As cooler weather sets in, my outdoor grounds crew rushes to complete our long list of fall gardening tasks around my Bedford, New York farm.
This week, one of our main projects is to prepare all the tropical plants for winter storage, including all the specimens potted up in decorative planters. Every spring, I always display interesting plants on my terraces, in giant urns along the carriage road, and on the cobblestone courtyard in front of my stable. At the end of the warm season, these plants are removed from their pots, trimmed where necessary, and then repotted in plastic containers before they are put away in one of four greenhouses here on the property. It's quite an undertaking, but it's the best way to ensure my plants are ready for the cold months ahead.
Here are some photos and tips, enjoy.
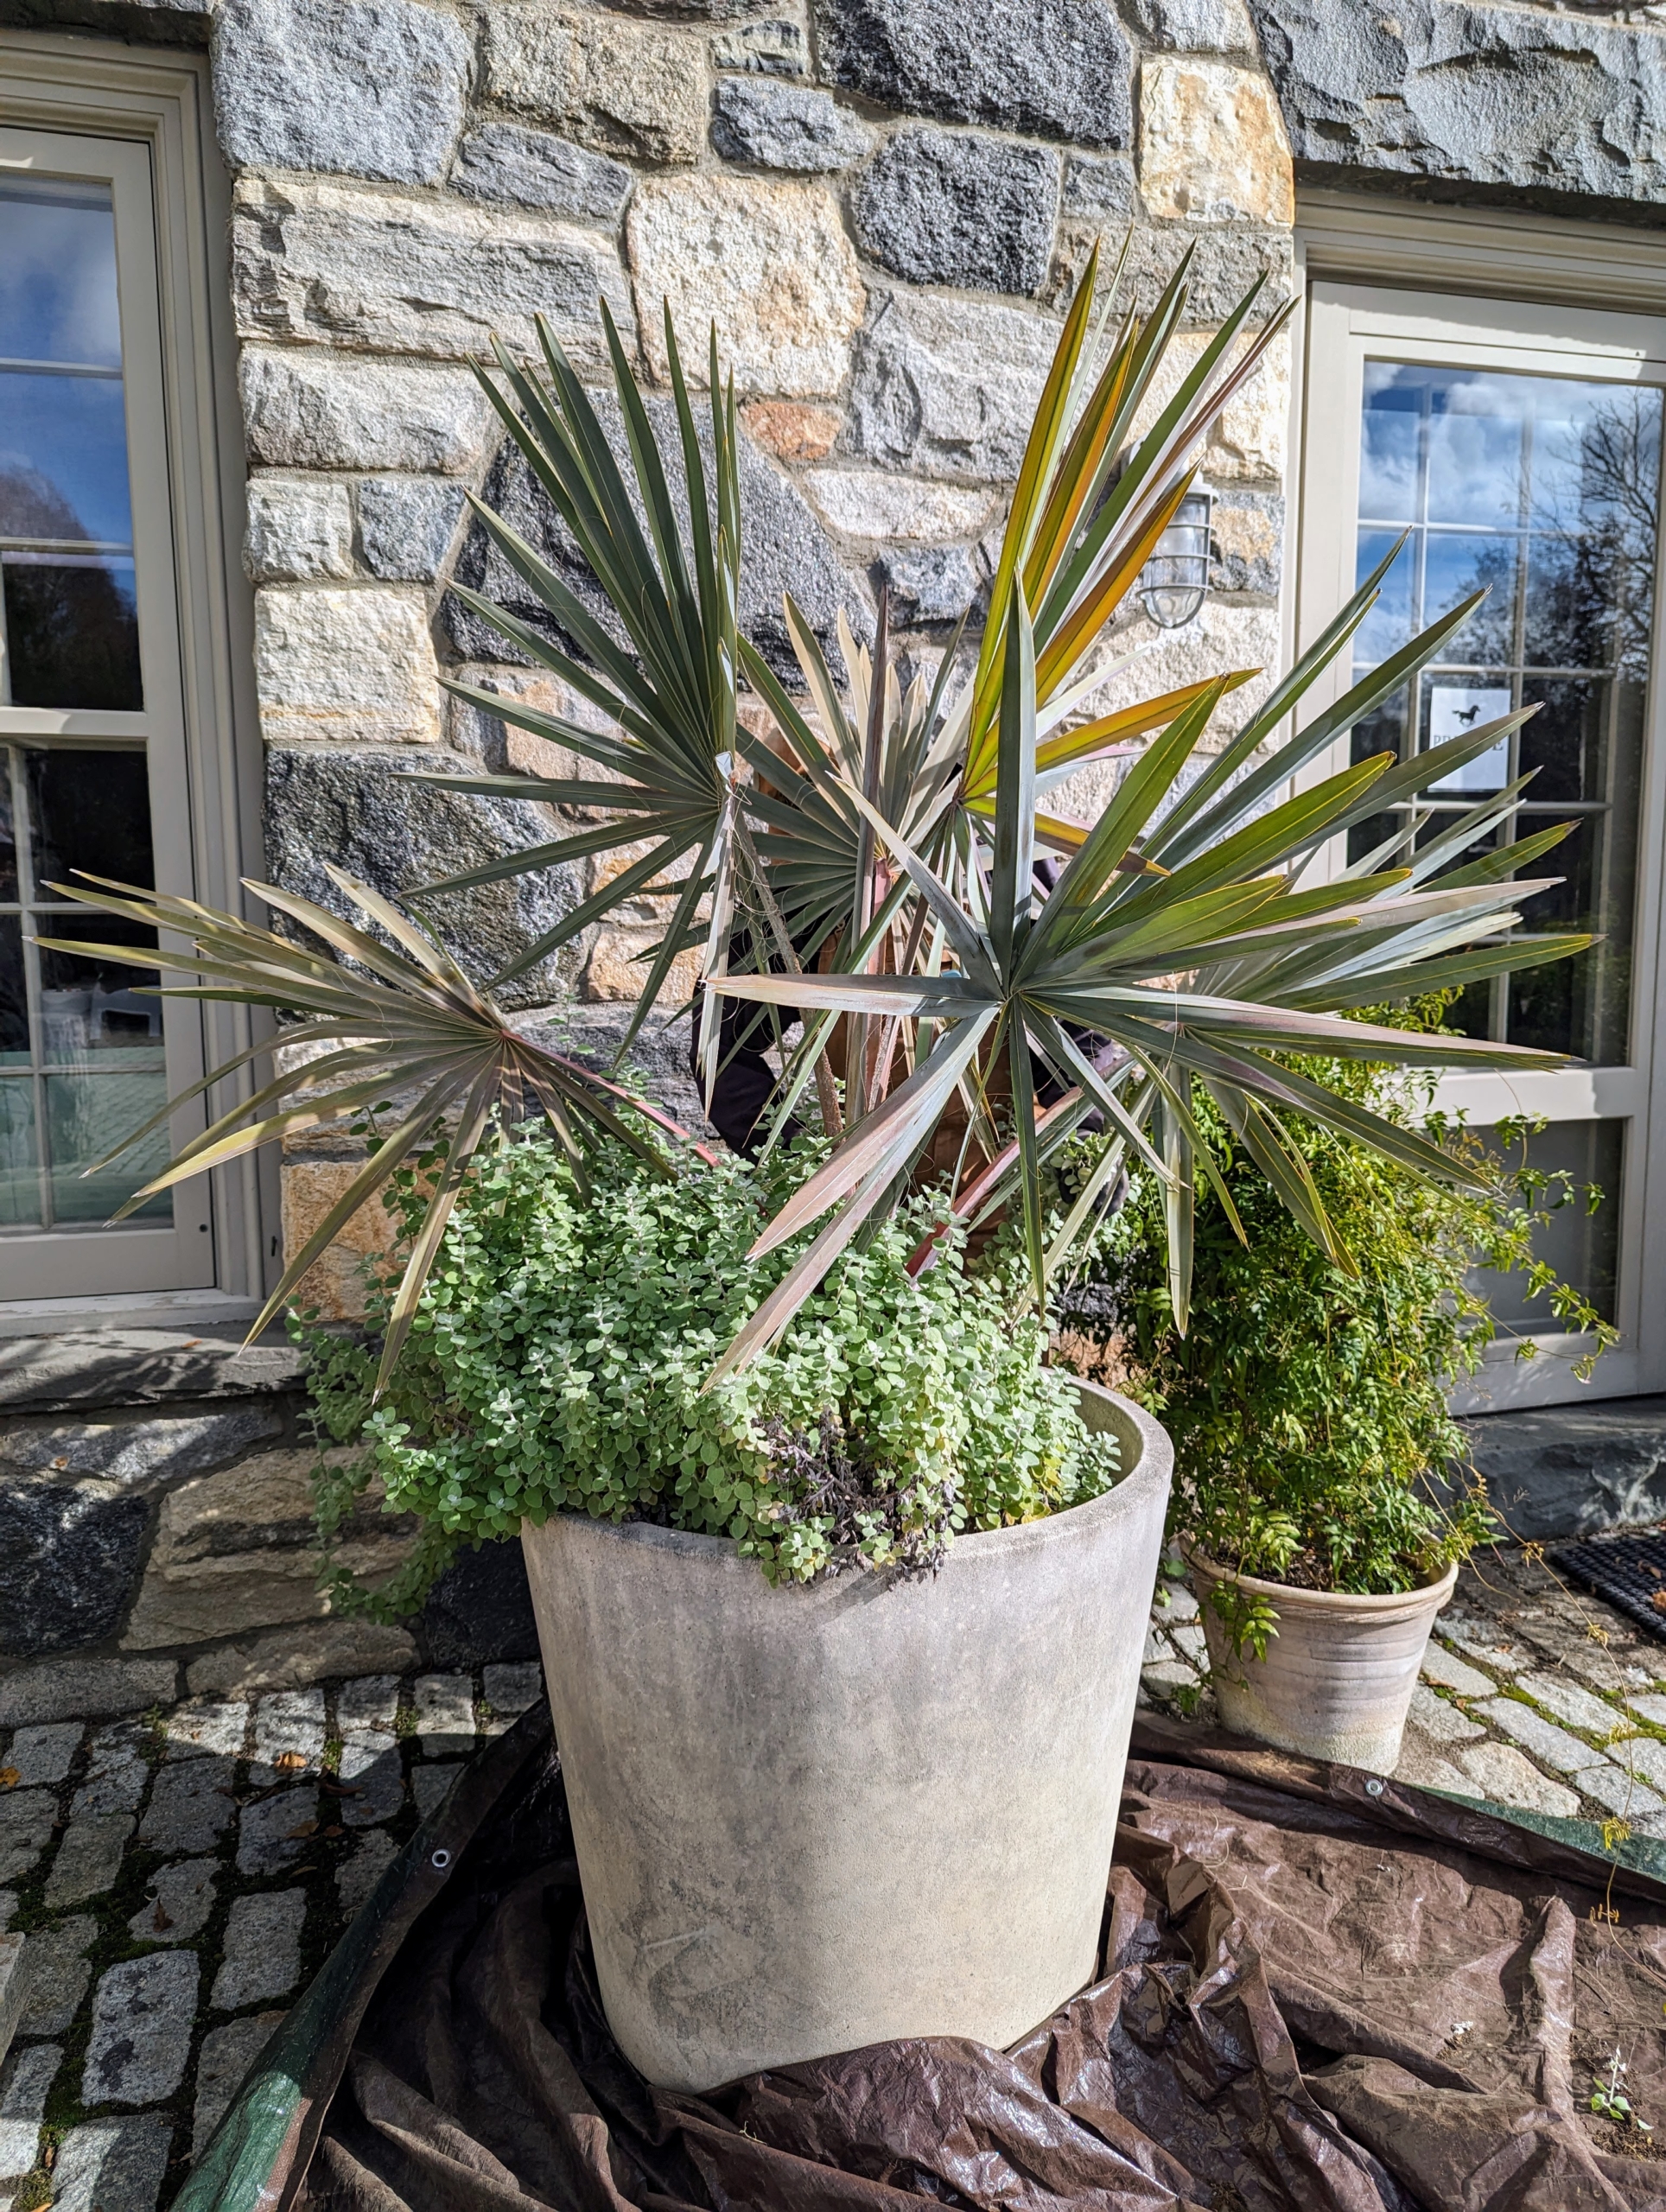
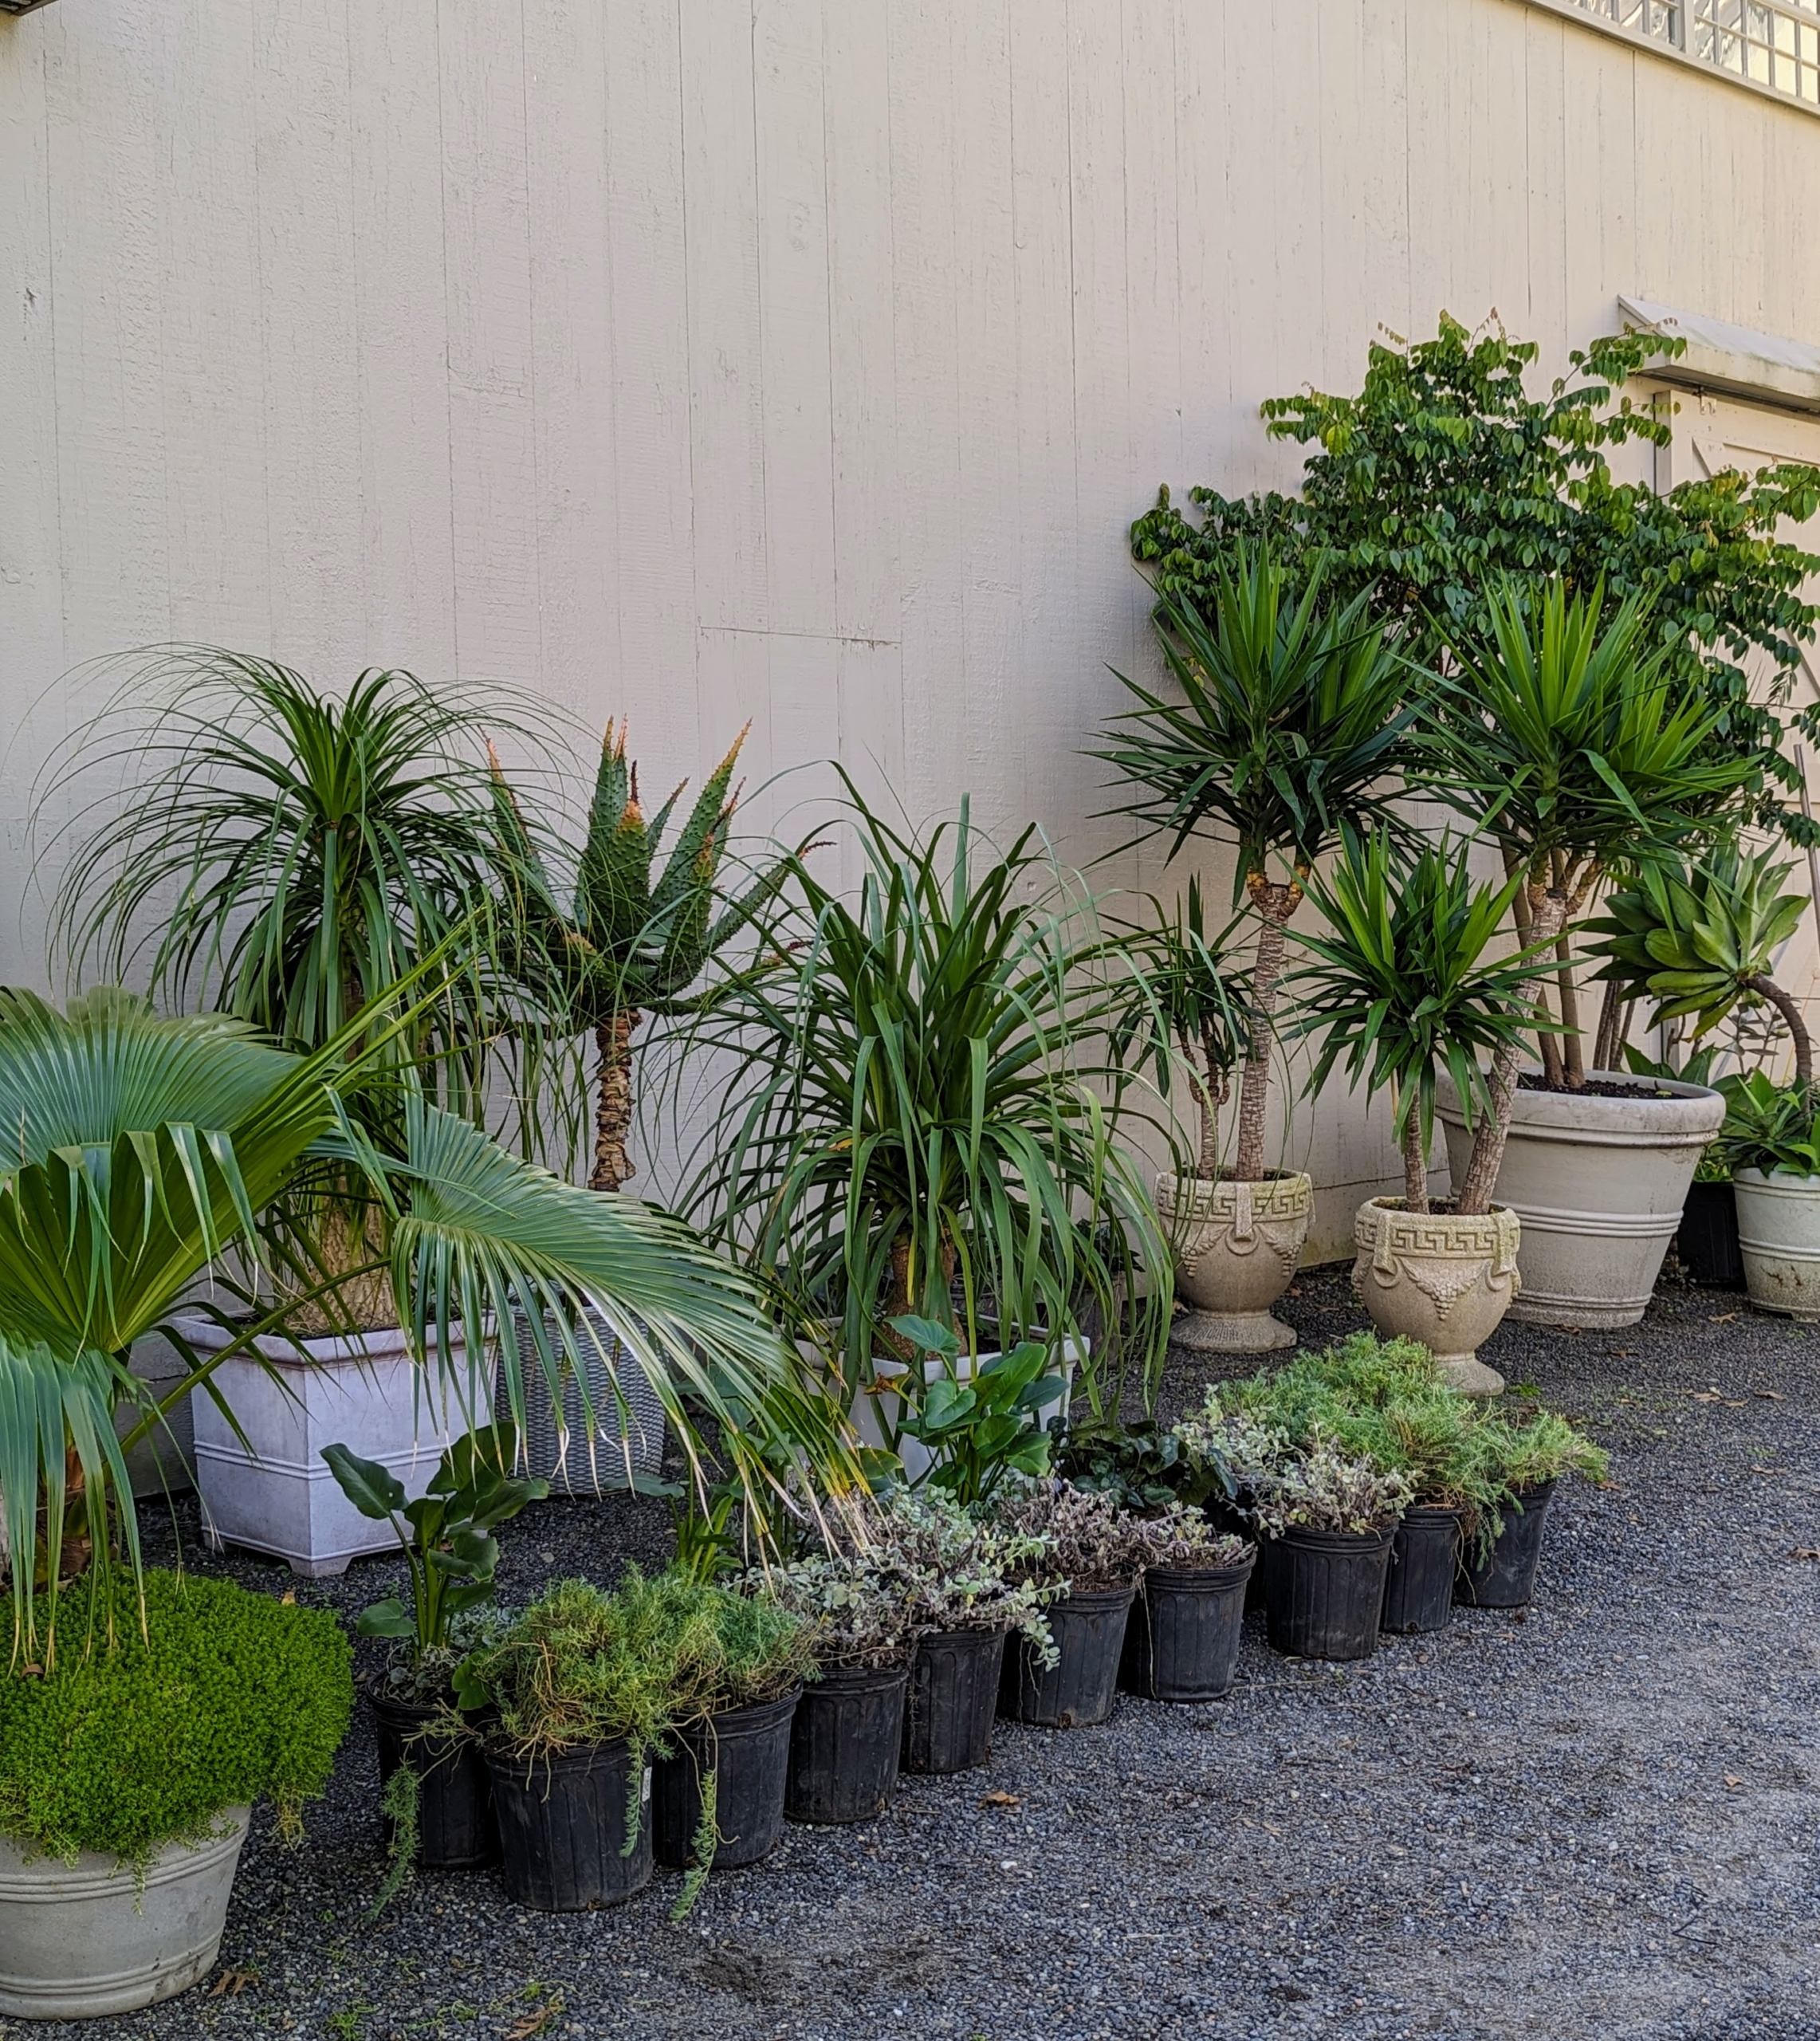
My gardeners and I select the various locations for all the potted plants displayed around the farm – it’s a little different every year. Here is a collection of potted specimens in the courtyard in front of my stable.
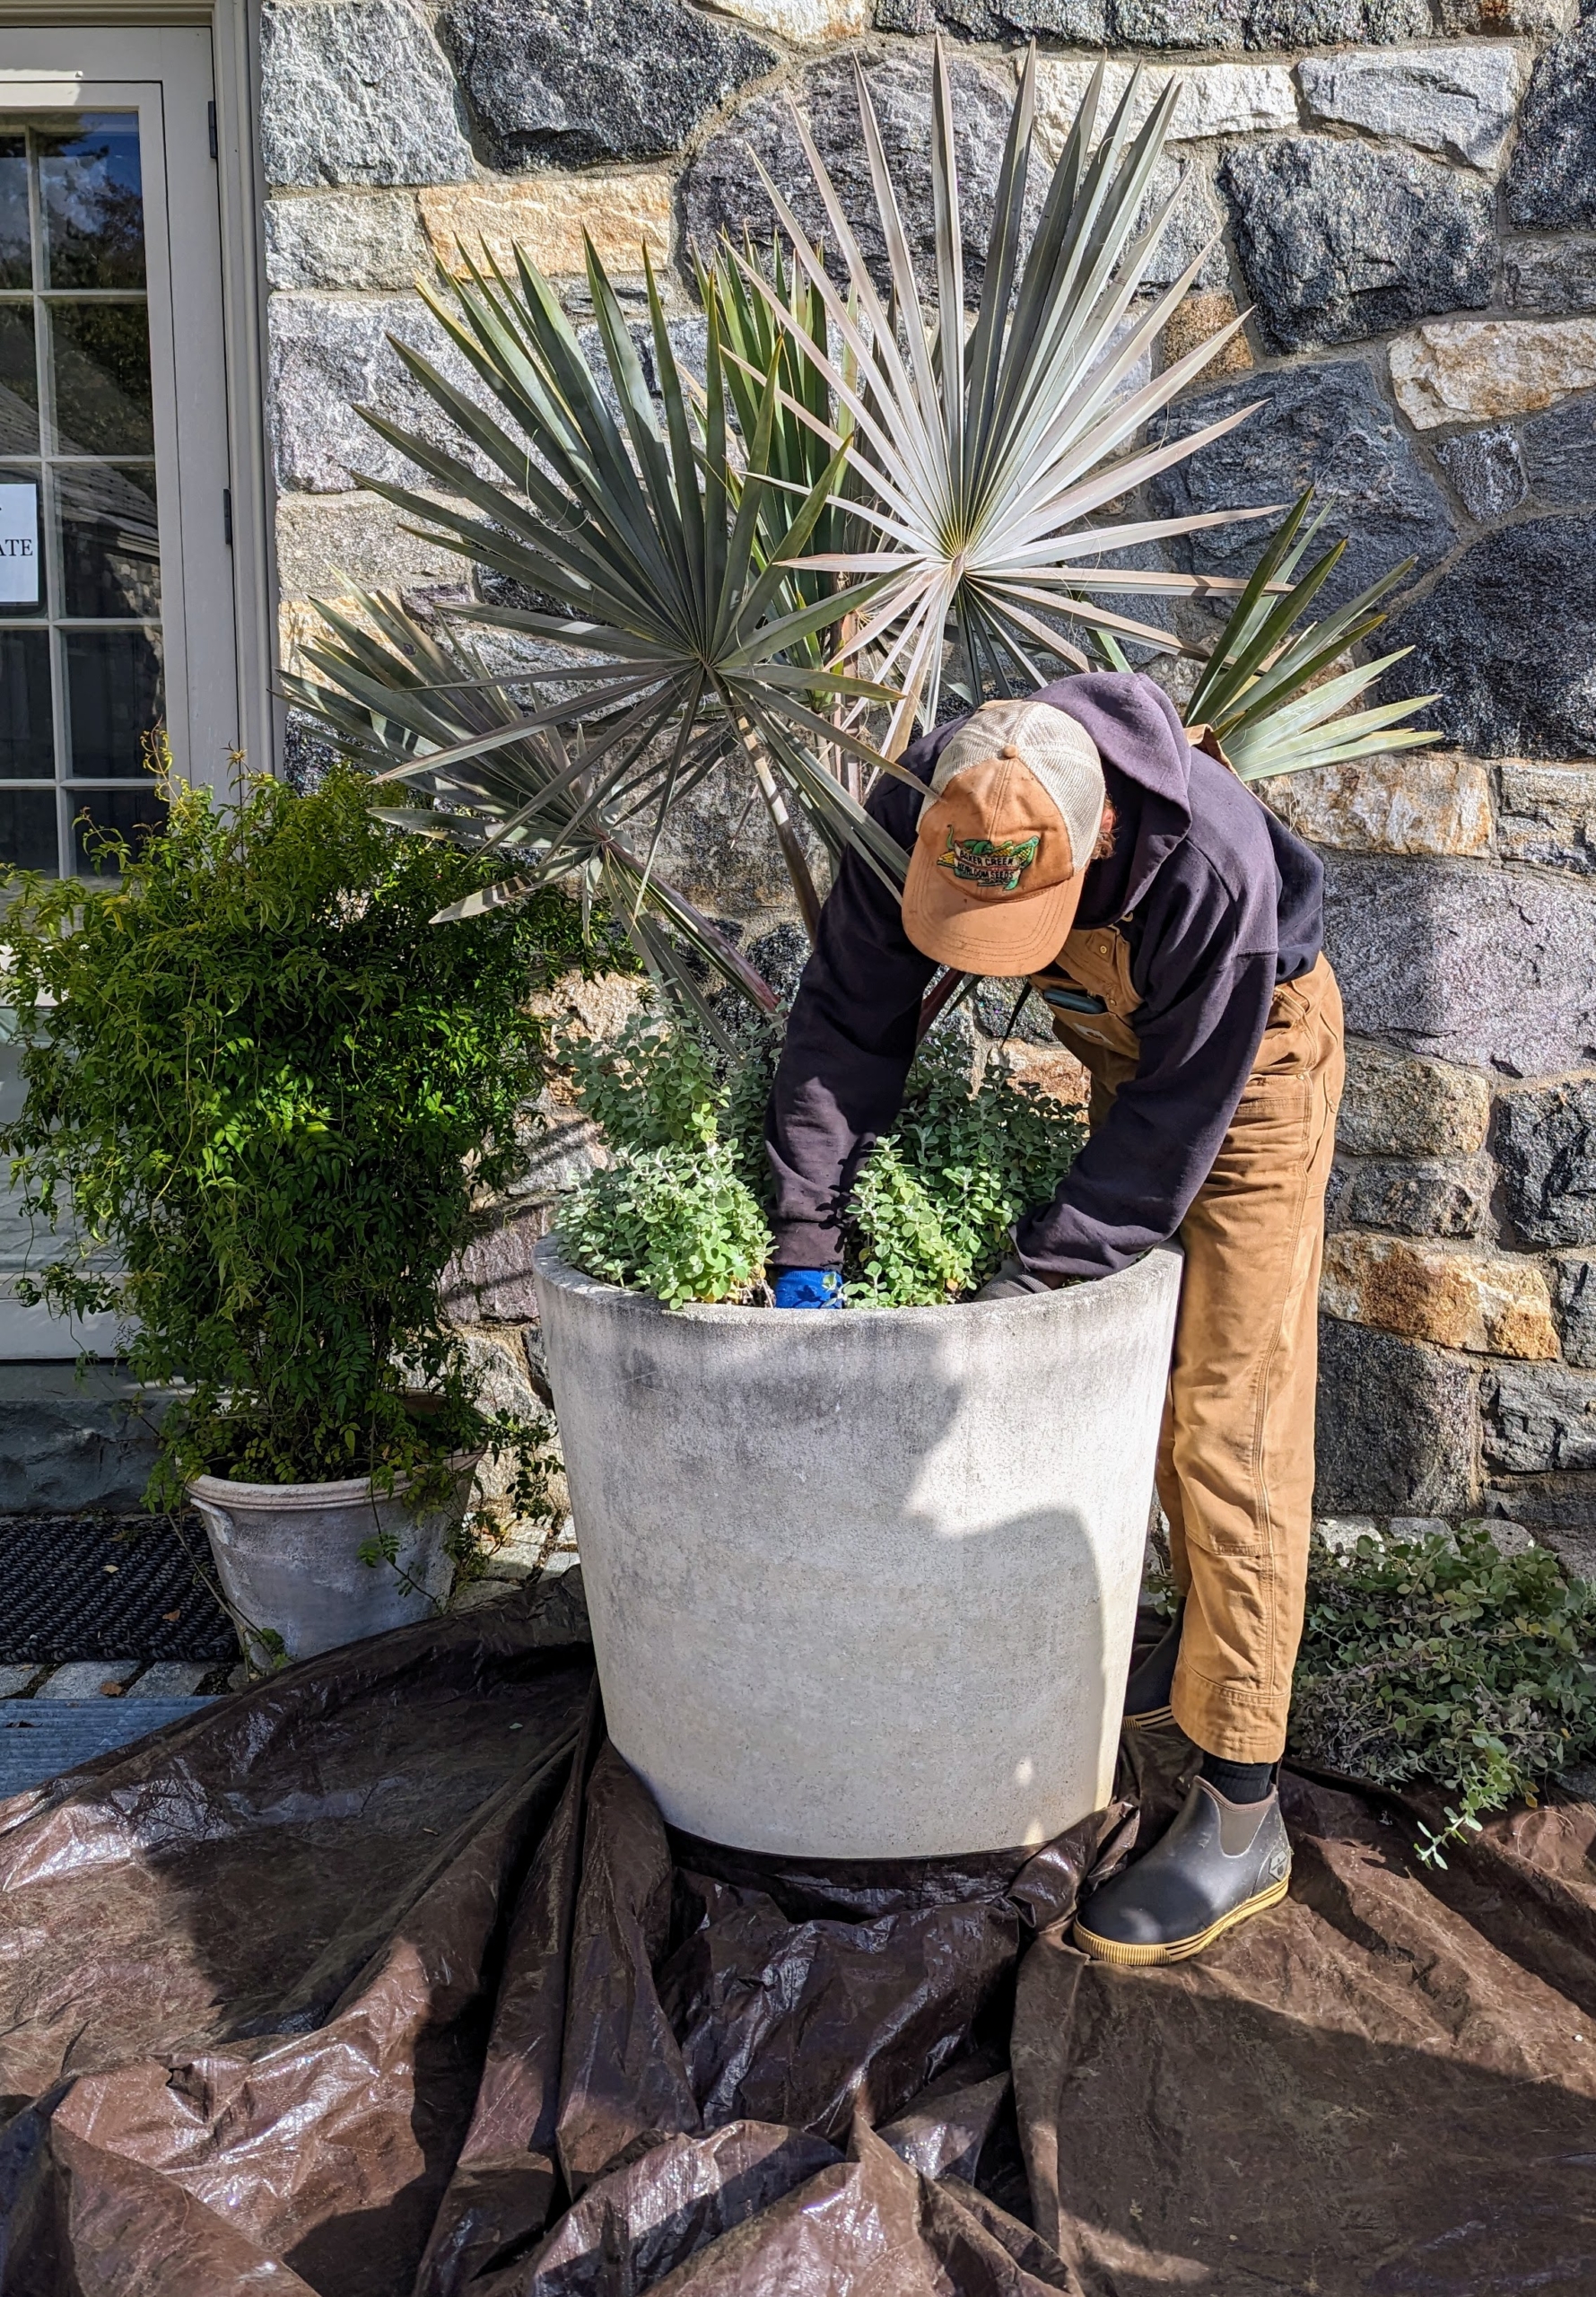
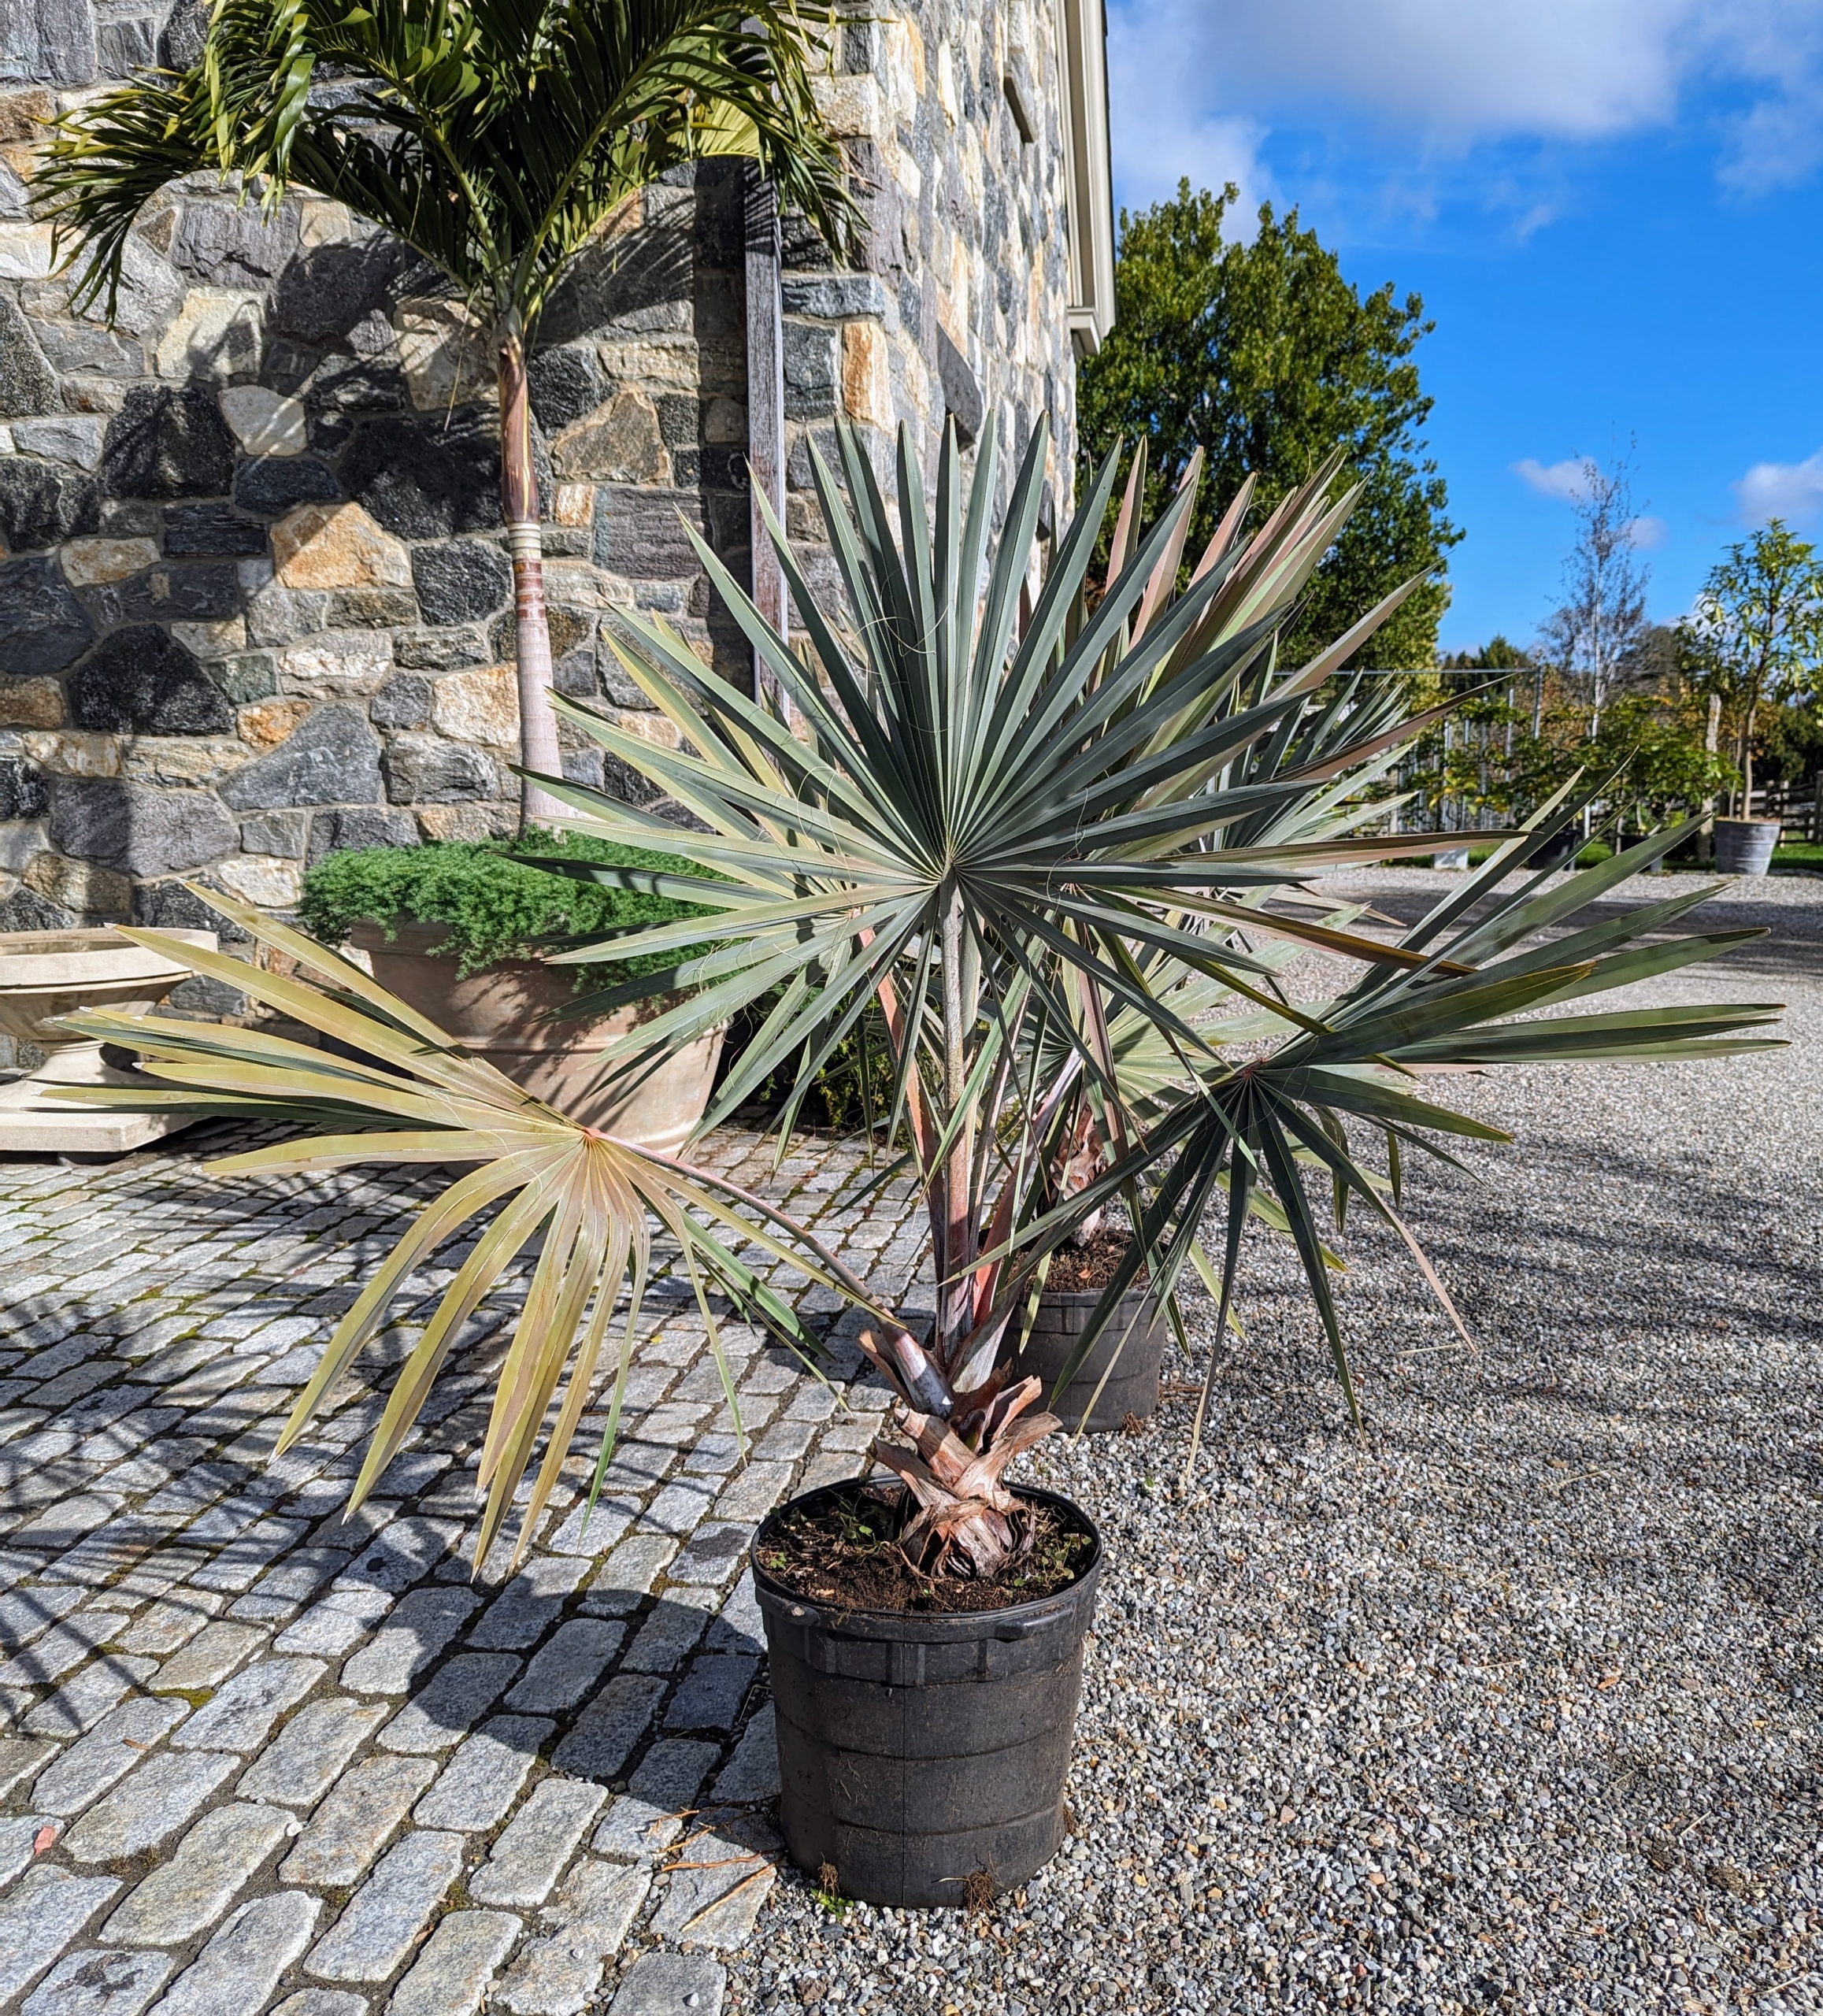
Some of these plants are actually “faux” planted – meaning we placed the potted plant in the giant container and planted ground cover around it. This Bismarkia palm is underplanted with Helichrysum petiolare, the licorice plant. Brian places a tarp below to catch any soil or debris while working – doing this saves a lot of time cleaning up later.
First, Brian removes the Helichrysum petiolare from the base of the plant.
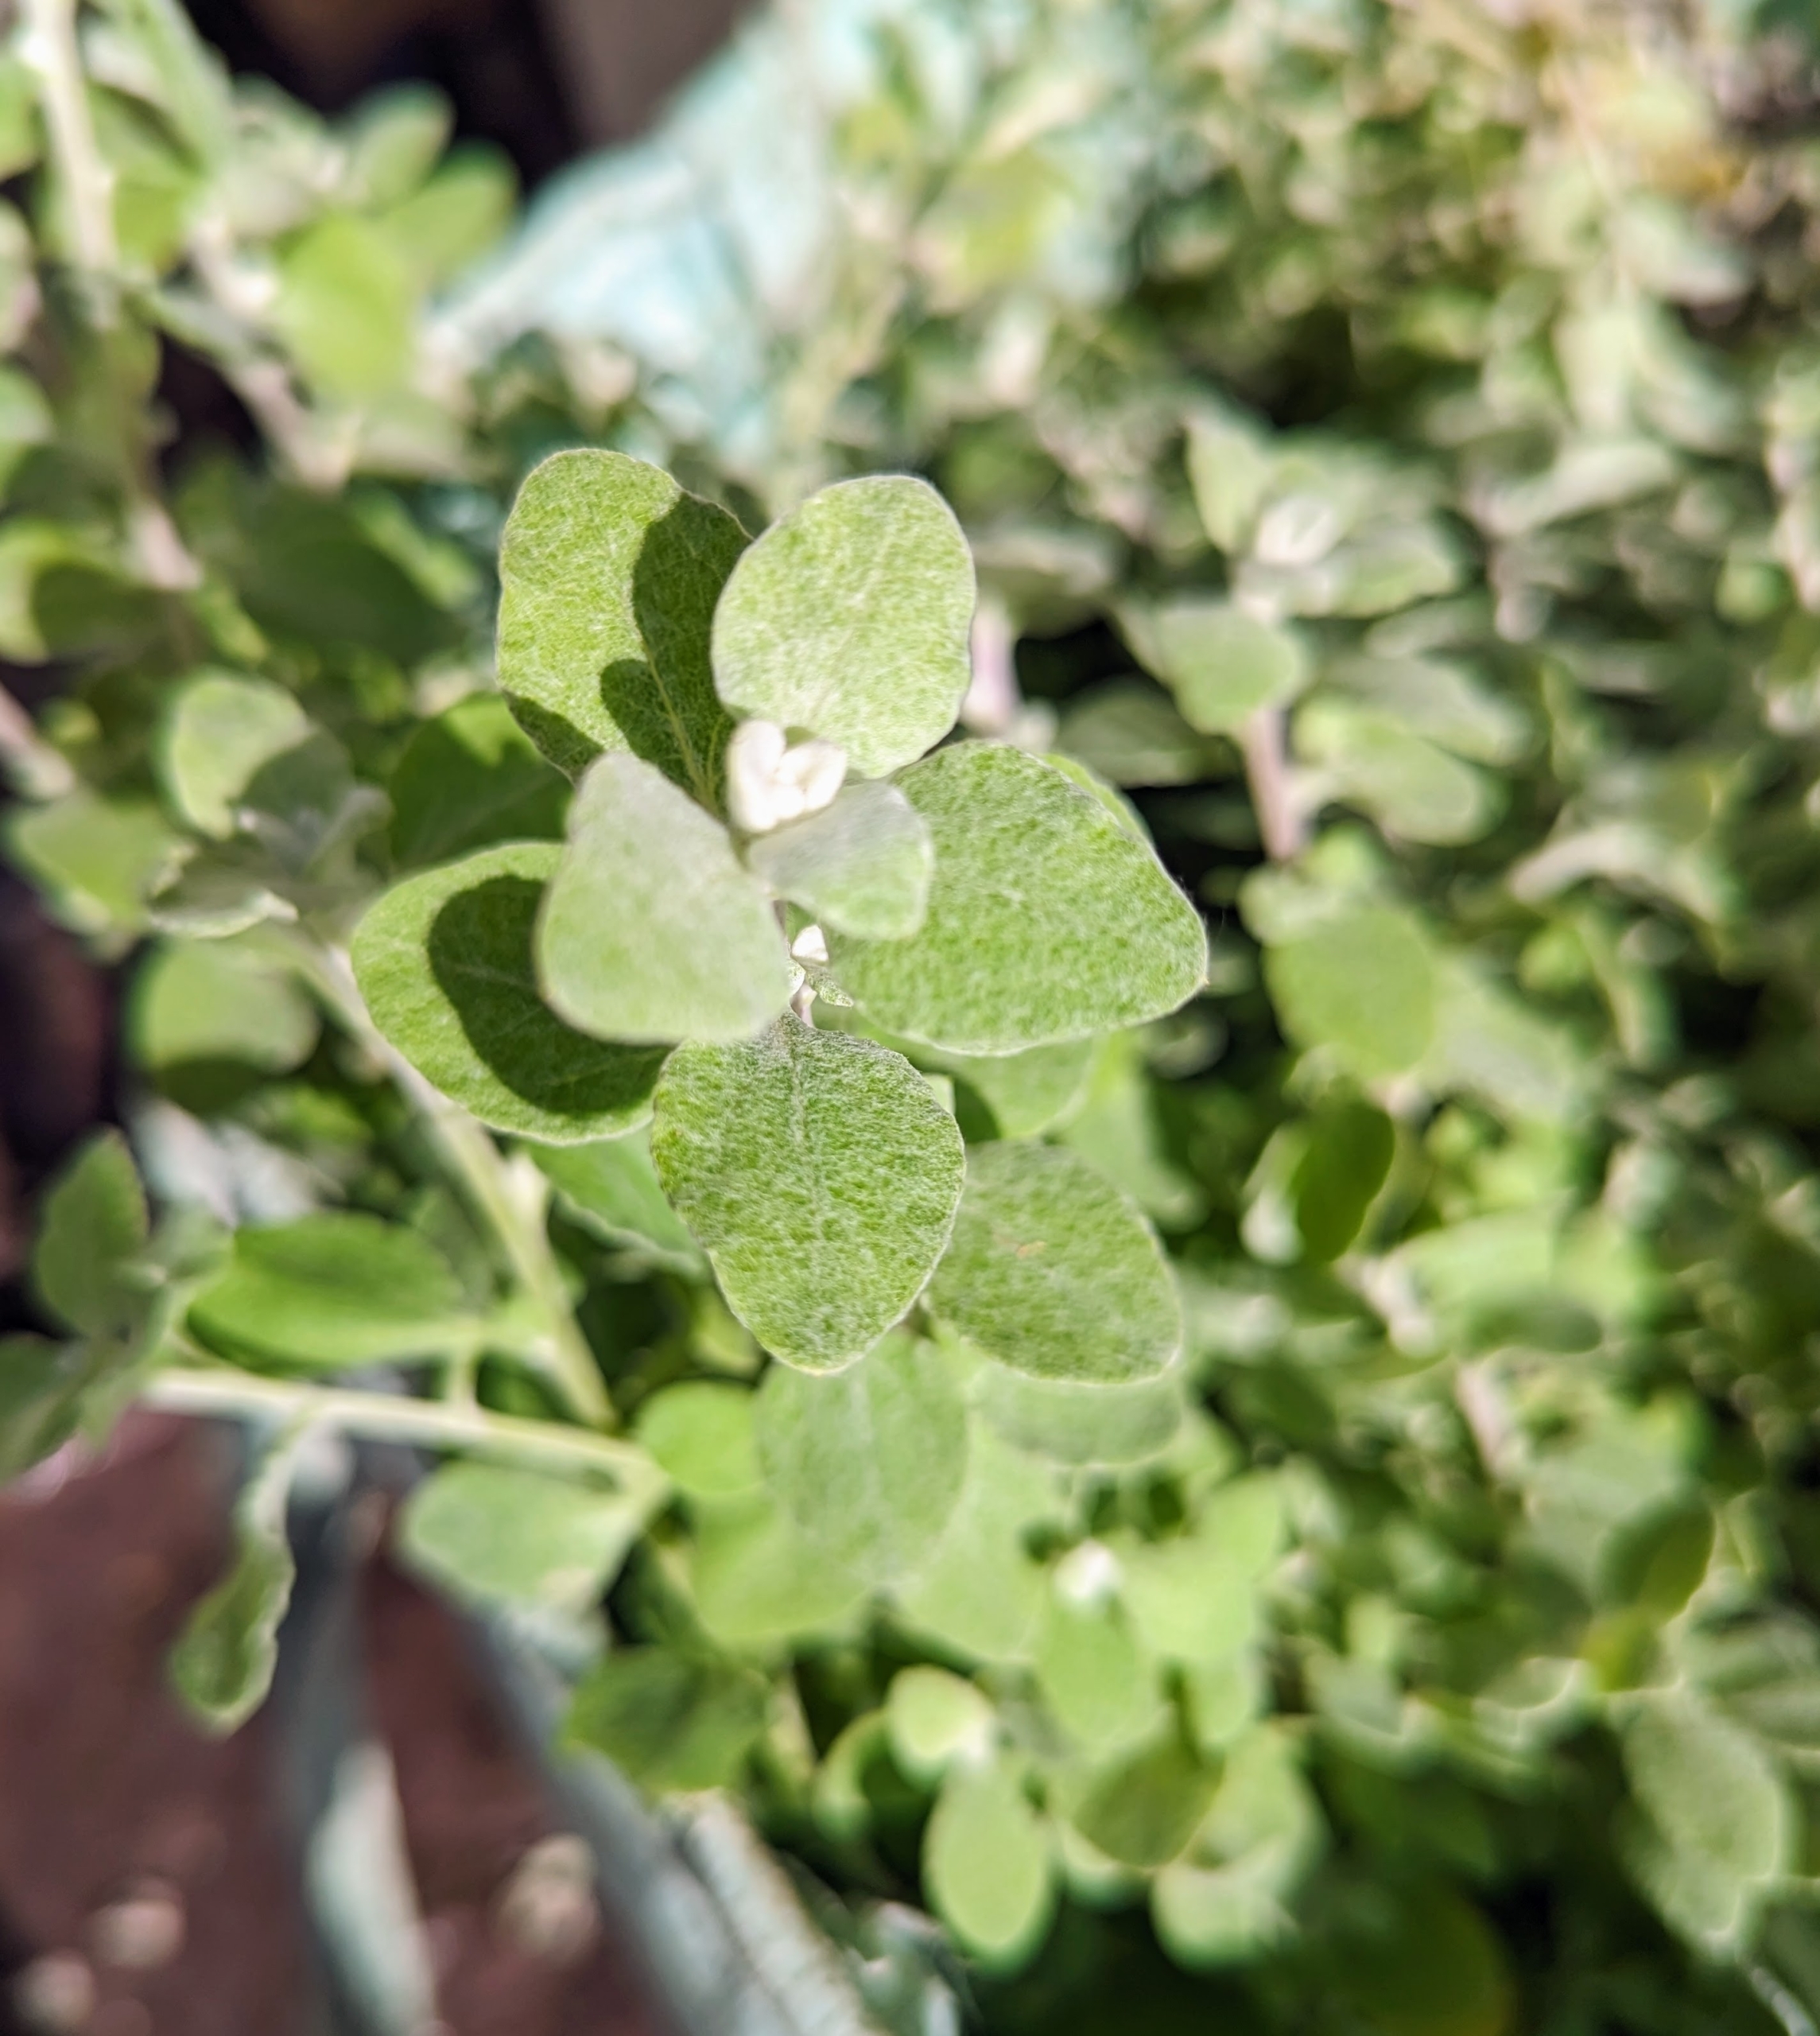
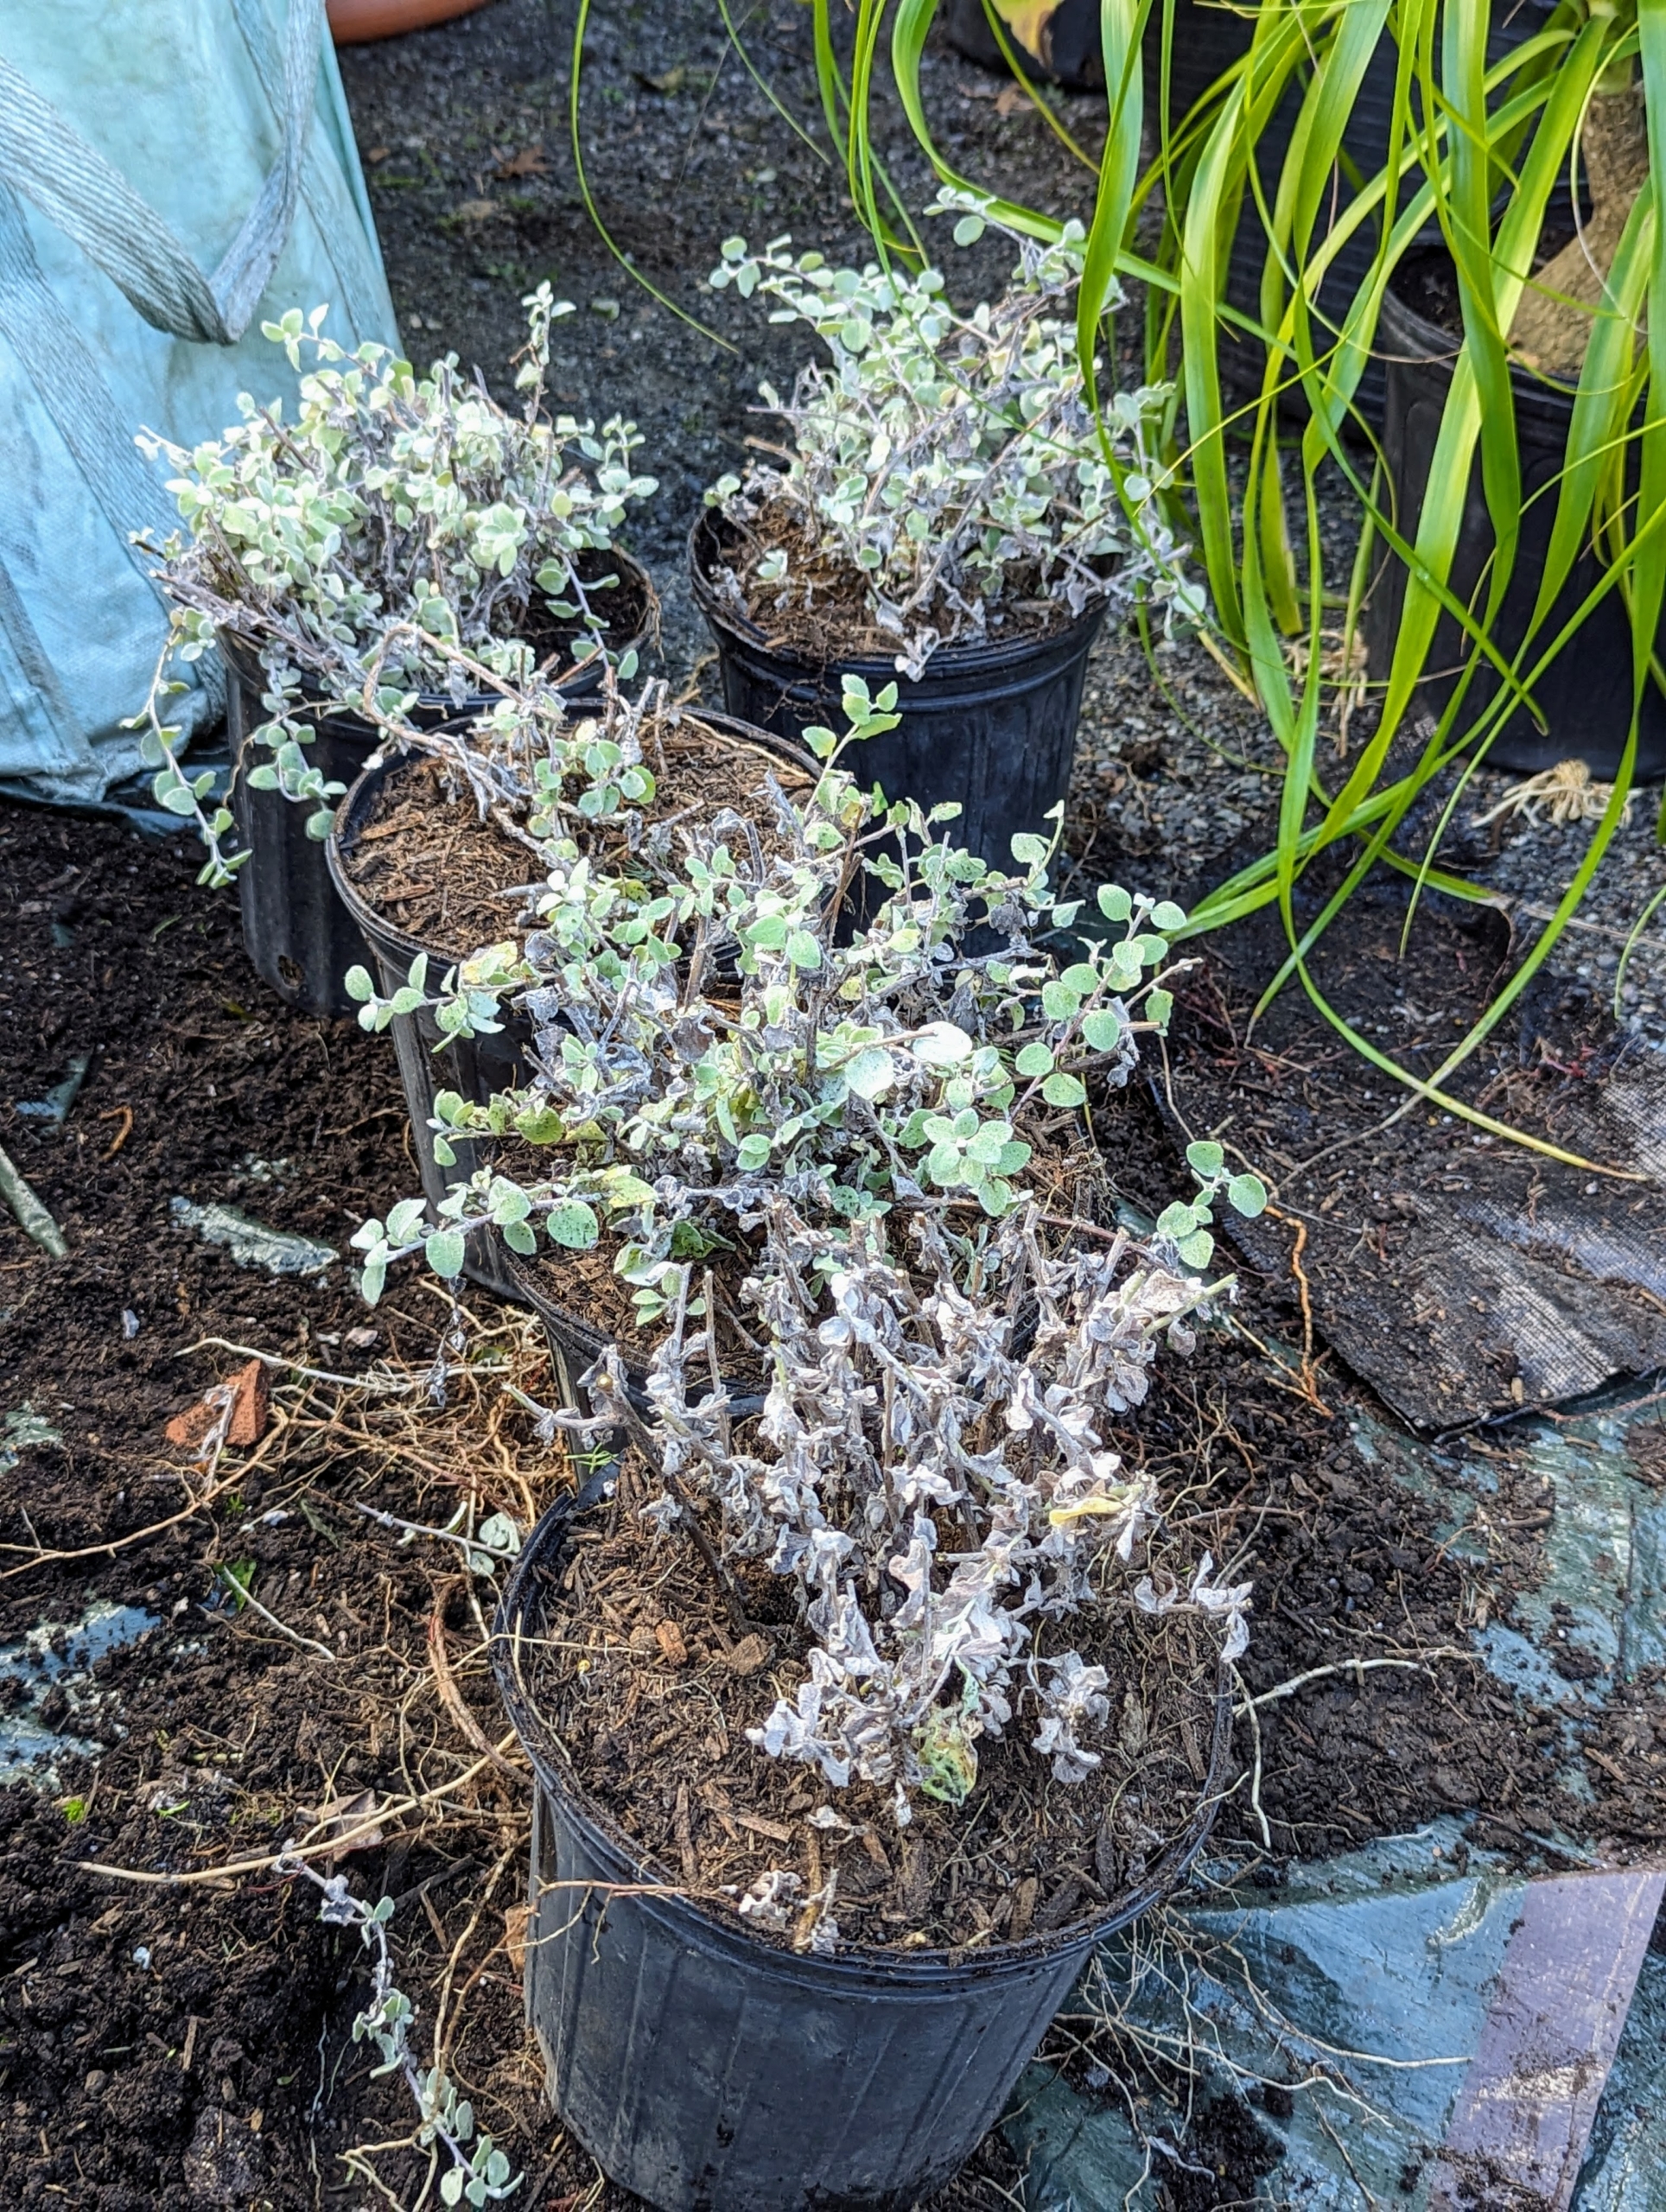
Helichrysum is a species of flowering plant in the family Asteraceae, native to South Africa — where it is known as imphepho — and naturalized in parts of Portugal and the United States. I underplant many of my potted tropicals with Helichrysum – it comes in silver or white but can also be found in a variety of soft hues of green, gold, or variegated foliage. It actually gets its pale coloring from numerous dense hairs that cover the plant, giving the plant a soft texture.
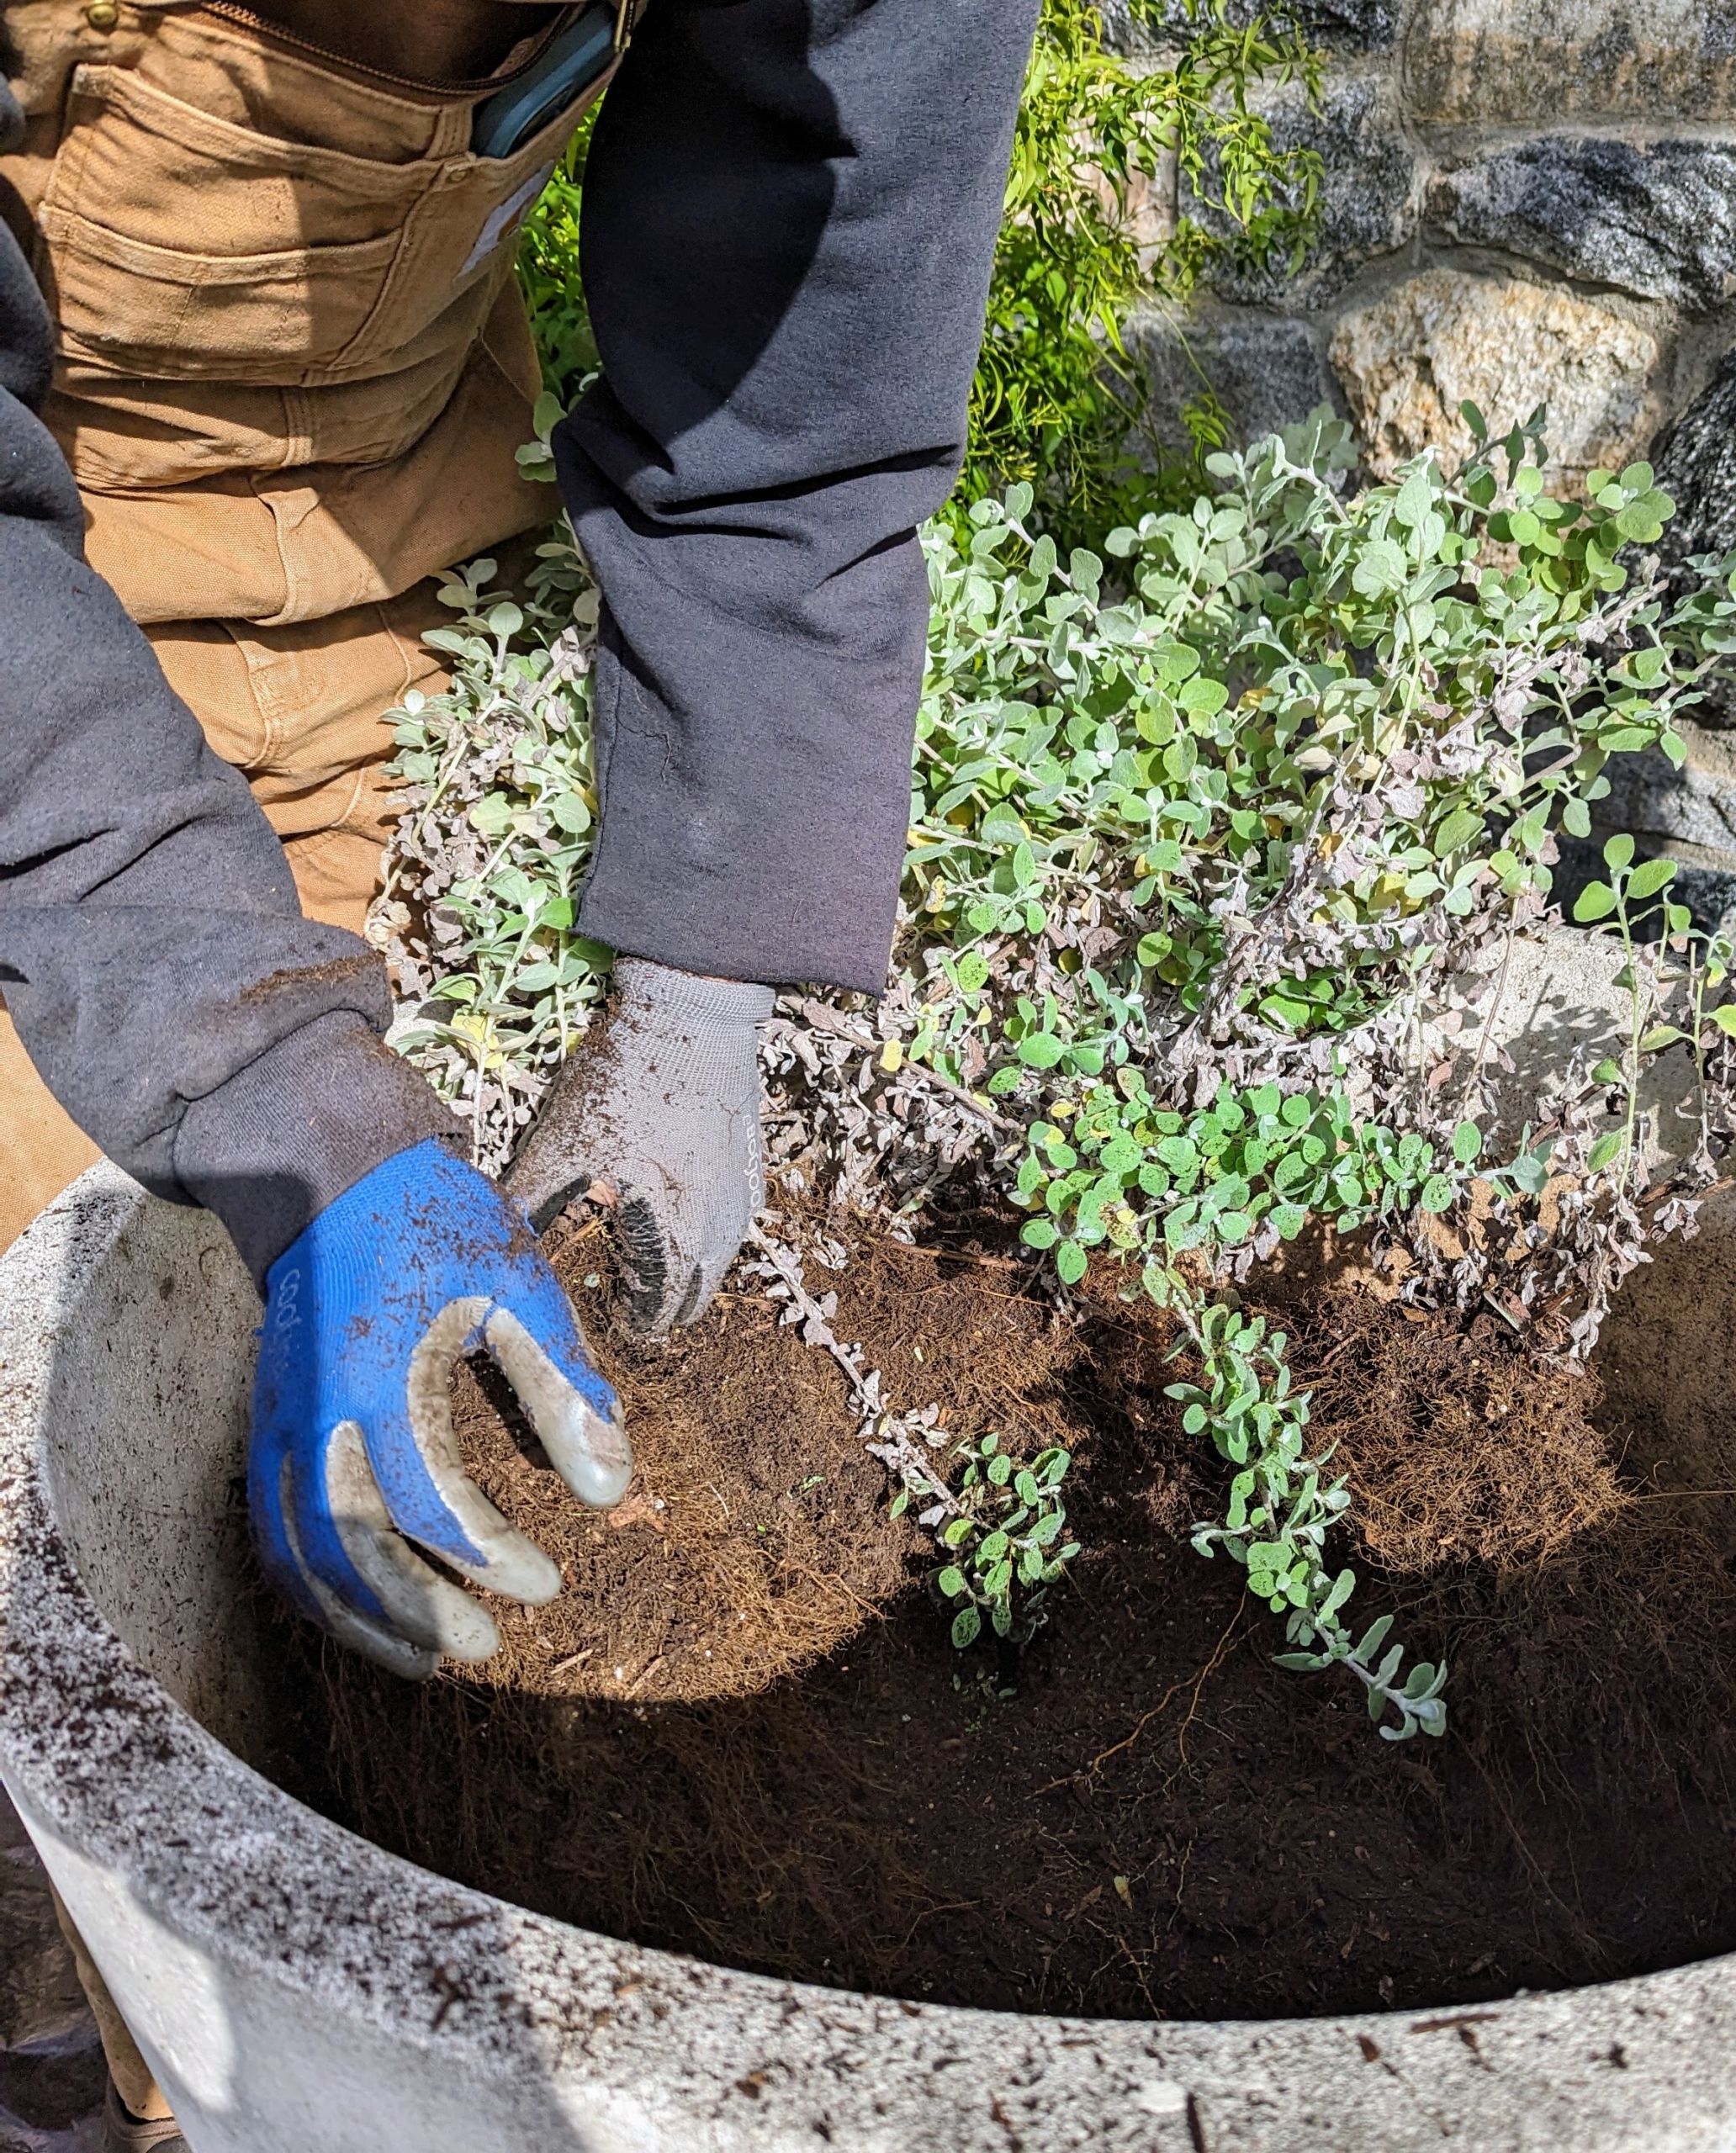
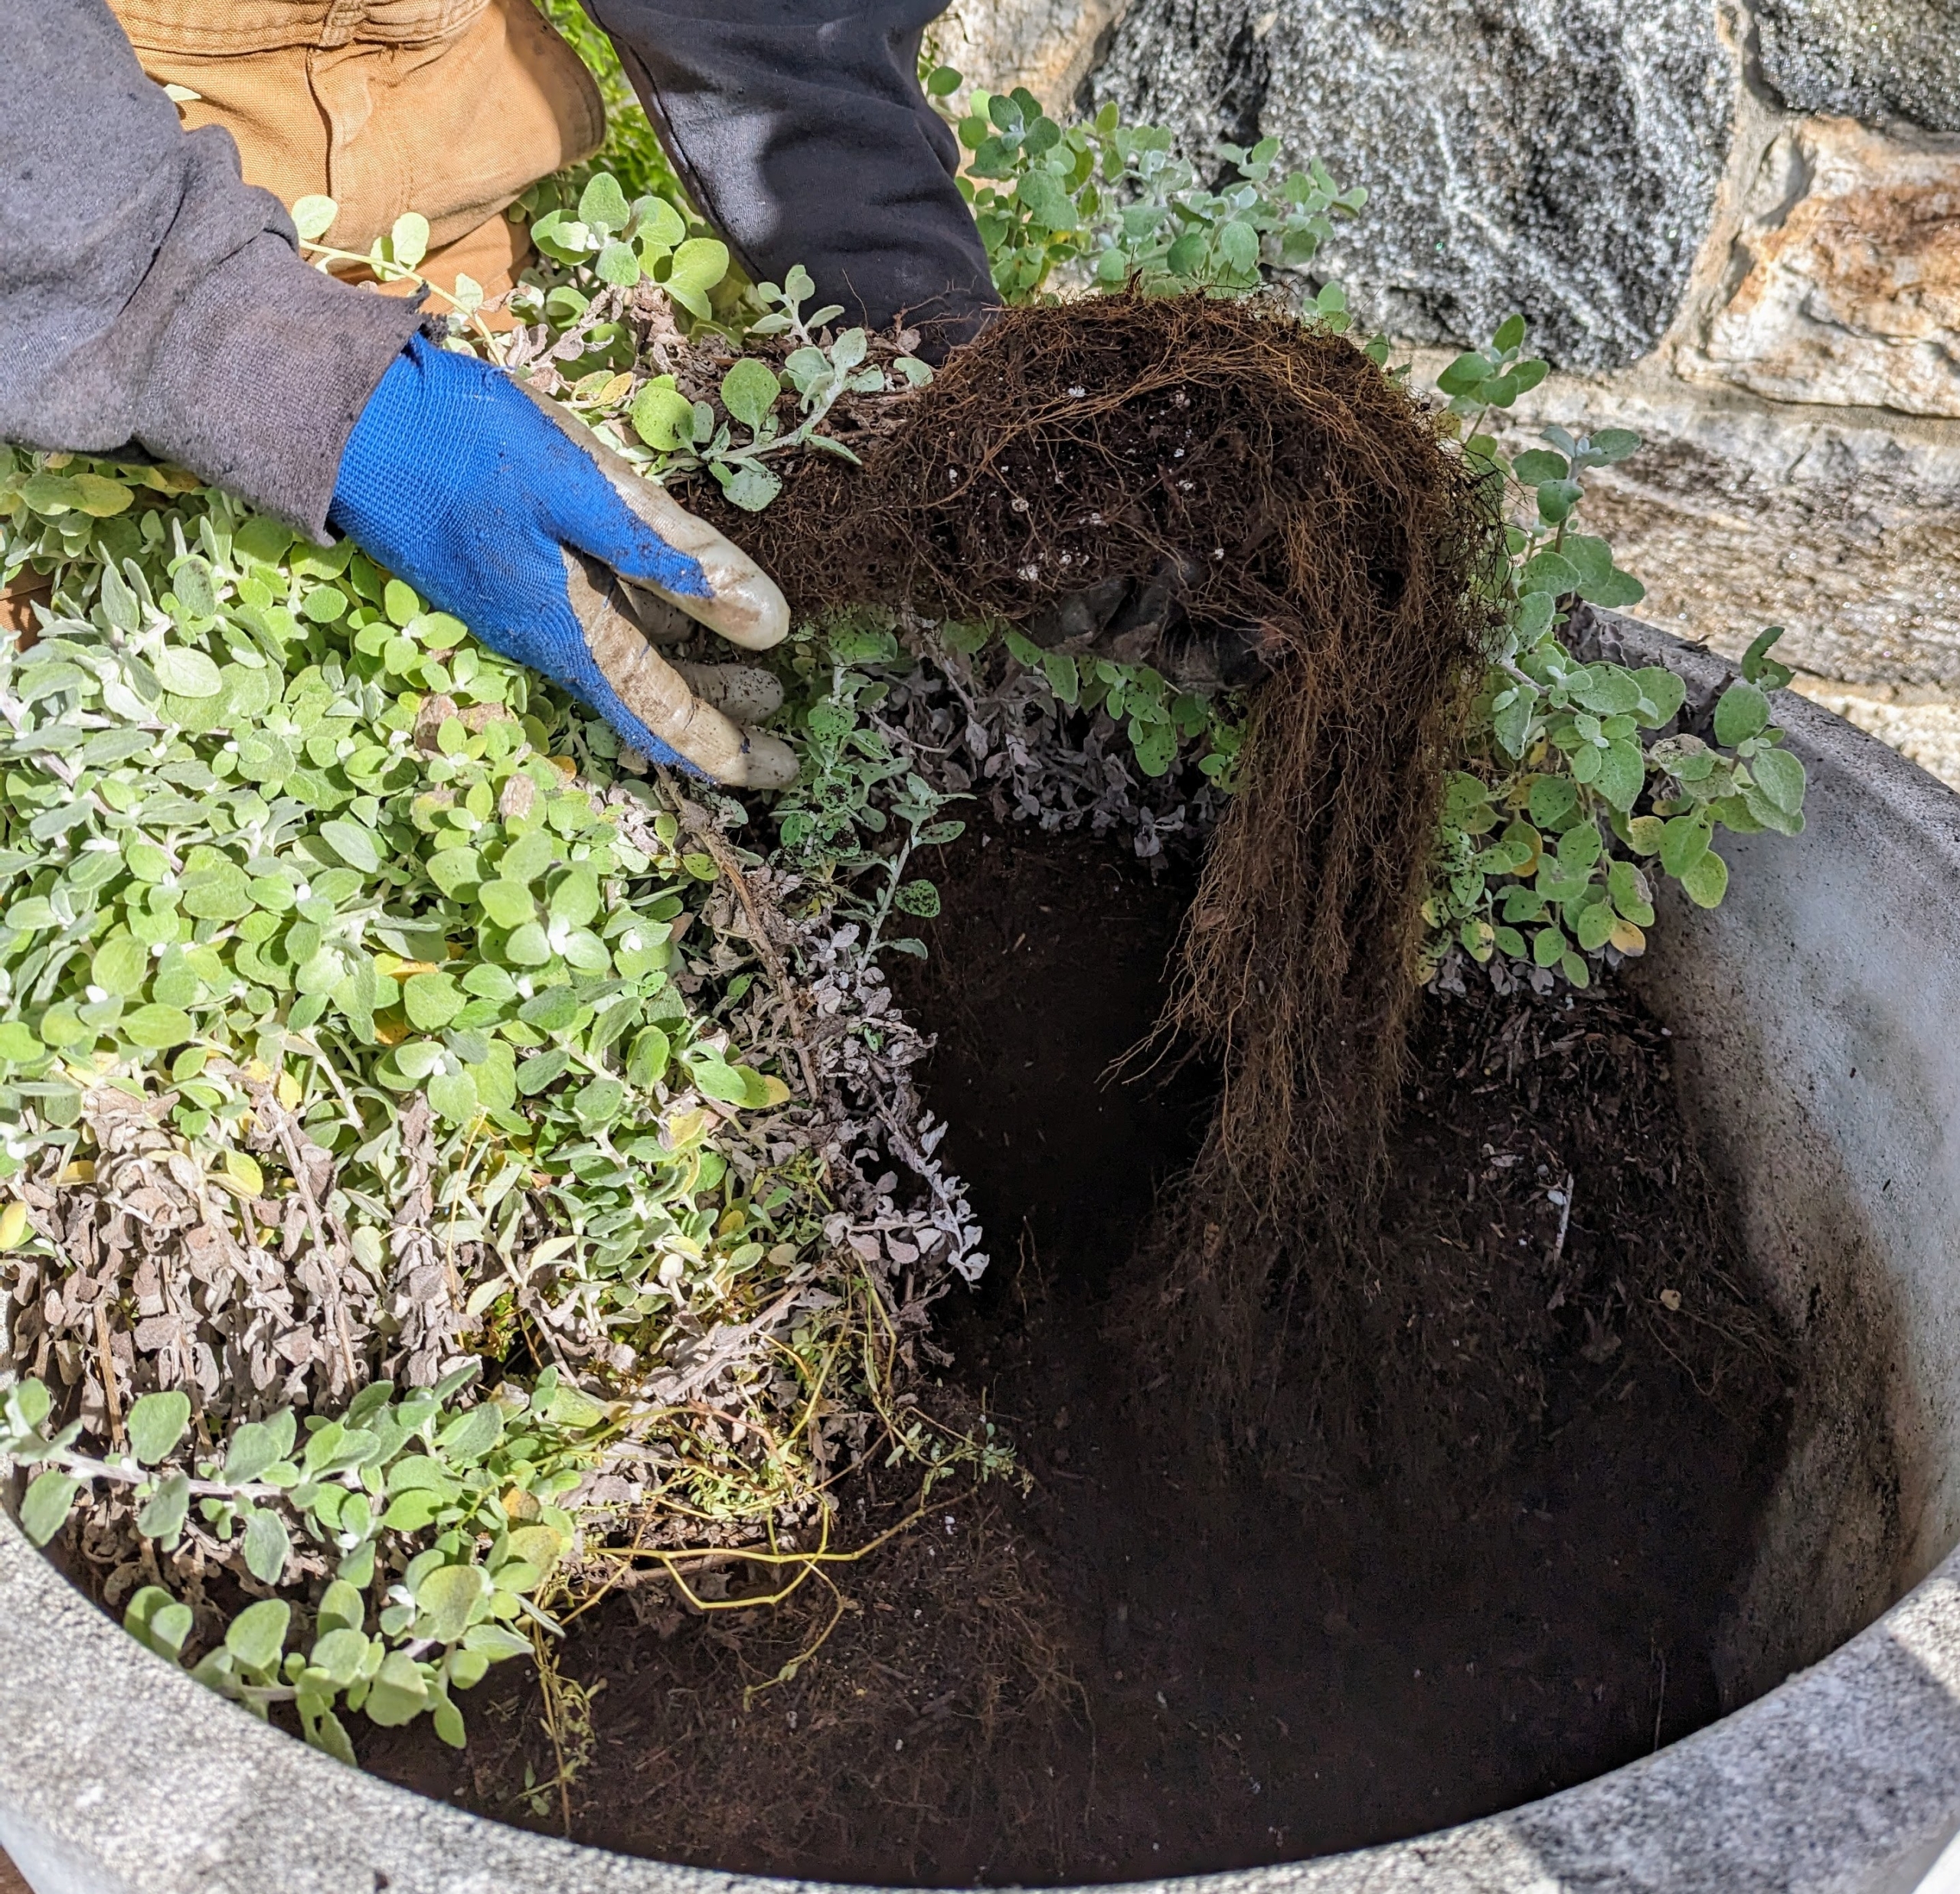
Brian removes the plants in sections. They will be repotted into smaller pots and then stored in the greenhouse until next summer.
Look at the roots – they’ve grown considerably during the season. Helichrysum can grow as much as a foot or two in one season and spread up to three feet.
Once most of the Helichrysum petiolare is removed, Brian pulls out the potted palm. If plants are kept in containers for a short while, it is okay to pot them up this way to save on time, effort, and soil.
This palm can now be taken to one of the tropical hoop houses for winter storage.
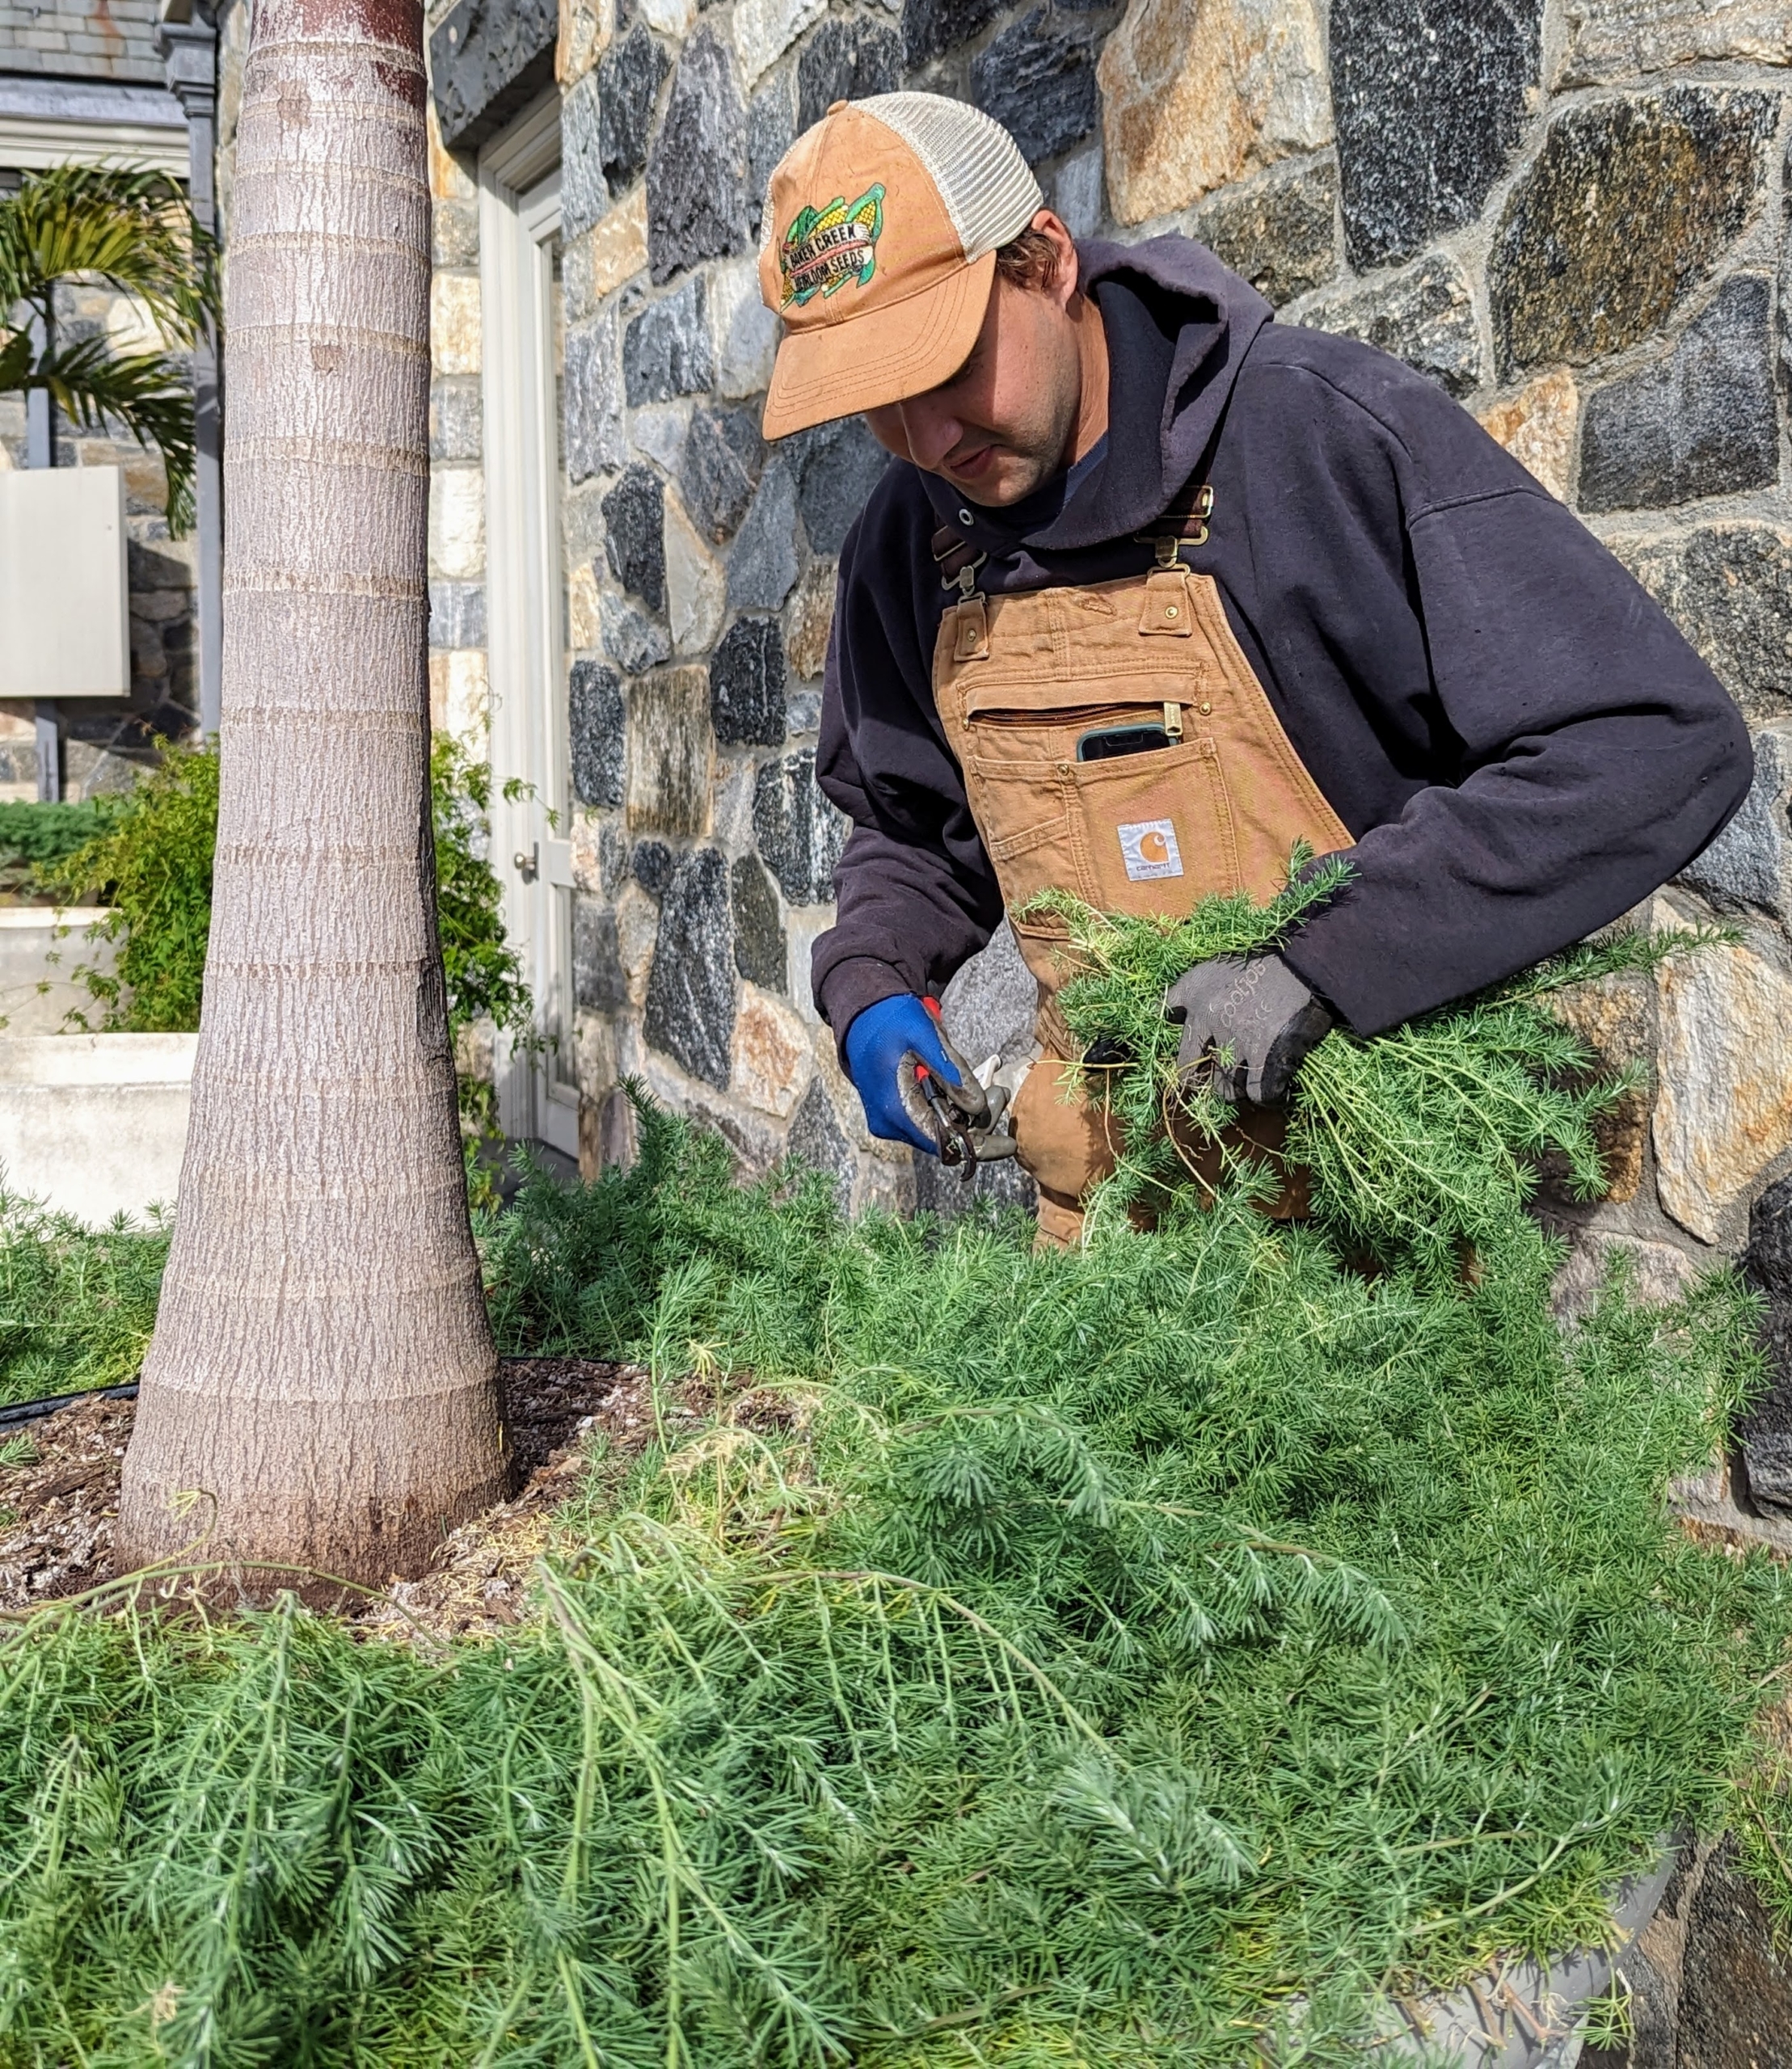
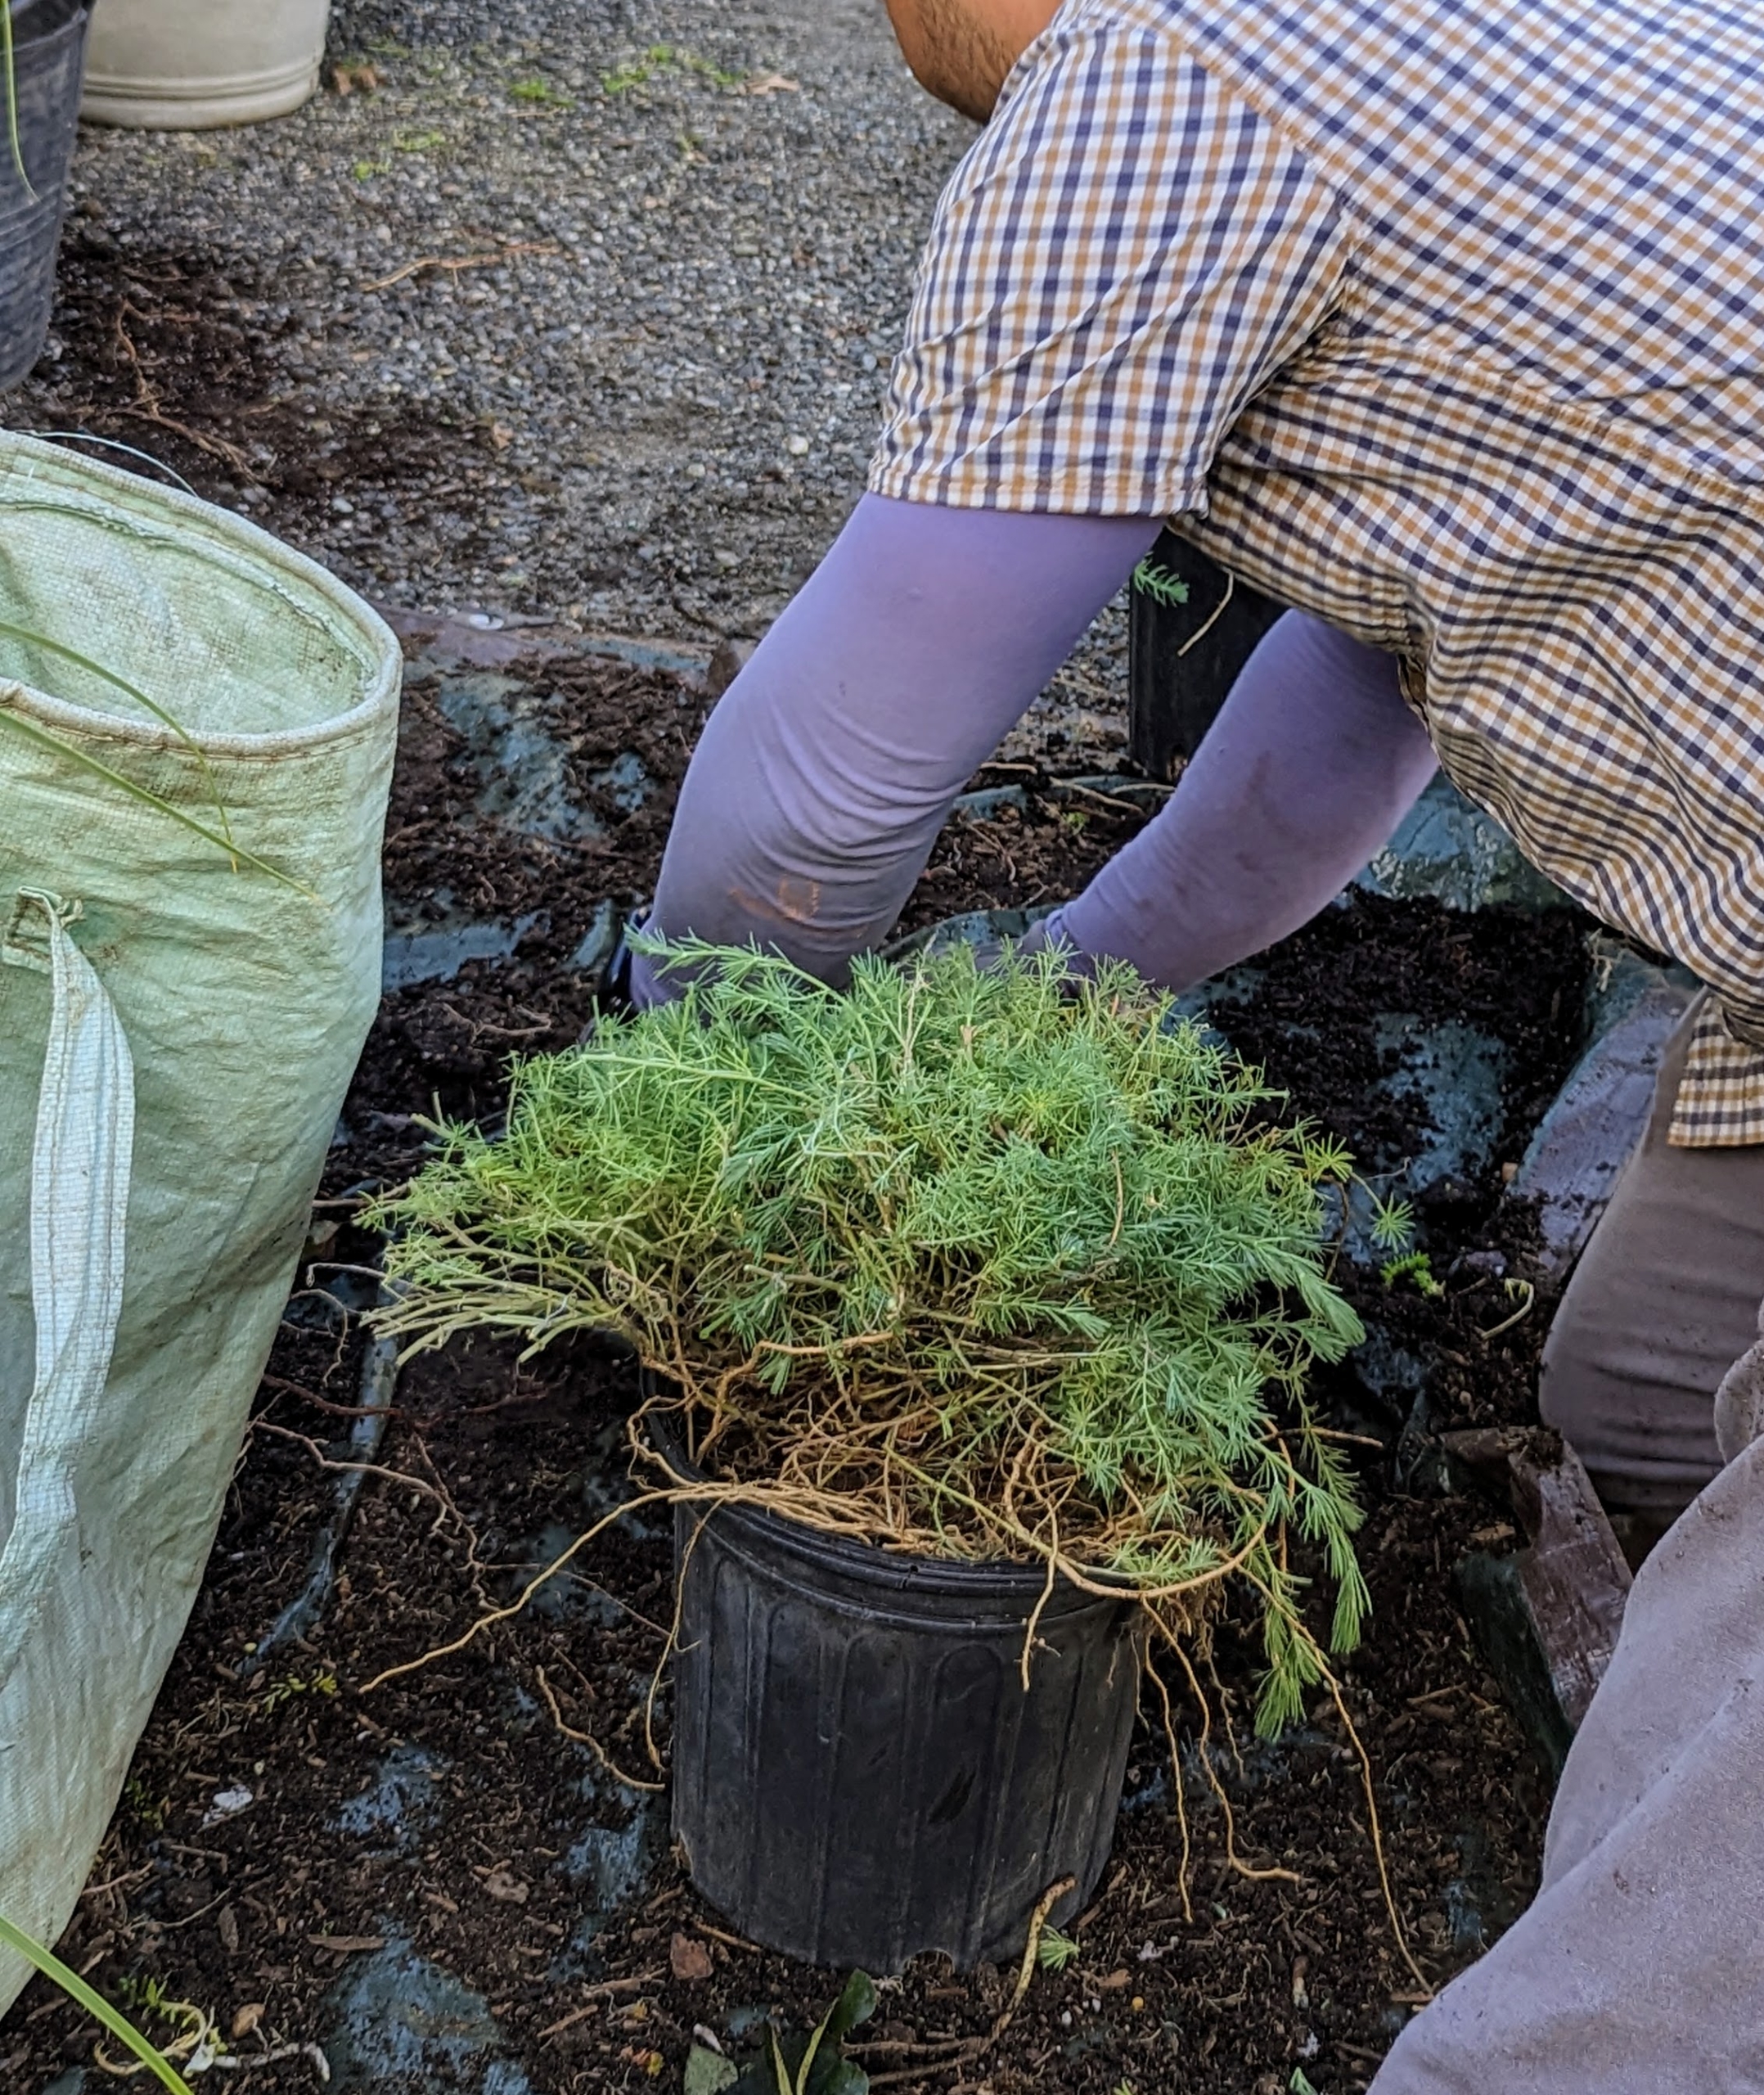
Brian moves onto a King palm underplanted with lotus, another trailing perennial.
Lotus has soft silver grey needle-like foliage. It is great for pots and containers where the trailing branches can cascade over the sides.
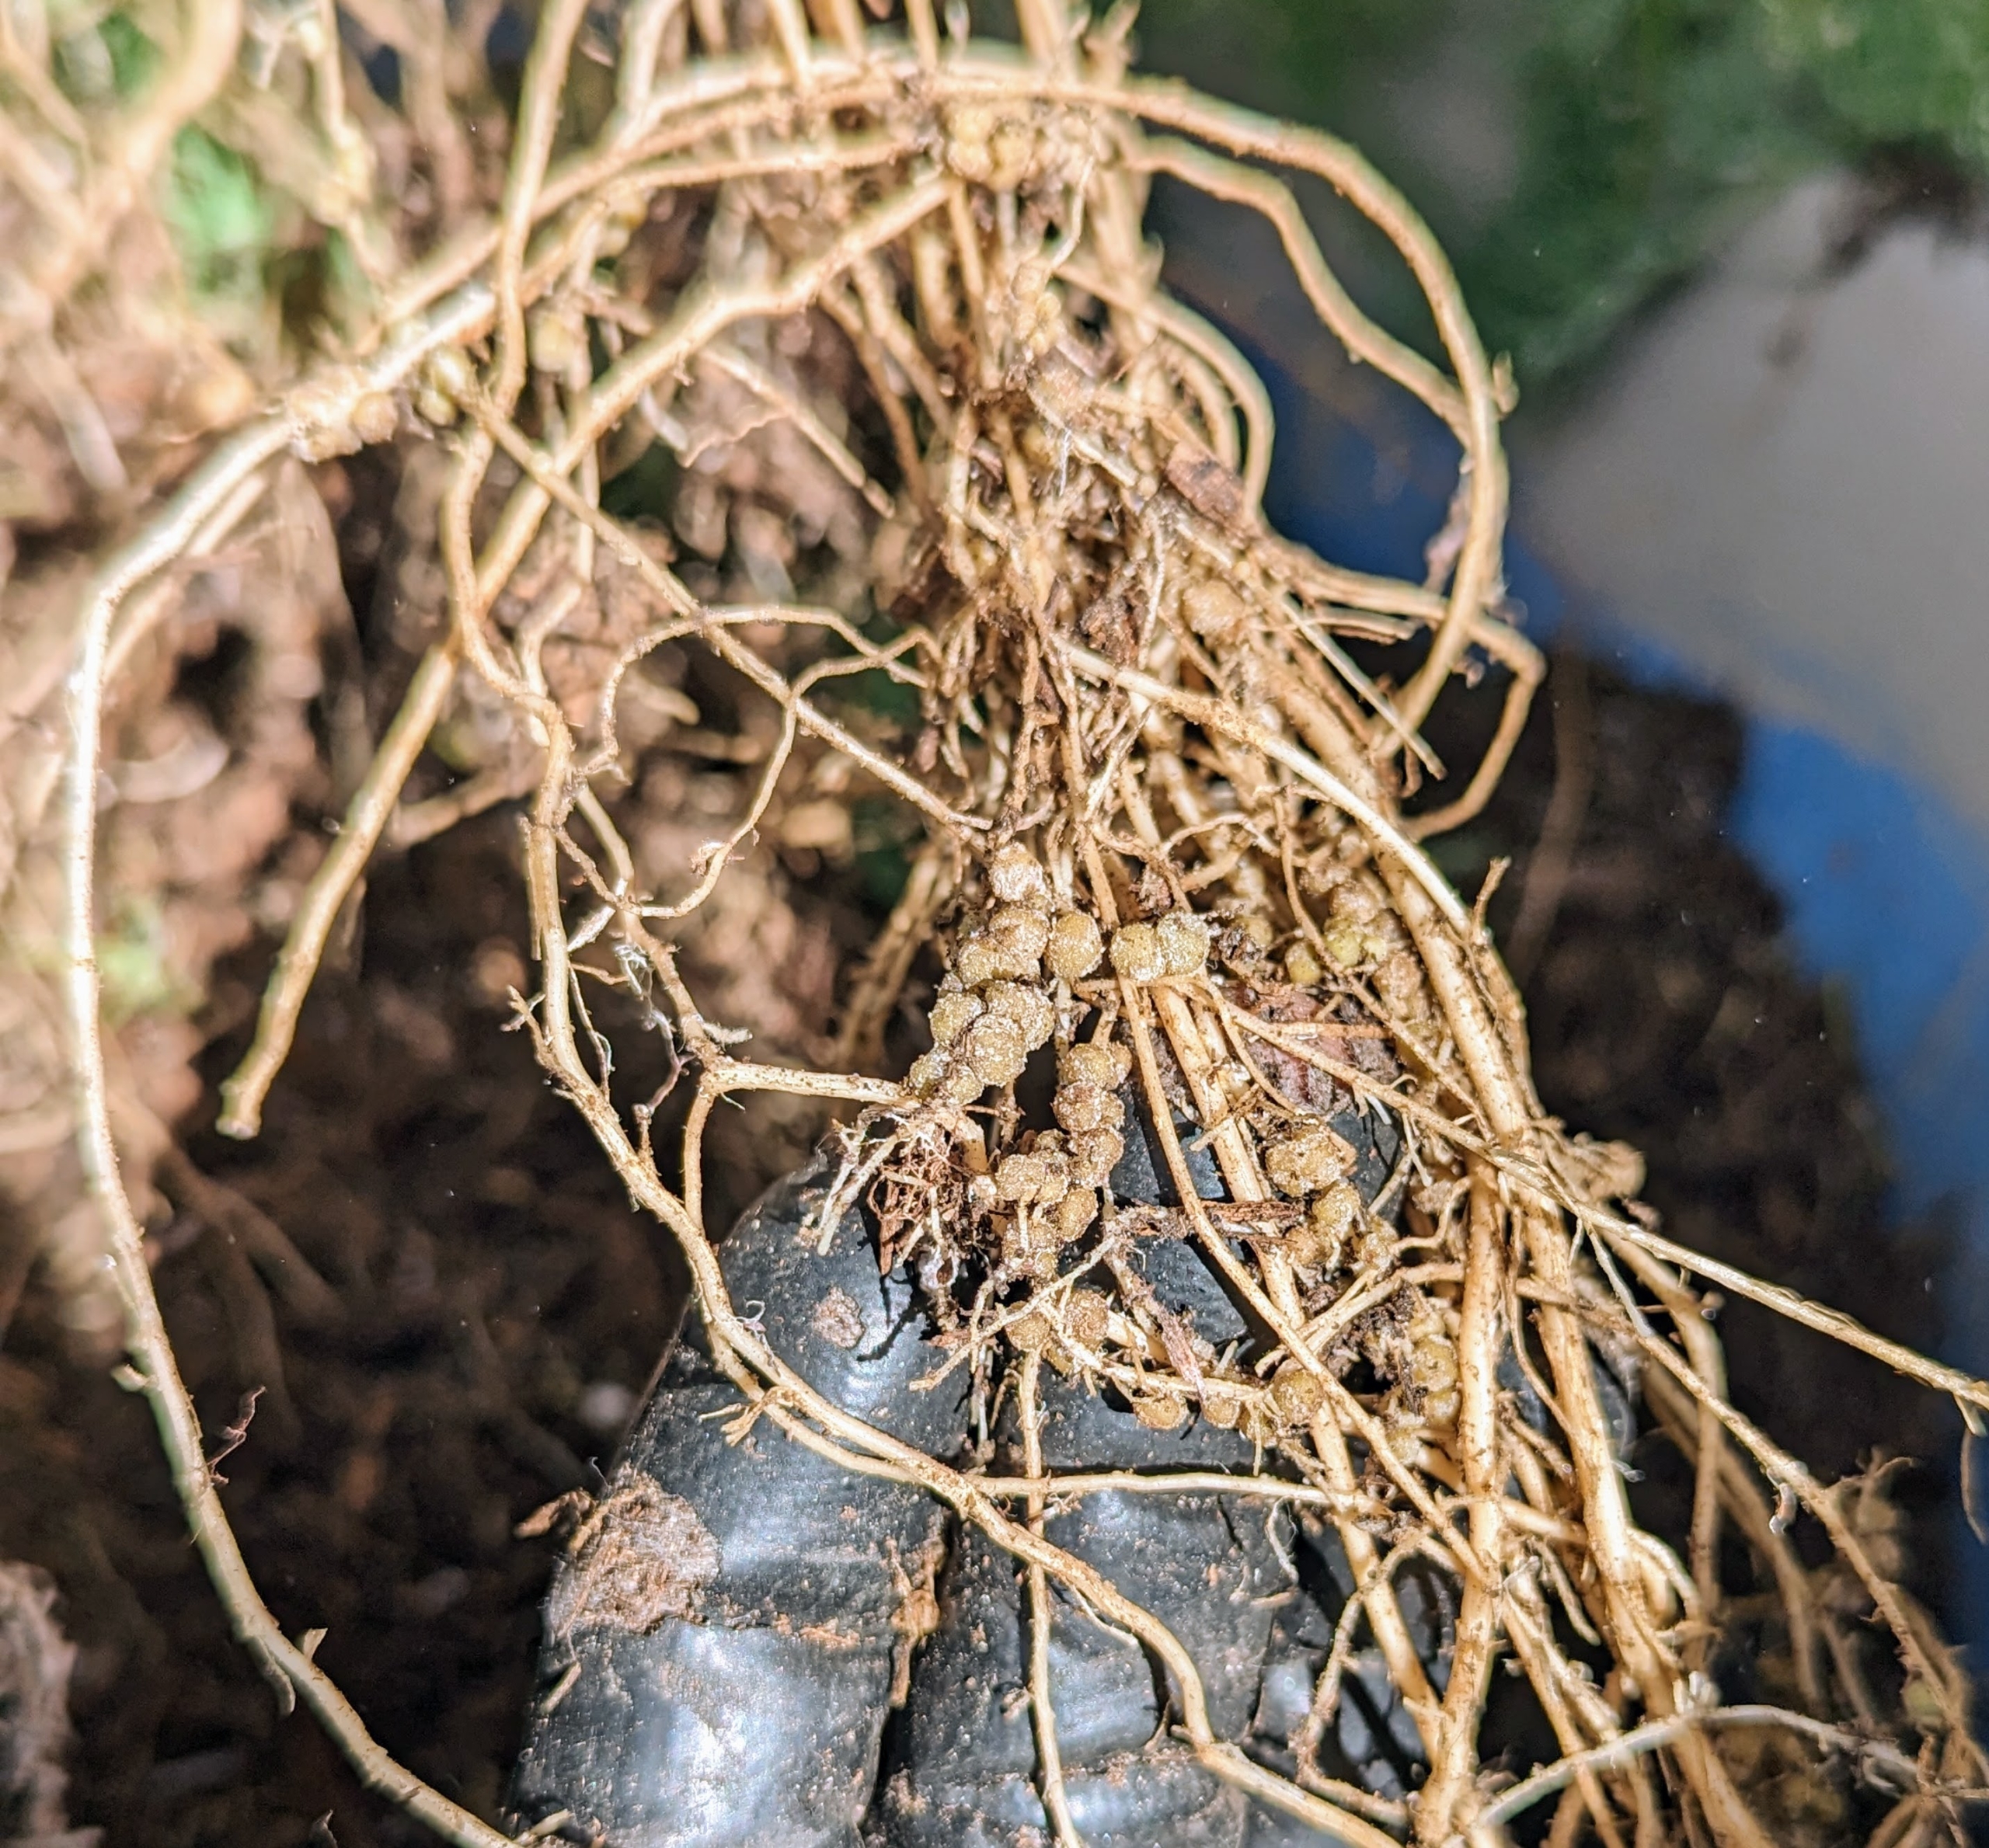
The lotus roots are also very strong and healthy.
Look closely – this plant’s roots have tiny nitrogen fixing root nodules. The bacteria live inside the root nodules where they trade nutrients with the plants. Bacteria provides nitrogen and the plant provides sugars from photosynthesis. Not all plants can make nodules, but lotus can.
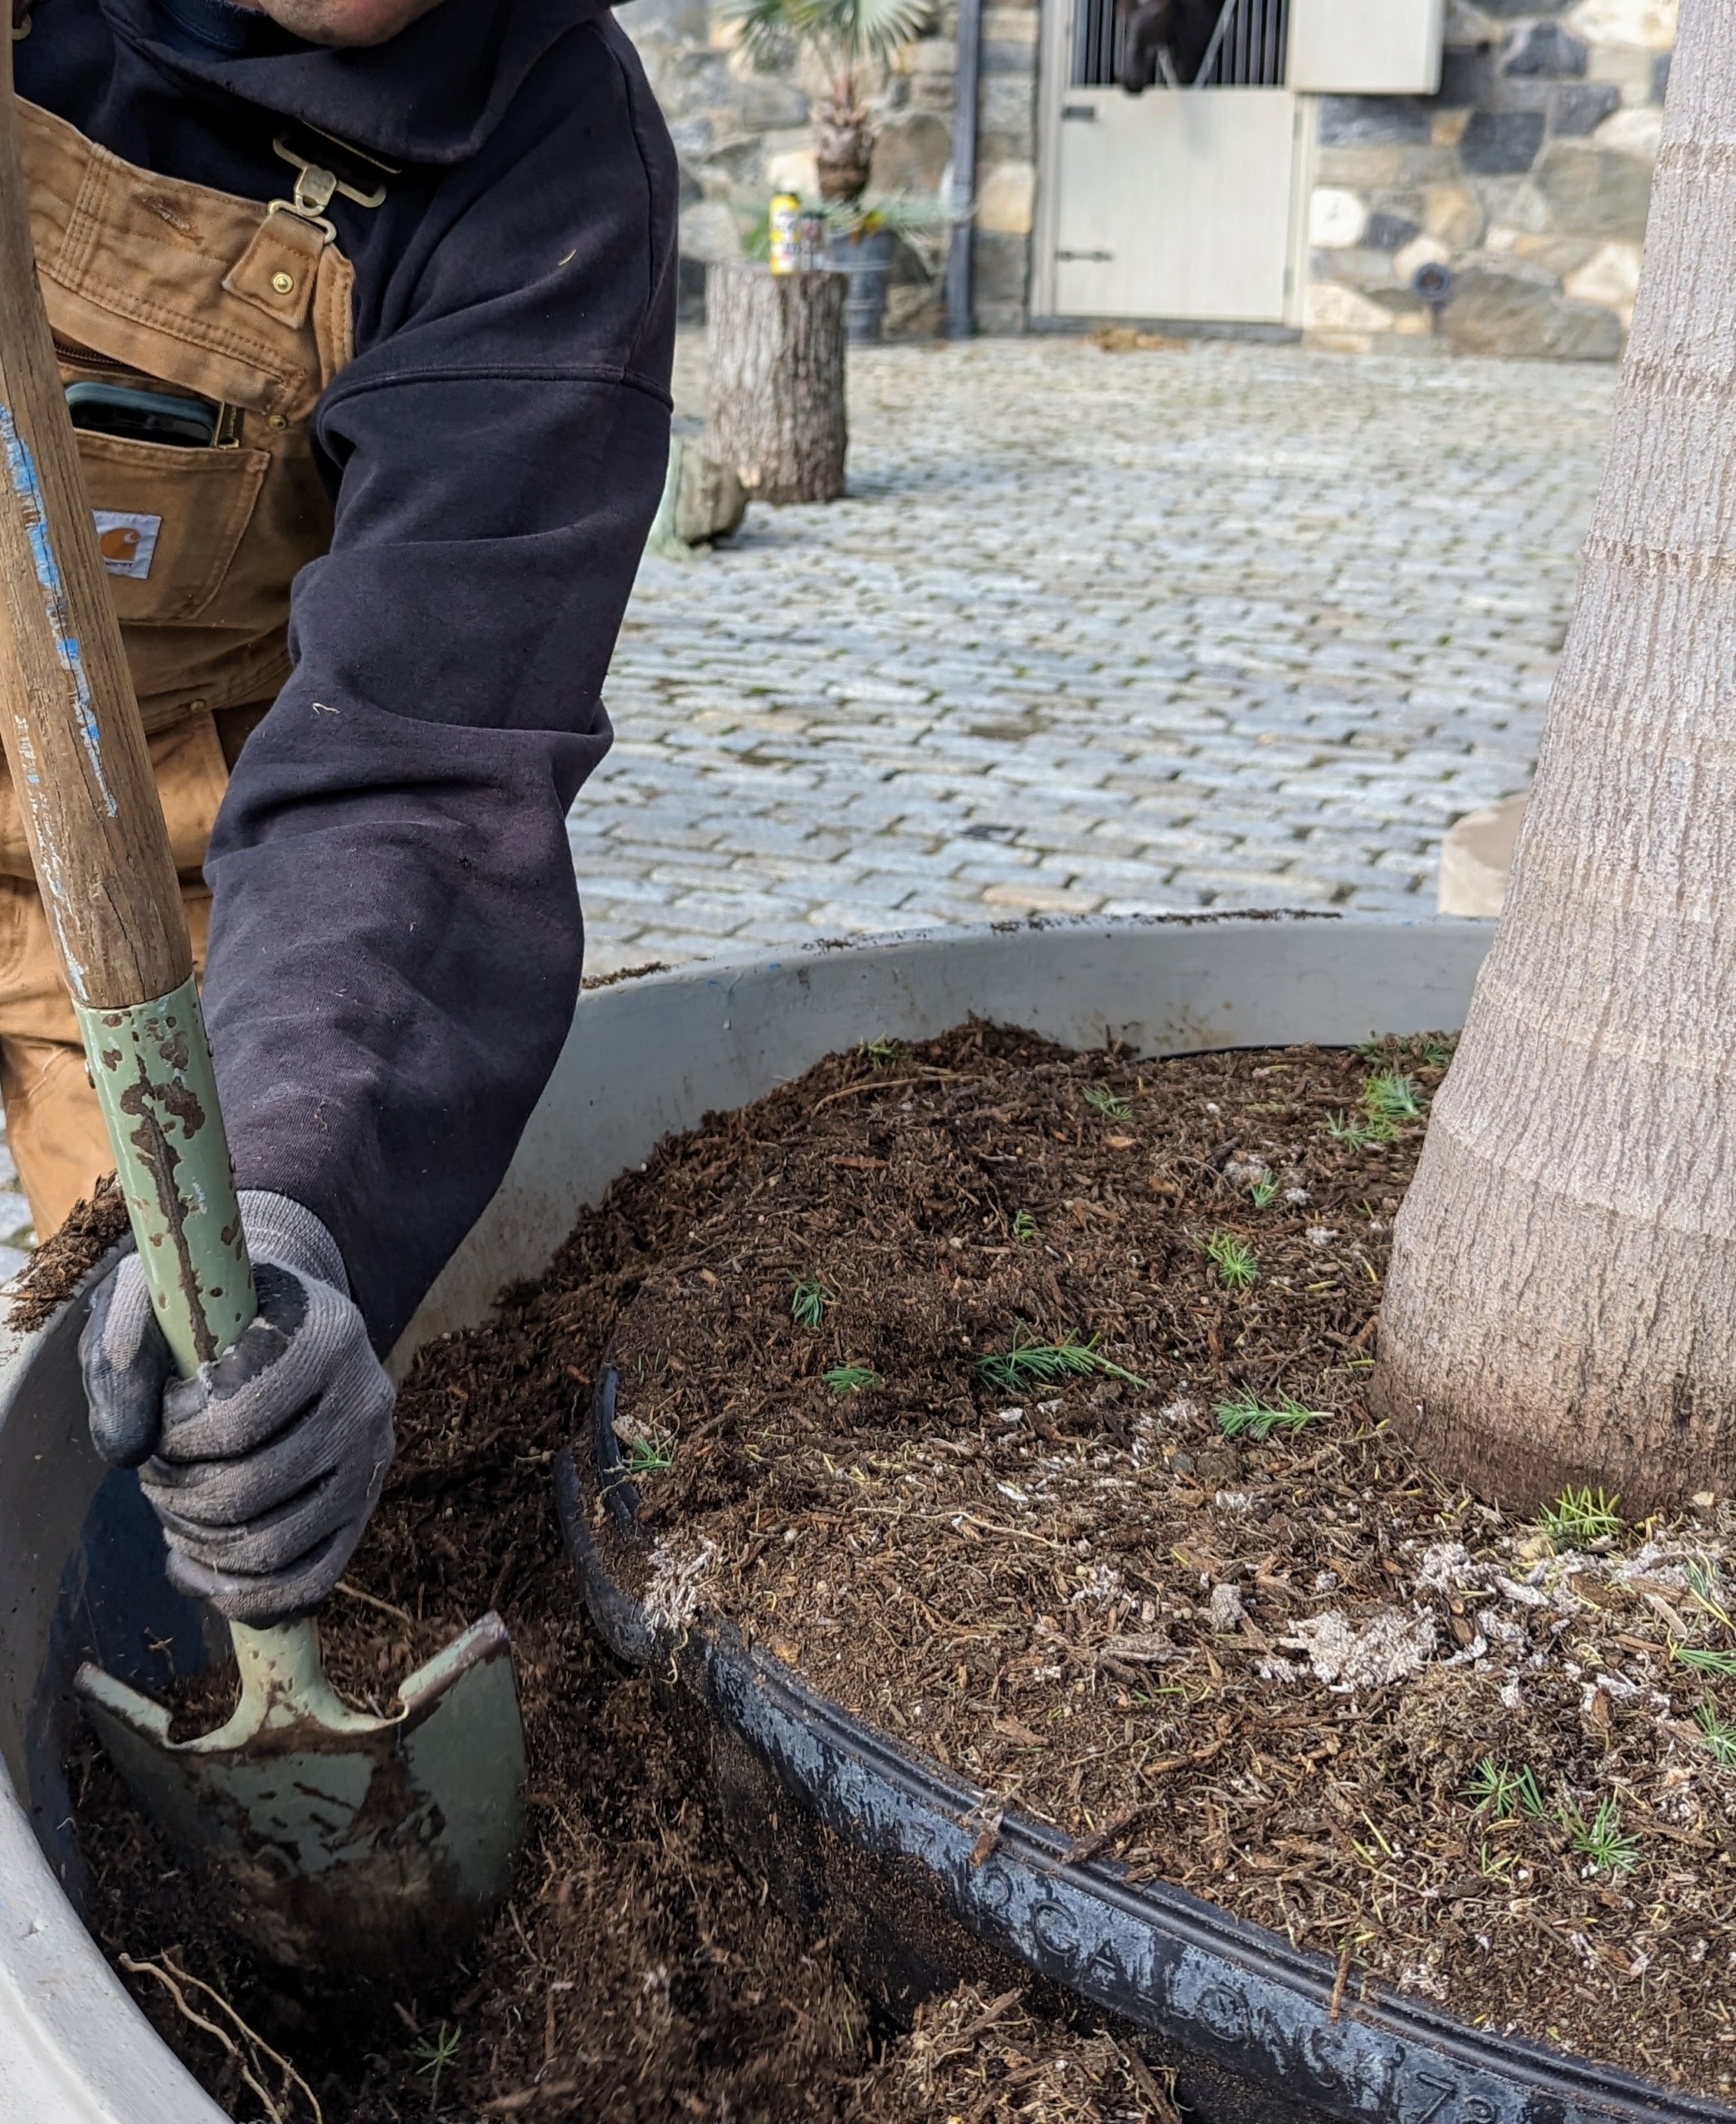
Again, once the ground cover is removed, the large potted palm can be pulled out.
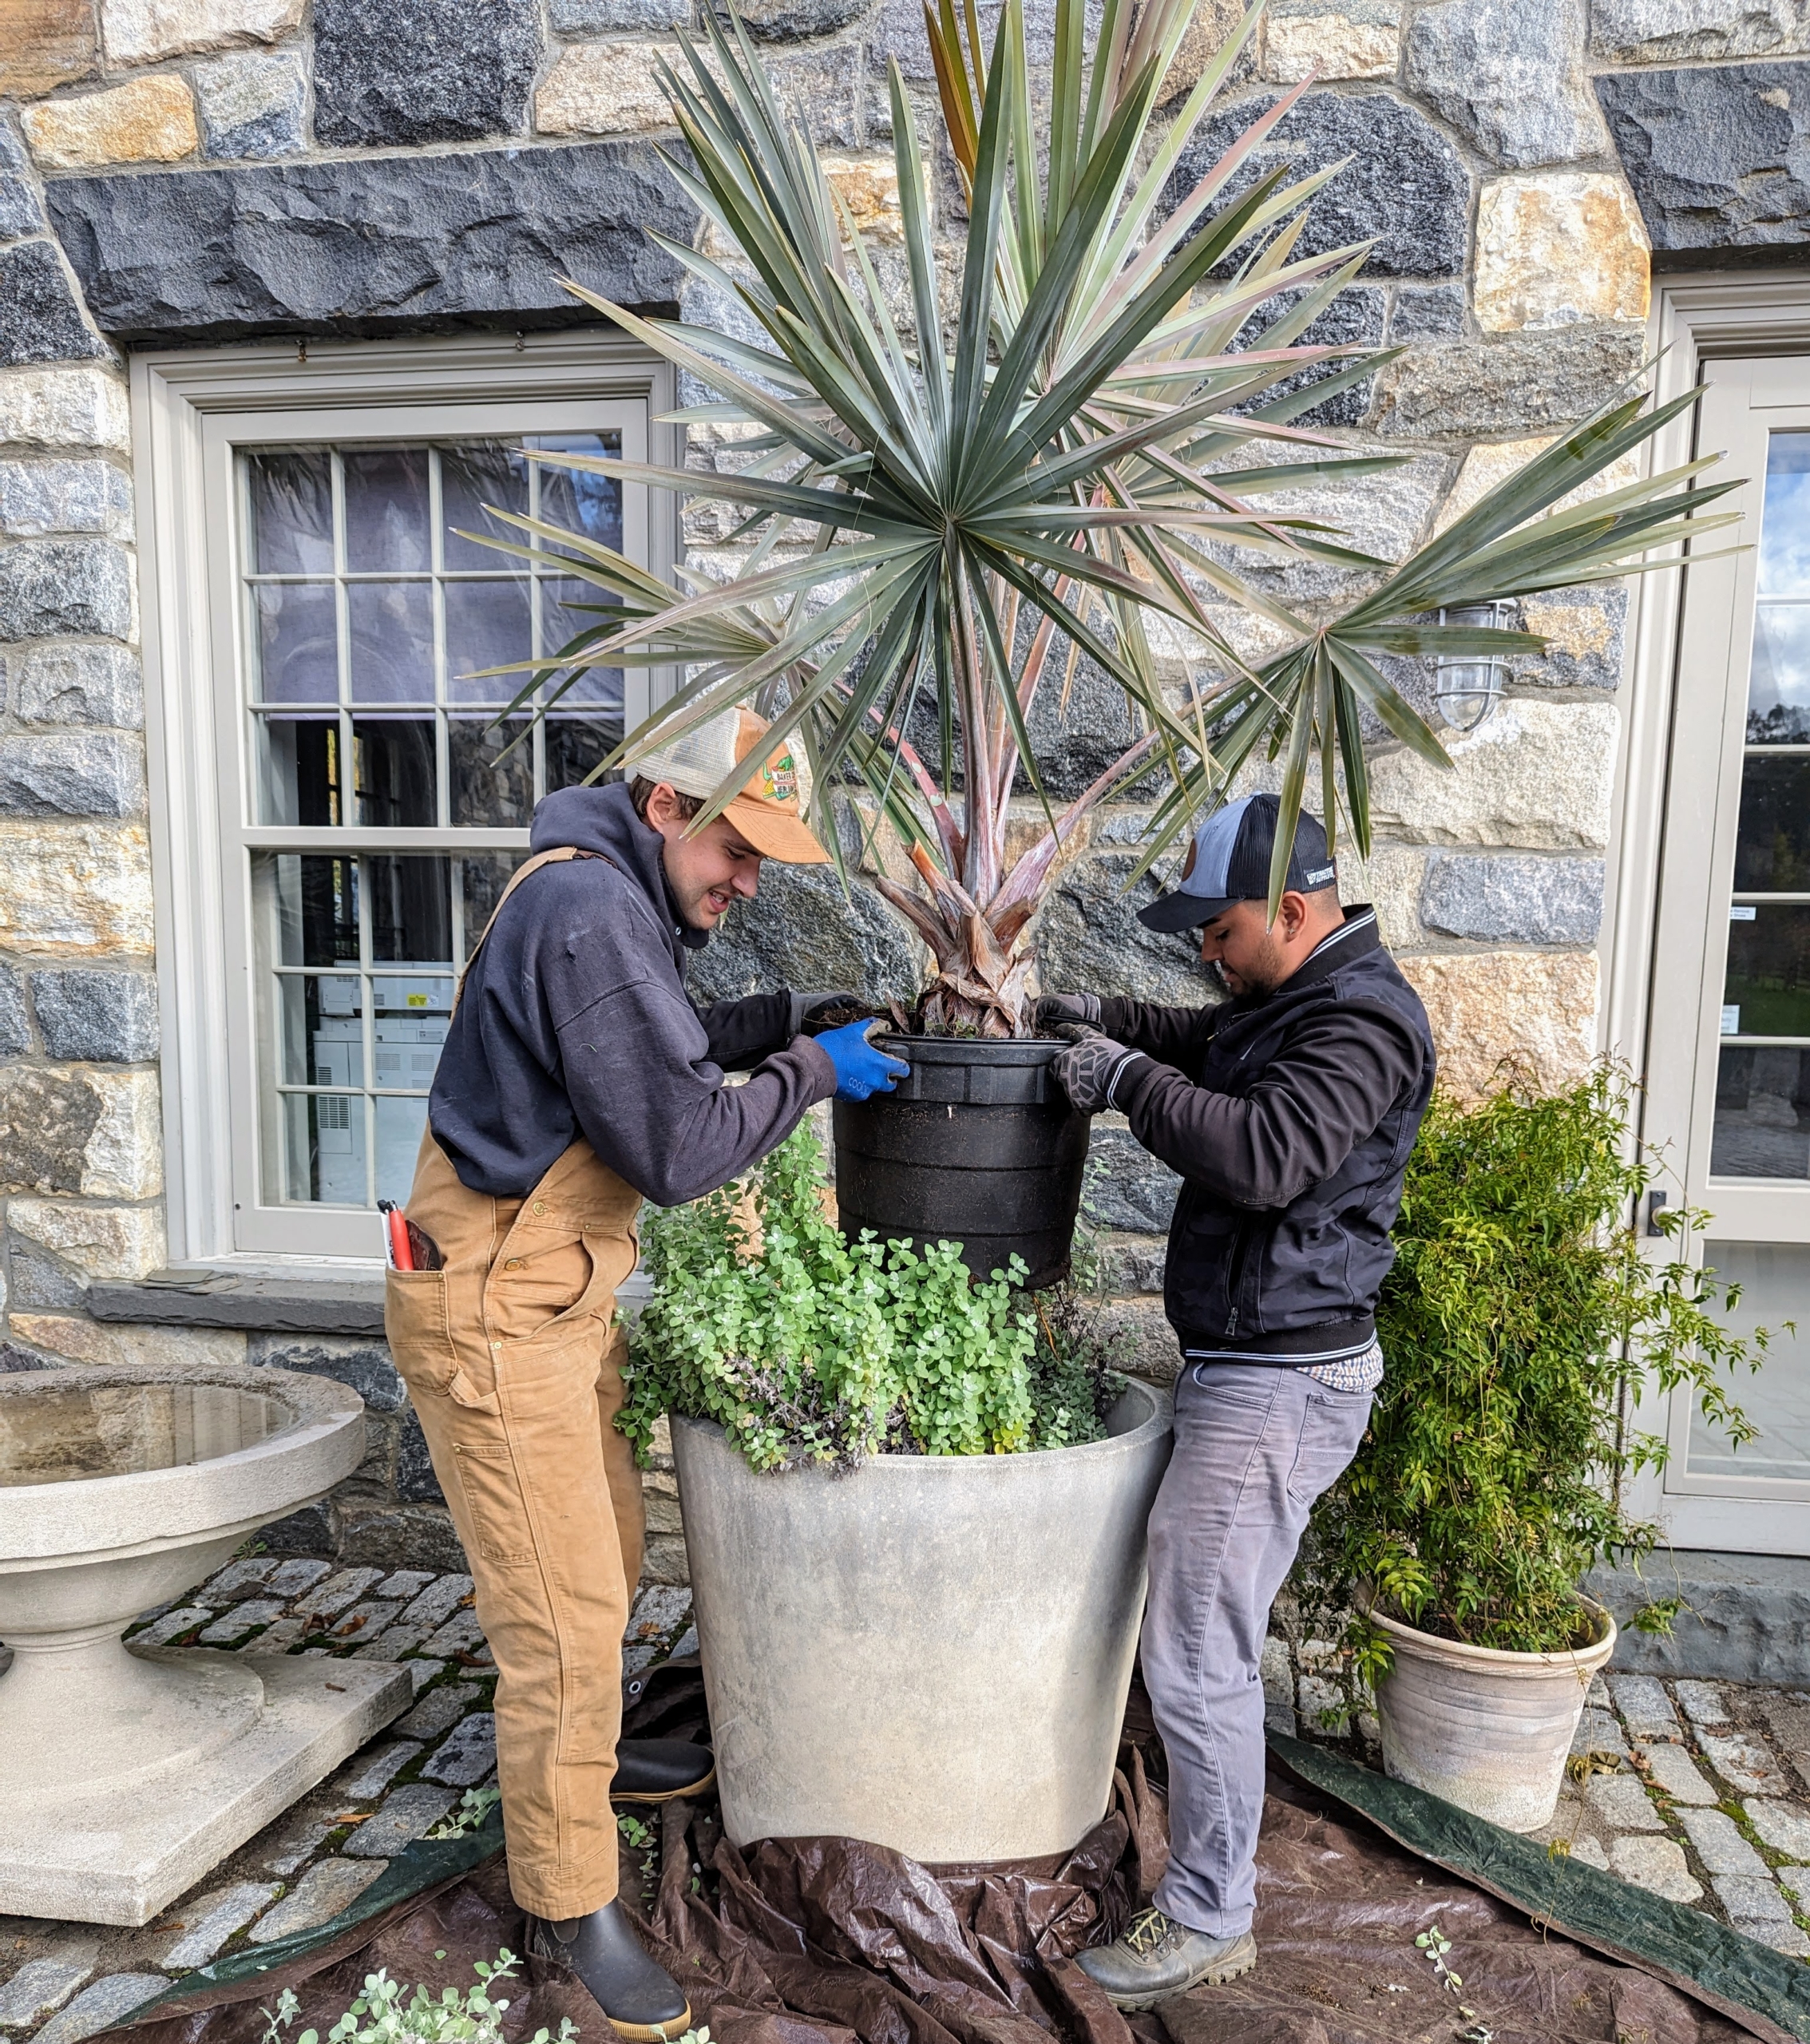
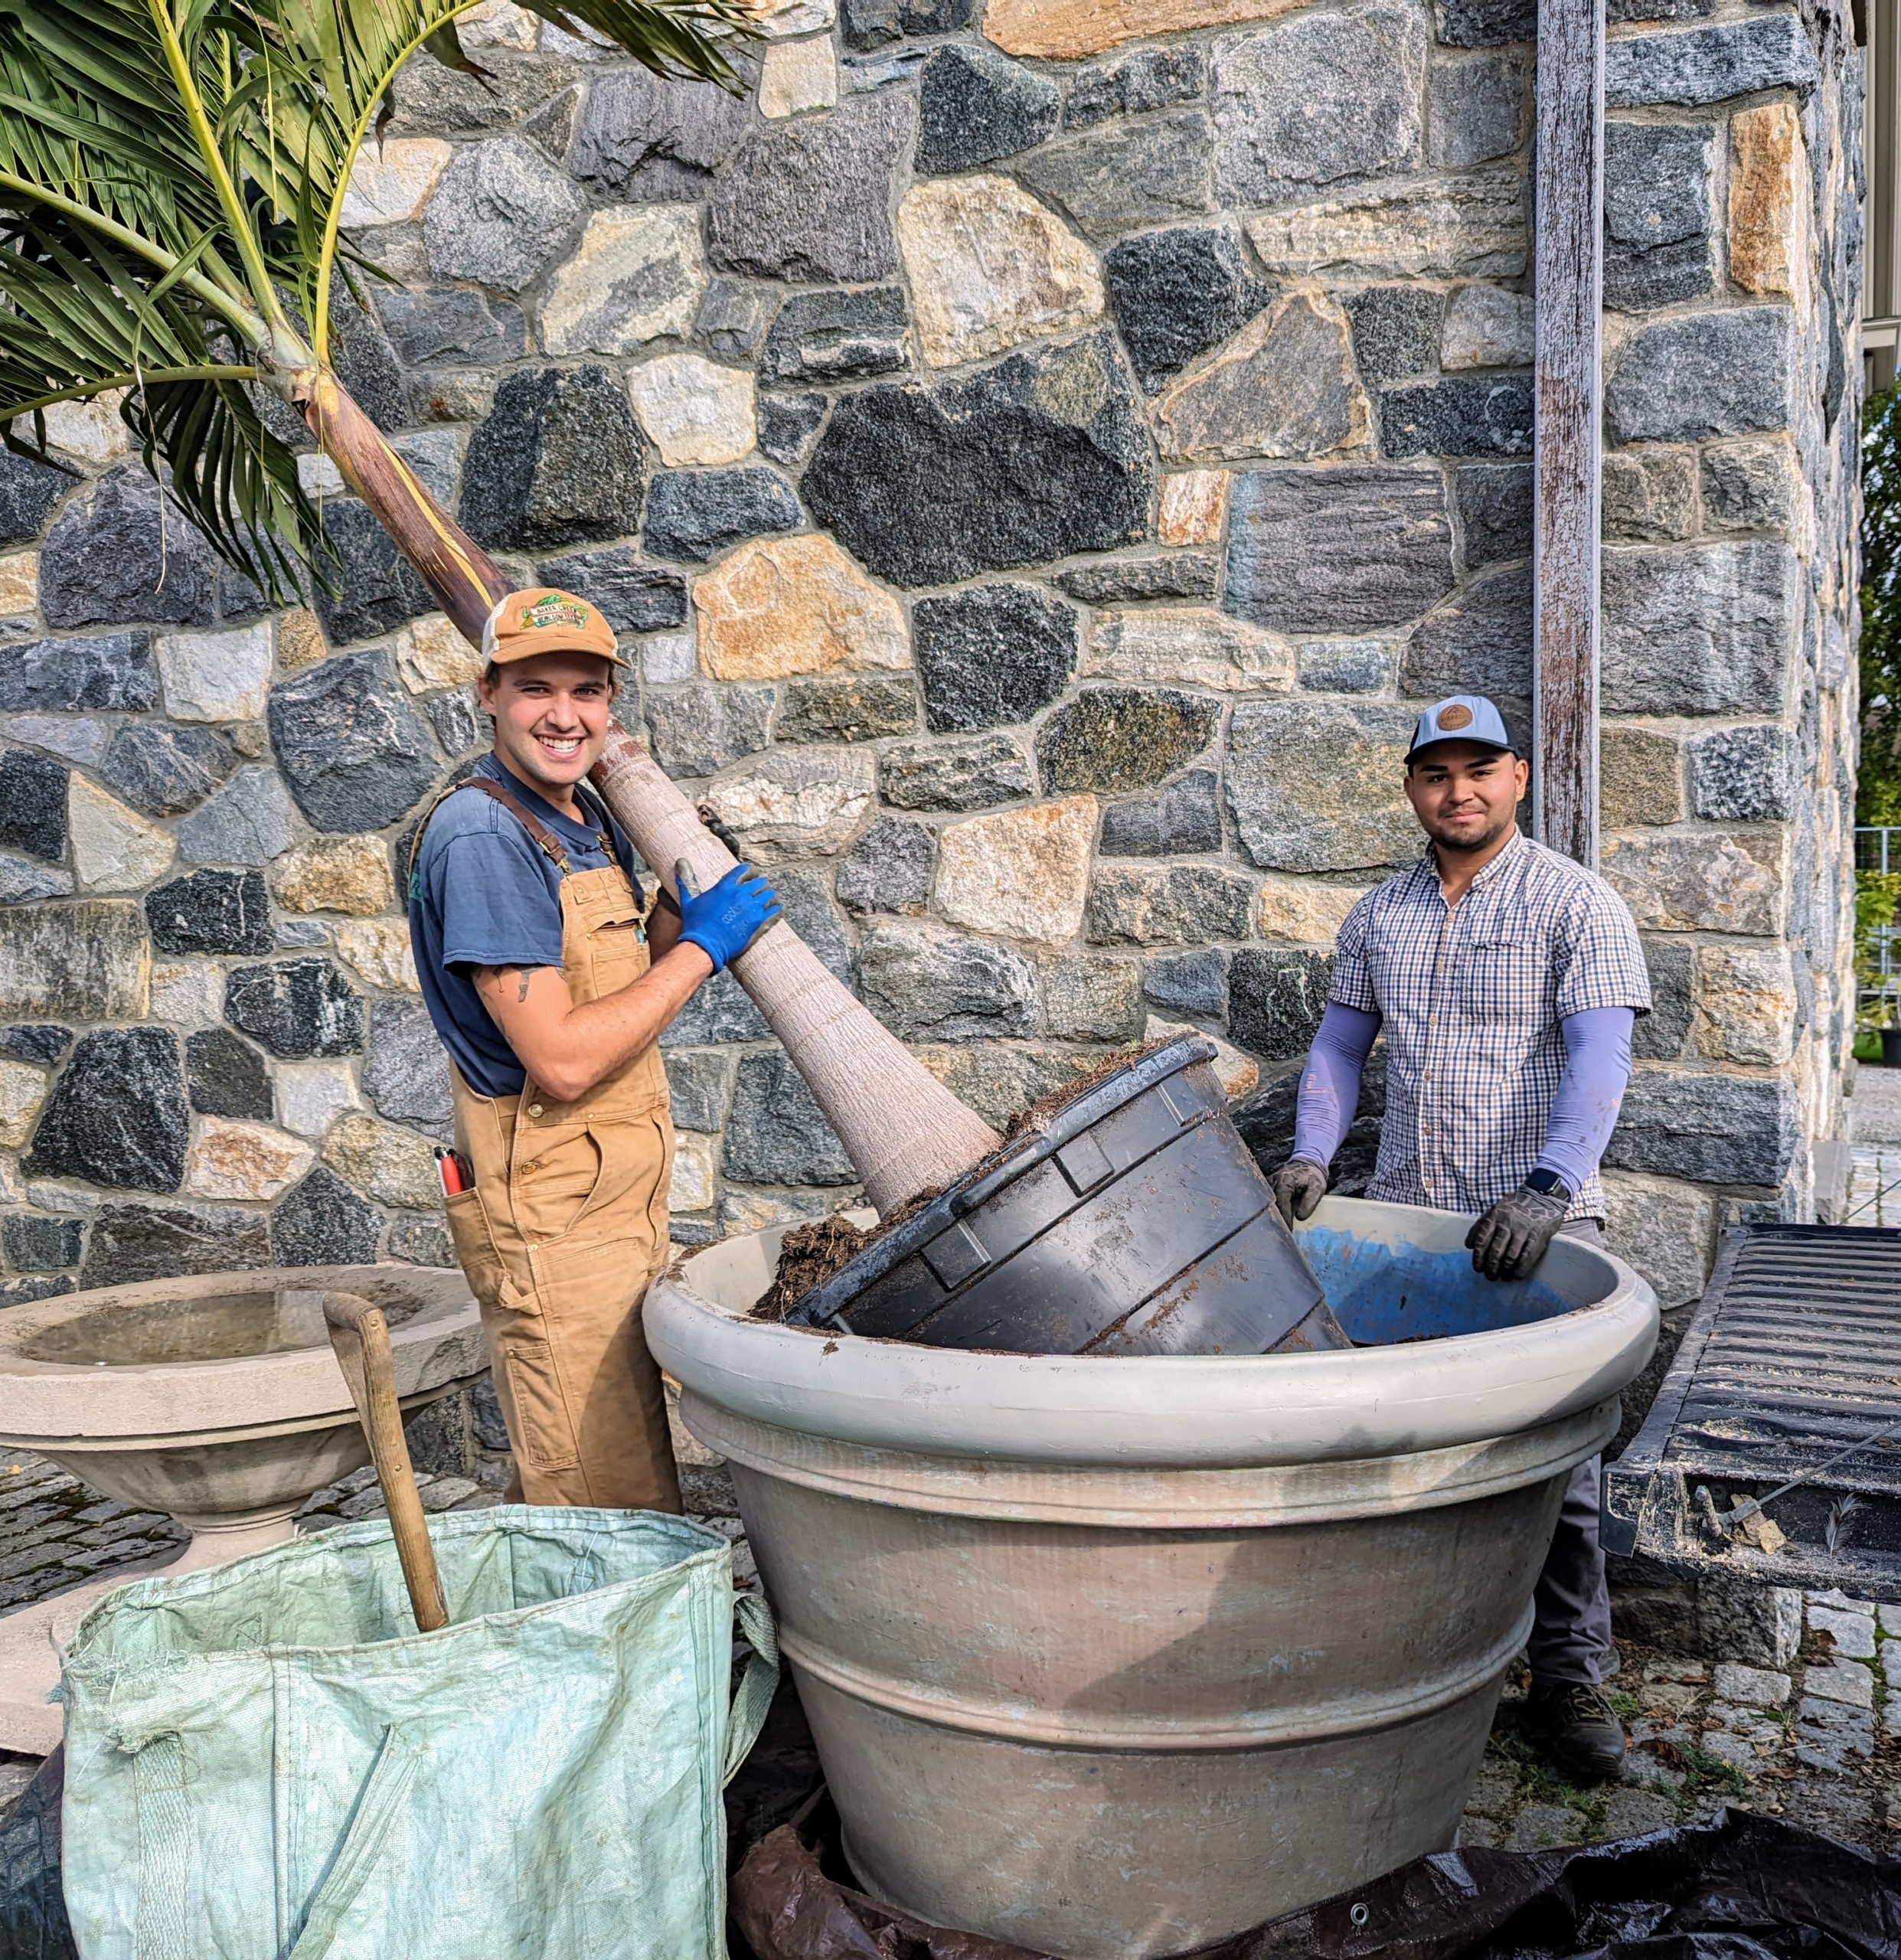
Brian and Jimmy take a moment to smile for this snapshot before gathering their strength to lift this giant king palm, Archontophoenix alexandrae, also known as Alexandra palm, northern Bangalow palm, or feather palm. It is a palm endemic to Queensland, Australia.
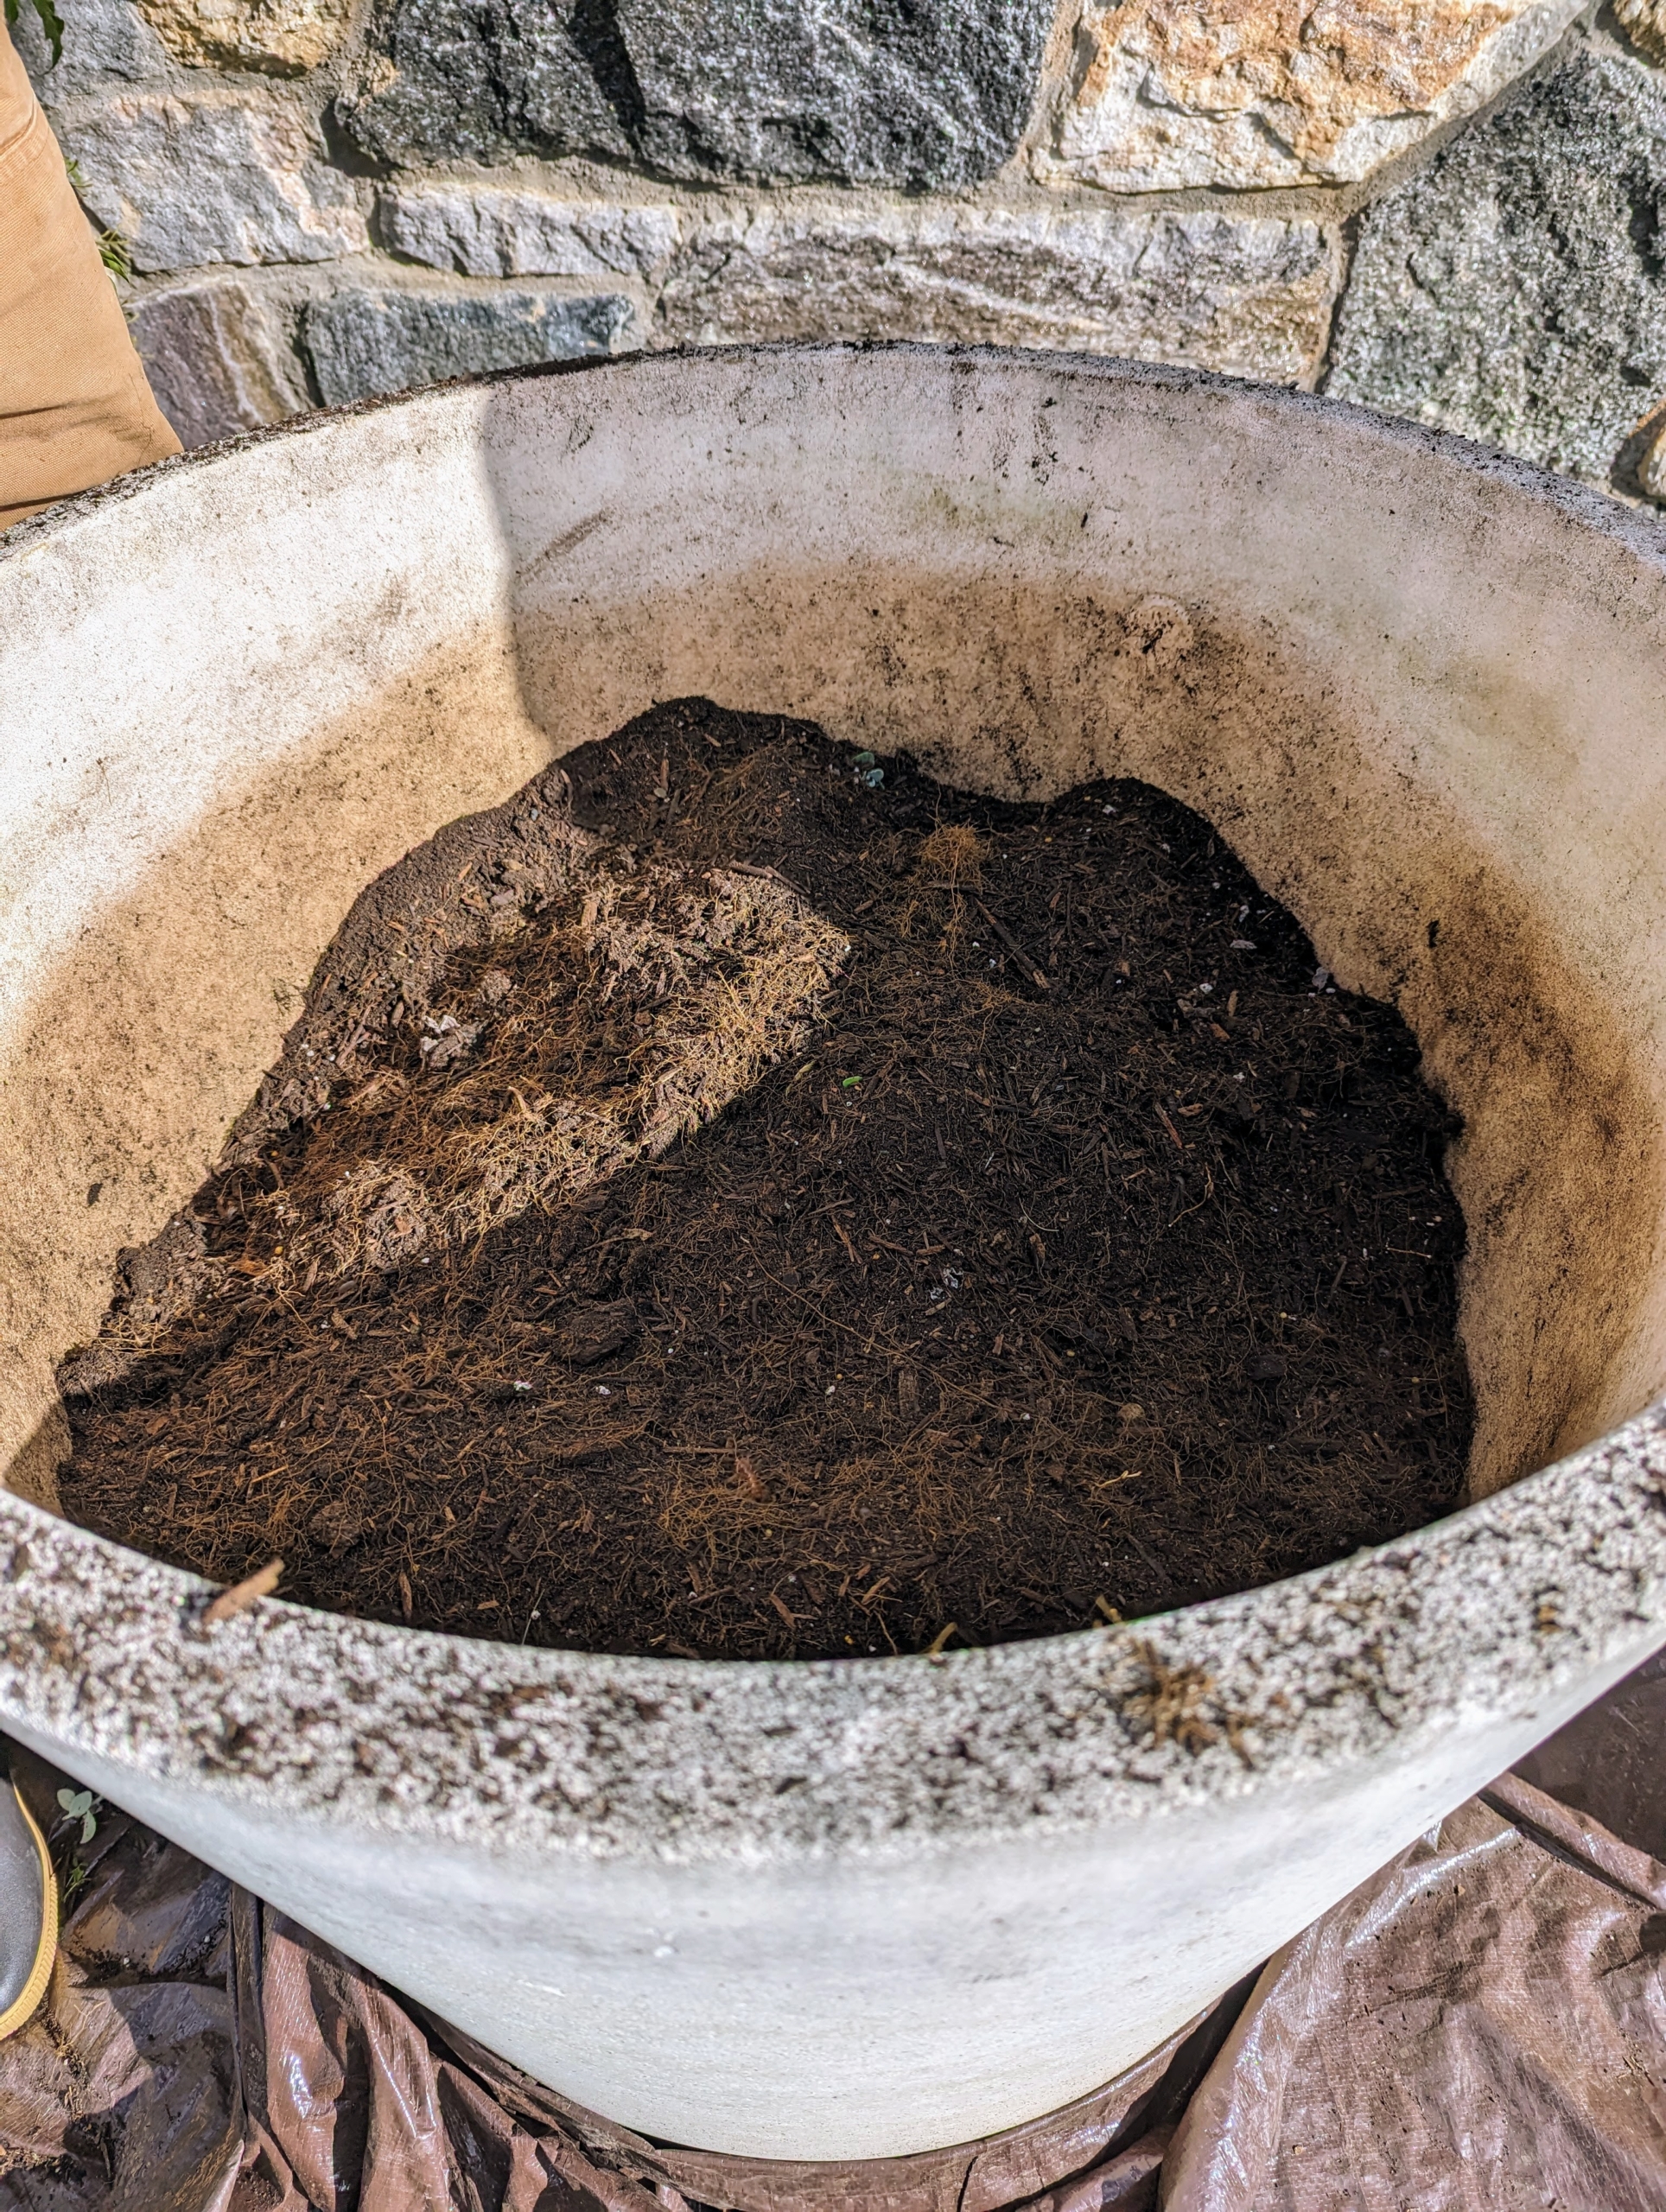
The entire pot is now removed and the remaining soil can now be repurposed.
The king palm tree is one of the most popular palms in tropical and subtropical climates. It has a single smooth grey-brownish trunk ringed by the scars from the fallen fronds. The trunk is a little wider at the base and has about 15 to 20 arching evergreen fronds that emerge from the graceful crown. The leaves are bright green above and below and they have about 100 to 150 leaflets that are six to 12 inches long. At maturity, this tree can grow up to 40 feet tall and 15 feet wide.
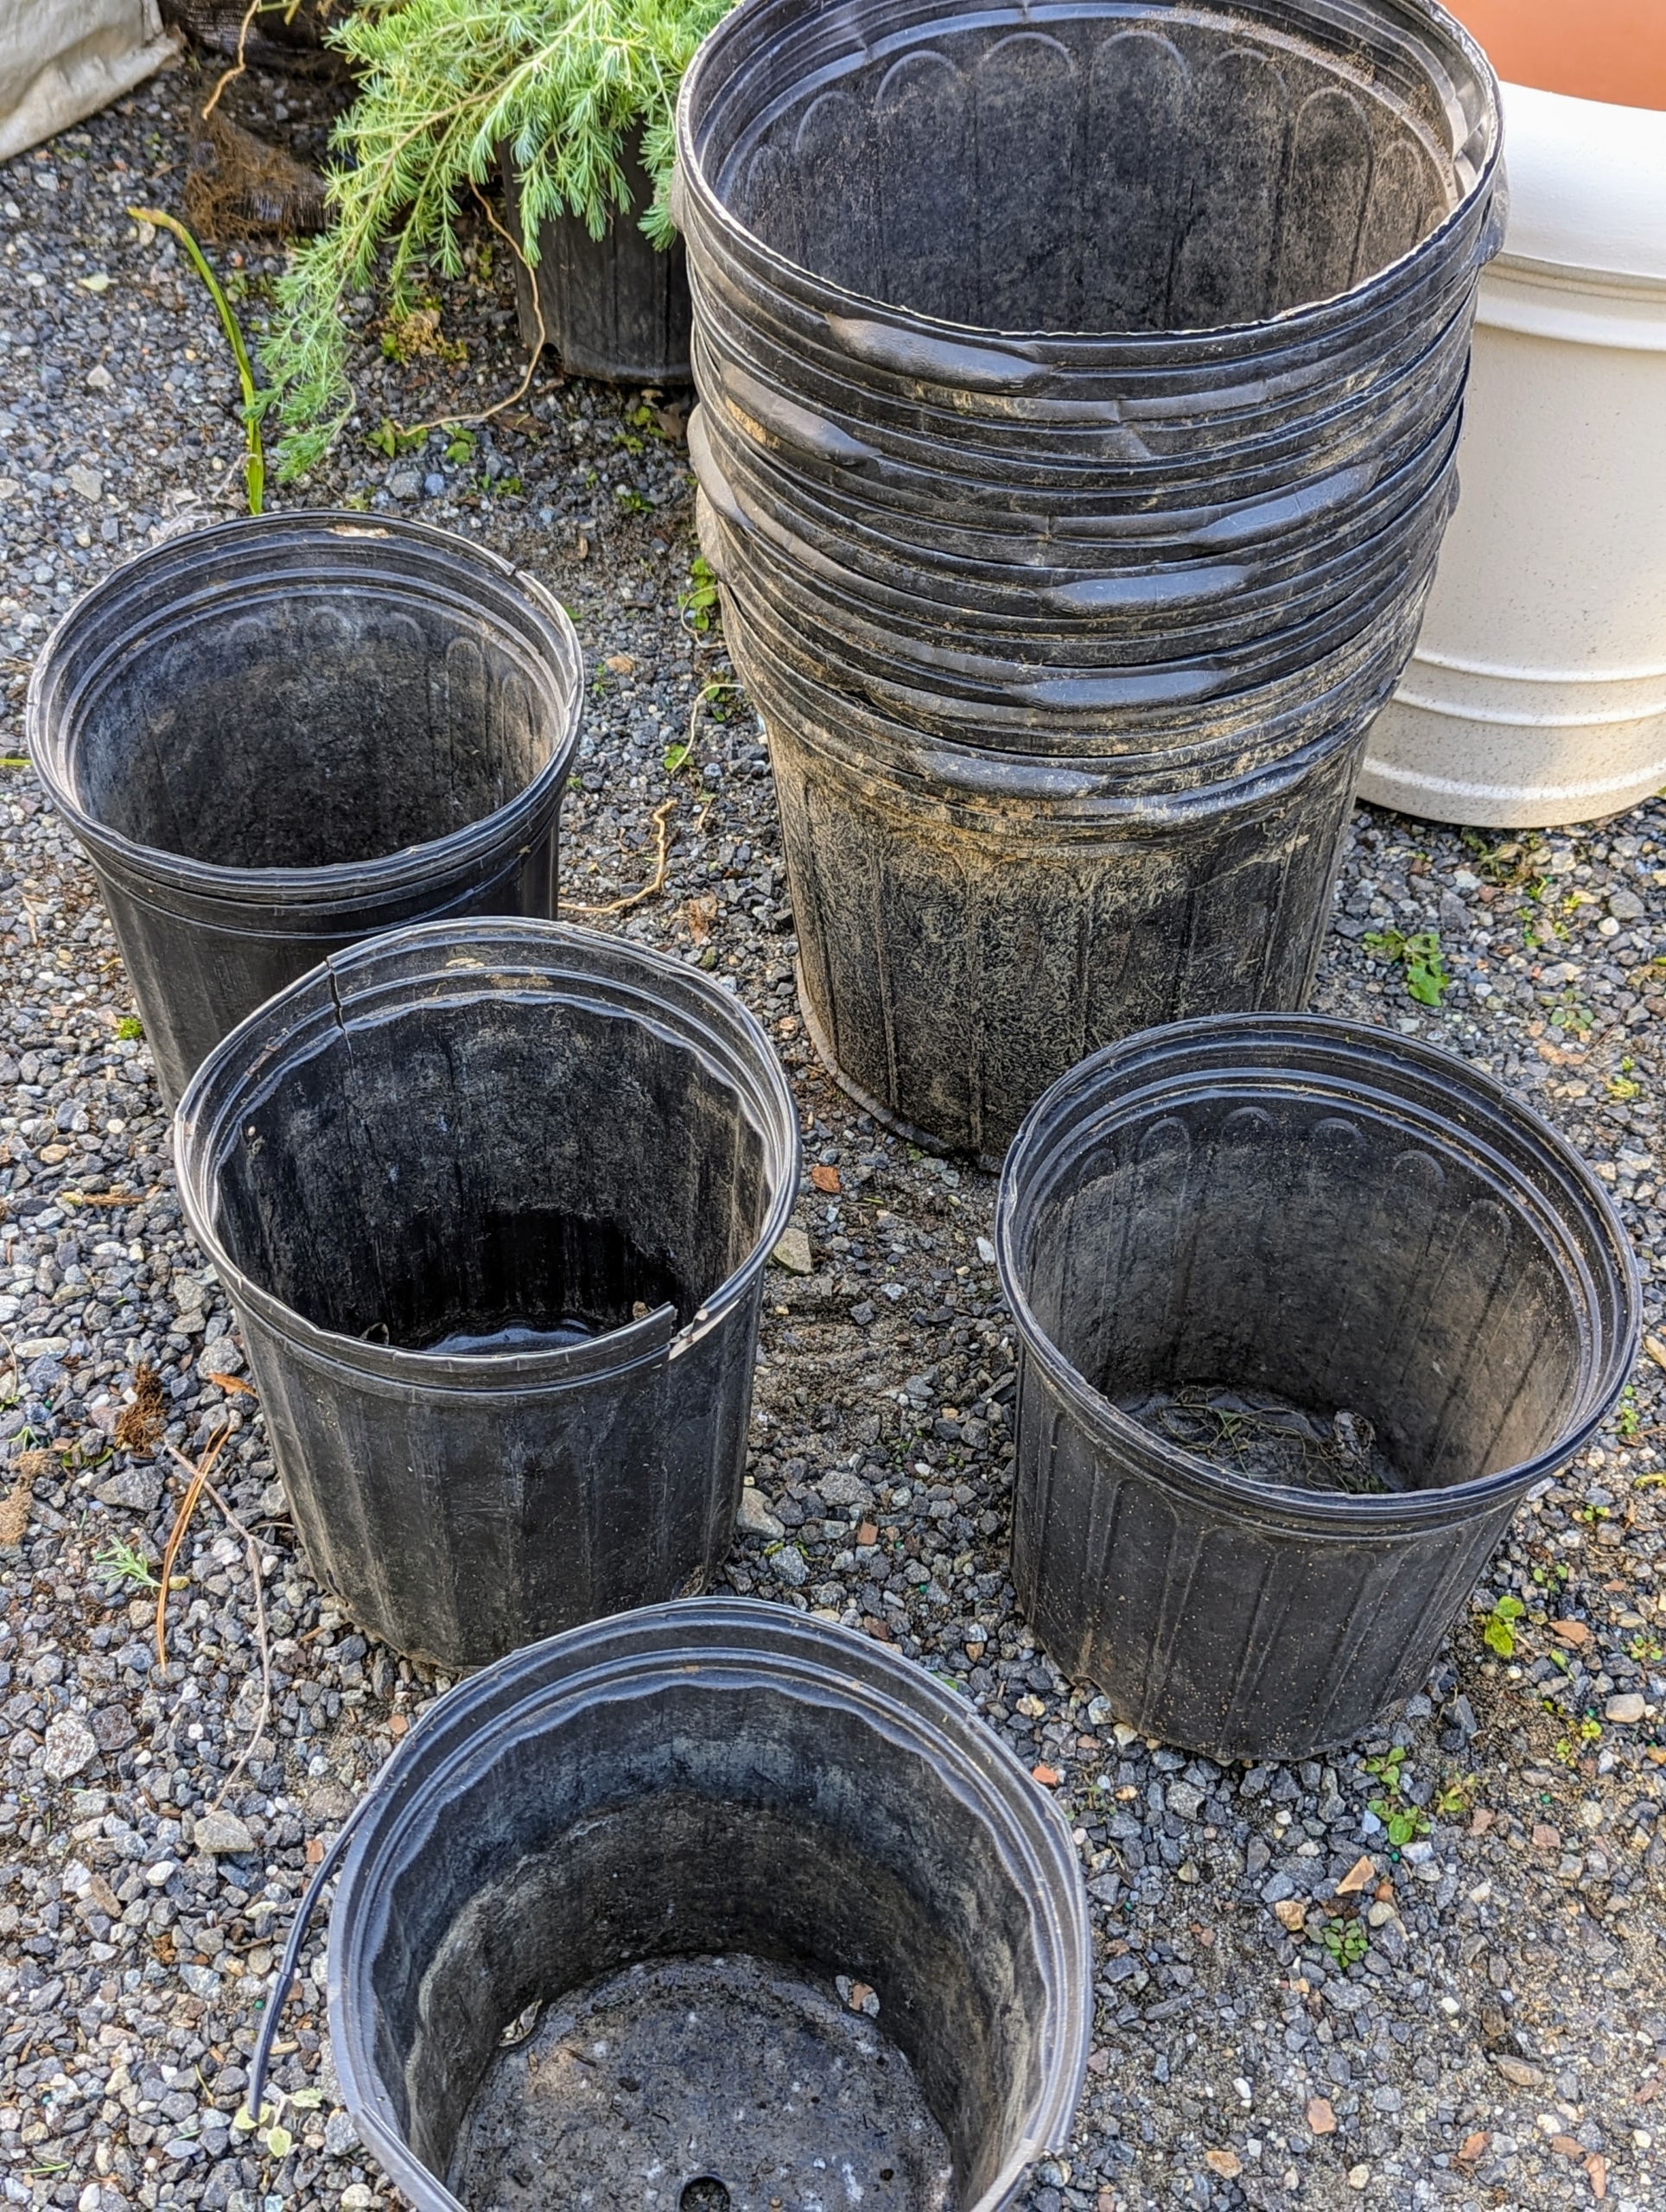
We always save the plastic pots that come with new plants. These pots are very helpful for winter storage and for potting up our bare root seedlings.
Here, Jimmy pots up the saved lotus.
Here is some of the Helichrysum also getting planted into a pot. These pots will be placed in a sunny area of the greenhouse. Helichrysum is easy to maintain. It prefers warm, dry conditions and well-drained soil.
Autumn cleanup is well-underway here at the farm. I am fortunate I have the room to store all these plants for the cold season and visit them in their temperature and humidity controlled enclosures when it is cold and dreary outside. Is it getting cold where you are? How do you winterize your plants? Share your comments with me.
Adding just one type of tree, bush, or plant can totally transform a space. I am always looking for ways to improve the landscape here at my Bedford, New York farm.
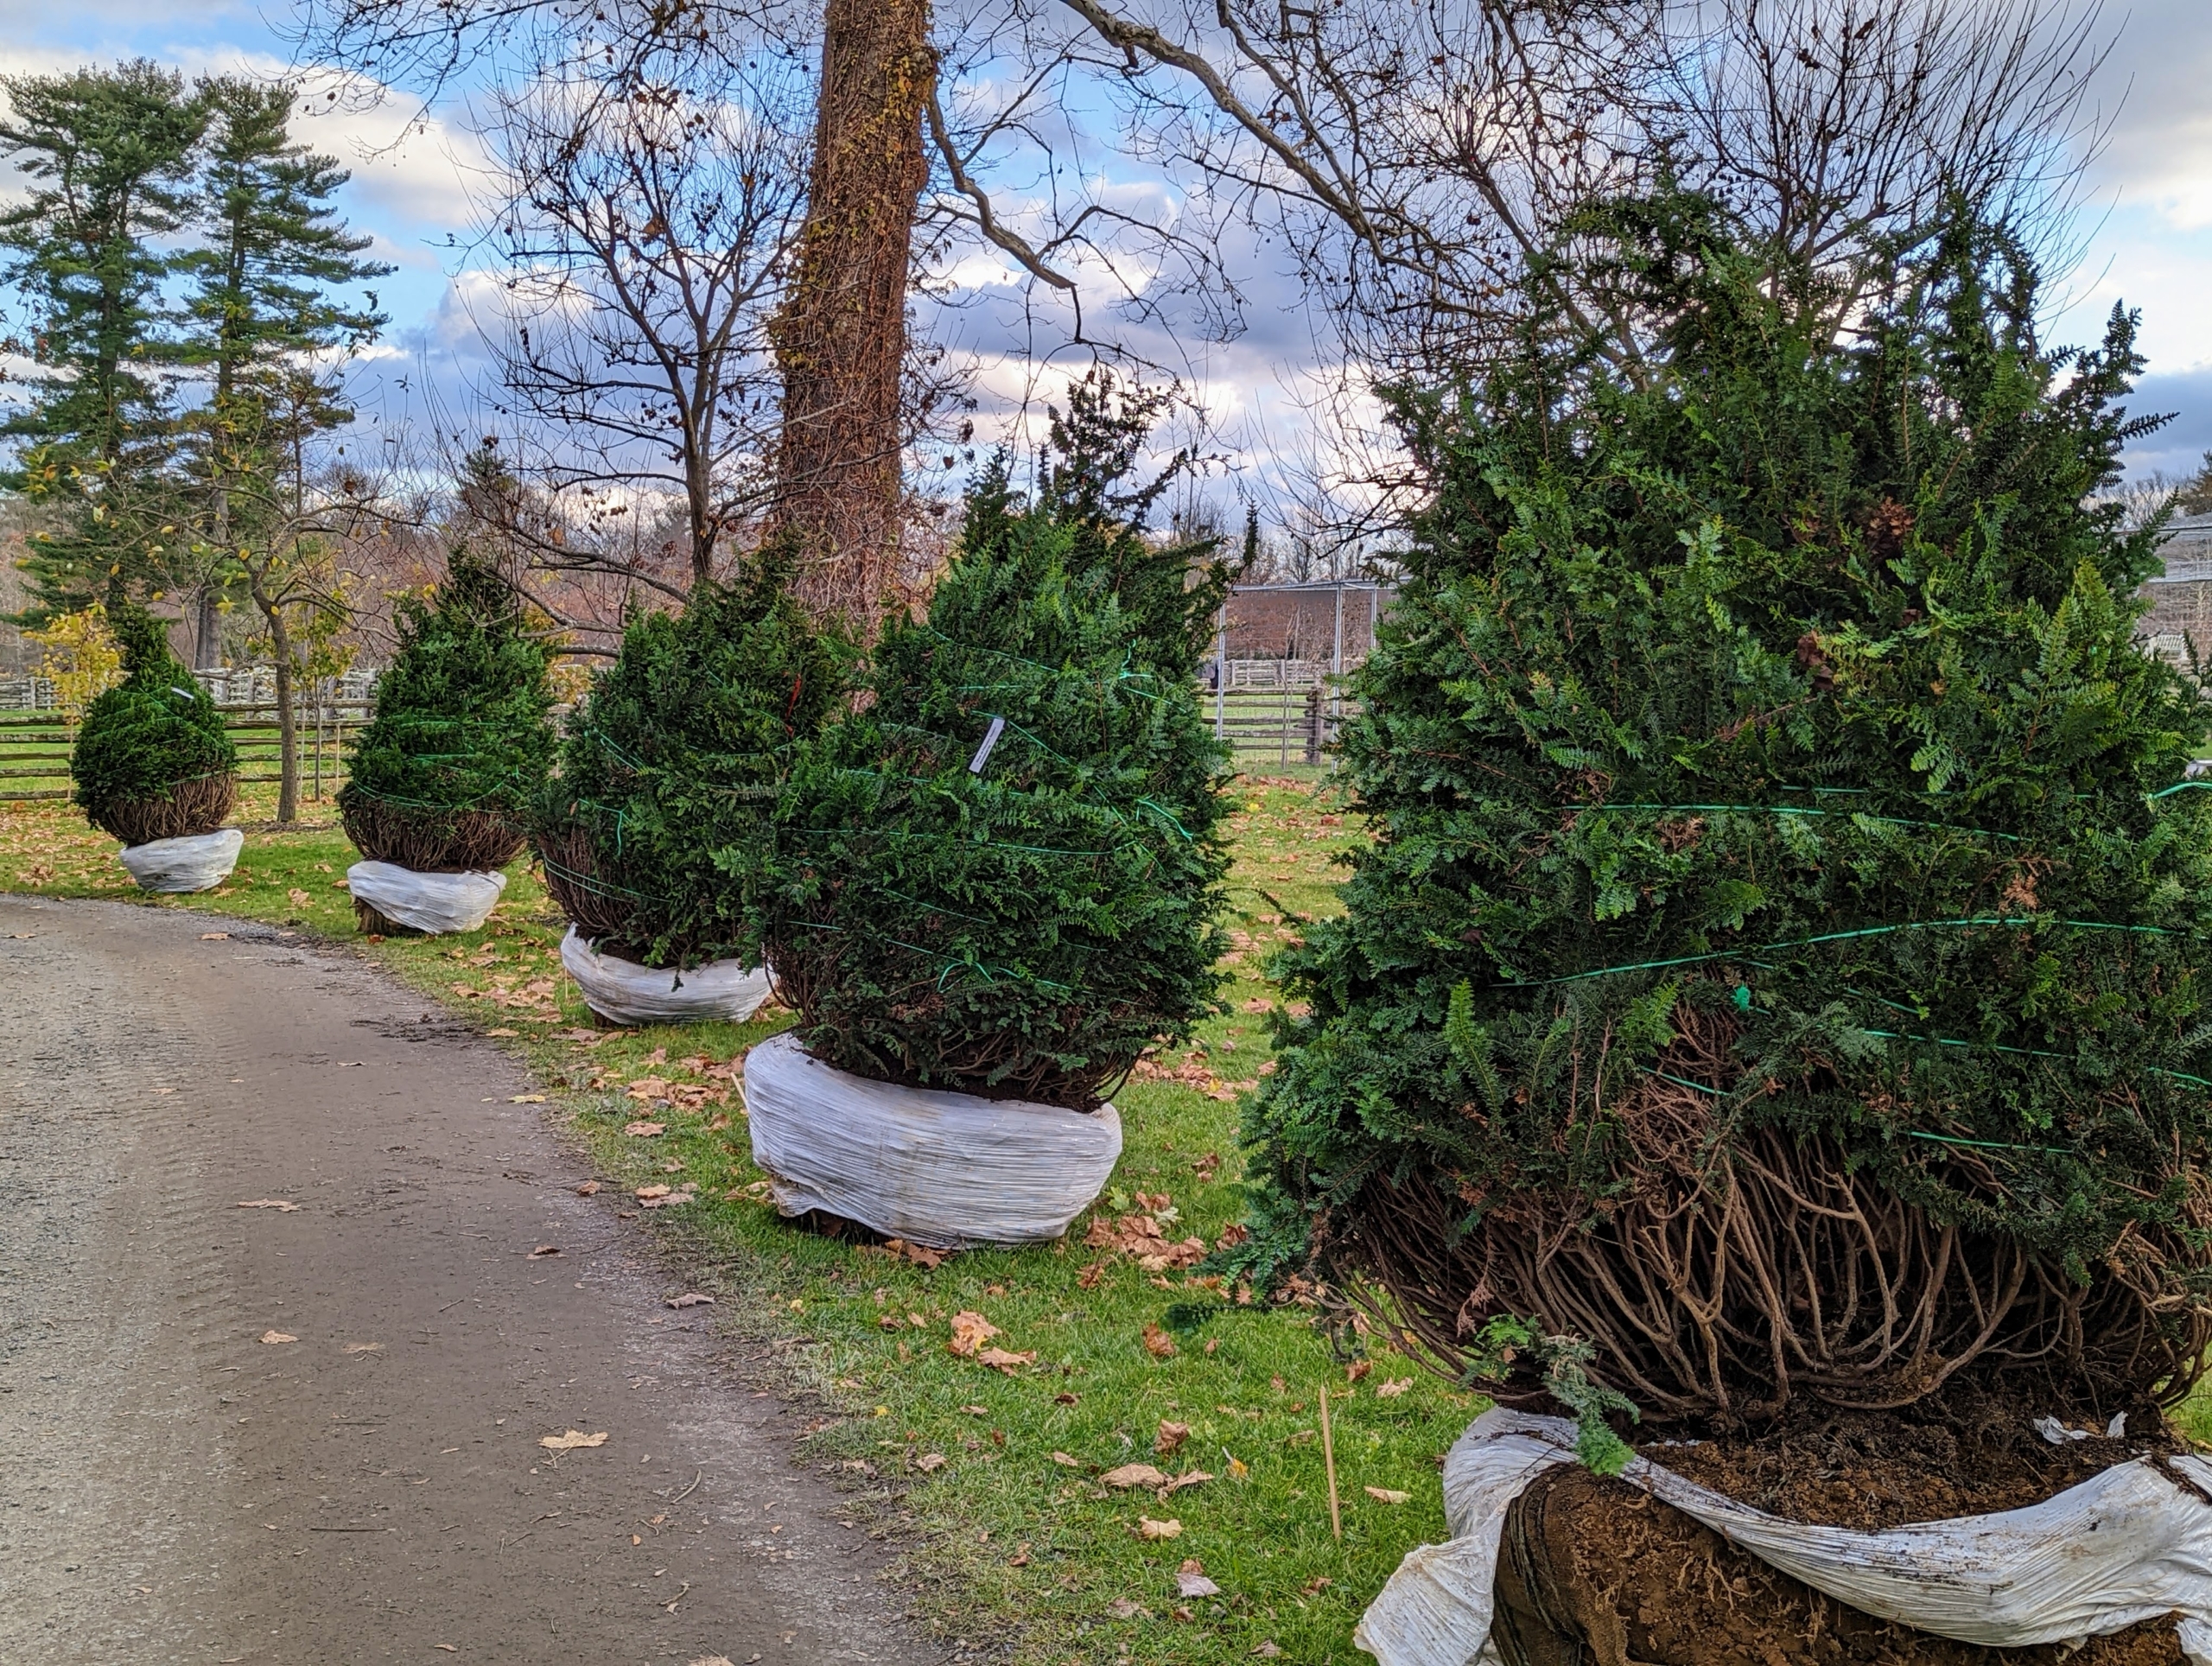
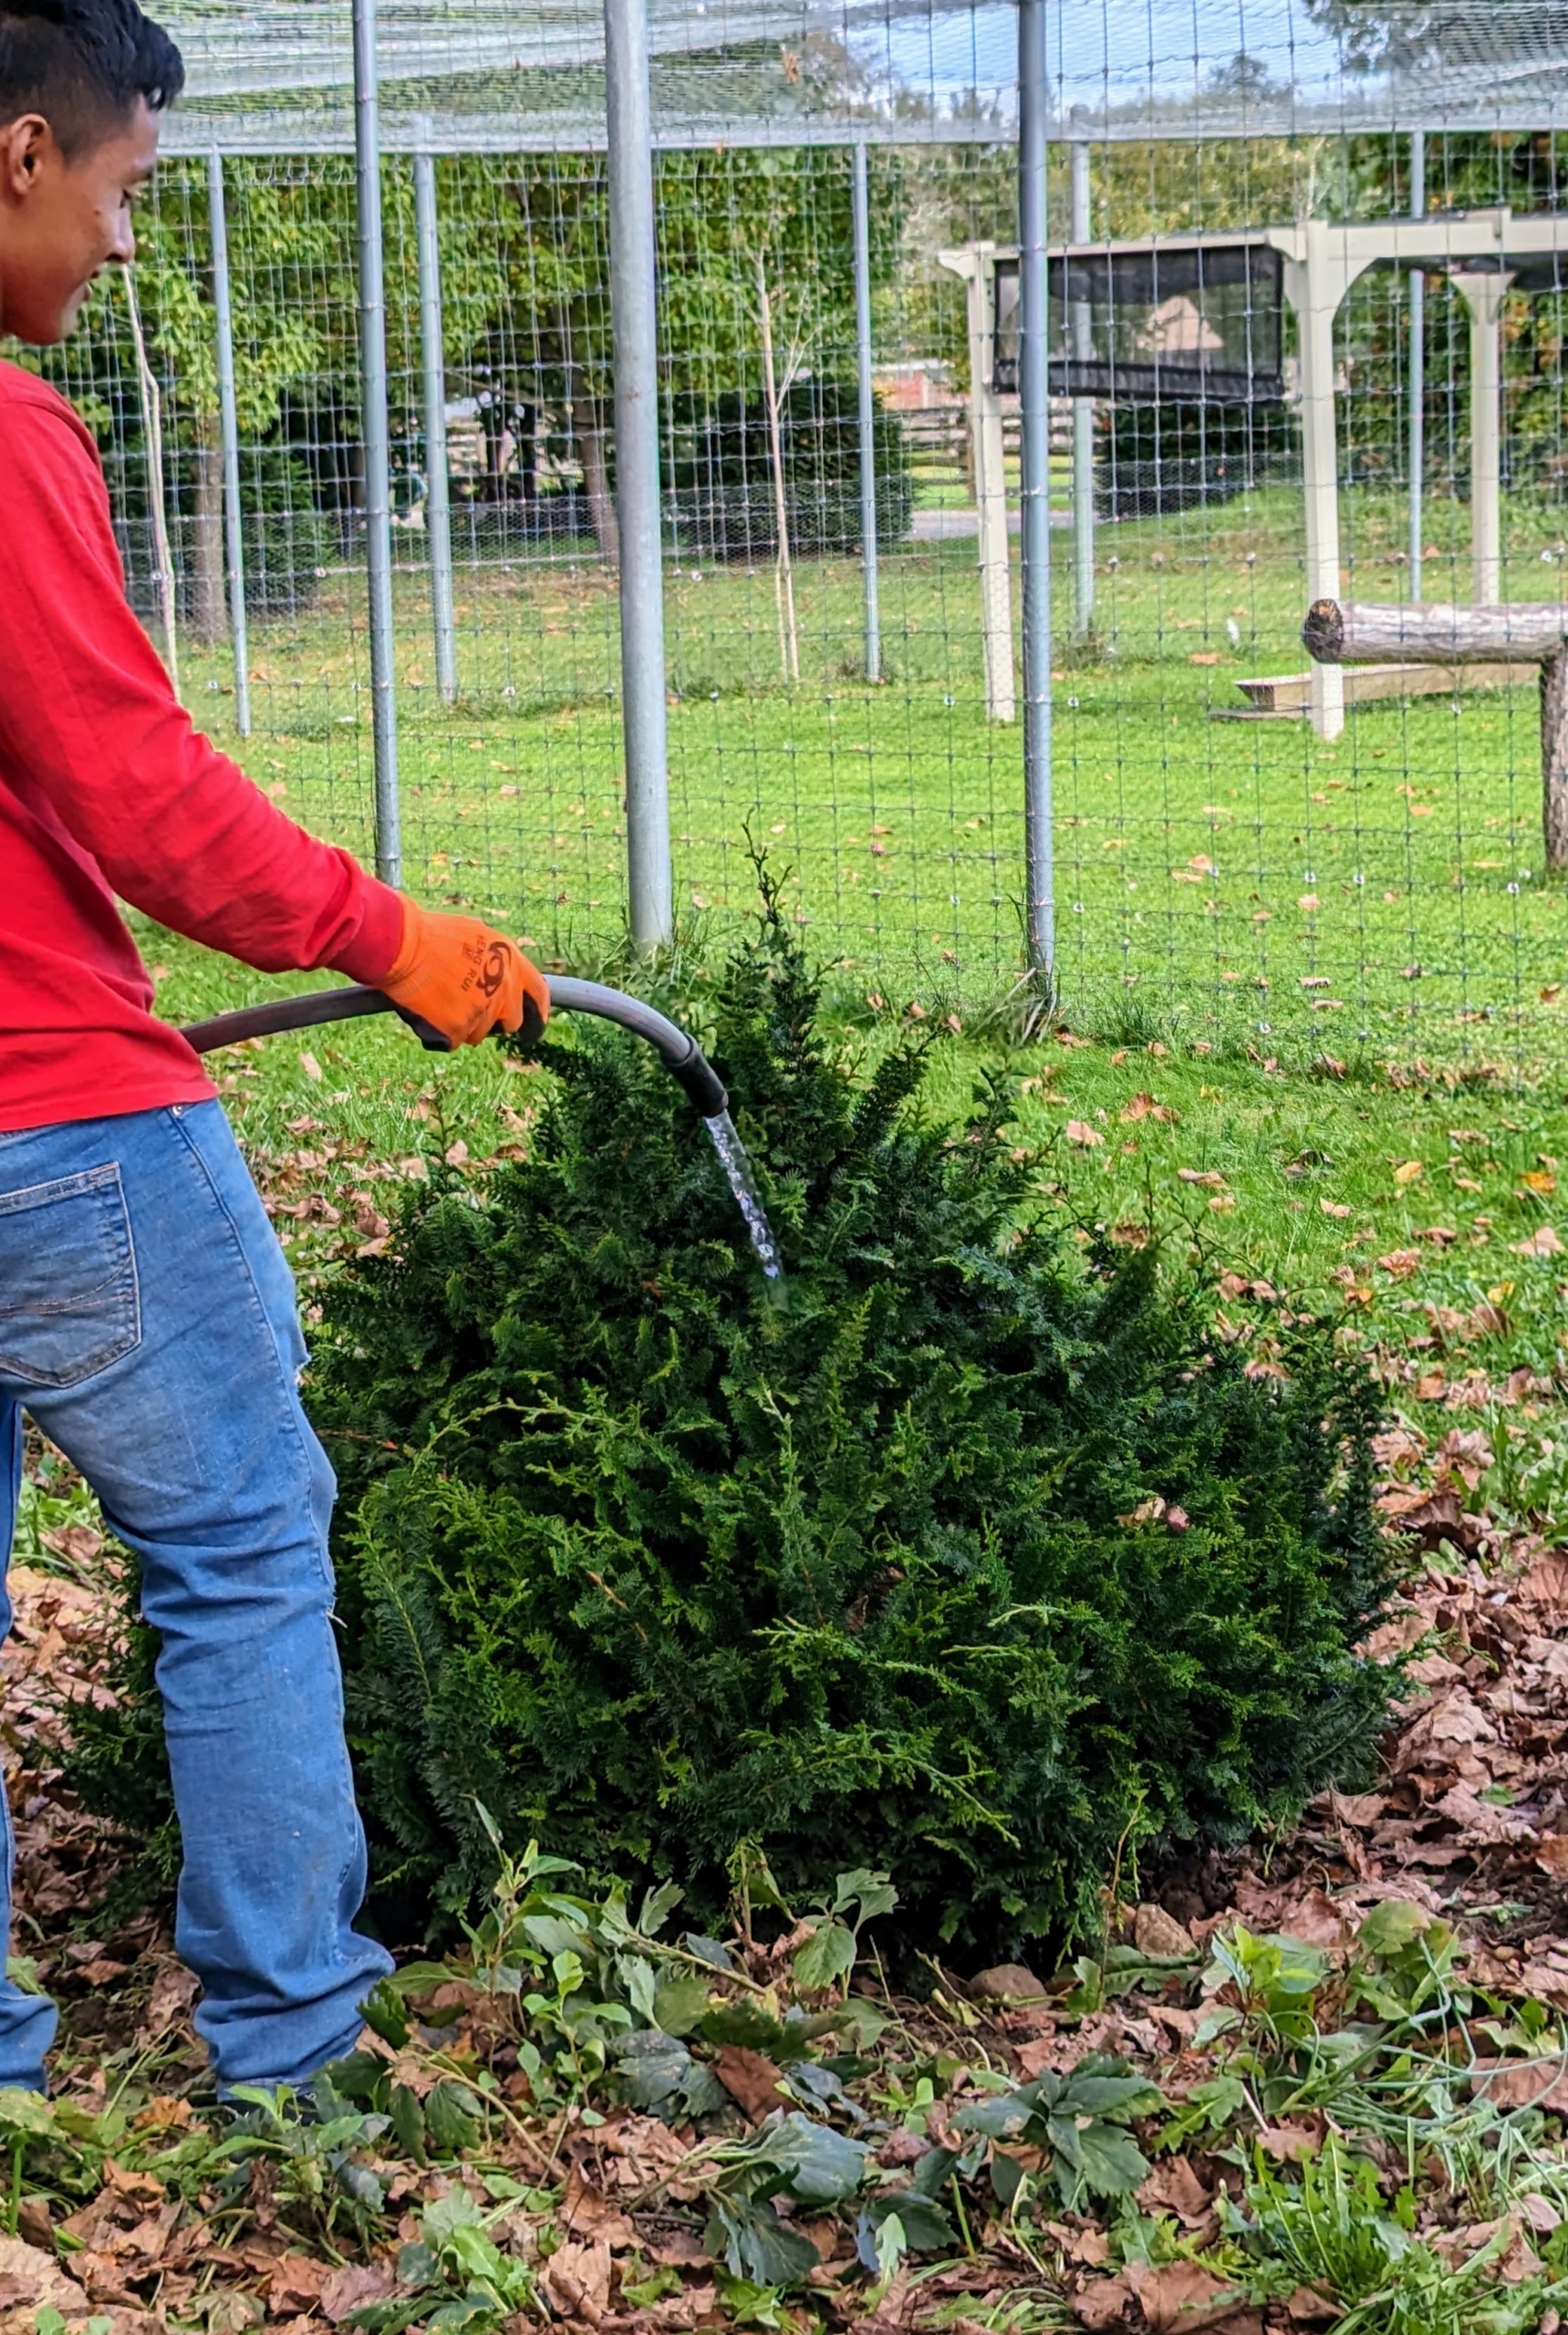
Last year I planted a group of large Chamaecyparis obtusa 'Filicoides' or Fernspray Hinoki cypress bushes along the carriage road just past my allée of lindens near the entrance to my Japanese Maple Woodland. They looked so beautiful, I decided to plant some more - 16 more! Yesterday, smaller Fernspray Hinoki cypress bushes were planted in between the lindens on both sides of the allée. These bushes are large-growing, upright specimens with long, ascending branches - perfect for this area!
Enjoy these photos.
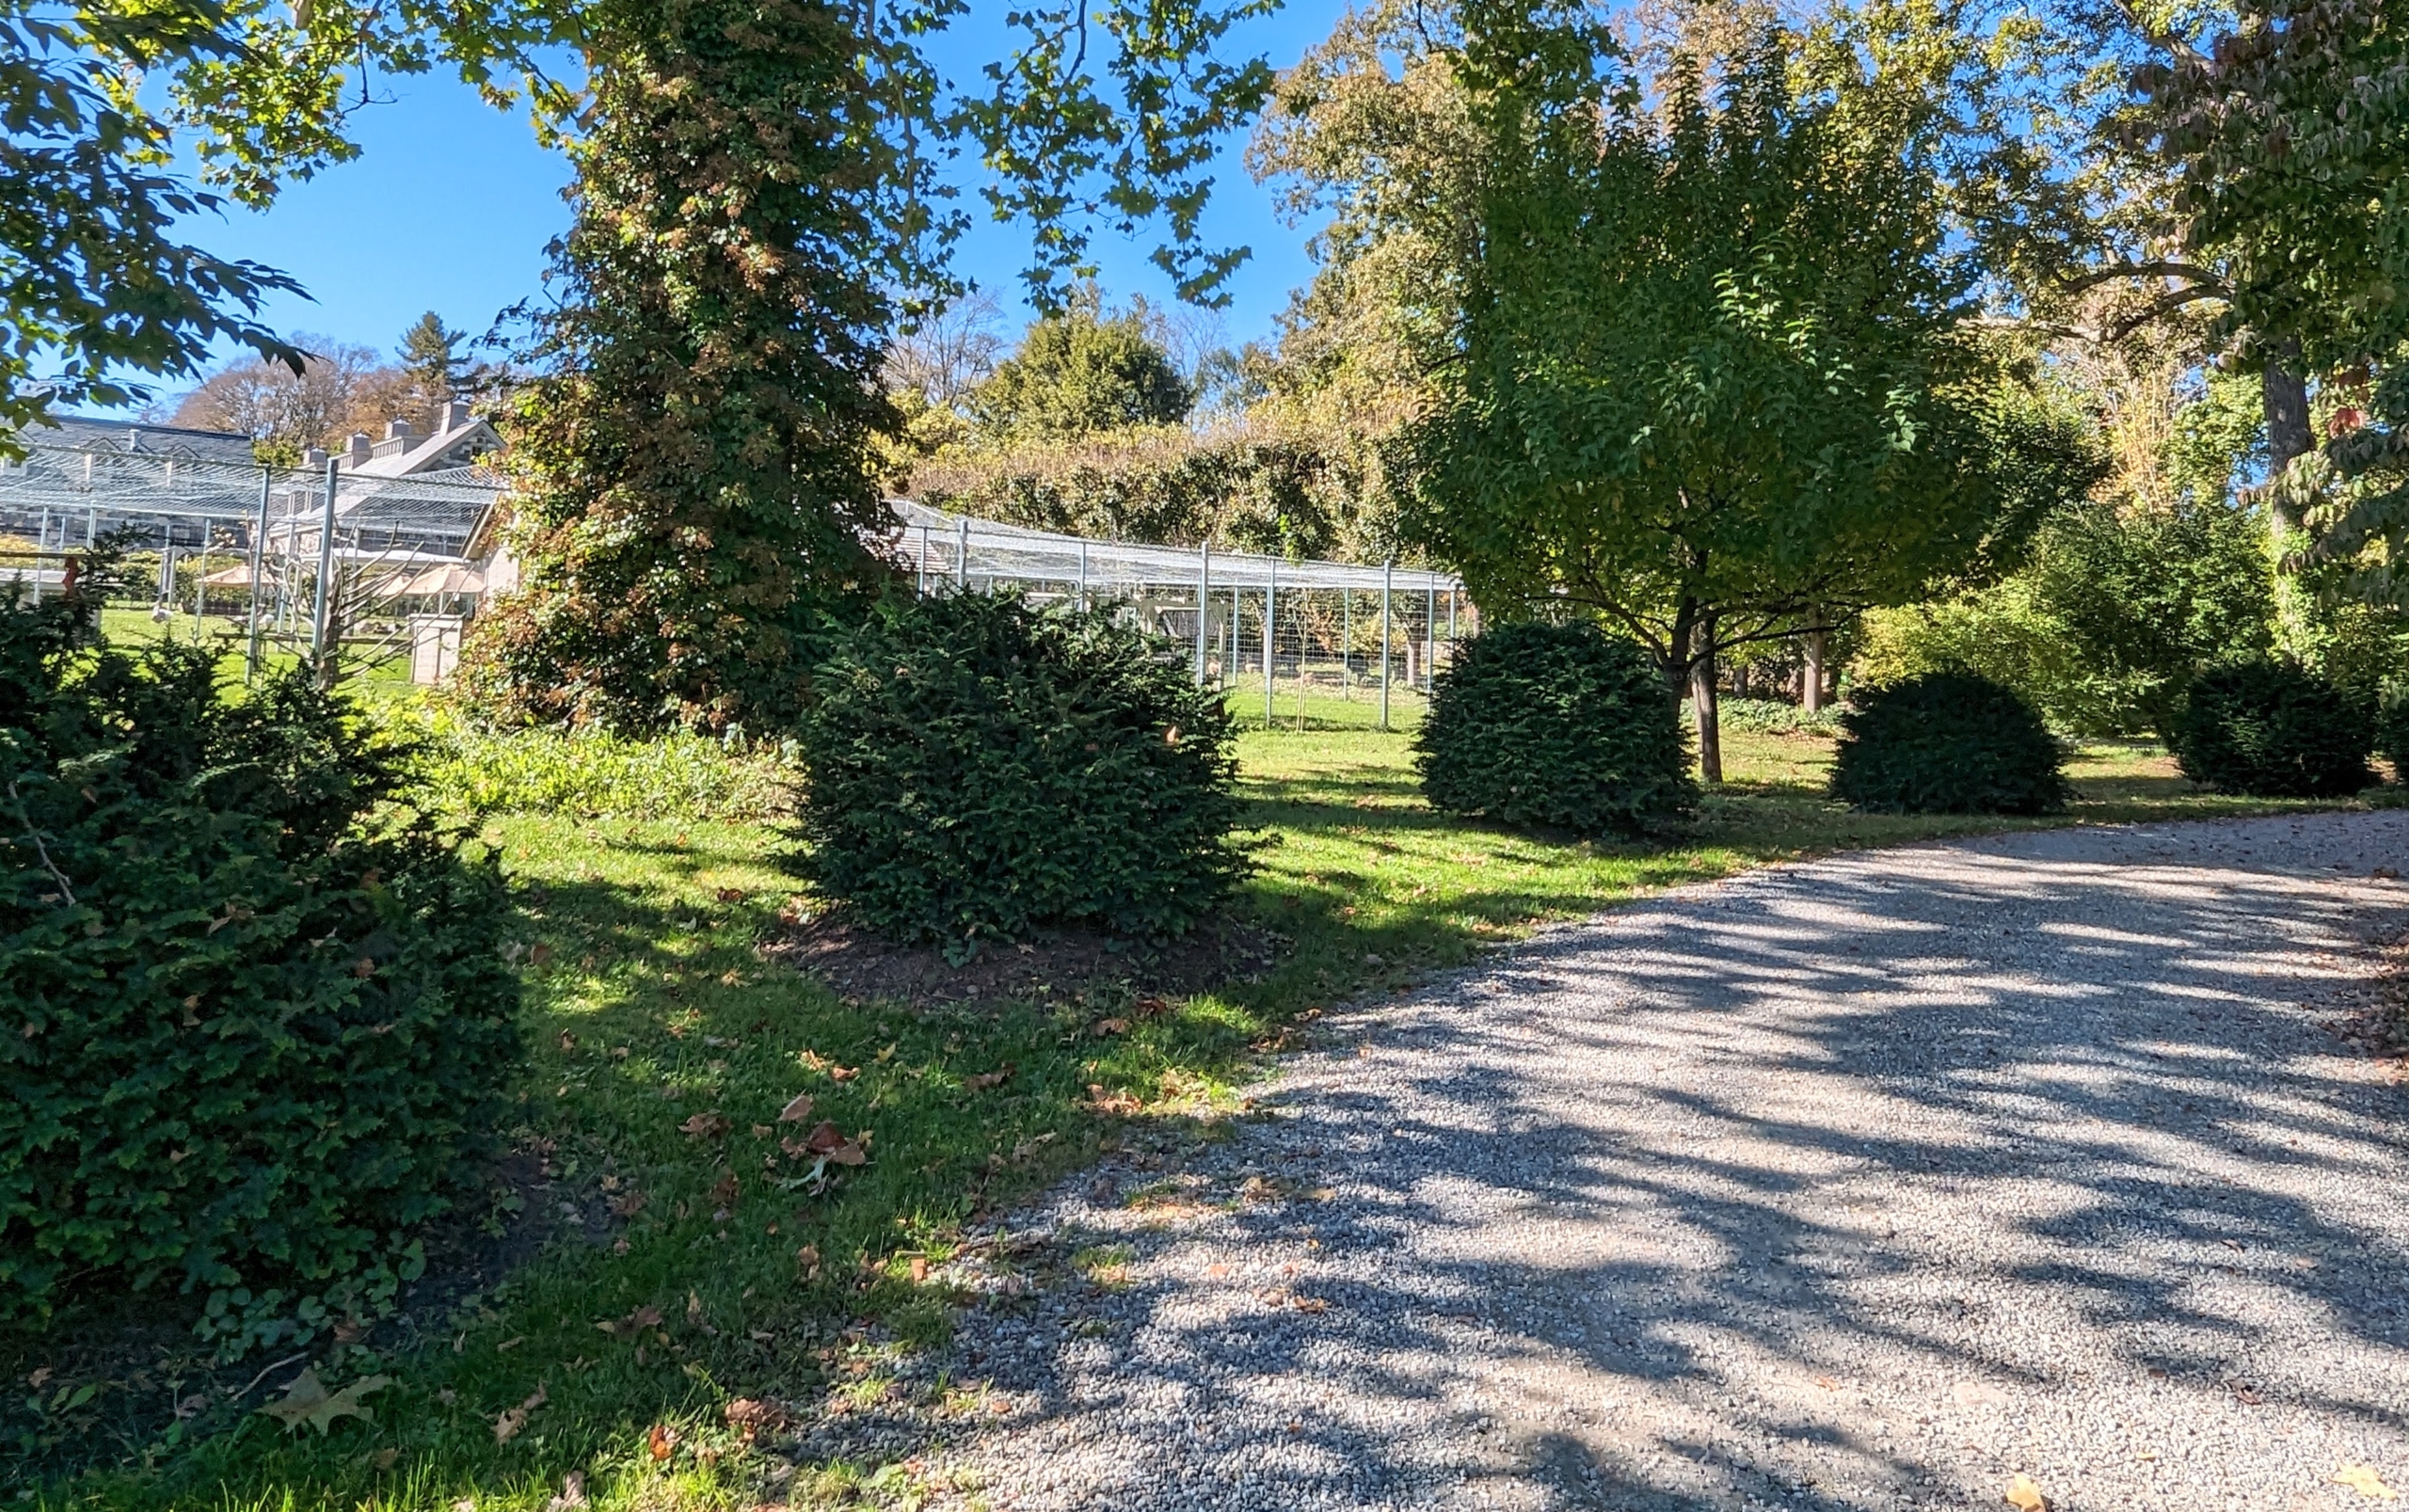
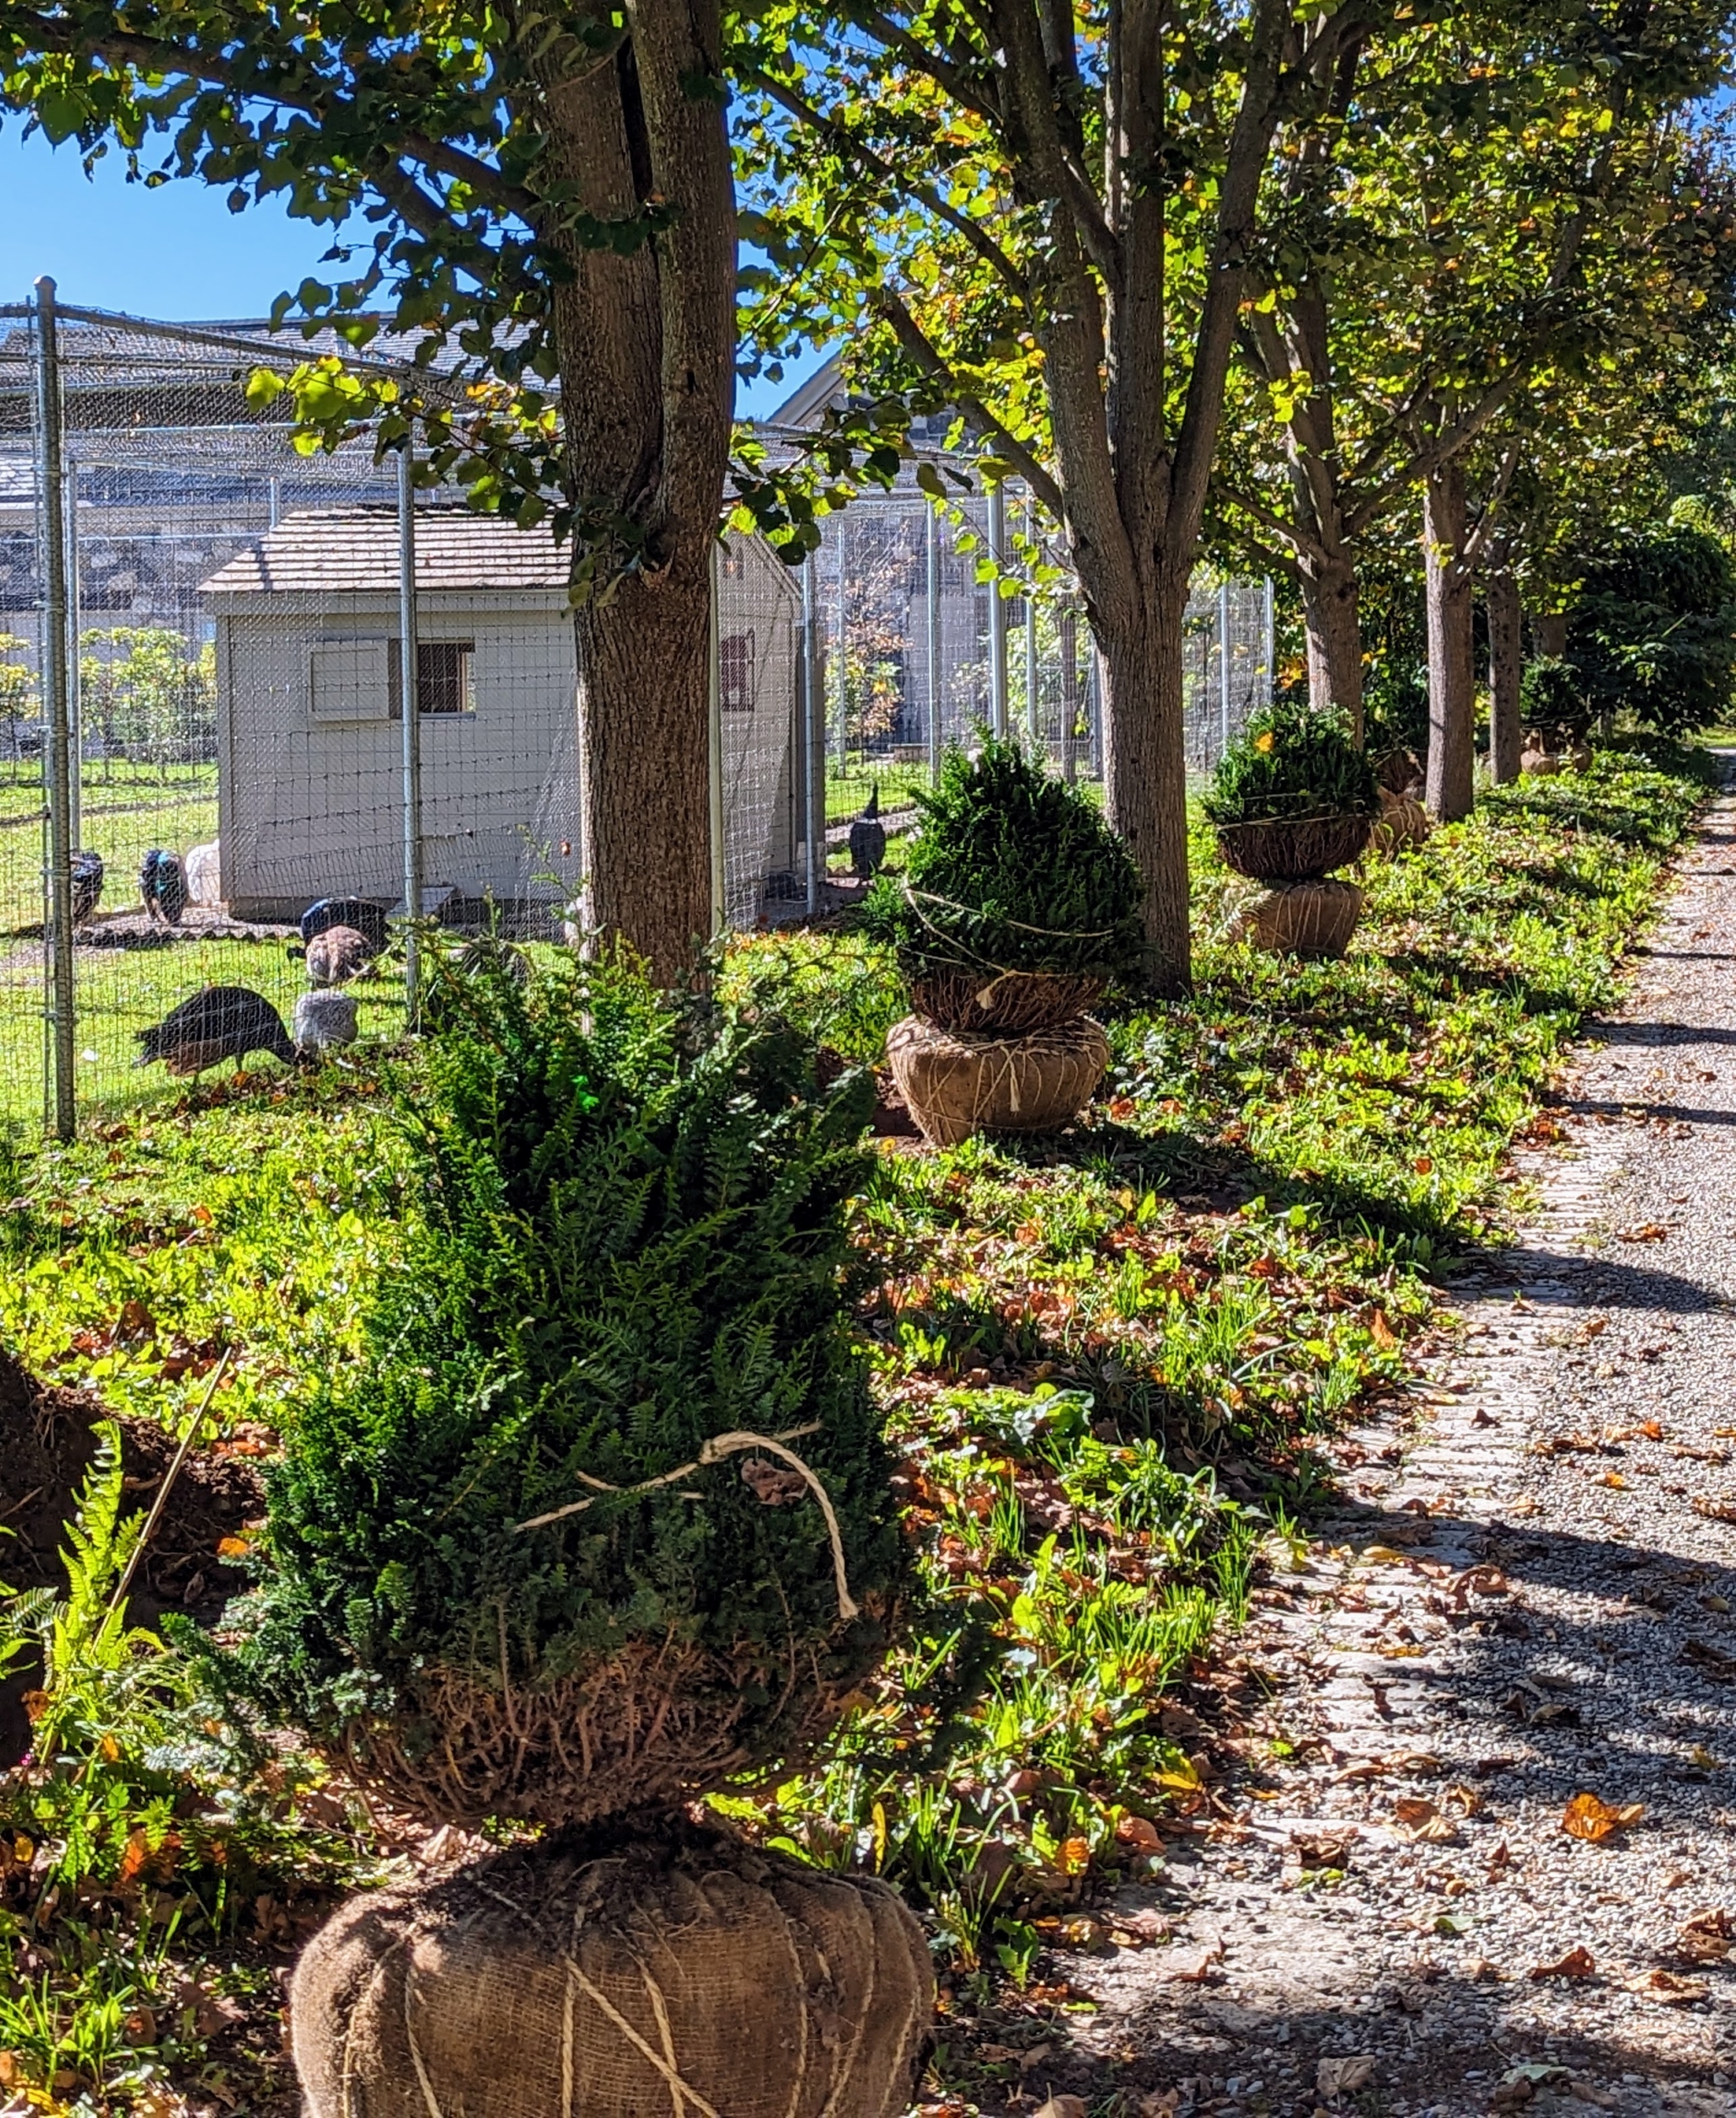
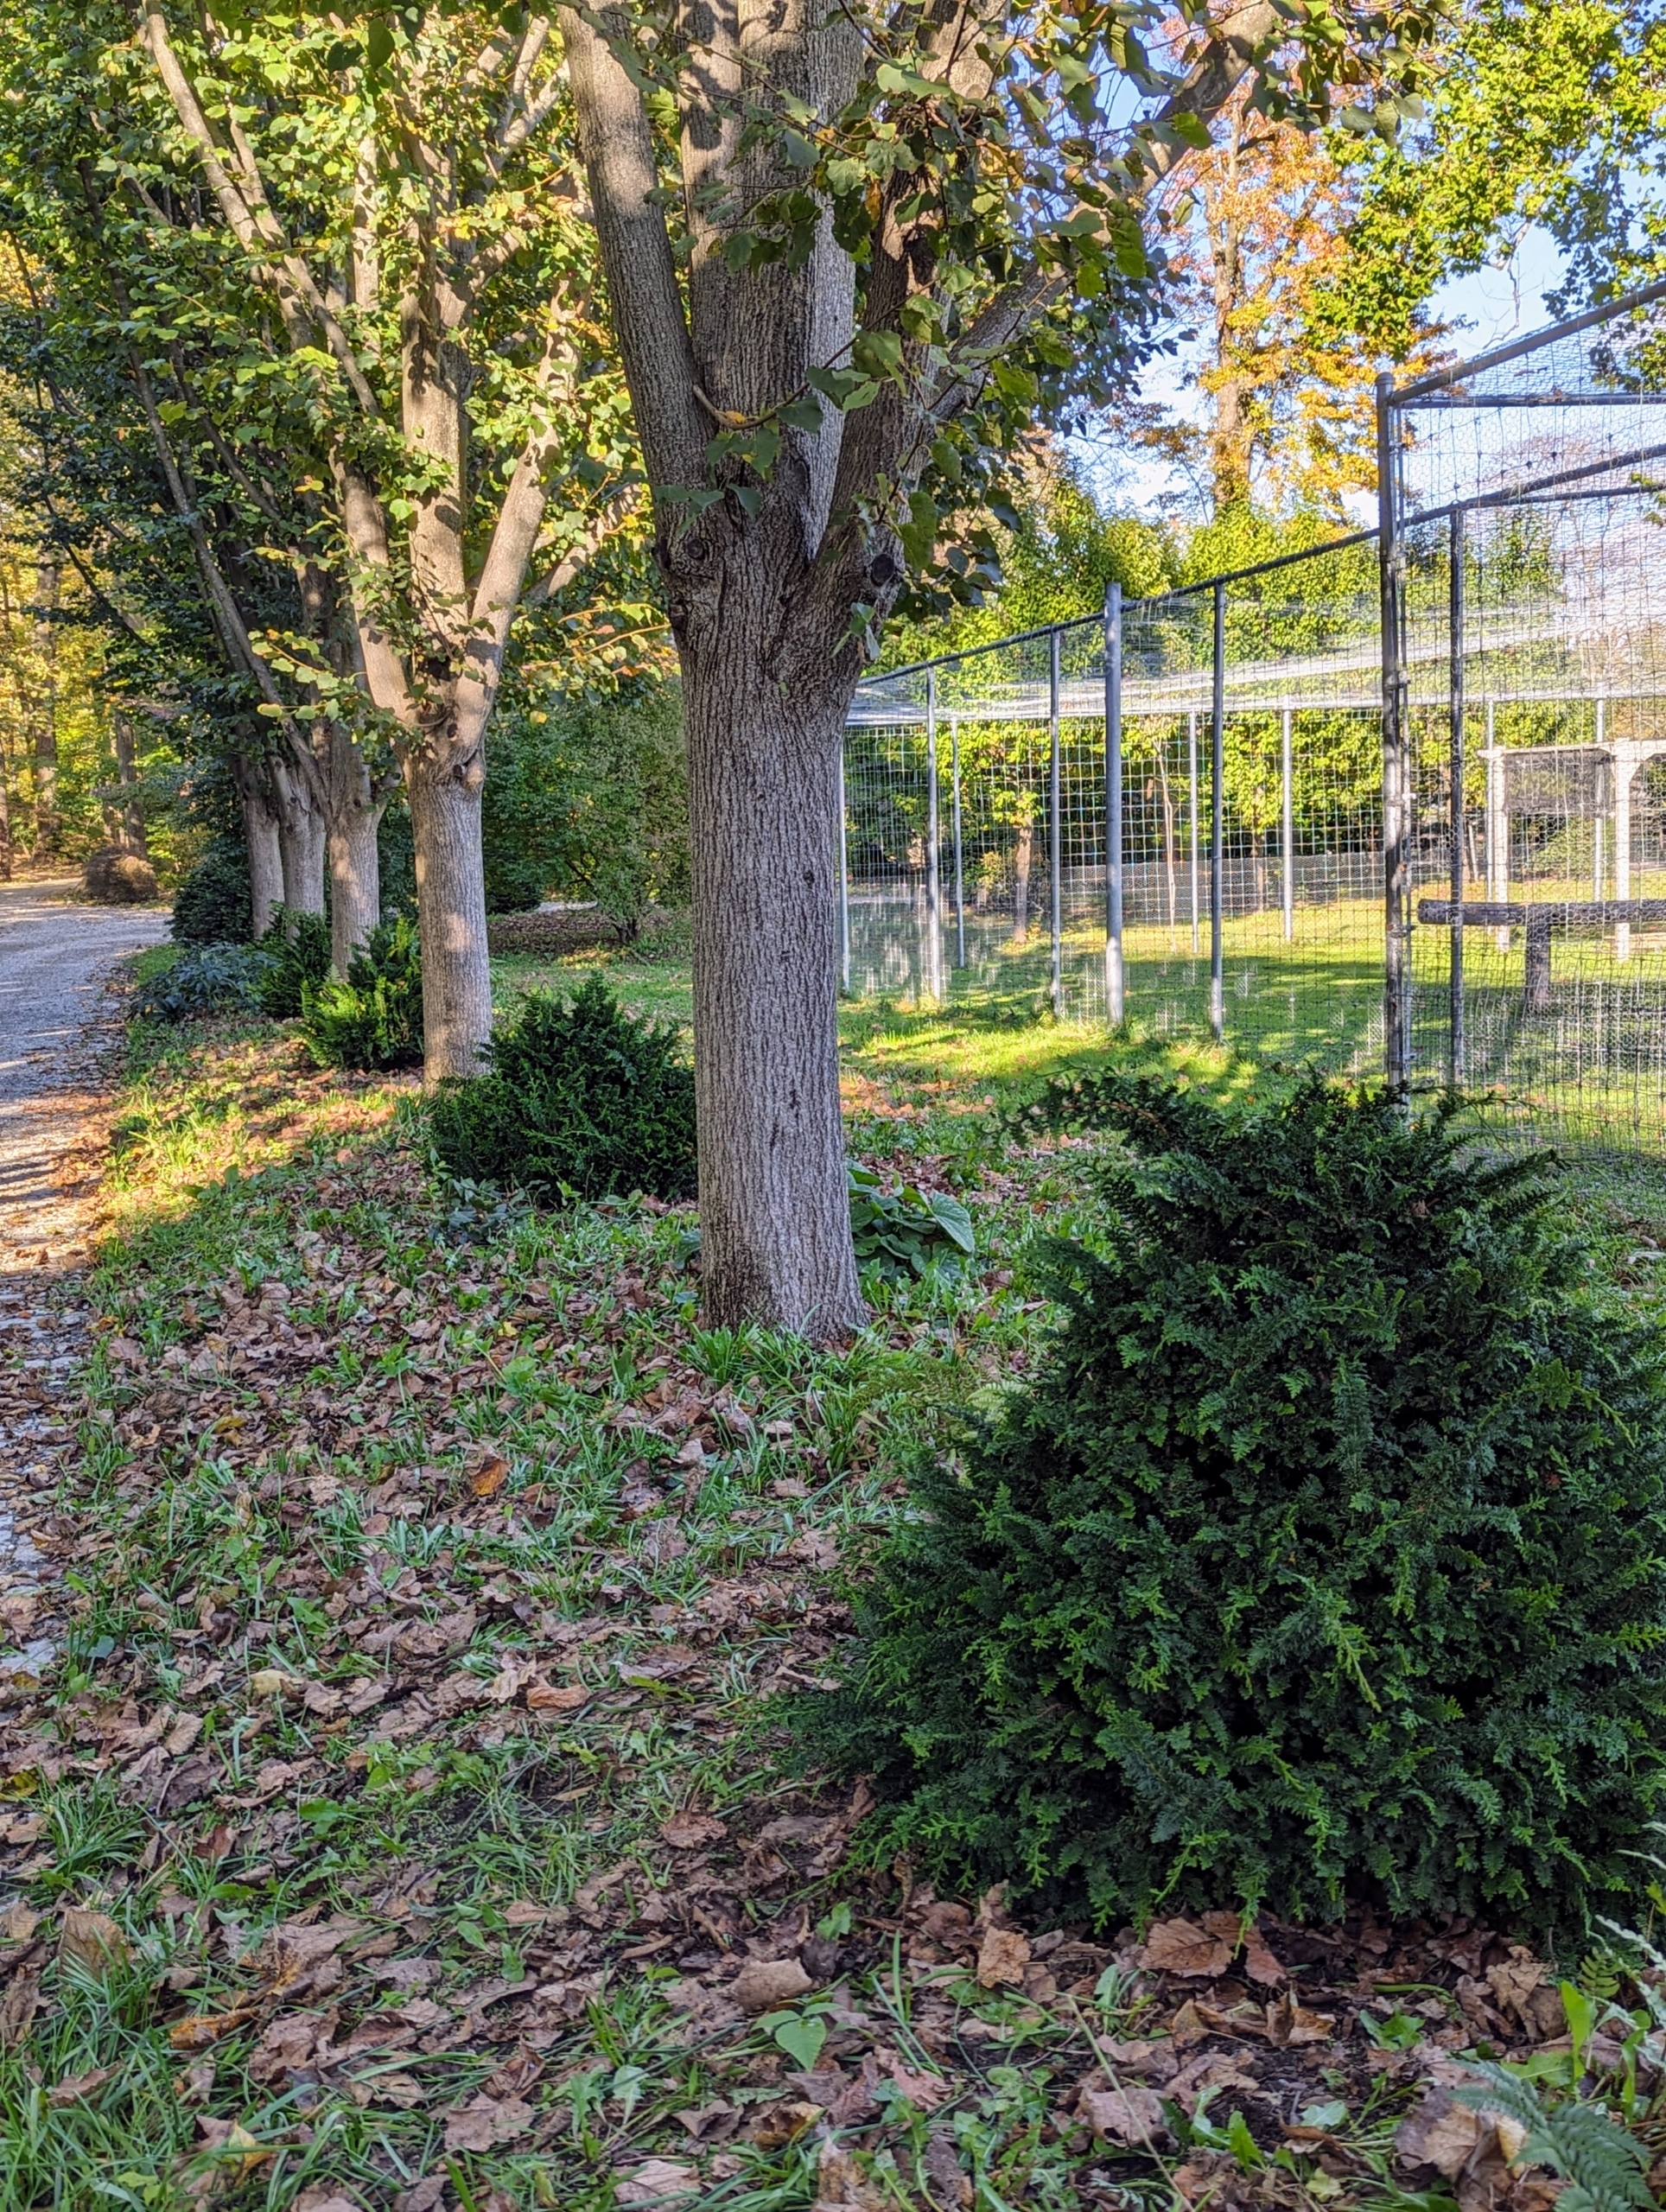
If you follow this blog regularly, you may recall last November I decided to plant this group of Hinoki cypress along the curved carriage road leading to my chicken coops. I love planting interesting and beautiful specimens that add texture, growth and beauty at different times throughout the year. I also enjoy arranging large groups of certain plantings to create borders and appealing displays.
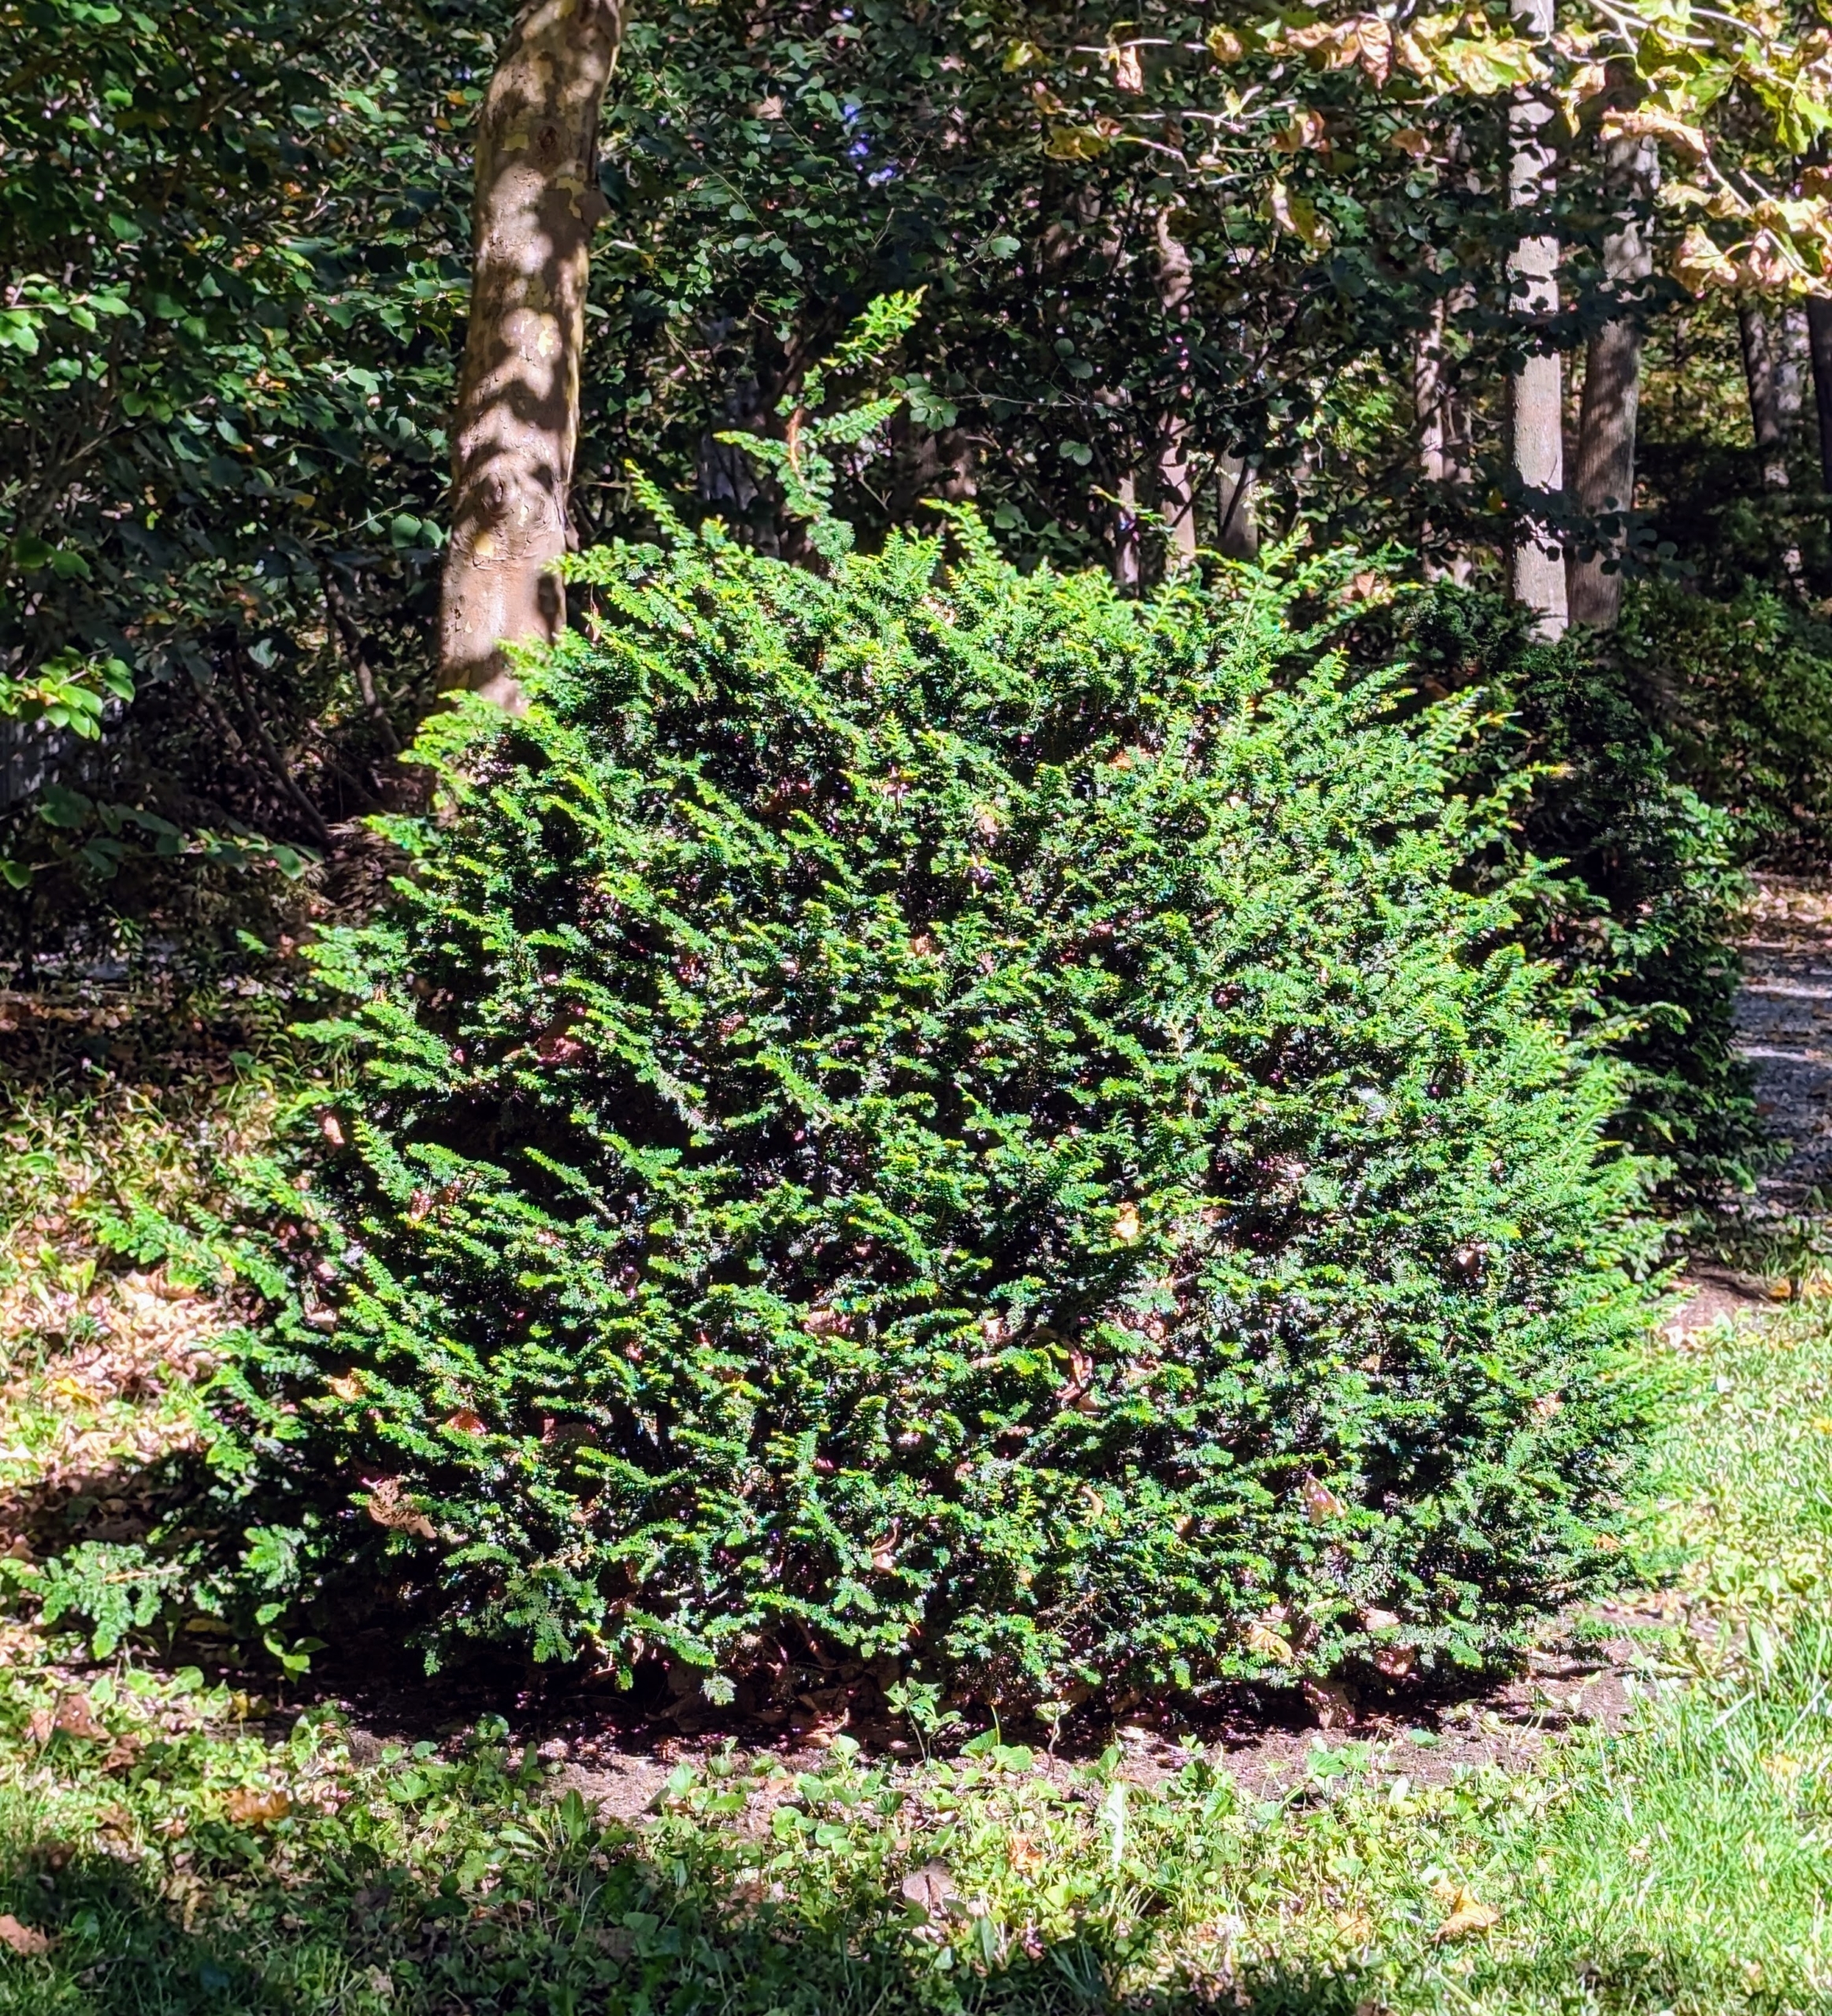
These Chamaecyparis obtusa ‘Filicoides’ or Fernspray Hinoki cypress bushes have thrived here. All who visit ask about them – they’ve become such a beautiful addition to this area of the farm.
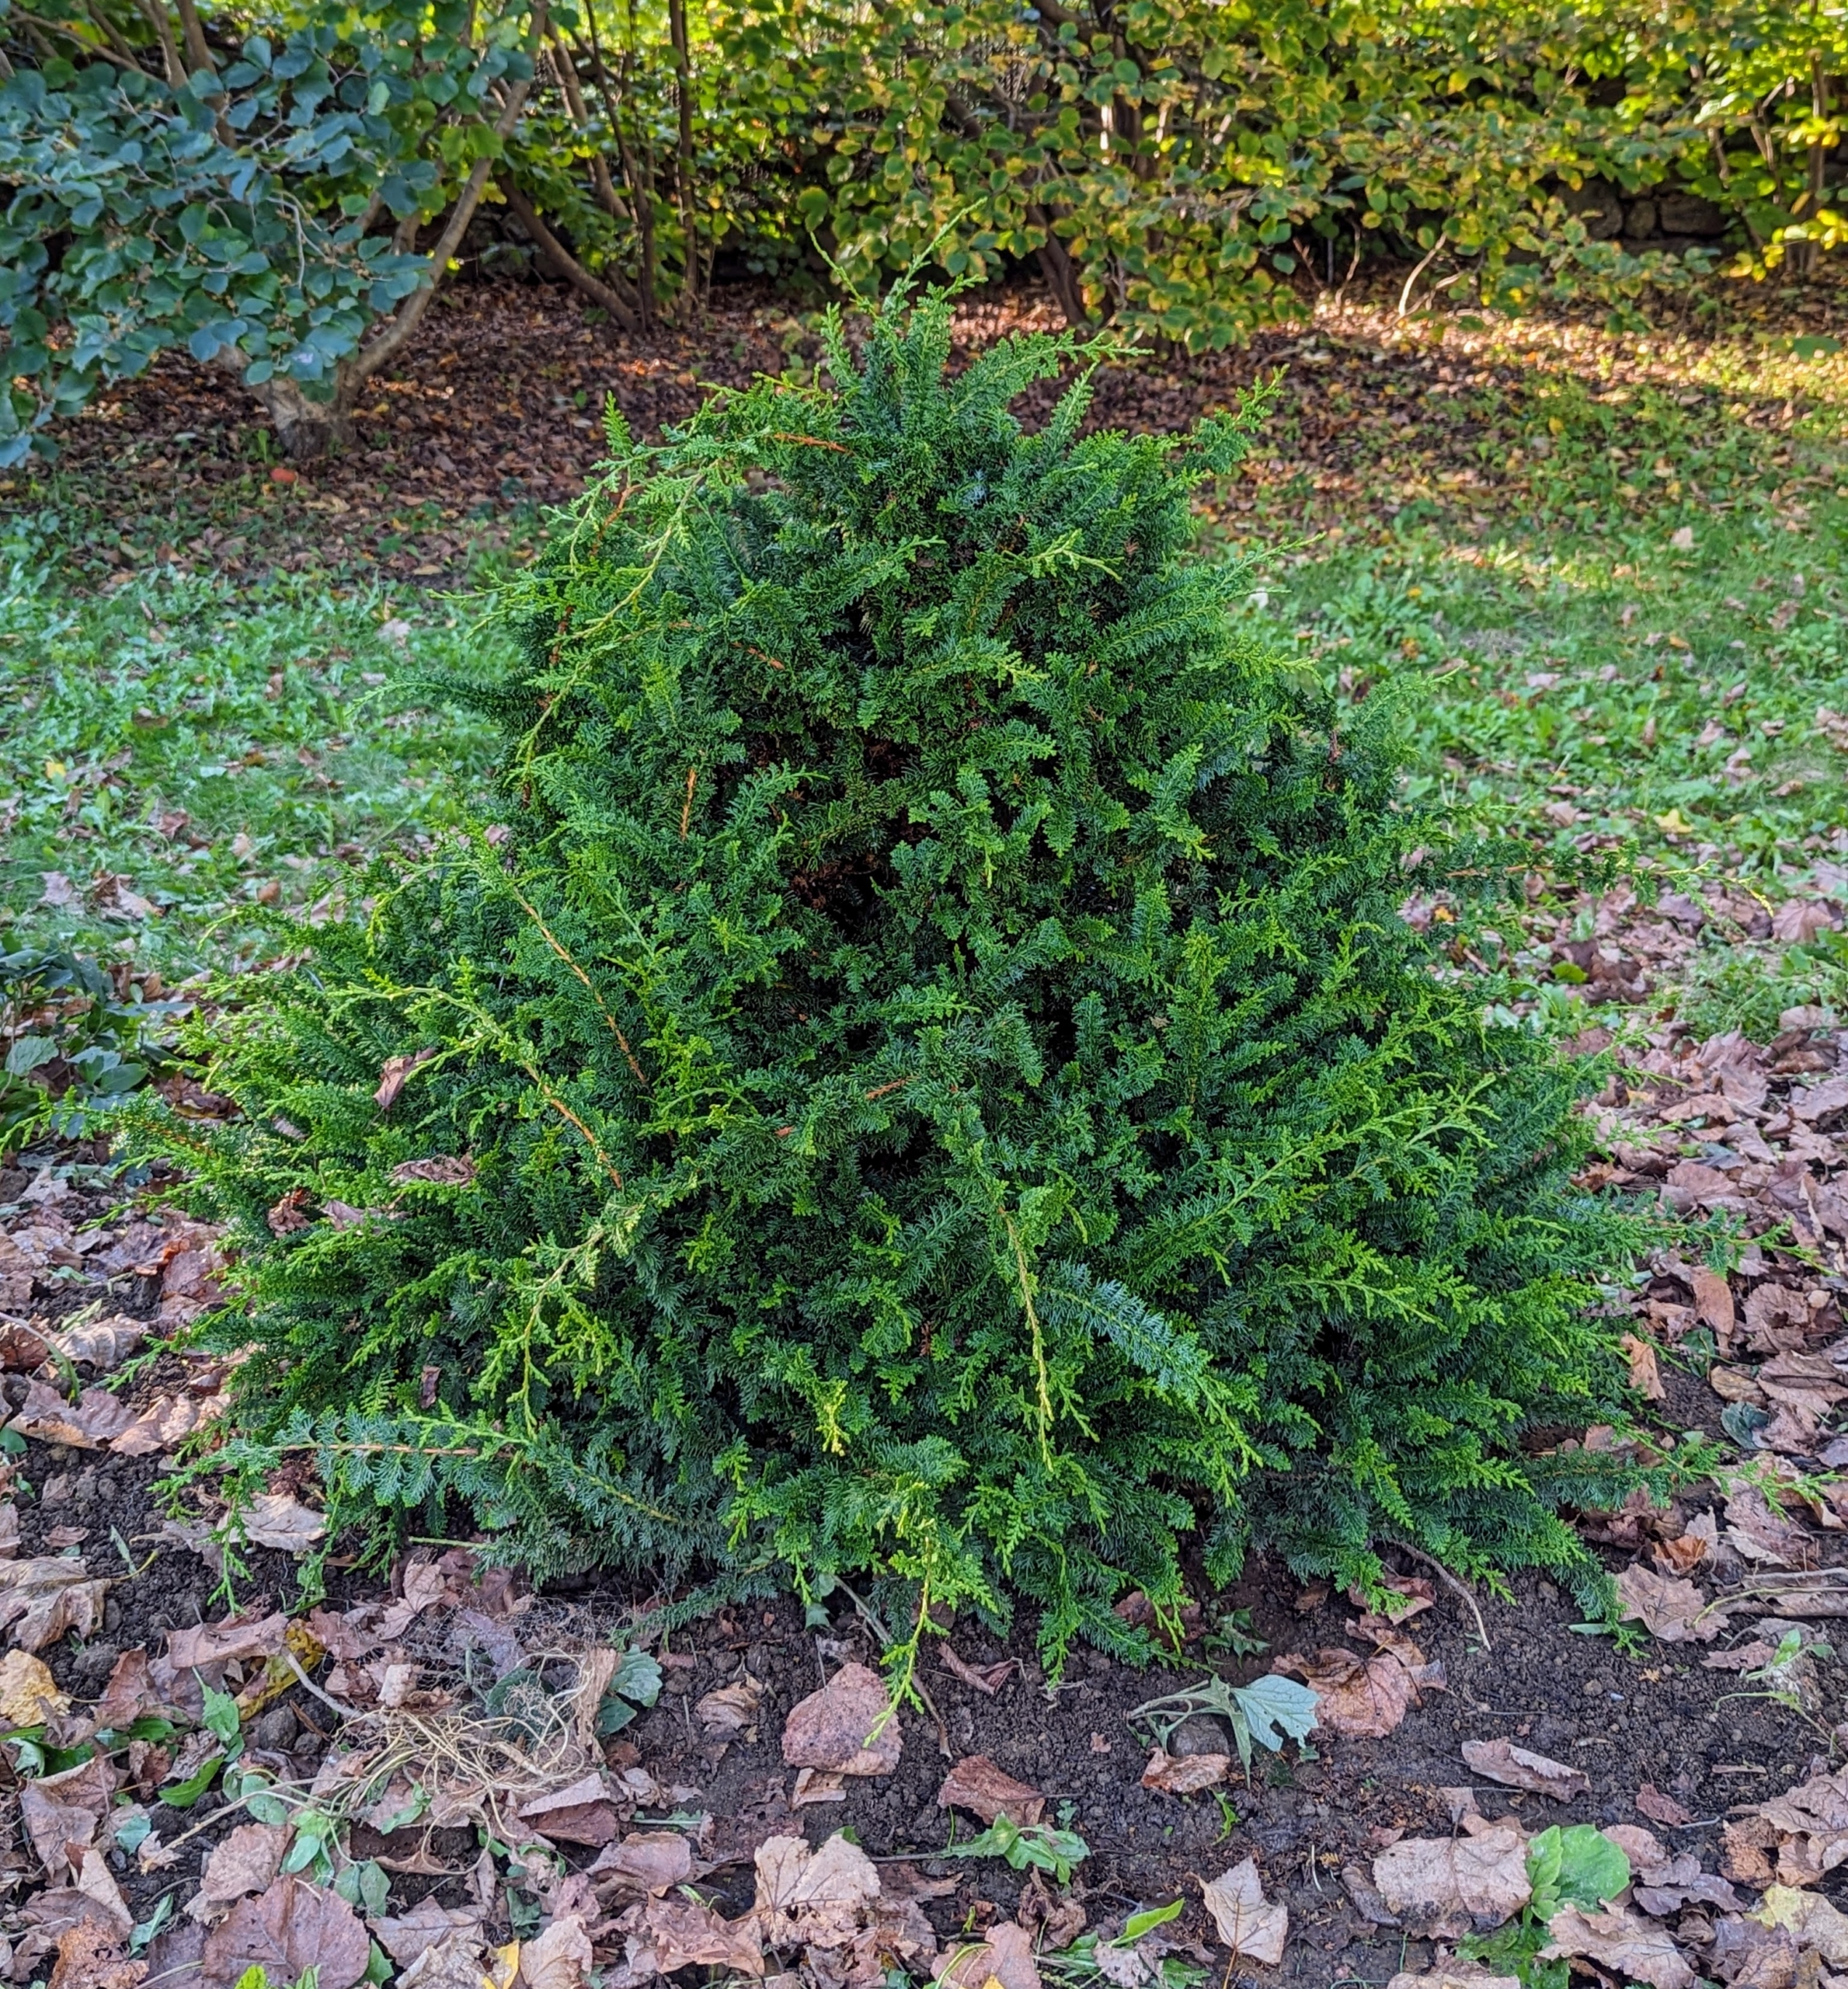
Chamaecyparis obtusa ‘Filicoides’ is a large-growing, upright and full conifer native to Japan. It is commonly called Hinoki cypress or Hinoki falsecypress. It grows 10 to 15 feet tall with a pyramidal shape and spread that reaches 10 to 20 feet wide.
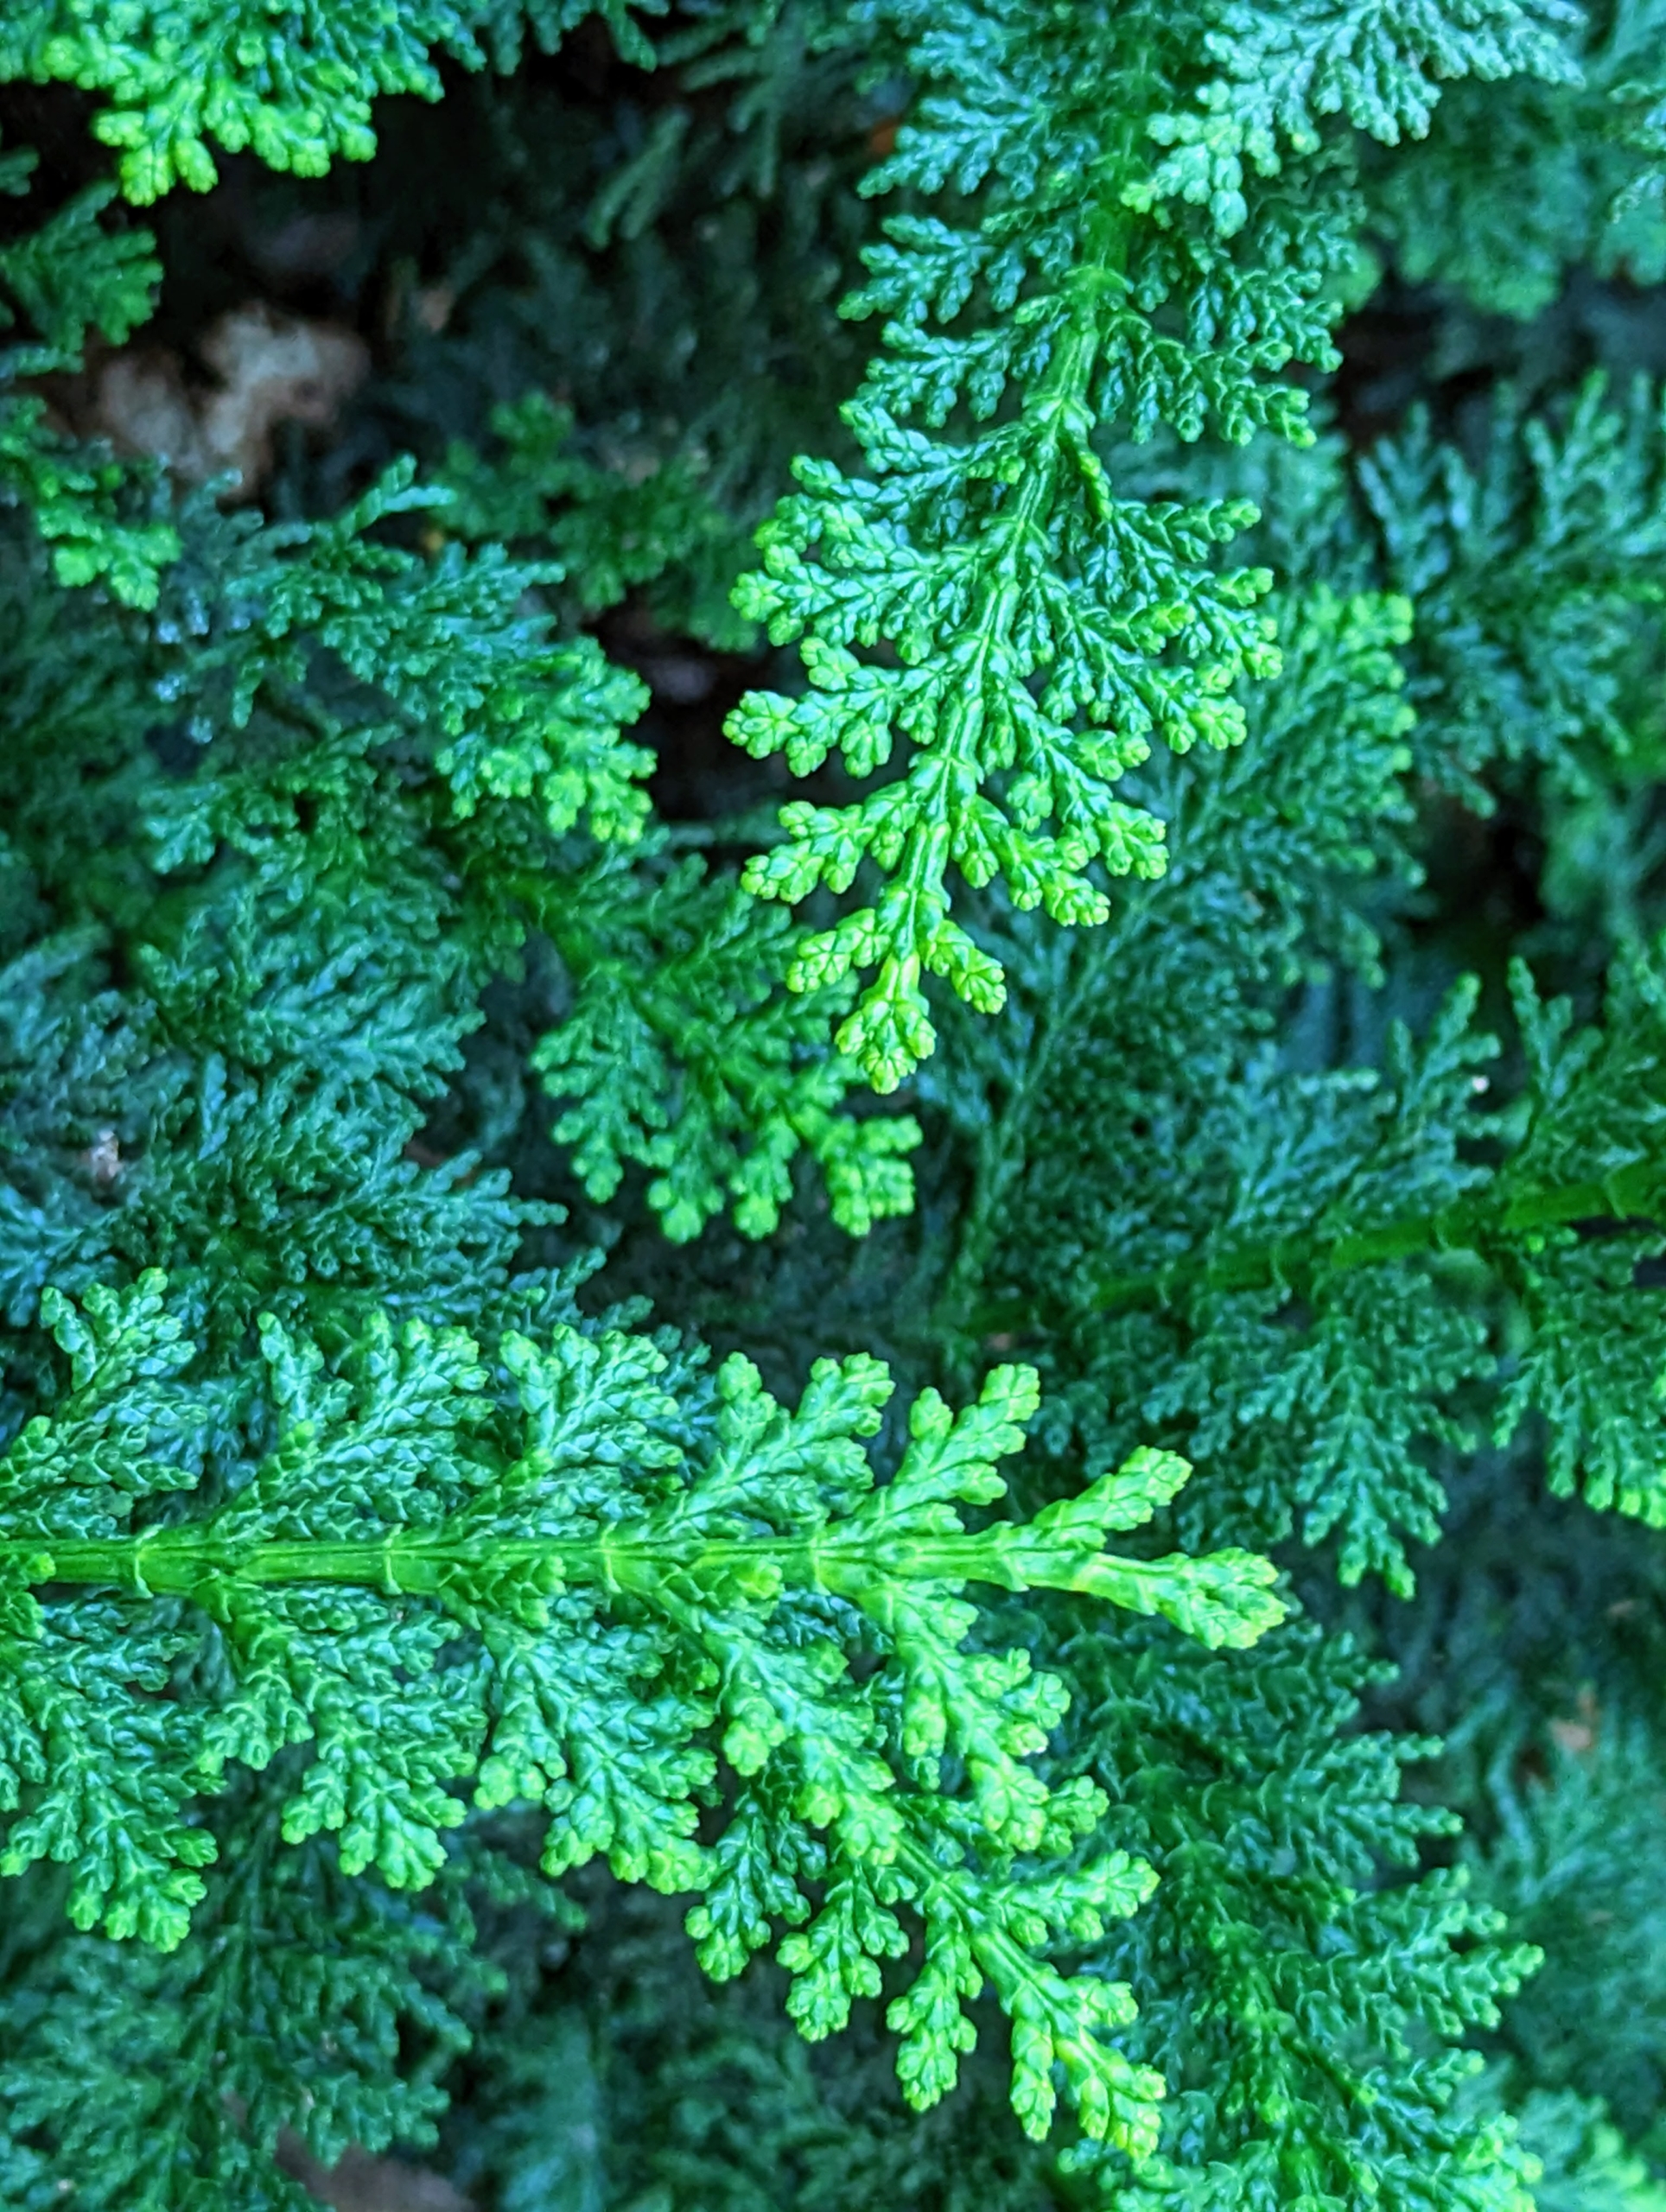
It features spreading branches with flattened fern-like horizontal branchlets that droop at the ends. Here is a close look at the foliage which is bold, emerald-green in color.
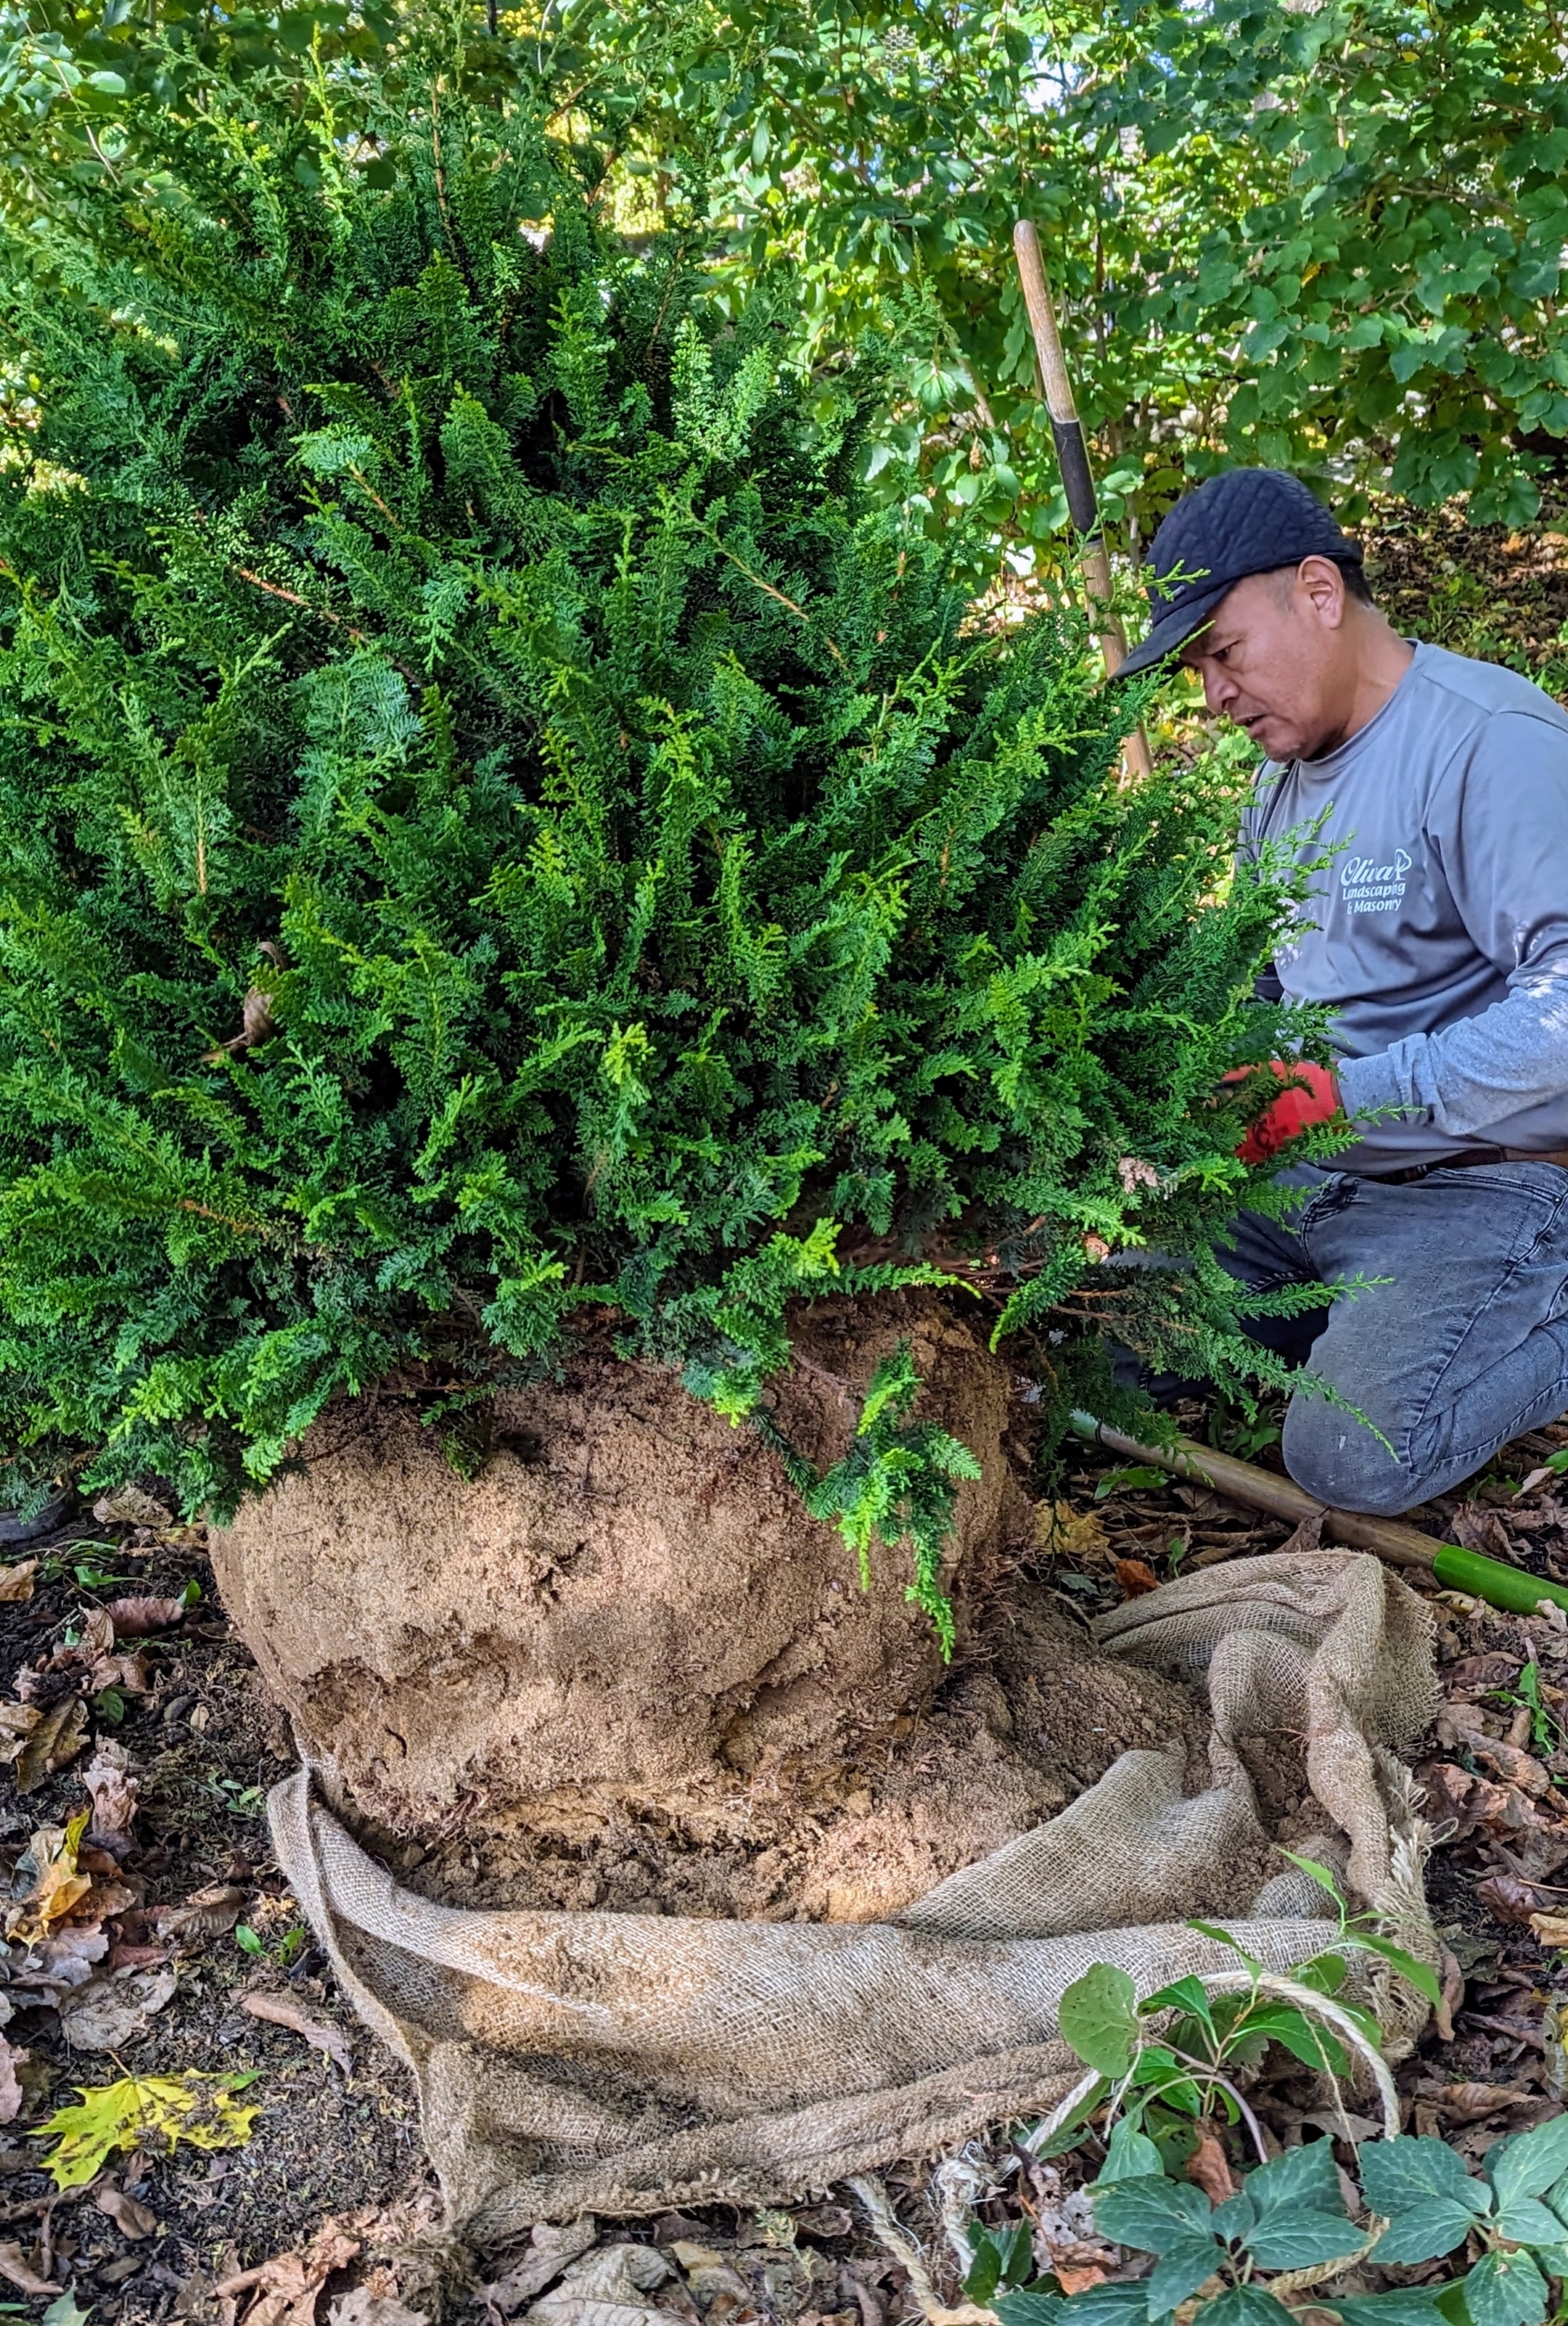
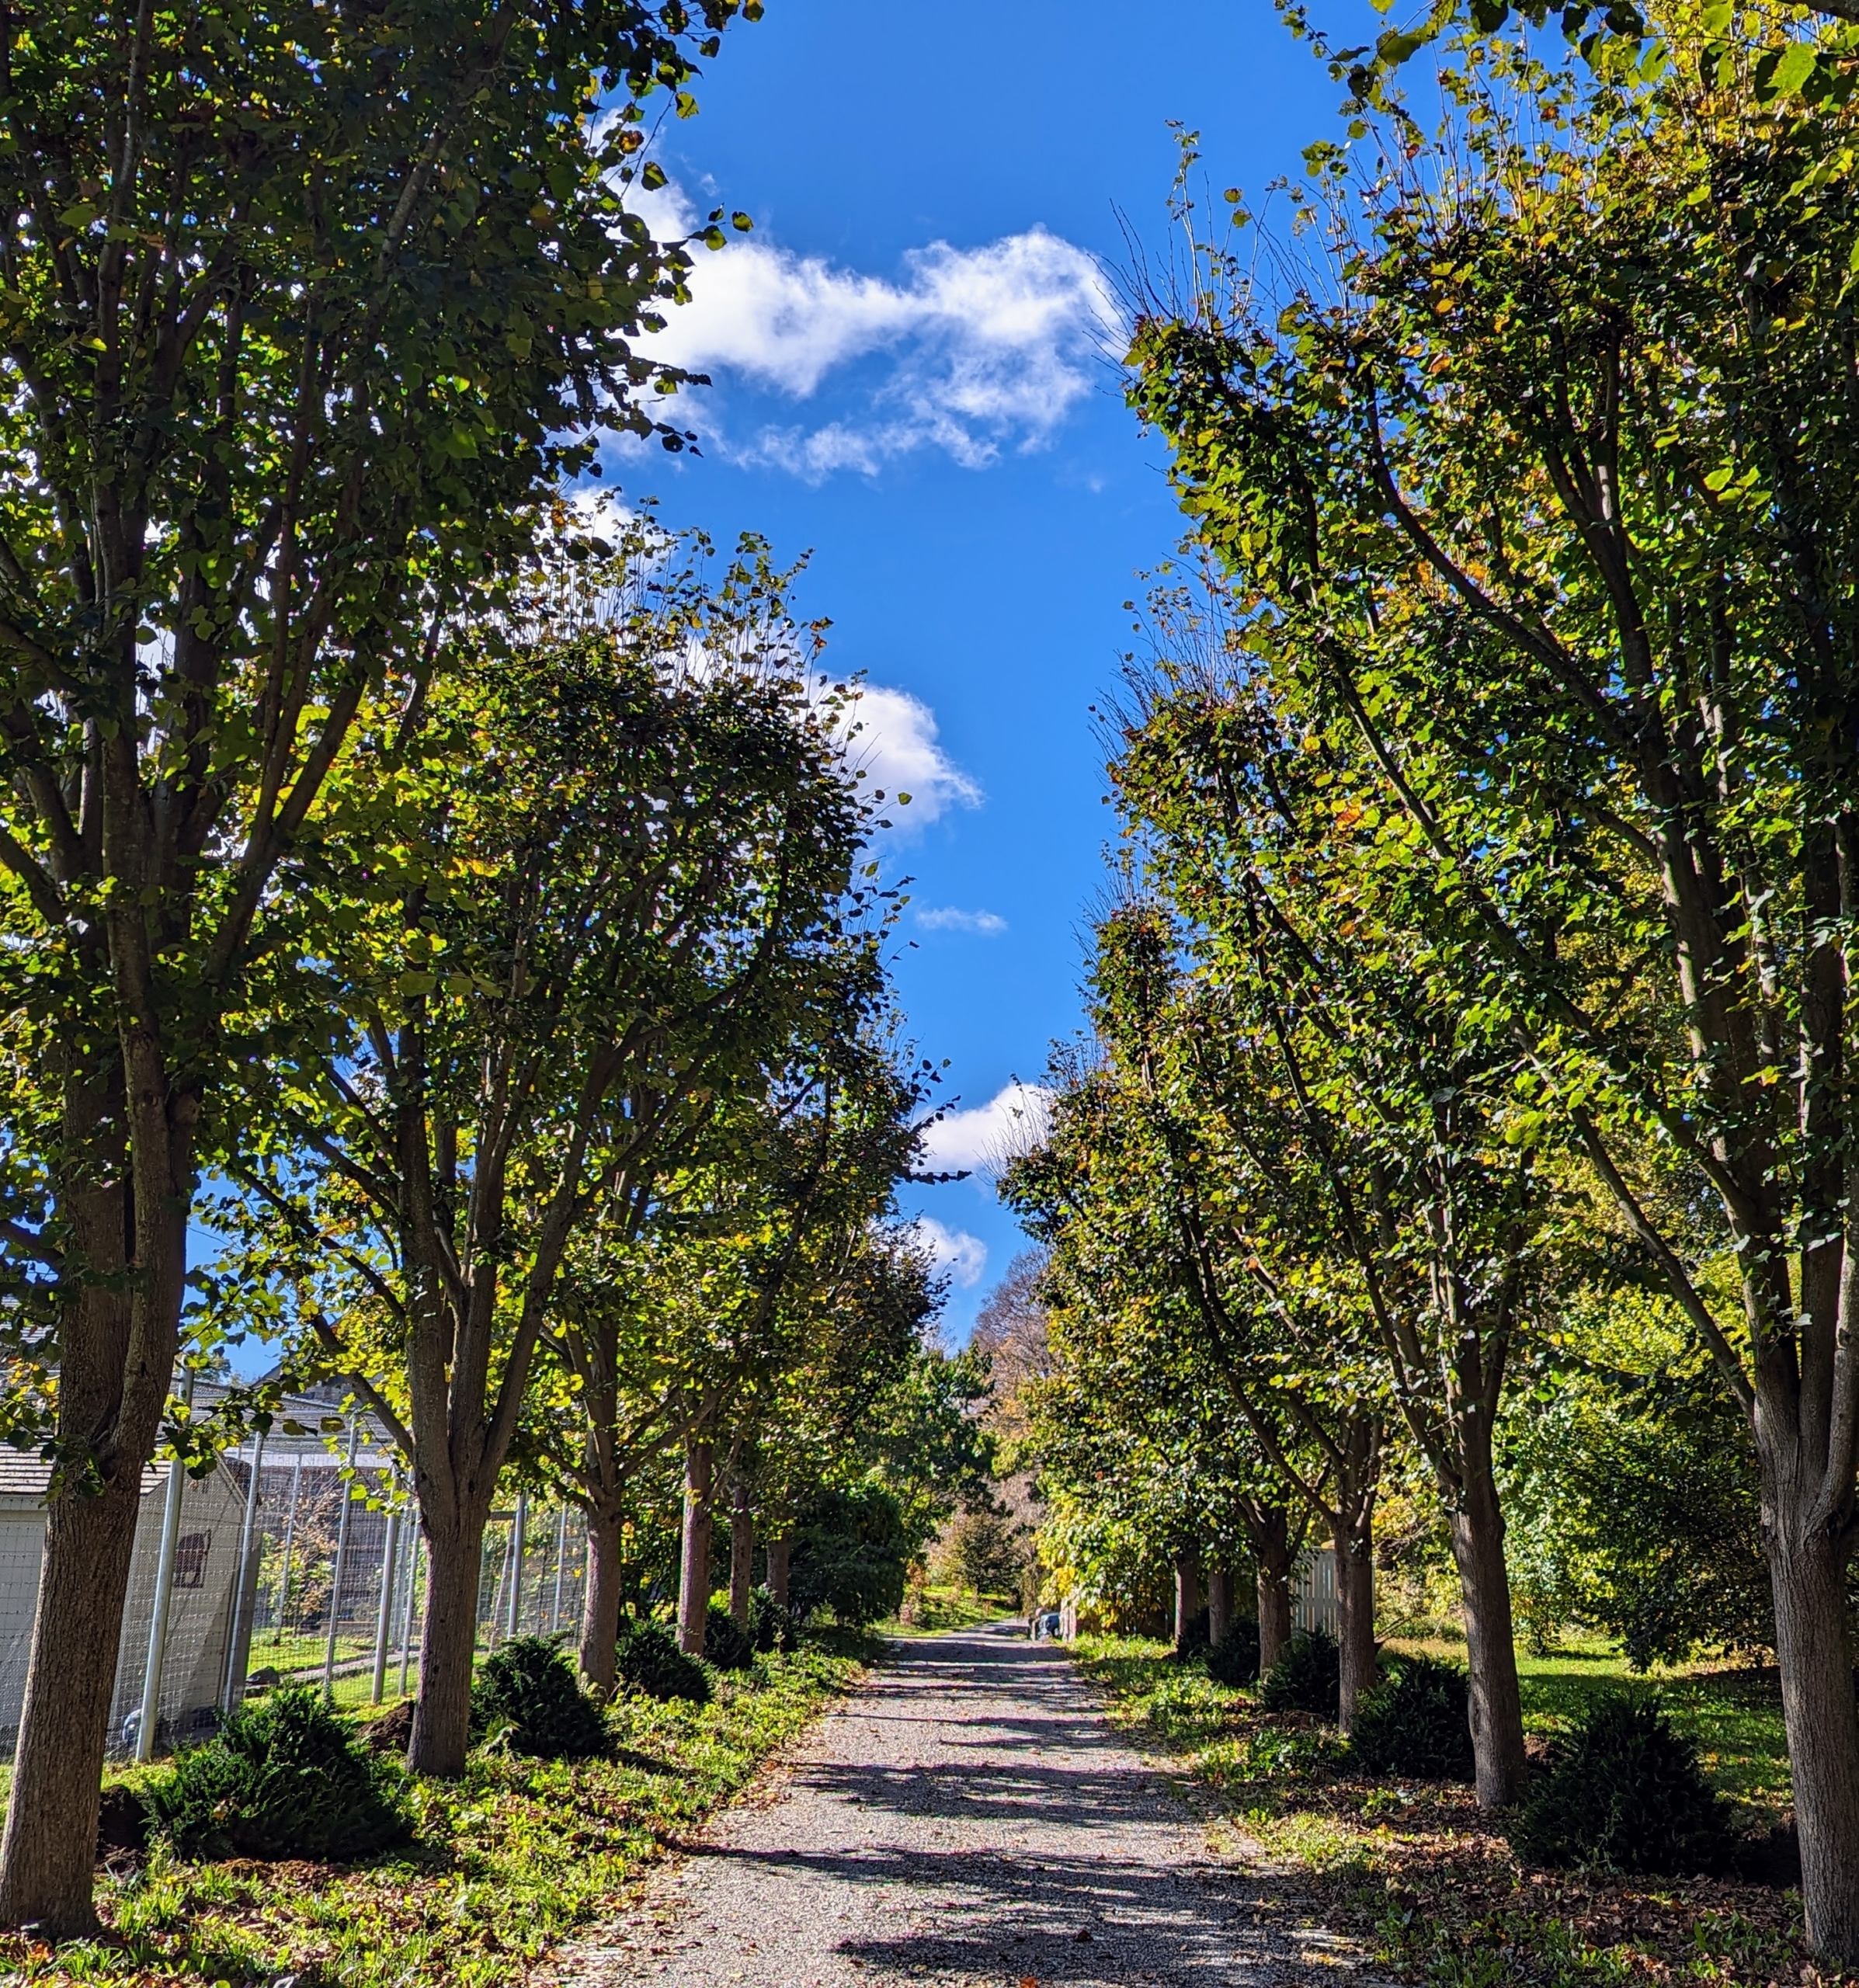
I knew planting one in between each of the lindens in this allée would be a great idea. I purchased 16 36-inch tall bushes from our friends at Select Horticulture in nearby Pound Ridge. Here they are positioned between the trees. Spring blooming bulbs and flowers will open around the base of these bushes and look so pretty.
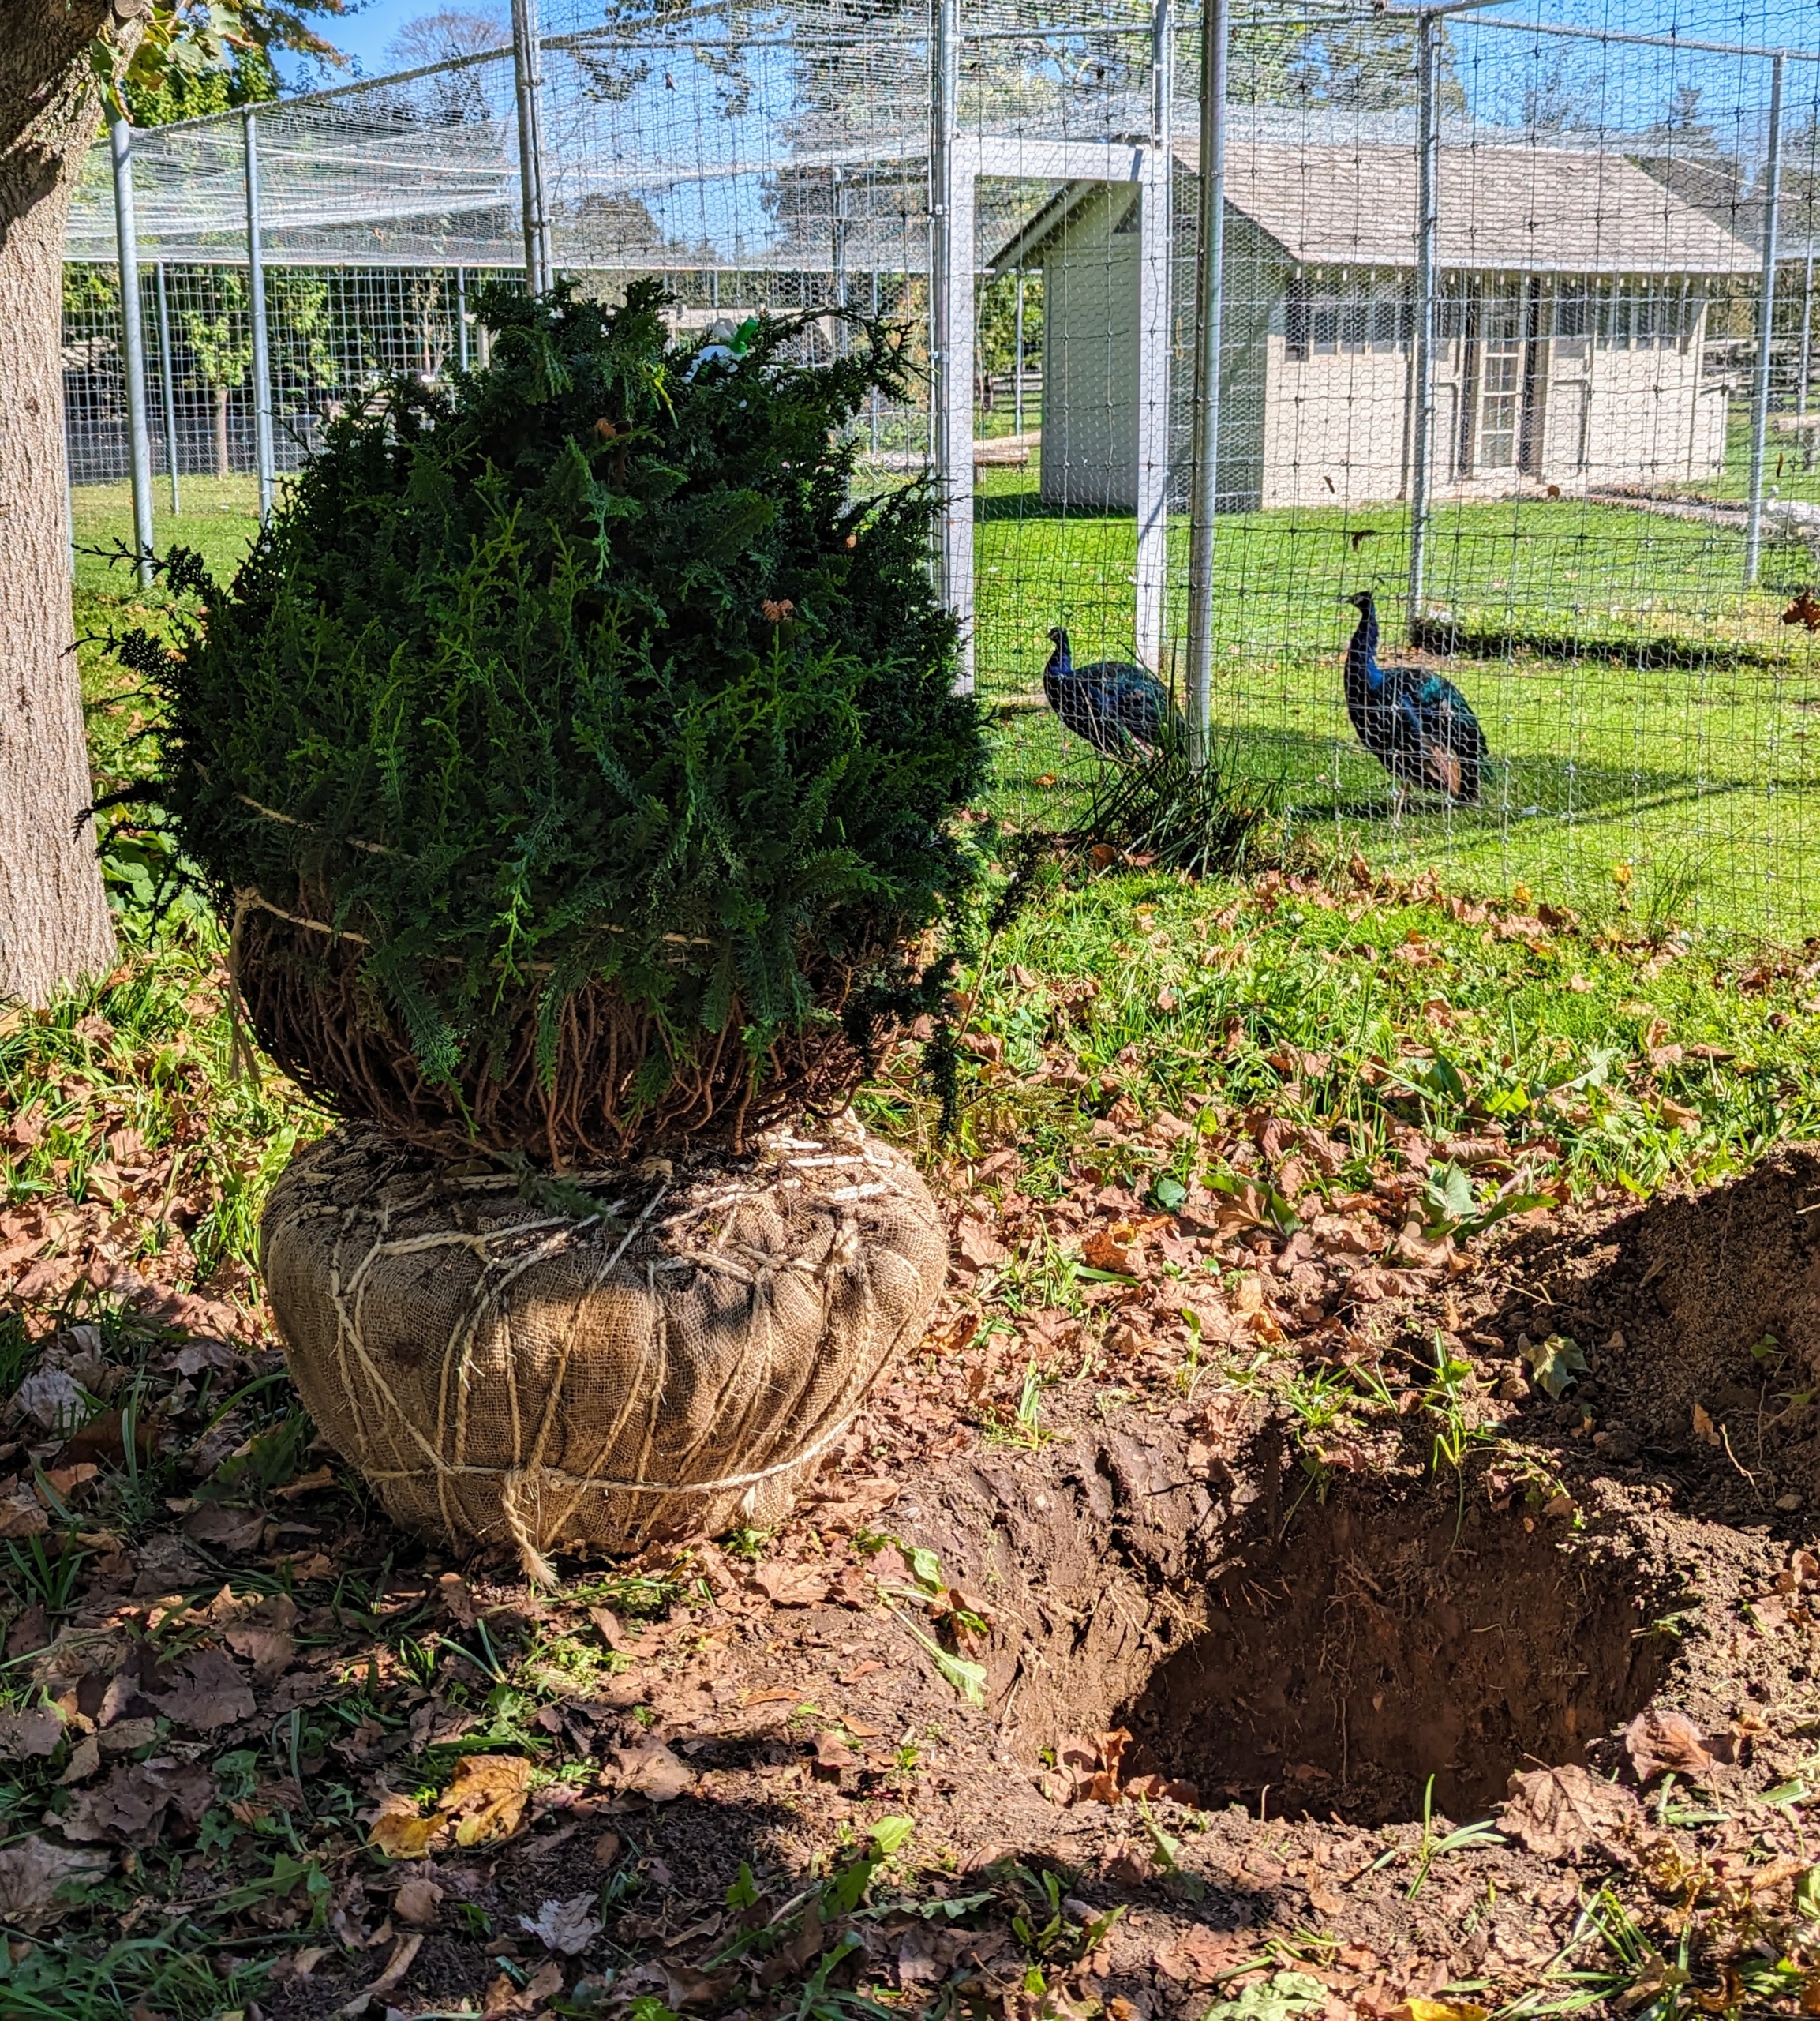
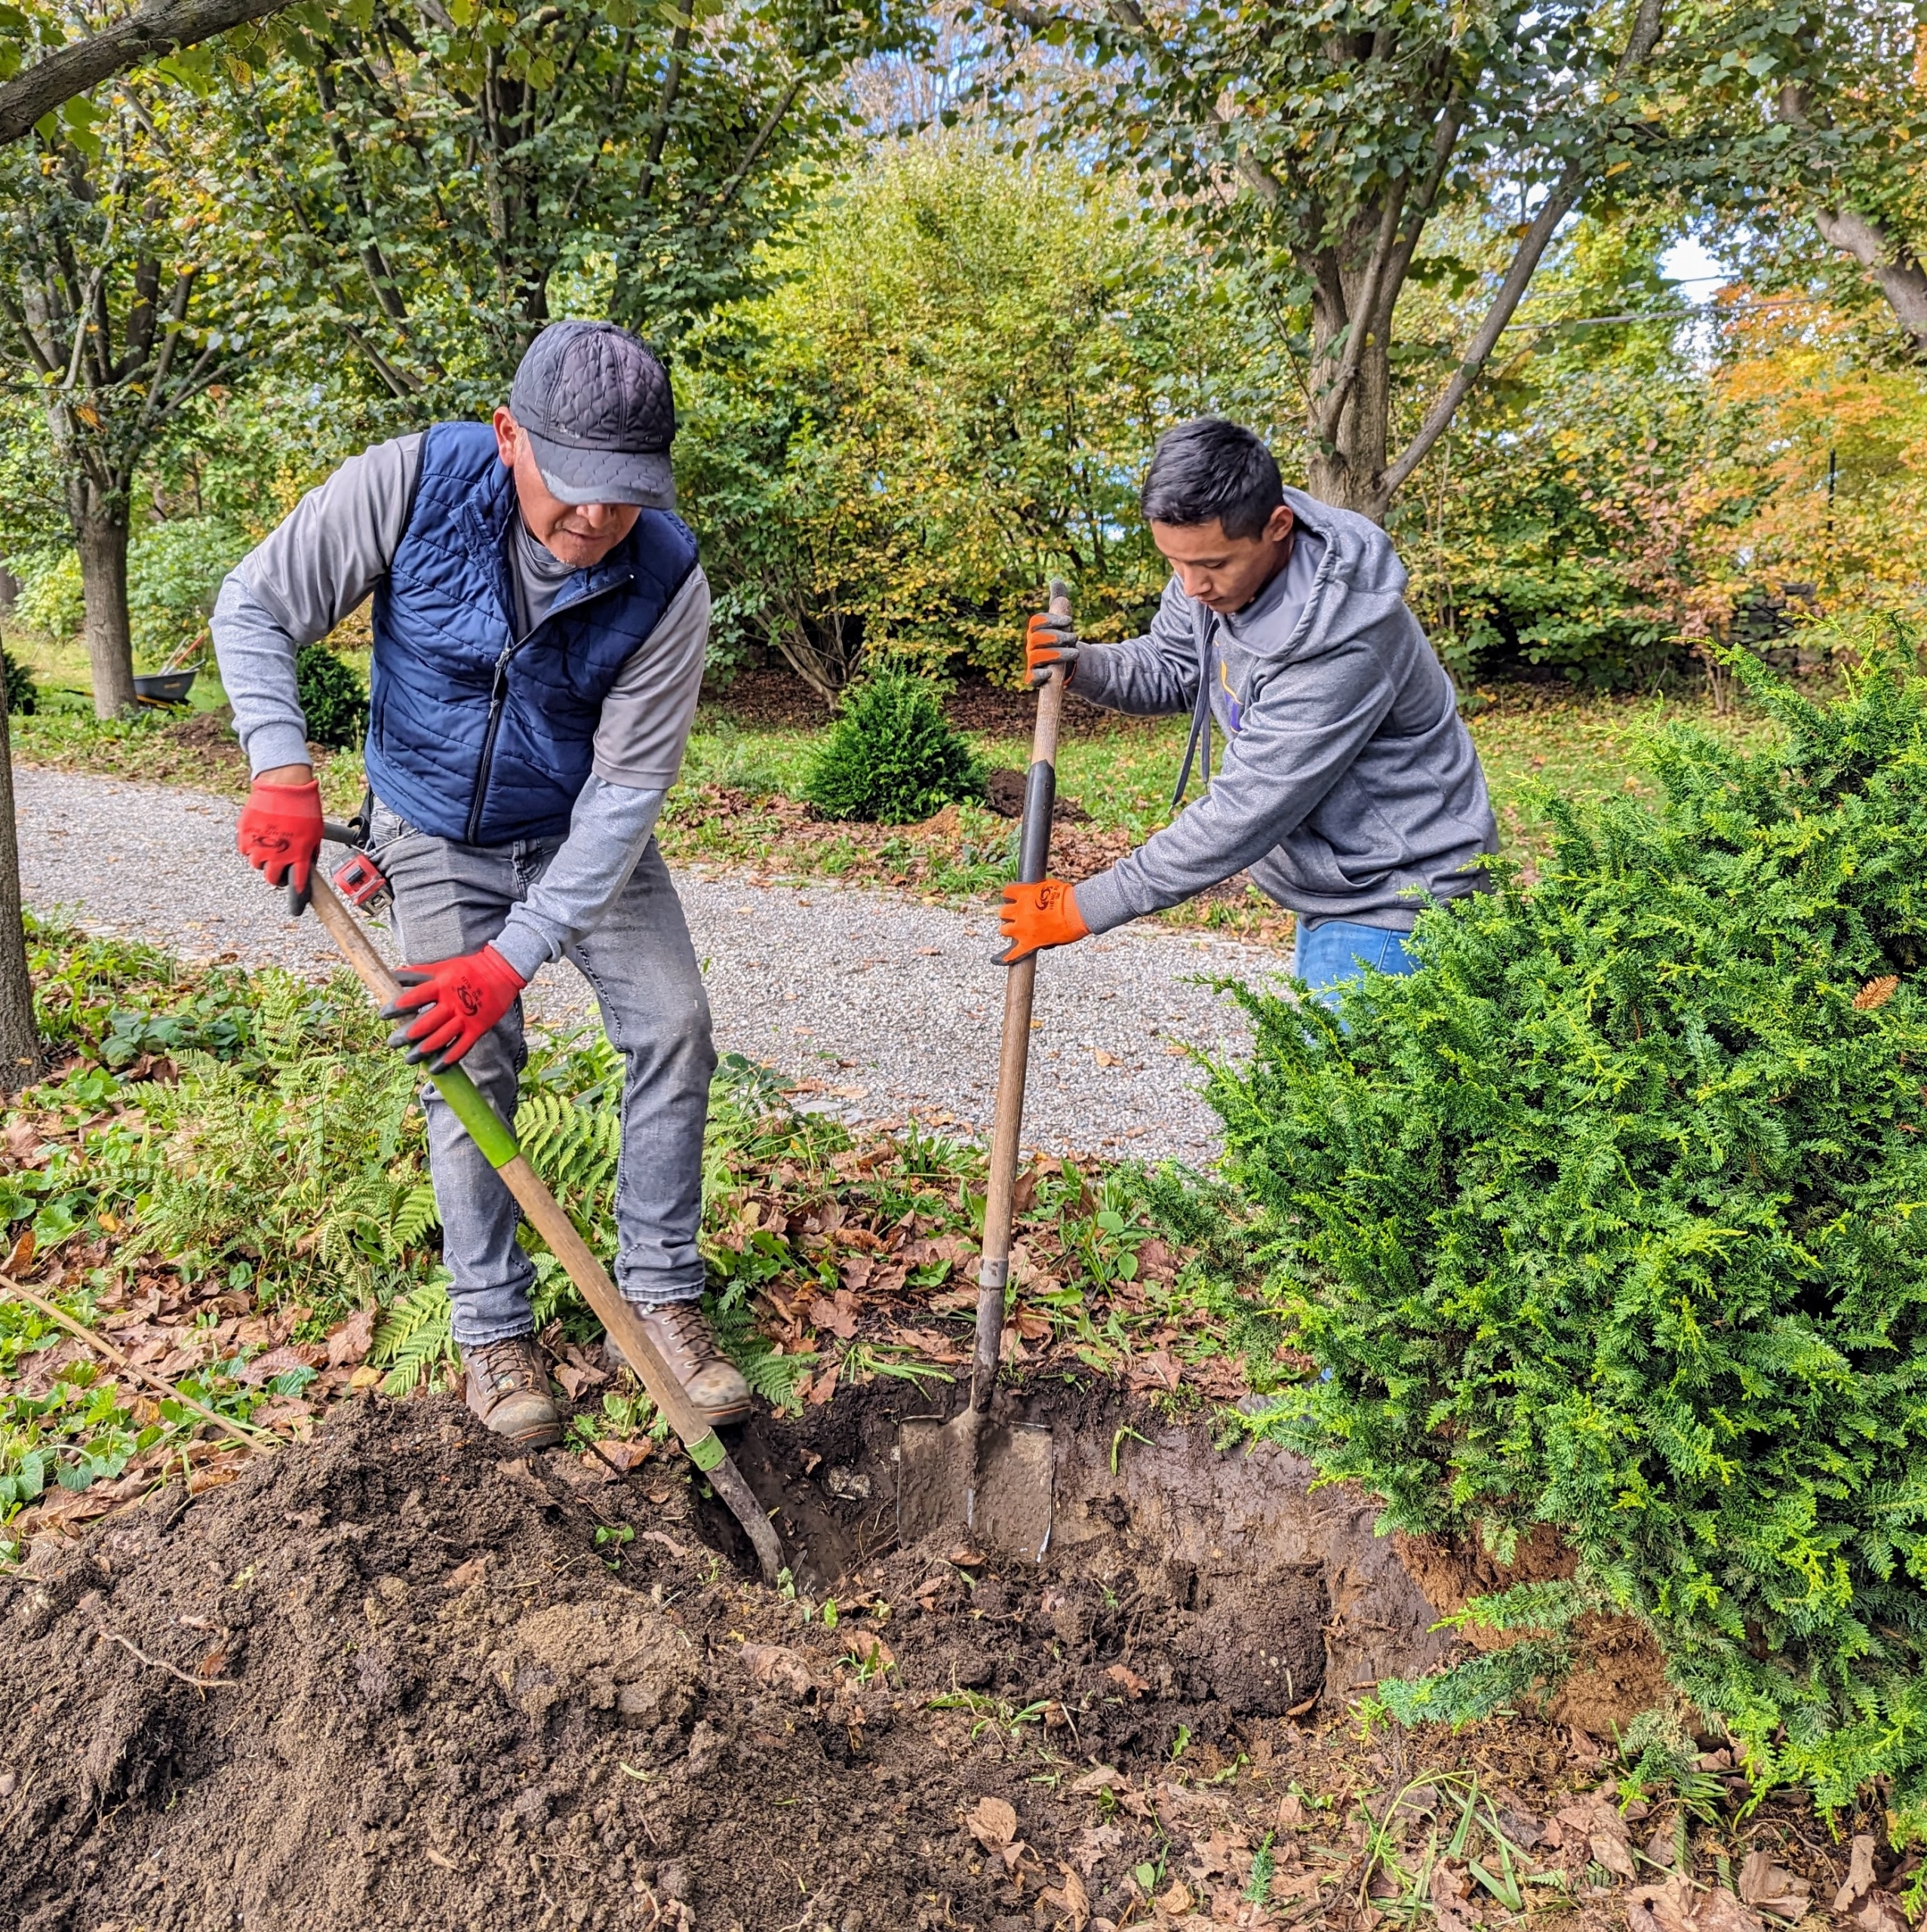
This allée is adjacent to my bird enclosures. Two peacocks are watching all the planting activity. Here, holes were started for each bush to be planted.
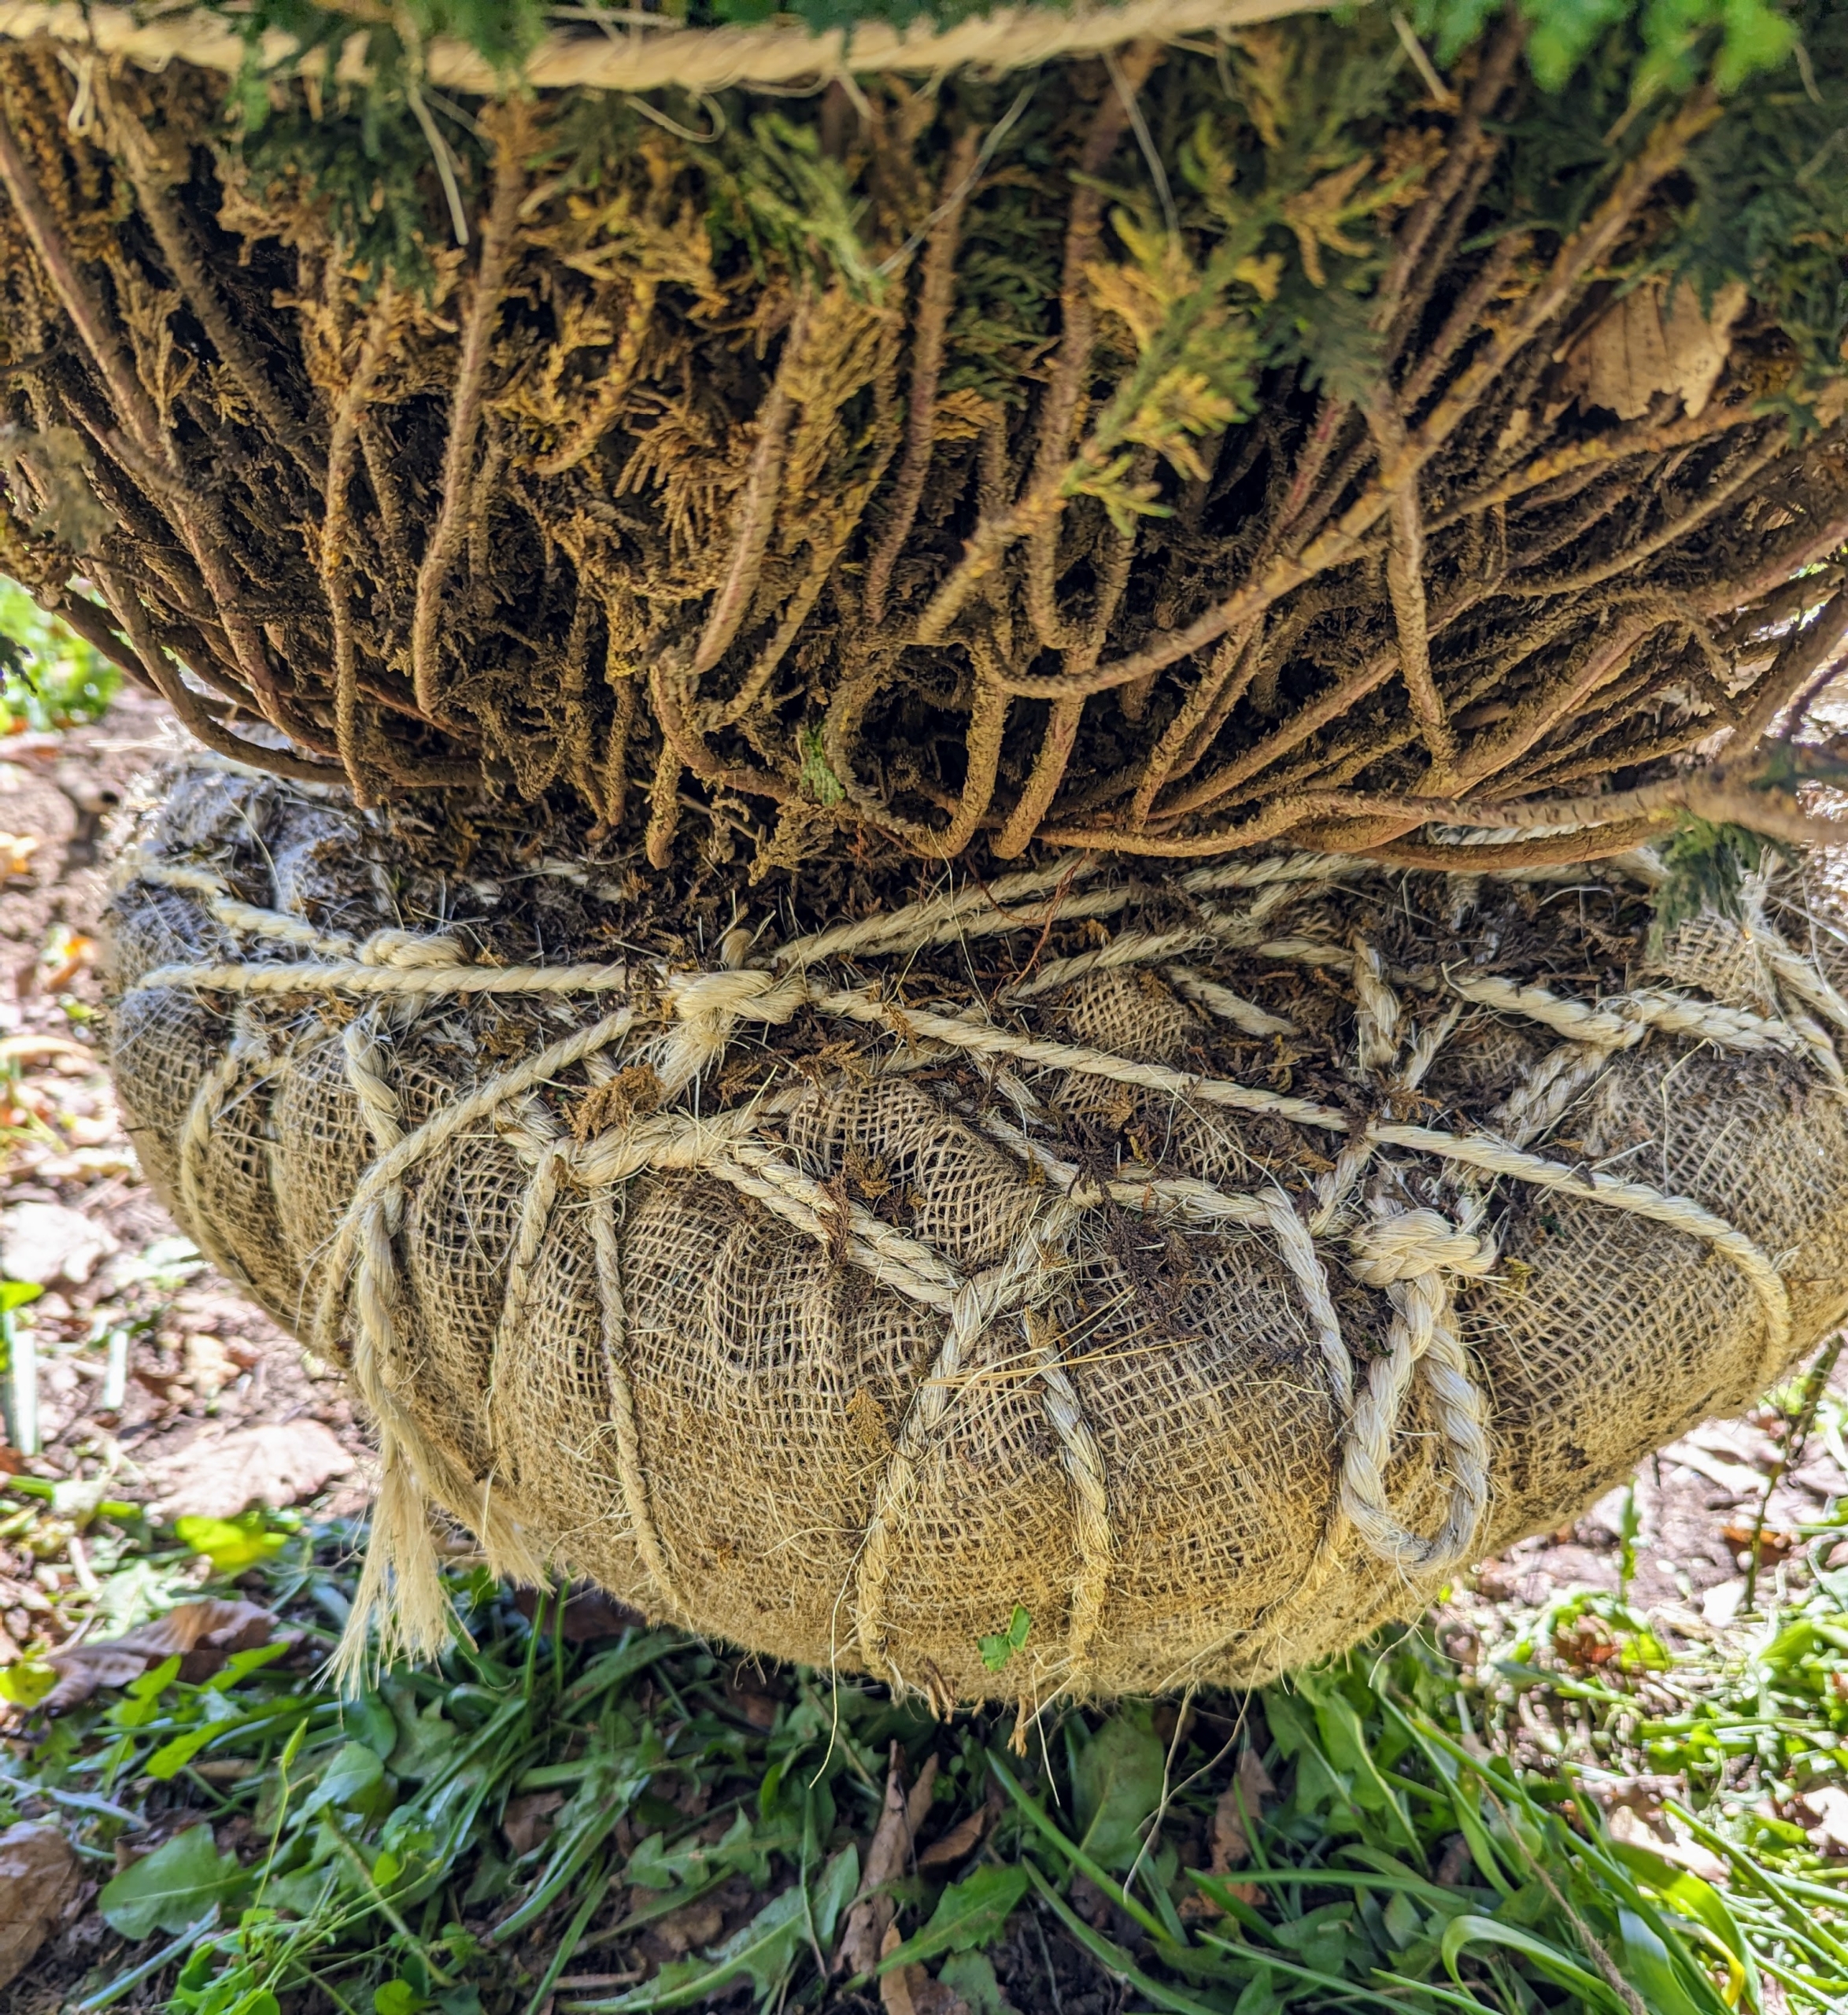
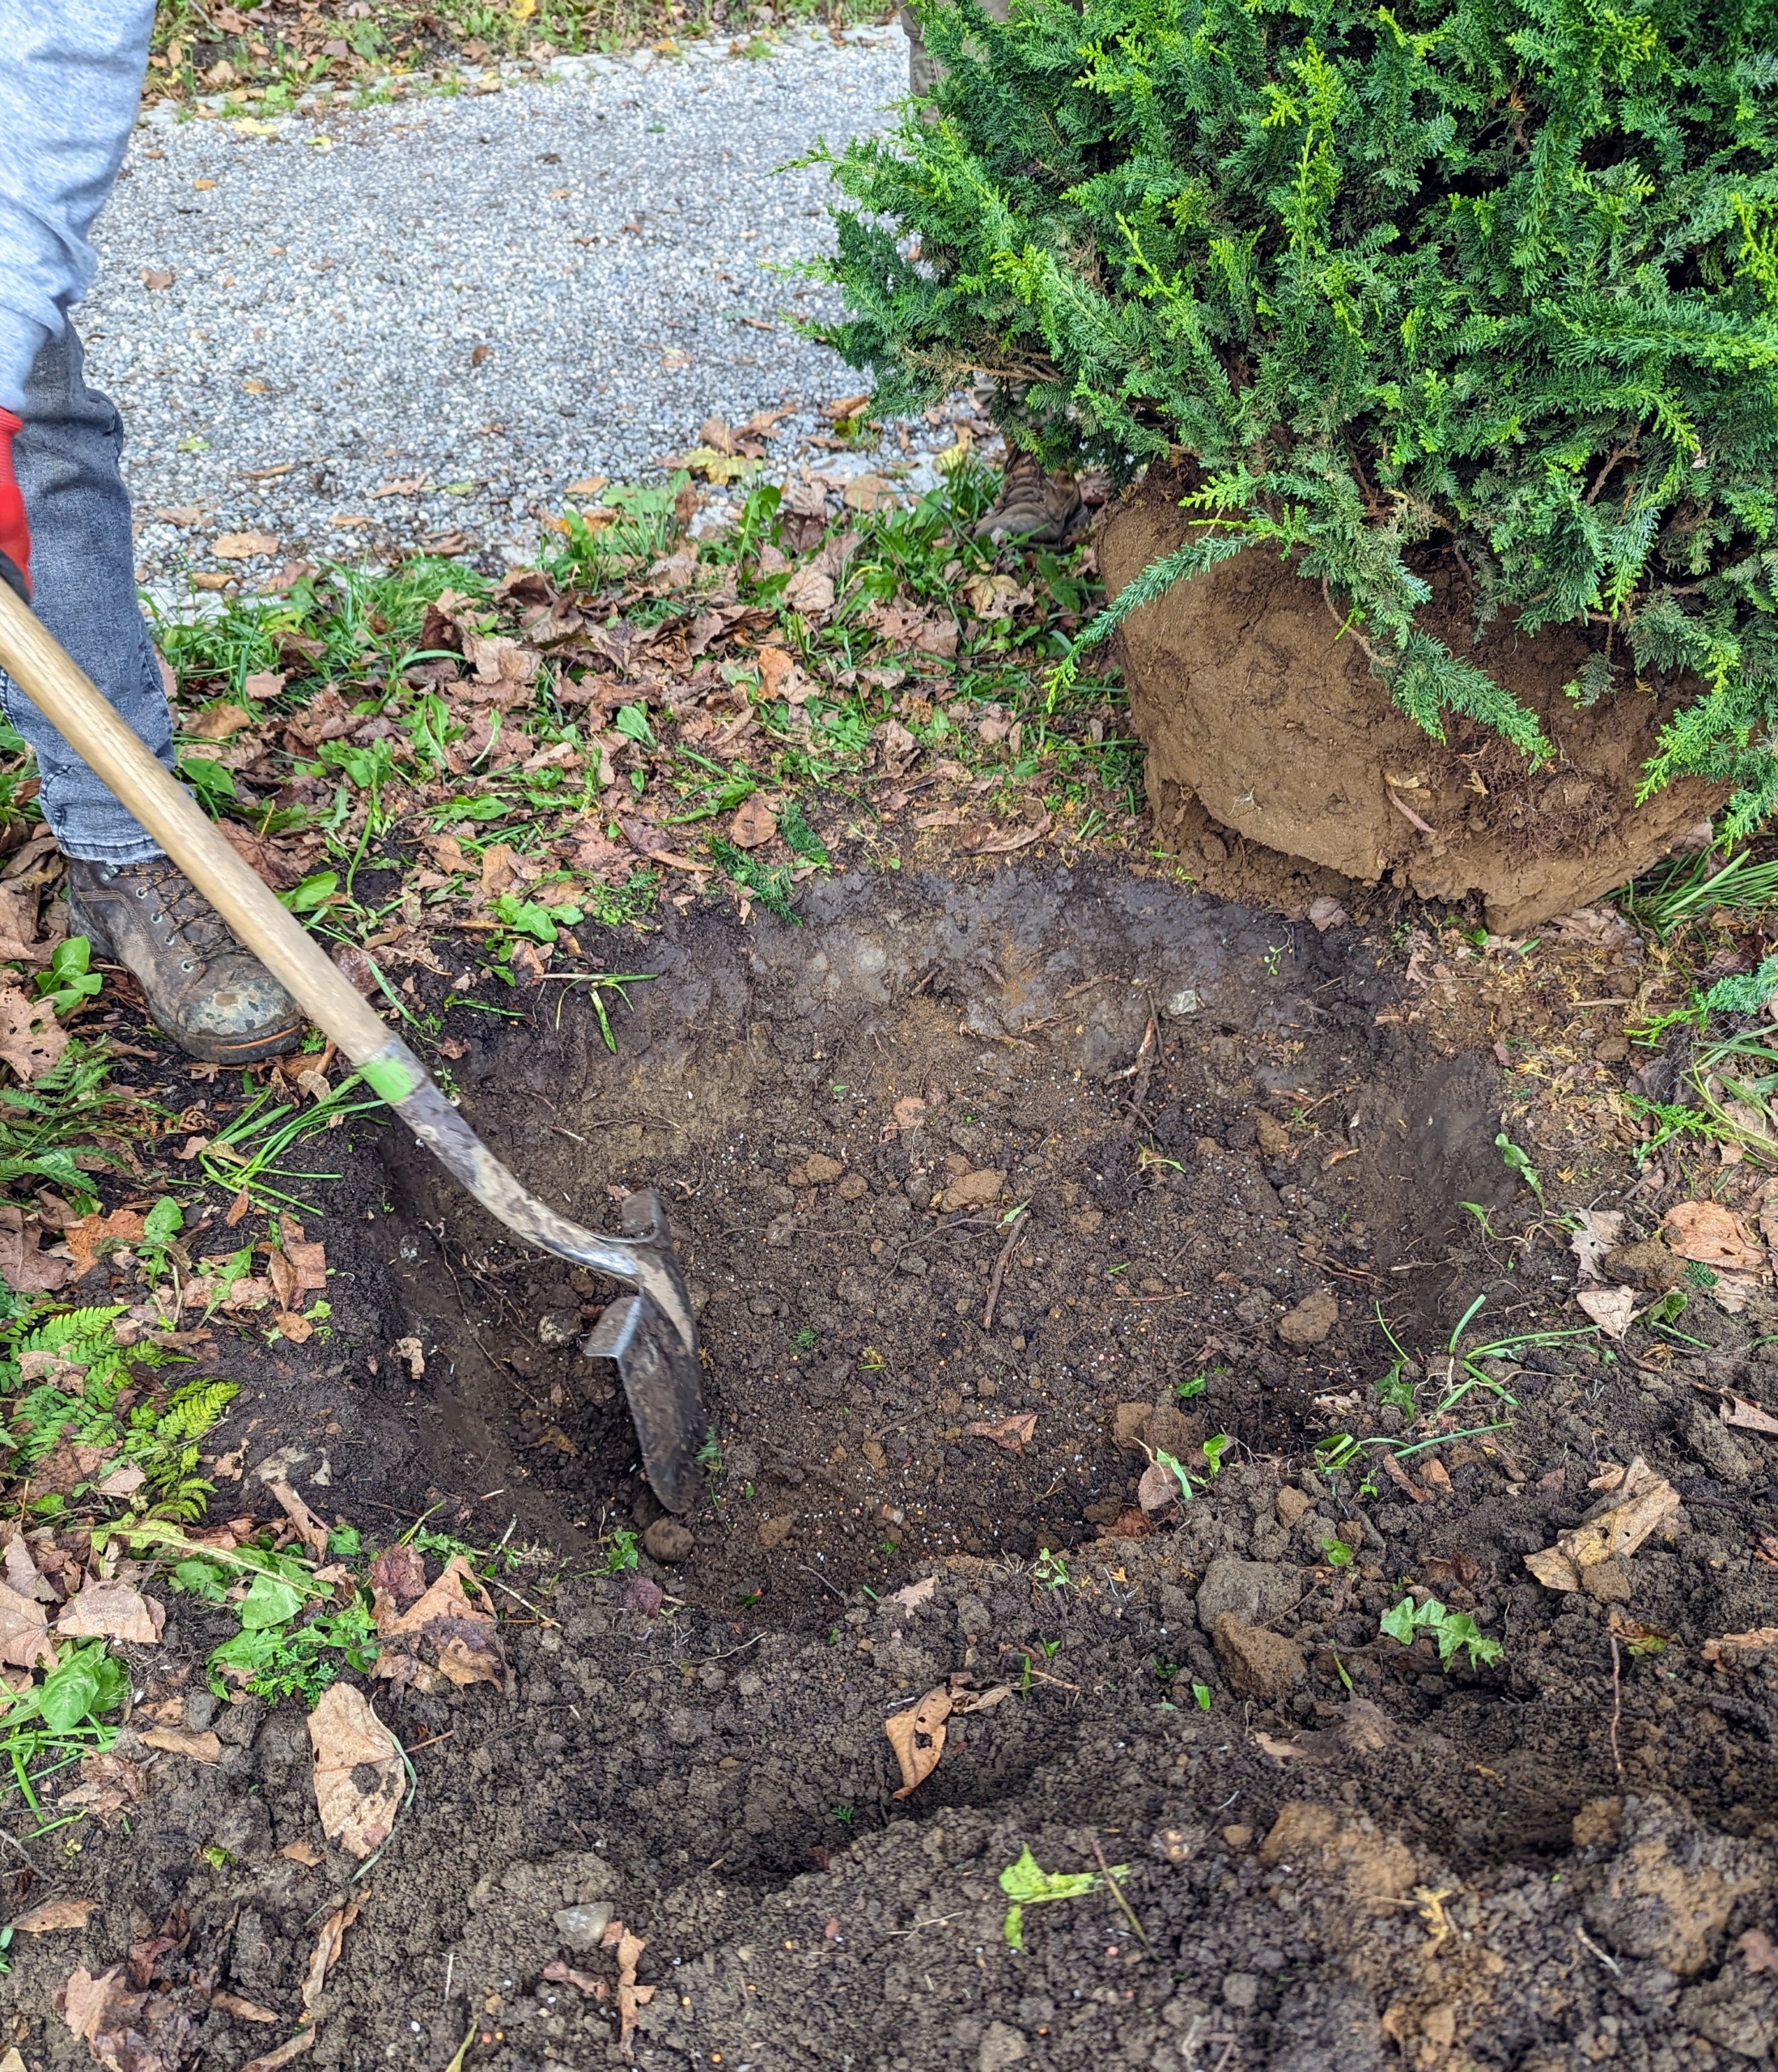
The wrappings around a tree’s rootball keep a tree or bush safe during transport and make it easier to move it to its planting position. Here, strong twine is used to keep the burlap well secured. Some also use wire cages.
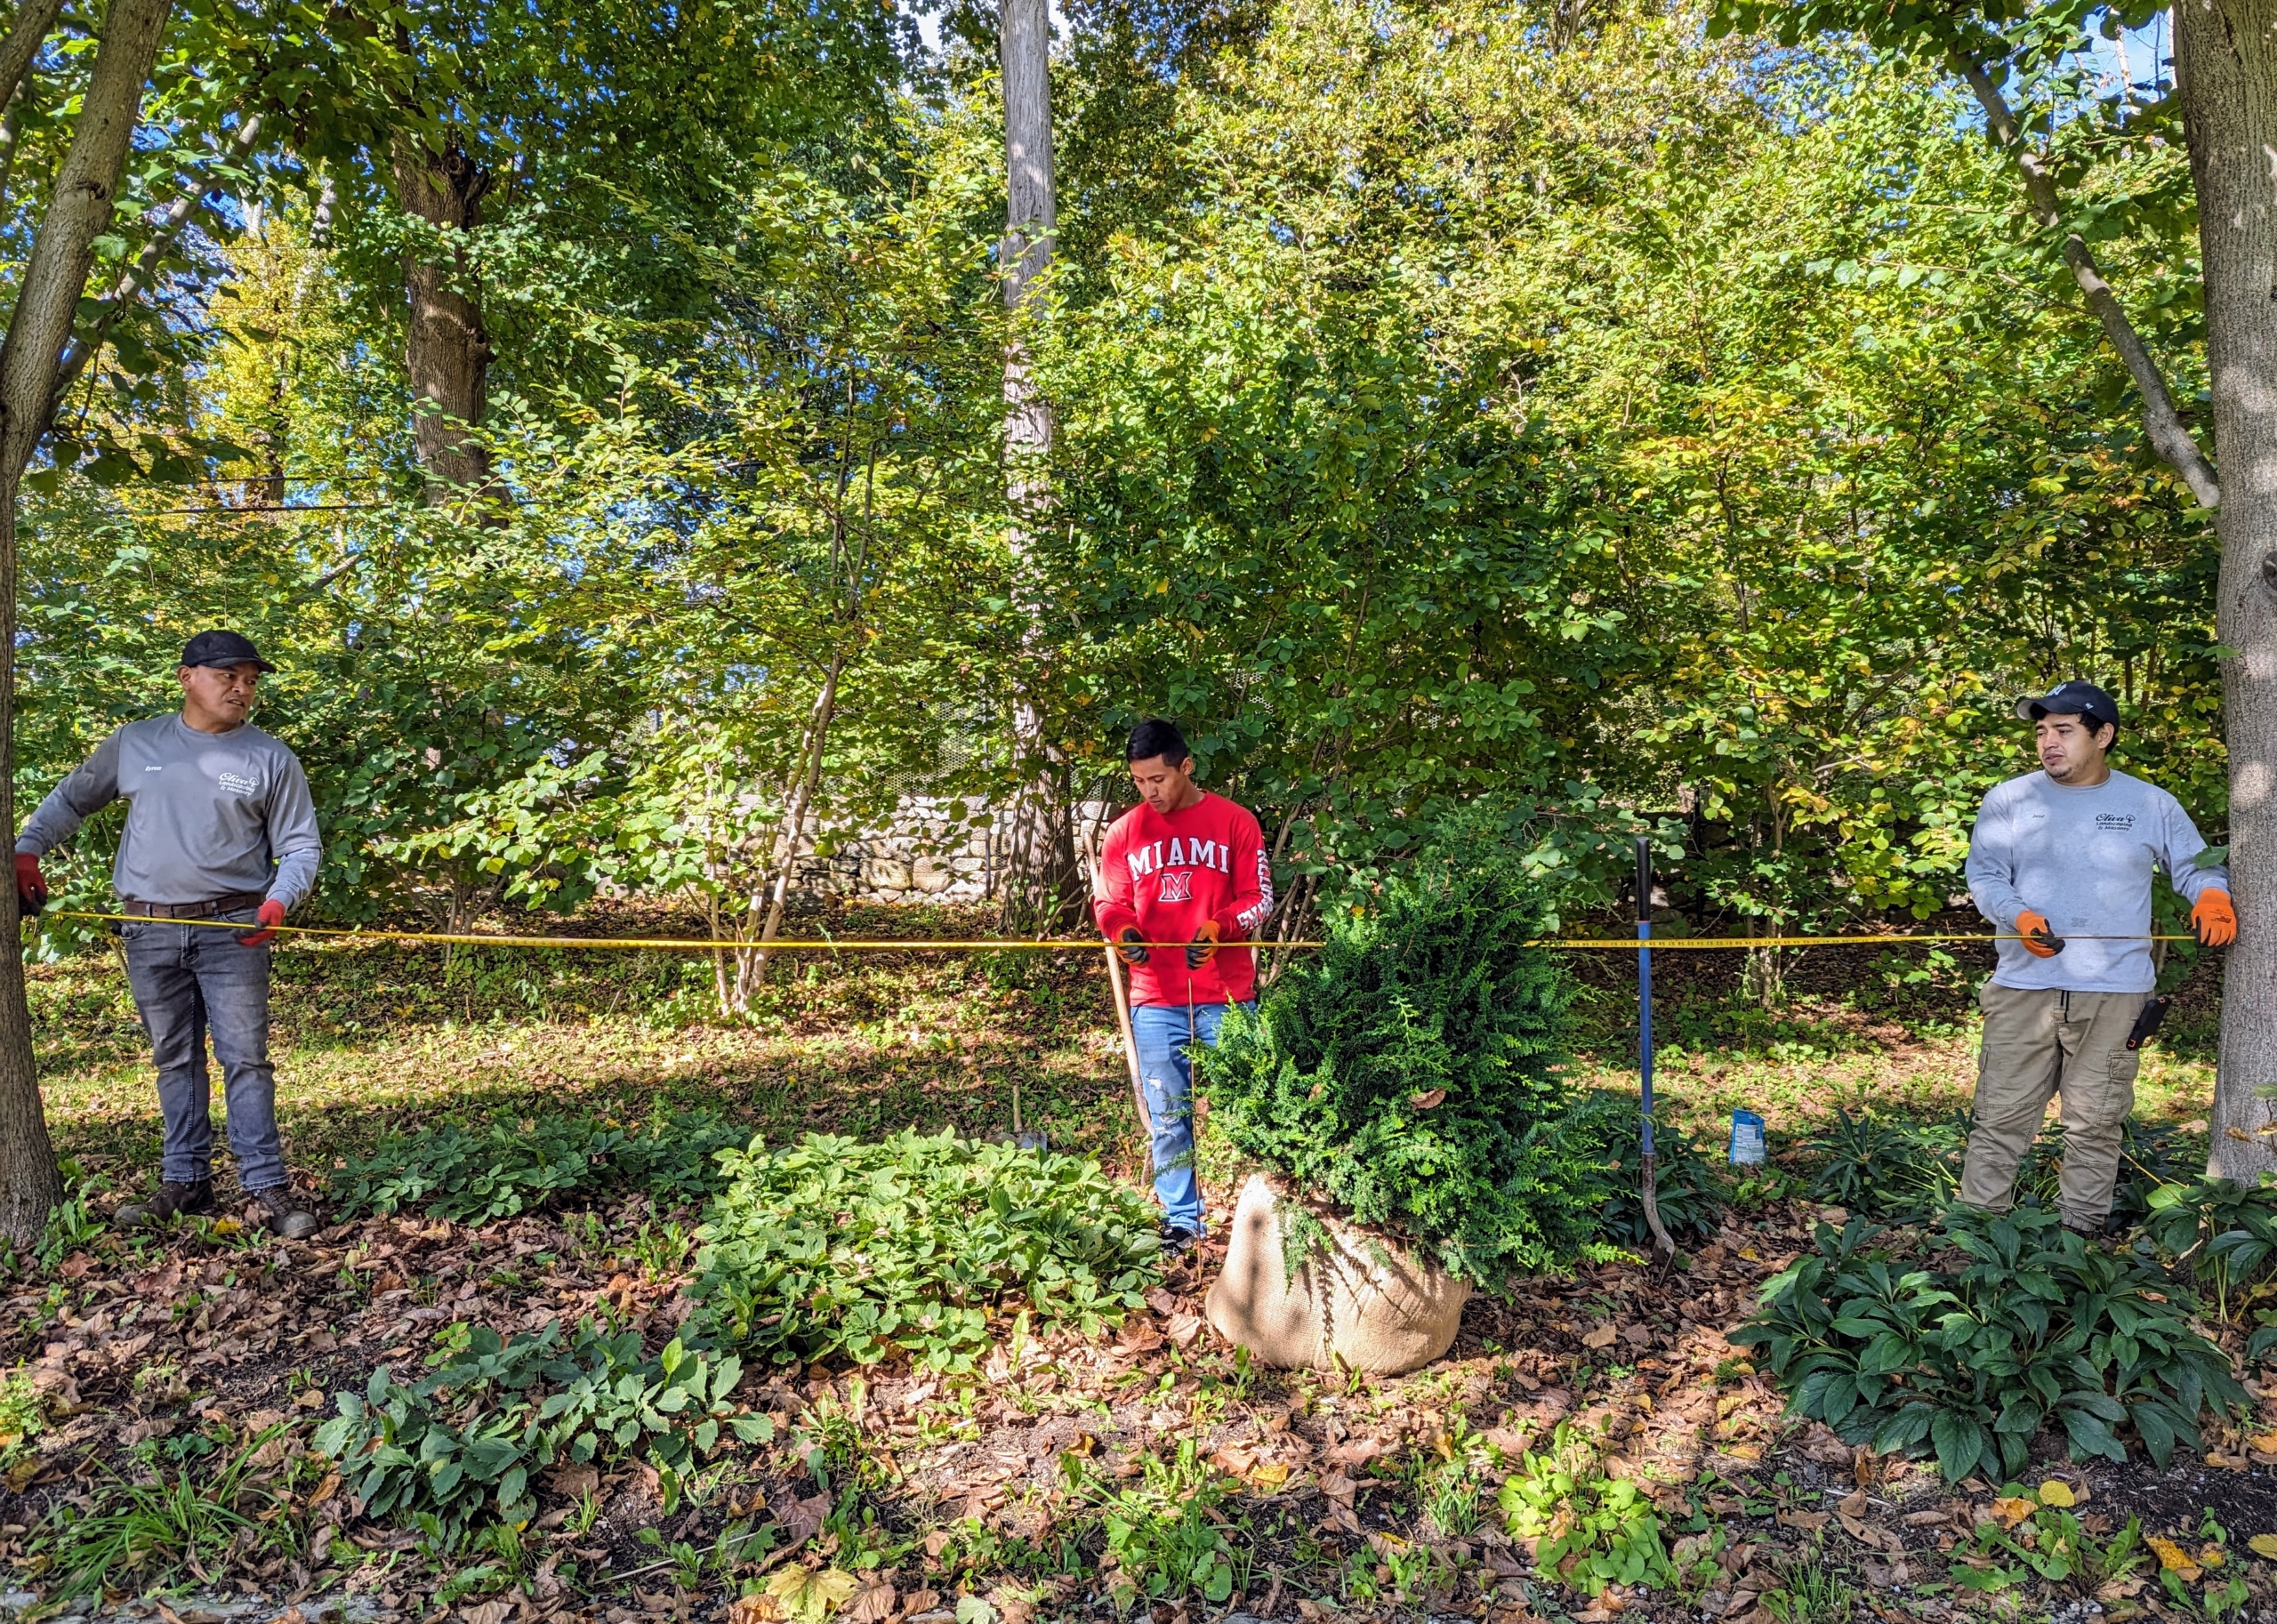
It’s important to make sure these bushes are centered exactly between the lindens. Before final planting, each hole is measured several times to be absolutely sure.
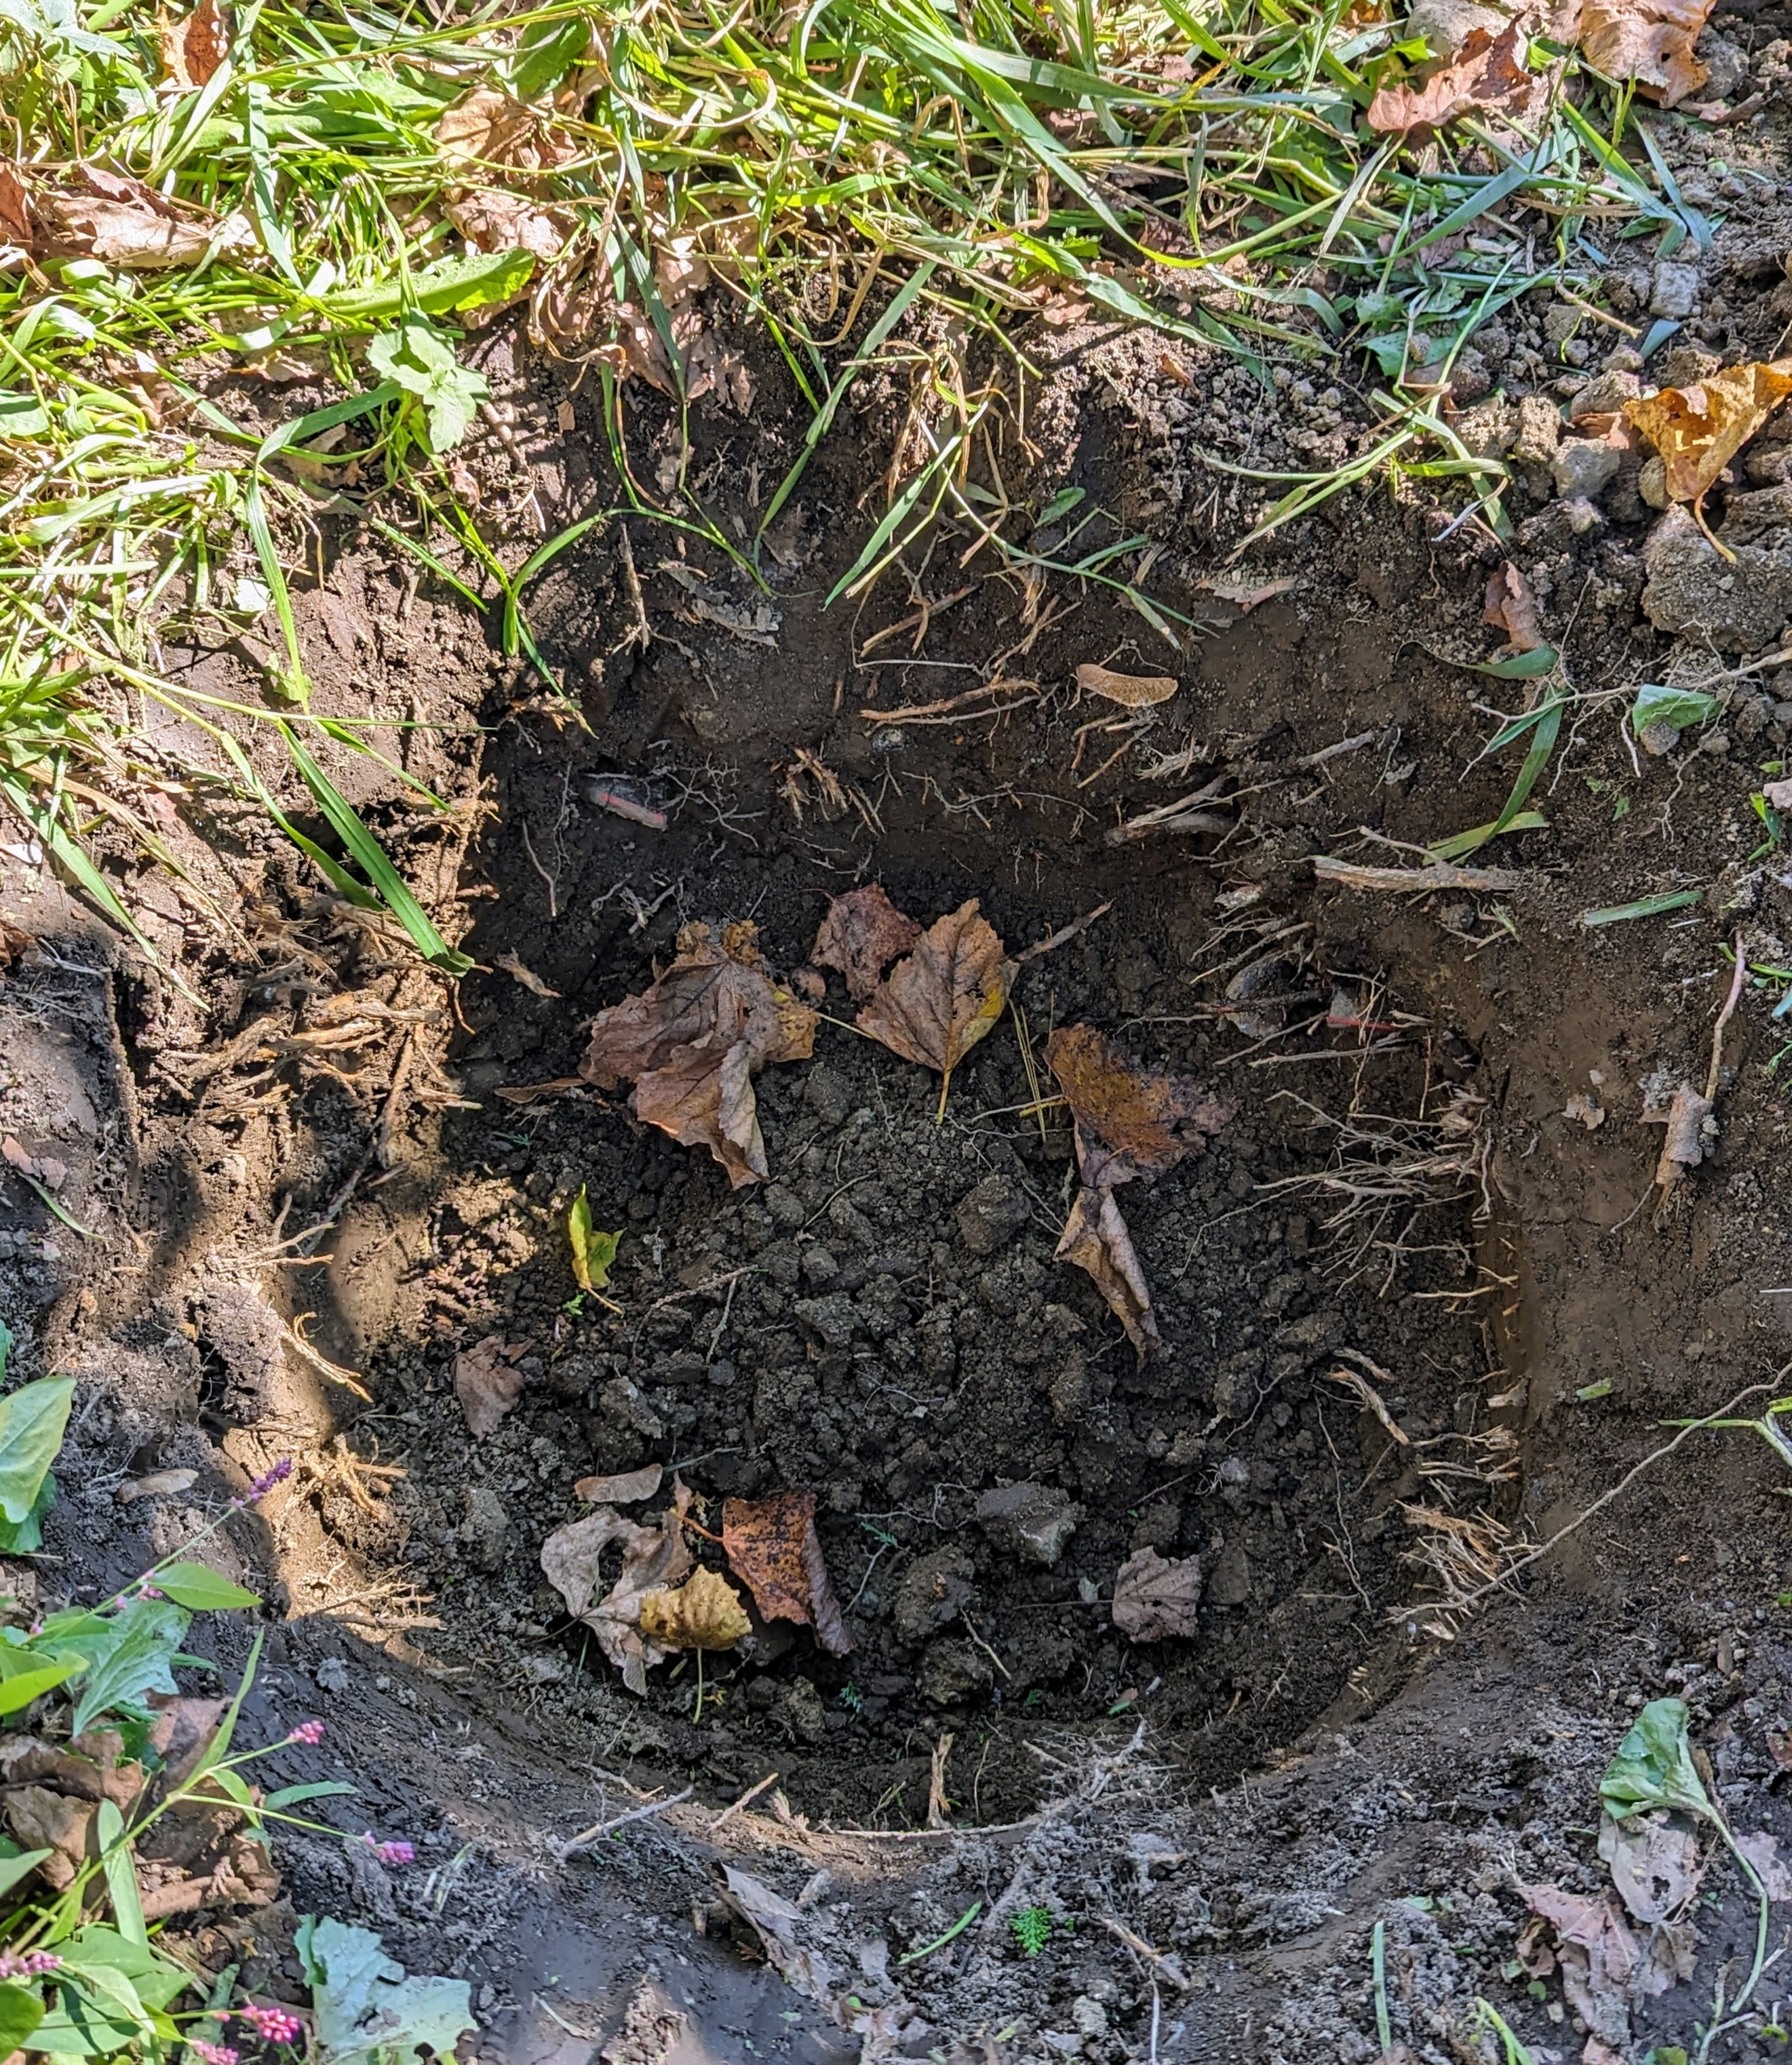
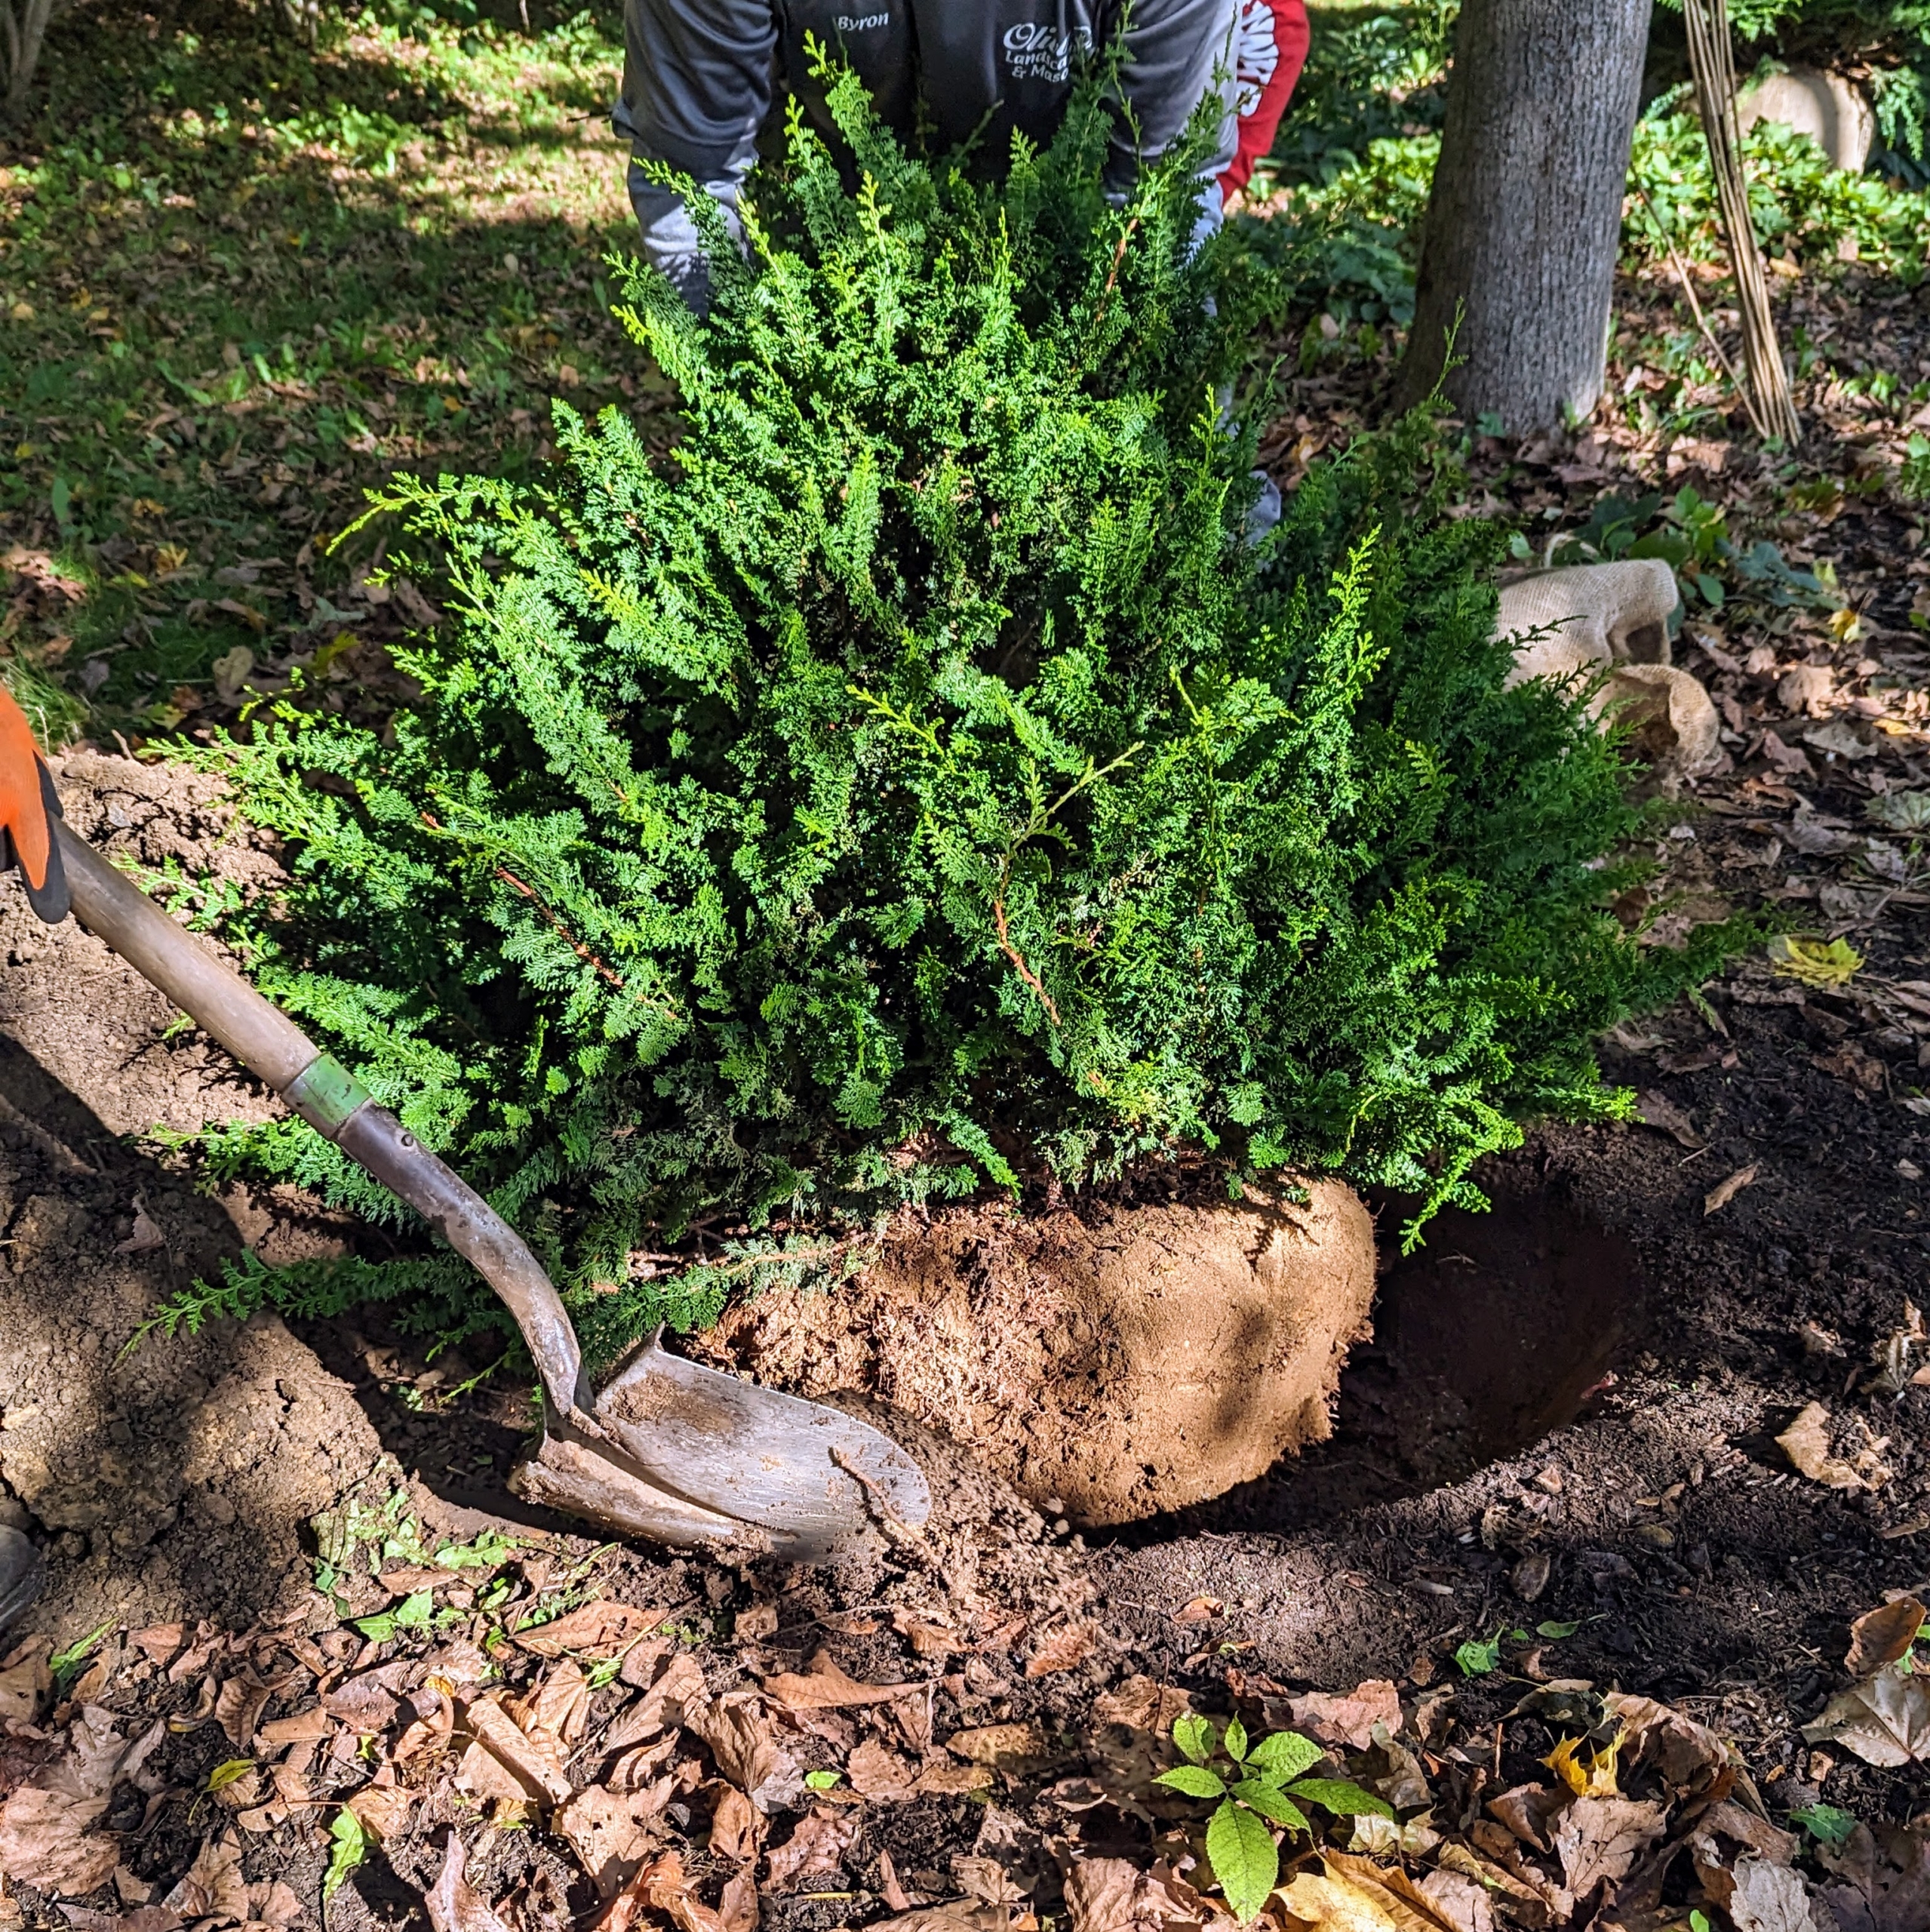
The team continues to dig the holes a bit bigger. The holes must be pretty wide – each one should be at least two to five times as wide as the root ball, but no deeper than the root ball. Once in the hole, the top of the root ball should just be slightly higher than the soil surface, much like it was planted at the nursery.
The hole sides should also be slanted. Digging a proper hole helps to provide the best opportunity for roots to expand into its new growing environment.
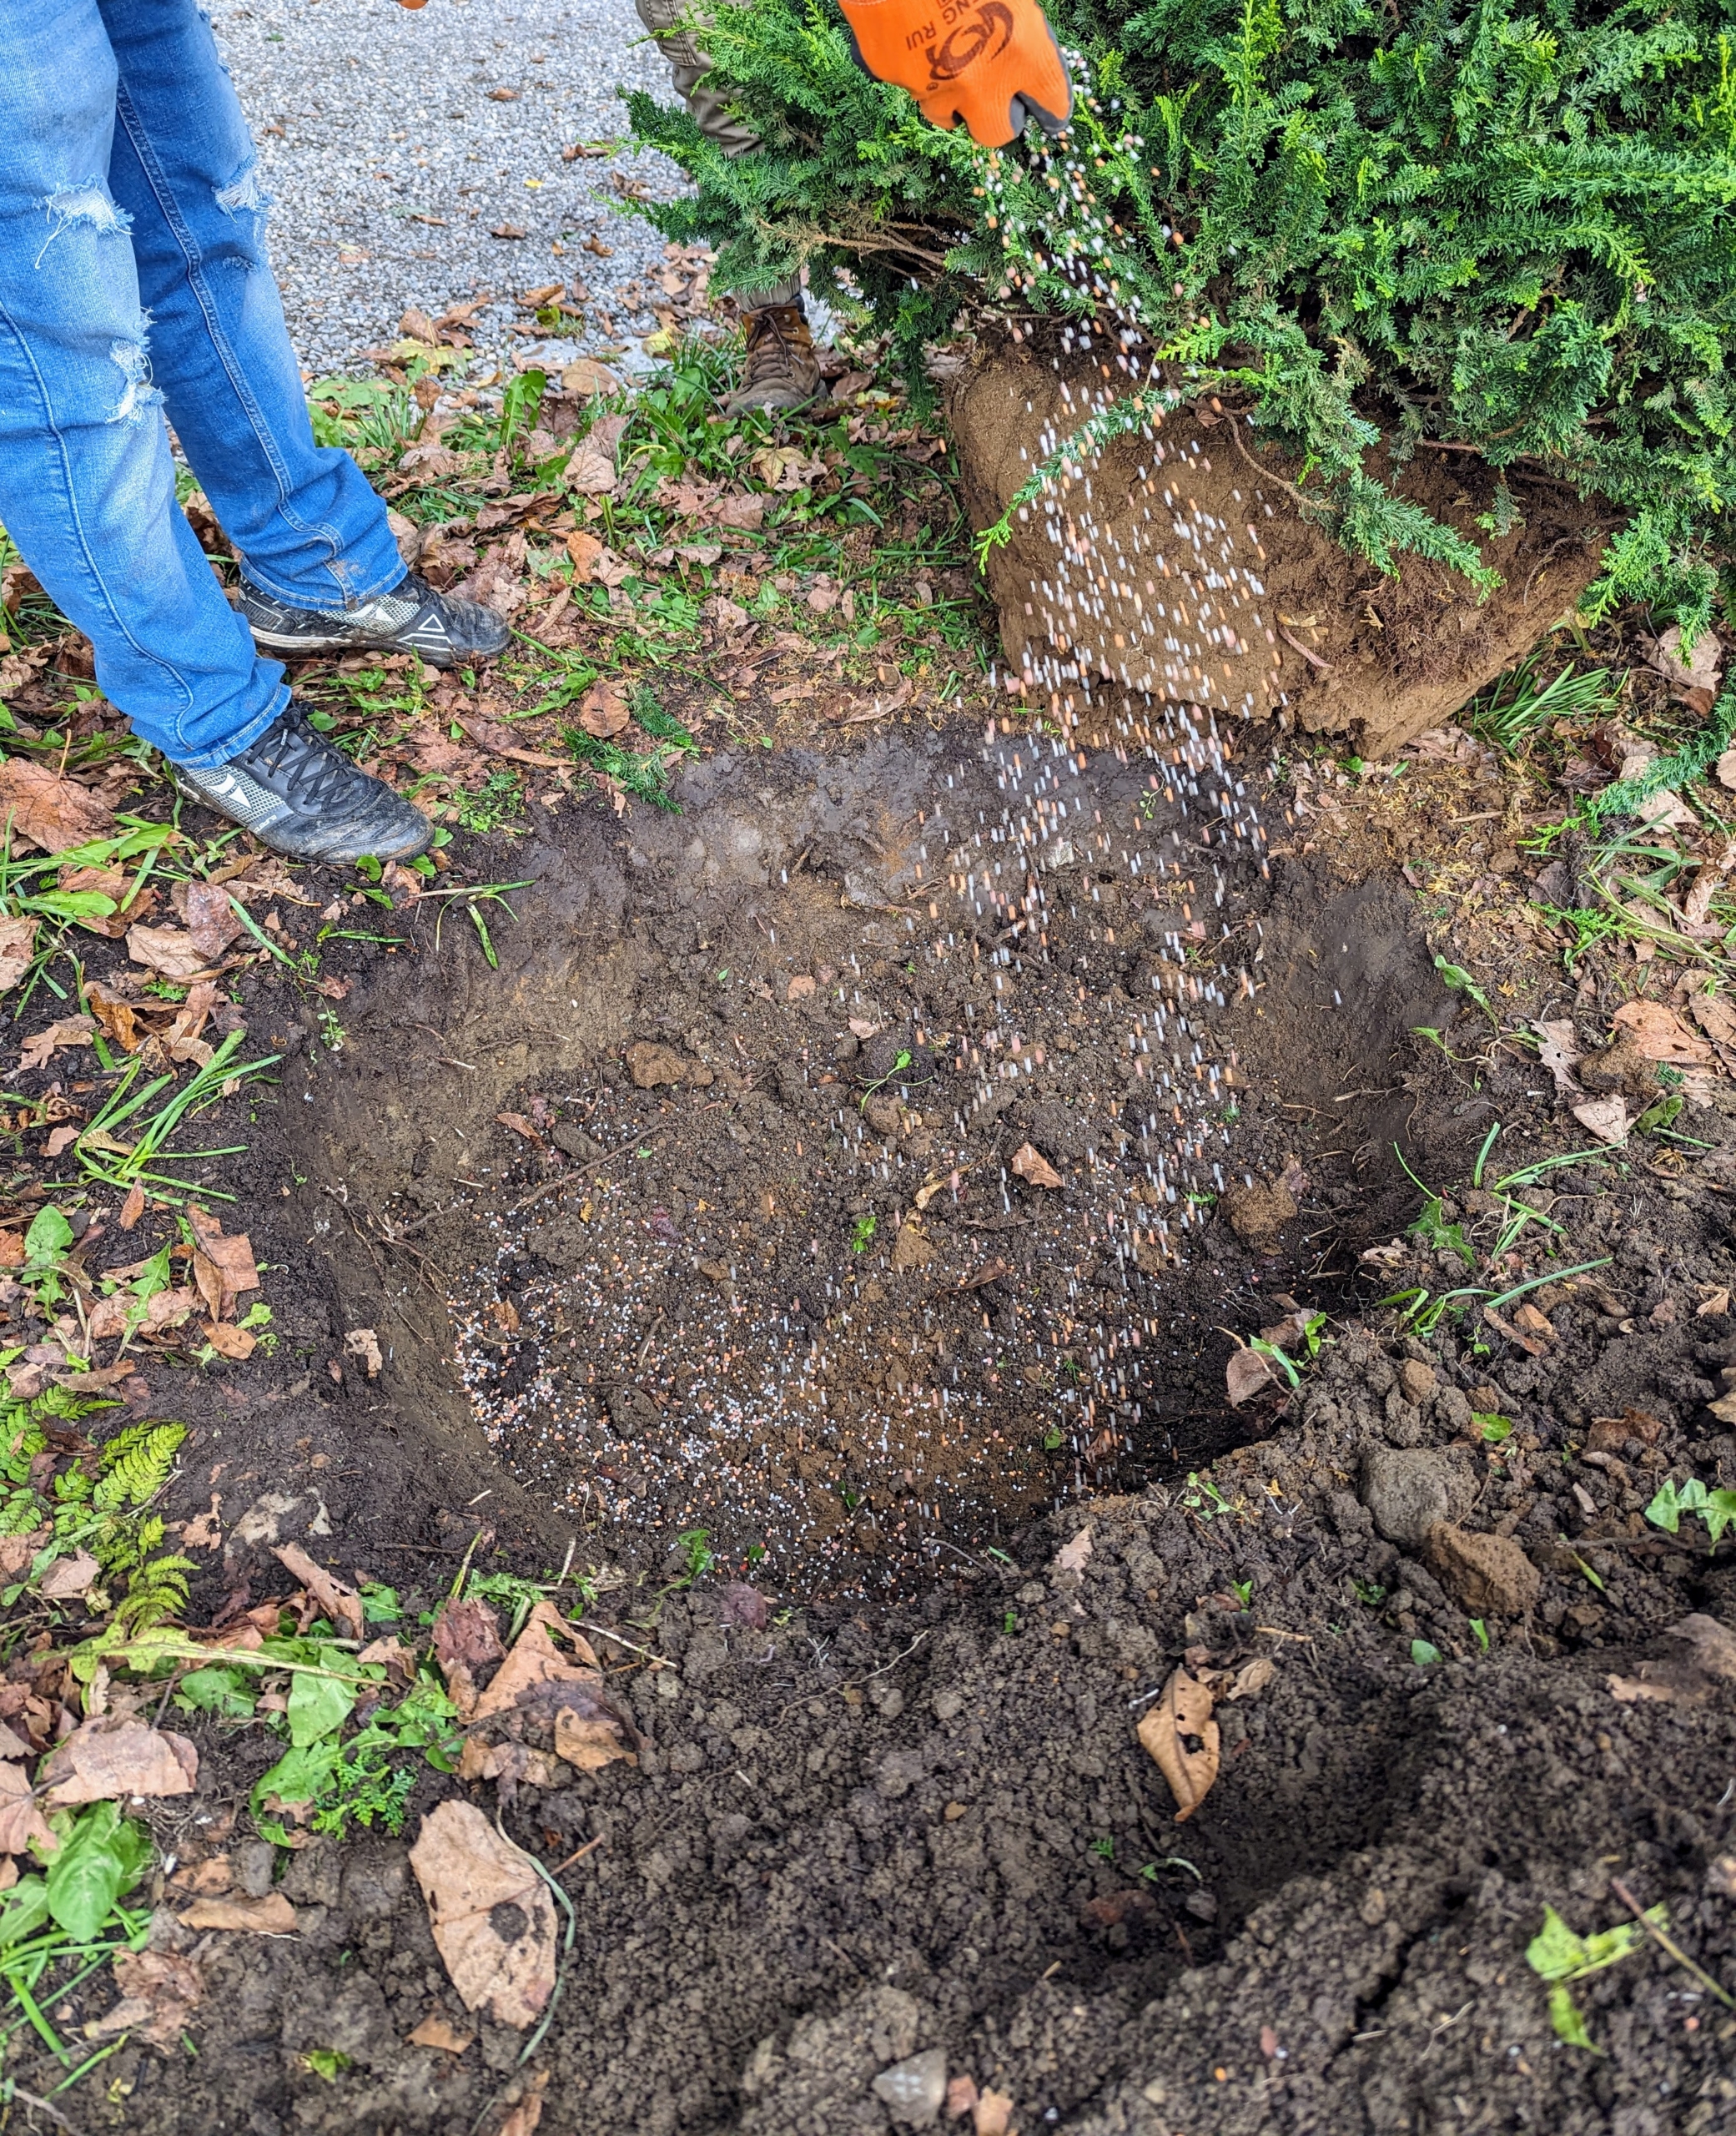
A good fertilizer made especially for new transplanted evergreens, trees and shrubs should be used. This is fortified to help with transplant survival, increased water and nutrient absorption, and to encourage vigorous root growth and lush foliage.
Byron mixes the fertilizer in with the existing nutrient-rich soil.
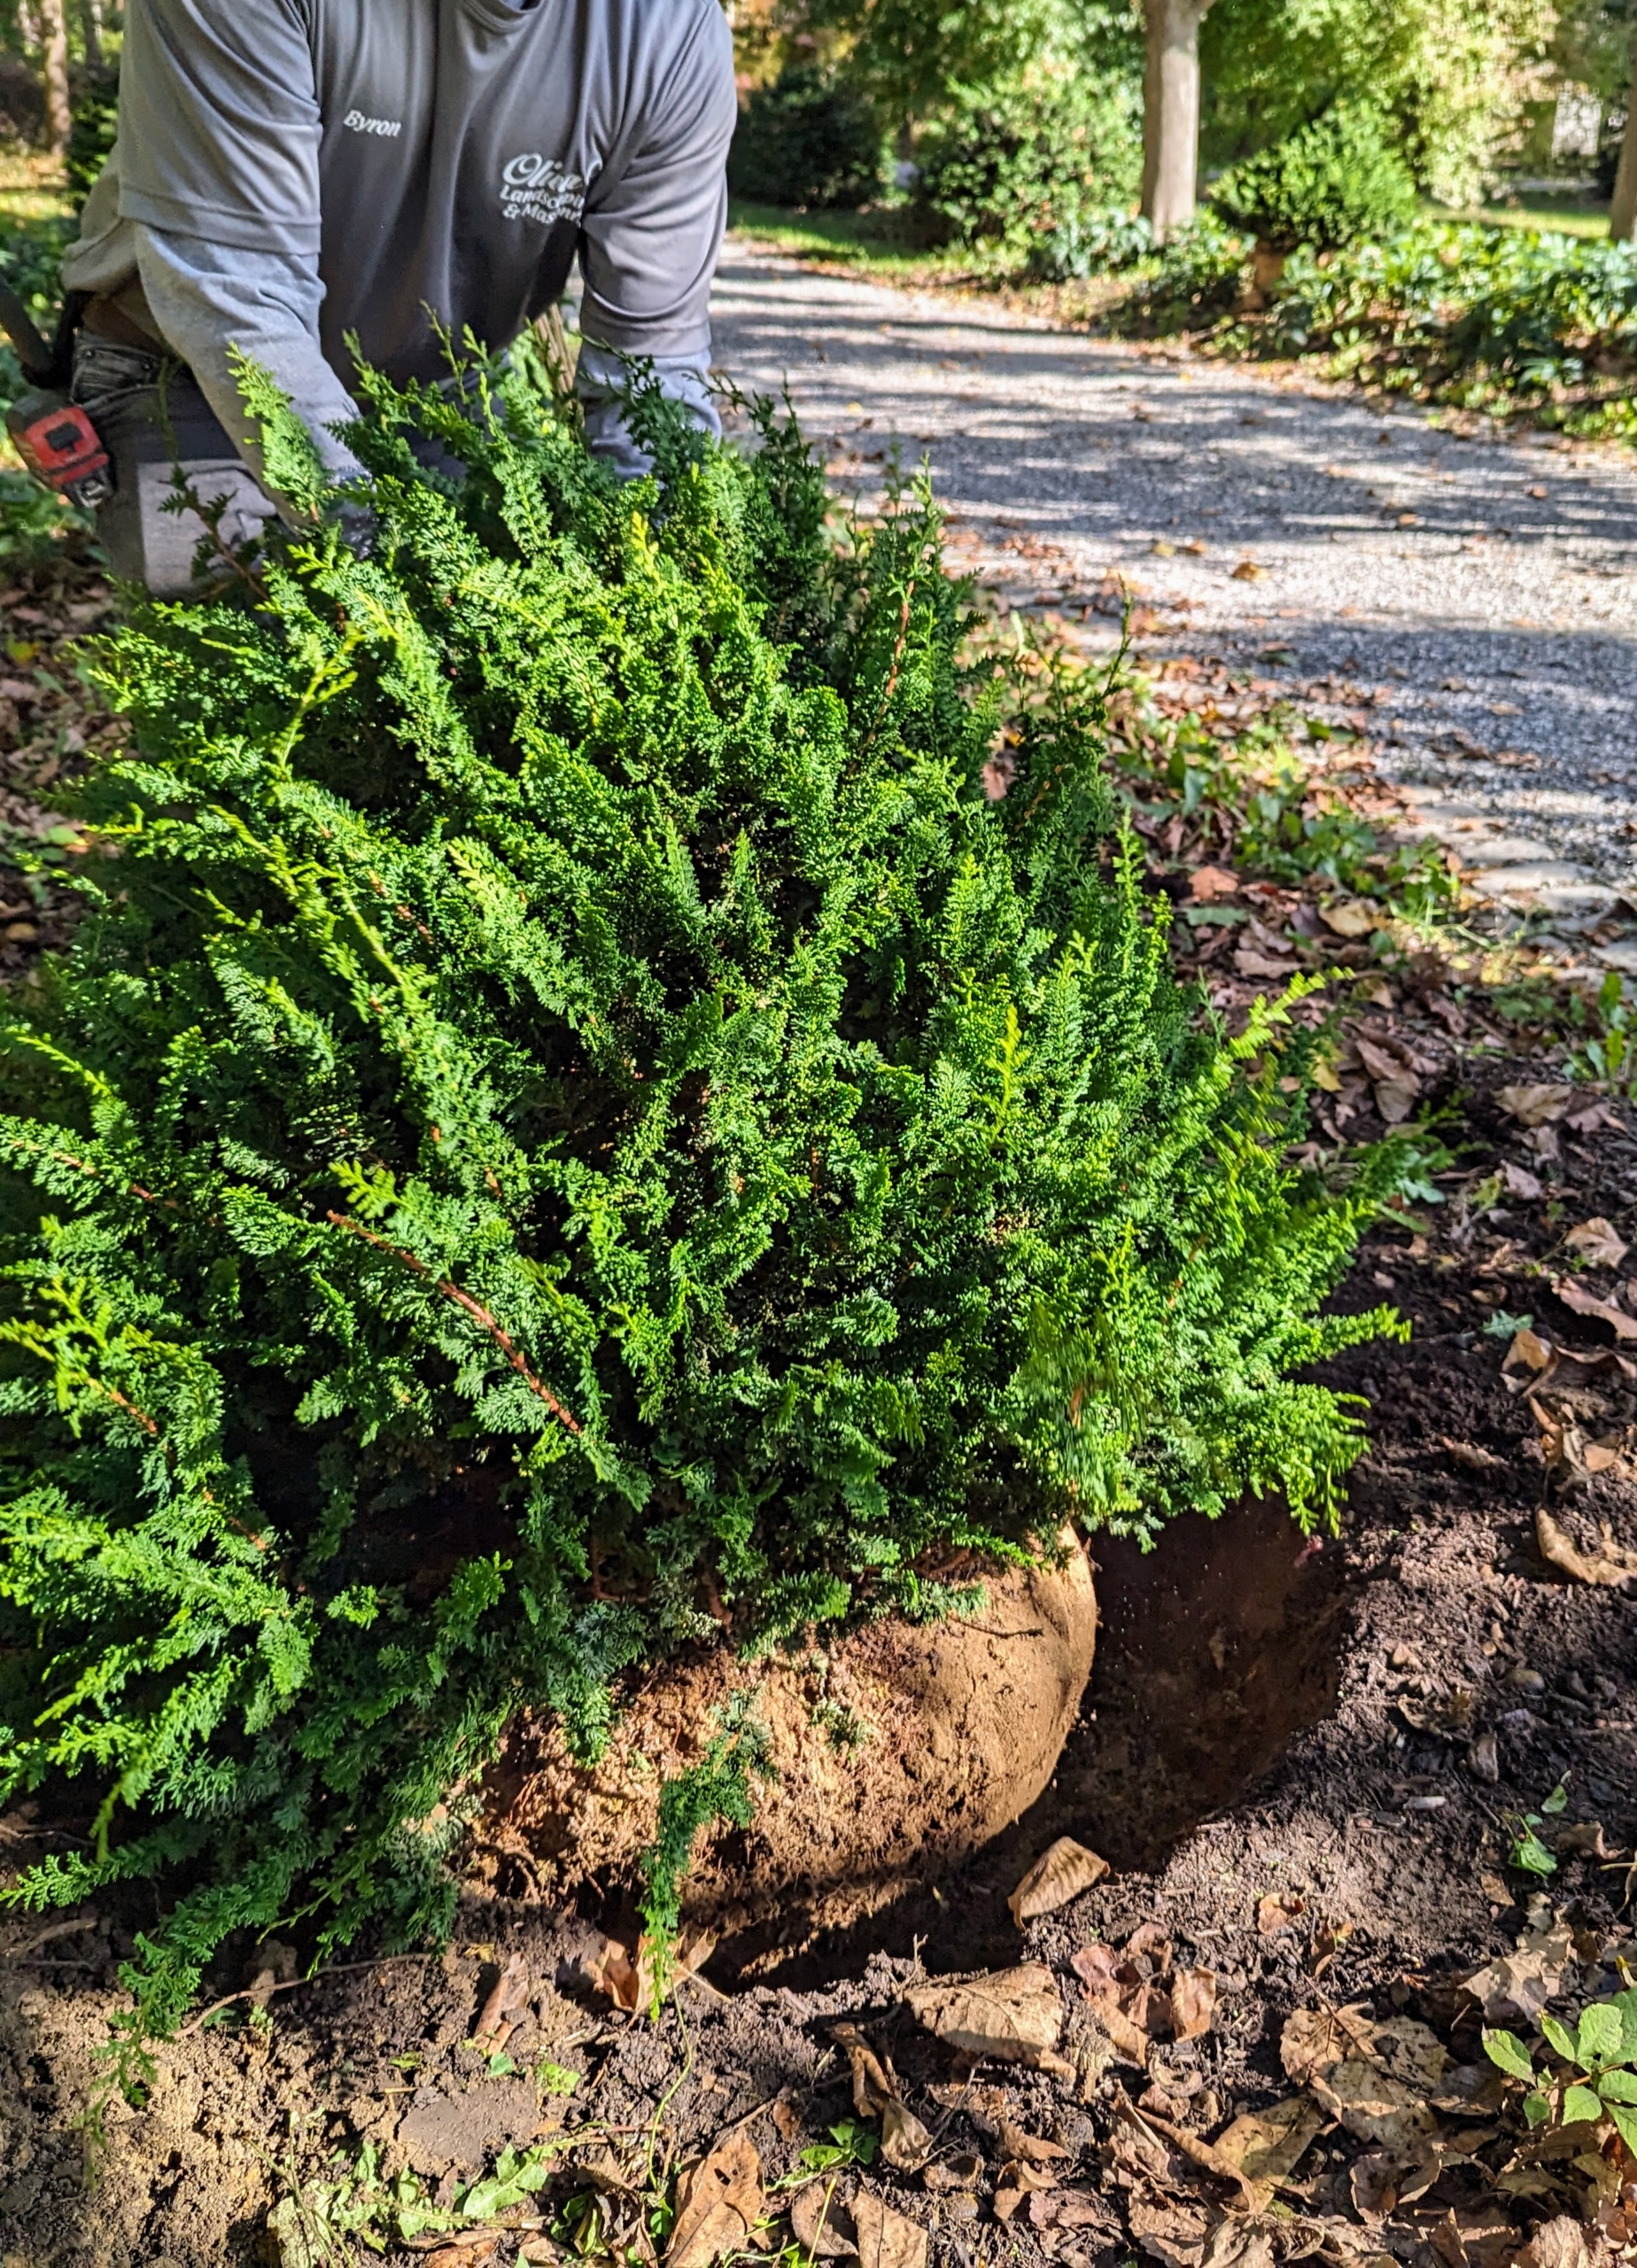
Then Byron removes all the twine ad burlap wrapping. Some leave them in the ground, but I prefer to remove them completely, so there is nothing blocking the growing roots.
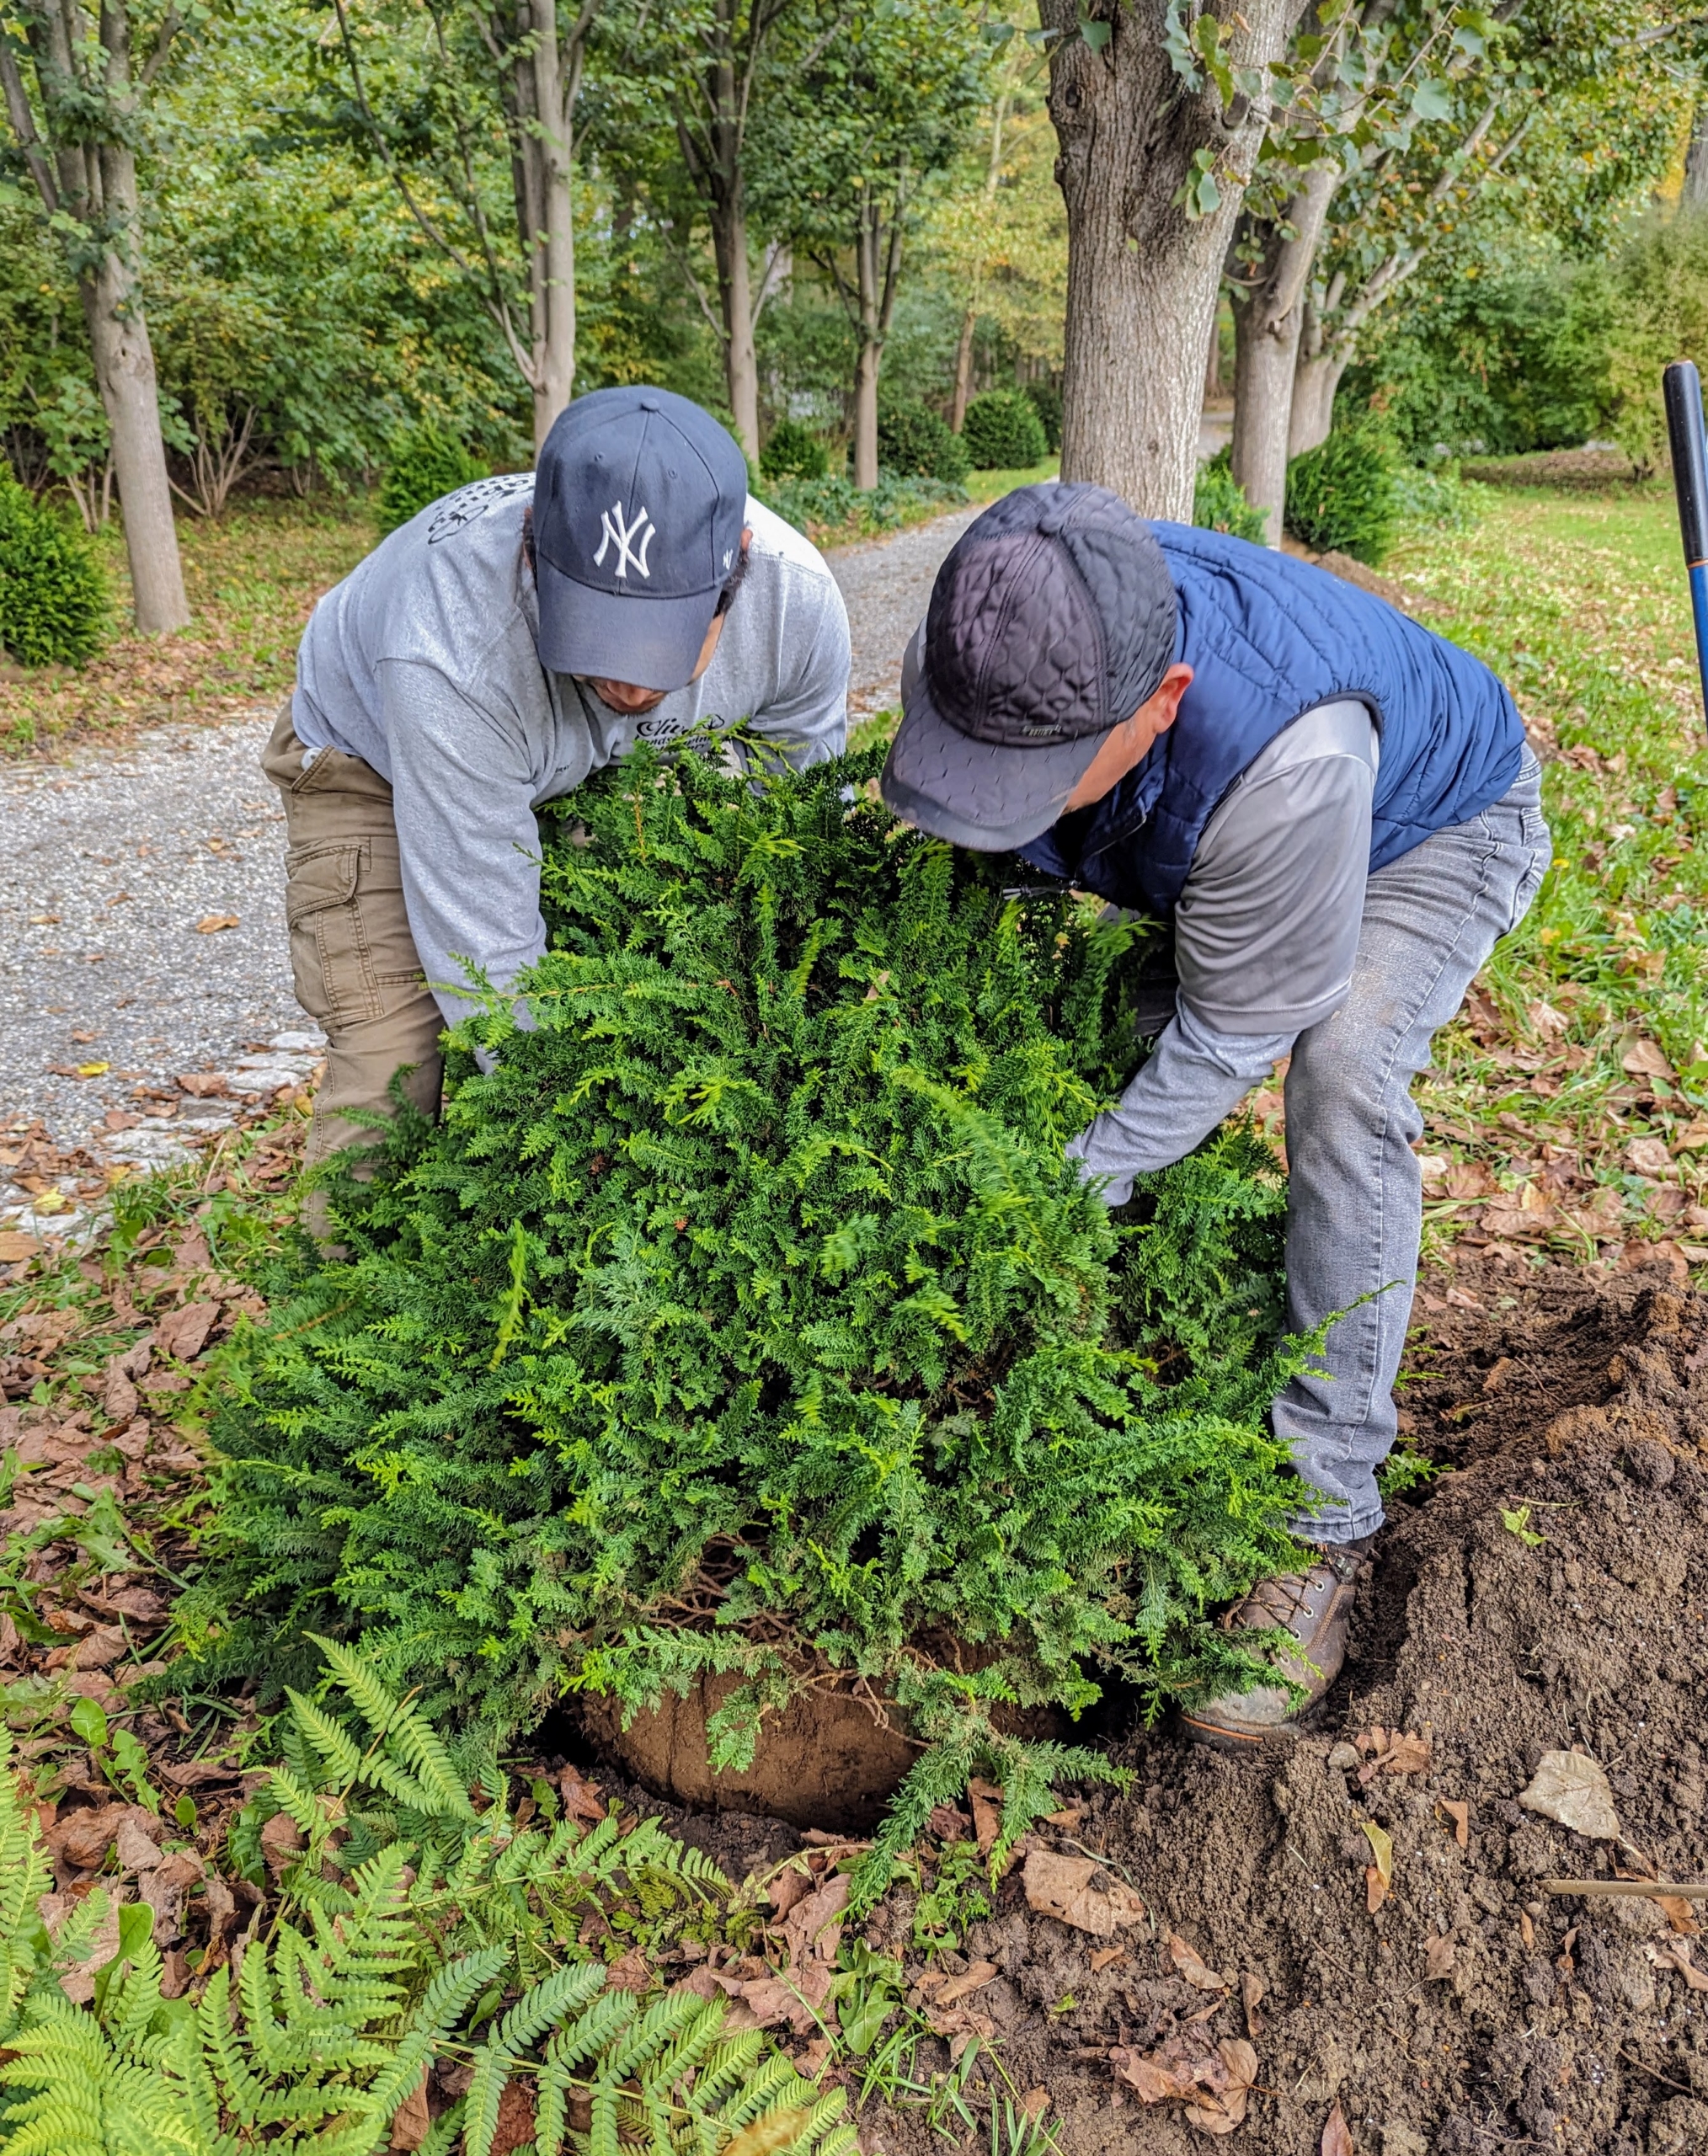
Fernspray Hinoki cypress ‘Filicoides’ do best with medium moisture, in well-drained soils. They also prefer full sun to part shade and some shelter from high winds. I think they’ll do wonderfully here. When moving heavy specimens, only hold it by the root ball, center trunk, and the base of the planting – never by its branches, which could easily break.
Once in the hole, it is turned so its best side faces the allée carriage road.
Then the crew backfills the hole. And remember, don’t plant it too deeply – always leave it “bare to the flare” or where the first main roots attach to the trunk.
Finally, each specimen is given a good drink of water – we’re not expecting any significant rain until the weekend.
These bushes can grow several inches to a foot each year. And do you know… when the foliage is slightly crushed, it lets off an aromatic scent?
By afternoon, all 16 of these handsome falseypress bushes were planted, fed, and watered – another big project checked off our list.
I am looking forward to seeing these Chamaecyparis obtusa ‘Filicoides’ bushes develop and flourish. There’s still time! What new plantings are you adding to your gardens this season?
Here in the Northeast, we're expecting cloudy skies today with temperatures in the low 60s - it's definitely feeling like fall. I'm glad we are now done baling our second cut of hay for the season.
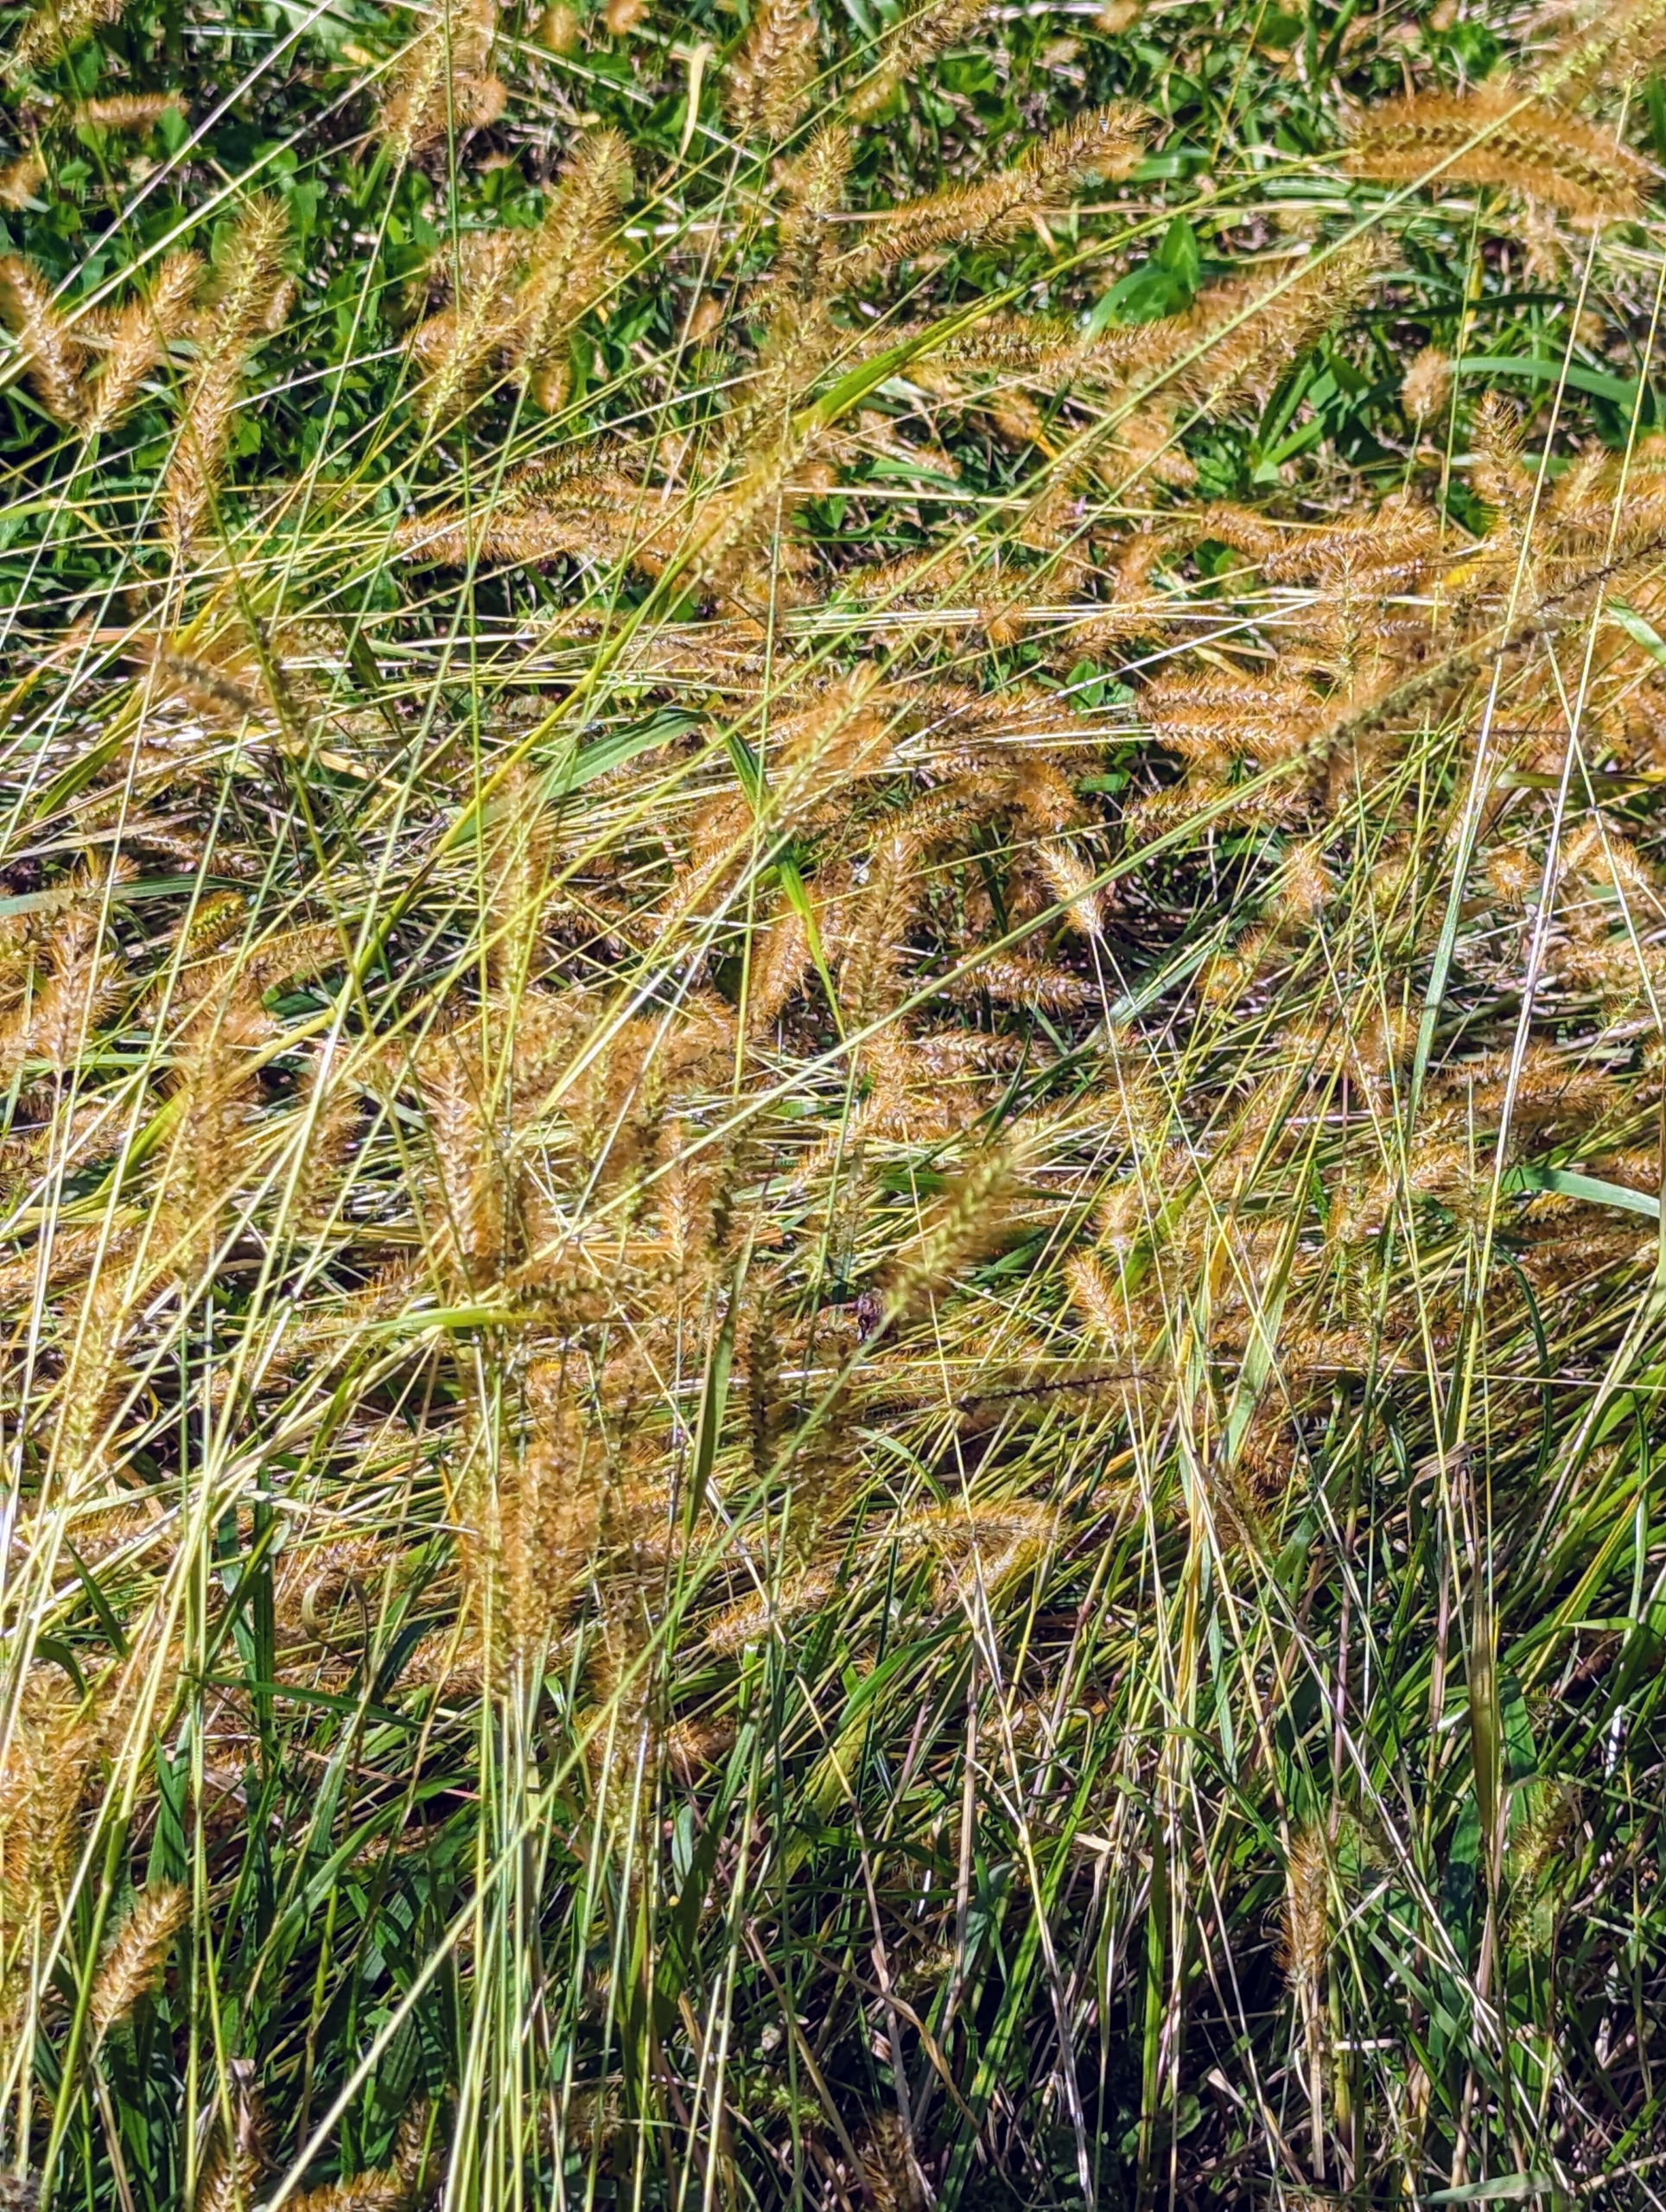
Hay is a harvested plant that’s dried and cured after being cut in the field. In most cases, hay is cut during the late bud or early bloom stage to maximize its nutritional value. Last week, my outdoor grounds crew cut, tedded, raked, and then baled the hay from my giant fields. It must be done within a four day window when there is no rain in the forecast. They did a first cut in late June. This is the second cut - it's greener, more dense, and filled with lots of protein - my horses love it.
Enjoy these photos.
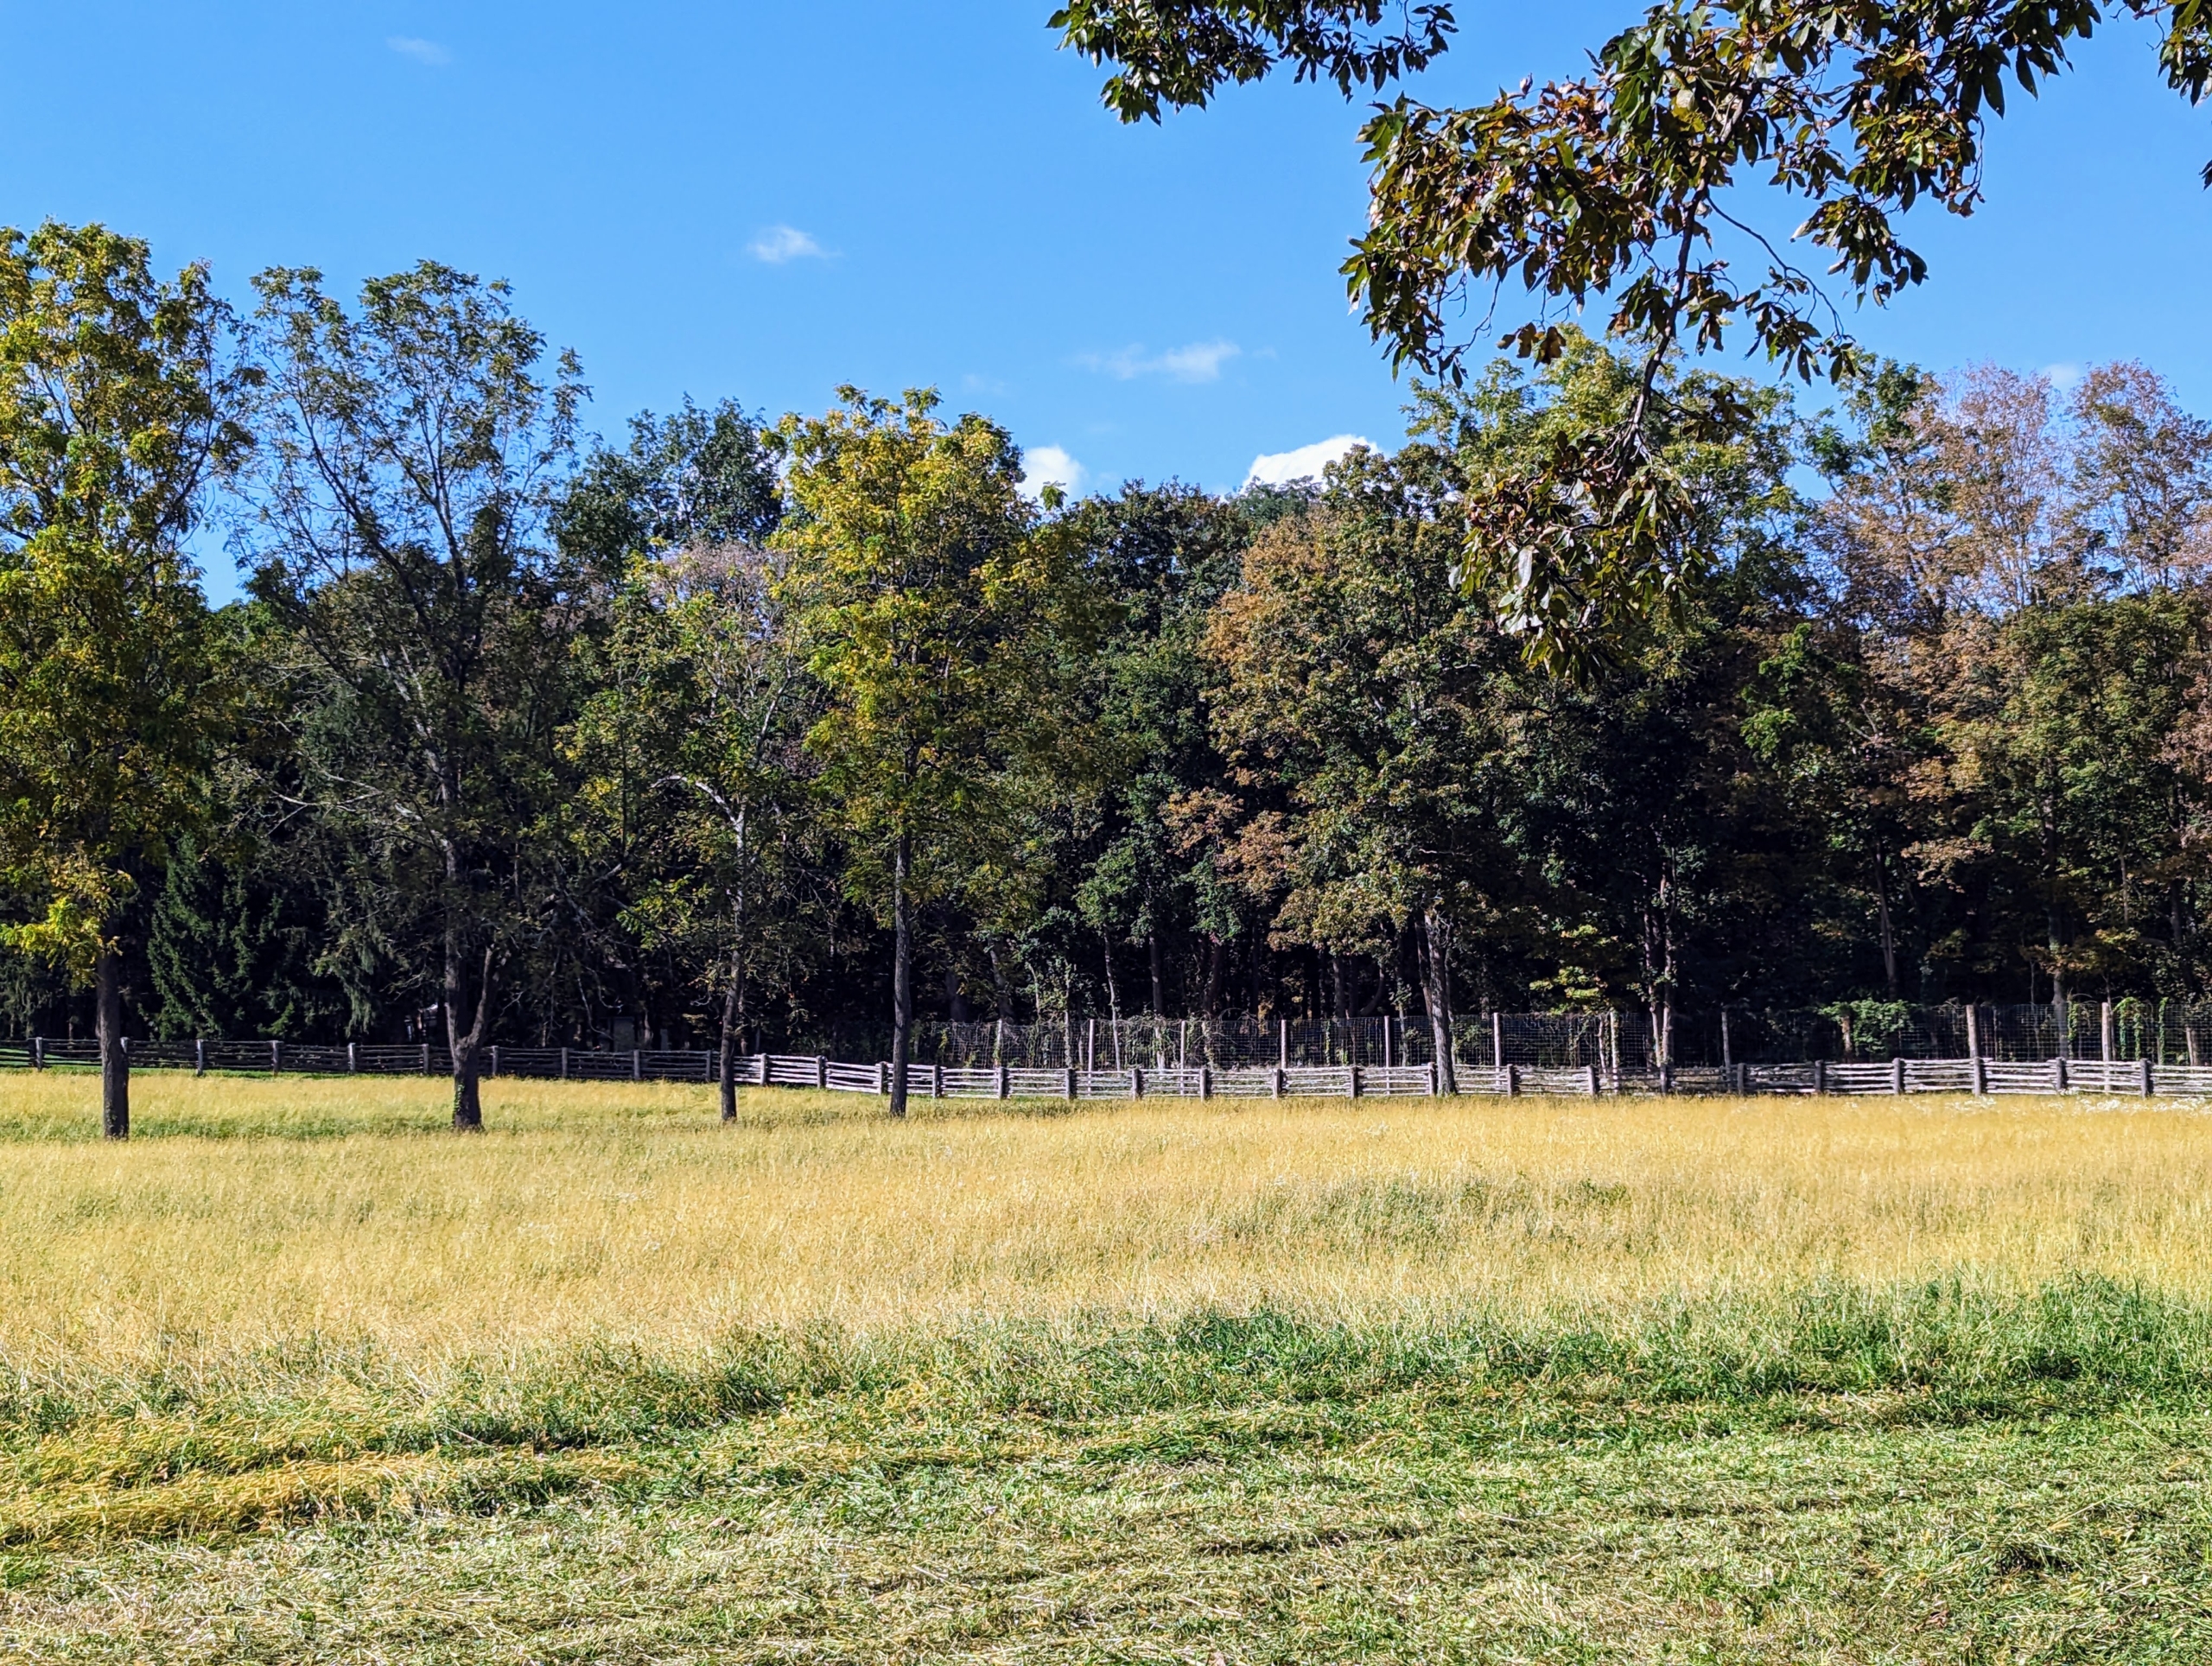
Here at my farm around this time every year, we hope for at least a week of good, dry, warm weather, so we can get a second cut of hay from the fields. Timing is everything when cutting the hay crop.
The first step is to mow the fields and cut the hay that has grown. It’s important to consider the time of day that’s best for mowing. The plants’ sugar content is highest at dusk but because of moisture, it’s not ideal to cut hay at night. The best time is to start as soon as dew is off in the morning, which will maximize drying time.
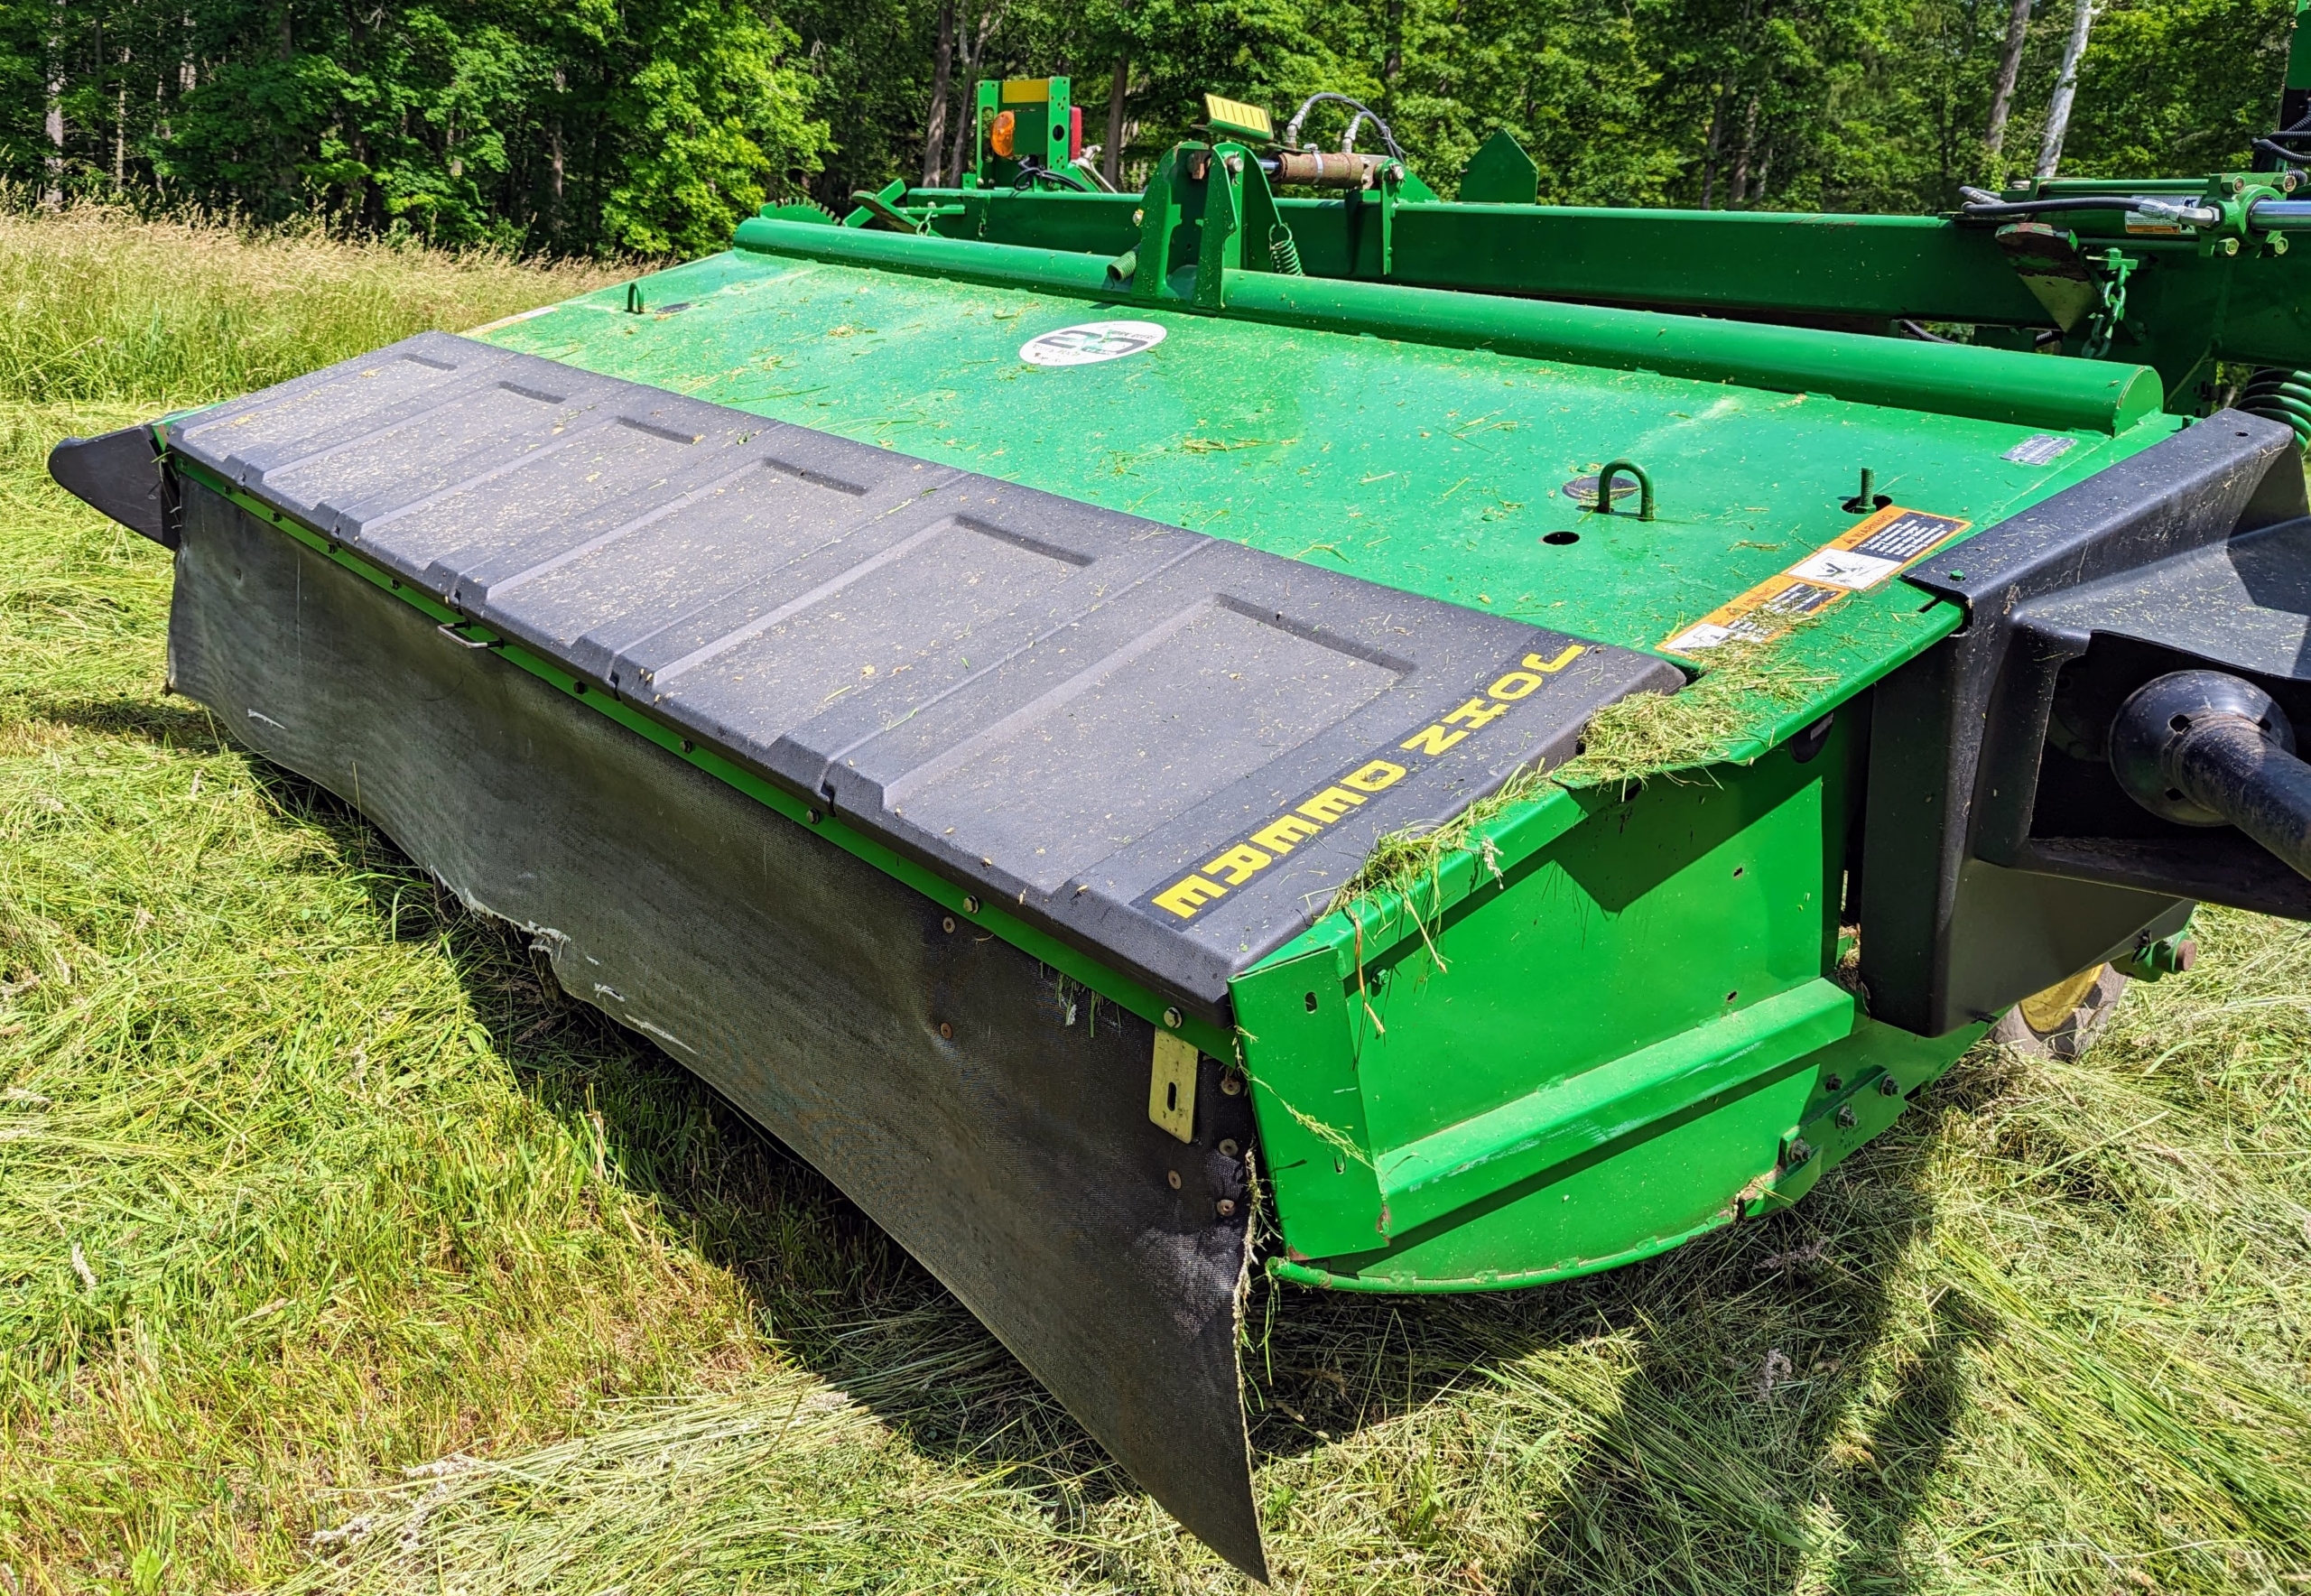
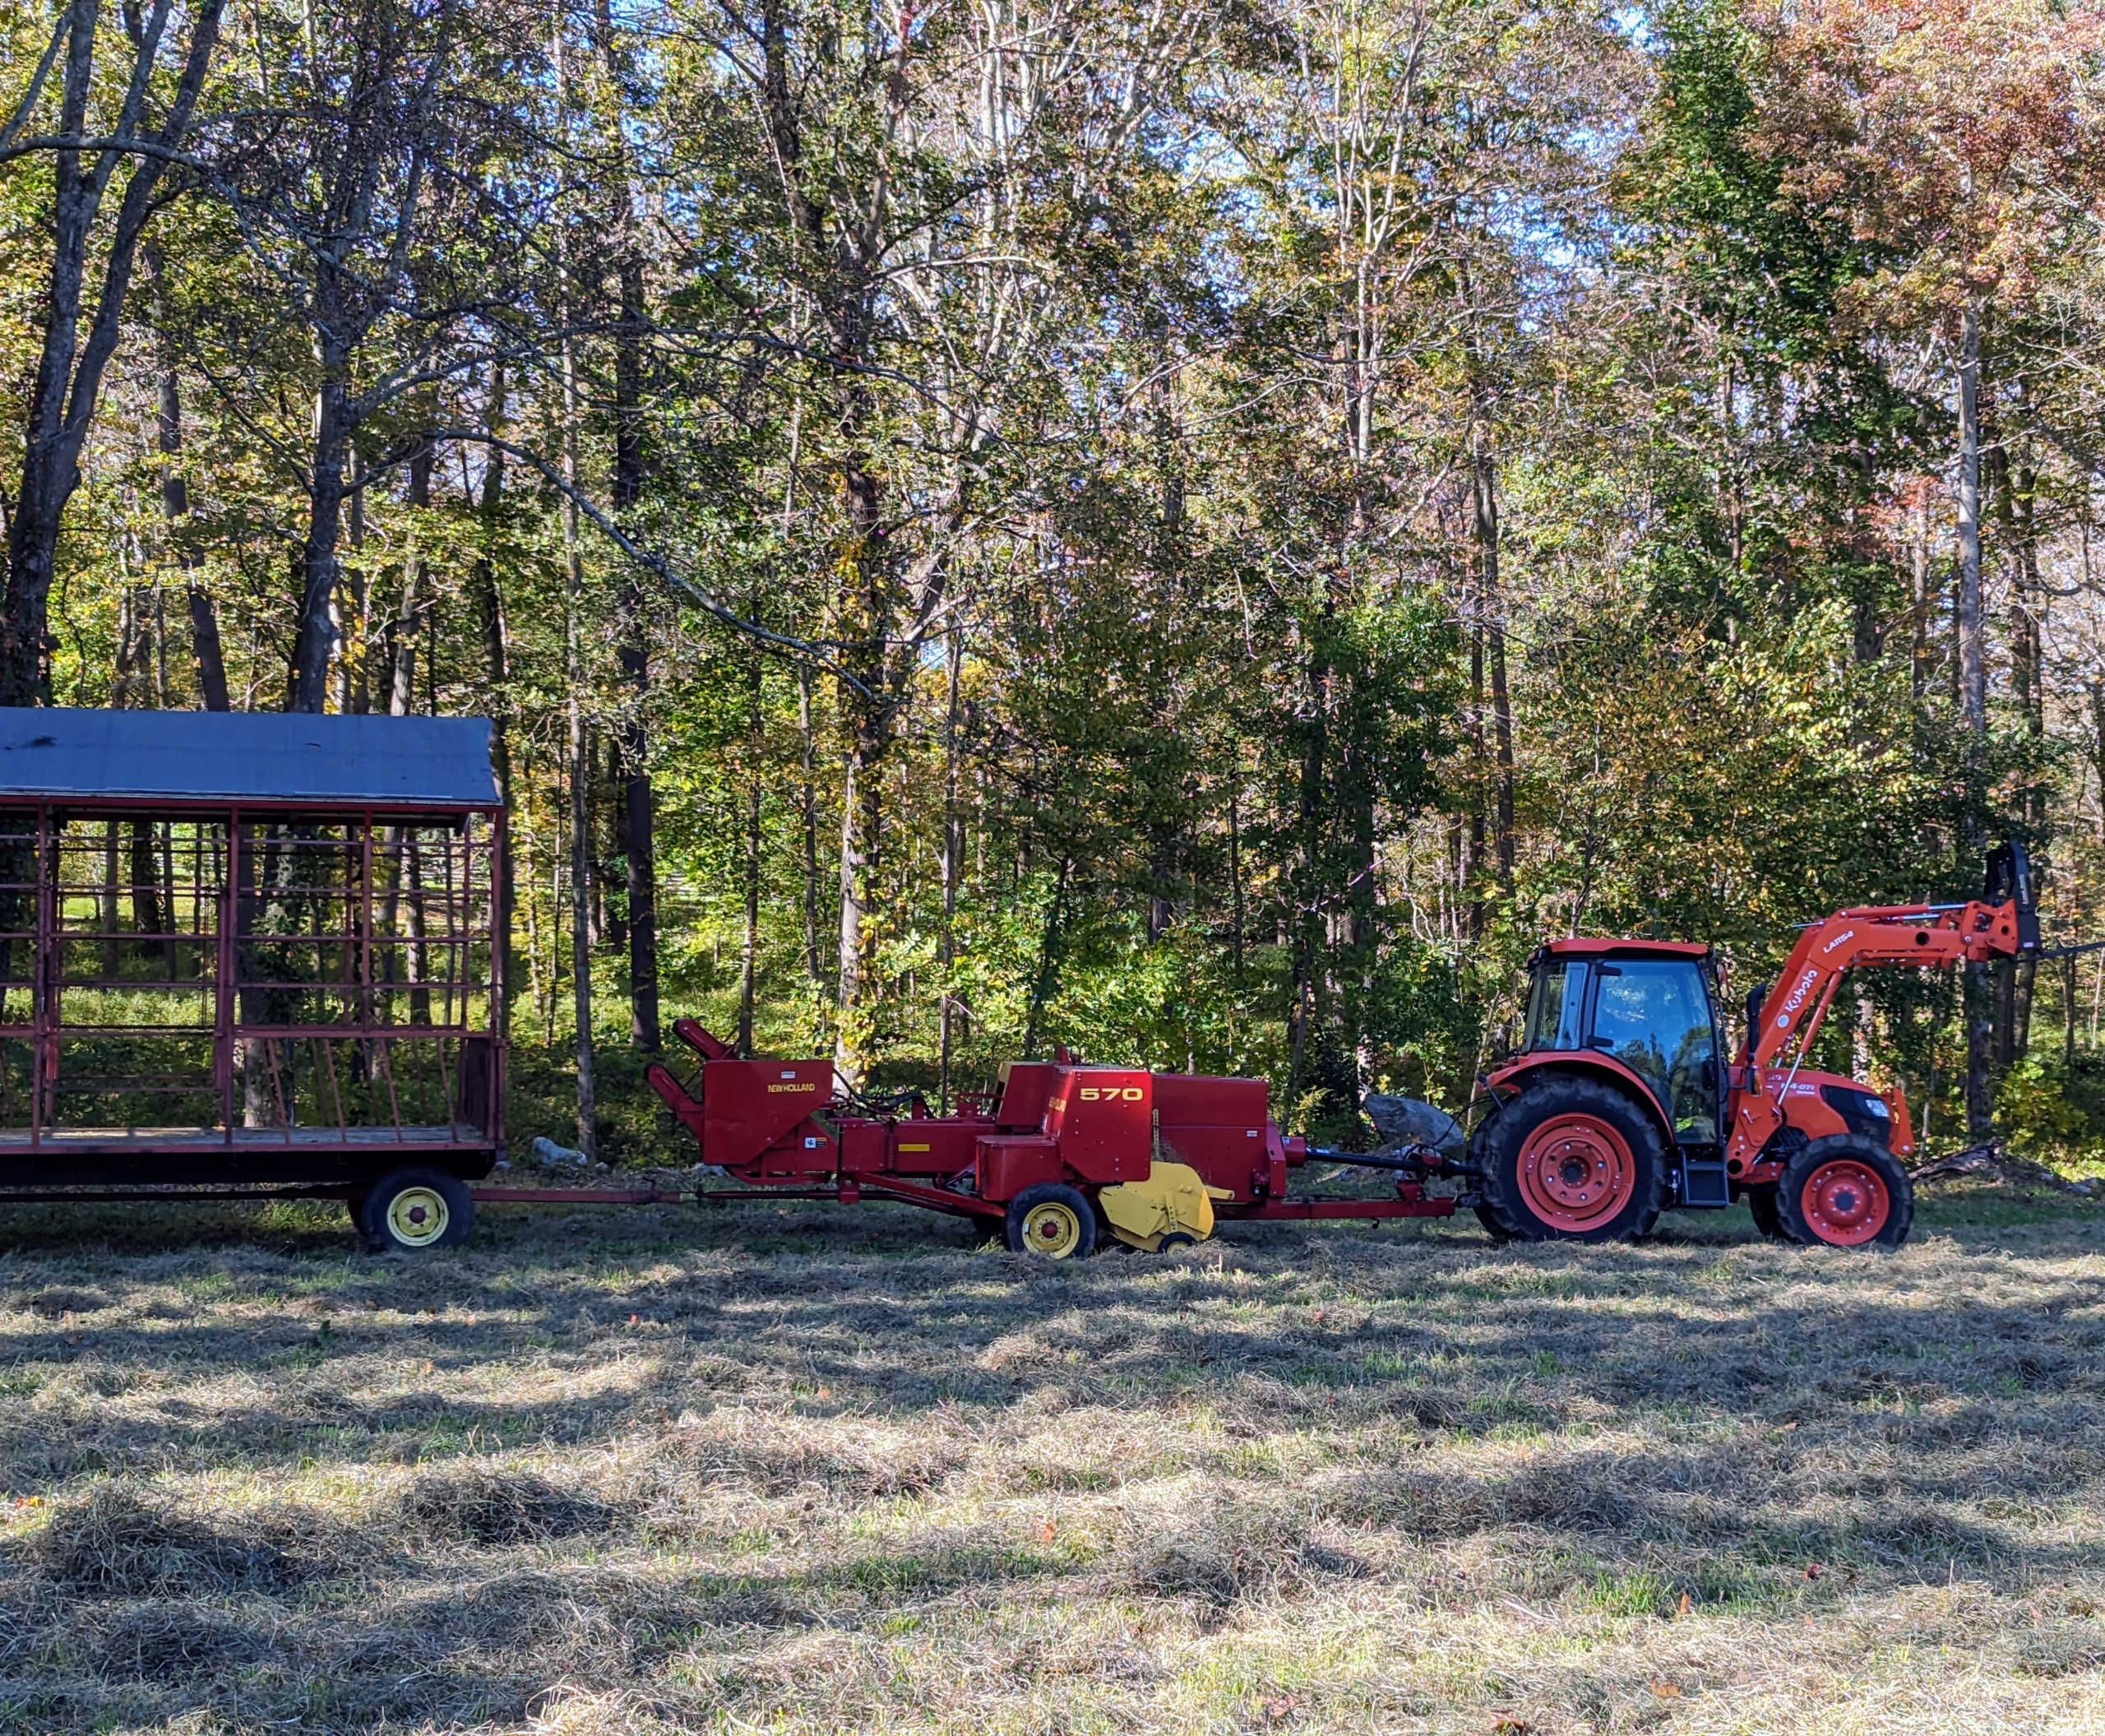
My outdoor grounds crew foreman, Chhiring Sherpa, is our resident hay expert. He does a great job keeping track of when it should be cut. This is our mower-conditioner attached to our trusted Kubota M4-071 tractor – a vehicle that is used every day here at the farm to do a multitude of tasks.
Mower-conditioners are a staple of large-scale haymaking. It cuts, crimps, and crushes the hay to promote faster and more even drying.
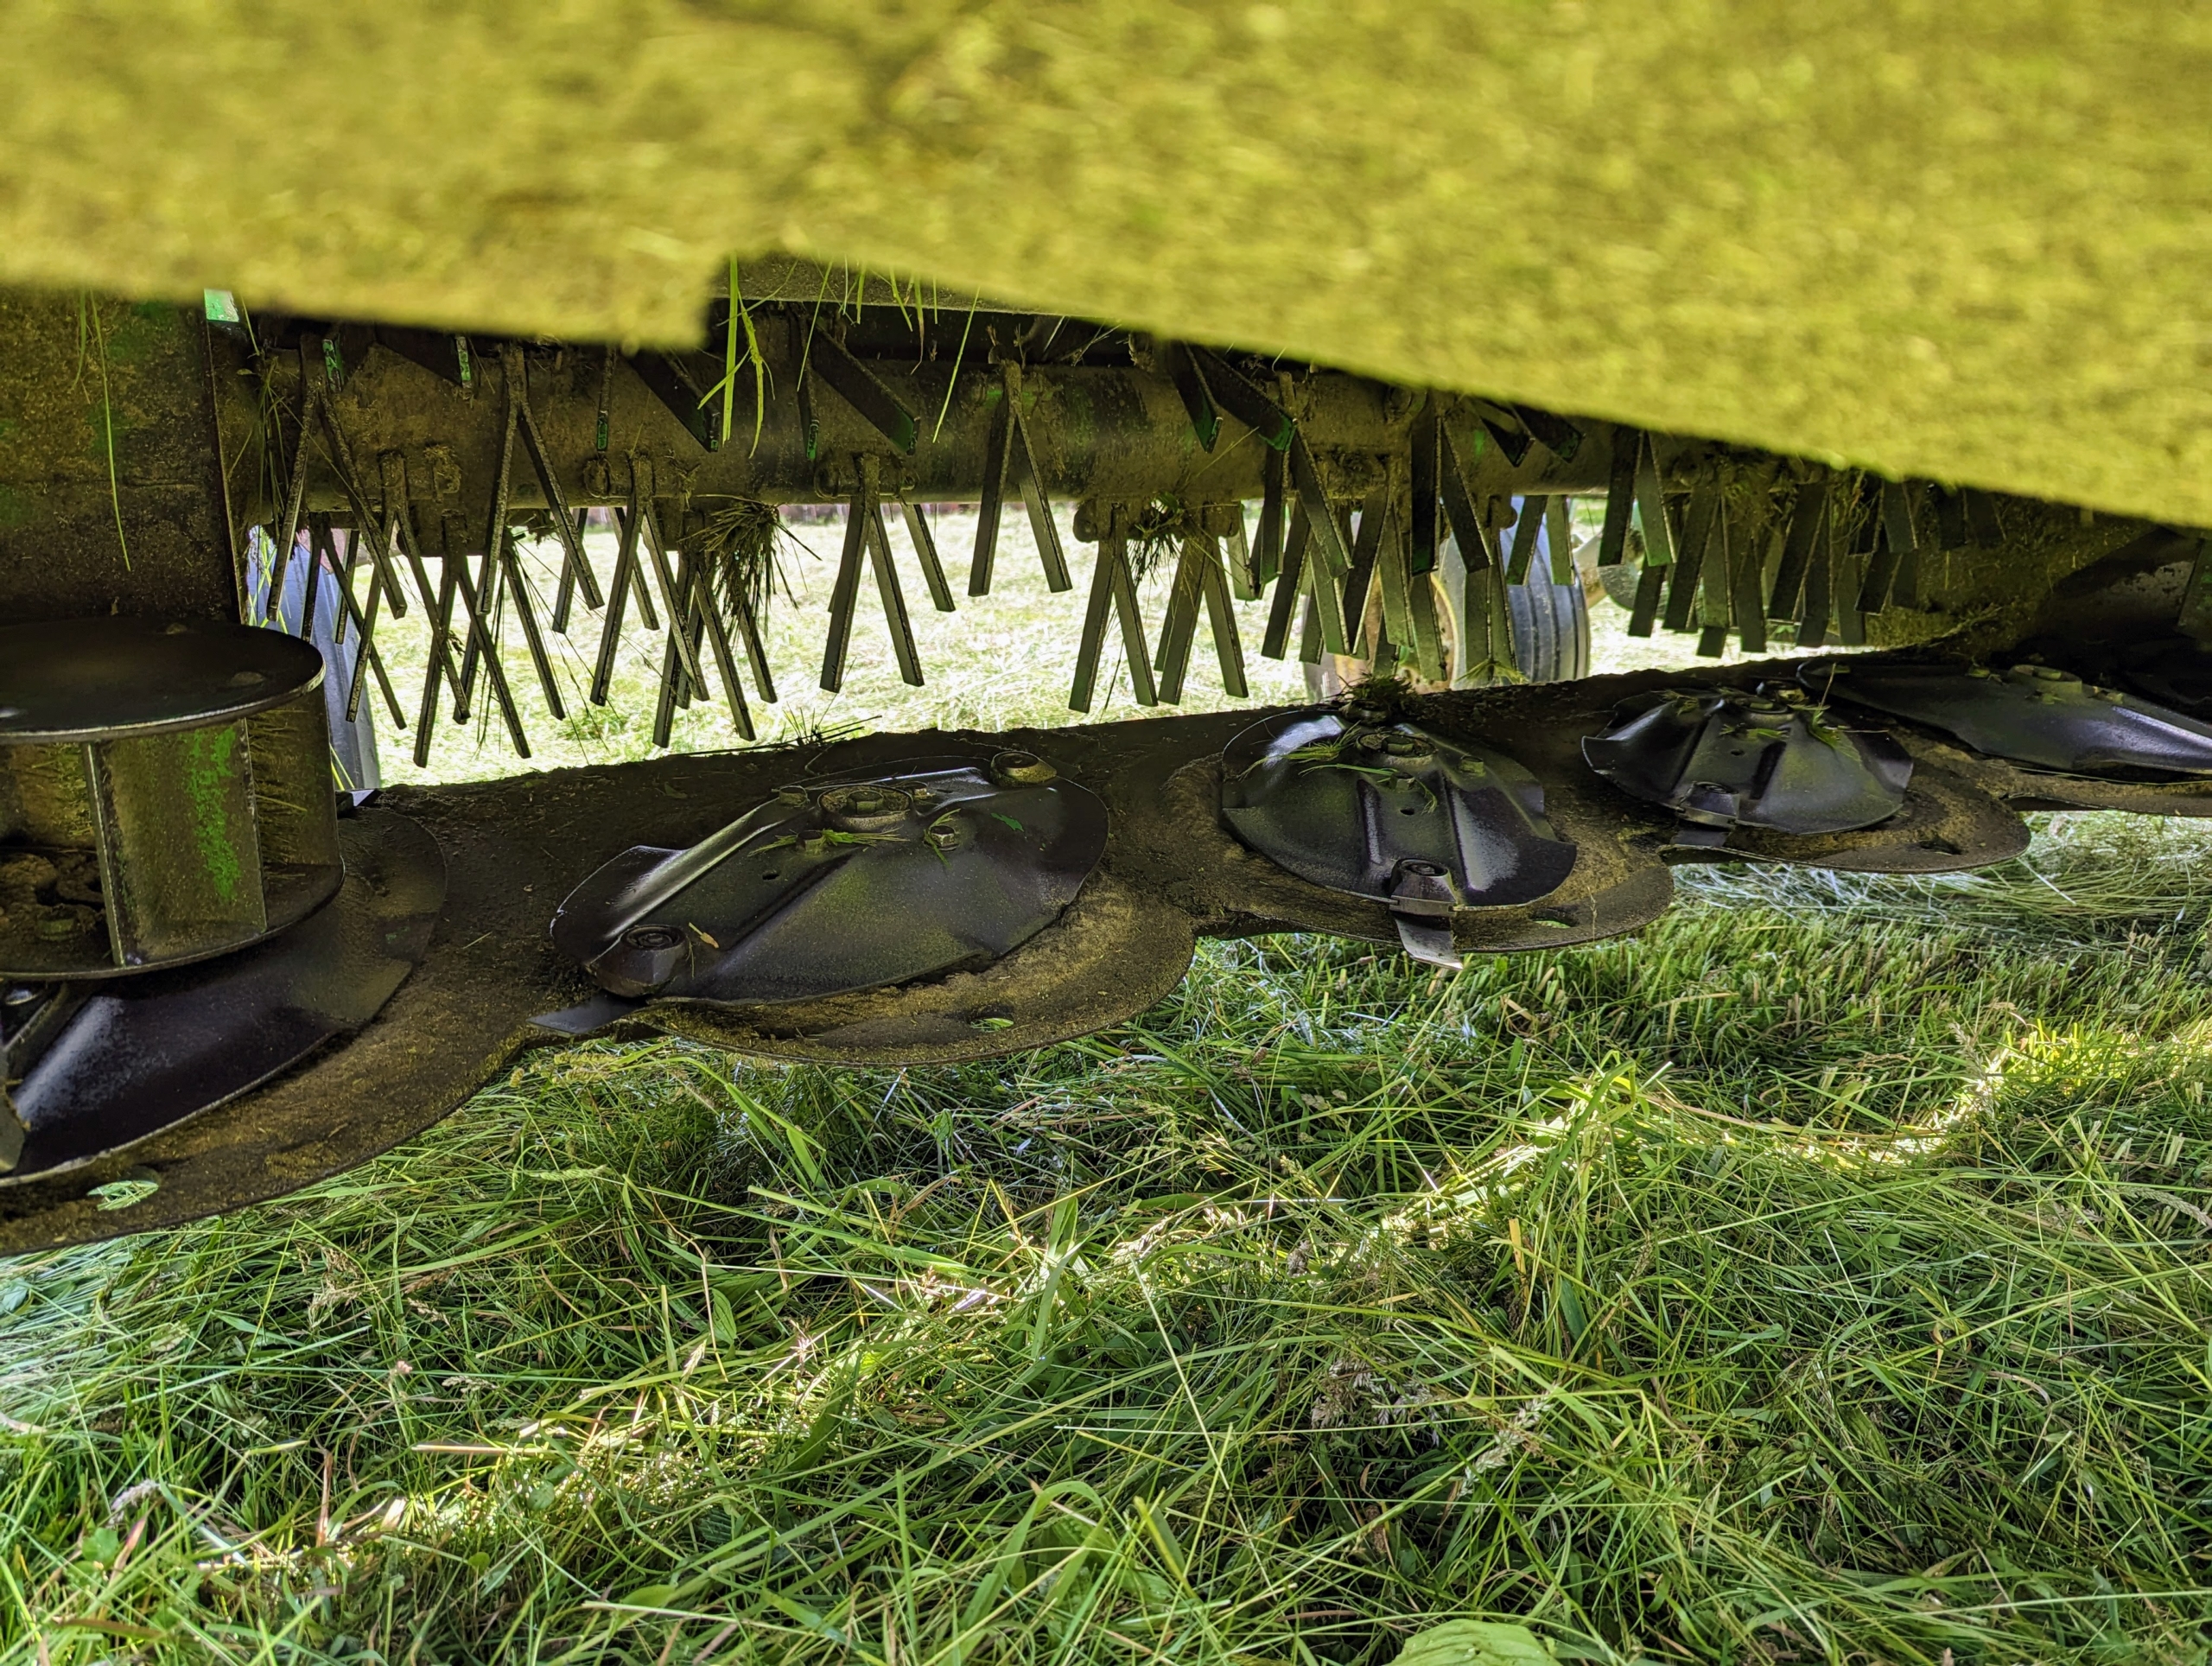
The discs and blades are located behind the protective shield of the mower-conditioner.
Chhiring goes around the fields counter clockwise cutting all the hay. The process of cutting should take about an hour per field. On the right is the mowed hay. On the left is tall hay still to be done.
When weather conditions are ideal, these machines allow farmers to cut wide and fast – the best formula for quality field productivity. Chhiring goes over the field slowly and evenly. As the mower-conditioner goes over the grass, it cuts it and then conditions it – all under the protective hood of the machine.
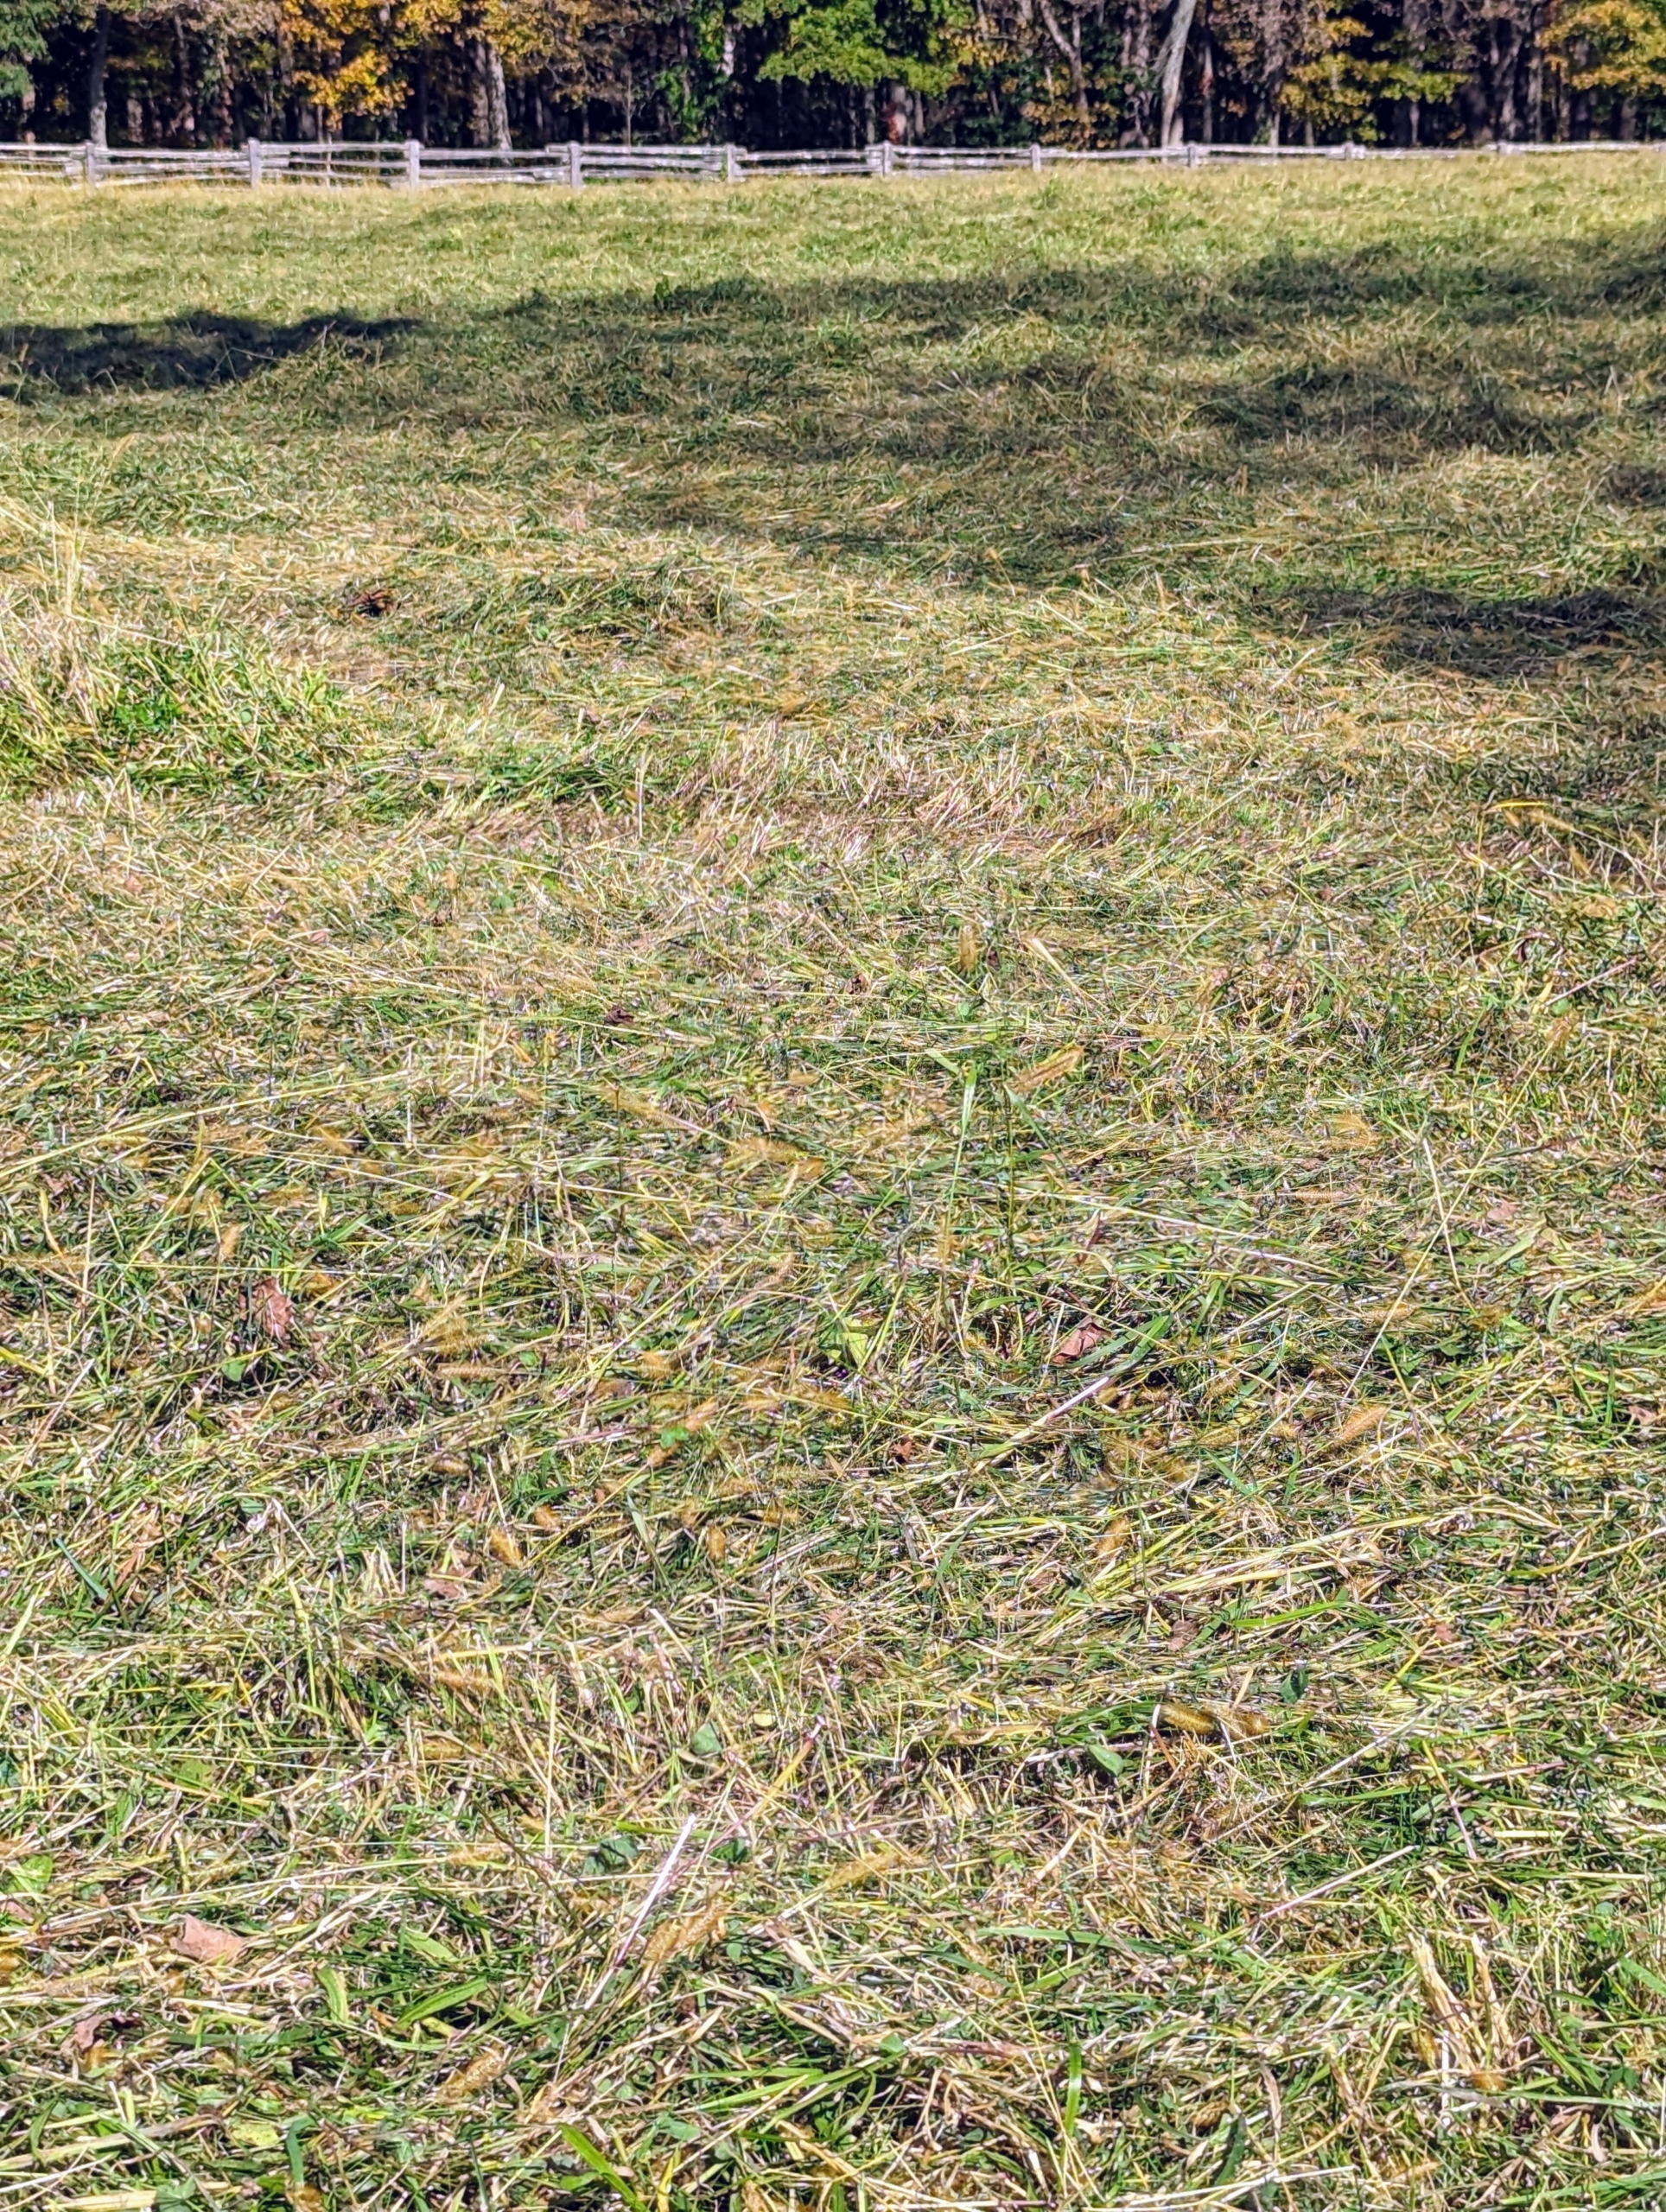
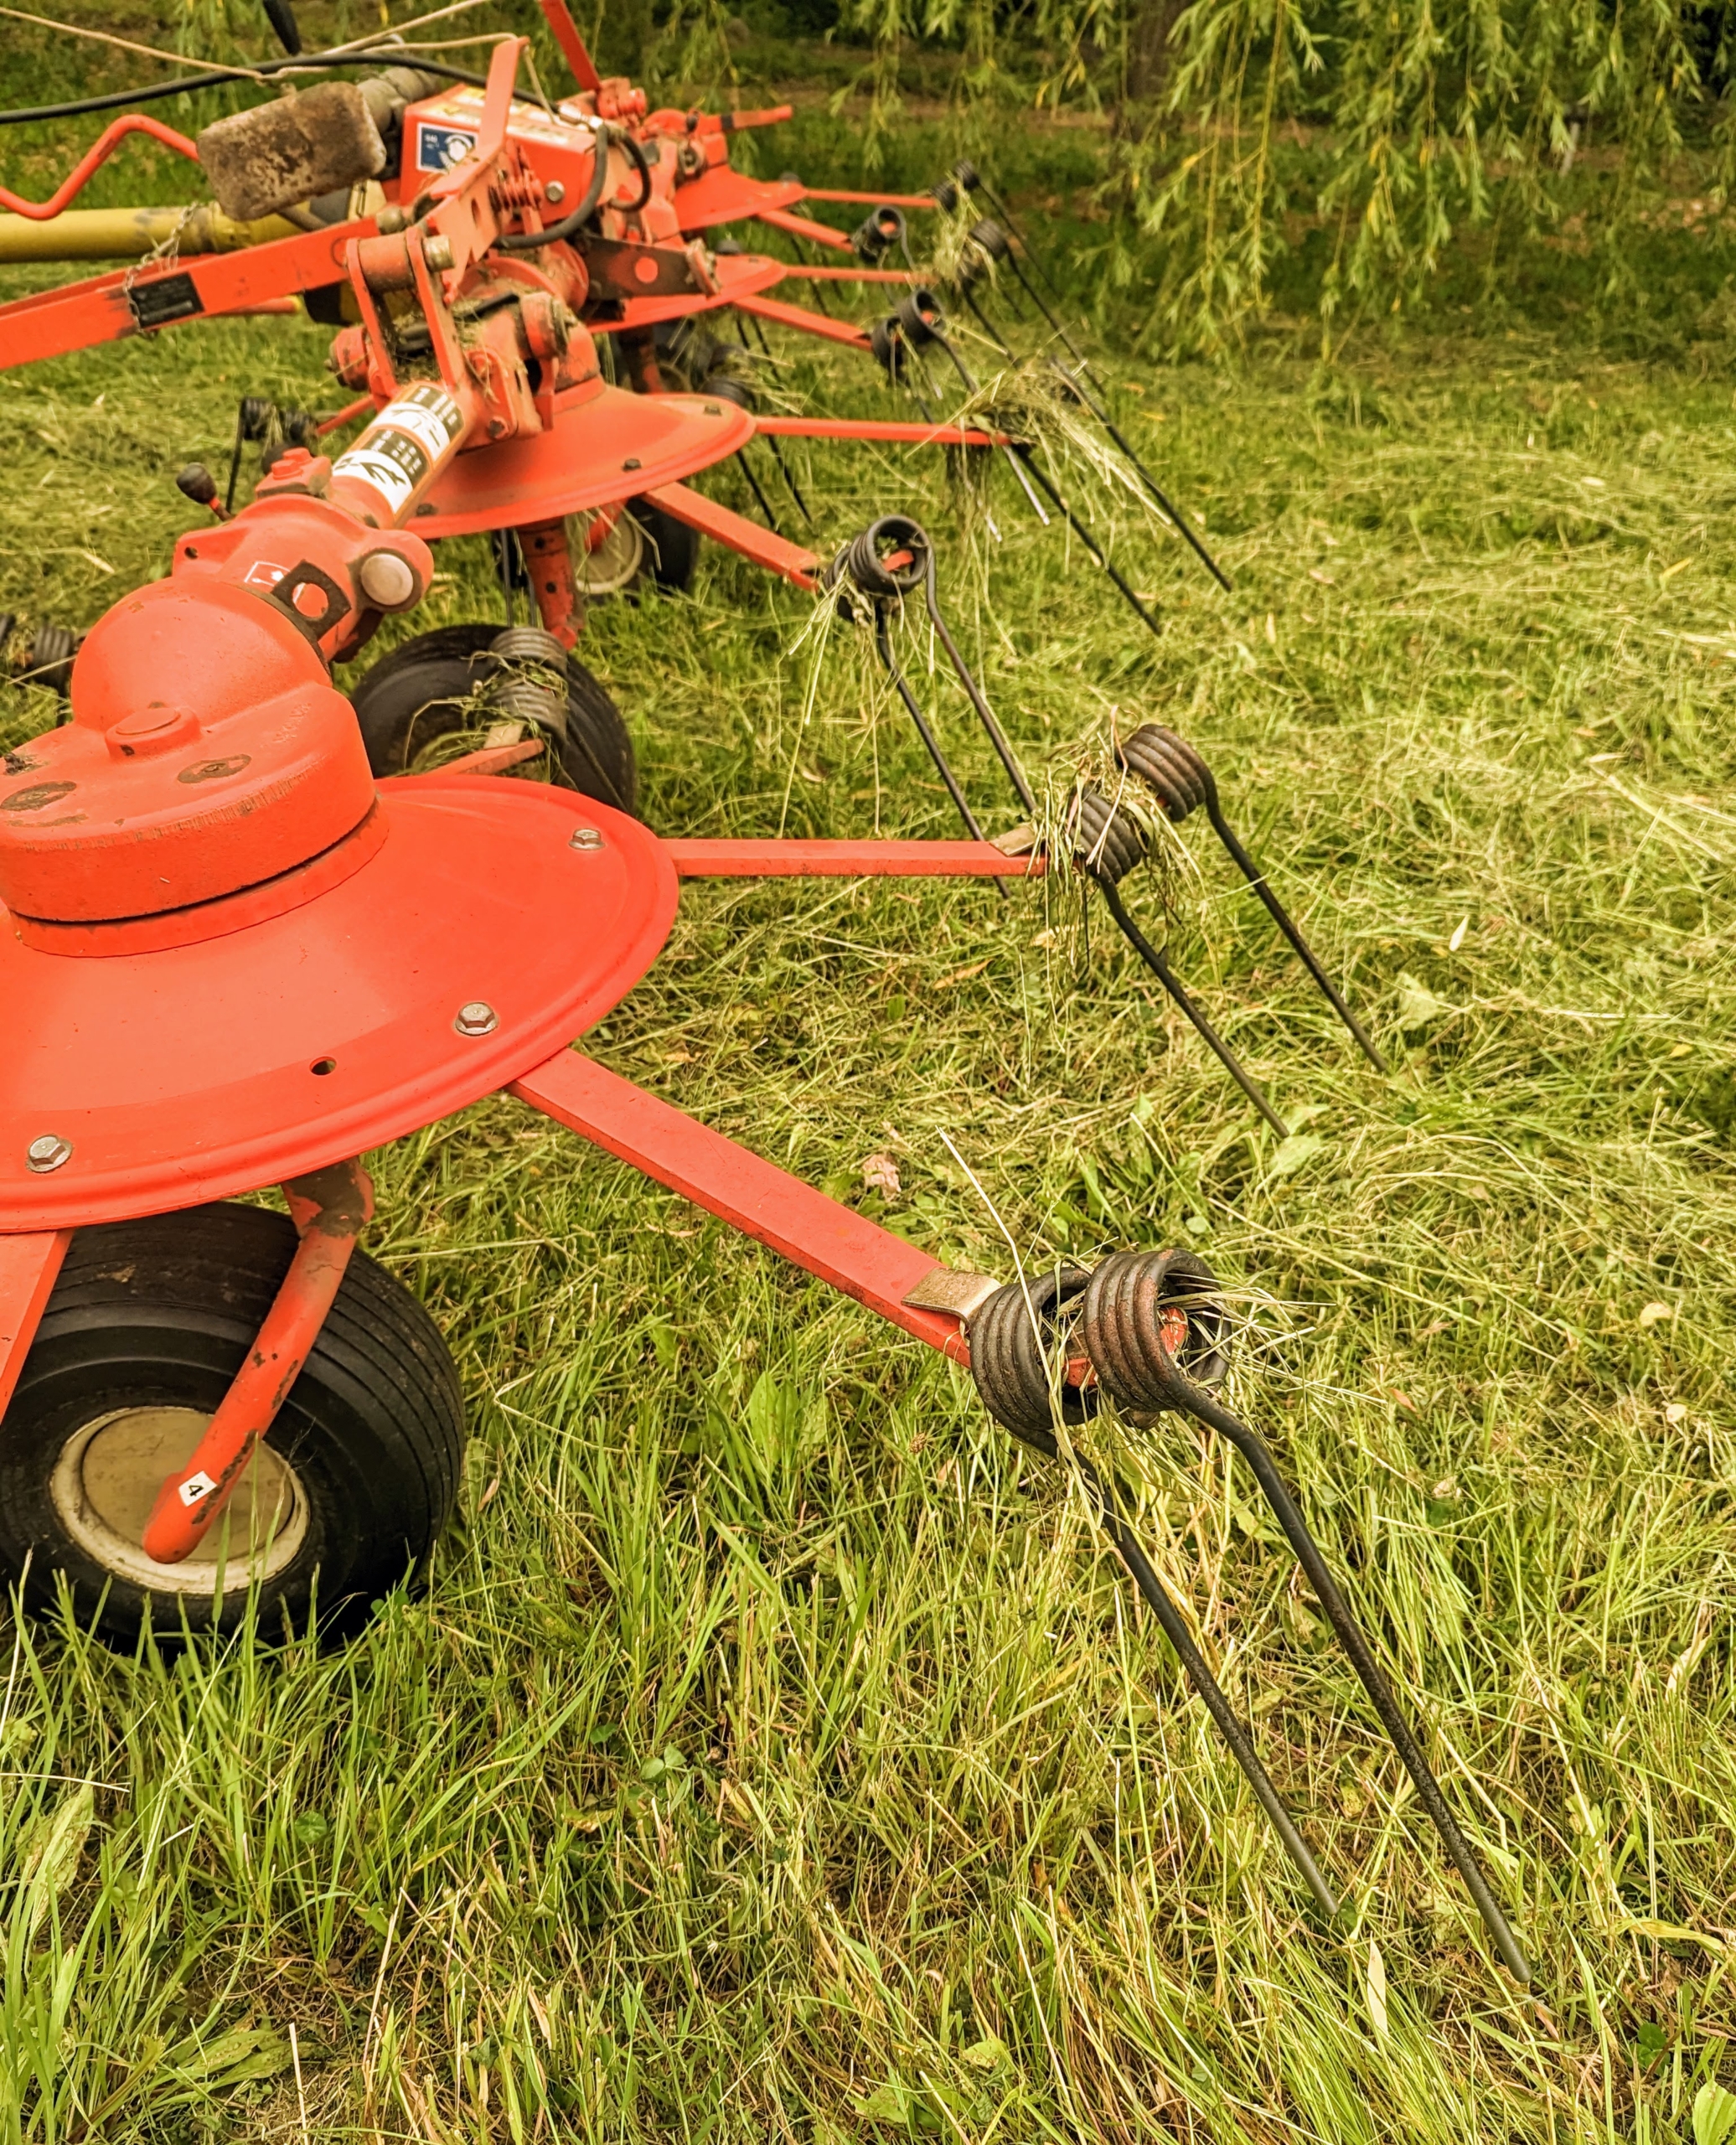
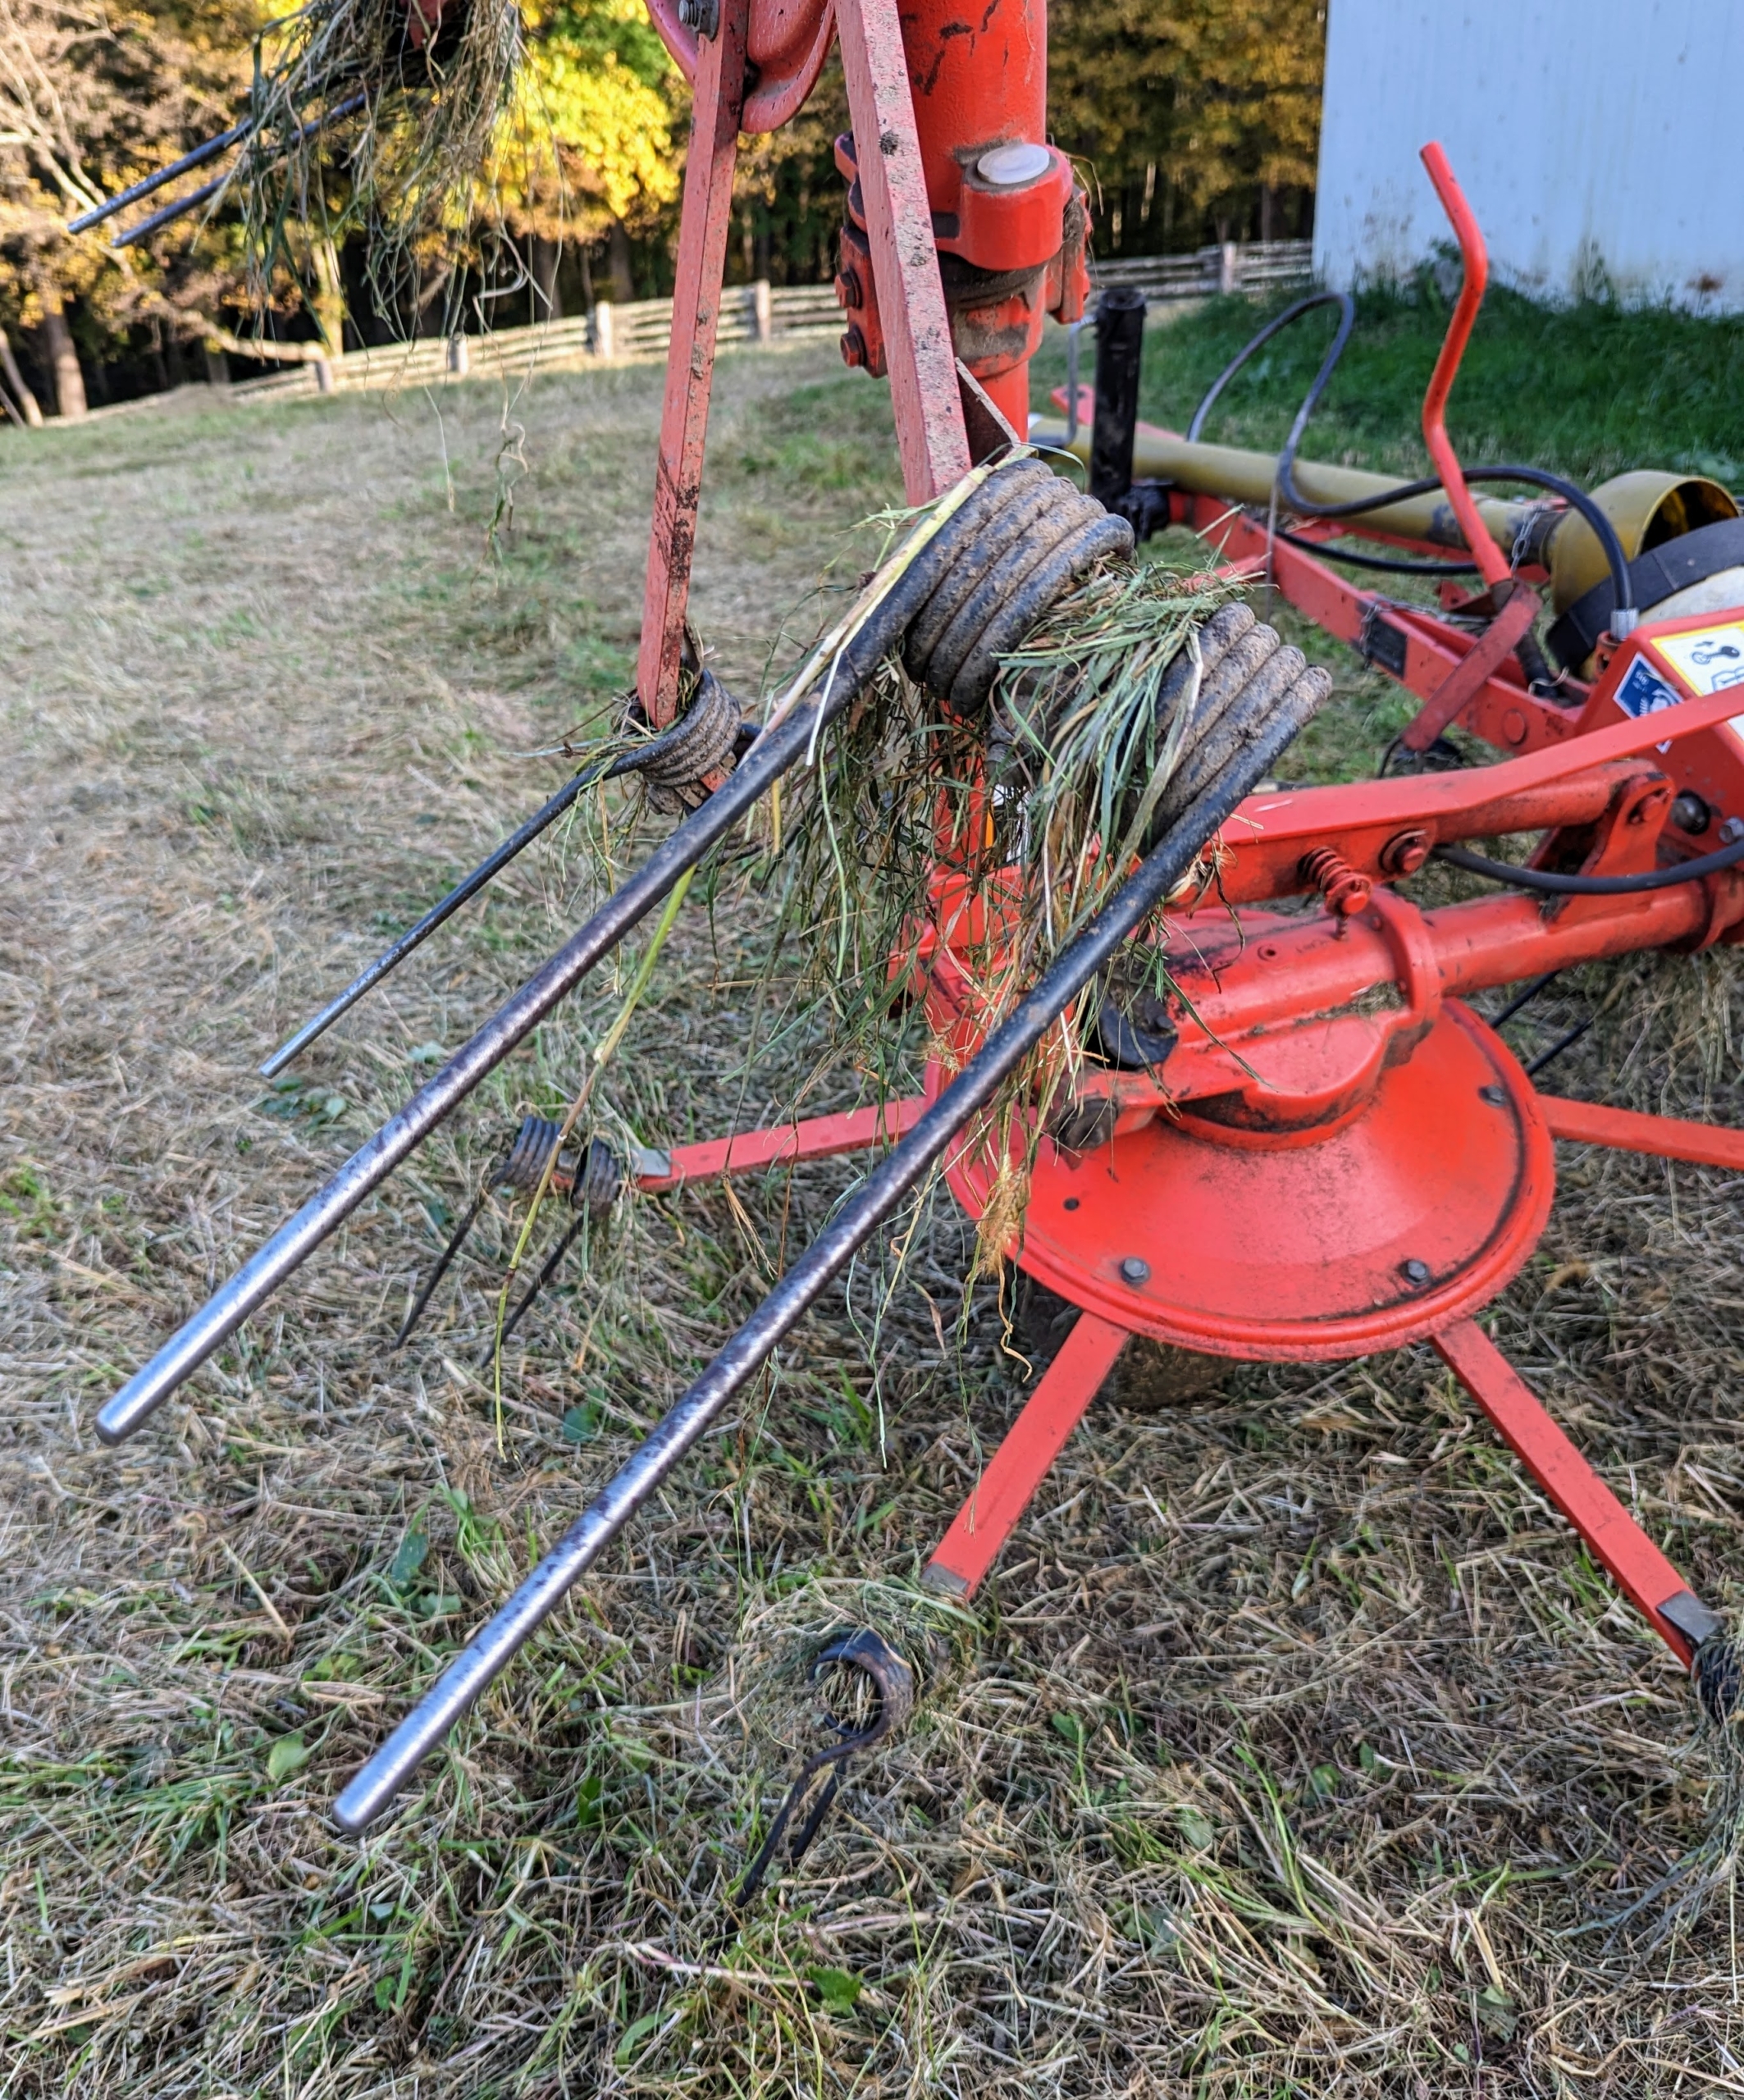
The next day, the cut hay is ready for tedding, also known as fluffing. This is our hay tedder. A tedder spreads and fluffs the hay in a uniform swath. It uses a rotary motion to grab the hay with spinning tines and then cast it out the back of the machine.
Here is one of the tines, or moving forks, which aerate or “wuffle” the hay and speed up the drying process even more.
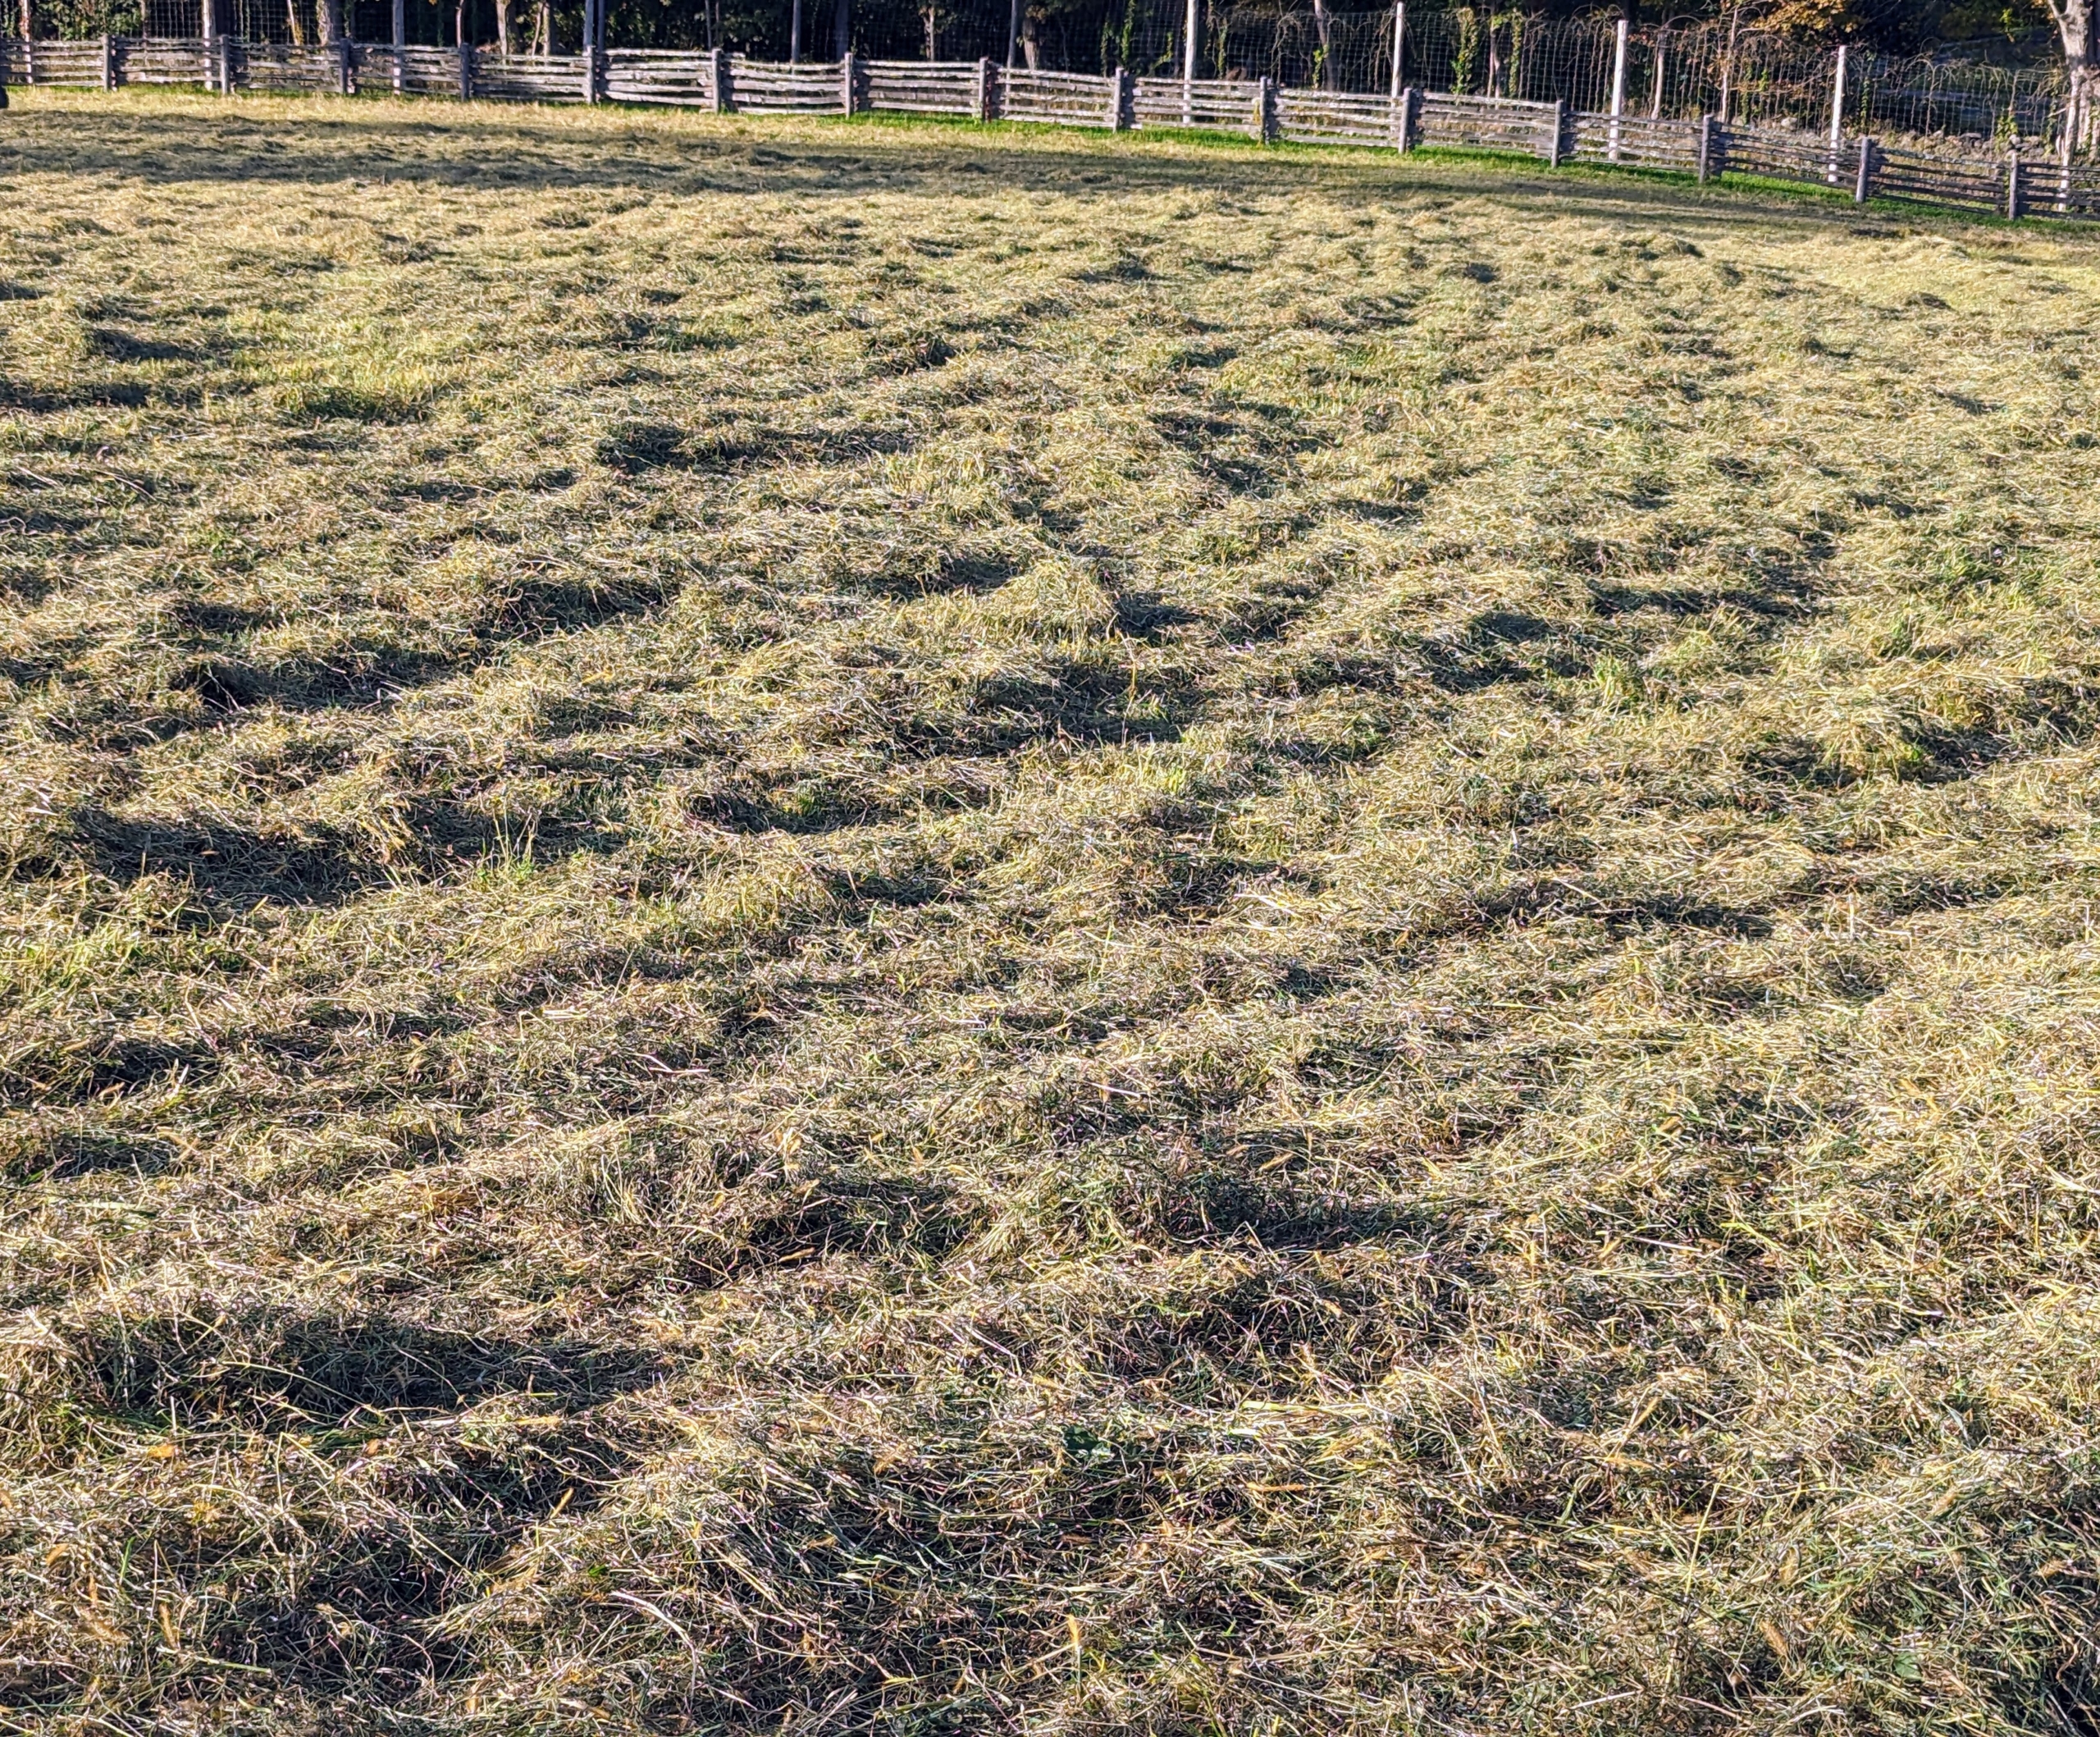
The tedder moves up and down the field taking all the greener hay from the bottom and turning it over to dry. This is best done on warm days, so it dries quickly.
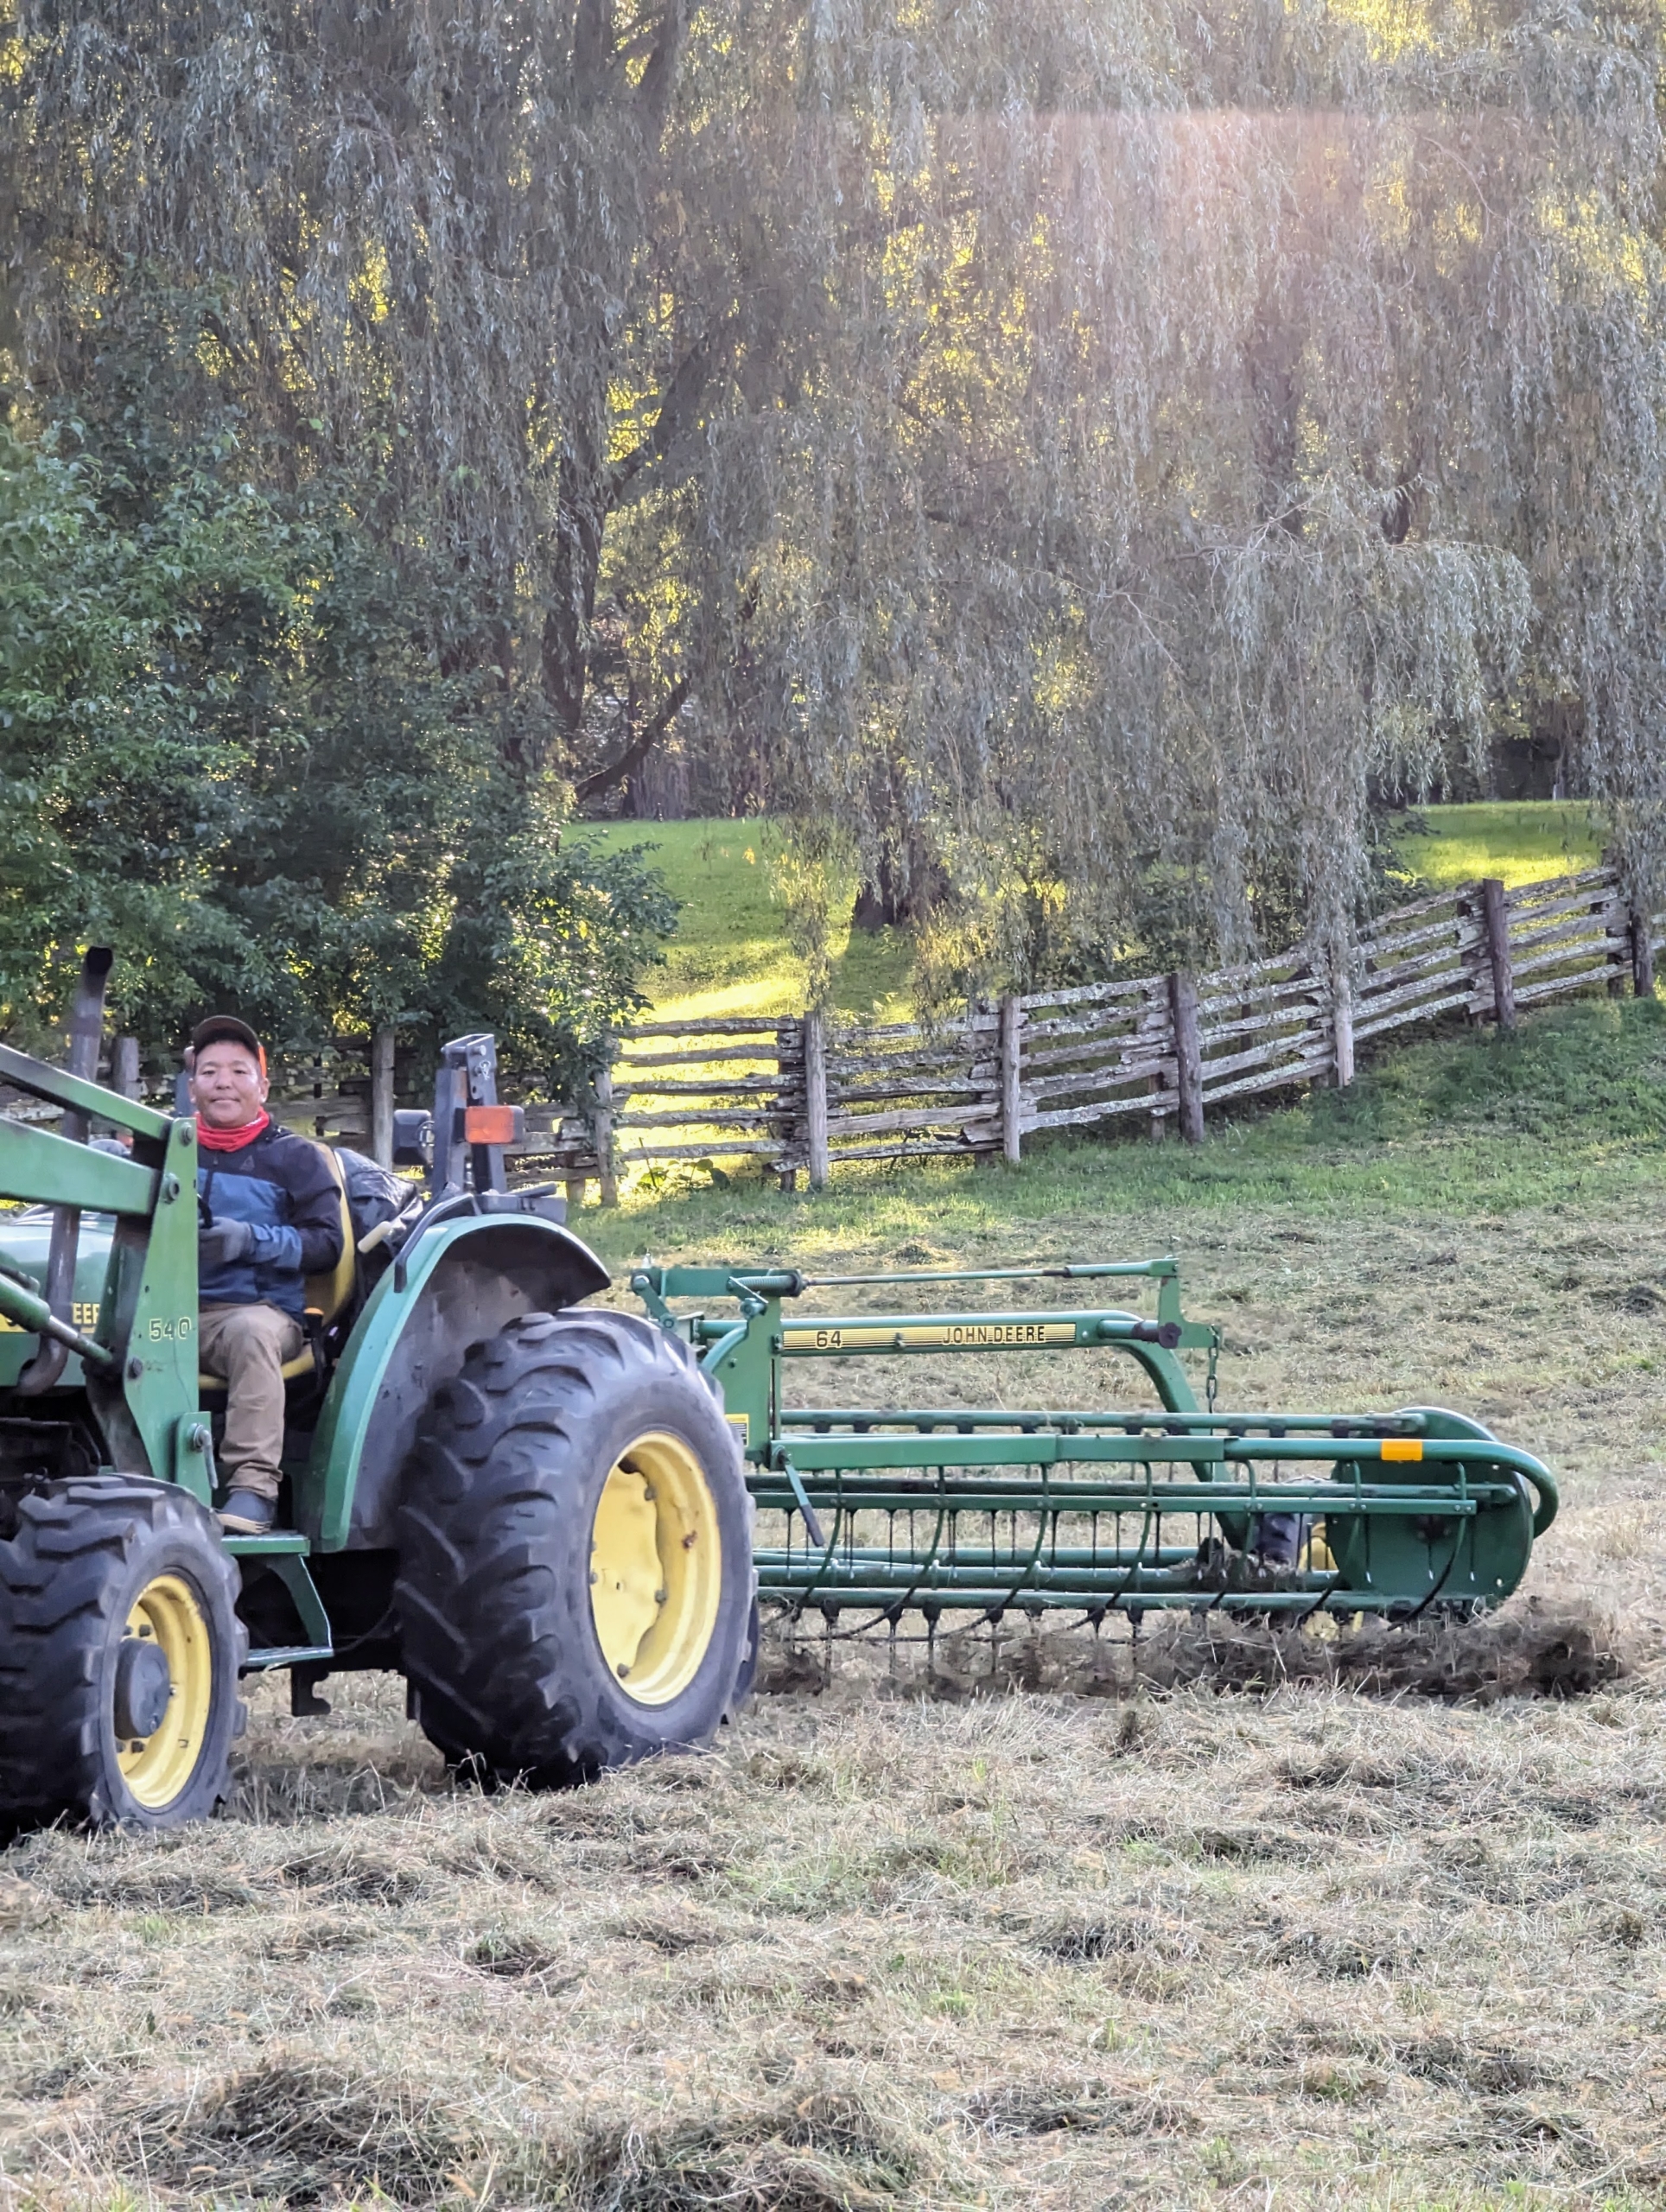
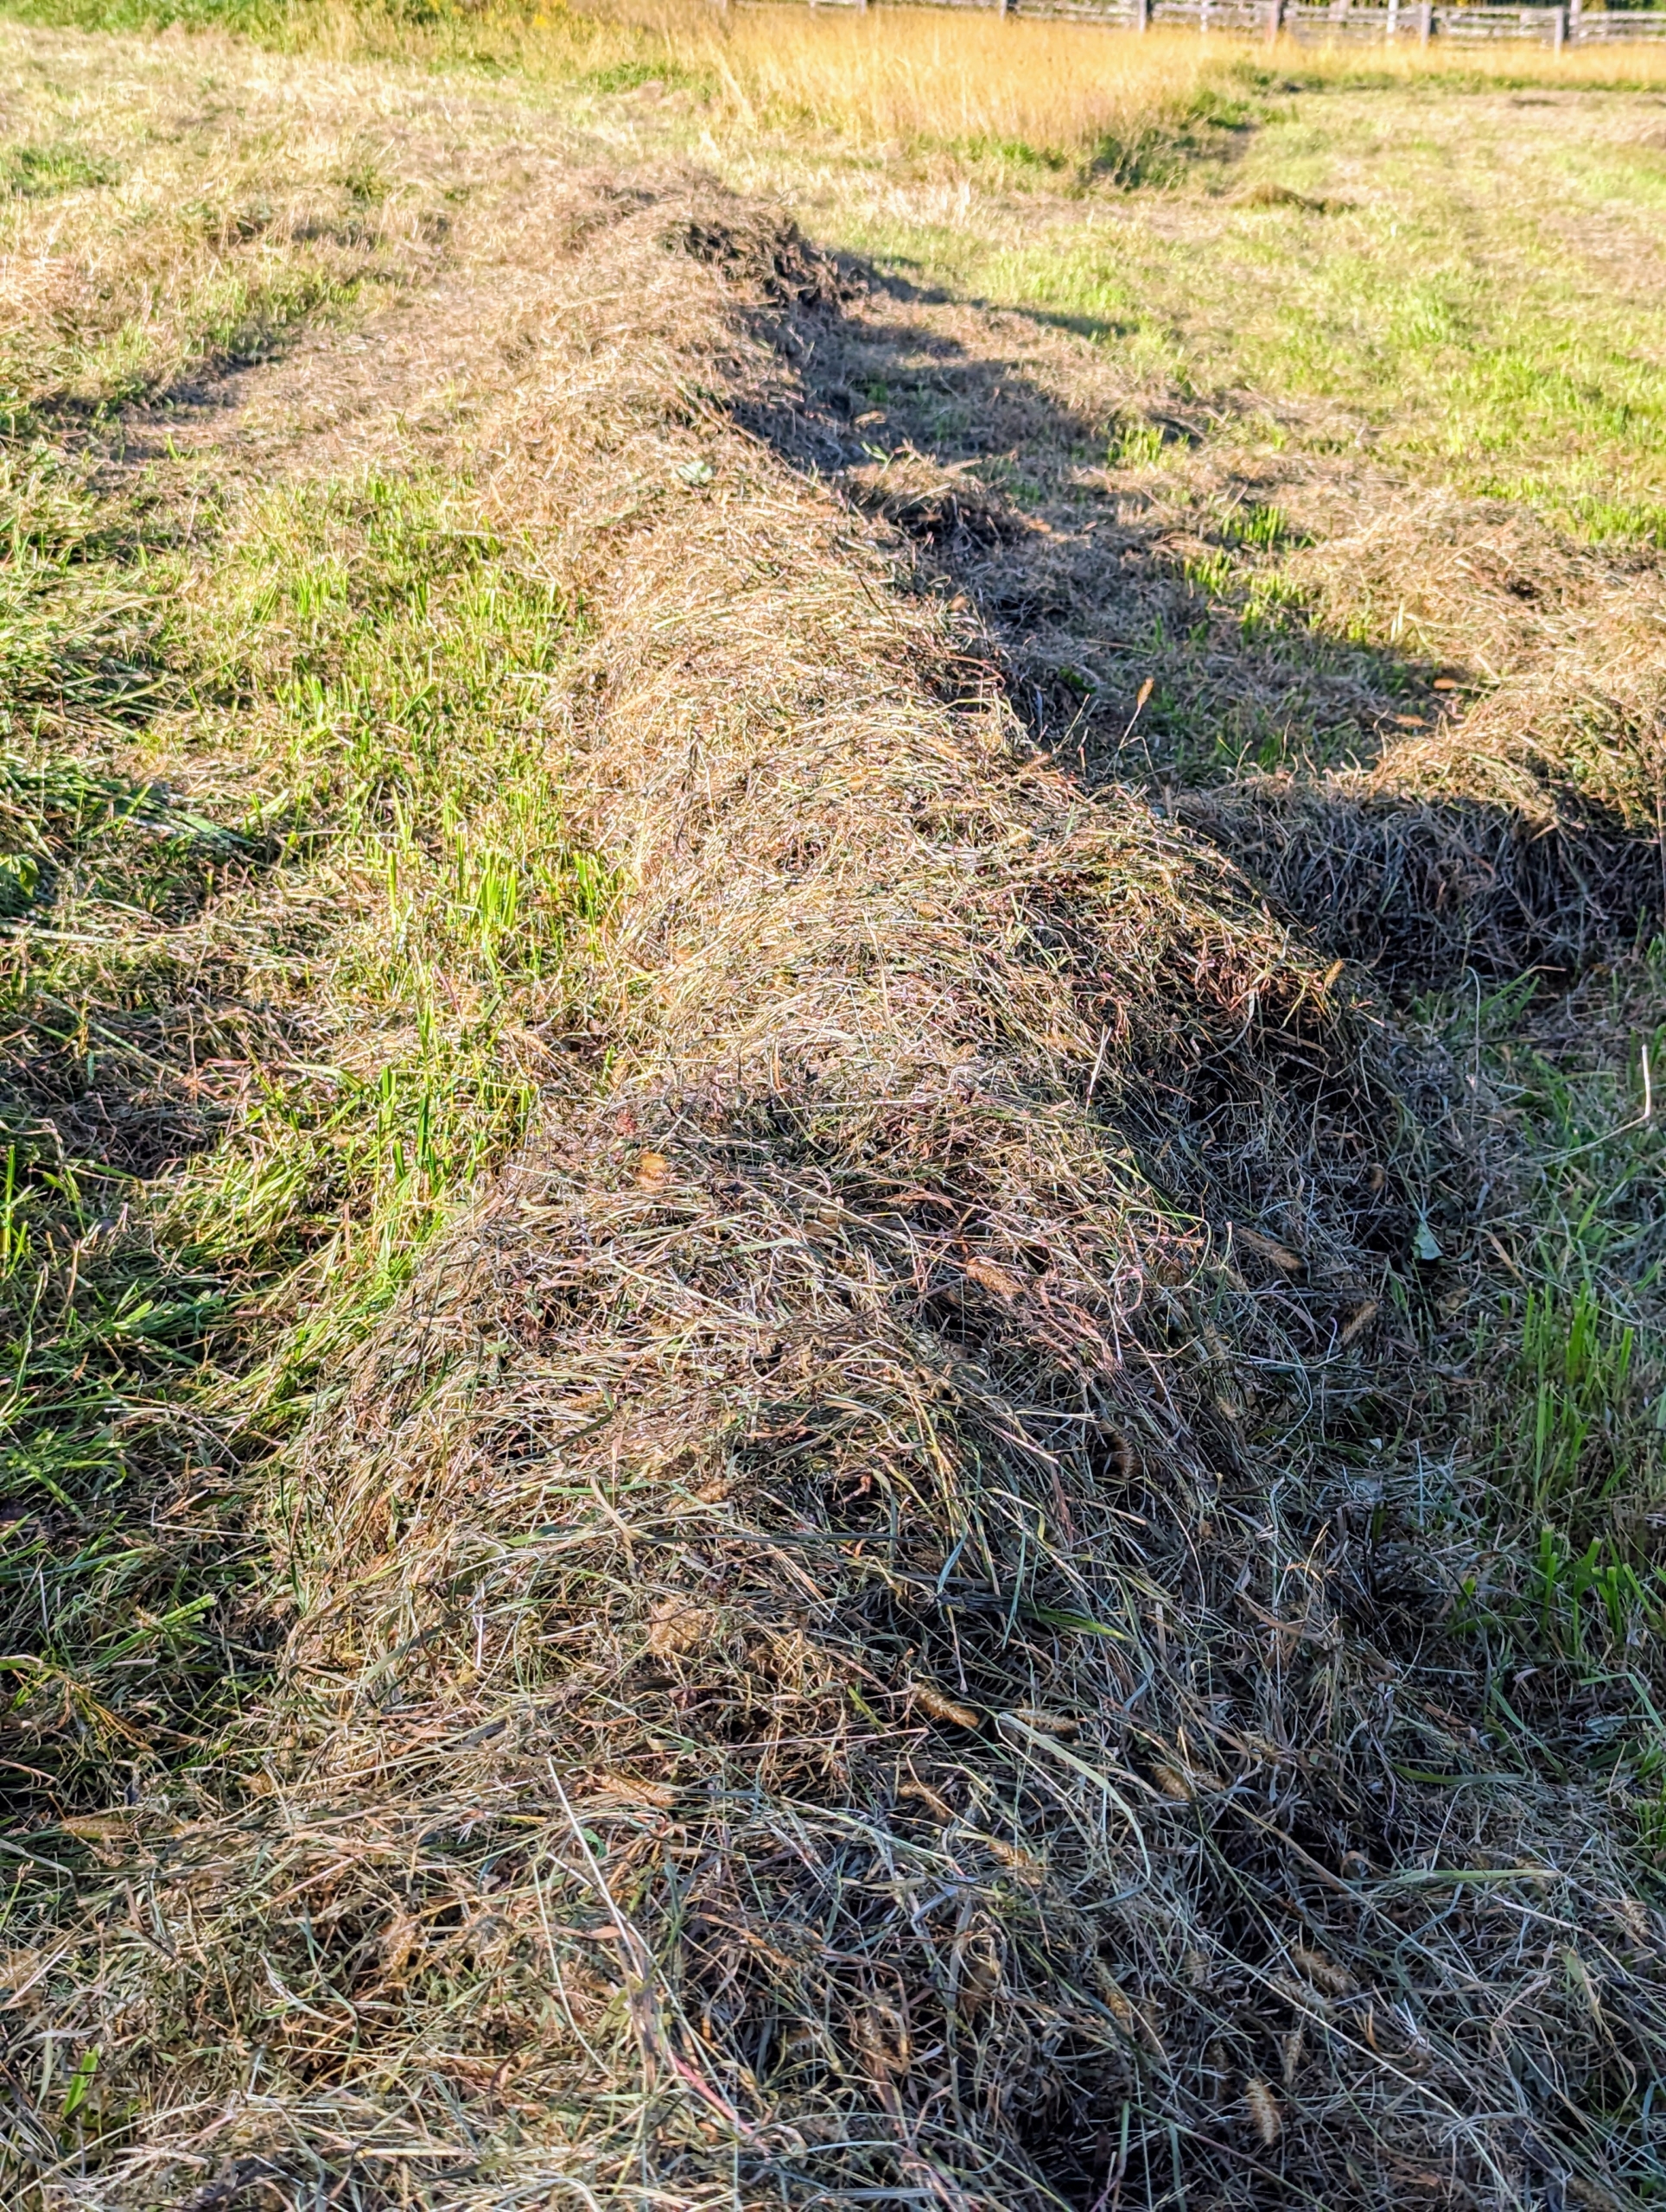
Next, it’s time to make the windrows, which are rows of hay raked up and shaped before being baled. Here is Phurba pulling the bar rake and making windrows from the tedded hay.
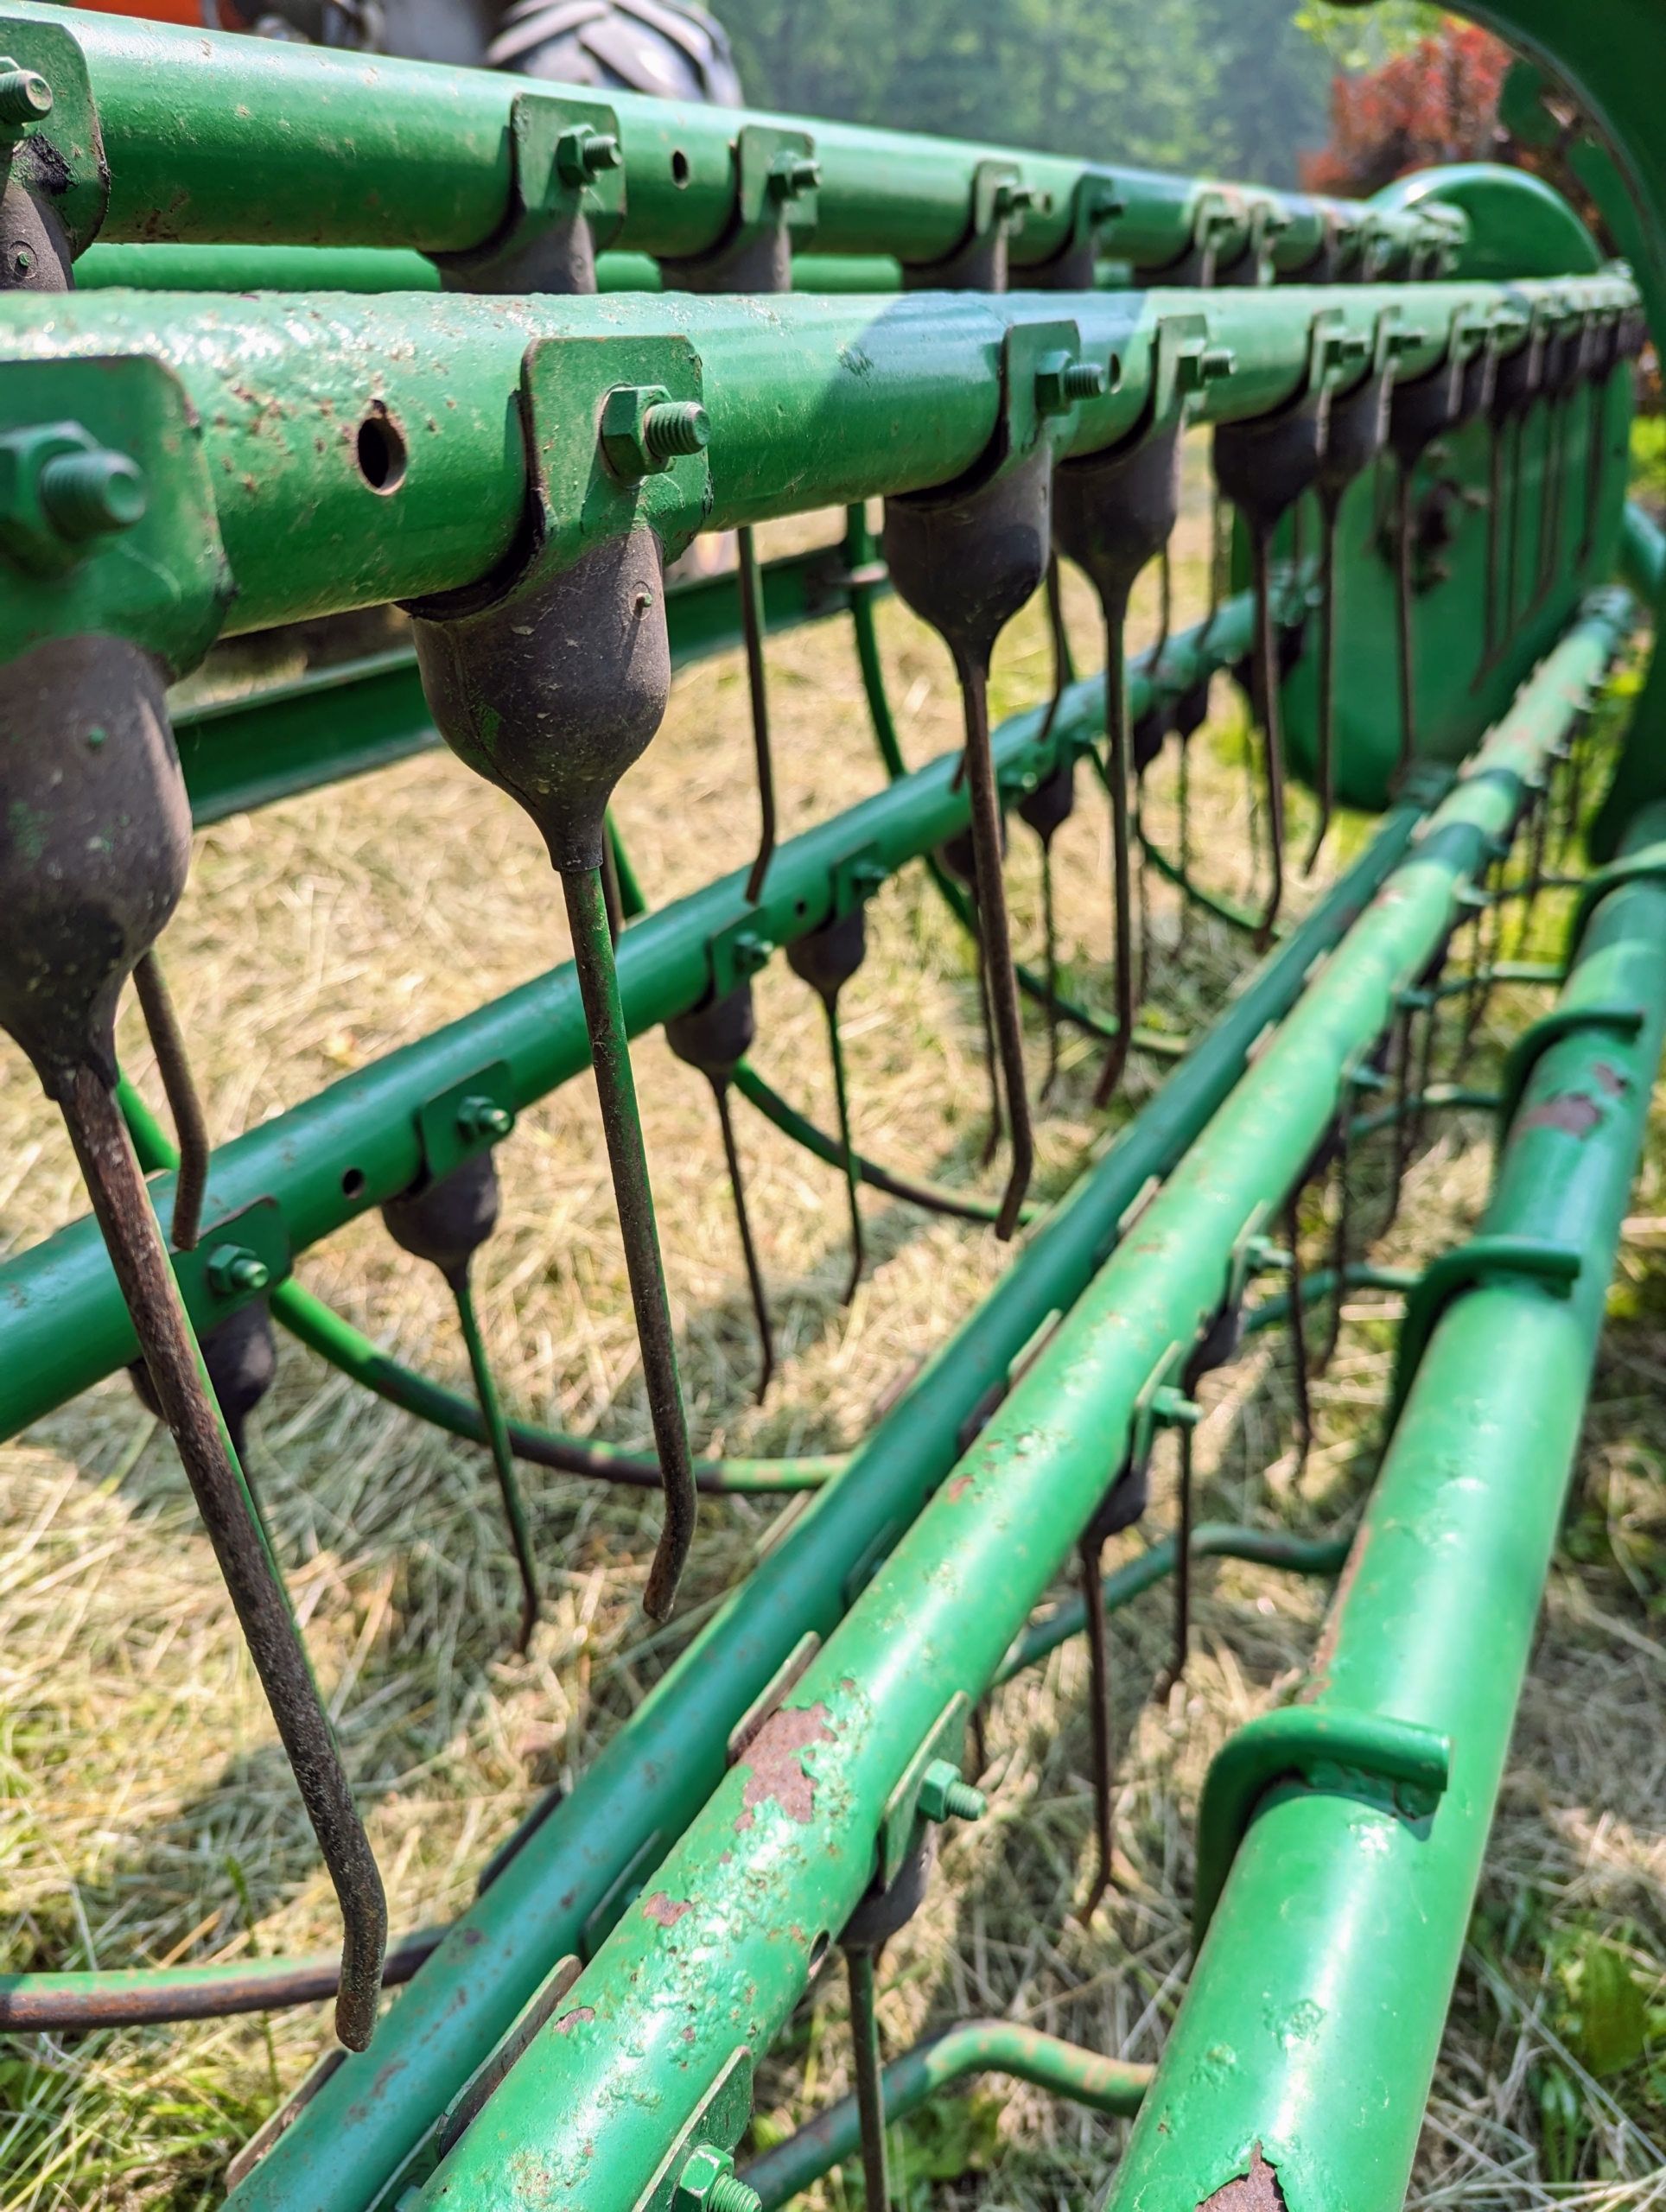
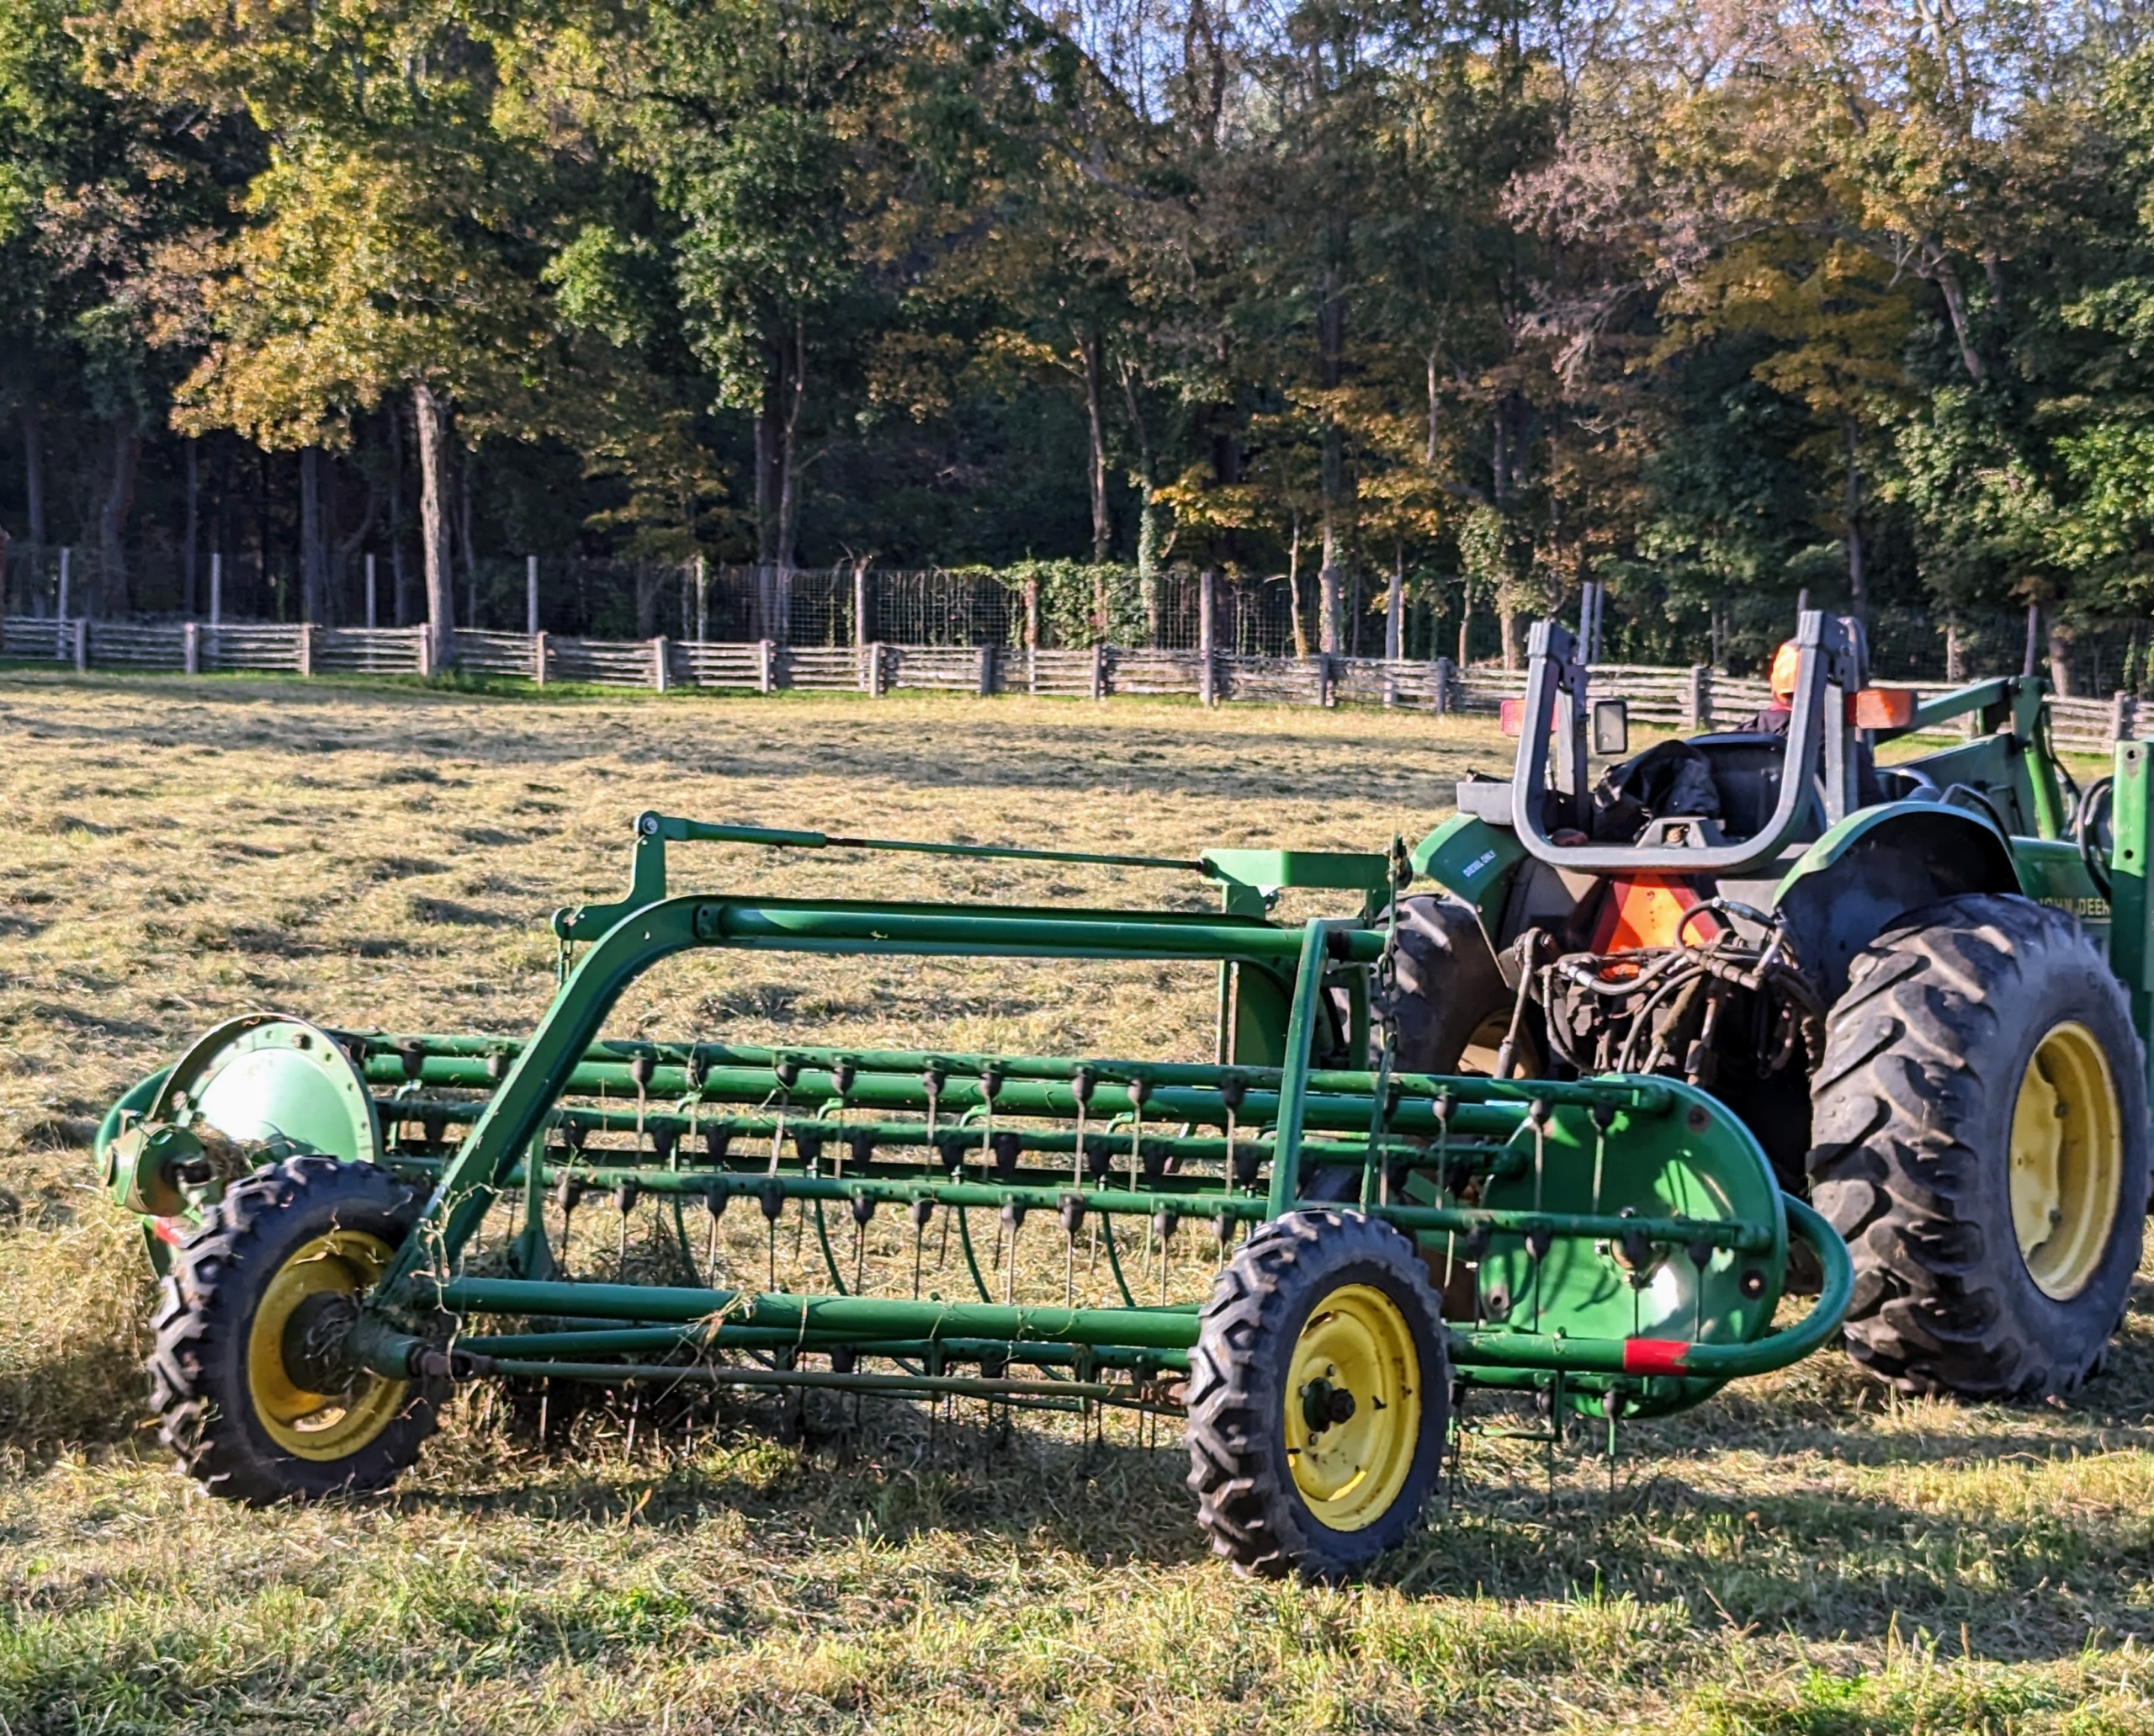
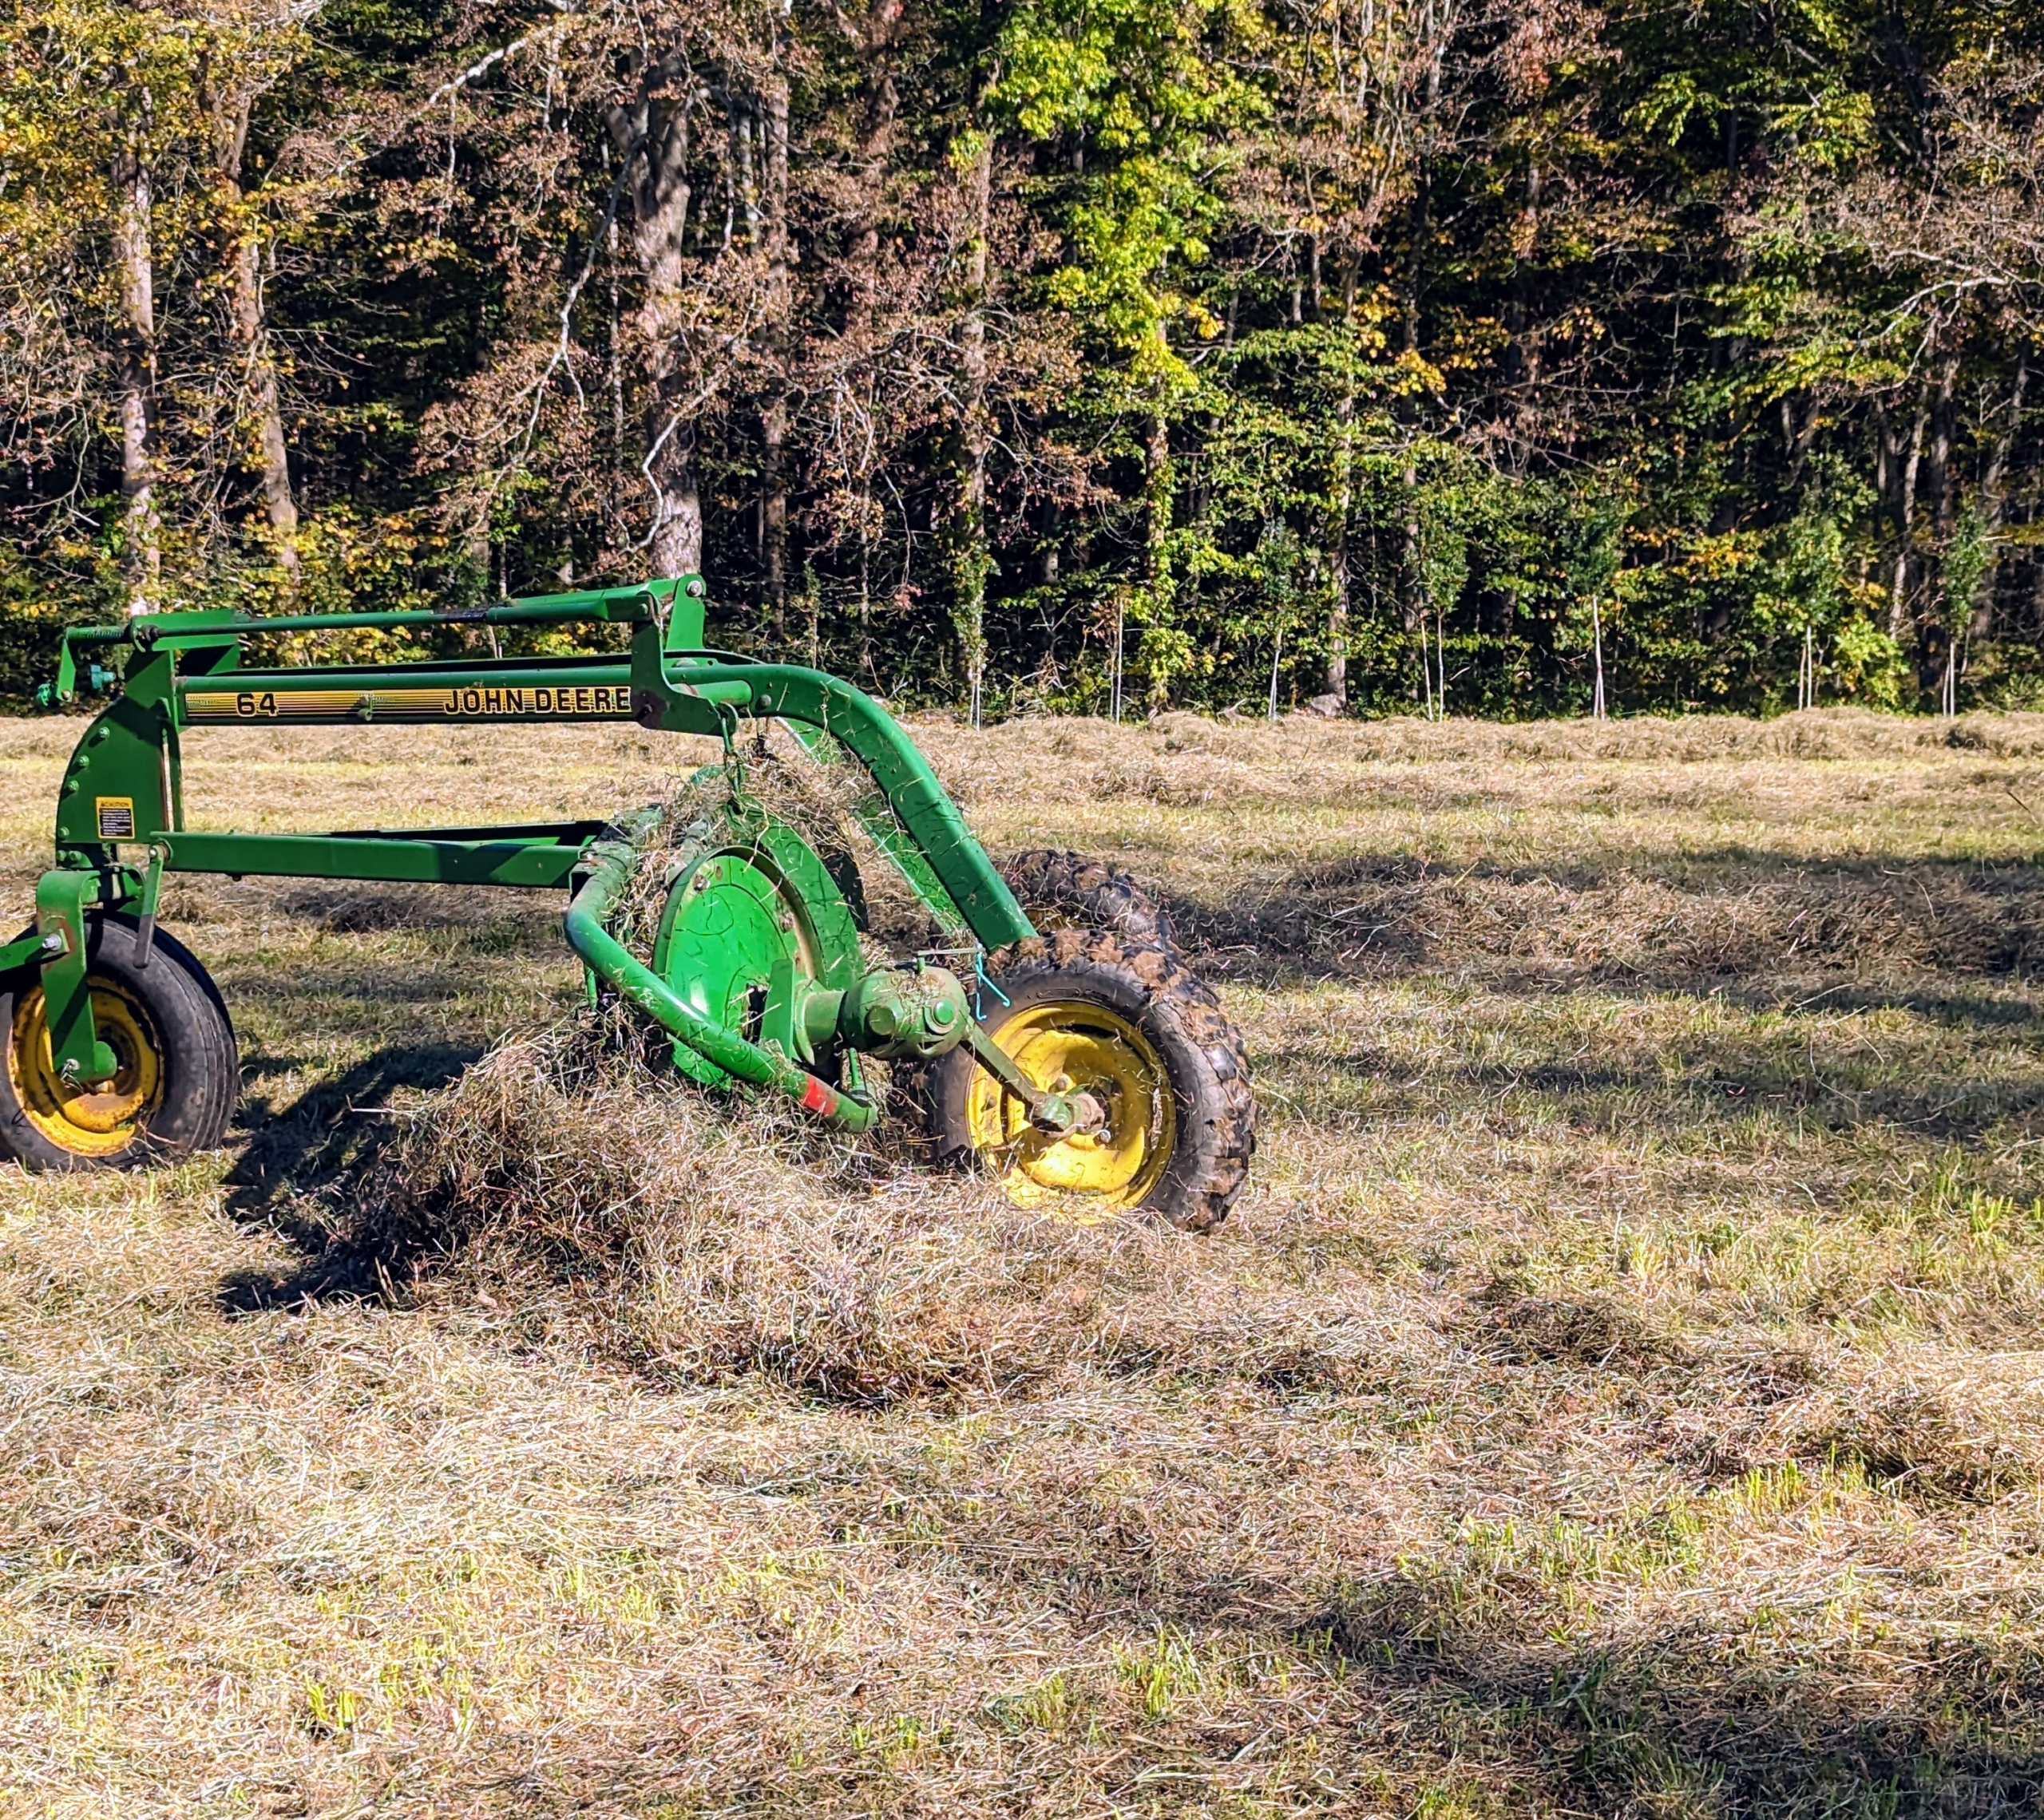
The bar rake, also known as a basket rake is hydraulically driven. This rake allows for consistent movement across the fields making well-shaped windrows.
Here, one can see the bar rake attached to a tractor as it is being pulled around the field.
From this angle, one can see how the machine pulls the hay to create a windrow.
The hay is ready to bale when hay pulled from the bottom of the windrow makes a crunching sound when snapped. I have three separate areas for growing hay. They are all planted with a mixture of timothy, orchard grass, Kentucky bluegrass, ryegrass, and clovers – all great for producing good quality hay.
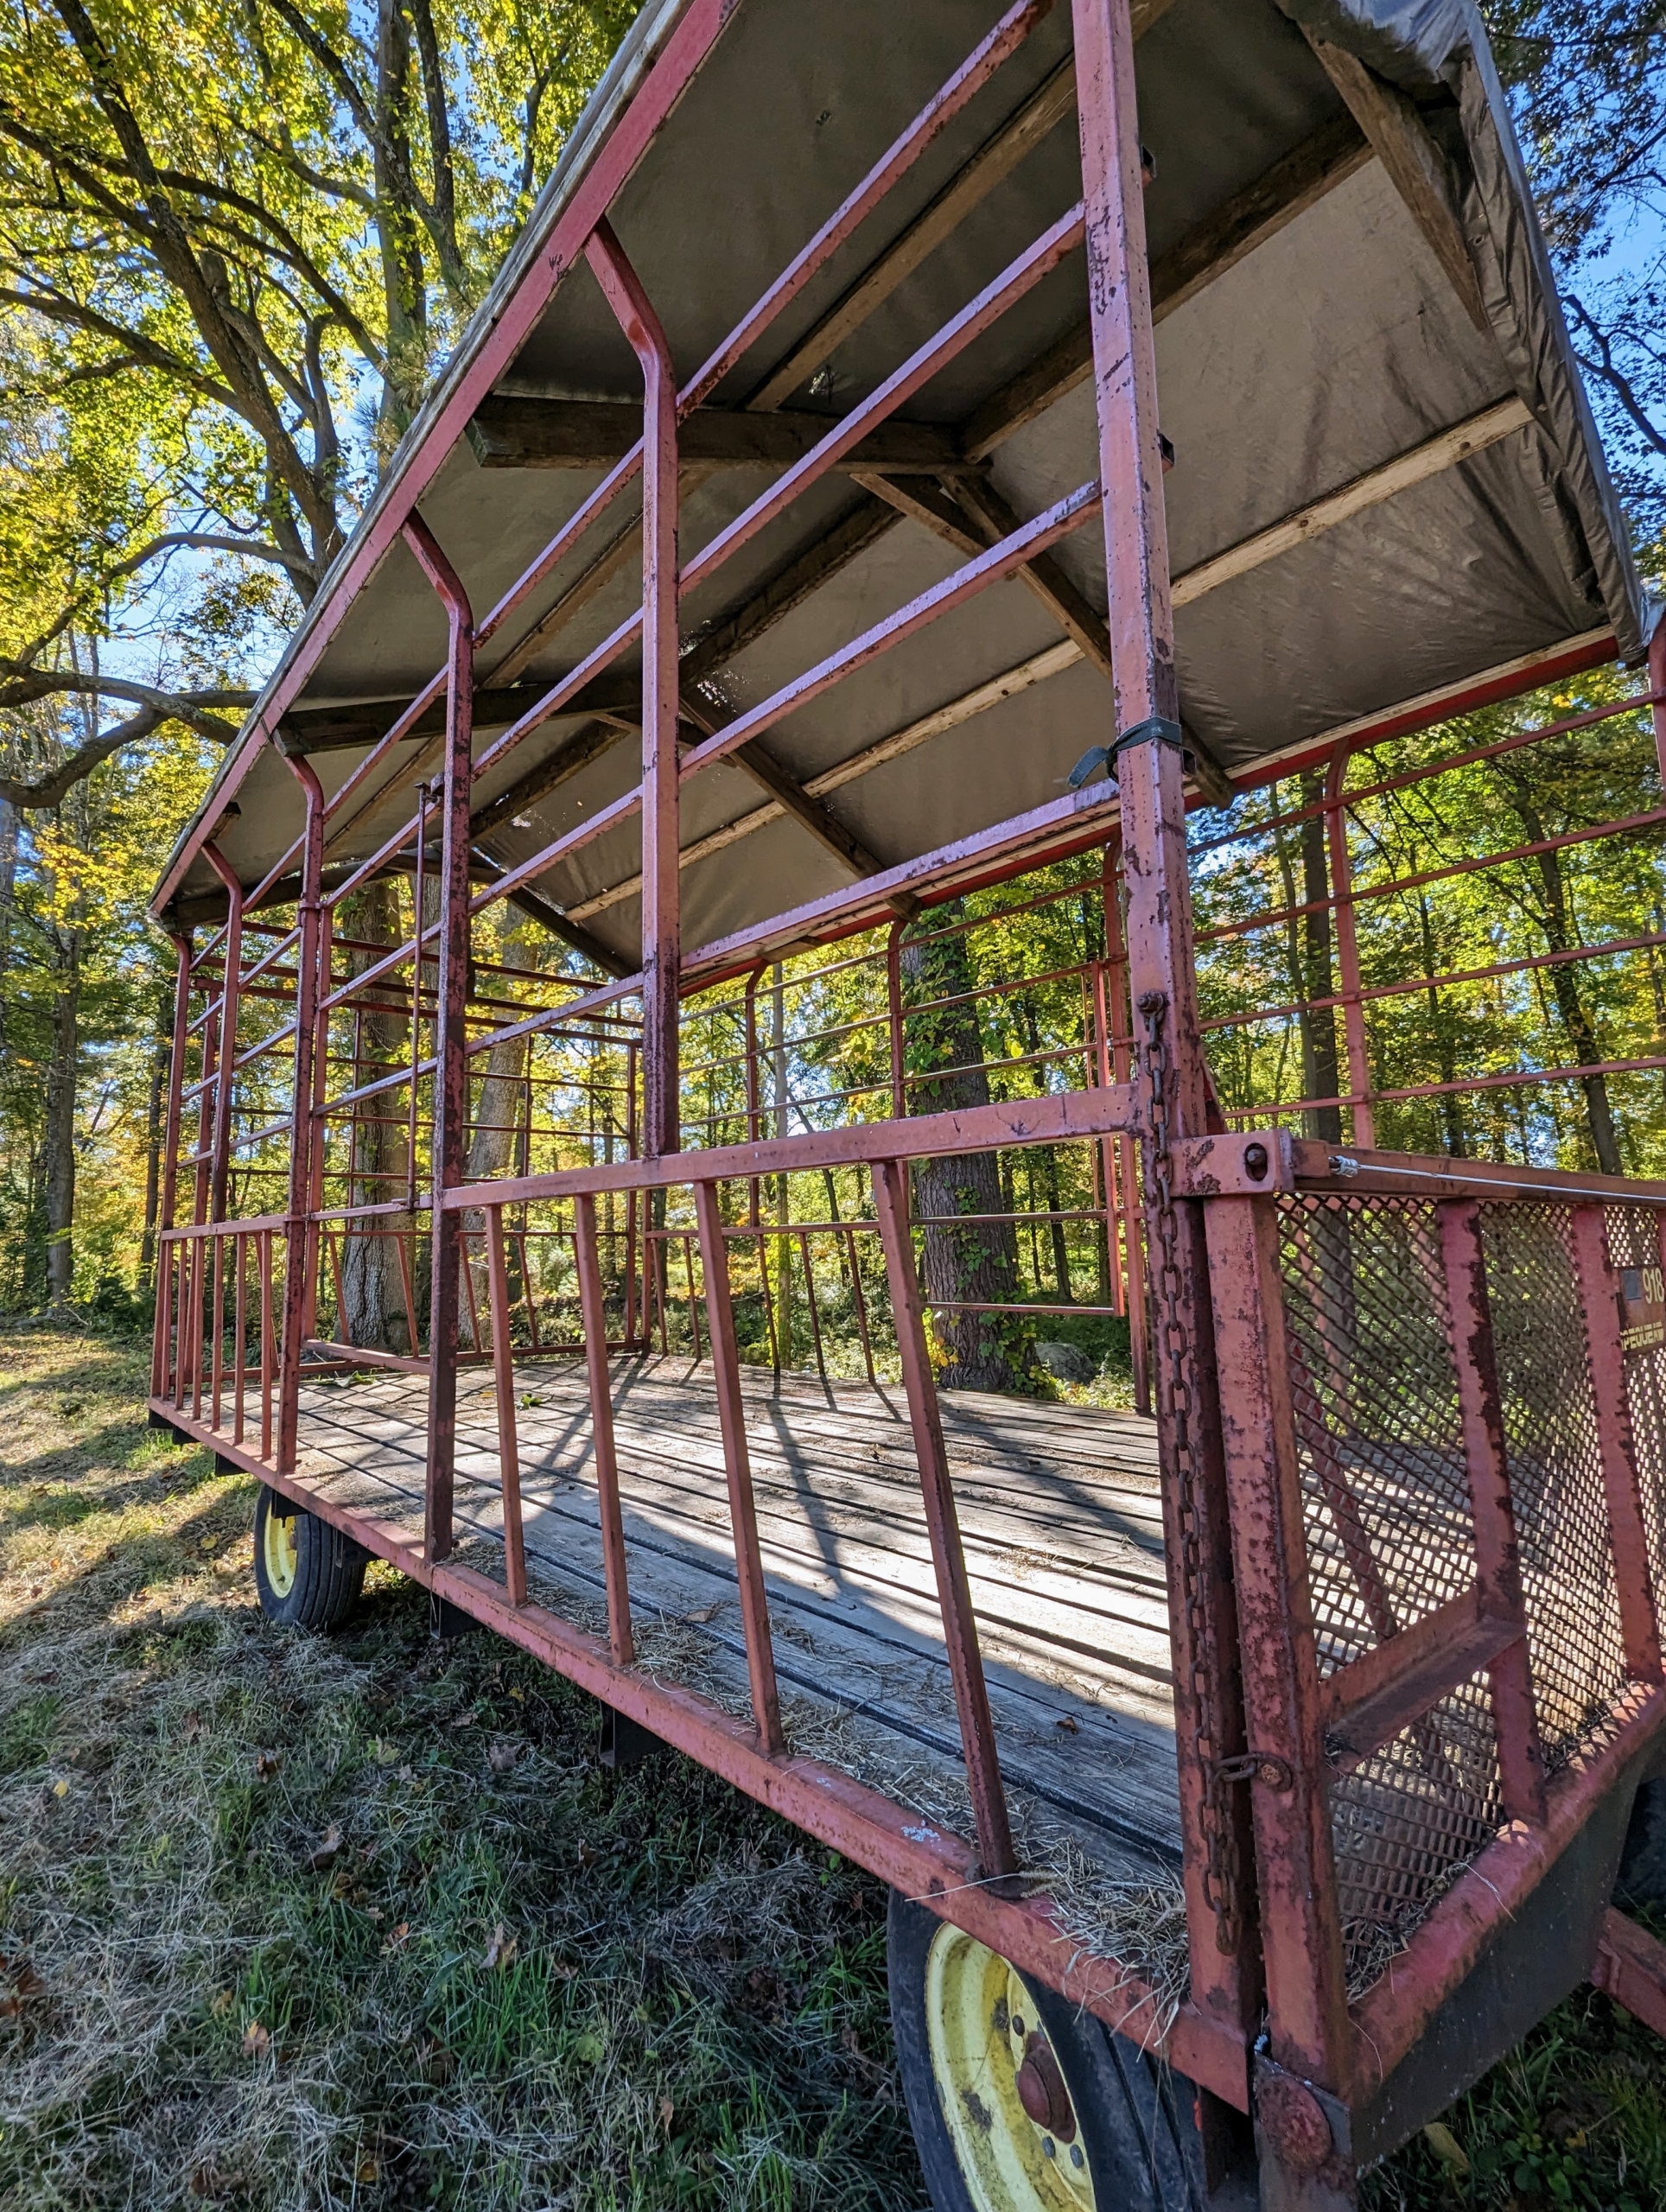
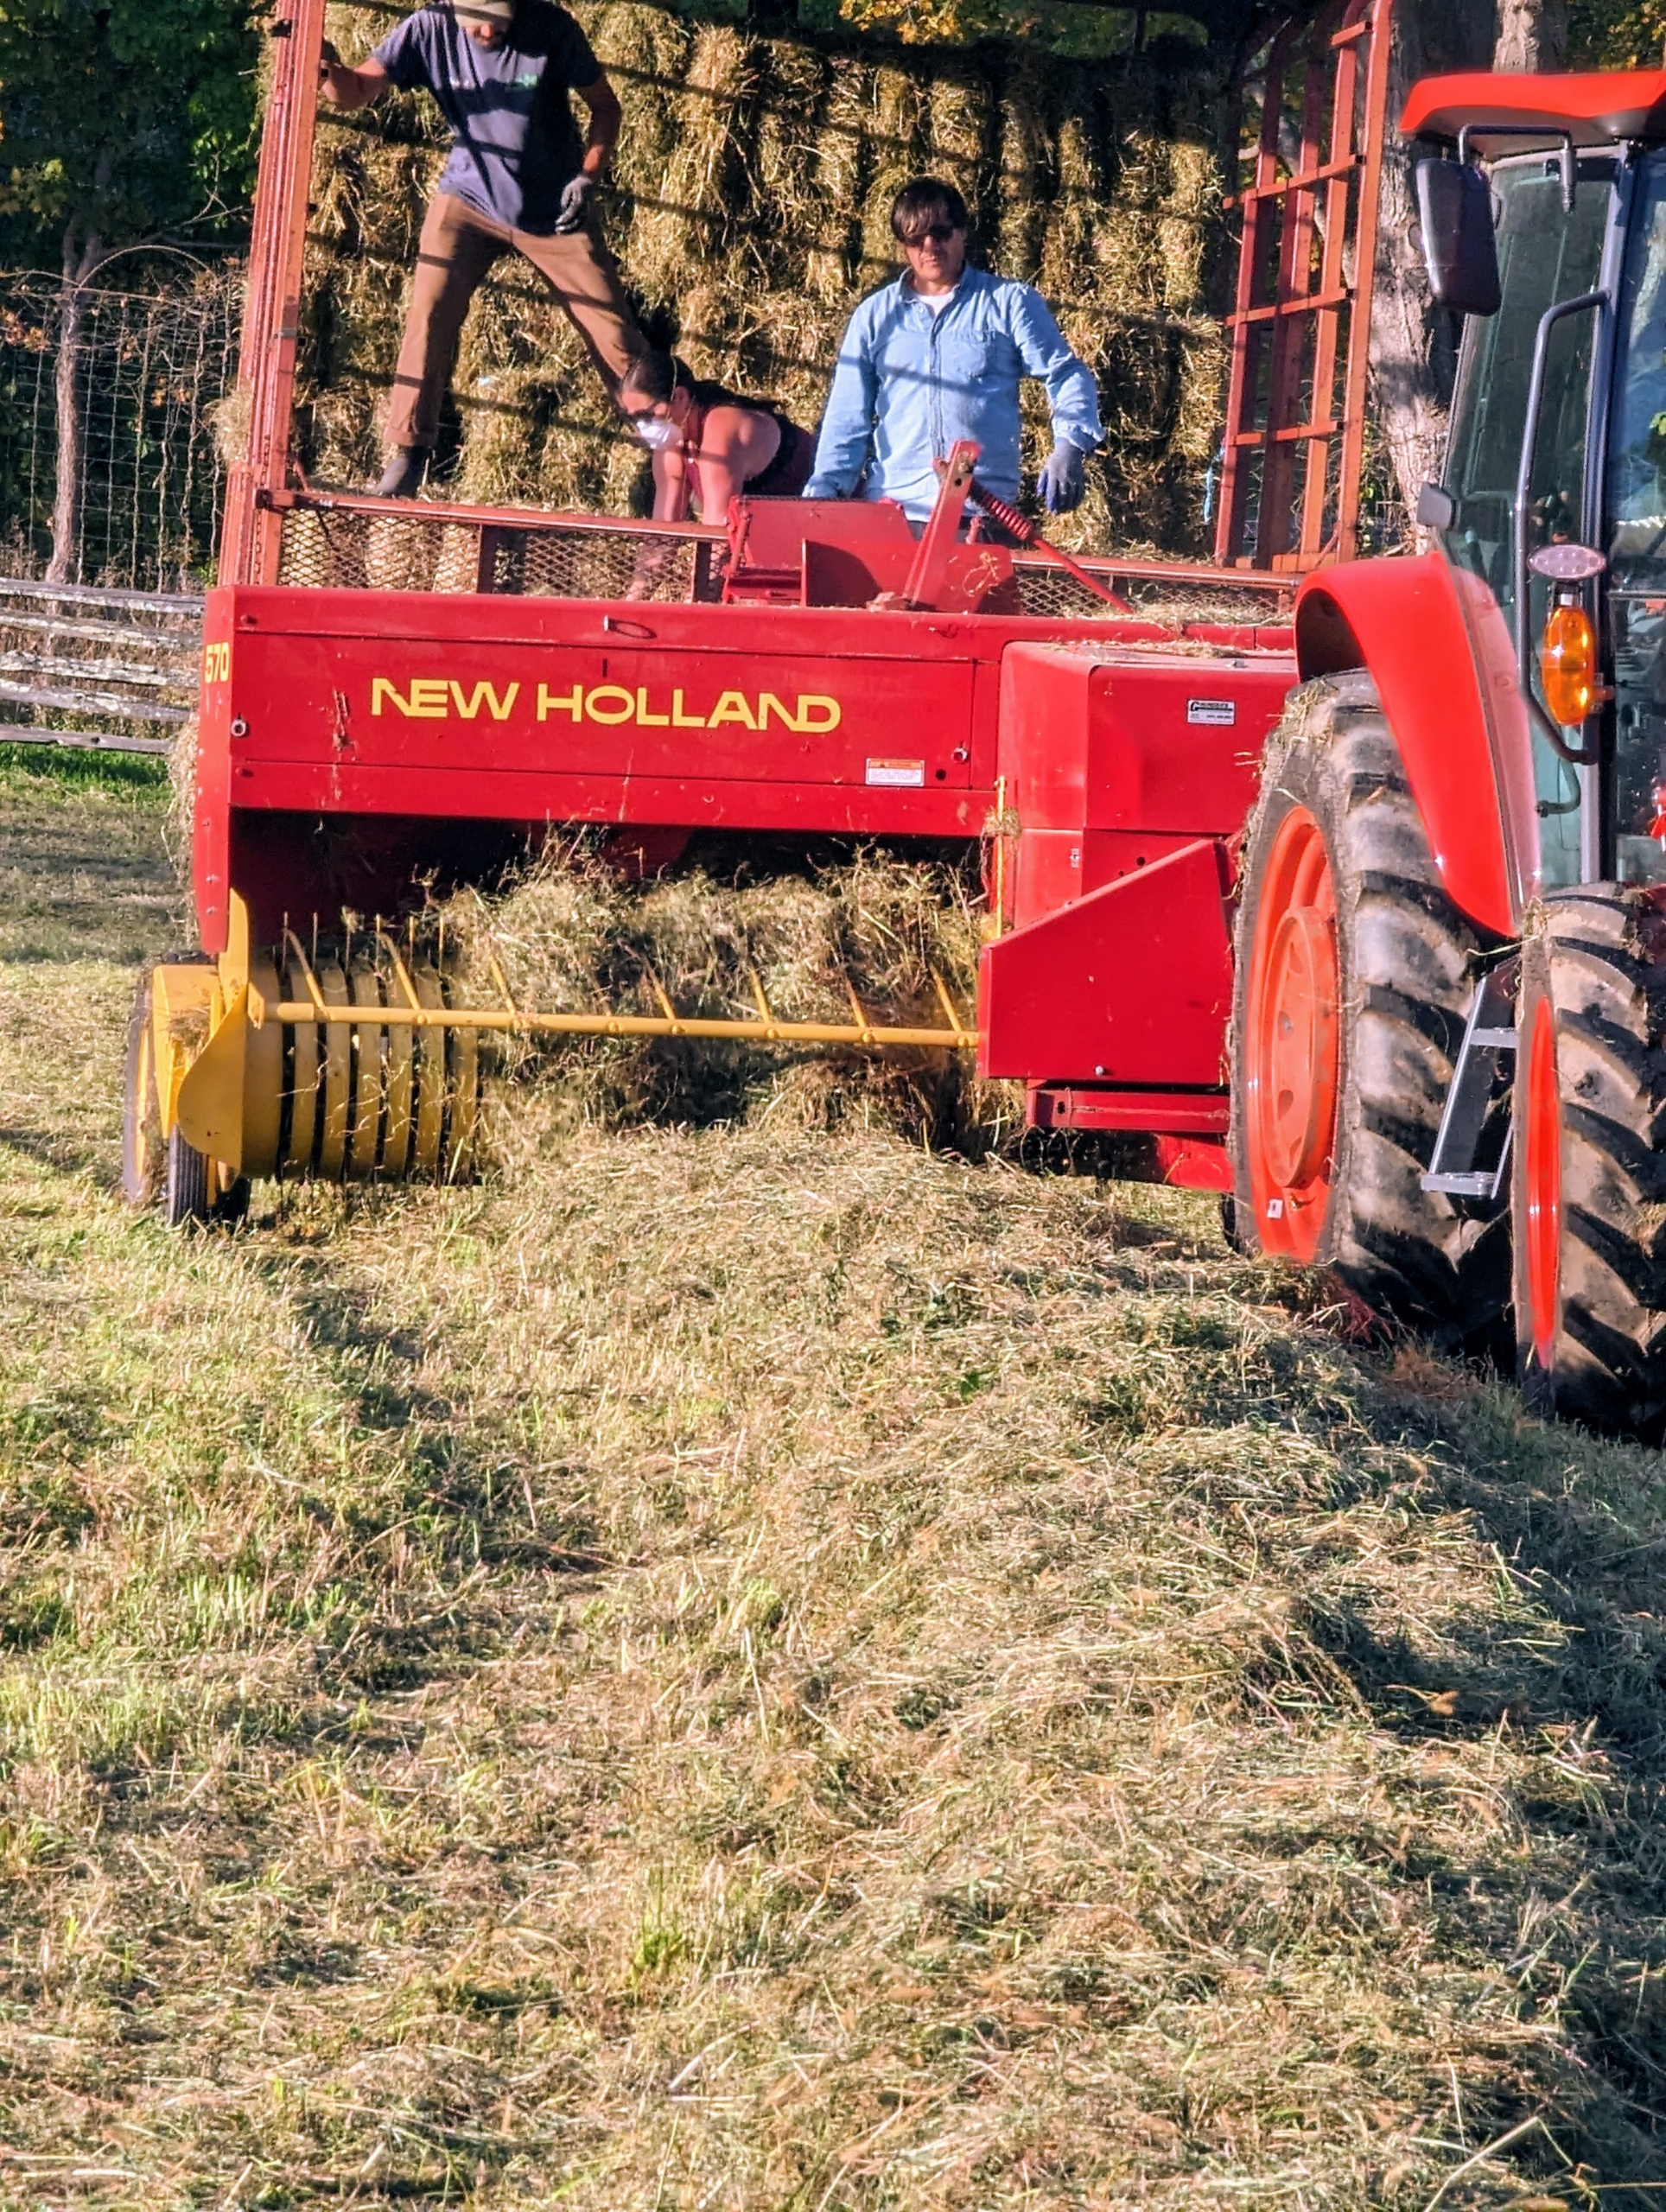
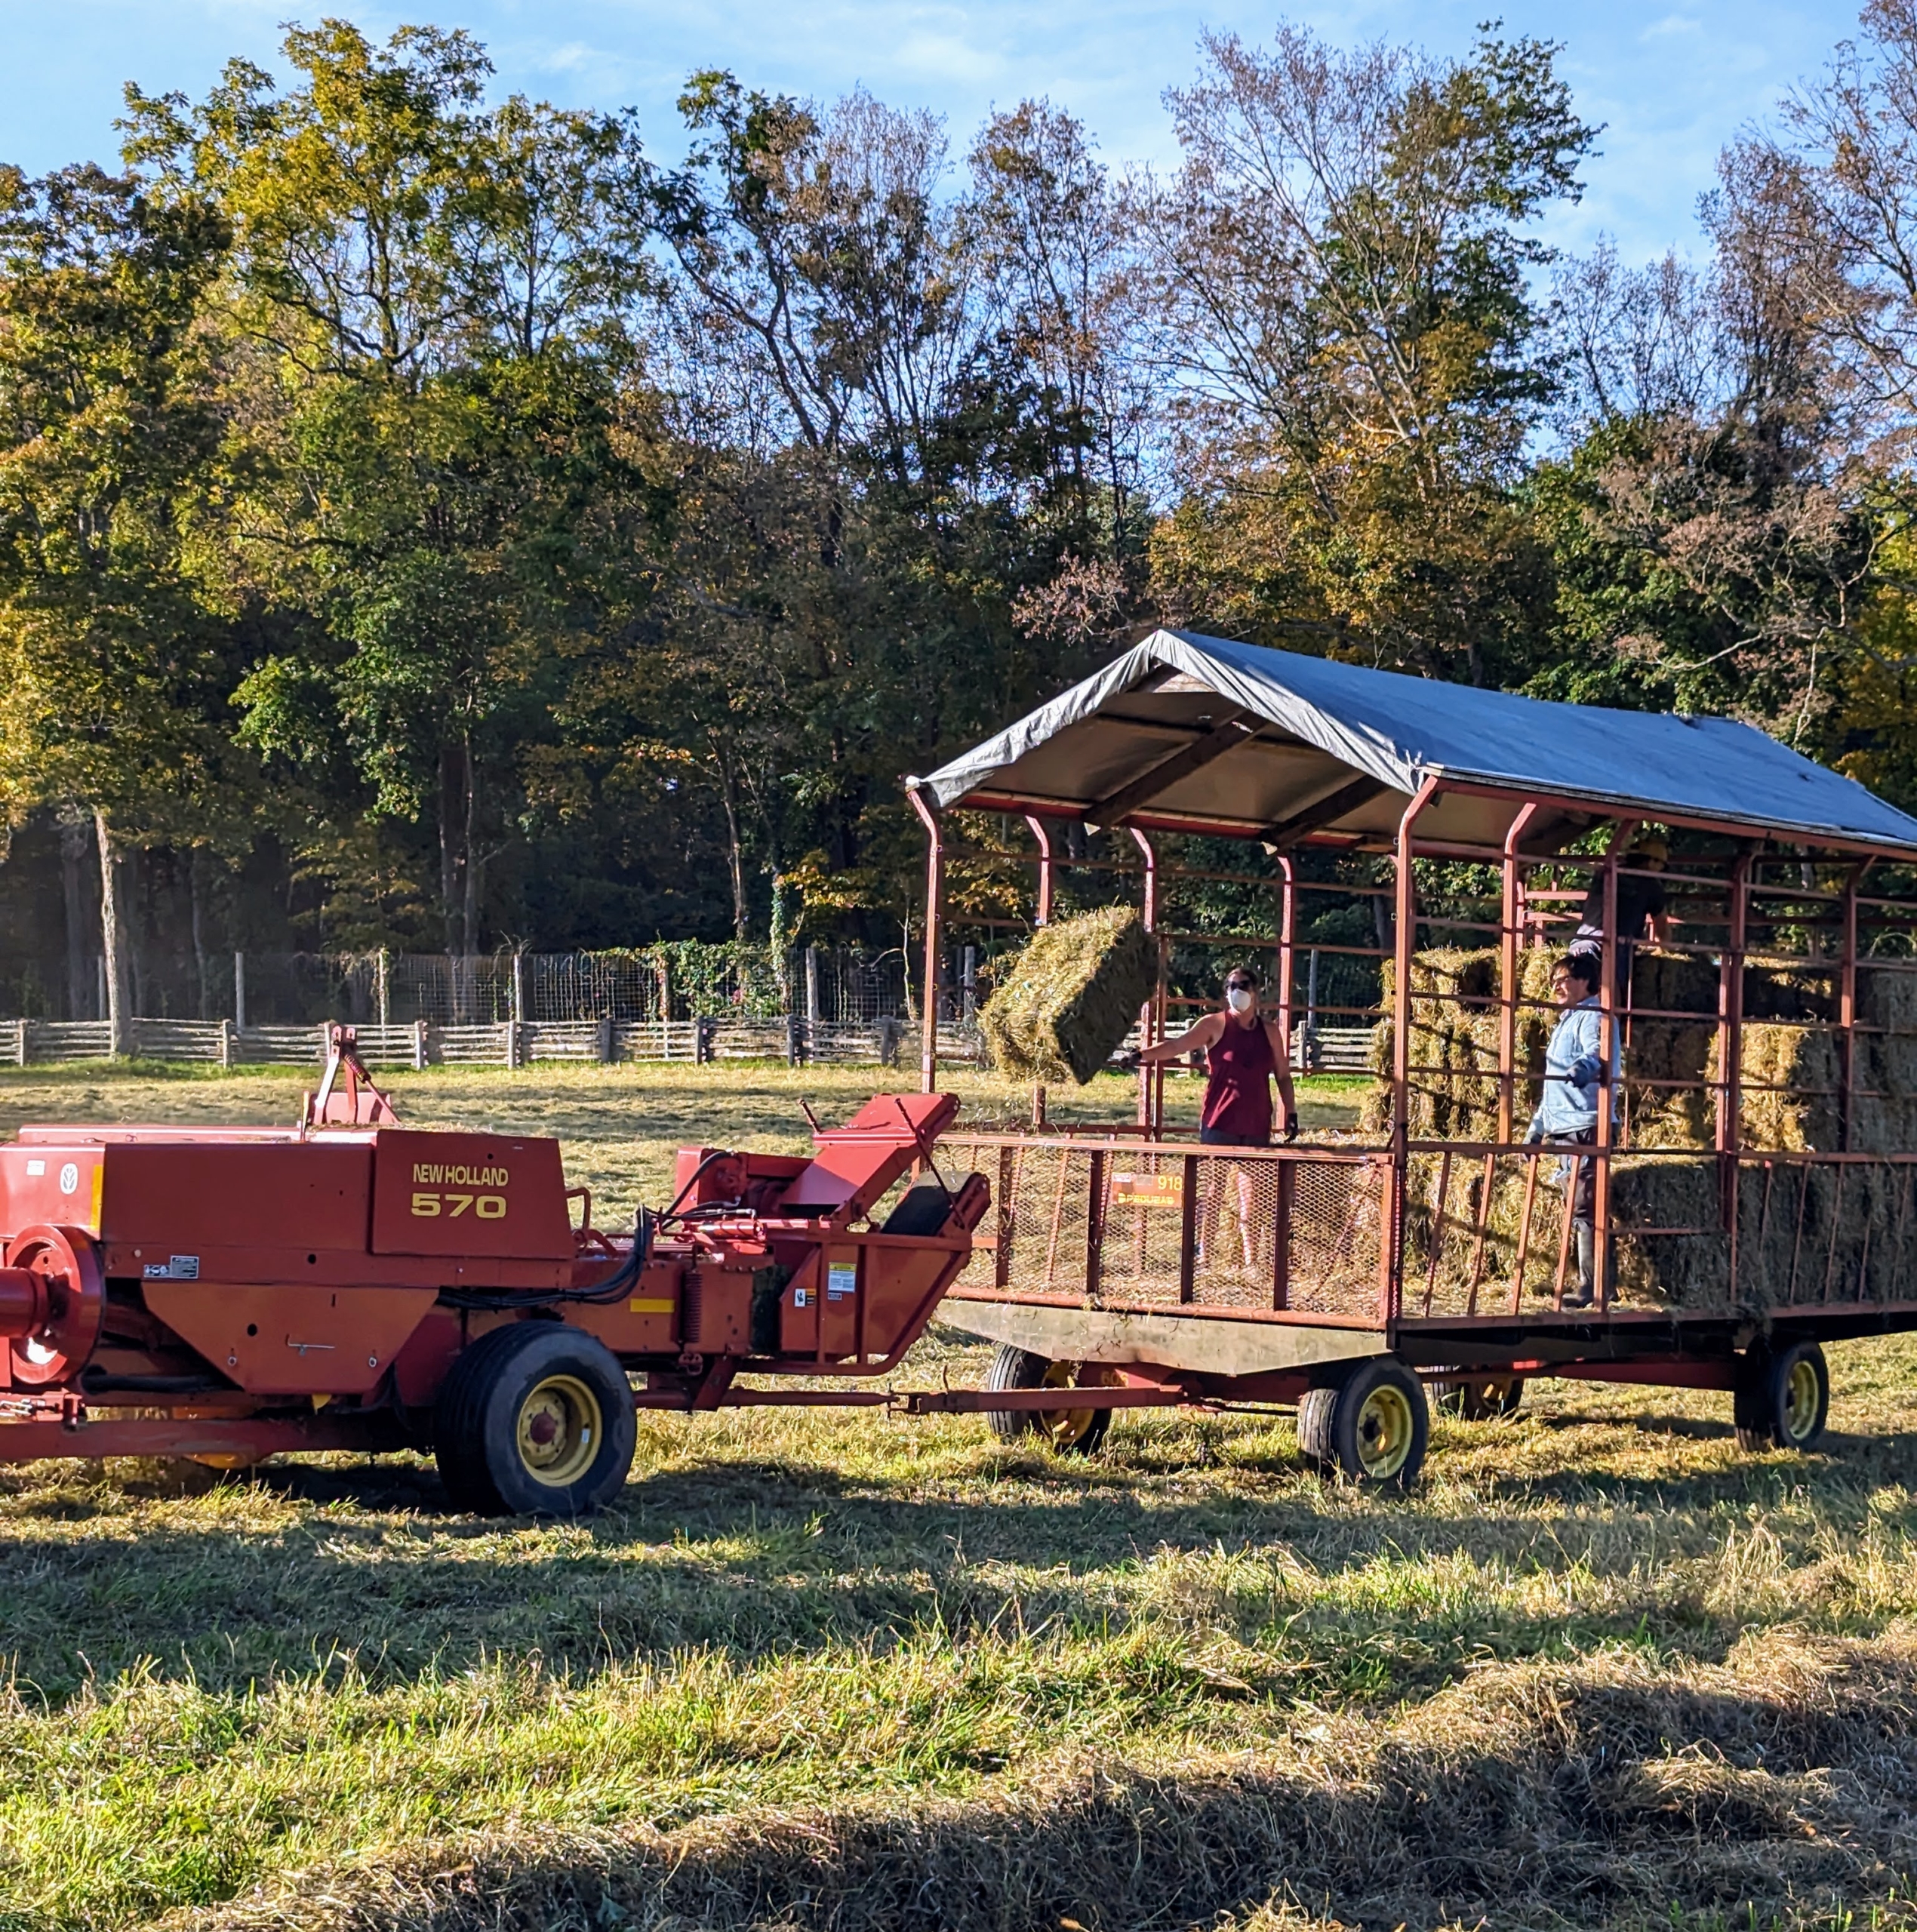
Chhiring has all the proper equipment standing by ready to use. A baler is a piece of farm machinery that compresses the cut and raked crop into compact bales that are easy to handle, transport, and store. The baler is attached to the tractor, and then the hay wagon is attached to the baler.
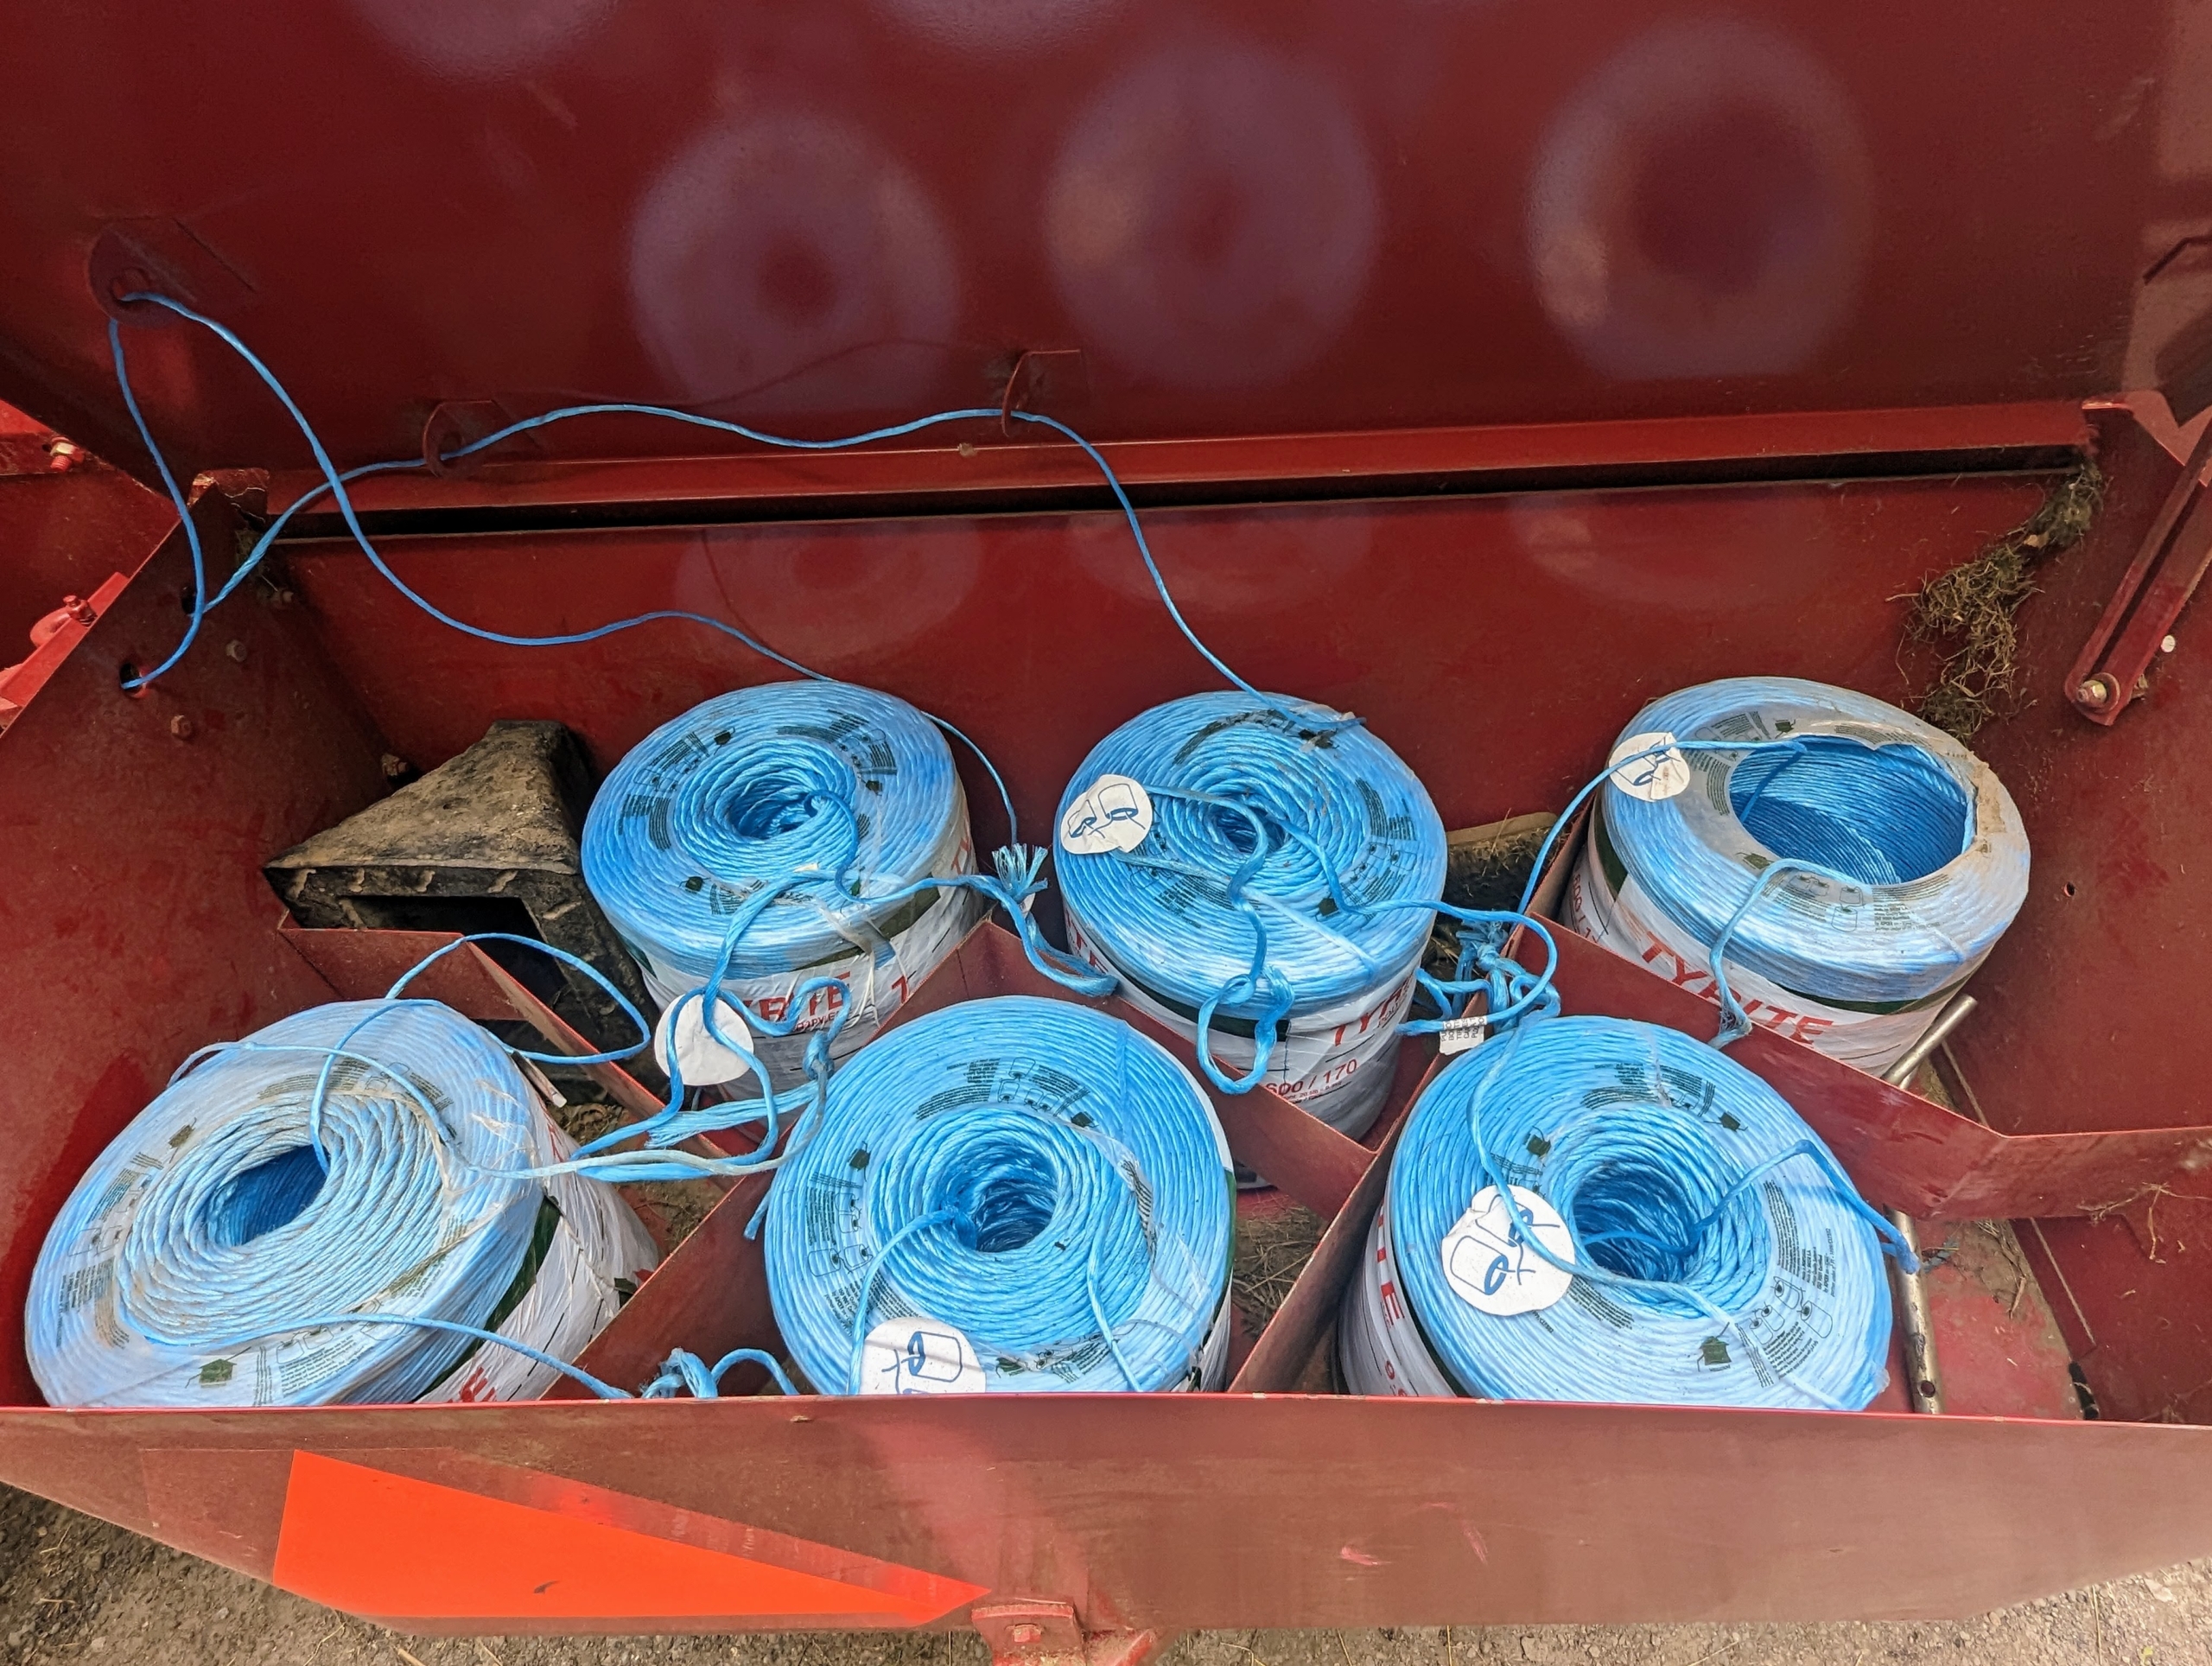
In one compartment, large rolls of twine are positioned and tied to each other, so they can feed into the baler and secure the hay just before it shoots out into the trailer. There are three choices of materials to wrap bales – twine, net wrap, or plastic wrap. If properly baled and stored, hay can last a long time without degrading in quality.
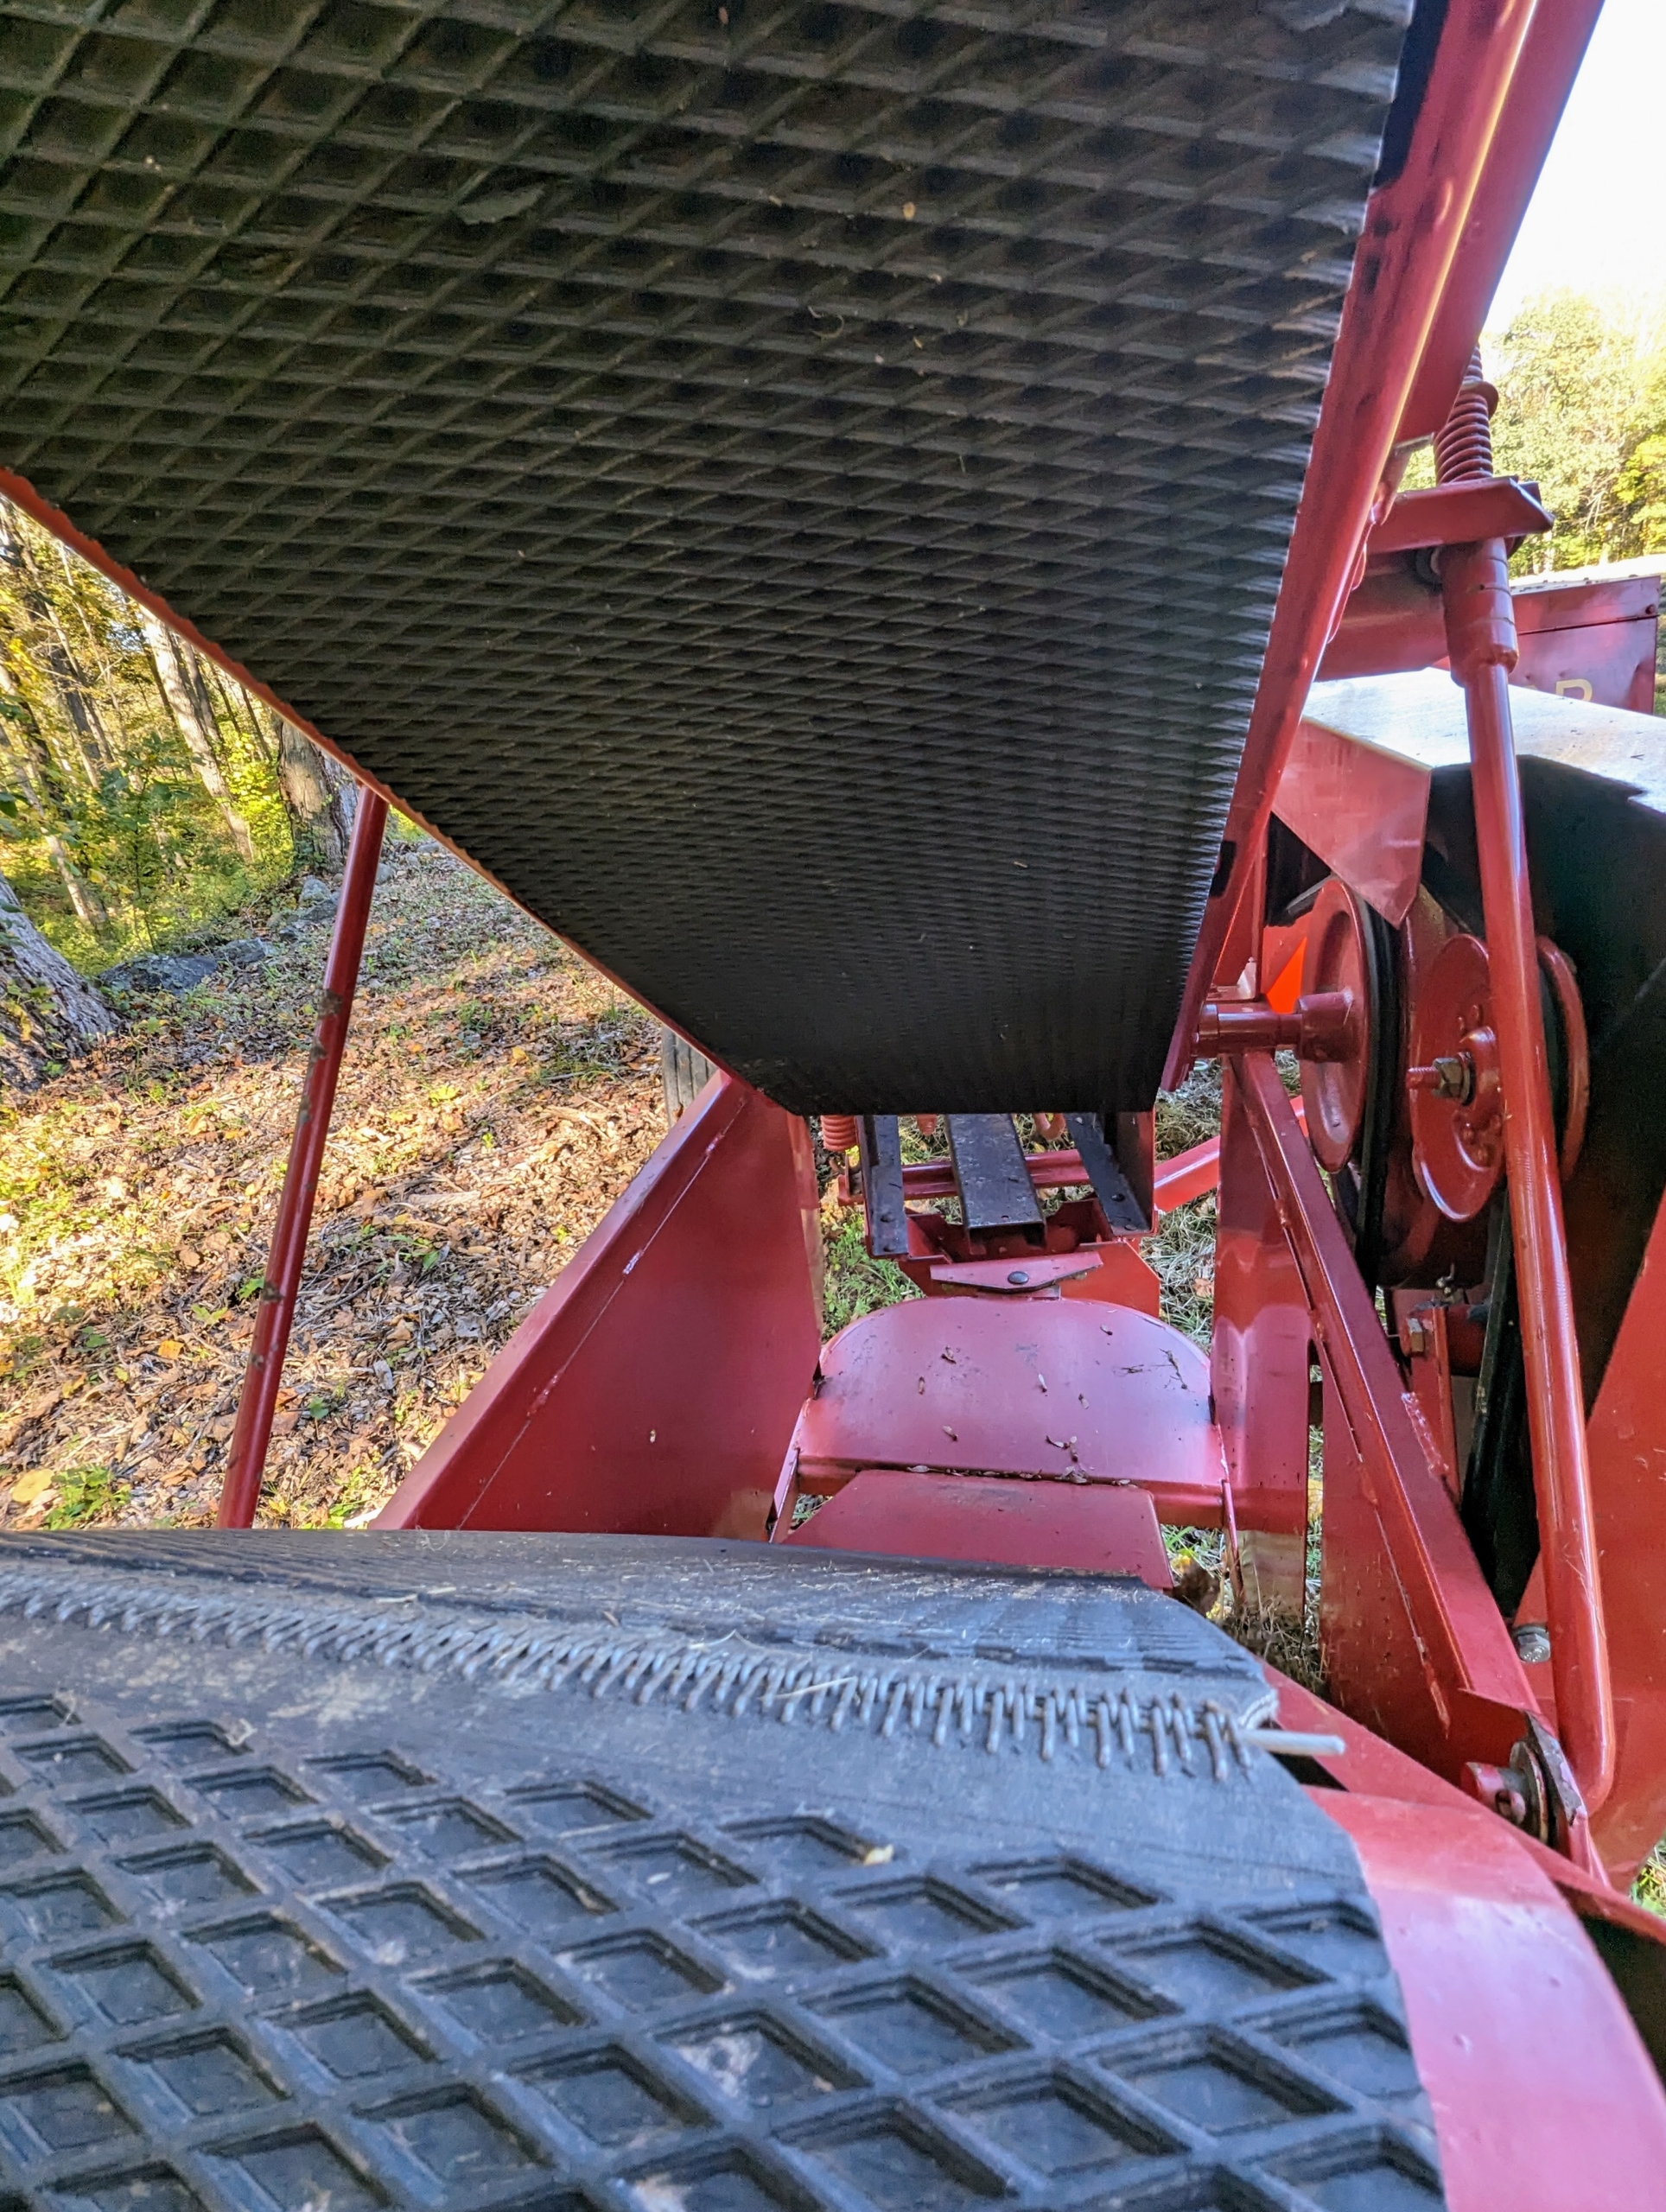
Once it is tied, it moves up this conveyor belt…
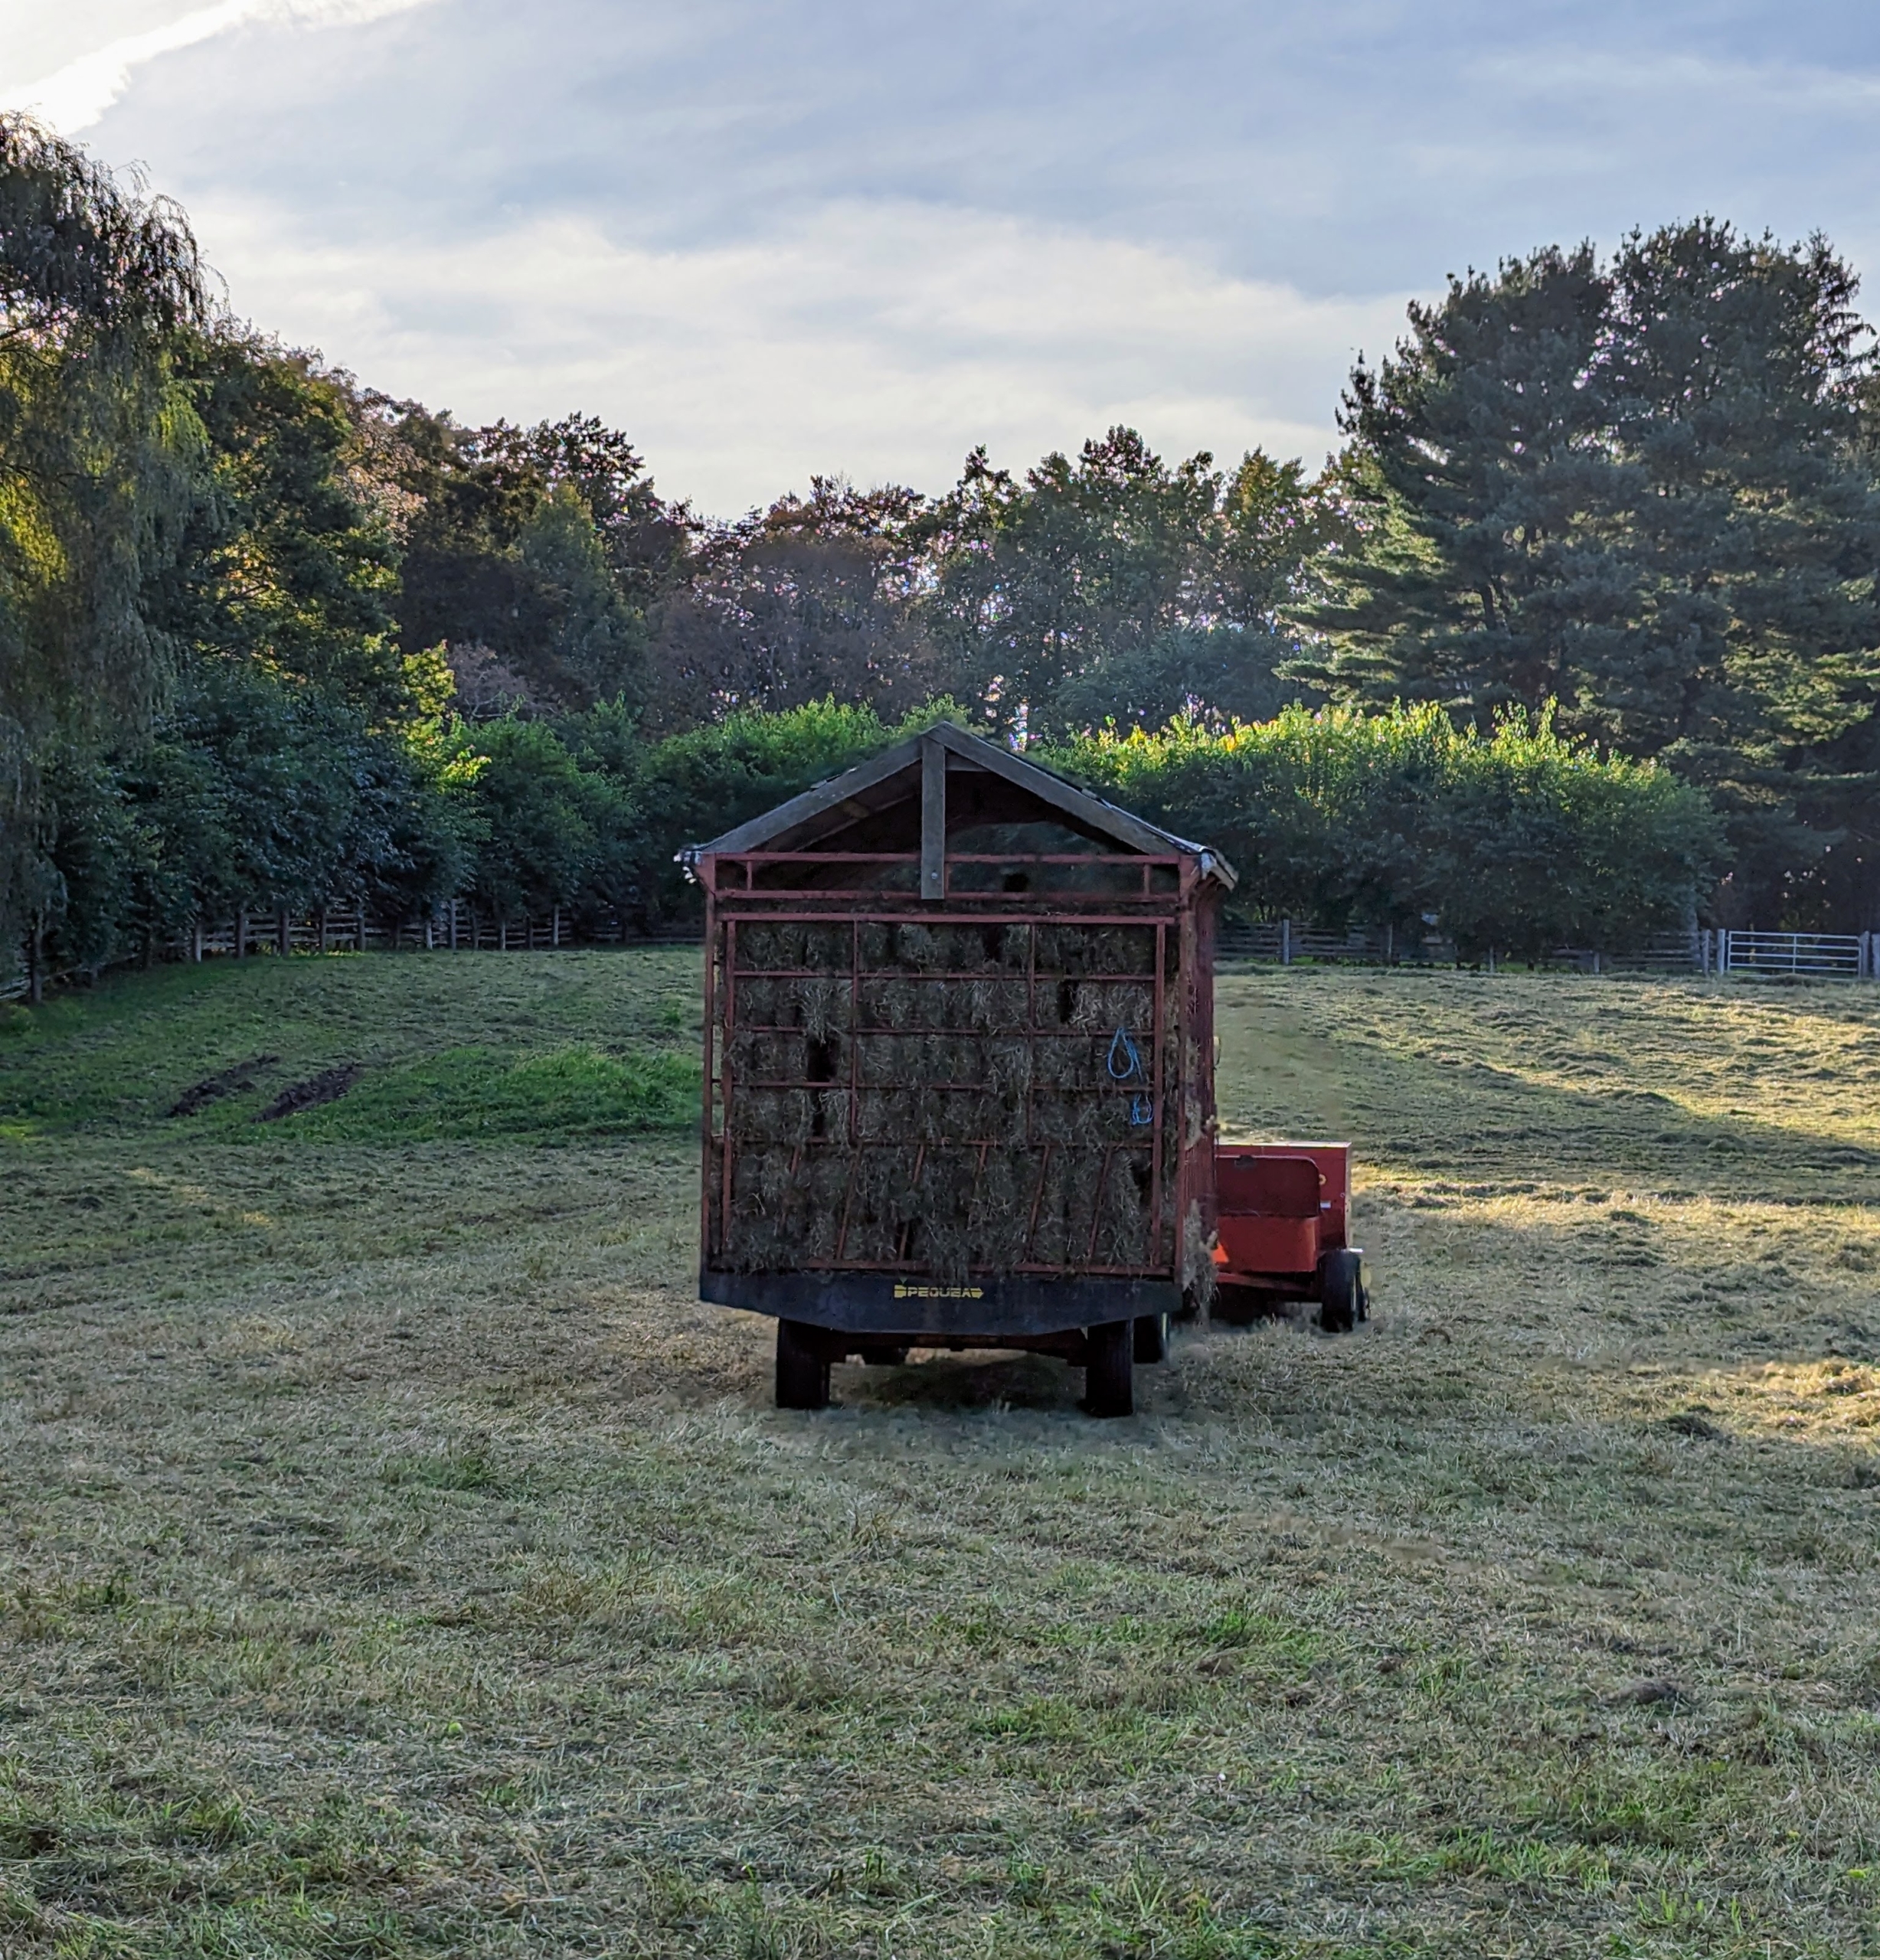
… and then gets thrown into this trailer where two other outdoor grounds crew members work together to grab the bales and stack them. Our wagon is covered to protect the bales from any unexpected rain and to offer shade to the crew stacking the bales as they are thrown.
Chhiring drives the tractor and starts the process midday when there is the least amount of moisture. The tractor rides to one side of the windrow while the baler passes directly over it to collect the hay.
Here is a bale of hay as it is lifted in the baler’s reel and moved up the conveyor belt. And then propelled into the wagon by a mechanical arm called a thrower or a kicker. The bales are manageable for one person to handle, about 45 to 60 pounds each.
In less than an hour, the wagon is almost completely filled with bales of hay. Each bale is about 15 by 18 by 40 inches large. The number of flakes in the bale is determined by a setting in the baler. Many balers are set for 10 to 12 flakes per bale. I have two hay trailers. Each one can hold about 150-bales. These bales will go to the stable hay loft, where they will be stored until needed.