Here in the New York City area, we're expecting rain and possible thunderstorms with temperatures in the upper 60s - a good watering over the gardens after a couple of days in unseasonably warm weather.
It always amazes me how quickly plants and trees grow from day to day. And, while many of the flowers are erupting with vibrant color, we've also been taking photos of the various trees and all the precious buds just beginning to open on their branches.
Here are some photos, enjoy.
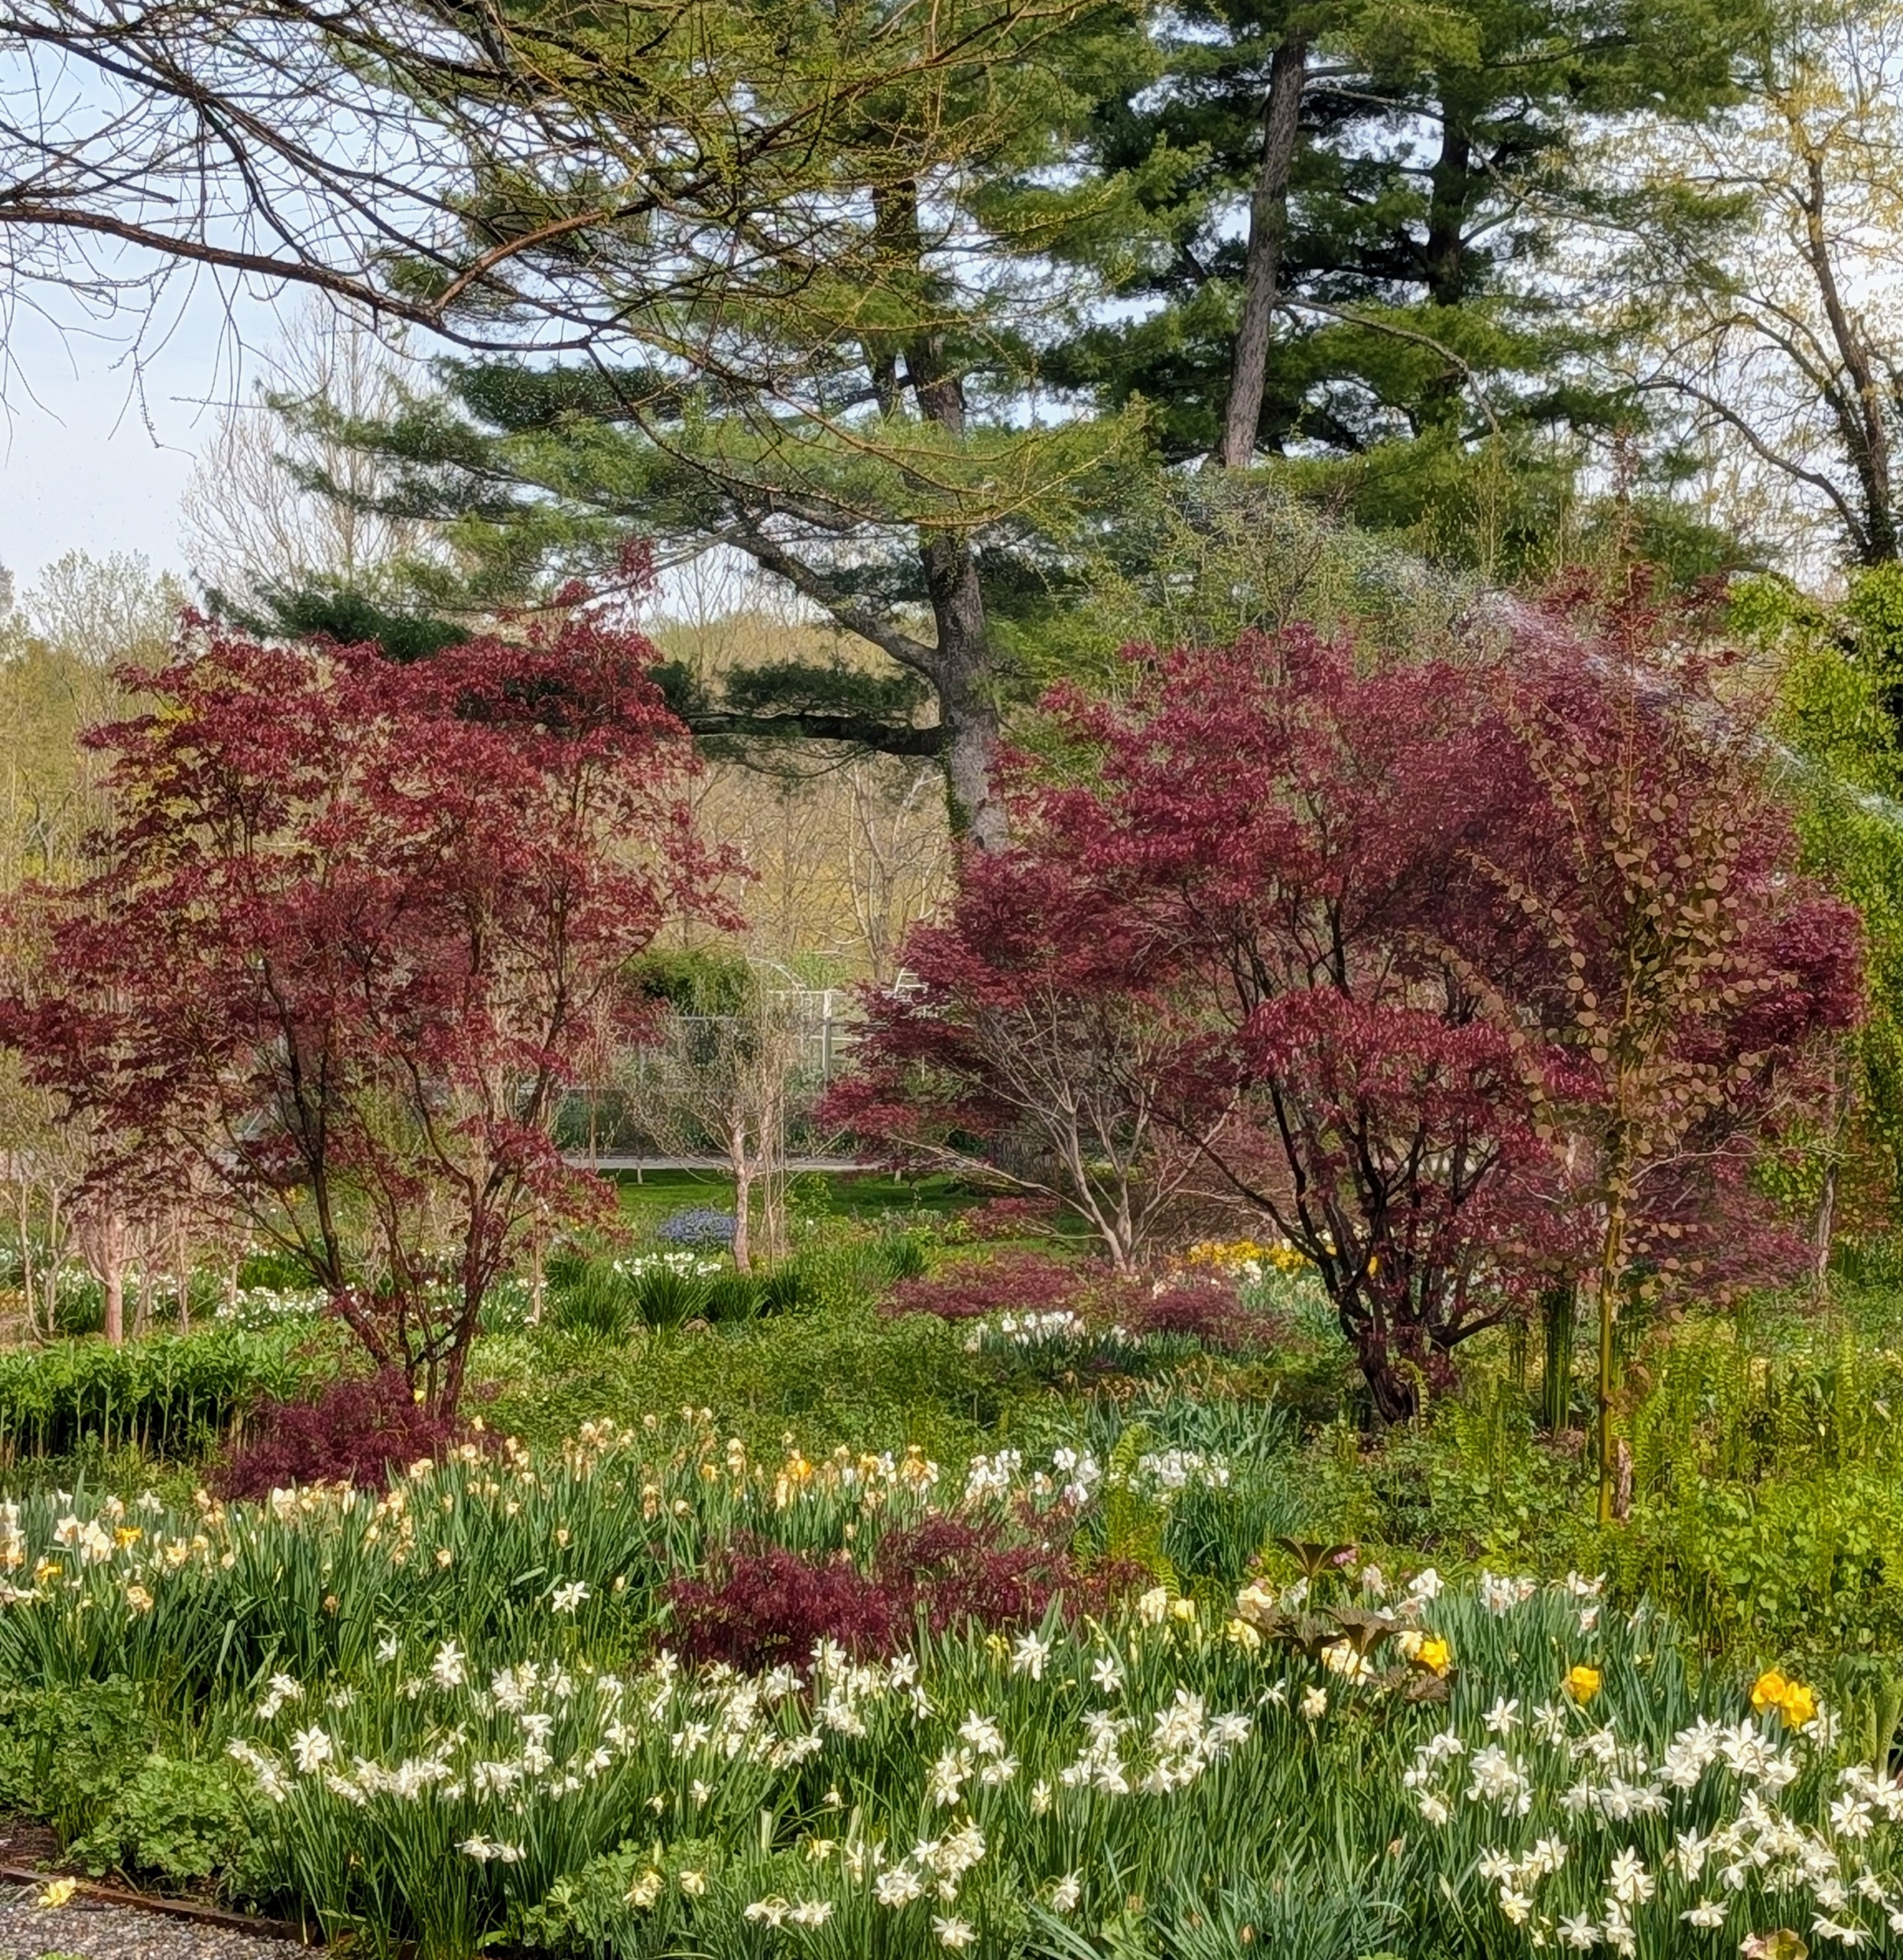
Every single day I am home, I tour the farm to see how all the trees and plants are doing. Every specimen is special. Here are two of many Japanese Maple trees on the property showing off their vibrant red spring foliage.
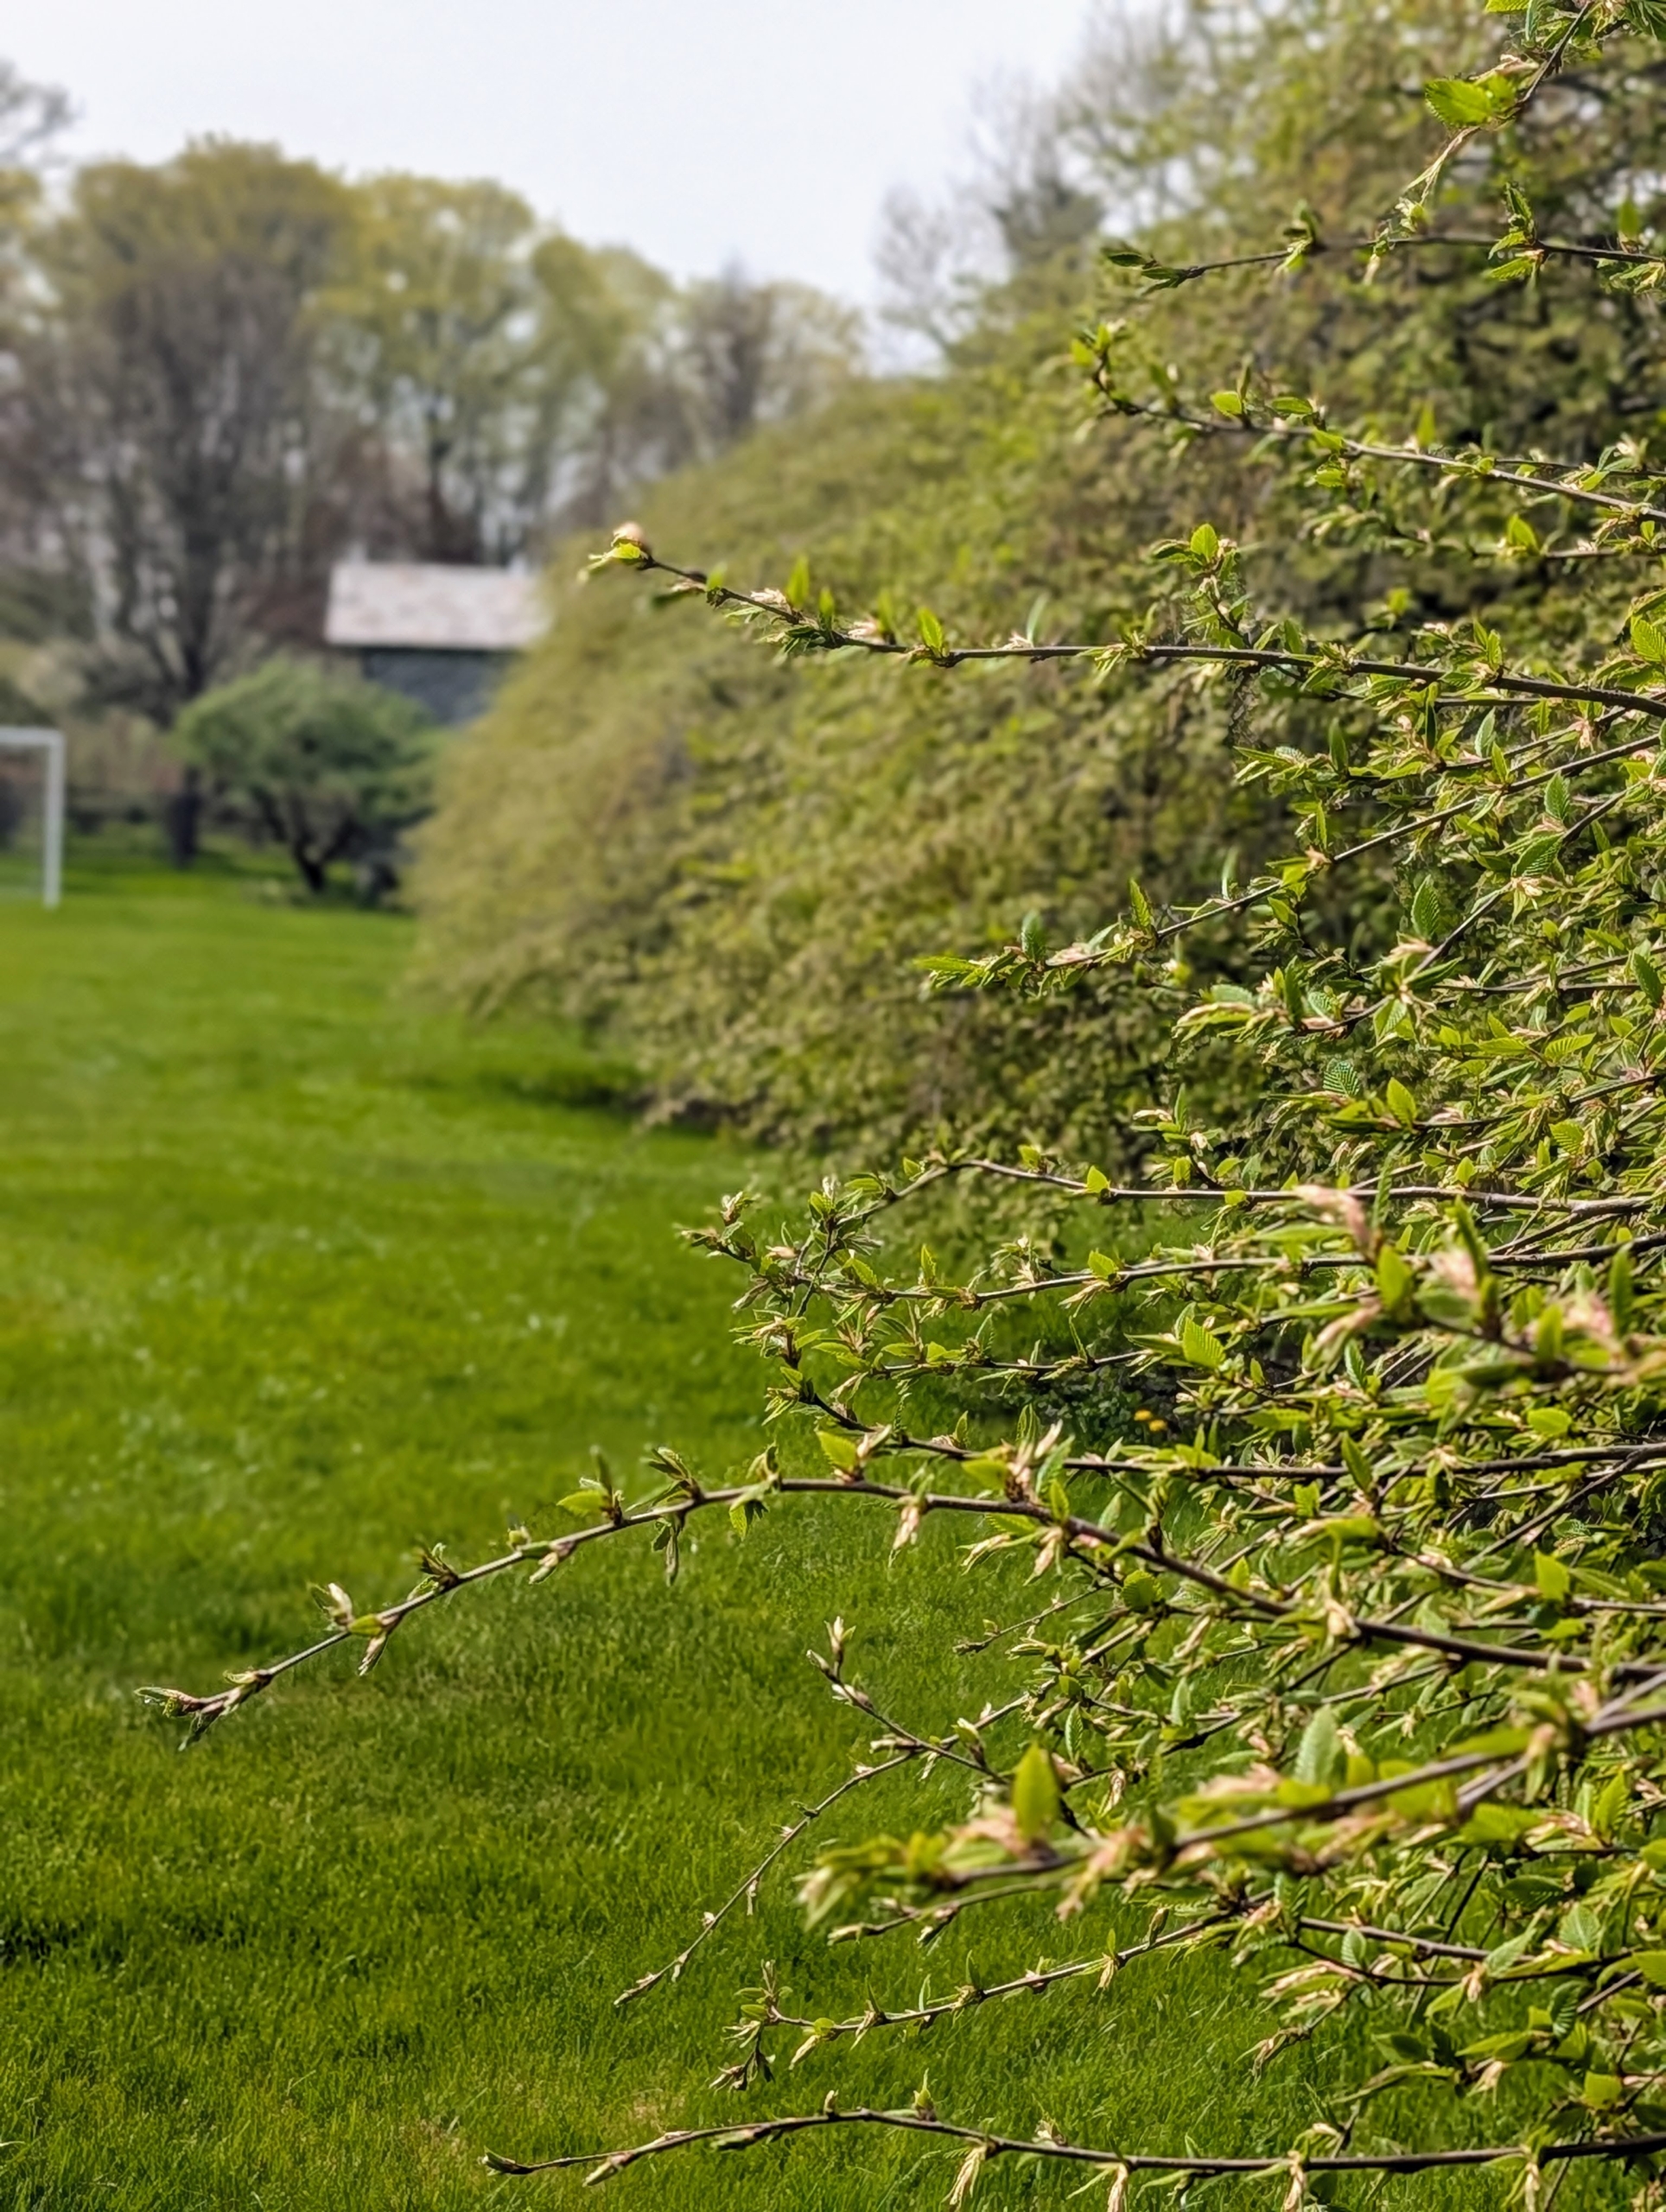
In my soccer field, a large stretch of lawn where my grandson Truman enjoys playing when he is here, are these weeping hornbeams, Carpinus betulus ‘Pendula’ – the branches of these trees gracefully weep creating umbrellas of foliage that reach the ground.
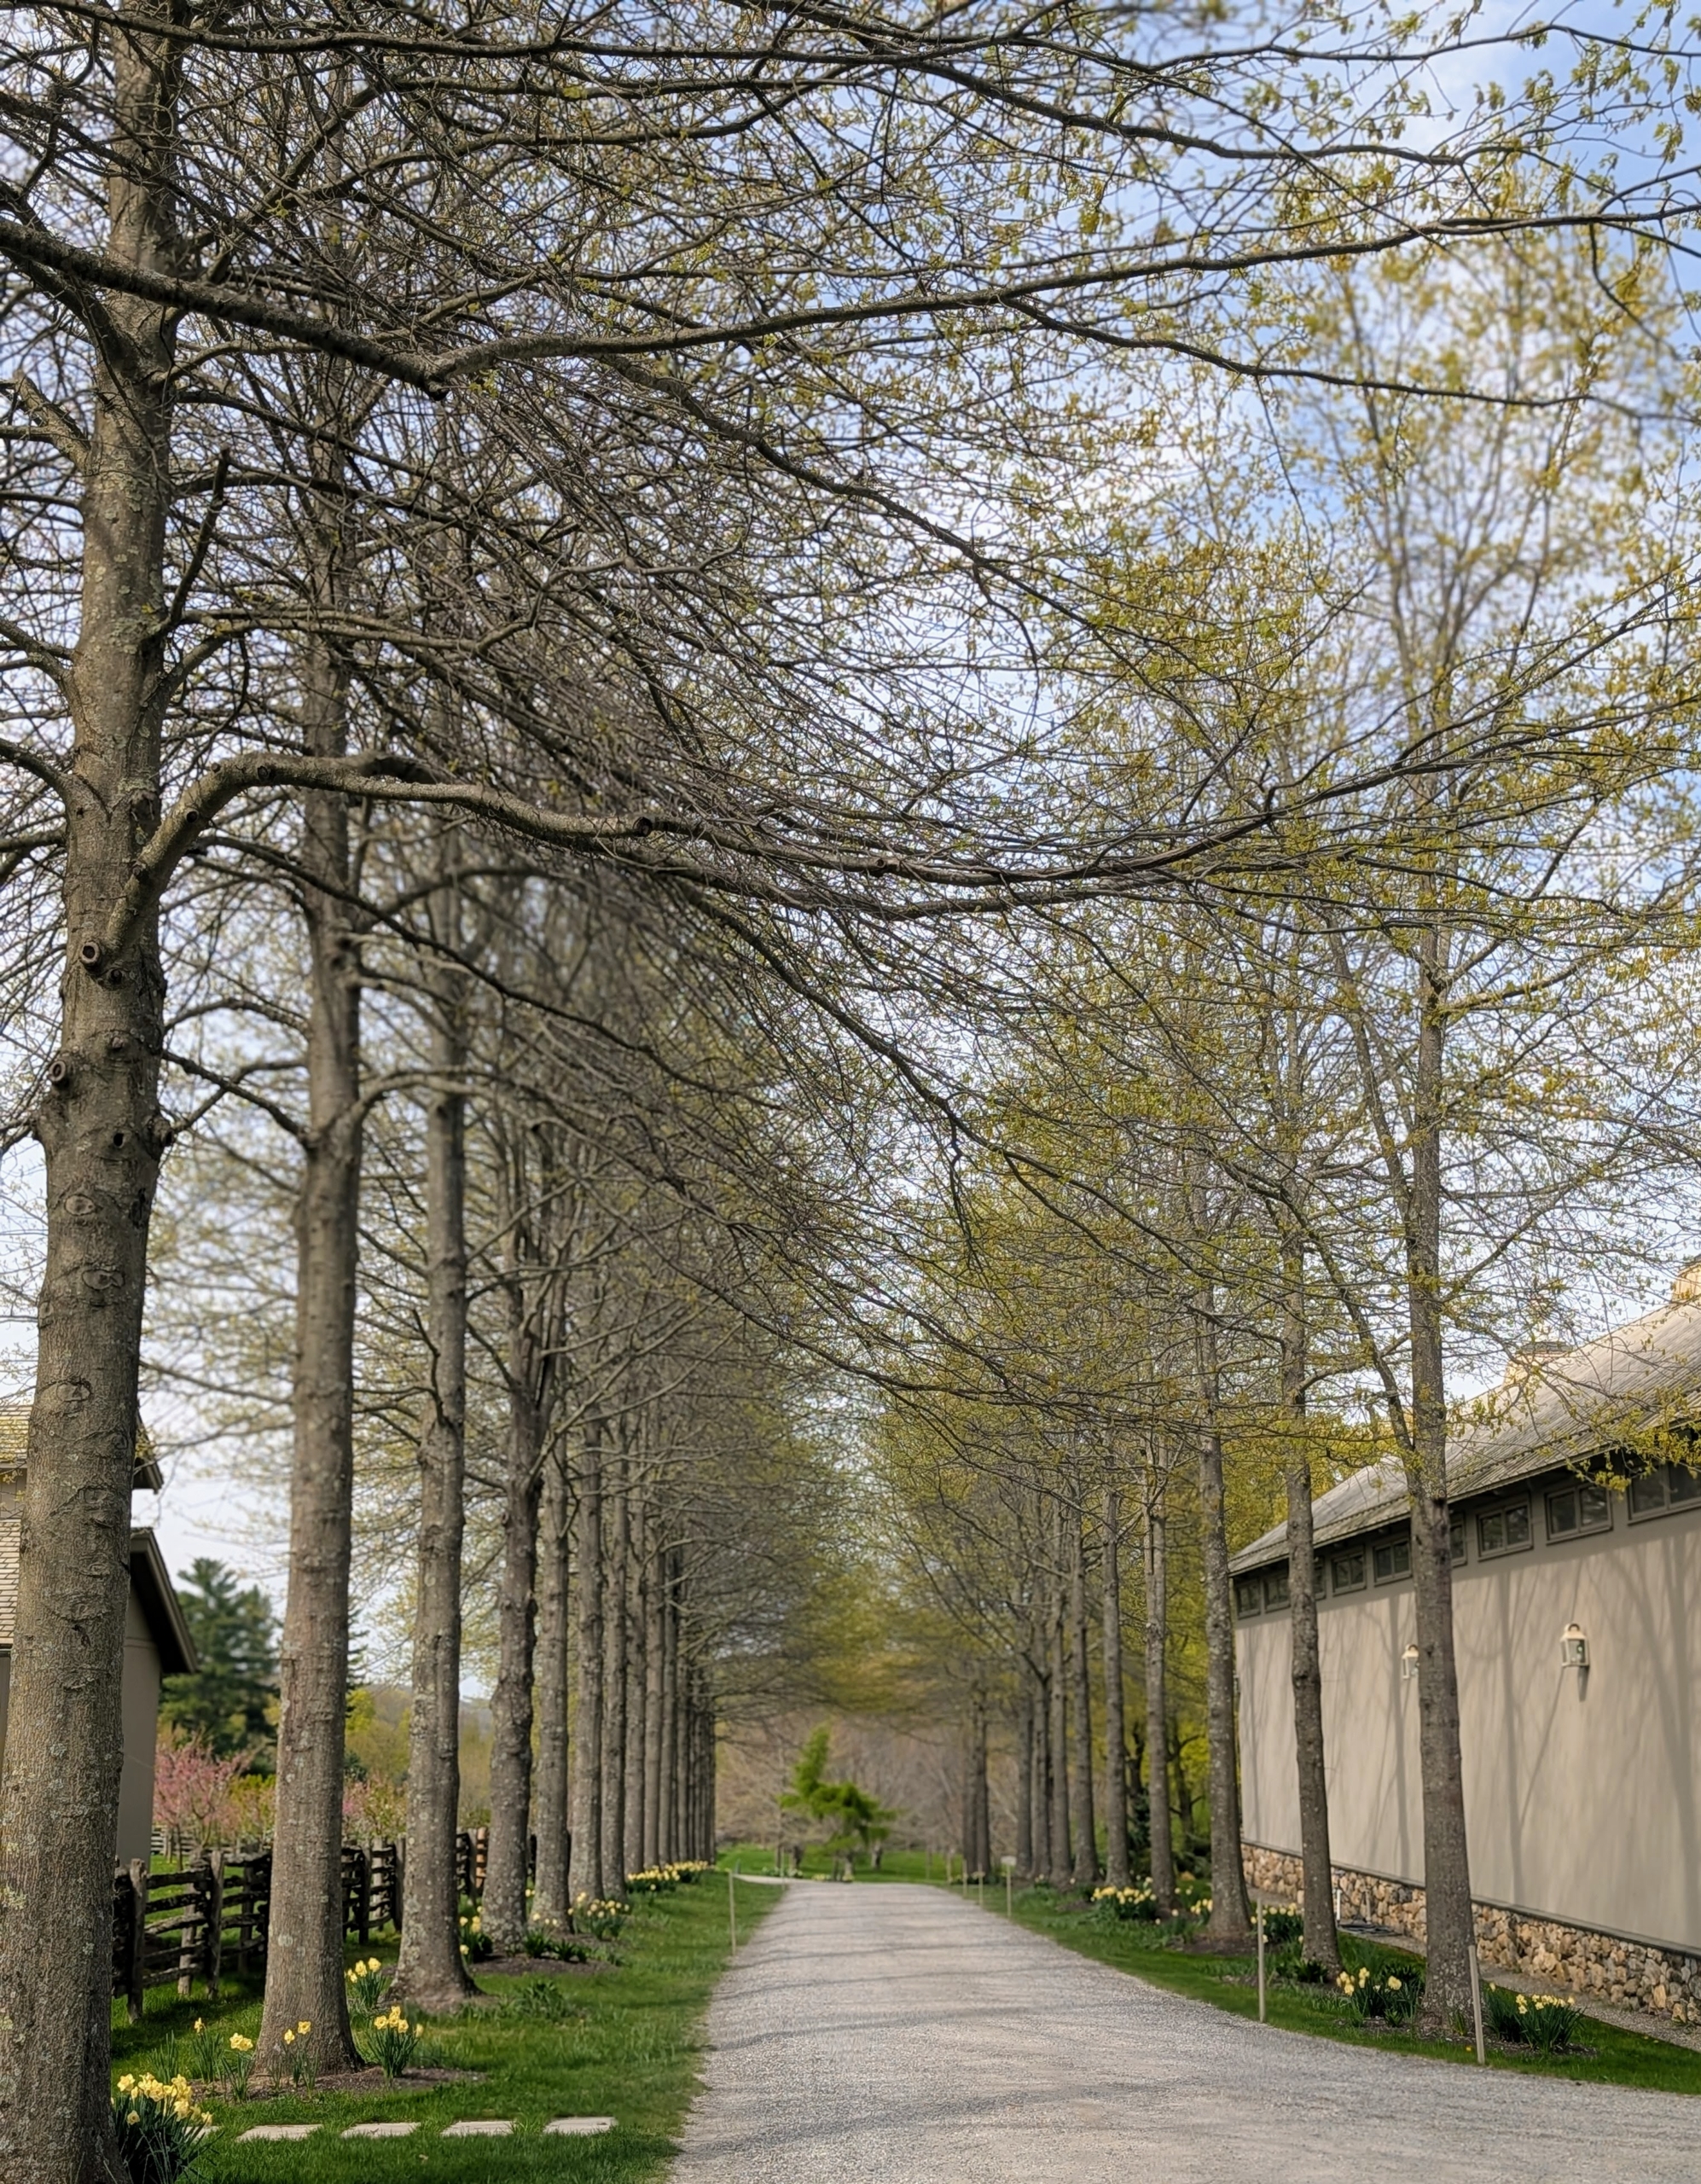
This is my Pin Oak Allée. The trees are beginning to leaf out, but at this time it is easier to see its recognizable branch habit, where the lower branches hang down, the horizontal middle branches flare out and the upright upper branches point up.
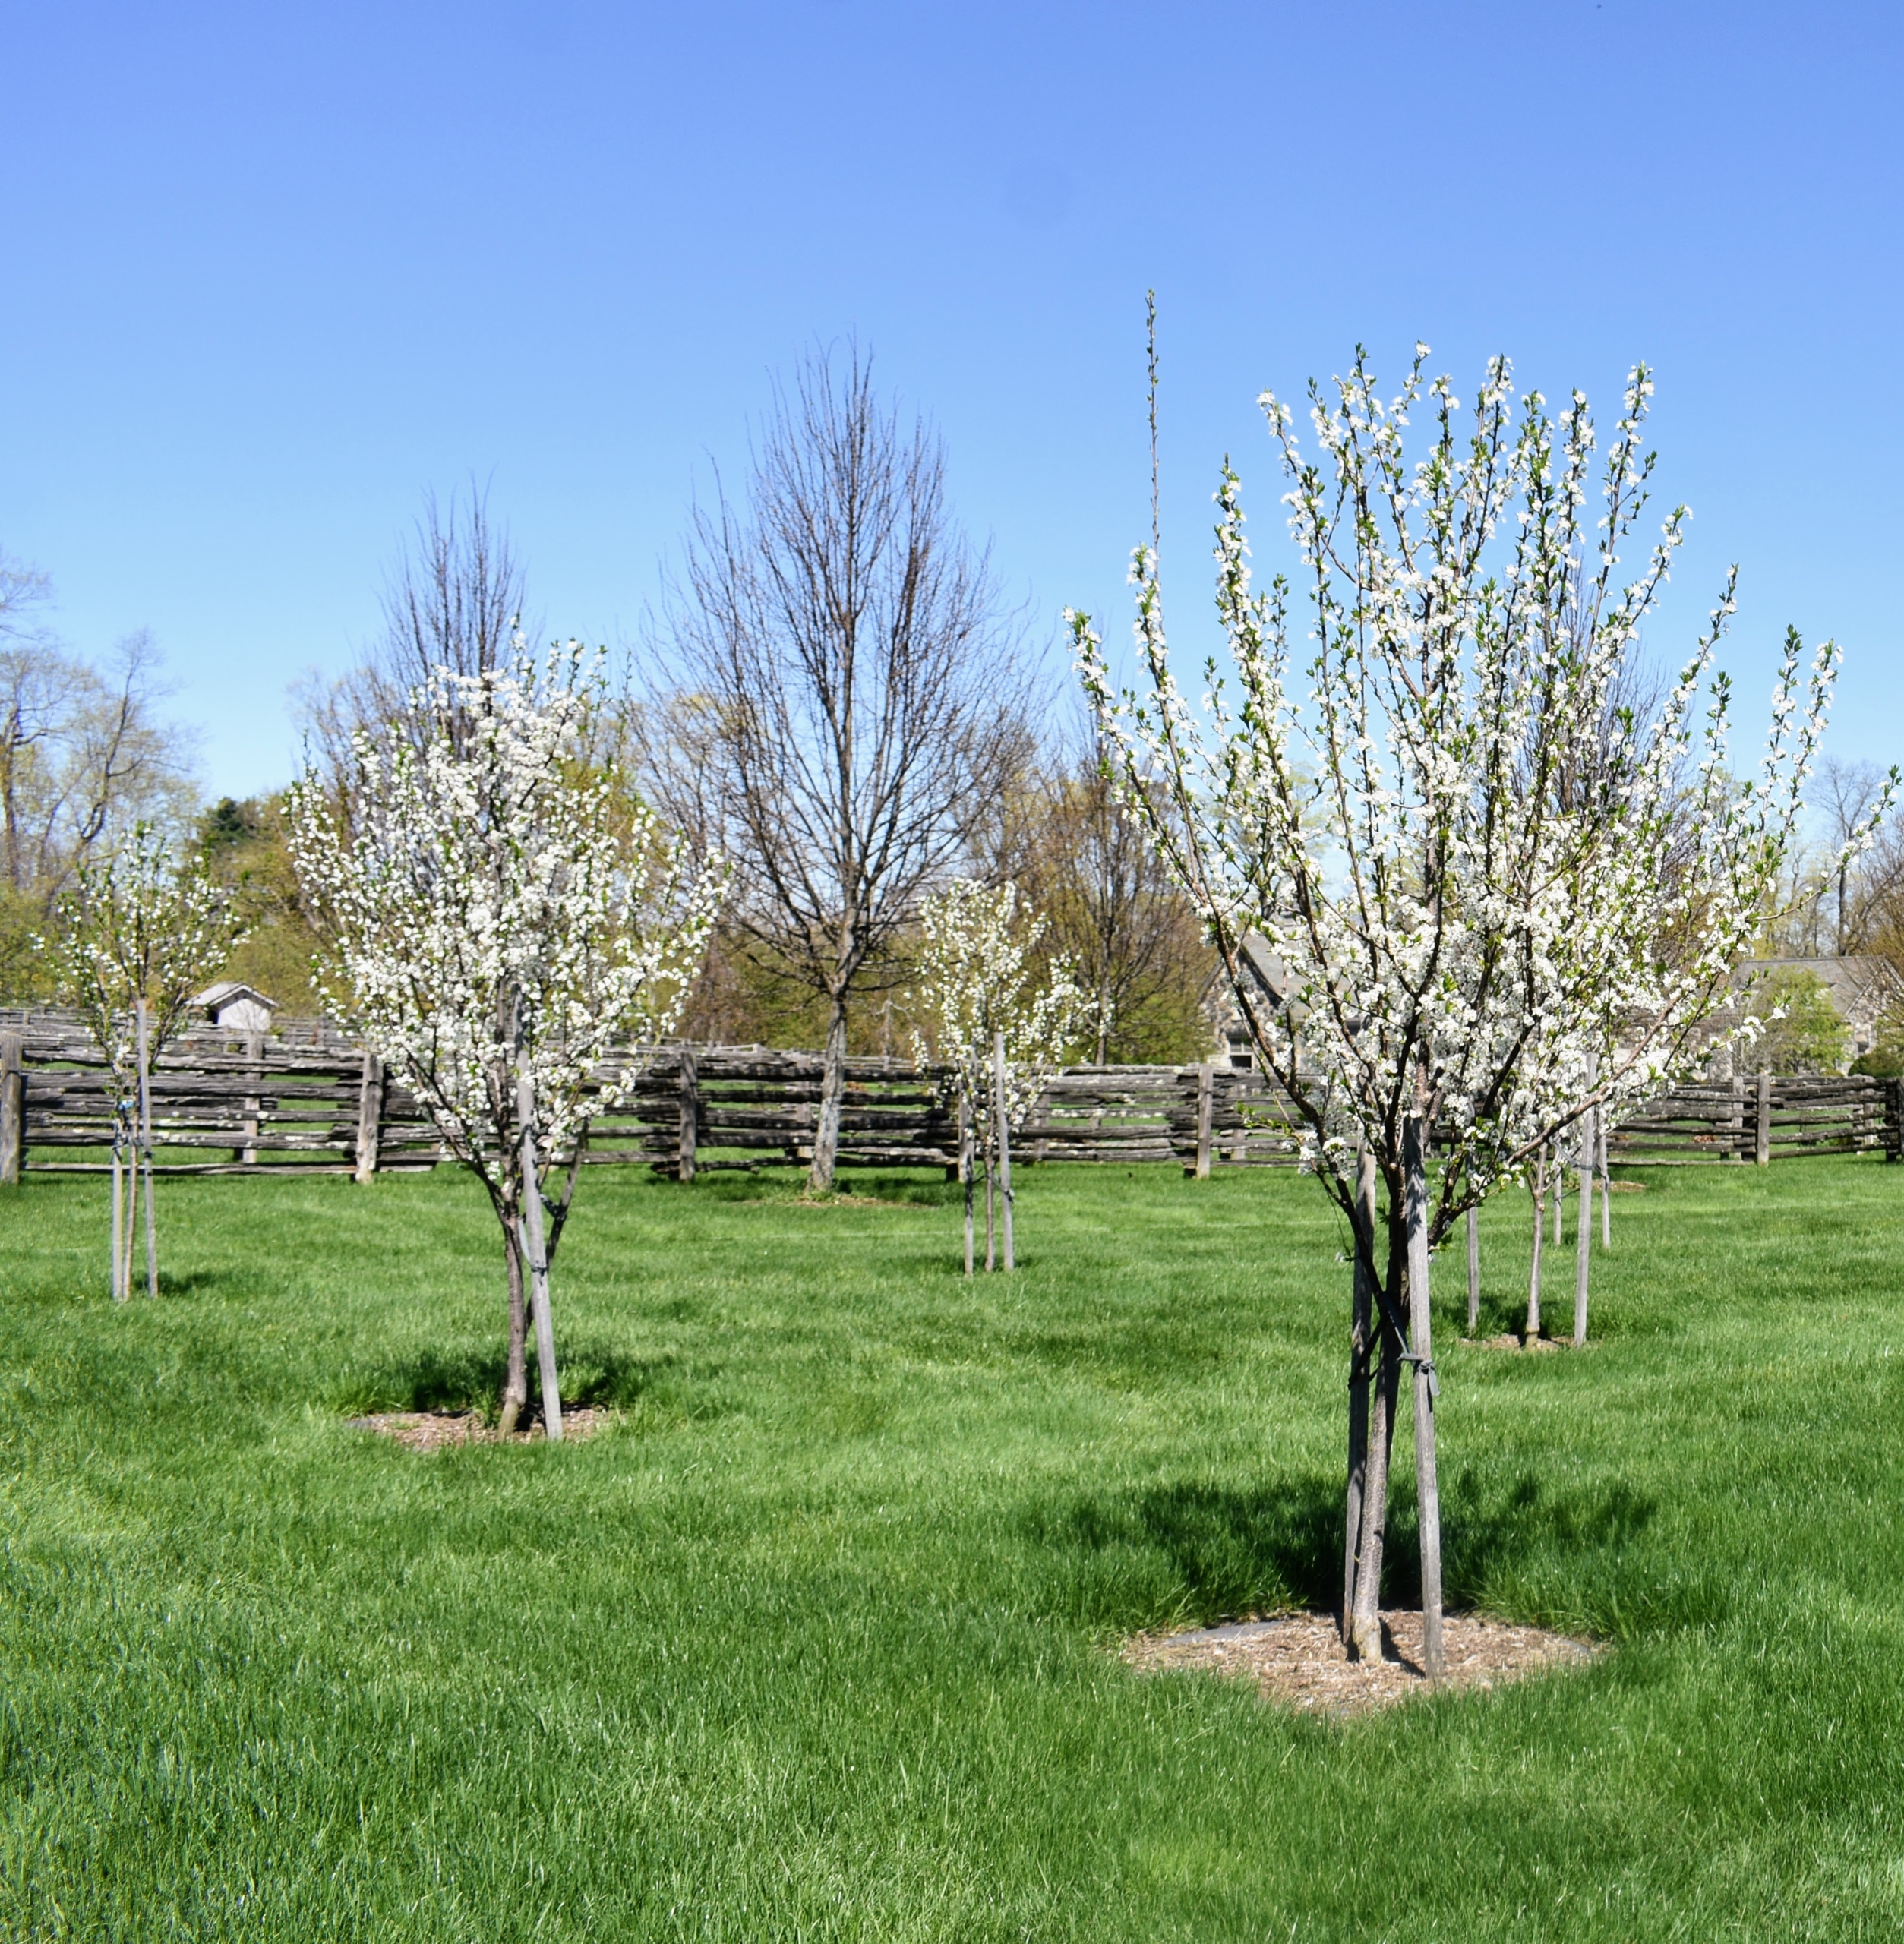
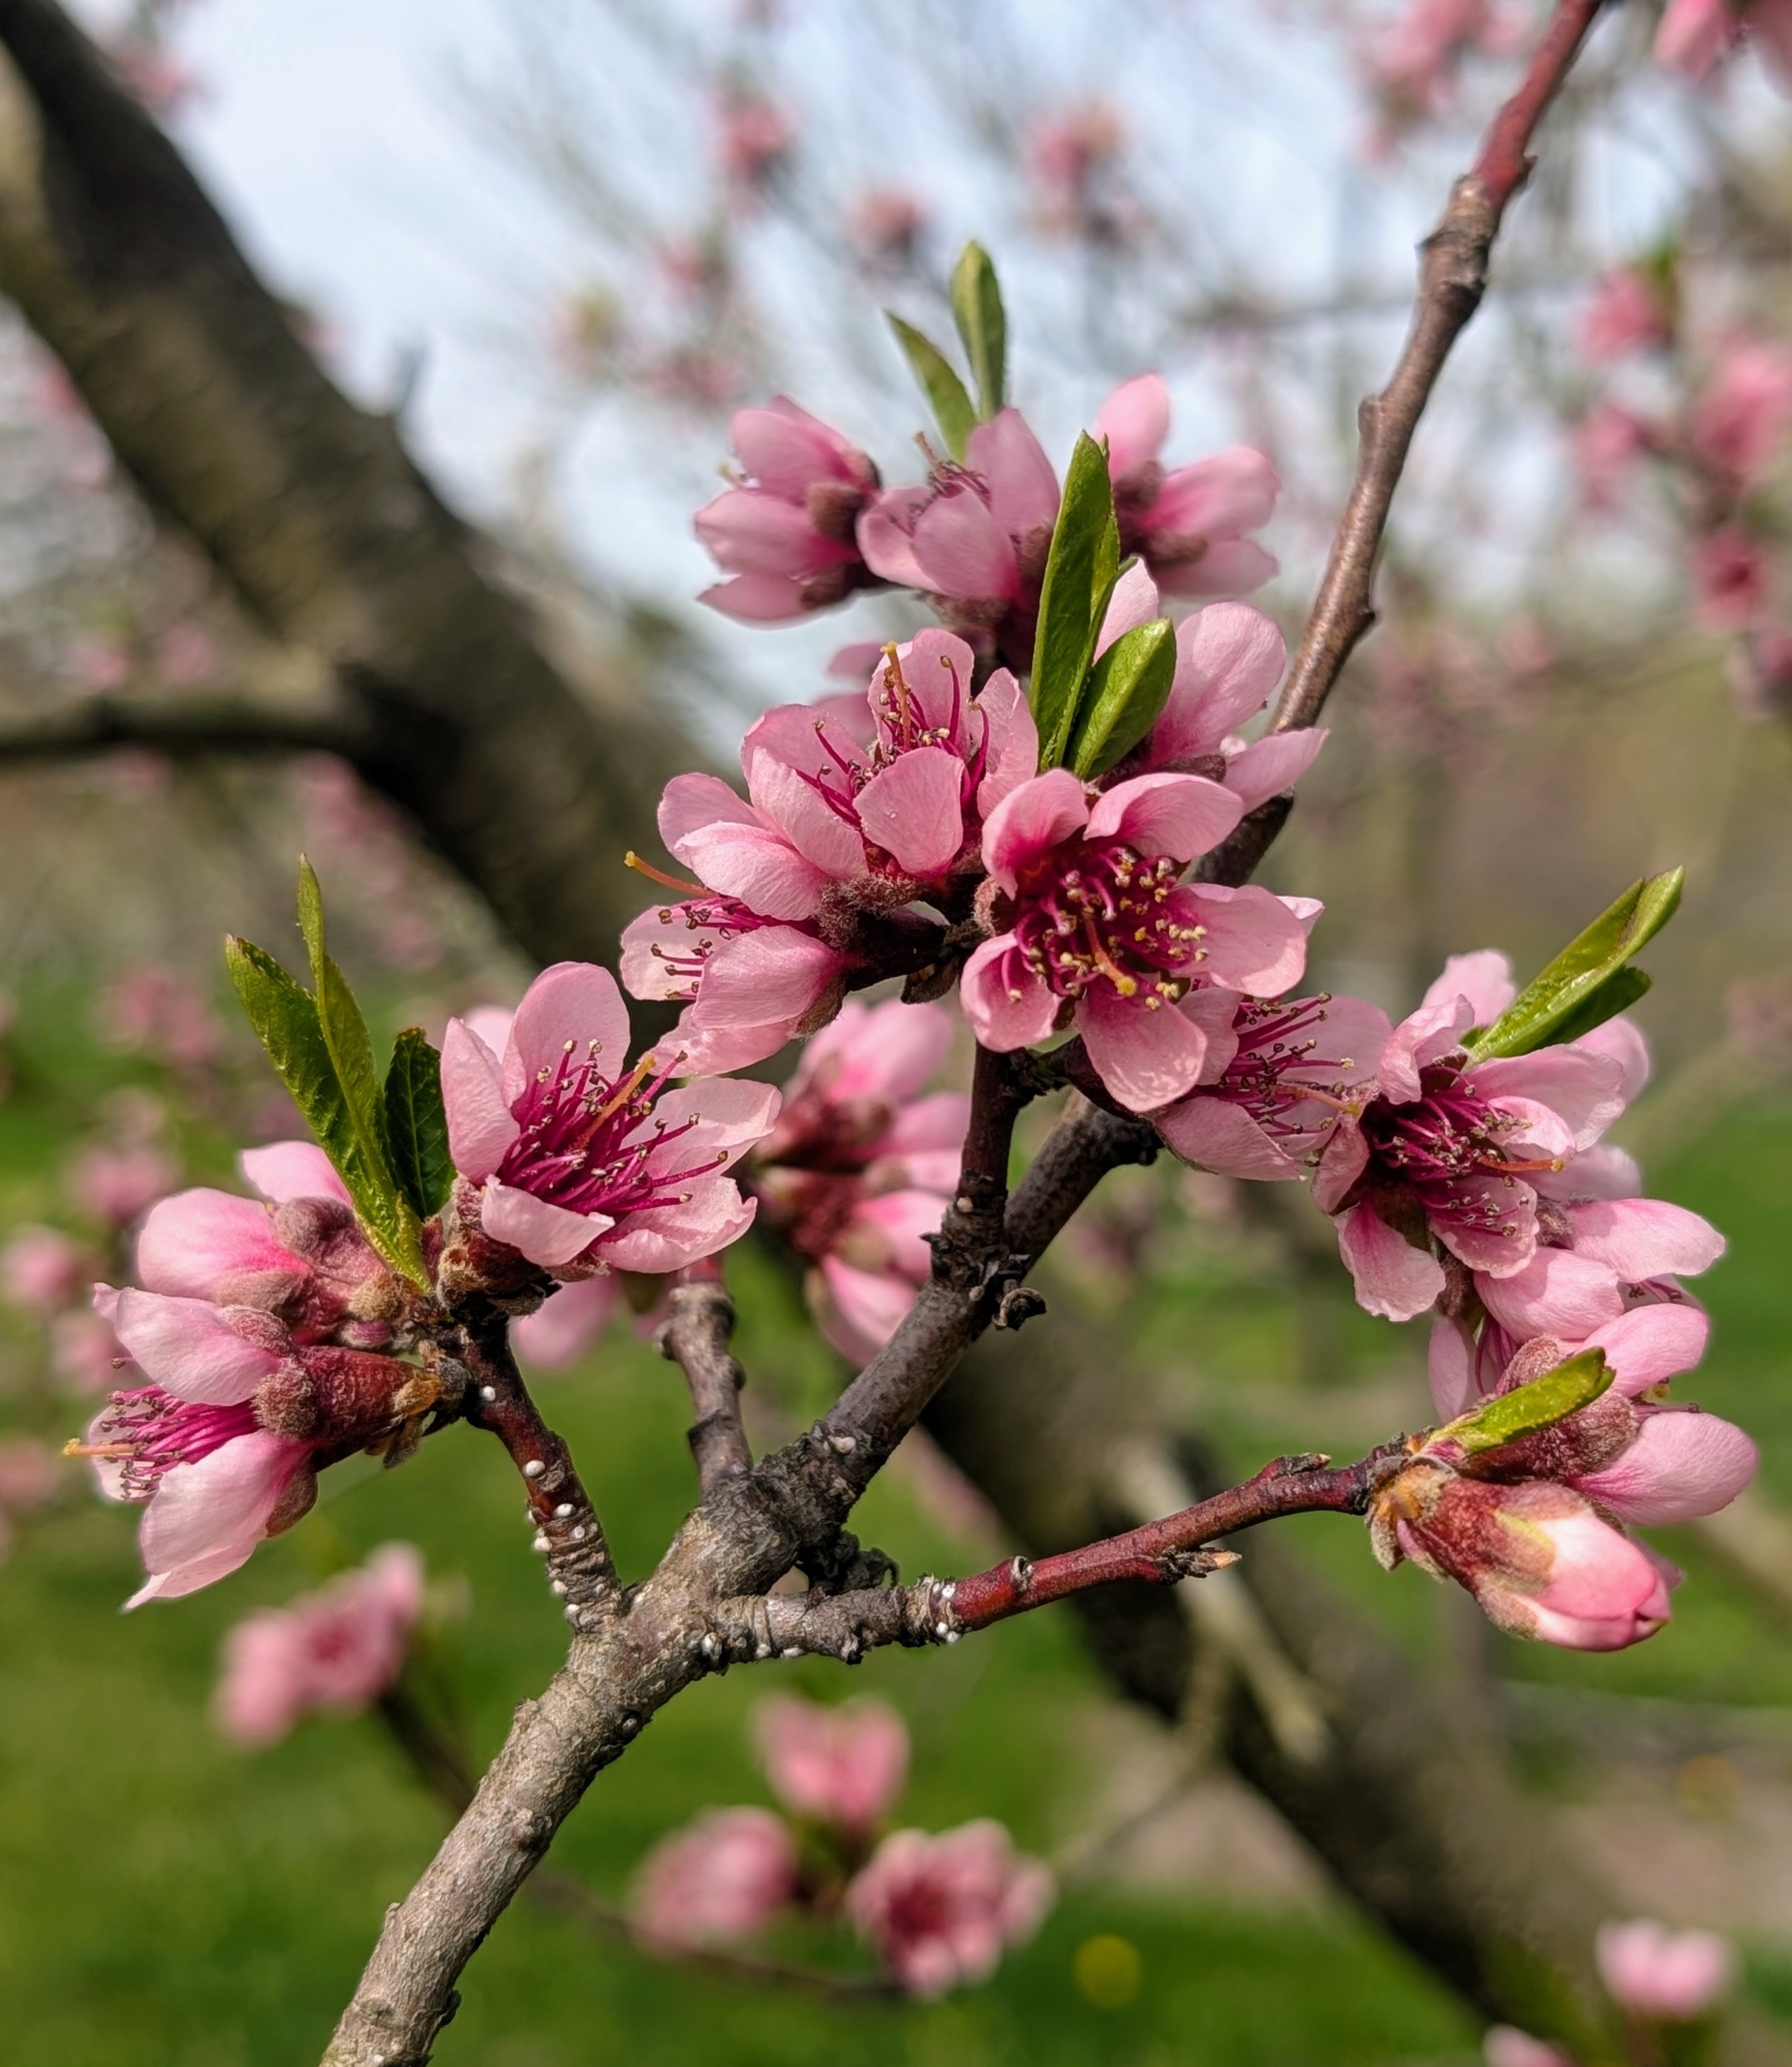
My orchard surrounds three sides of my pool. I planted more than 200-fruit trees here, many of which started as bare-root cuttings.
These are the pink buds of one of my peach trees – so many of them are blooming.
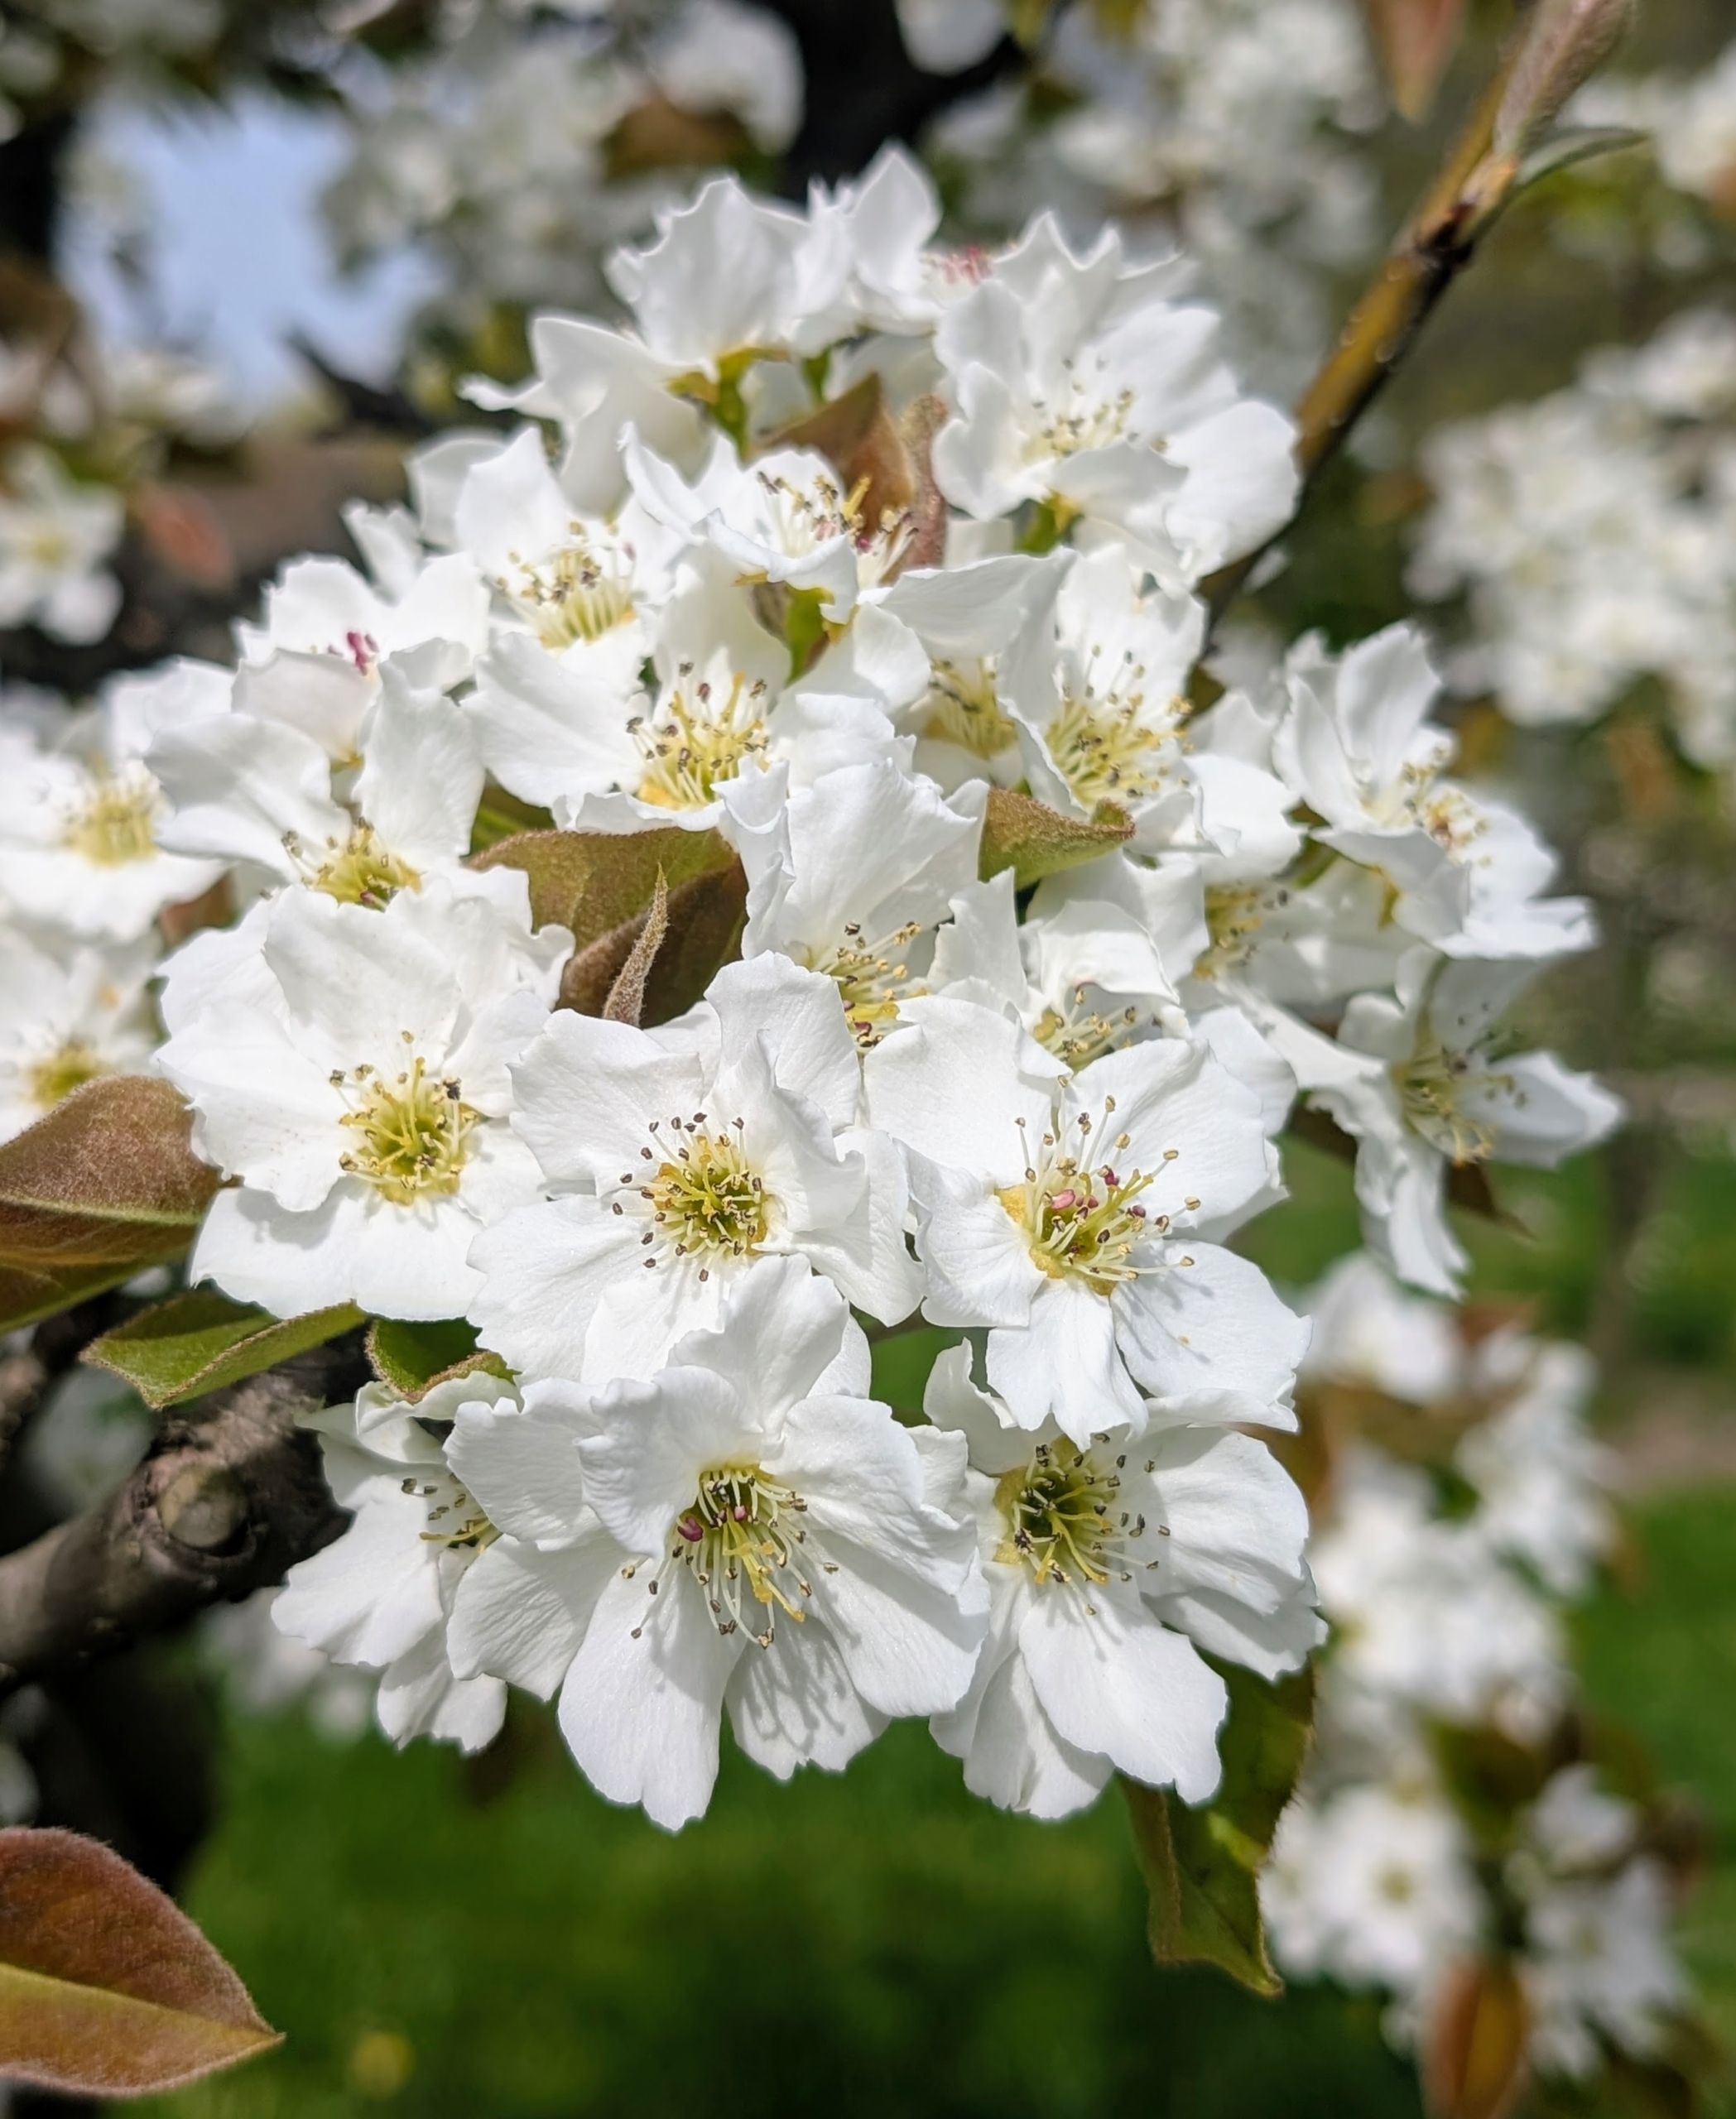
Fruiting pear trees bloom from April to May, with stunning white flowers.
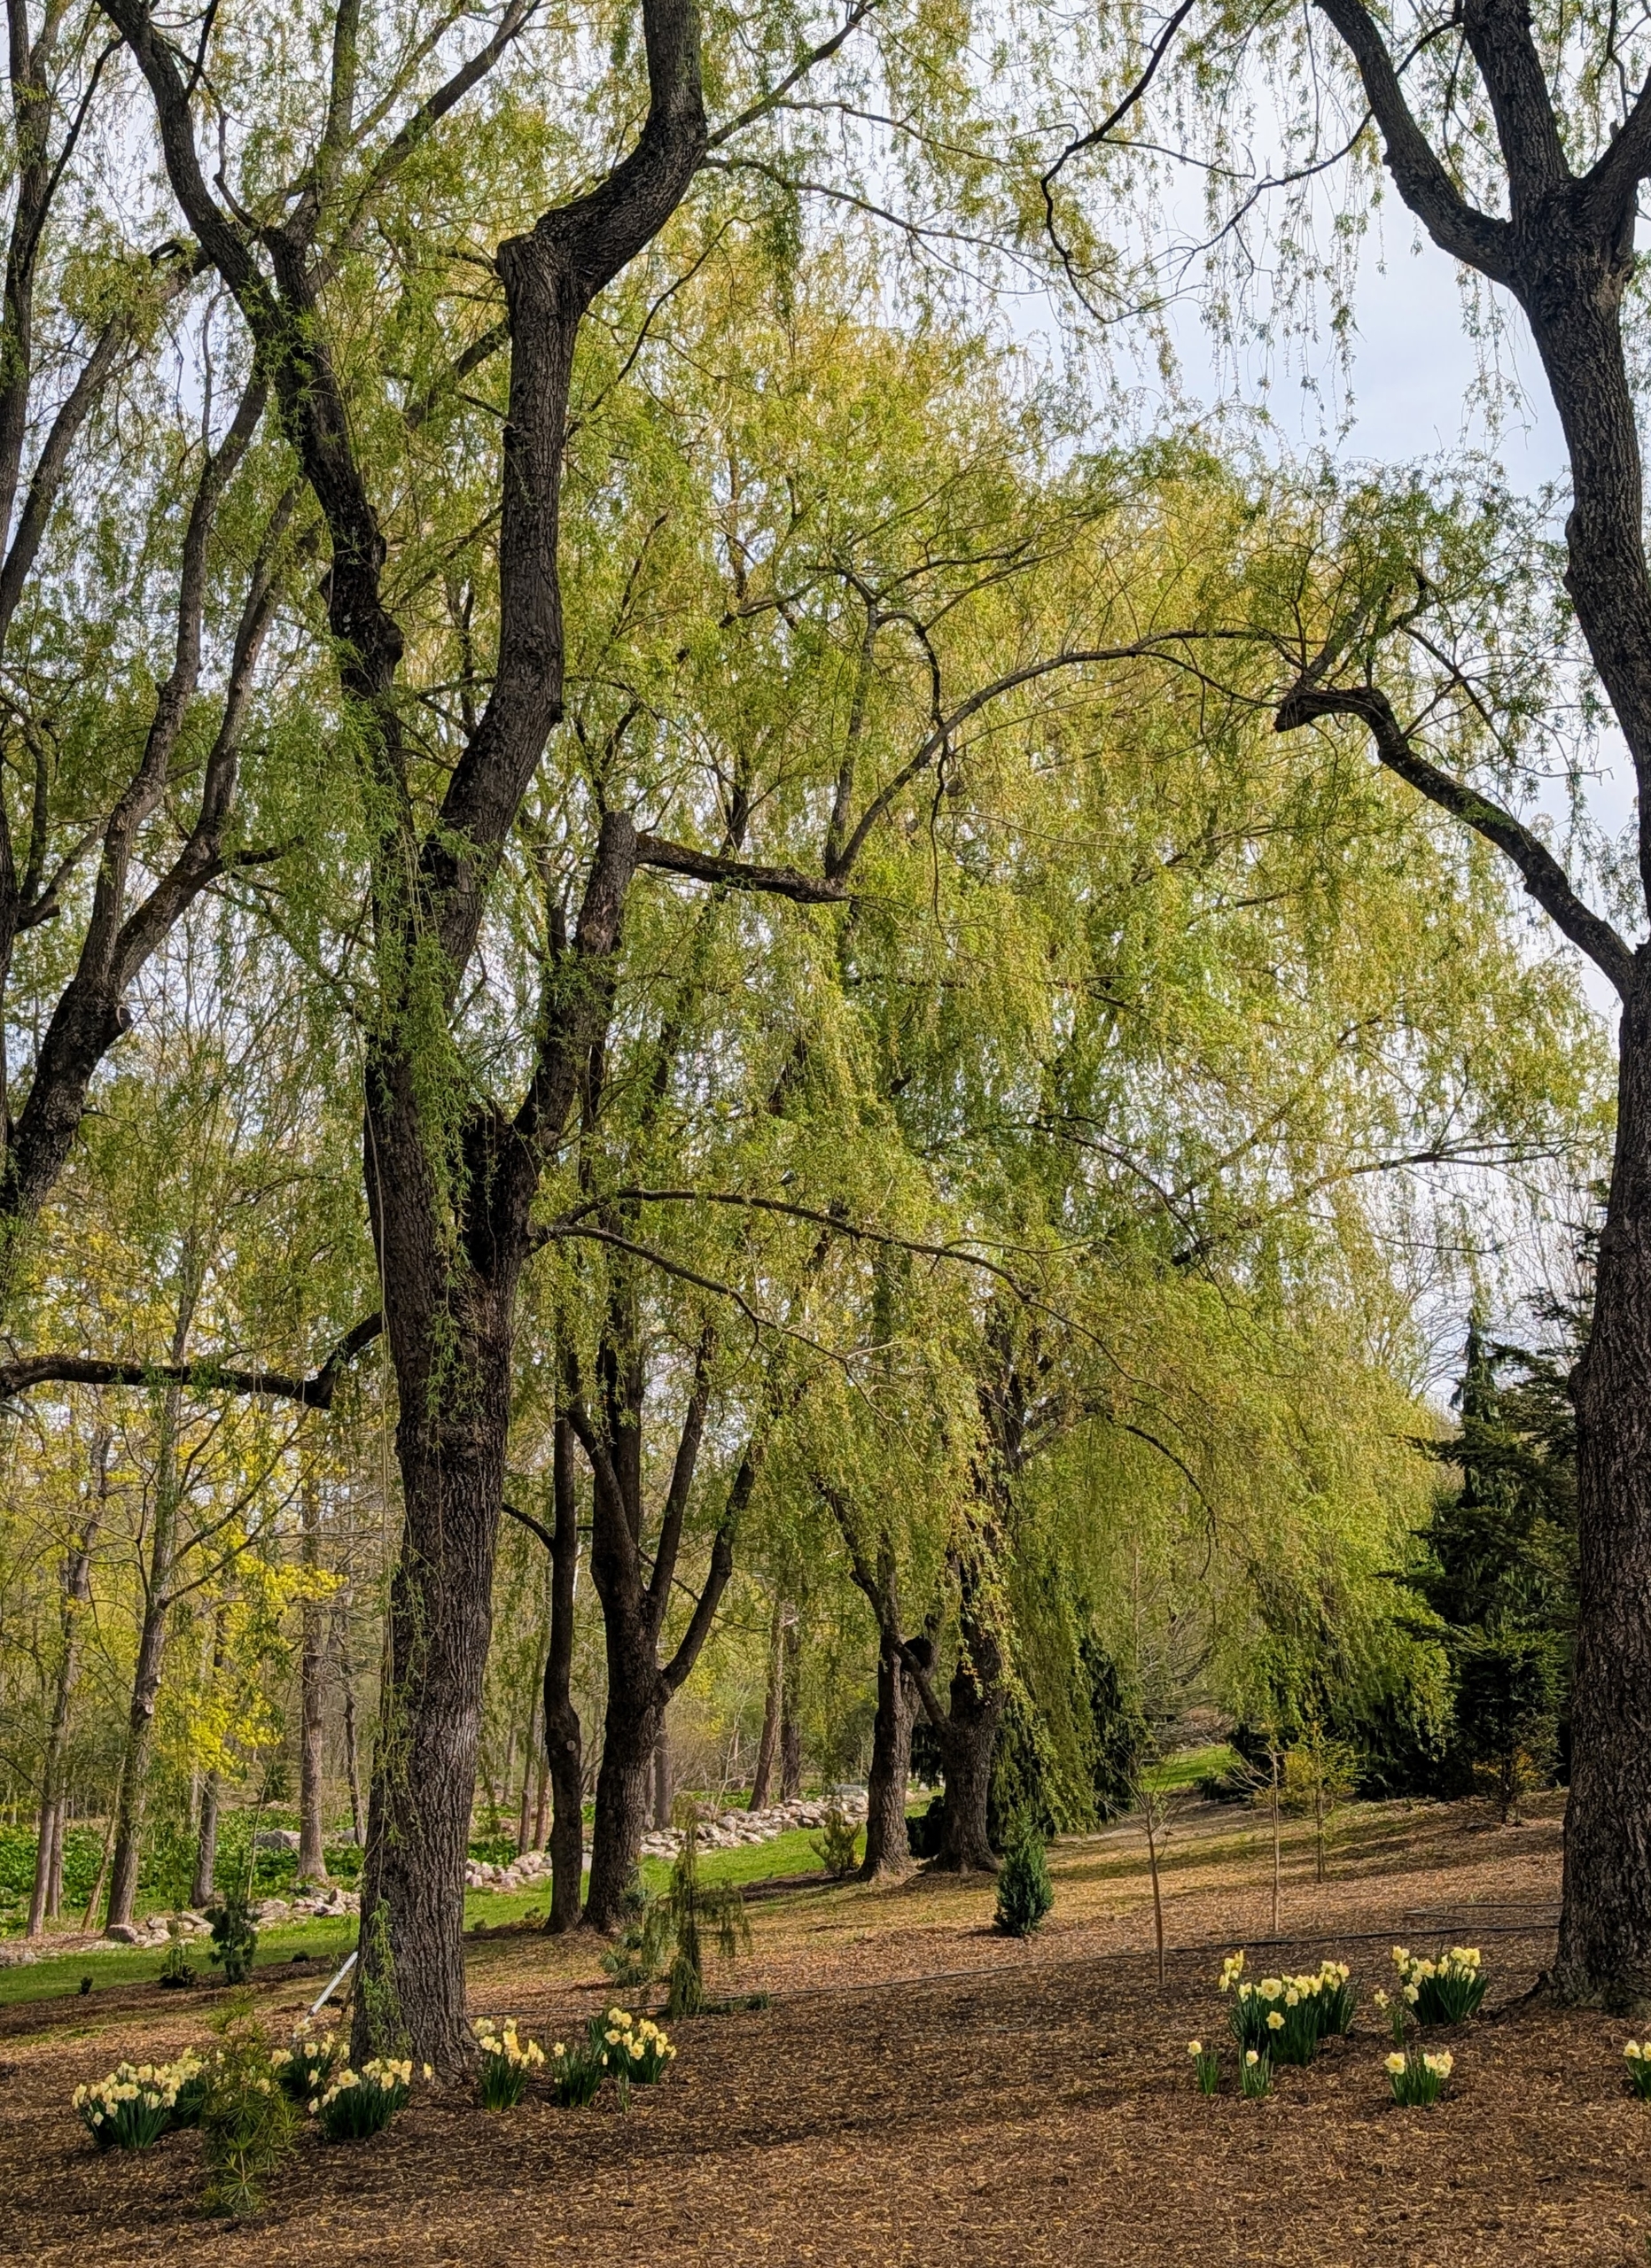
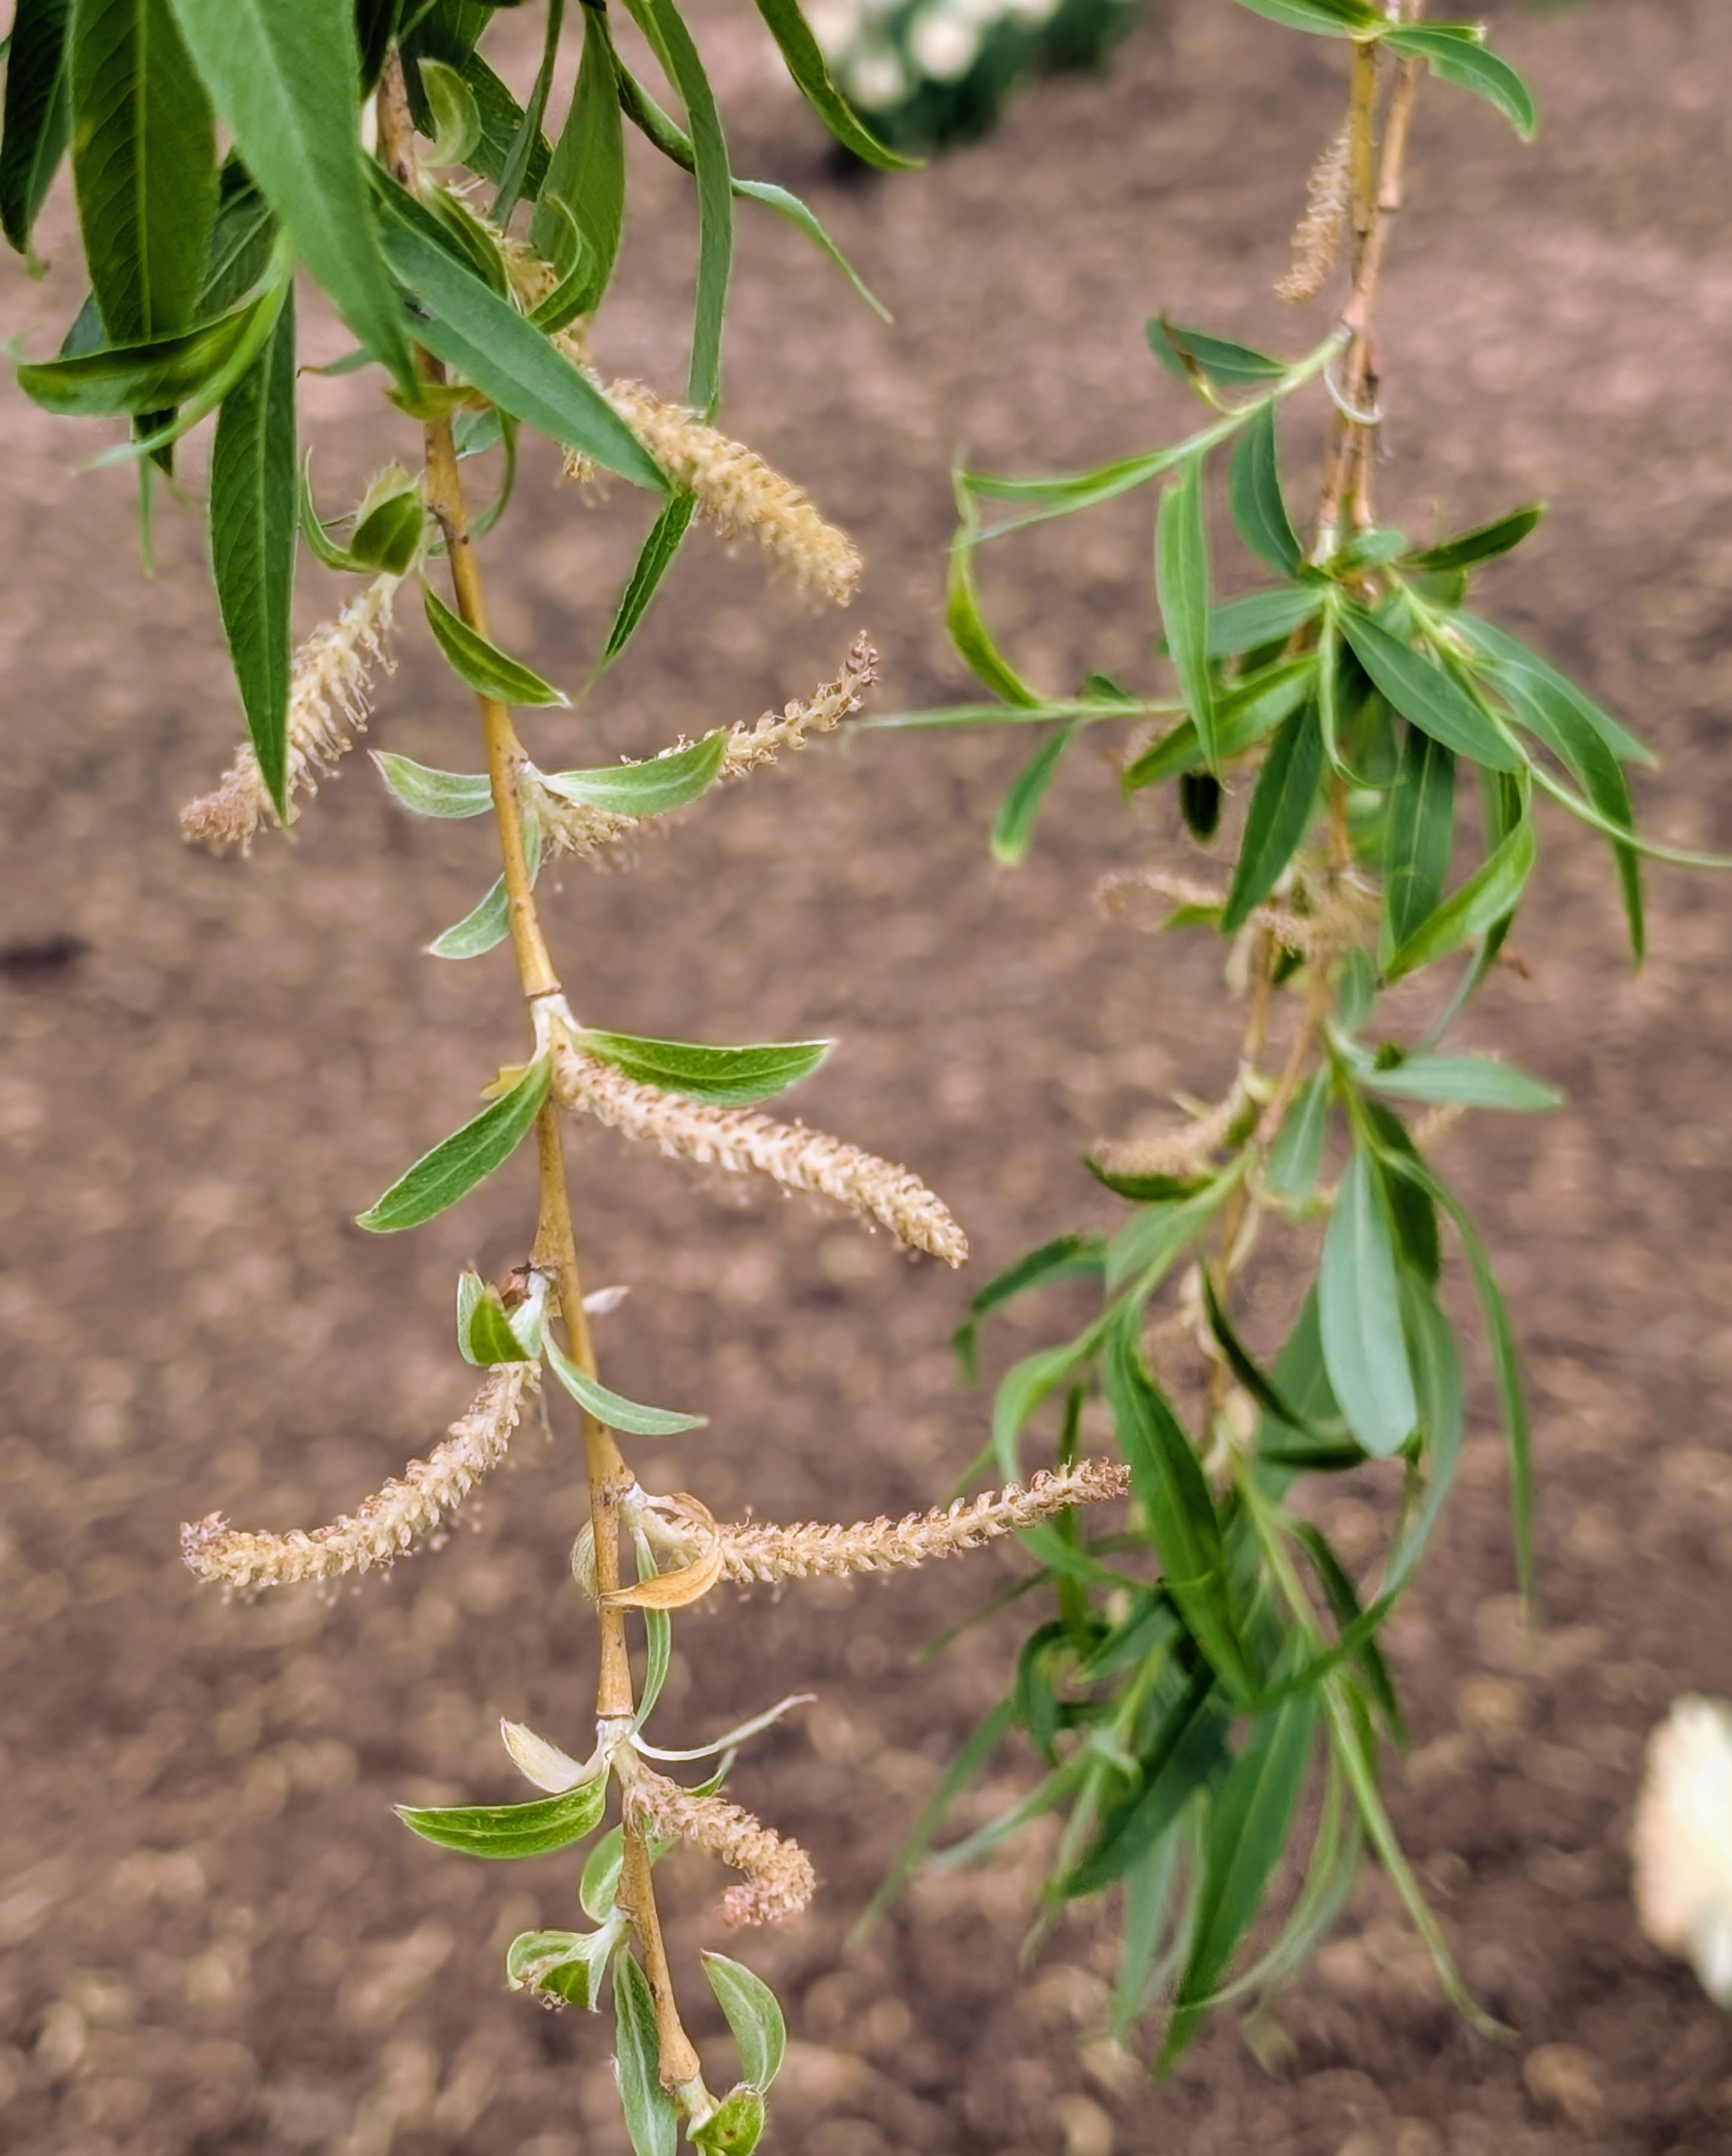
From a distance, it is easy to notice the golden-yellow weeping willows. This grove is at the edge of my pinetum. The golden hue looks so pretty against the early spring landscape.
These medium-sized trees have arching branches that sweep down to the ground.
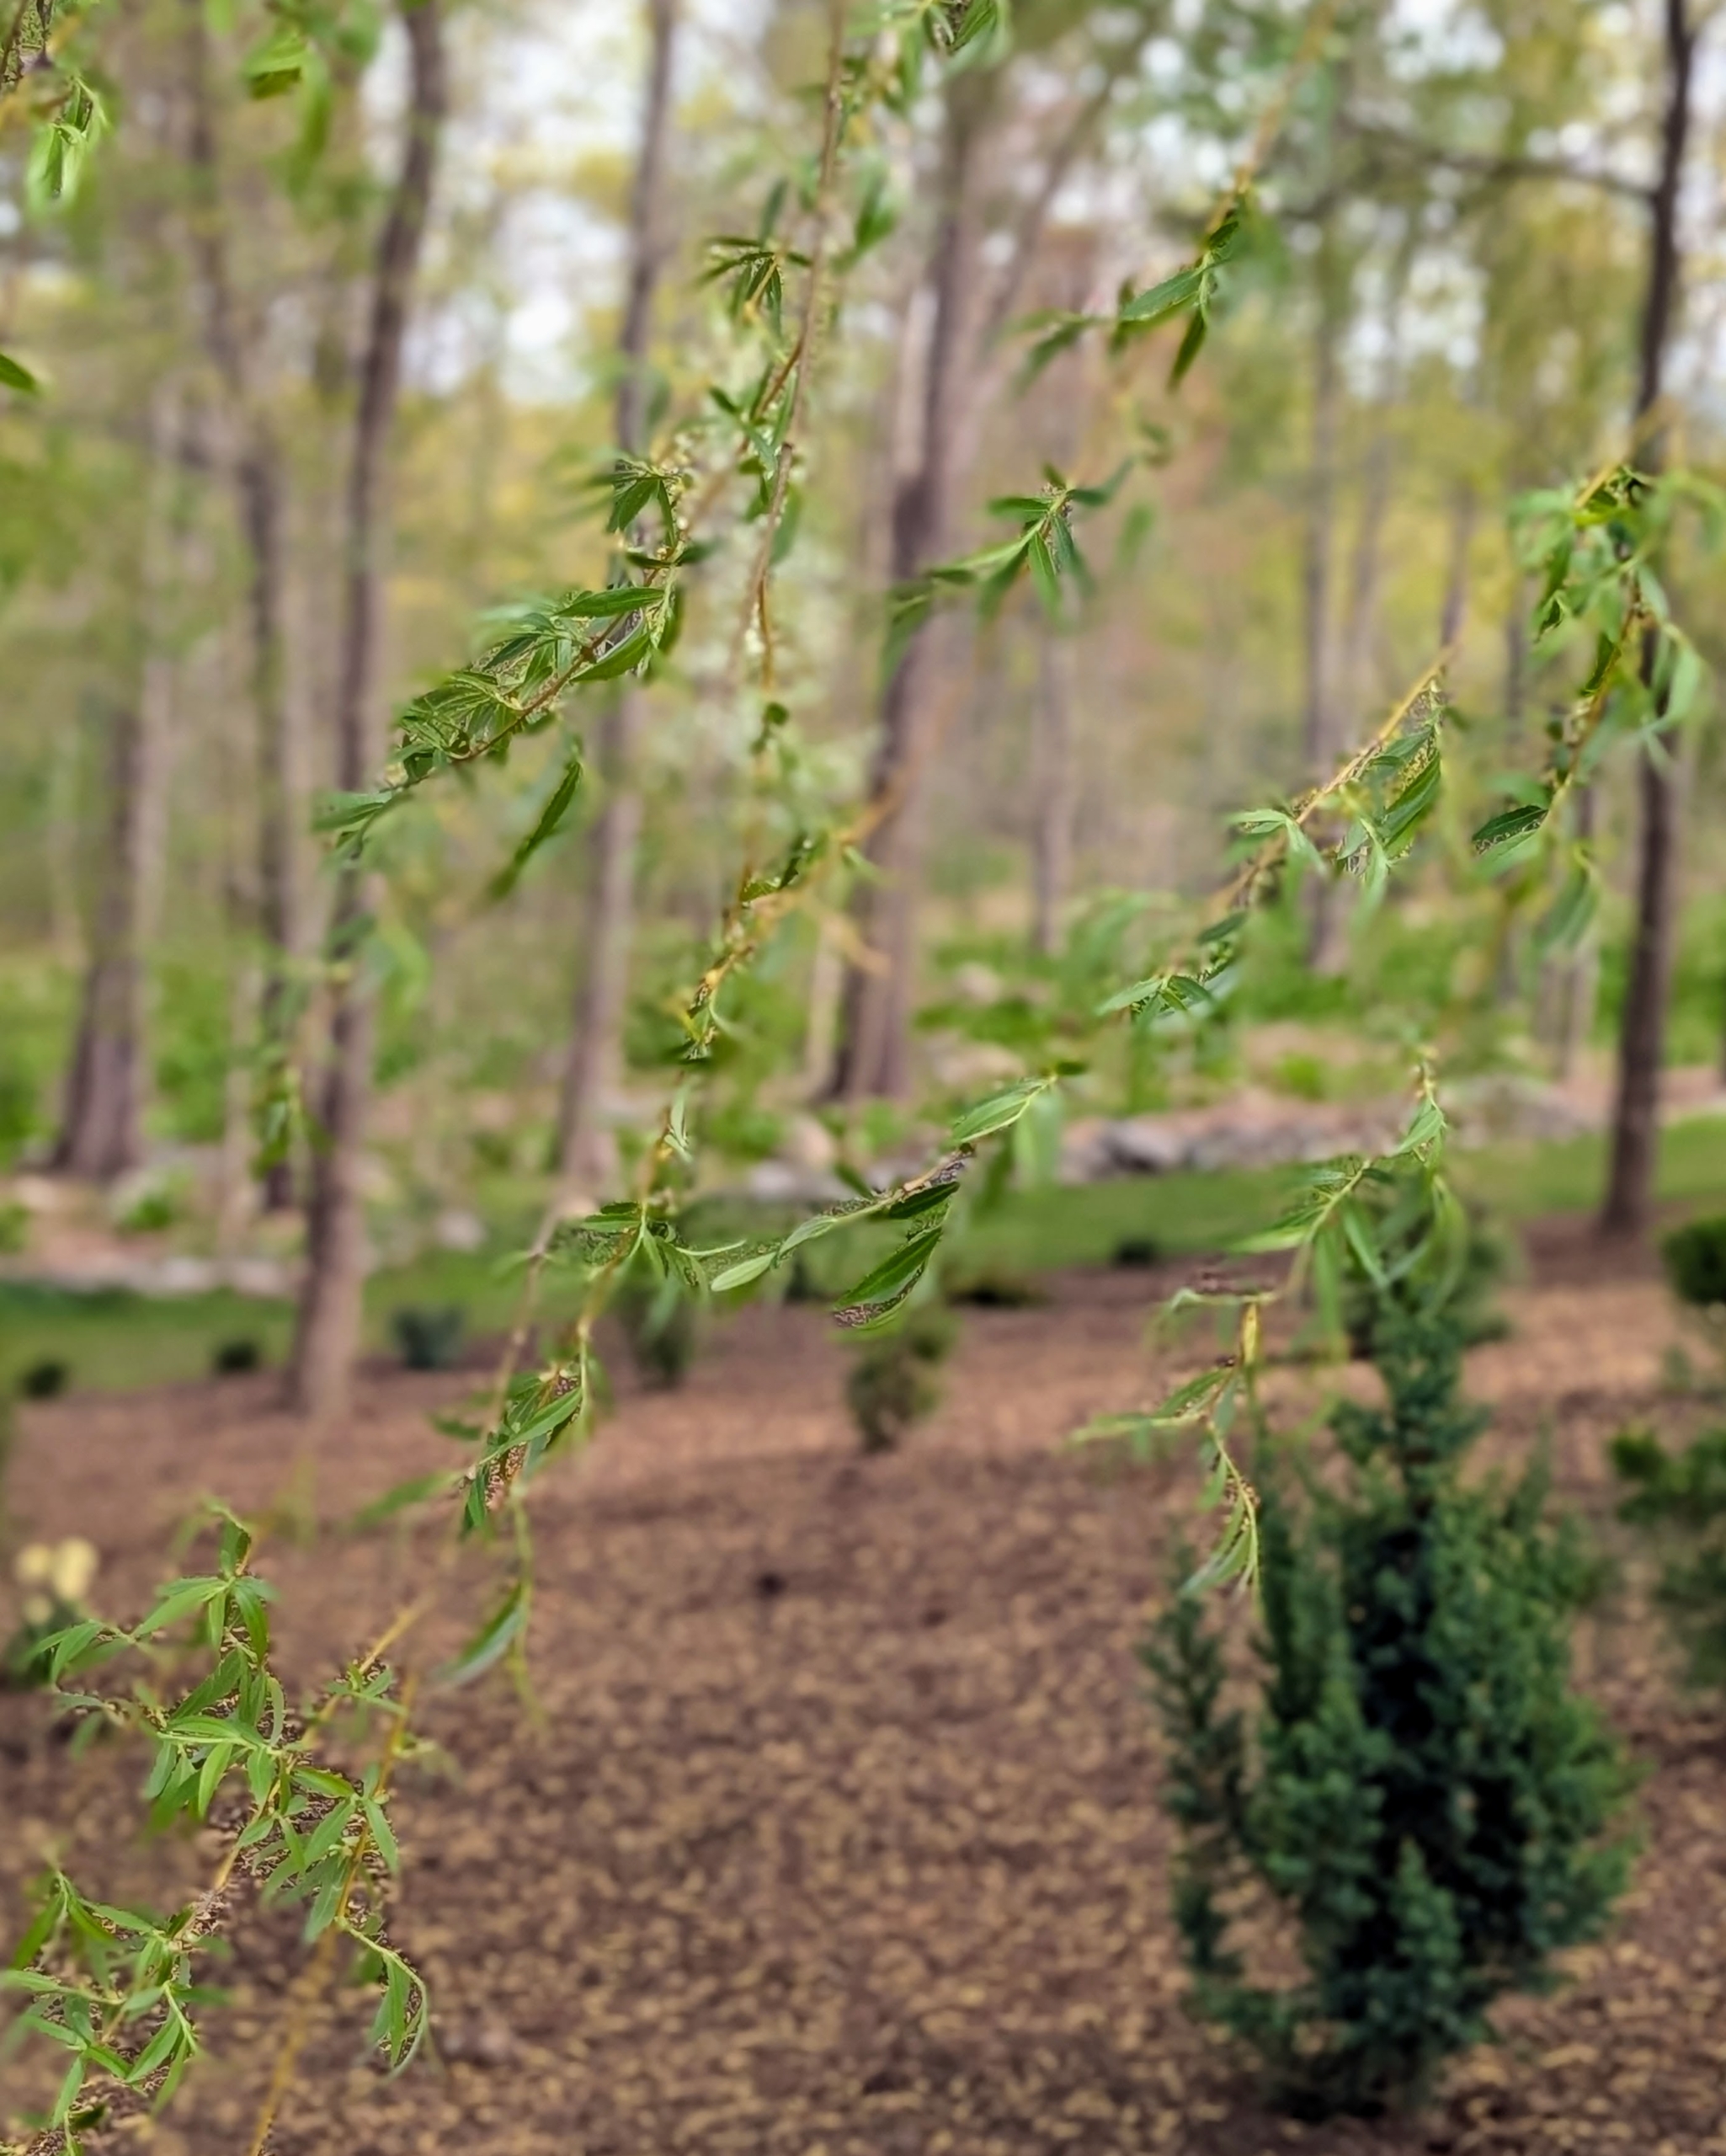
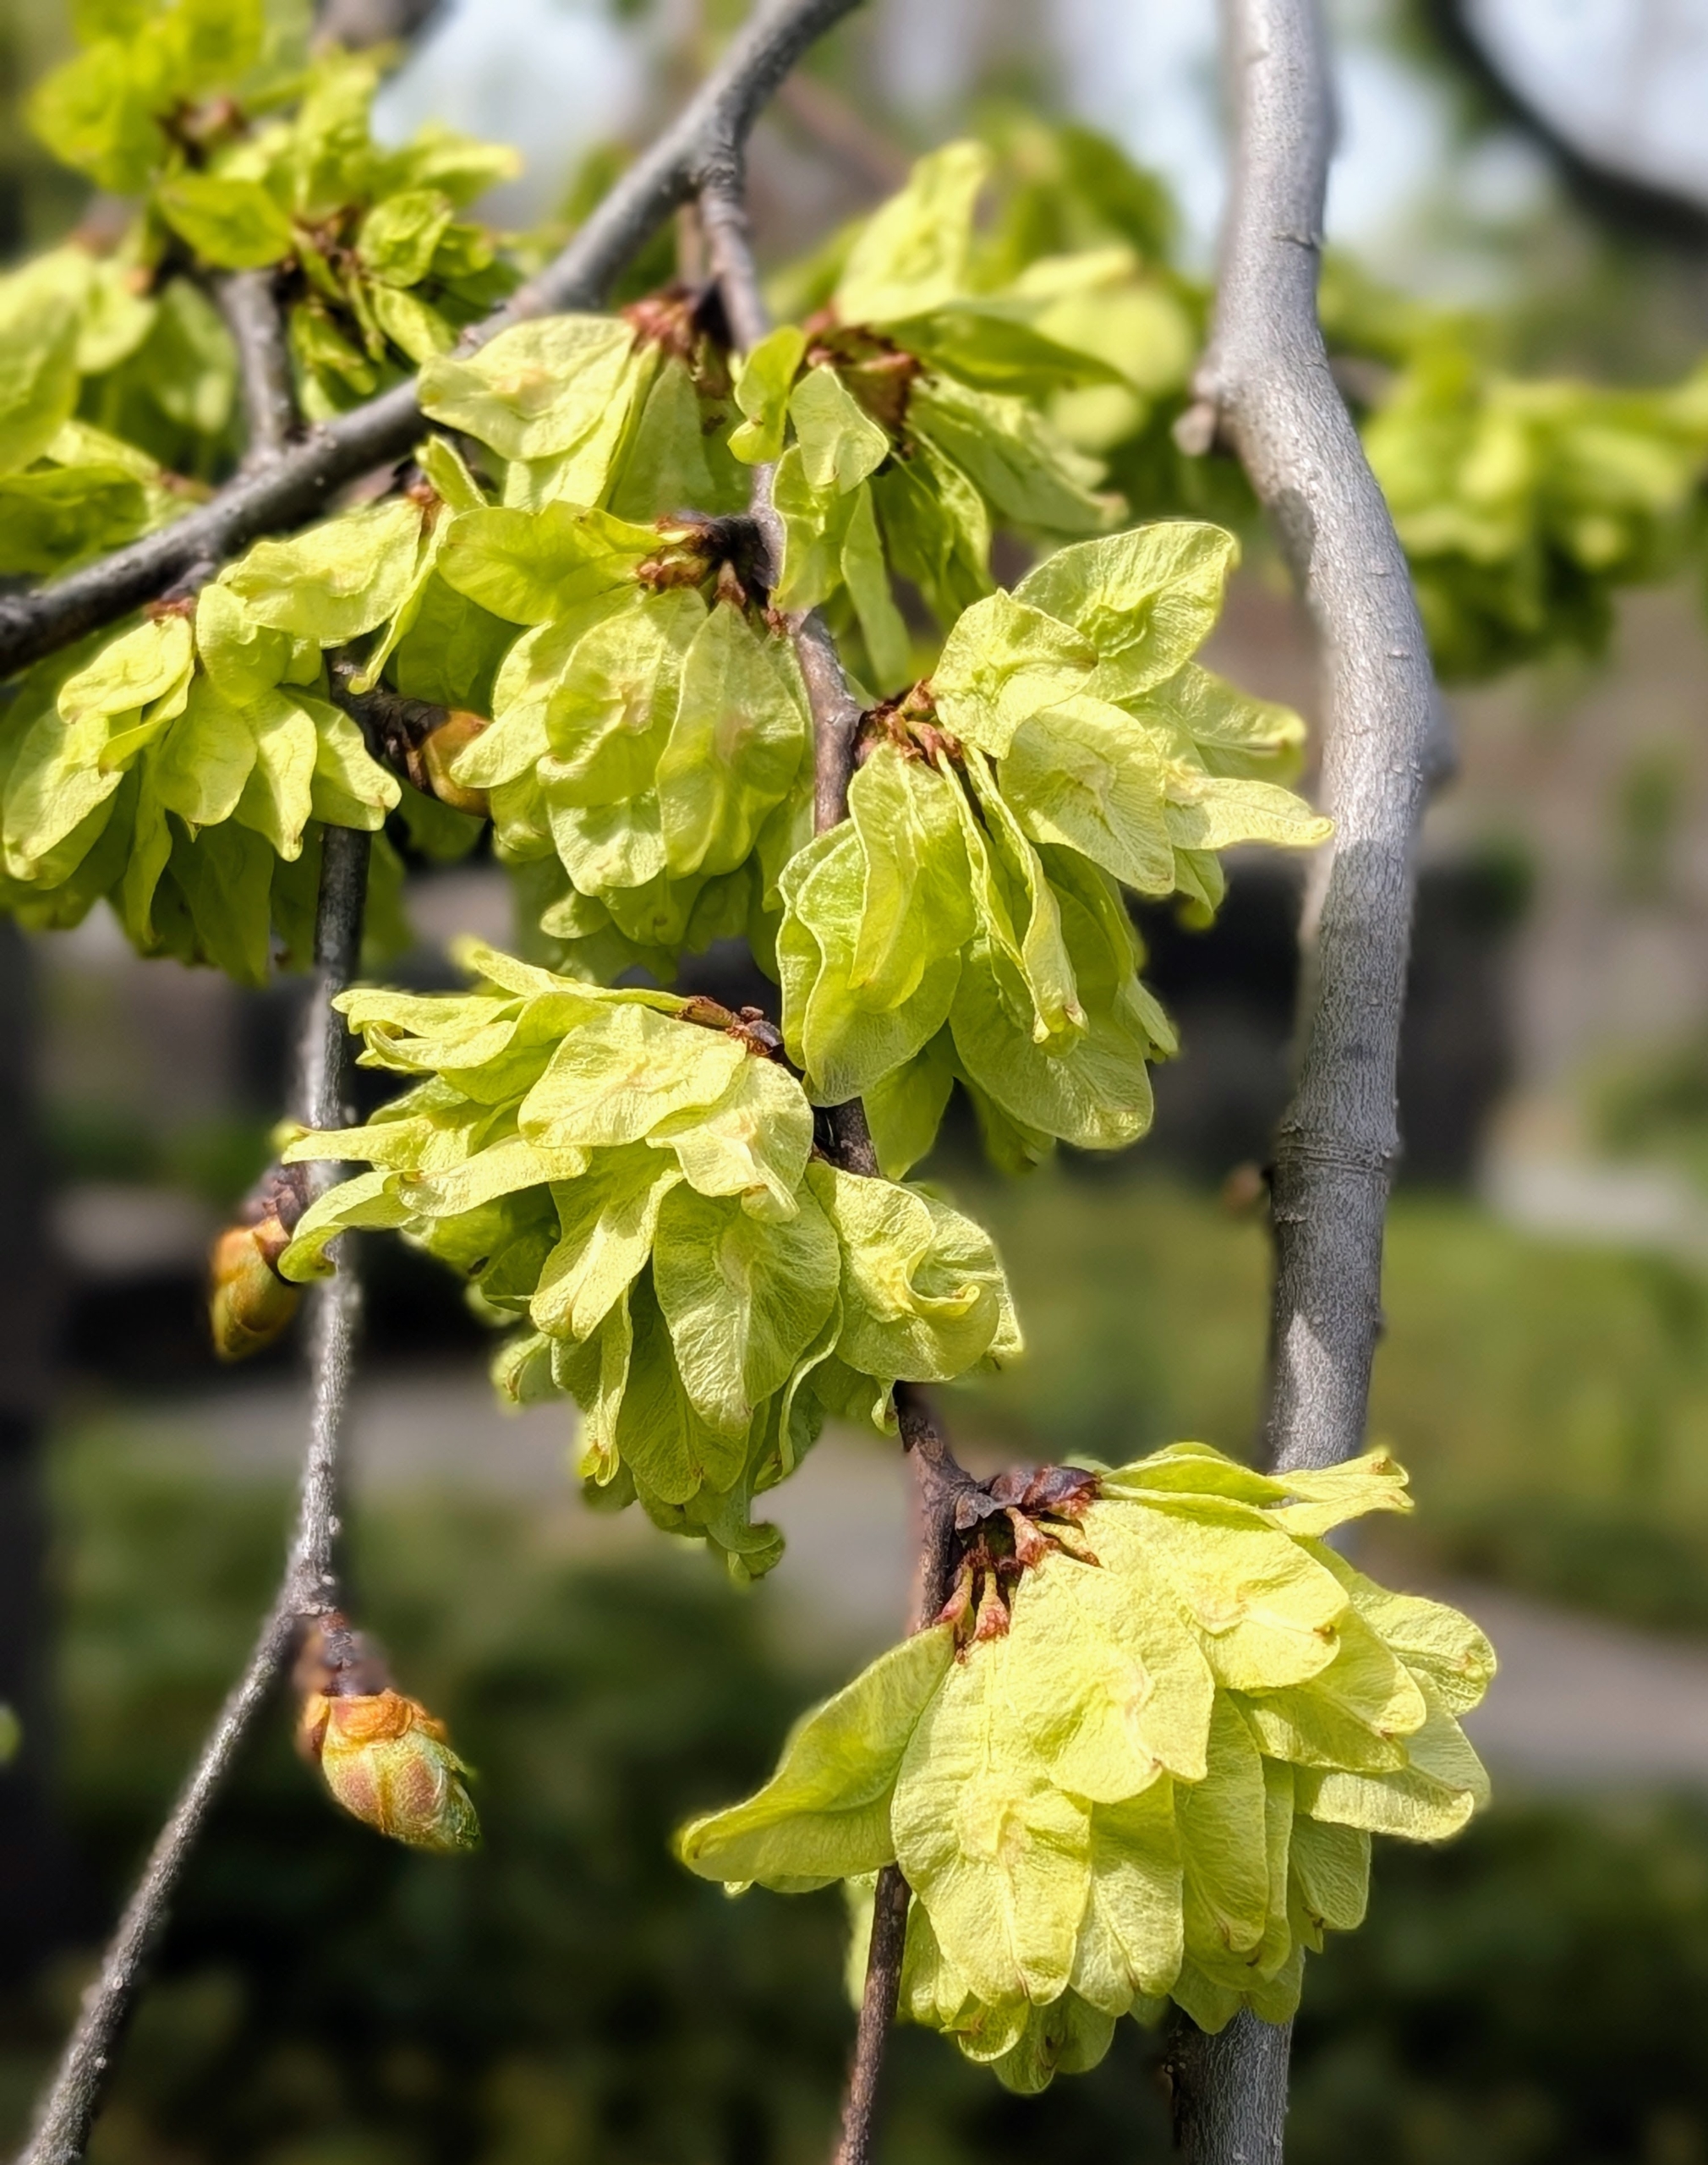
When the tree blooms late winter to spring, yellow catkins such as these appear. The catkin flowers are one to two inches long, and each blossom consists of hundreds of hairlike protrusions. The flowers mature to yellow before they are disbursed by wind or rain.
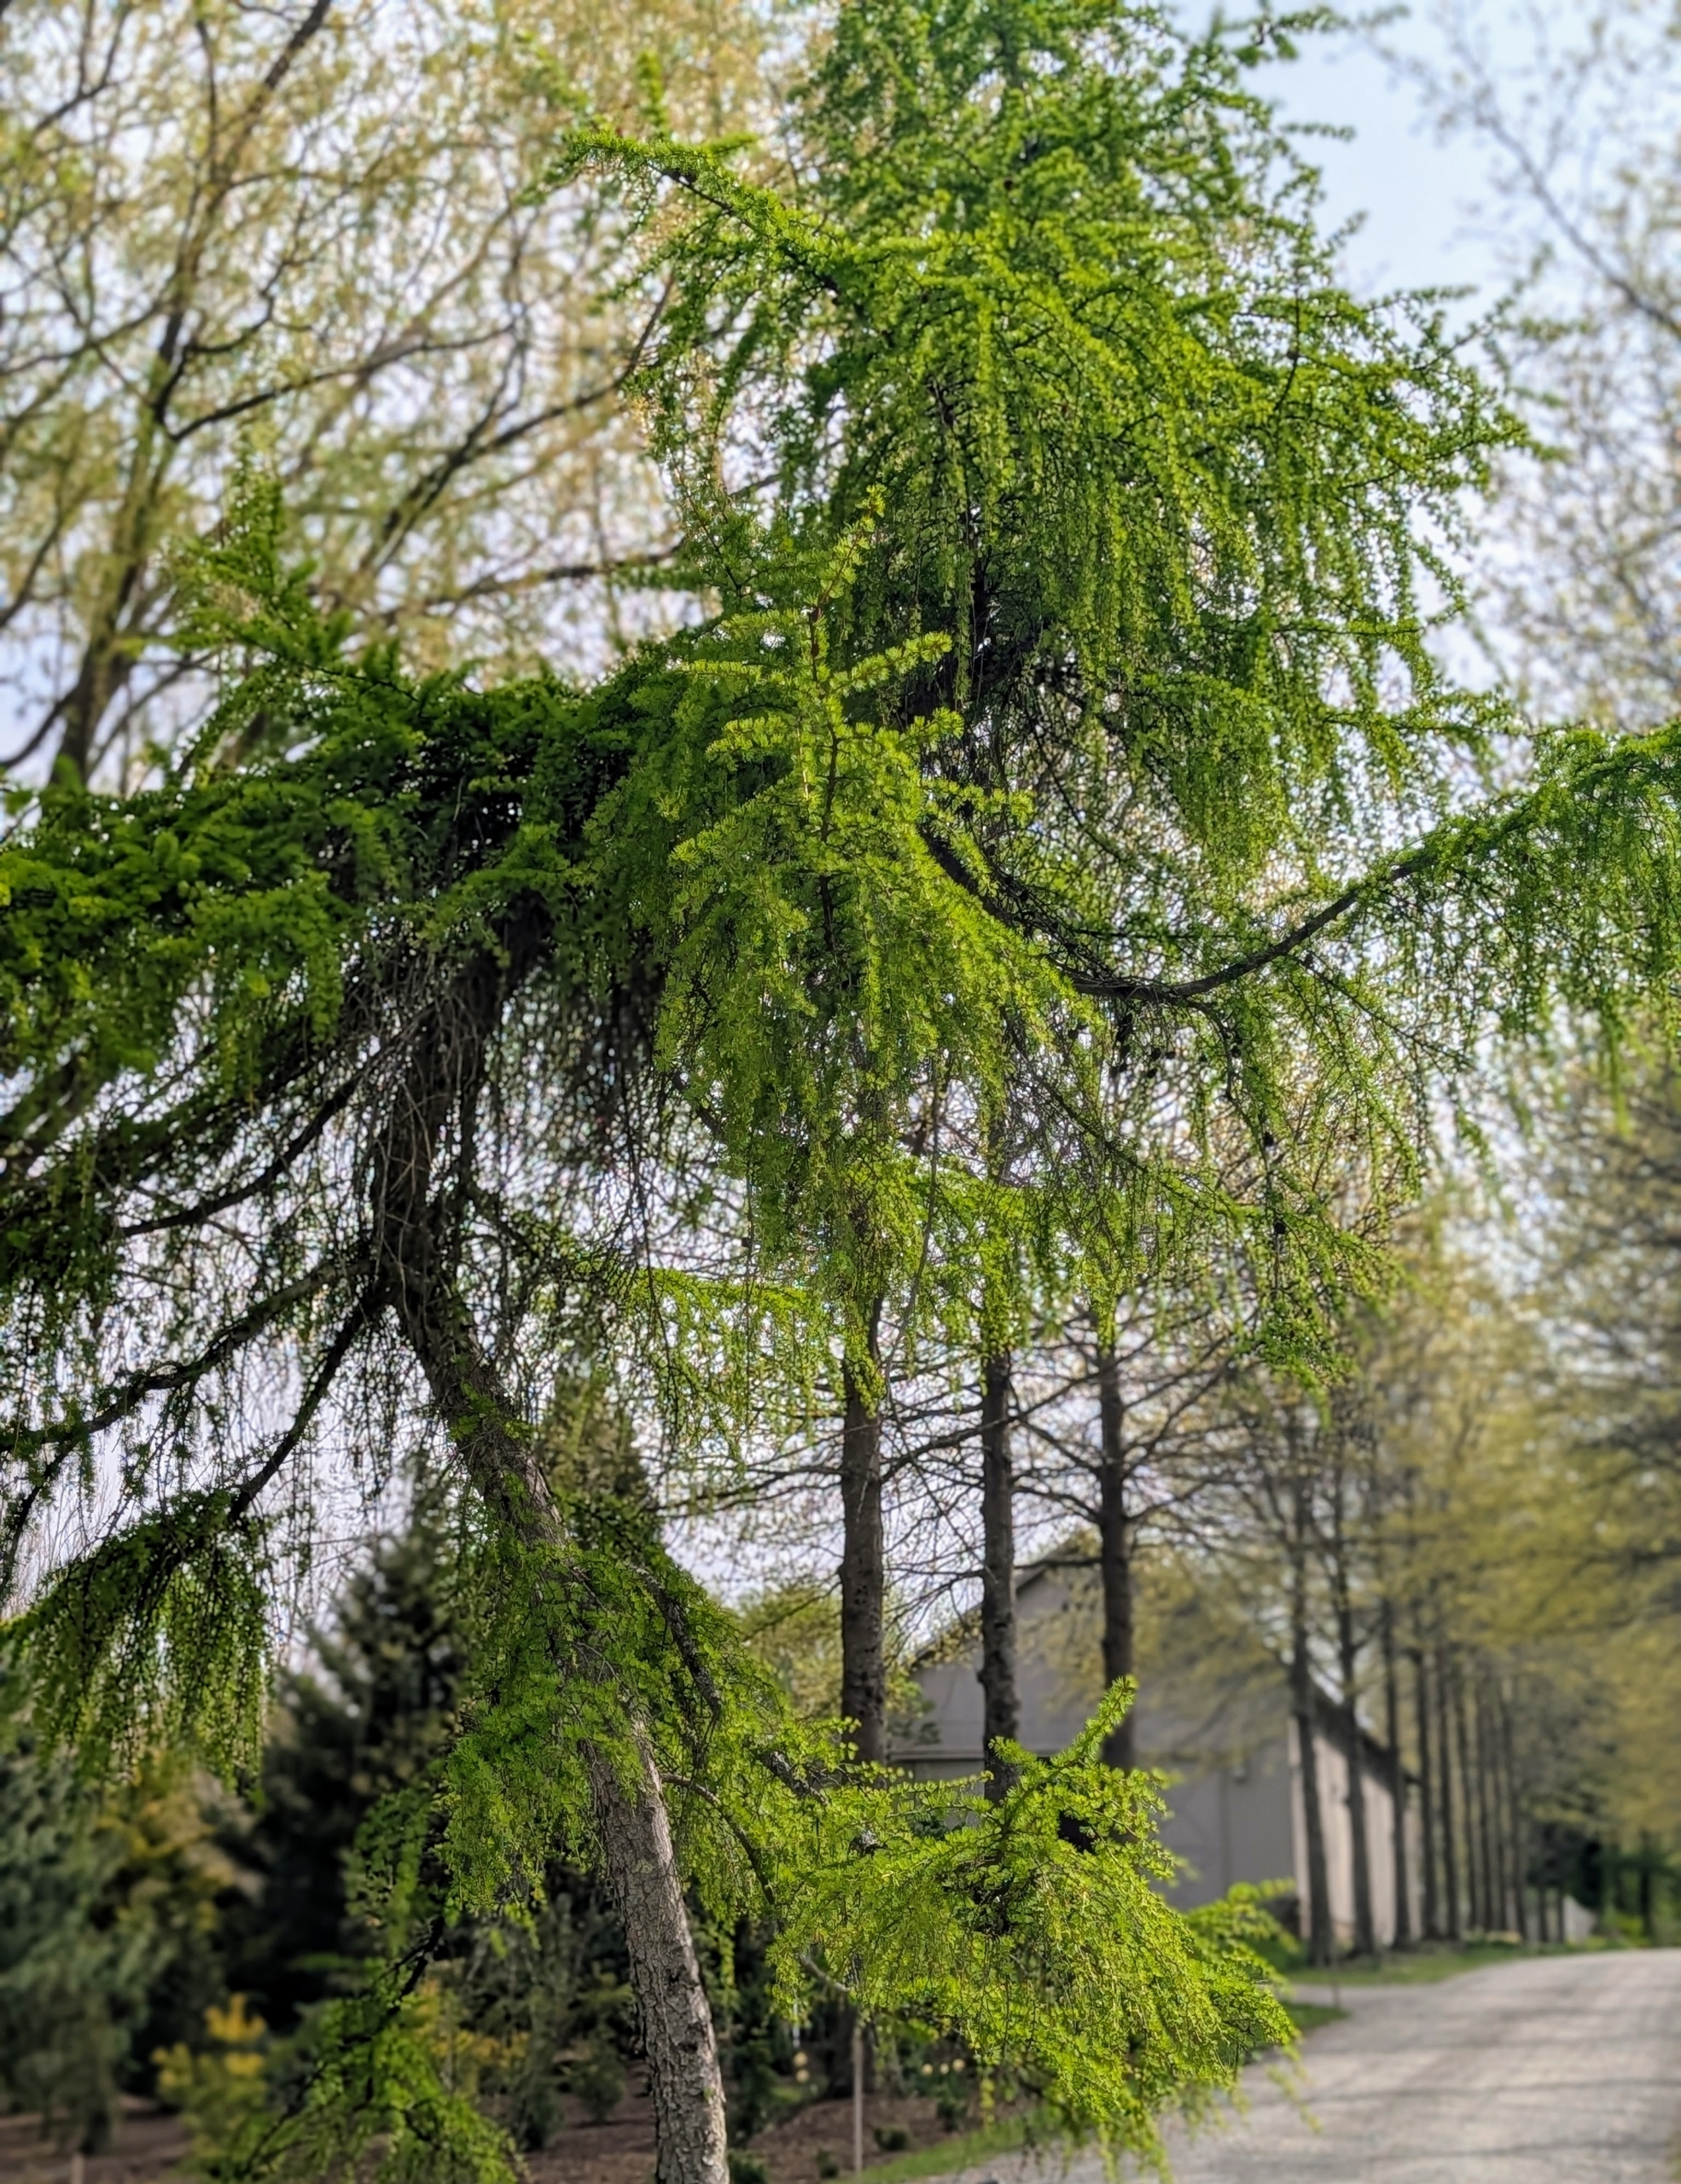
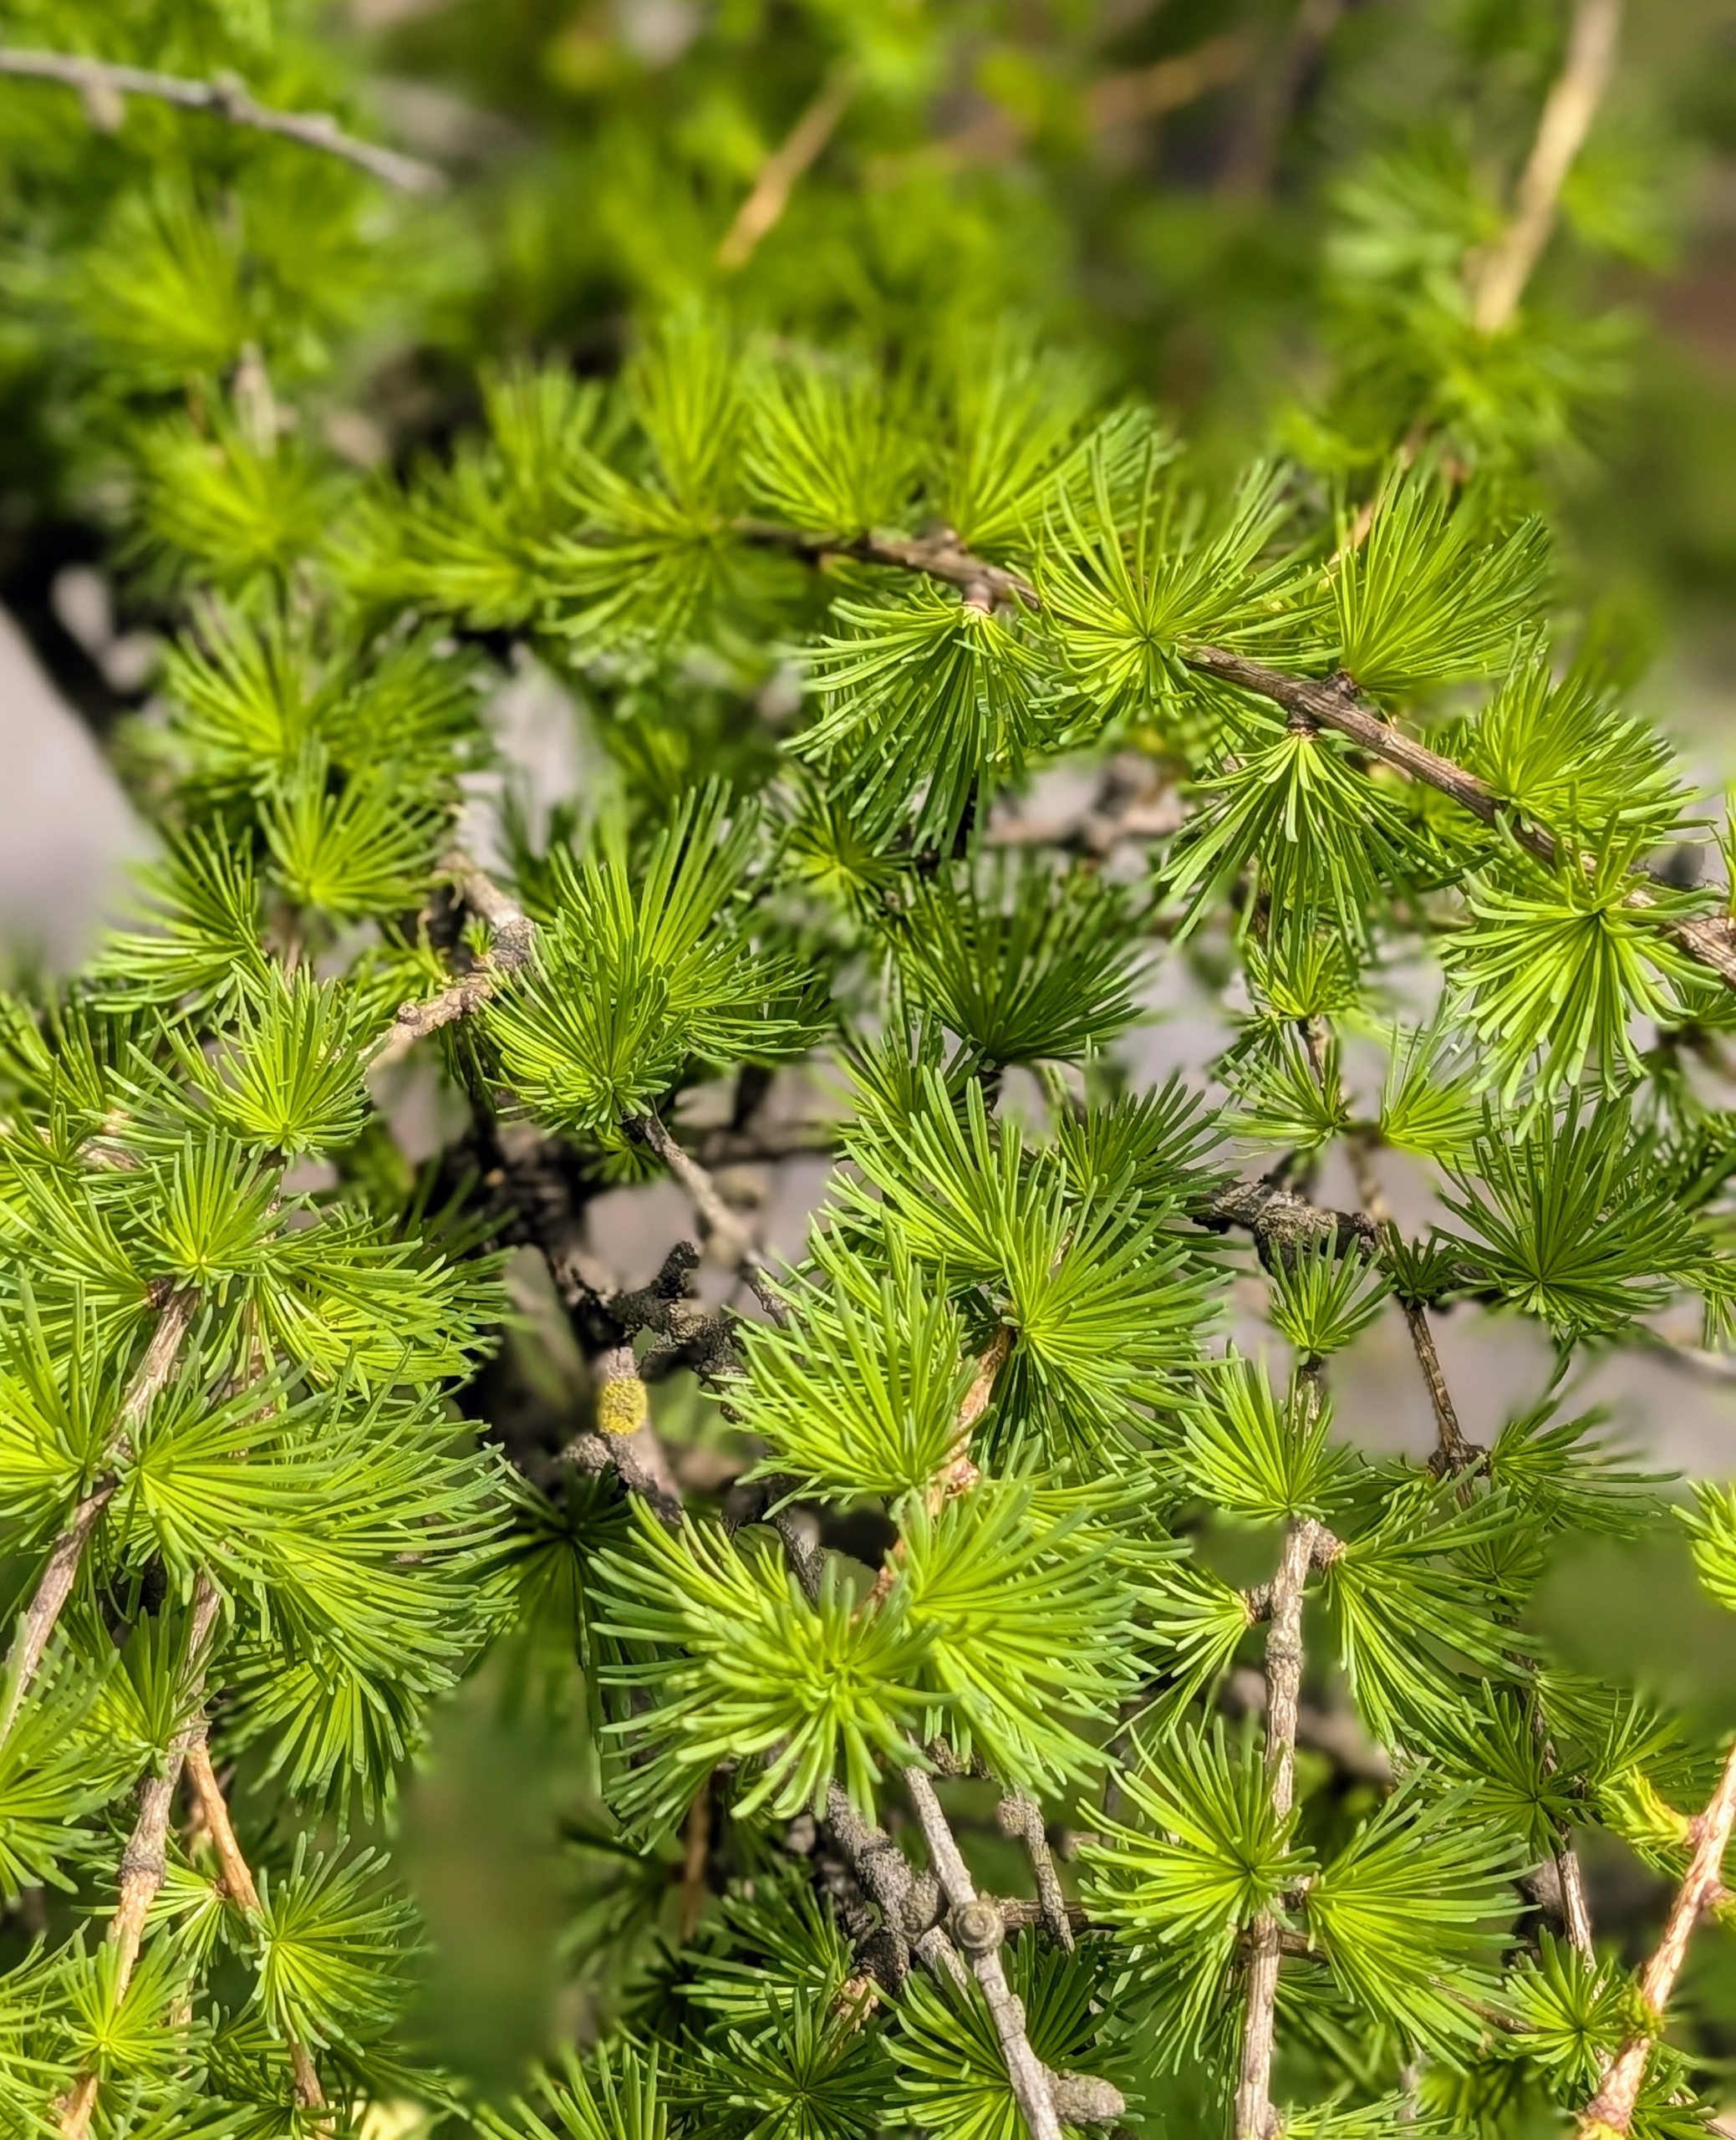
This is a weeping larch, Larix decidua ‘Pendula’. It has bright lime green needles in spring, which turn gold before dropping in fall.
Here, one can see how the foliage grows on the tree giving it an elegant sculptural effect. This tree is planted at the intersection between my pin oaks and my great Allée of Boxwood.
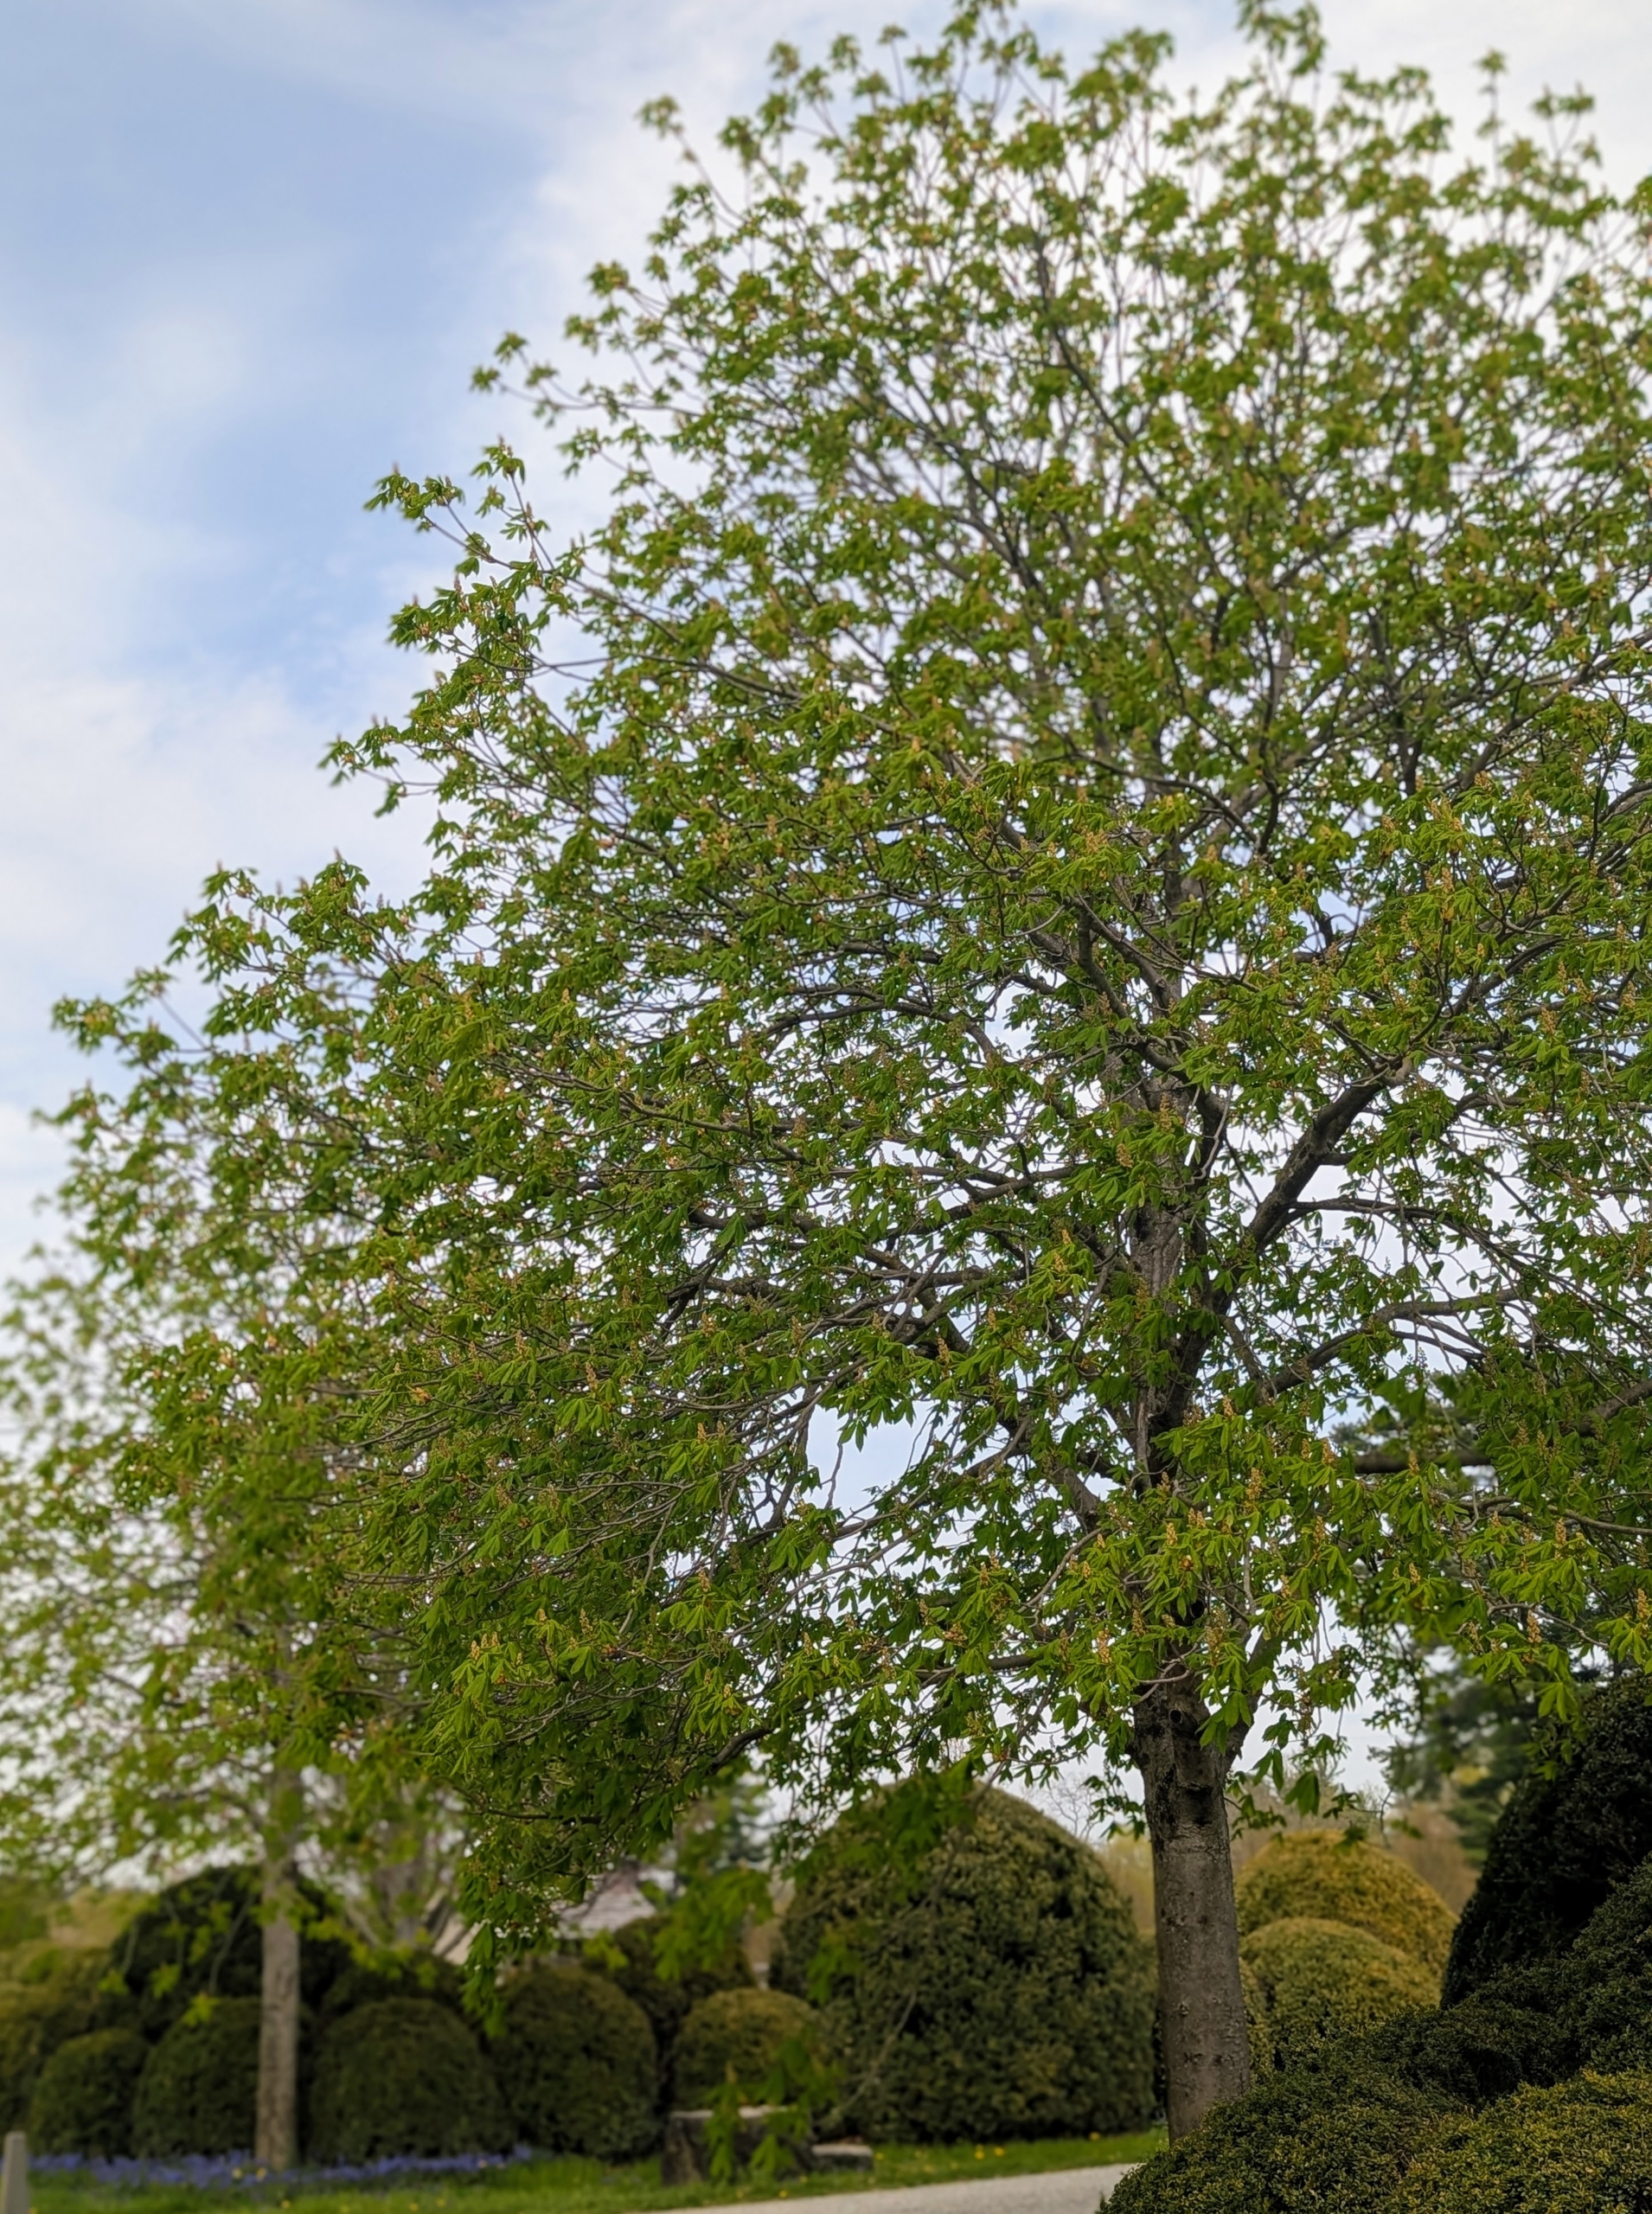
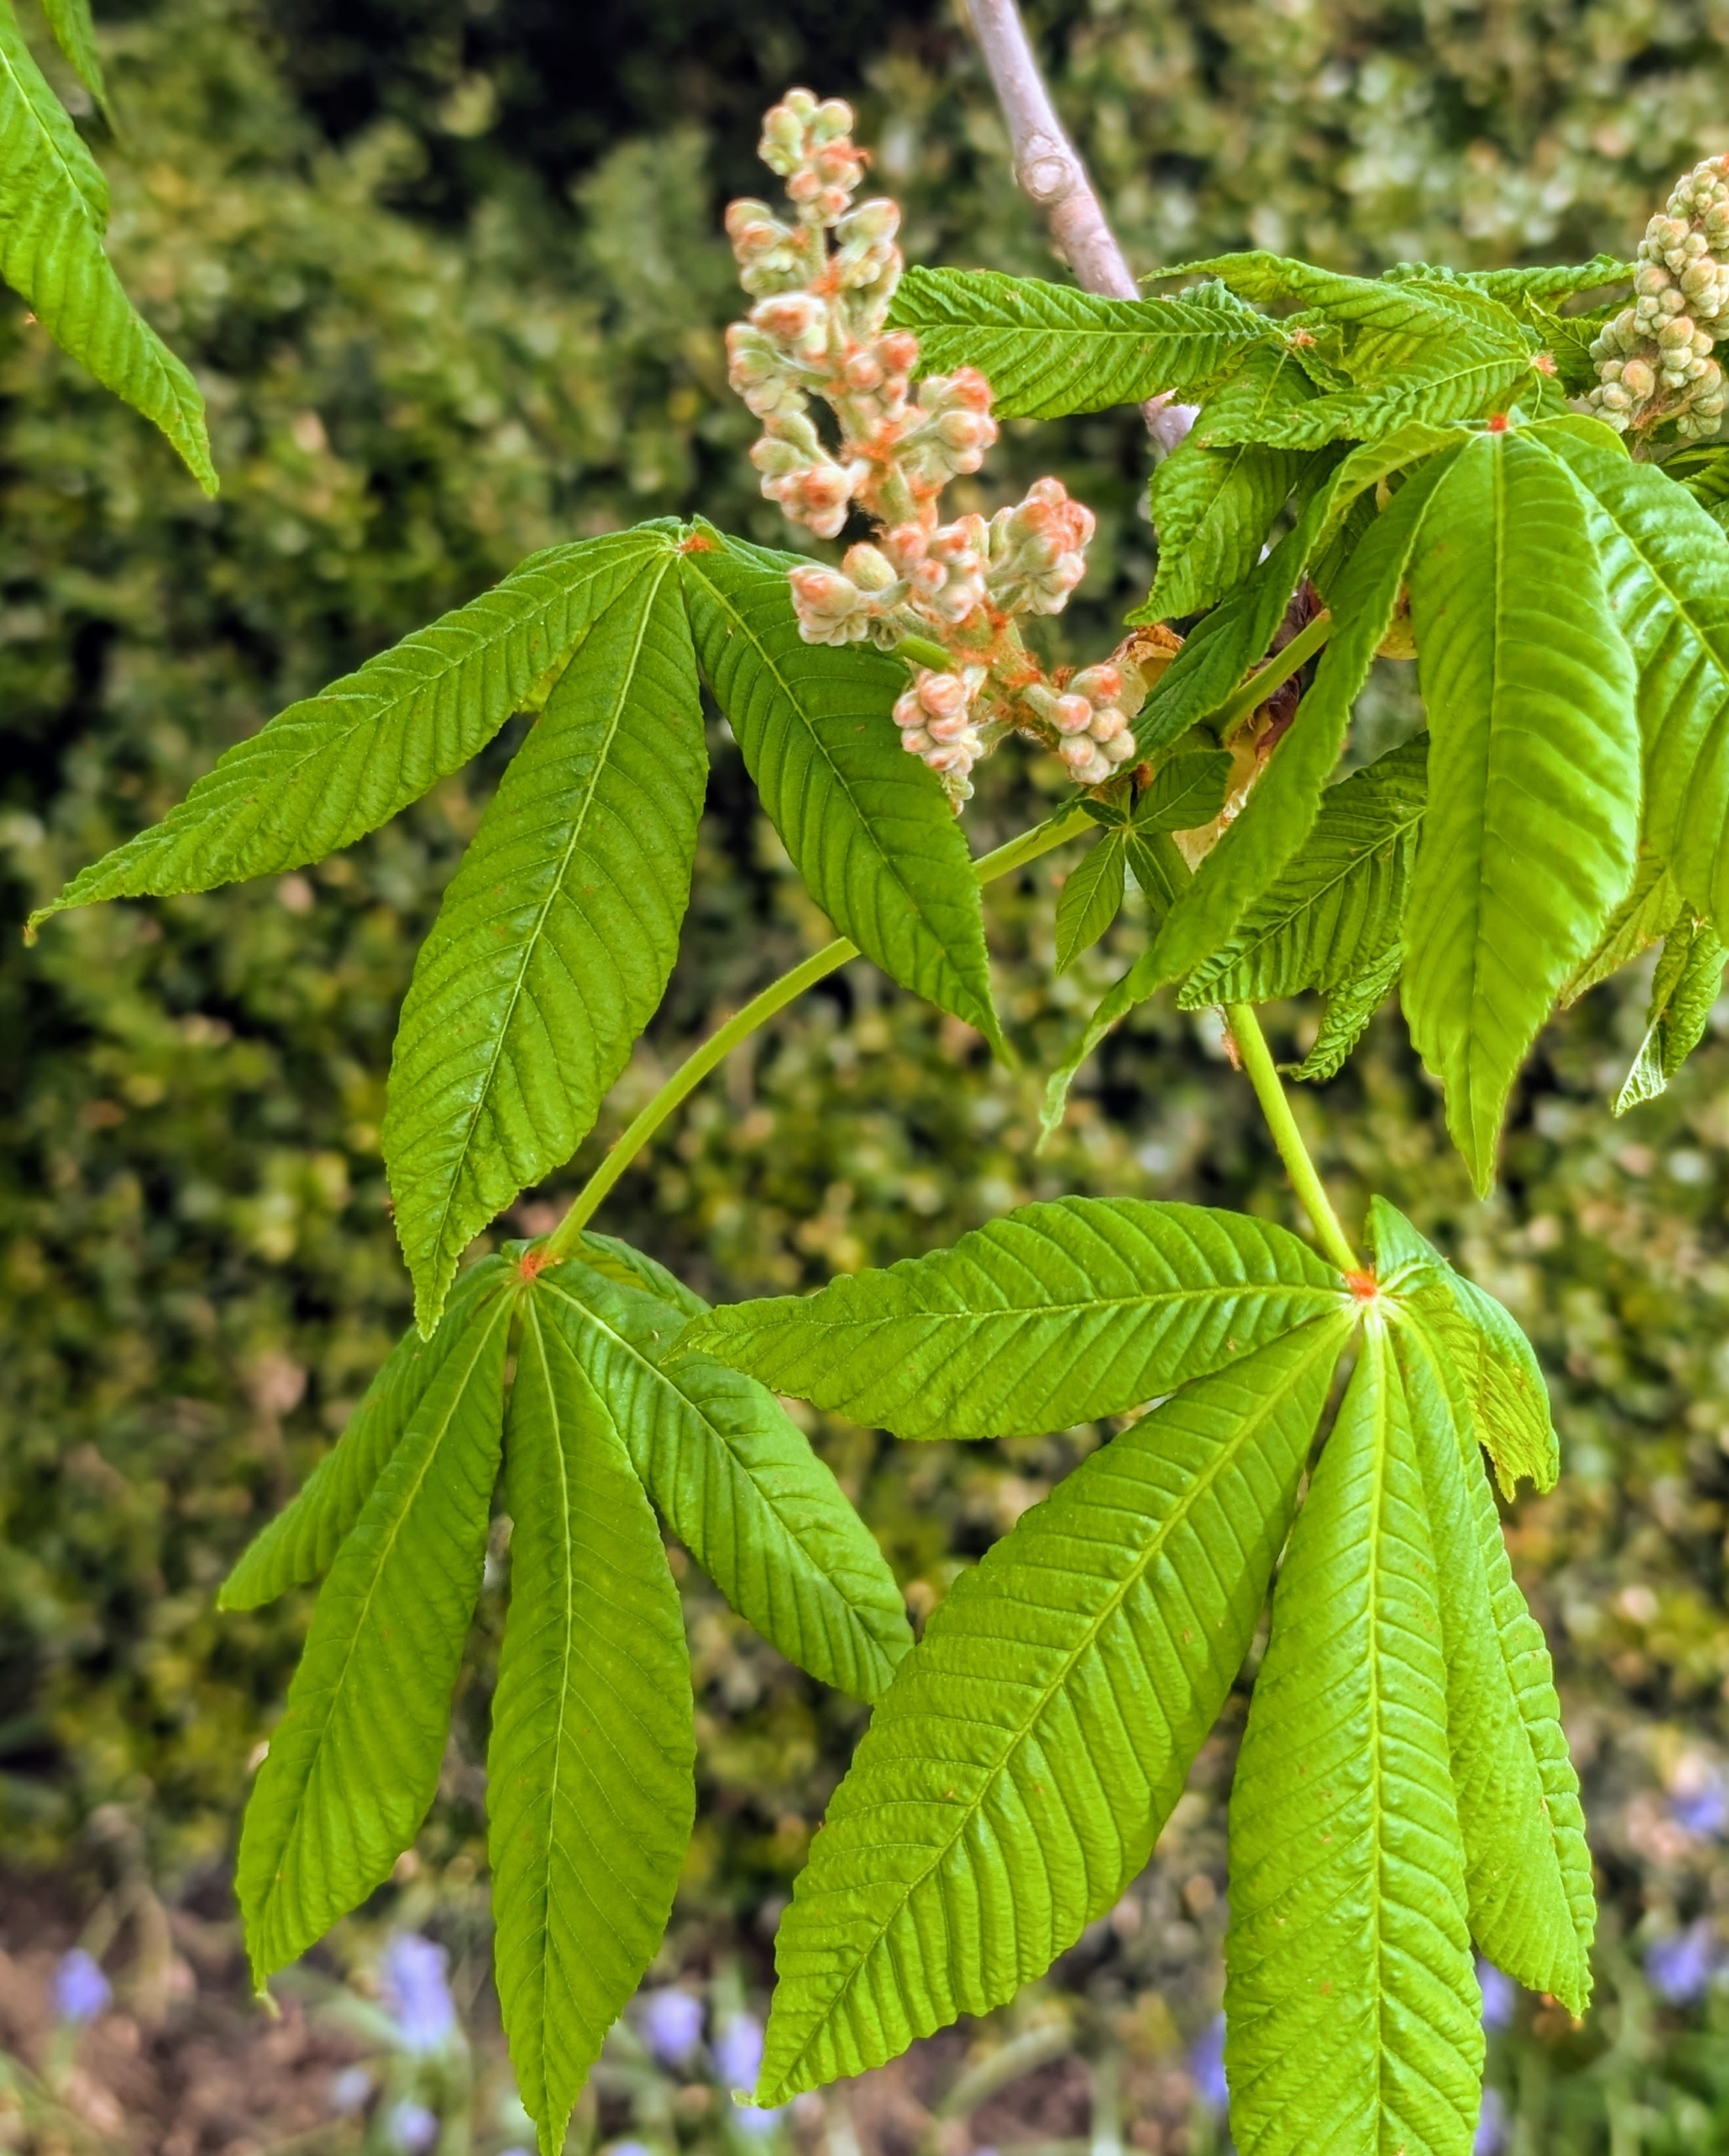
Aesculus hippocastanum is a large deciduous tree commonly known as the horse chestnut or conker tree. I have two of these large specimens in front of the stable at the foot of the Boxwood Allée.
Here are the leaves of the horse-chestnut. Even at this early stage, one can clearly see leaves and developing flowers. By mid-May to early June, these trees will be in full flower.
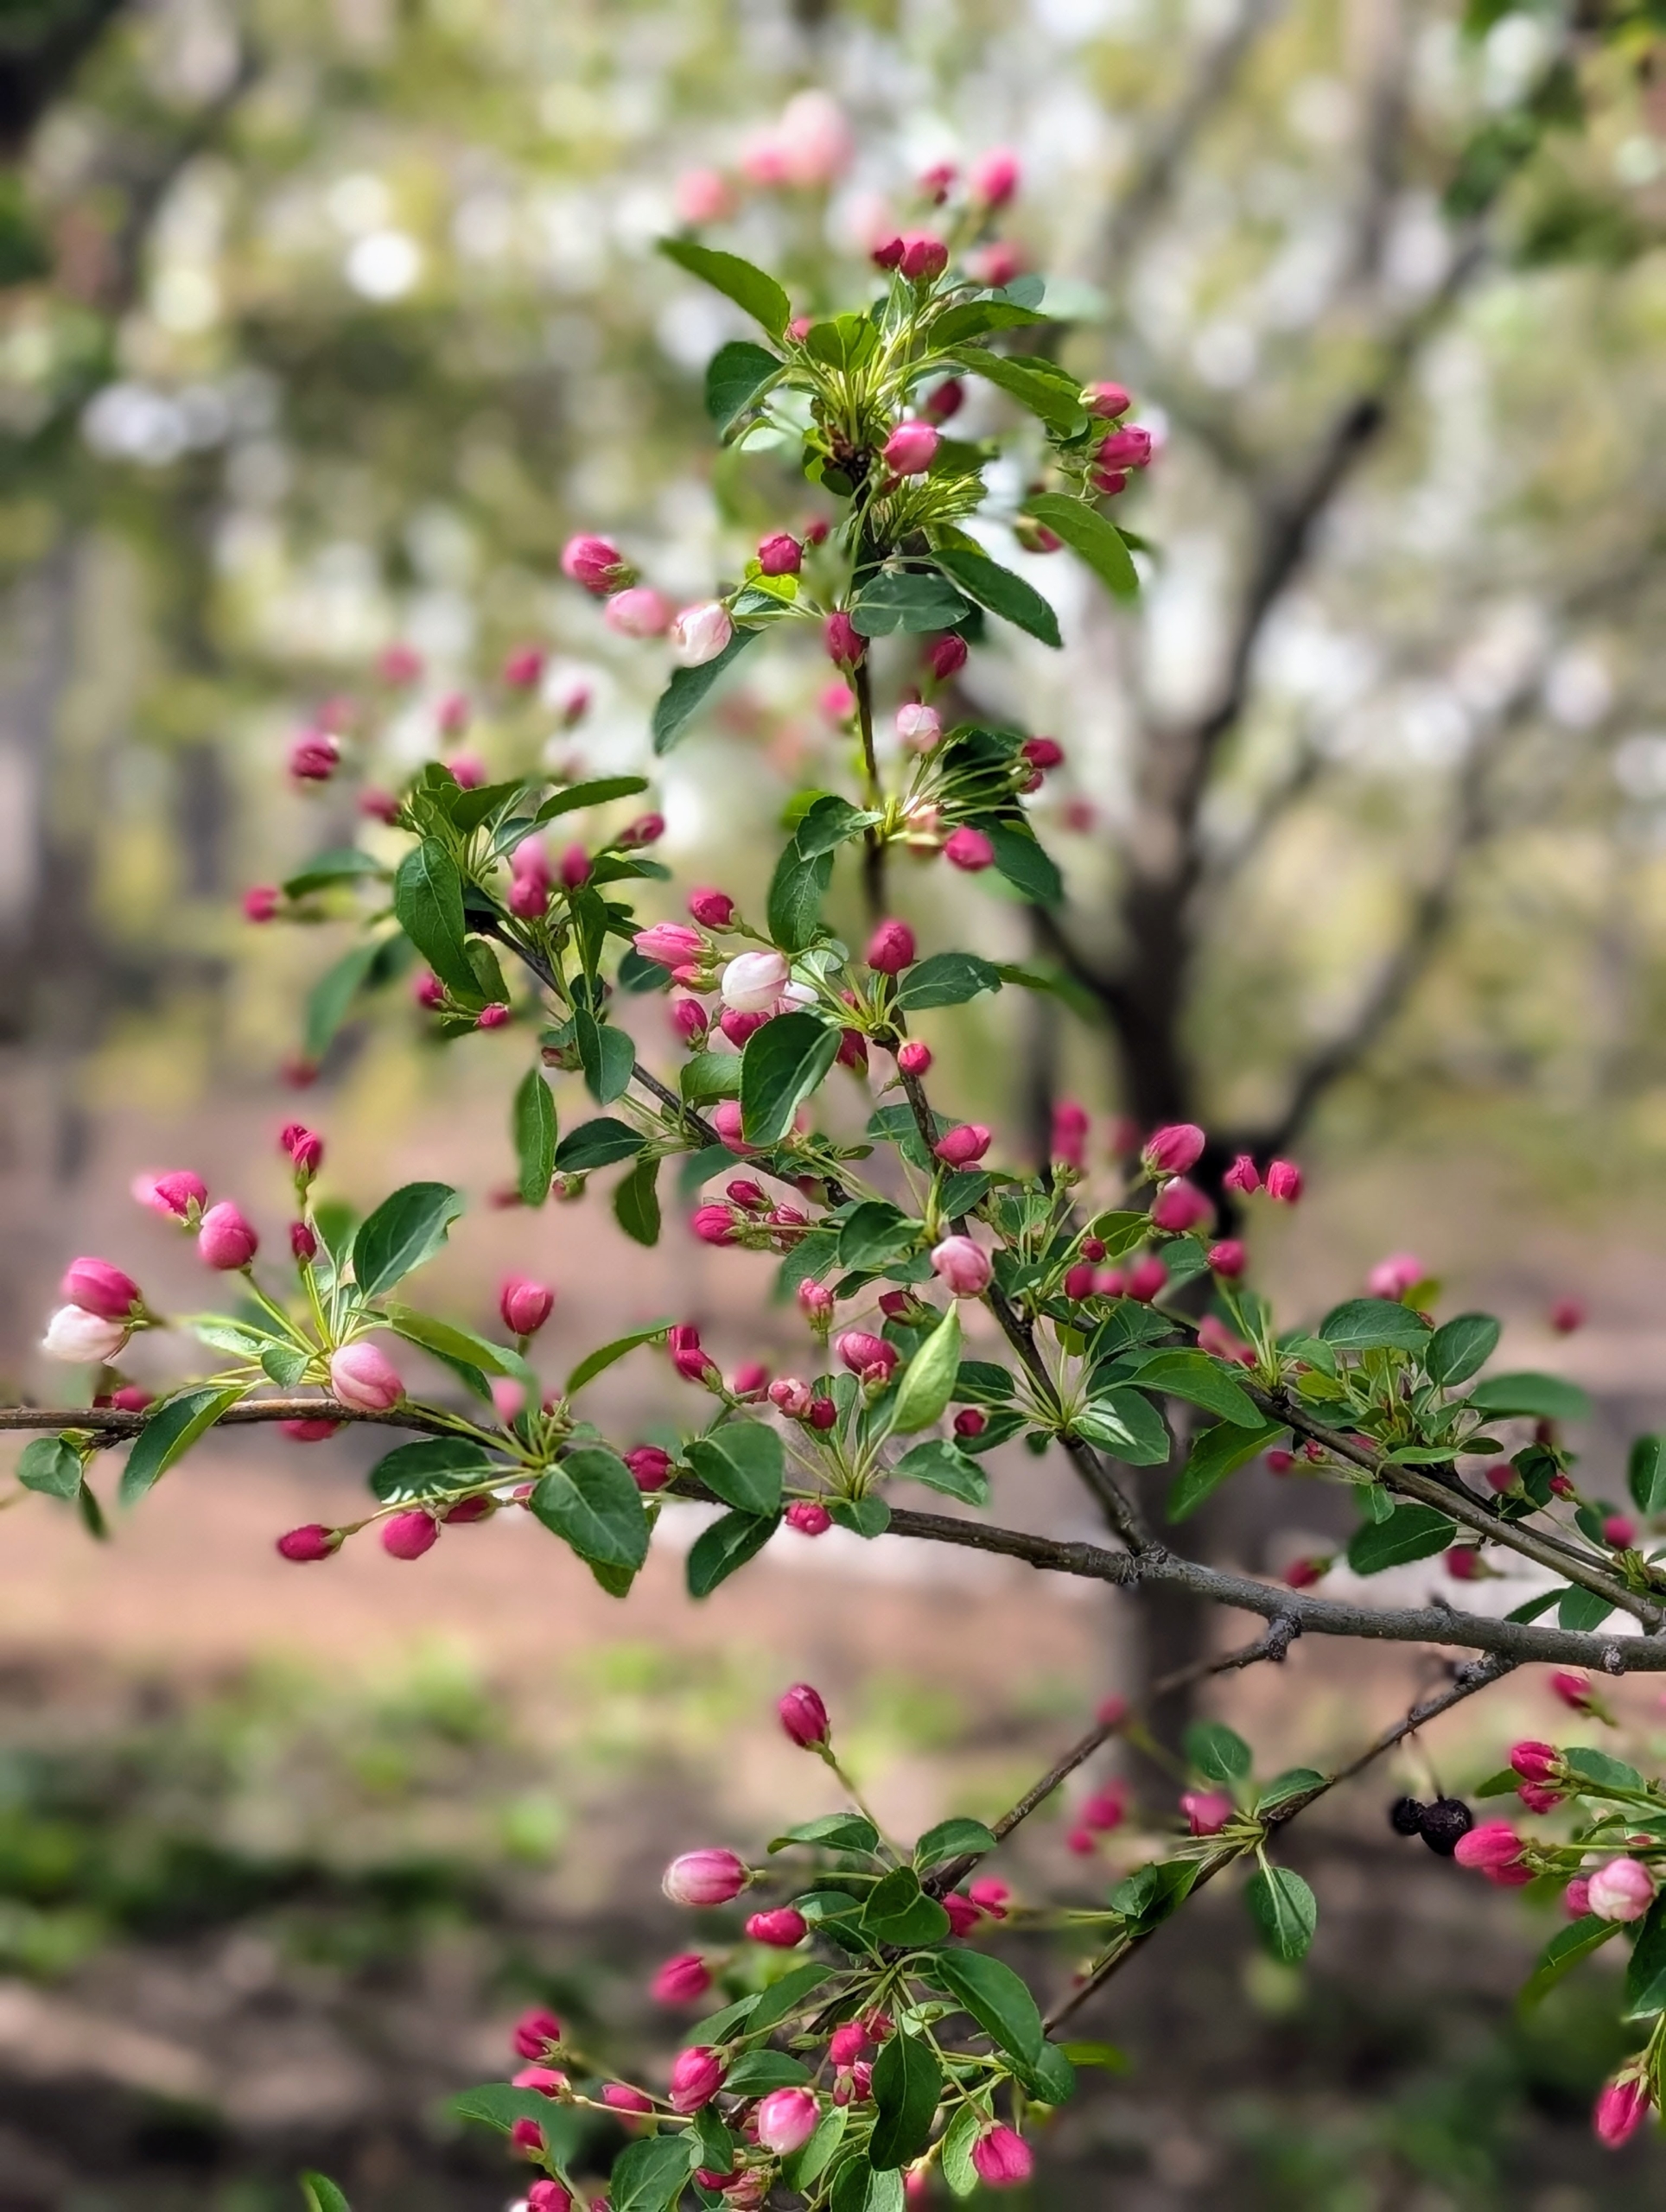
Outside my vegetable garden is a grove of mature crabapple trees. In spring, these crabapples bloom with bright magenta blossoms that can be seen from April to May, depending on the variety. These flowers are often fragrant and create a stunning display in garden.
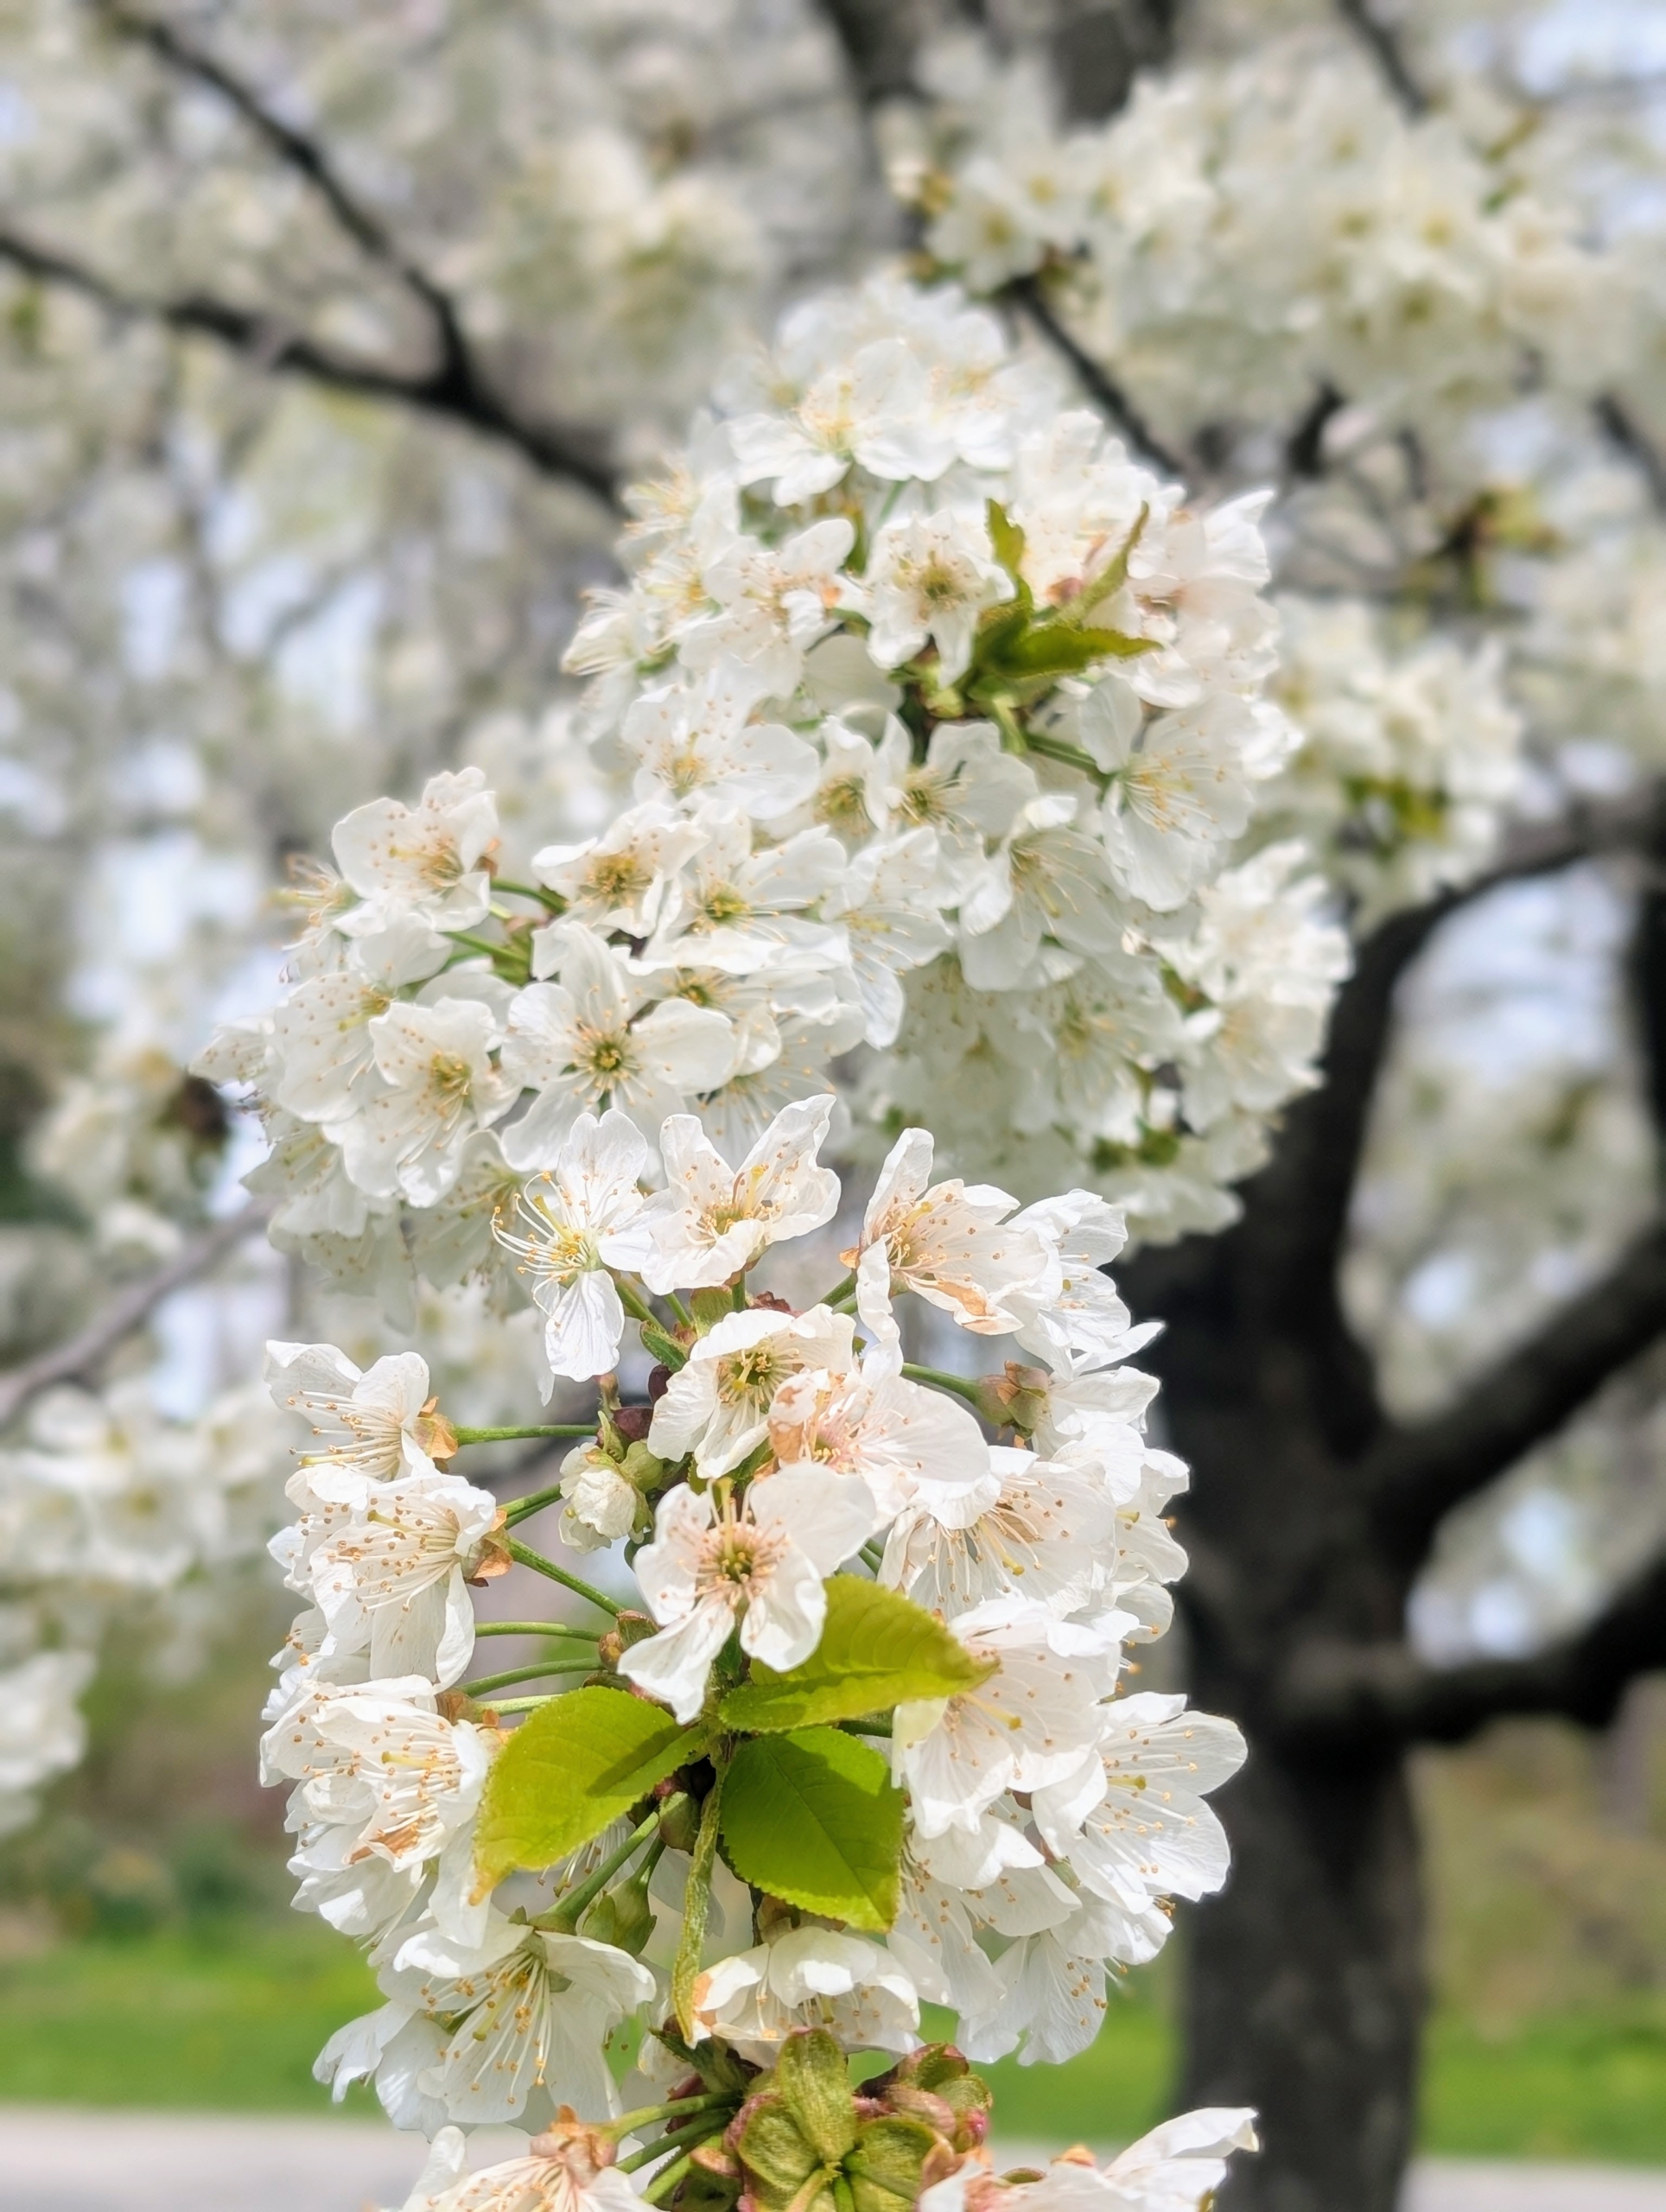
Down outside my chicken coops is this cherry tree. Cherry trees belong to the genus Prunus and are in the family Rosaceae. These trees are famous for their sweet or sour stone fruits called drupes and their eye-catching blossoms. Unfortunately, we all wait with anticipation for the fruits, but oftentimes squirrels beat us to them.
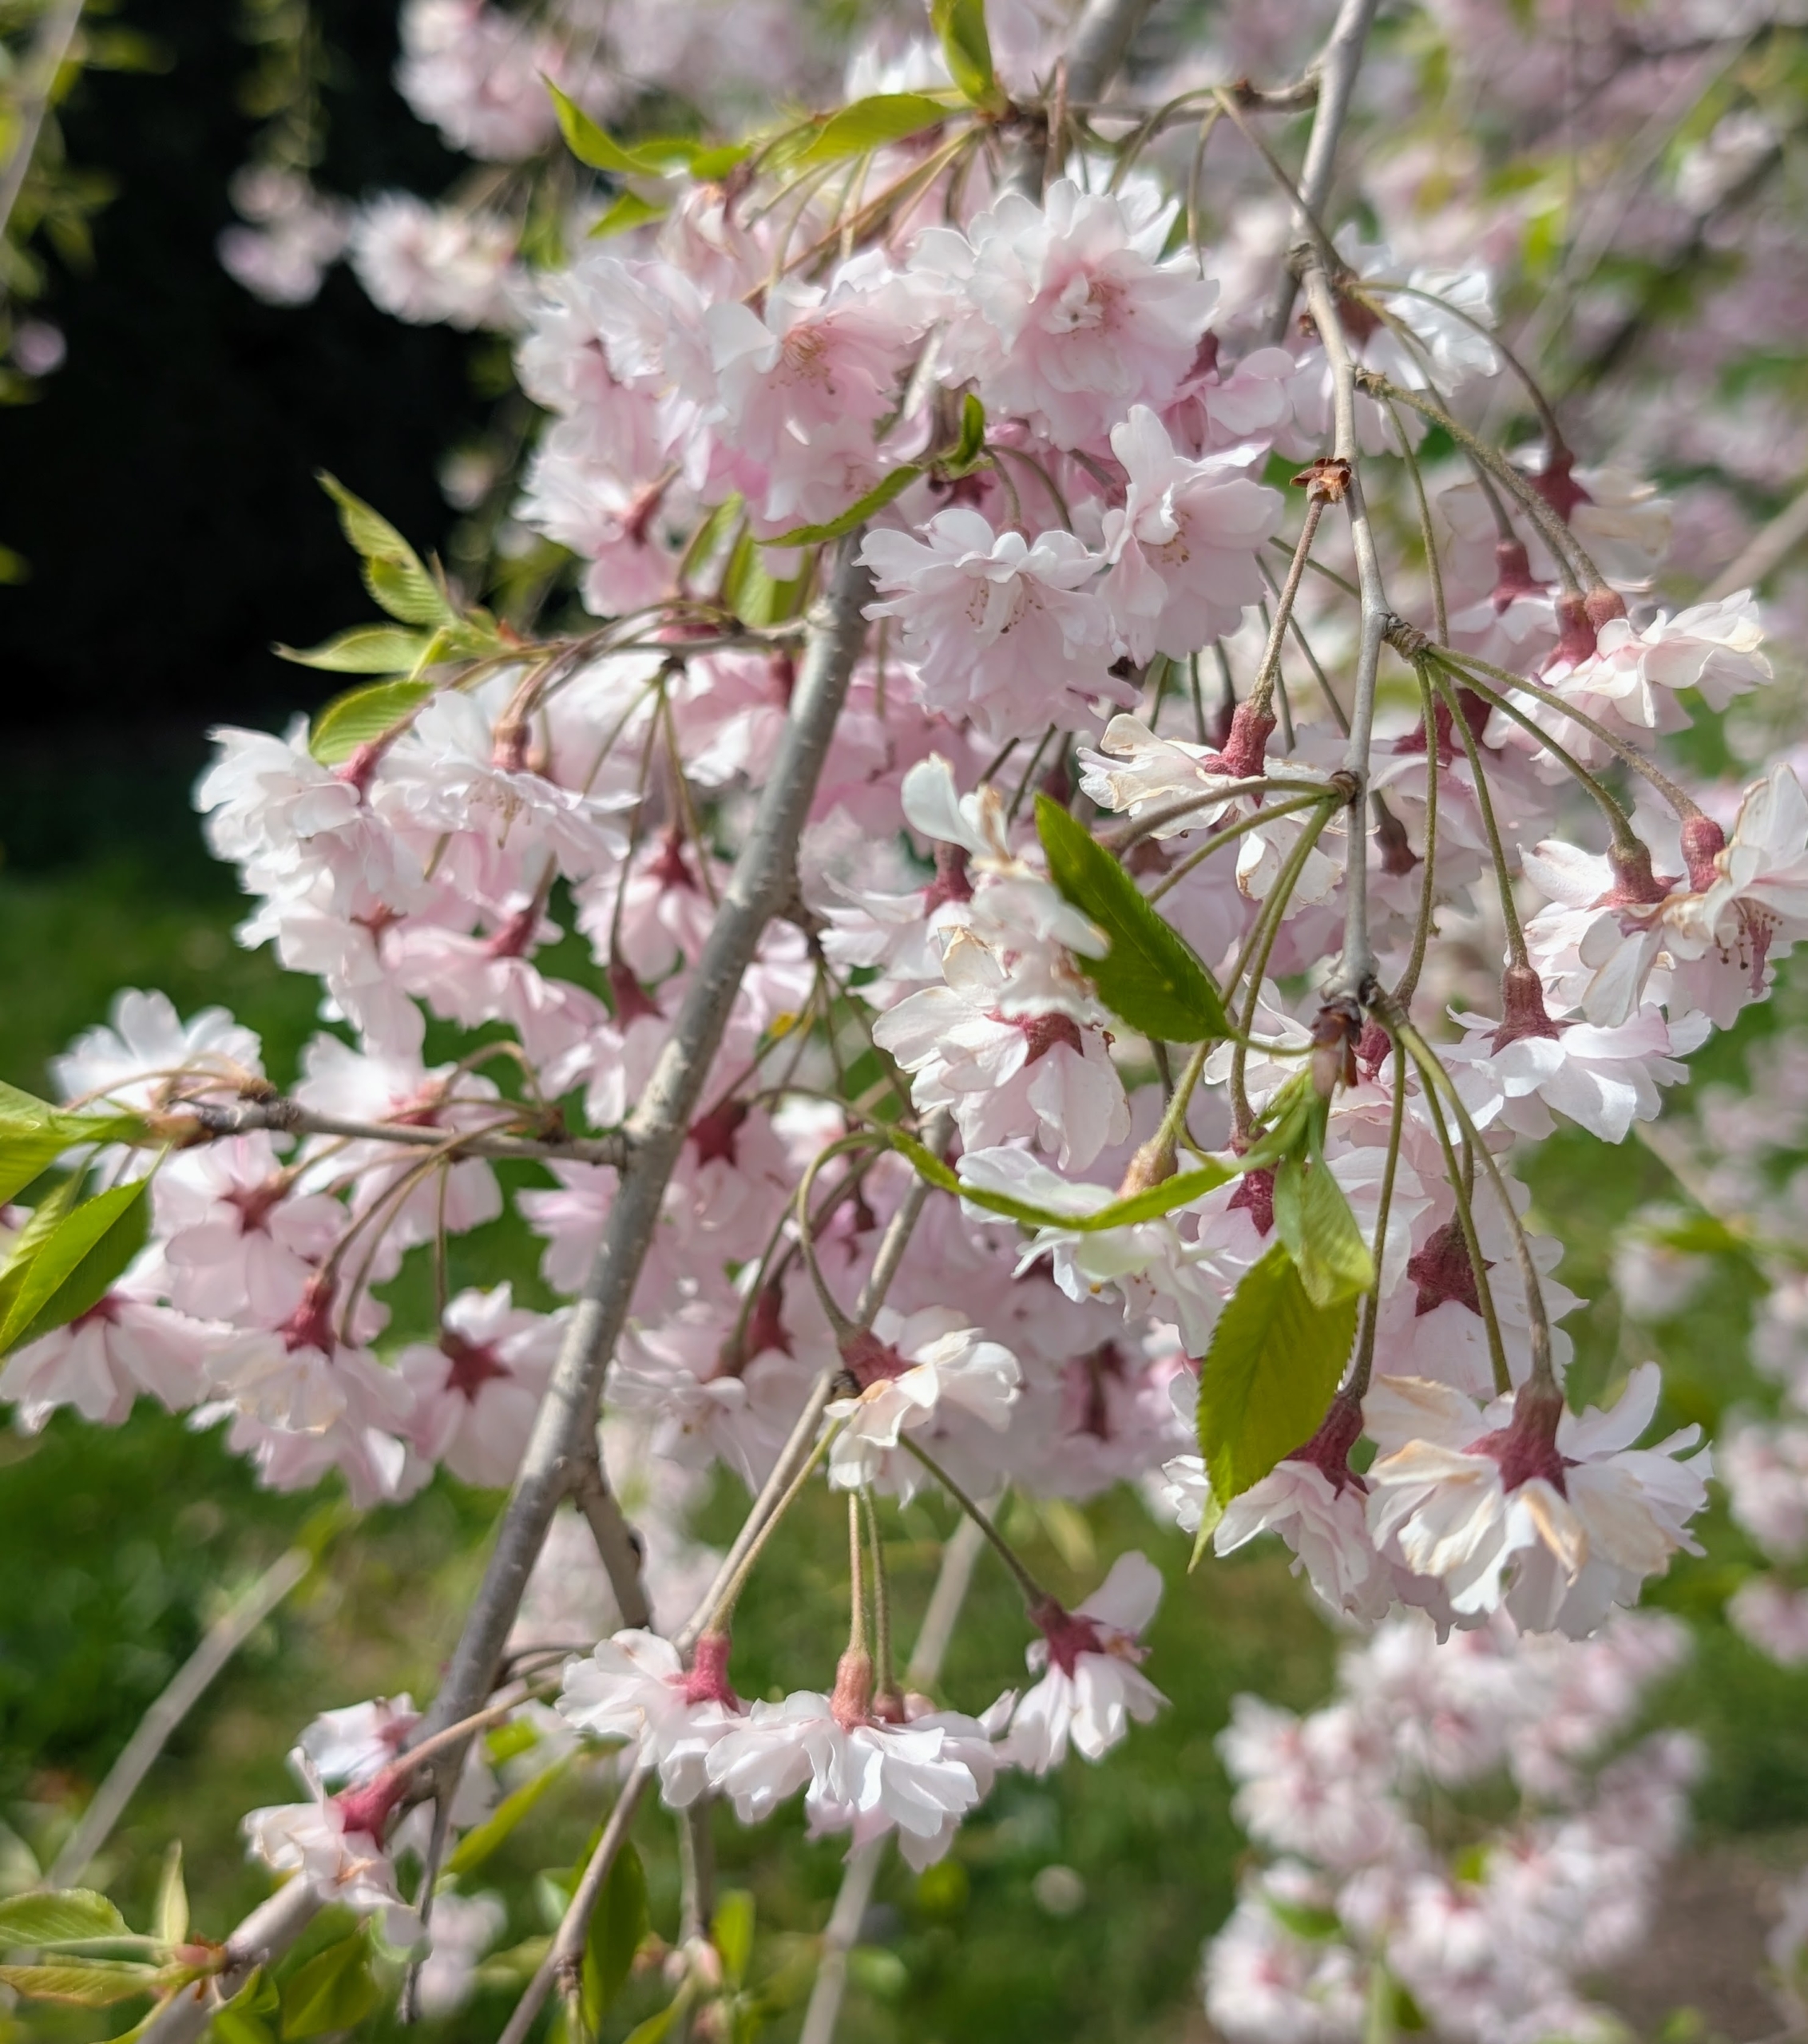
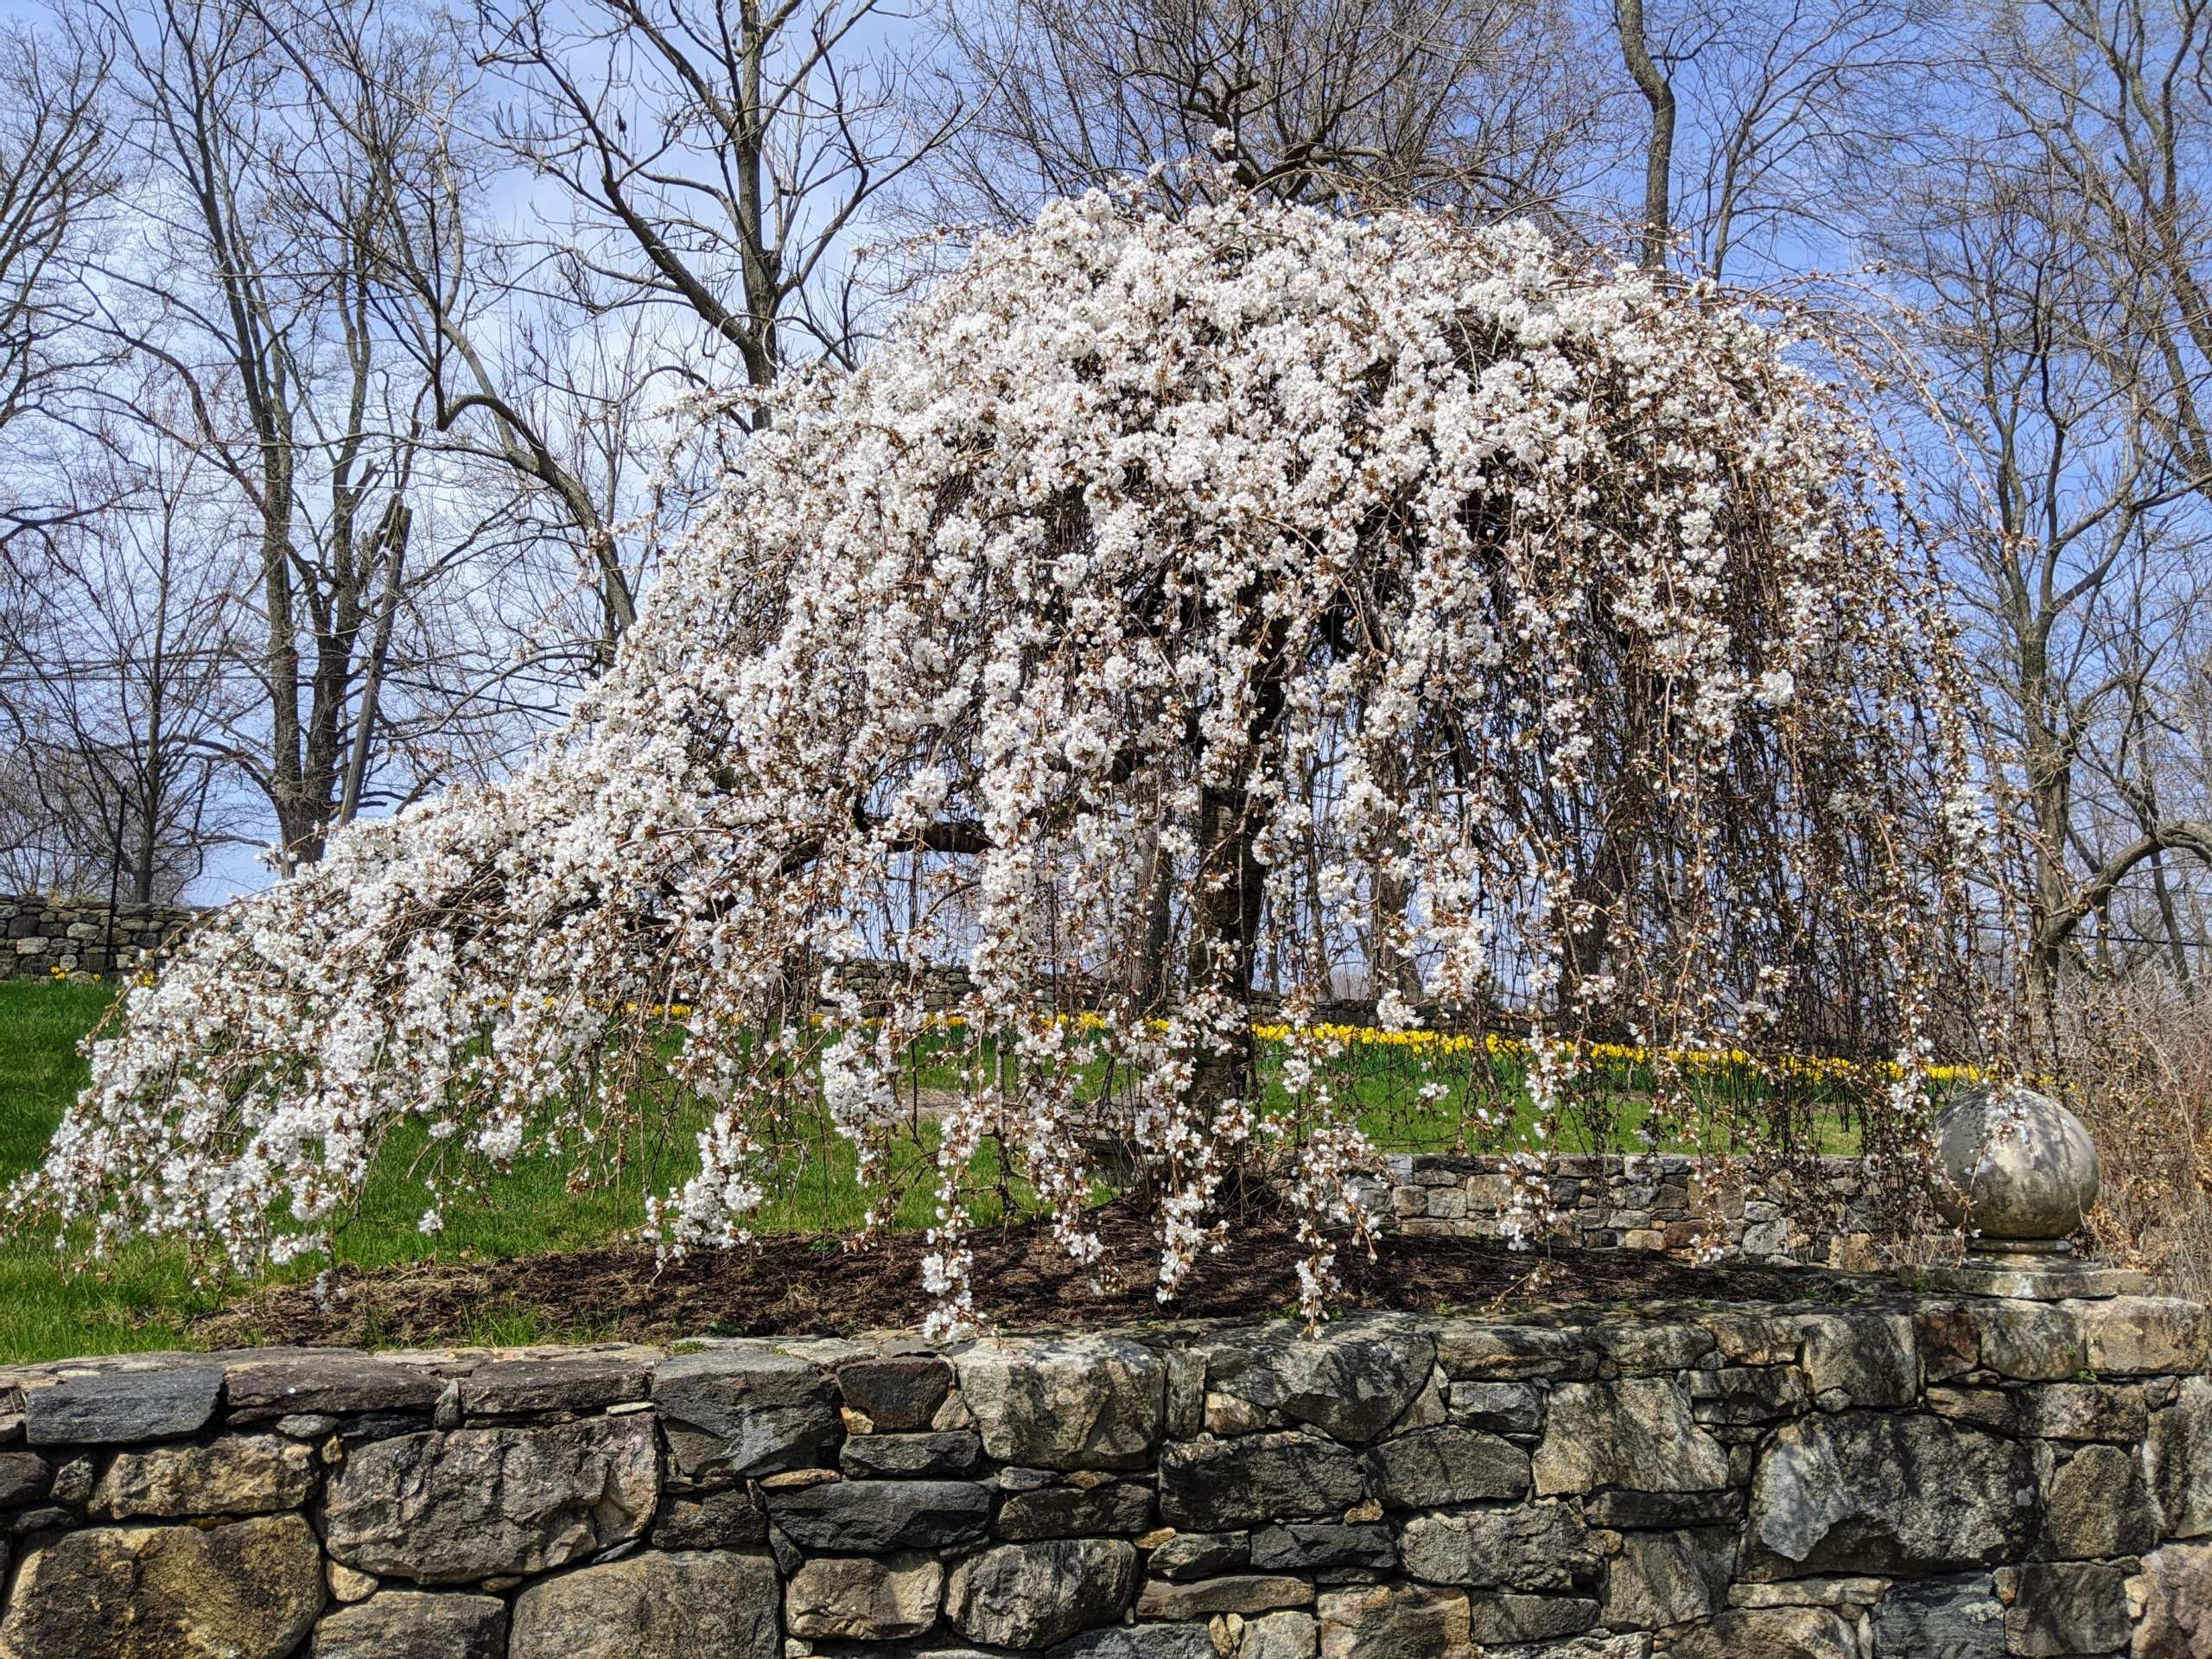
This is a weeping Japanese cherry tree in pink, which does not bear edible fruit. This was gifted to me a couple of years ago and is planted at the east end of my Boxwood Allée.
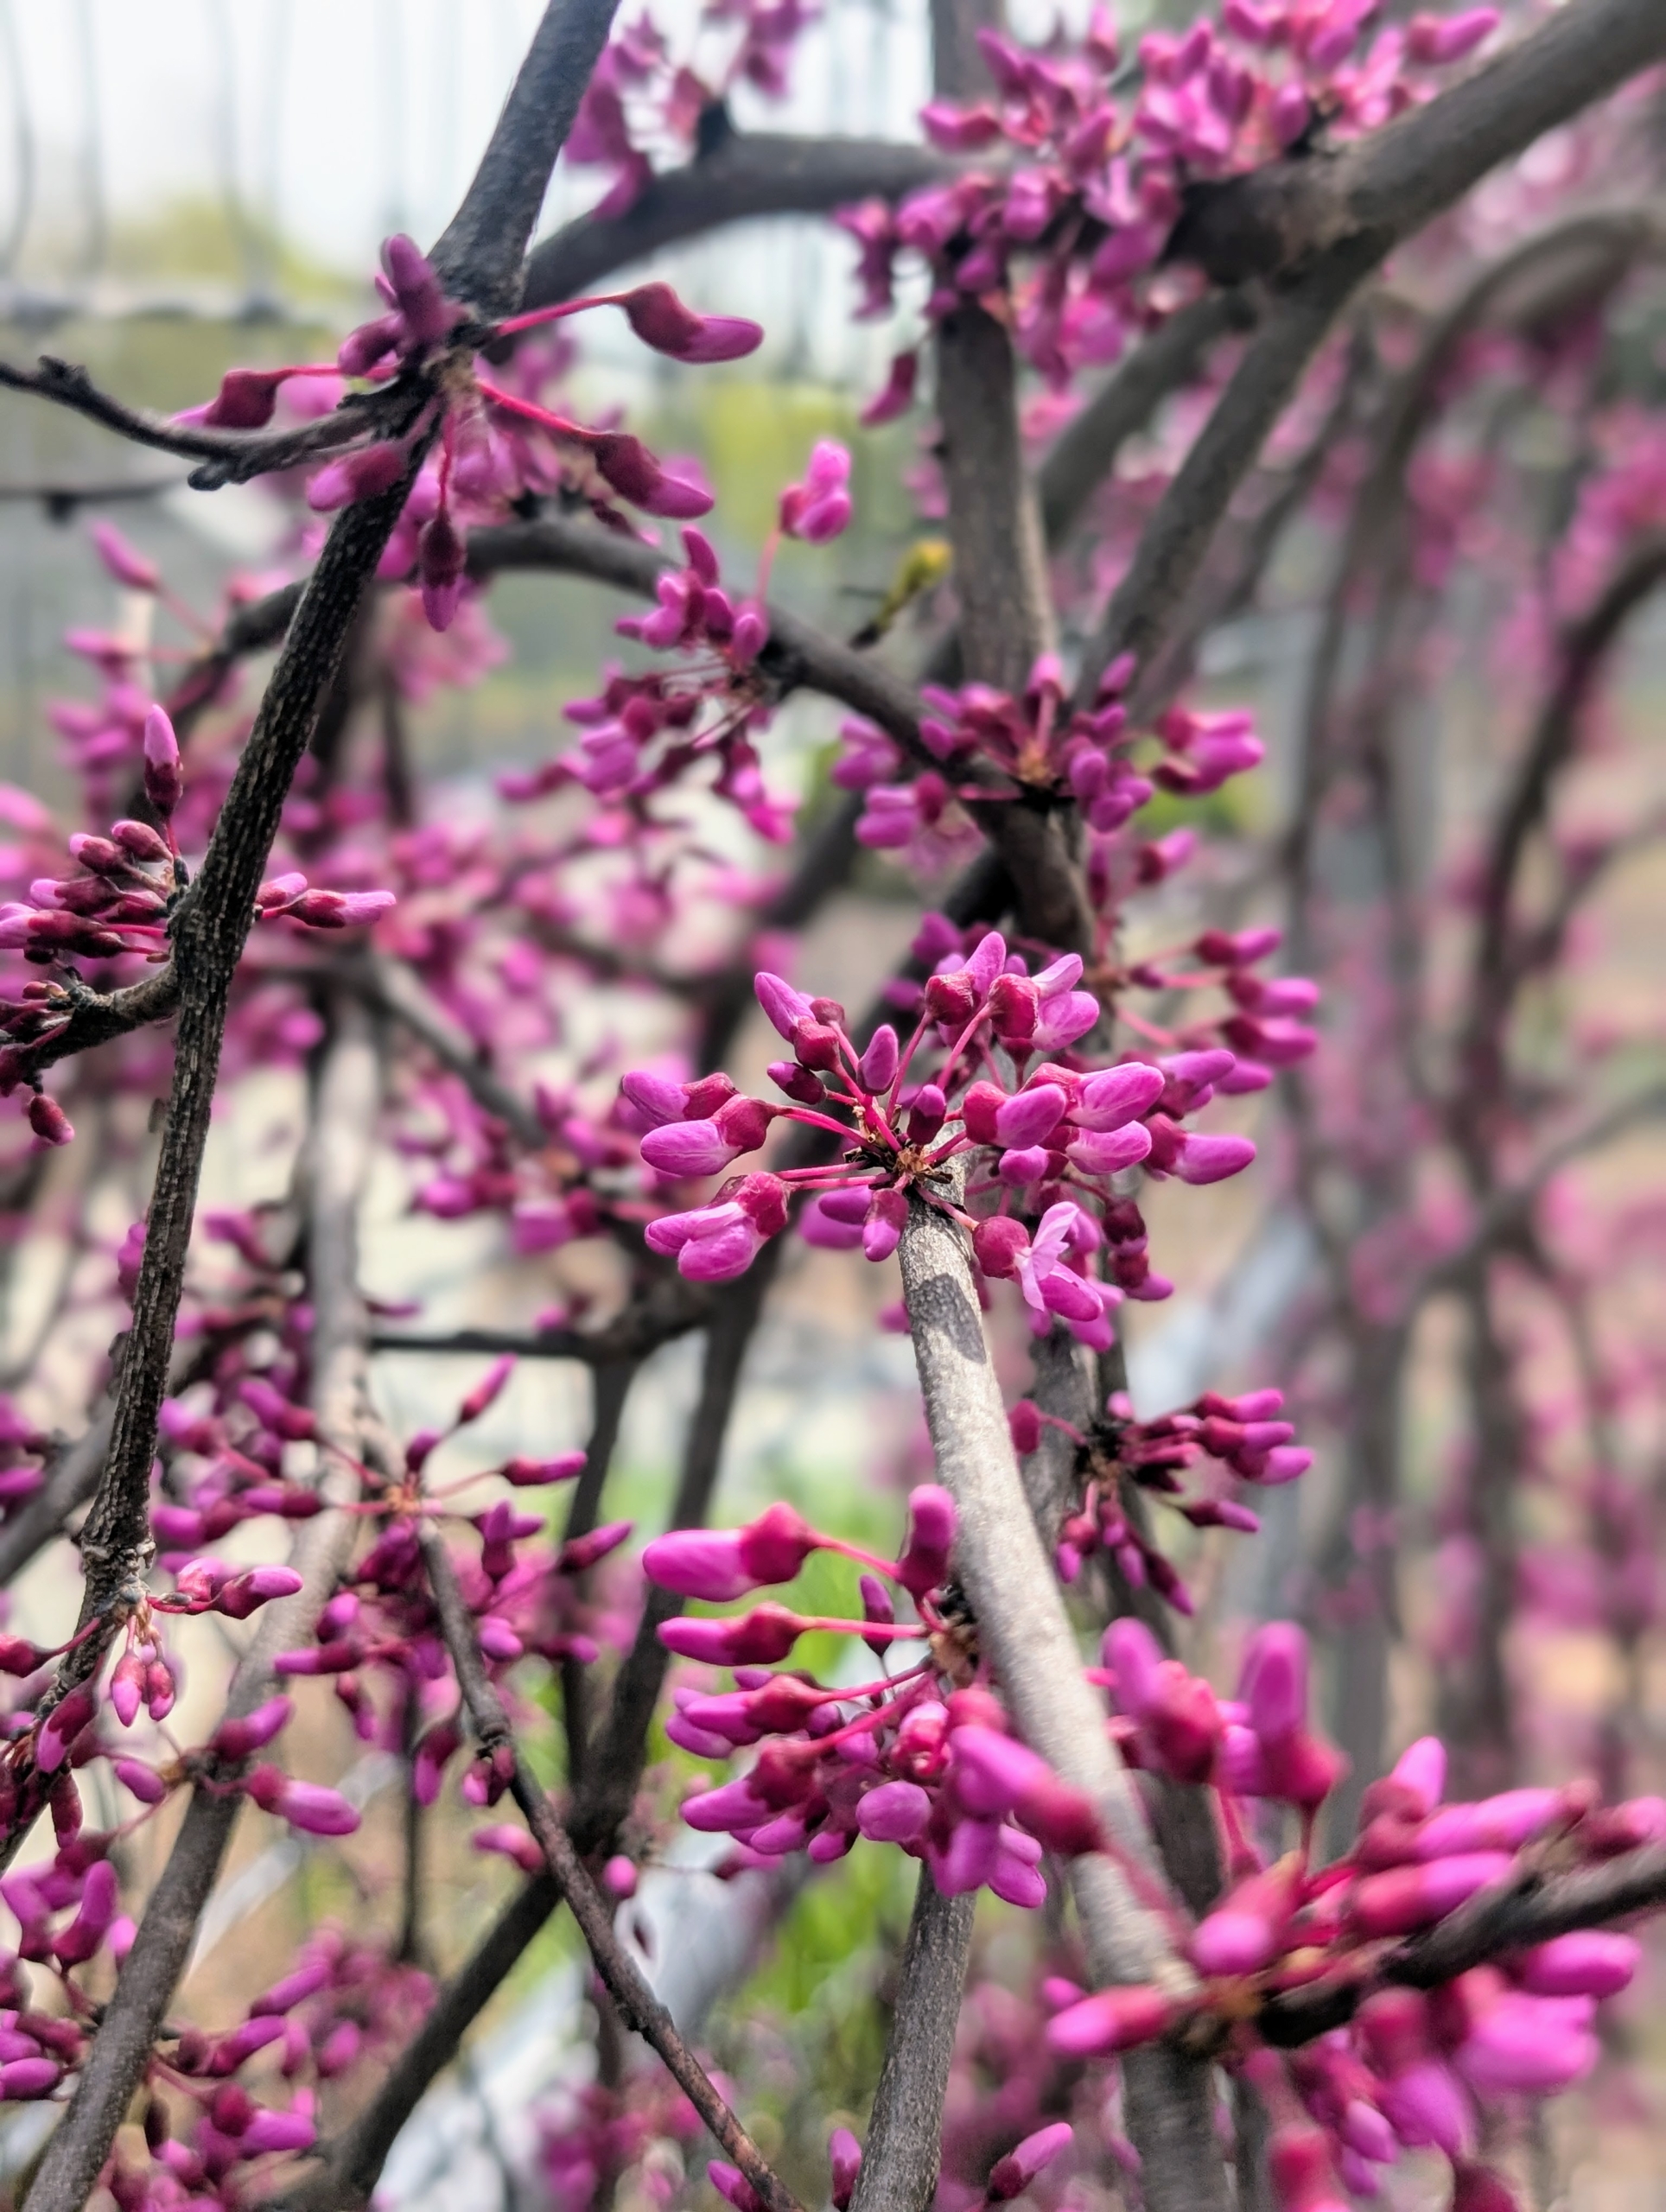
I have several Cercis canadensis ‘Merlot’ trees, or eastern redbuds. They’re all just starting to show off their beautiful early season purple-pink flower buds.
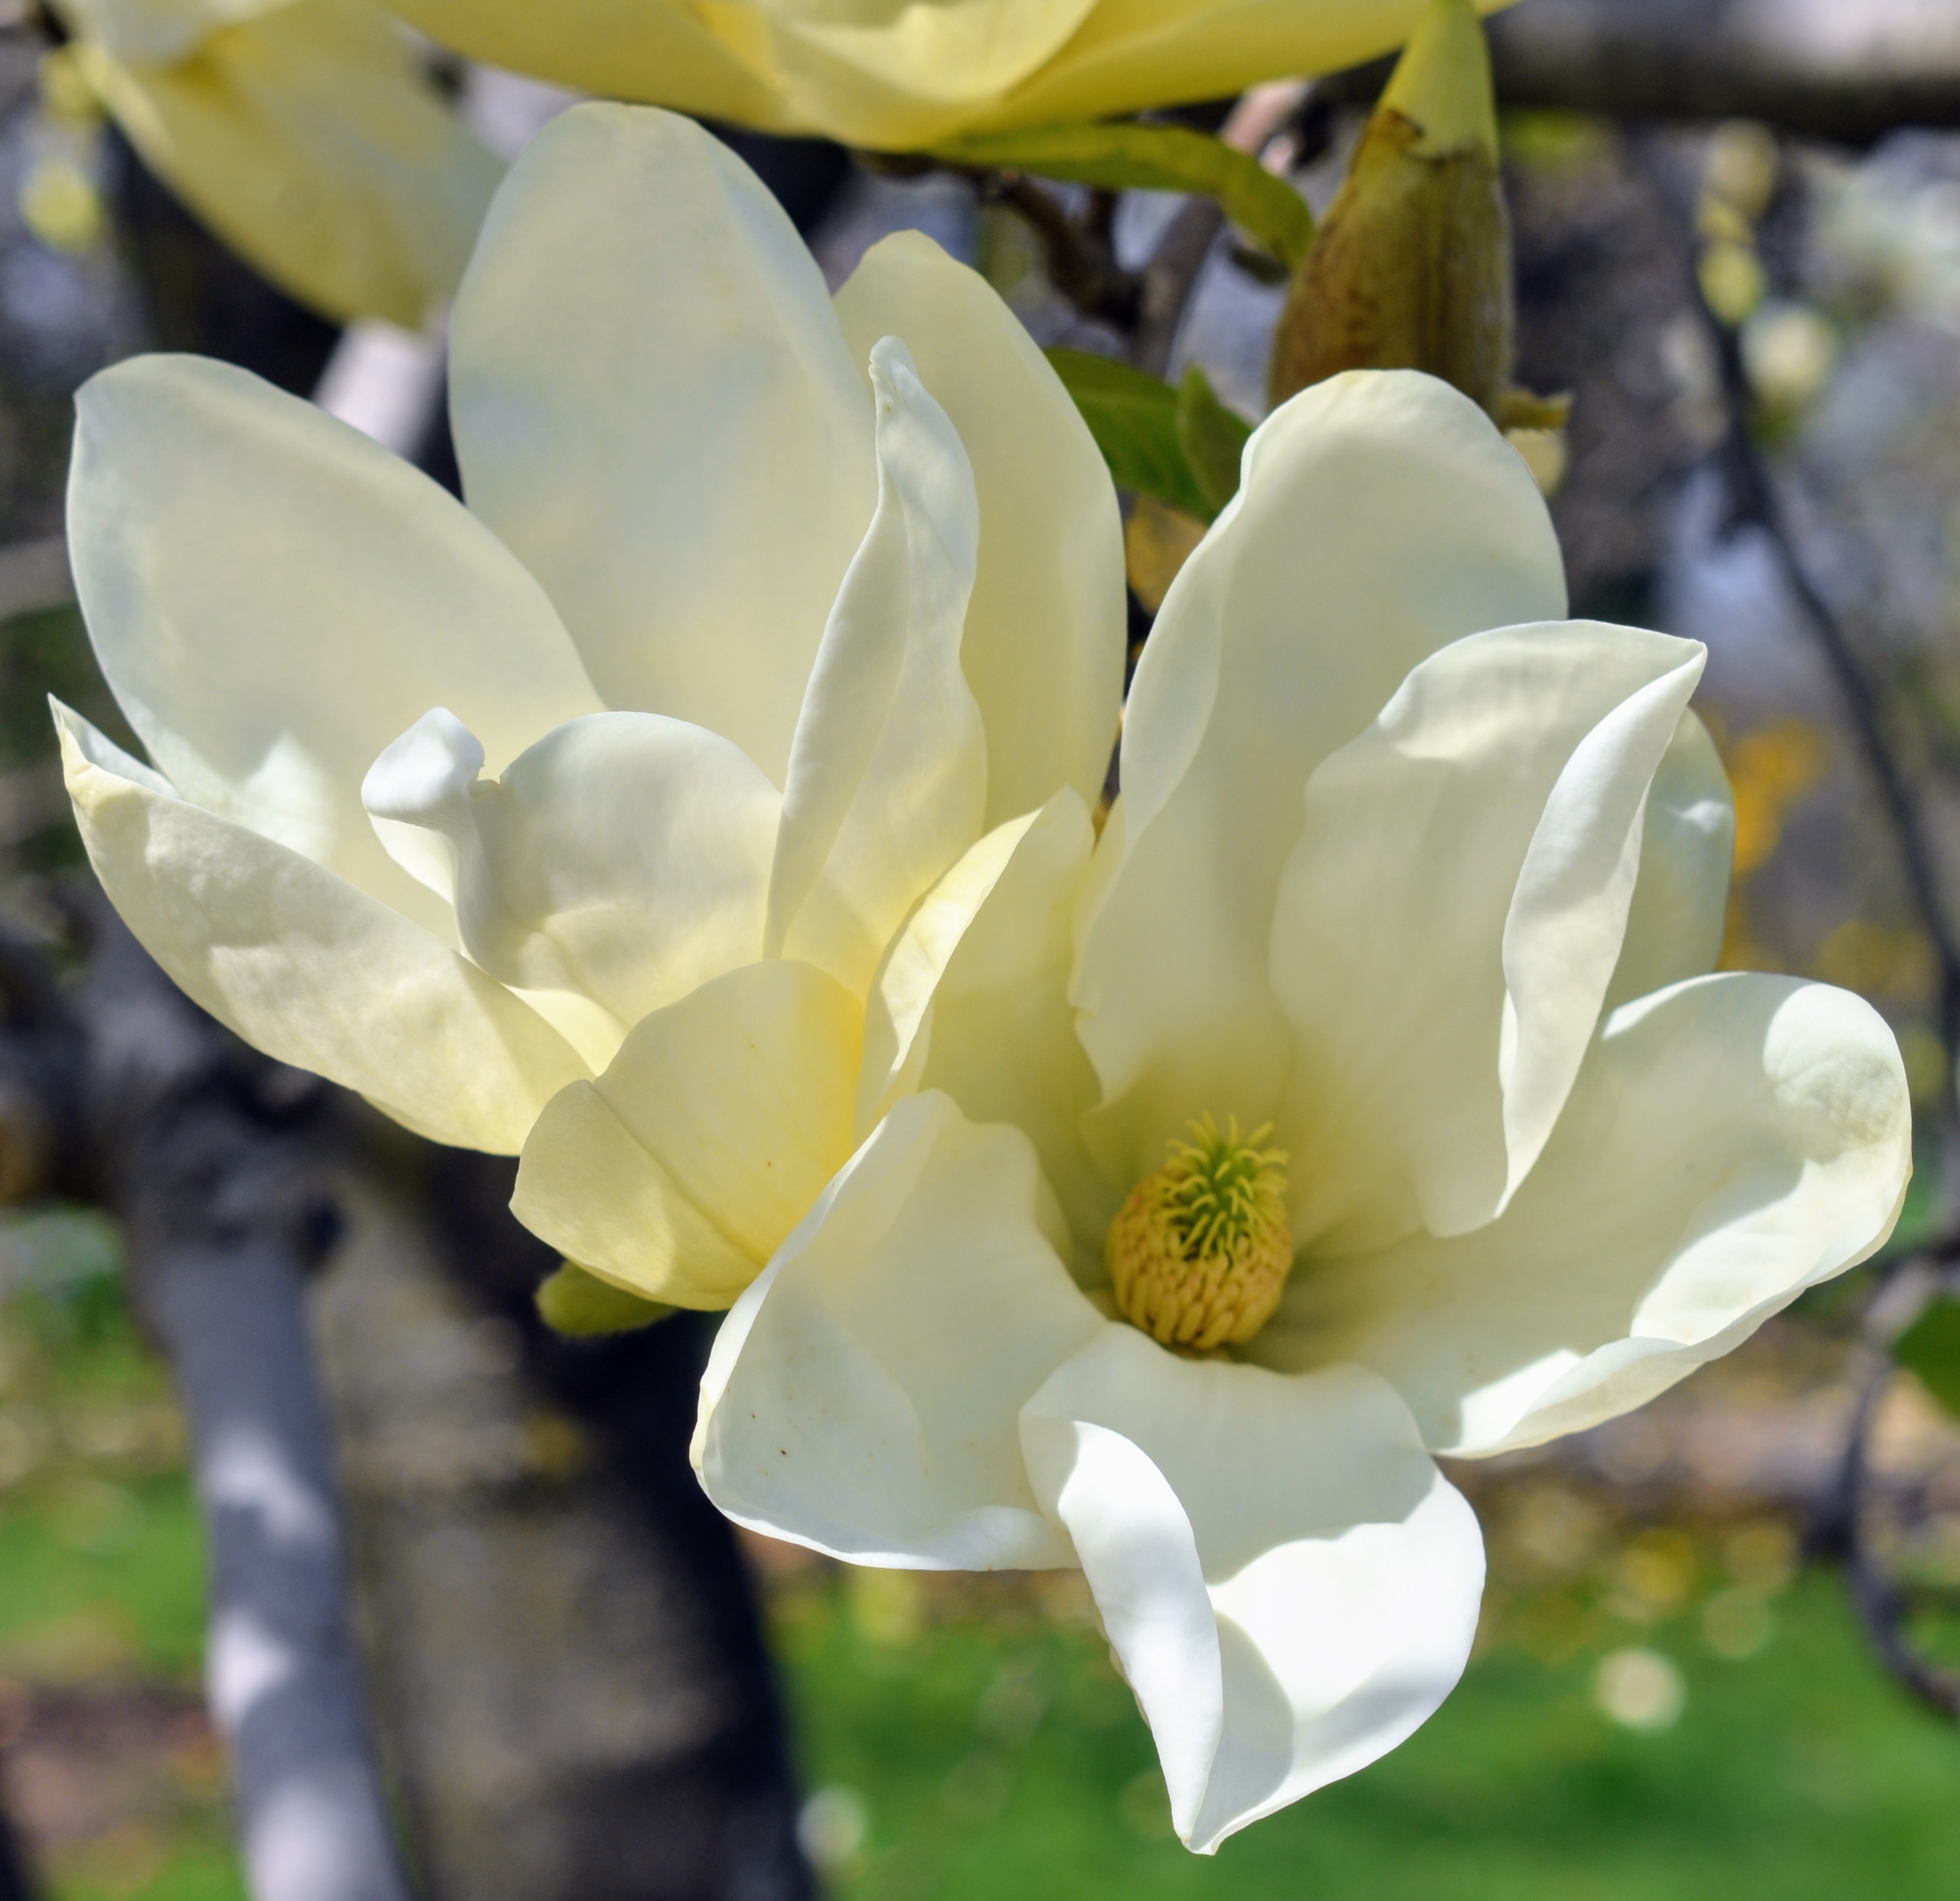
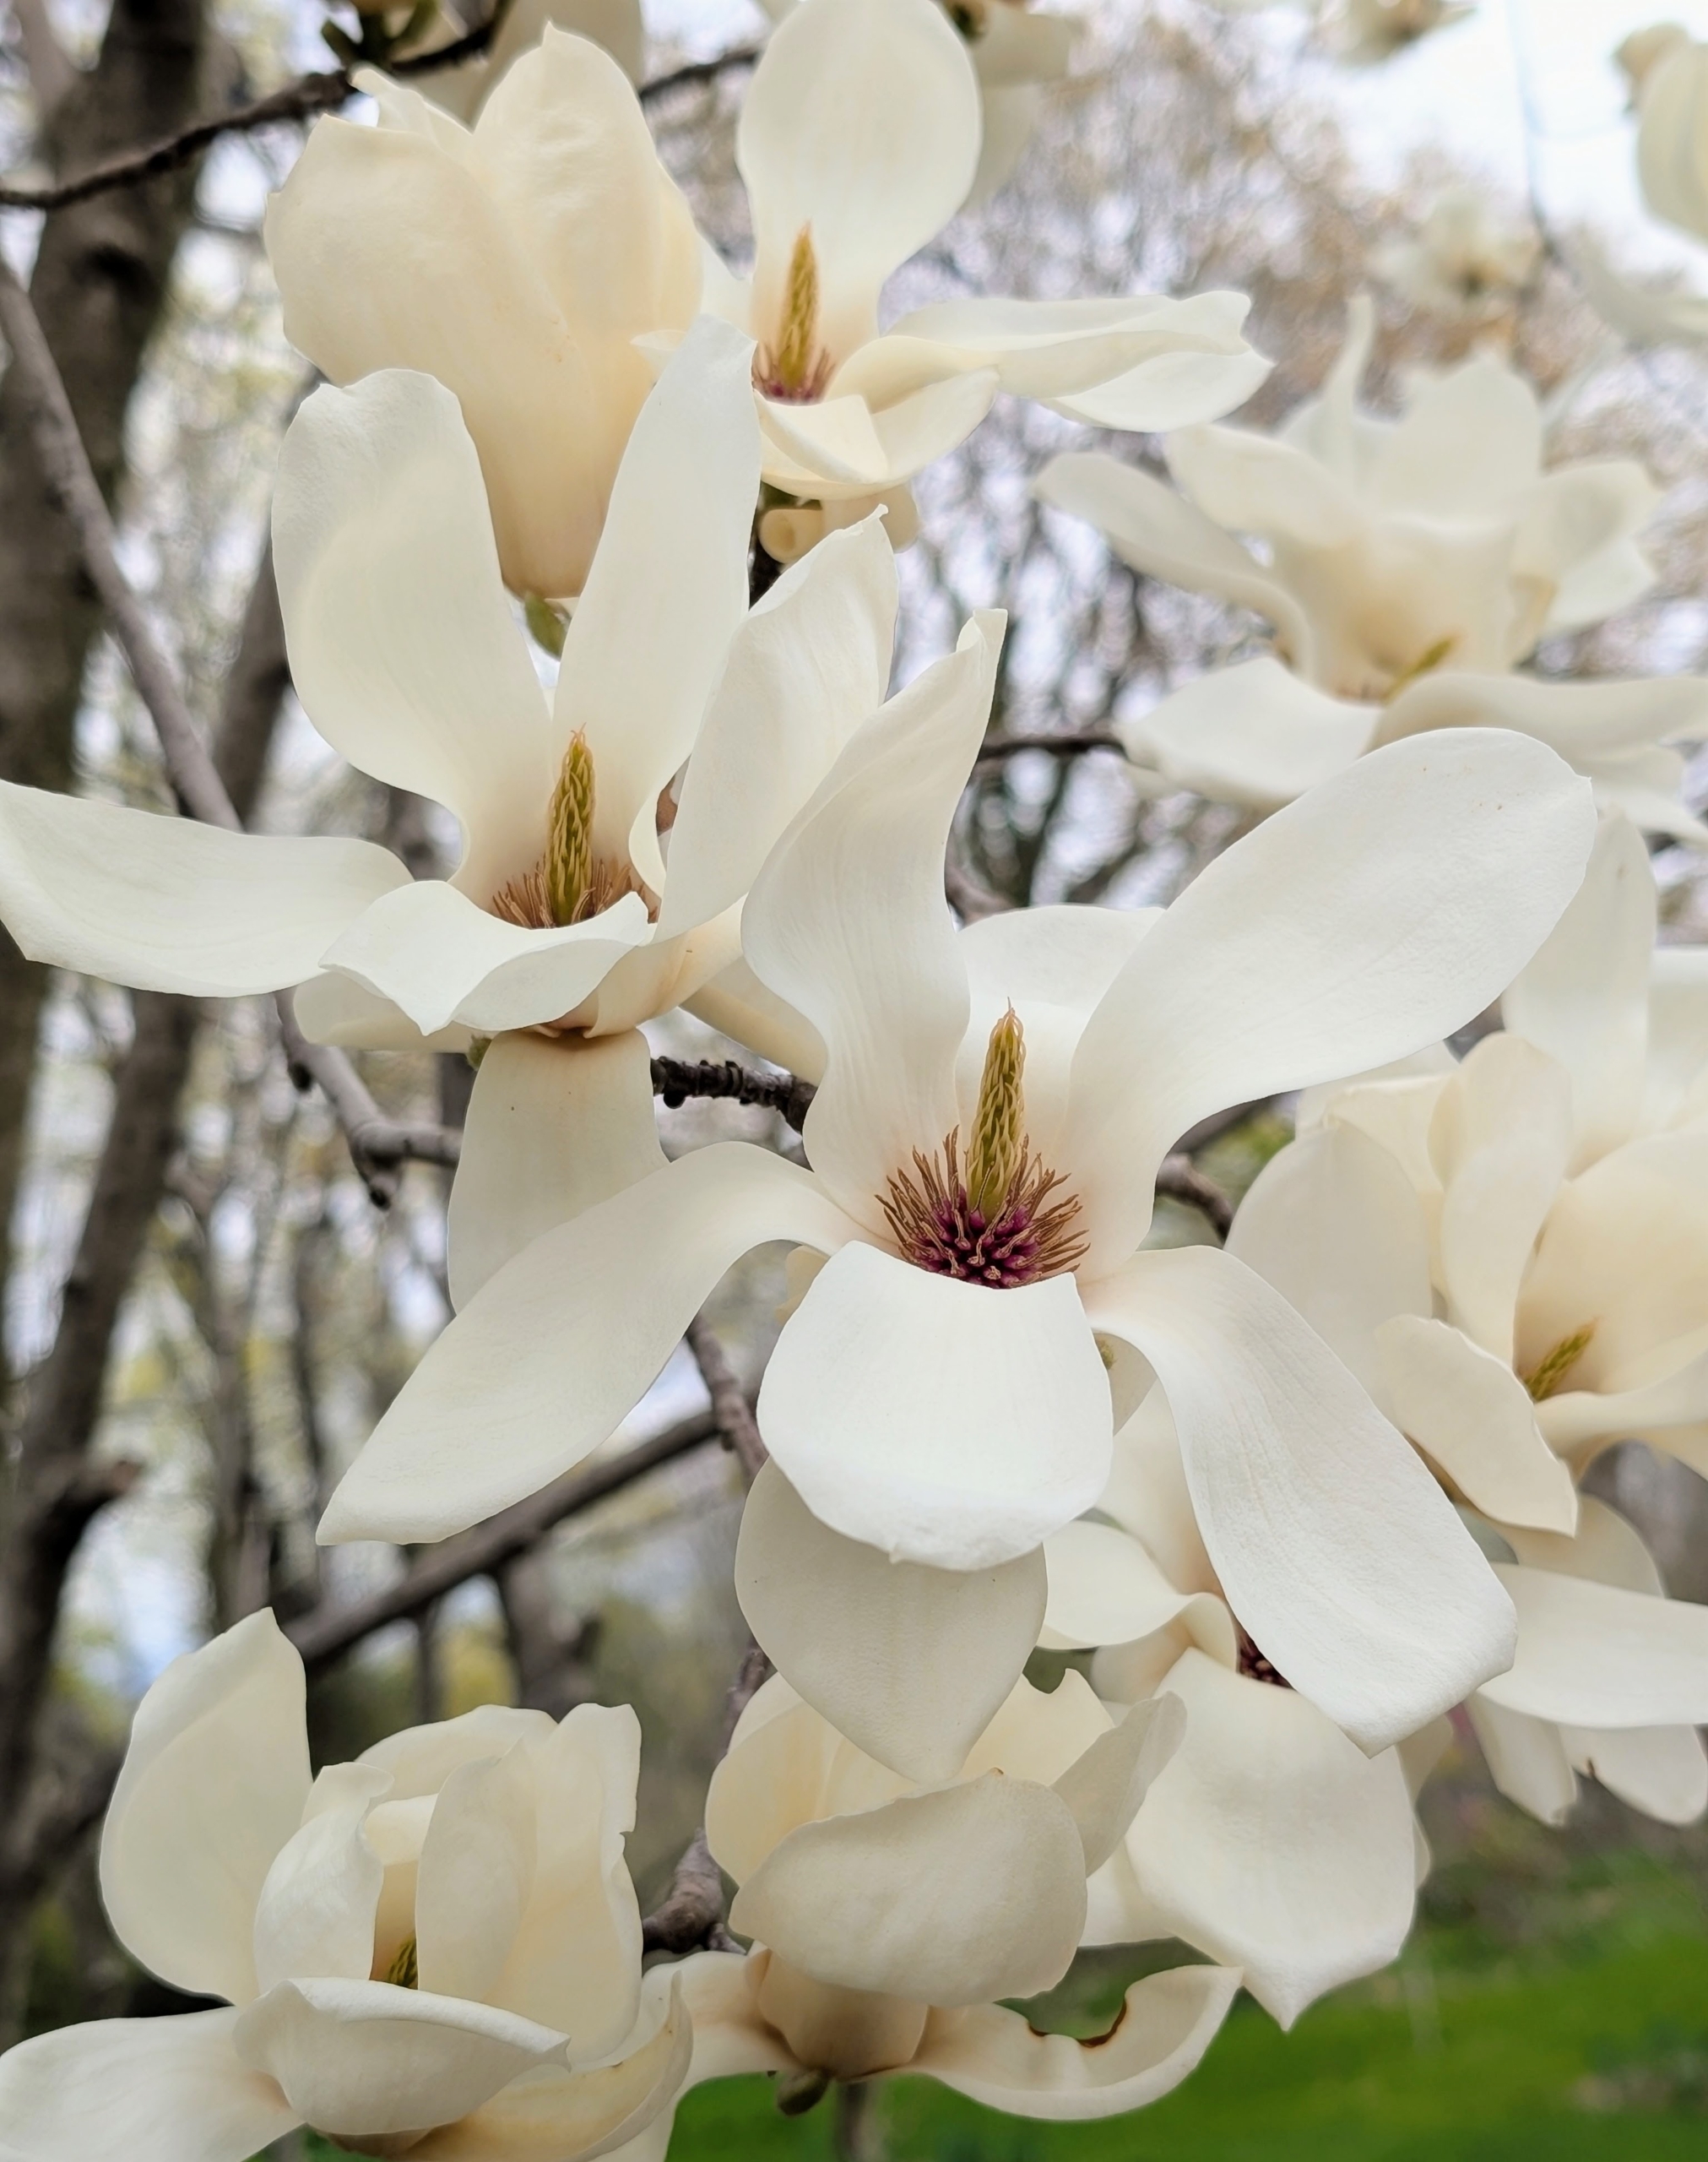
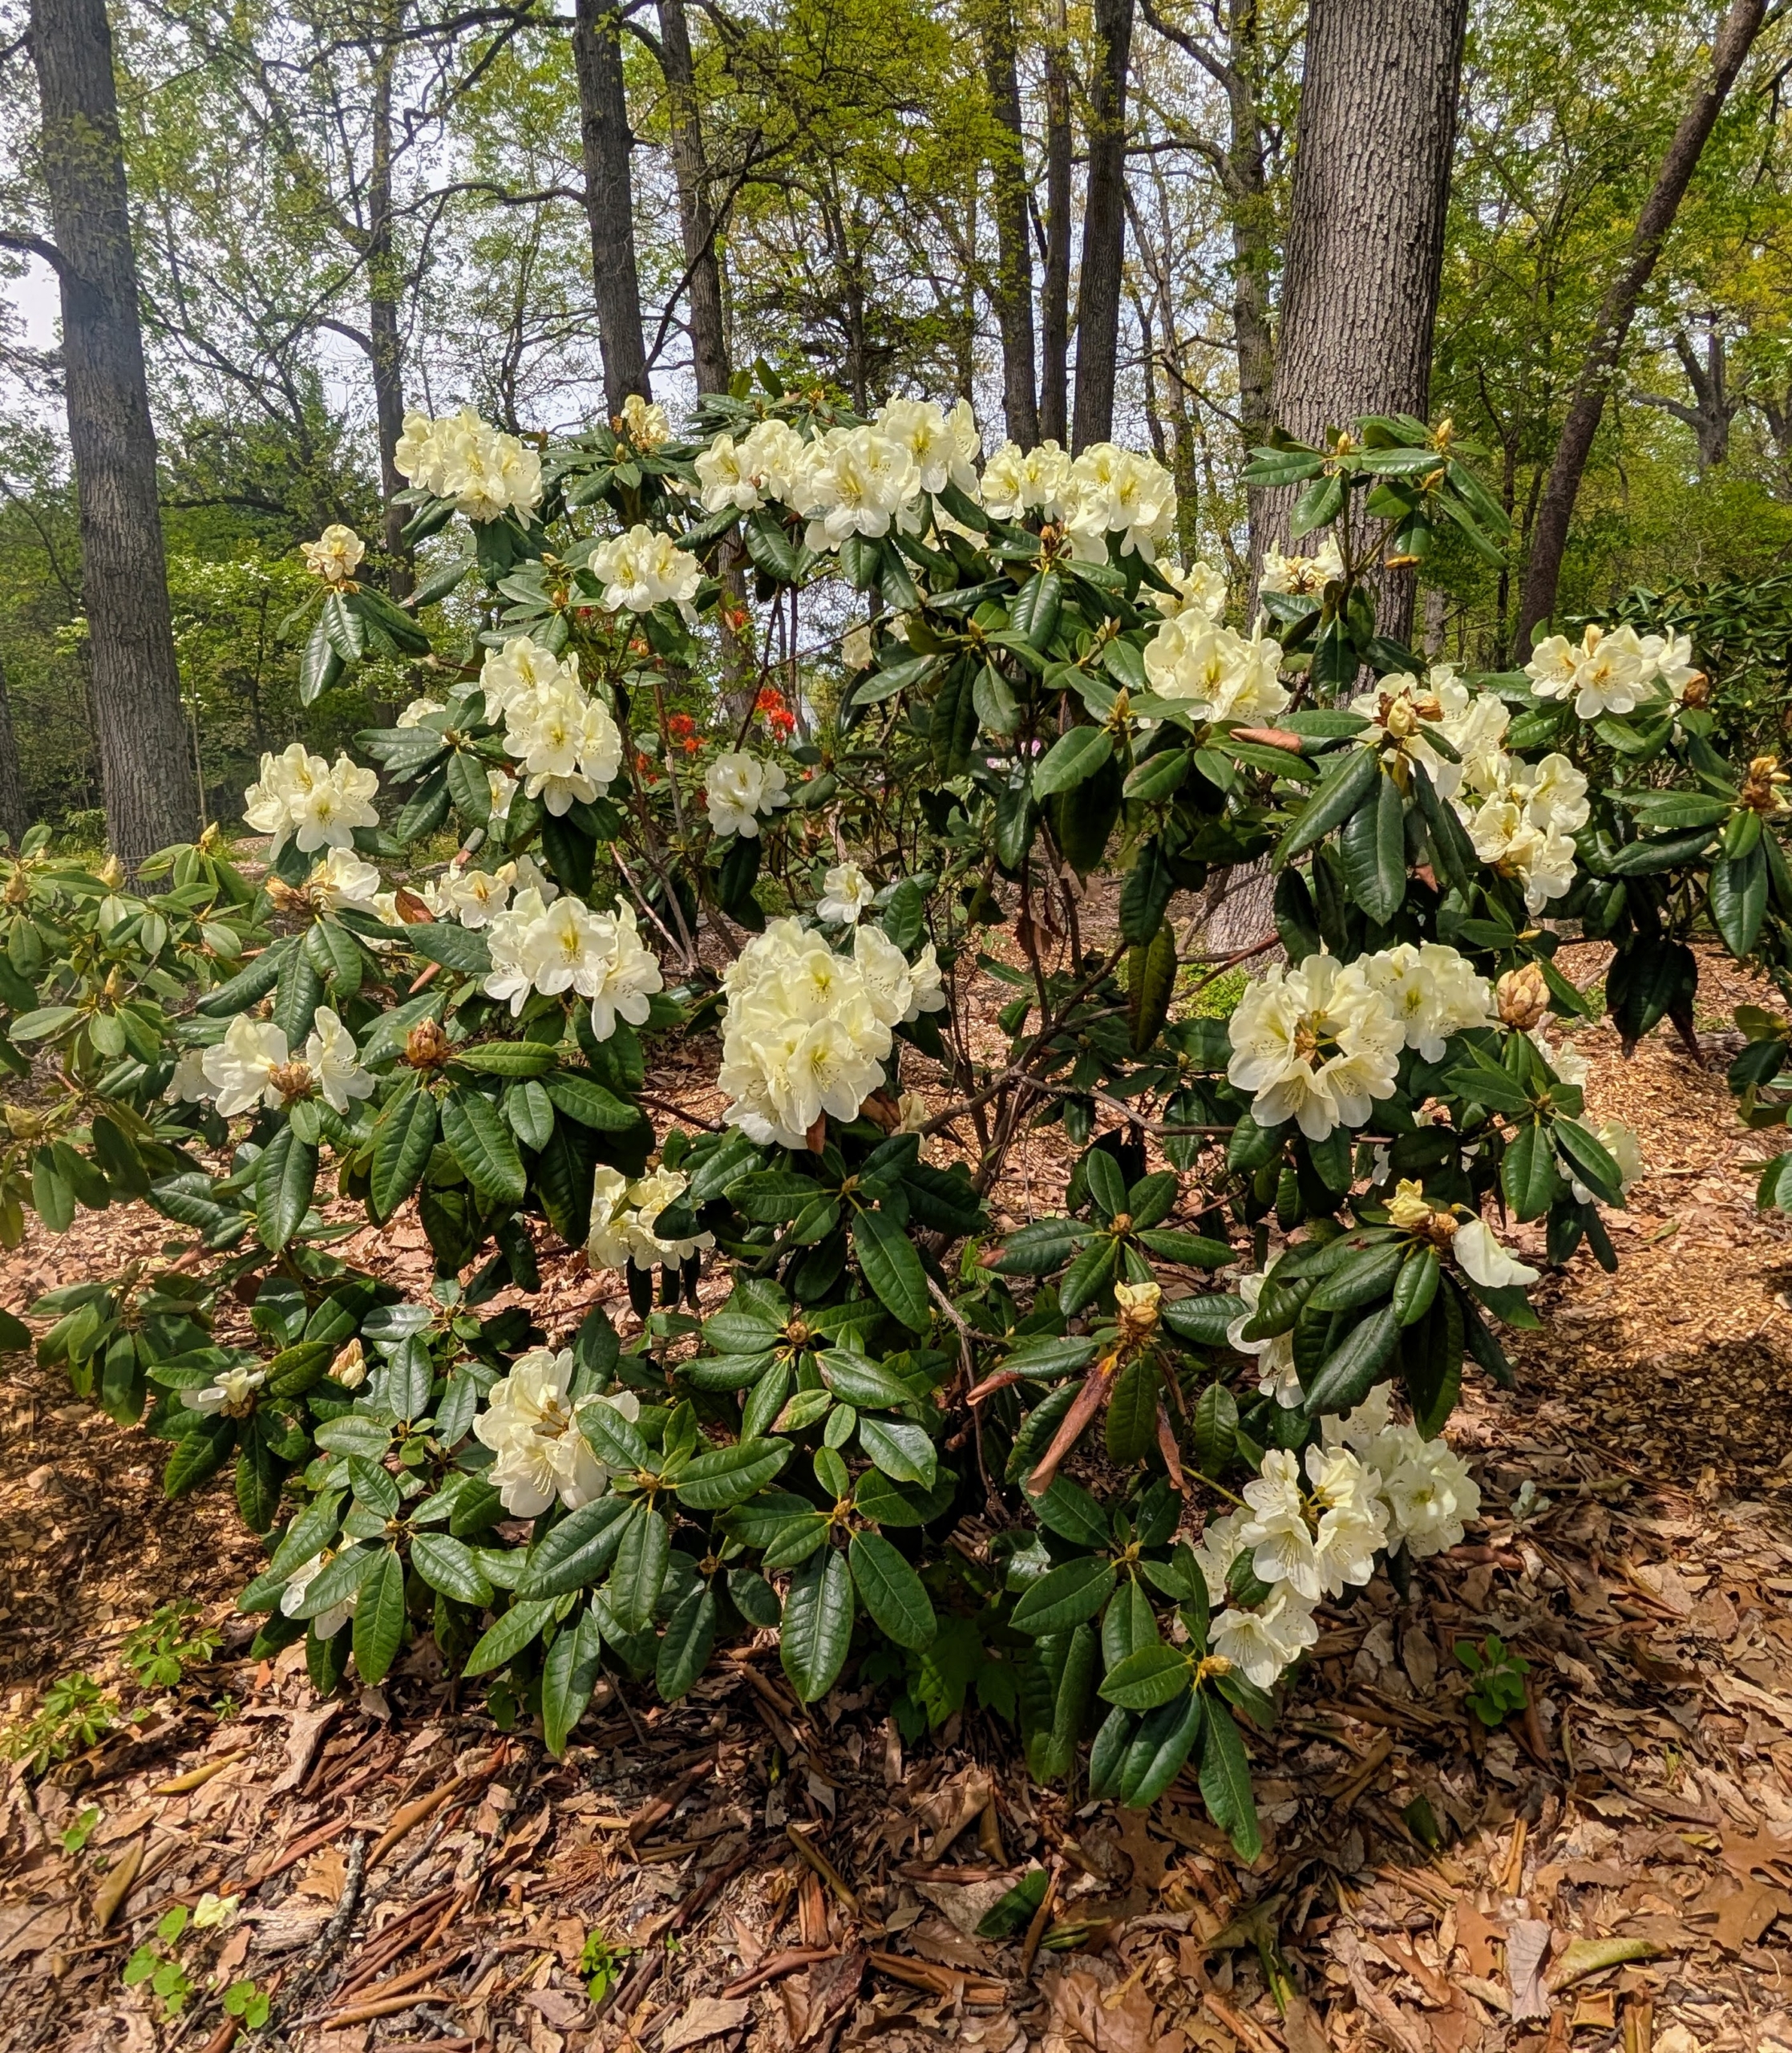
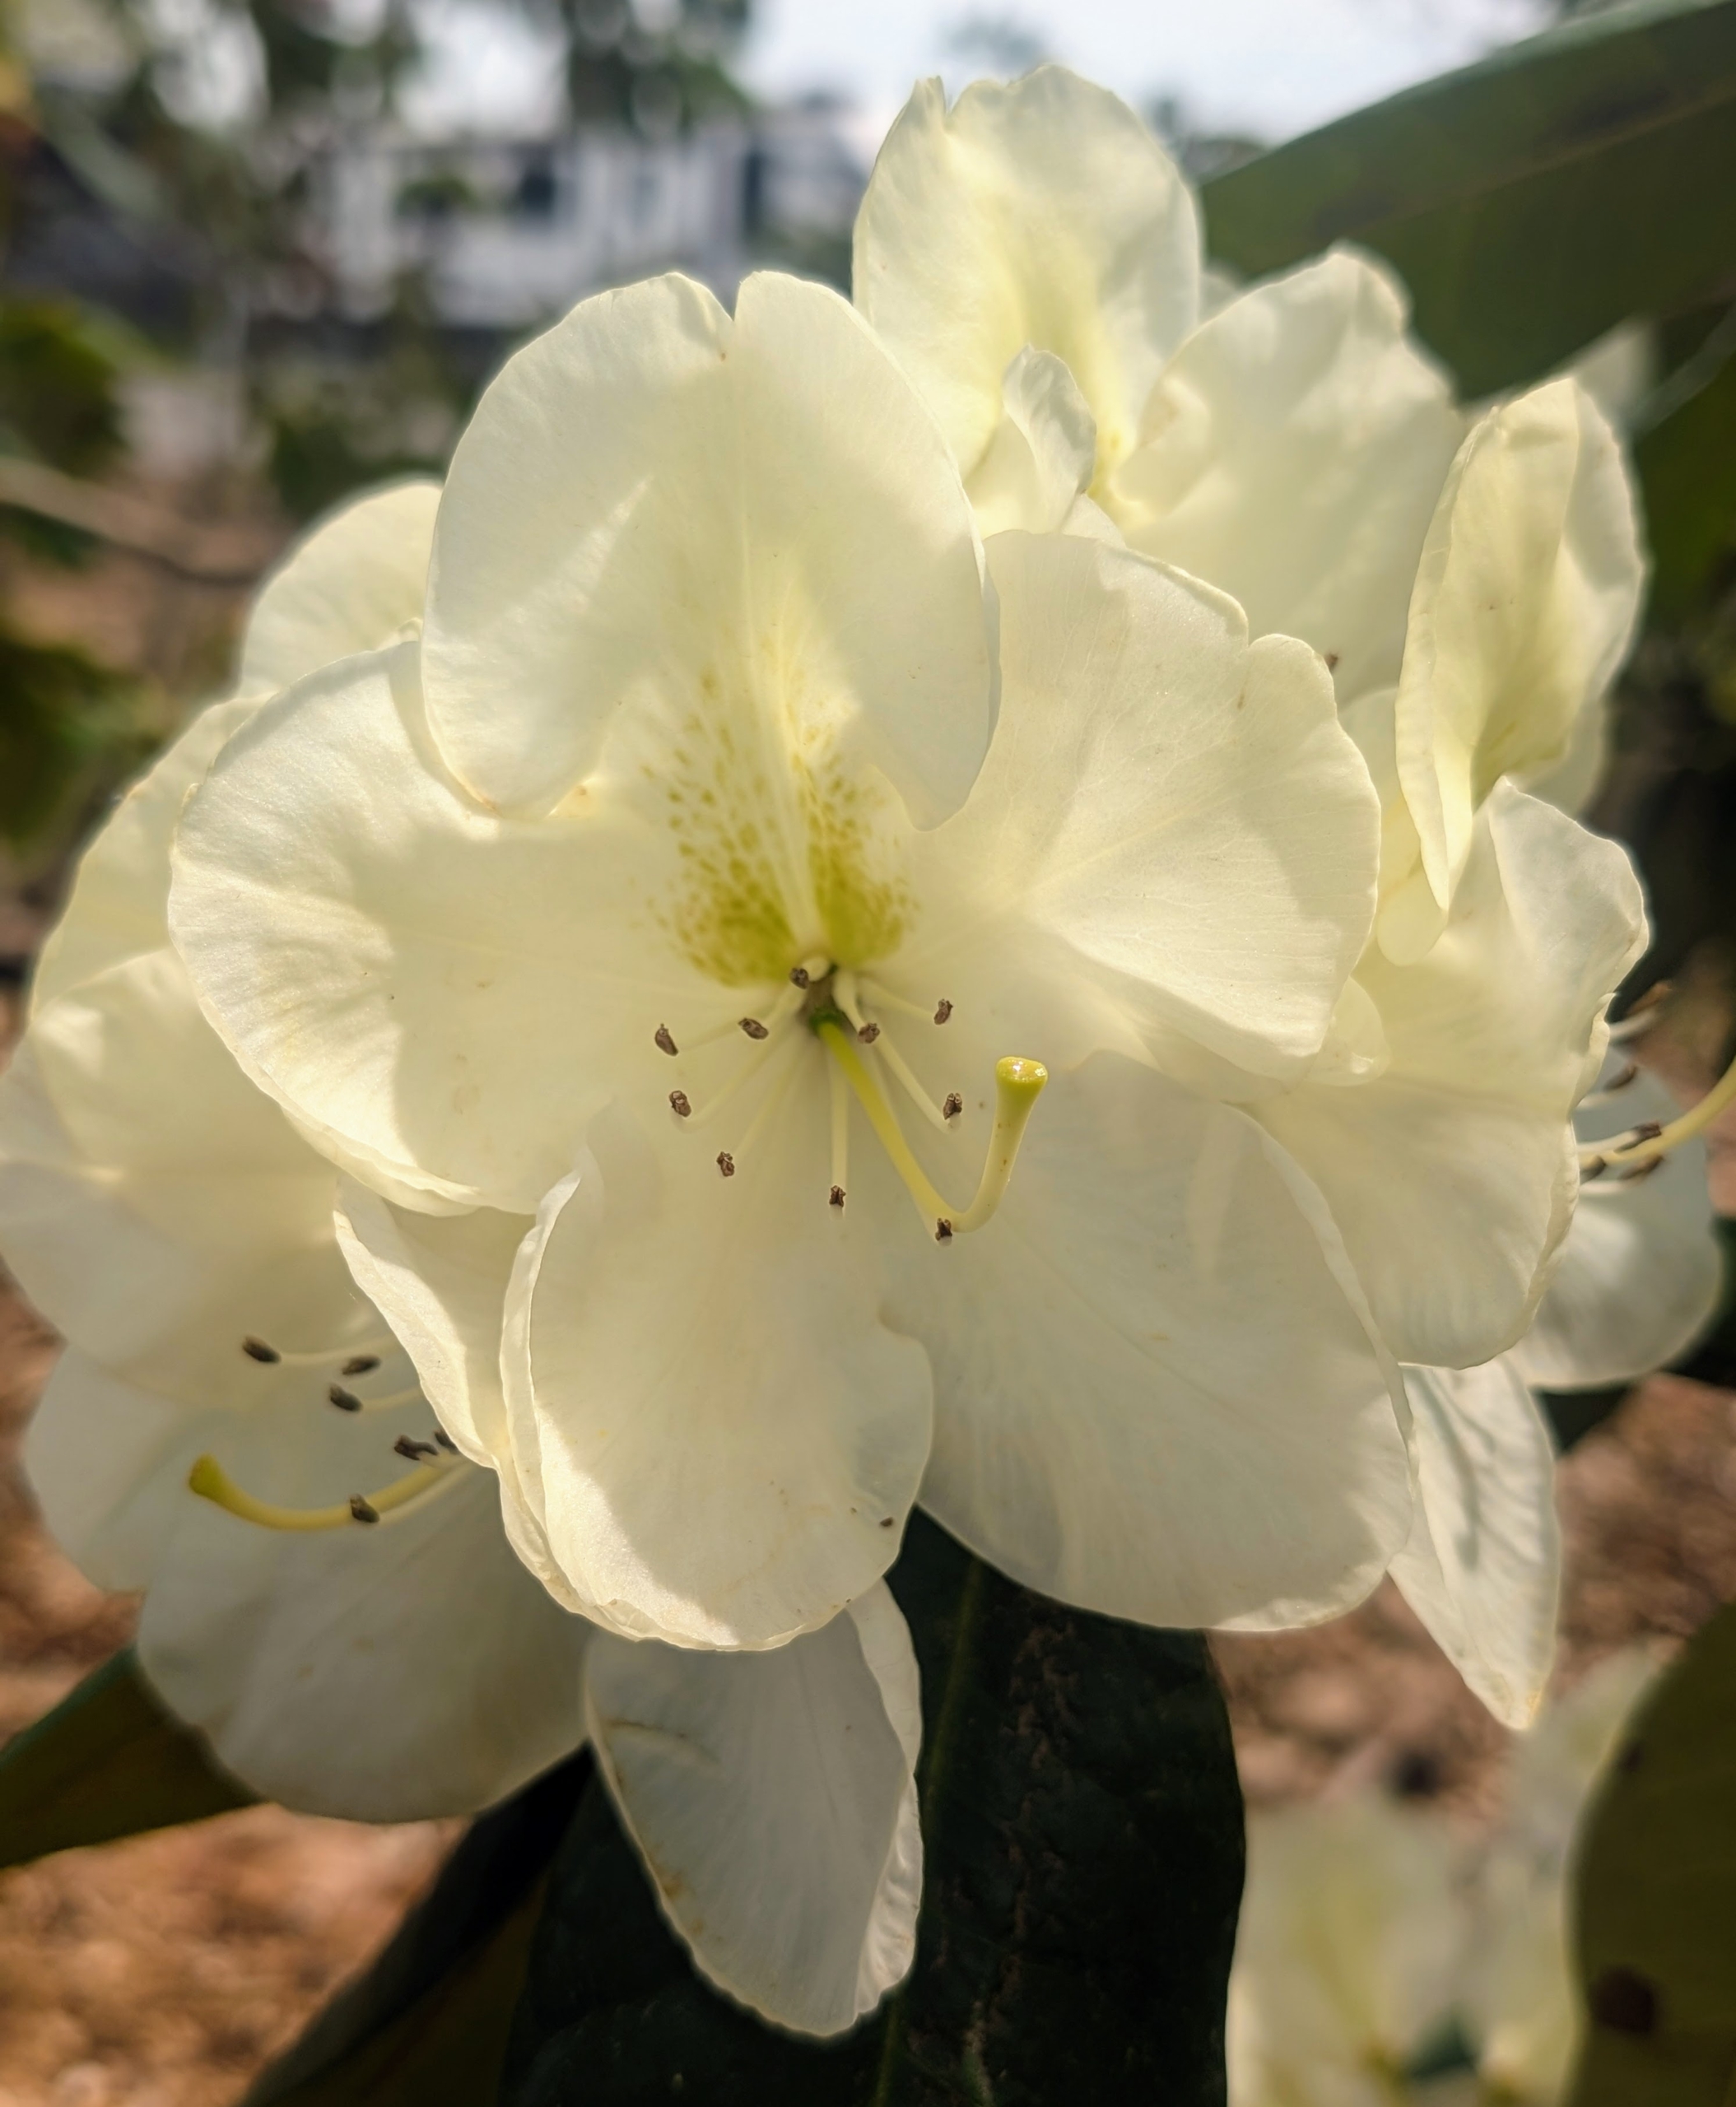
Growing as large shrubs or trees, Magnolias produce showy, fragrant flowers that are pink, white, cream, red, purple, or yellow.
Magnolia is a large genus of about 210 flowering plant species in the subfamily Magnolioideae. It is named after French botanist Pierre Magnol.
Look how bold and bright these flowers are. The magnolia family is one of the oldest trees in existence. Because of this, their flowers do not have true petals and sepals; instead, they have petal-like tepals. Also, the flowers do not produce real nectar, but attract pollinating beetles with fragrant and sugary secretions.
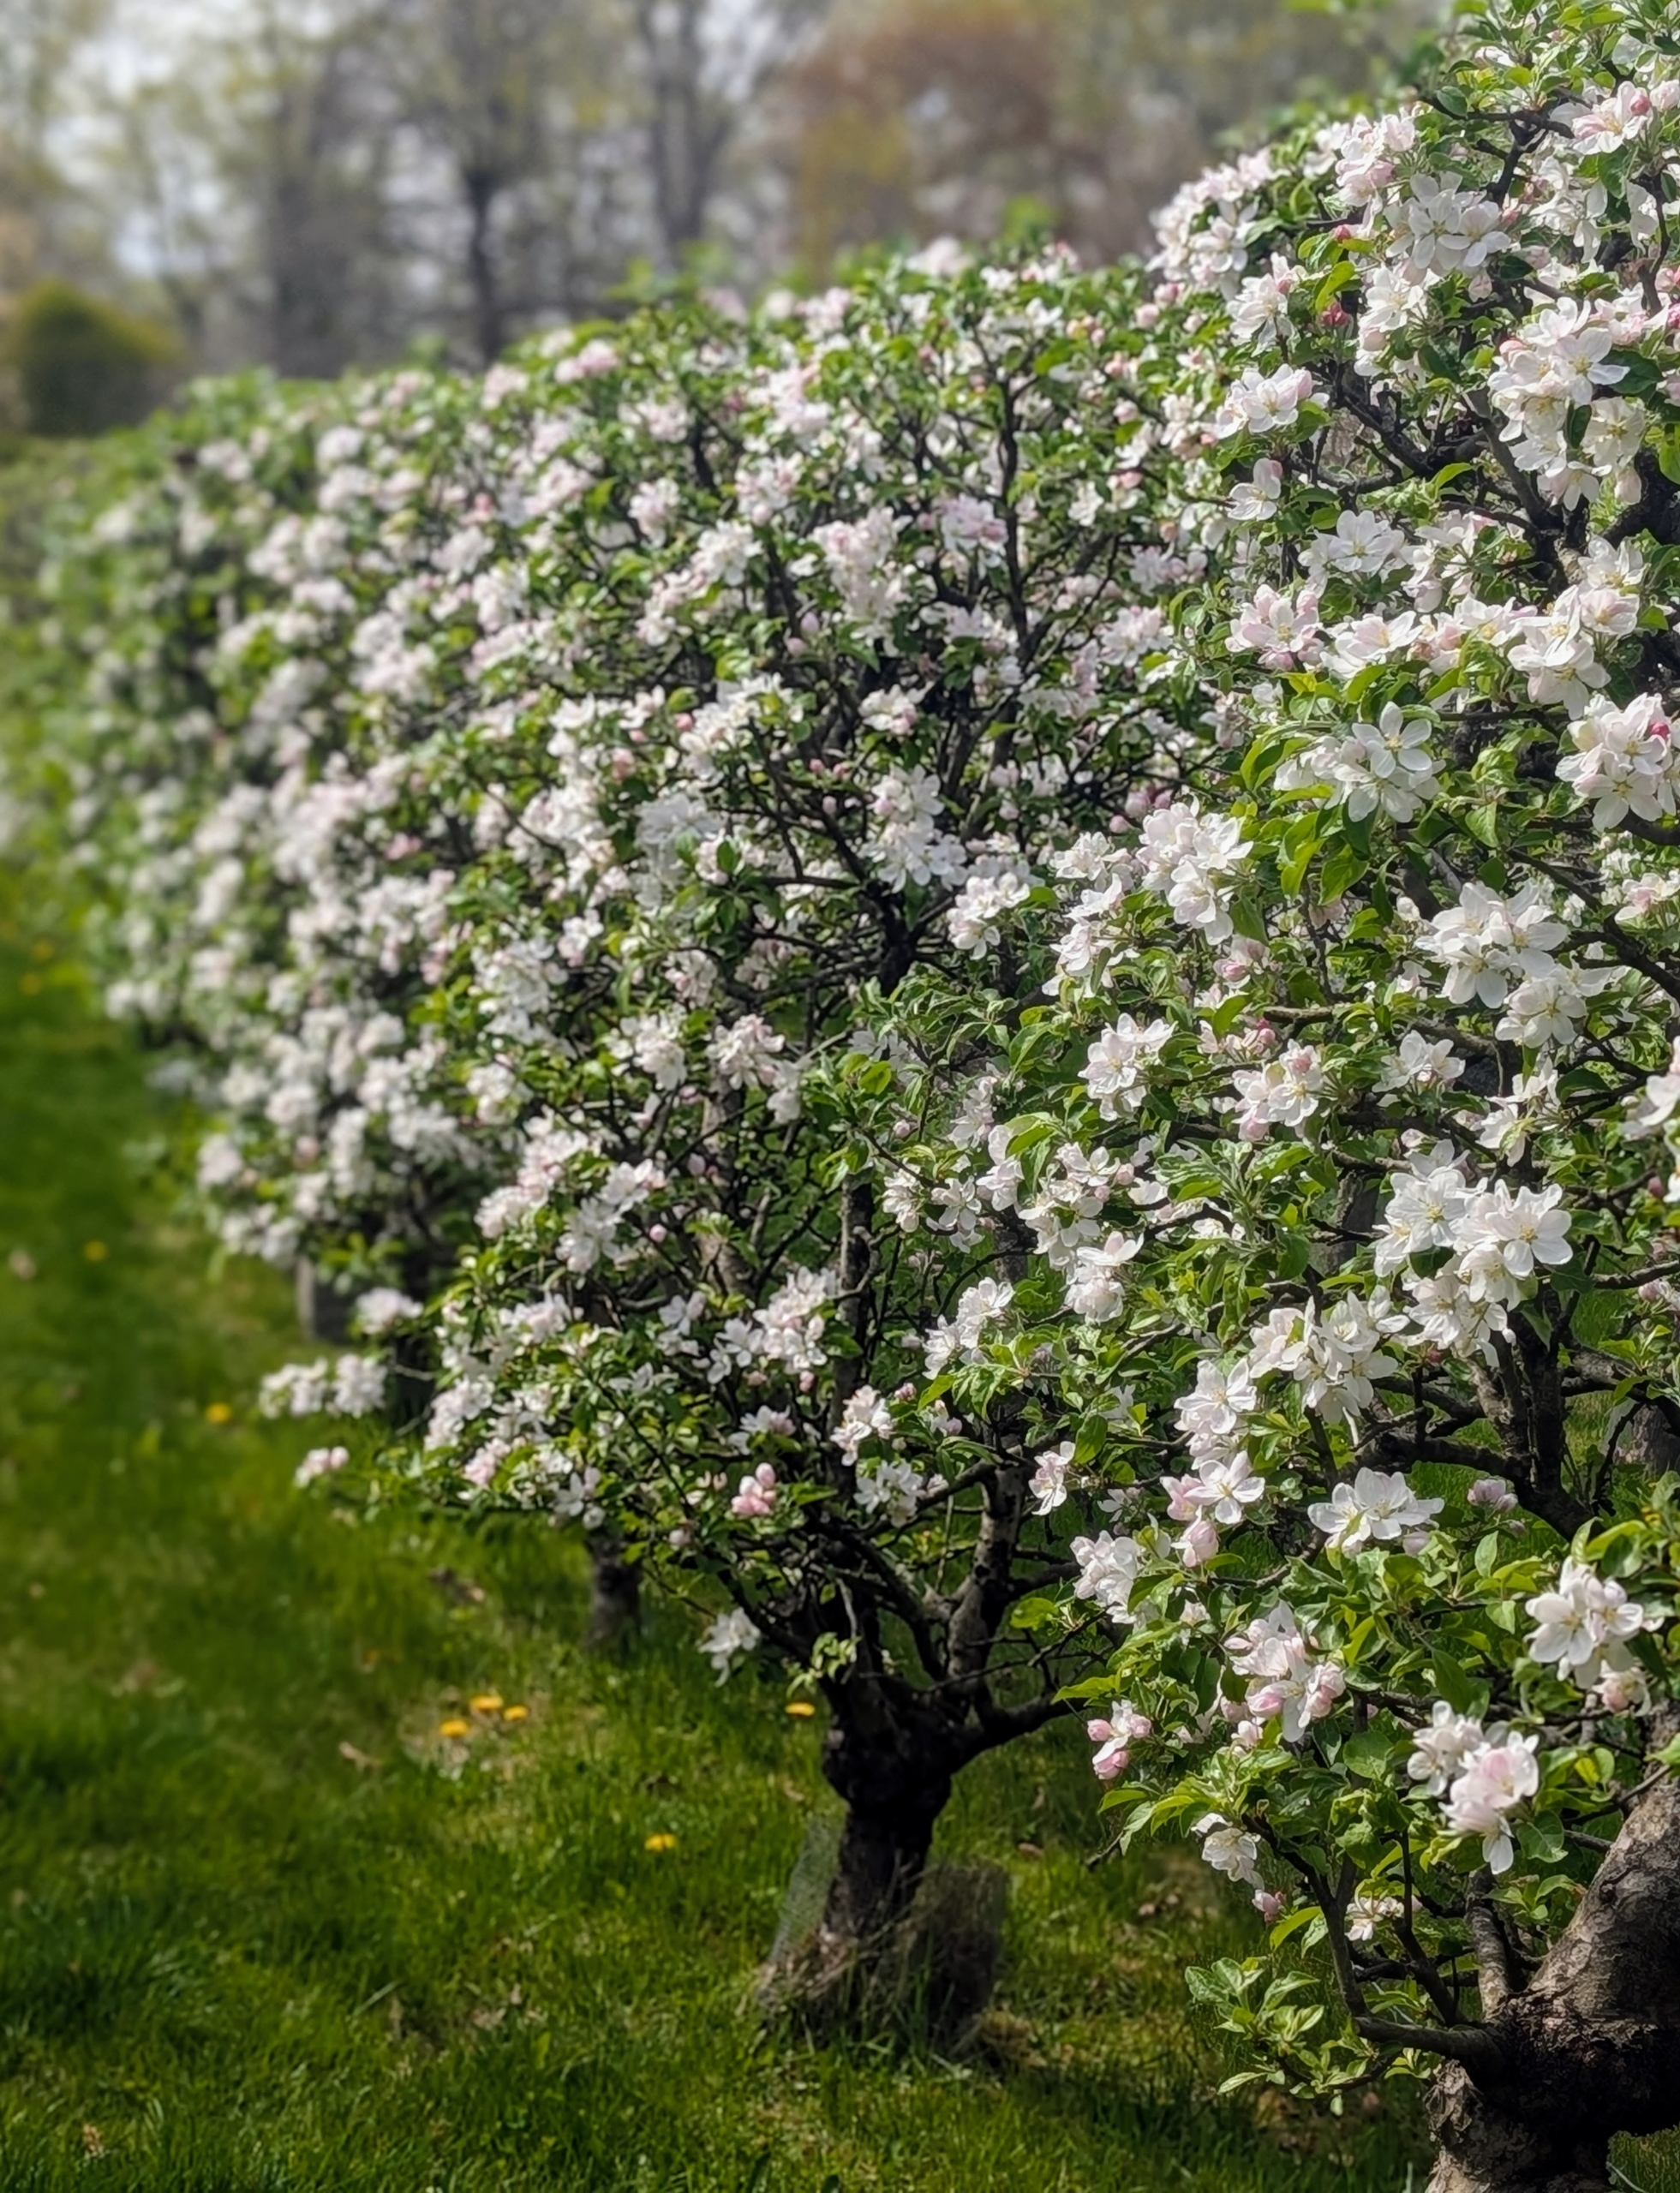
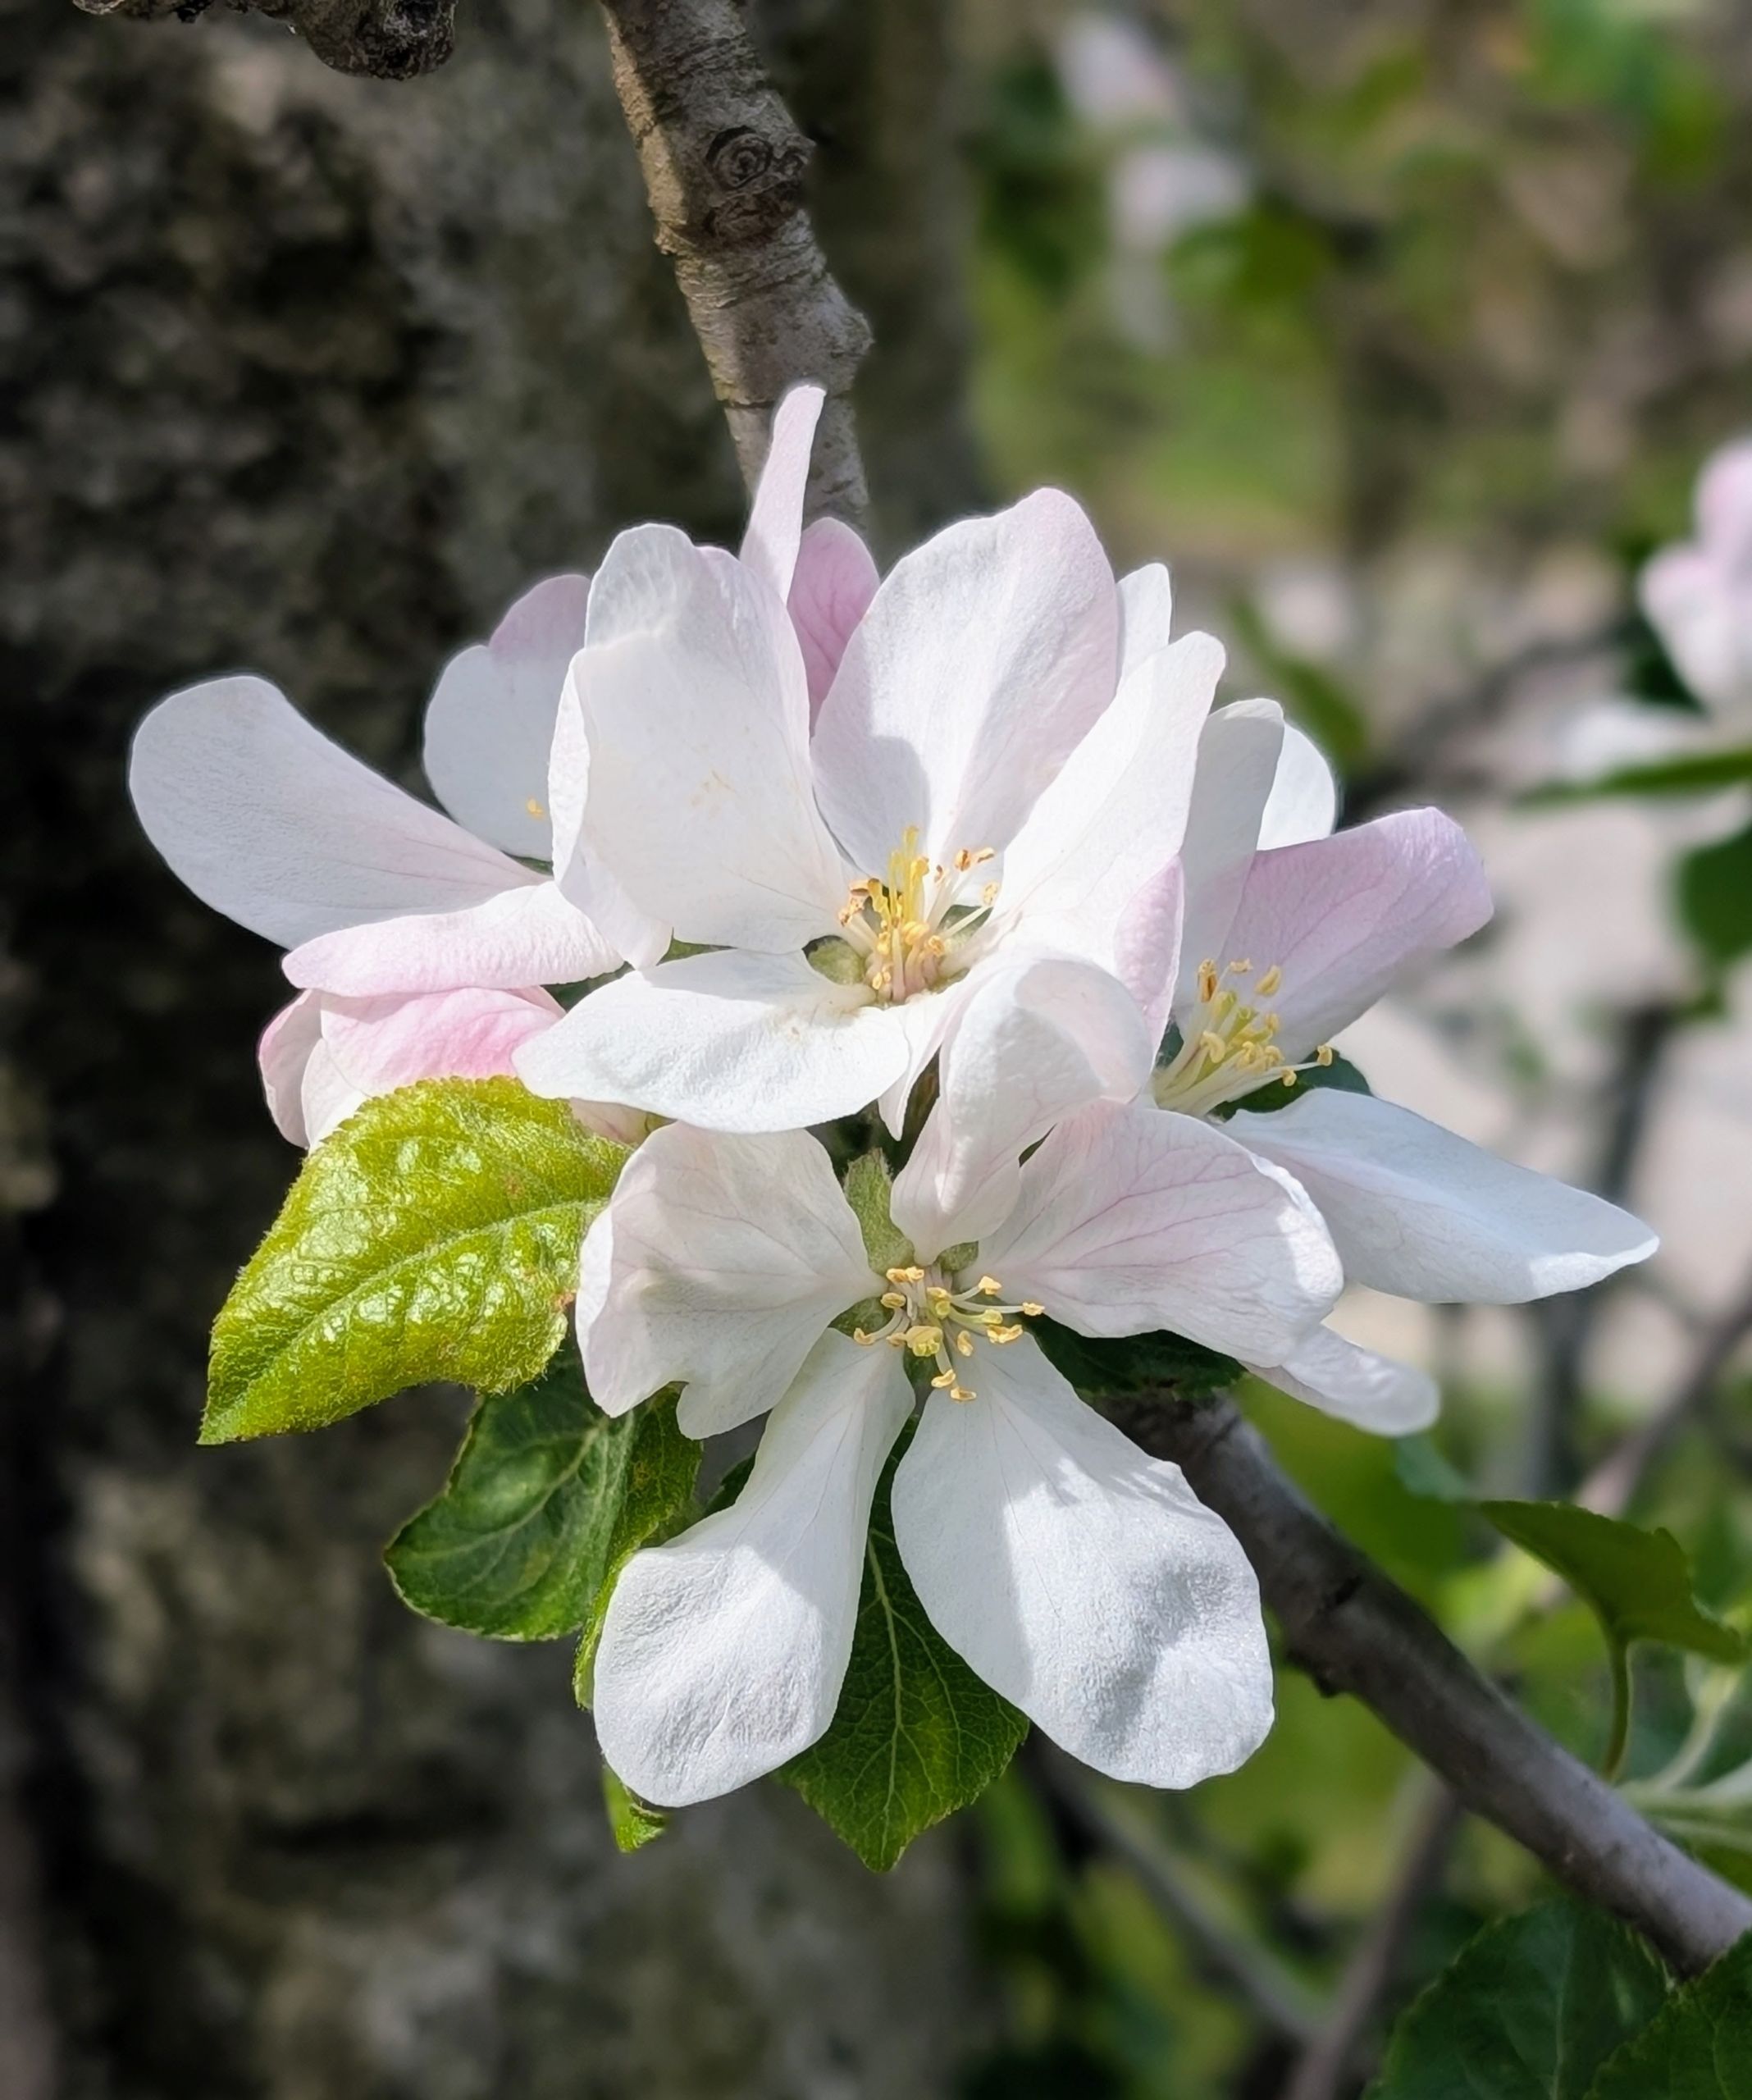
Up near my Winter House, just outside my kitchen, is my dwarf apple espalier – also showing gorgeous spring flowers.
The majority of apple tree blossoms begin as pink buds and bloom as crisp white flowers.
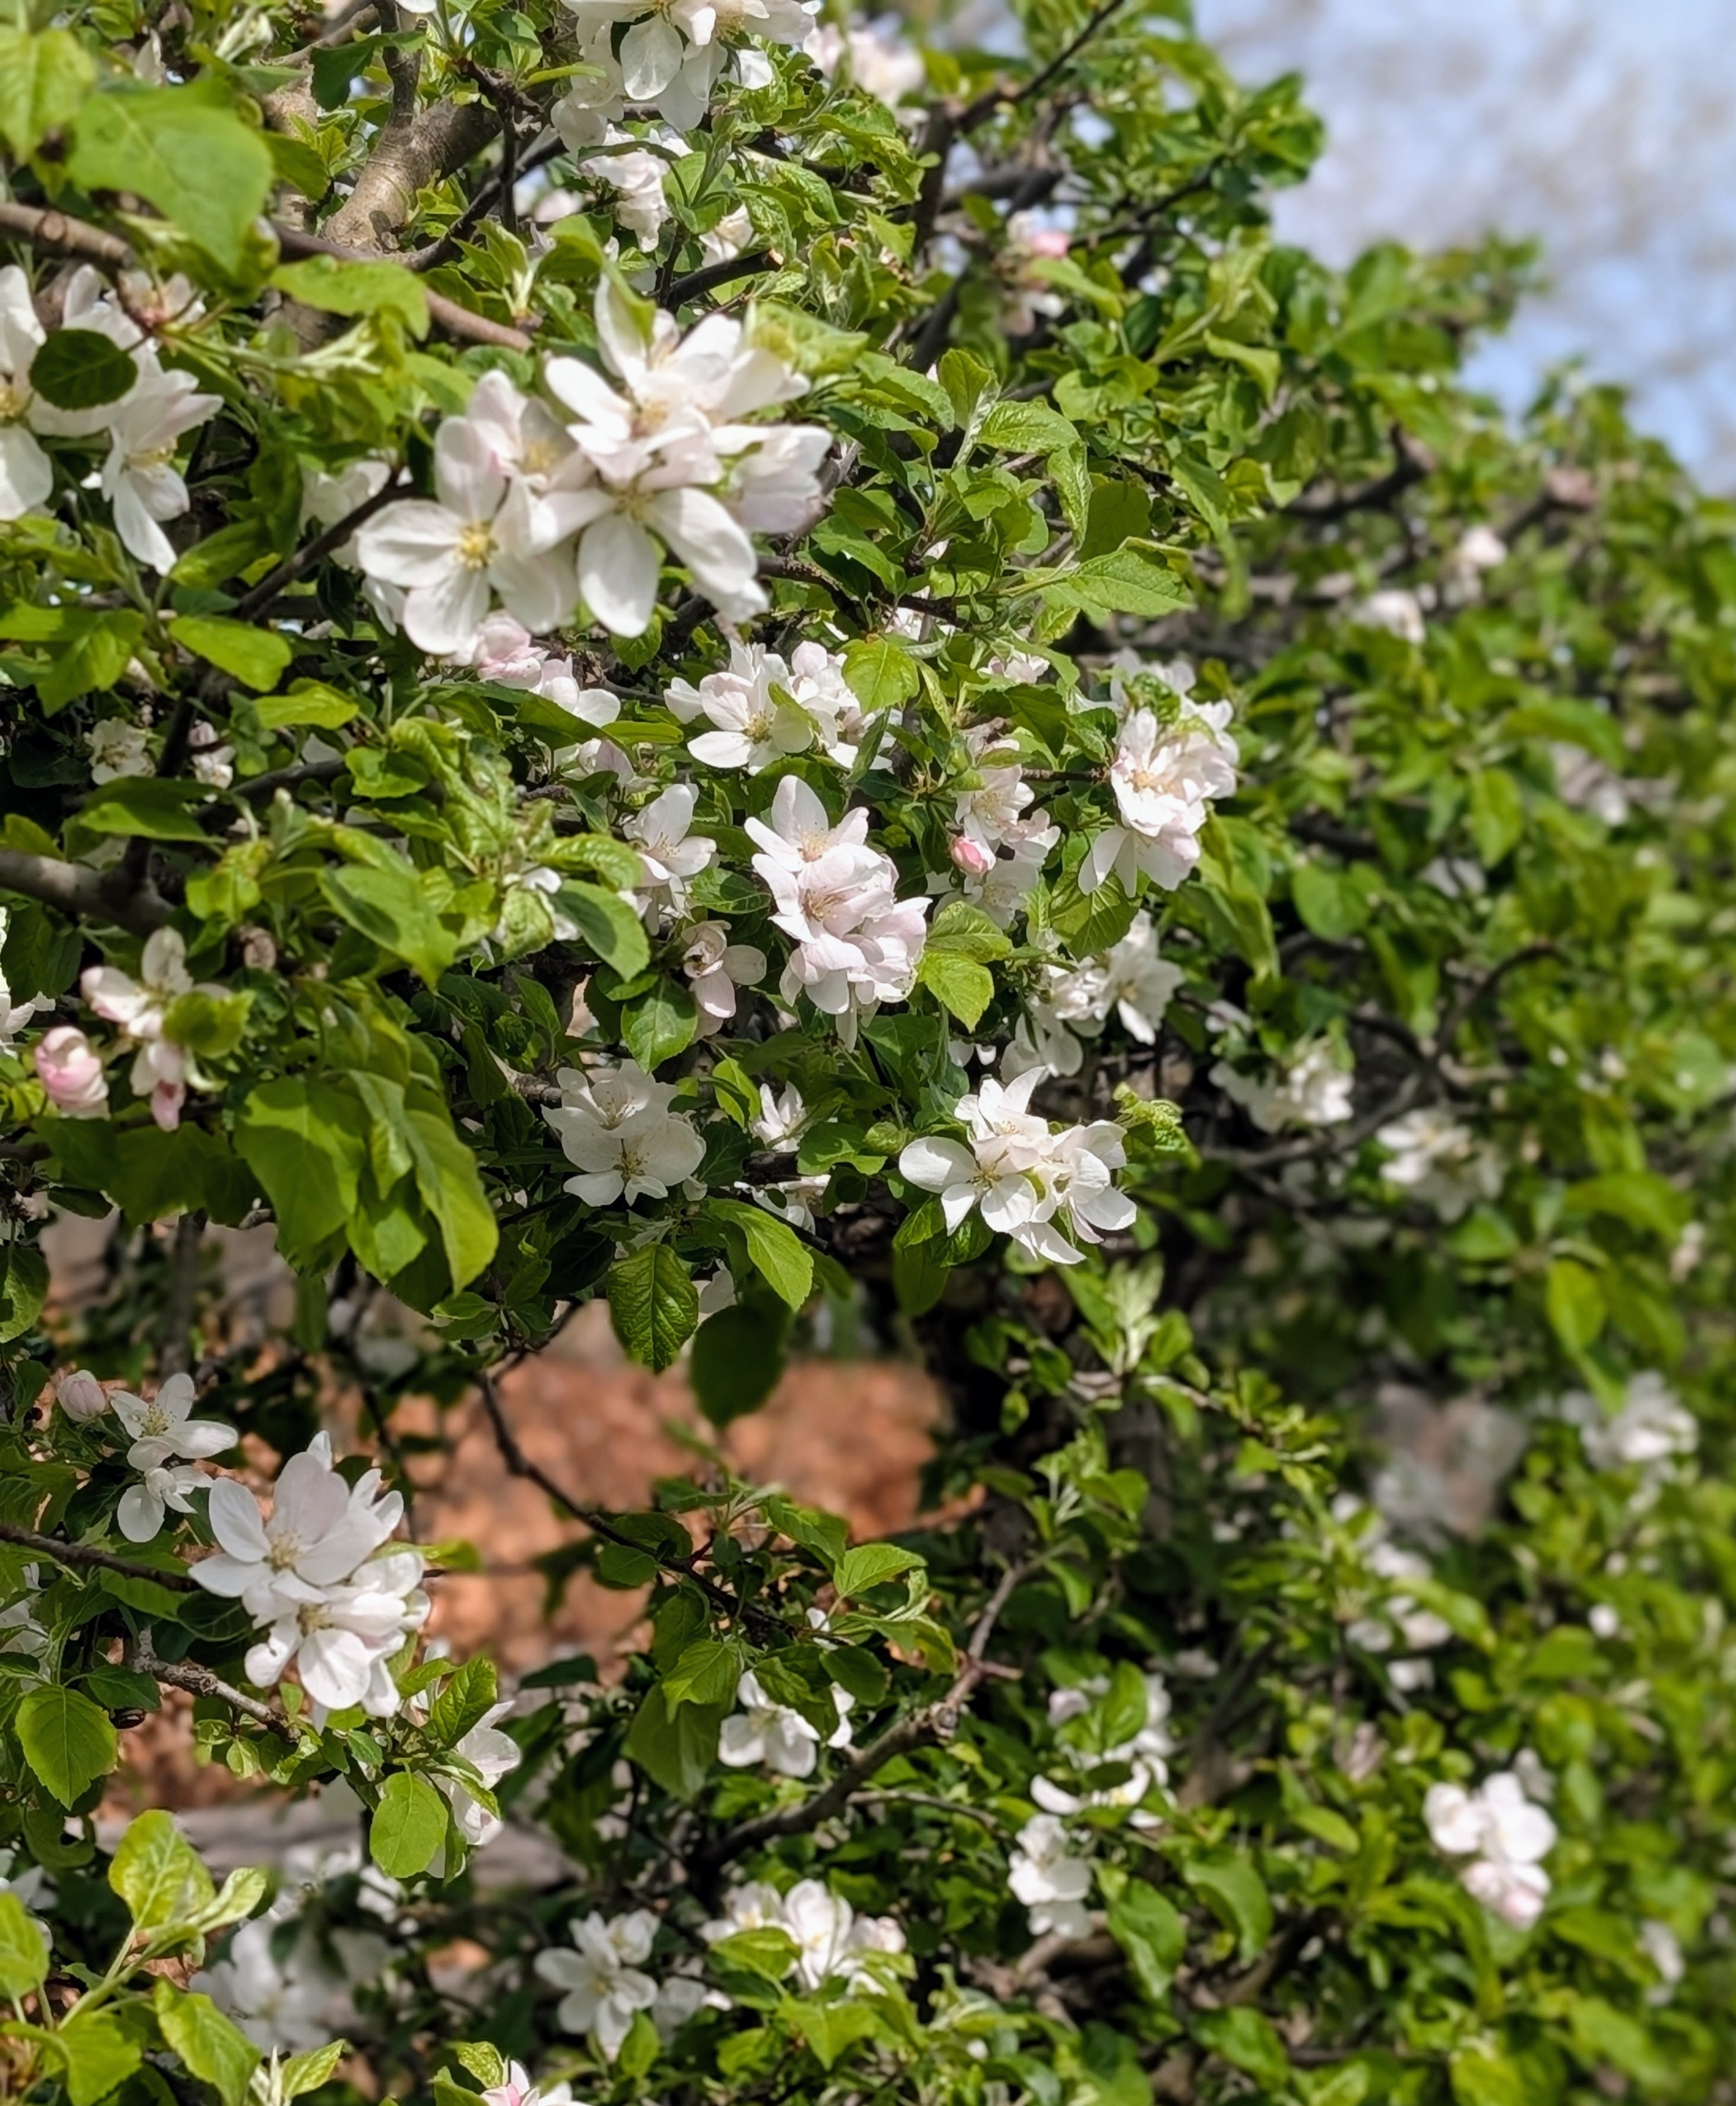
Across the carriage road are the beautiful Malus ‘Gravenstein’ espalier apple trees, also flowering. I am hopeful we will have a very productive apple season this year.
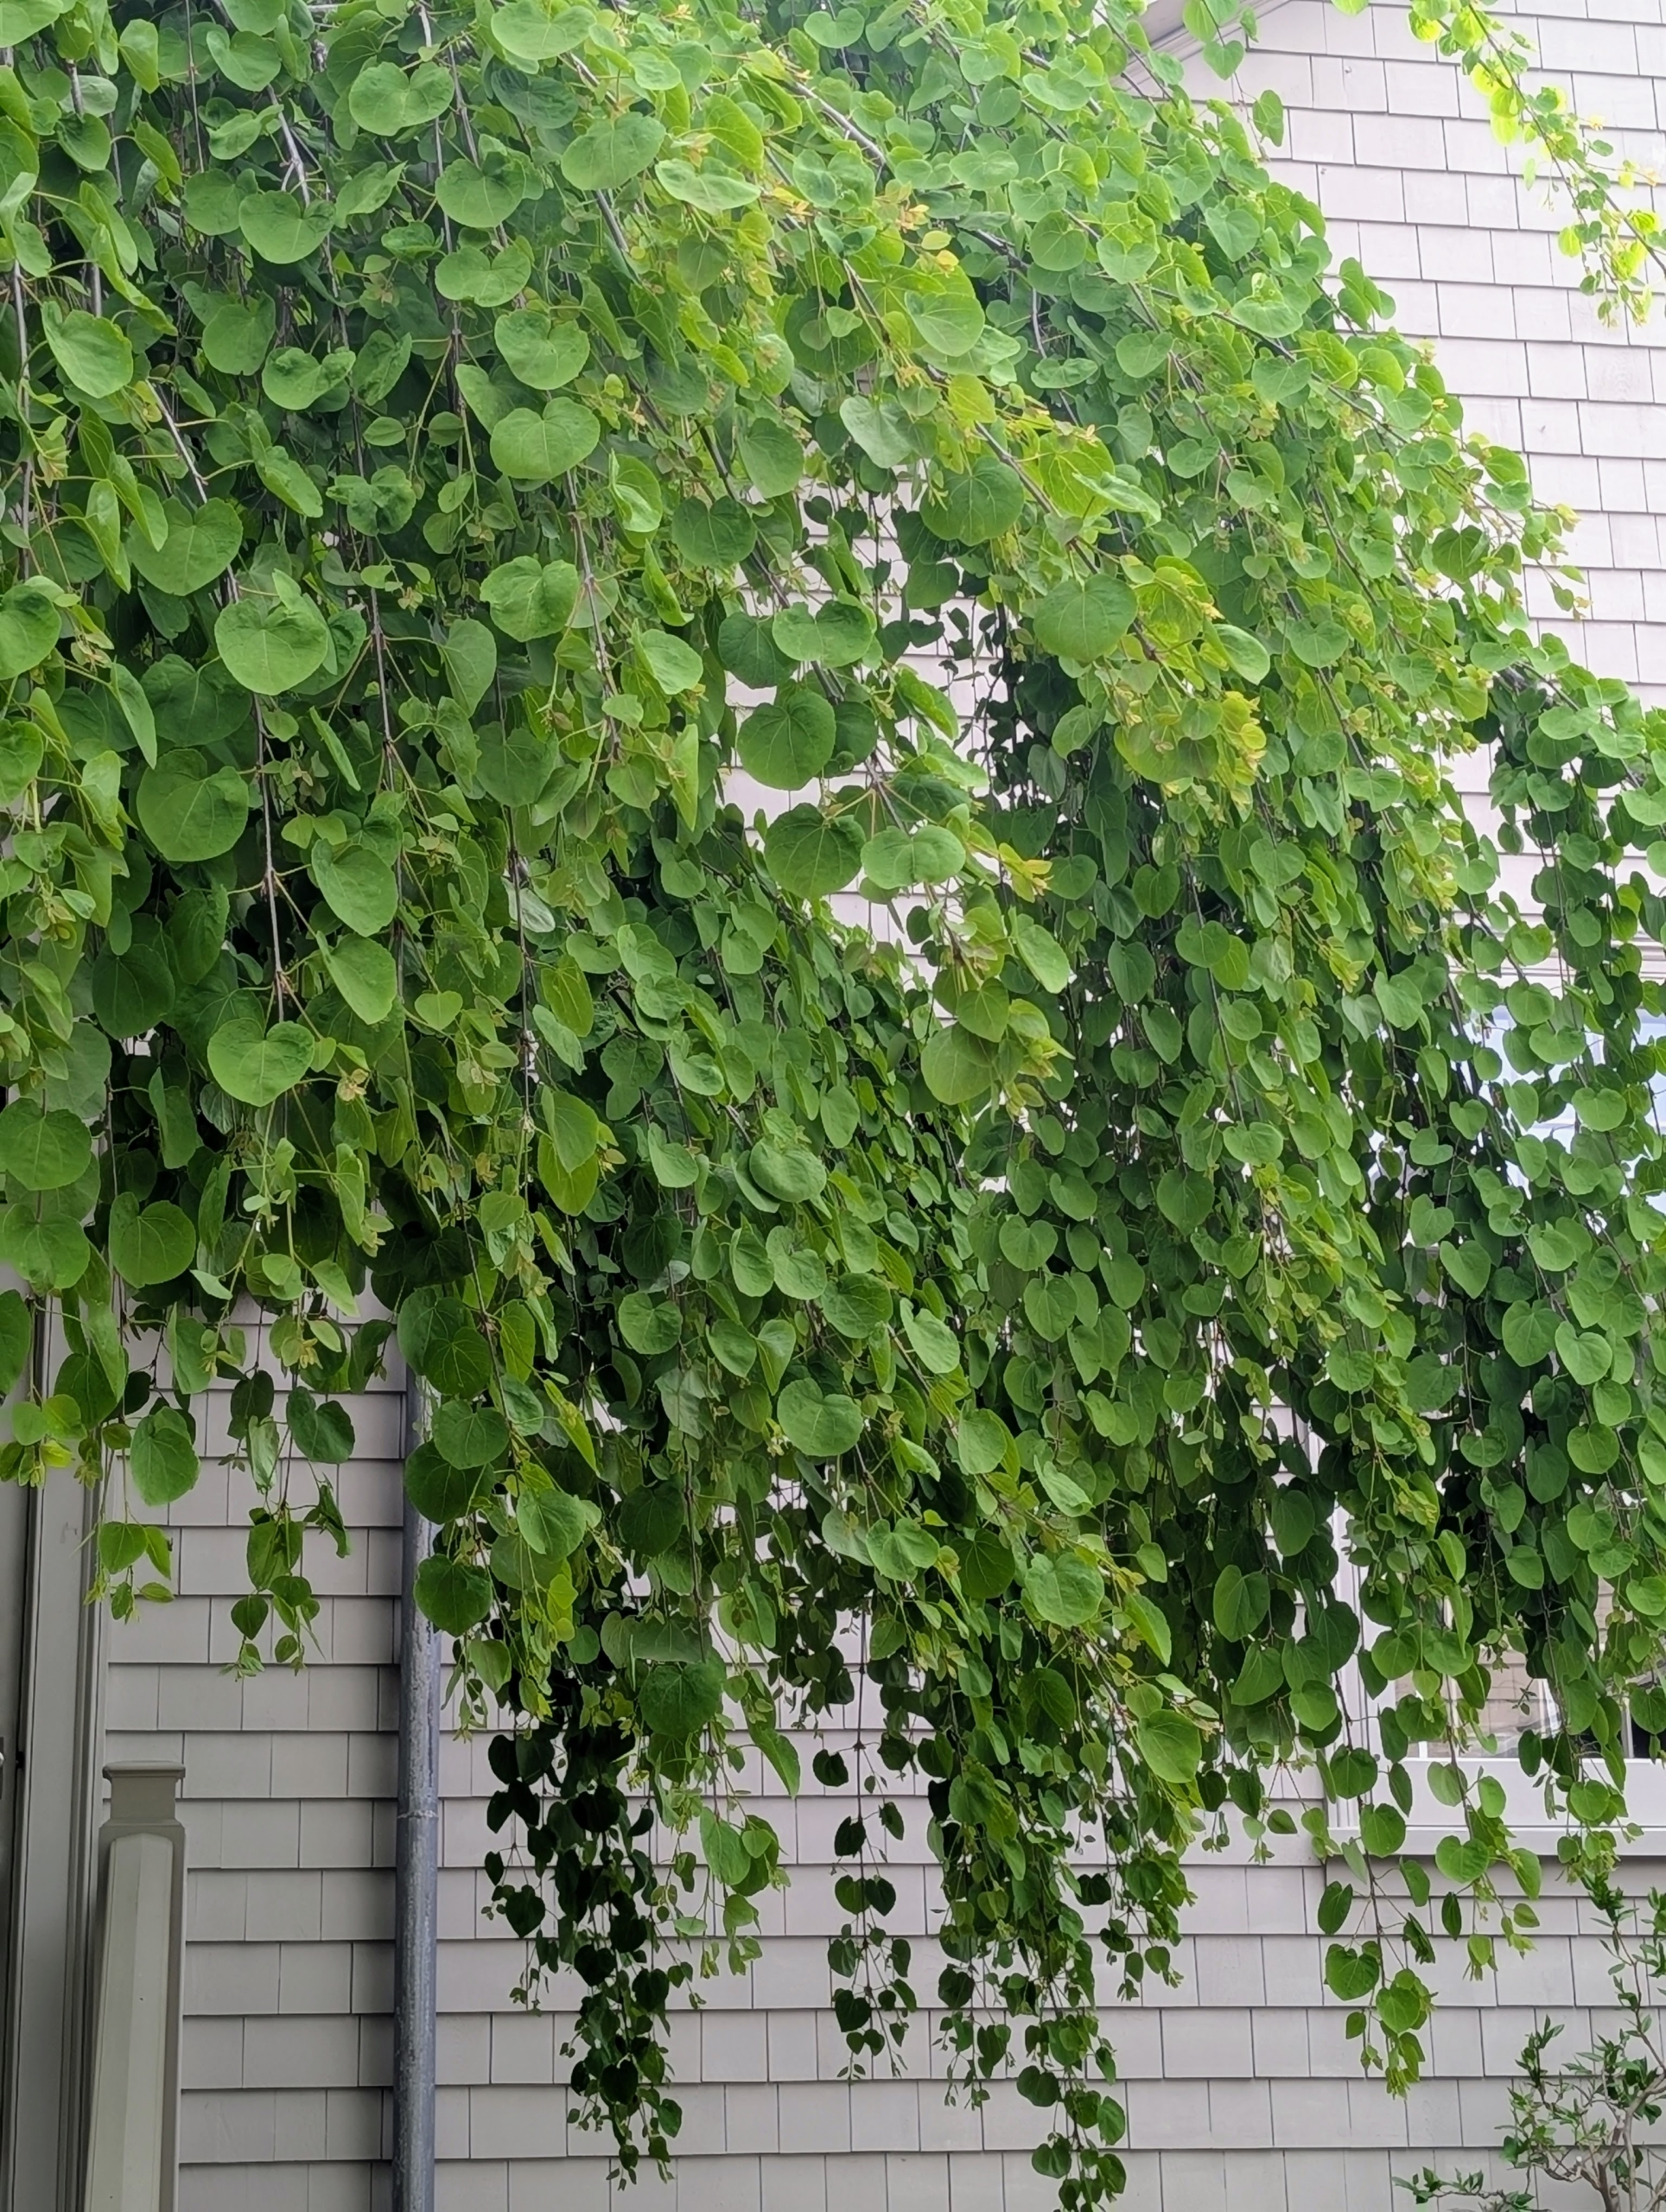
On my terrace parterre and on one side of my home are weeping katsura trees, one of my favorites. Cercidiphyllum japonicum f. pendulum has pendulous branches that fan out from the crown and sweep the ground. Caramel-scented foliage emerges bronze or purple-red, turns blue-green, then fades to gold or apricot in autumn.
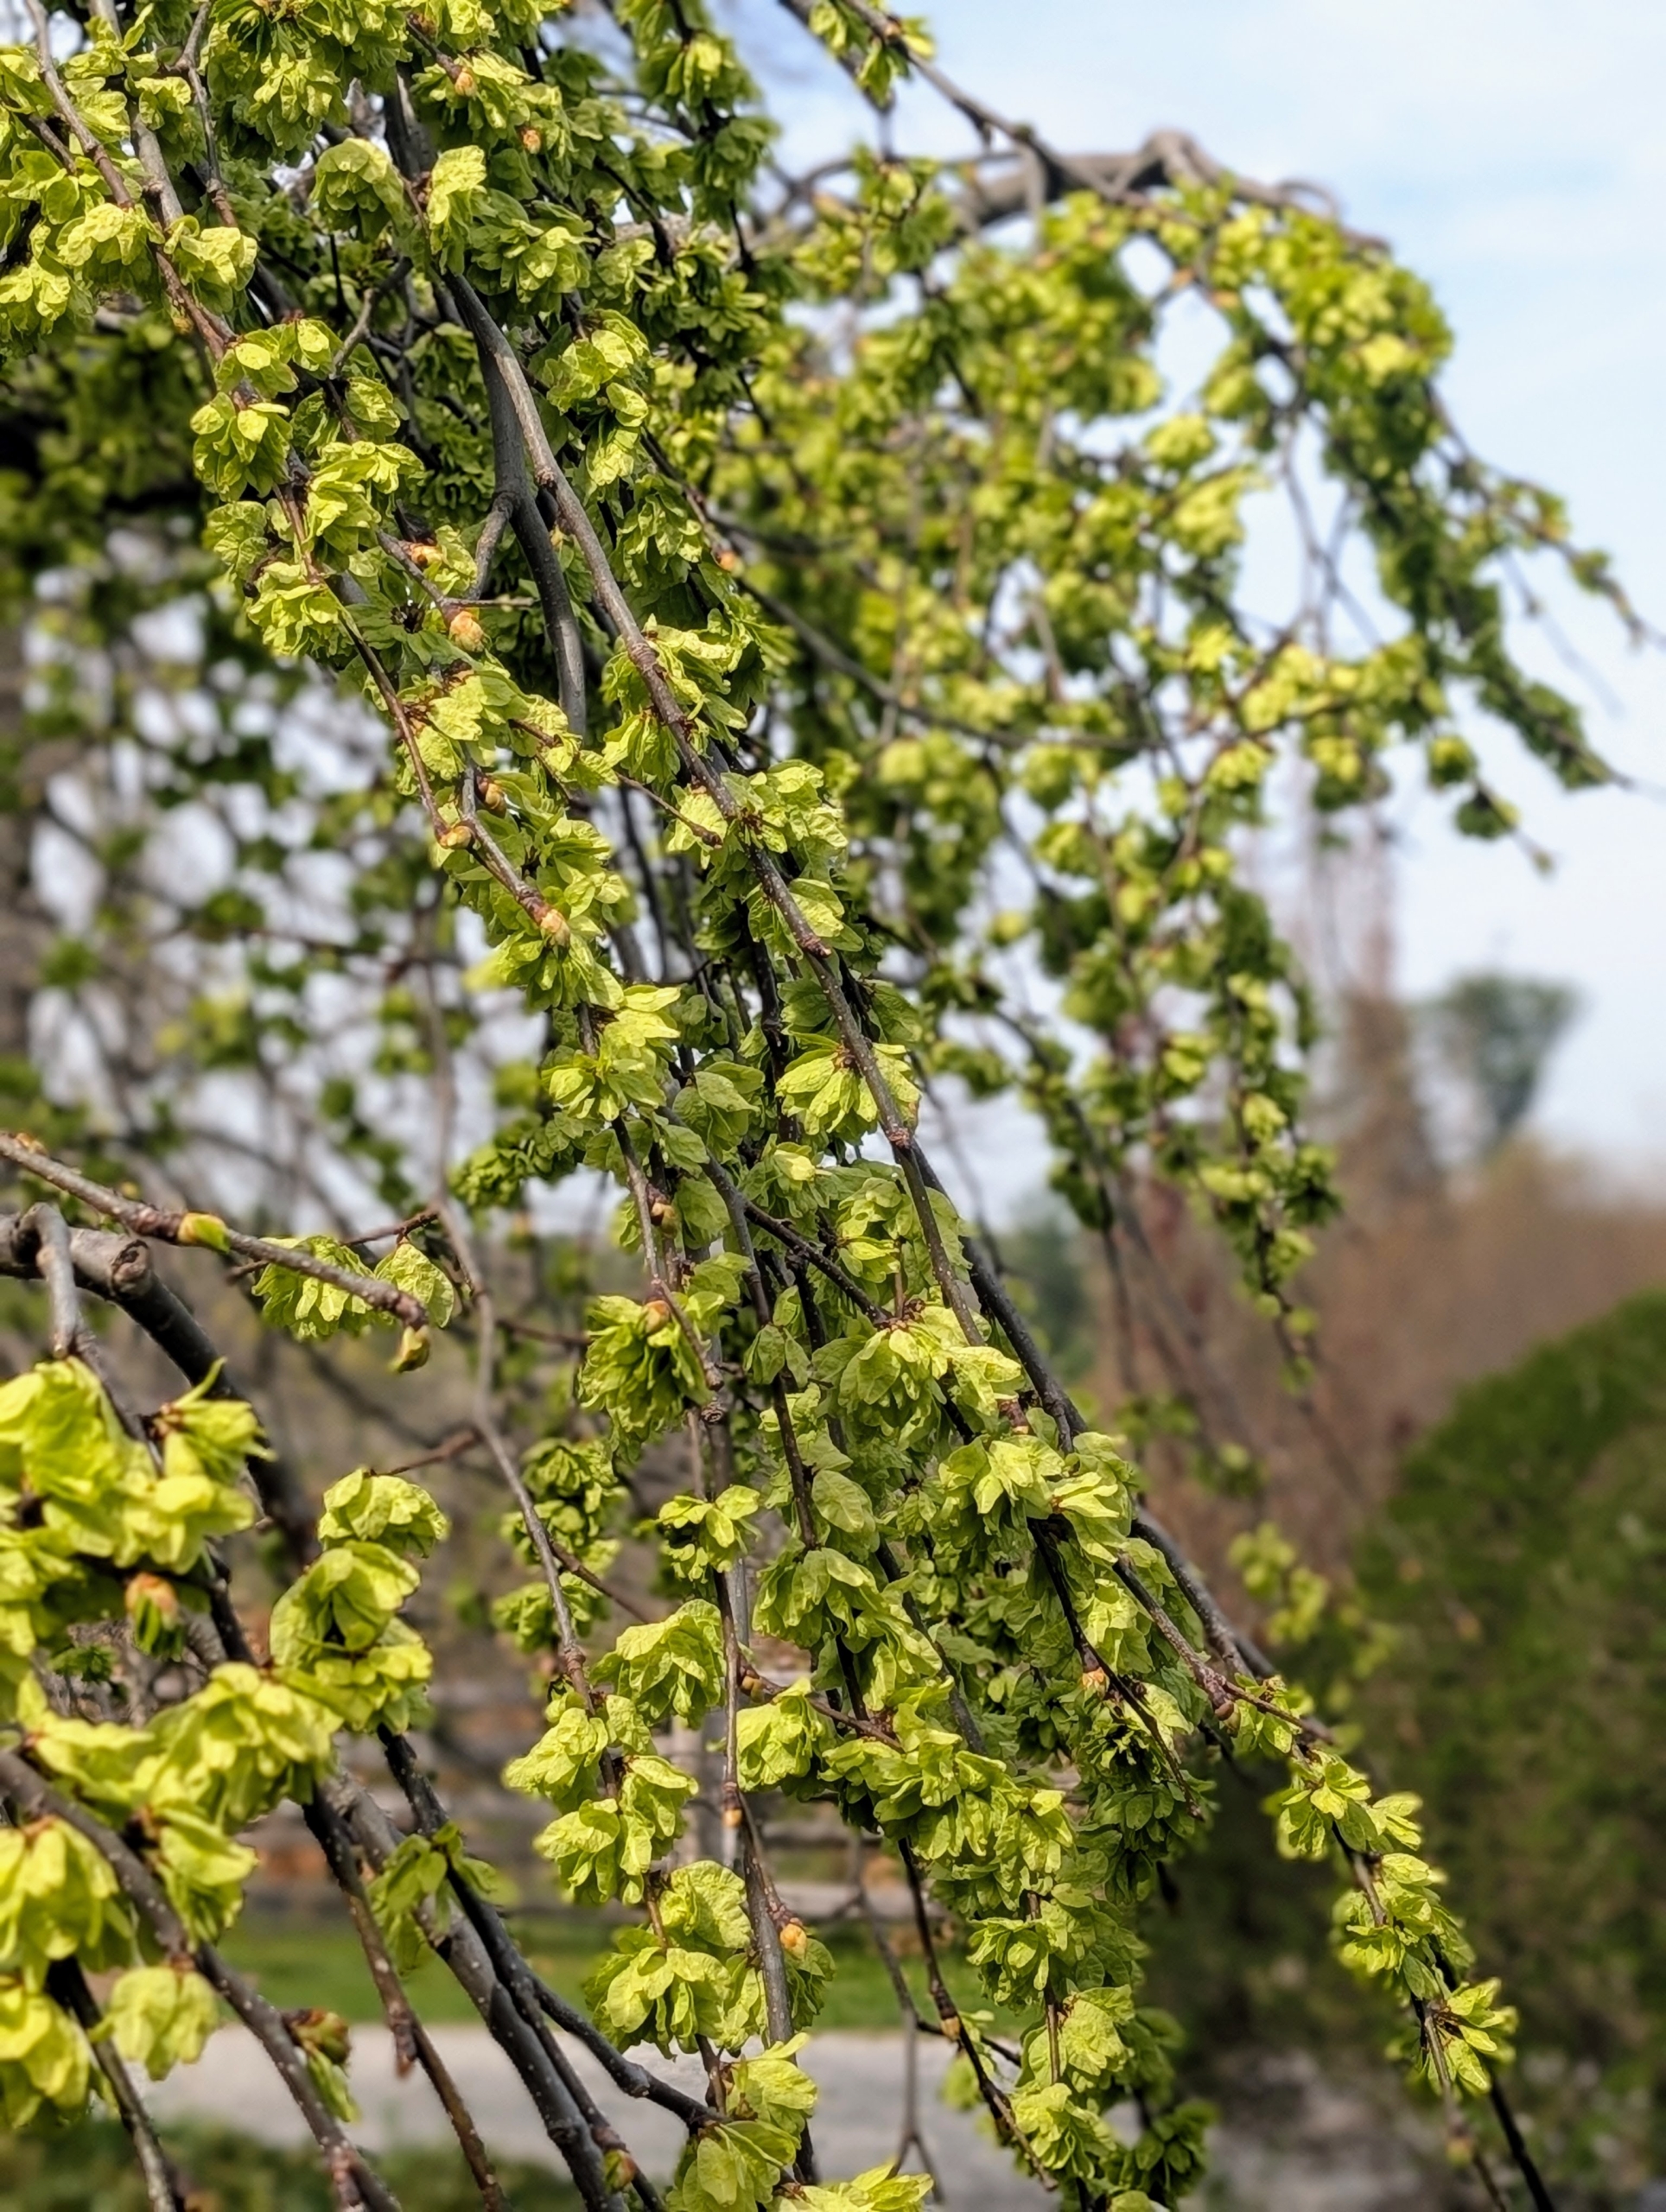
And here is one of two Camperdown Elms outside my kitchen. Camperdown Elms slowly develop broad, flat heads and wide crowns with weeping branch habits.
Its leaves are broad oblong-obovate to elliptic, rough-textured and serrated. Spring has sprung with such energy and growth. I hope you appreciate something new in the garden every day.
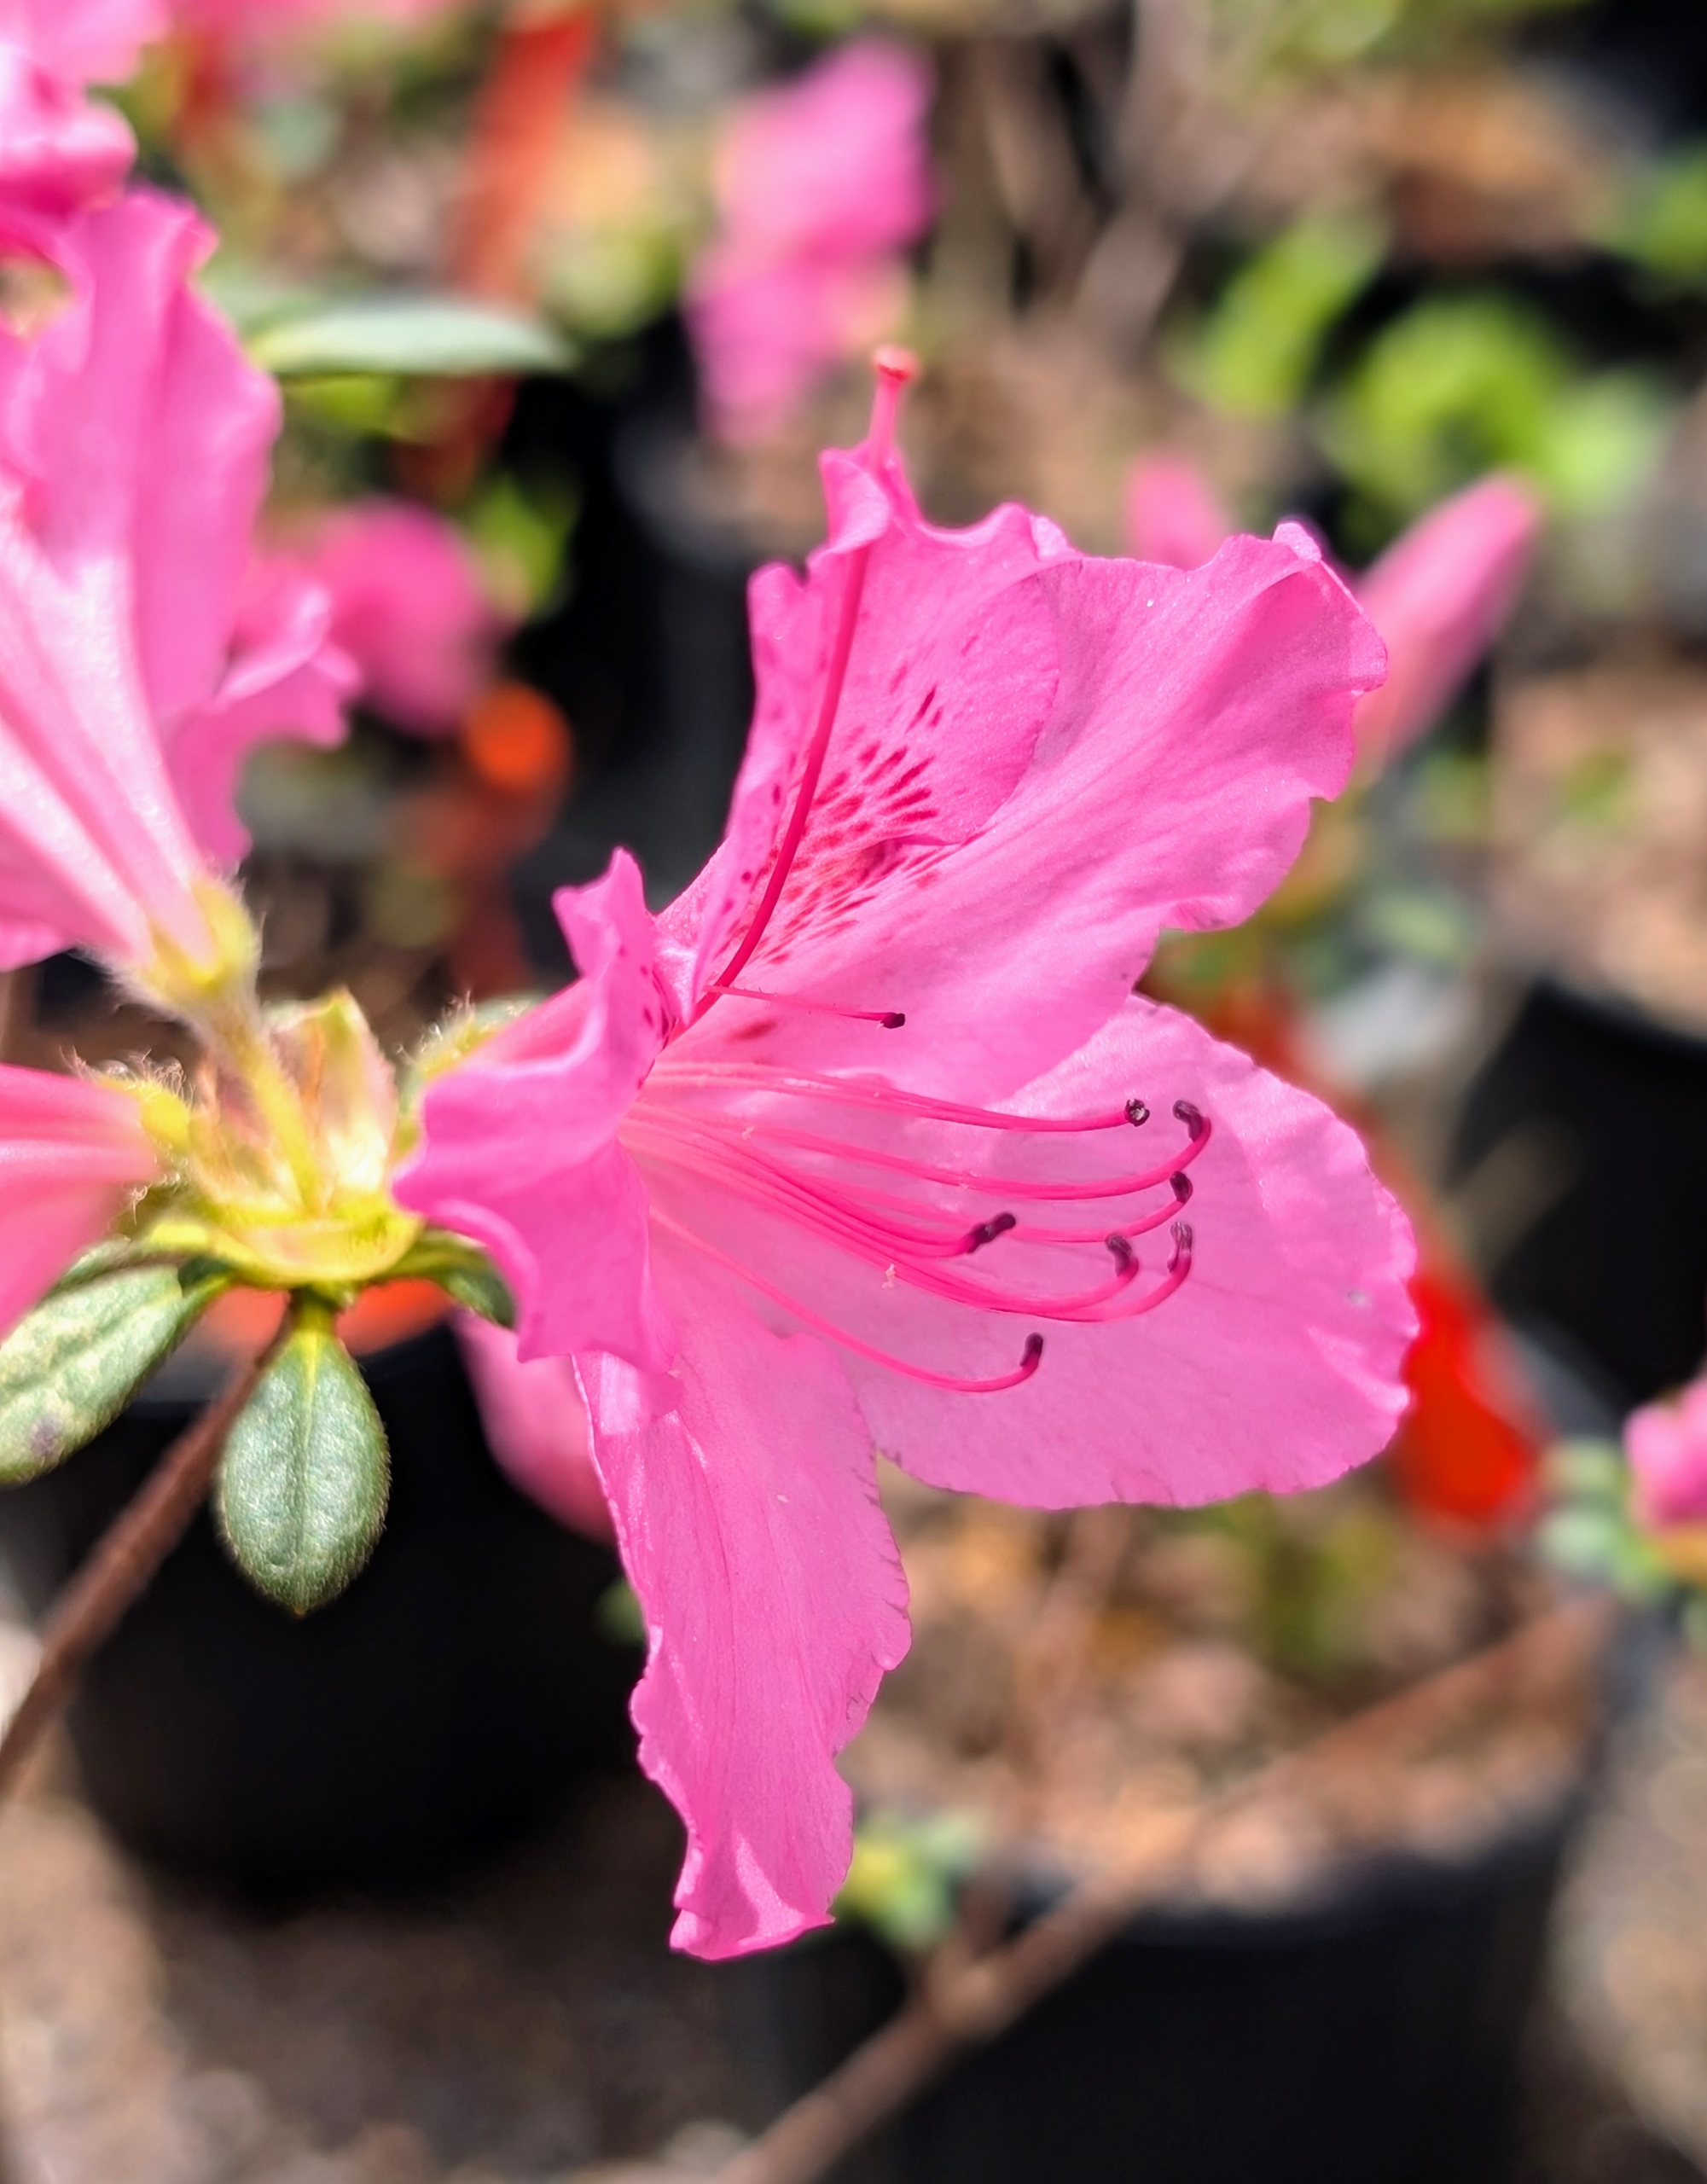
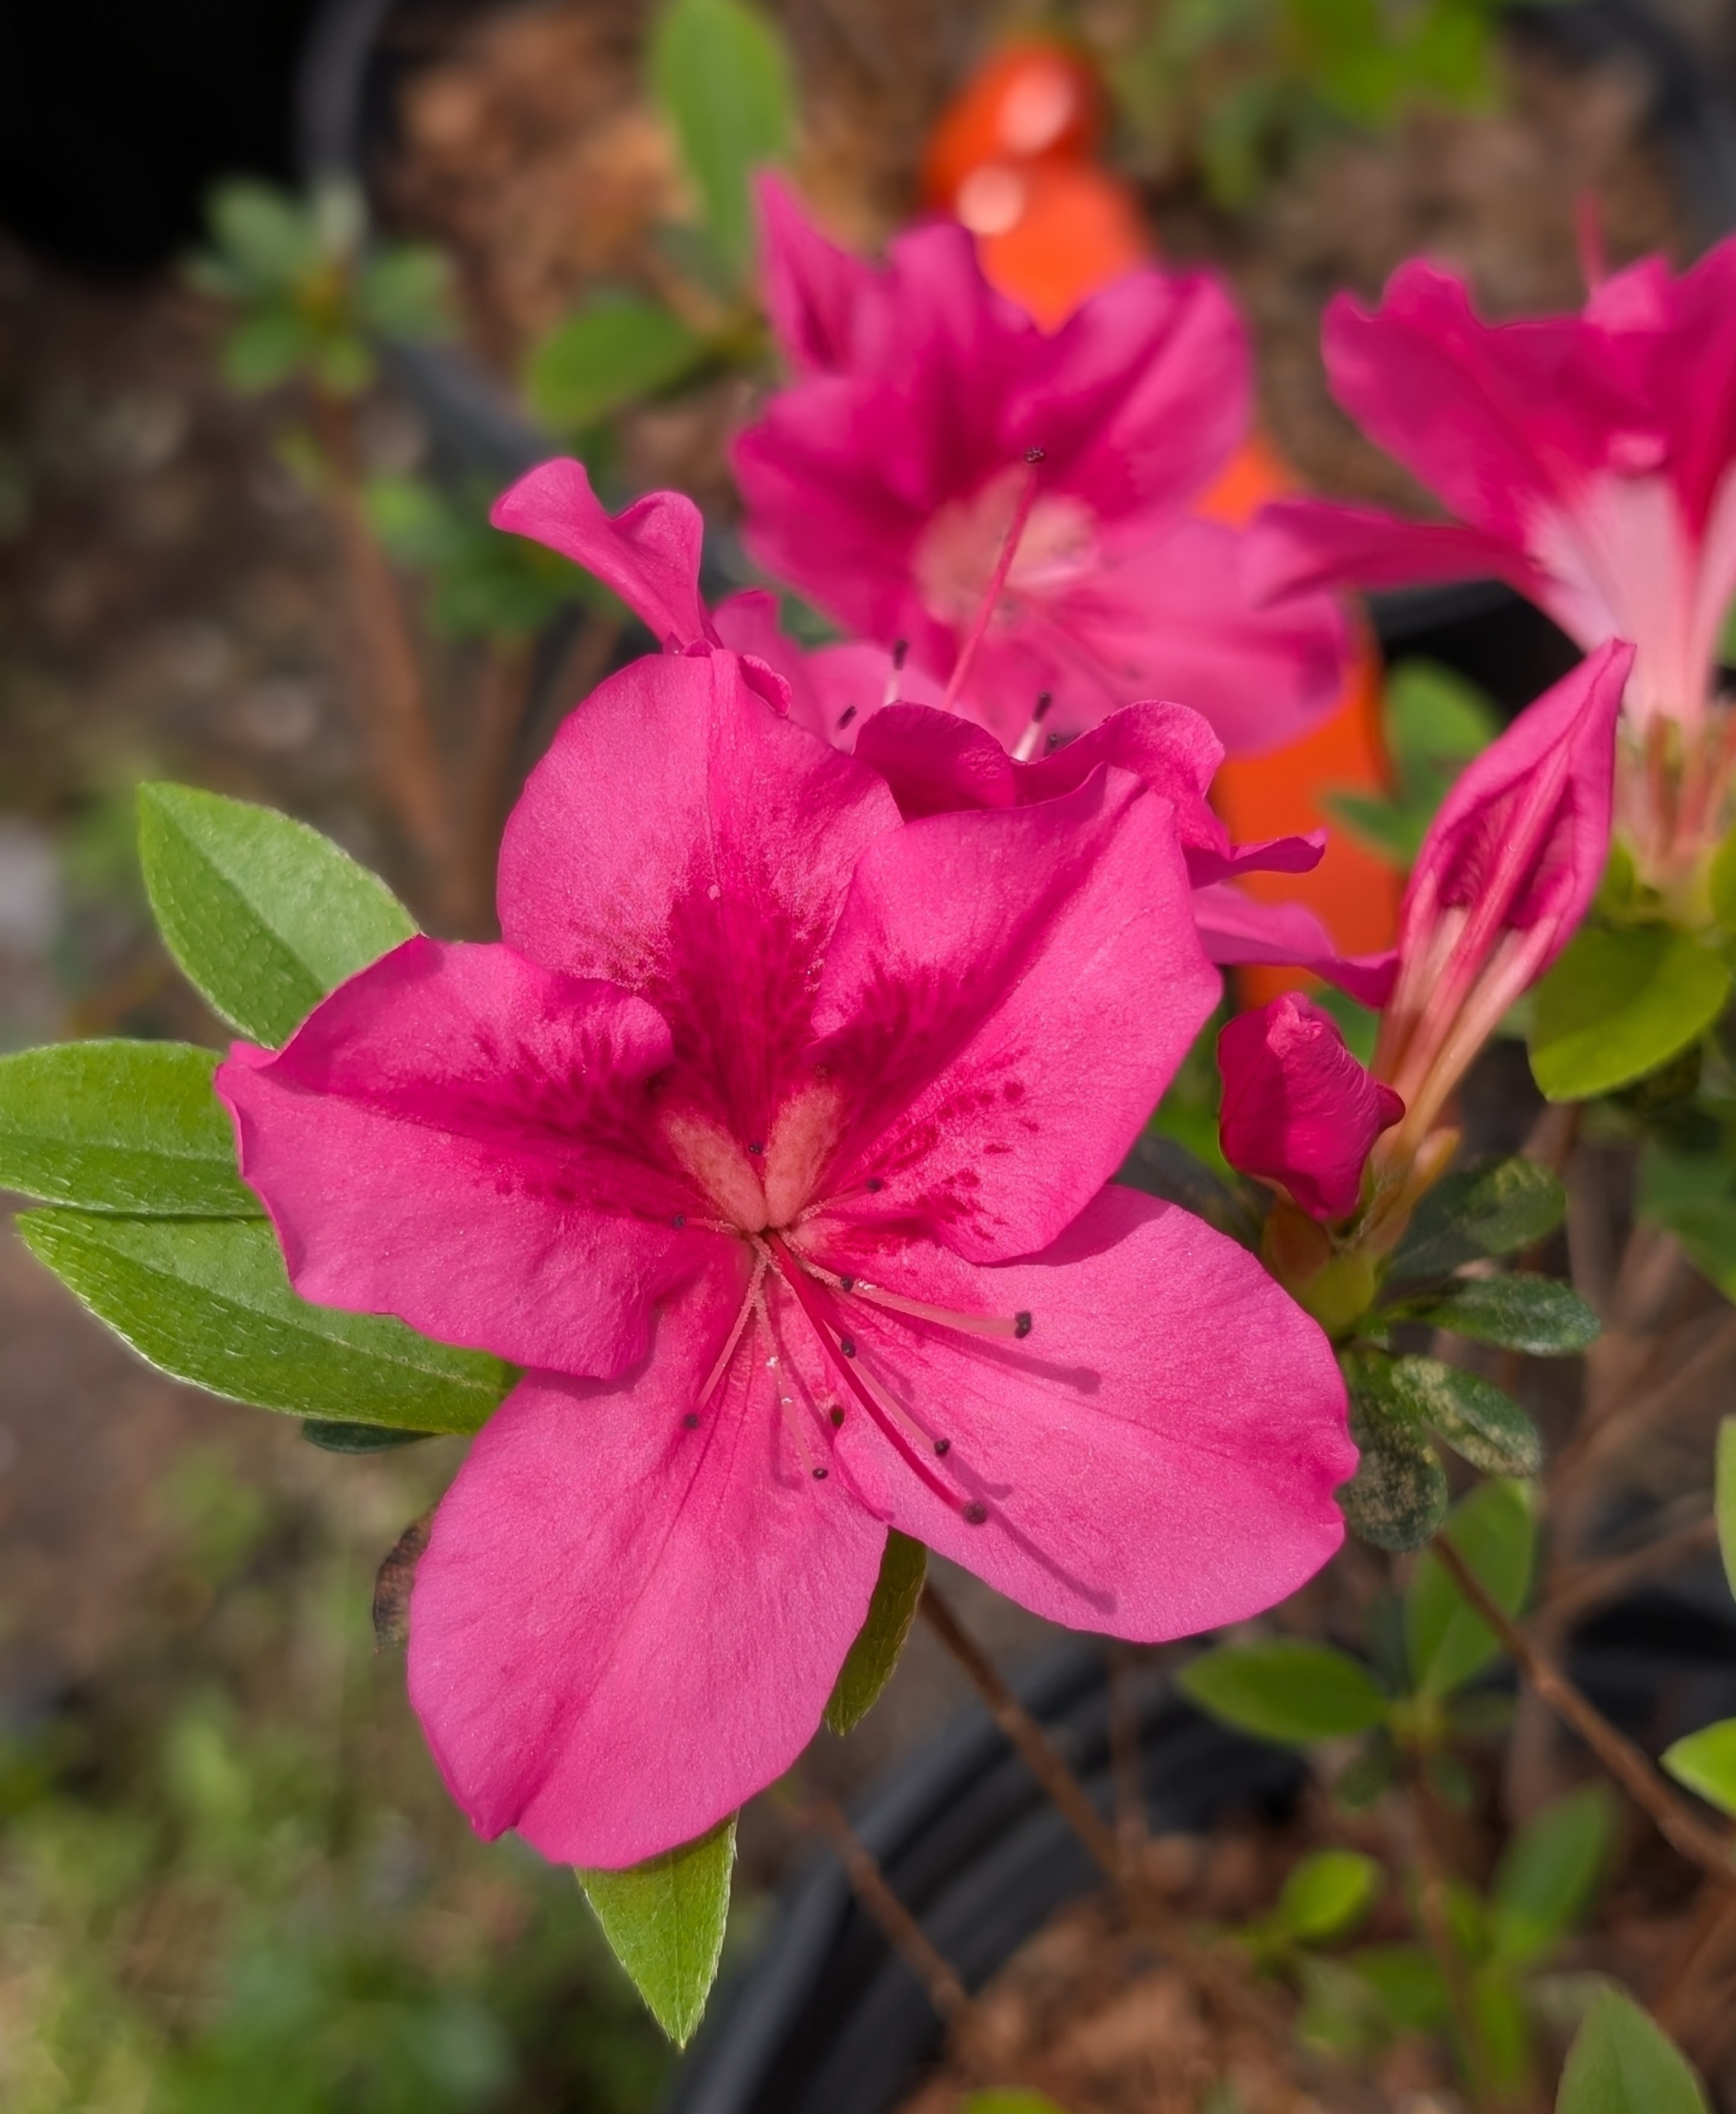
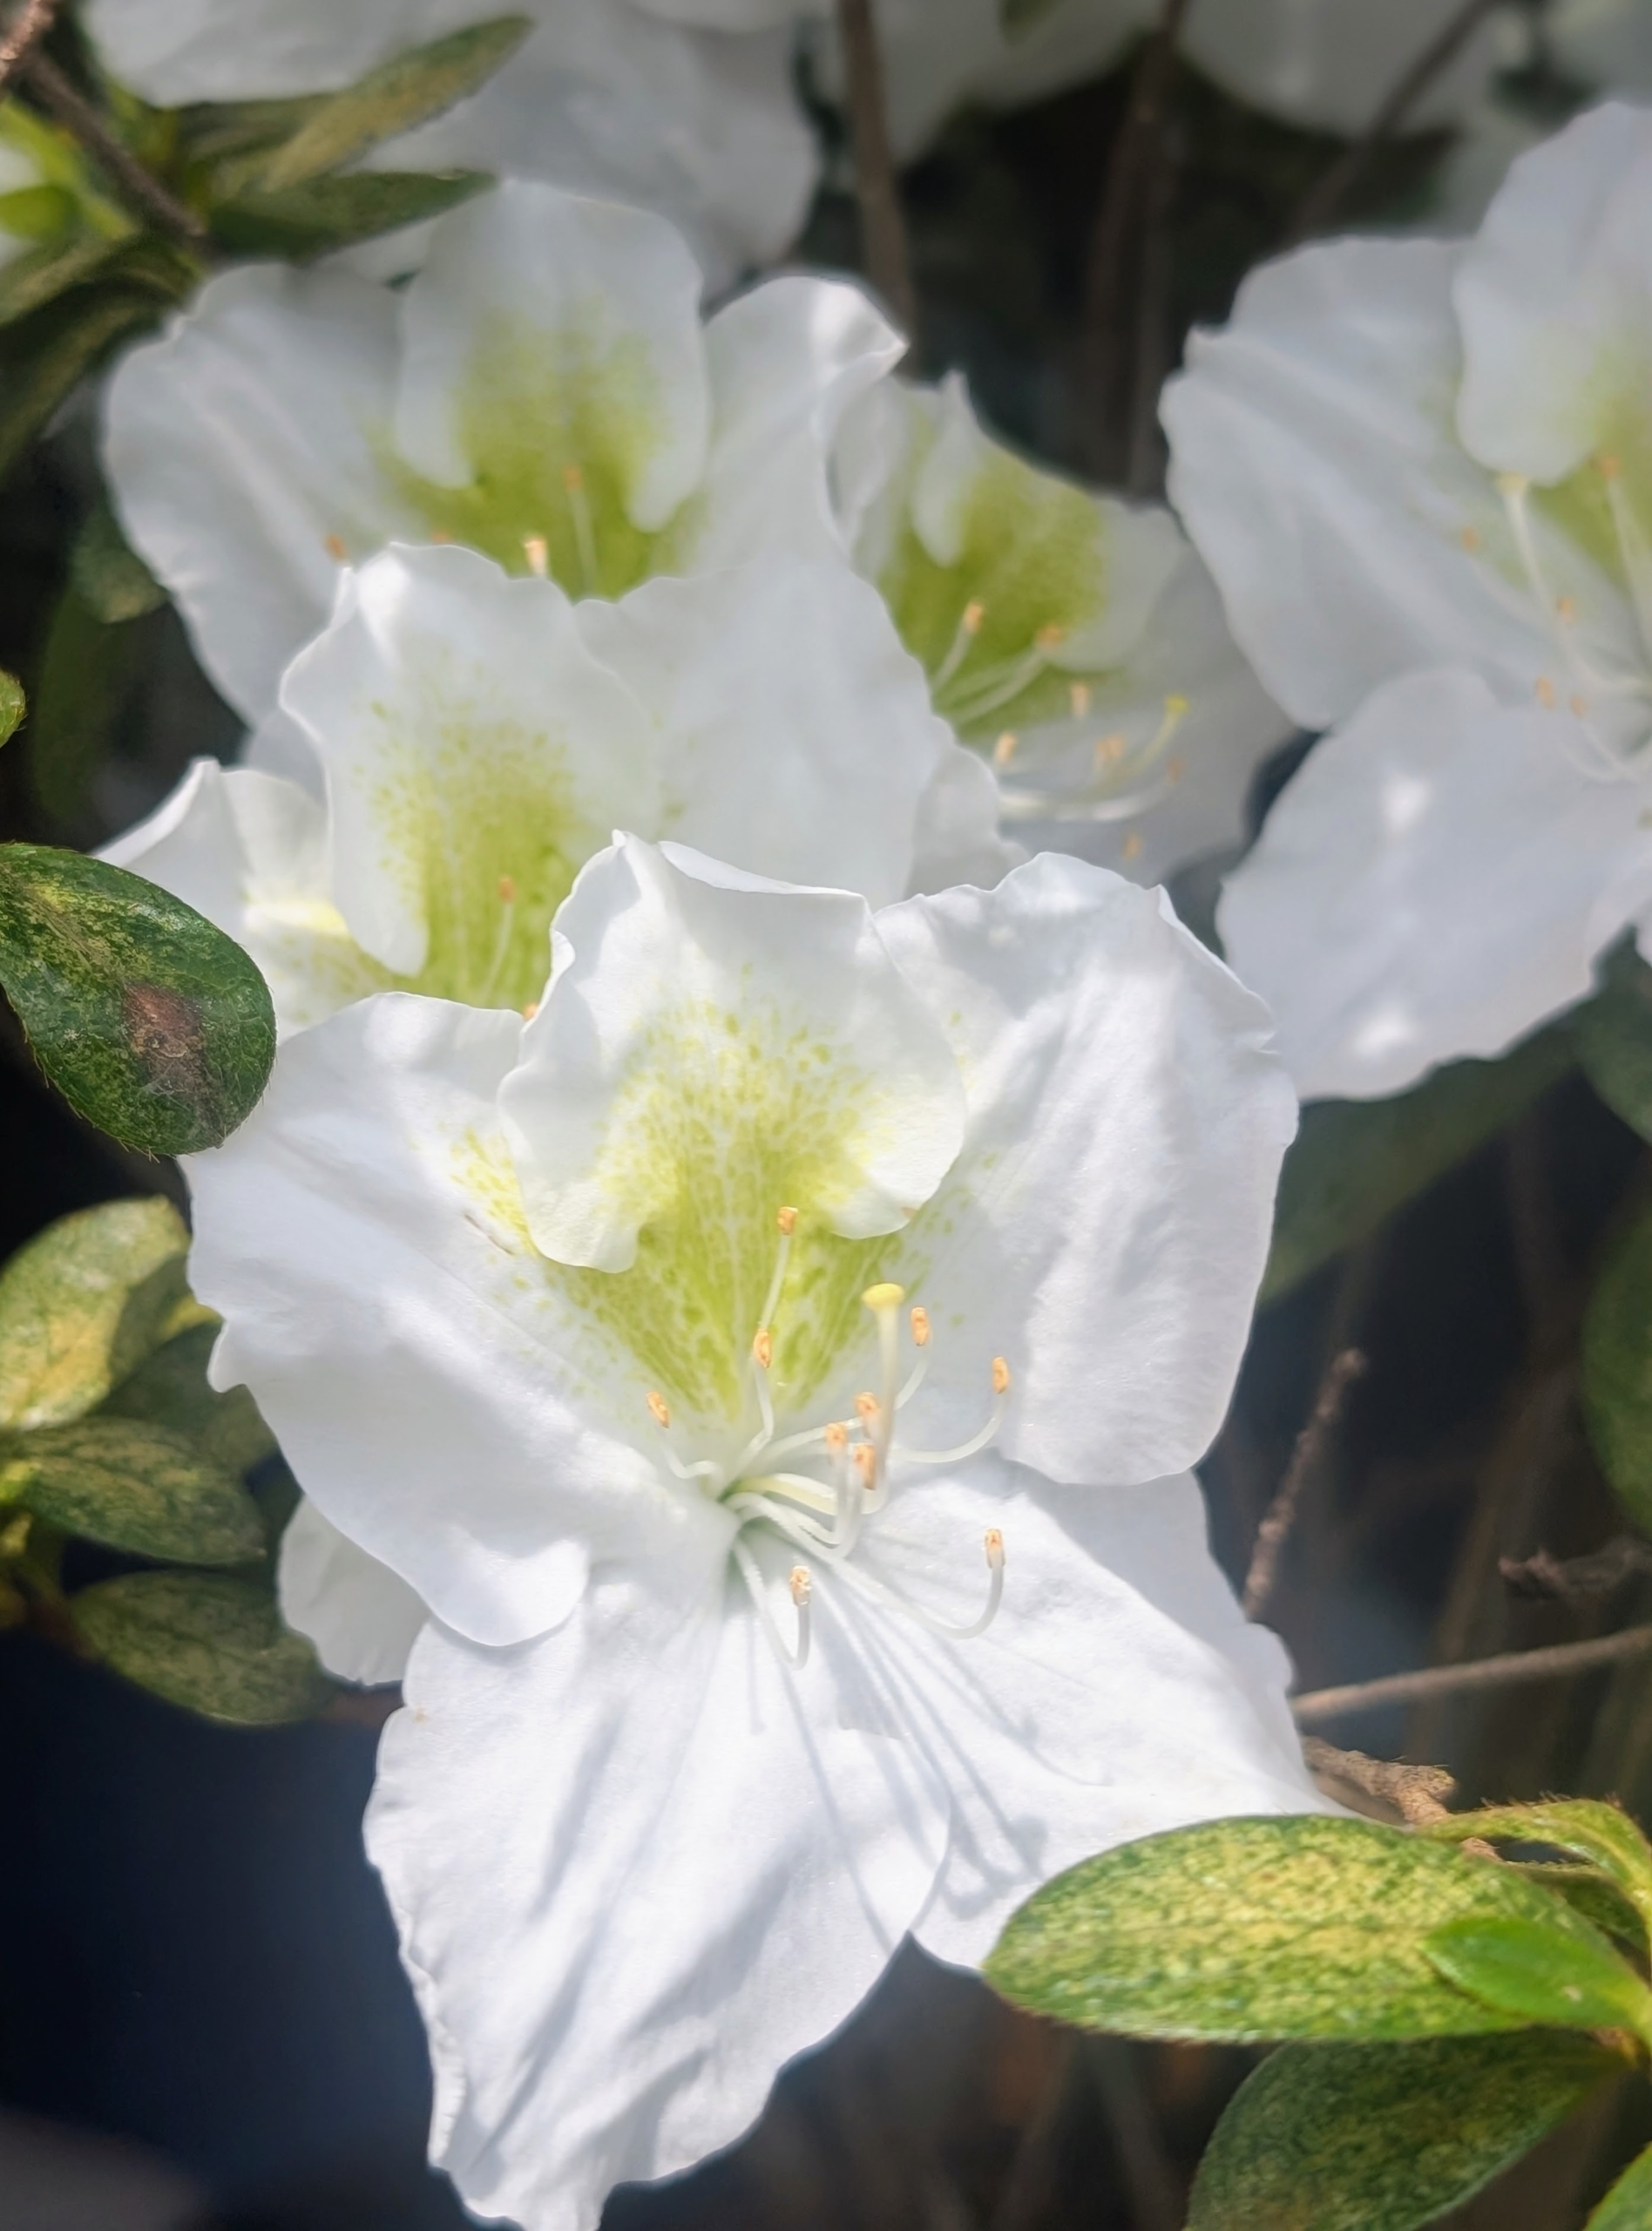
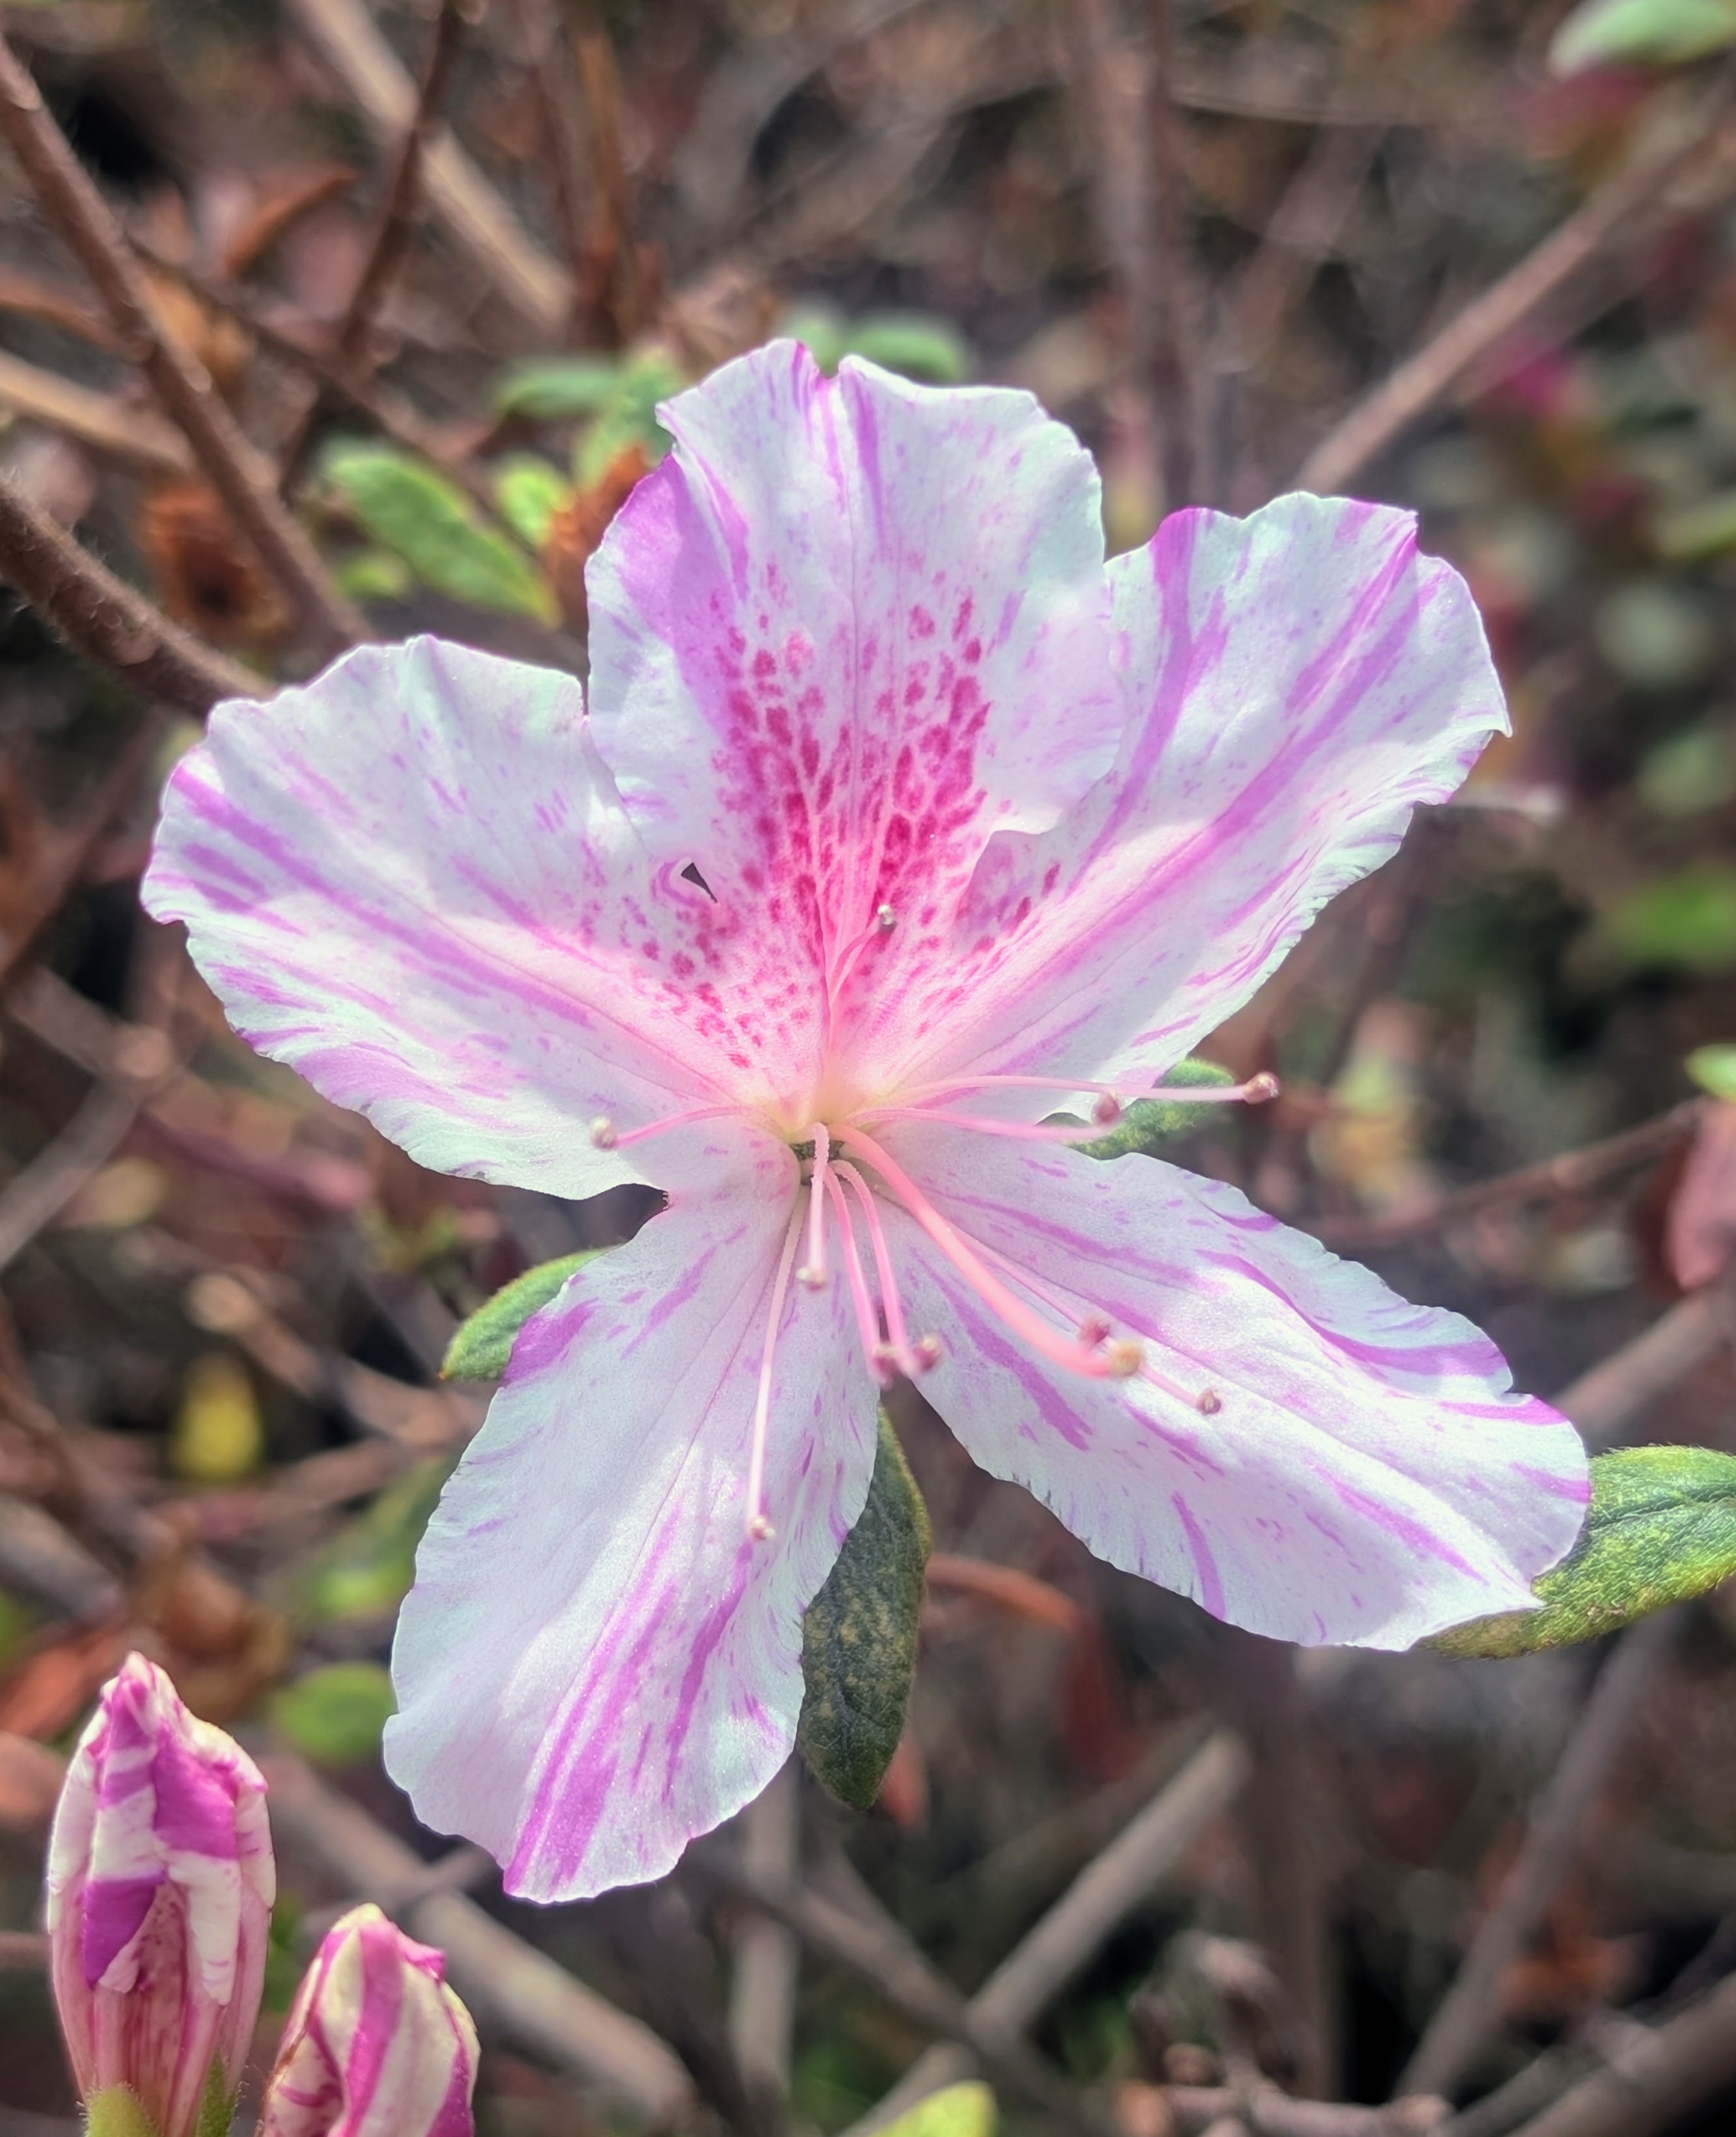
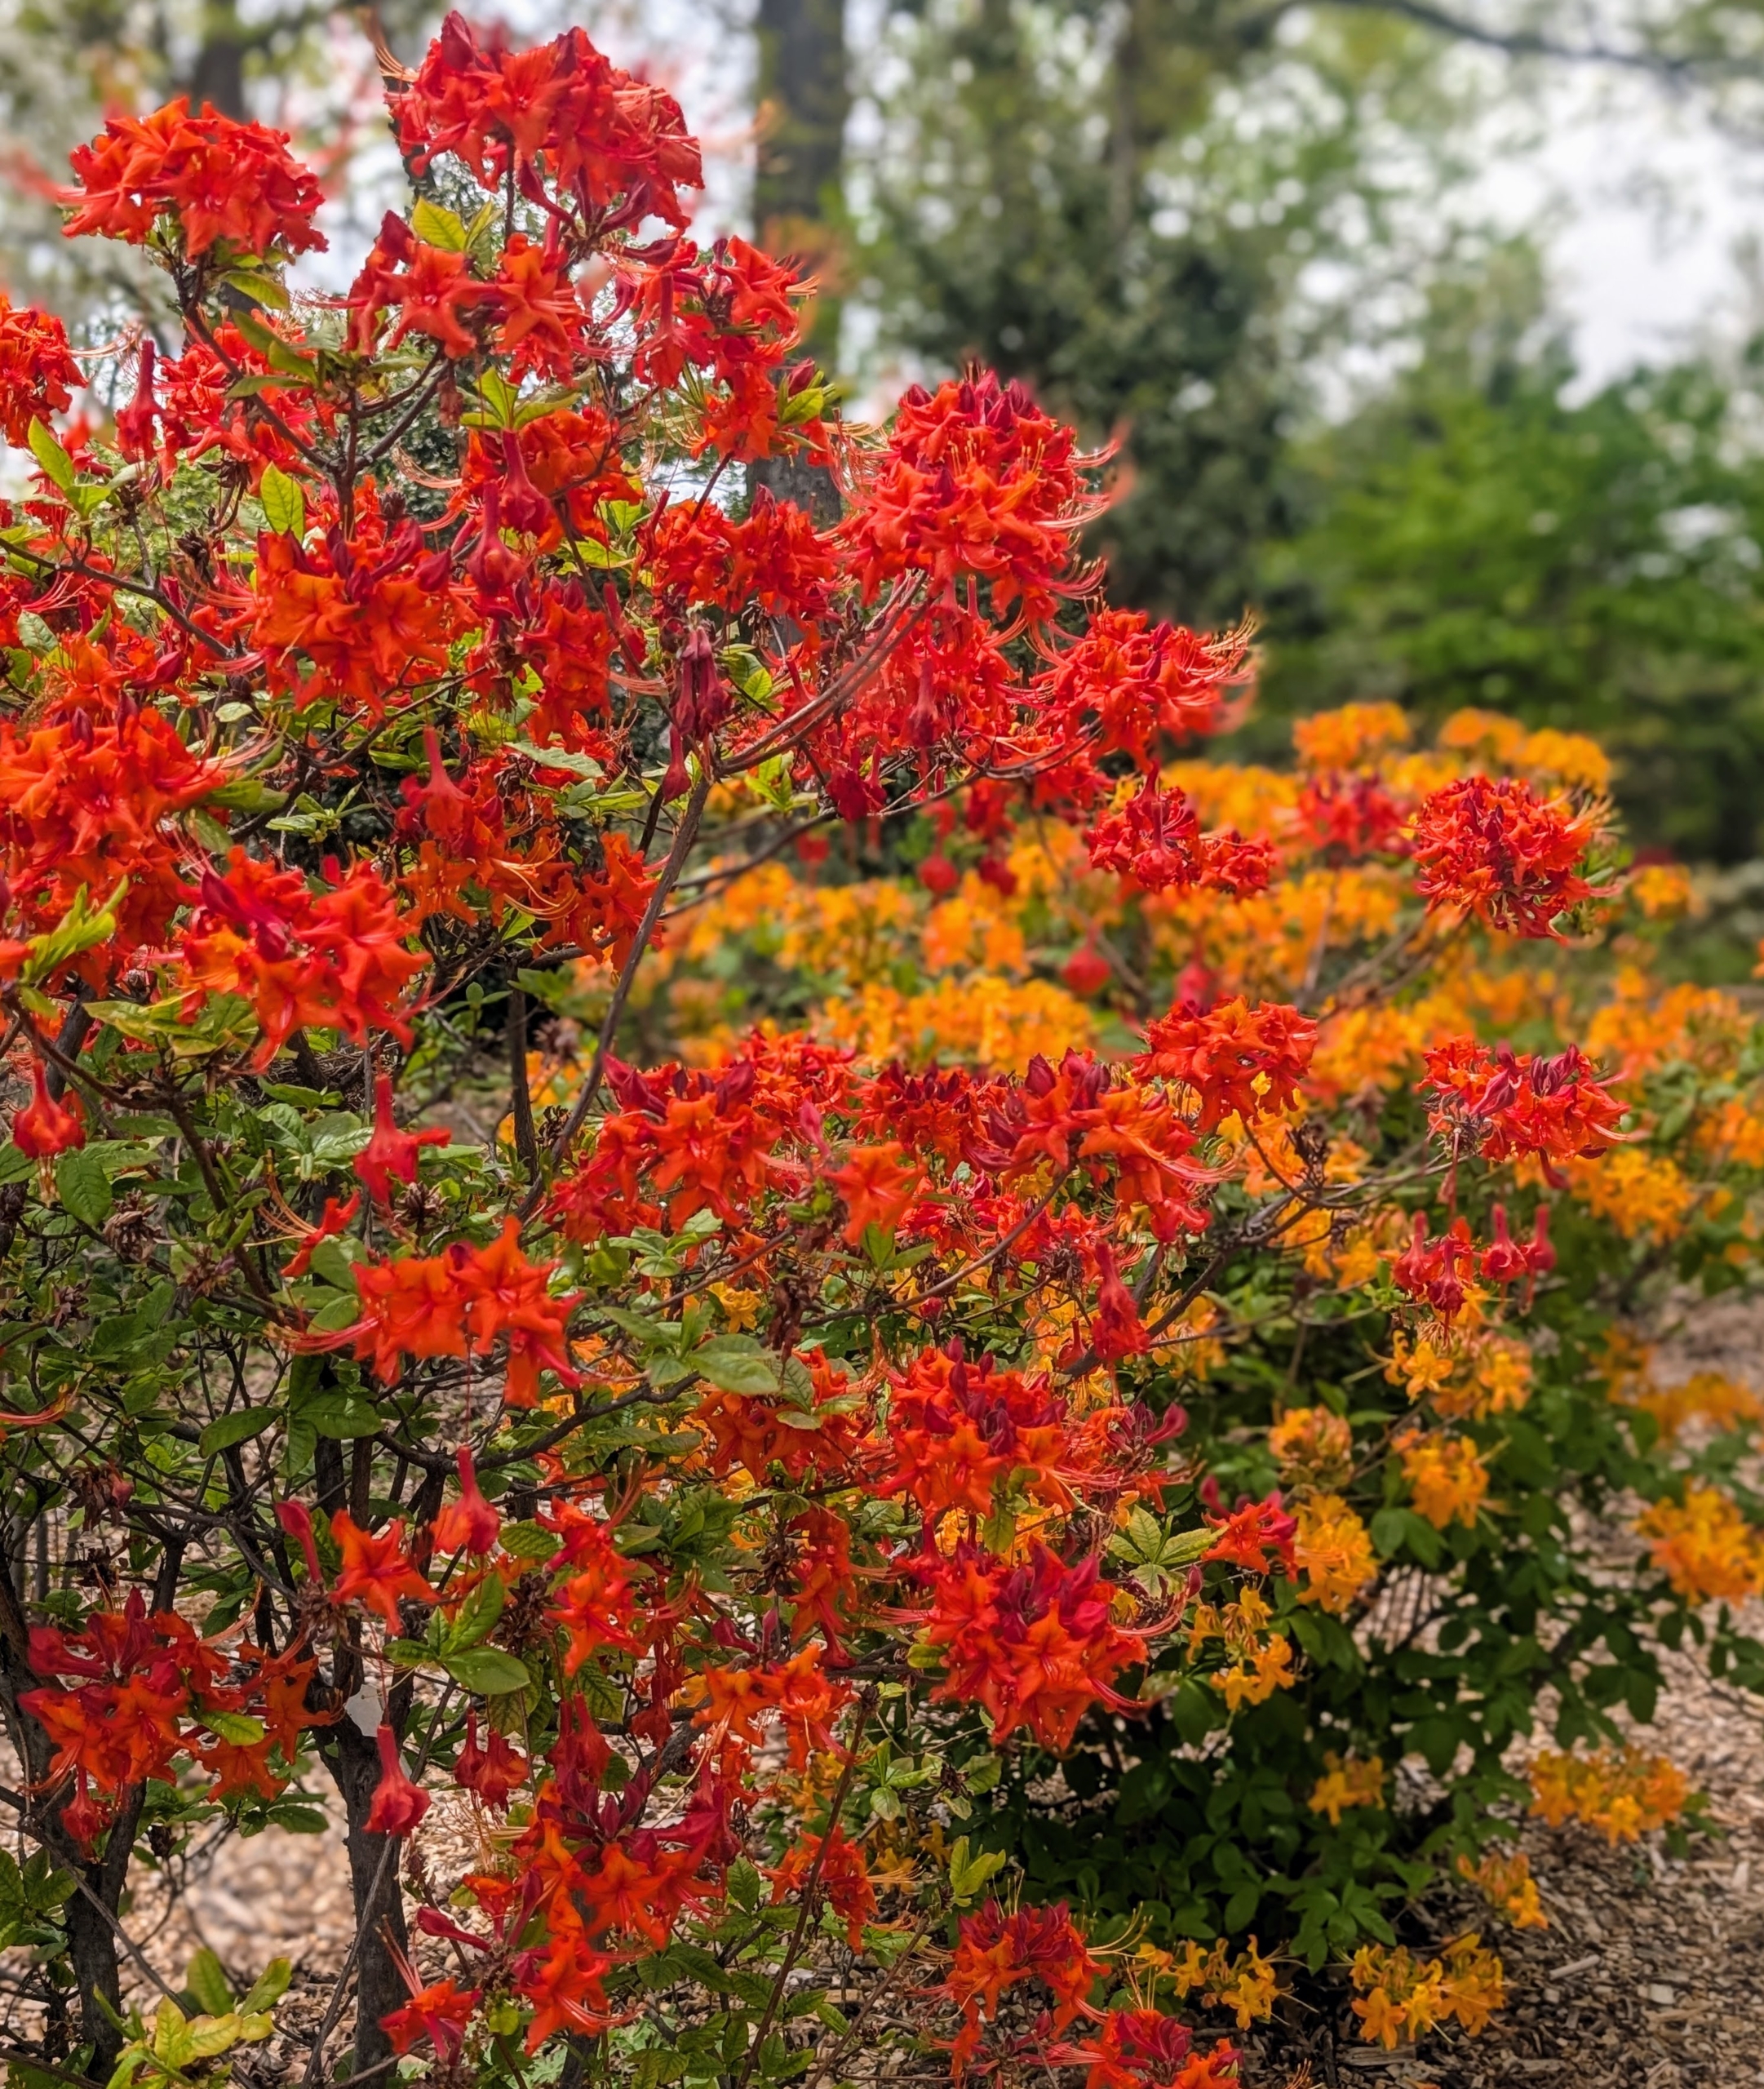
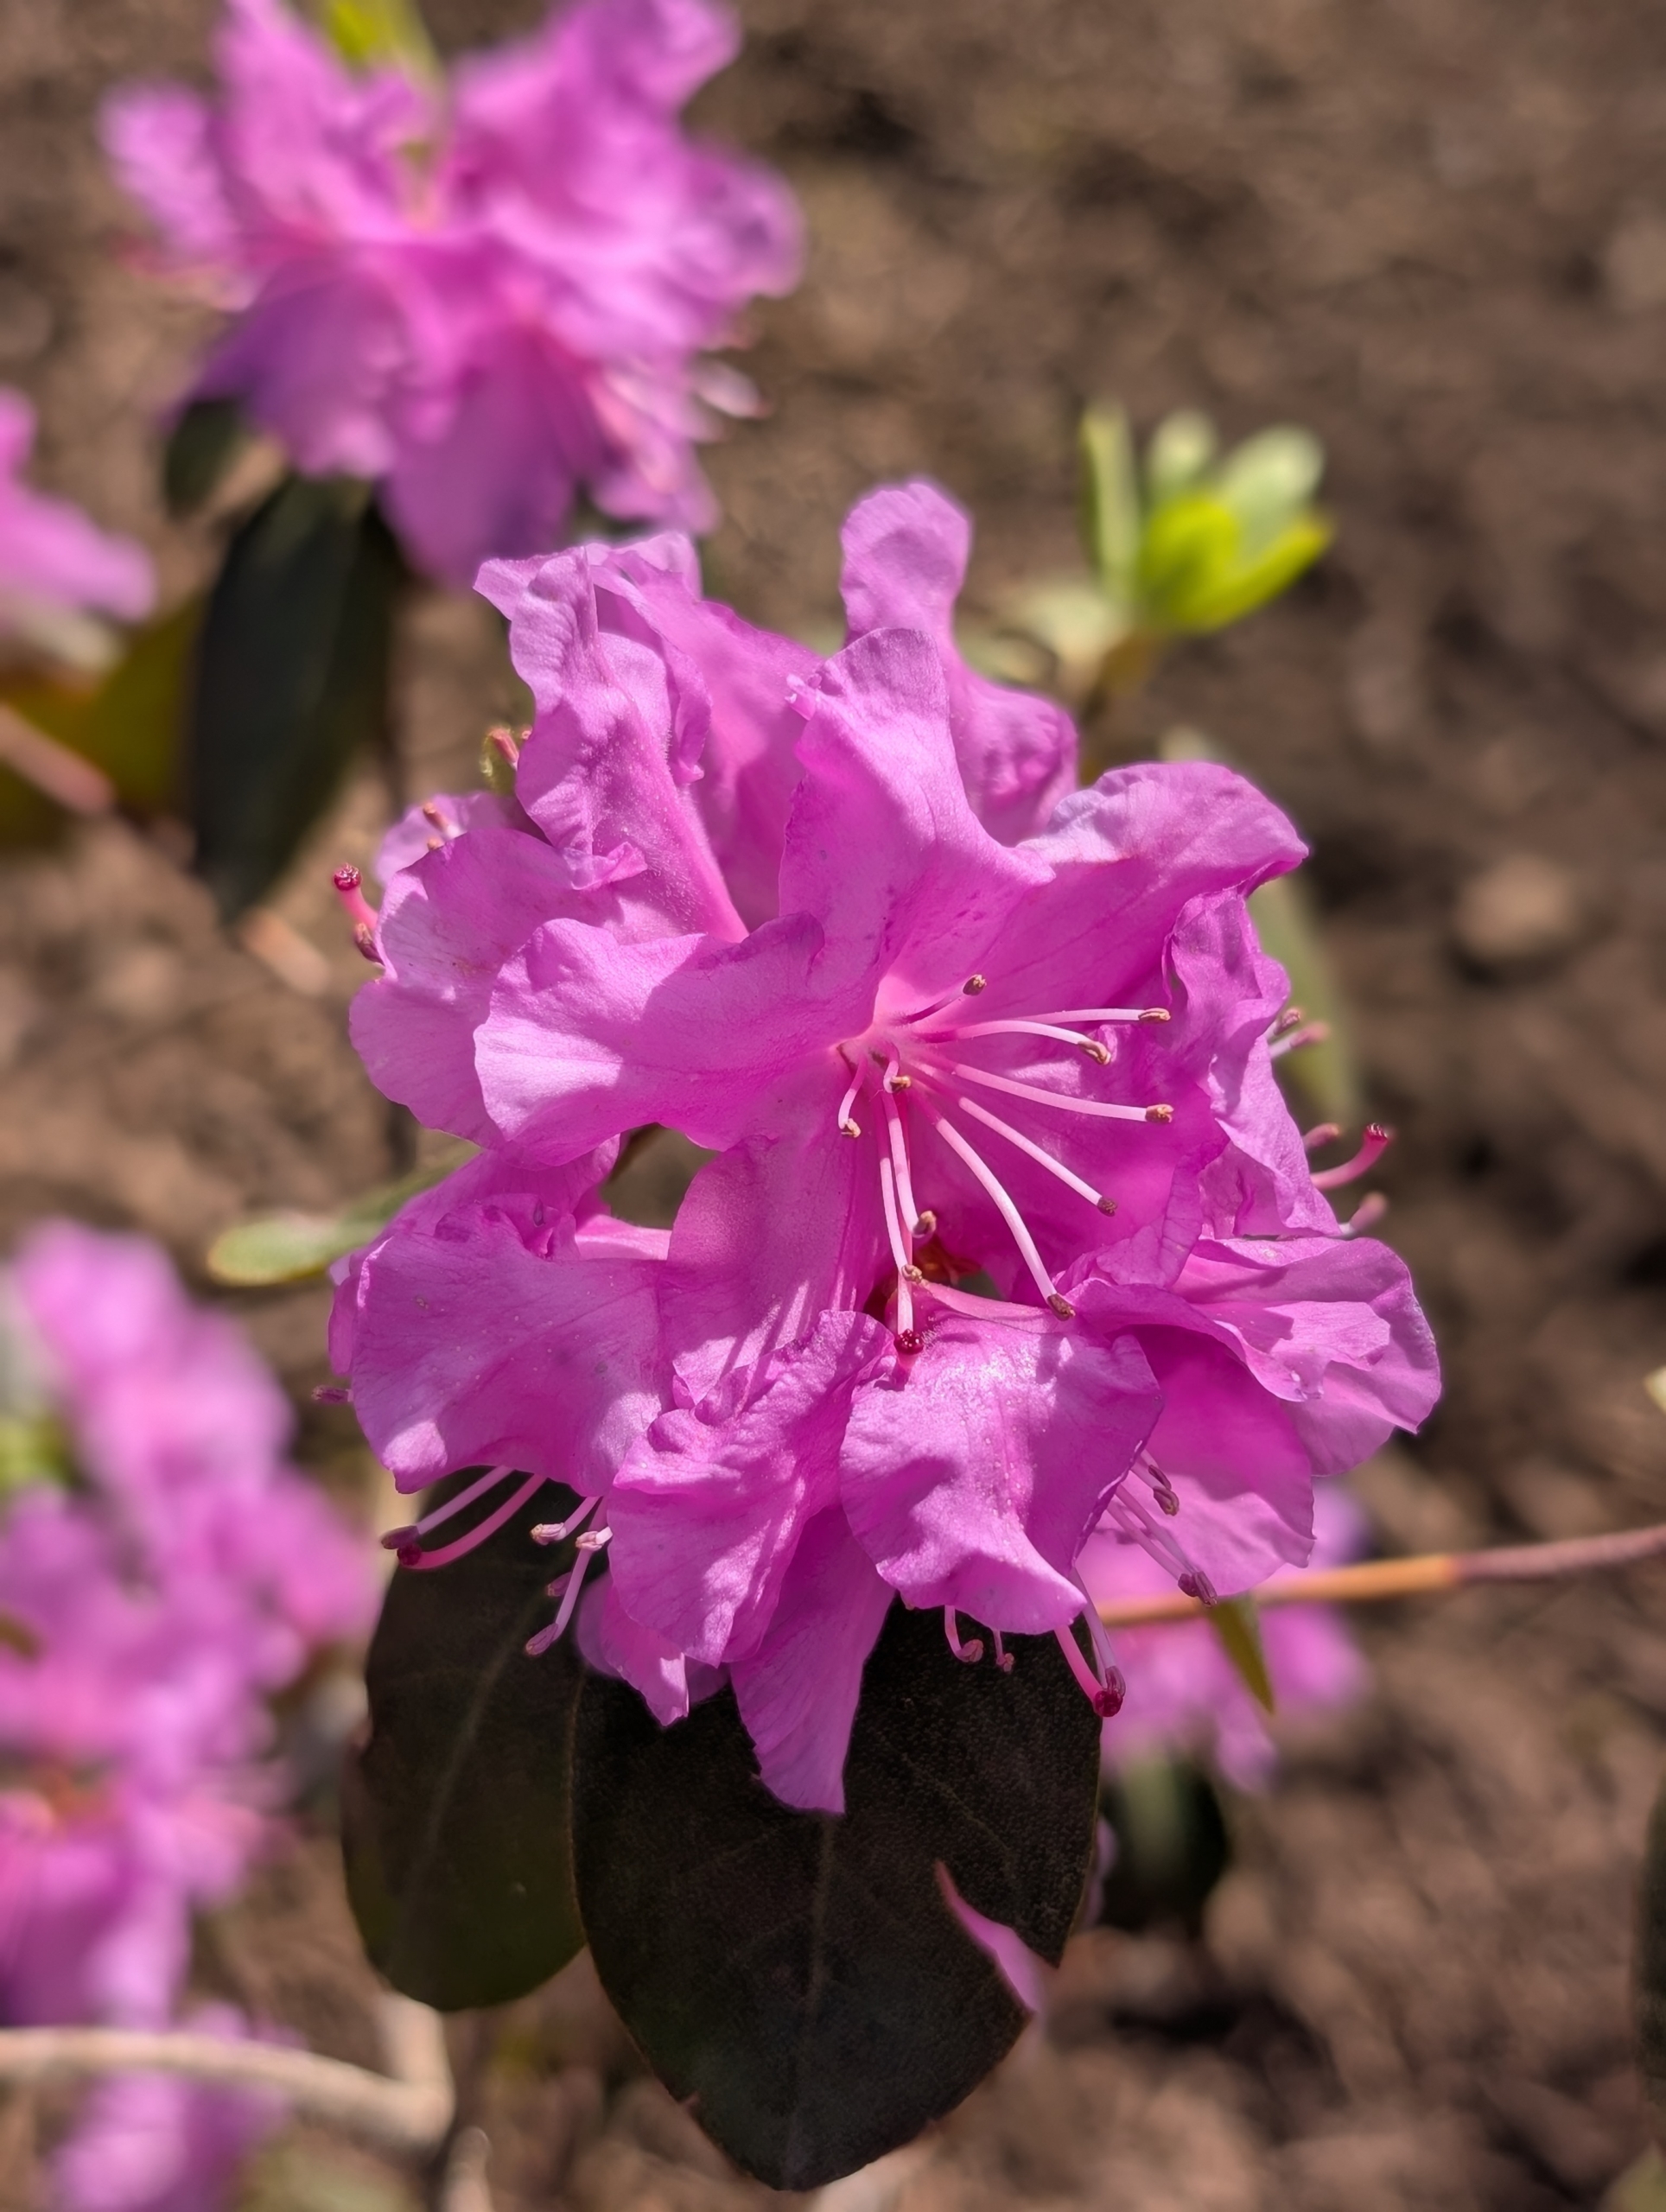
Among the most popular spring-blooming shrubs are azaleas - and mine are just starting to flower beautifully.
Azaleas come in an array of rich and vibrant colors including pink, white, orange, yellow, and crimson. I have a large azalea border featuring hundreds of these gorgeous specimens. Many of the plants are from White's Nursery, LLC in Germantown, Maryland. White’s specializes in evergreen, deciduous, and native azaleas as well as rhododendrons. Owners Mike and Debra White grow all their plants and nurture them in their greenhouses. Yesterday, I picked up another large selection of azaleas in shades of orange and yellow for a new project at the farm.
Here are some photos, enjoy.
White’s Nursery is located about 50-miles outside of Baltimore. It is here, on 17-acres of lush, verdant fields where Mike and Debra created a specialized nursery where they breed and grow some of the most beautiful azaleas.
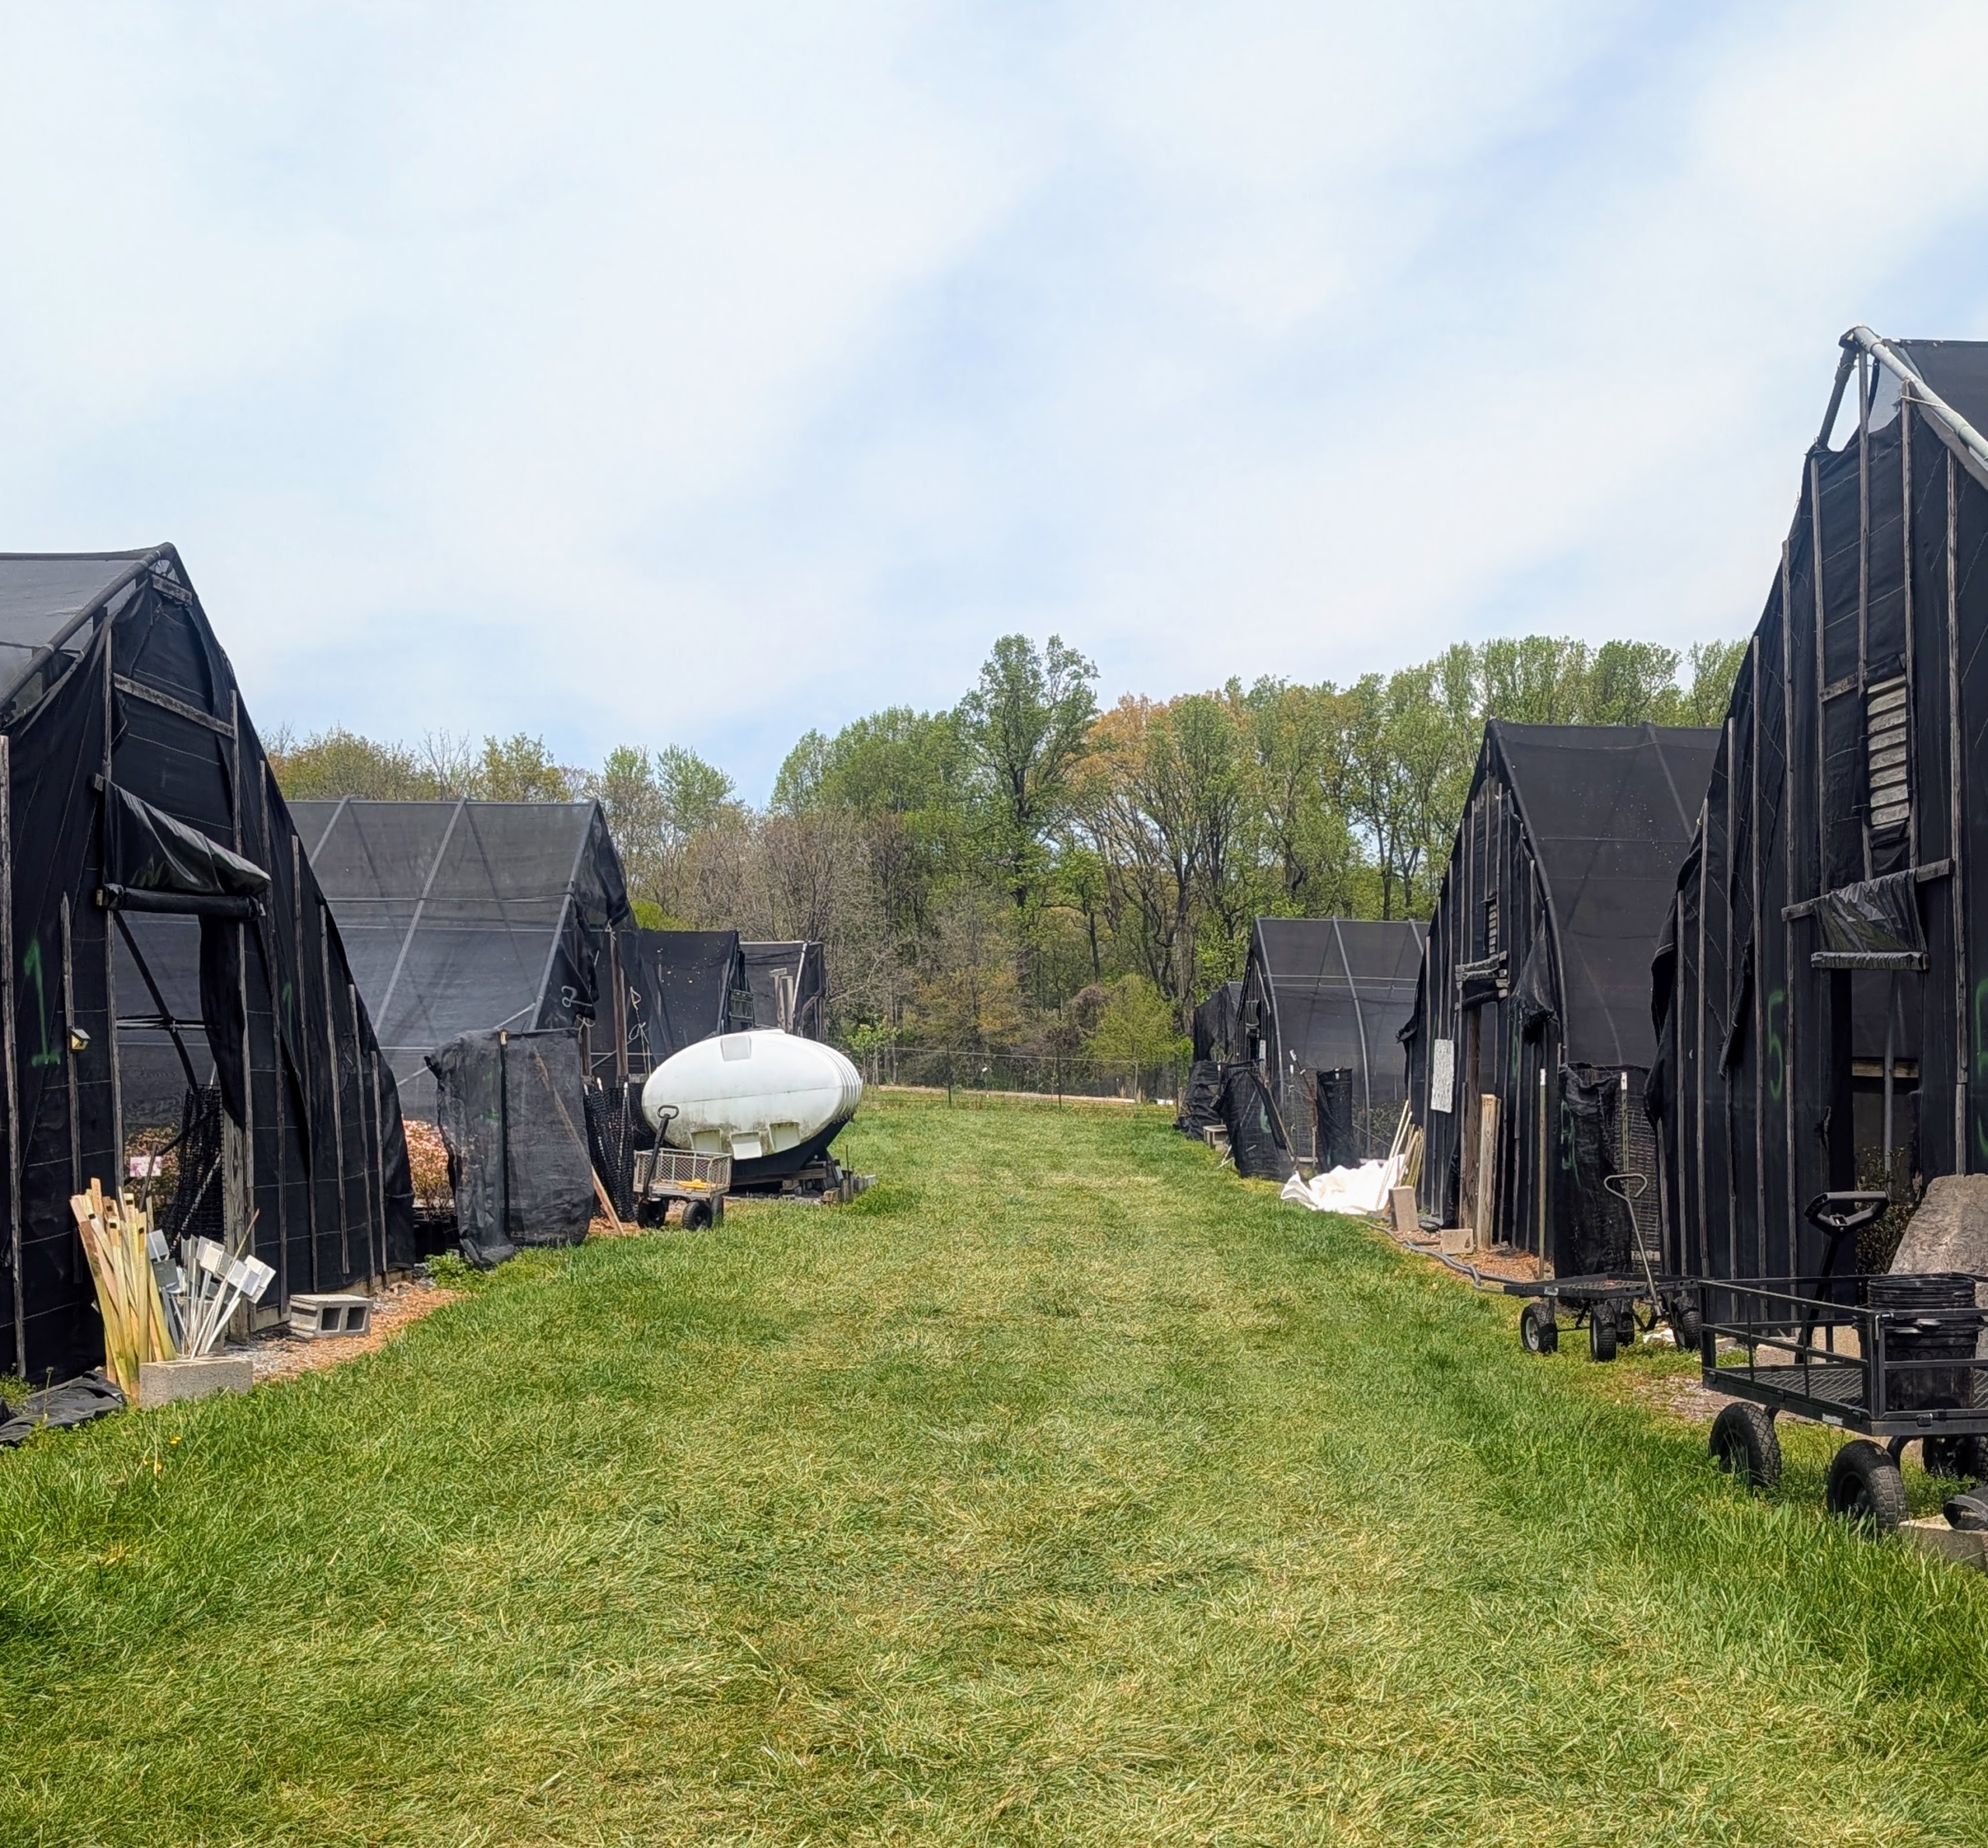
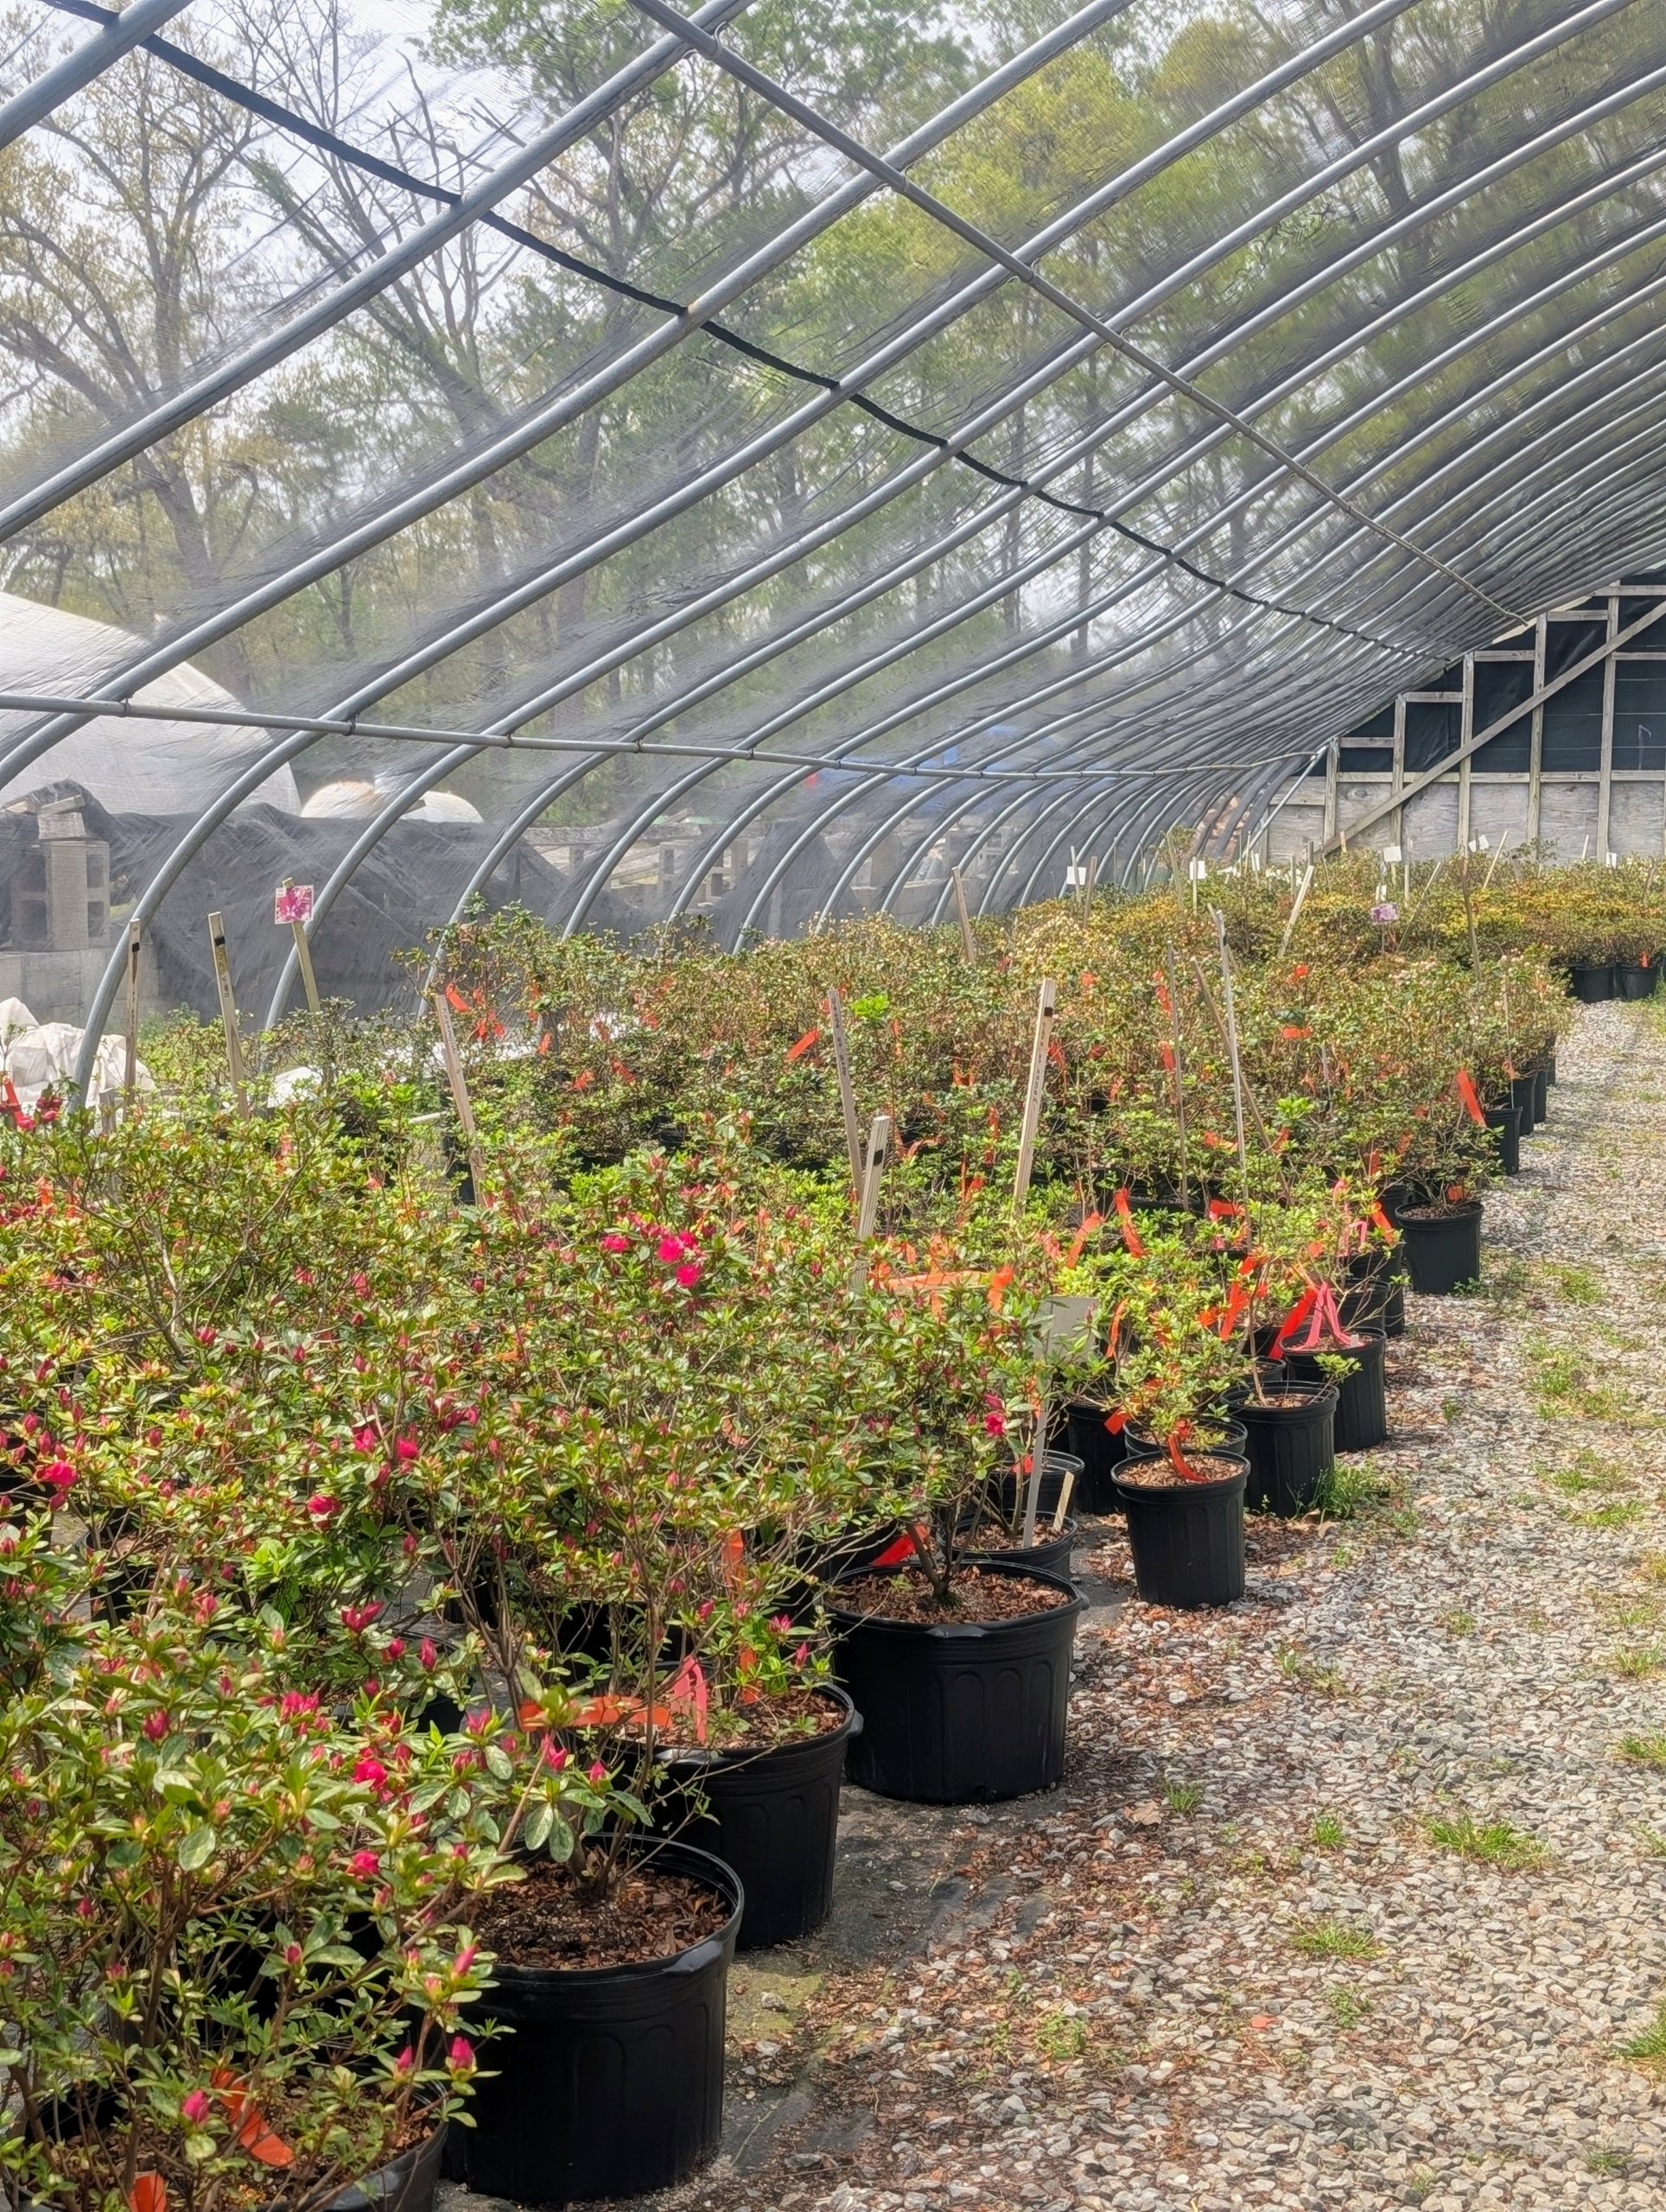
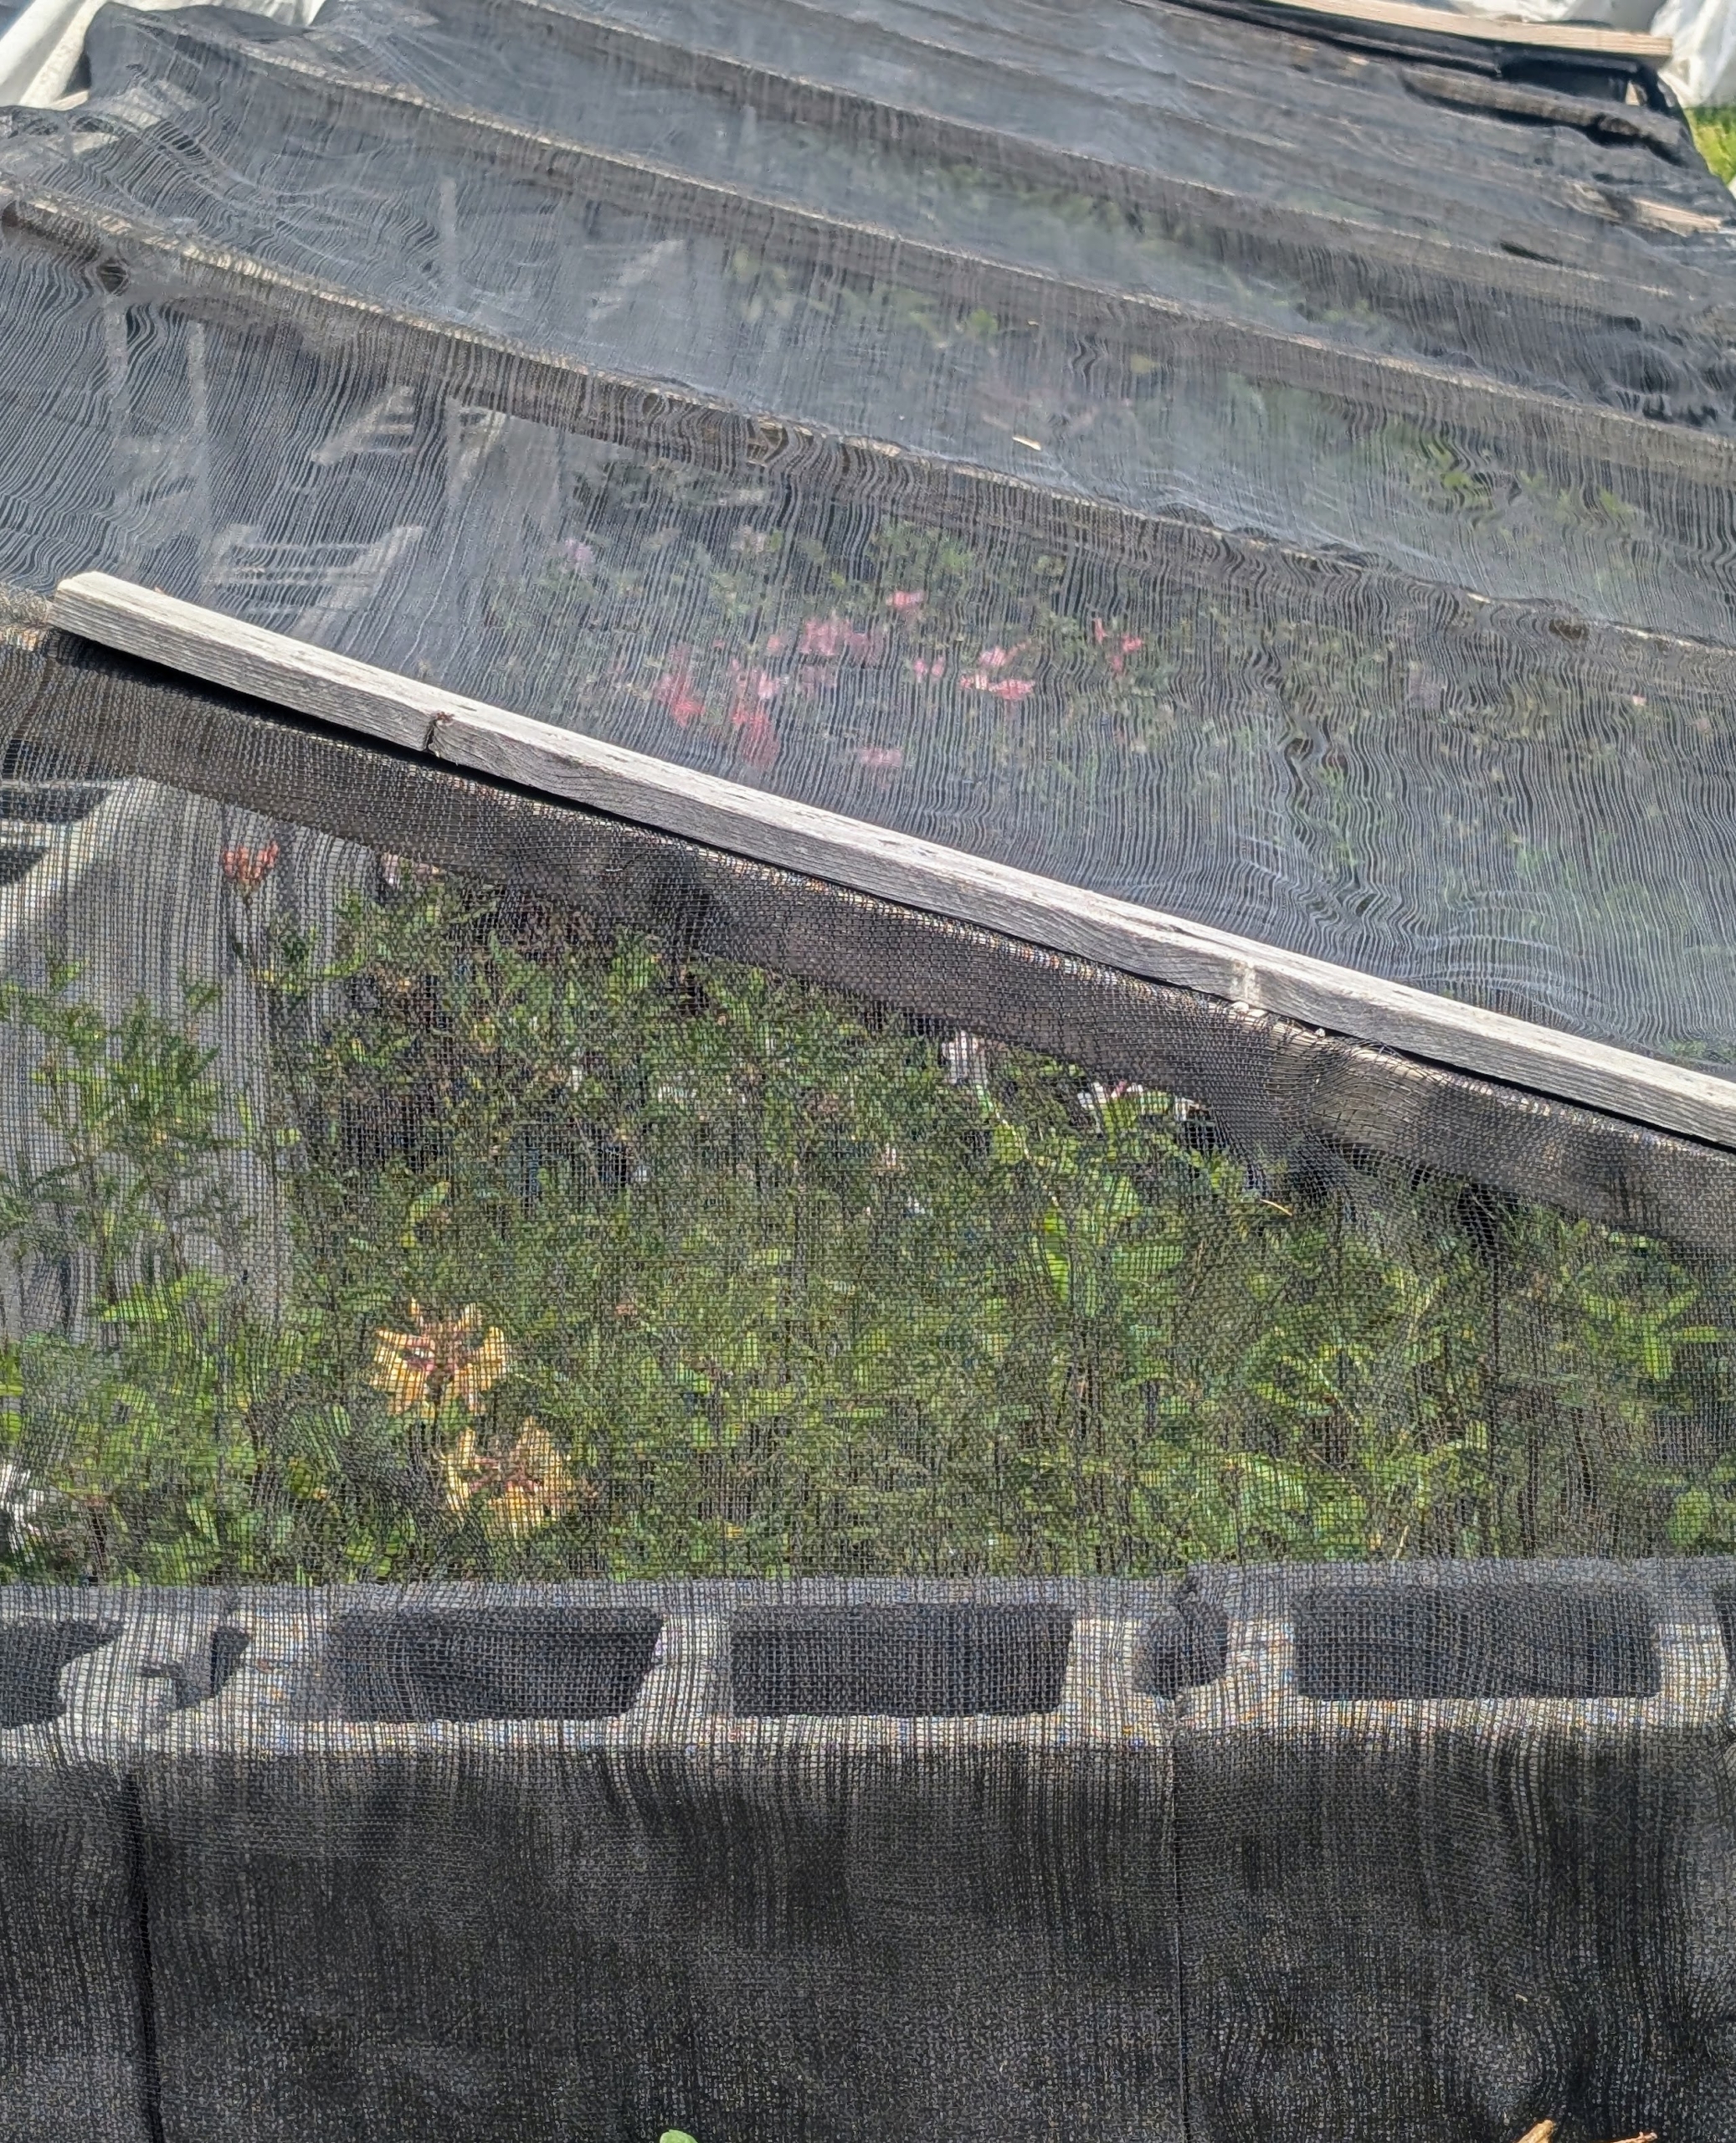
They house their plants in two rows of large greenhouses – all closely maintained by Mike and Debra.
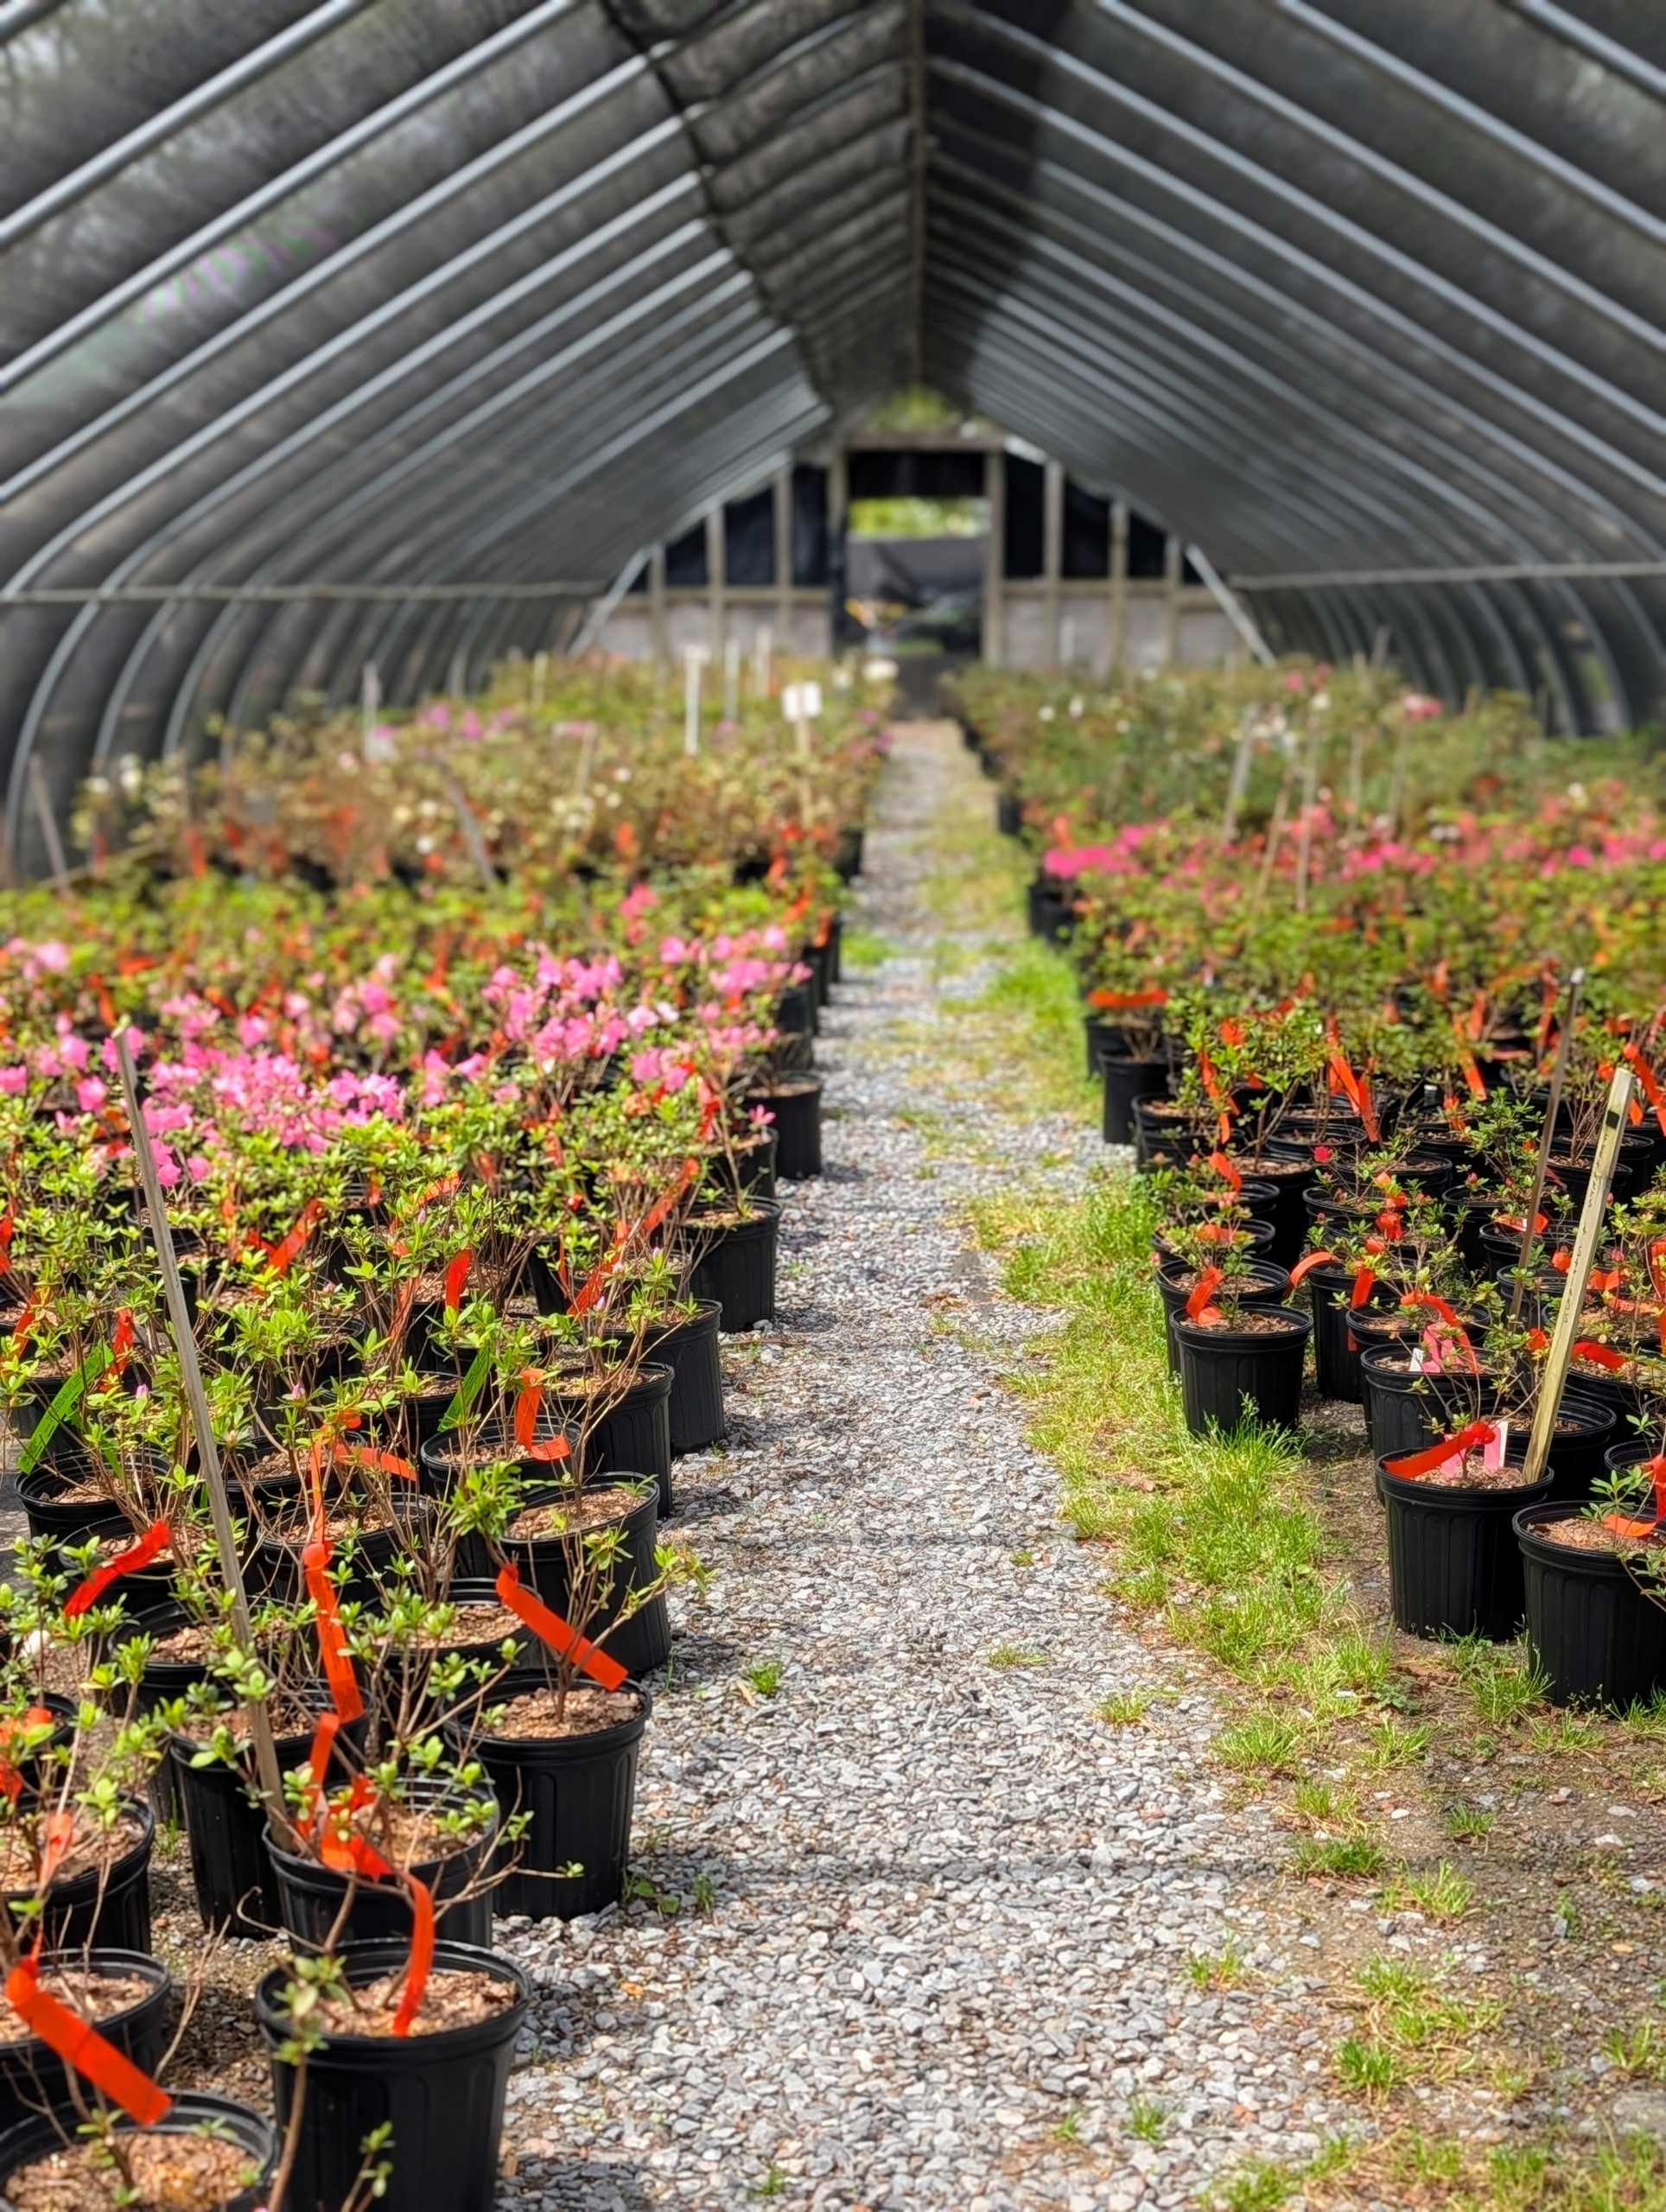
Inside each one are hundreds of potted azaleas and rhododendrons just beginning to bloom. Debra said it was a cold and long winter, so they’re flowering a little later this year, but everything is doing well.
White’s Nursery has more than 350 varieties of evergreen azaleas such as Glenn Dale, Bowie Mill, Satsuki, Robin Hill and many others. In addition, they also carry a wide selection of deciduous and native azaleas such as Calendulaceum, Chop Tank, Great Balls of Fire, Lemon Drop, Red Pepper, and some fragrant varieties.
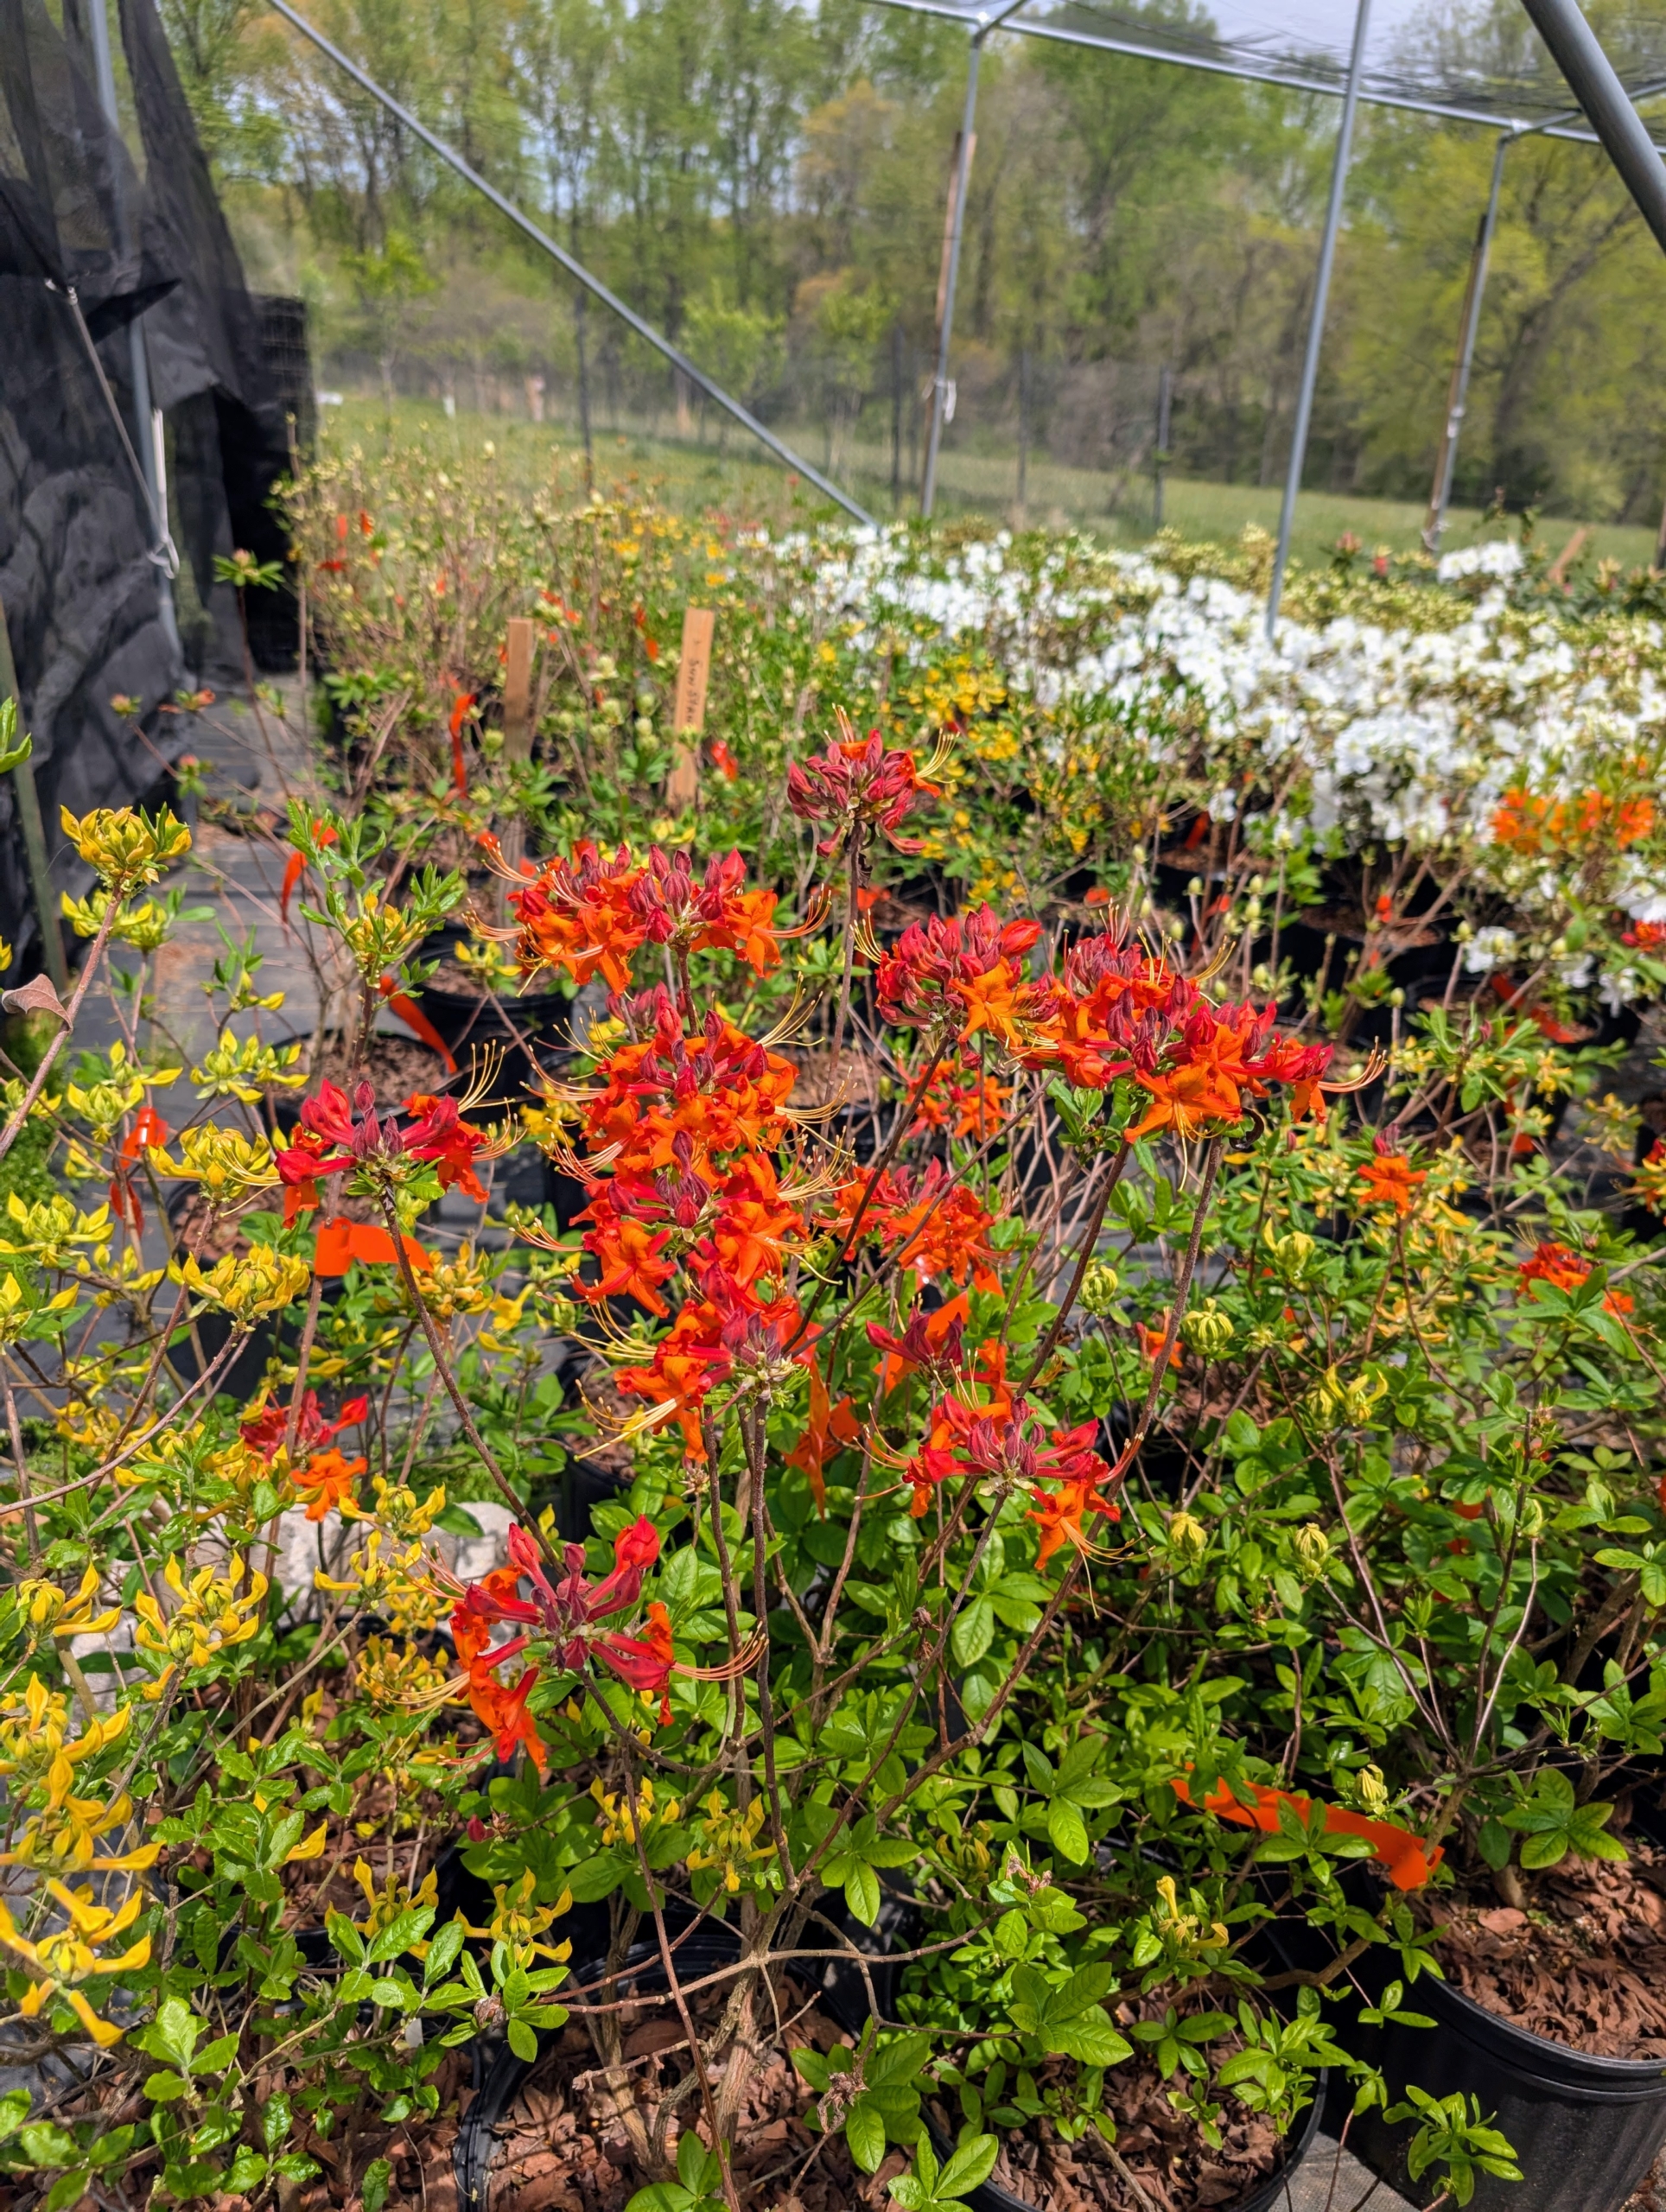
In this greenhouse are 70 orange and yellow azaleas ready for the drive to my farm. Among the varieties in this collection – ‘Admiral Semmes,’ ‘Appalachian Gold,’ ‘Don’s Variegated Austrinum,’ ‘Great Balls of Fire,’ ‘My Mary,’ ‘Red Pepper,’ ‘Sunyside Up,’ ‘Sunrise,’ ‘Sunstruck’ and a number of unknown deciduous varieties.
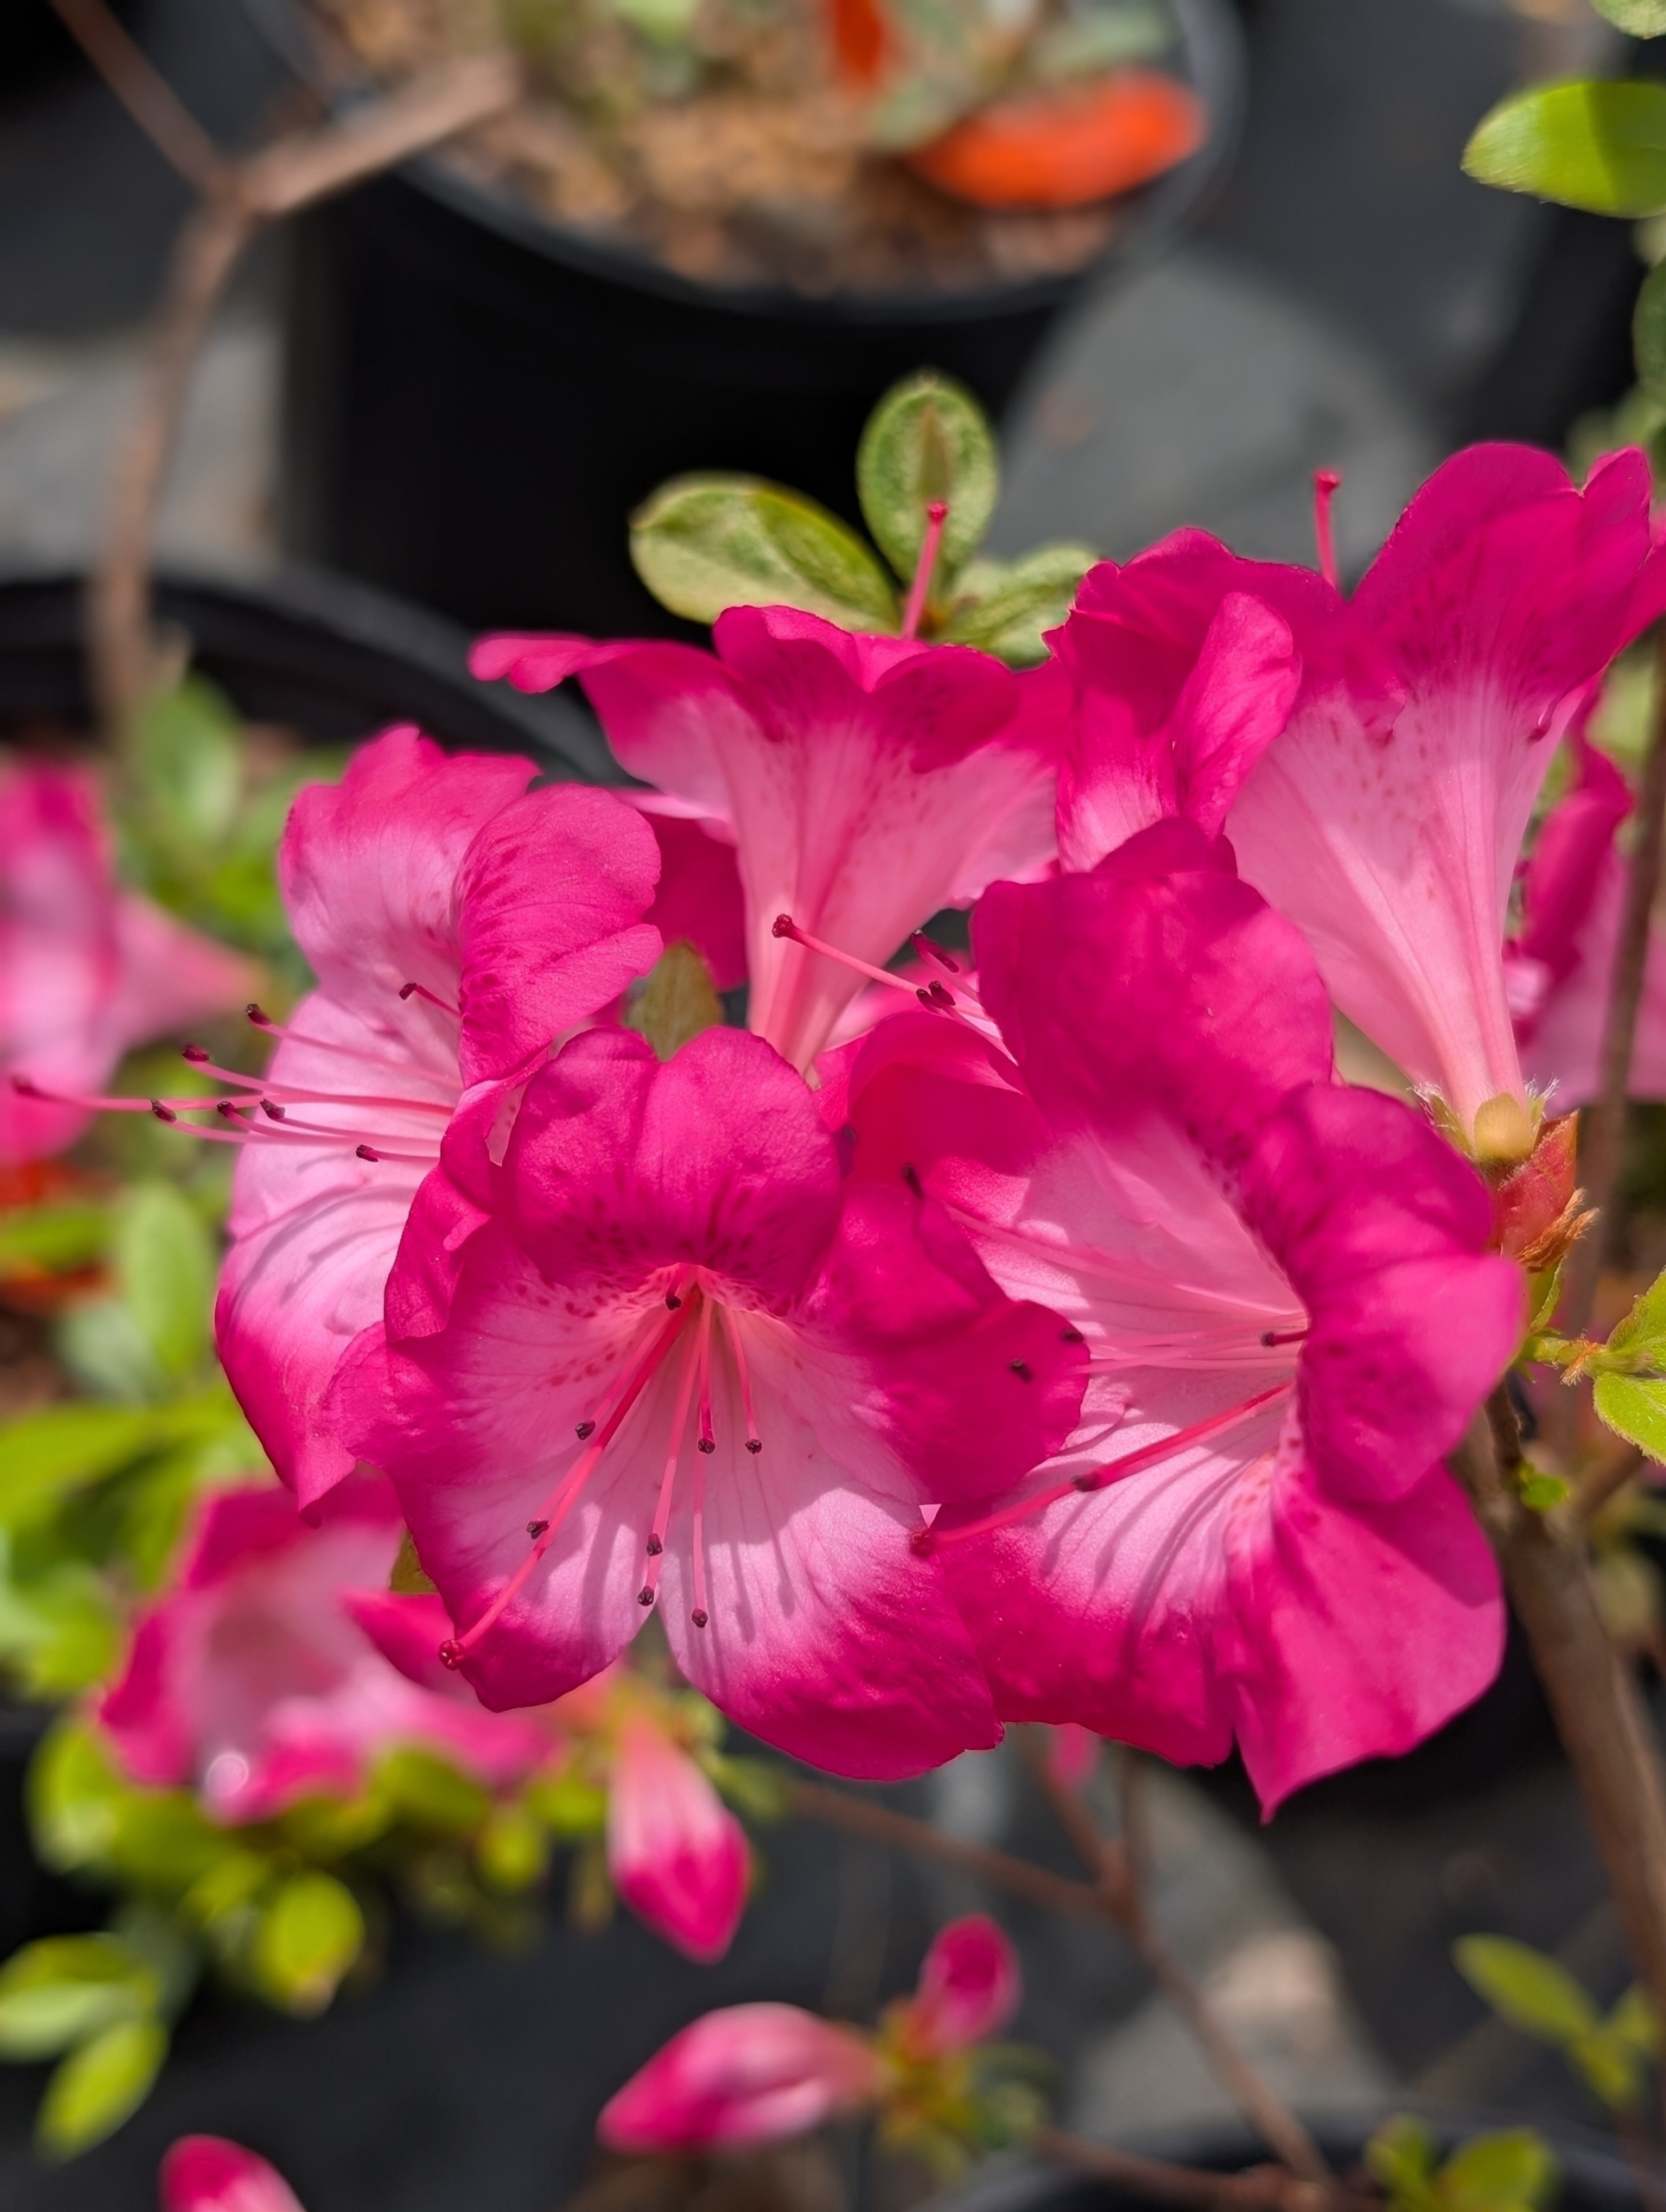
These azaleas are so bold in color and all of them in excellent condition. Azalea petal shapes vary greatly. They range from narrow to triangular to overlapping rounded petals. They can also be flat, wavy or ruffled.
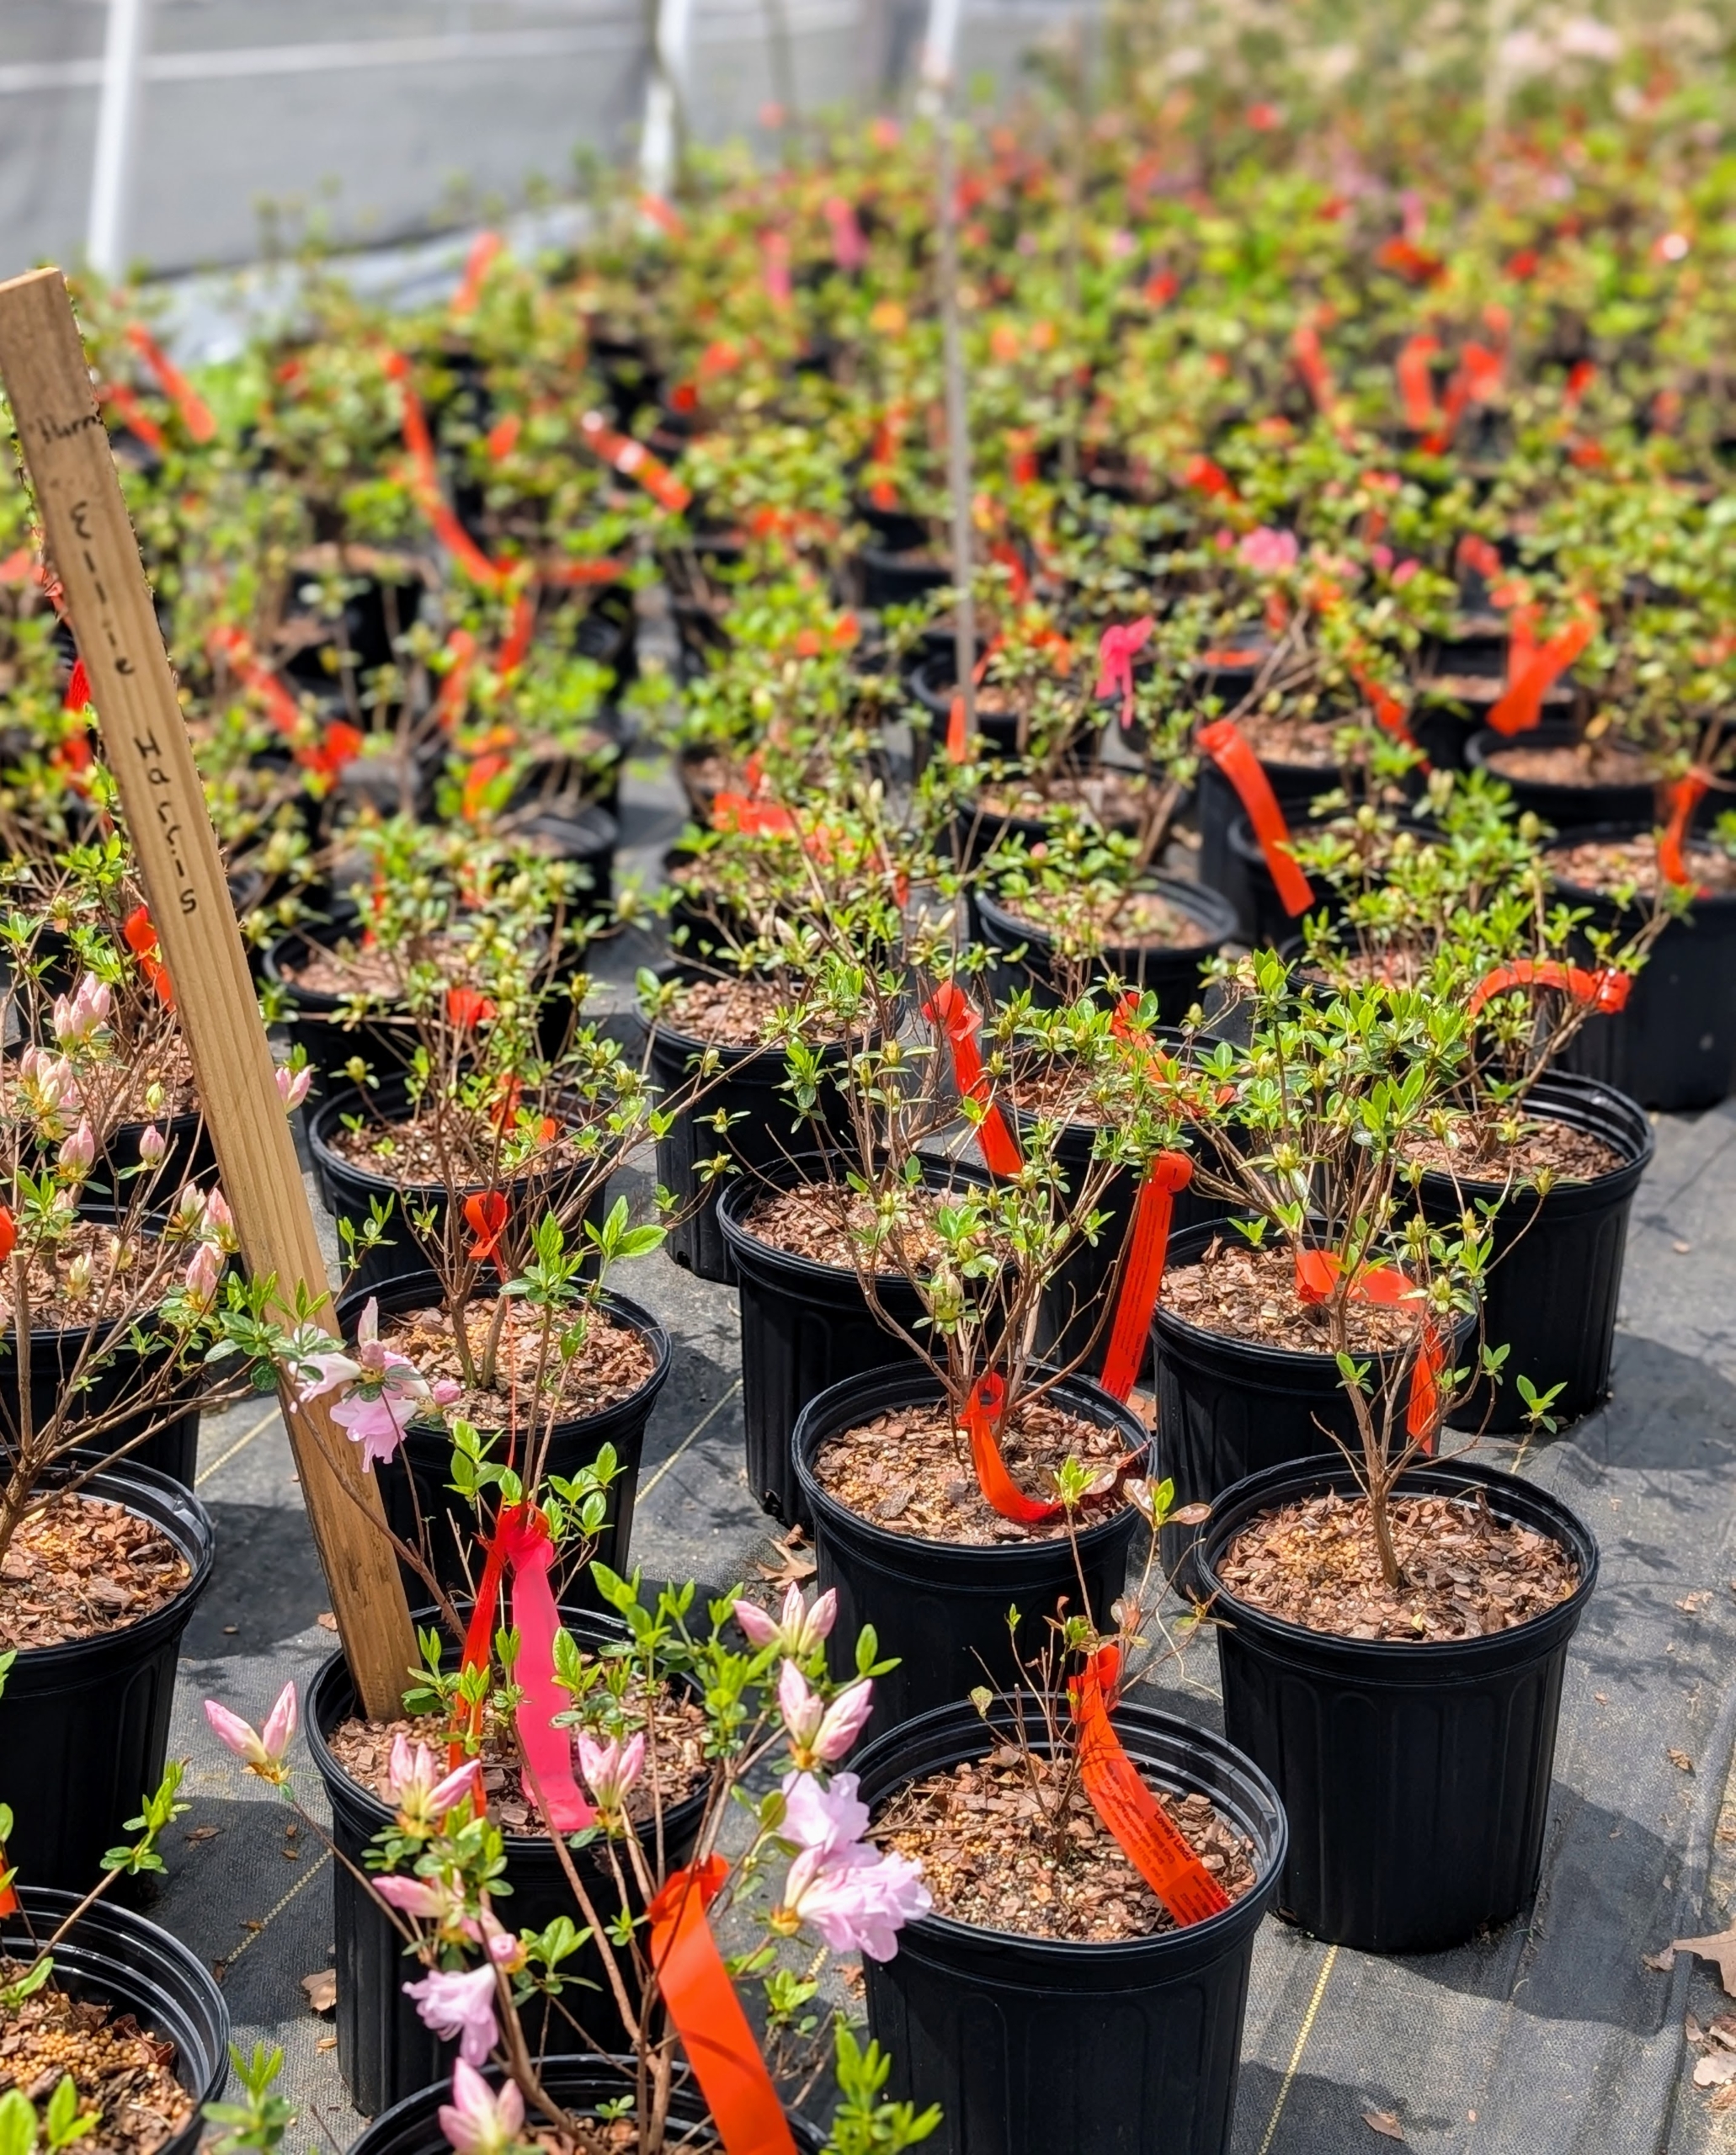
All of my azaleas are tagged to make sure there is no confusion.
This greenhouse is where Mike breeds his own azaleas from cuttings. Mike is extremely knowledgable and is passionate about creating colorful and hardy varieties – it’s a true labor of love.
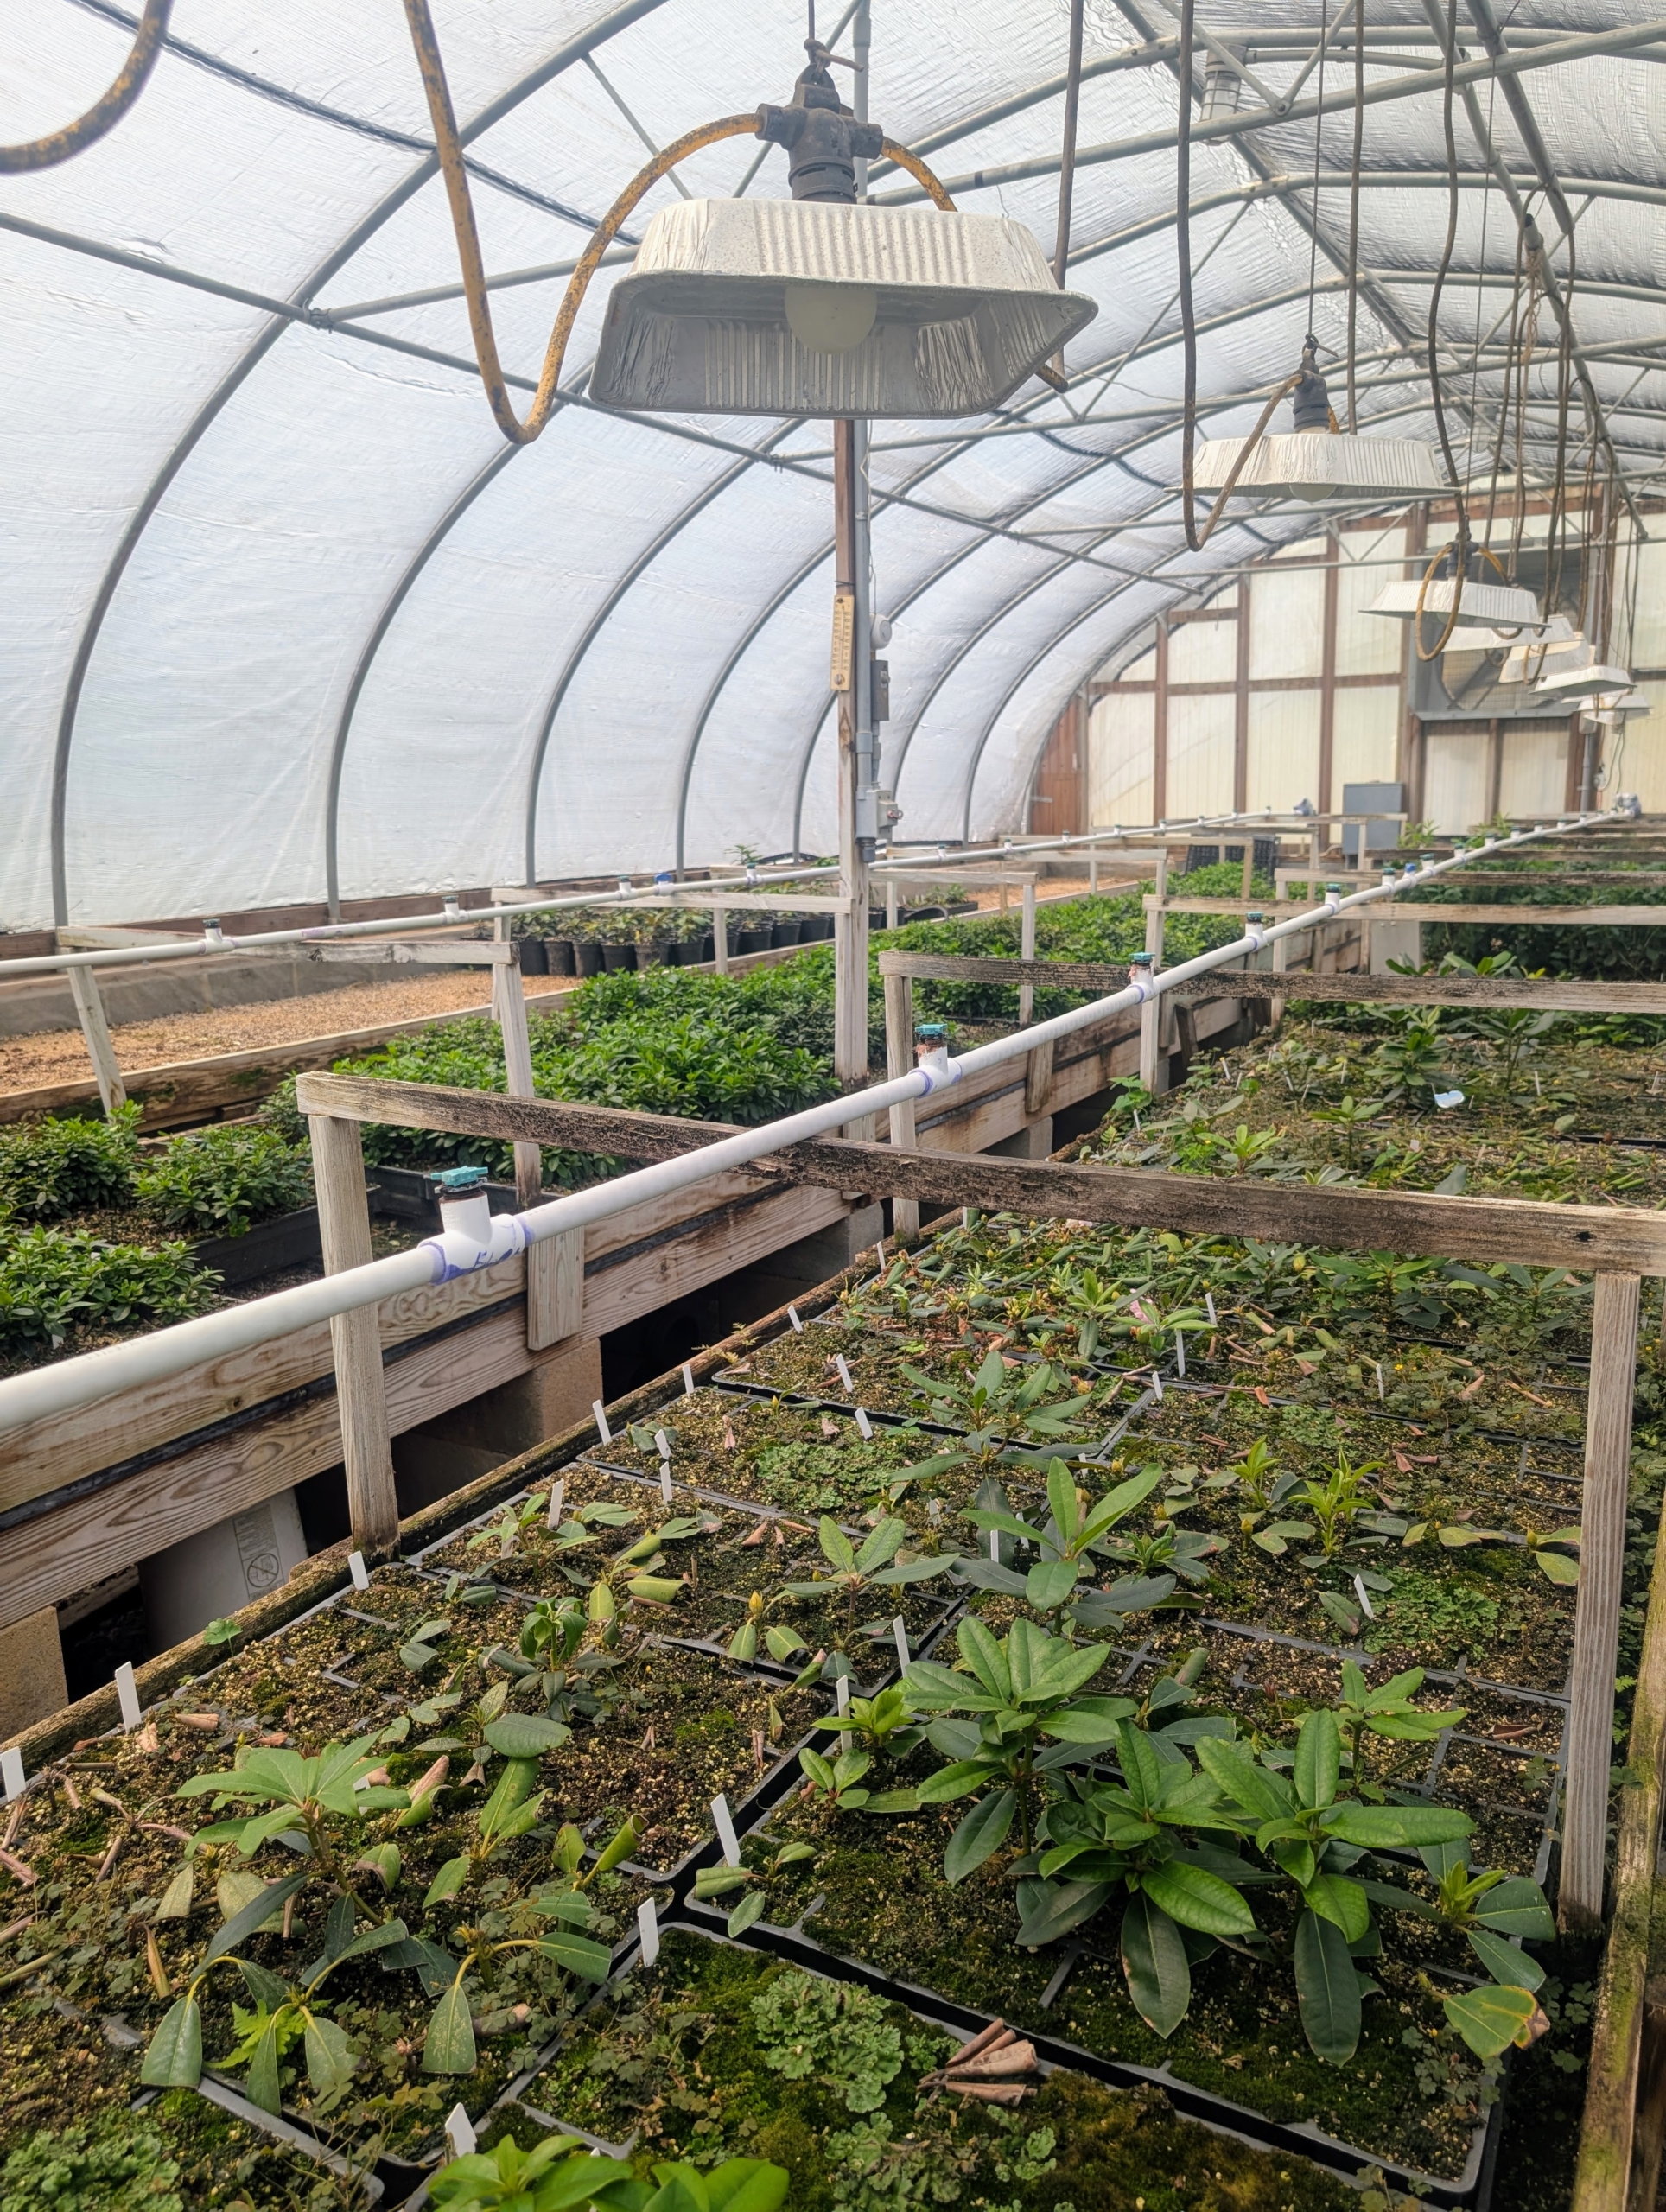
Once the plants are big enough, they’re moved to one of several cold frames to develop further.
Some of the plants blooming right now include this ‘Cotton Candy’ – a broadleaf evergreen shrub with green foliage. In spring, bright pink flowers emerge.
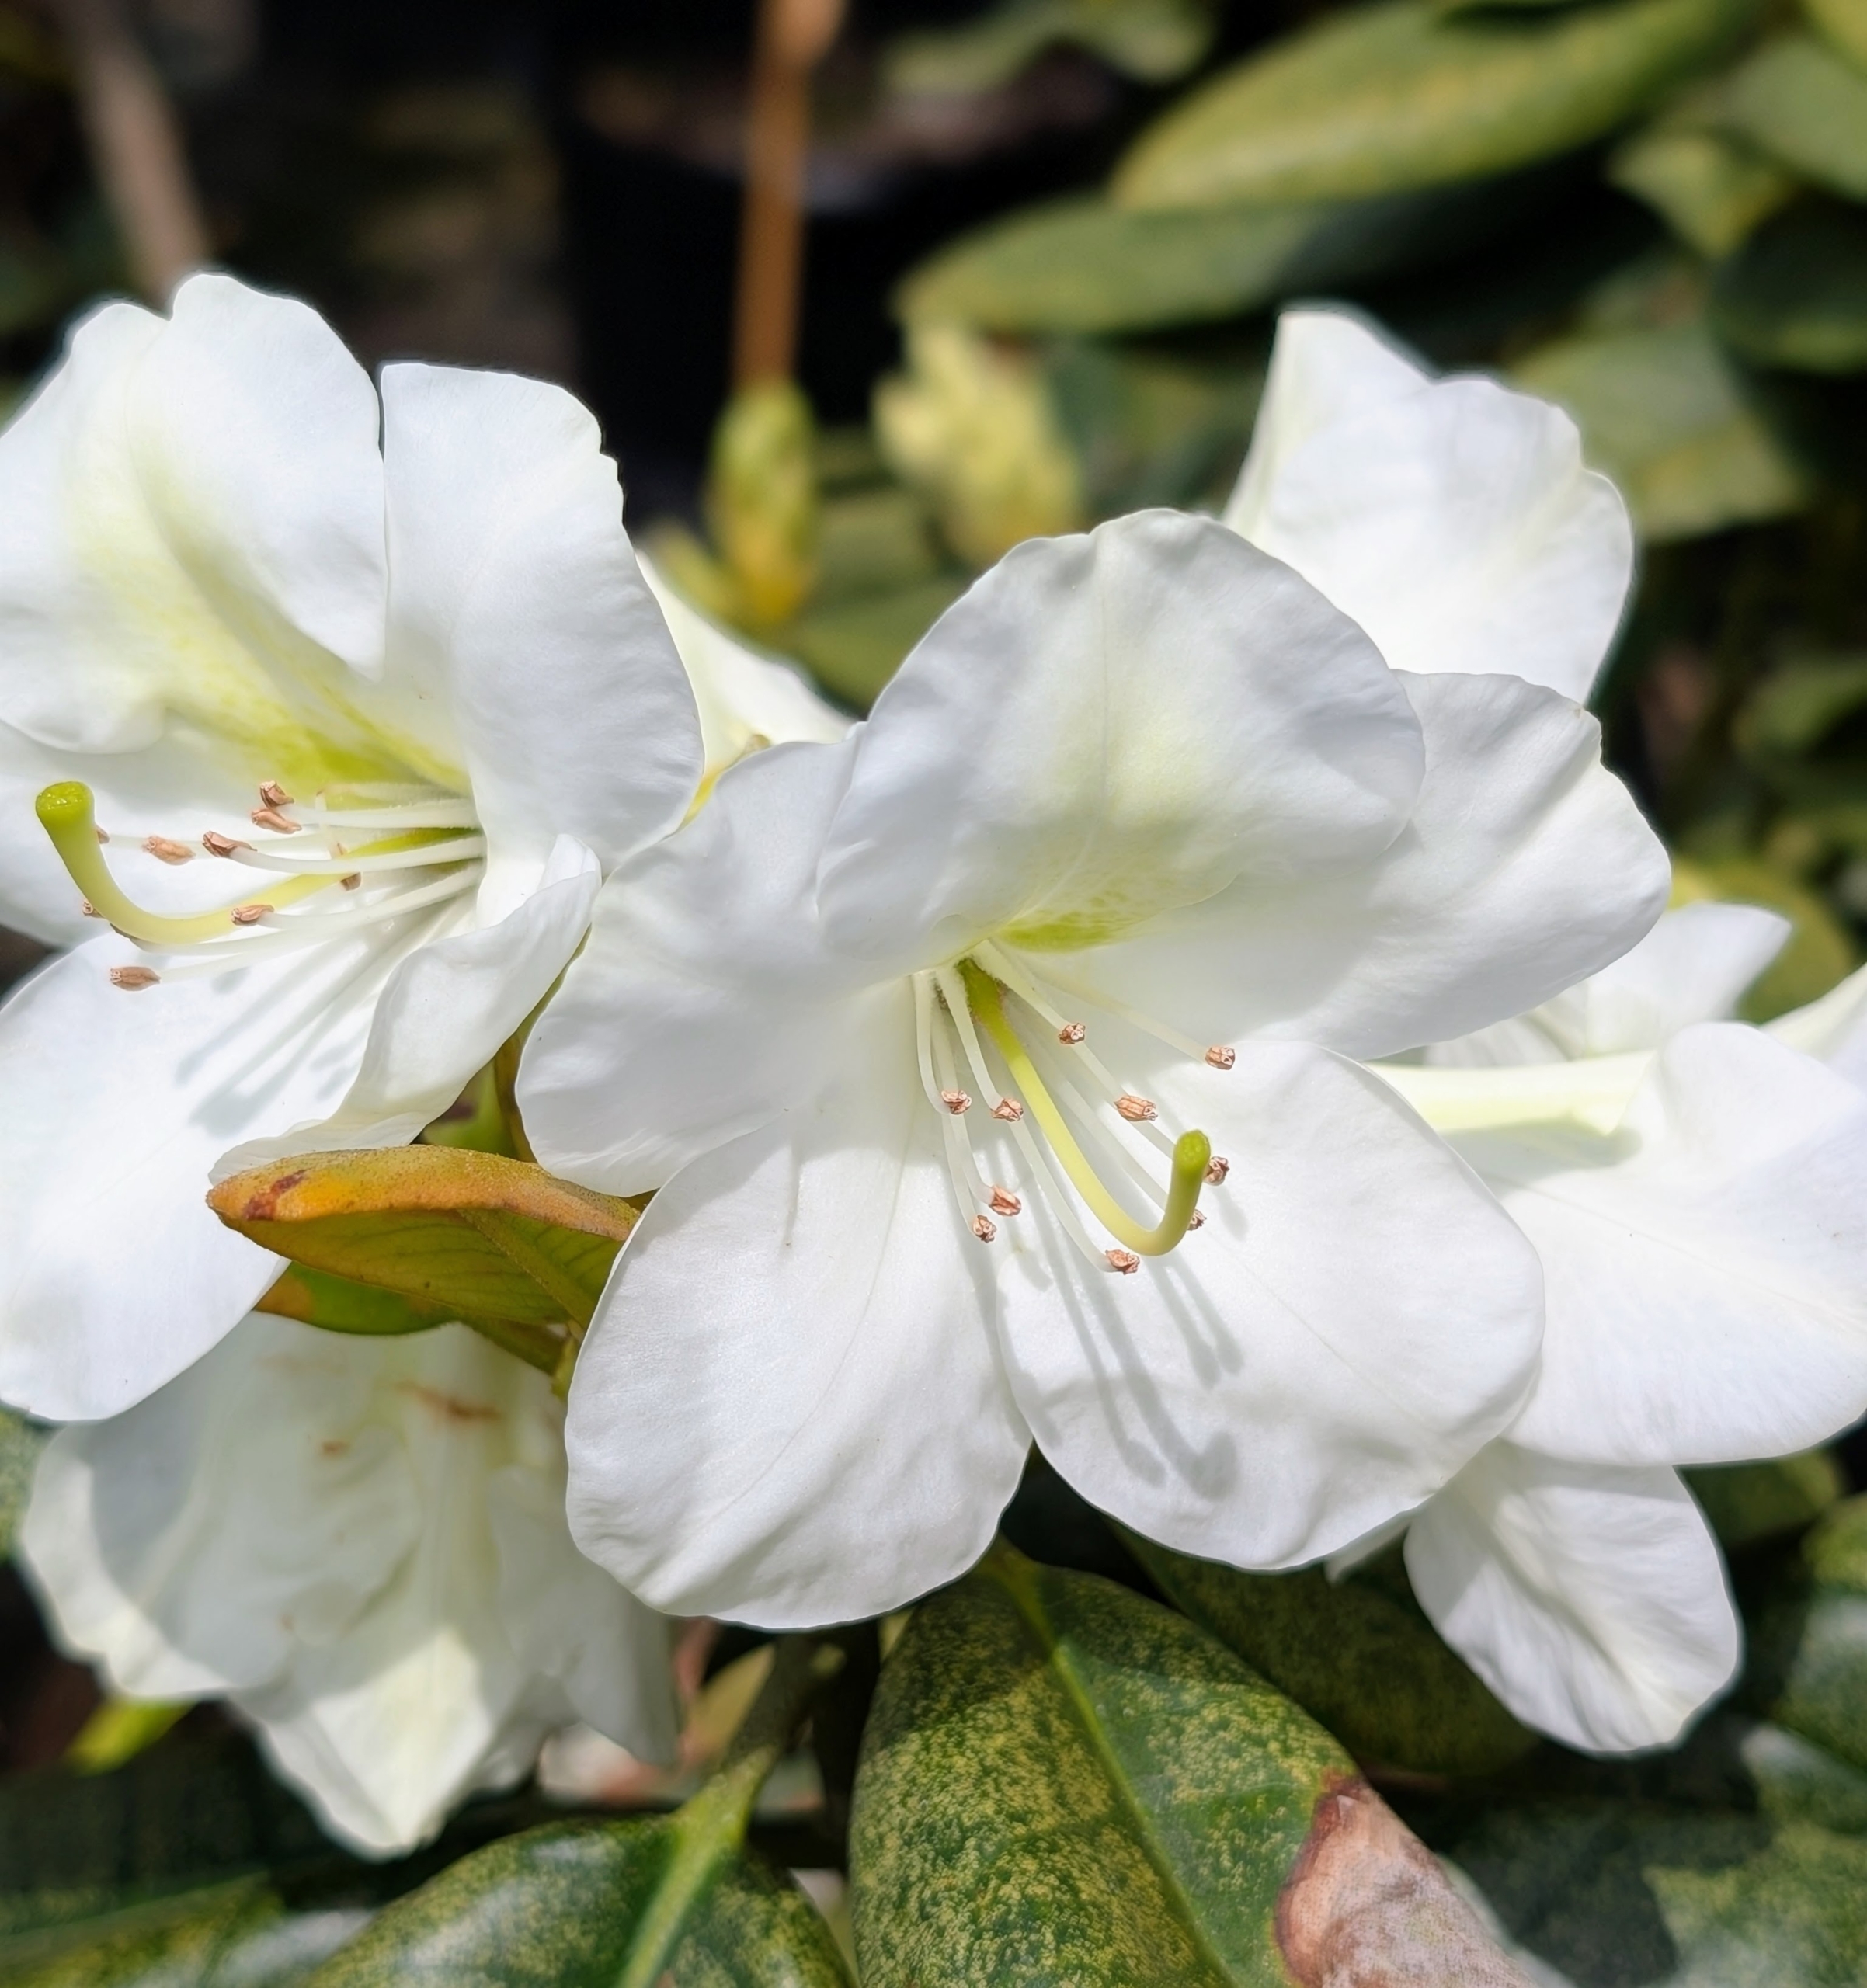
‘Phyliss Korn’ shows off big cream and white flowers.
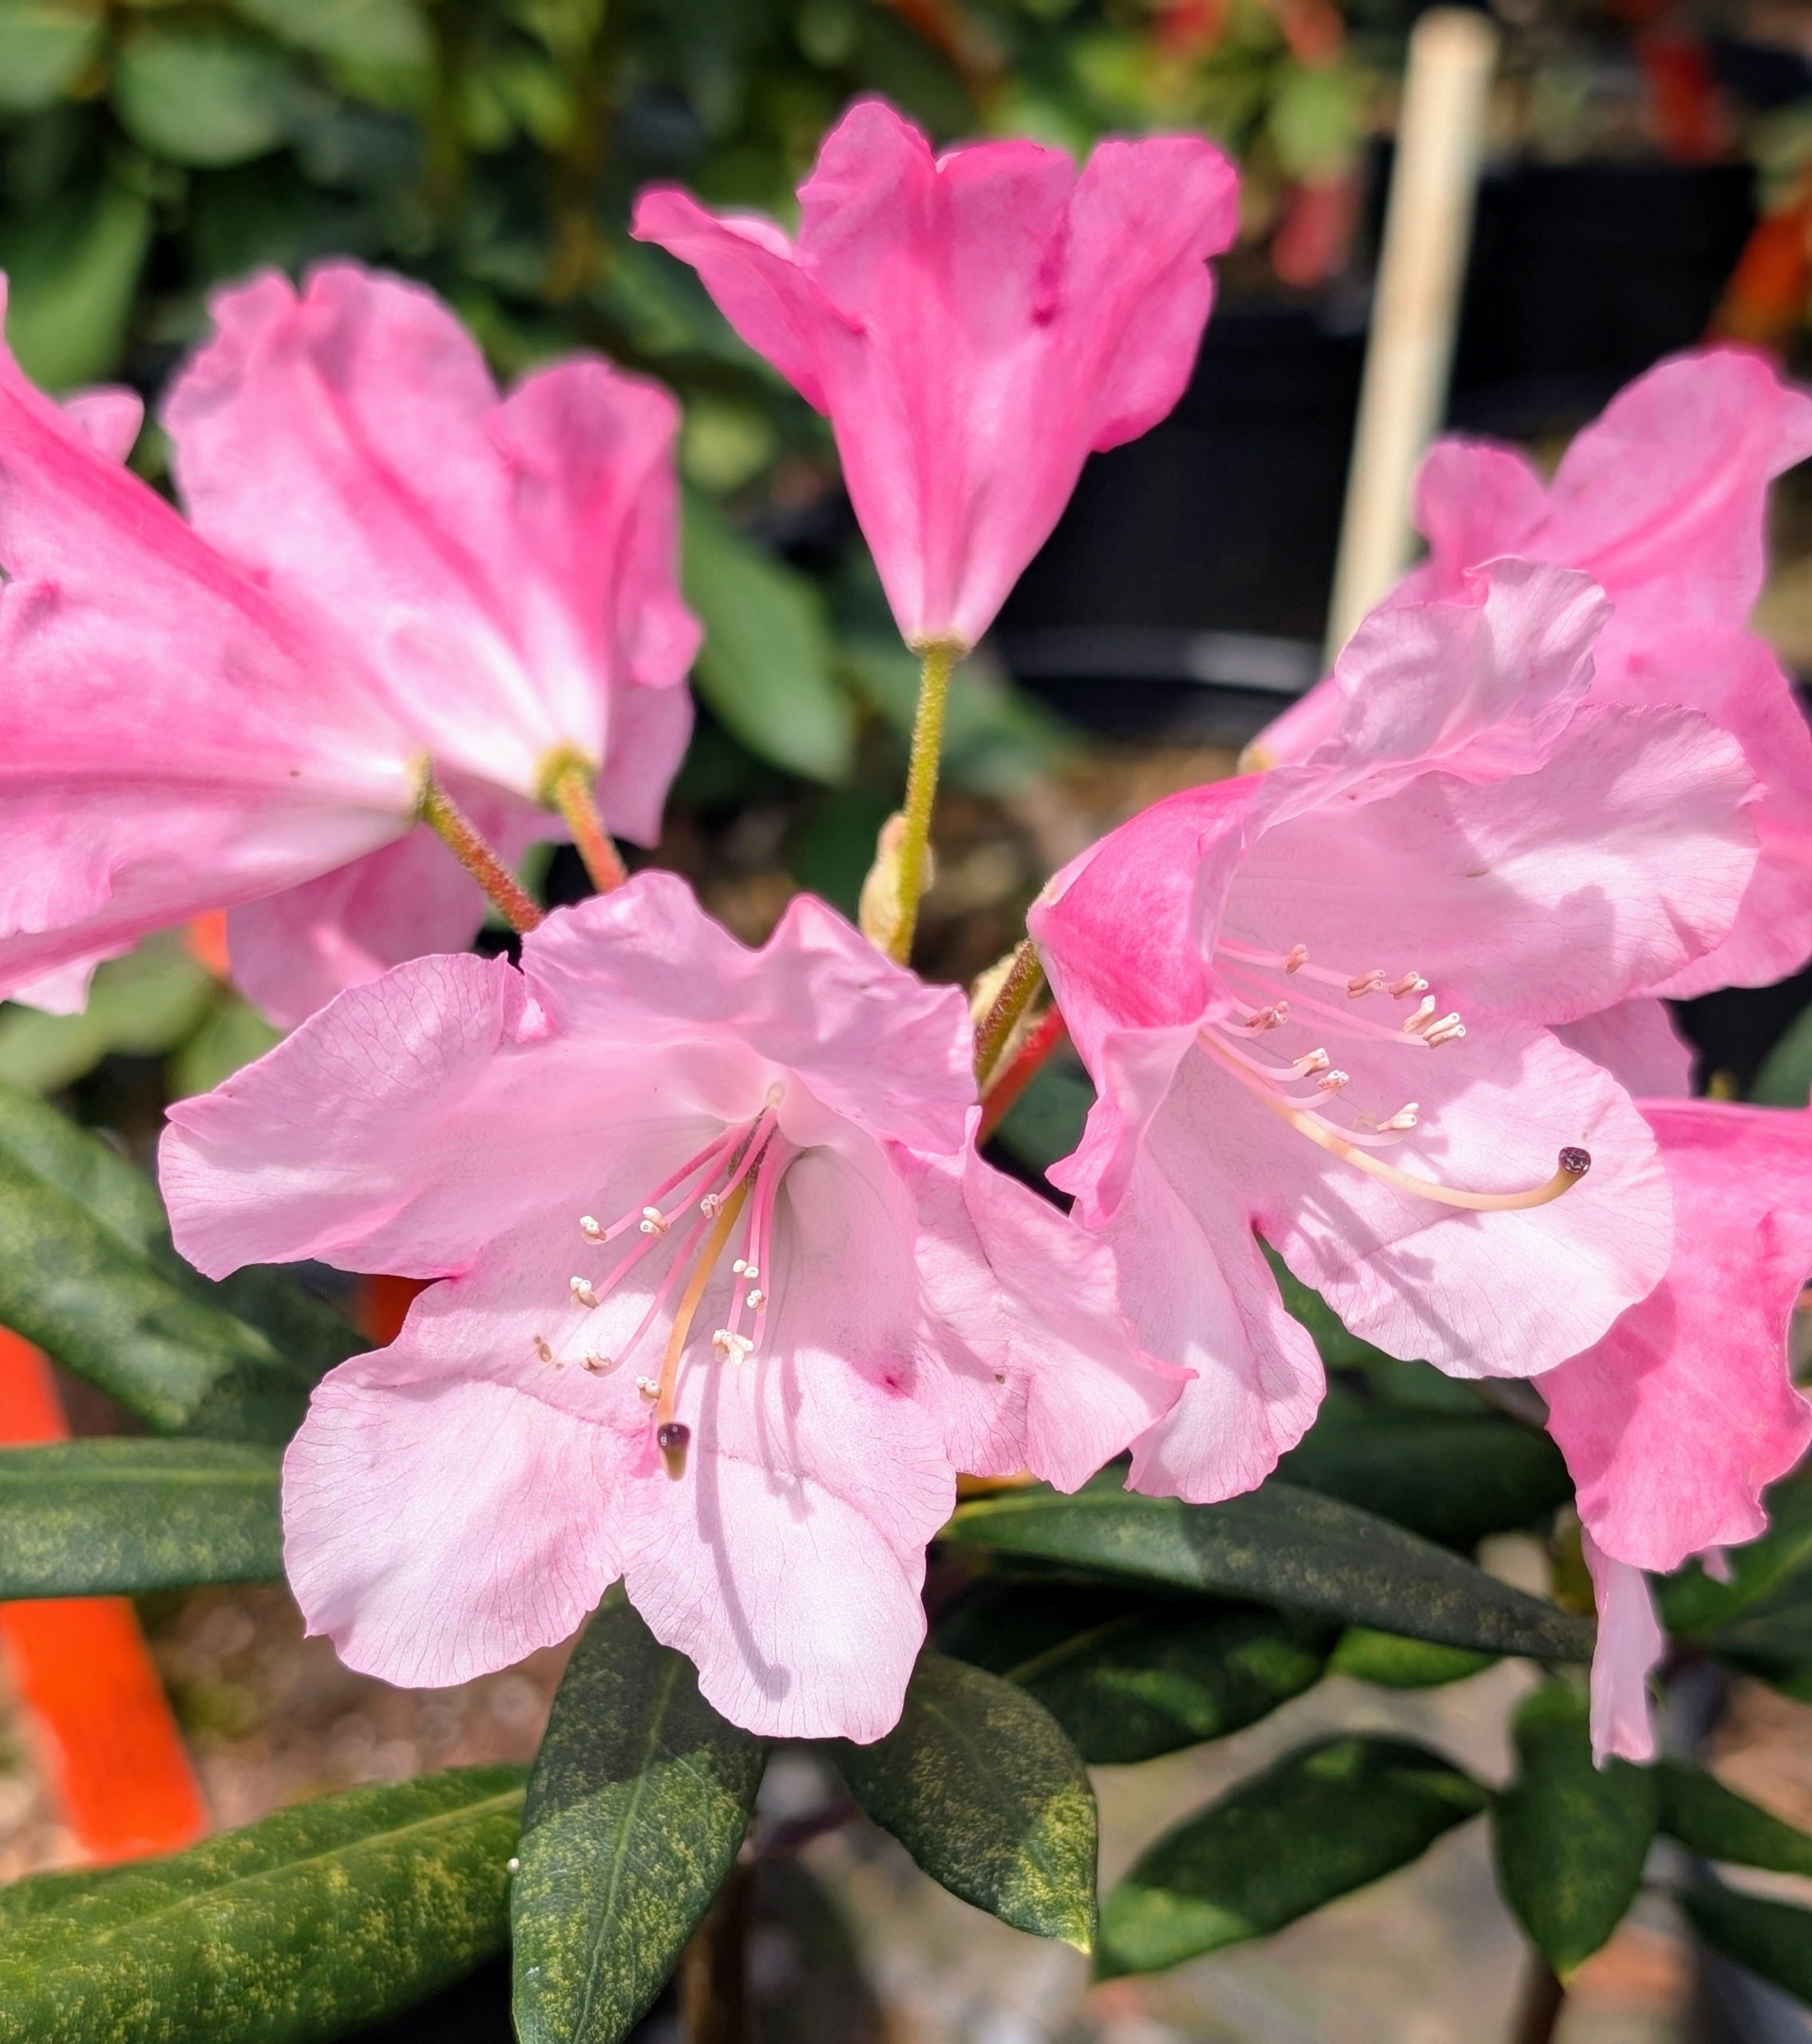
This light colored pink variety is called ‘Rhodo works’ with its dainty blooms featuring light pink on one side and darker pink on the other. The best time to shop for azaleas is when they are in bloom so one can see their flower colors and forms.
Azaleas are native to several continents including Asia, Europe, and North America. These plants can live for many years, and they continue to grow their entire lives. This ‘Dream’ has three inch strong pink flowers with wavy-edges.
And ‘Marshy Point Stardust’ has dark pink flowers.
‘Marshy Point Irish Eyes’ features white blooms with yellowish light green centers.
This is ‘Hardings Pride’ – a beautiful peach pink and white azalea. Azalea flowers can be single, hose-in-hose, double or double hose-in-hose, depending on the number of petals. The tube-shaped base of the flower contains a stamen that protrudes from the center. The leaves are often evergreen with wooly undersides.
‘Quakeress’ is another bicolored beauty with a striking pink and white pattern.
And here are two beautiful azaleas in Mike and Debra’s personal garden. These are bold orange and yellow colored shrubs that are about five to six feet tall. Always consider mature size when selecting a planting location. Some azaleas, including native types, can reach towering heights of 20 feet or more. Dwarf azaleas grow two to three feet tall, and many garden azaleas stay four to six feet in height with as wide a spread.
They also have this mature ‘Phyliss Korn’ in their garden. Azaleas prefer morning sun and afternoon shade, or filtered light. Hot all-day sun can stress the plants and make them more susceptible to pests.
The broadleaf evergreen’s large flowers attract many pollinators.
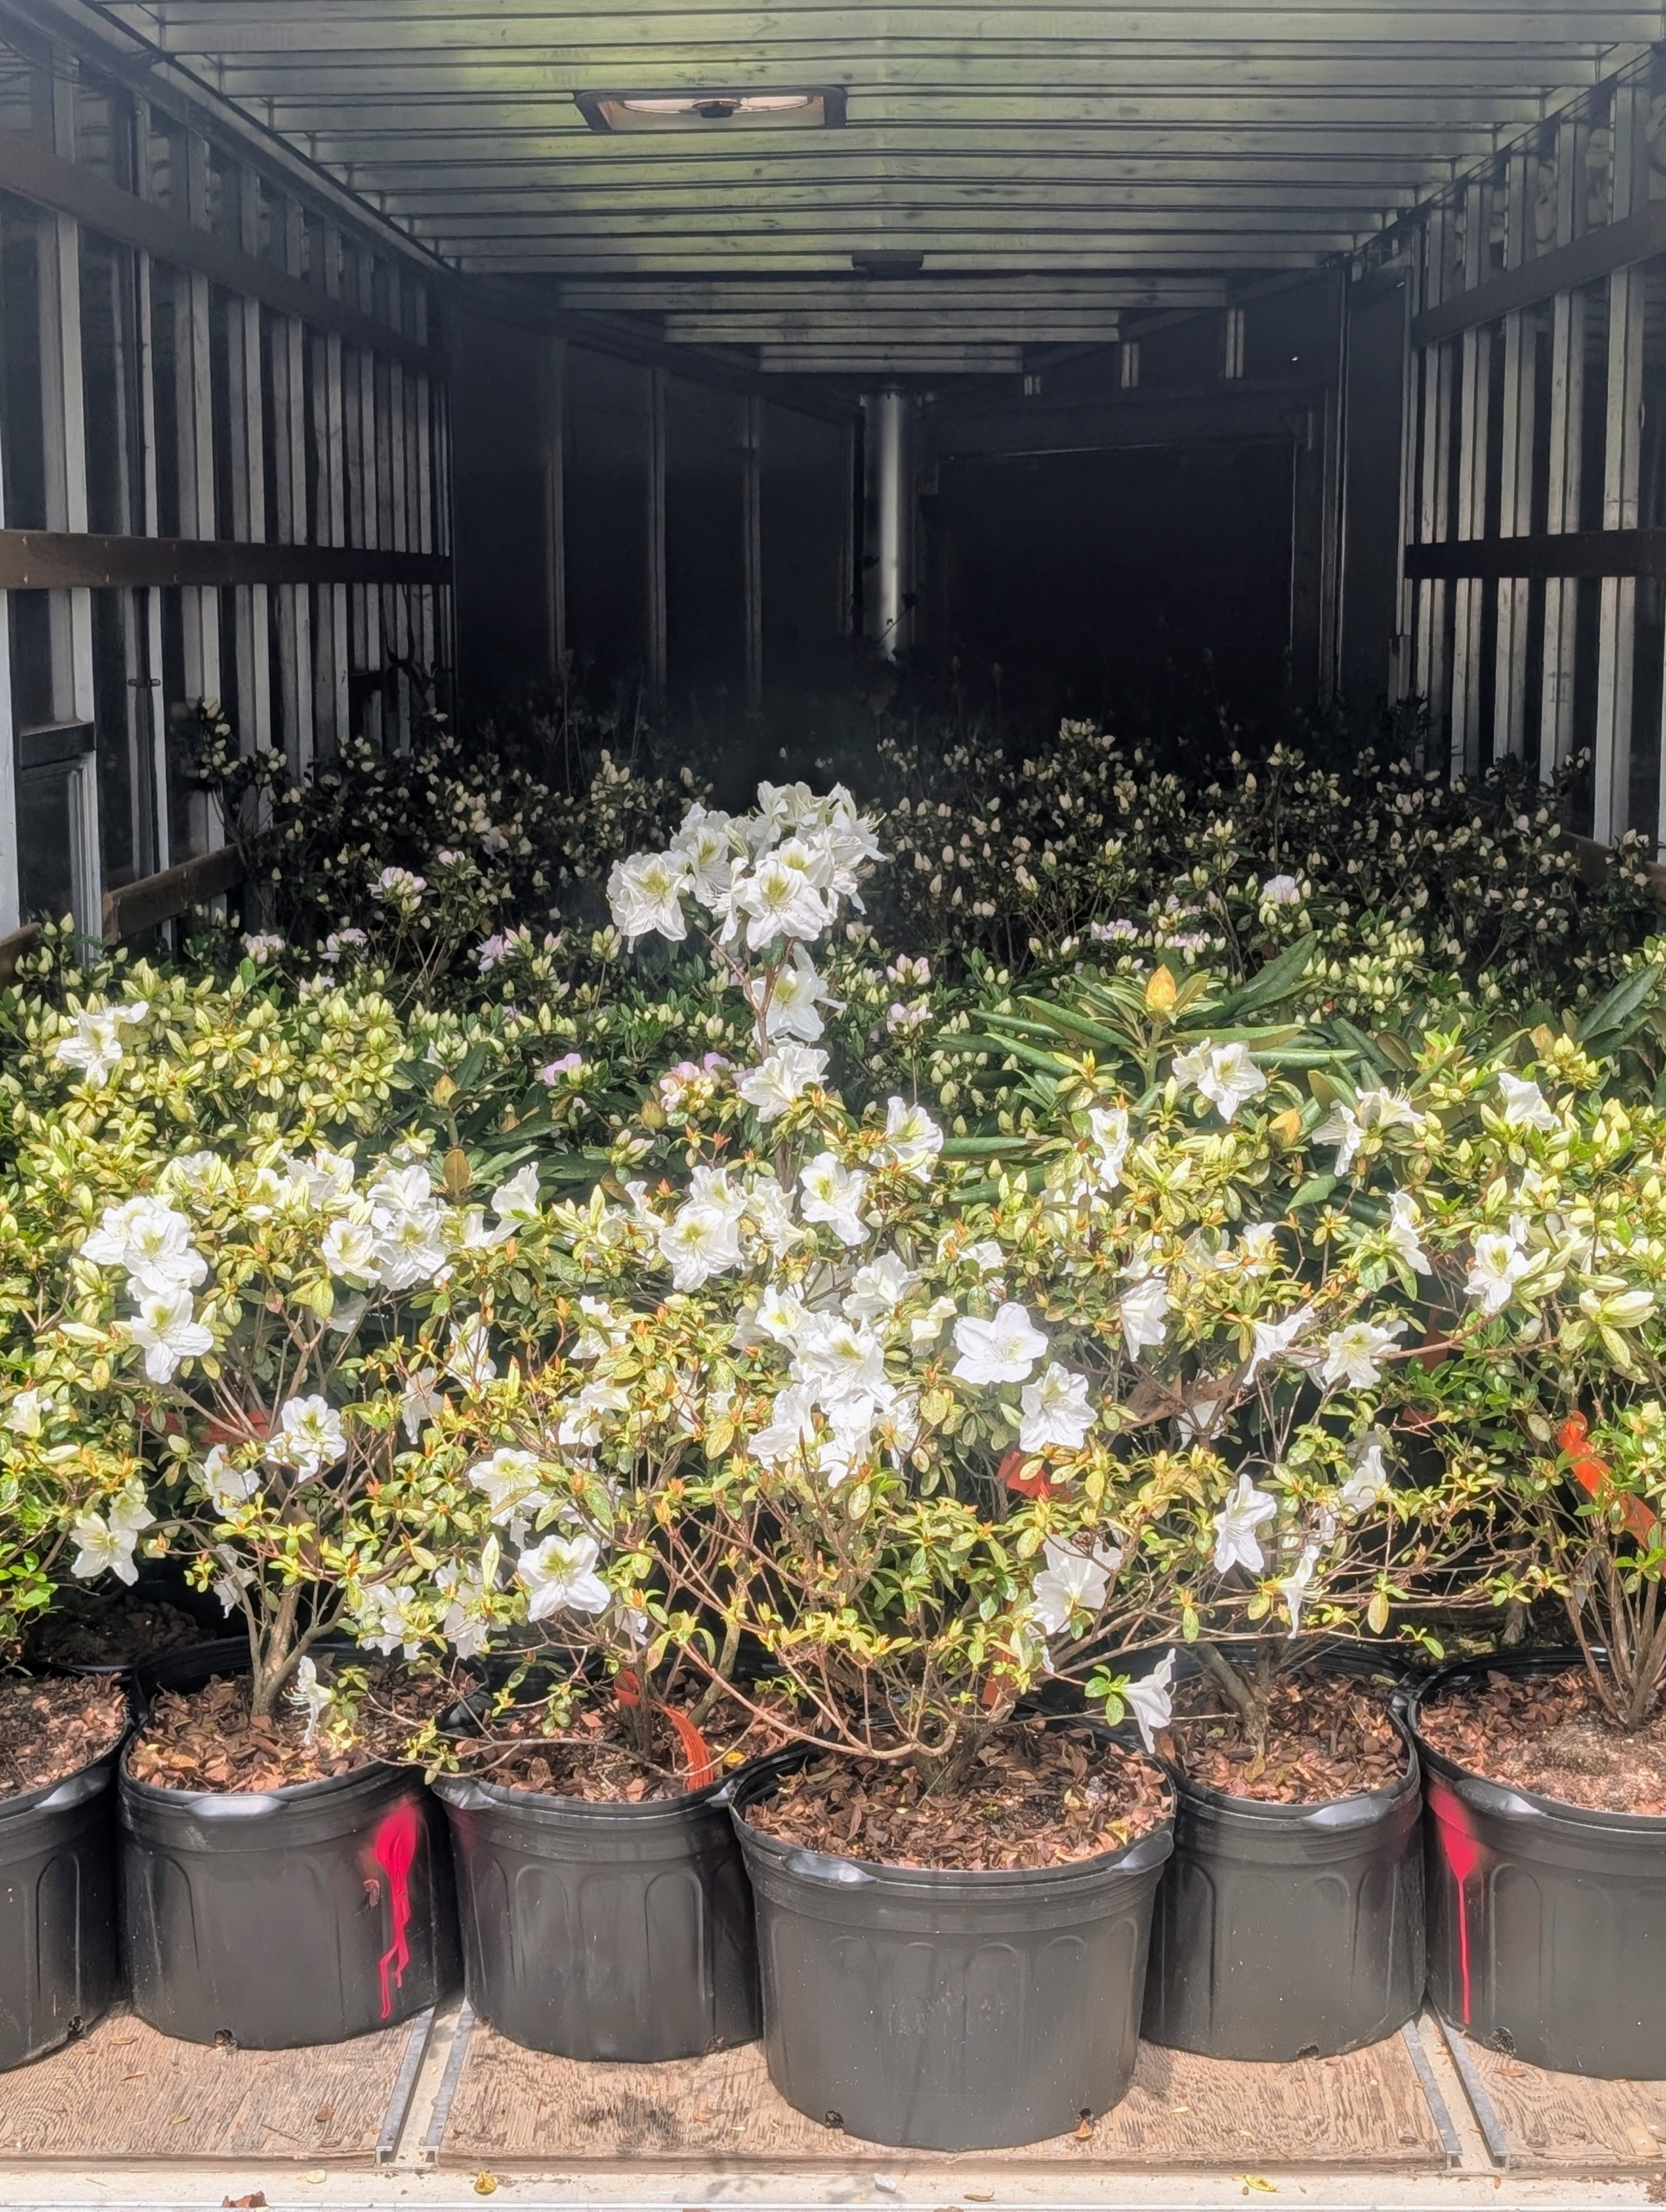
All my plants are loaded up in my large trailer. I also picked up more than 90 white azaleas for my good friend, Stephen Sills. We’ll both be busy in the gardens this weekend! I’ll share more photos as mine are planted. You’re going to love where they’re going – just wait and see.
The plants around my farm are growing so beautifully - there are gorgeous spring blooms in every garden.
Every day I see something new. Trees are leafing out and flowers are bursting with color and energy - Fritillaria, Leucojum, Muscari, the trout lilies, the tulips, the Mertensia with their charming blue flowers that open from pink-tinged buds, the large blooms of the Magnolias, and of course, lots and lots of daffodils.
Here are some photos, enjoy.
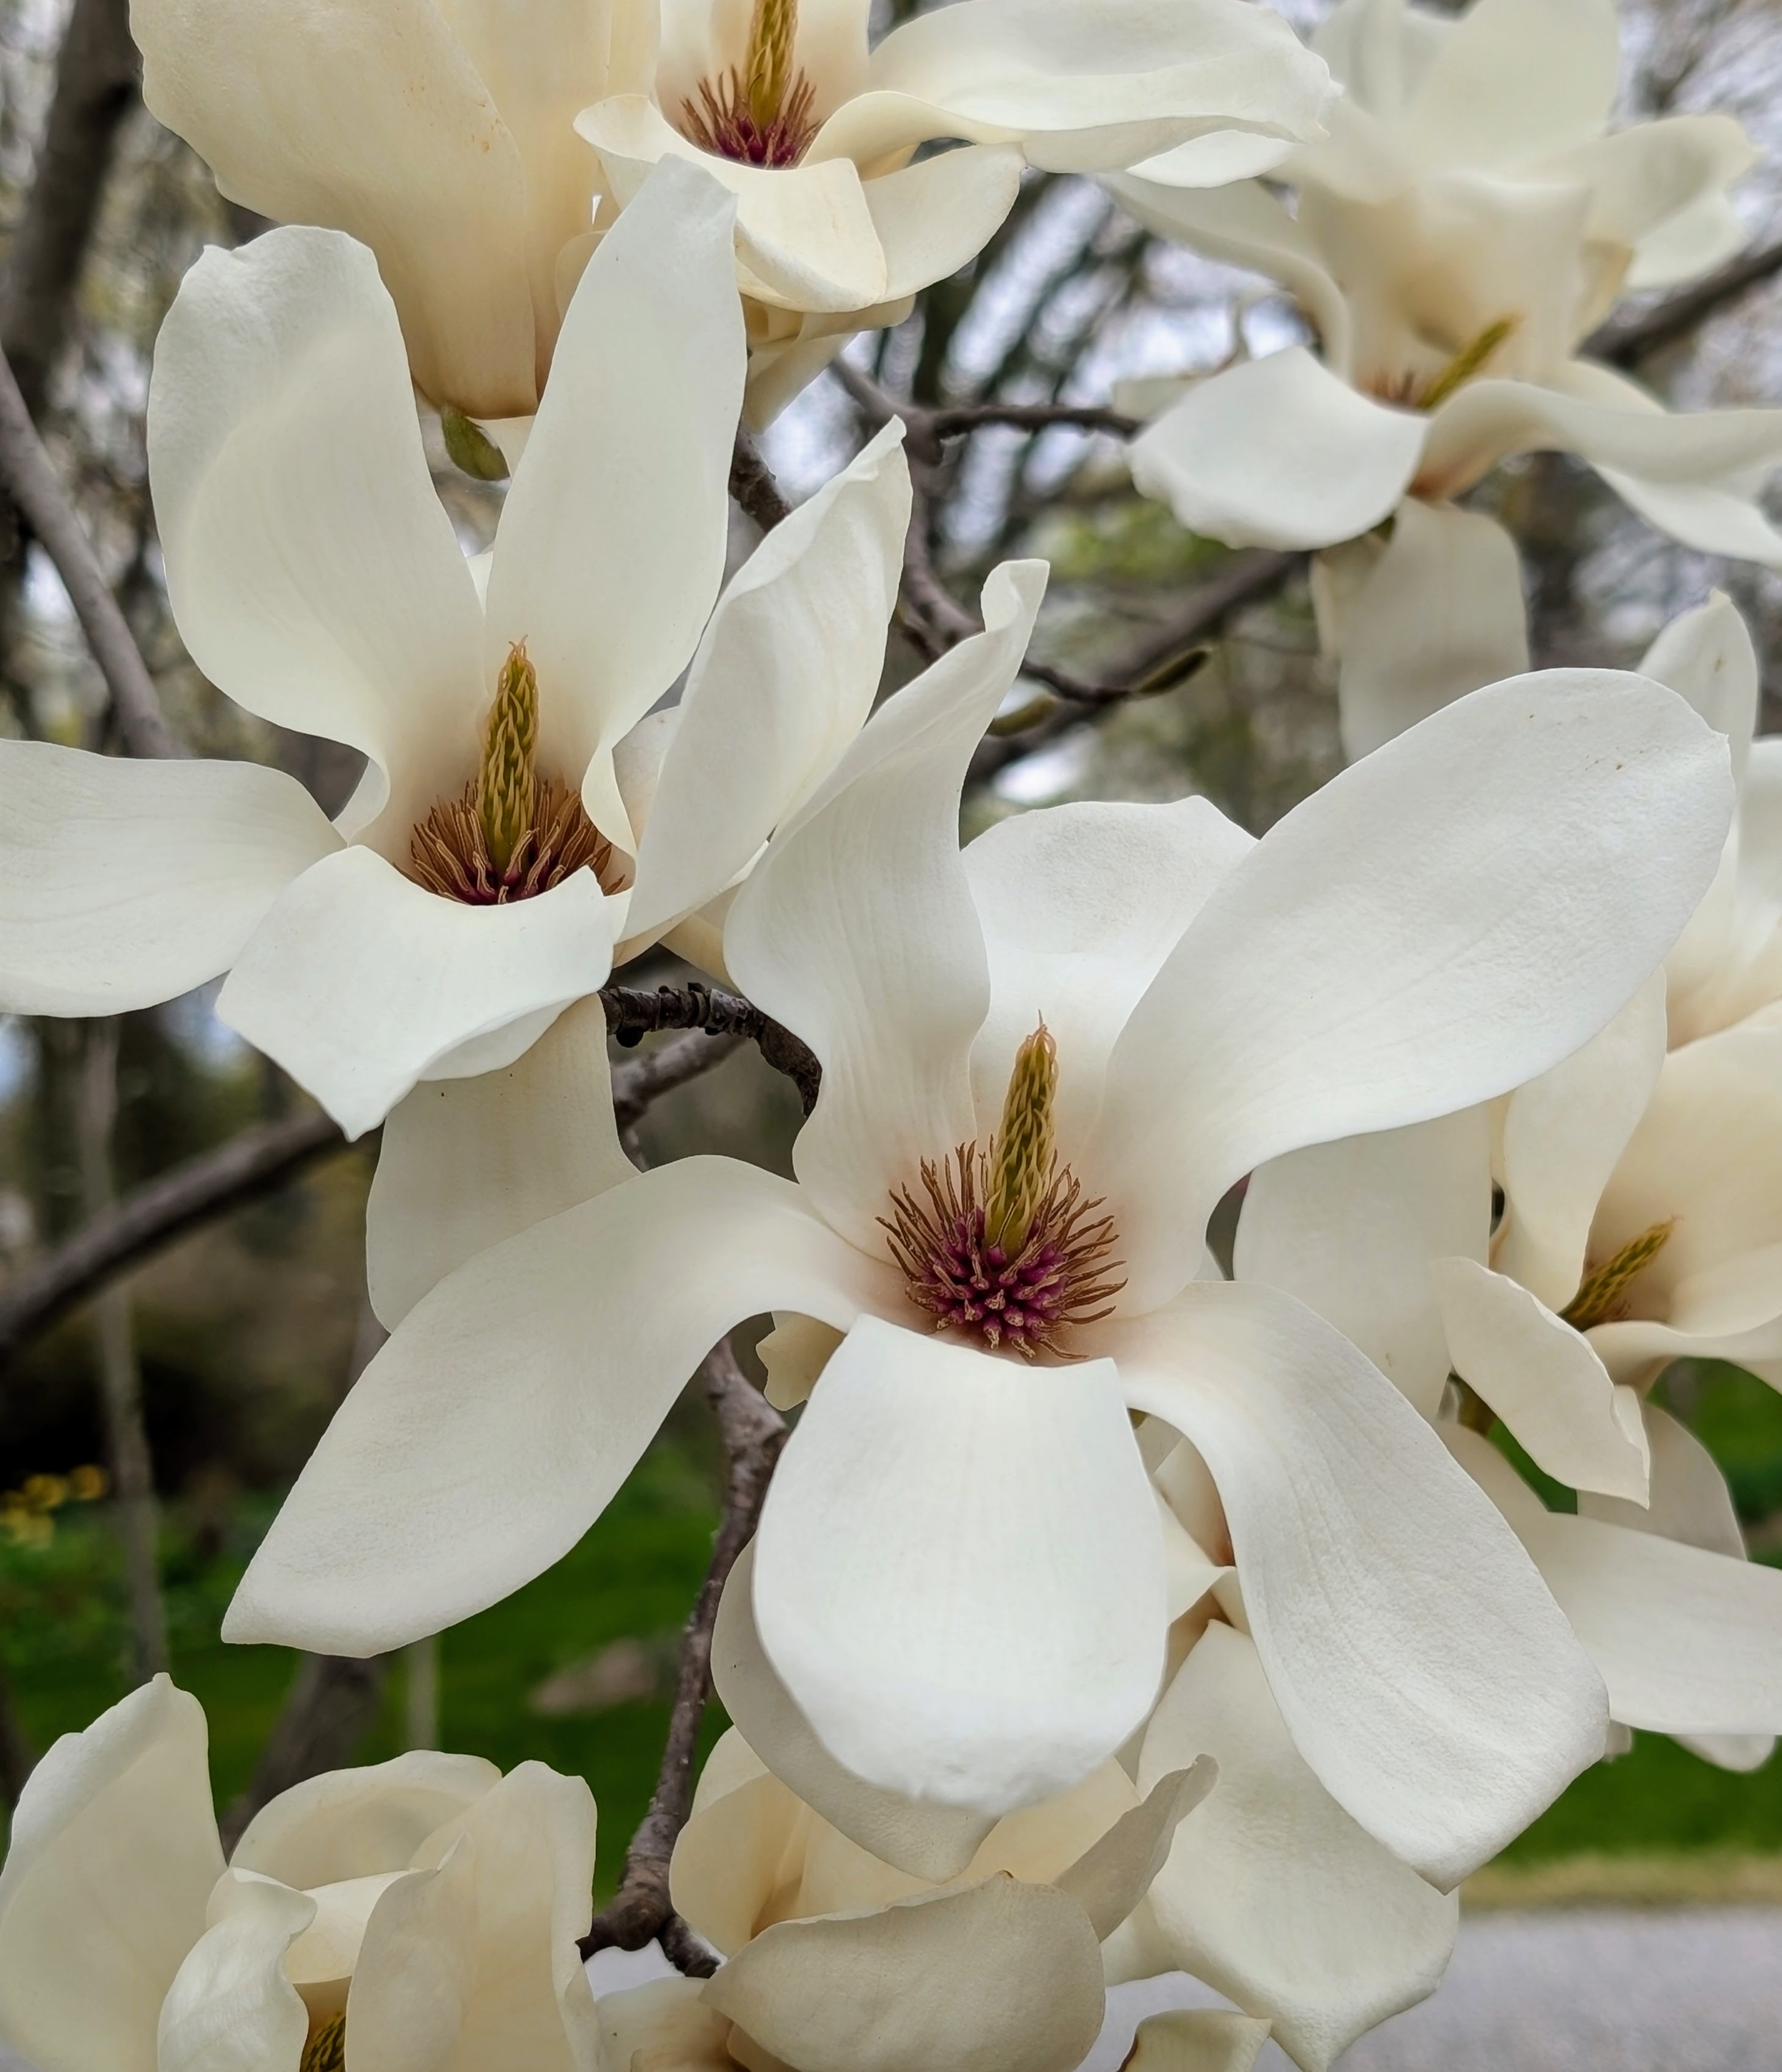
Some of the early season blooms are the big flowers of the magnolia trees. Magnolia is a large genus of about 210 flowering plant species in the subfamily Magnolioideae. It is named after French botanist Pierre Magnol. Growing as large shrubs or trees, they produce showy, fragrant flowers that are white, pink, red, purple or yellow, which may be bowl-shaped or star-shaped.
I have these magnolias in one corner of my farm not far from my tree peony garden.
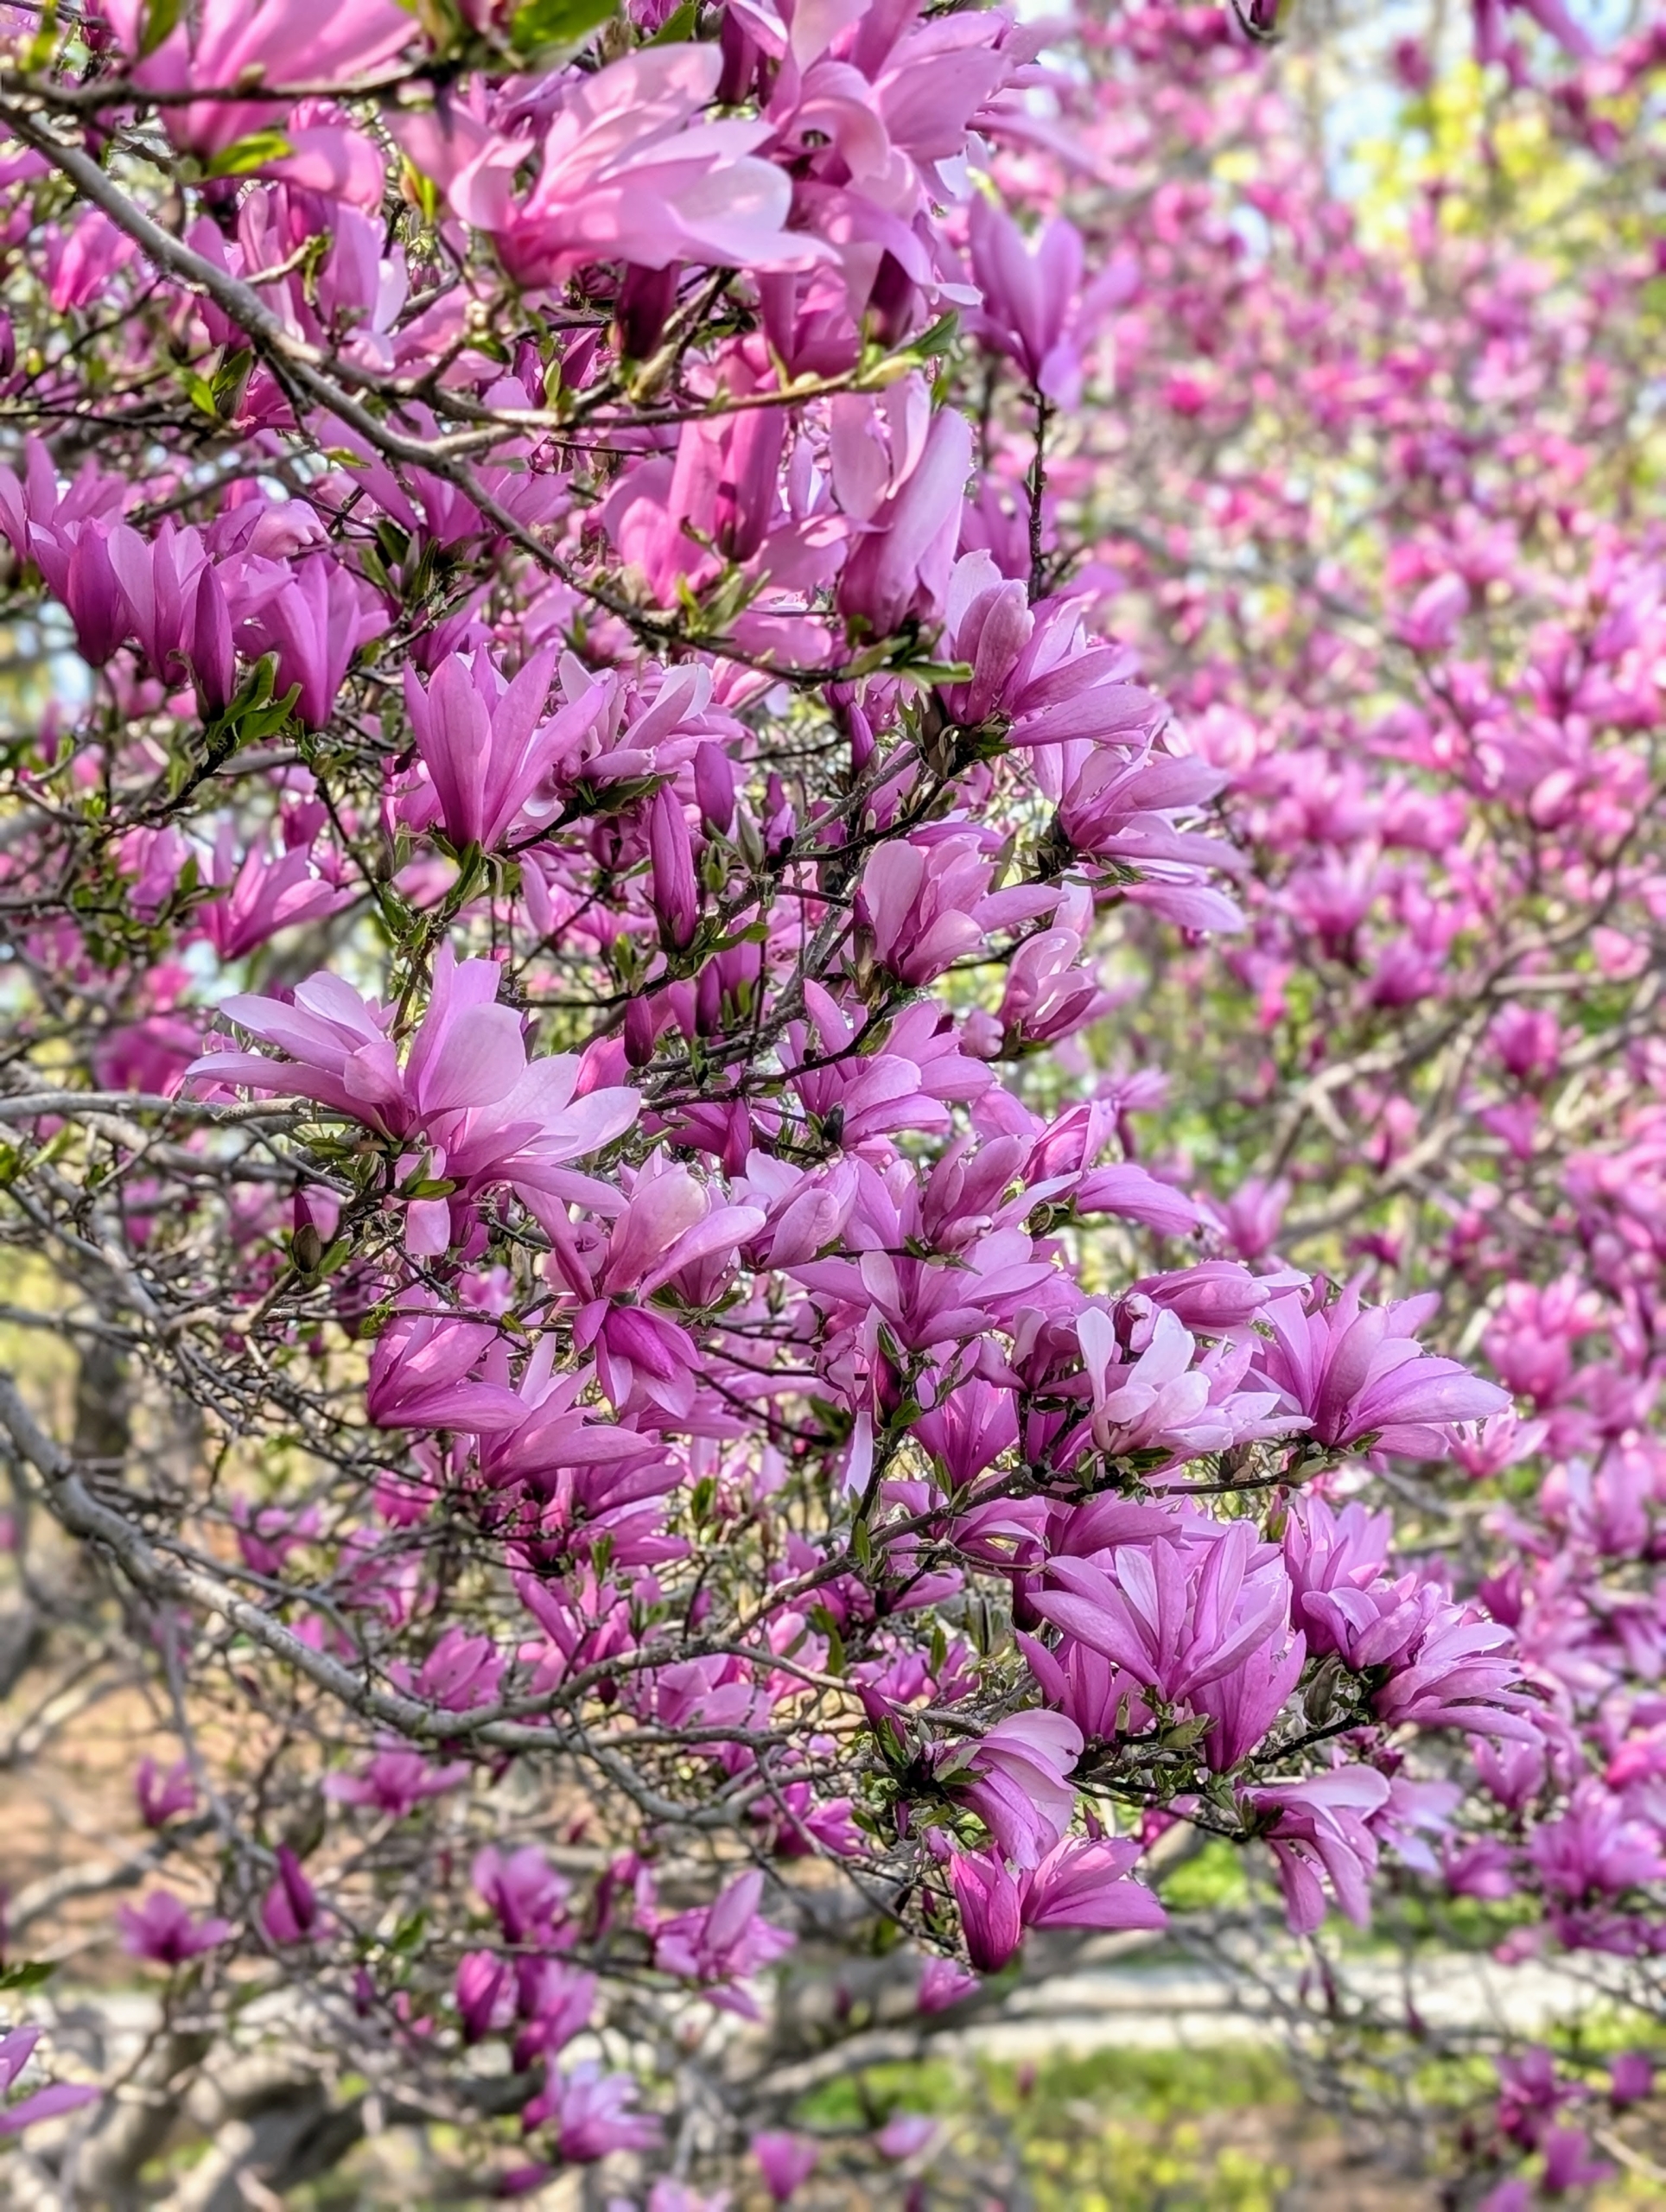
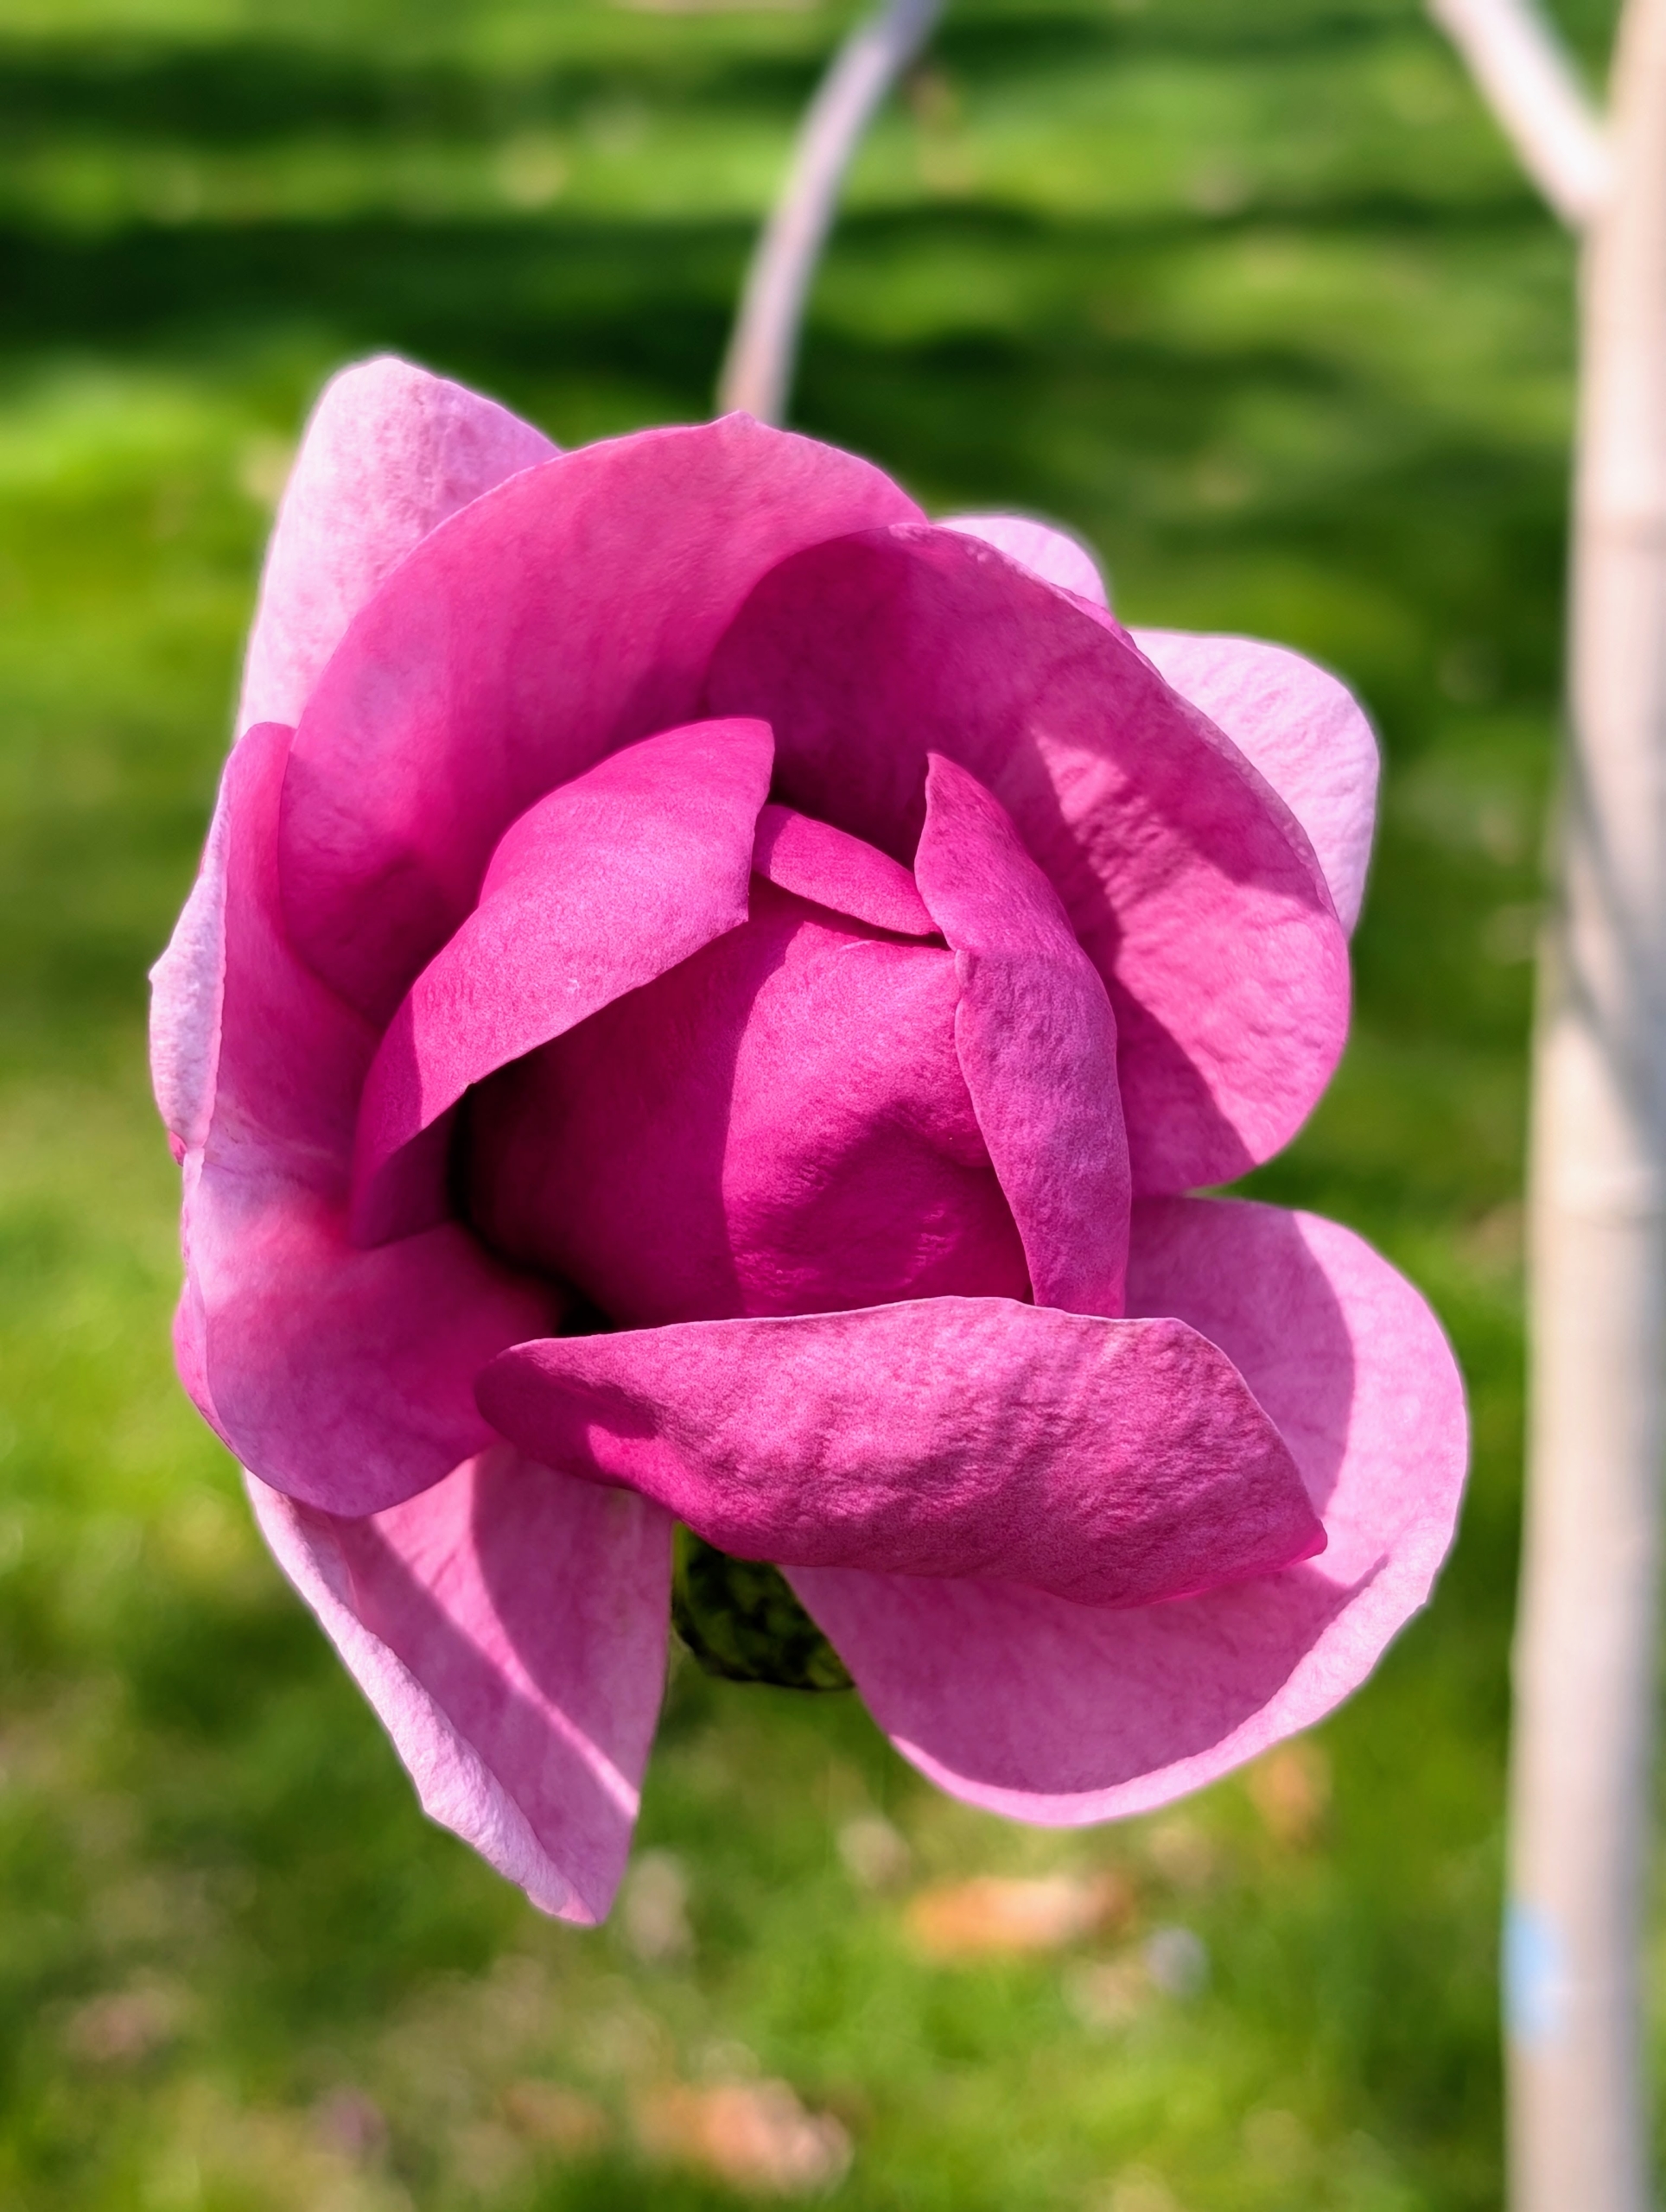
Last year, I planted several darker pink magnolias with these large flowers. The variety is called ‘Black Tulip.’
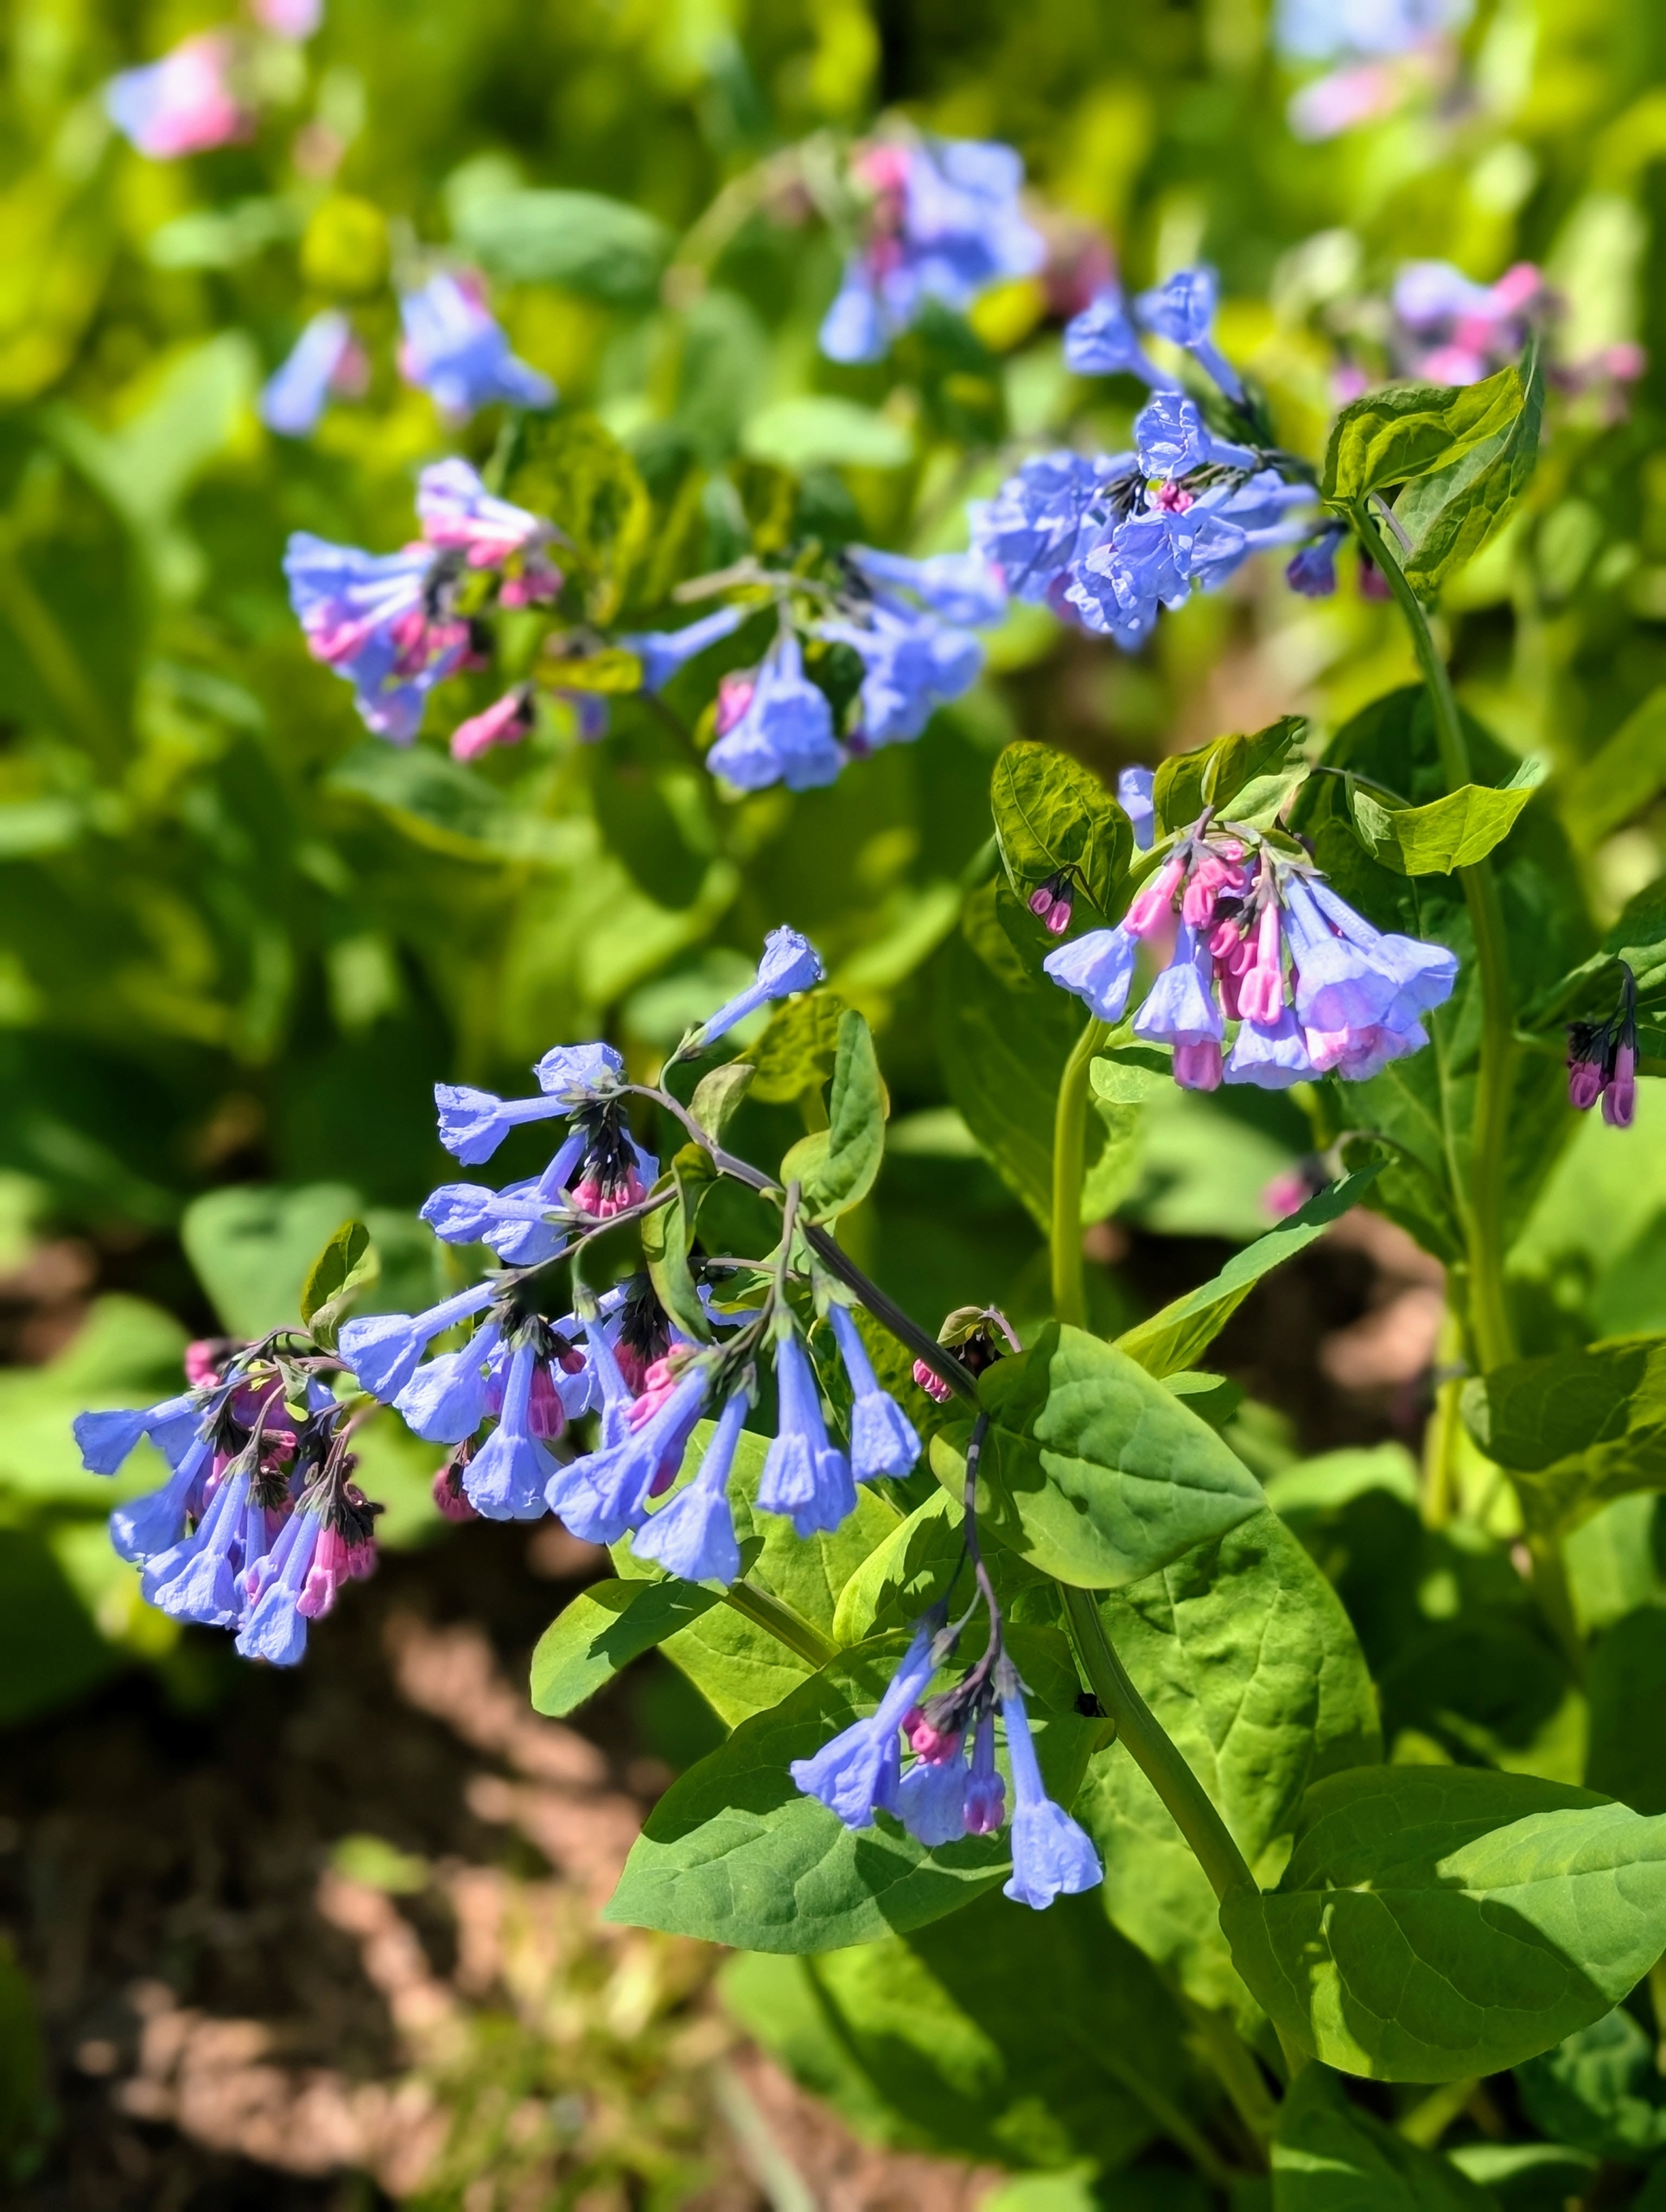
Mertensia virginica, or Virginia bluebell, is a perennial that is native to North America. Its buds are actually pink, but the flowers are blue. They can grow in any garden and bloom in early to mid spring and continue blooming through early to mid summer.
These plants grow best in deep to partial shade and moist, well-drained rich humus. They self-seed and colonize, so there are more in the garden every spring.
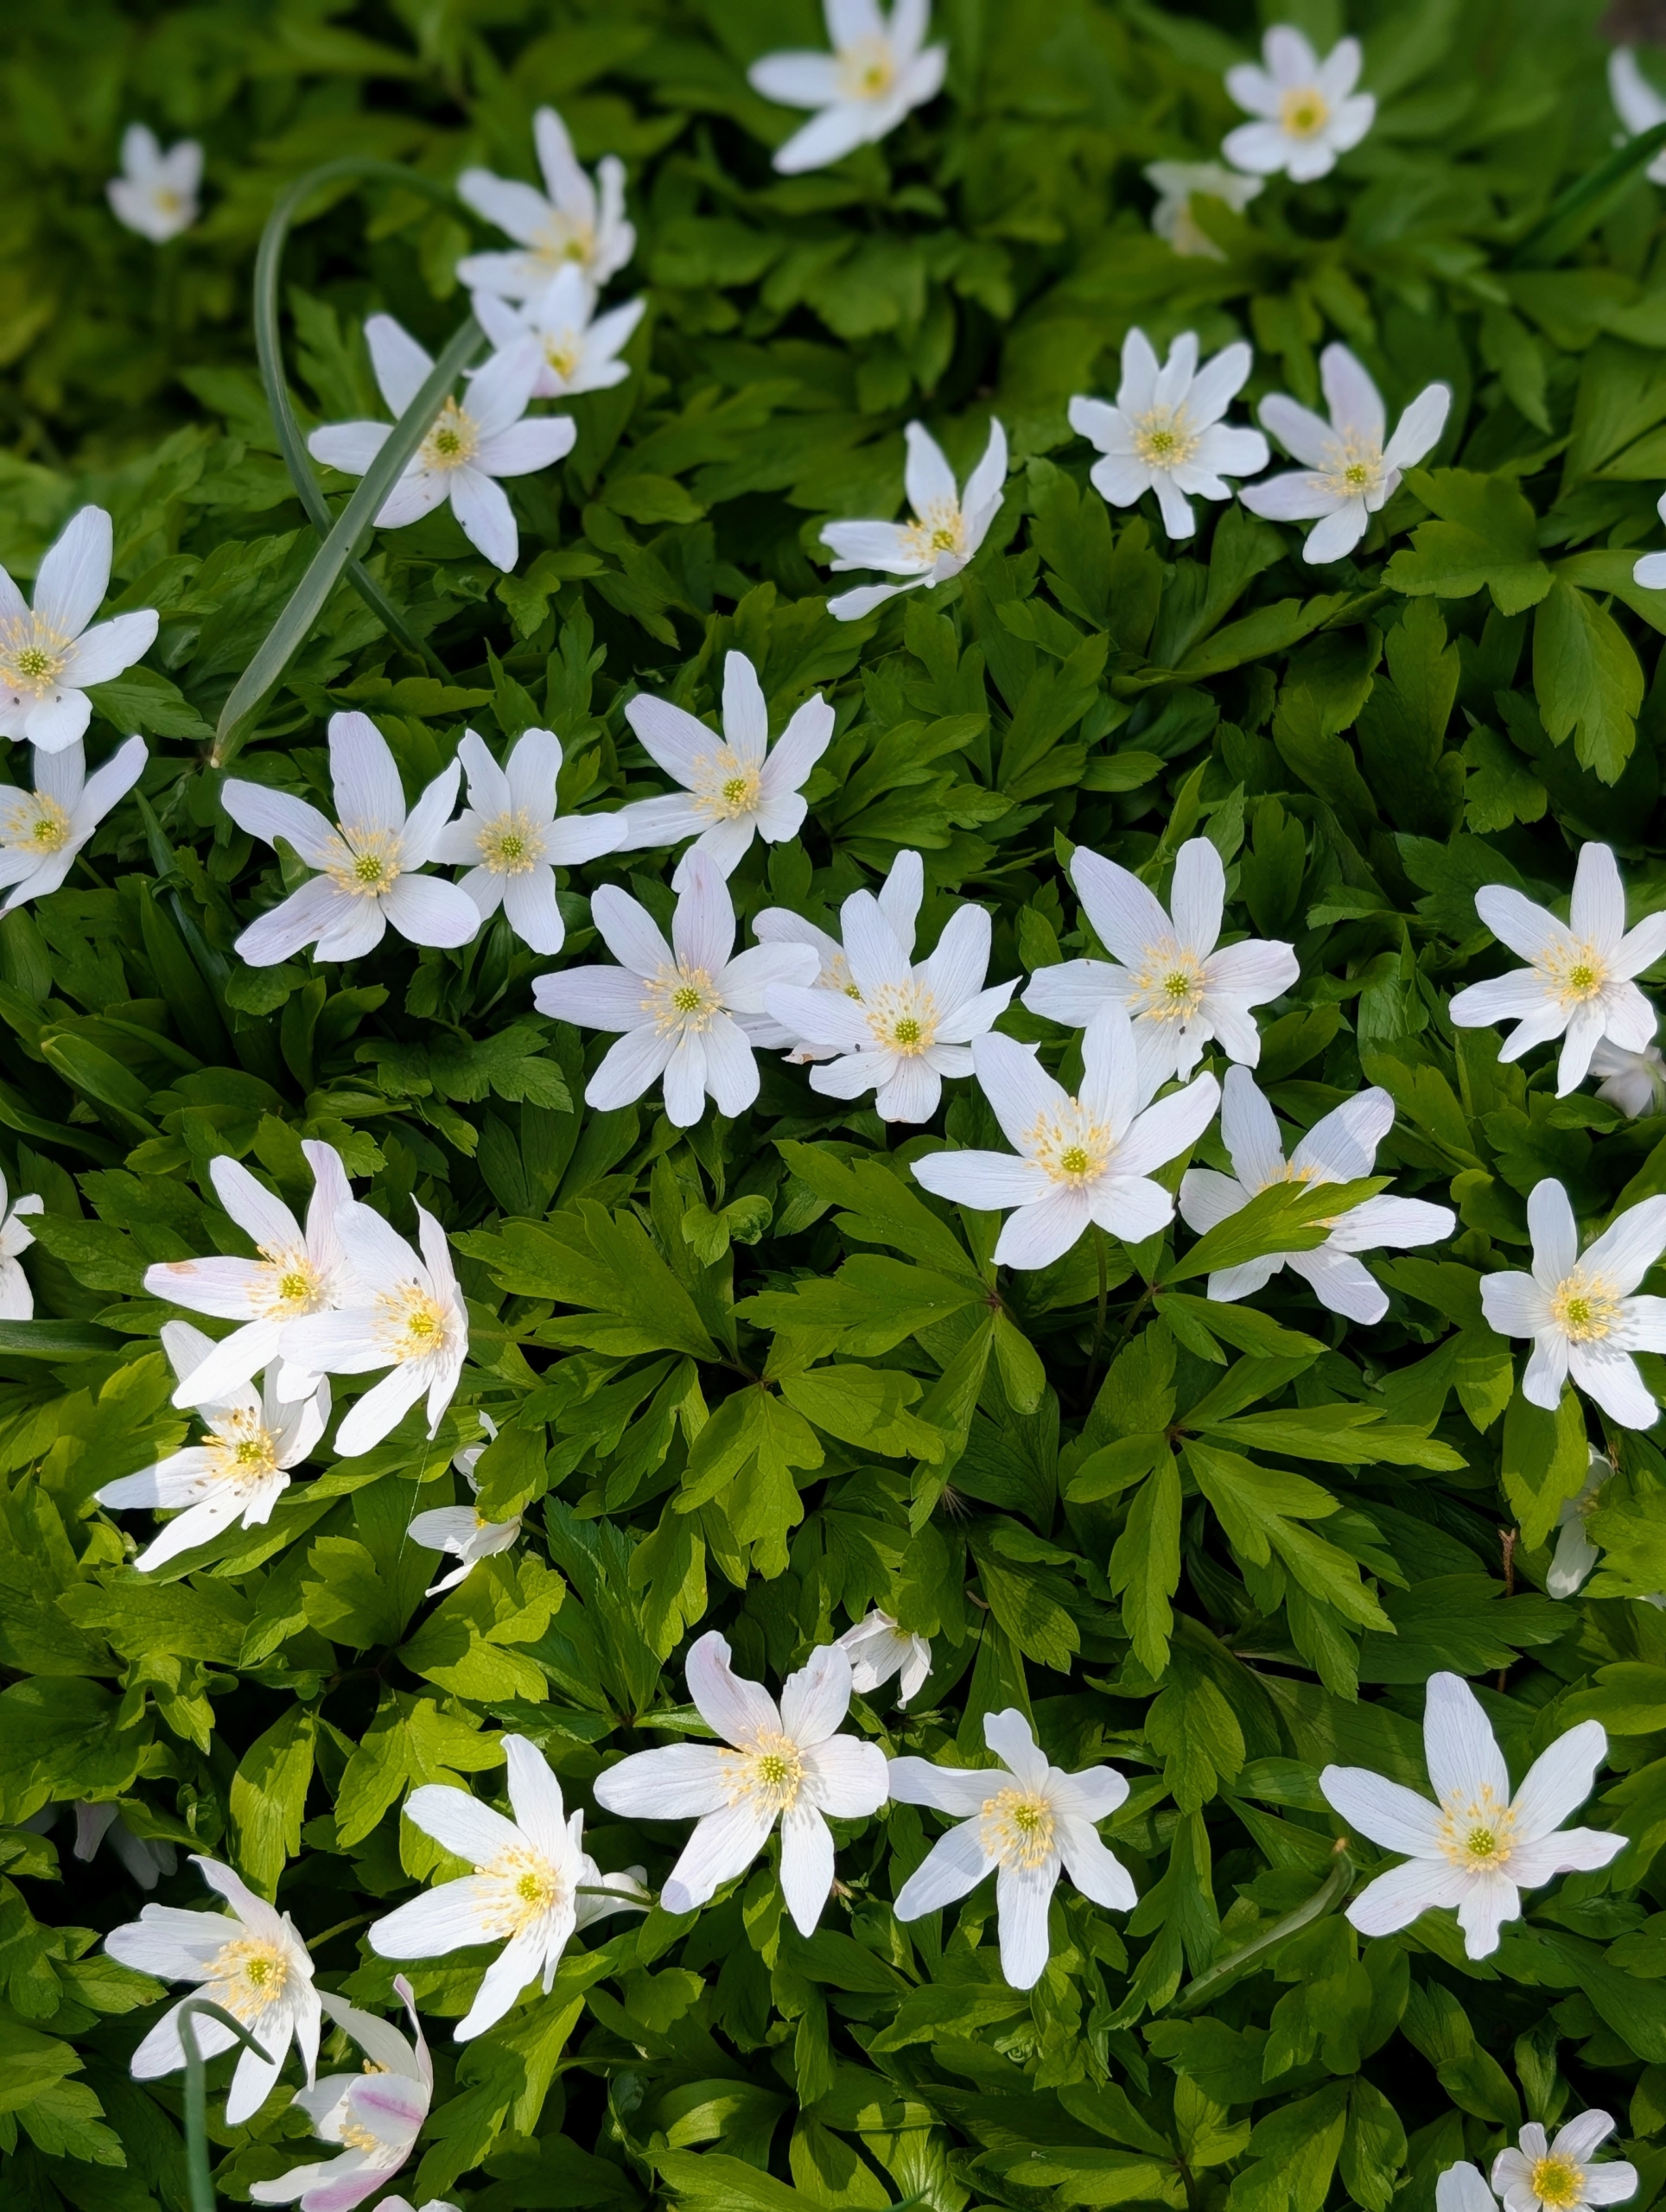
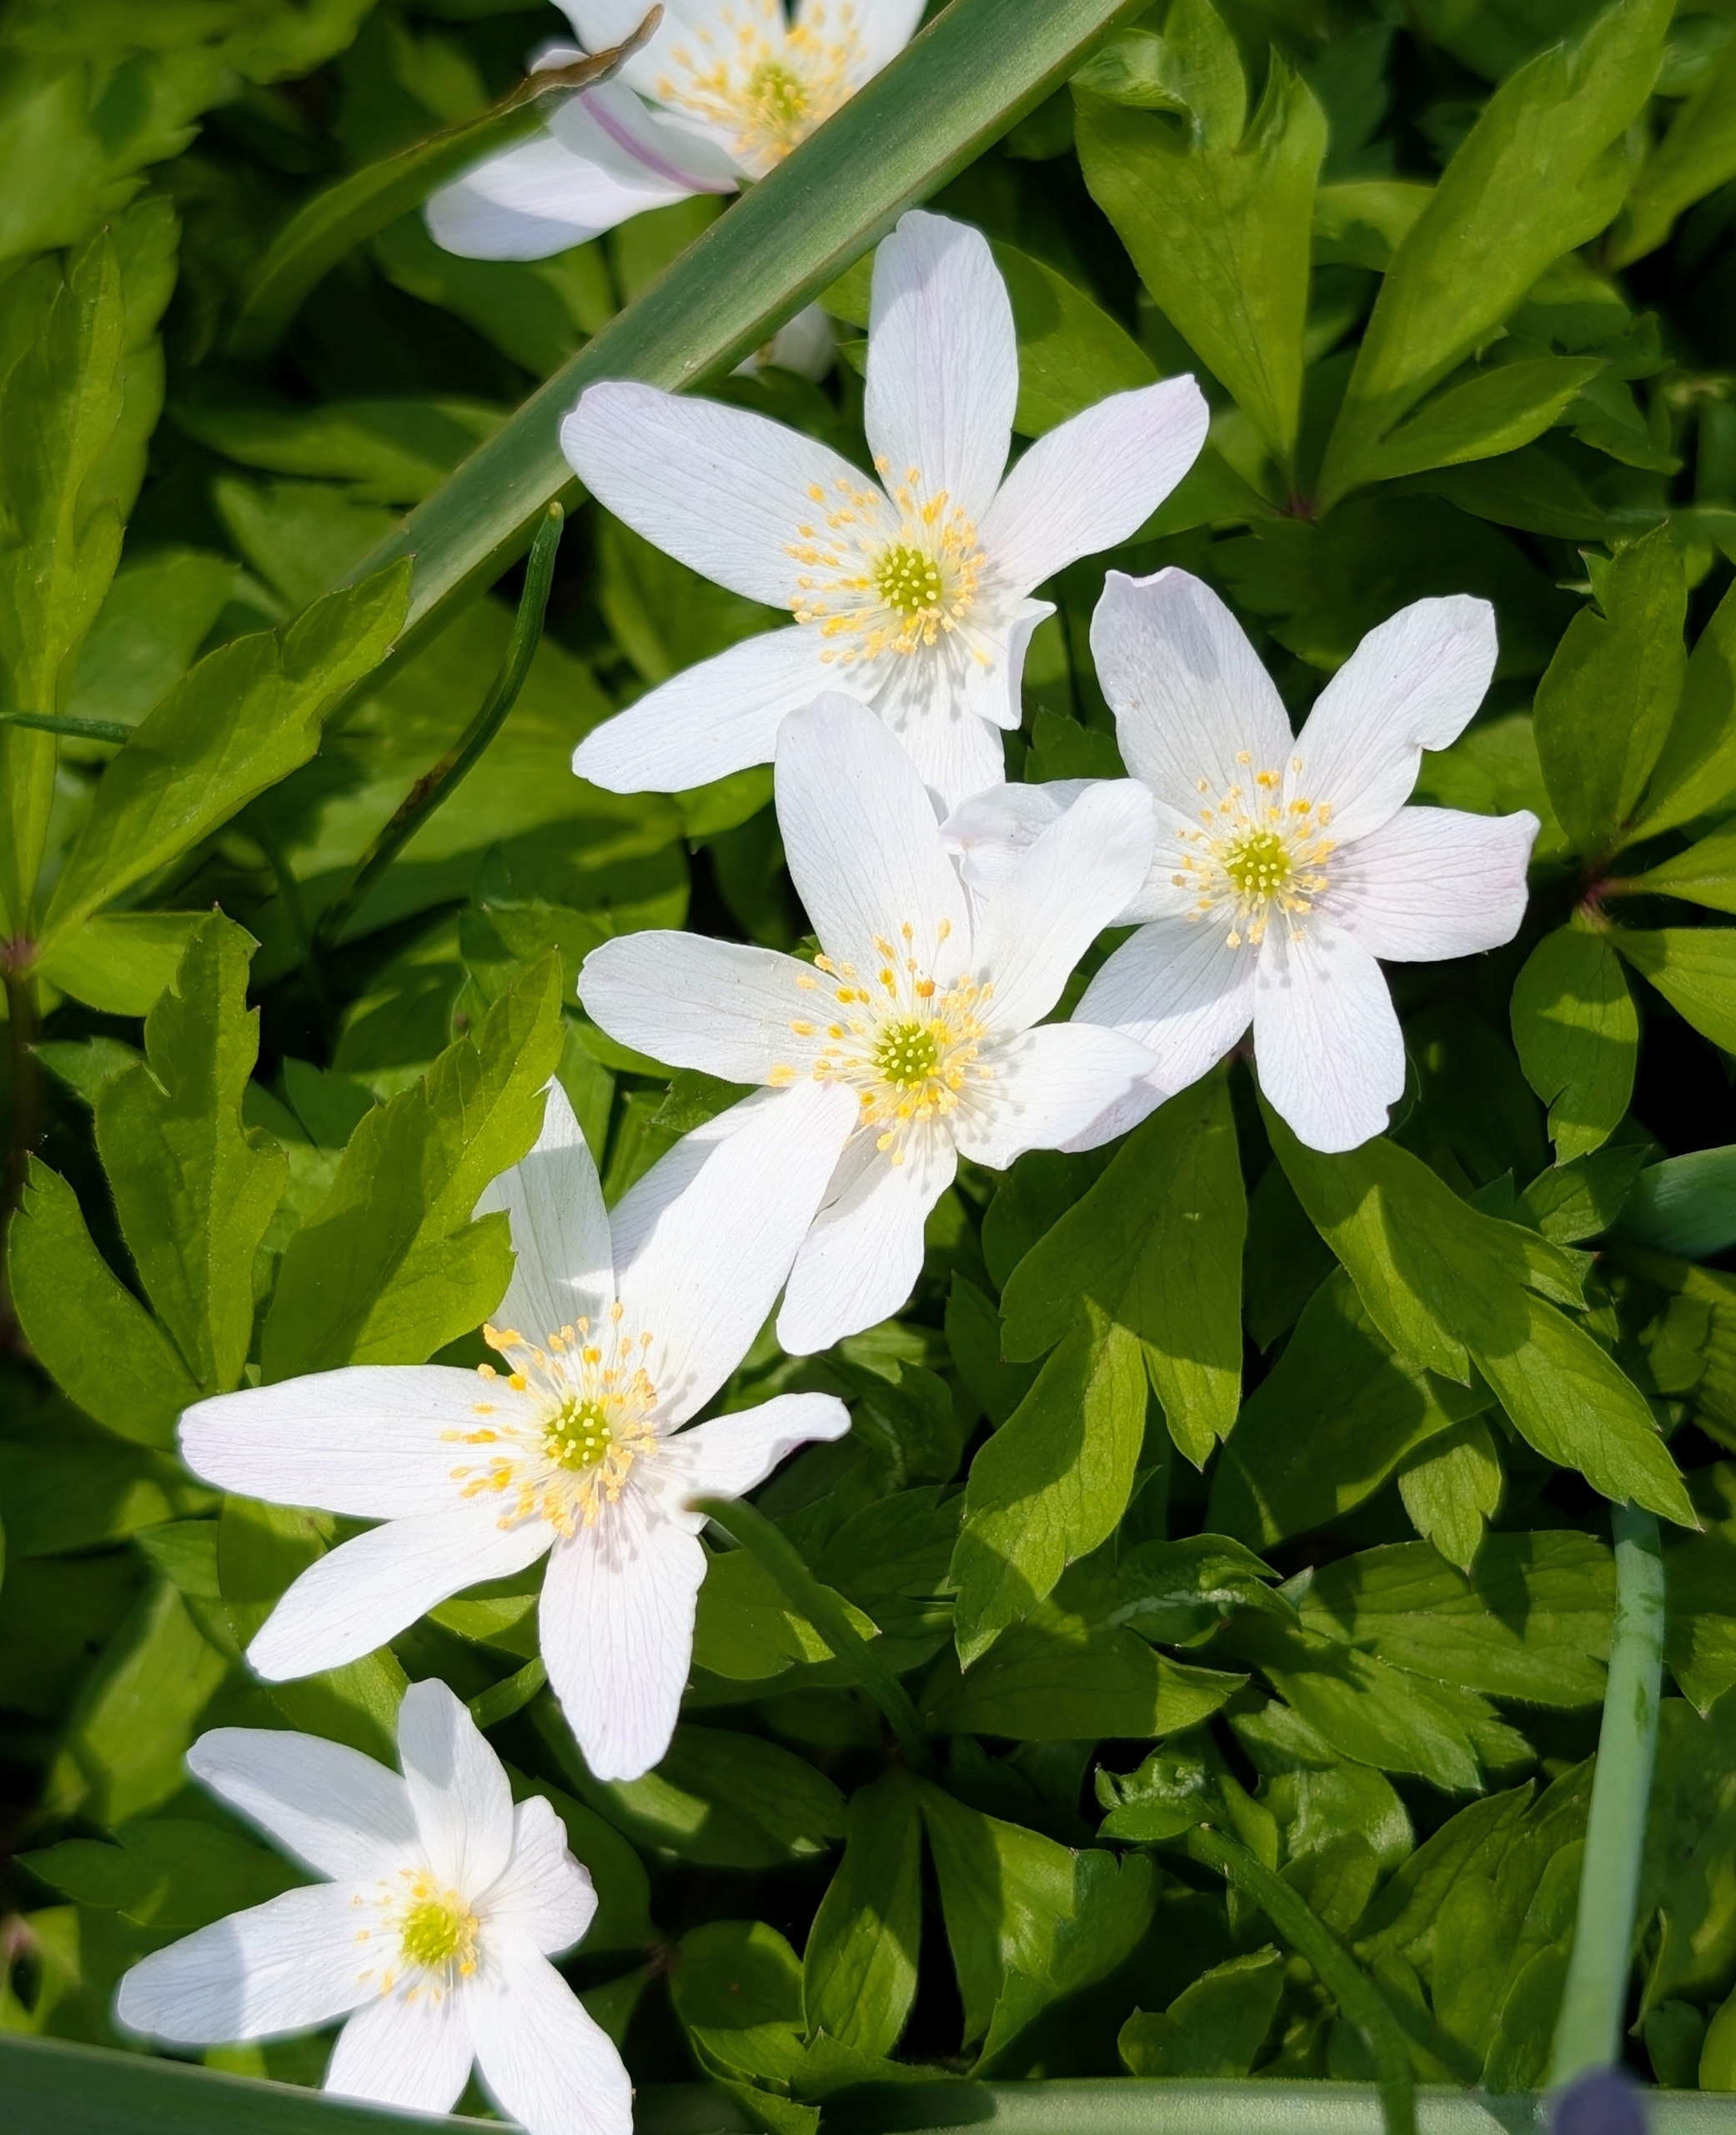
This lovely woodland plant is the wood anemone from the Buttercup family. They are cheerful and hardy ground covering plants.
Each flower features white petal-like structures called sepals and yellow centers.
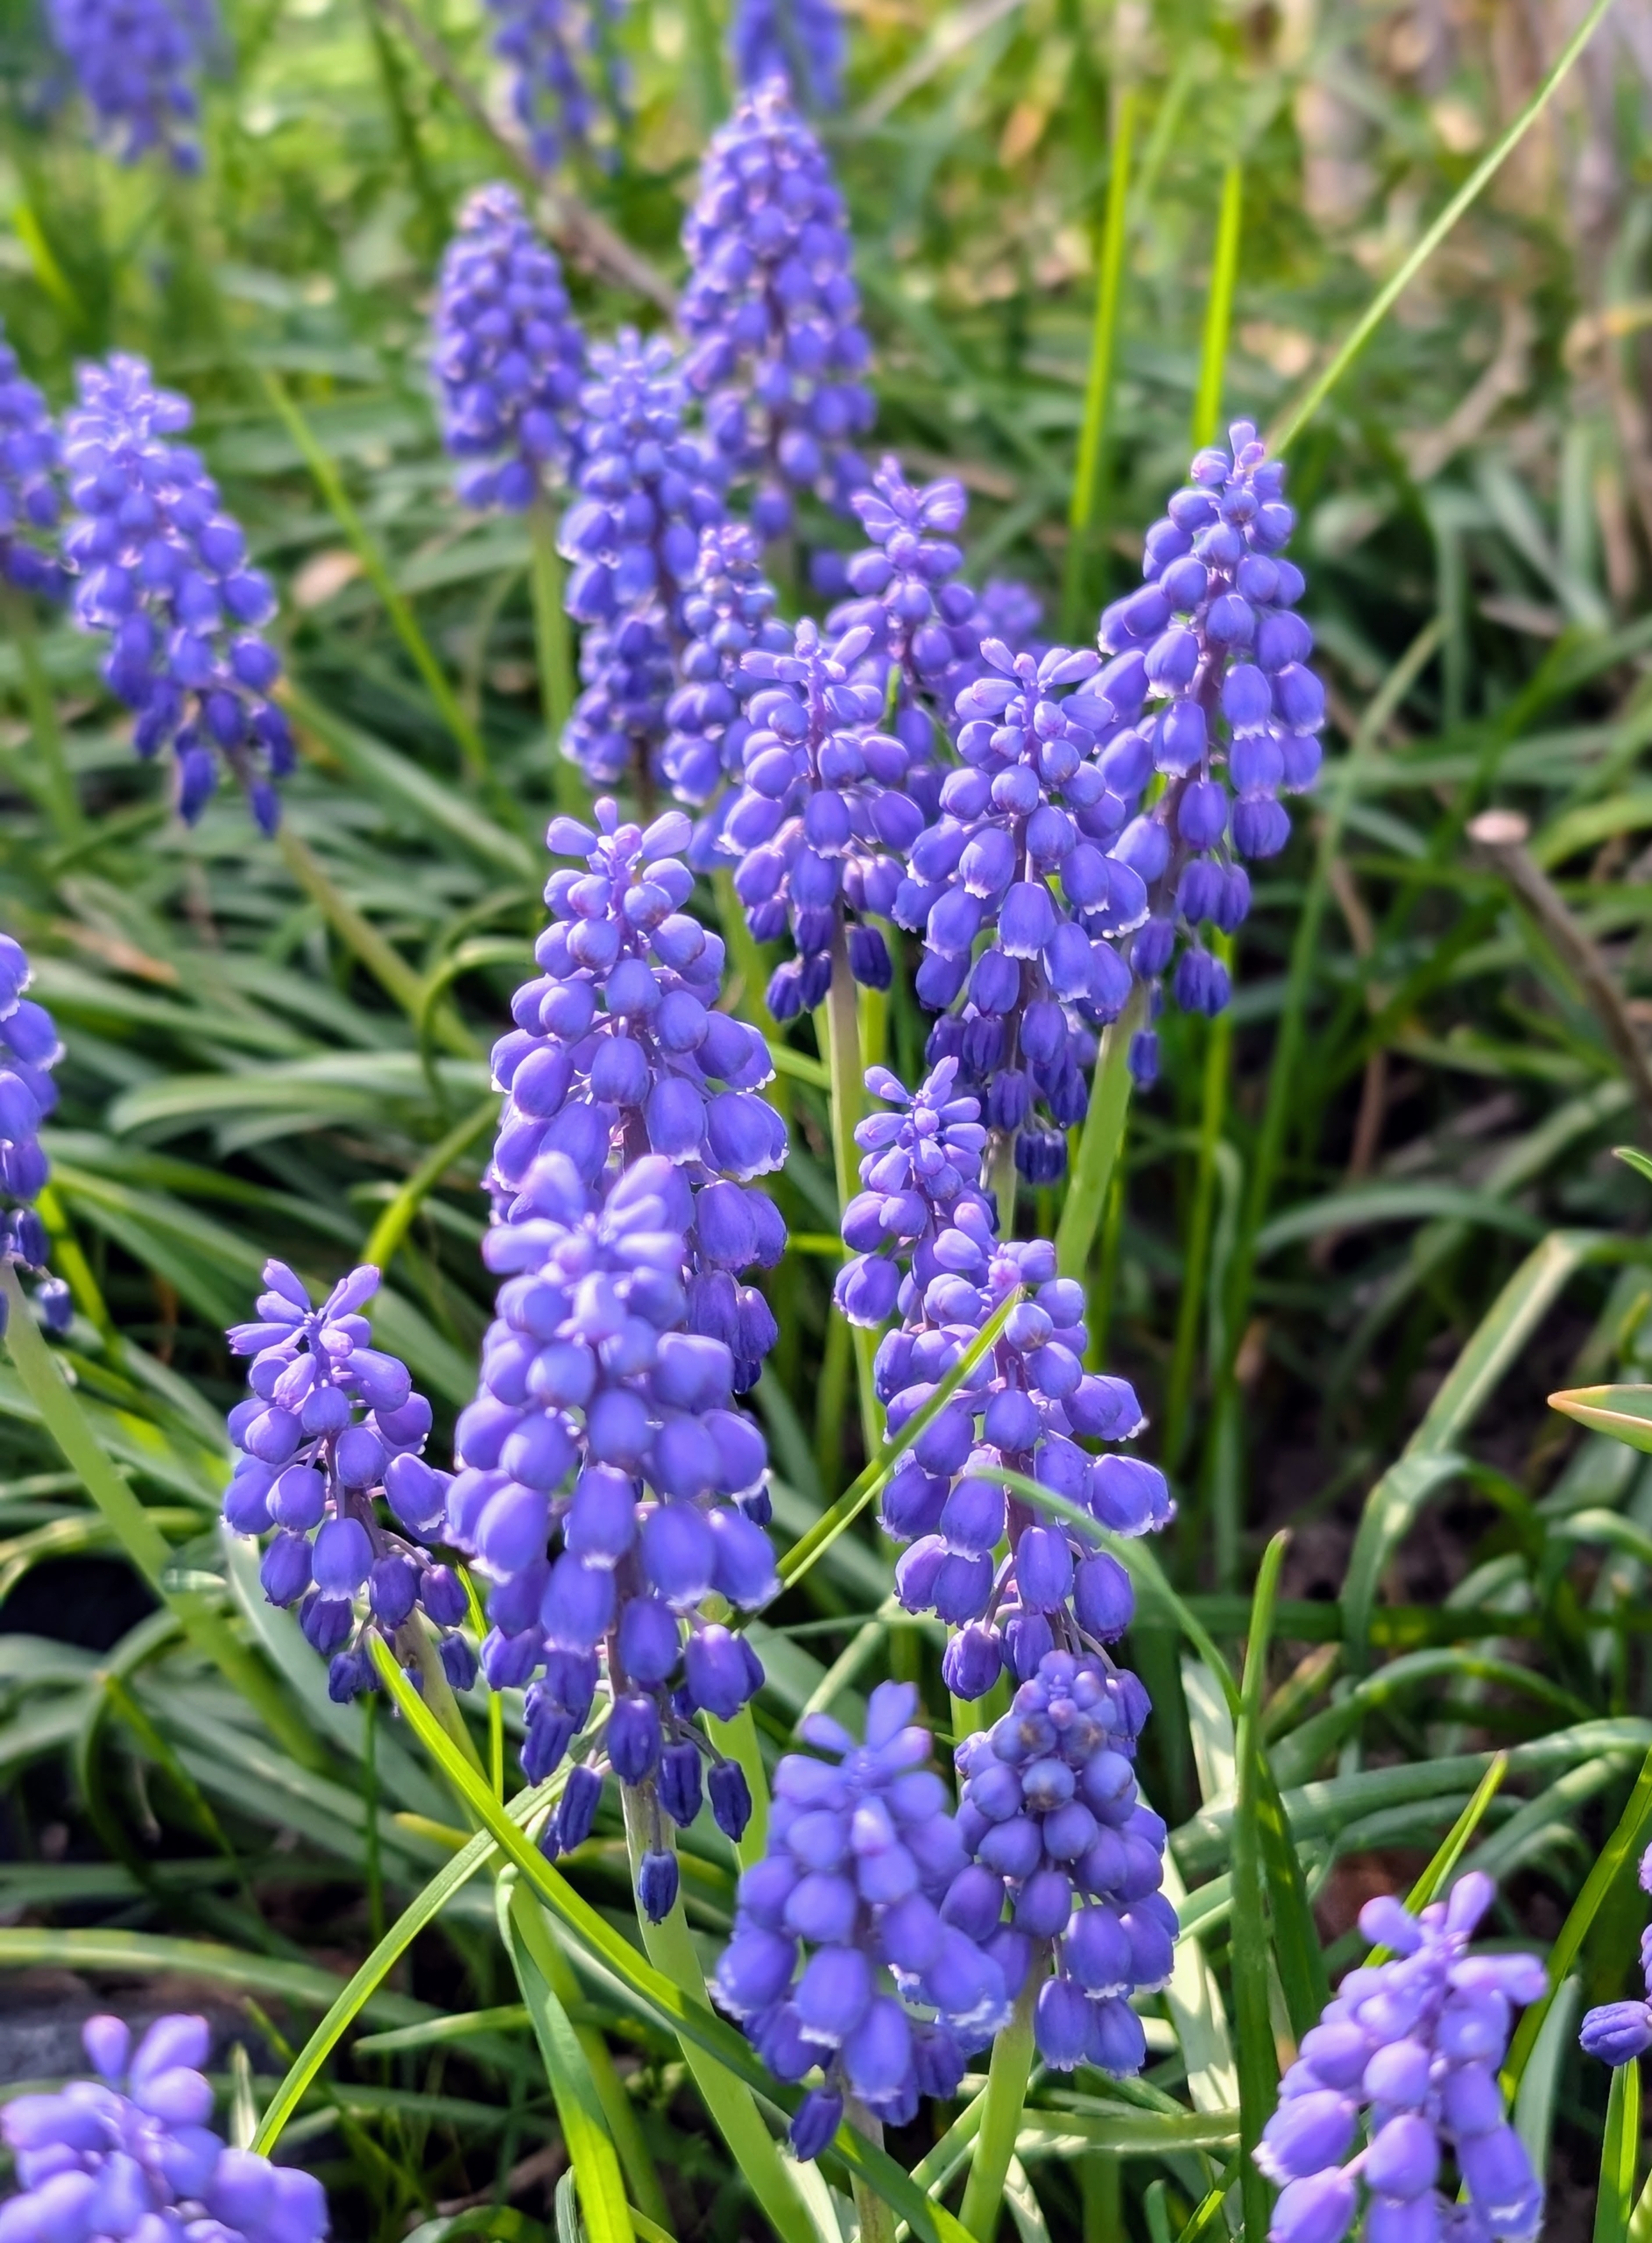
Muscari is a genus of perennial bulbous plants native to Eurasia that produce spikes of dense, most commonly blue, urn-shaped flowers that look like bunches of grapes in spring. Muscari is also known by its common name for the genus – grape hyacinth.
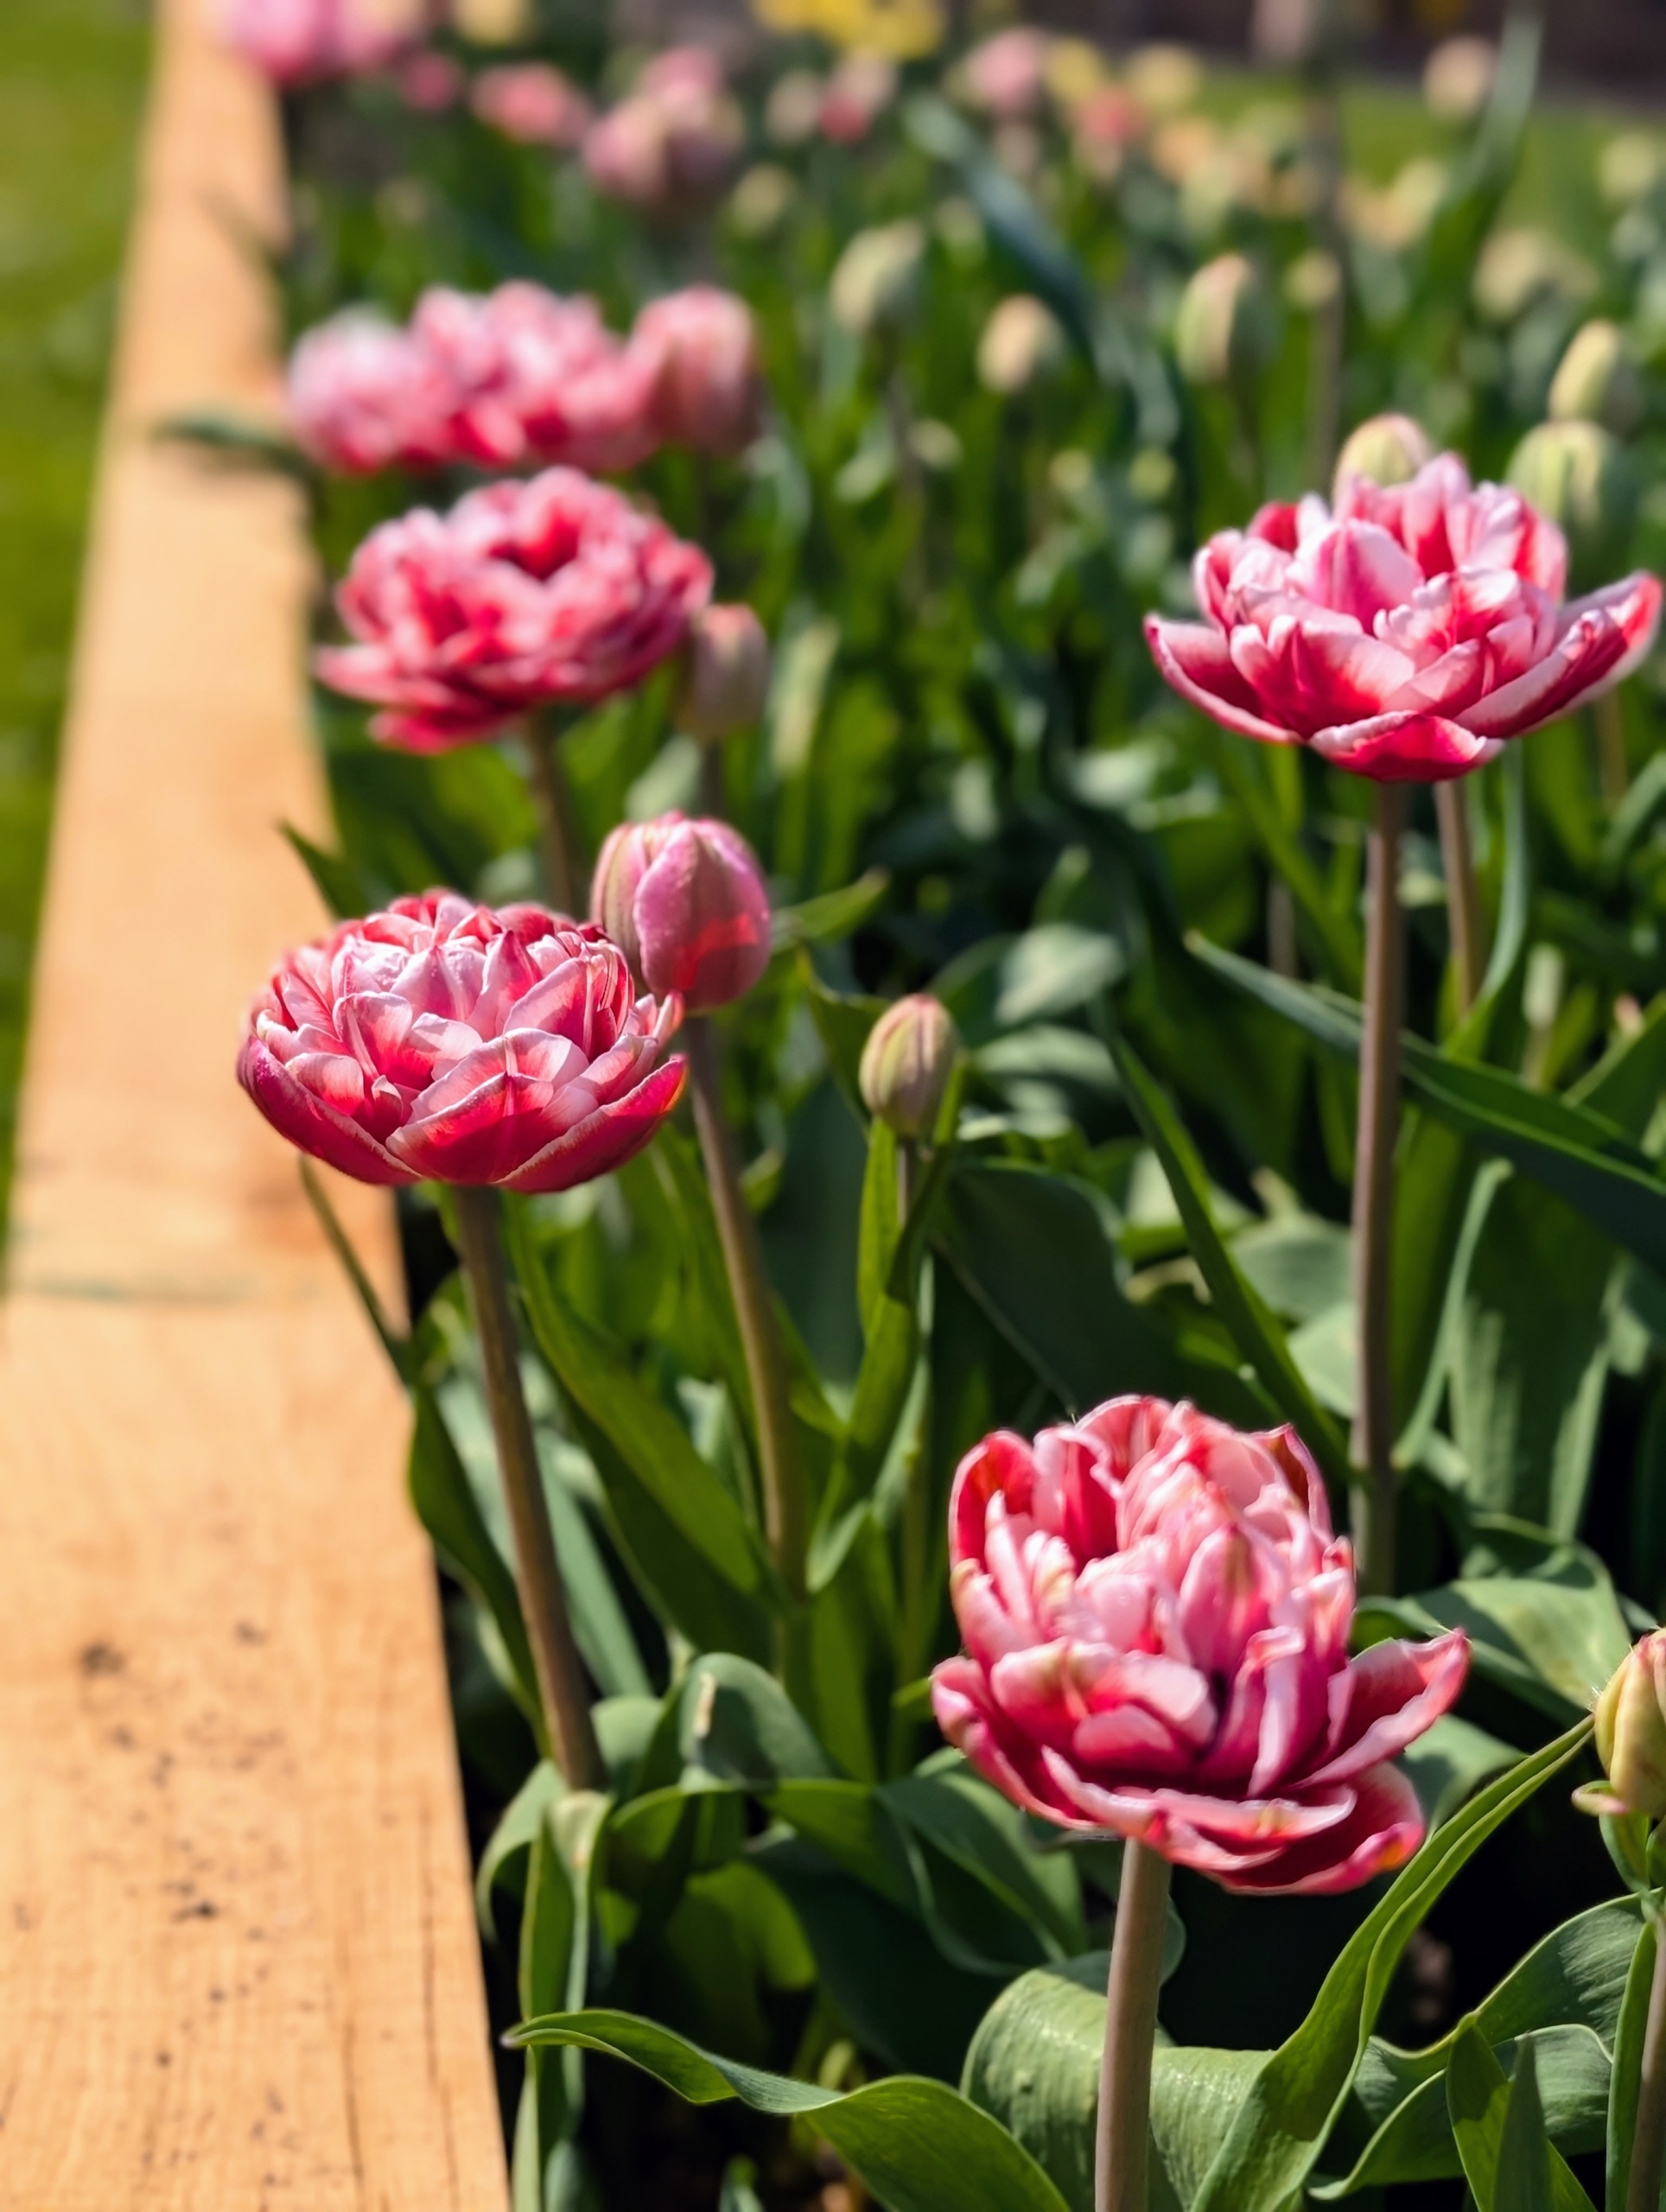
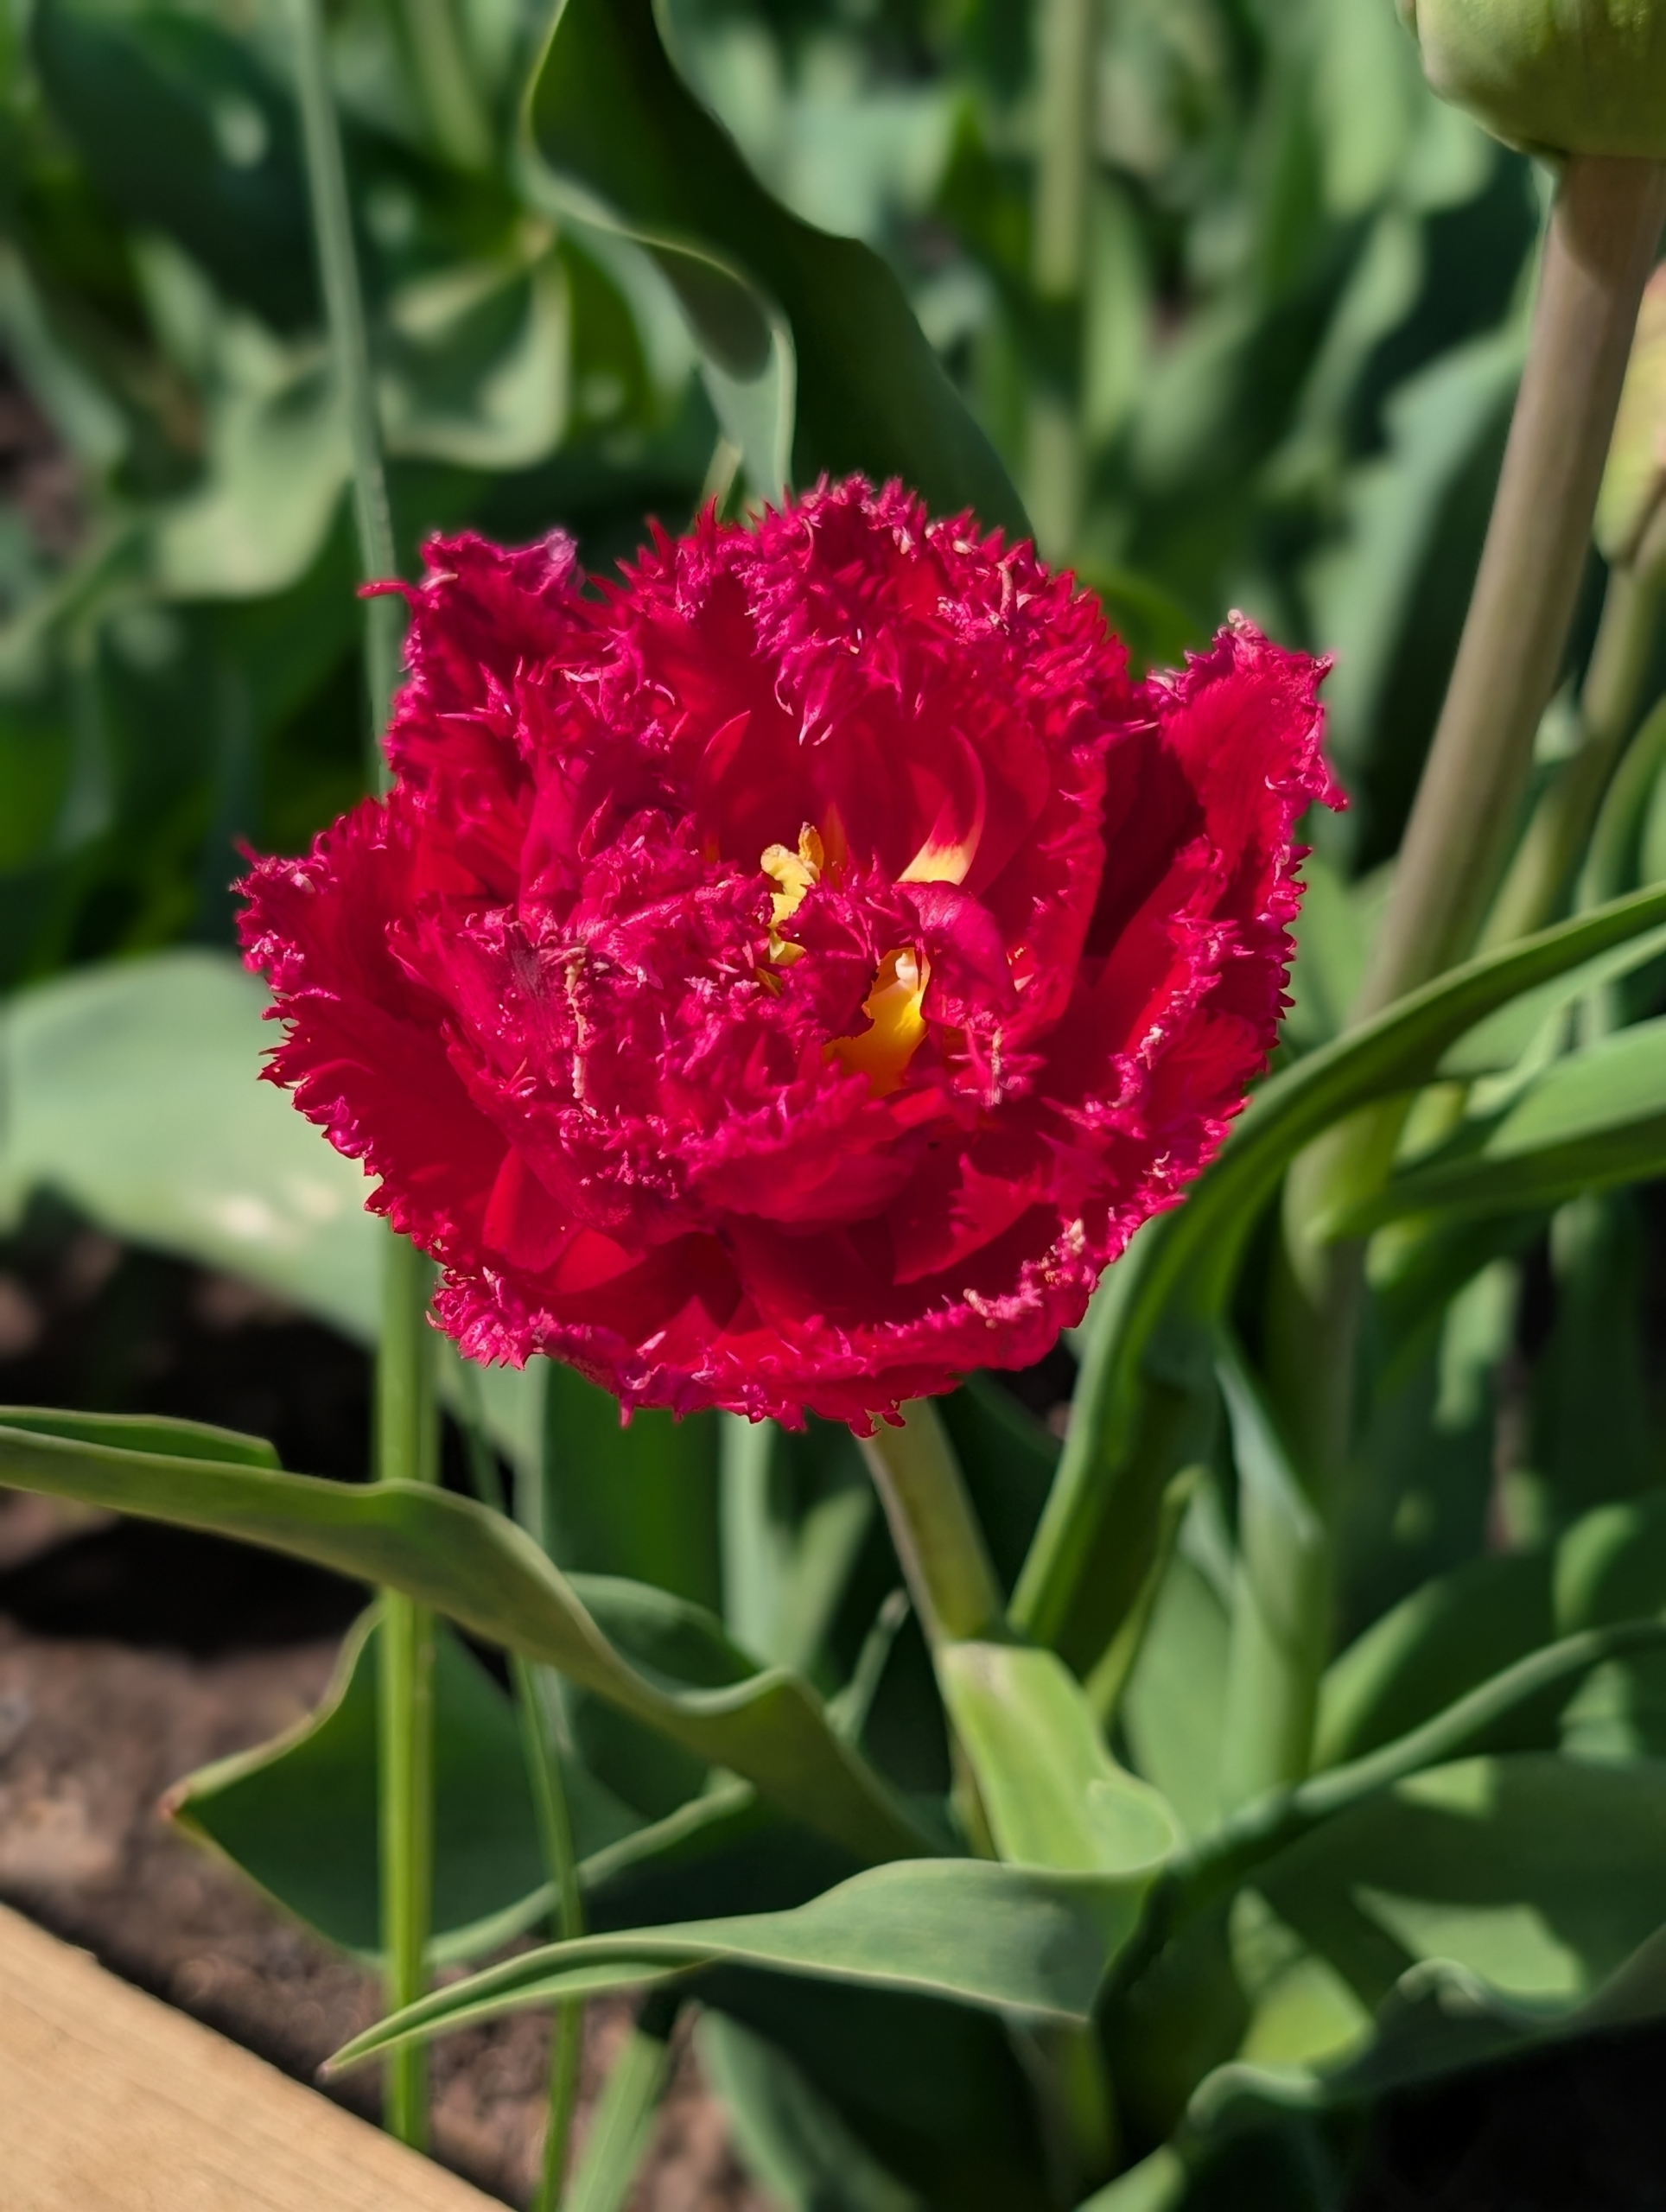
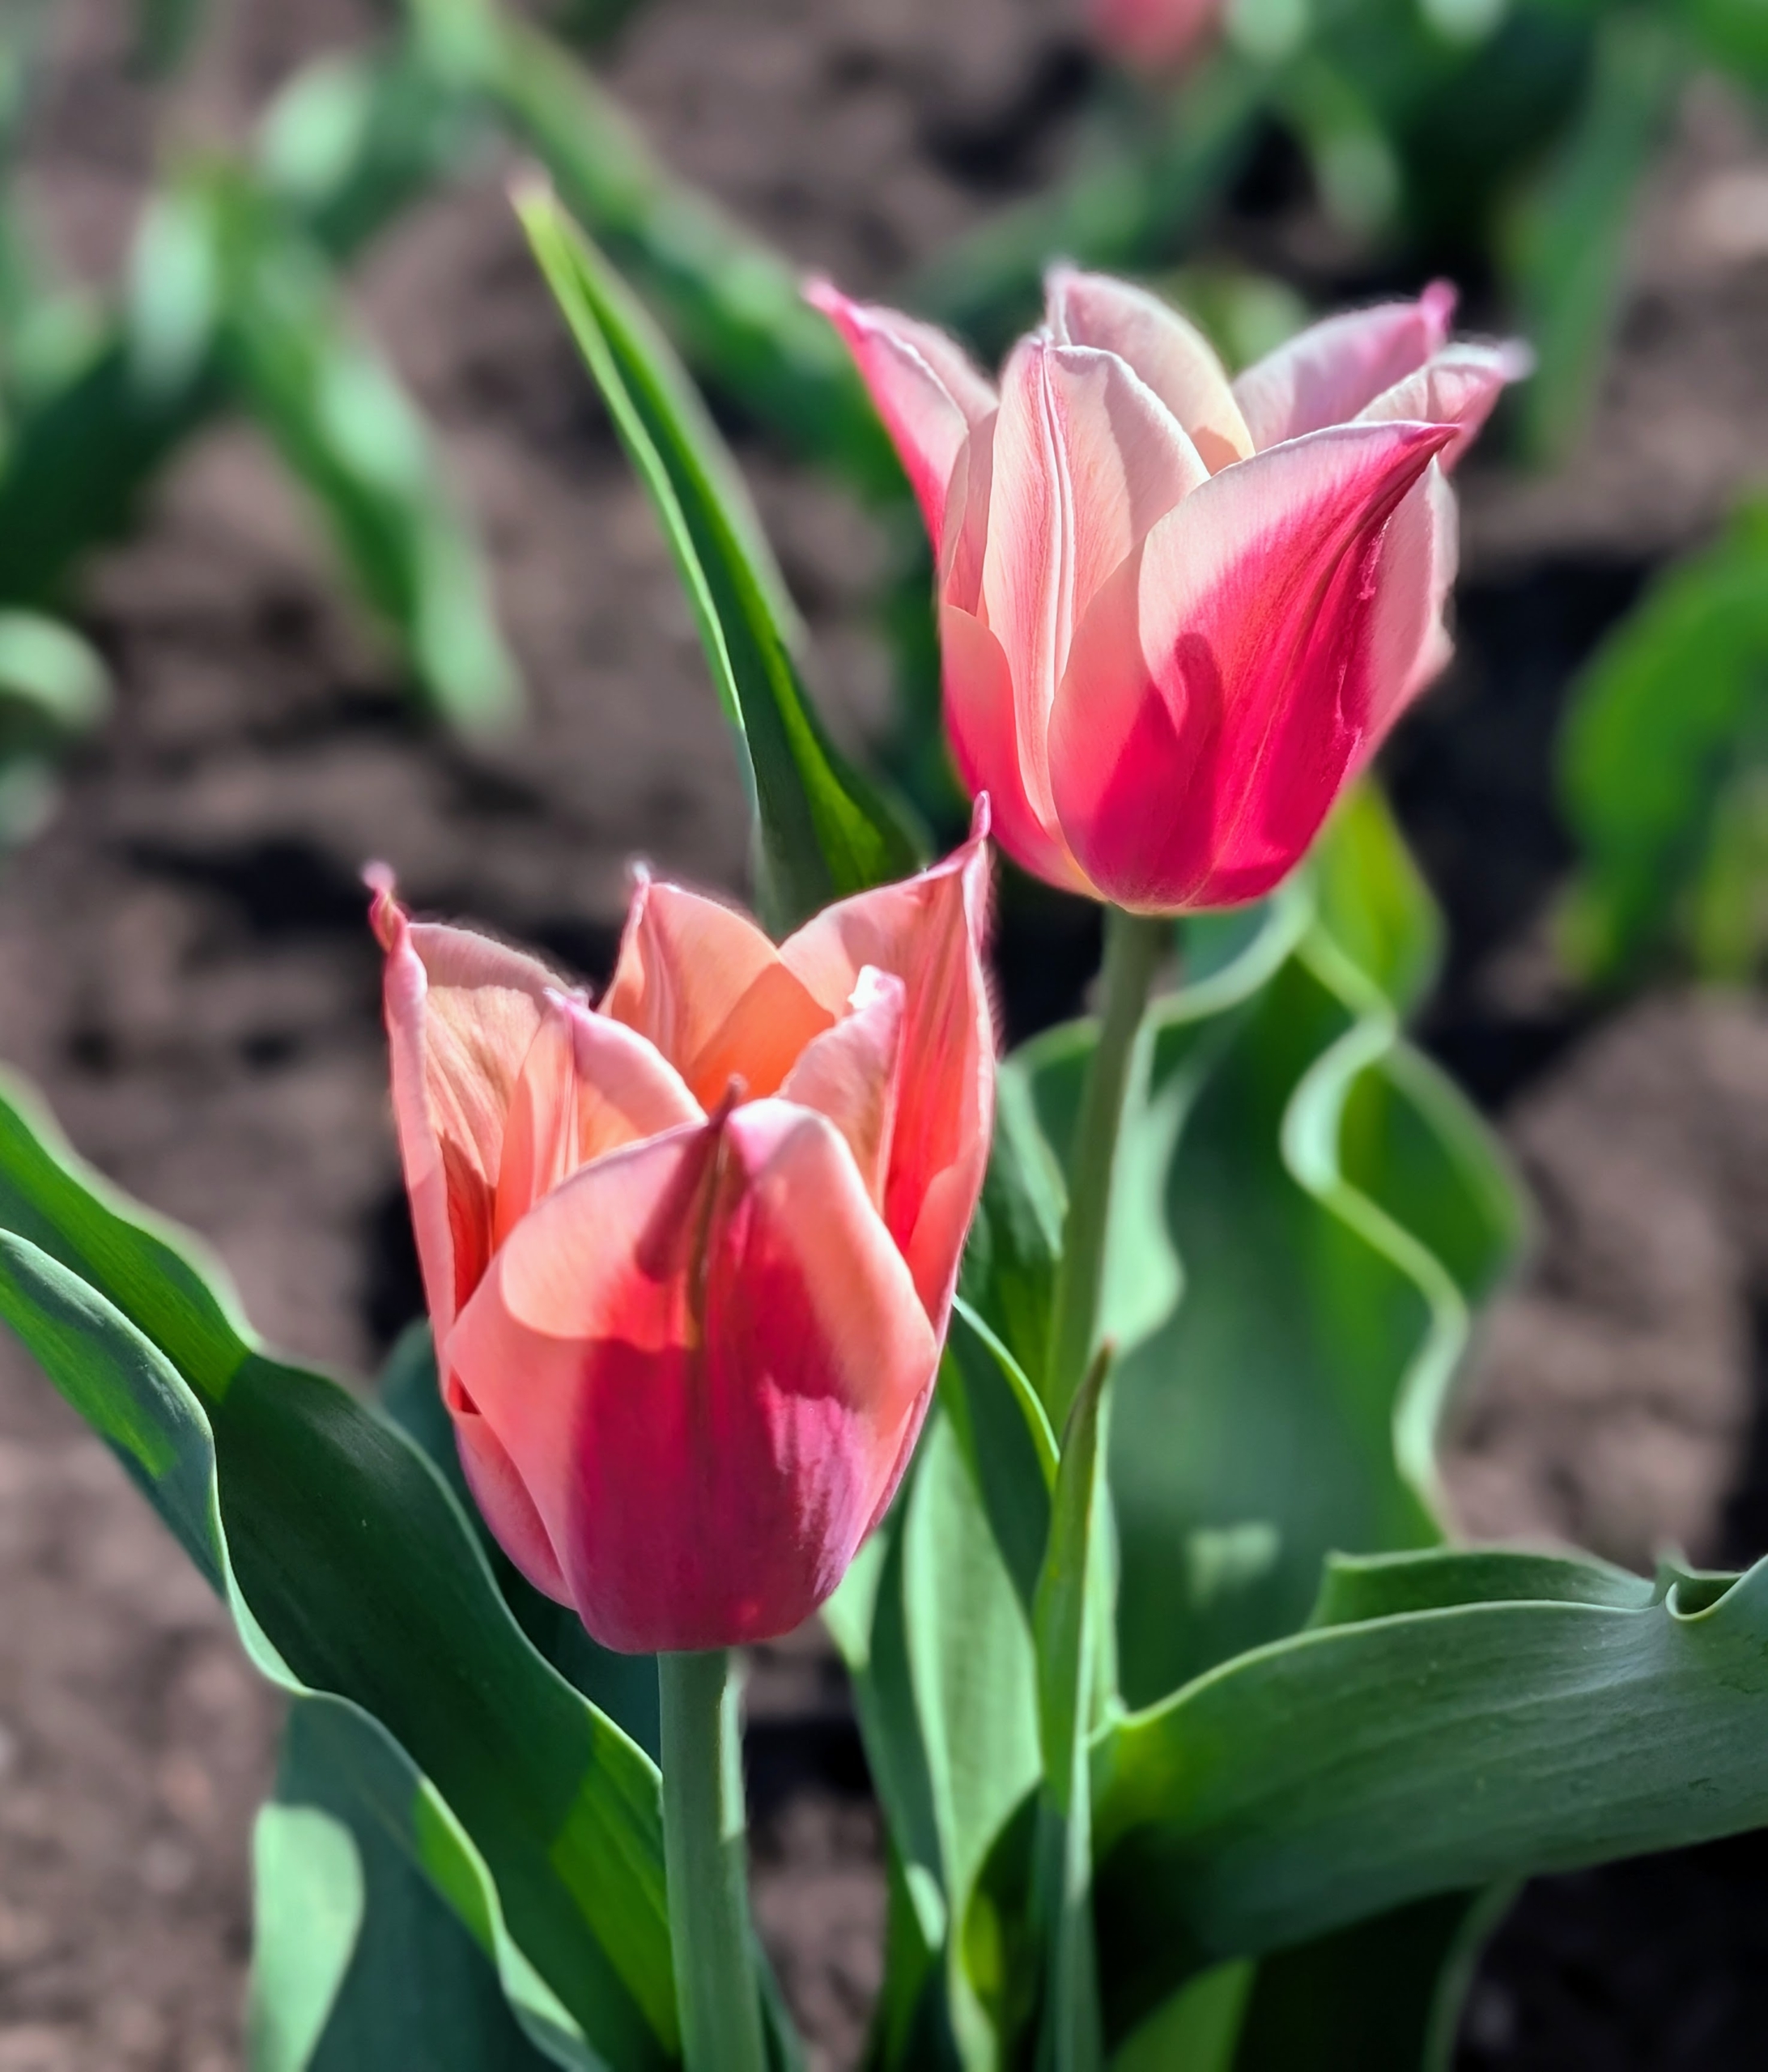
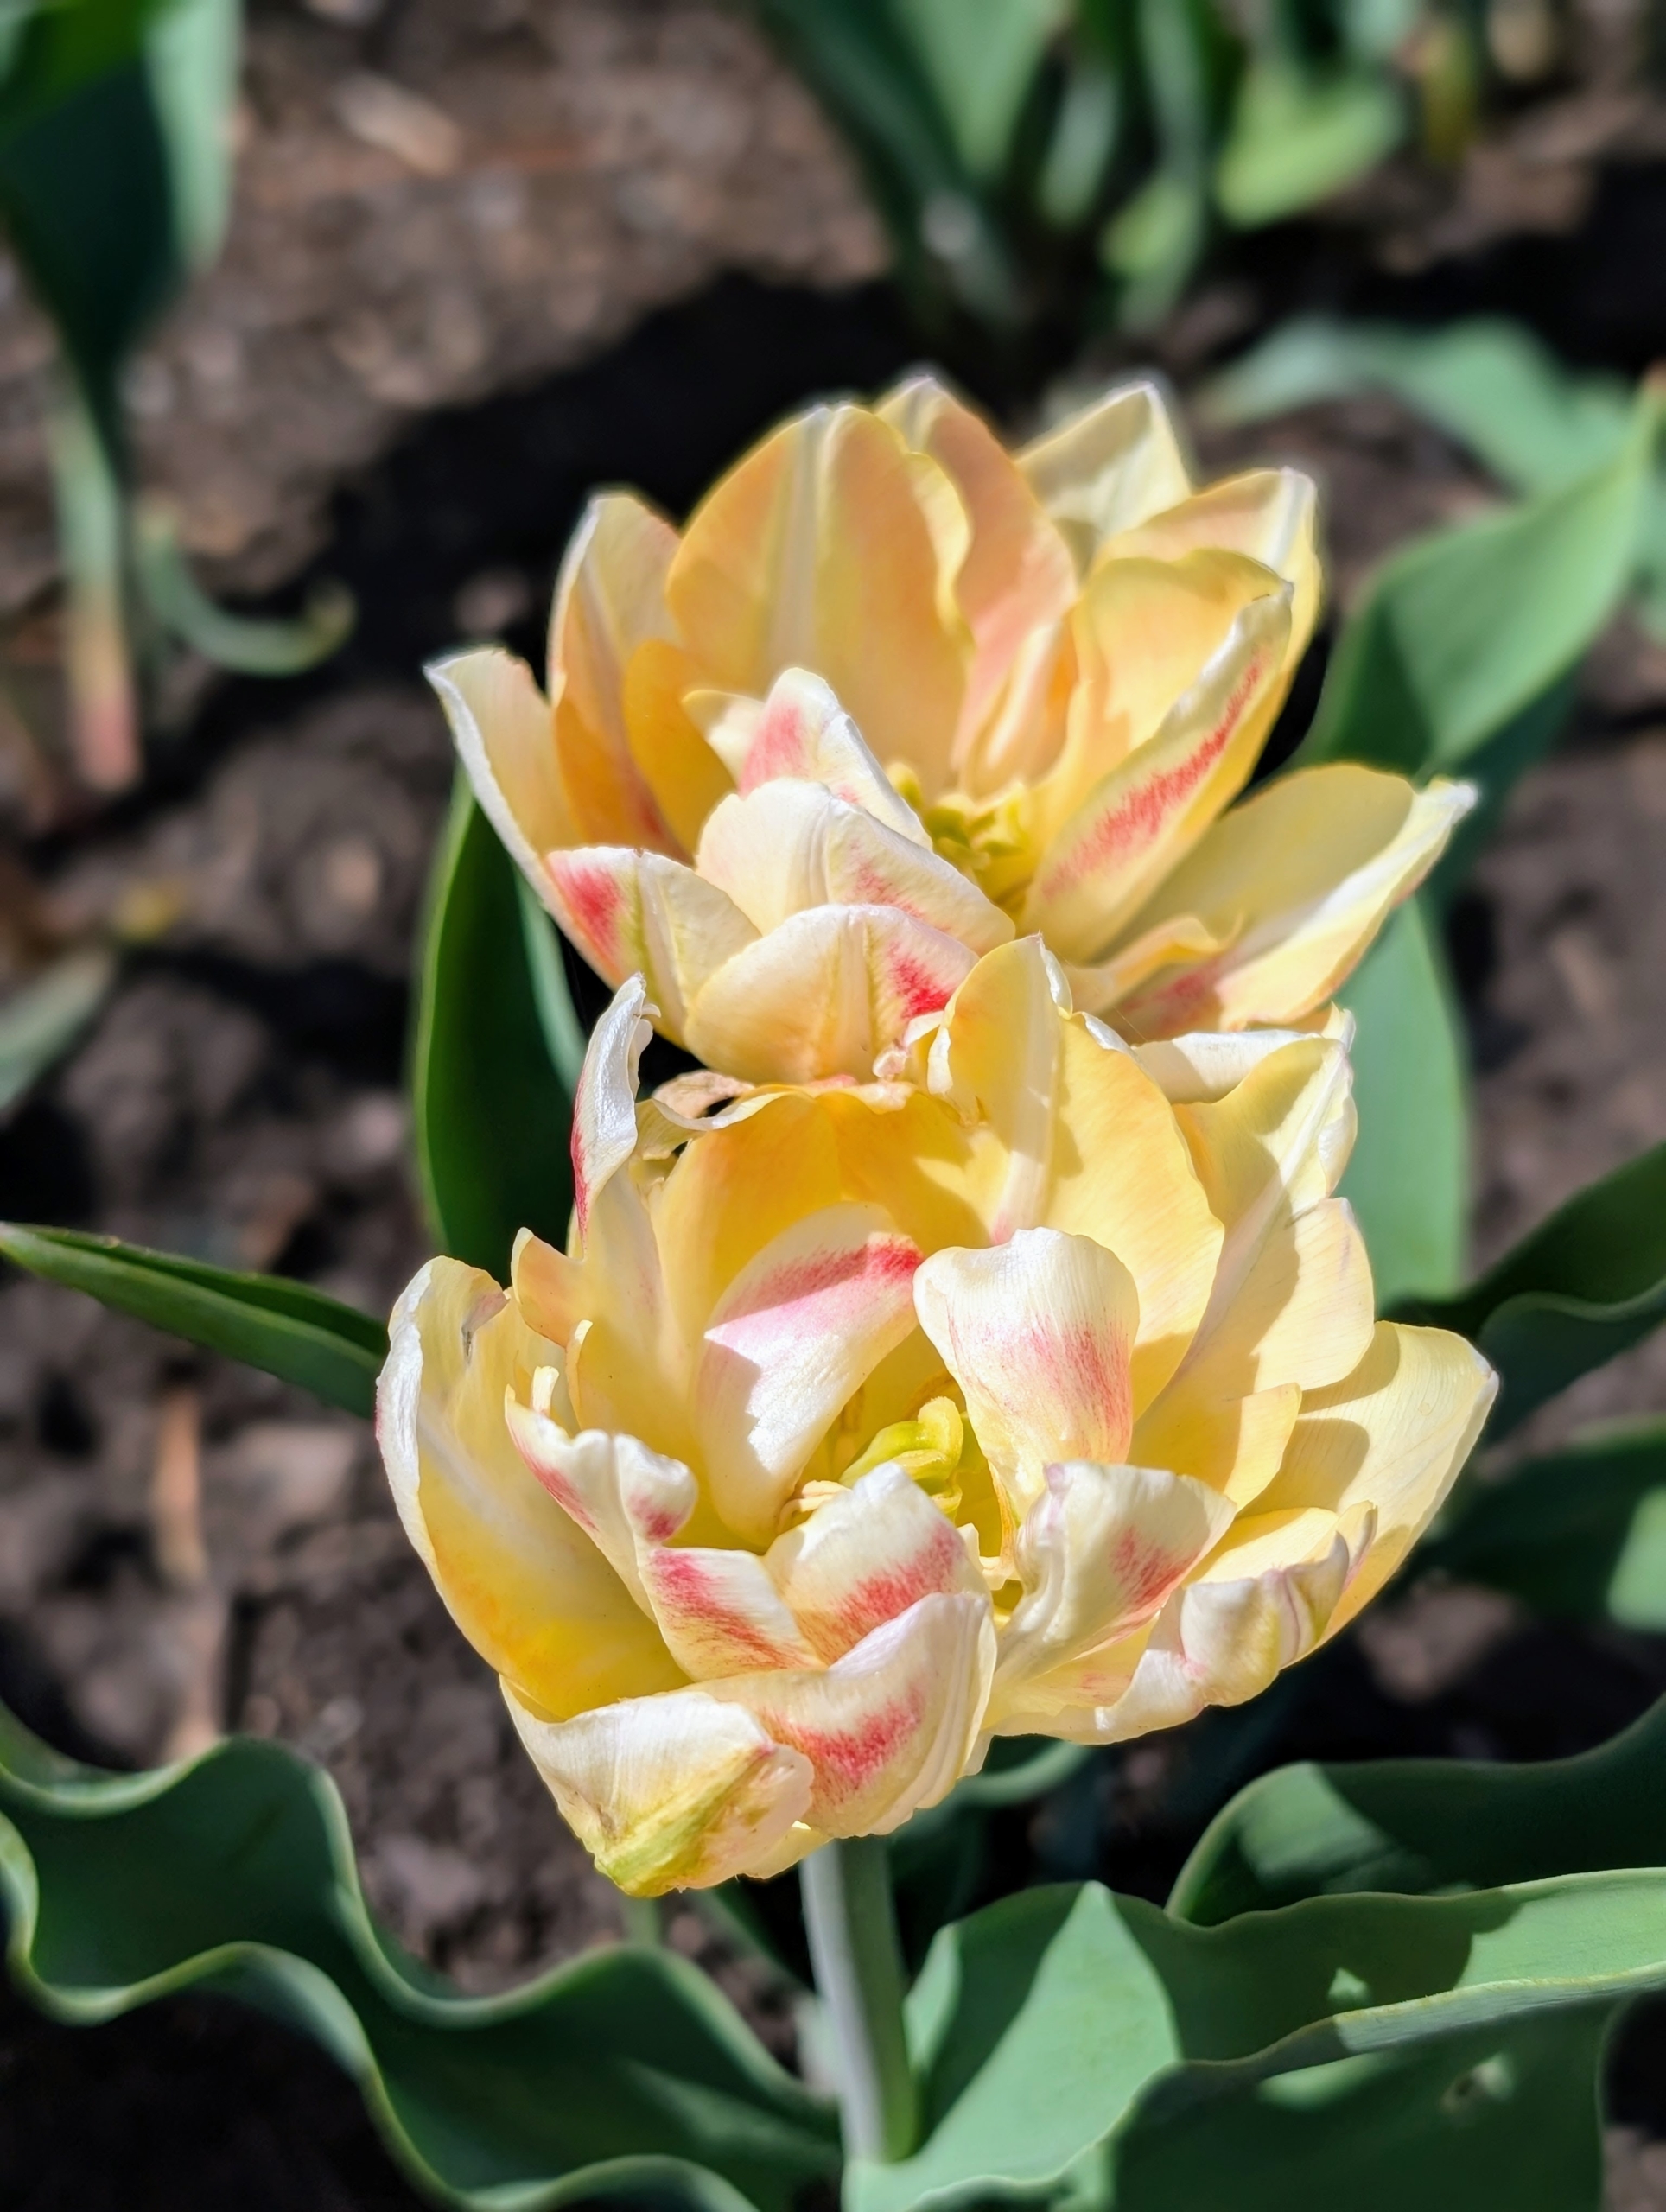
In my vegetable garden, I also have a few beds of blooming tulips. There are currently more than 3000 registered tulip varieties, which are divided into at least 15-groups, mostly based on the flower type, size, and blooming period.
All tulips are planted as bulbs in the fall and bloom in the spring. They also have the ability to come back year after year, but beware – the deer love them too.
Tulip ‘Sanne’ has impressive, elegantly tapered flowers that open deep rose-pink and creamy-pink edges. As it matures, it turns lilac-pink with pink-ivory edges.
‘Foxy Foxtrot’ is a double tulip with shades of apricot, yellow, and hints of rose orange.
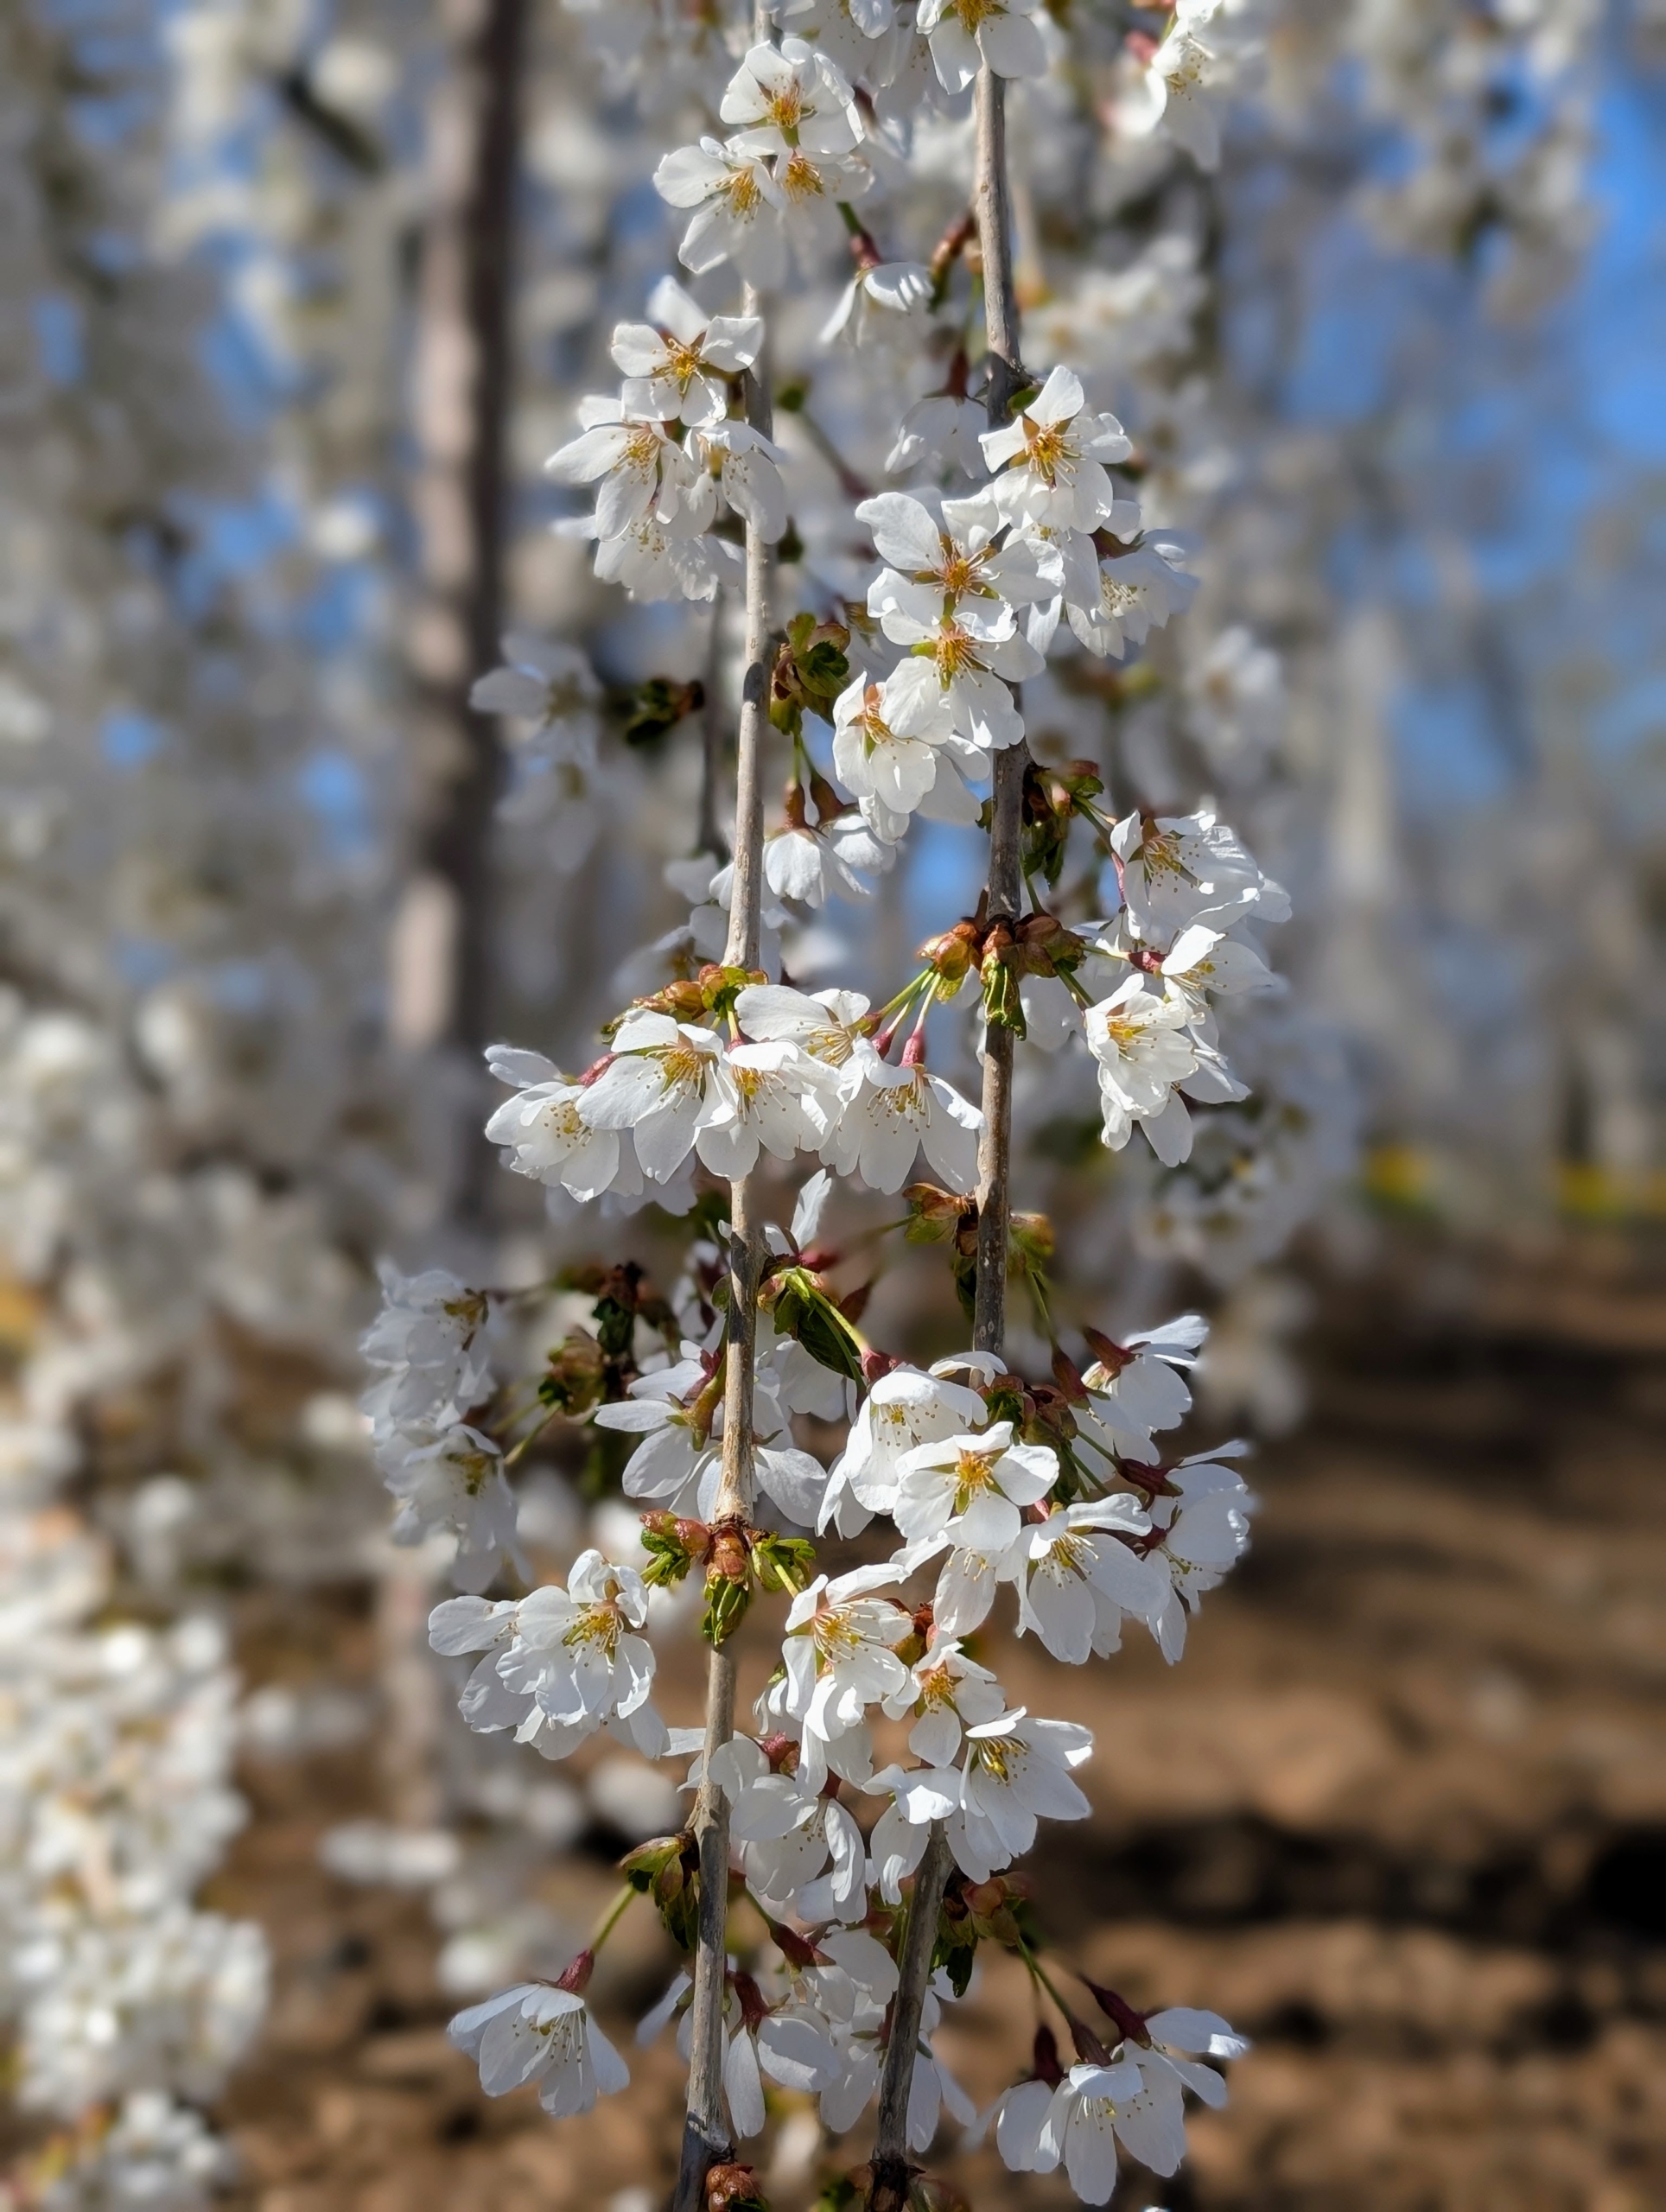
These are the flowers of a weeping cherry tree with its cascading branches. This is one of several outside my stable. They only bloom for a short while. These trees are eye-catchers when guests are lucky enough to see them filled with white flowers.
When in bloom, weeping cherry flowers attract many butterflies and hummingbirds.
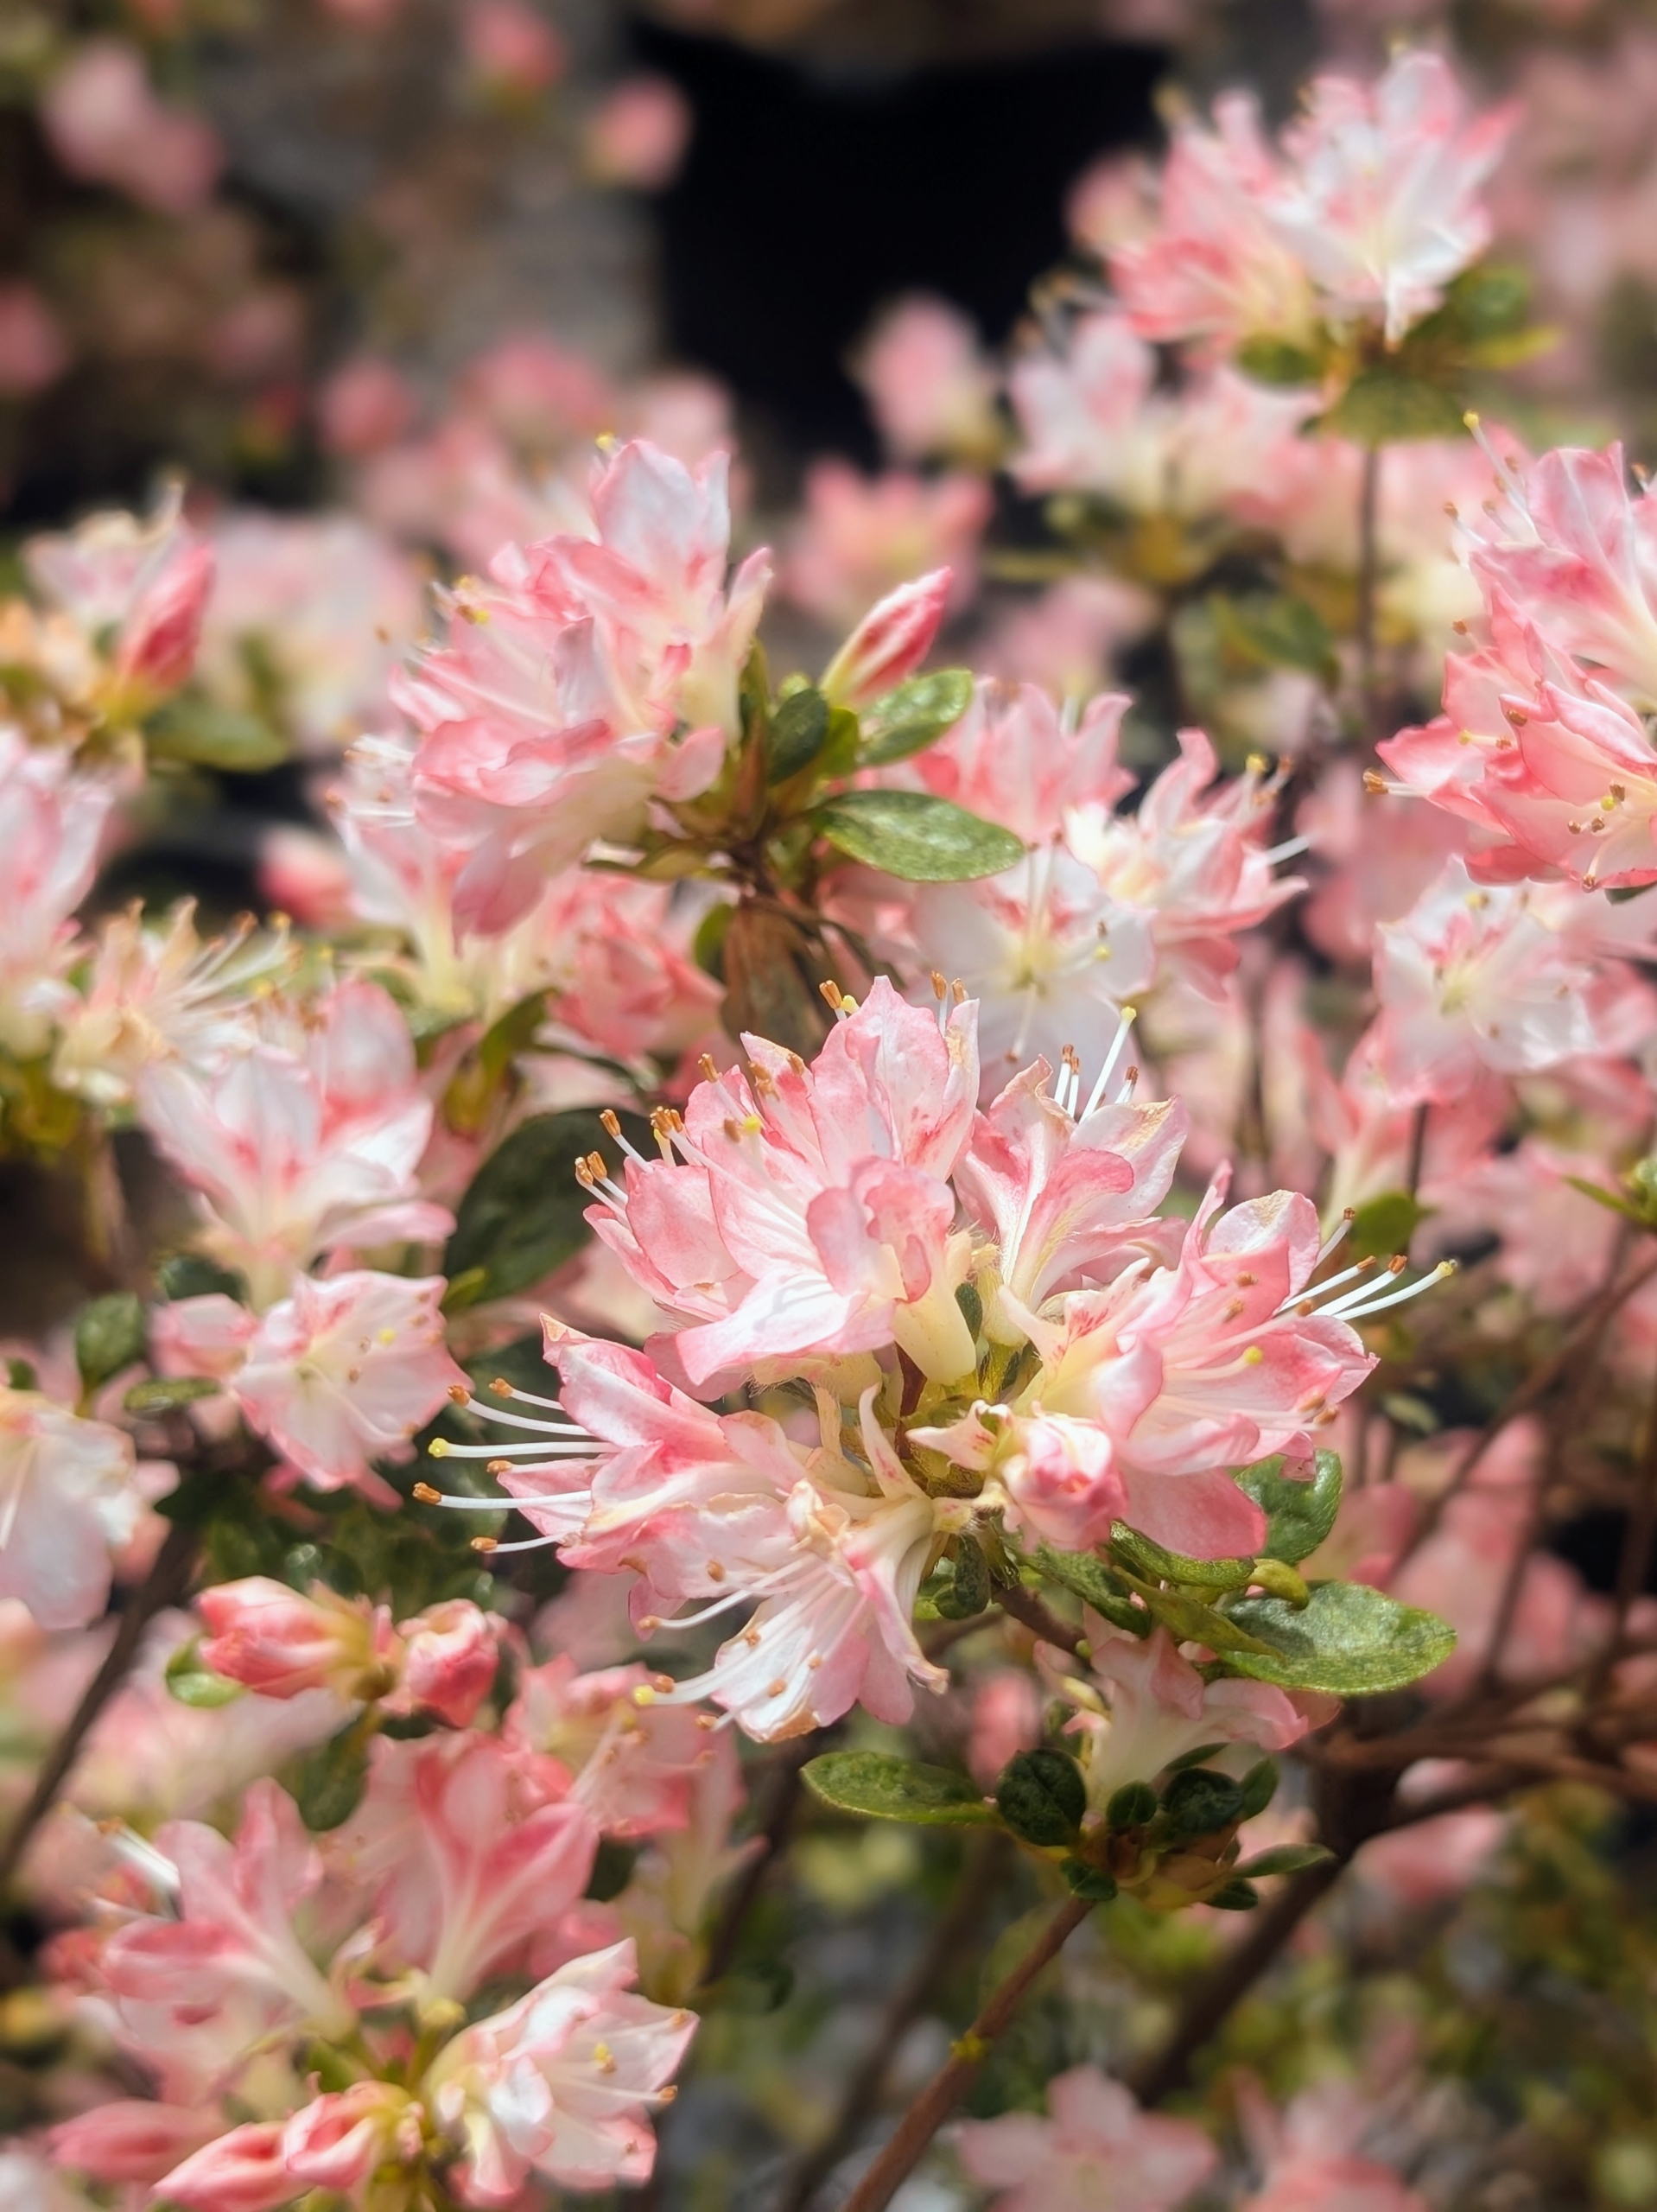
A handful of azaleas along one side of my farm are also blooming. Of all the shrubs that flower in spring, azaleas provide some of the most brilliant displays. I have hundreds planted outside my Summer House and down the carriage road to the stable.
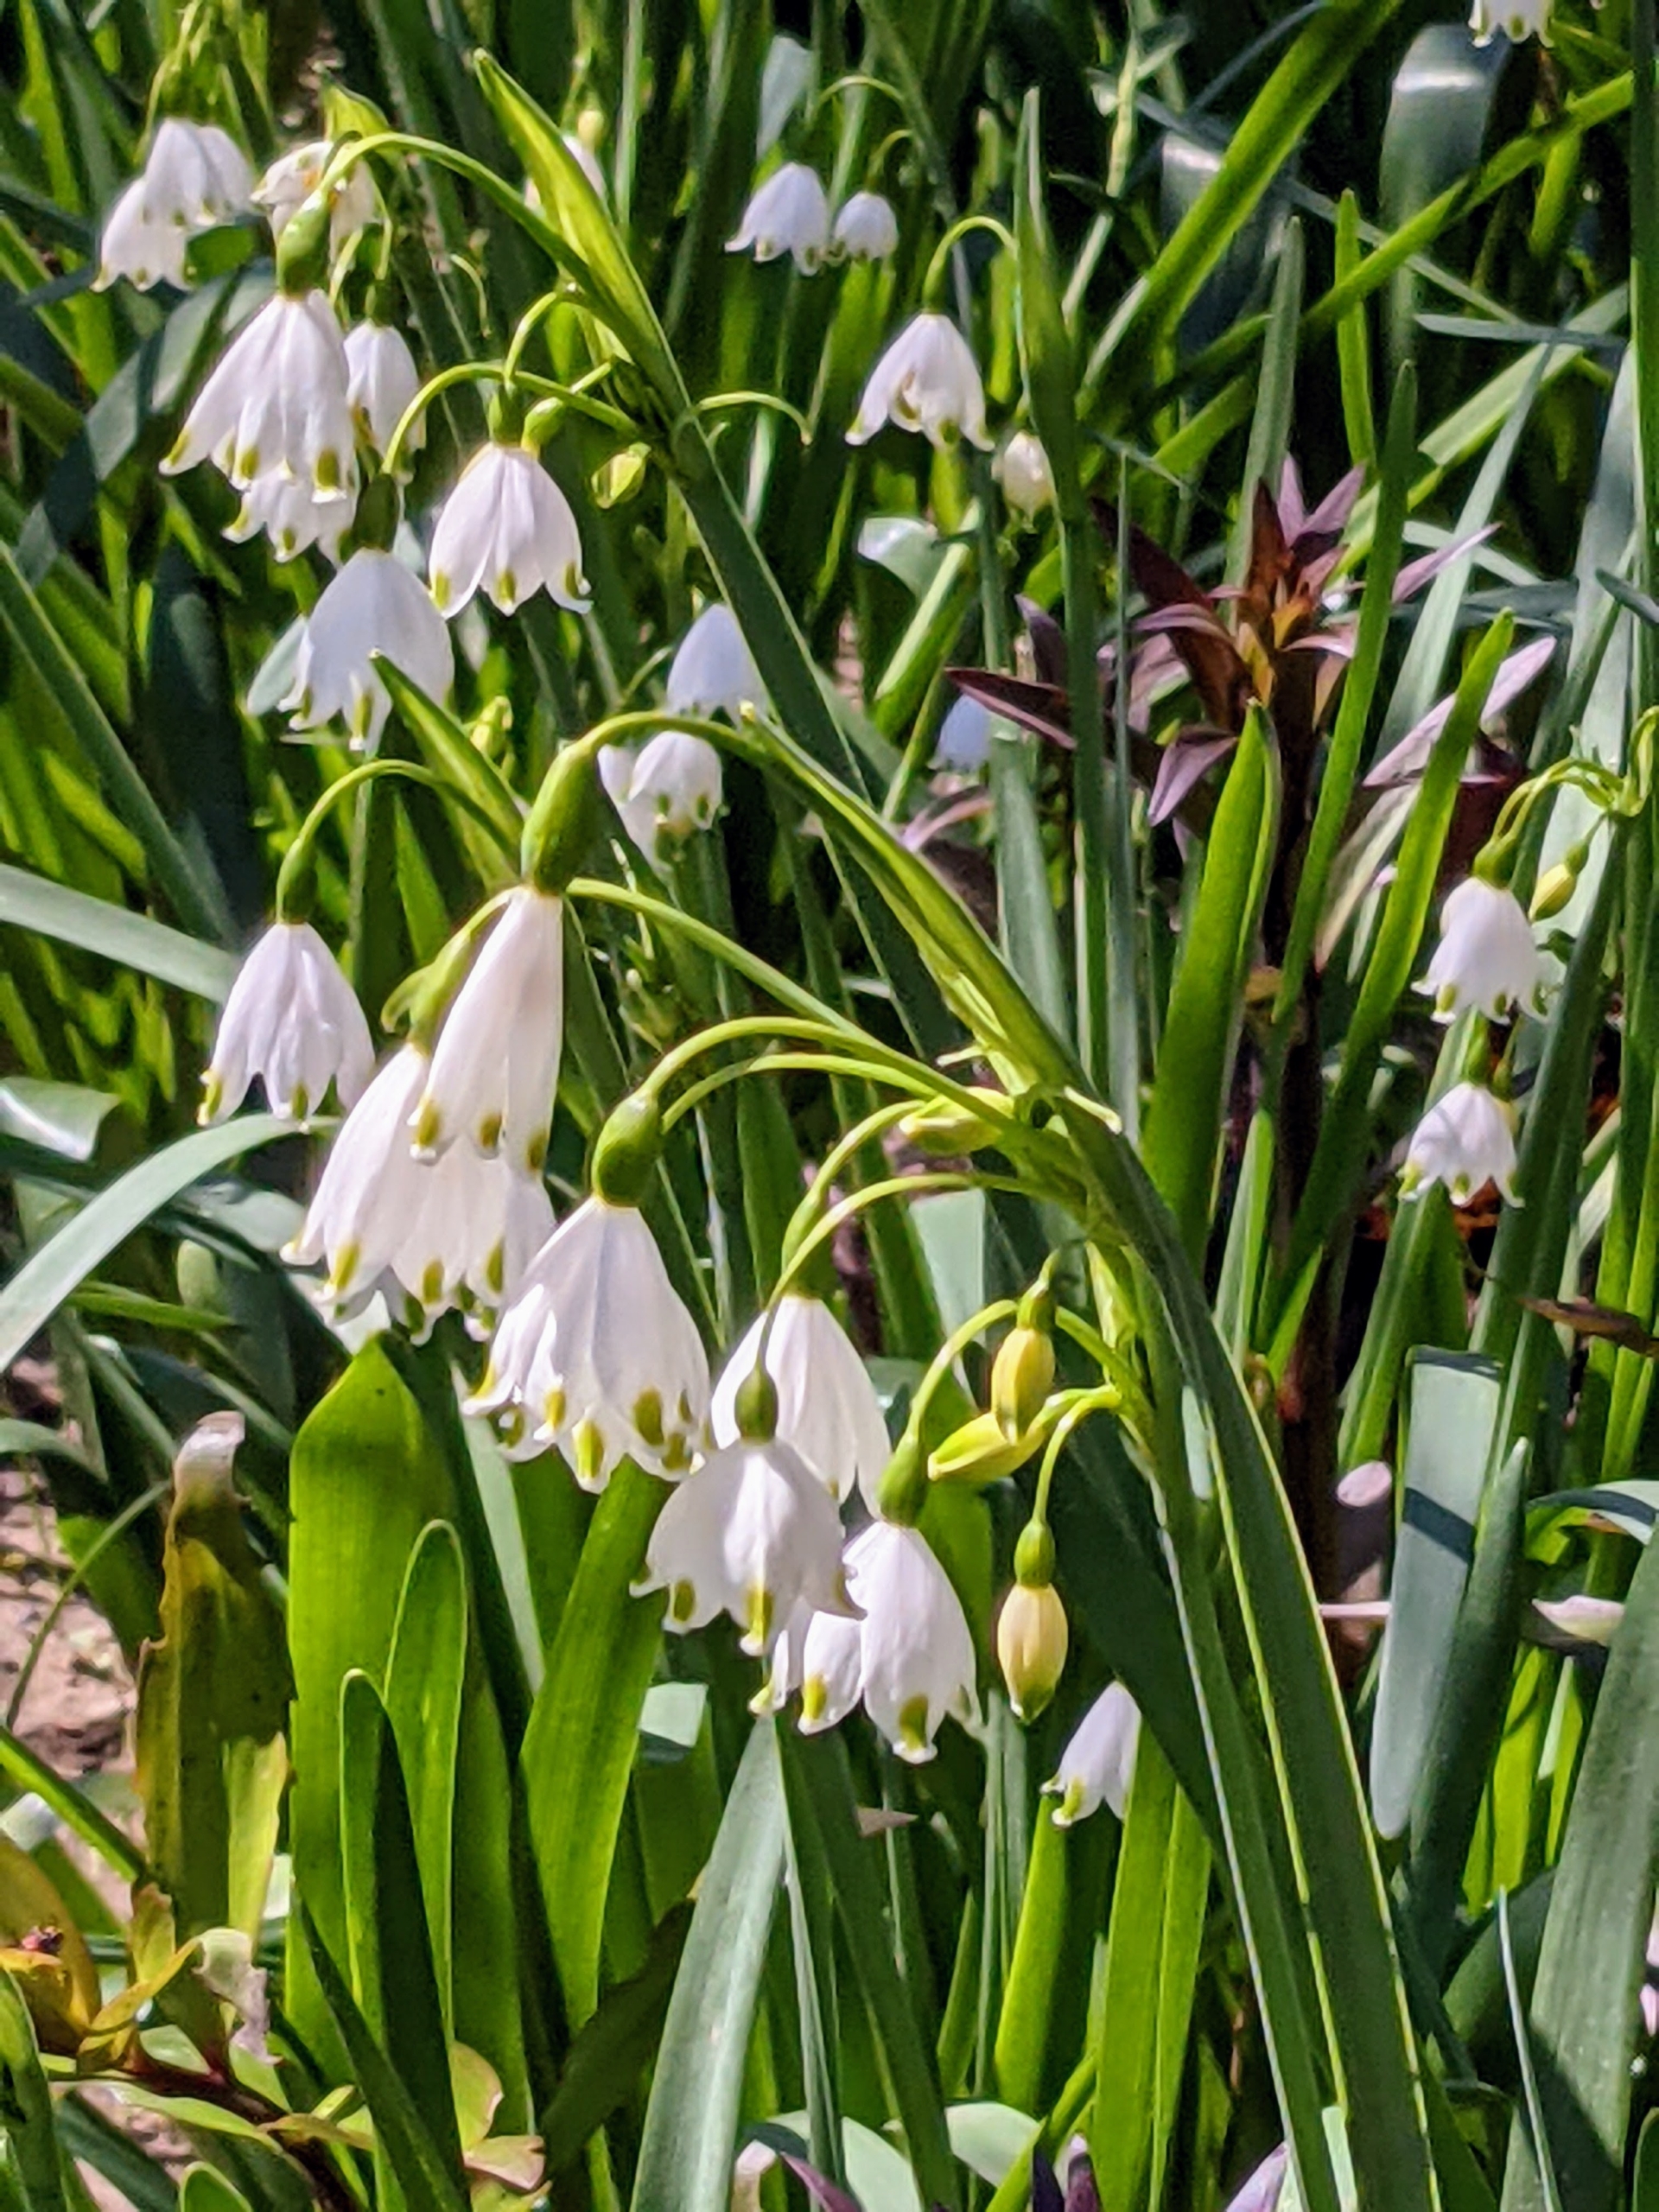
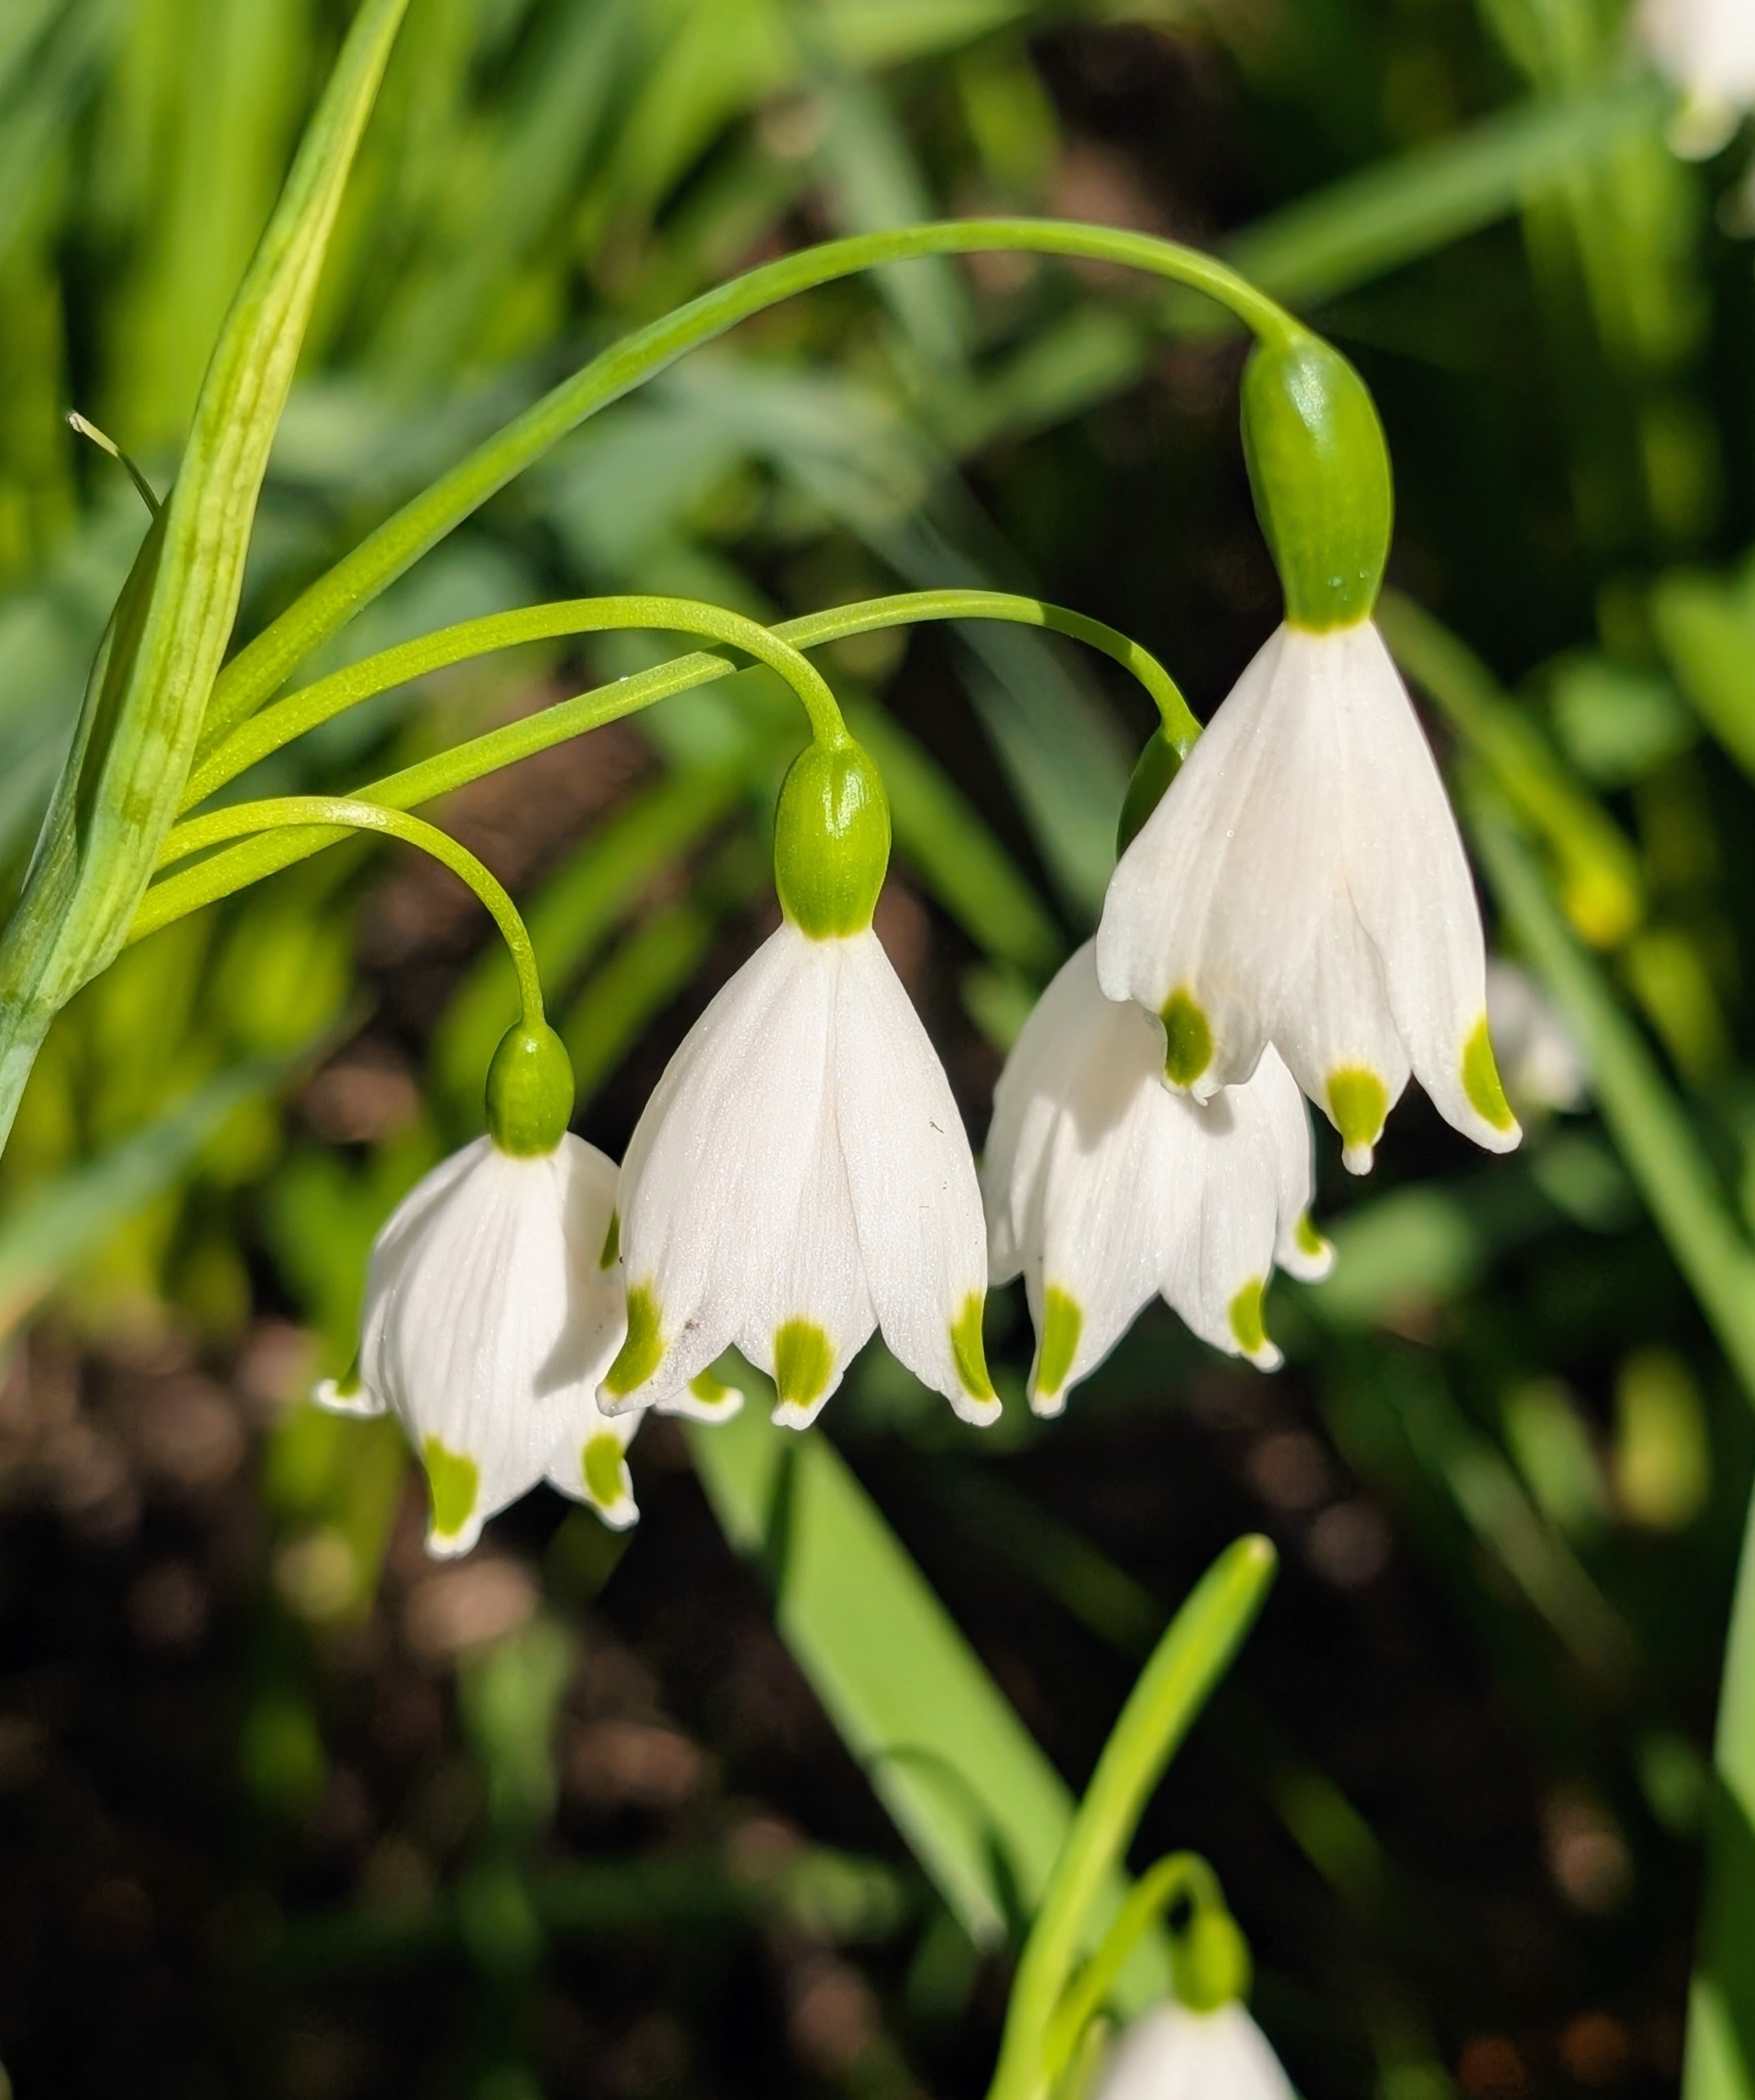
These are Snowflakes – not to be confused with Snowdrops. The Snowflake is a much taller growing bulb which normally has more than one flower per stem. Snowflake petals are even, each with a green spots on the end, whereas Snowdrops have helicopter-like propellers that are green only on the inner petals.
Snowflakes, Leucojum, are native to Eurasia and are members of the amaryllis family. These perennials increase over time and are not attractive to deer or rodents.
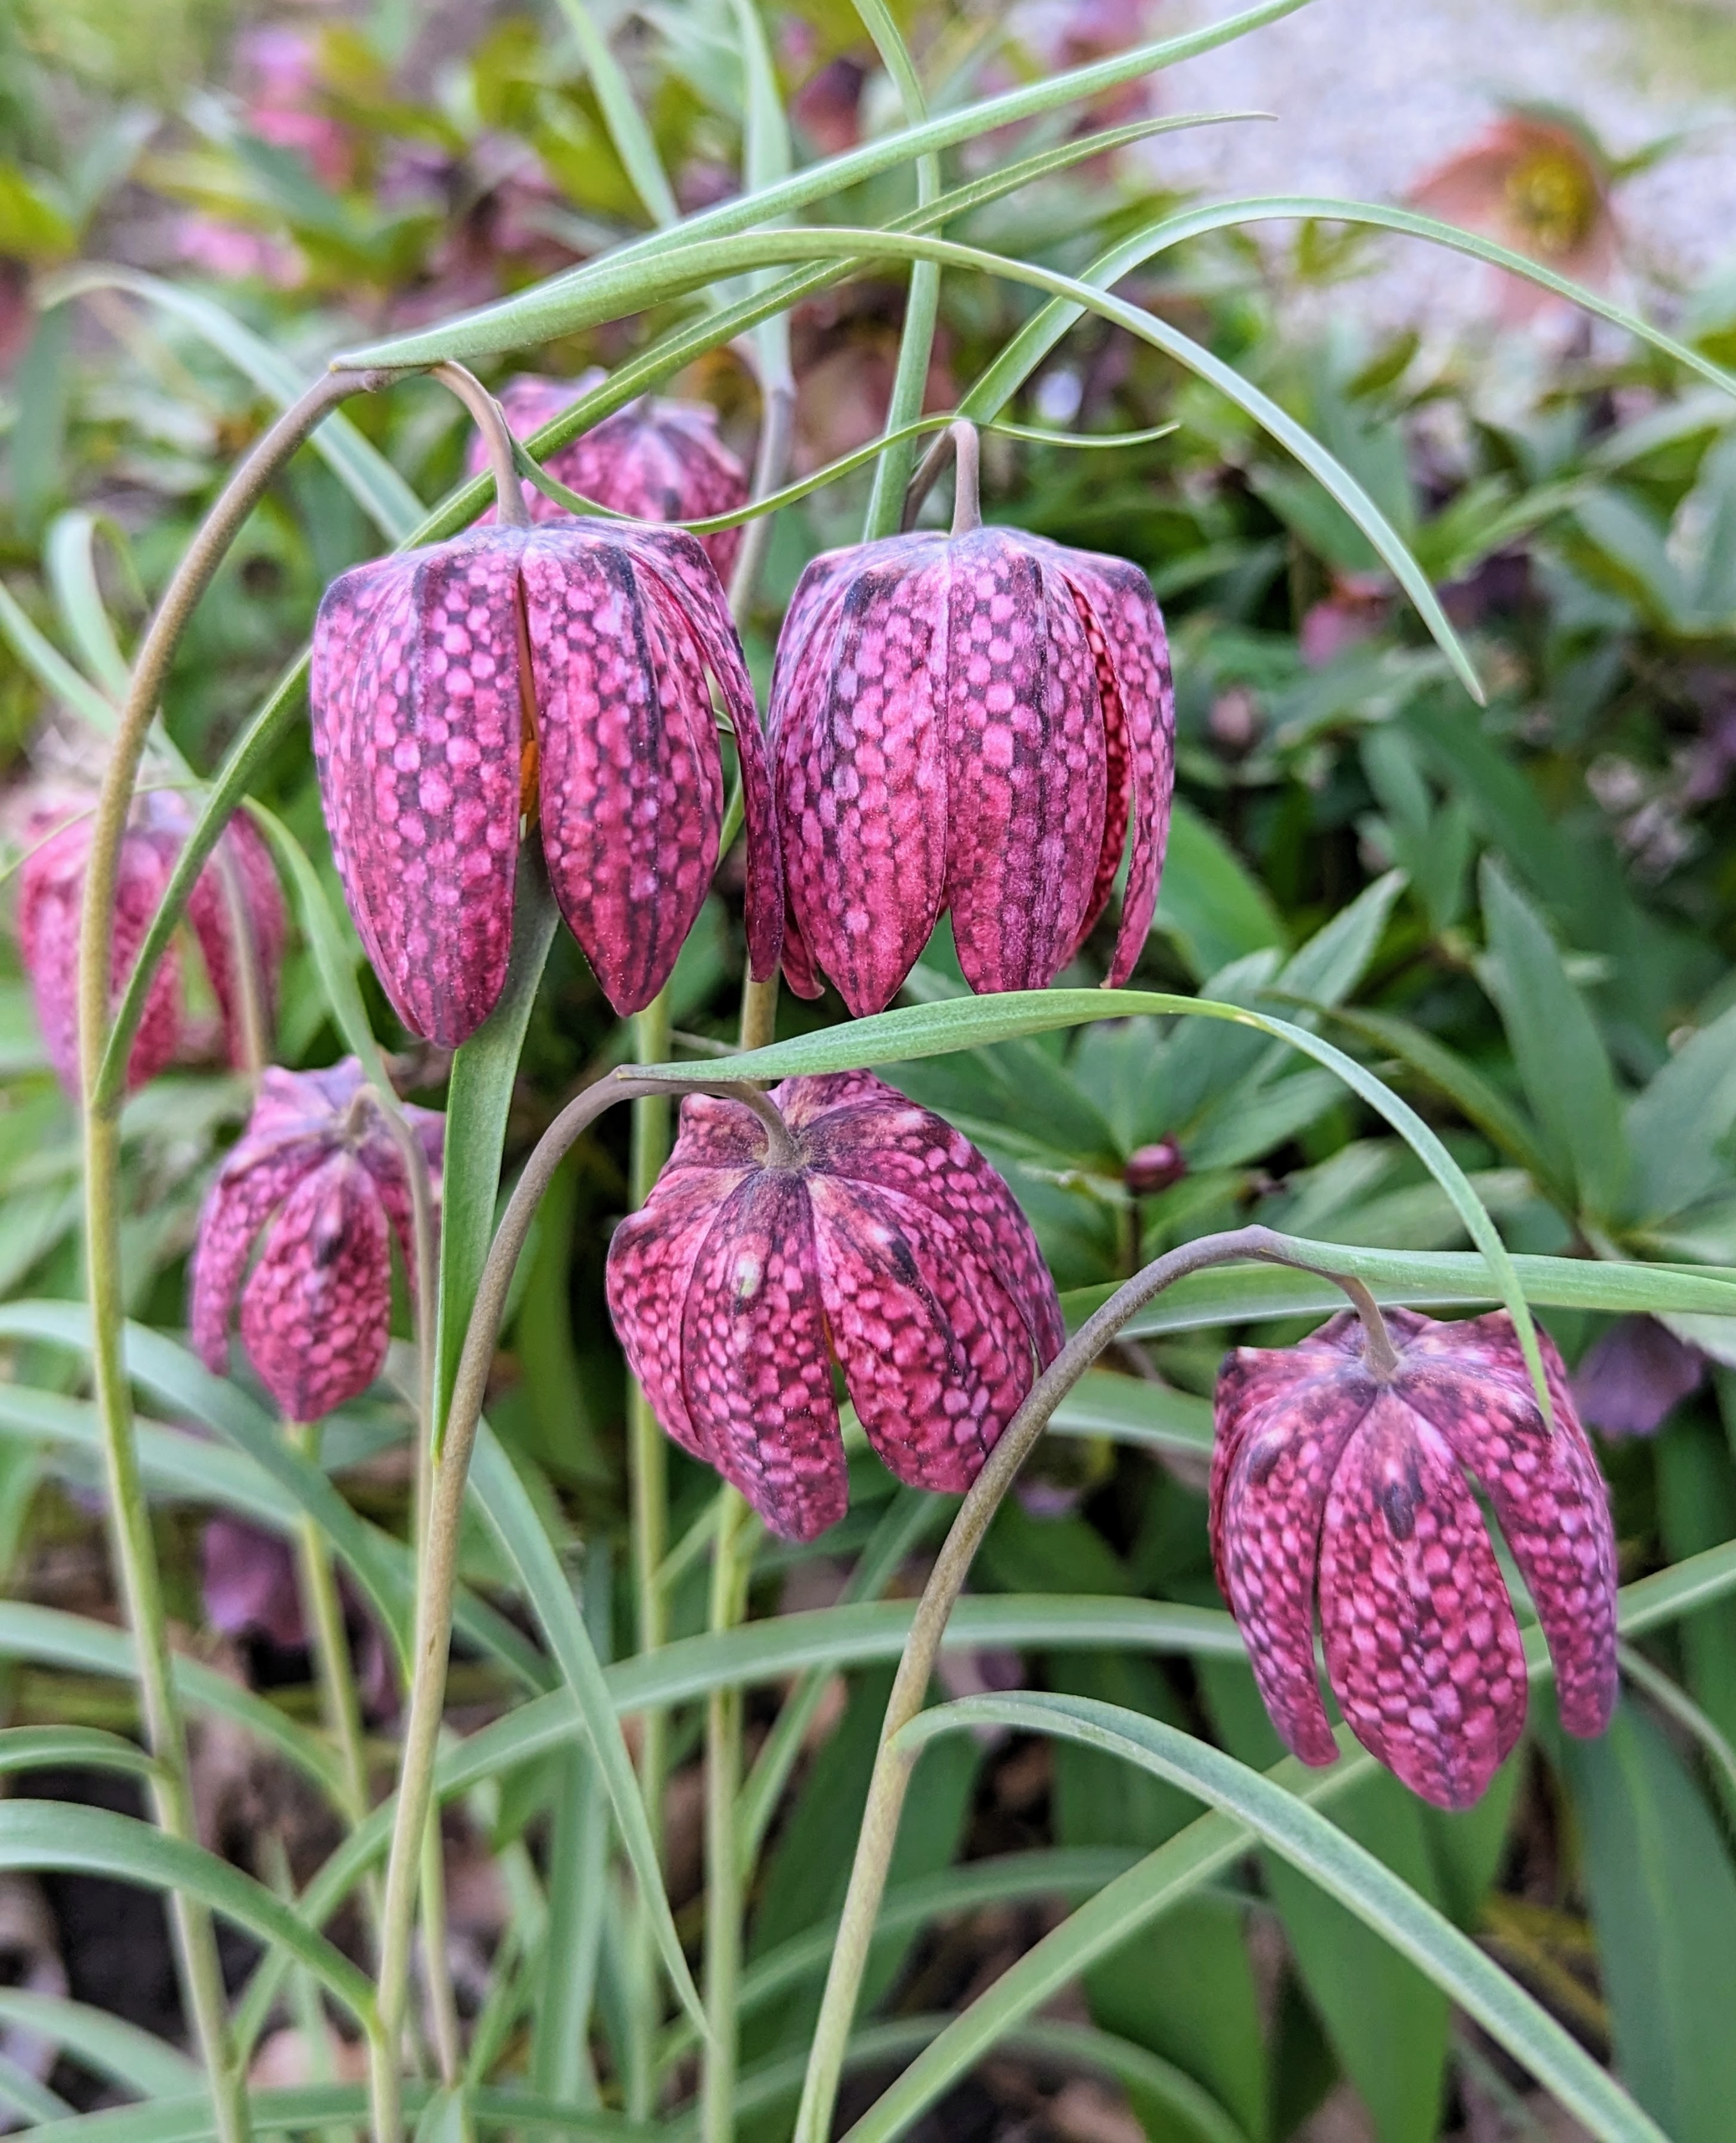
Commonly known as Guinea Hen Flower, Checkered Lily or Snake’s Head Fritillary, Fritillaria meleagris is an heirloom species dating back to 1575. It has pendant, bell-shaped, checkered and veined flowers that are either maroon or ivory-white with grass-like foliage on slender stems.
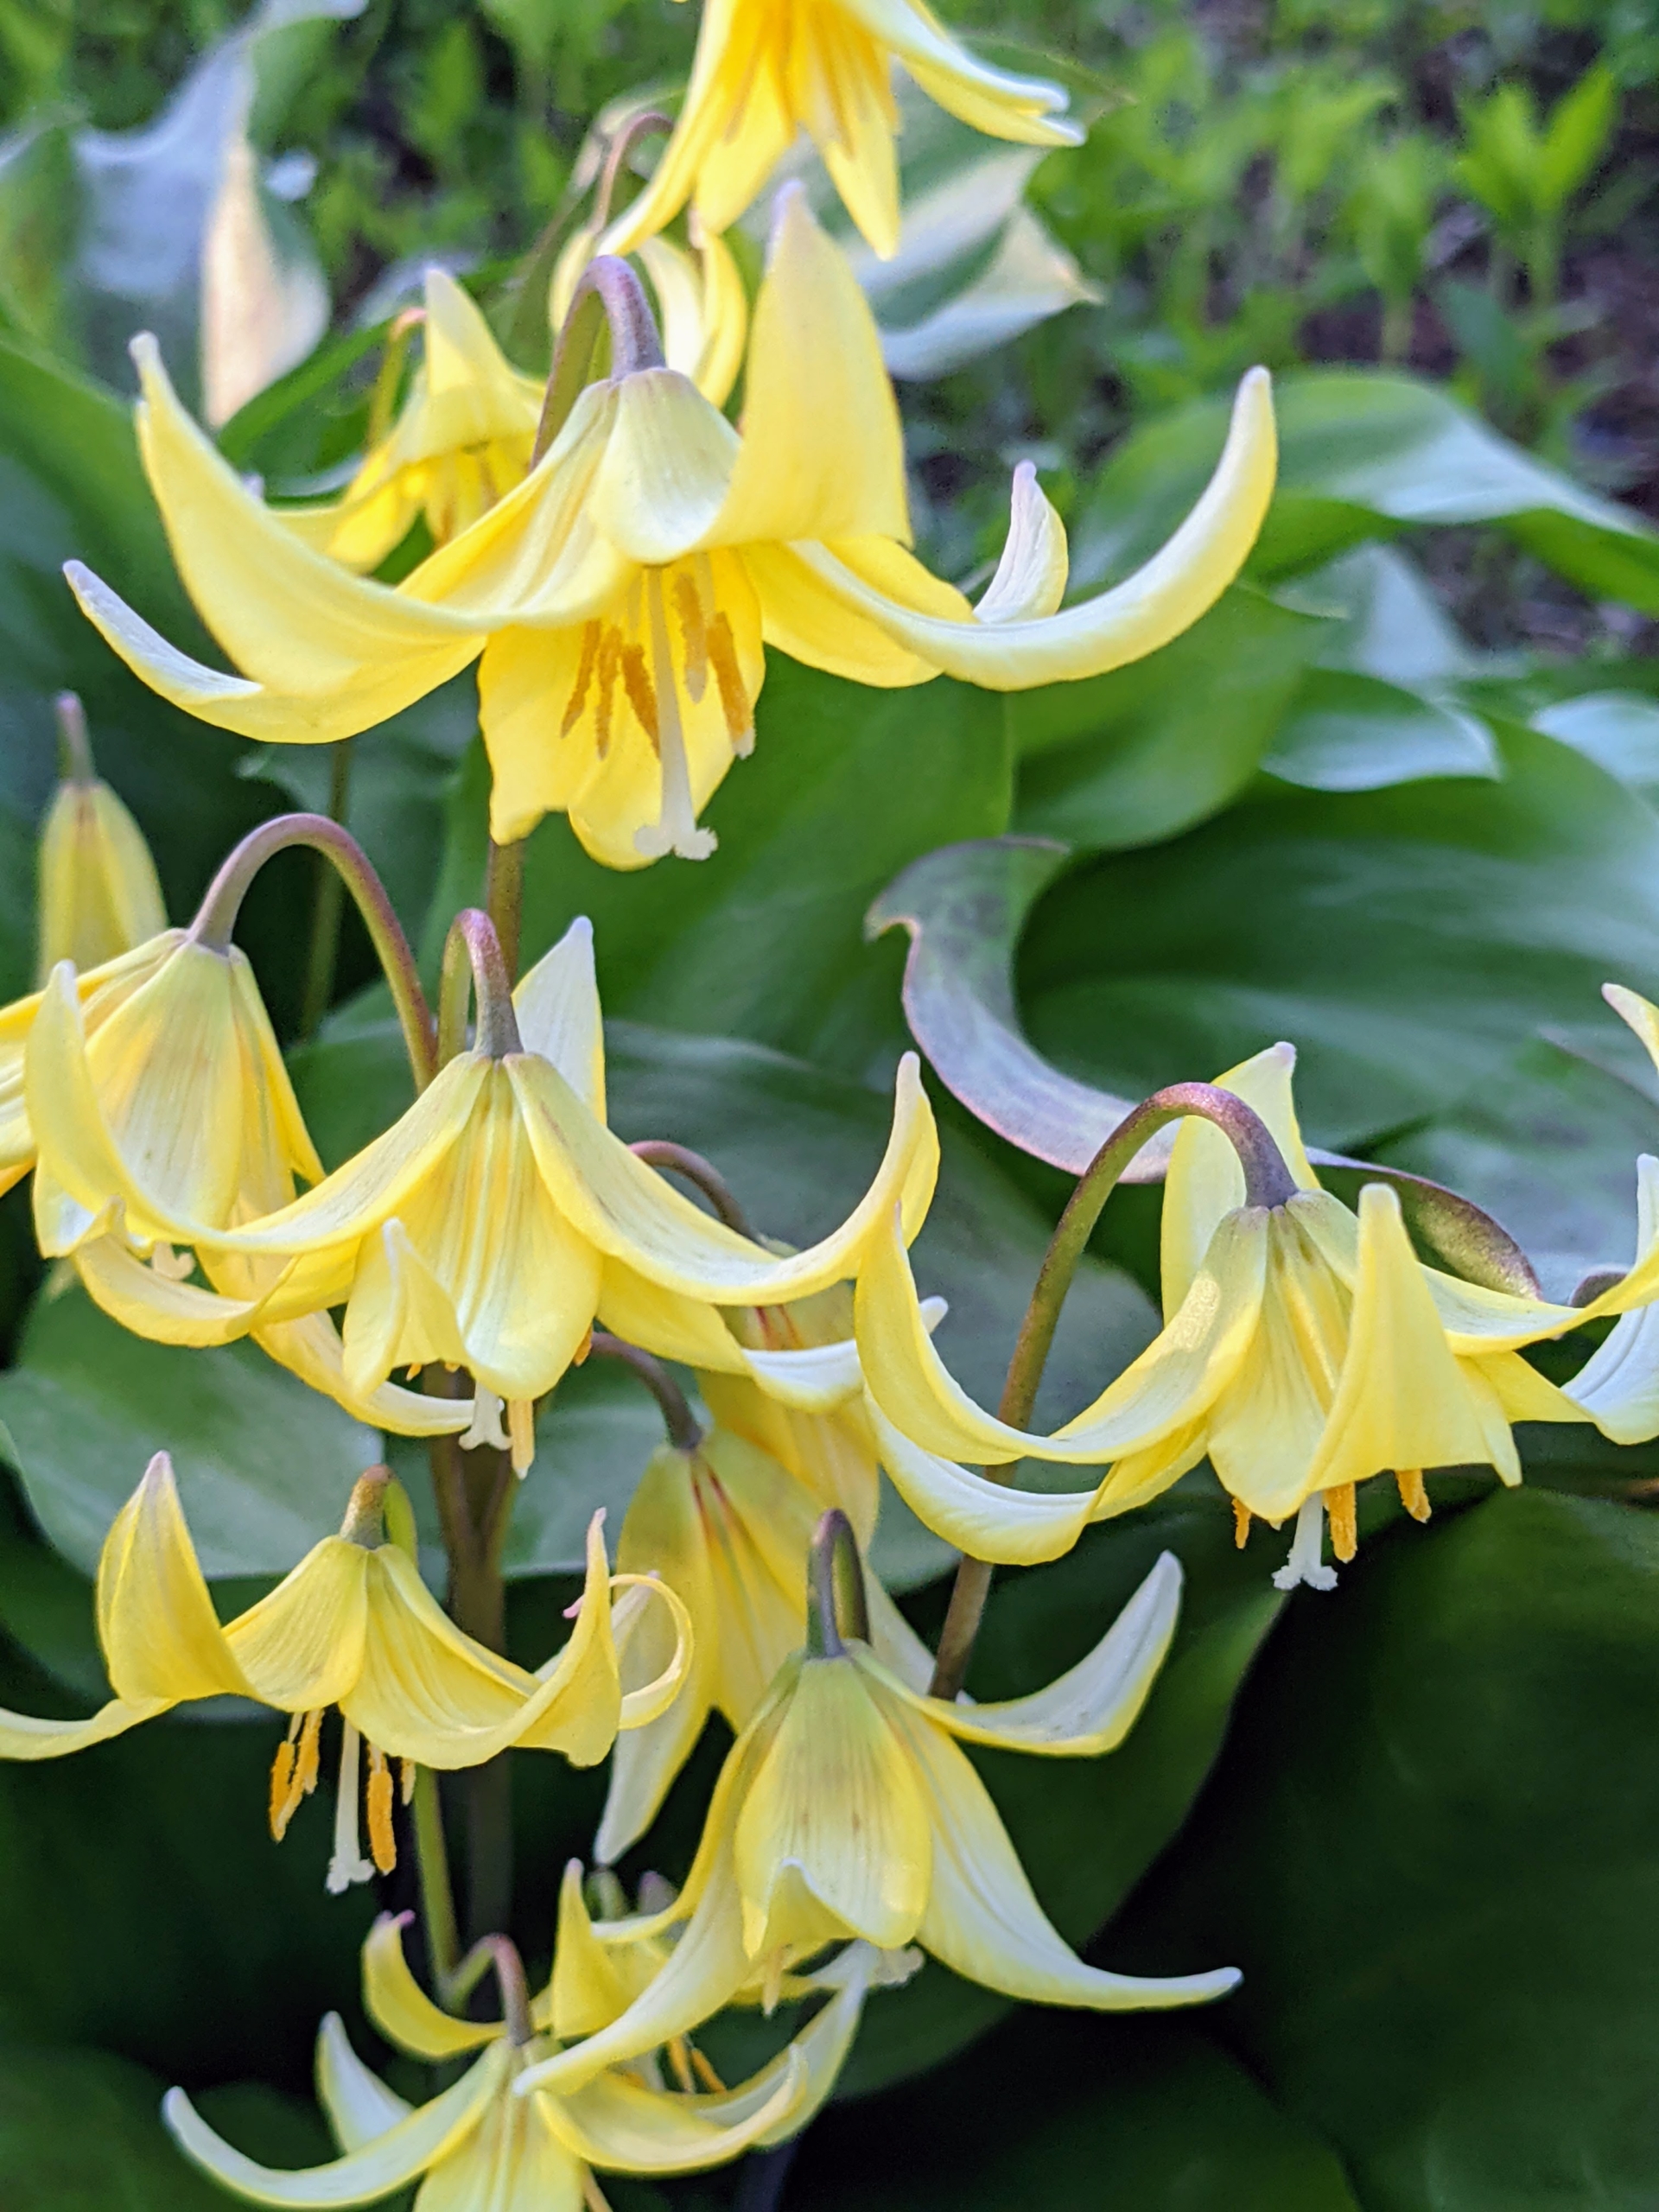
The delicate blooms of the trout lily, Erythronium, resemble turks cap lilies and stand out in the dappled light. These are planted in a bed outside my chicken coops, but many others also grow in the woodland.
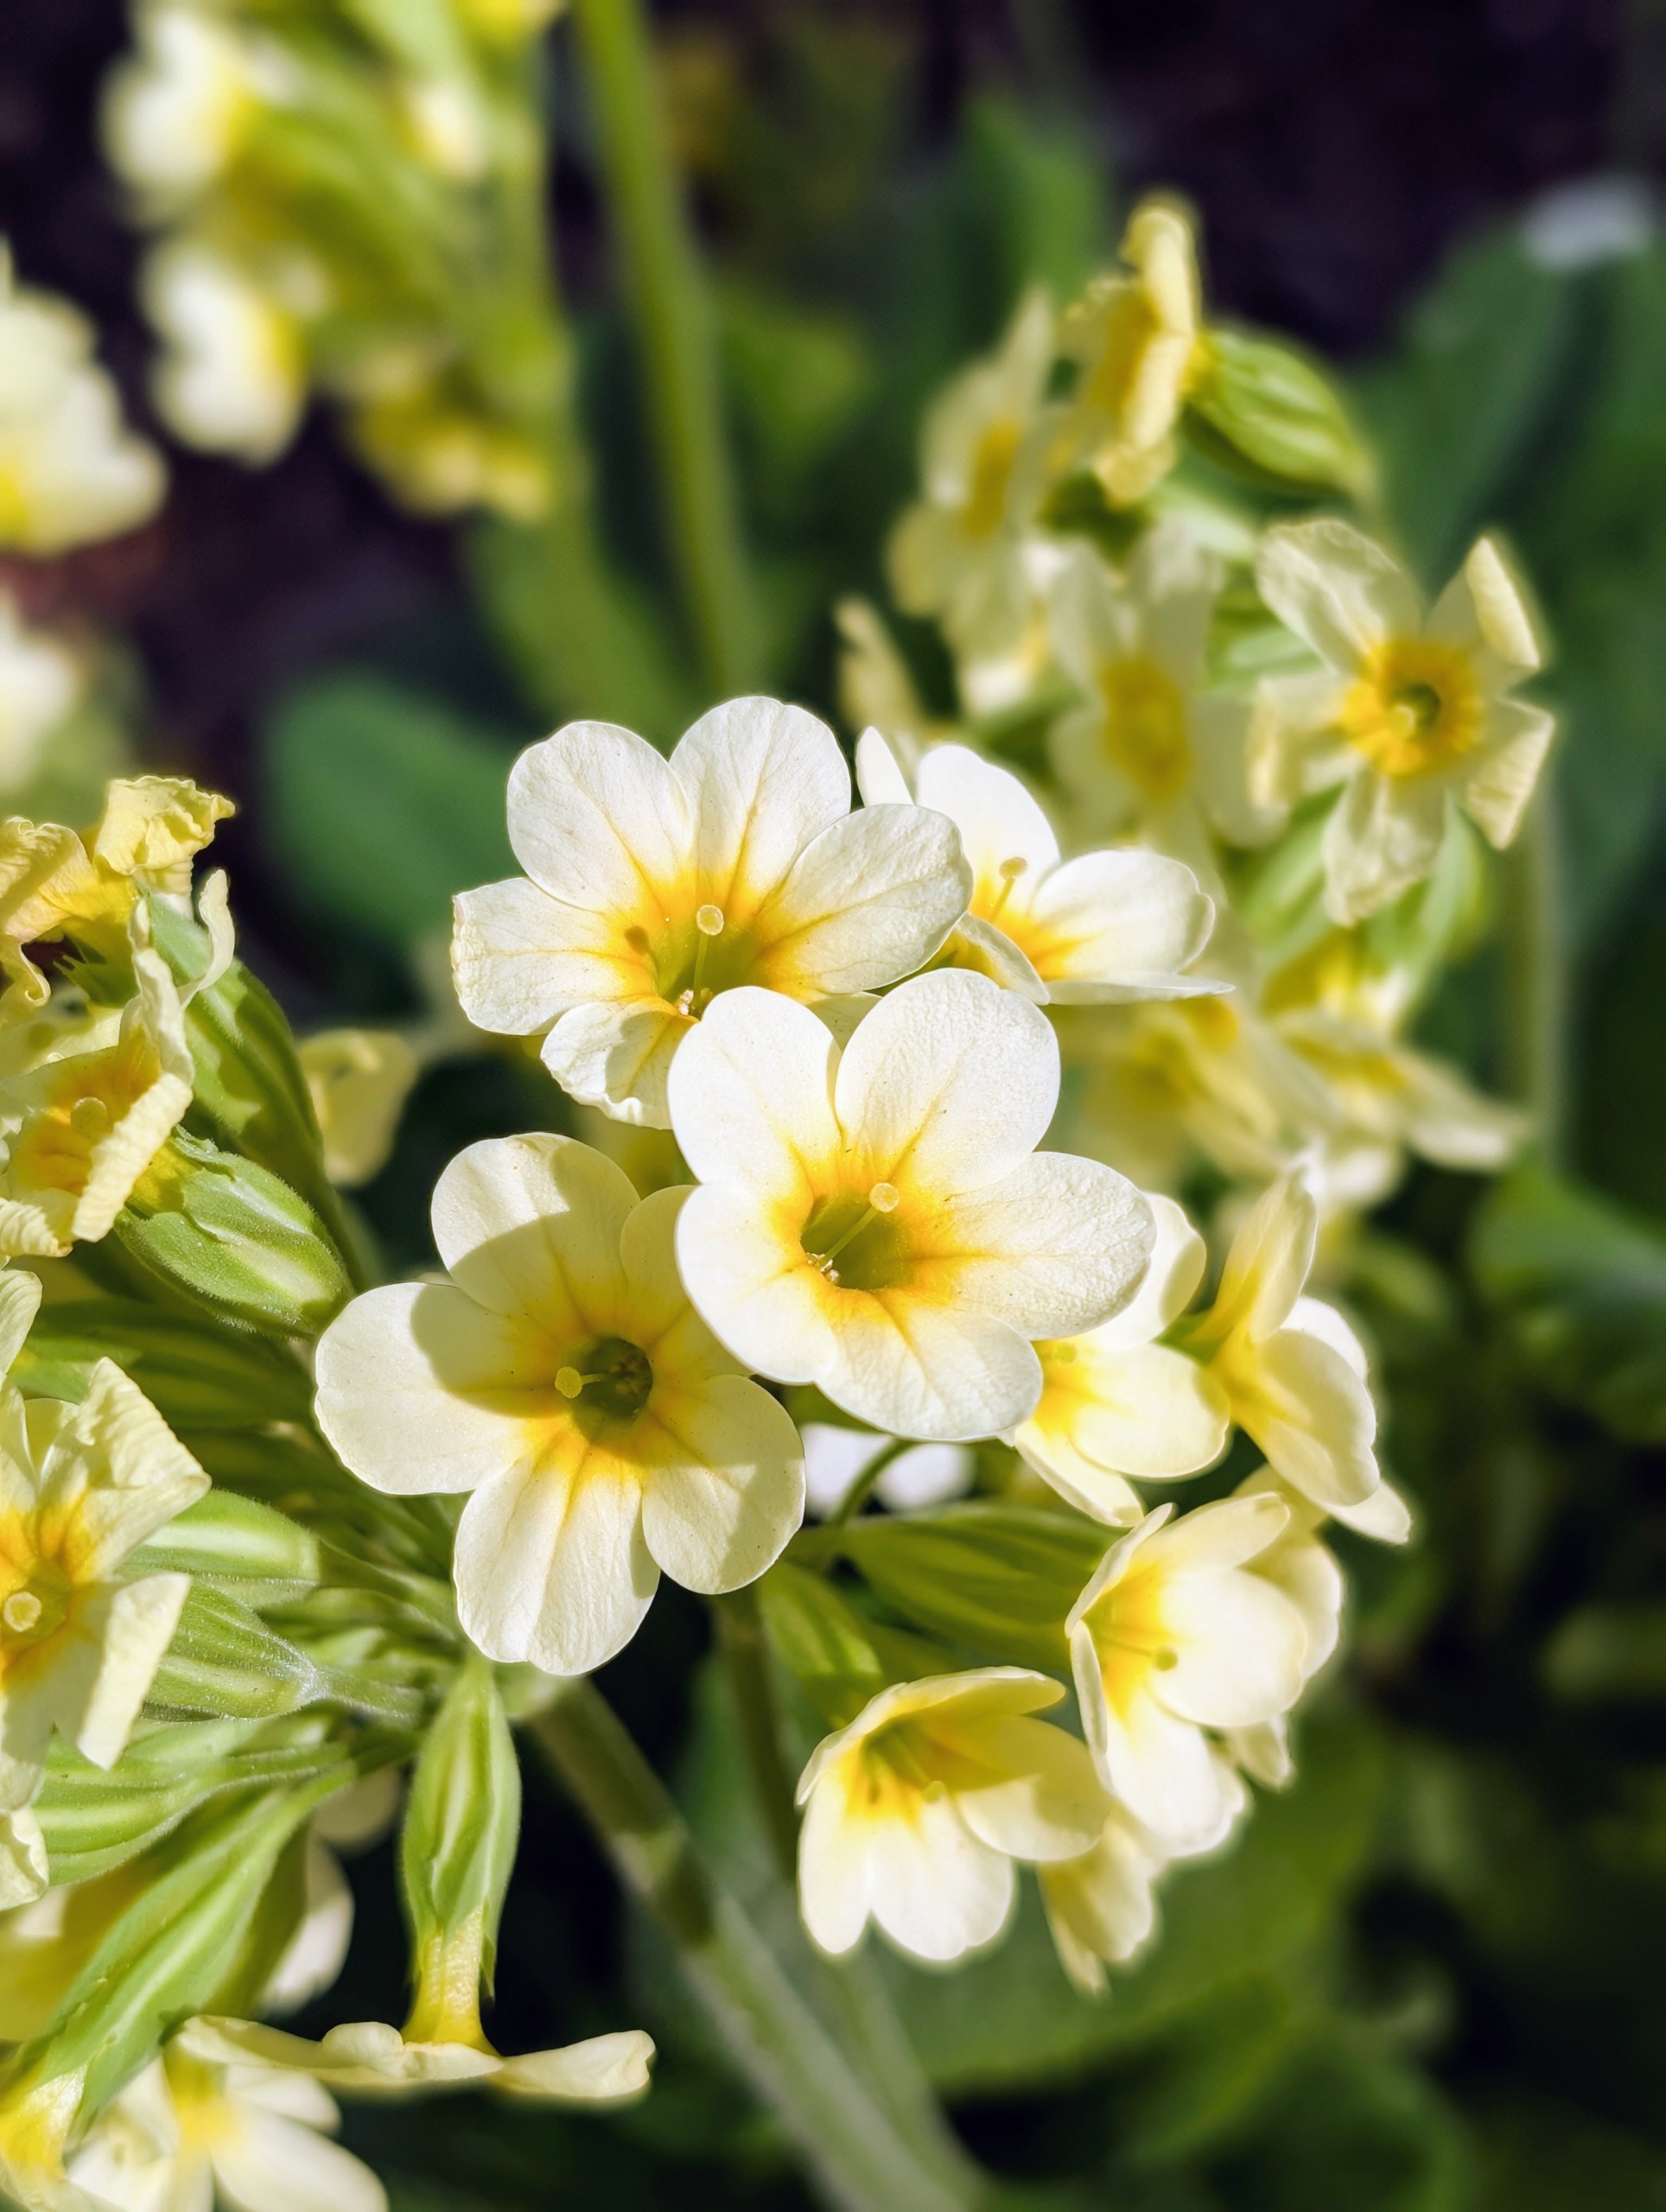
Nearby, this a blooming primrose – a vibrant perennial known for its early blooms that come in yellow, pink, purple, and red. Primrose thrives in cool temperatures and does well in garden beds, borders, and containers.
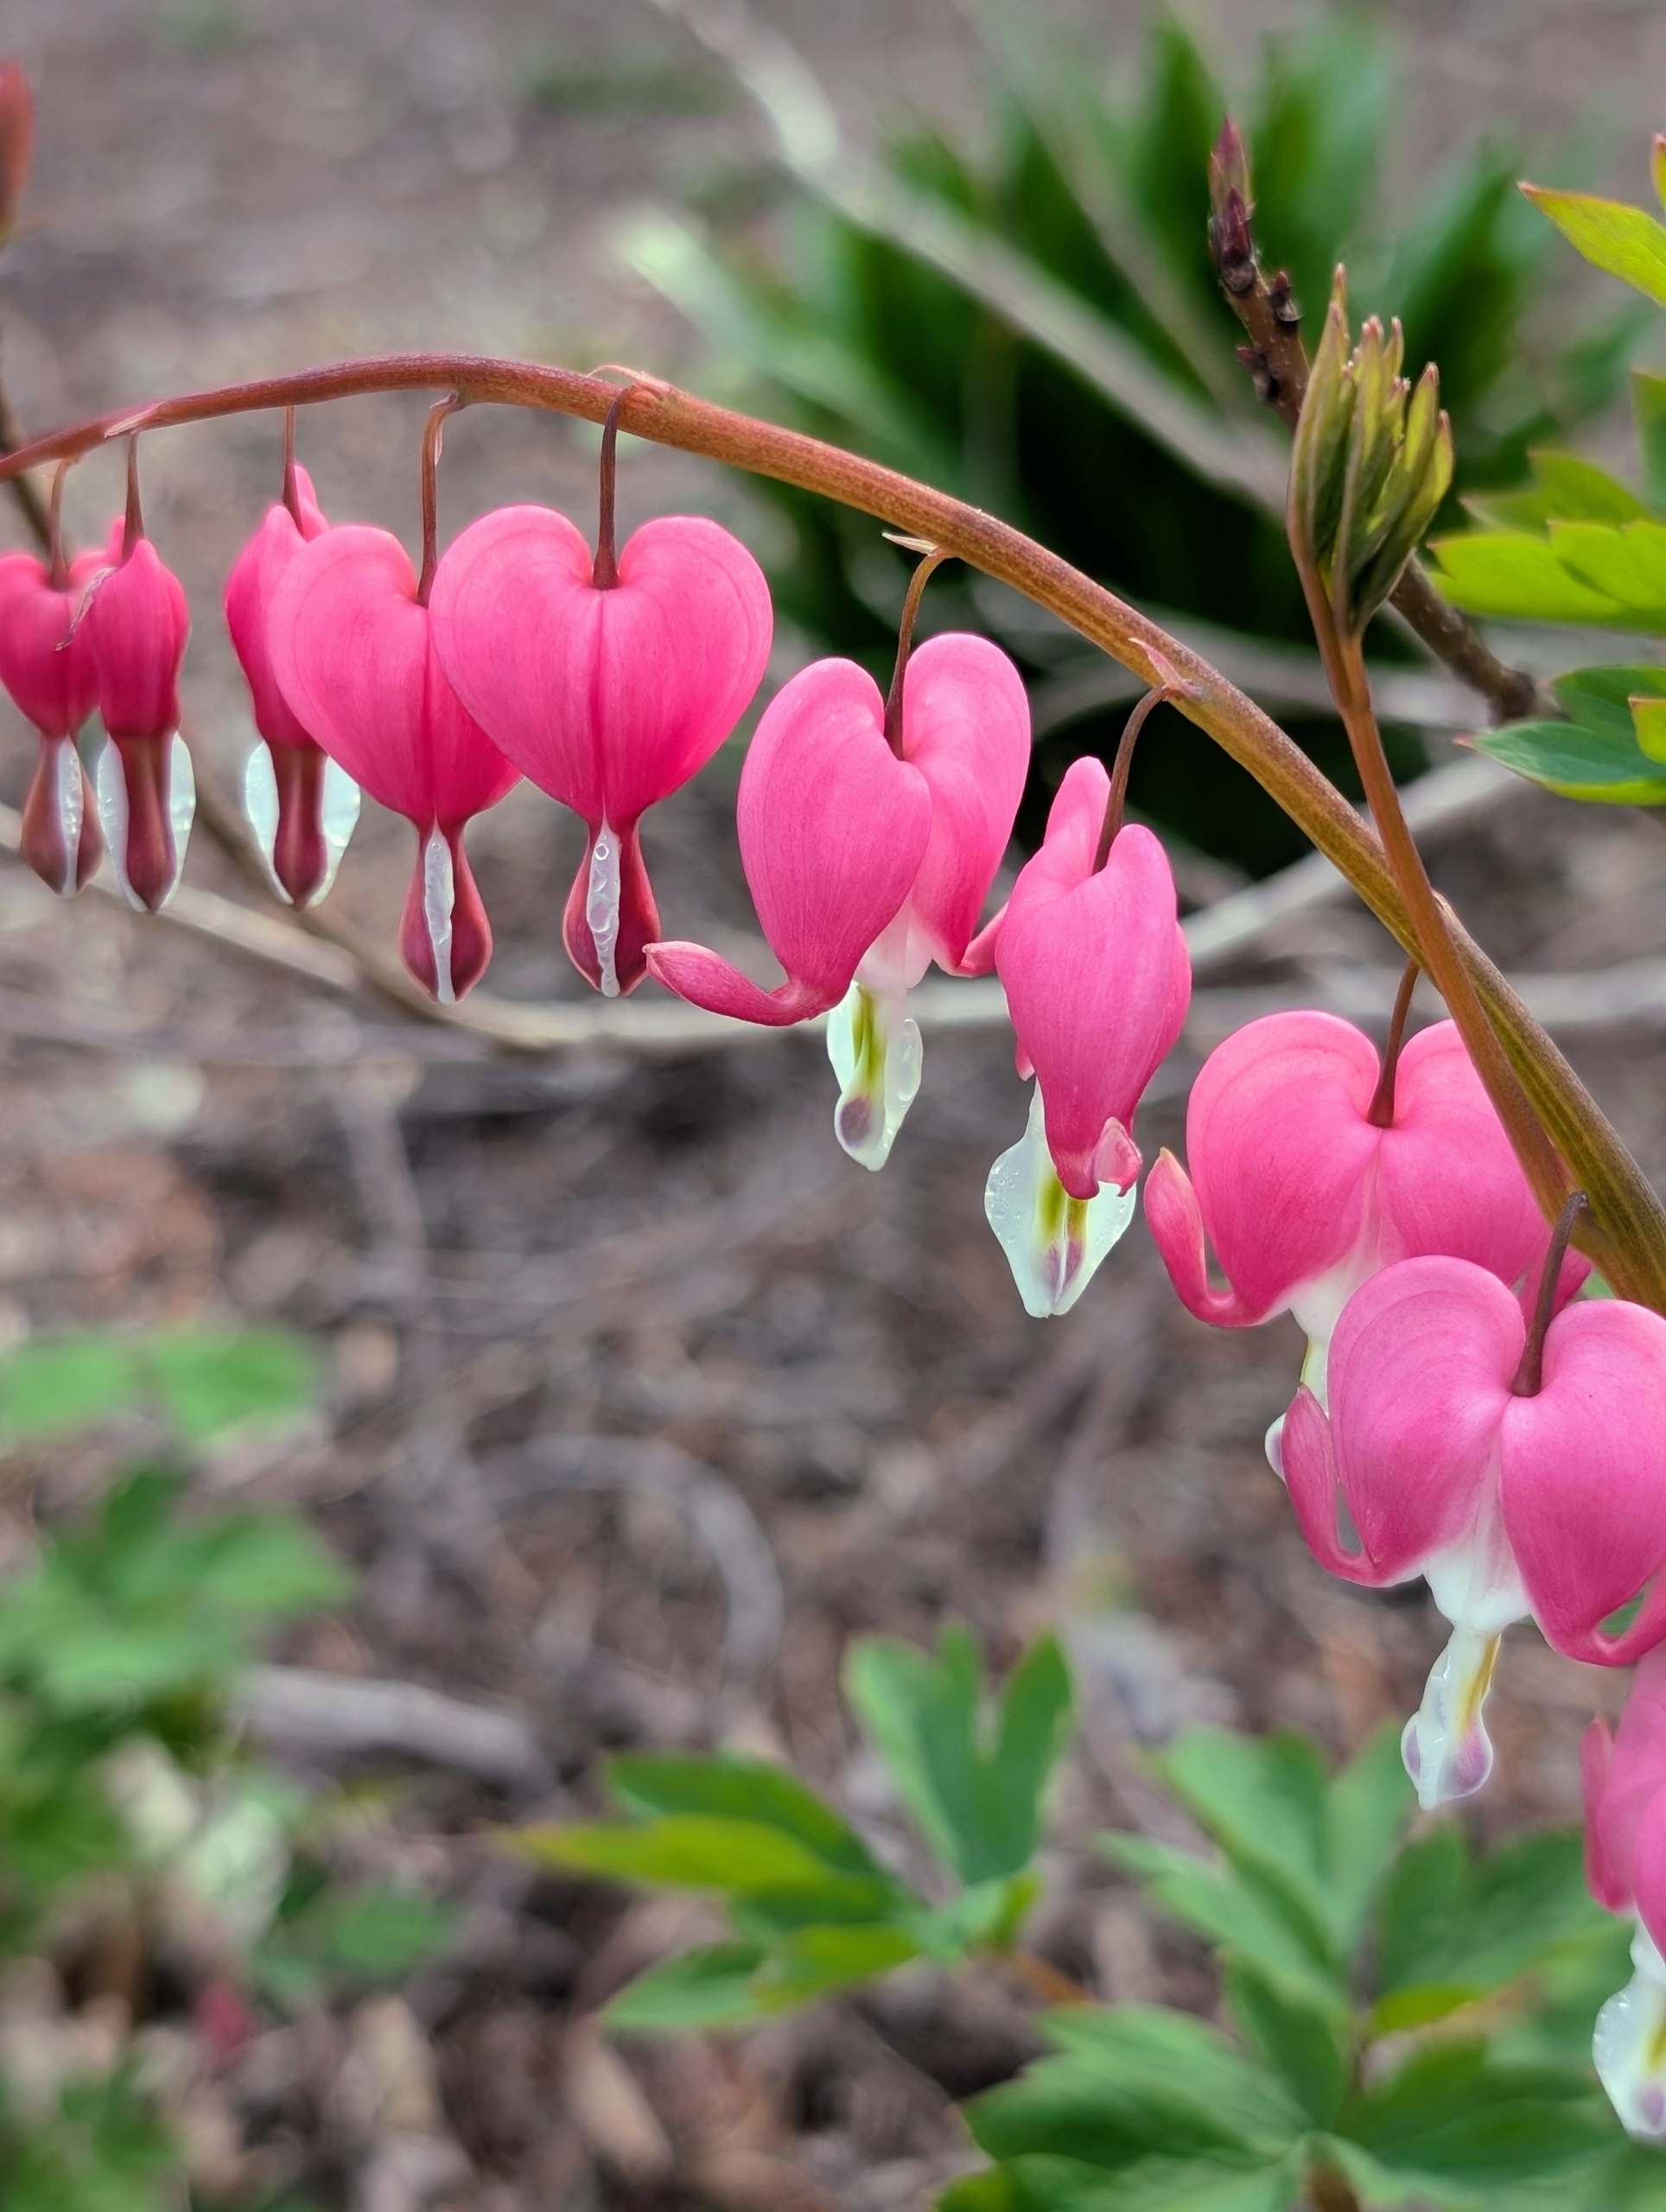
And here is a spring favorite, Dicentra spectabilis, or bleeding heart – a herbaceous plant with oddly shaped flowers that look very similar to hearts. These flowers are native to eastern Asia and North America. They are shade loving woodland plants that bloom in the cool of spring and stay in bloom for several weeks.