My Bedford, New York farm is buzzing with activity this fall - television shoots, photography shoots, and lots and lots of seasonal chores.
My gardeners have also been hard at work planting spring-flowering bulbs. Every year, I order thousands and thousands of bulbs to add to my landscape. It’s so exciting to see the swaths of color in the gardens after a cold and dreary winter. This week, Ryan McCallister planted Puschkinia and Chionodoxa in various beds outside my Summer House, outside my Tenant House, and under my grove of tall bald cypress trees. They will all look so marvelous come spring.
Here are some photos - enjoy.
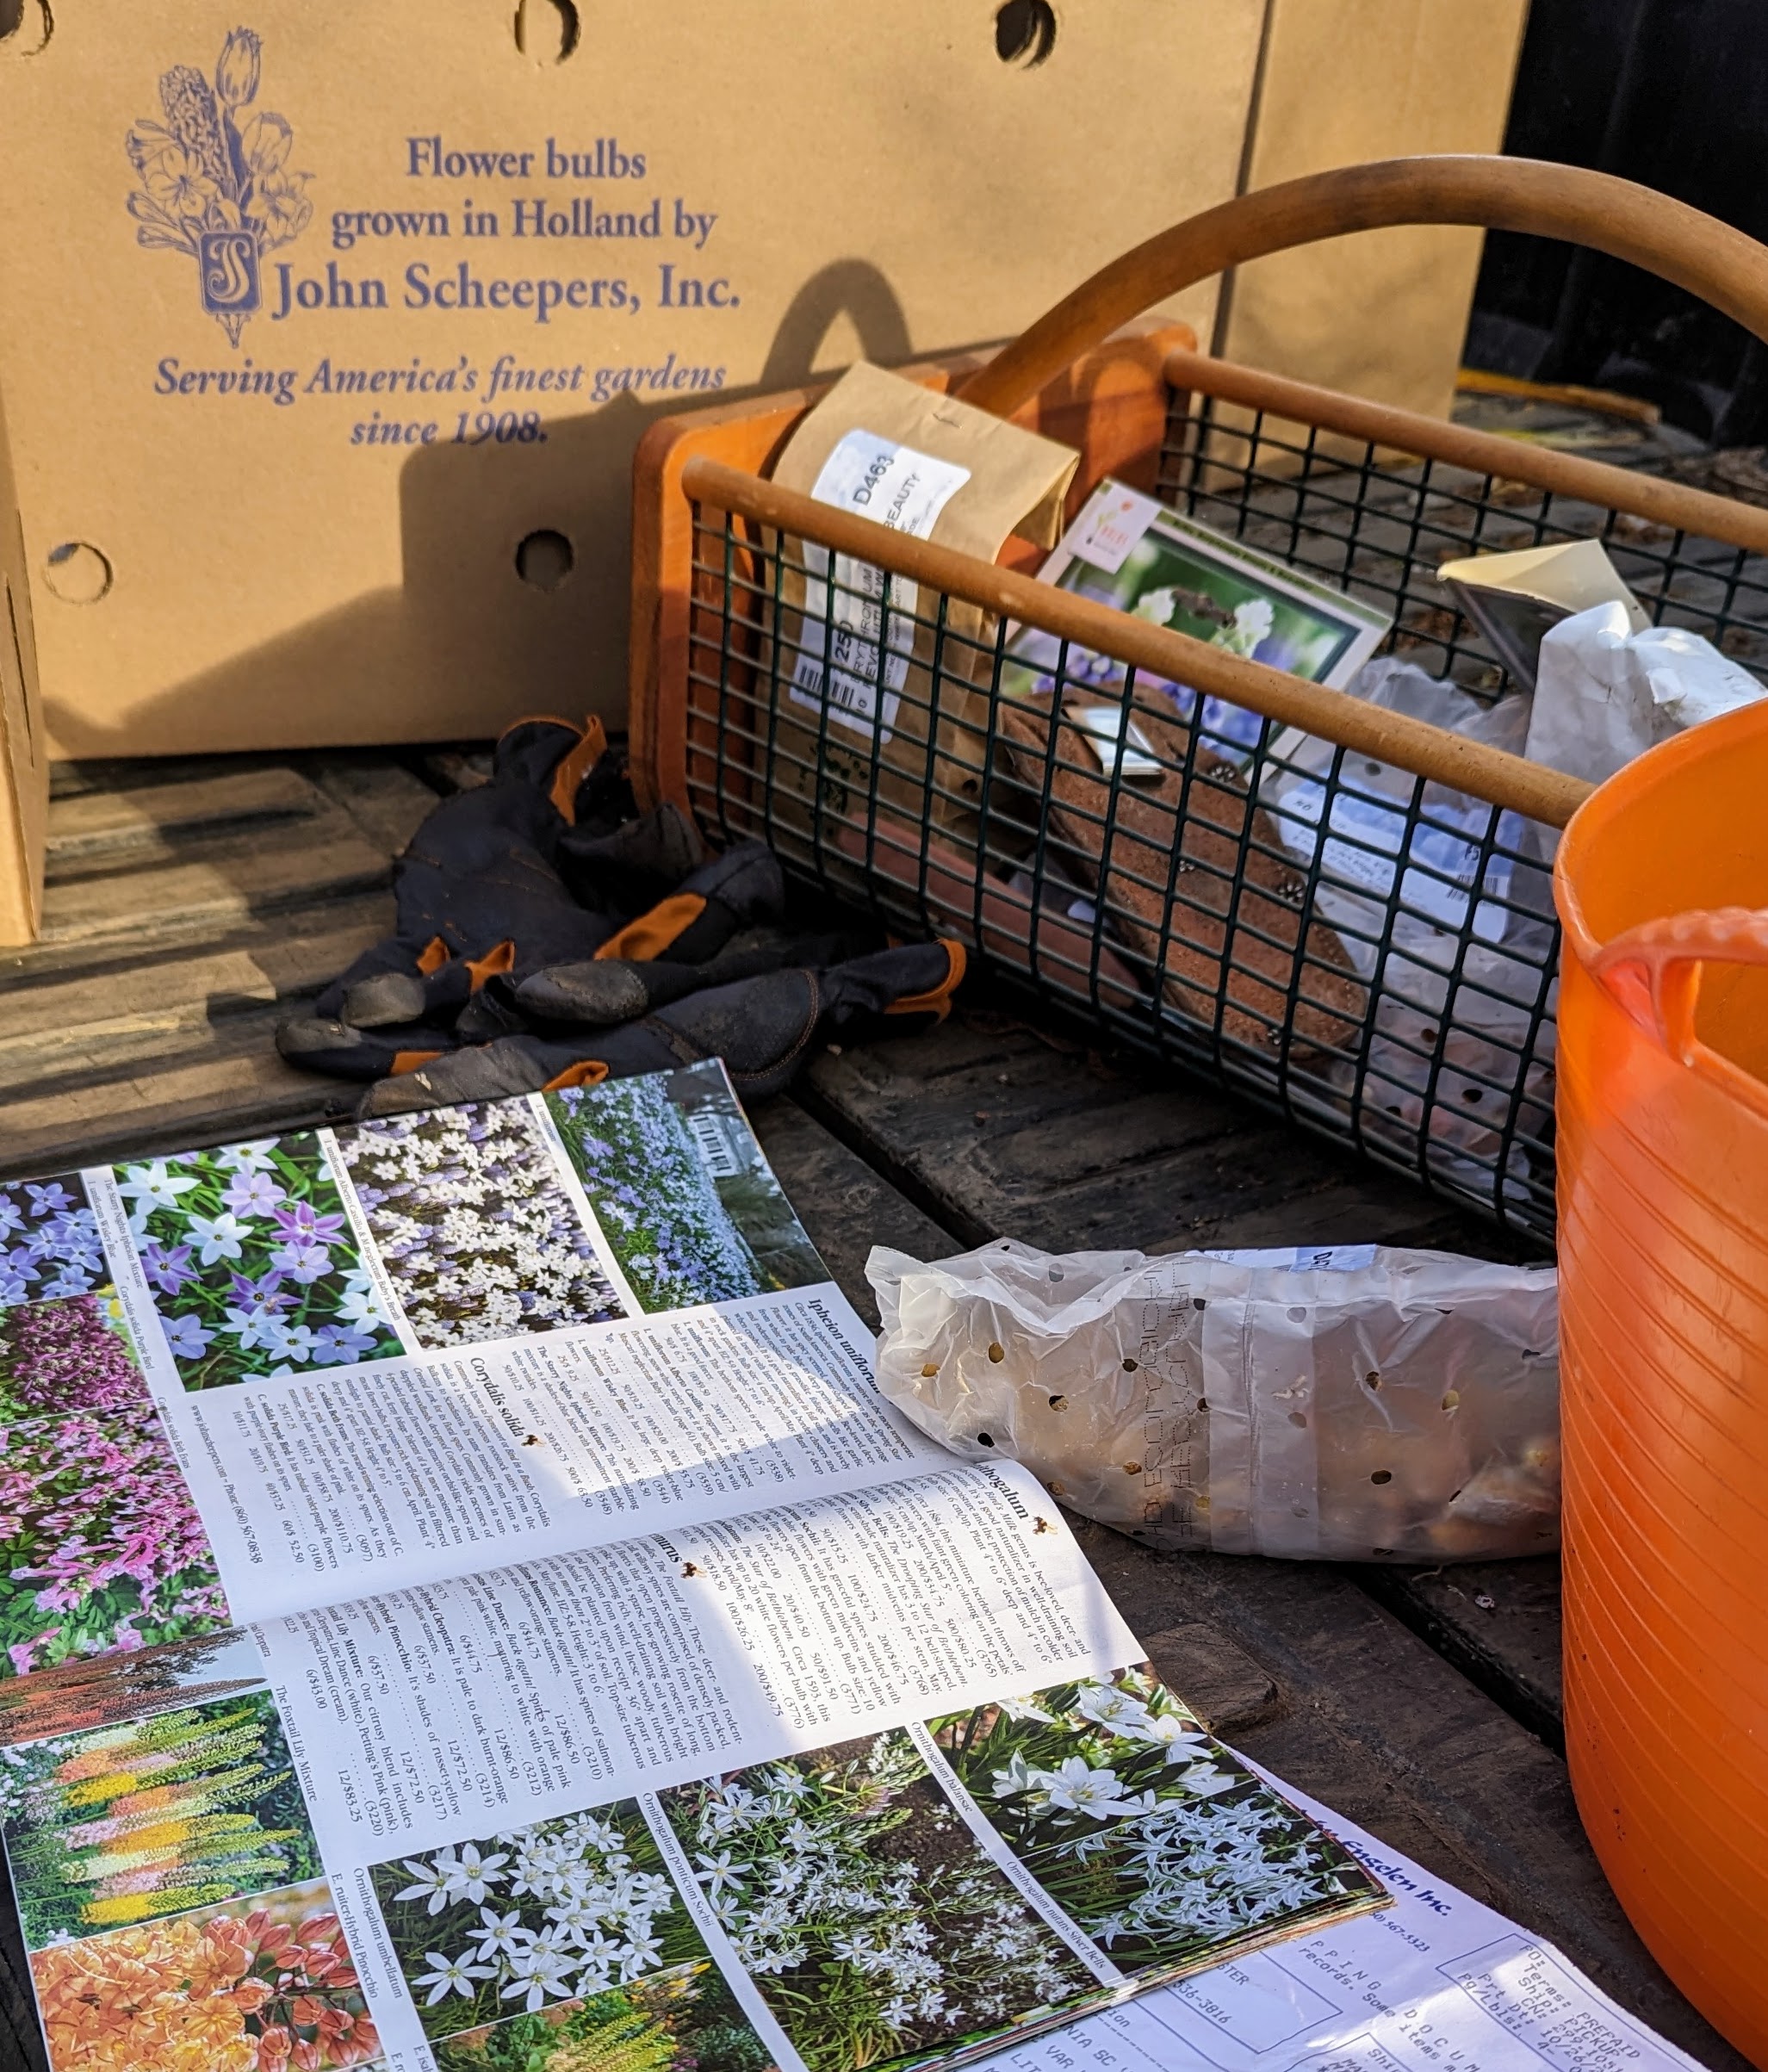
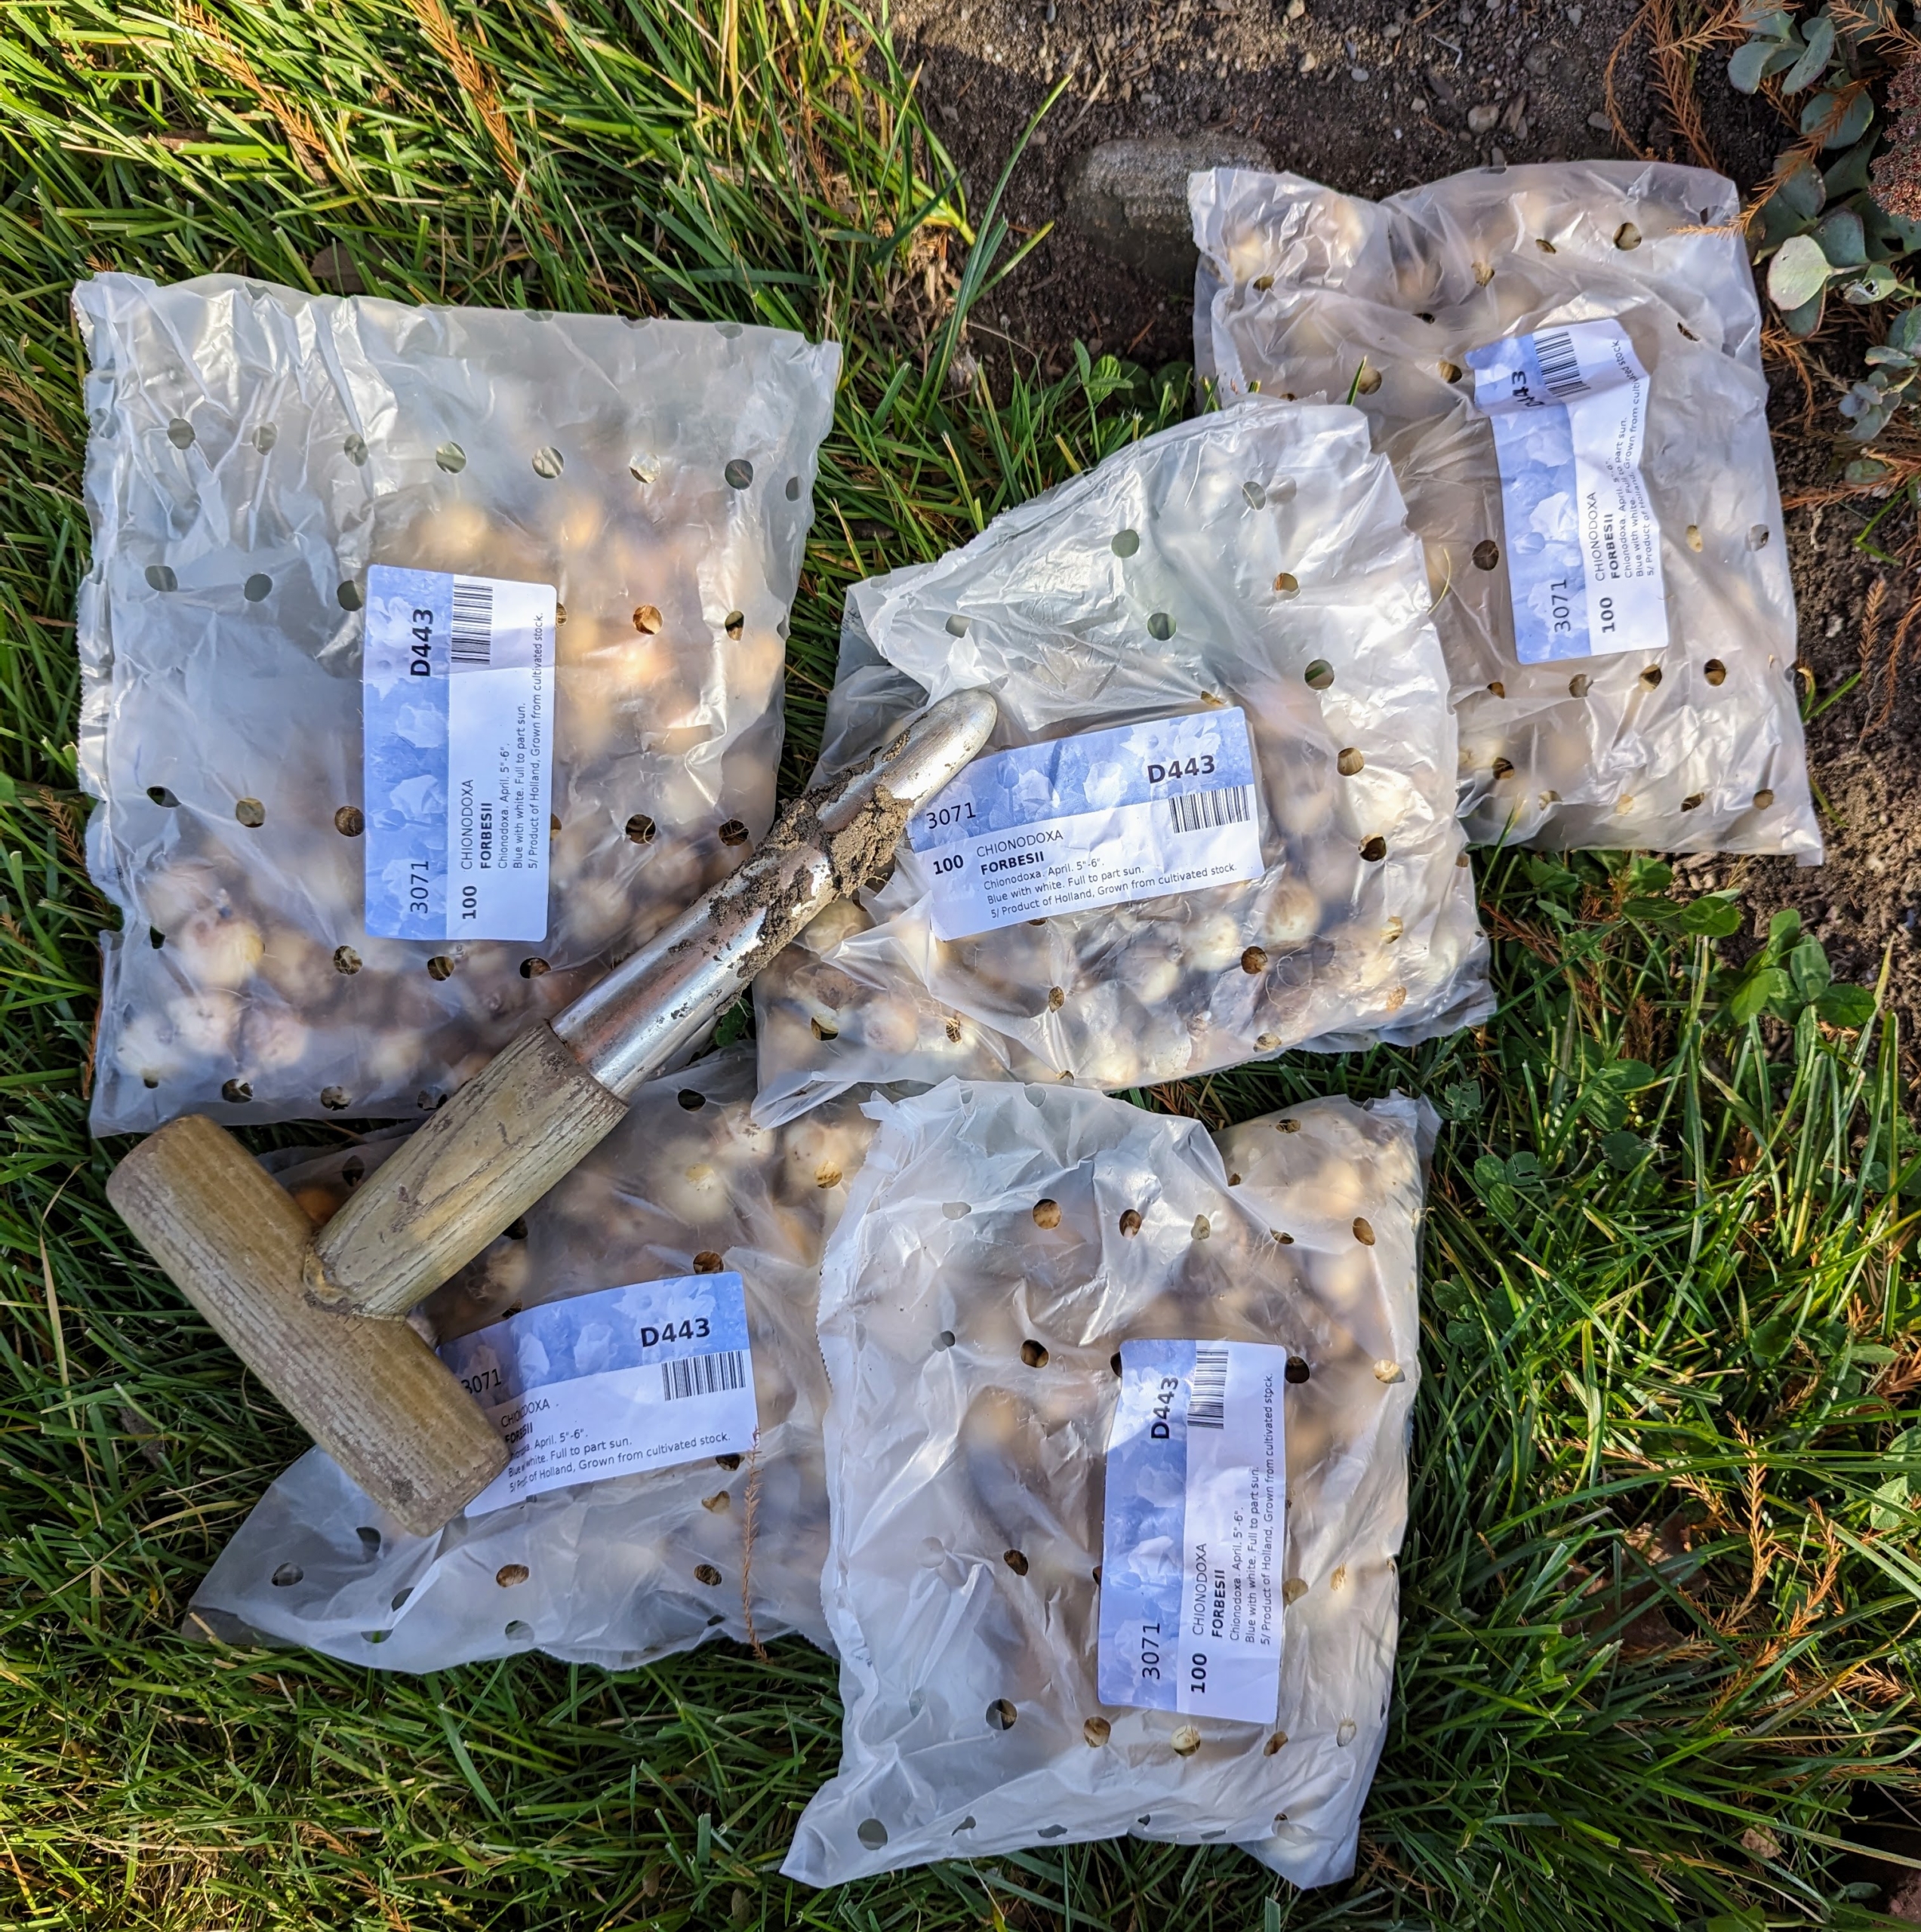
Every year it is a rush to plant all our bulbs before the ground freezes. This season, we’ve had some very pleasant, very mild days – just perfect for planting. Ryan keeps track of all the flowers and plants, and knows exactly where our bulbs should go. Here he is organizing the varieties – all from Van Engelen Inc., and its sister company, John Scheepers,
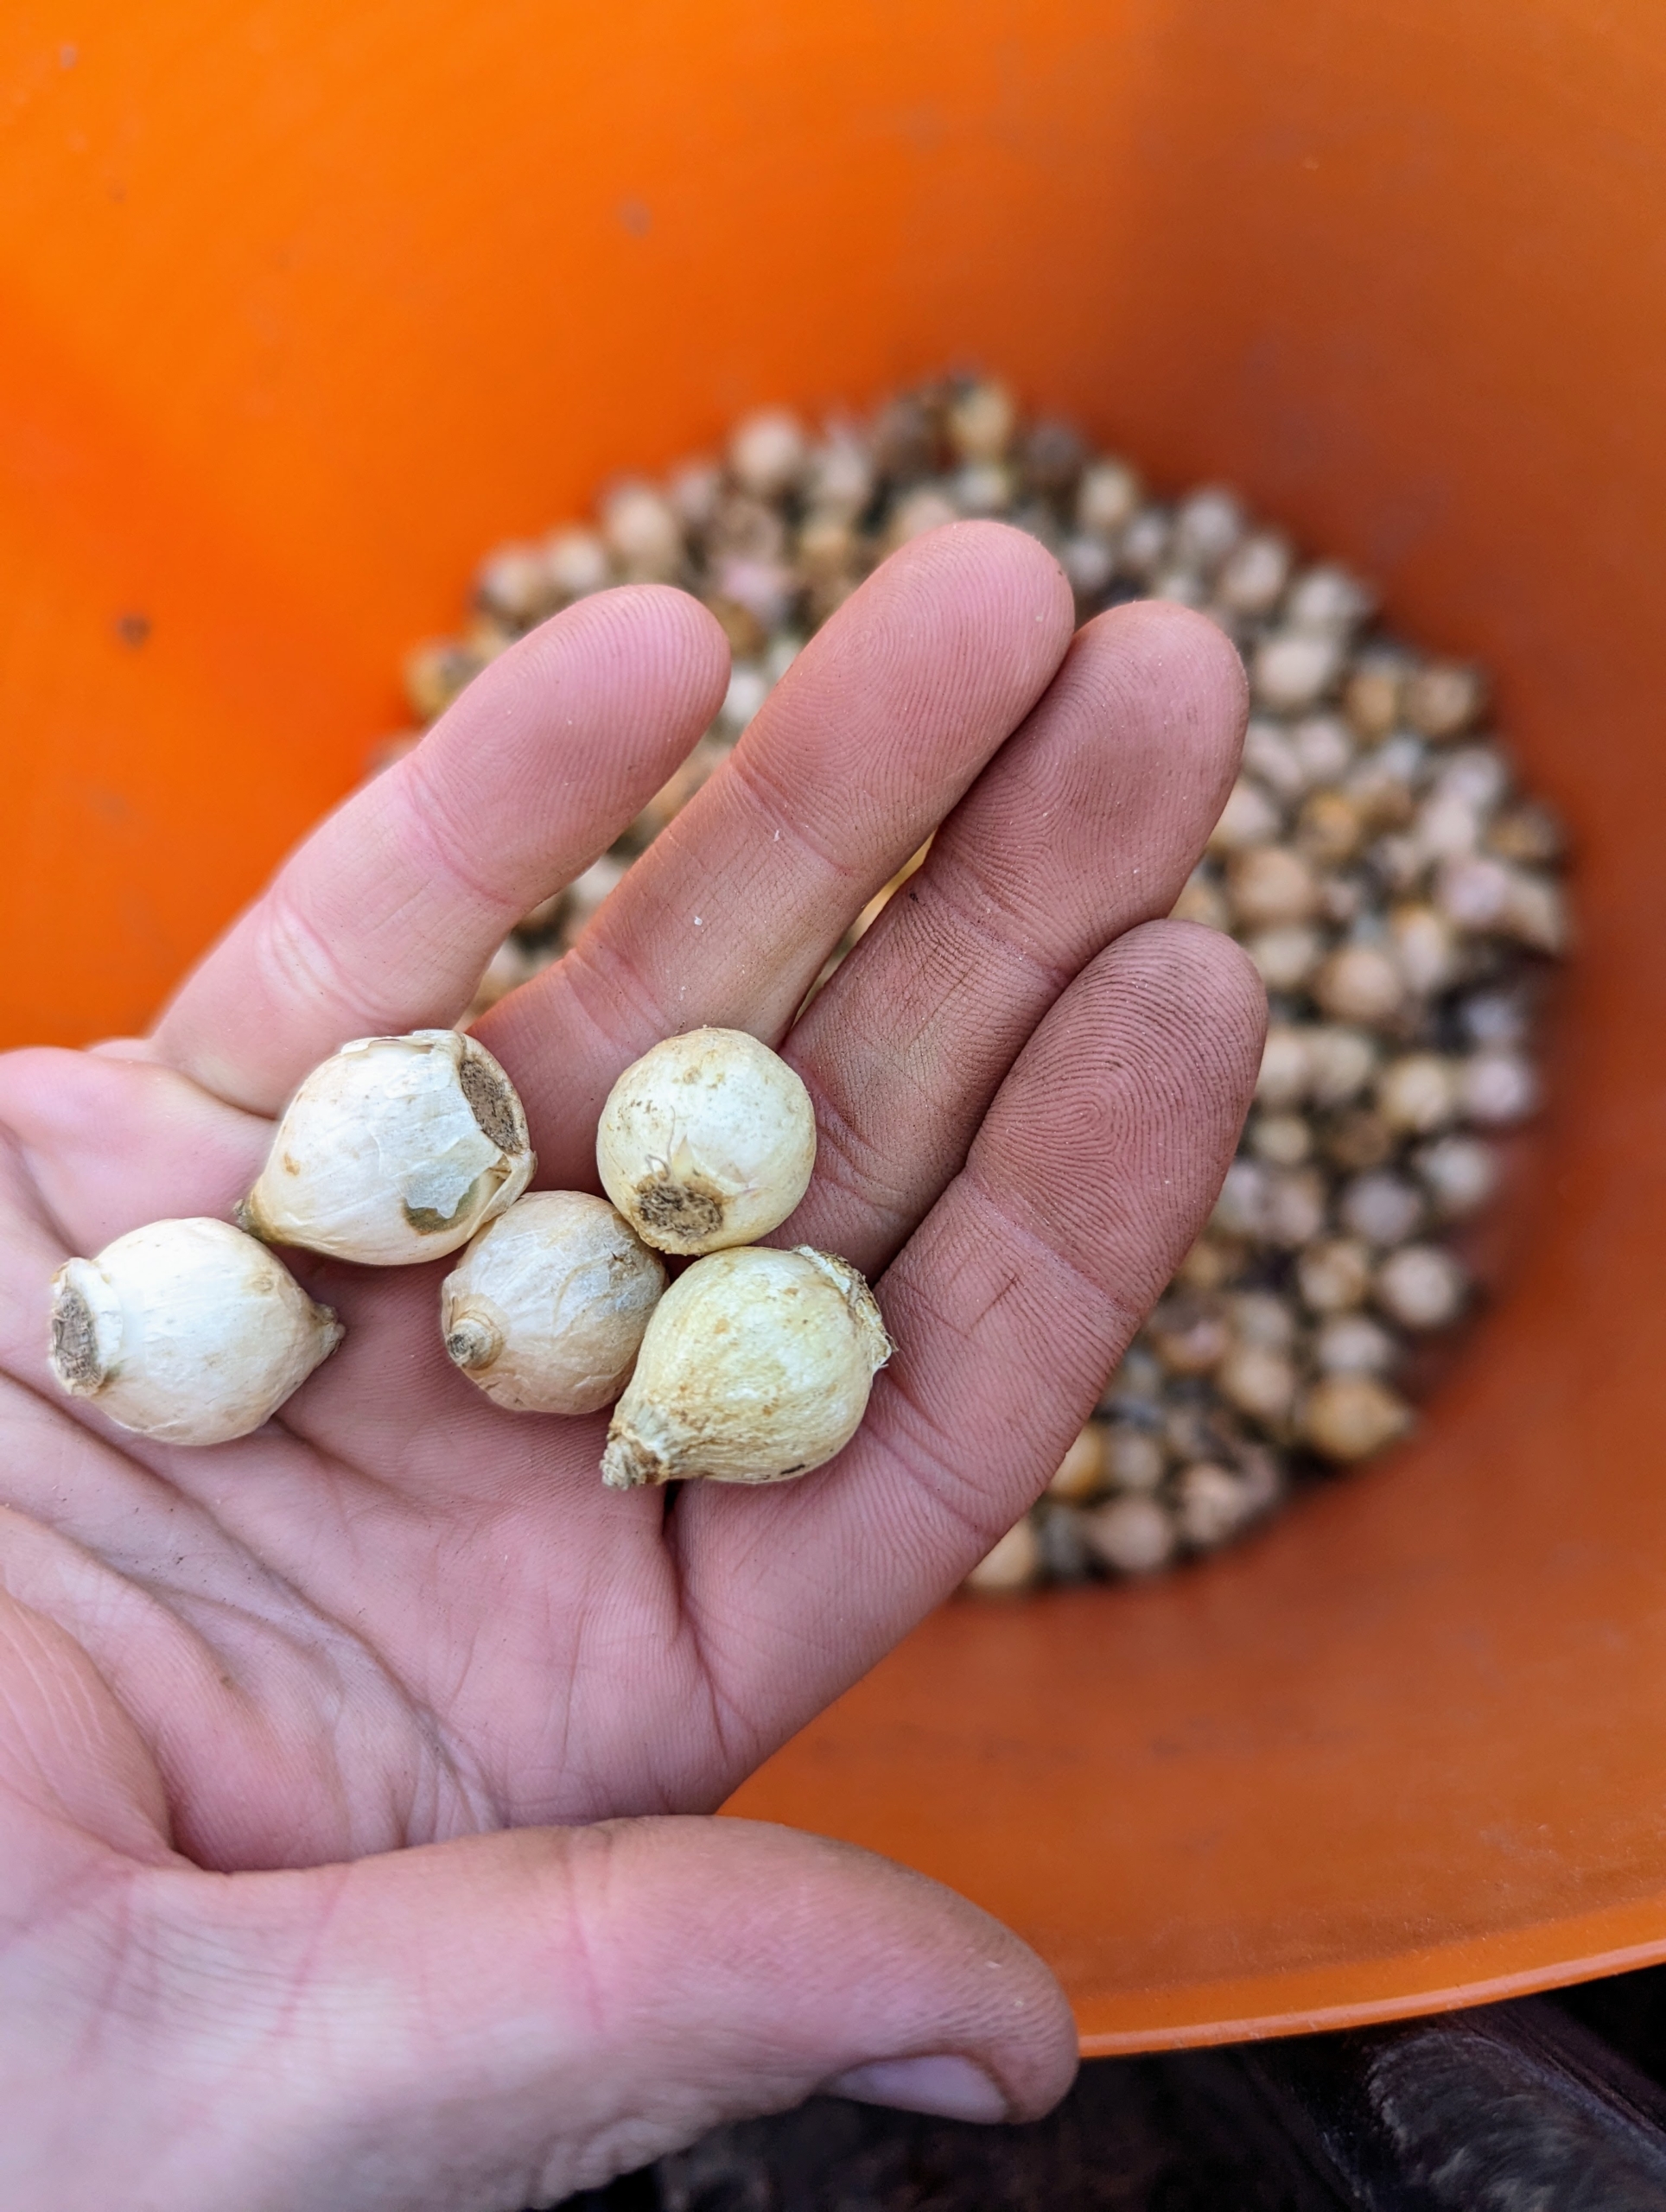
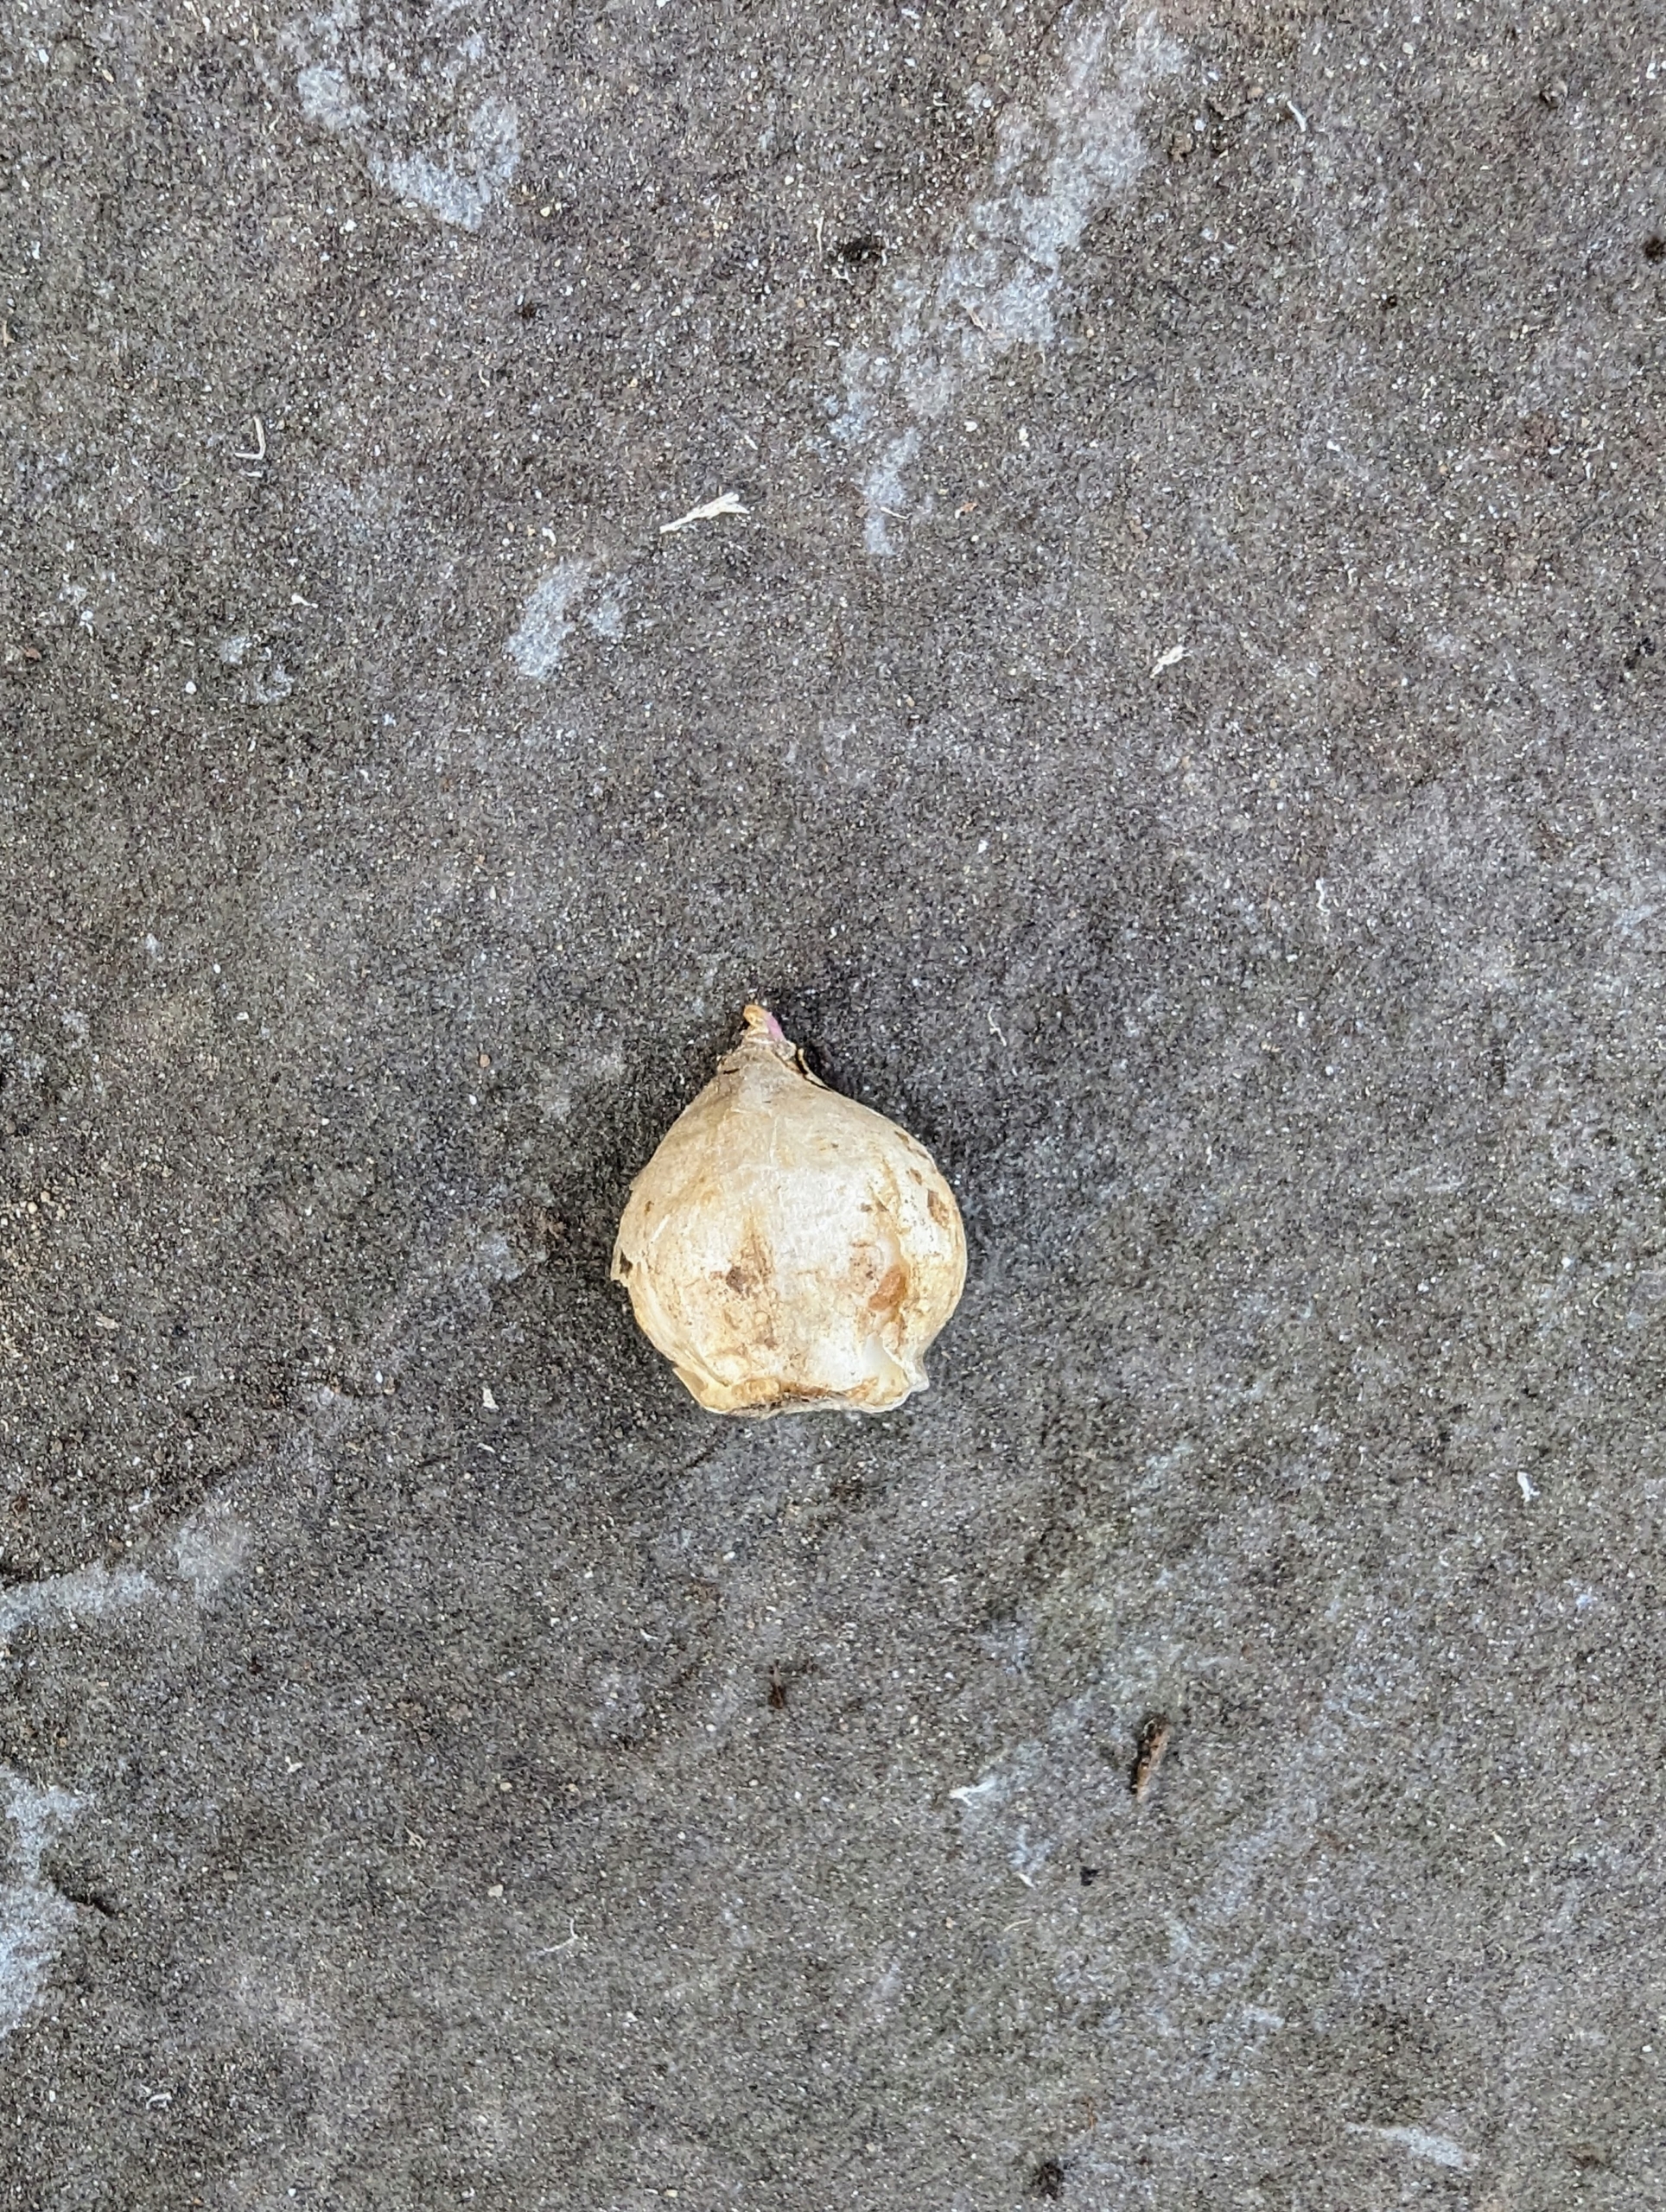
When purchasing bulbs, always look for those that are plump and firm, and avoid those that are soft.
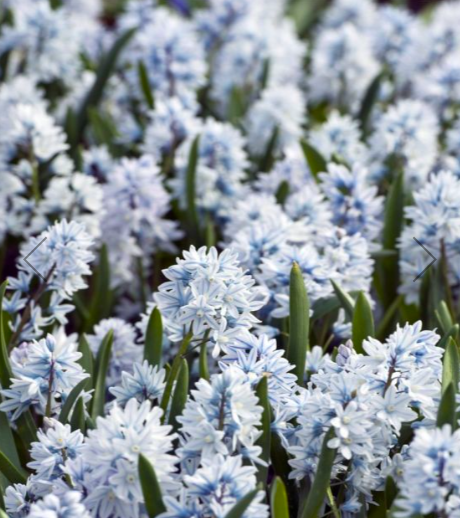
The bulbs getting planted on this day include this pretty Puschkinia. Puschkinias are also known as Striped Squill – a deer- and rodent-resistant naturalizer named after Russian botanist Count Apollos Apollosvich Mussin-Puschkin. Puschkinia does best in moist, fertile, well-draining soil in full sun to partial sunlight. (Photo from vanengelen.com)
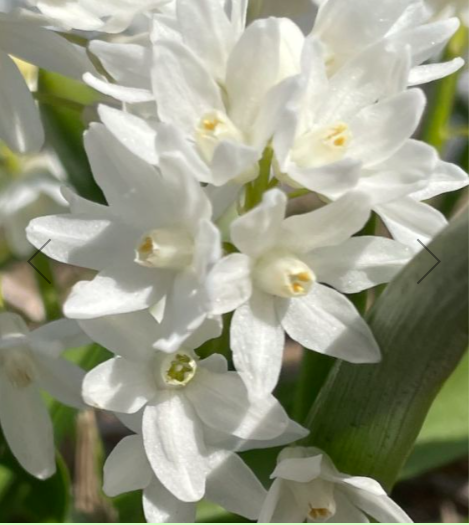
This is Puschkinia scilloides var. libanotica alba. All Puschkinia varieties take time to mature, but if it’s happy where it’s planted and left undisturbed, it naturalizes by bulb offsets called bulbils: baby bulbs and great planted en masse in garden borders. (Photo from vanengelen.com)
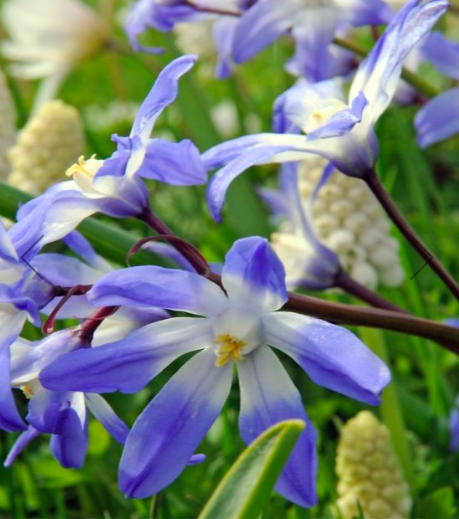
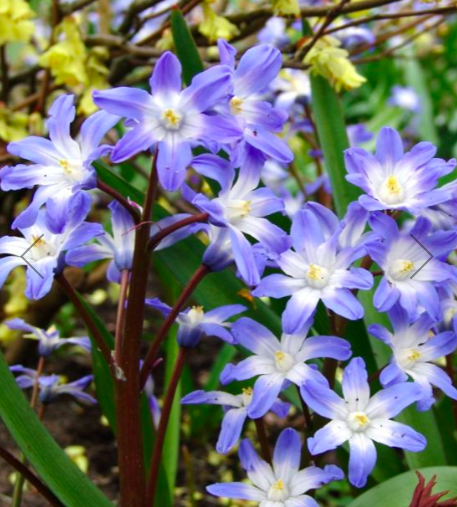
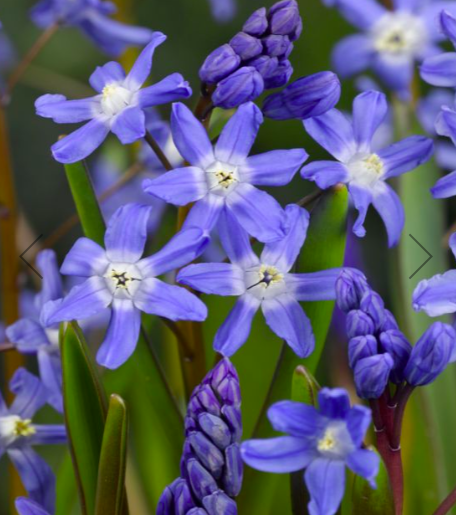
This is Chionodoxa forbesii. Commonly known as Glory of the Snow, this Chionodoxa has up to 12 star-shaped, six-petaled clustered rich blue flowers with bright white central zones atop dark stems with narrow foliage. (Photo from vanengelen.com)
A very close variety is Chionodoxa forbesii Blue Giant. Blue Giant is the improved form of forbesii with up to eight, larger, star-shaped, six-petaled clustered rich blue flowers. (Photo from vanengelen.com)
And this is Chionodoxa sardensis, which has multiple star-shaped, six-petaled clustered bright blue flowers with small white centers atop dark stems. This variety was discovered circa 1883 from an area around Turkey. (Photo from vanengelen.com)
The first thing before planting bulbs is to prepare the bed with the proper bulb food. The food should be a balanced fertilizer that has a good amount of phosphorous. Fertilizing spring-blooming bulbs also helps them fight off diseases and pests.
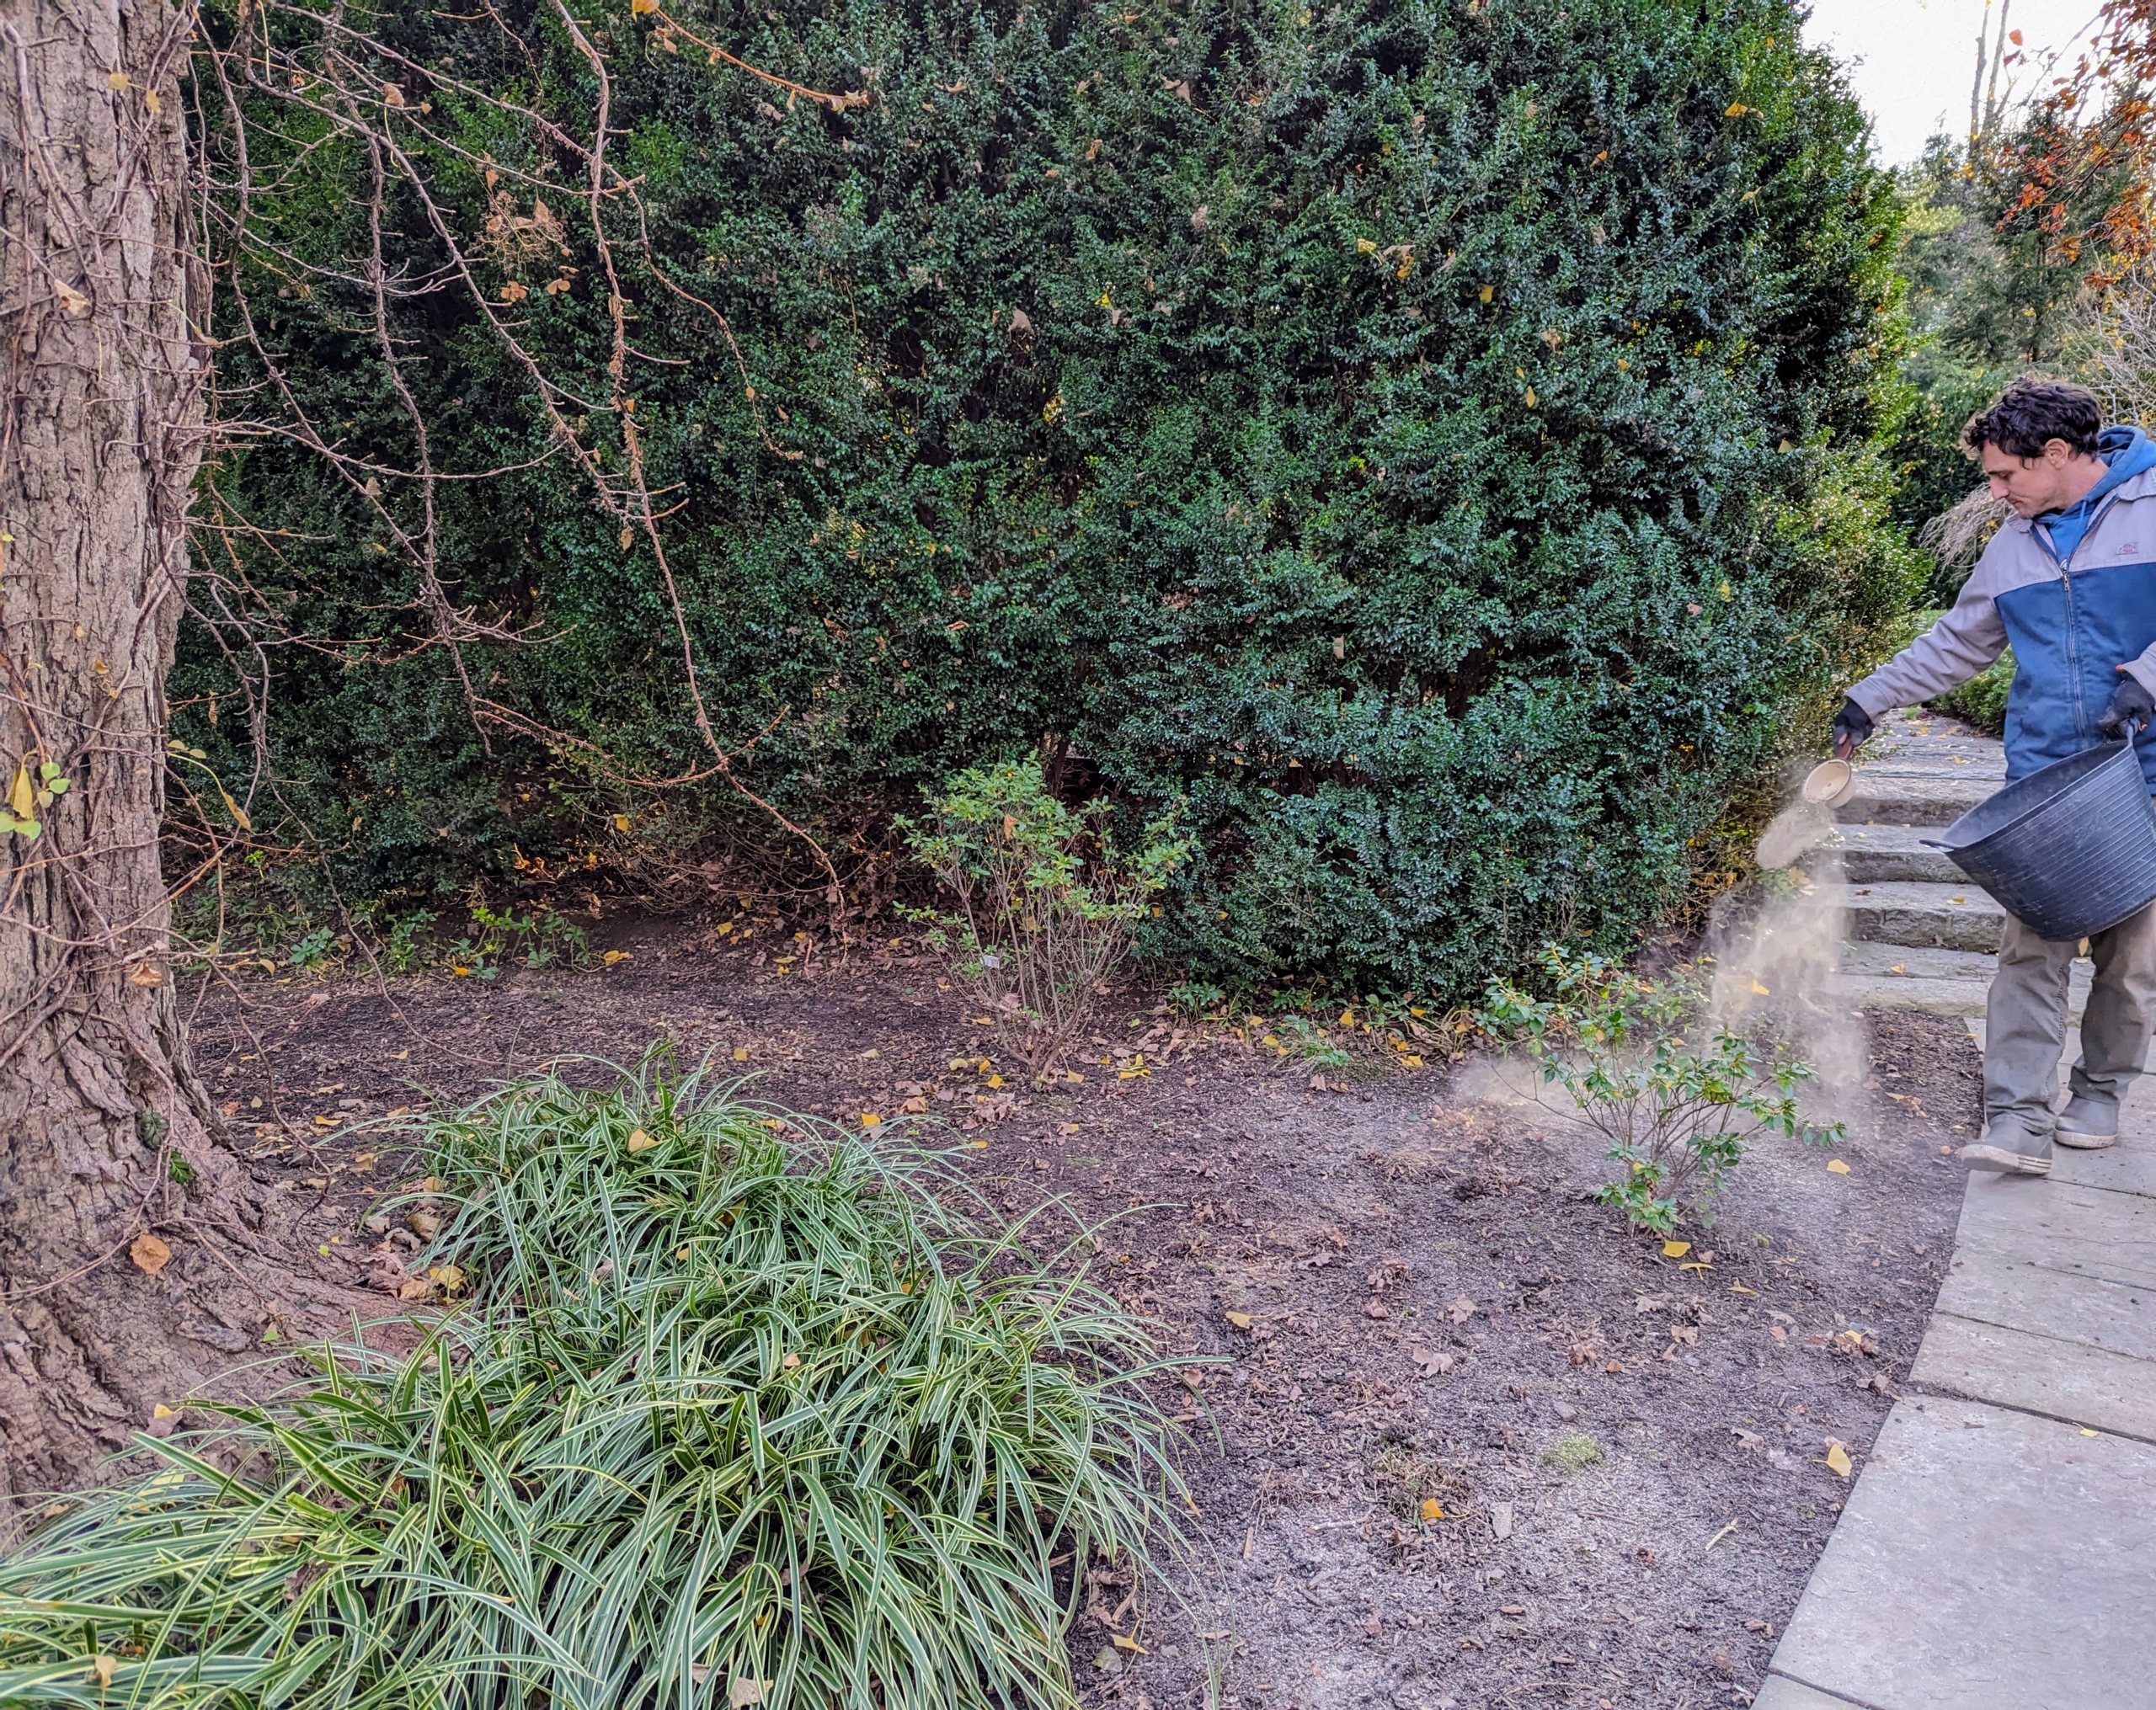
This area outside my Summer House garden is fed evenly and generously.
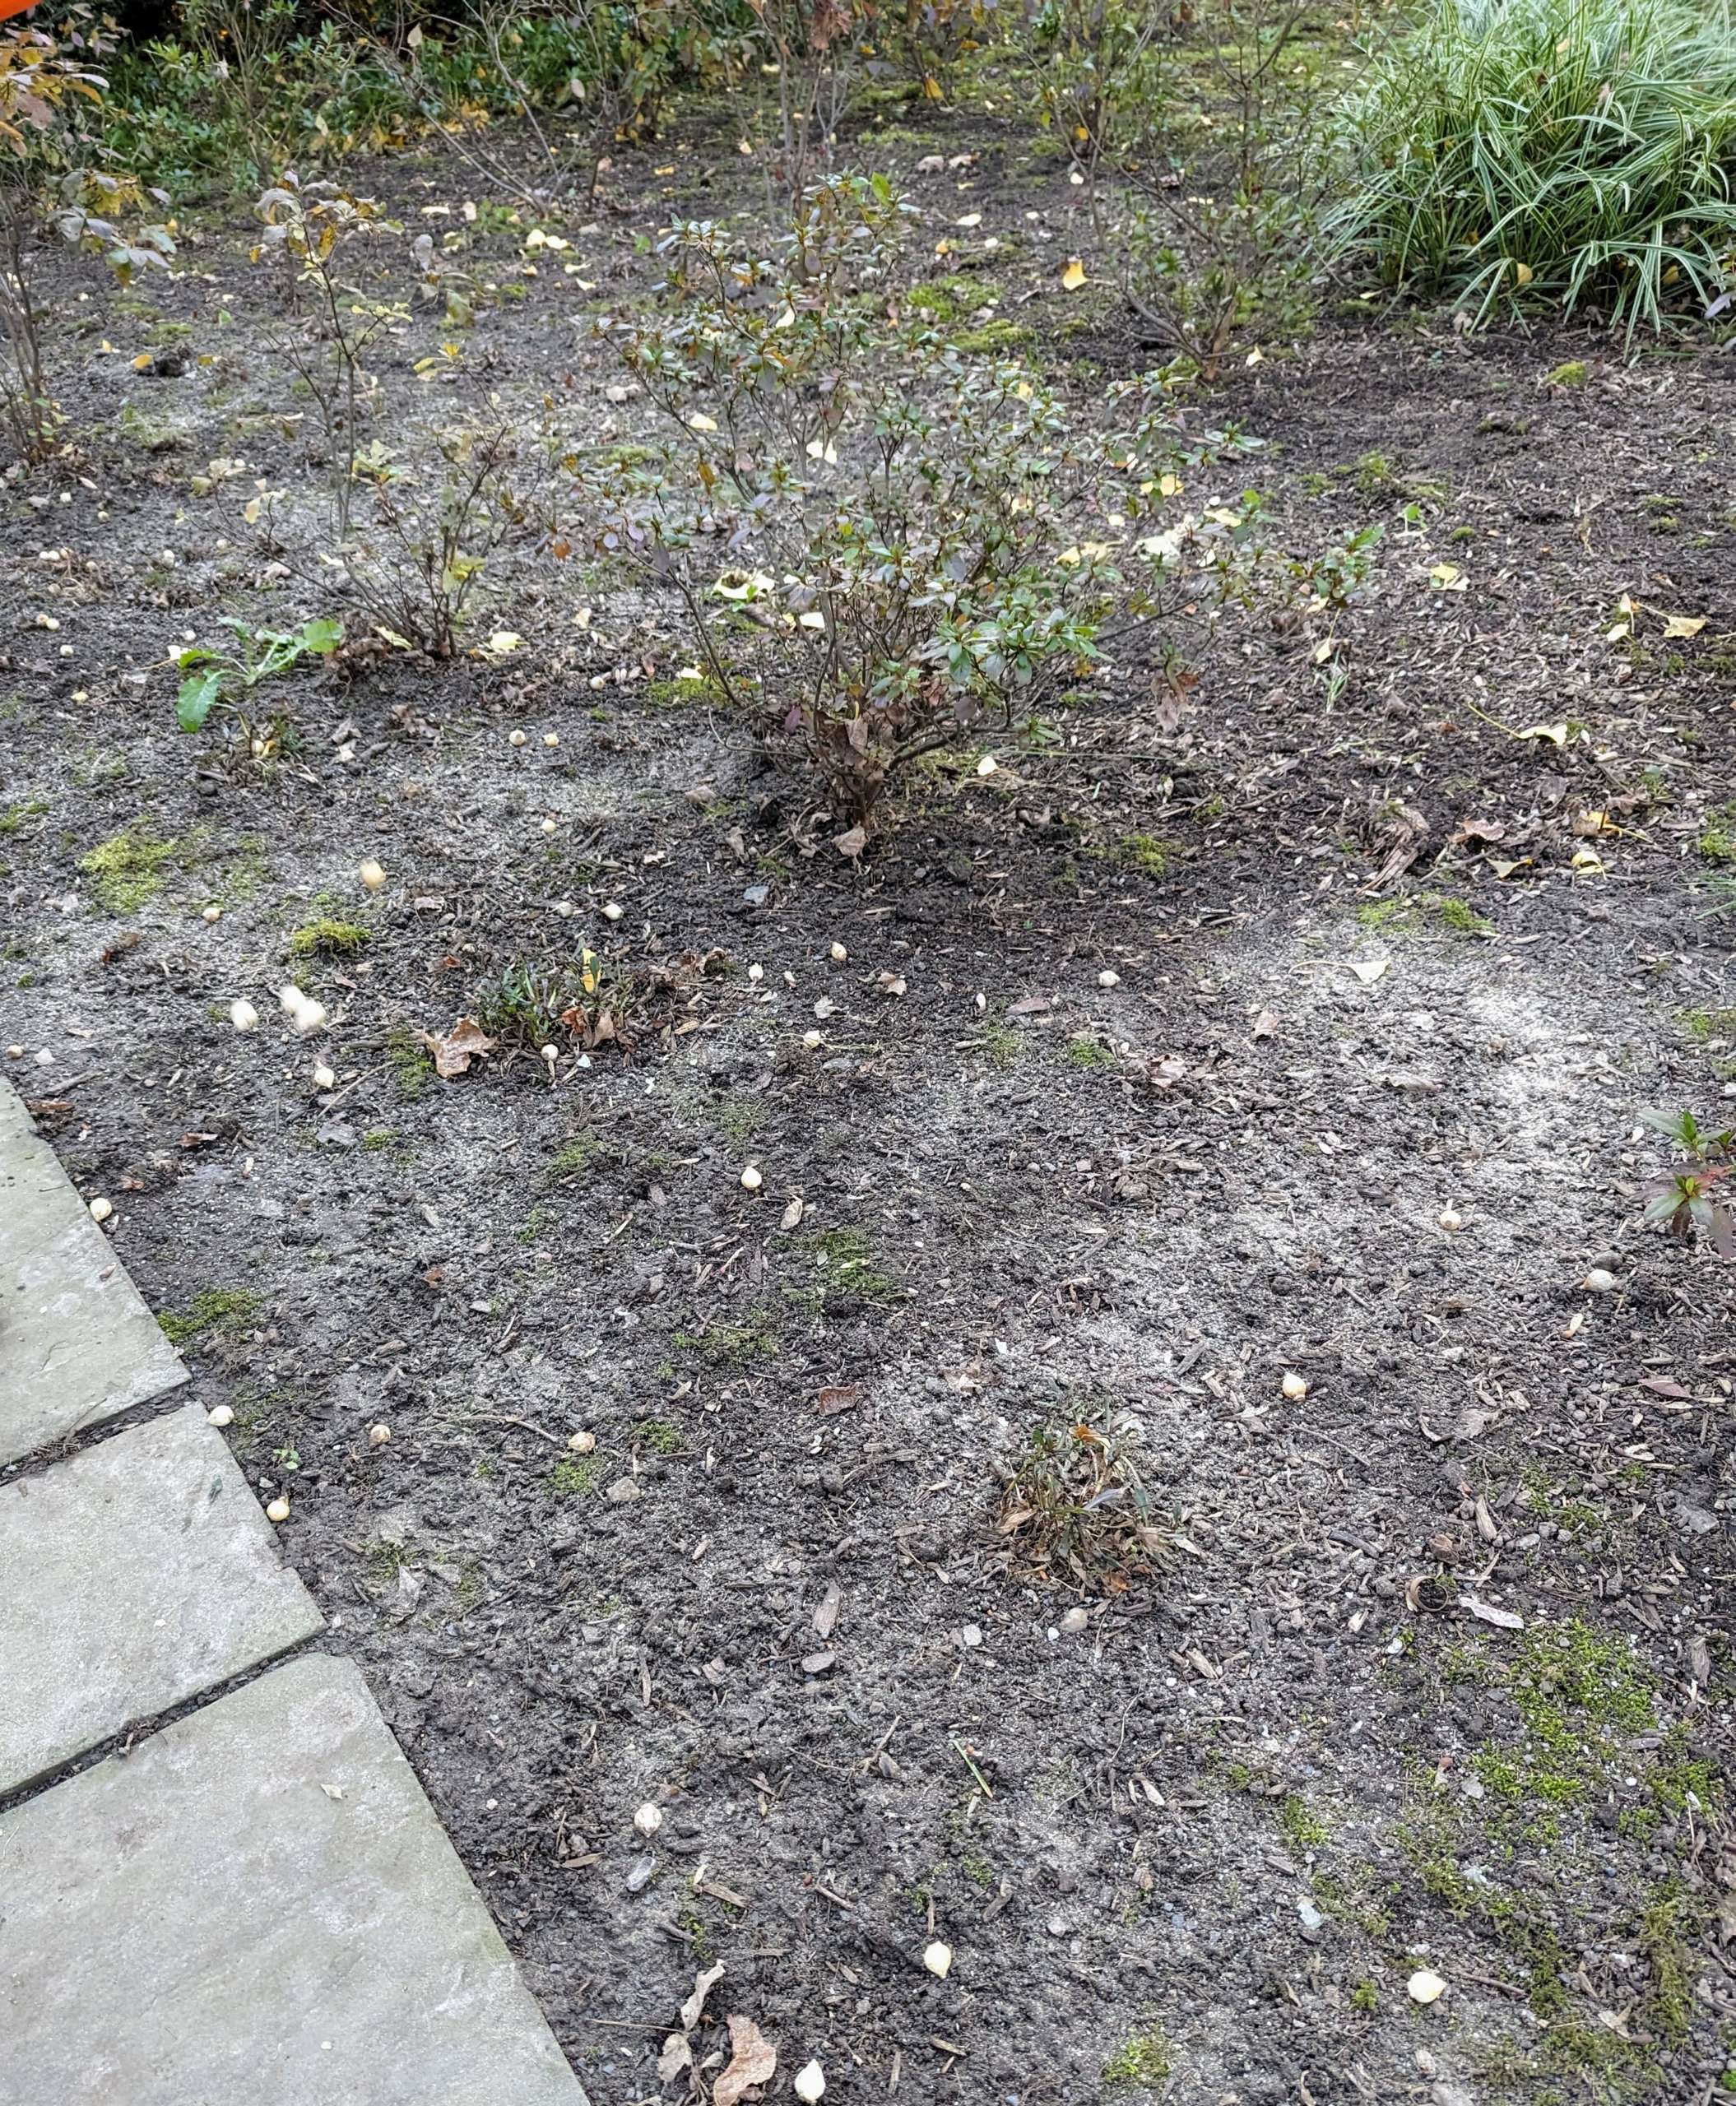
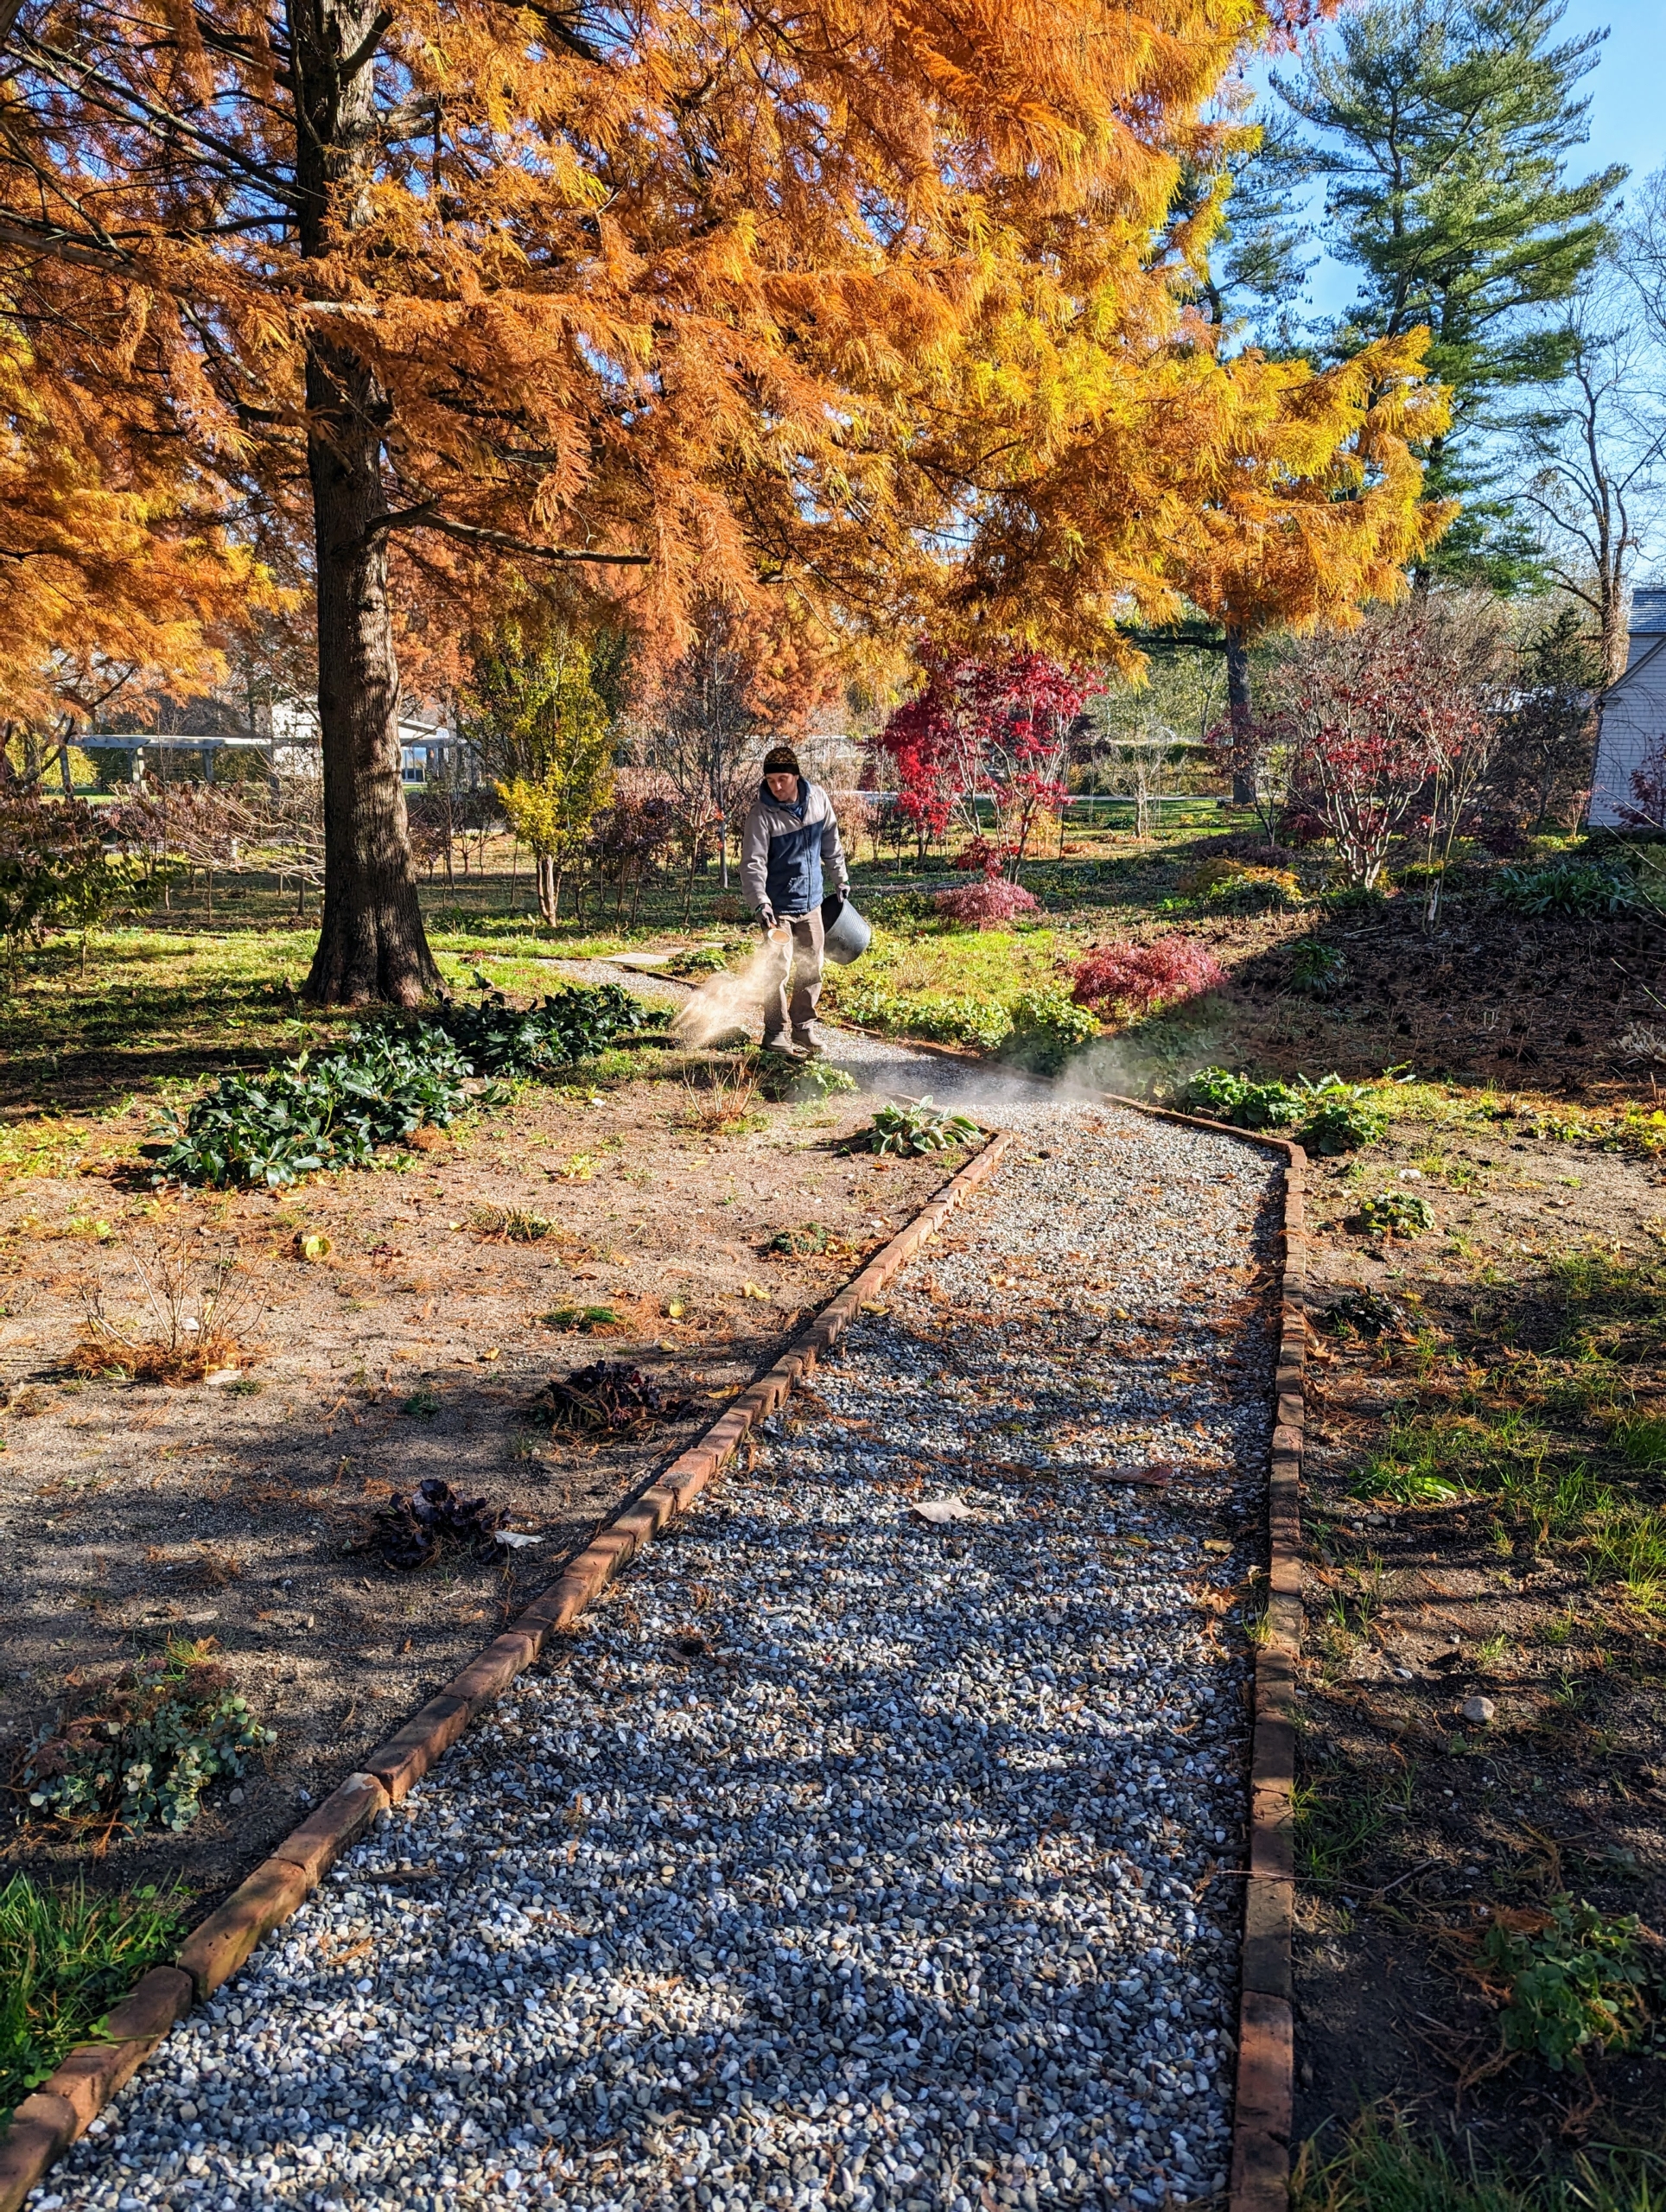
In this area, Puschkinia bulbs are tossed gently onto the soil – where they fall is where they are planted, creating a natural growth appearance.
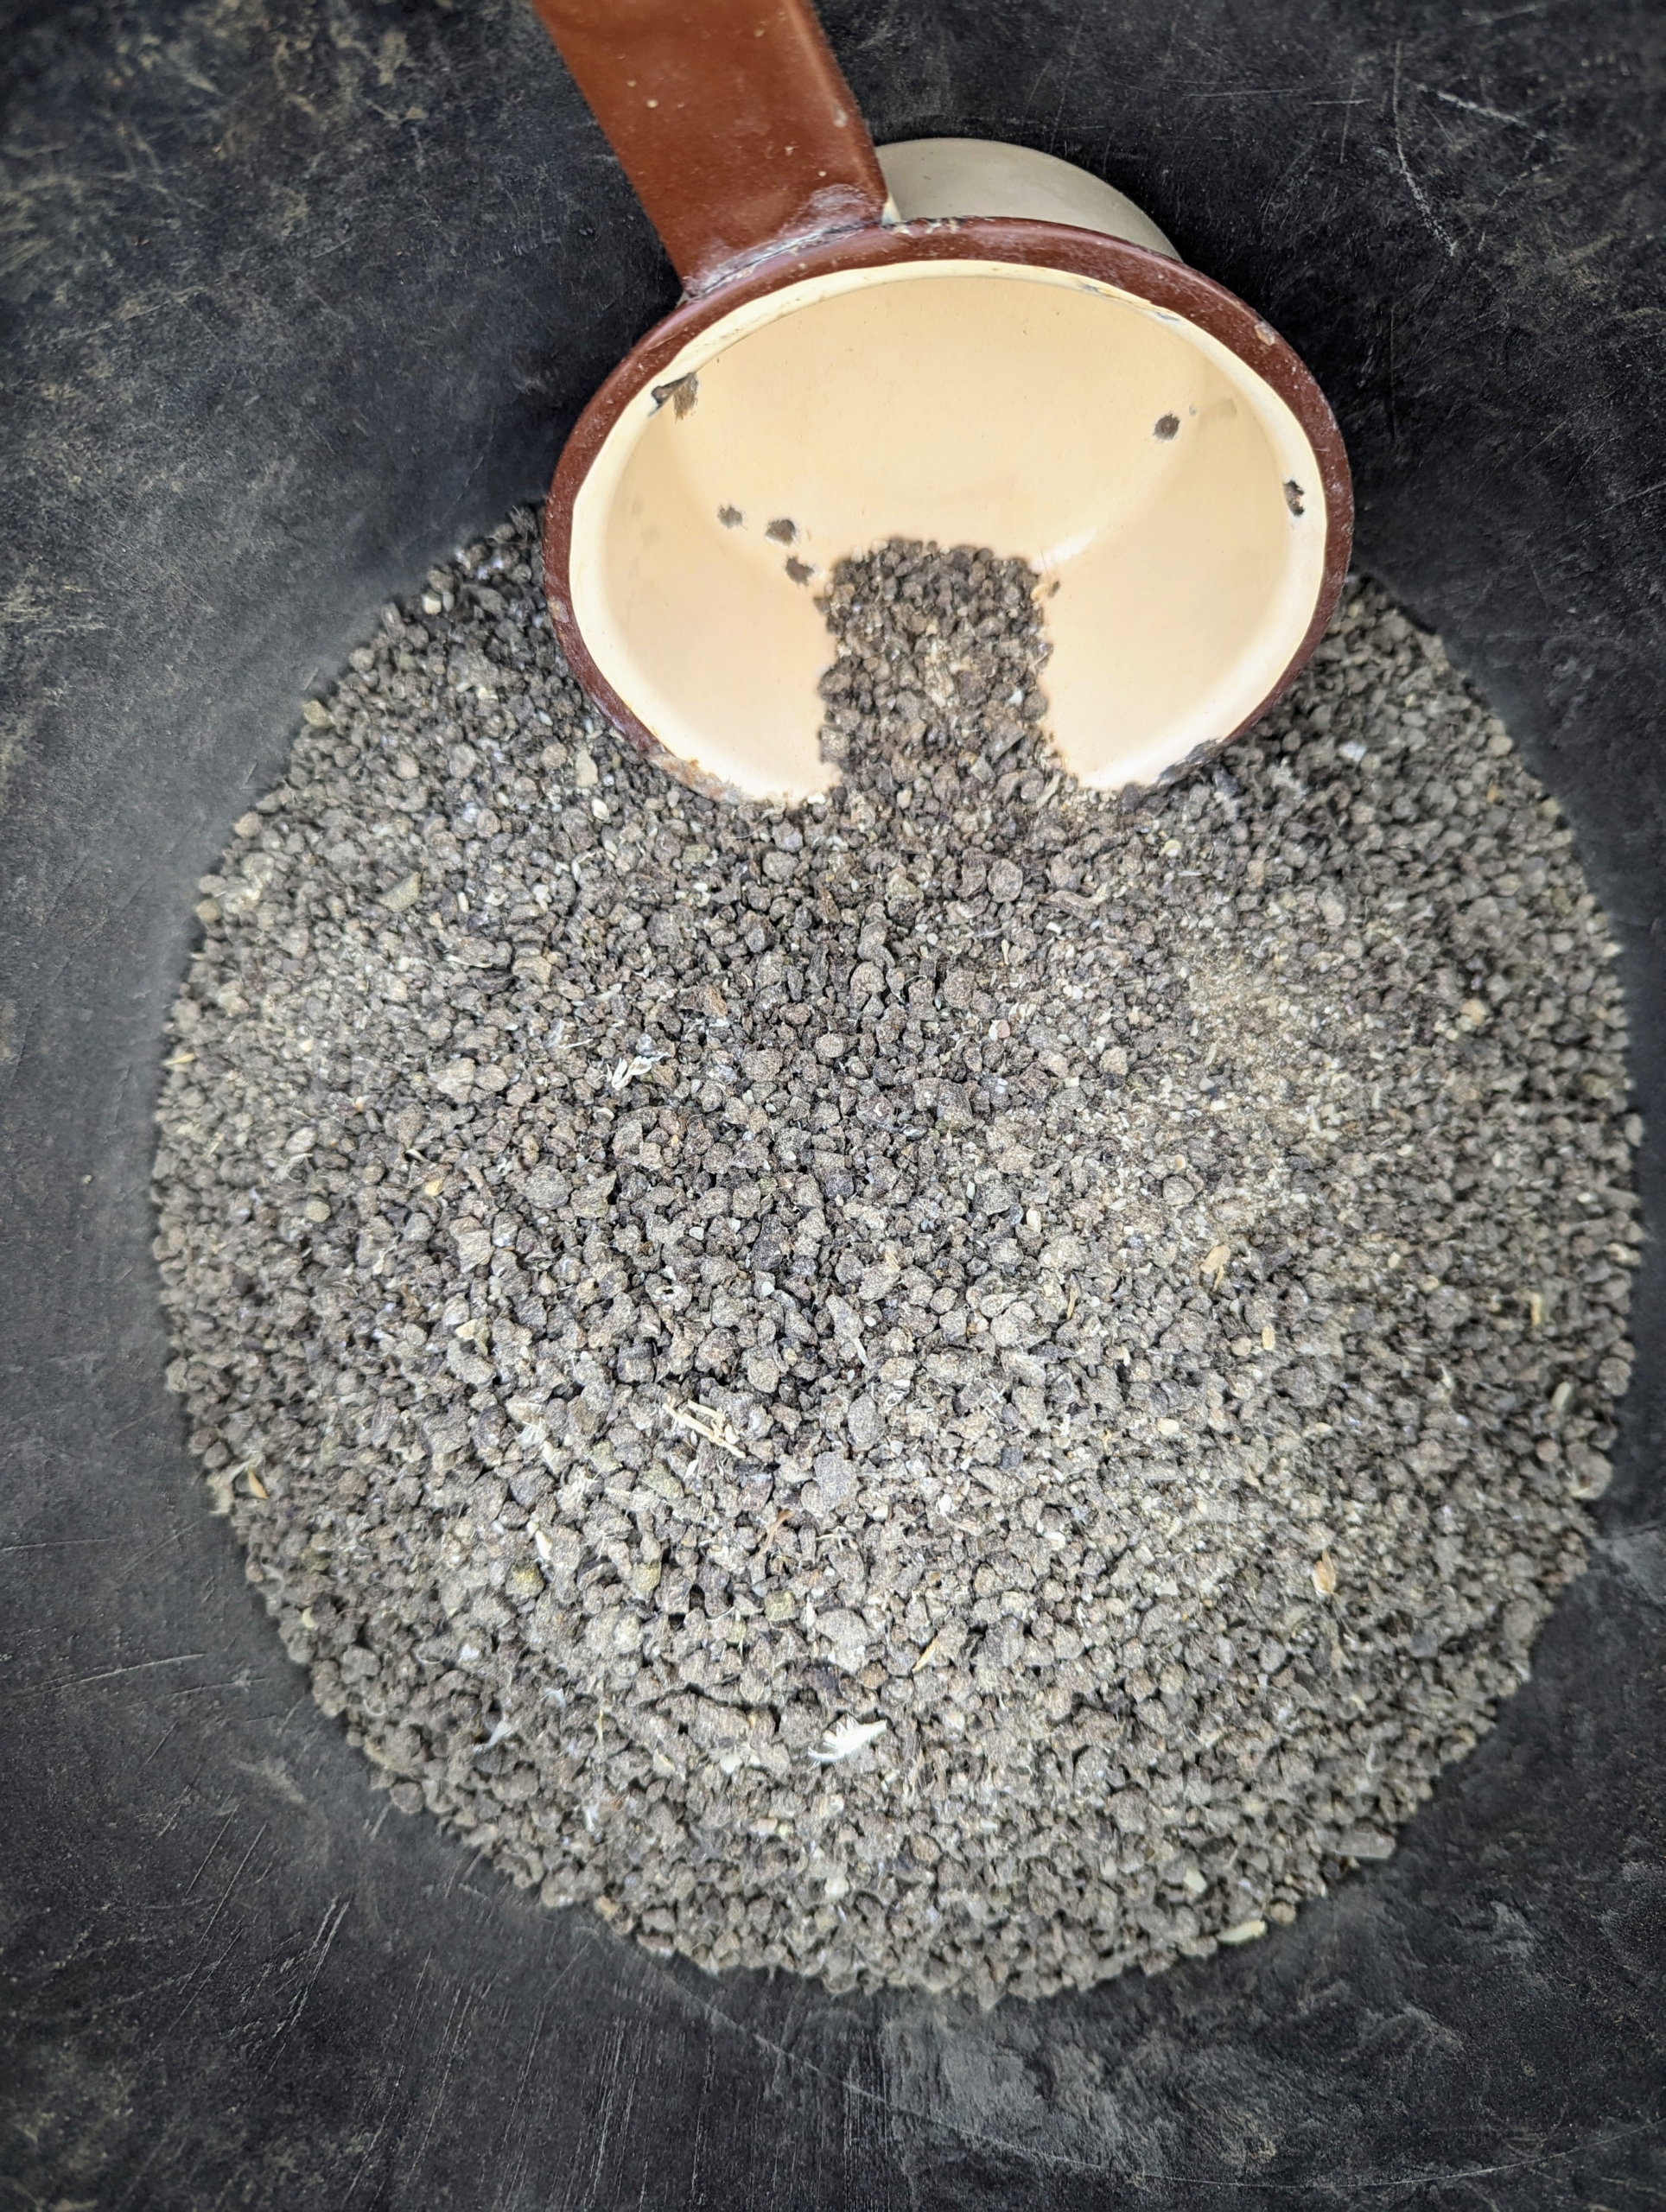
Both Puschkinia bulbs and Chionodoxa bulbs are small, but looking closely, one can still tell which end is pointed and which end is not – it is important to know when planting.
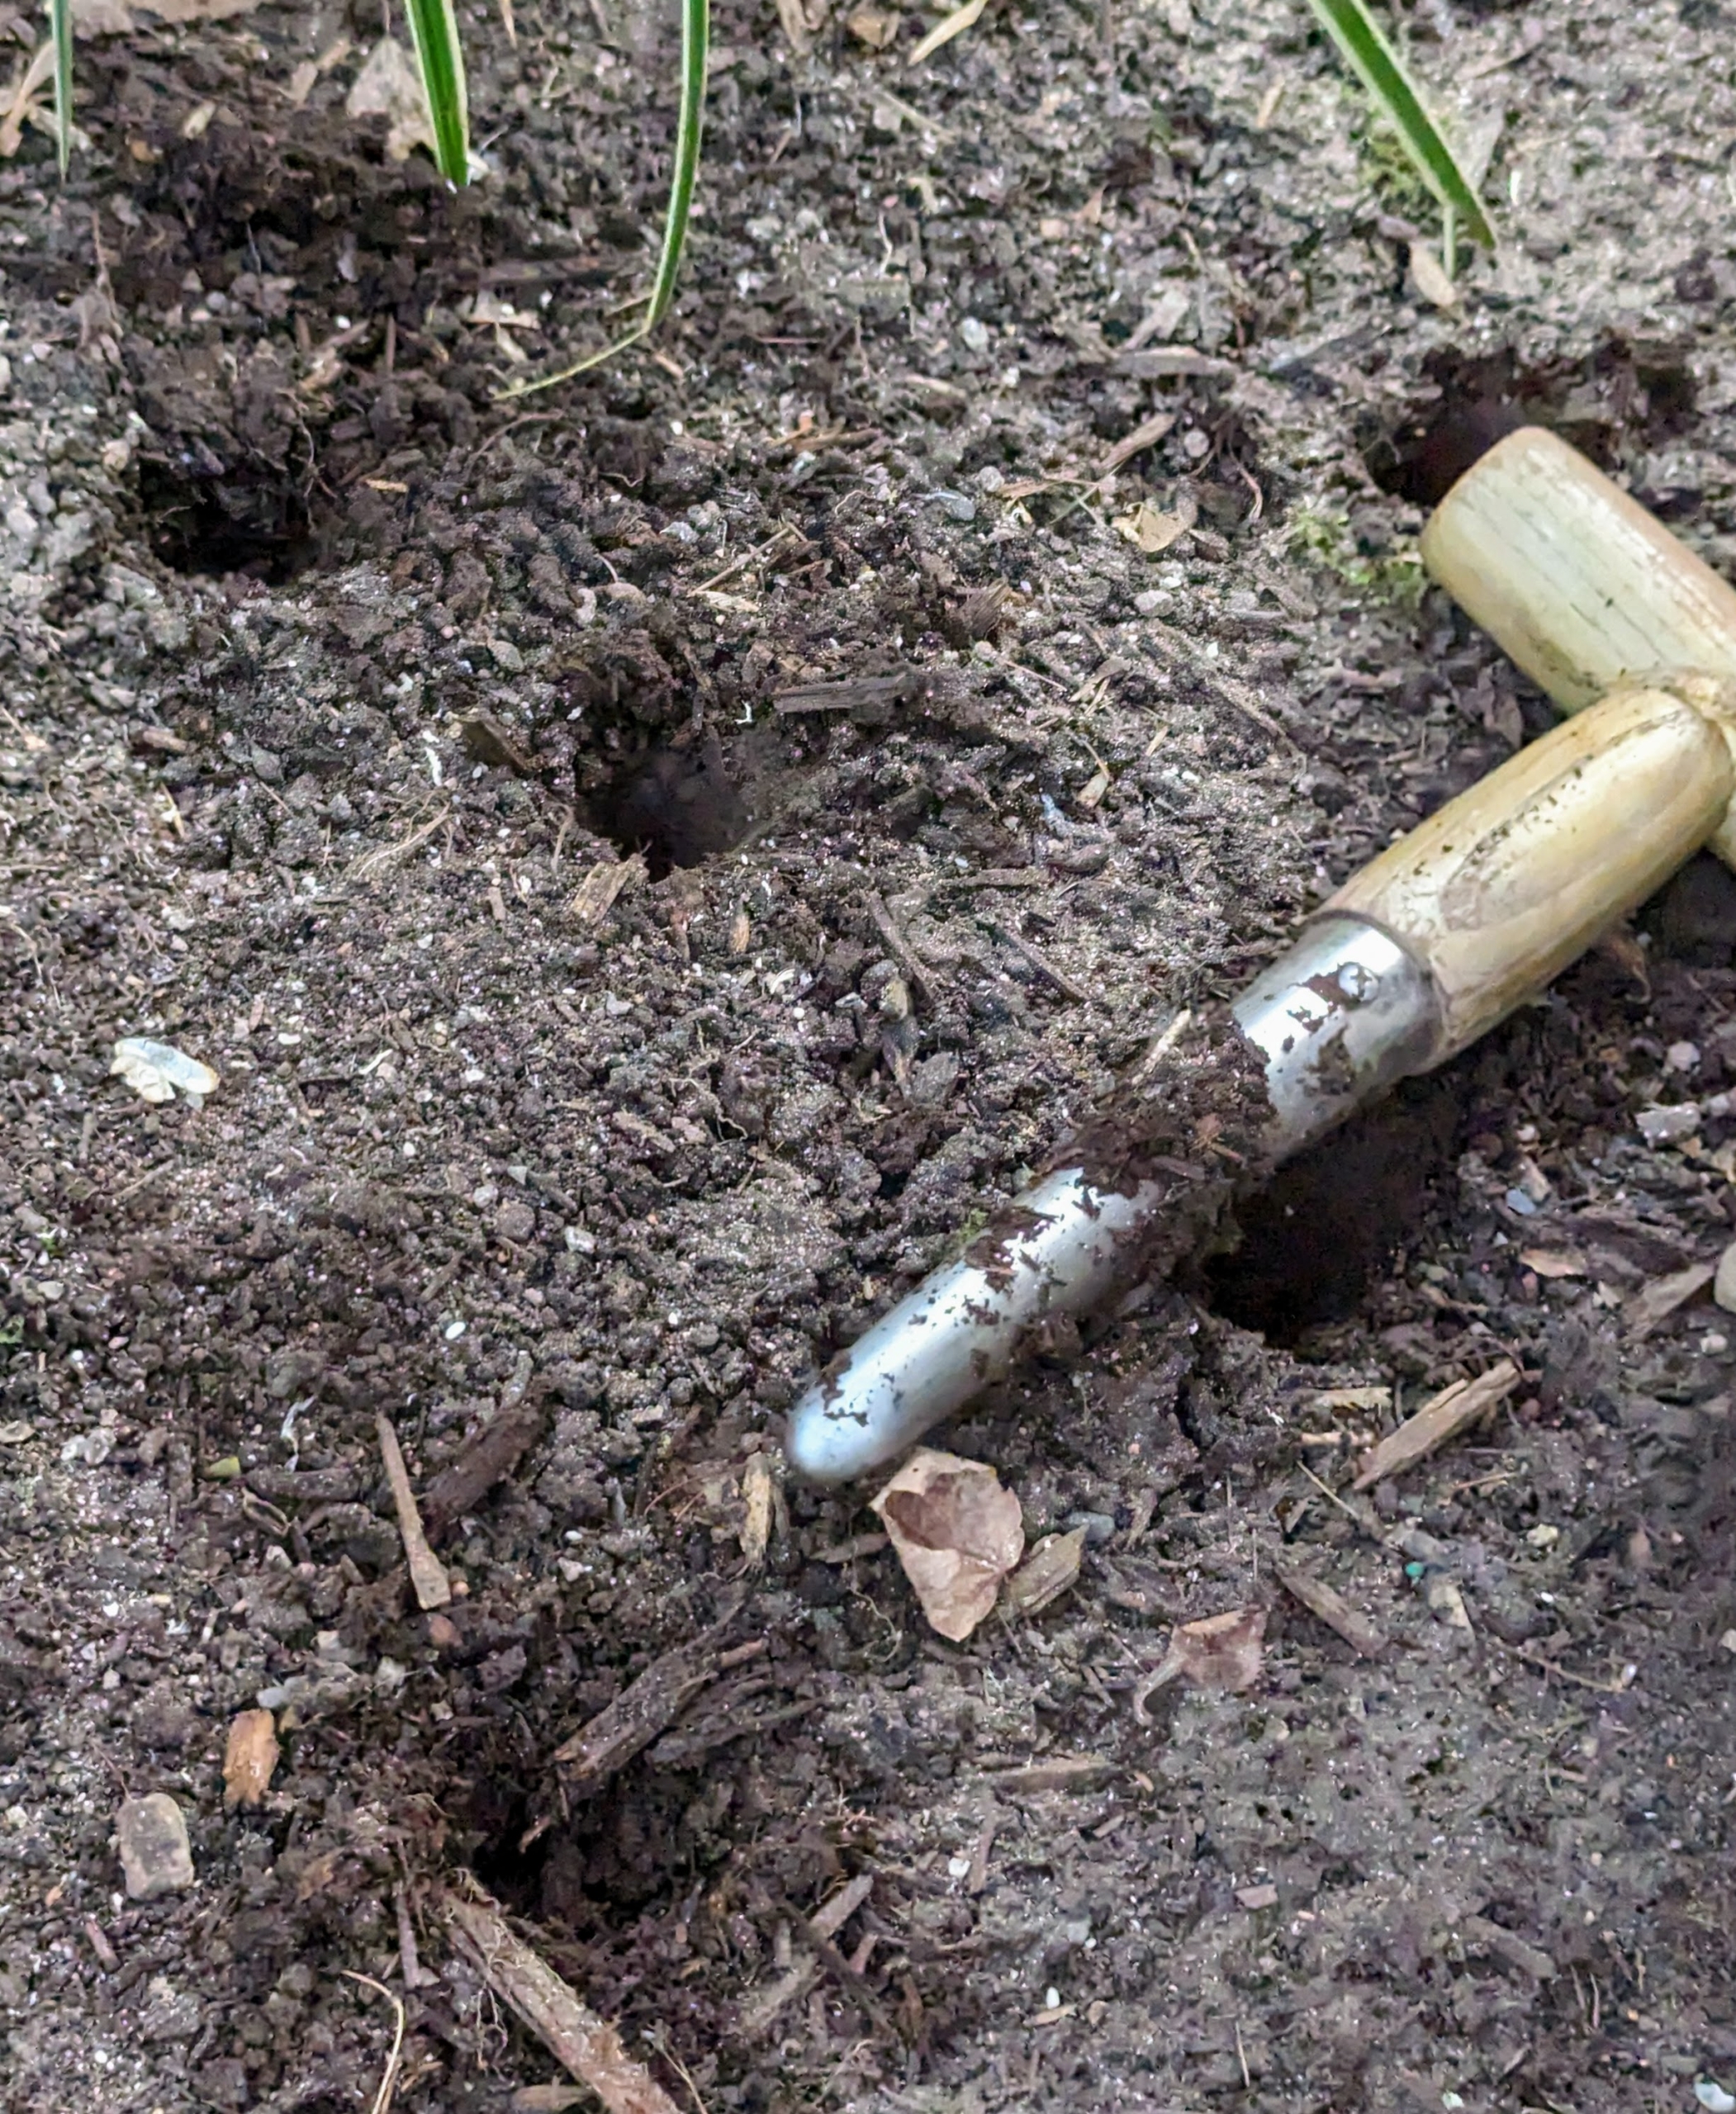
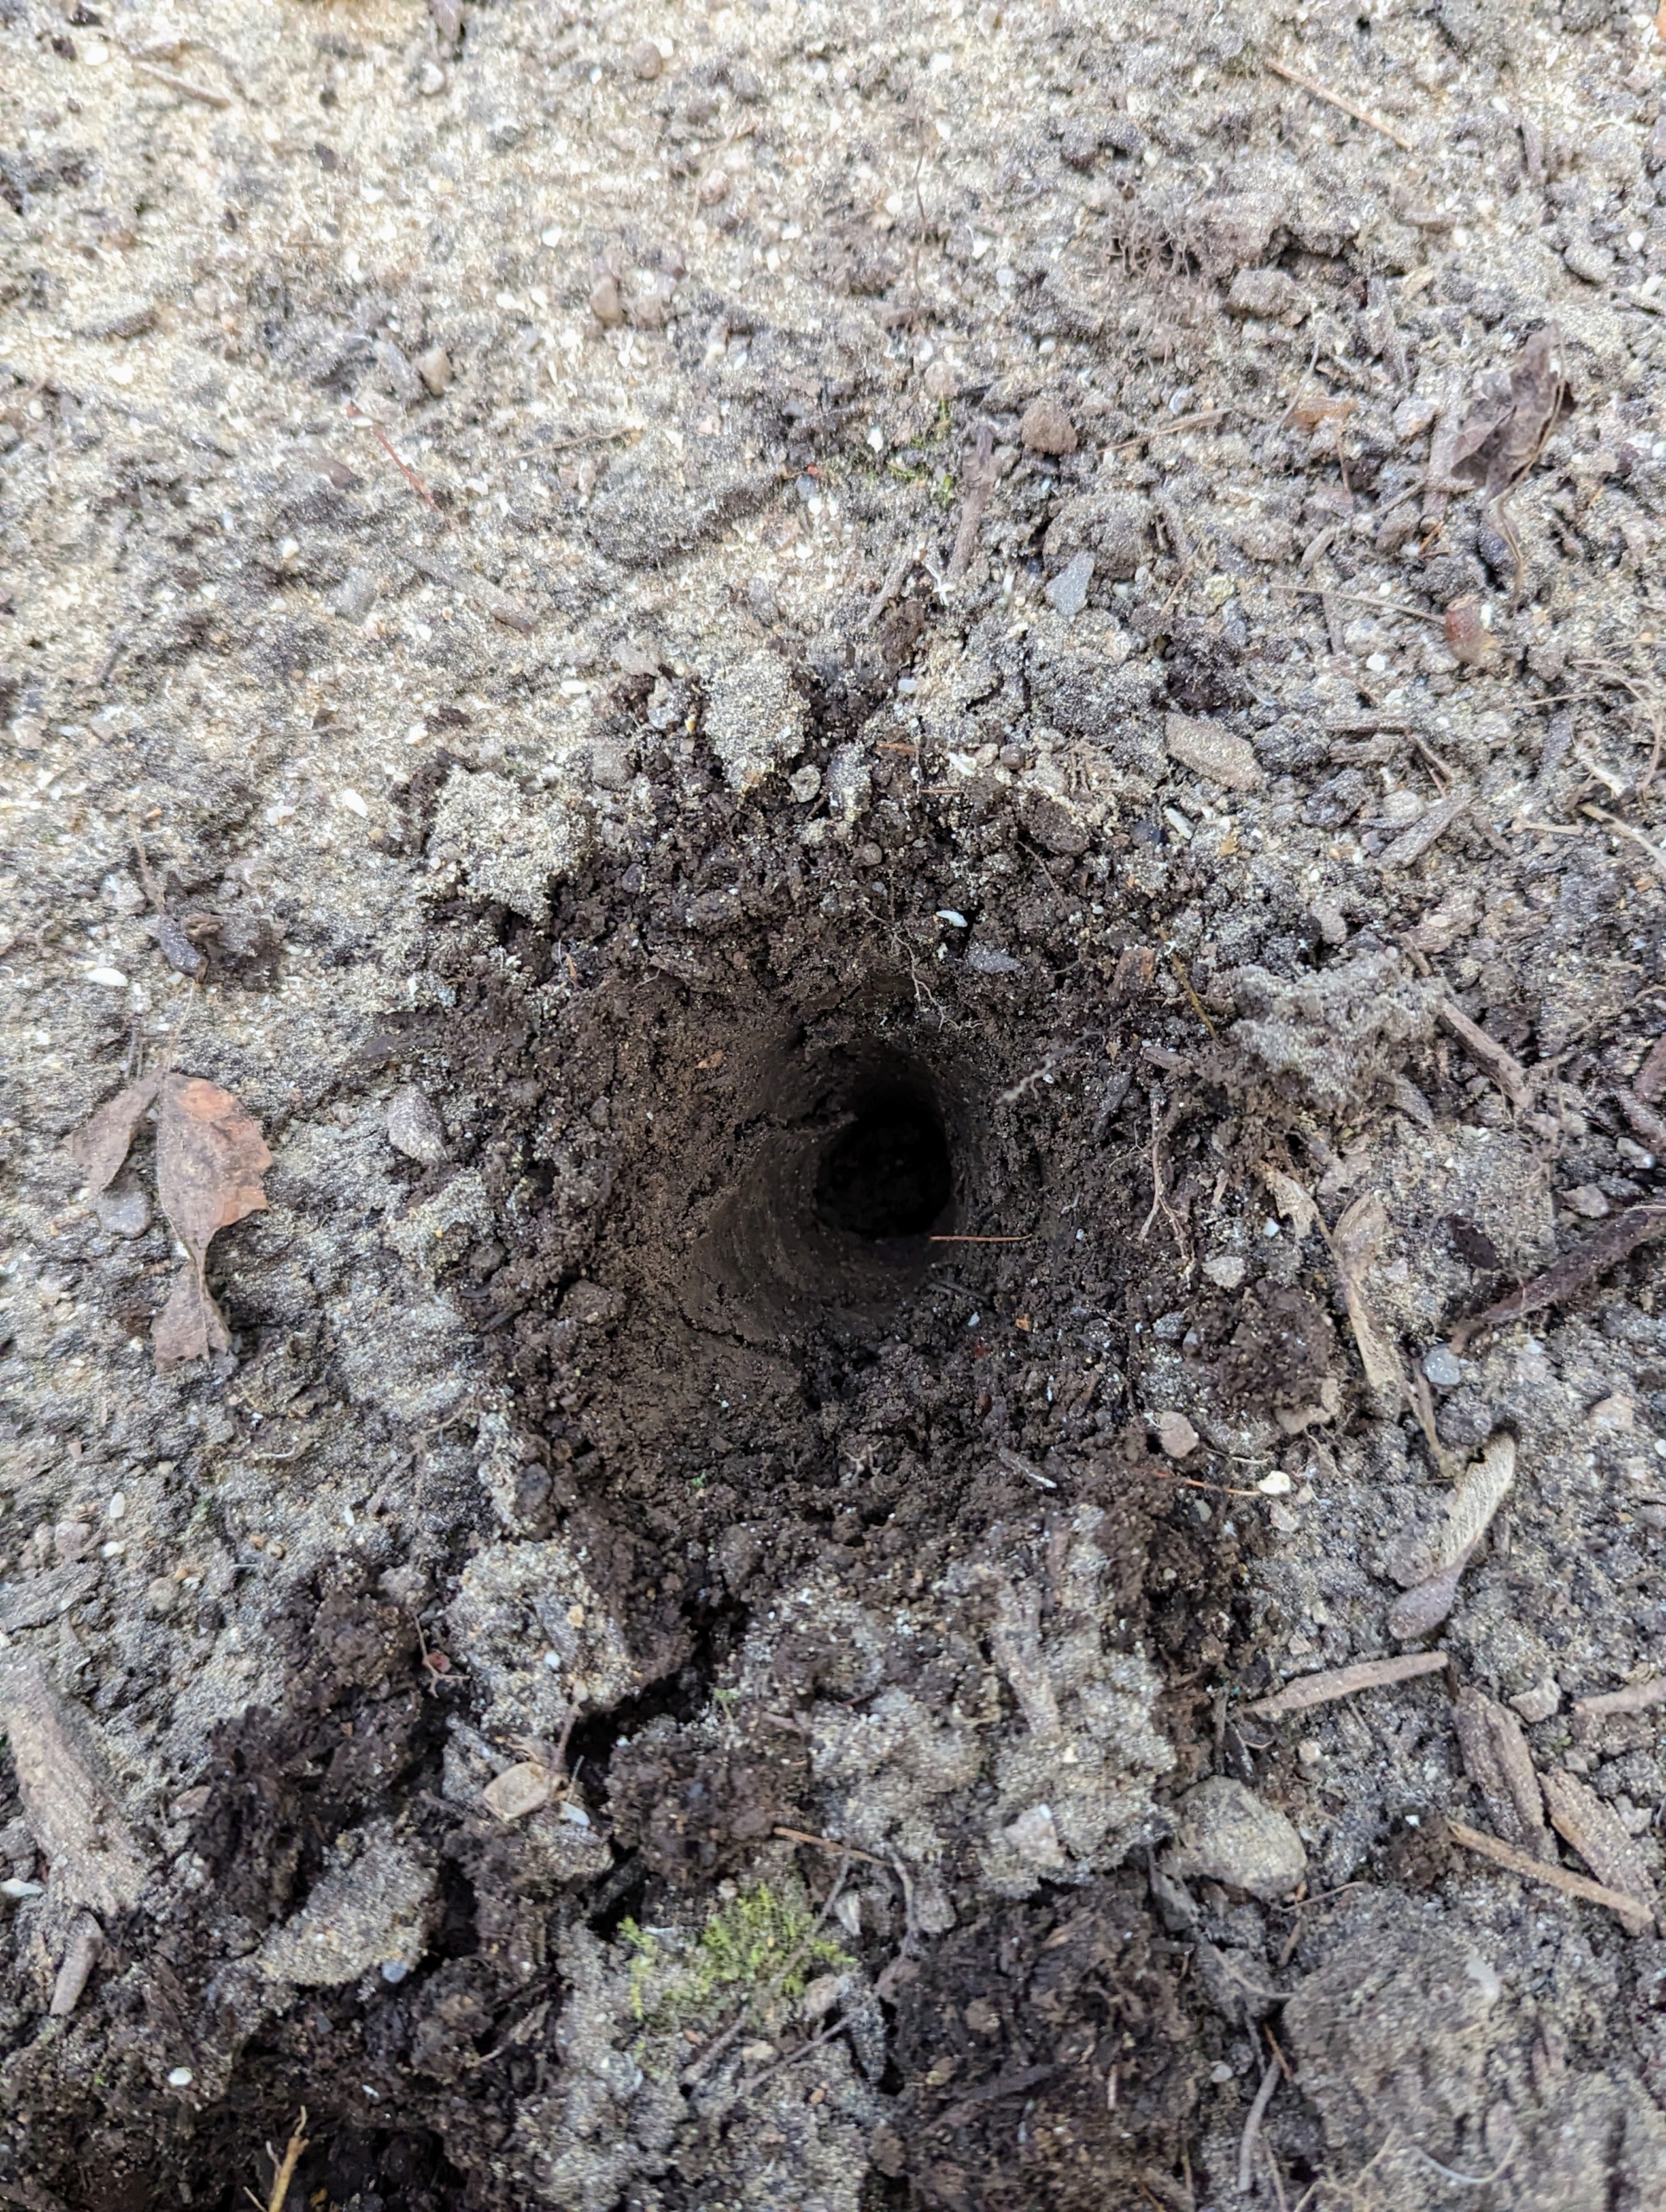
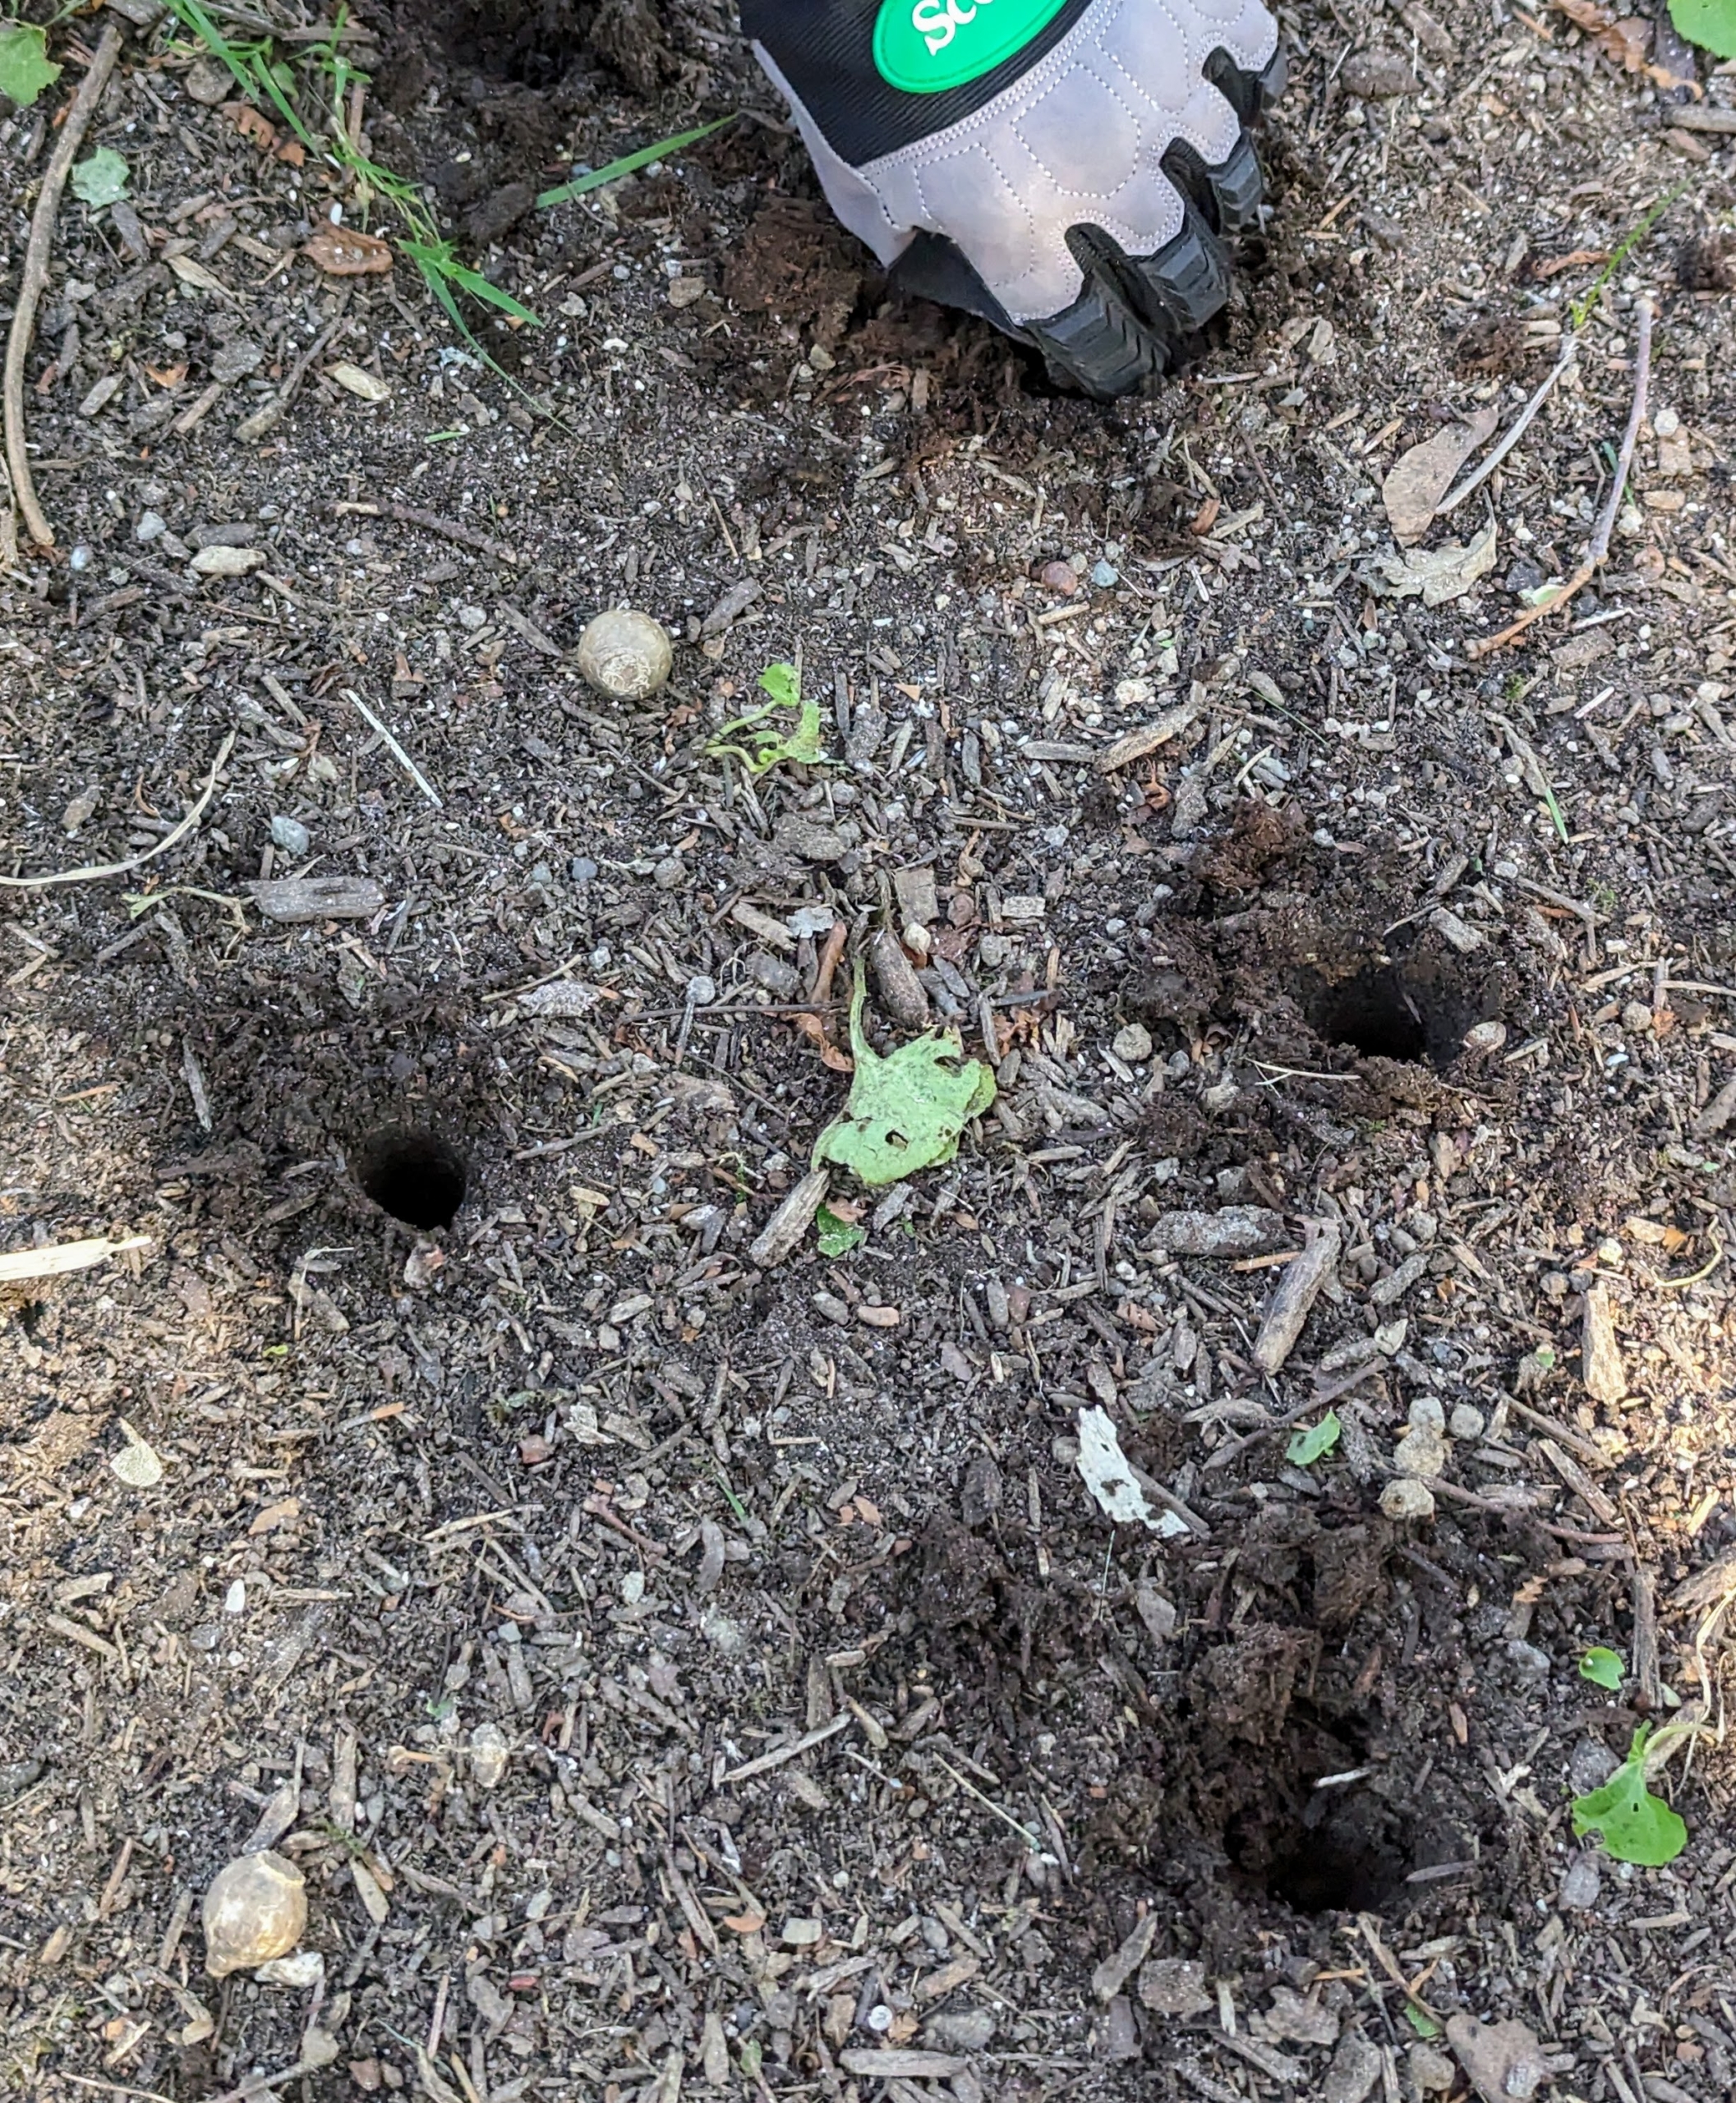
This tool is a dibber, used to create a narrow deep hole for smaller bulbs.
In general, holes should be three times deeper than the bulb’s length.
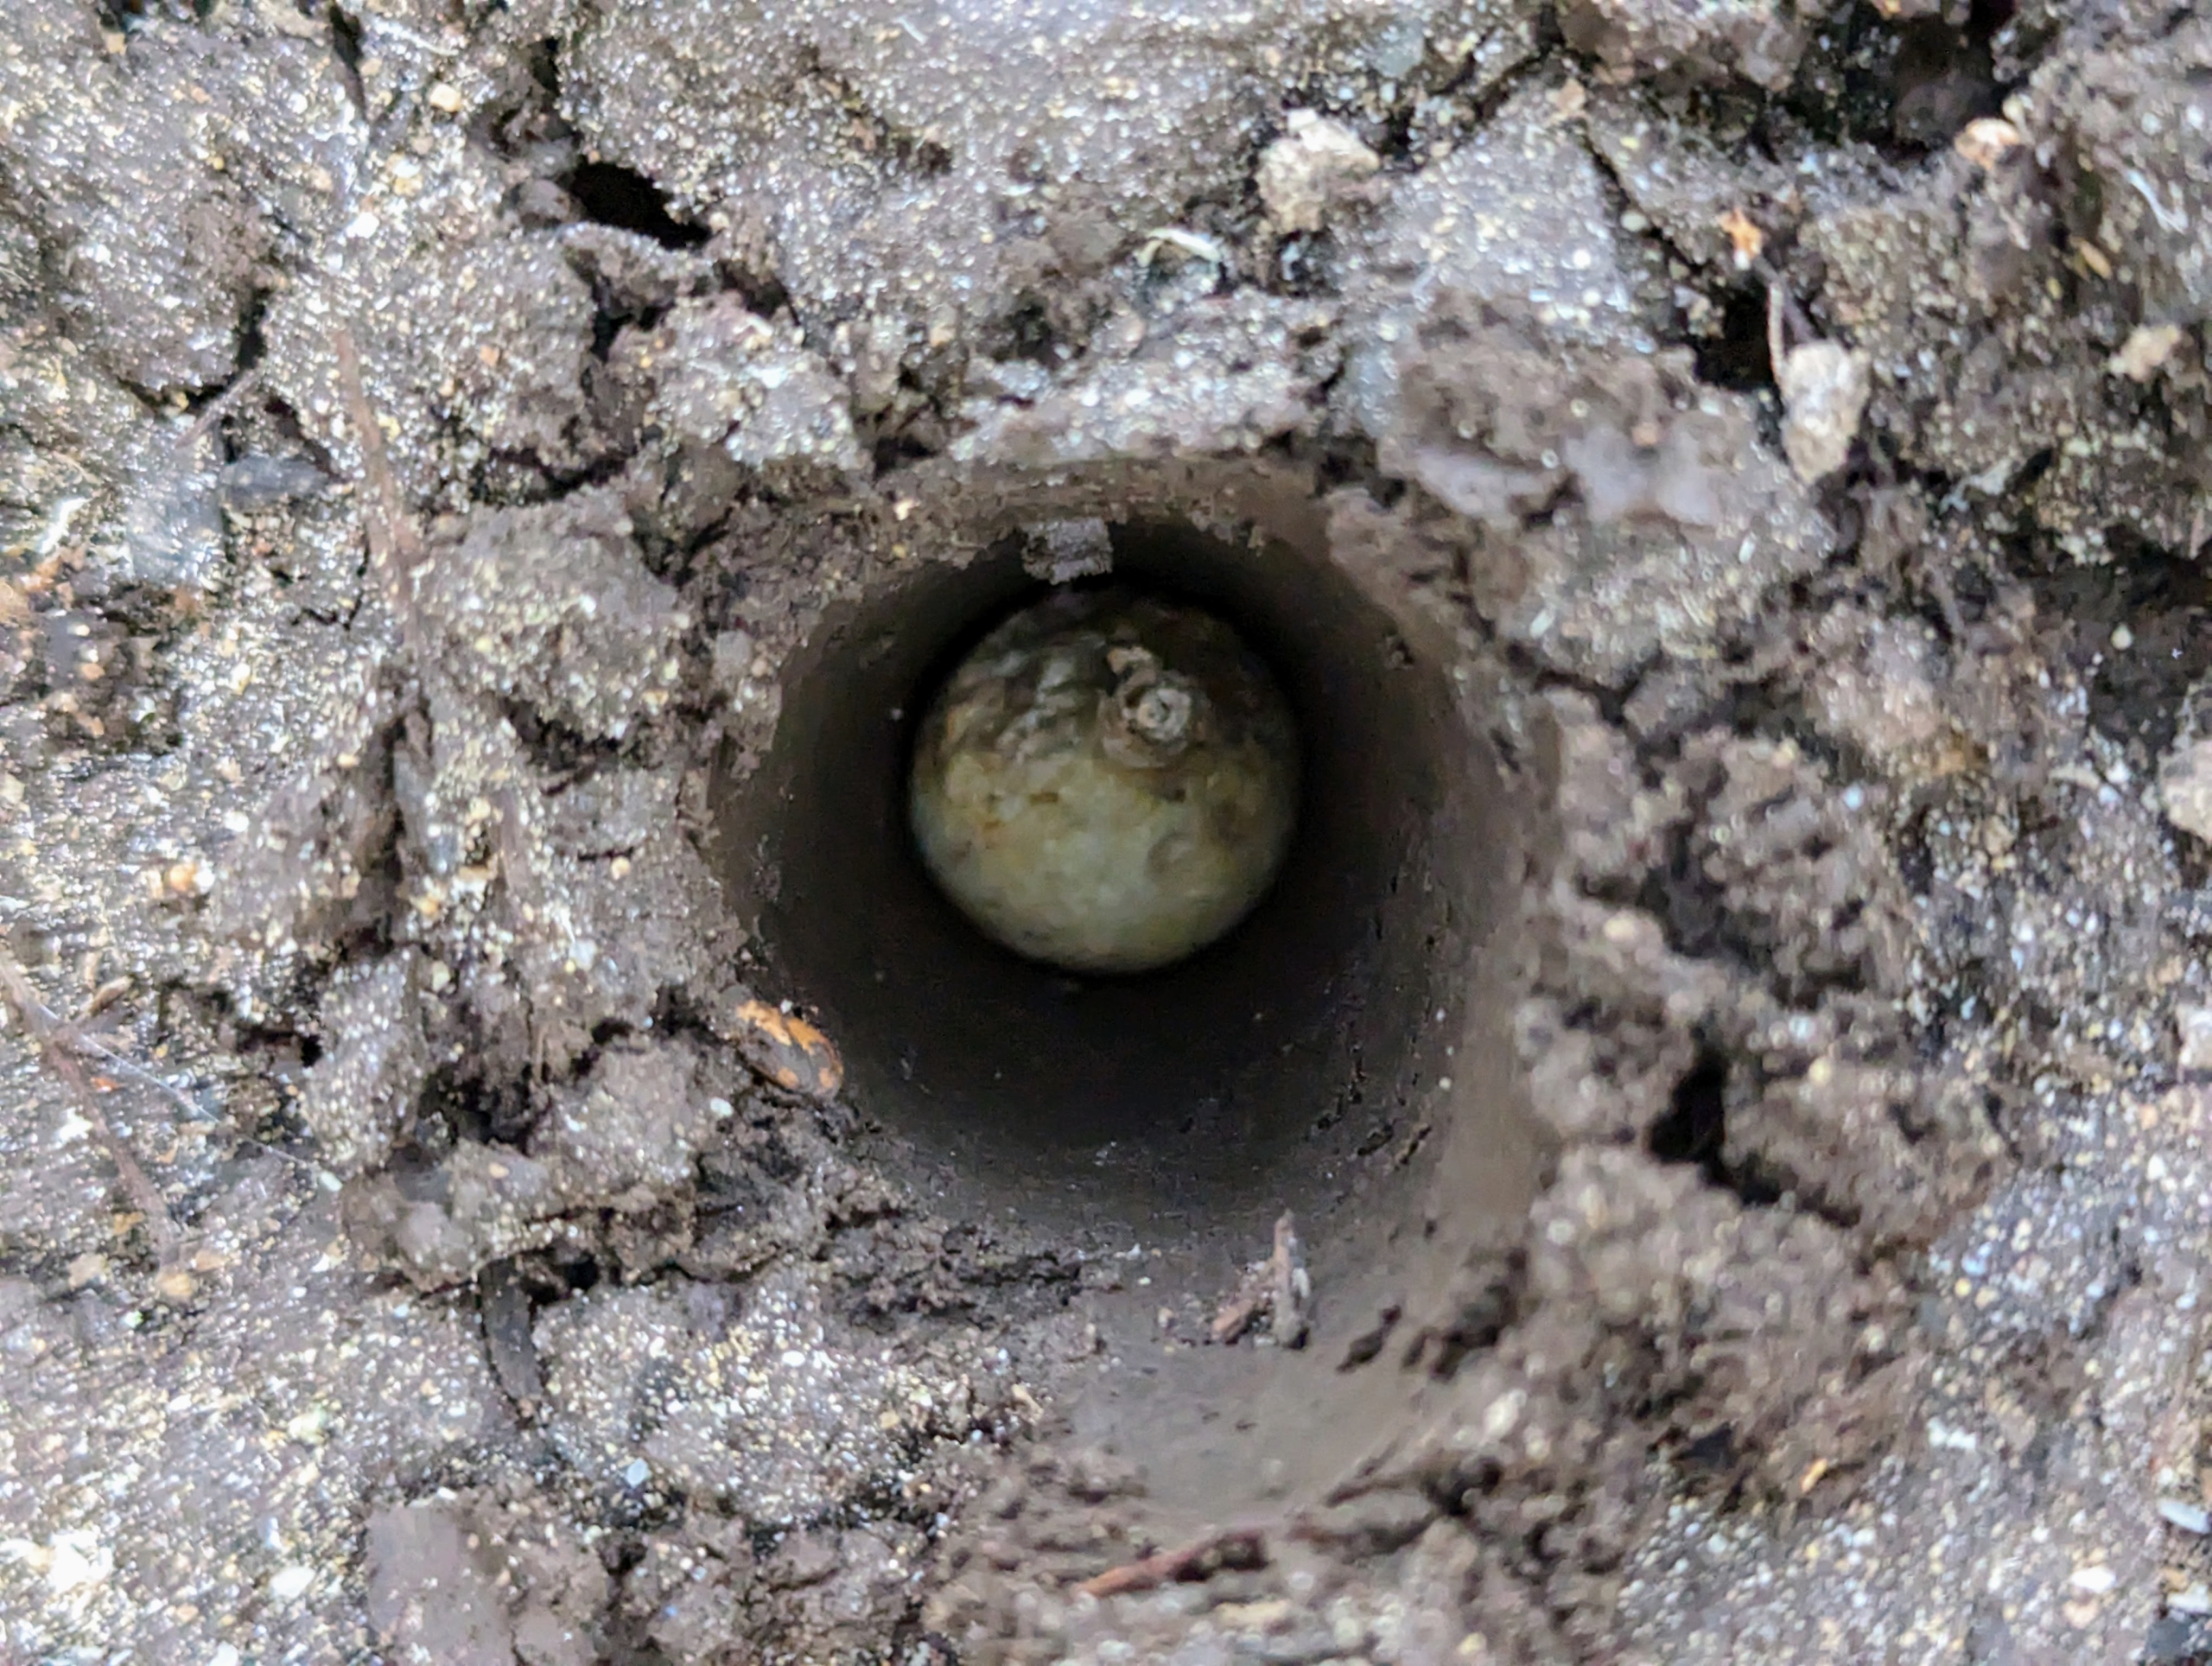
One by one, each bulb is carefully placed into a hole, with the pointed end faced up, or root end faced down, so the plant grows properly from the bulb.
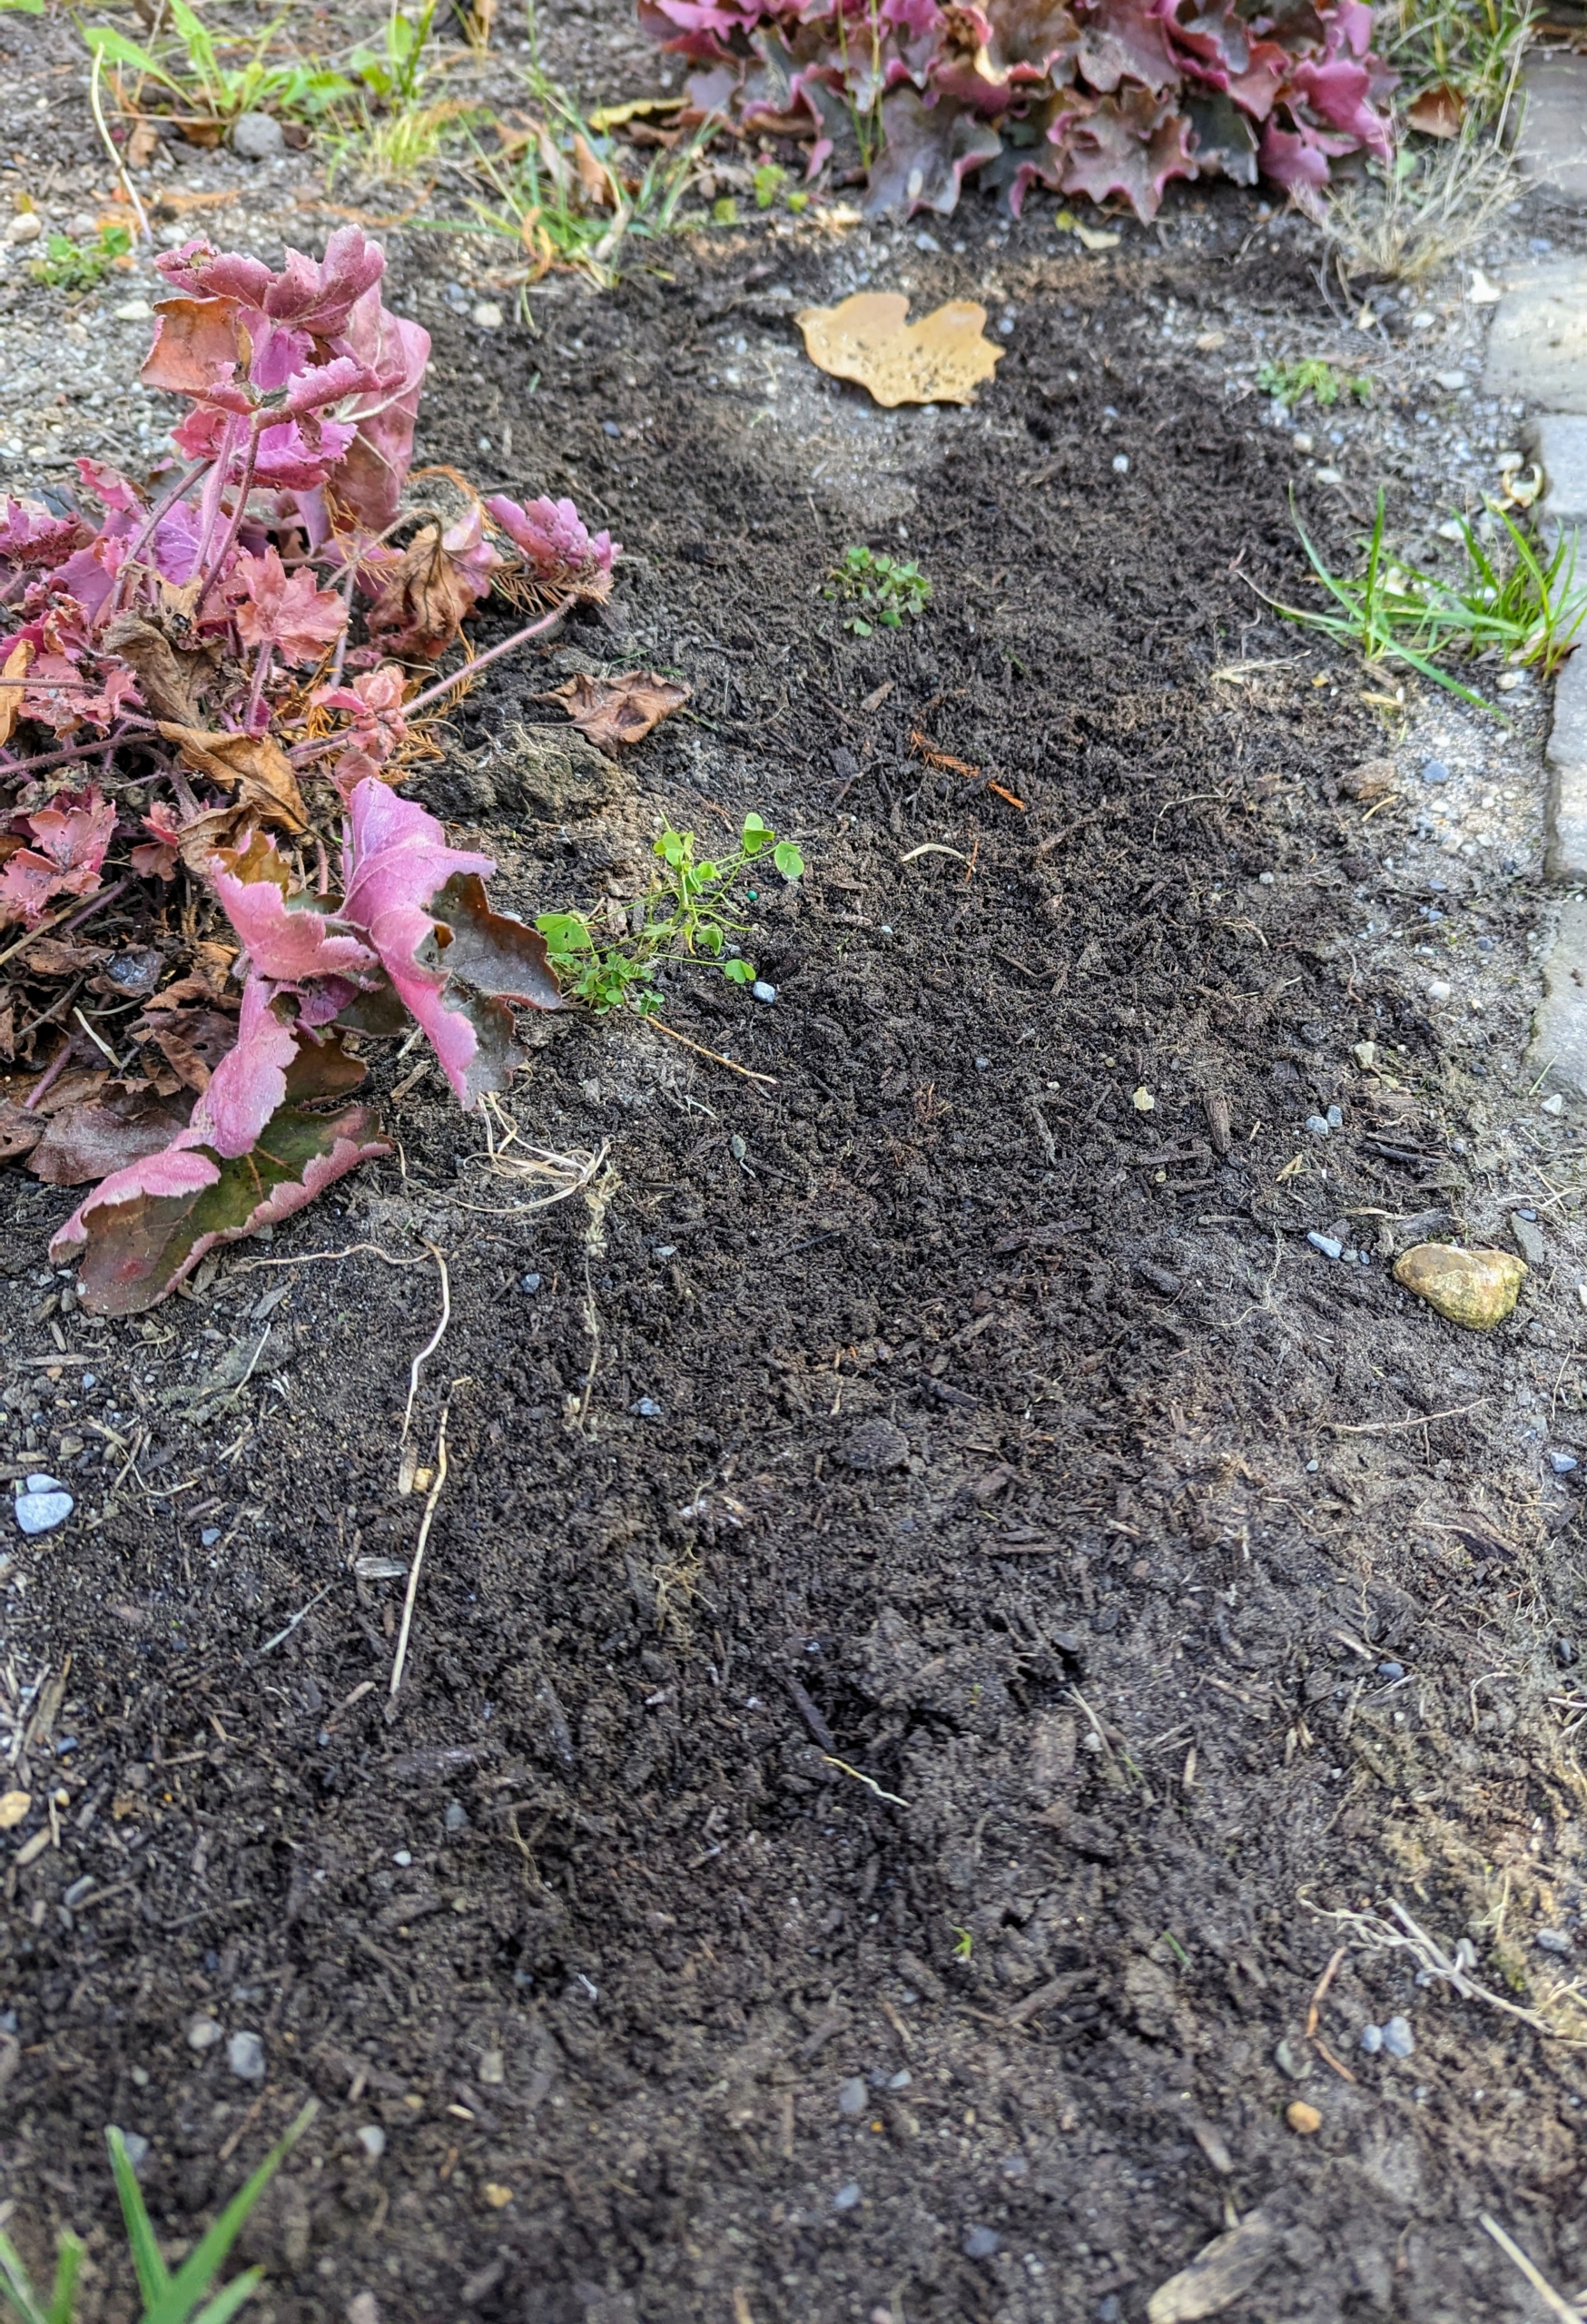
Once in the soil, Ryan backfills the area with his gloved hand.
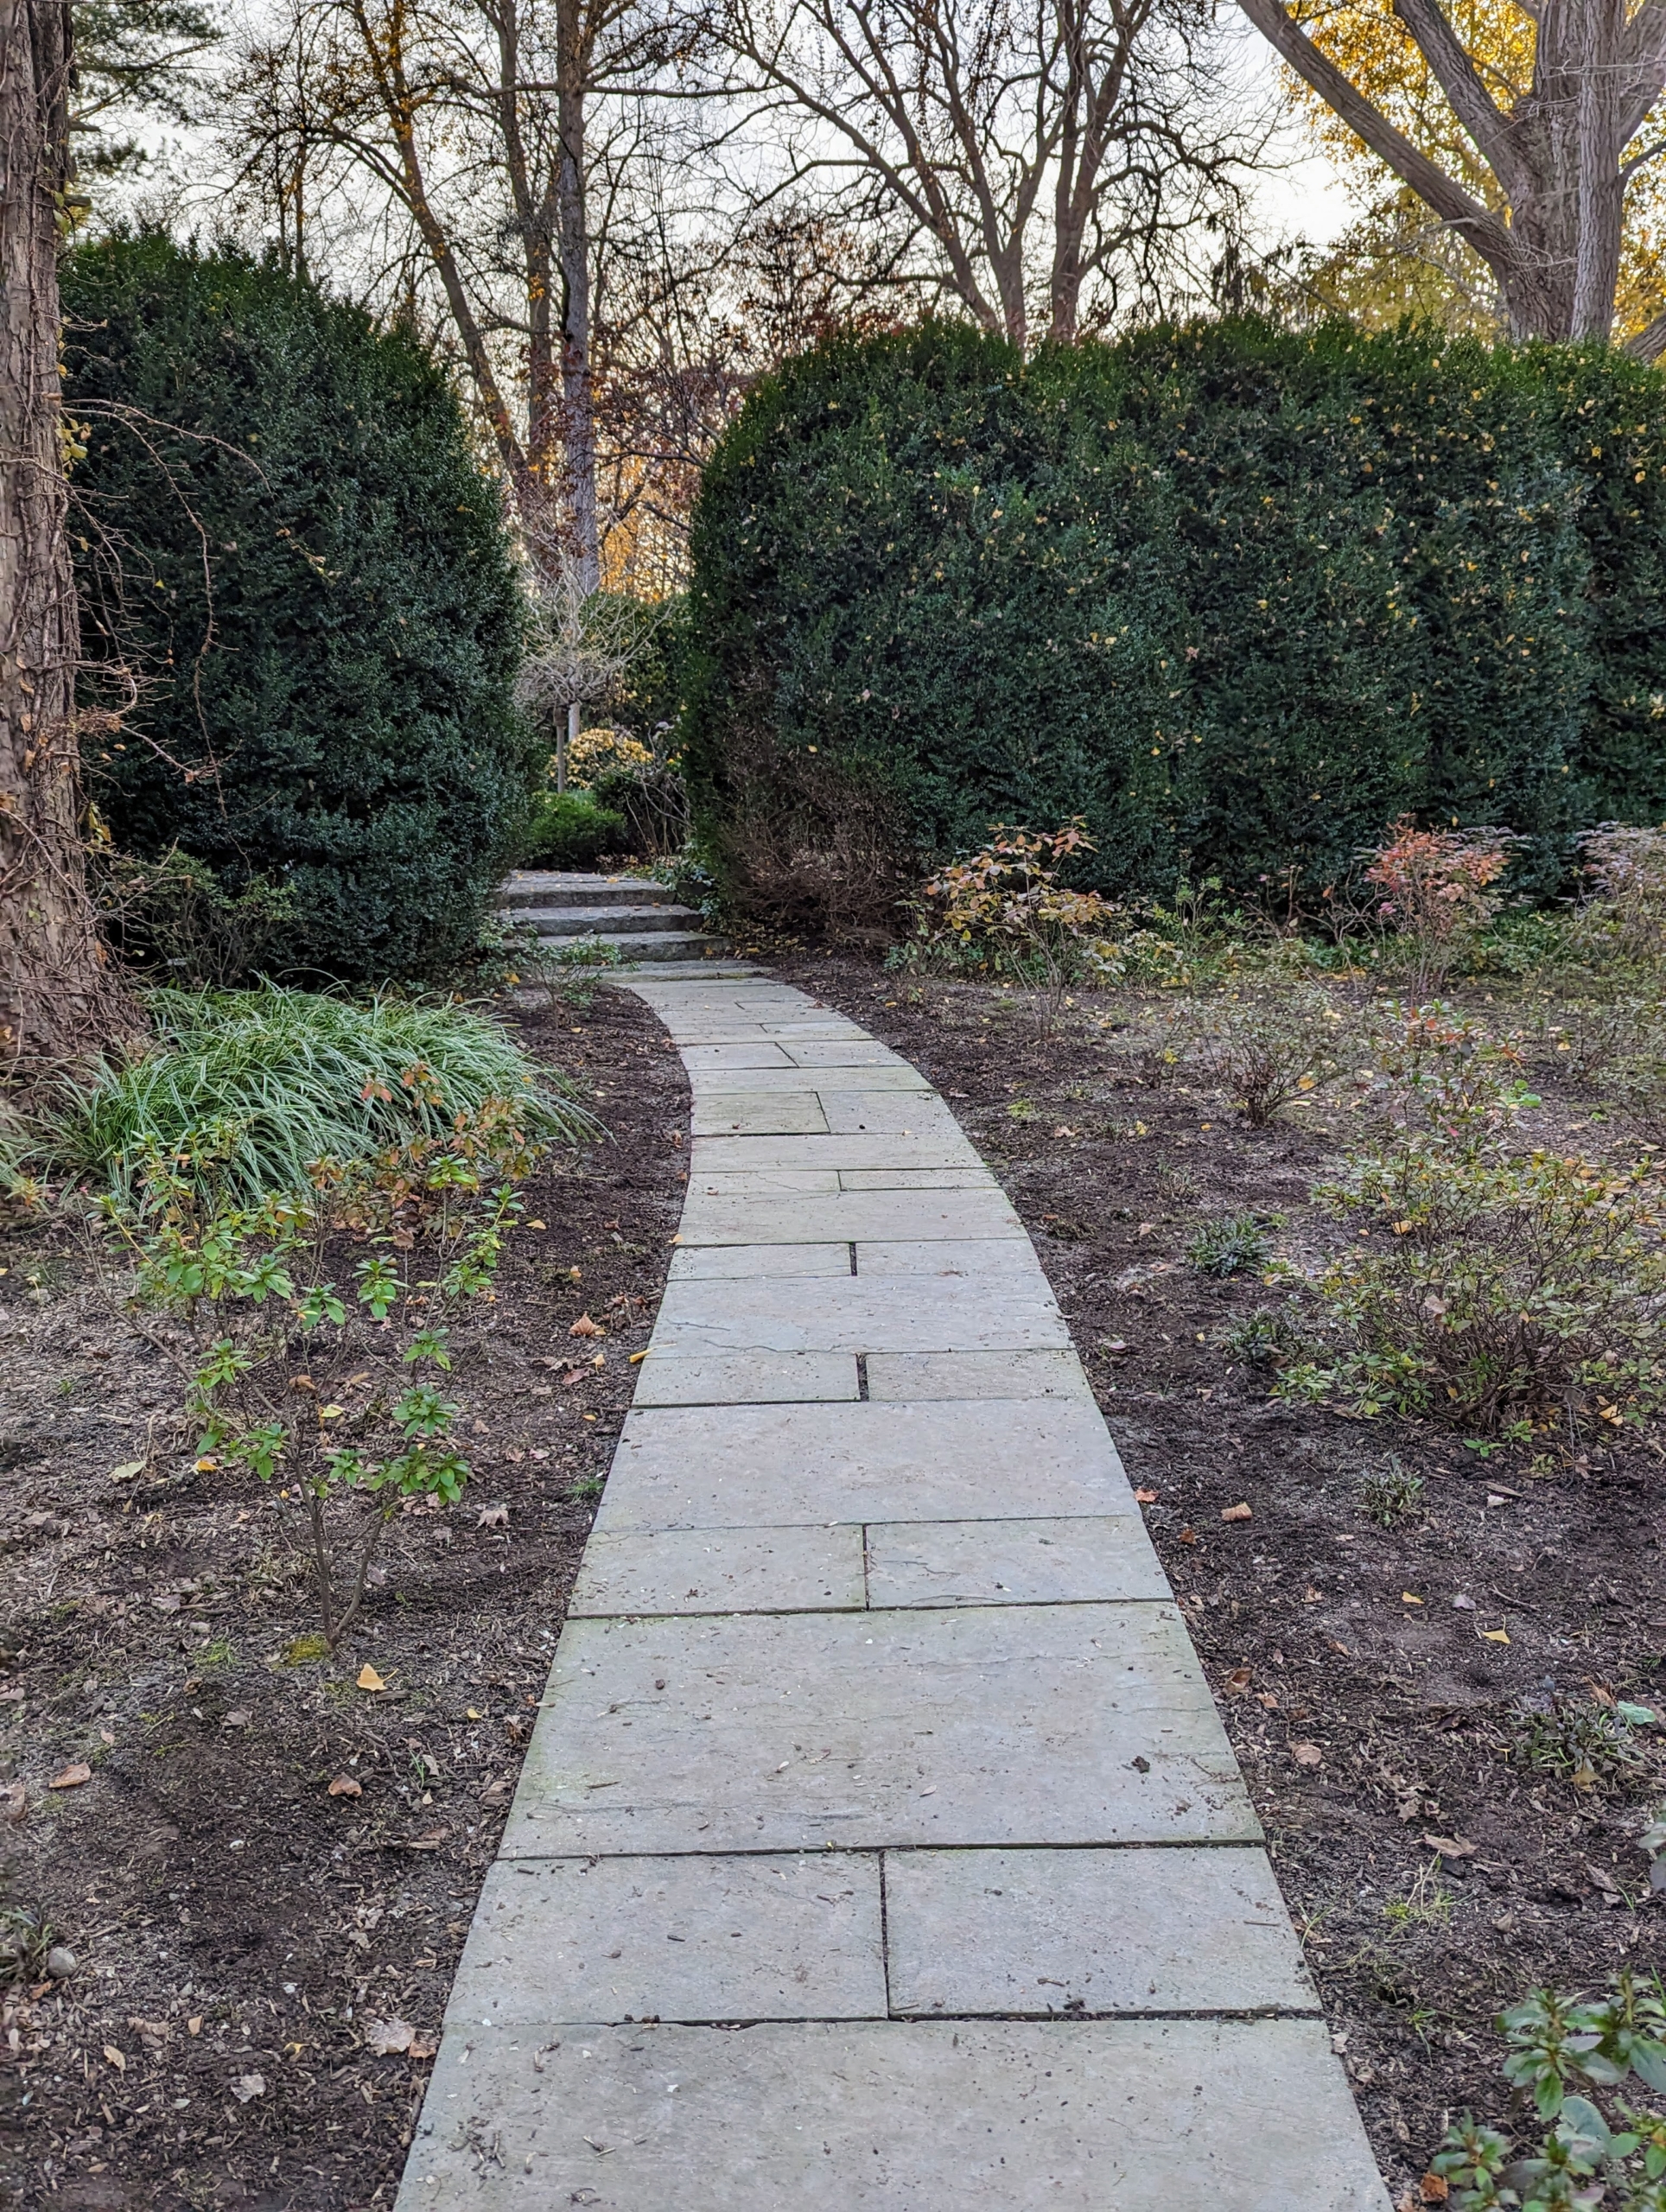
Ryan planted both sides of the footpath leading to my Summer House garden. It will look very pretty come spring.
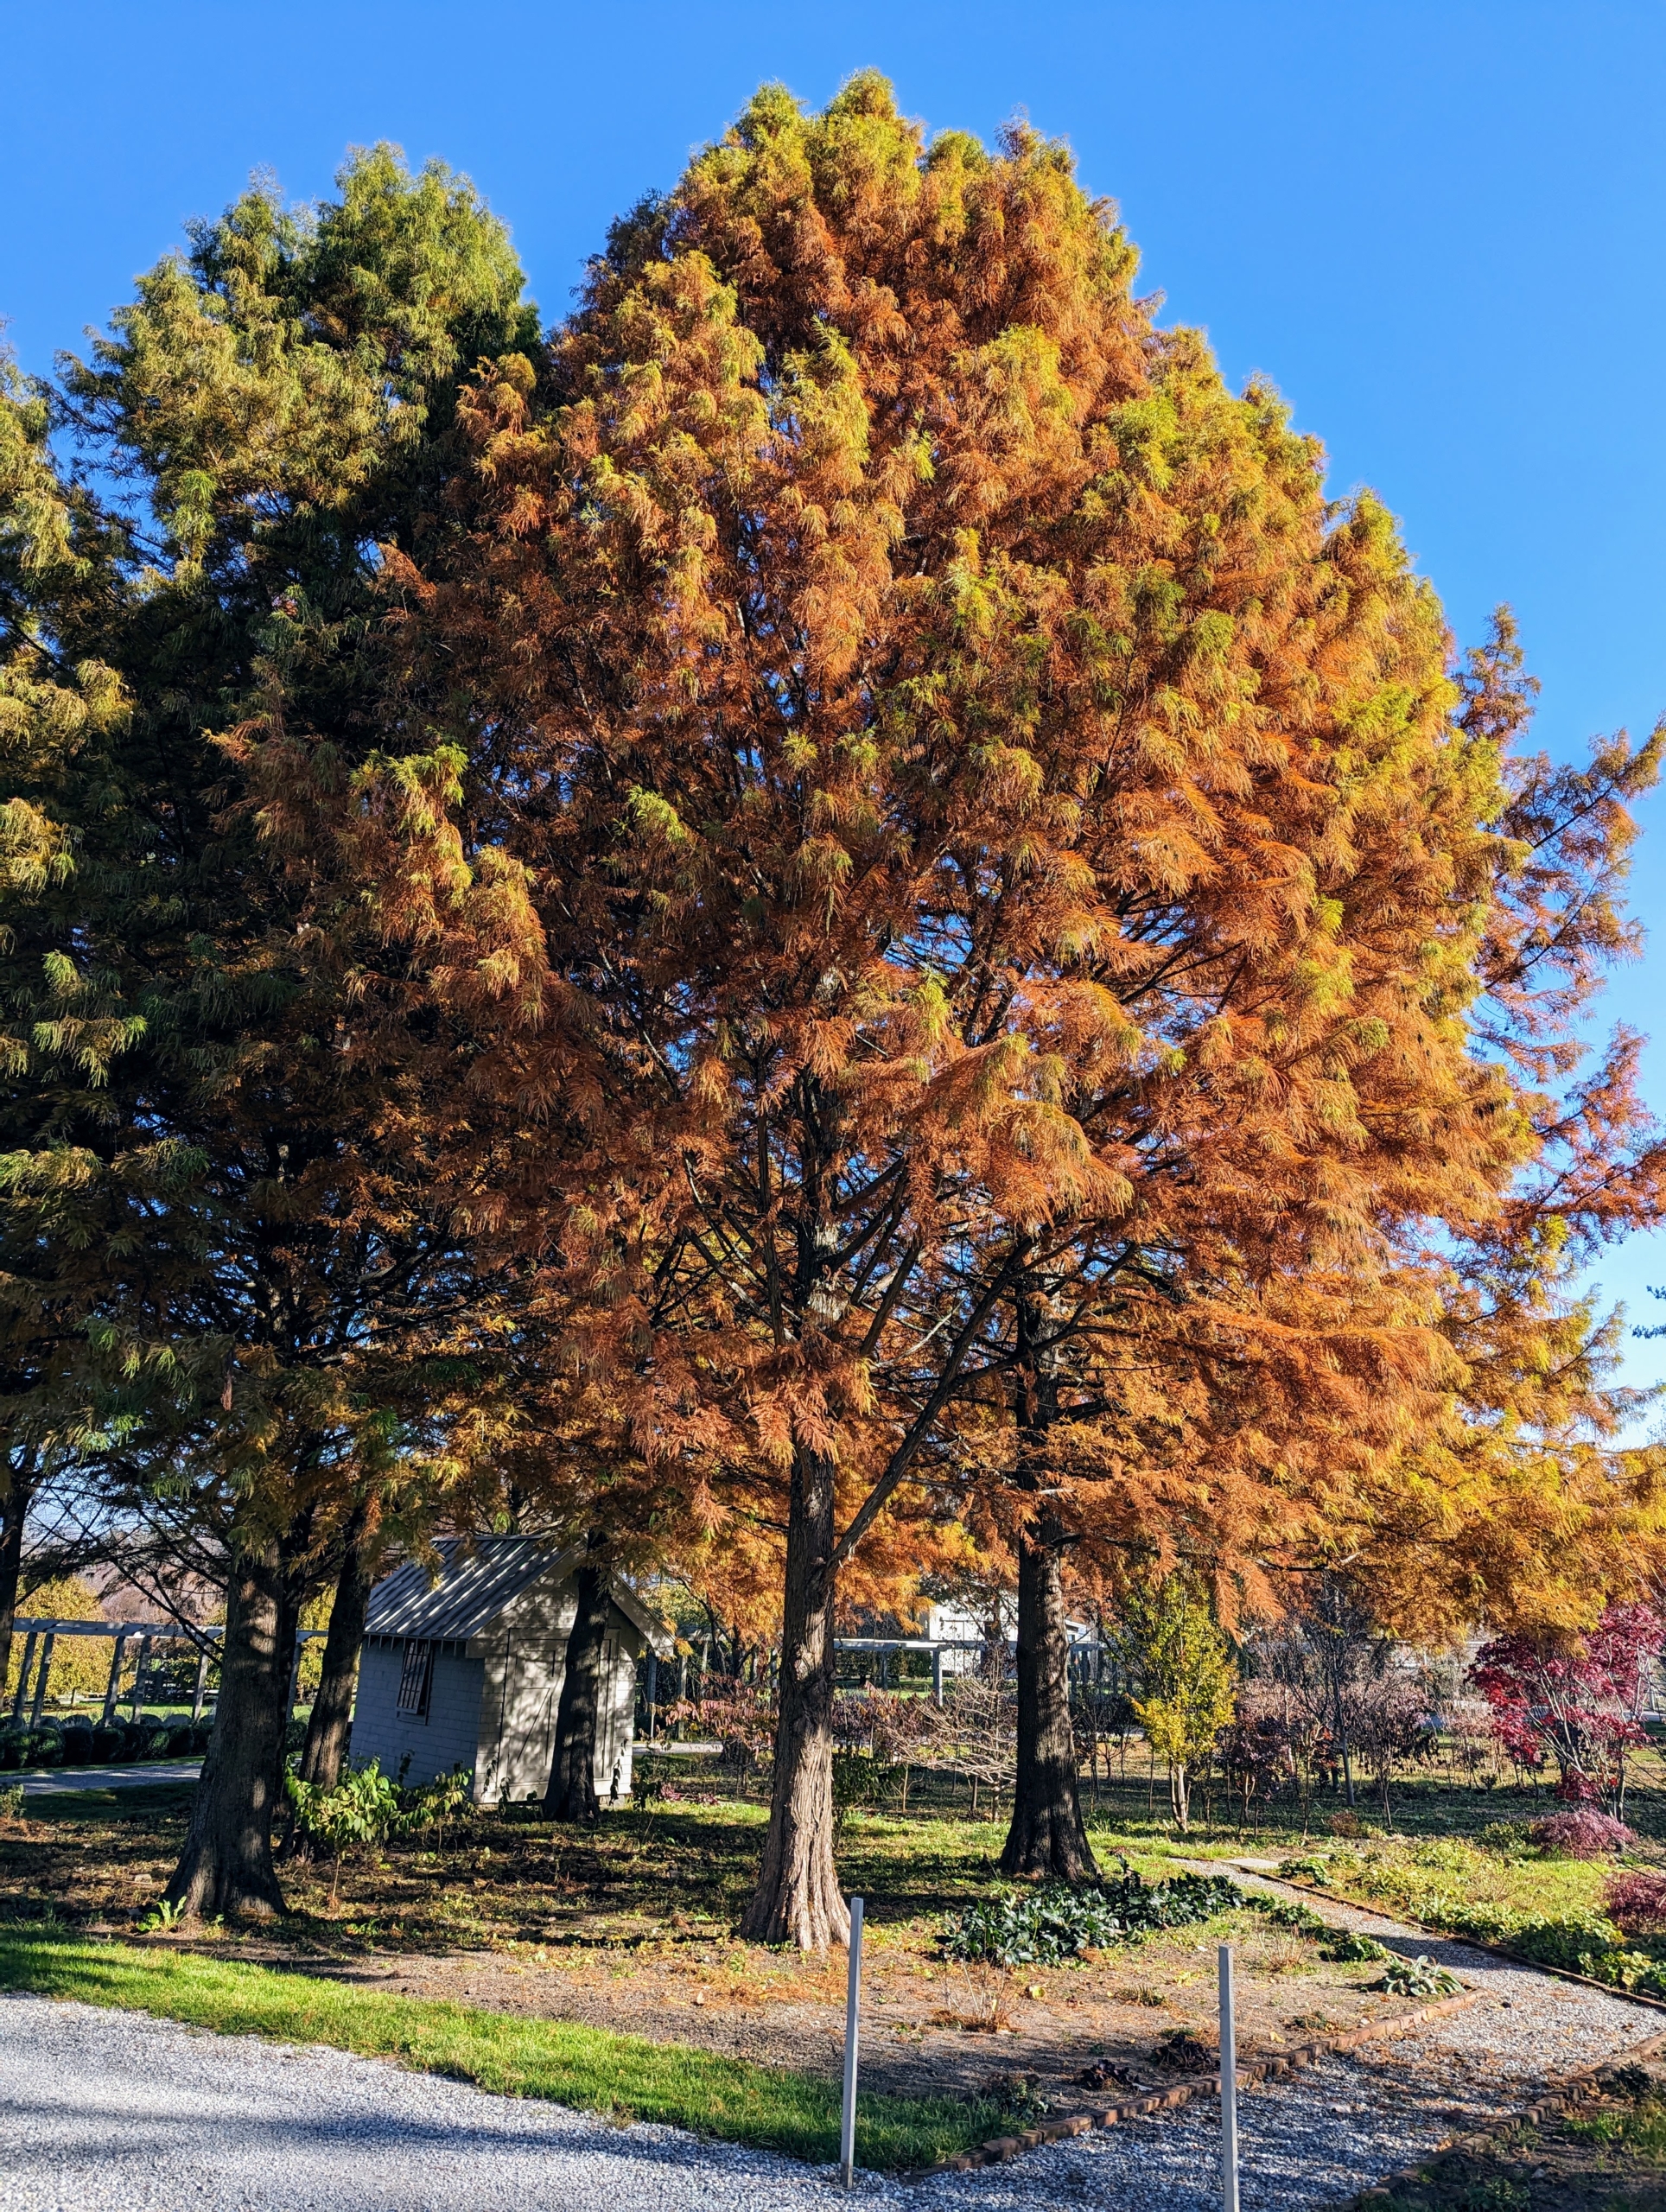
Another area is here, underneath and near my towering bald cypress trees, Taxodium distichum – a deciduous conifer.
Once again, Ryan feeds the area with a good amount of food specifically for planting bulbs.
Bulbs need to be packaged very carefully to ensure they are kept in the best conditions during transport. Van Engelen uses different bagging materials depending on the bulbs’ humidity needs. The bags are also designed with a number of holes for air circulation and humidity control.
Here are chionodoxa bulbs. These bulbs also have very distinct pointed ends and rounded bottoms.
Each bulb is placed in a hole about three to five inches deep. Ryan is always careful to place it in the hole properly. However, if a bulb accidentally gets planted sideways or upside down, it will still grow – it will just take a bit longer.
And once again, as the bulbs are planted, the areas are backfilled.
I can’t wait to see all these bulbs erupt with gorgeous color come spring. We still have many, many more bulbs to plant. Follow this blog and see where we go next – the daffodil border perhaps?
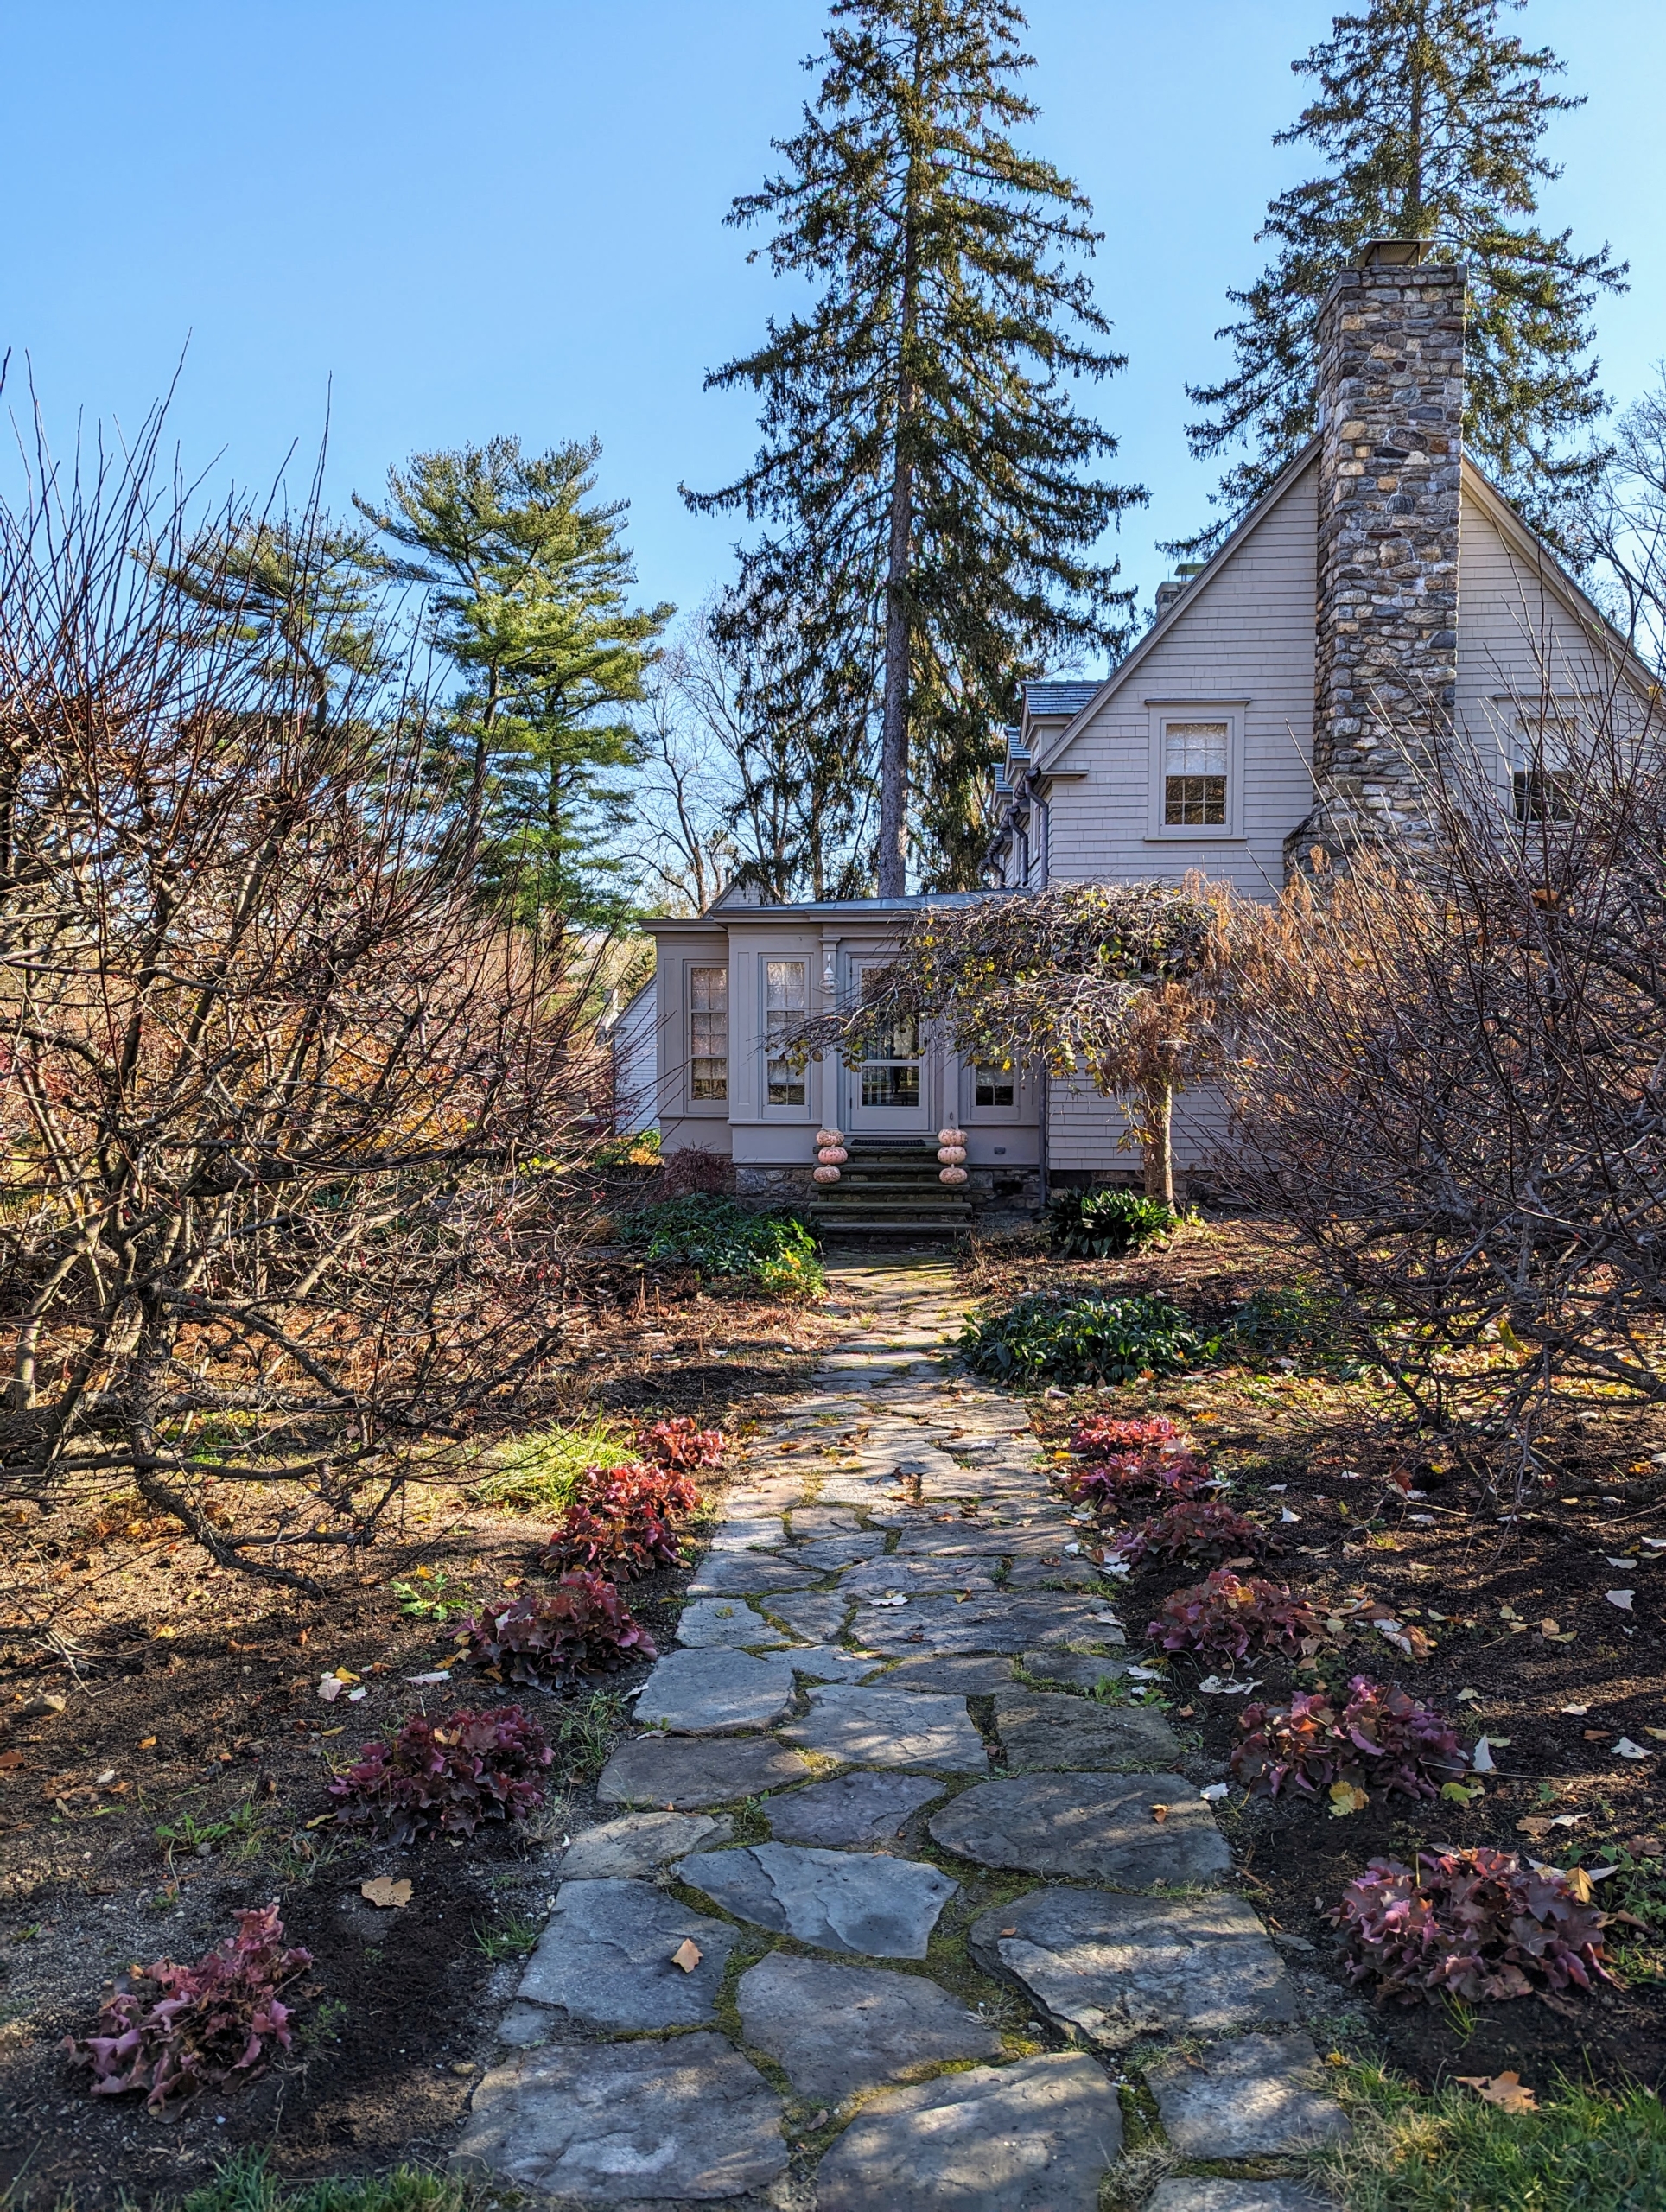
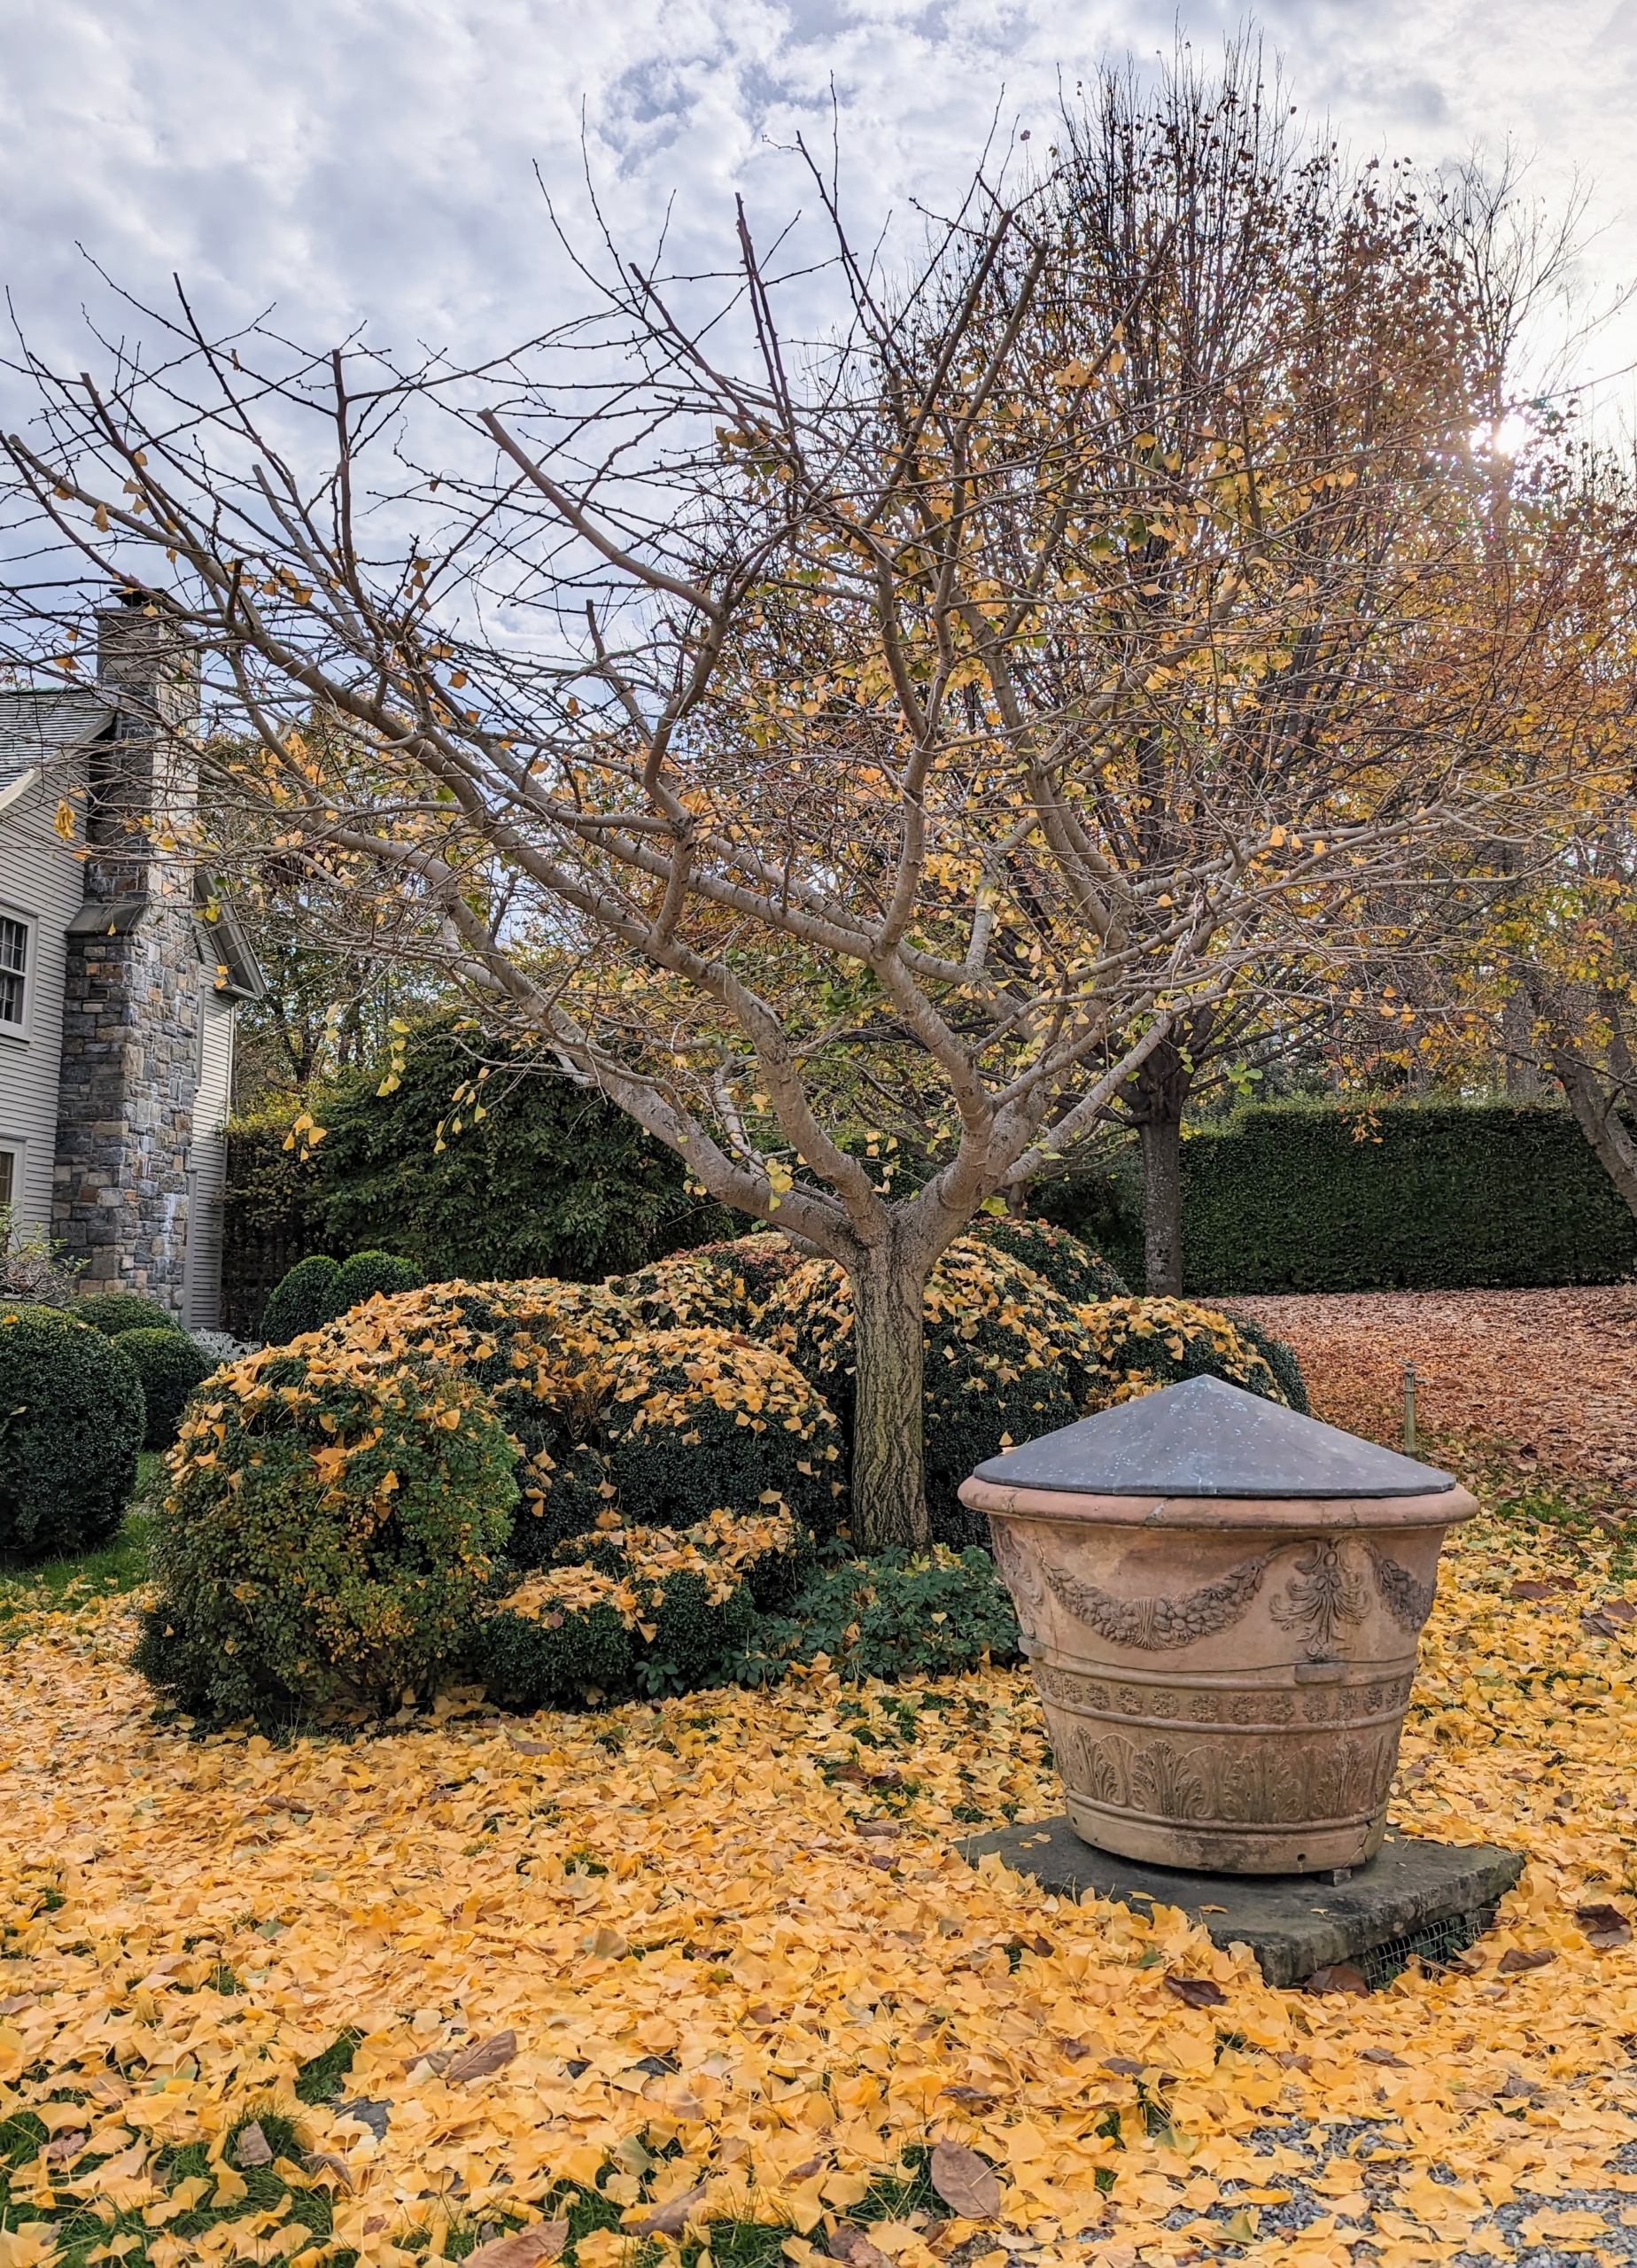
At my Bedford, New York farm, I have thousands and thousands of trees. Many were already well-established when I purchased the property, but the rest I've planted - in allées, in groves, as privacy hedges, and in rows within my living maze. One type of tree, however, stands out this time every year - the mighty ginkgo.
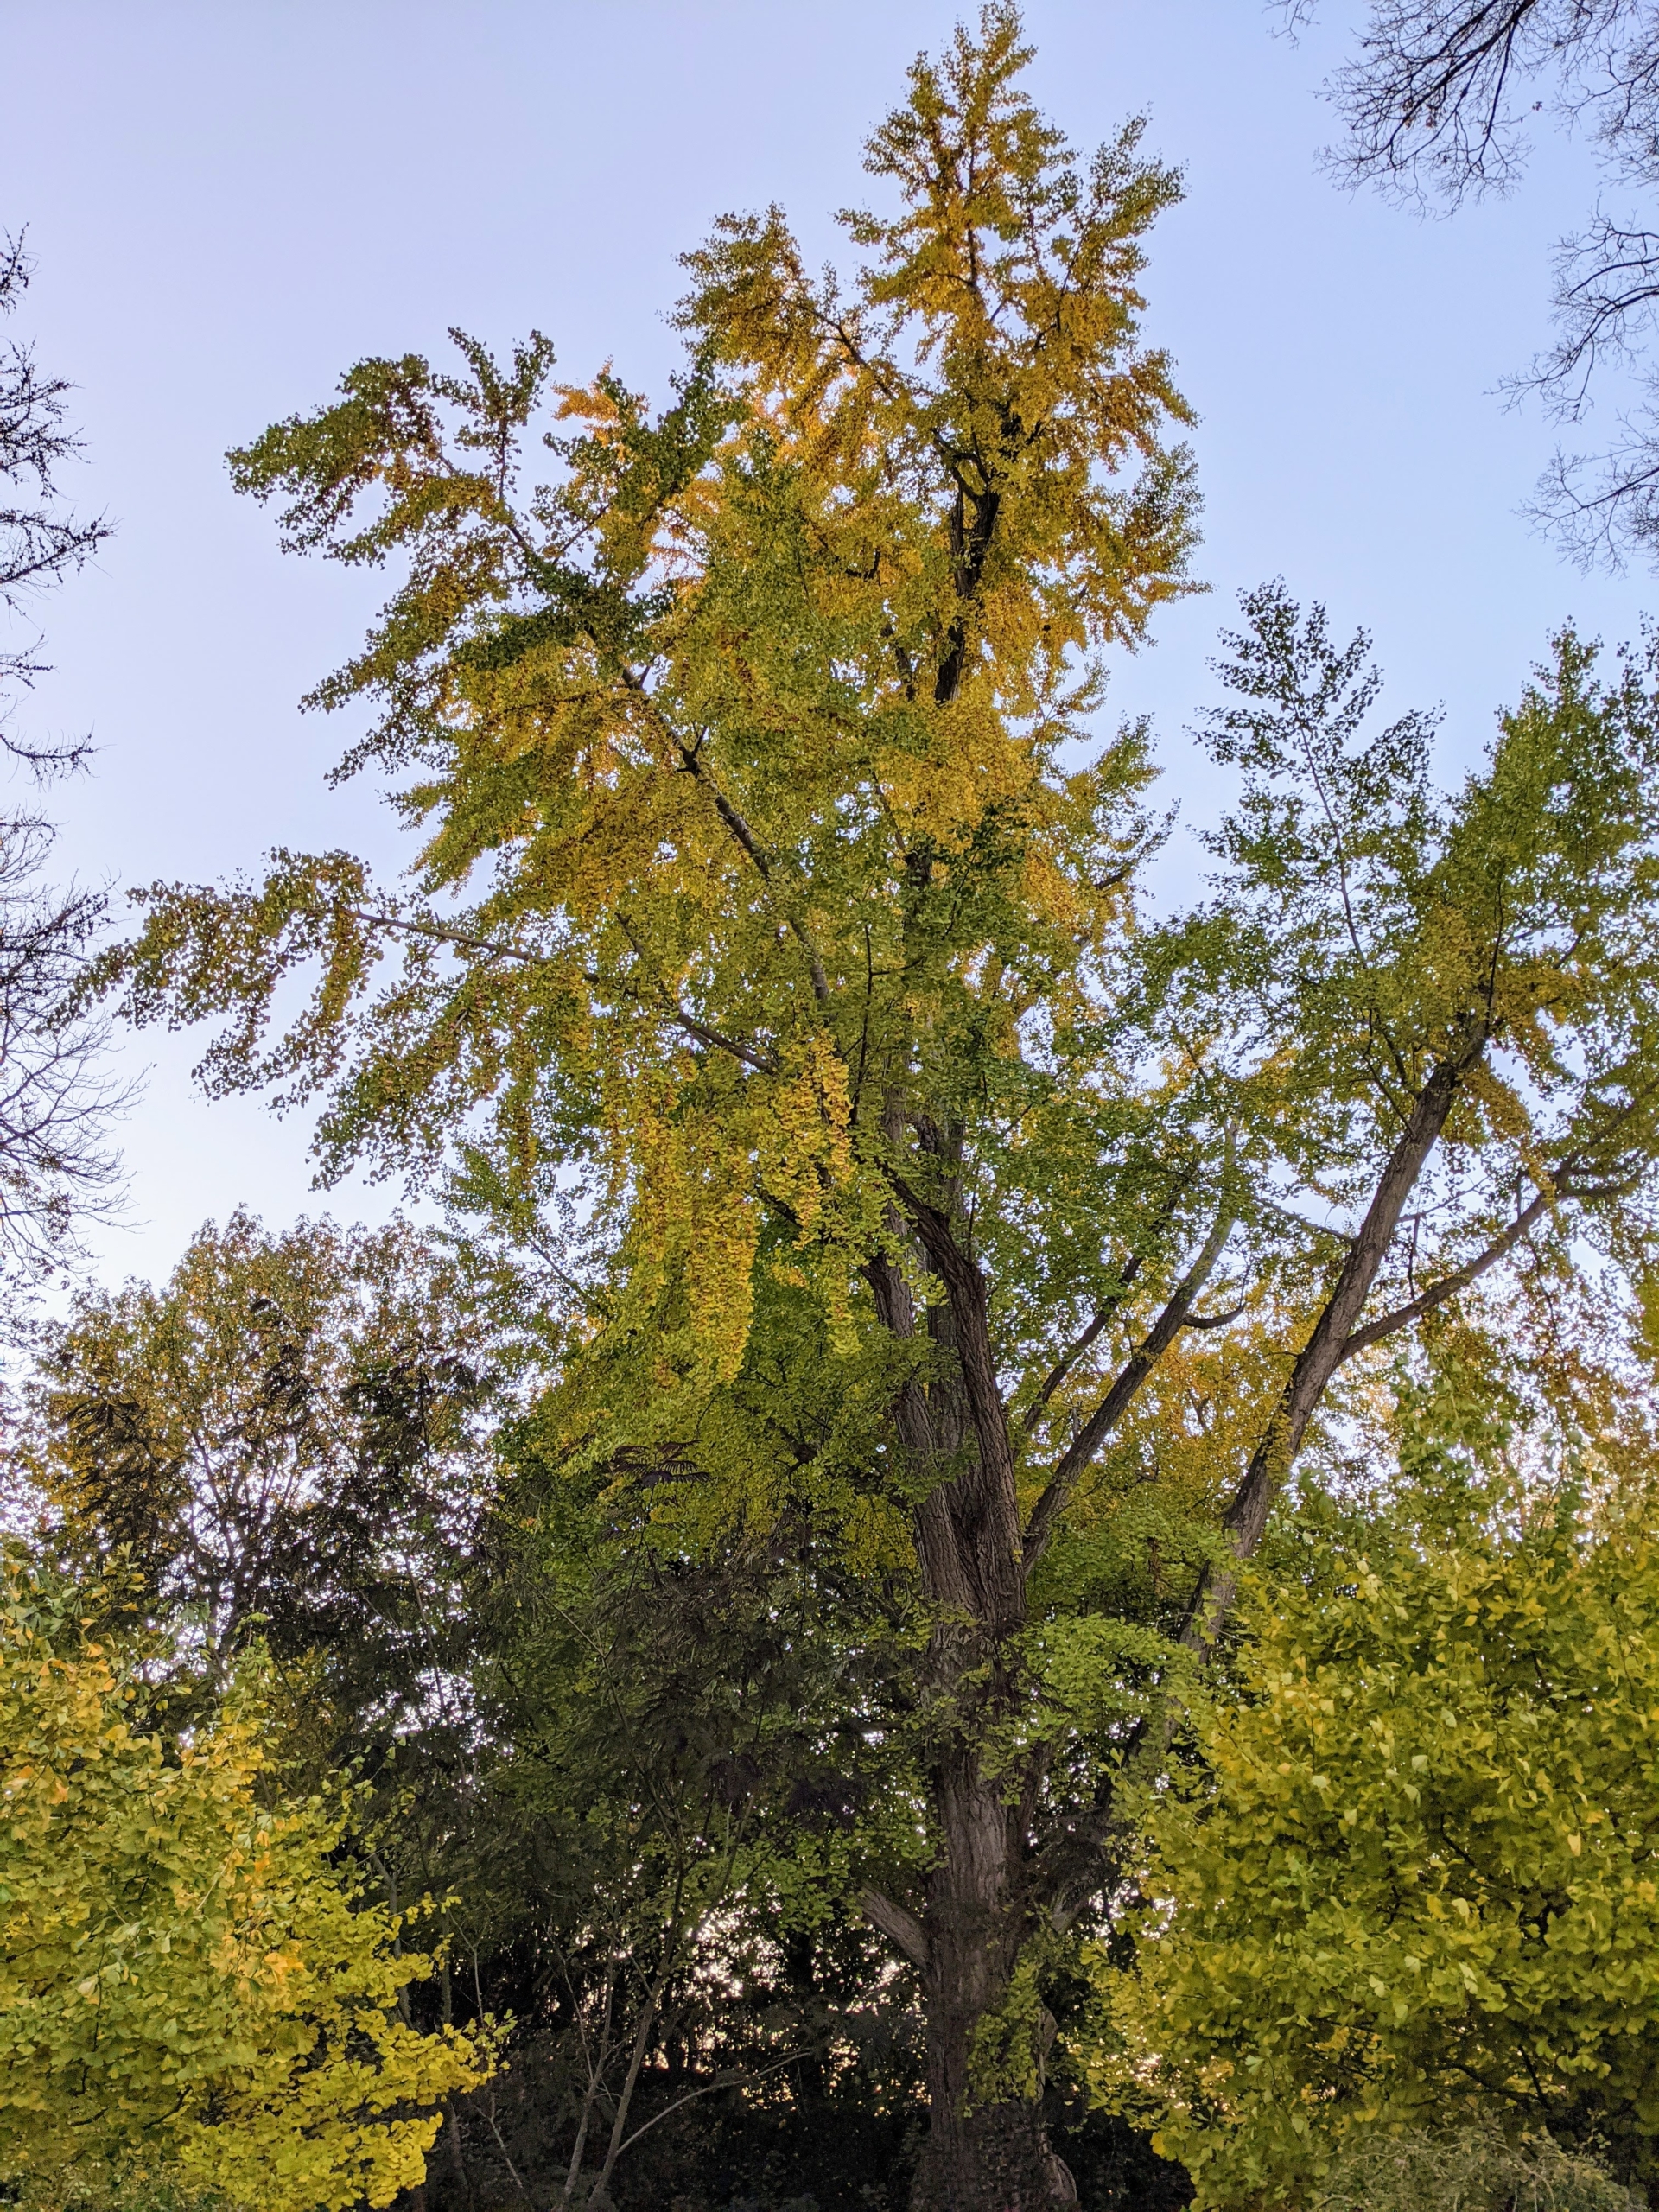
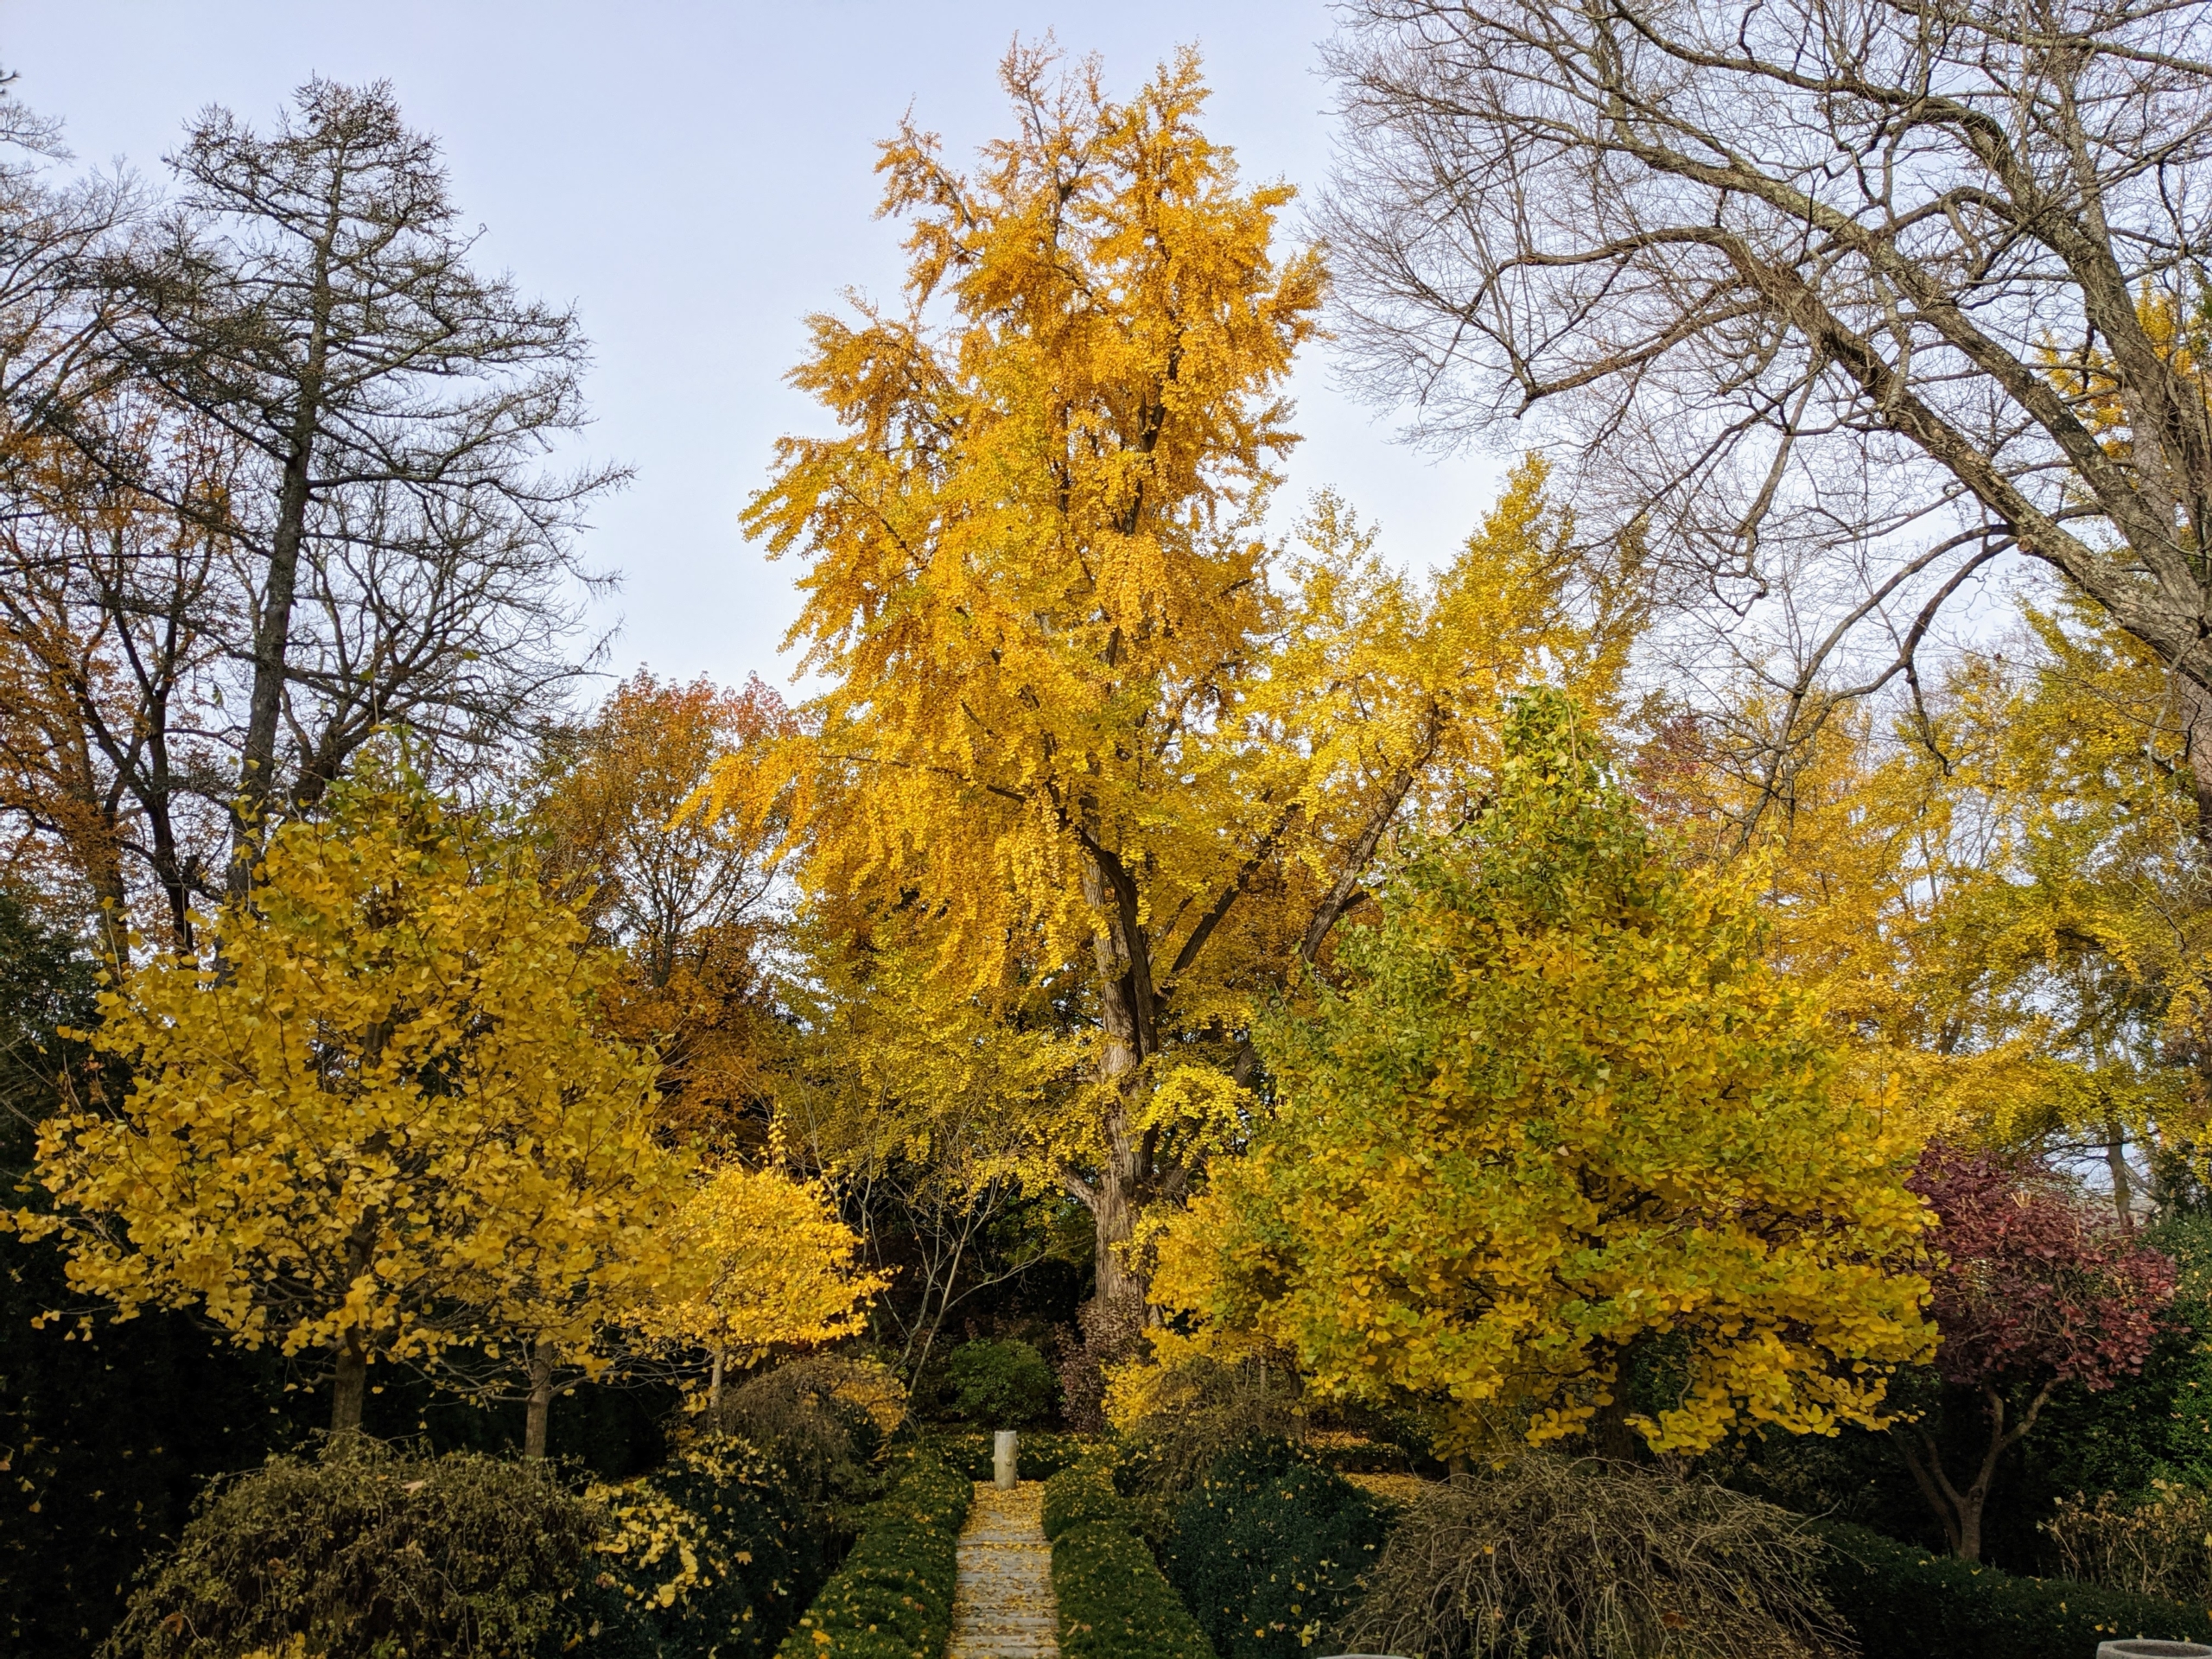
Ginkgo biloba, commonly known as ginkgo or gingko, and also known as the maidenhair tree, is the only living species in the division Ginkgophyta. It is found in fossils dating back 270-million years. Native to China, the ginkgo tree is widely cultivated, and was cultivated early in human history. In the sunken garden behind my Summer House, I have a stunning ginkgo tree that's probably about 250-years old. Although not as large as others I've seen during trips to Asia, my tree is quite massive - its trunk circumference measures at least 14-feet. Ginkgo trees have beautiful green leaves that turn a luminous golden-yellow in autumn. Then at some time after a hard frost sweeps down the east coast, this ginkgo, along with others at my farm and countless more in the area, drops its leaves to the ground leaving a gorgeous carpet of color below.
Enjoy the season's changes on the ginkgo in these photos.
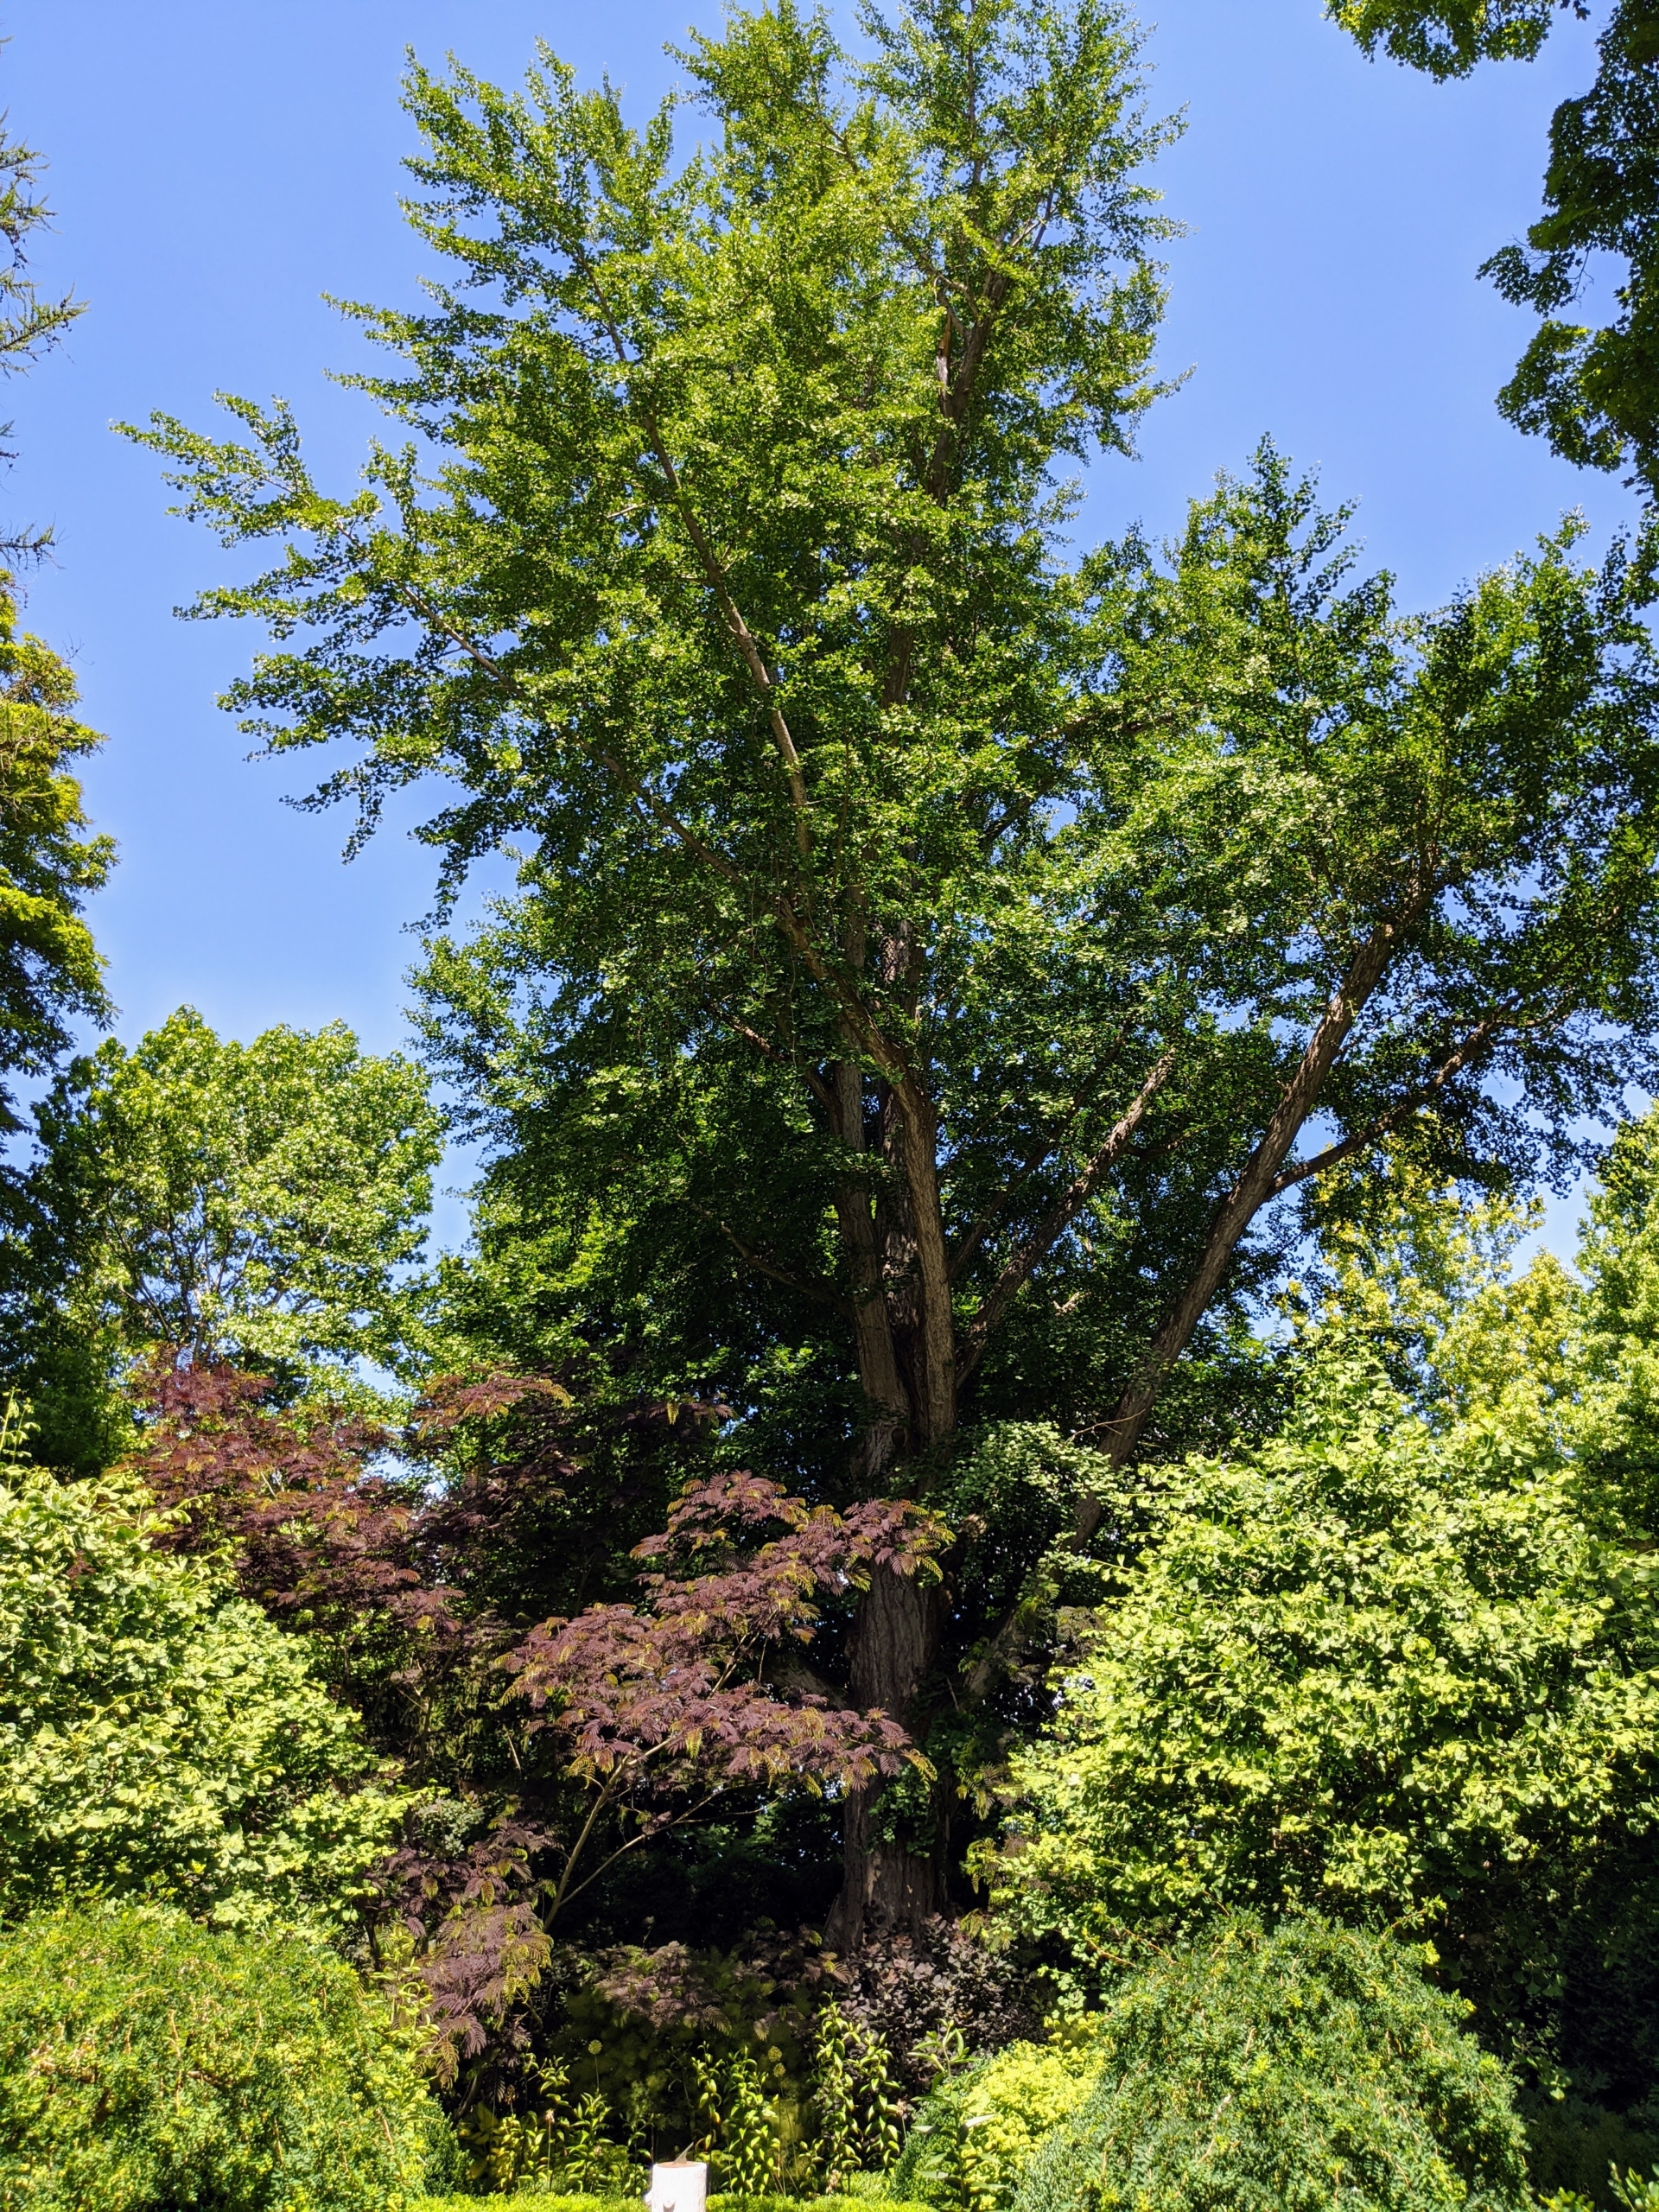
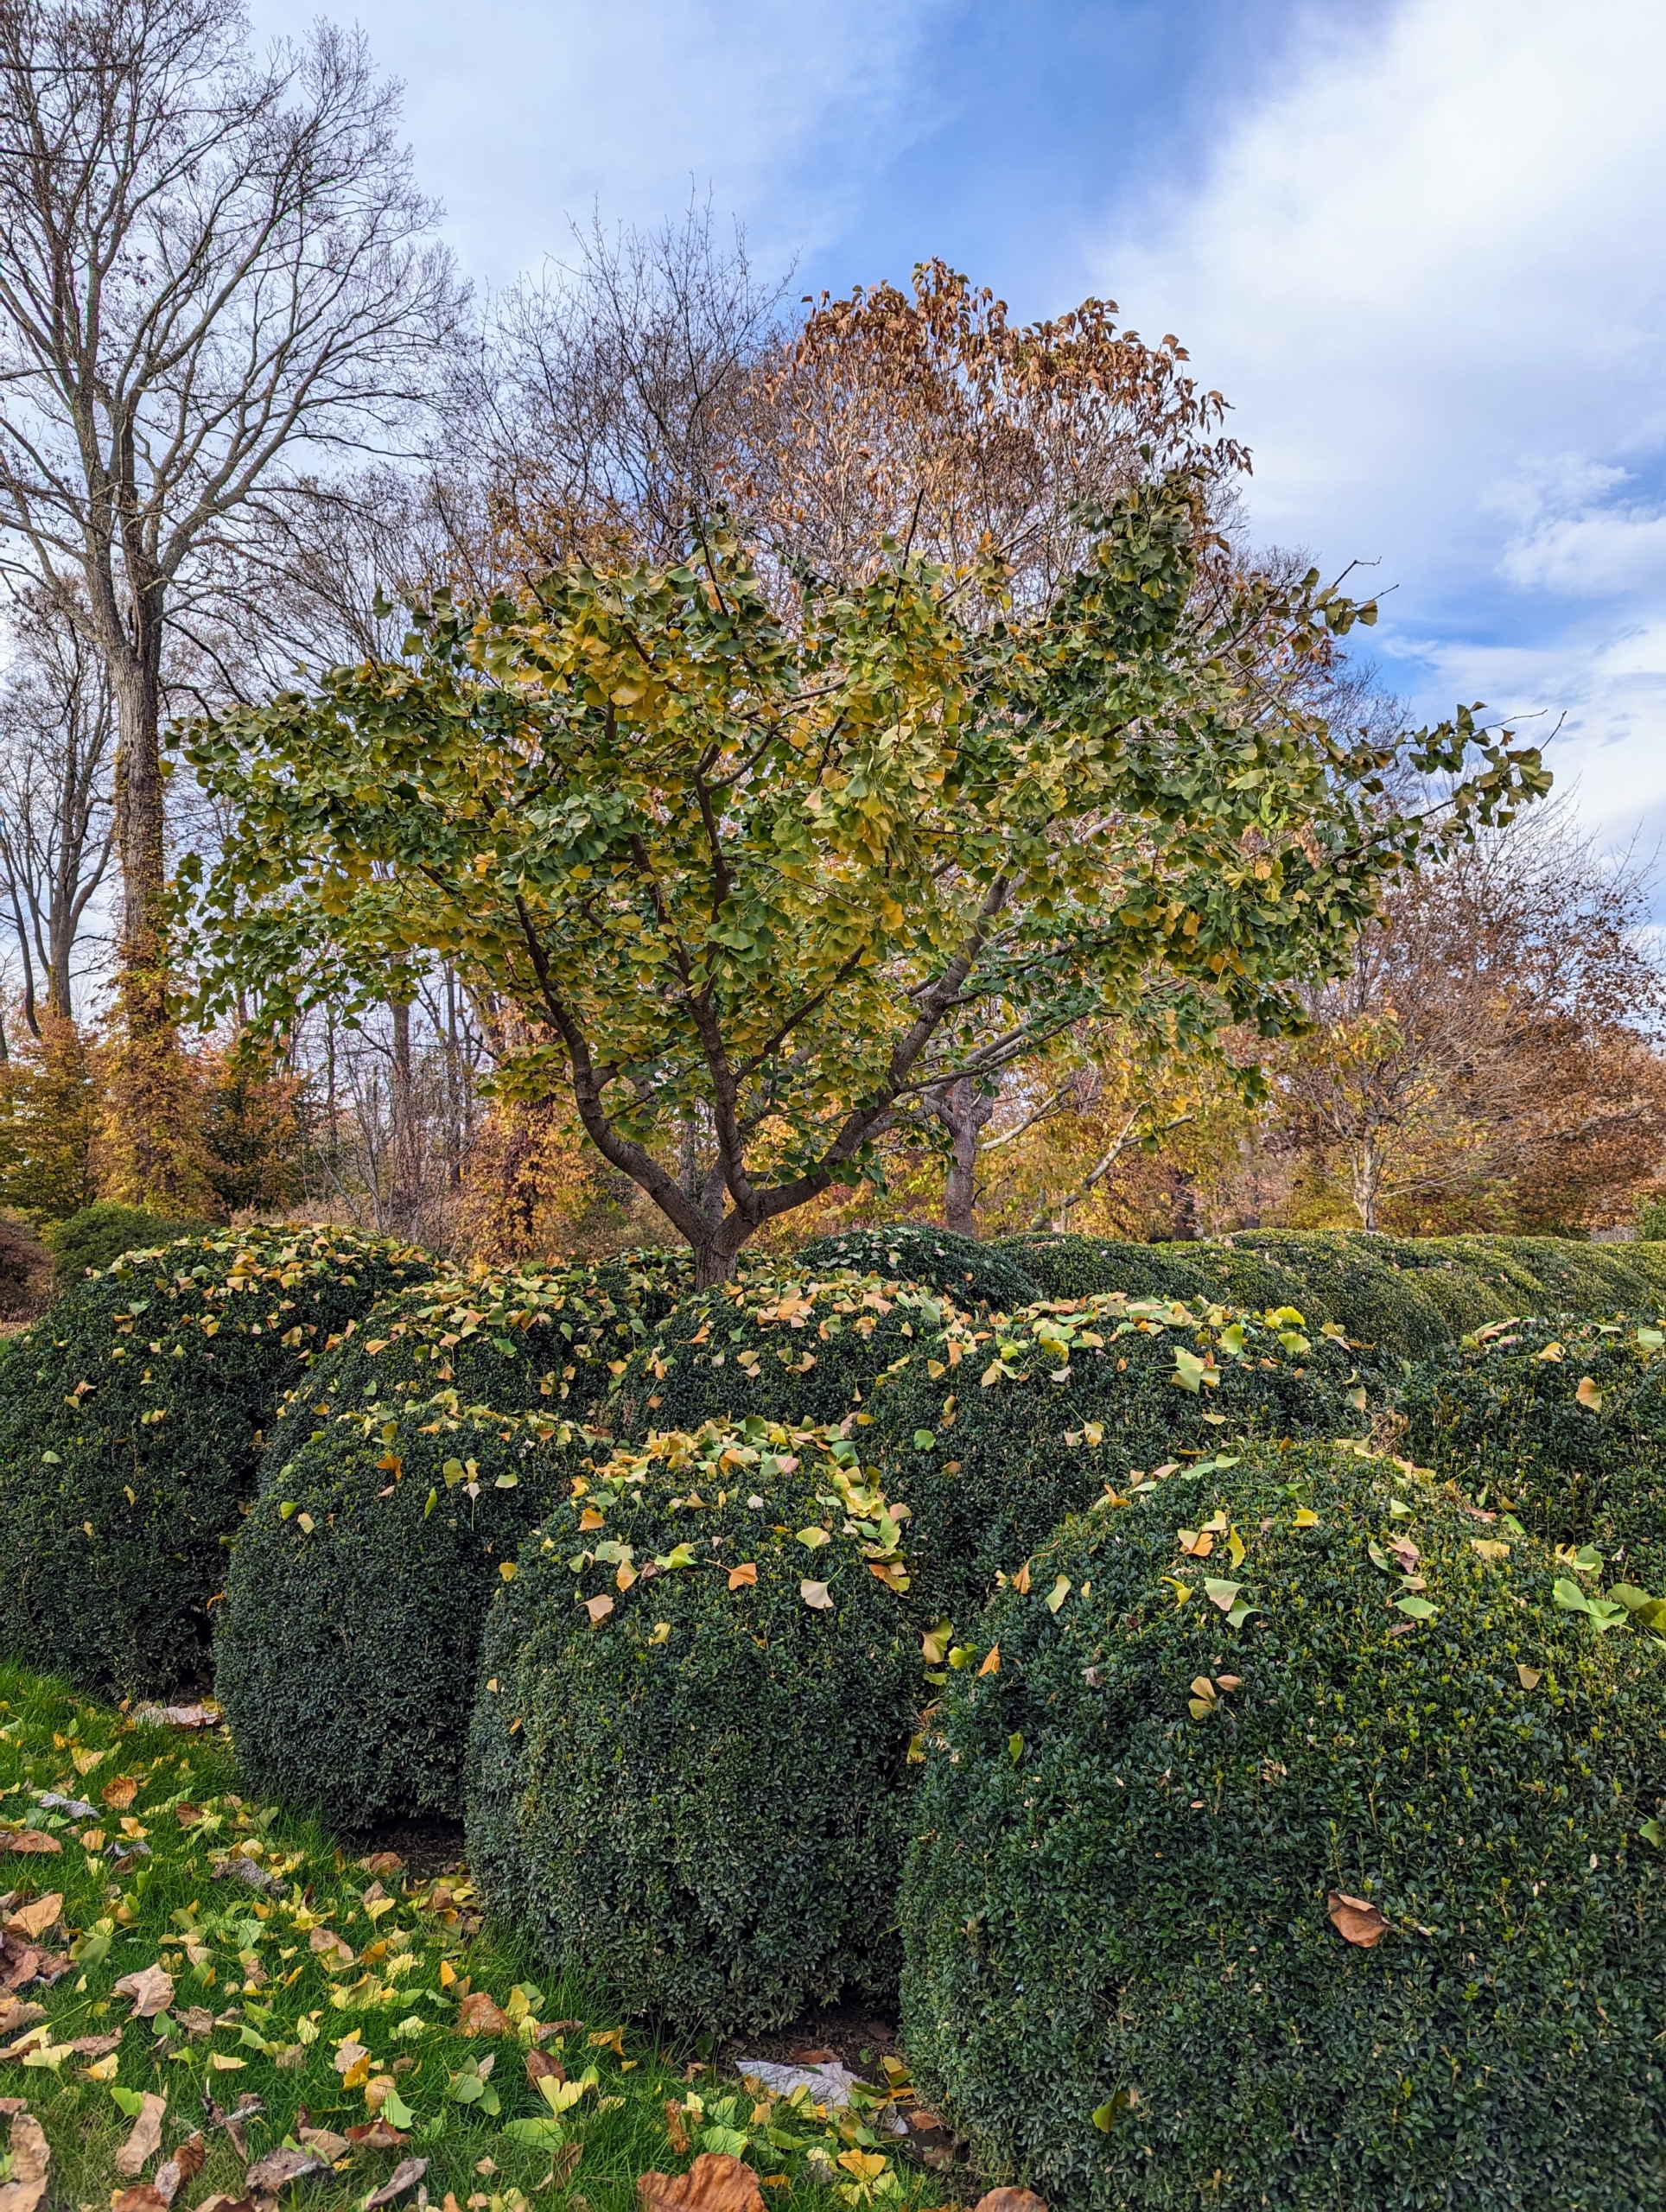
This is the great ginkgo tree in the back of my Summer House sunken garden in June. This parterre garden is very formal and focused on the giant tree. Growing beneath the ginkgo is a beautiful chocolate mimosa tree, a fast-growing, deciduous tree with a wide, umbrella-shaped canopy. The other green trees are younger ginkgoes.
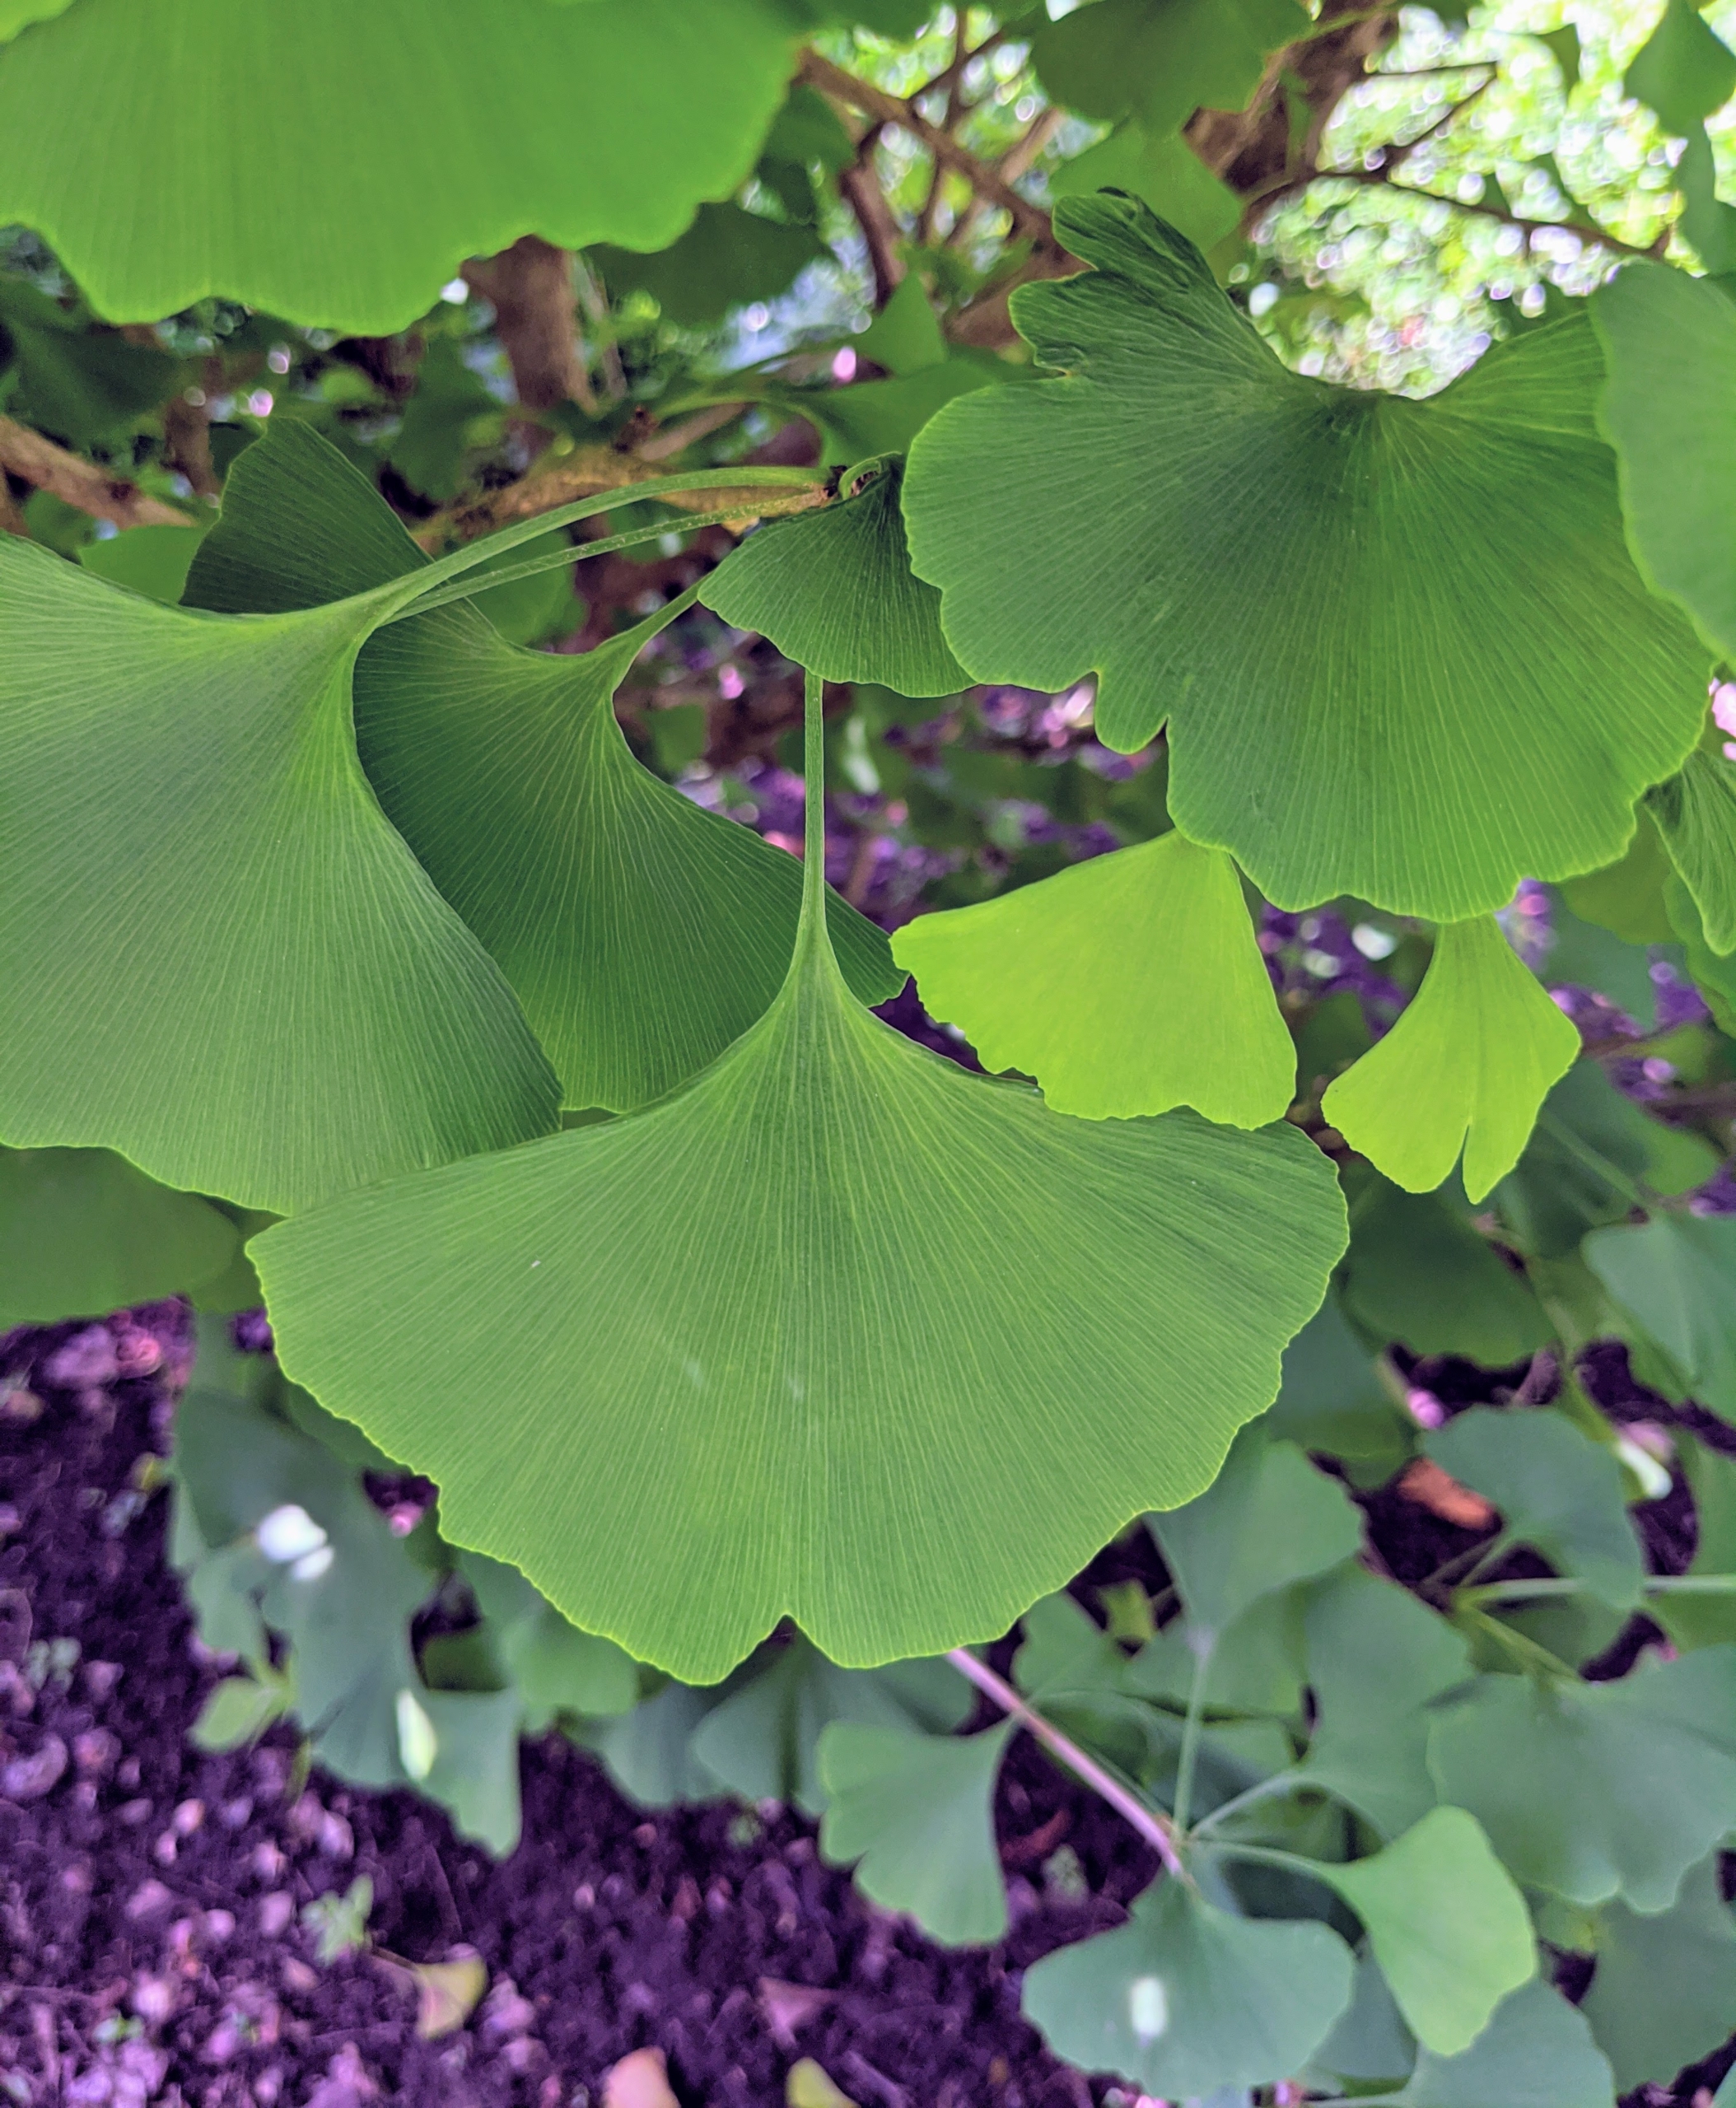
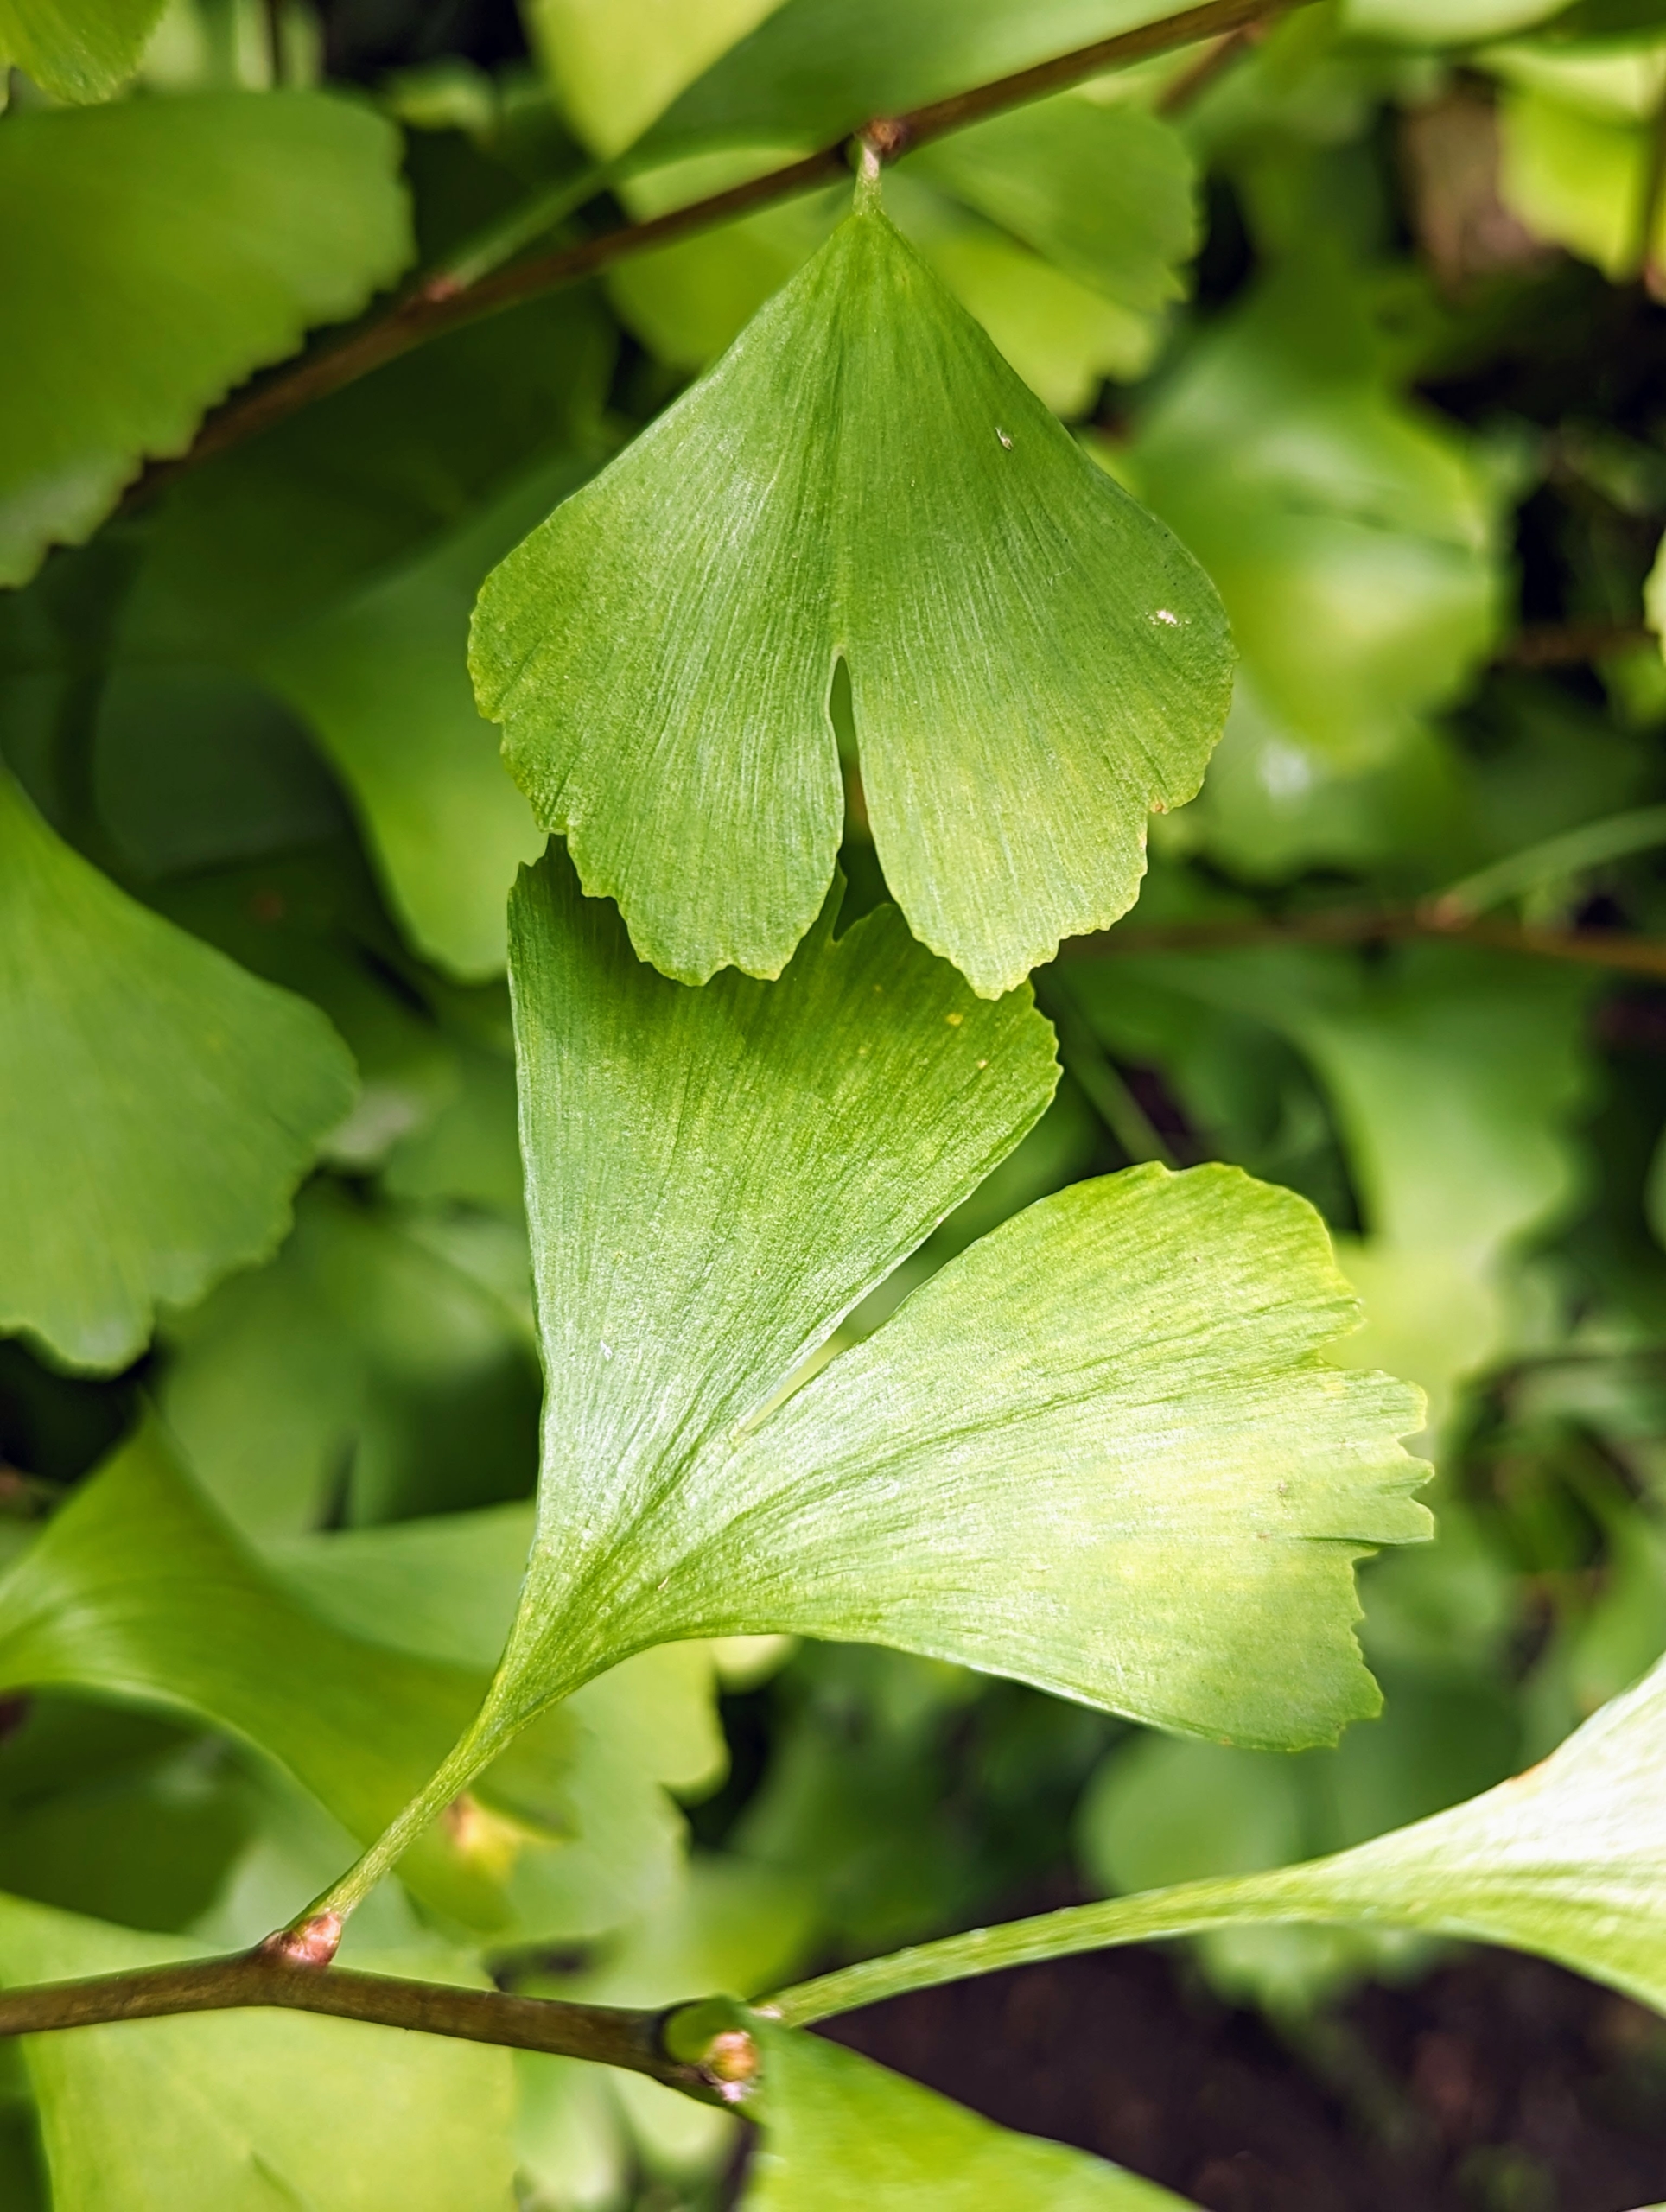
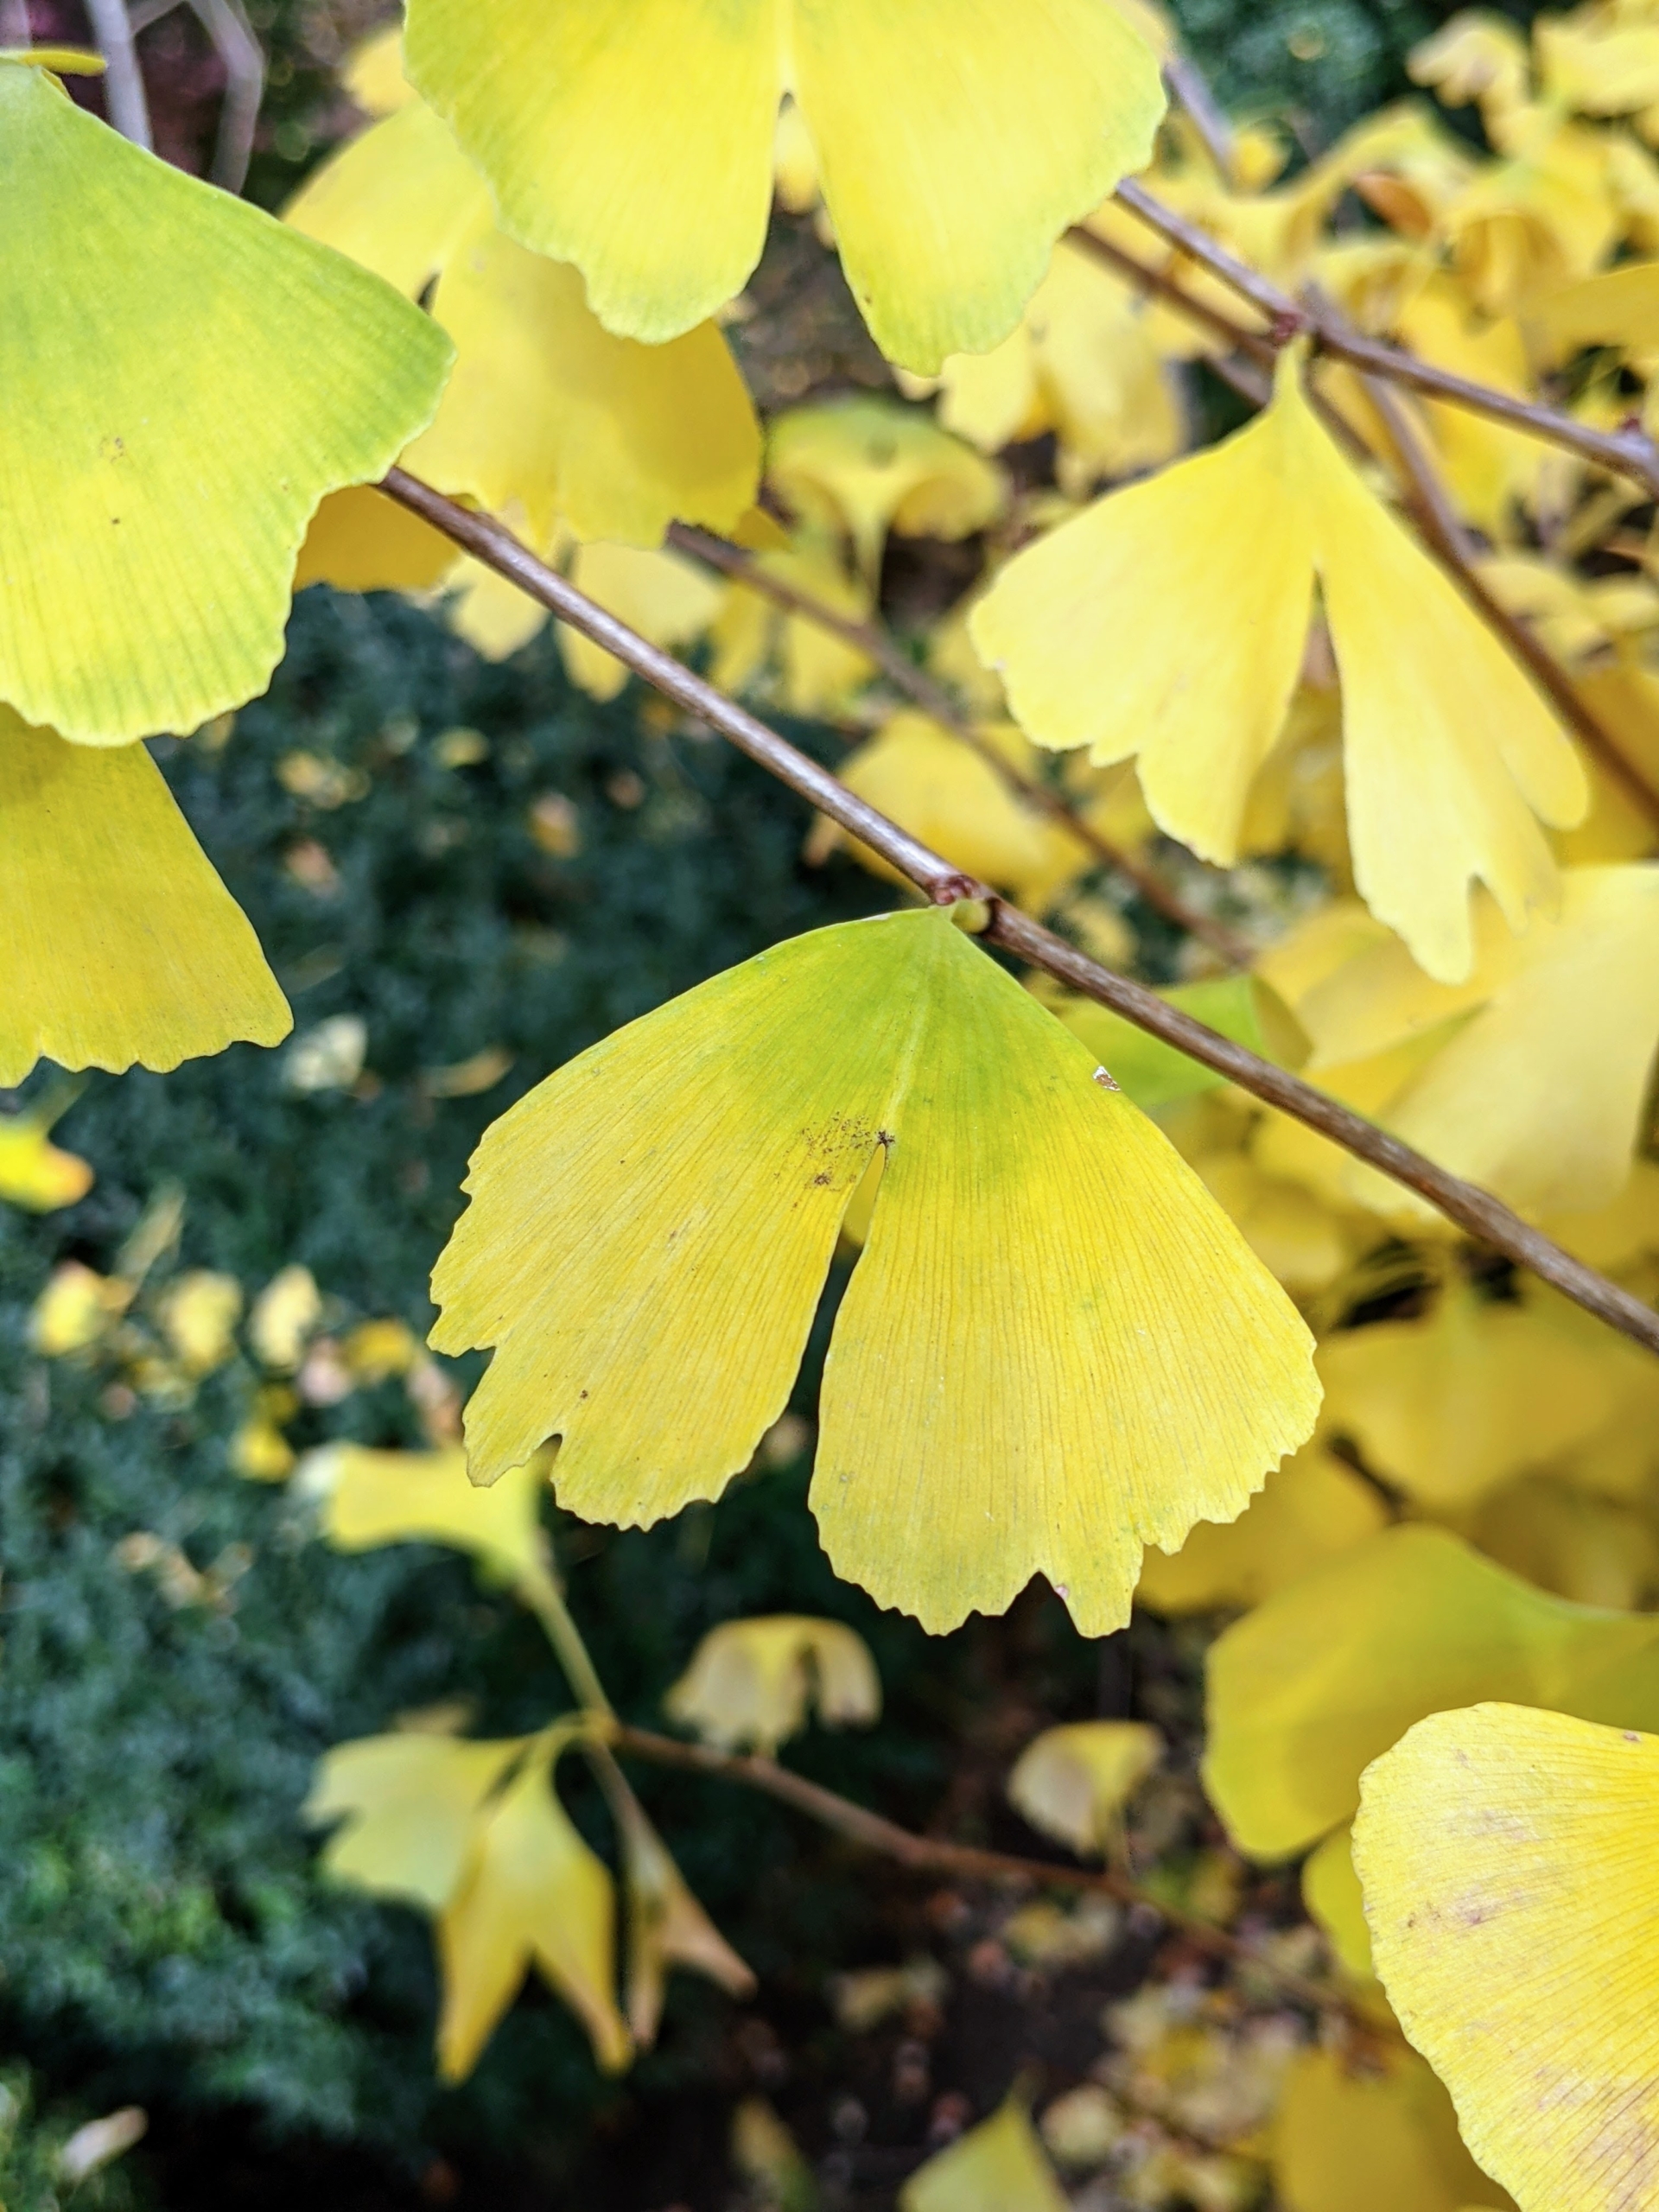
The leaves of the ginkgo are unusually fan-shaped, up to three-inches long, with a petiole that is also up to three-inches long. This shape and the elongated petiole cause the foliage to flutter in the slightest breeze. They are bold green in summer.
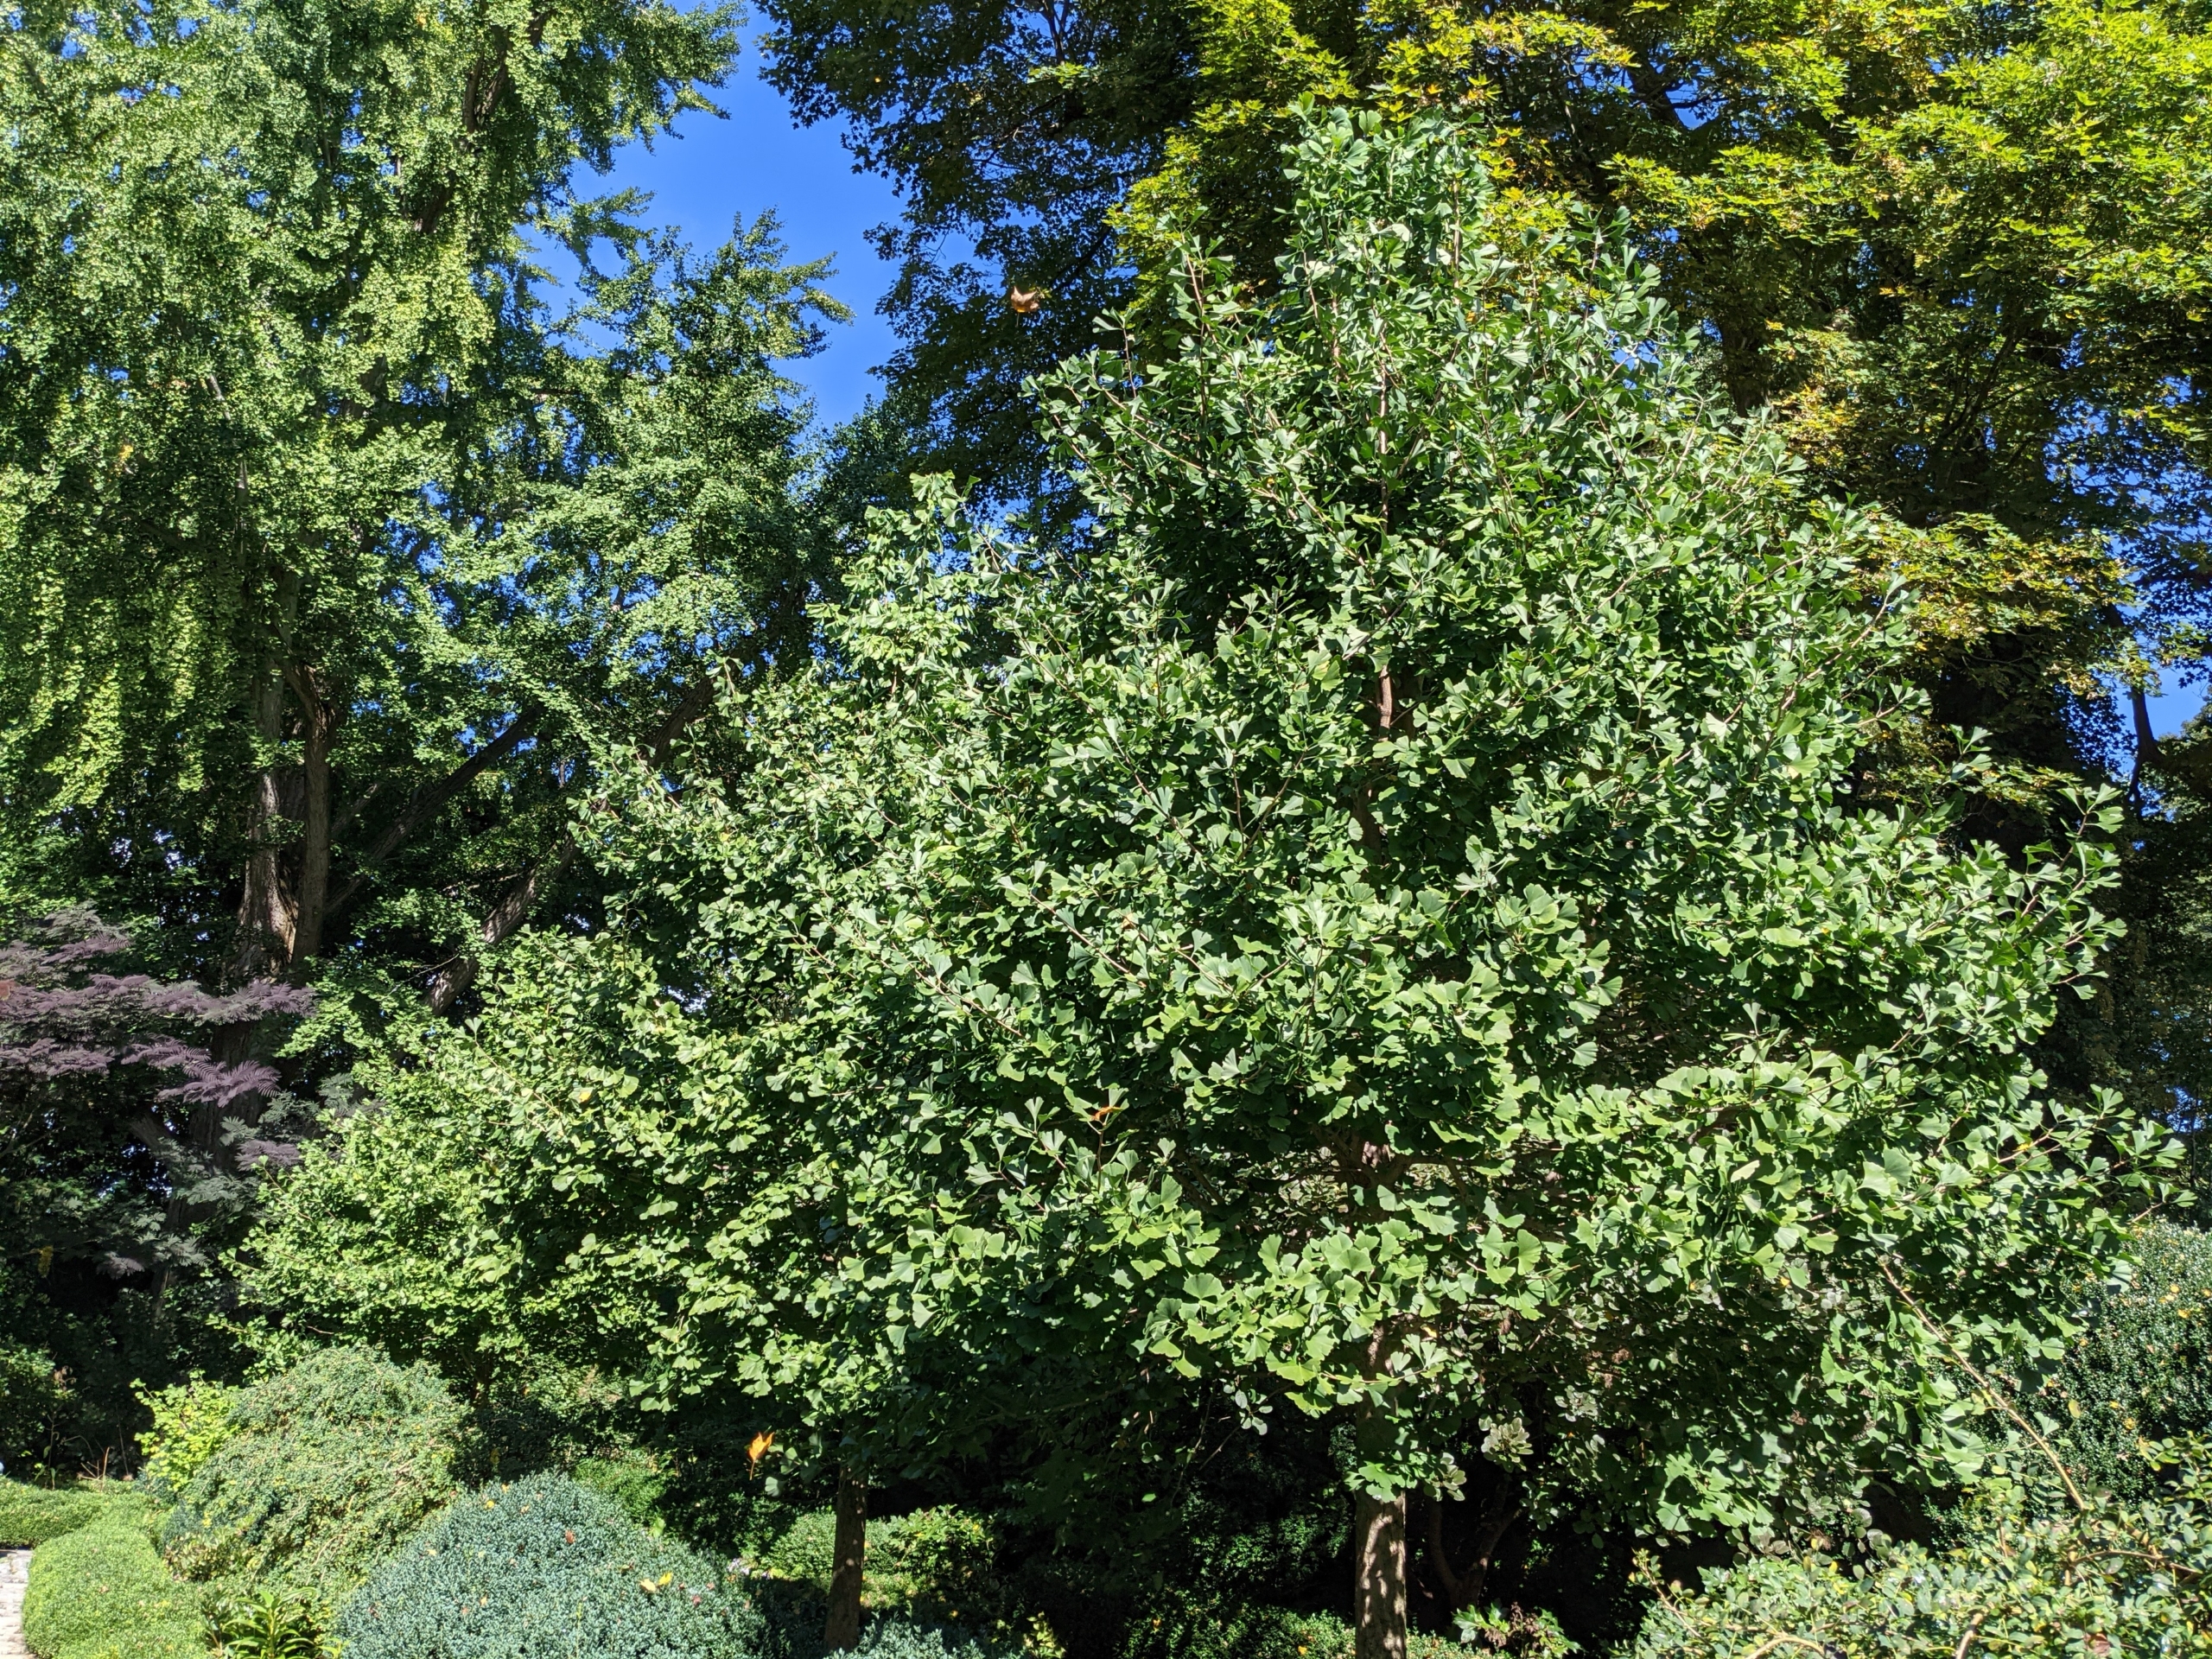
The younger ginkgo trees are planted on both sides of the footpath in this garden. The ginkgo is considered both a shade tree and an ornamental tree. It features a spreading canopy capable of blocking sunlight and adds visual interest and beauty to the landscape. The ginkgo grows to about 50 to 80-feet tall with a spread of 25 to 35-feet at maturity.
Starting in late September, one can see a slight change to the color of the leaves – they’re starting to turn.
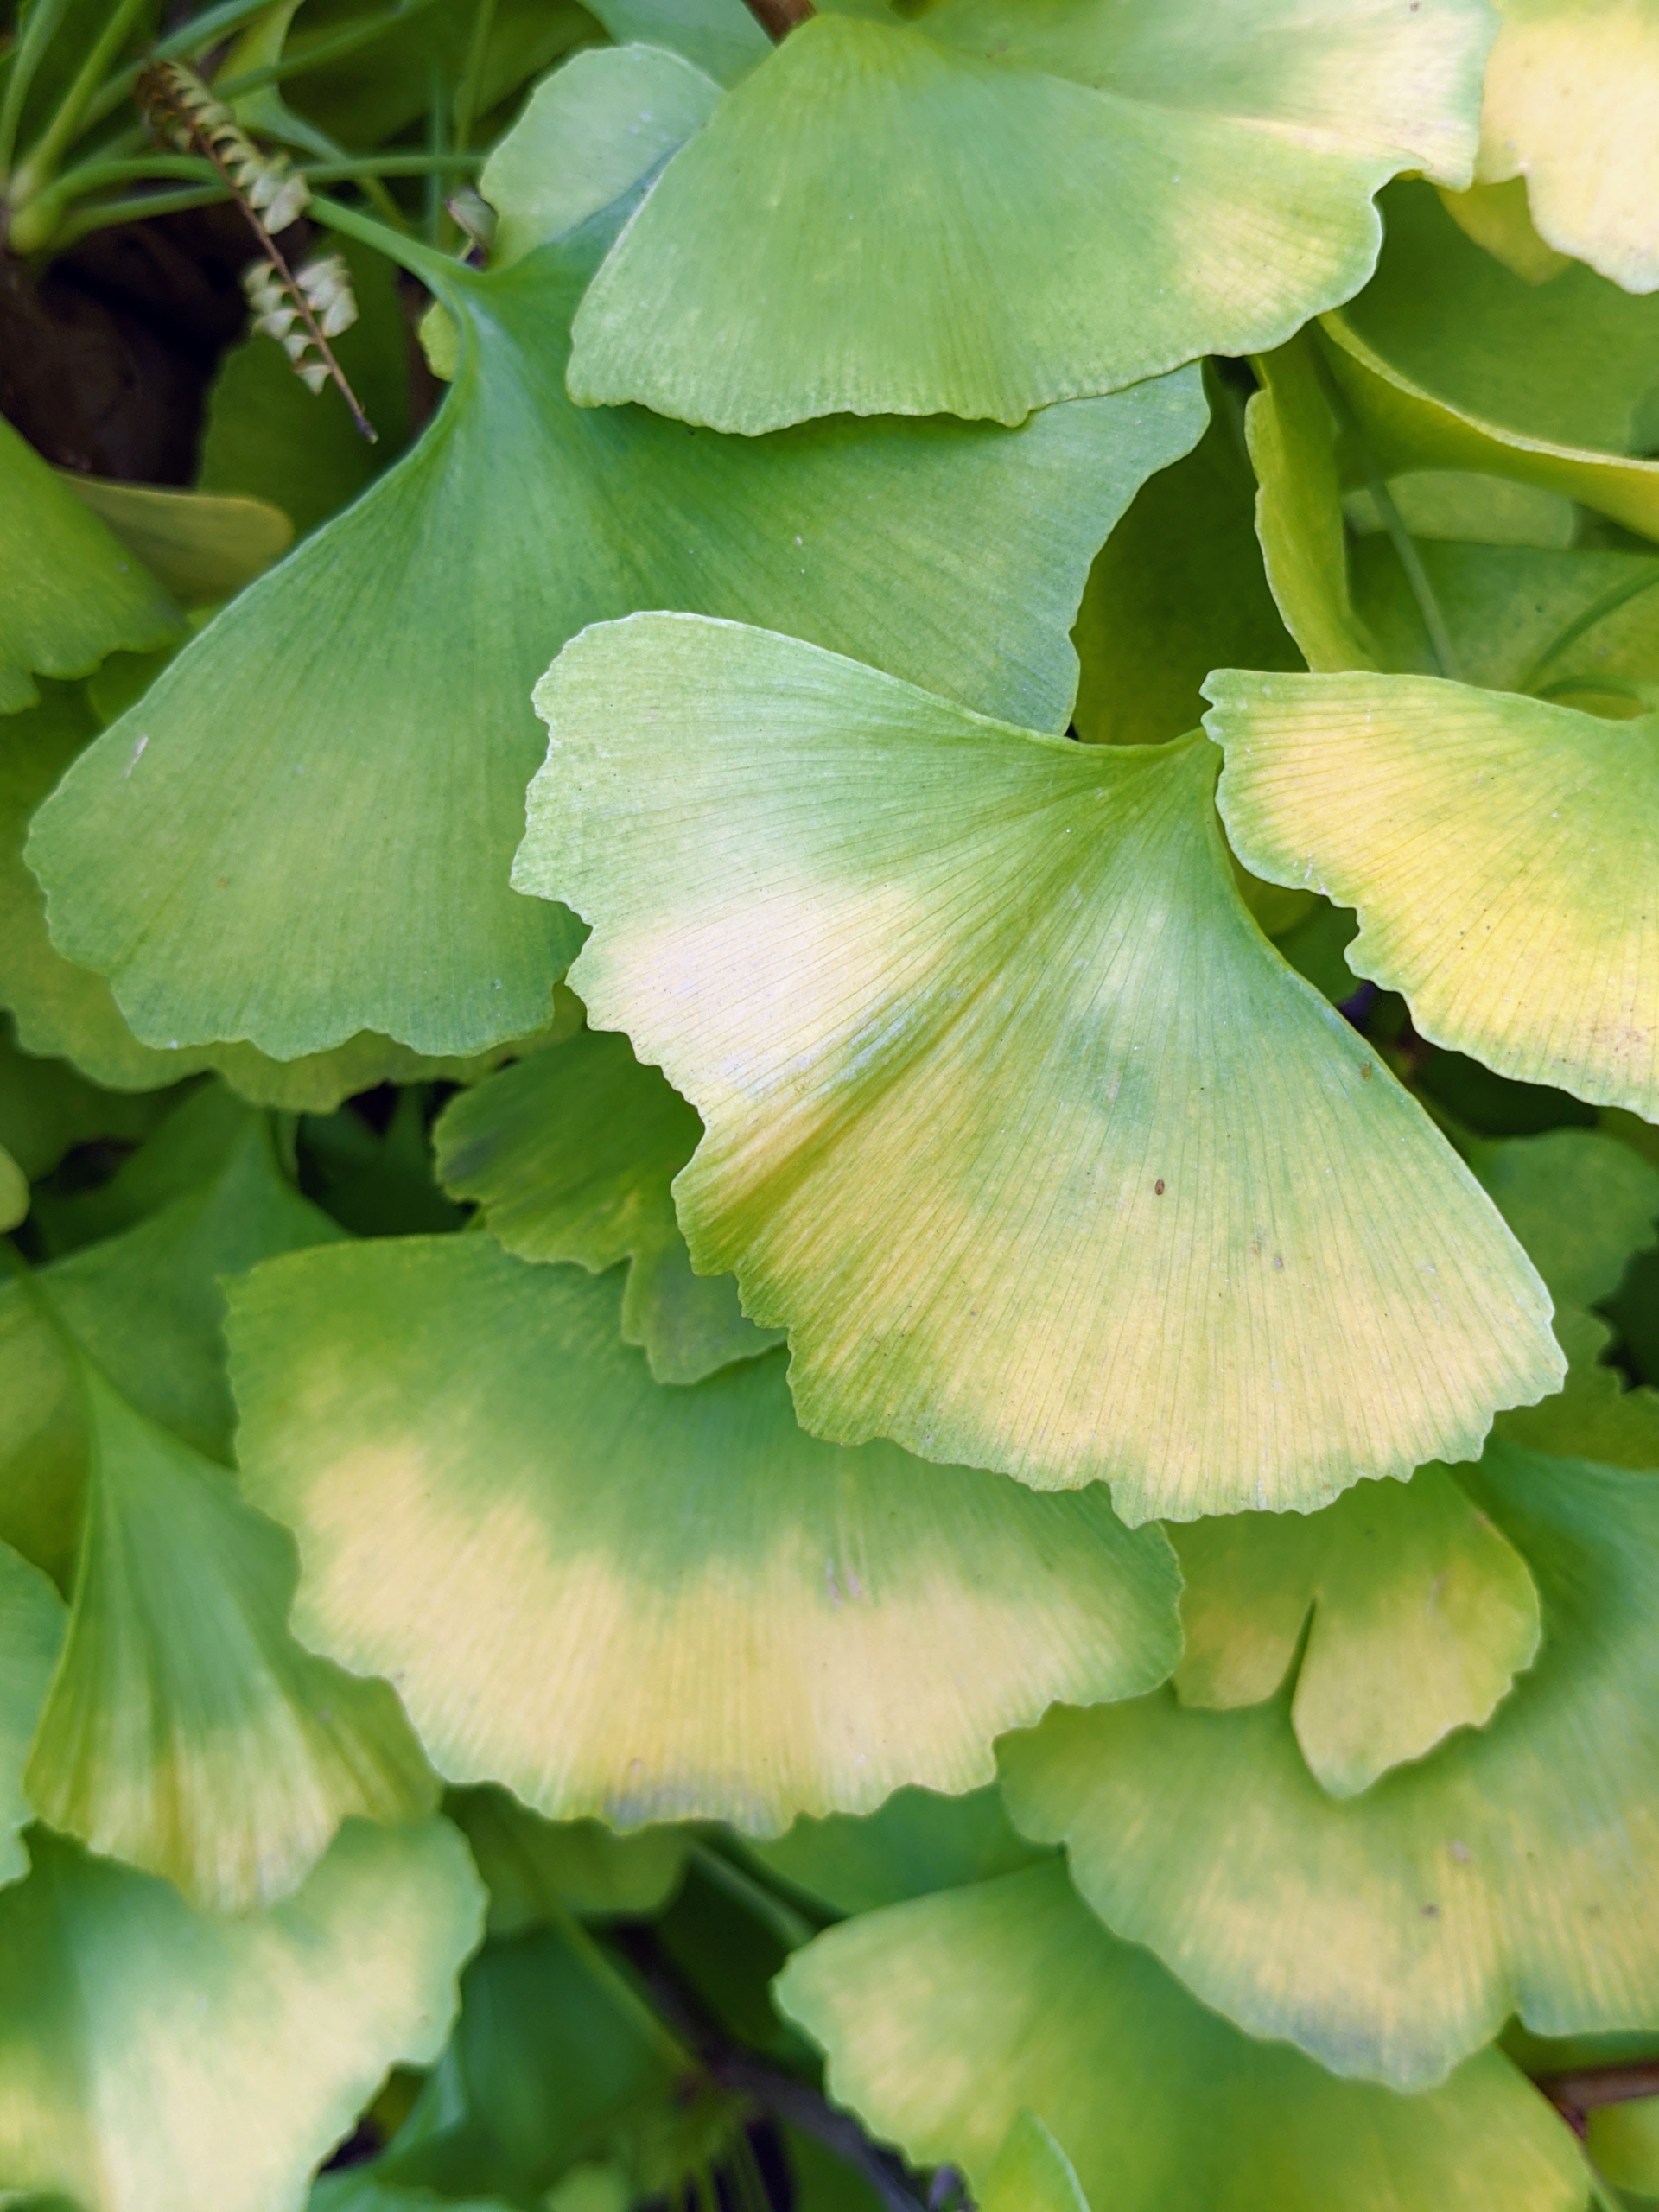
A couple of weeks later, many of the changing leaves are two-toned, with separate bands of gold and green.
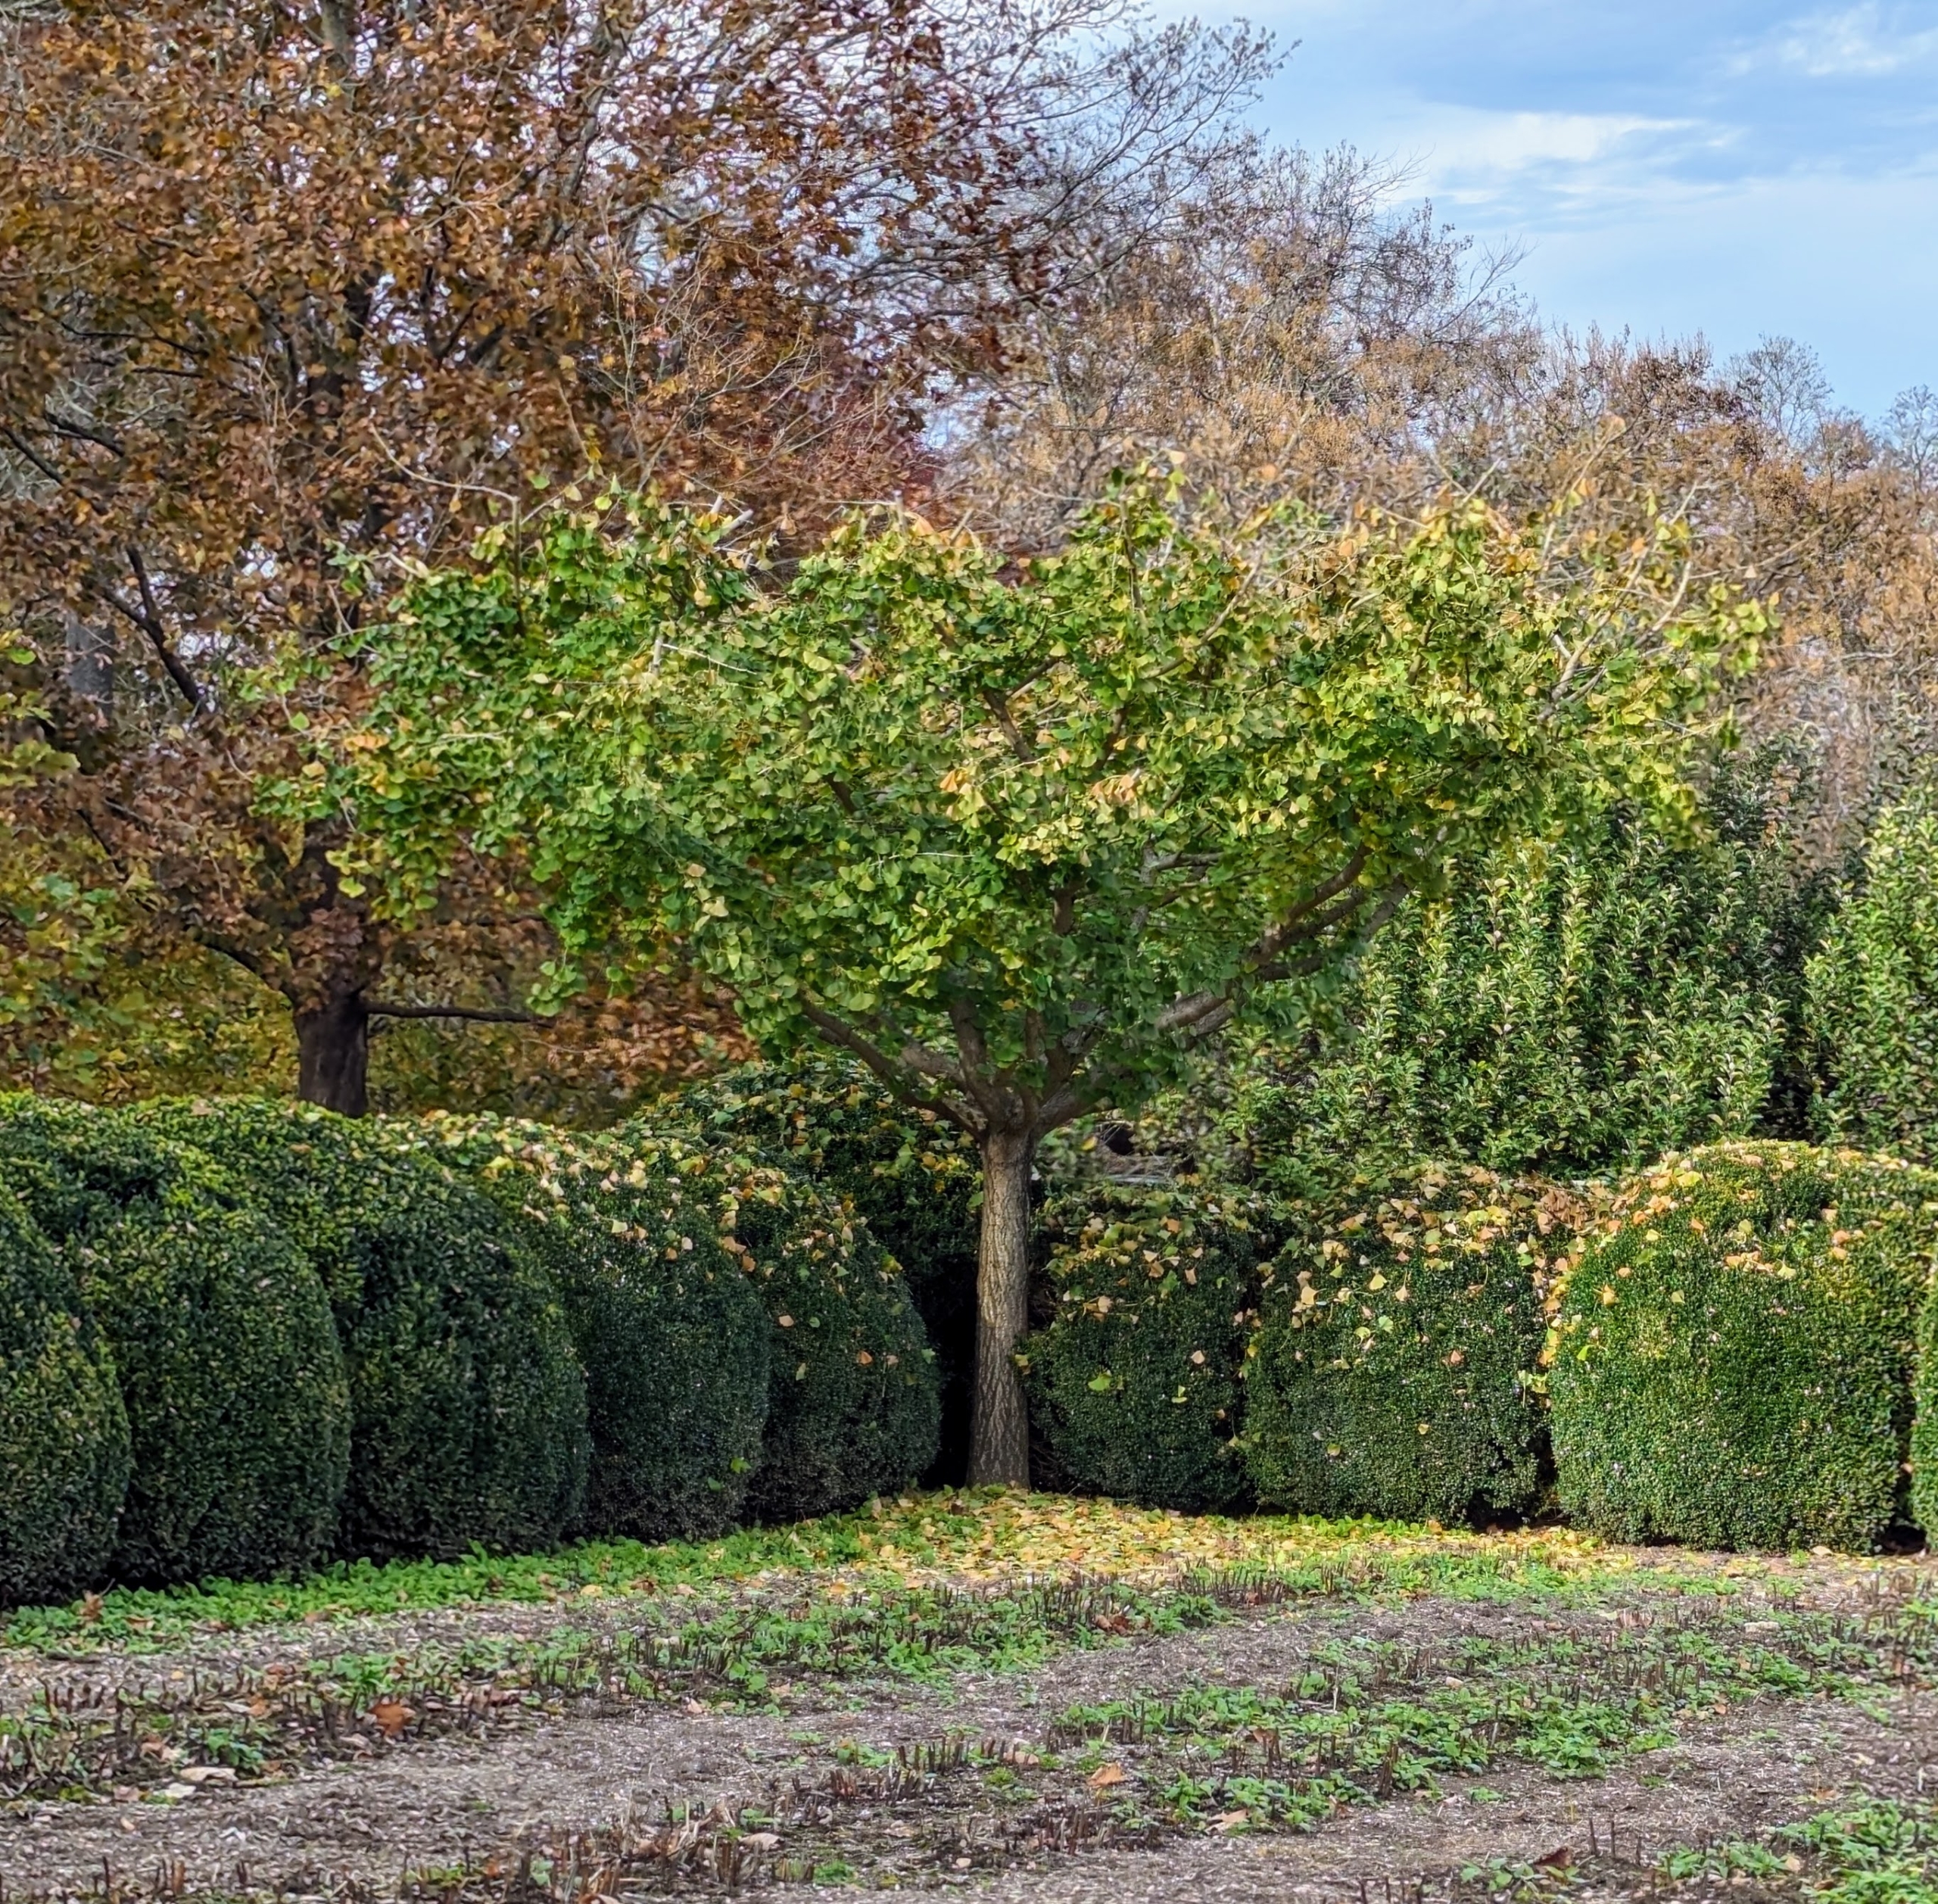
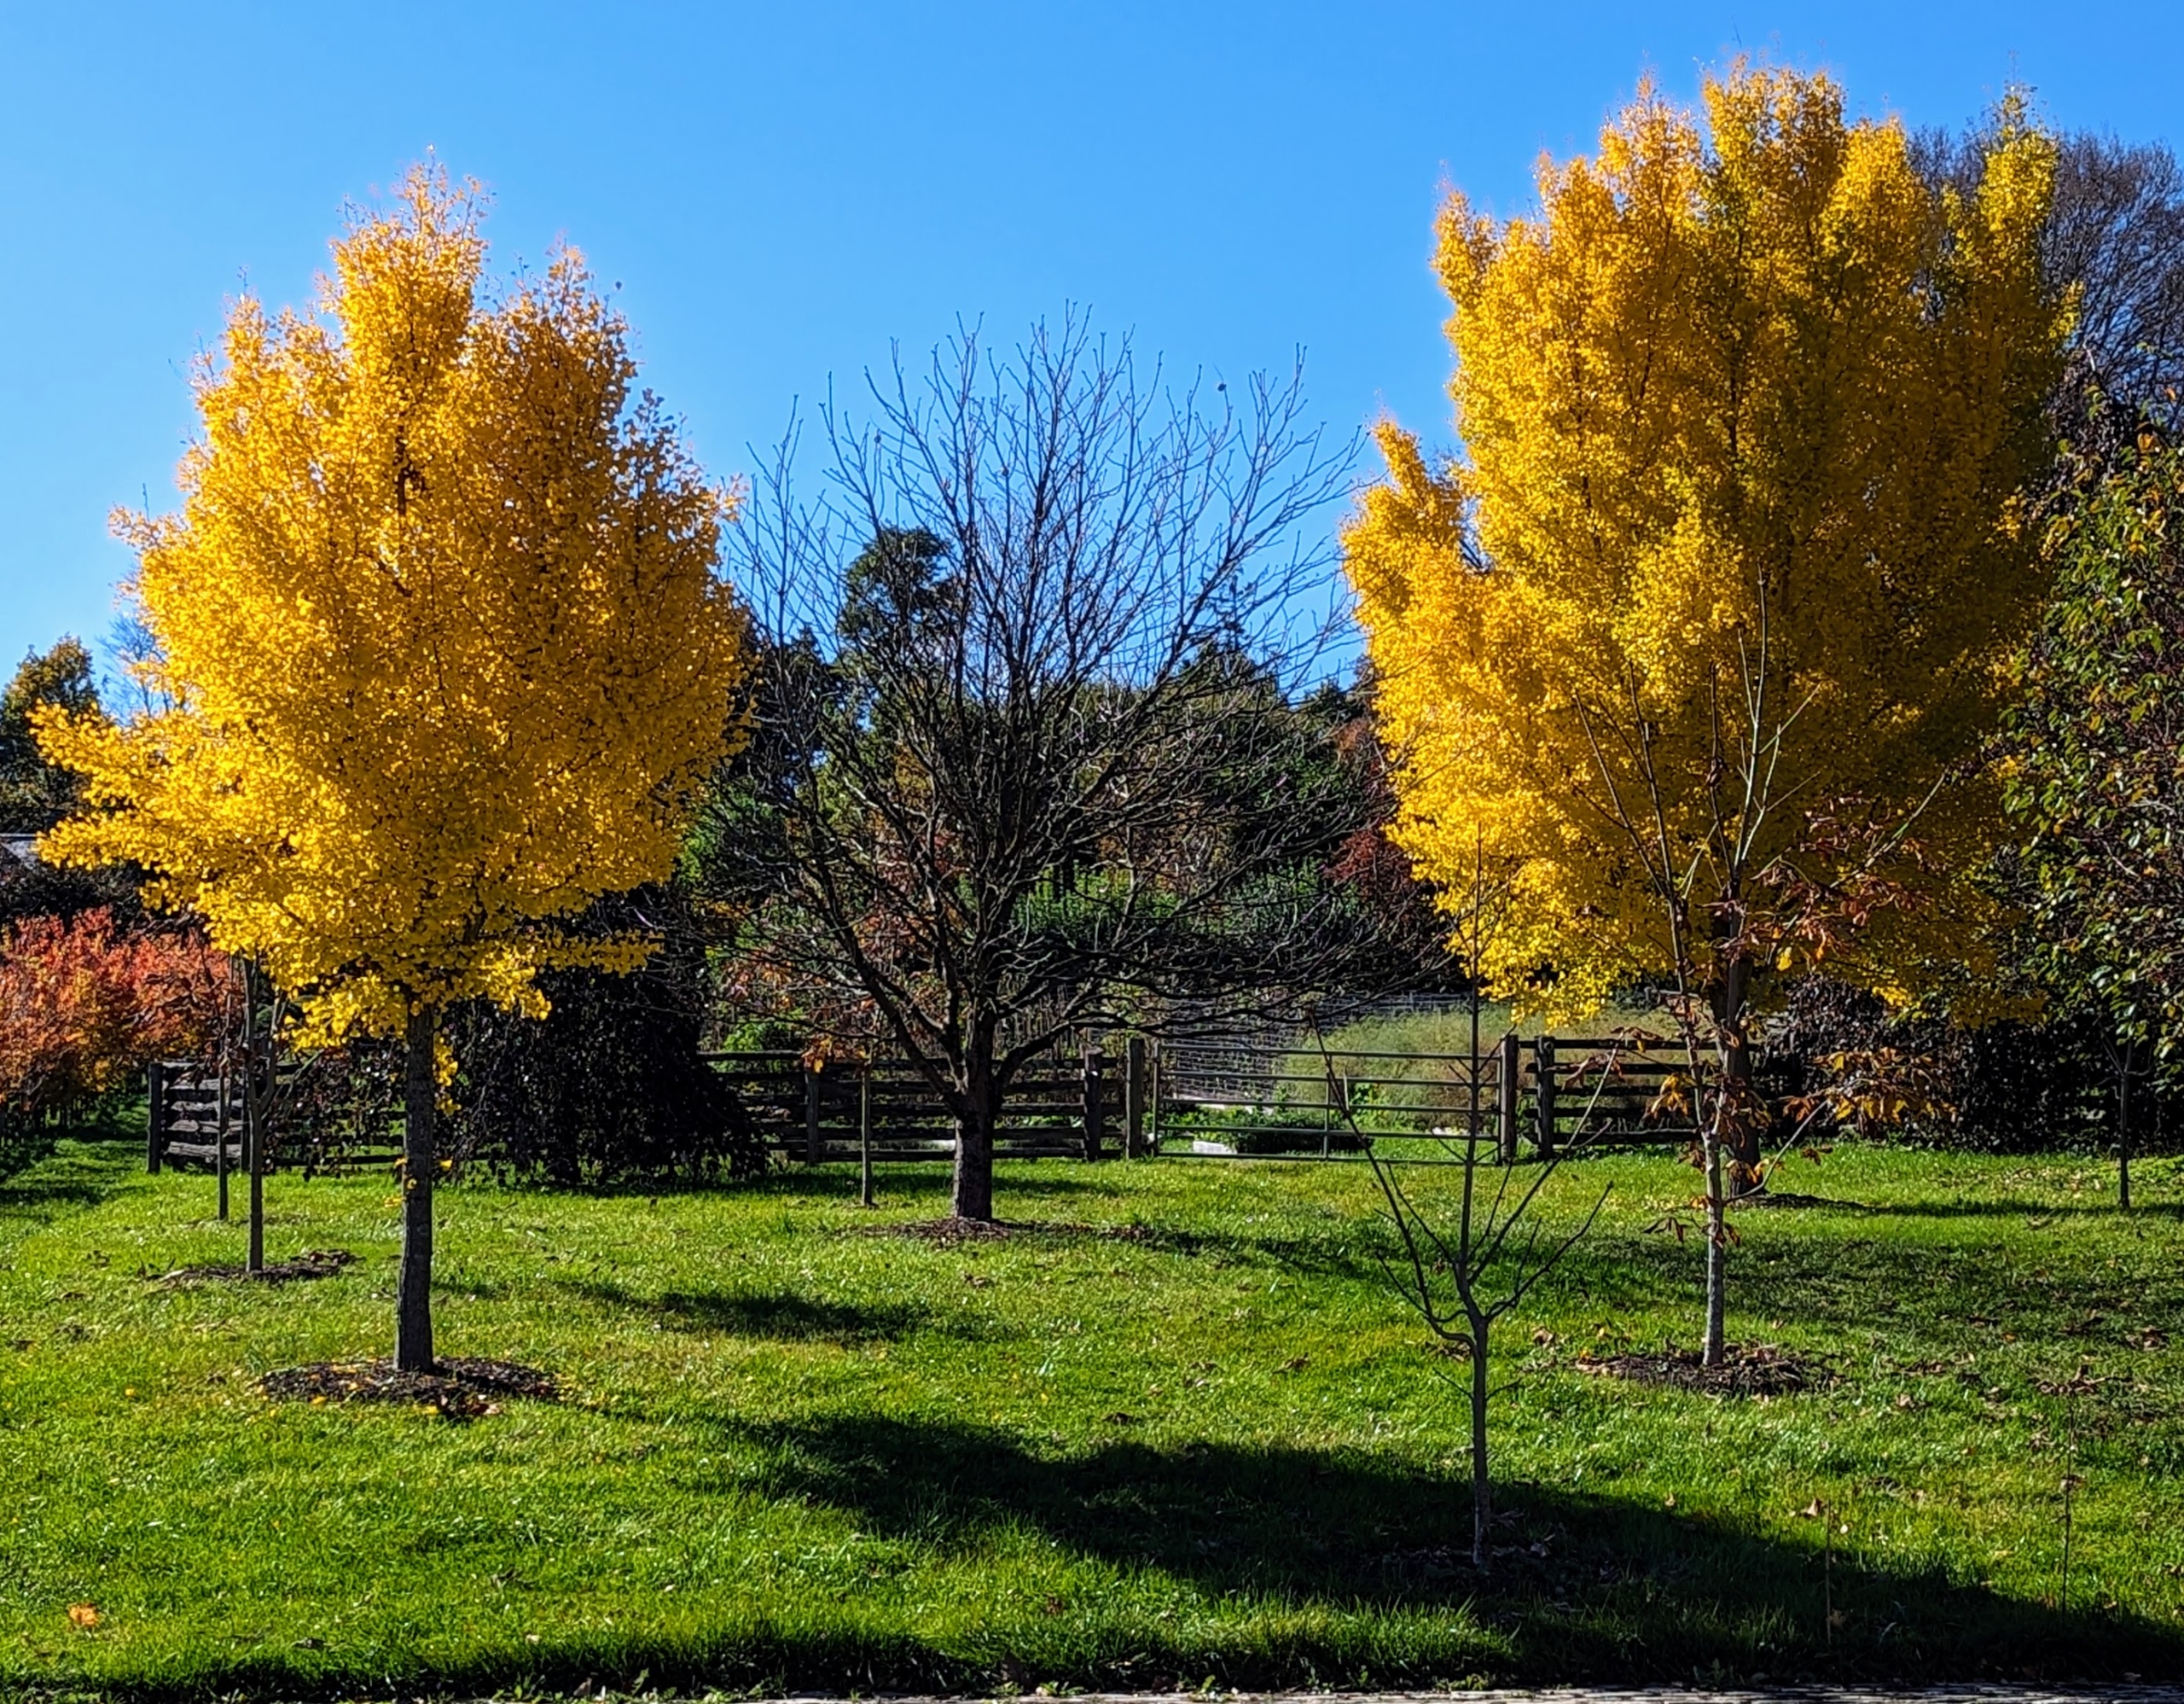
The season’s changes can be seen on the ginkgo trees planted at each corner of my herbaceous peony bed. This ginkgo in the northwest corner of the bed was still mostly green in late October.
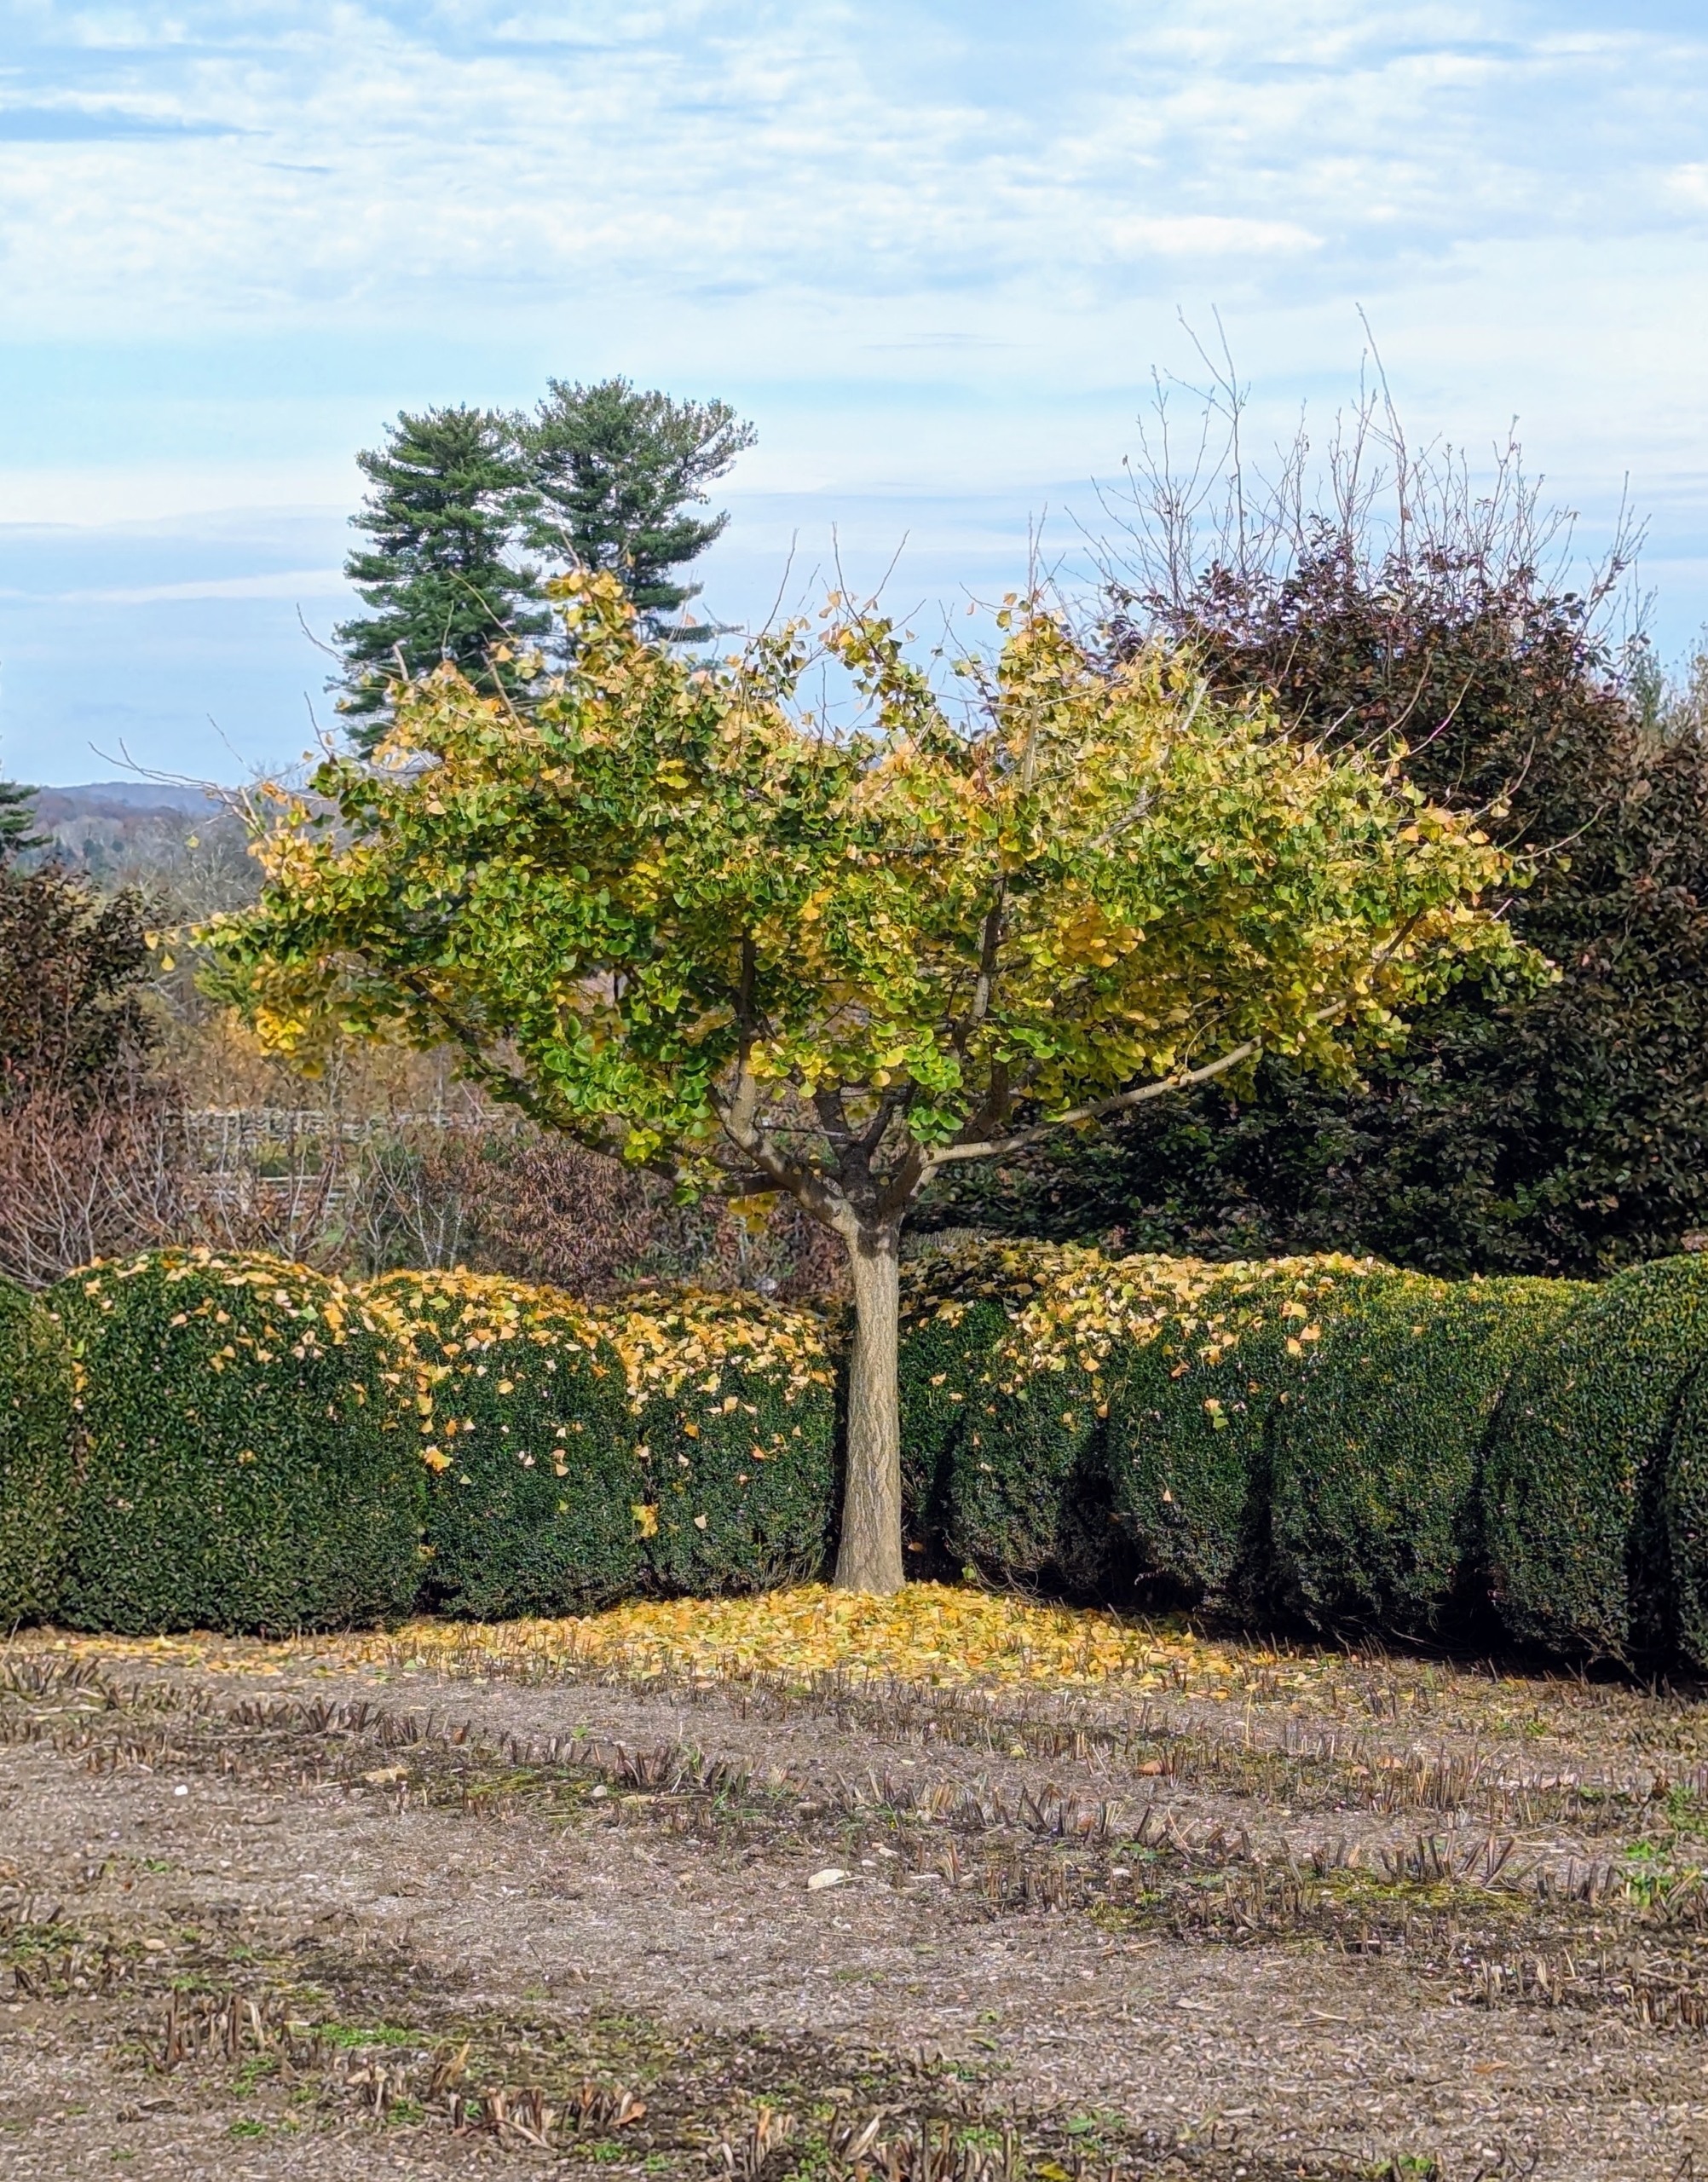
On the same day, the tree in the northeast corner shows a few more golden-yellow leaves.
Each mature leaf often has a single vertical slit in the top center. This forms the fan with a cavity in the middle separating it into two lobes. Bi-loba means “with two lobes”.
This is the tree on the southwest corner taken on the same day as the others, also showing half green and half yellow leaves.
And here is the southeast ginkgo tree – mostly yellow.
Here is the giant ginkgo tree in late October. This tree is a female specimen. Female ginkgo trees produce tan-orange oval fruits that fall to the ground in October and November.
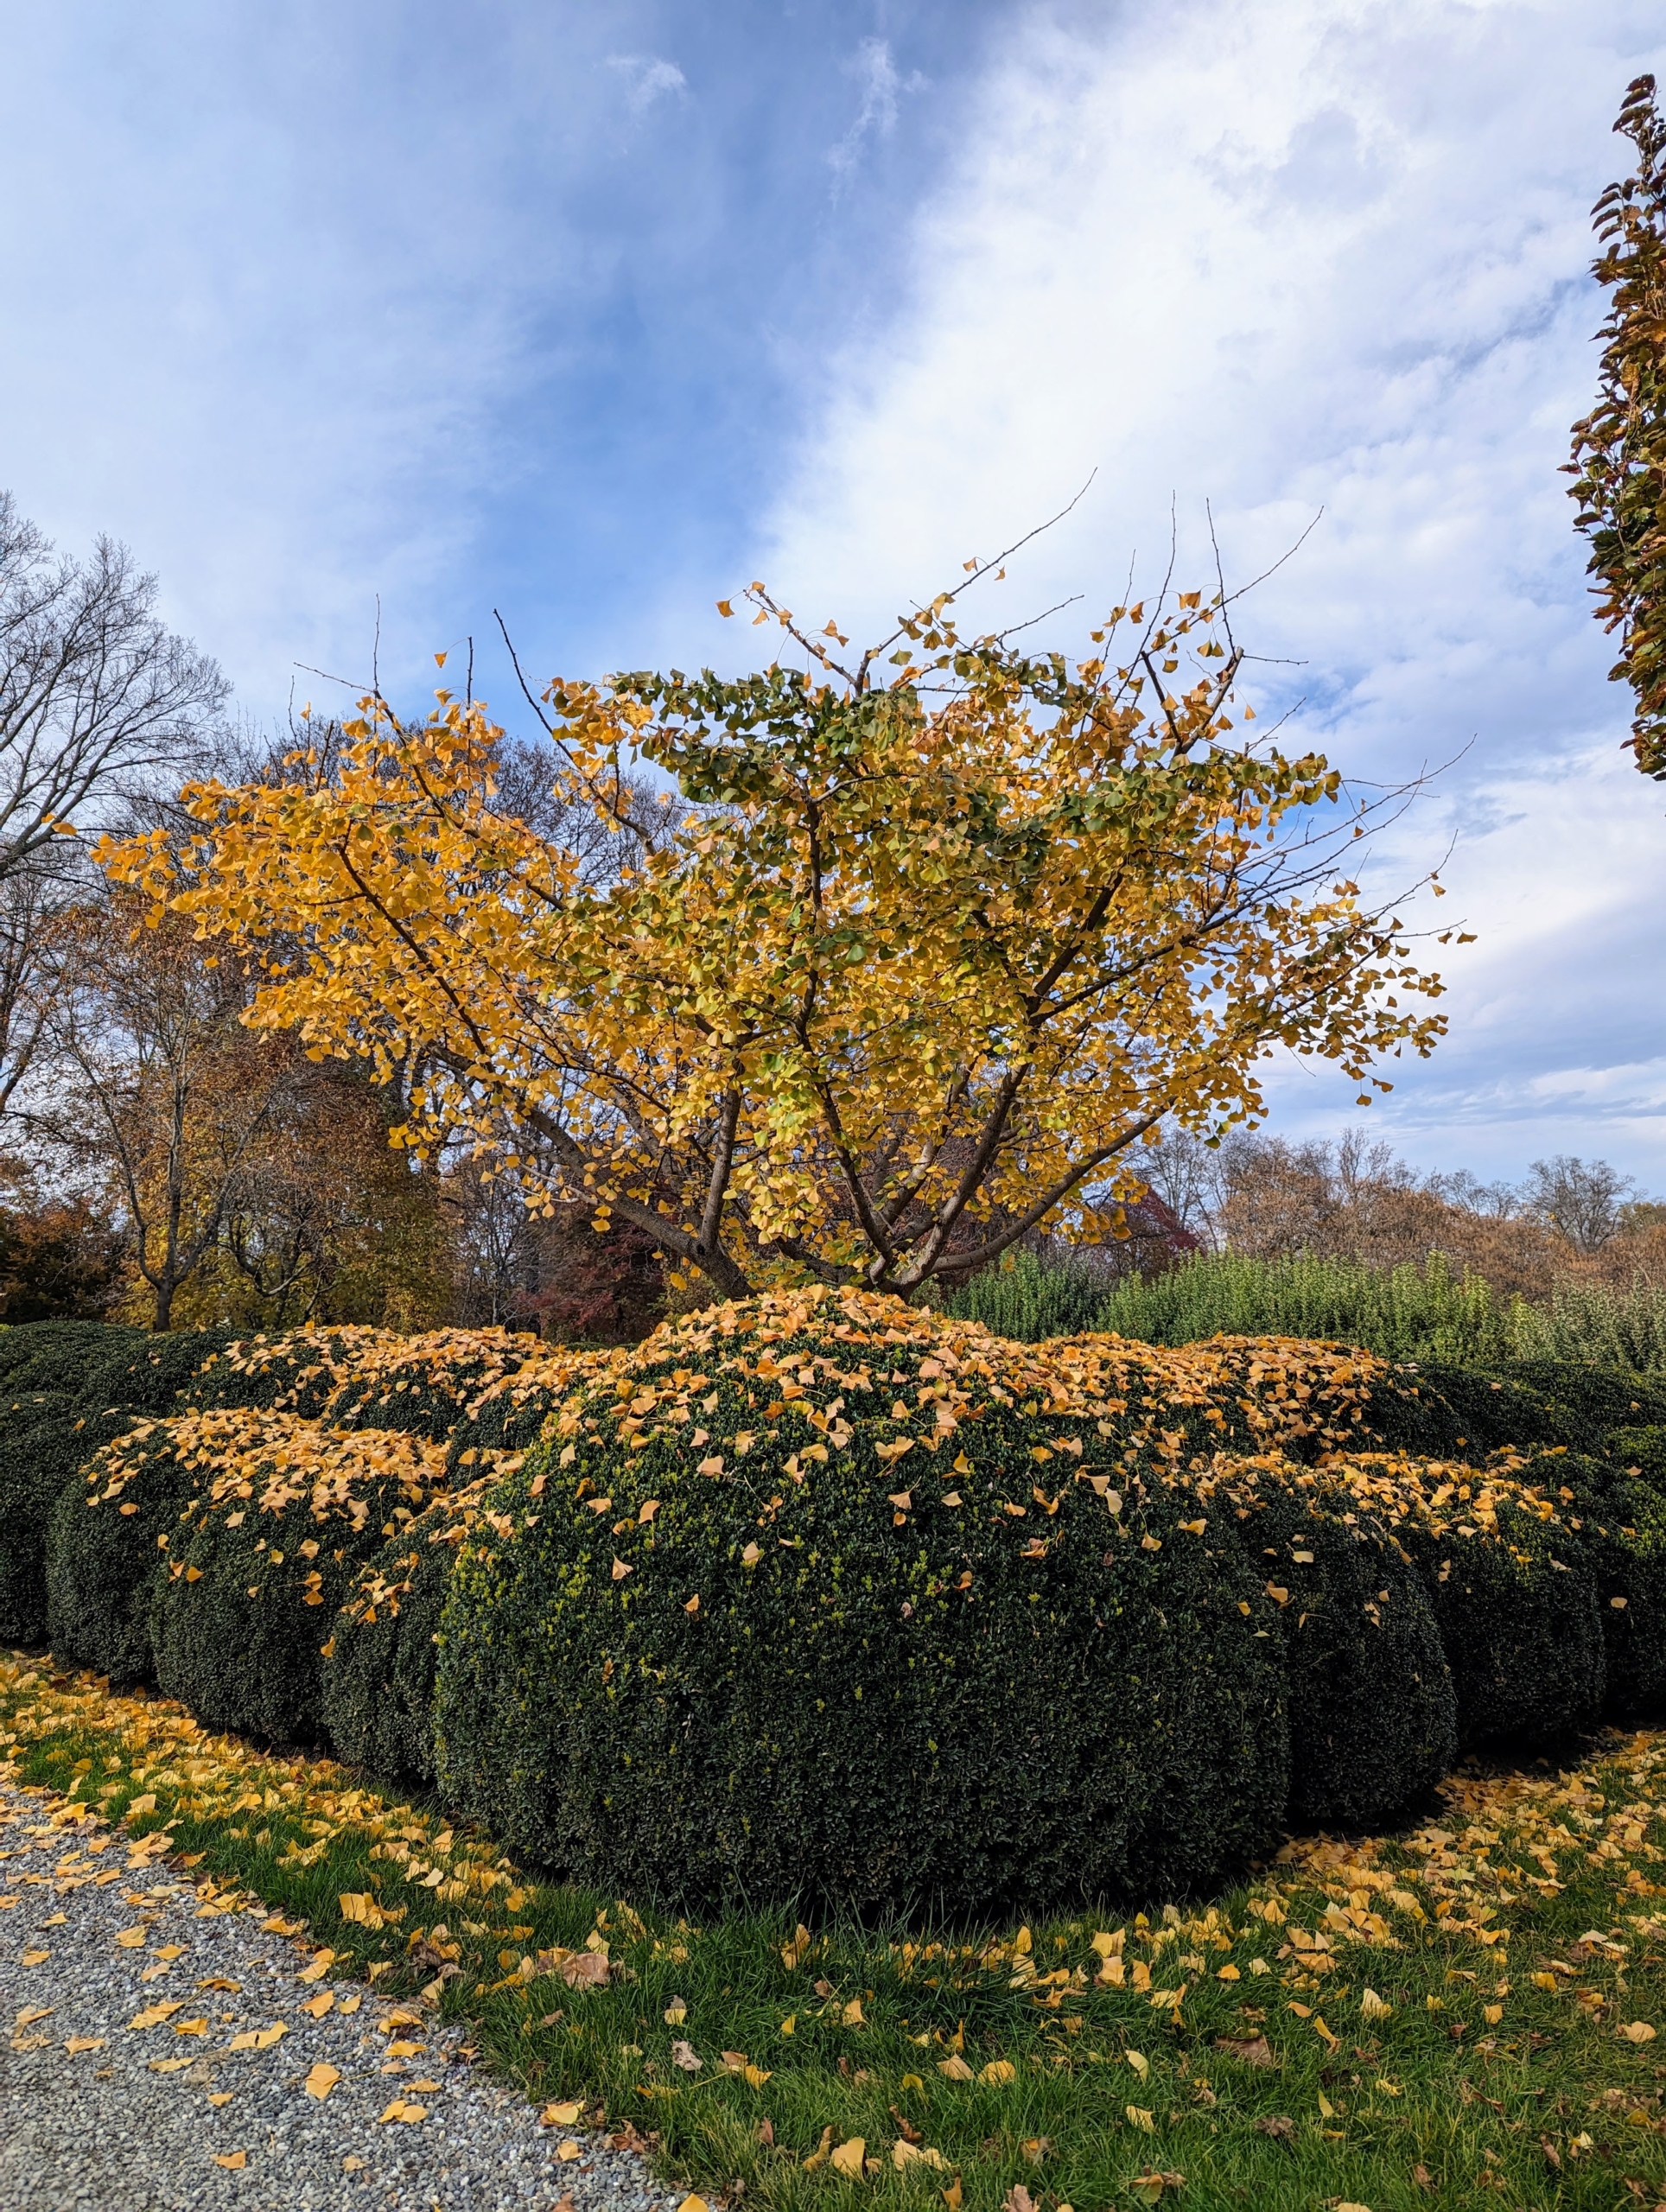
Here is the great ginkgo tree two weeks ago. It is still quite full, but its leaves are all bright golden-yellow. The smaller ginkgoes are also more yellow than green.
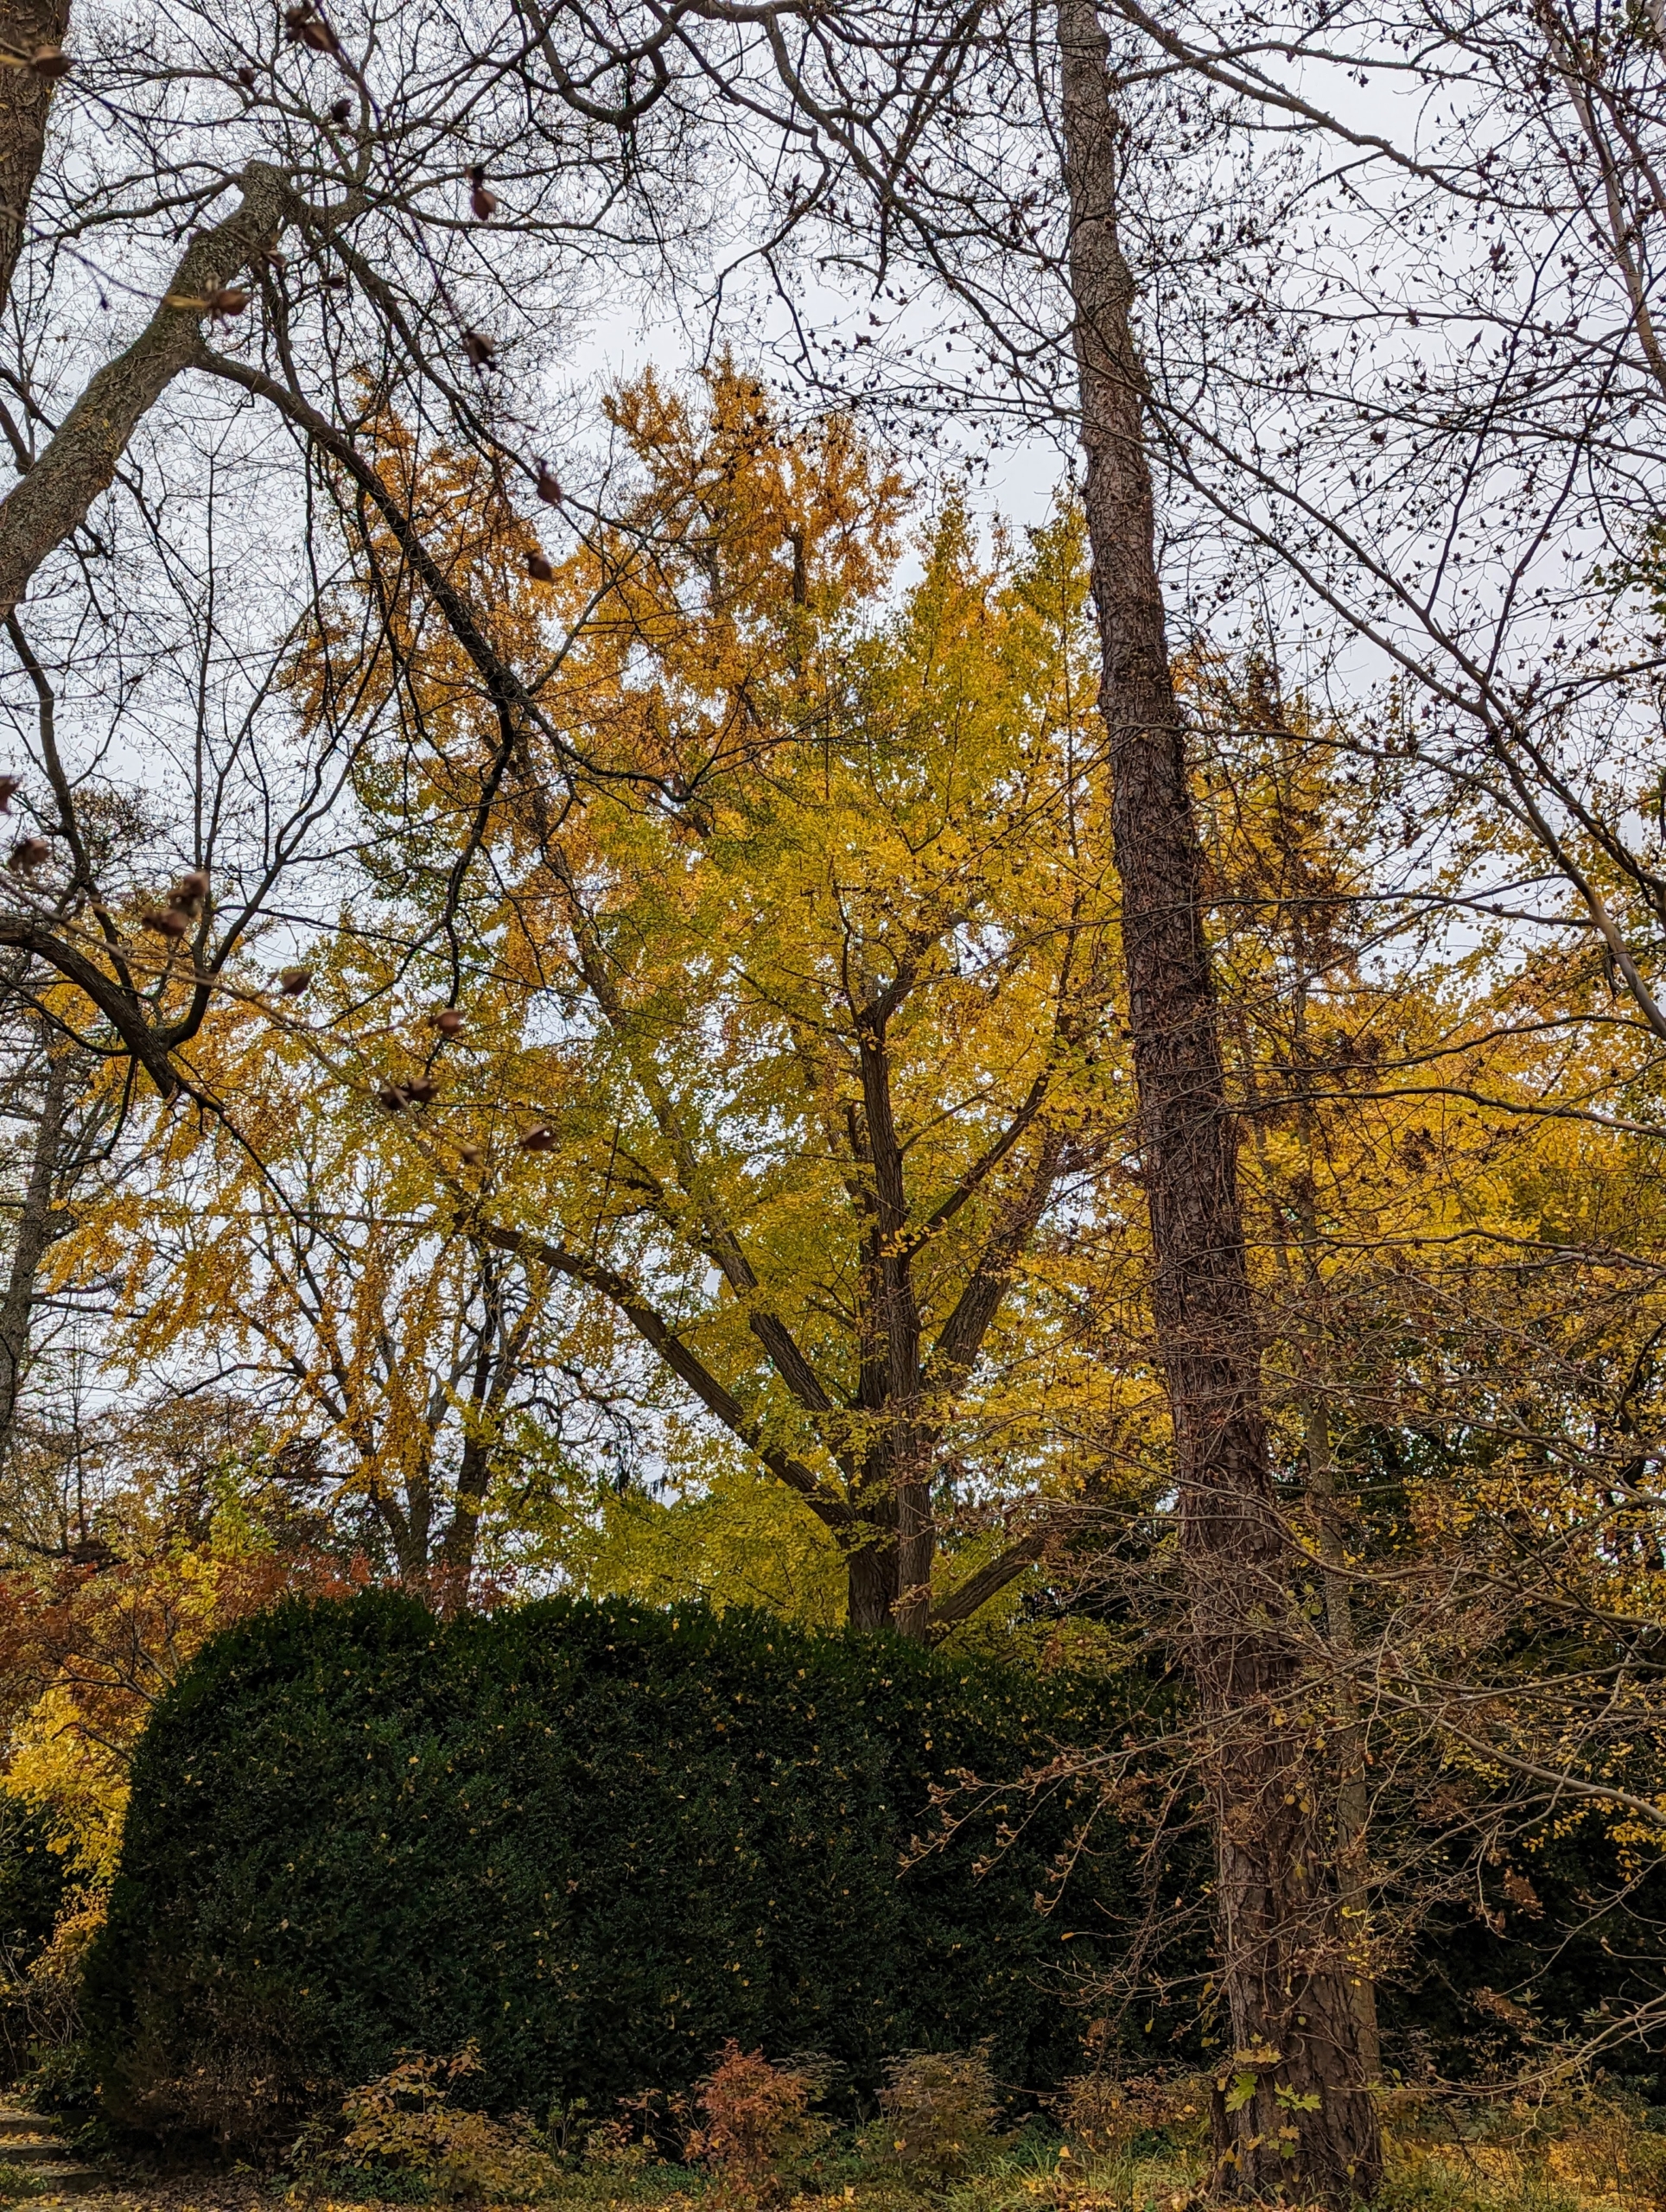
As soon as the giant tree turns color, every day all of us at the farm check to see whether it has dropped its leaves. This is a view from the carriage road outside the garden.
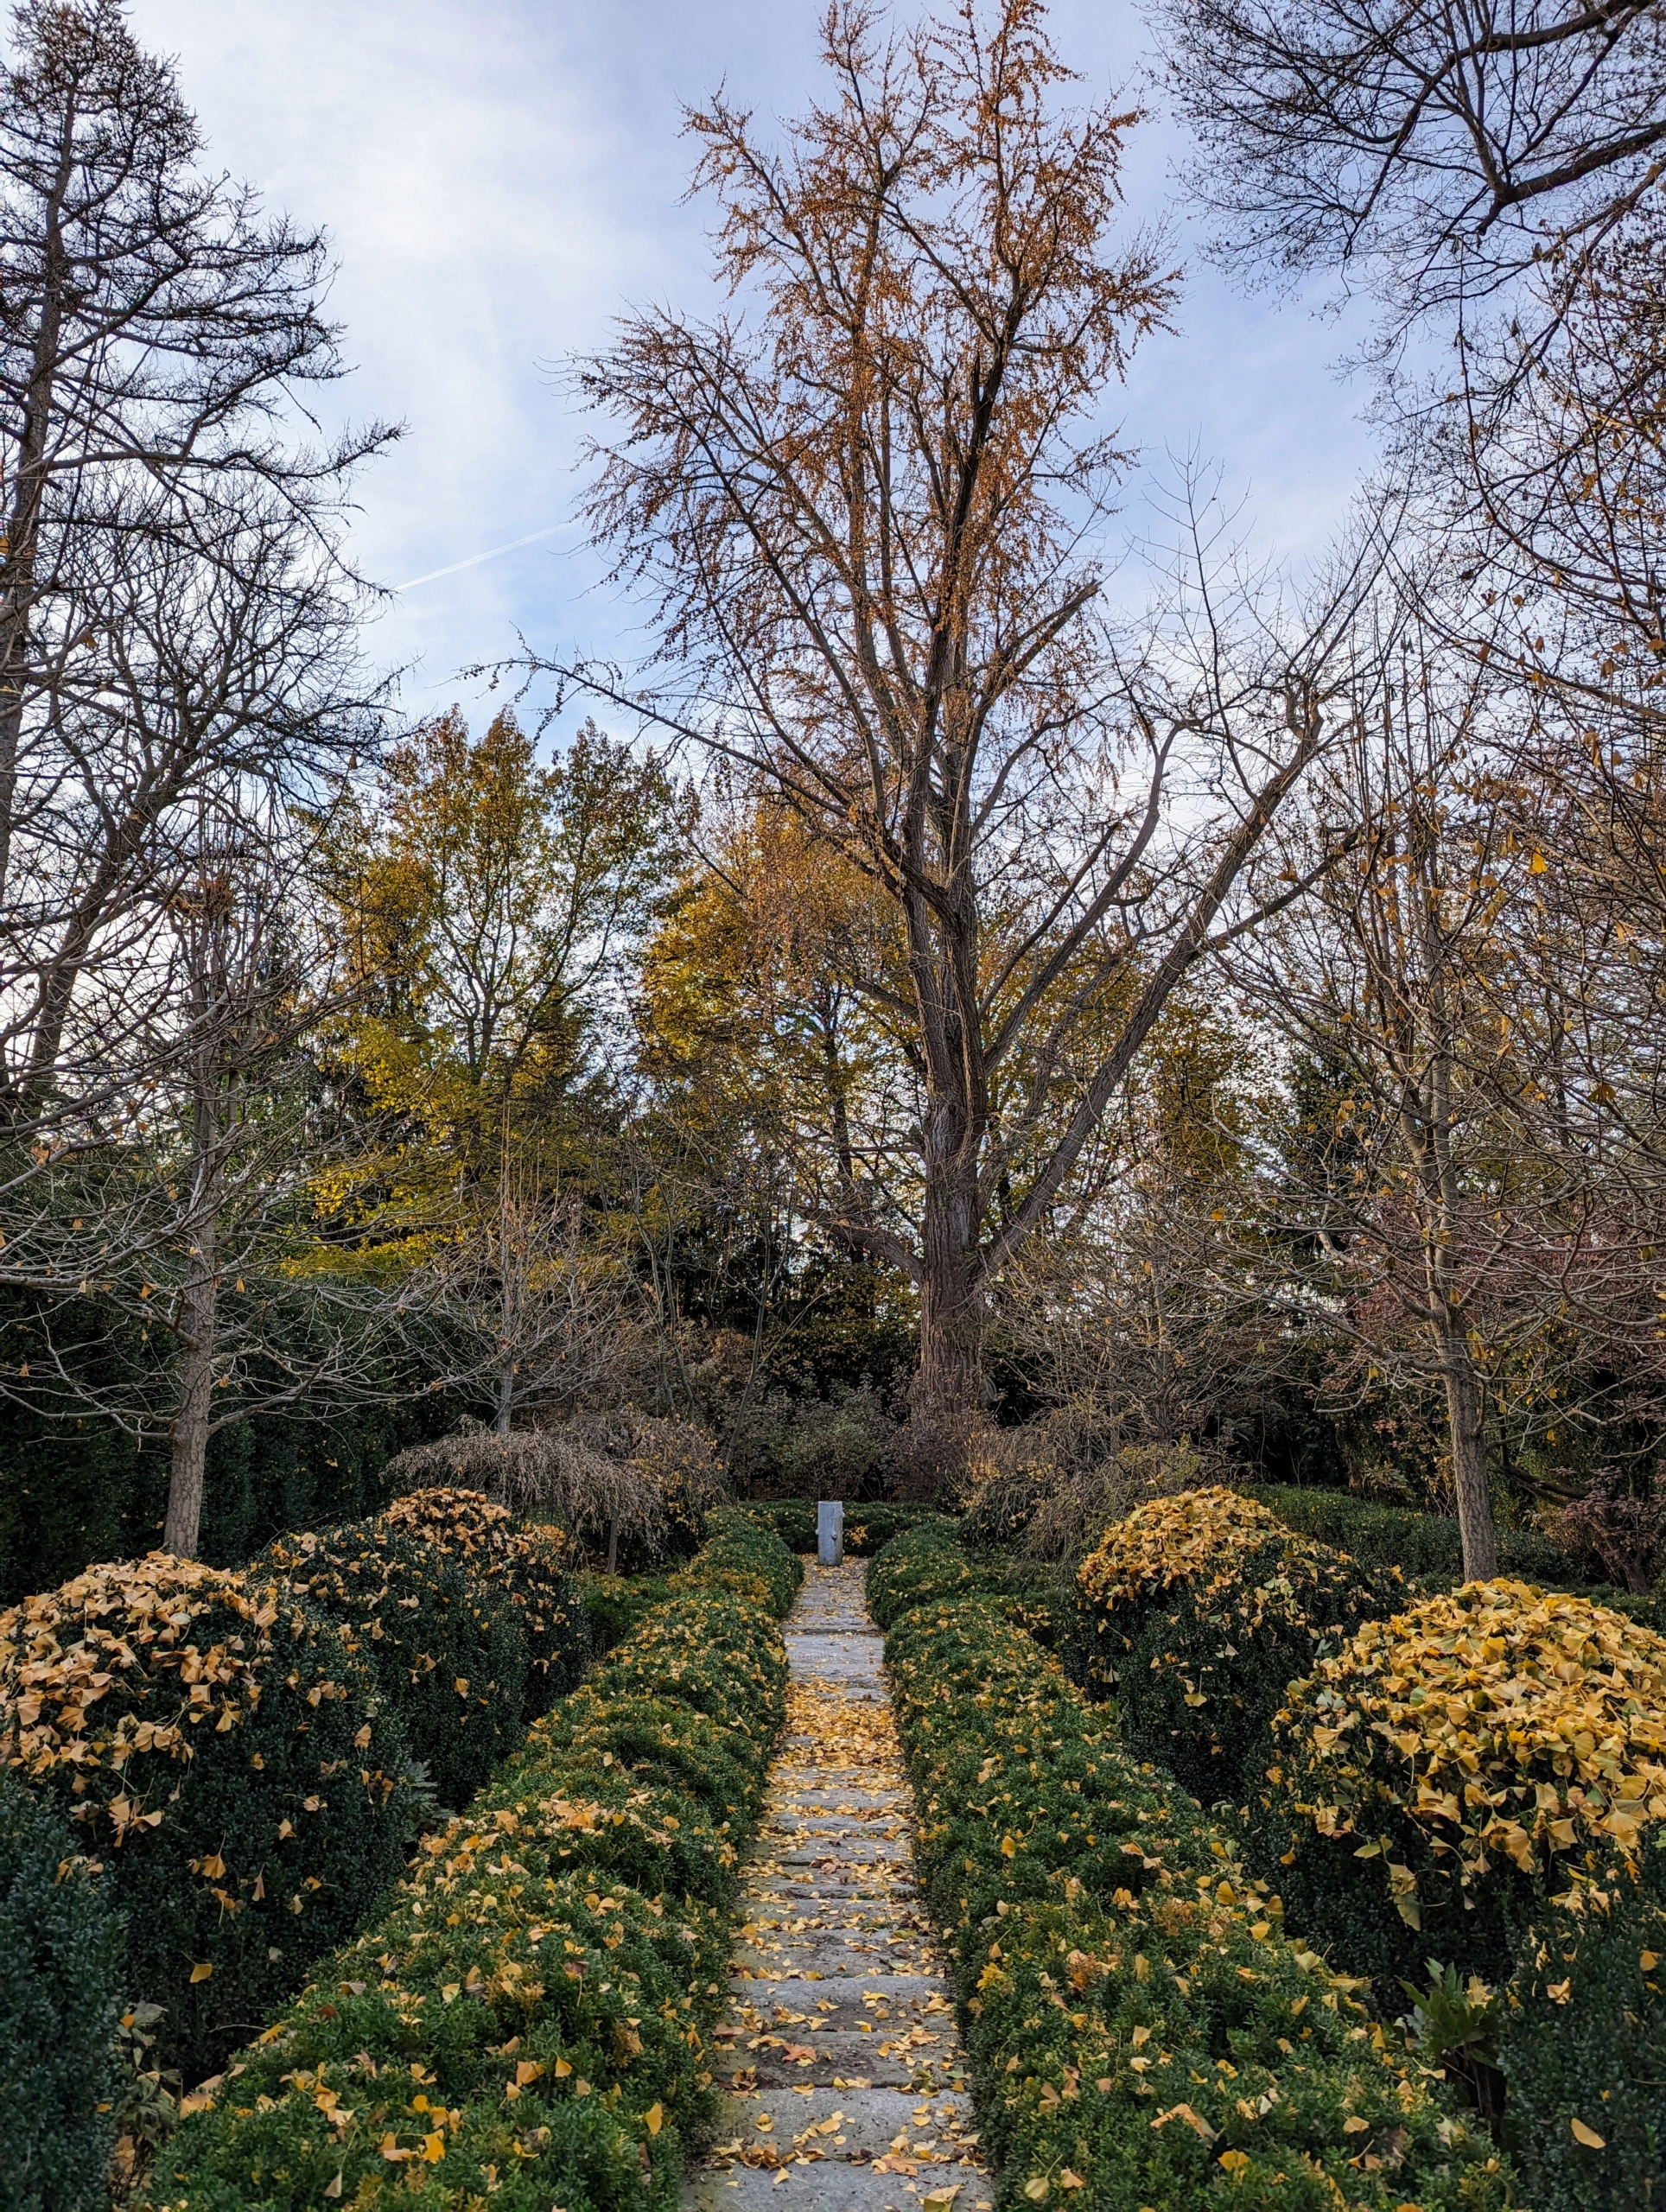
Inside the garden, the trees are sill full, but many of the leaves have already fallen to the ground in the beds and on the footpath. Ginkgoes are grown as hedges in China to supply the leaves for western herbal medicine. The leaves contain ginkgolides, which are used to improve blood circulation to the brain and to treat many cardiovascular diseases. It is usually Europe’s number one selling herbal medication.
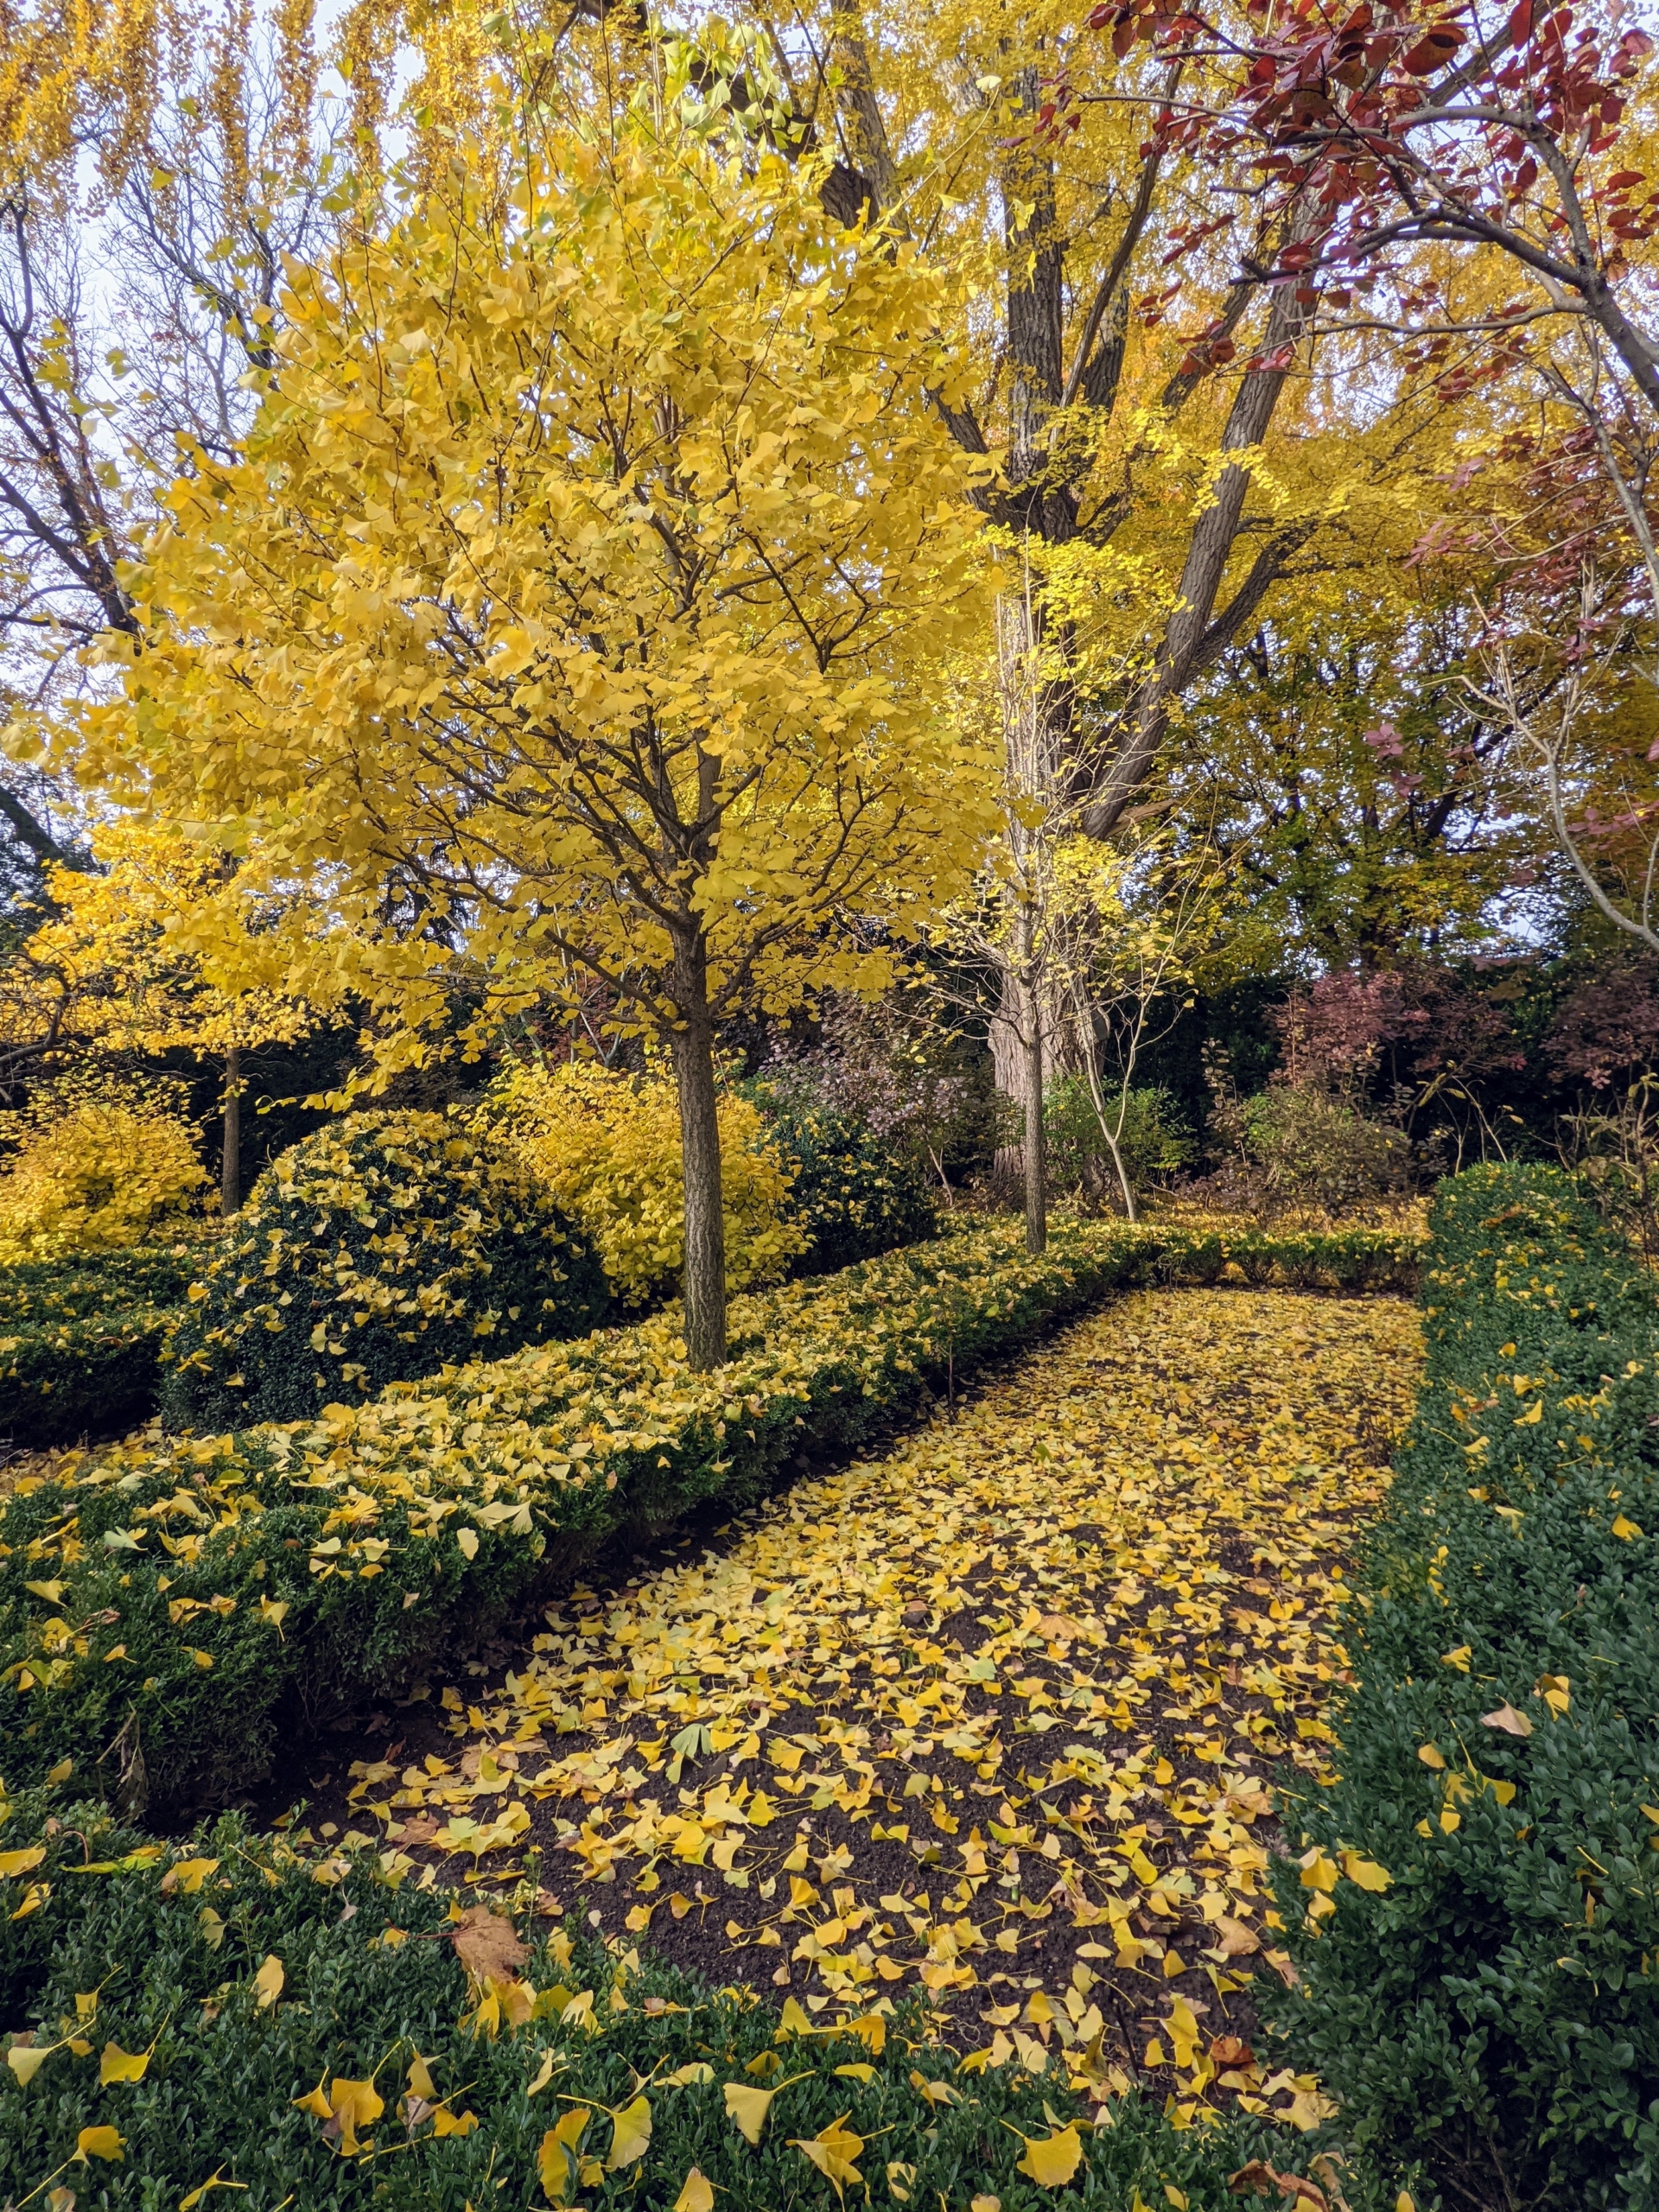
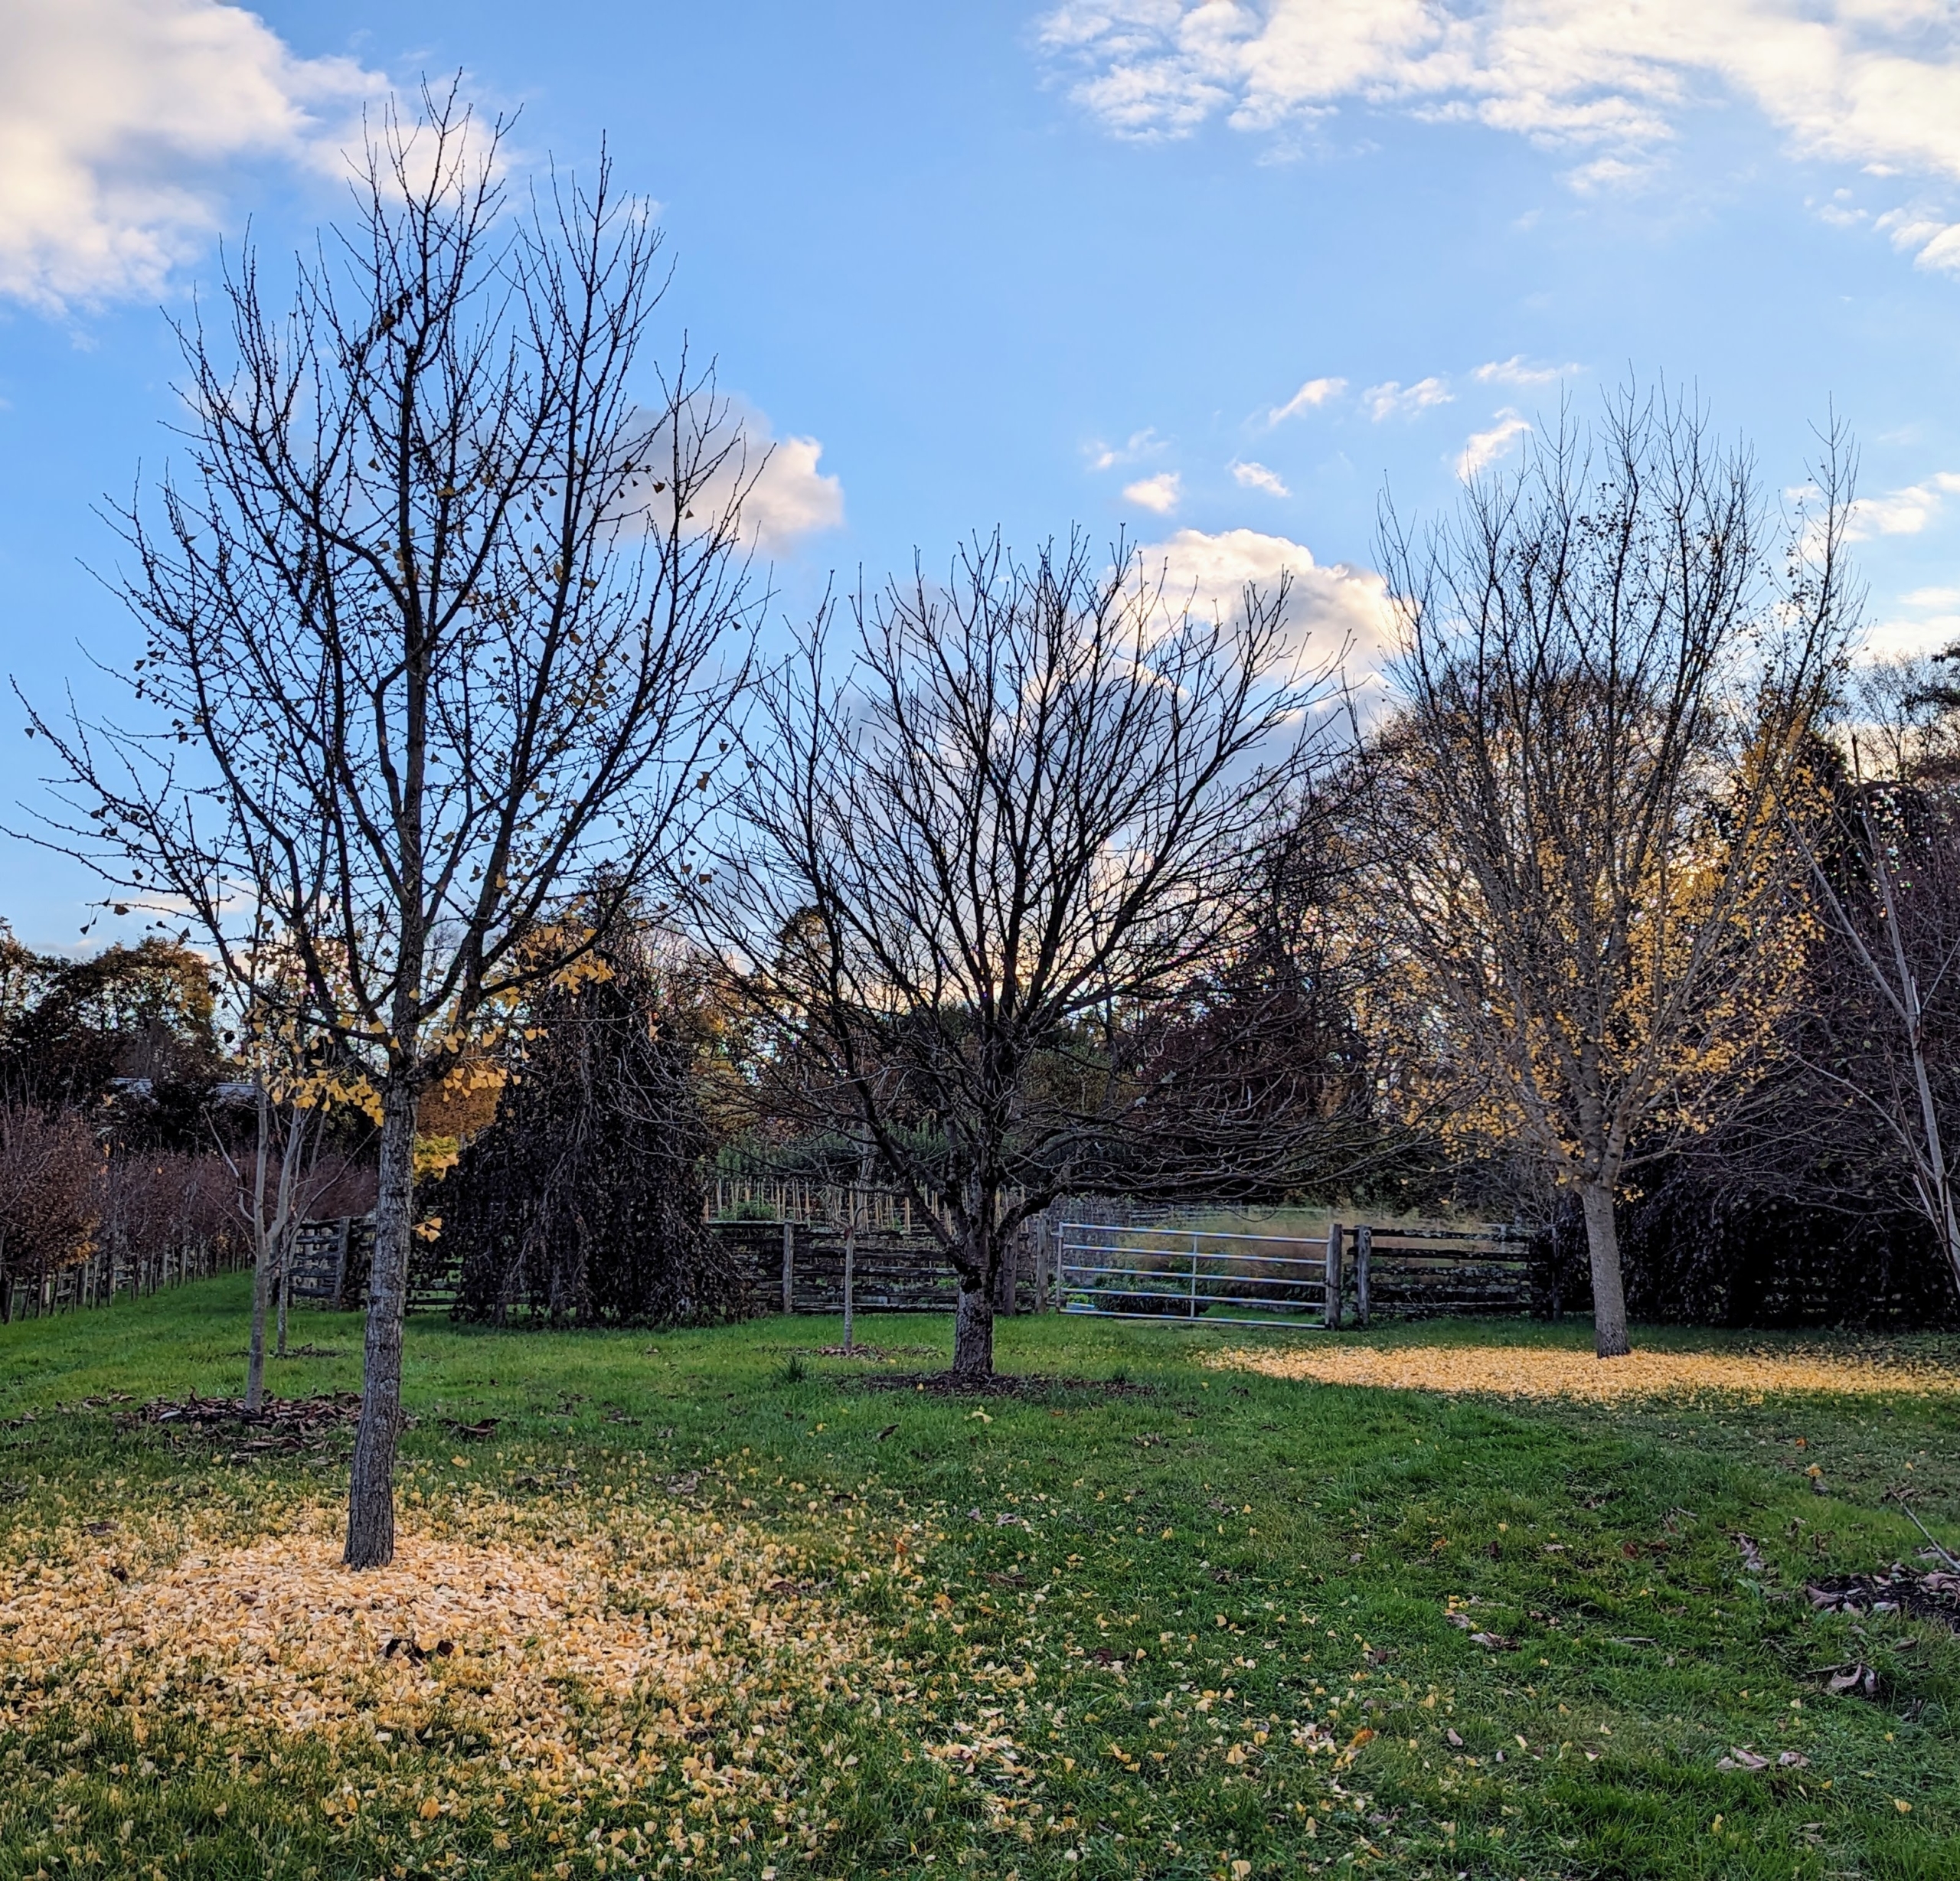
Earlier this month, these two ginkgoes outside my new raised bed vegetable garden gave off a beautiful autumn show.
But here are the same trees now.
And here is the Summer House garden. The leaves have fallen – in almost a synchronized leaf drop. With such mild temperatures this autumn, the “great fall” seems less dramatic. Some of the leaves blew off in the wind, with some still clinging to the branches.
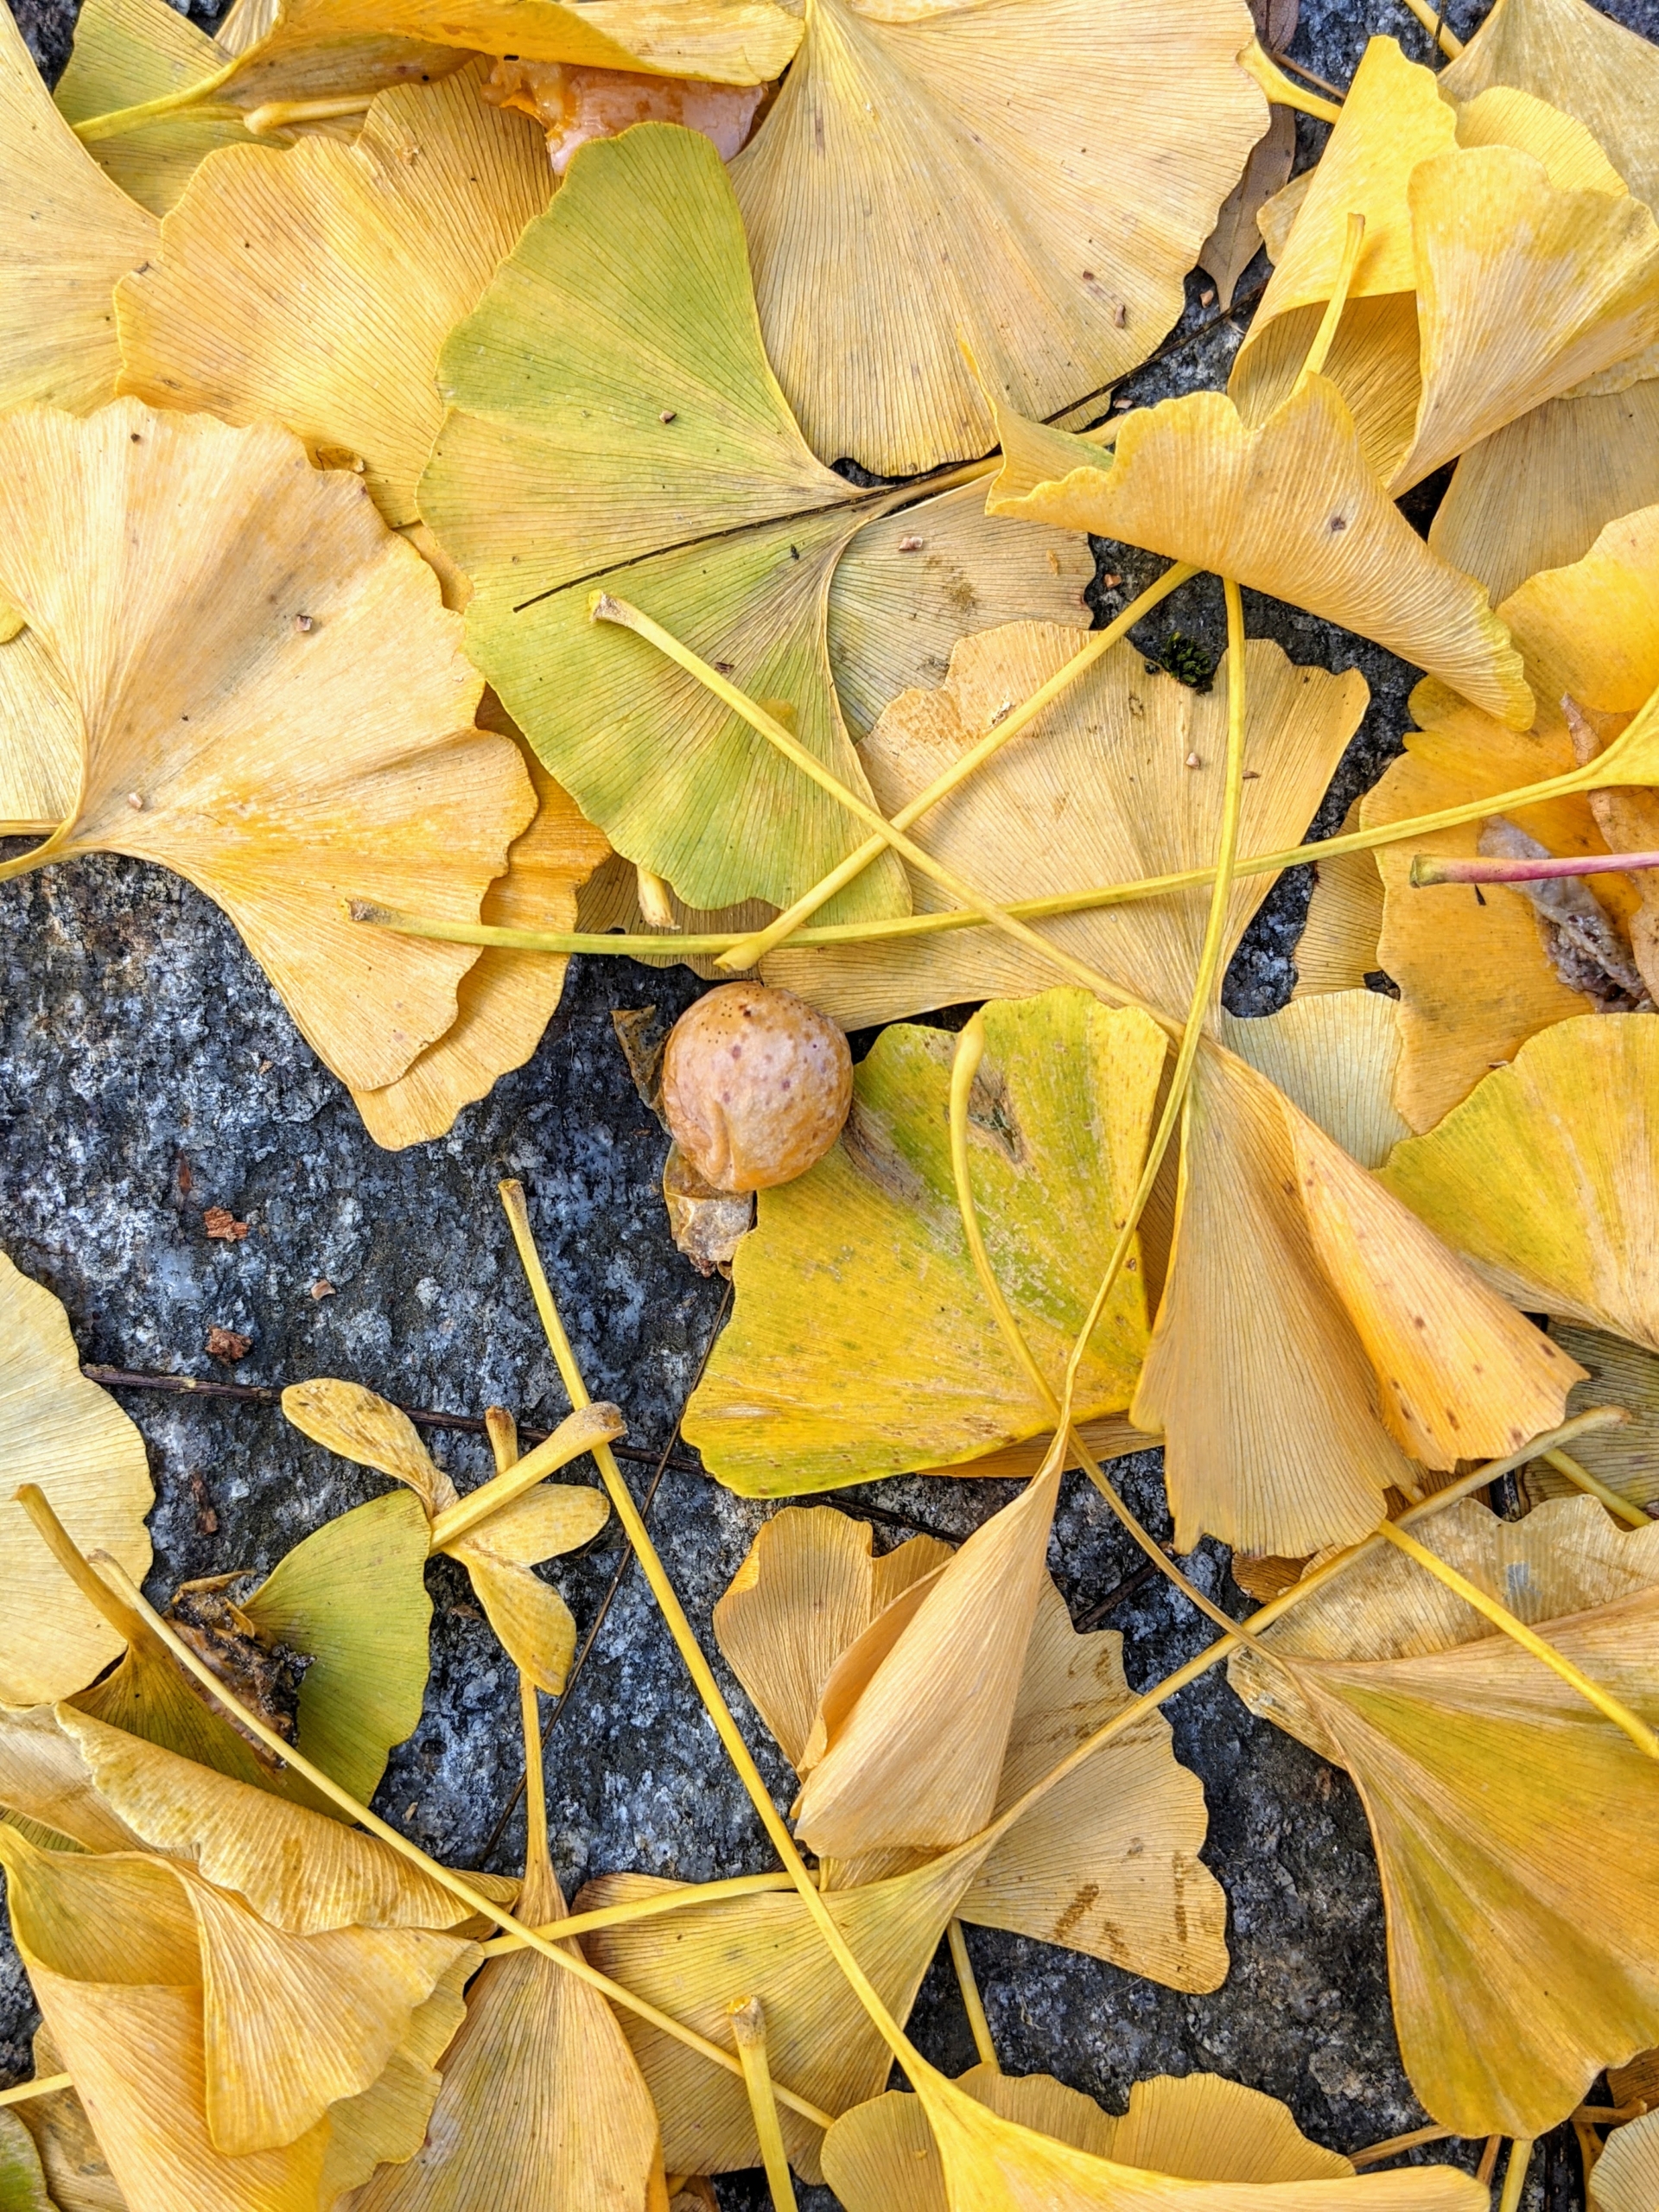
Now the fruits are also falling. They can be found all along the footpath. The most noticeable thing about these is their smell – it is hard to miss, and the stench is quite disagreeable. The outer, nasty smelling pulp is known botanically as sarcotesta. Inside is a single hard-shelled seed enclosing an edible kernel. The kernels are often roasted and used in Asian cuisines. This year, a bucketful of my ginkgo fruits went to New York City’s Masa Restaurant.
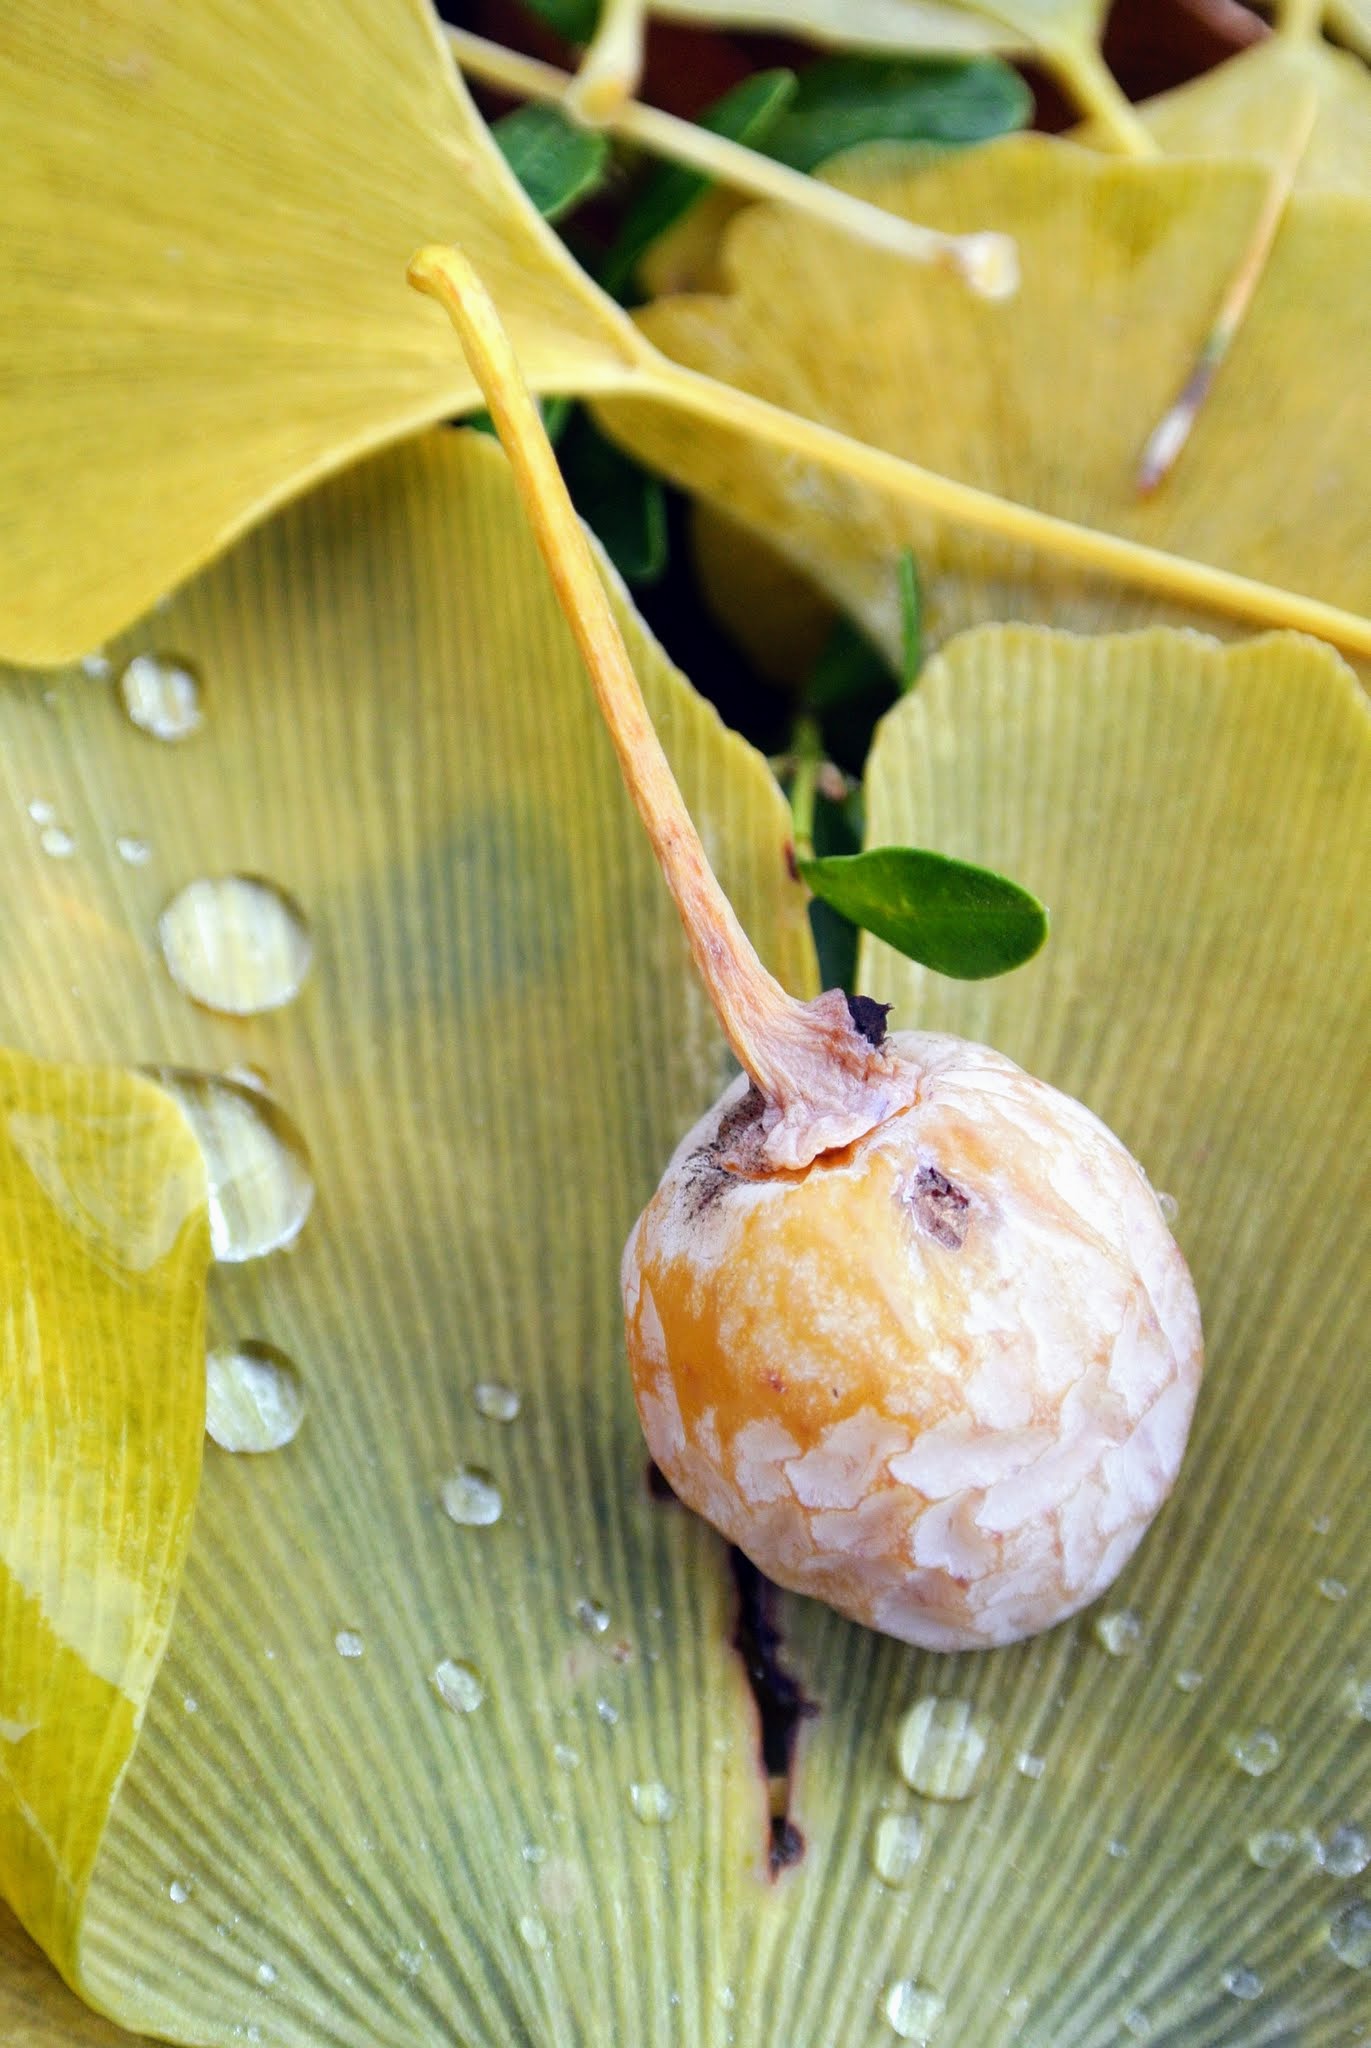
Here is a closer look at the fruit, which is small and fleshy – about the size of small jujube, or Chinese date.
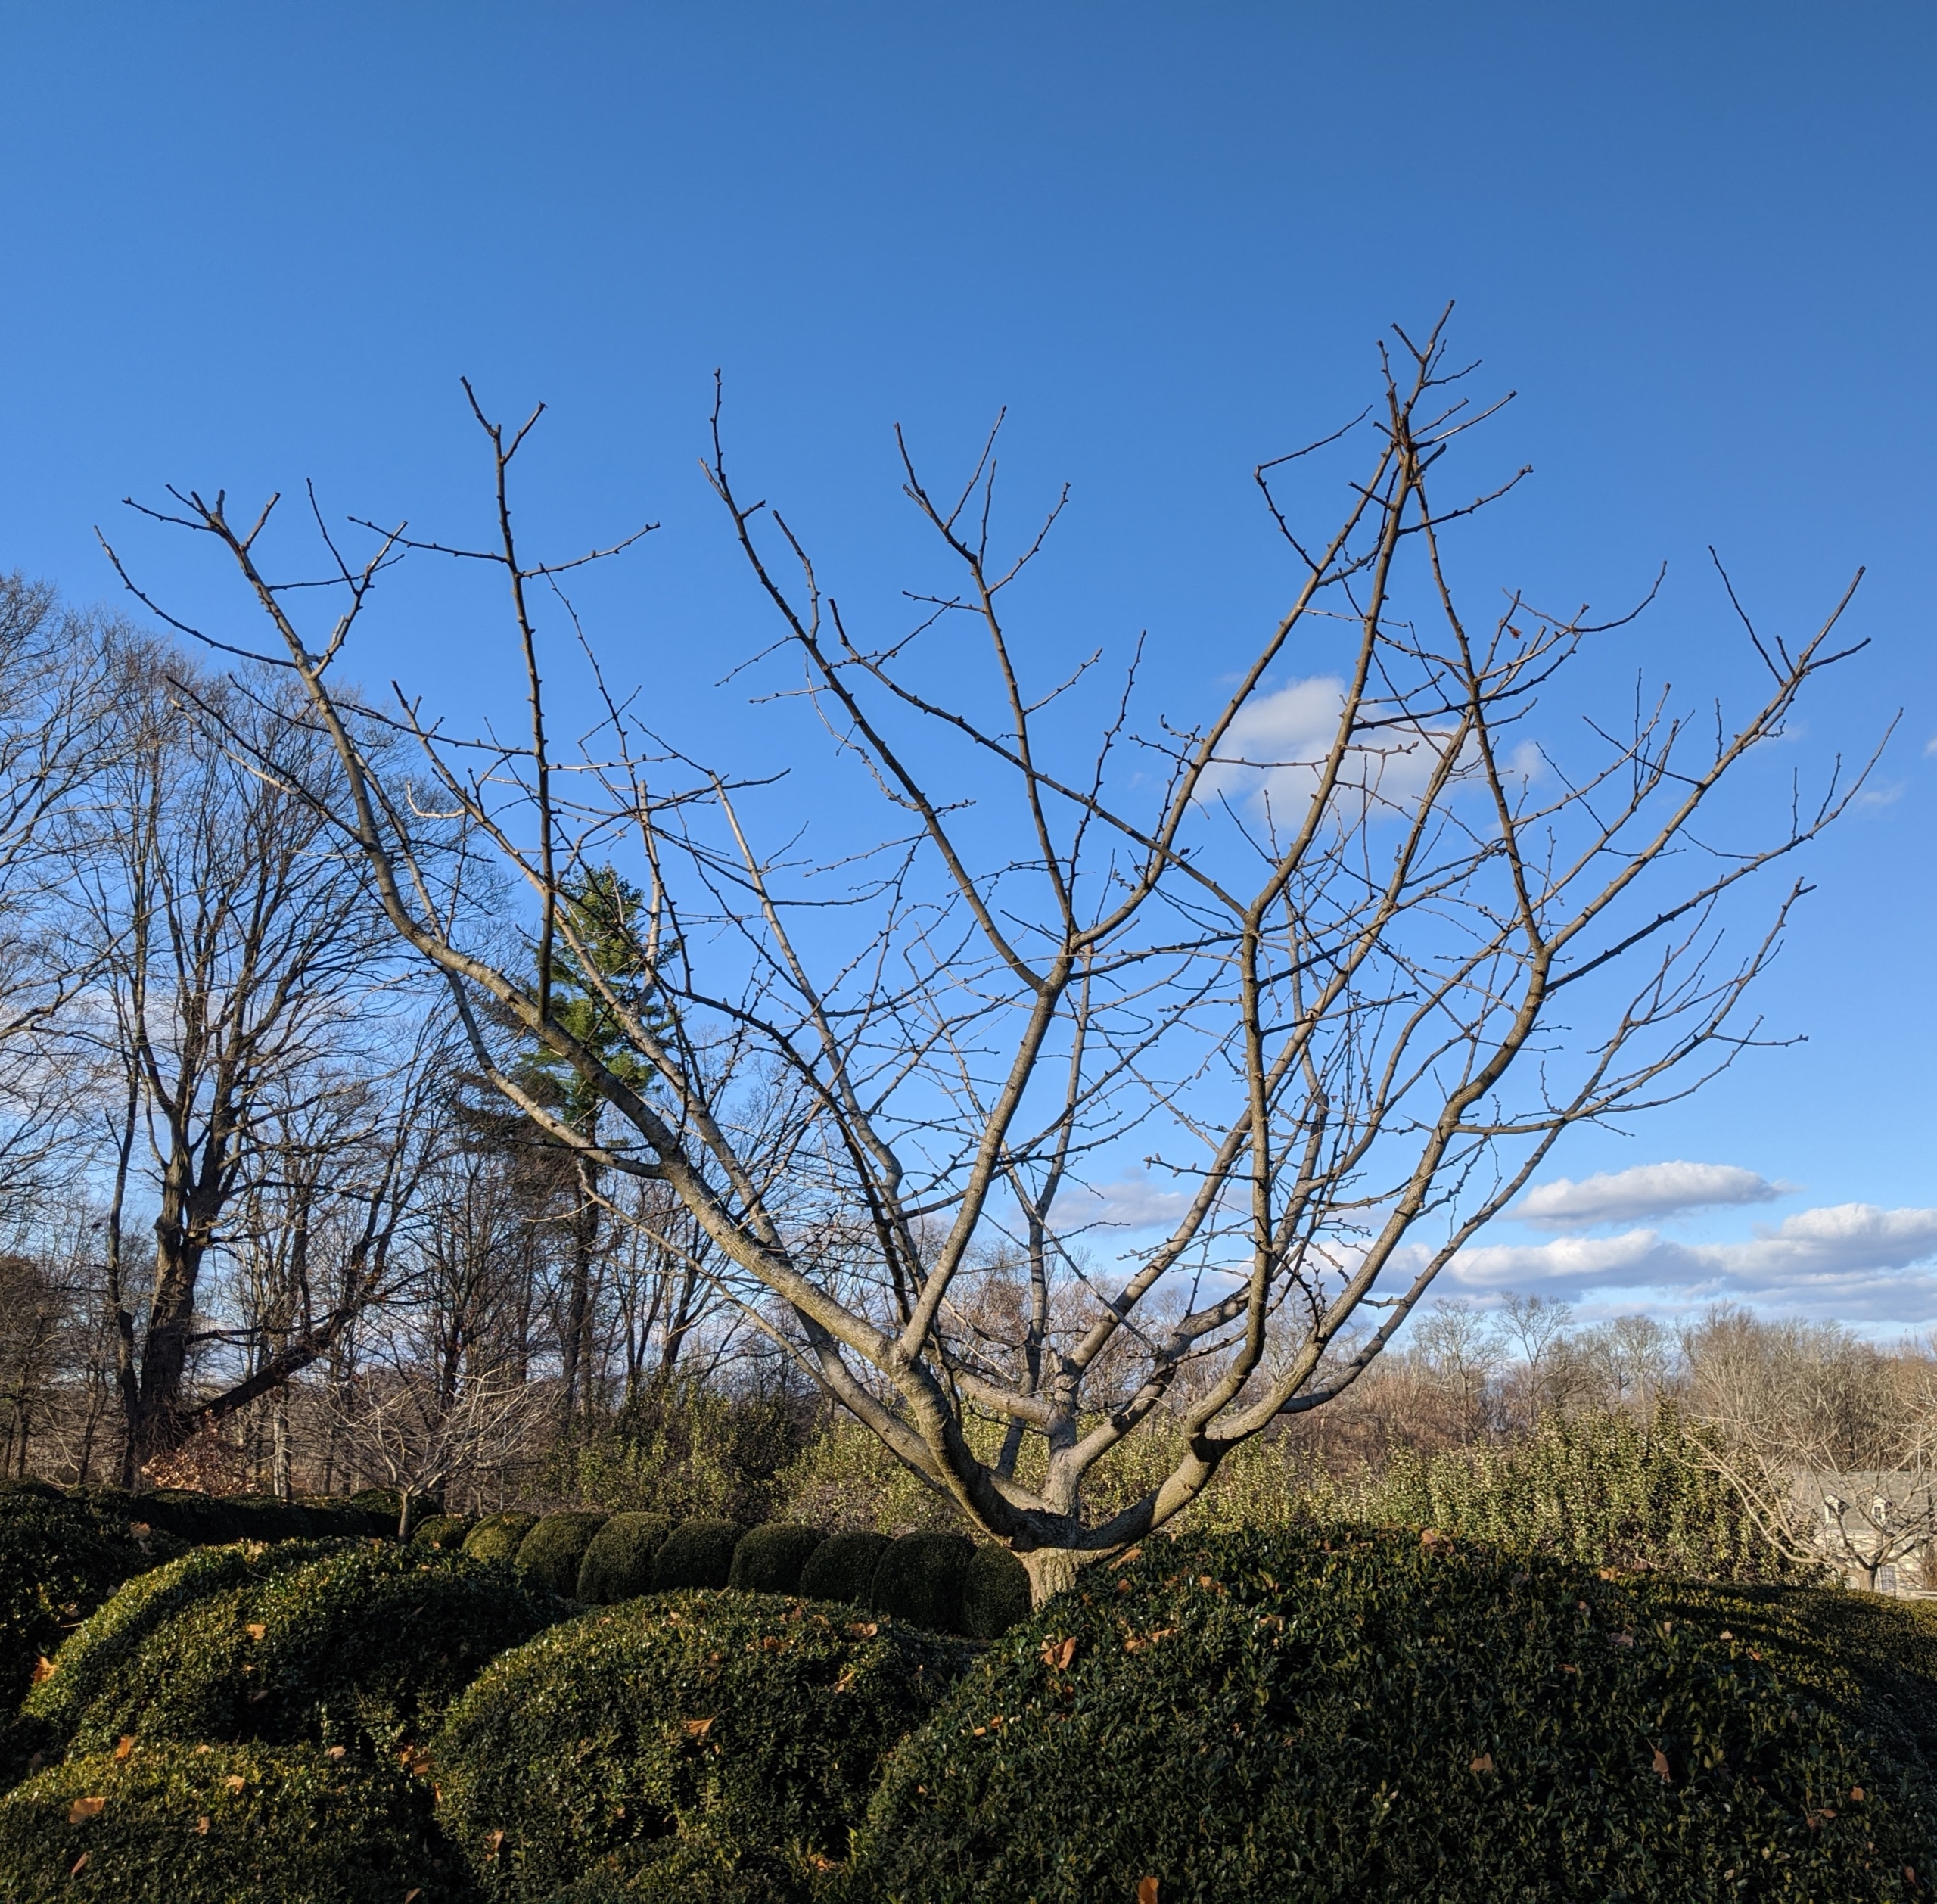
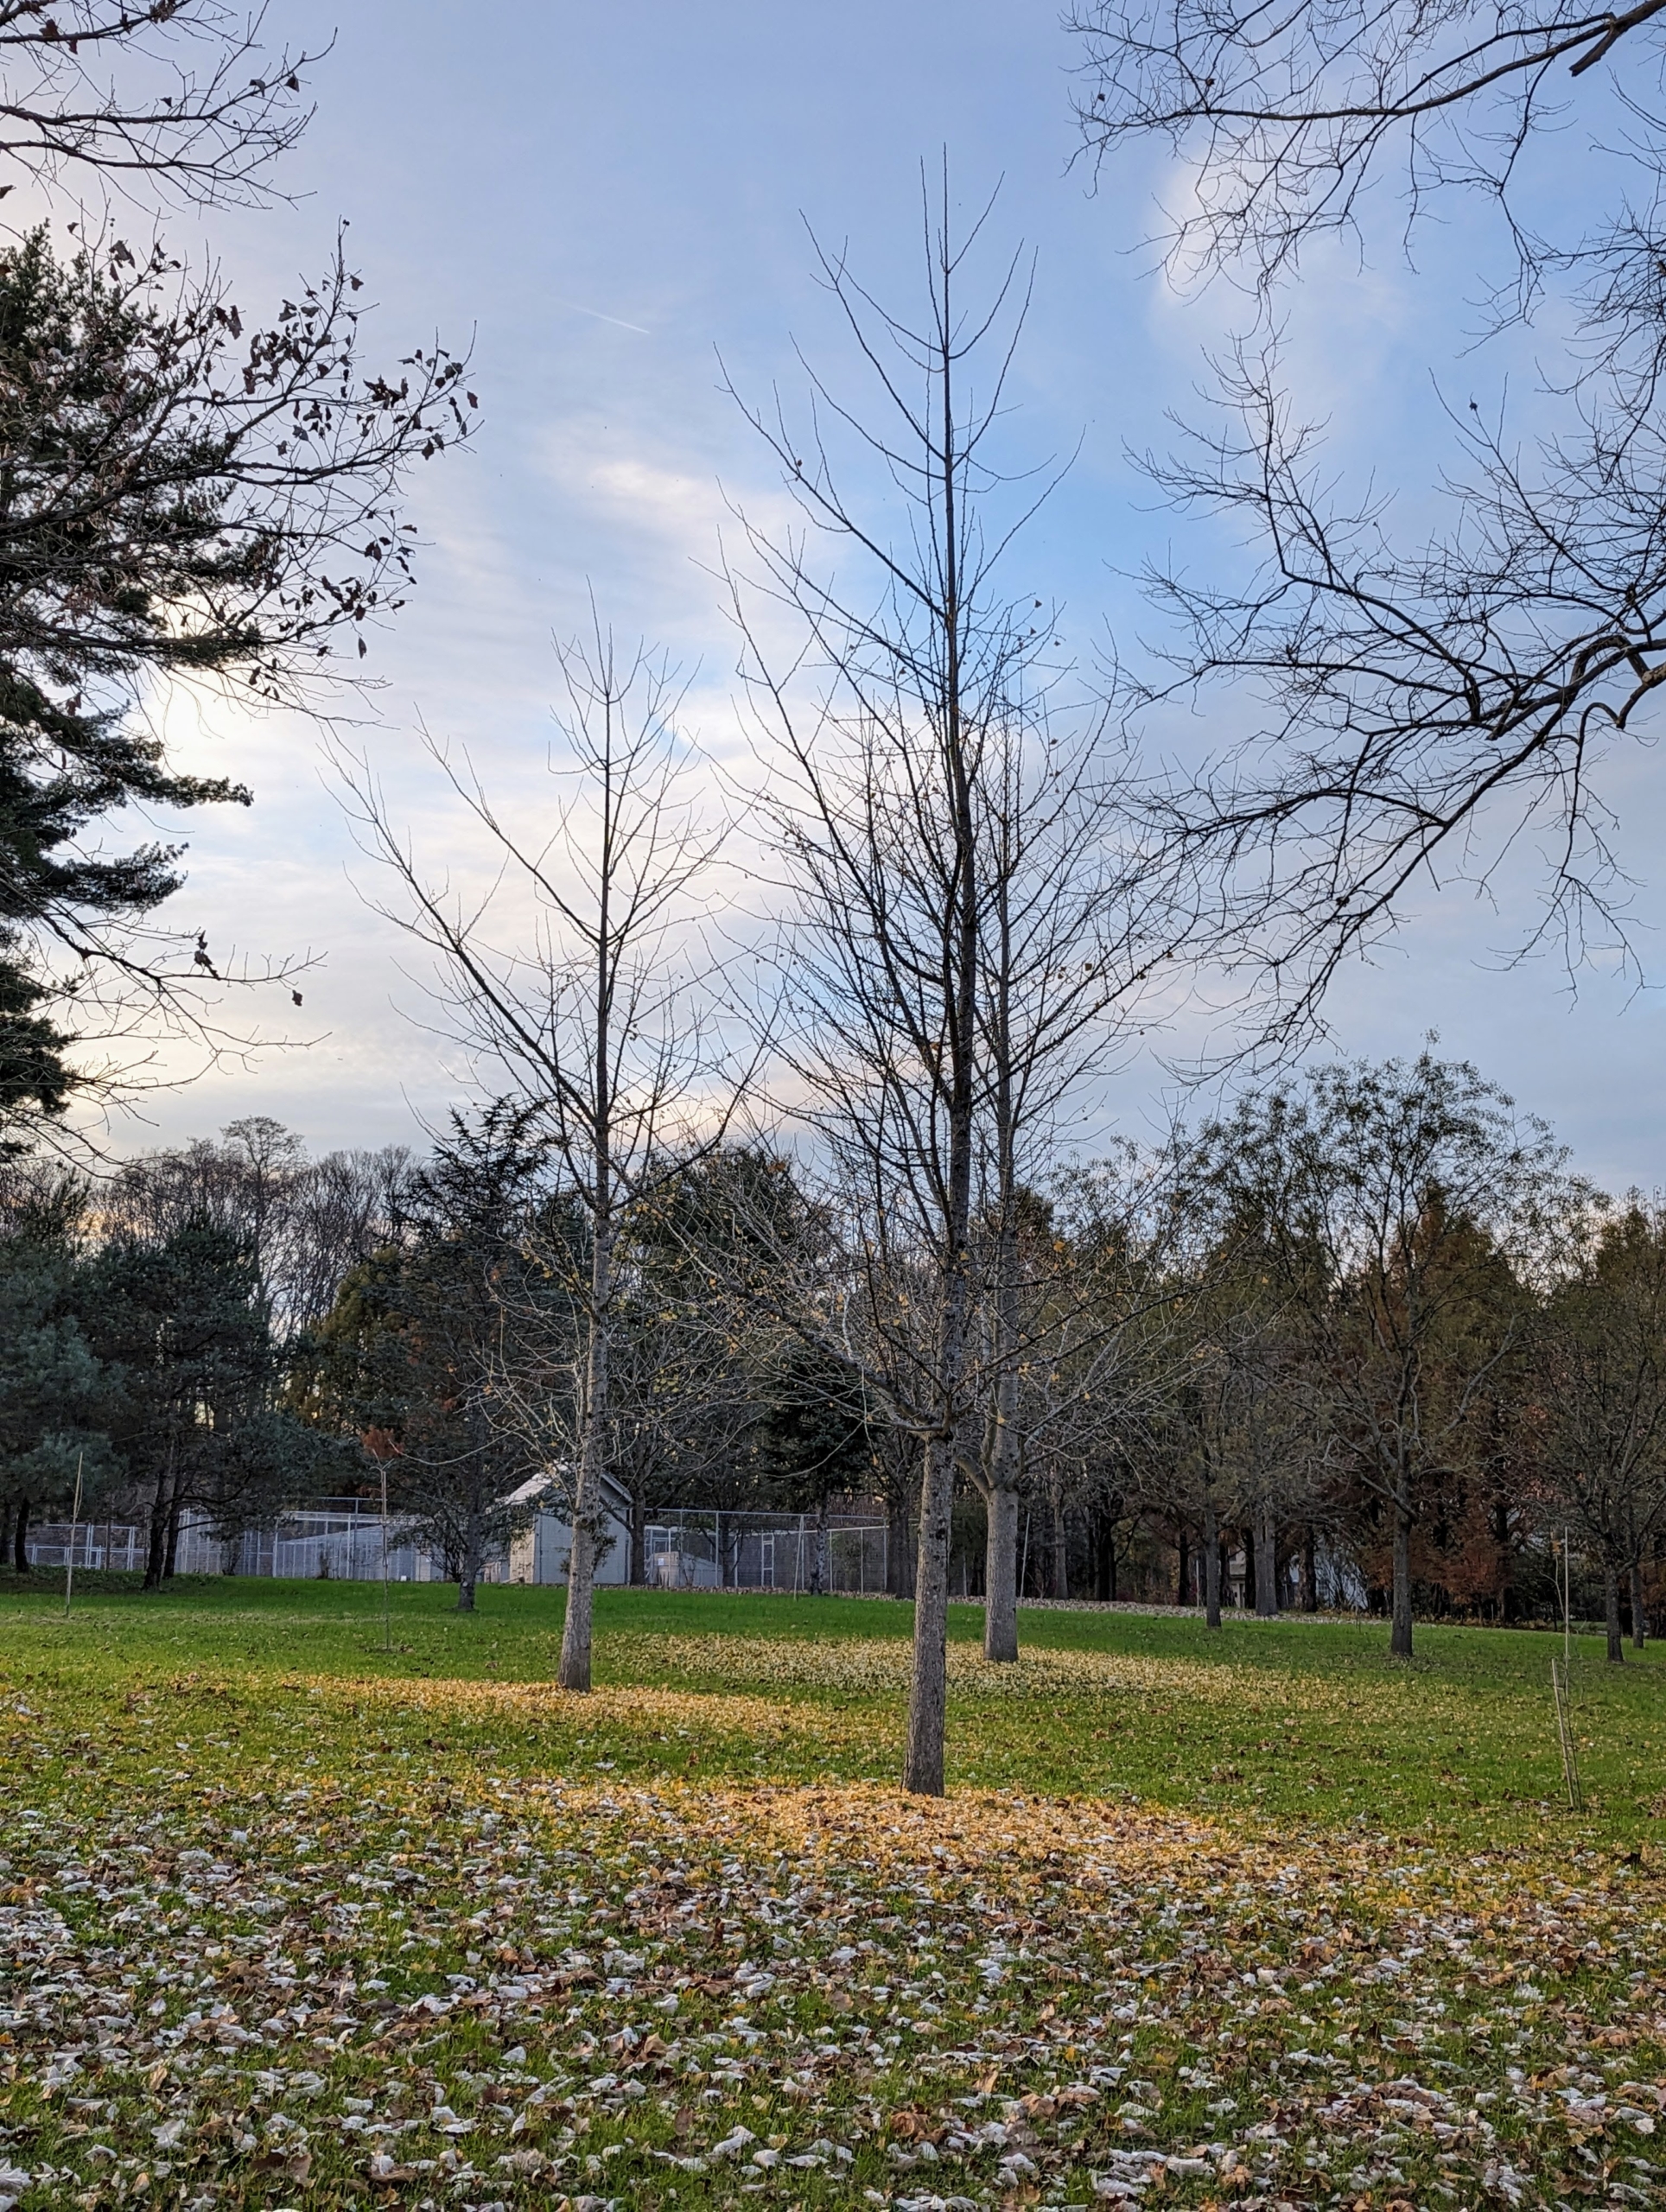
All the ginkgoes are now bare. This is the ginkgo tree outside my Winter House, with the gorgeous carpet of yellow below.
And across the carriage road – the trees around my herbaceous peony bed. Look, very different now.
And these are the ginkgo trees behind my chicken coops. All showing their bare winter branches. It’s a cycle of growth and bloom, followed by a period of dormancy – until spring, when nature’s cycle begins all over again.
If you haven’t started planting your spring-blooming bulbs yet, try to get it done soon! Here in the Northeast, the temperatures are getting colder fast.
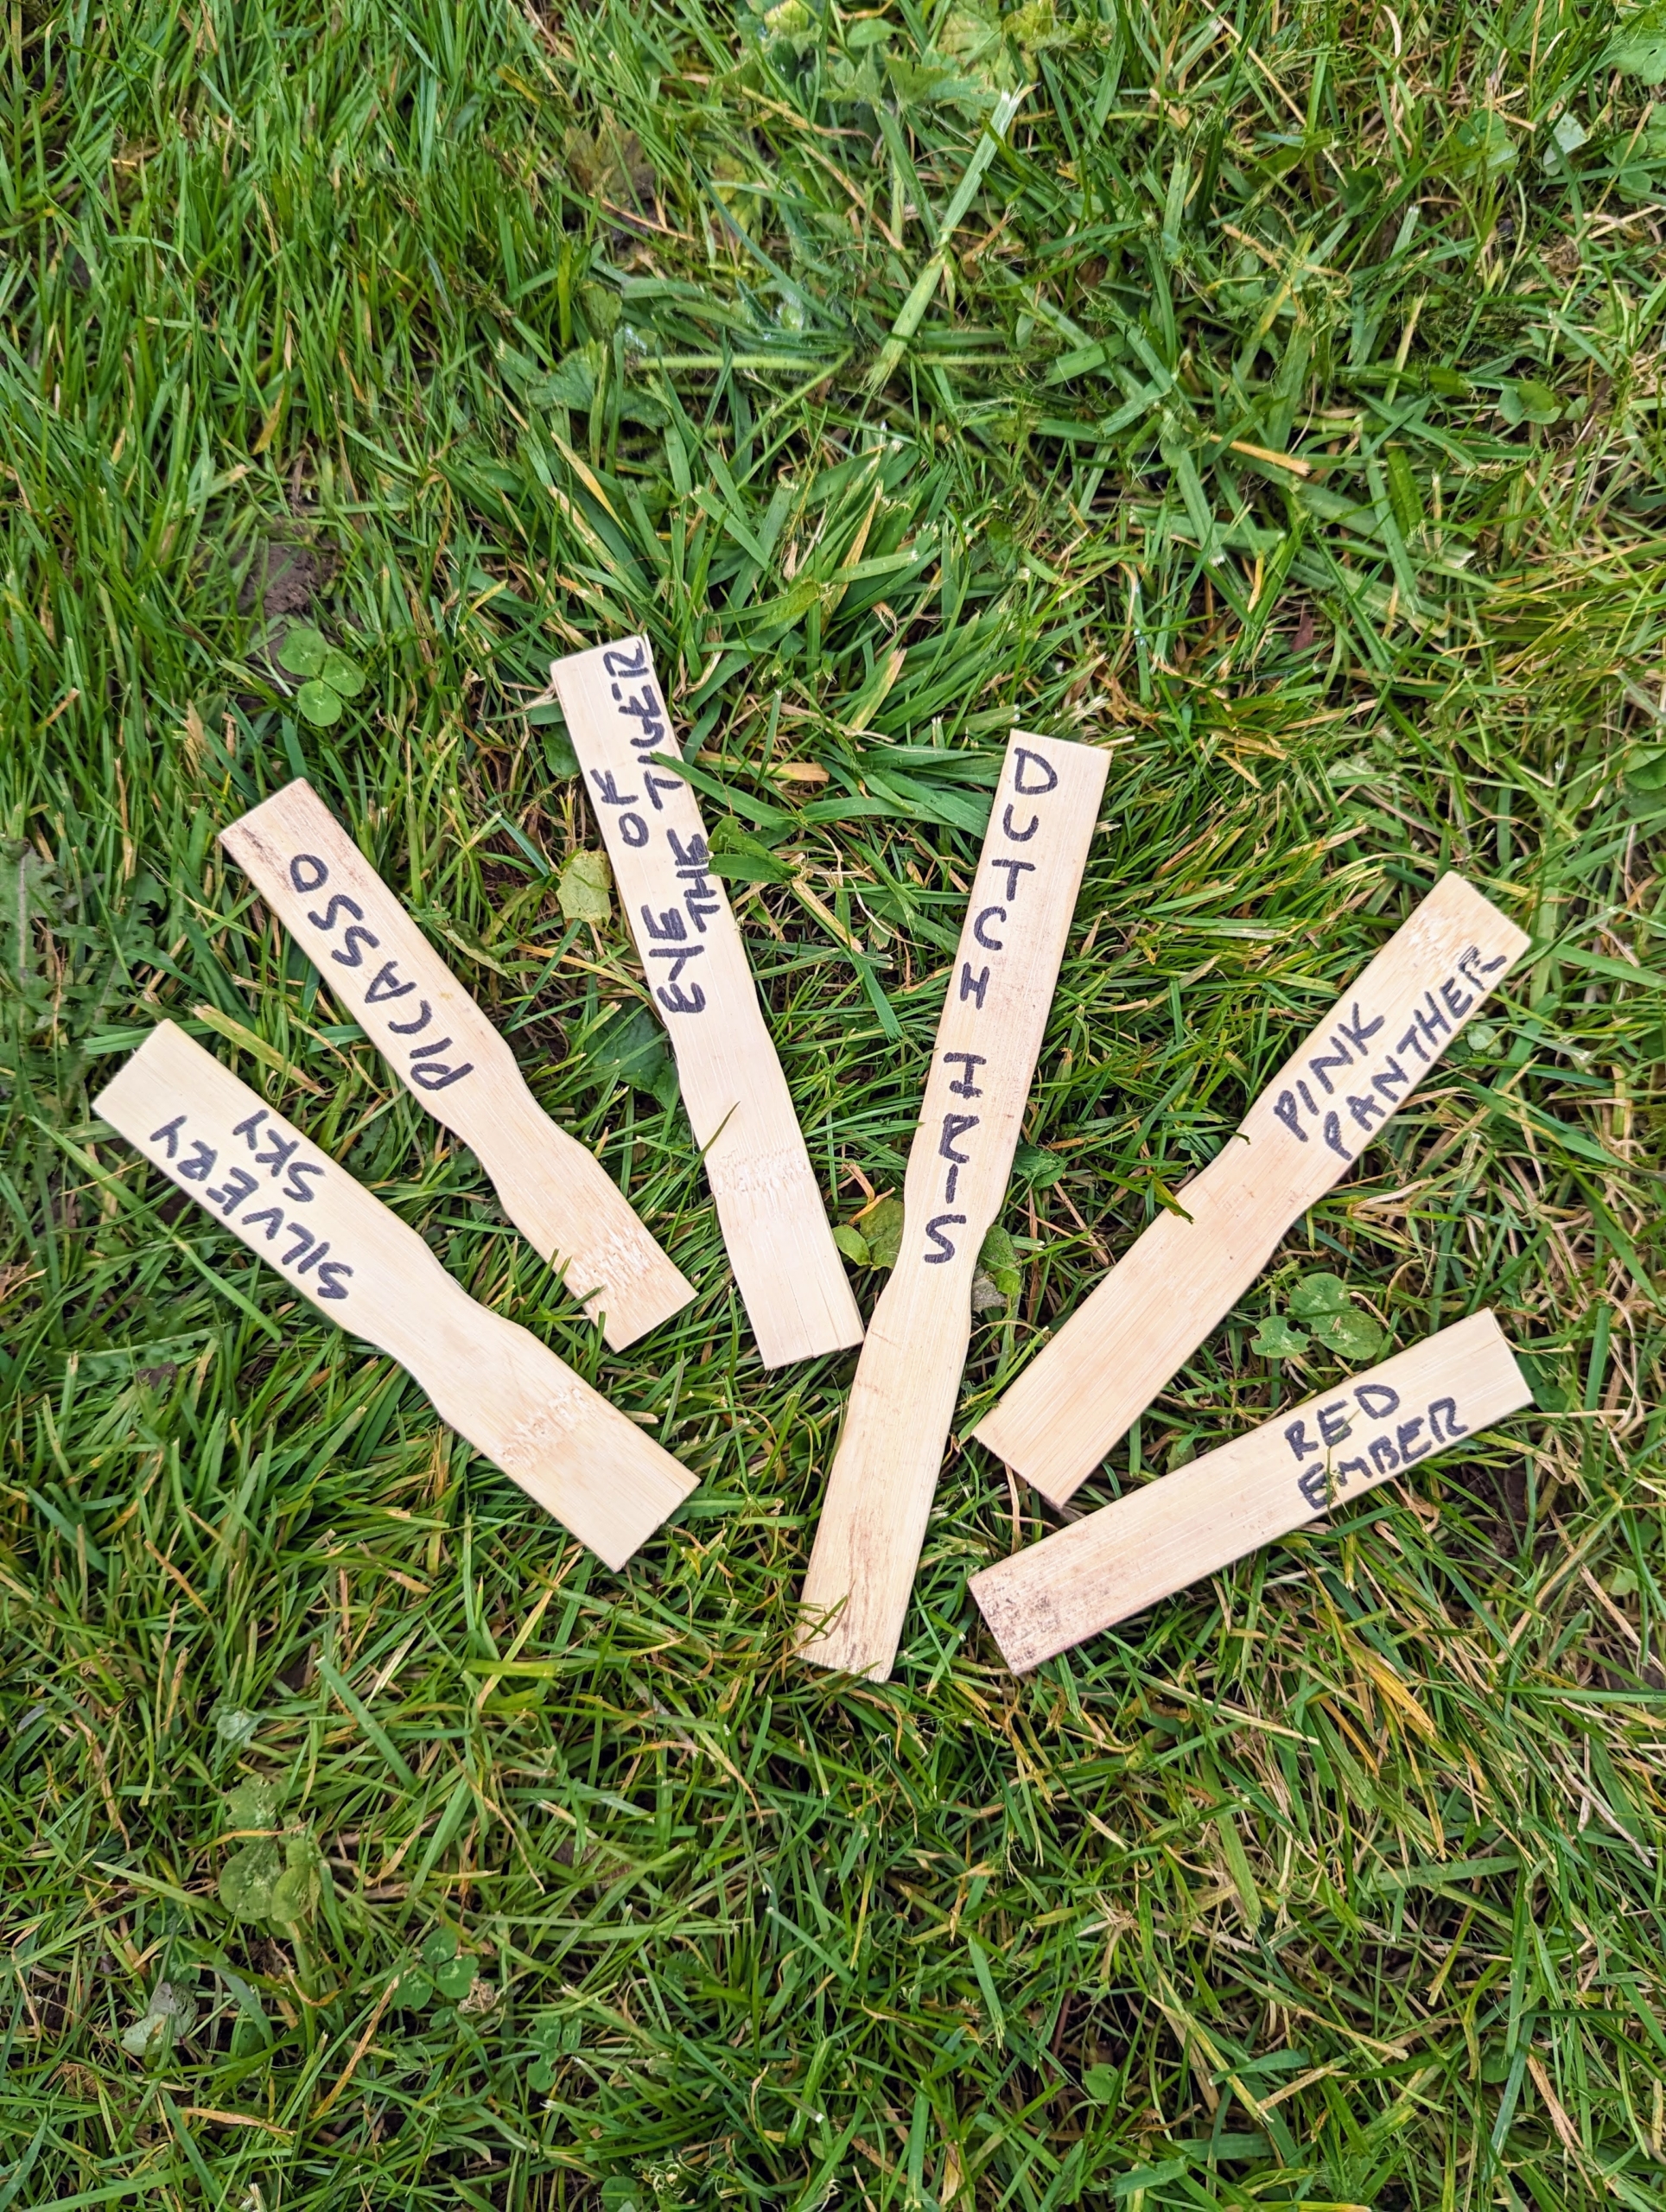
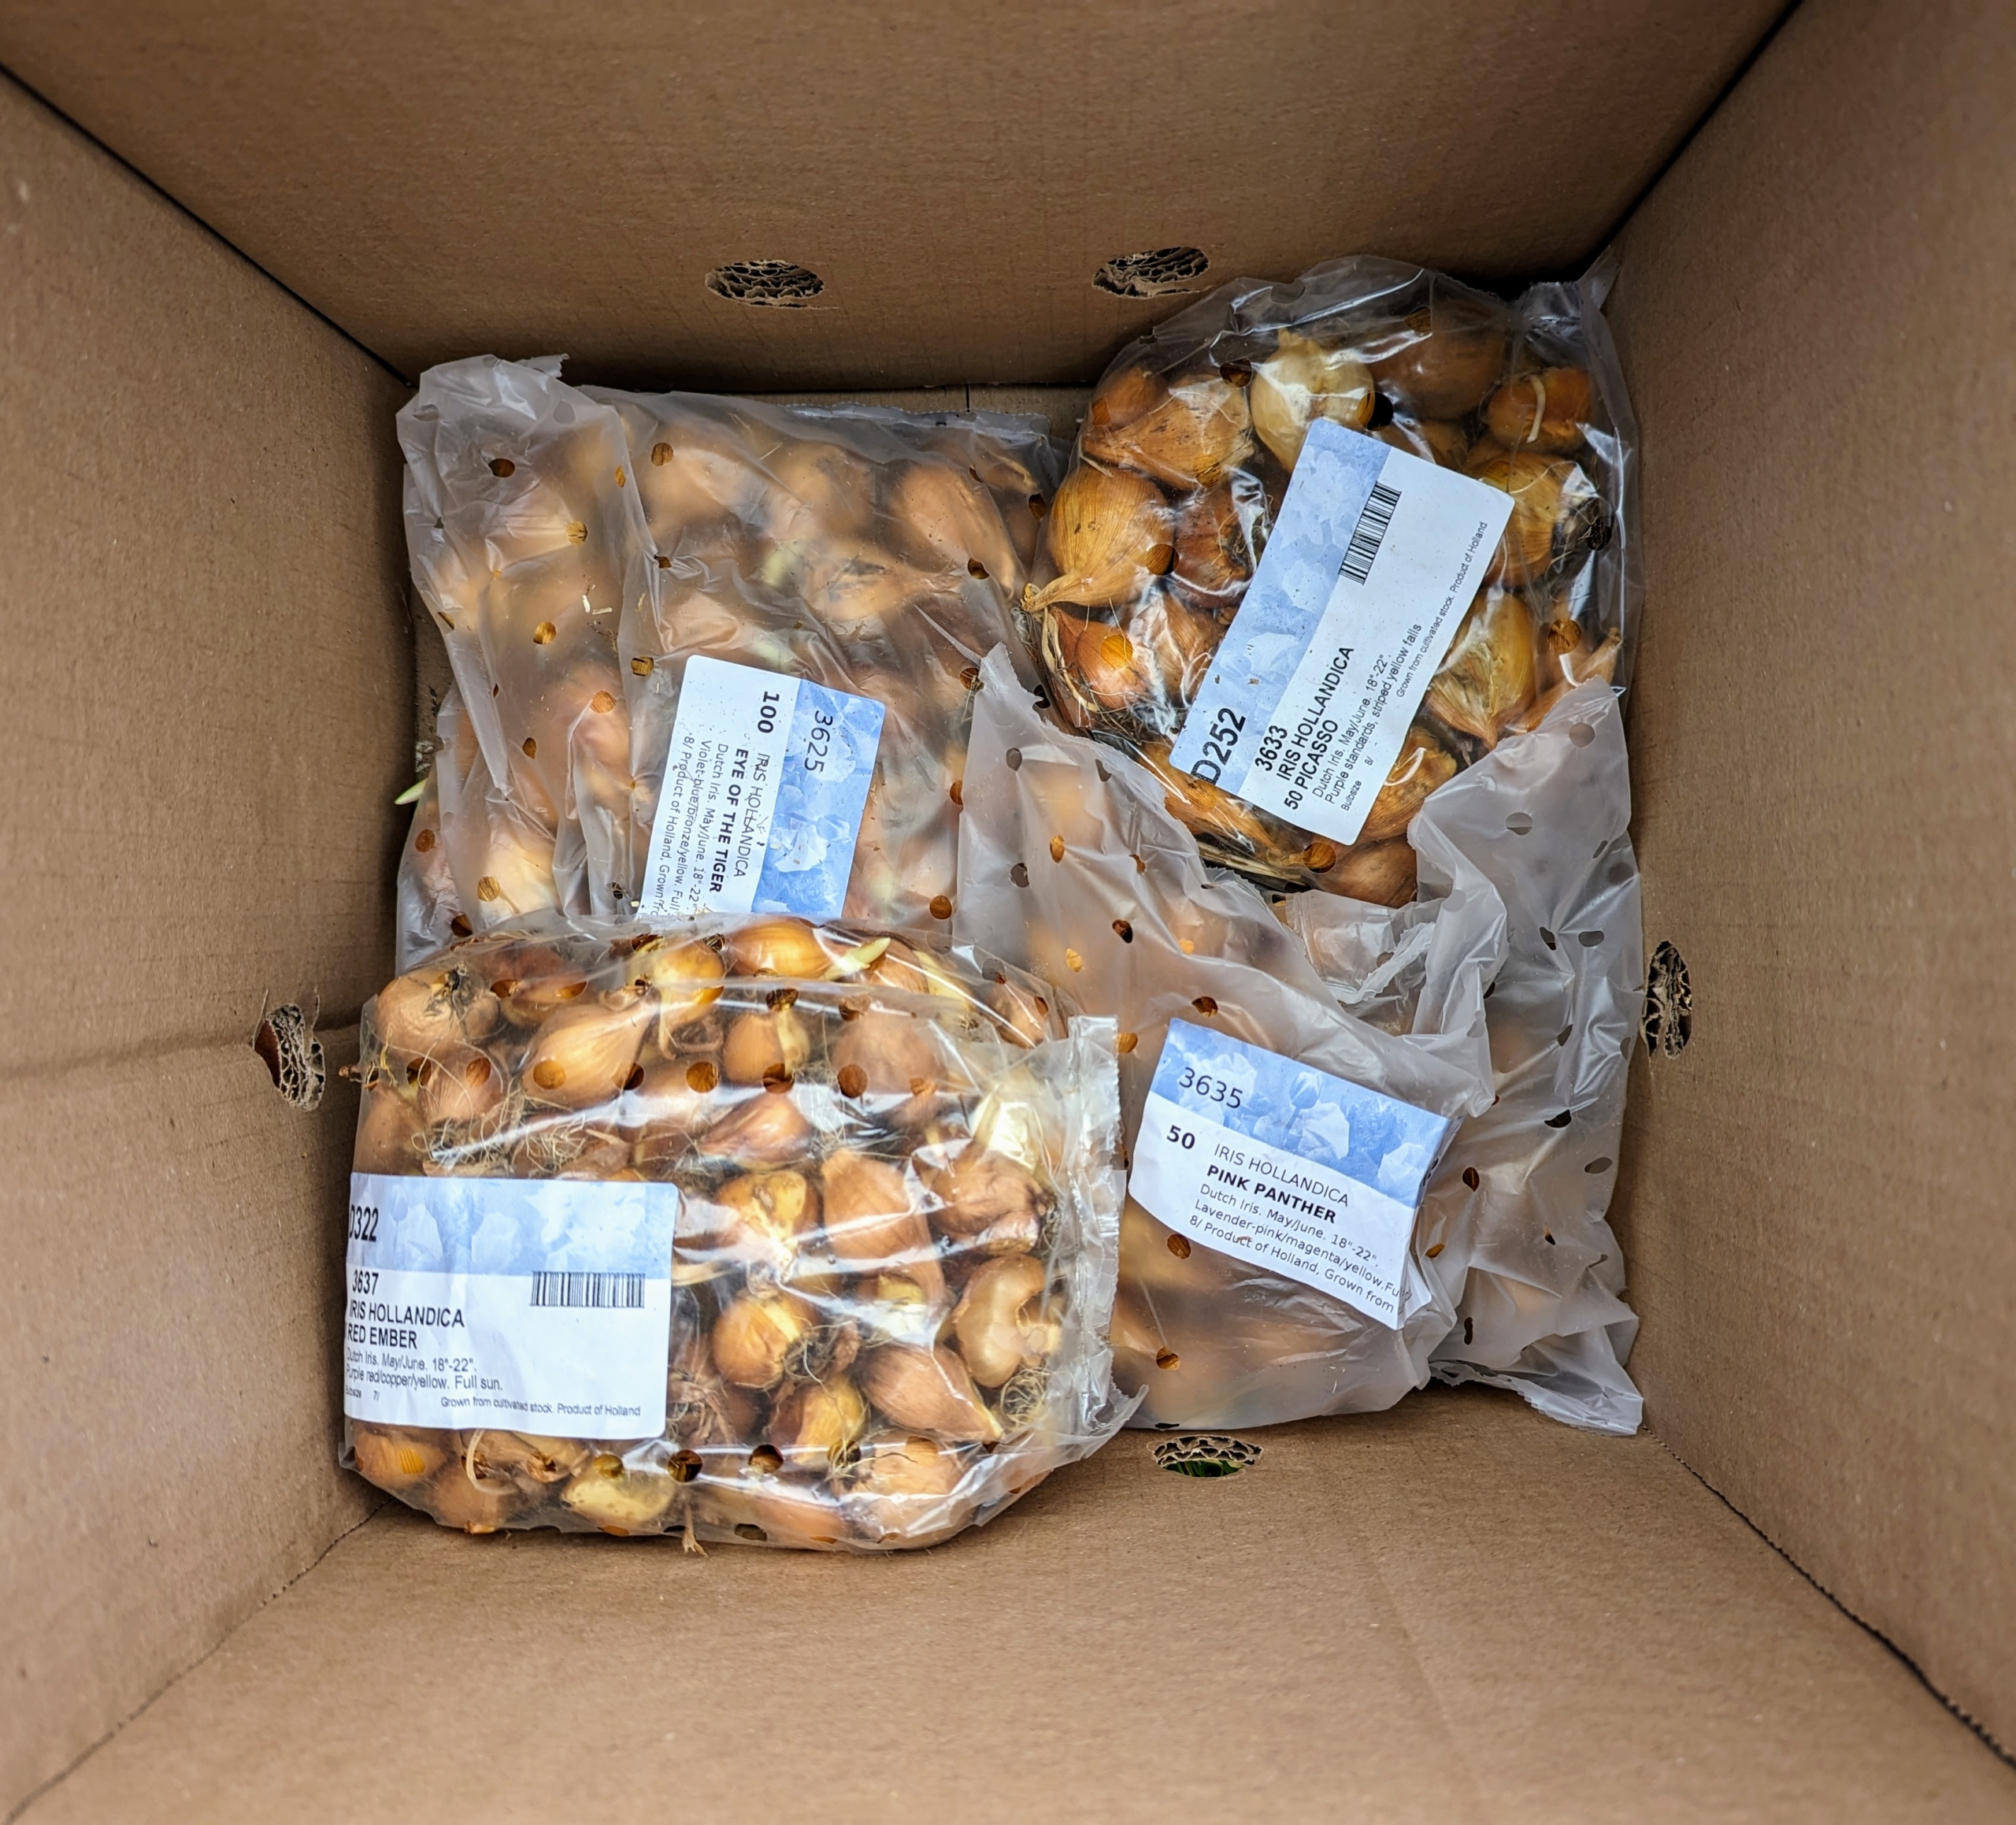
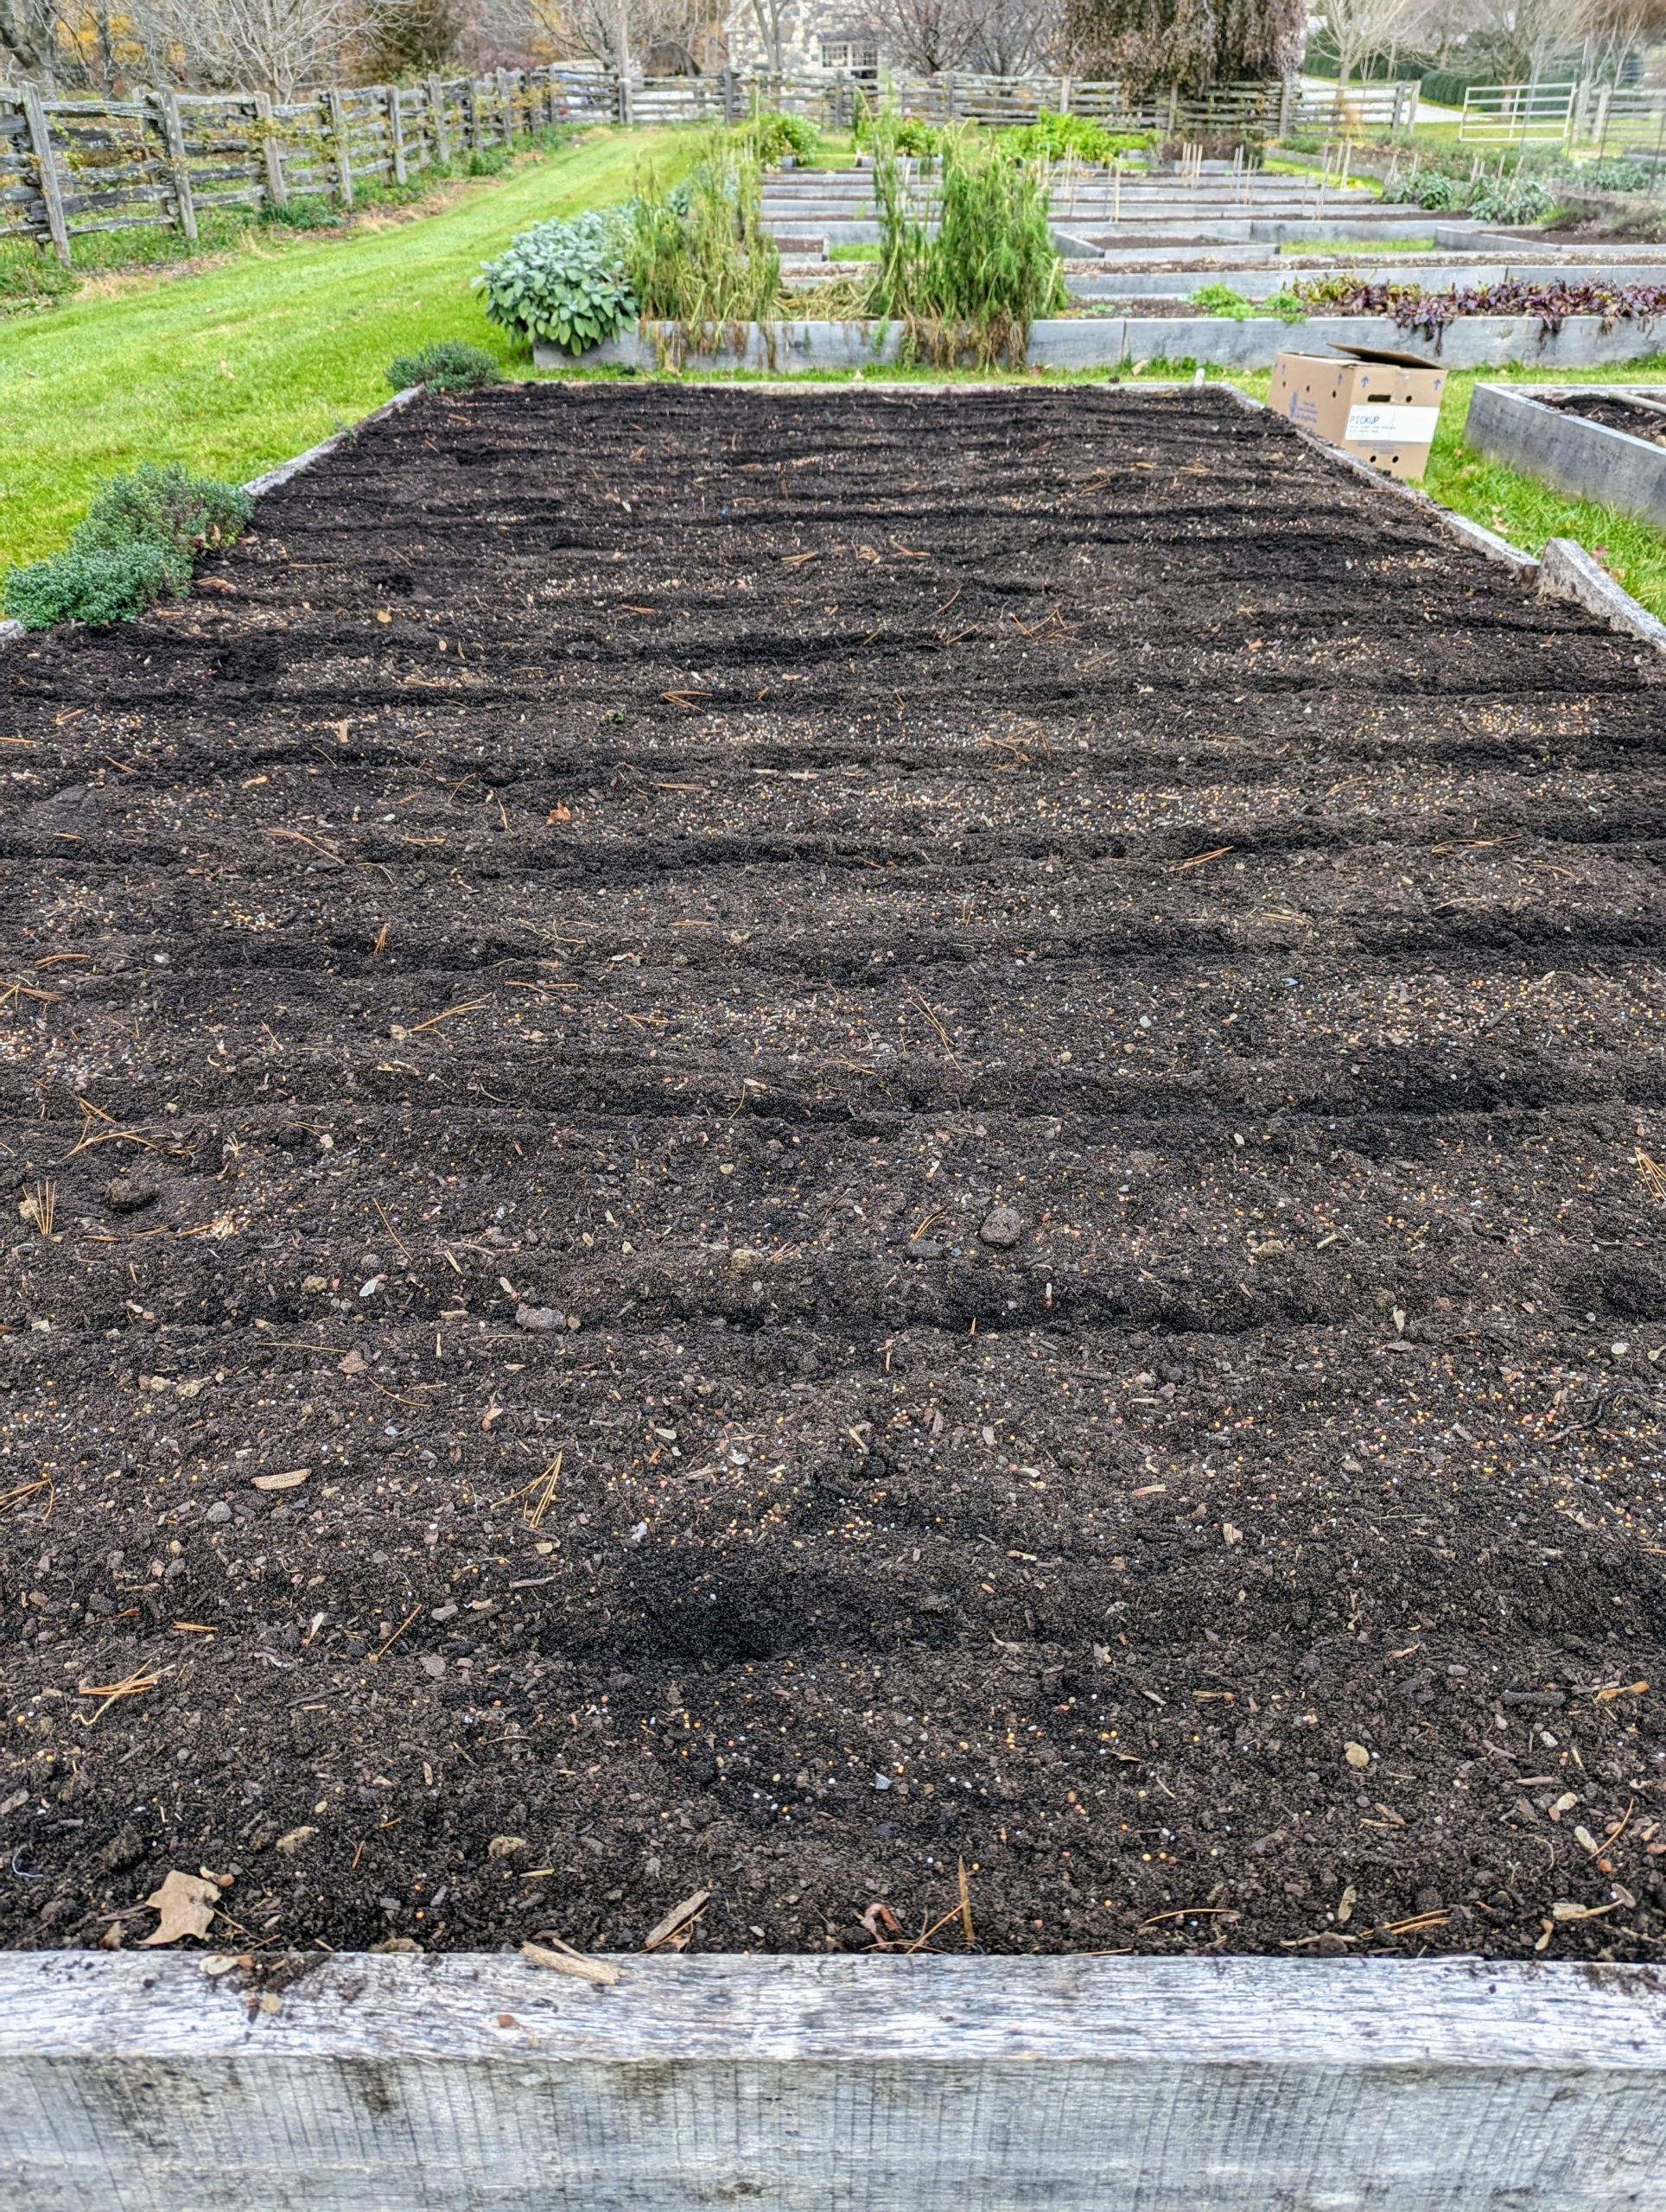
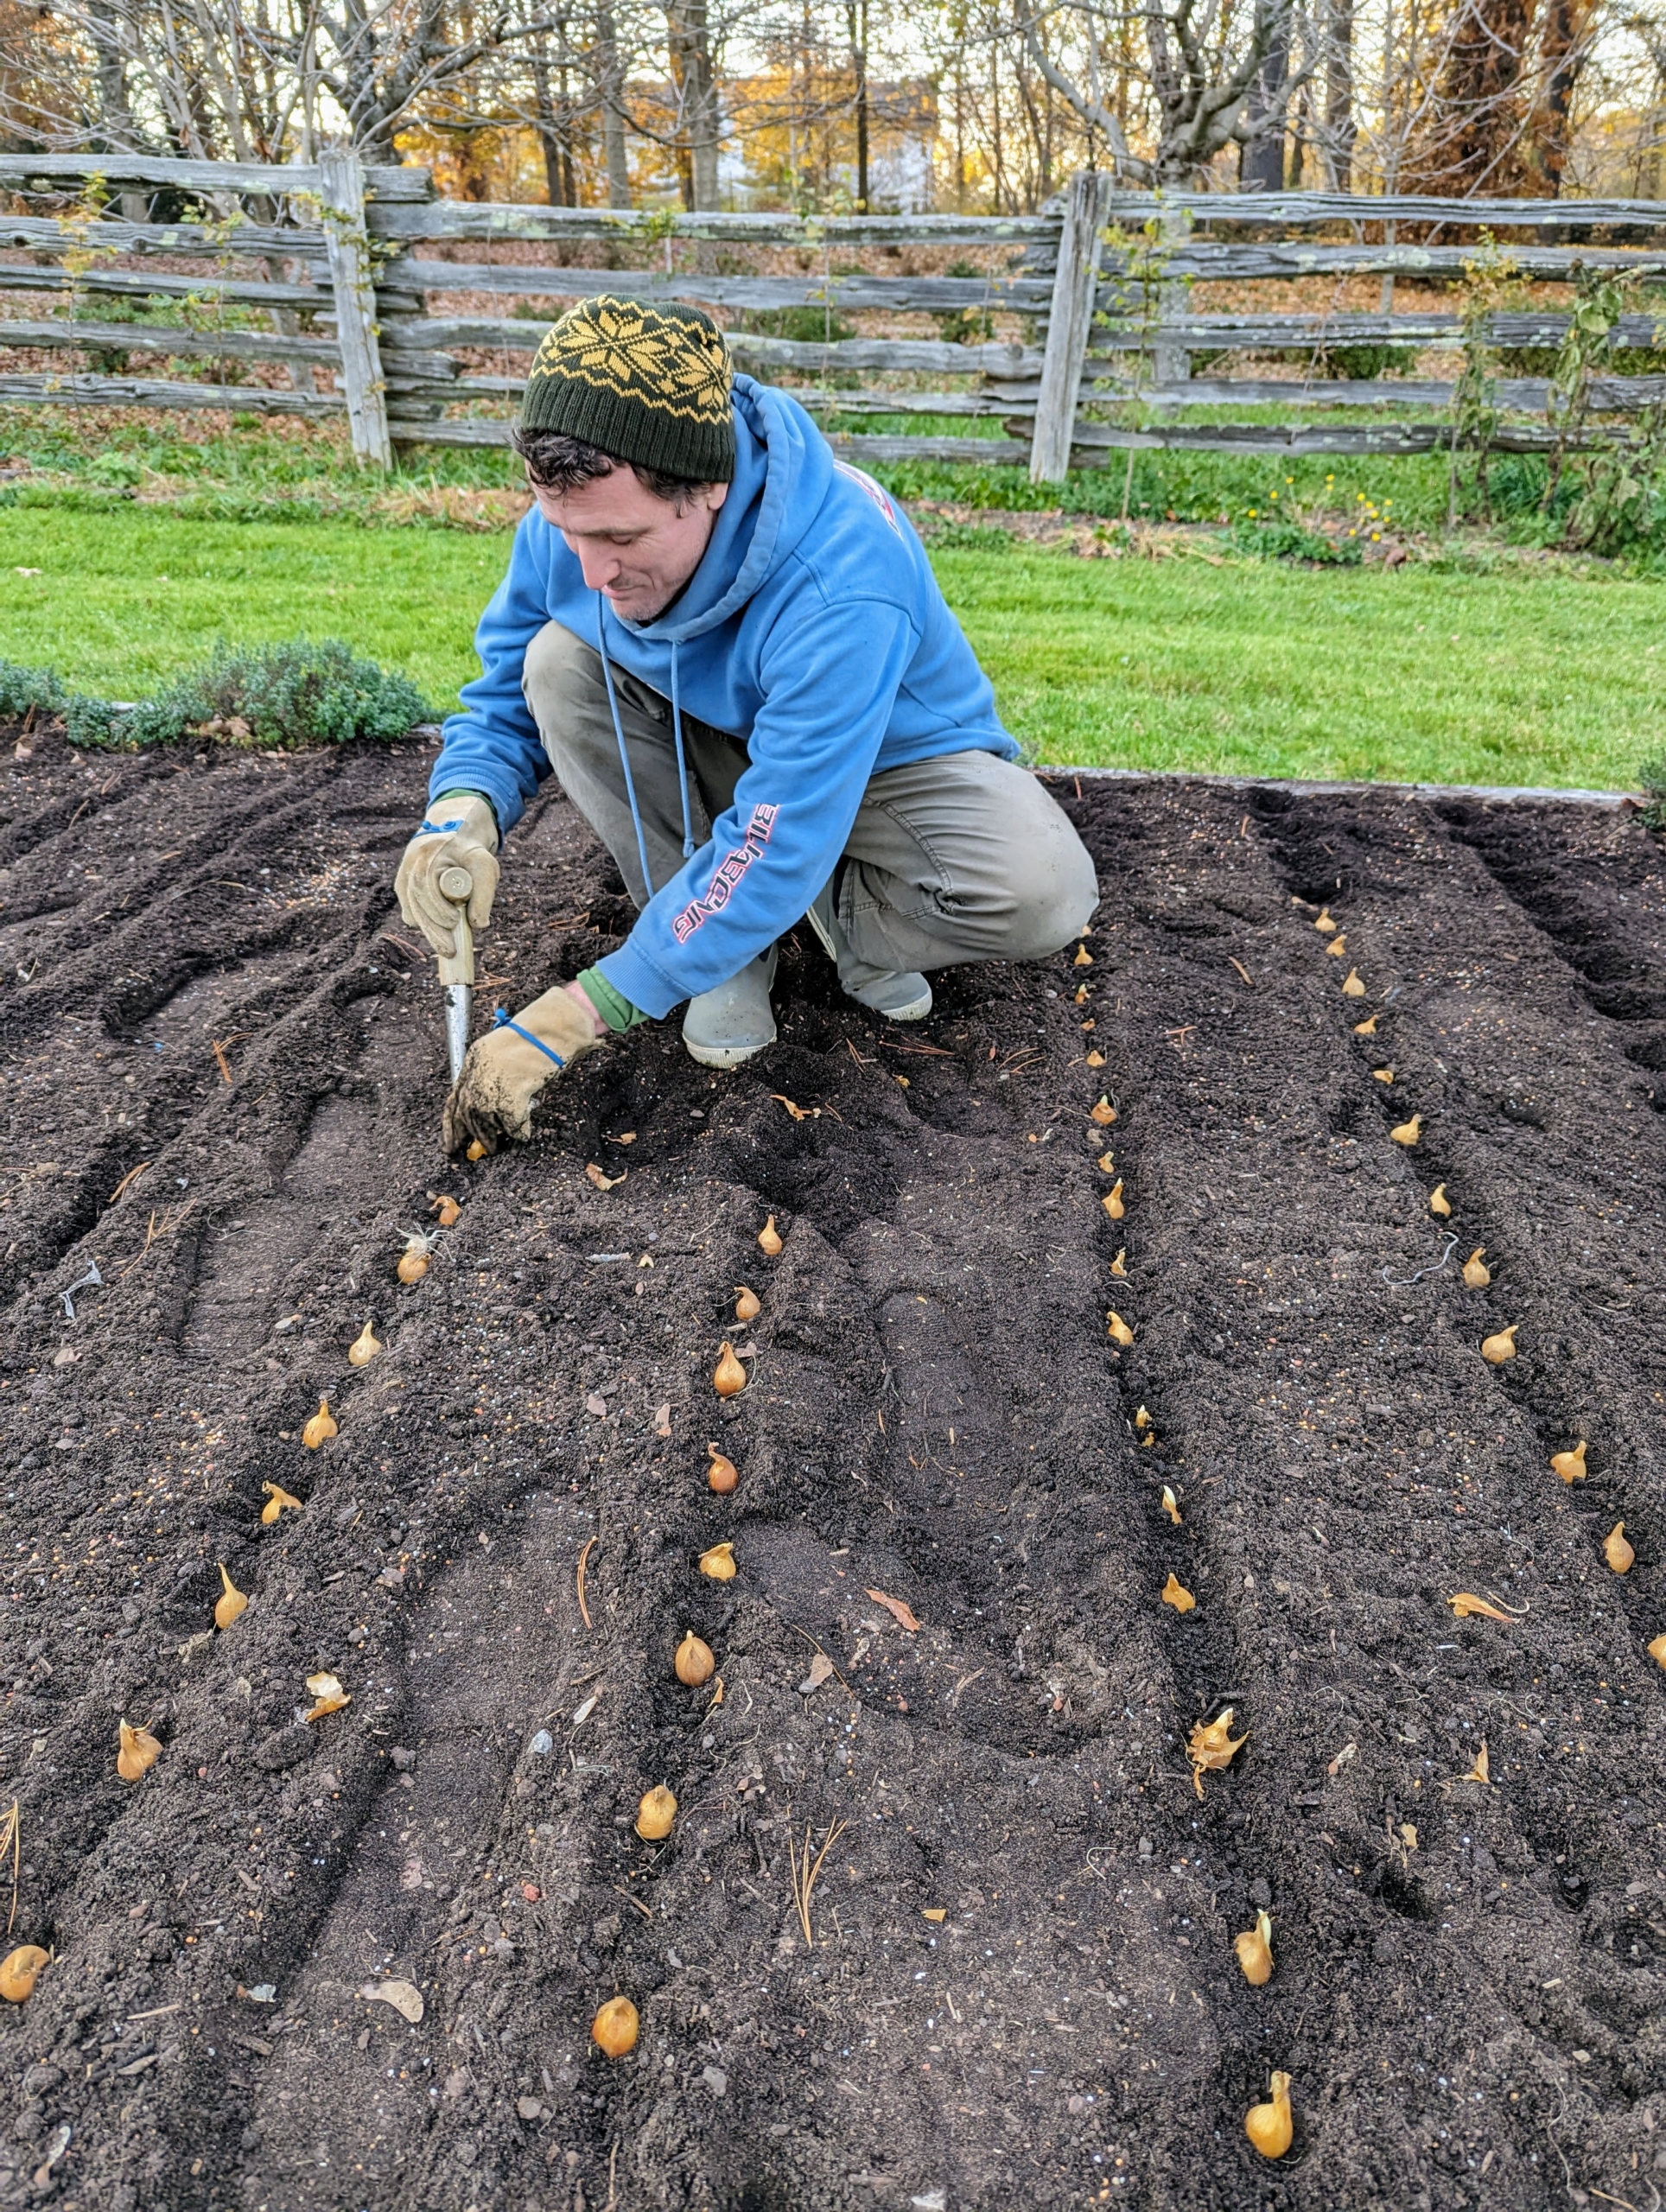
Planting these bulbs can be a a very labor intensive task. As many of you know, every autumn we plant thousands and thousands of bulbs at my farm. This week, my head gardener, Ryan McCallister, carefully planted rows and rows of Dutch iris bulbs in one of the beds of my new vegetable garden. These irises from Van Engelen Inc., a wholesale family-run flower bulb business in Bantam, Connecticut, are in shades of blue and purple and include varieties 'Silvery Sky,' 'Picasso,' 'Eye of the Tiger,' 'Pink Panther,' and 'Red Ember.'
Enjoy these photos.
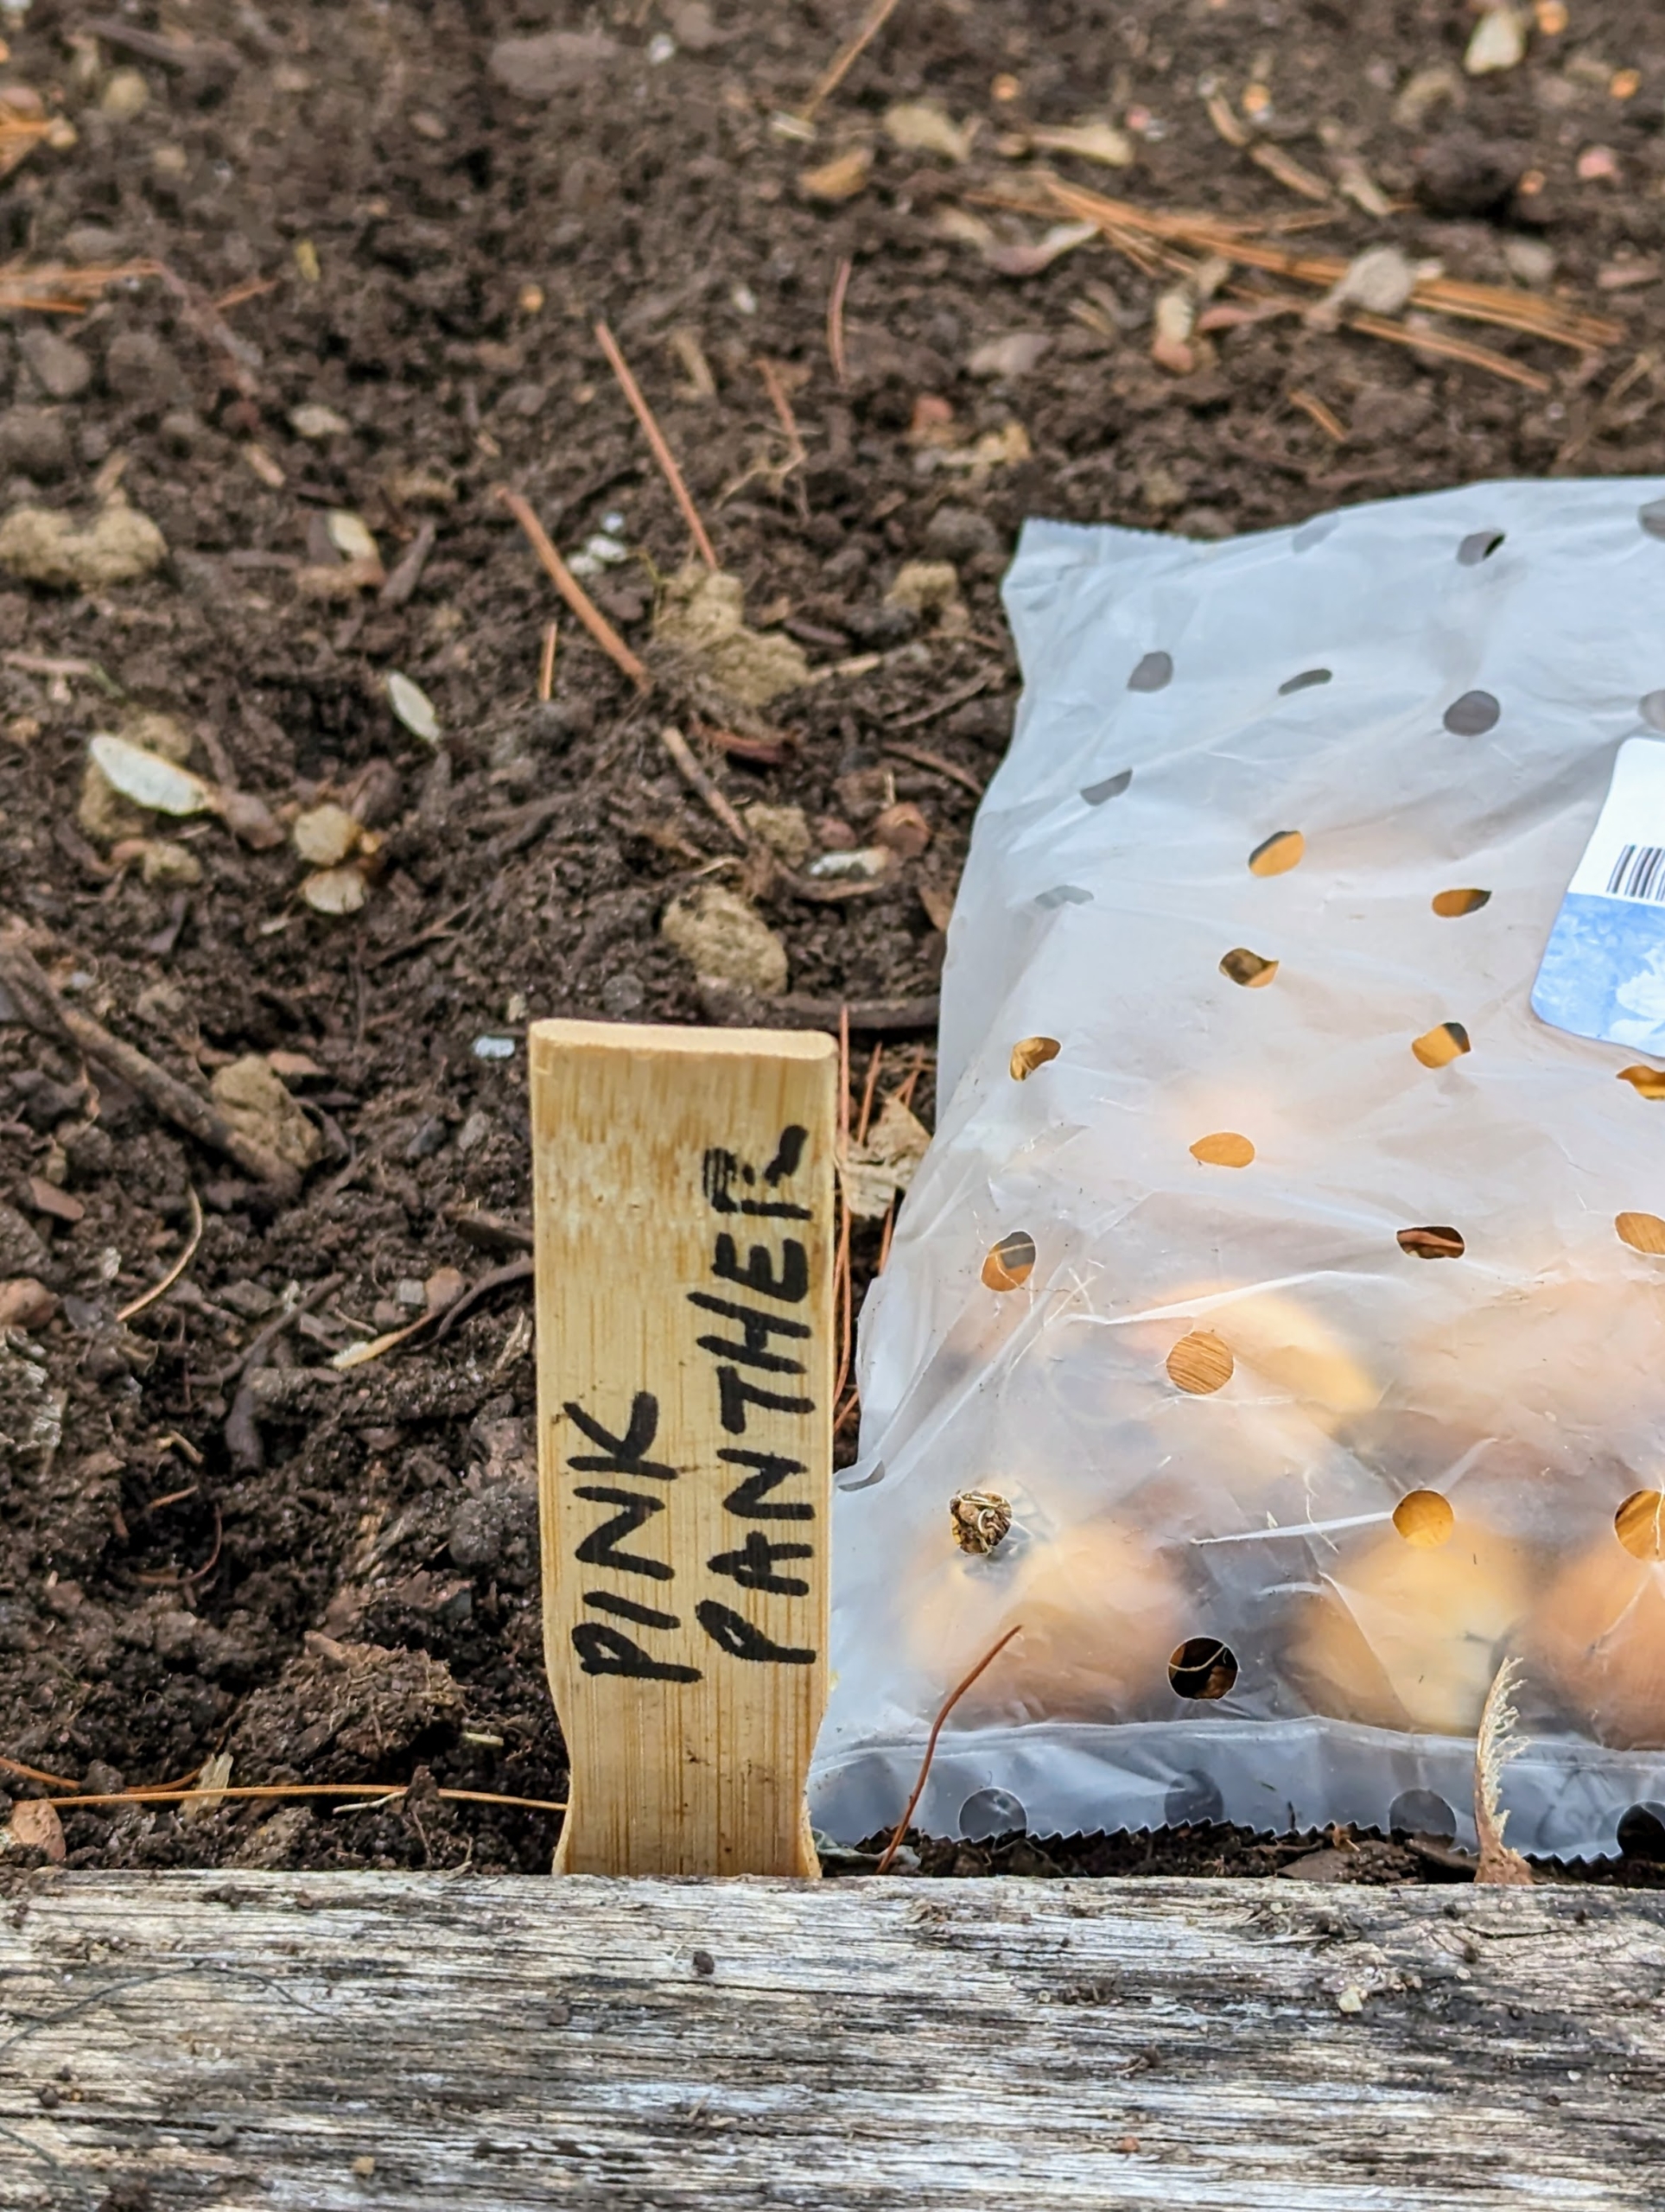
Ryan wrote all the names on markers, so we could identify the flowers when they bloom in spring. Ryan repurposed some unused paint stirrers to make these, but plant markers can be found at all gardening shops.
I’ve been using Van Engelen Inc. as a bulb source for years. Van Engelen Inc., and its sister company John Scheepers, Inc. are located in the Litchfield, Connecticut borough of Bantam. Jo-Anne’s father, Jan Ohms, acquired the Van Engelen flower bulb company in the 1970s and created the first real wholesale flower bulb catalog available to private residences in the US. Jan then acquired John Scheepers in 1991 in order to keep his uncle’s flower bulb business in the family.
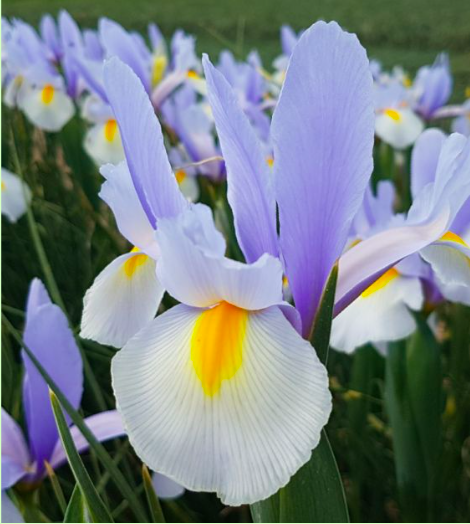
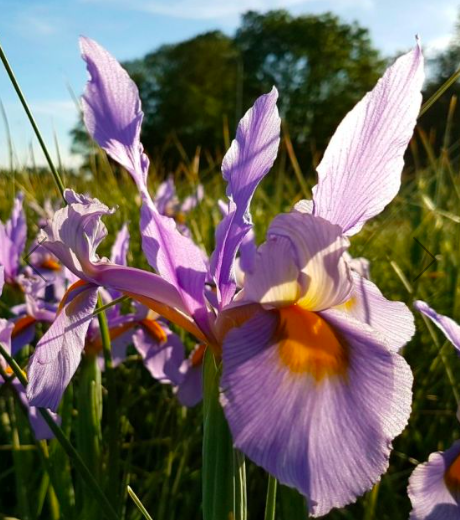
Among the varieties I selected for planting – Iris ‘Silvery Sky.’ This has beautiful periwinkle-blue standards and blue-tinged, white falls with yellow blotches. (Photo from VanEngelen.com)
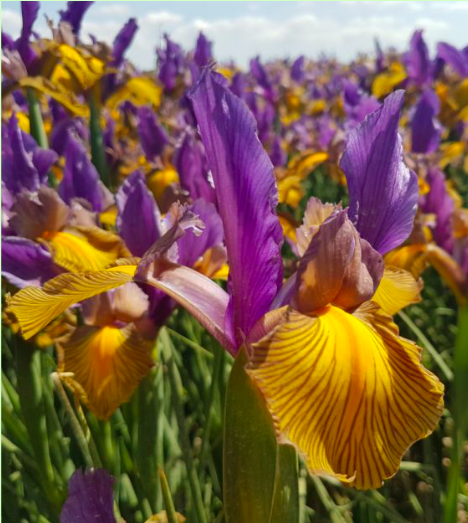
Iris hollandica ‘Picasso’ has bright yellow falls with chocolate veins and shades of lavender and purple standards. (Photo from VanEngelen.com)
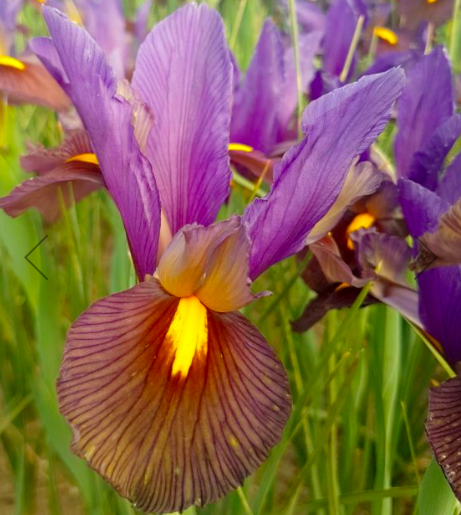
Another interesting Dutch iris is ‘Eye of the Tiger’ with its violet-blue standards and dark mahogany-bronze falls with yellow blotches. (Photo from VanEngelen.com)
This variety is called ‘Pink Panther.’ It is lavender-pink with a buttercup-yellow blotches on deeper magenta-pink etched falls. (Photo from VanEngelen.com)
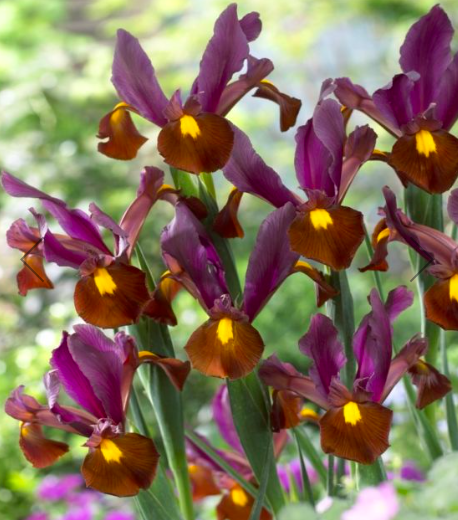
And this one is ‘Red Ember’ – a more dramatic iris with bold purple-red standards and copper-terracotta falls accented with yellow blotches. (Photo from VanEngelen.com)
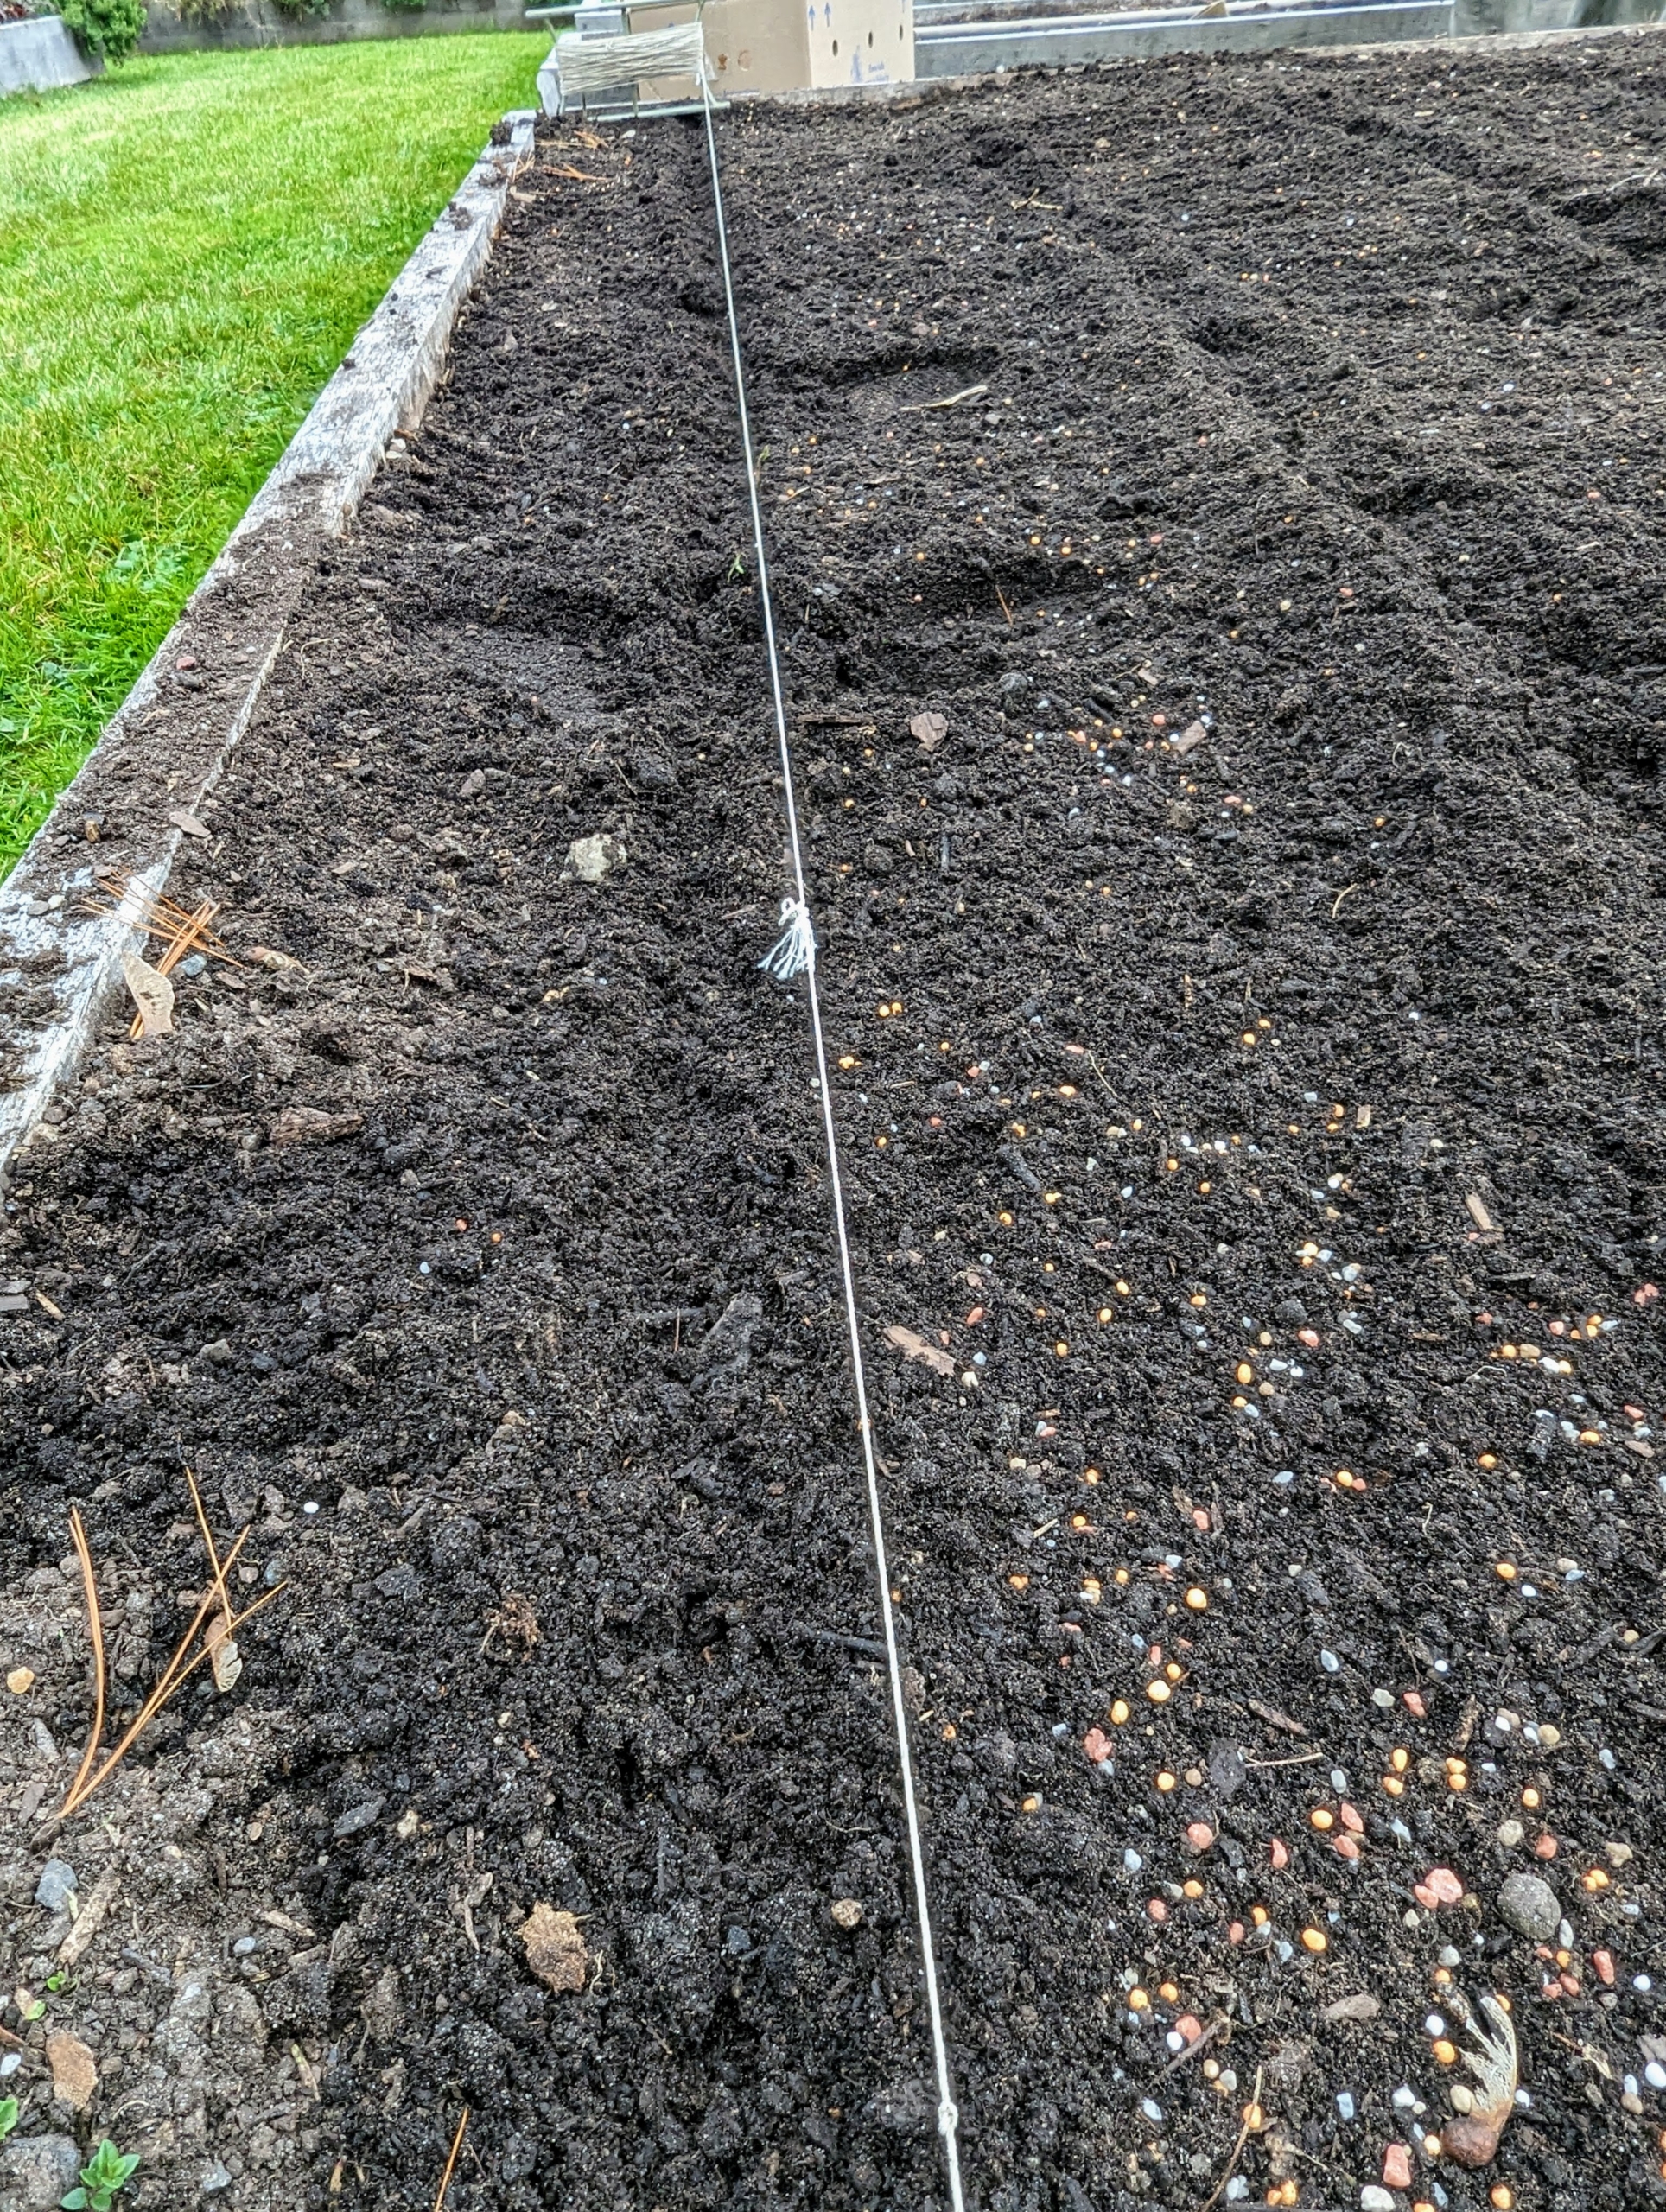
The bed was already fed with an all-purpose flower and vegetable continuous release fertilizer.
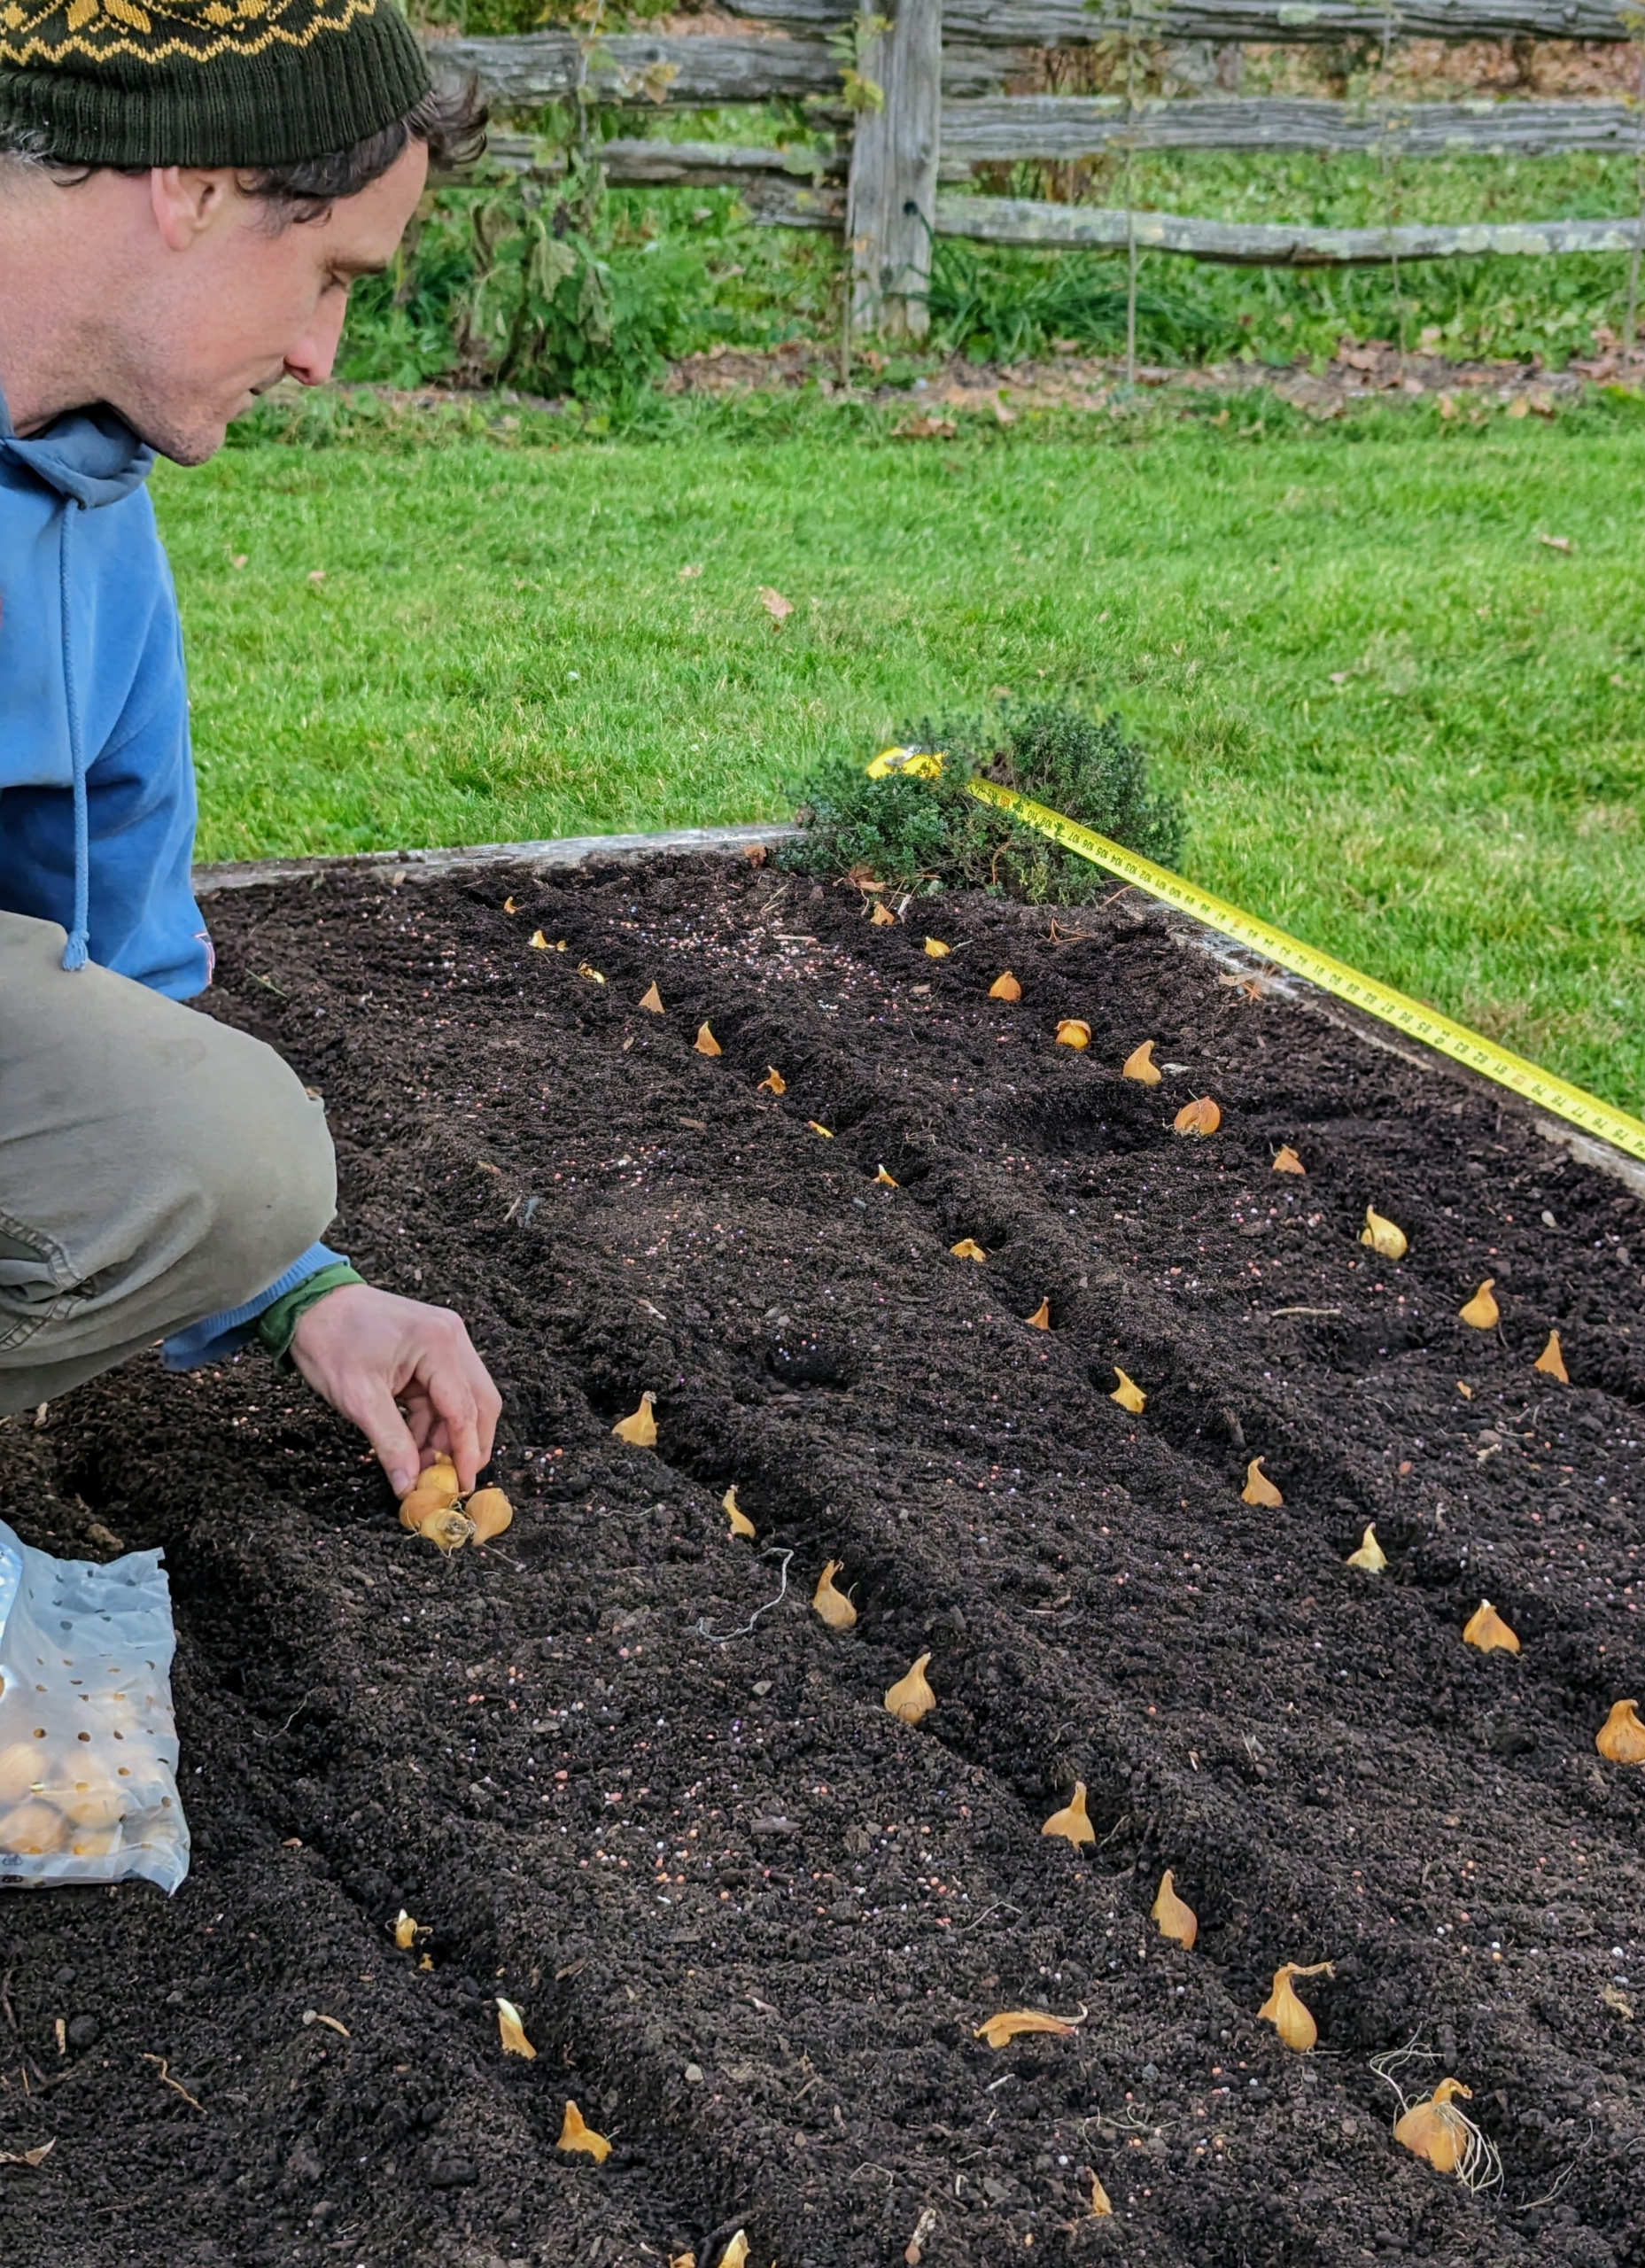
Ryan then uses garden twine to mark where the rows would be in the bed. Proper spacing is crucial in a flower cutting garden. Ryan figures out how many rows are needed for each variety, so the entire bed is well-utilized and the bulbs have ample room to grow.
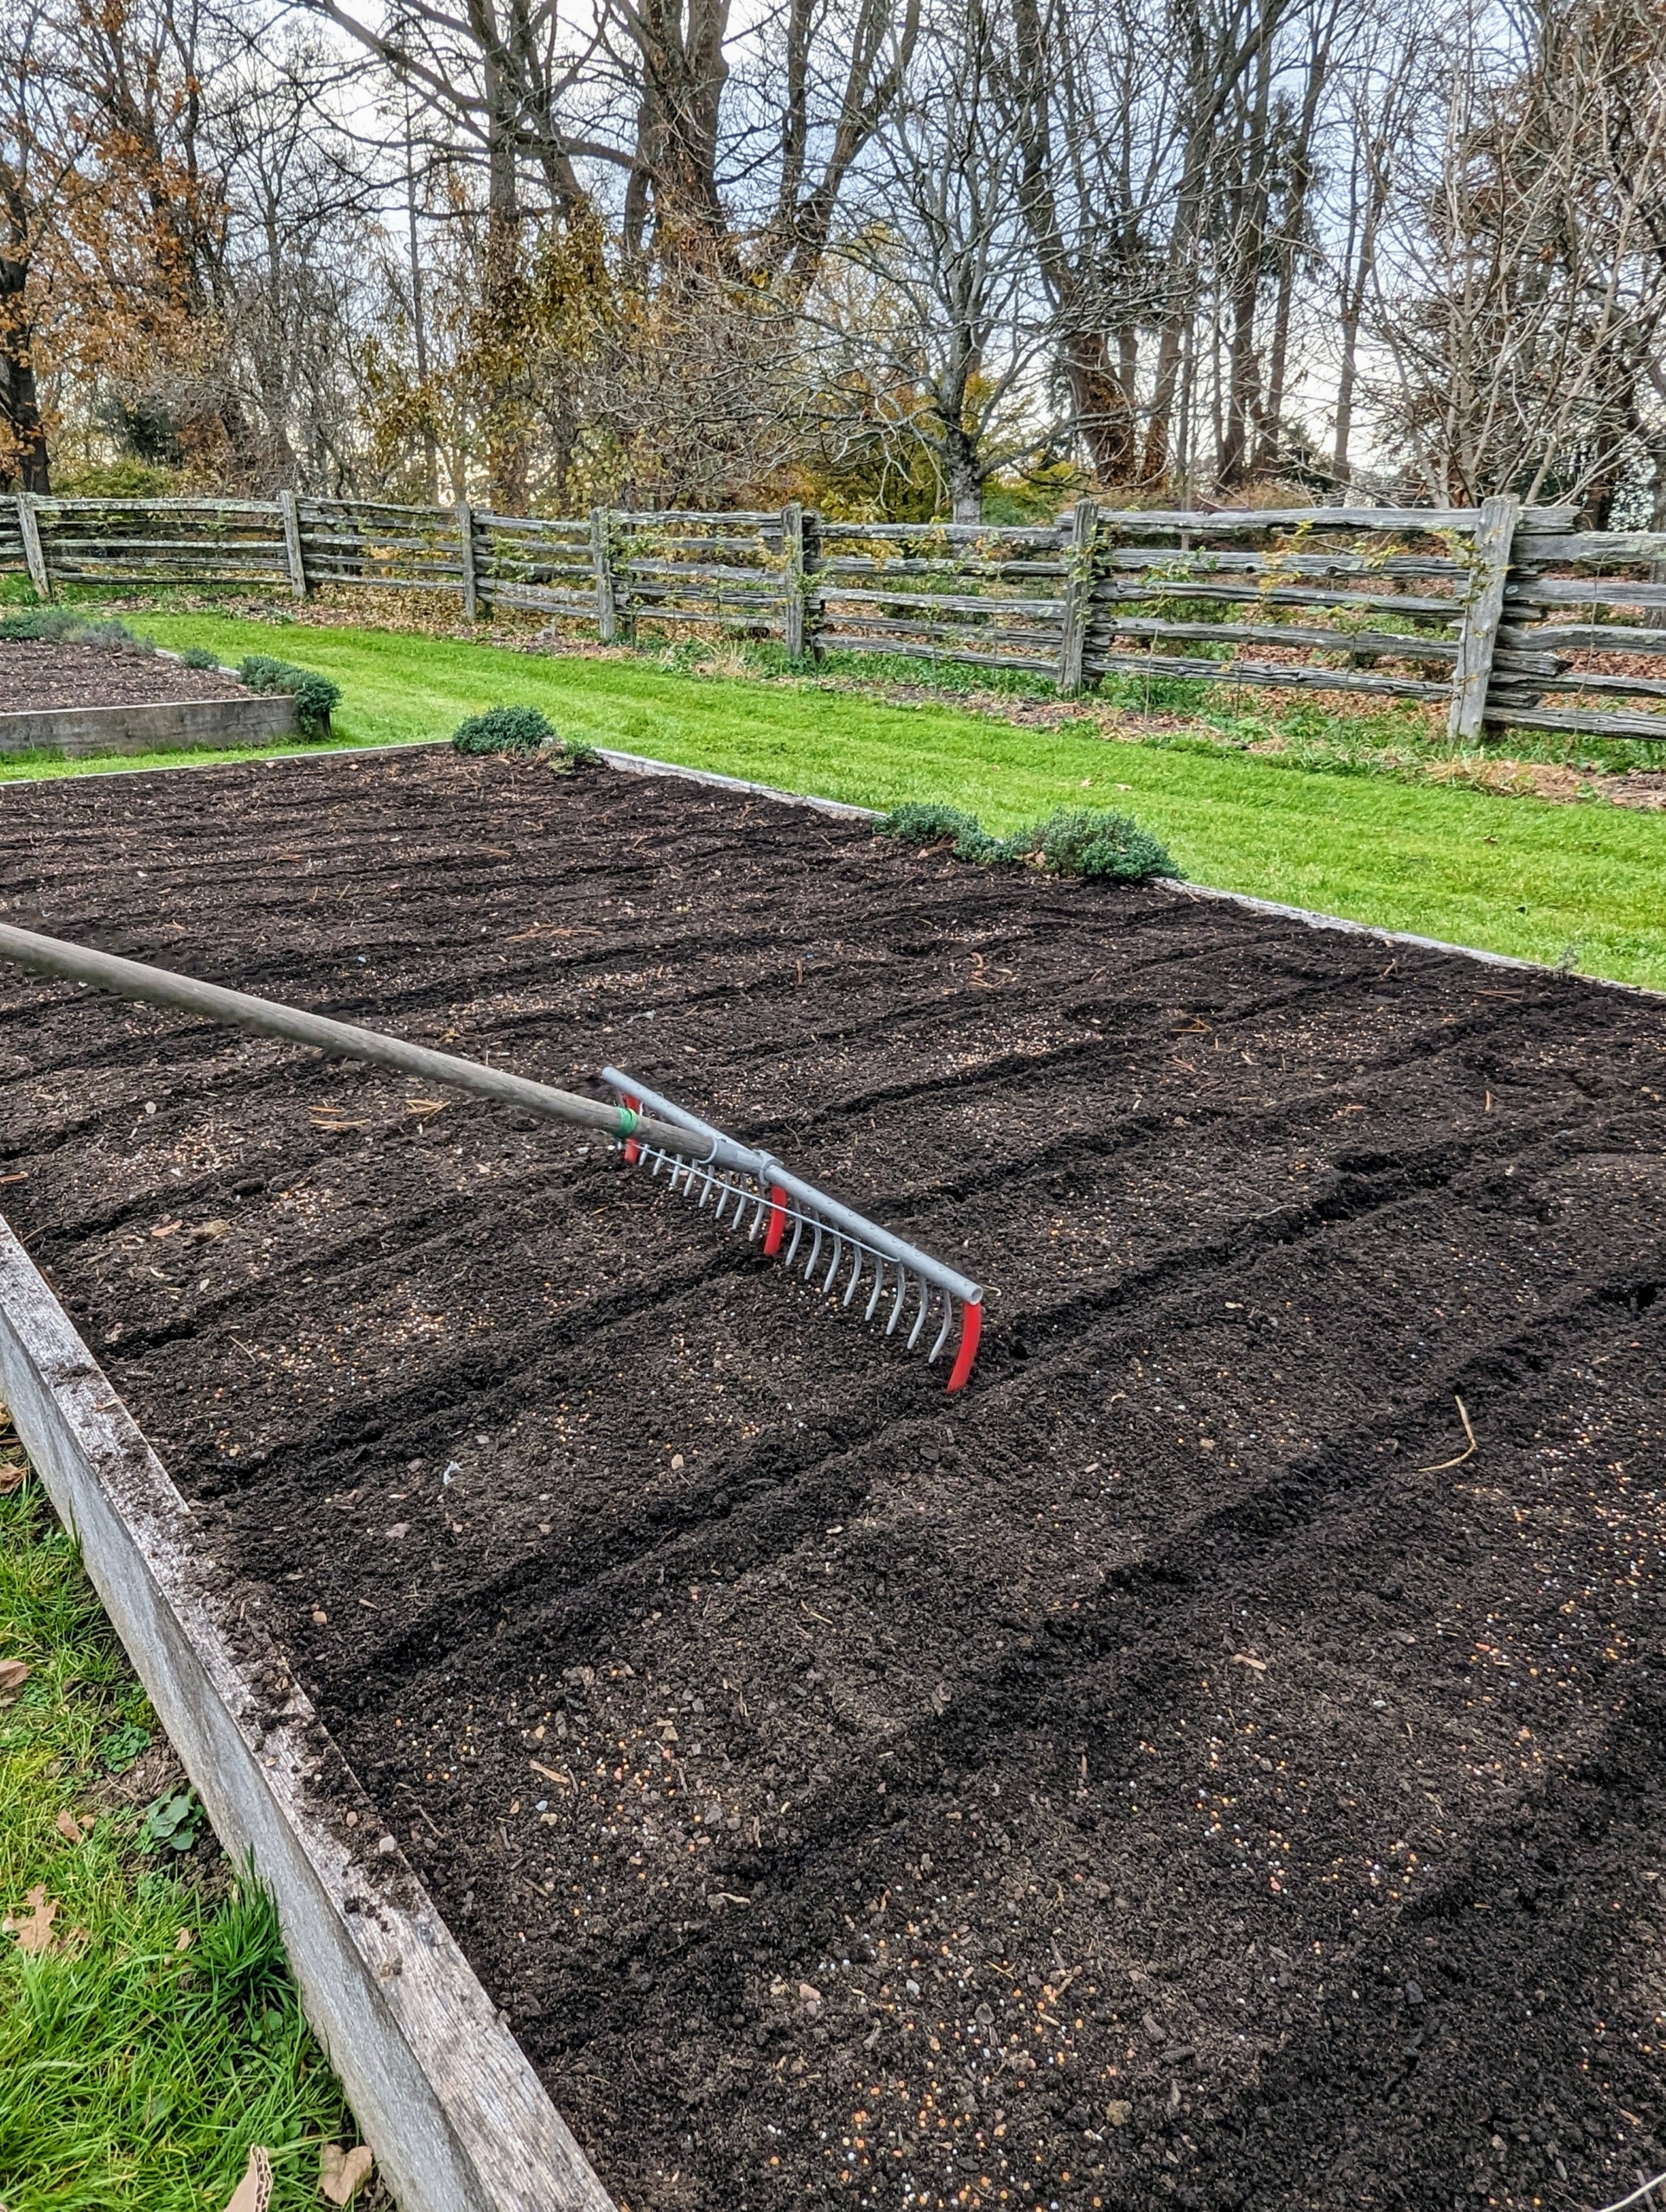
Next, Ryan makes the rows using the bed preparation rake from Johnny’s Selected Seeds. This tool allows him to easily create furrows in the soil. Hard plastic red tubes slide onto selected teeth of the rake to mark the rows.
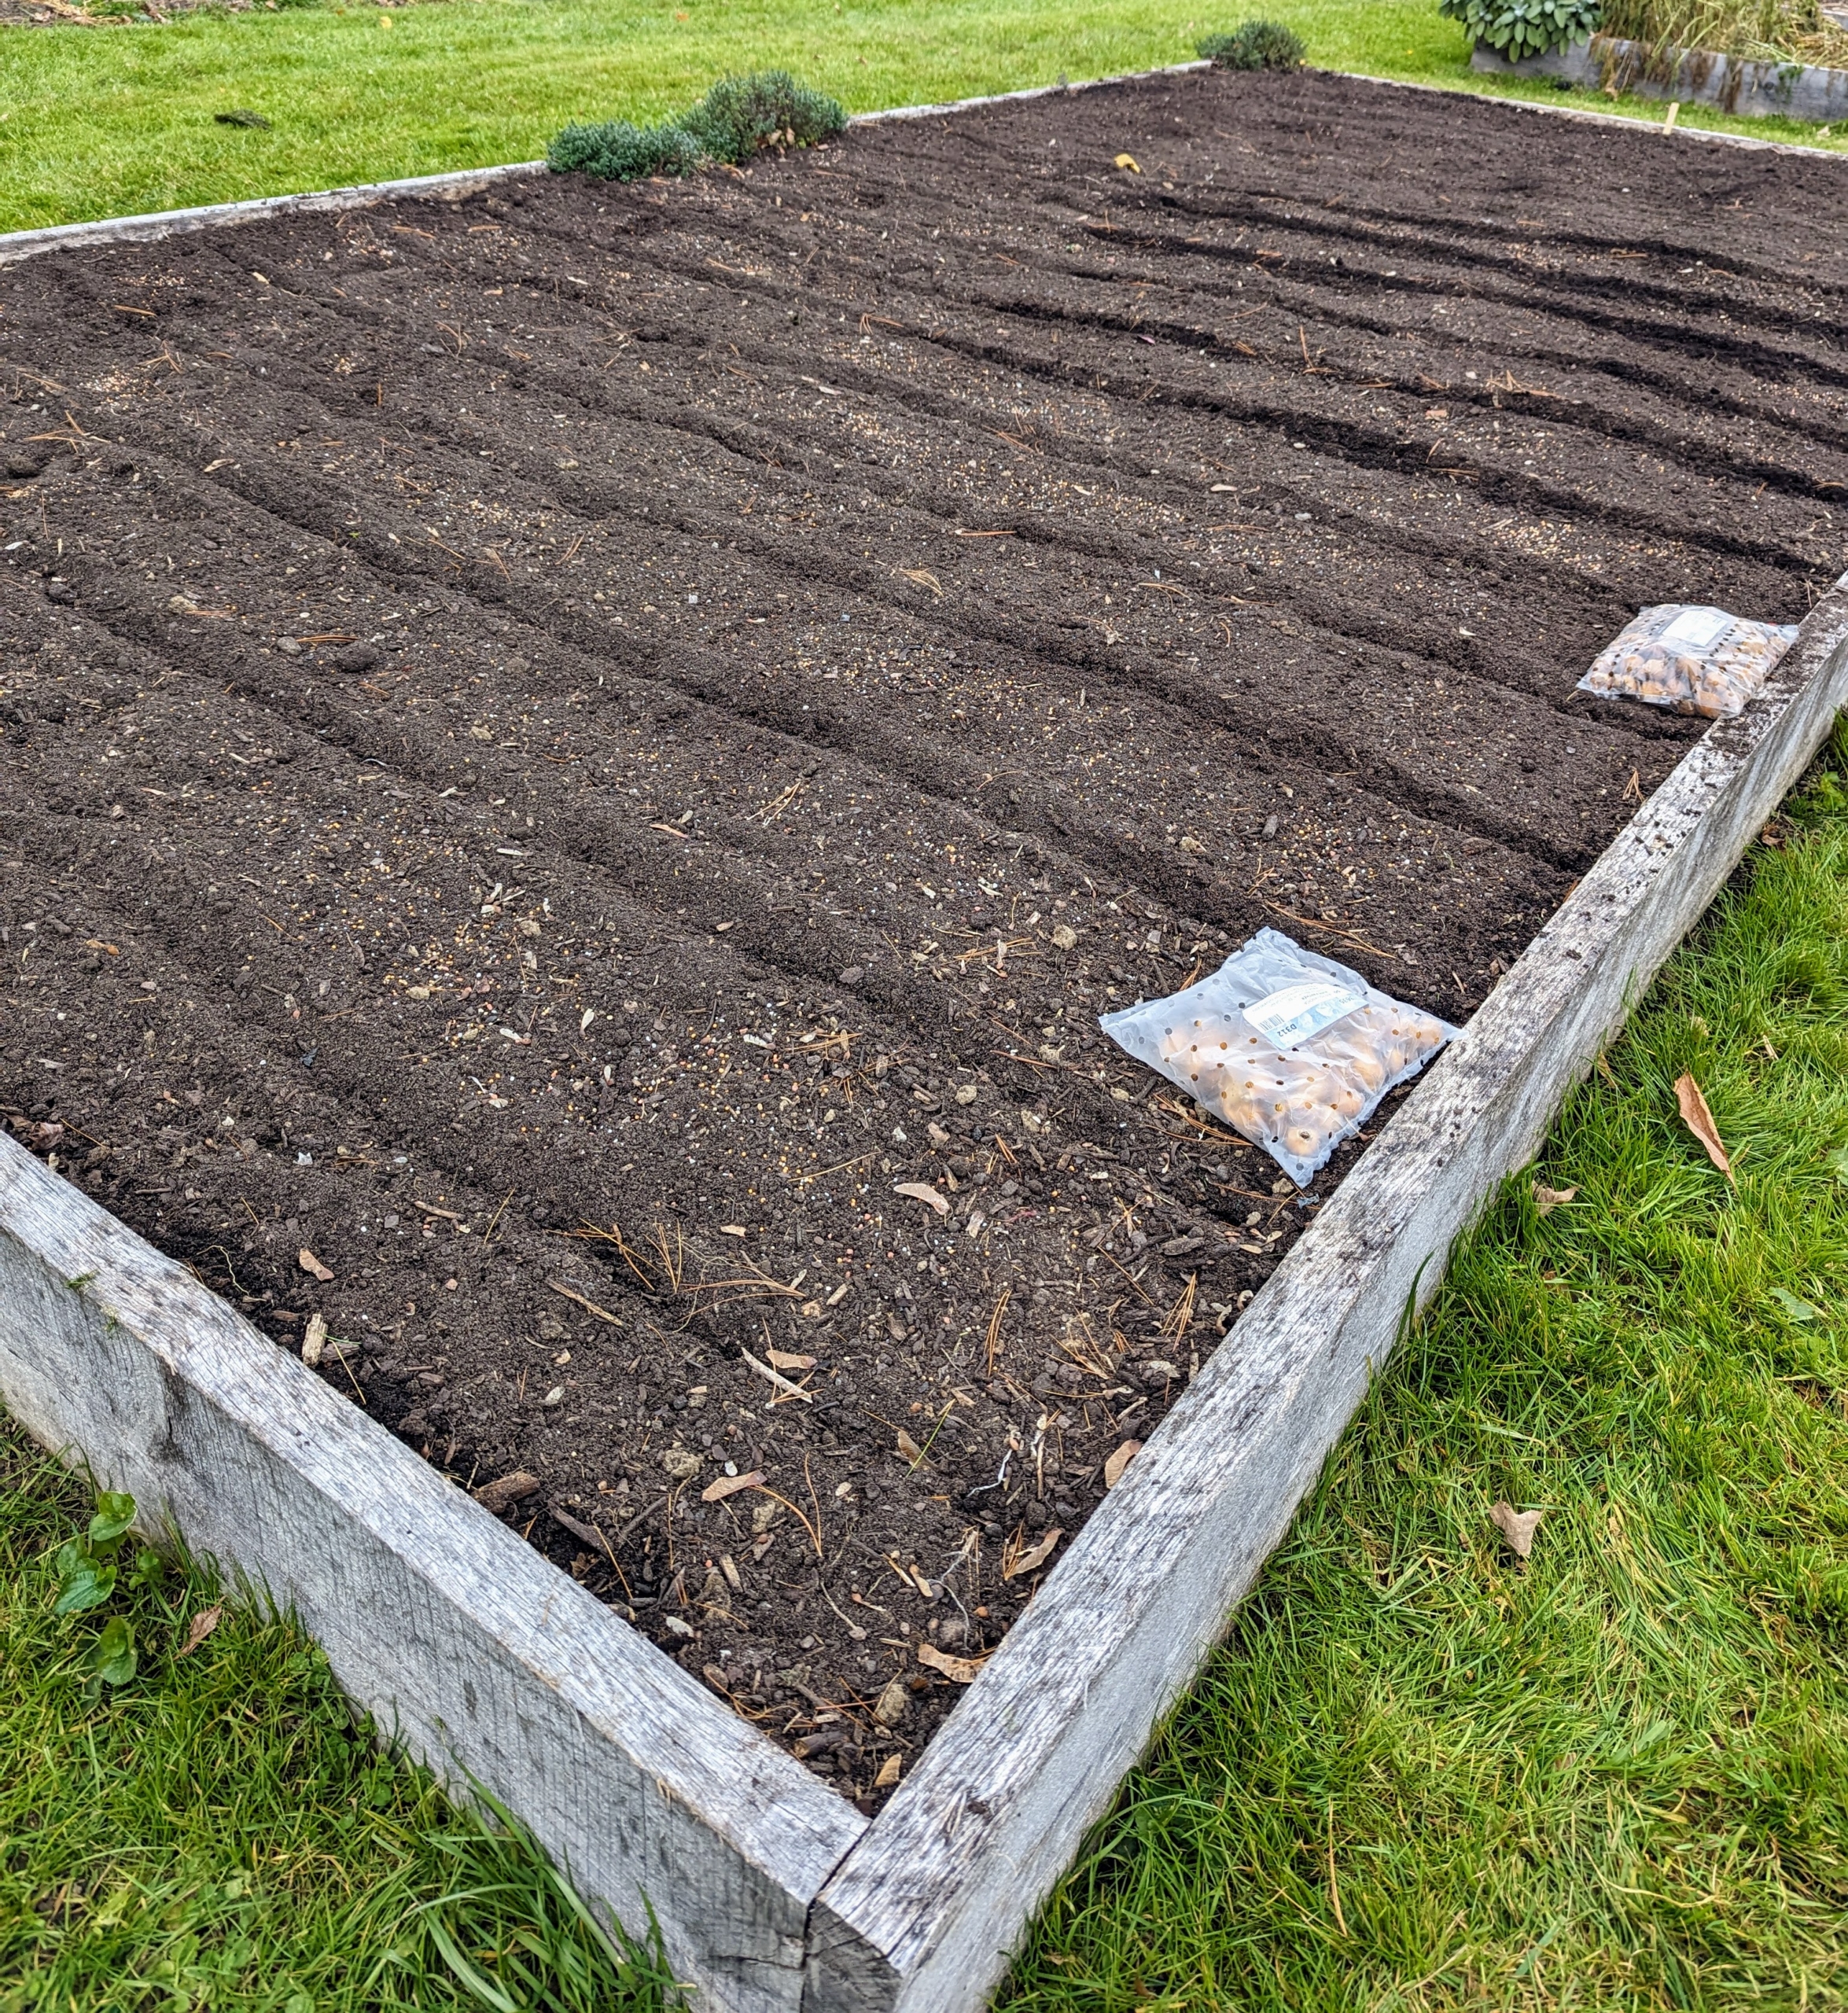
Here is the bed all ready for the bulbs.
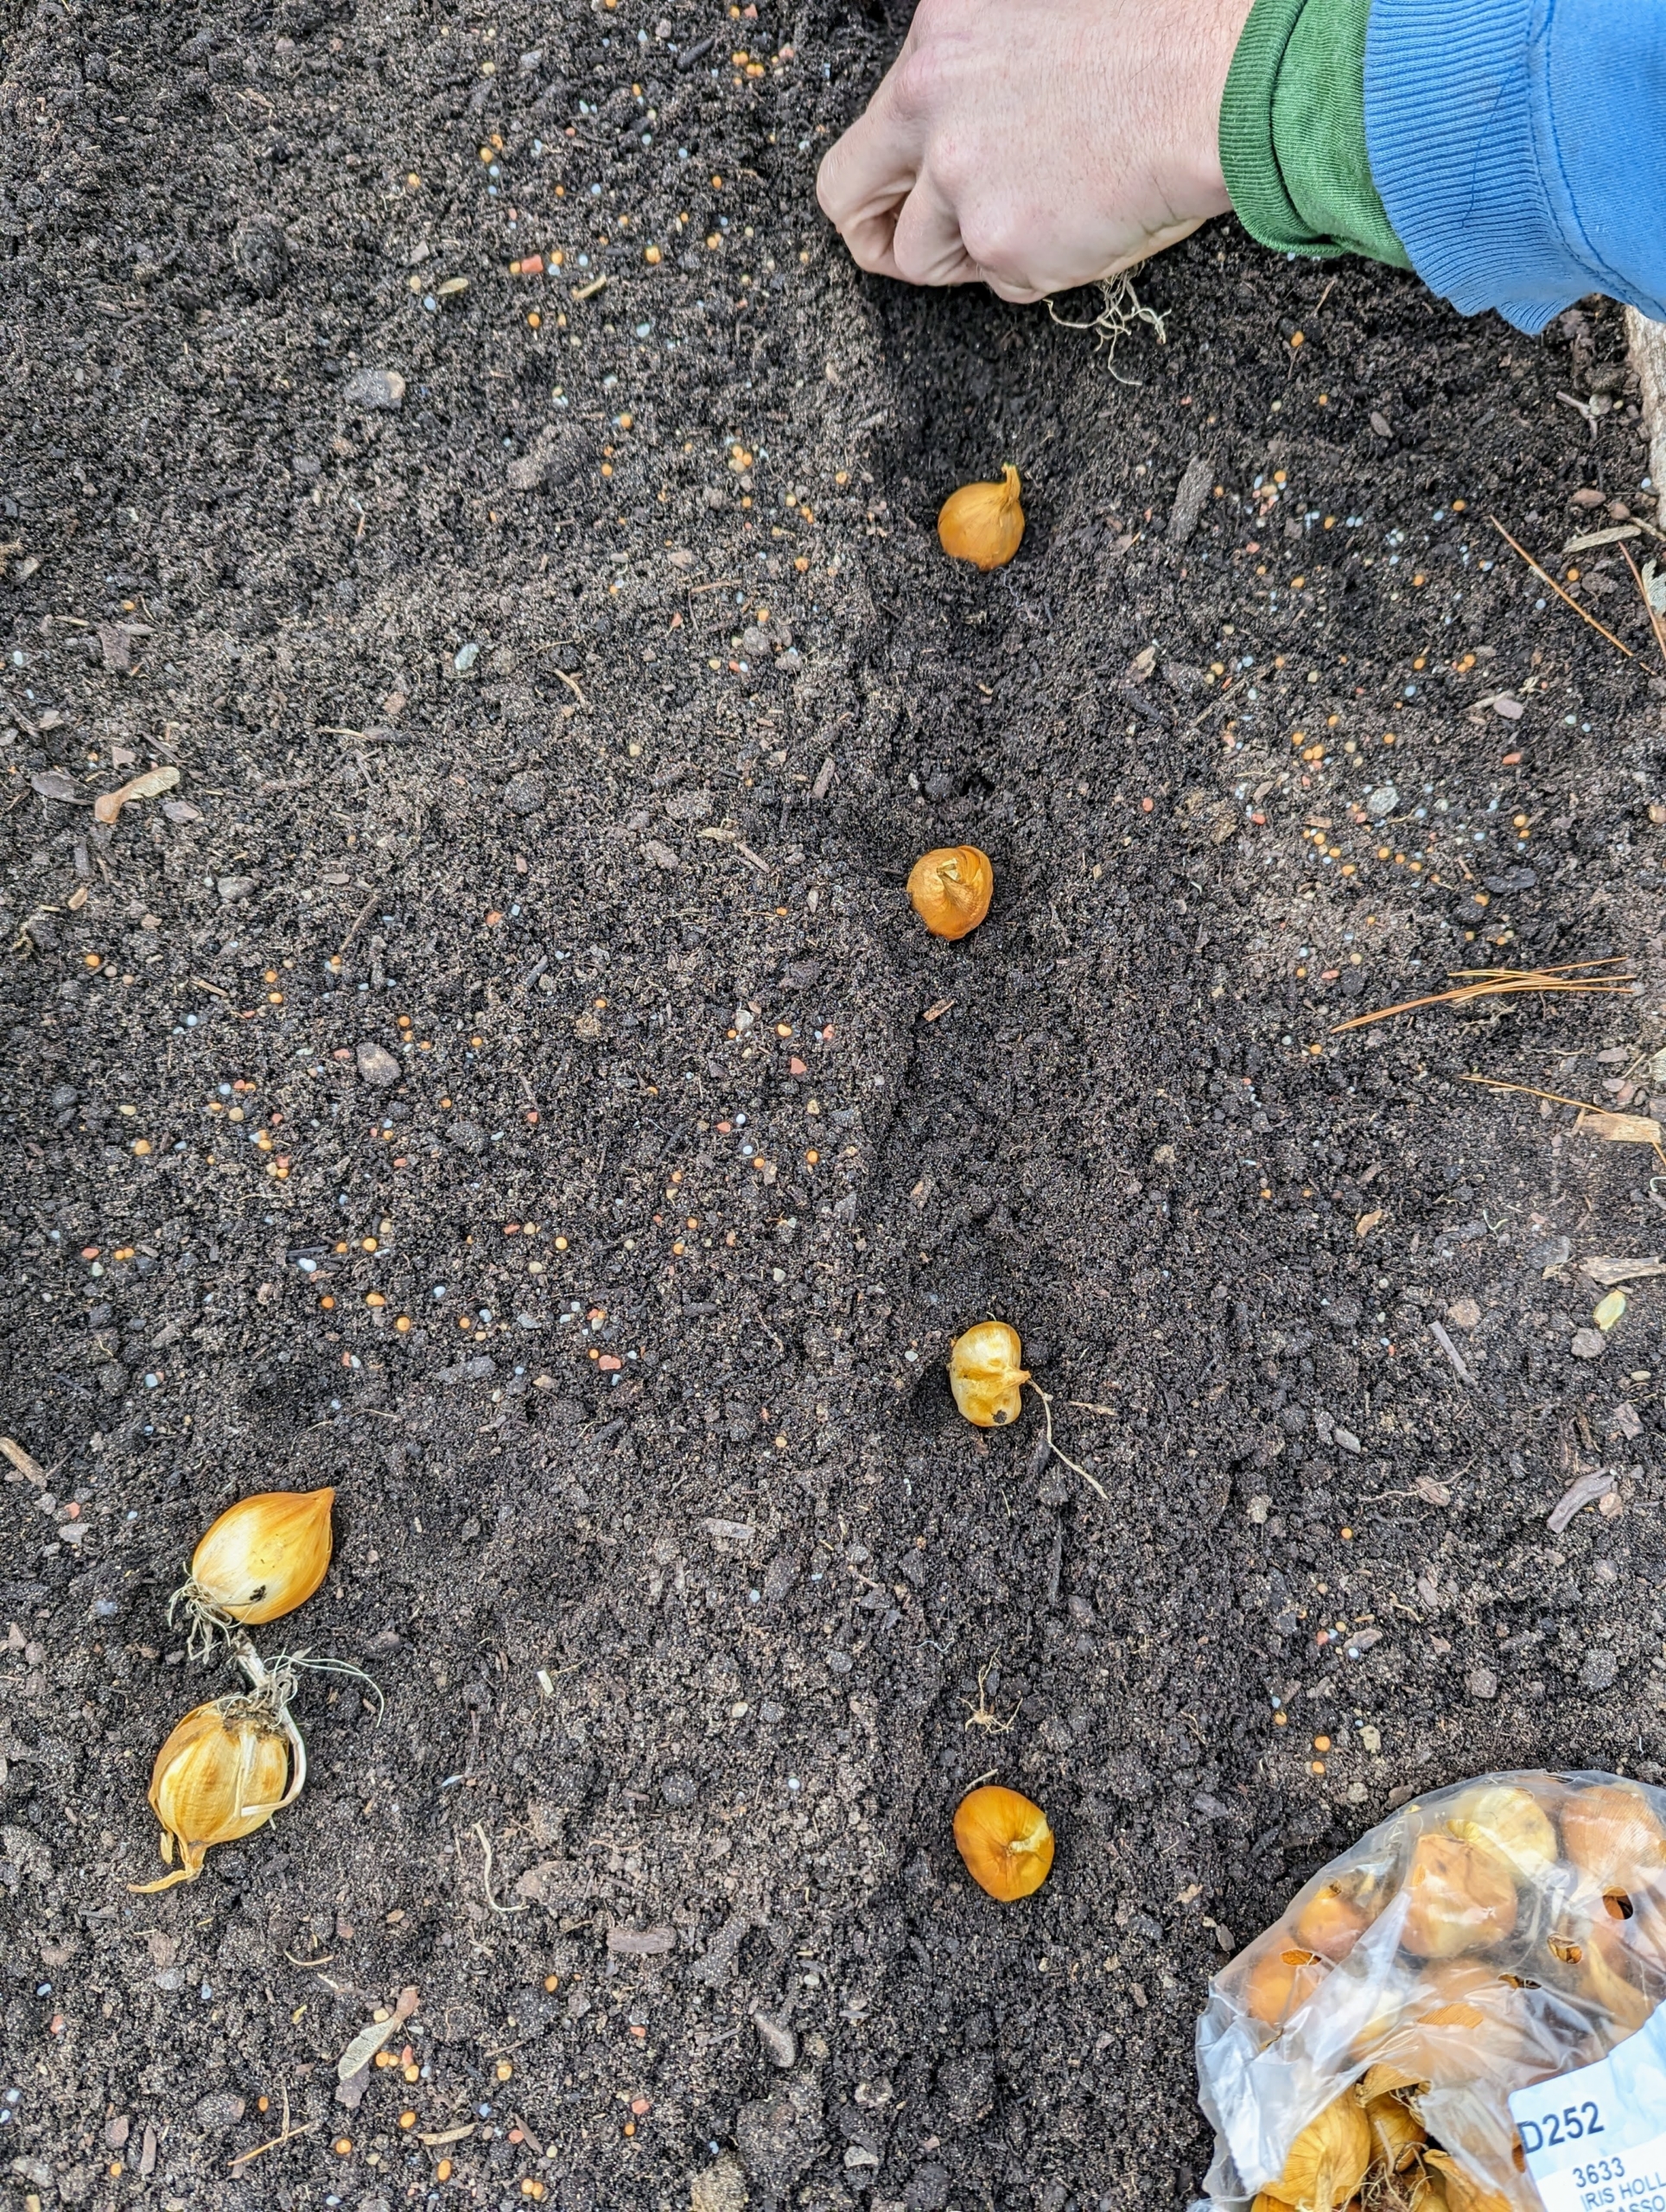
The bags of bulbs are placed on the bed where they will be planted.
The coinciding markers are put down next.
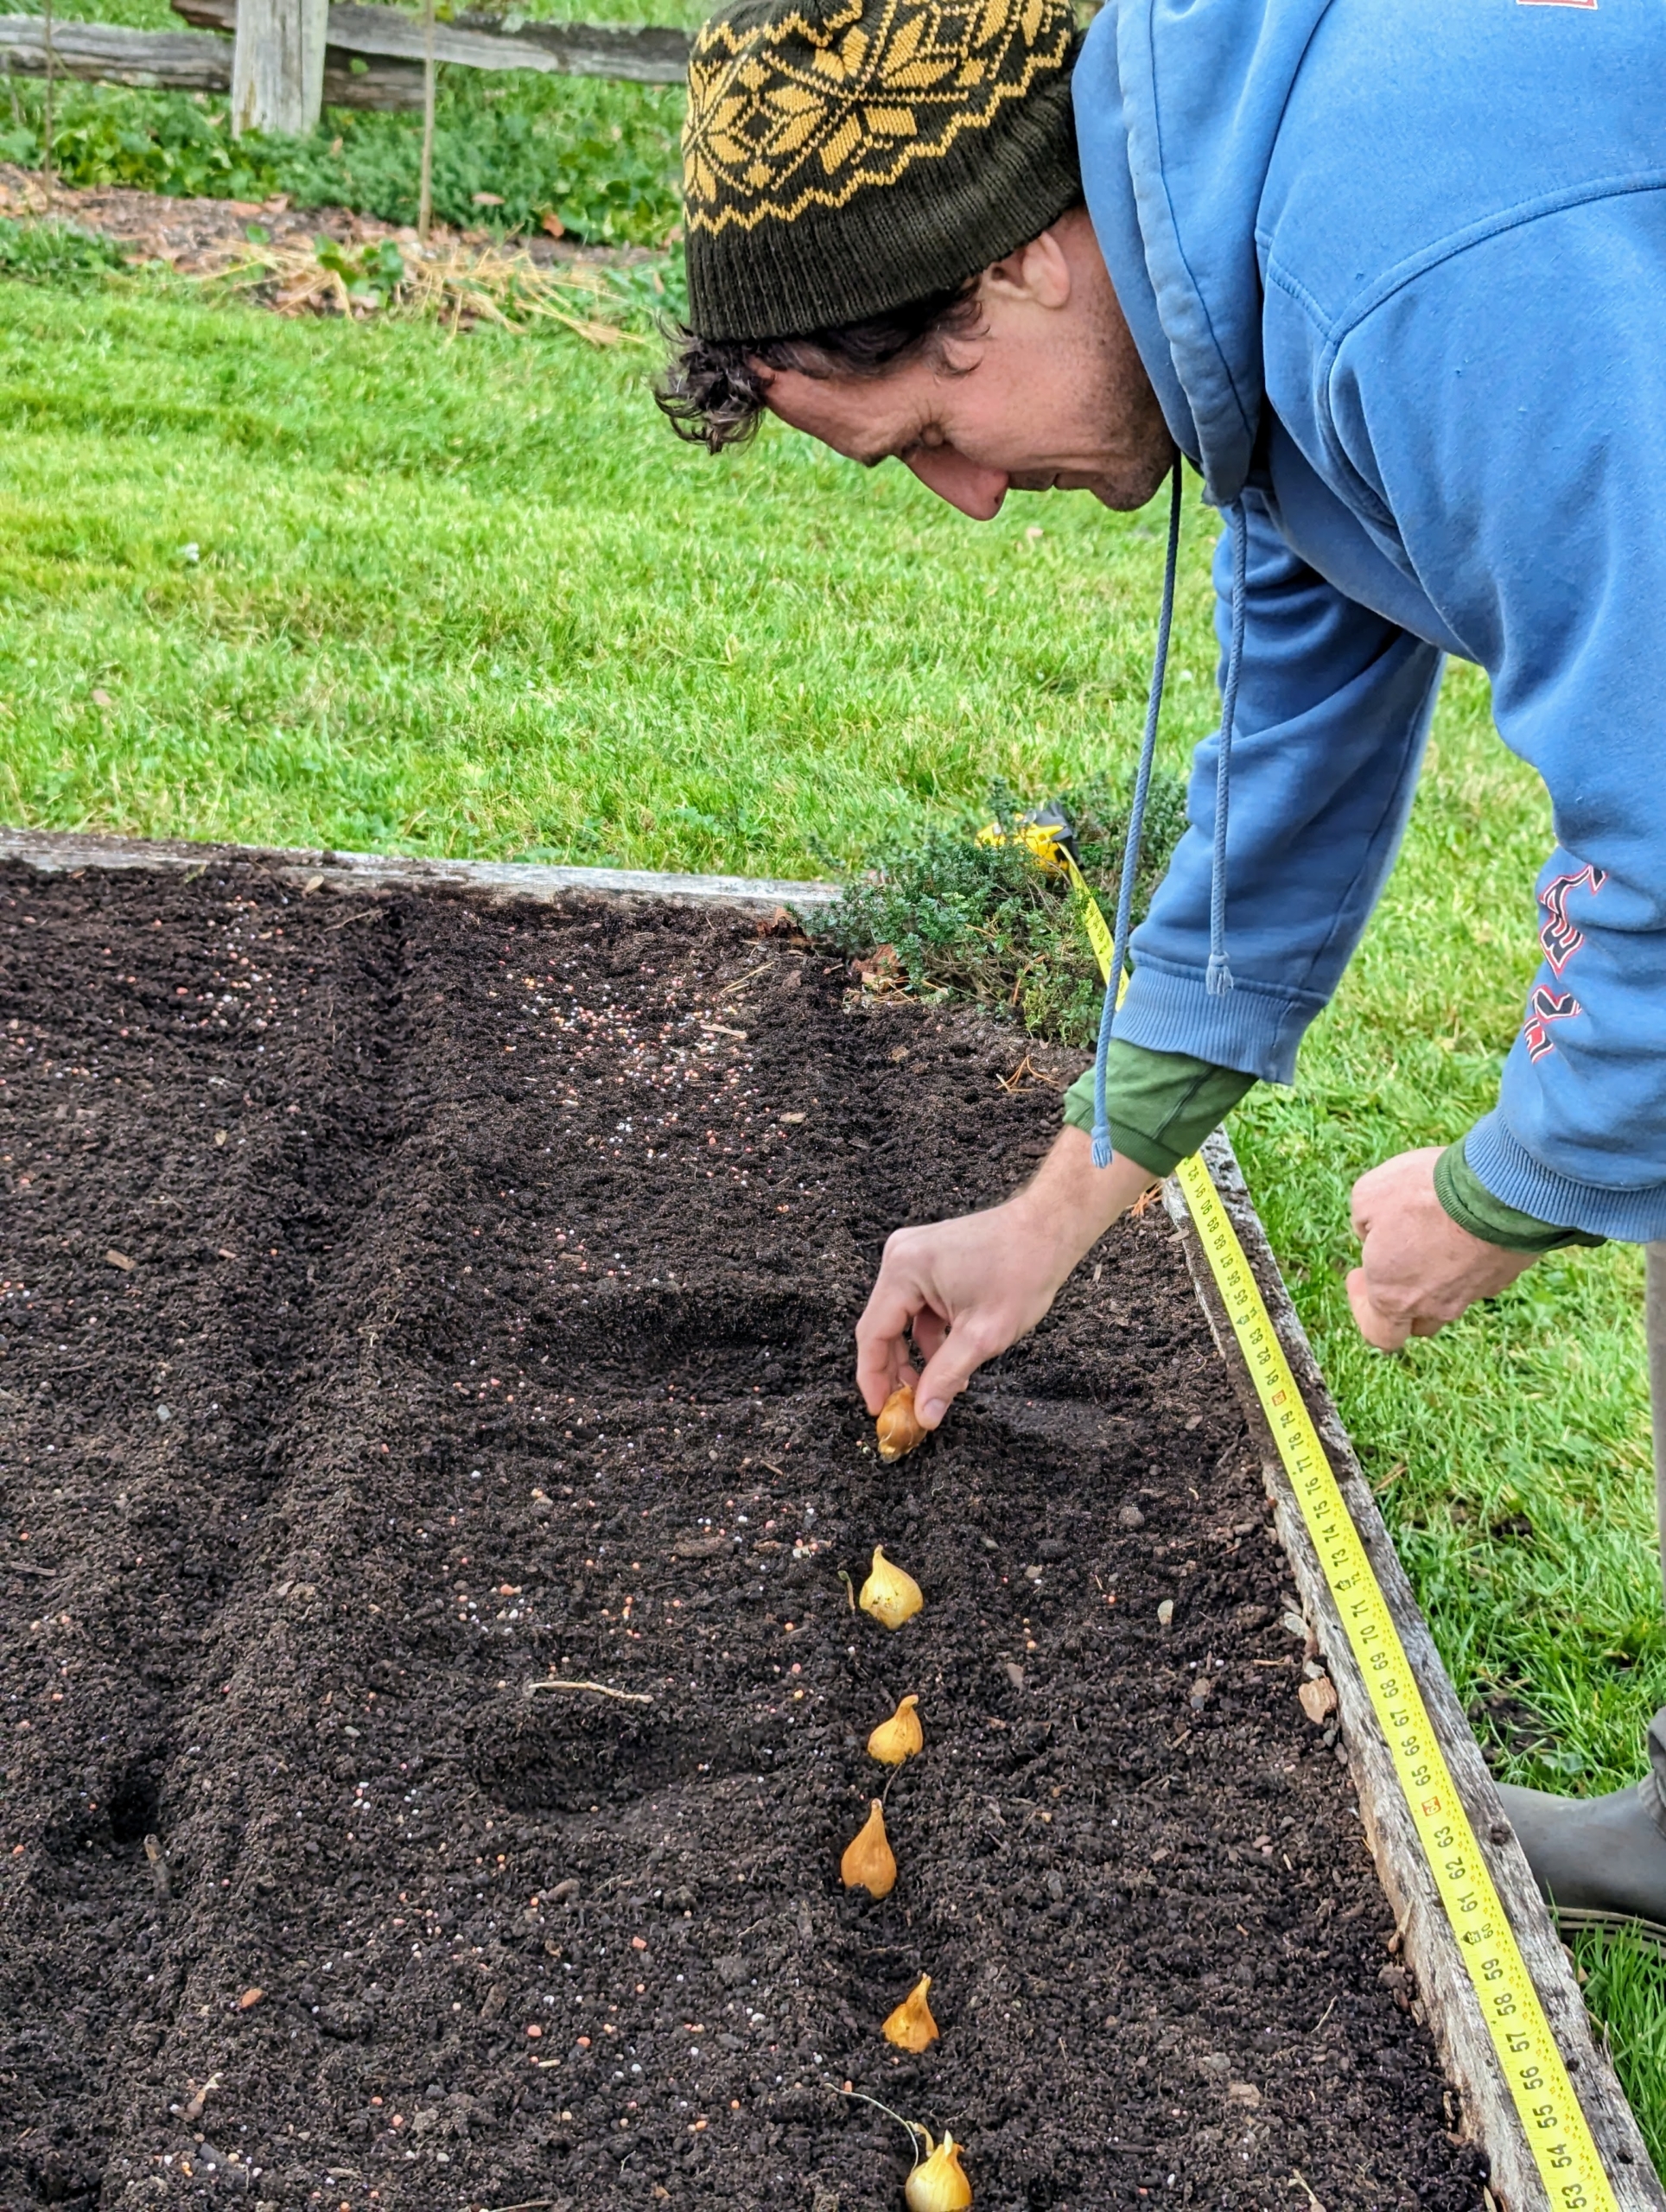
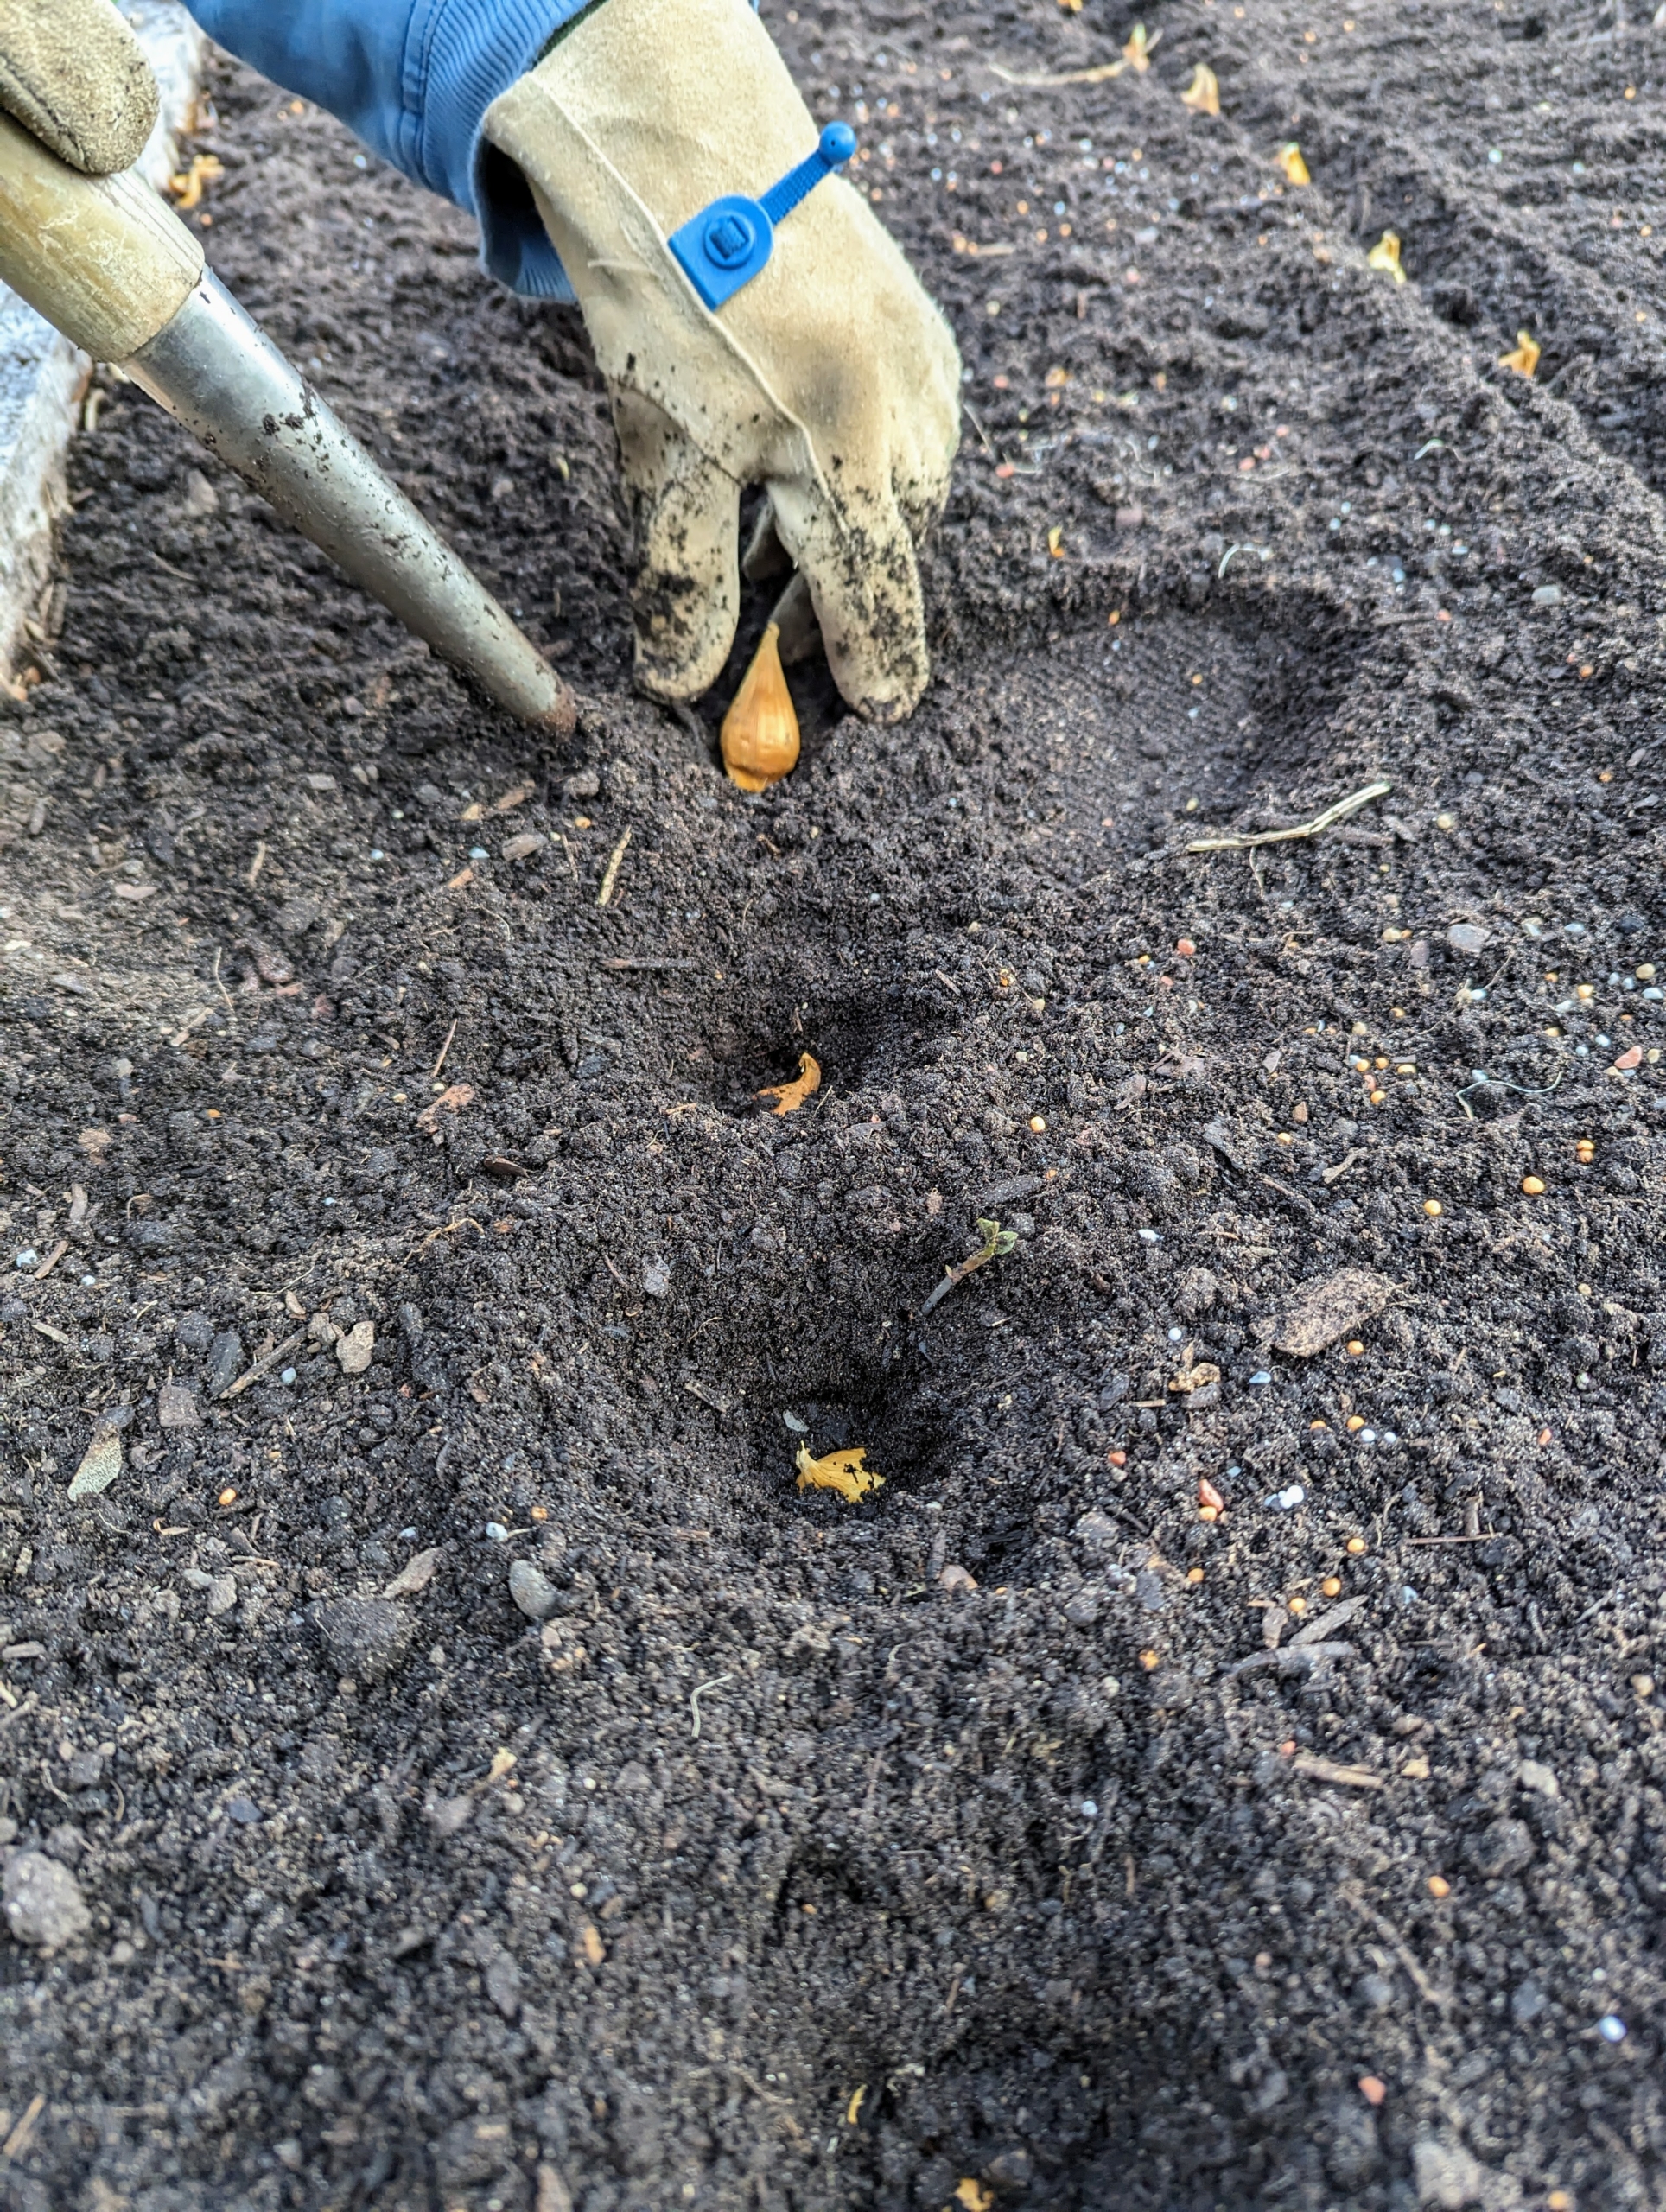
Ryan places each of the bulbs six-inches apart in the row.
Bulbs should always be planted pointed end up. On many bulbs, it is very easy to see which end should be faced up. If it is planted upside down, the flower will still grow, but it will likely take longer.
Spacing the bulbs carefully takes a bit of time. On the right is a tape measure, so Ryan can be sure they are all planted equally spaced. We take a lot of photos of my gardens, so it is also important to plant everything properly, so I can share the most precise and beautiful photos with all of you.
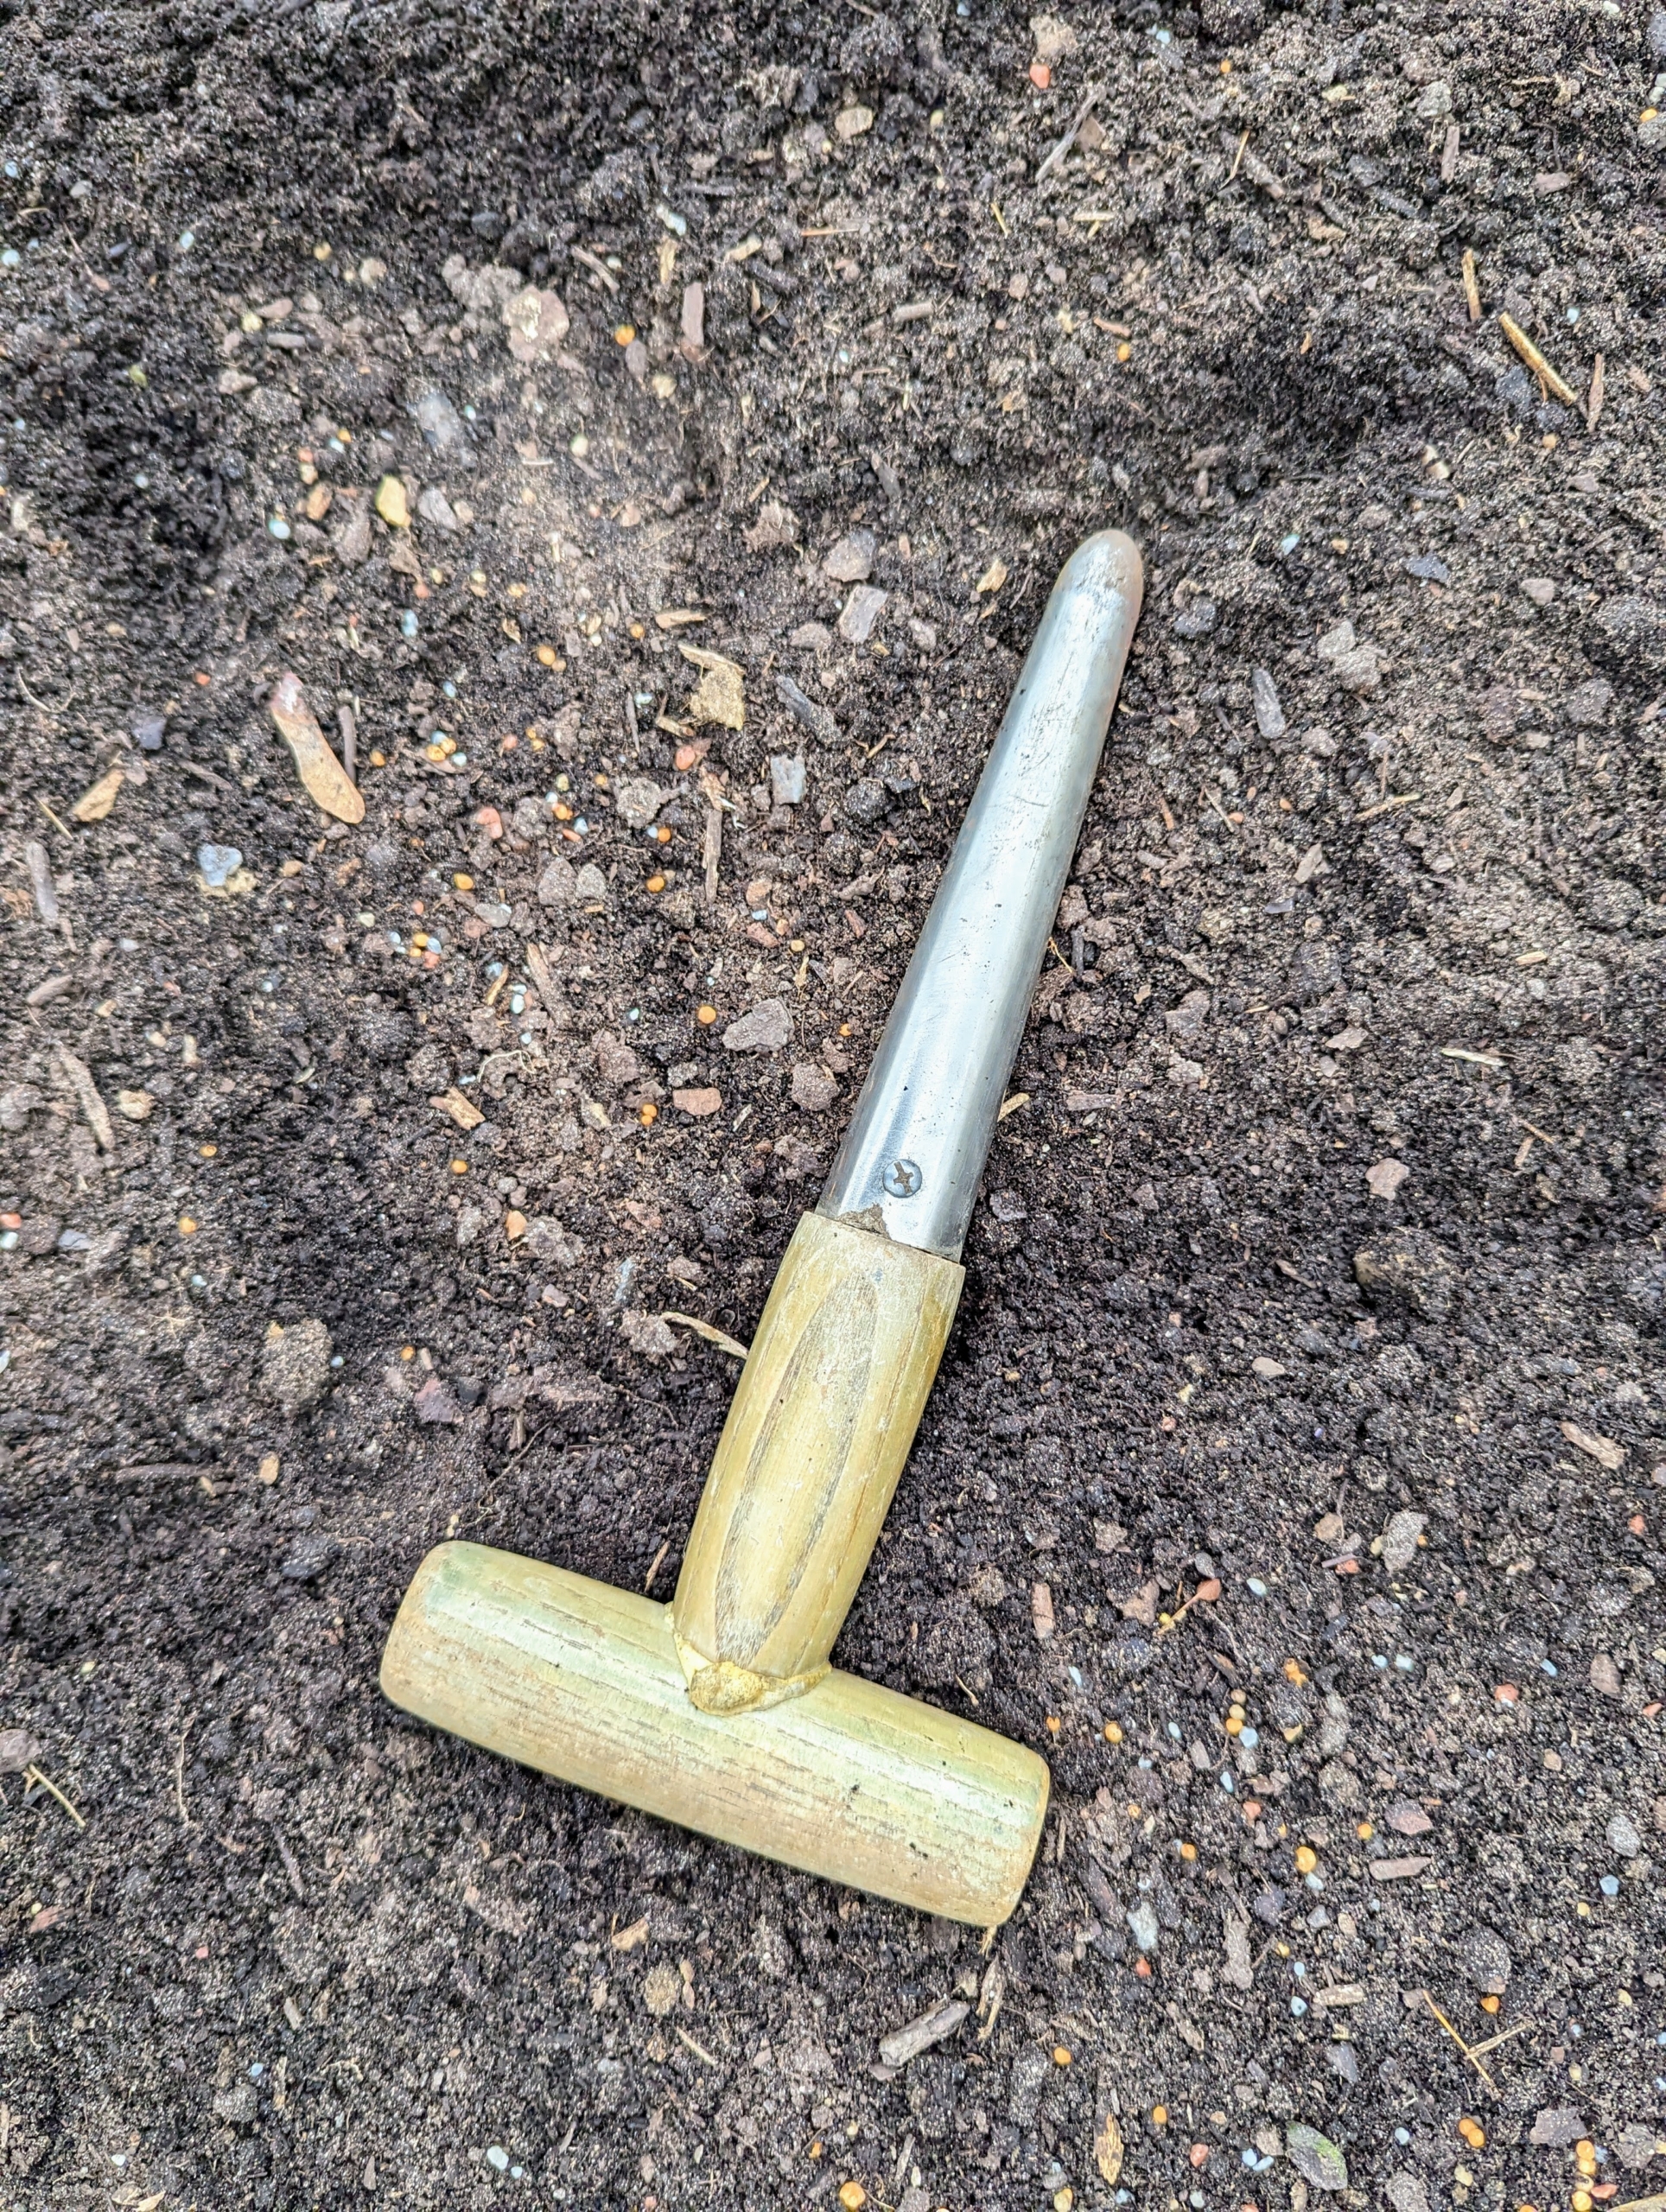
For these Dutch iris bulbs, Ryan uses a dibber. A dibber or dibble or dibbler is a pointed wooden stick for making holes in the ground so seeds, seedlings or small bulbs can be planted. Dibbers come in a variety of designs including the straight dibber, T-handled dibber, trowel dibber, and an L-shaped dibber. This is a T-handled dibber.
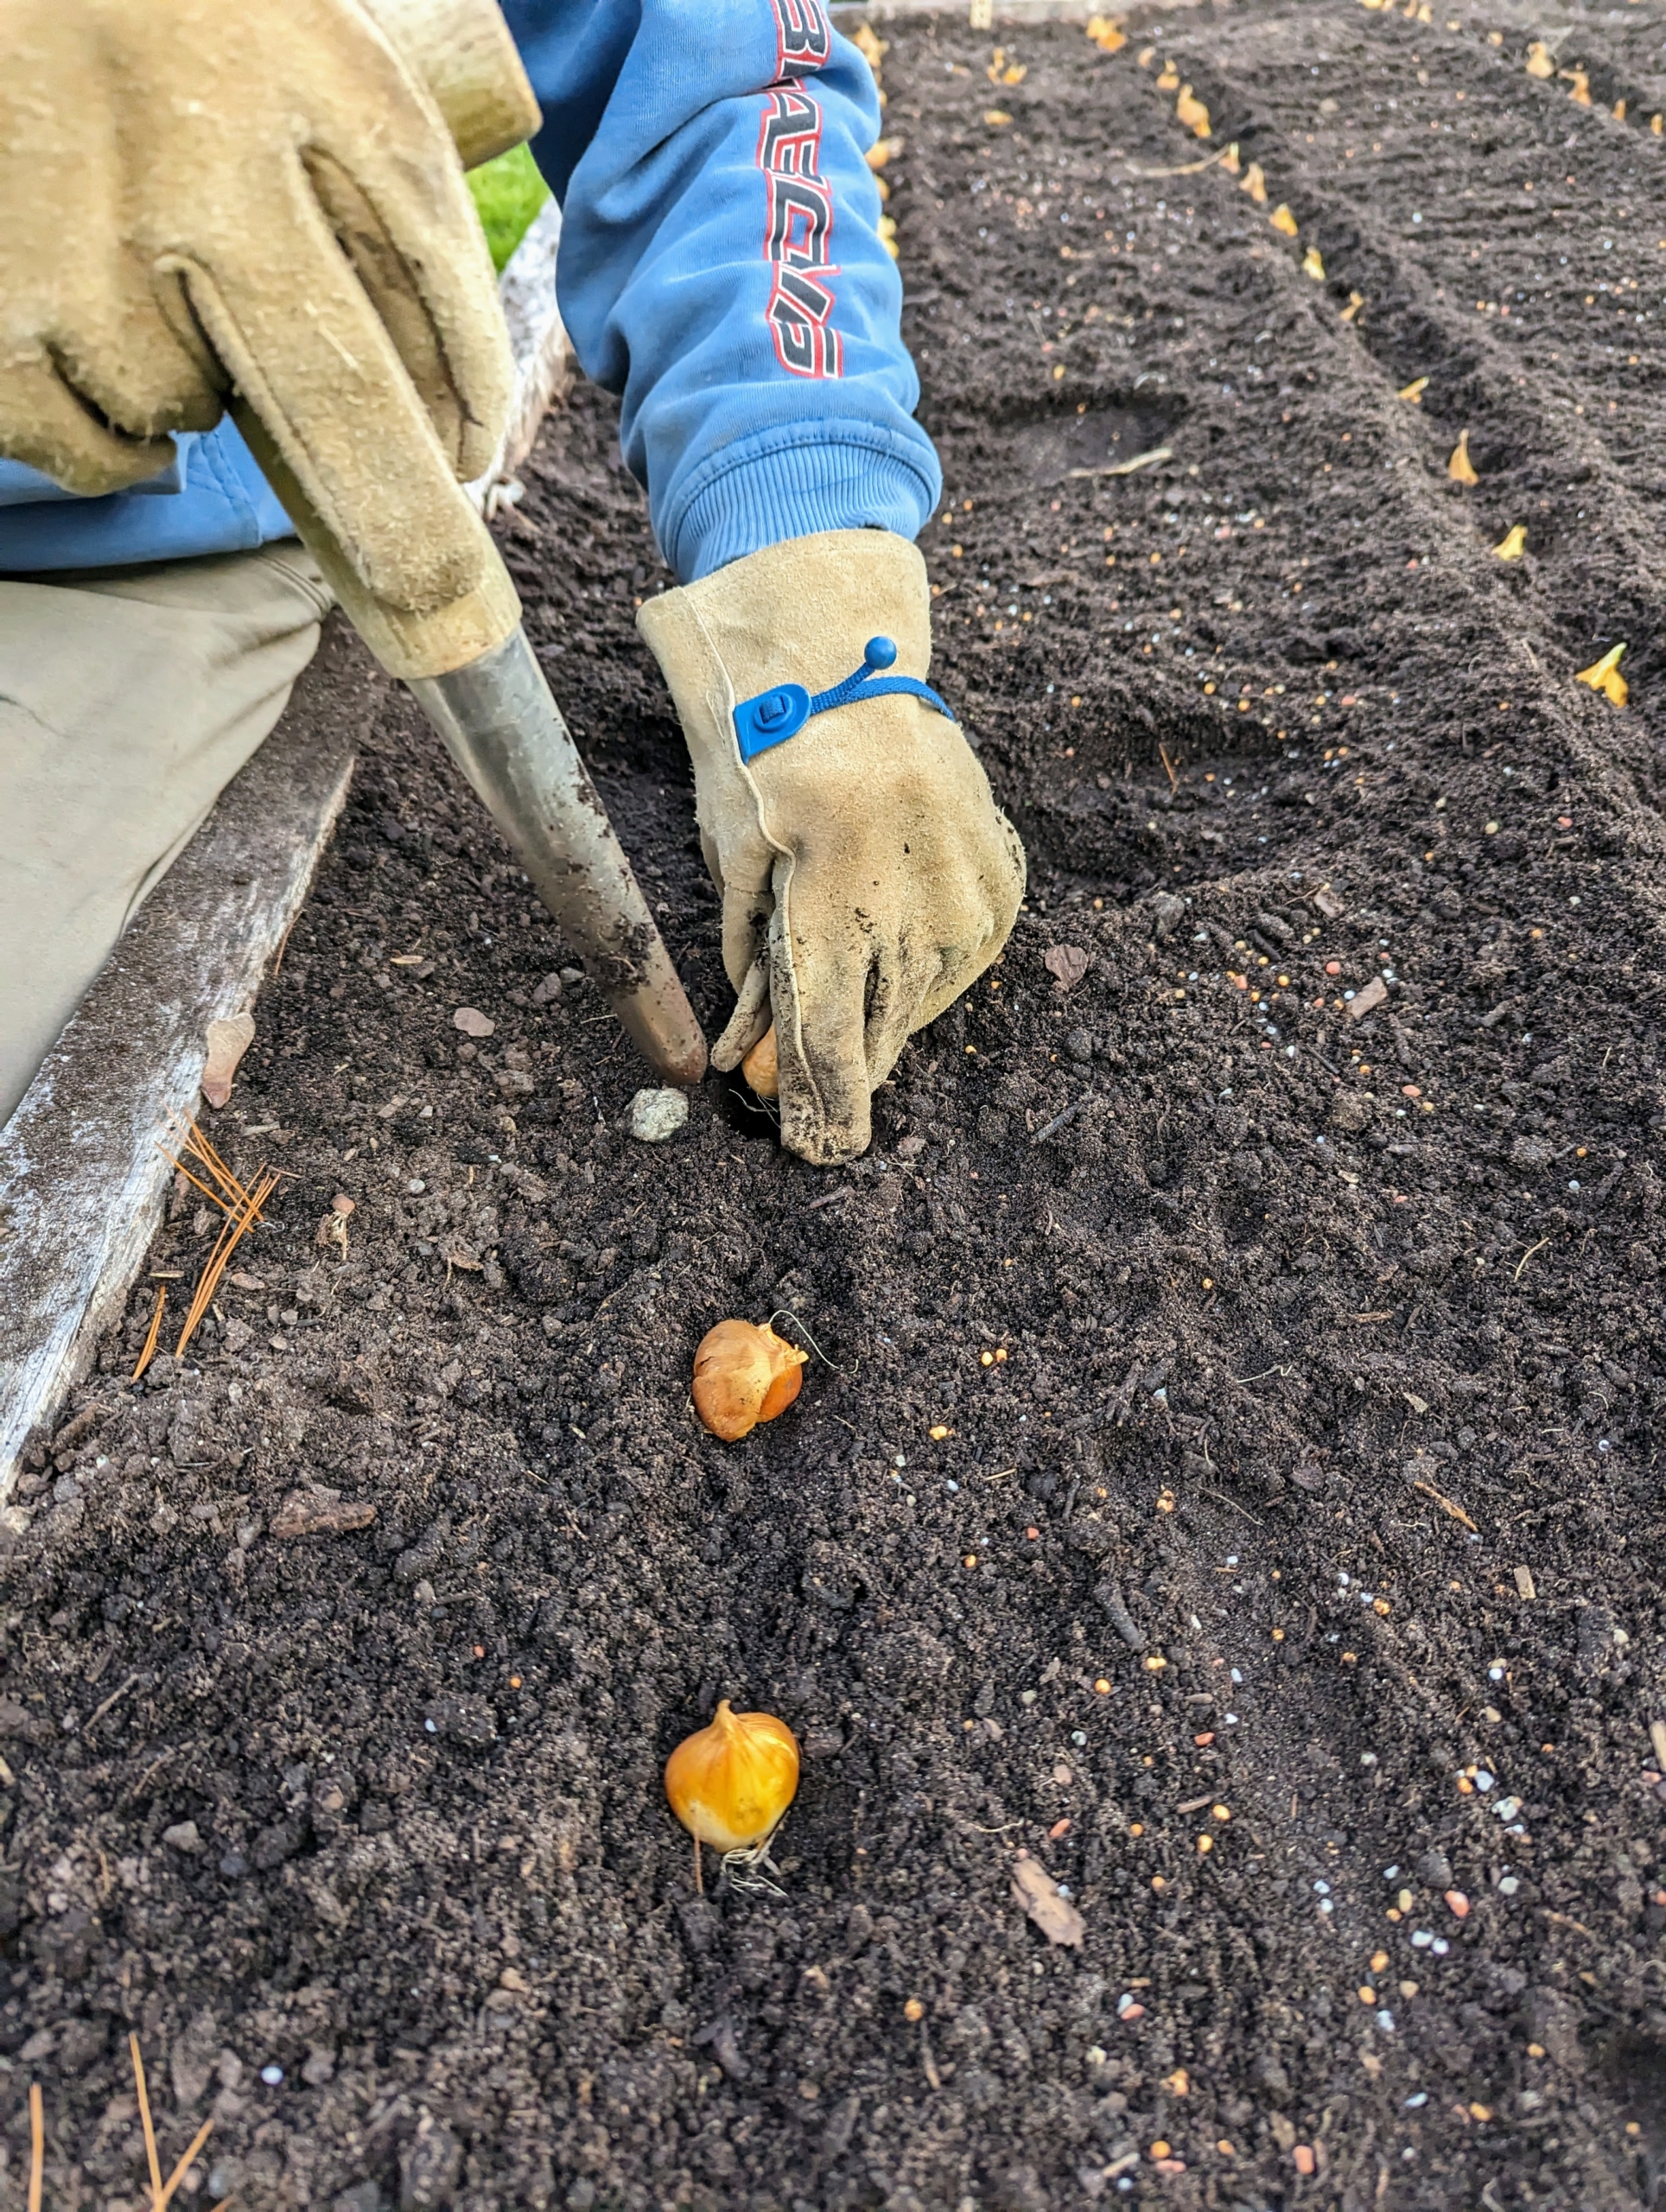
Then, once all the bulbs are in their designated rows, Ryan pushes the dibber into the soil making a hole where the bulb will be planted.
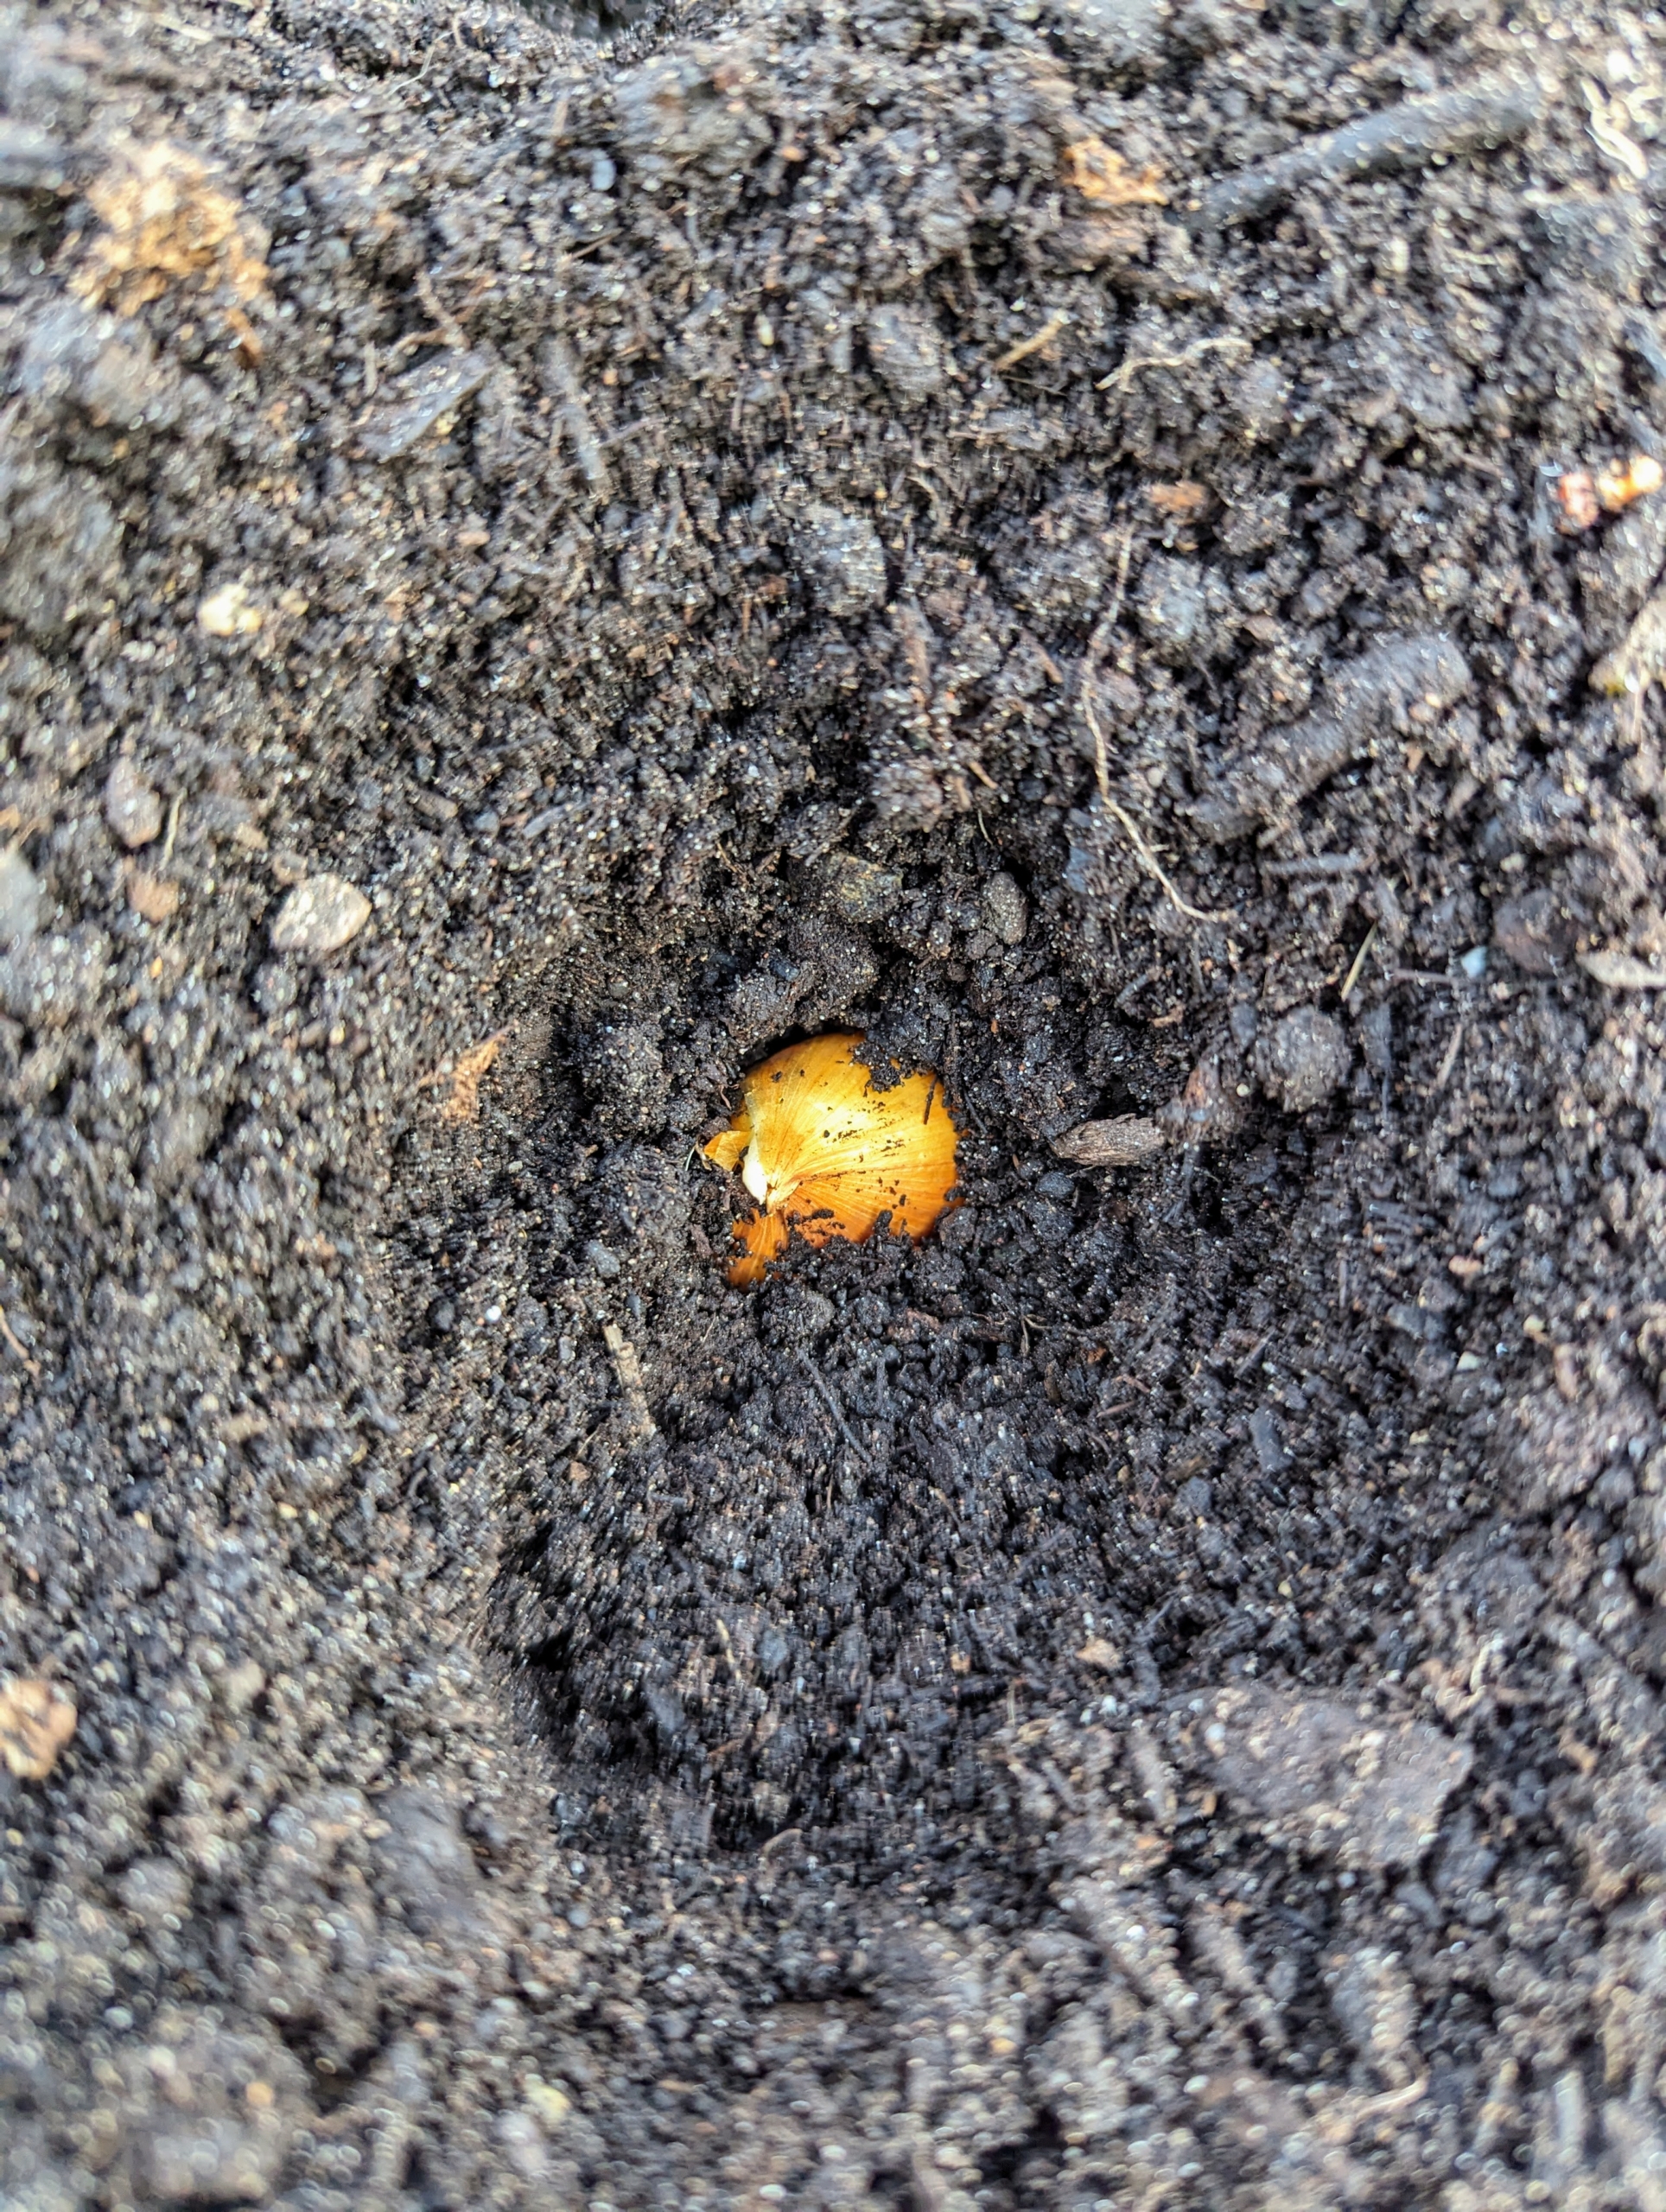
Smaller bulbs can be planted about five-inches deep.
Here is the bulb in the soil.
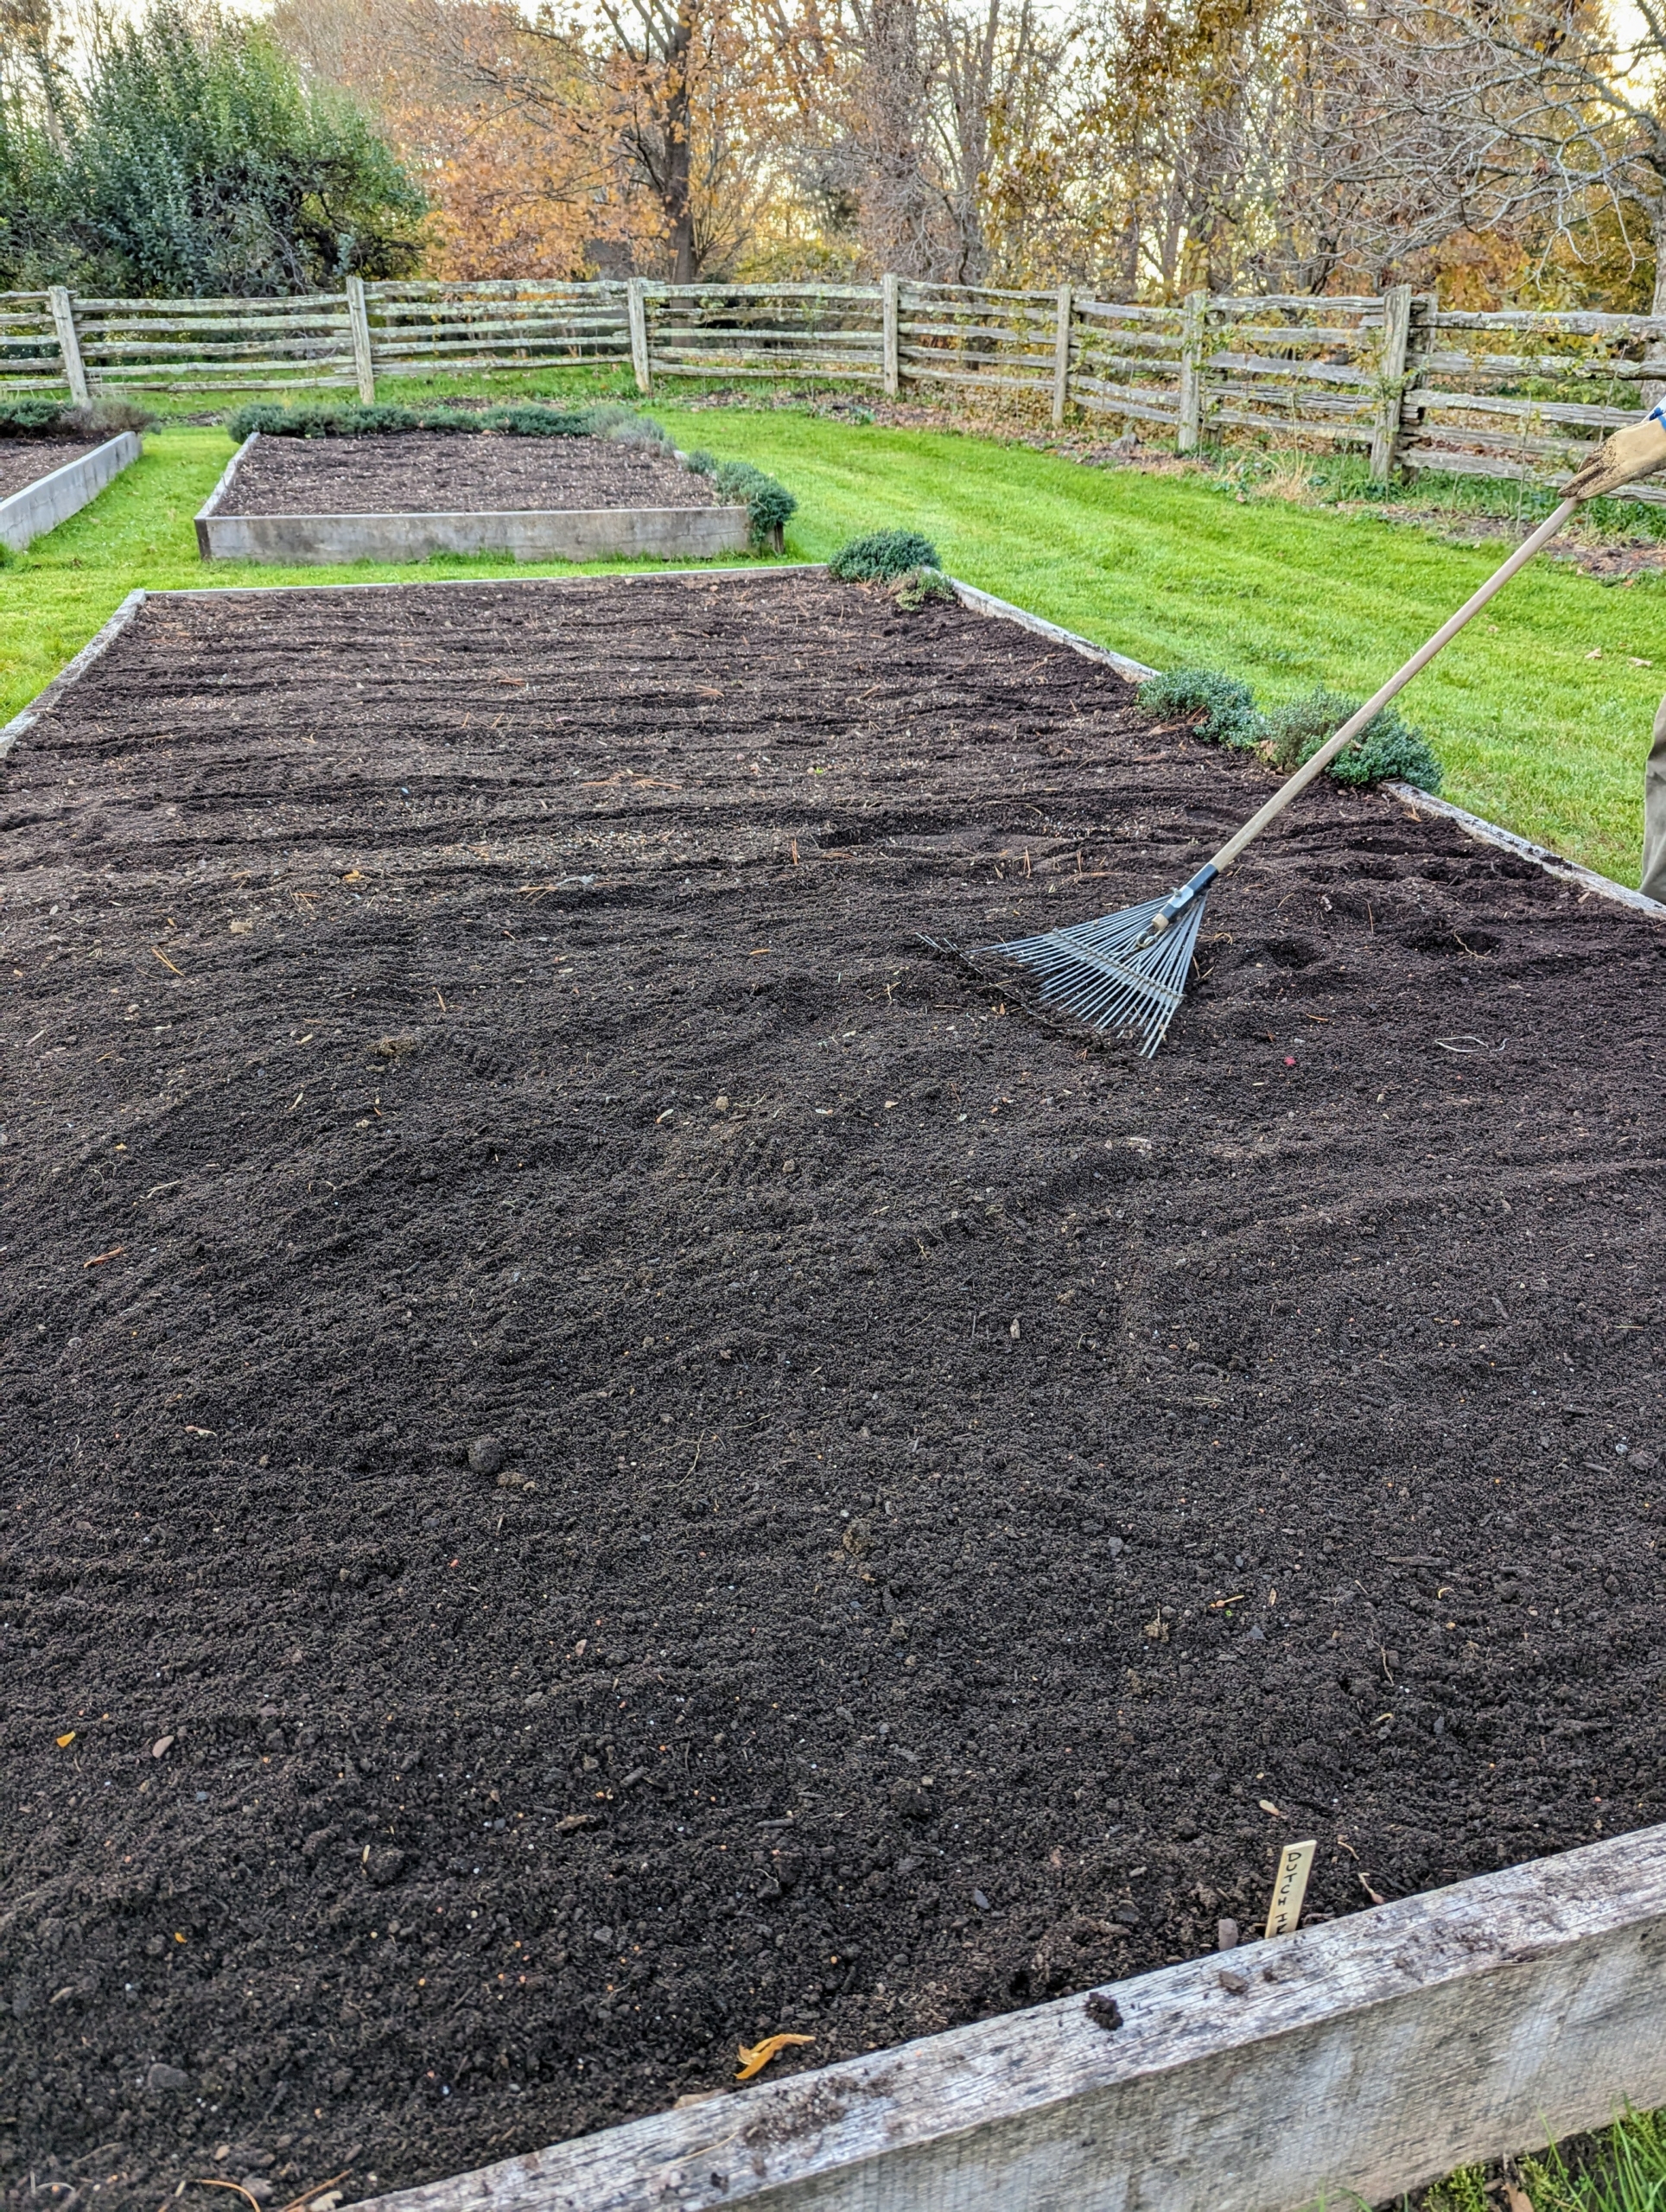
Ryan plants all the bulbs before backfilling, so he can keep track of the planted holes and rows.
And then it’s time to rake this side of the bed. The other side will be done next. Dutch iris bulbs are planted around the same time as tulips and daffodils, so be sure to plan accordingly. These will look so beautiful when they bloom in spring – I can’t wait.