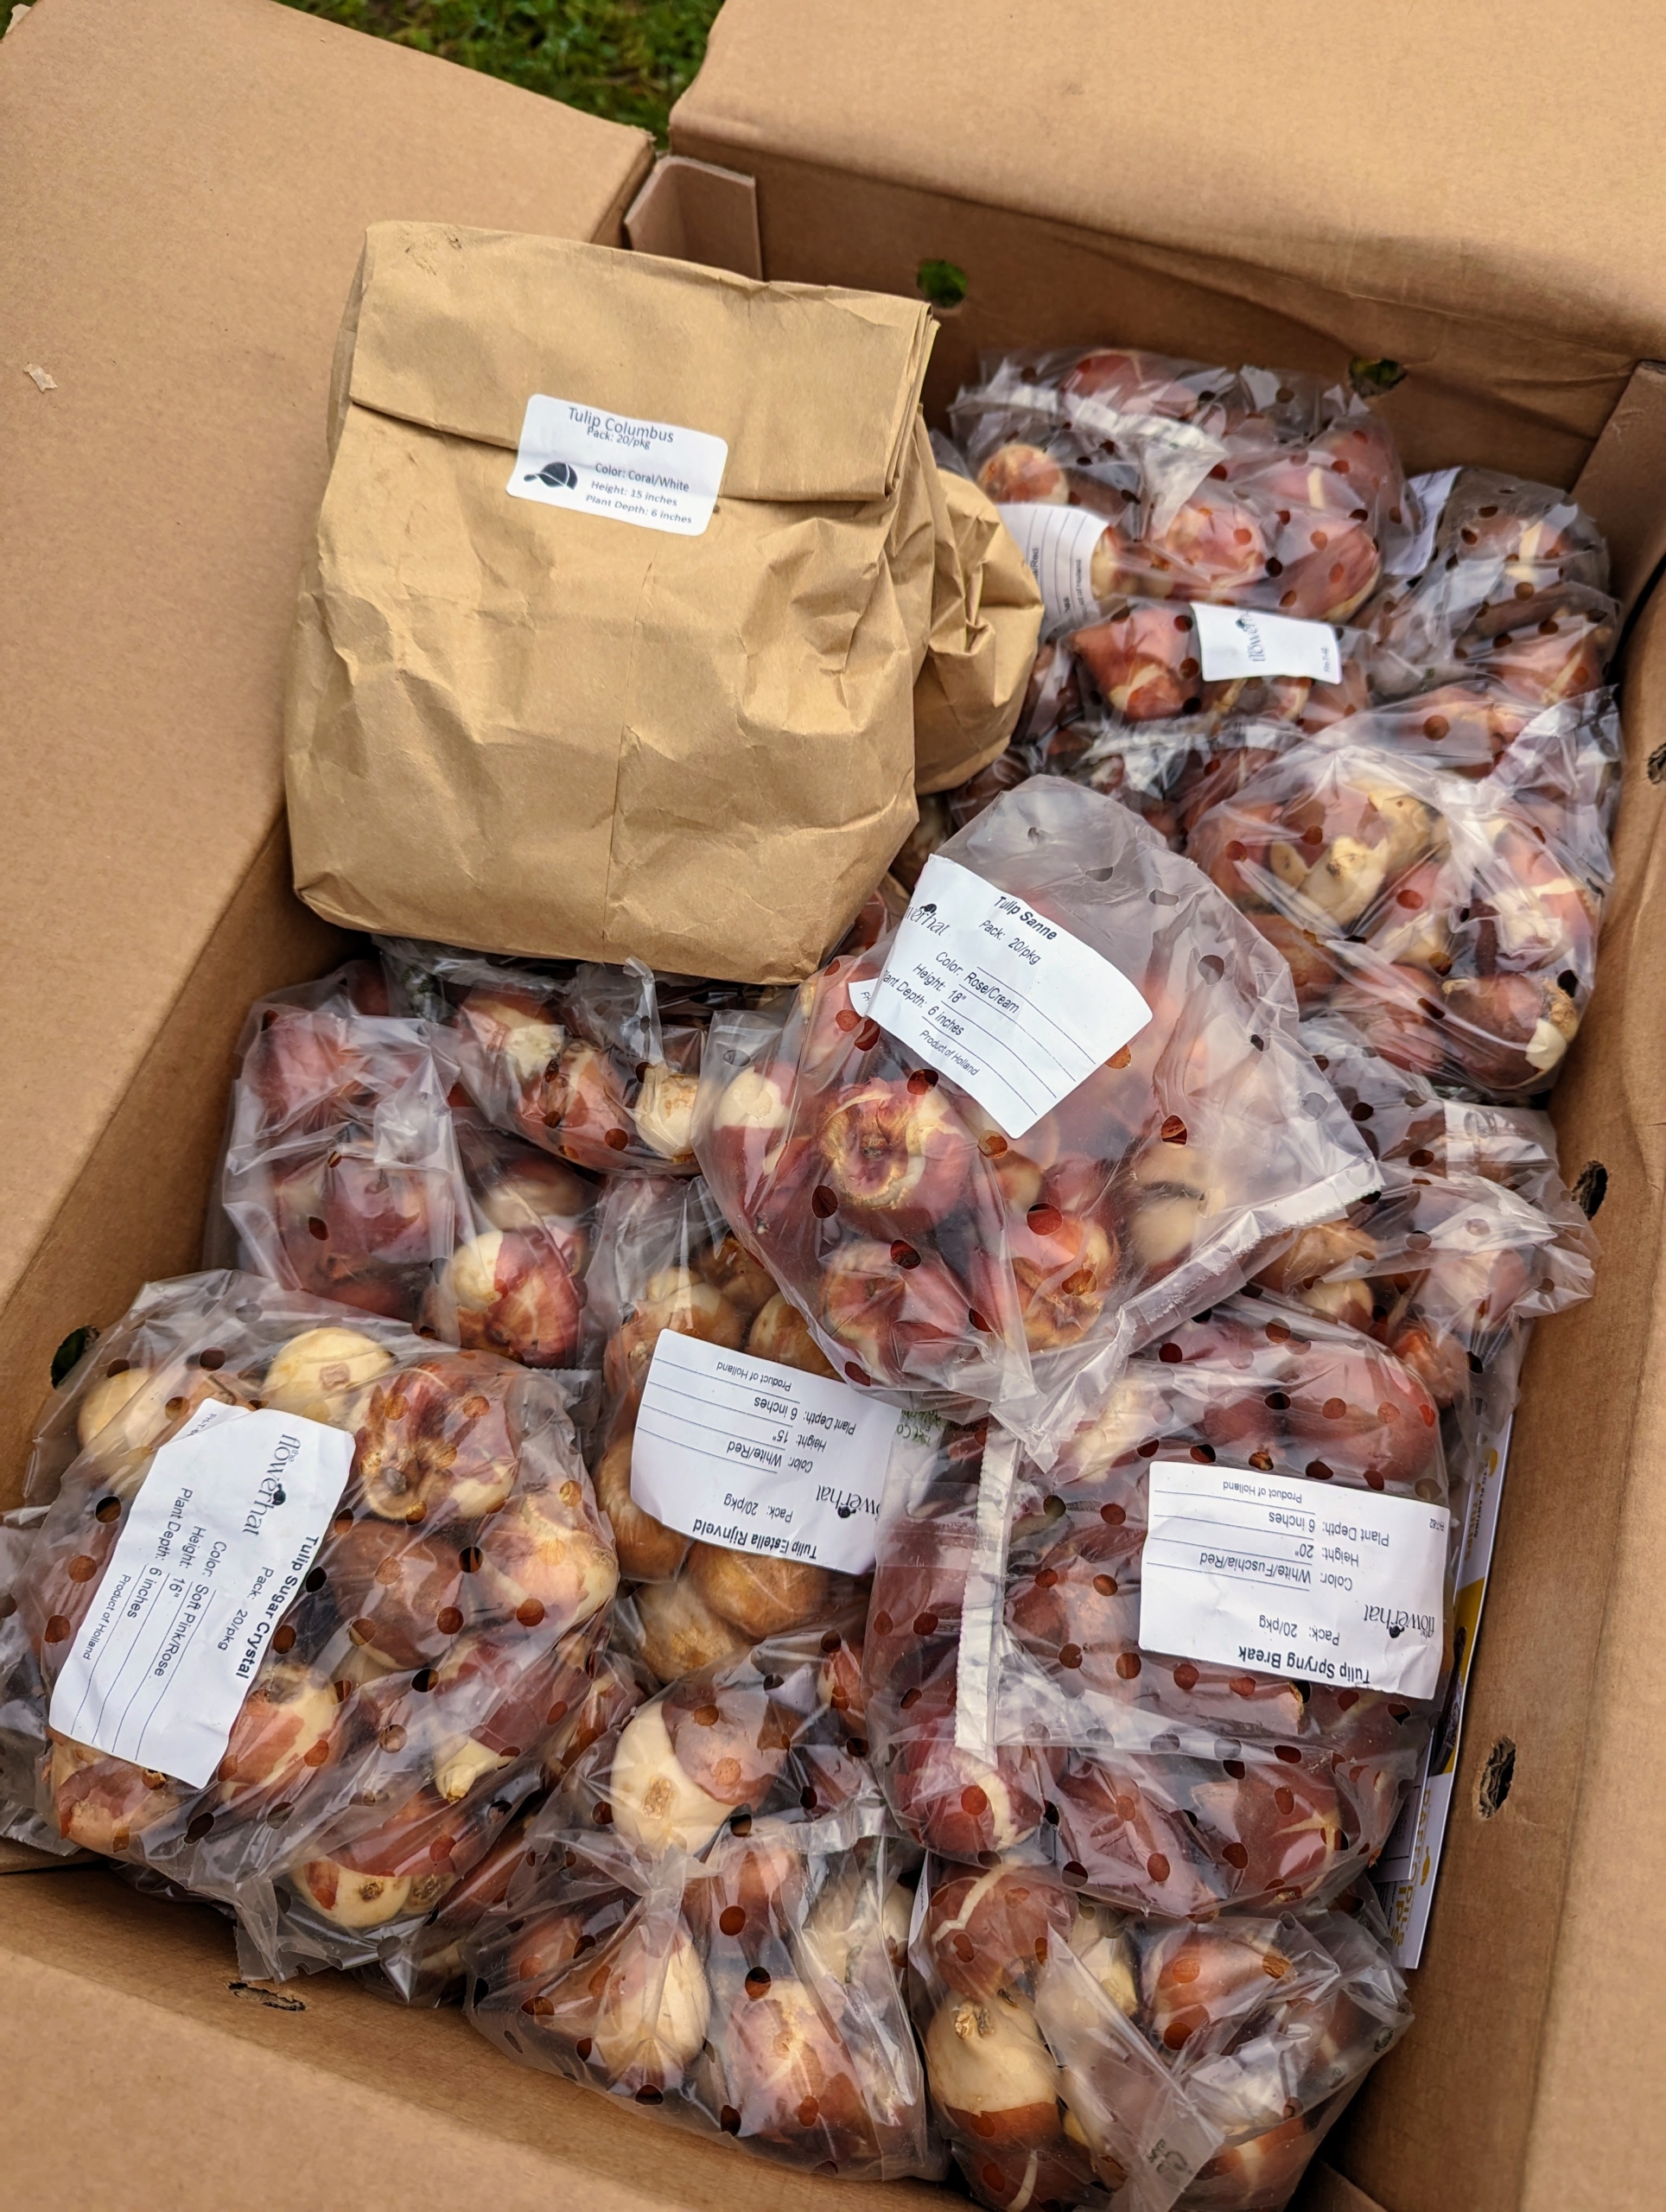
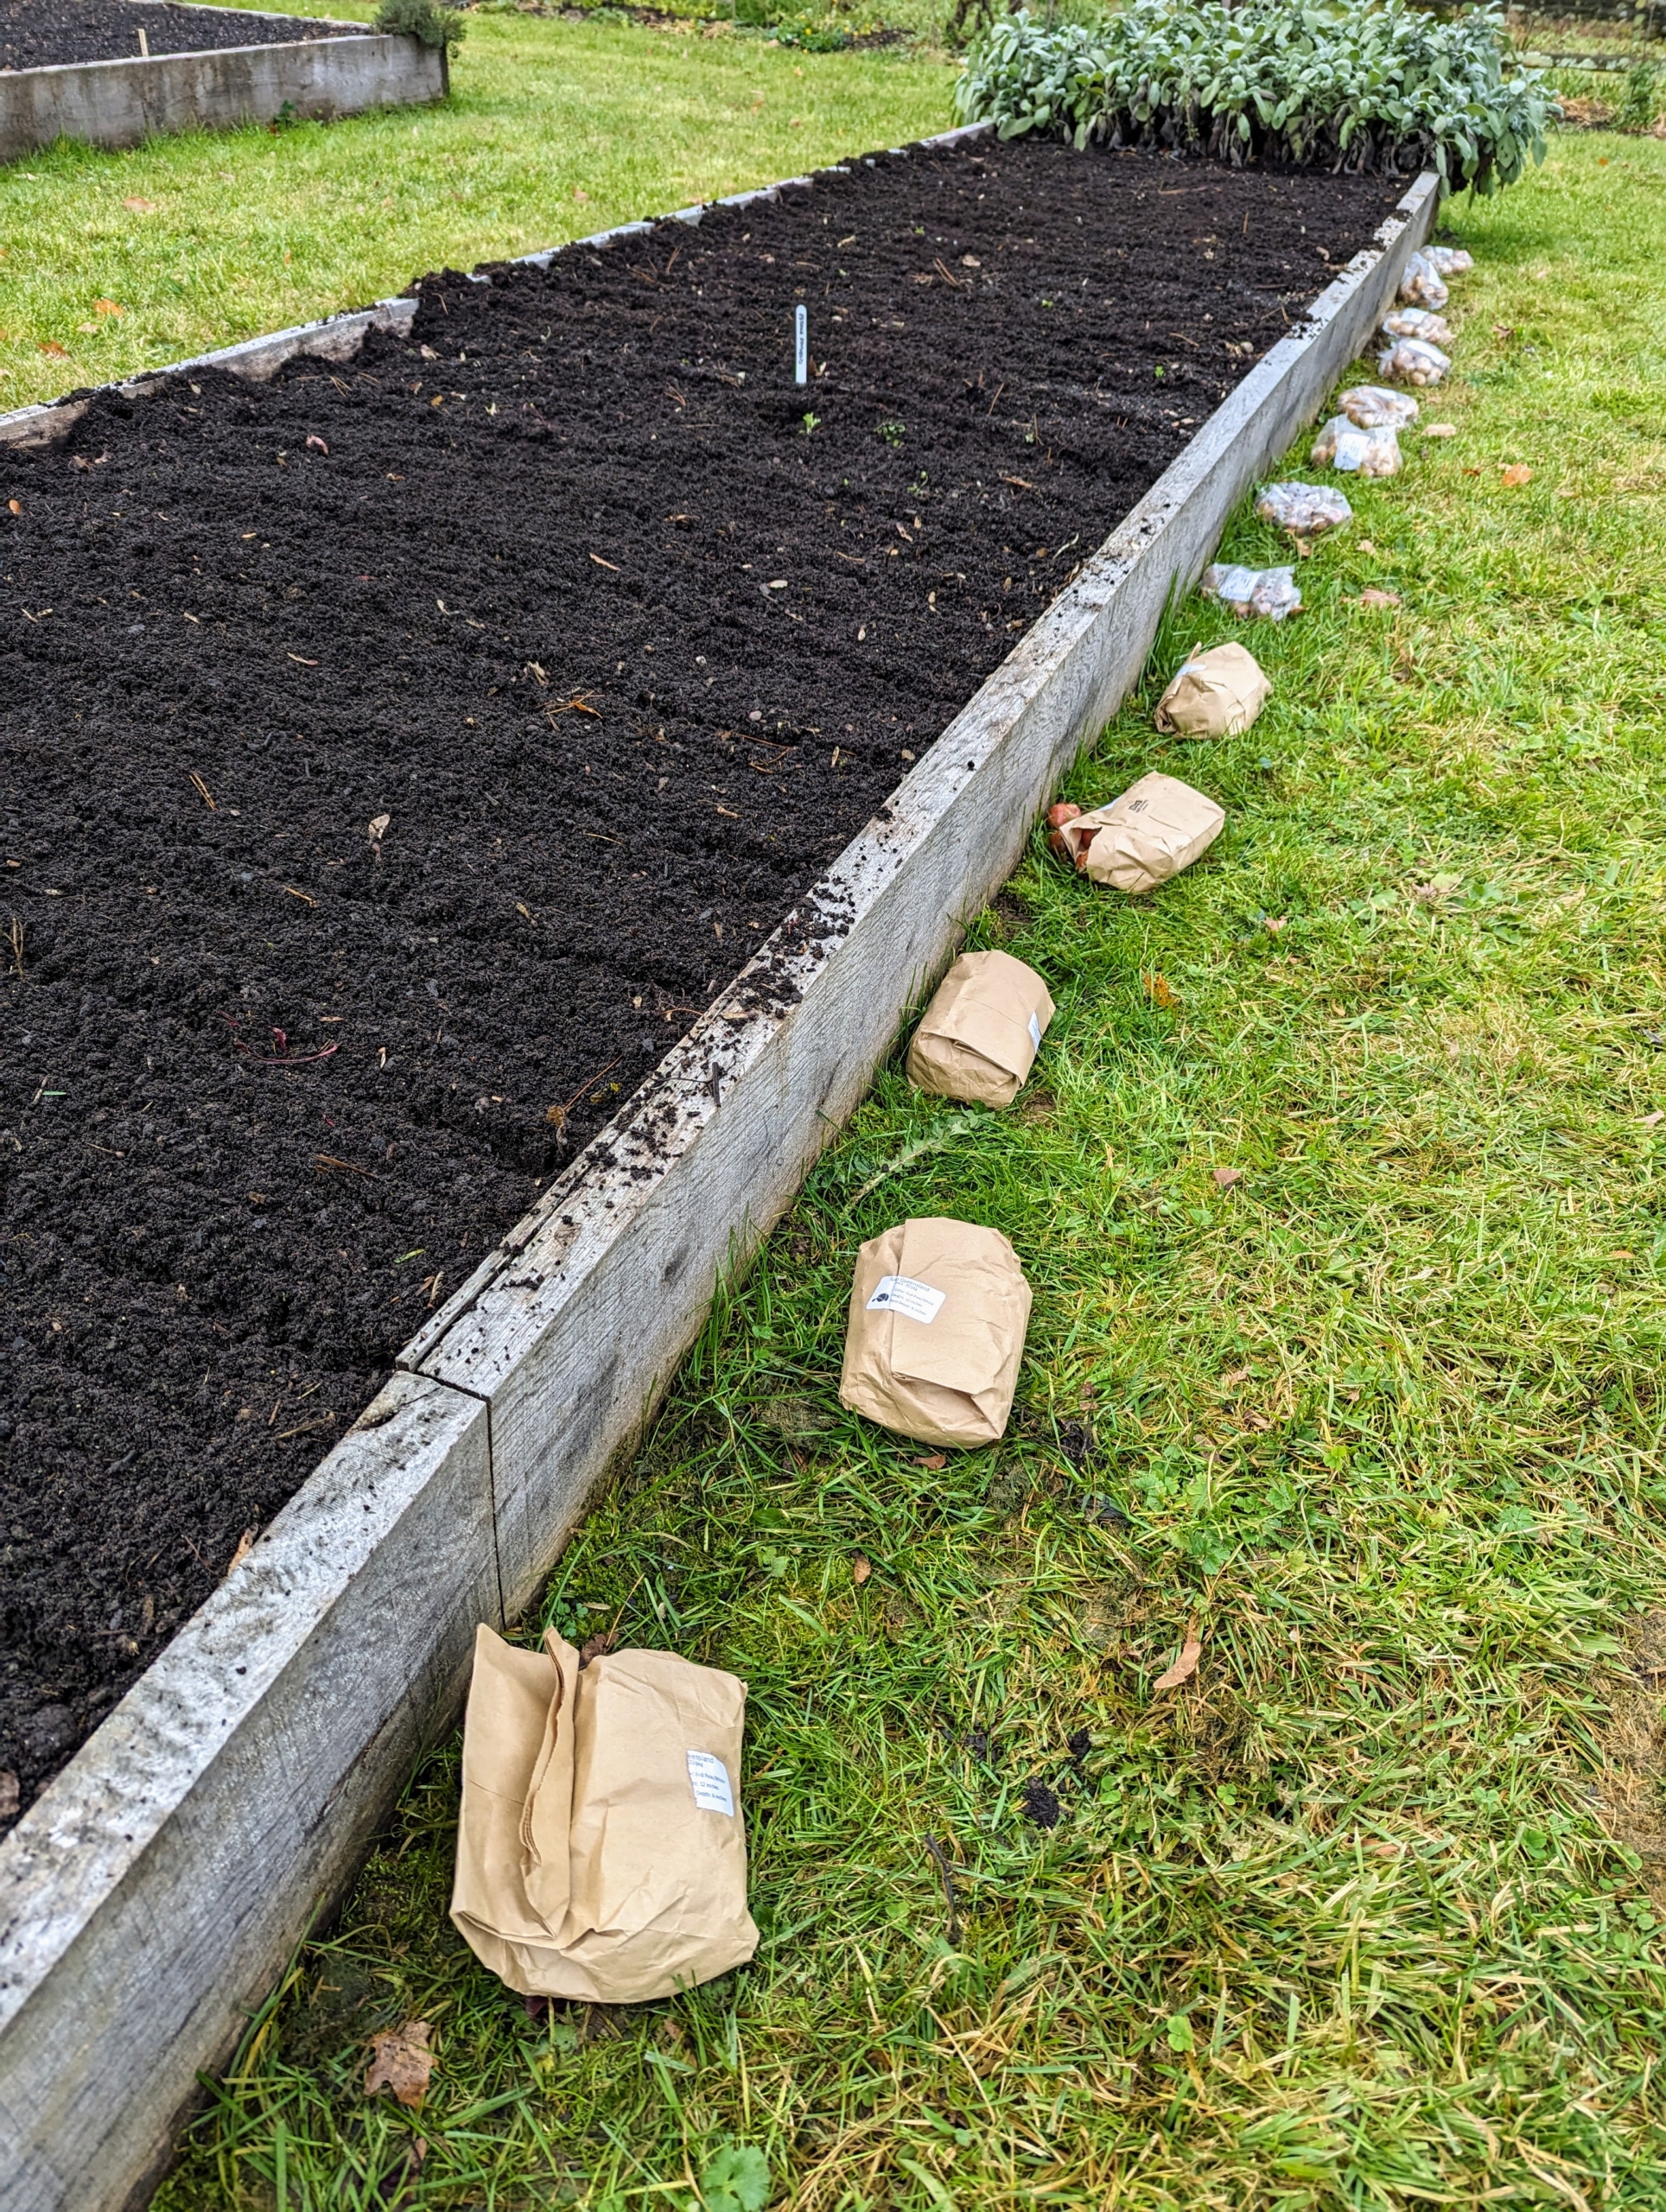
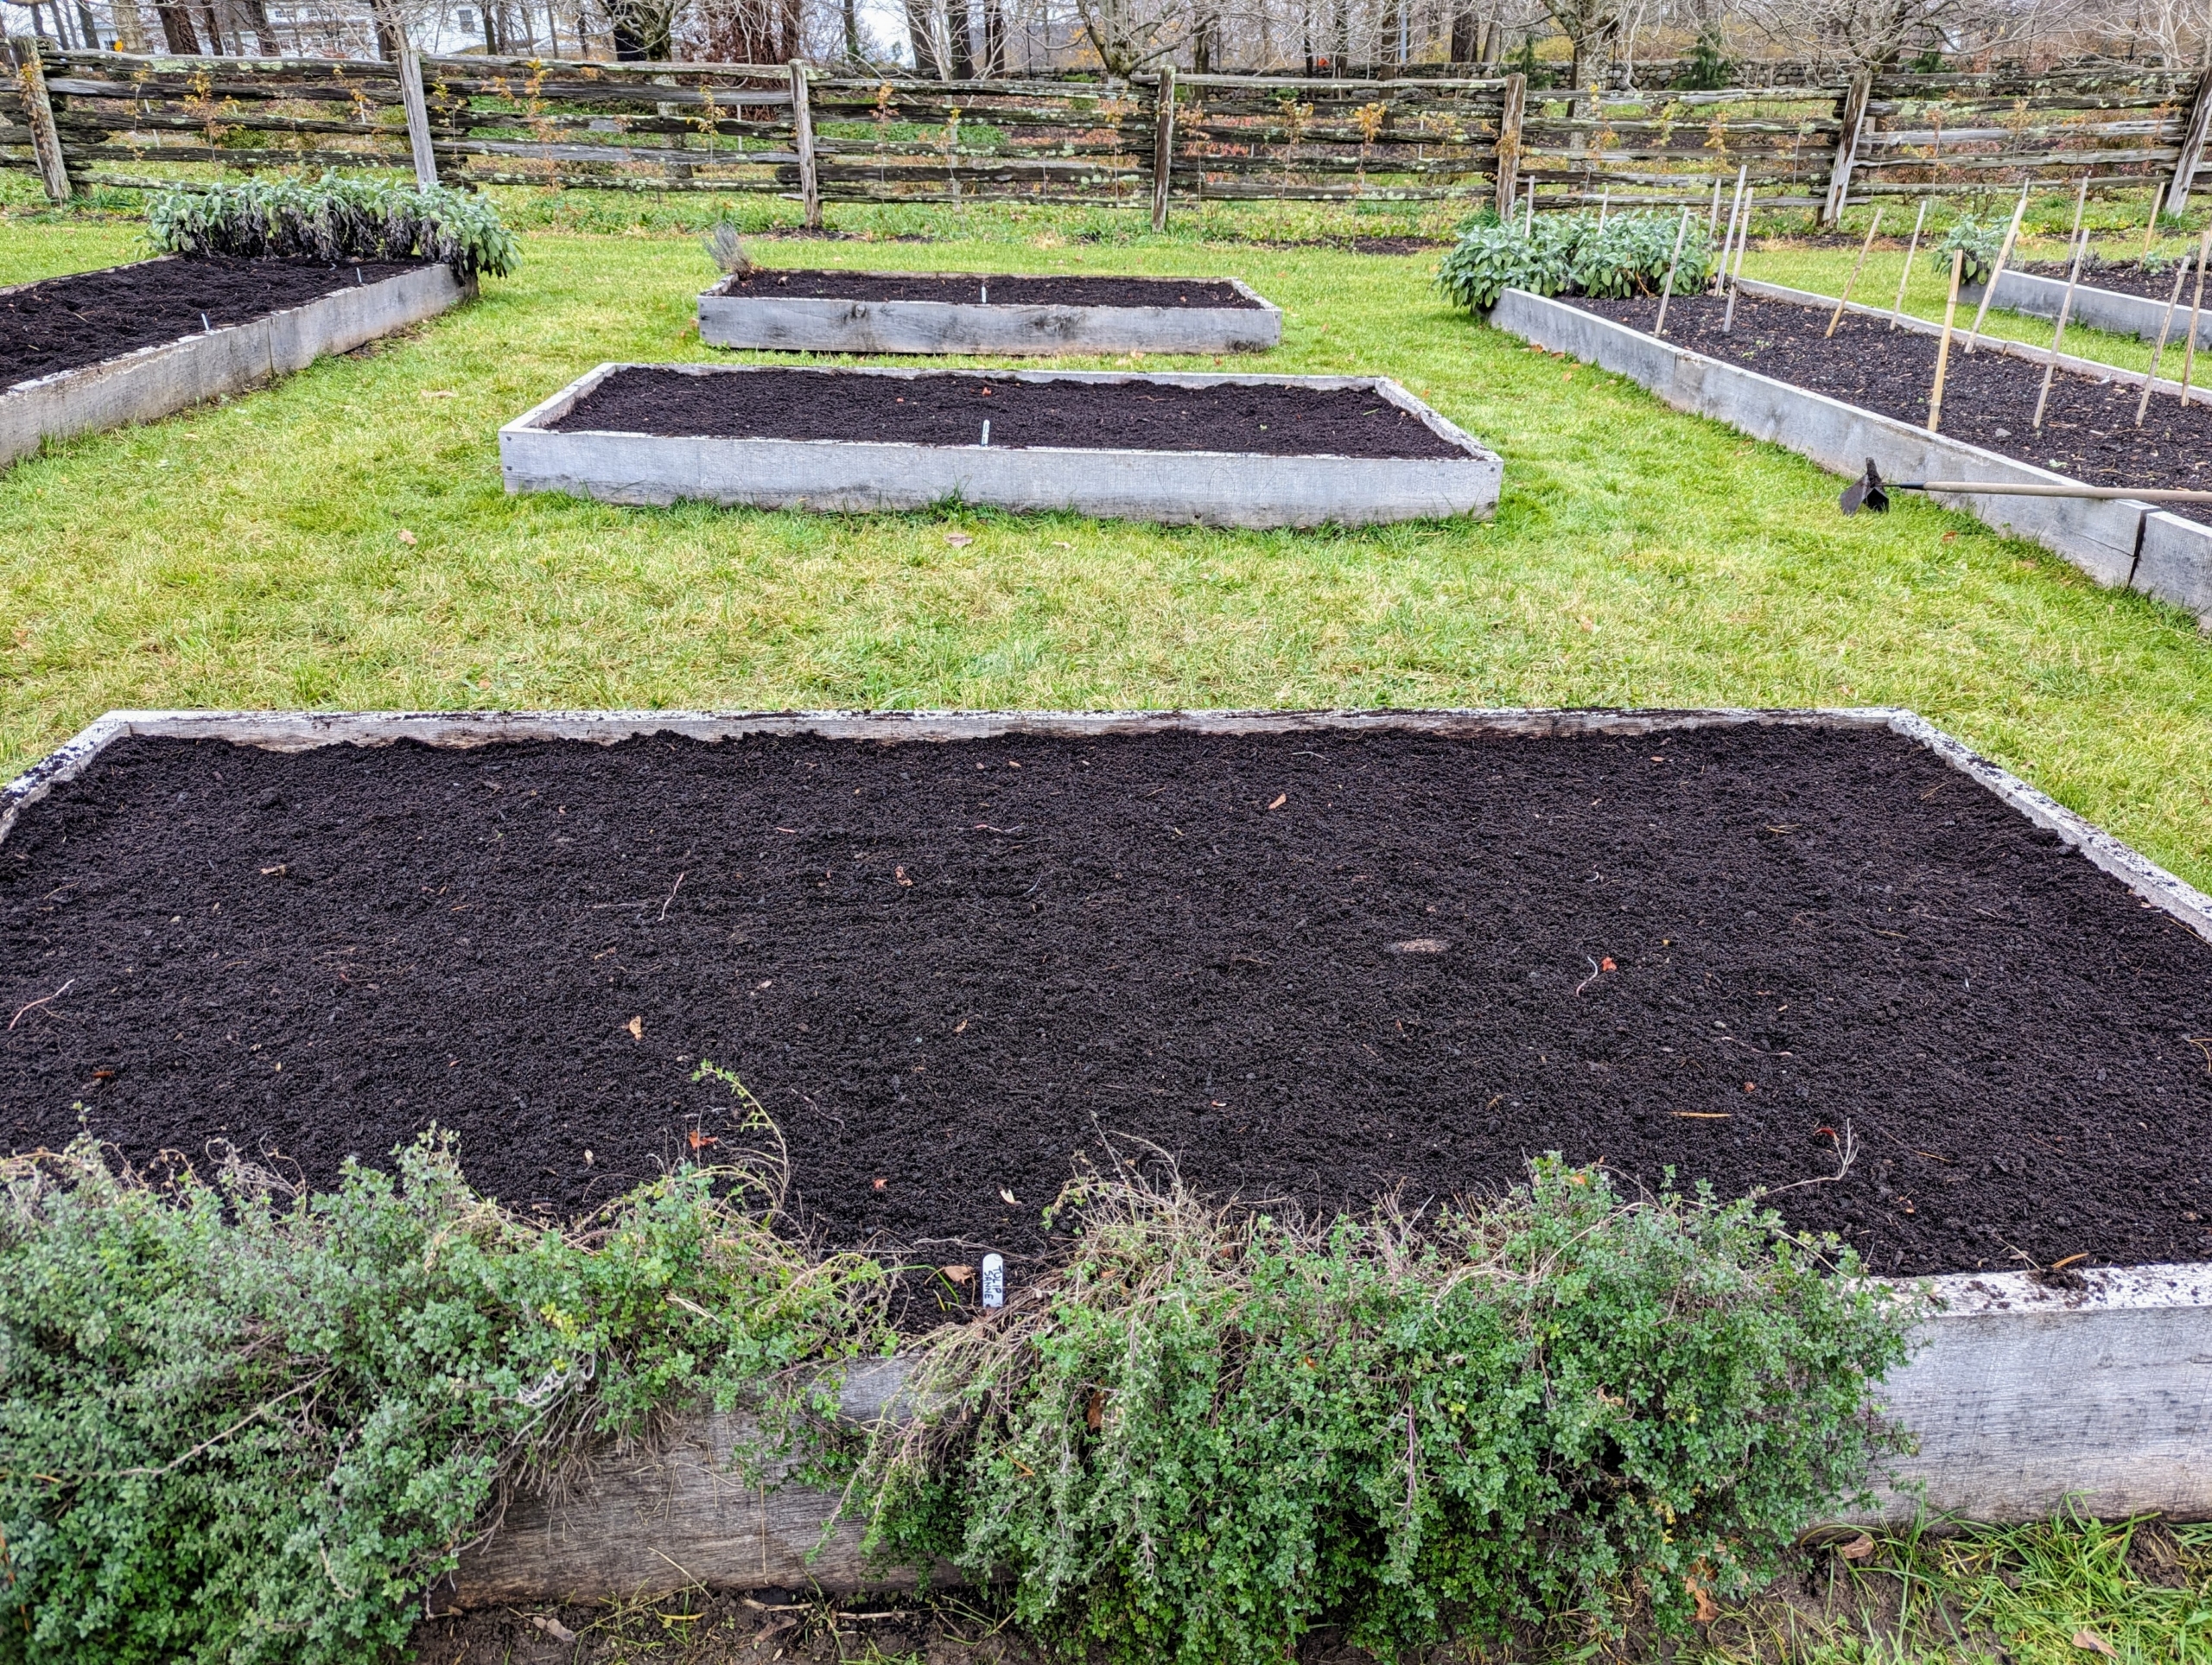
The last of our spring-flowering bulbs are now planted. This latest batch - 1200 gorgeous and colorful tulips!
If you like spring flowers in your garden, autumn is the time to plant the bulbs because they require a sustained dormant period of cold temperatures in order to stimulate root development. Here at my Bedford, New York farm, we plant thousands of bulbs every year - daffodils, Puschkinia, Chionodoxa, Dutch Iris, Camassia, alliums, etc. It’s so exciting to see the swaths of color in the garden beds after a cold, dreary winter. Our tulips are from The Flower Hat - a floral design studio and farm in Bozeman, Montana dedicated to floral services and floral industry education. Last week, just before the holiday, we planted all of our tulip bulbs in a handful of raised beds in the vegetable garden. They will look marvelous come spring.
Enjoy these photos. And be sure to check in all this week for Thanksgiving images!
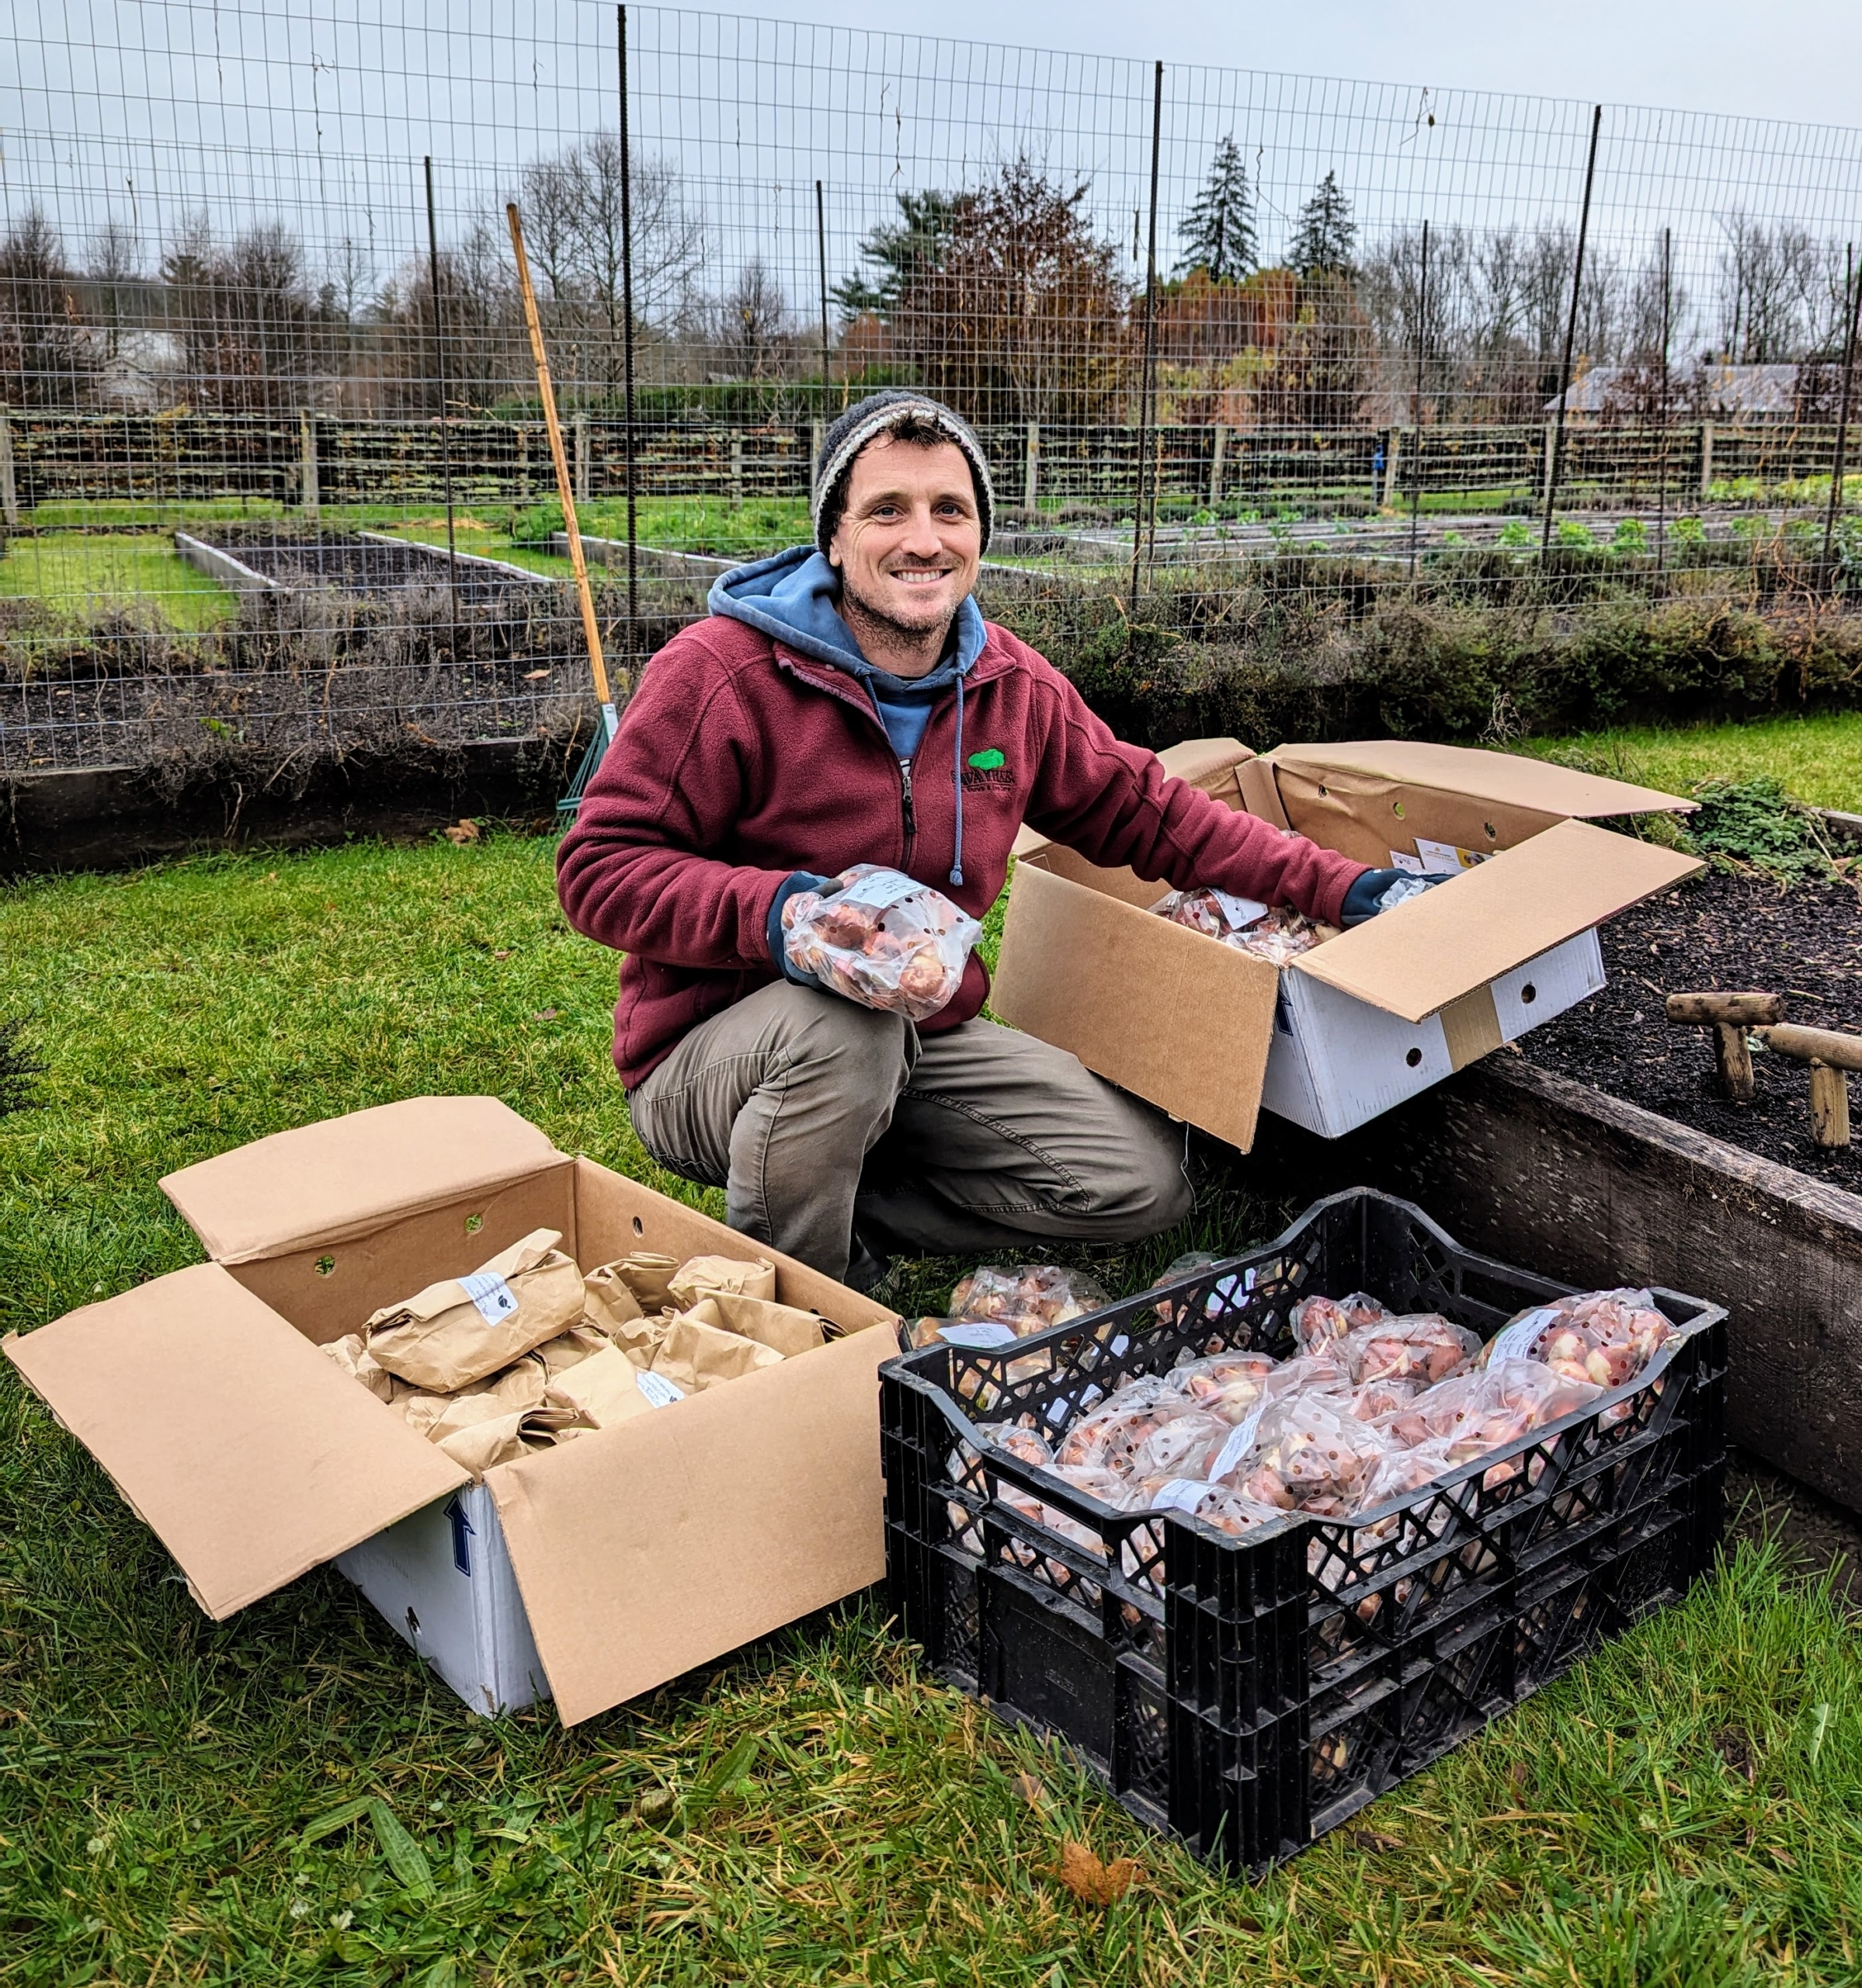
We were so excited to receive all these bulbs from The Flower Hat. We received a great variety of different tulip bulbs, all in excellent condition. All tulips are planted in the fall and bloom in the spring. They grow best in zones 3 to 8 where they can get eight to 12 weeks of cold temperatures while under the soil.
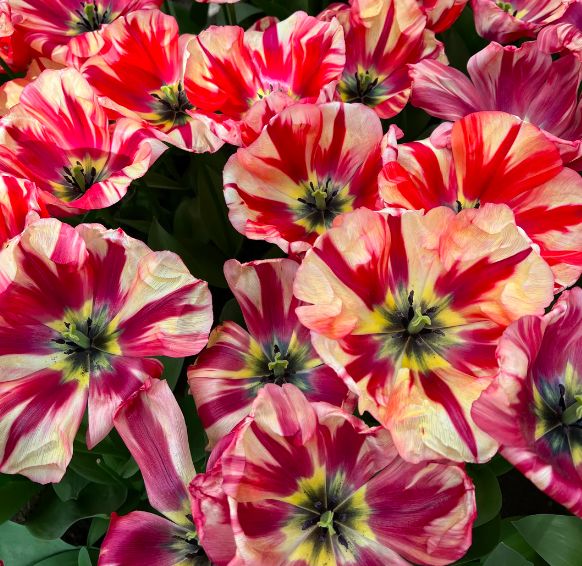
Among the tulip bulbs we received, this is ‘Spryng Break.’ It has huge flowers that open in white with intense fuchsia-red flames. (Photo courtesy of theflowerhat.com)
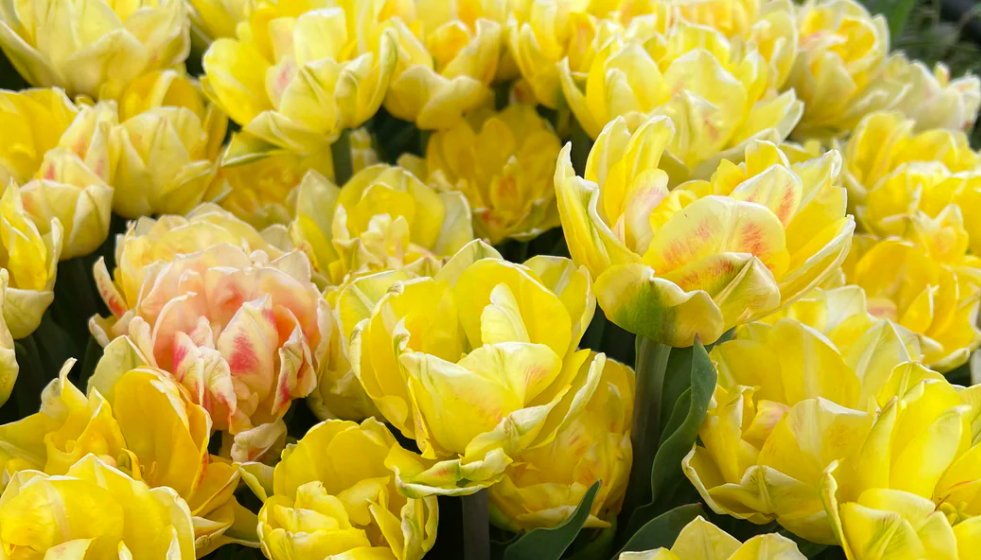
‘Foxy Foxtrot’ is a double tulip with shades of apricot and yellow and hints of rose orange.(Photo courtesy of theflowerhat.com)
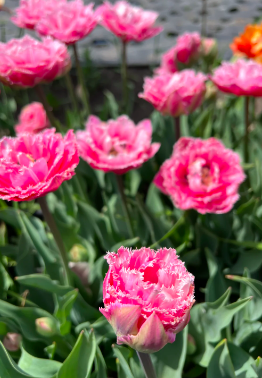
‘Queensland’ is a double fringed tulip with rose-red petals accented with light pink ruffles and serrated edges. This tulip opens with five-inch large blooms and grows up to 12 to 14 inches tall. (Photo courtesy of theflowerhat.com)
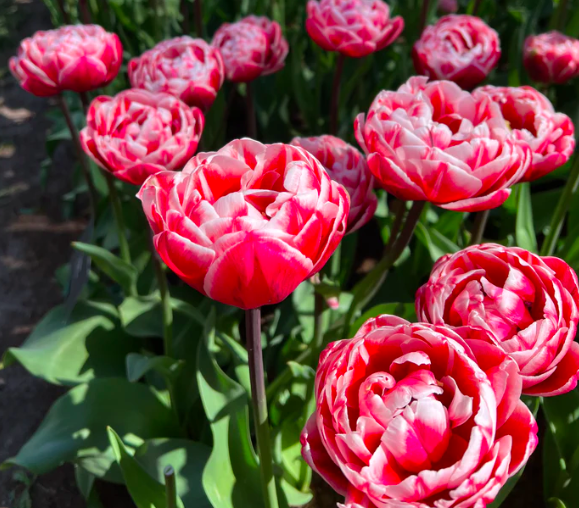
This big red and white peony-like tulip is called ‘Drumline.’ (Photo courtesy of theflowerhat.com)
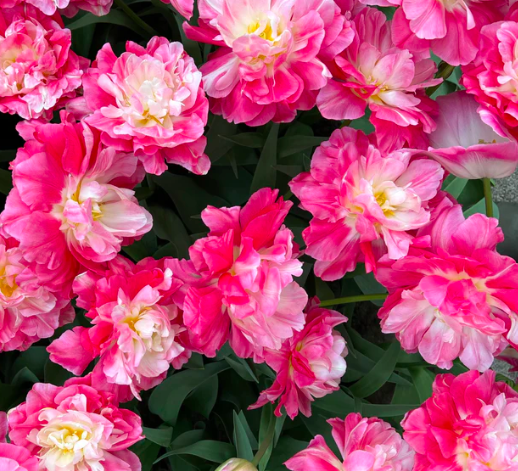
And this one is ‘Double Sugar’ – with pink petals and a round, white center. (Photo courtesy of theflowerhat.com)
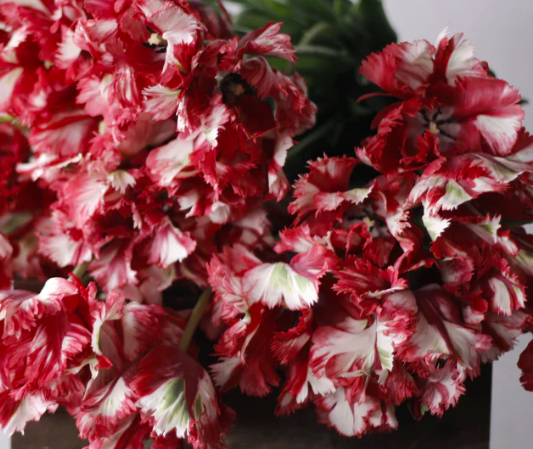
‘Estella Rijnveld’ is a bicolor heirloom with red and white flames that vary in width. When it opens, it has a yellow cast that fades to white as the flowers mature.
(Photo courtesy of theflowerhat.com)
‘Flaming Parrot’ has bright buttercup-yellow blooms with red flames. It is among the most popular for cut-flower arrangements. (Photo courtesy of theflowerhat.com)
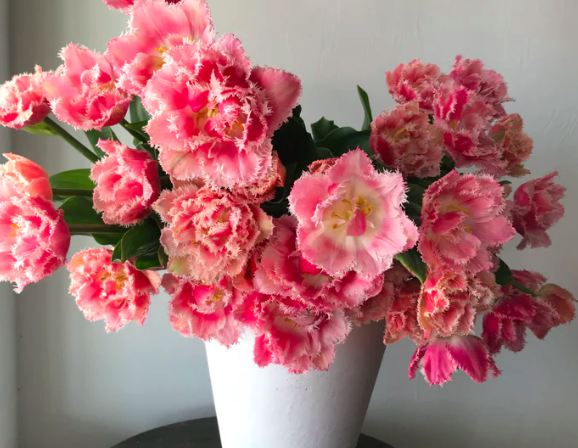
This gorgeous double tulip is ‘Sugar Crystal.’ It has huge, feathery blooms with many layers of frilly petals in shades of silvery baby pink. (Photo courtesy of theflowerhat.com)
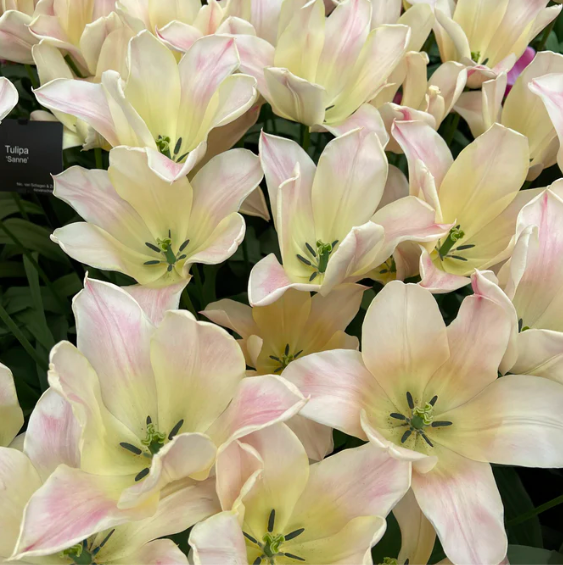
And ‘Sanne’ has large, tapered flowers that open in deep rose-pink with creamy-pink edges and mature to lilac-pink with pink-ivory edges. (Photo courtesy of theflowerhat.com)
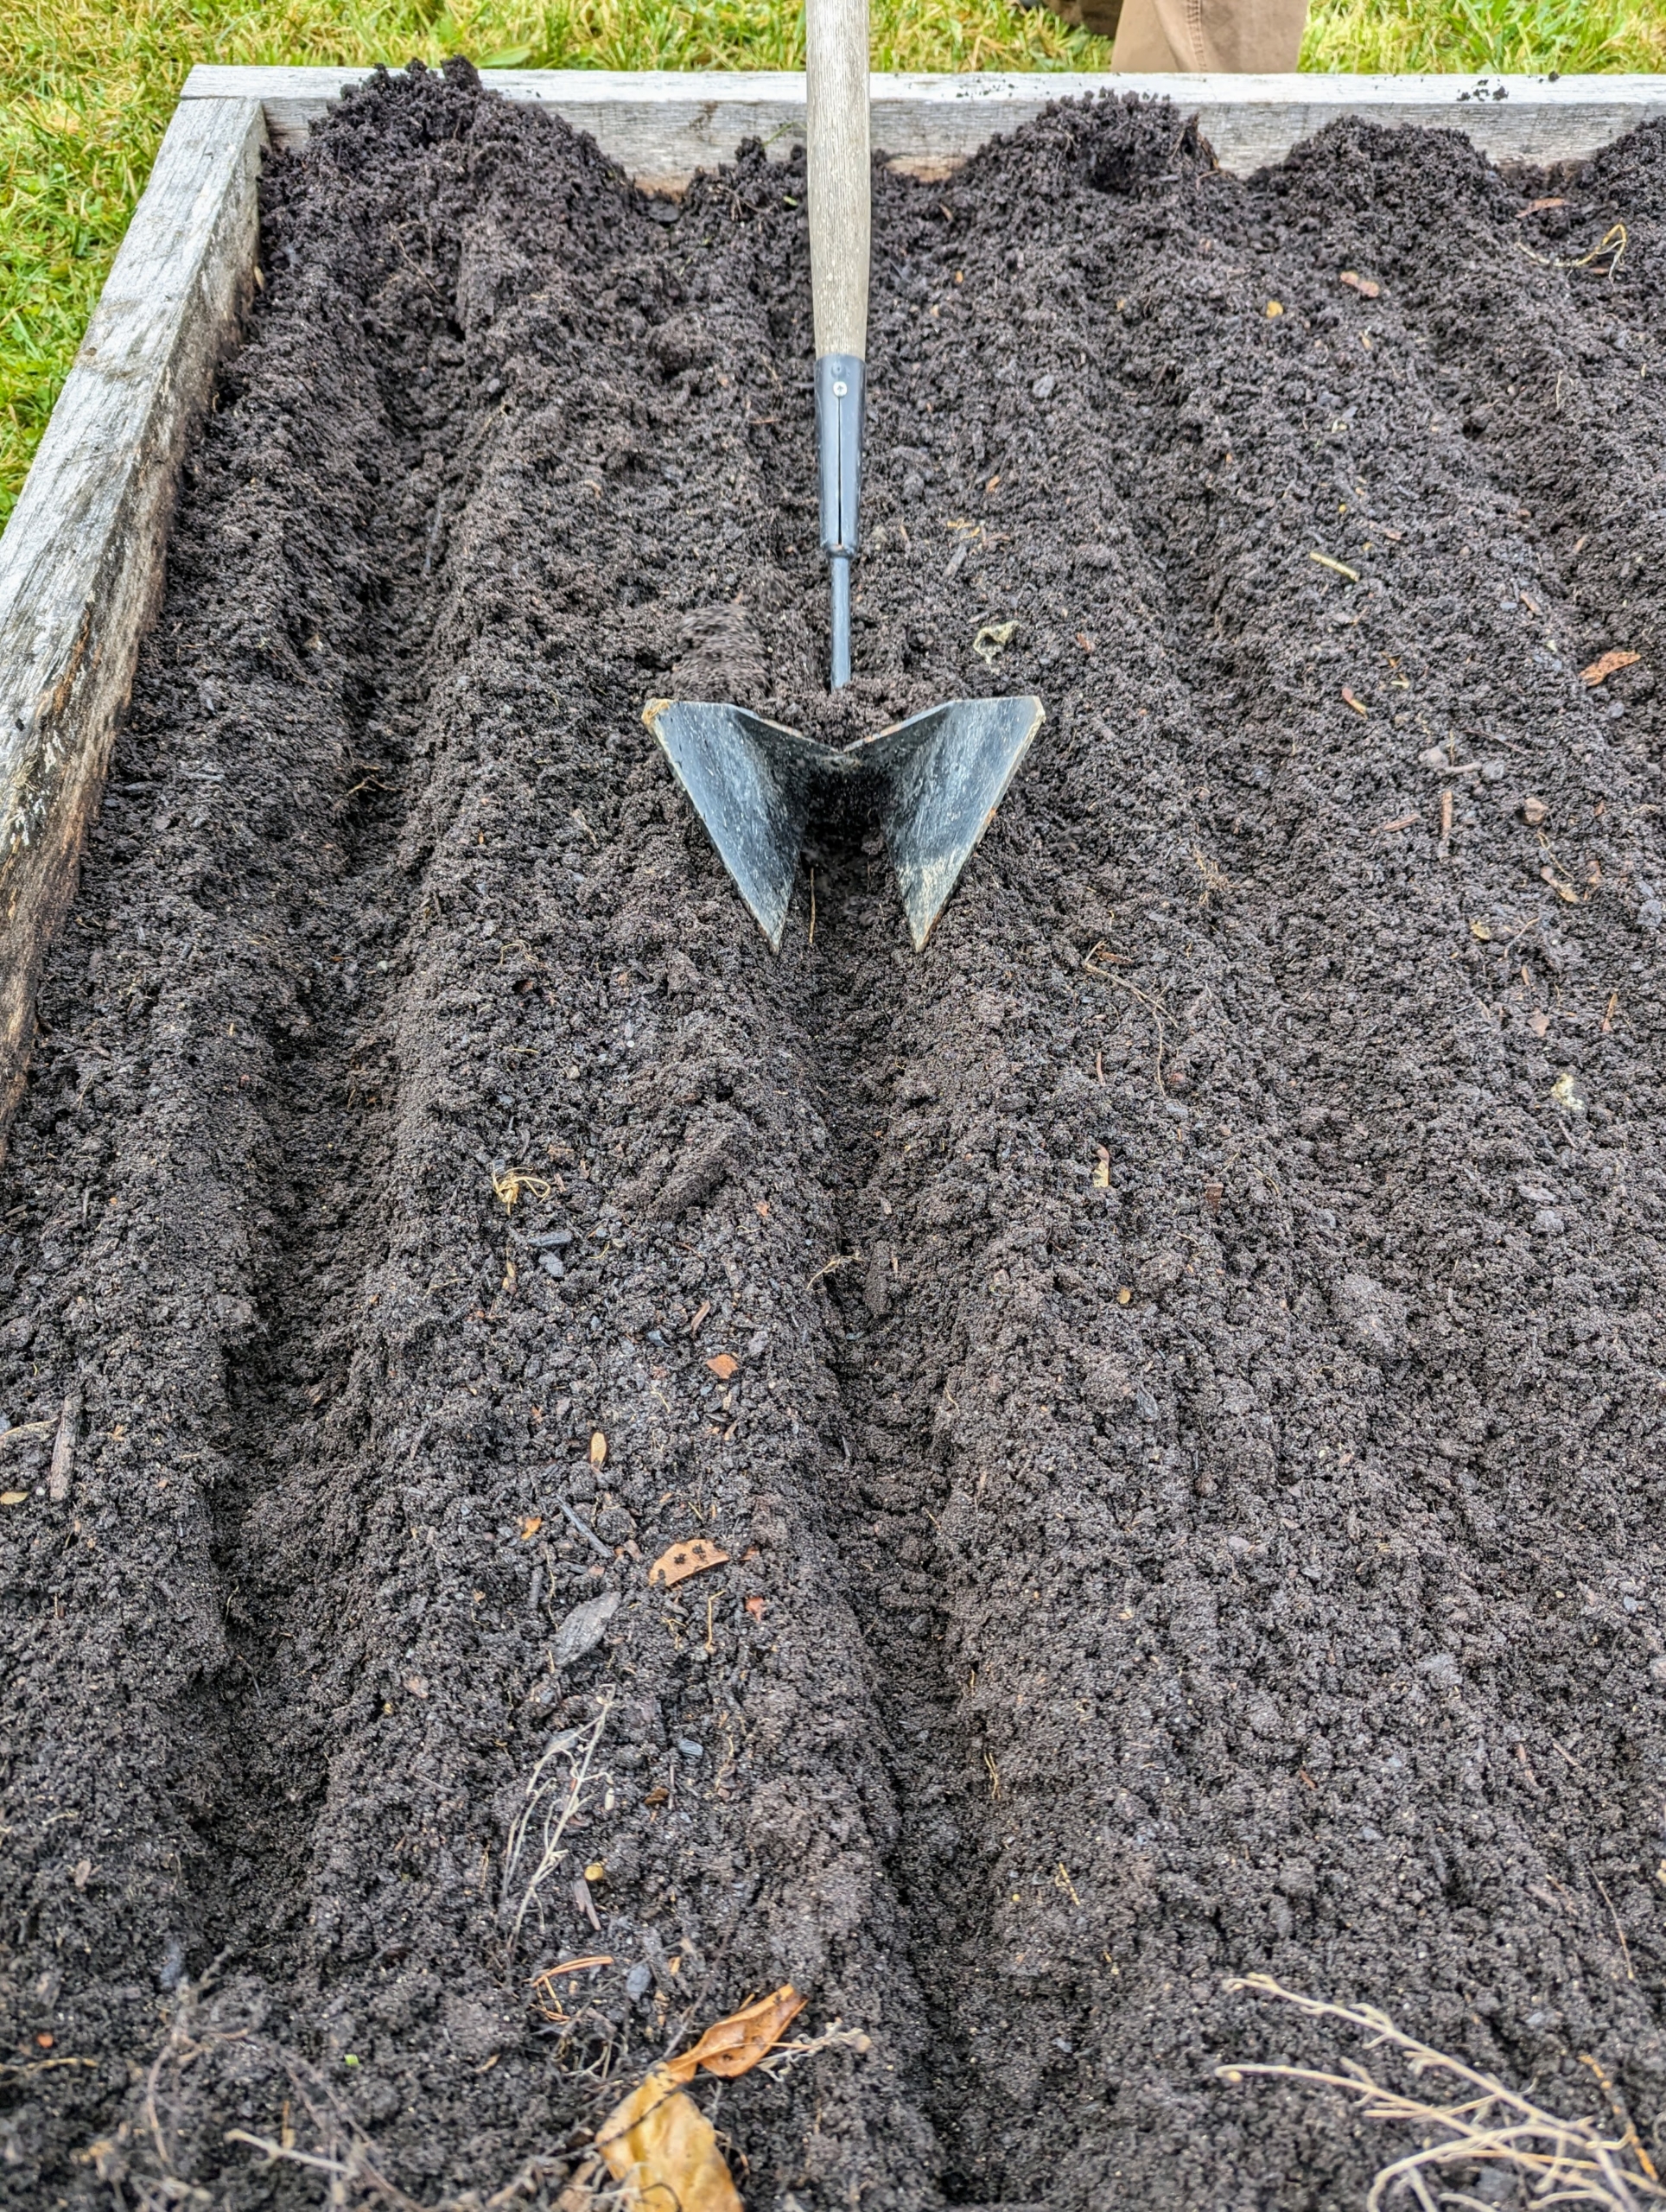
Brian starts by making the rows using the bed preparation rake from Johnny’s Selected Seeds. This tool allows him to easily create shallow furrows in the soil. Hard plastic red tubes slide onto selected teeth of the rake to mark the rows. All the beds were already well-fertilized.
Then he goes over the same furrows with the Row Pro™ from Johnny’s Selected Seeds. It’s great for making deeper trenches in the soil.
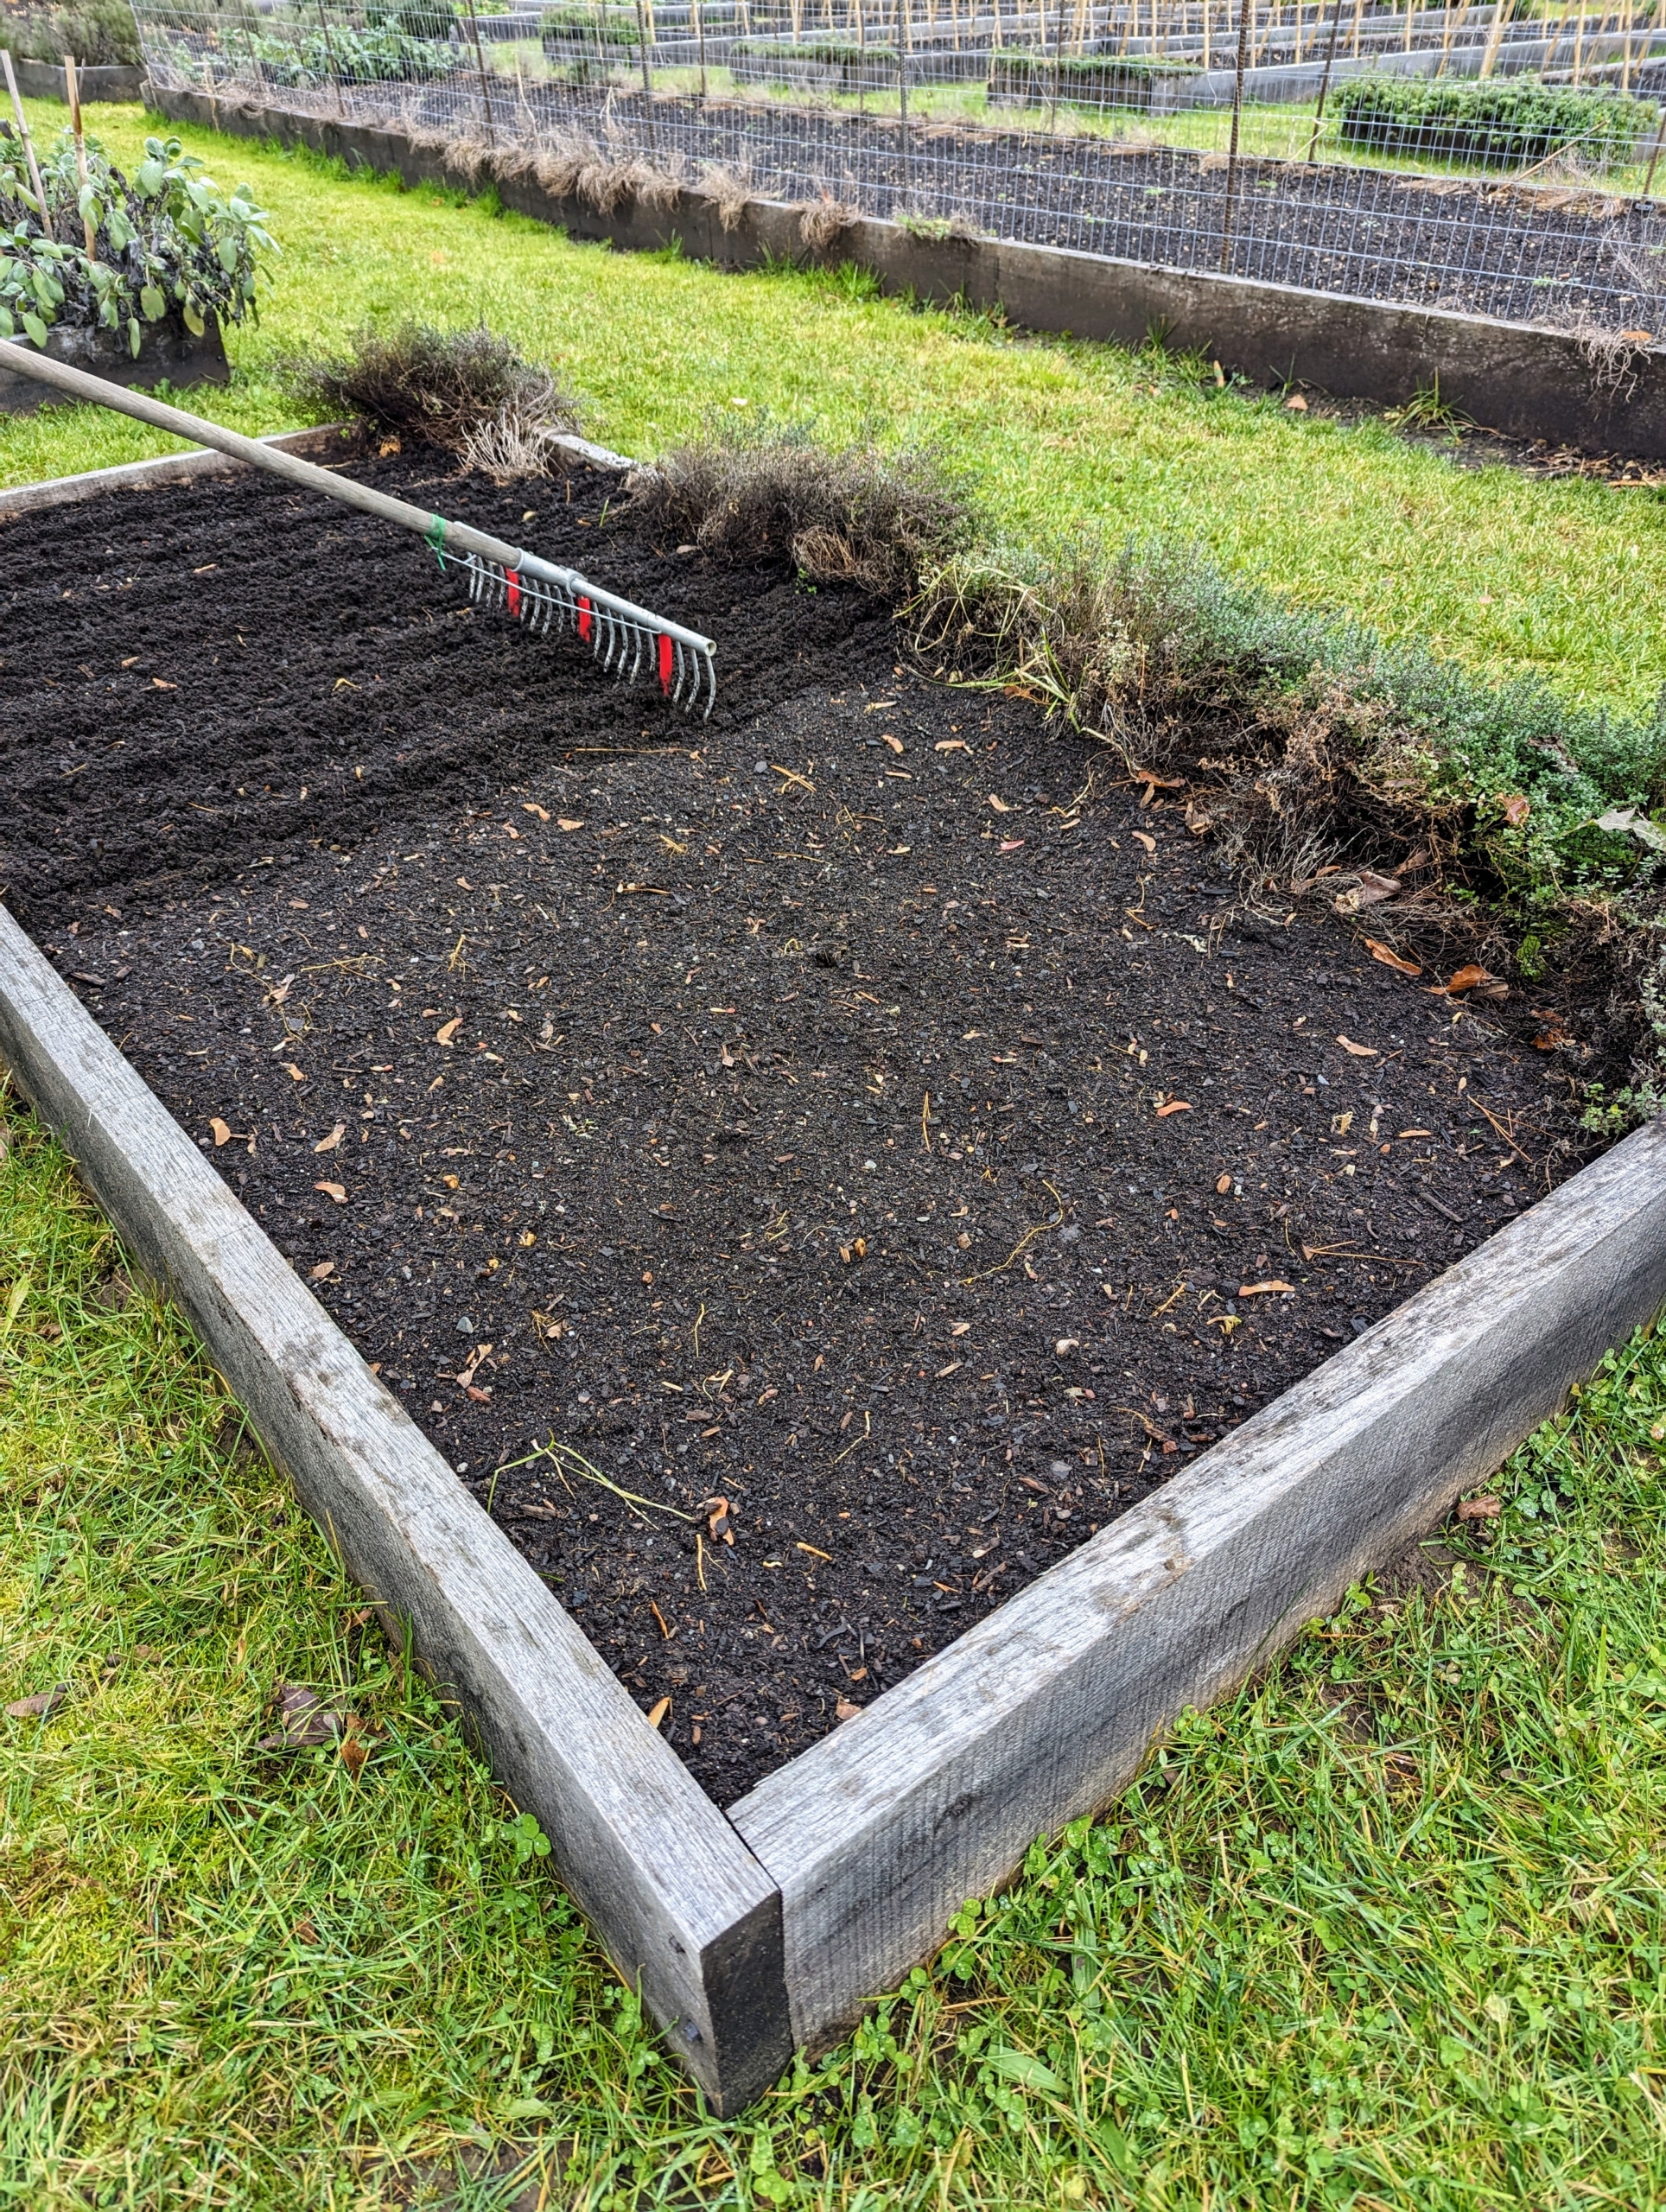
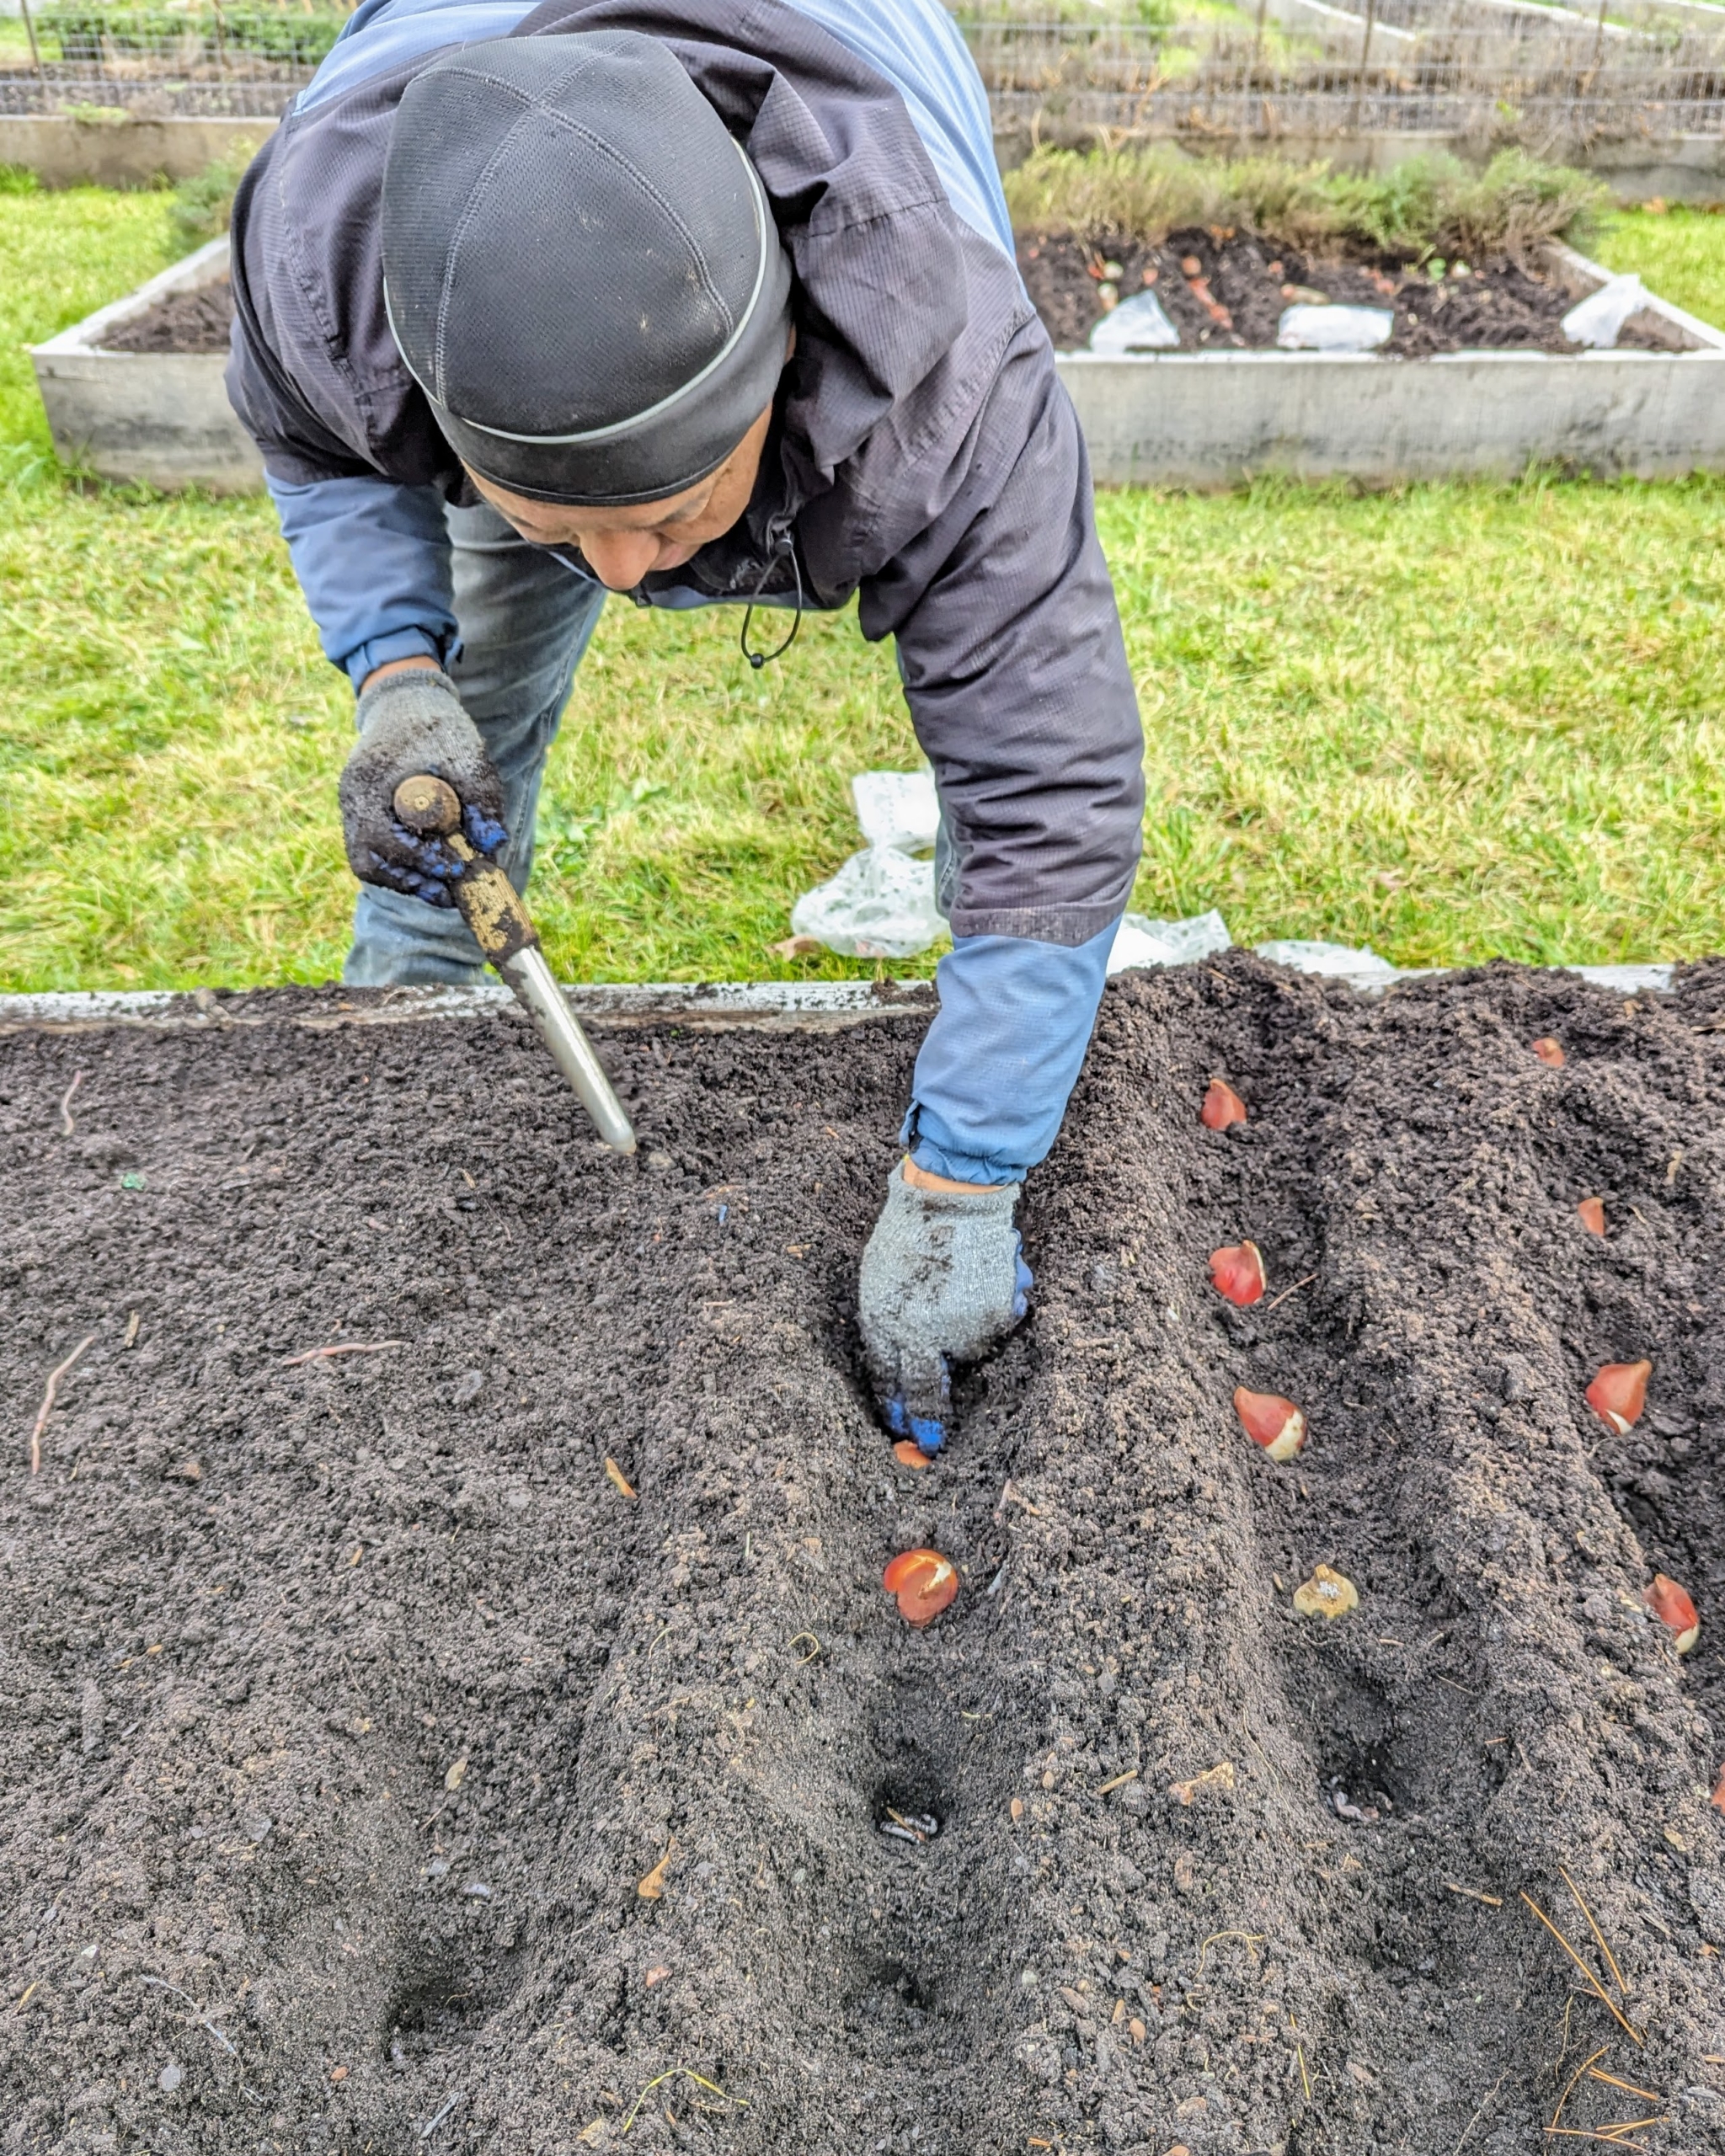
Meanwhile, Ryan sorts out the bulbs and decides what will be planted in which bed. They will look so pretty when in bloom. And they will be done blooming before it is time to plant our vegetables.
Ryan places the bulbs next to the bed in which they will be planted – all like varieties together.
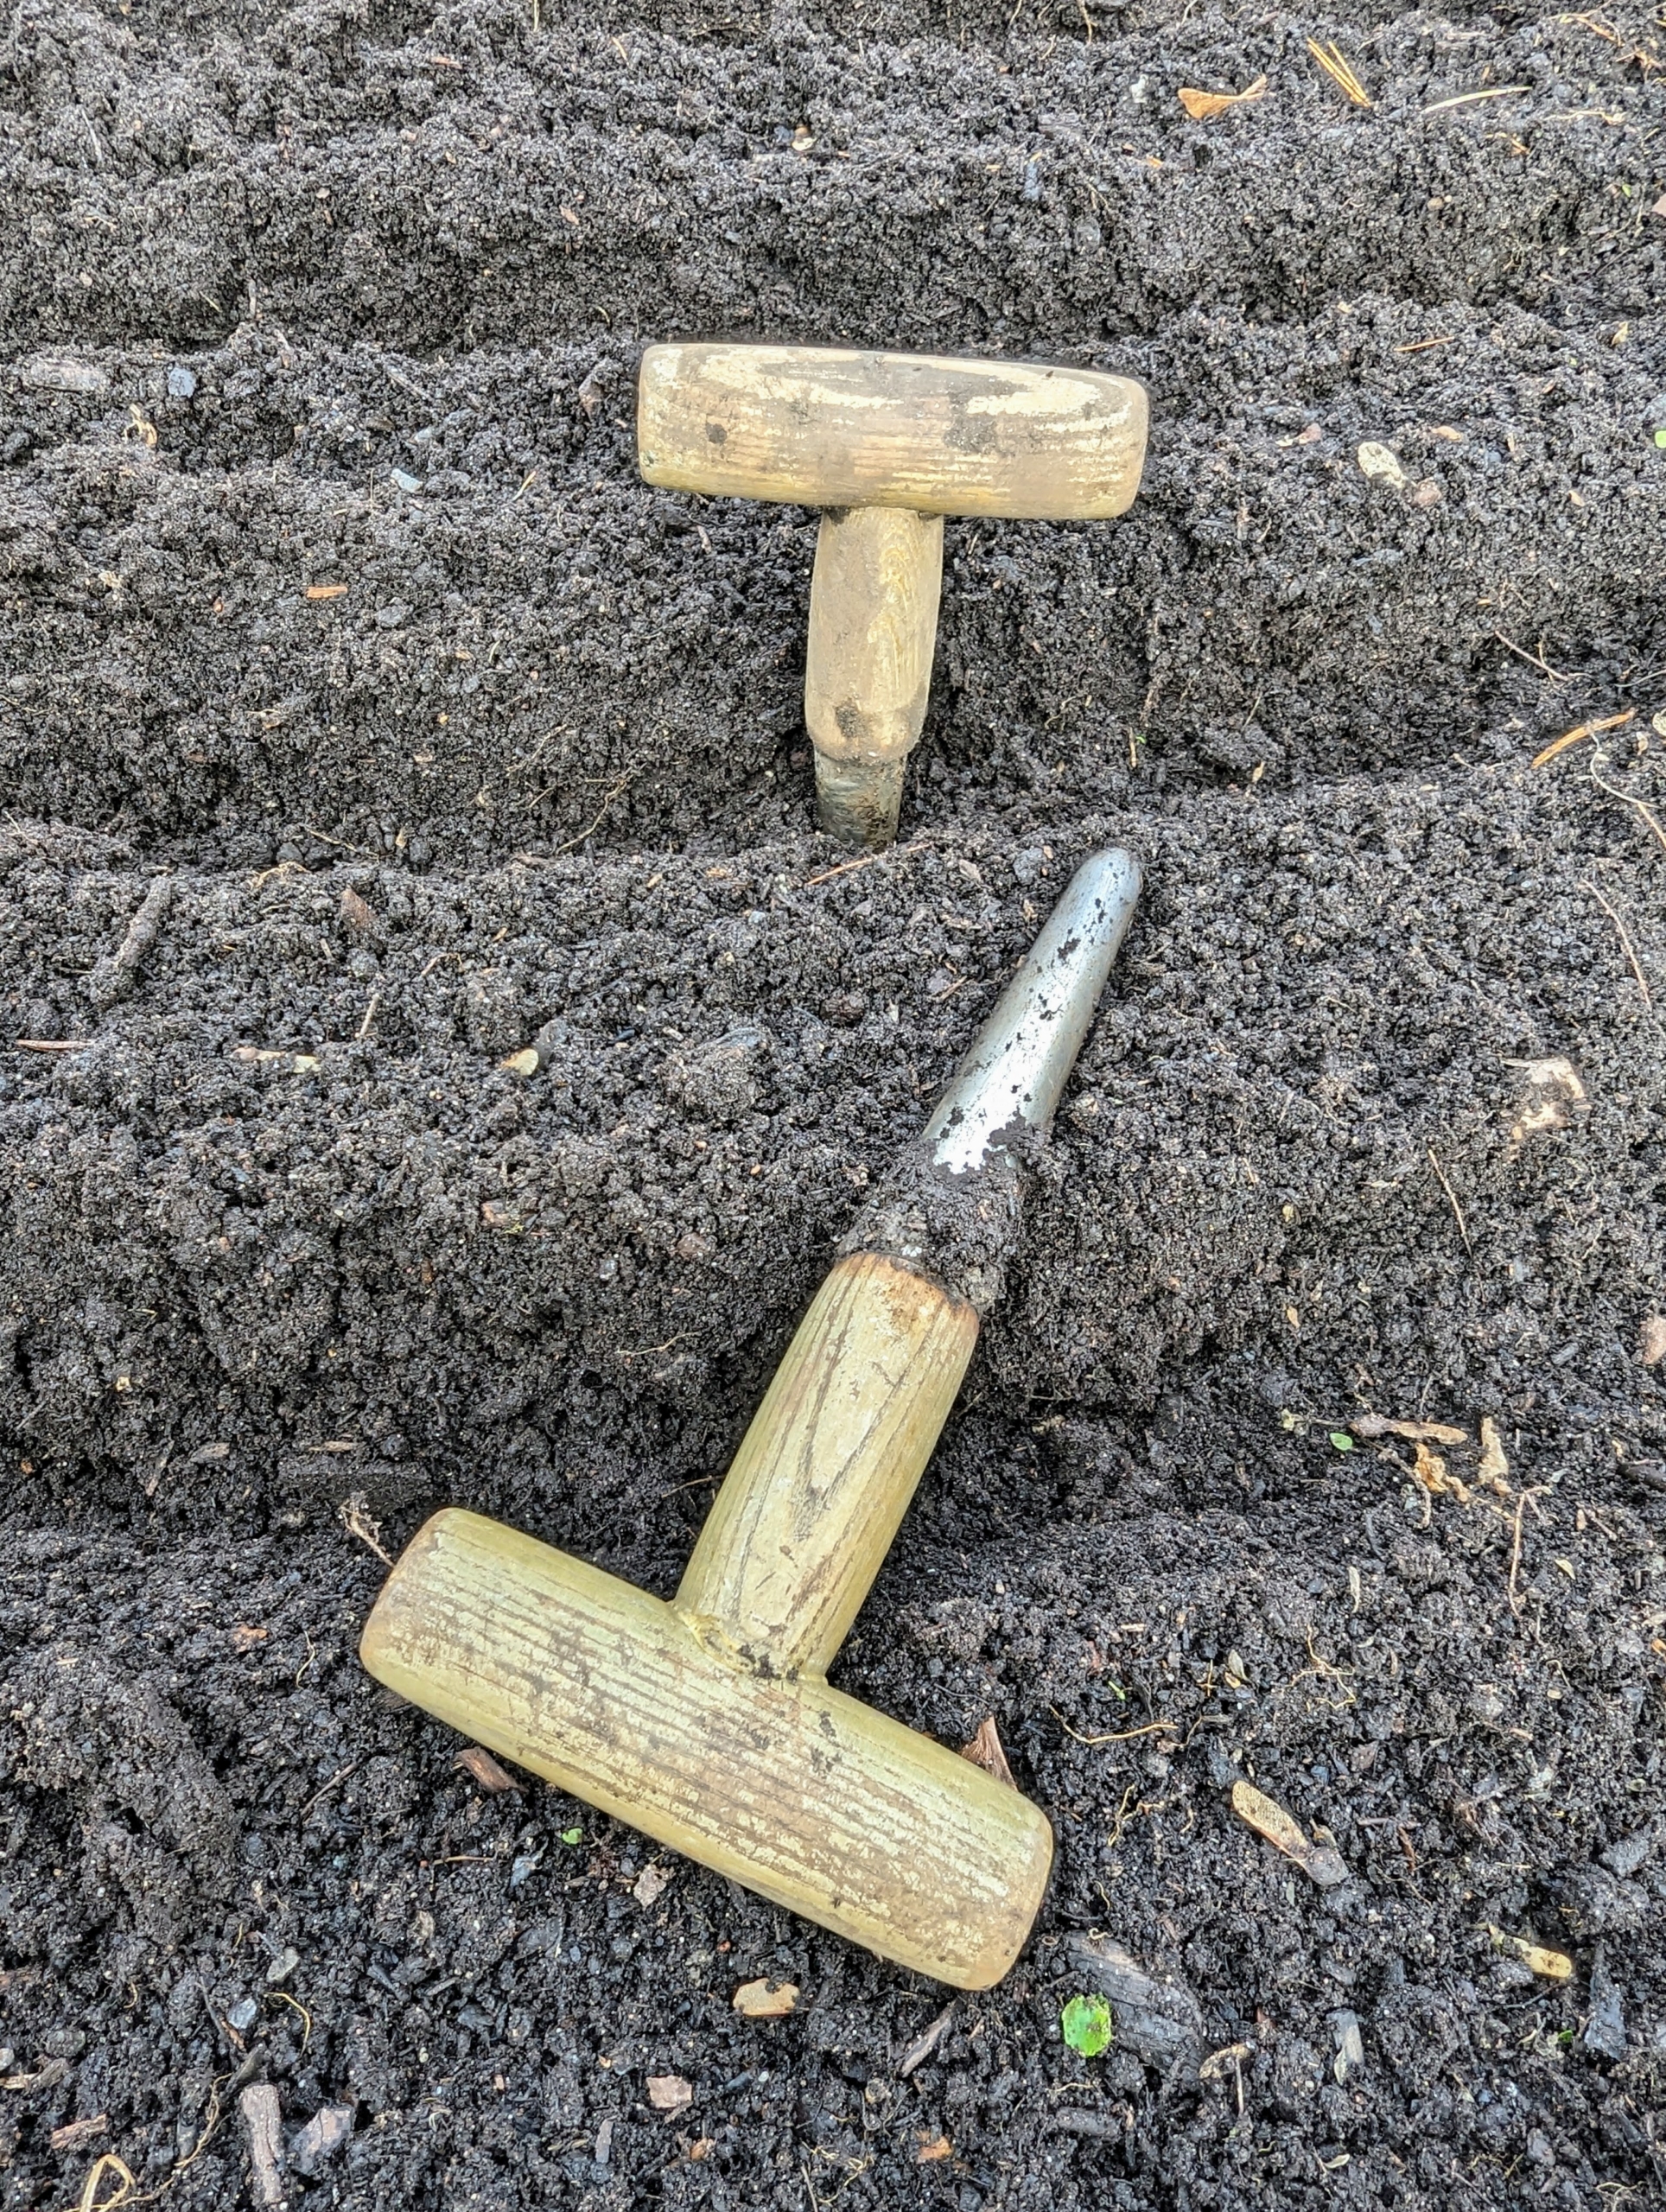
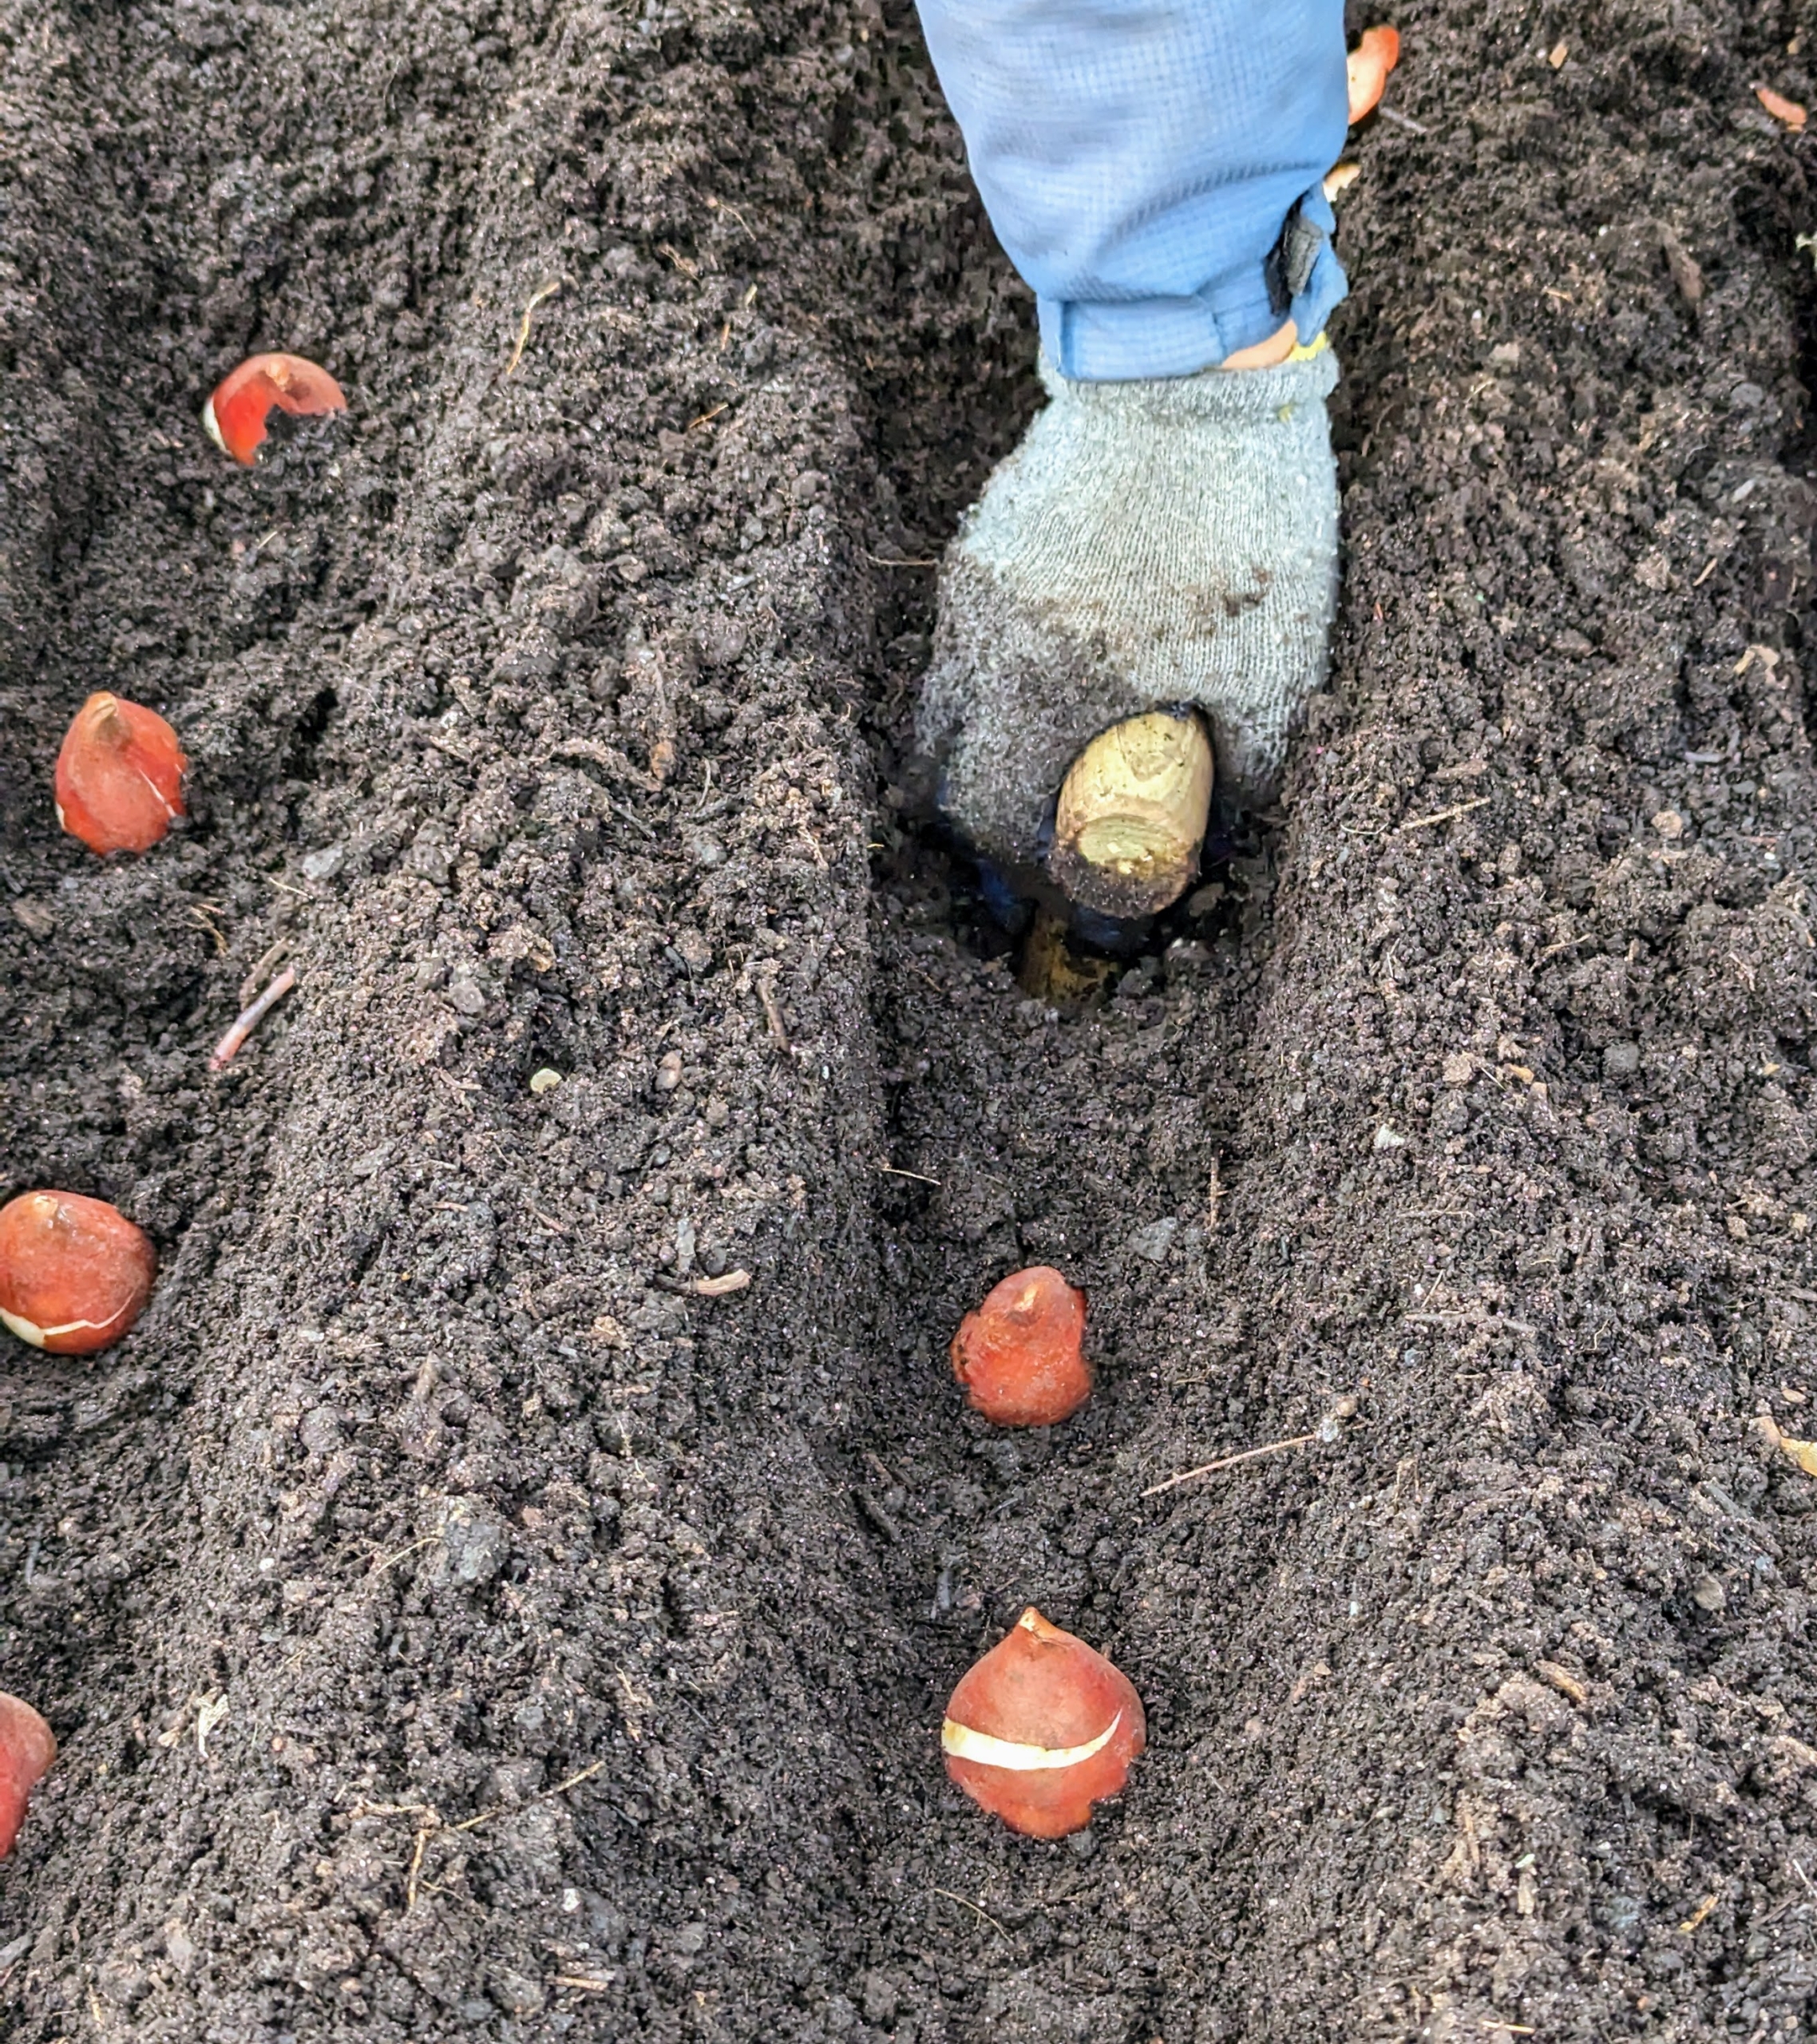
To plant these tulip bulbs, Brian and Phurba use these dibbers. A dibber or dibble or dibbler is a pointed wooden stick for making holes in the ground so seeds, seedlings or bulbs can be planted. Dibbers come in a variety of designs including the straight dibber, T-handled dibber, trowel dibber, and an L-shaped dibber. These are T-handled dibbers.
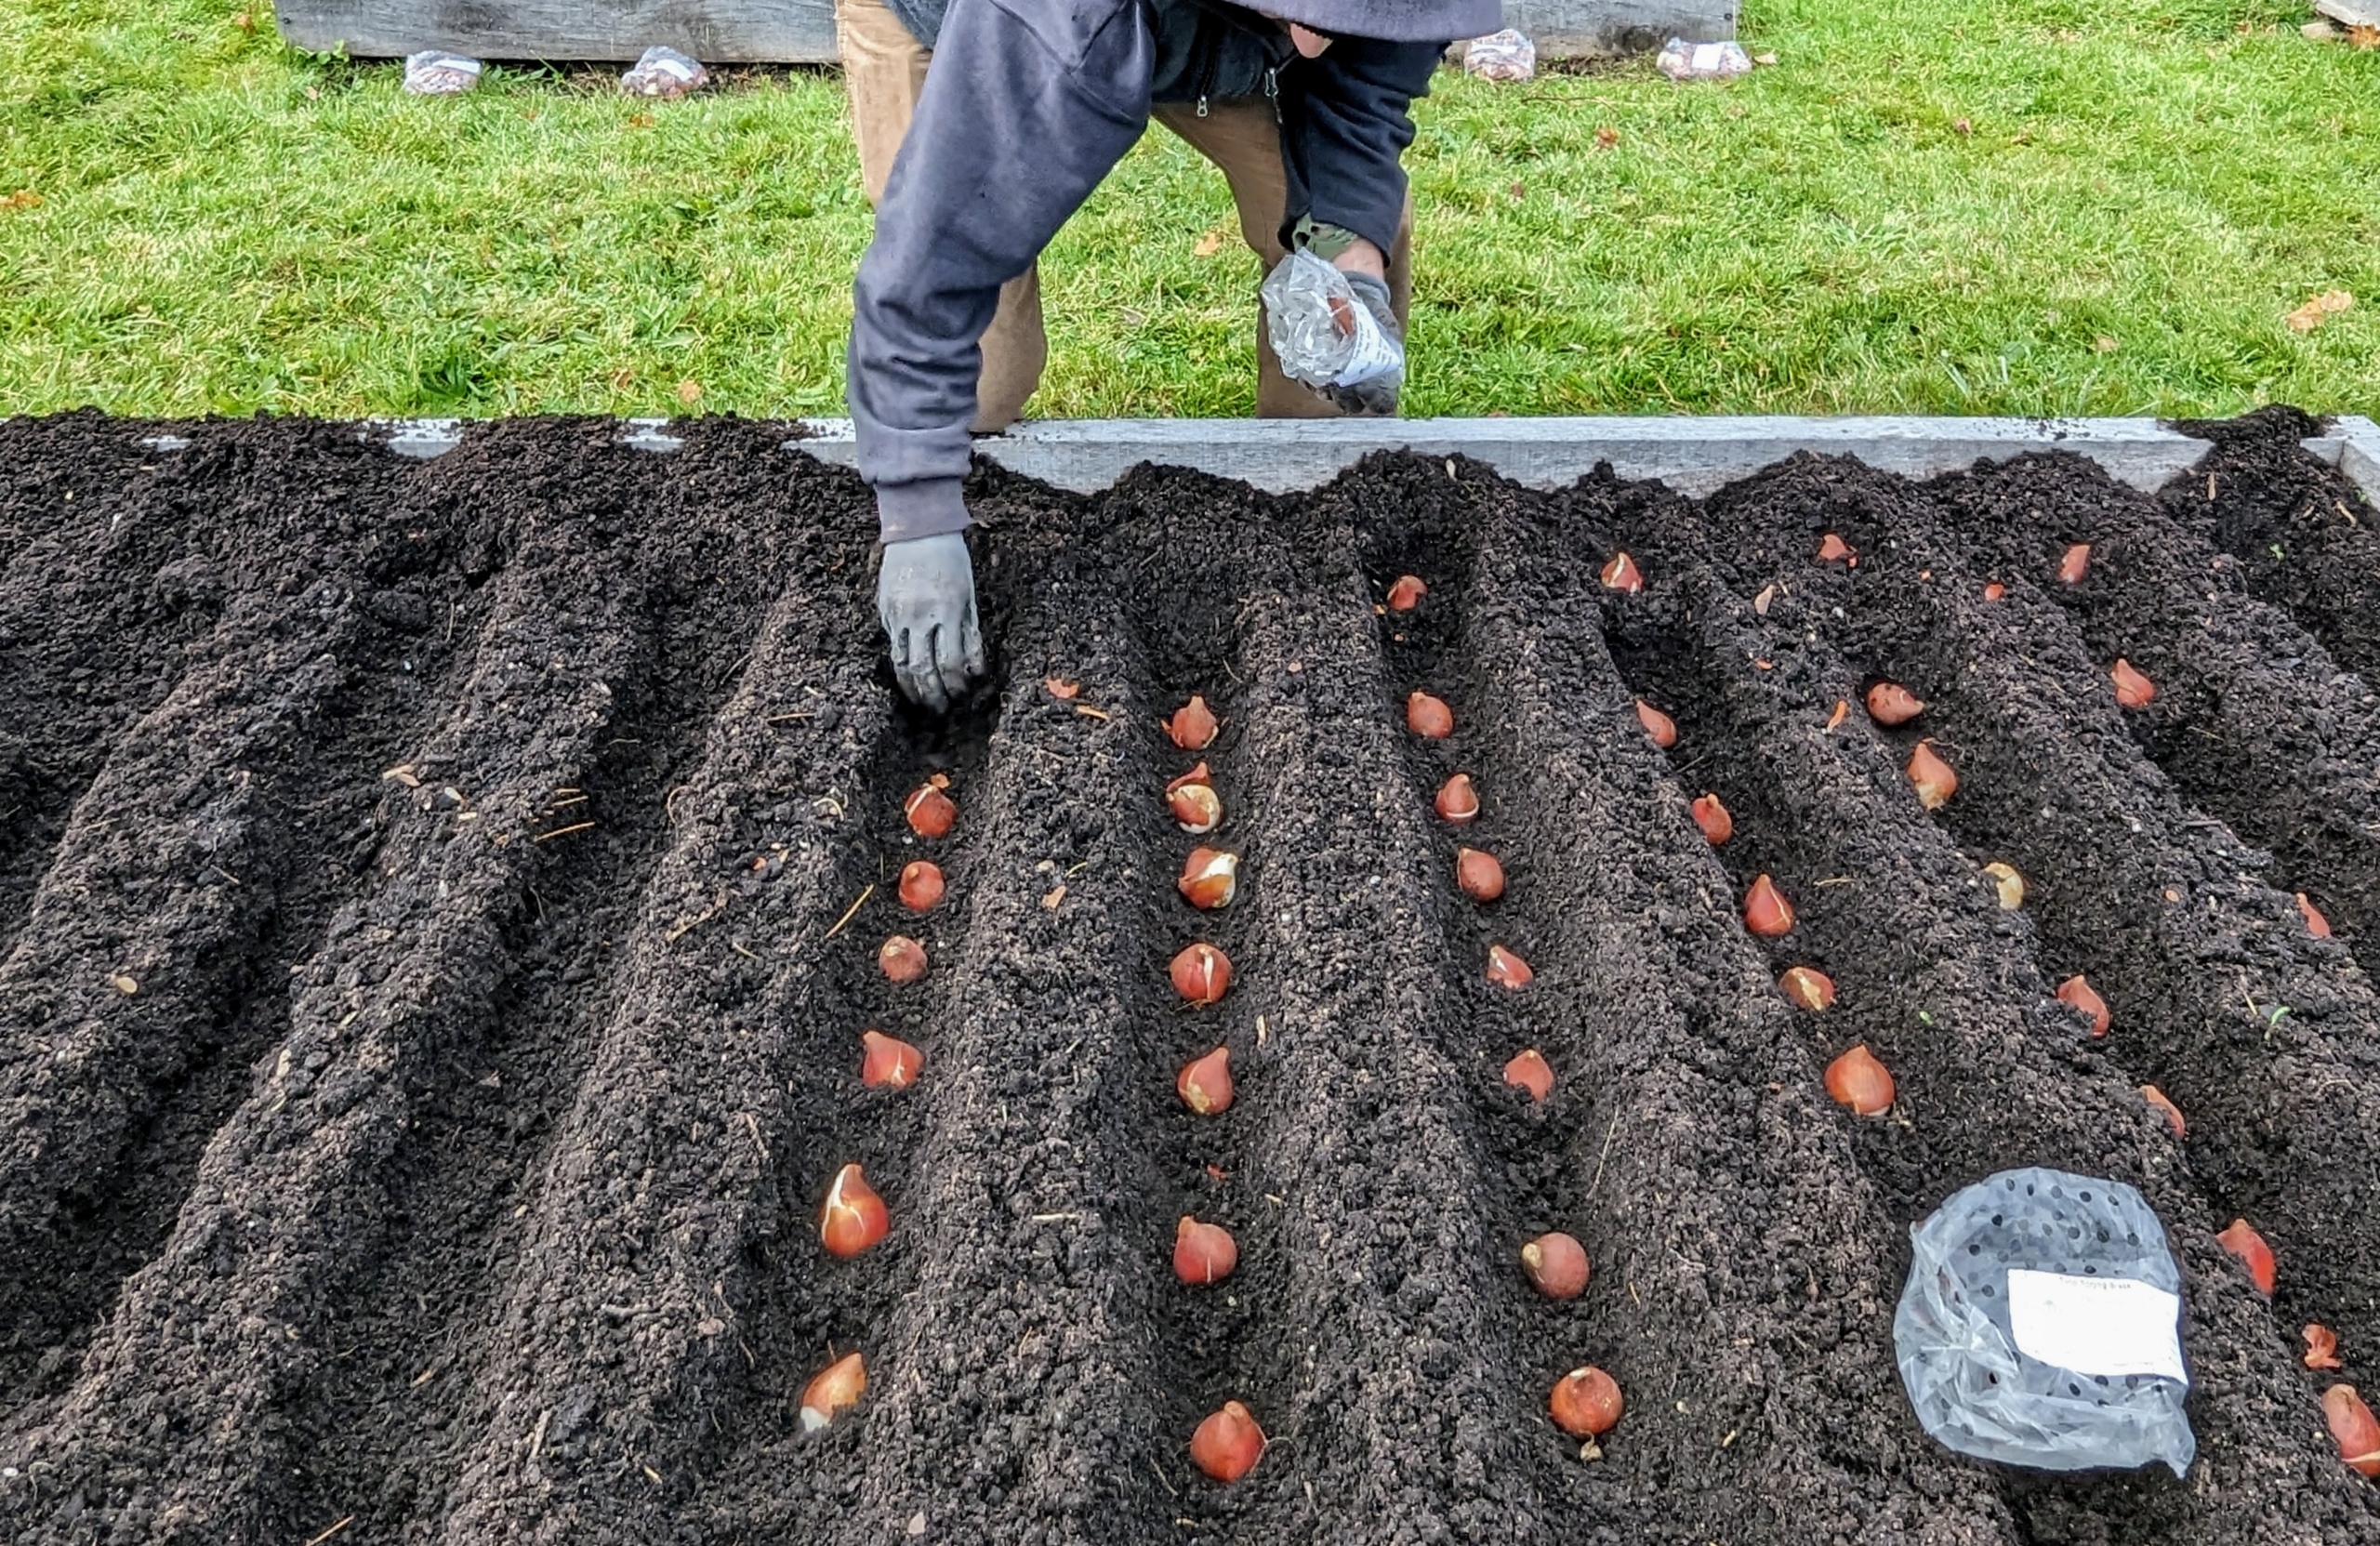
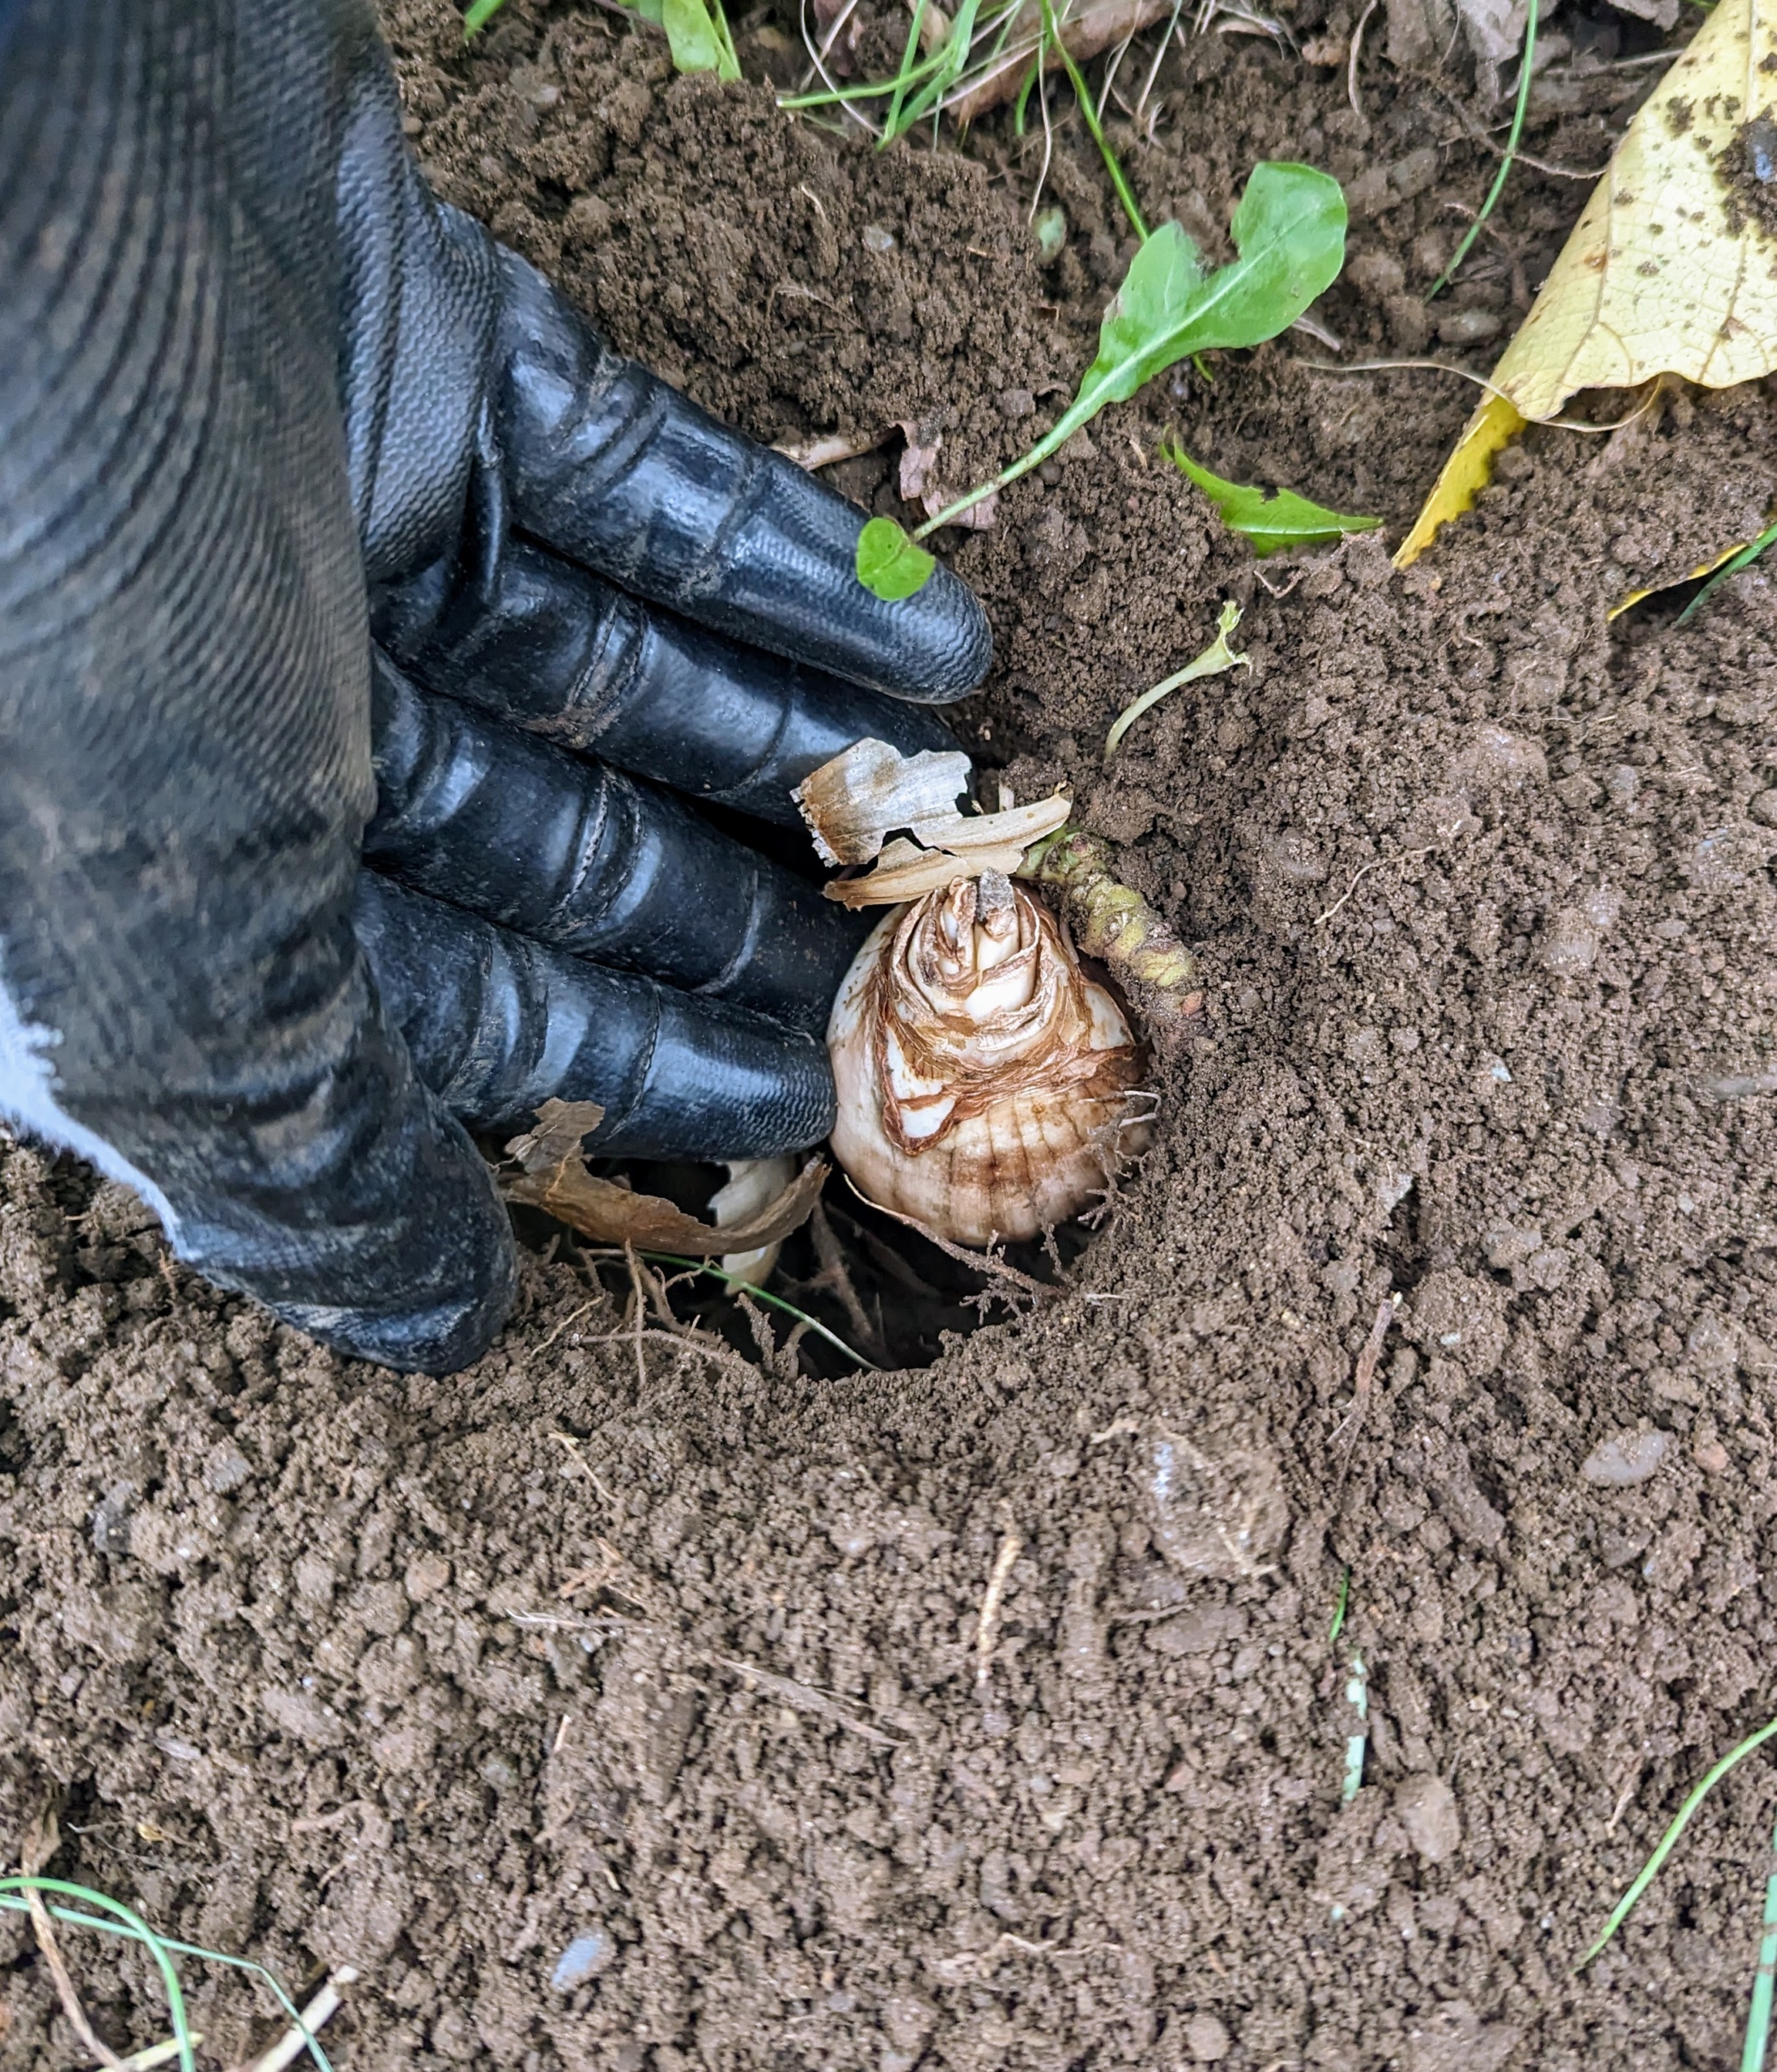
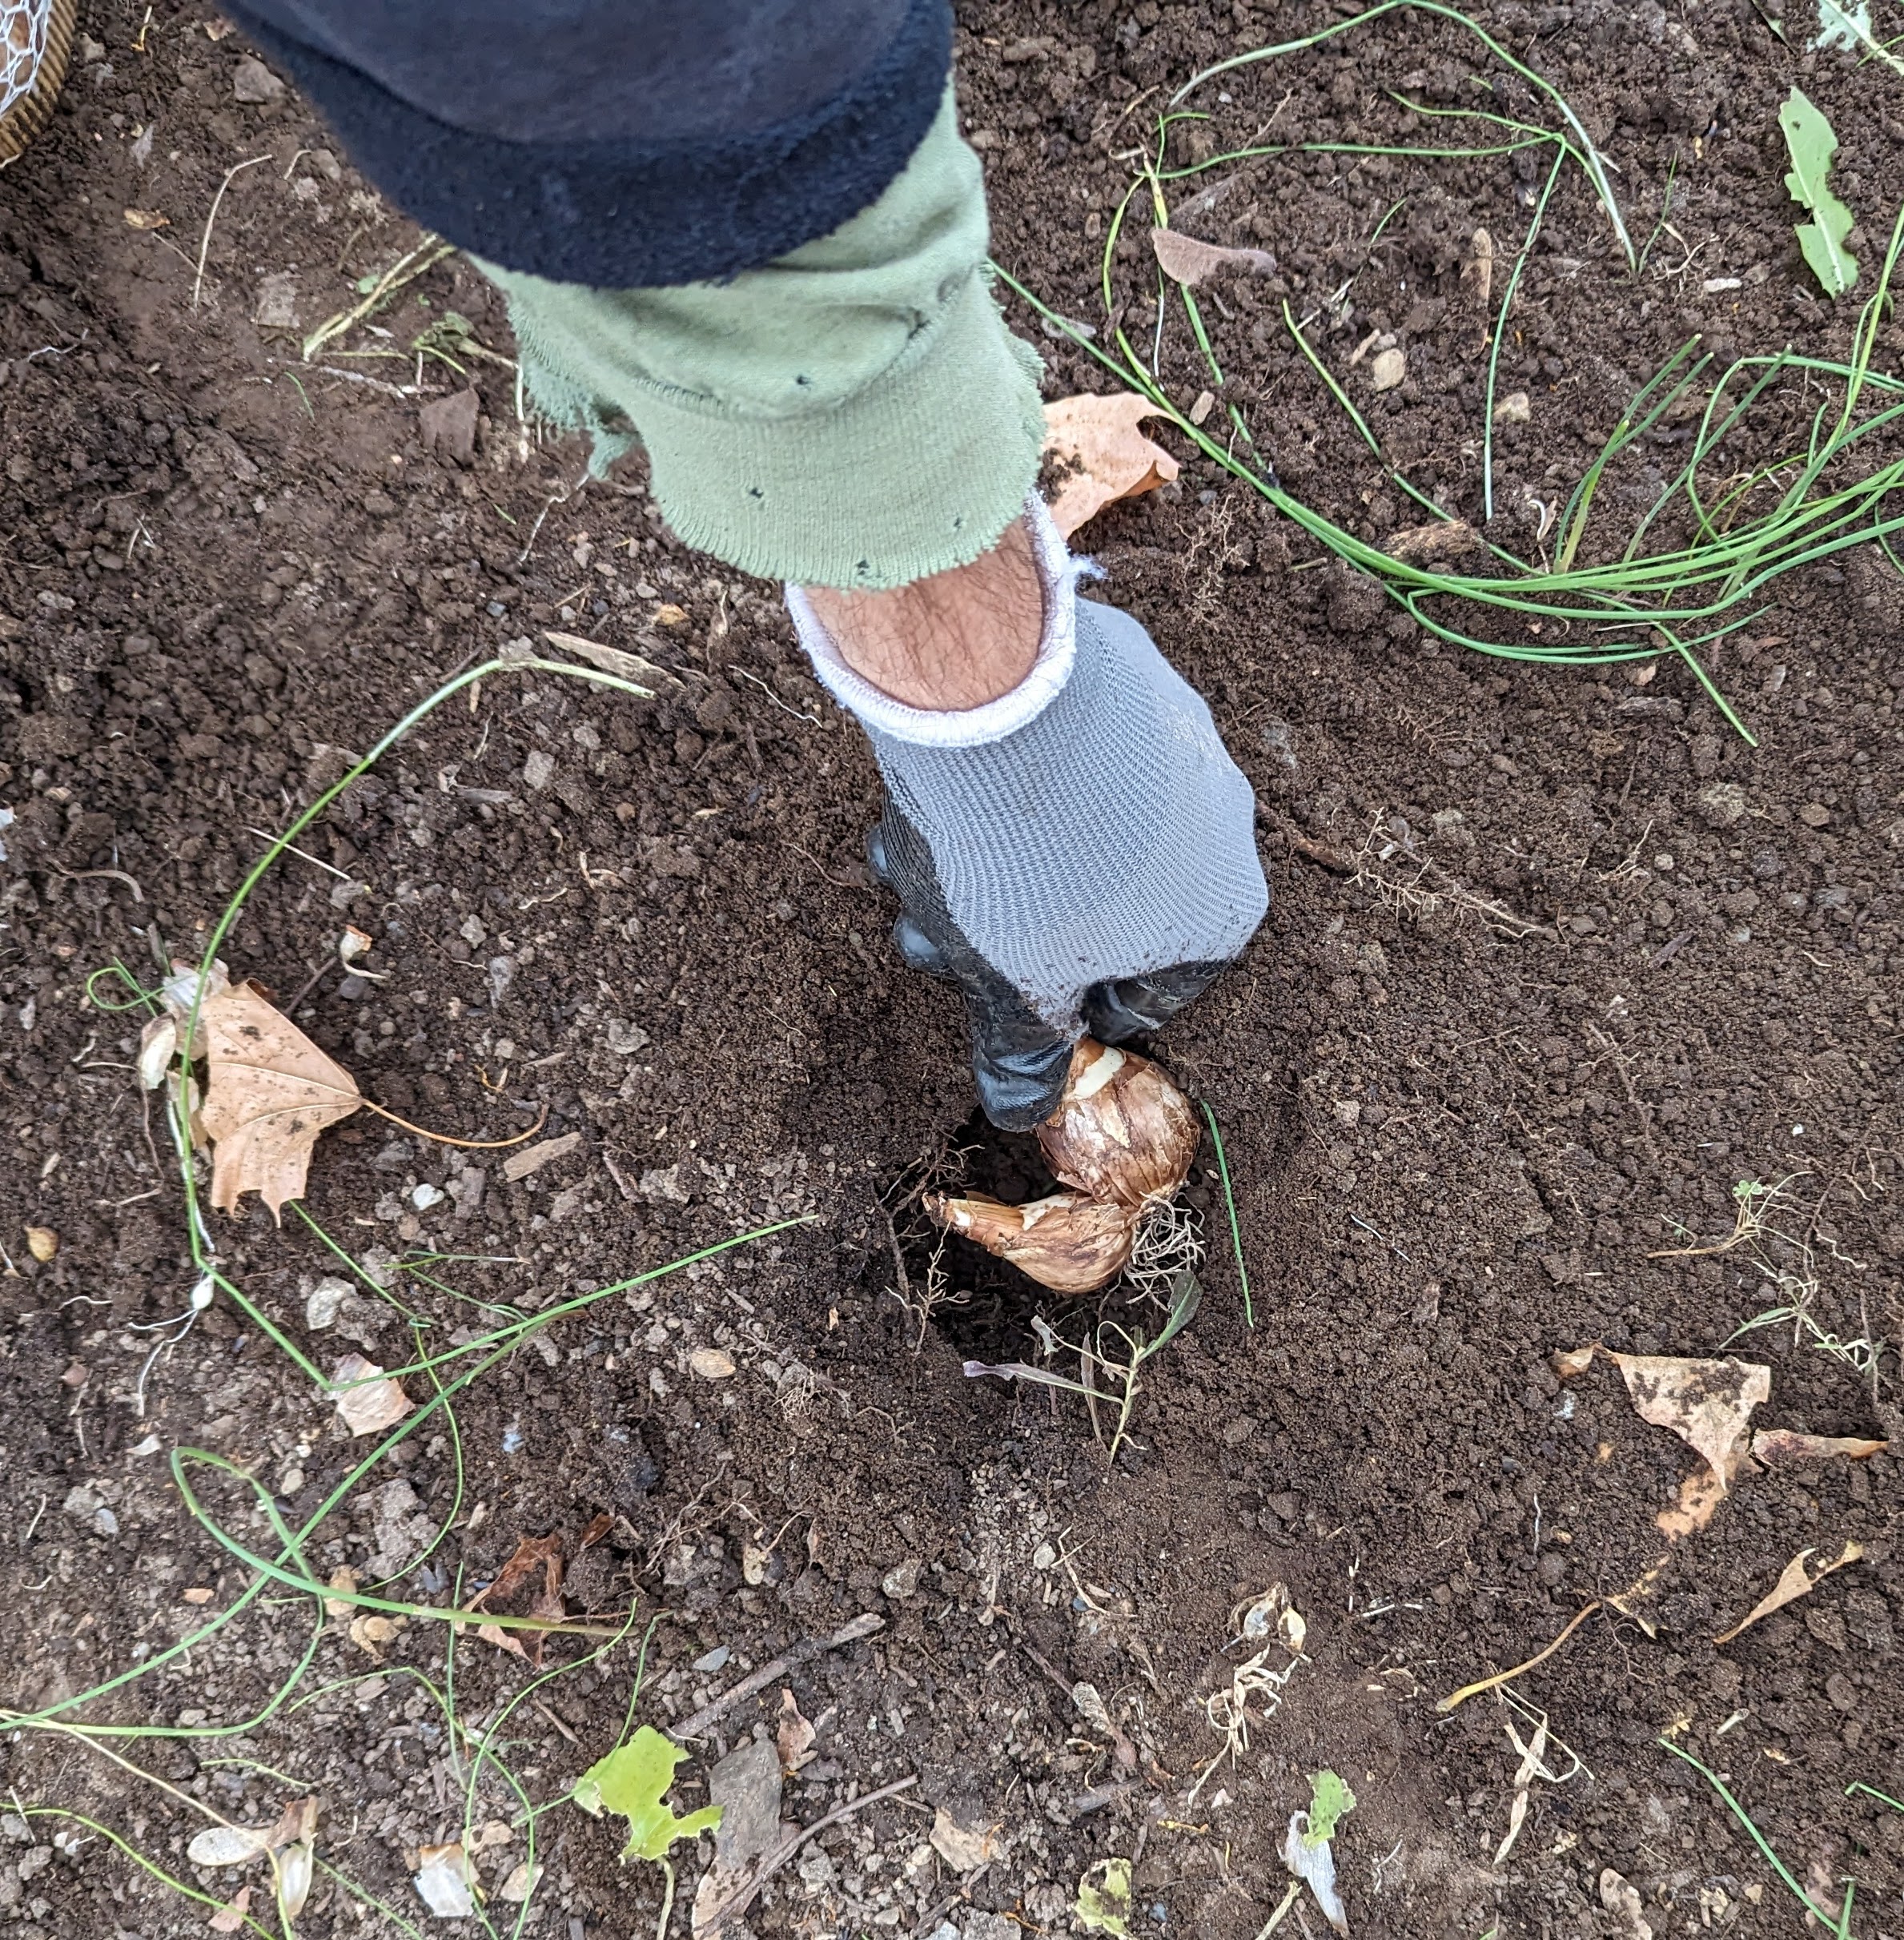
One by one, Brian places each bulb into the trench. Tulip bulbs are medium sized, so they should be buried at least six to eight-inches deep. As a rule of thumb, bulbs should be planted about three times the height of the actual bulb.
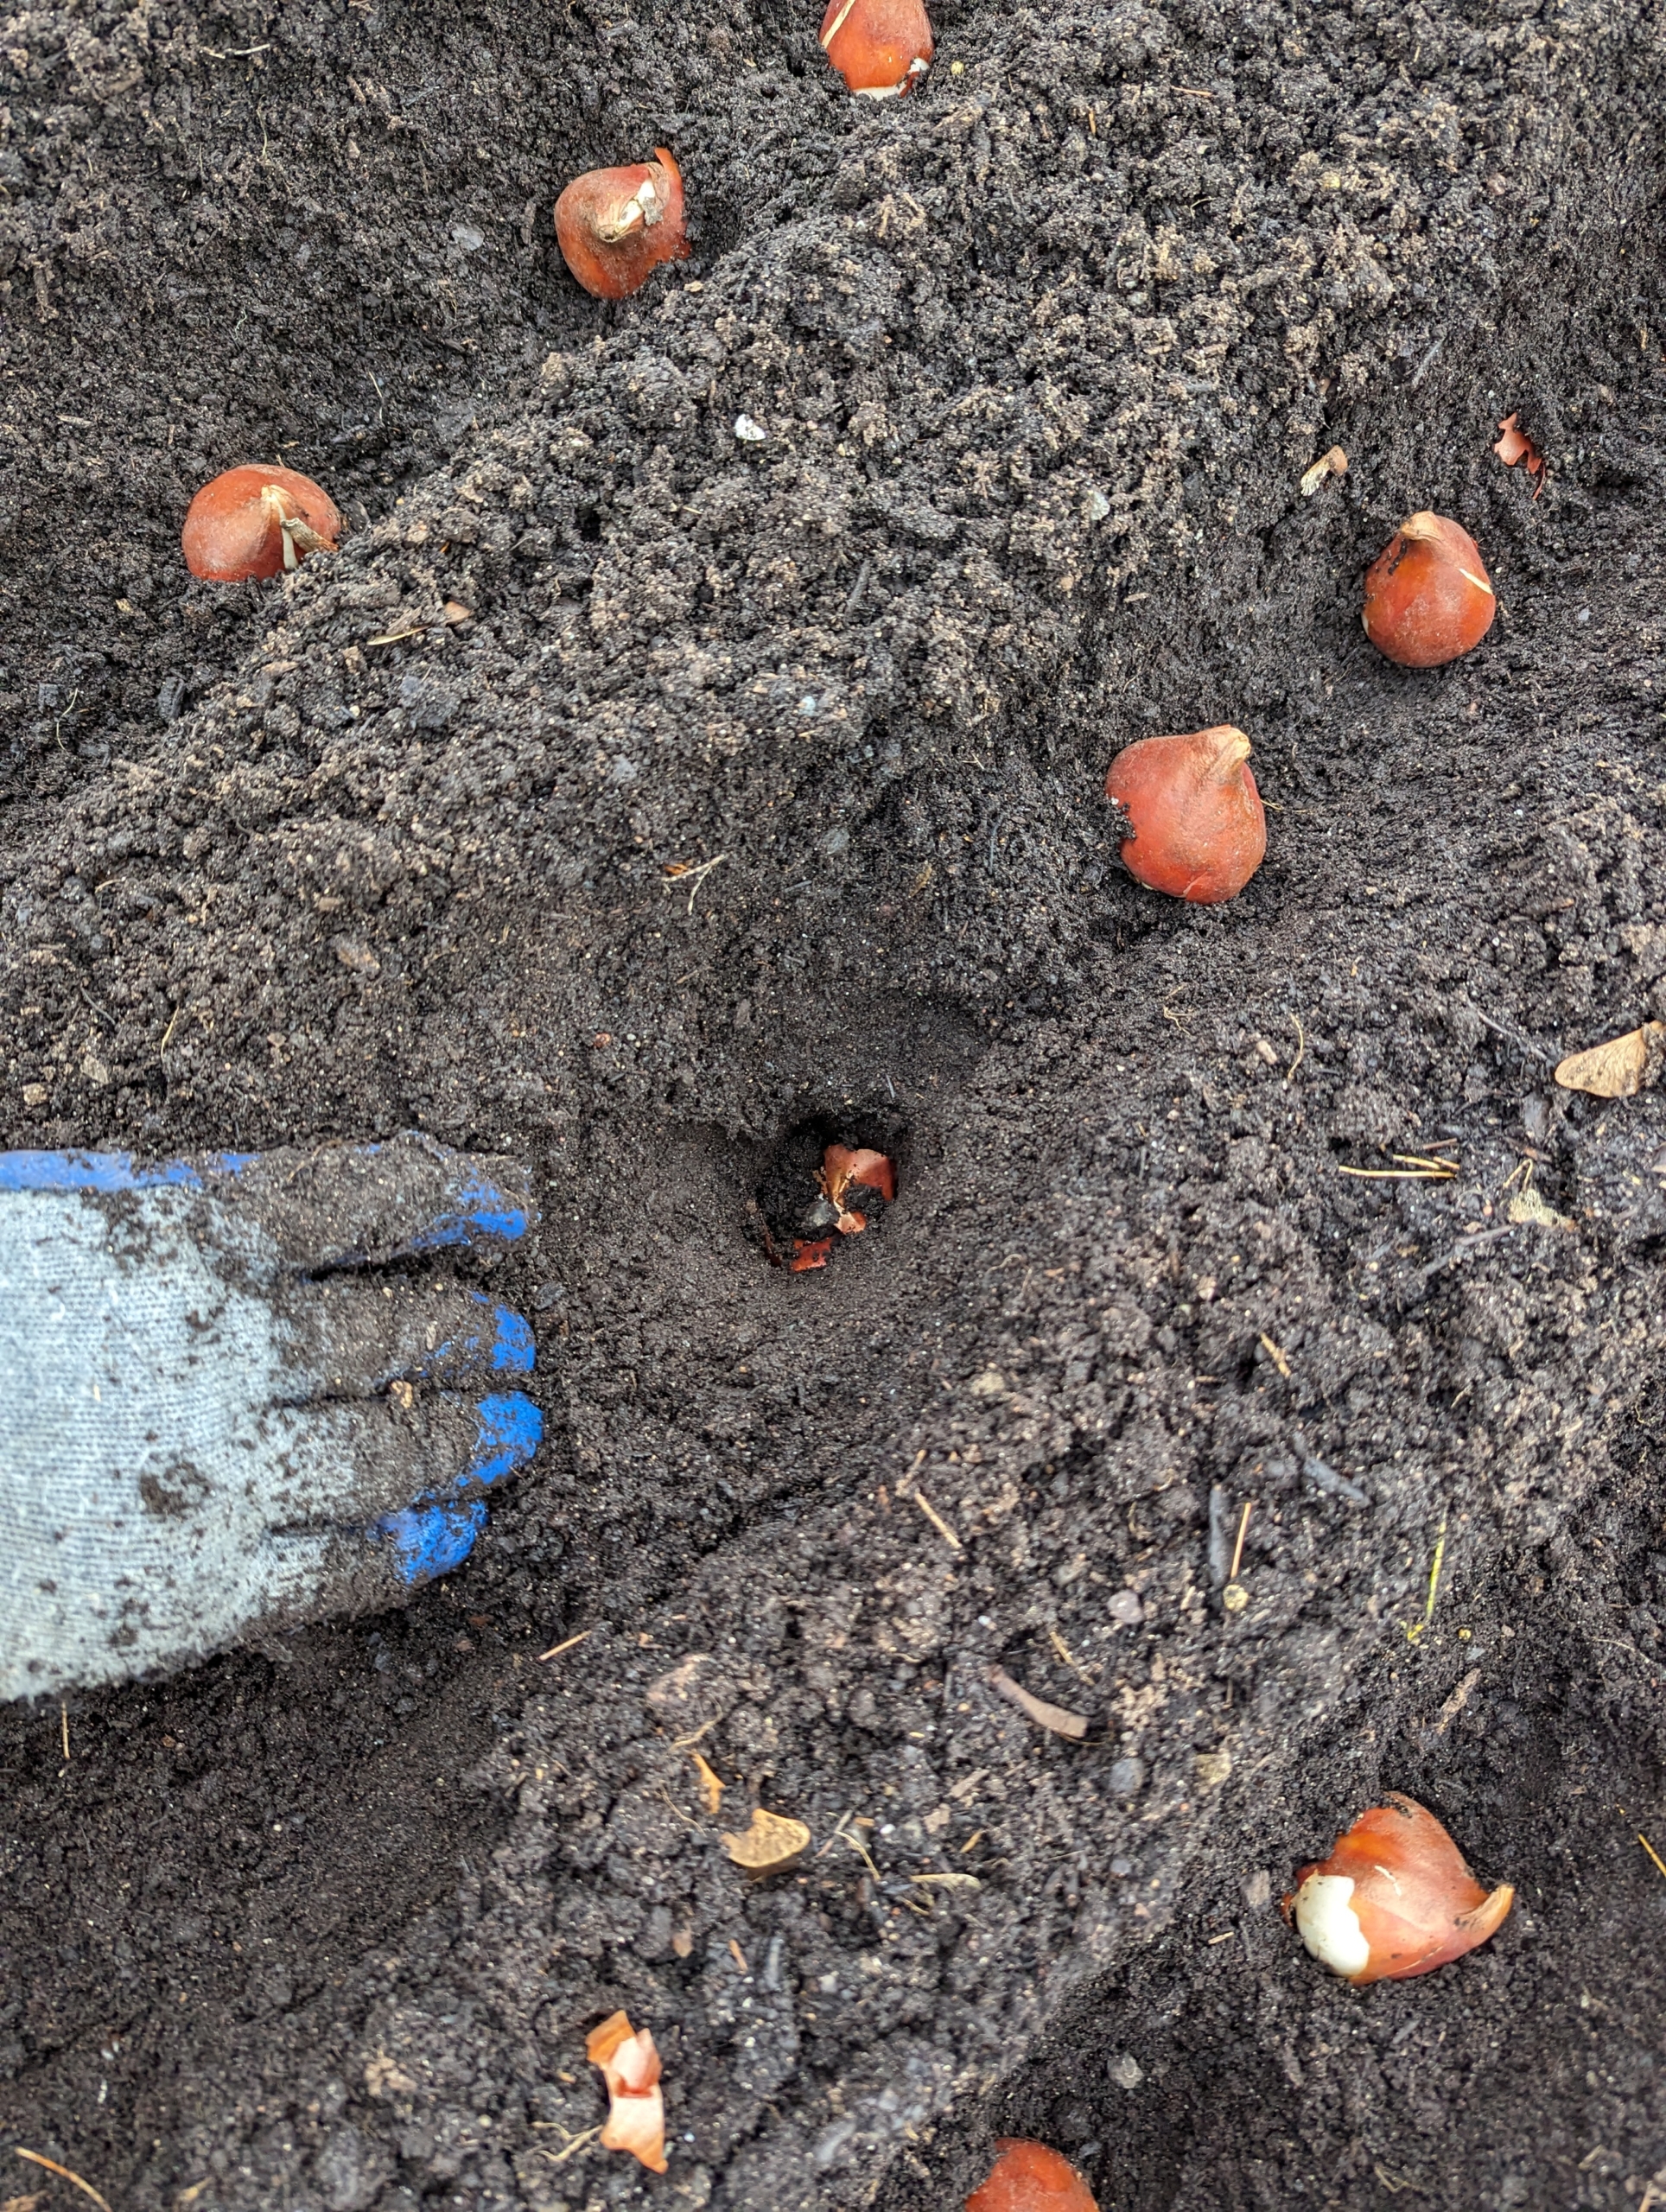
These tulip bulbs look so healthy. Any kind of bulb should be firm and free of soft spots or visible rot. Check for signs of disease, cracking or other damage, which may cause the bulb to rot in the ground. The brown tunic, or outer skin protects each bulb’s bottom or basil plate. One can peel it off, or plant as is.
Once all the bulbs are in their designated rows, Phurba follows behind and pushes the dibber into the soil making a hole where the bulb will be planted.
Phurba is careful to place each bulb with the pointed end faced up. This is important for all bulbs. If the pointed end is not obvious, look for the flat side of the bulb, which is the bottom.
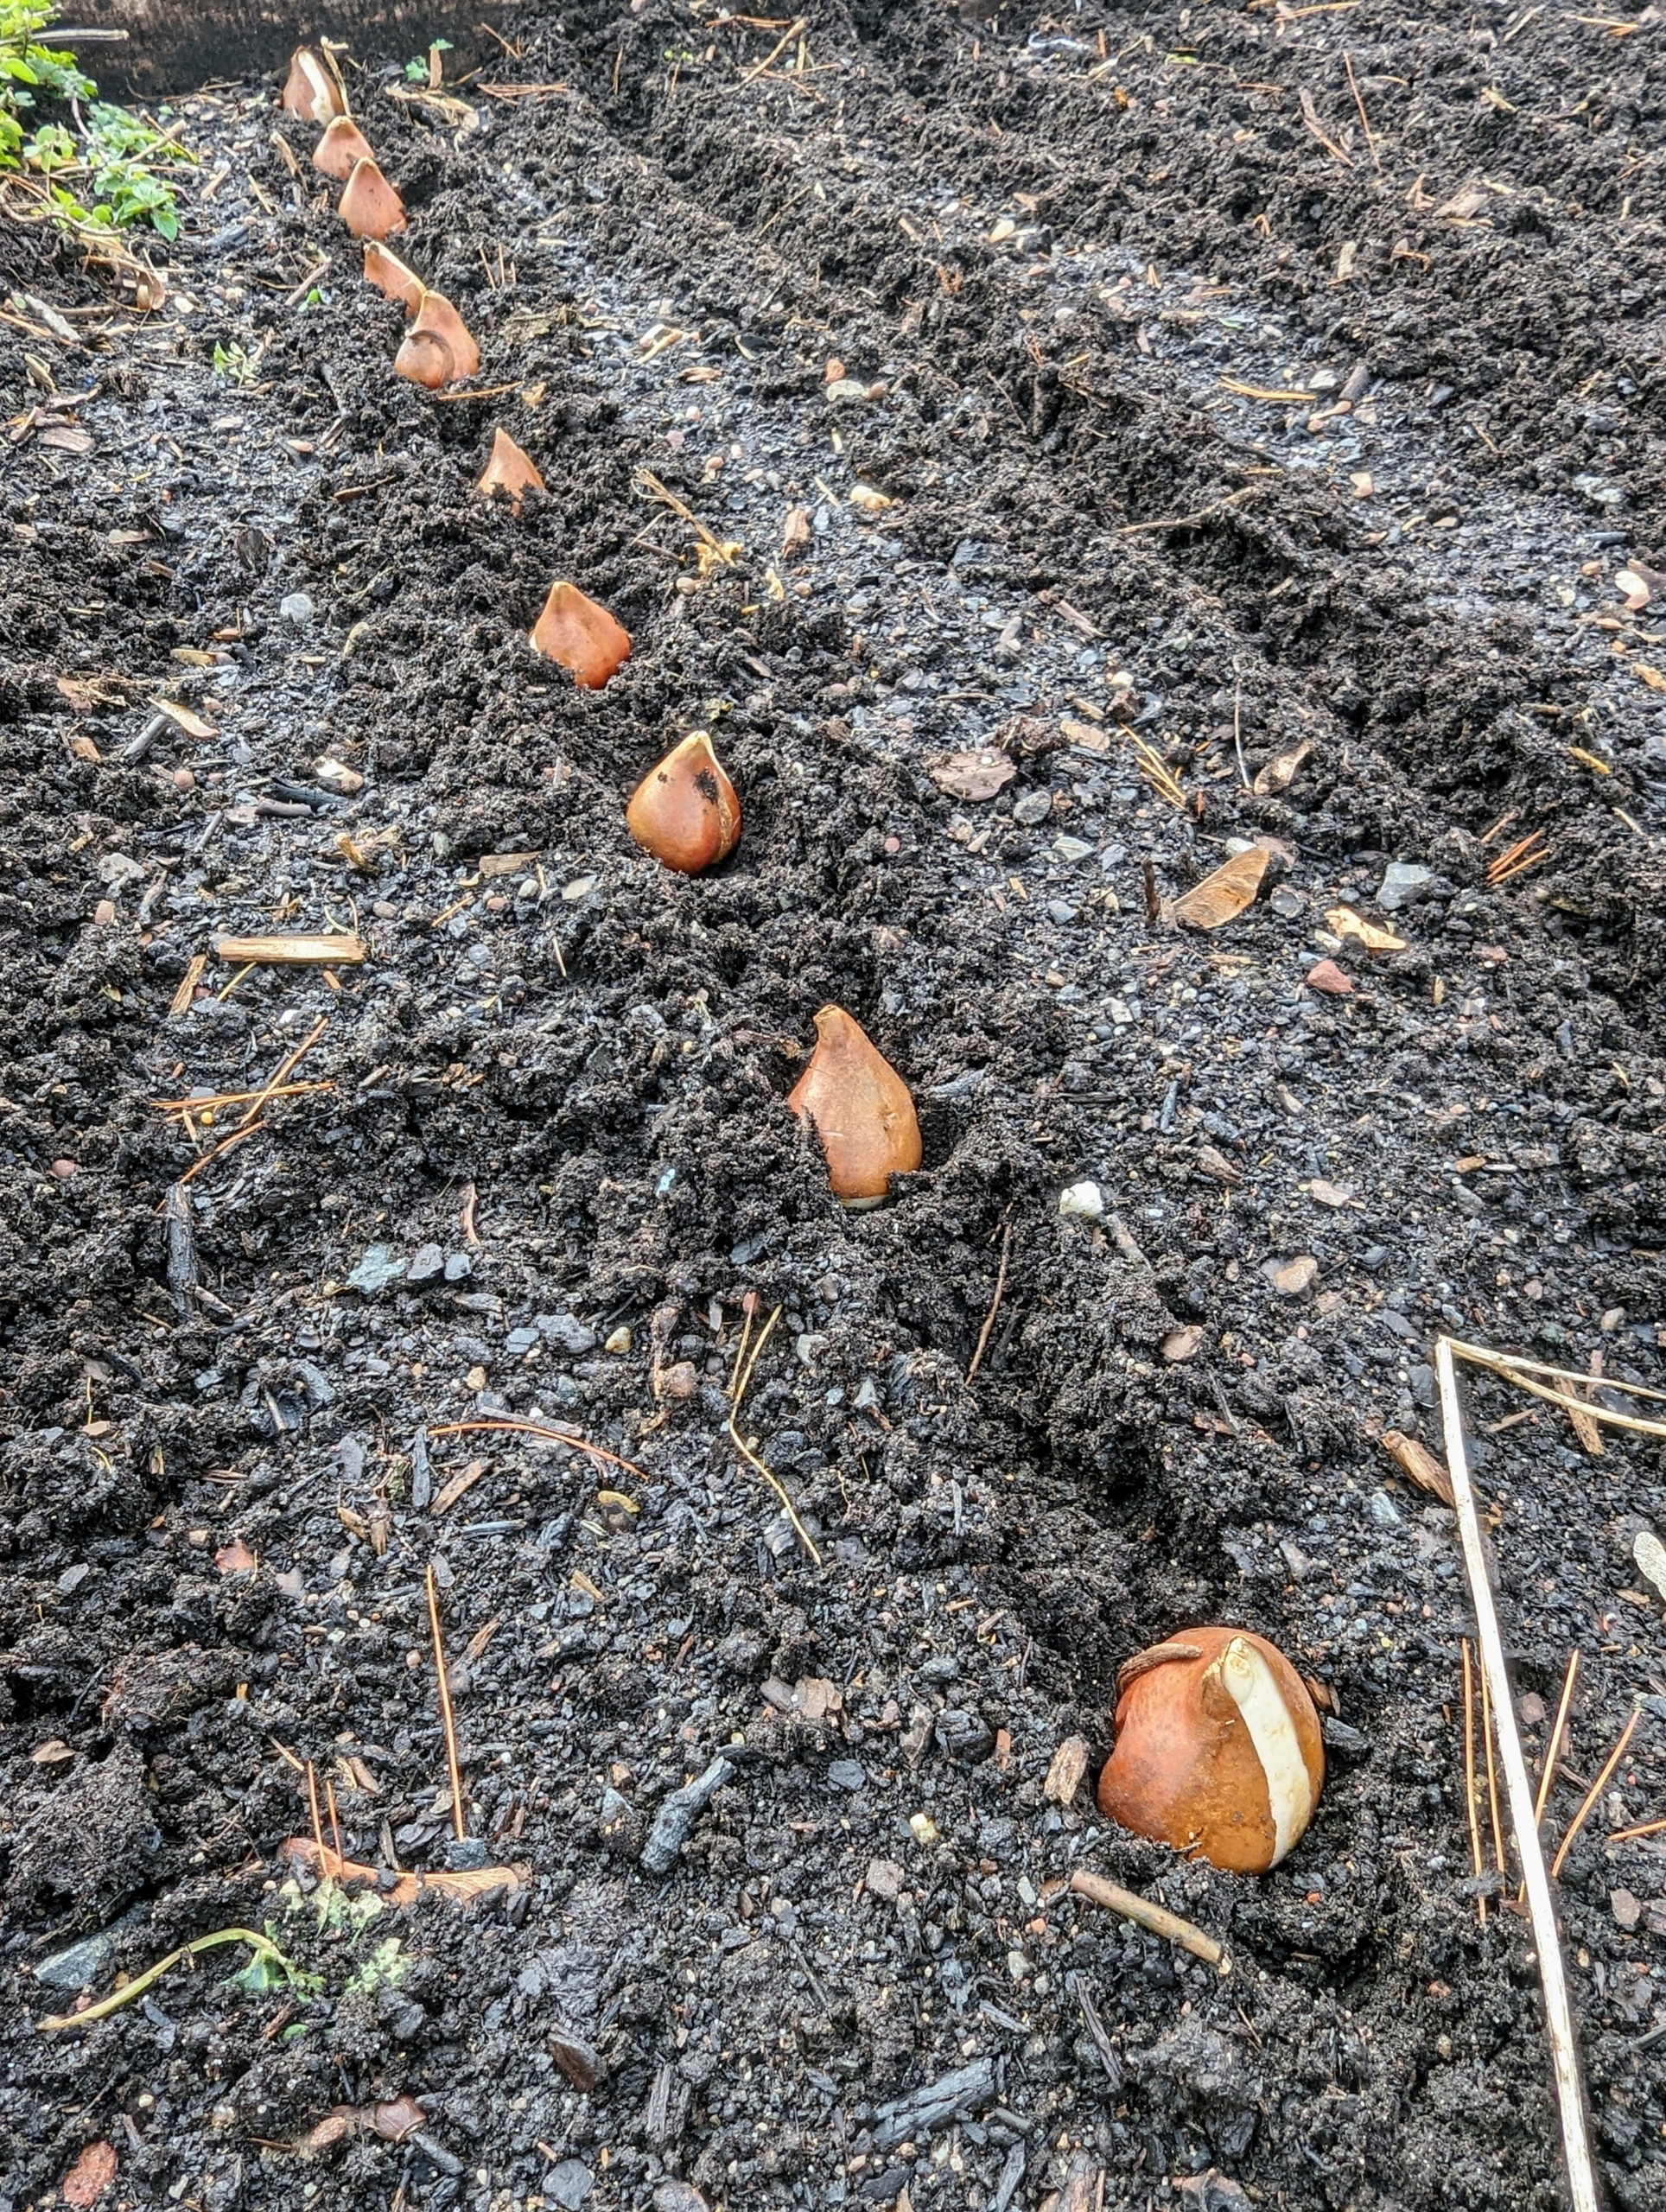
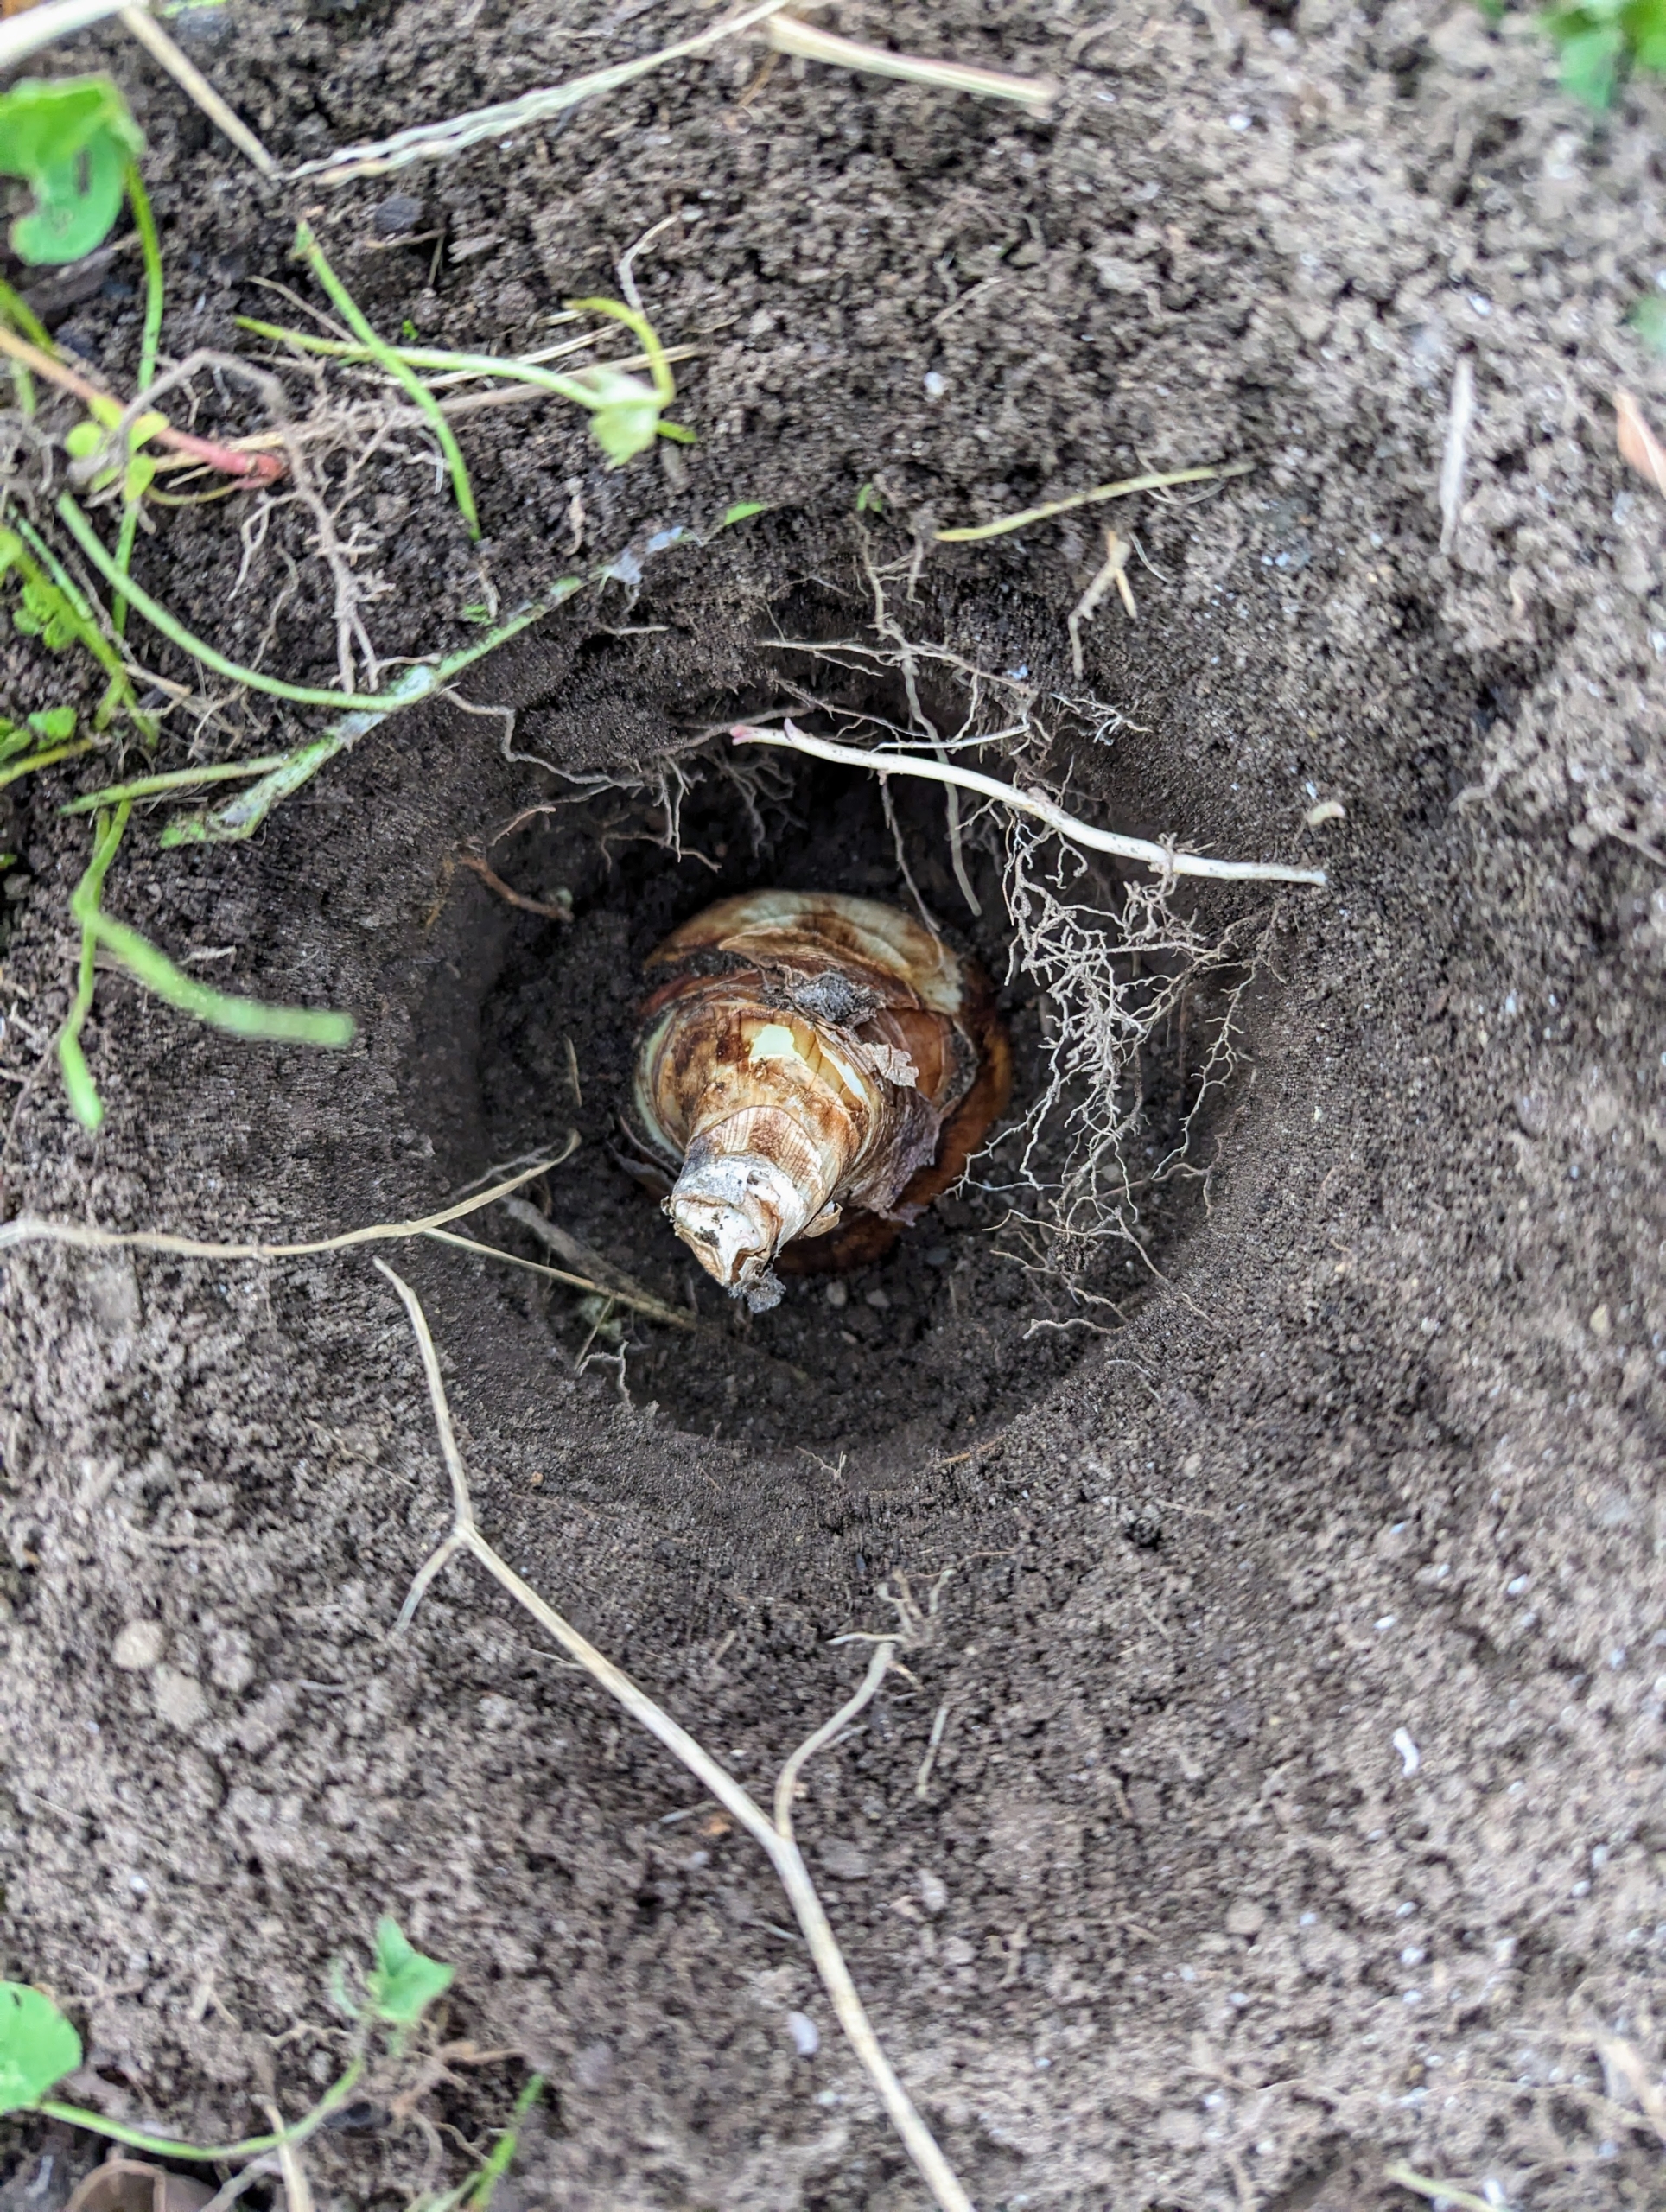
Here is the bulb in the soil. Phurba plants all the bulbs before backfilling, so he can keep track of the planted holes and rows.
Bulbs are alive, but dormant, so they prefer to be in the soil. If they cannot be planted promptly, store them in a dark, dry location with good air circulation and temperatures averaging about 50 to 65-degrees Fahrenheit.
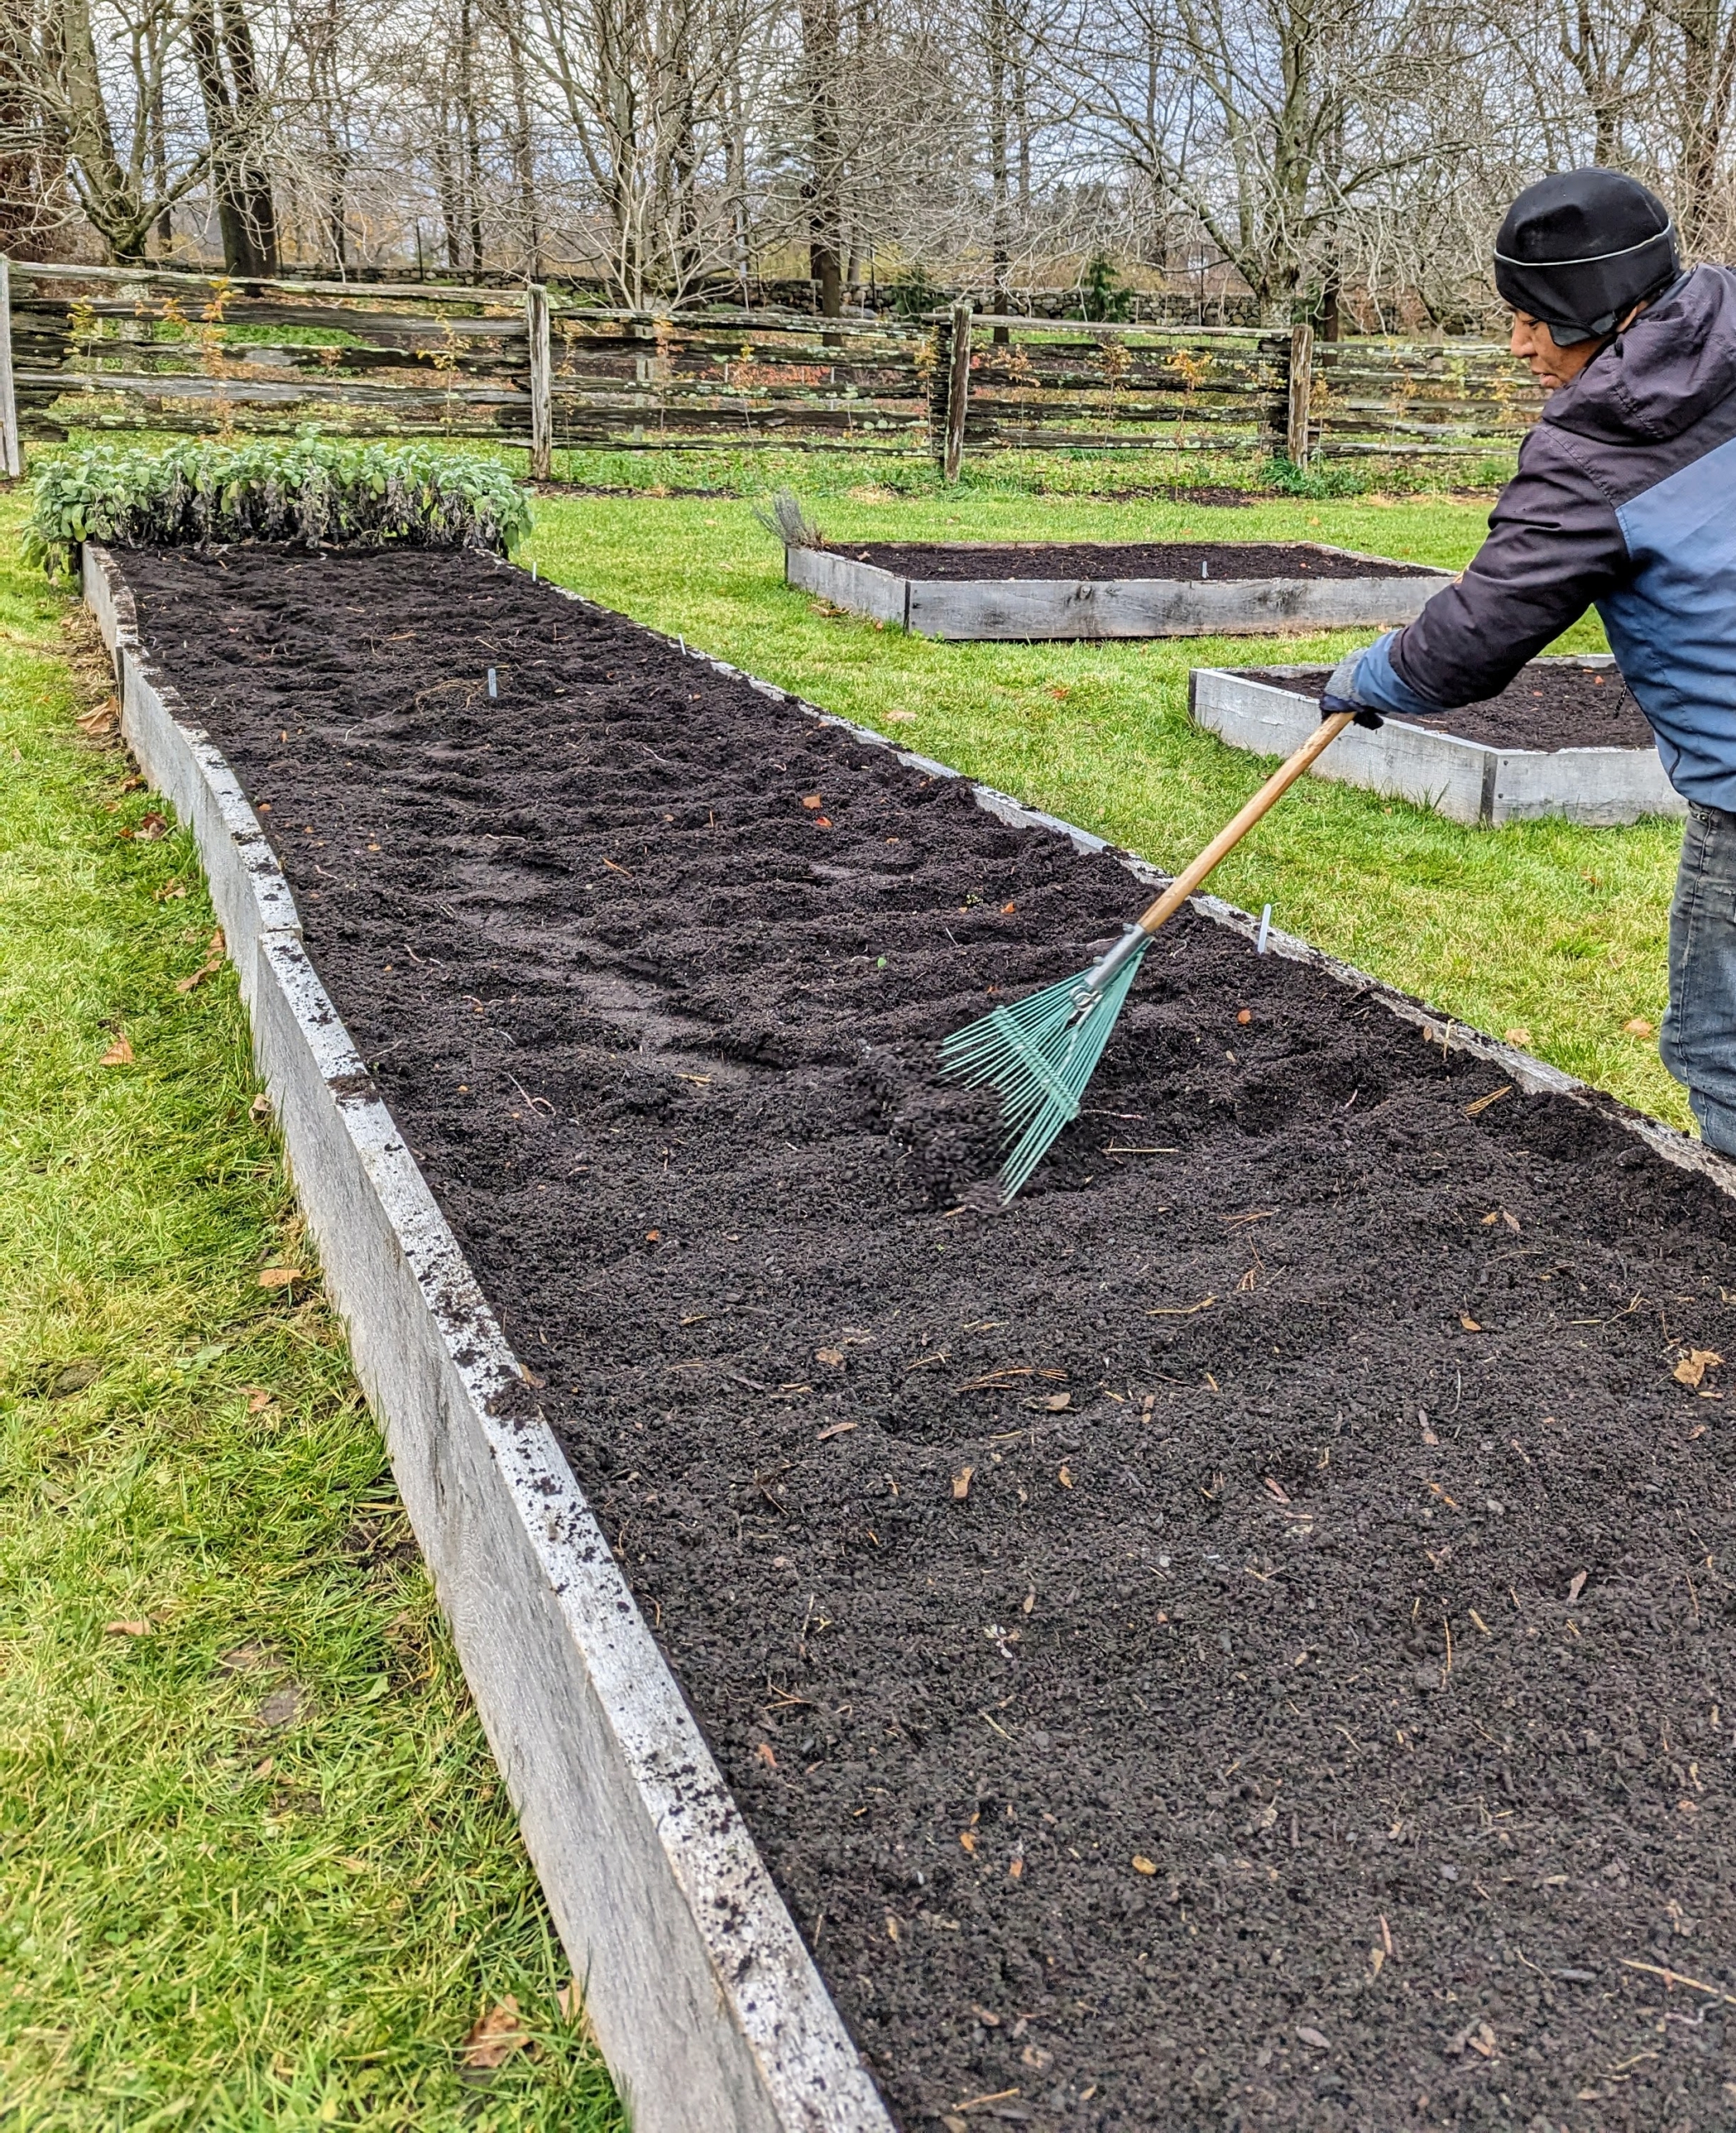
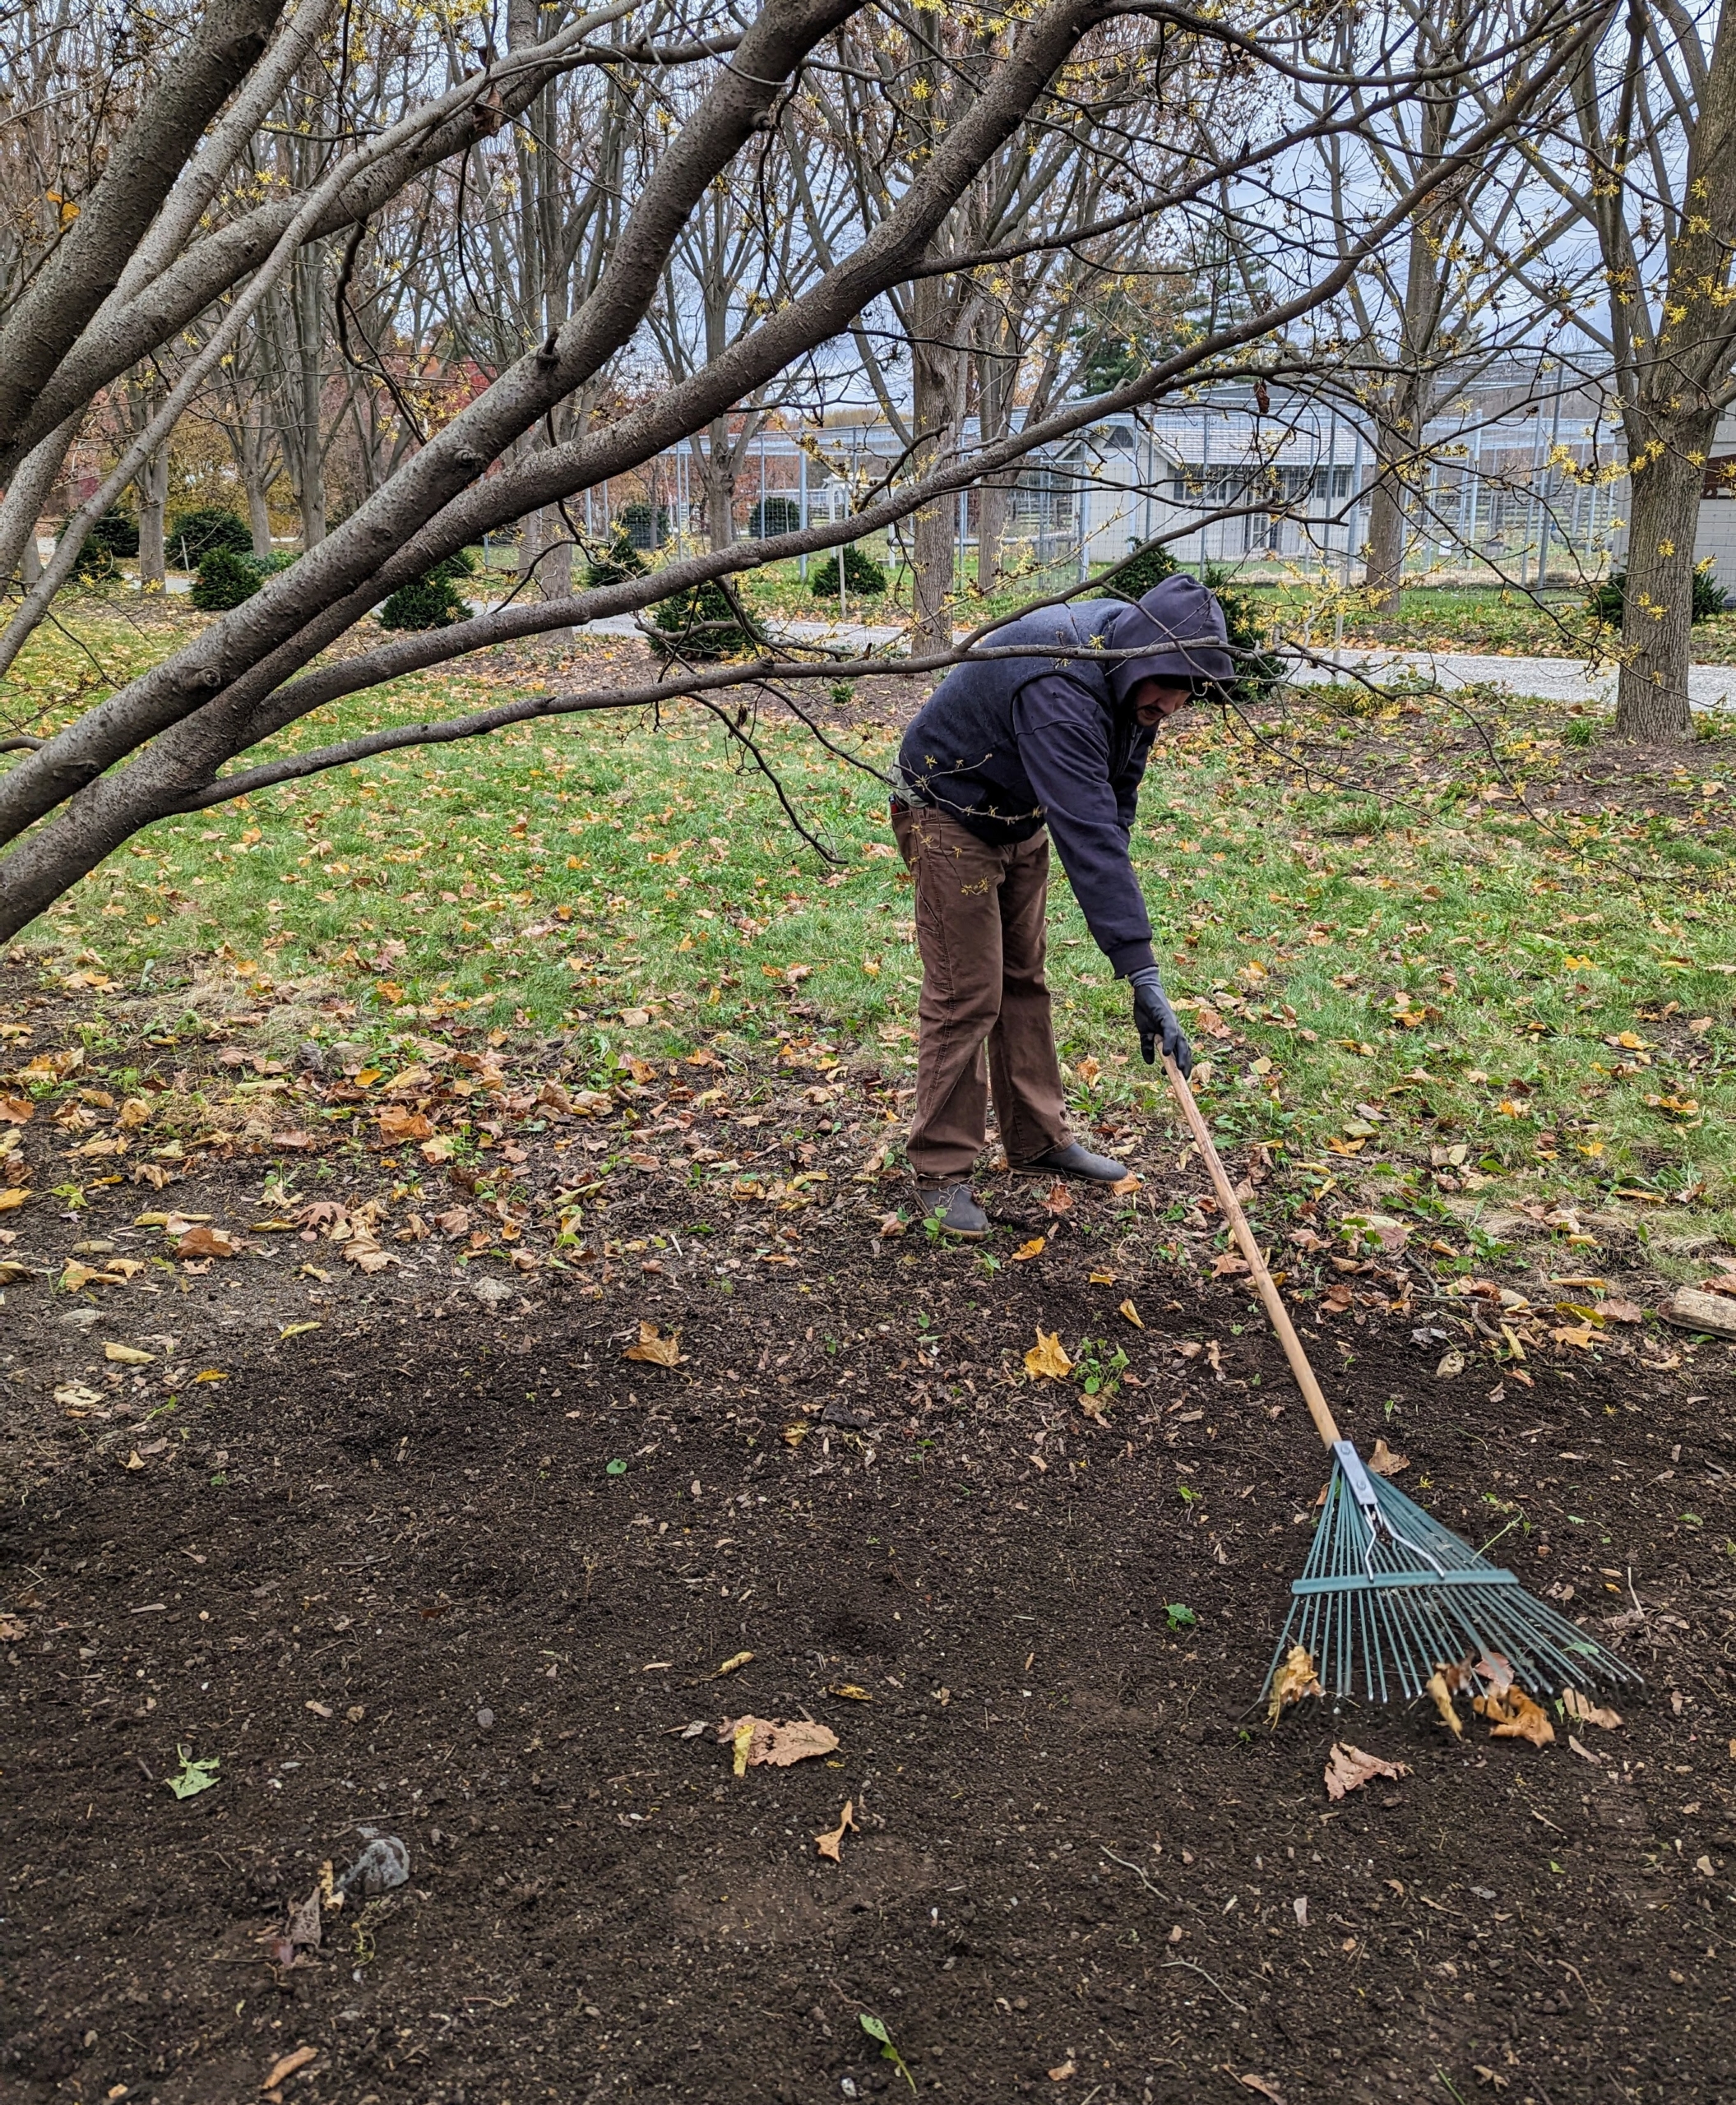
Once the bulbs are in their designated trenches, it’s time to rake the bed. Phurba carefully uses the back of a soft rake so he doesn’t disturb the bulb placements.
Most bulbs prefer full sun and average moisture. This day was quite cloudy, with showers in the forecast – perfect for our newly planted bulbs. We’ll have a beautiful cutting garden of colorful tulips come spring – I’ll be sure to share the photos.
Happy Thanksgiving! I hope you all have a very safe and enjoyable holiday!
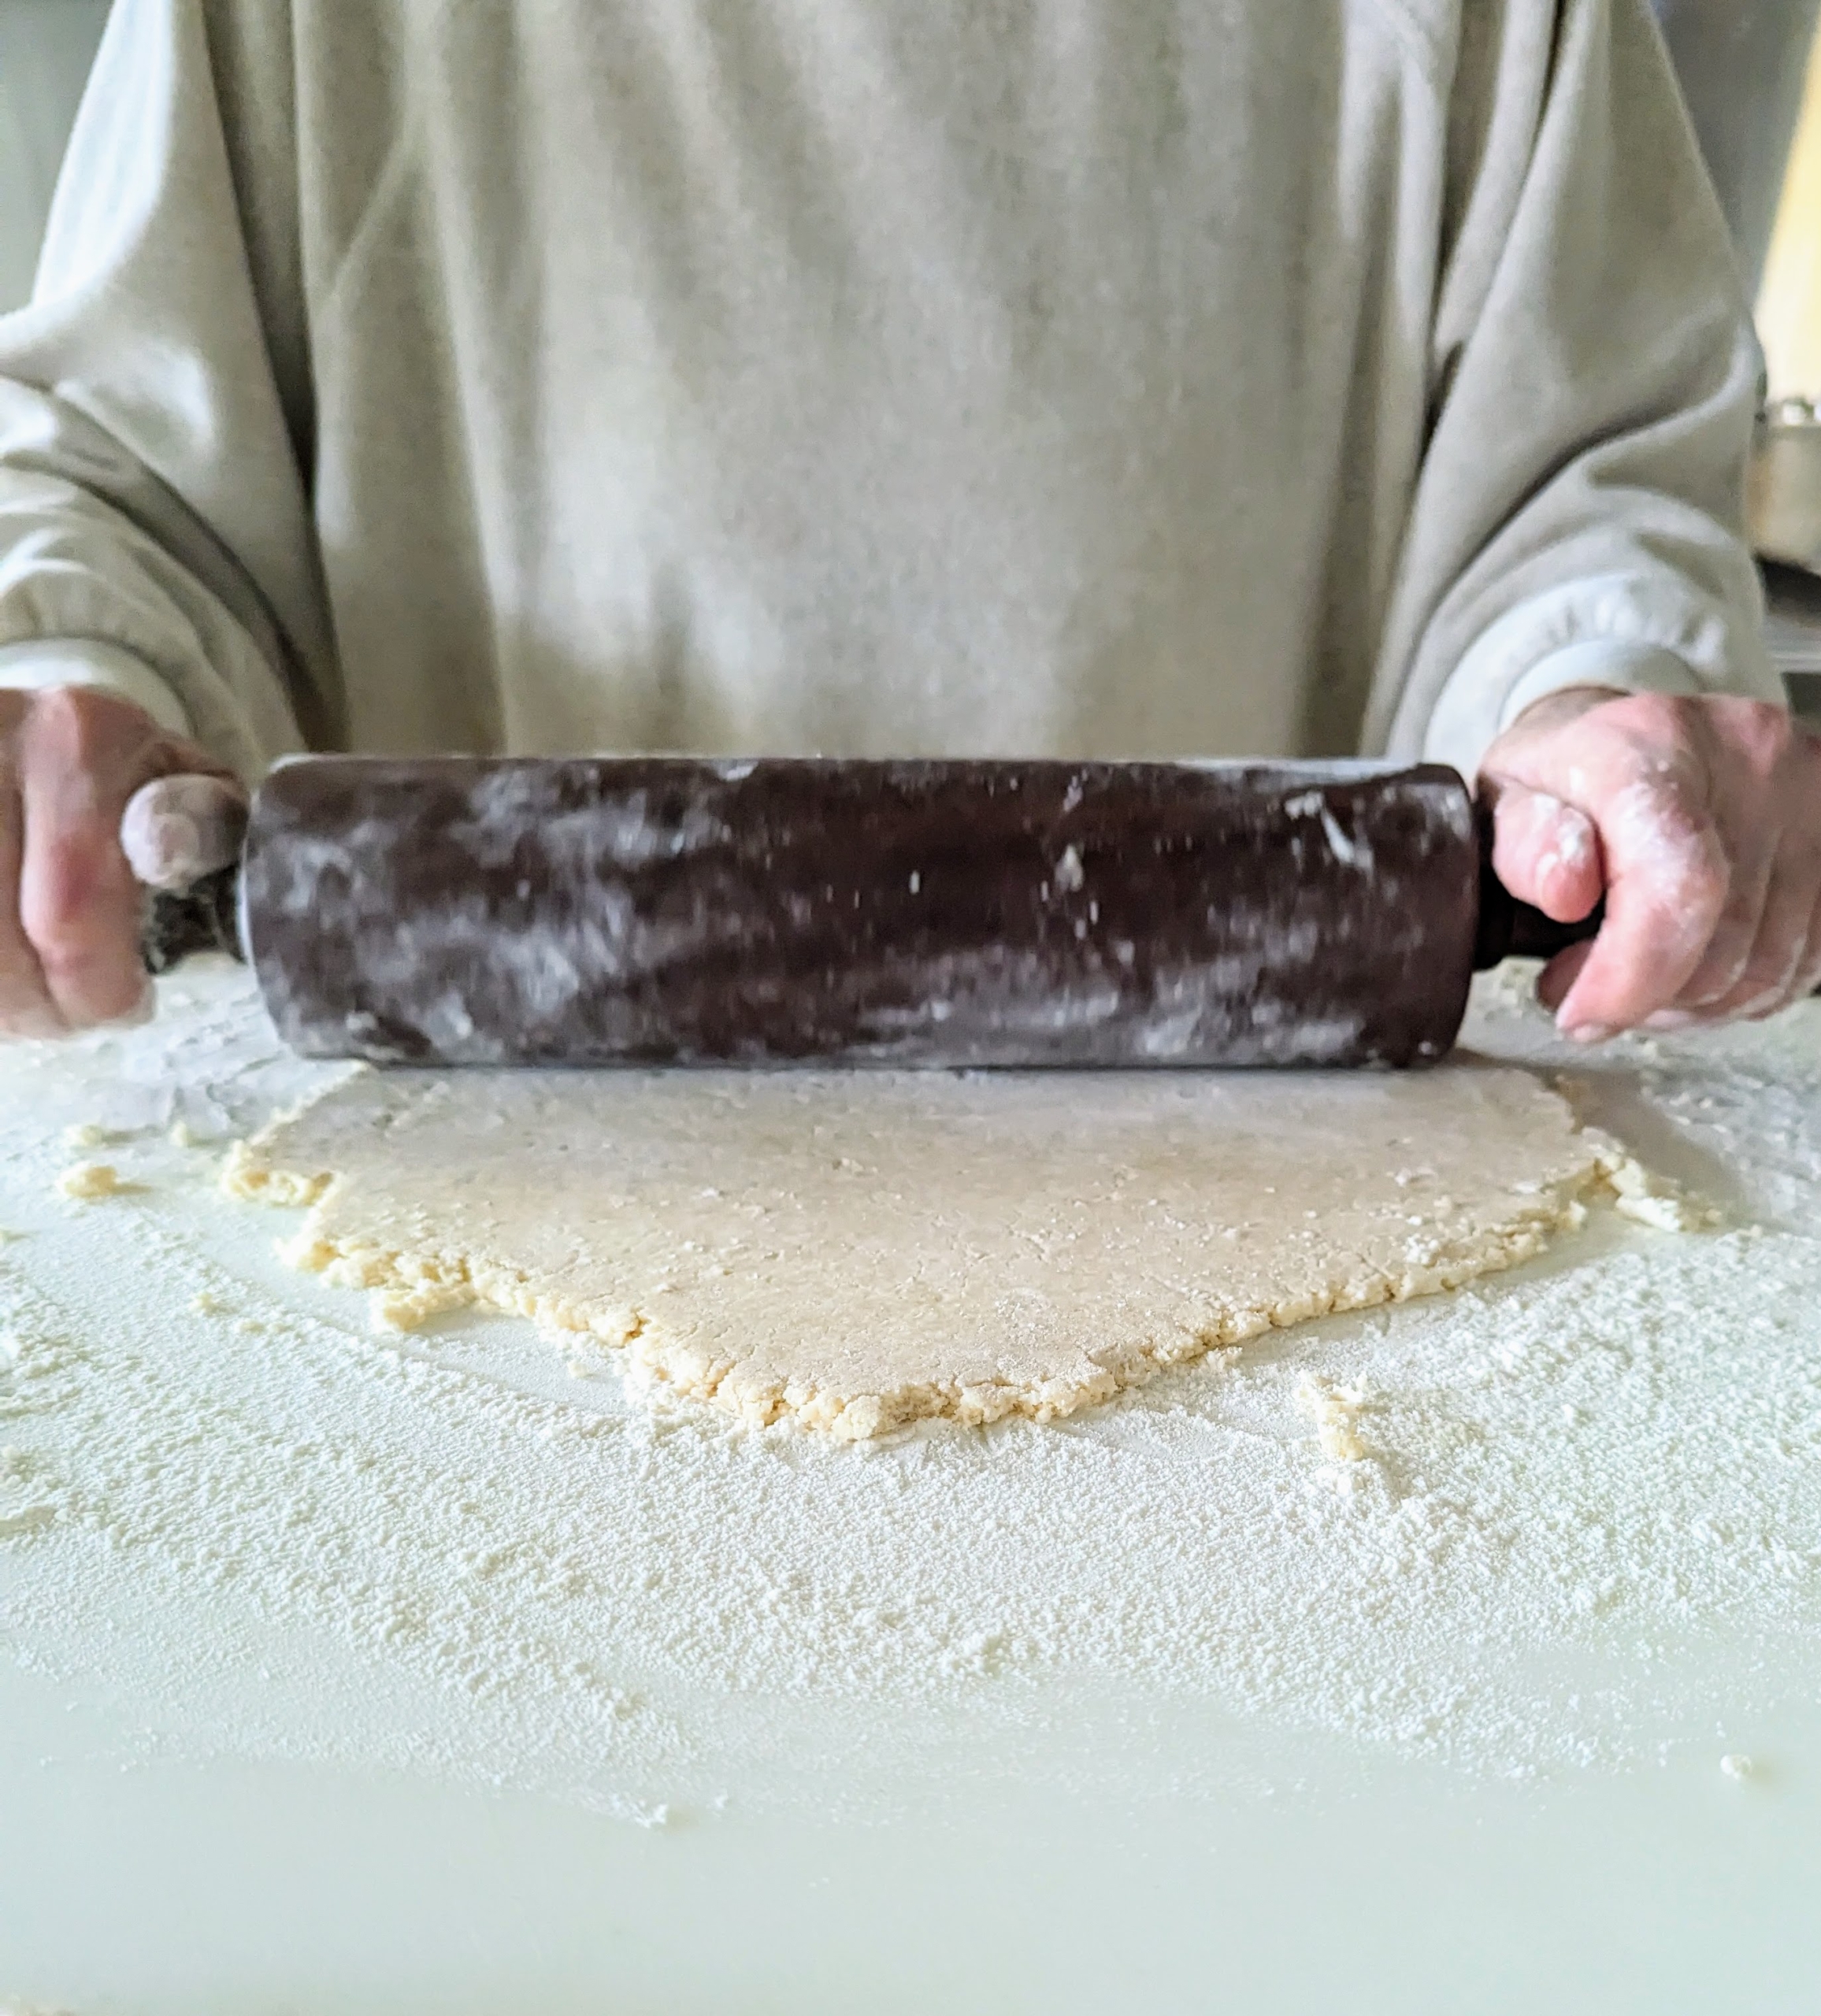
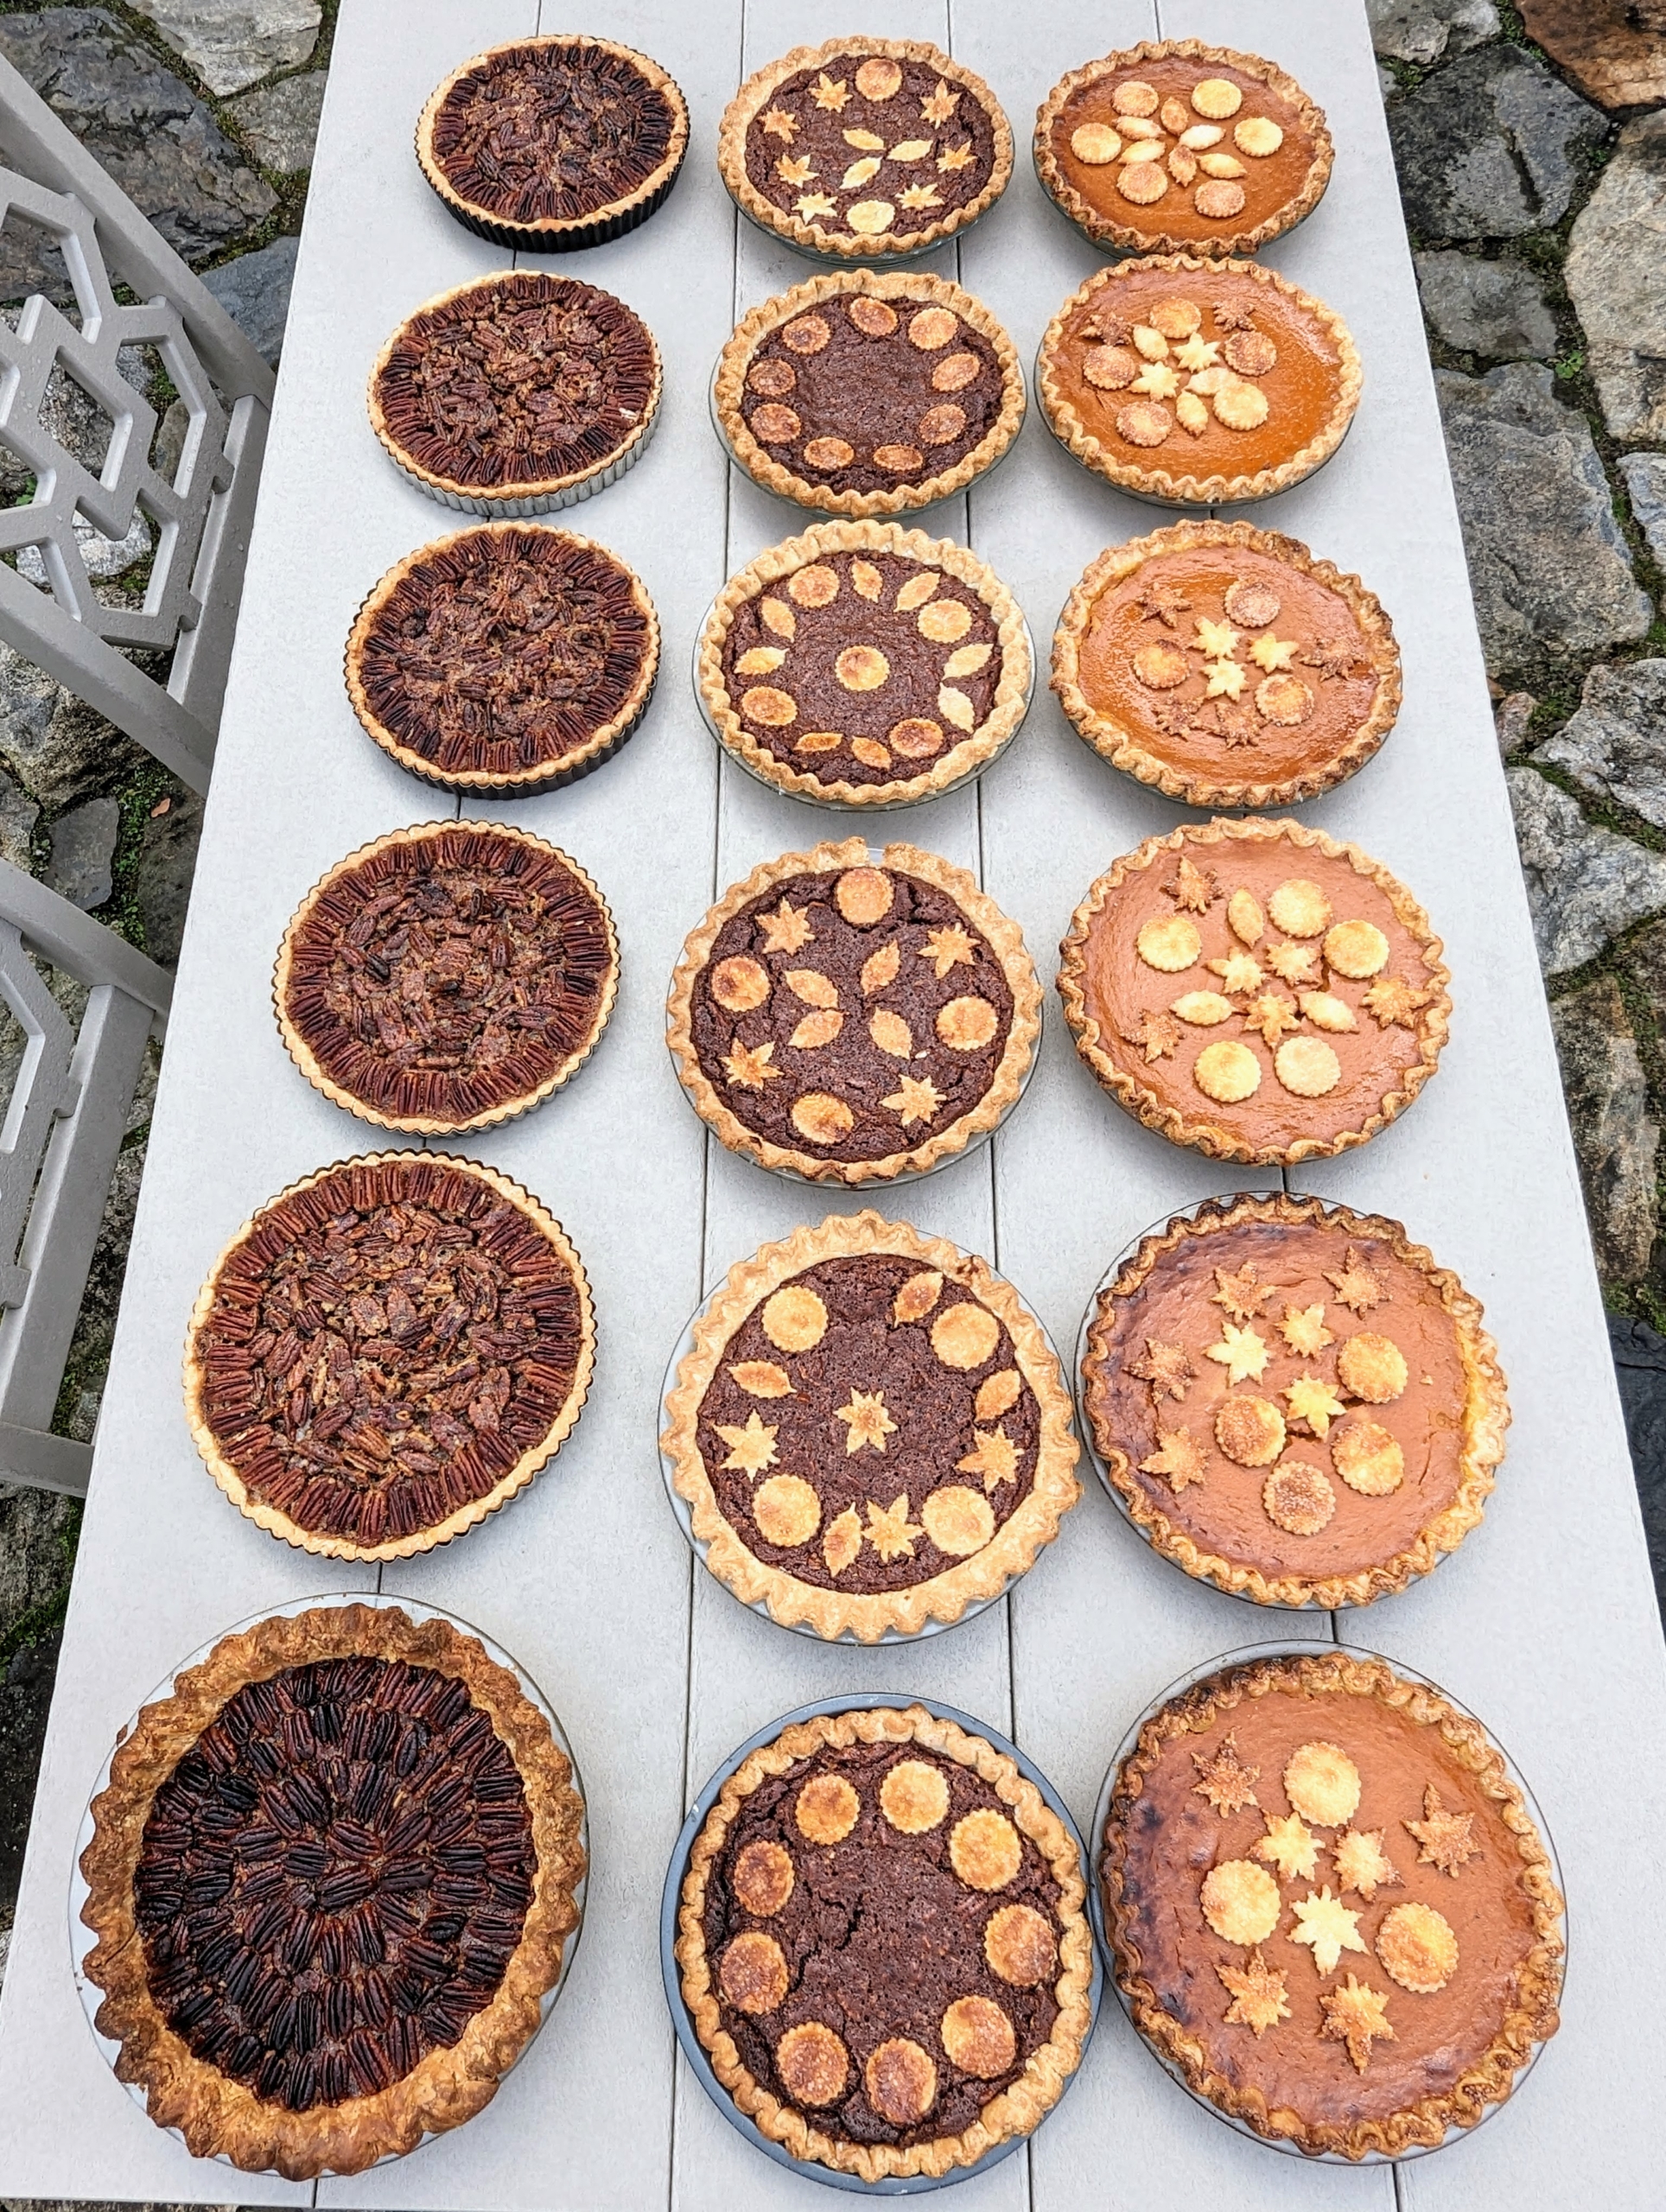
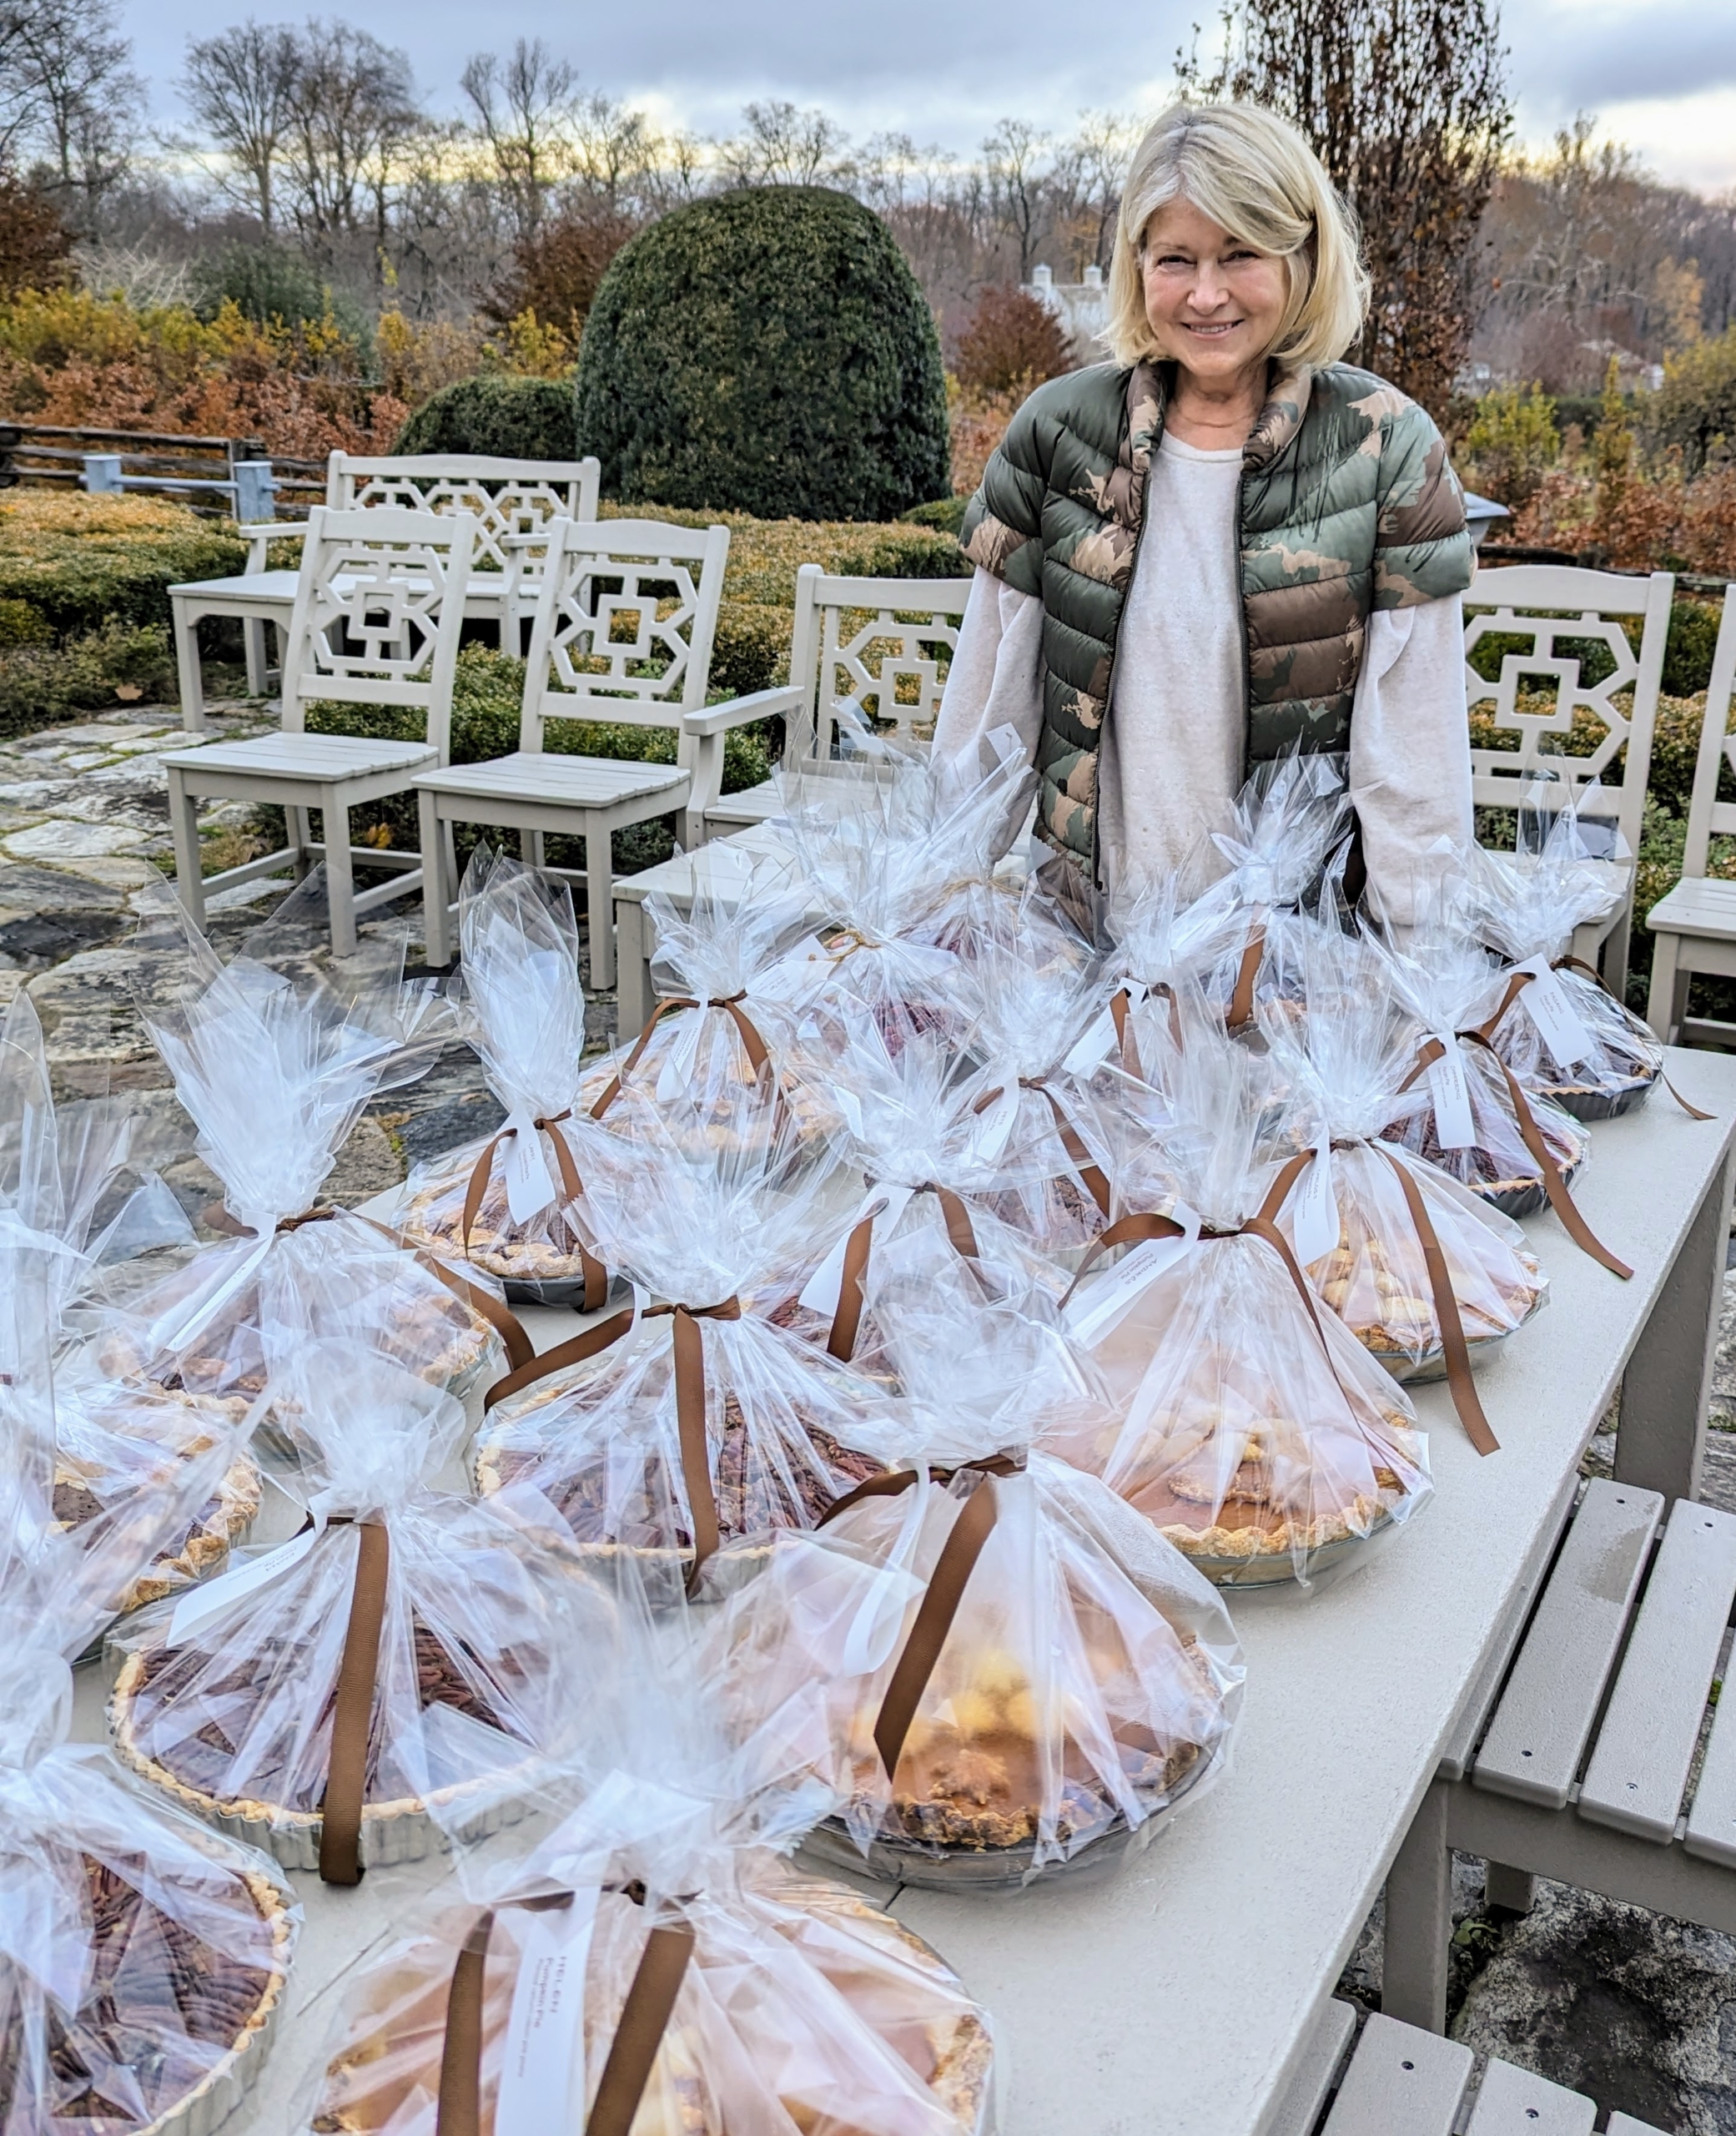
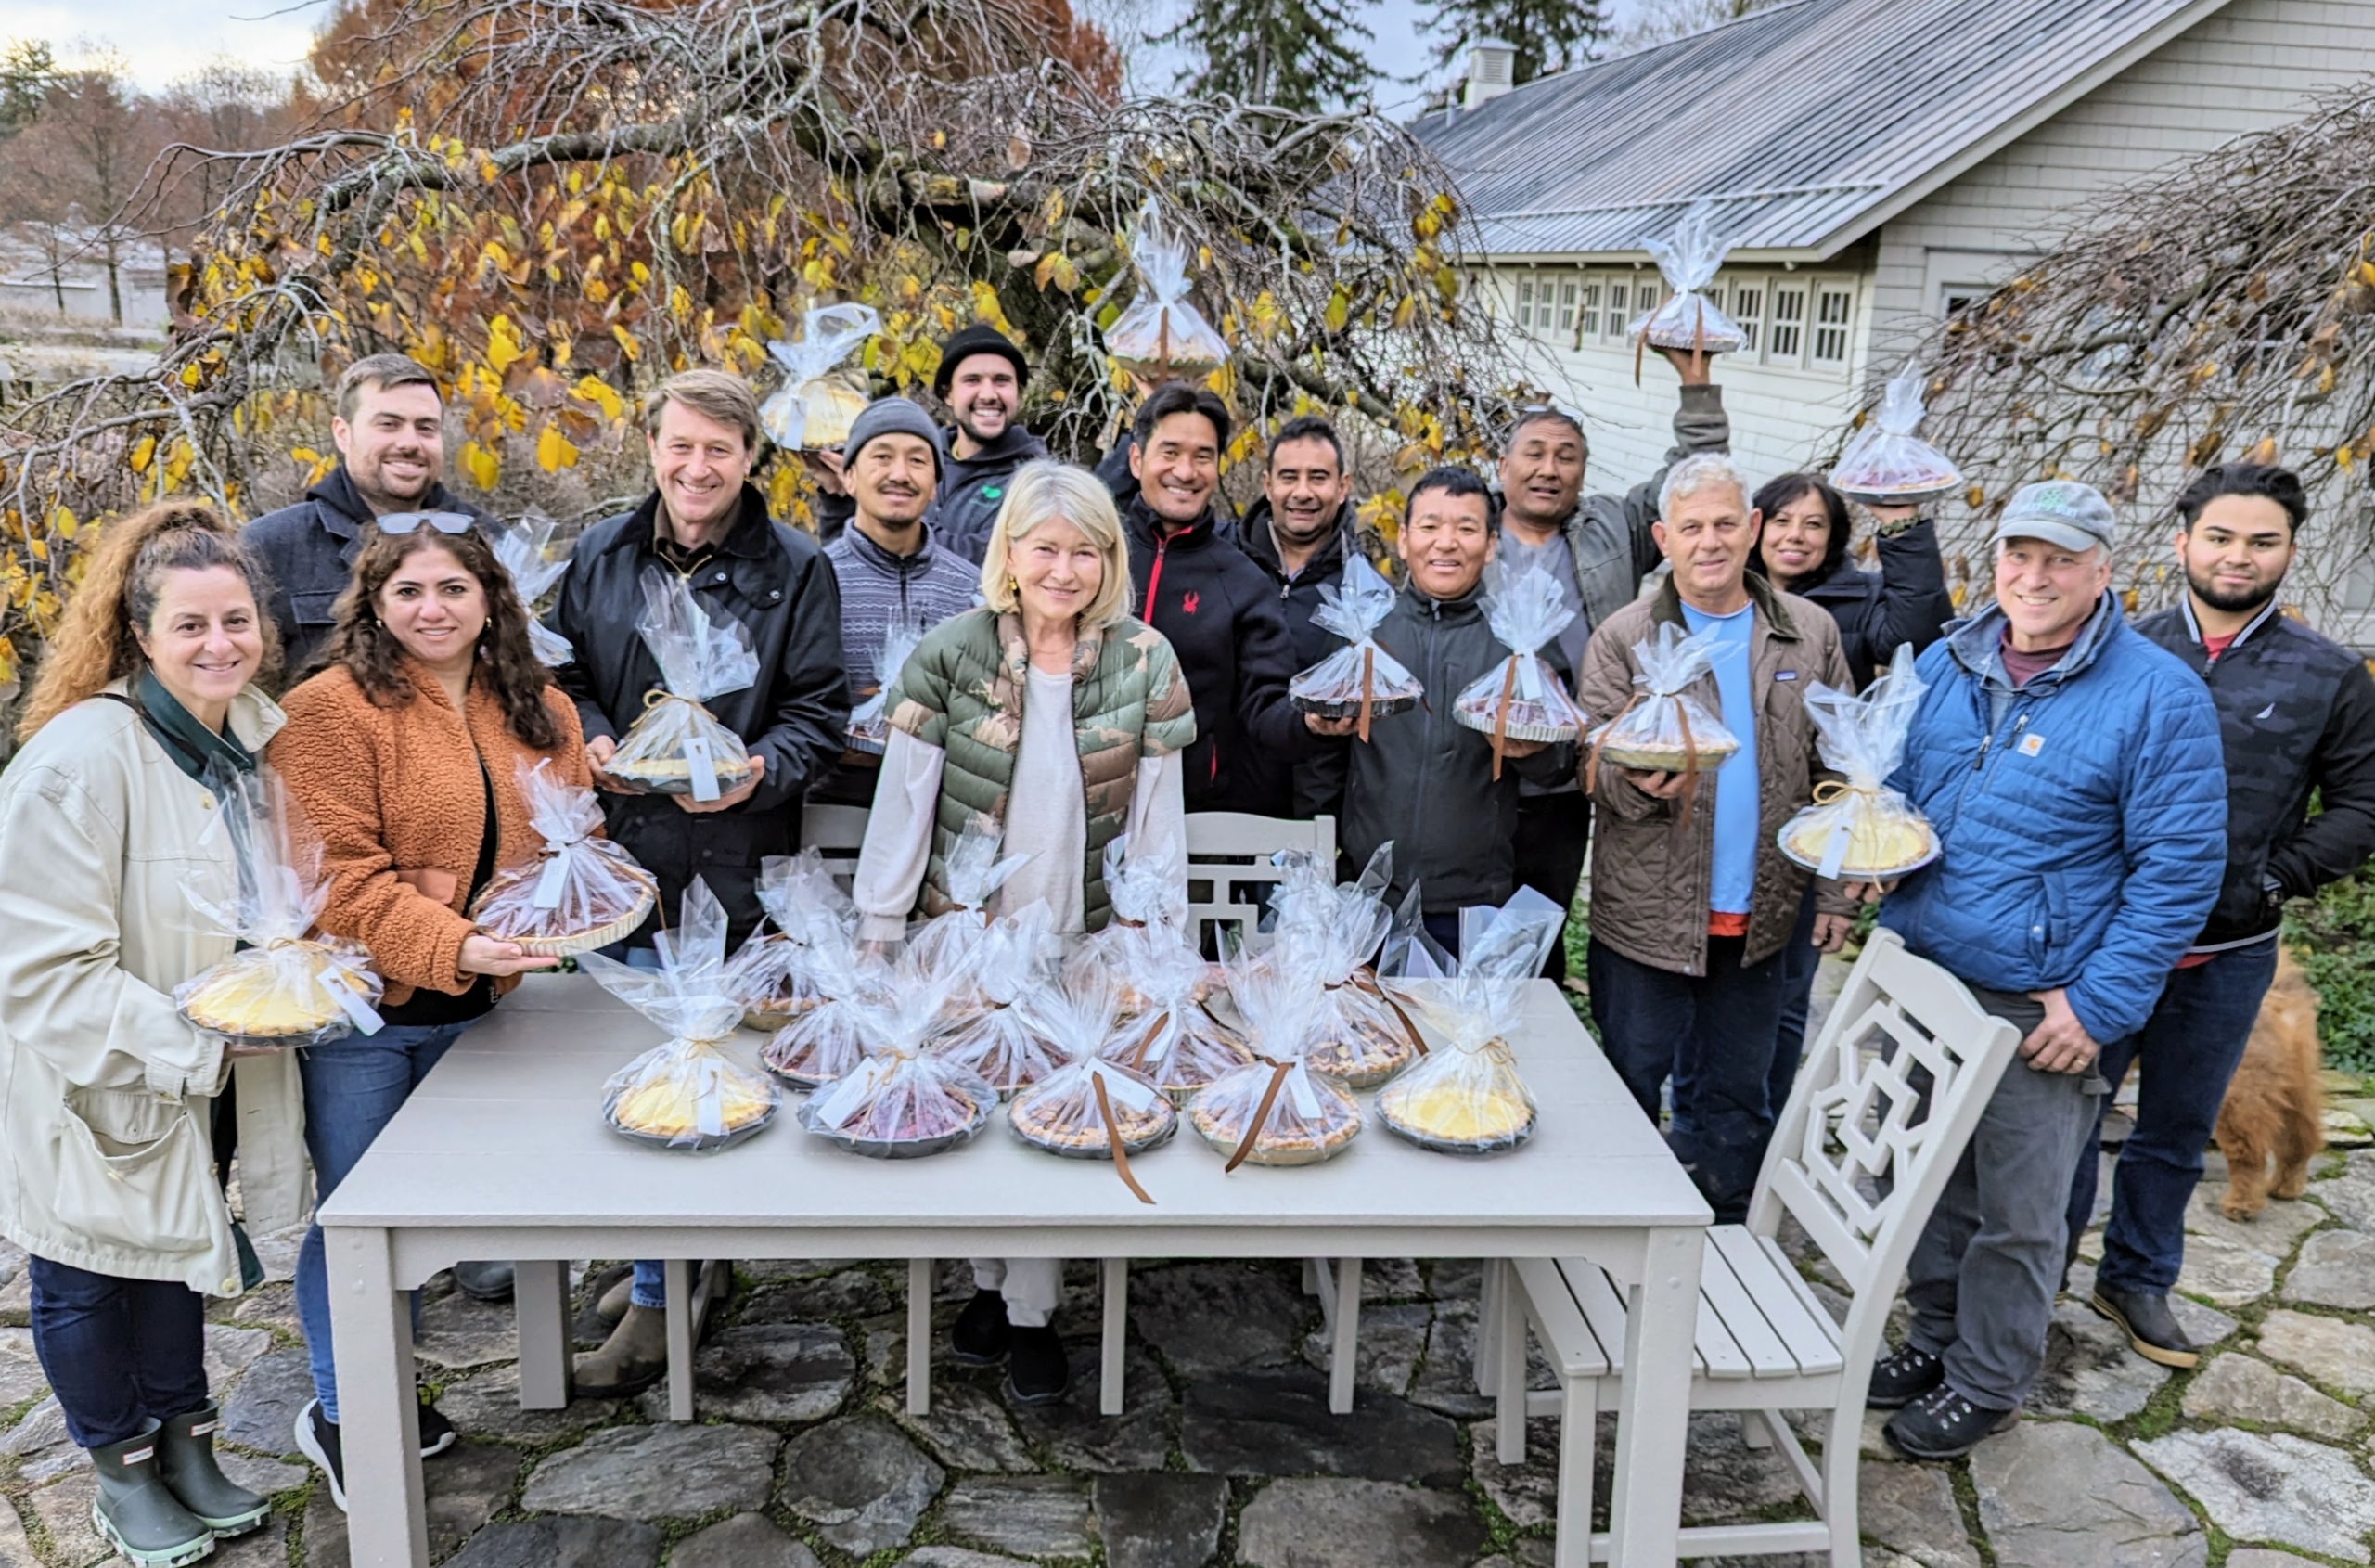
This morning I am busy cooking in my kitchen like all of you. I am preparing a stuffed and roasted 20-pound organic heritage turkey to add to my friend's buffet table. And of course, I am also making a big bowl of my mother's, "Big Martha," delicious mashed potatoes! Yesterday, I was busy baking 30-pies! I love baking pies and every Thanksgiving, I bake one for every member of my staff here at the farm to thank them for all their hard work during the year.
Here are some photos.
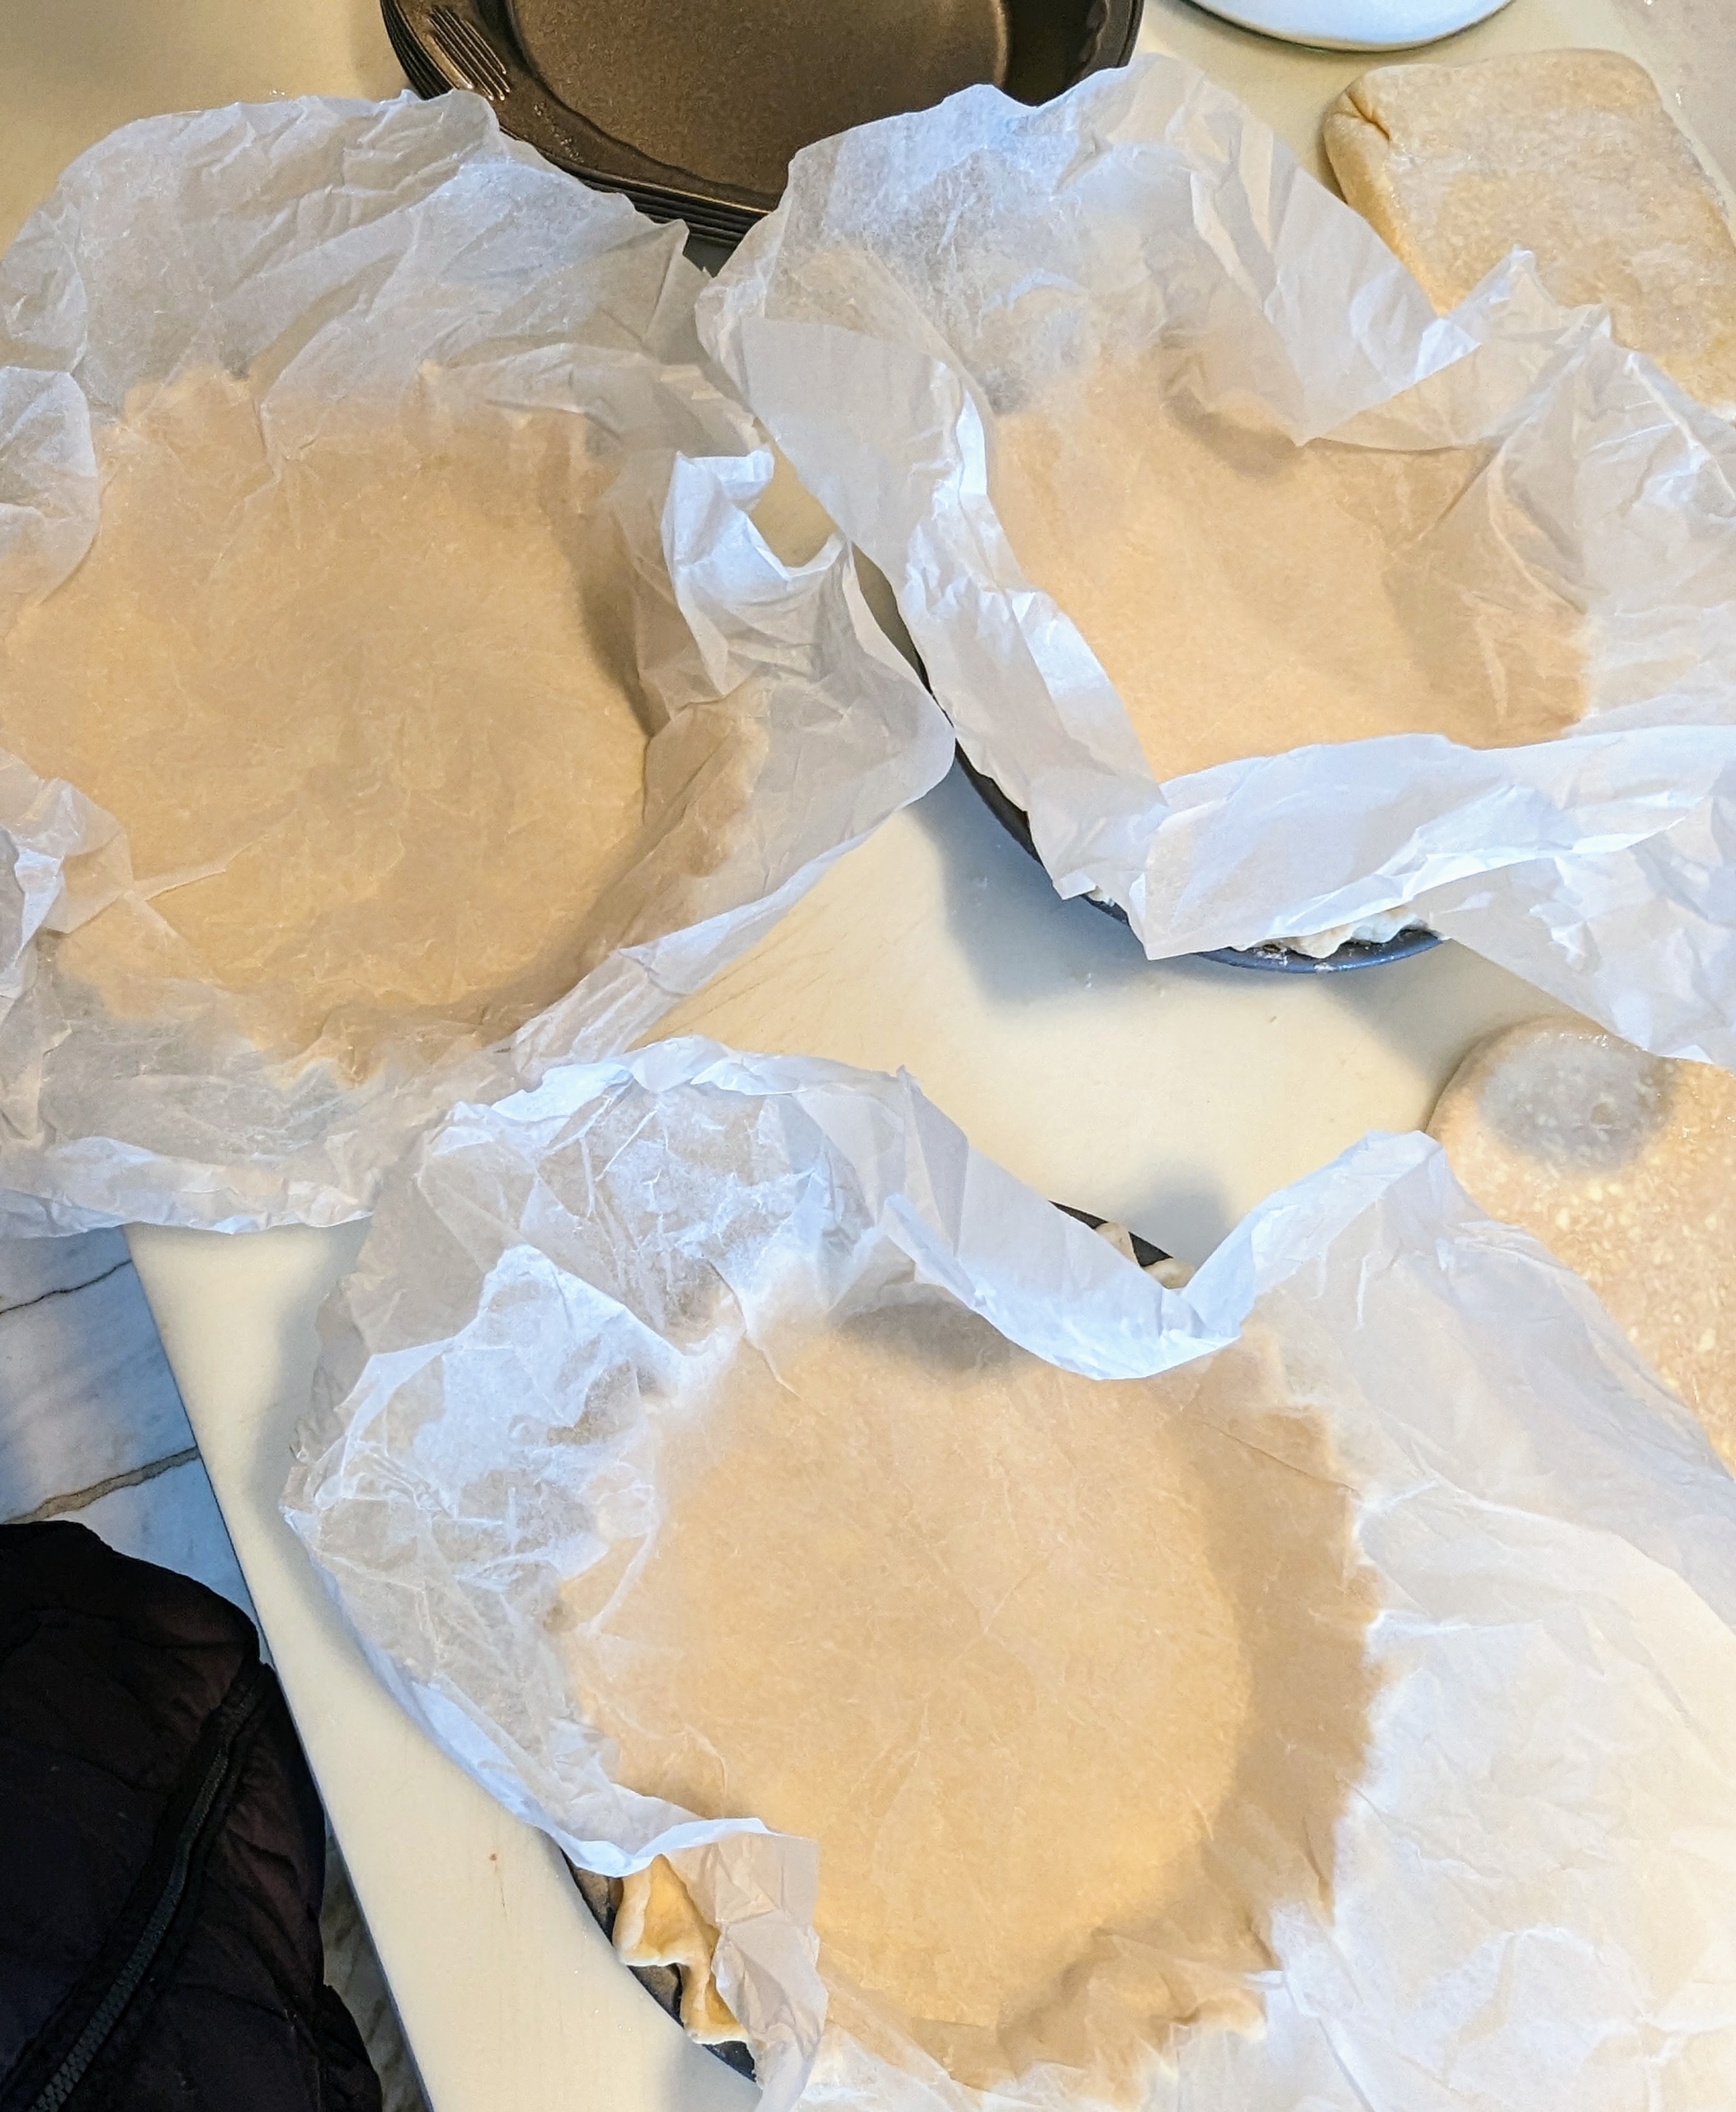
Here I am rolling out one of the pâte brisée discs. When rolling, make sure there are no cracks. To fit a nine-inch pie plate, roll out an 11-inch round that’s about 1/8-inch thick. I have been making this pâte brisée for many years and have perfected this recipe. It calls for two-and-a-half cups all-purpose flour, one teaspoon kosher salt, one teaspoon granulated sugar, two sticks unsalted butter, and a quarter to a half cup of ice water.
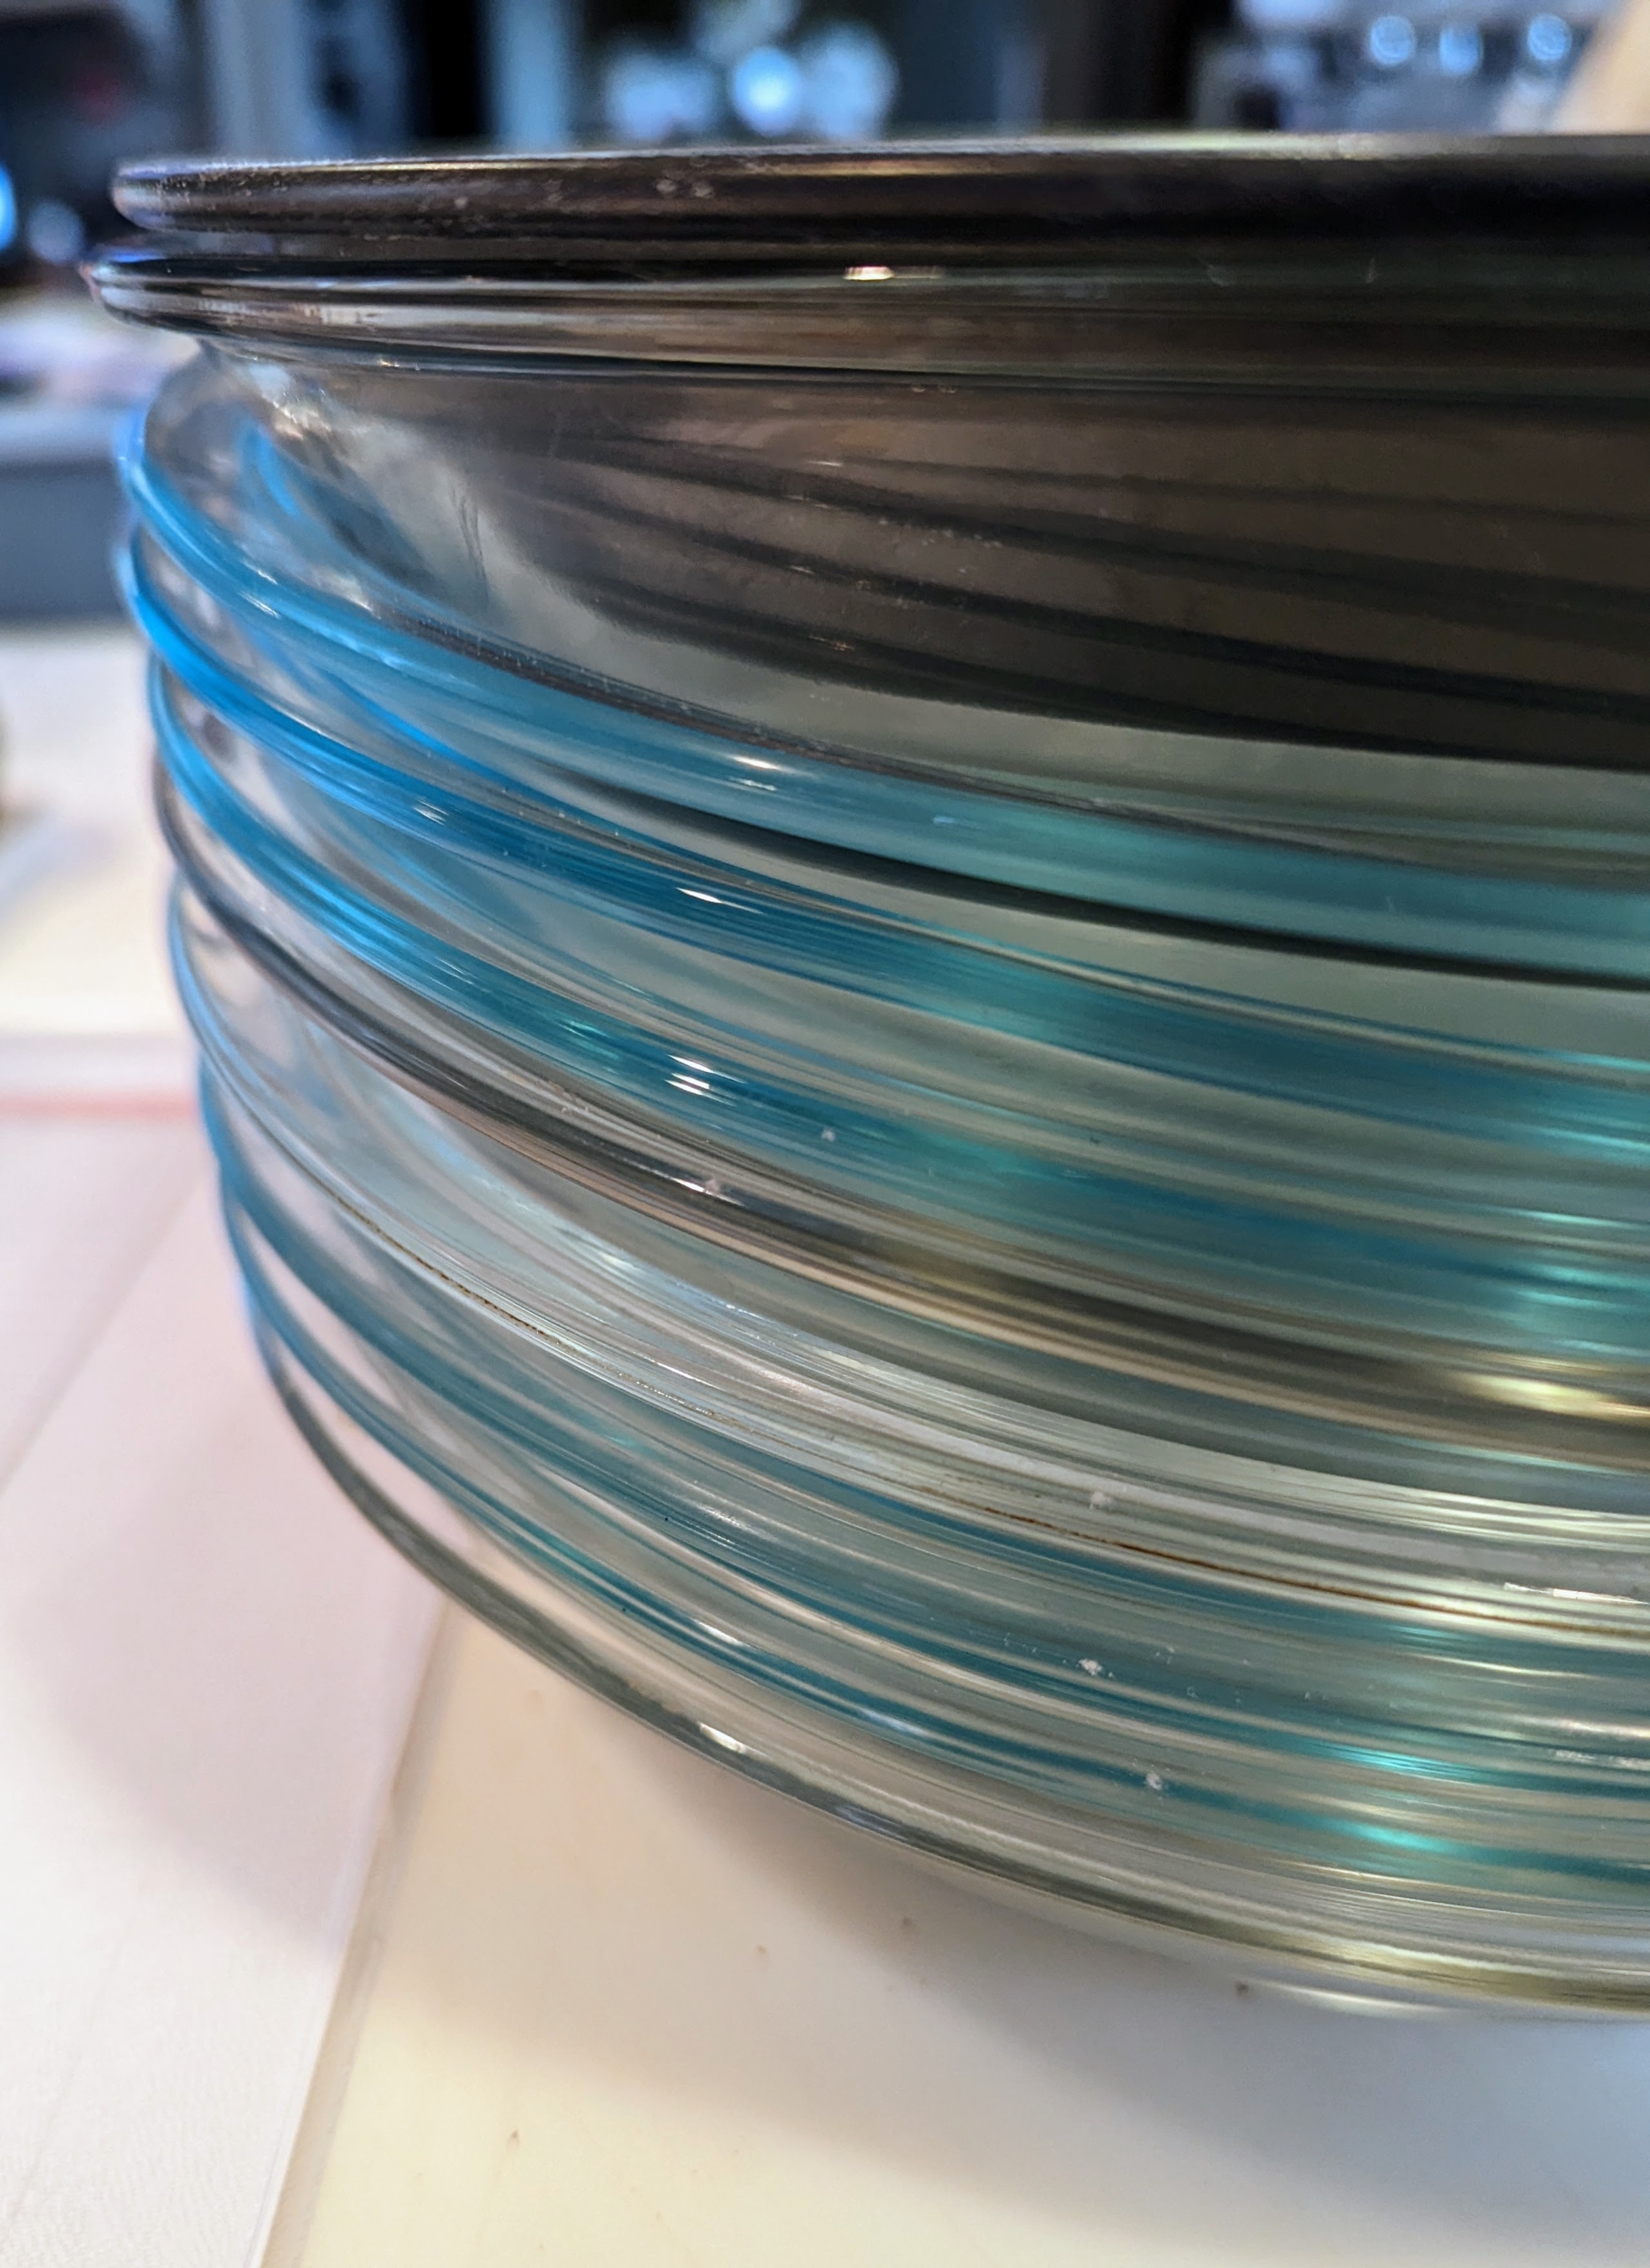
Every year, I pull out lots of my own pie plates, but I remind all the recipients that they must come back after the holiday. I like to use glass pie dishes most, so it is easy to see when the pie’s bottom crust is sufficiently browned.
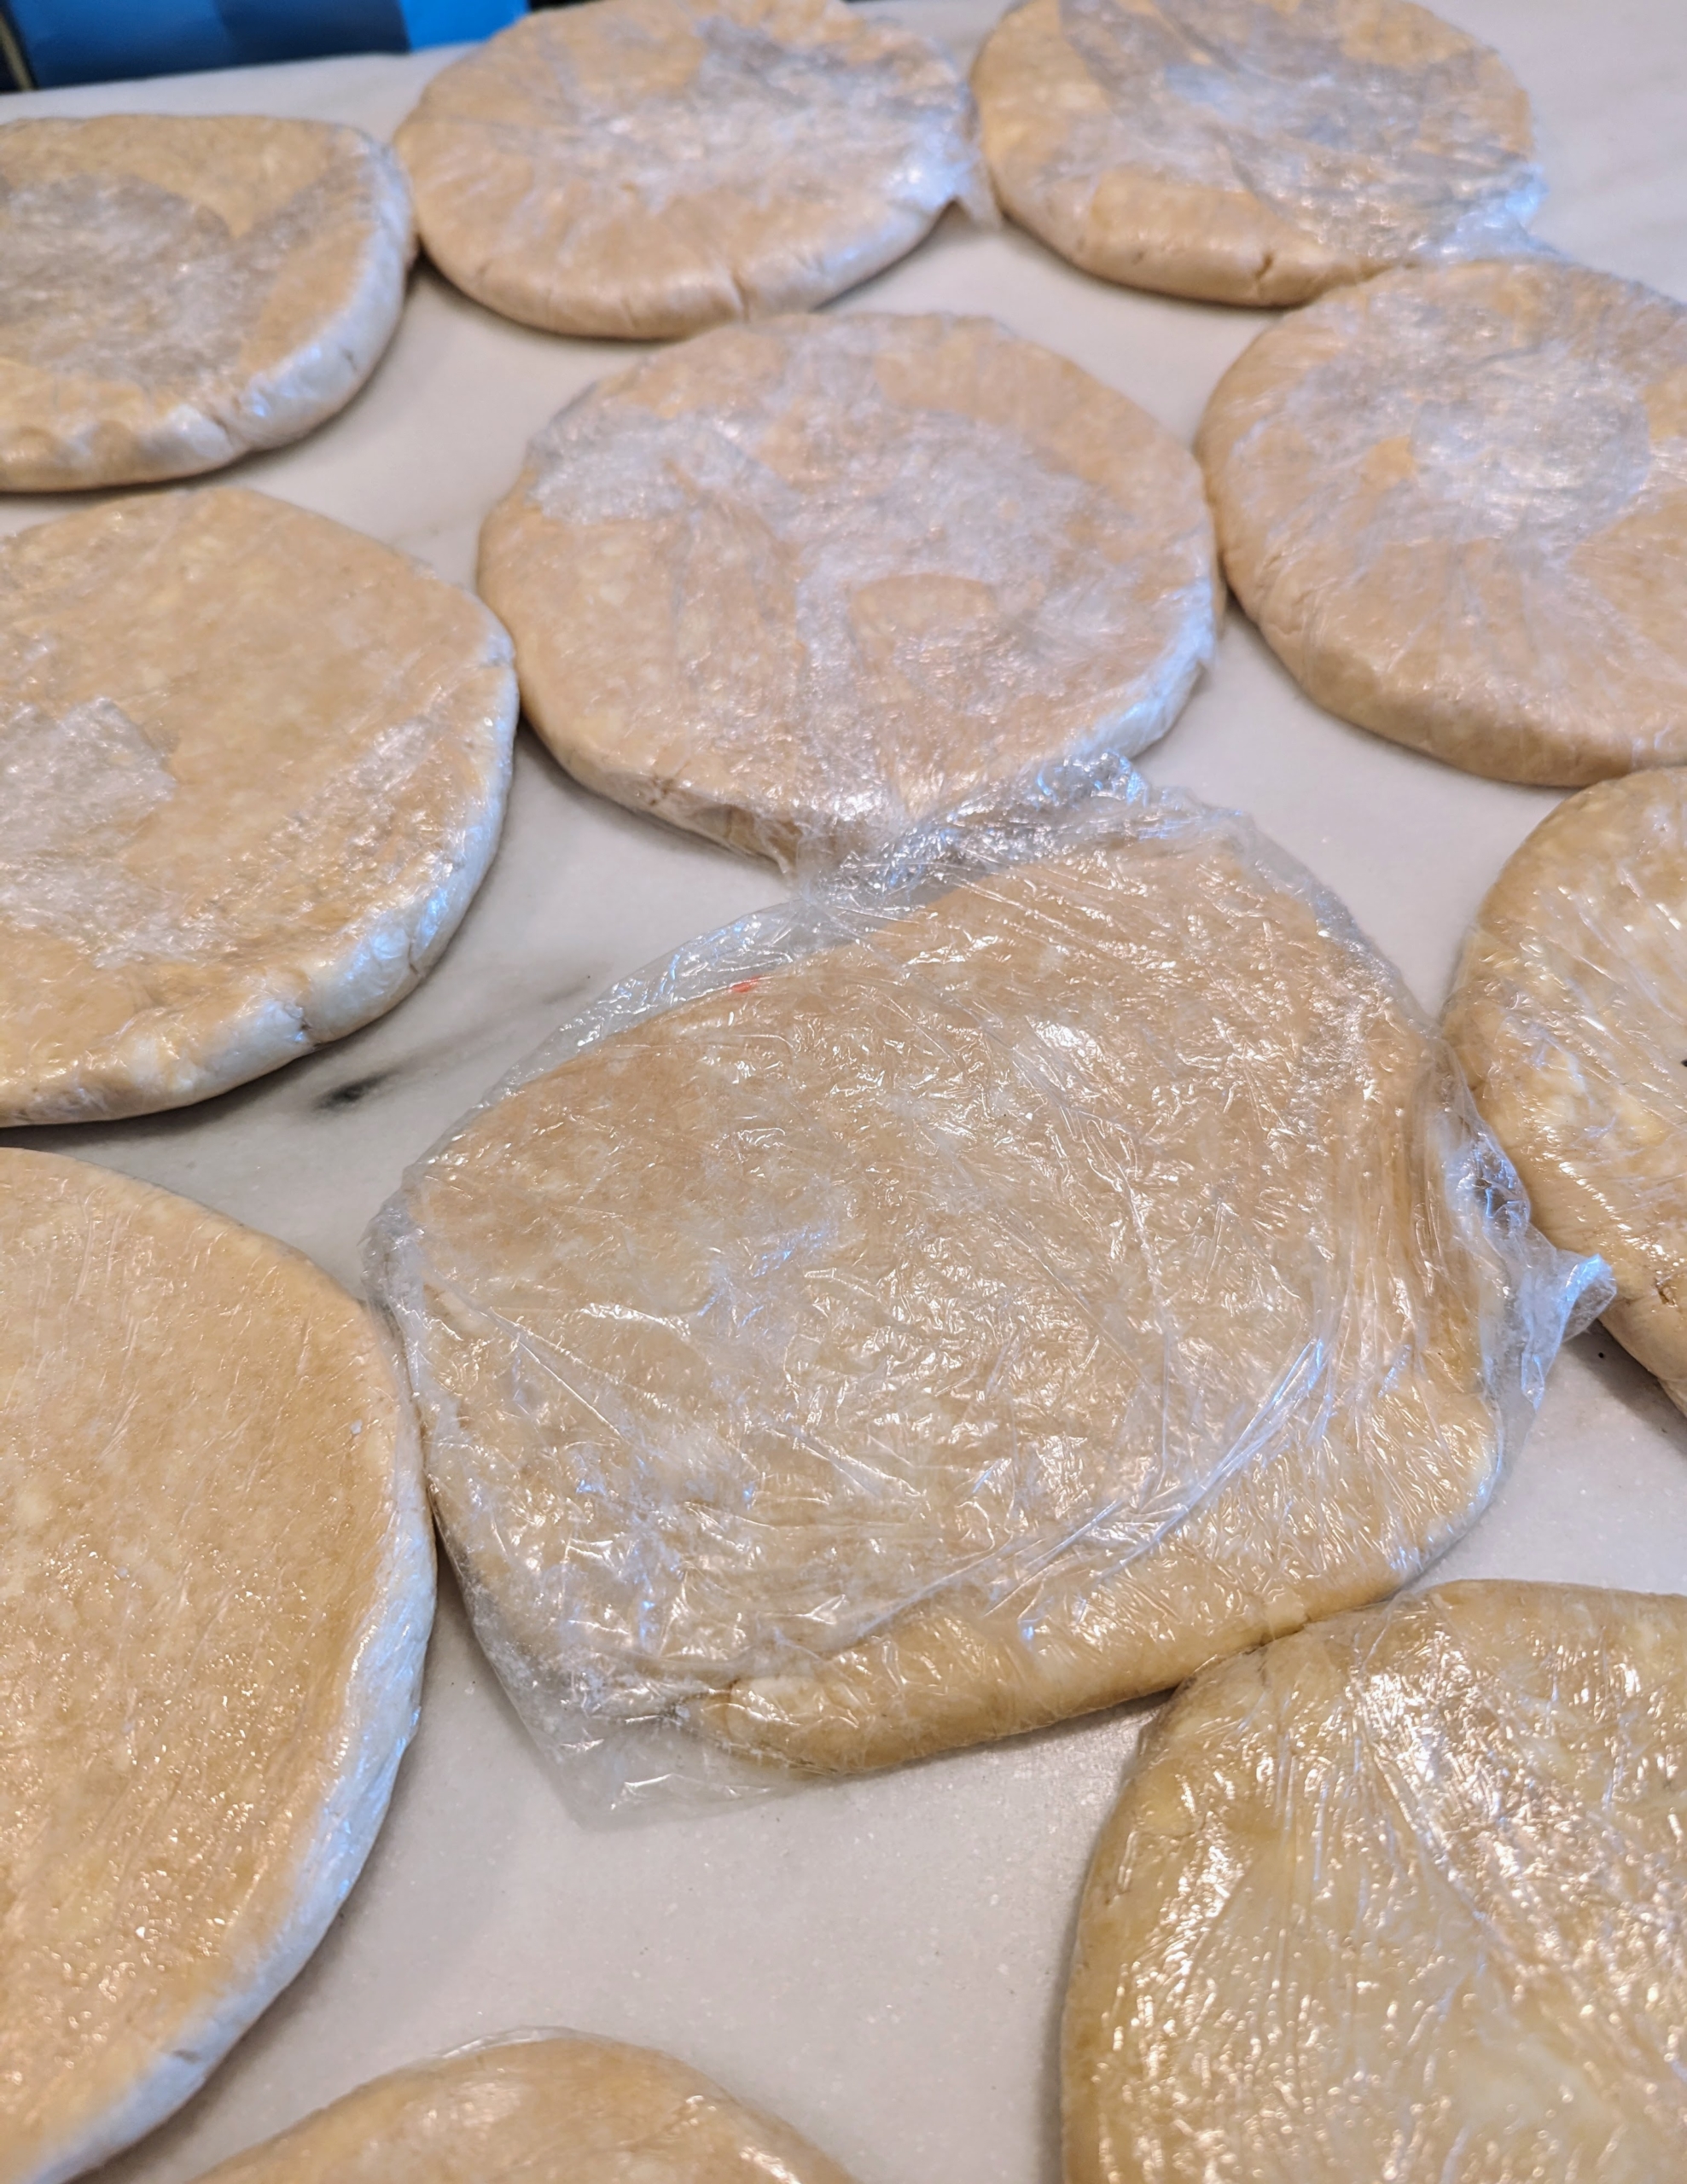
Here are several chilled pâte brisée discs. Pâte brisée is the French version of classic pie or tart pastry. It is a versatile all-butter dough for both sweet and savory recipes—from apple pie to quiche.
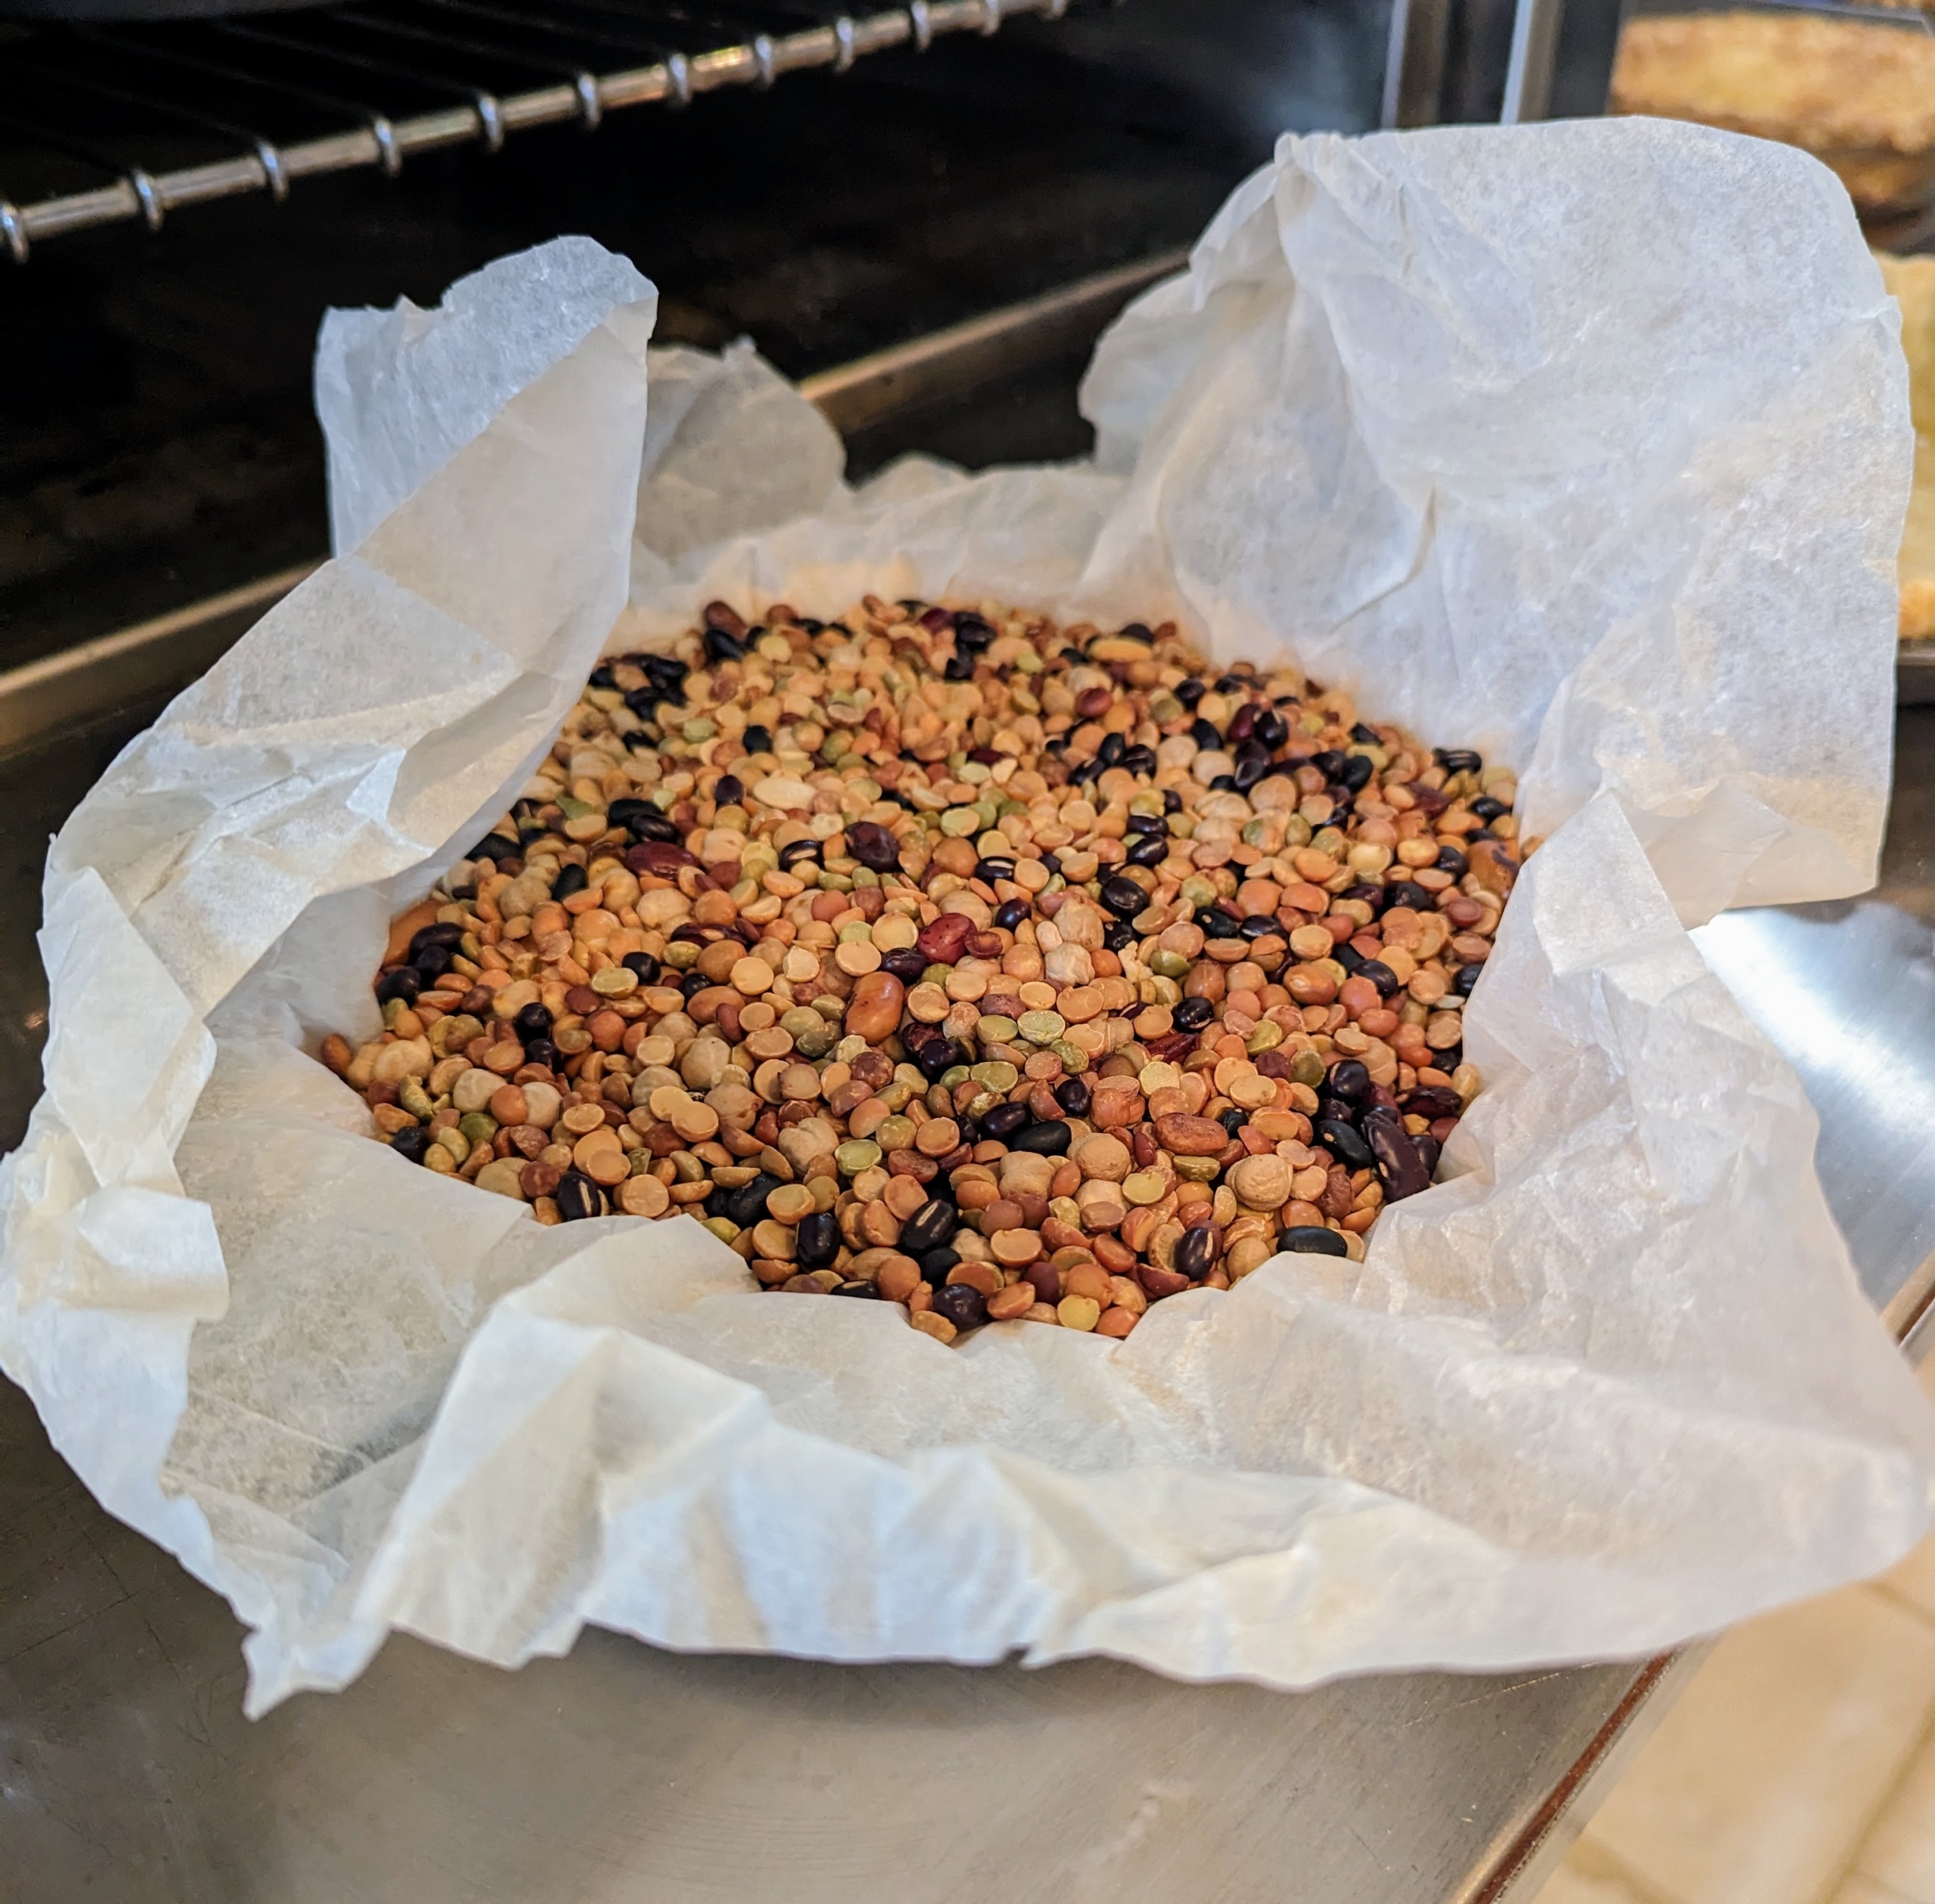
I blind bake my pie crusts. This is the process of baking a pie crust without the filling. To blind bake a chilled pie crust, just line it with parchment paper in the pie dish and fill it with pie weights or dried beans. After about 20 minutes at 375-degrees Fahrenheit, carefully remove the parchment and the weights. Then bake it until the crust is dry but not brown, about five minutes more.
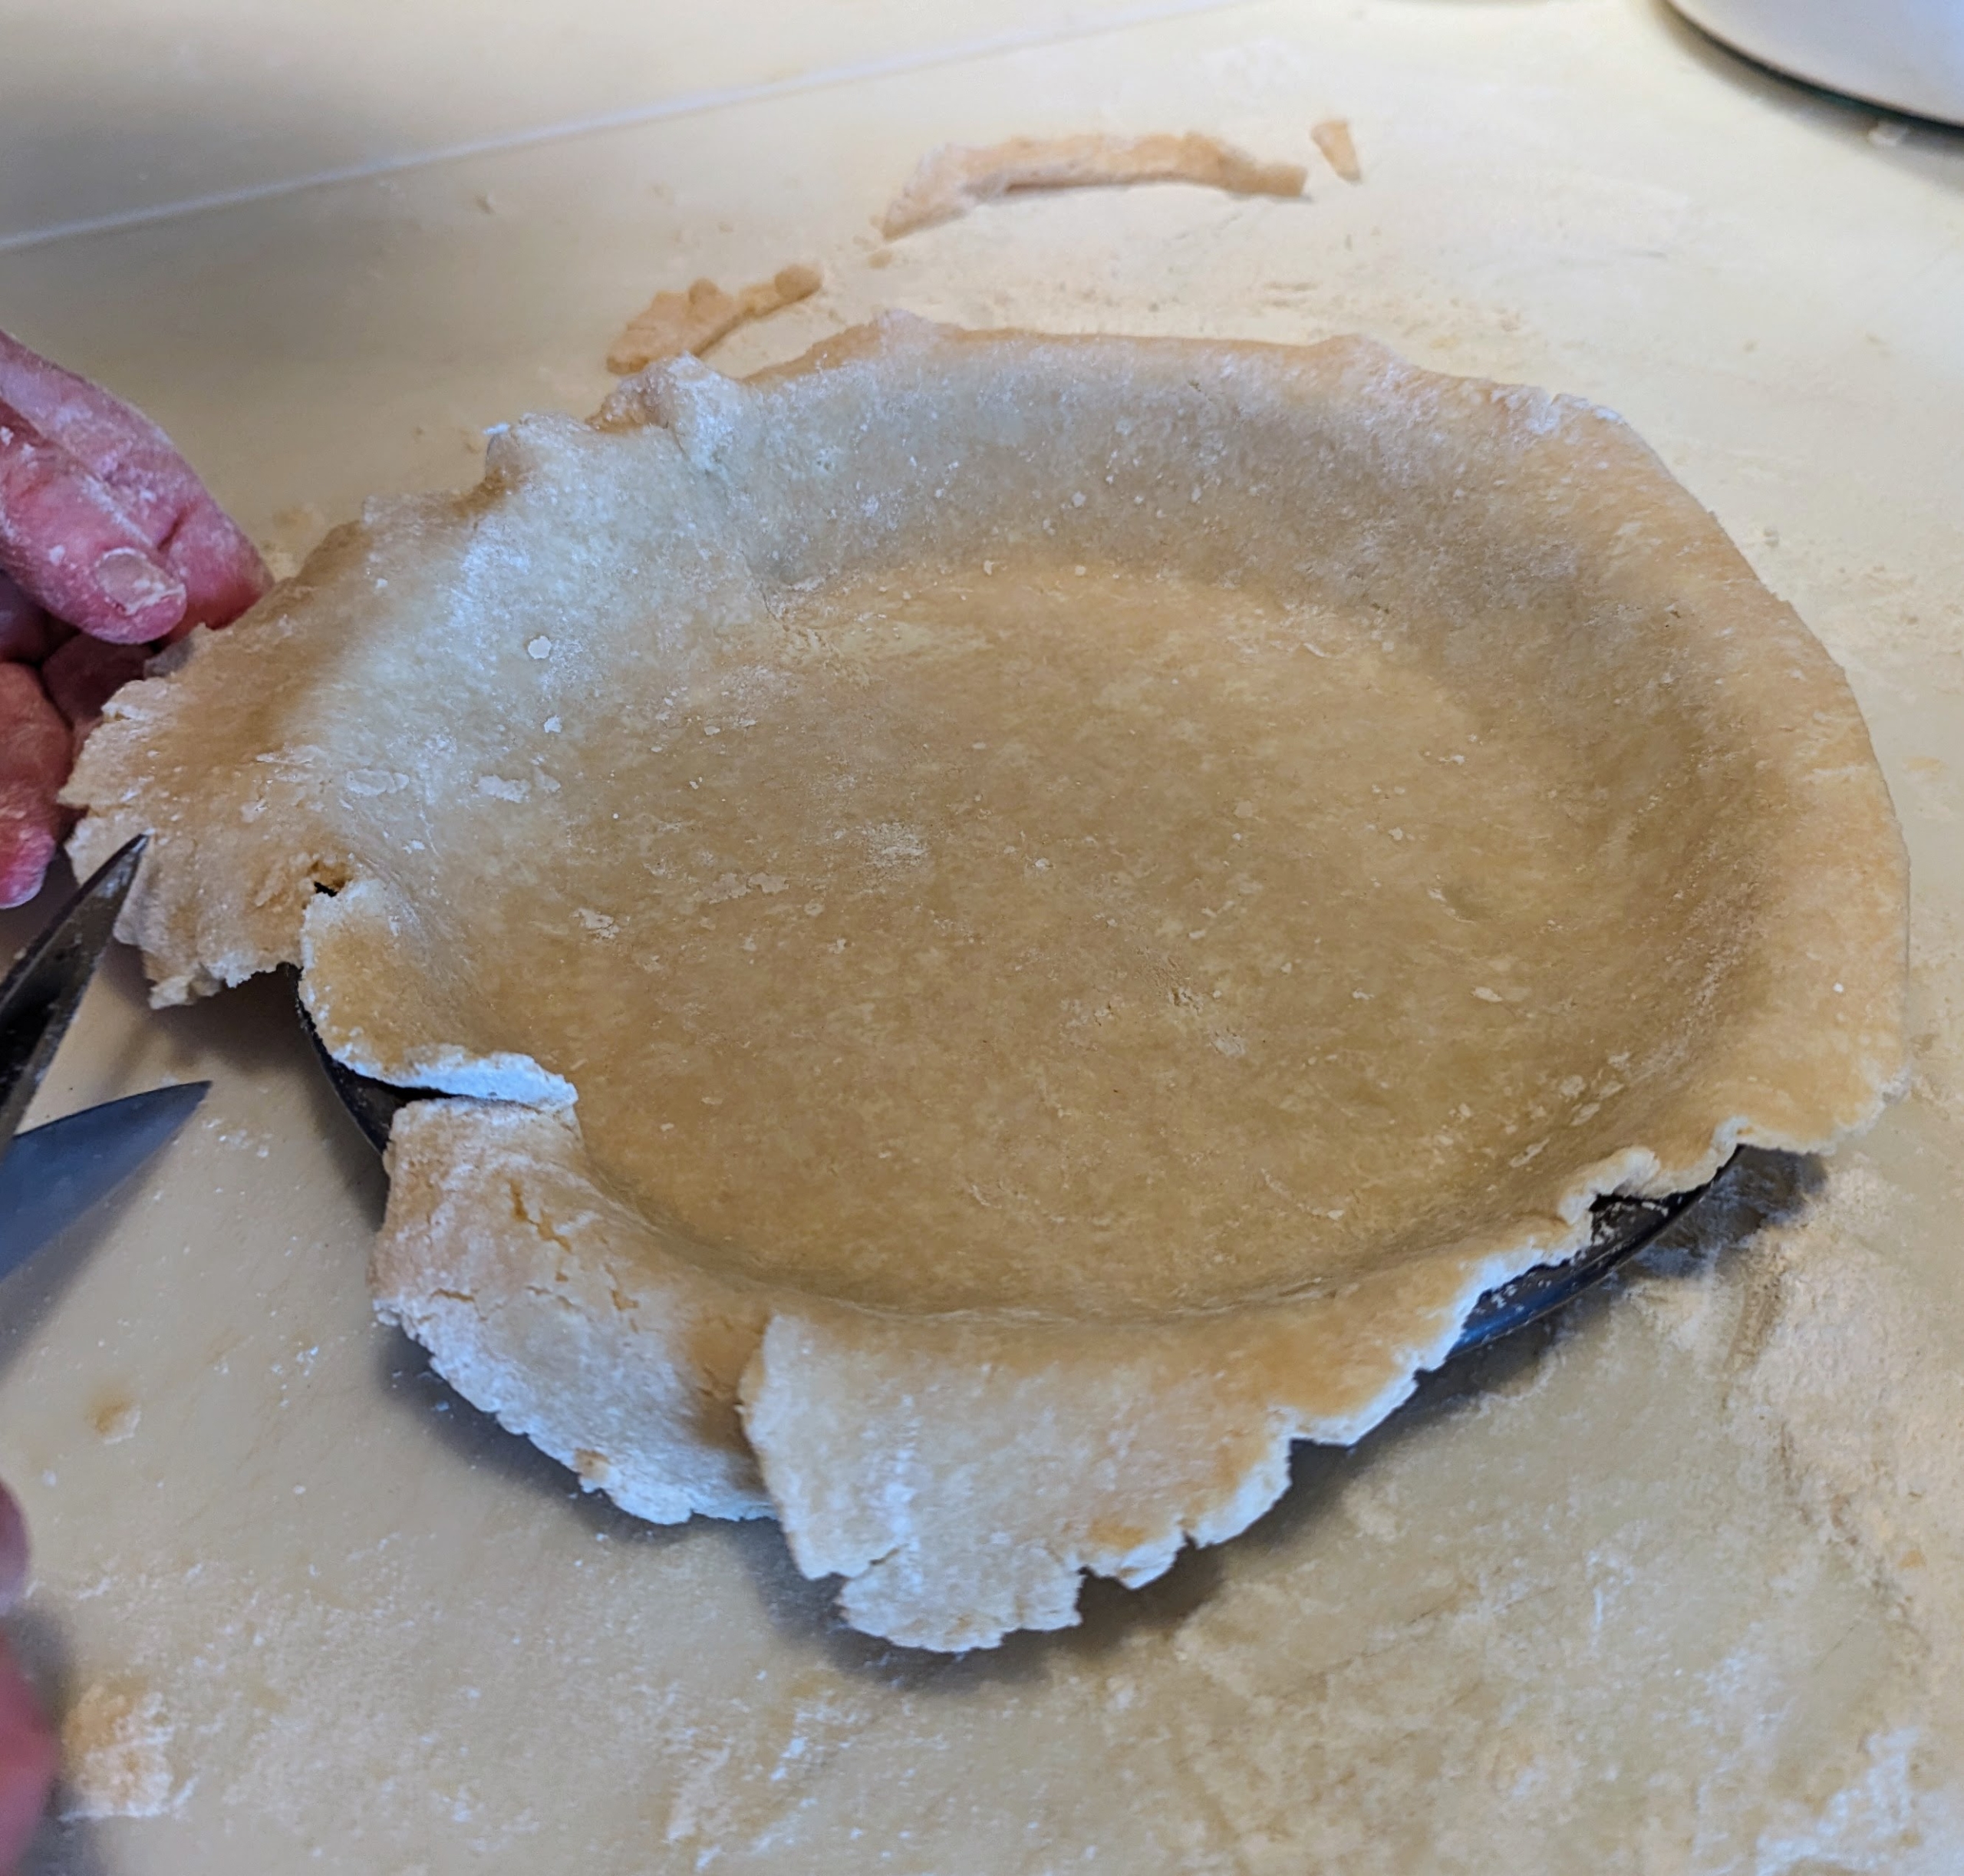
Here is one pie crust baked and ready to empty of its bean weights. I’ve been using the same dried beans for more than 25-years. I reuse them time after time and store them in a big glass jar in my kitchen.
Using kitchen shears, I just trim the edge to one inch and fold under, so it all looks neat and tidy.
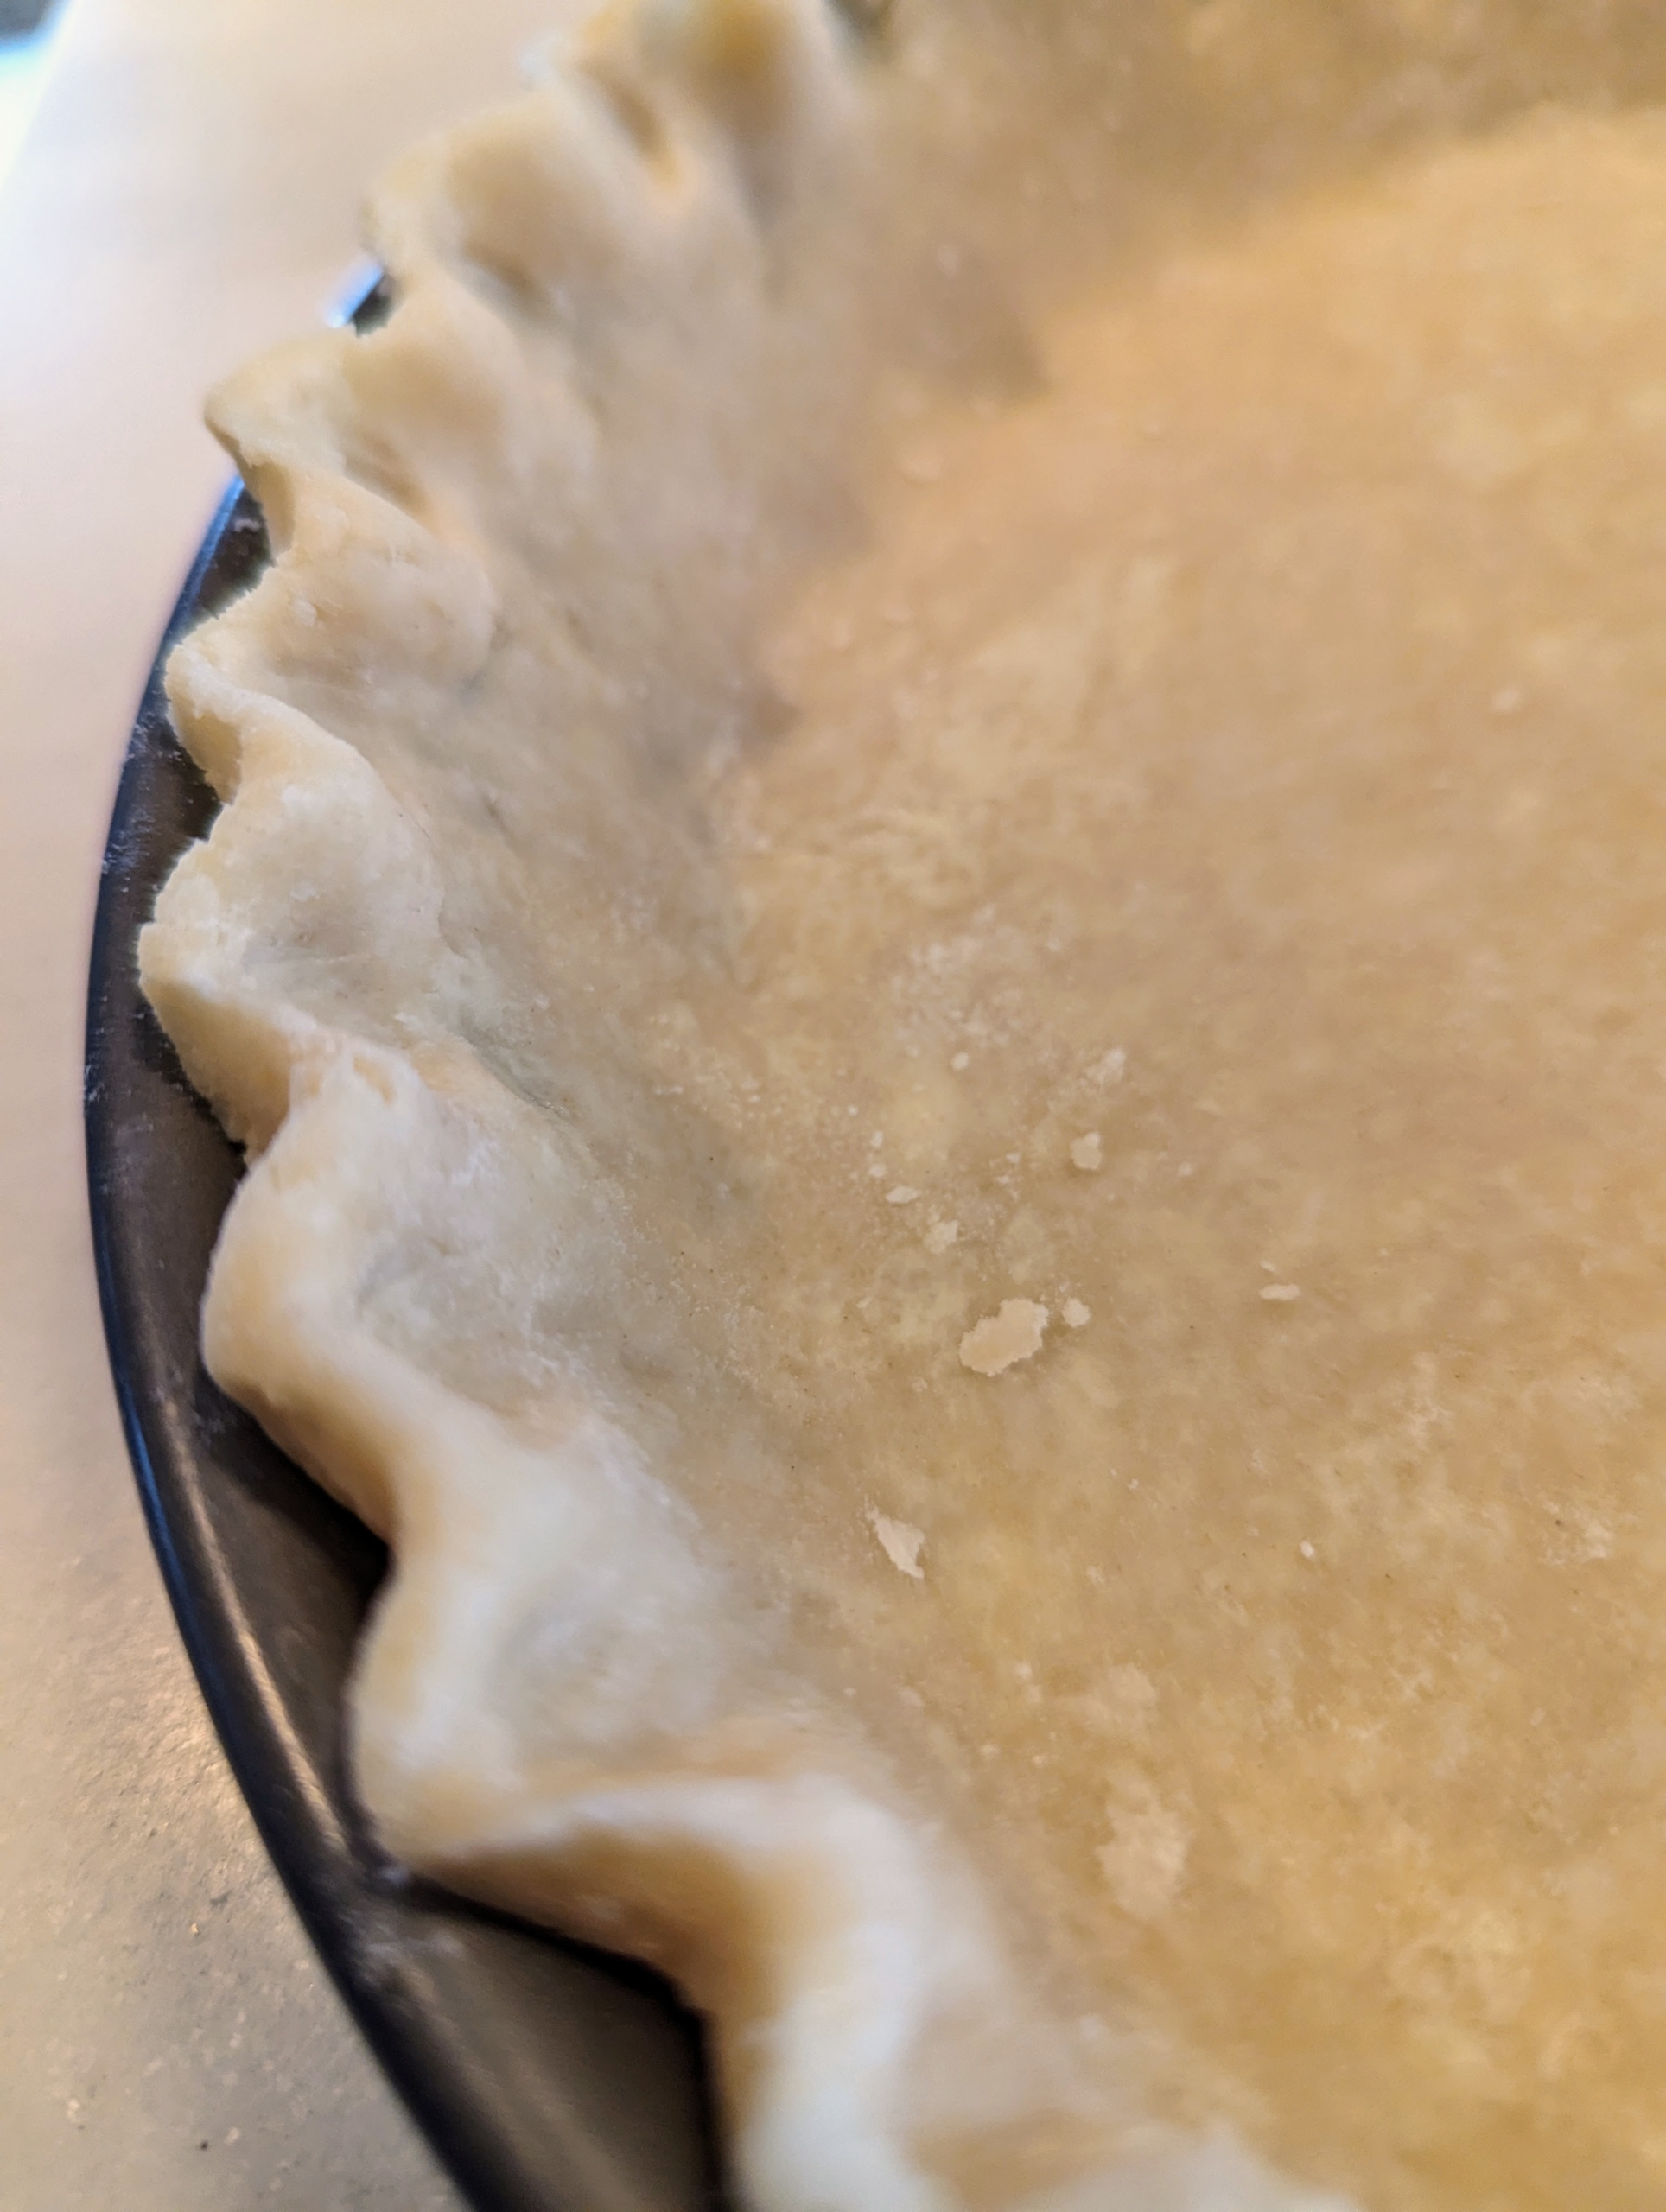
Next, using my fingers I decoratively crimp the crust. Crimping is not only decorative, but it makes it less likely the sides of the pie will fall or shrink during baking.
I also prick the bottom of the crust a few times with the tines of a fork. This is called docking, the culinary term for poking holes in a pie crust. The holes allow steam to escape, so the crust should stay flat against the baking dish when it isn’t held down by pie weights or a filling. Otherwise the crust can puff up, ruin its appearance, and leave less space for whatever filling is planned.
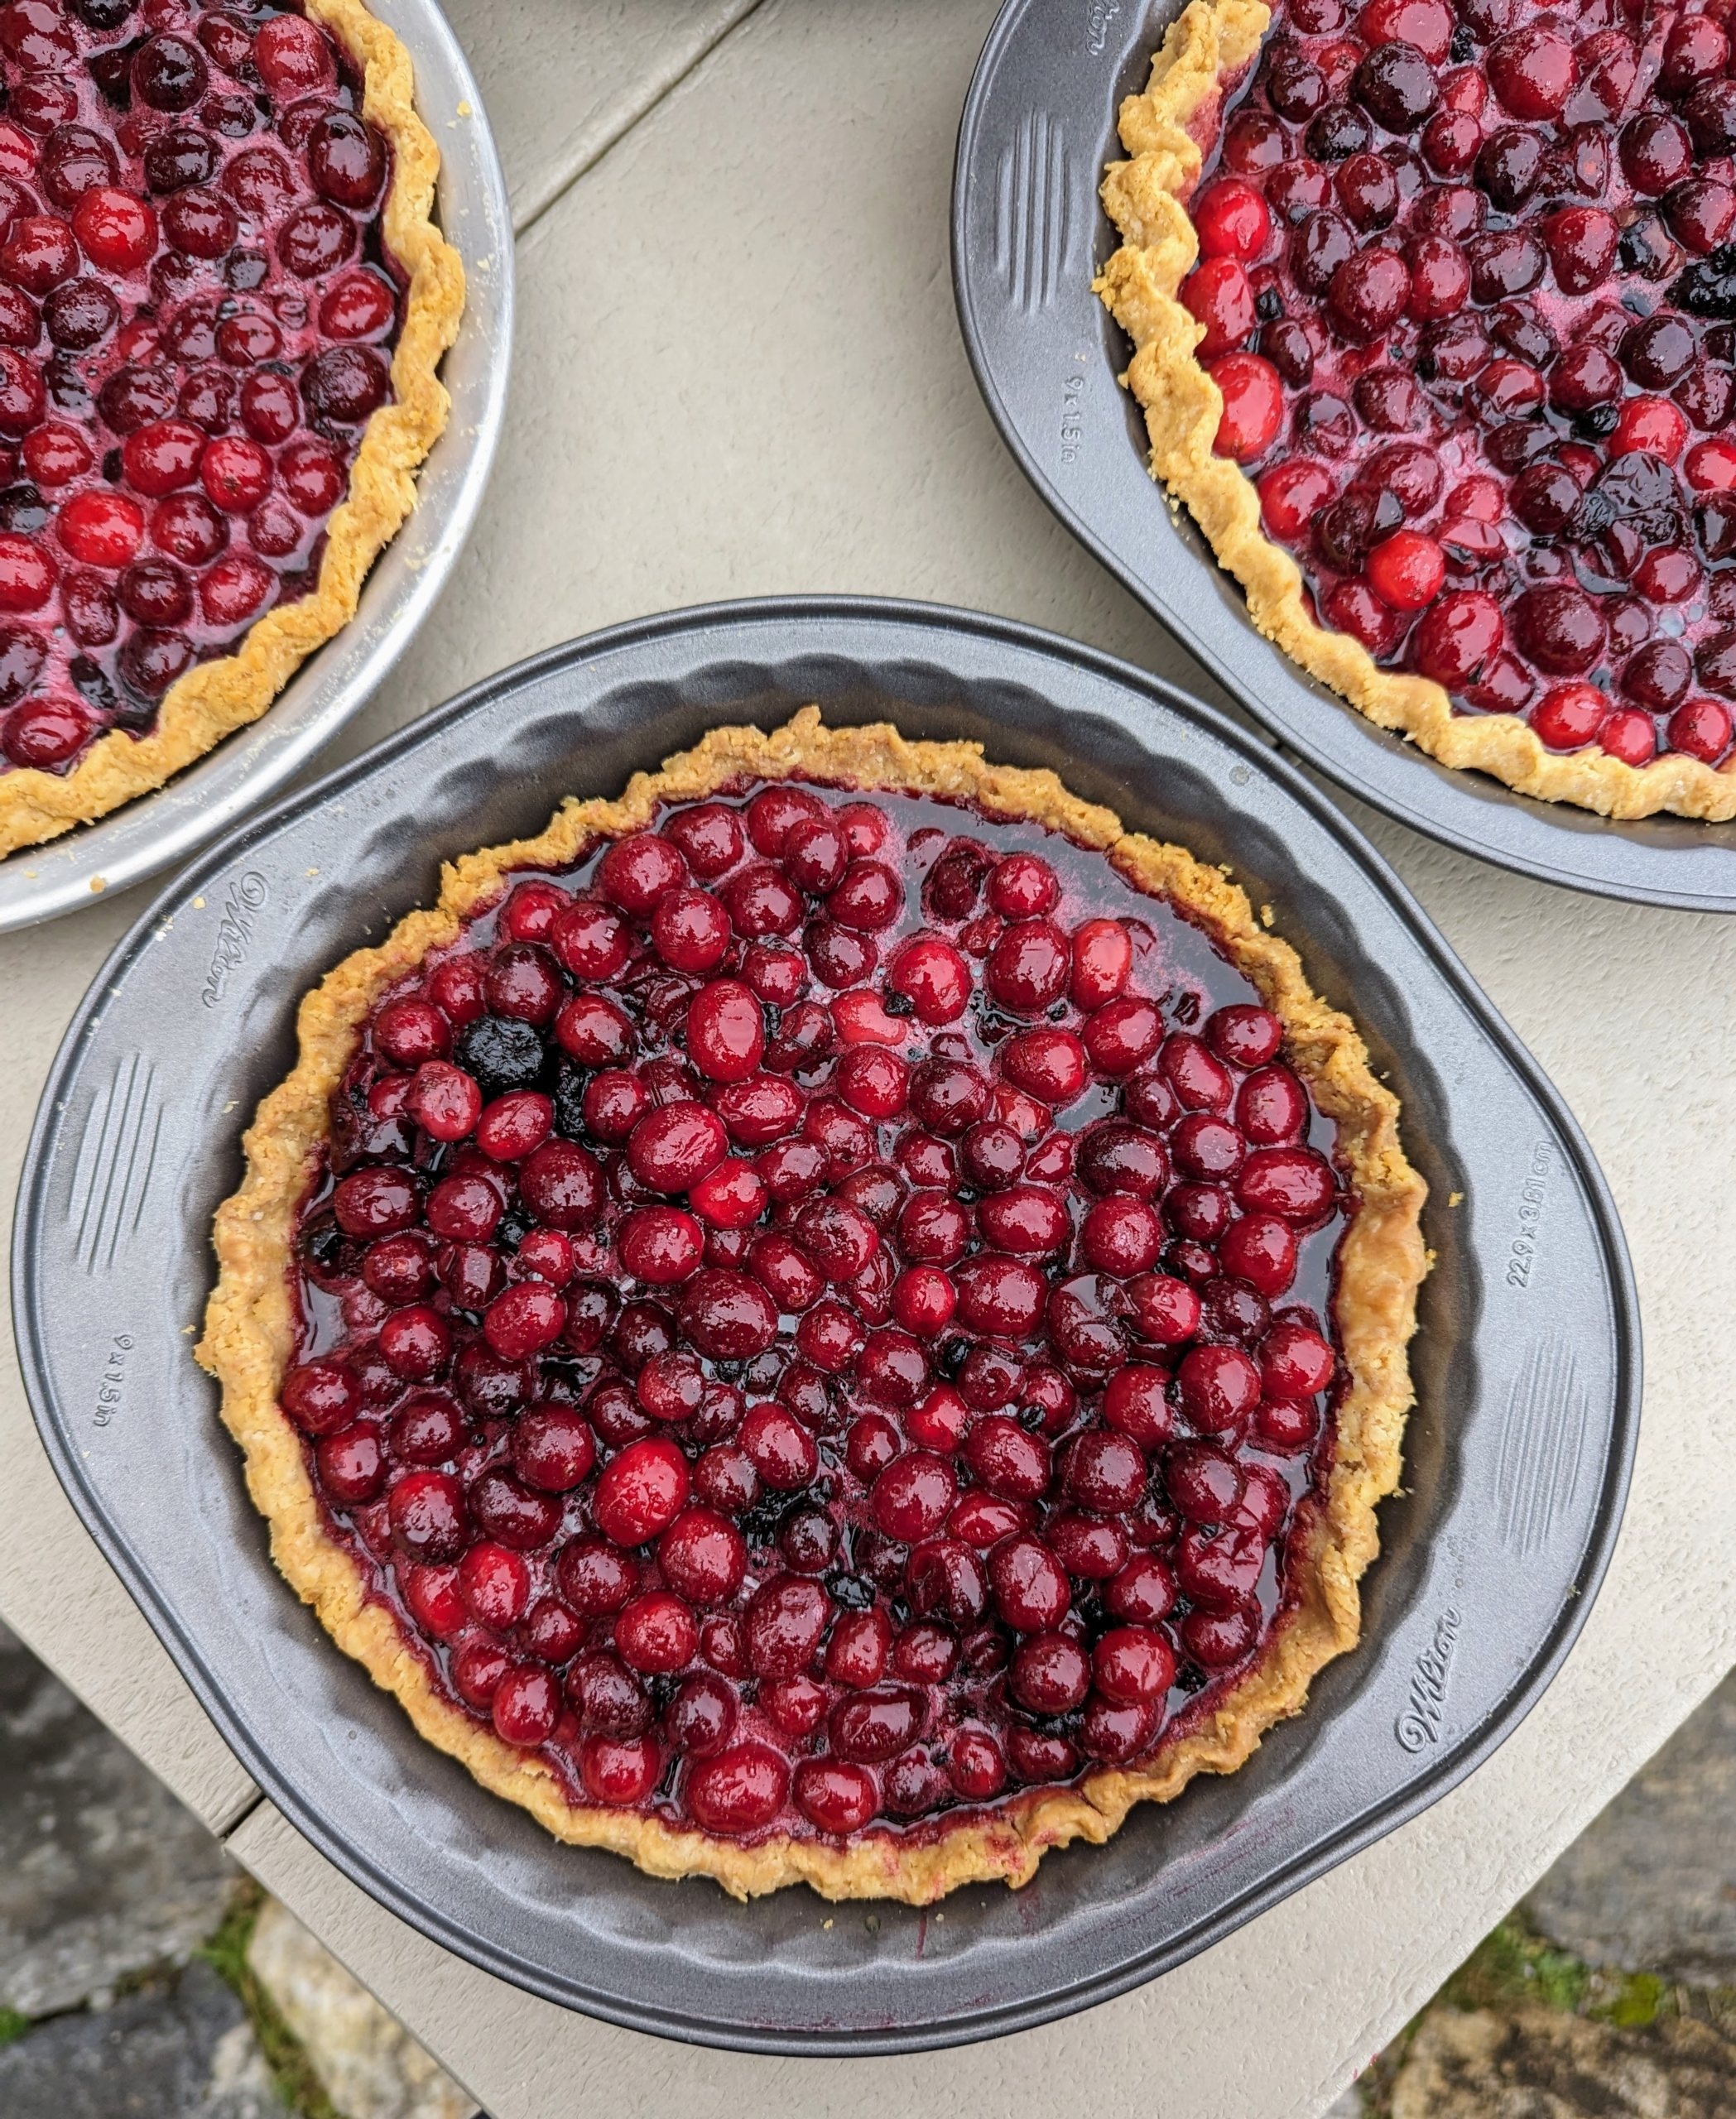
Meanwhile, on the stove cooking are two large pots of beautiful cranberries.
I worked in an assembly line fashion to get all the pies ready on time. Once cooked, they are left to cool – on the counter, on the stovetop, near my sink – anywhere there is room.
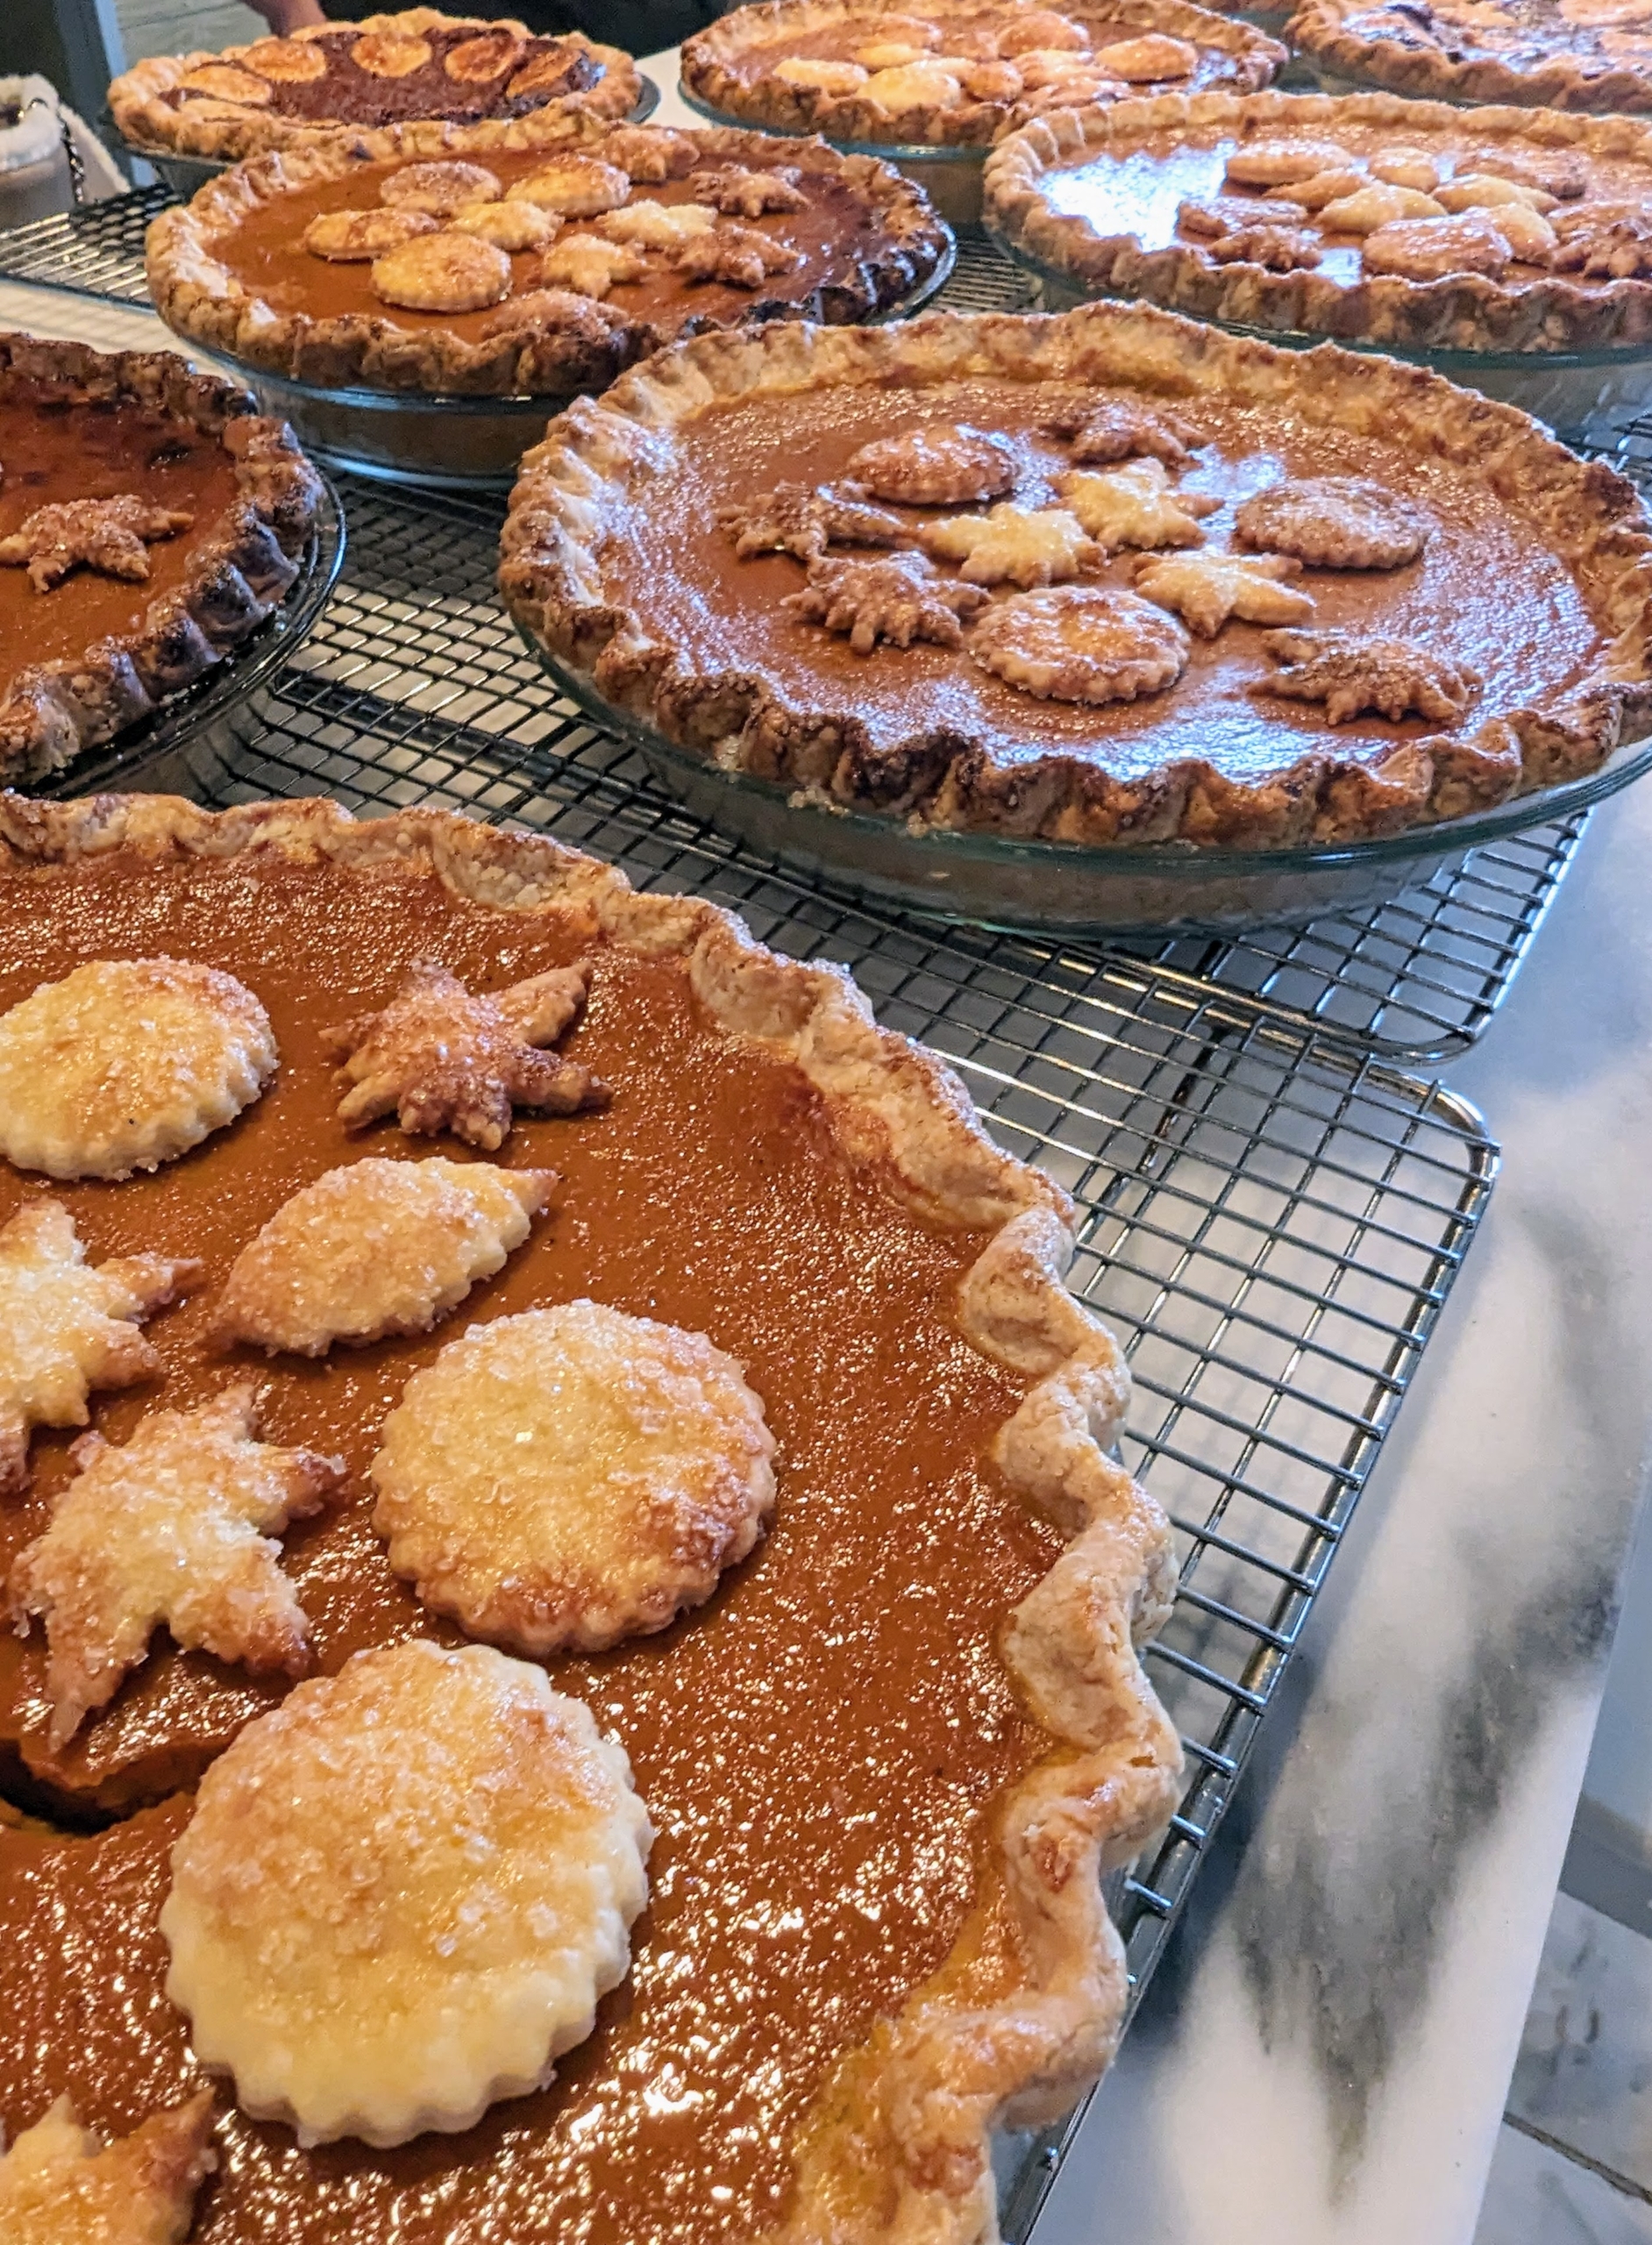
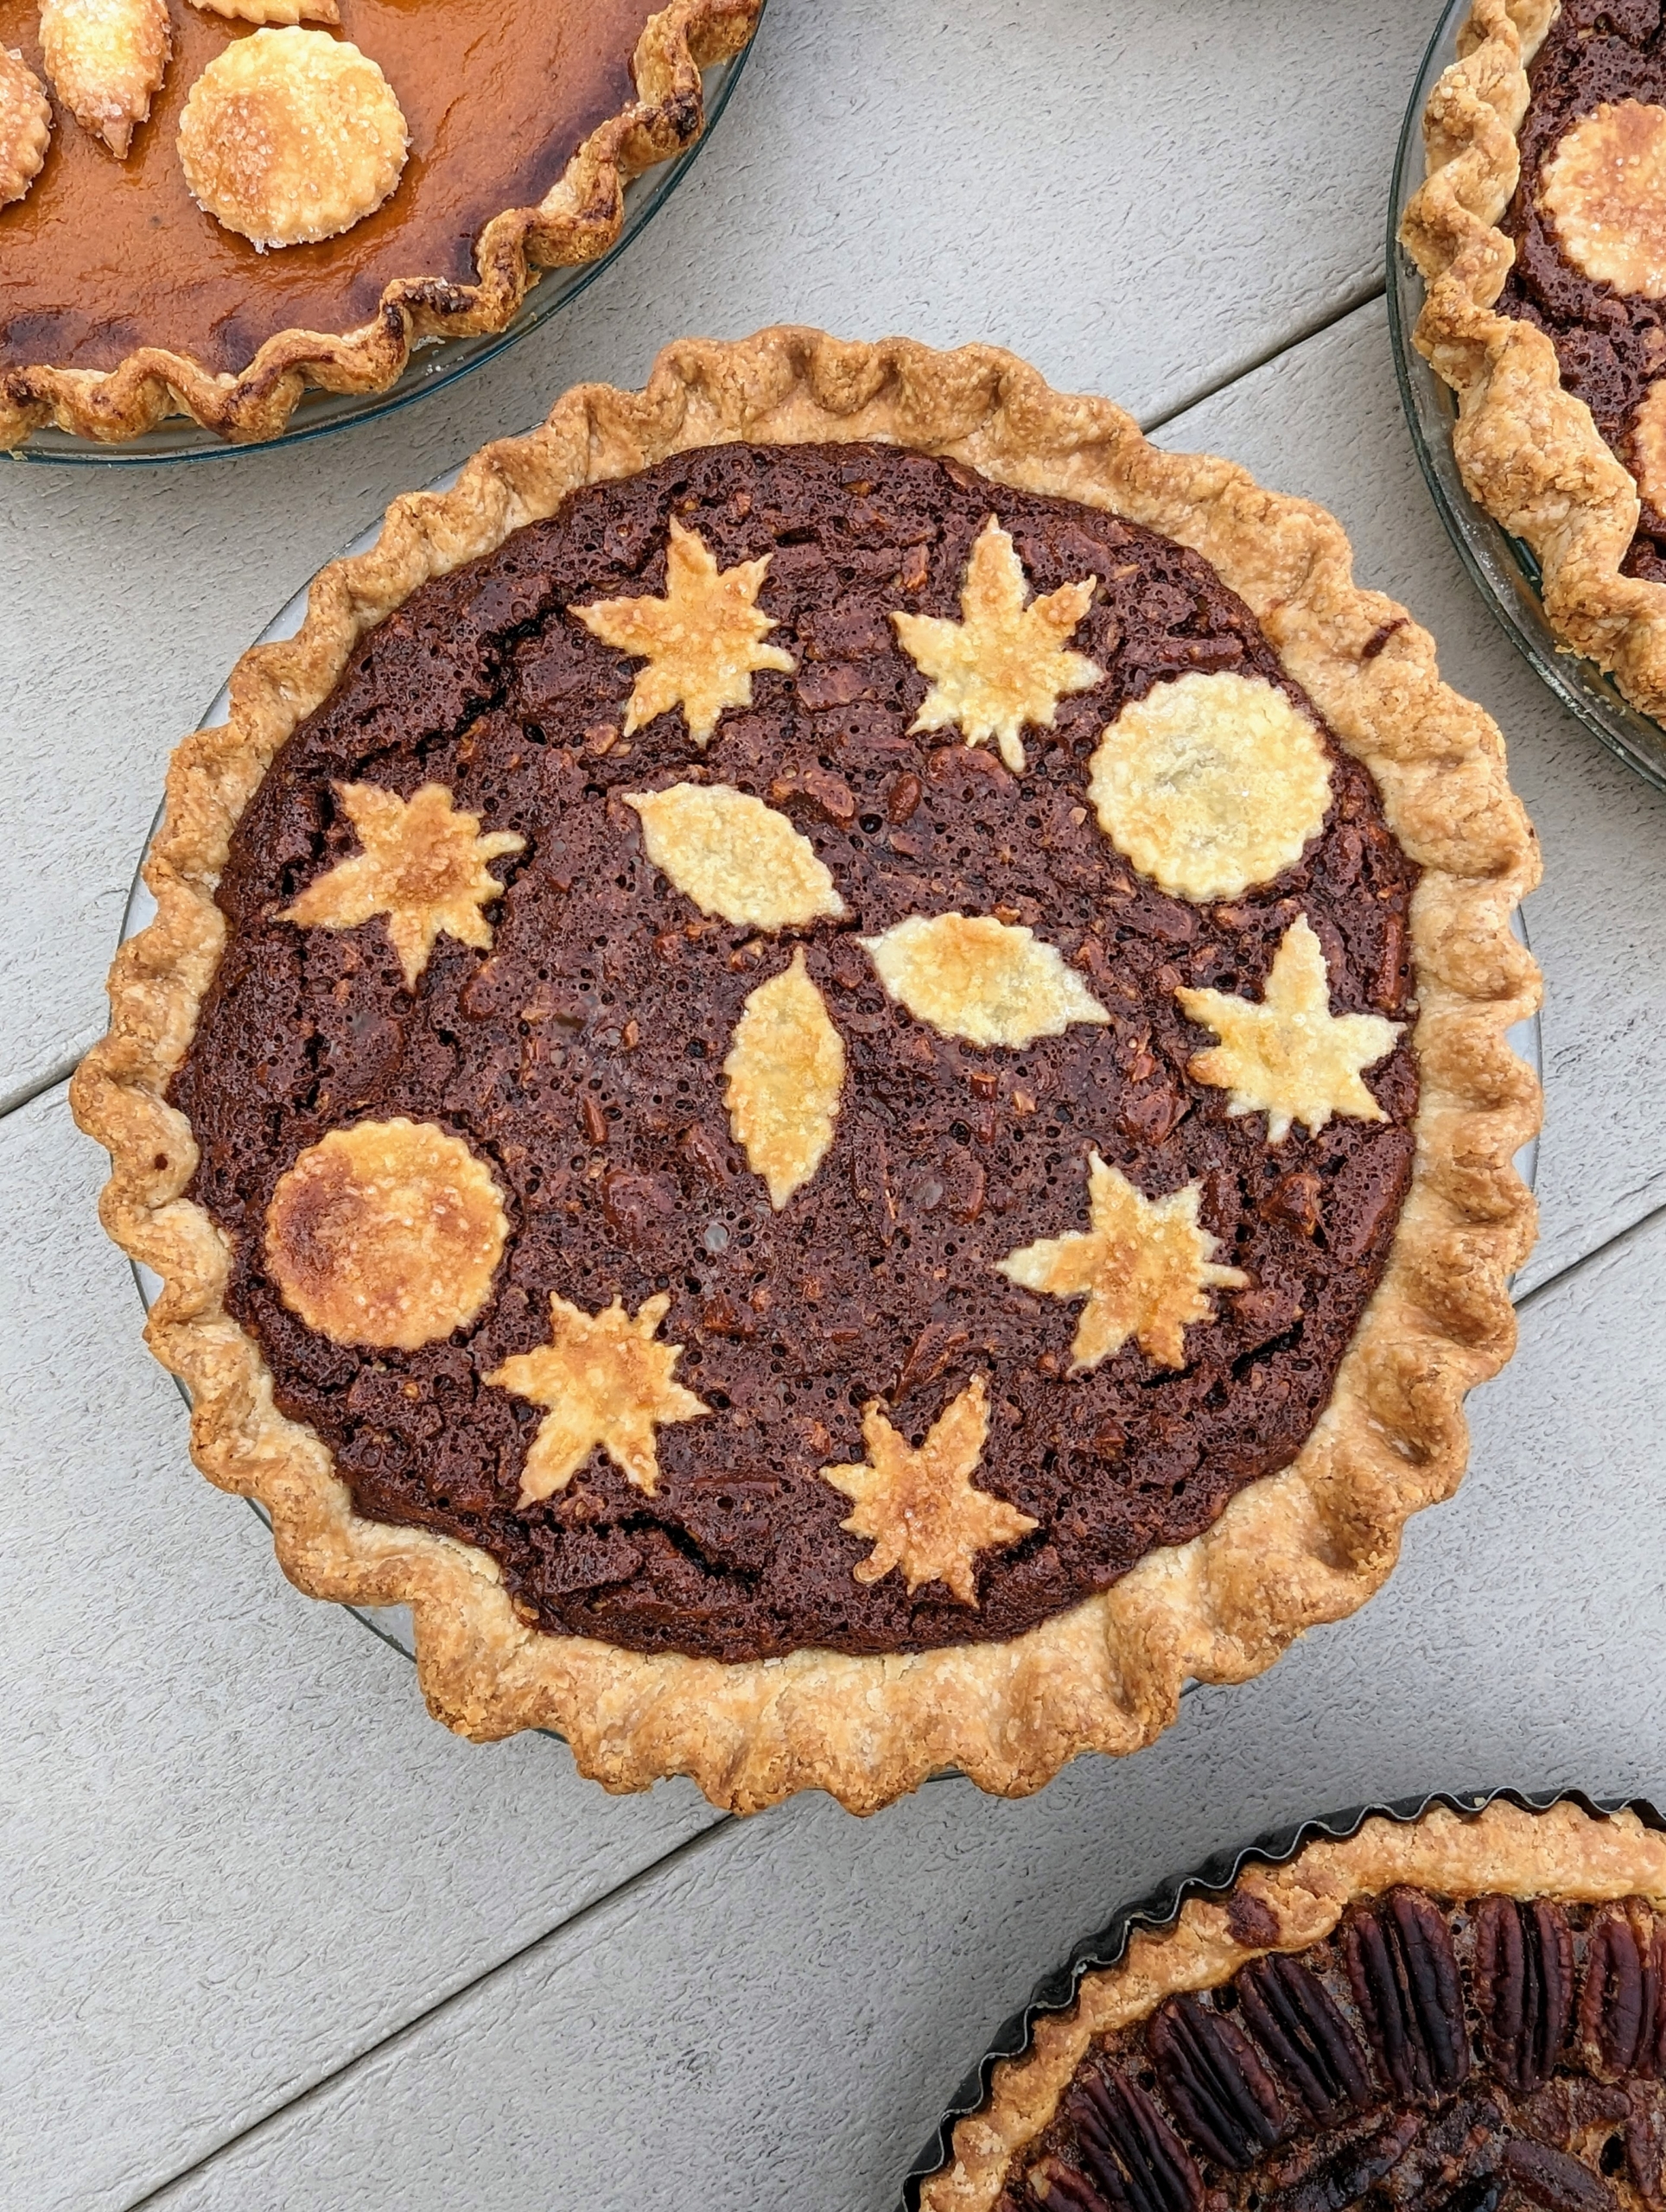
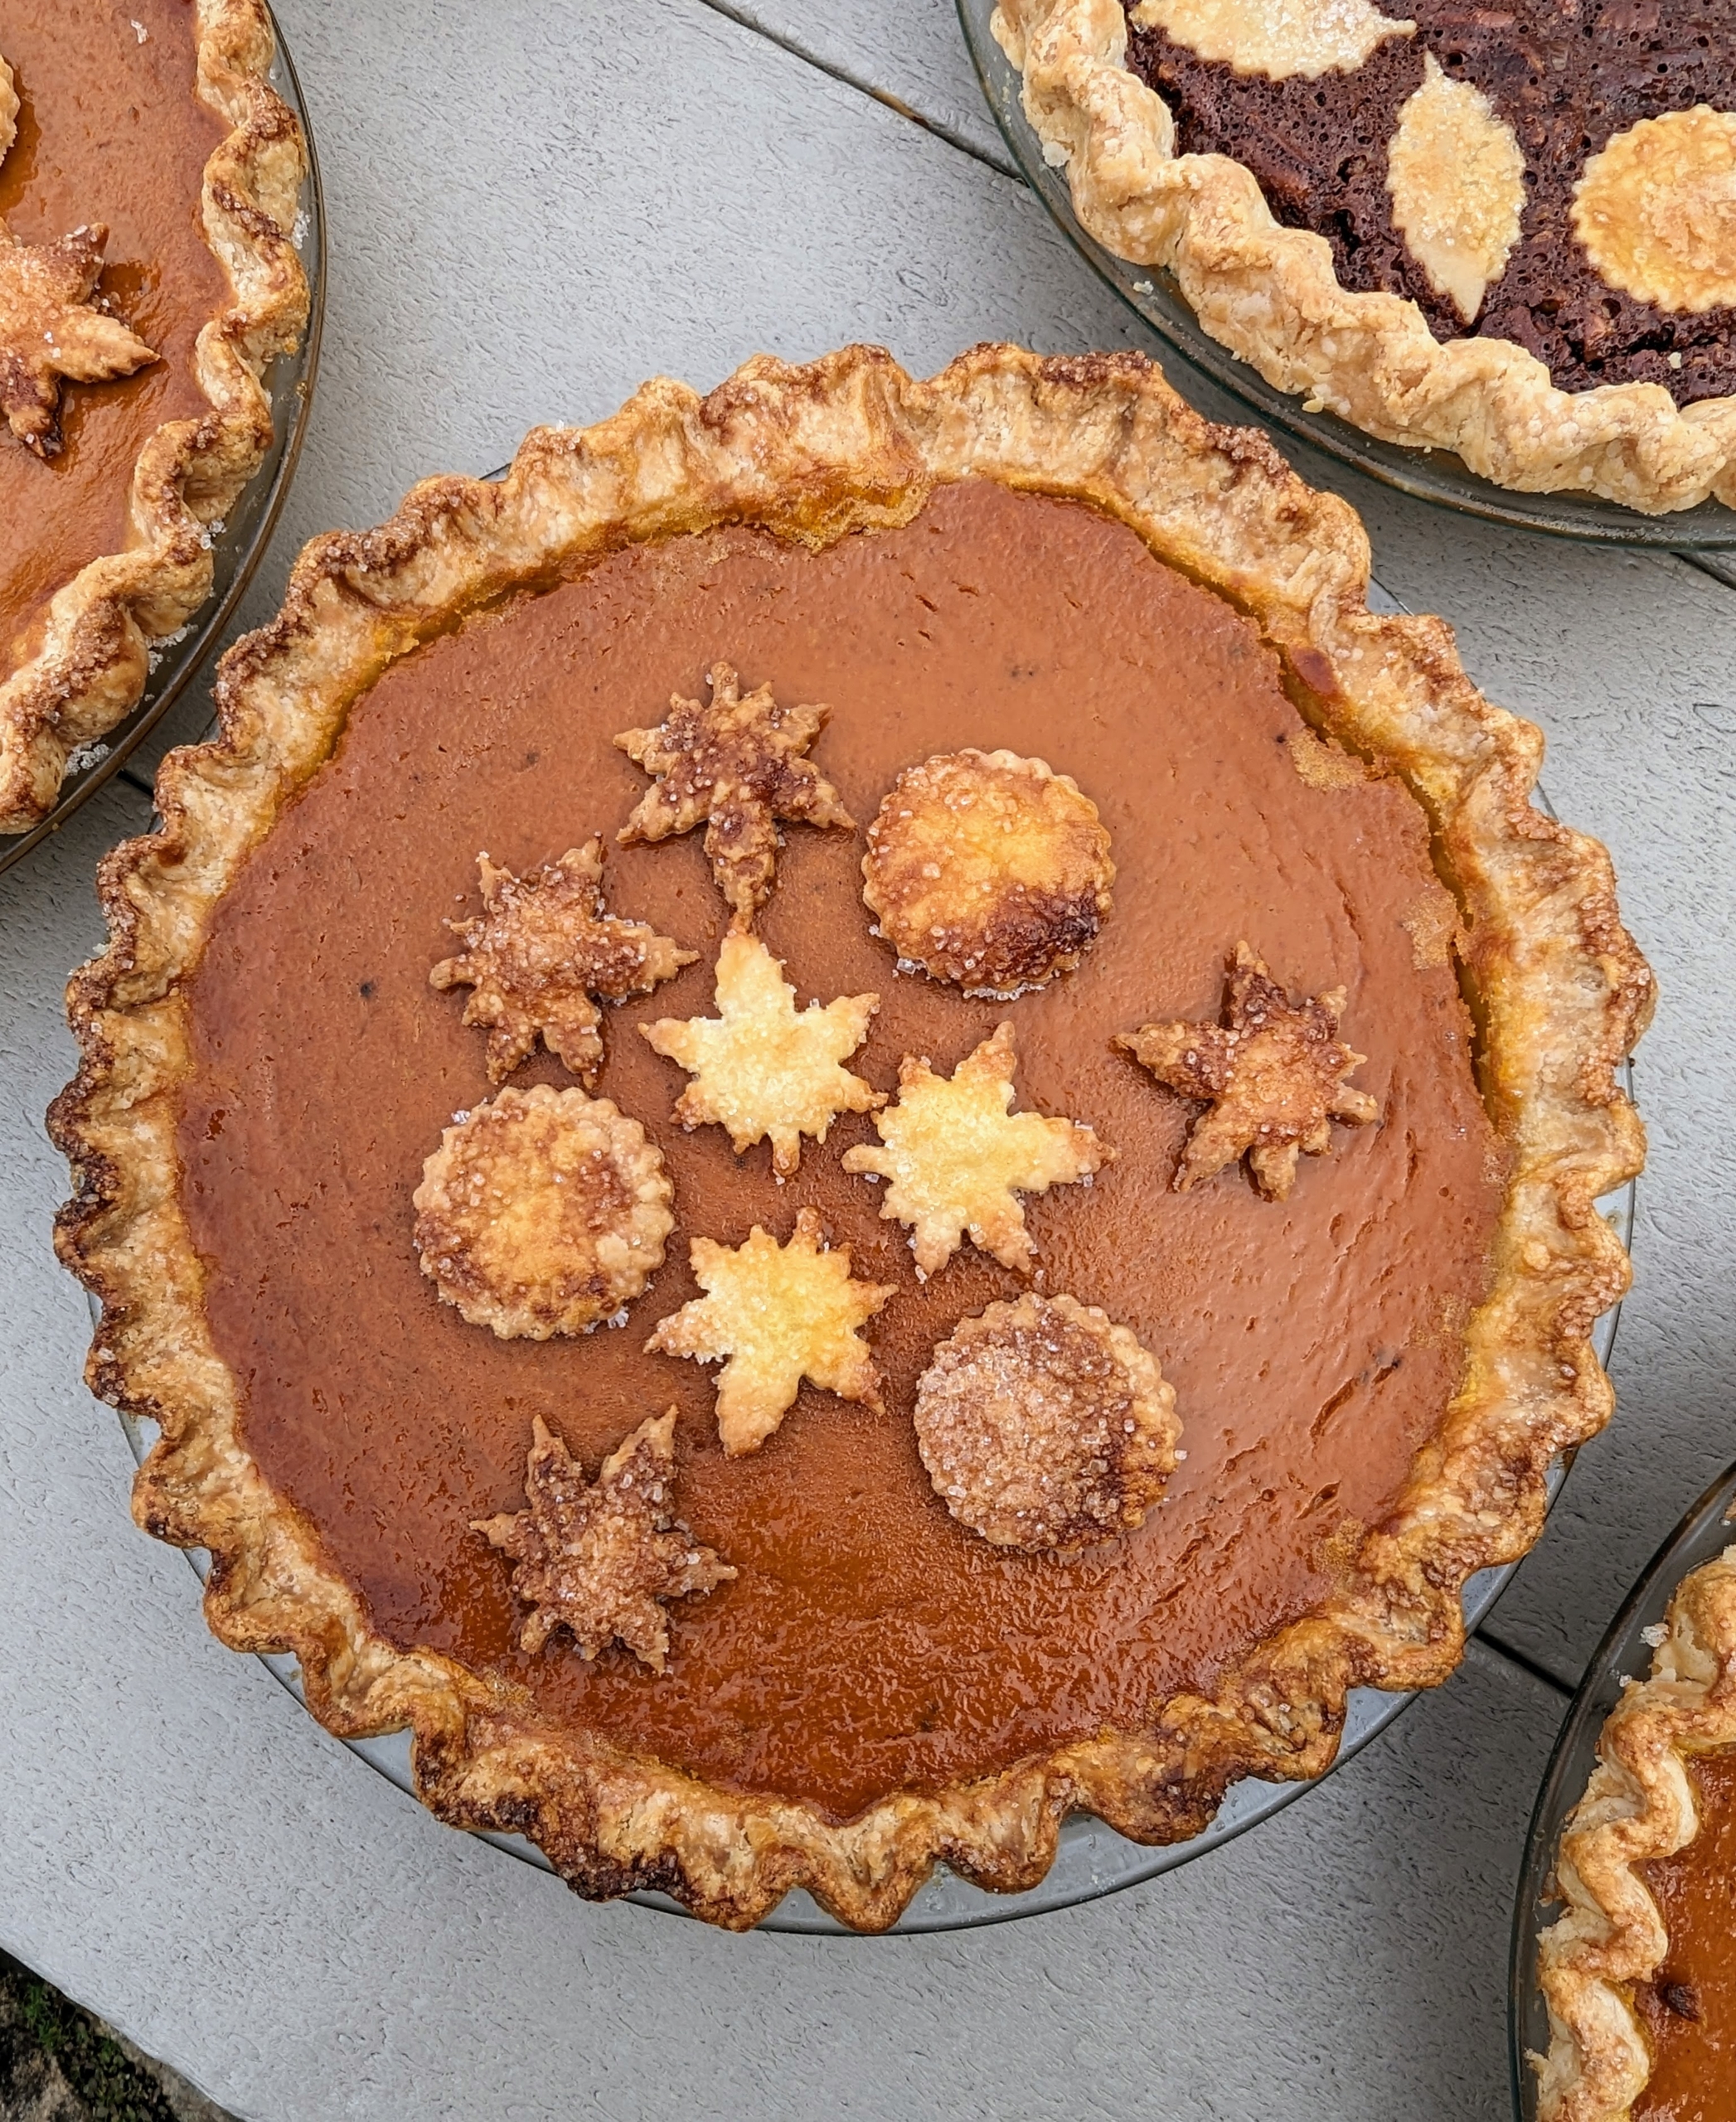
I also make lots of small decorations for the pies. The decorations are baked separately and then placed on the pie at the end – this allows for pieces to be moved onto each individual piece of pie when served.
After they are all done and slightly cooled, the pies are brought outside to the terrace to cool some more. The crew was given several choices, and I made all the pies and tarts “to order.” With a couple for me too, of course.
And a cranberry tart. This recipe is from my original “Martha Stewart’s Pies & Tarts” book.
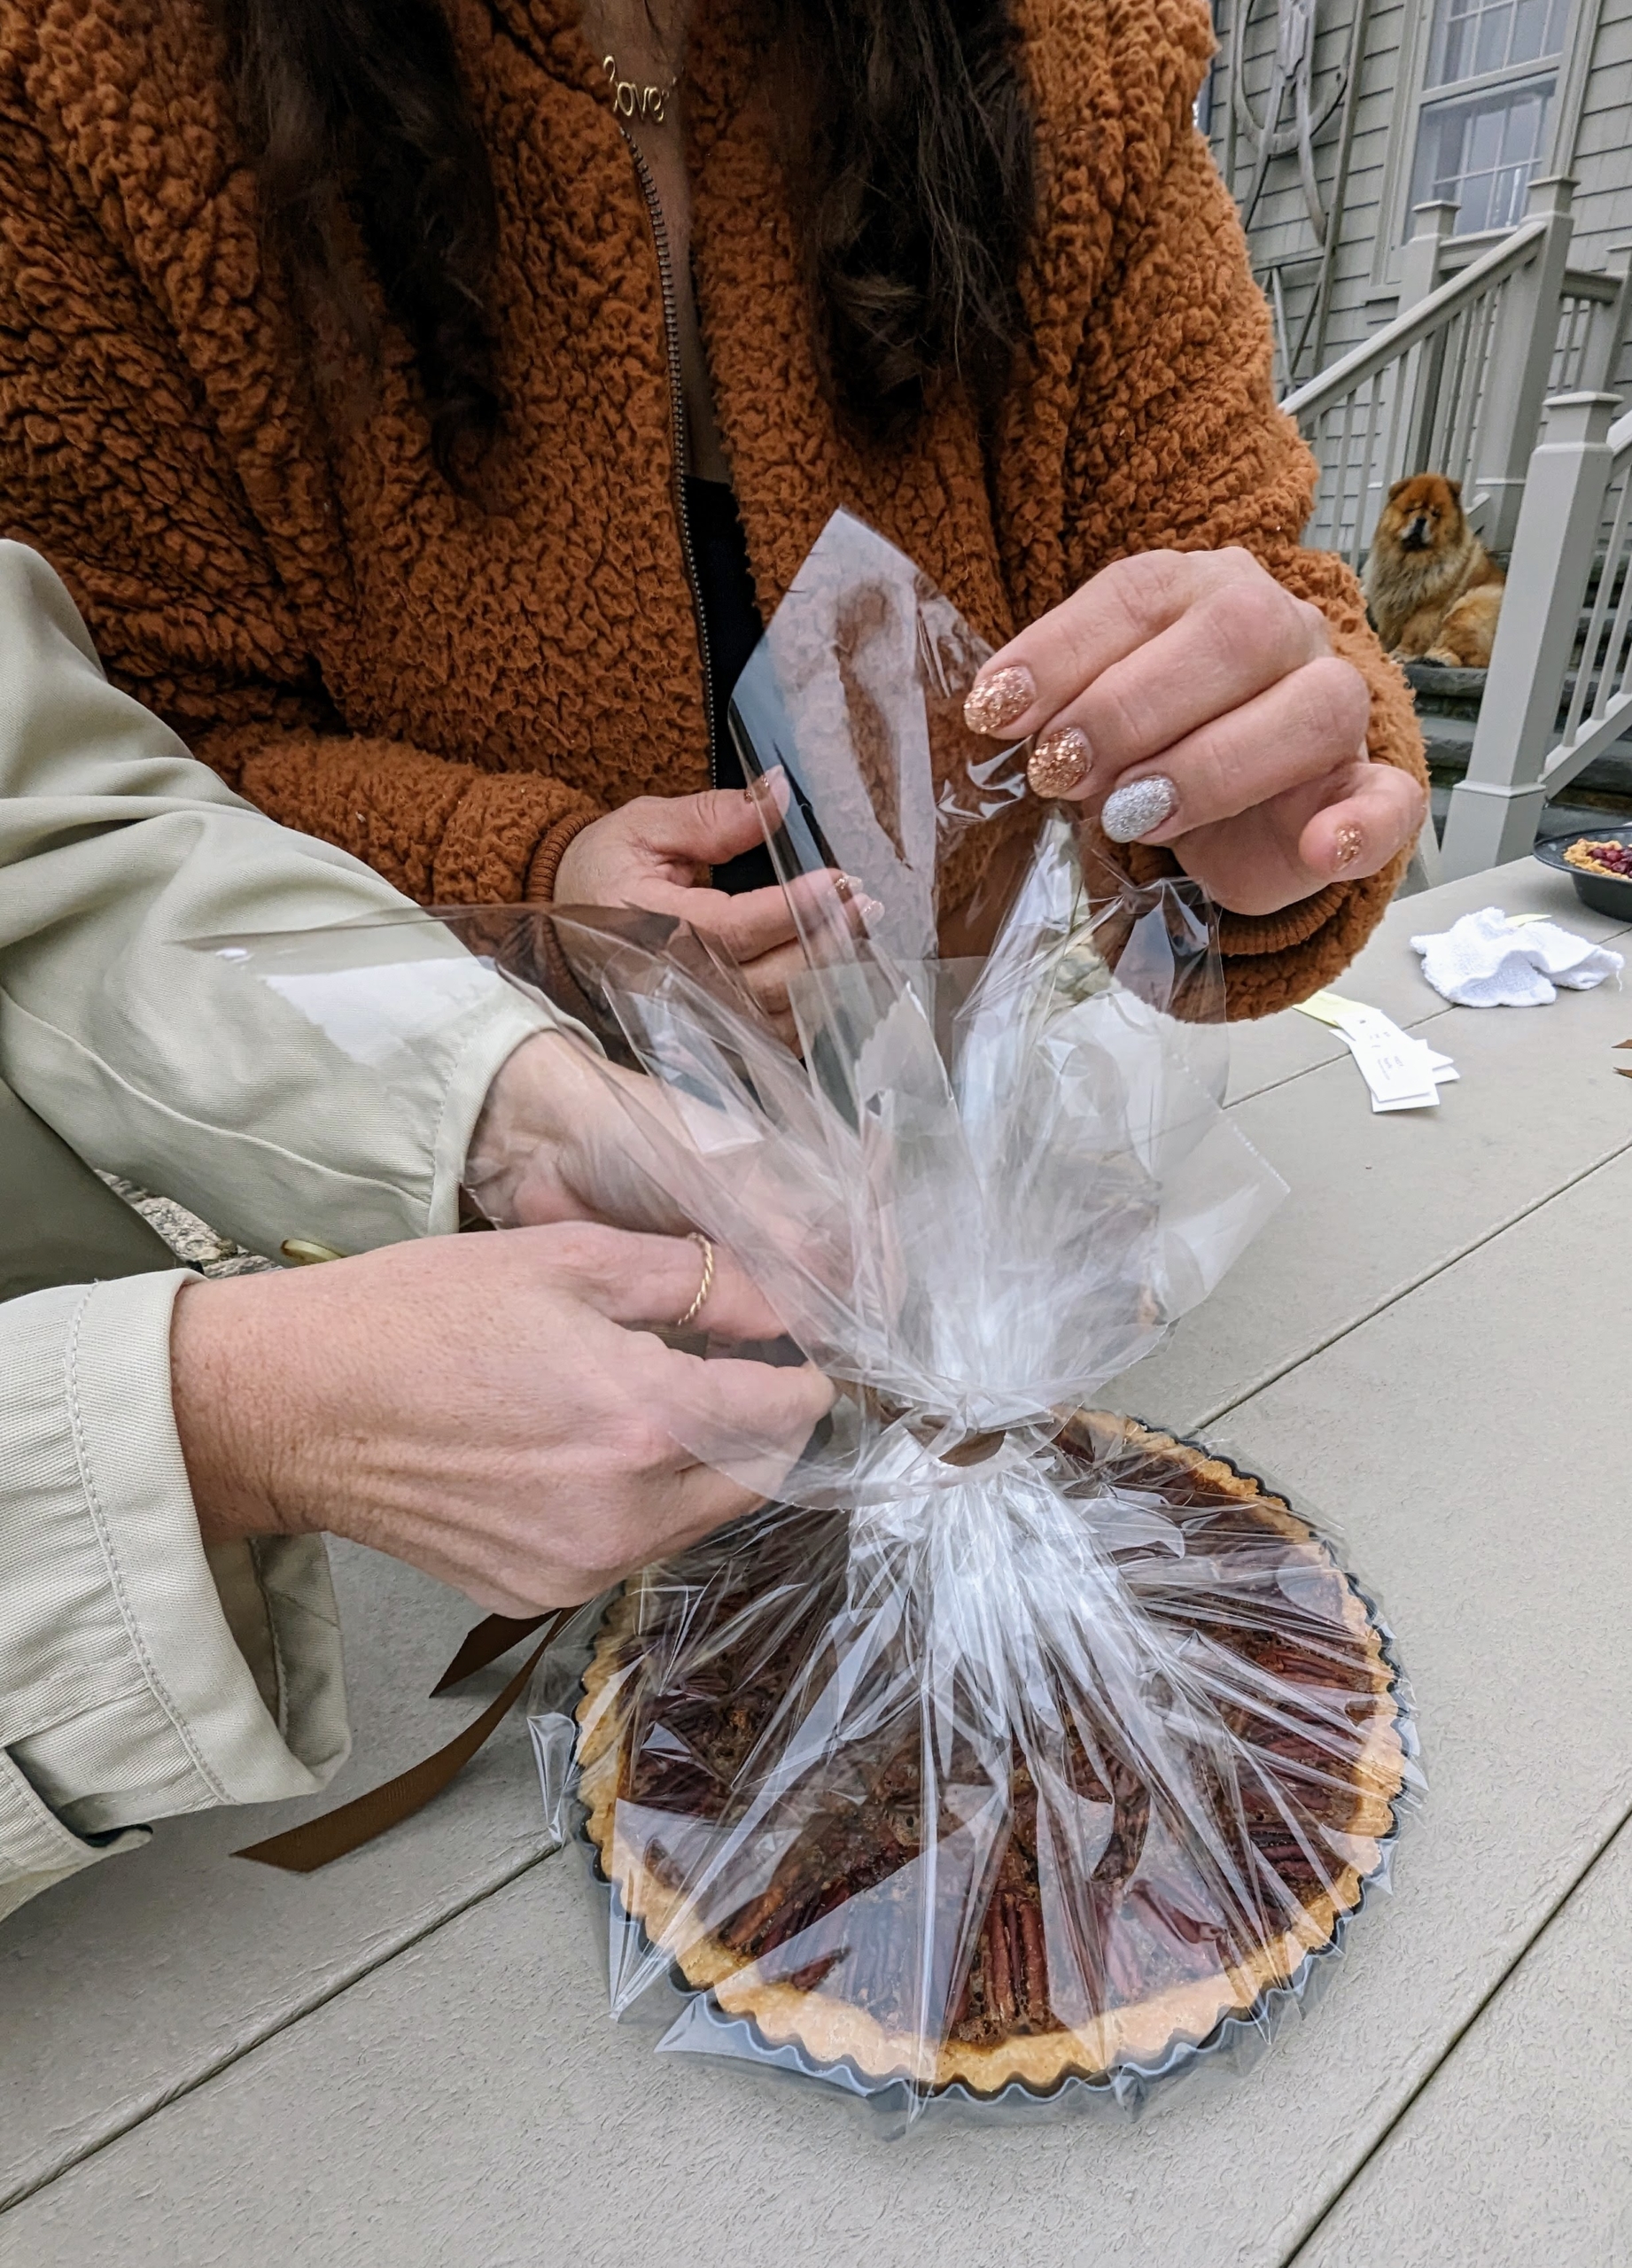
All the pies for gifting were wrapped carefully in cellophane, tied with ribbon, and labeled for each recipient.
Then they were displayed on the tables by type.
Just before I personally distributed a pie to each staff member, I stopped for a quick photo – it’s all in a day’s work.
My beautiful Chow Chows, Emperor Han and Empress Qin, watched all the activity from the steps of my kitchen – and hoping for a crumb of crust to fall their way.
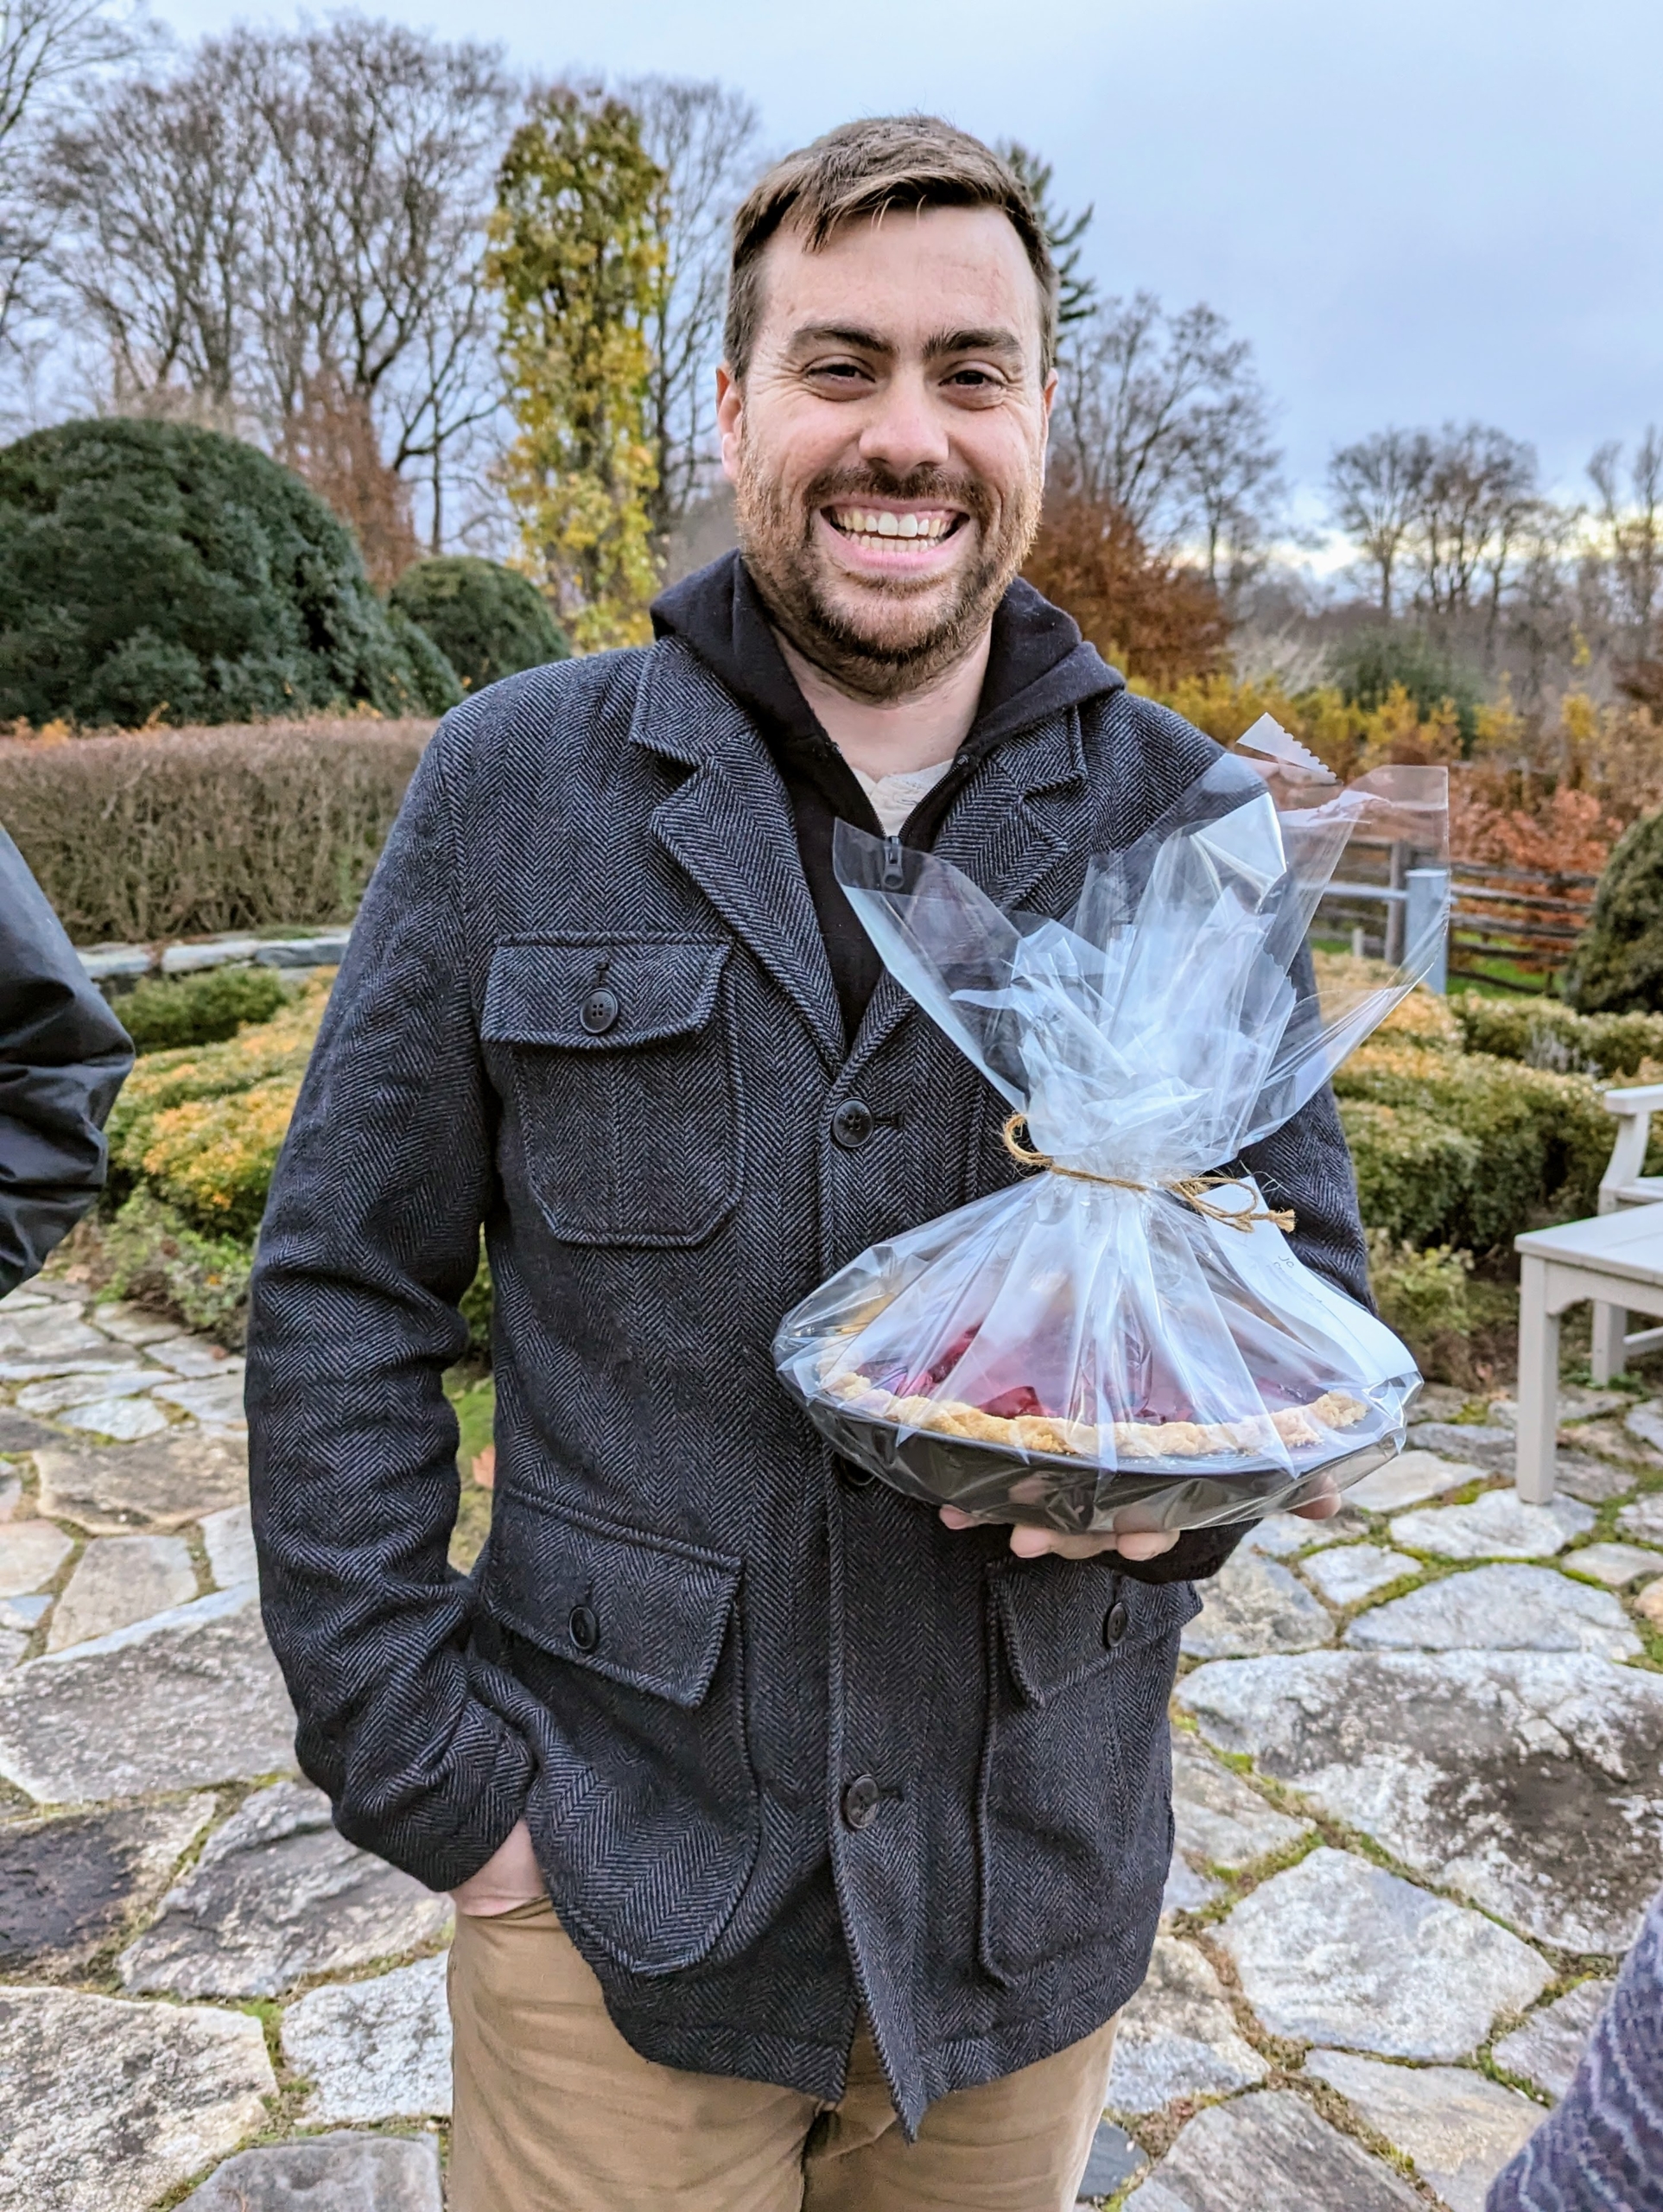
Here’s my business manager, JC Roberts, with his cranberry tart.
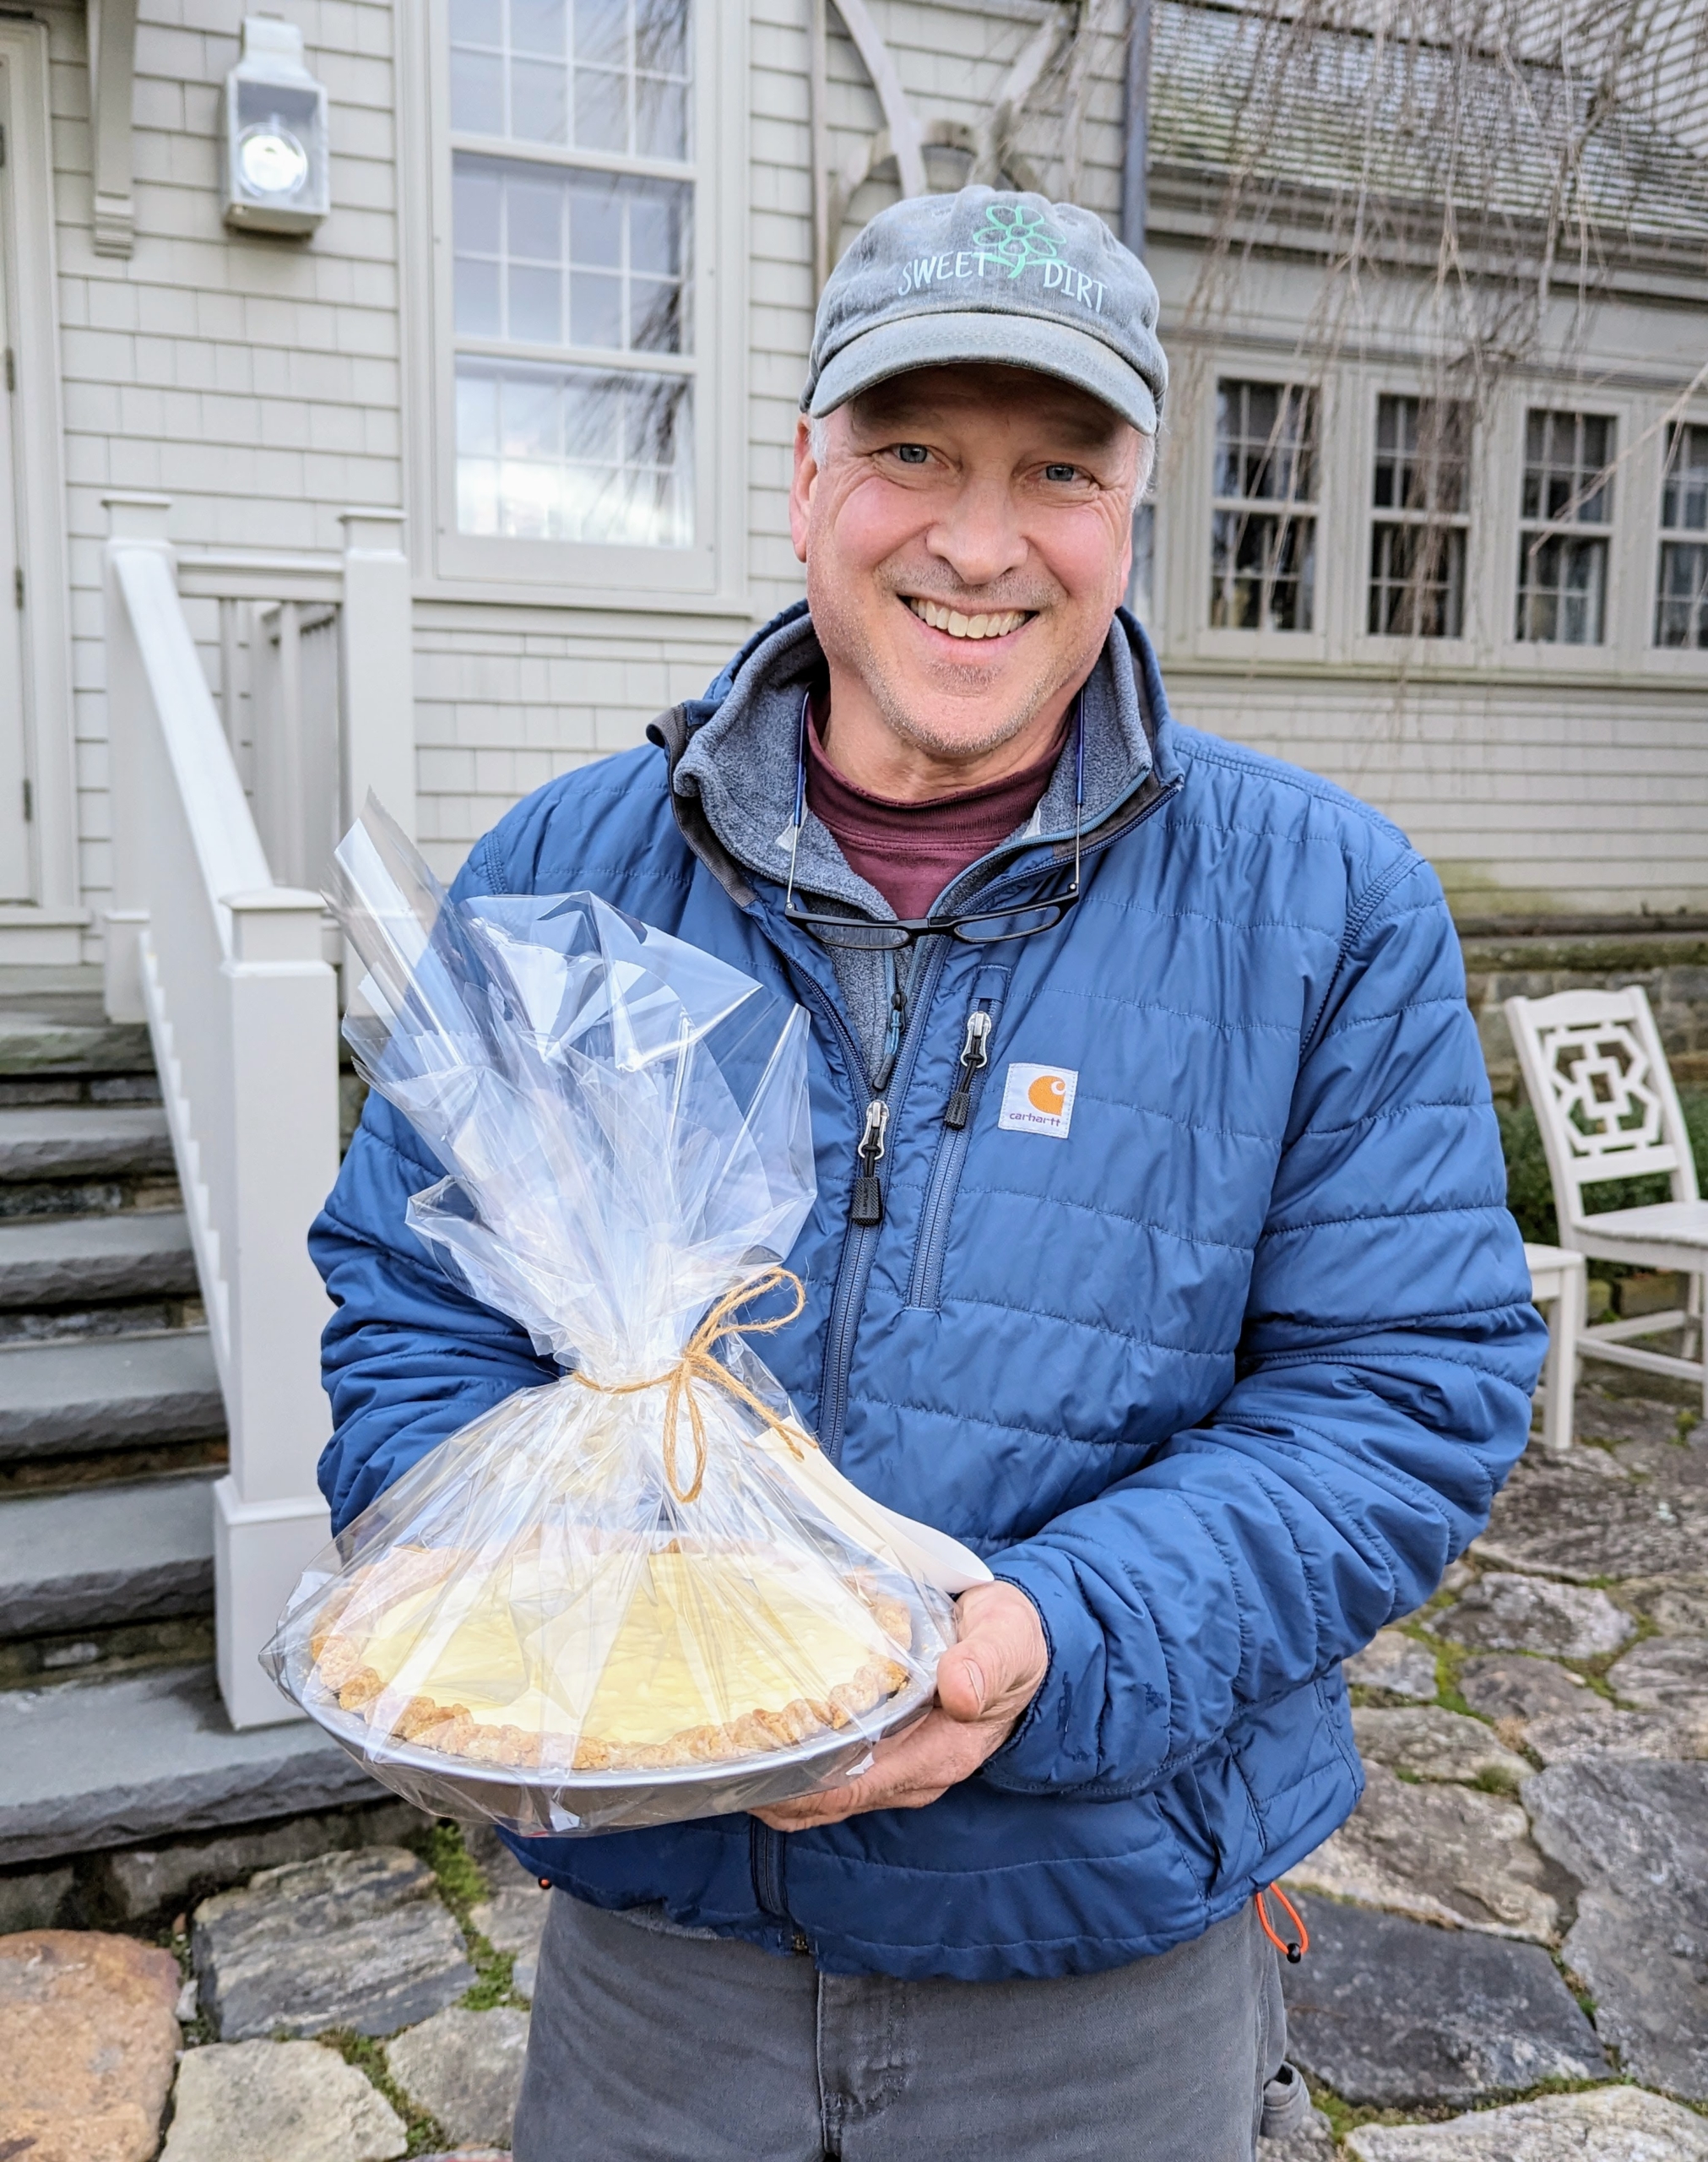
My property manager, Doug White, selected a lemon curd pie.
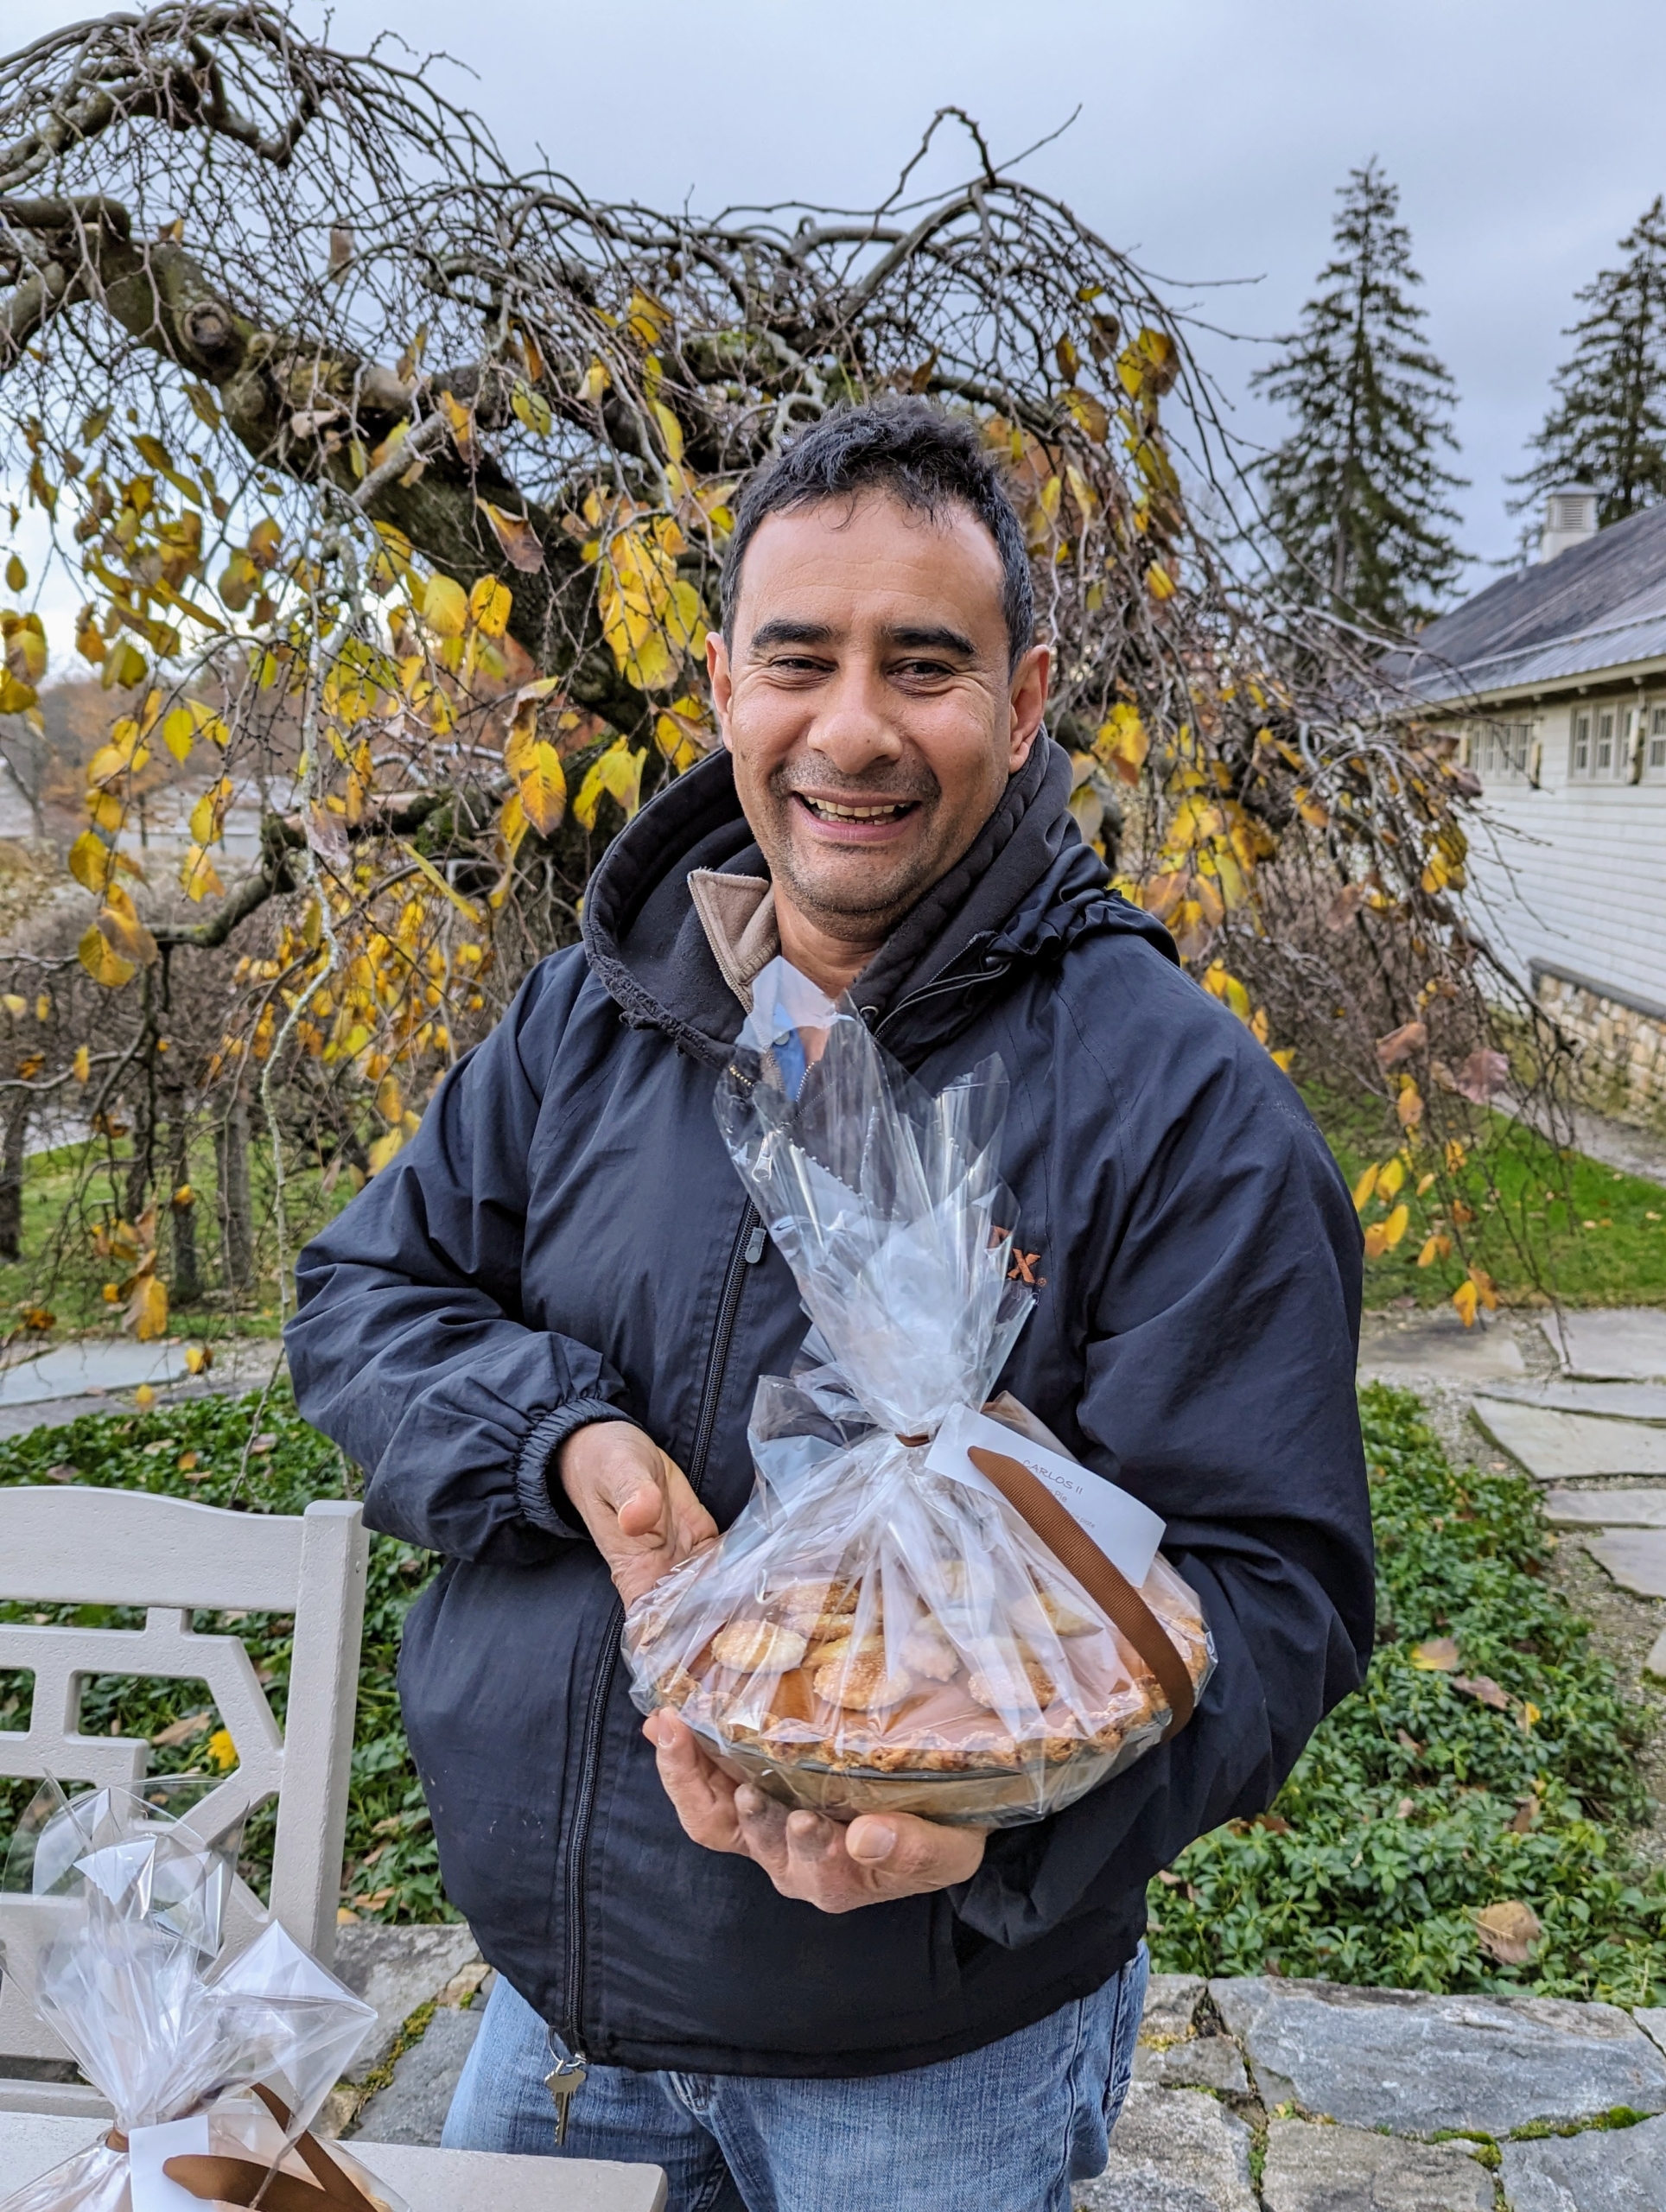
Carlos Restrepo from my housecleaning team wanted a classic brown sugar pumpkin pie.
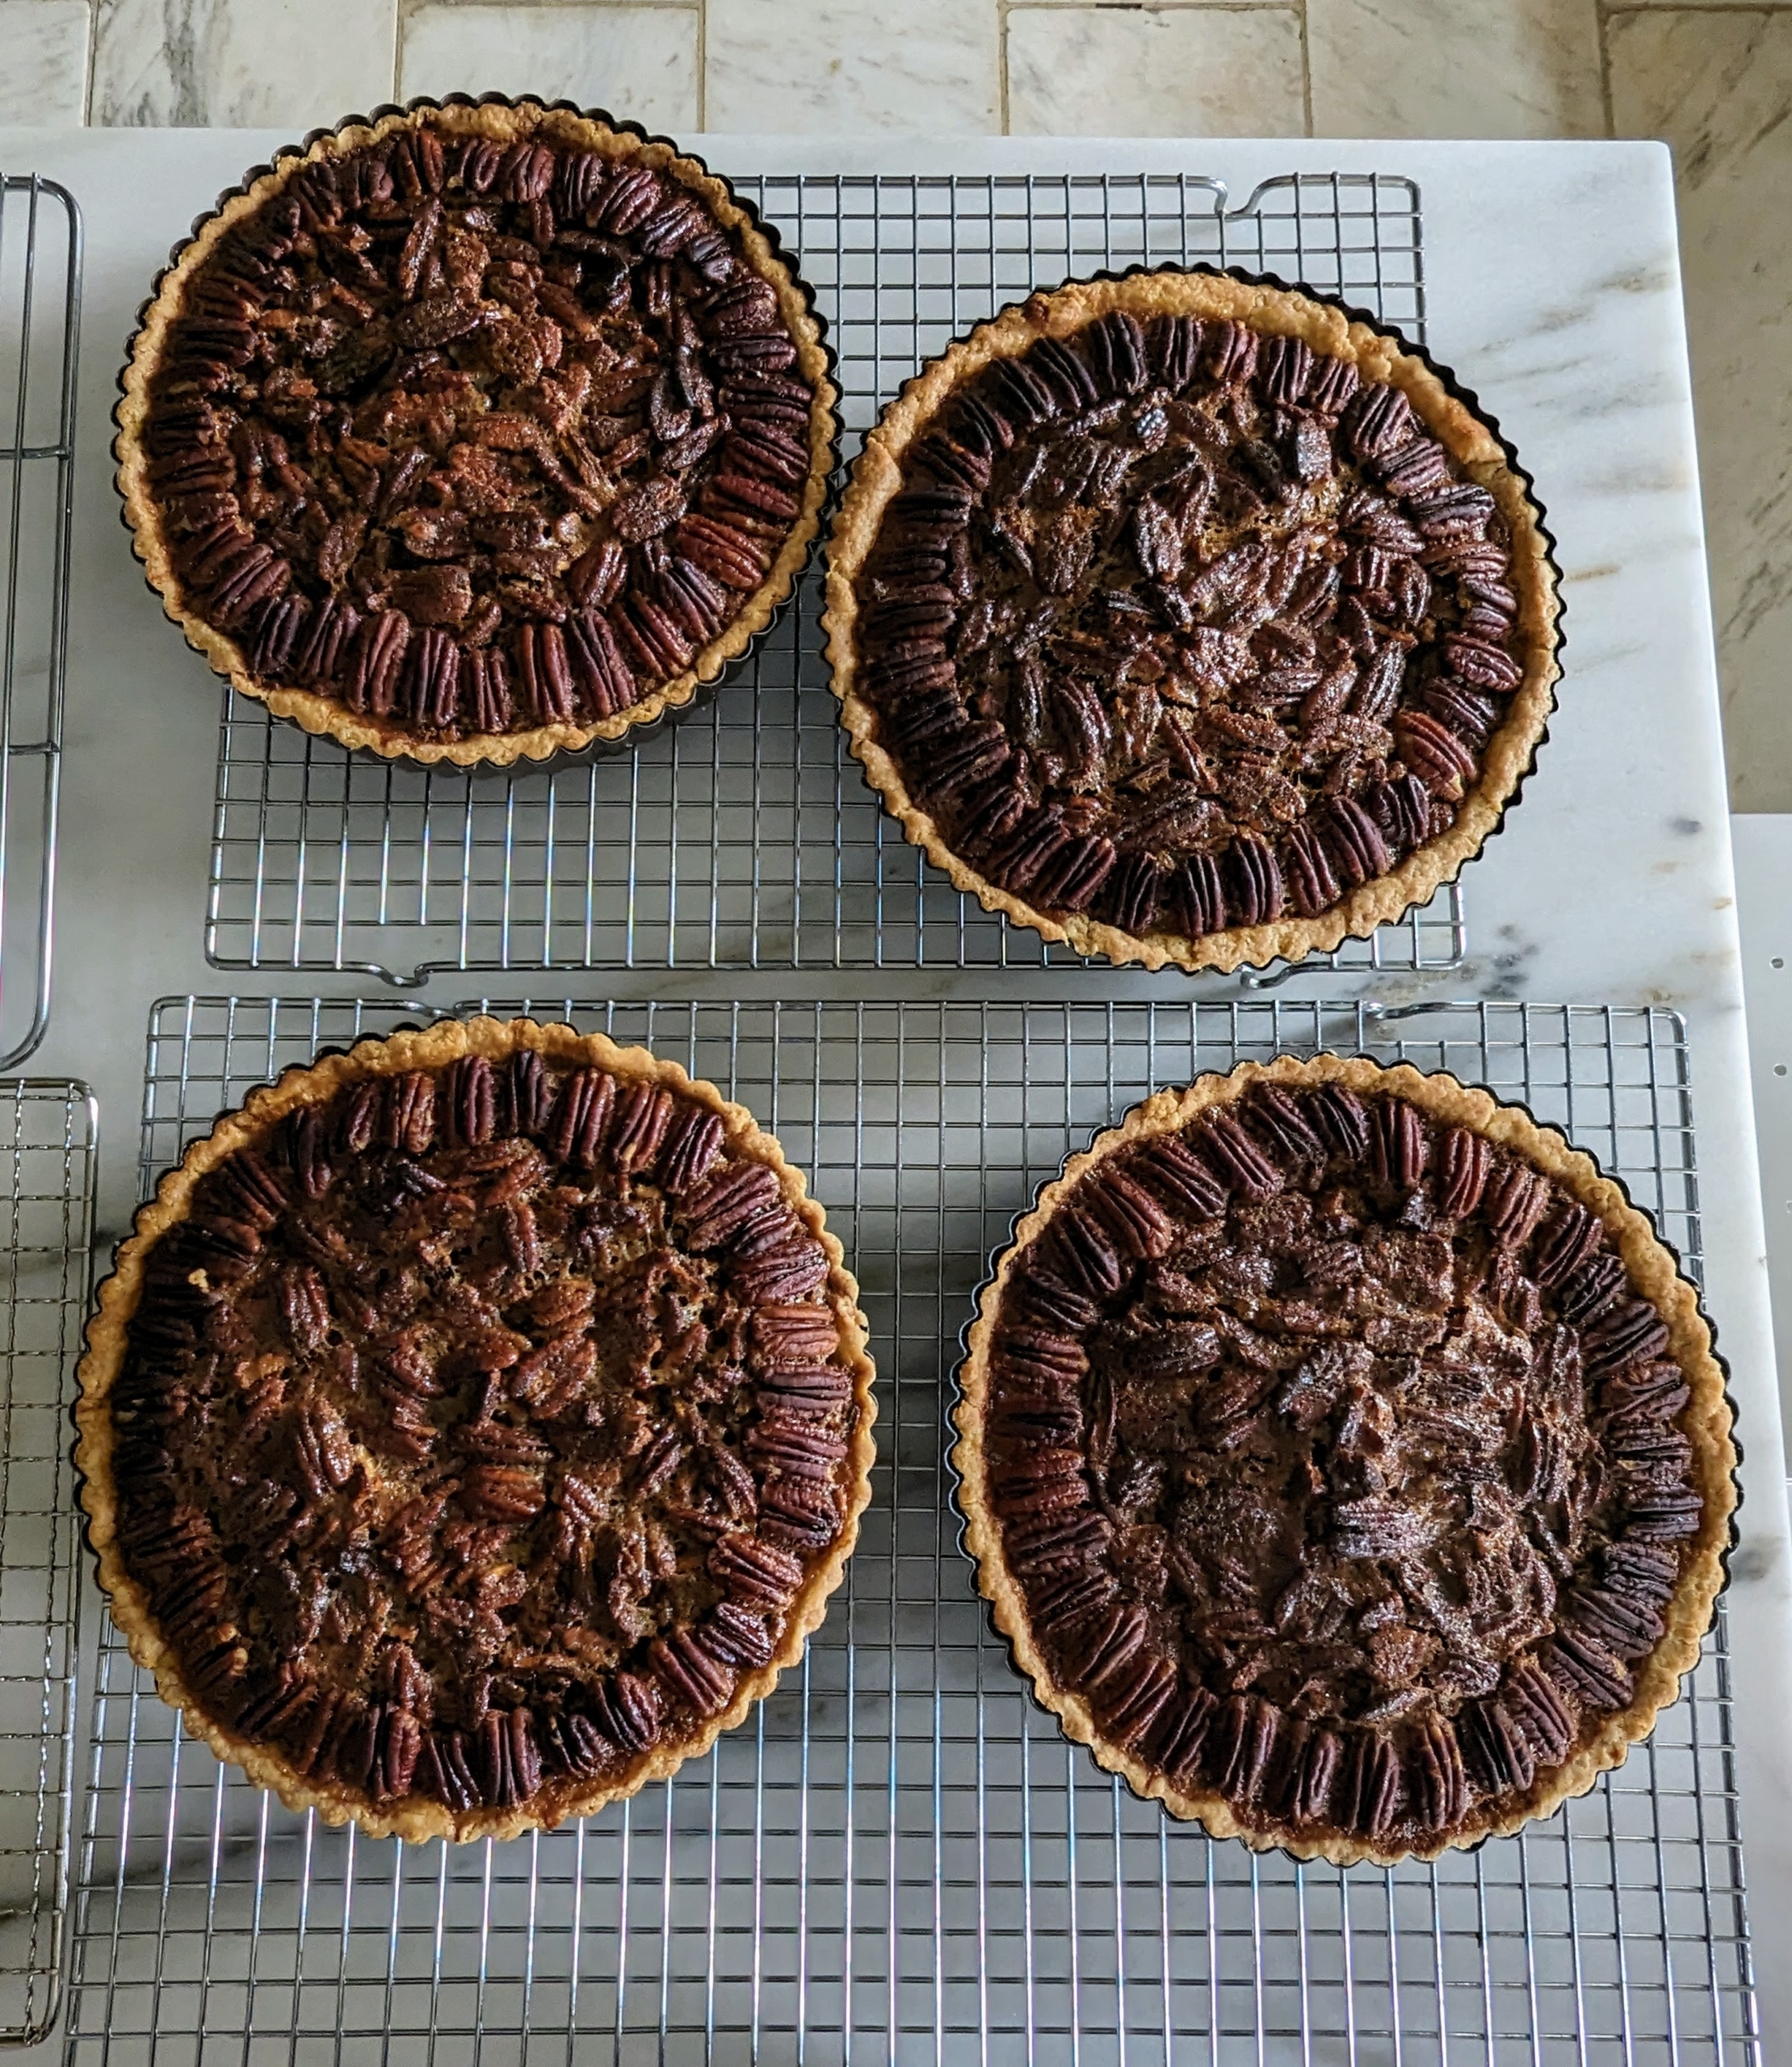
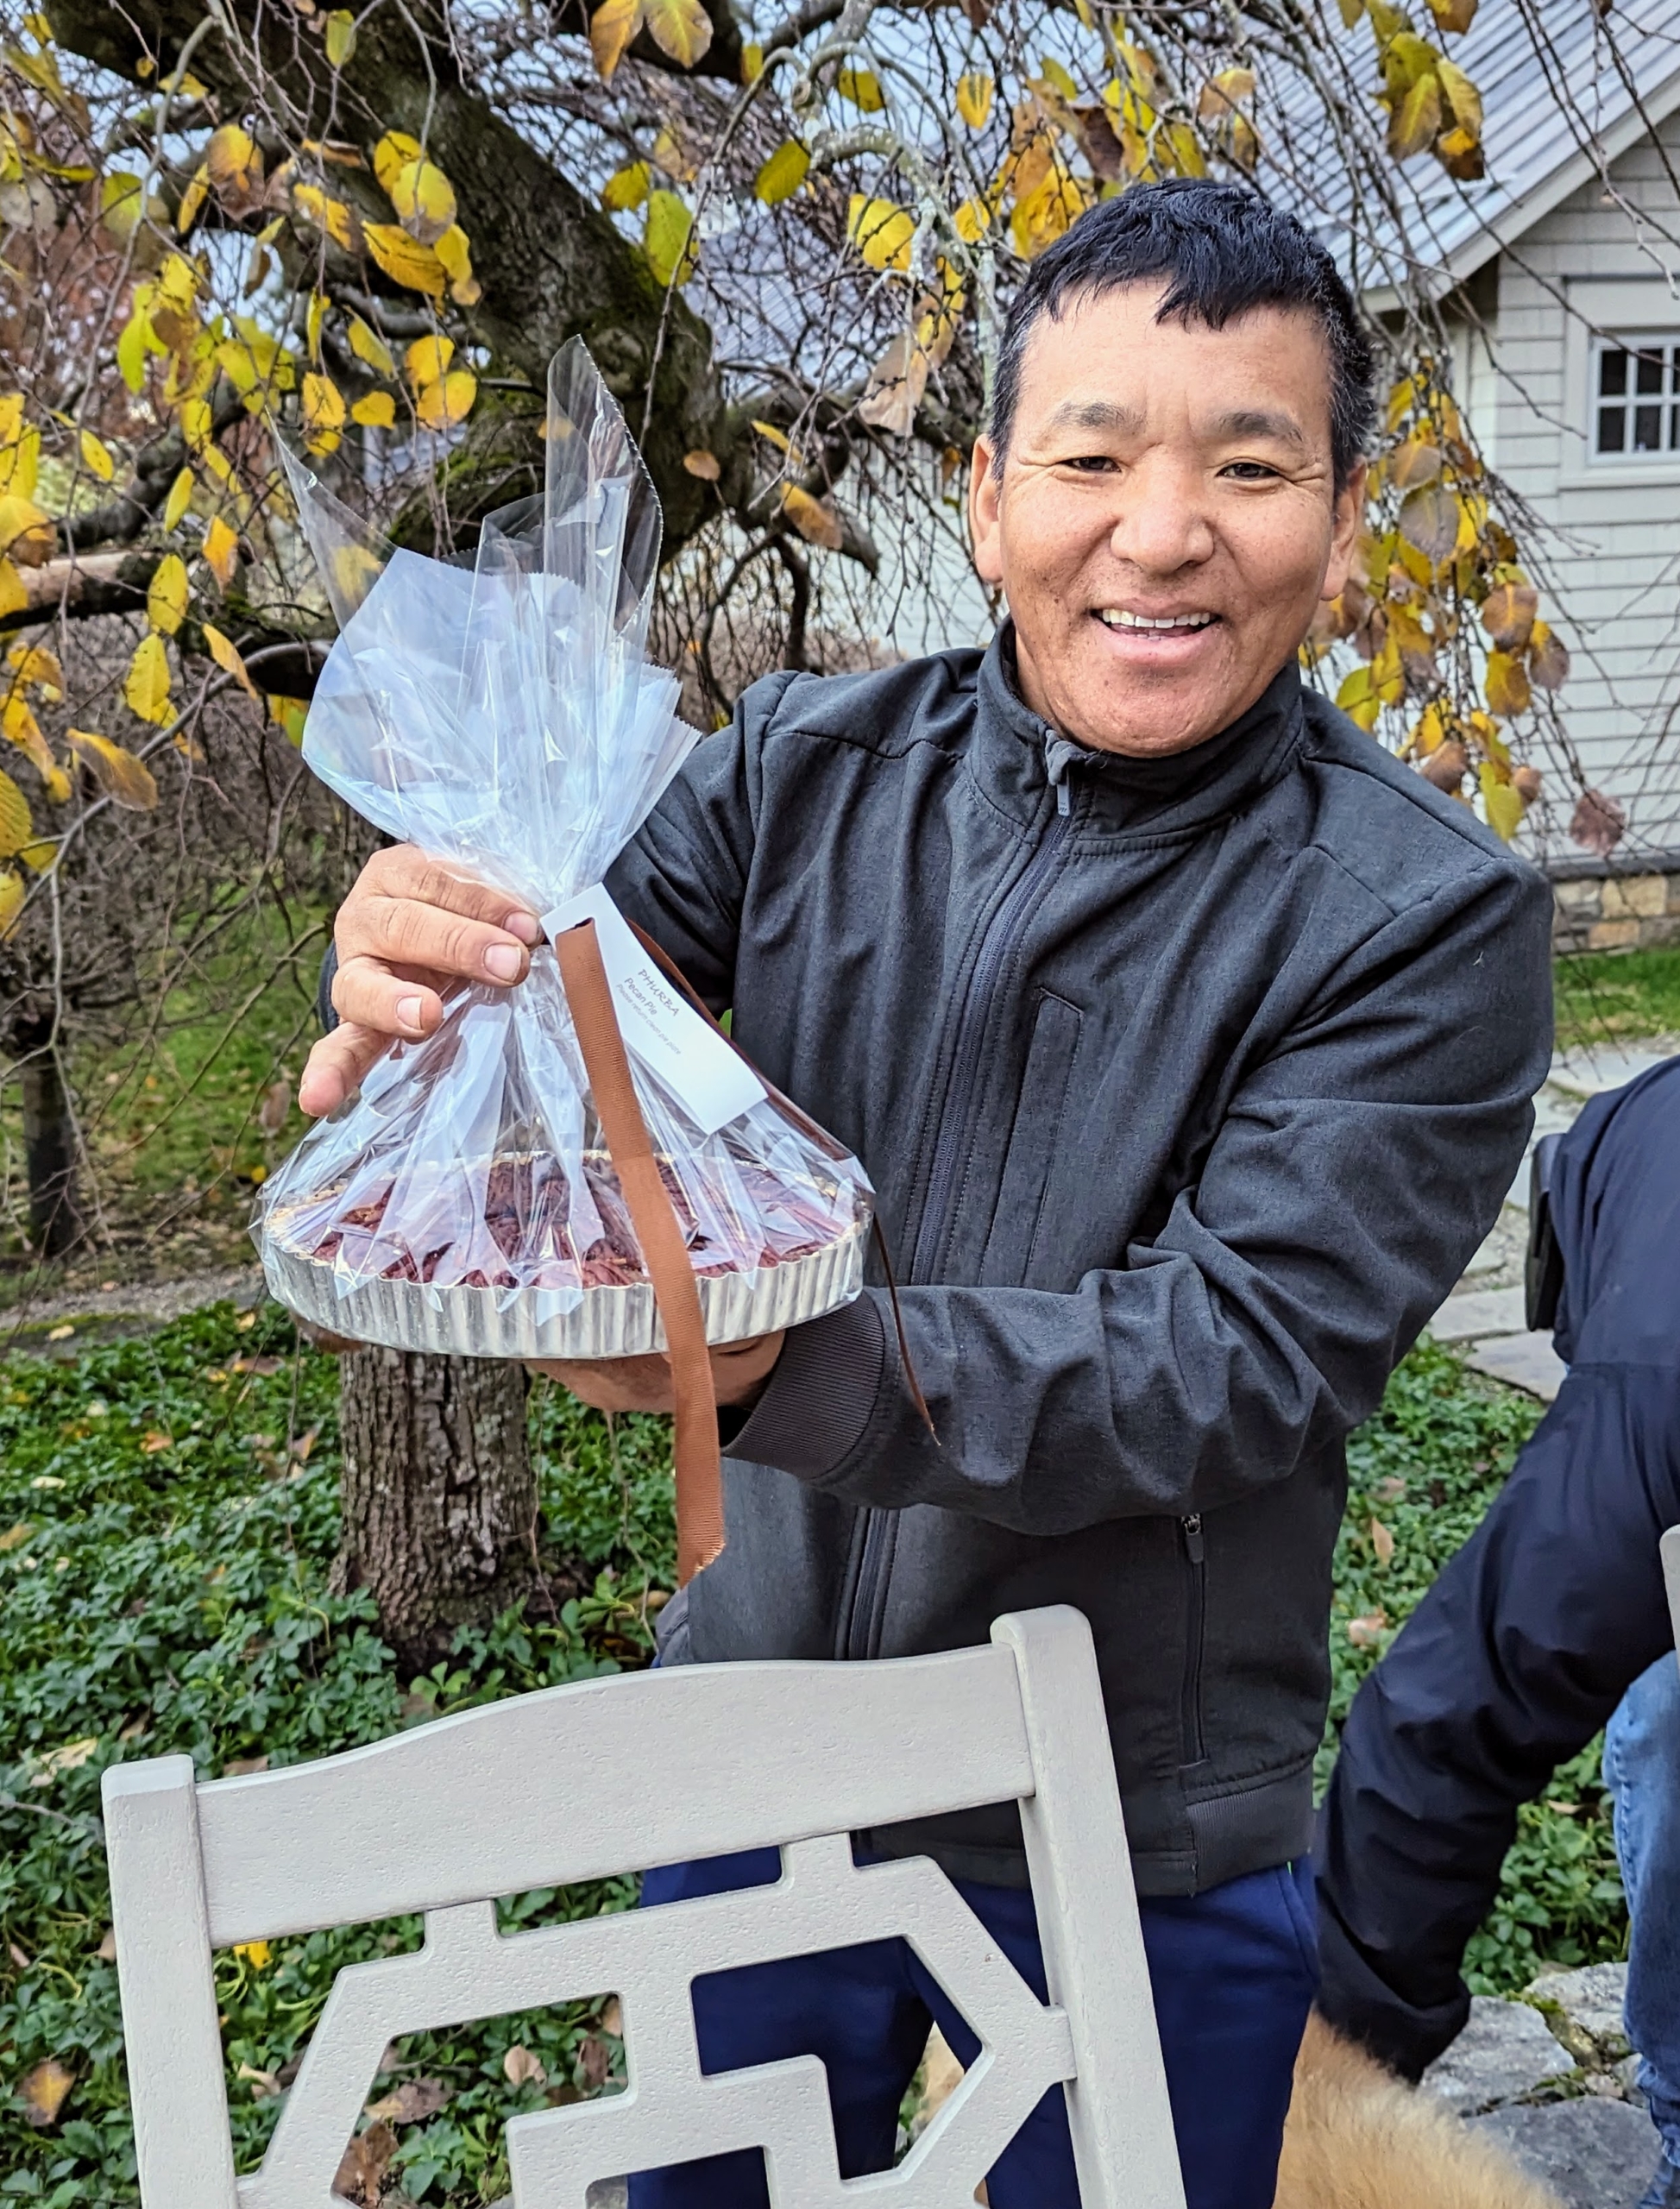
Phurba Sherpa, a member of my outdoor grounds crew, asked for a pecan pie.
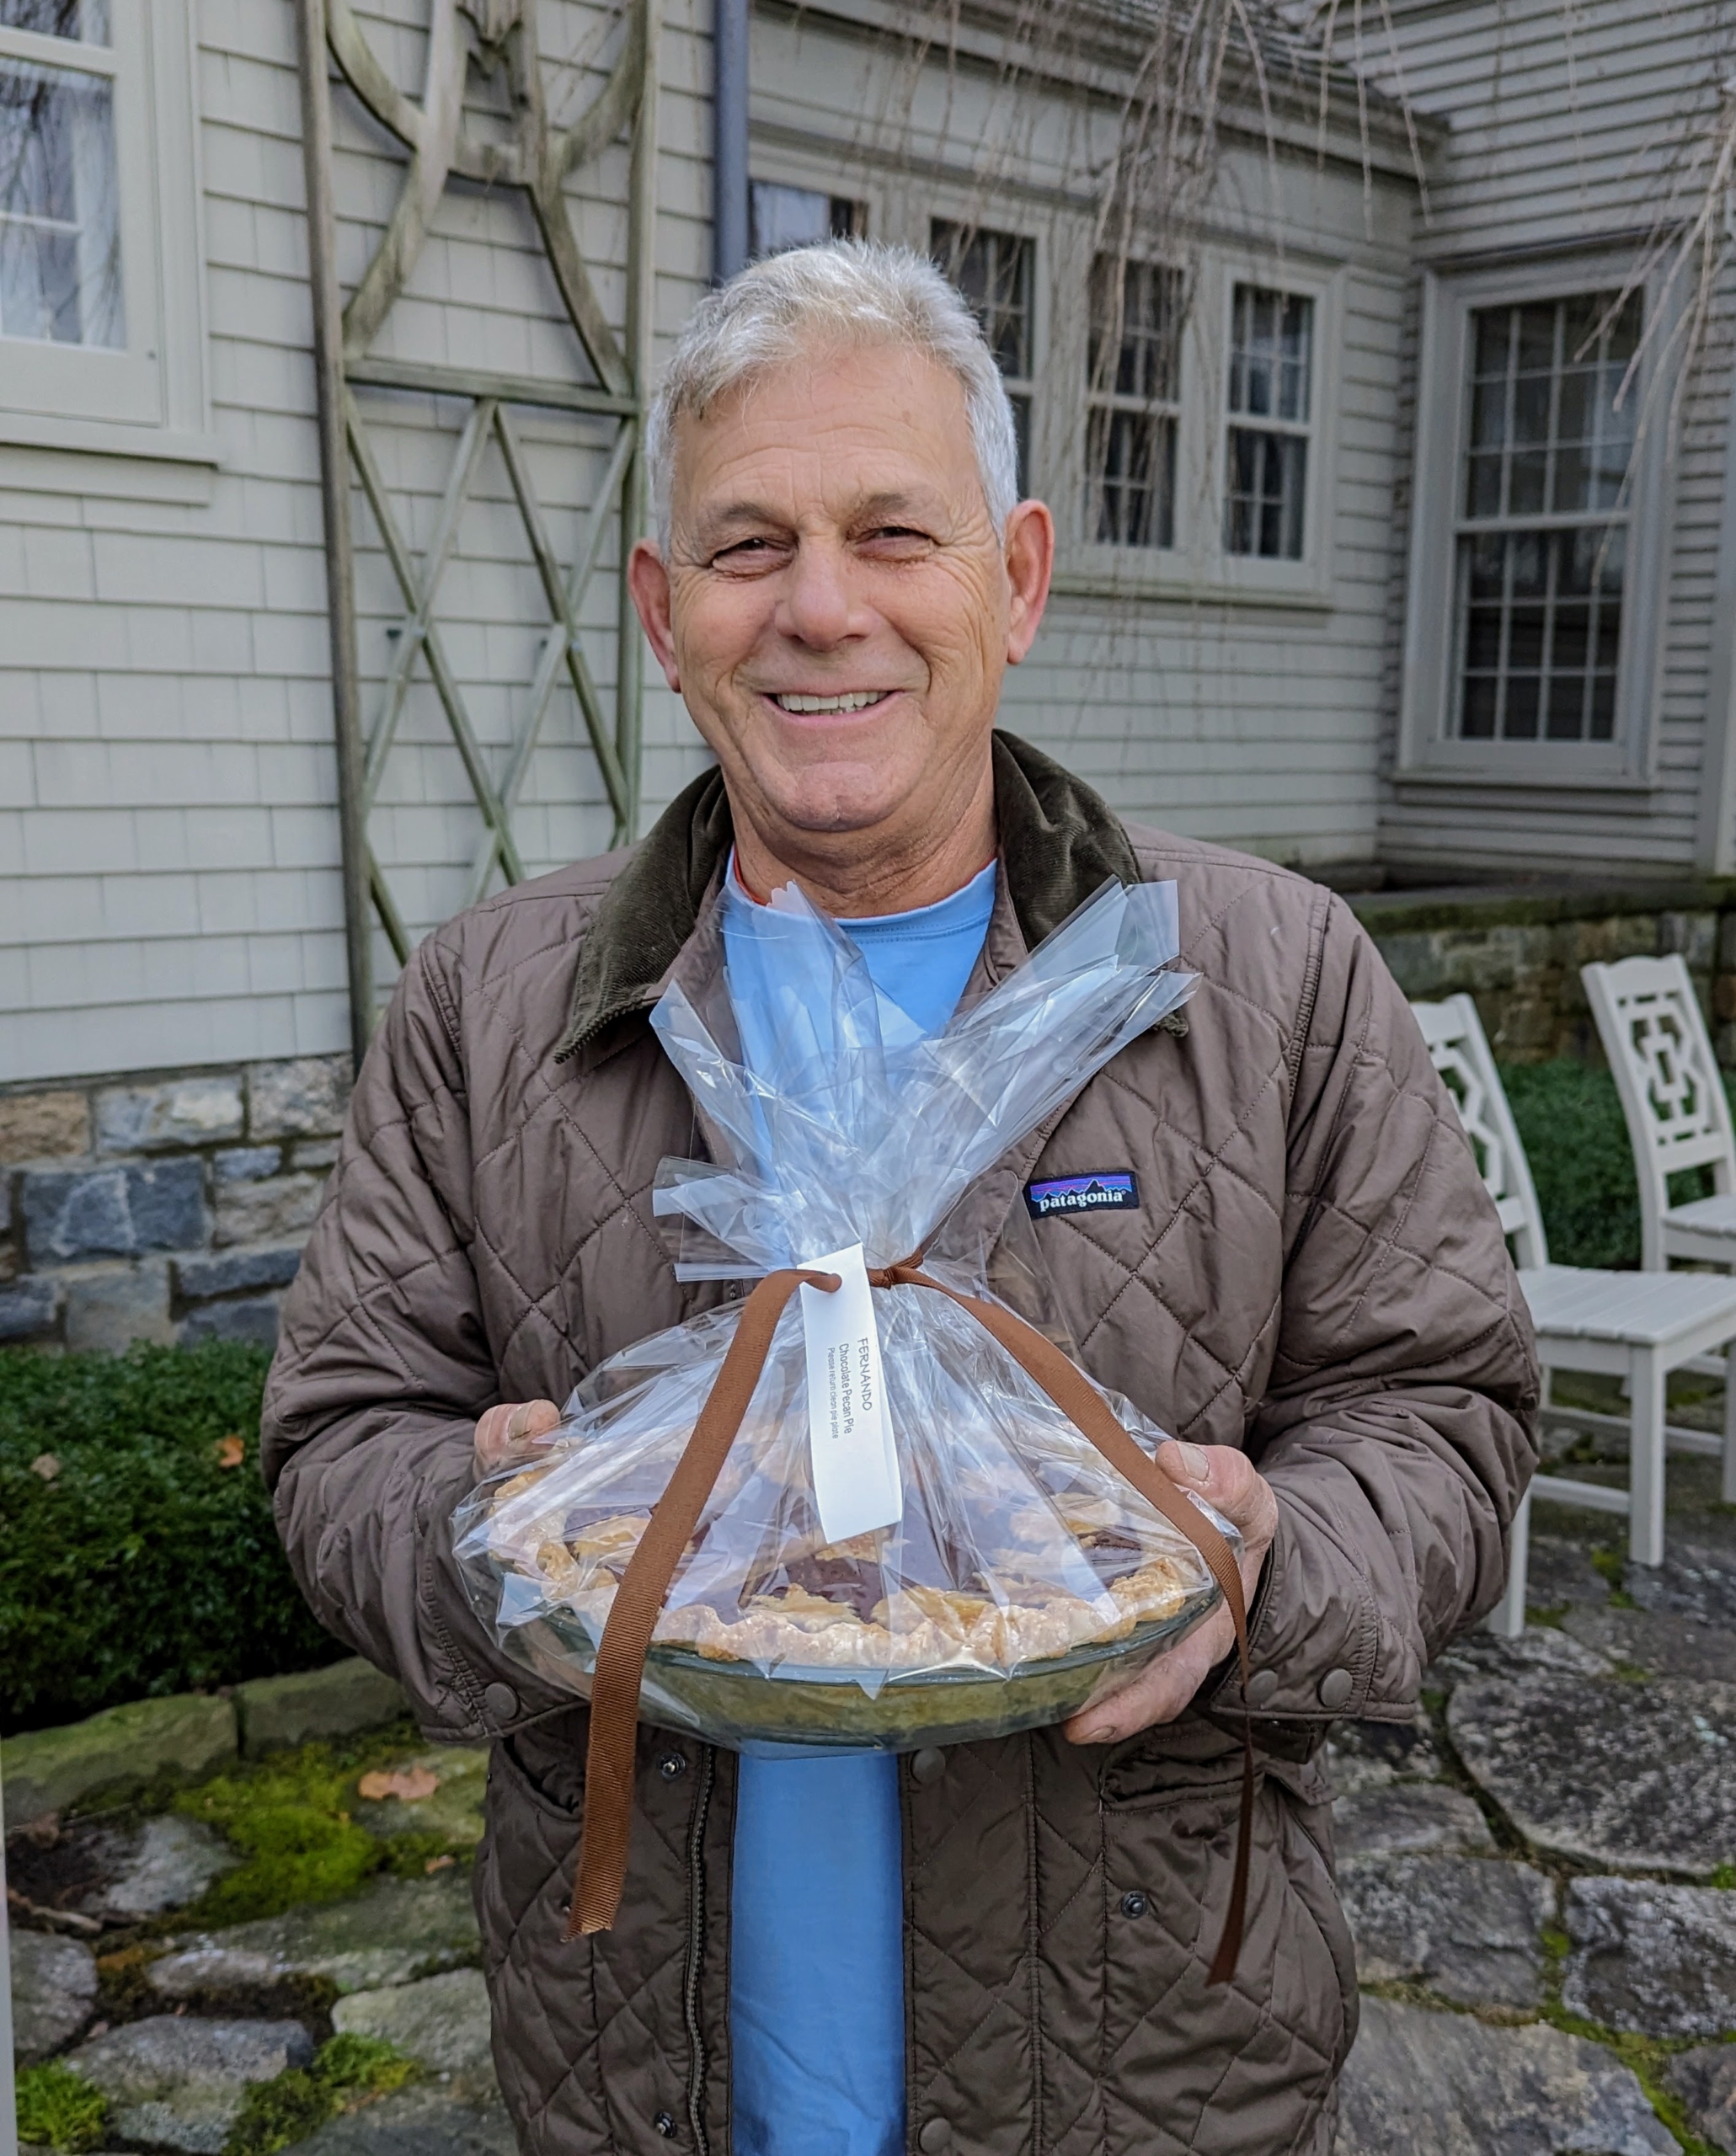
And my longtime helper here at the farm, Fernando Ferrari, took home a chocolate pecan pie.
I am always so happy to make pies for my hardworking team. I hope you are all having a wonderful time preparing for today’s big feast. Have a safe and wonderful holiday. And please share some of your memories with me in the comments section below.
Here at my Bedford, New York farm, most of our spring-blooming bulbs are finally planted.
Every autumn we plant thousands and thousands of bulbs. A majority of them are daffodils. When I moved here, I established a long daffodil border along one side of my property. This border extends from my Summer House behind the stable and down to the north end of my Linden Allée. When the flowers are in bloom, I carefully assess what areas need more flowers and color, and then we plant in those spaces. This year, I selected bulbs from one of my favorite sources, Van Engelen Inc., a wholesale family-run flower bulb business located in Bantam, Connecticut. The varieties we got include 'Watch Up,' 'Frosty Snow,' 'Pink Wonder,' 'Edinburgh,' and 'Zinzi.'
Enjoy these photos.
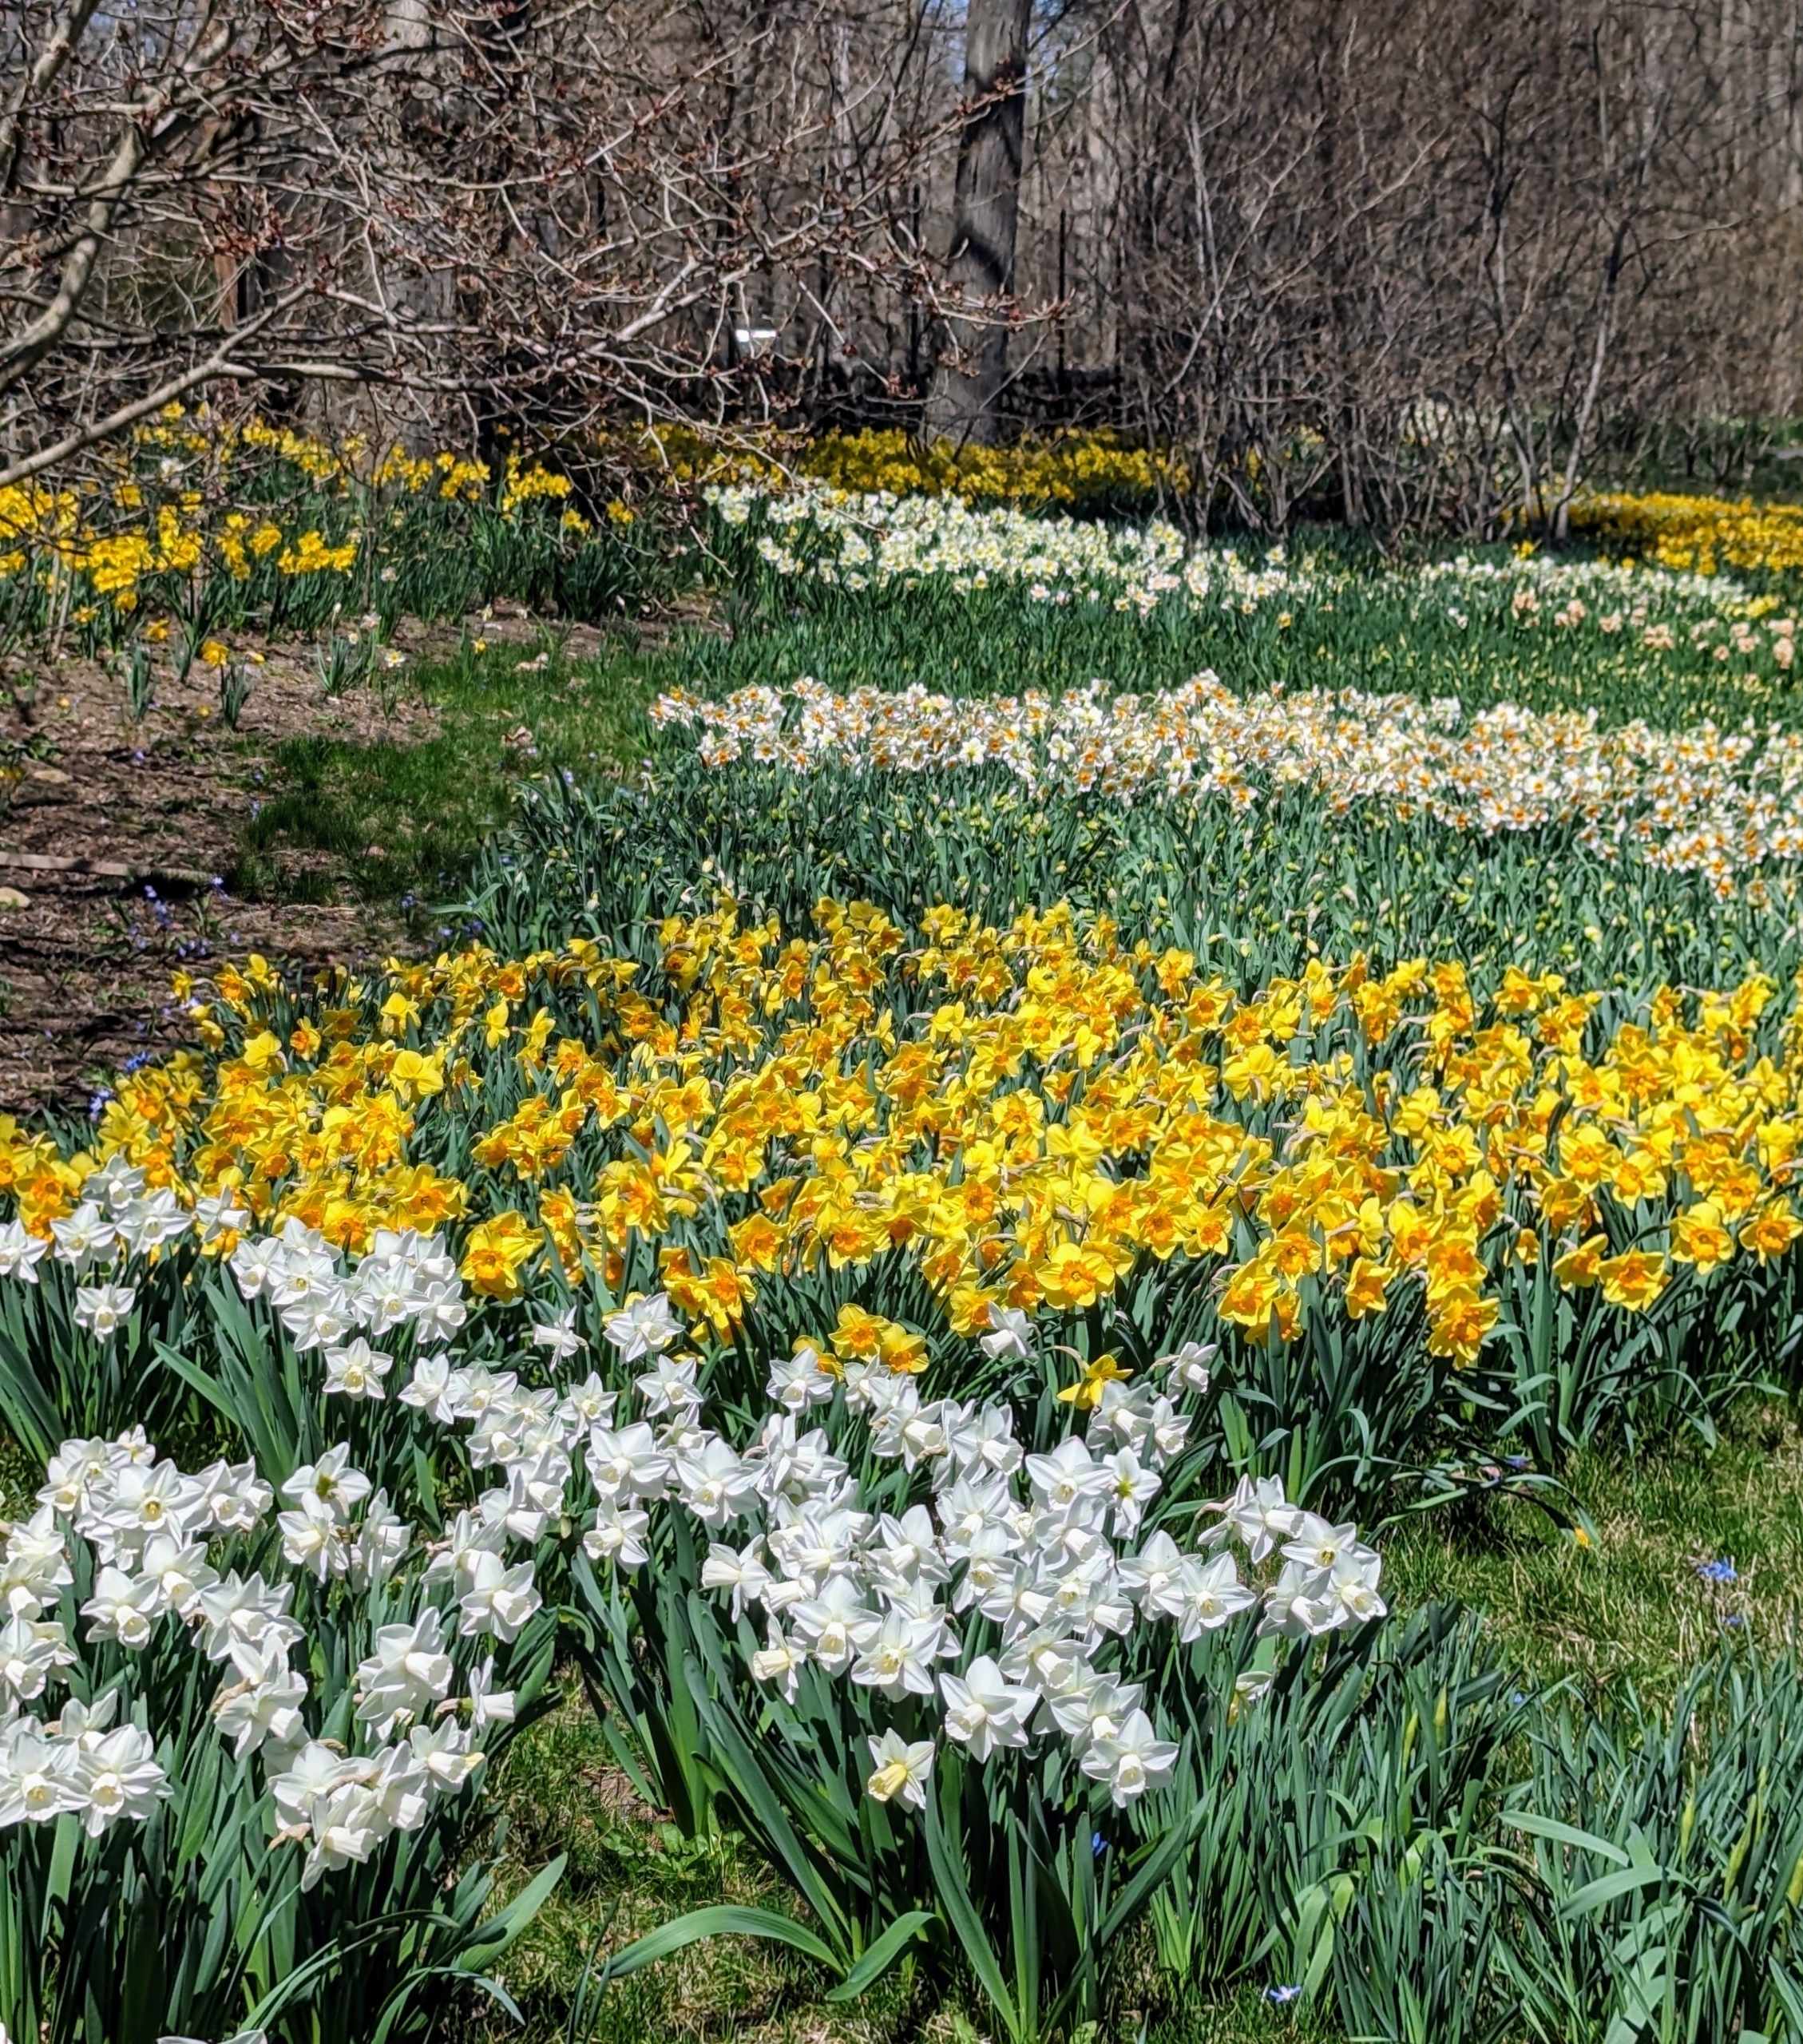
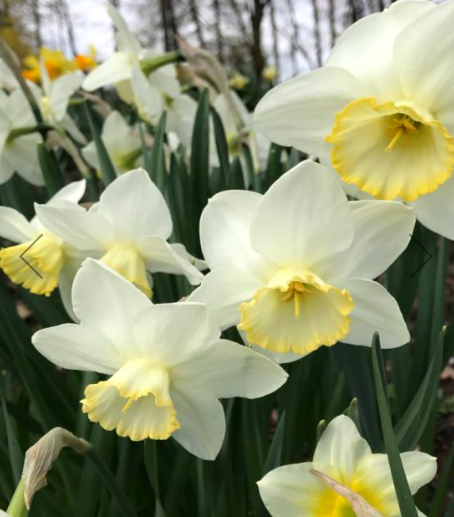
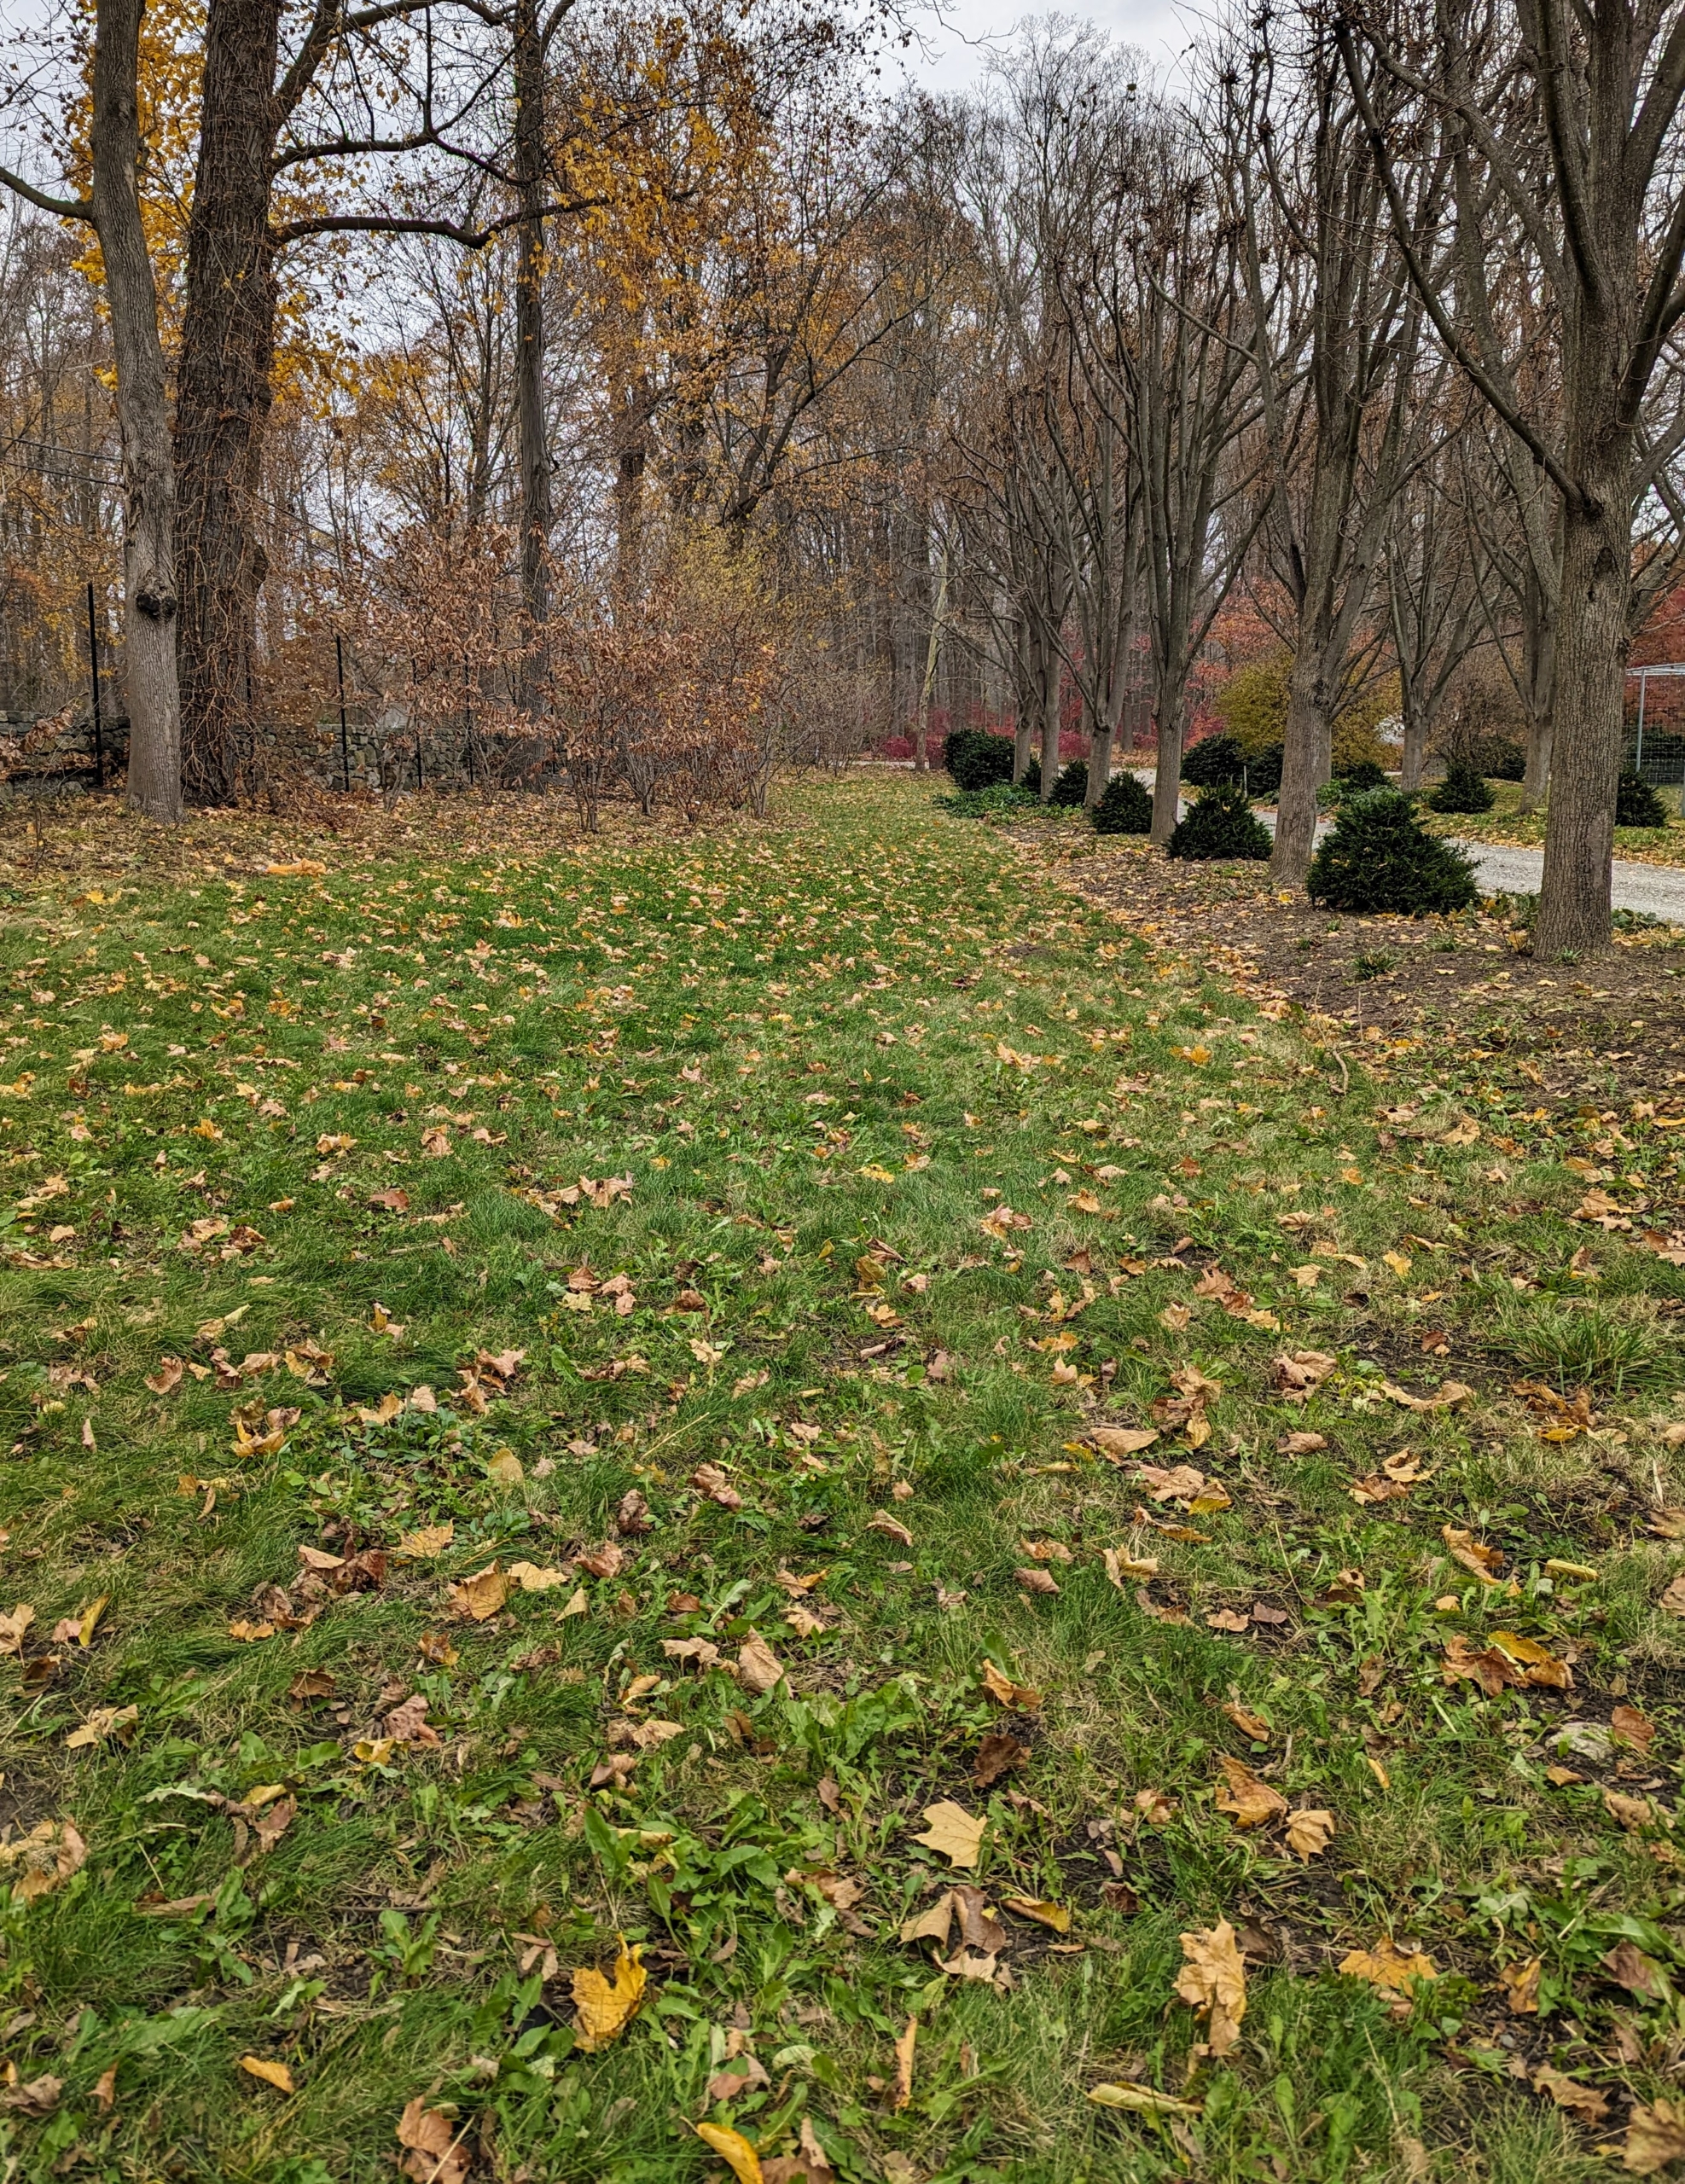
This is one section of my long daffodil border in spring. It stretches down one side of my farm and erupts with gorgeous swaths of color every year.
My gardeners and I always take photos of the flowers in bloom, so we can see what areas need planting in the fall. In this photo, one can see the areas to the left of the border could use more bulbs.
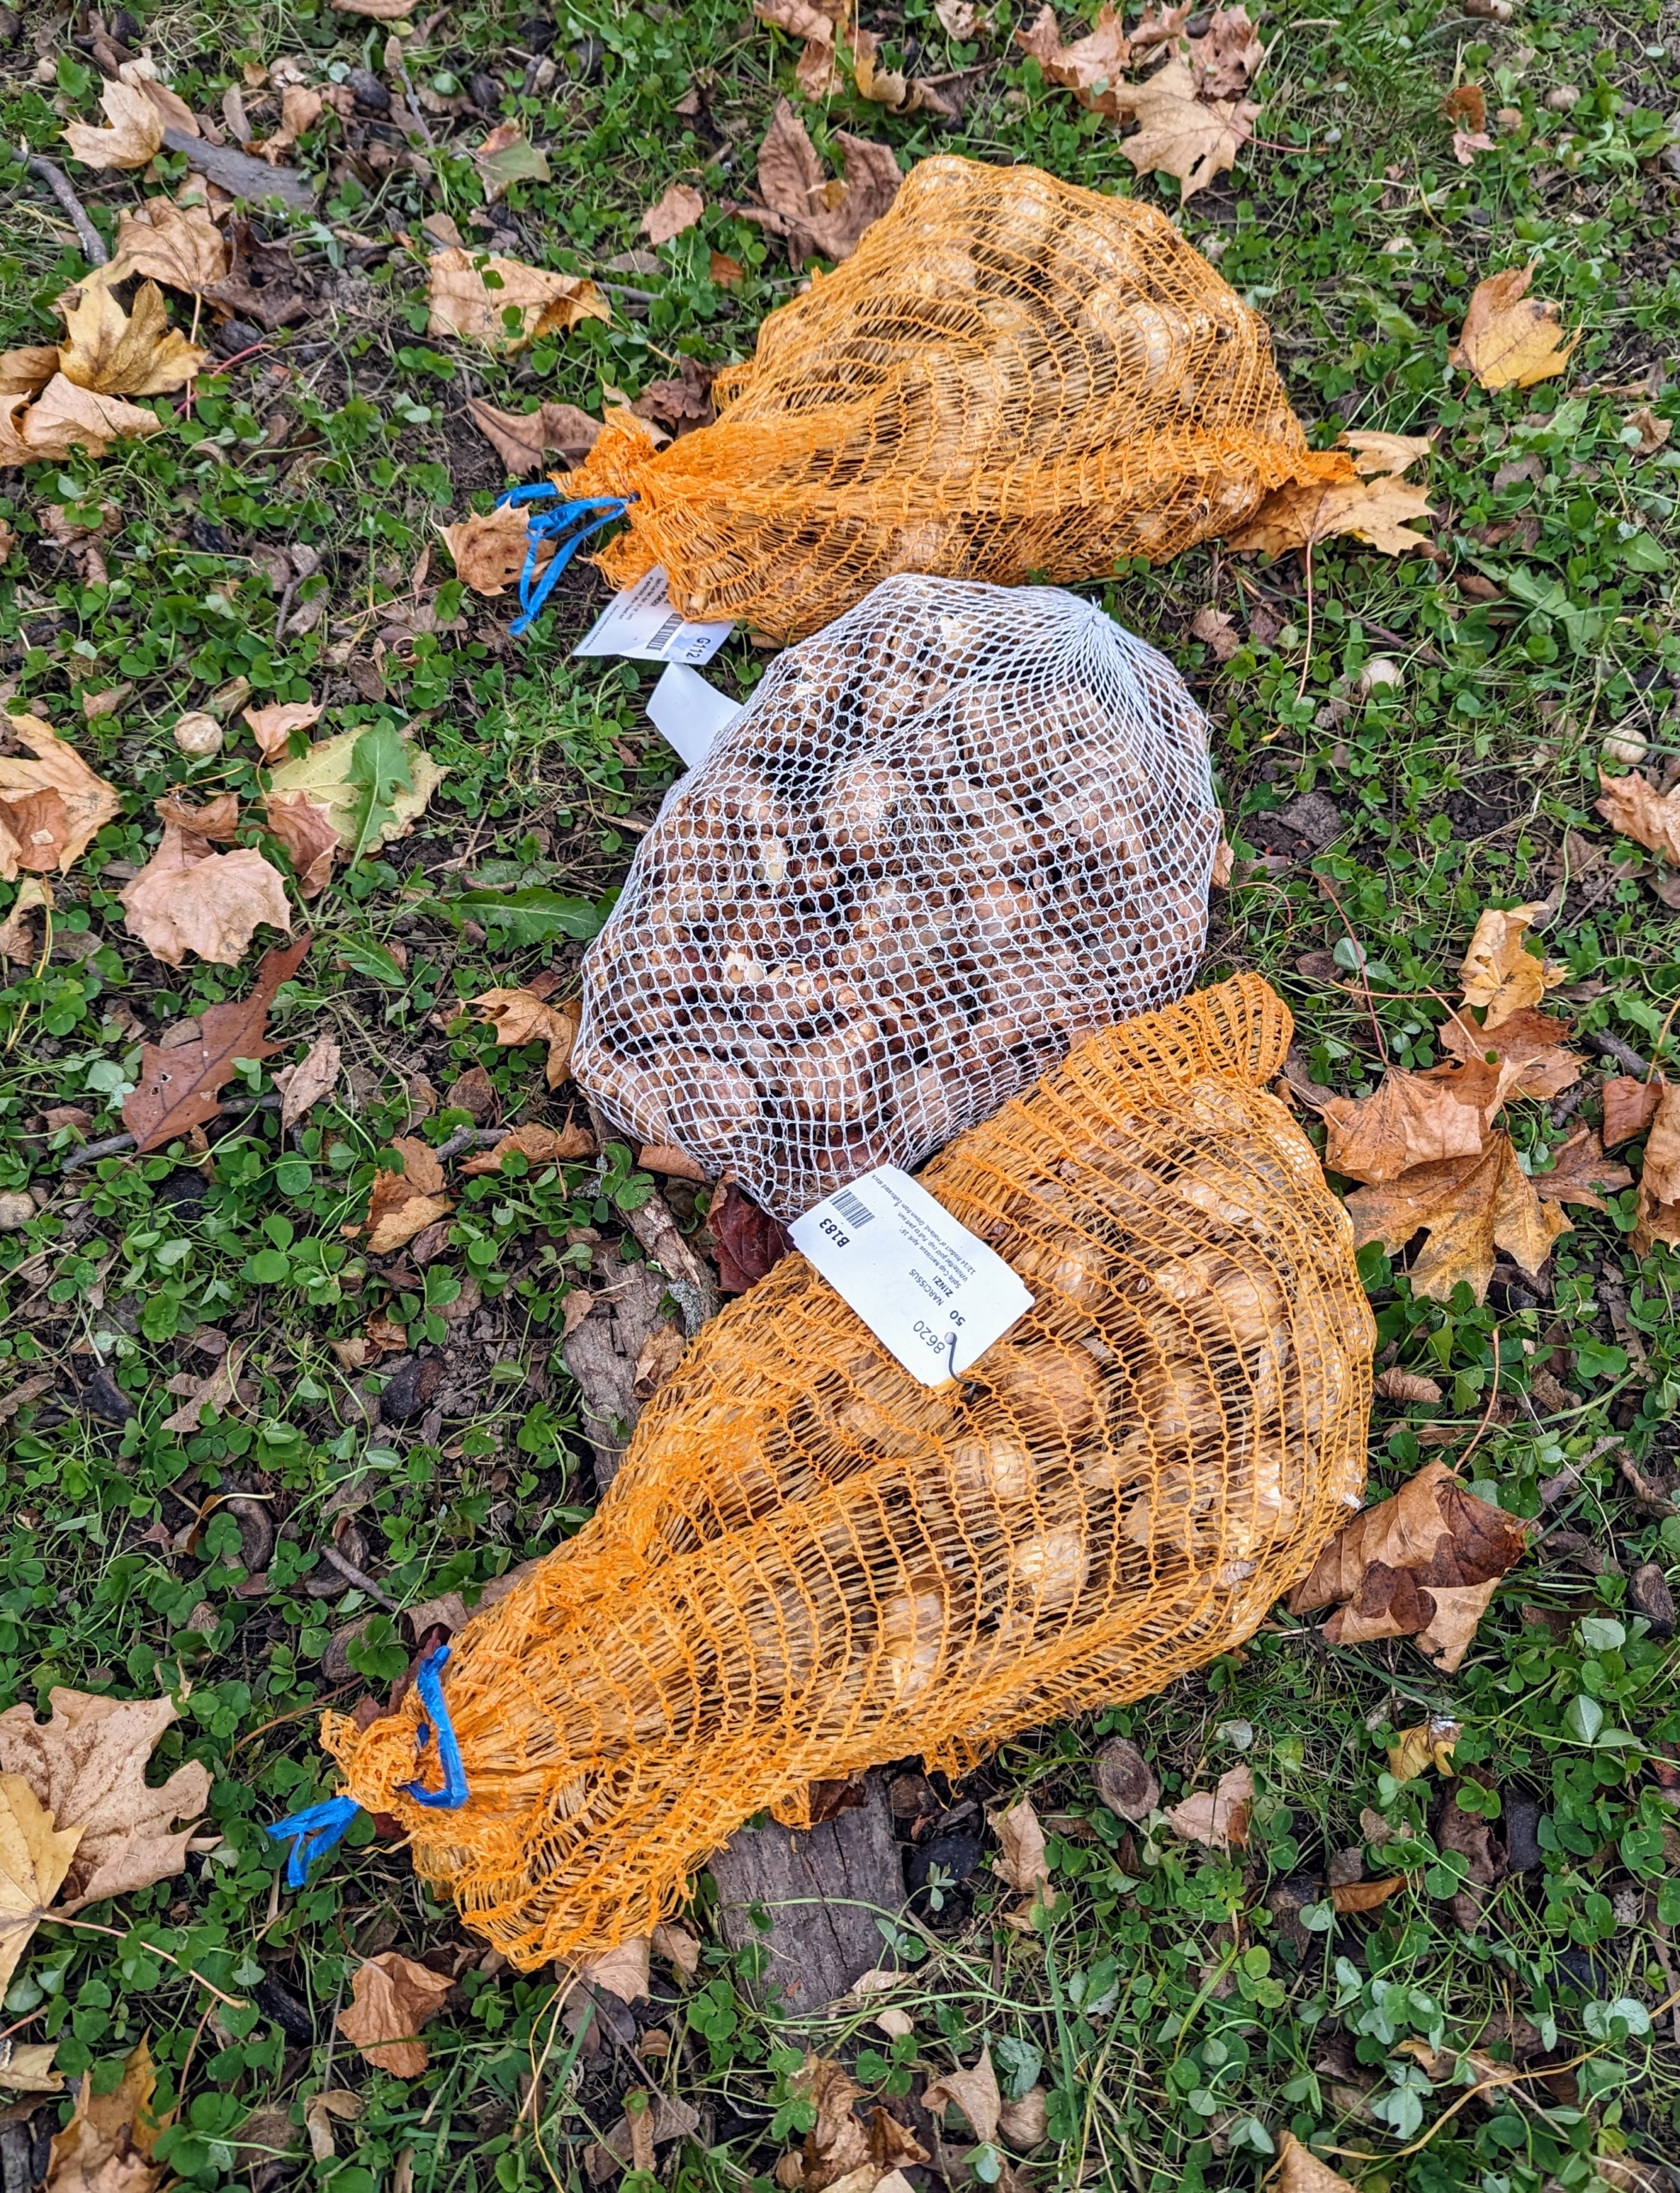
I order lots of bulbs in batches of 50, 100, 500, and a thousand. Bulbs need to be packaged very carefully to ensure they are kept in the best conditions during transport. Van Engelen uses netted sacs as well as paper bags and plastic pouches depending on the bulbs’ humidity needs.
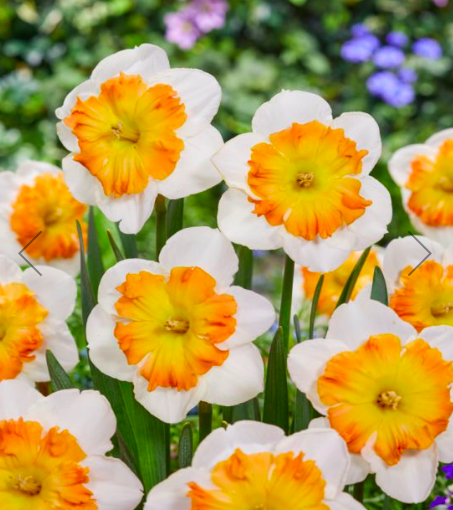
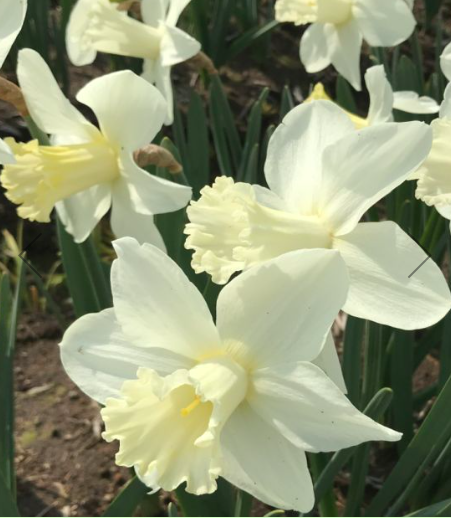
I plant all different kinds of daffodils from crisp white to bright yellow. This is Narcissus ‘Zinzi.’ This daffodil has a snow-white perianth framing a flat, irregularly split, golden-yellow corona edged in pinkish-apricot. (Photo courtesy of vanengelen.com)
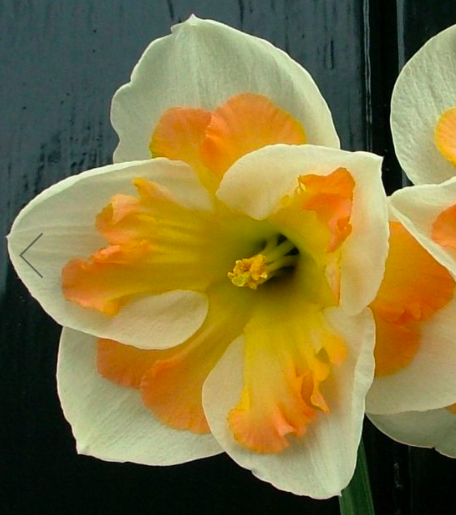
Narcissus ‘Edinburgh’ is has a four inch-wide, greenish-white perianth and a big yellow split corona with a frilled, wavy orange-pink rim. (Photo courtesy of vanengelen.com)
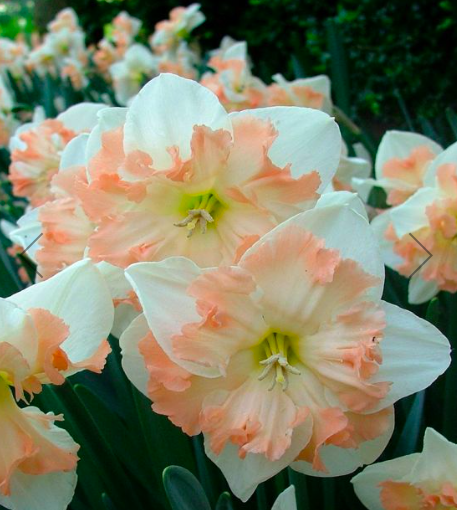
This year, I also added Narcissus ‘Pink Wonder’ – this flower features three ivory petals overlaid with gently frilled, split corona petals that subtly blend from apricot-pink to golden-apricot with a striking chartreuse-yellow center. (Photo courtesy of vanengelen.com)
Narcissus ‘Frosty Snow’ opens sparkling snow-white with a flanged, cup-shaped, lemon-yellow crown that matures to white with a yellow rim. (Photo courtesy of vanengelen.com)
And Narcissus ‘Watch Up’ has sweetly scented, upward-facing blooms with large, four and a half inch-wide, greenish-white flowers and funnel-shaped trumpets that open yellow and mature to white. All these varieties will blend in so nicely with the existing ones. (Photo courtesy of vanengelen.com)
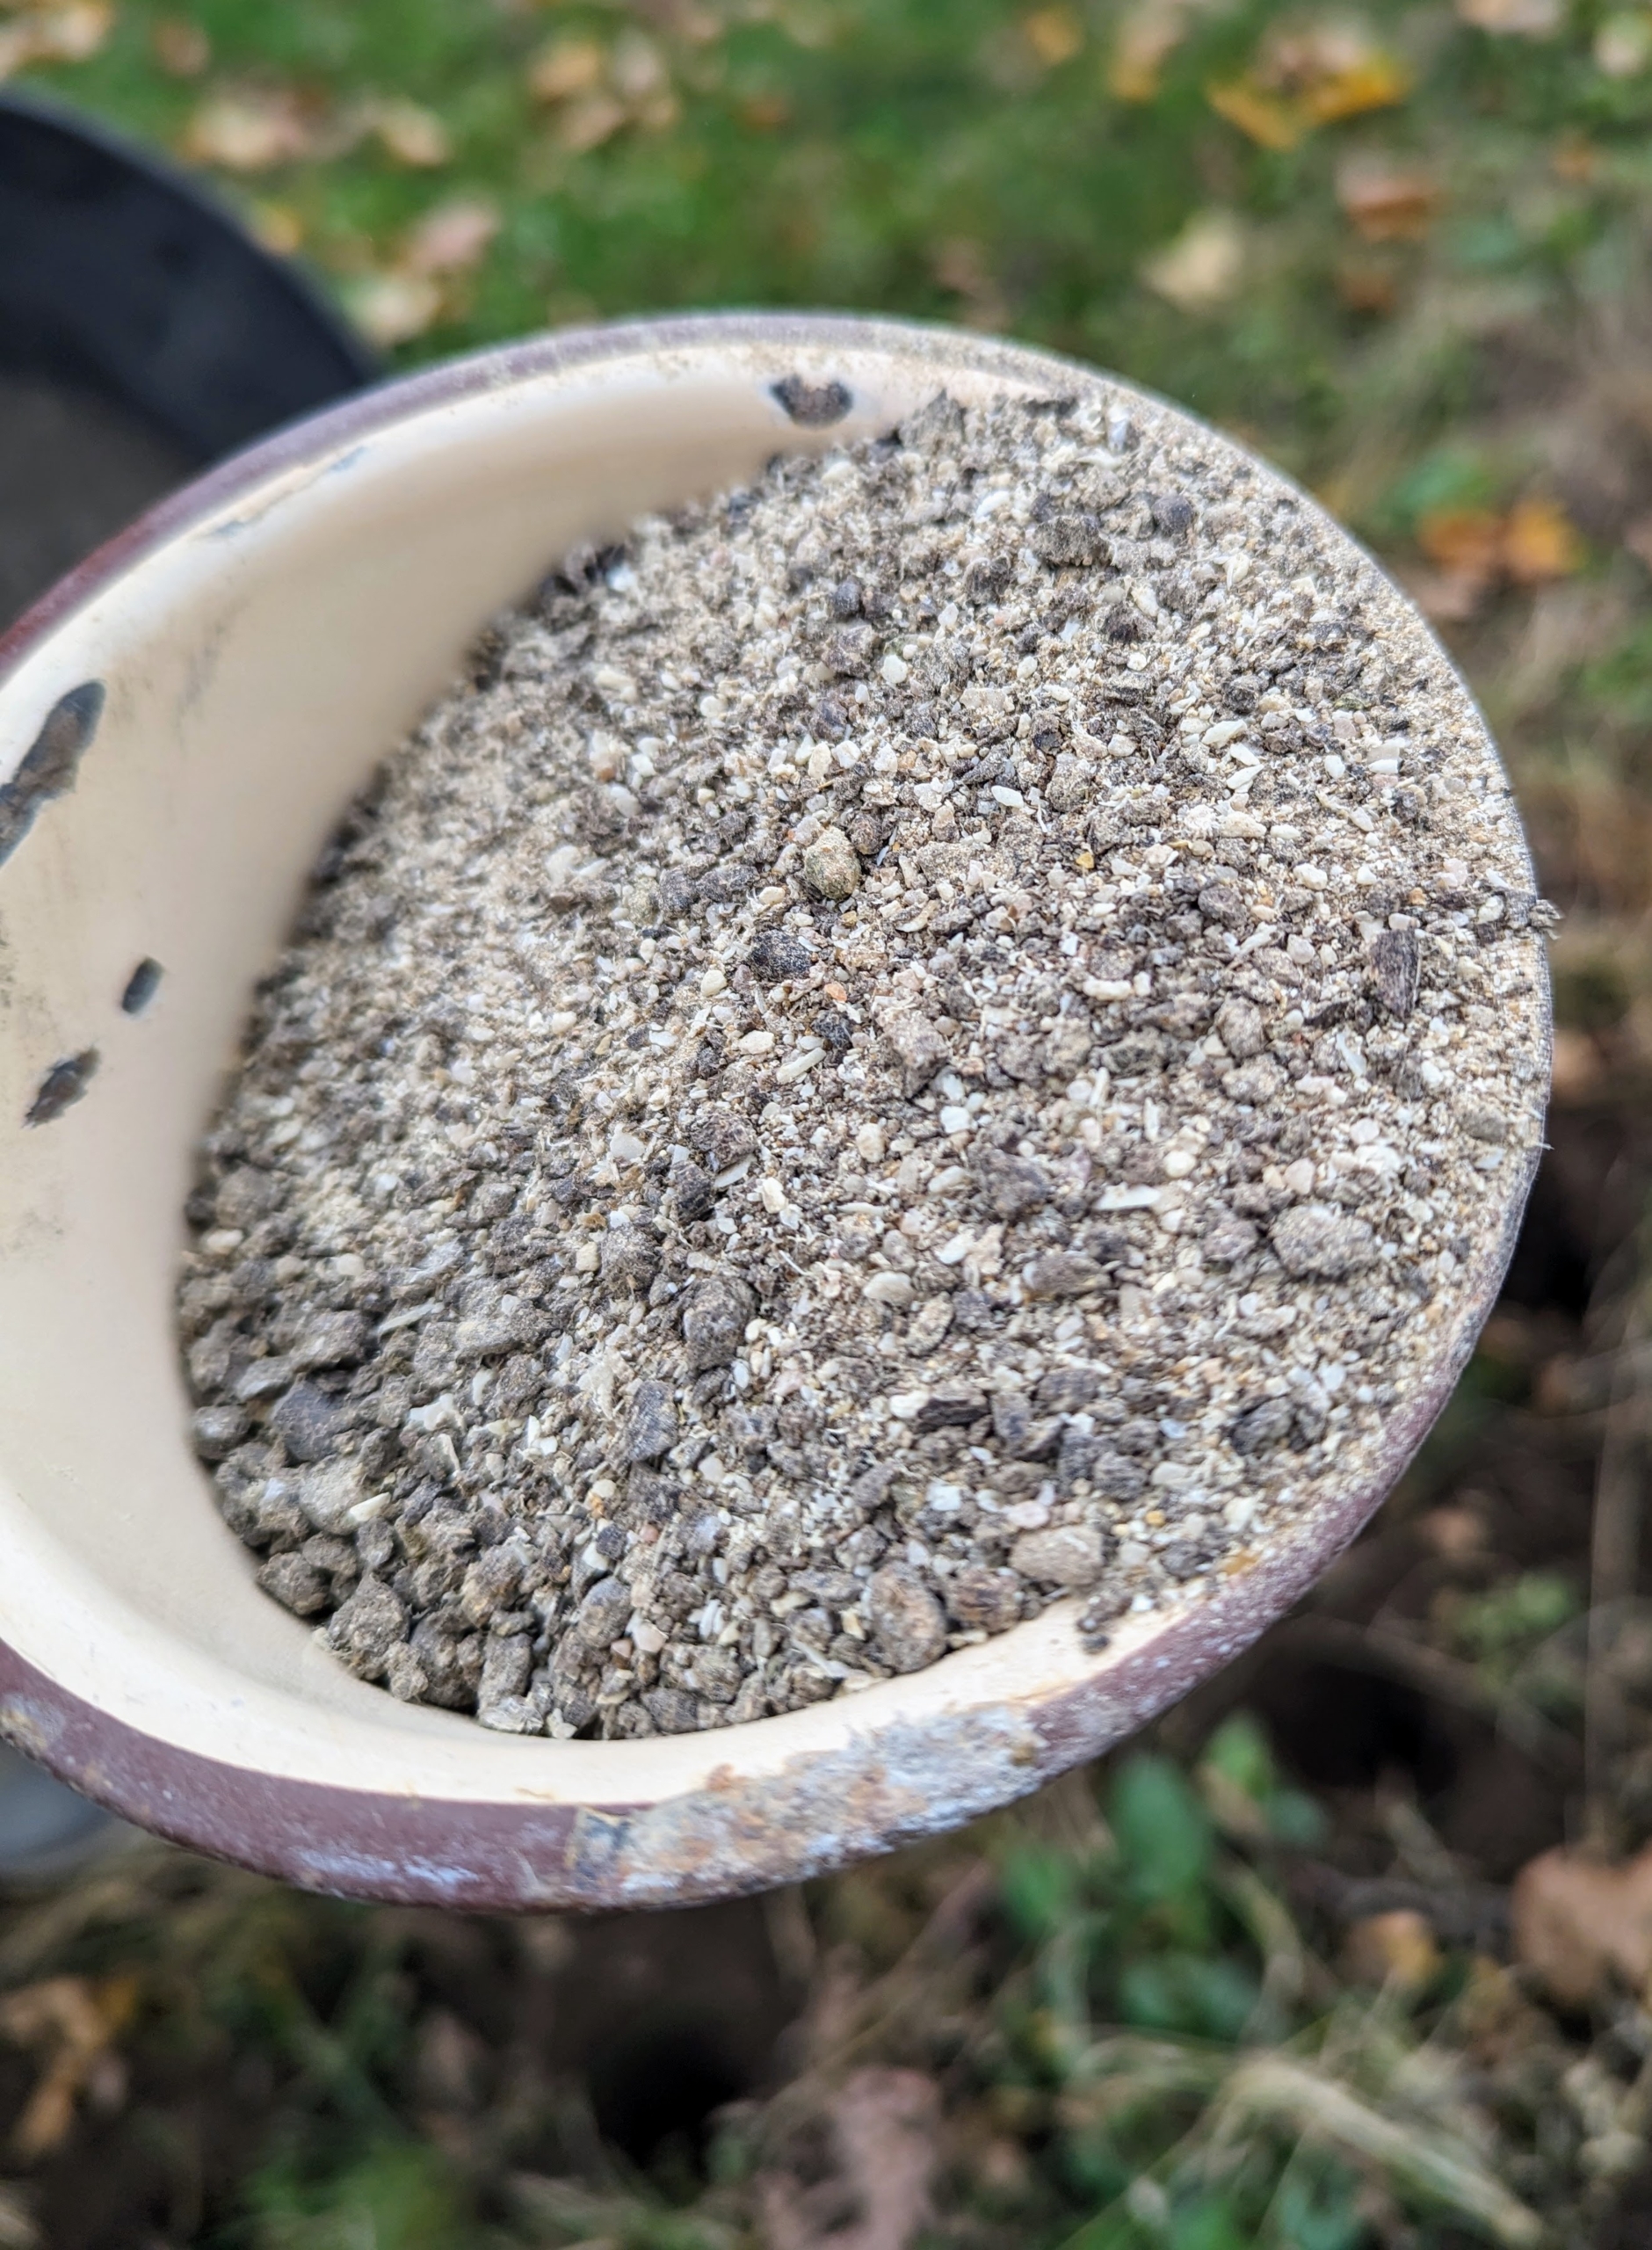
For food, we use a natural and organic fertilizer that is specifically recommended for all bulbs, including daffodils, crocus, hyacinths, and tulips. We also combine it with bone meal fertilizer from ground-up animal bones. It is used to increase phosphorus in the garden, which is essential for plants to flower.
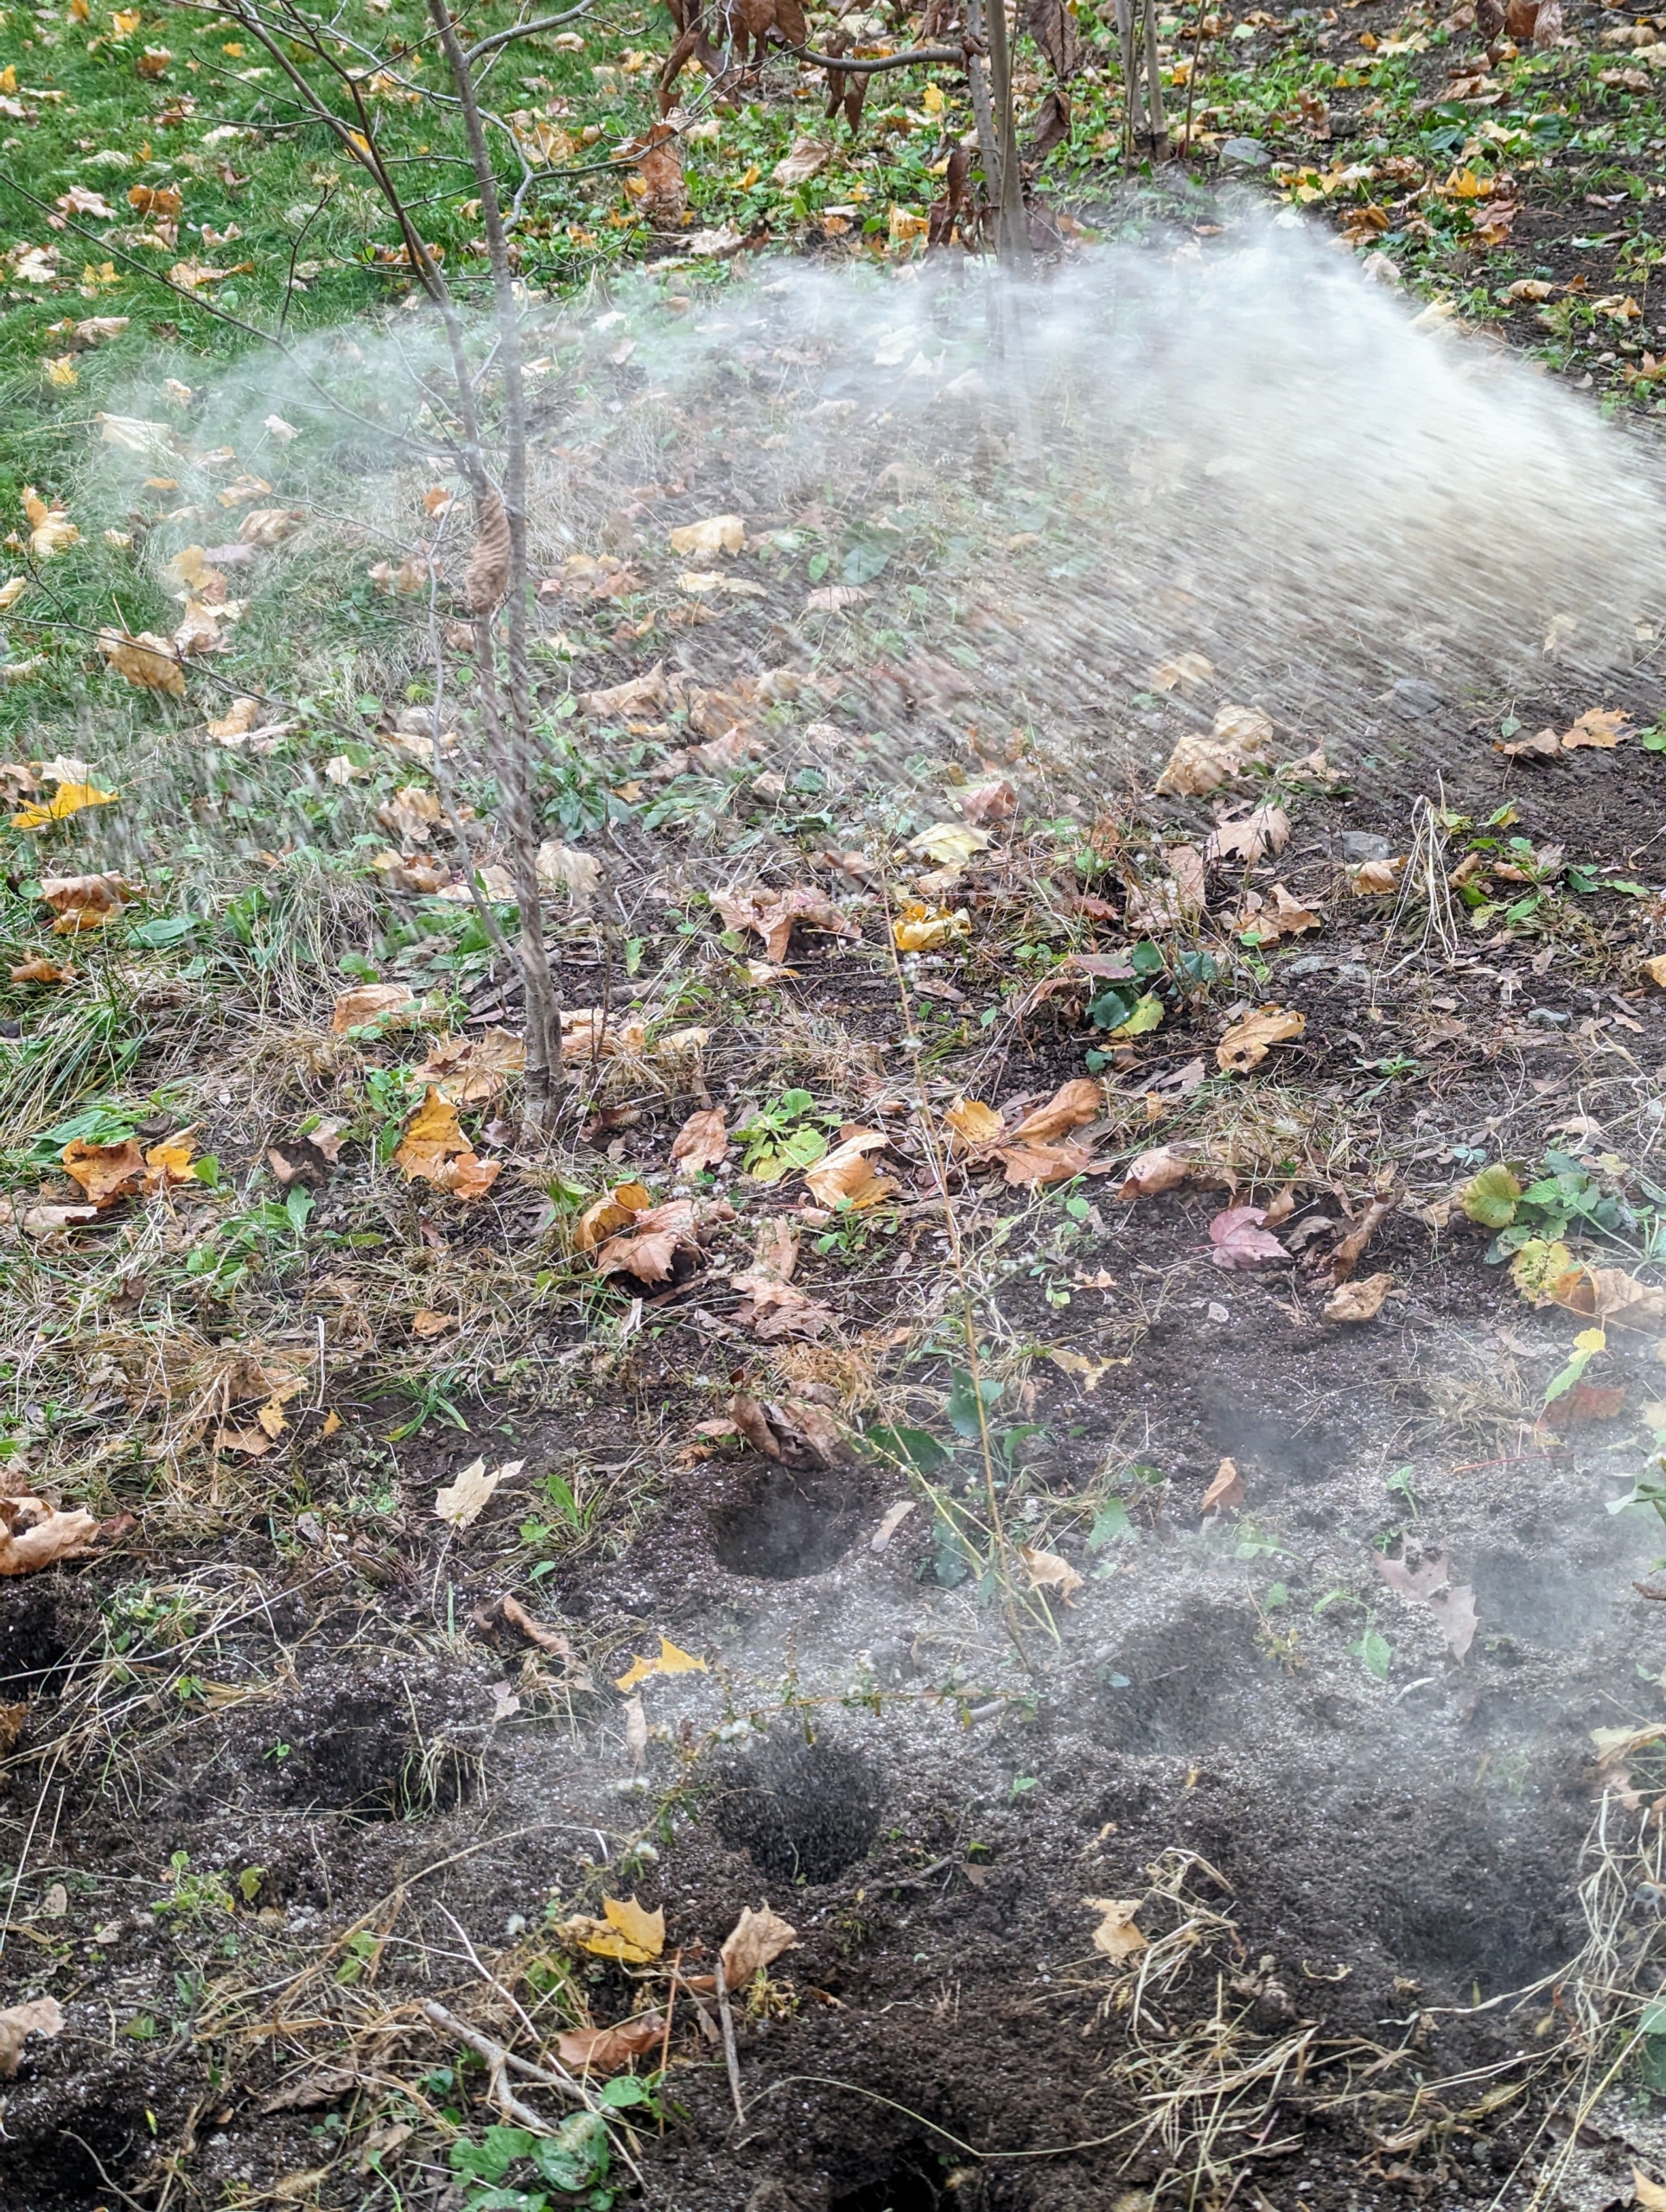
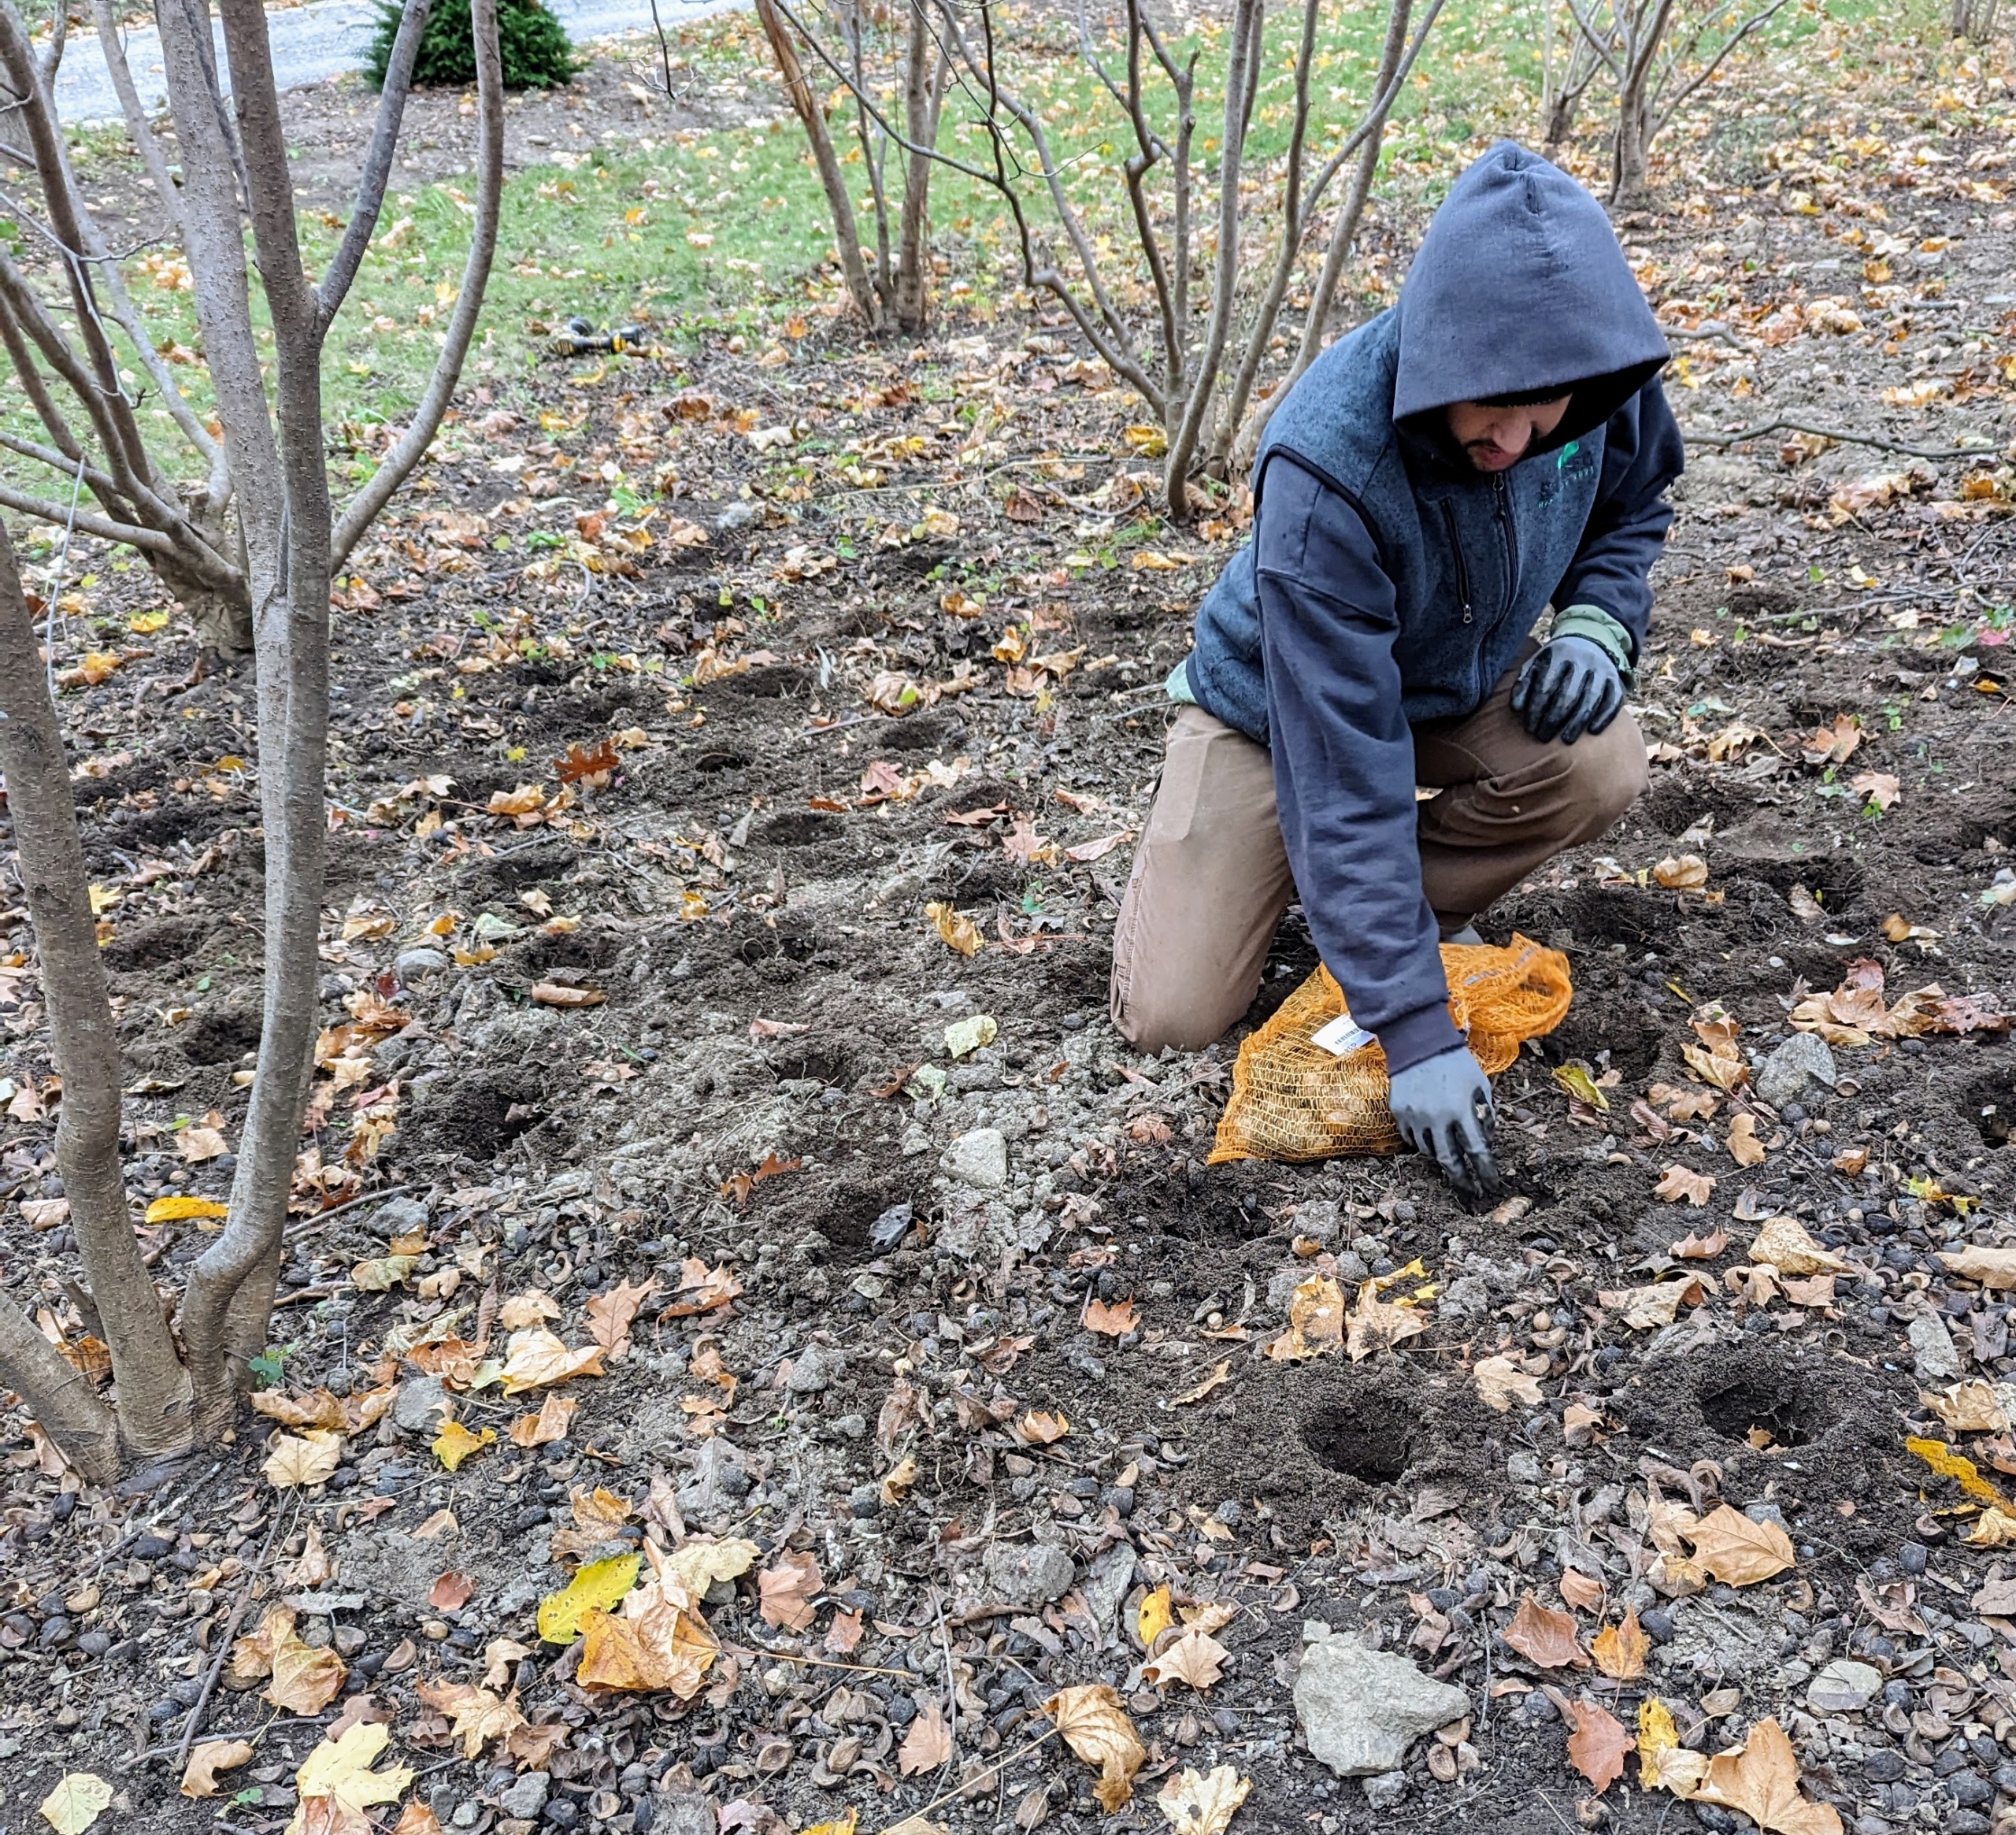
Ryan sprinkles a generous amount of fertilizer over the entire area. It is so important to feed any plants and trees that are planted. As I always say, “if you eat, so should the plants.”
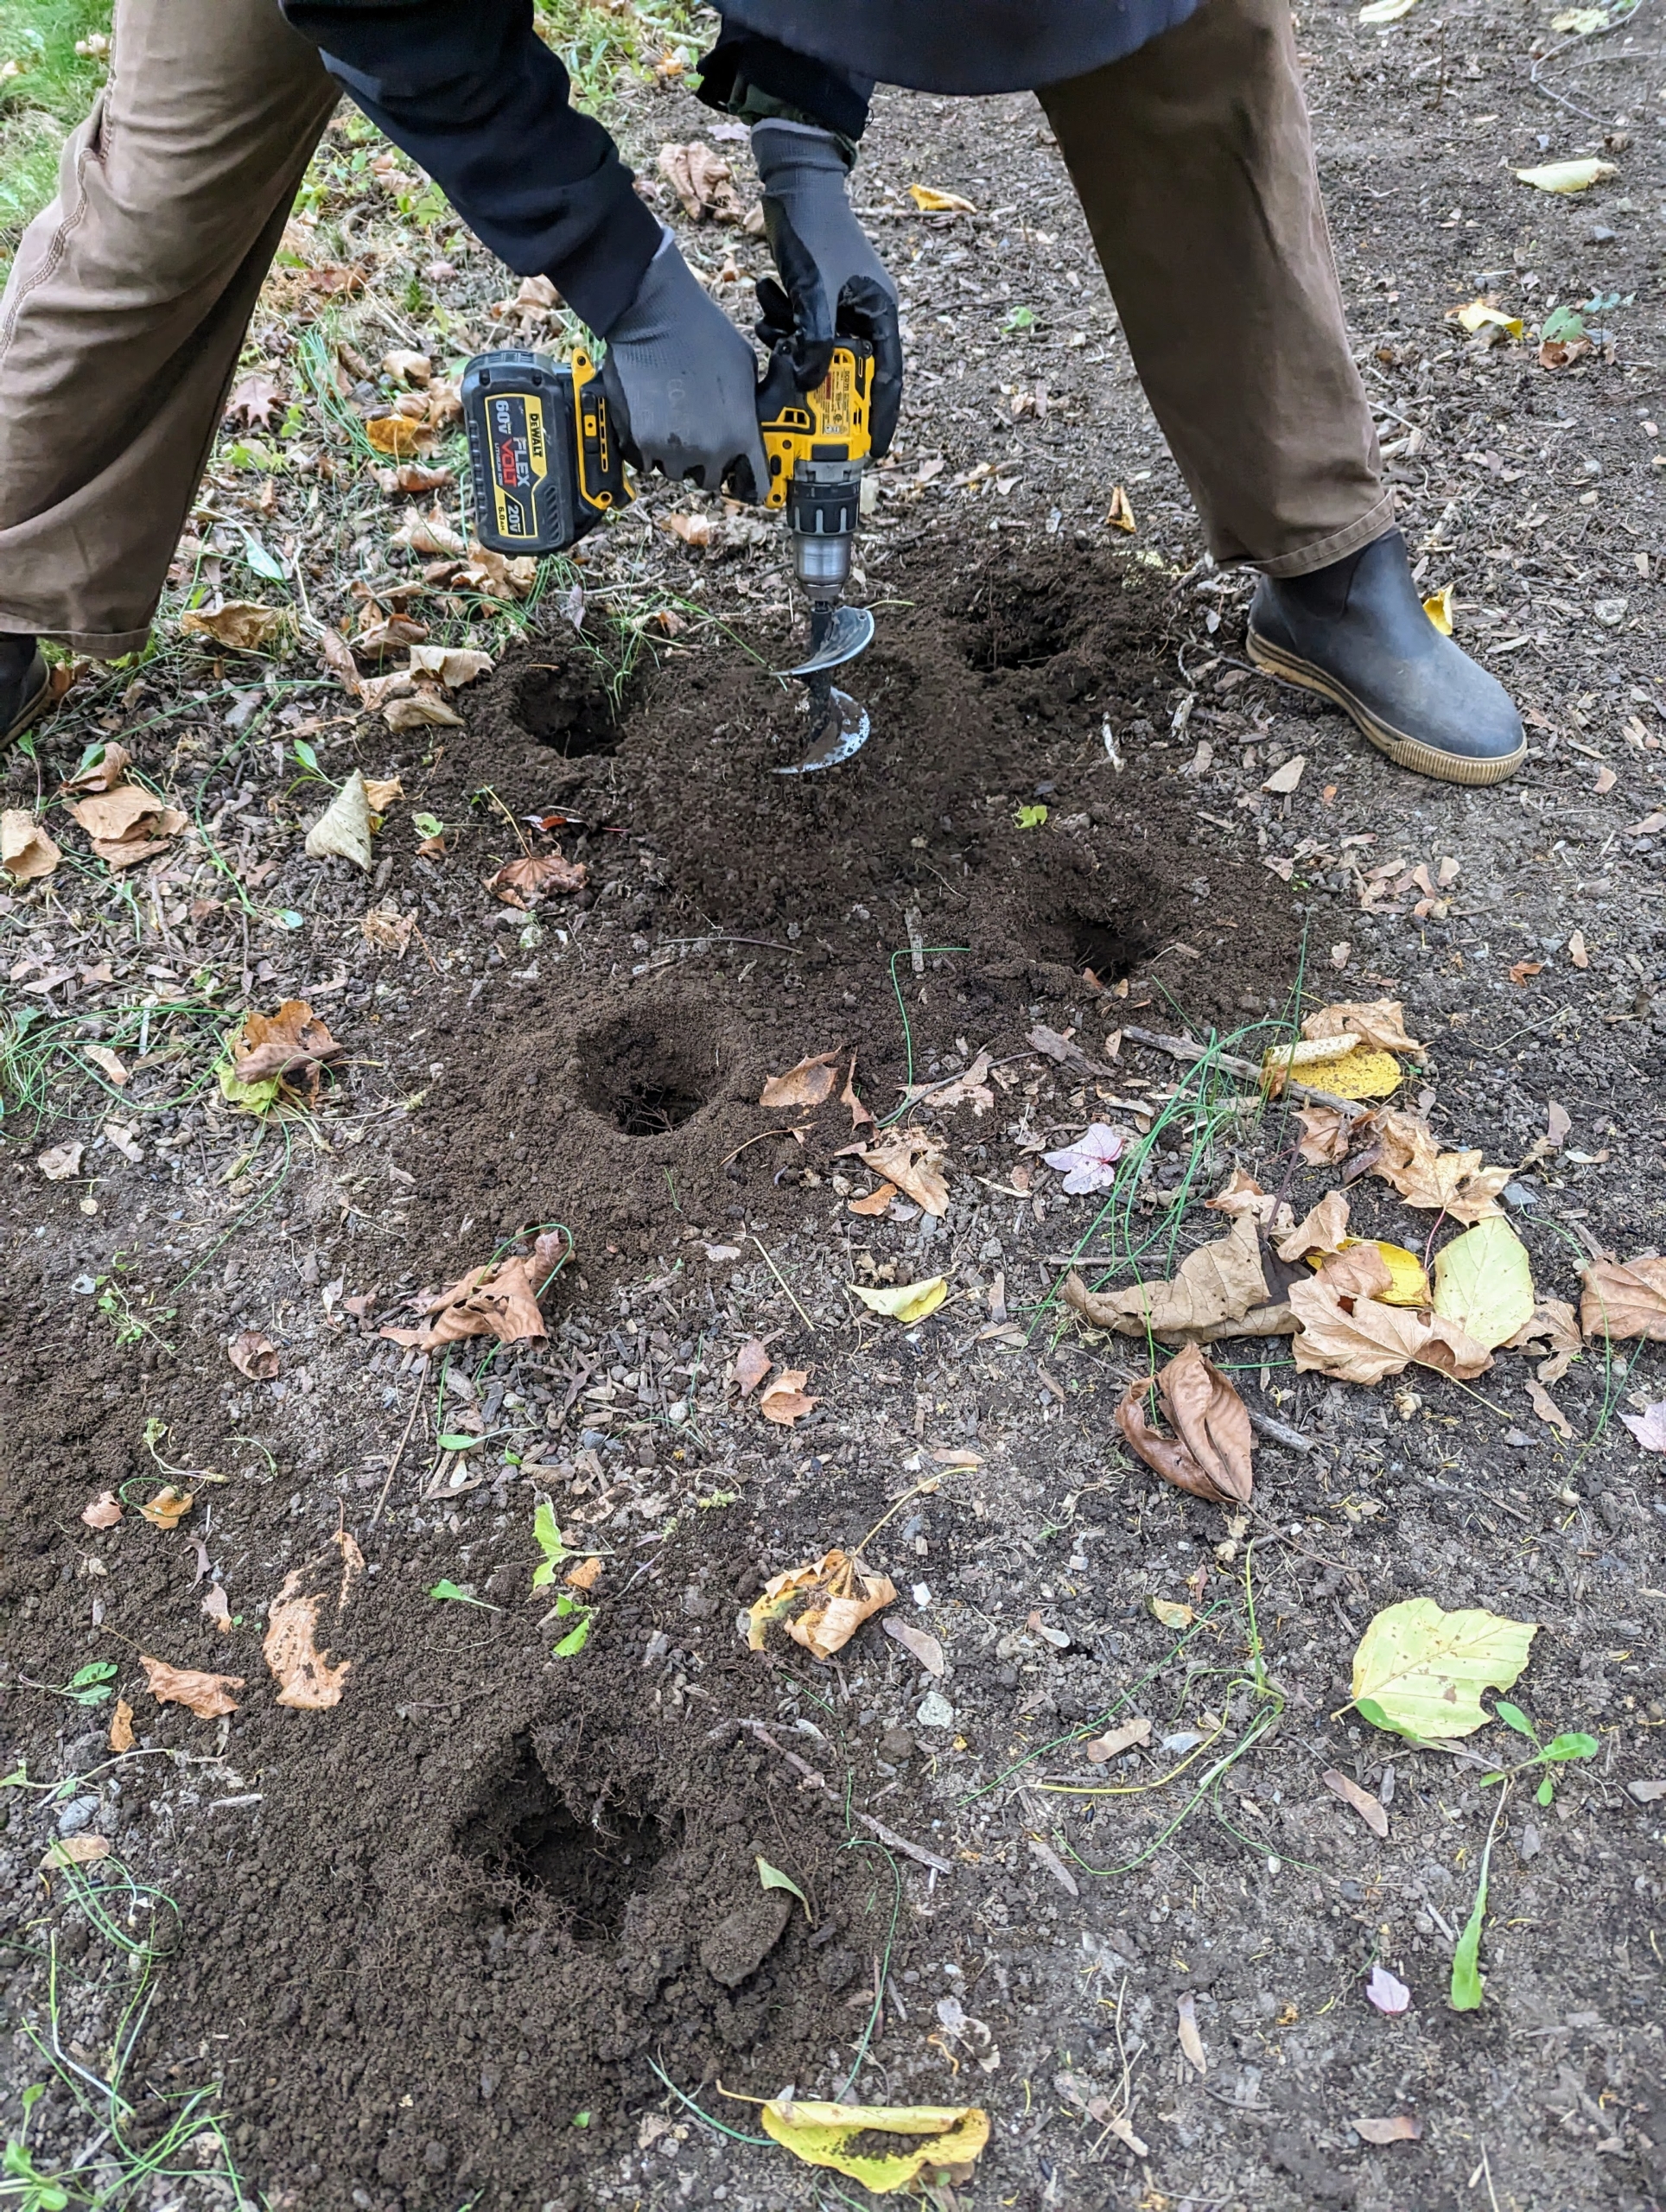
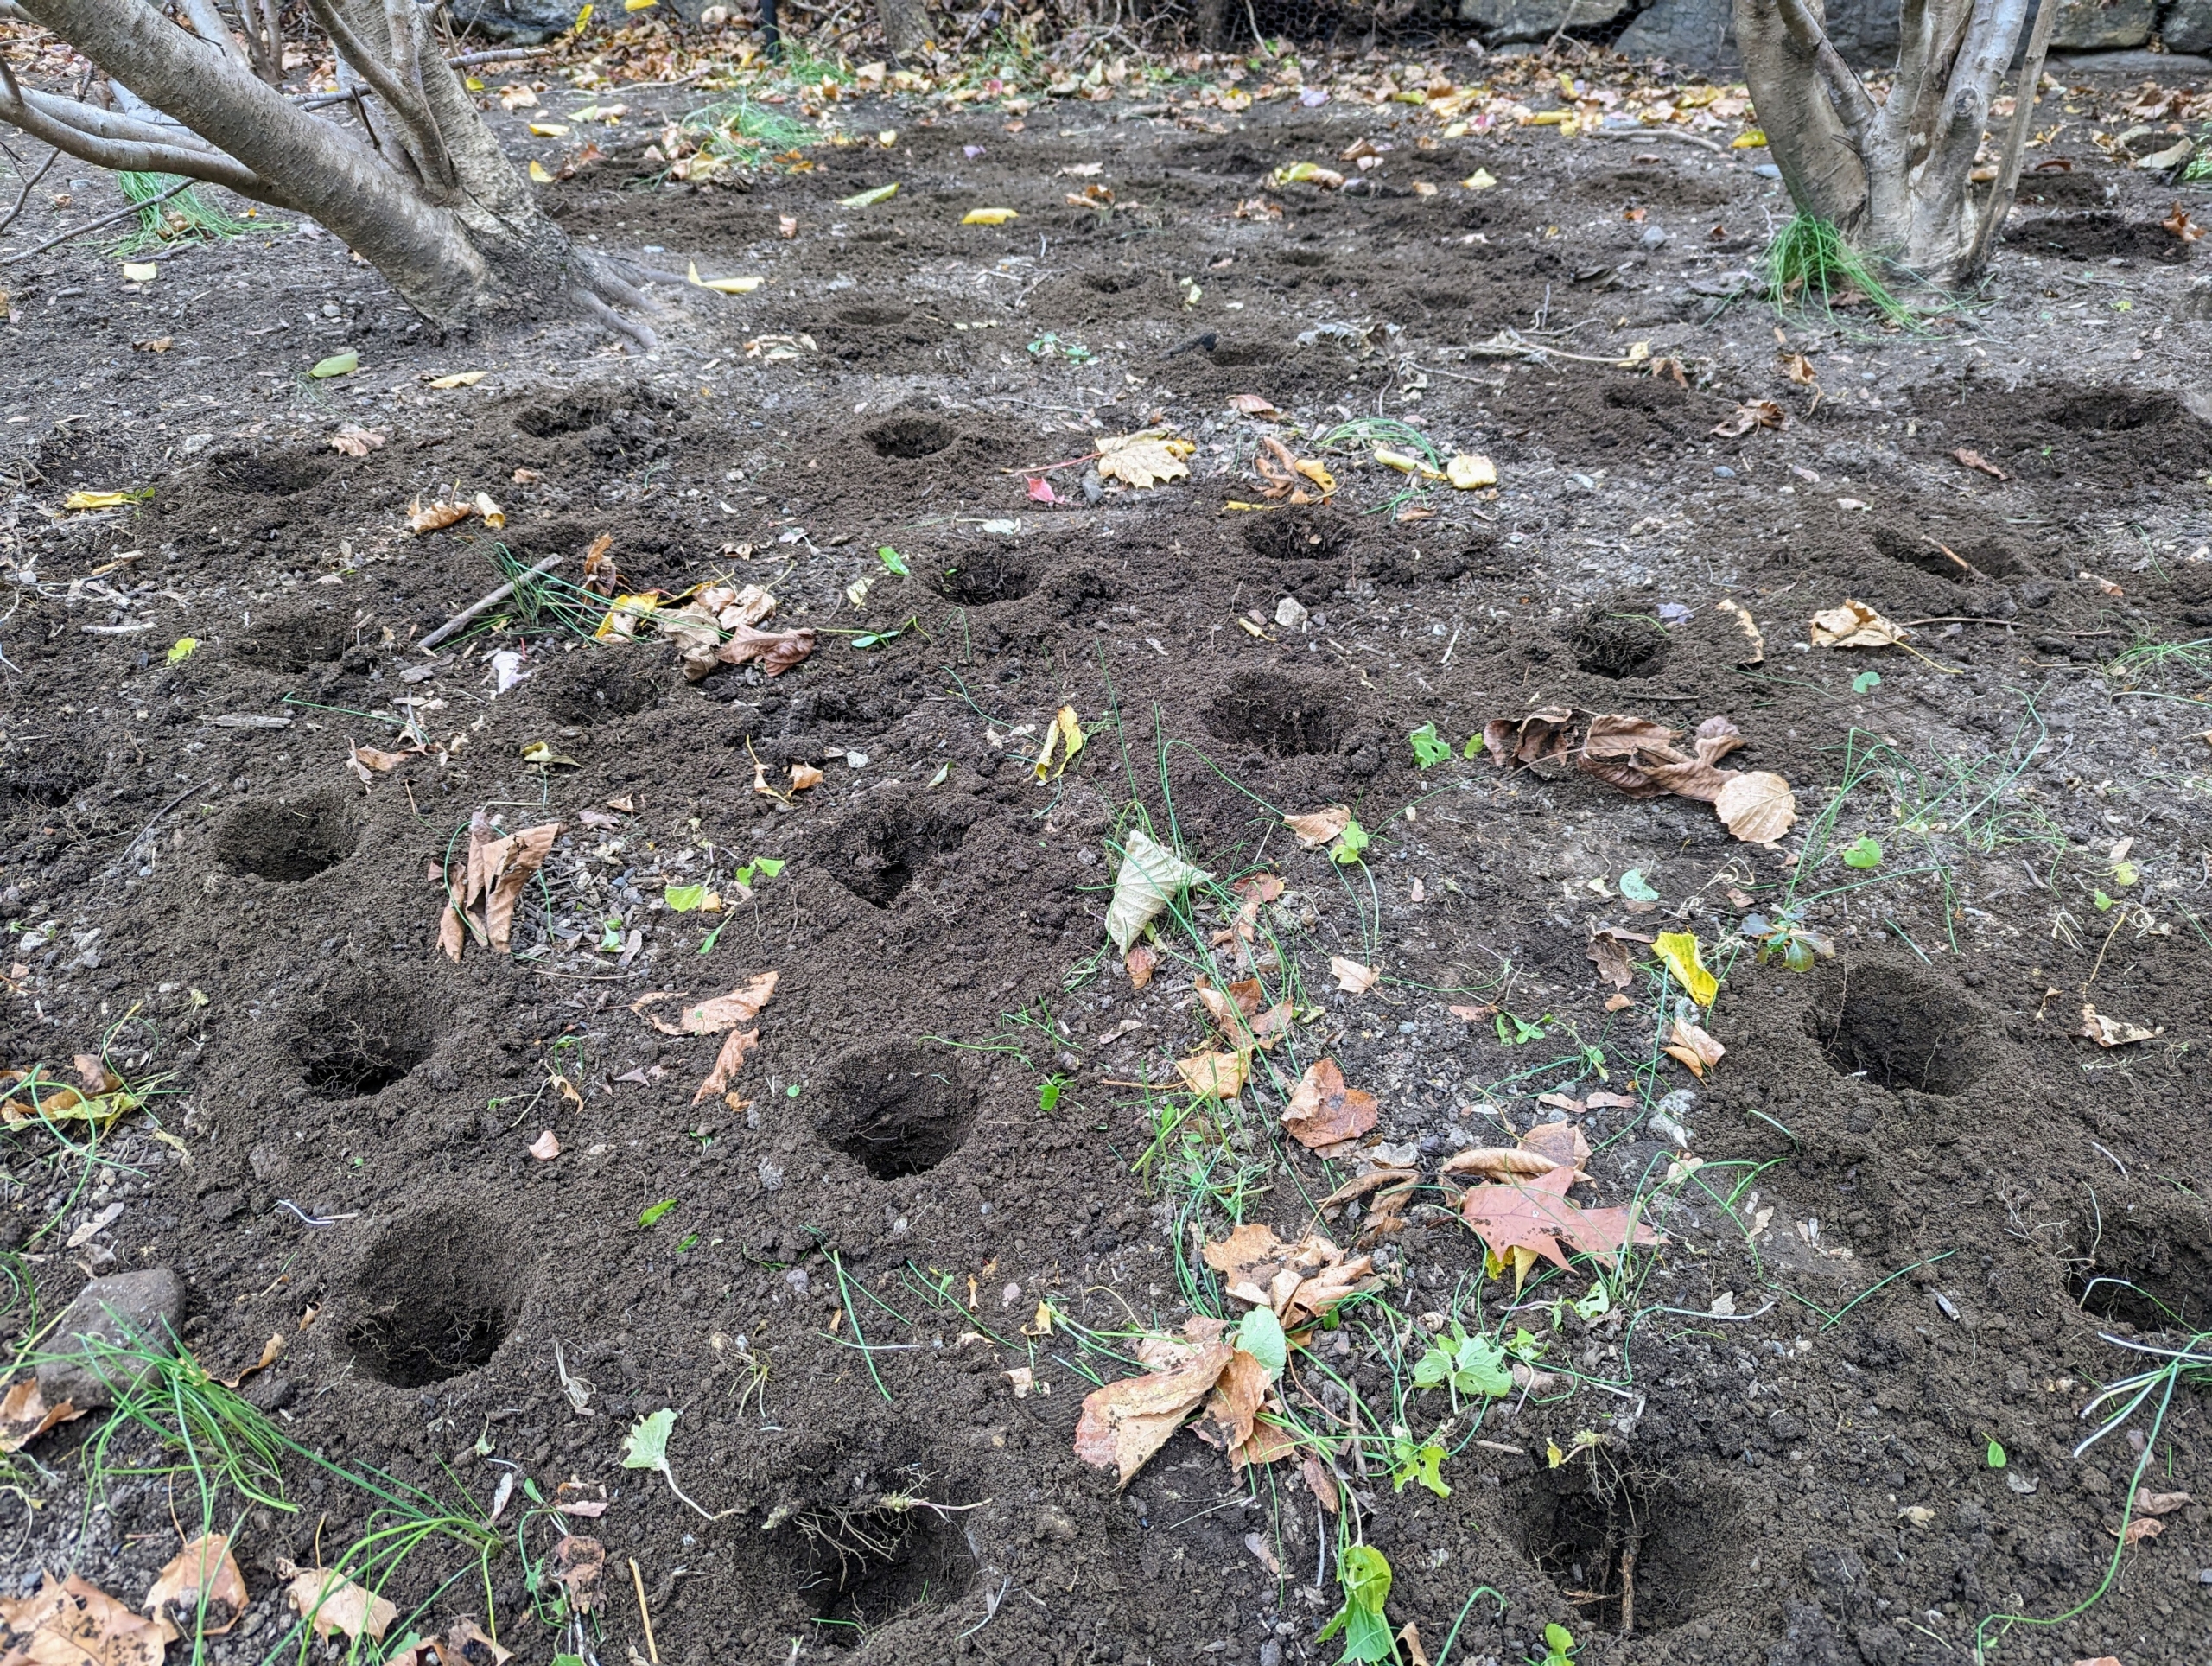
There are several different tools one can use for planting bulbs. Using an auger drill bit attachment specifically for this task, Brian makes the holes – counting them as he goes.
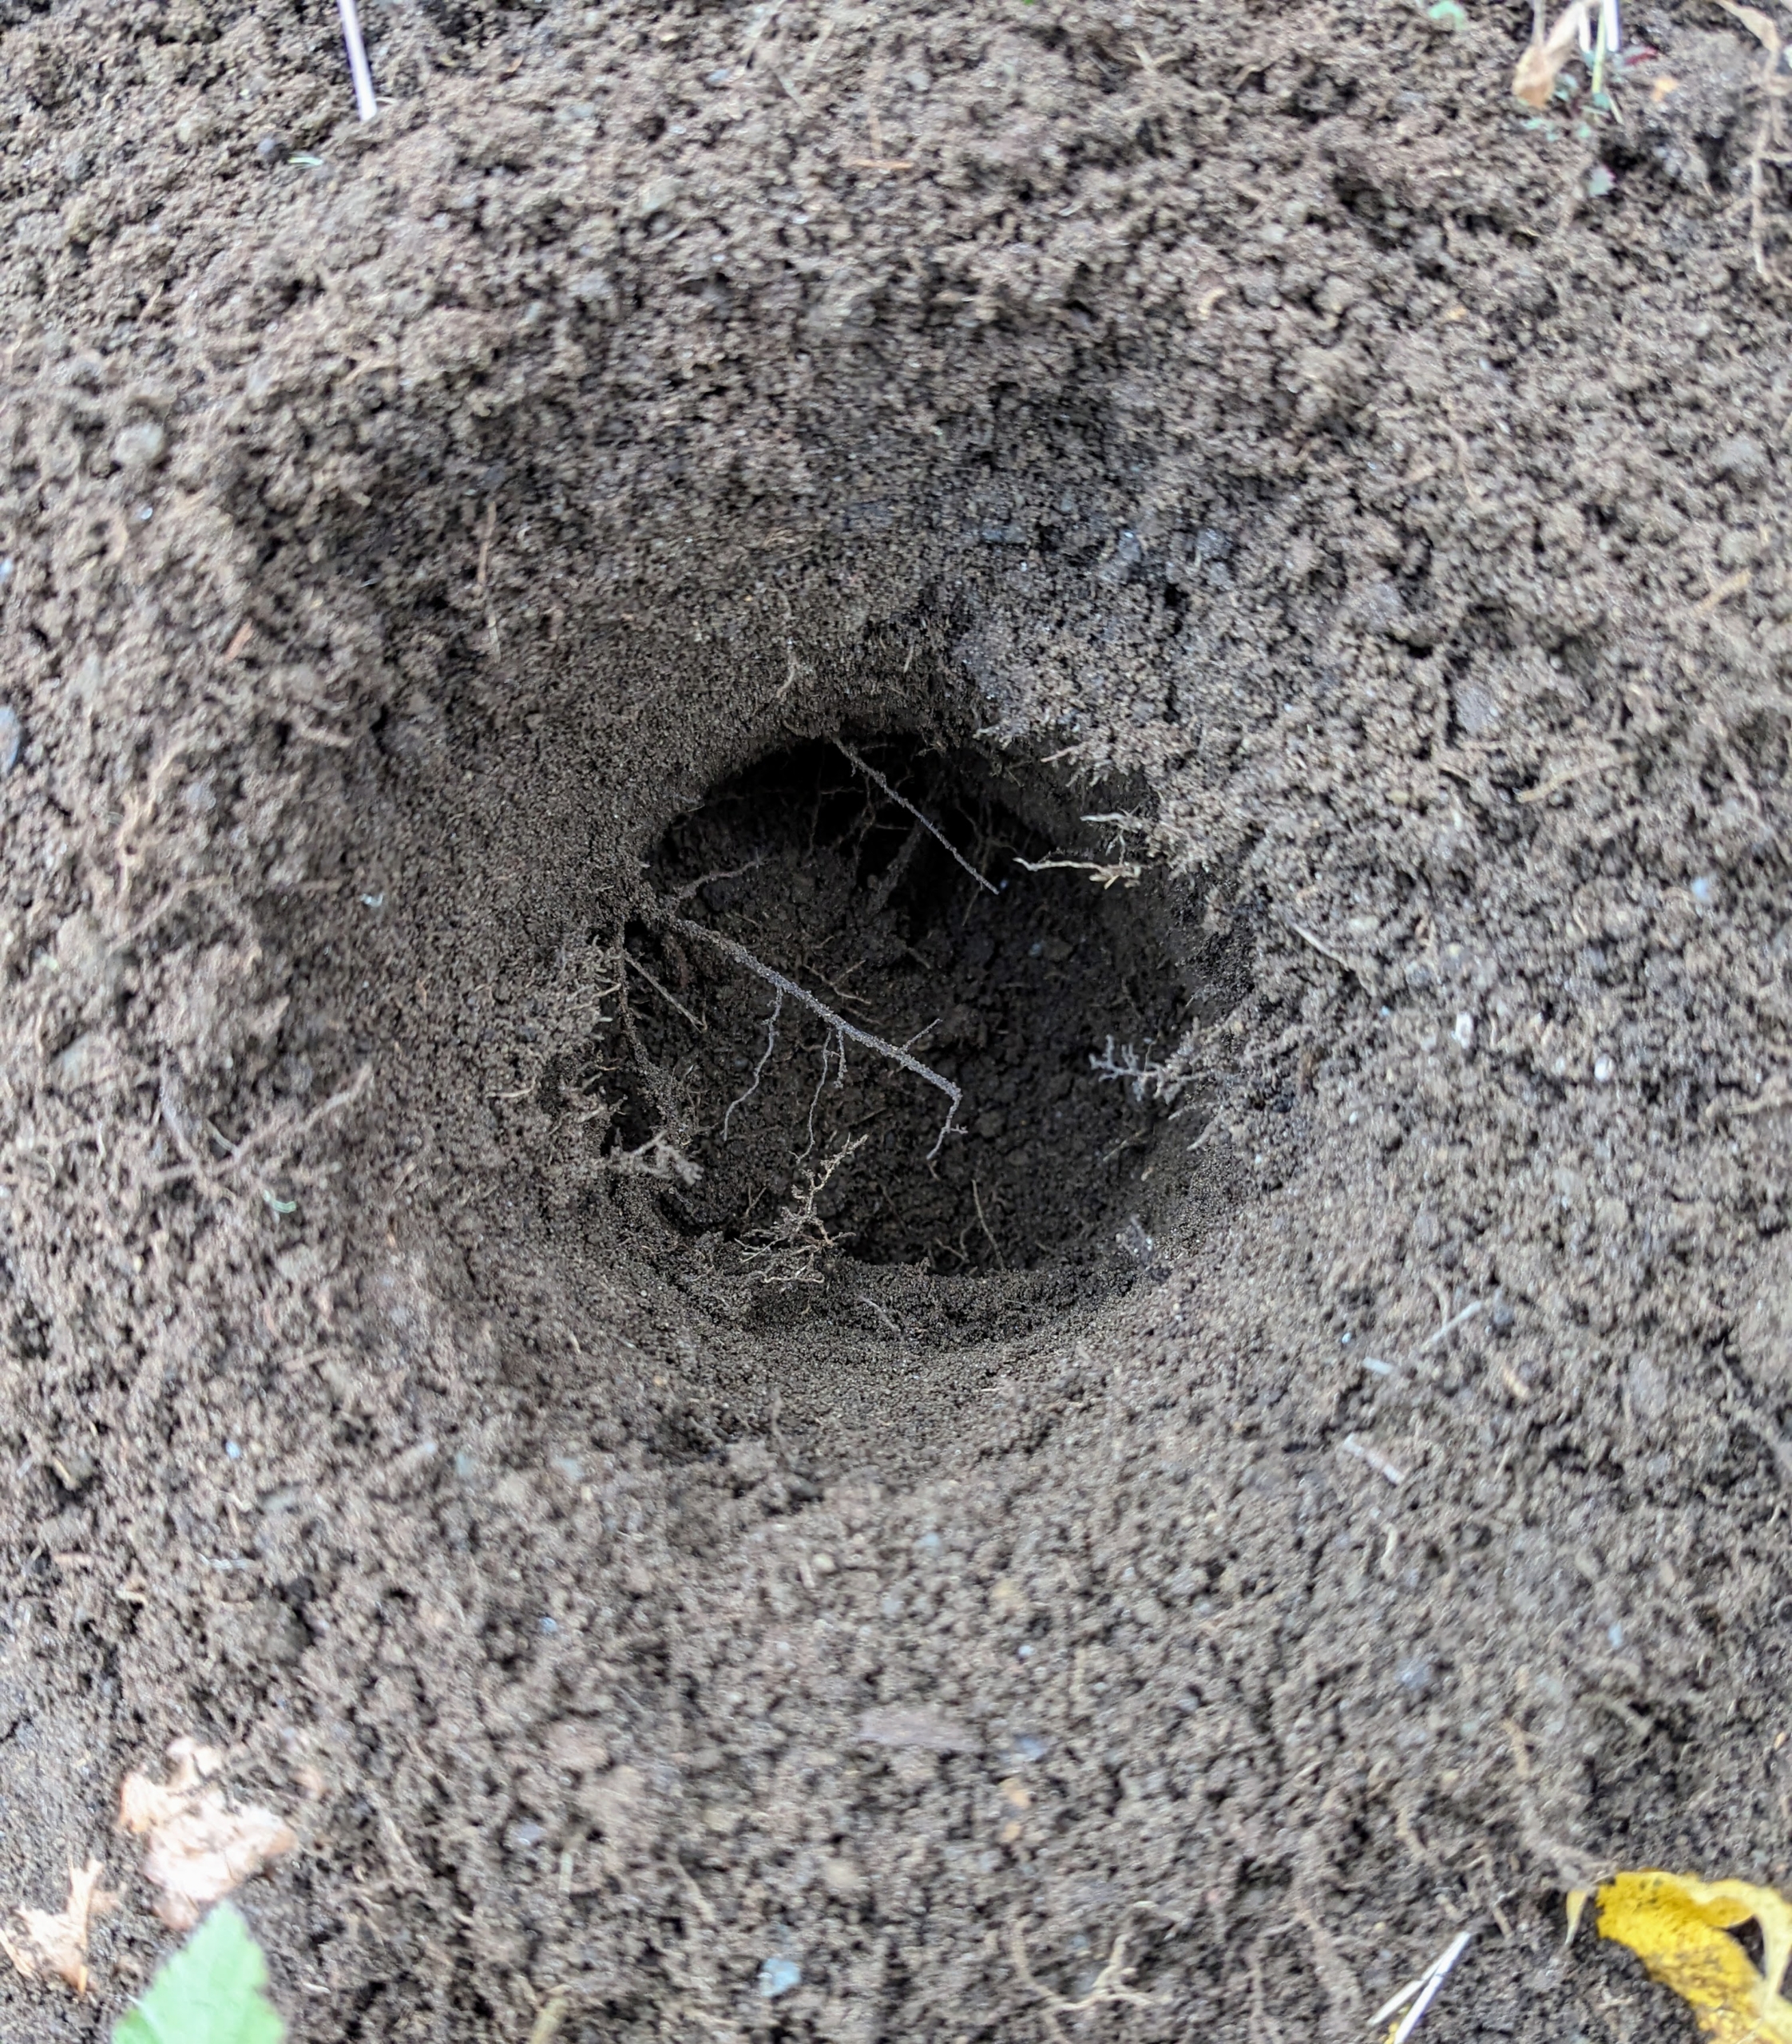
Daffodils are medium-sized bulbs, so the holes are spaced about six-inches from one another on all sides. And the general rule of thumb for planting spring bulbs is to plant them two to three times as deep as the bulbs are tall. This means most daffodils will be planted about six inches down.
Brian makes all the holes first before planting. If planting a lot of bulbs, this is a good way of keeping track of all the bulbs and their varieties.
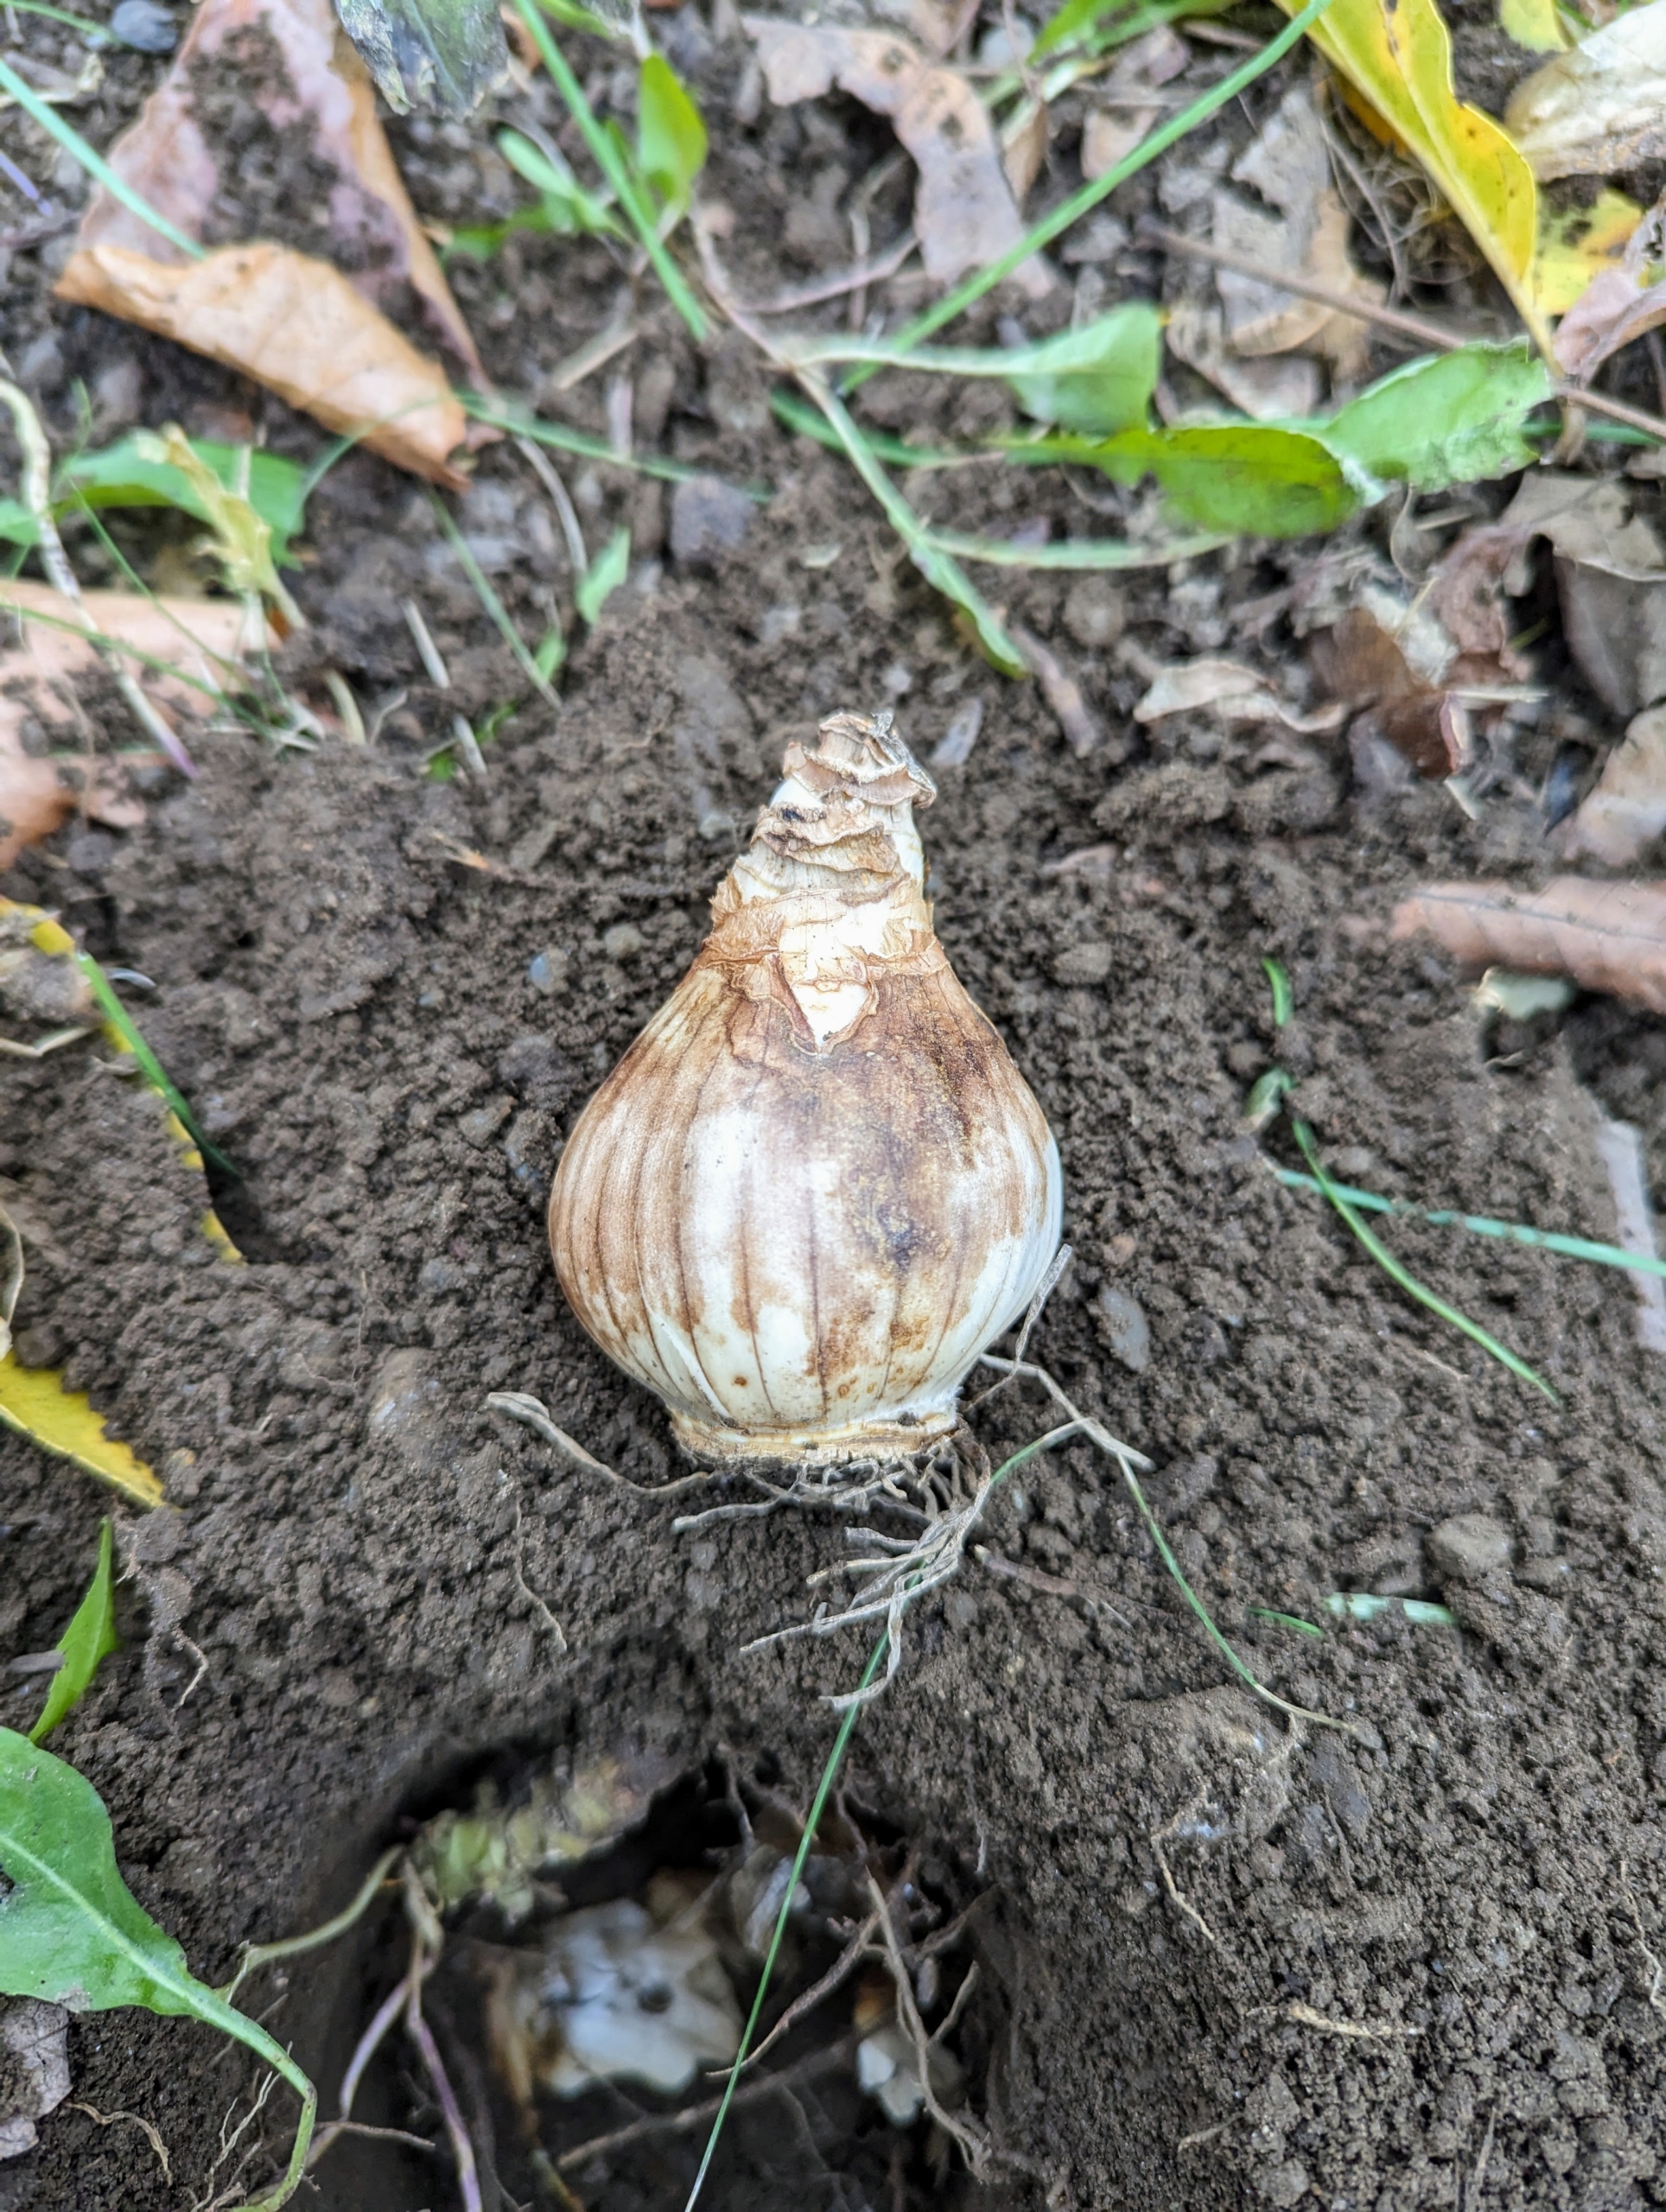
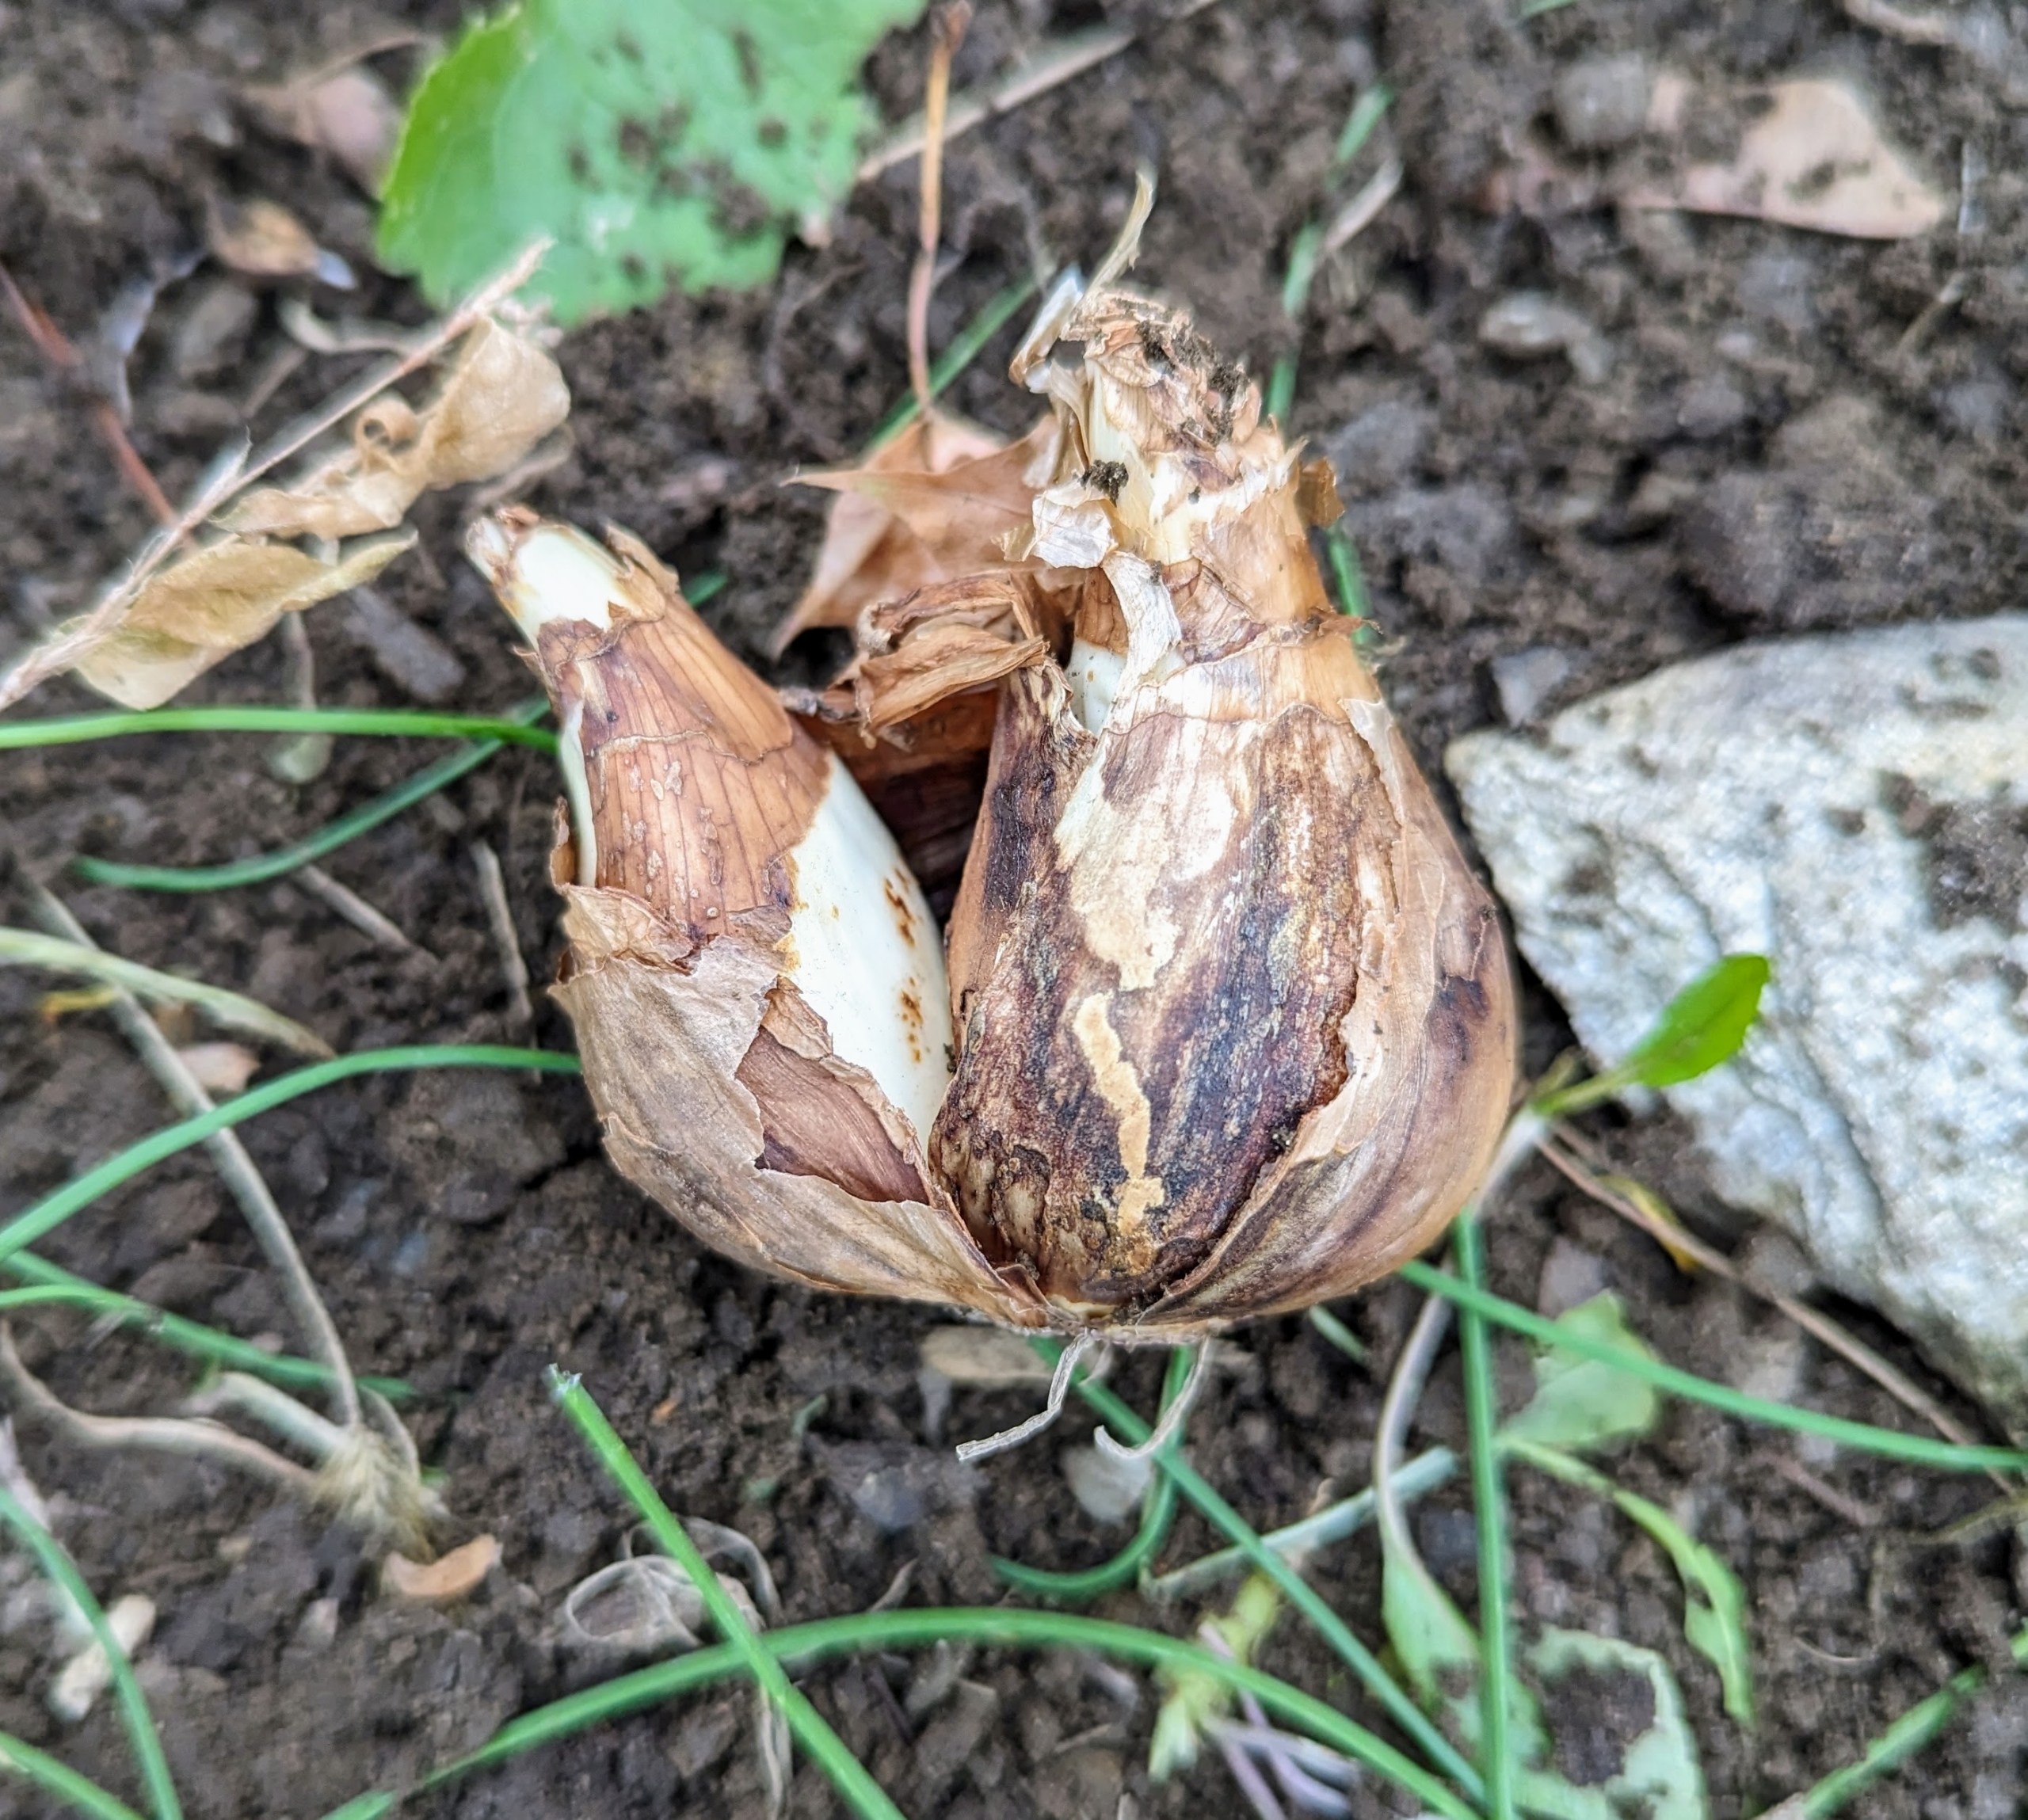
This is a daffodil bulb. Daffodil bulbs are round in shape with a pointed tip which is where the shoot will appear. Look closely and see the small roots on the underside of the bulb. Daffodil bulbs are usually around two to three inches in diameter. All bulbs should be stored in a cool, dry, dark place until they are planted. These bulbs are in good condition and ready to plant.
Brian places the bulb into the hole. Always plant with the pointed end faced up. If it is planted upside down, the flower will still grow, but it will likely take longer.
Here is one bulb in its hole several inches deep.
In production line fashion, Brian fills the holes in sections to ensure the varieties remain together.
Sometimes, daffodil bulbs may divide and produce bulblets. This bulb has one bulblet on its side. Some bulbs could produce two or even three bulblets.
Whenever possible, plant the bulb and its bulblet as is; however, if it does not fit into the hole, it is okay to separate the bulblet from the parent bulb and plant them in different holes.
After all the bulbs in the area are placed into their designated holes, Brian backfills with a soft rake.
This border looks more lovely every year. I am always eager to see it filled with color in spring. Just wait and see it with me. I’ll be sure to share photos. What bulbs are you planting in the garden?