One of the easiest and most beautiful ways to observe and appreciate wildlife is by feeding the wild birds. During this time of year, the bird feeders at my farm are filled with chirping hungry creatures.
I have a number of bird feeders at my farm, and all the birds love to come by and feast on the seed I provide. I also set out fresh water and cut holes in the burlap covers over the boxwood, so birds are able to take shelter during inclement weather. Helping the wild birds is important to sustain local wild bird populations, especially during the harsh winters and challenging migration periods.
Enjoy these photos.
I have long fed the wild birds that visit my farm. Feeders are set up where they are easy to see, convenient to fill, and where seed-hungry squirrels and bird-hungry cats cannot reach them.
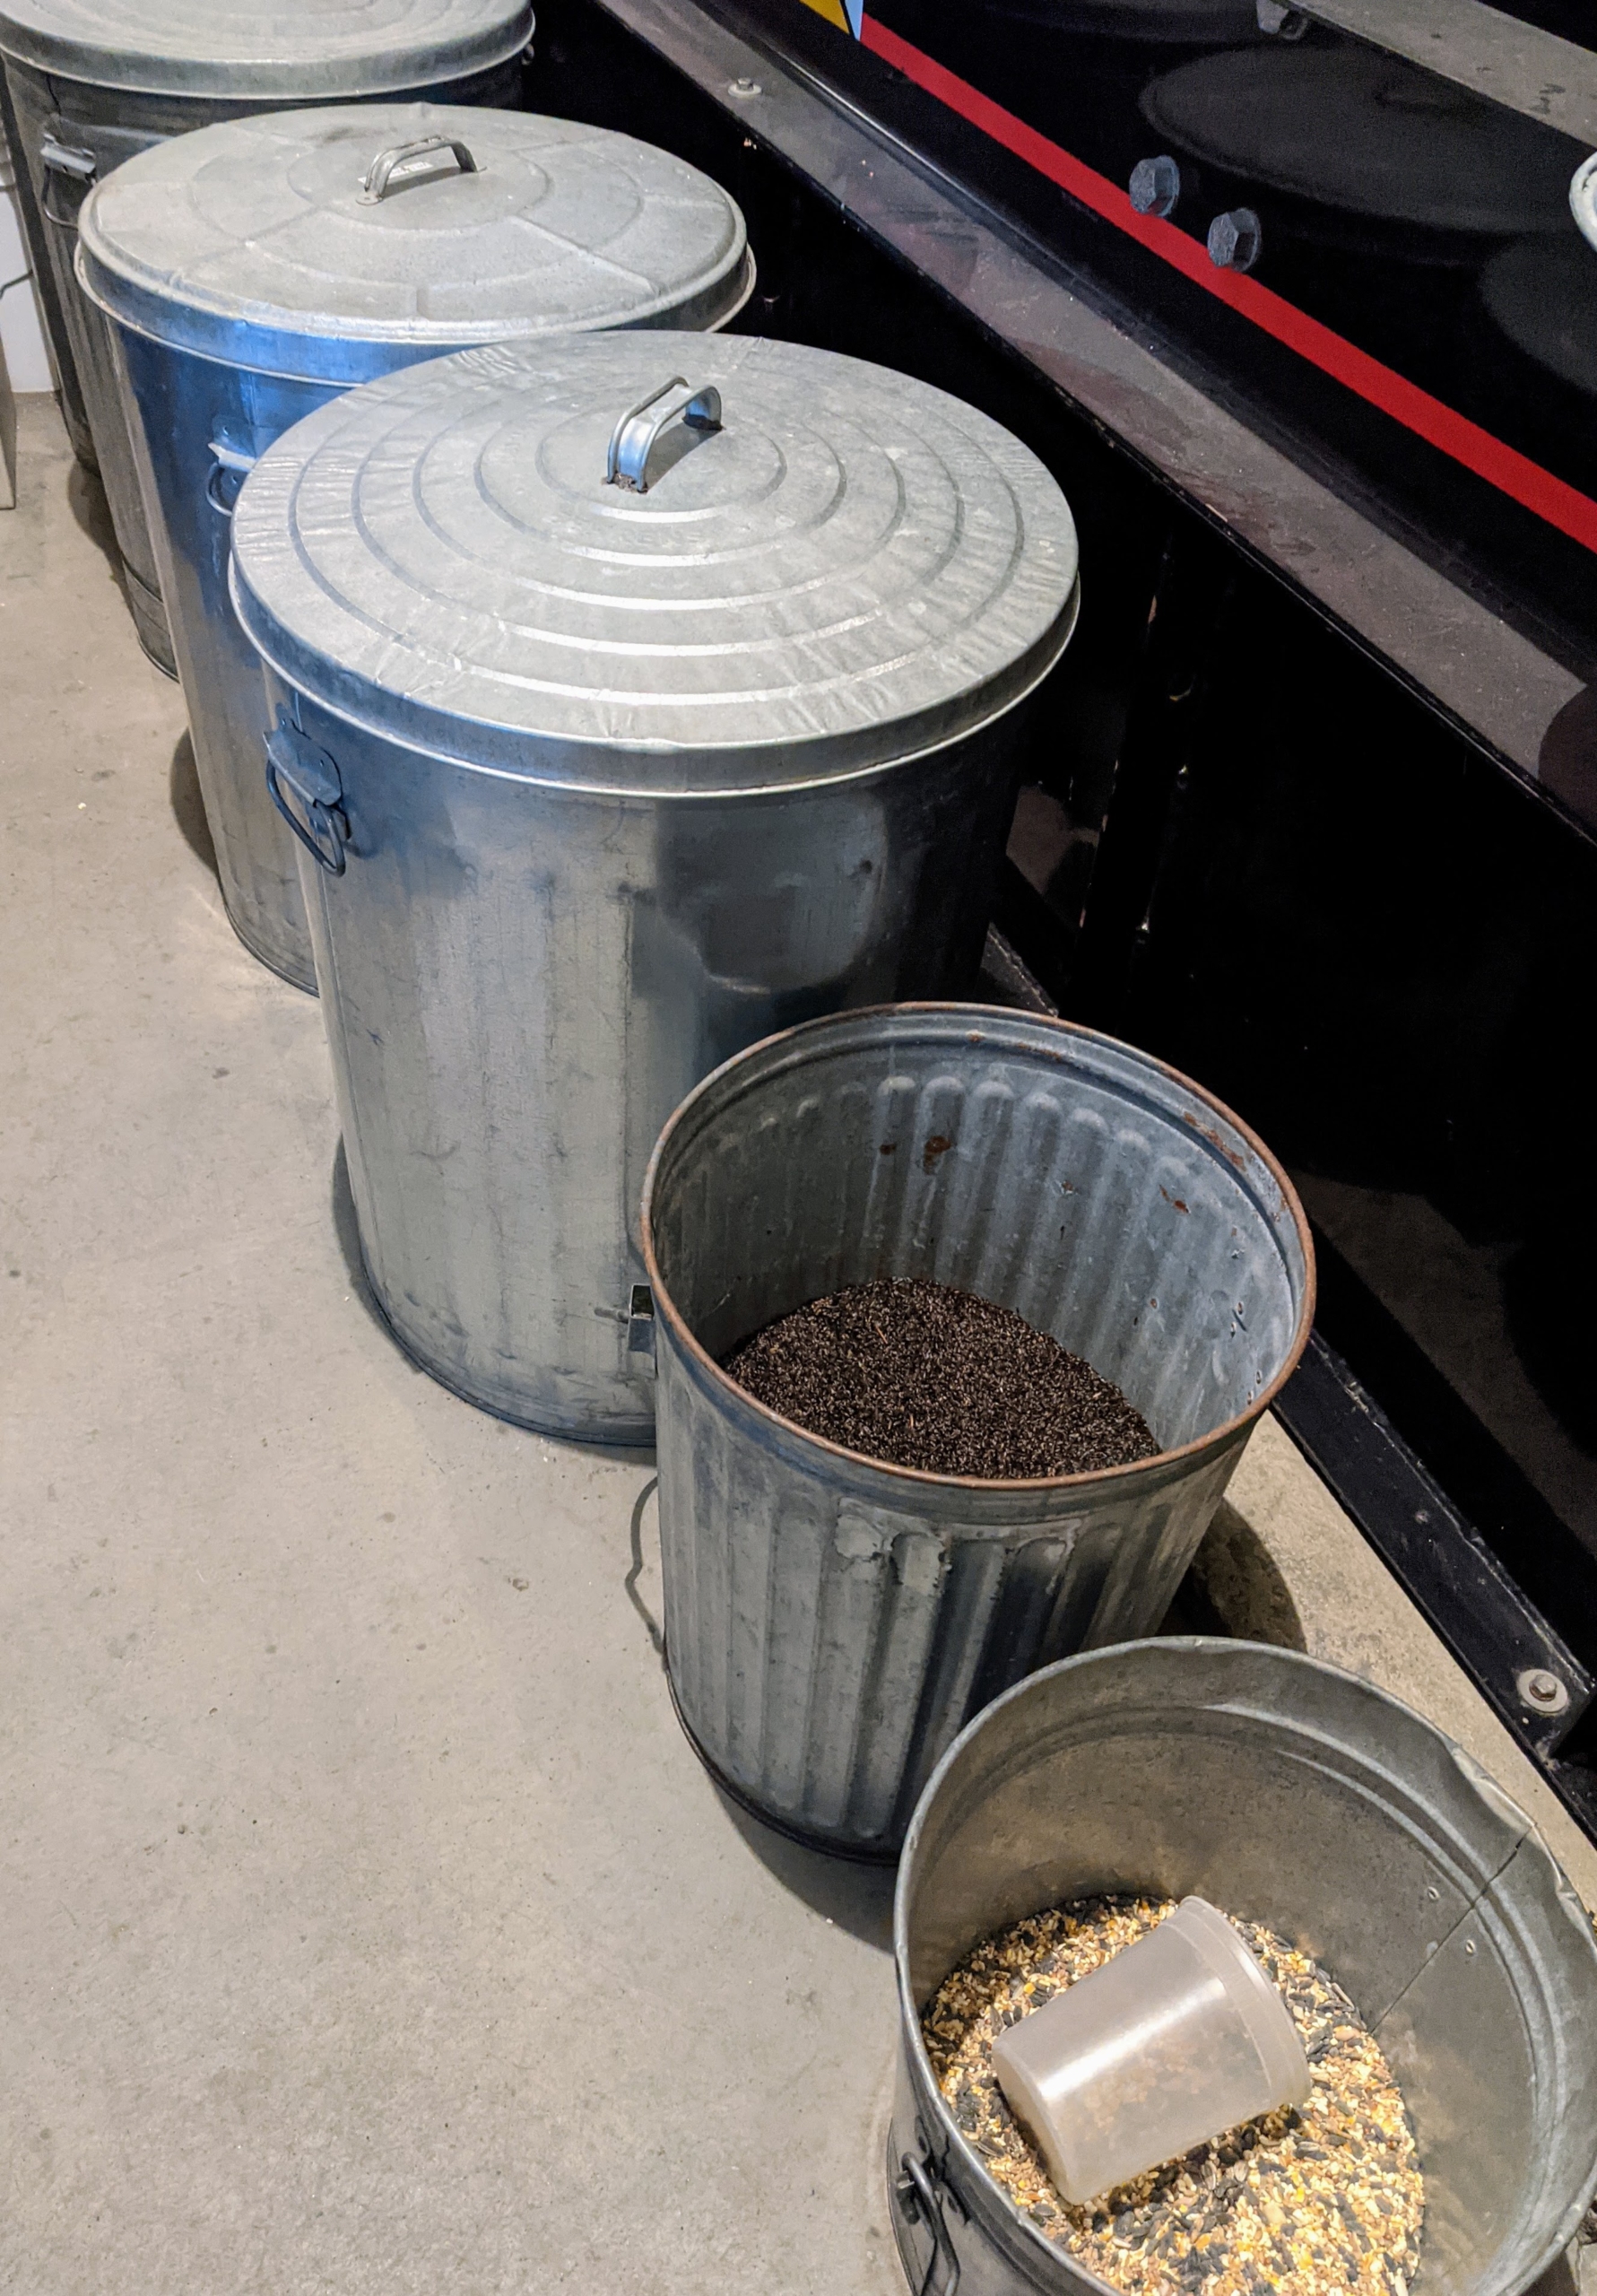
All my wild bird seed is stored in galvanized metal cans and kept inside my generator room next to the carport.
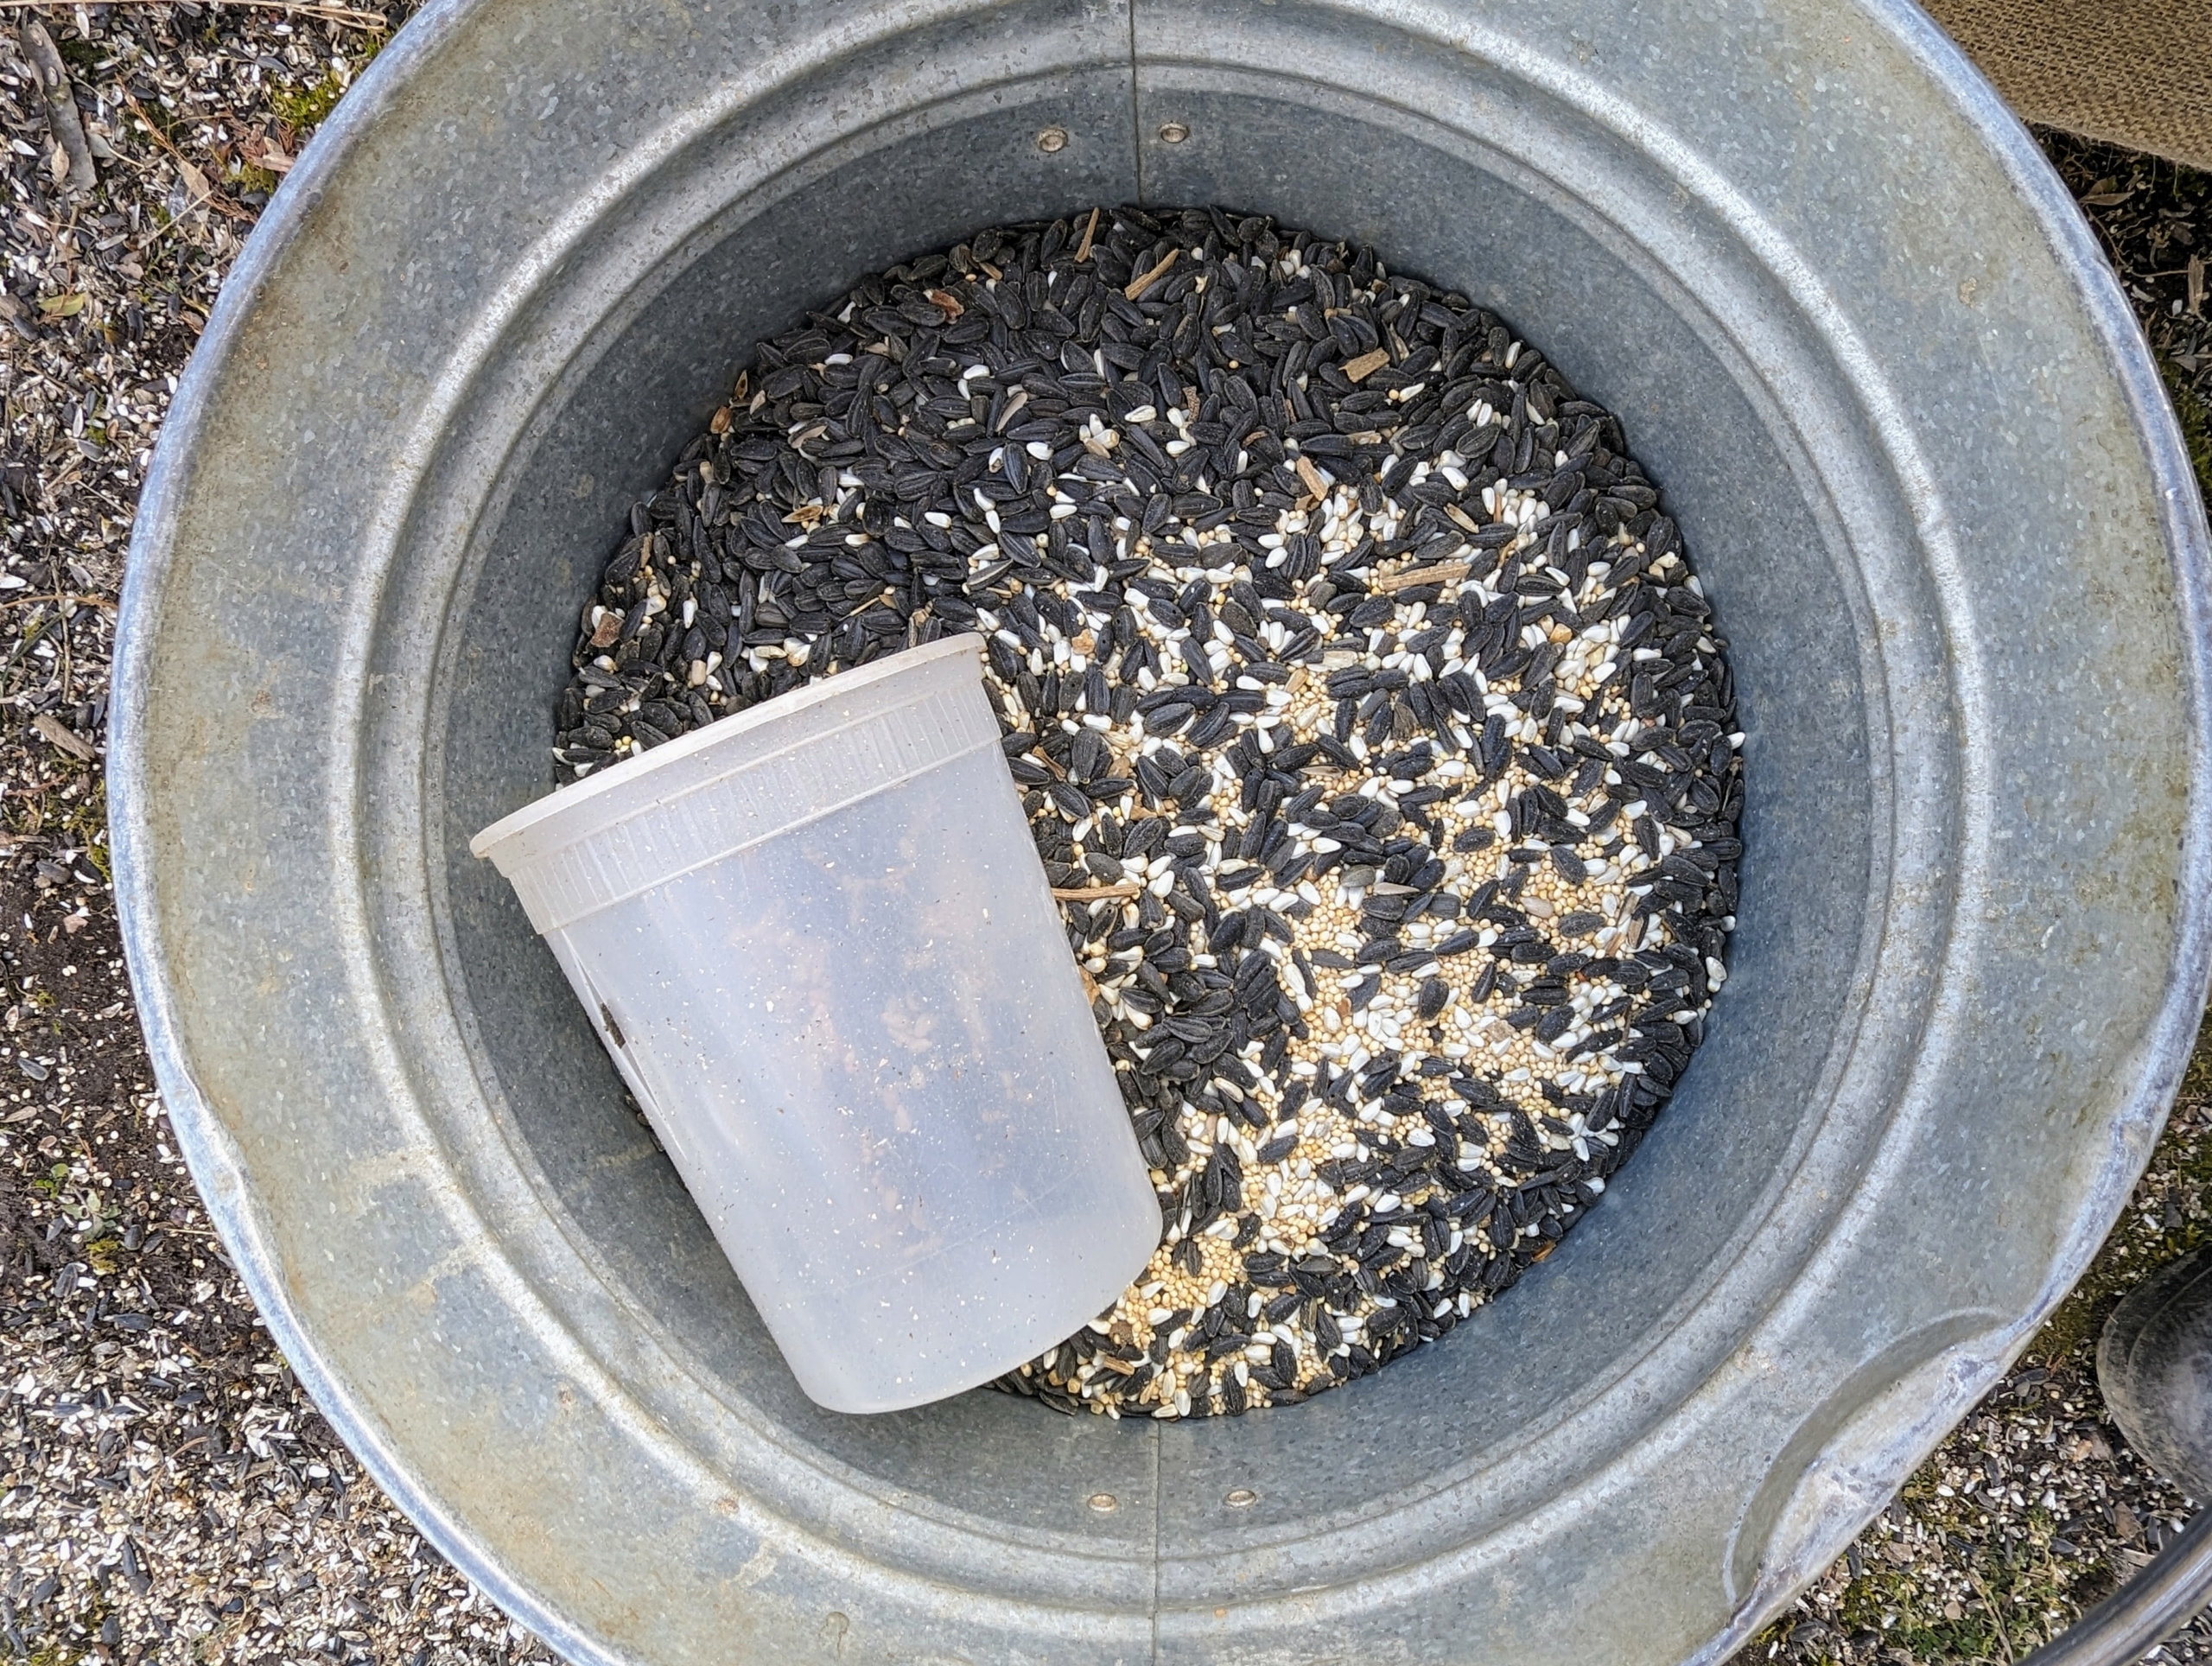
This is a wild bird seed mix. This includes white millet, black oil sunflower seeds, striped sunflower seeds and cracked corn. The birds love this seed.
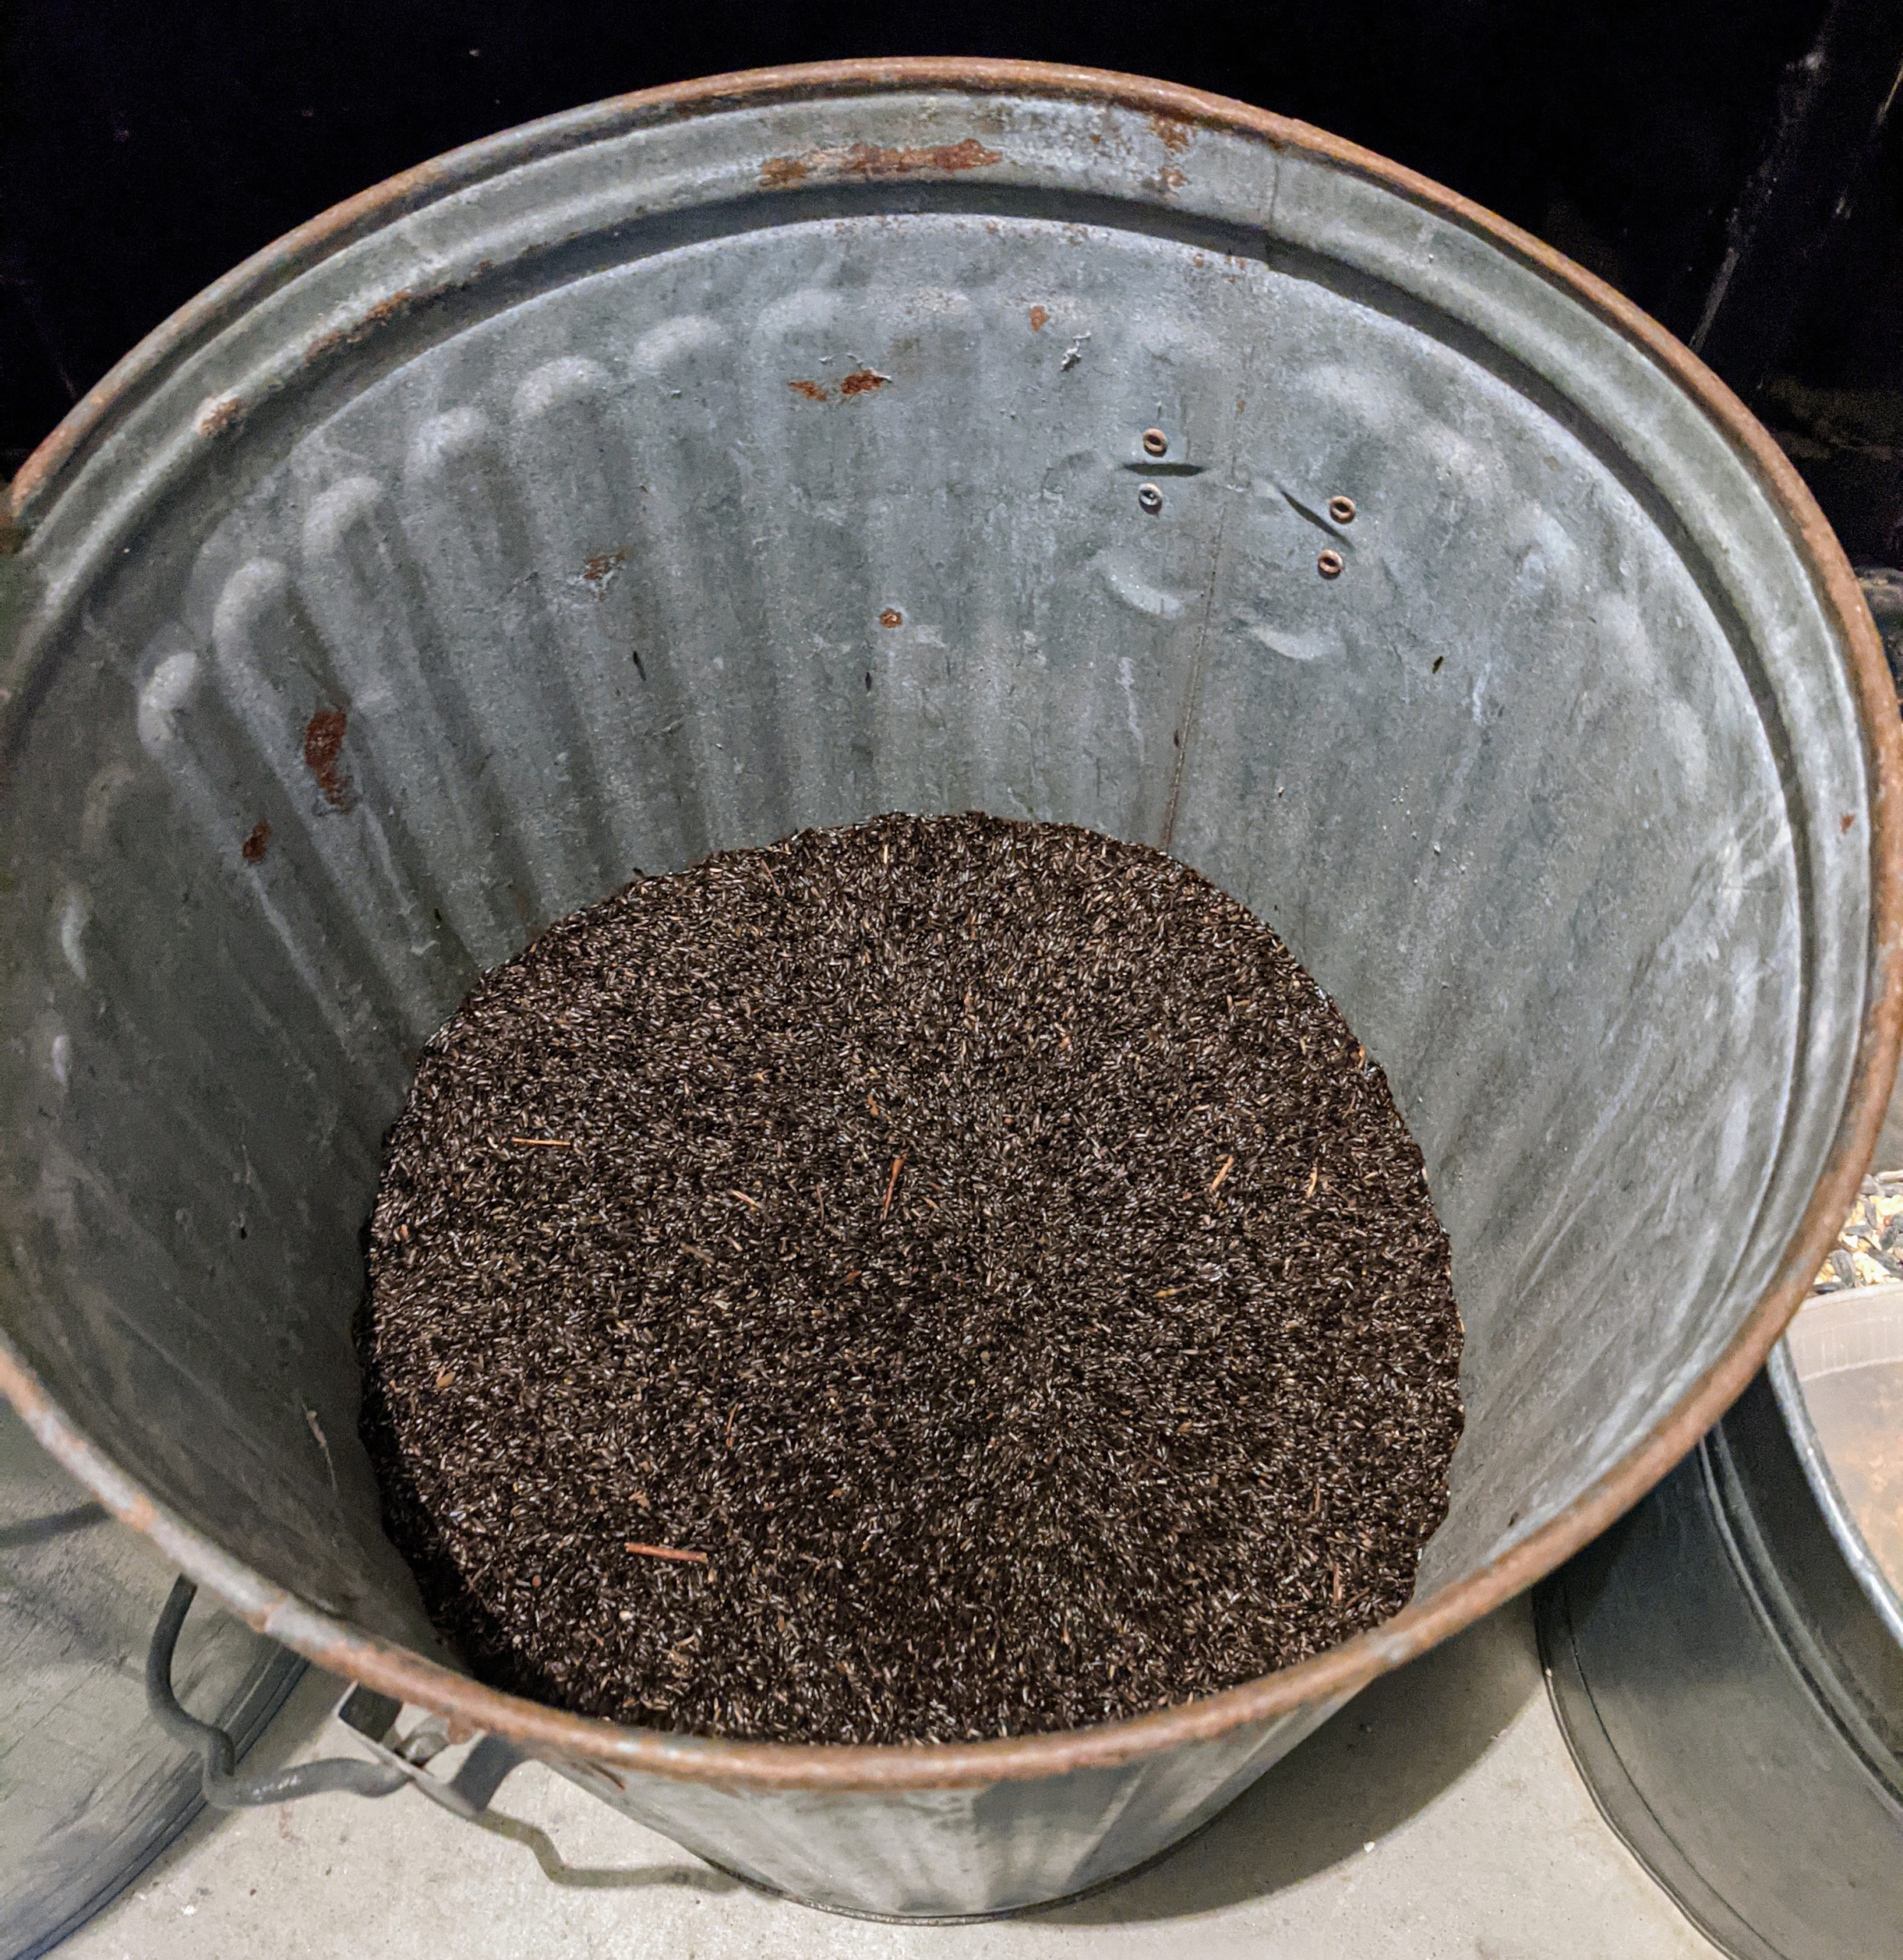
Nyjer is a great seed to offer birds, especially in winter because it contains more oil, and a higher calorie content, so birds can store fat to survive the season.
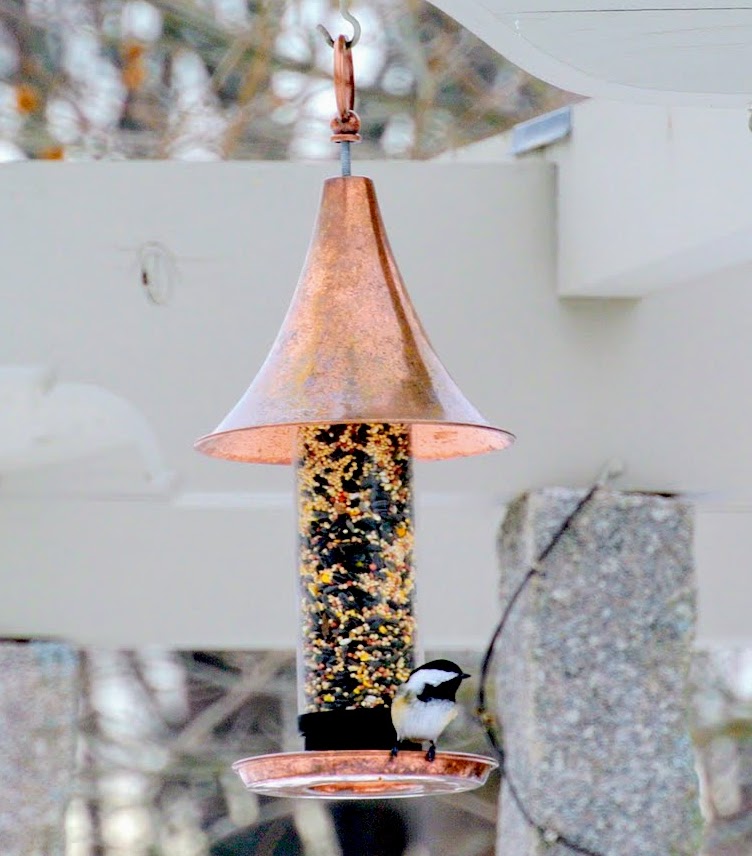
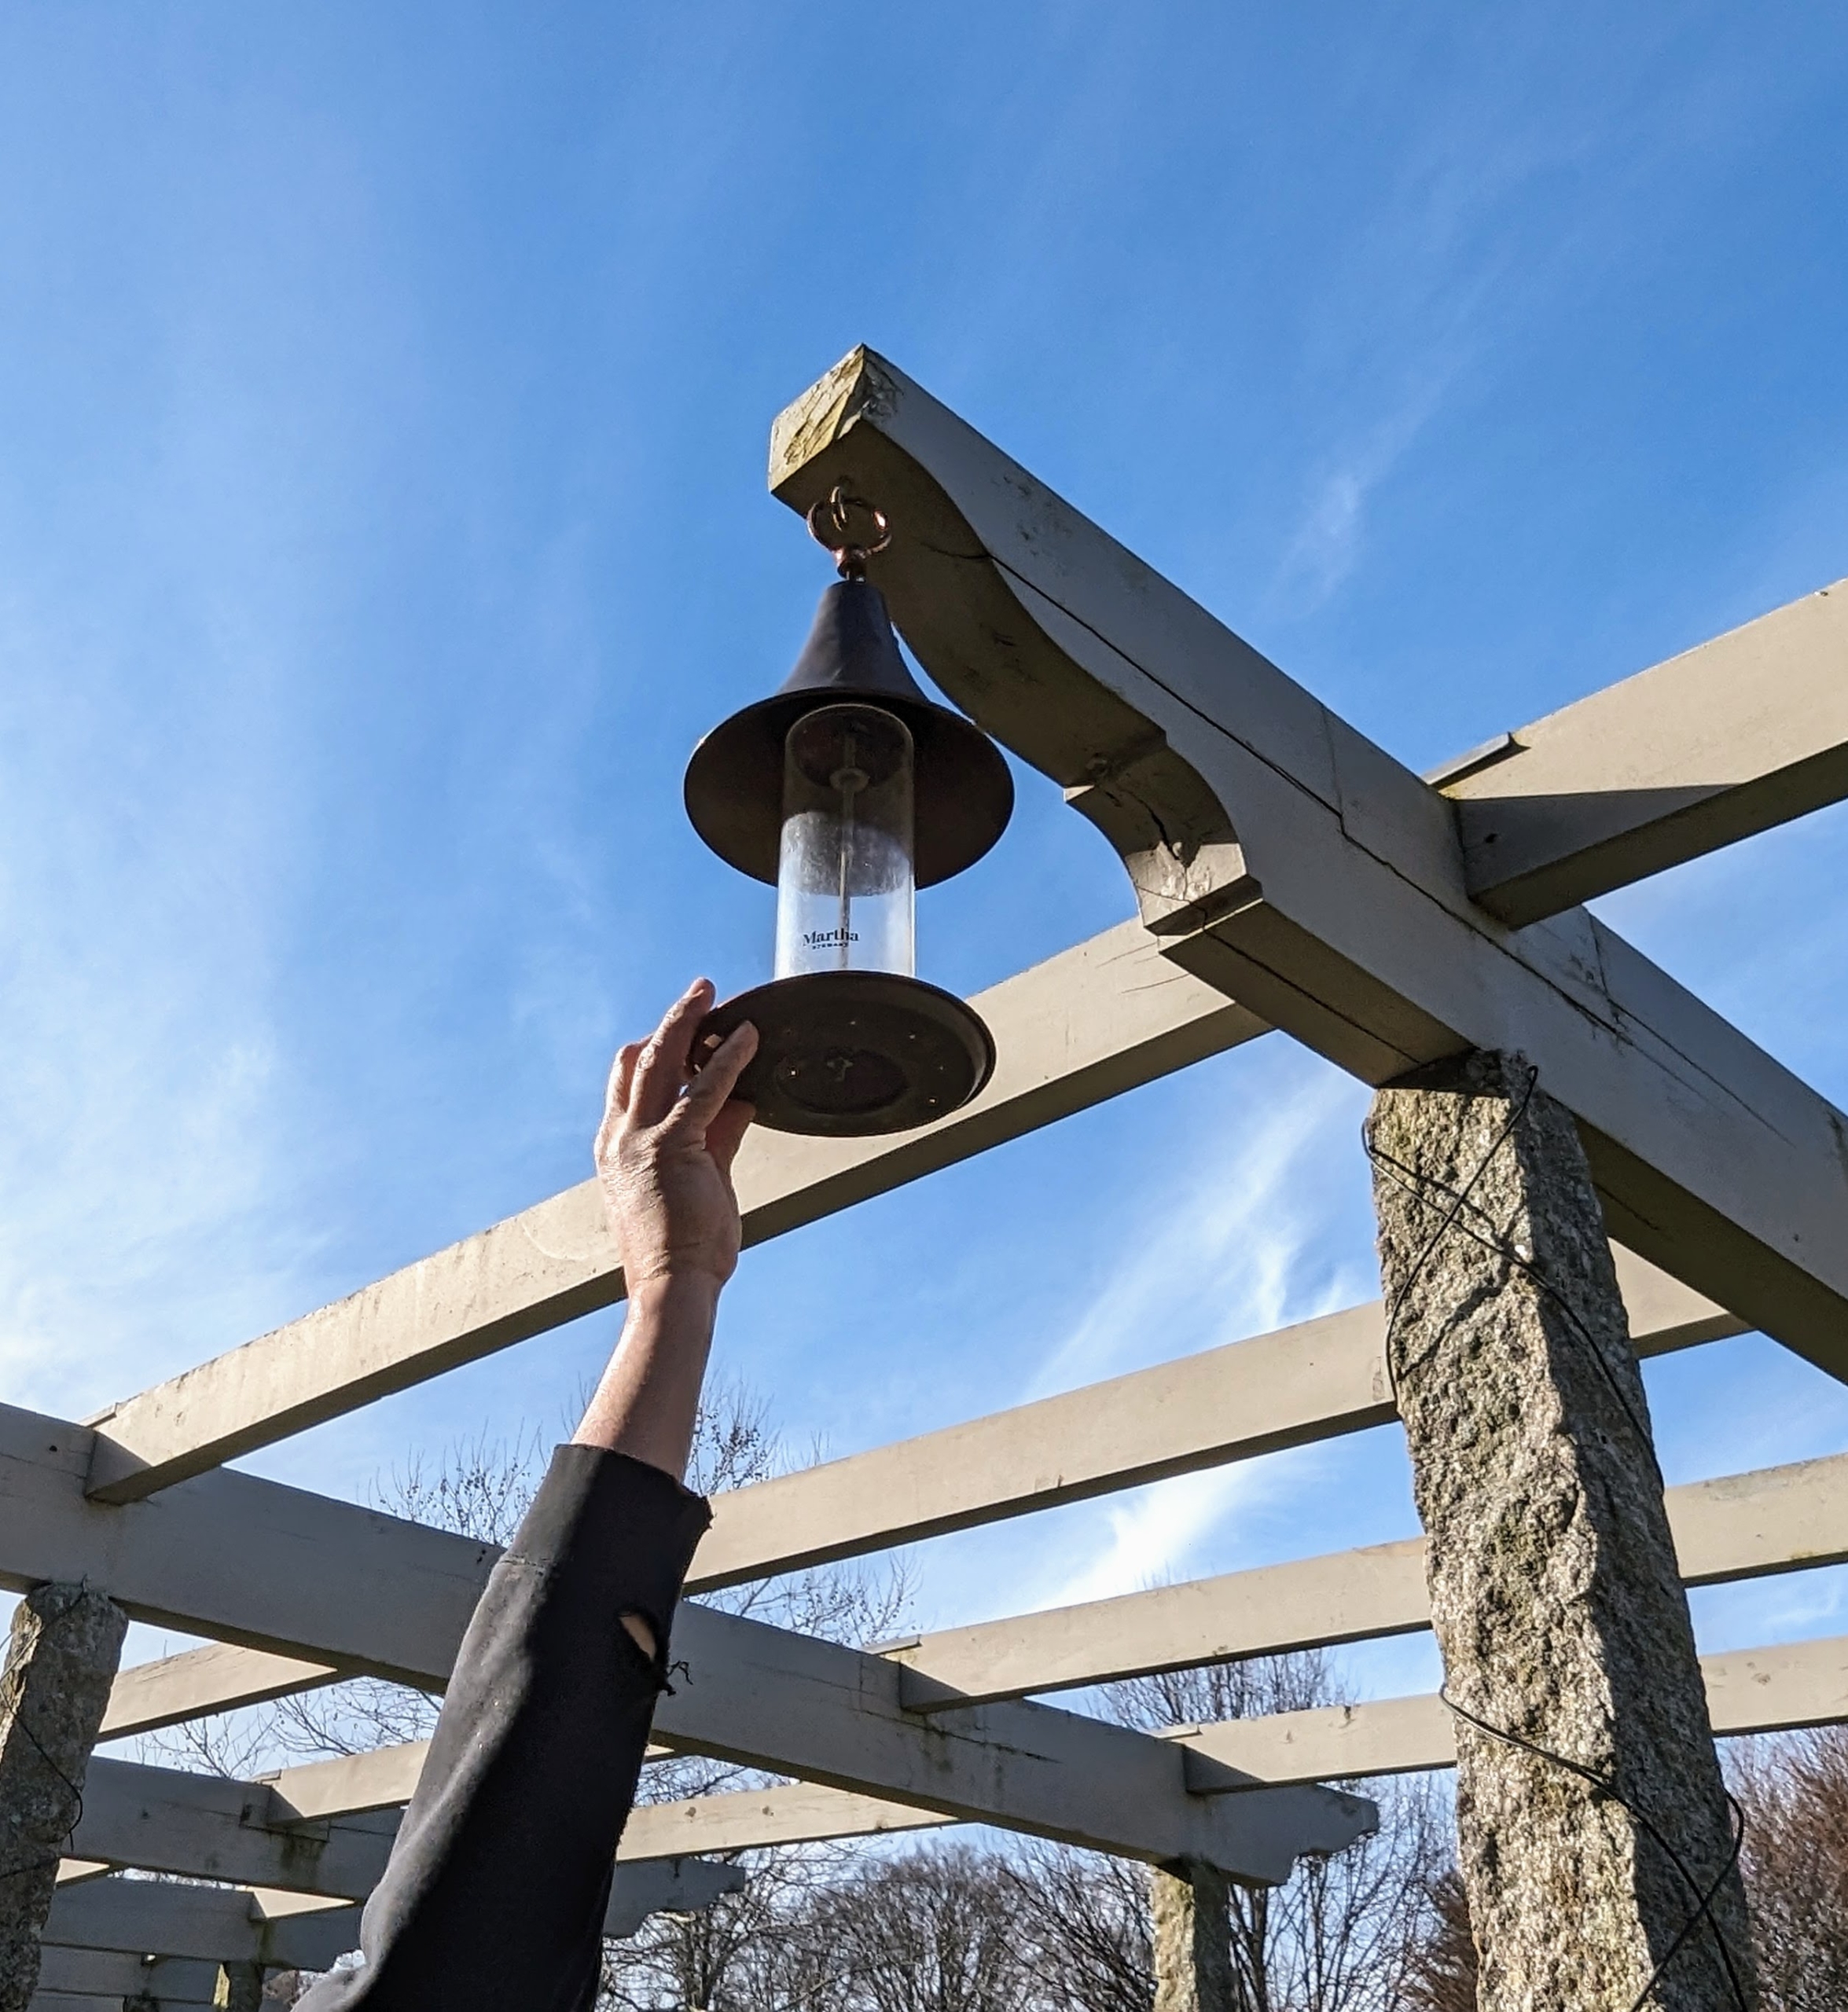
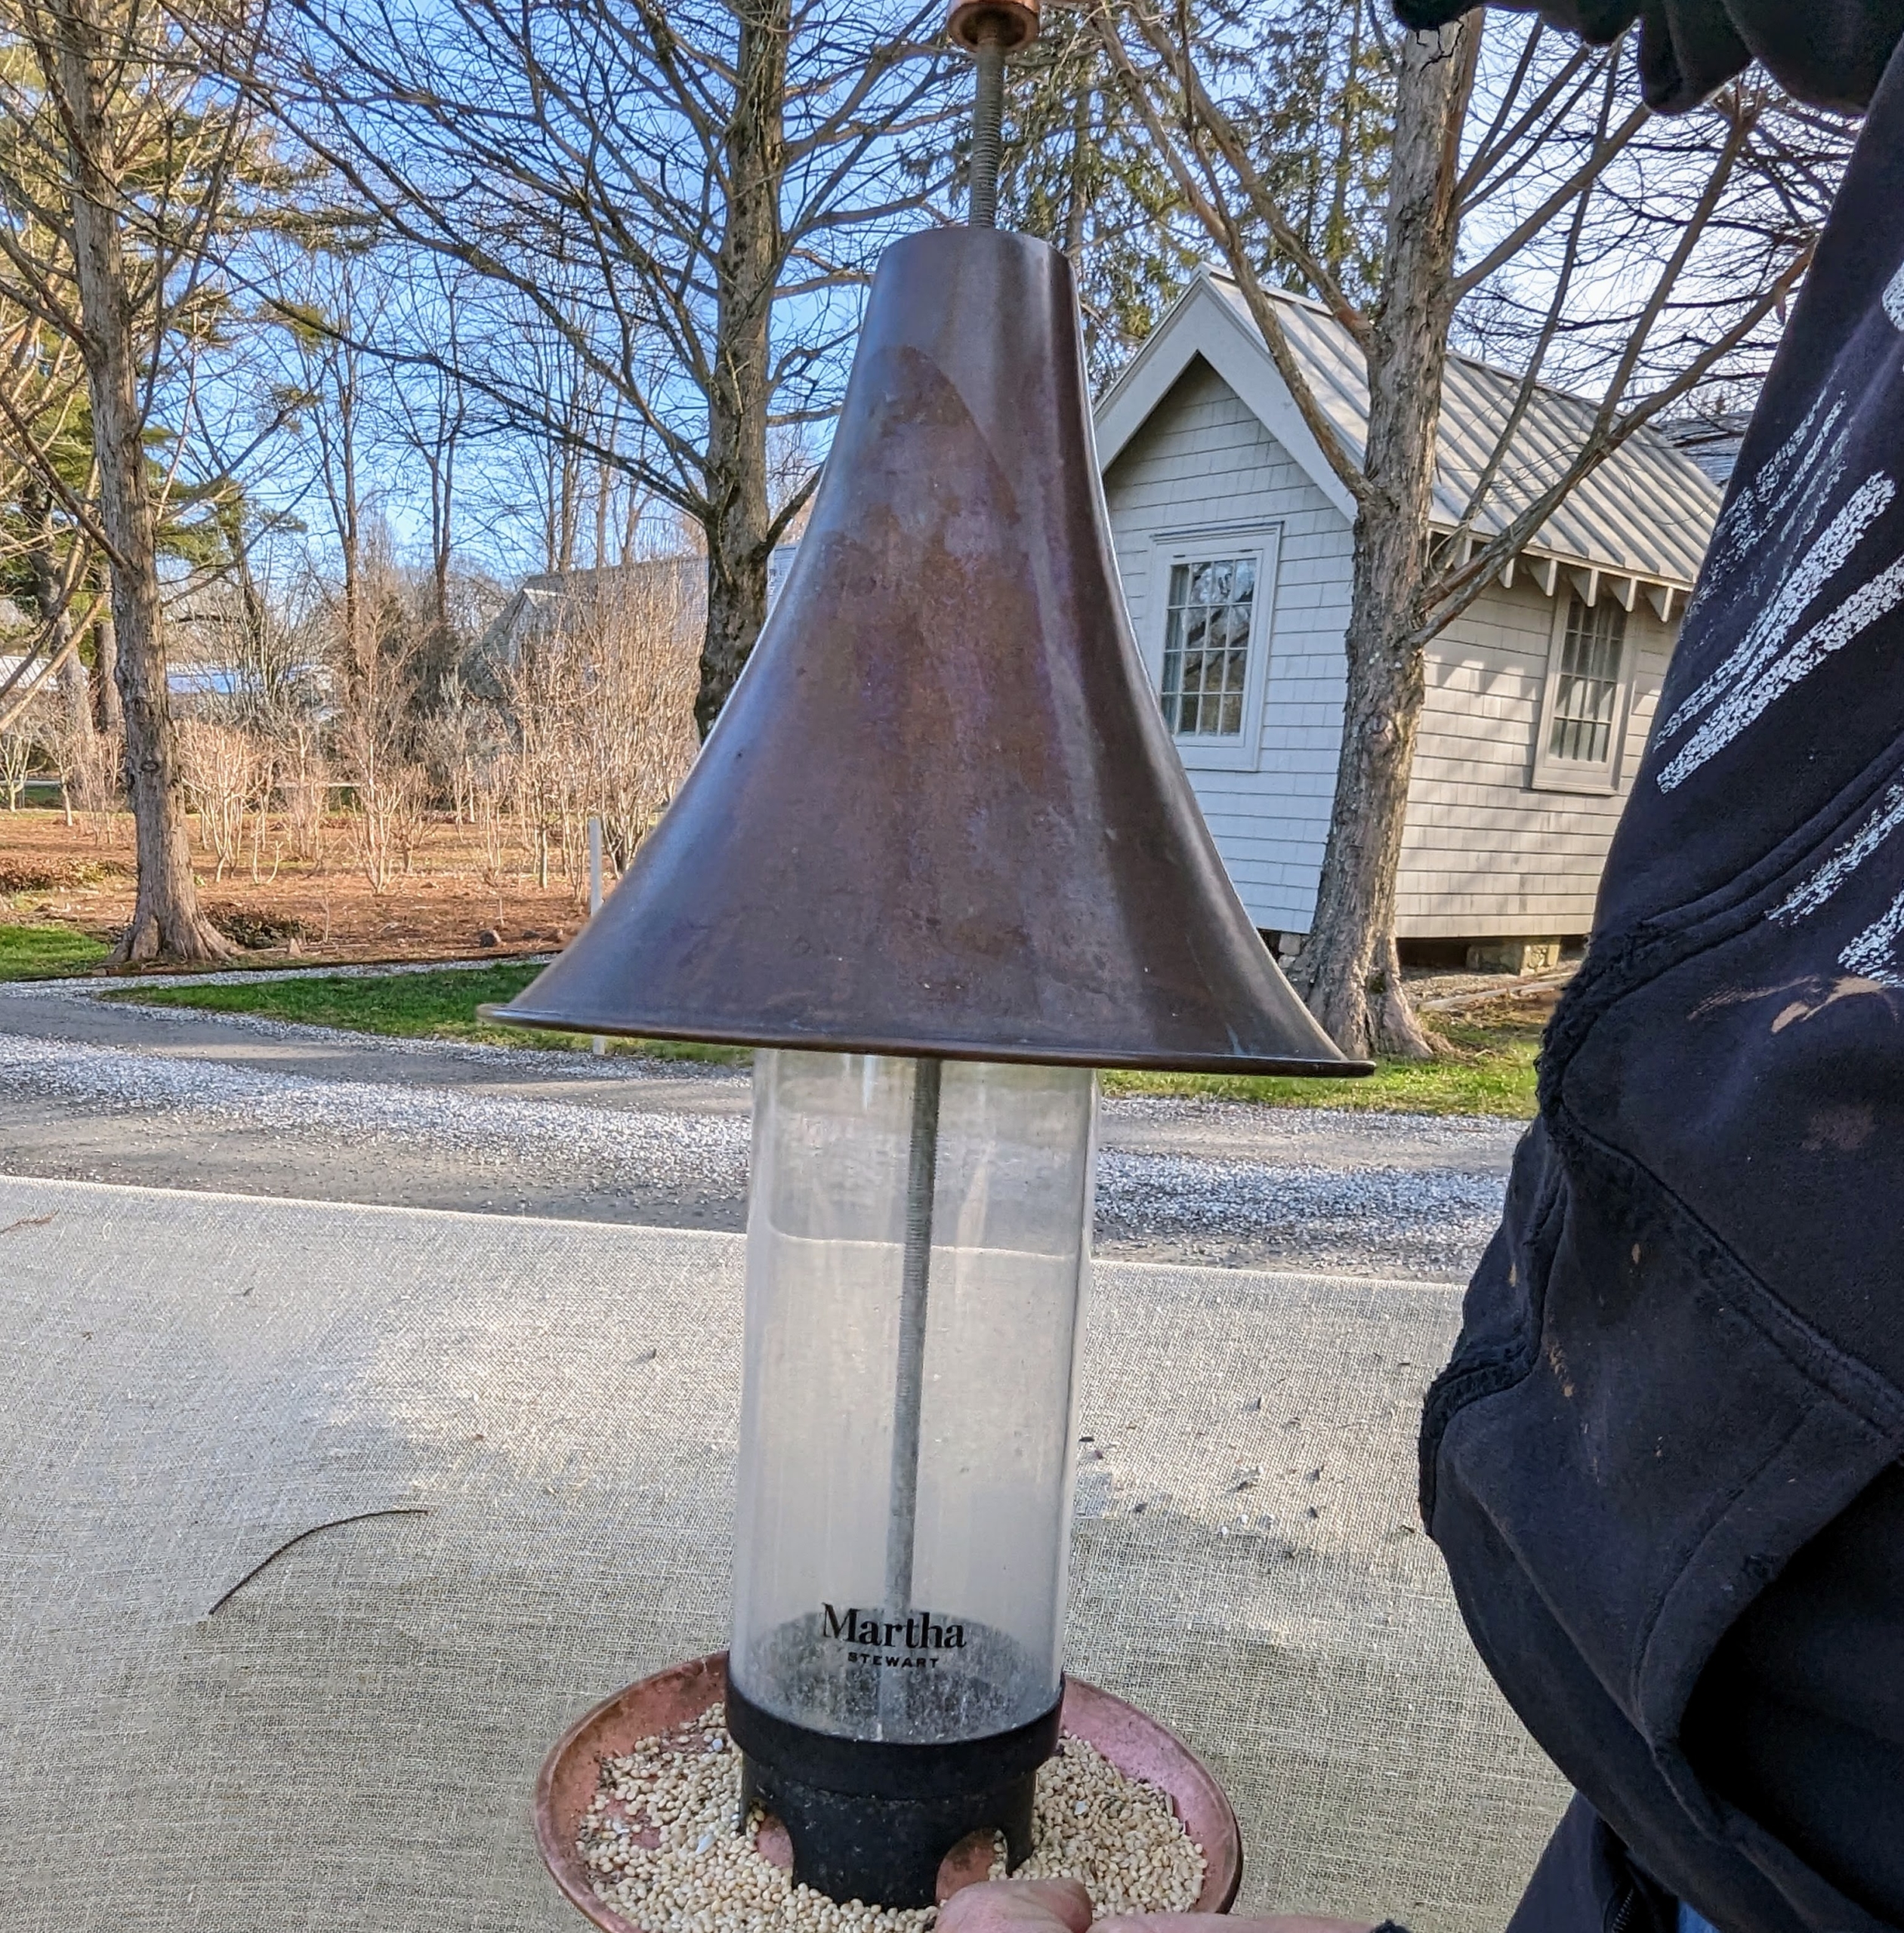
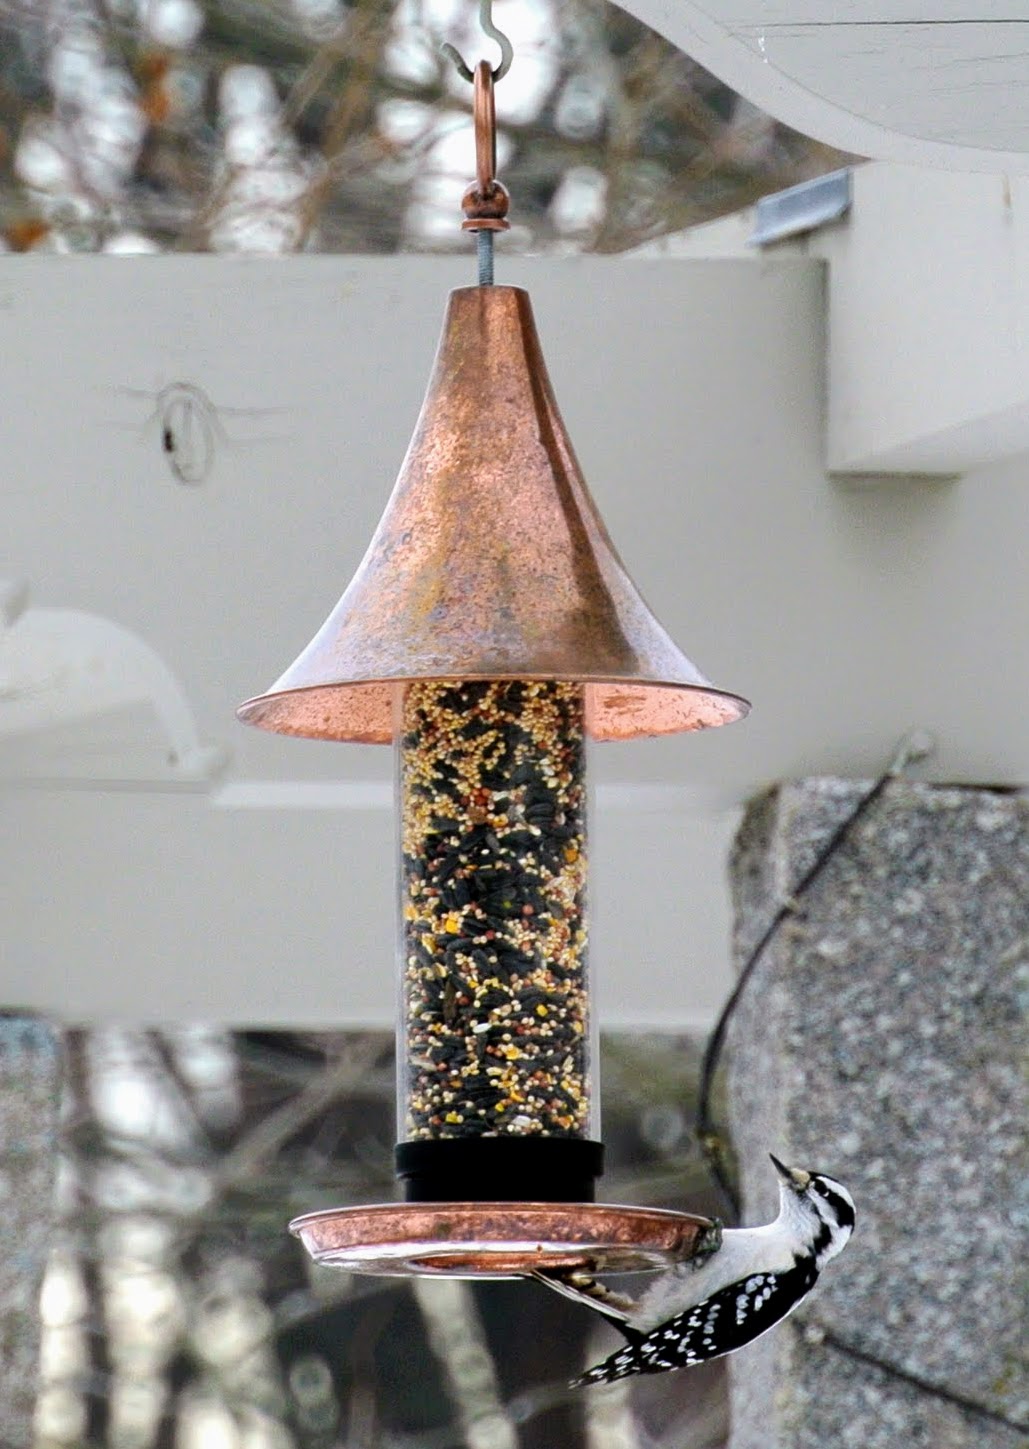
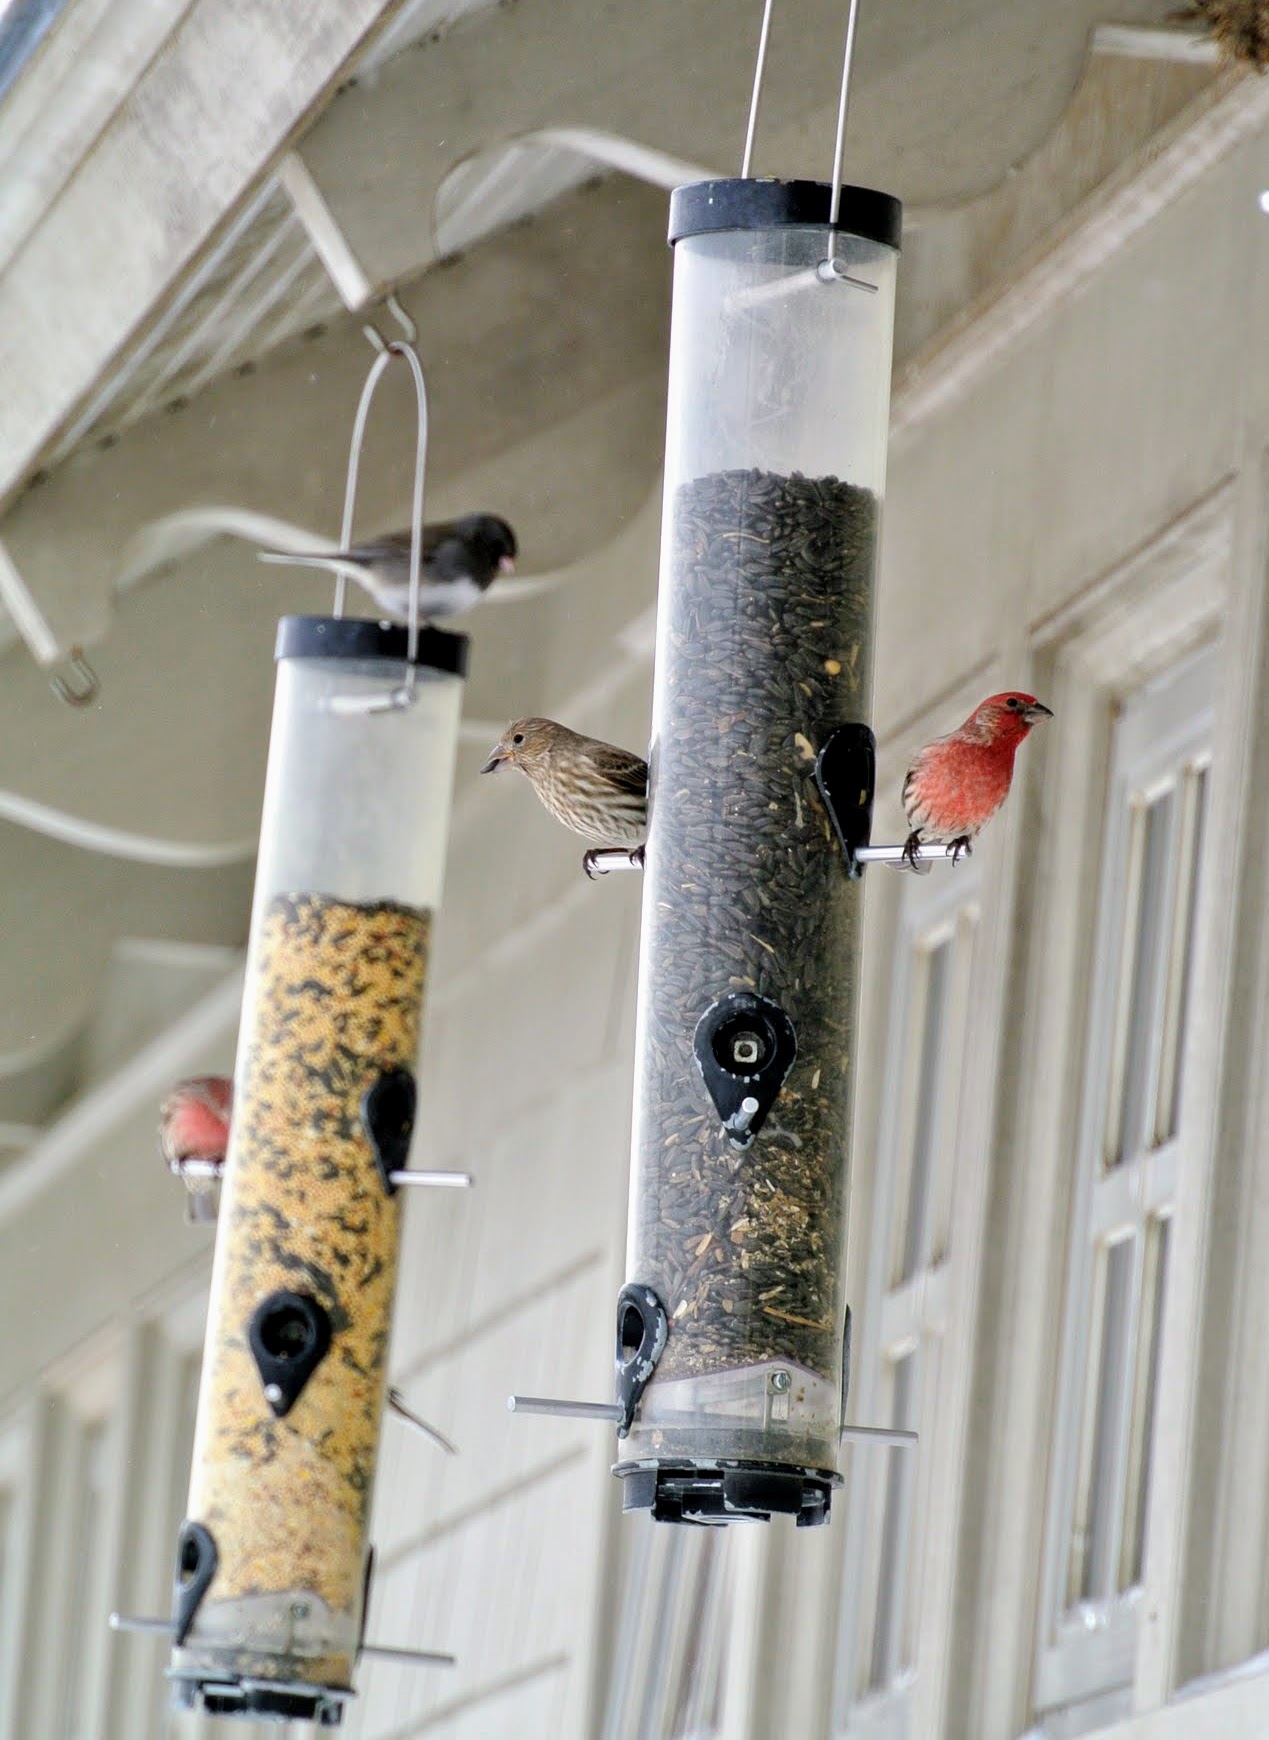
I have several feeders under my clematis pergola. This is a Martha Stewart Copper Bird Feeder from one of my previous collections – very durable and attracts many avian visitors through the day.
These feeders are the first to empty. Birds just love to eat from here and perch on the copper lipped tray and watch the activities around the farm.
This feeder has four feeding ports aside from the lipped tray to catch any fallen seeds.
When starting to feed birds, it may take time for new feeders to be discovered. Don’t be surprised if the feeding station doesn’t get birds right away. As long as feeders are clean and filled with fresh seed, the birds will find them.
In winter, we fill the feeders in the morning, and then check them again in the afternoon. Once refilled, it doesn’t take long before birds start arriving again.
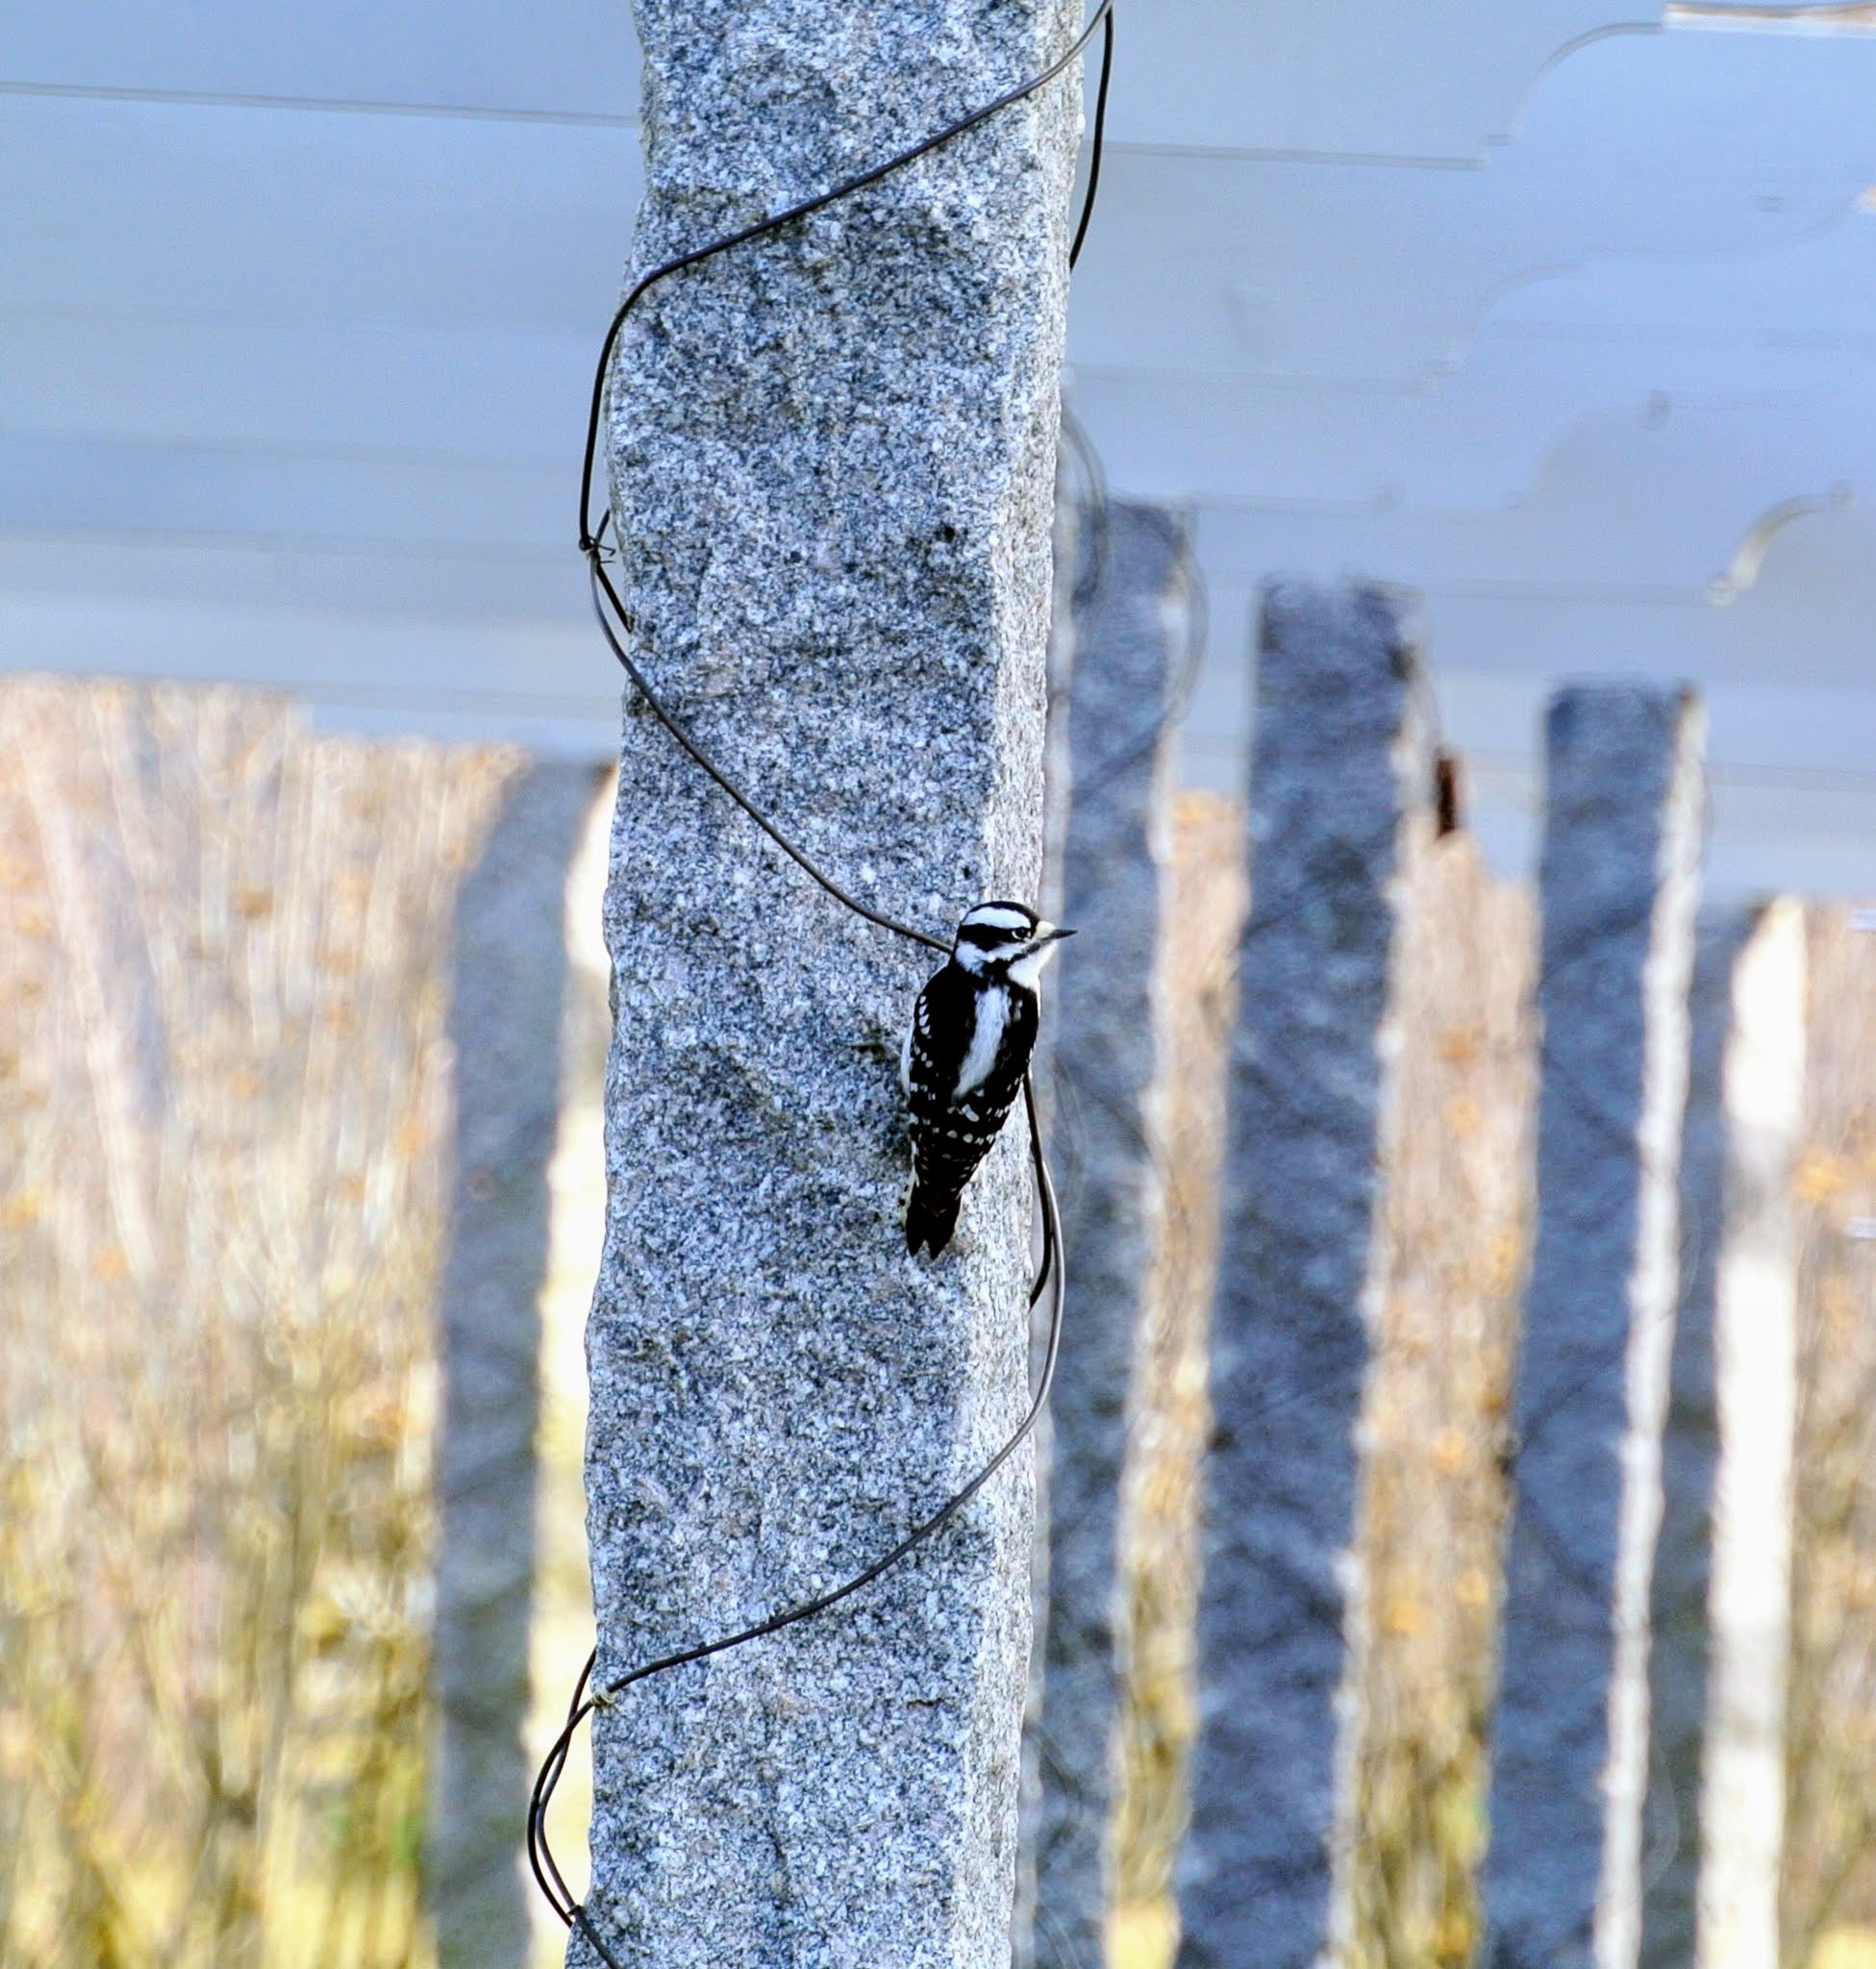
Here’s a downy woodpecker on the granite upright of my pergola. This is the smallest type of woodpecker in North America.
During this time of year, I also help provide shelter for the visiting birds. I purposely create these holes in the seasonal burlap covers that protect my boxwood. They love to go in and out, especially when it is windy.
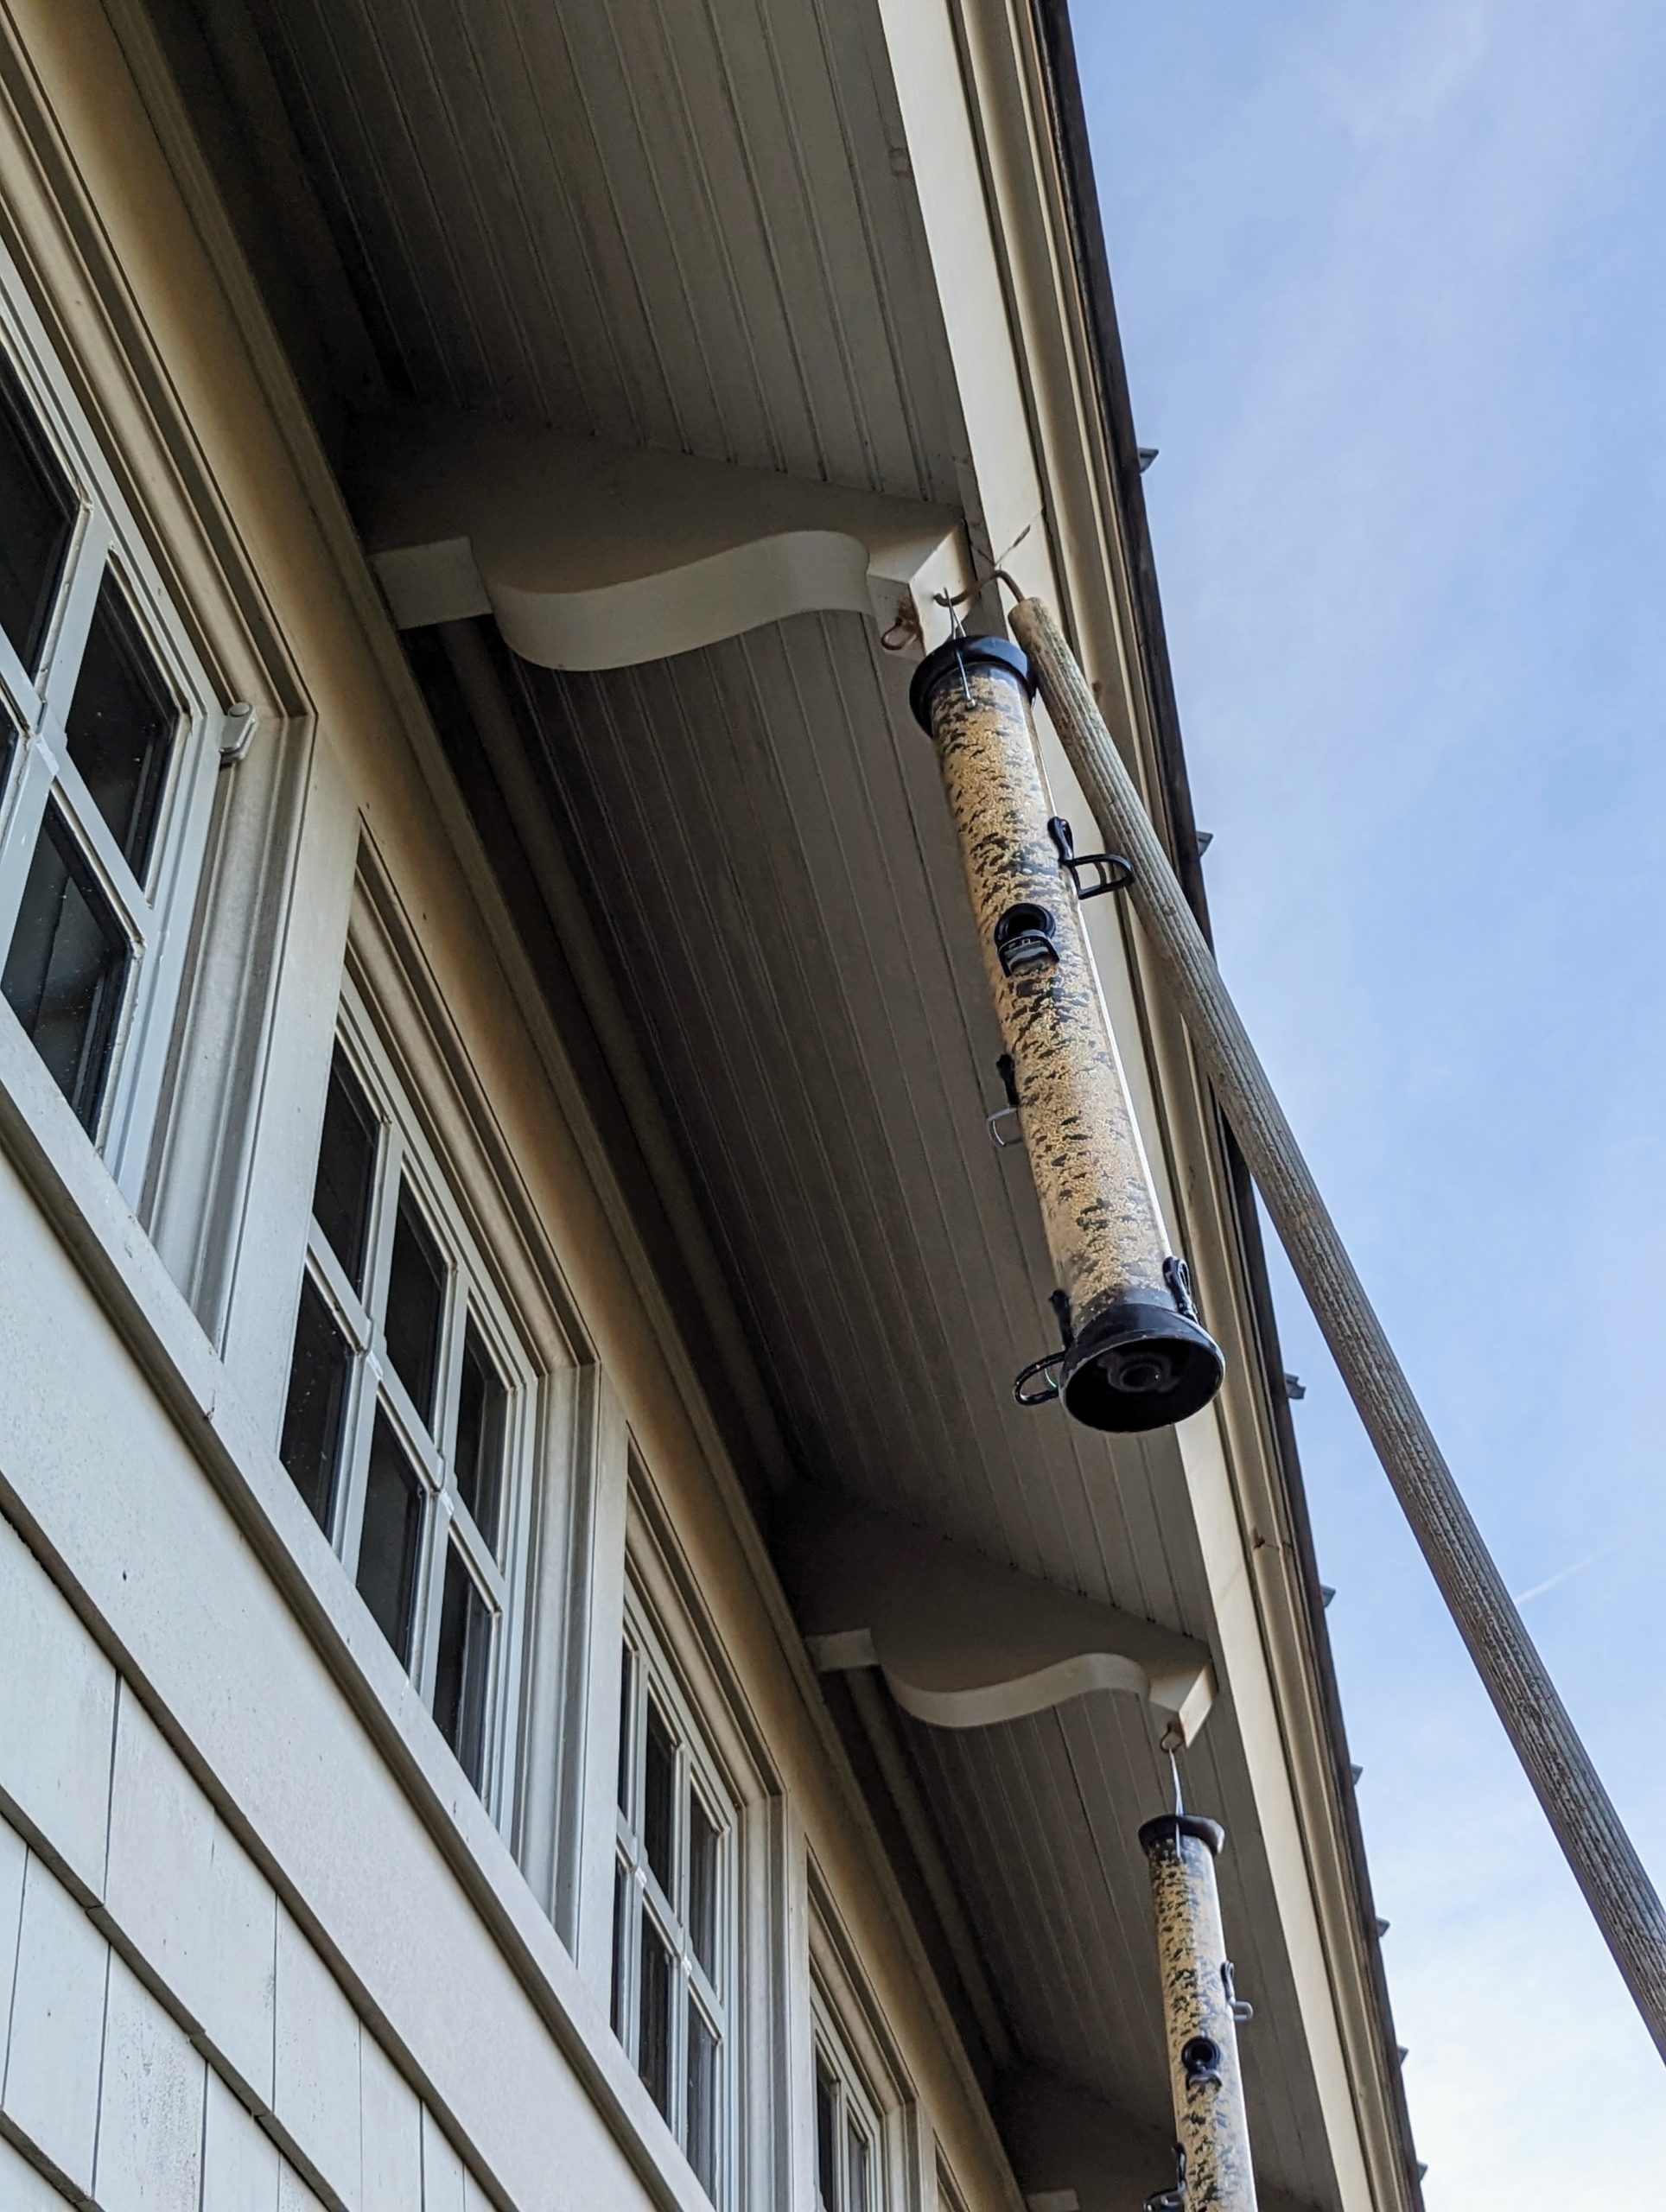
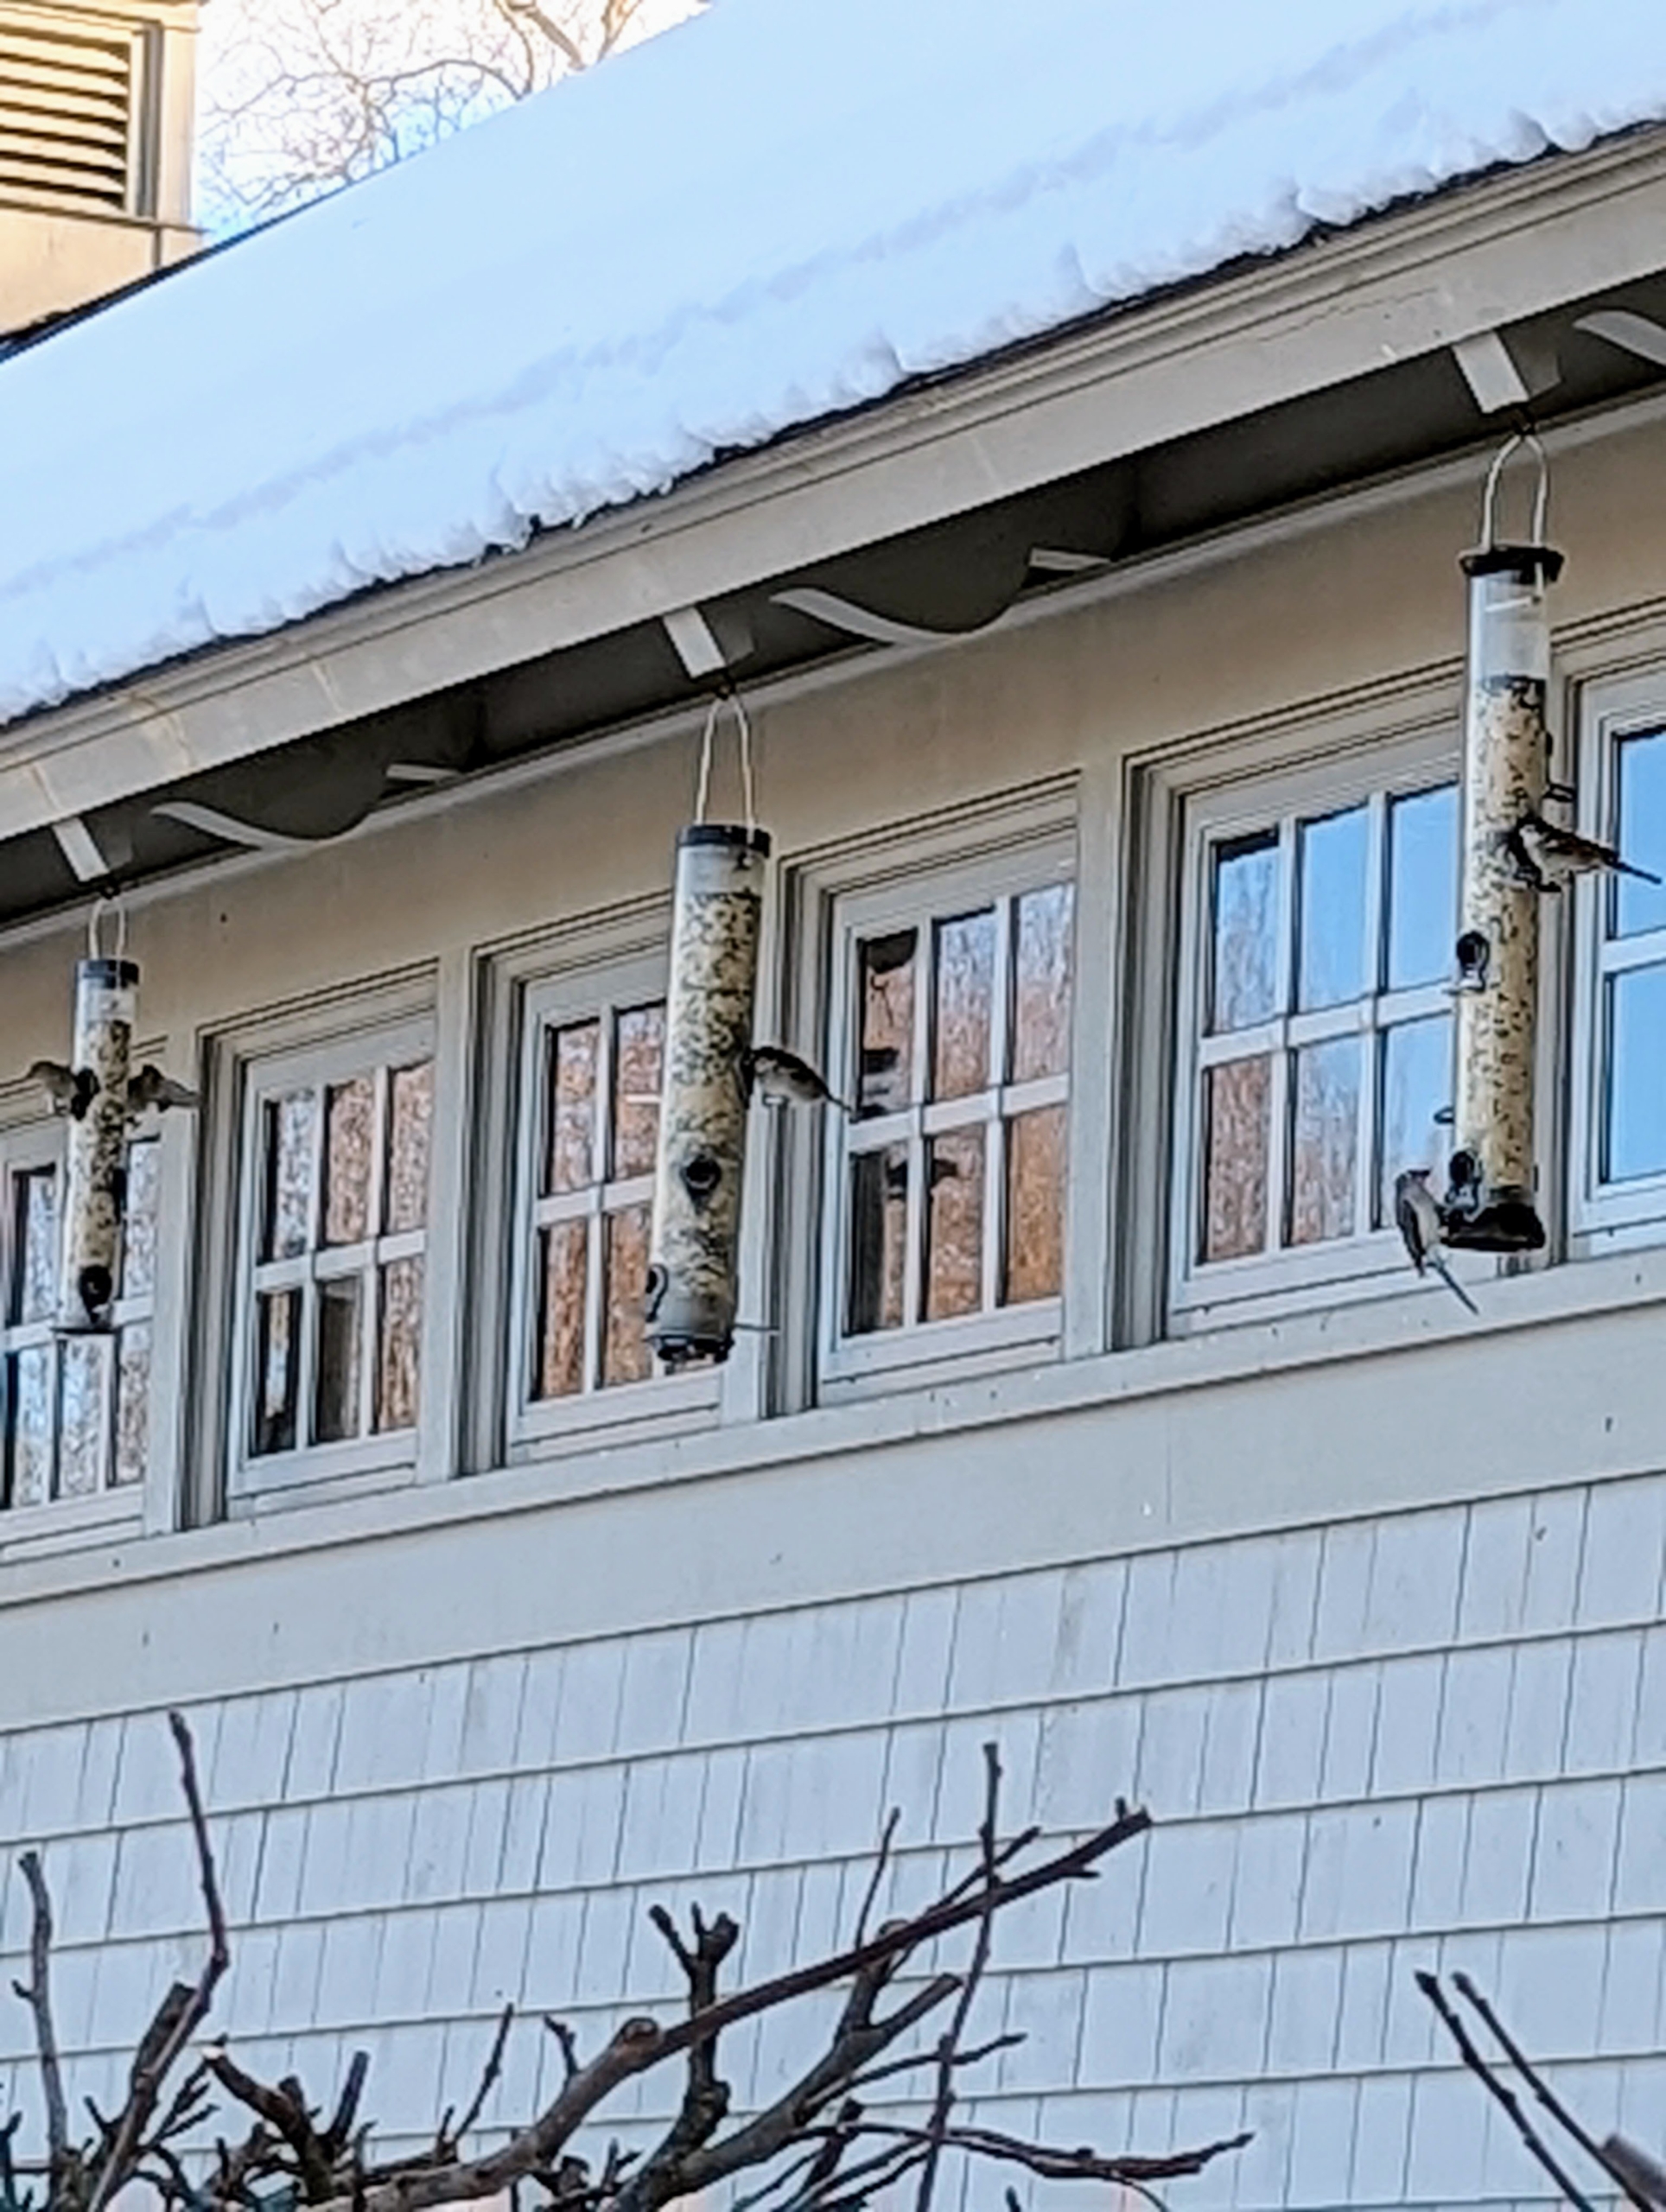
A long row of bird feeders are hung behind my carport. Currently, there are more than 10 here – in spring, there are a few less. It’s important to feed the birds consistently as they become accustomed to looking for food here at the same times every day.
Some of the birds perch patiently in nearby trees until they’re ready to feast.
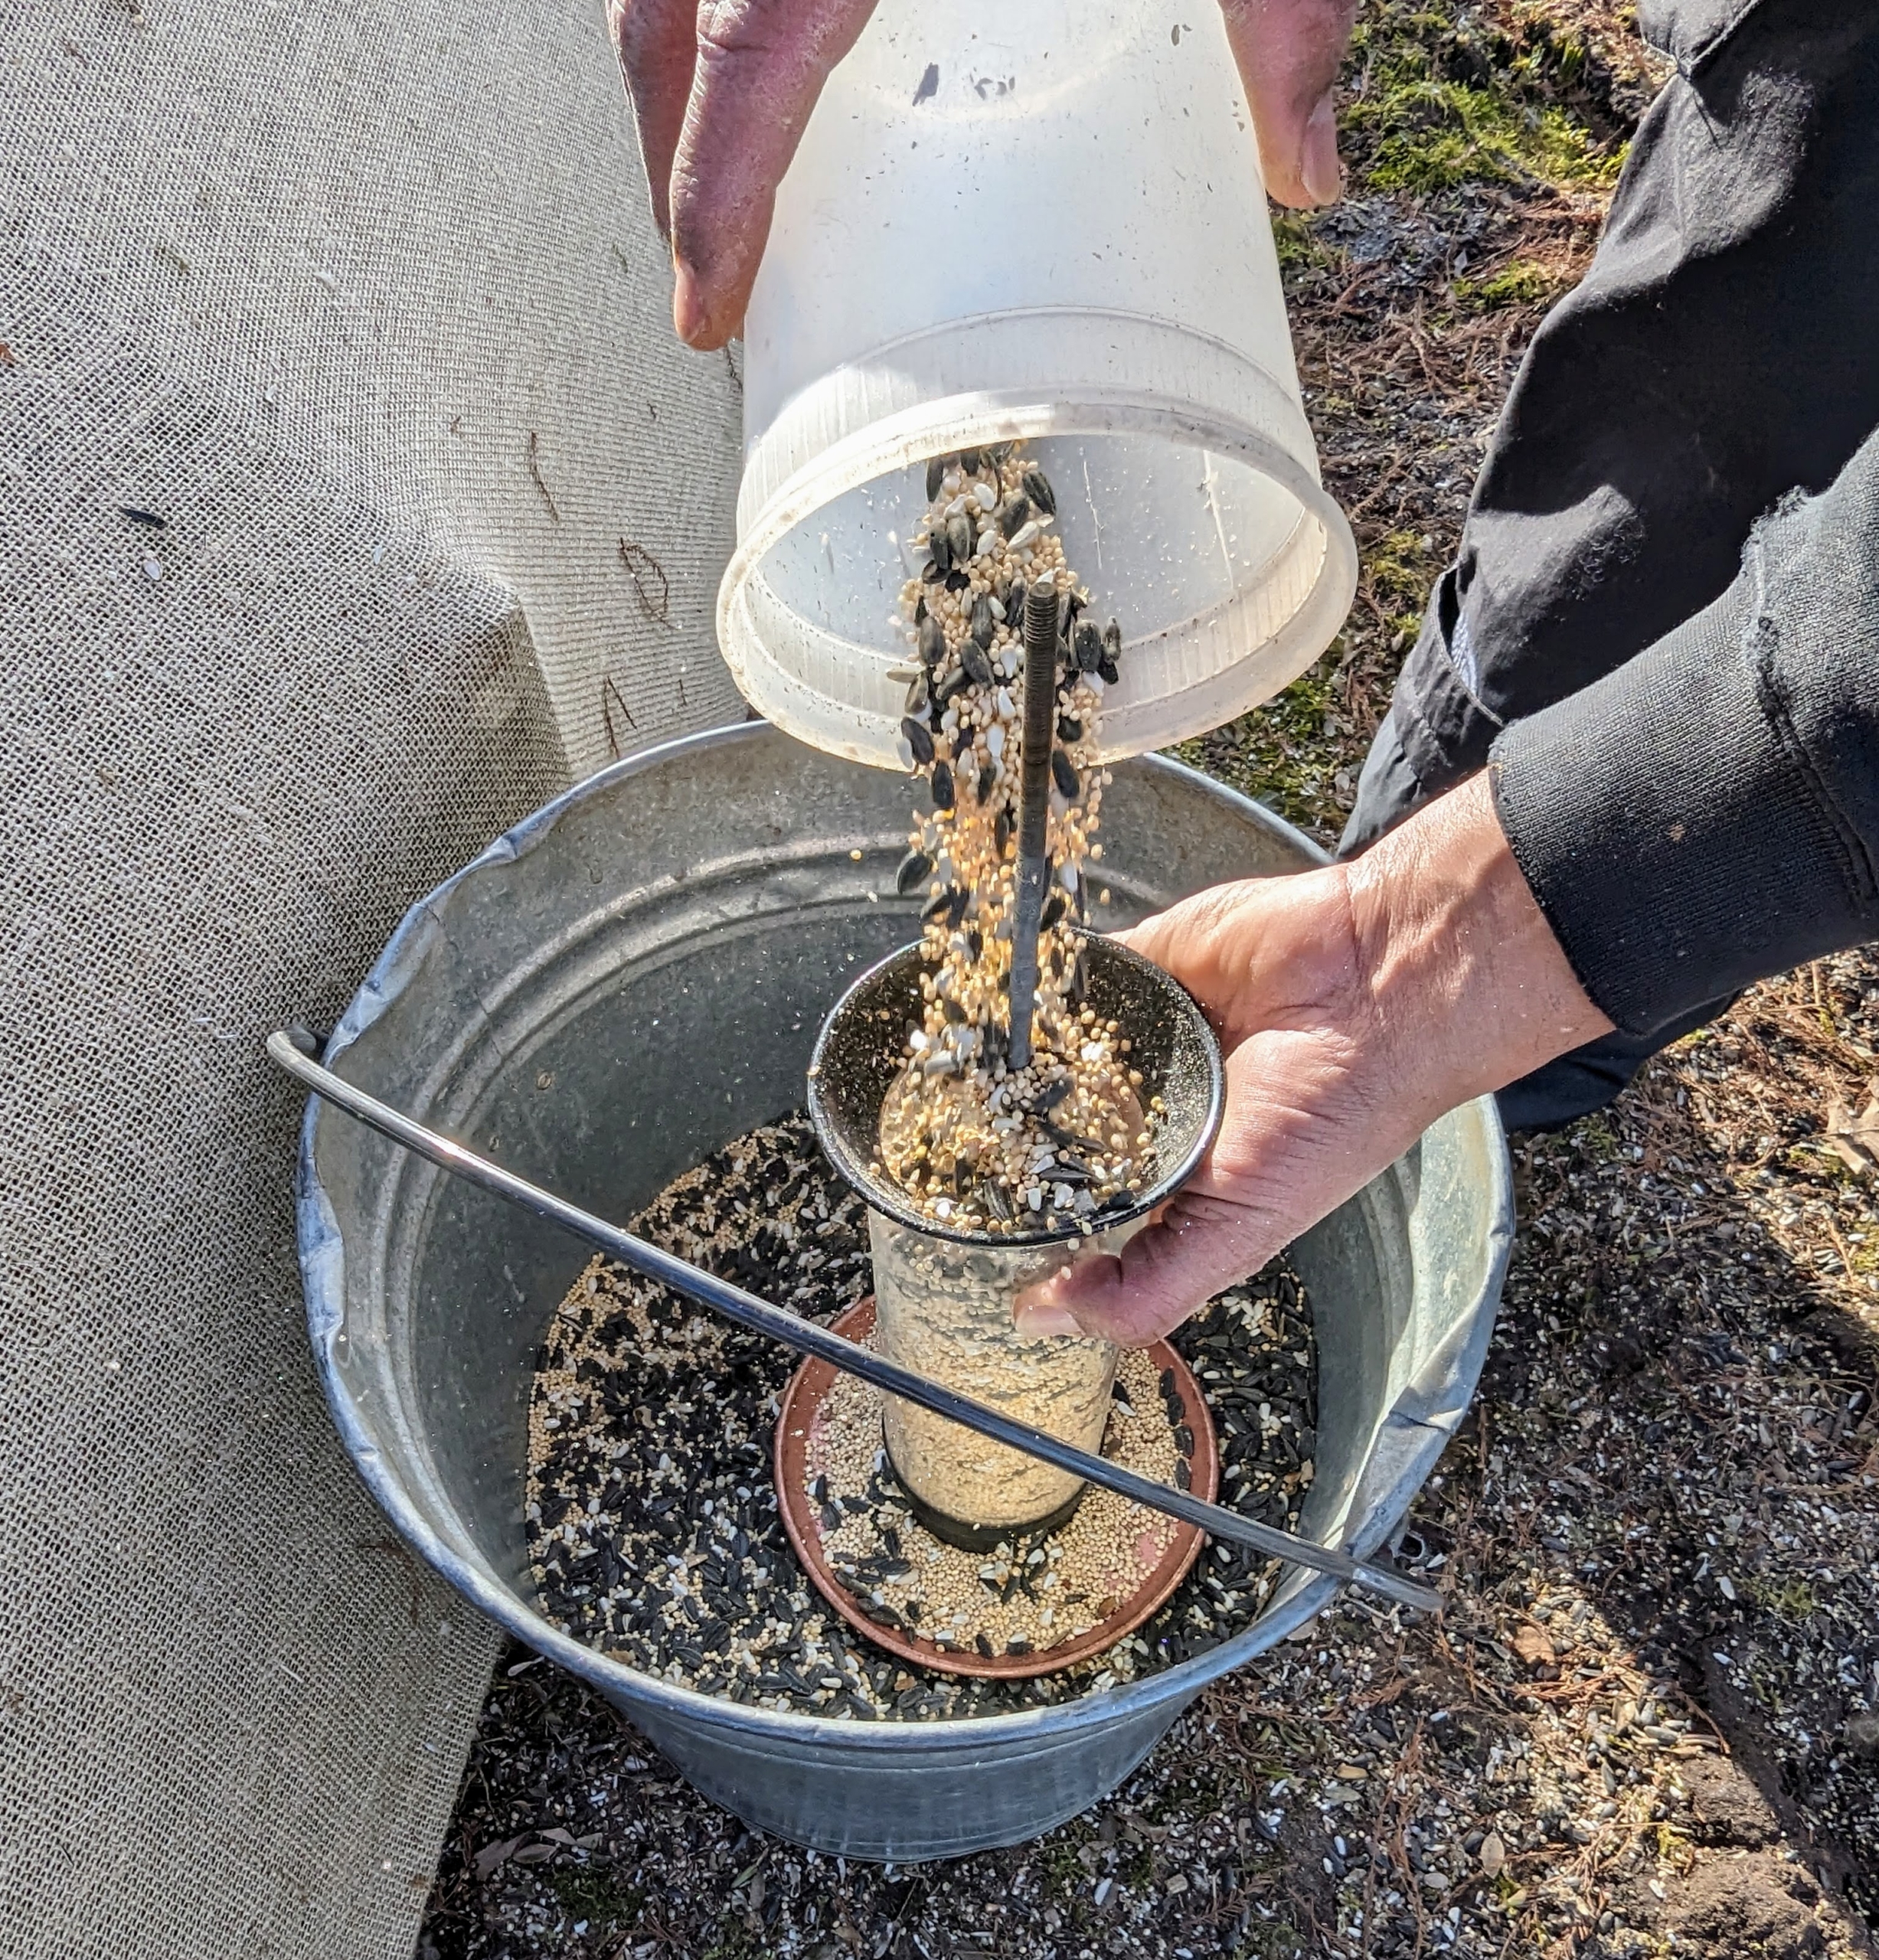
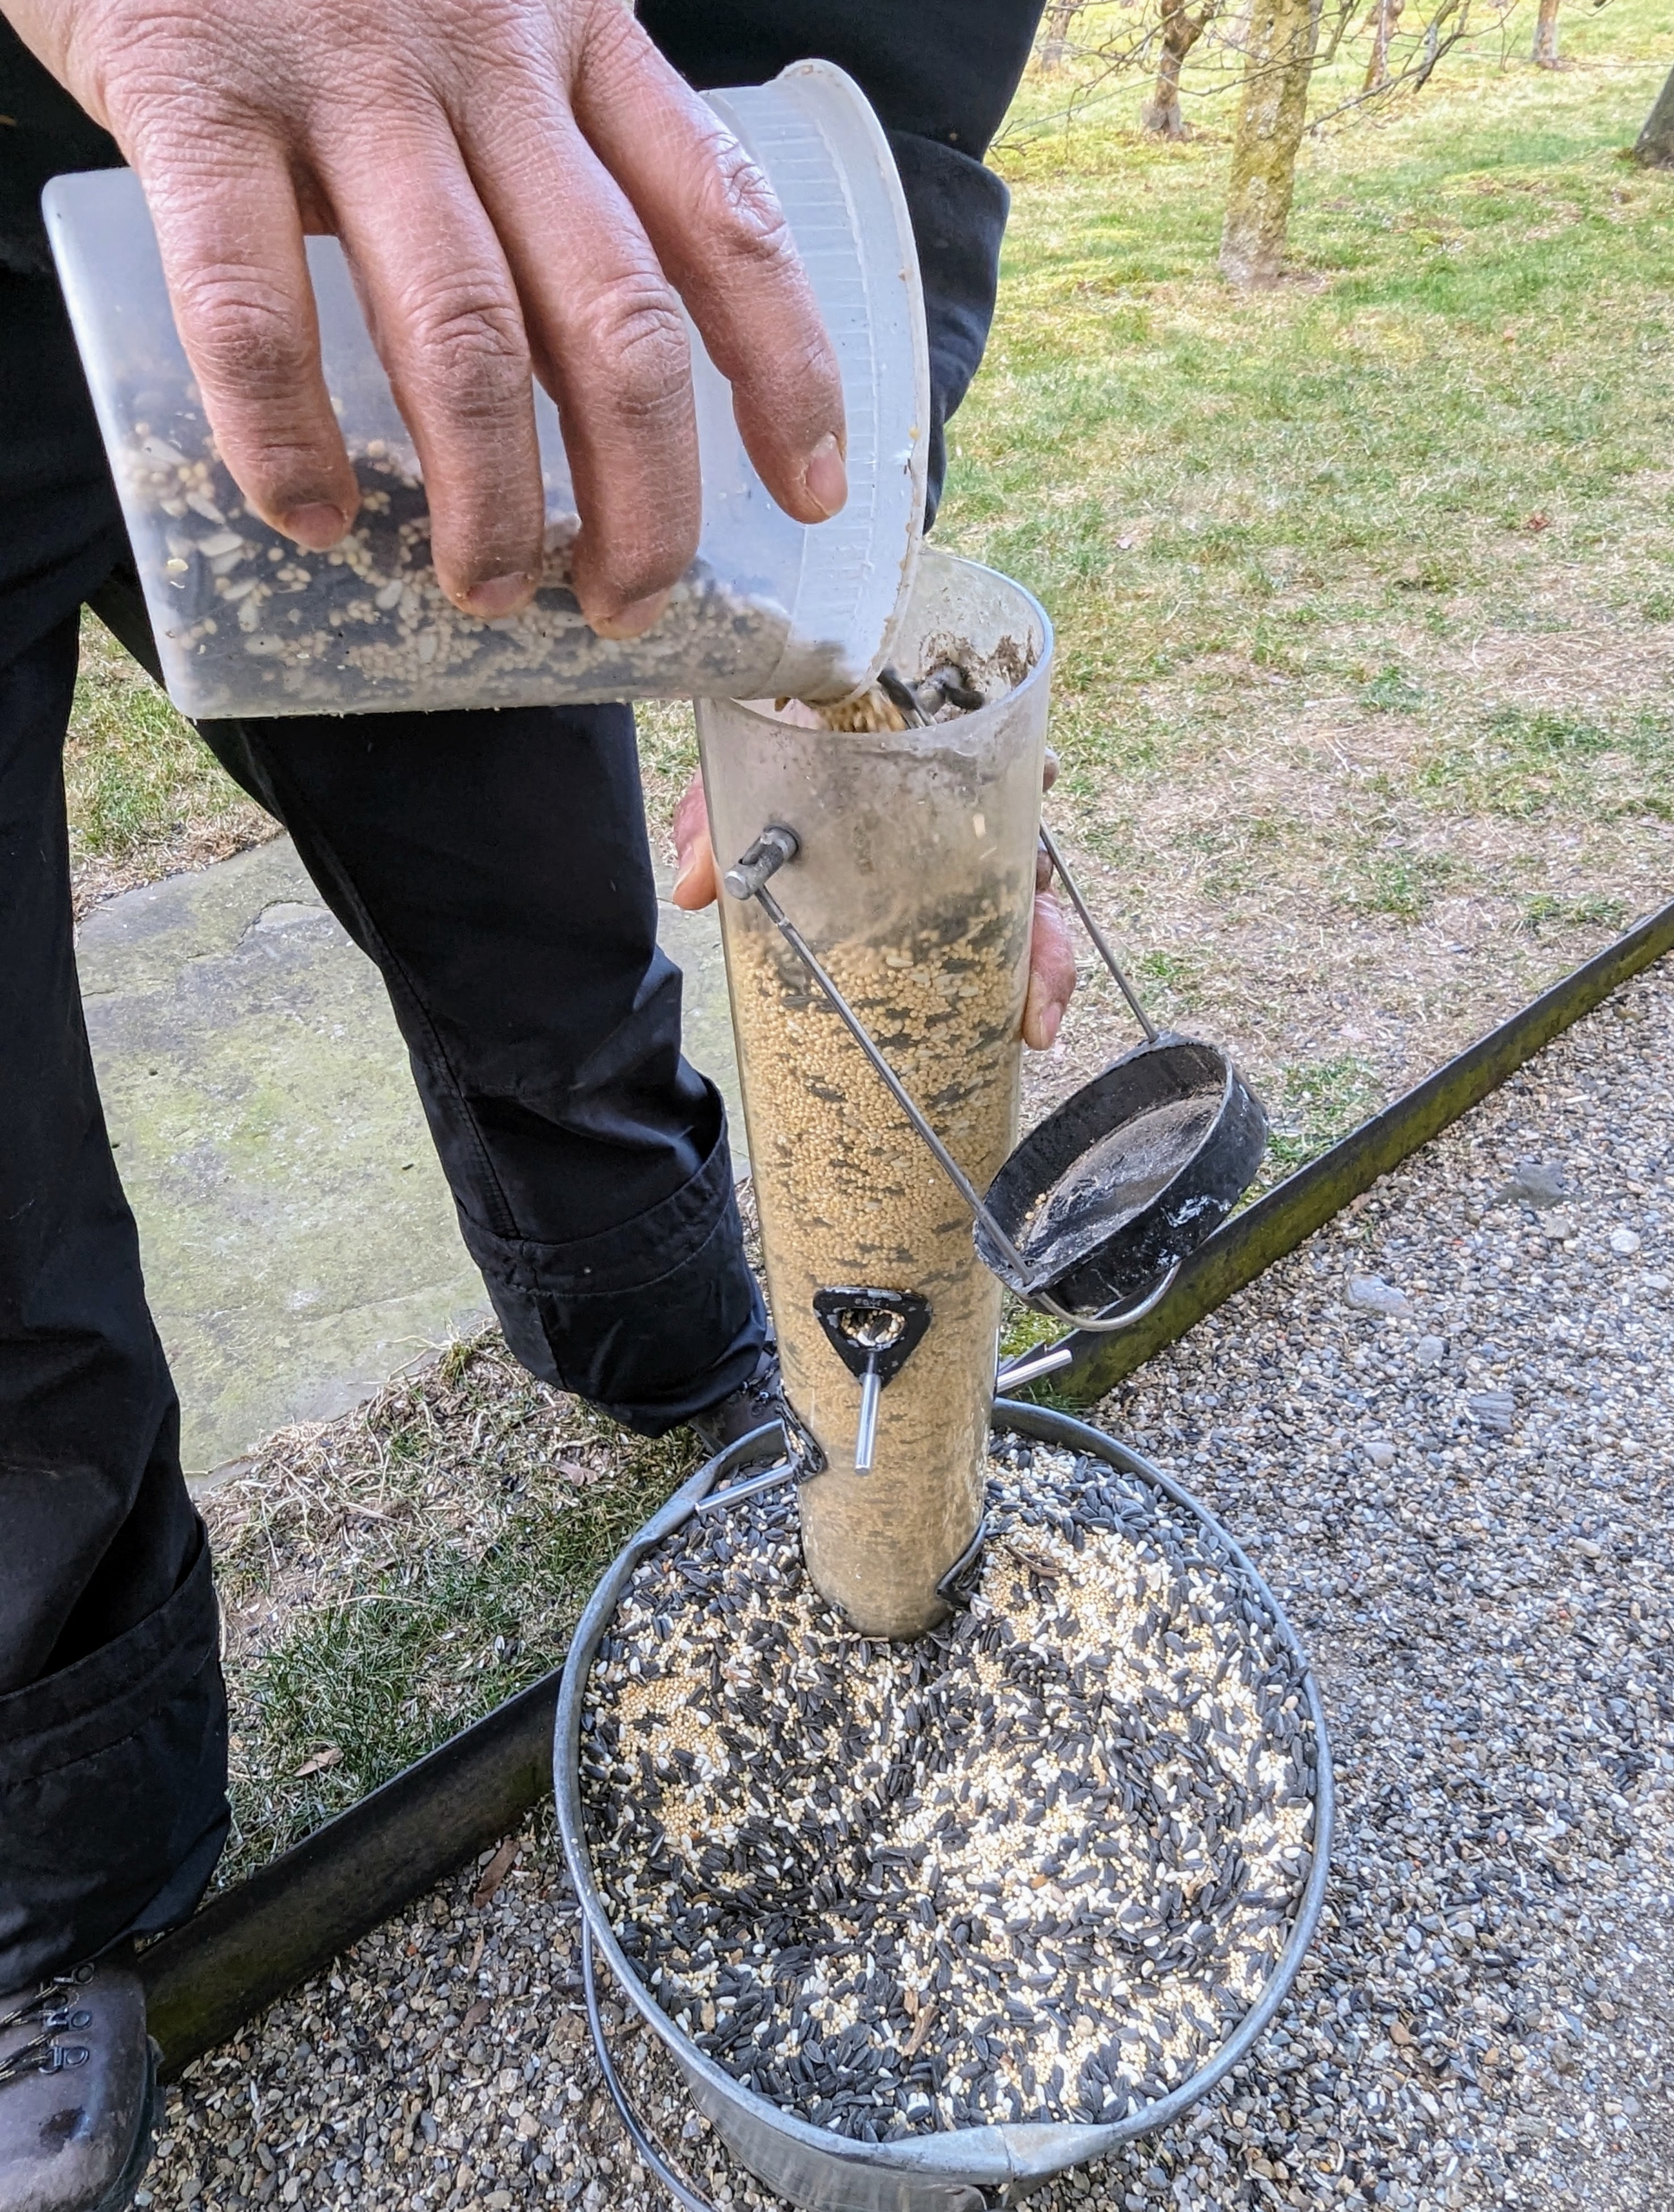
When filling these high feeders, we use a pole with a hook on one end. Each feeder is carefully removed from its hanging location and refilled on the ground.
Here is a closer look at the pole with the handy hook at the top – it works very well and makes filling these feeders very easy.
Every feeder is filled to the top depending on the time of year, these feeders can quickly empty. Each of these tube feeders holds about three quart-sized containers of seed.
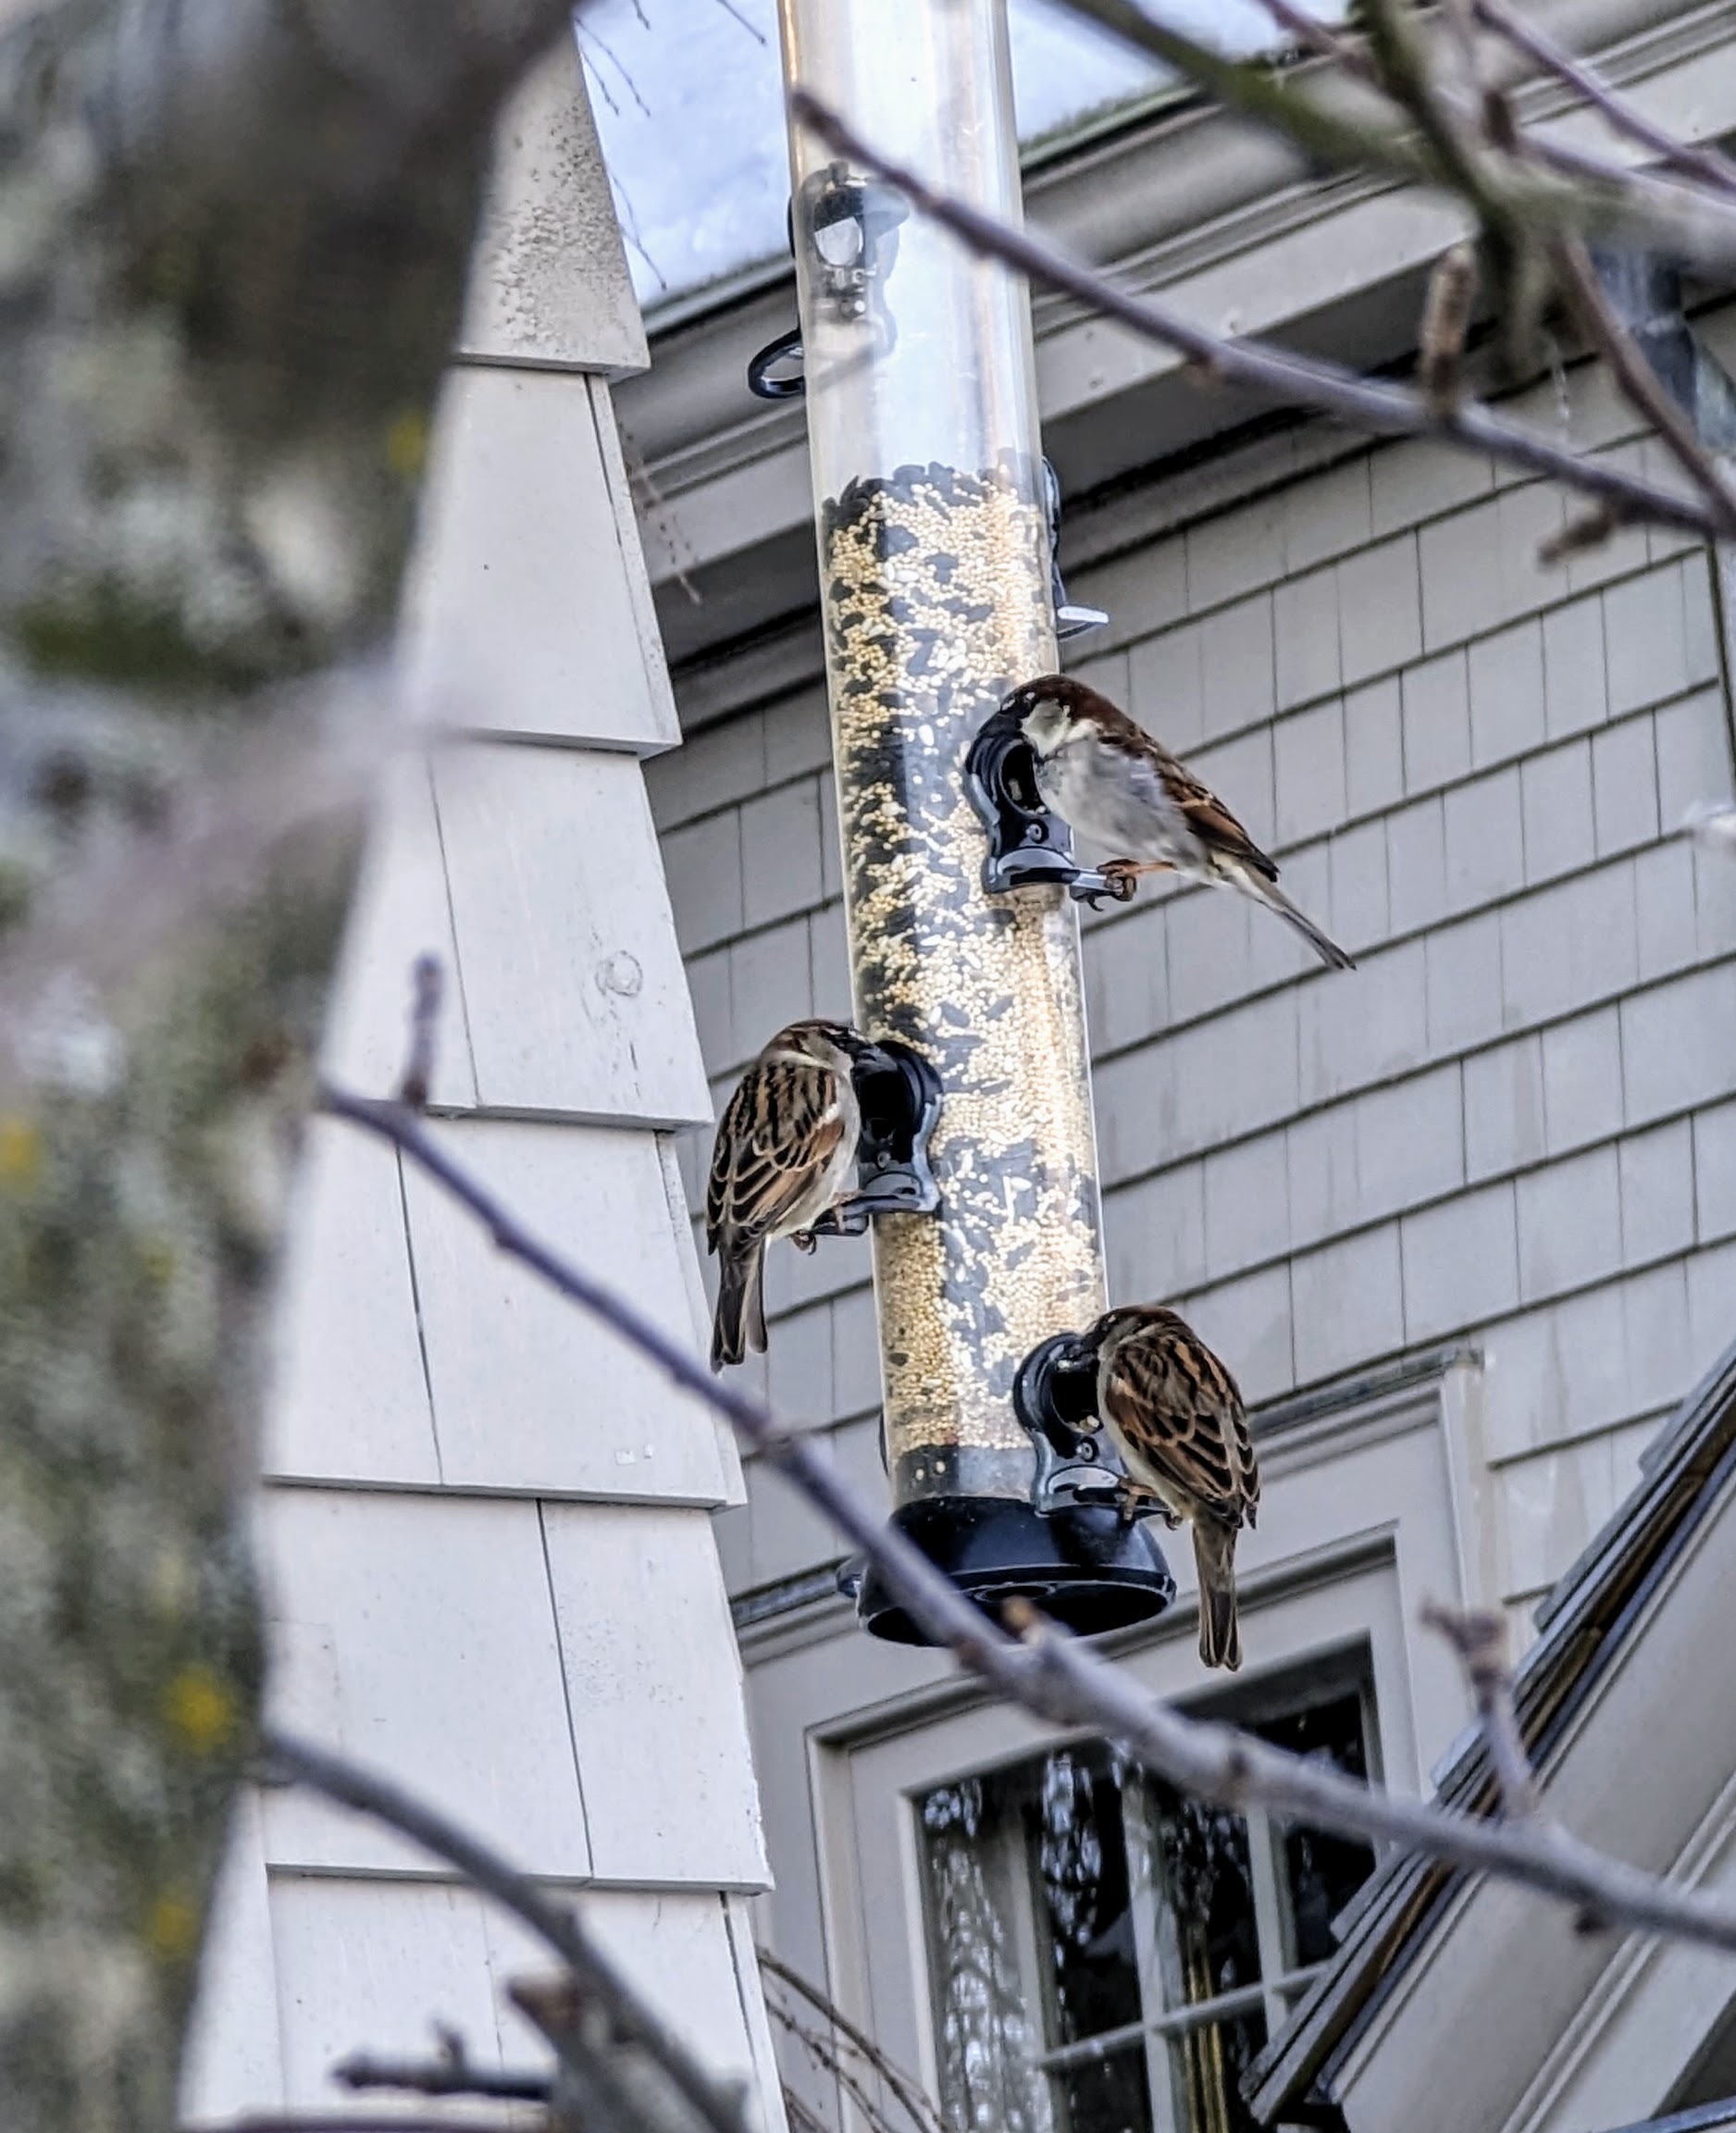
These tube feeders allow the seed to flow only when birds peck at it, which helps keep any spillage to a minimum.
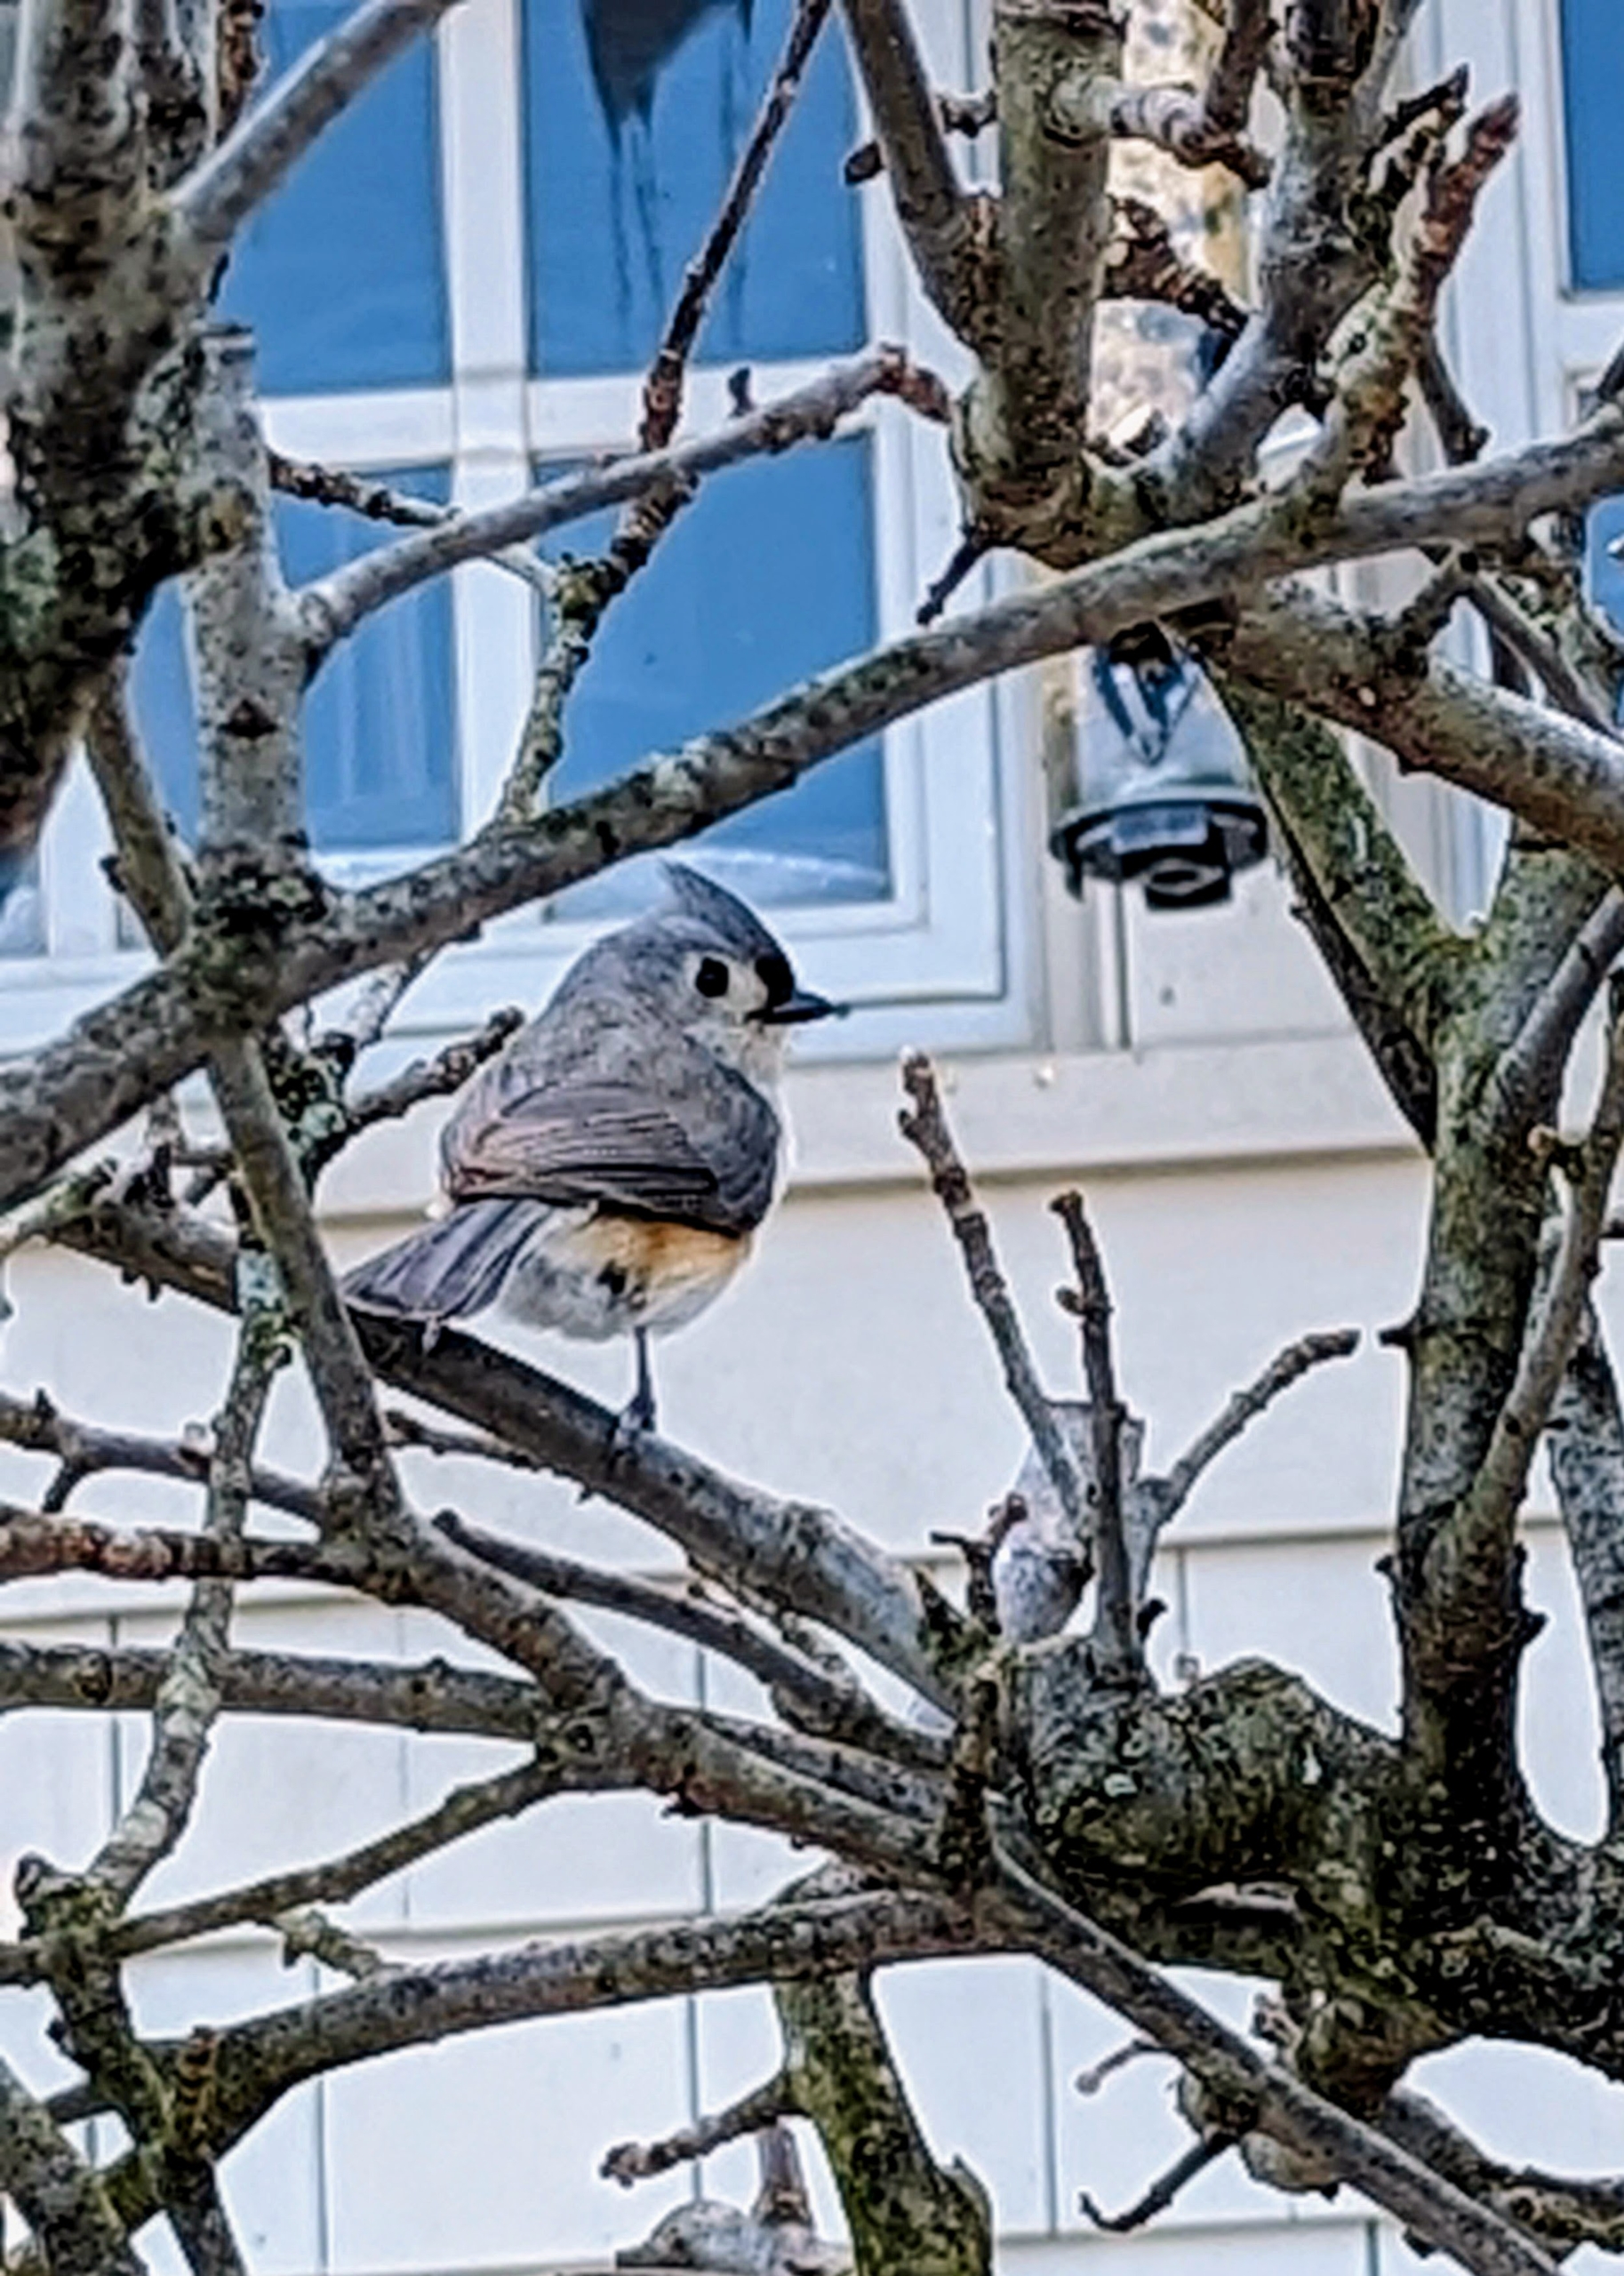
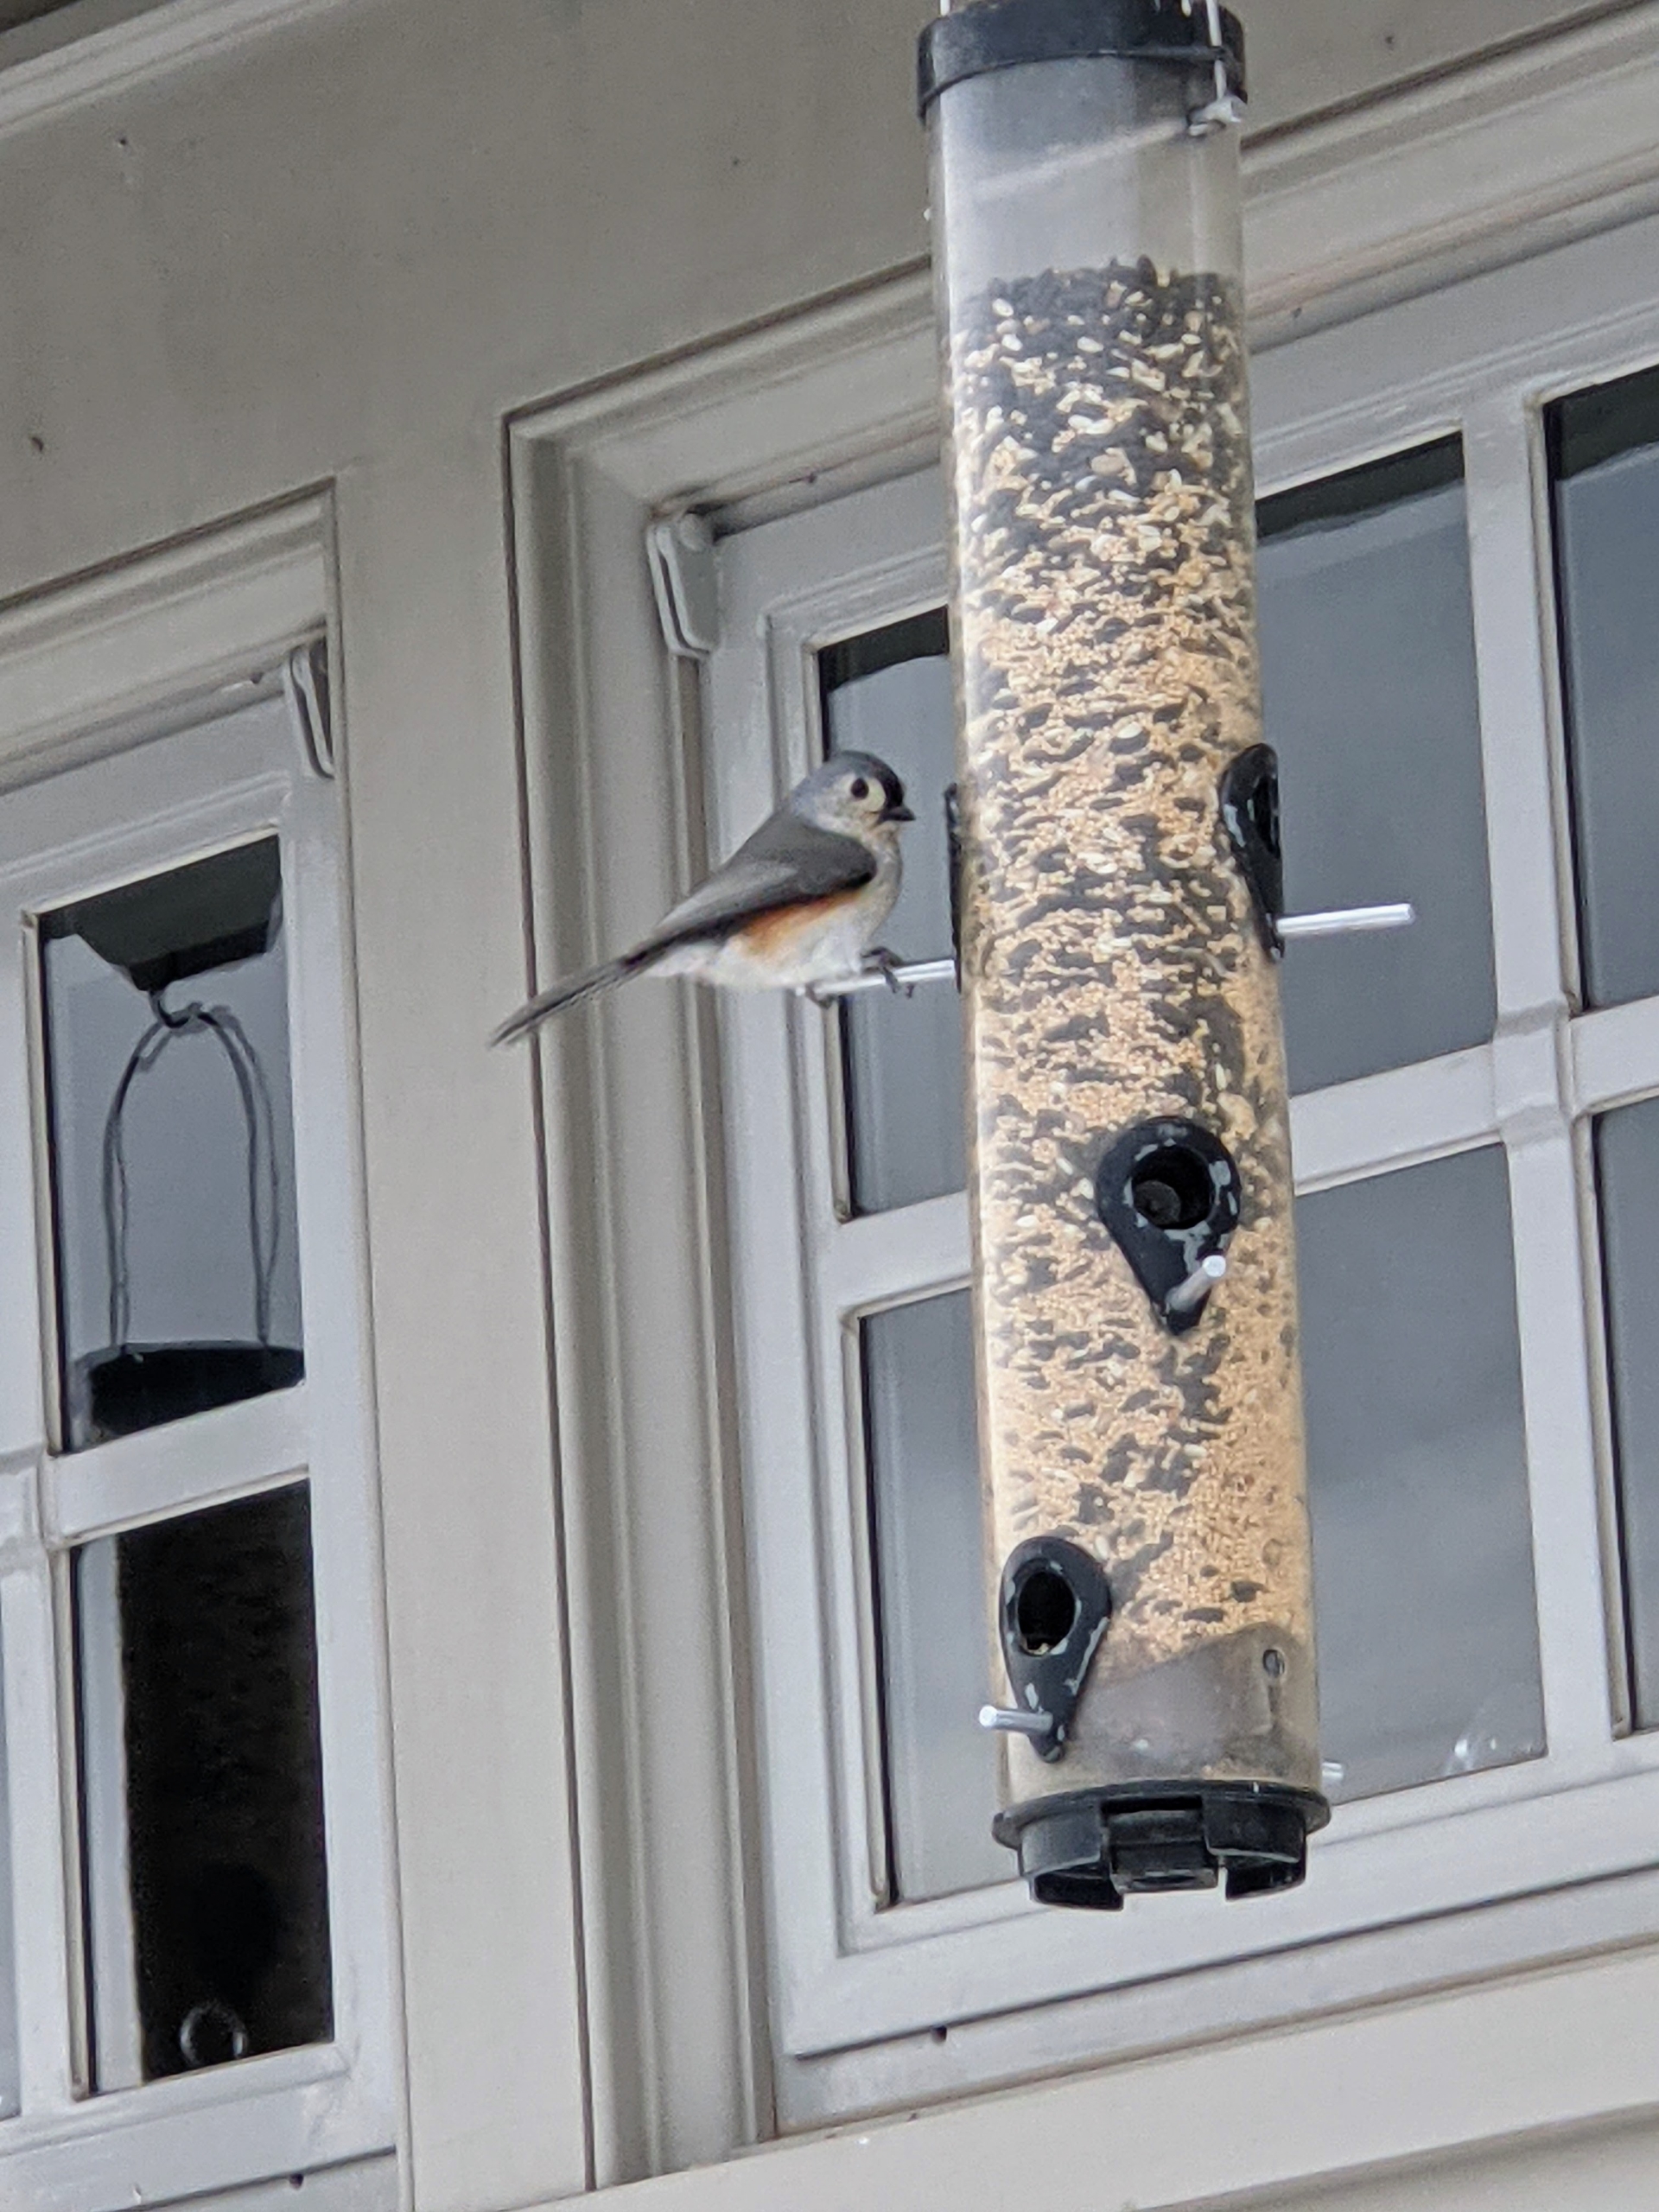
Many birds prefer tube feeders – hollow cylinders with multiple feeding ports and perches. Tube feeders attract small perching birds such as finches, goldfinches, titmice, and chickadees.
The tufted titmouse is a small songbird from North America. It is rather tame, and active, with an echoing voice, and can often be found near bird feeders especially in winter.
The feeders are visible from my Winter House steps – it’s always so nice to see what birds come to eat. I have up to 125 different birds visiting the farm every day.
This is a black-capped chickadee. These birds are highly curious about everything, including humans. Its black cap and bib, white cheeks and gray back, wings and tail make it an easy bird to distinguish and identify.
When feeding birds, take note of which type of seed is eaten most often. And always discard any seed that has become wet, moldy or foul smelling.
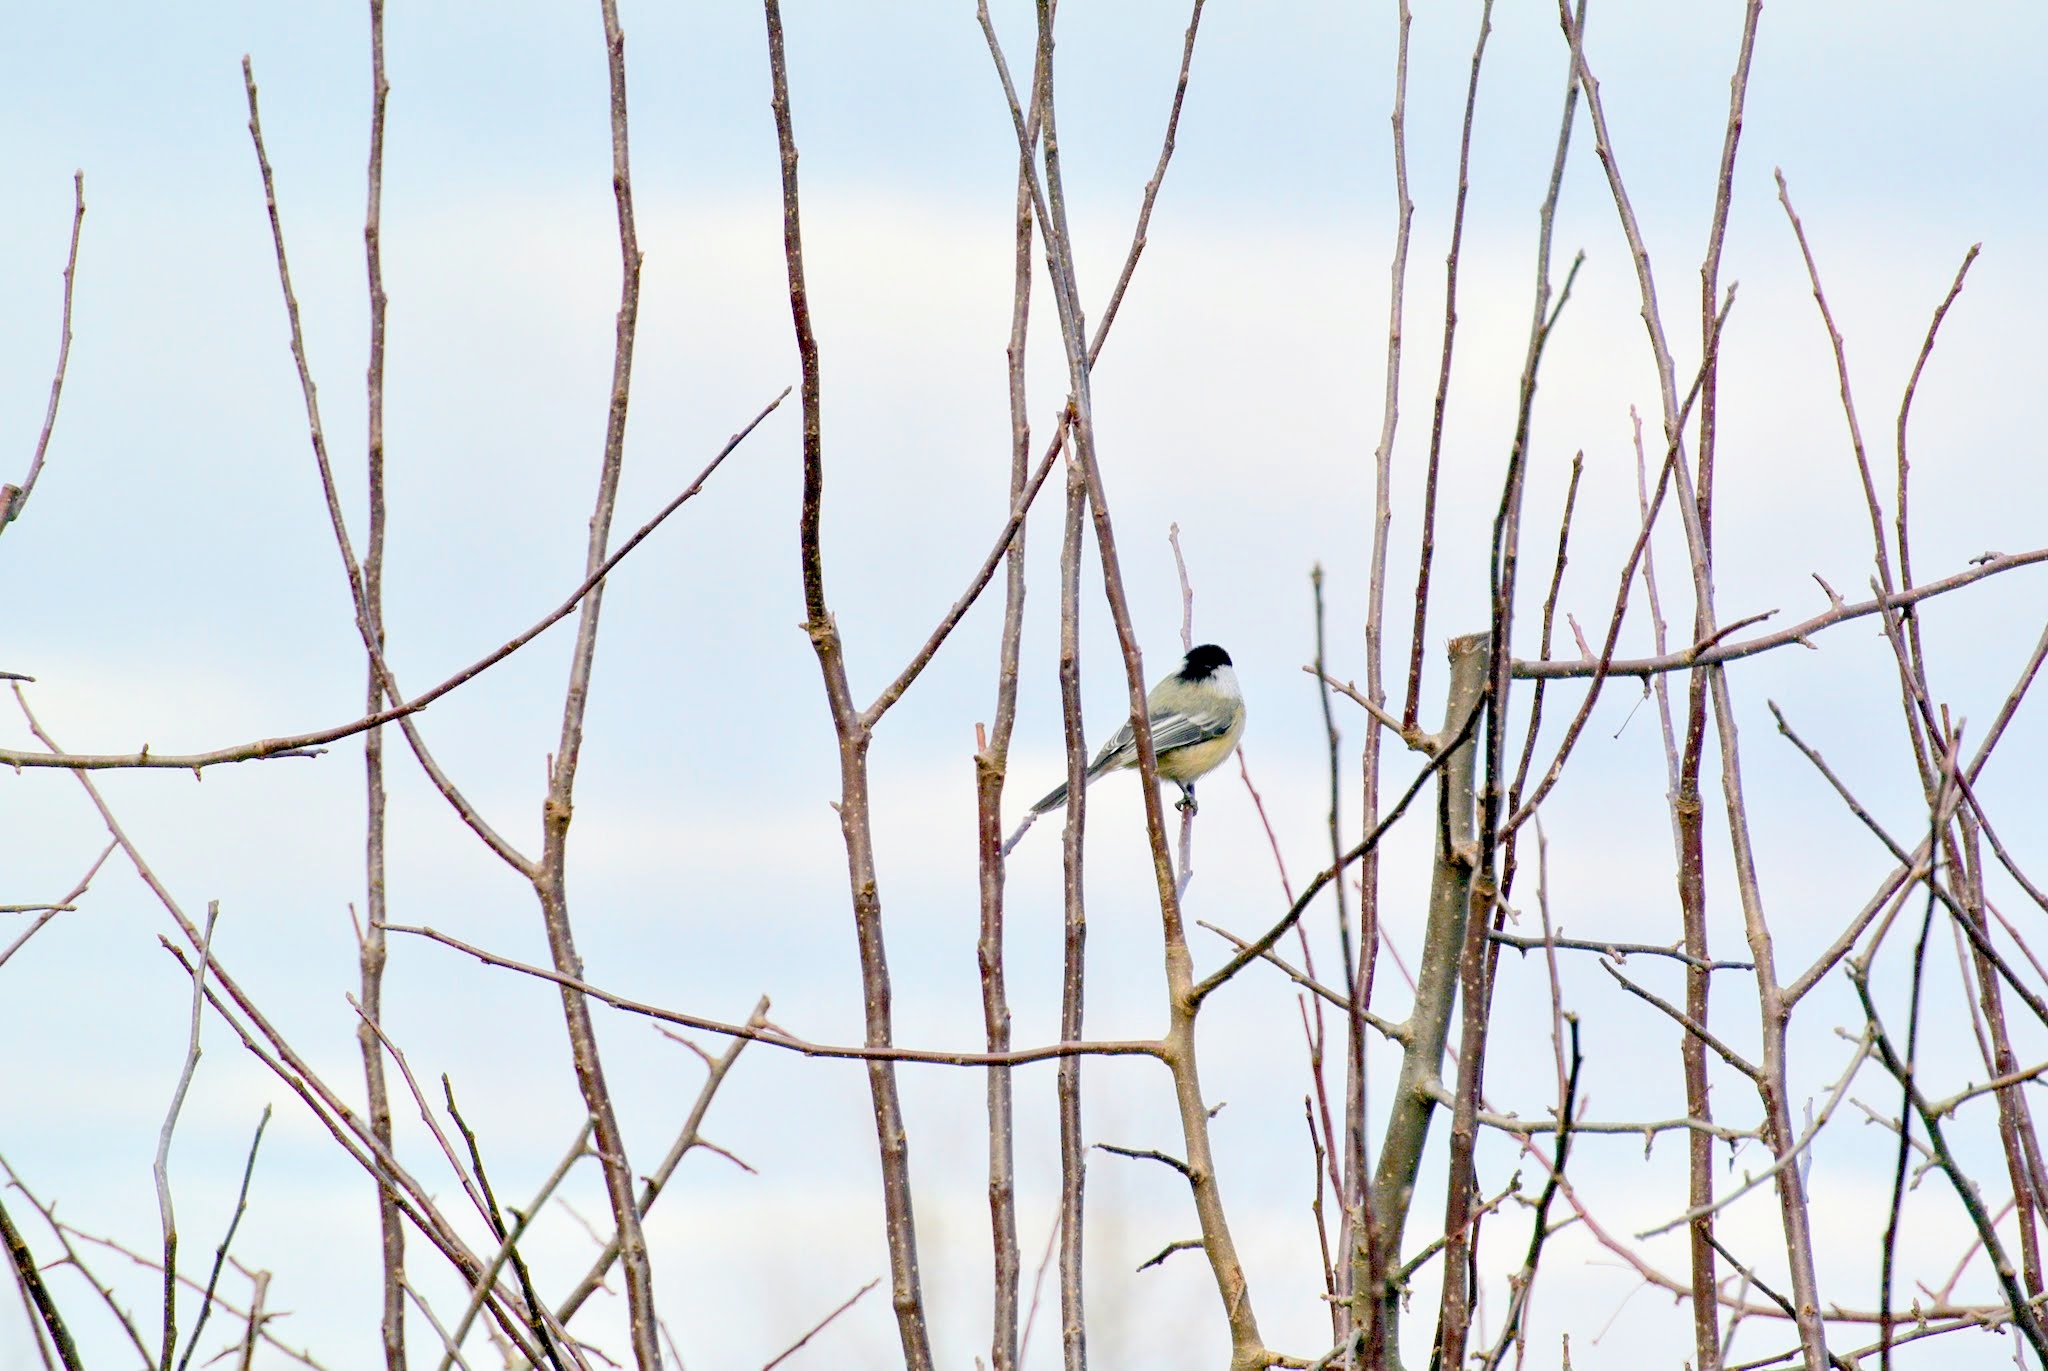
Here’s another chickadee sitting on a branch nearby – safe and hopefully full. What birds do you see outside your home?
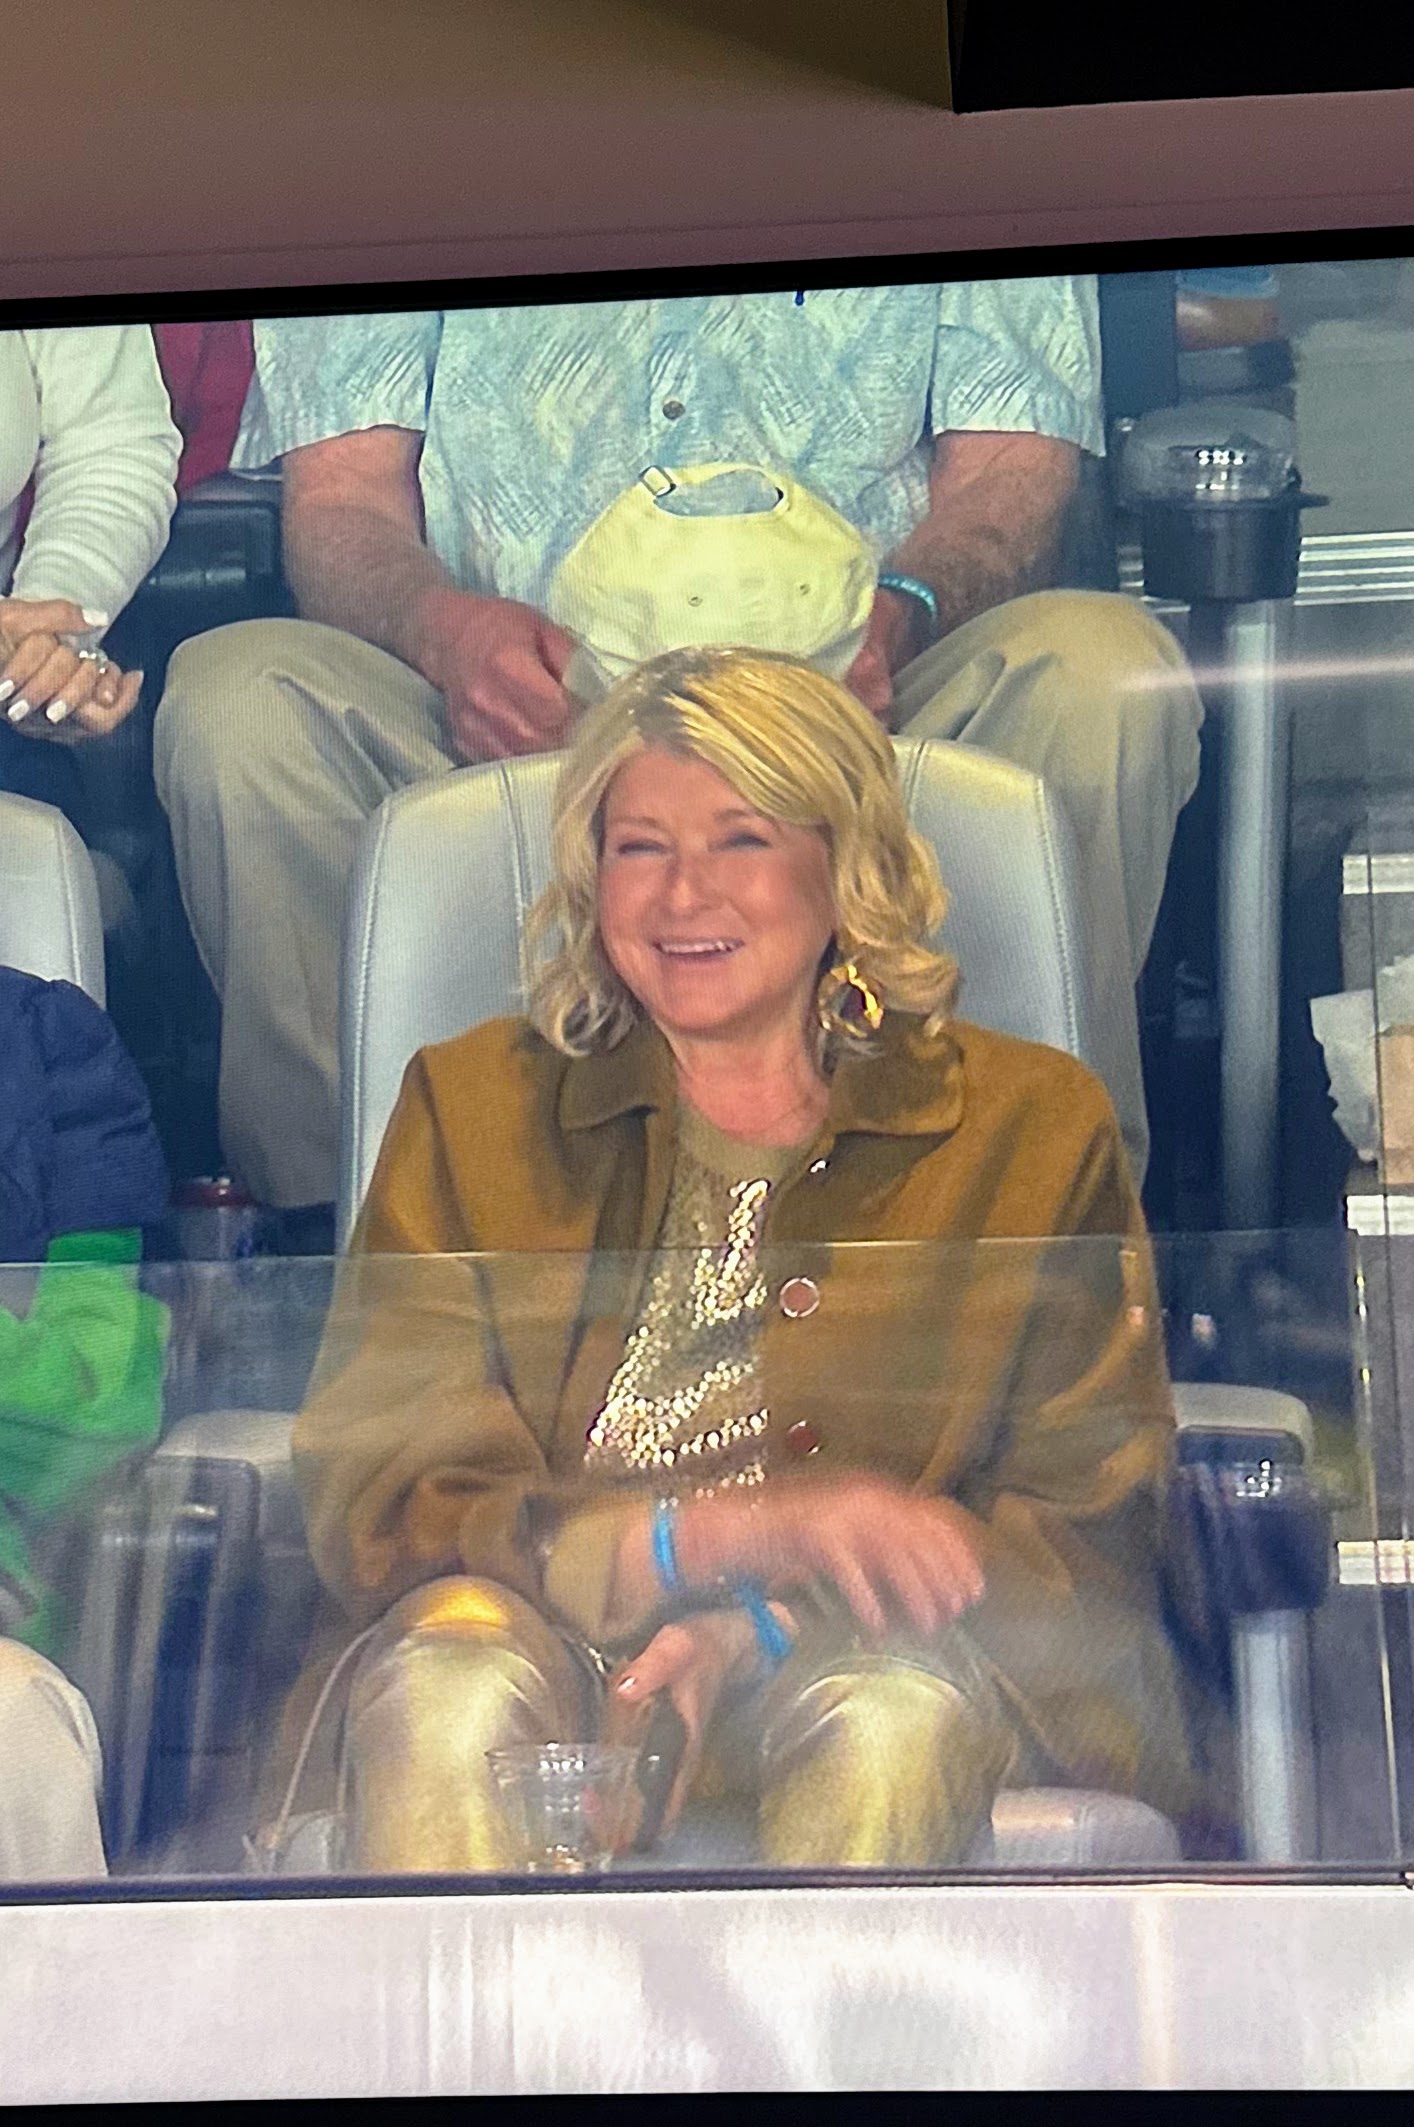
I look forward to Super Sunday weekend every year - and no matter where the Big Game is held, there’s always so much to do.
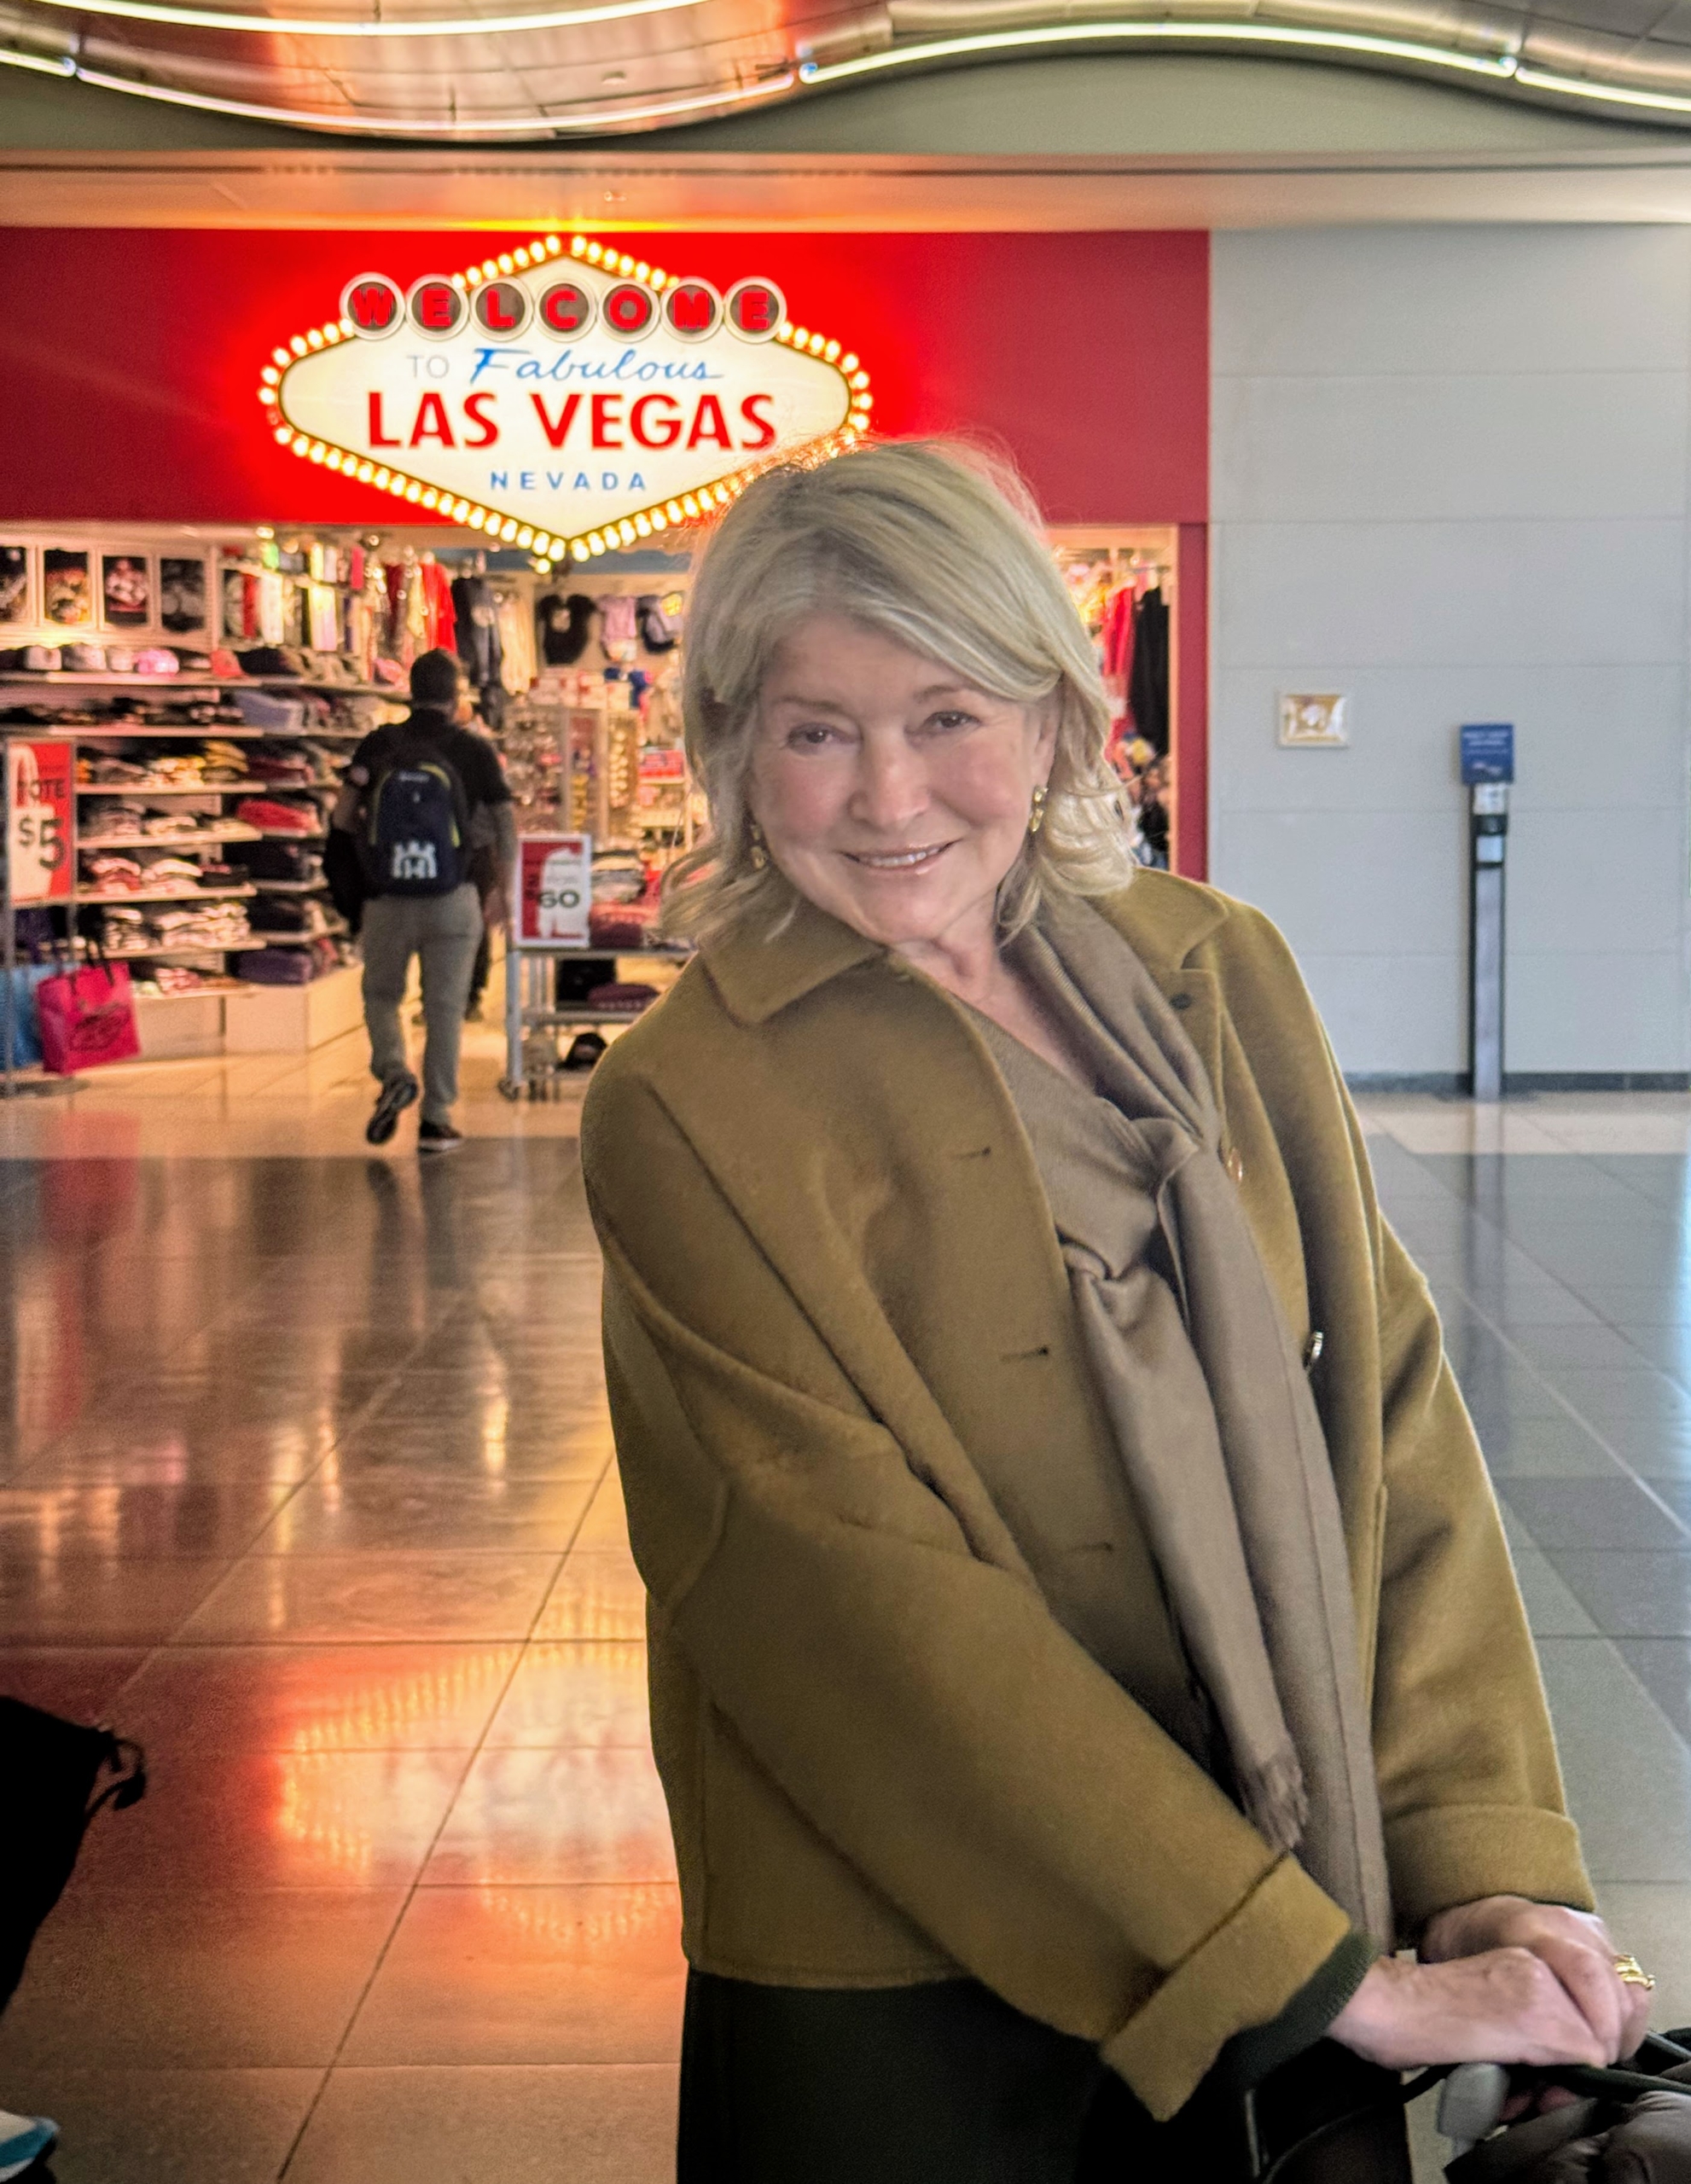
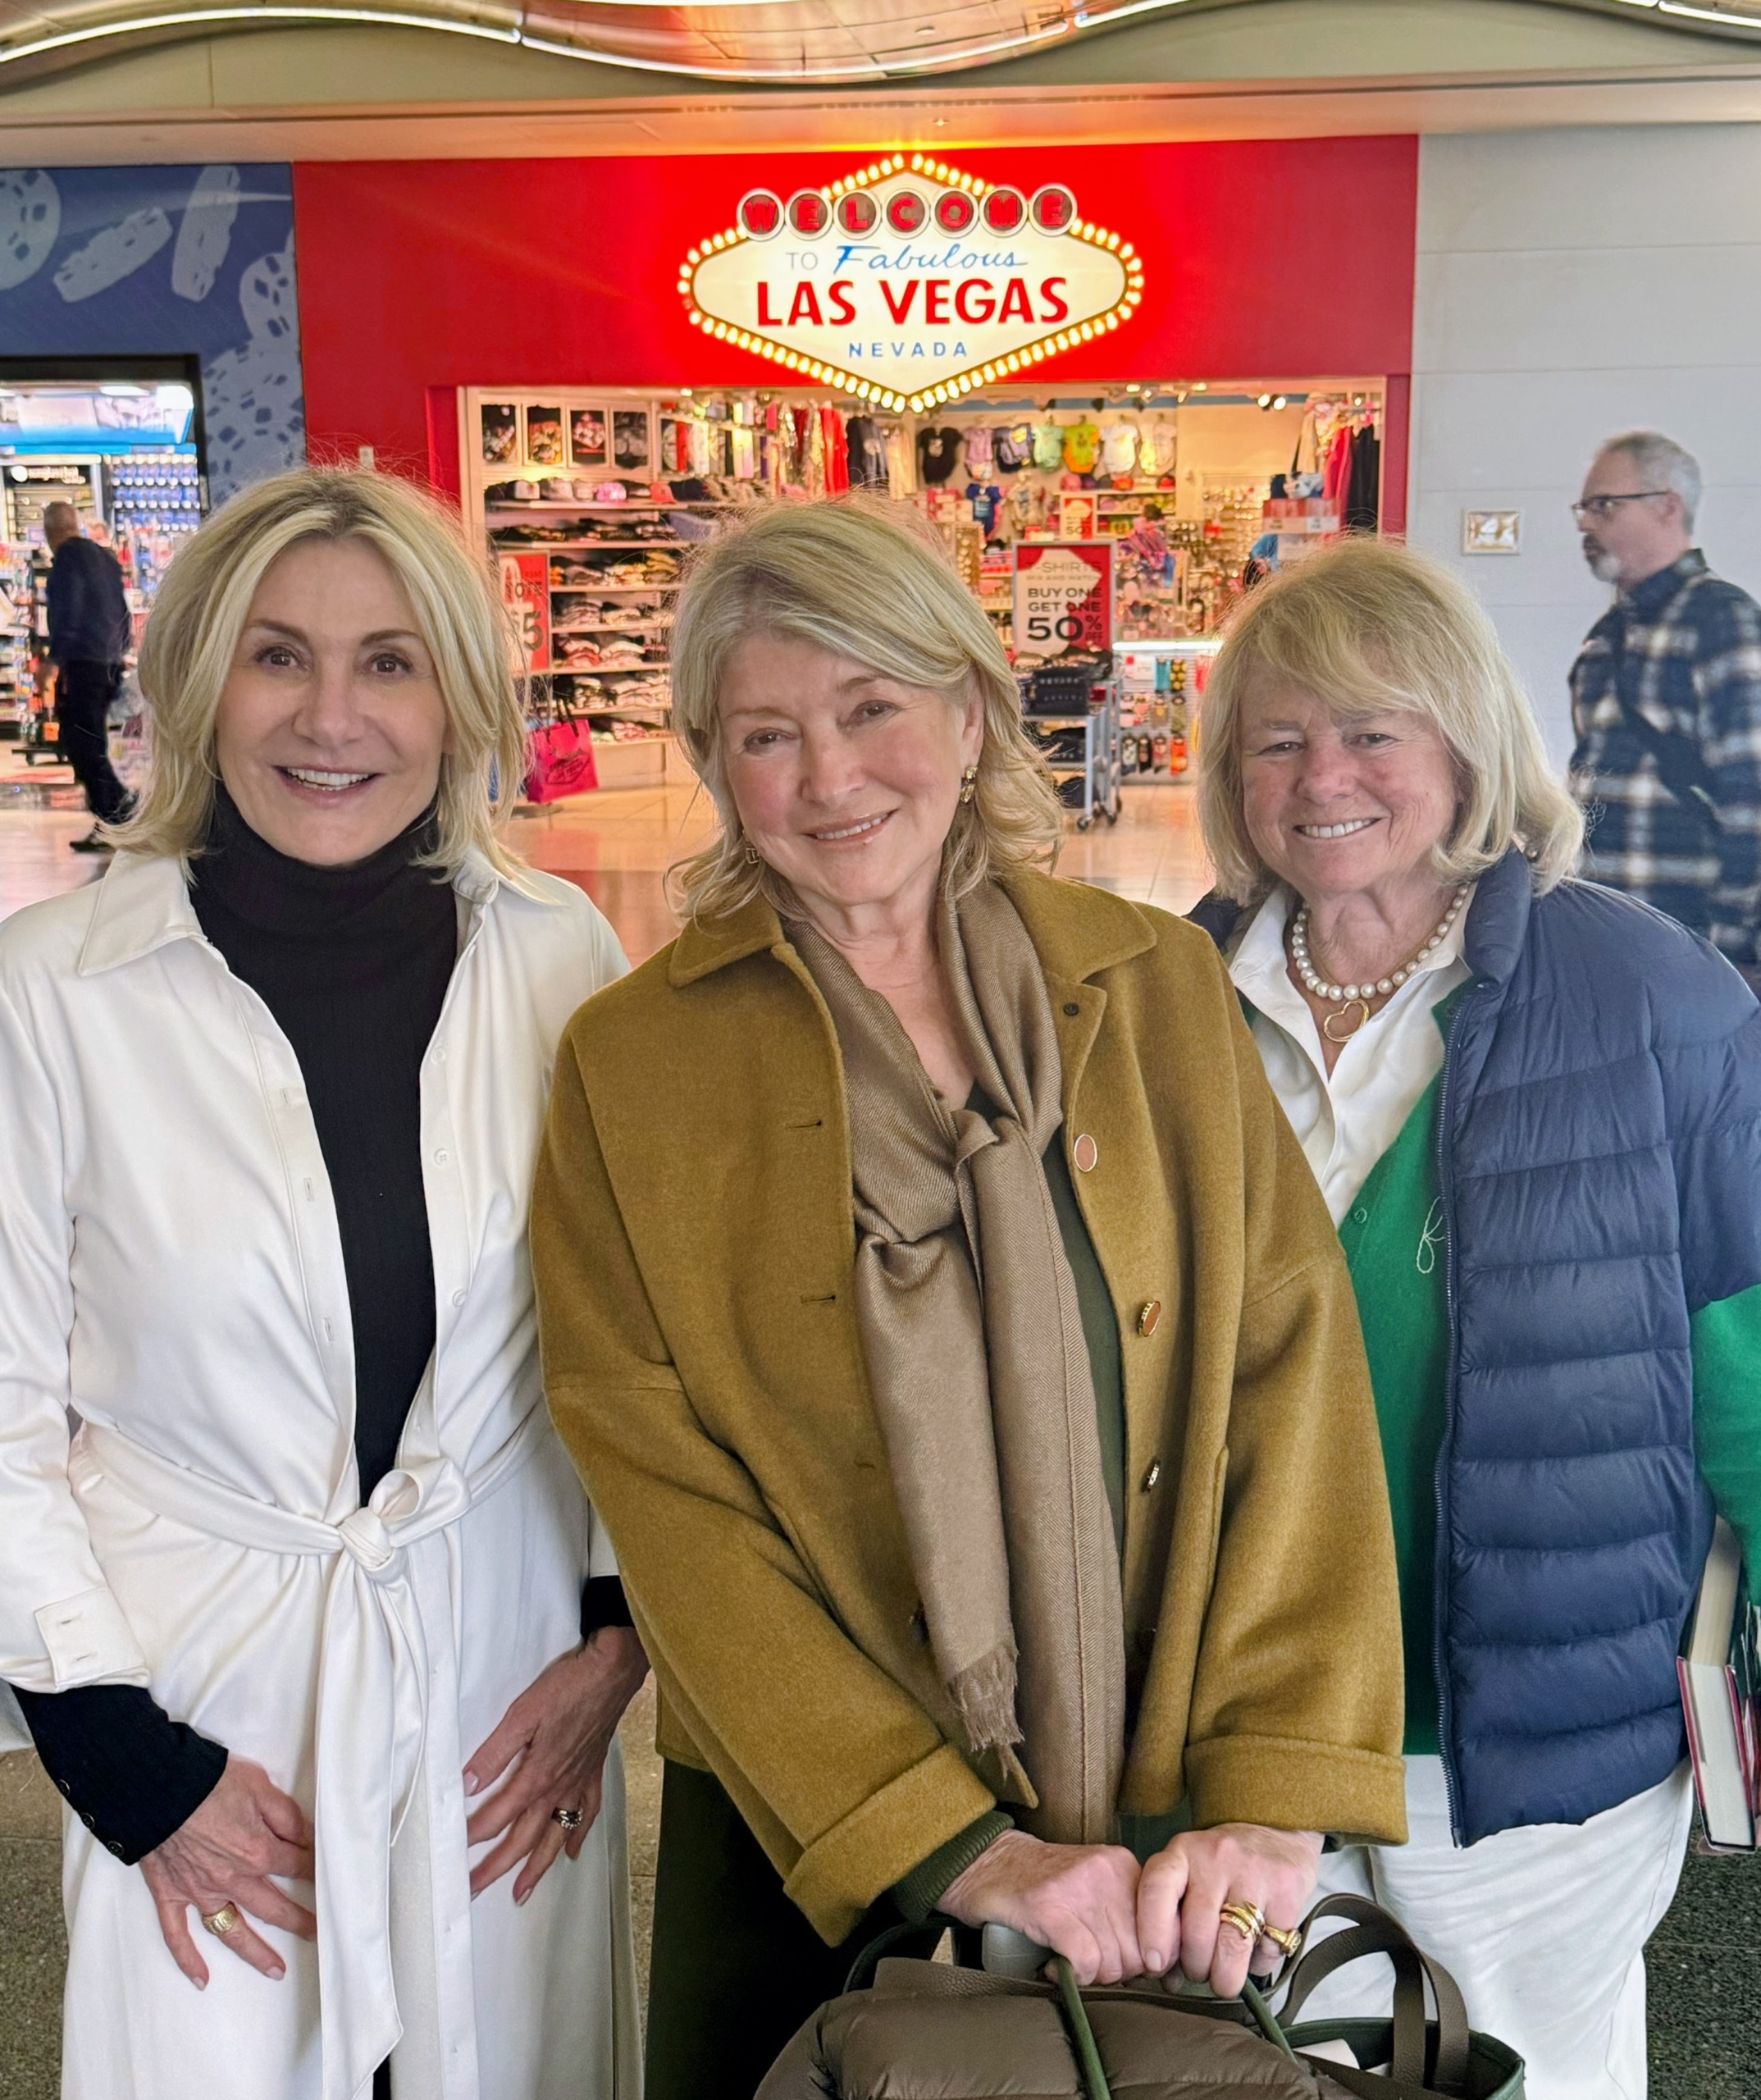
Every February, I try to attend the event with my good friend, Jane Heller. This year we traveled to Las Vegas, Nevada - the first time the NFL championship football game has ever been played in that state. My longtime publicist, Susan Magrino, and my makeup artist, Daisy Schwartzberg Toye, were part of our group. And as an early birthday gift, I also had my grandson, Truman, out there with me along with our friend, Ari Katz. We all enjoyed fun lunches, dinners, parties, and concerts. Among our many stops, we visited my restaurant, The Bedford by Martha Stewart. It was a very action-packed few days.
Here are some photos, enjoy.
Viva Las Vegas! Here I am in Sin City for the Big Game LVIII.
Susan, Jane, and I arrived a couple days early to enjoy all the festivities surrounding the Big Game.
Las Vegas, often referred to simply as Vegas, is the most populous city in the state of Nevada. Known as the Entertainment Capital of the World, Las Vegas is the sixth-most visited city in the U.S., after New York City, Miami, Los Angeles, Orlando, and San Francisco. On the right is Paris Las Vegas, where my restaurant, The Bedford by Martha Stewart, is located.
Business before play. I signed 150 Martha’s Entertaining books for a special luncheon at my restaurant.
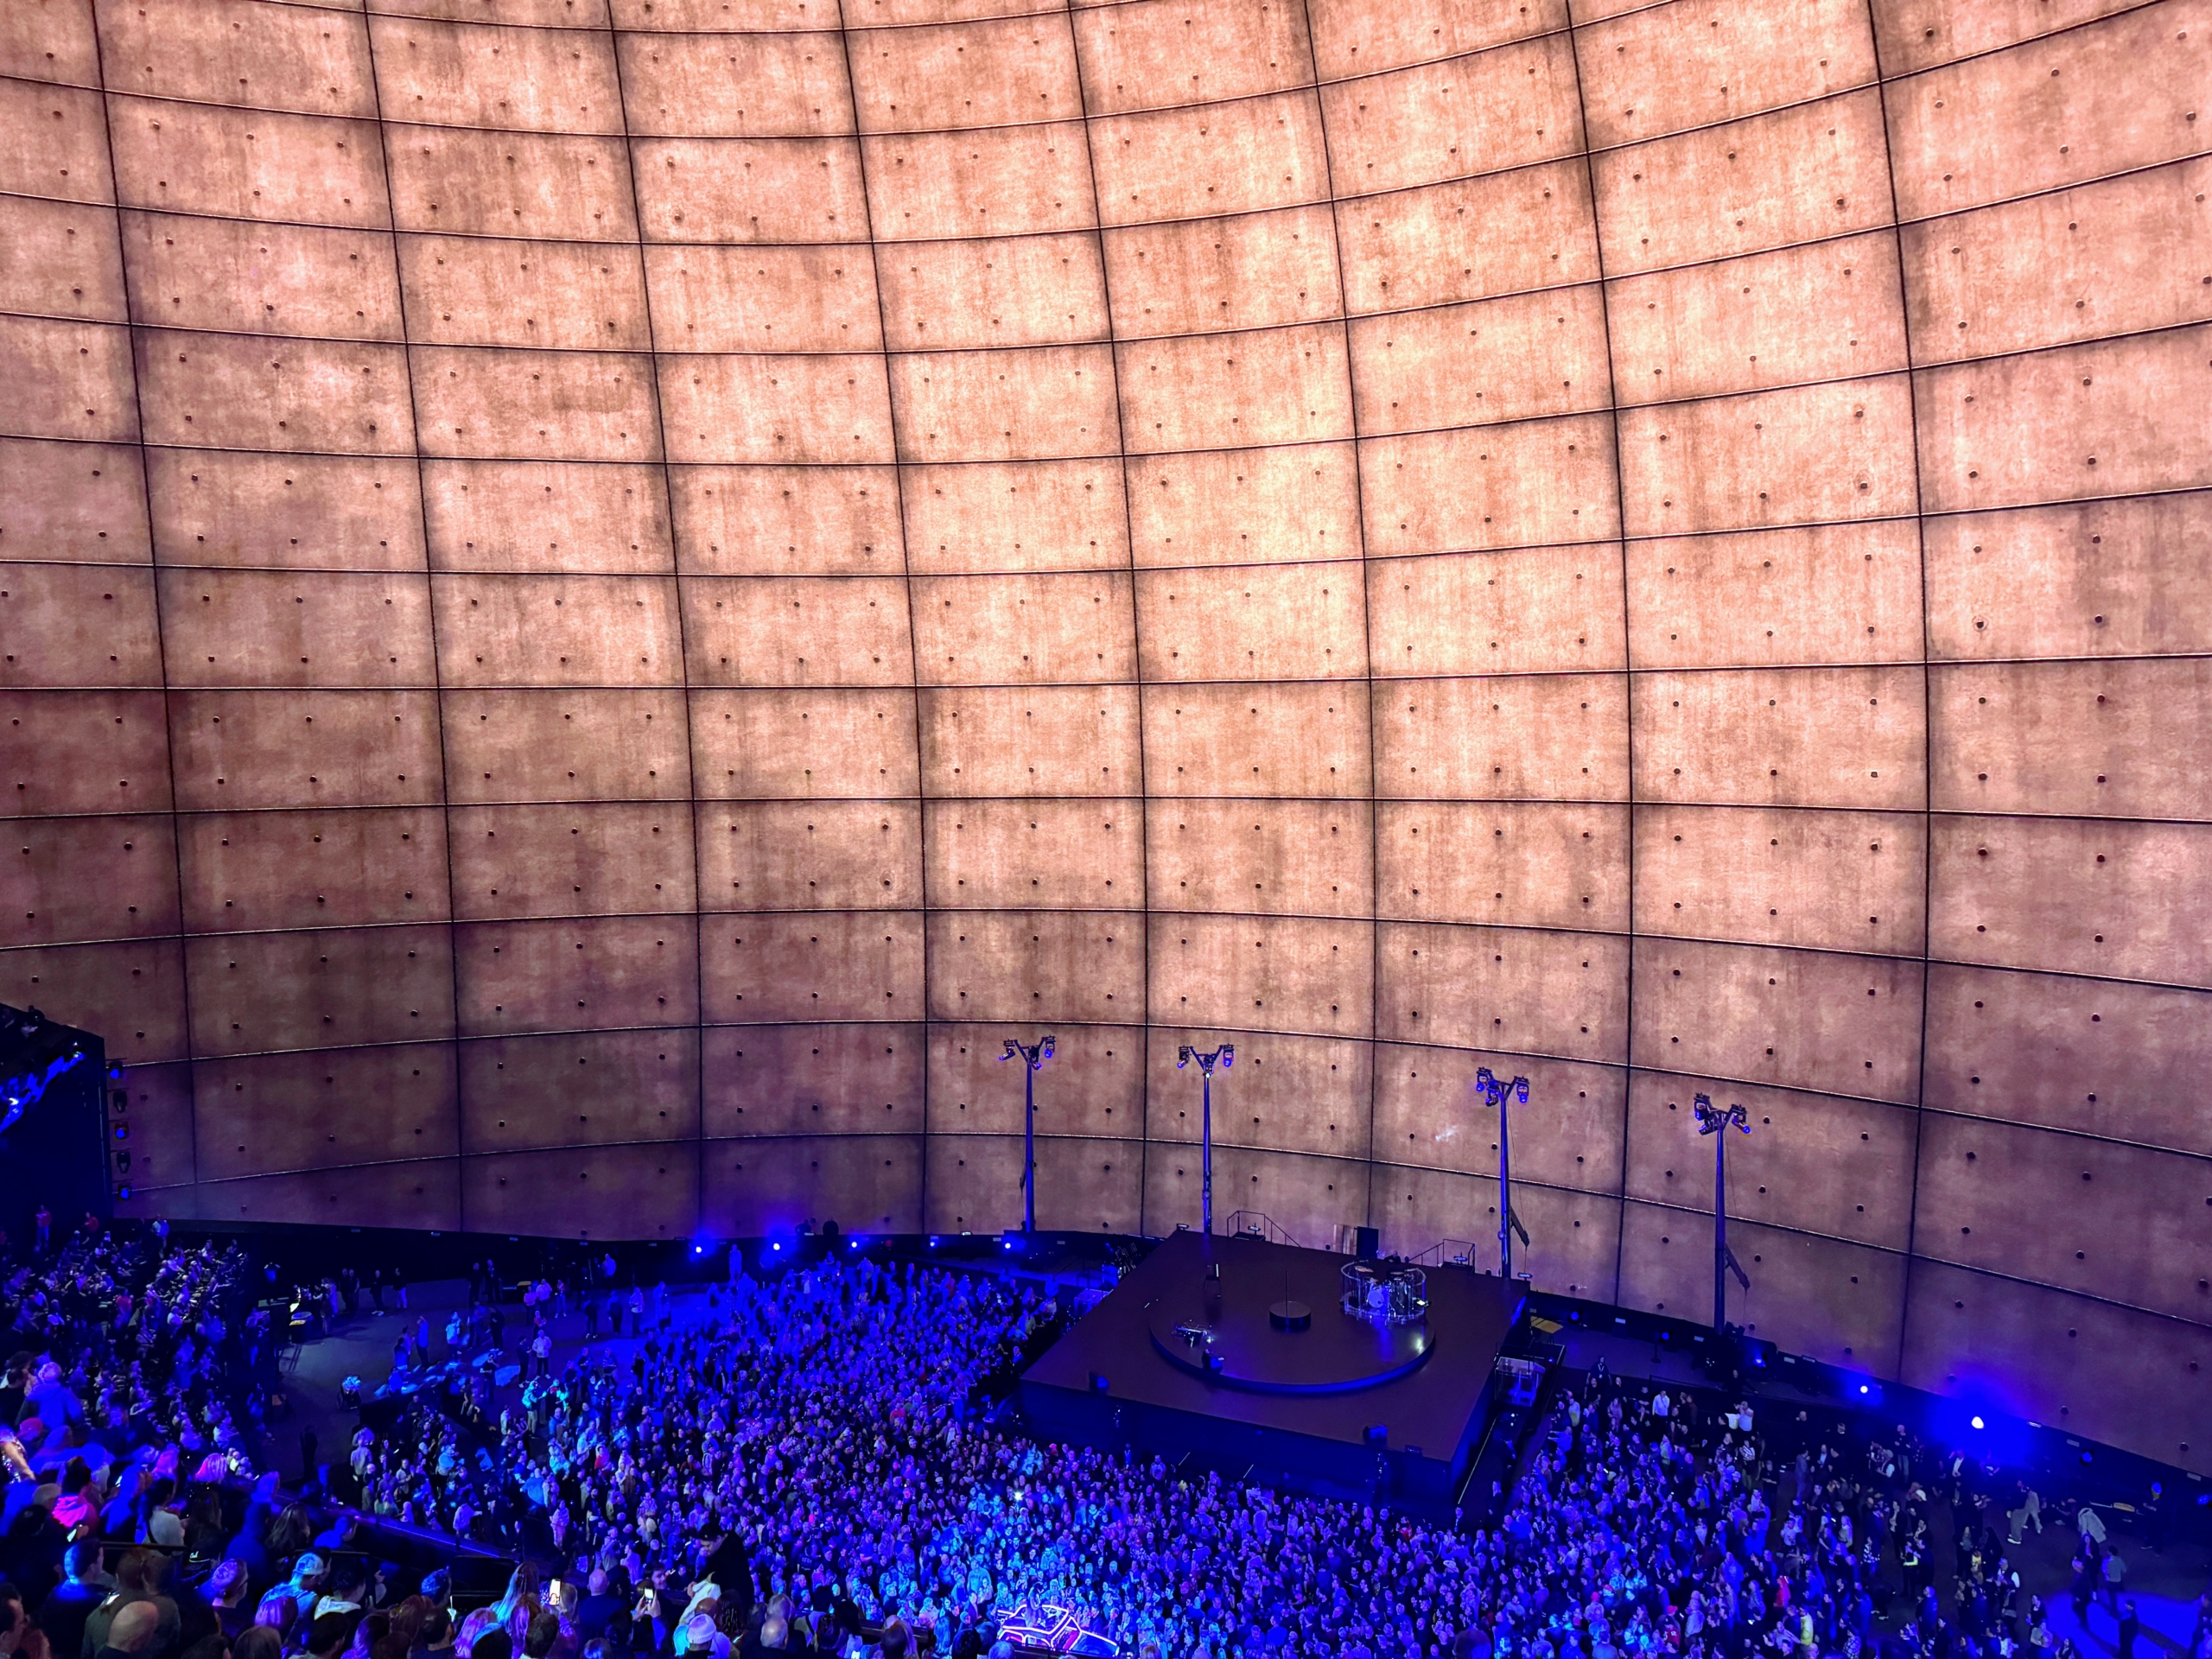
The first night, we attended a U2 concert at the MSG Sphere – what an amazing venue.
The Sphere is a music and entertainment arena in Paradise, Nevada, just east of the Las Vegas Strip. Designed by Populous, the 18,600-seat auditorium measures 366 feet high and 516 feet wide.
It was great to watch the famous Irish rock band from Dublin. U2 formed in 1976. The group consists of Paul “Bono” Hewson, Larry Mullen Jr., David “the Edge” Evans, and Adam Clayton.
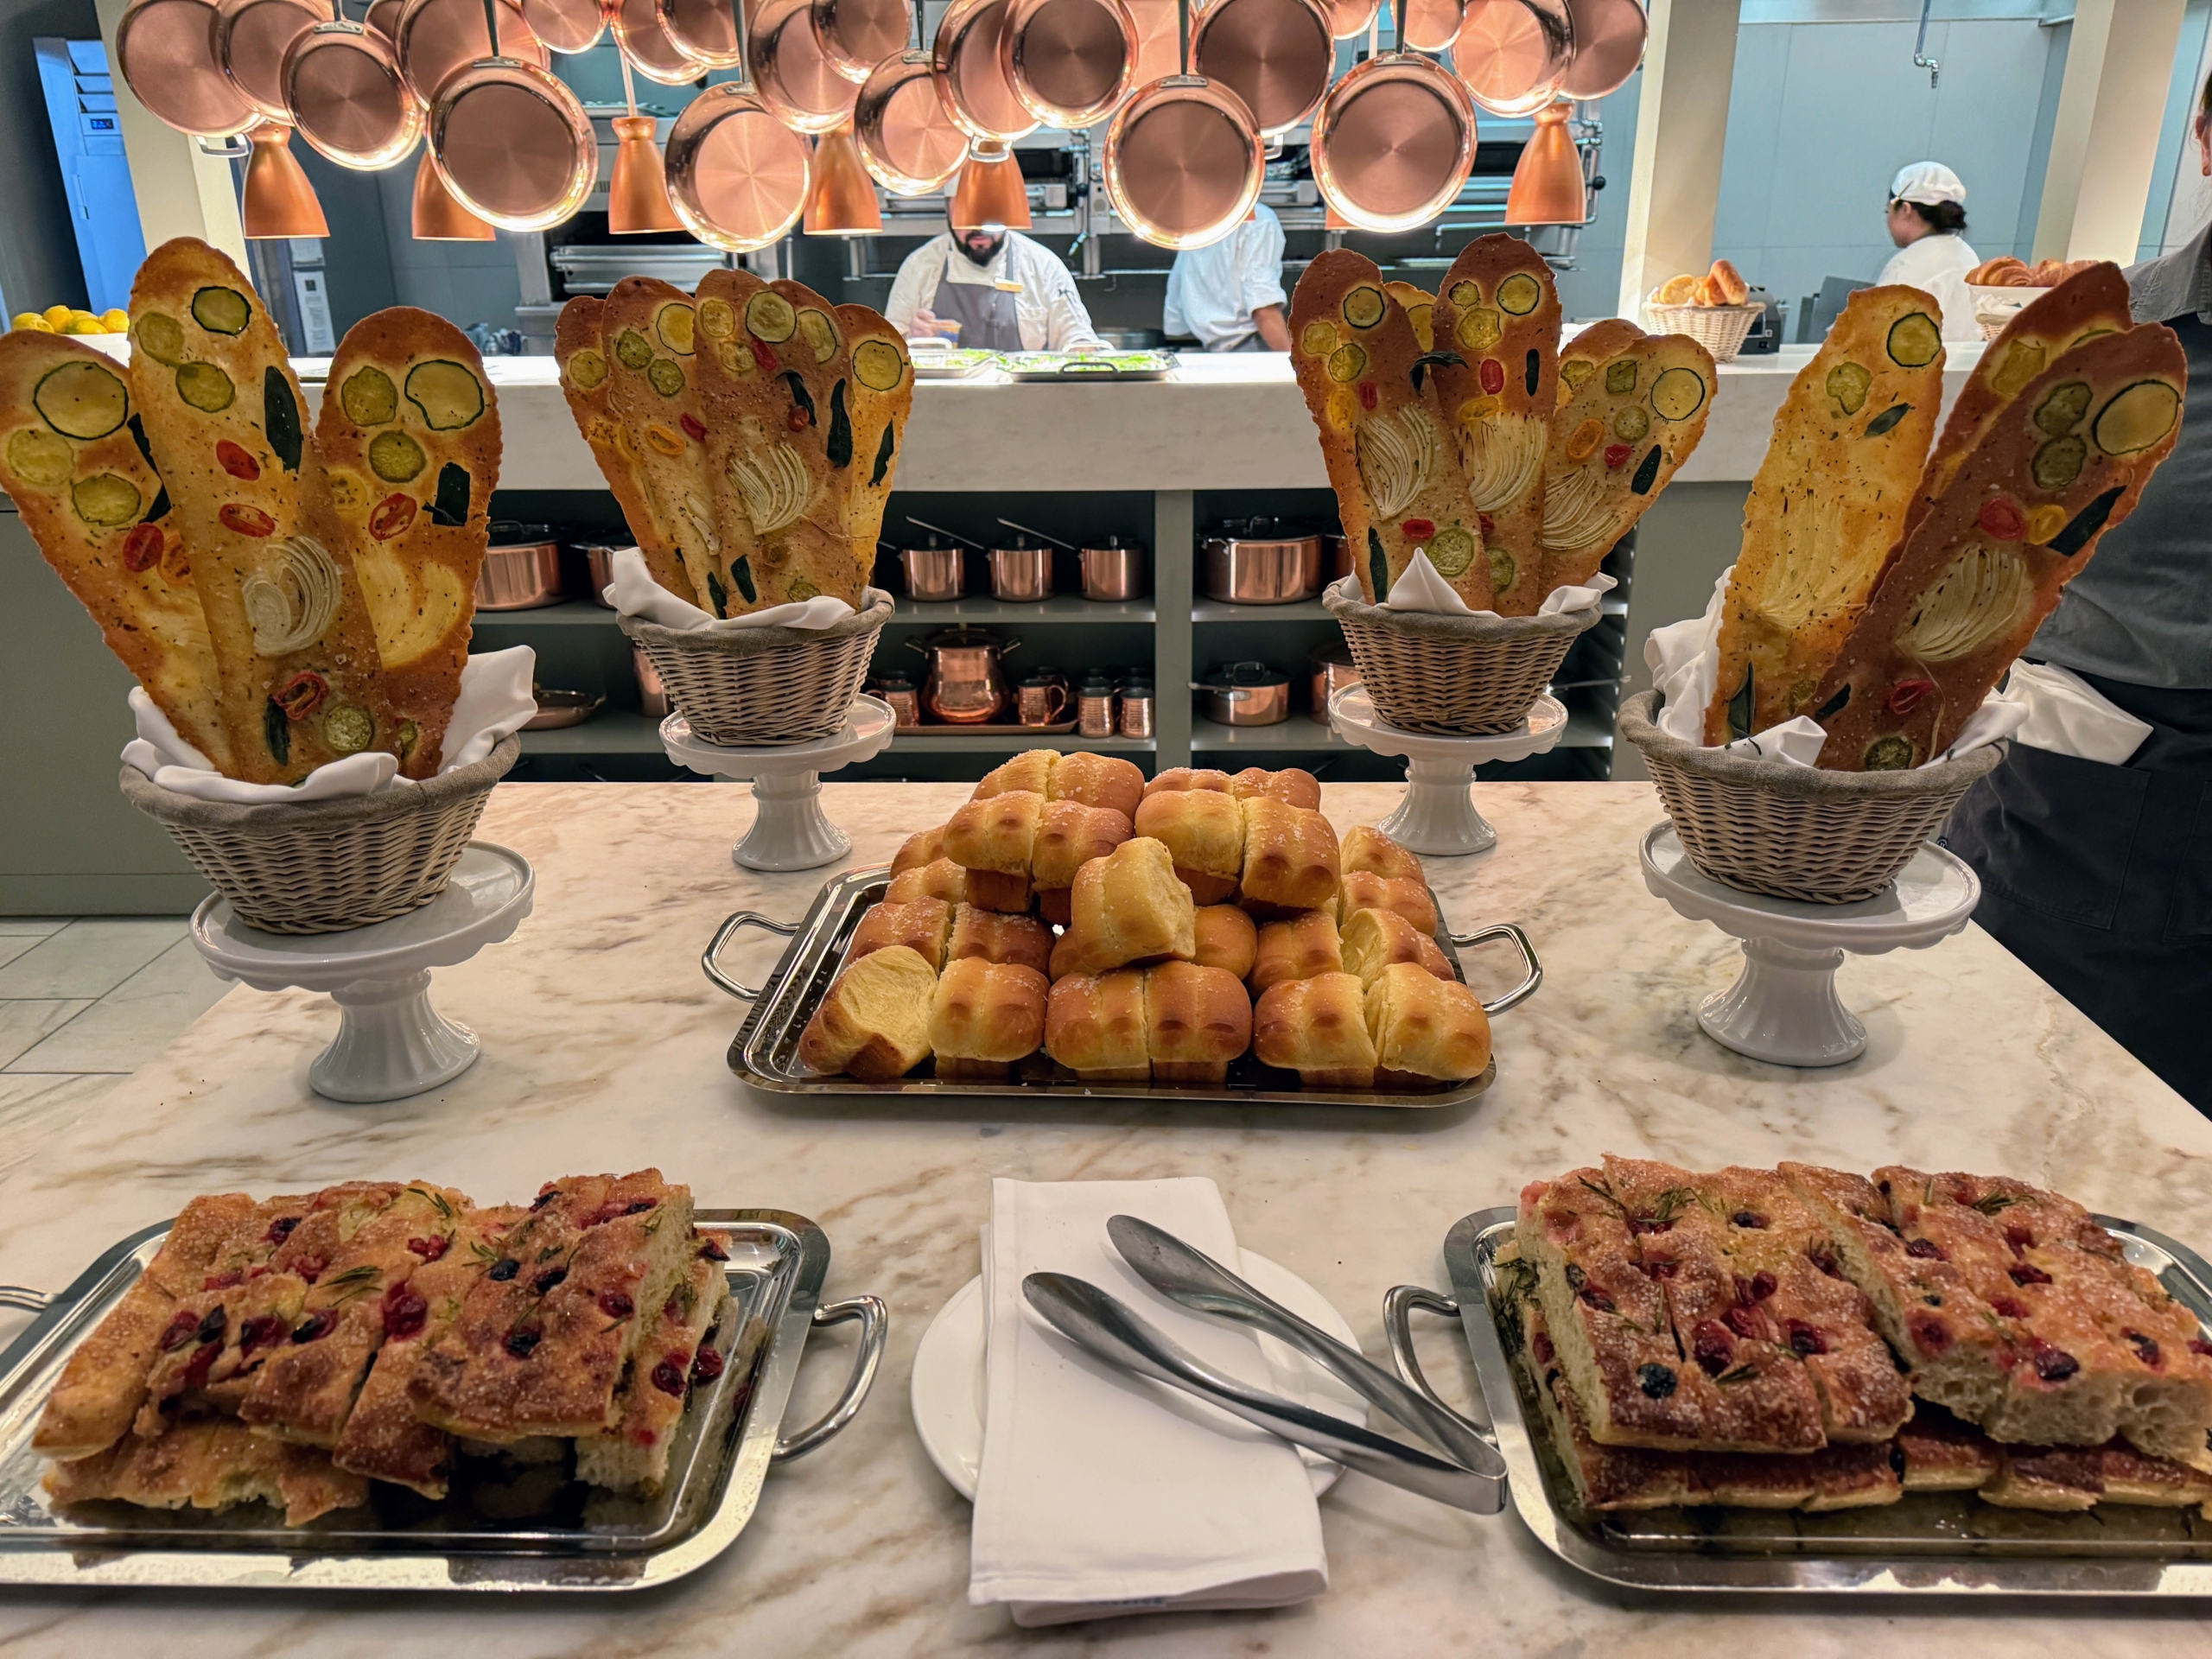
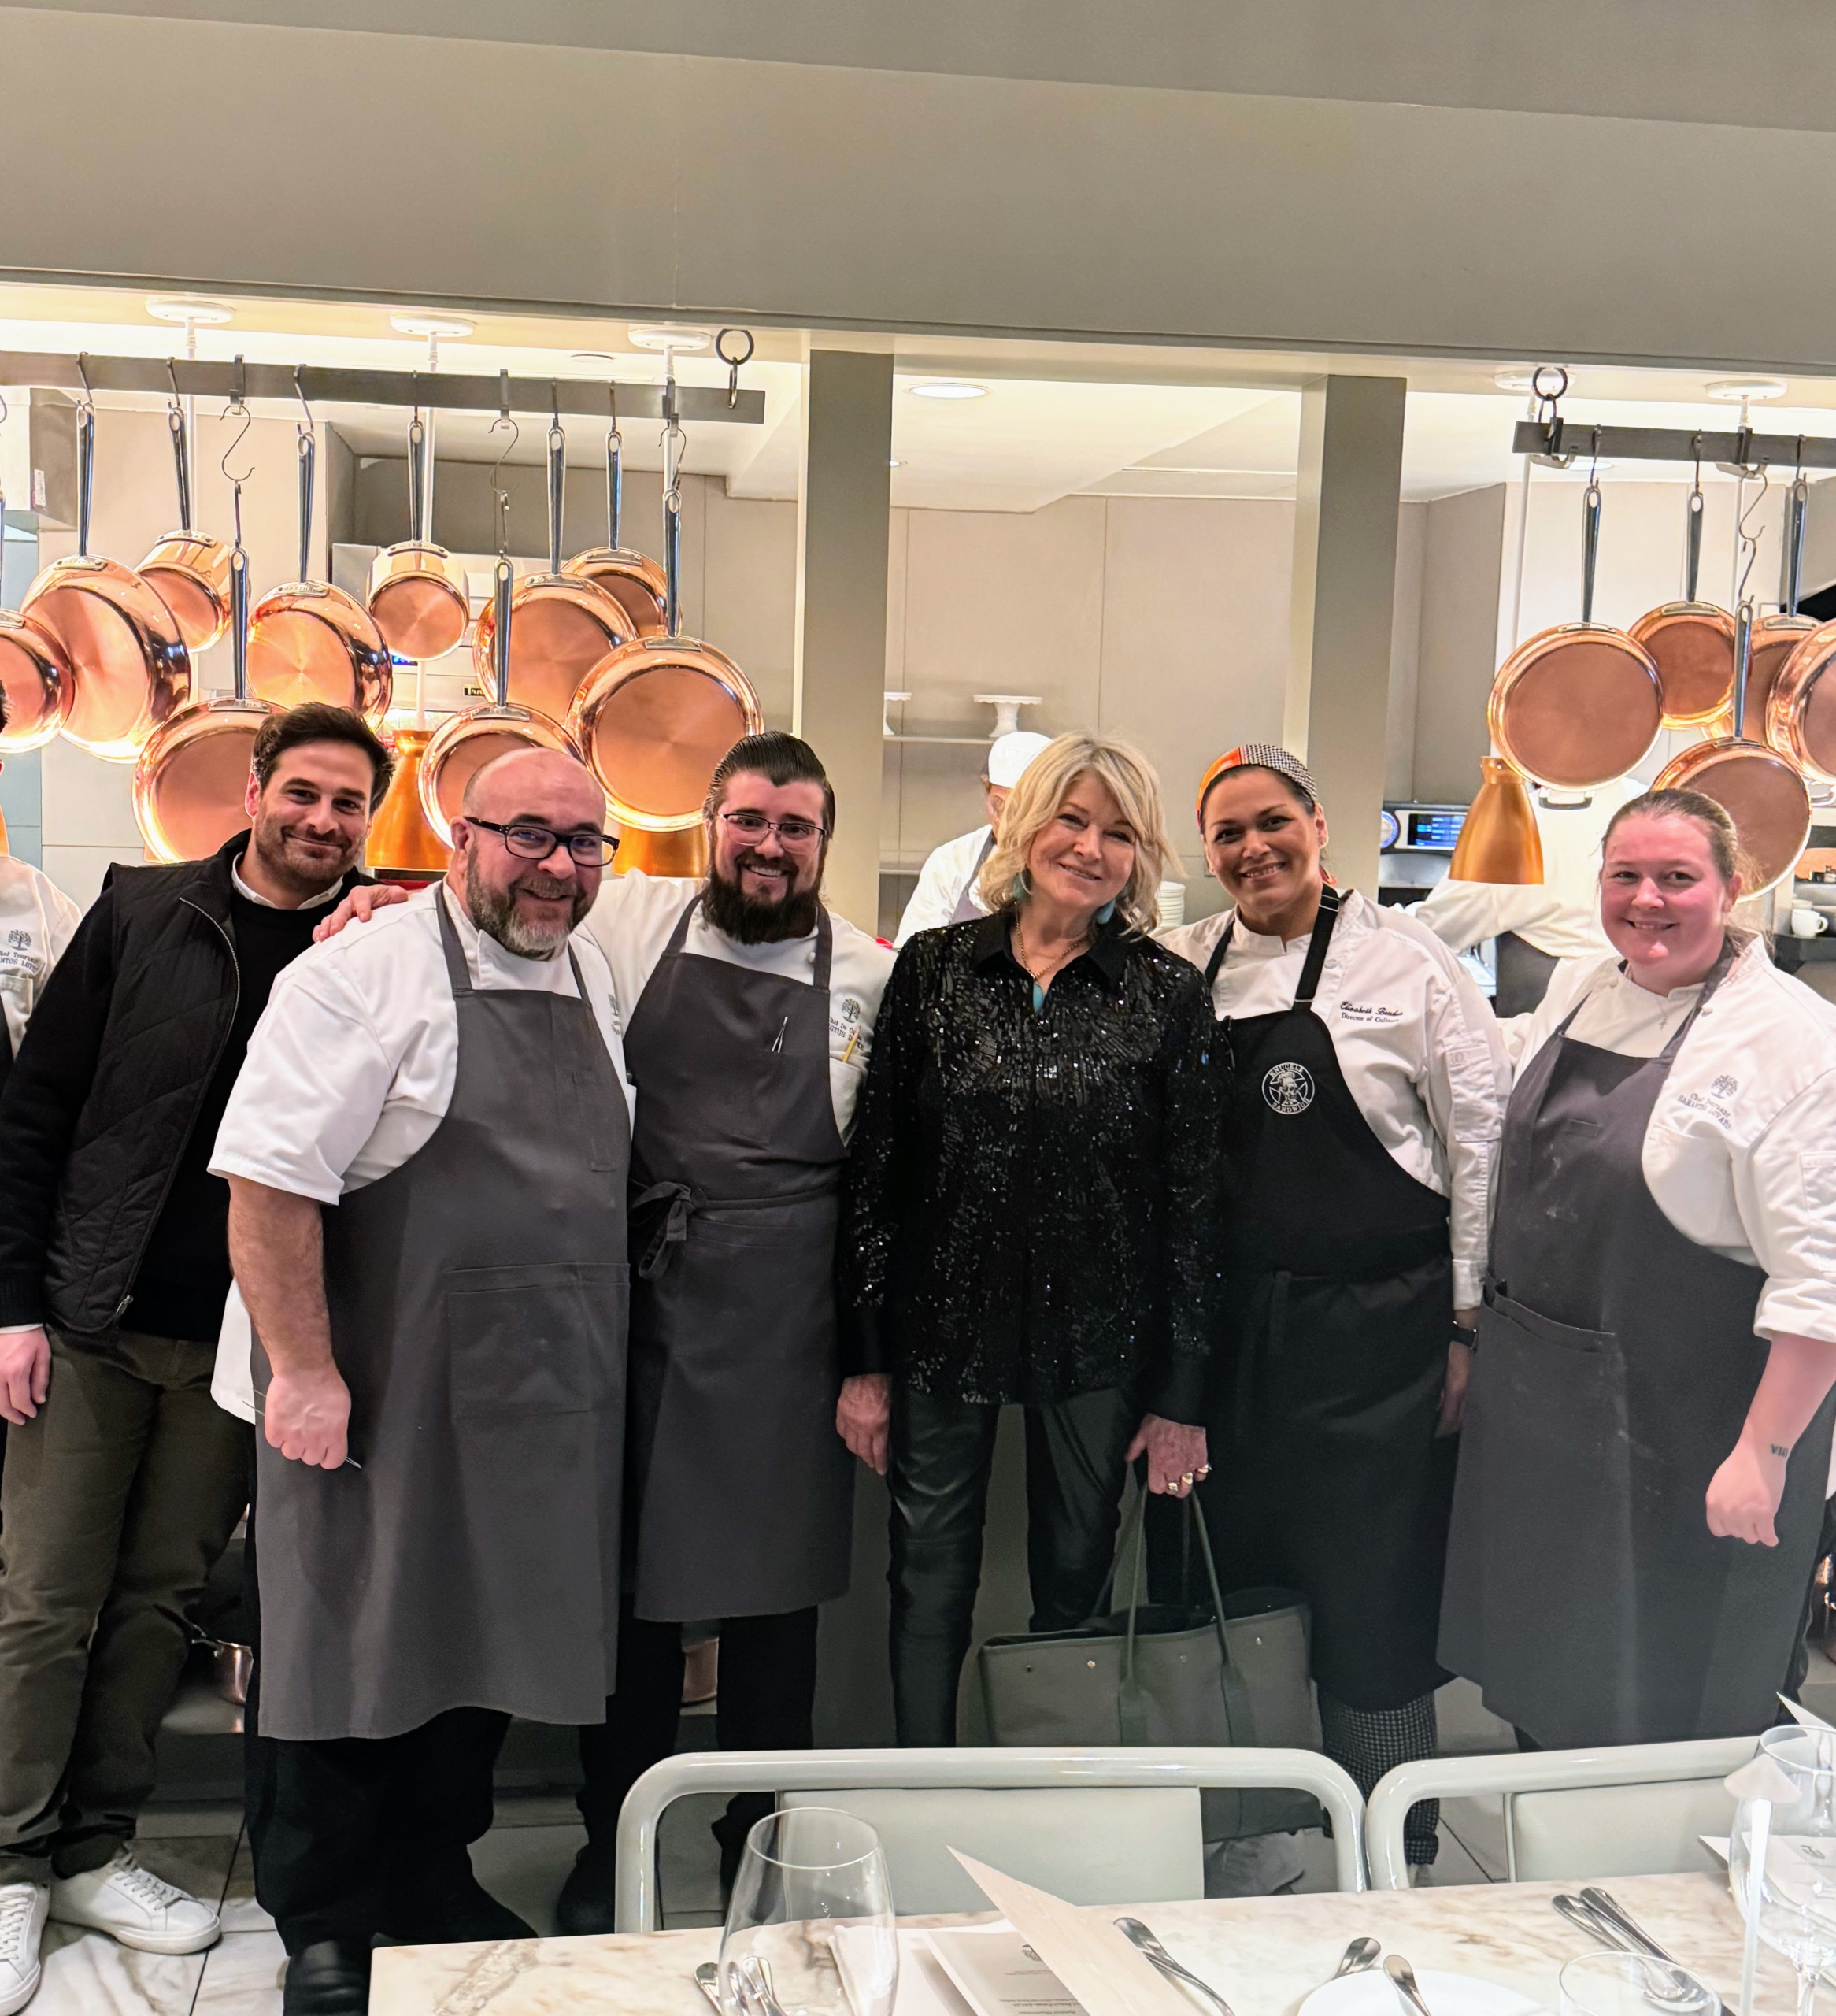
Of course, when in Vegas I always have to visit my restaurant, The Bedford by Martha Stewart. It is doing so well – we’ve received so many excellent responses to our menu and our food. The 194-seat dining destination was inspired by my own 1925 farmhouse in Westchester, New York. The menu features French-inspired cuisine along with some of my own favorite recipes.
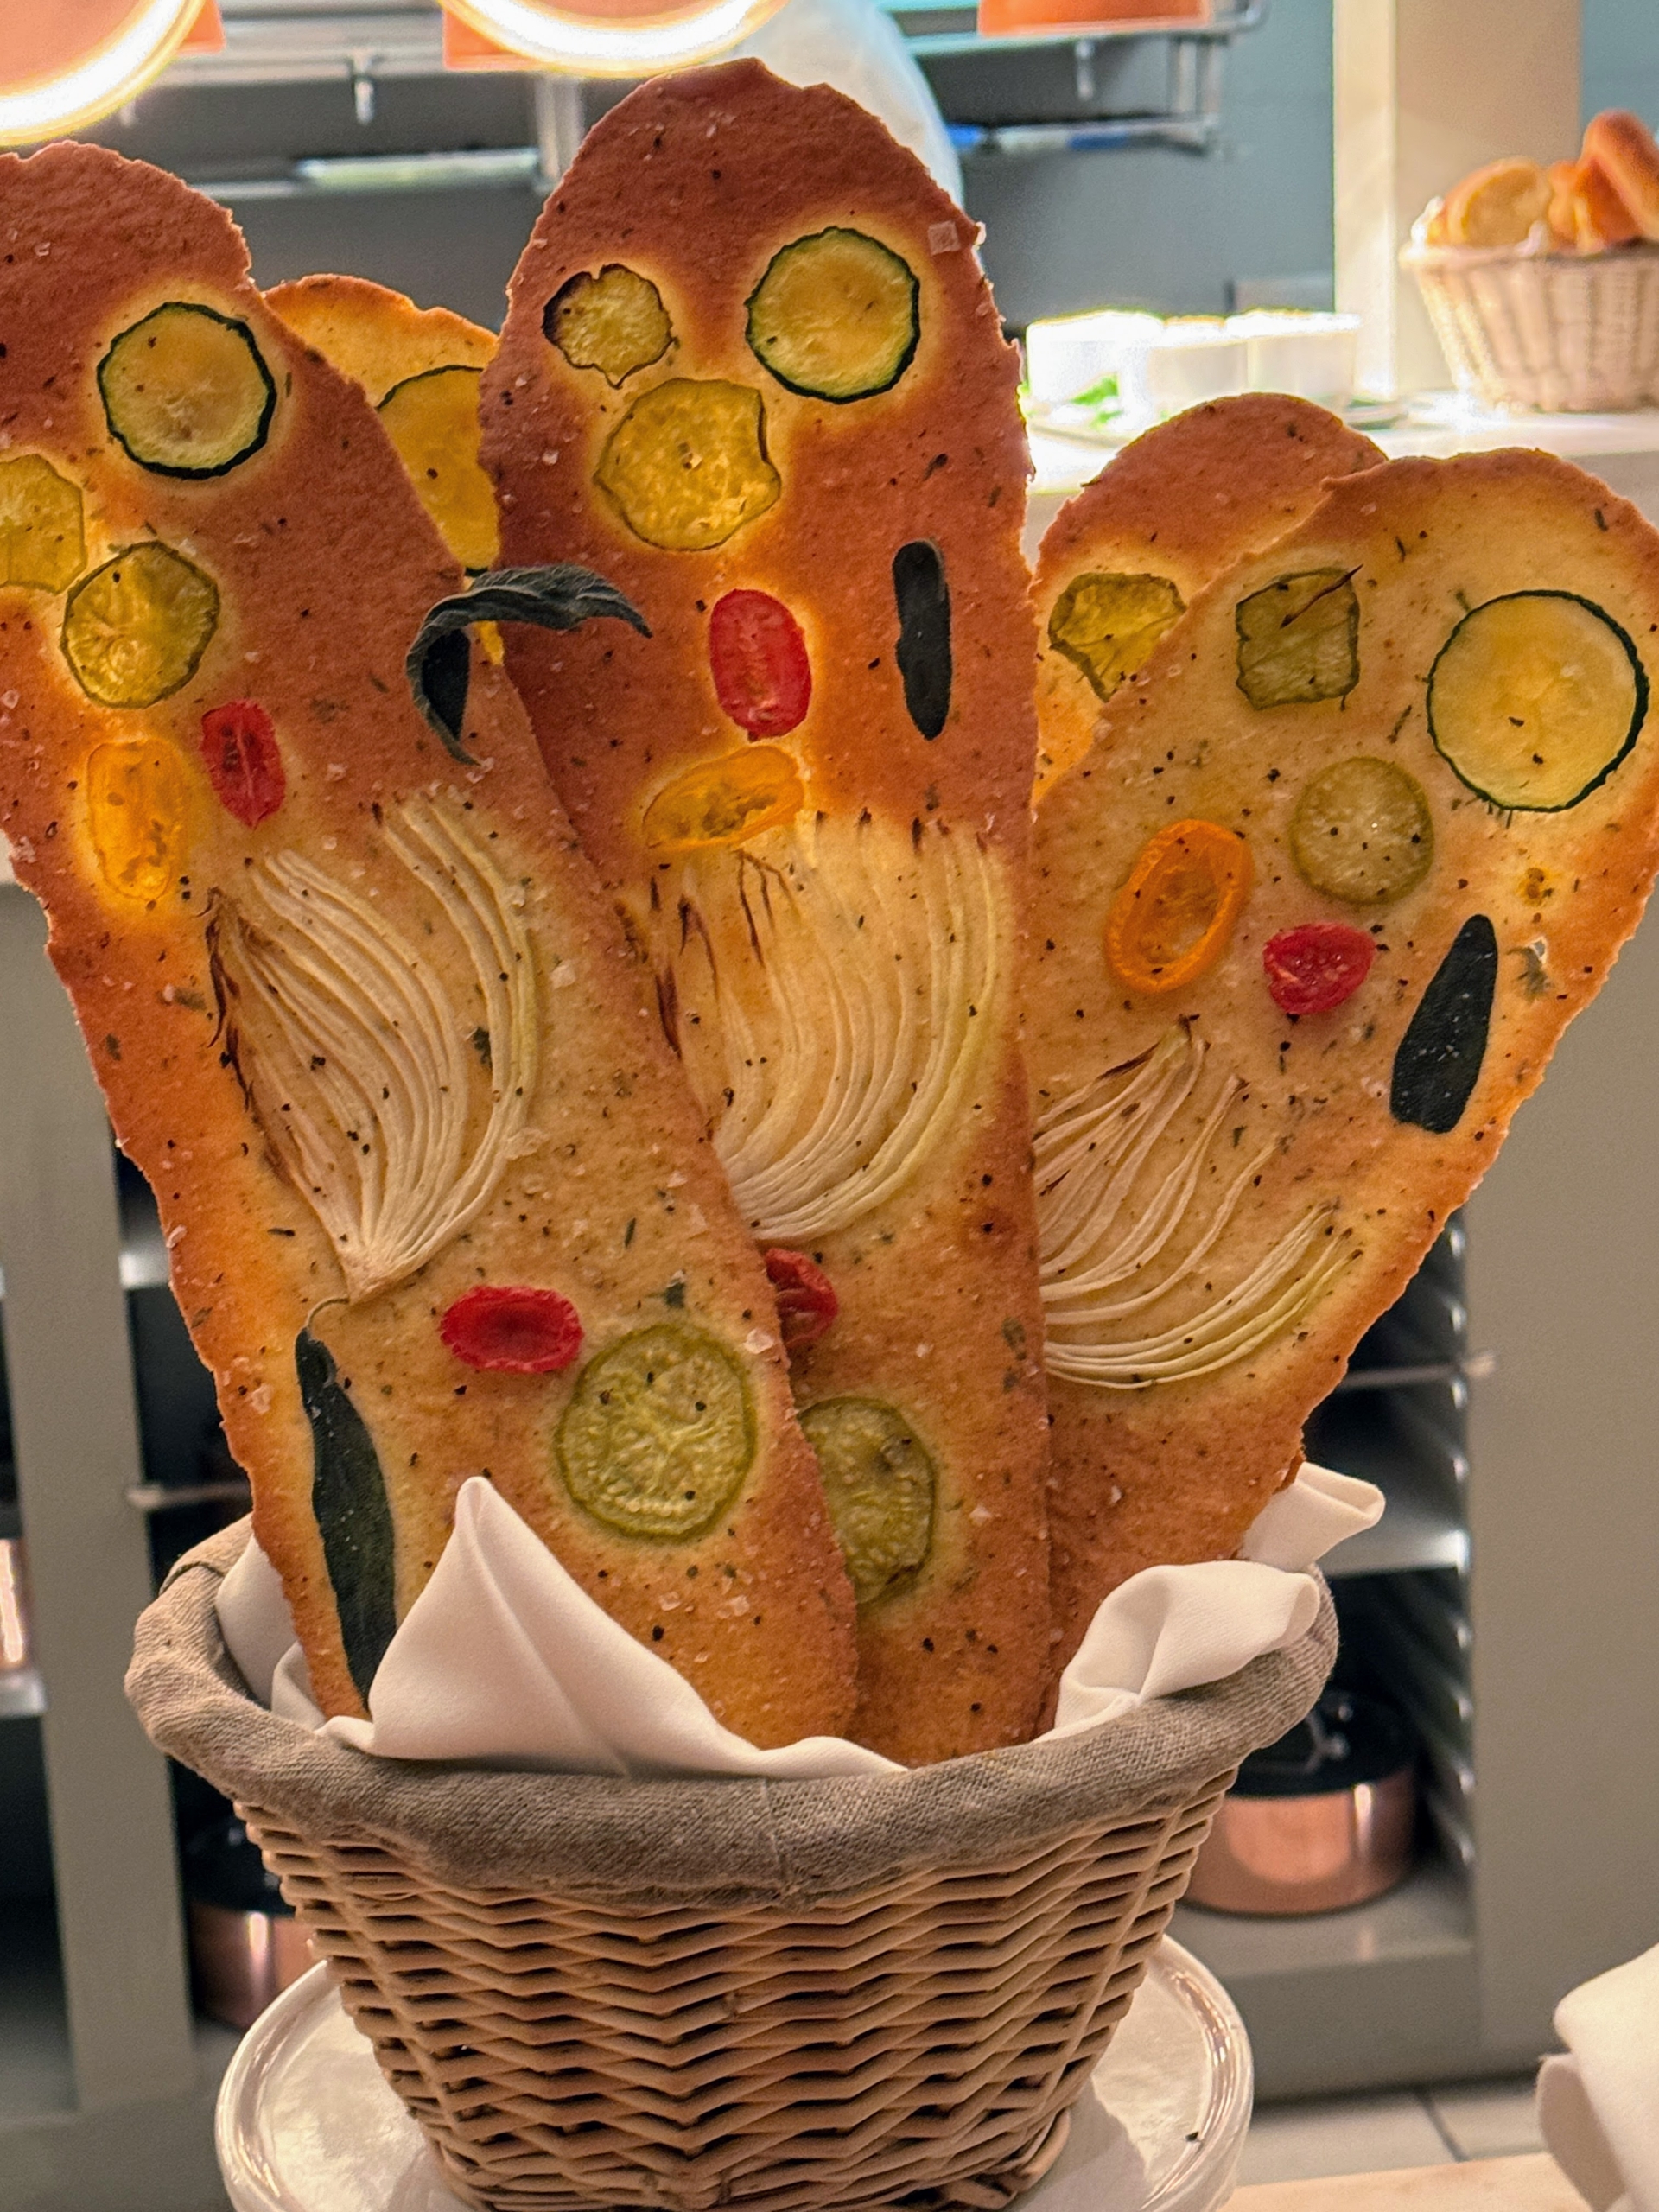
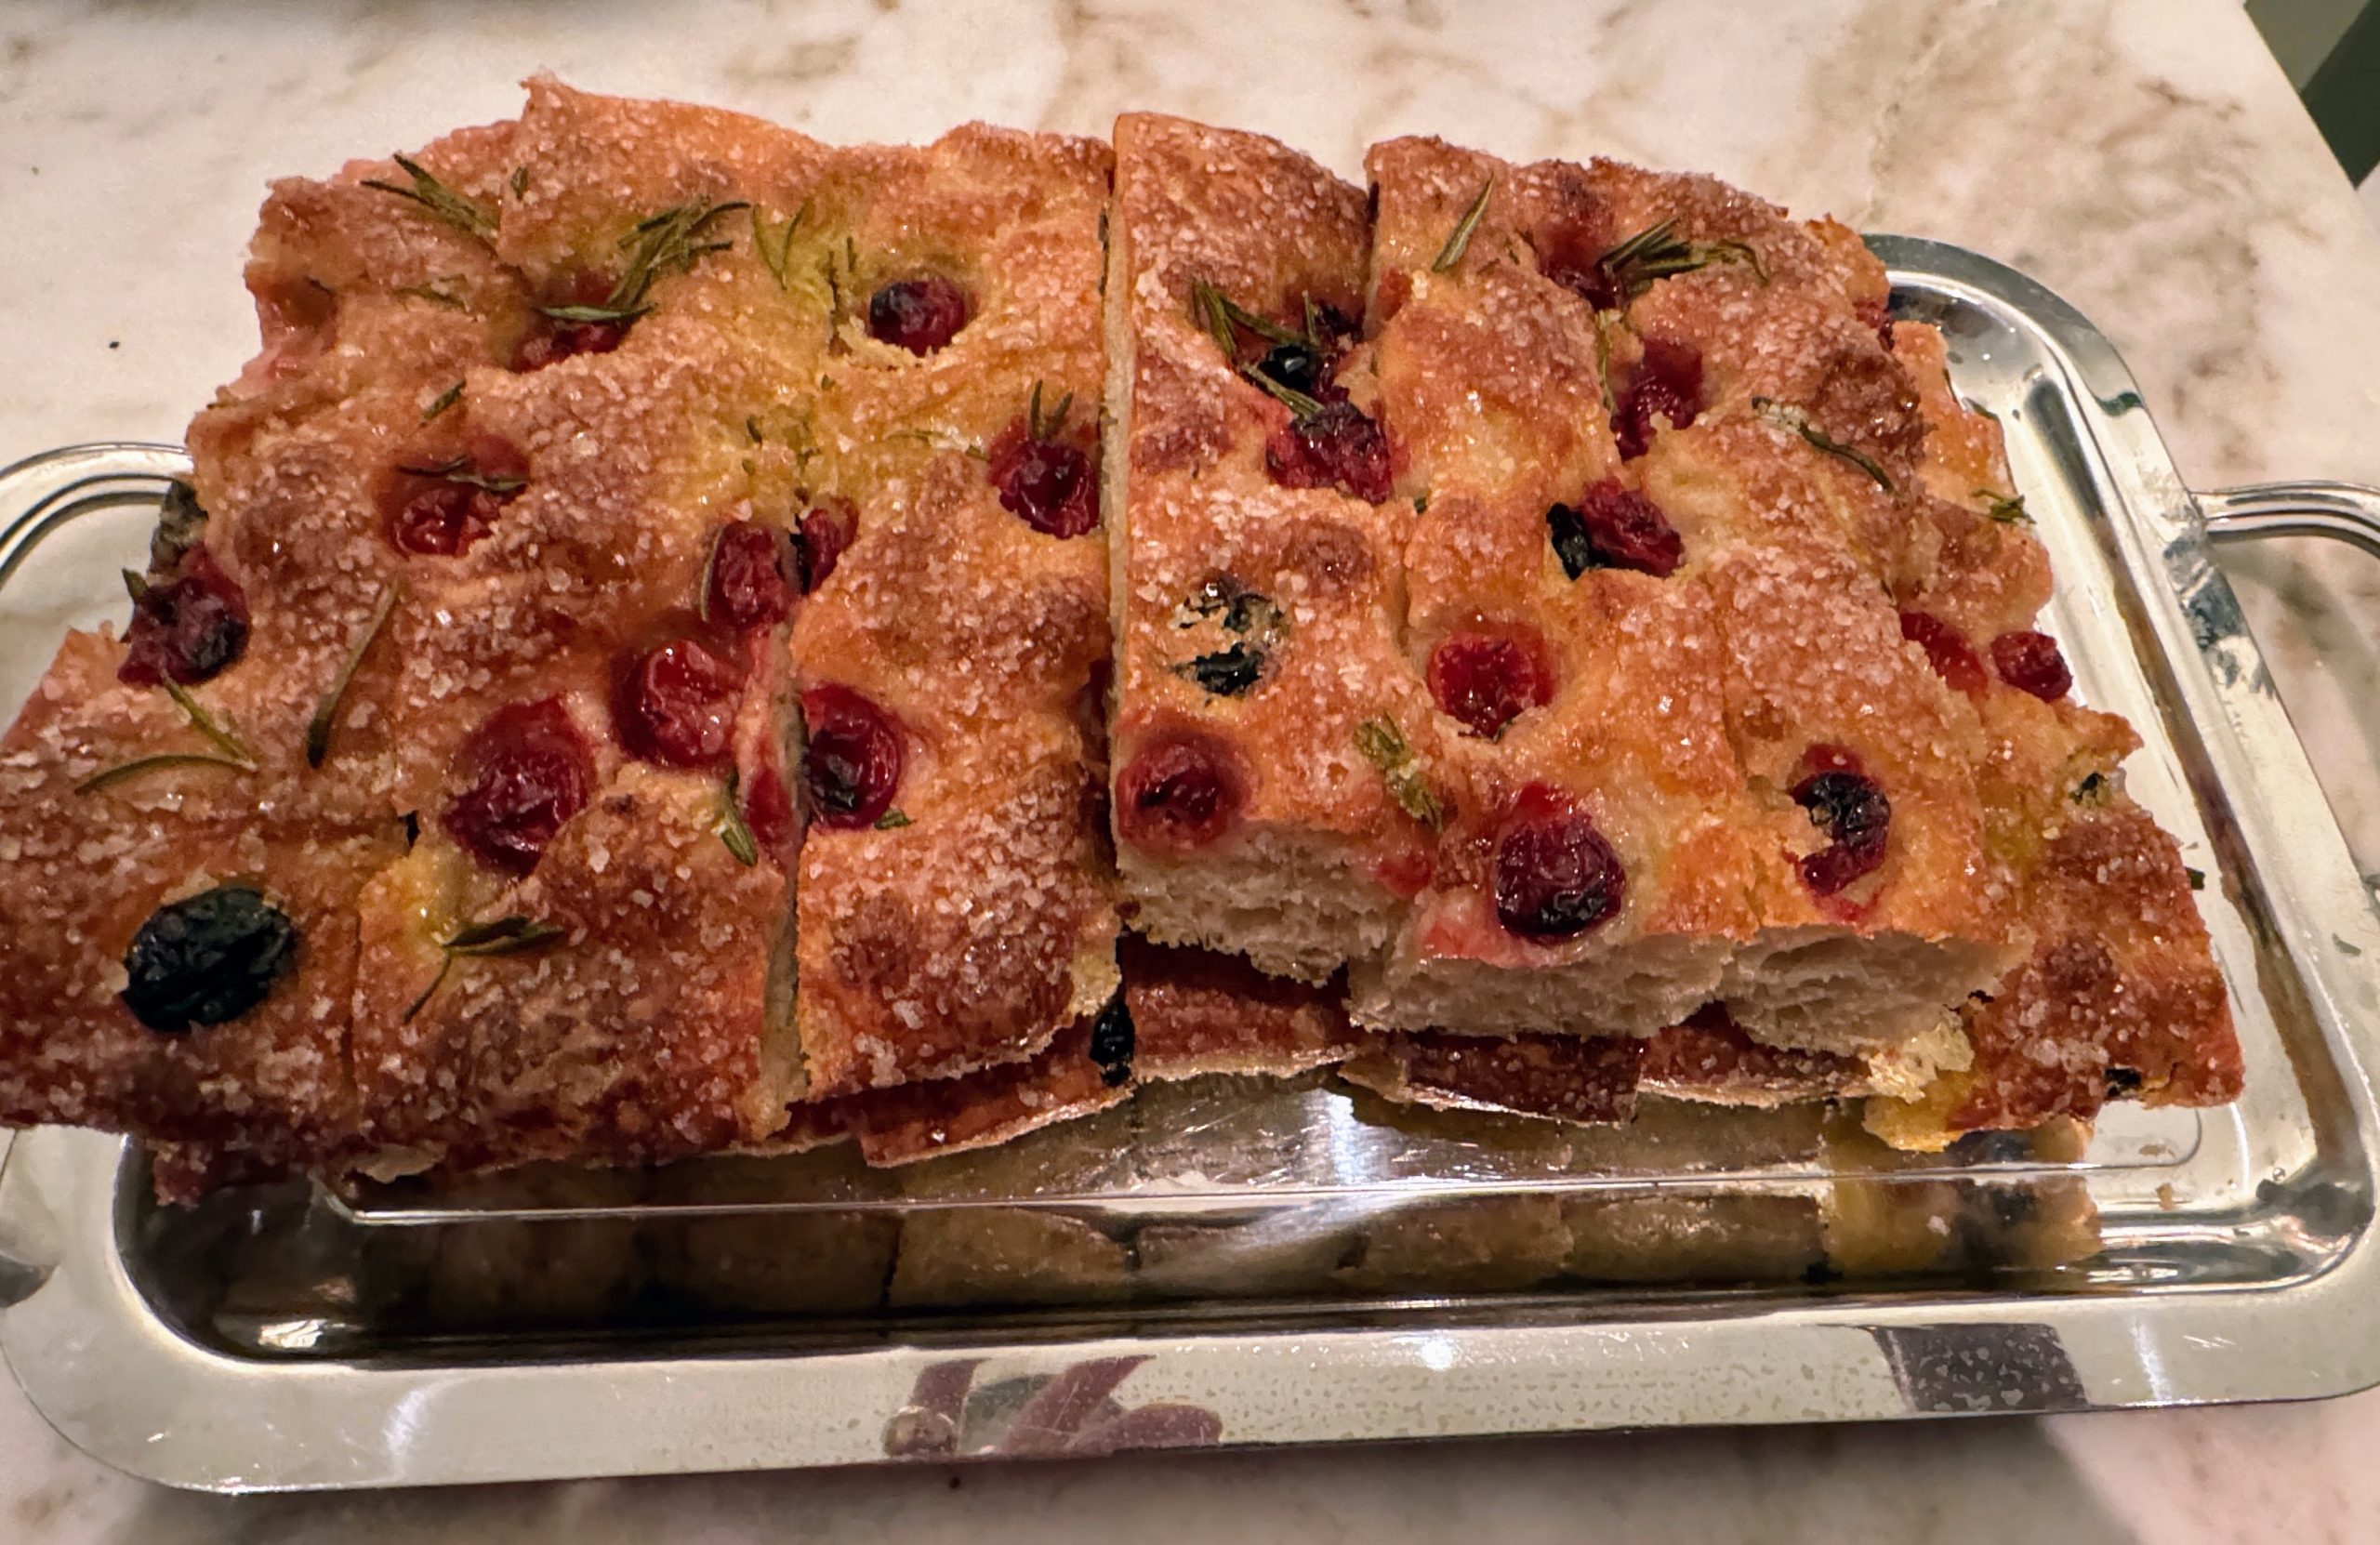
For dinner appetizers, we offer these house made bread baskets. Each one has JuneBug’s garden flatbreads, grape-rosemary focaccia, and warm Parker House rolls.
It’s a very popular appetizer. And these flat breads look so beautiful. Have you been to The Bedford yet?
Everything is made fresh right here at the restaurant. Look at this focaccia bread – baked perfectly.
Here I am with Brian Sandoval, who served as the 29th Governor of Nevada from 2011 to 2019, and his wife, Lauralyn.
In this photo I am joined by former 49ers MVP wide receiver Jerry Rice, president of Bank of America Private Bank, Katy Knox, and and sportscaster, Mike Tirico.
Before leaving I took this photo with some of those who have helped make The Bedford by Martha Stewart such a success. We have a great team at The Bedford.
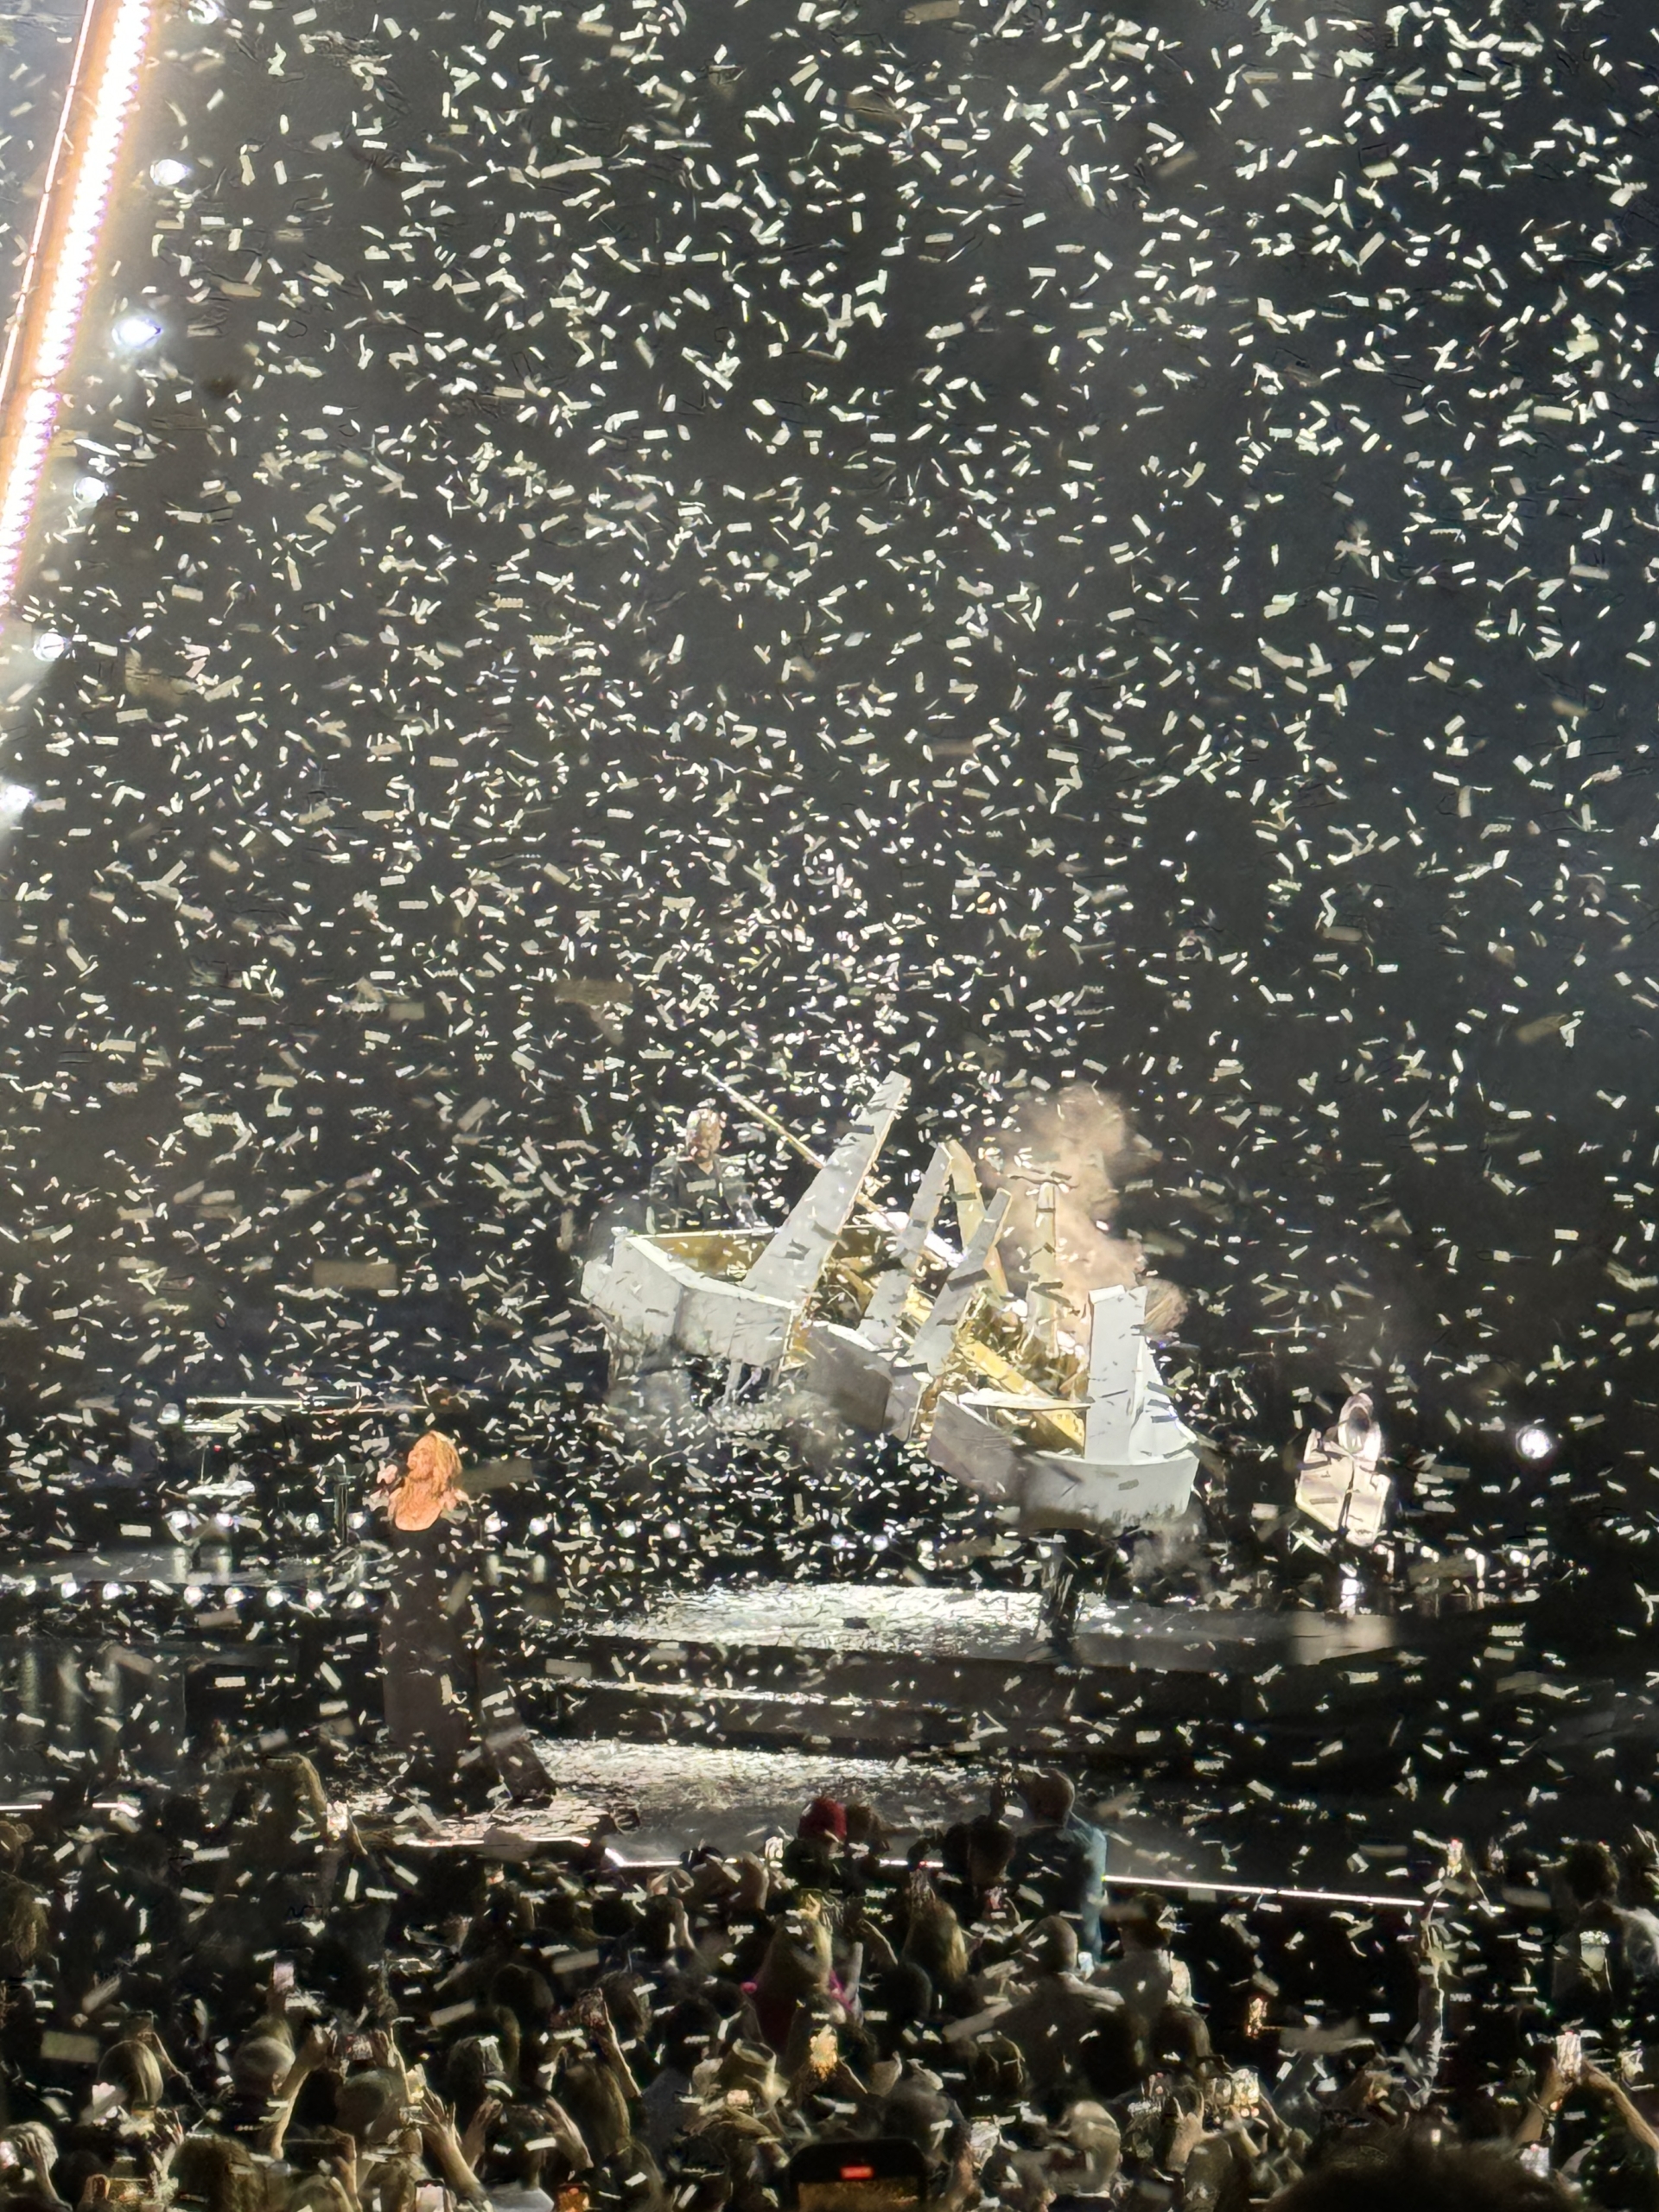
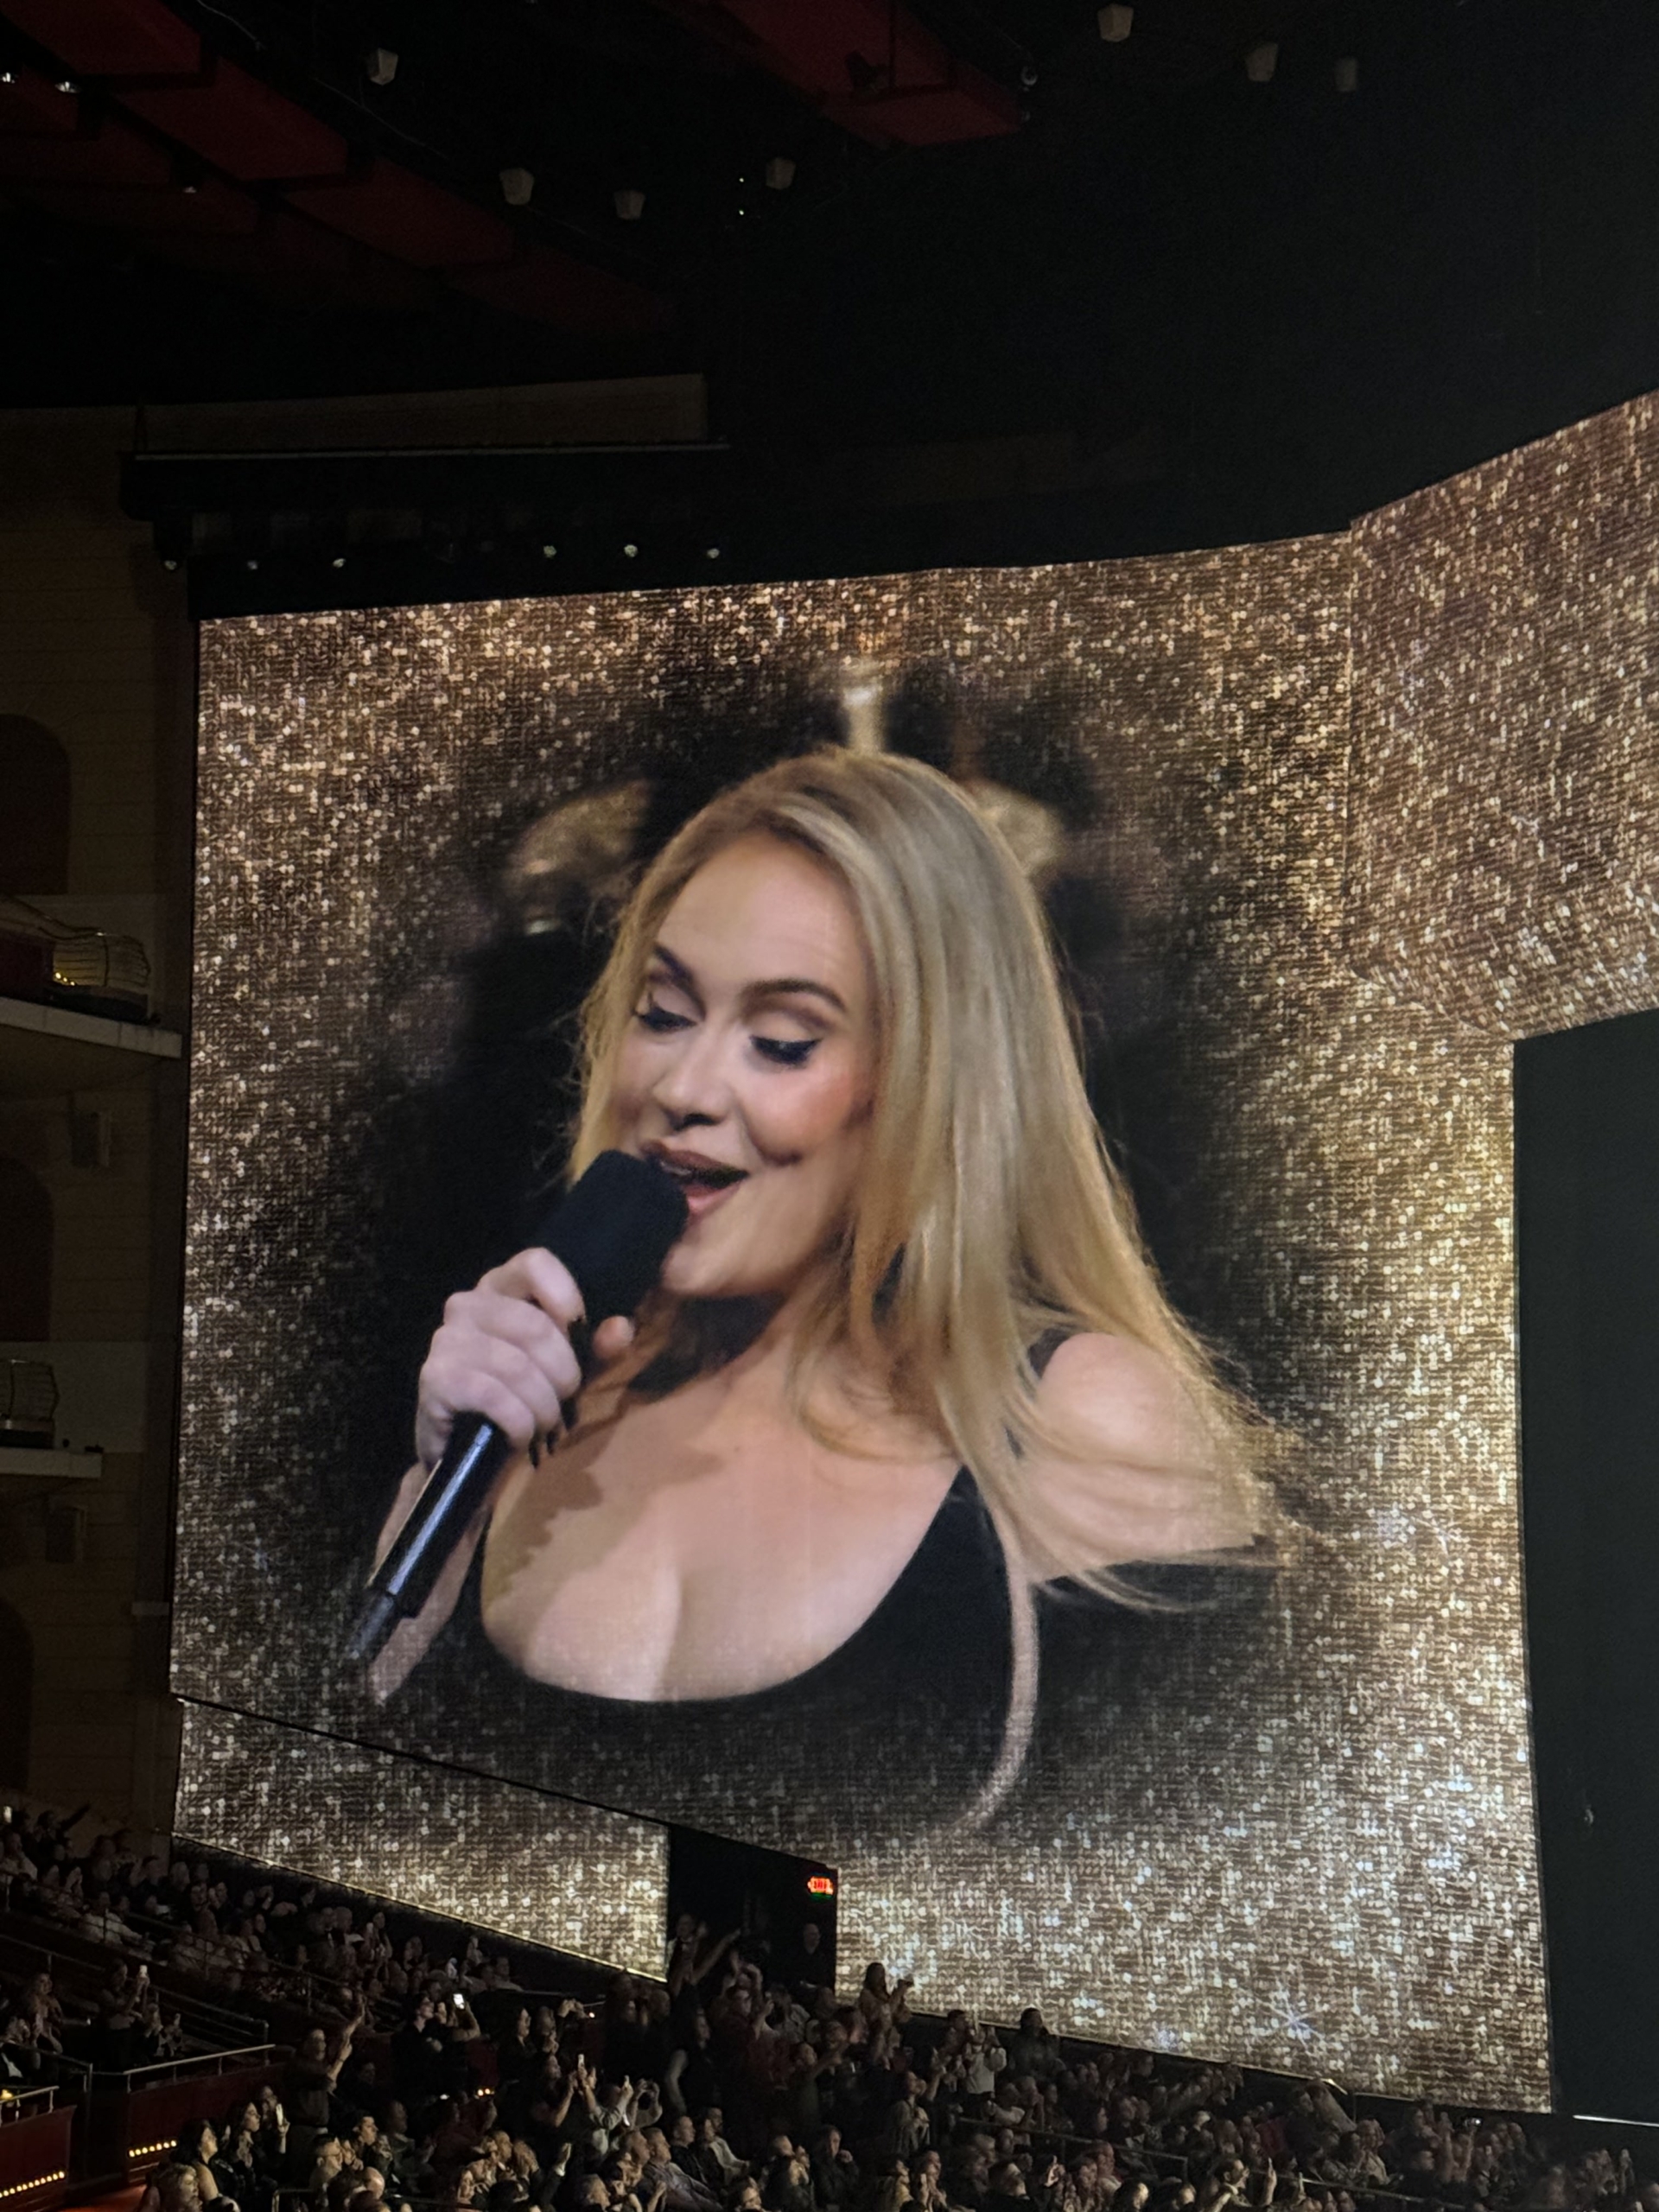
On another night, we saw multi-Grammy-winning artist Adele perform at the Caesars Palace Colosseum. It was magical.
The more than two-hour-long show featured 20-song sets that included hits from her albums like “21” and “30,” including tracks such as “Rolling in the Deep,” “Hello,” “Rumour Has It,” and “Easy on Me.”
Here I am standing with “Sheriff” himself, one of the greatest quarterbacks of all time, Peyton Manning. Peyton played in the National Football League for 18 seasons – 14 with the Indianapolis Colts and four with the Denver Broncos. It was such a treat for my grandson to meet him.
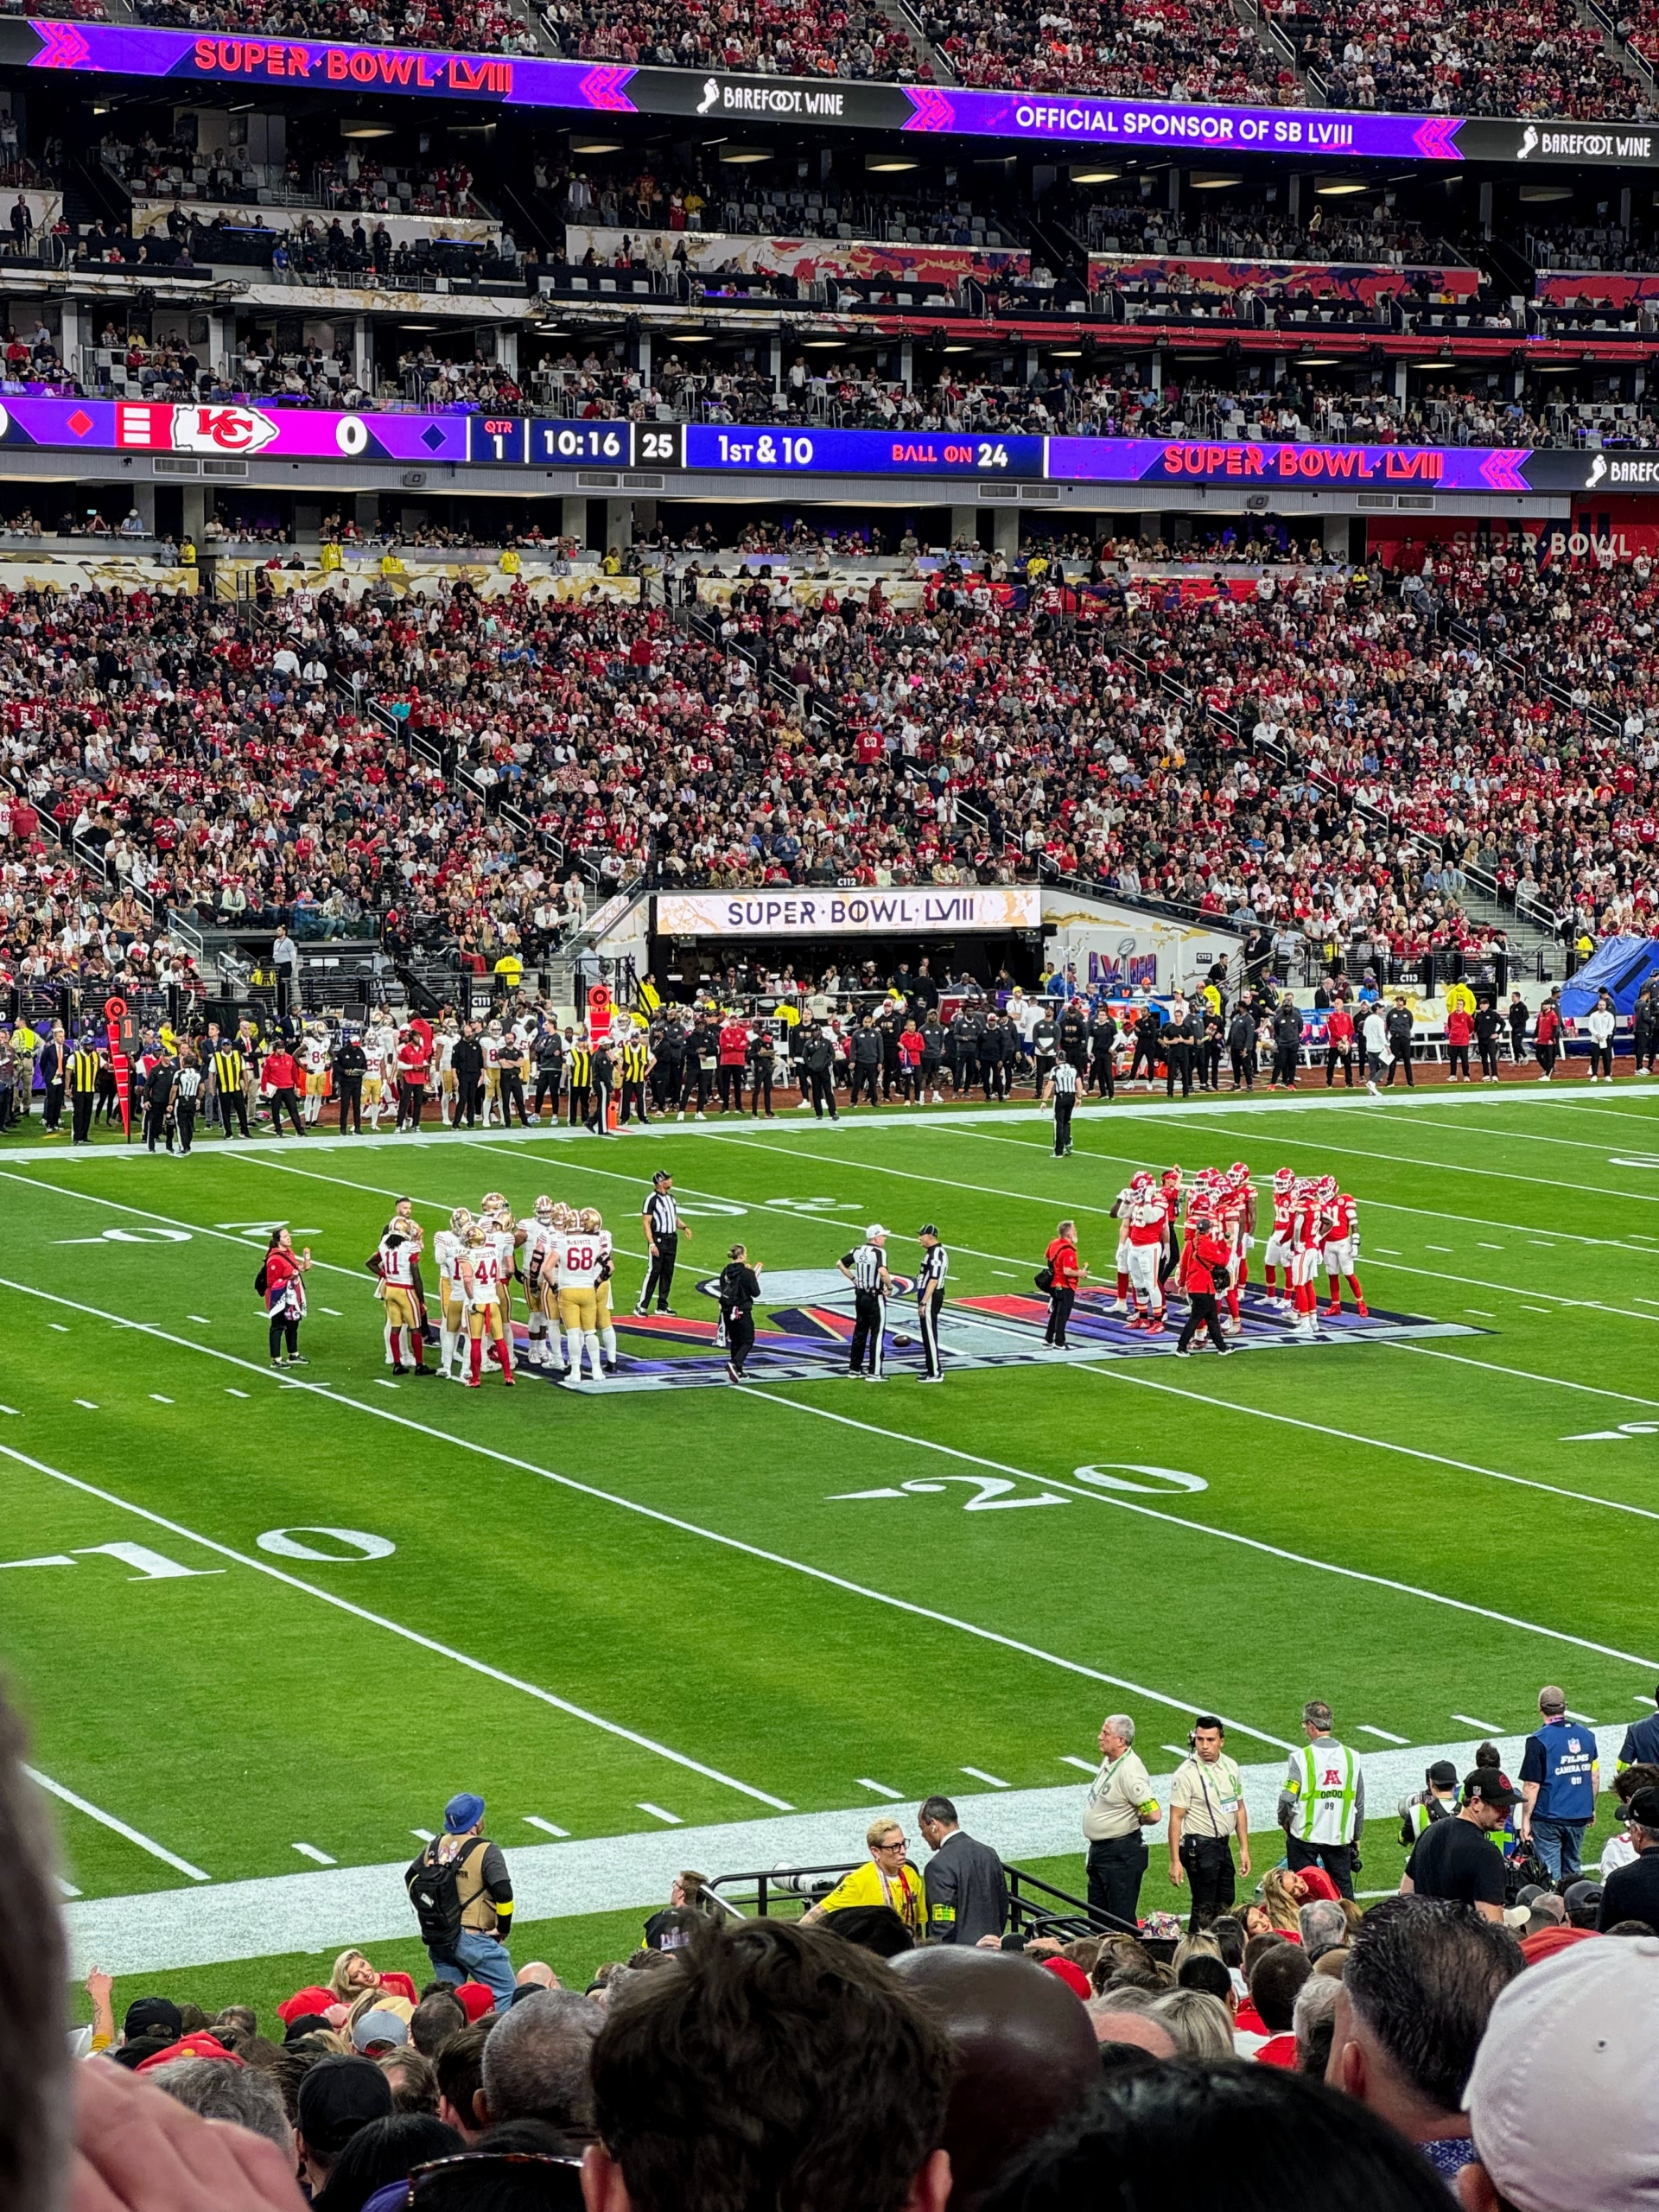
The Big Game was played at Allegiant Stadium, a domed multi-purpose facility located in Paradise, just southwest of Las Vegas. With 65,000 seats, the stadium is home field of the Las Vegas Raiders and the University of Nevada Rebels college football team.
This game was the second Chiefs-49ers Super Sunday face-off. They also played each other four years ago in game LIV, Kansas City.
Here I am with Christine Colaco from Bank of America. She manages events and has been overseeing this Big Game weekend for our group for many years.
I love attending this event – the excitement of the crowds and the action on the field, from the battling NFL teams to the halftime entertainment. It’s a fun time every year. The 49ers are in white and gold and the Chiefs are in red.
And look, I made it to the jumbotron video wall. It was still early in the game – second quarter.
Here, preparations for the half-time show featuring Usher.
Alicia Keys, dressed in a billowing organza cape, appeared as a special guest with Usher during the performance. In the end, Kansas City Chiefs reigned supreme, beating the San Francisco 49ers 25 to 22 in overtime. It was a great game and a very enjoyable time in Las Vegas.
And just like that, my peacocks have grown back their lustrous covert tail feathers signaling the start of a very special time of year - breeding season.
From February until early August, the peacocks display their stunning and iridescent tail feathers, strut back and forth shaking their hindquarters to produce a rattling sound, and make loud calls to the females. Once the season is over, the males shed their plumes in a process called molting and regrow them longer and fuller the following year. My peafowl thrive in a large enclosure just outside my stable. I visit these beautiful birds every day. I love calling out to them and waiting for their energetic responses. They are all doing exceptionally well and remain active, curious, and very vocal.
Here are some of the latest photos of my peafowl, enjoy.
I share my farm with an ostentation of beautiful peafowl – peacocks as well as peahens. Peafowl are members of the pheasant family. There are two Asiatic species – the blue or Indian peafowl native to India and Sri Lanka, and the green peafowl originally from Java and Burma, and one African species, the Congo peafowl from African rain forests. All my peafowl are Indian.
My peafowl live in a large pen outside my stable, completely enclosed to keep them safe from predators. Here is a beautiful and very curious “blue boy” coming to say hello.
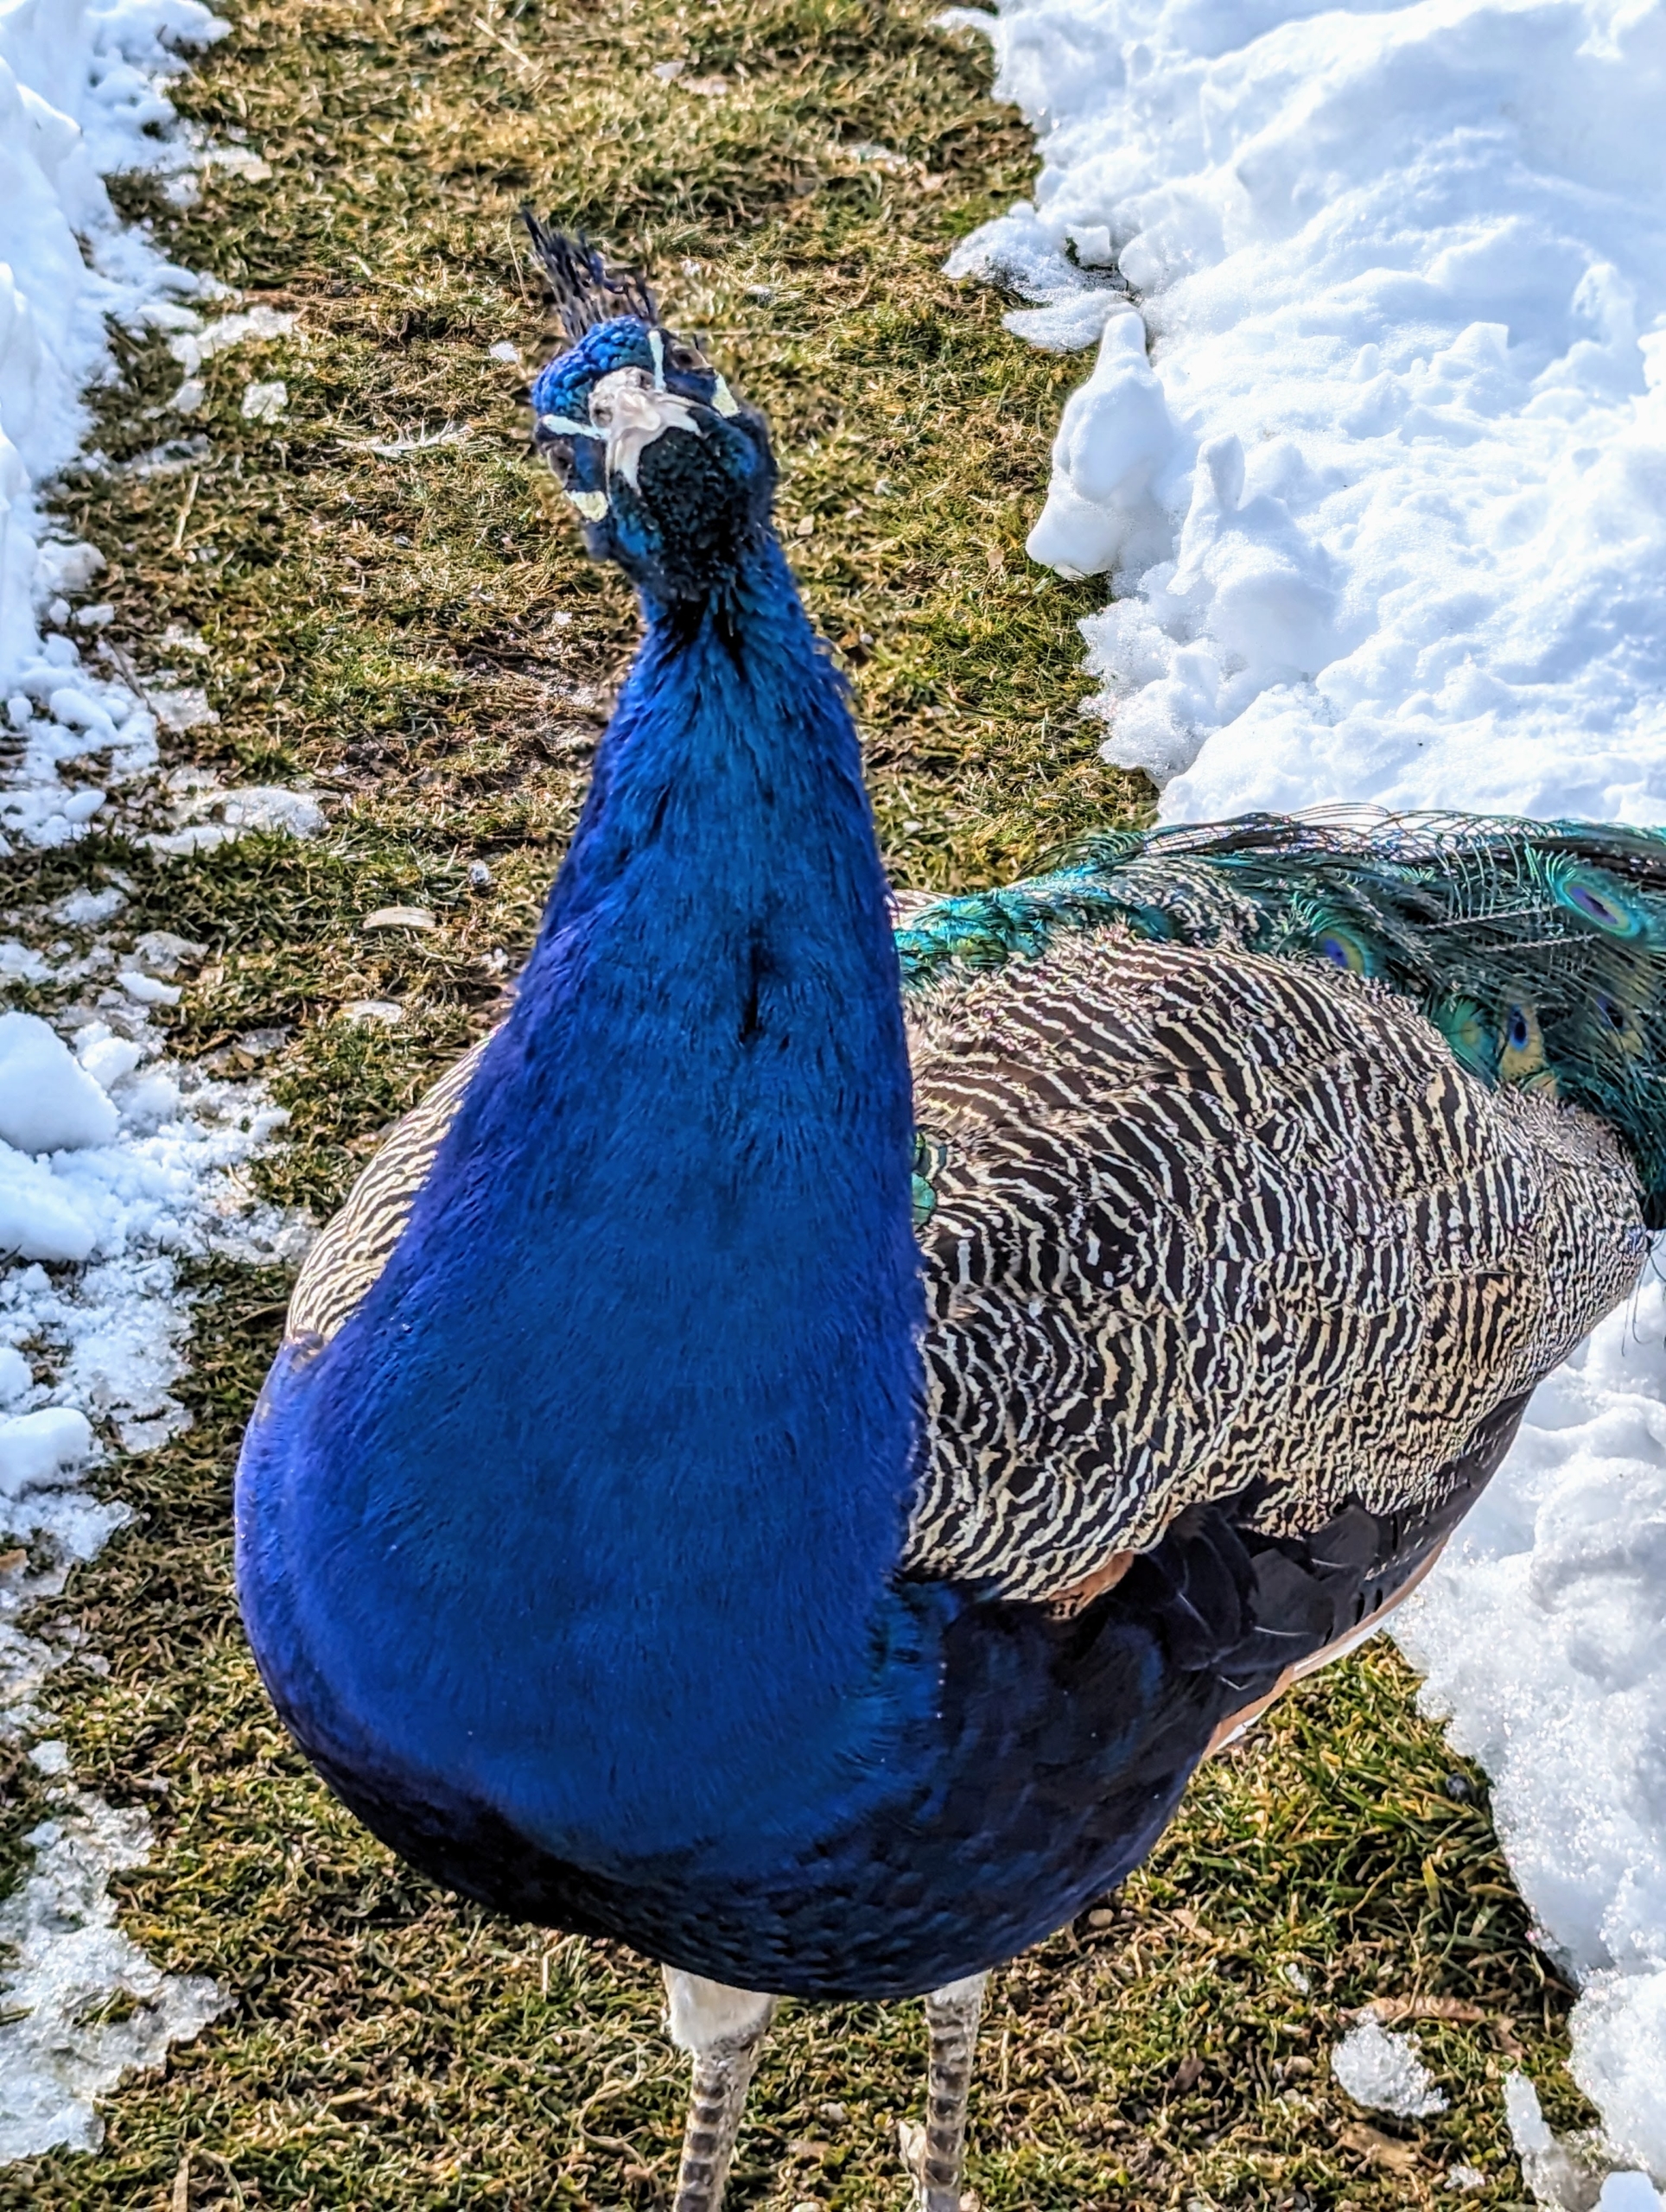
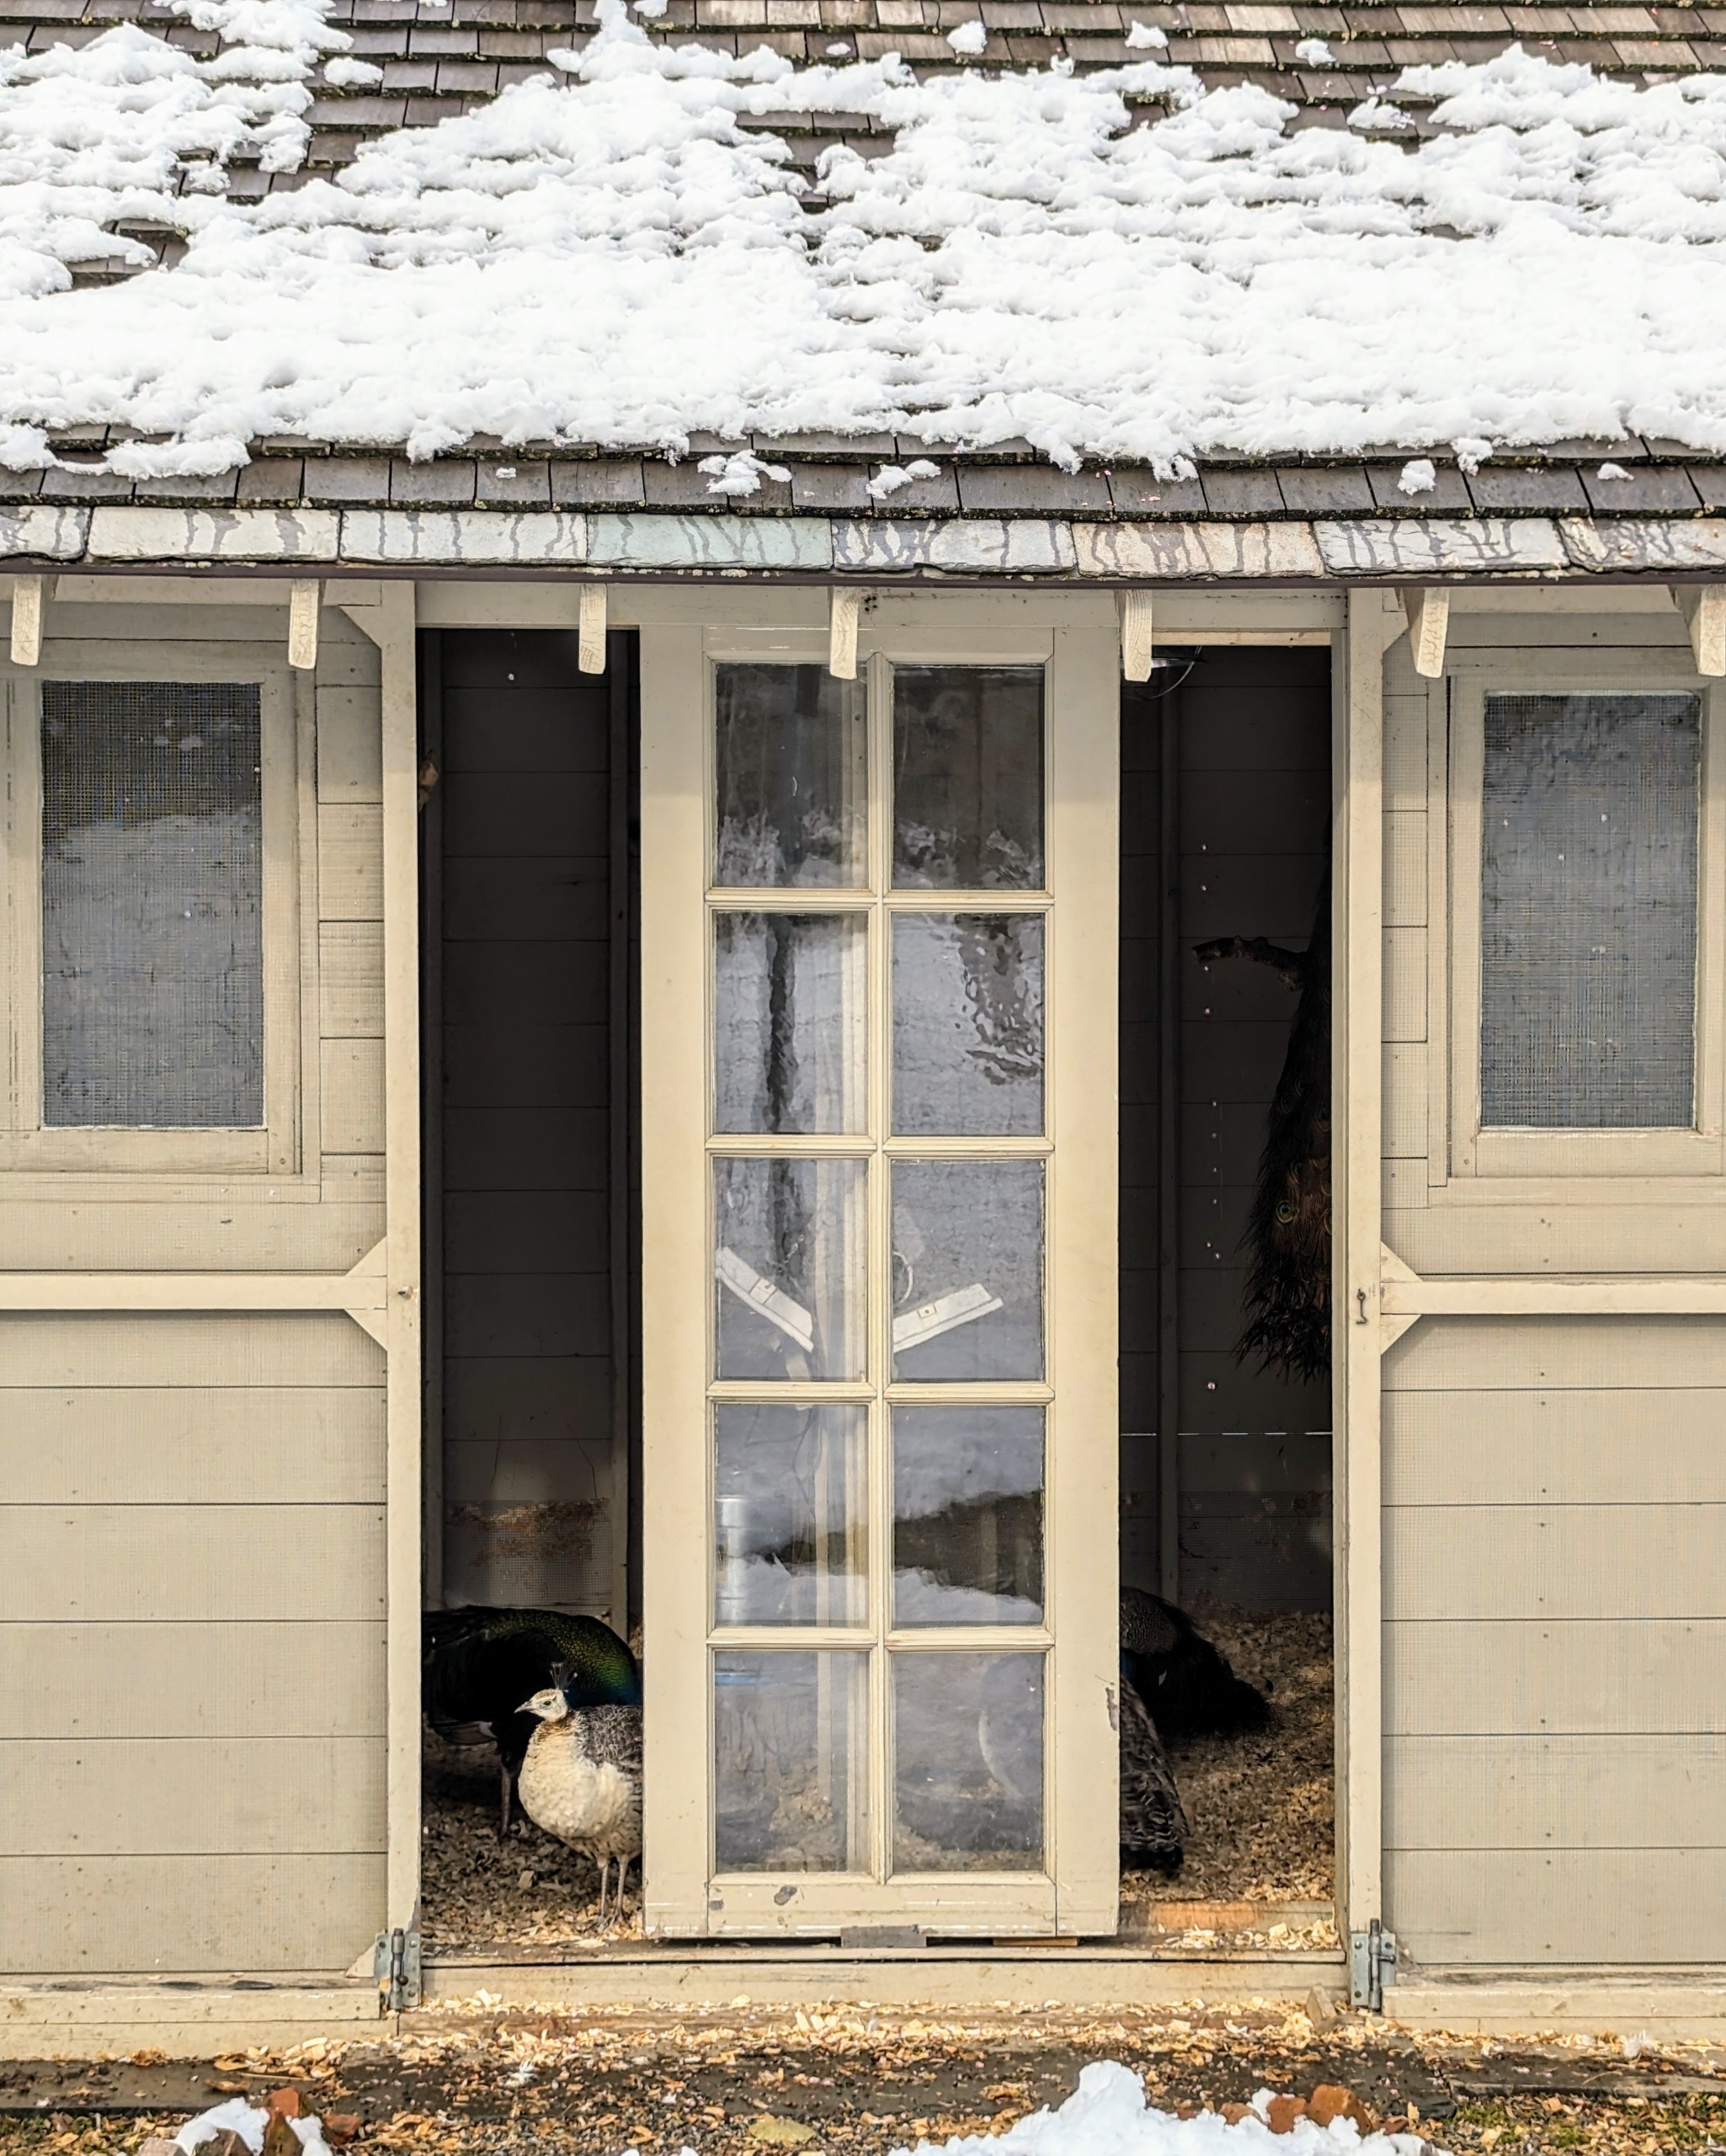
This is the outside of the coop. Peafowls are very hardy birds, and even though they are native to warm climates, they do very well in cold weather as long as they have access to dry areas away from strong winds. These birds will spend most of their days outdoors, and nights in their coop where it is warm and cozy.
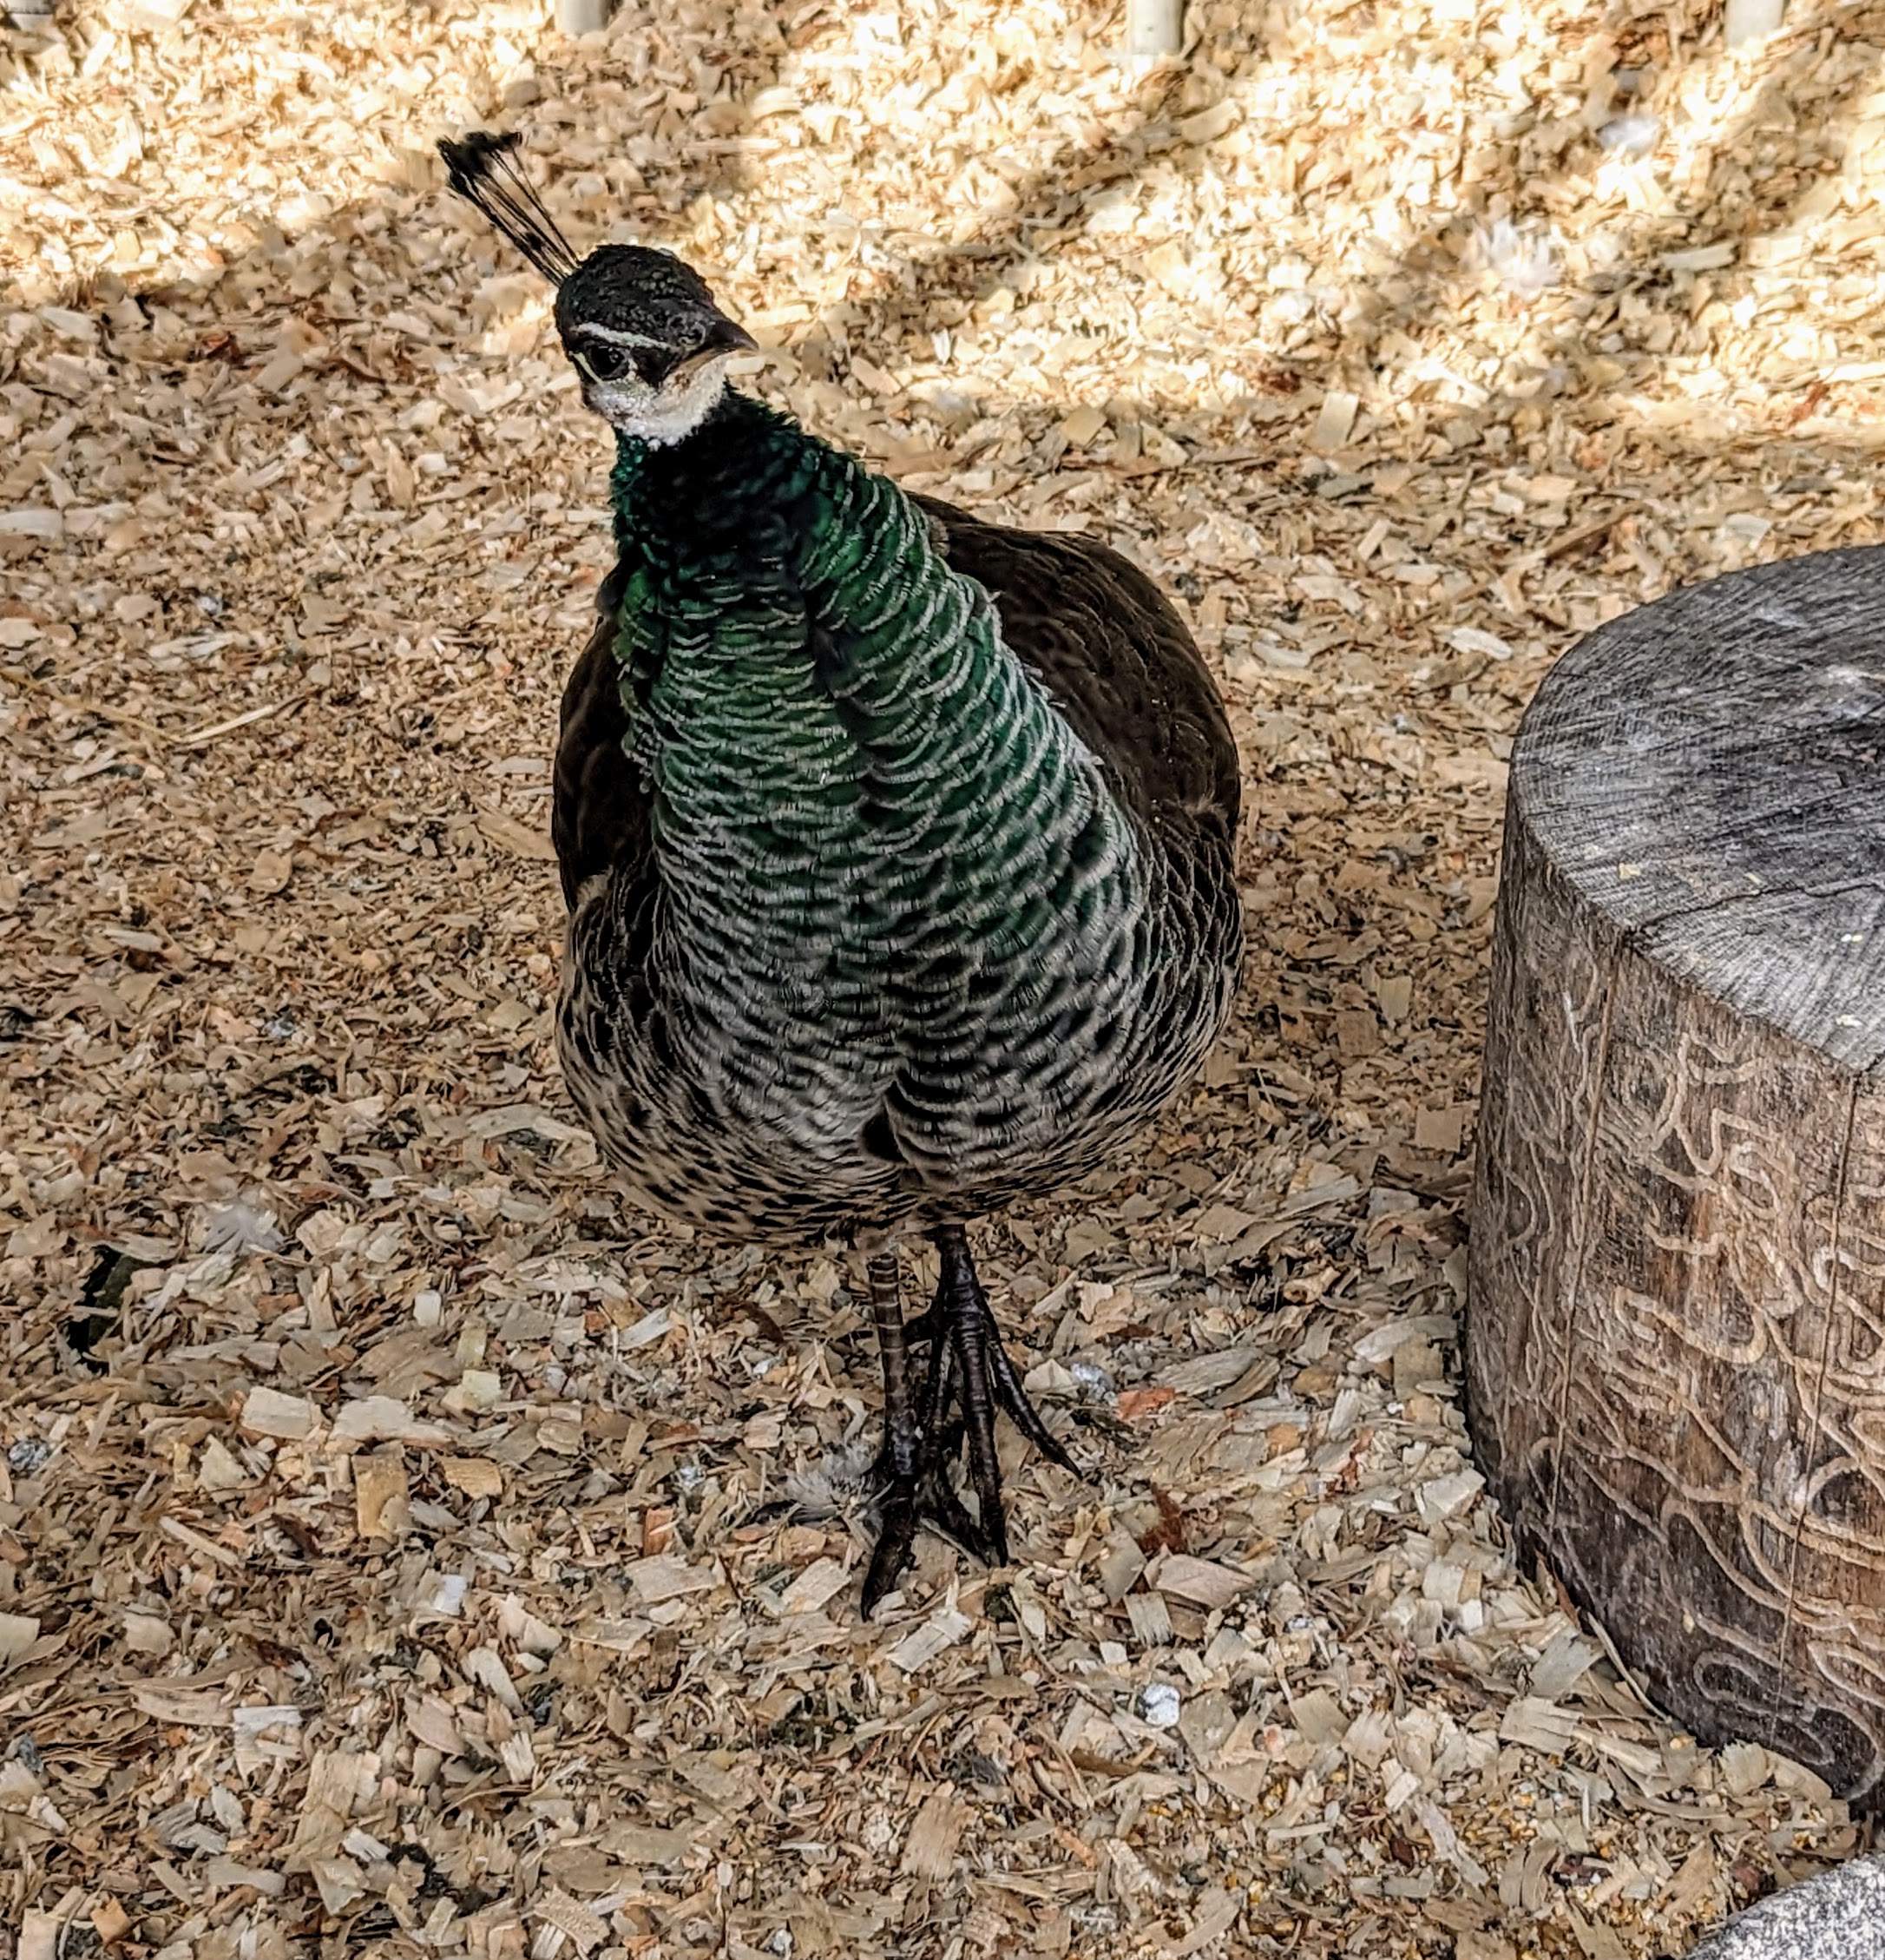
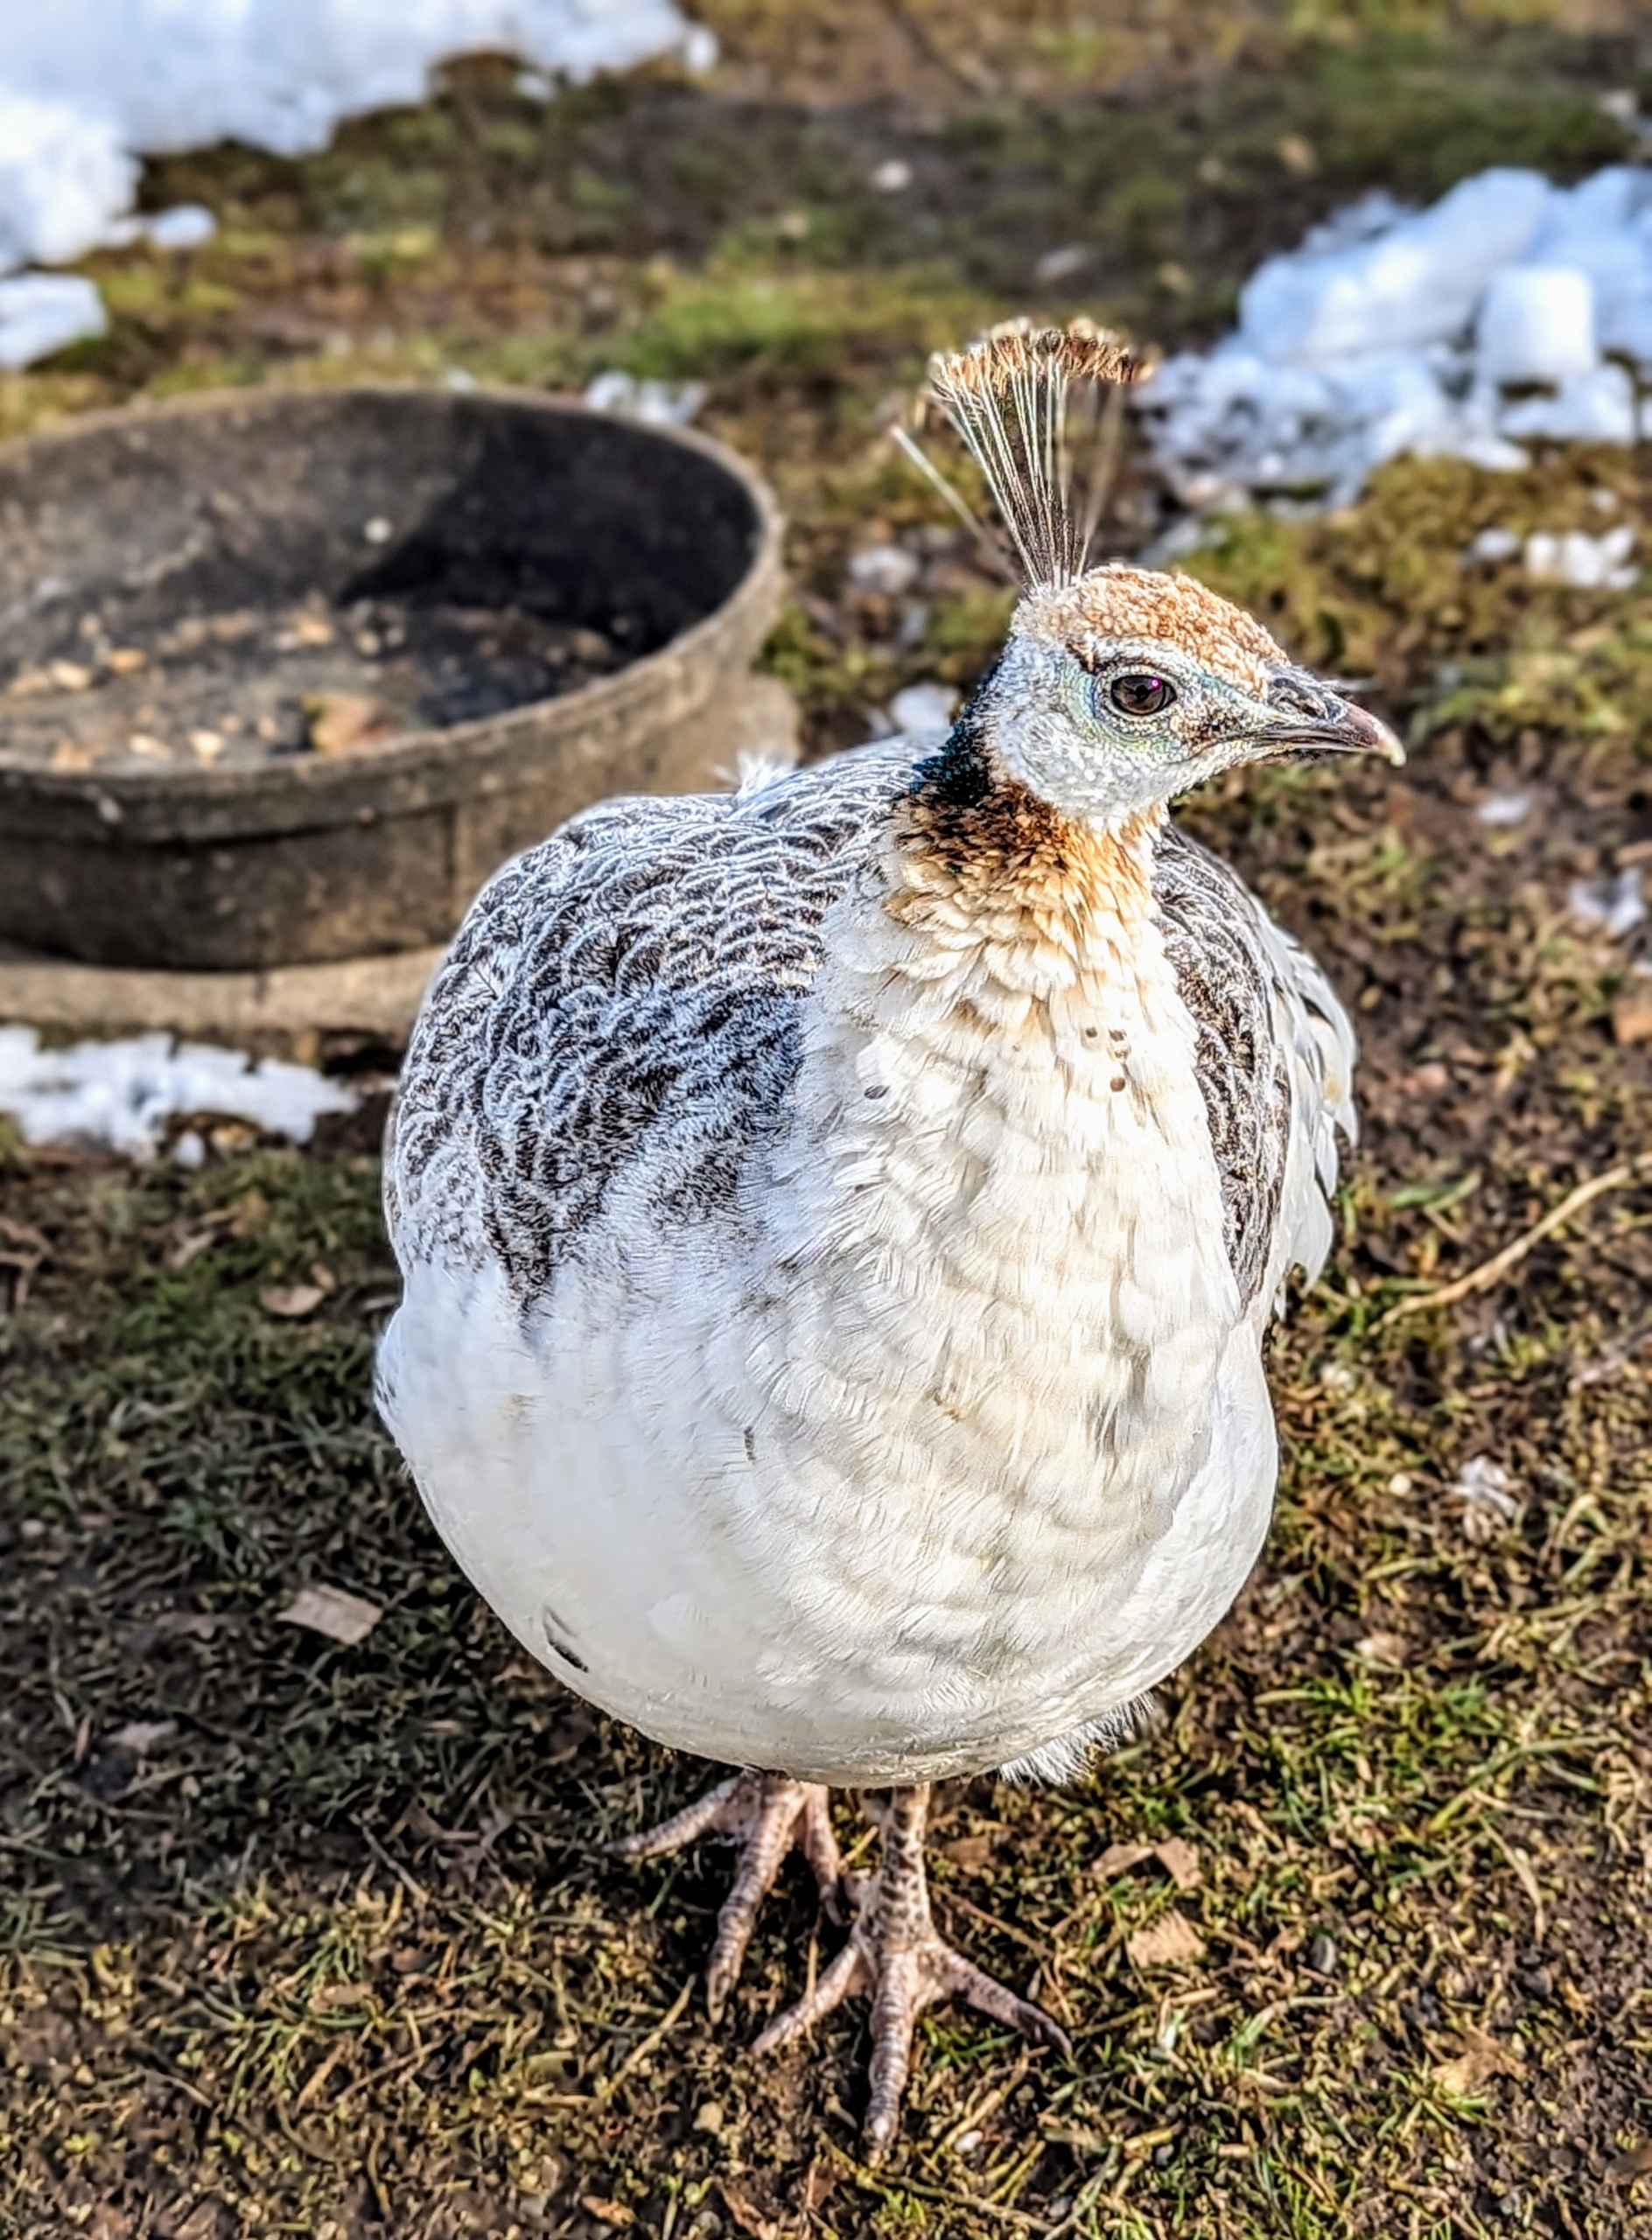
This is a female, or peahen, inside the coop. All my birds are friendly and come up quite close to visitors.
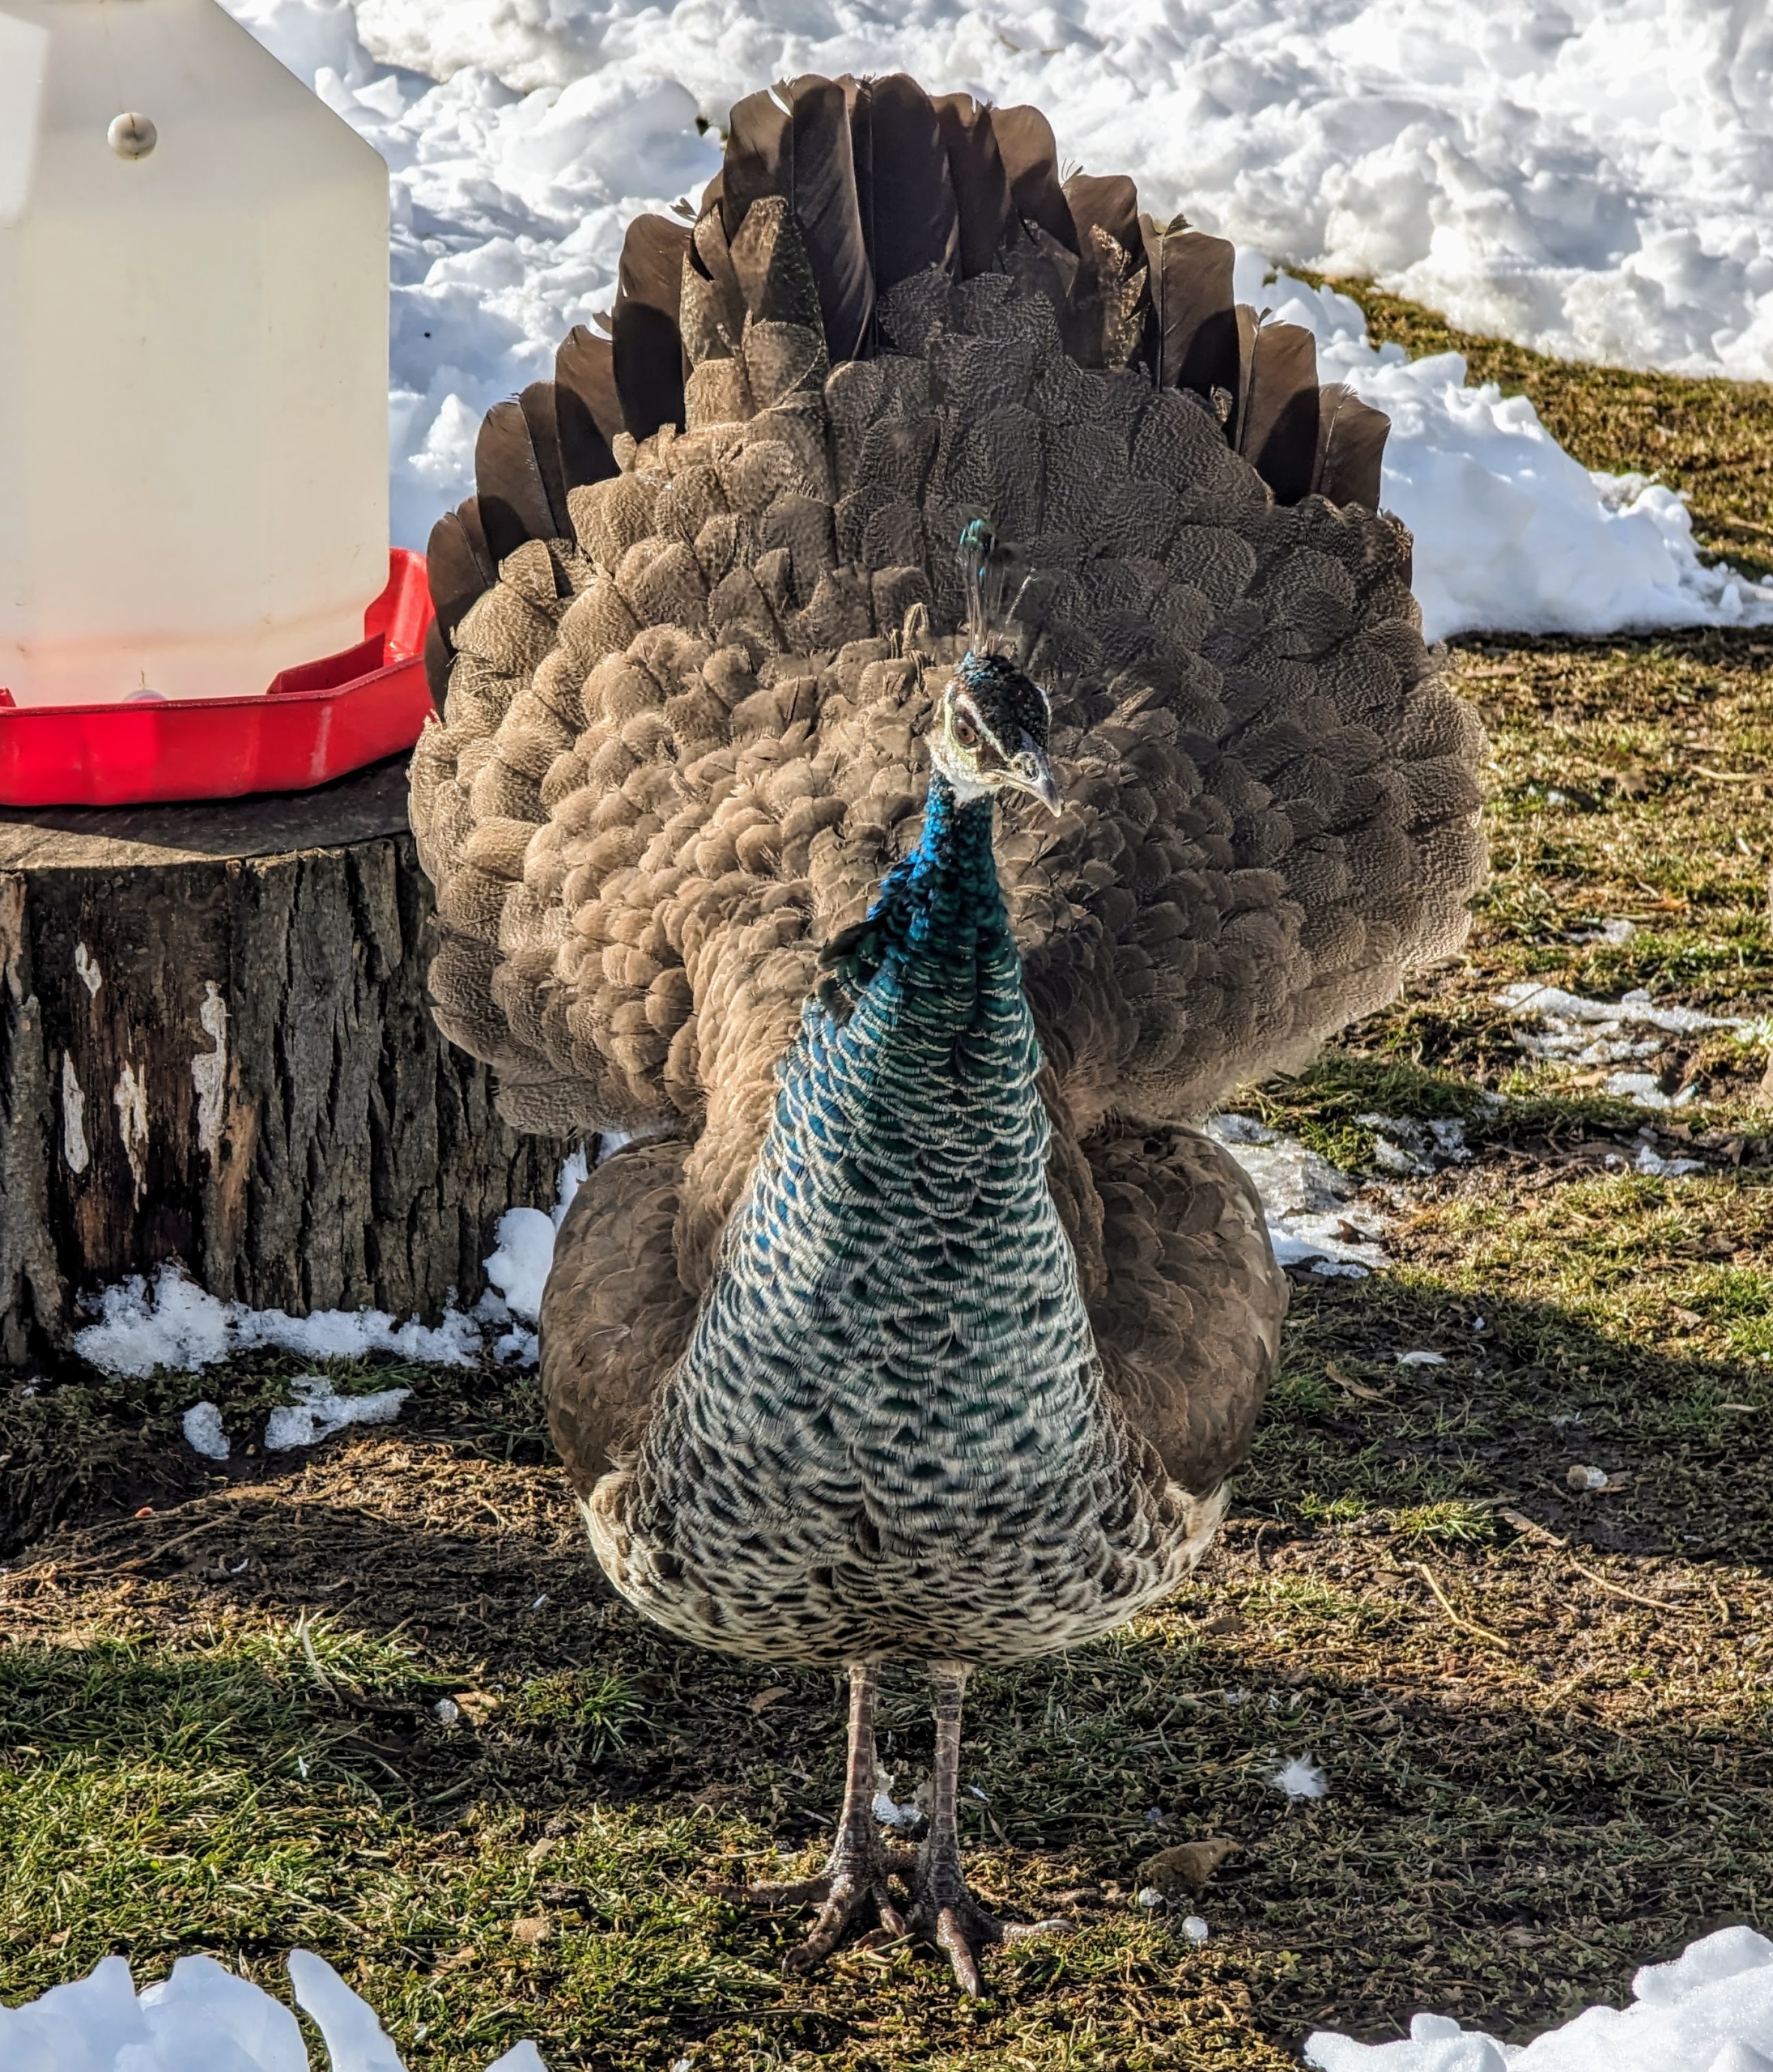
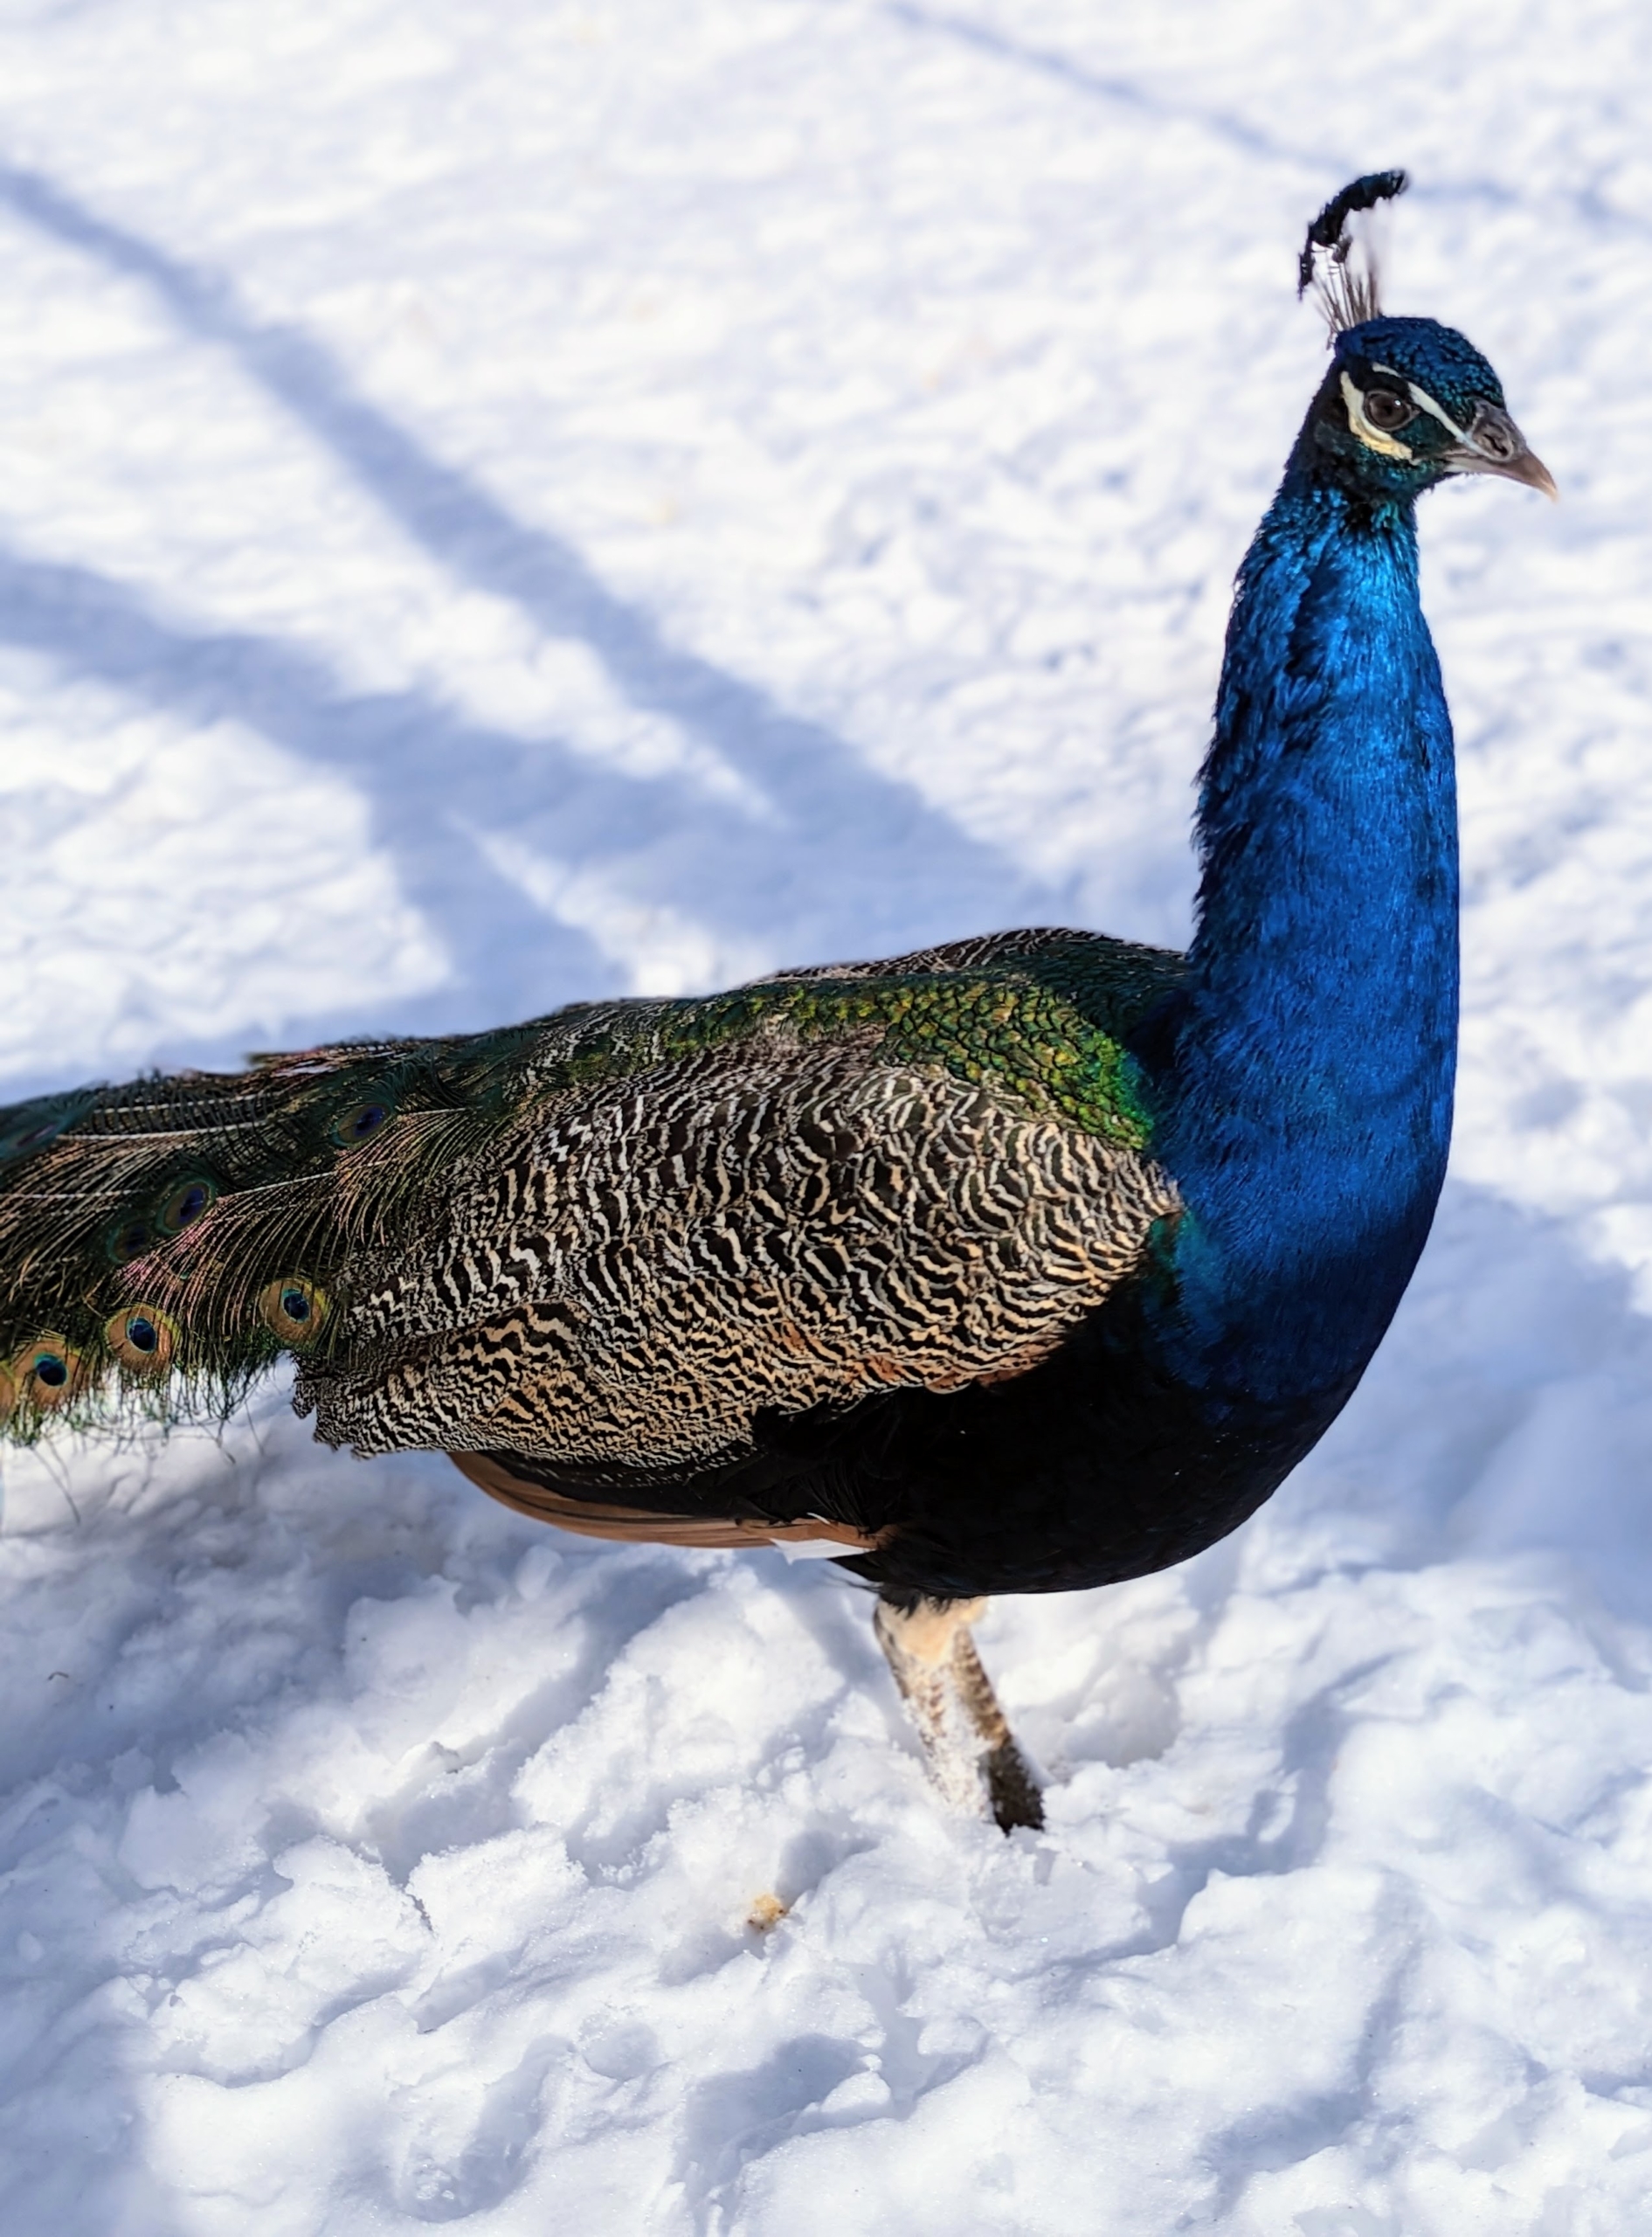
In autumn, when it is not mating season, the males’ plumes are shorter. This photo of one of my adult males was taken last November.
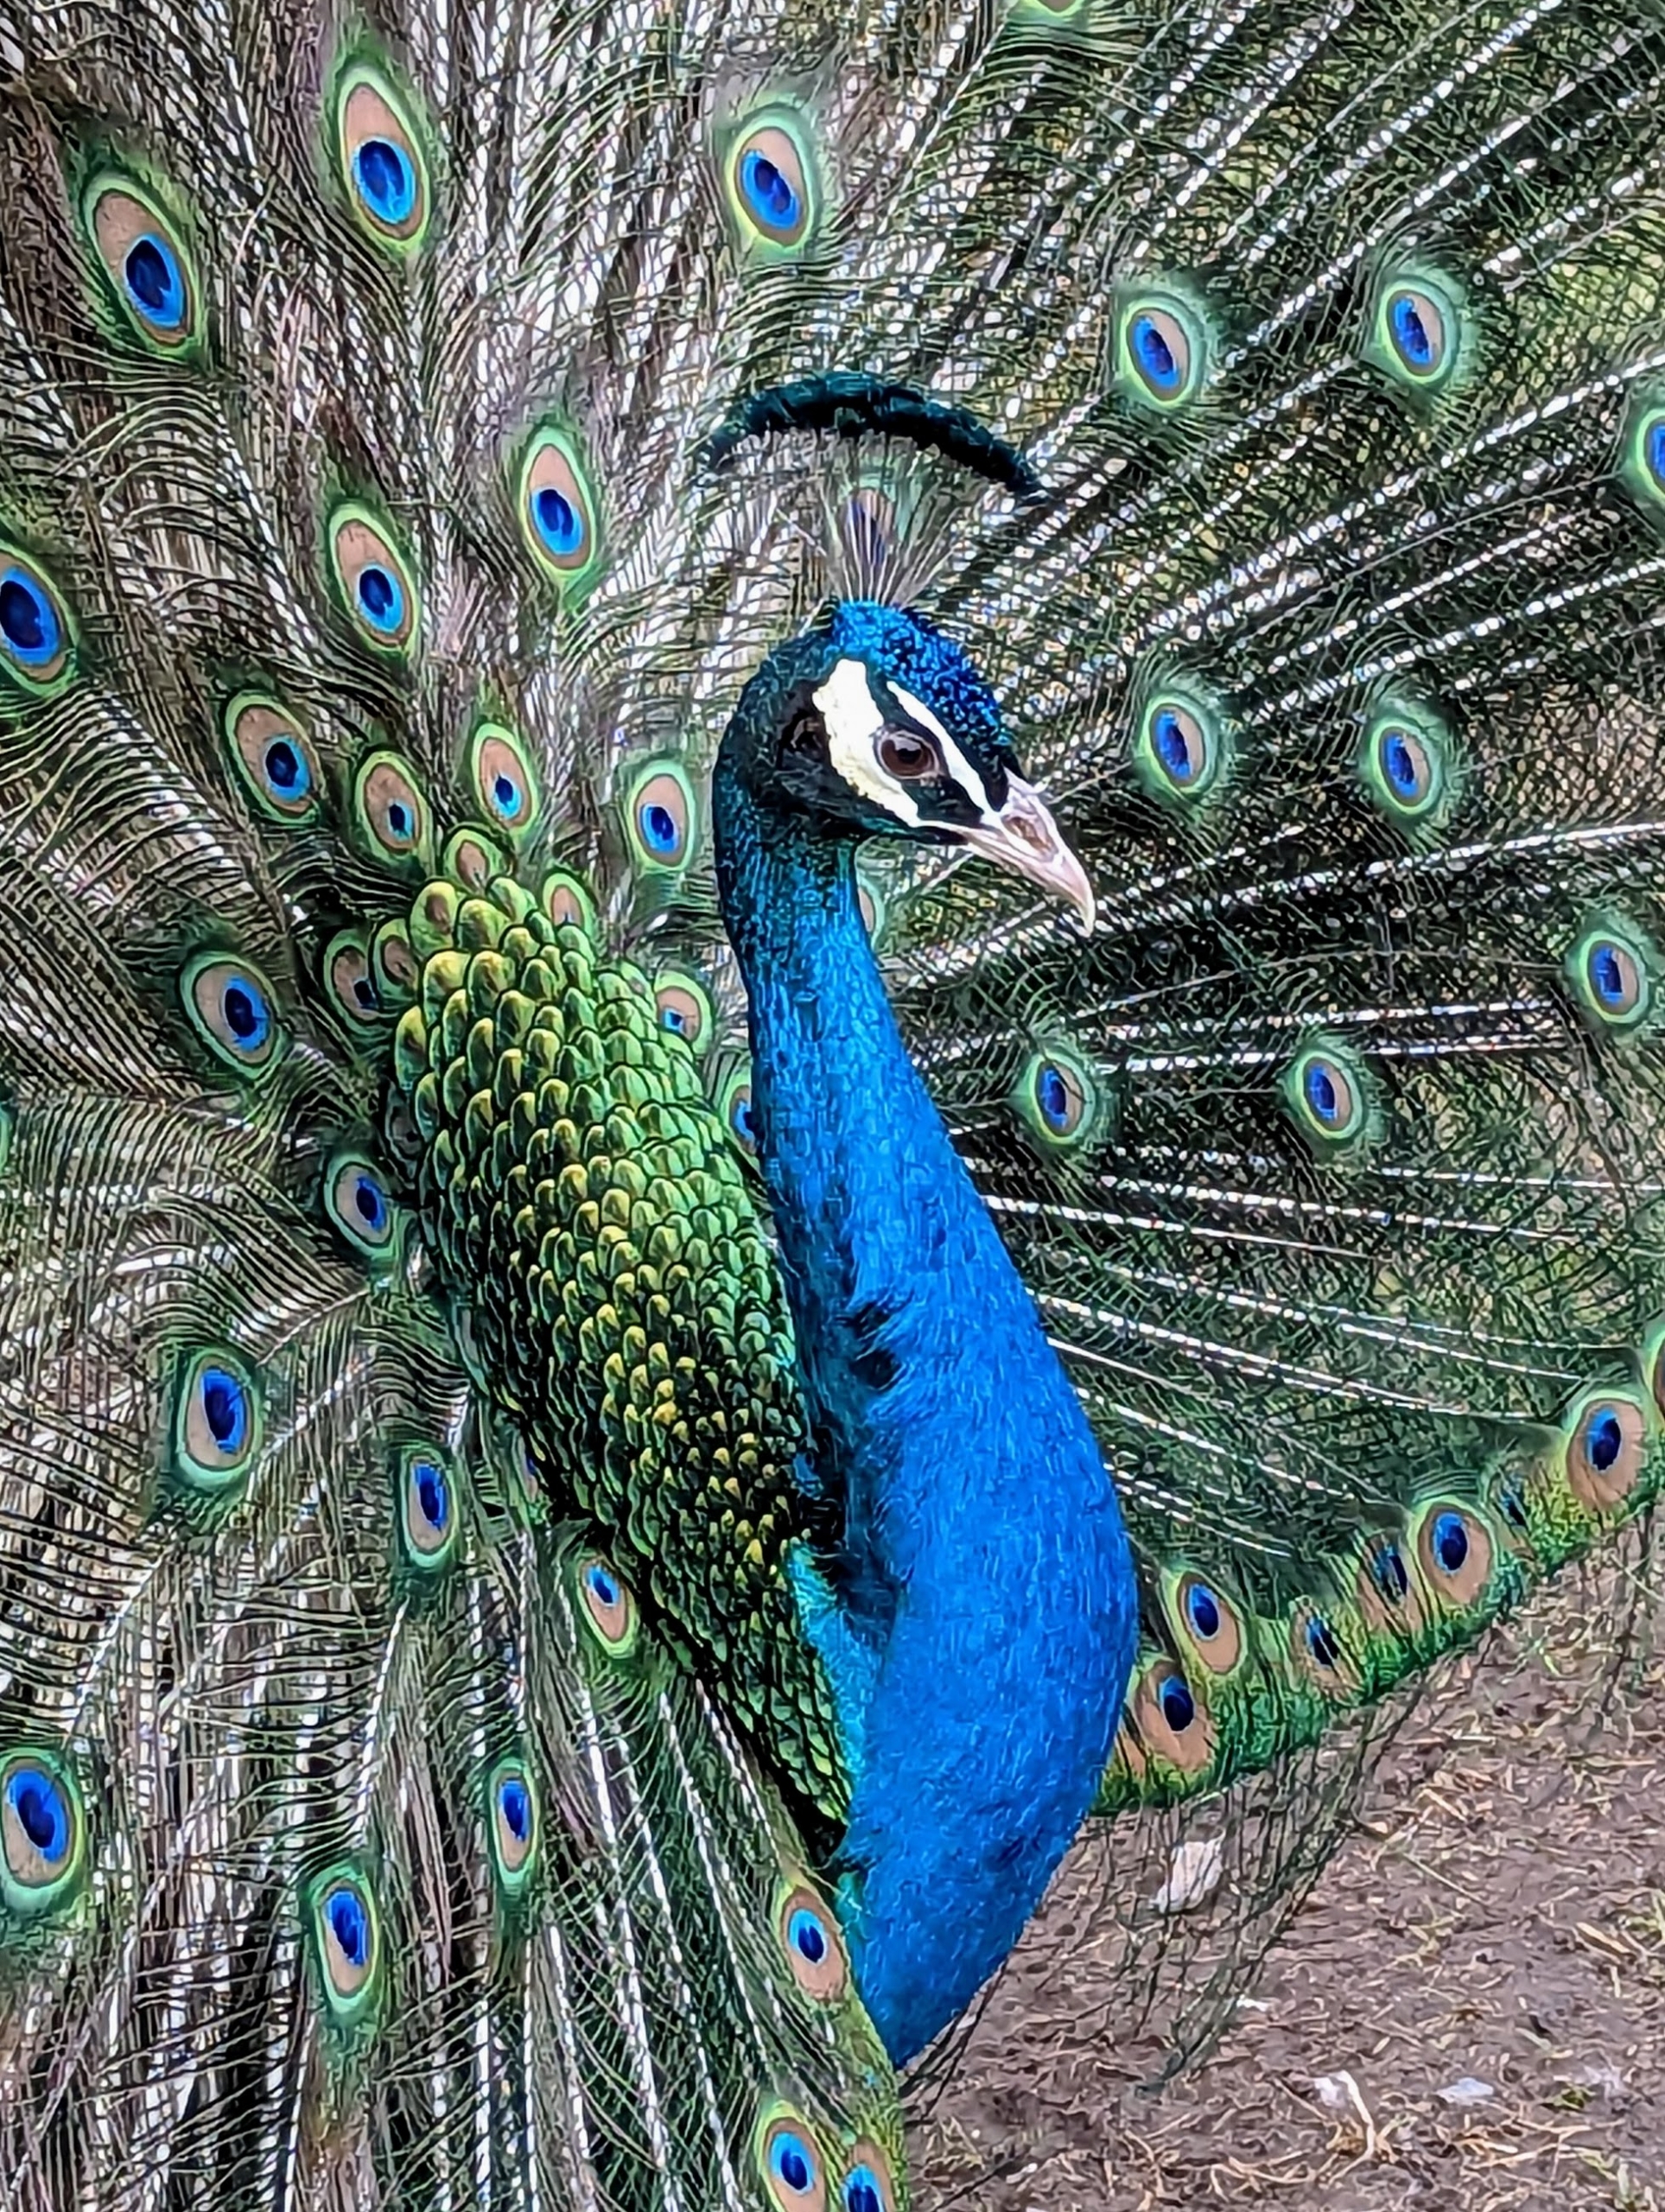
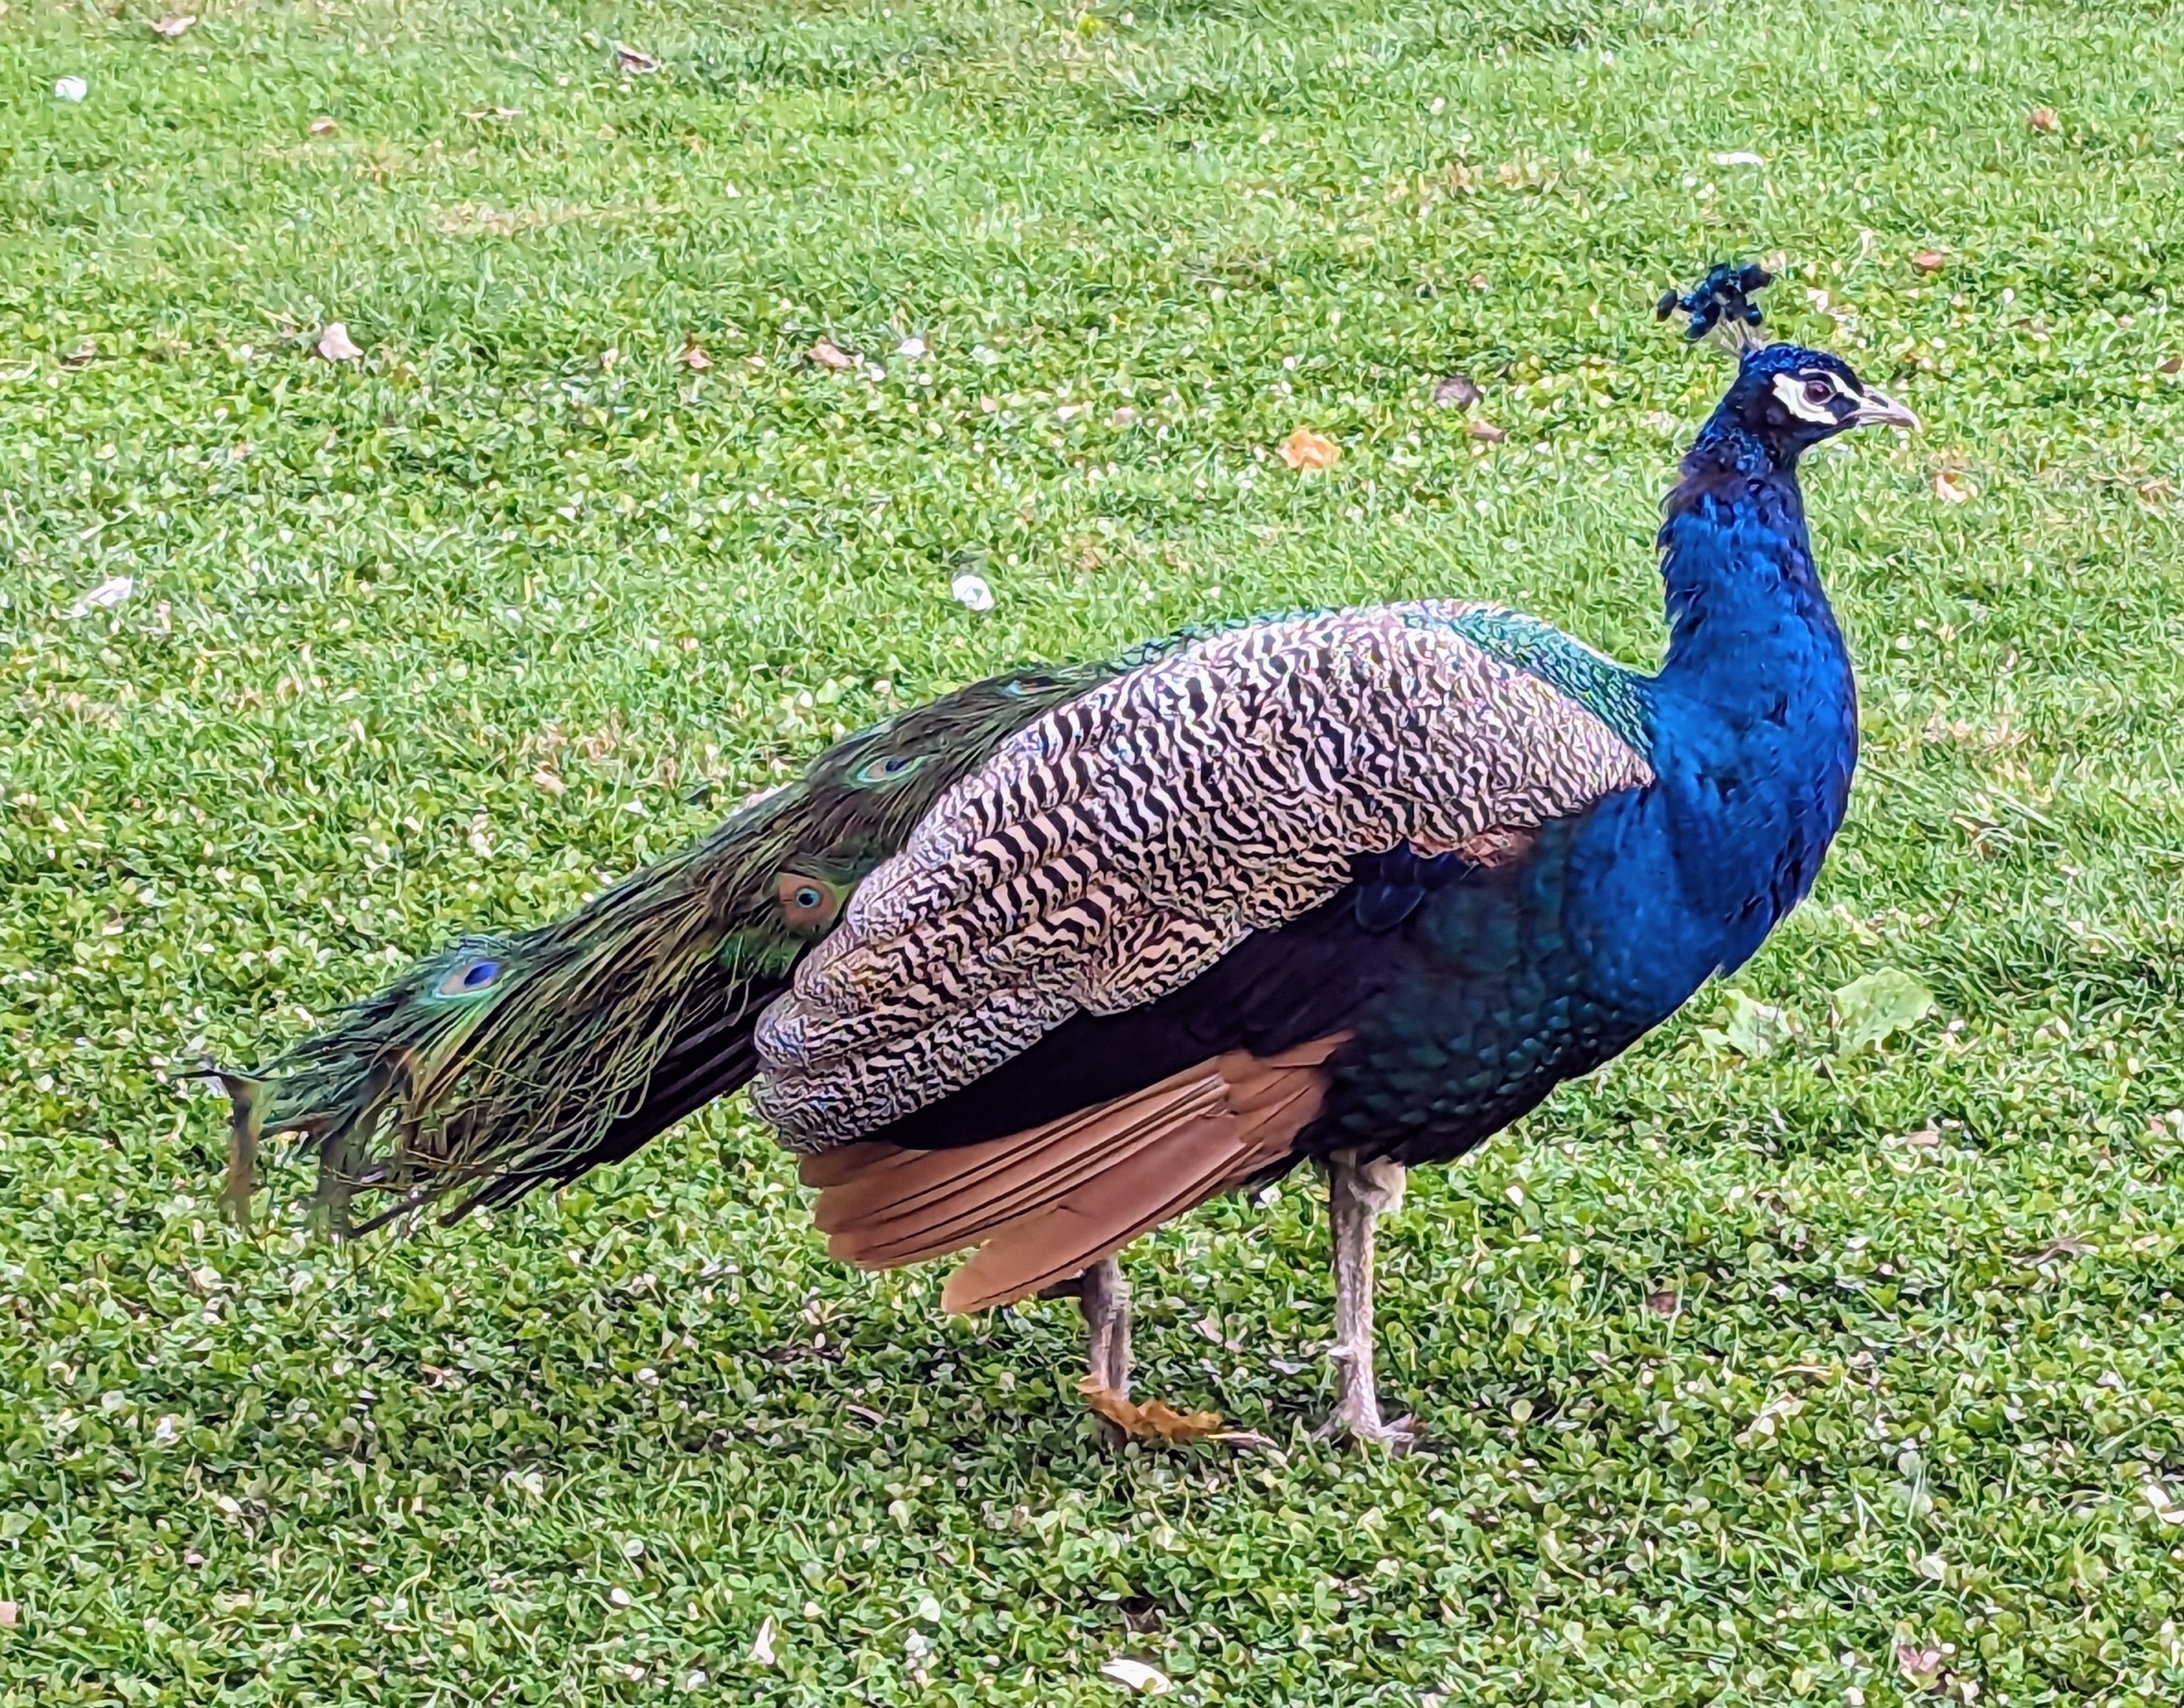
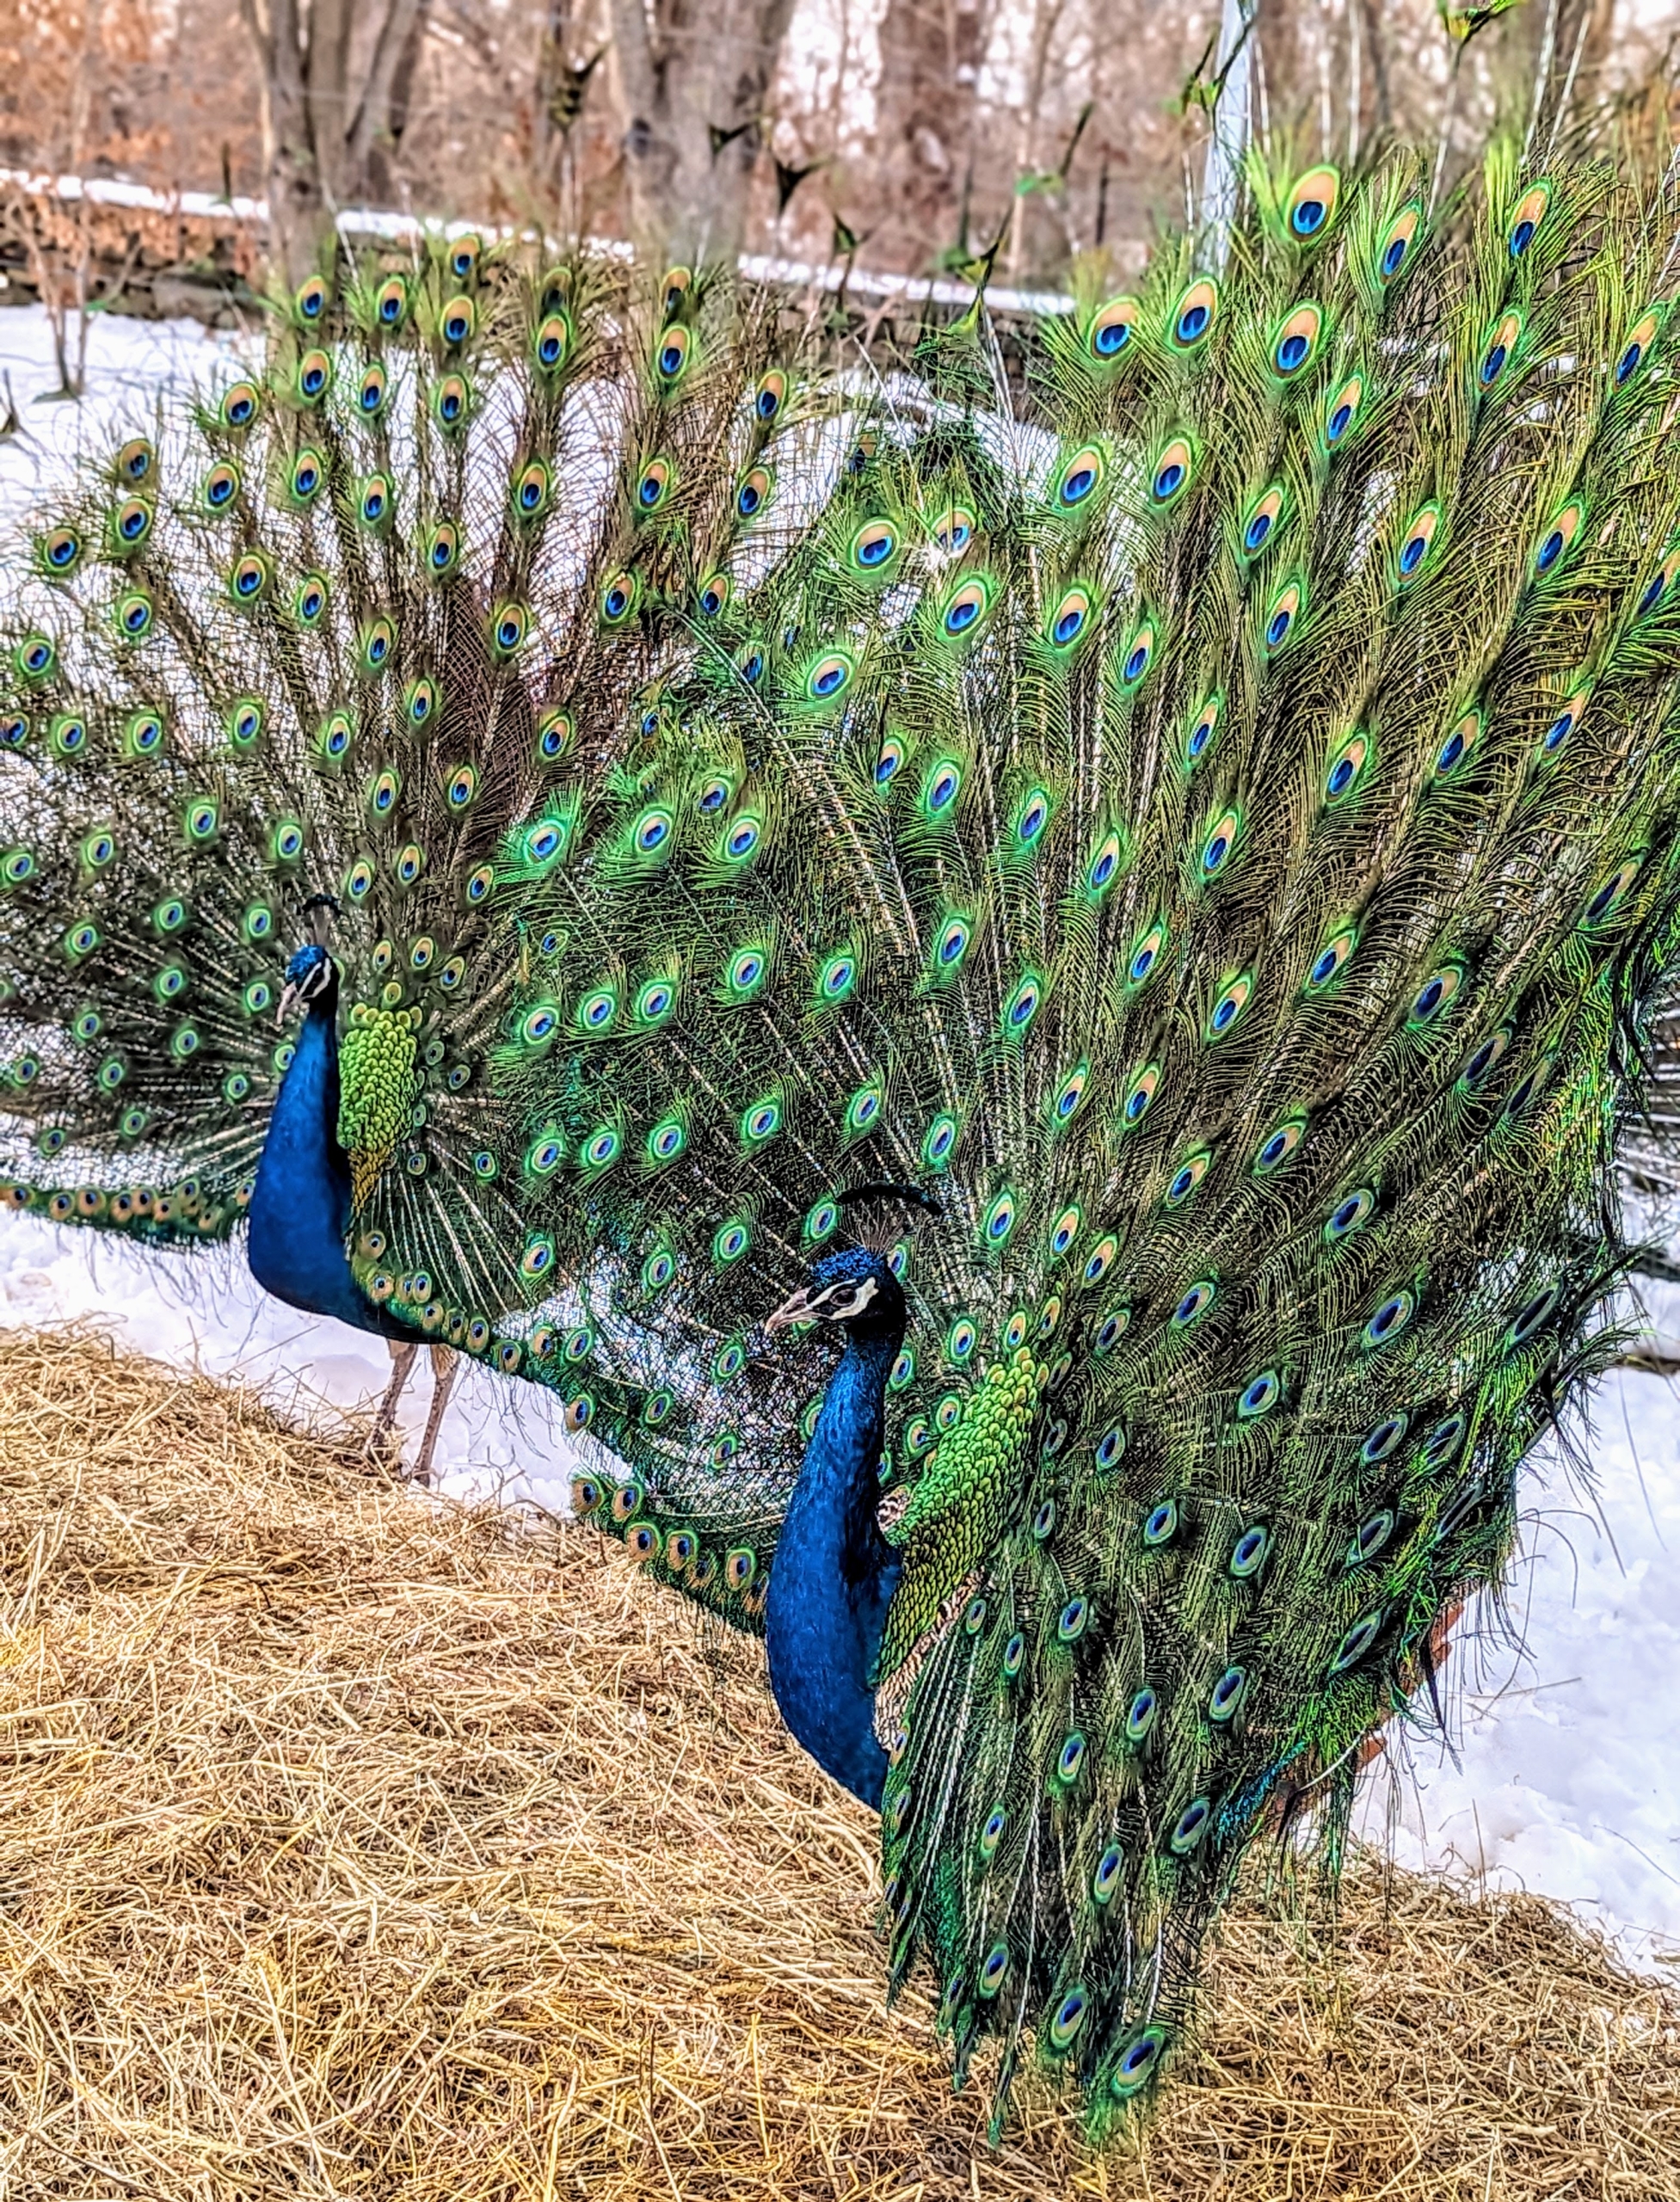
This photo was taken yesterday of a mature male with his gorgeous tail feathers hanging behind him. The train gets longer and more elaborate every year until five or six when it reaches maximum splendor.
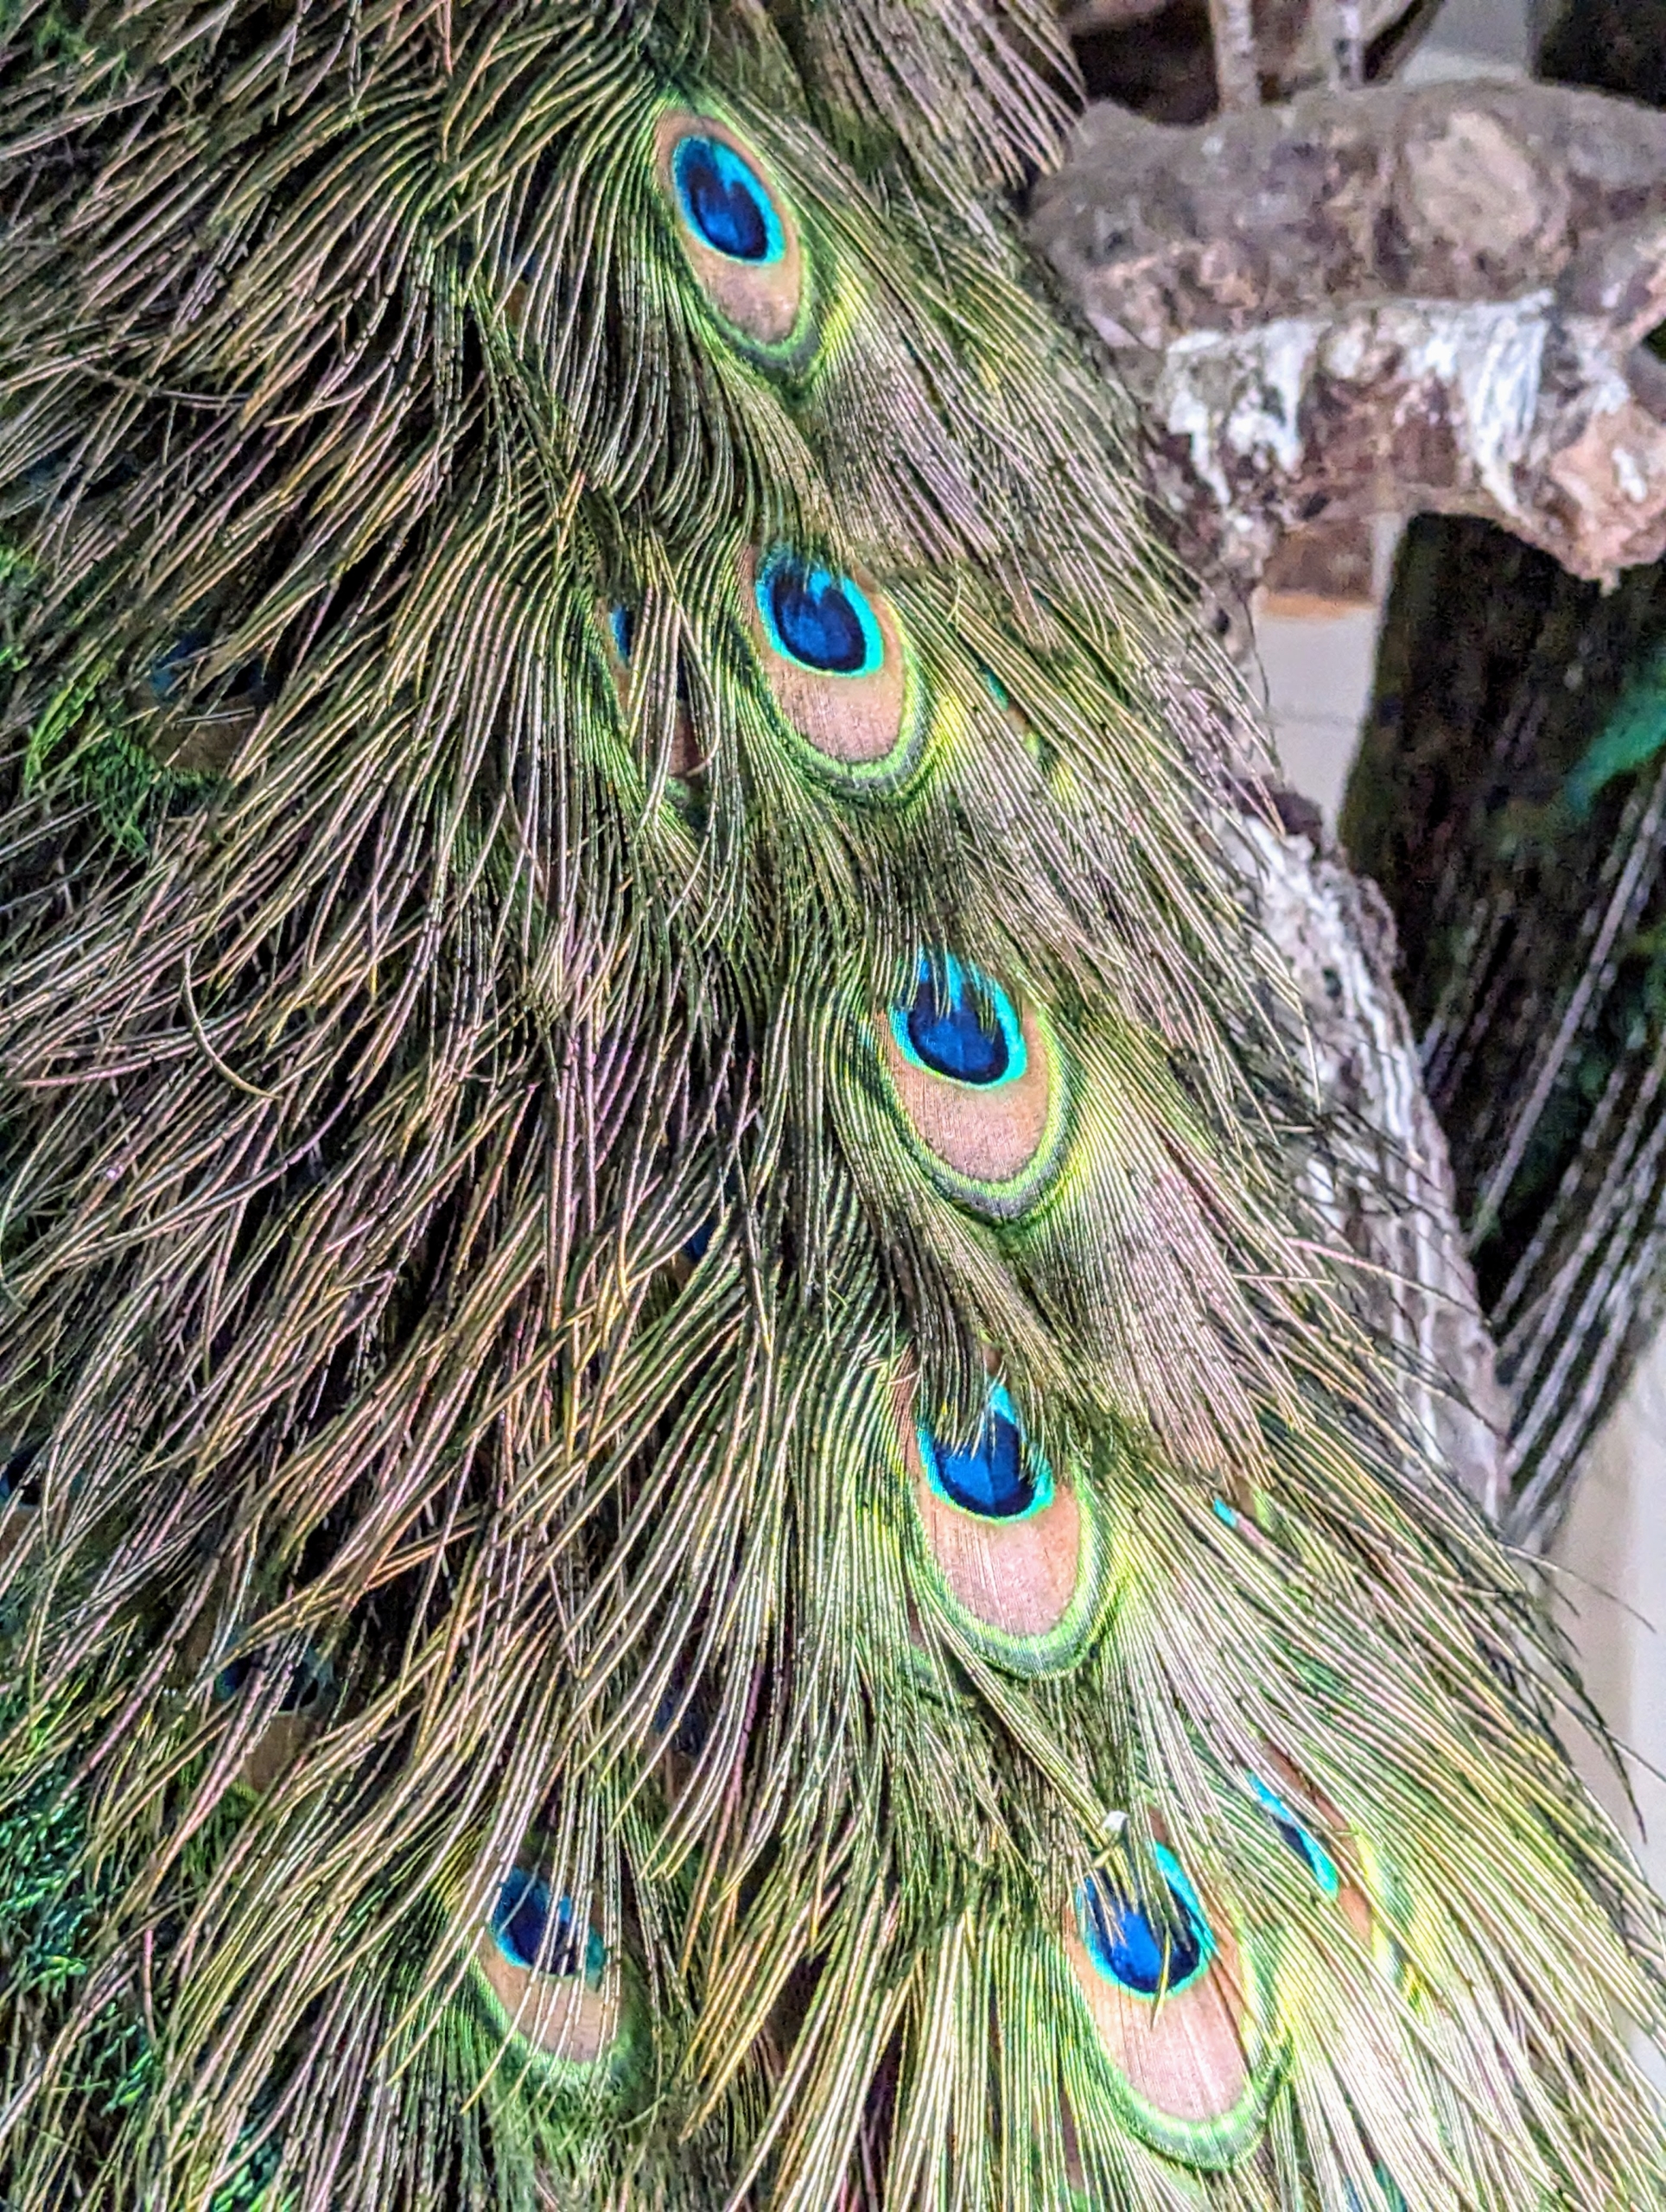
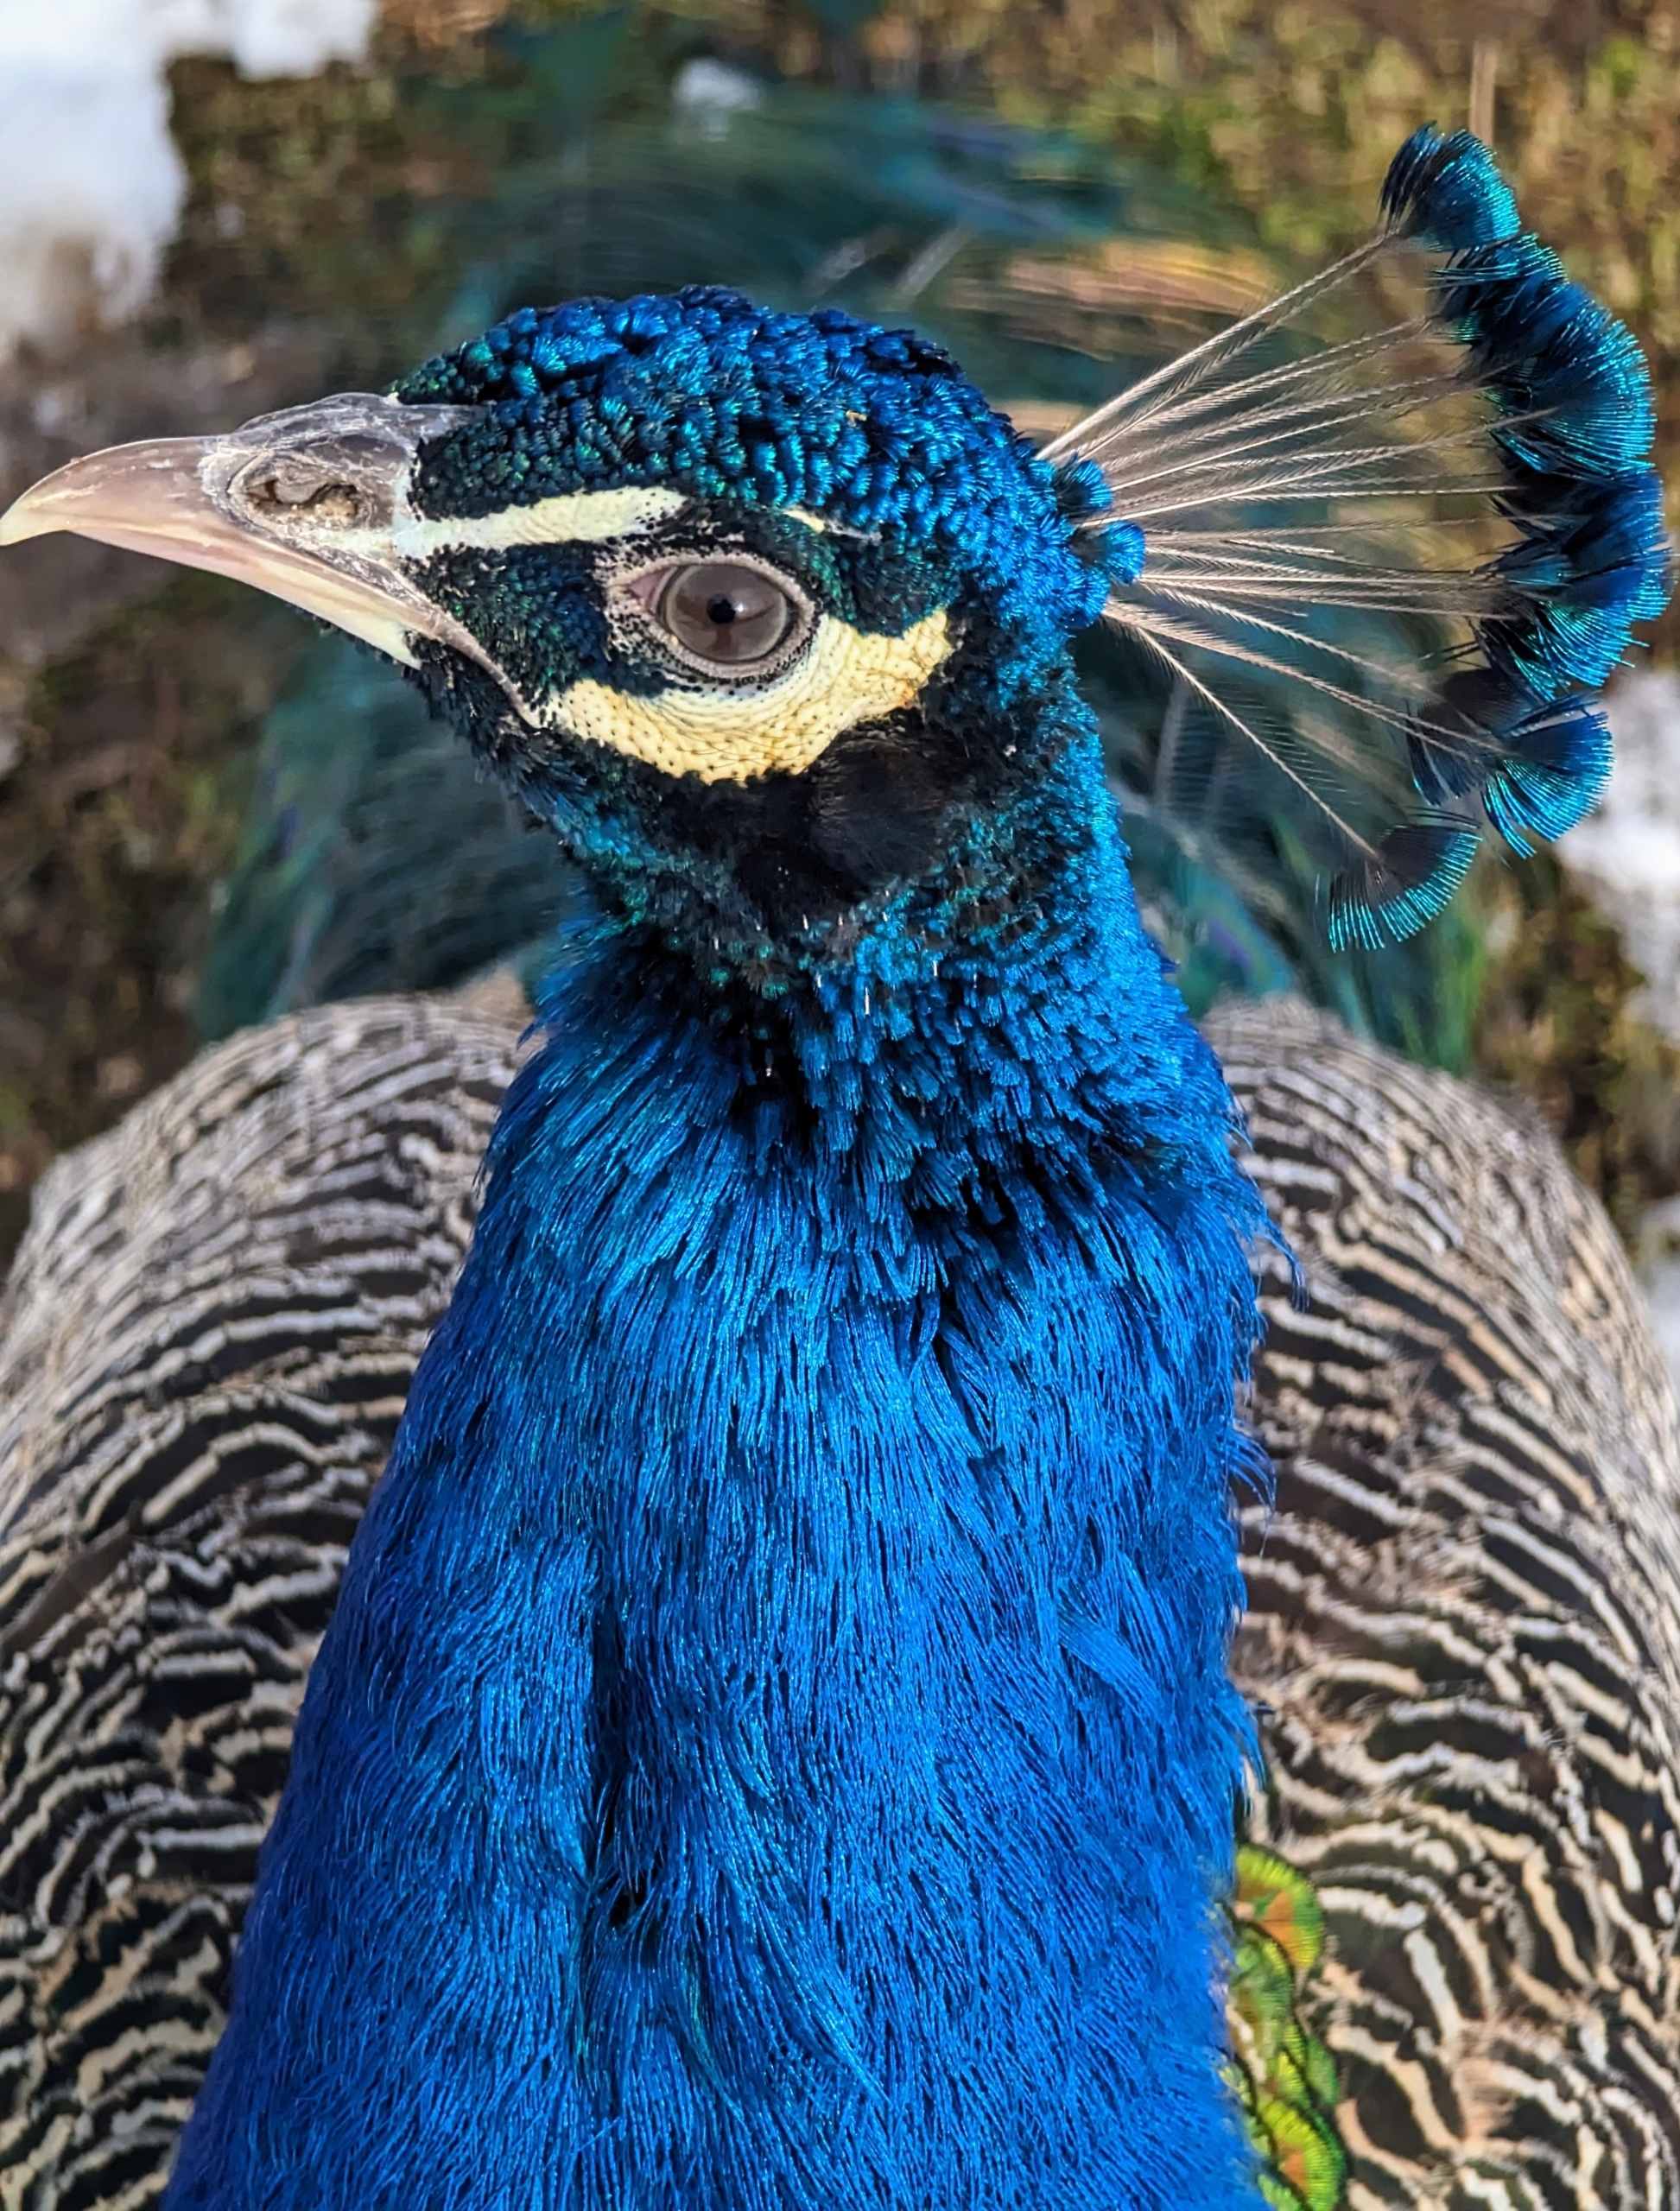
Each of the multicolored eyespots, ocelli, on the peacock’s train is a complex structure with dark centers surrounded by concentric bronze-gold and blue-green regions. These eyespots are the most important attractions to the females during the breeding season.
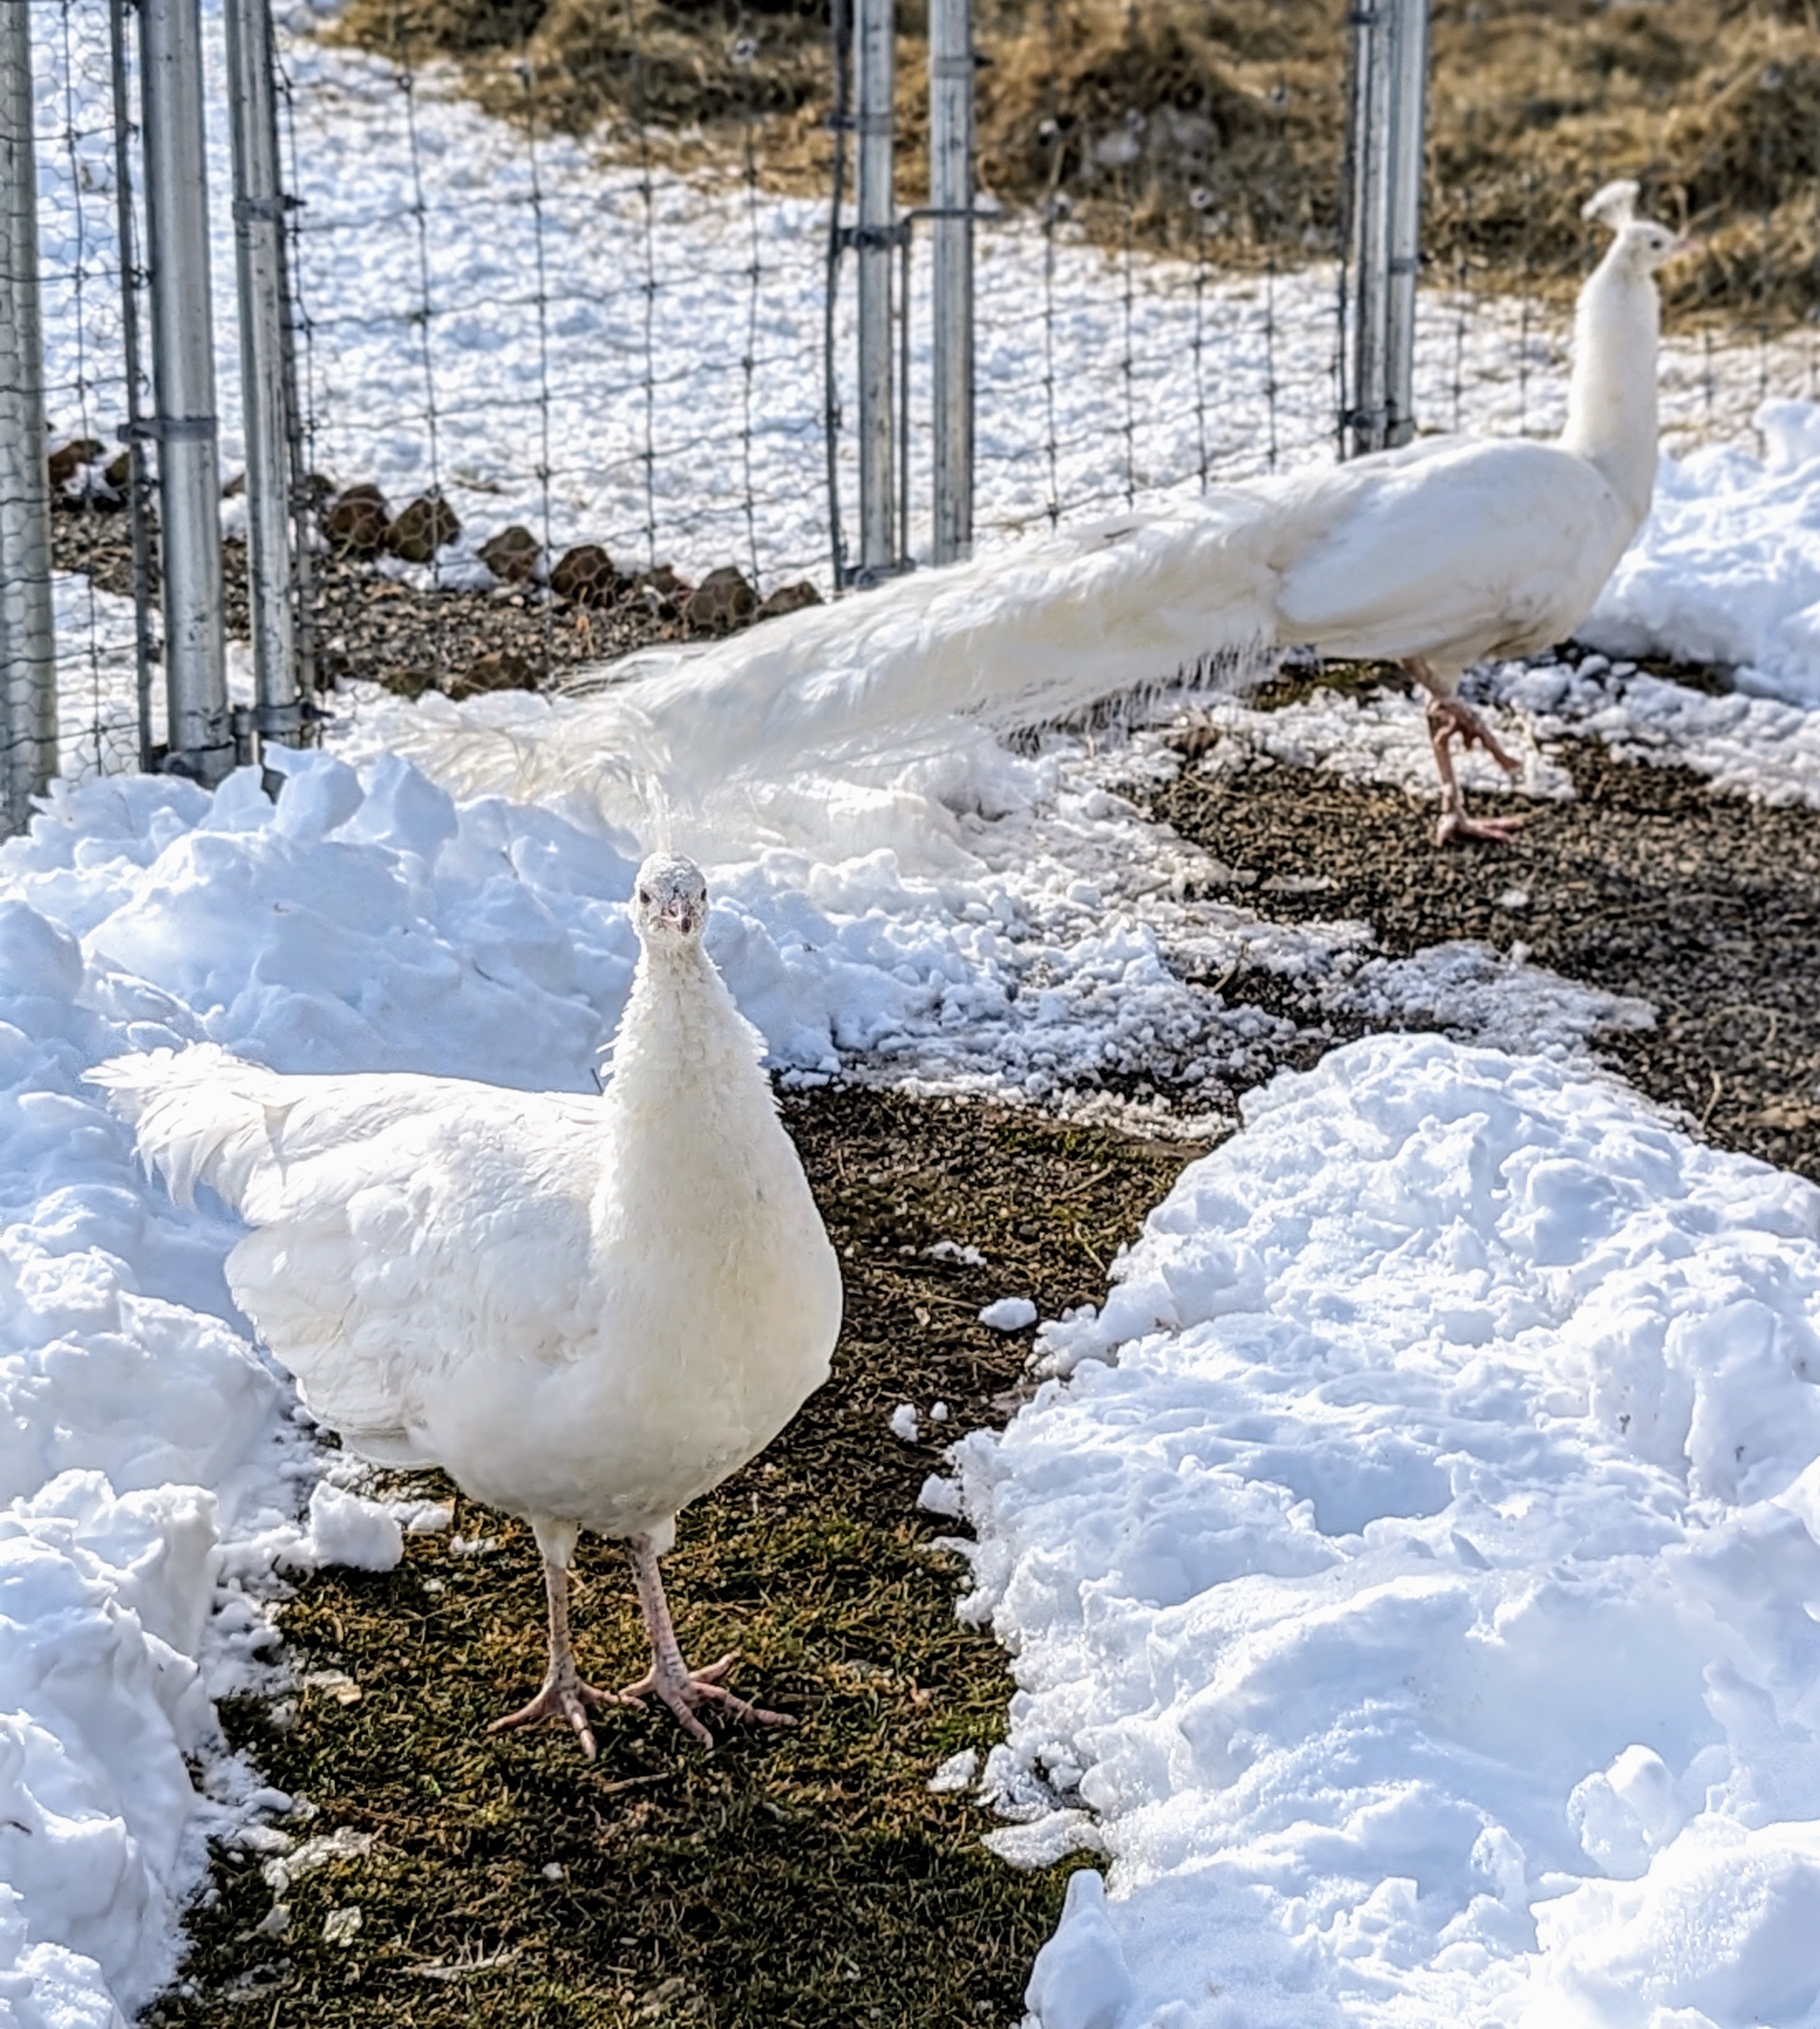
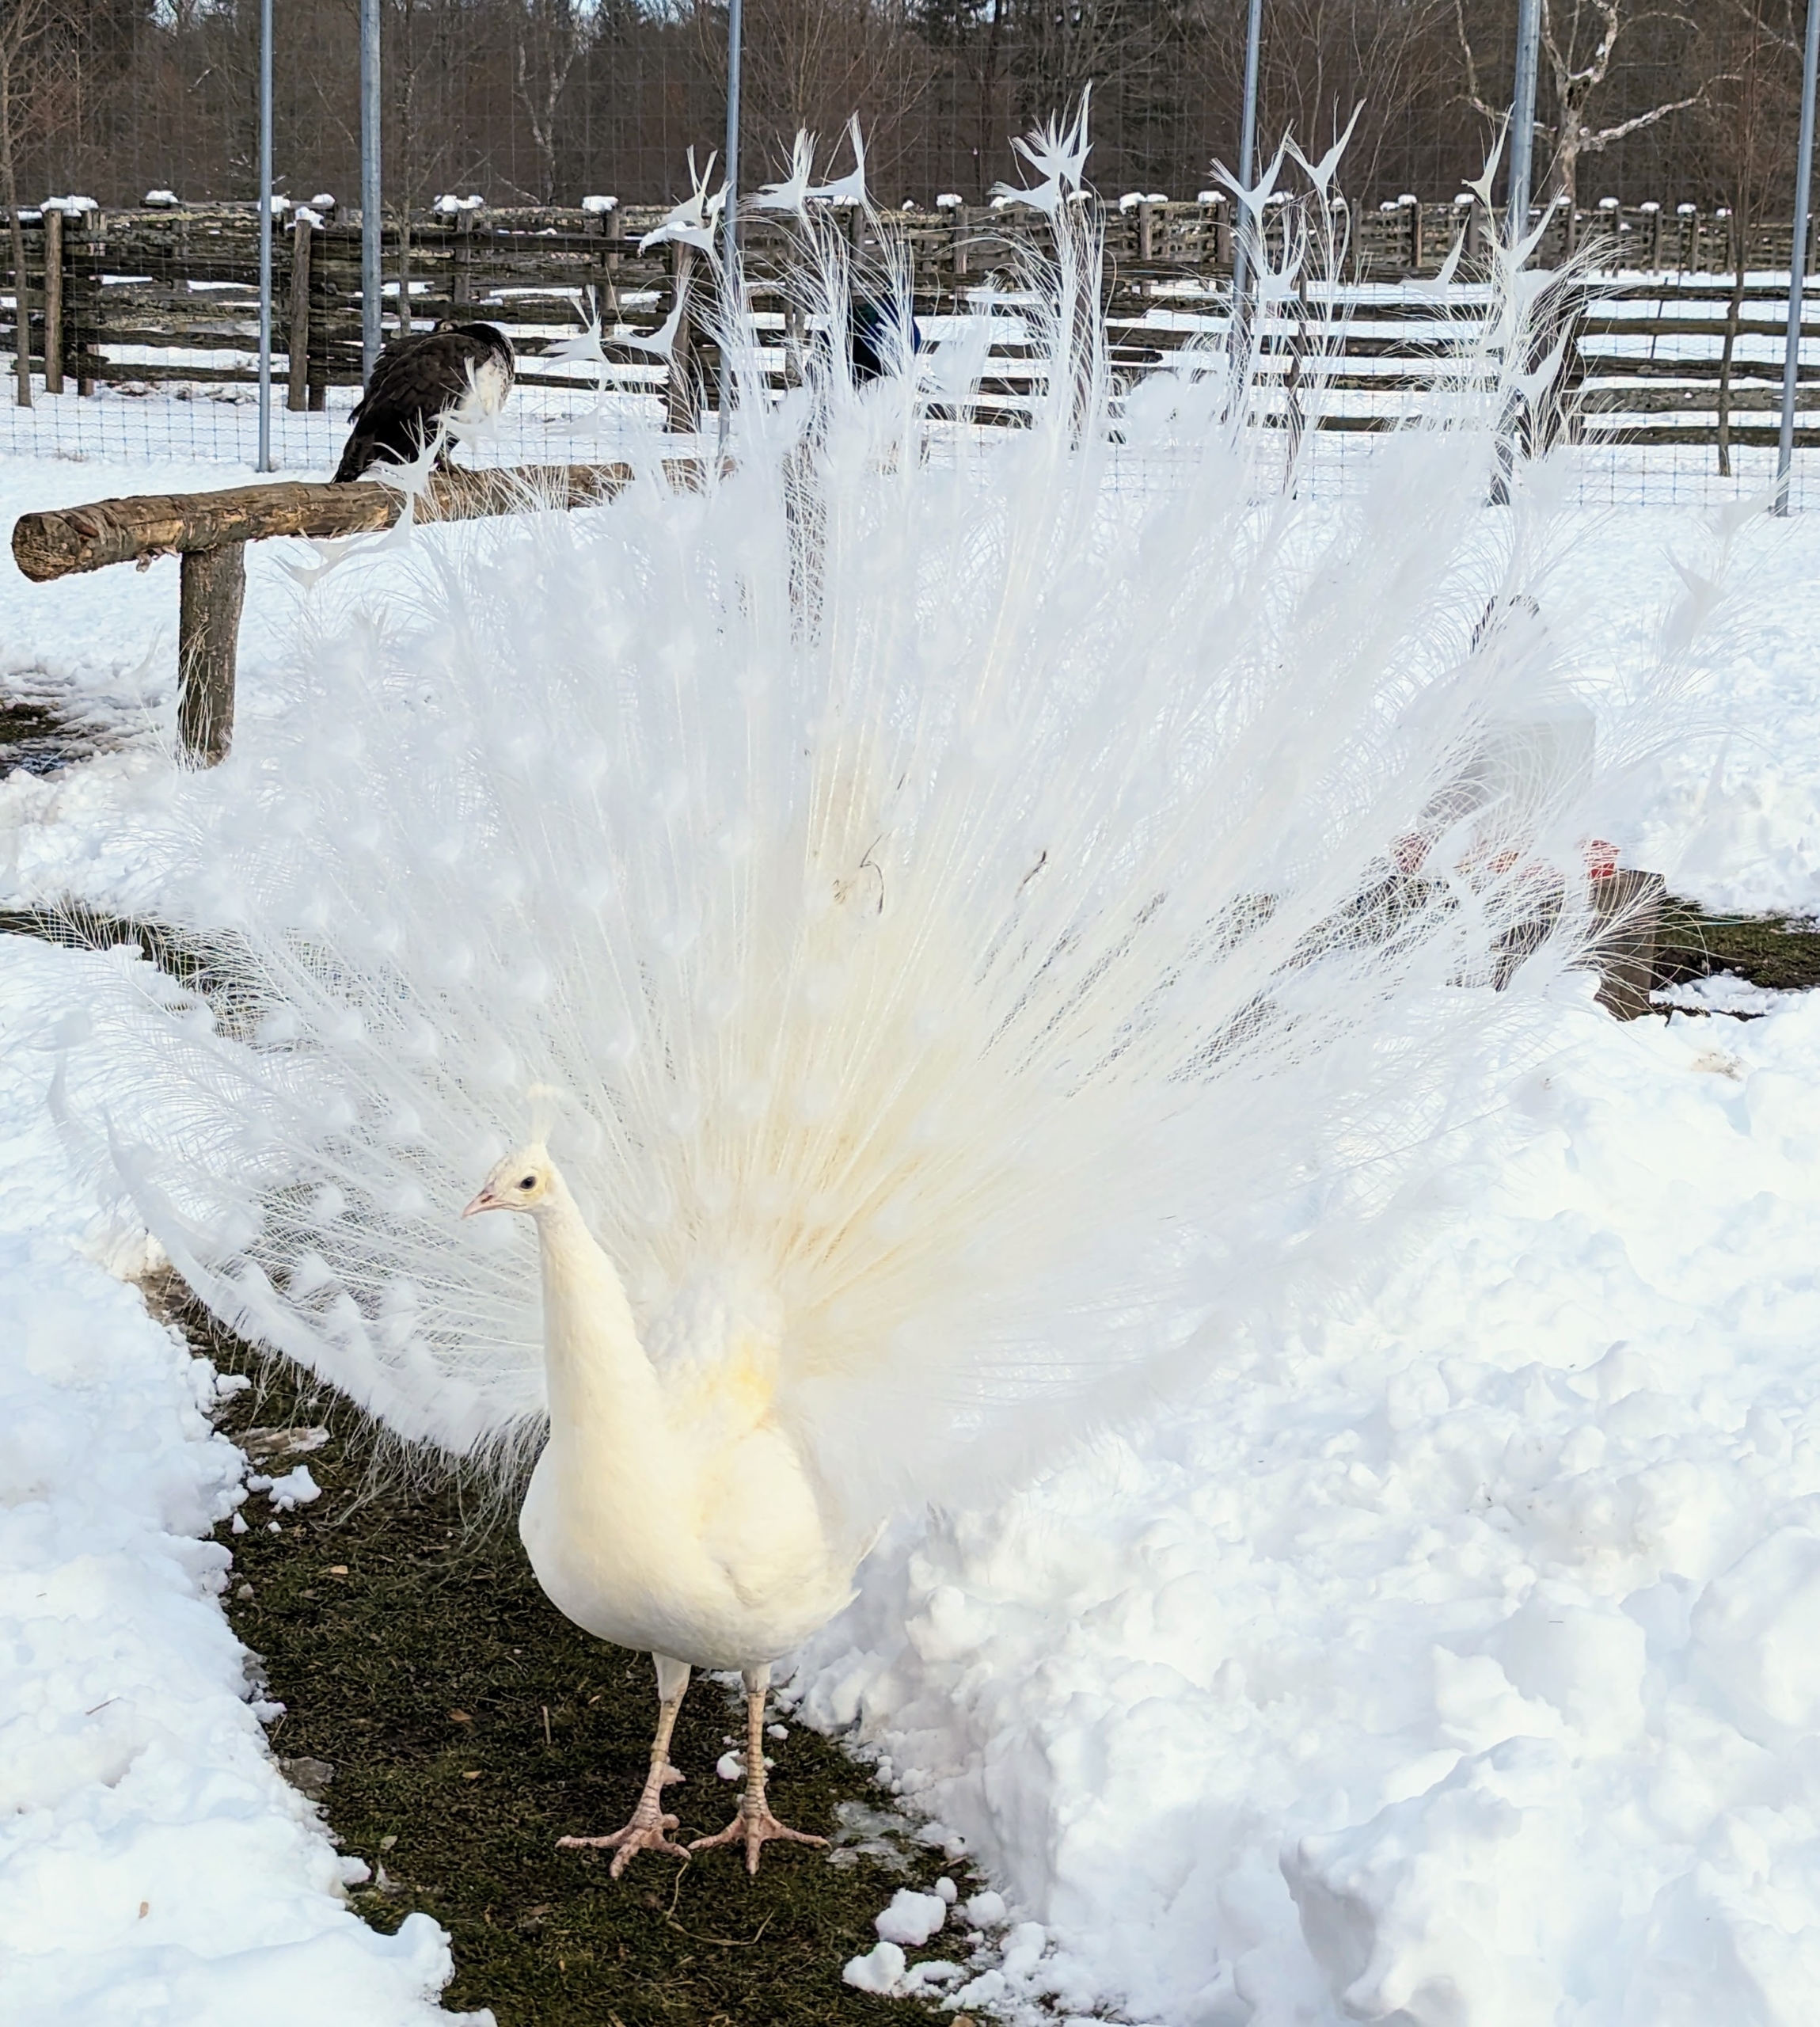
All peacocks and peahens will look you in the eye, but if you stare at them or seem aggressive in body movements, they will feel threatened. This is white peahen. White birds have a genetic variant called leucism, which involves a partial loss of pigmentation and white or cream-colored plumage. This is different from albino peafowl, which have albinism, causing a complete absence of melanin and resulting in pure white feathers, pink or red eyes, and pale skin.
I have a white peahen and a white peacock. As beautiful as all peahens and peacocks are, they don’t make very melodious sounds. Peafowls have 11 different calls, with most of the vocalizing made by the peacocks.
Both male and female peafowls have the fancy crest atop their heads called a corona. Male peacock feather crests are blue or green in color, while female crests are a more neutral shade of brown or cream.
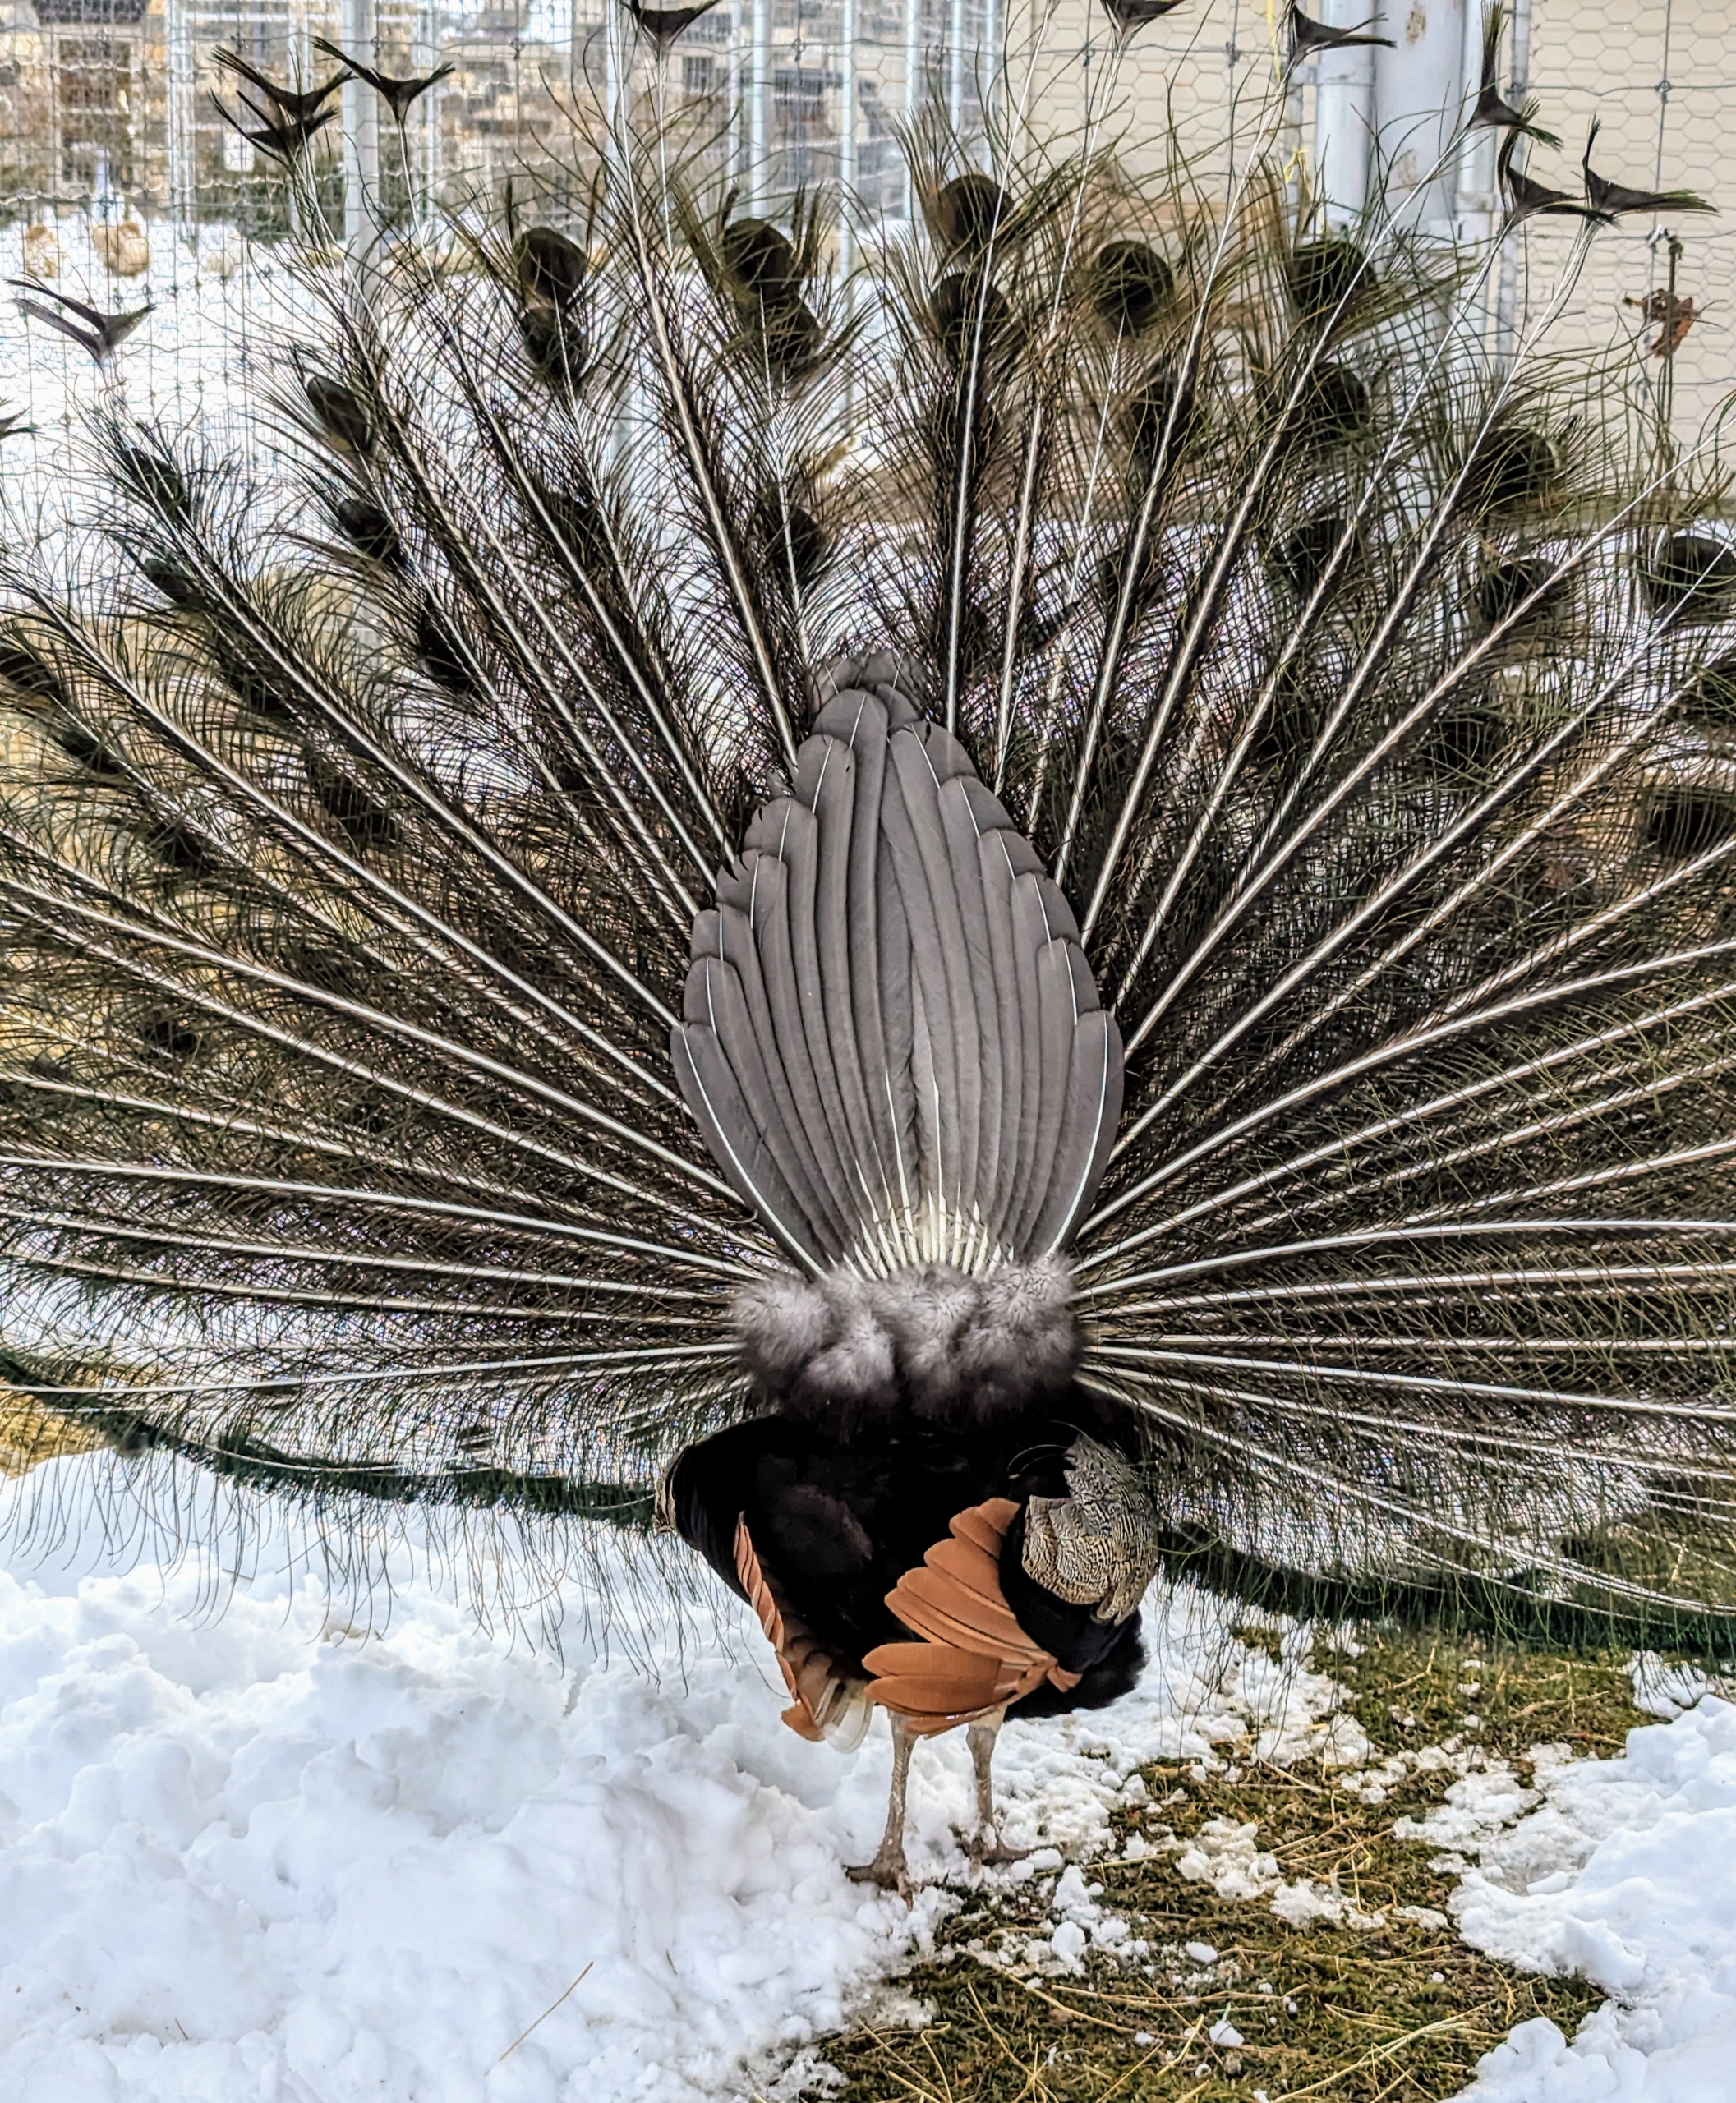
And here it is – a male just as he opened his tail. A mature peacock can have up to 200 feathers in his tail, which can weigh about a half pound during mating season. Peahens usually choose males that have bigger, healthier plumage with an abundance of eyespots.
Here is the same male strutting around in a circle. Researchers found that the longer the train feathers, the faster the males would shake them during true courtship displays, perhaps to demonstrate muscular strength.
These peacocks are “twinning” it. Peacocks are polygamous by nature, often having several partners during the season, and after courtship, and mating.
And here is the white male. No matter the variety, these male creatures boast impressively sized and patterned plumage as part of the courtship ritual – it’s so interesting to watch.
Females can also fan their short tails and do so when they feel threatened or want to appear bigger. This peahen was in no danger, but perhaps she didn’t like her photo taken too closely.
Notice, the females are less iridescent with more muted colors and markings, and no long tails. While these birds love to forage for insects, I also provide a healthy mix of cornmeal, soybean, and wheat. And, I feed all my birds lots of fresh greens. In the wild, peacocks are omnivores – they eat insects, plants, and small creatures.
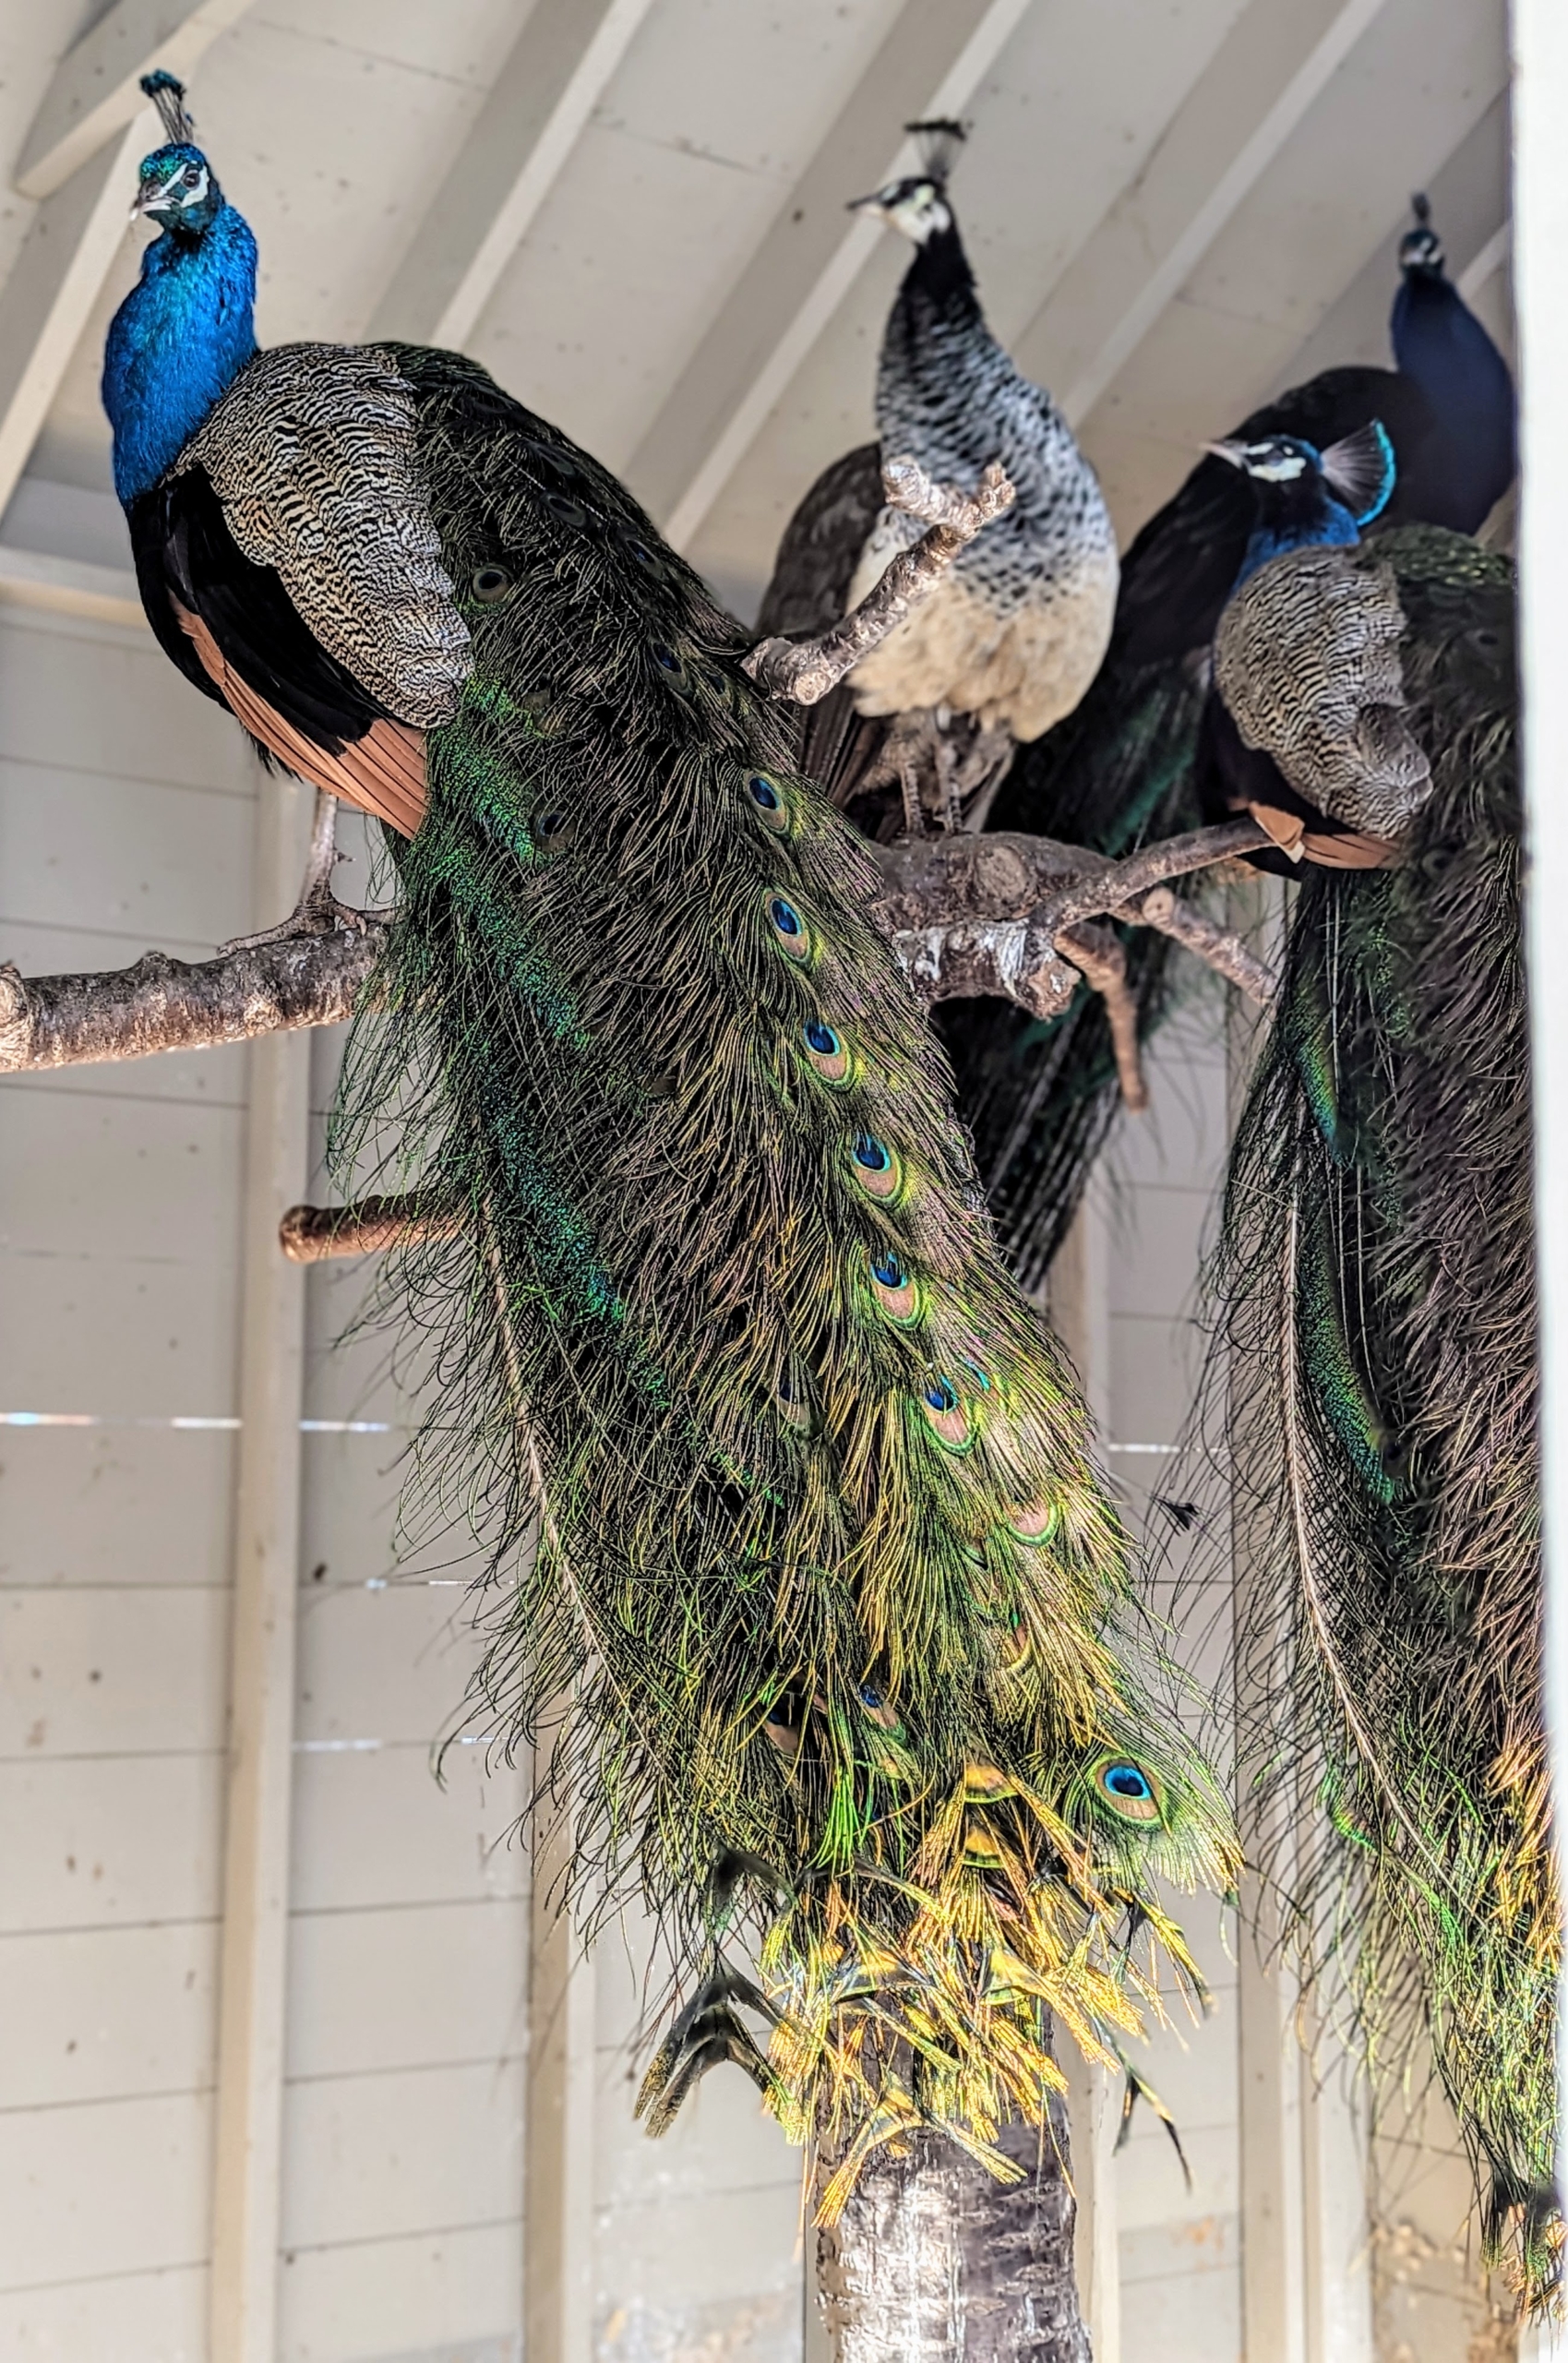
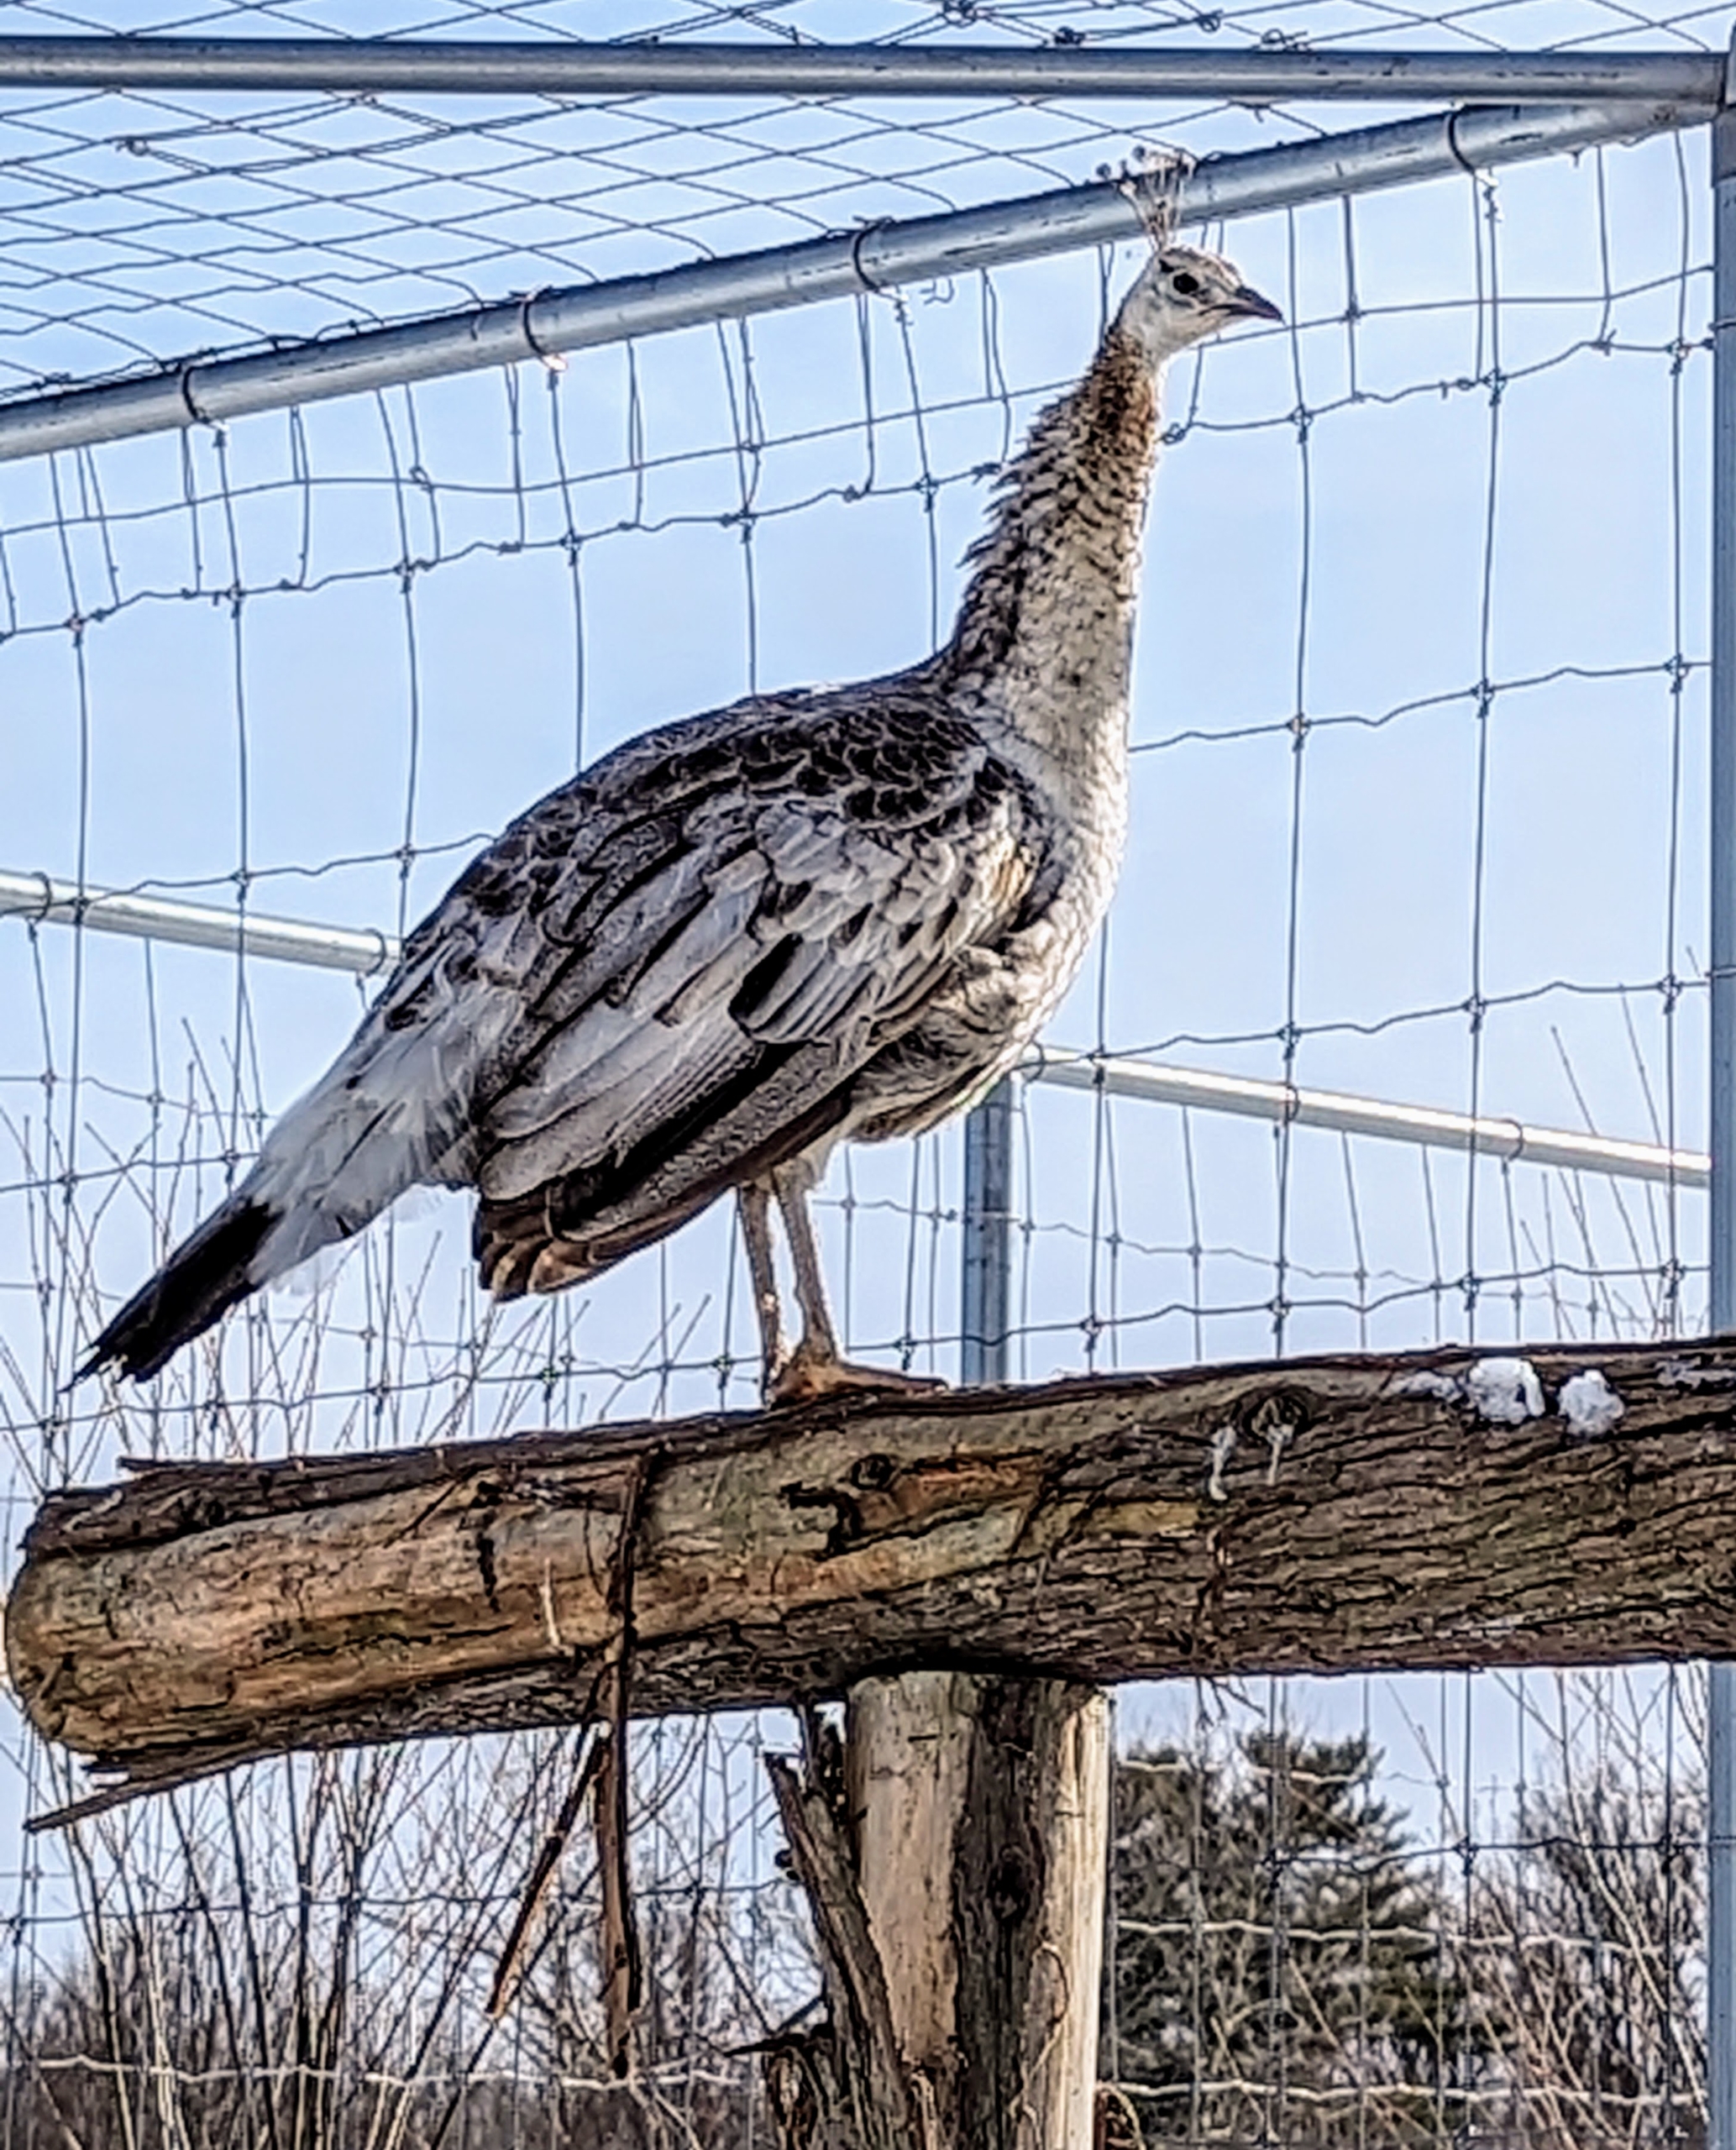
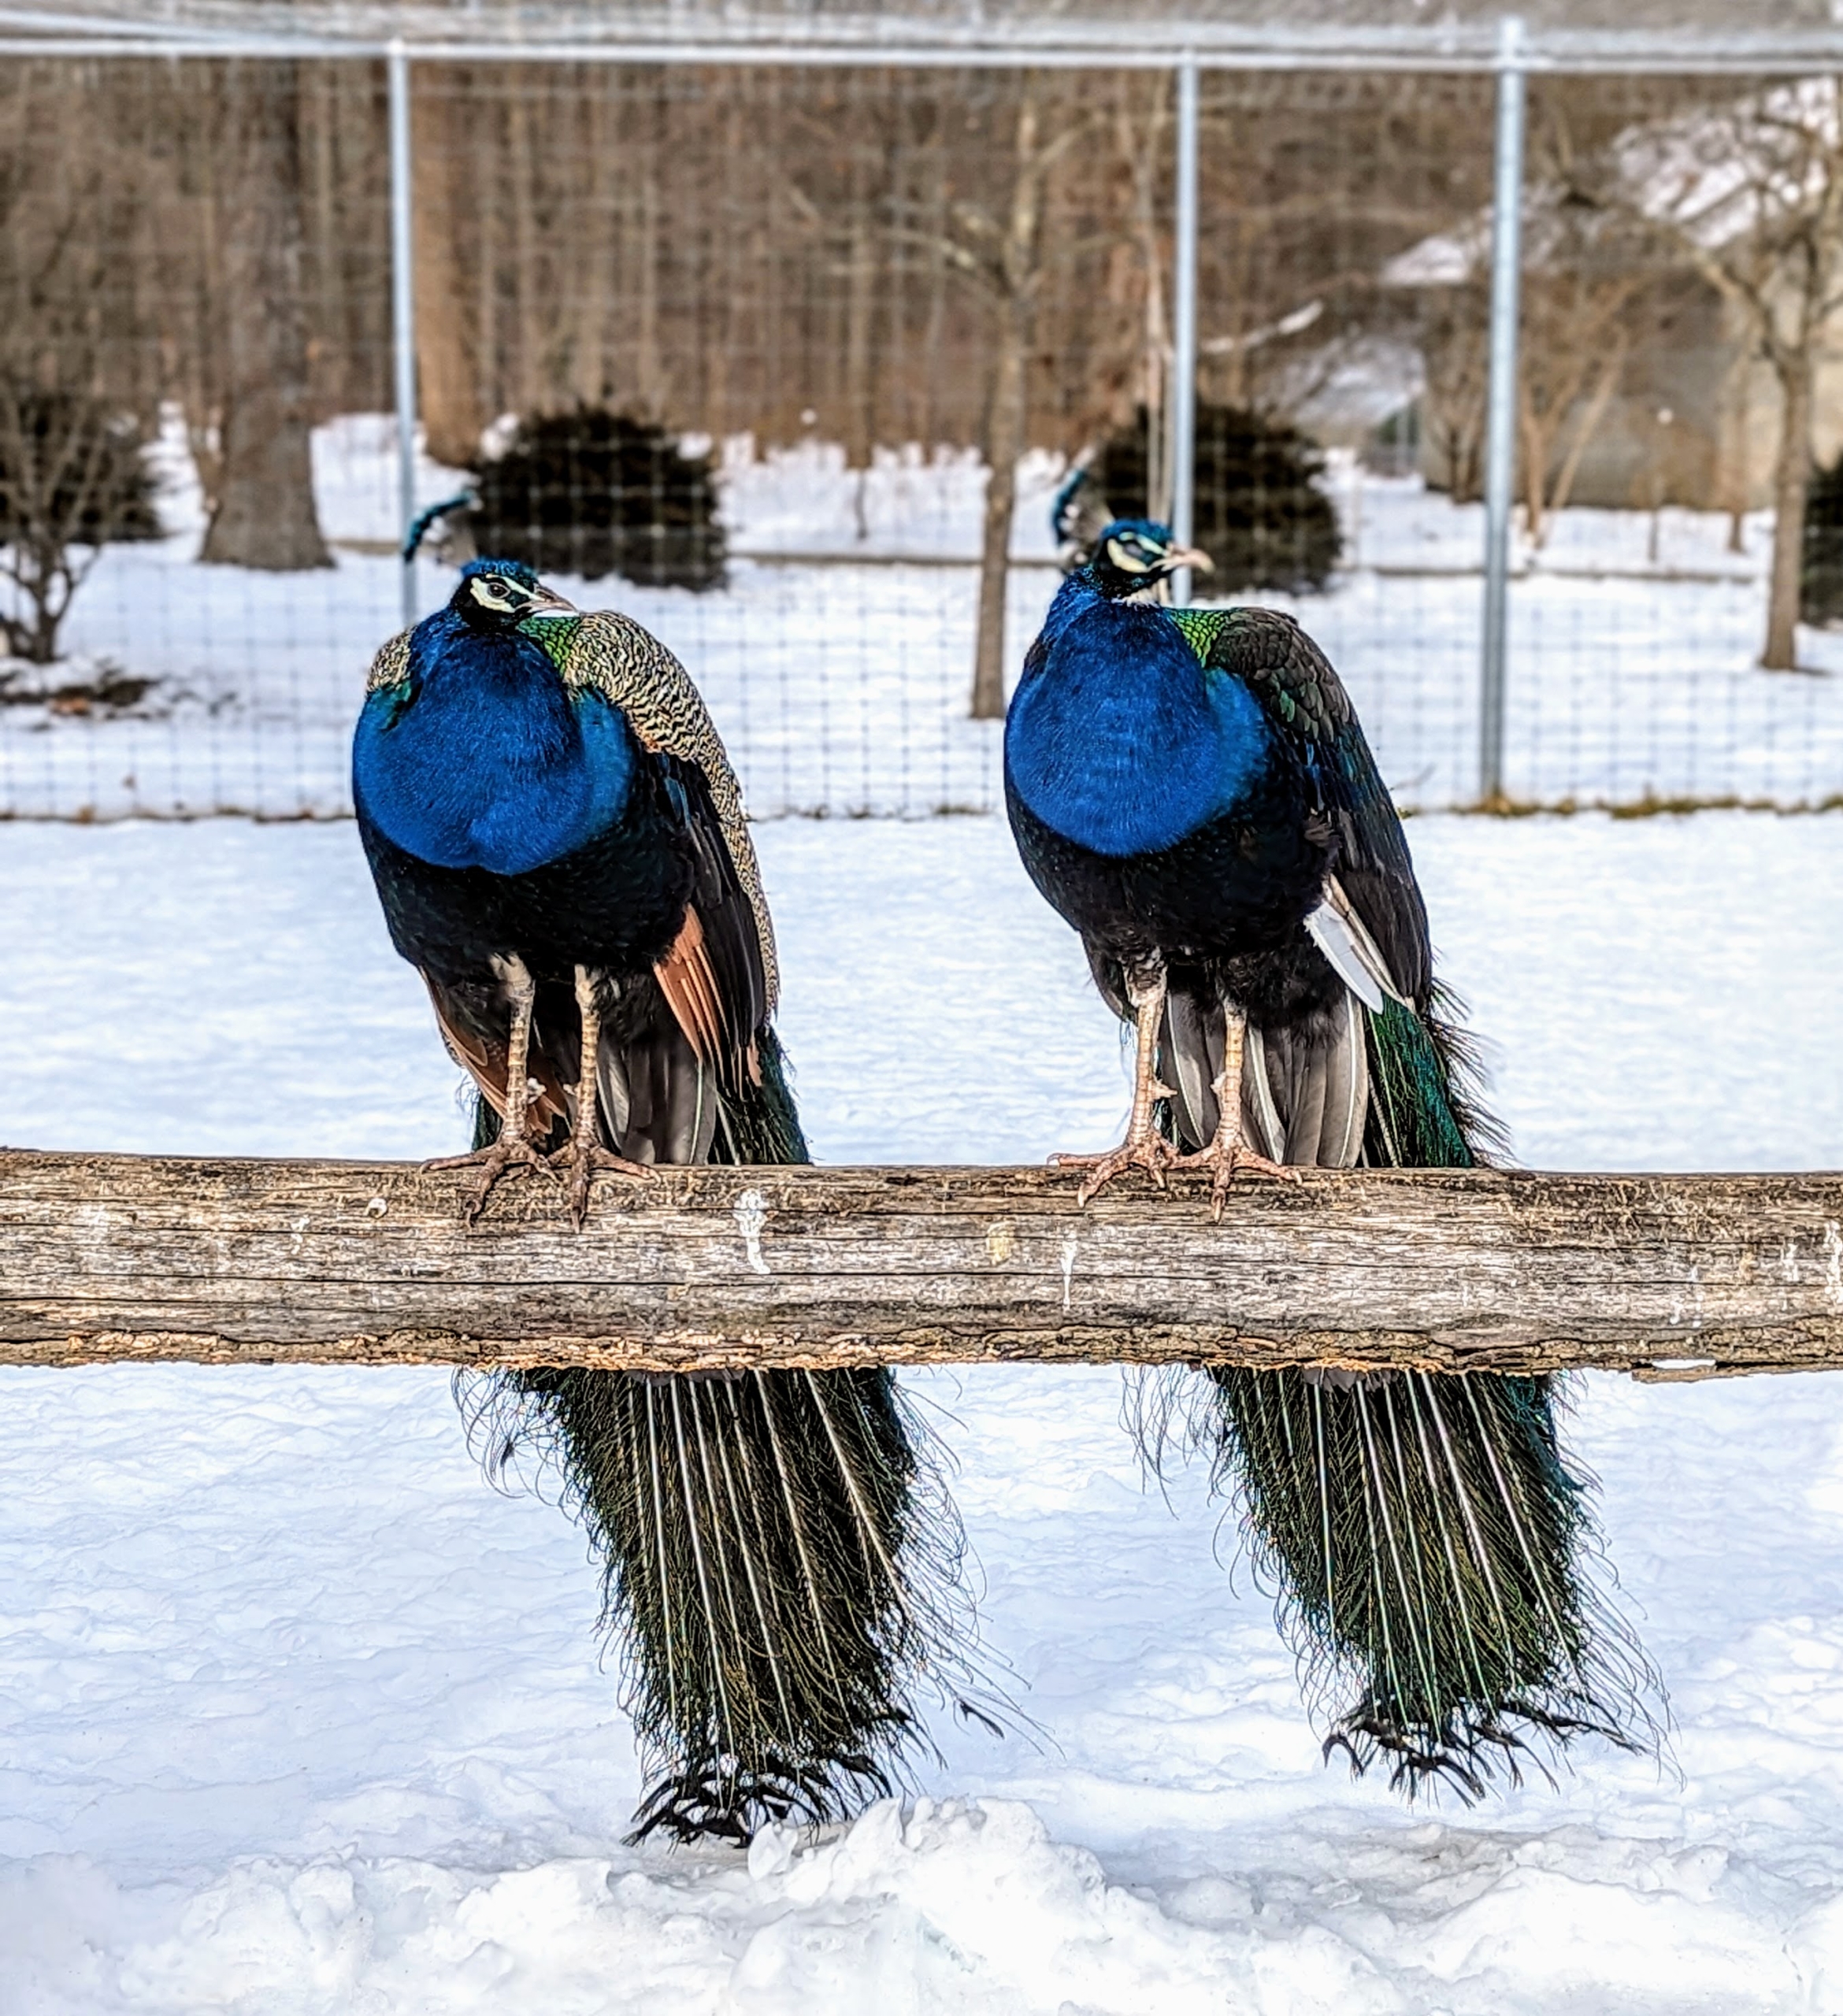
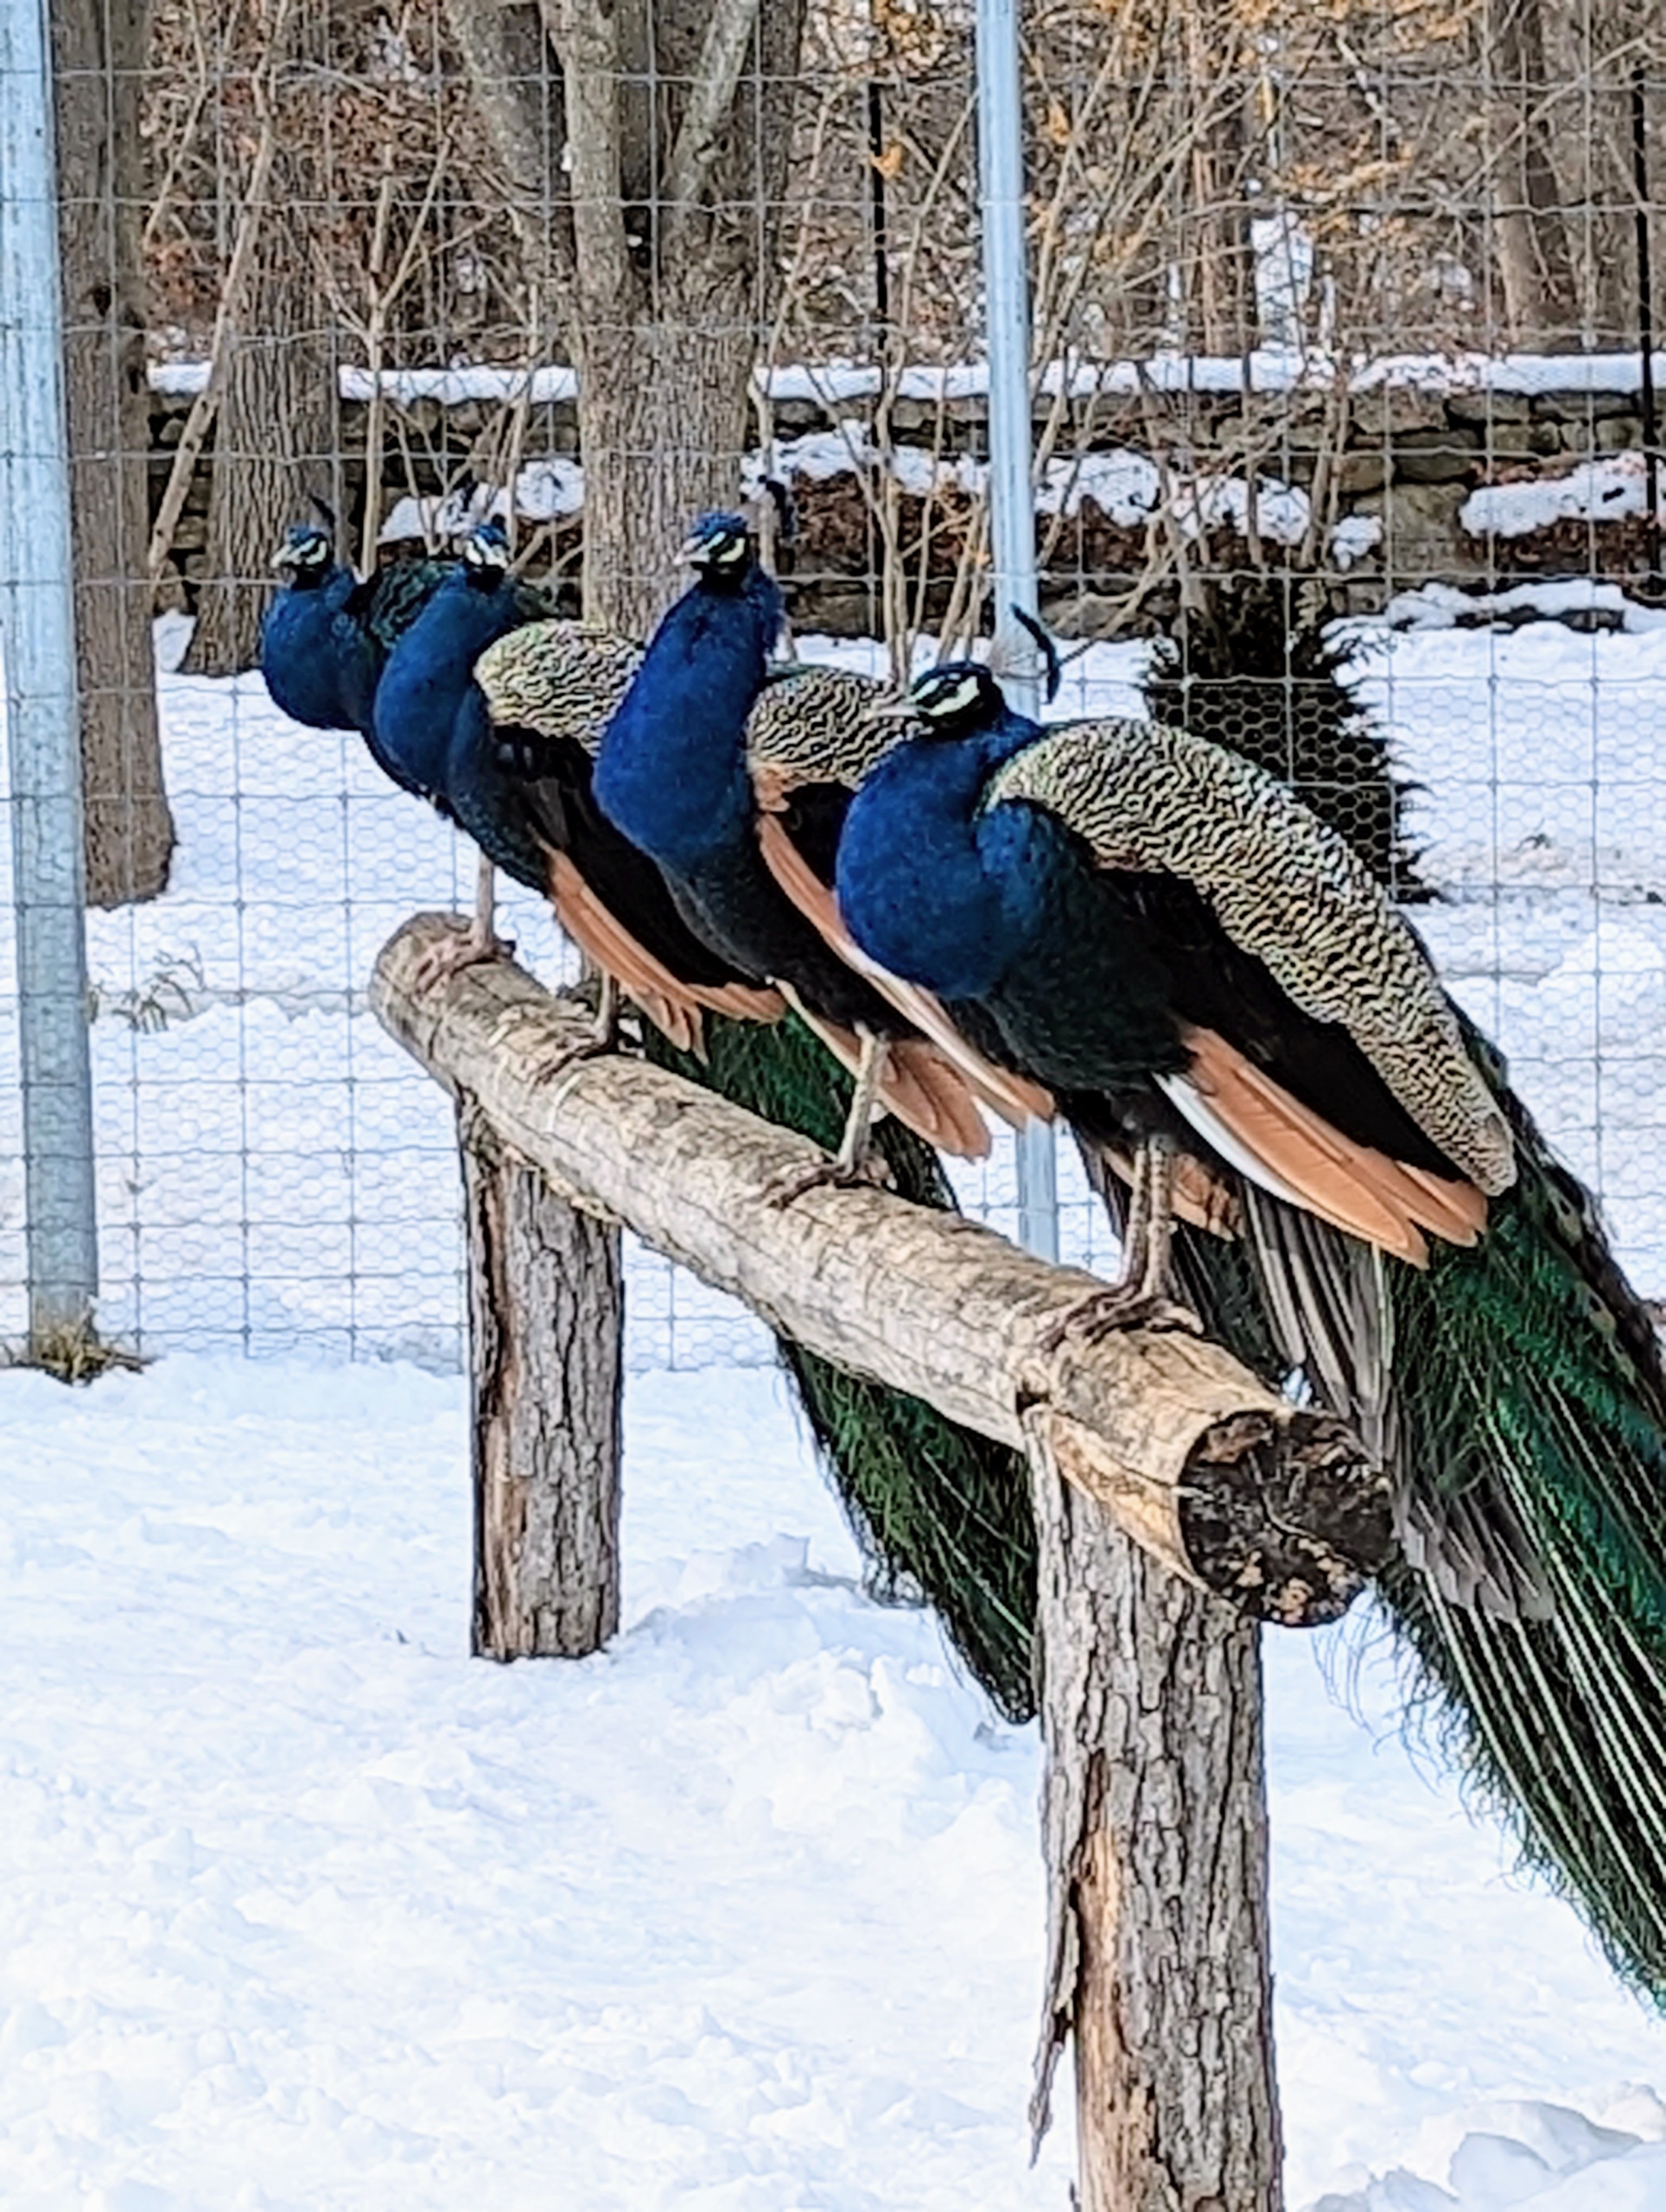
This hen is watching the activity from her perch. While these birds are ground feeders and ground nesters, they still enjoy roosting at higher levels. In the wild, this keeps them safe from predators at night. My outdoor birds all have access to natural perches made from old felled trees here at the farm.
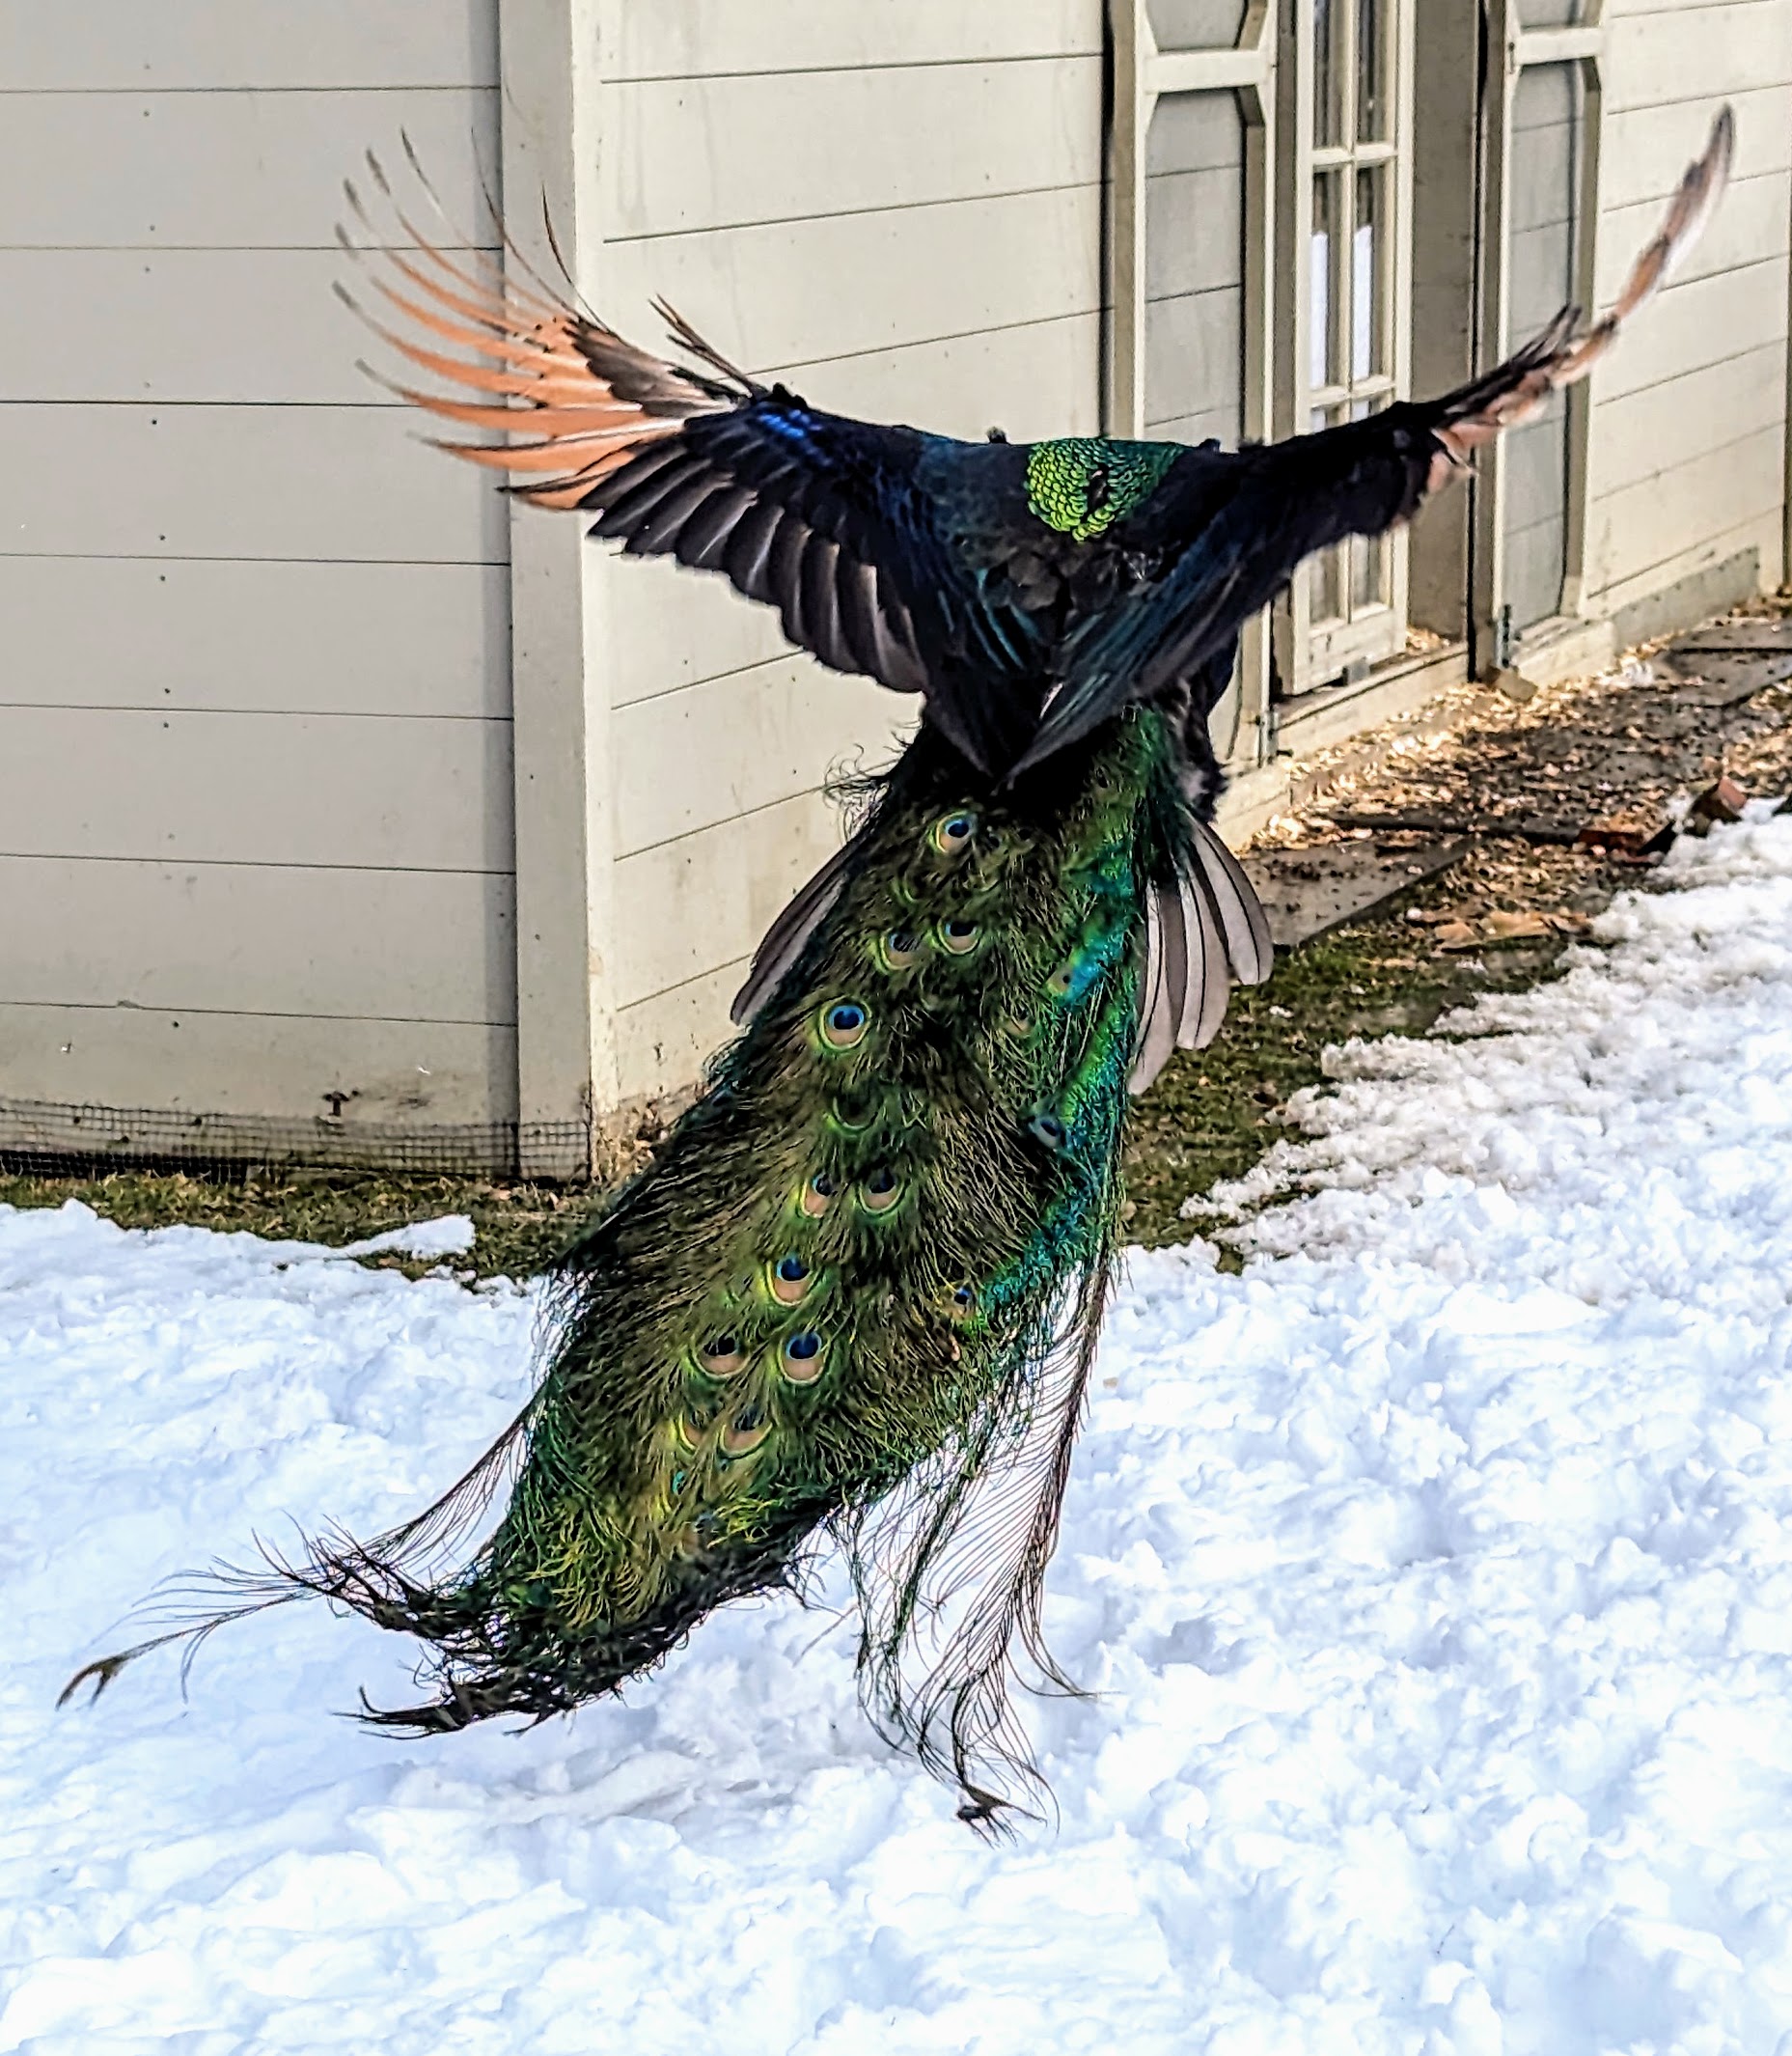
Peacocks can fly, but only two-percent of the time, and only for short distances. Peafowl learn to fly by about six-months of age.
This is one of their favorite roosts. From this vantage point, the peafowl can see all the activity happening around the stable. Peafowls are stunning to look at, but do not underestimate their power. These birds are extremely strong with very sharp spurs – just look at the legs and feet of these peacocks. Full-grown, peacocks can weigh up to 13-pounds. Females can weigh up to just under nine.
Peacocks and peahens are very smart, docile and adaptable birds. They are also quite clever and very curious. Whenever I visit, I call out to them – and they respond.
And remember, only the males are peacocks. The females are peahens, and both are called peafowl. Babies are peachicks. A family of peafowl is called a bevy. And a group is called an “ostentation” or a “muster.” Follow along through the season – I wonder if we will have baby peachicks later this year.