Here at my Bedford, New York farm, I always encourage my crew to "use the right tools for the right jobs." Among our favorites are the tractors from Kubota, a leading manufacturer of all kinds of farming machinery, tool attachments, and utility vehicles.
My Kubota equipment is used all over the property every single day - to mow the pastures and fields, transport compost and mulch, dig holes for trees, maintain the carriage roads, and many, many other important outdoor tasks. The machines are dependable, efficient, and great additions to my working farm. #KubotaUSA #KubotaCanada #KubotaTractor #Loan #LandPrideDoesThat
Here are photos of my tractors at work, enjoy.
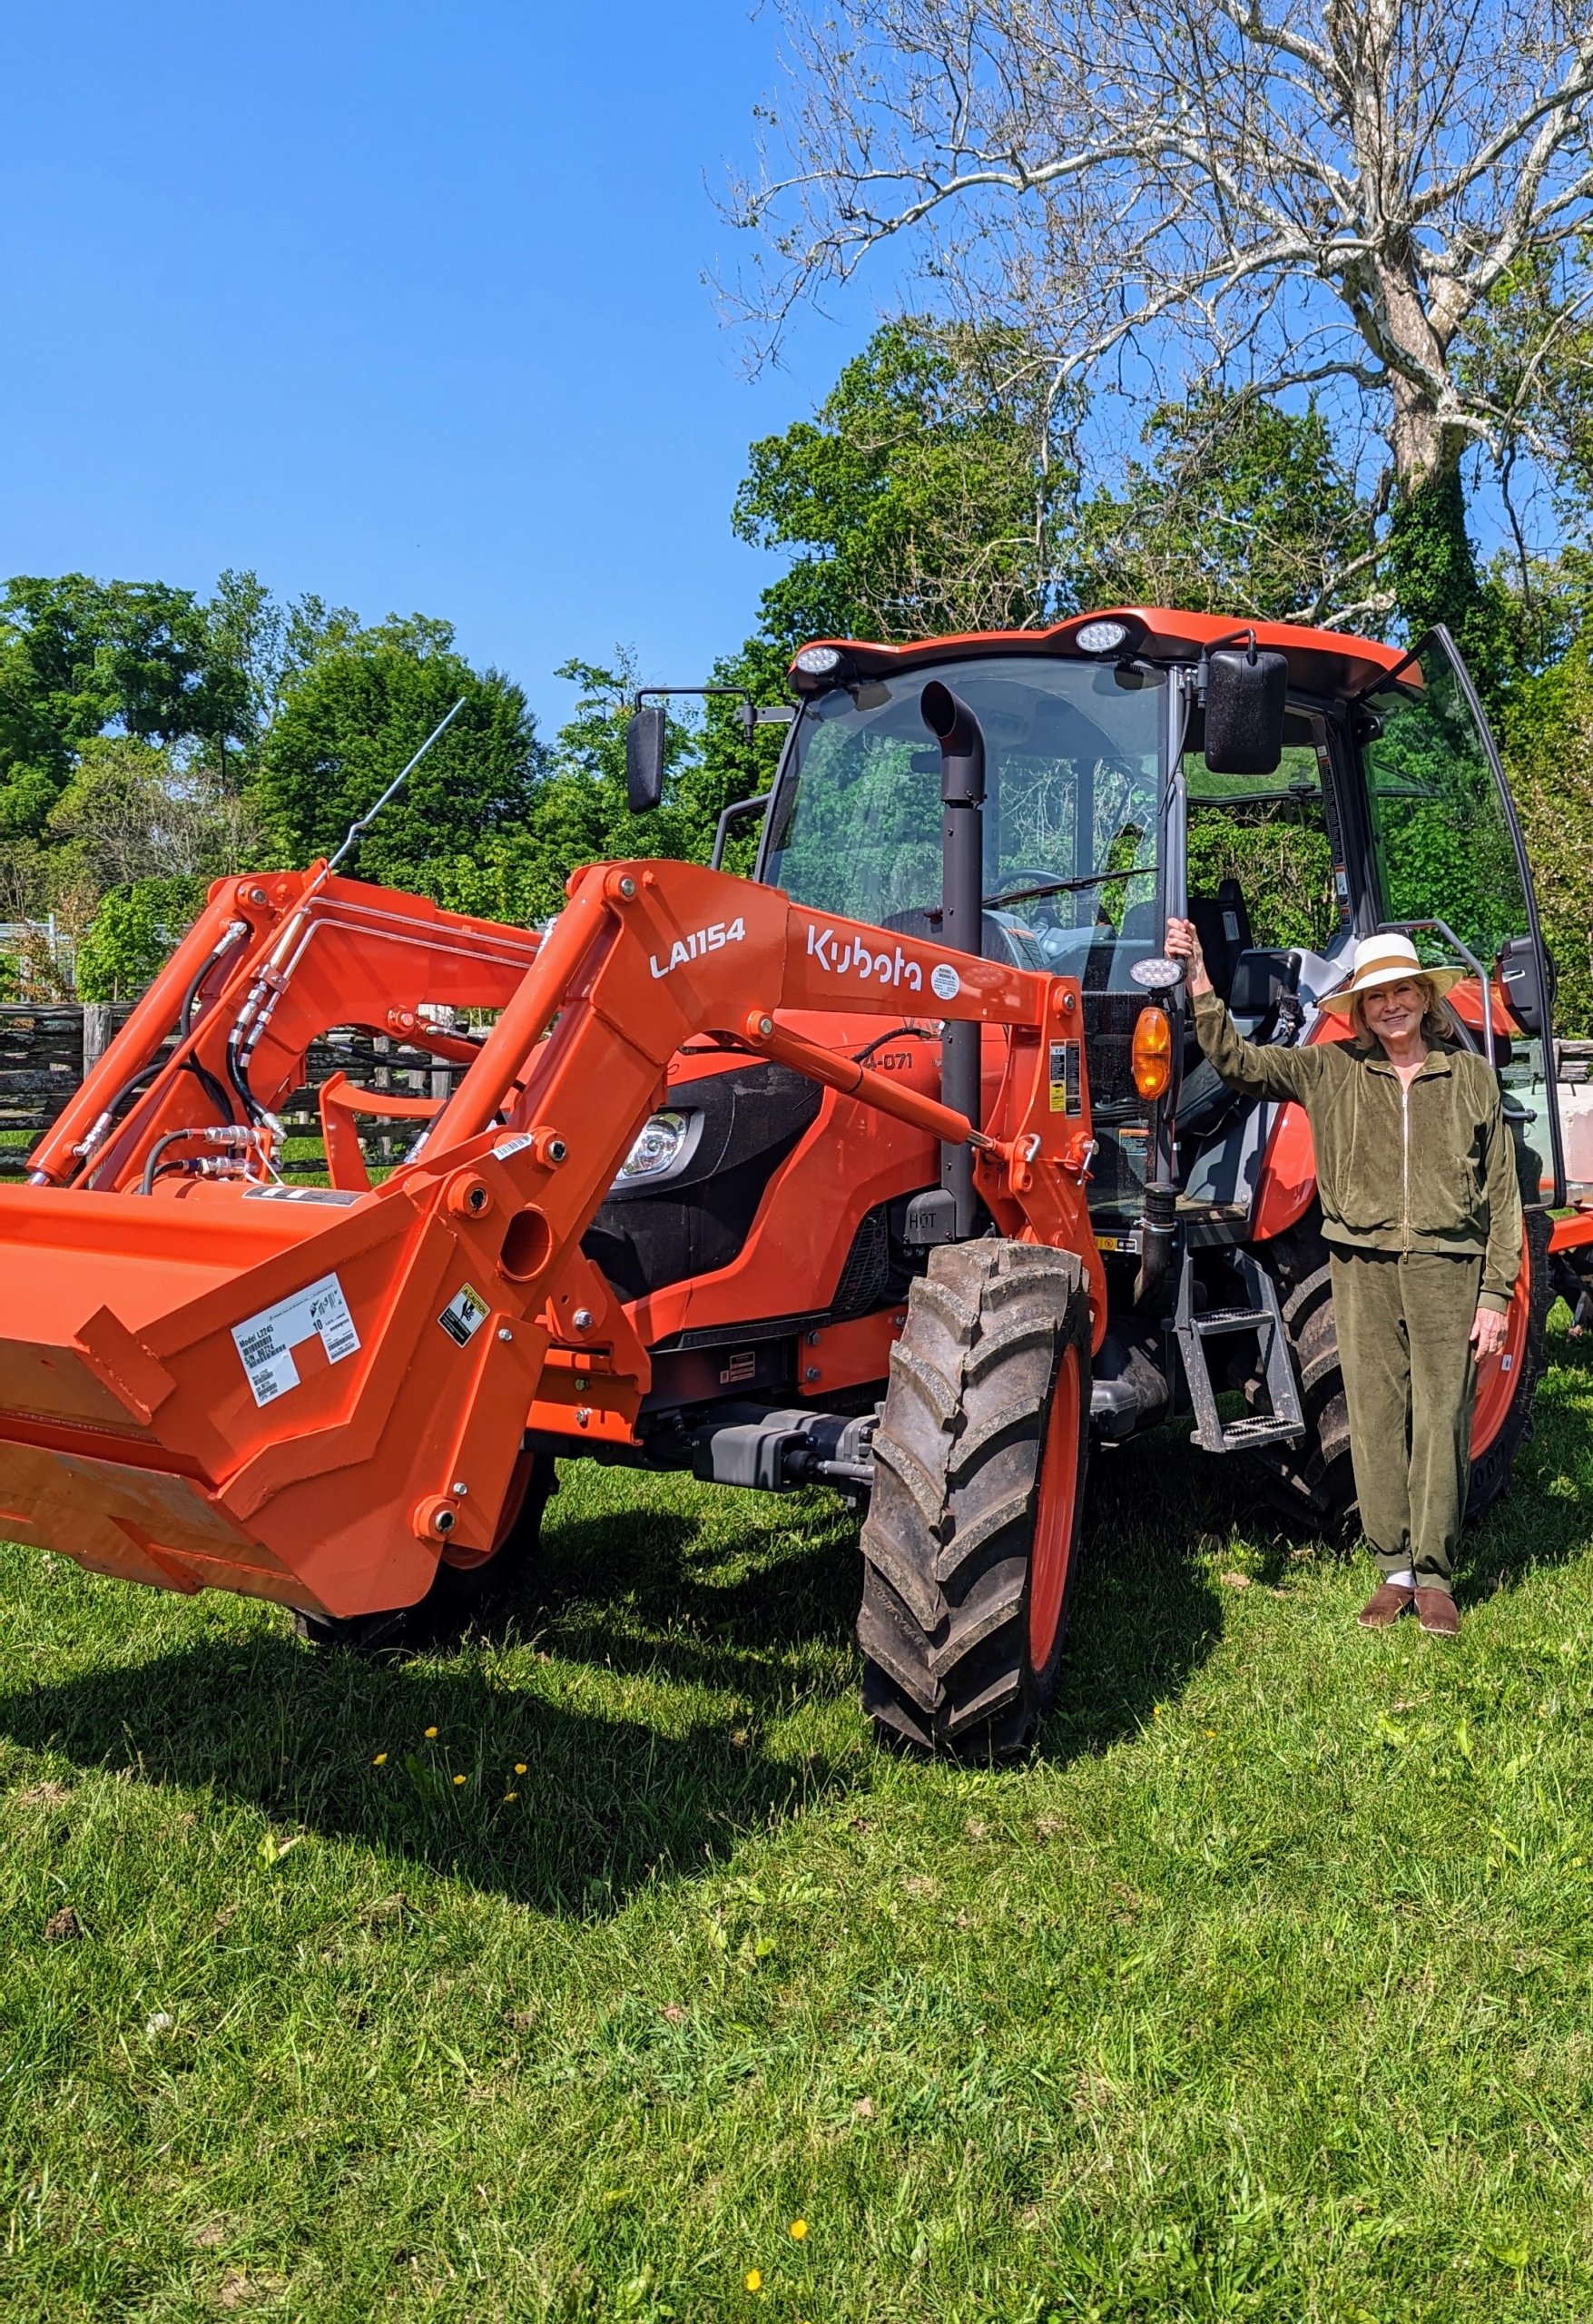
I am out and about around my farm several times a day – checking the gardens, pruning trees and shrubs, weeding, watering, and working with our big agricultural equipment. Here I am with my Kubota M4-071 tractor in one of my horse pastures.
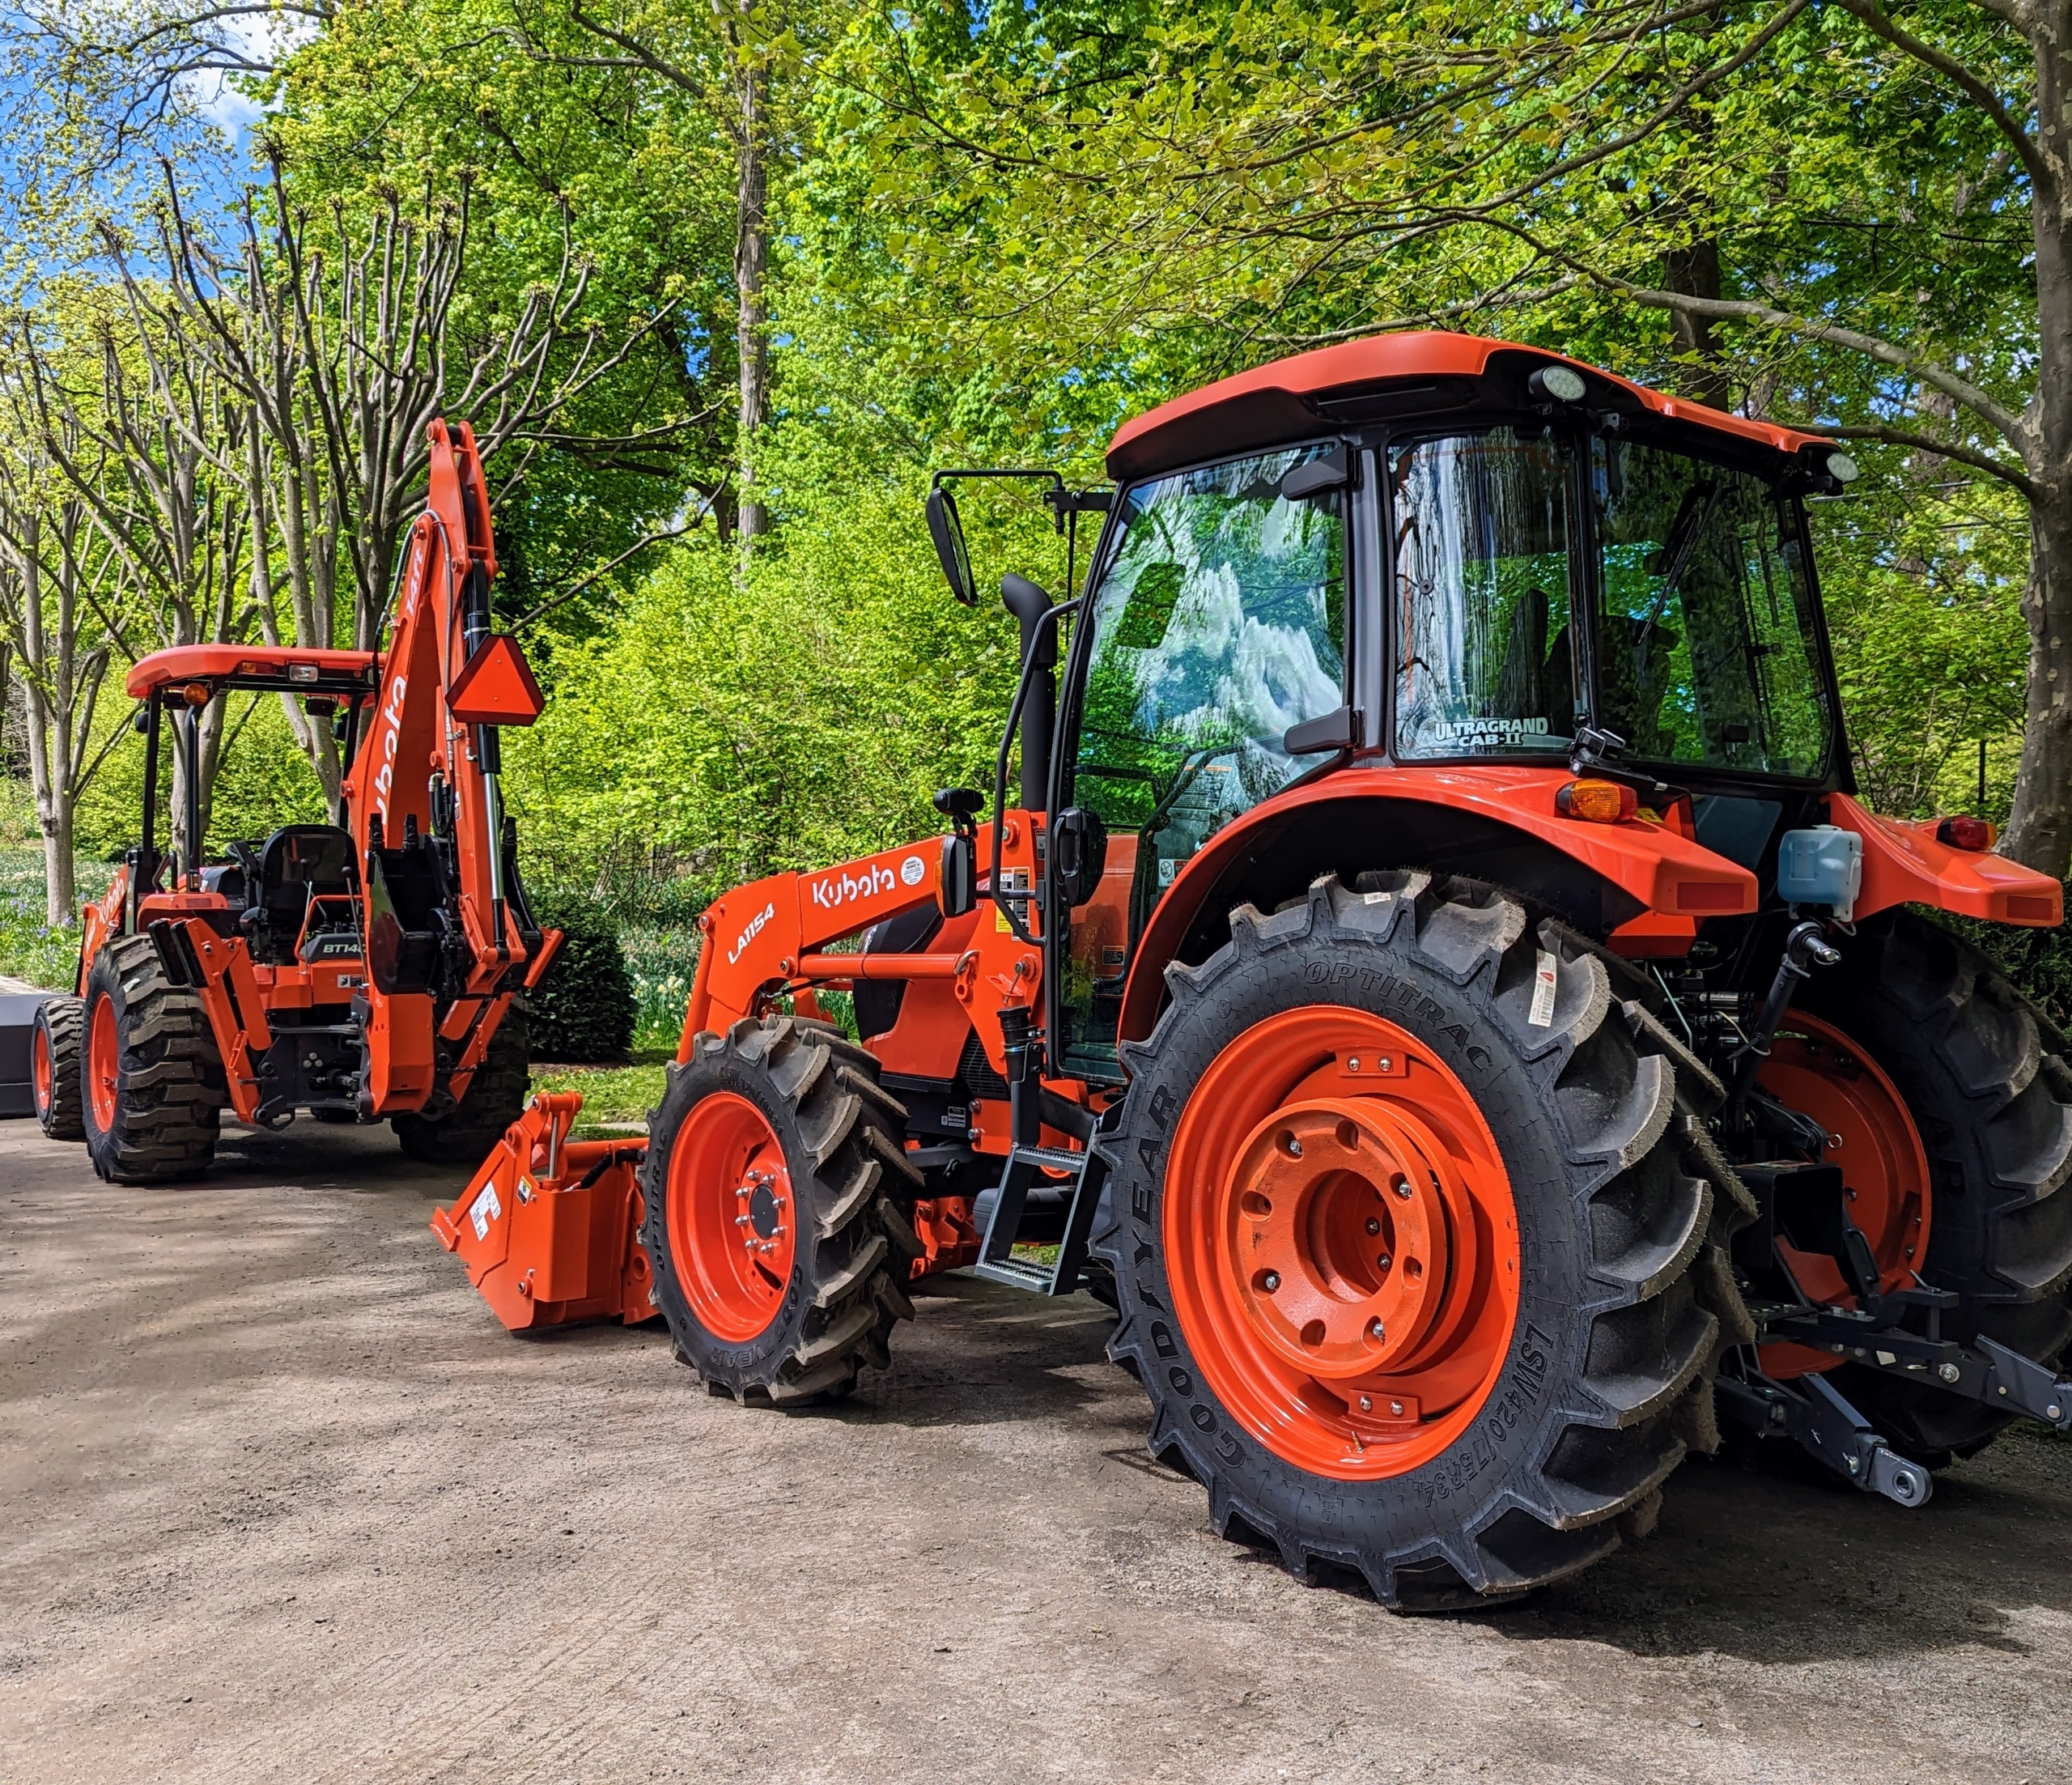
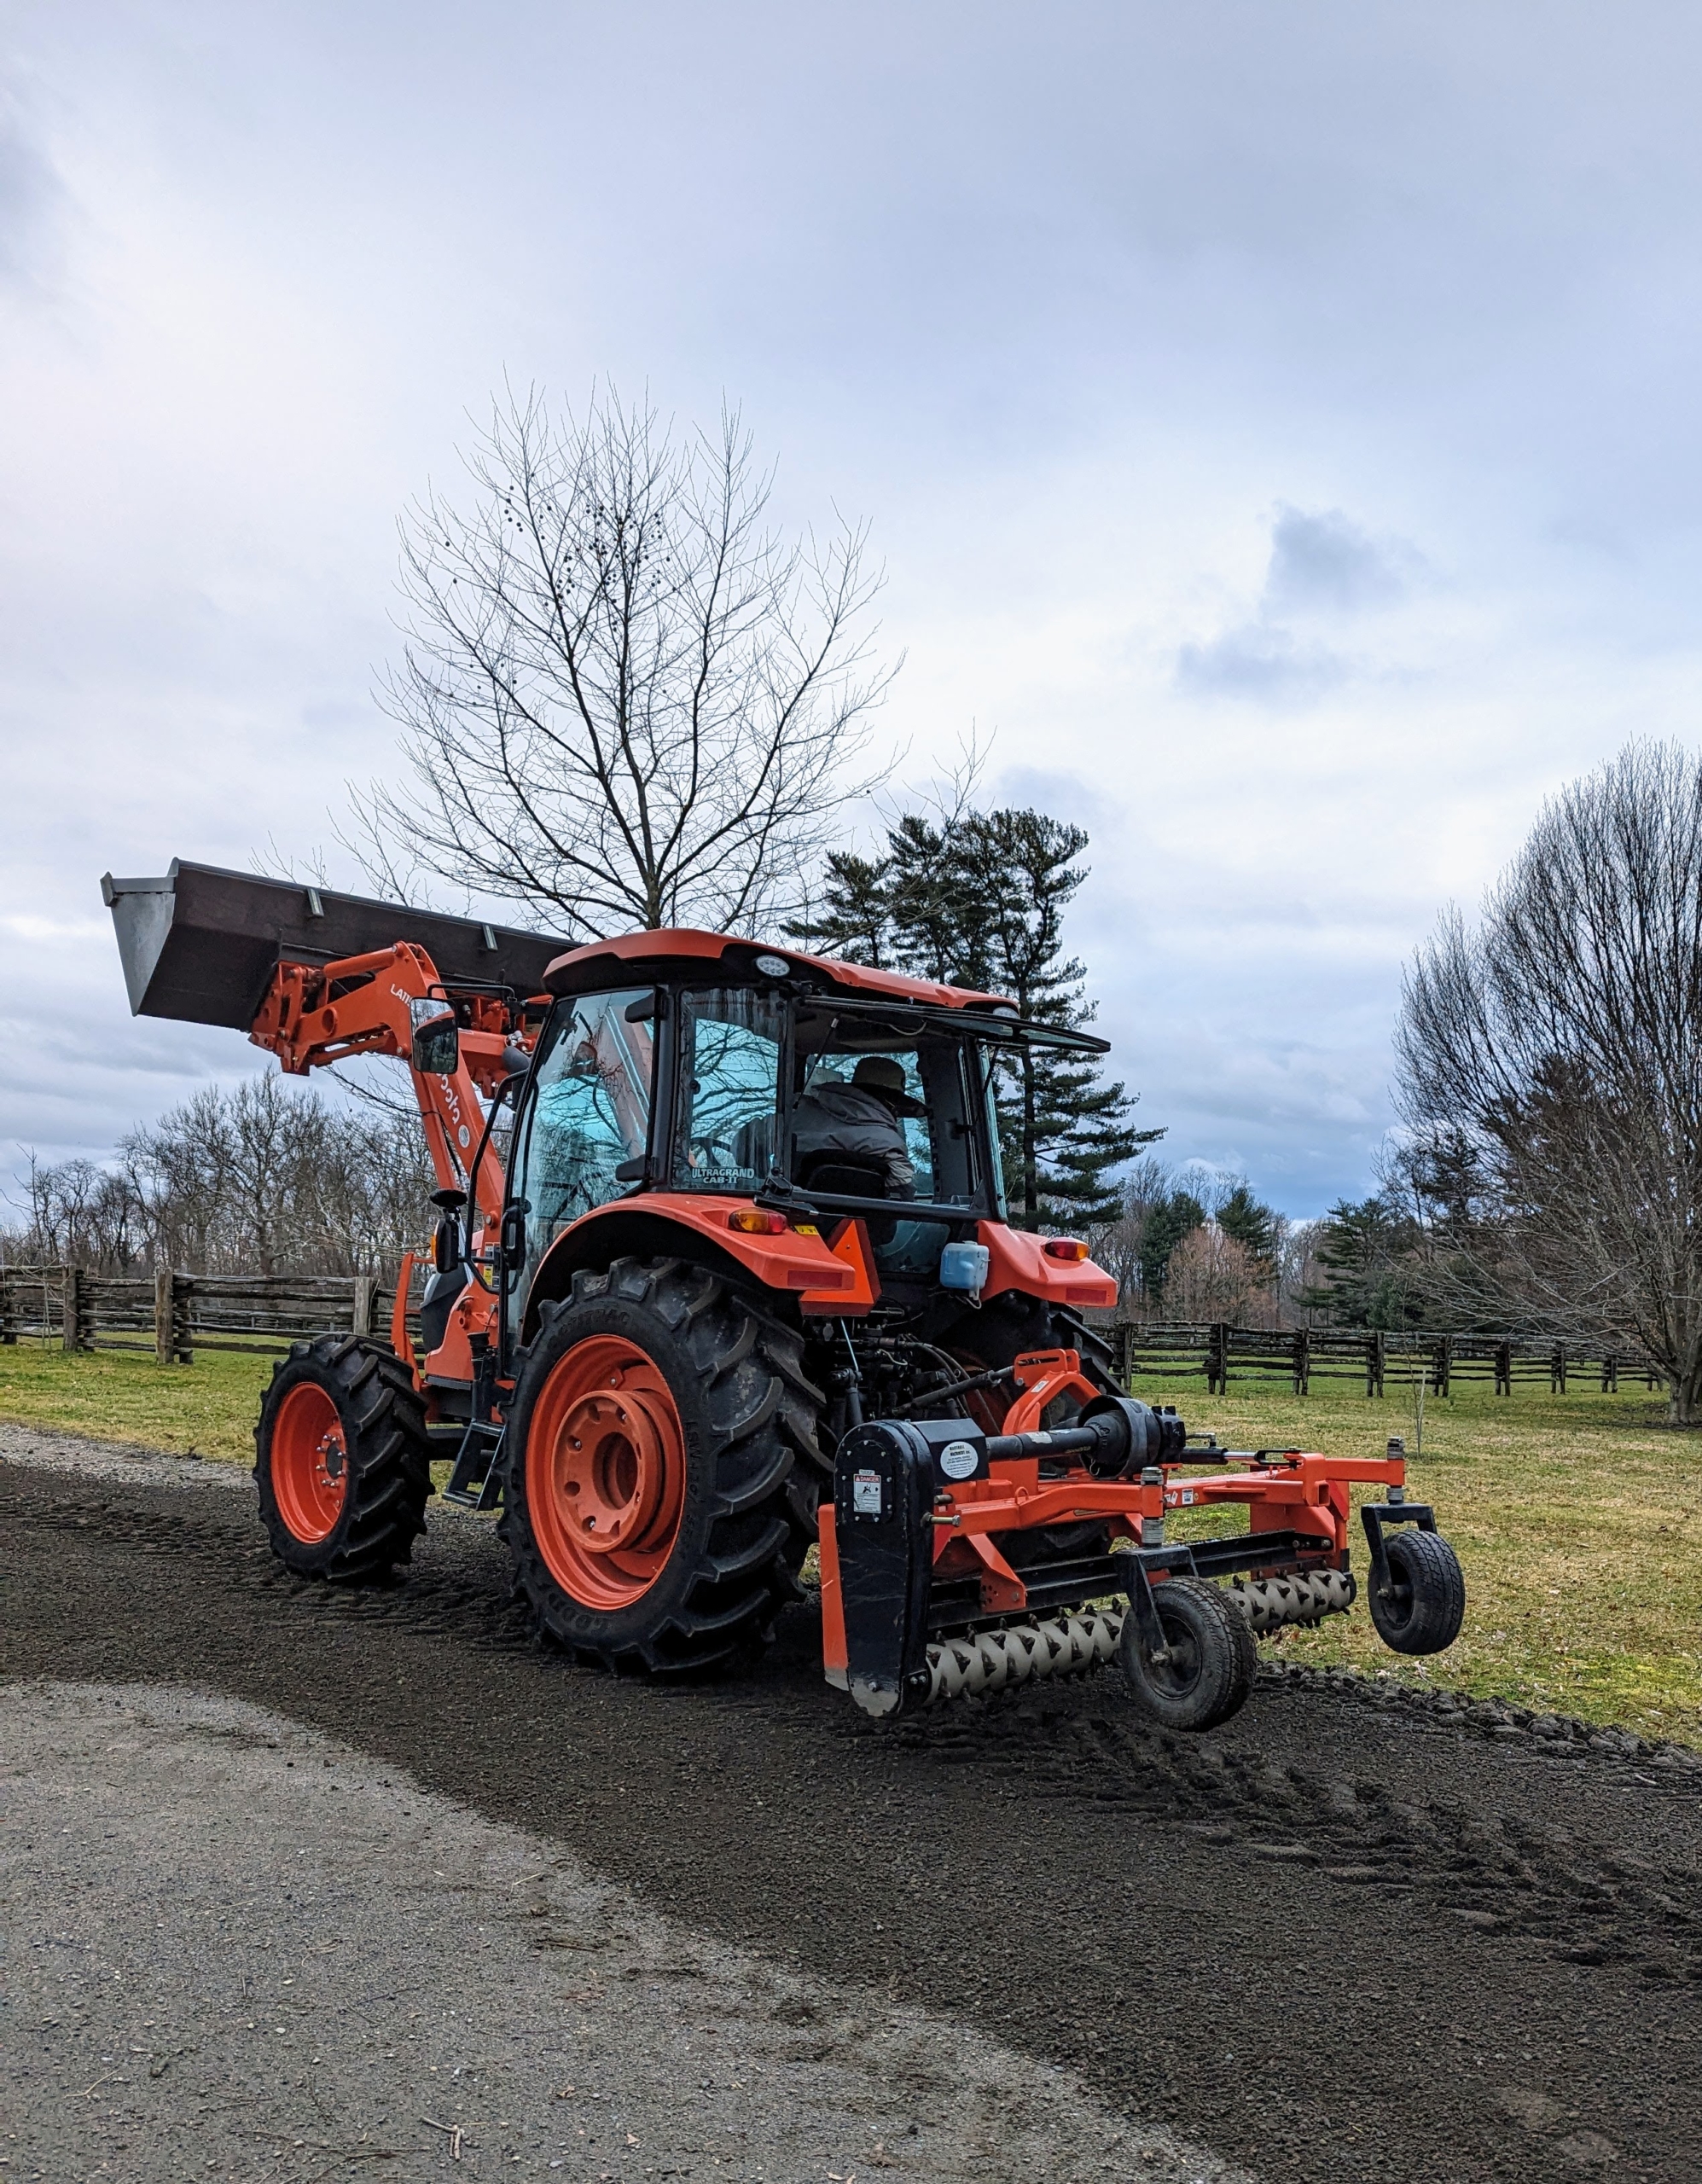
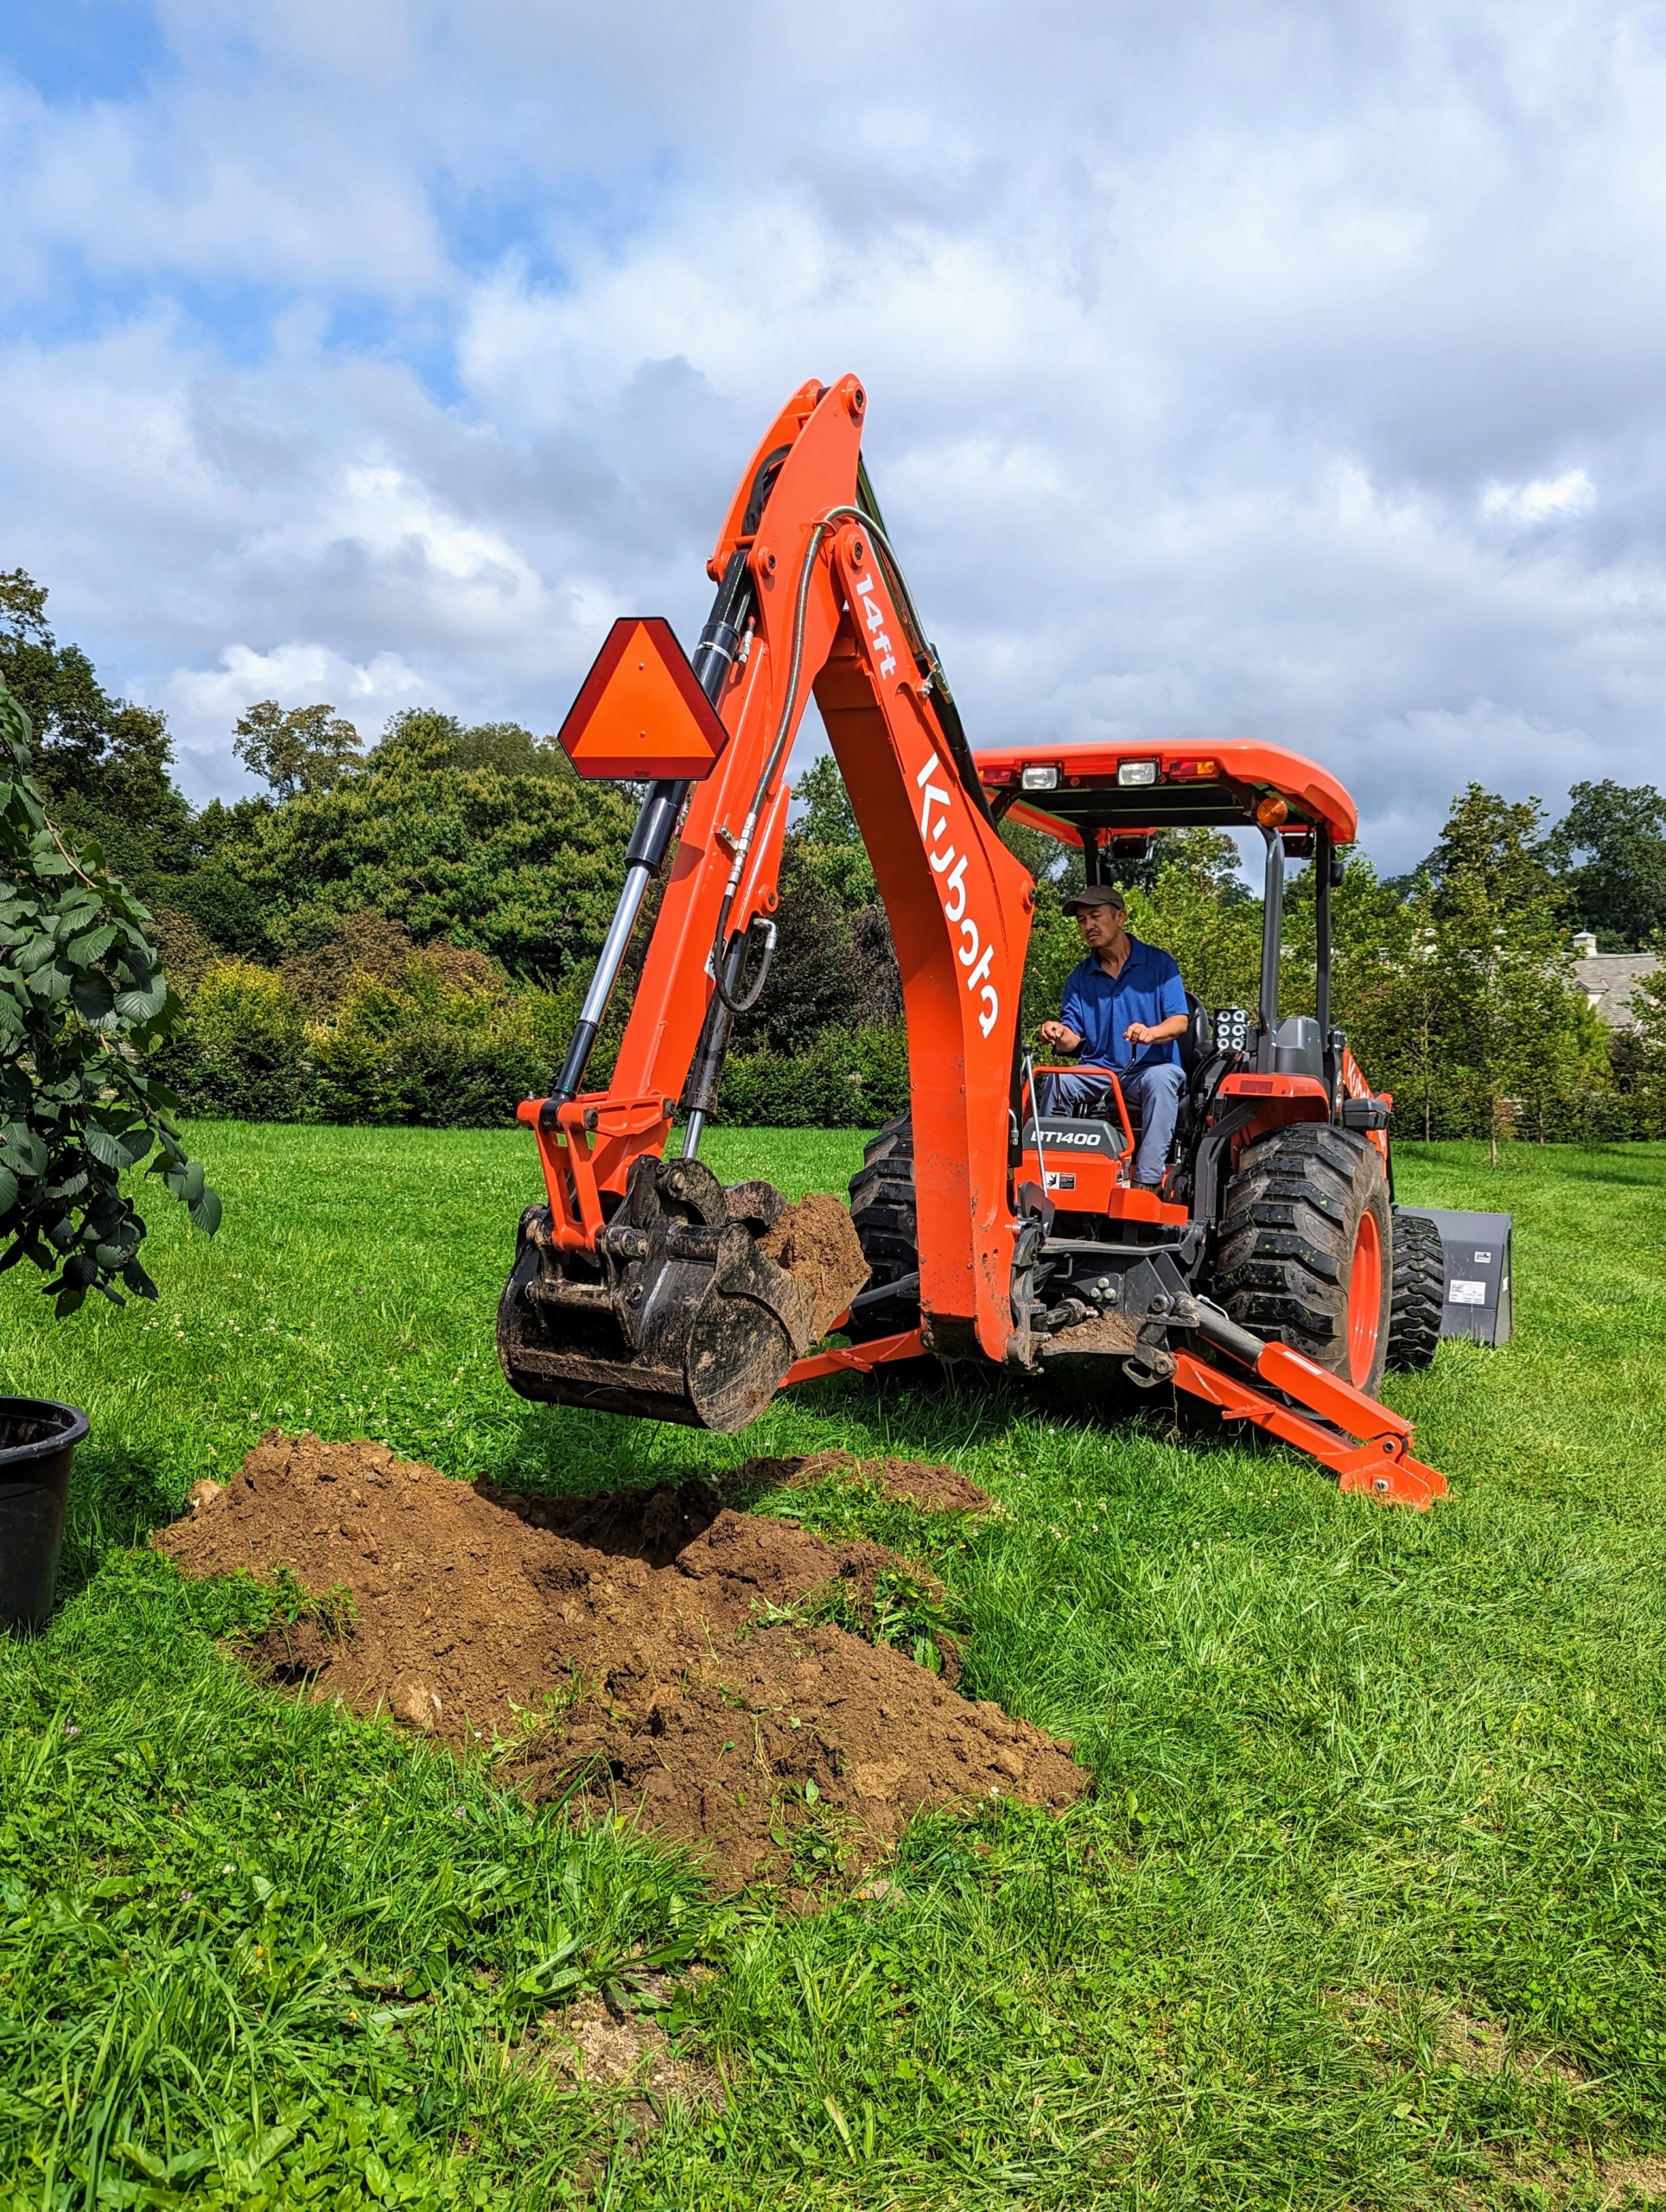
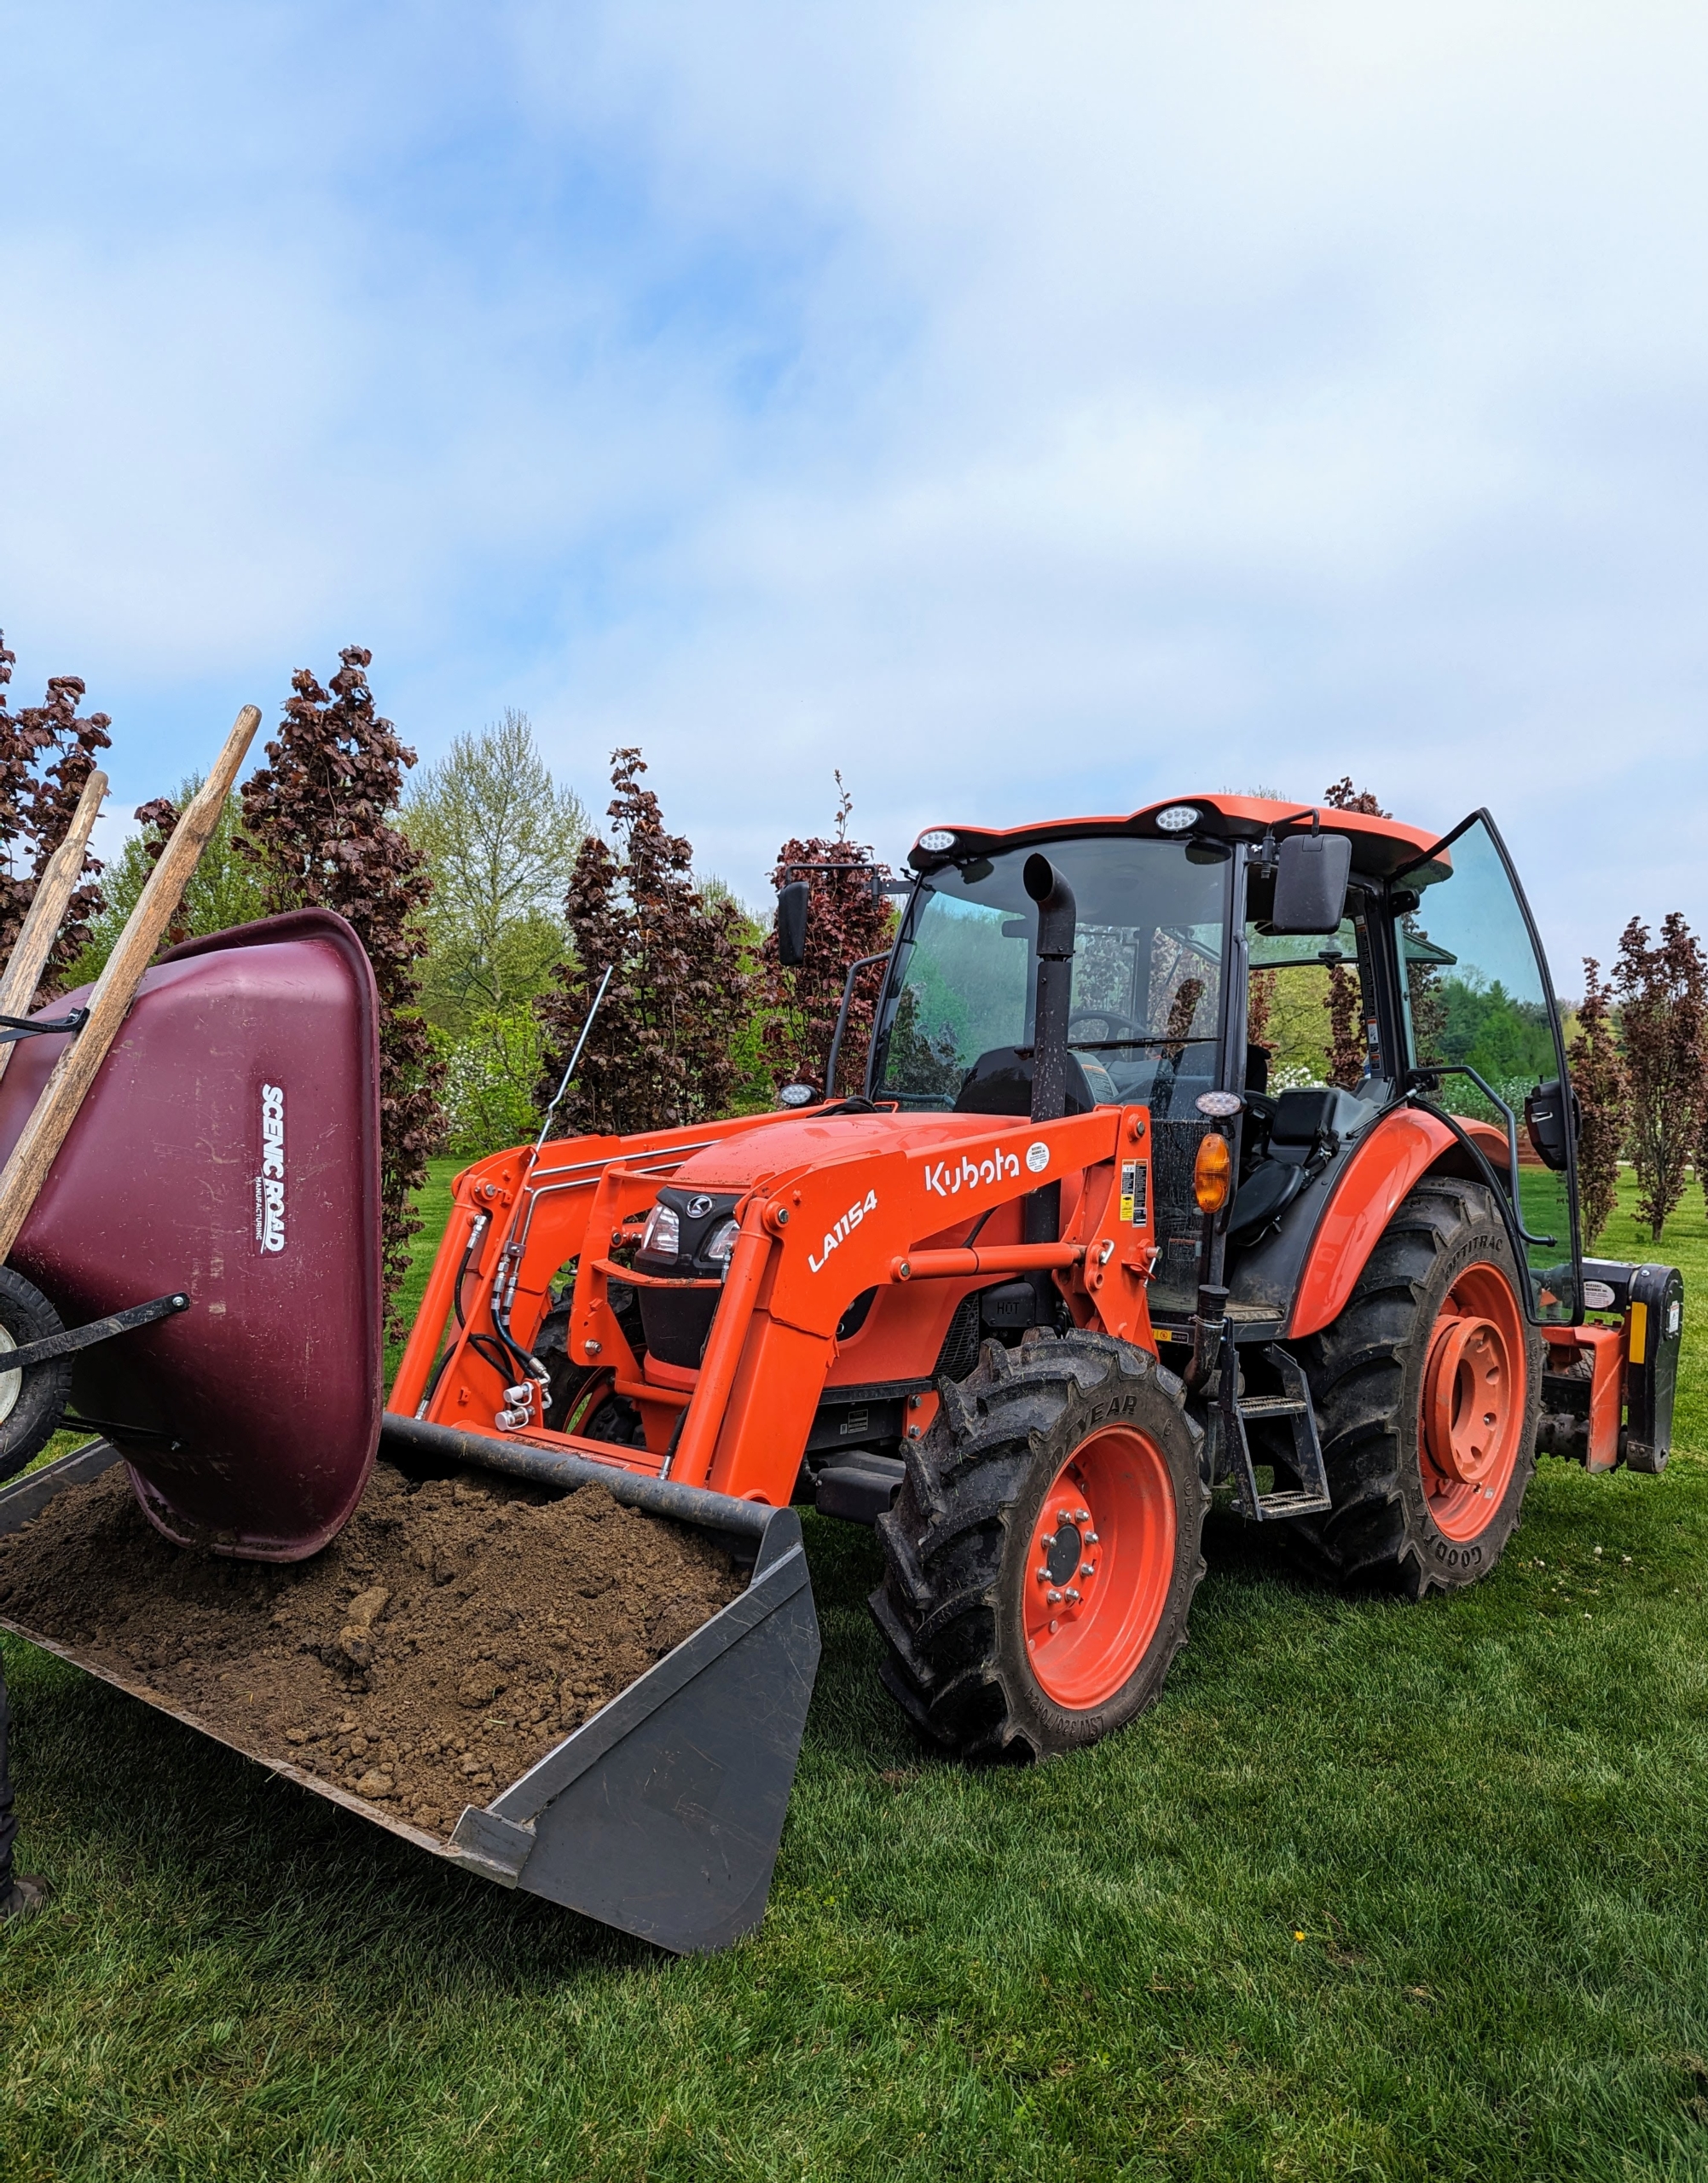
I am very fortunate to have two Kubota tractors – the M4-071 and the M62. Both of them have front loaders, and one of them is equipped with a backhoe.
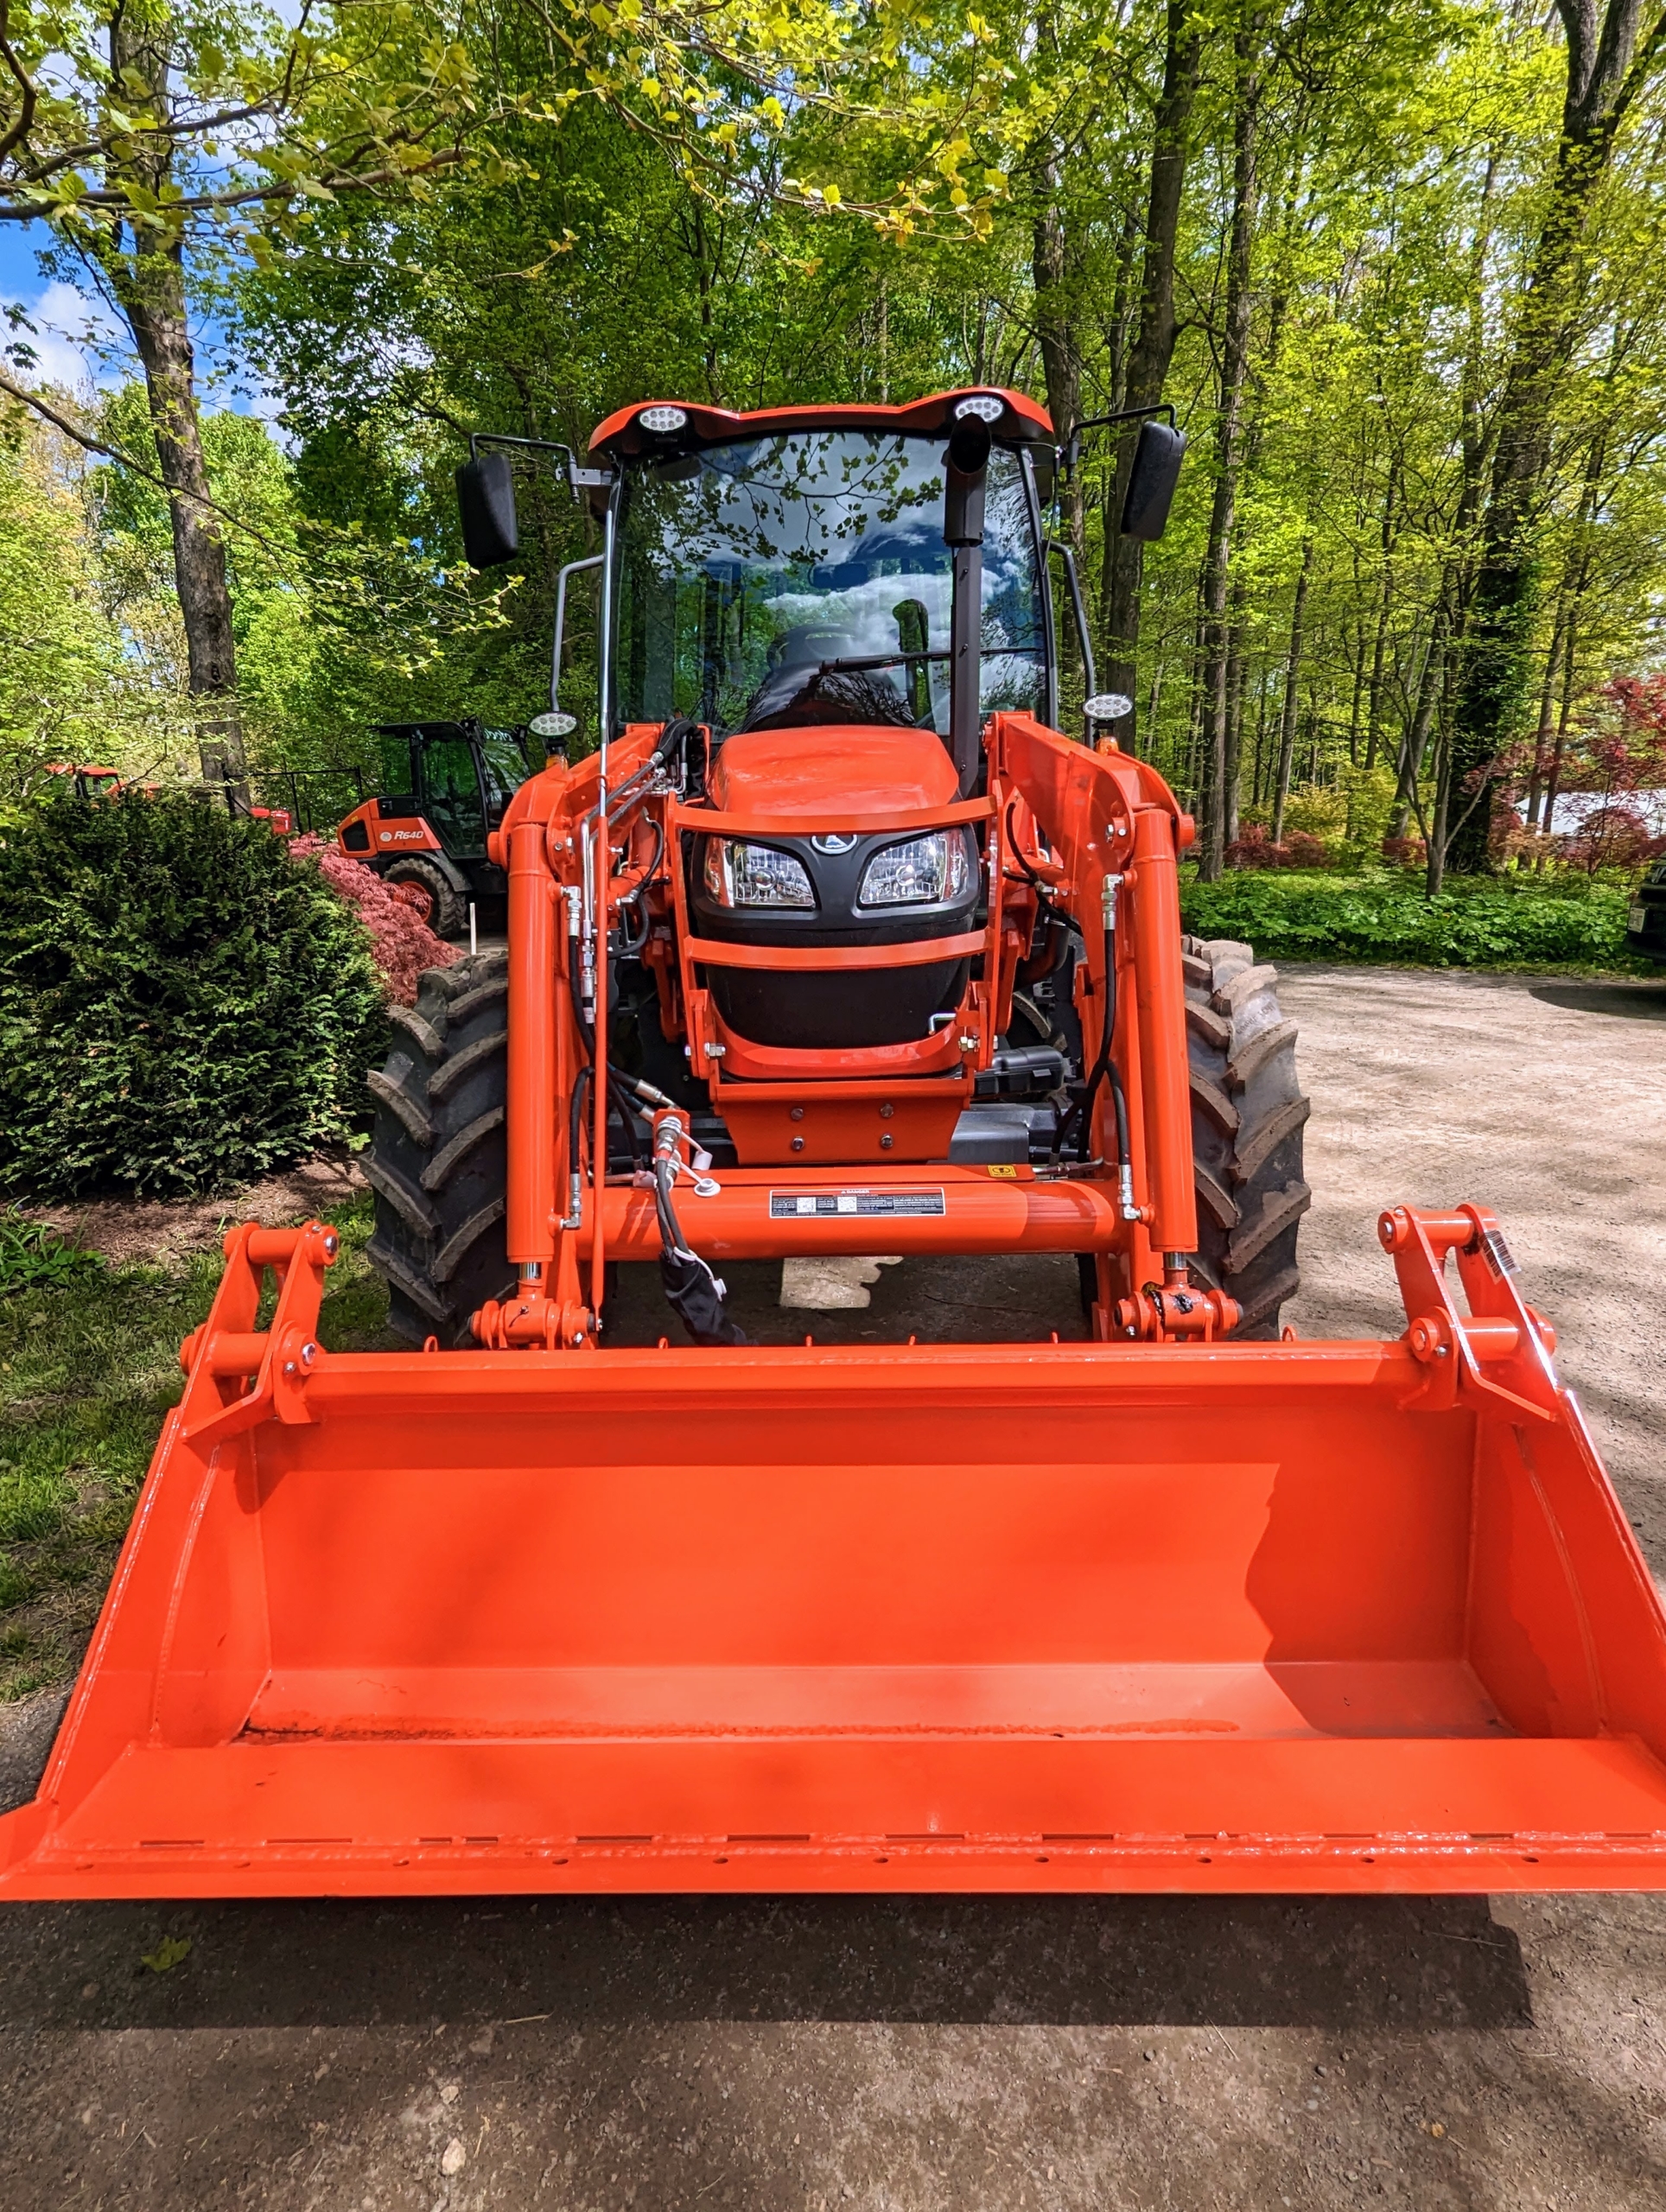
The bucket attachment is used for so many things – from transporting mulch and compost to carrying heavy potted plants to delivering heavy stone and logs.
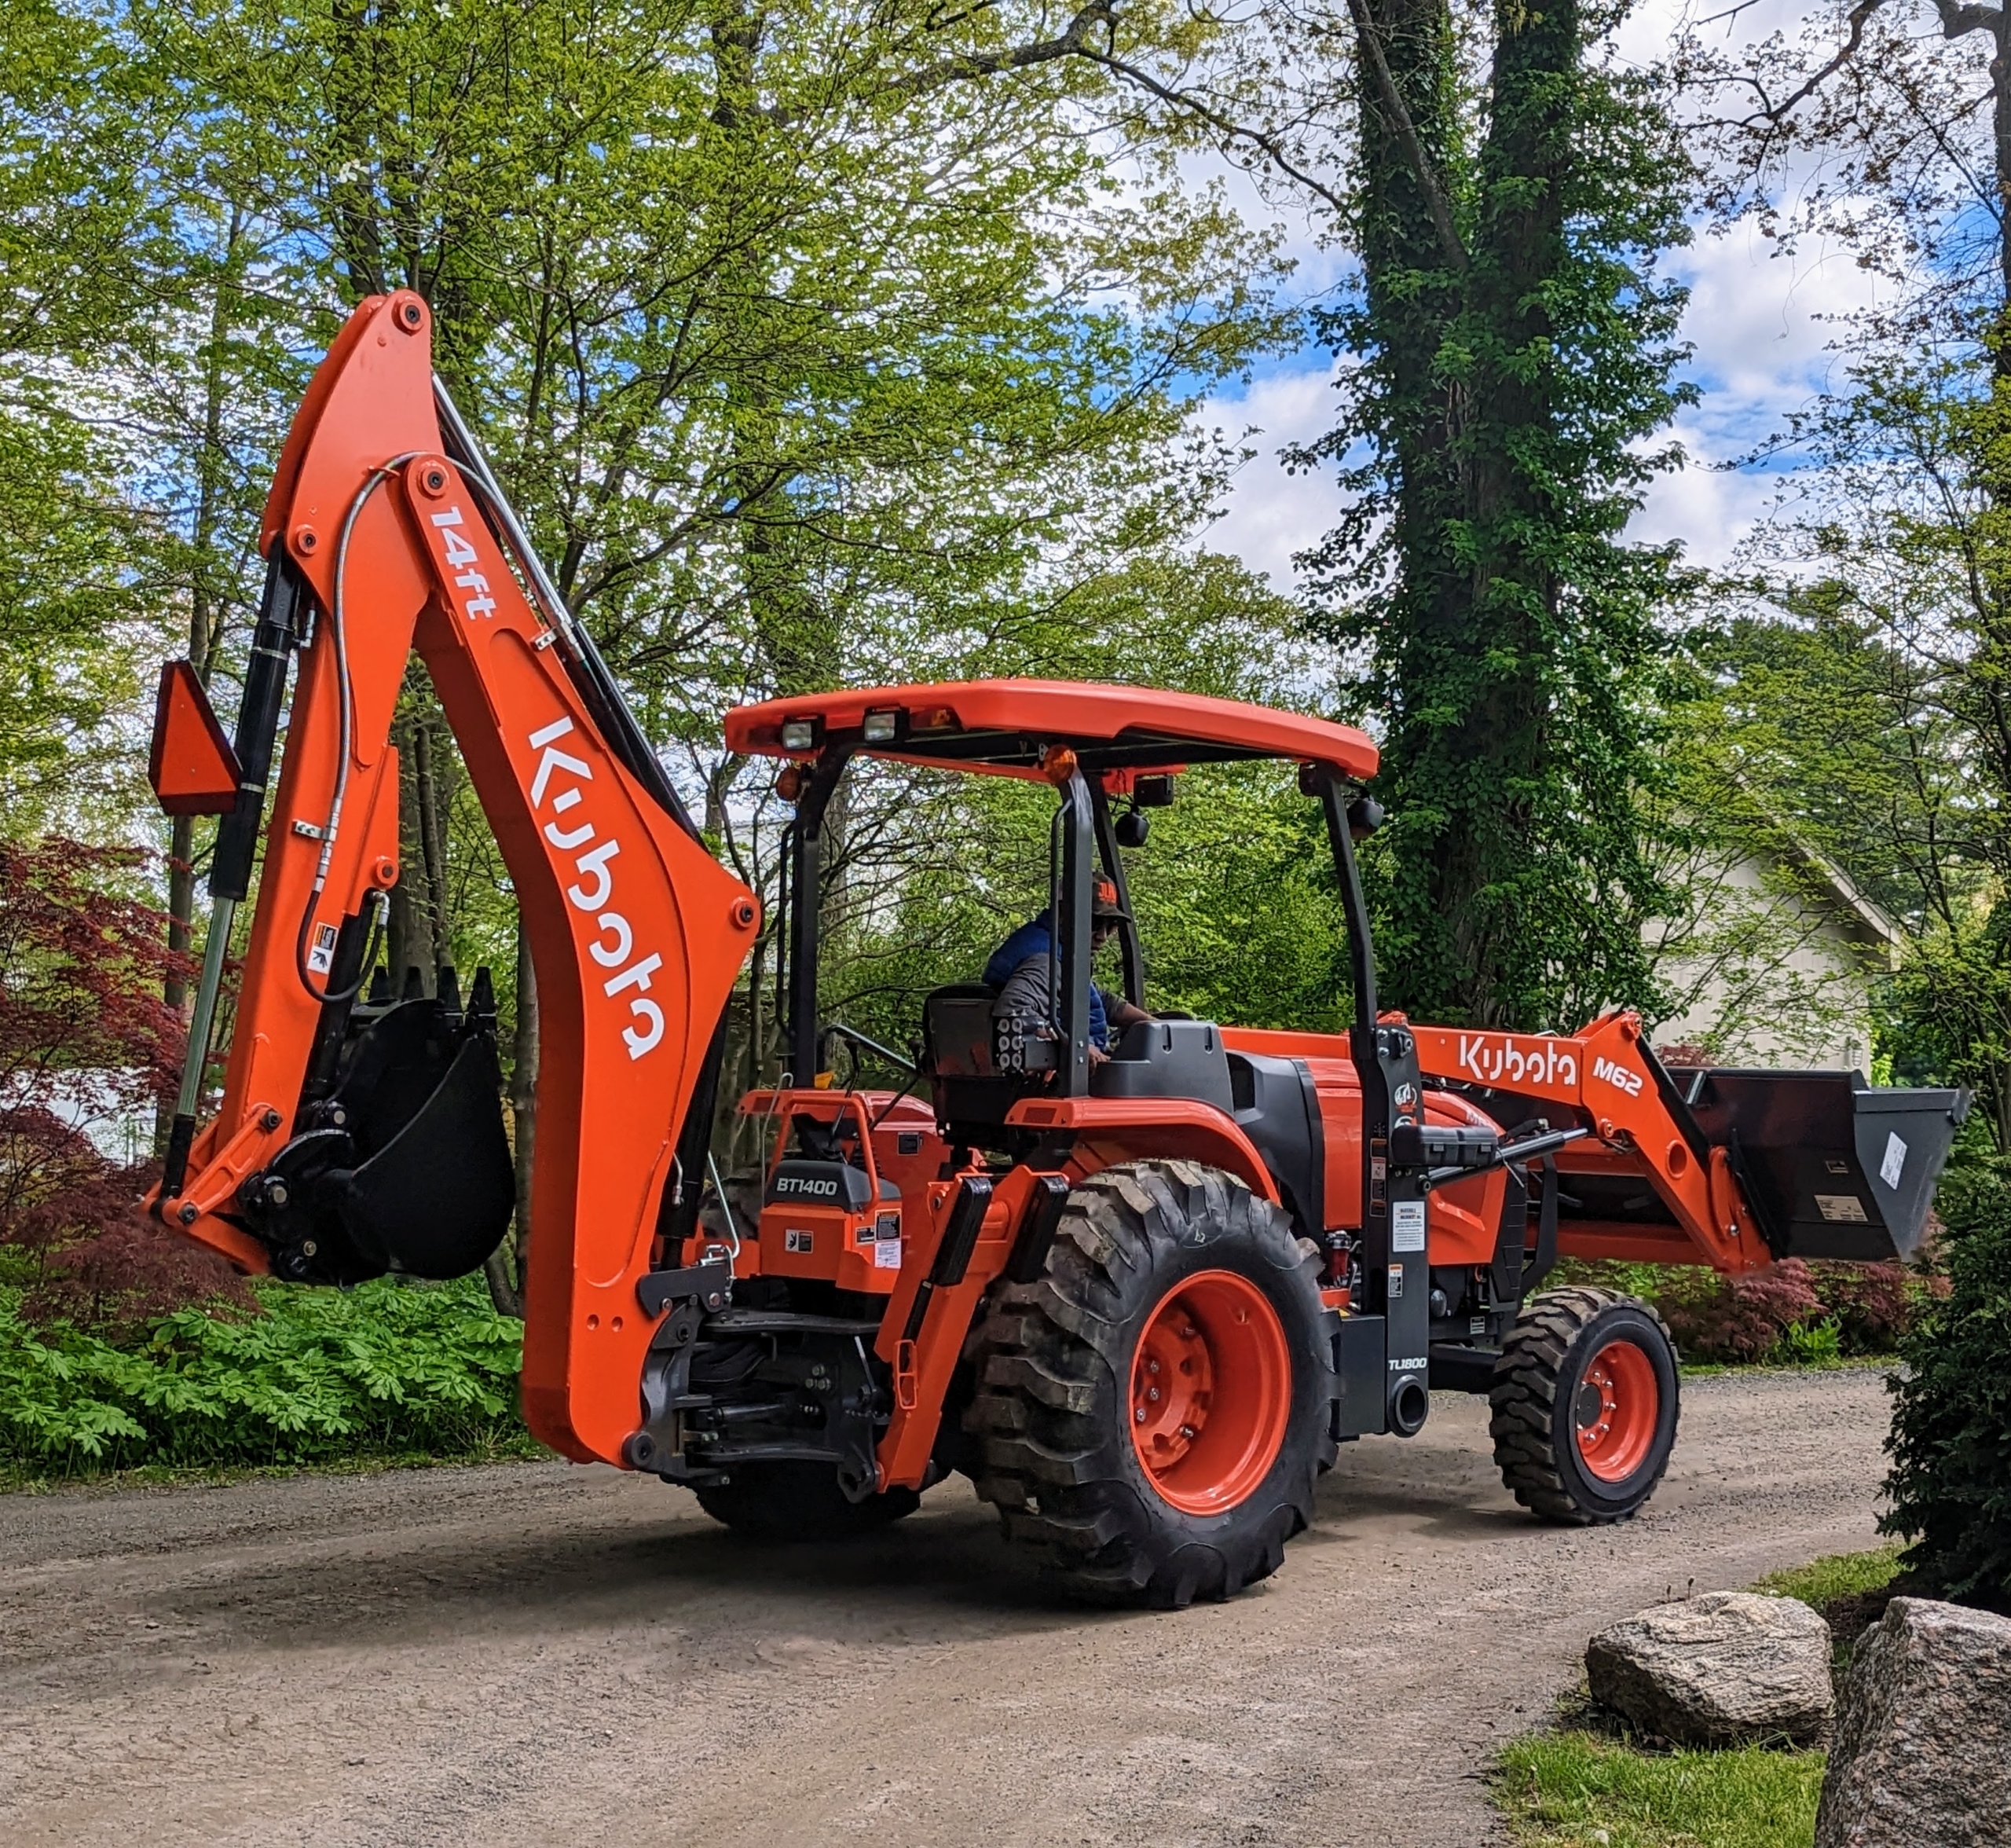
This is the Kubota M62 Tractor Loader Backhoe. This is essential for digging holes and planting large trees. It has a 63 horsepower engine, a front loader with a lift capacity of 3,960 pounds, and a powerful backhoe with 169.8 inch digging depth.
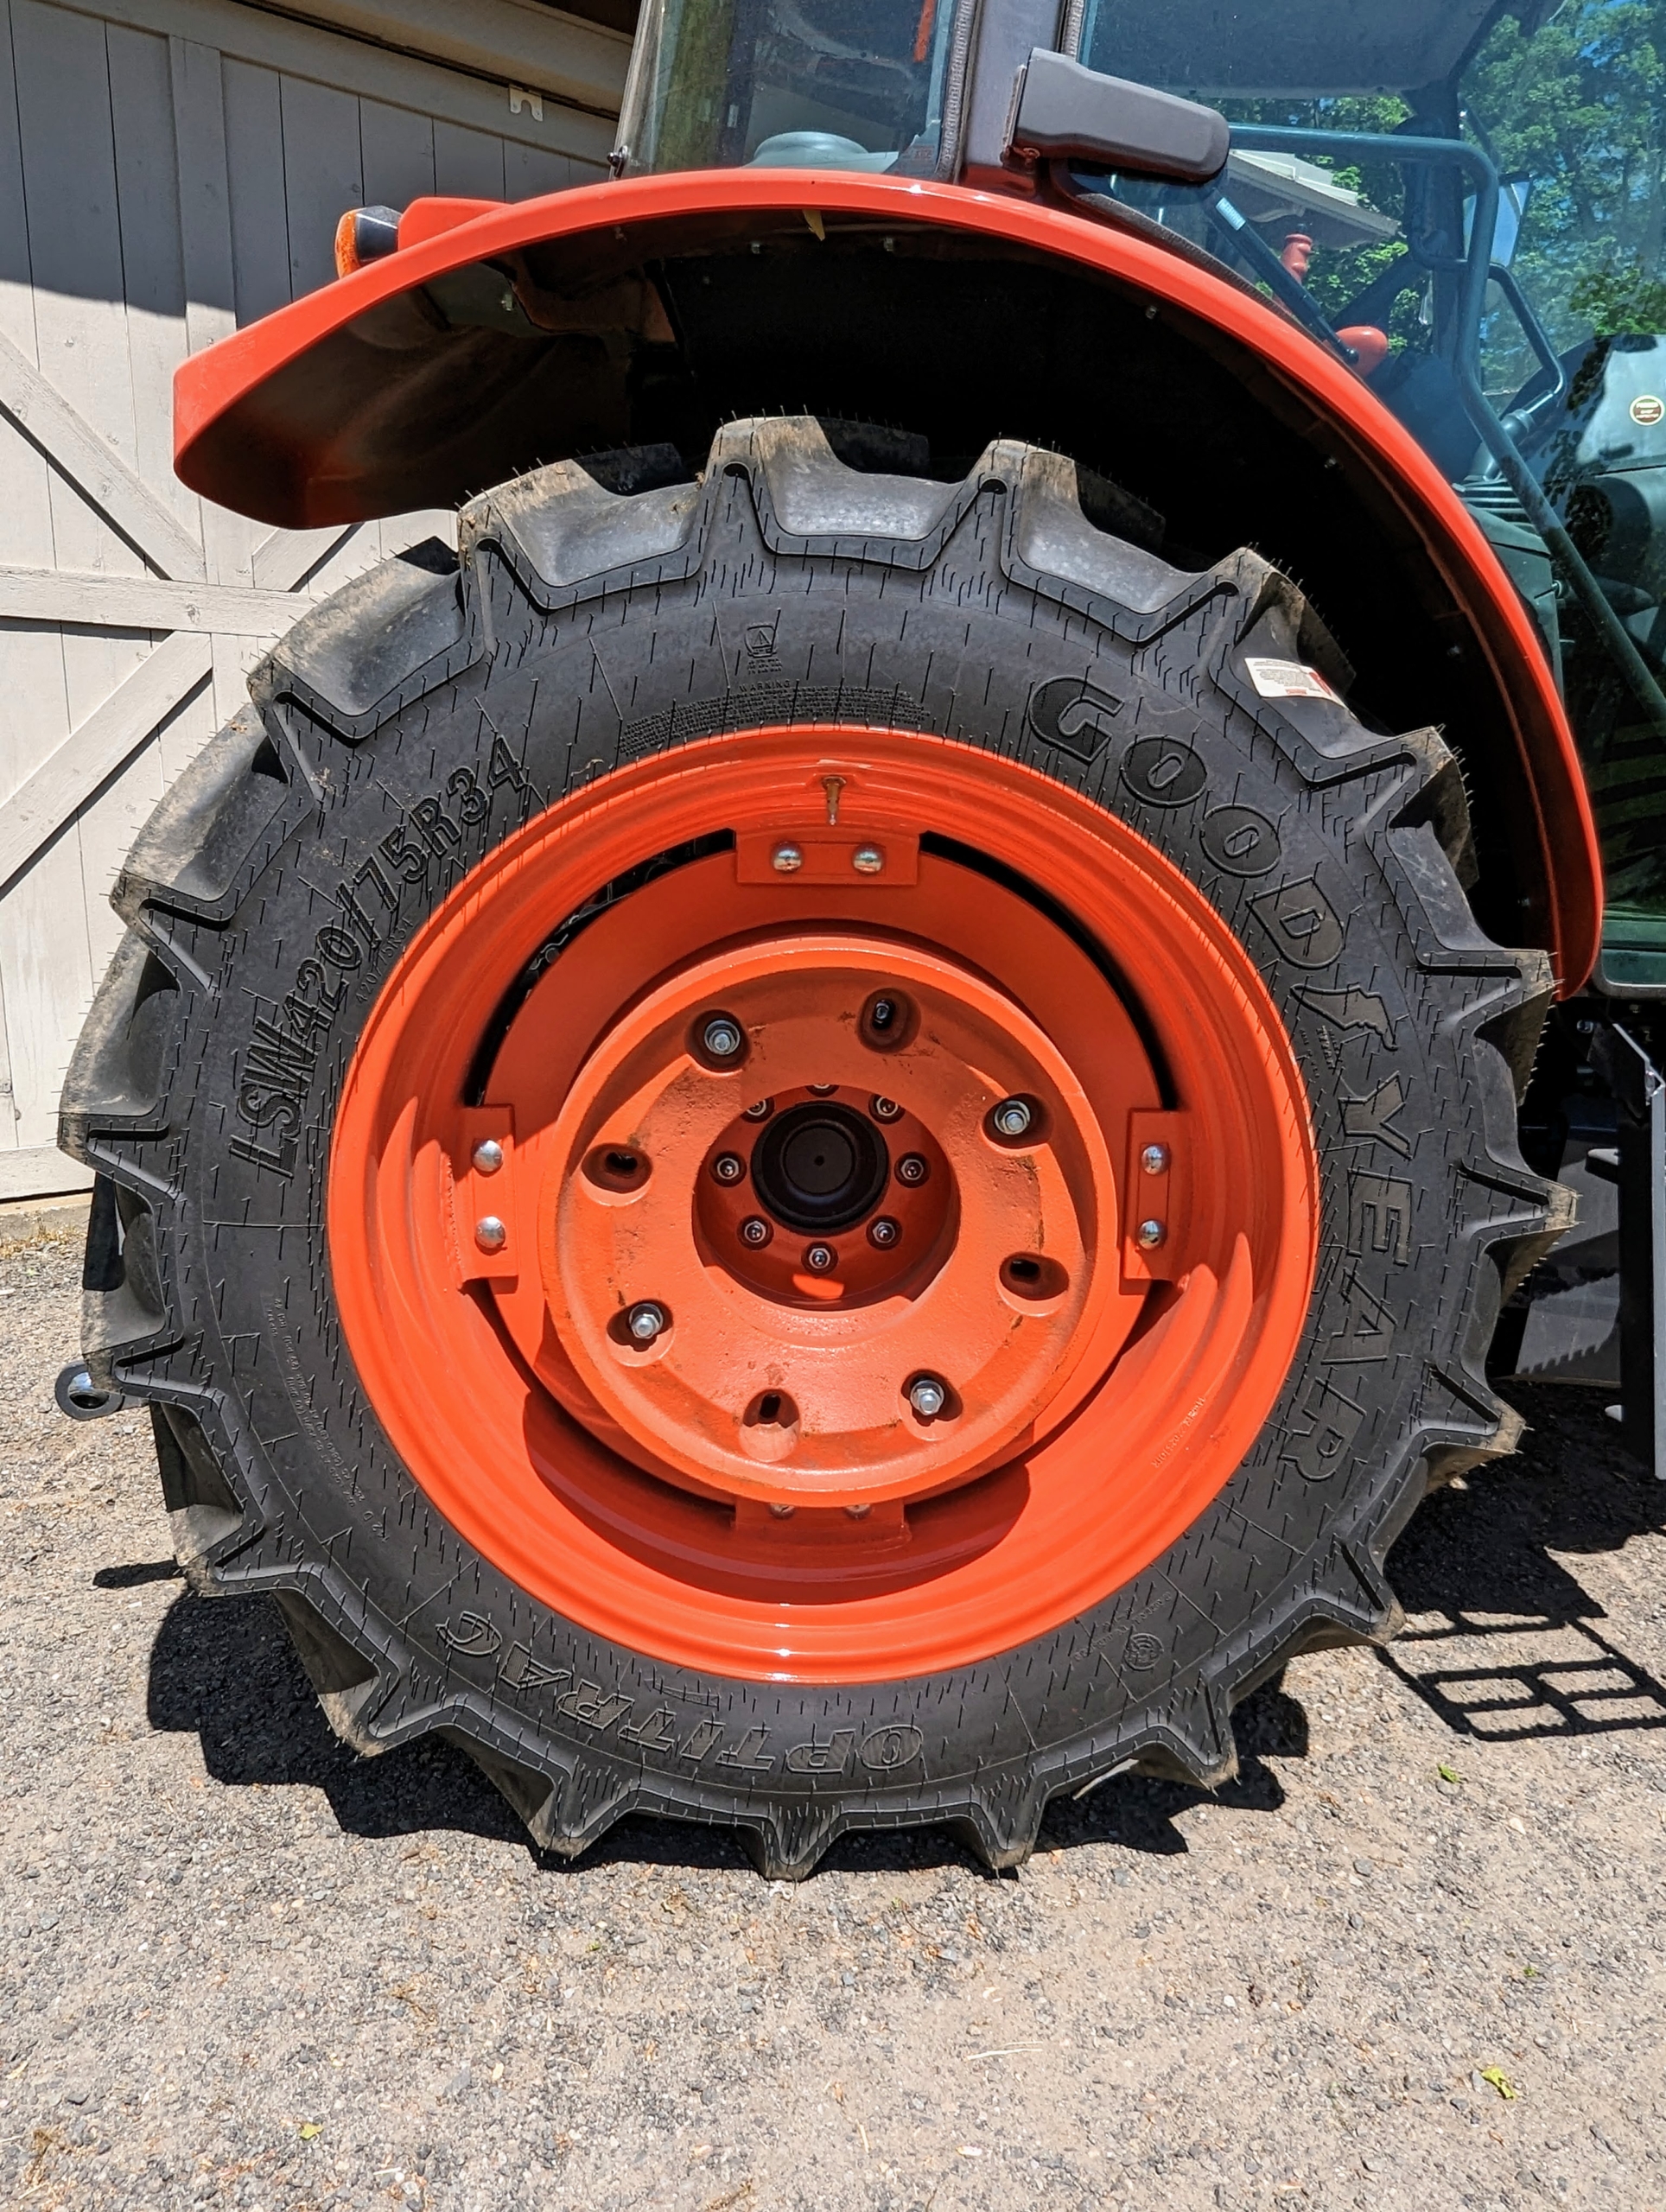
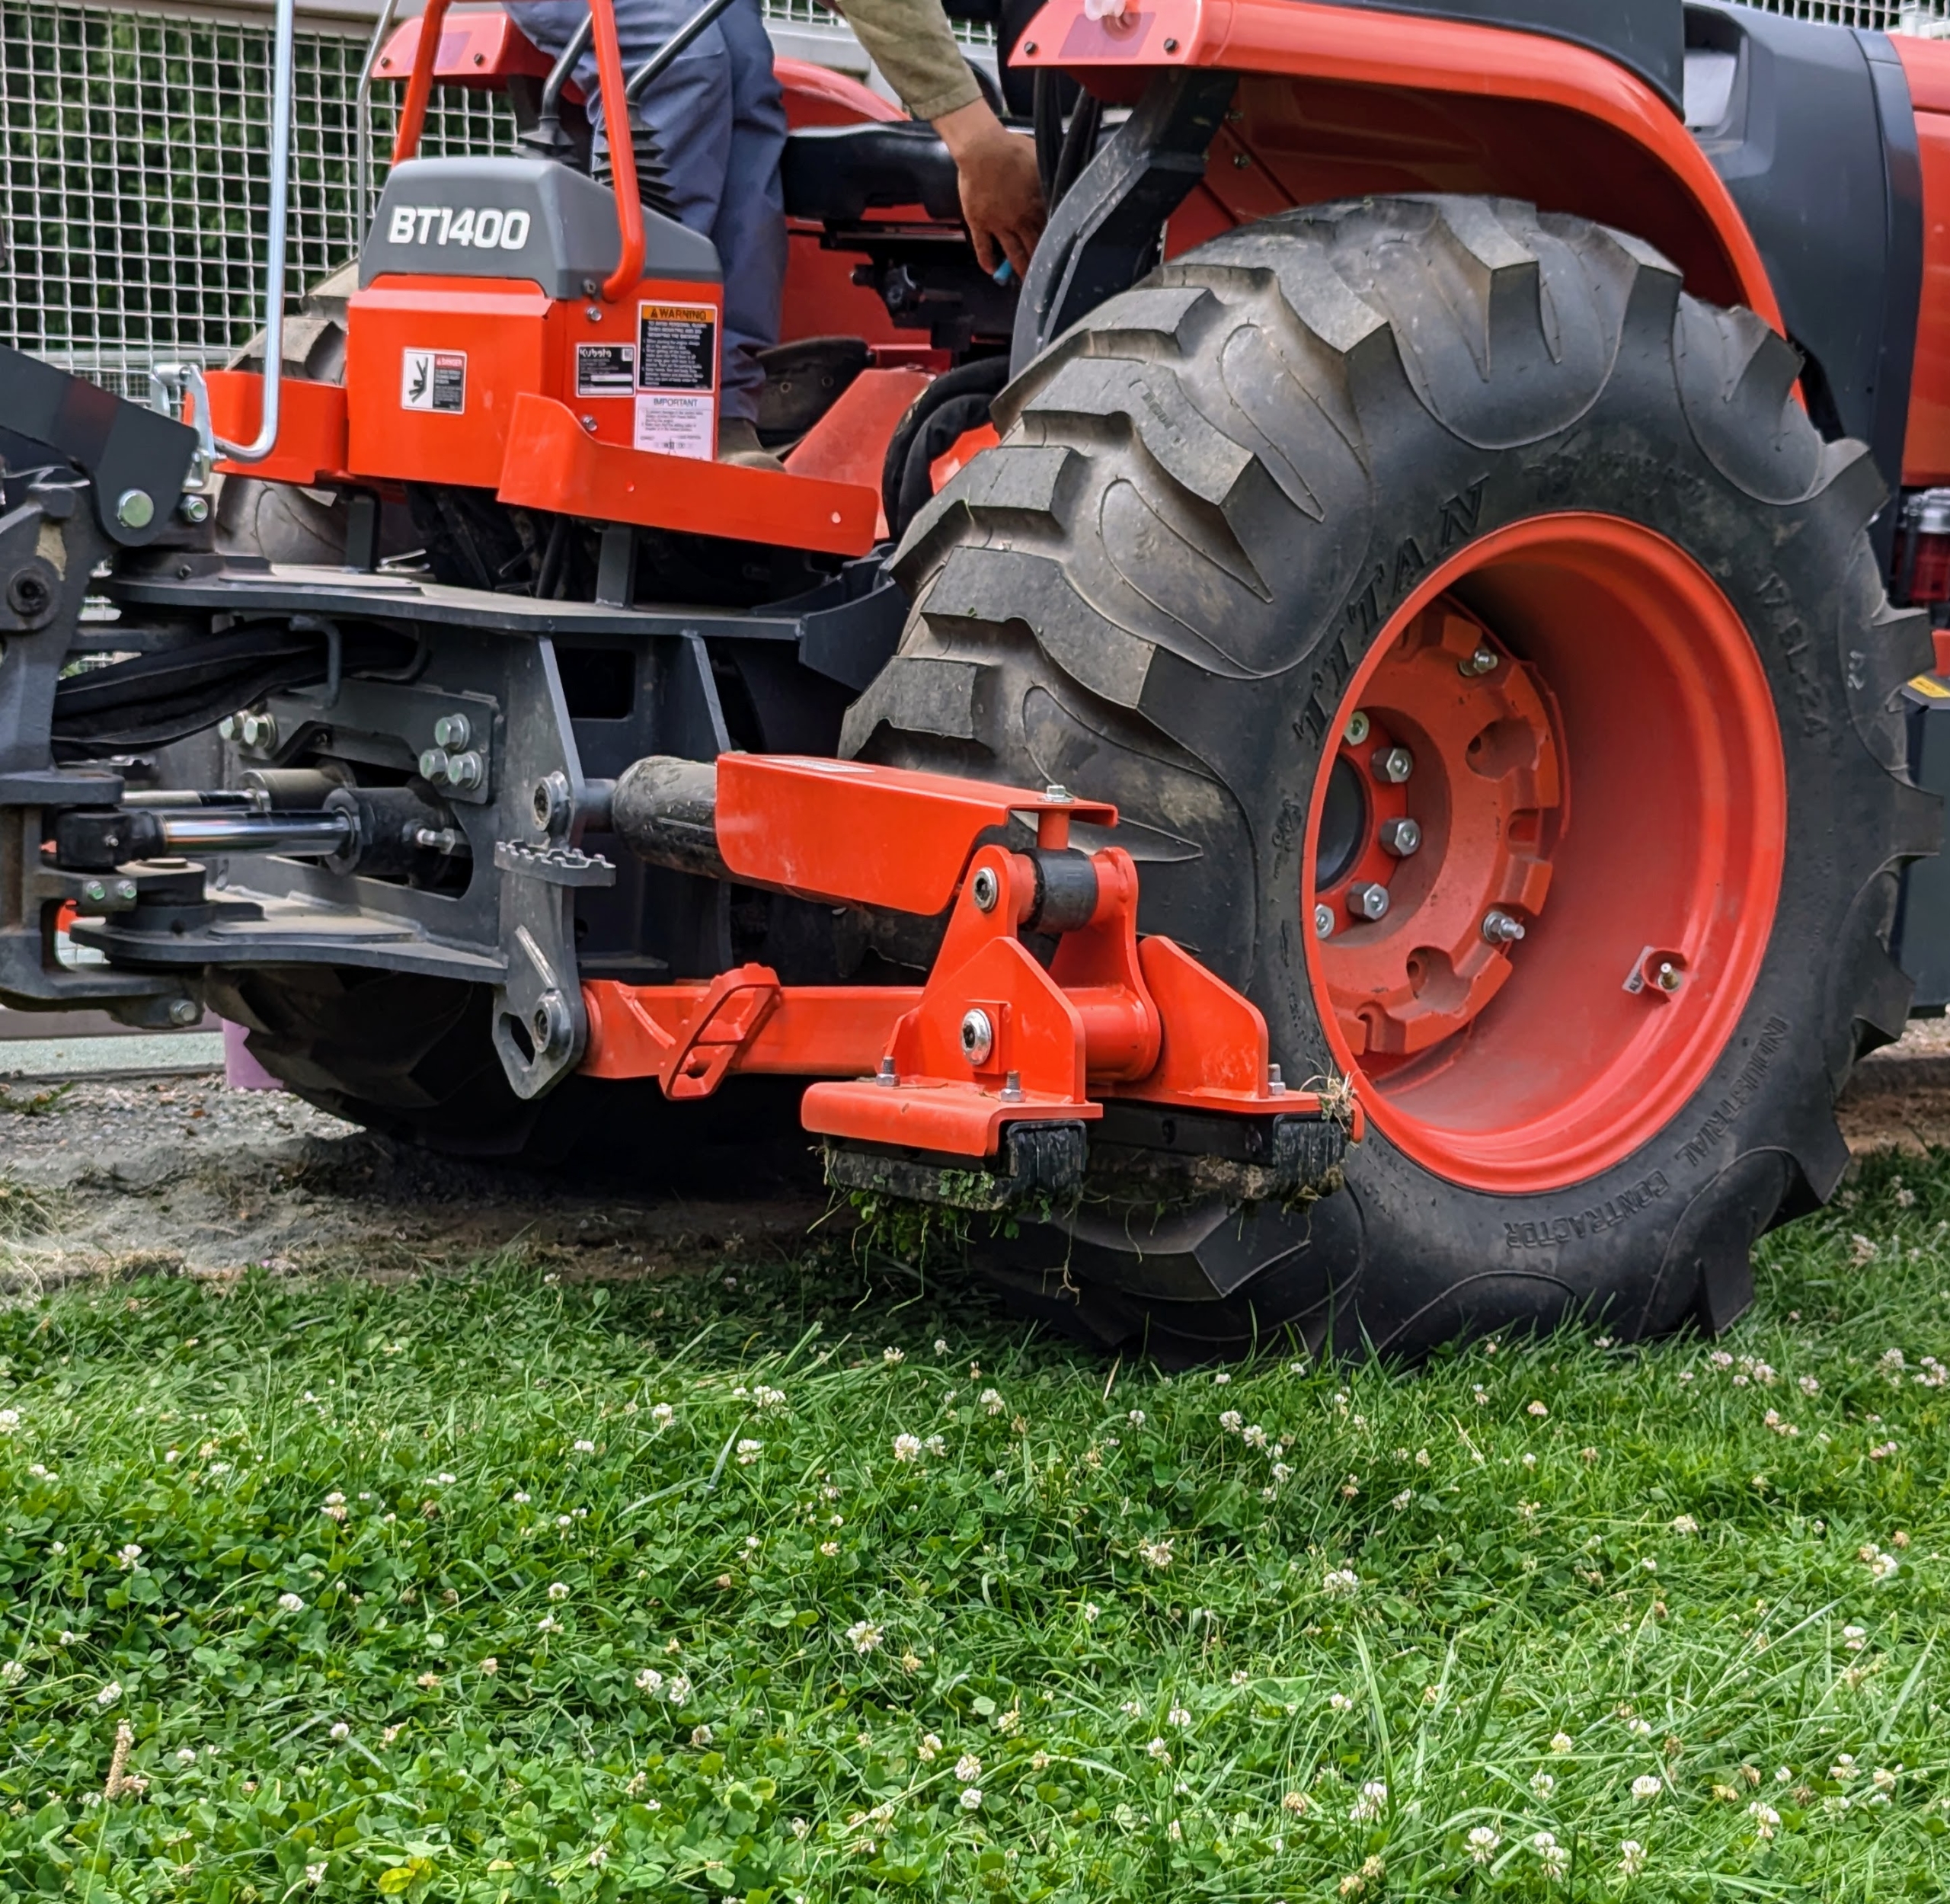
And look at the size of these wheels. The tractor wheels are five feet in diameter.
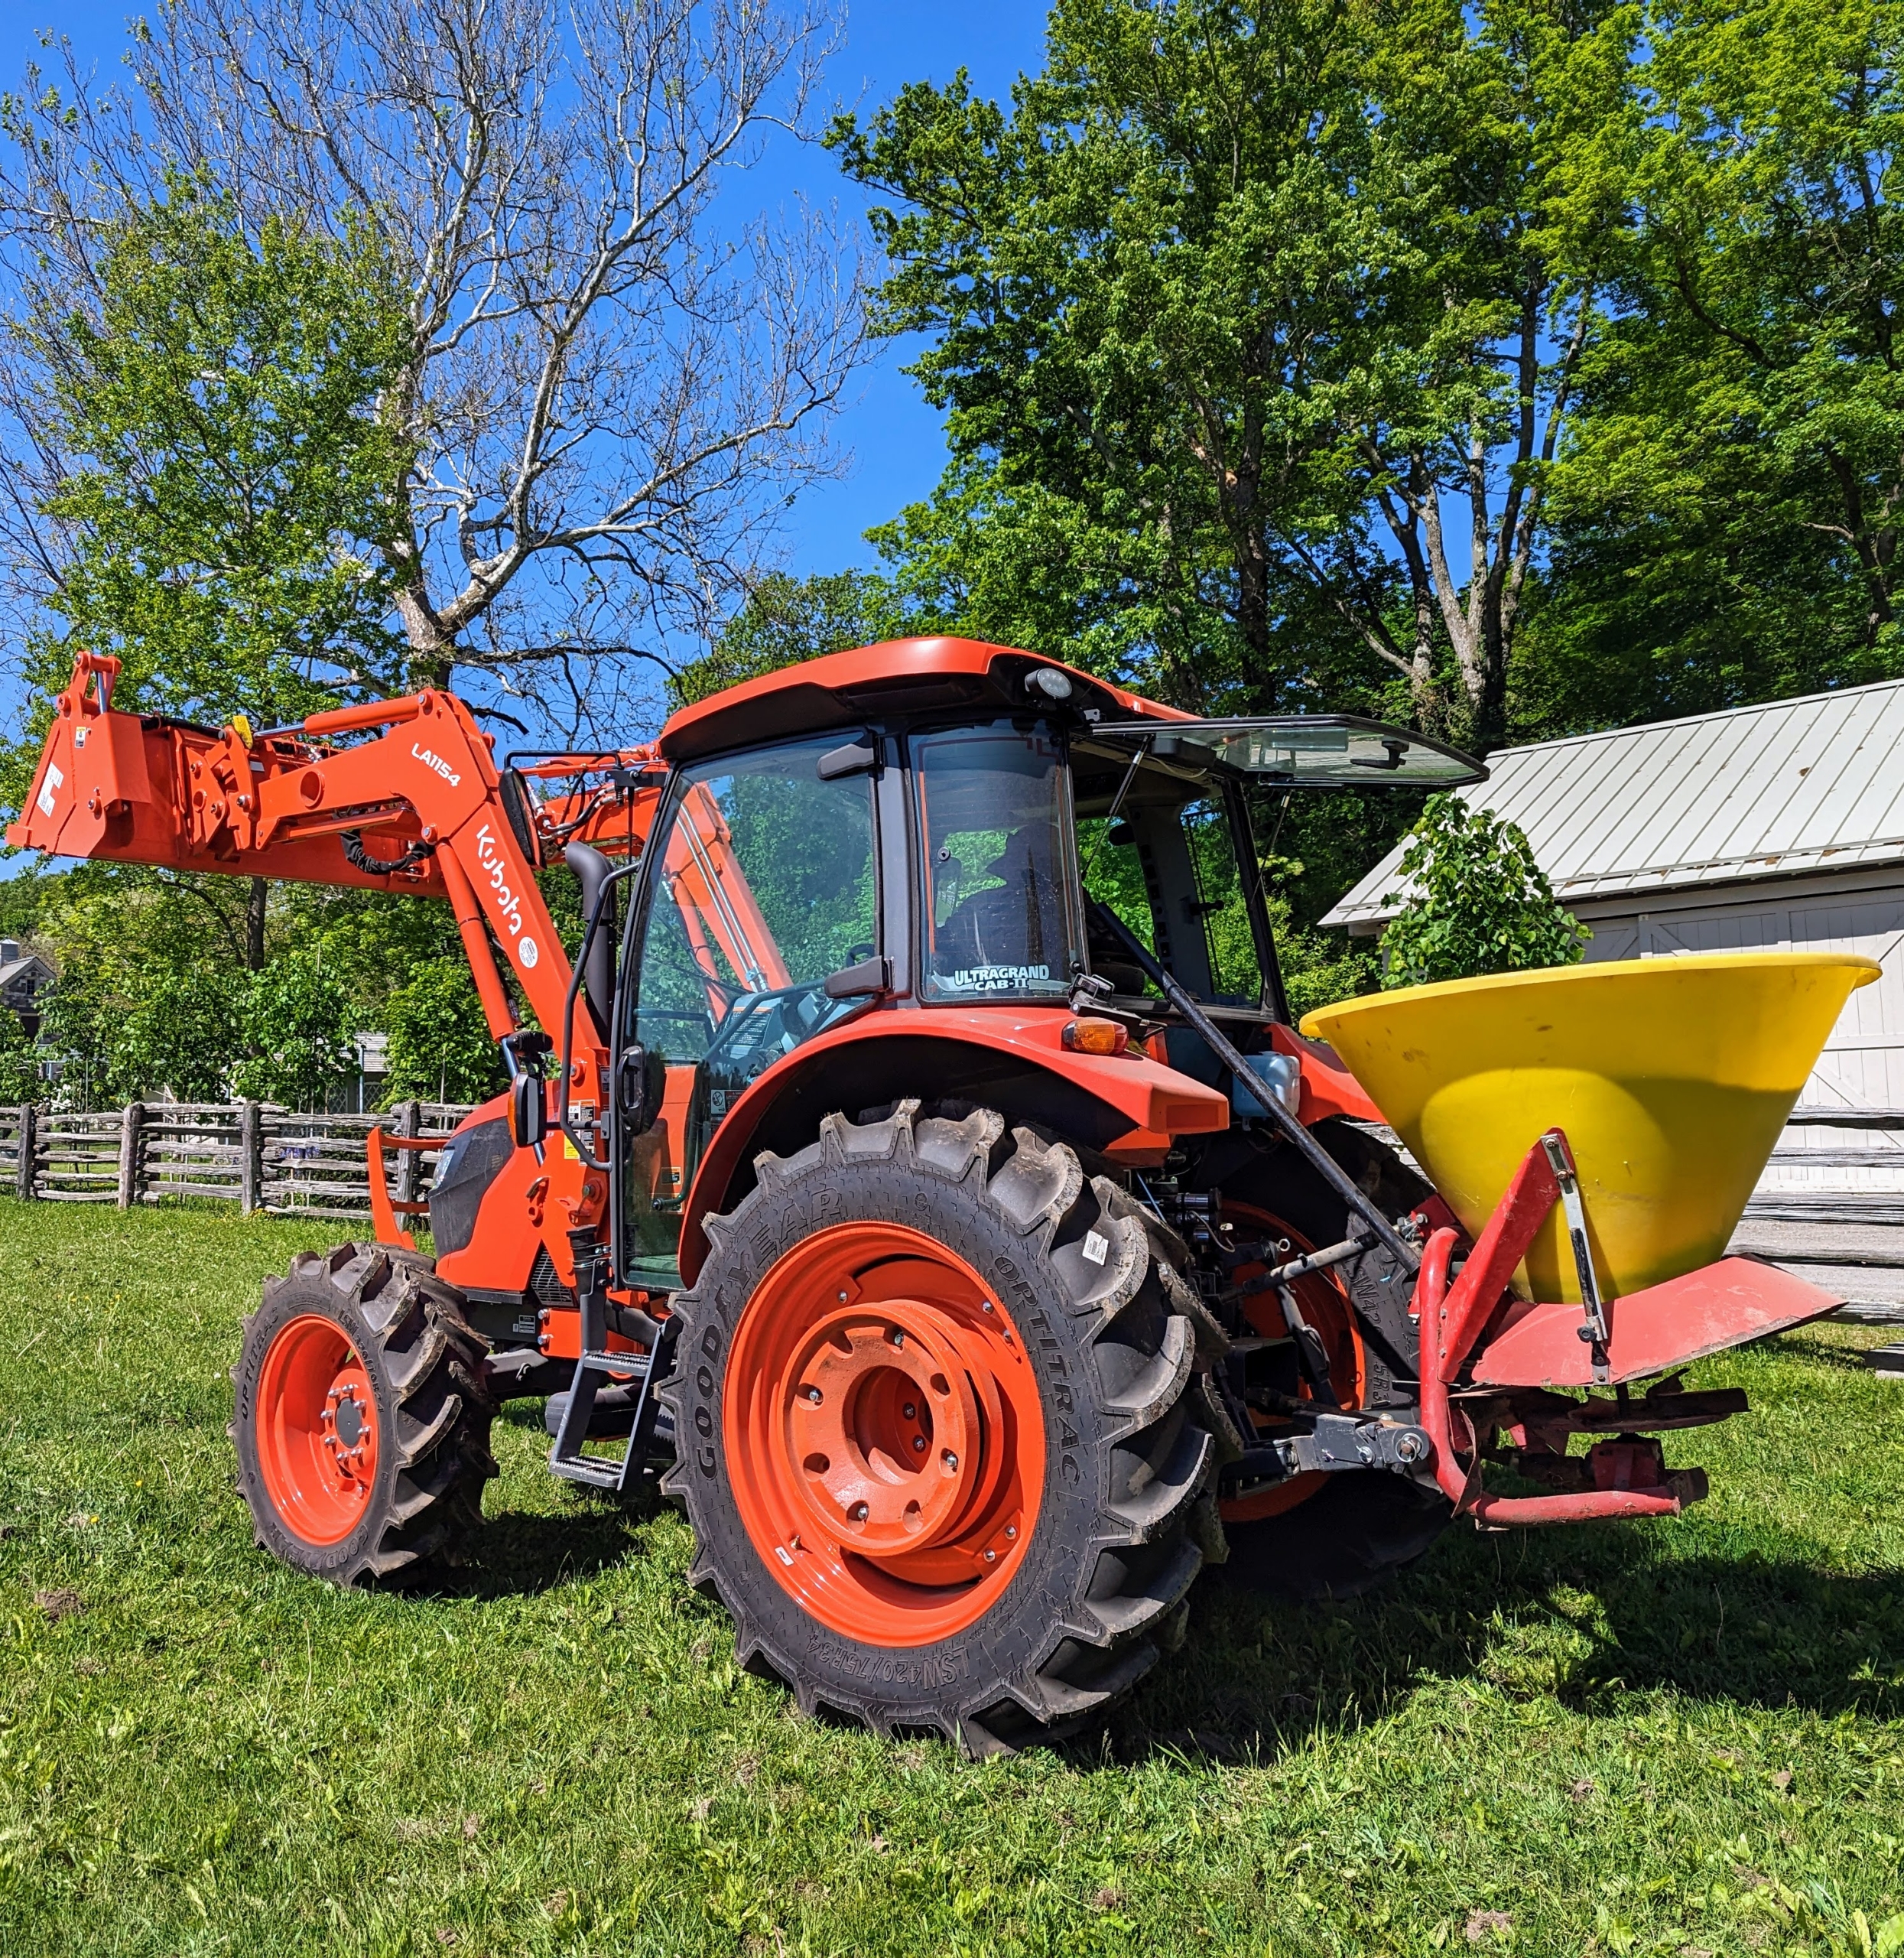
On this day, the tractor is used with a 3-point spreader to drop the grass seed in one of my paddocks.
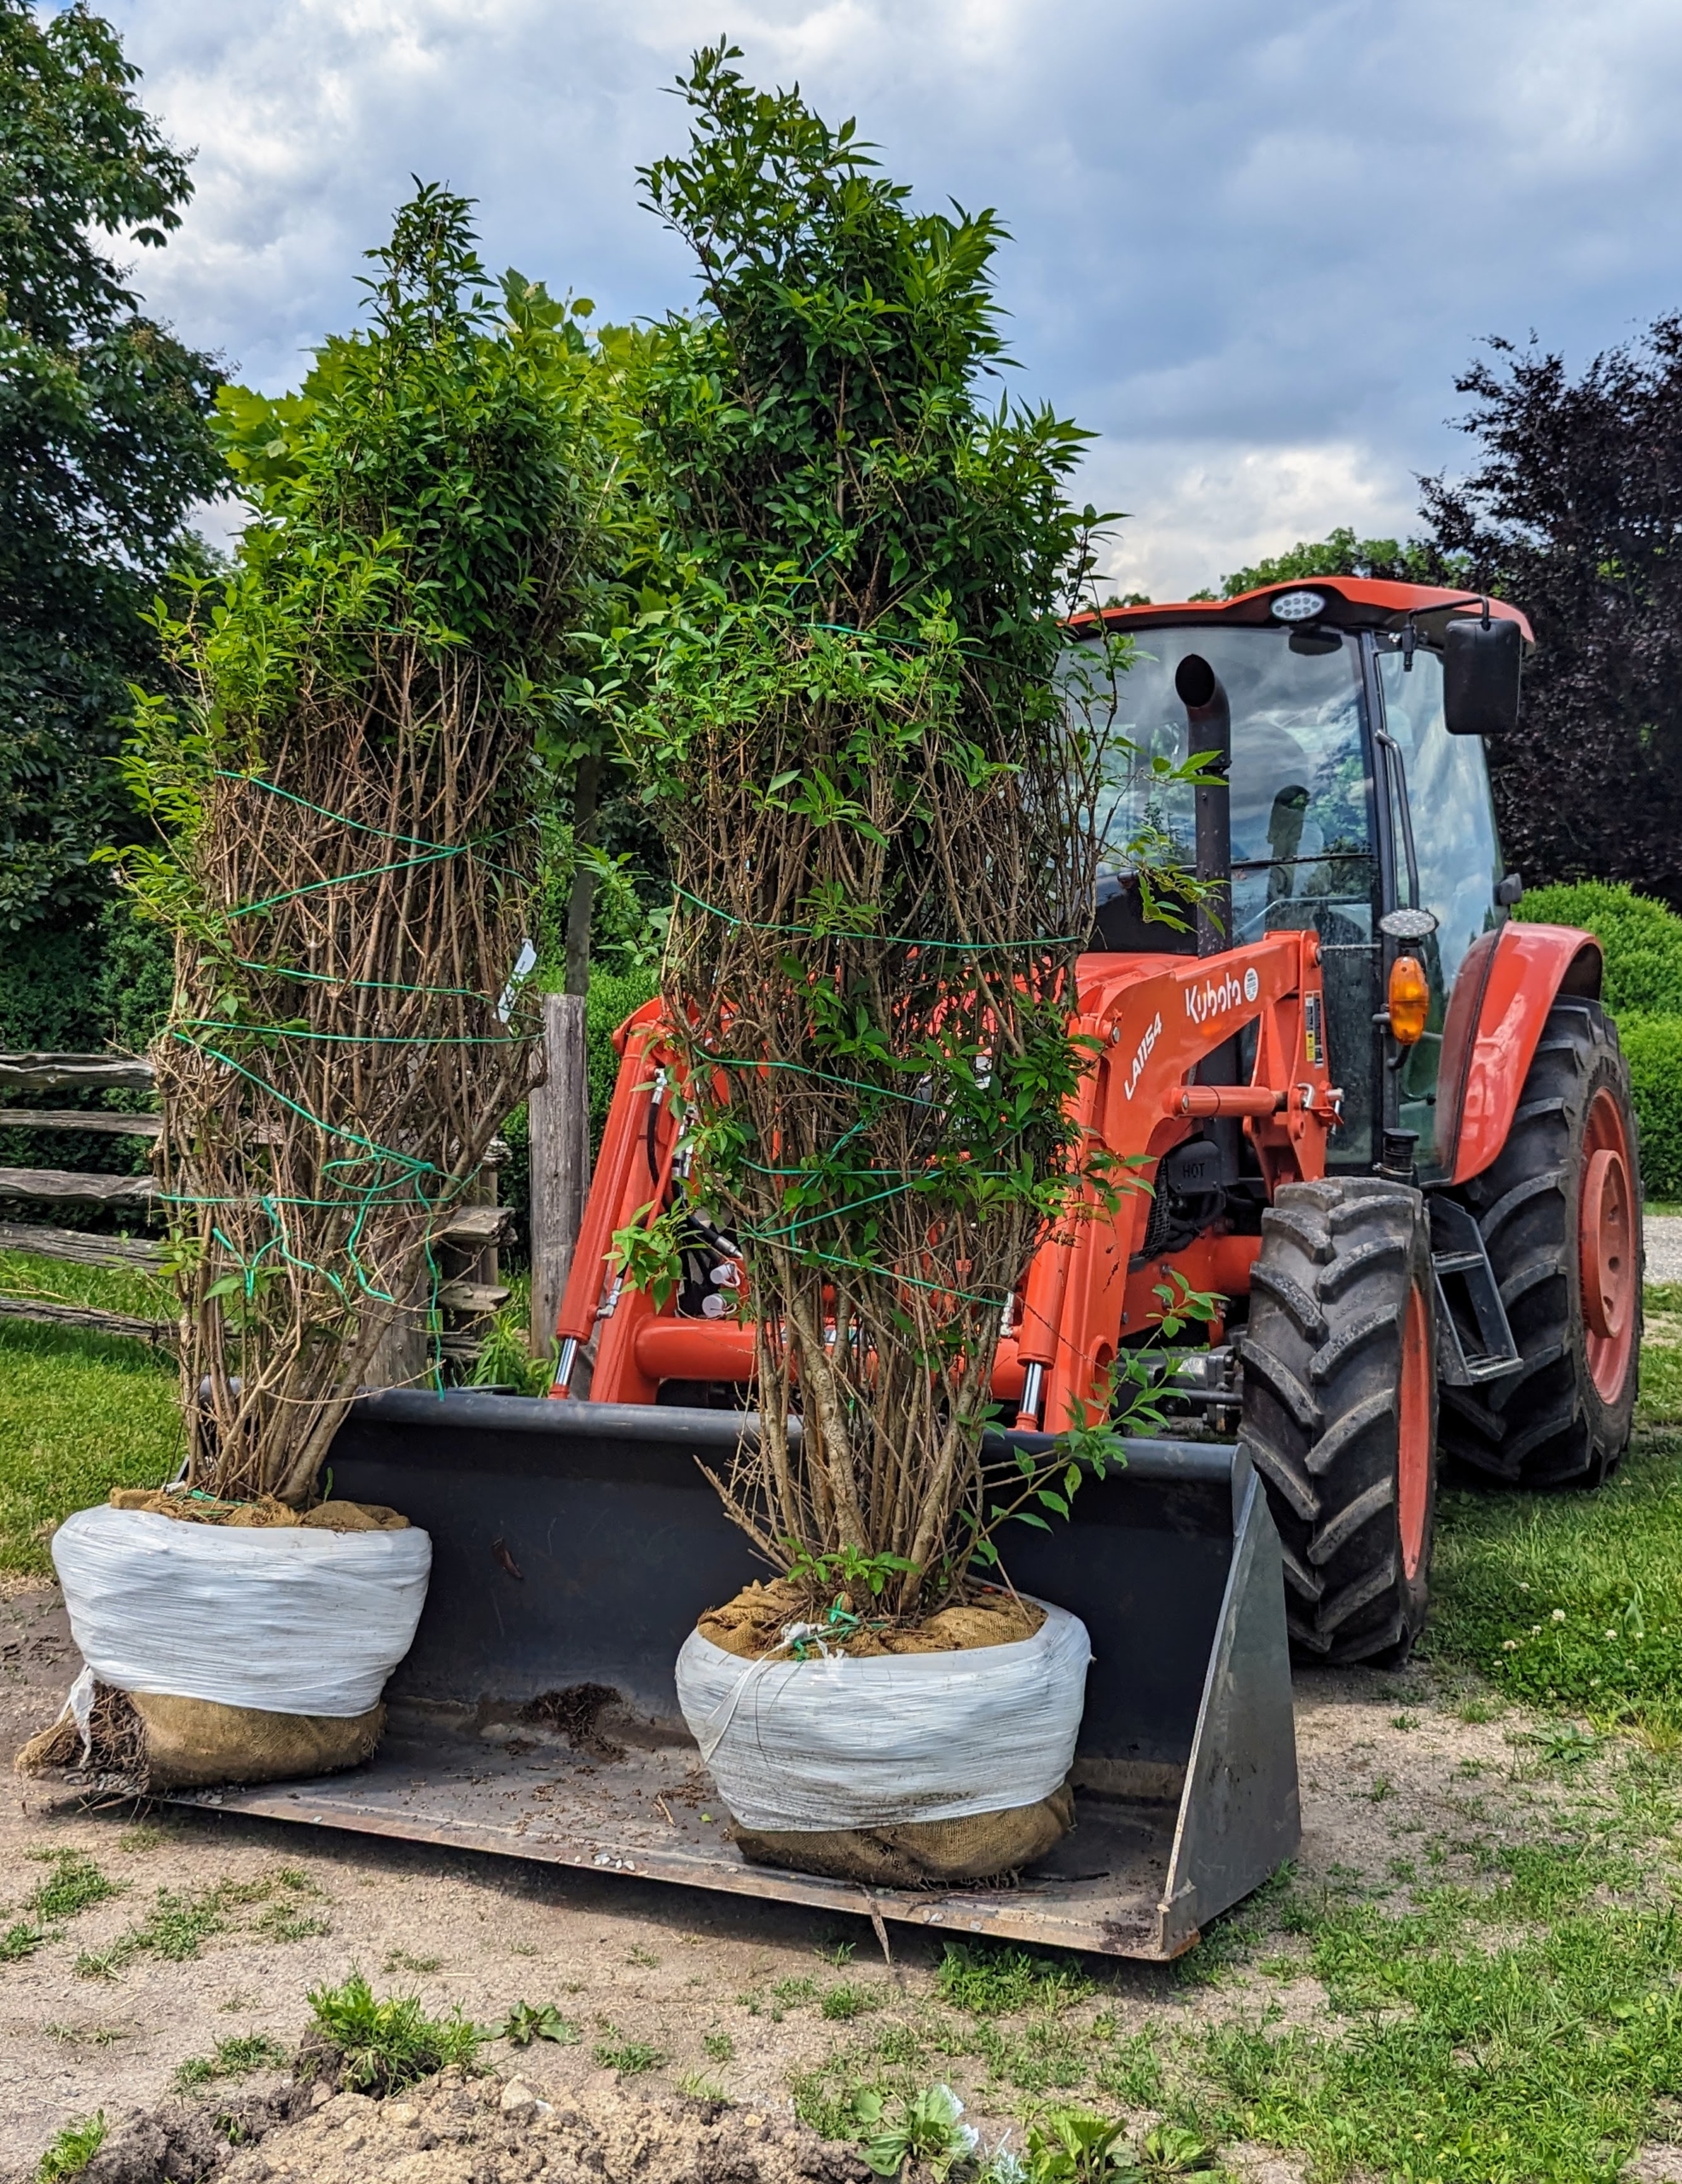
Here, the large bucket is used to carry new forsythia shrubs to their planting locations.
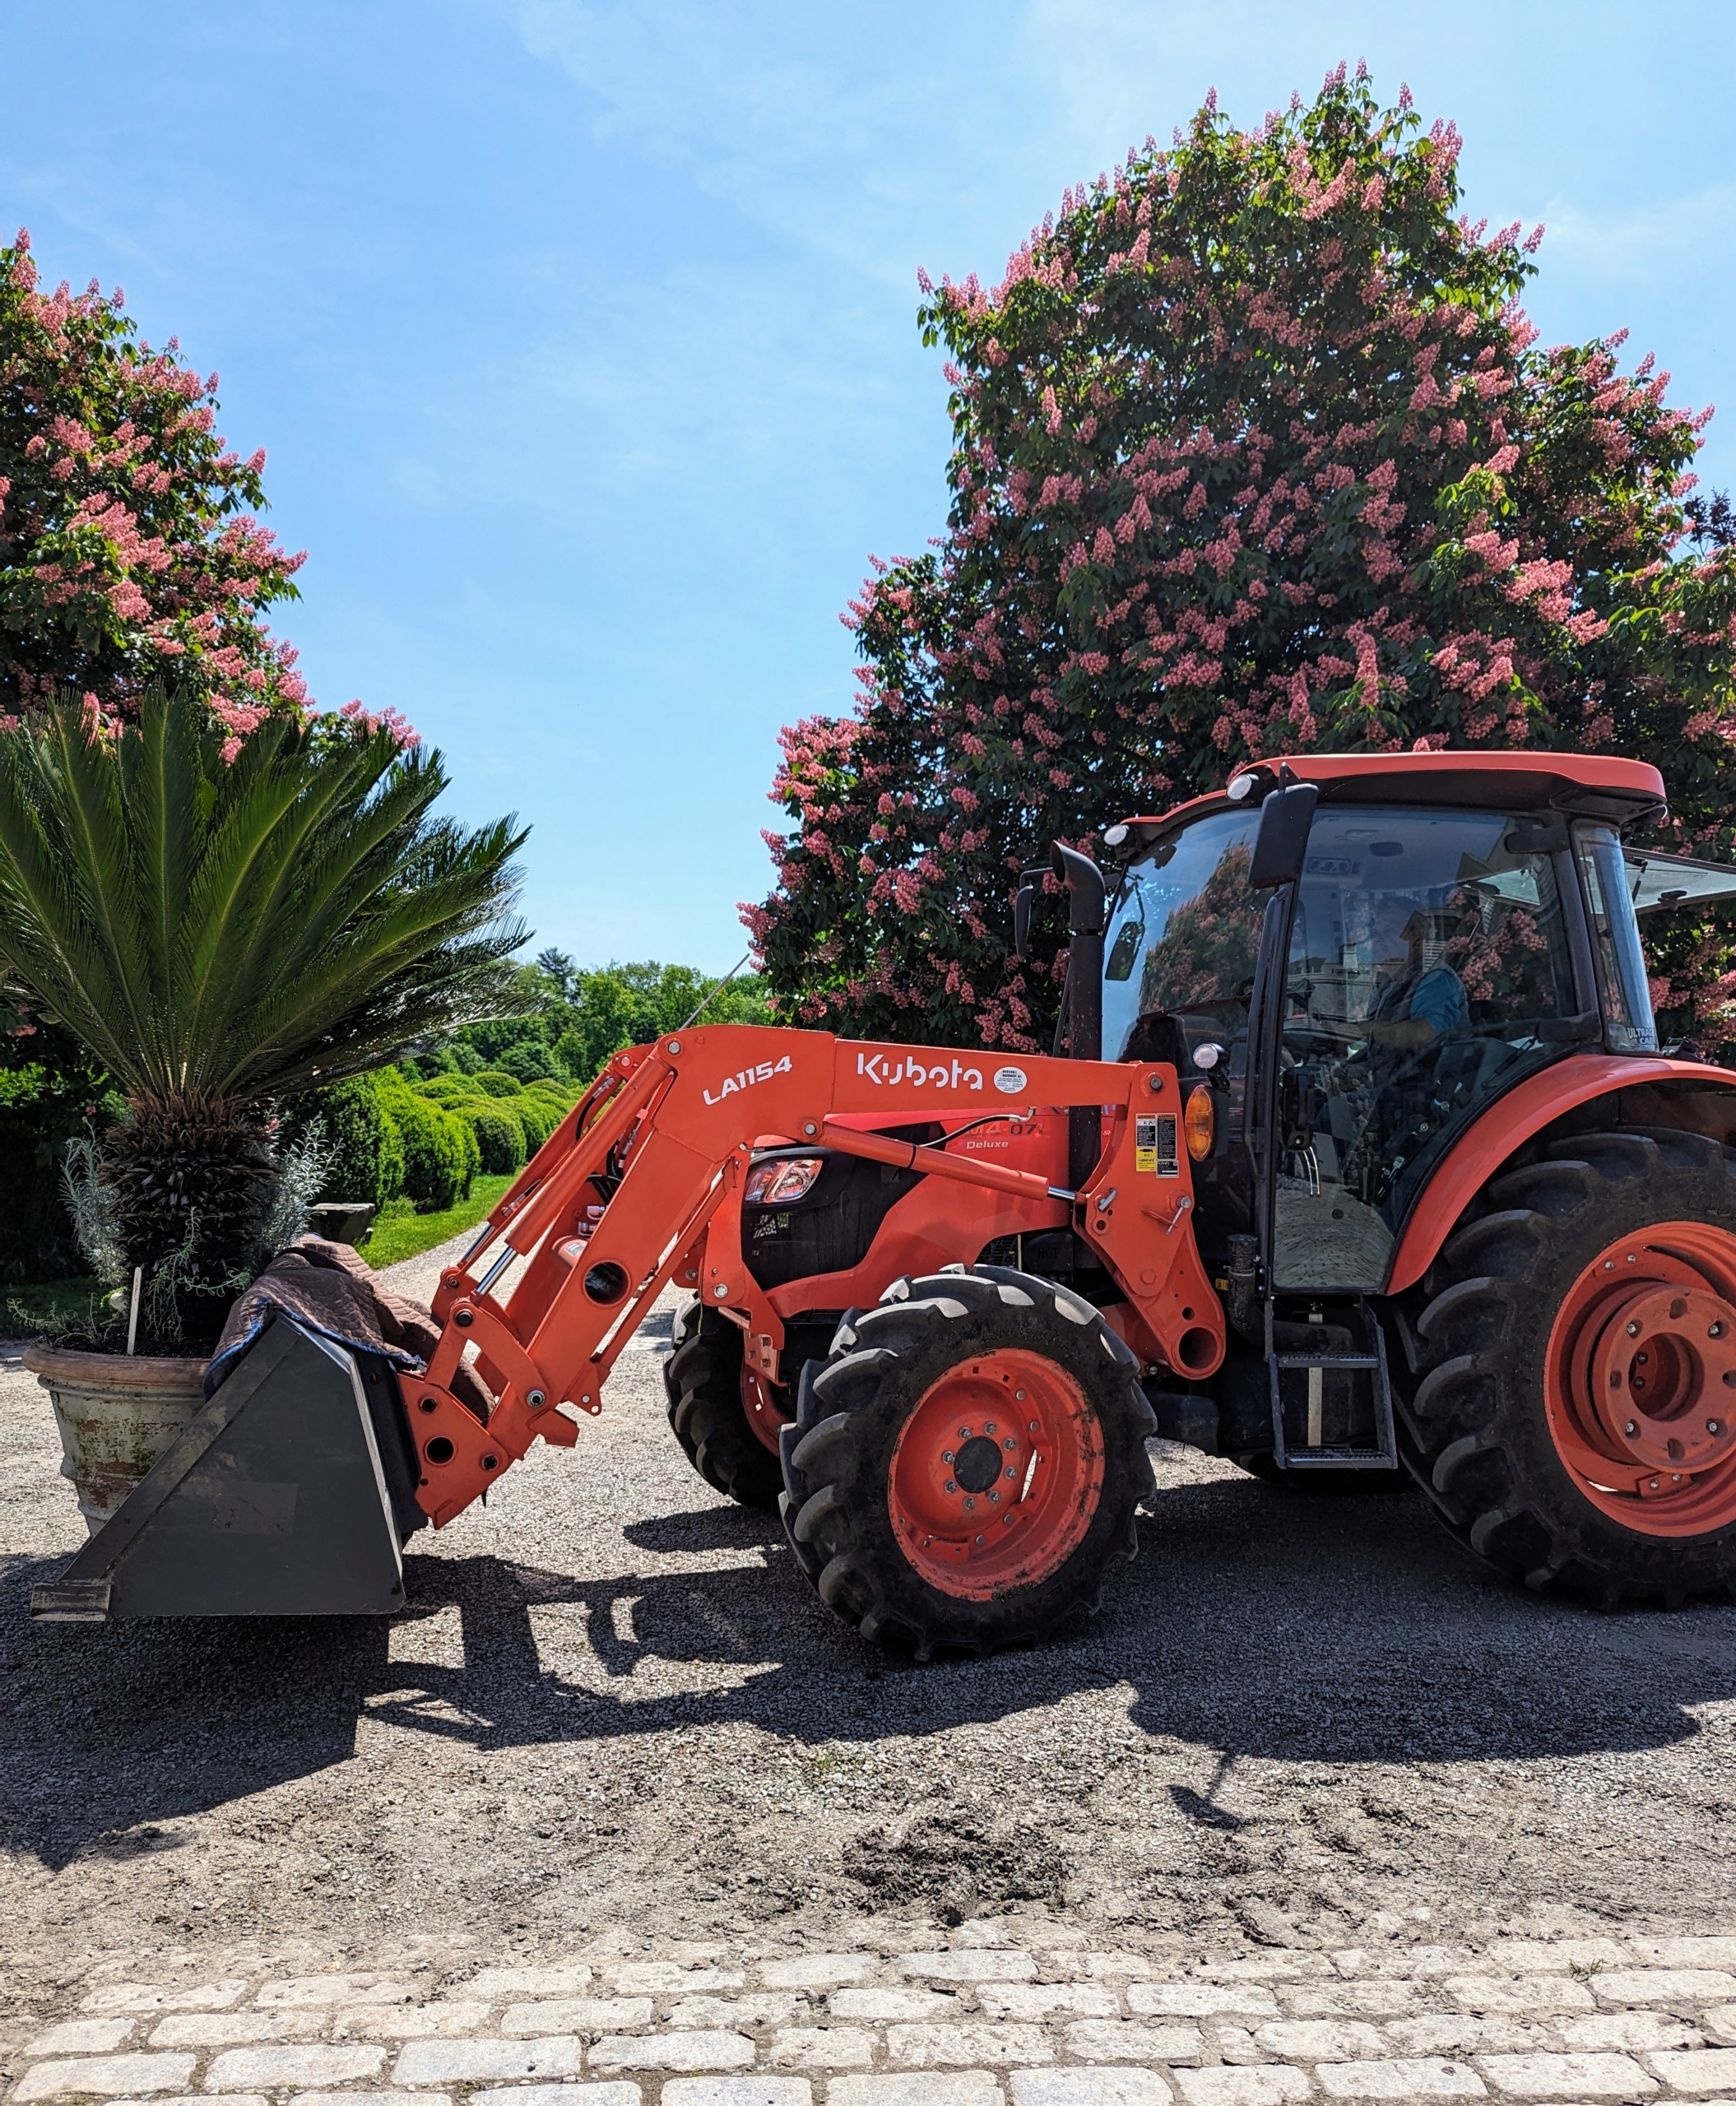
… And to move my tropical plants and their heavy urns from winter storage in the hoop houses to areas around the farm for display.
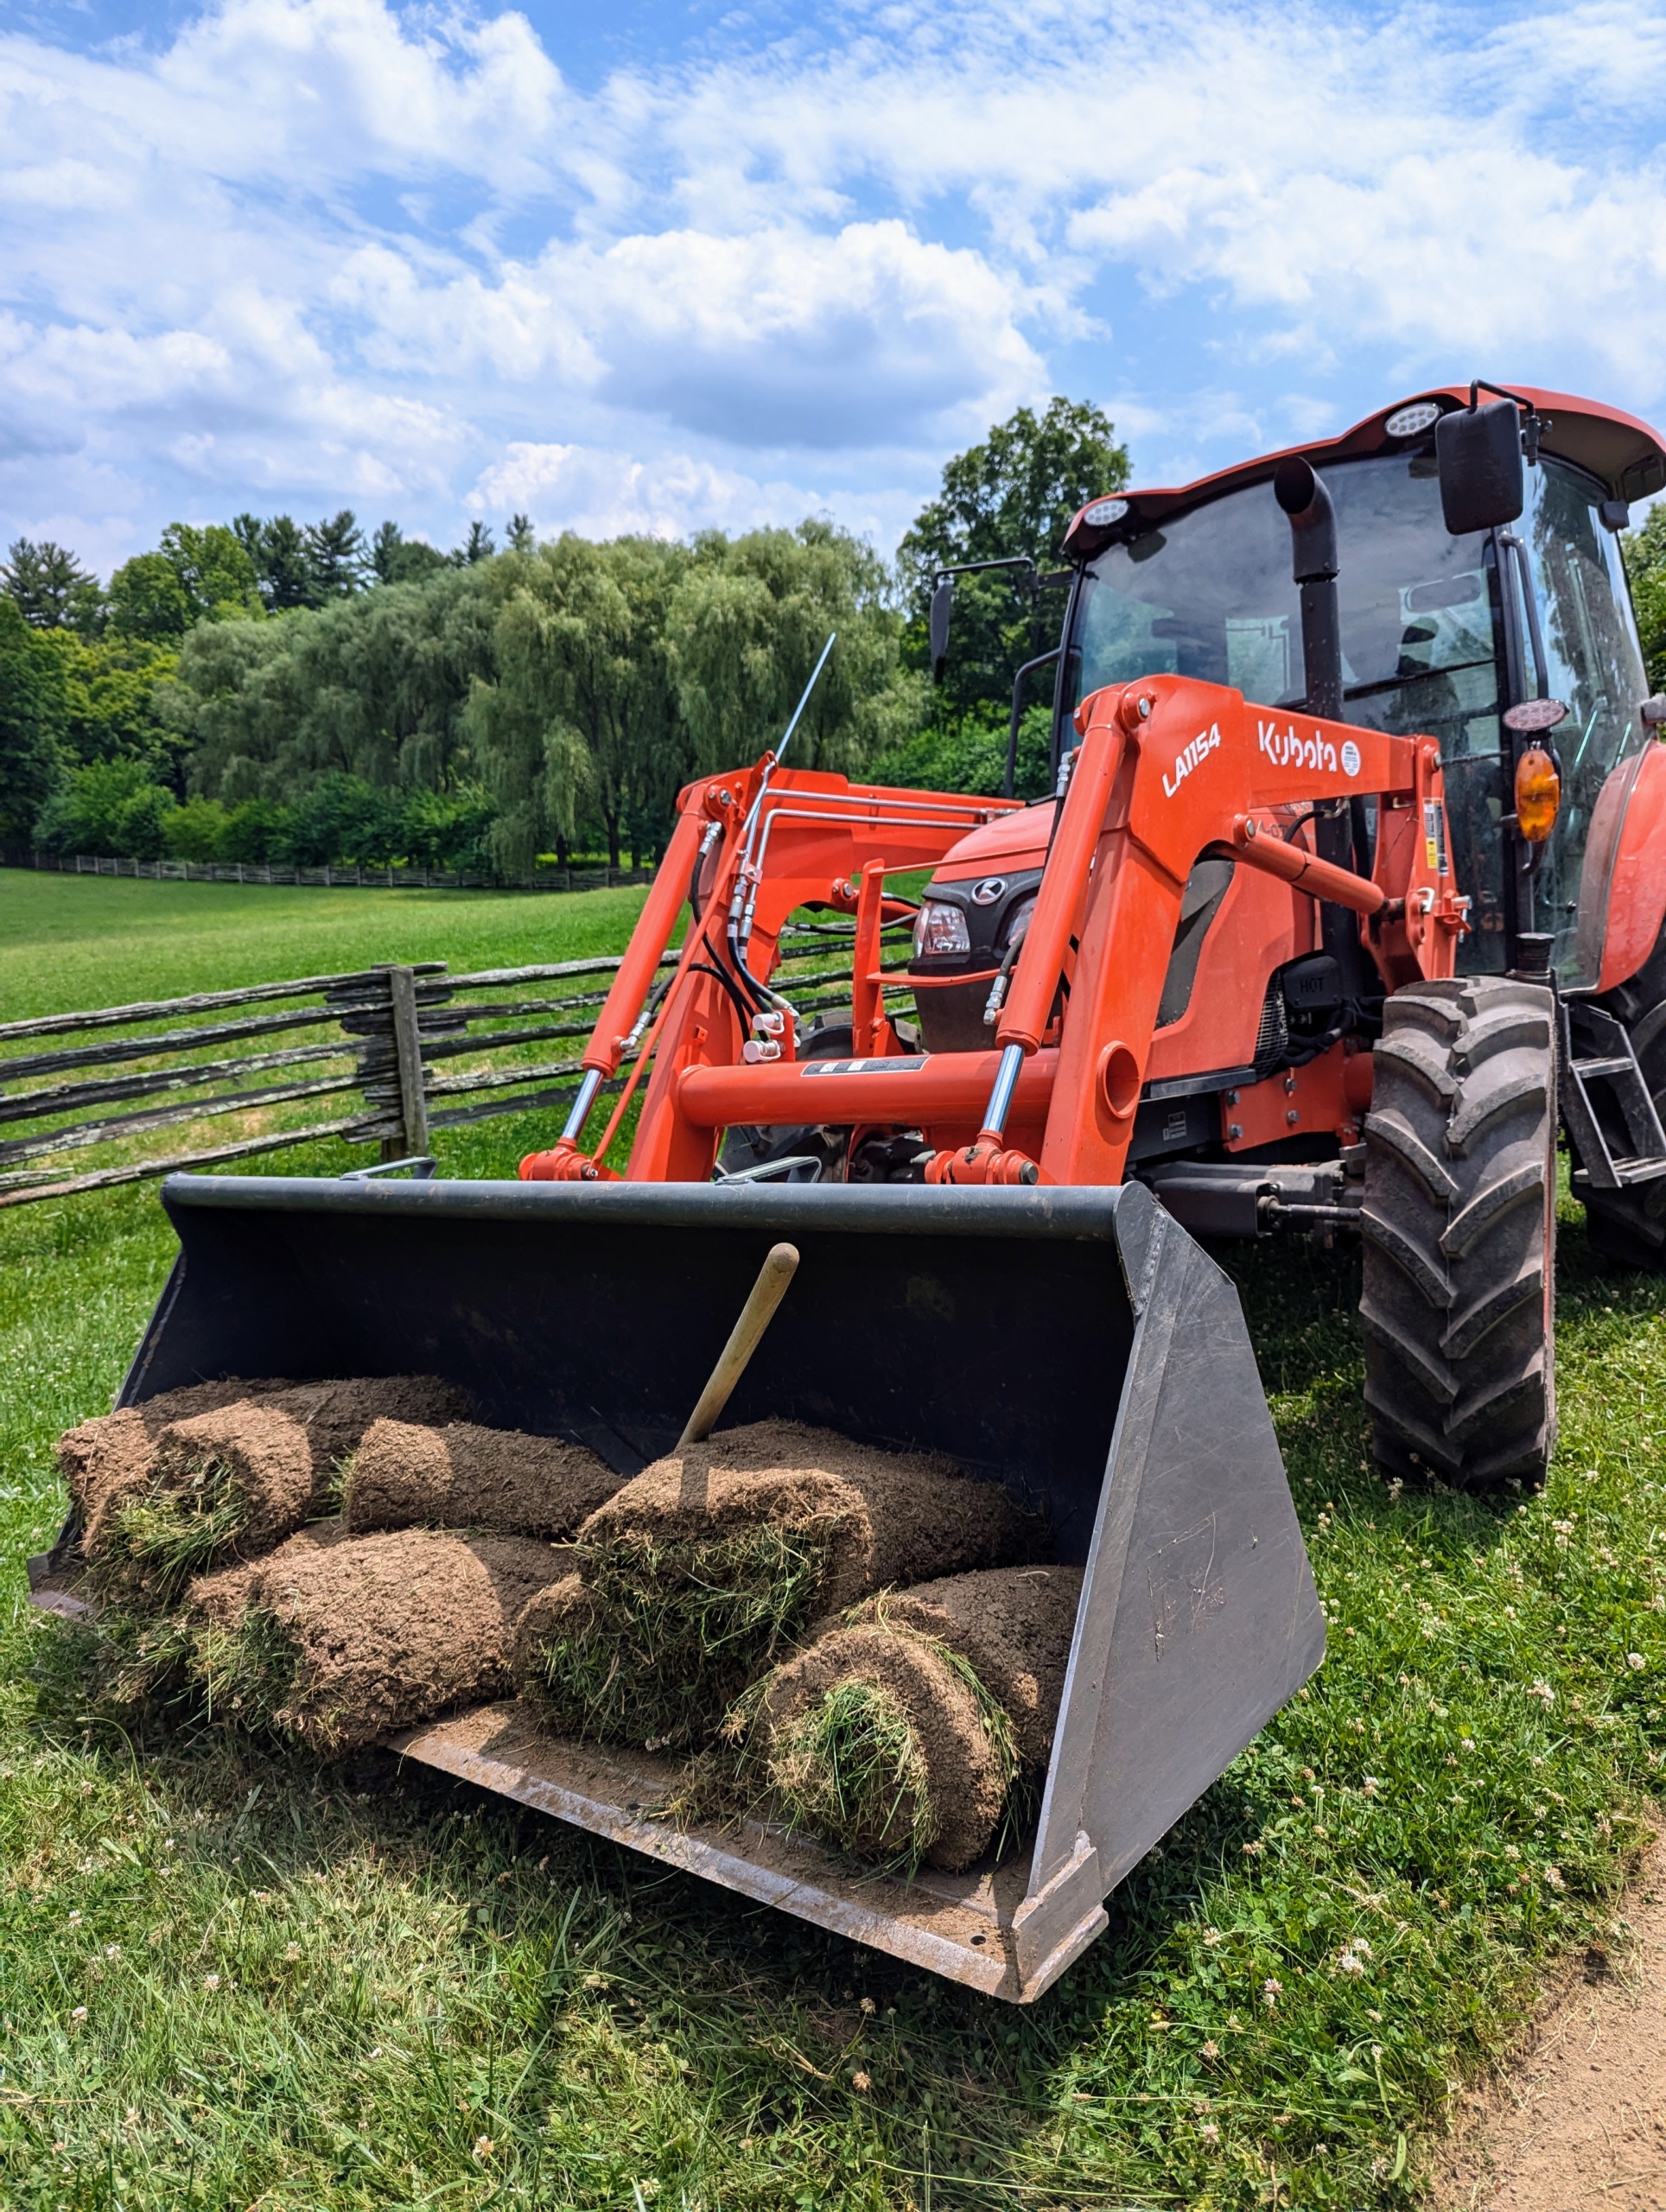
And here, the tractor bucket is loaded with pieces of heavy sod removed from a designated space, so new specimens can be planted.
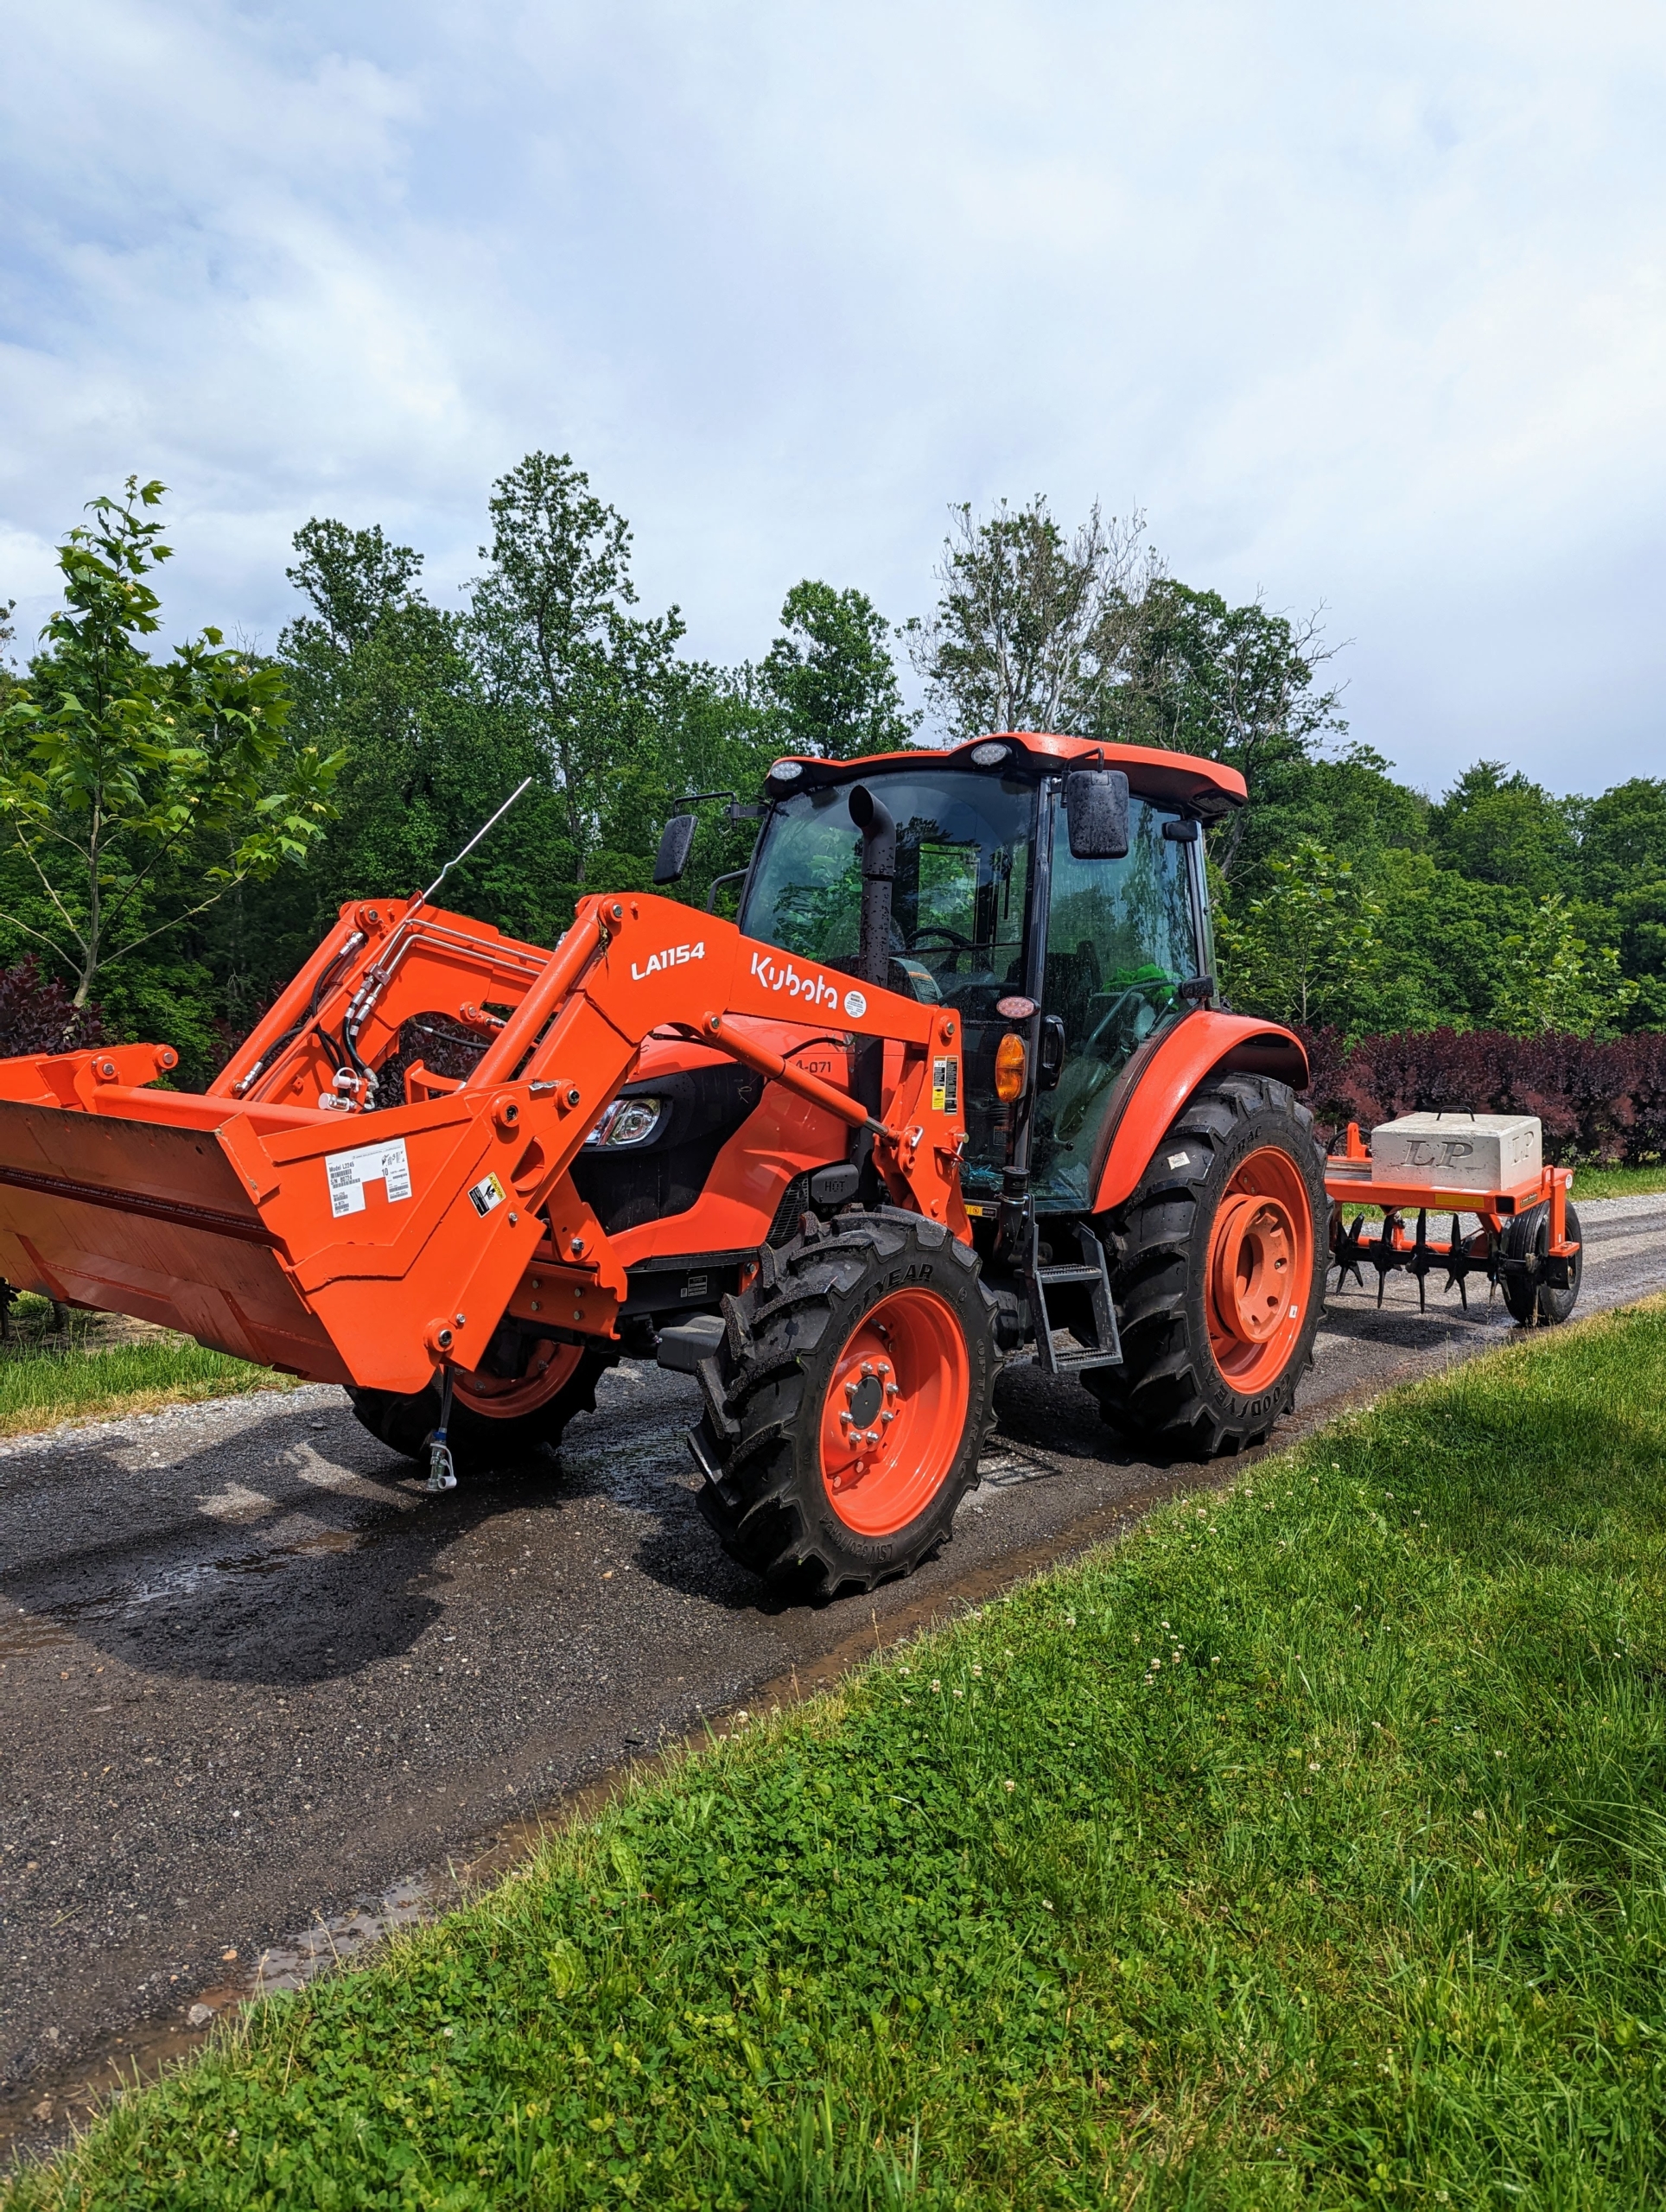
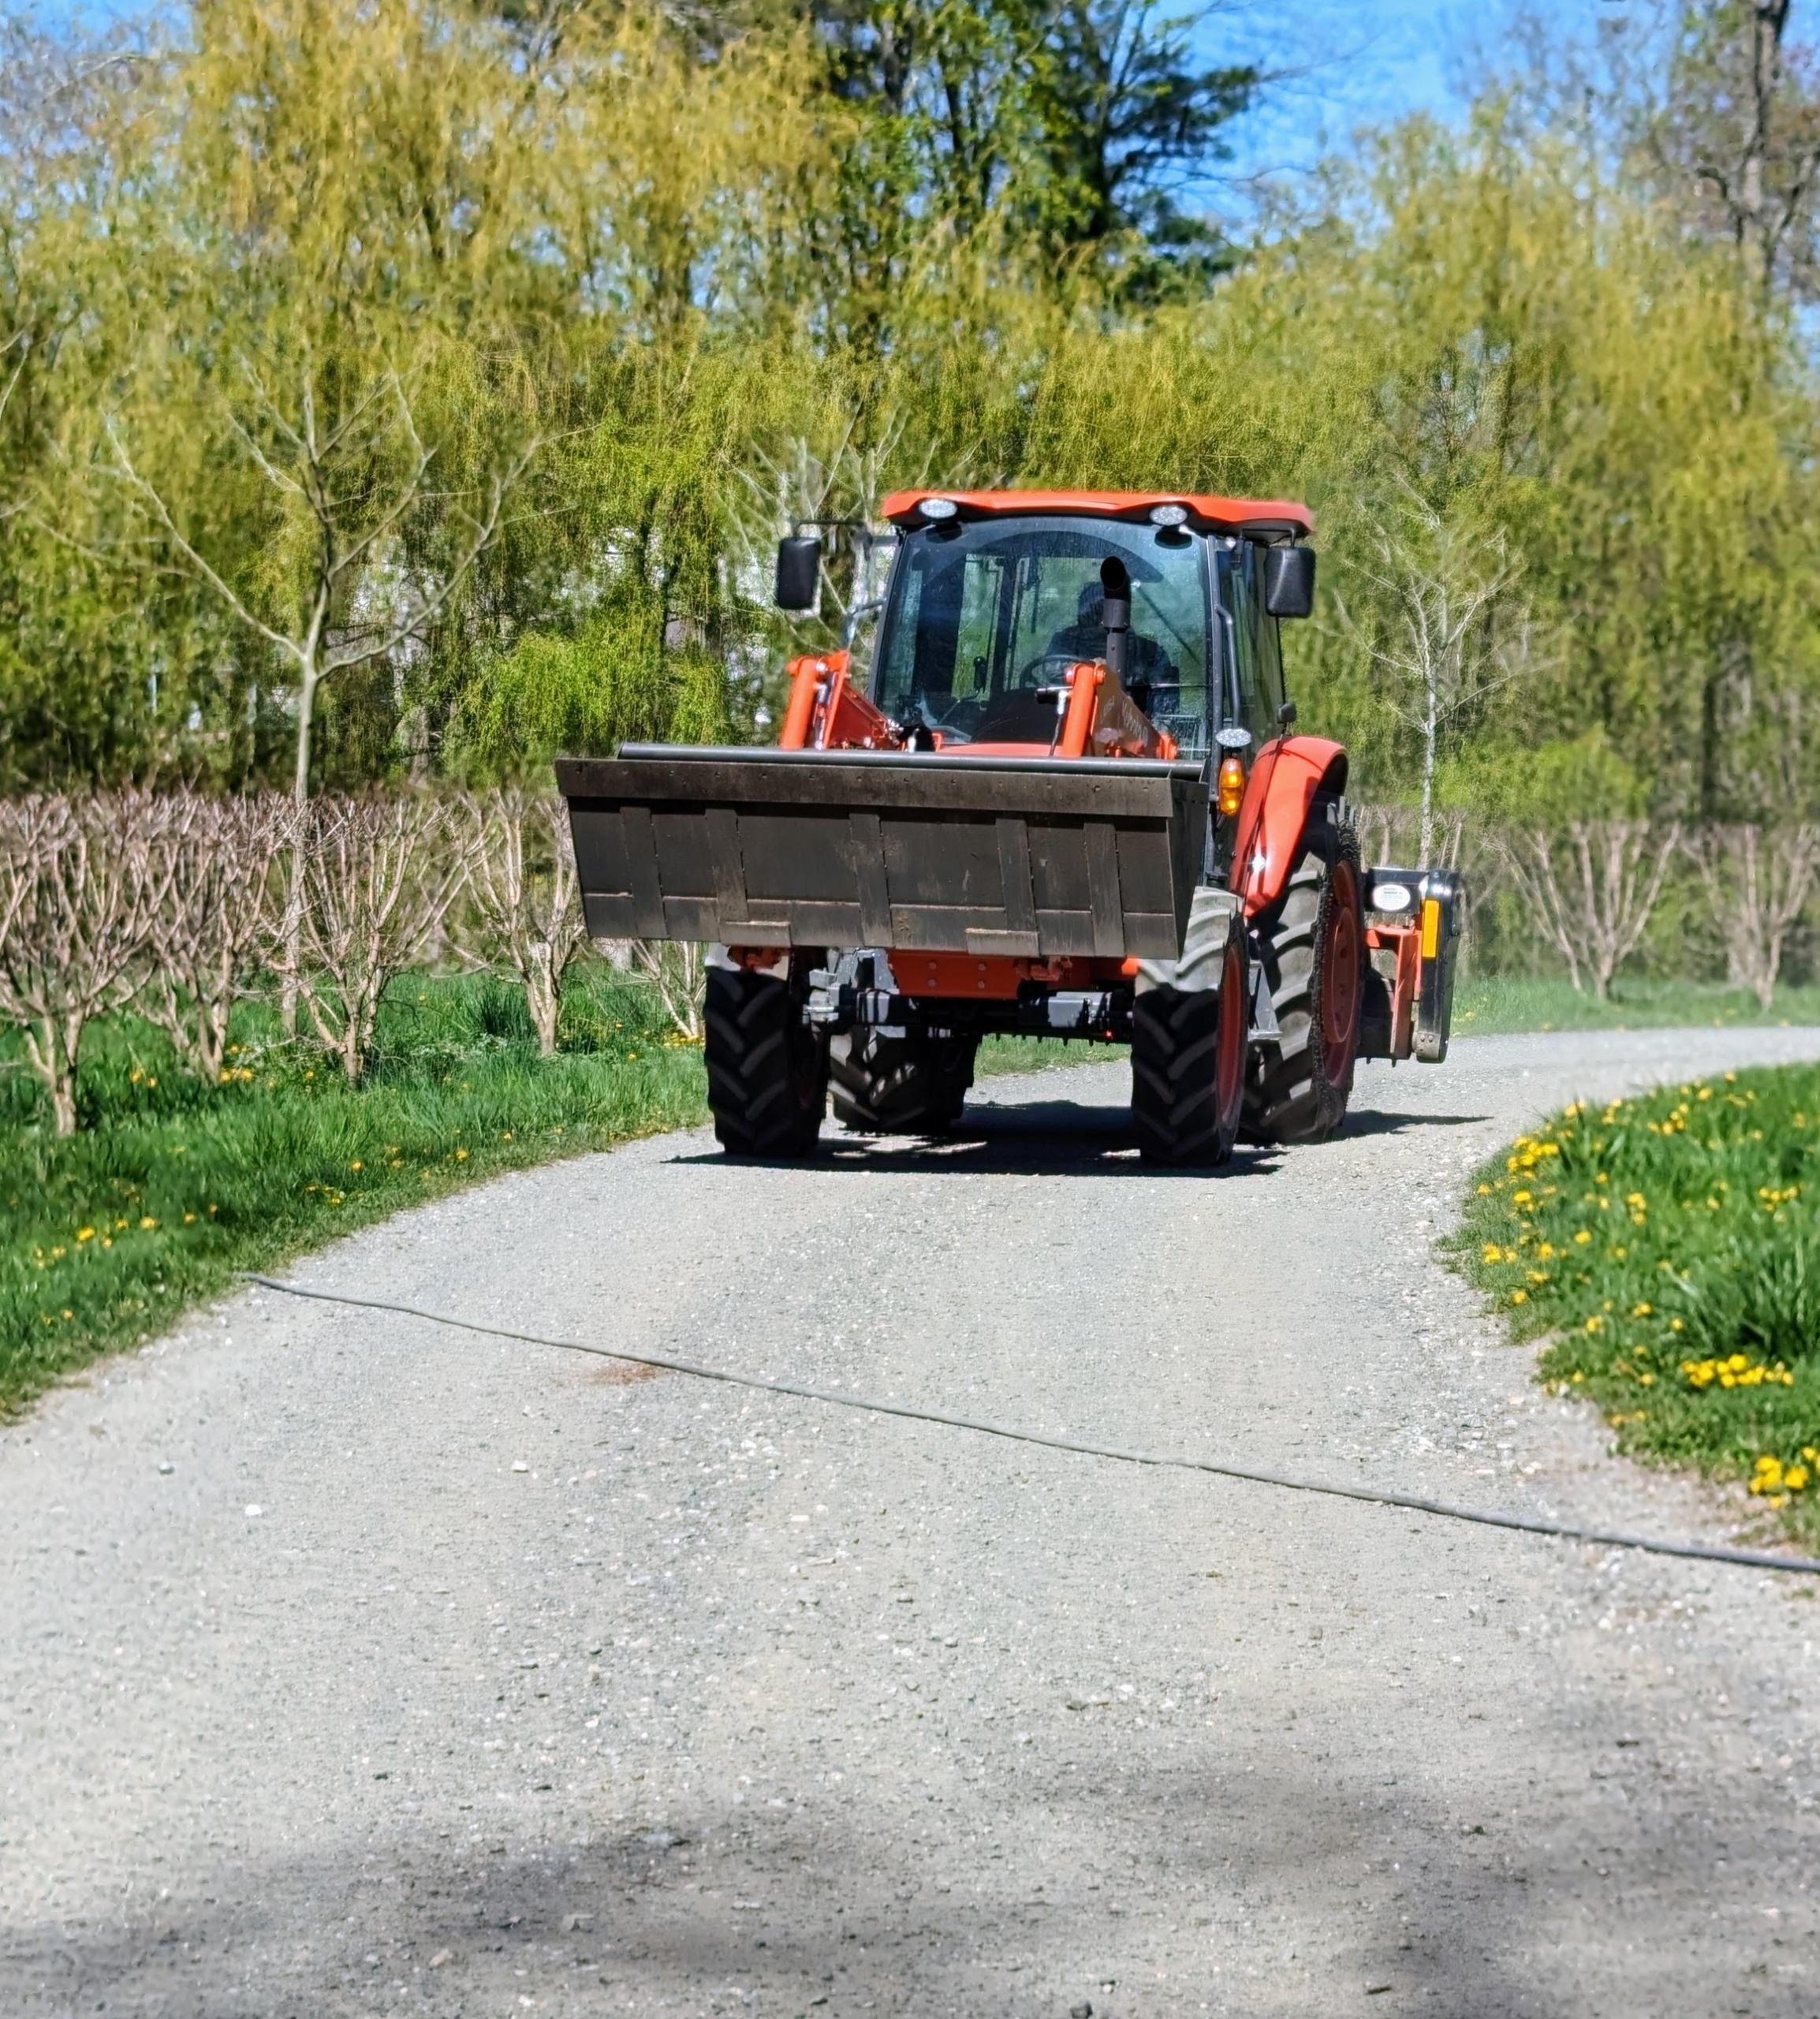
The tractors are also essential for maintaining the four miles of carriage road around my farm. The Land Pride PR1690 Power Rake is secured to the back of our tractor in order to rake and grade the carriage roads, but it is also capable of windrowing soil, rocks, and debris in a field.
When the rake is lowered onto the road surface and tilted to the proper angle, this attachment moves the gravel and road dust to the center, creating a crown. On less used roads, the power rake freshens up the existing gravel as it turns and brings any compacted gravel to the surface.
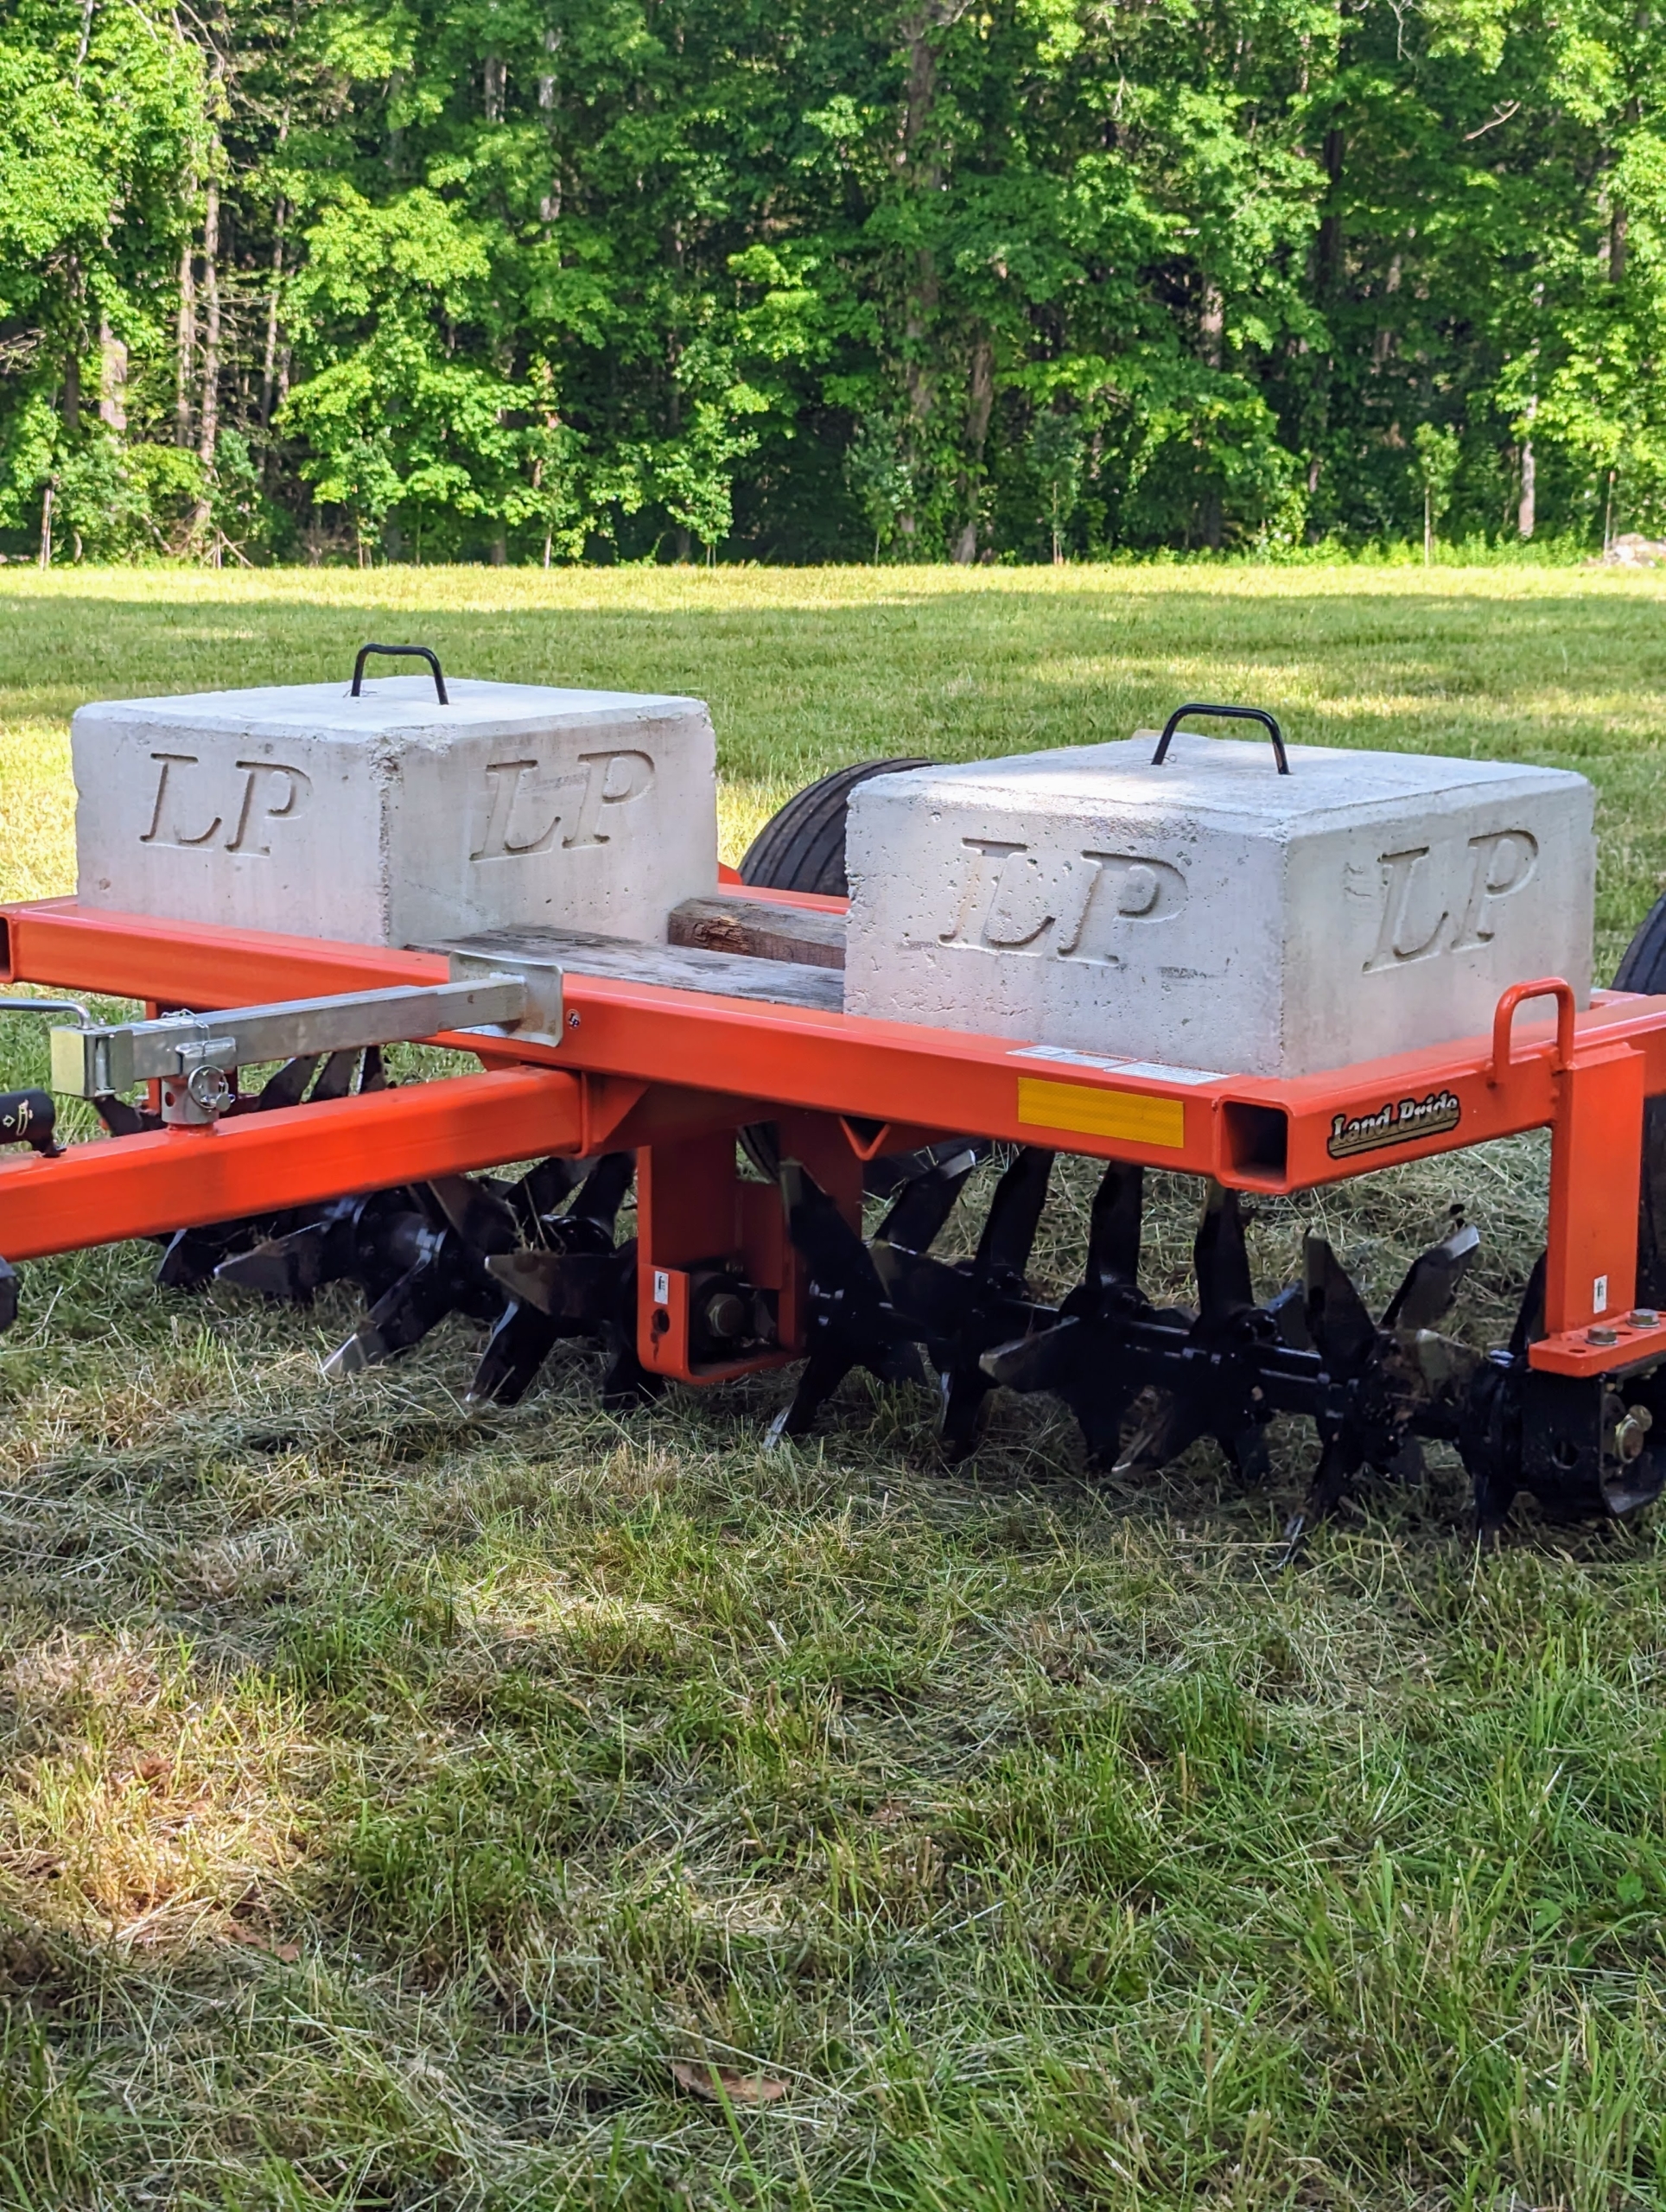
Weights are used on the aerator to help maintain even piercing in the soil.
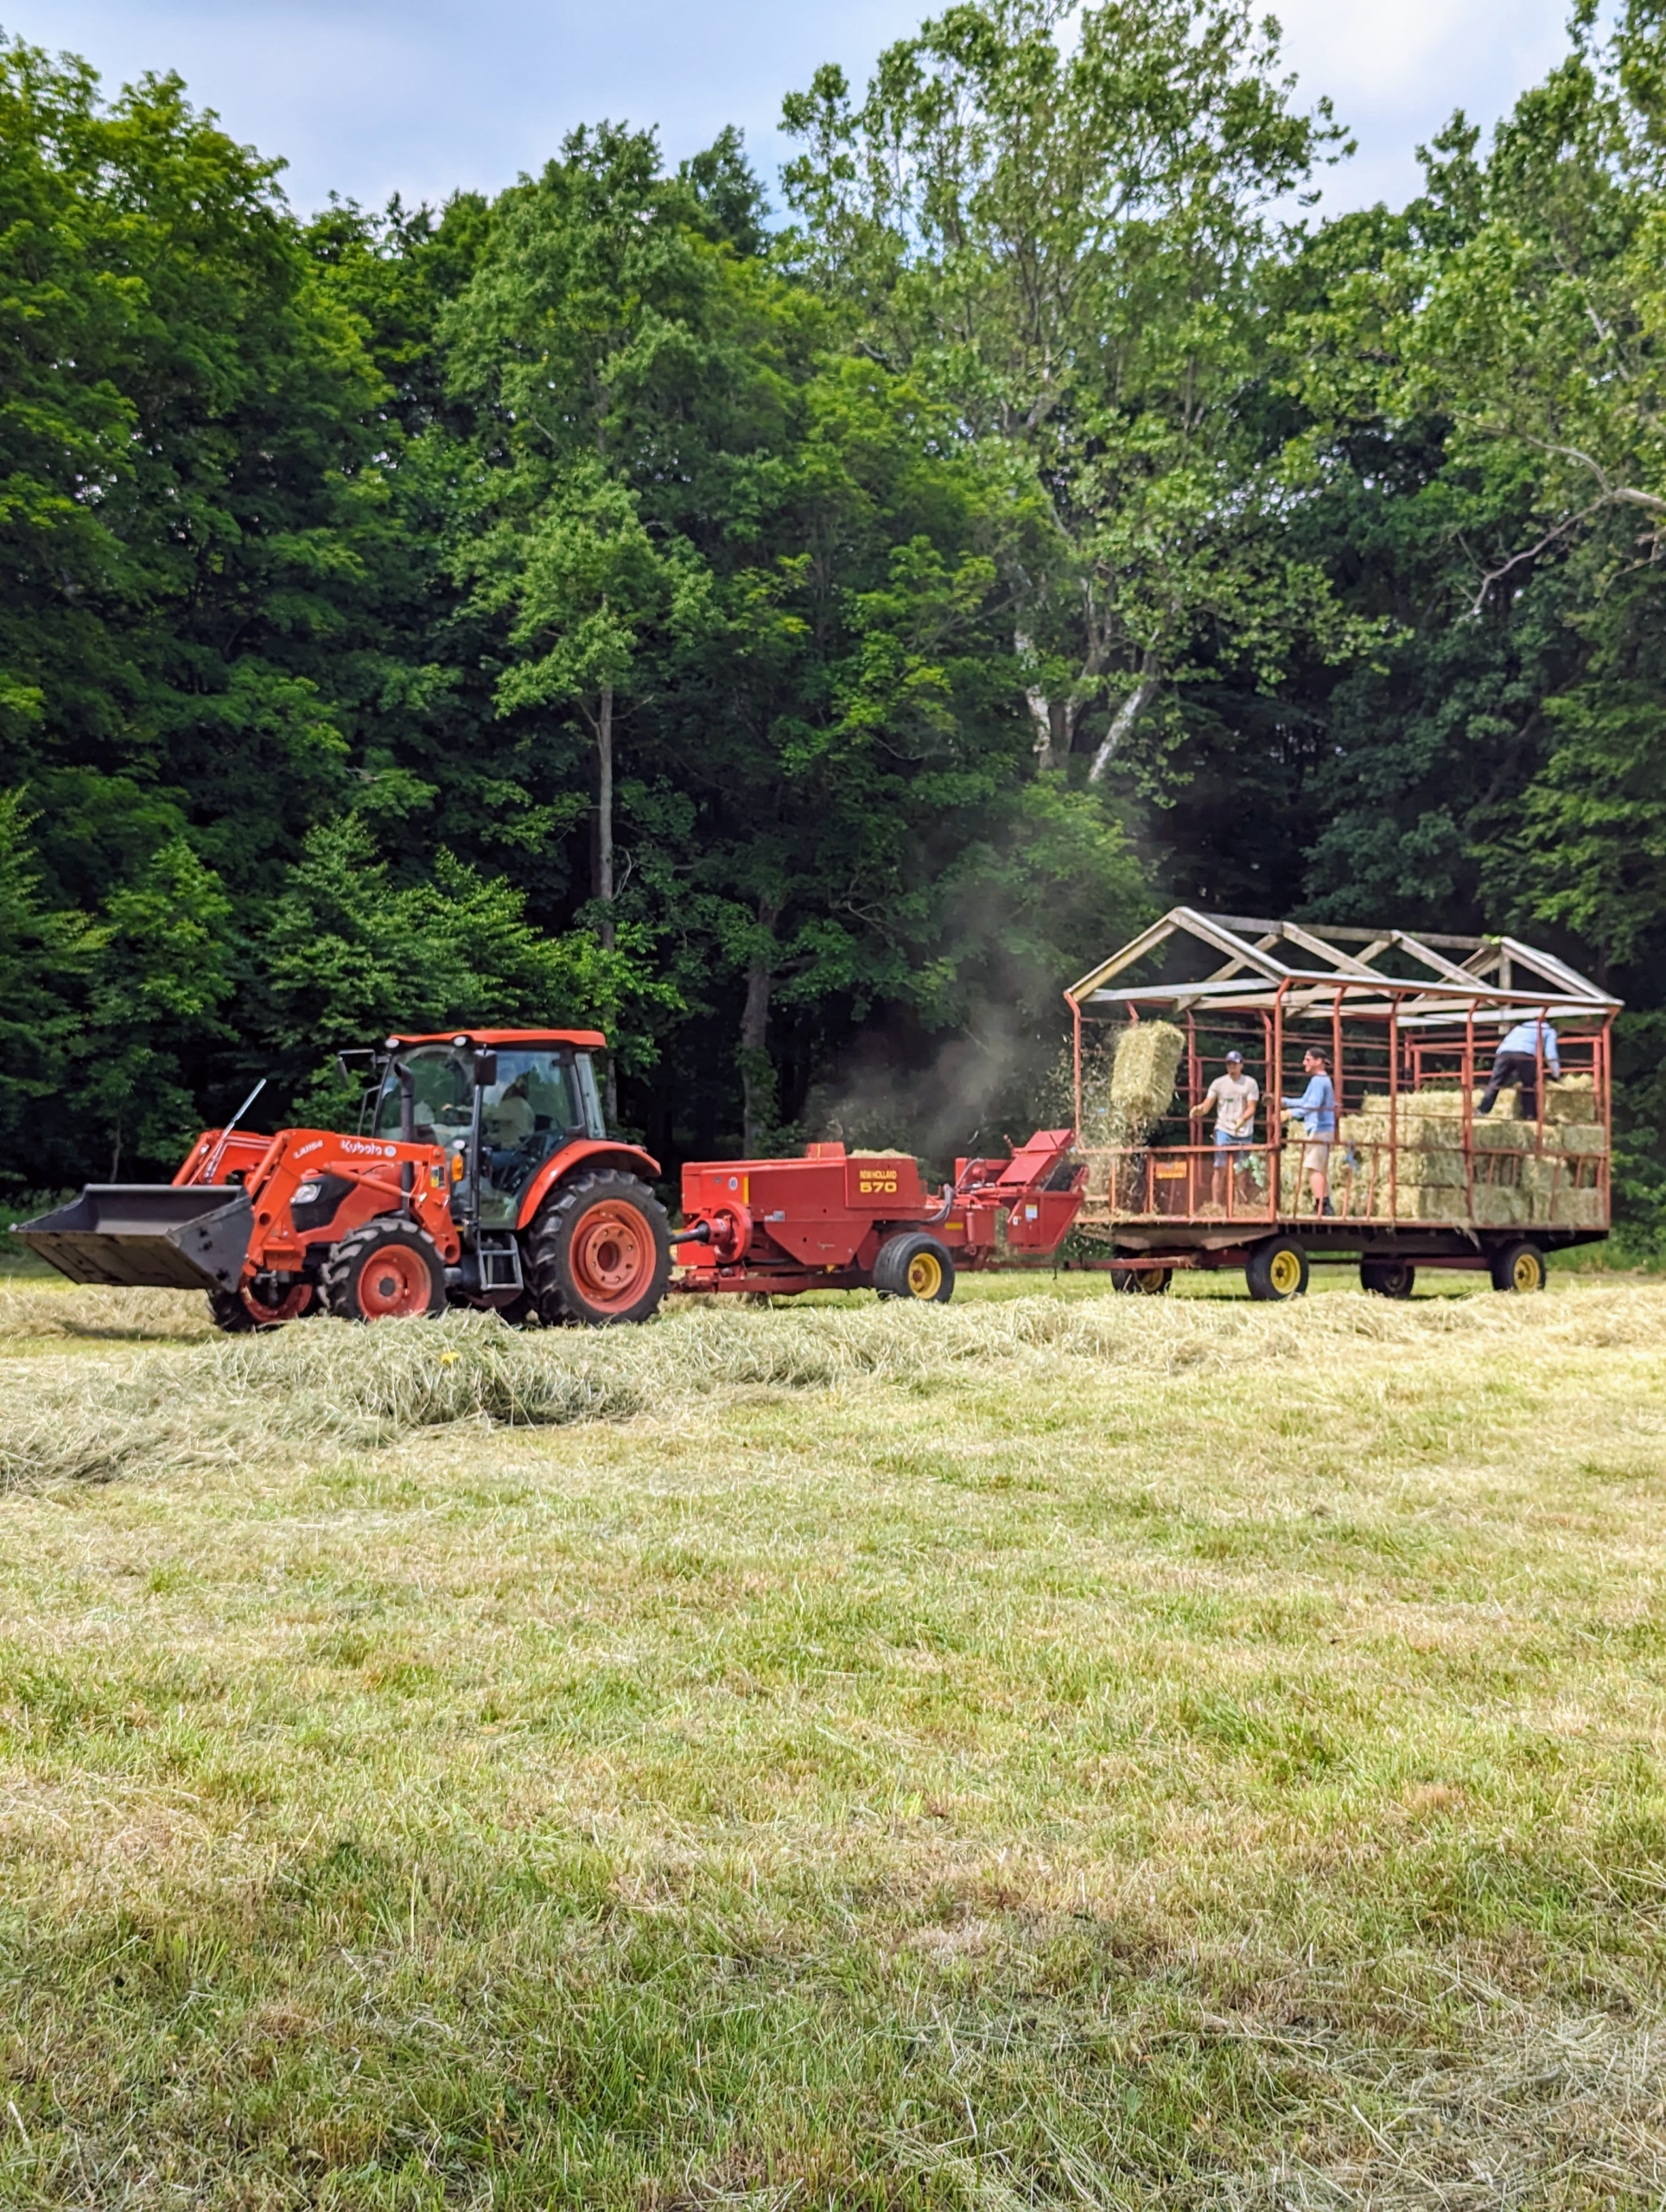
The same tractor is used to bale. Here it is pulling the baler and the hay wagon.
The backhoe is controlled from the safety of the tractor’s cab. The operator can turn and sit facing either direction to maneuver the backhoe or the loader.
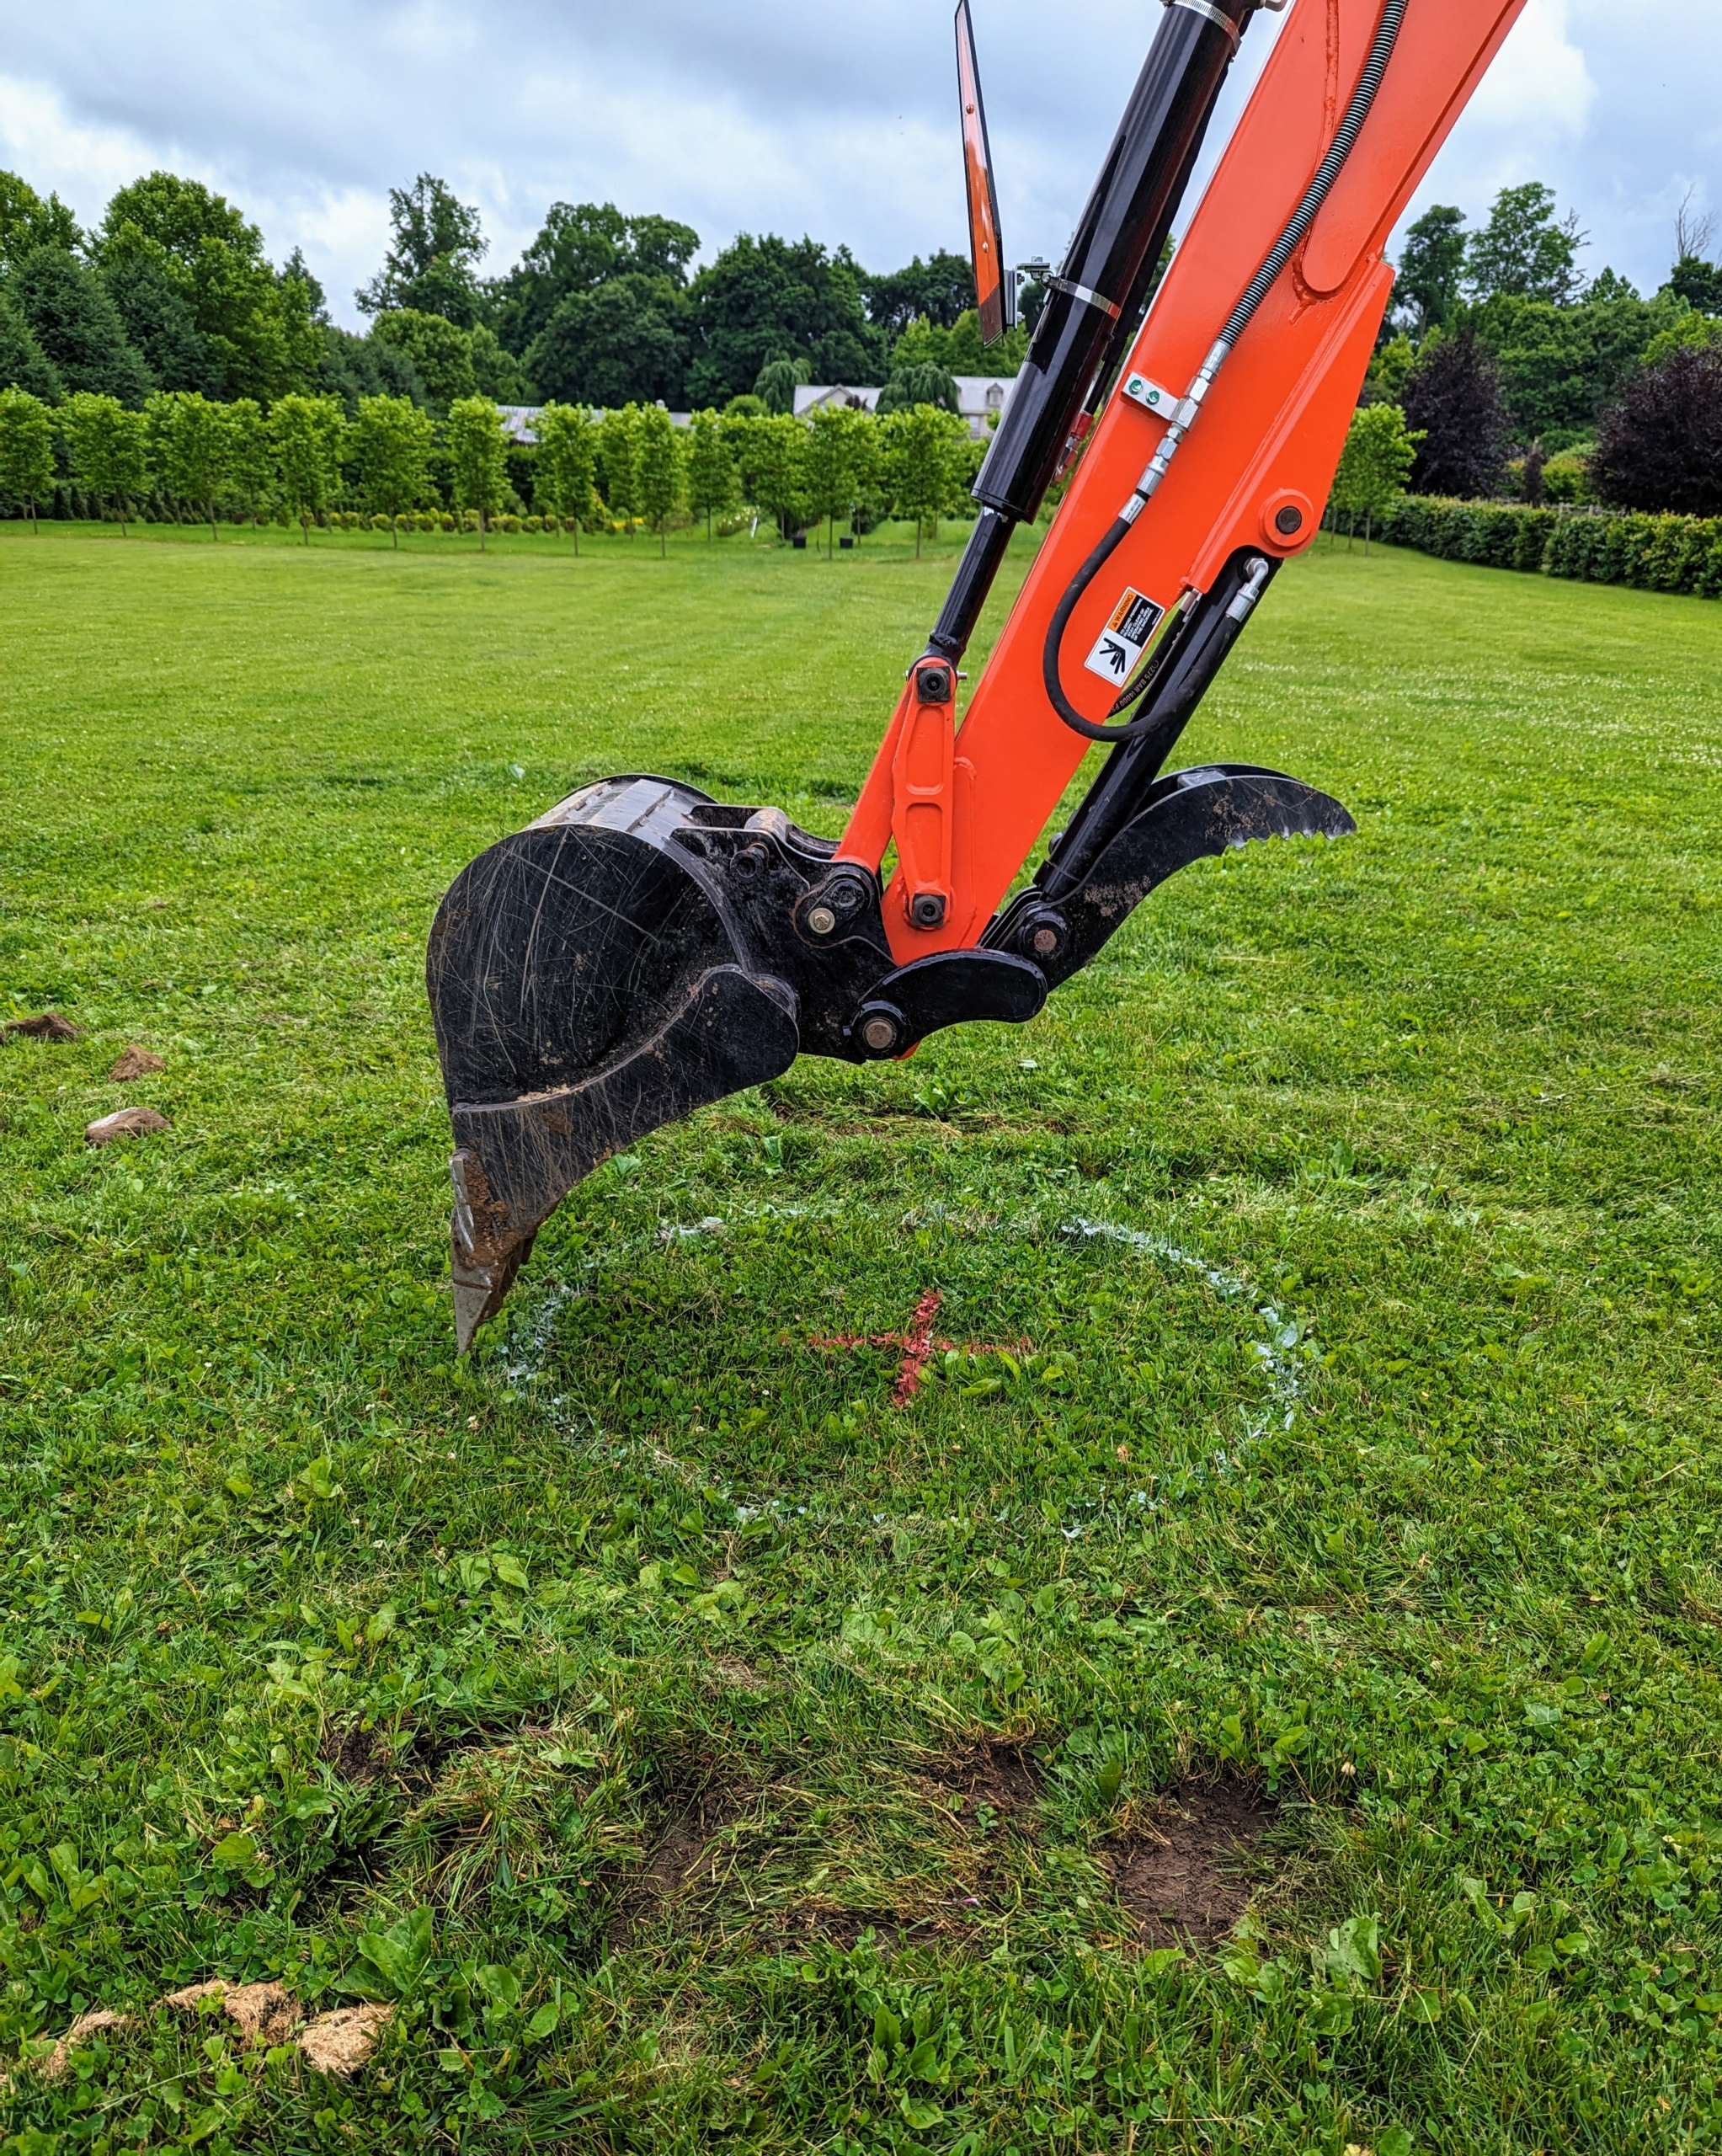
The backhoe is guided so easily and so precisely, so it cuts the soil and digs the hole right where “x” marks the spot.
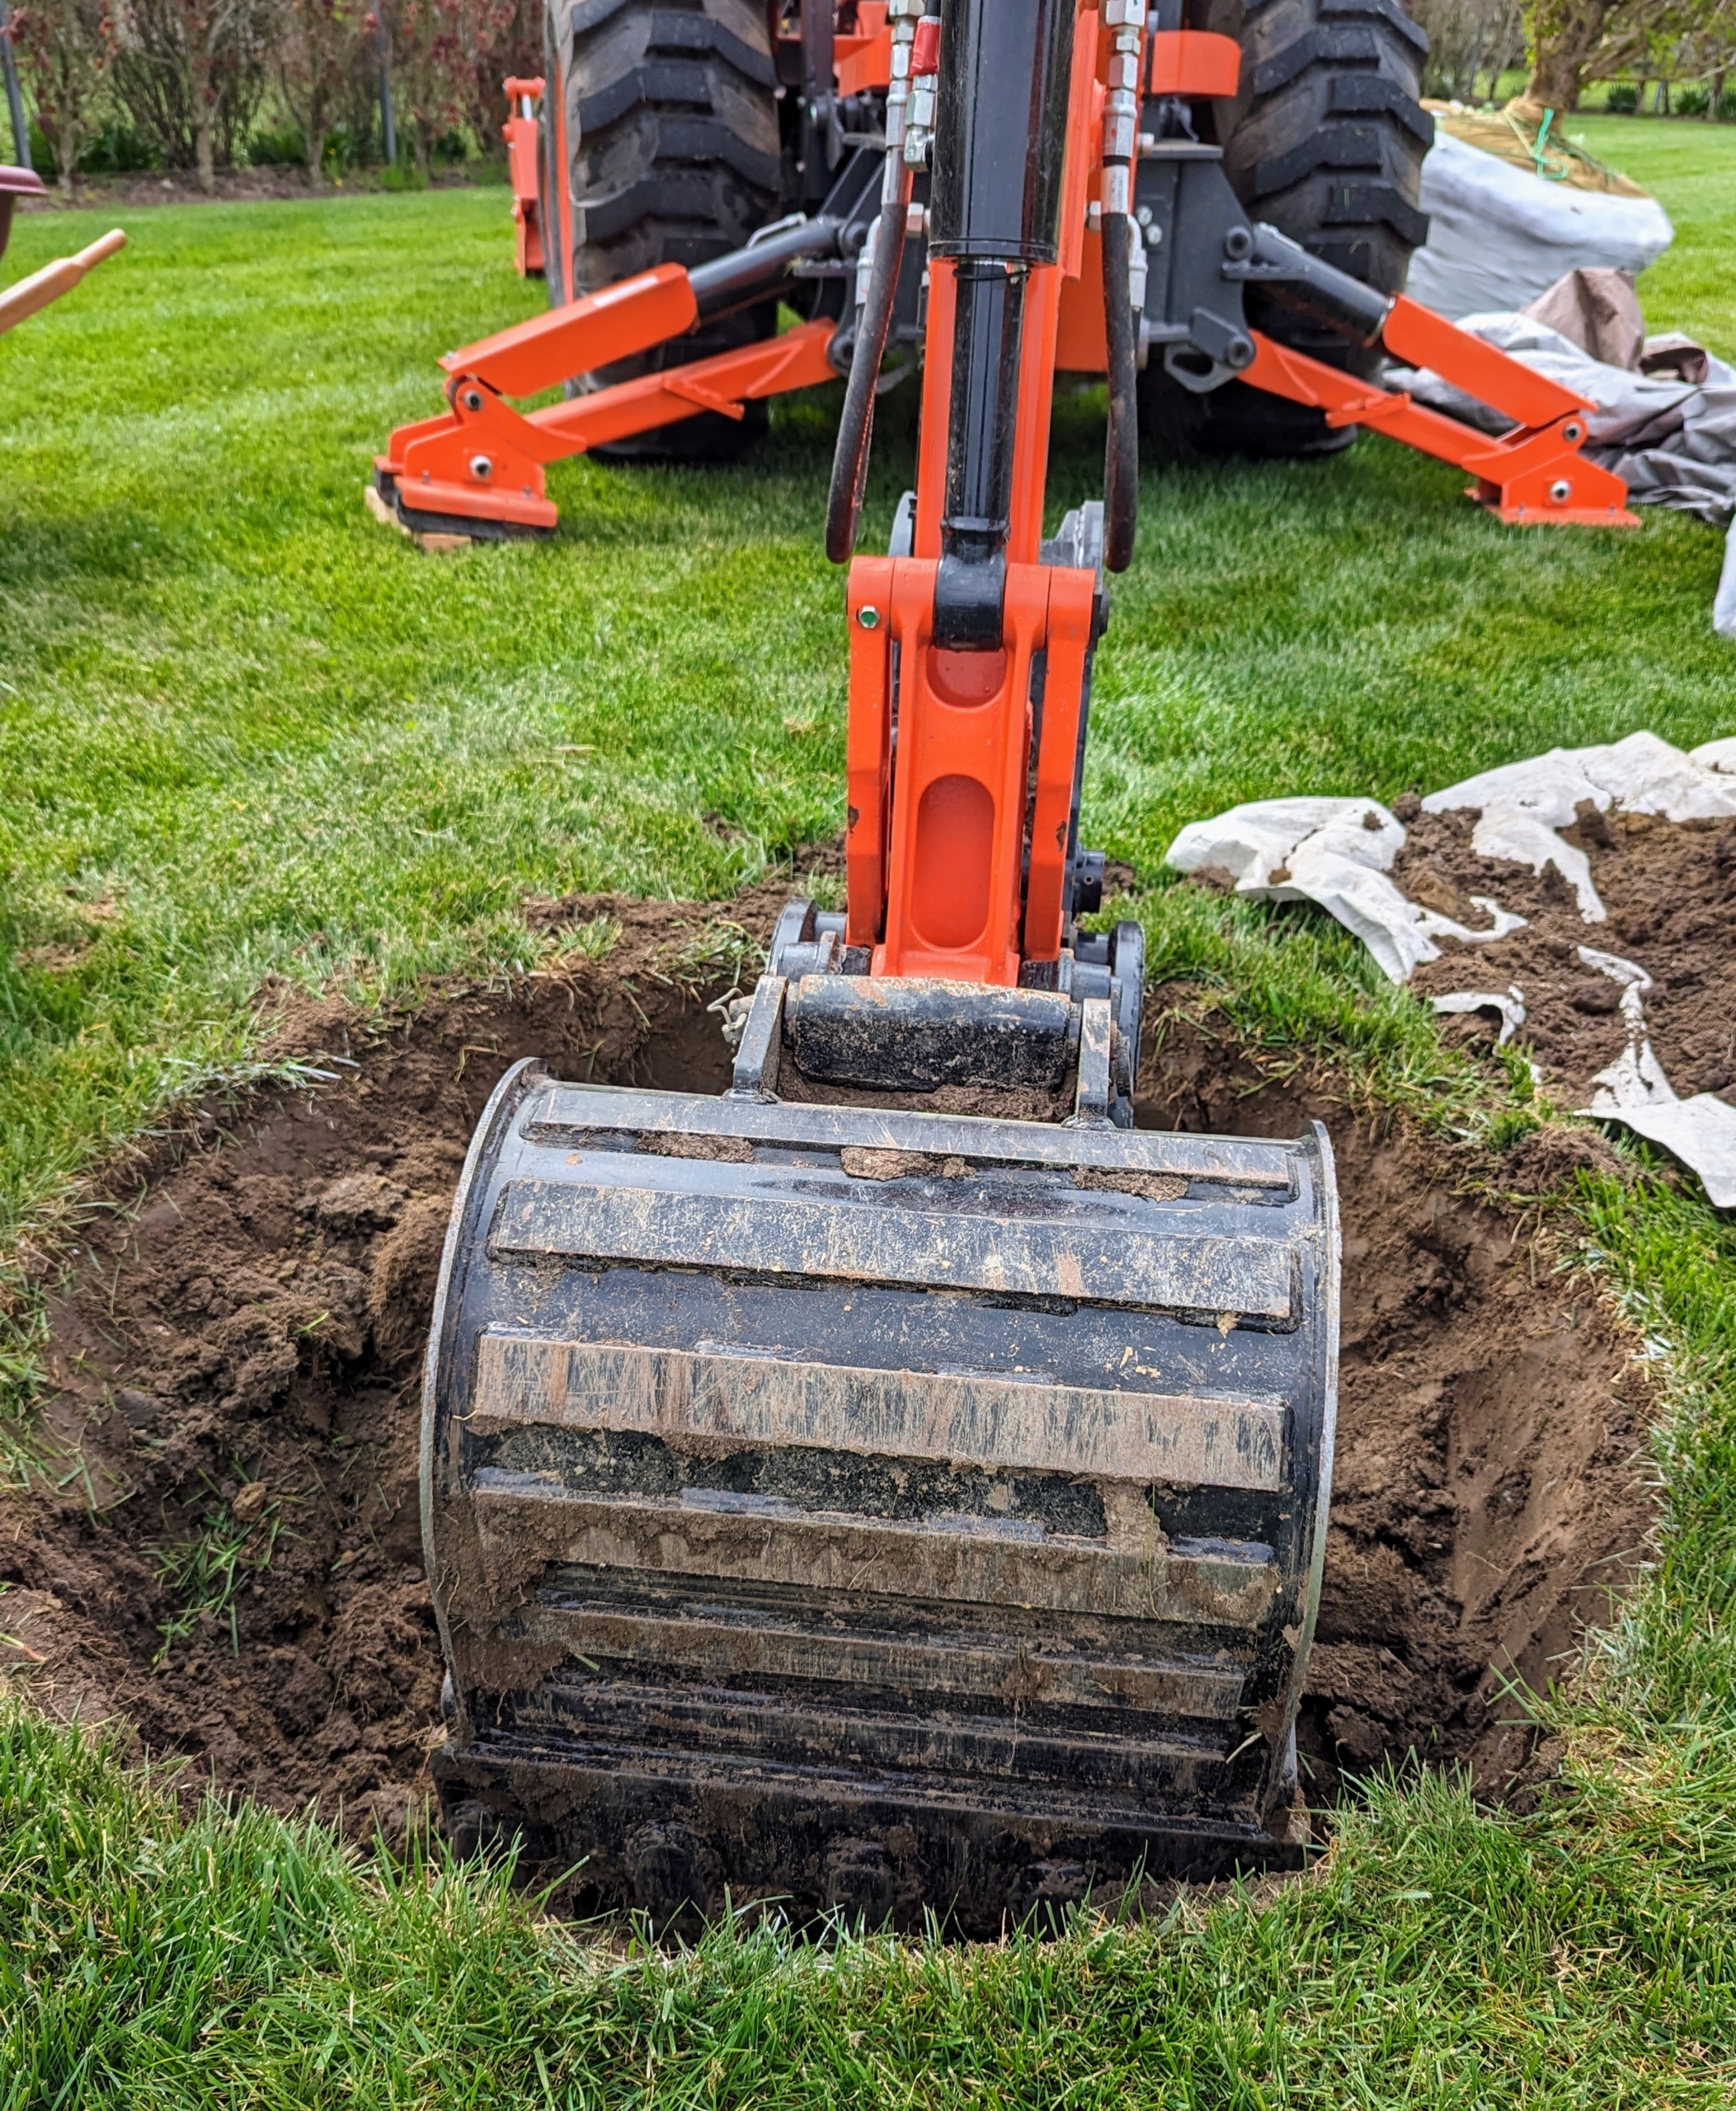
The backhoe works quickly, digging several holes in less than an hour.
Here, the tractor’s stabilizing feet are extended to keep it well balanced and safe.
Any unneeded soil is hauled away in the tractor’s bucket.
It’s a lot of work to maintain a farm – there’s always a long list of chores to complete. I’m glad we can get so many of them done with the help of our trusted Kubota equipment.
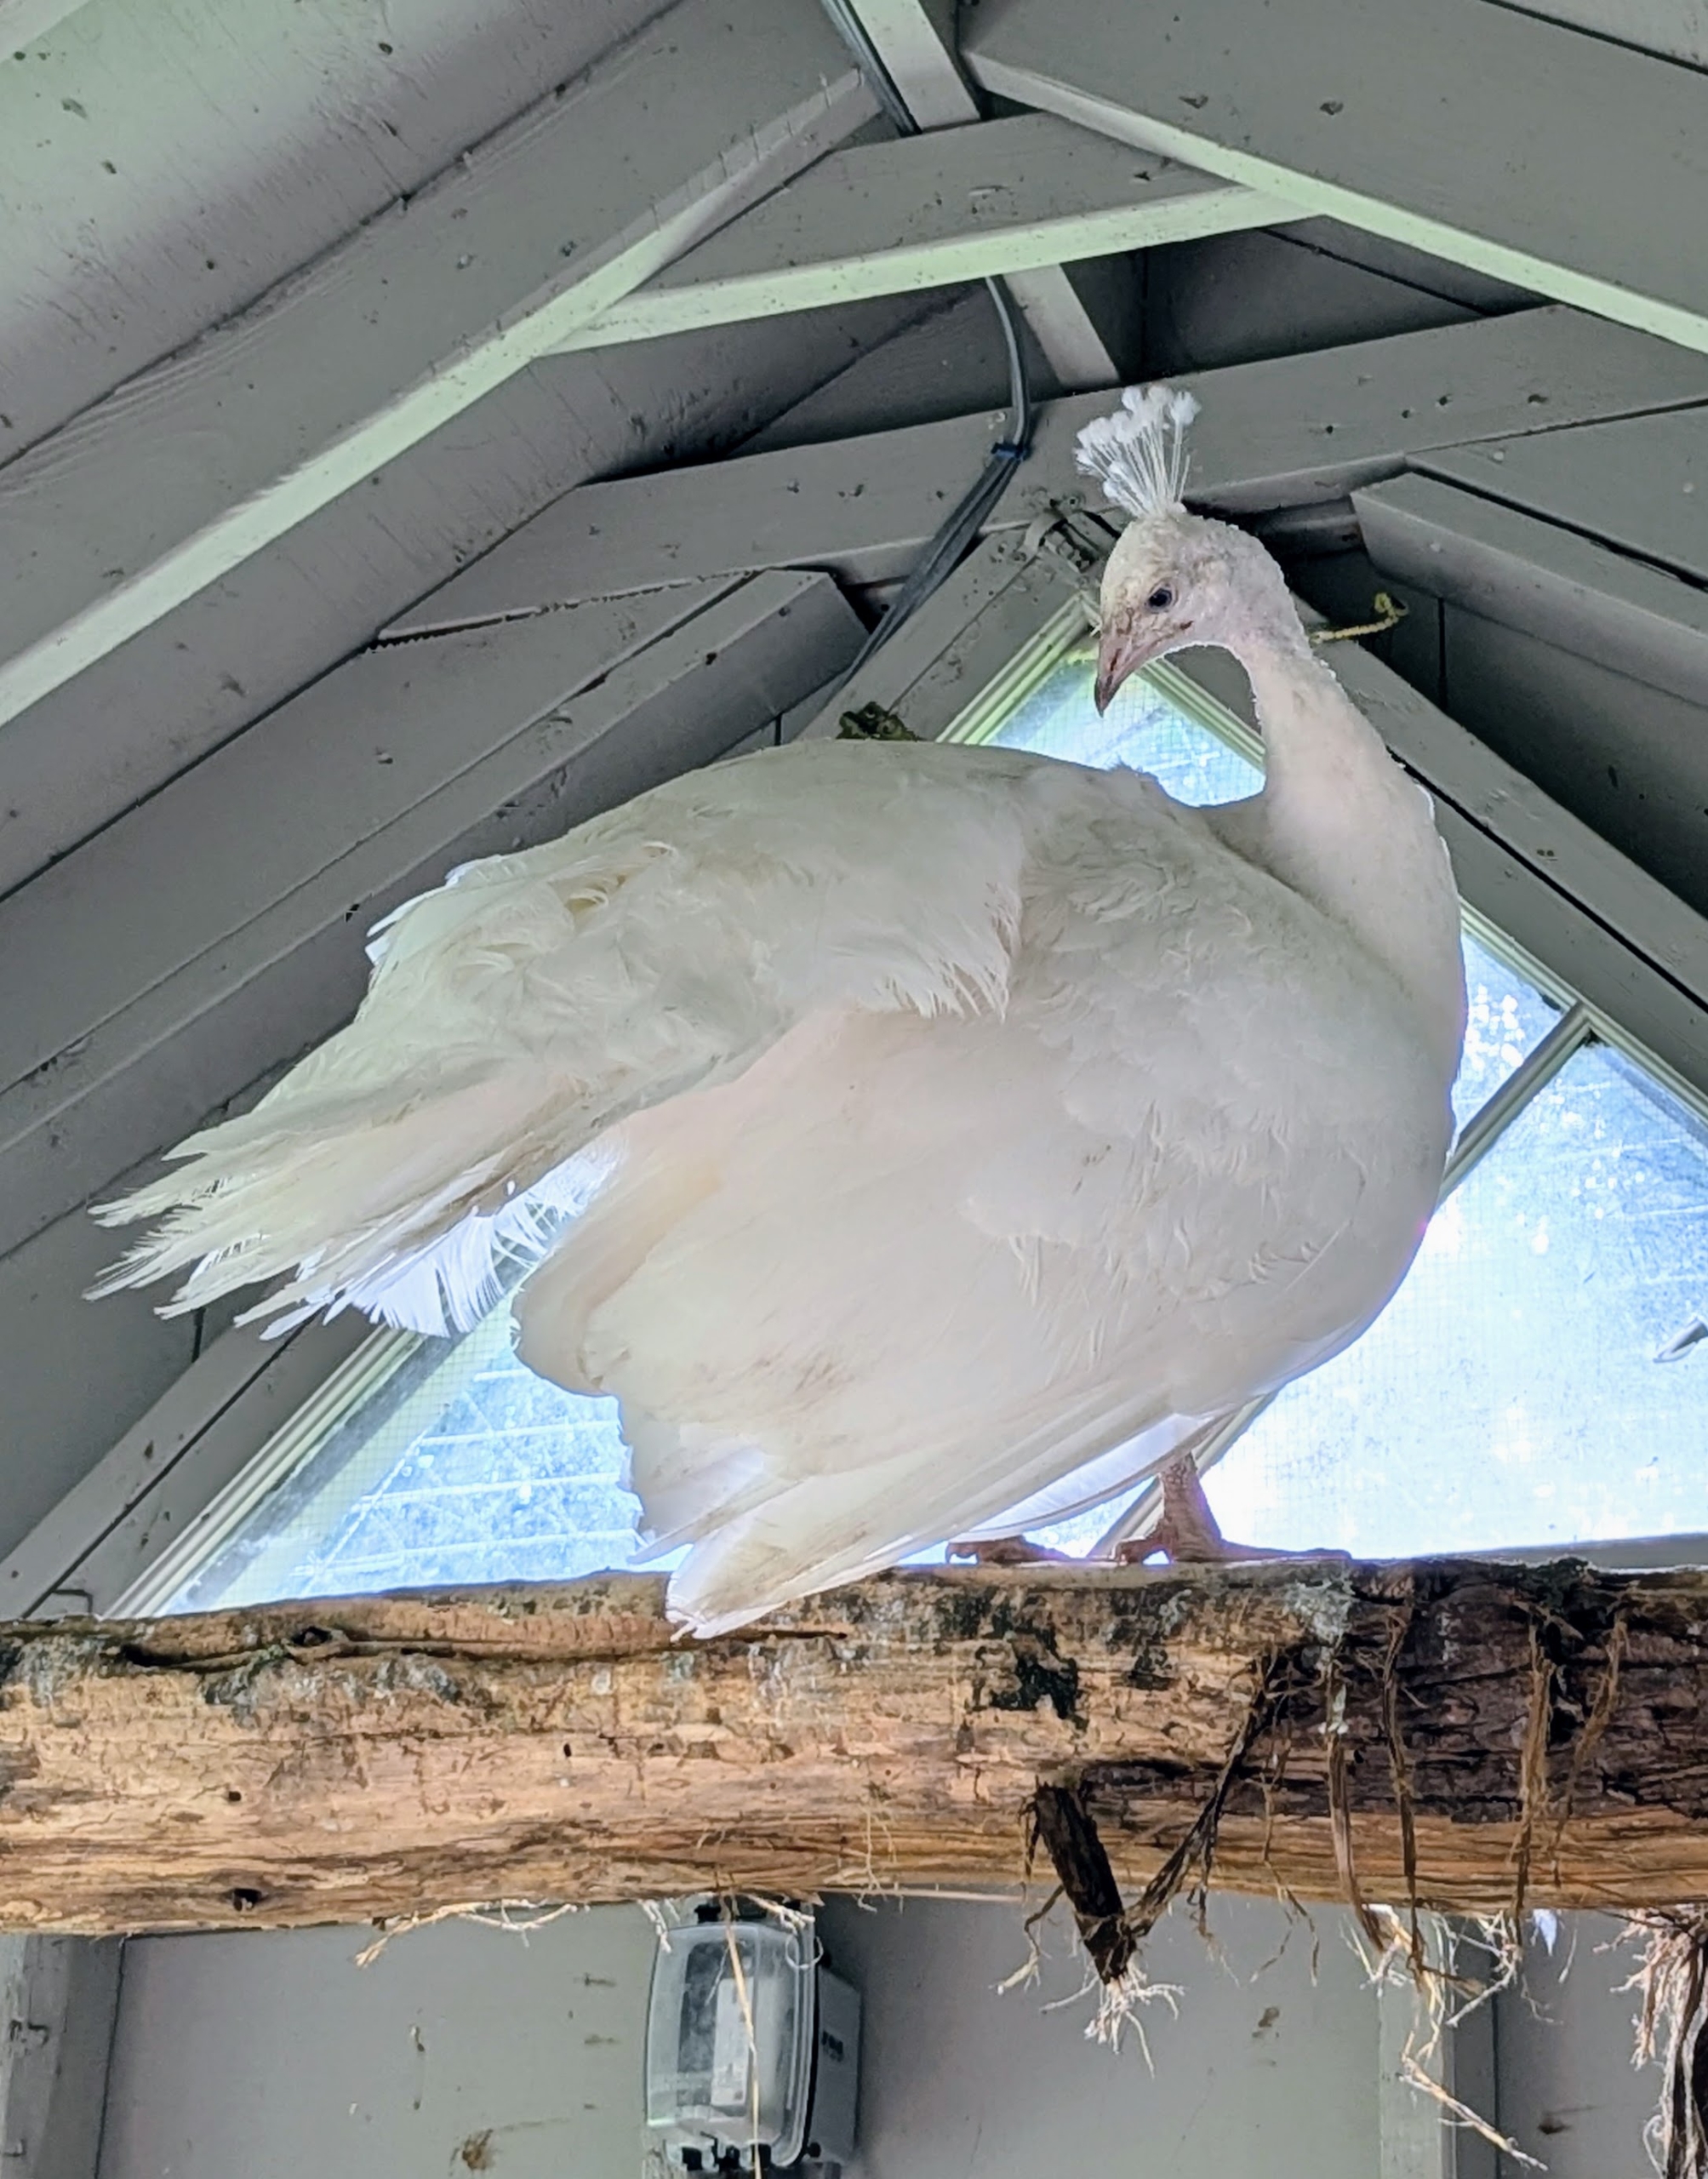
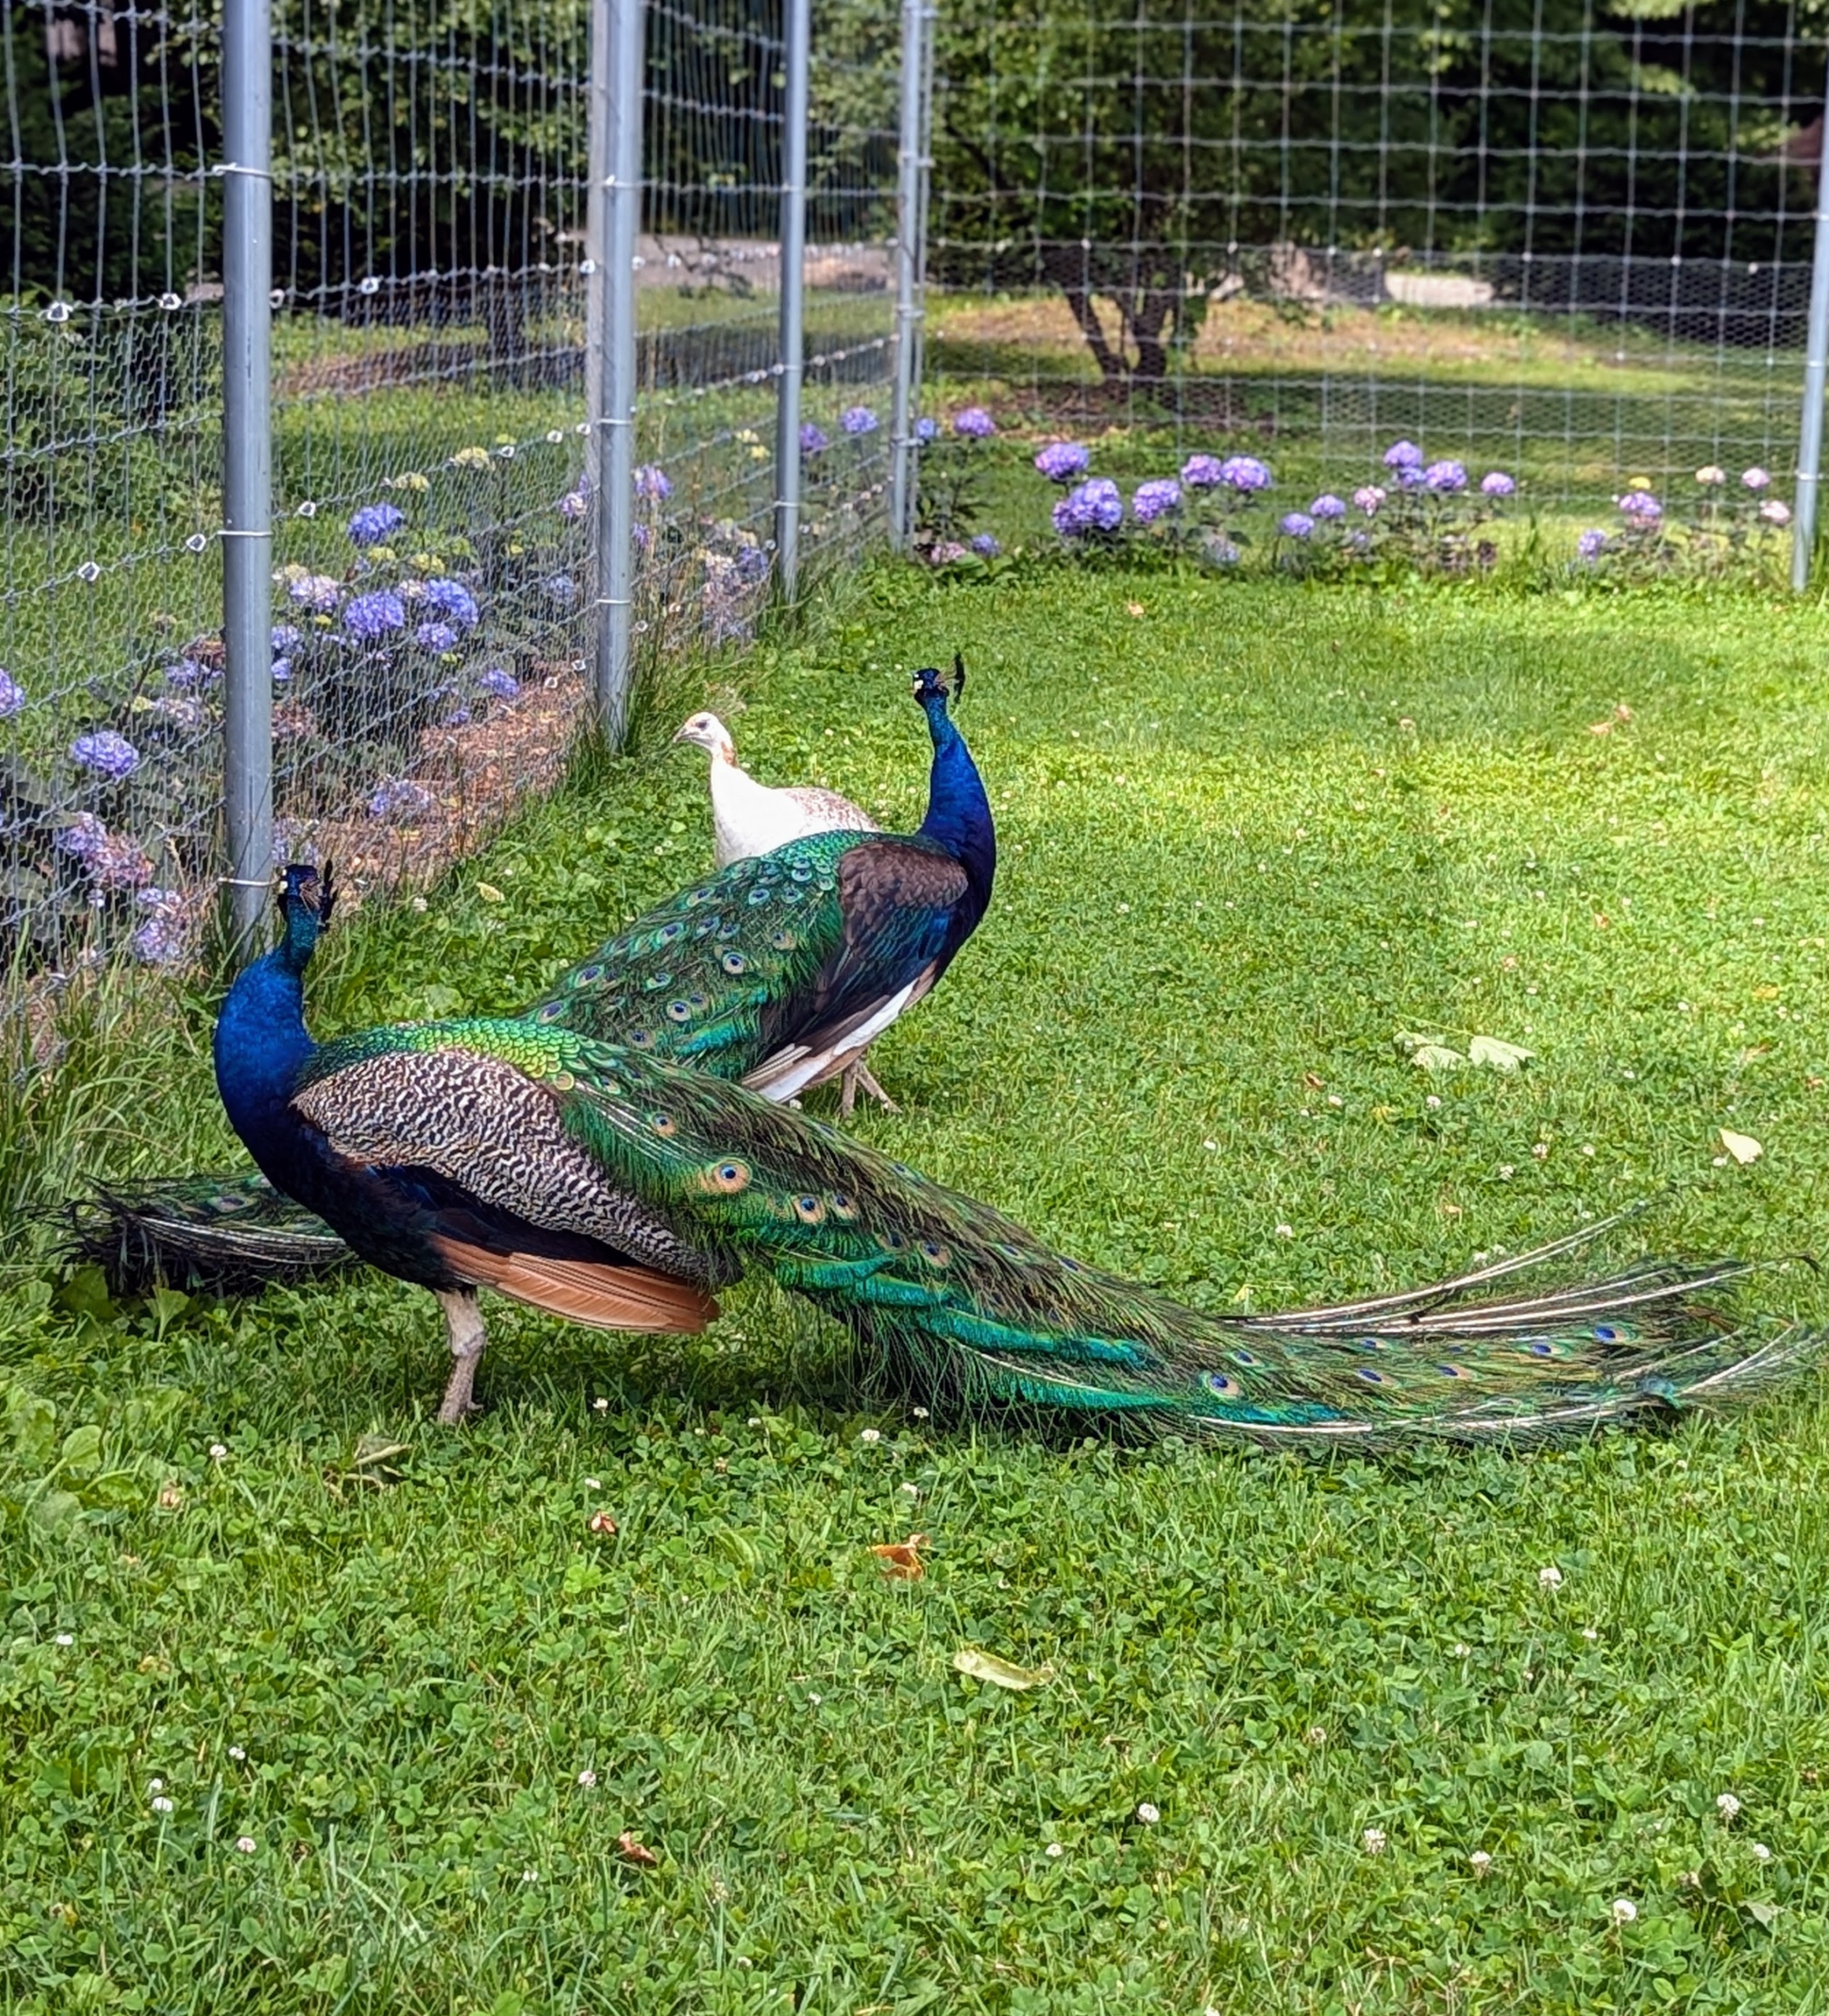
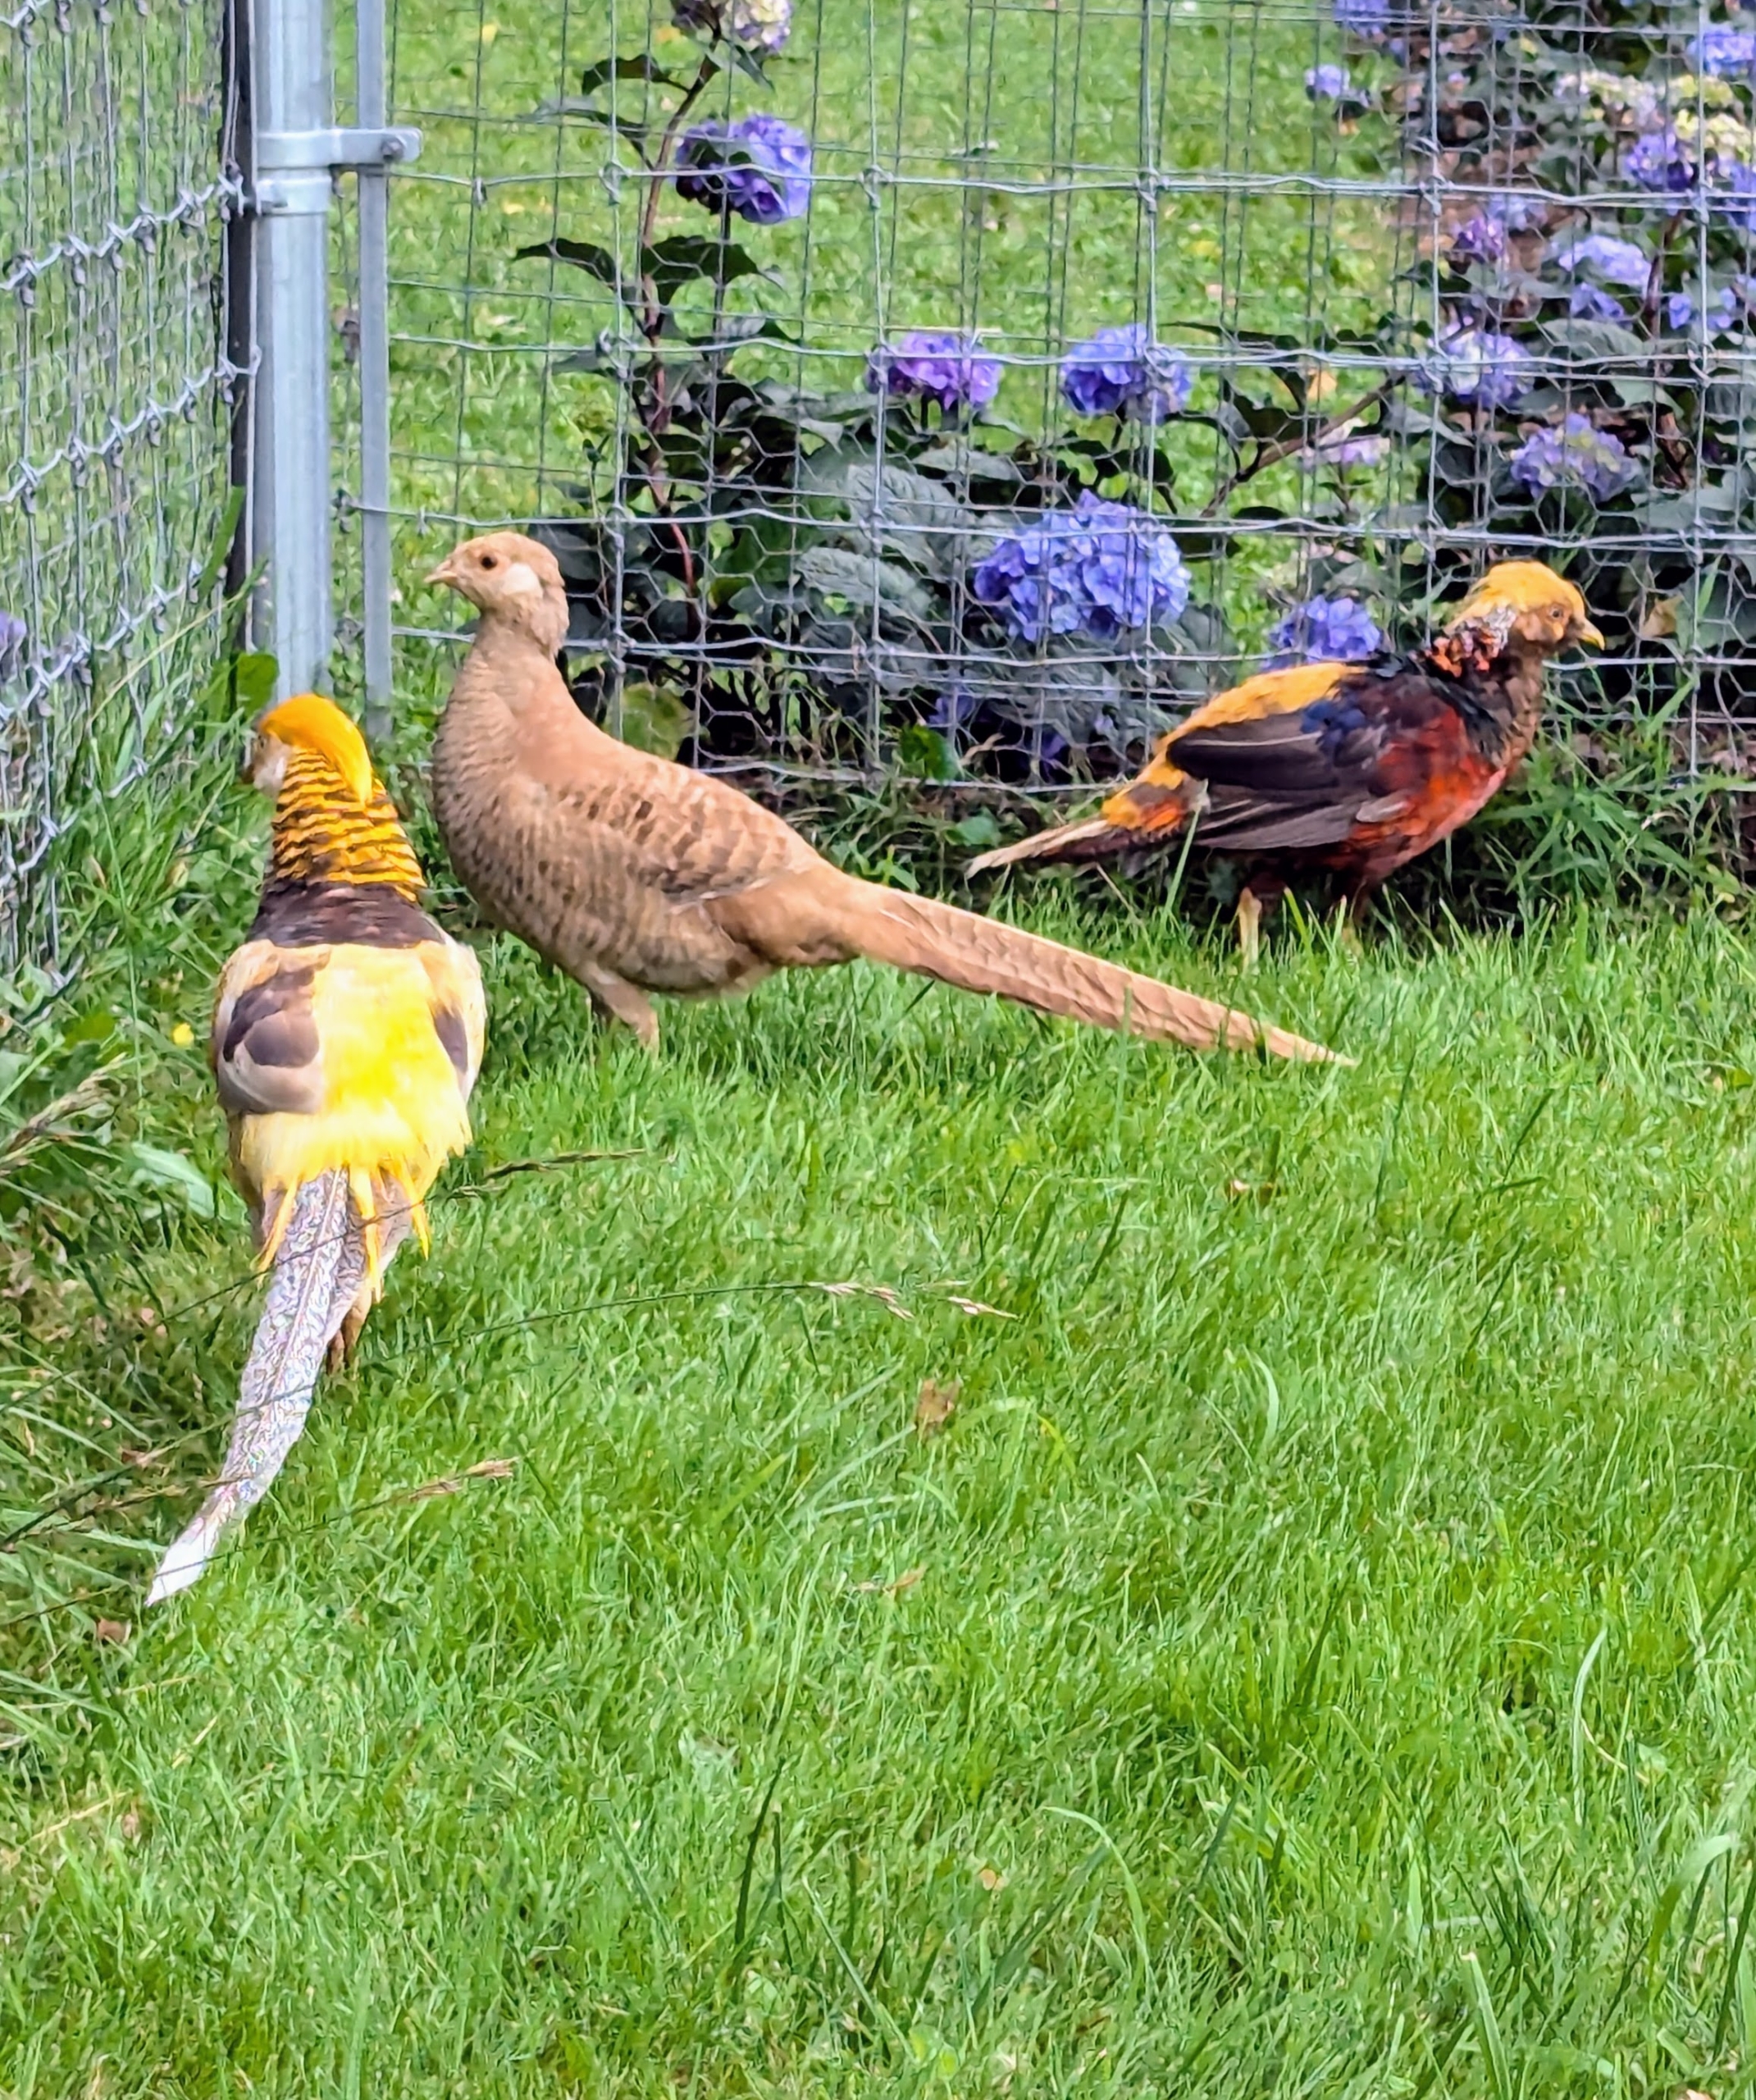
A white peacock and two female golden pheasants join my flock at Cantitoe Corners.
Earlier this year, I adopted three male golden pheasants from Animal Nation Farm Sanctuary in nearby South Salem, New York. The males are marked with bright red, orange, and yellow plumage. I knew they would make wonderful additions to my farm. Last week, when I heard two females were available, I adopted them also, along with a young white peacock. I am happy to report all the birds are happy and acclimating well to their new surroundings.
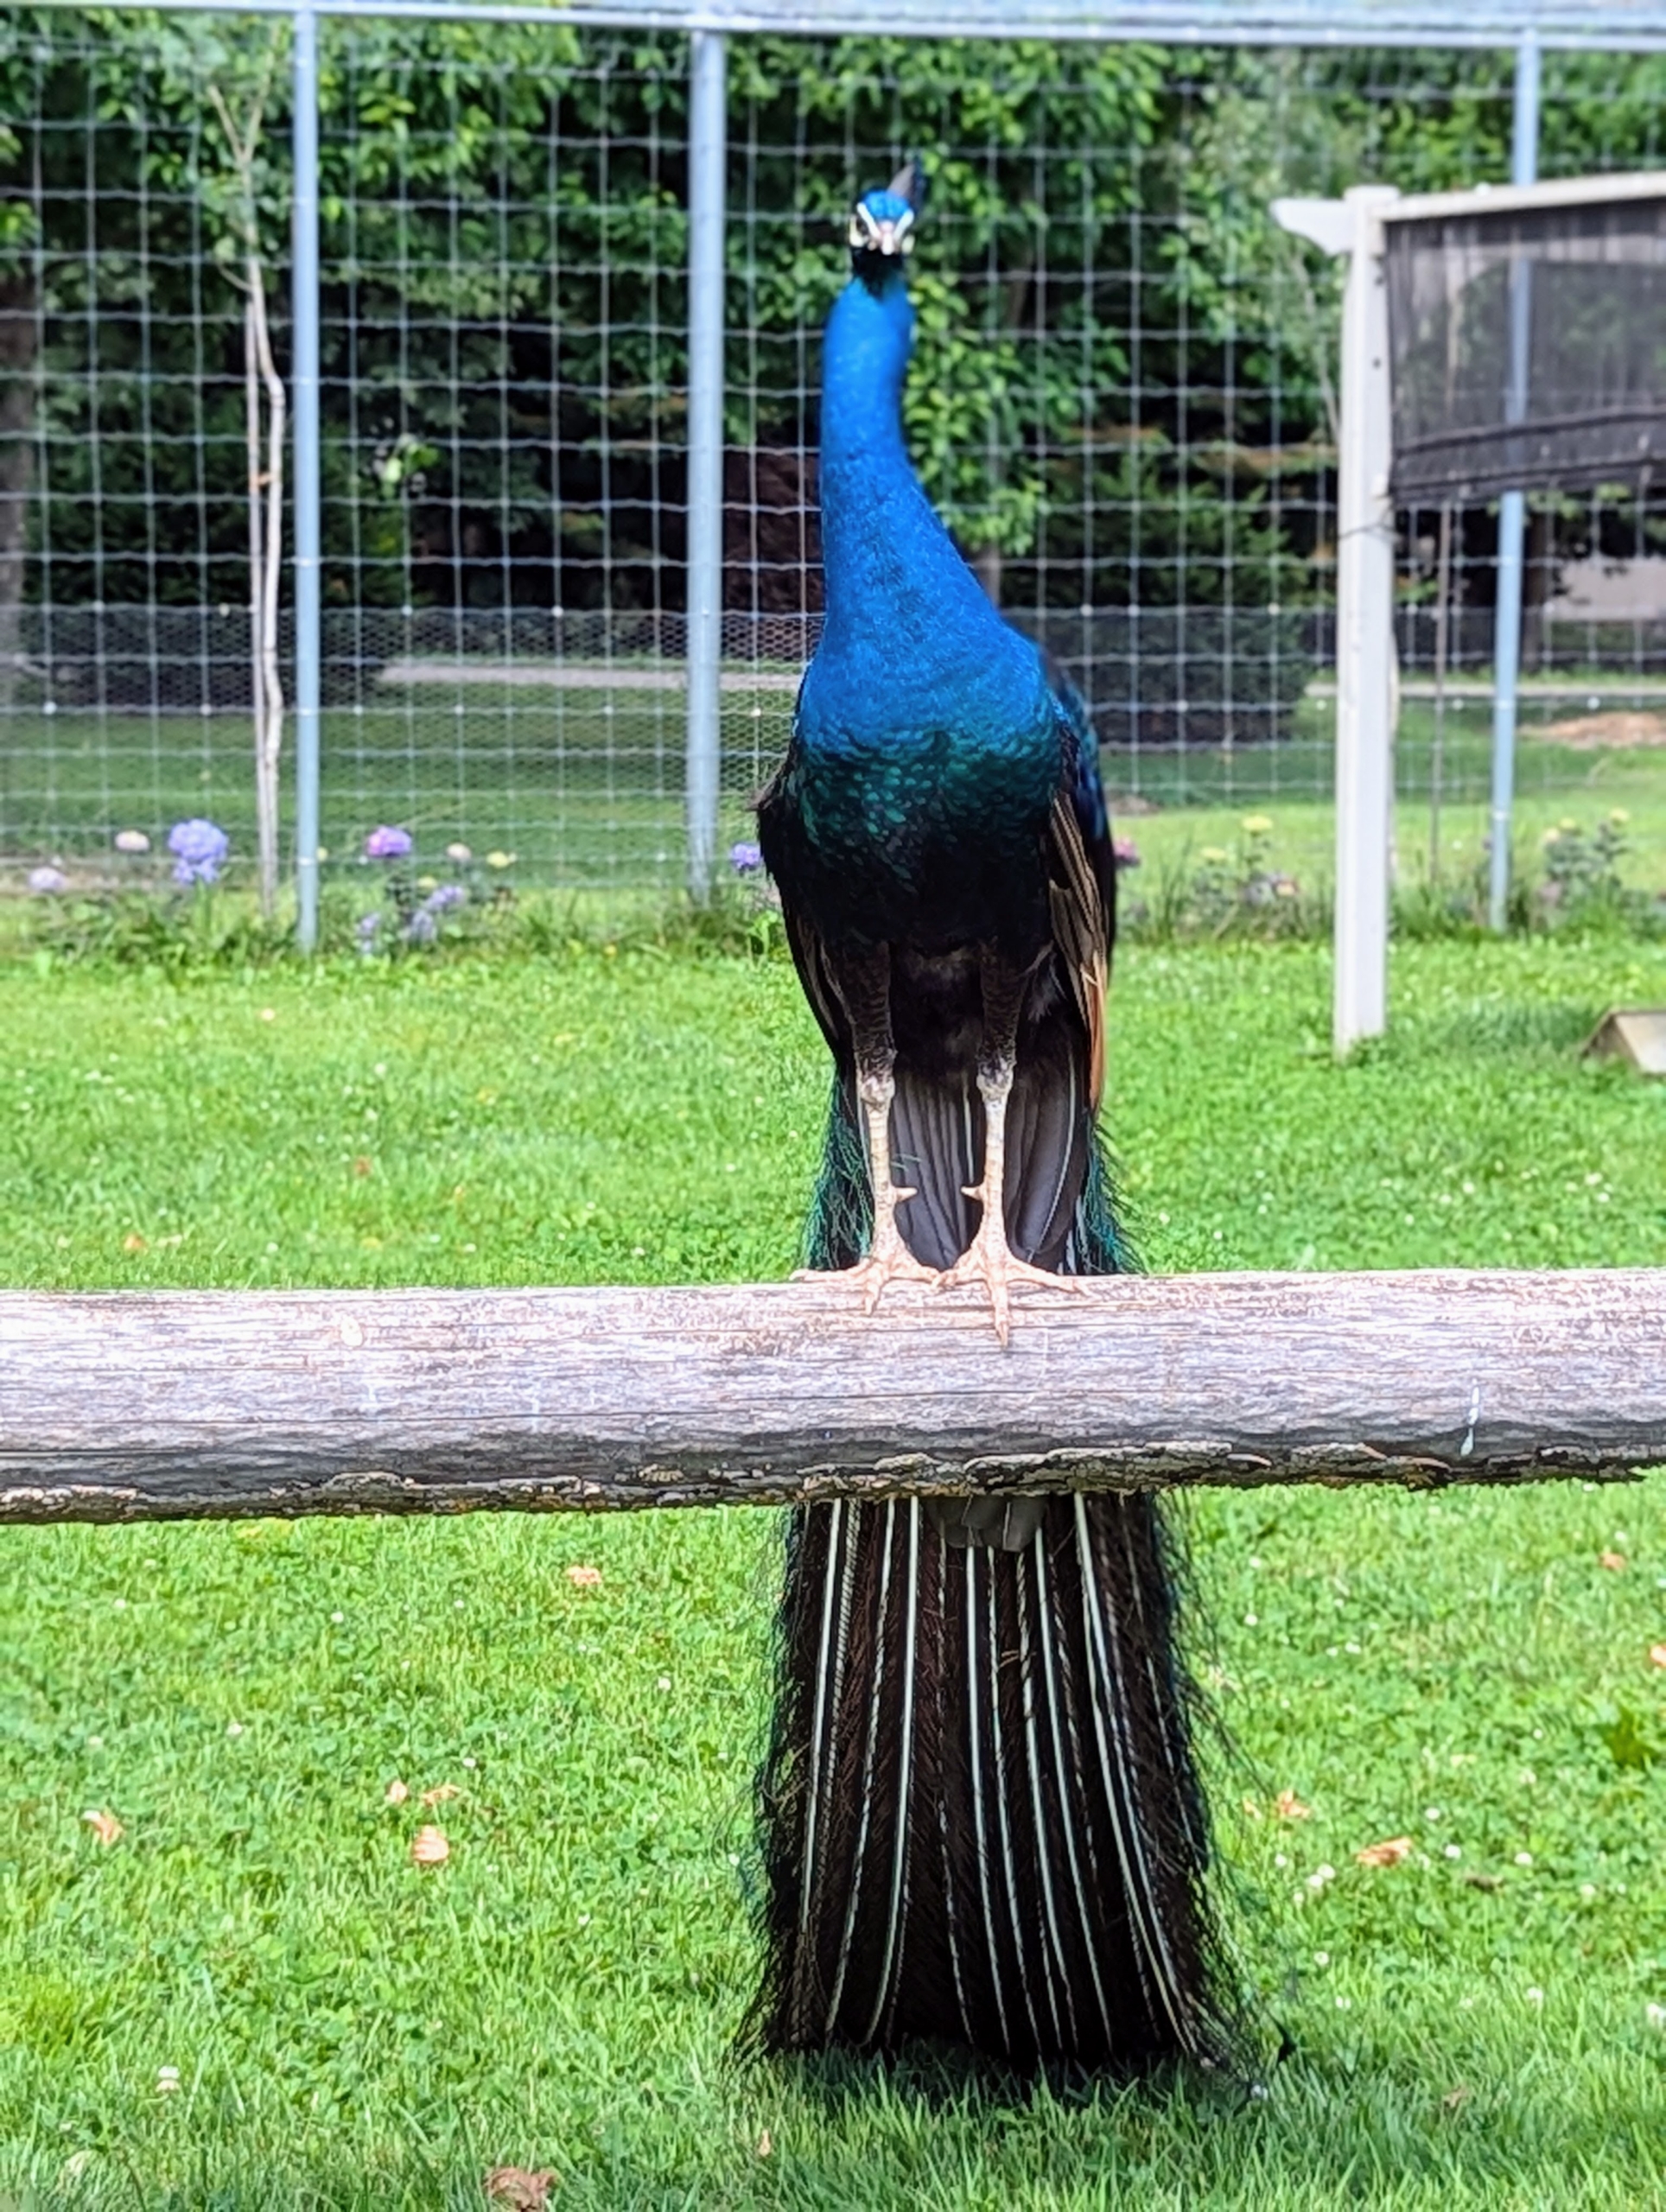
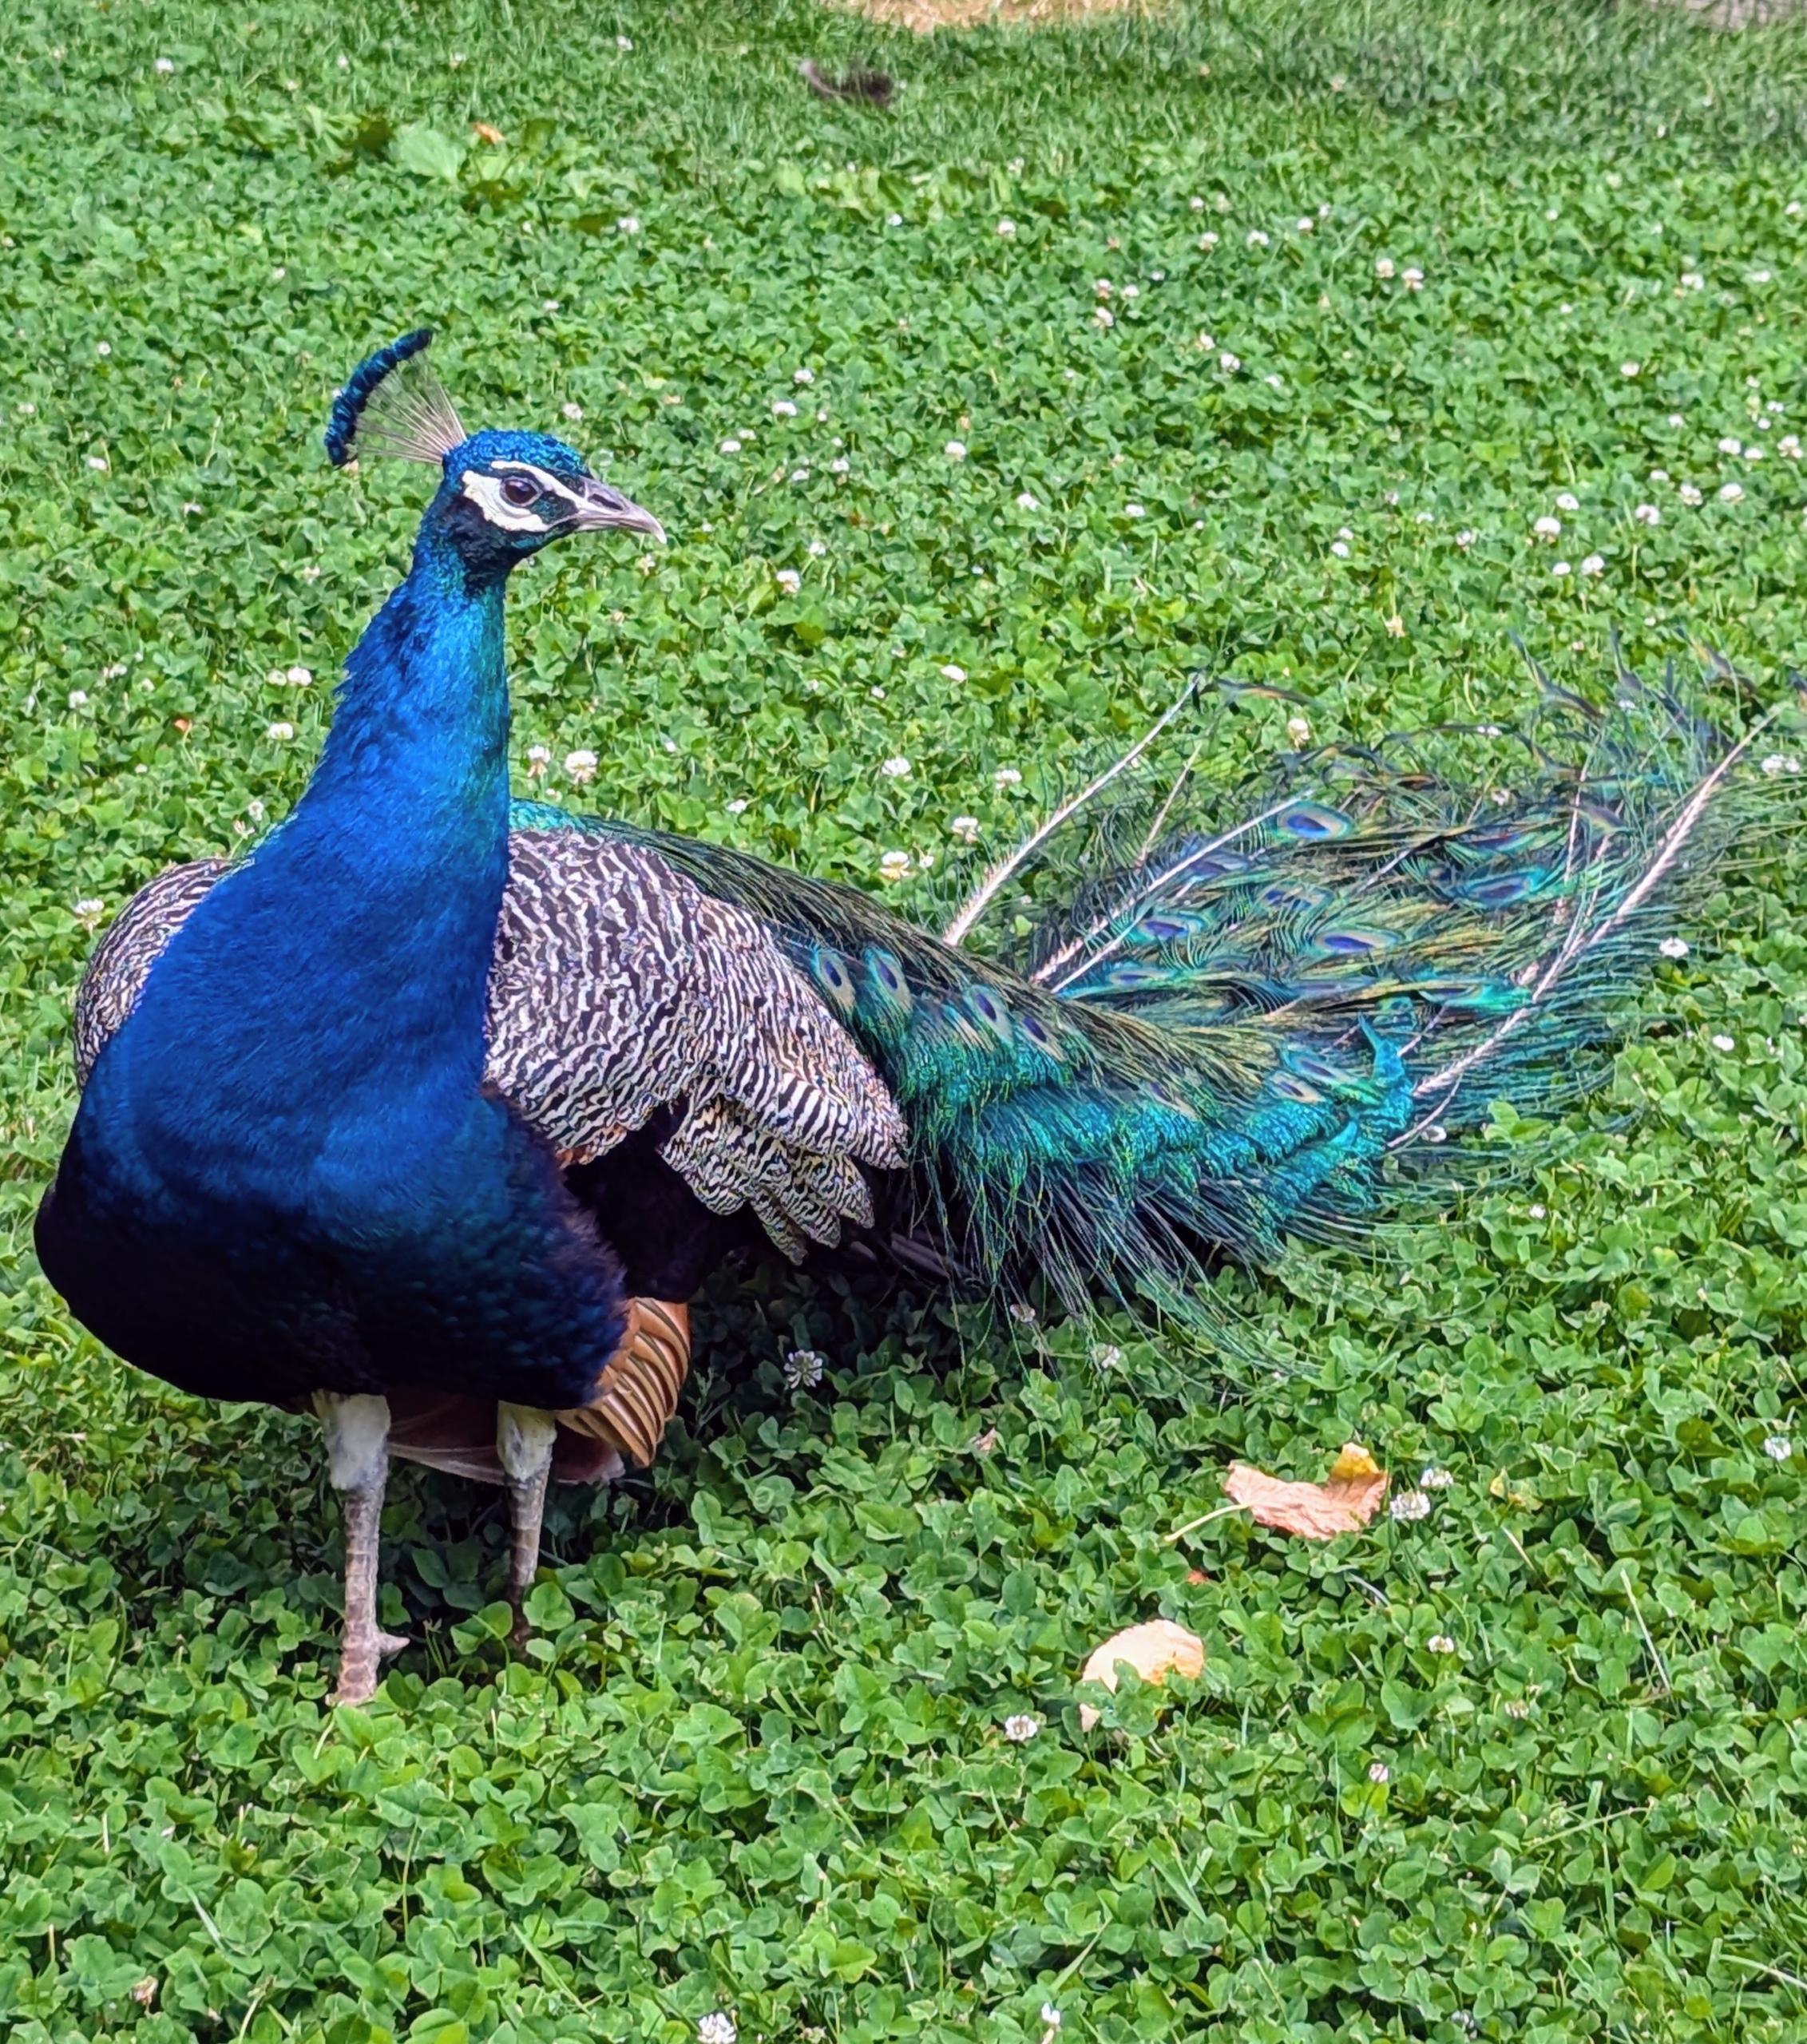
Since most of my peafowl were hatched right here at my farm, they are all accustomed to the loud noises and busy activities. My peafowl live in a large enclosure just outside my stable where they can be monitored closely during the day. Here is one of my mature “blue boys.”
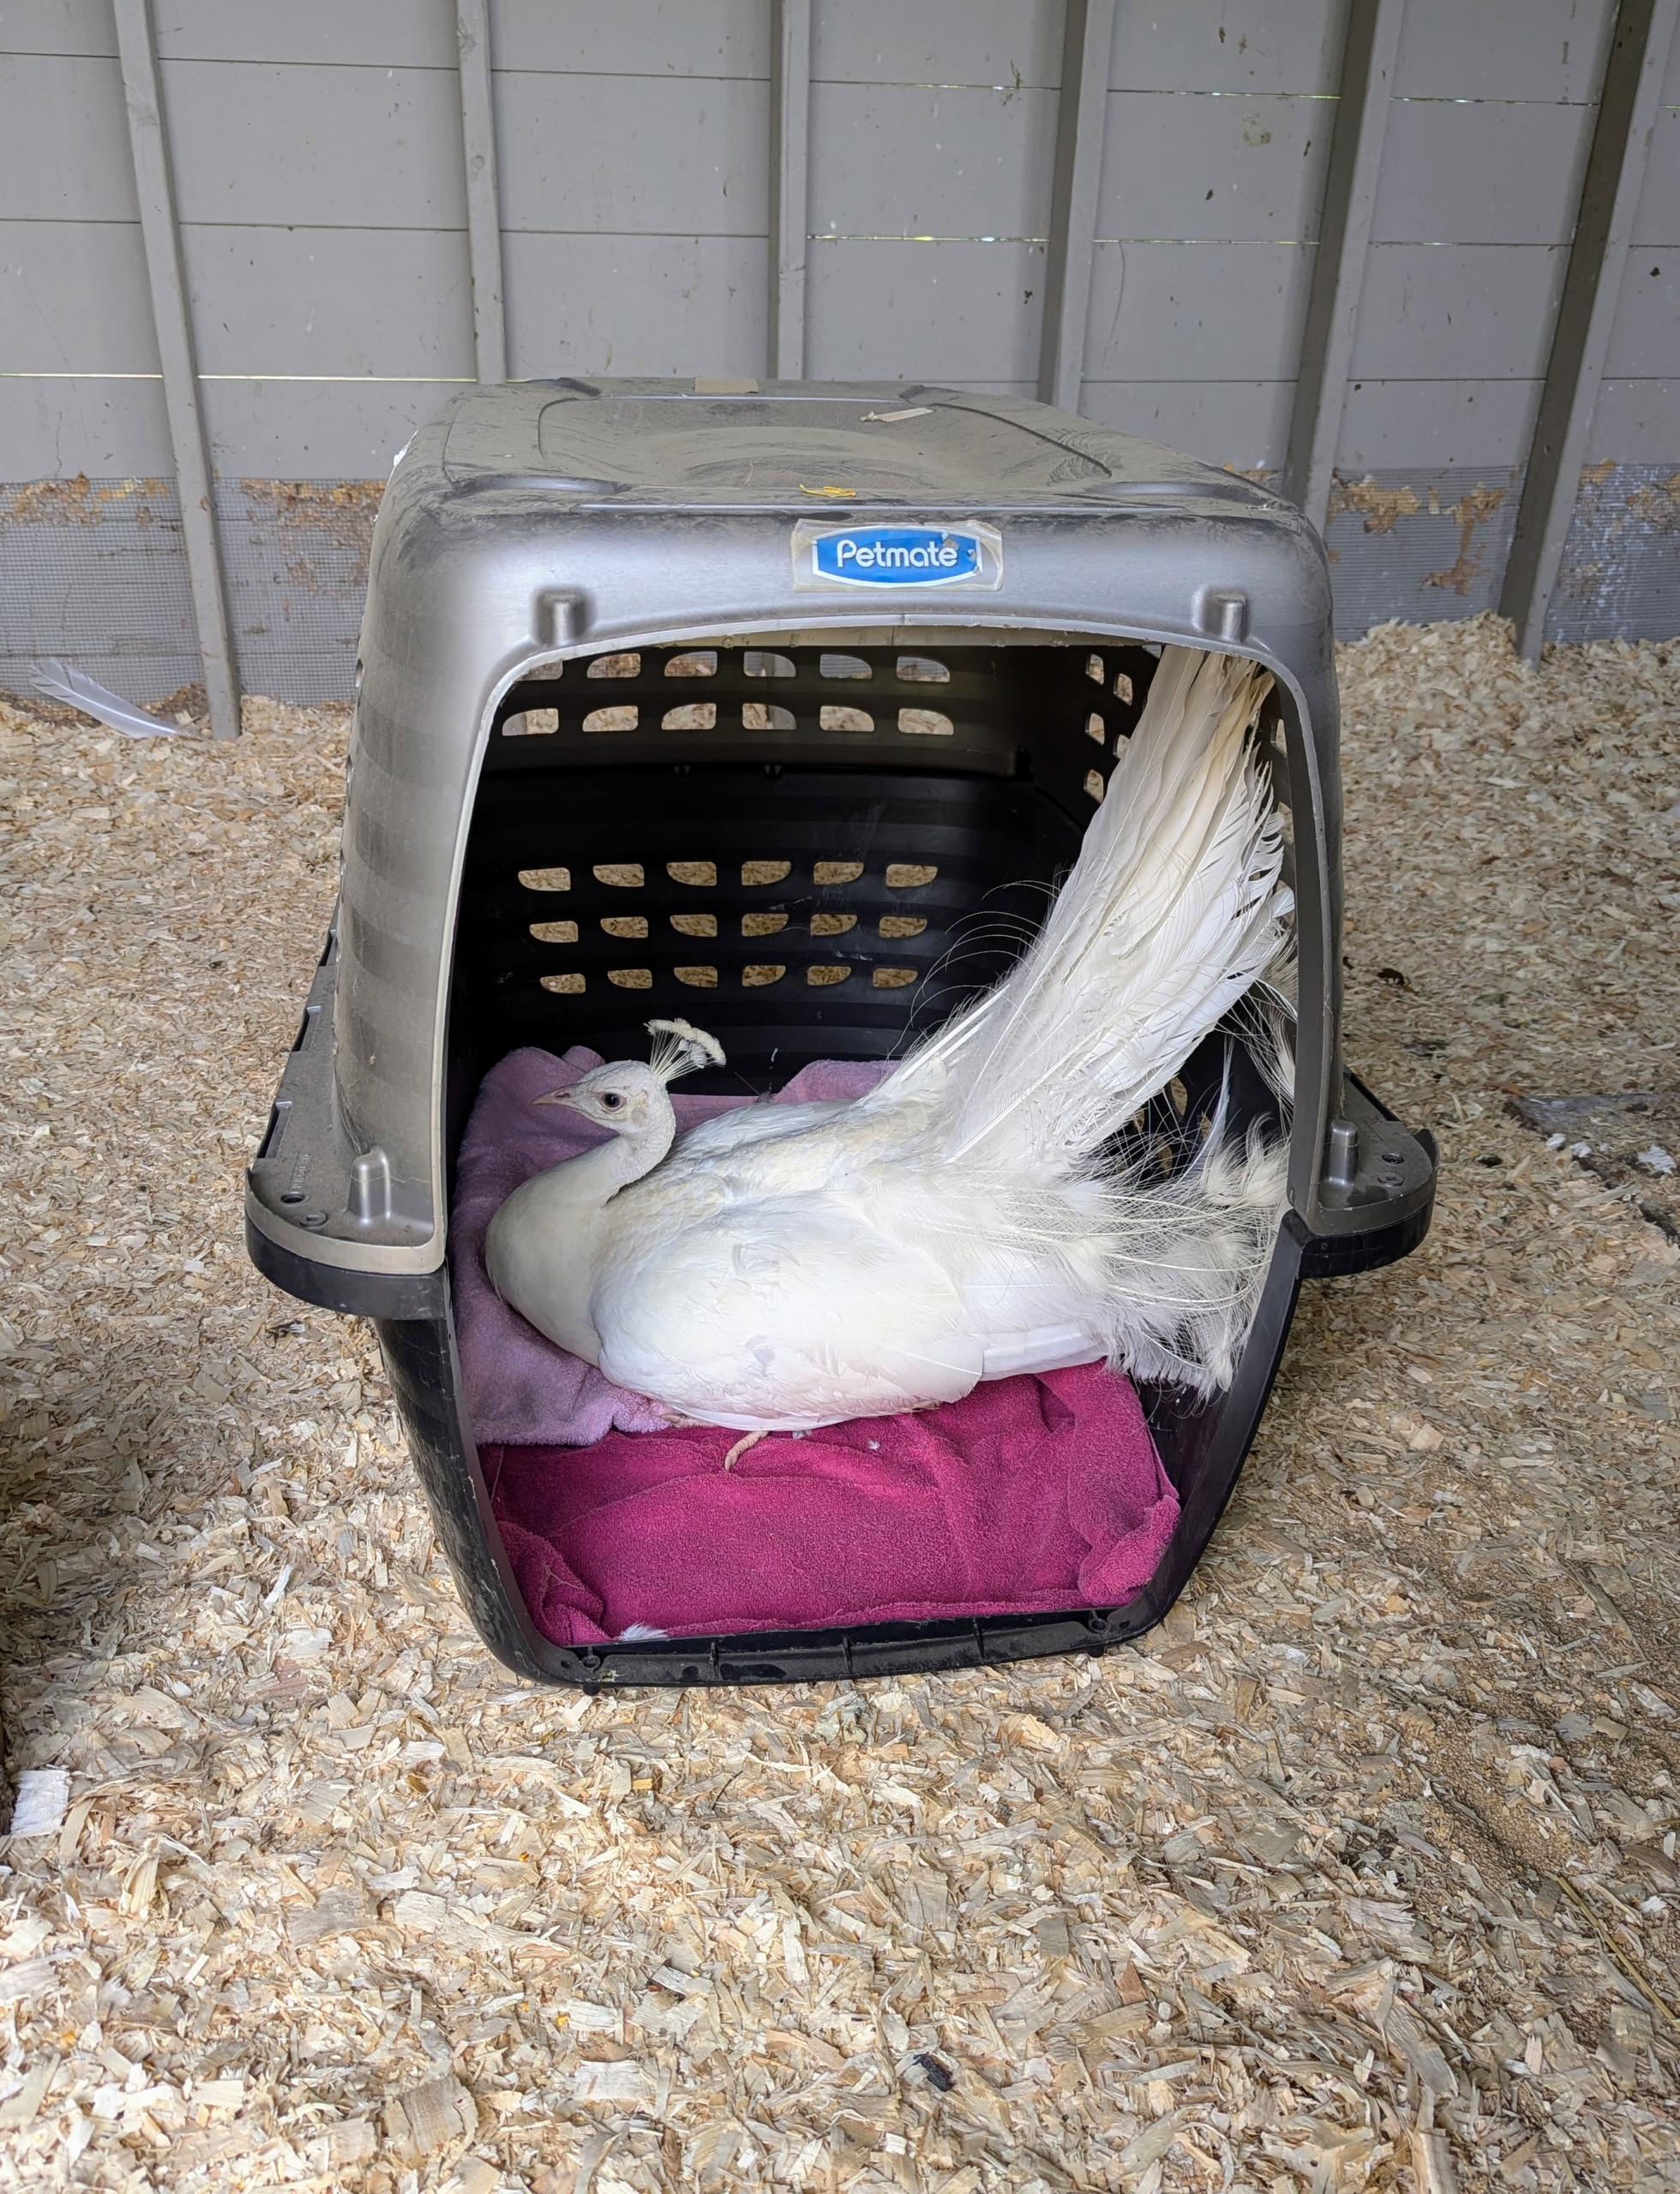
This week, our friends from Animal Nation Inc. came by with a delivery. This organization is a go-to resource for at-risk animals from New York City and the surrounding areas. The peacock they brought over was in need of a home – I saw it during a recent visit to the sanctuary.
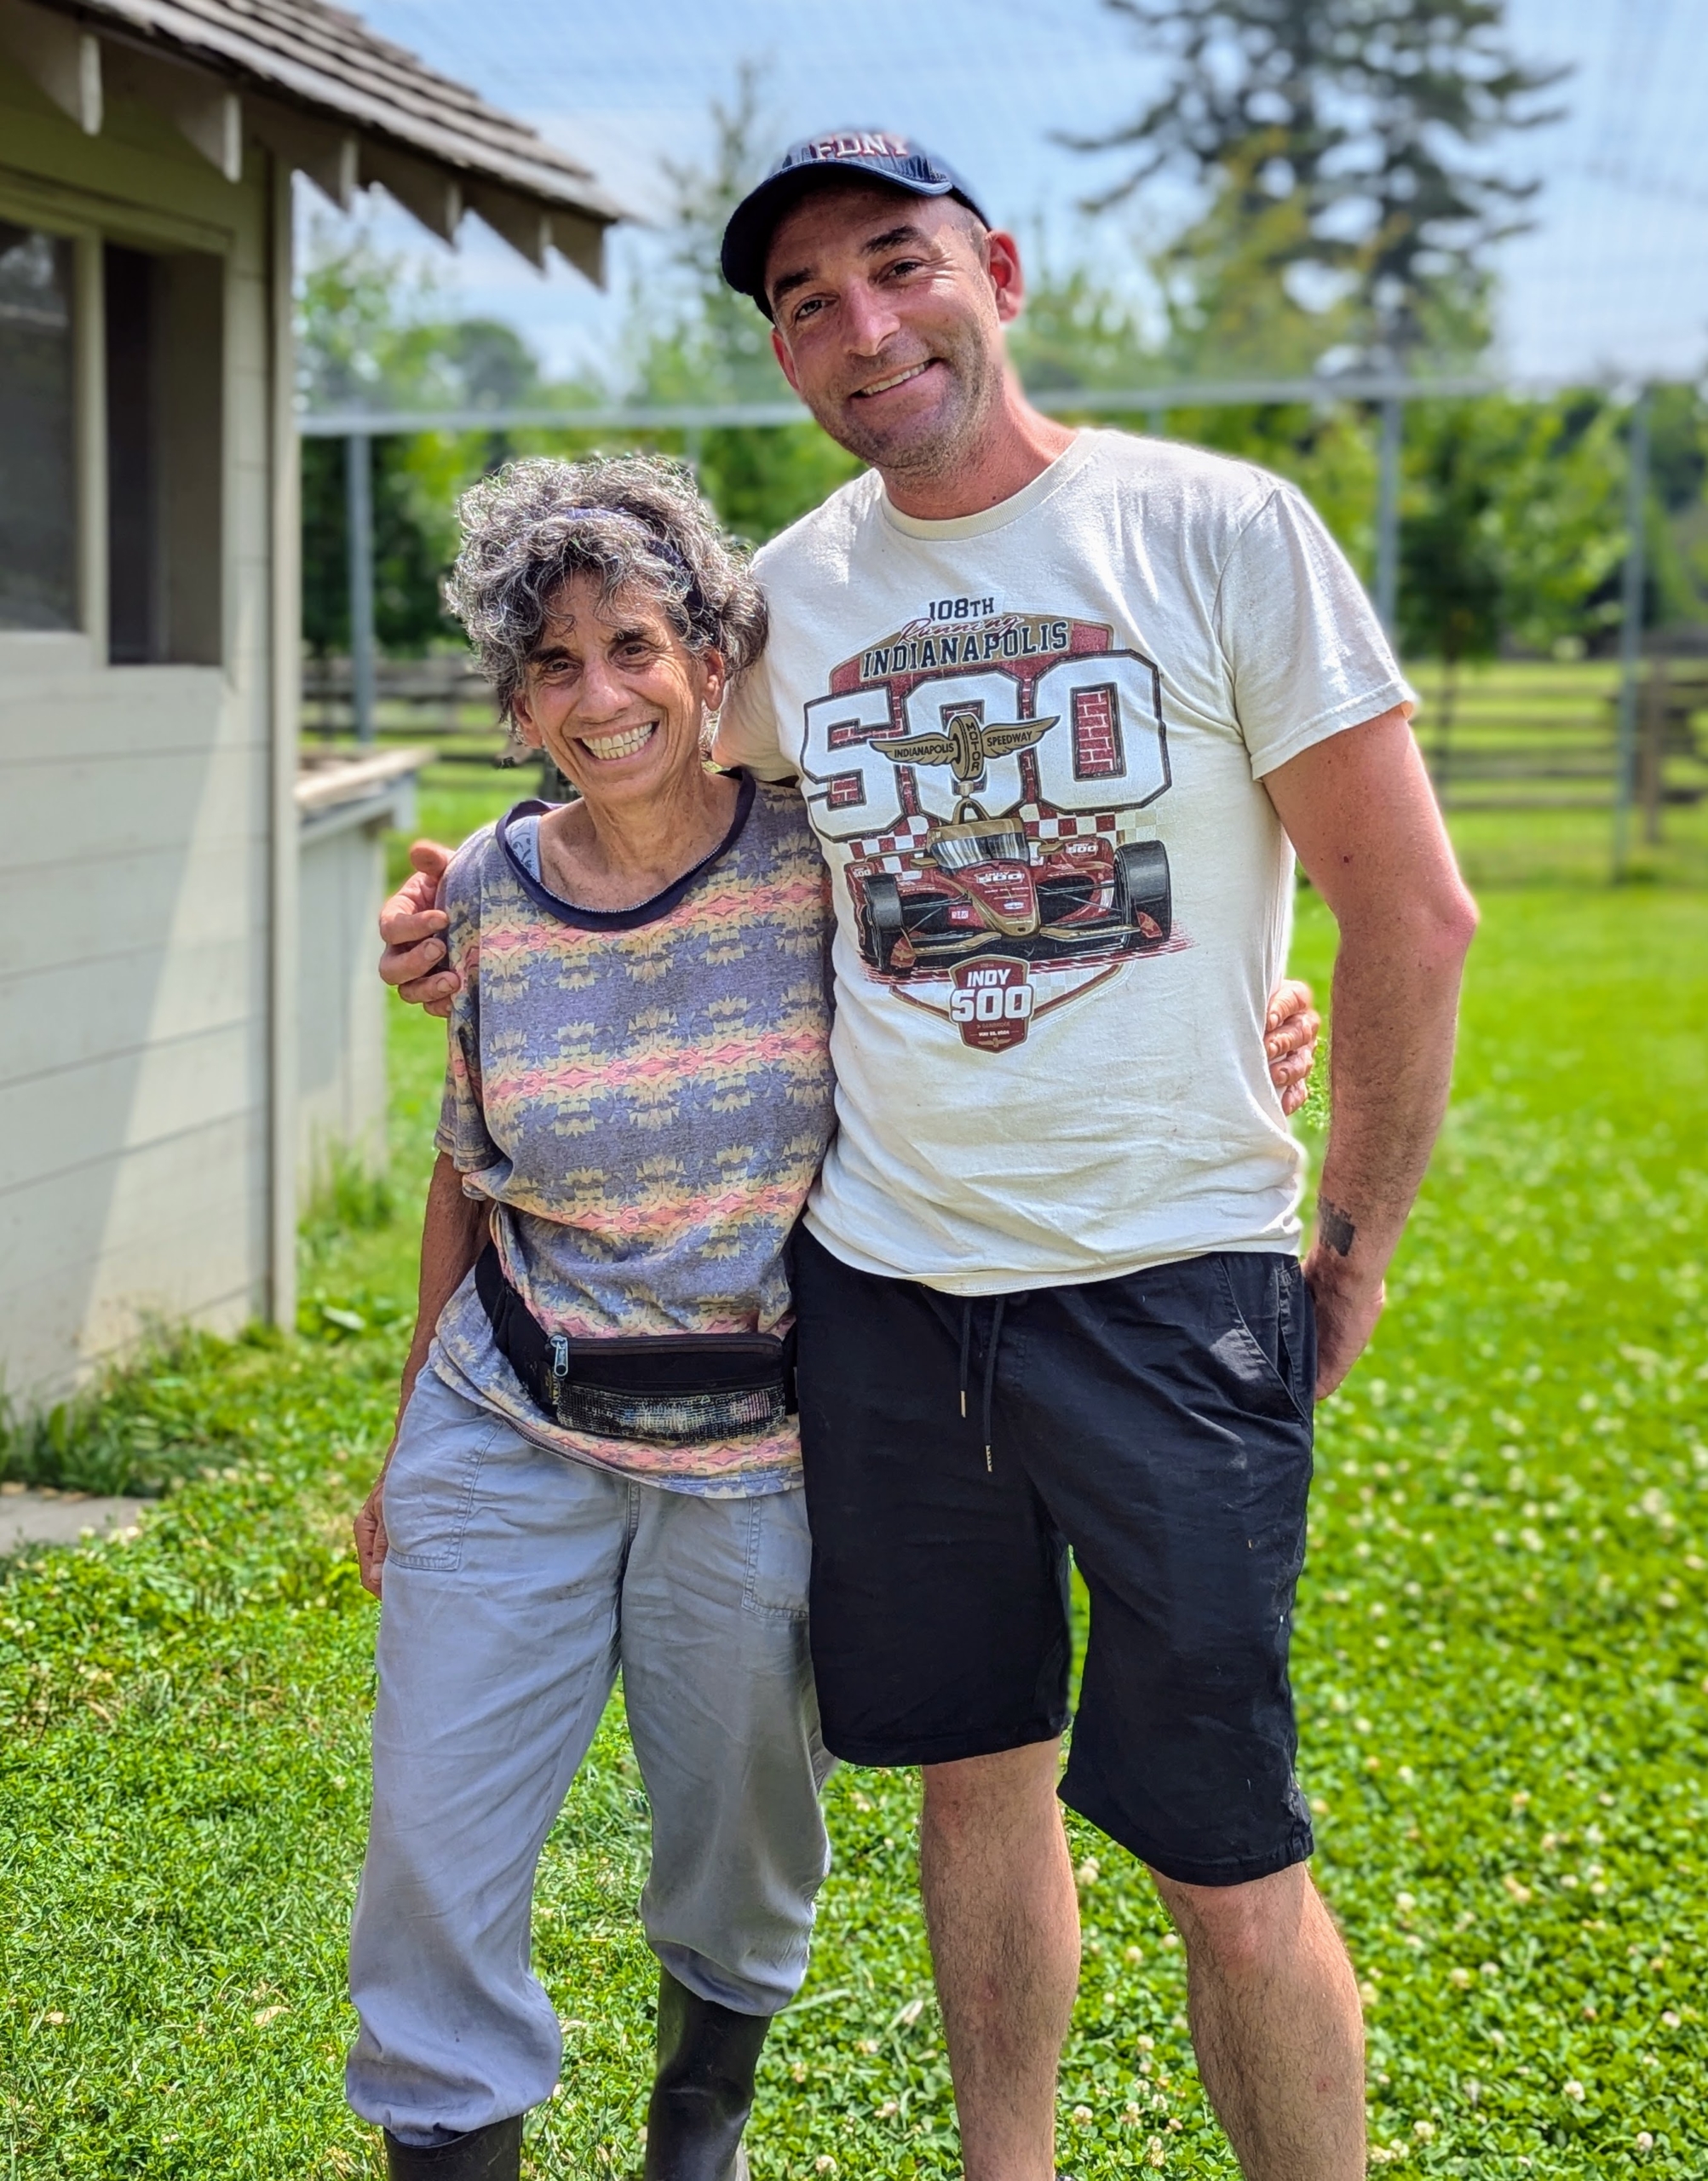
Patrick Moore is the president of Animal Nation as well as a New York City firefighter. With him is Lisa Loprinzo, a longtime dedicated volunteer.
And here is our new peacock – a three to four year old male who was found as a stray in Poughkeepsie, New York.
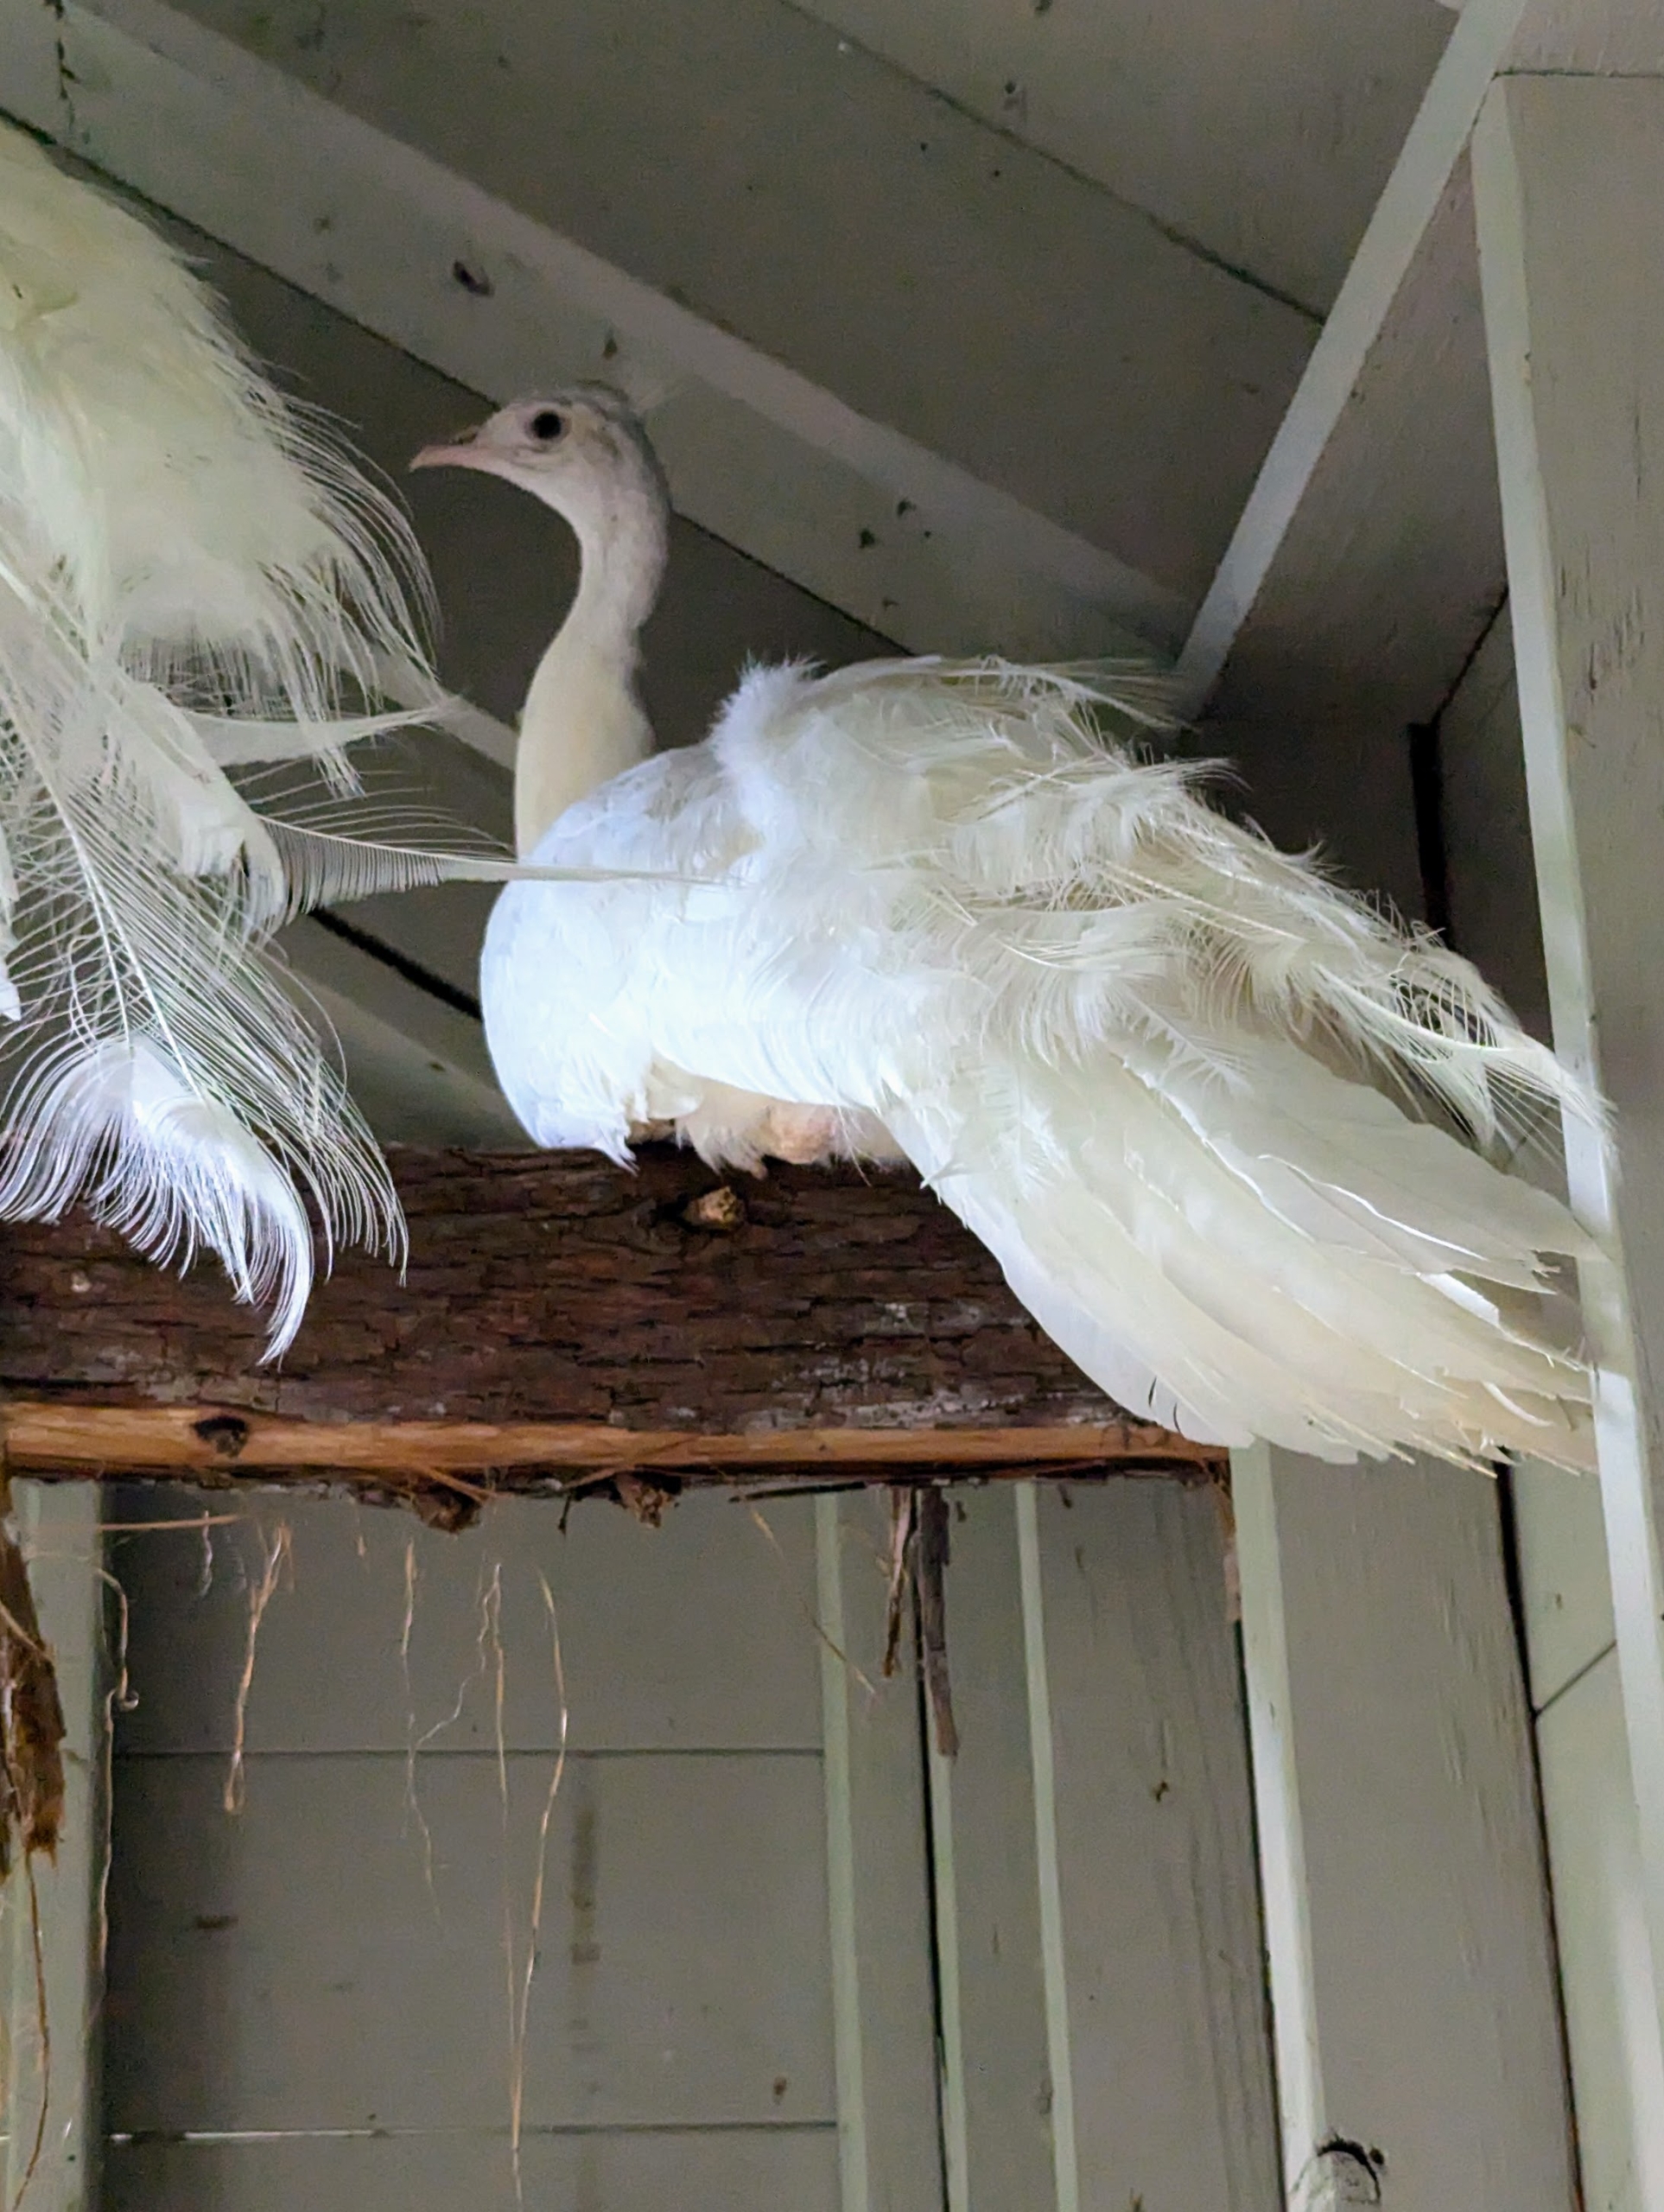
The bird quickly flew to a top perch in the peacock coop. Most white birds have a genetic condition called leucism, which causes pigment cells to fail to migrate from the neural crest during development. Leucistic peachicks are born yellow and become fully white as they mature.
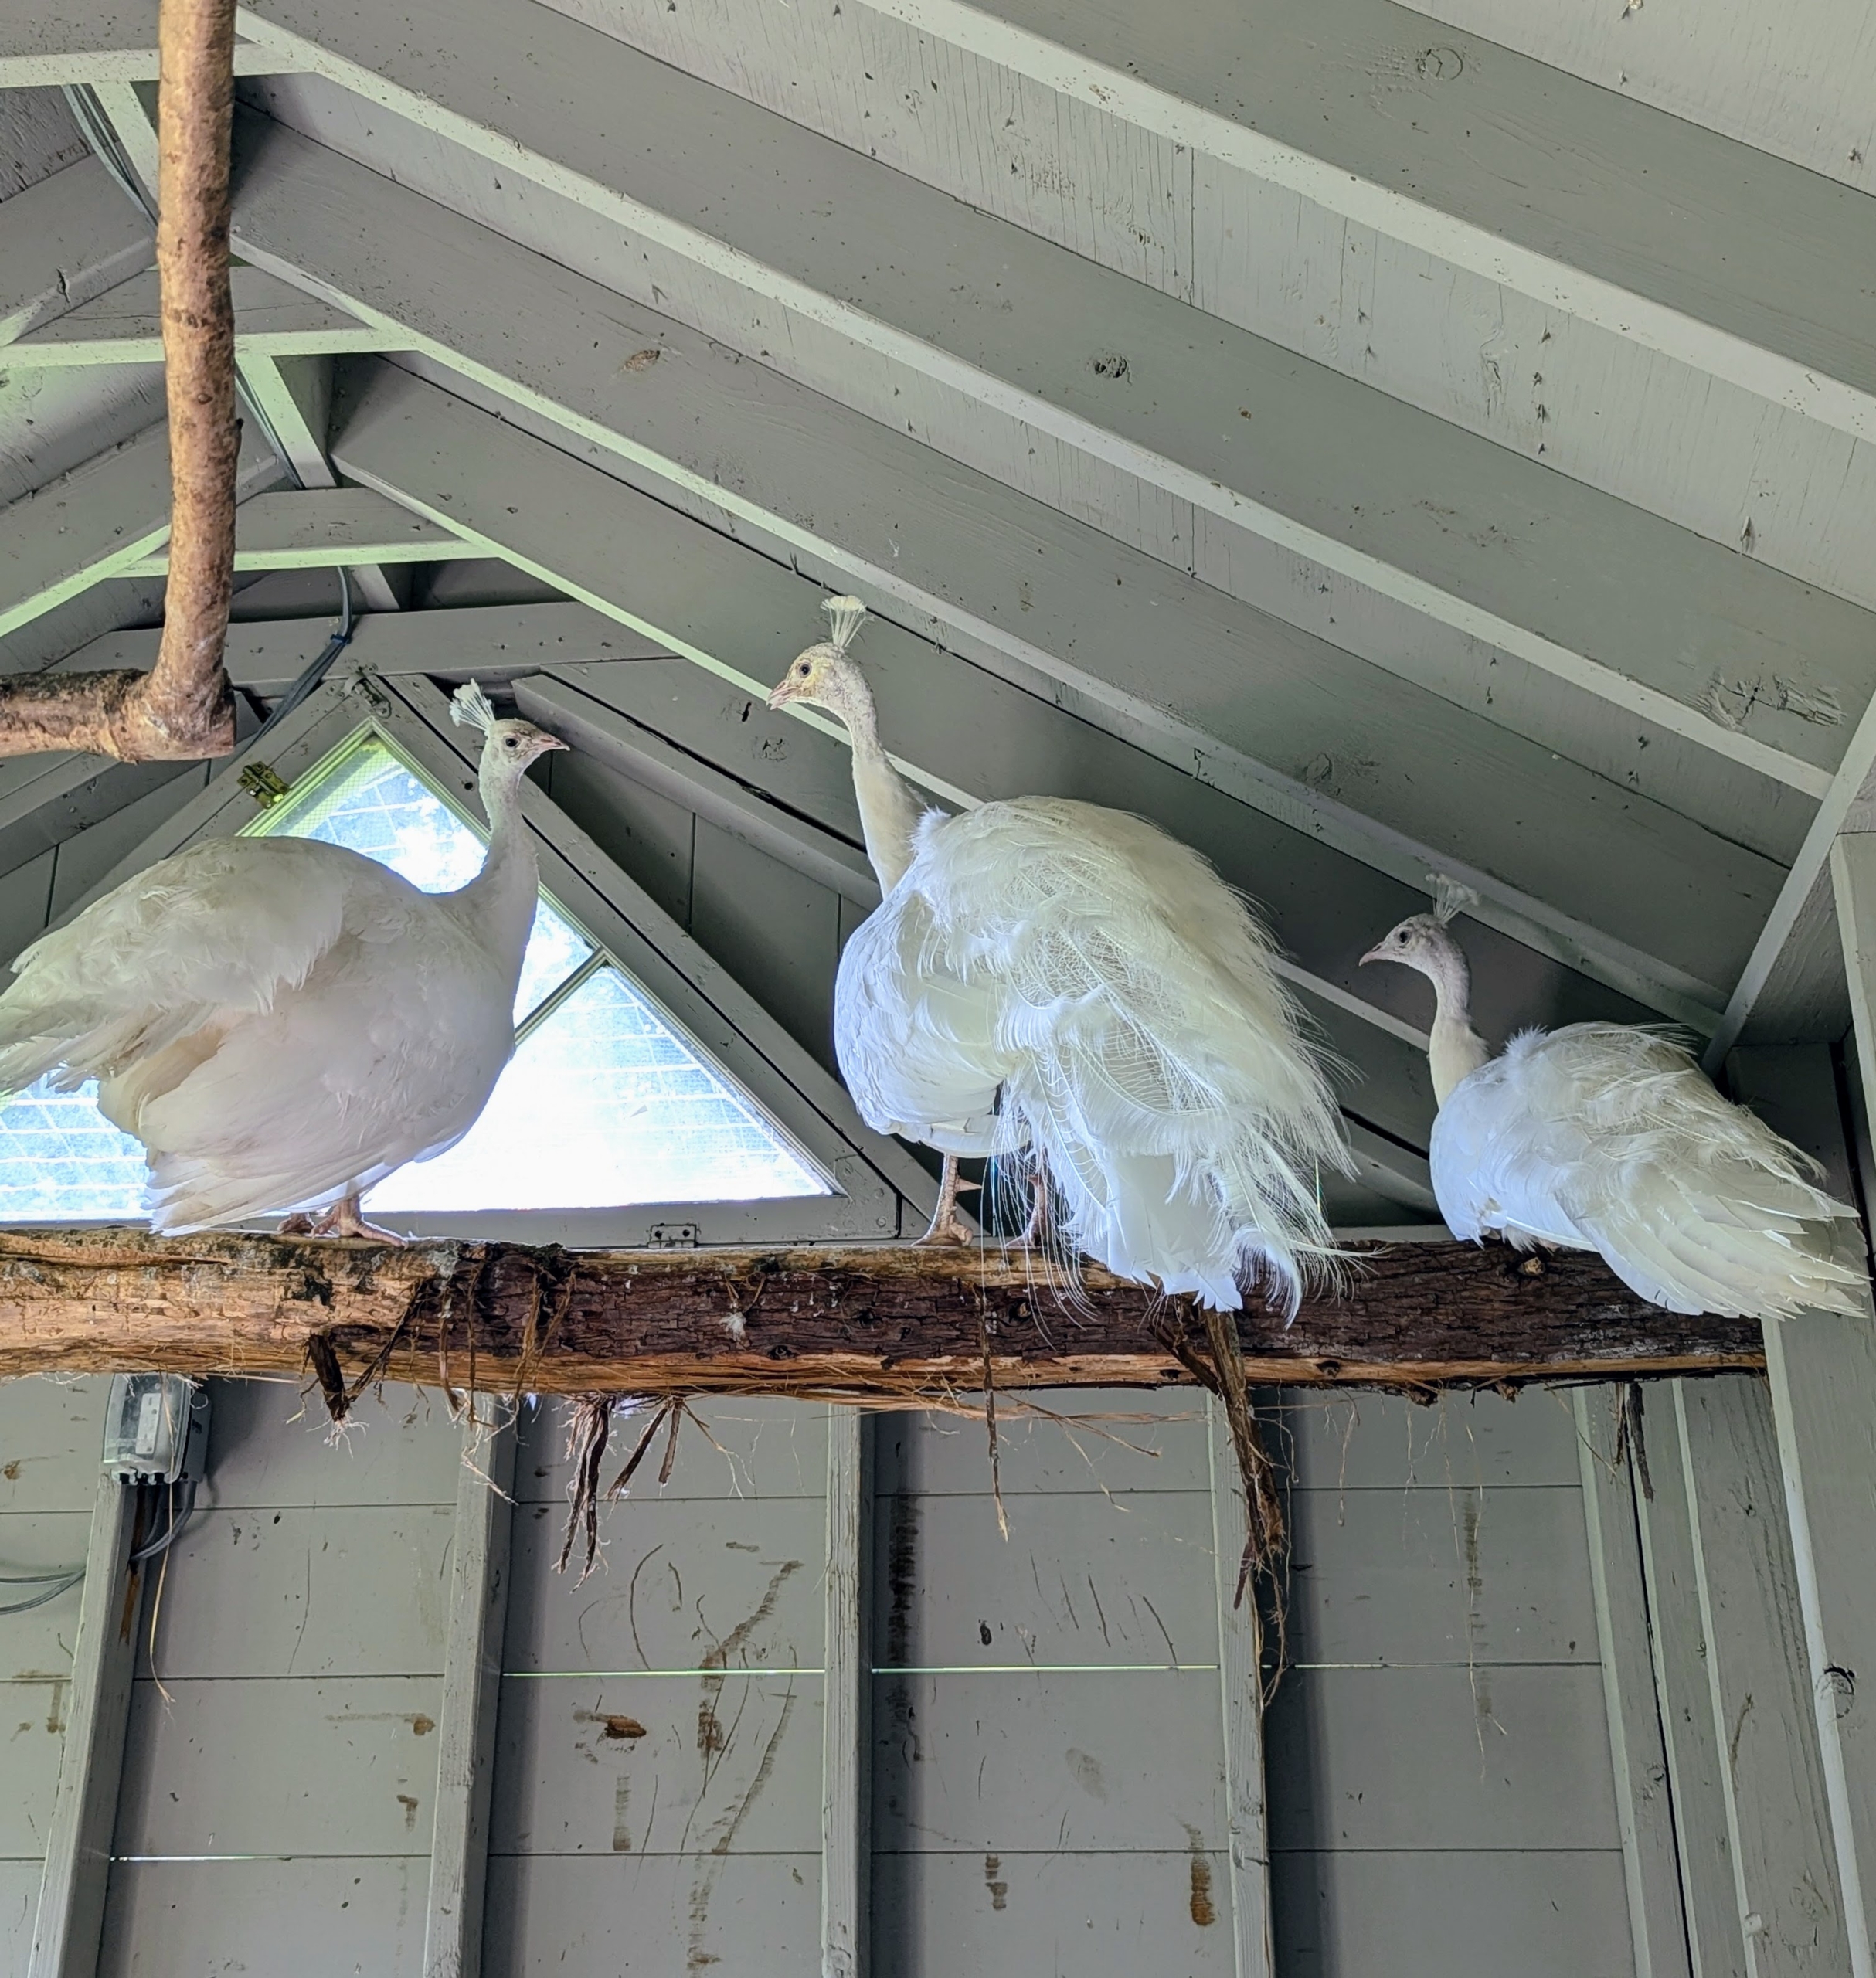
It wasn’t long before the other white peafowl found him and kept him company. My new rescued peacock is on the far right.
I think the three will get along just fine. Peafowl are members of the pheasant family. There are two Asiatic species – the blue or Indian peafowl native to India and Sri Lanka, and the green peafowl originally from Java and Burma, and one African species, the Congo peafowl from African rain forests. All my peafowl are Indian.
My “blue boys” have such gorgeous long trains. I visit the peafowl and all the other animals every day during my tours of the gardens and grounds.
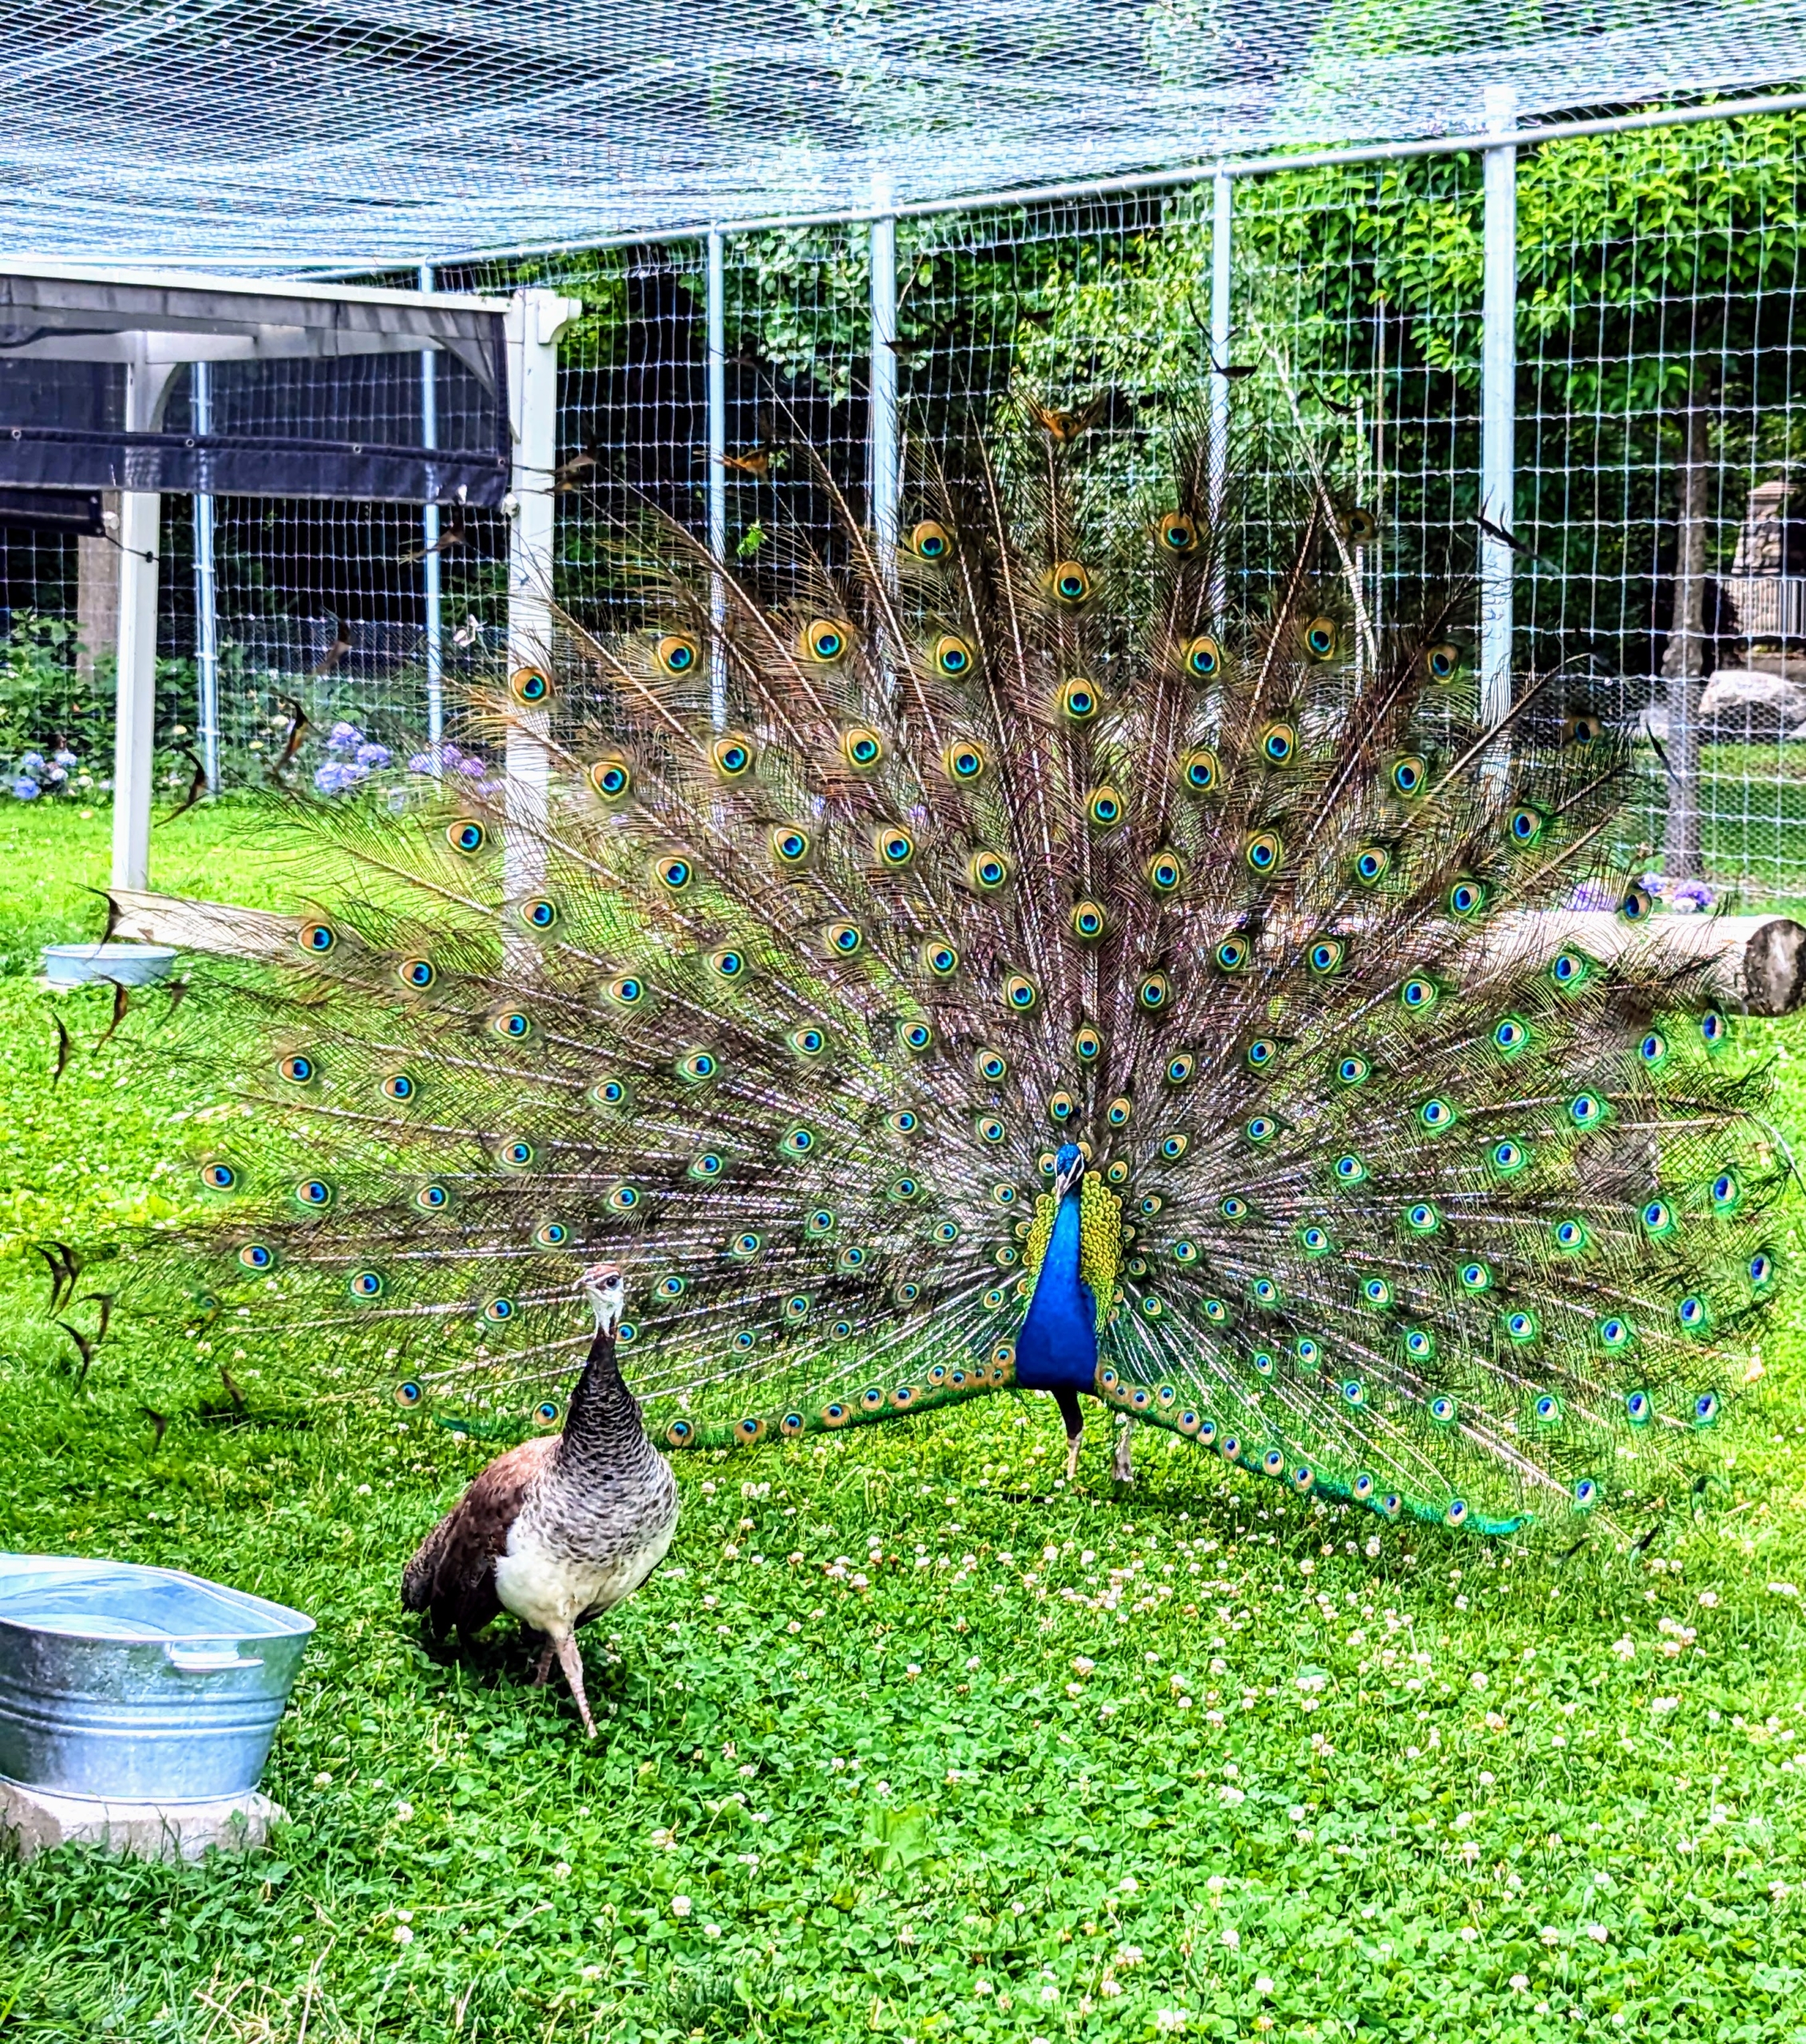
It is mating season, so during this time, the males will show off their tail feathers to the females. This peahen doesn’t look so interested. Males also fan their trains to show dominance, intimidate predators, and communicate with others.
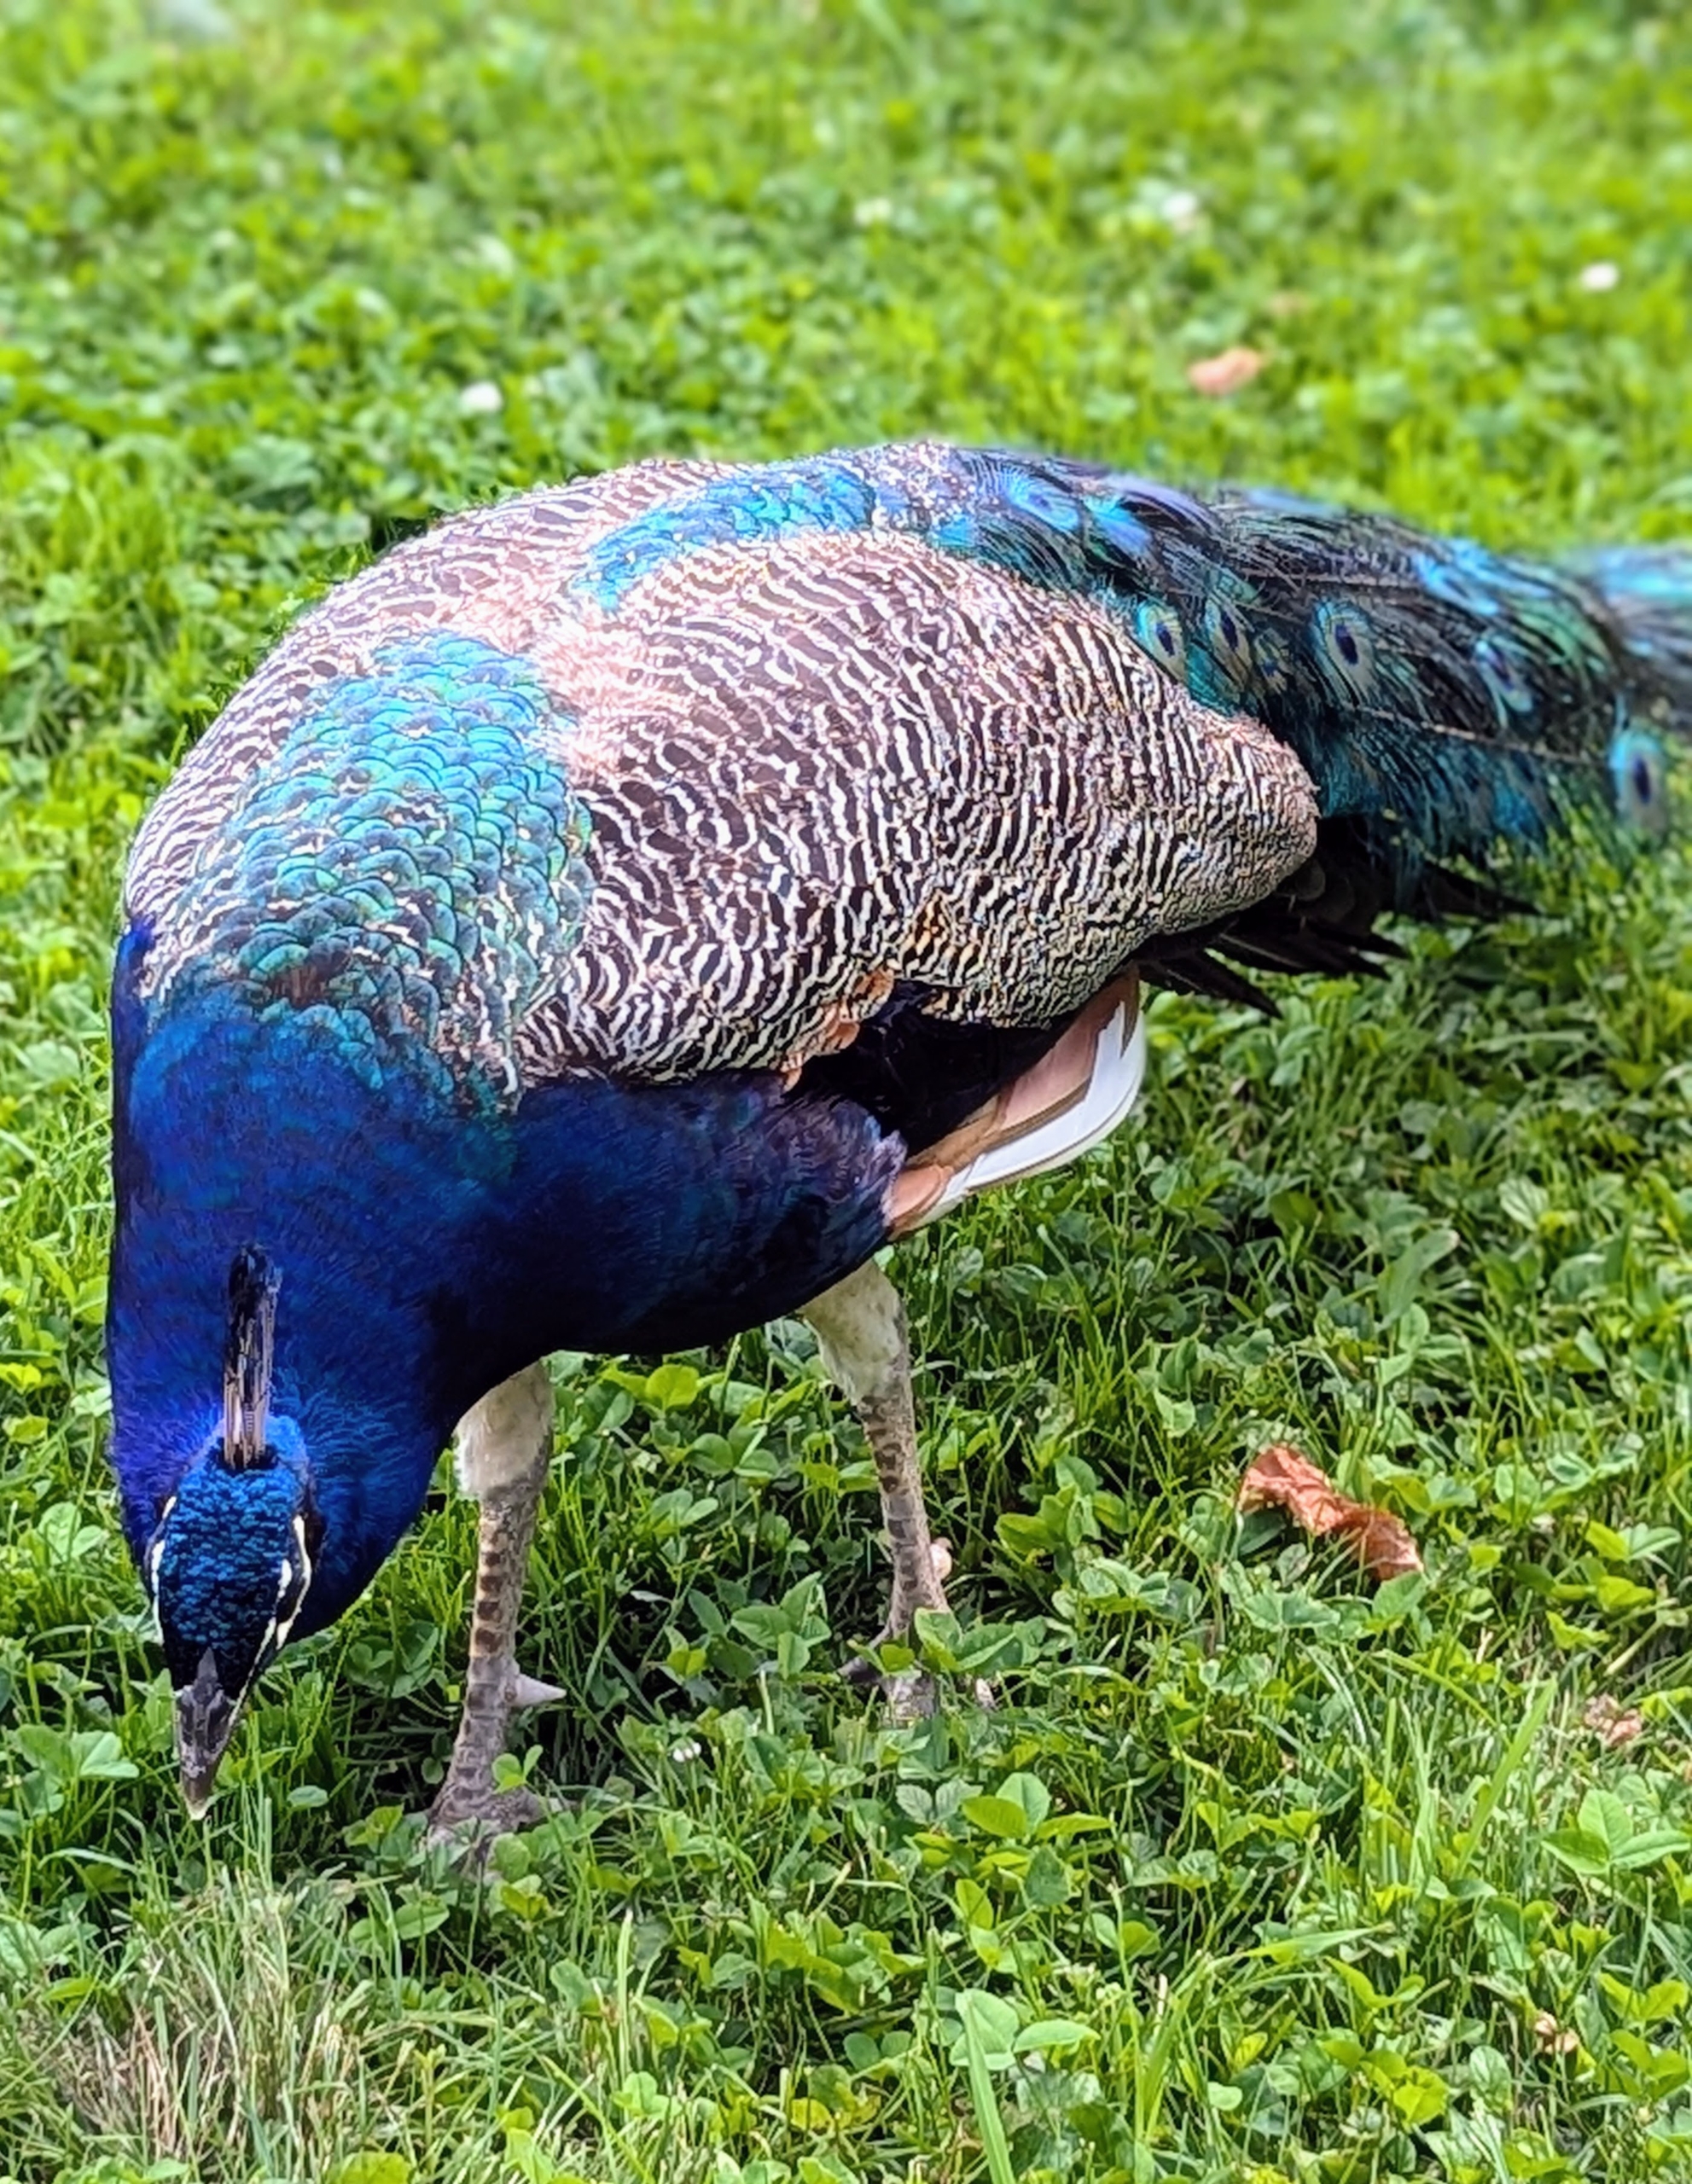
Both peacocks and peahens love foraging. Peafowl are omnivores, meaning they eat both meat and vegetation. In the wild, peafowl eat
ants, millipedes, crickets, termites, centipedes, locusts, scorpions, small reptiles and mammals, as well as seeds, grass, flower petals, and berries. I also fortify their diets with a good seed formula.
Here is one of my peahens. A hen’s plumage is generally more muted than the vibrant colors of male peacocks.
I am so happy all my peacocks and peahens get along. They are outdoors all day in their enclosure, where they are safe from predators. And then put into the coop at night.
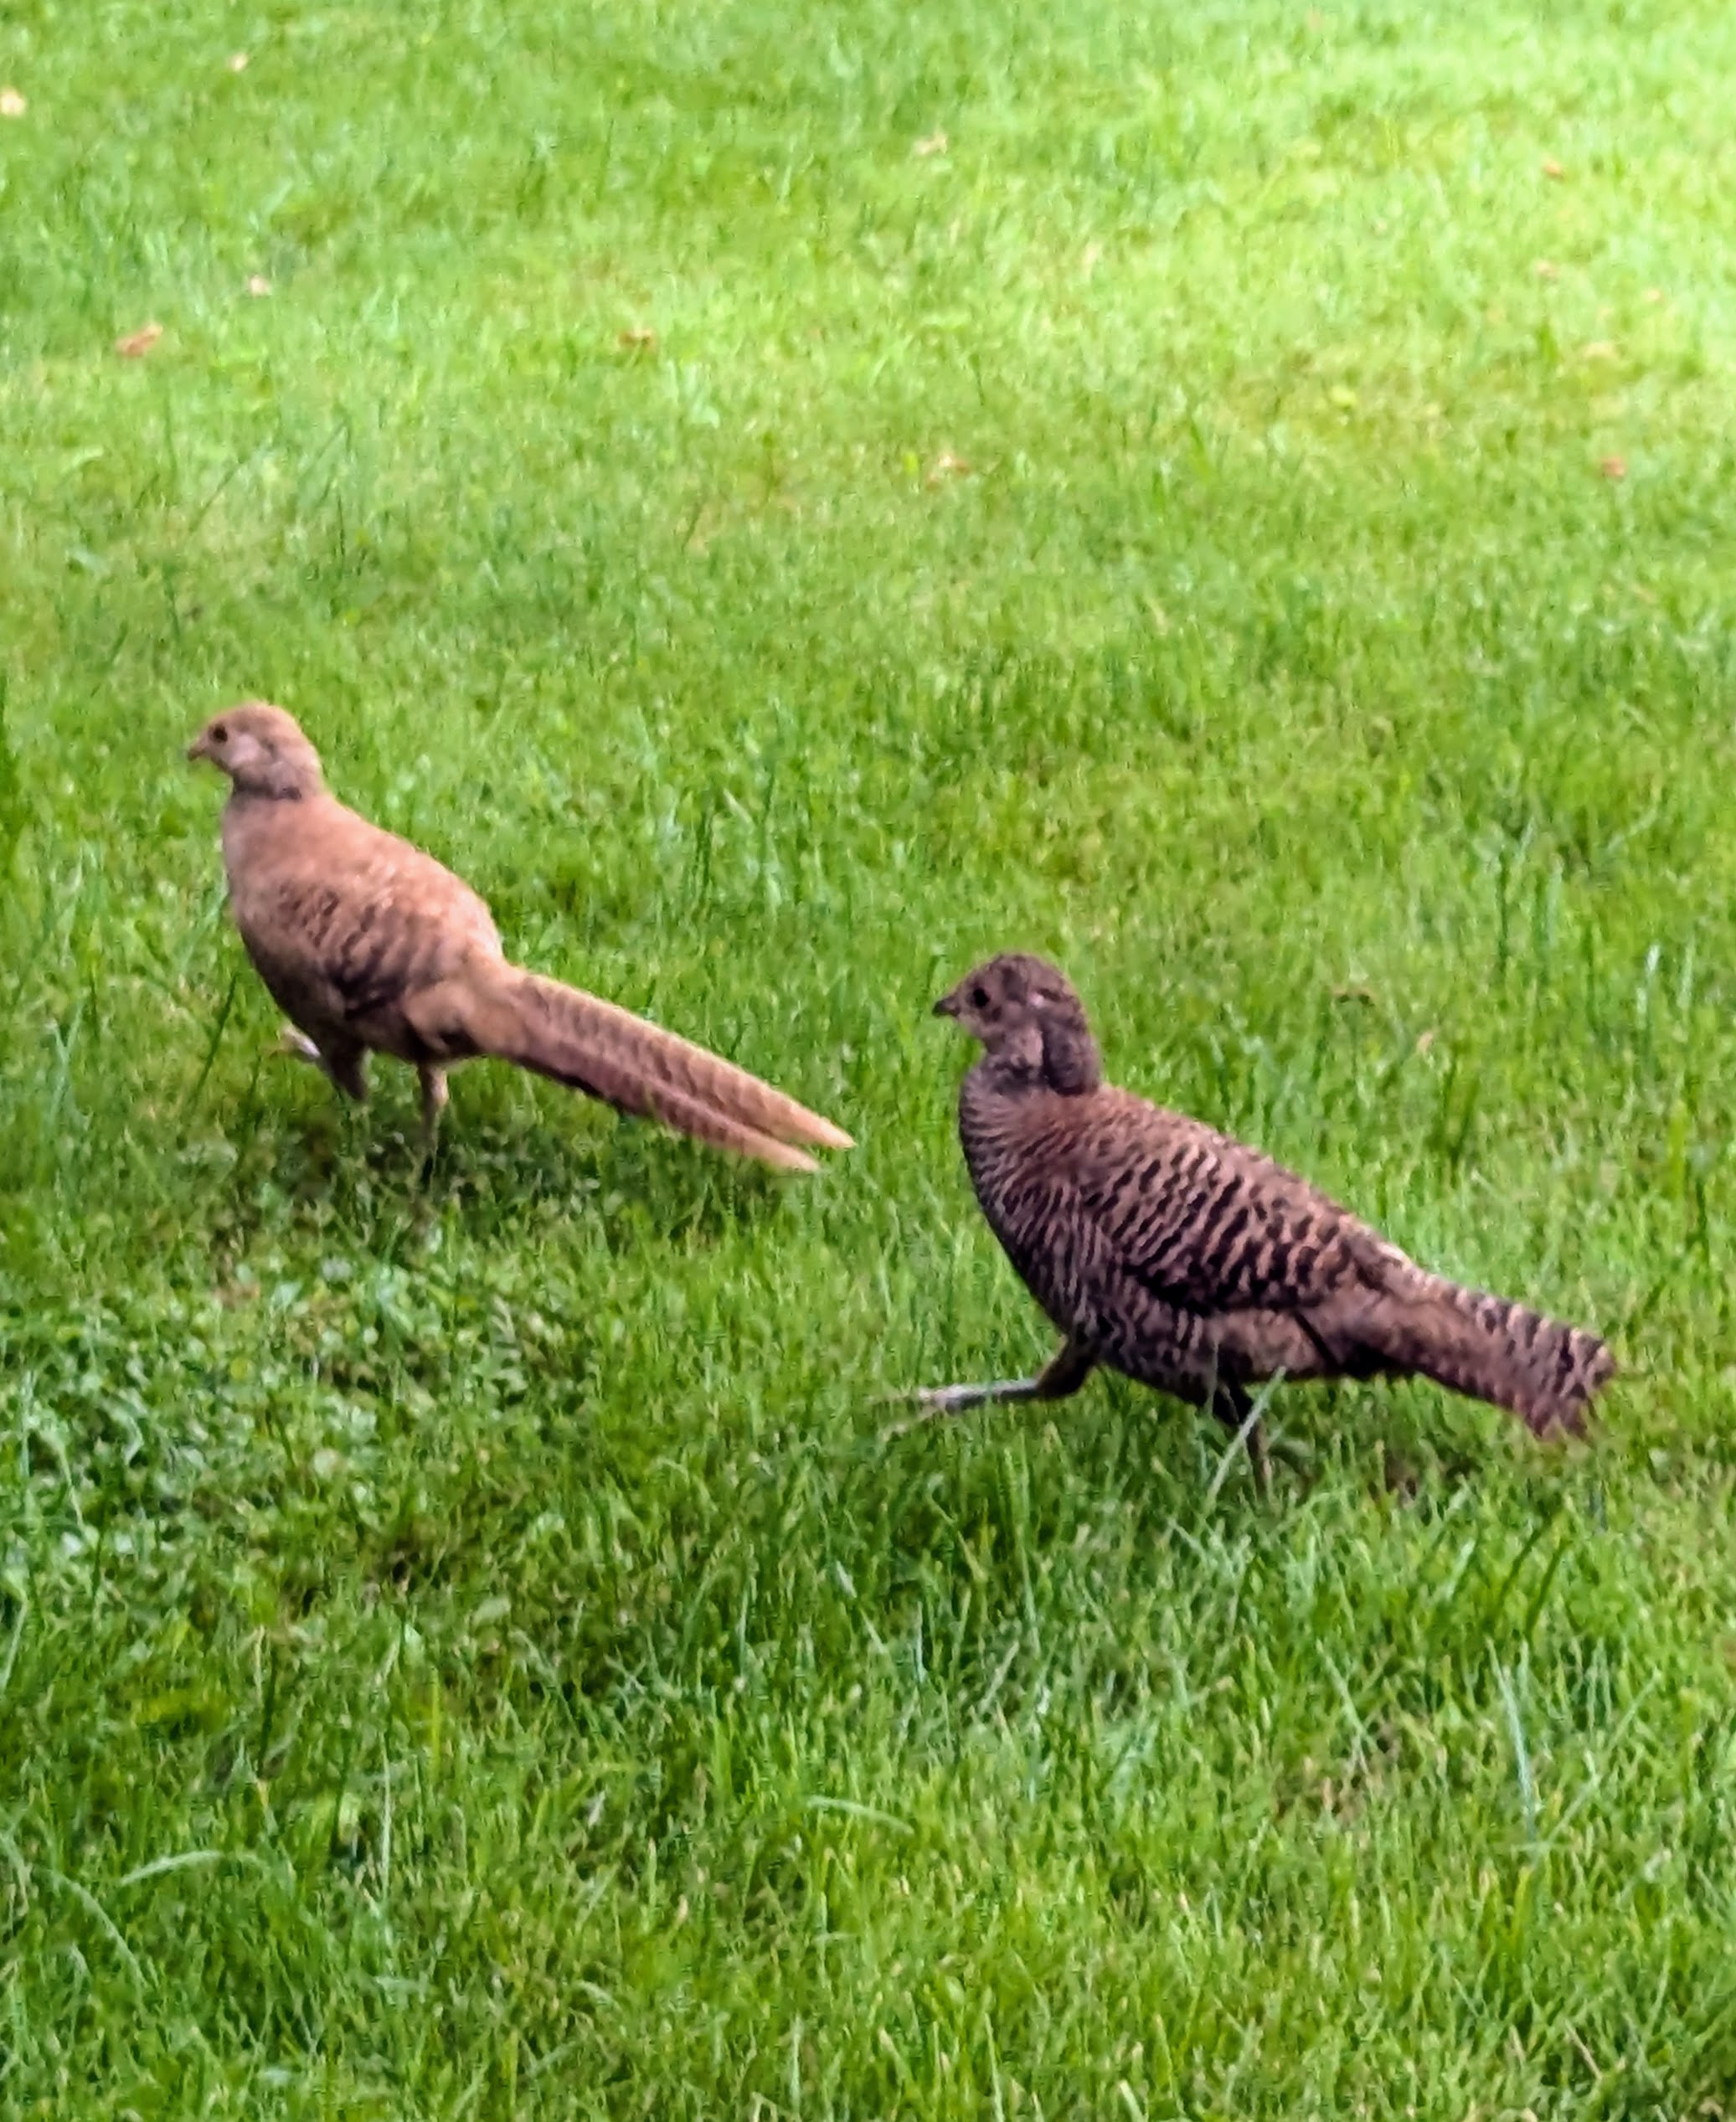
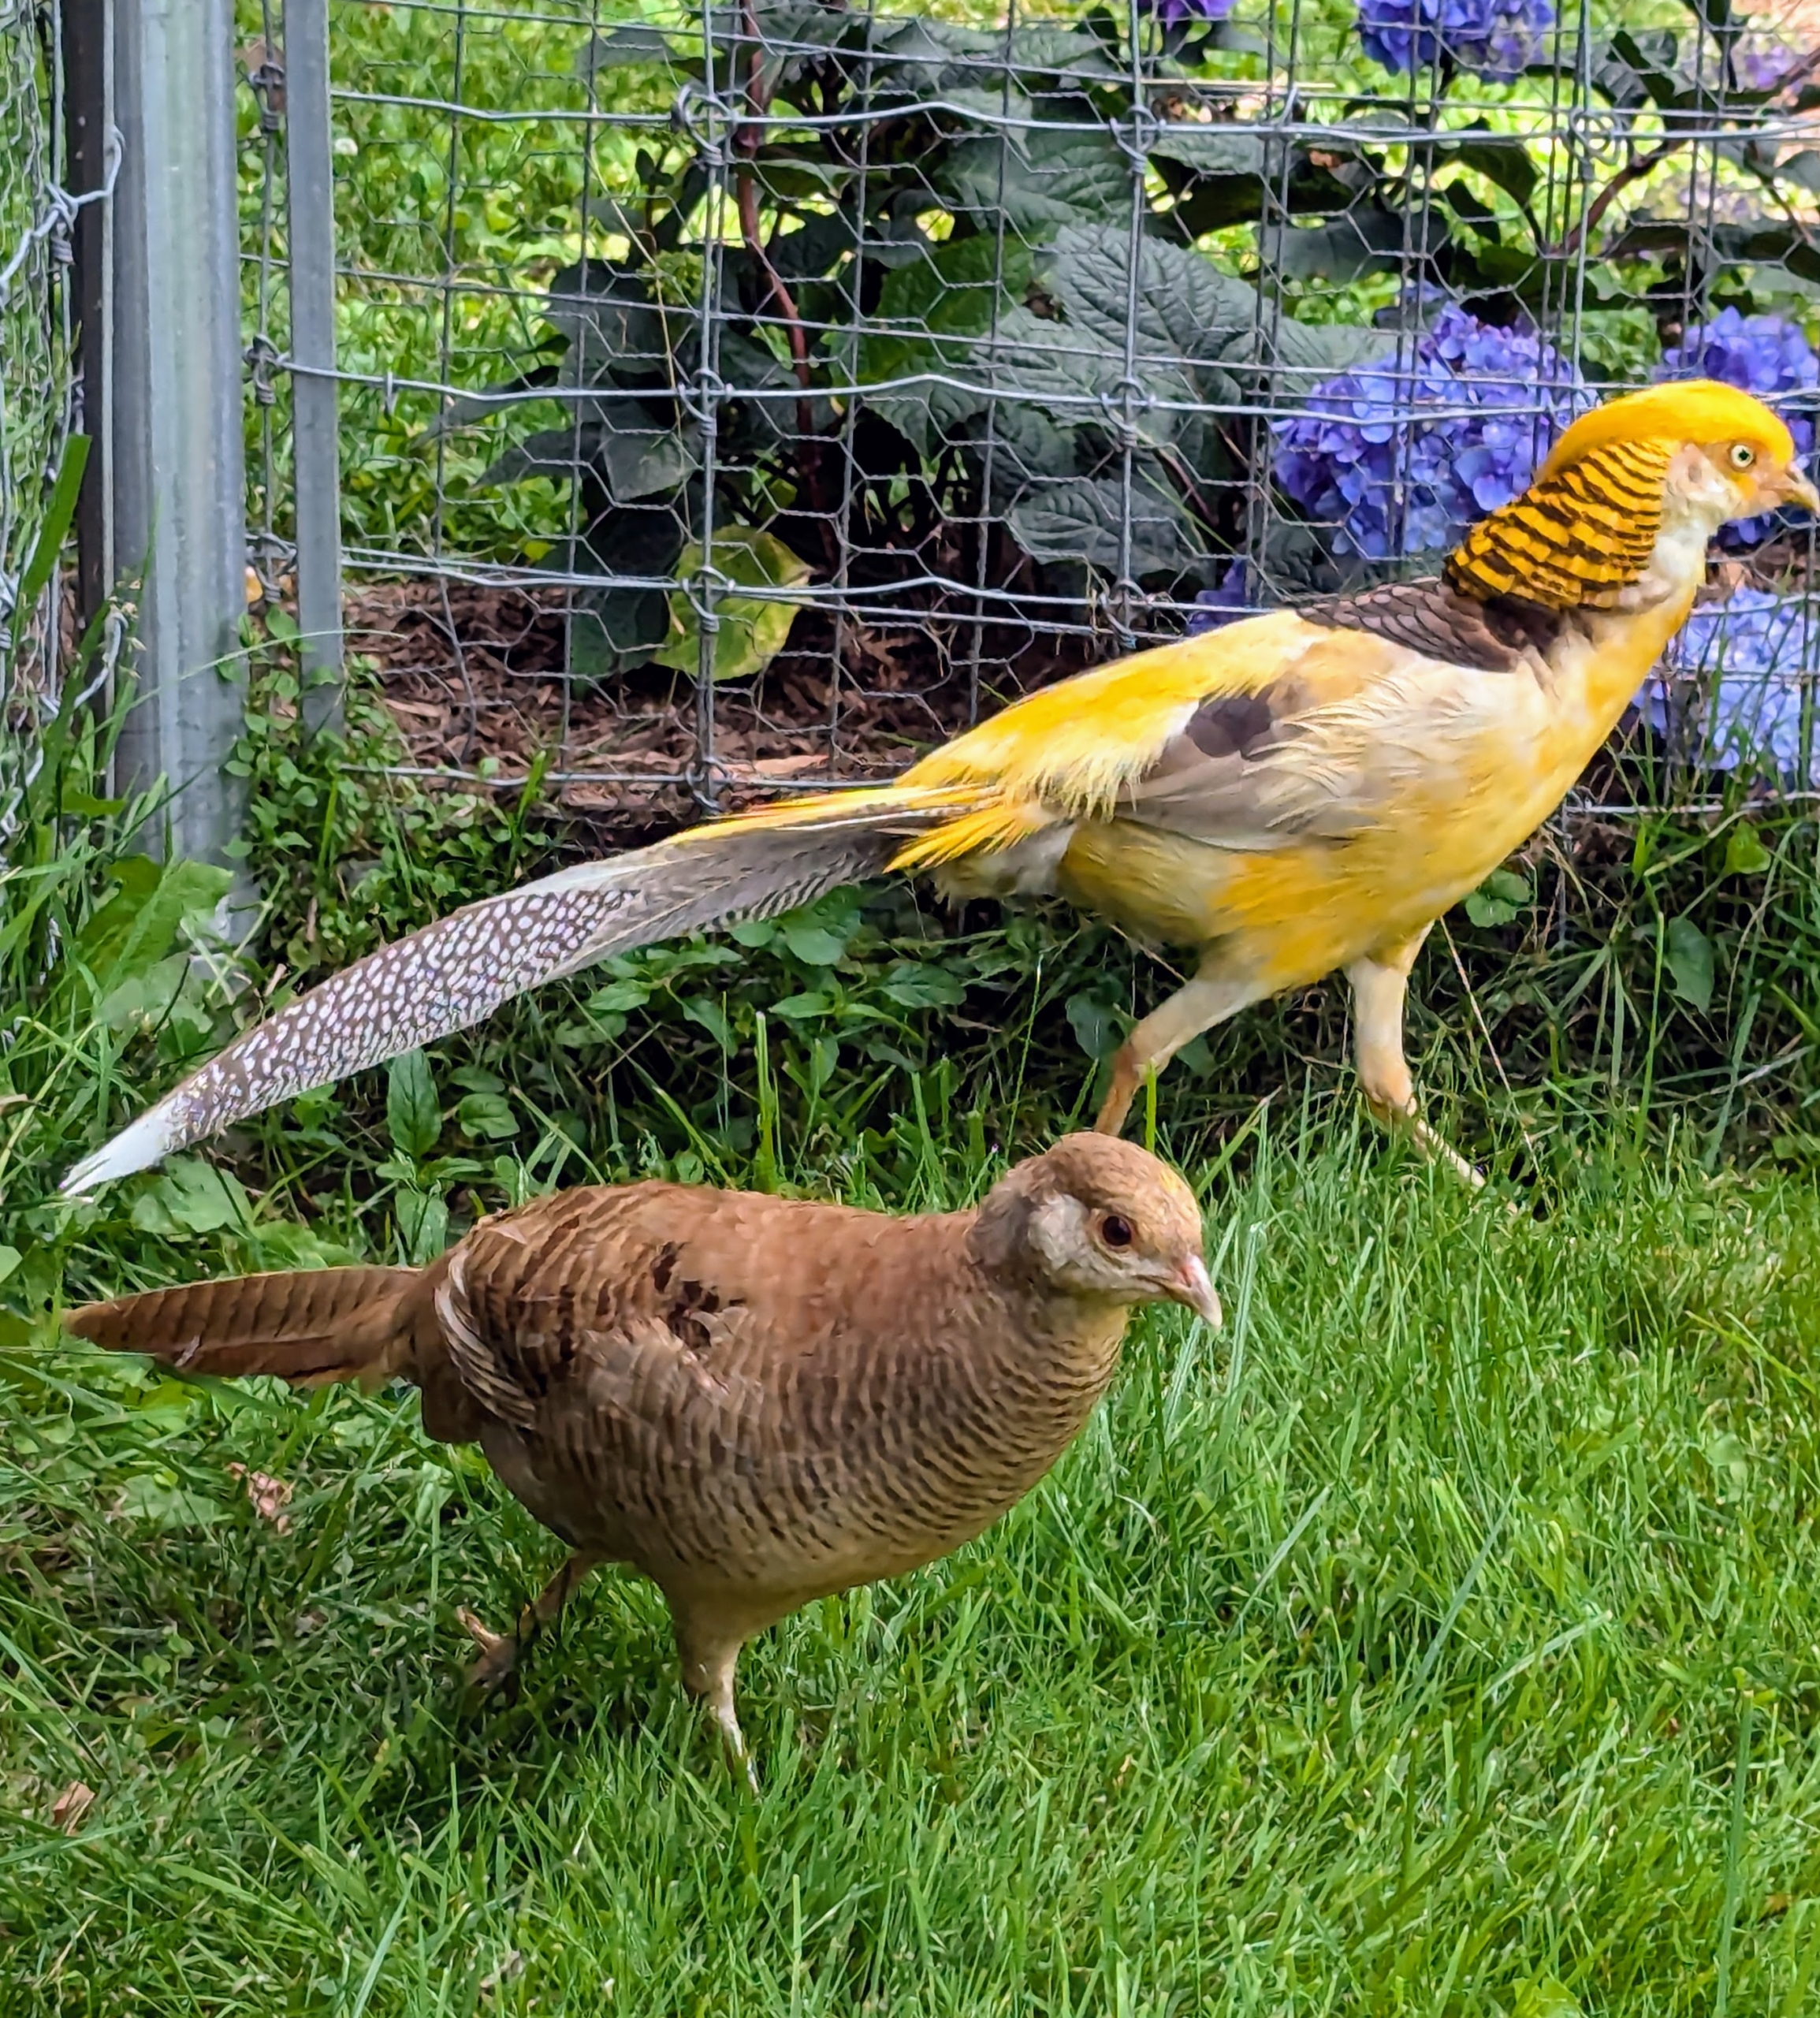
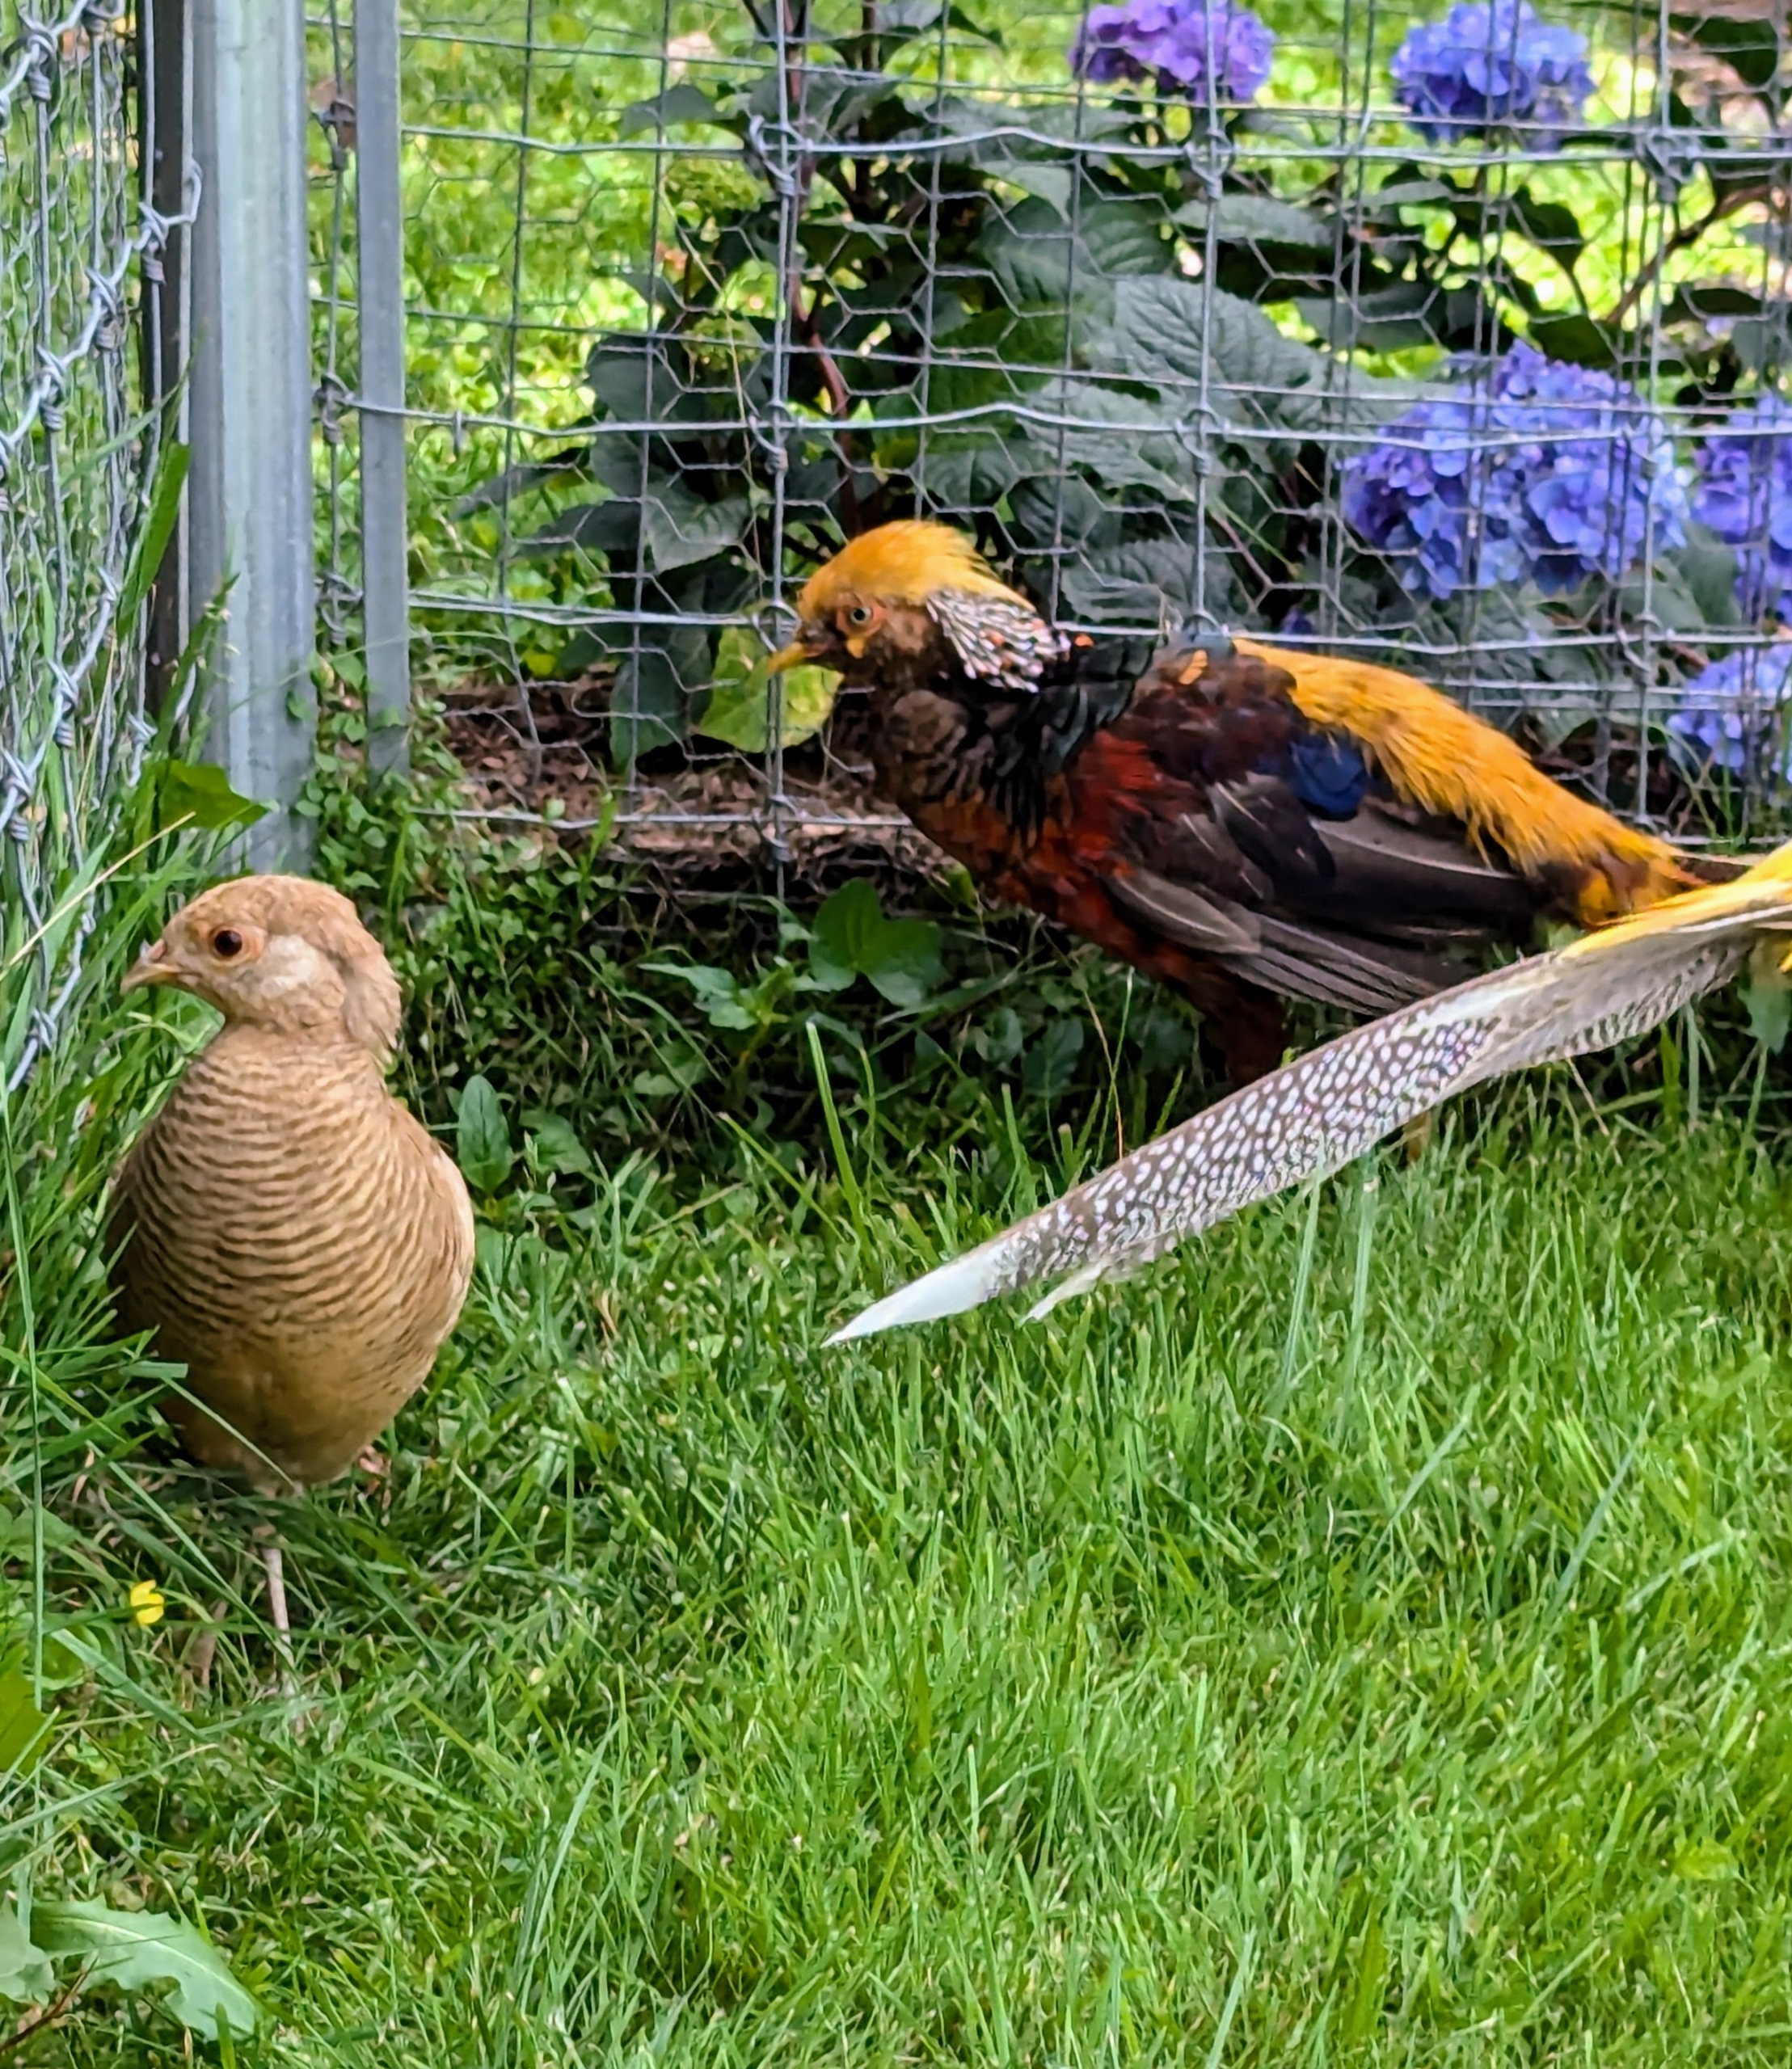
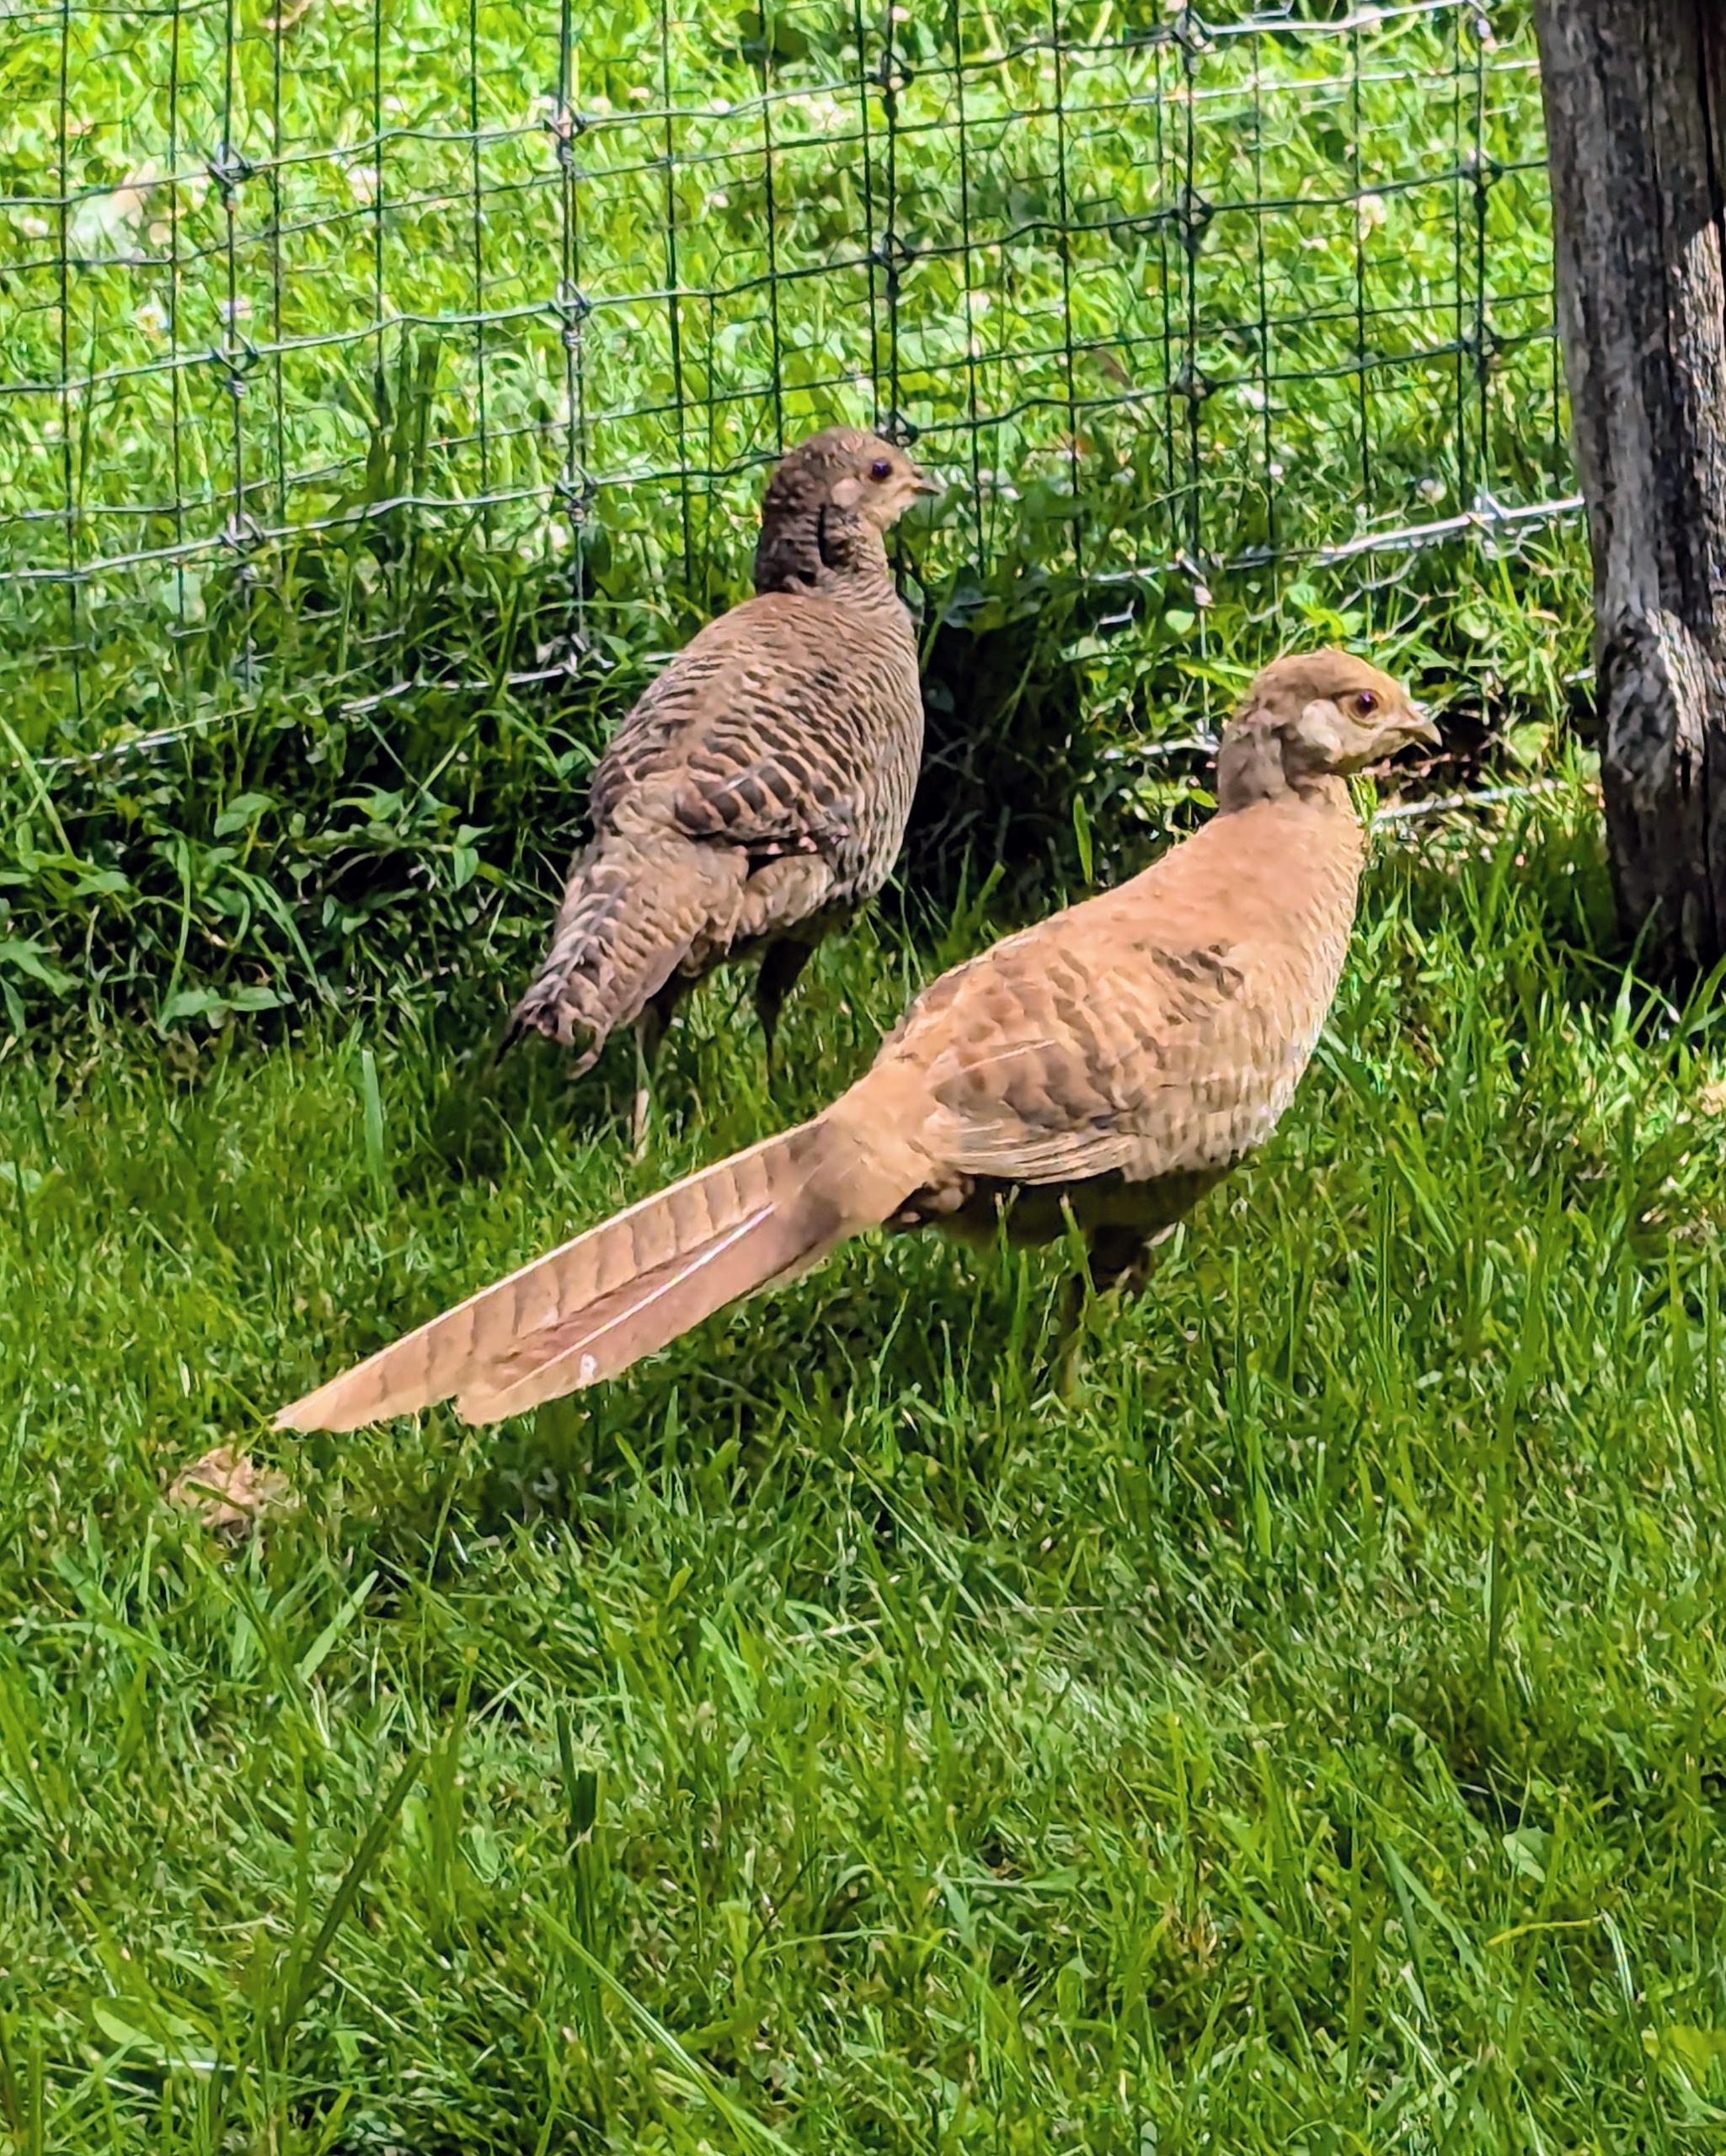
I also adopted these two female golden pheasants.
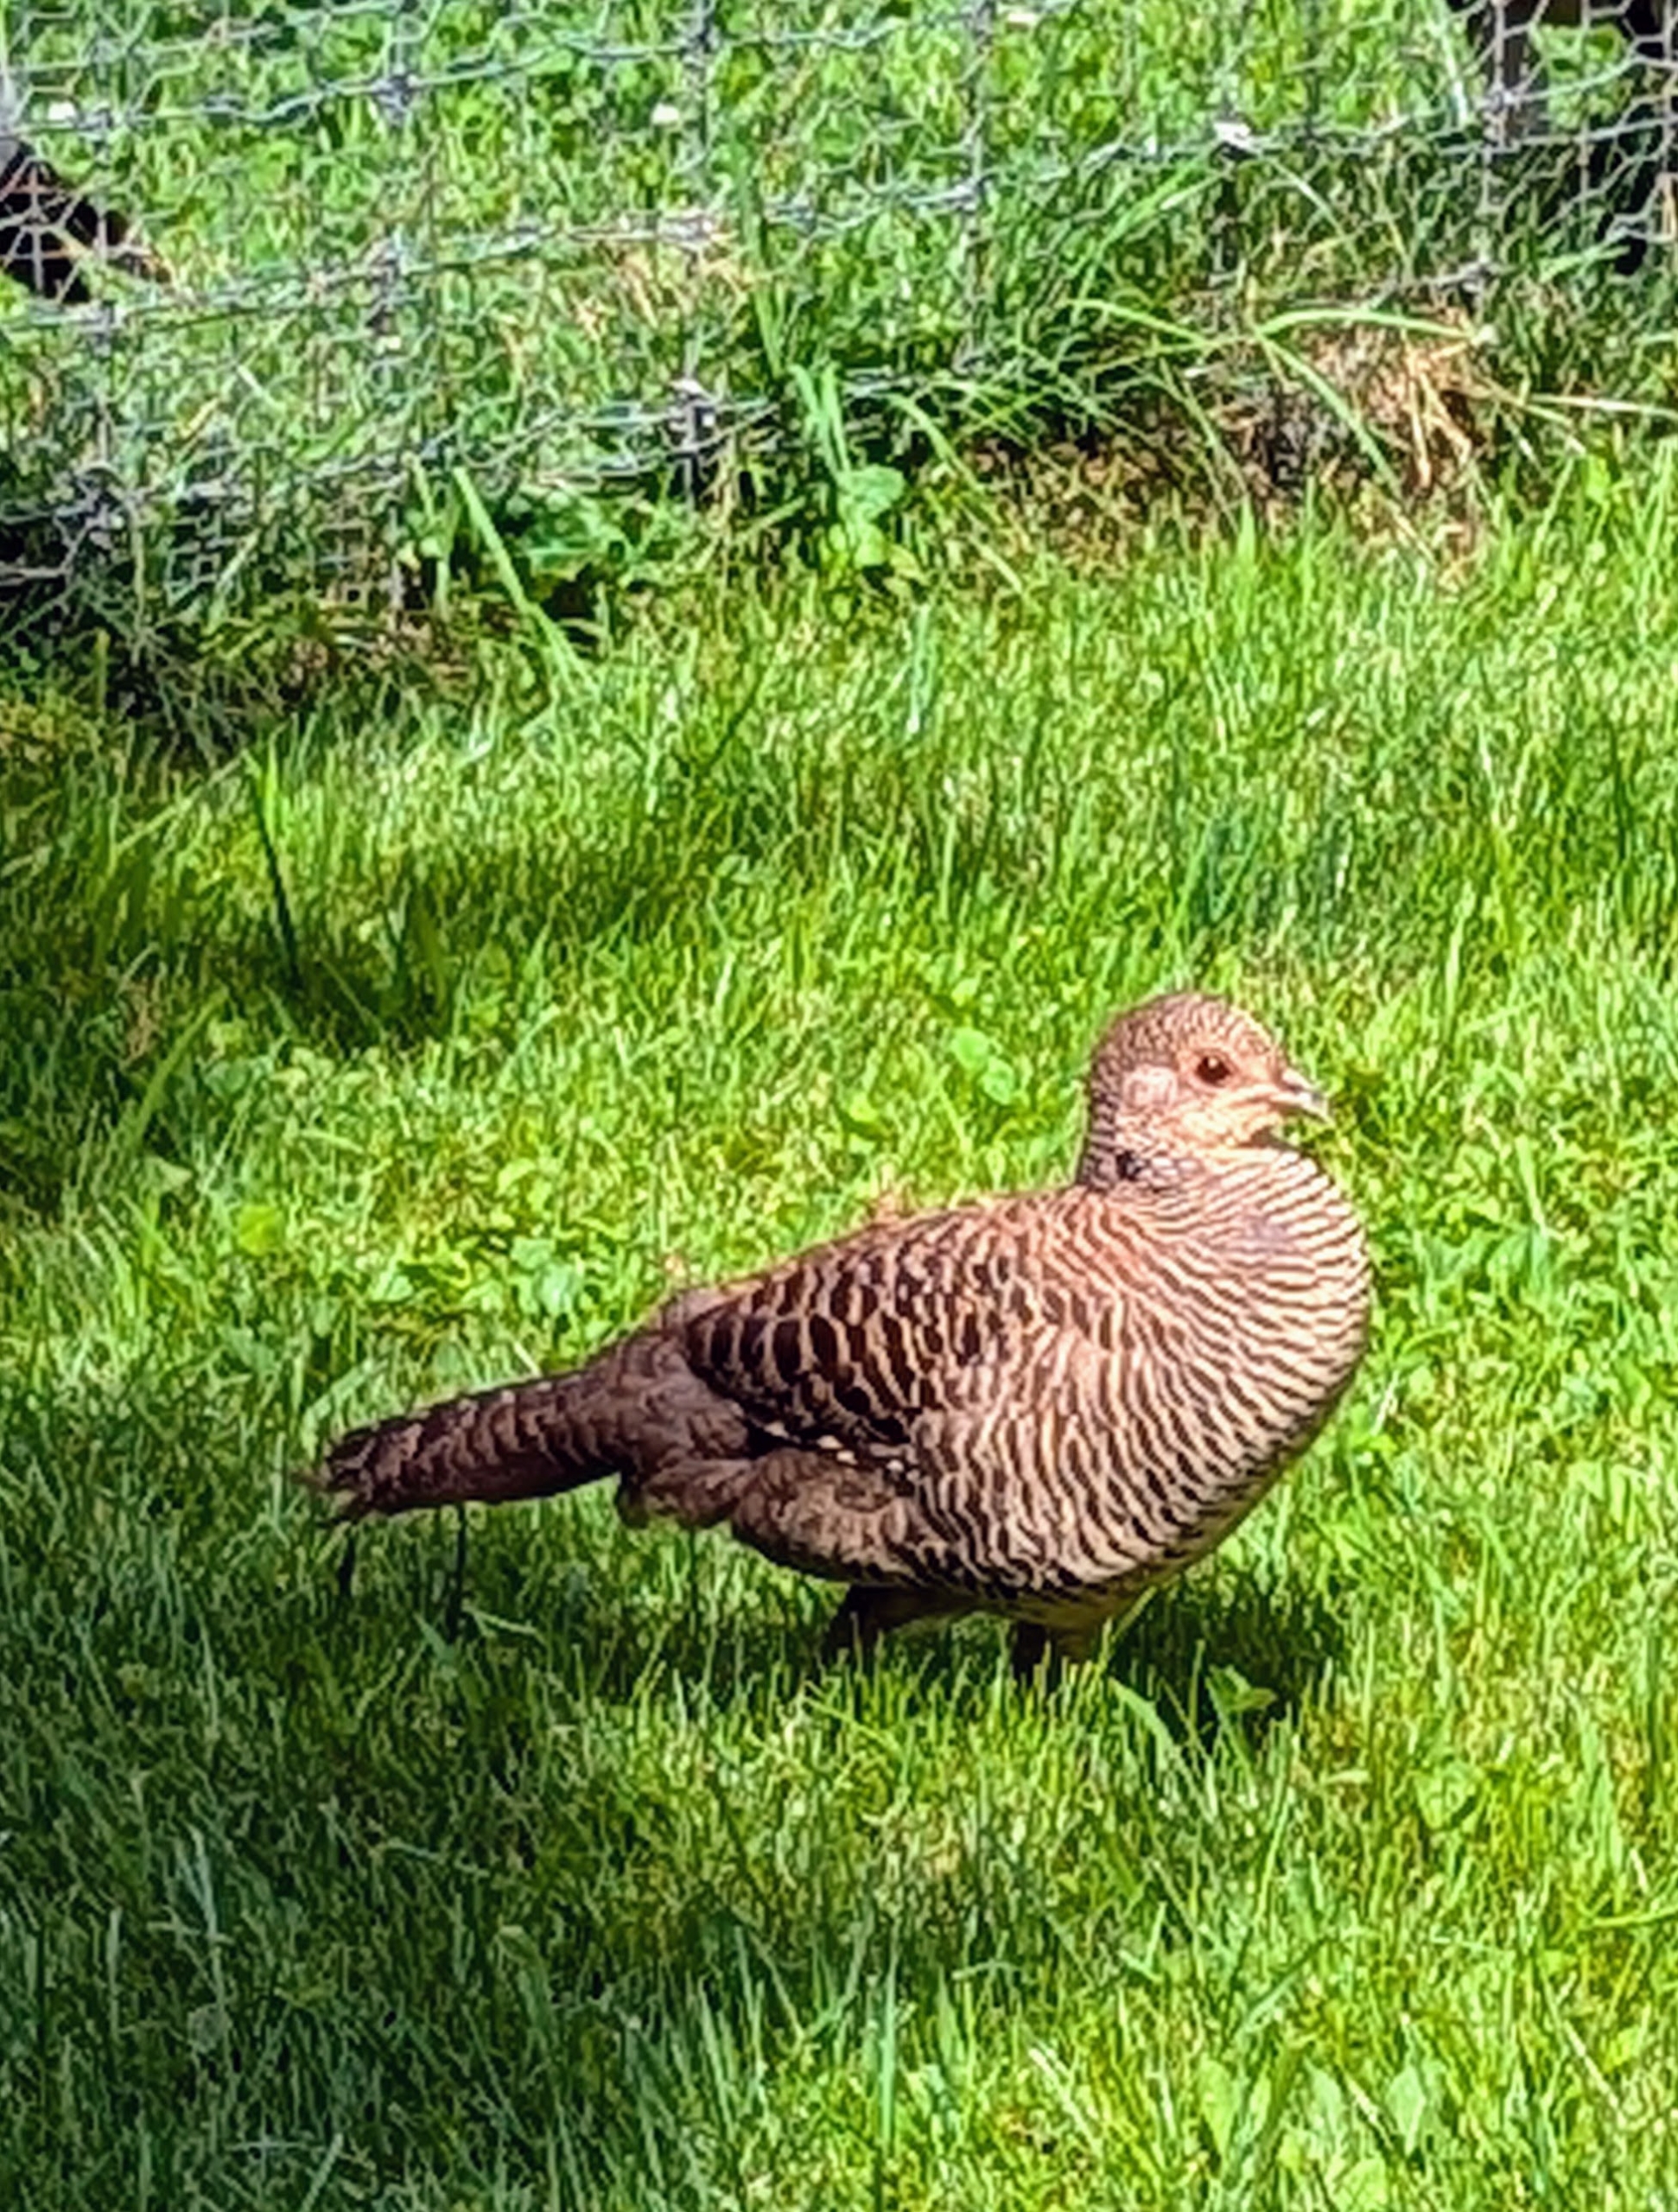
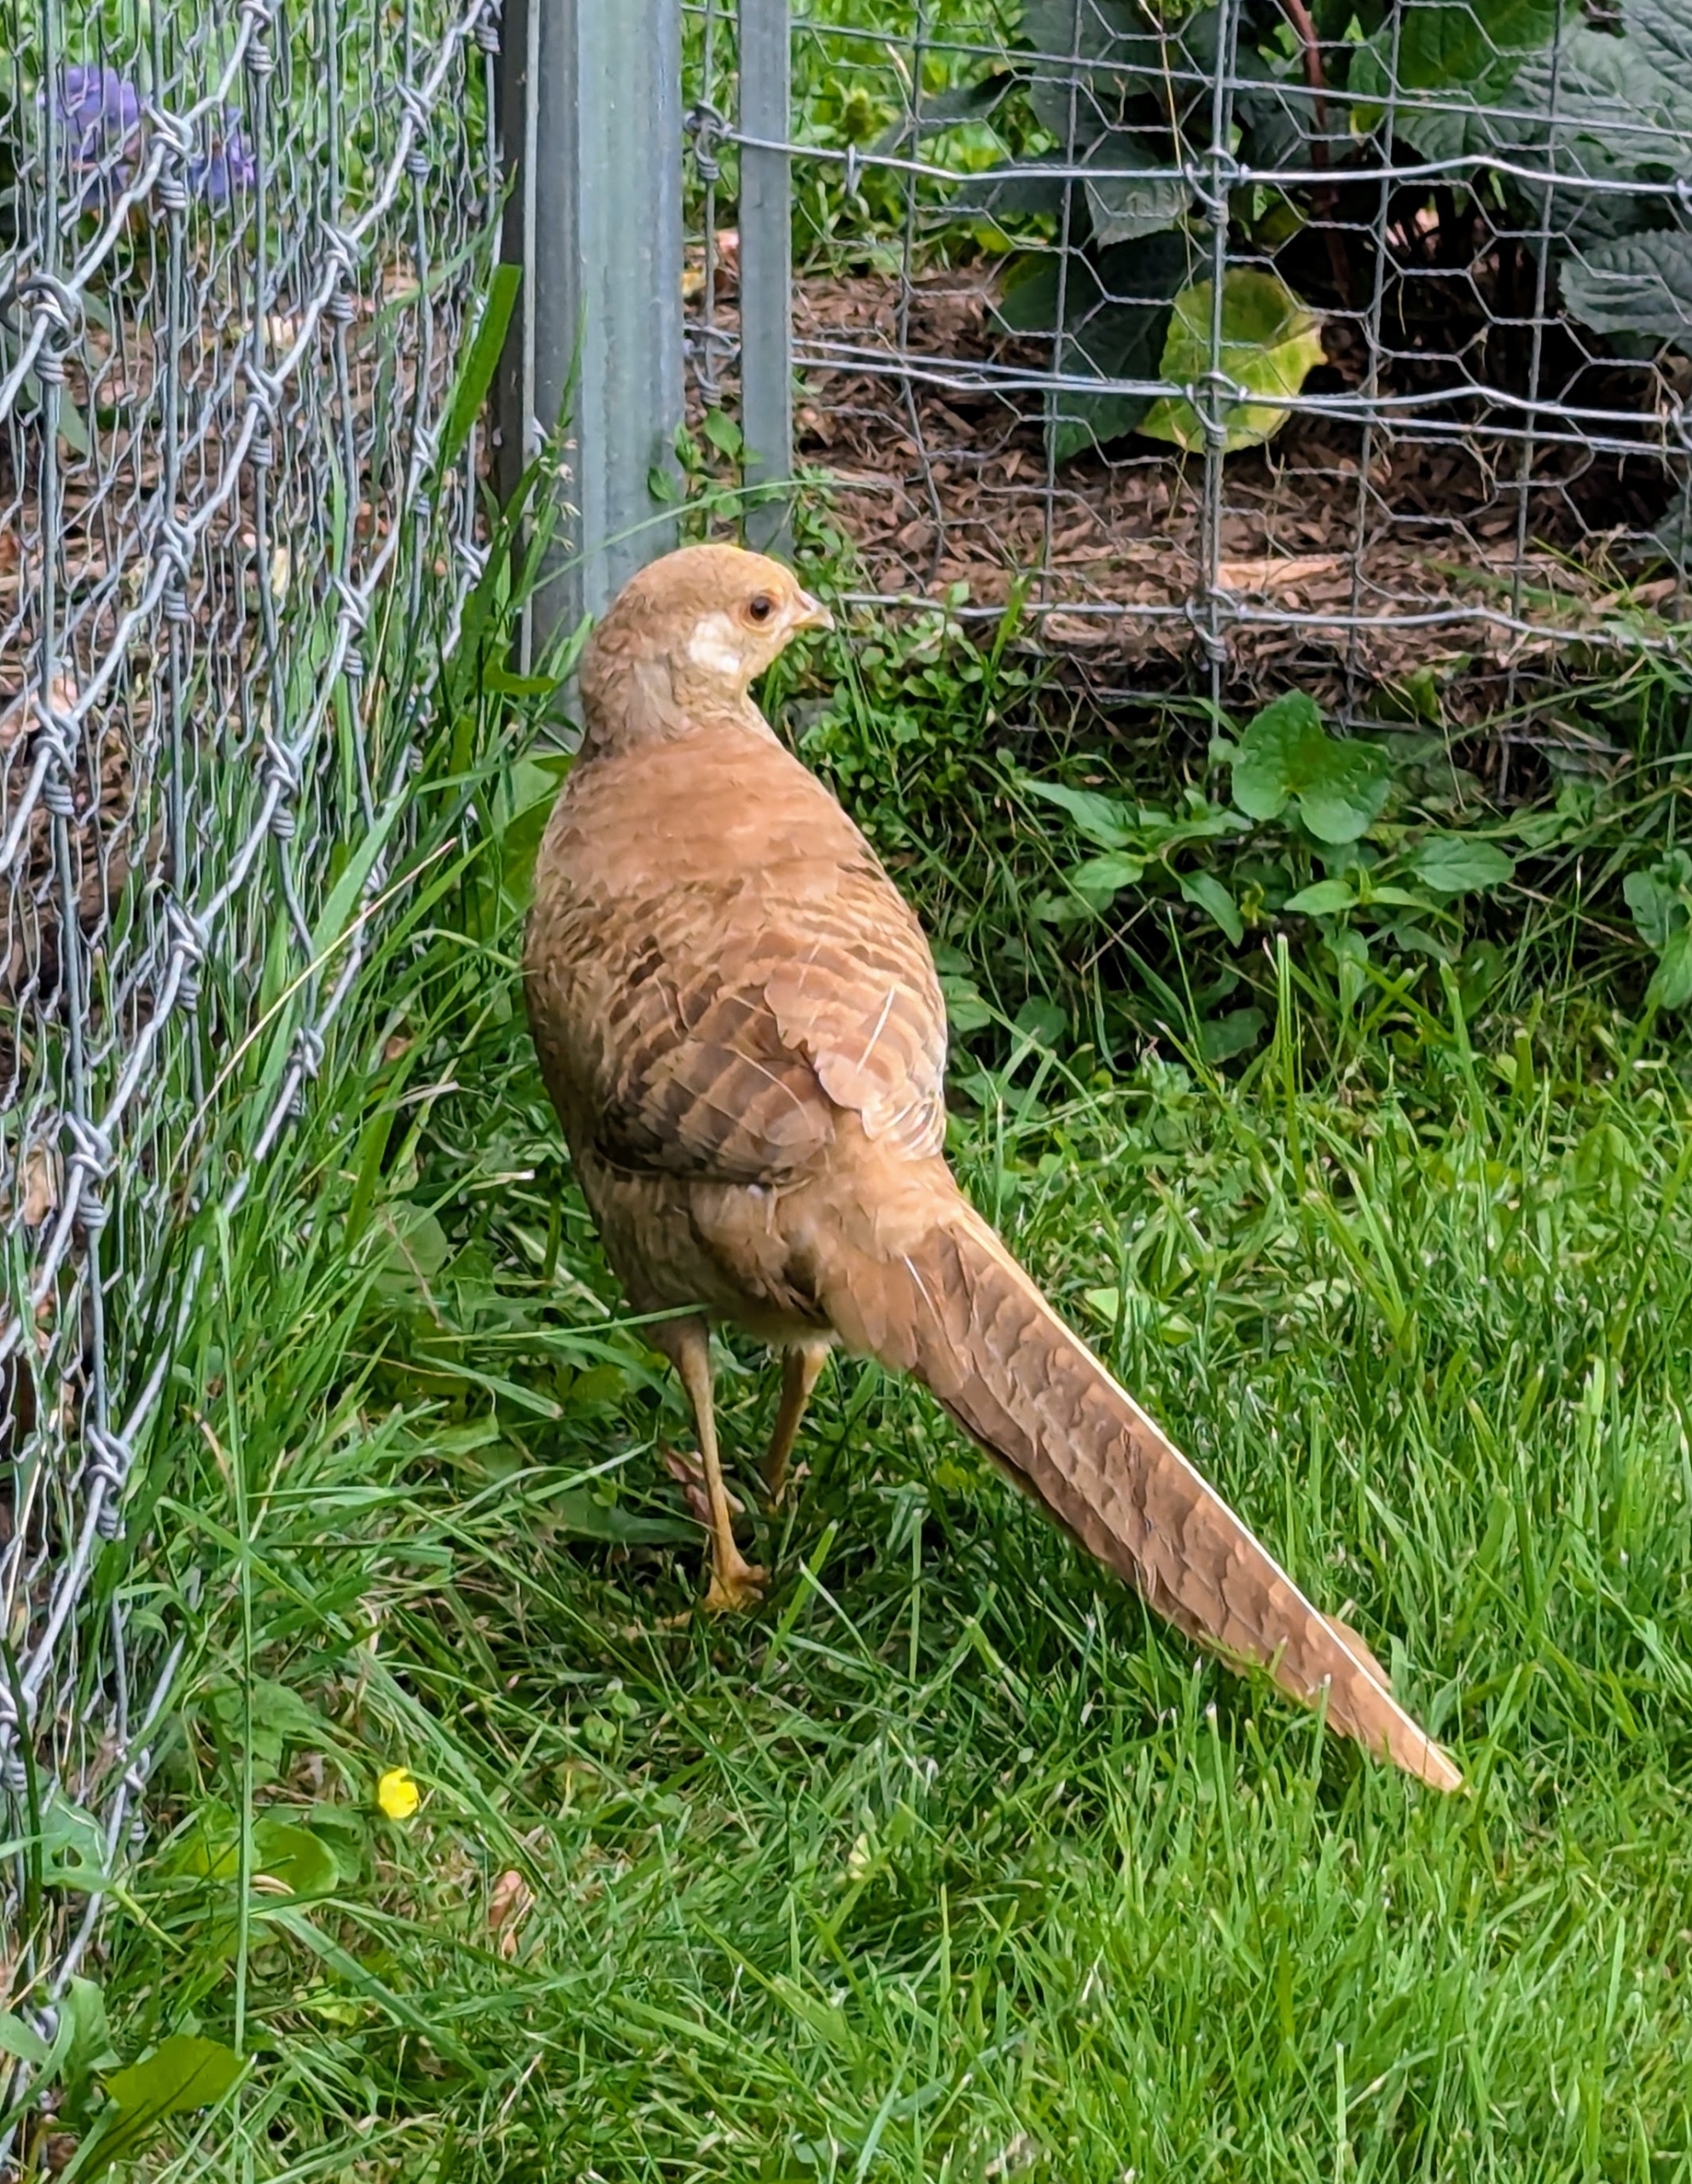
Female golden pheasants, or hens, are completely brown and dotted with black spots.
Pheasants are also foragers and love to spend time on the ground, where they eat waste grain, other seeds, and insects when available.
The two females took to the males right away, and vice versa.
They all seem so happy to be running around together. Pheasants are native to the forests in the mountainous areas of western China.
Inside, the five birds have a ladder where they can roost and rest. These birds are not big. Golden Pheasants can weigh between one and two pounds when full grown.
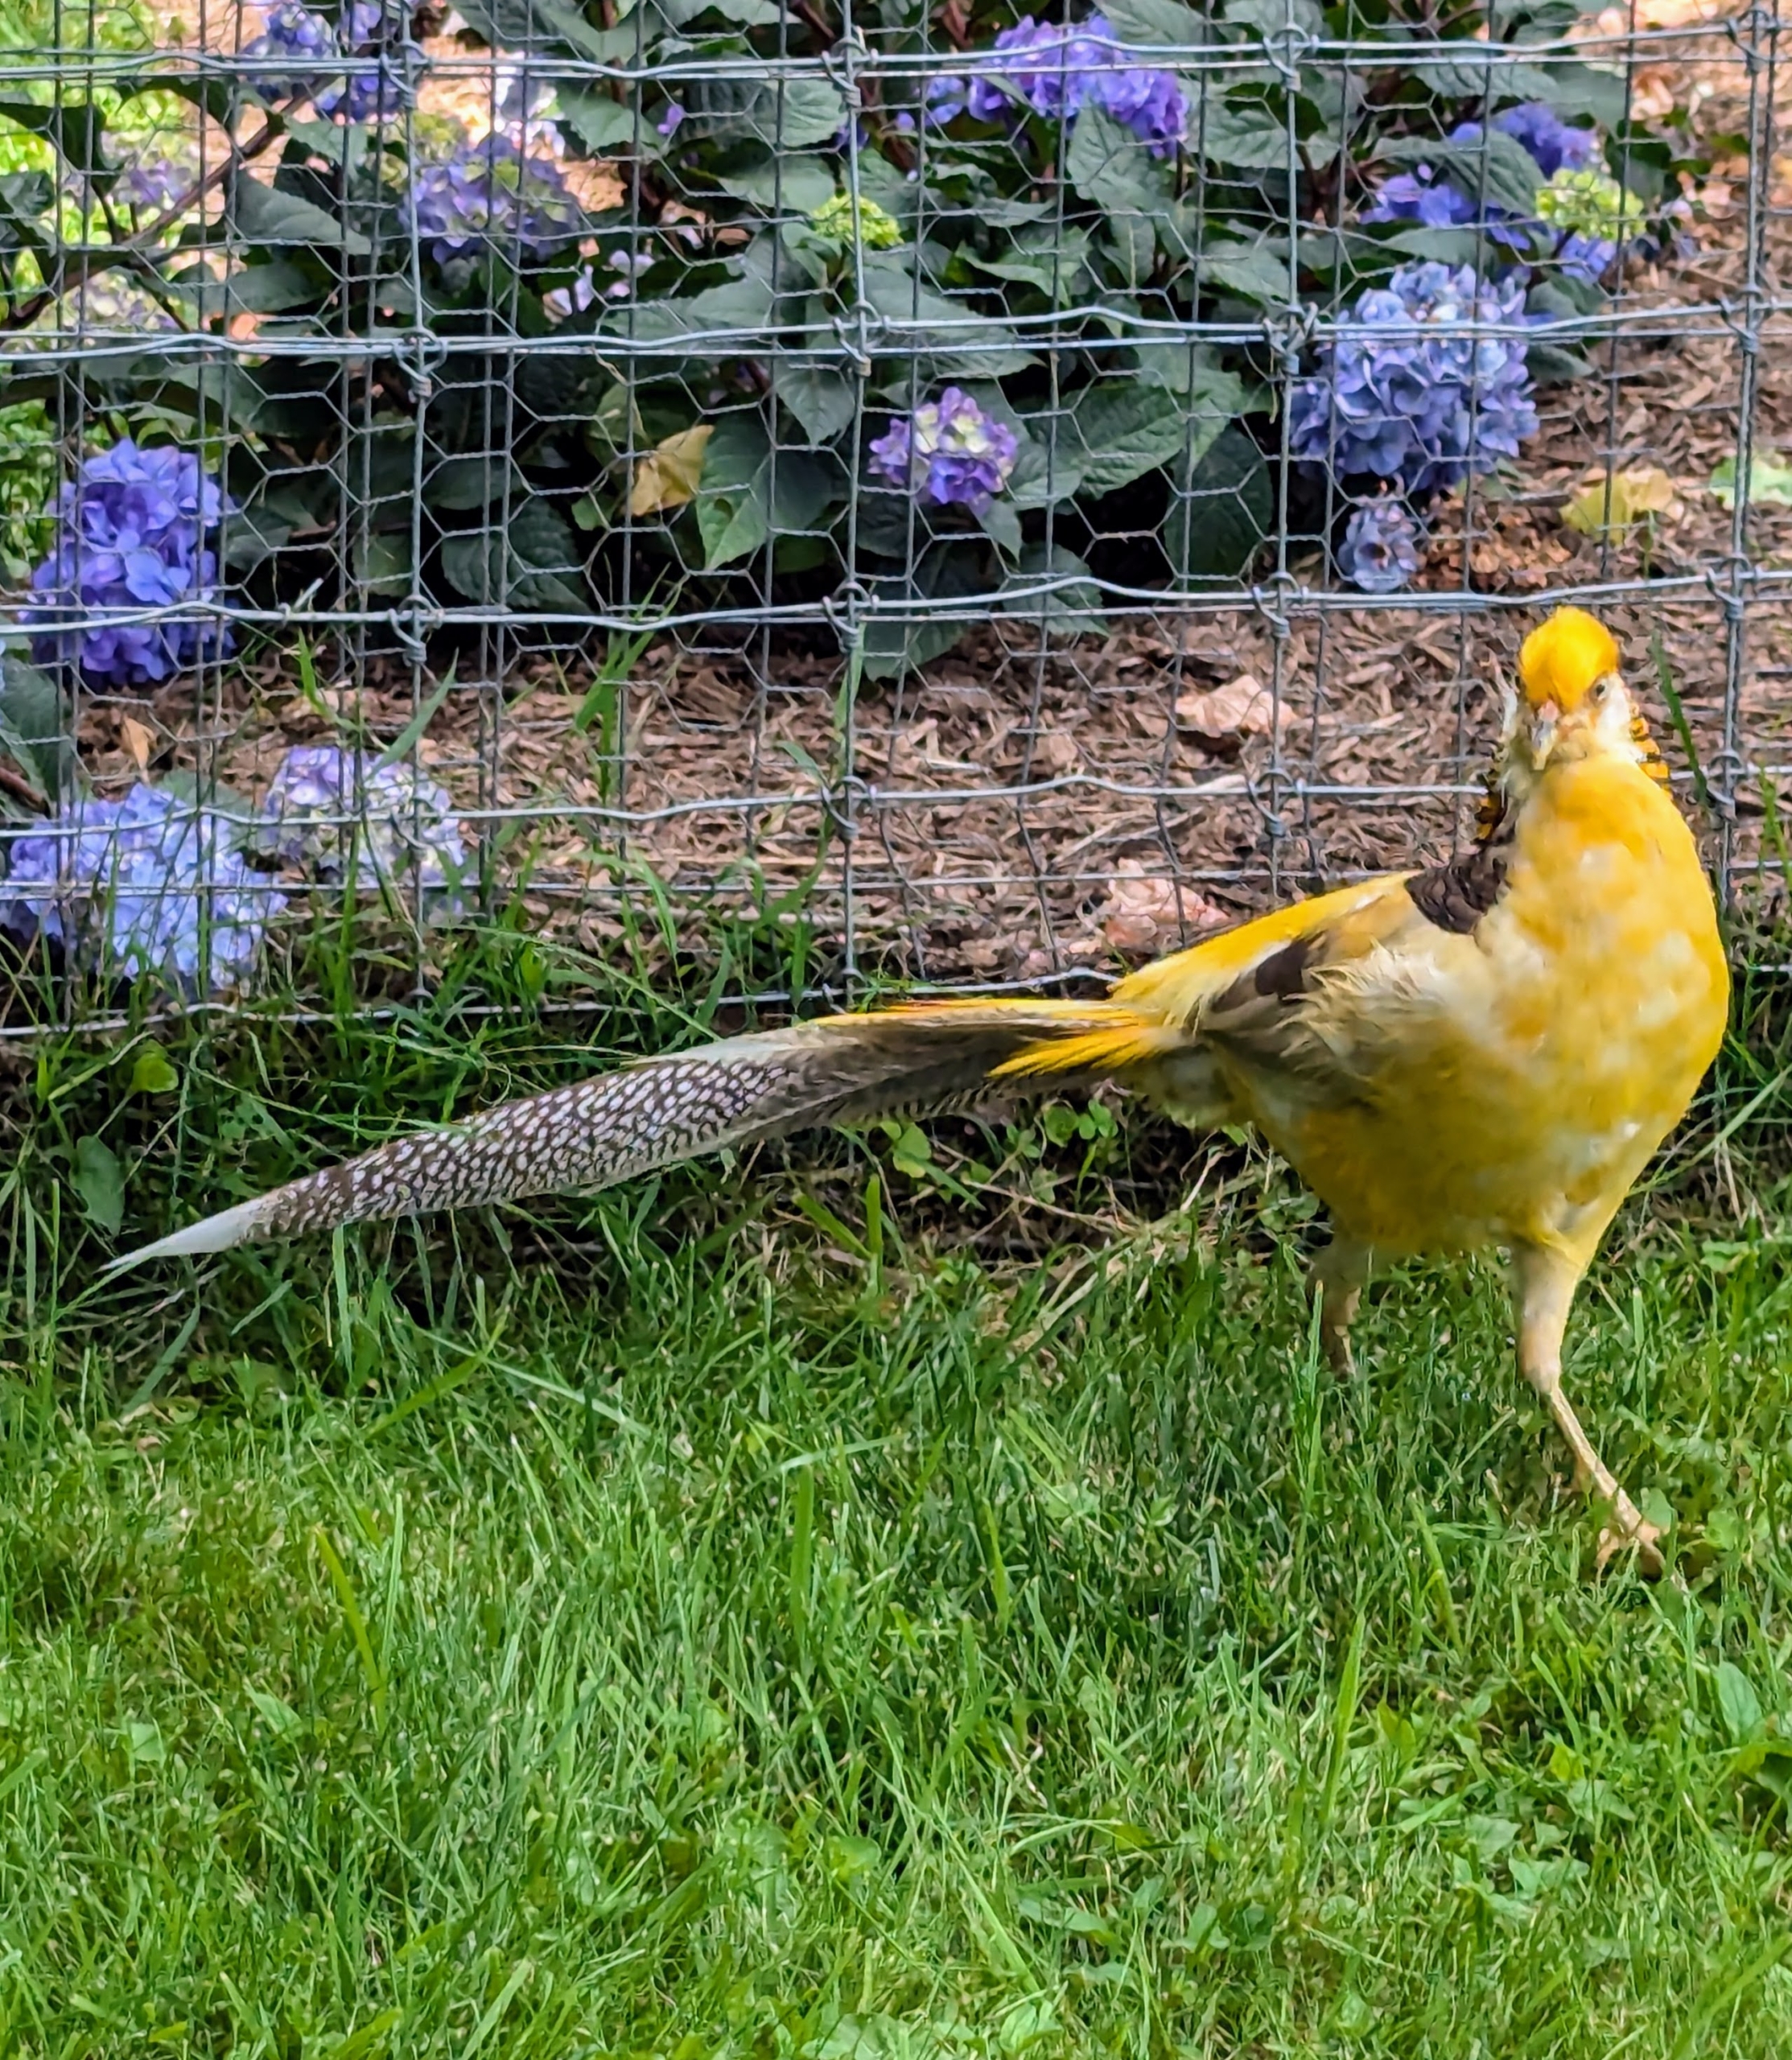
This is a red golden pheasant with its bright colorful plumage. Males have the golden-yellow crest with a hint of red at the tip. The face, throat, chin, and the sides of neck are rusty tan.
The yellow is a color mutation of the red golden pheasant. It was originally developed in the 1950s. To maintain the yellow coloring, these birds need shaded areas to protect their feathers from the sun.
These hens are already enjoying their large outdoor yard. The males are also coming out more since these two arrived. Do you know… while pheasants are able to fly fast for short distances, they actually prefer to run. And they run very fast – sometimes up to eight to 10 miles per hour.
Right now, they are very content getting to know their new male friends and their farm surroundings.
And already, the hens have laid two eggs. We put them in the incubator right away. I think the pheasants and peacock will be very happy here at the farm.
Lovely, fragrant, and showy, the Japanese snowbell tree, Styrax japonicus, is a beautiful small tree that thrives in full sun or part shade.
In 2016, I planted an allée of Styrax japonicus 'Marley's Pink Parasol' along the carriage road leading to my tennis court. These trees feature bold green foliage and in spring, lustrous pink, bell-shaped, fragrant flowers. A couple years later, I planted a collection of Styrax japonicus 'Evening Light' in the same allée. These are purple trees with white, sweet smelling blooms. Both varieties are developing so beautifully here at the farm.
Here are some photos.
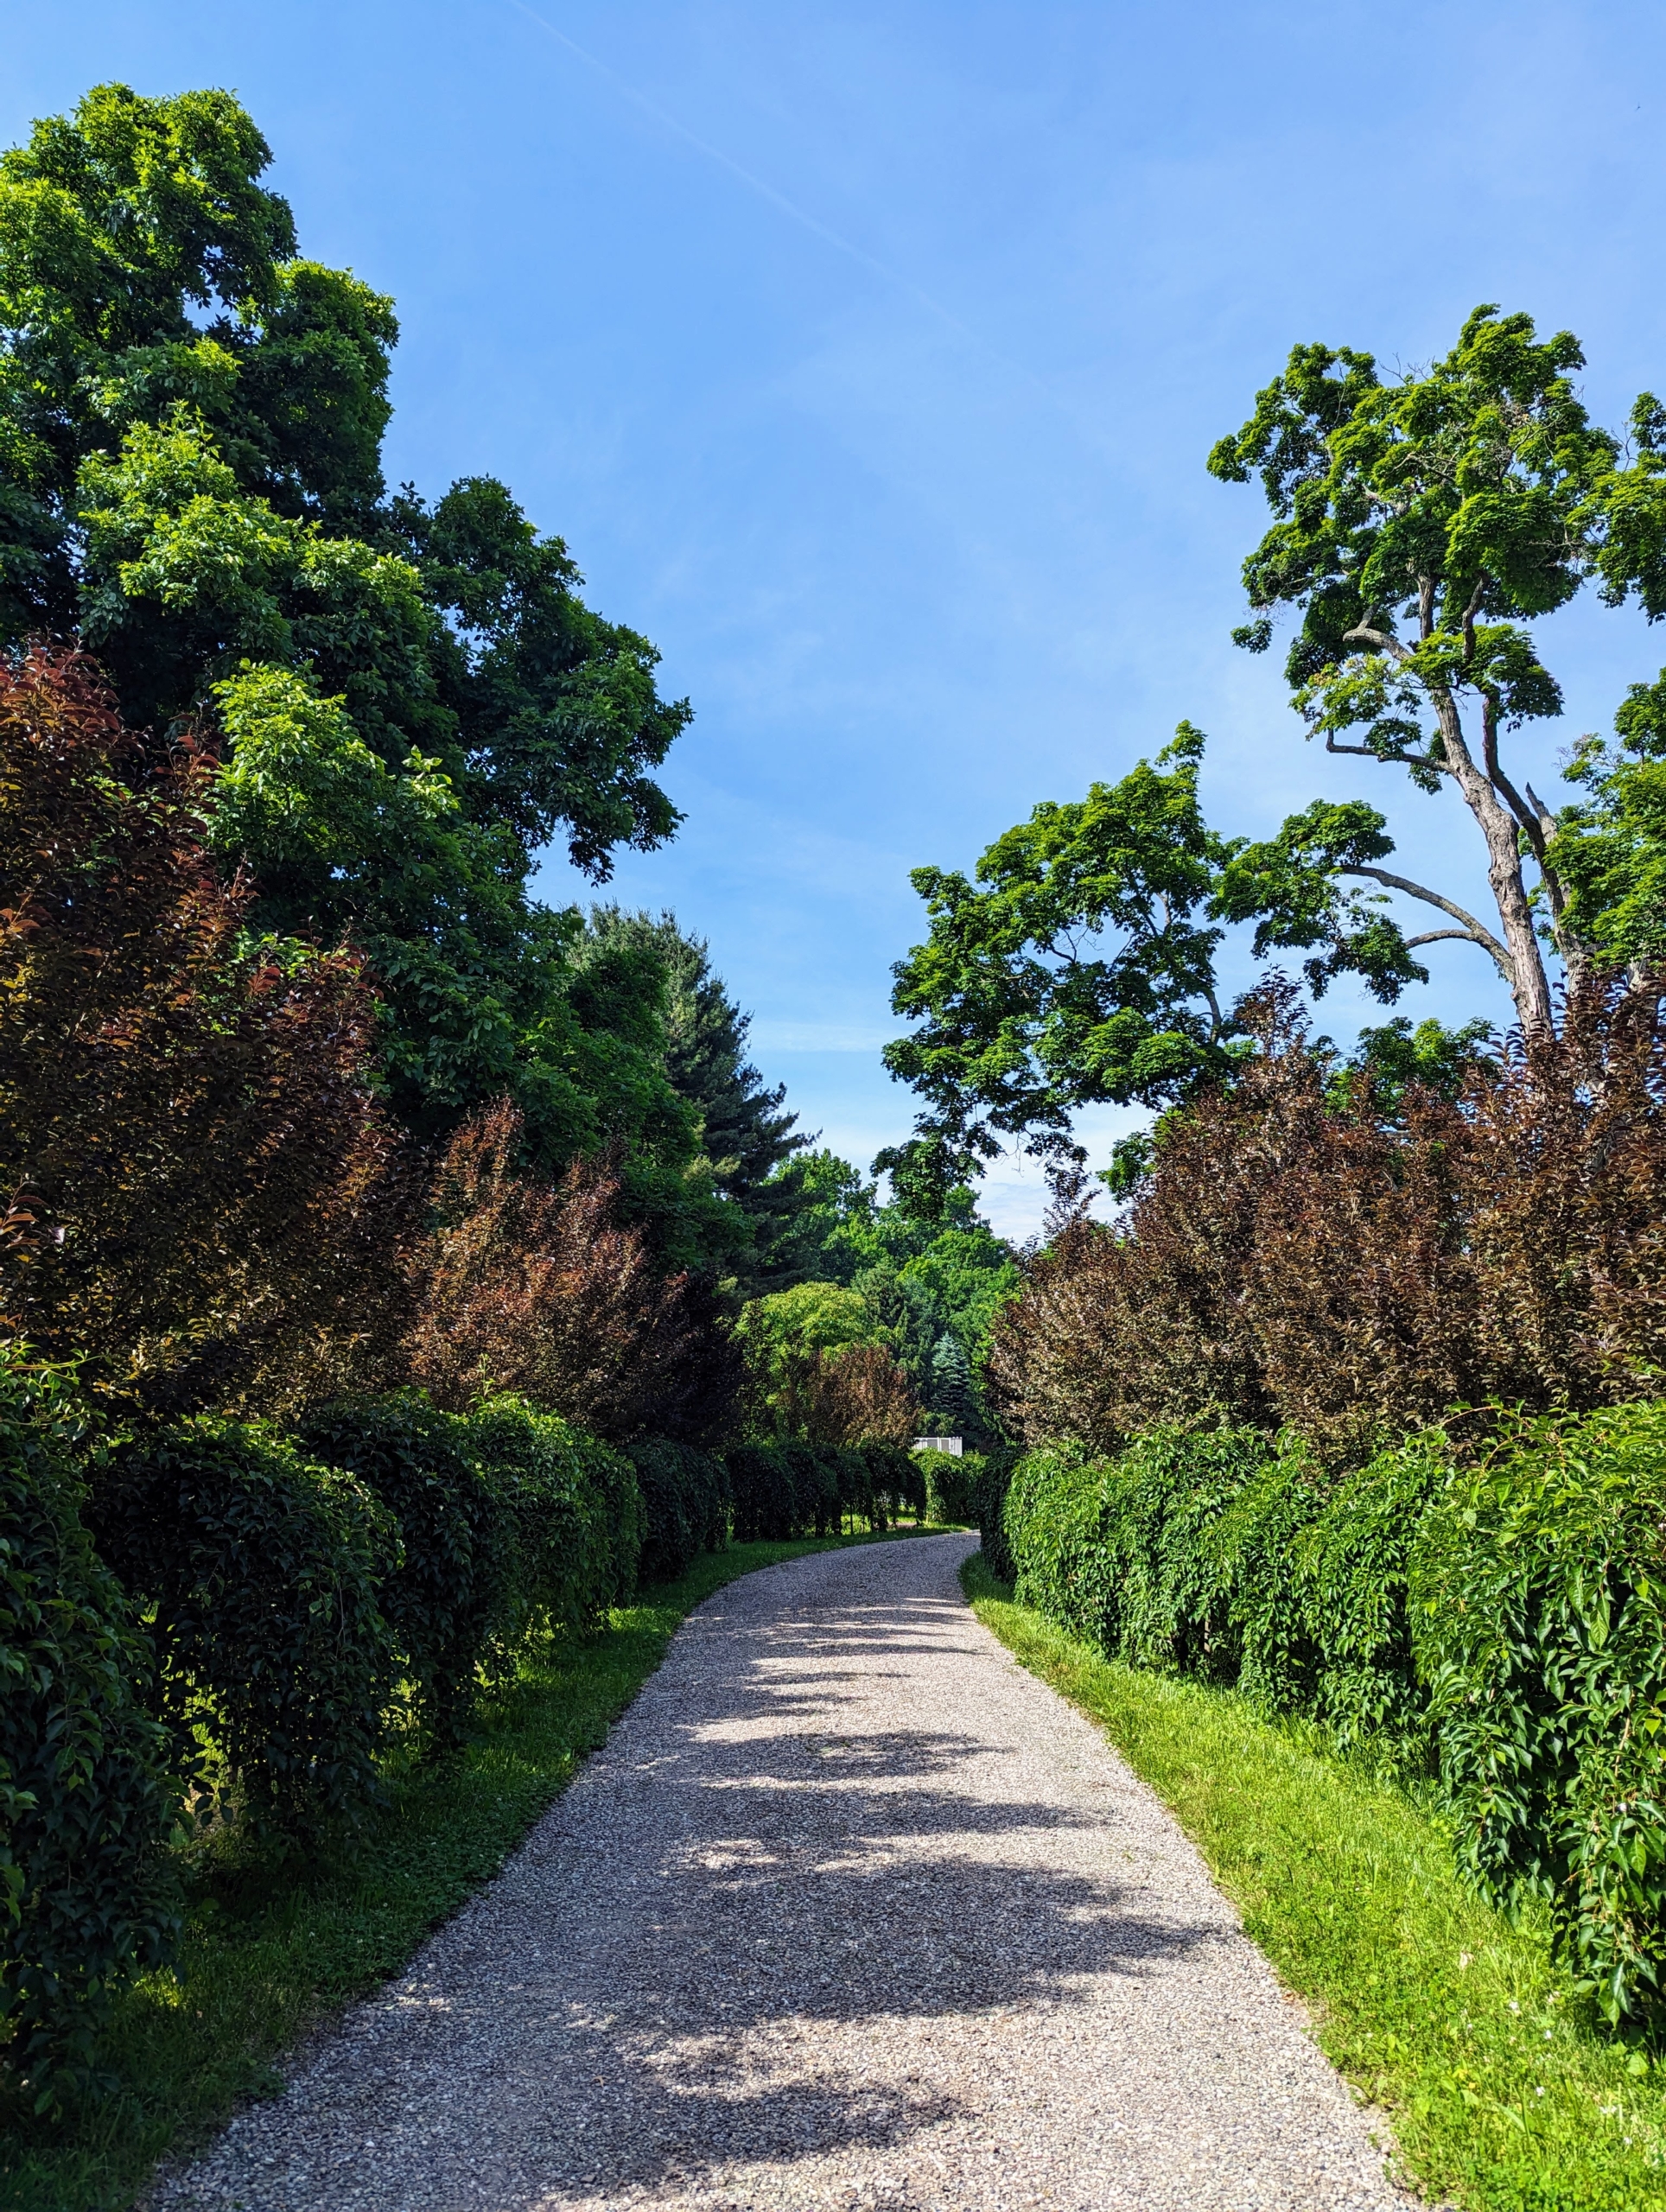
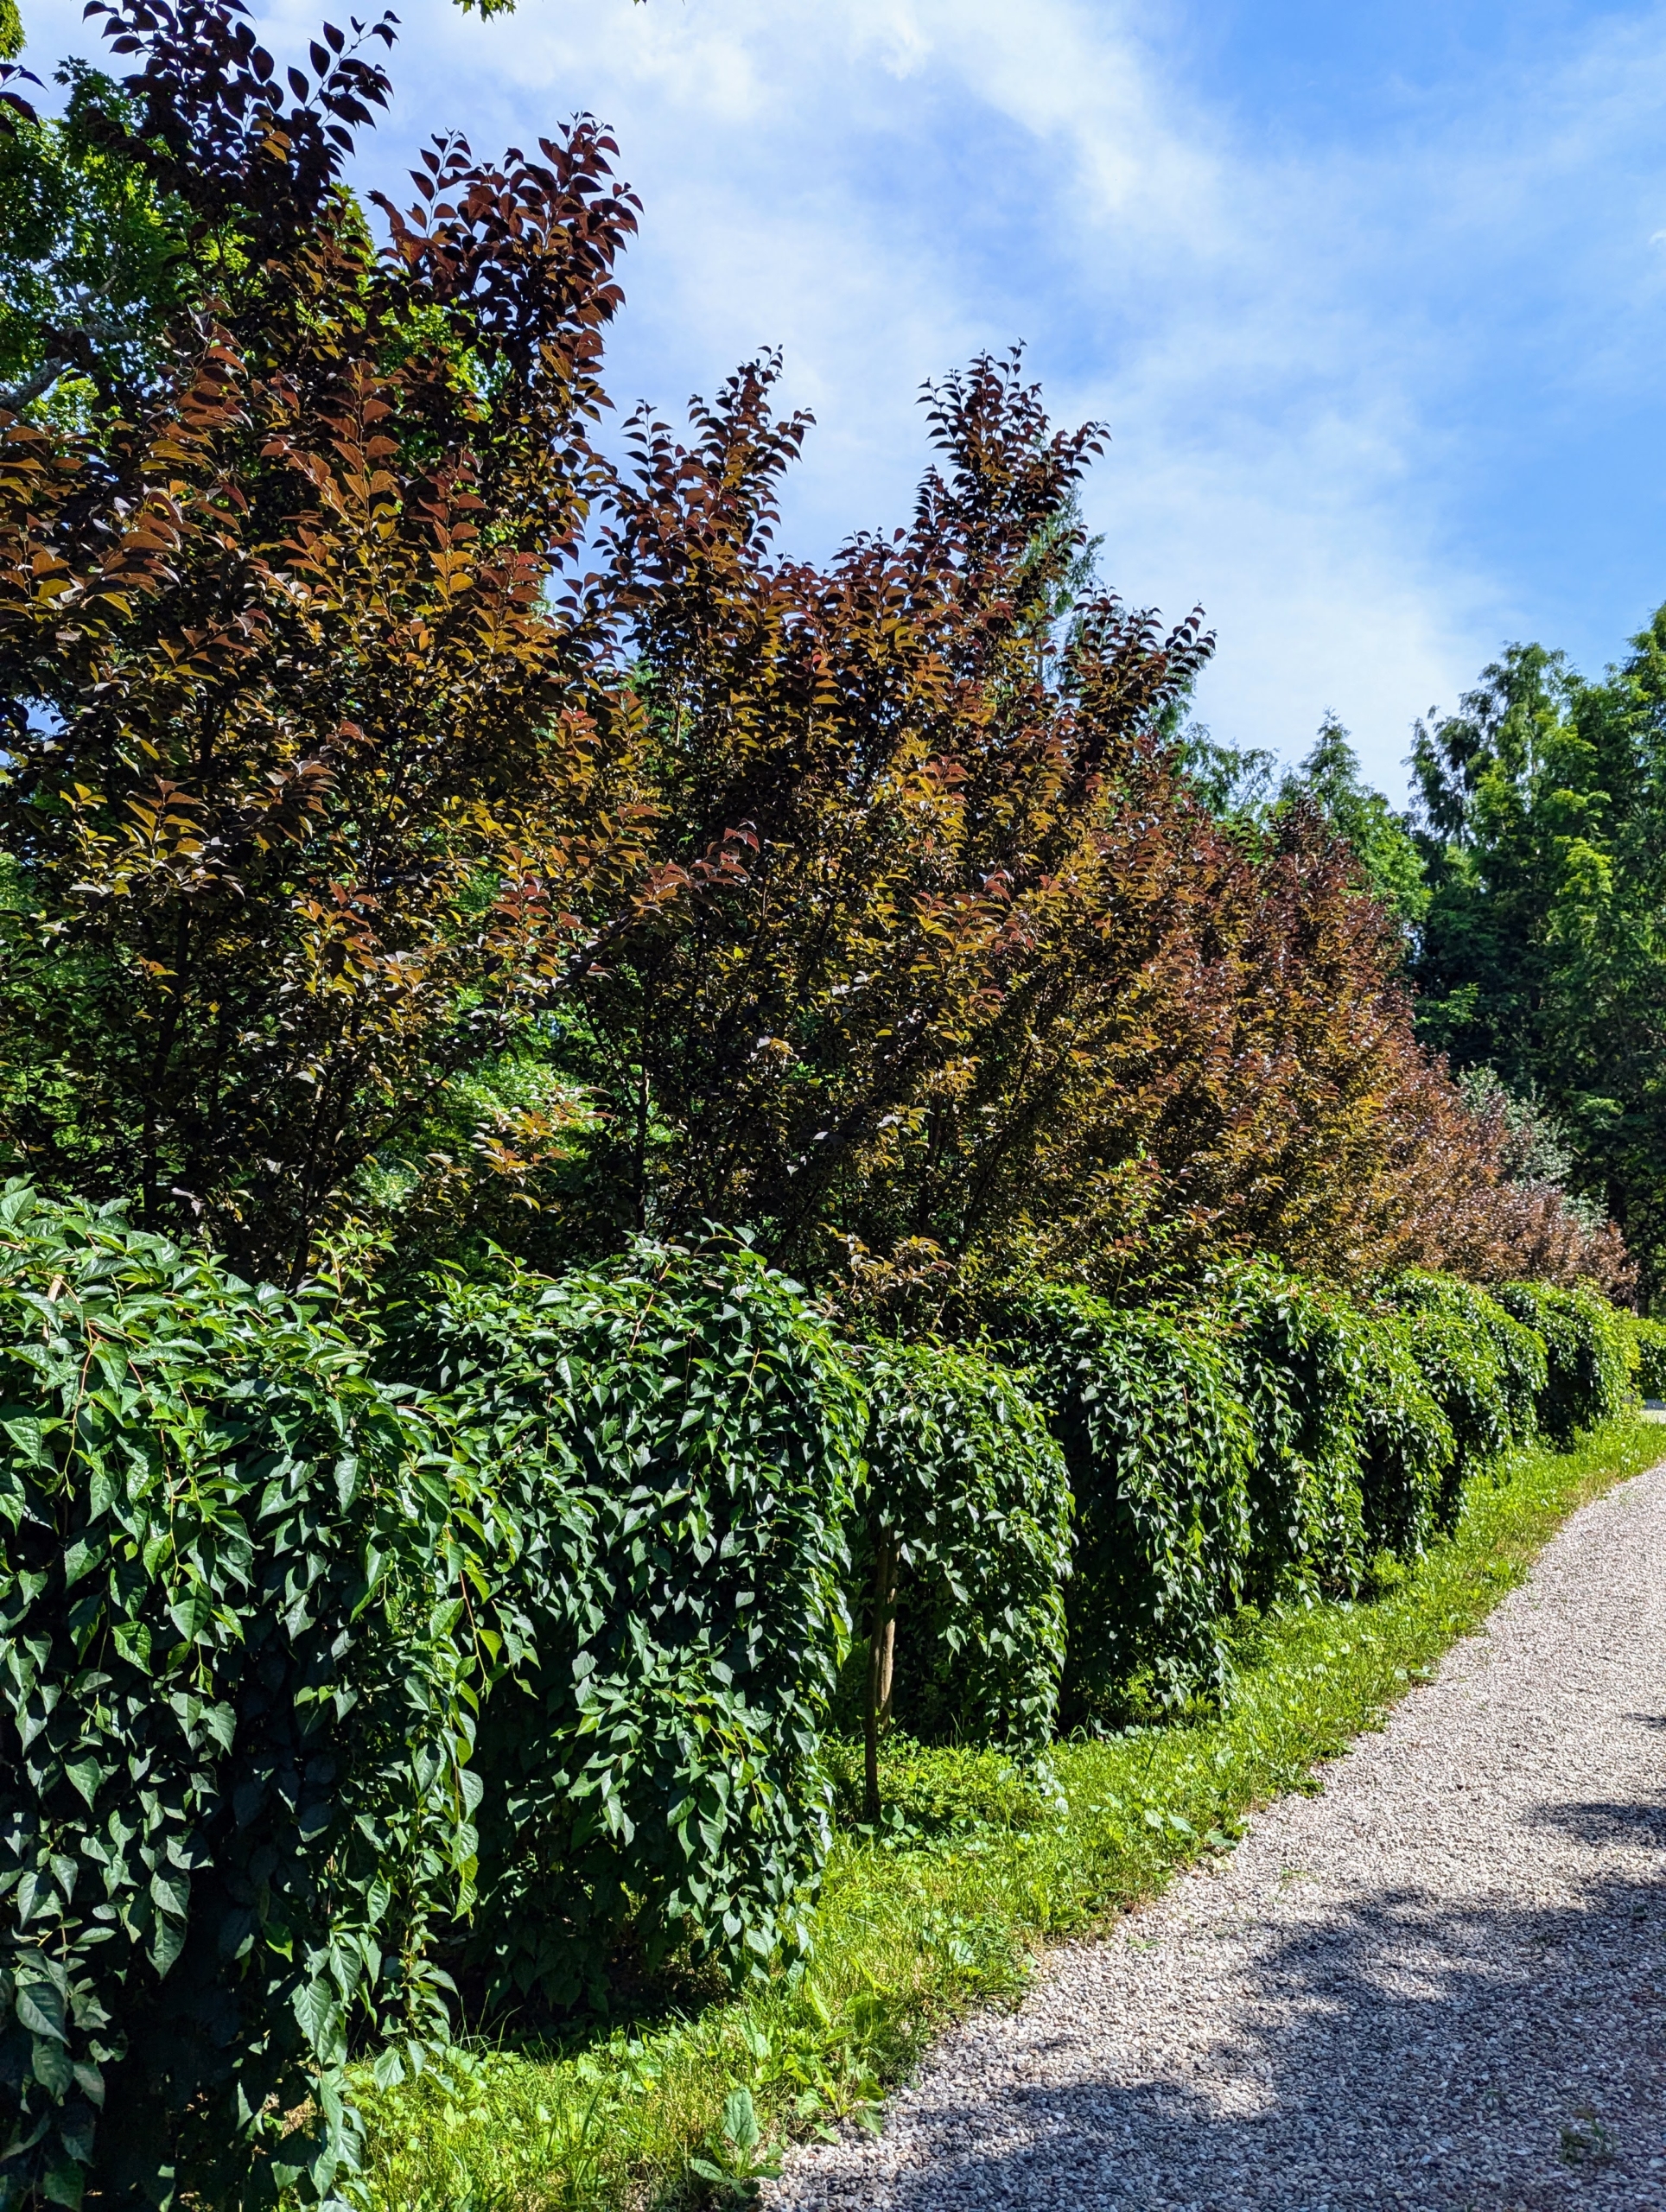
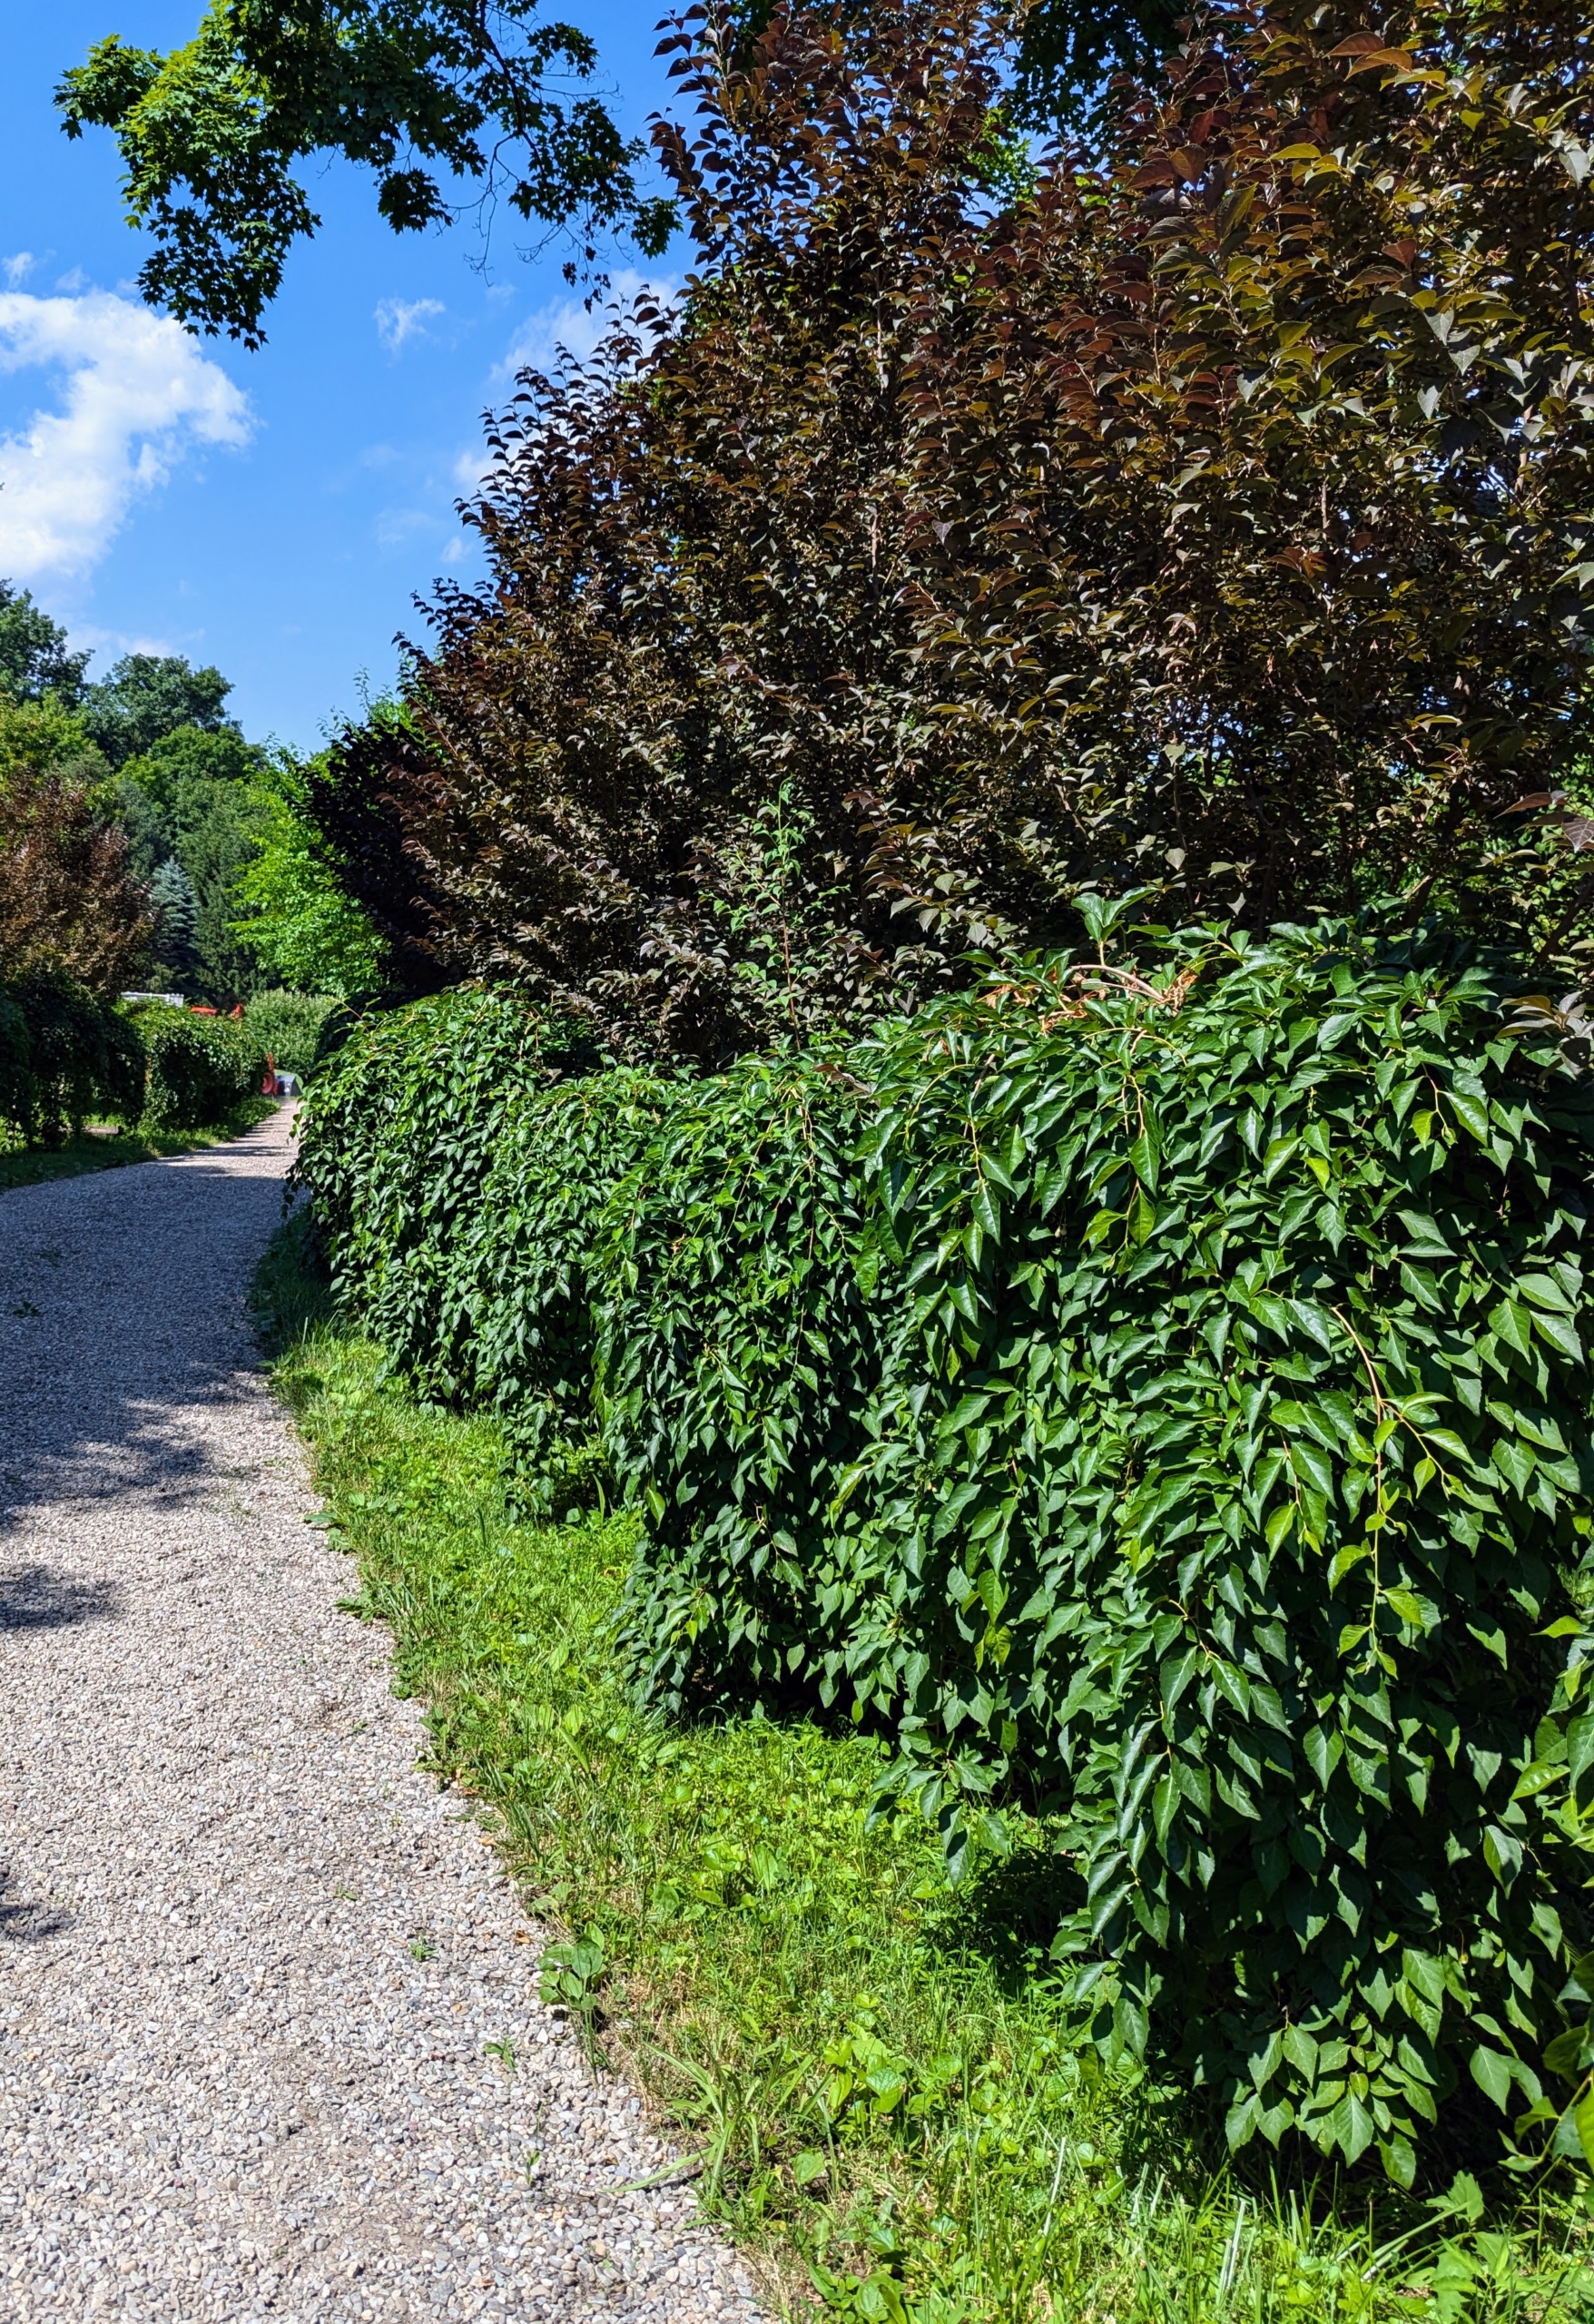
The carriage road to my tennis court is planted on both sides with Styrax japonicus trees, or Japanese Snowbells.
The Japanese Snowbell is a broad-crowned deciduous tree from the woodlands of China and Japan.
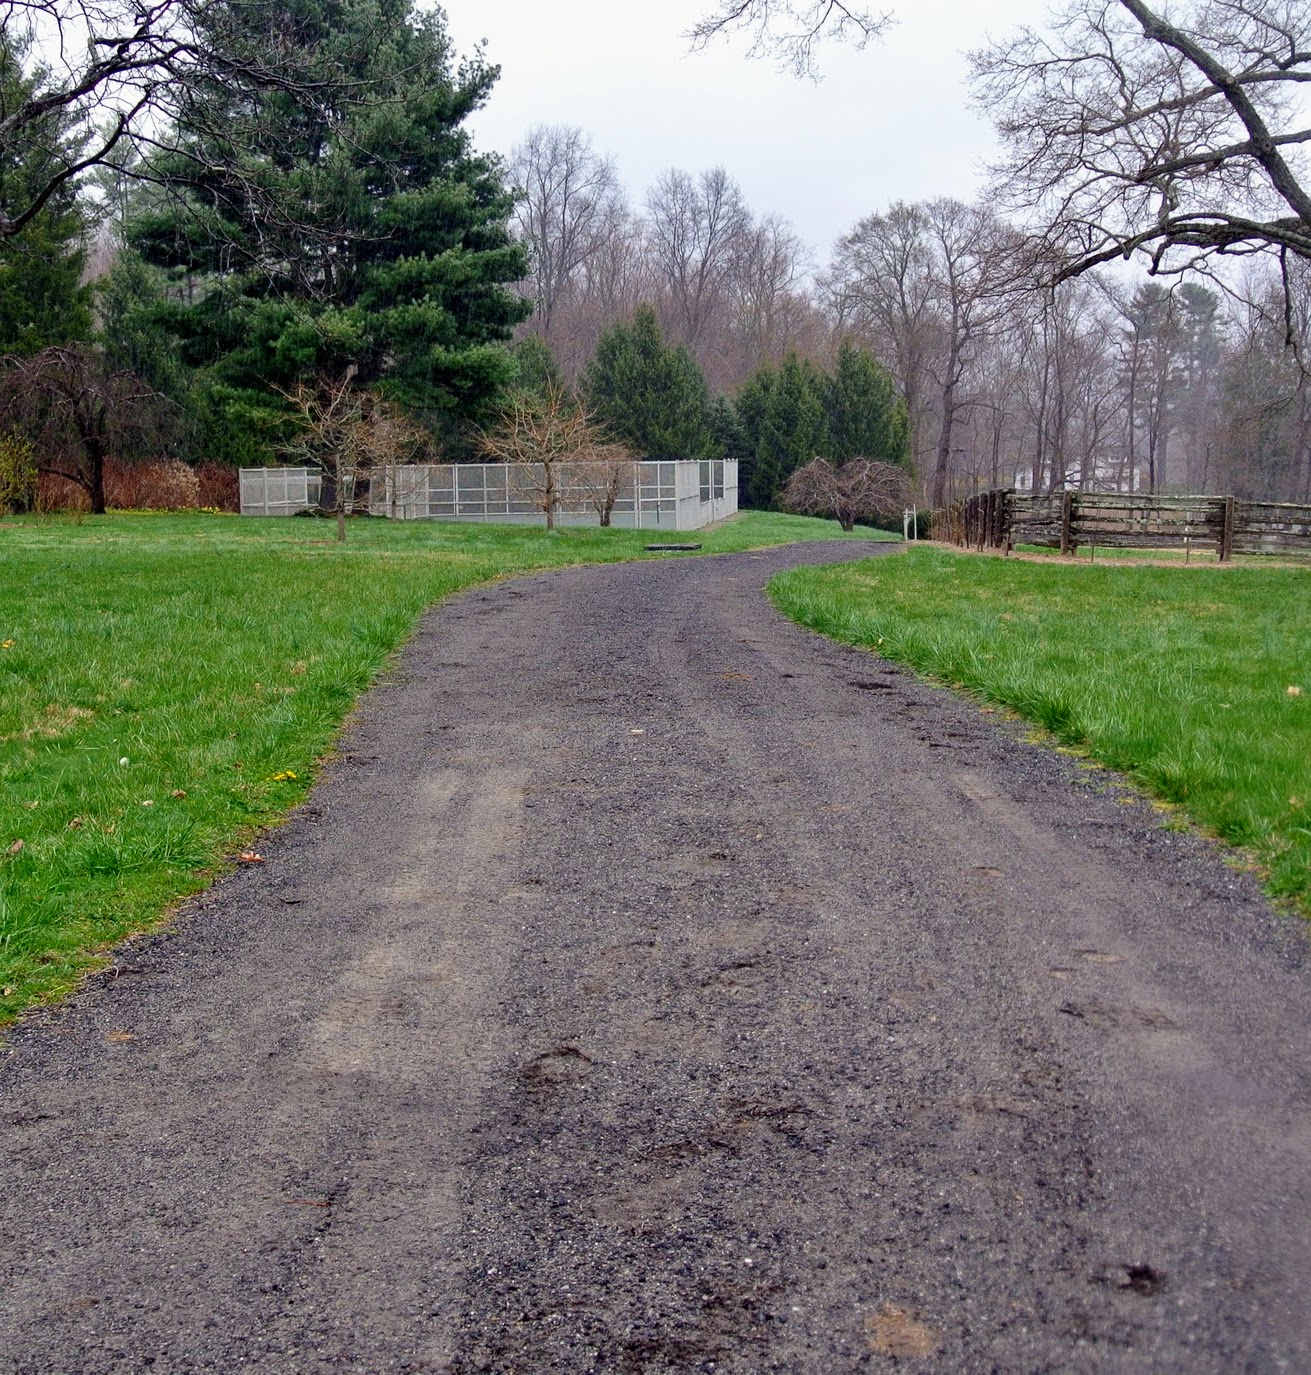
Here is a photo of the carriage road to my tennis court taken eight years ago. It looked quite bare then and in need of a pretty allée.
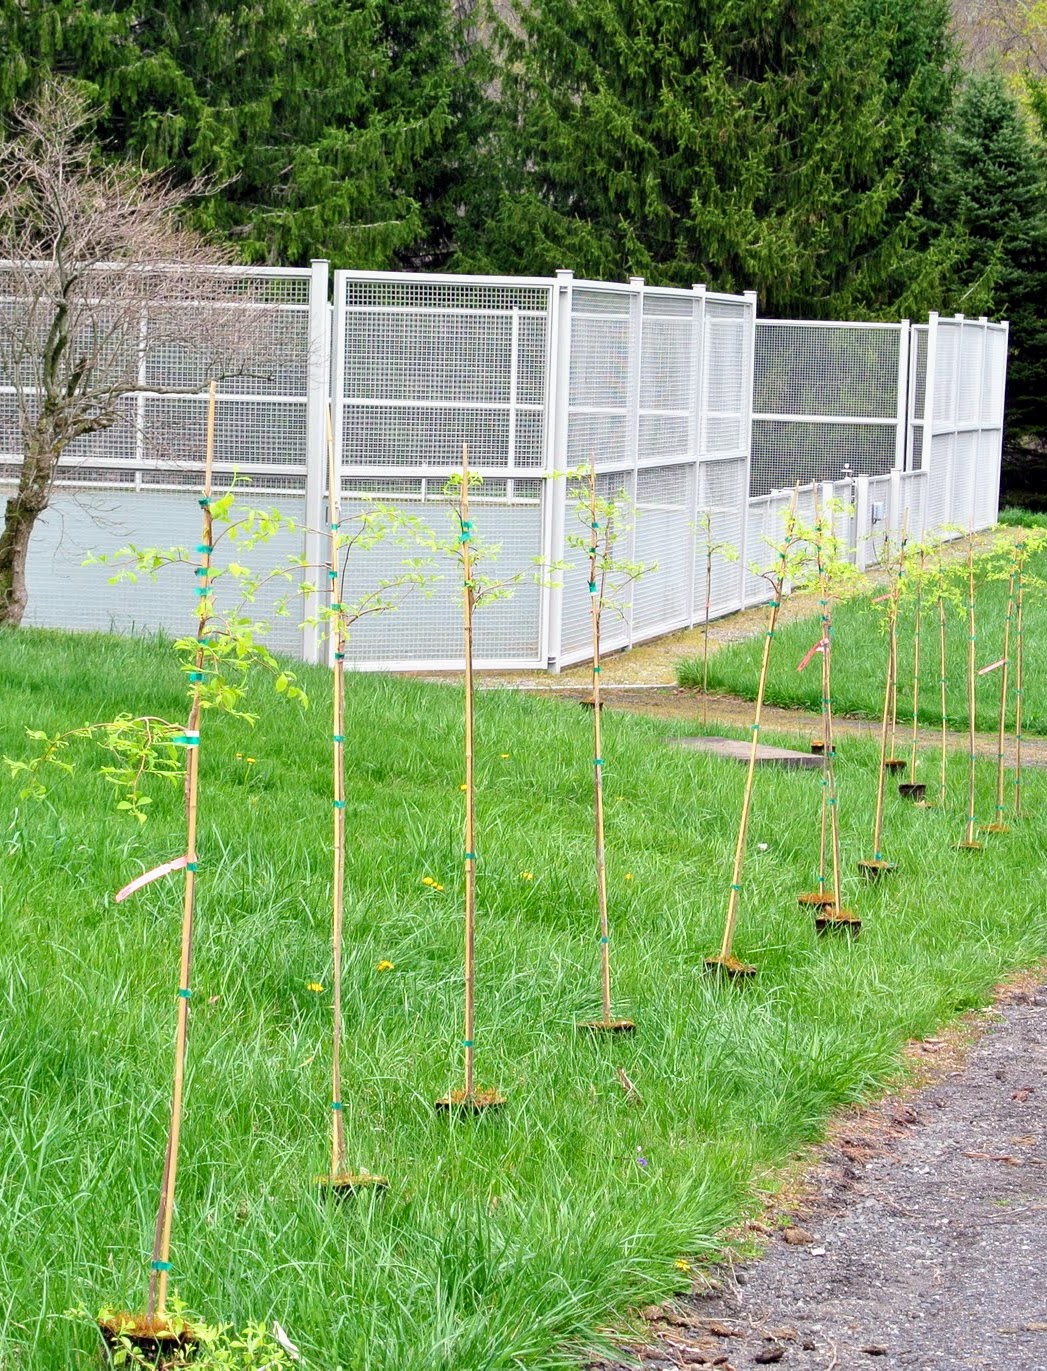
This photo is from April 2016. I planted 44 ‘Marley’s Pink Parasol’ Japanese Snowbell trees along both sides of the road. I knew in time they would mature excellently in this location.
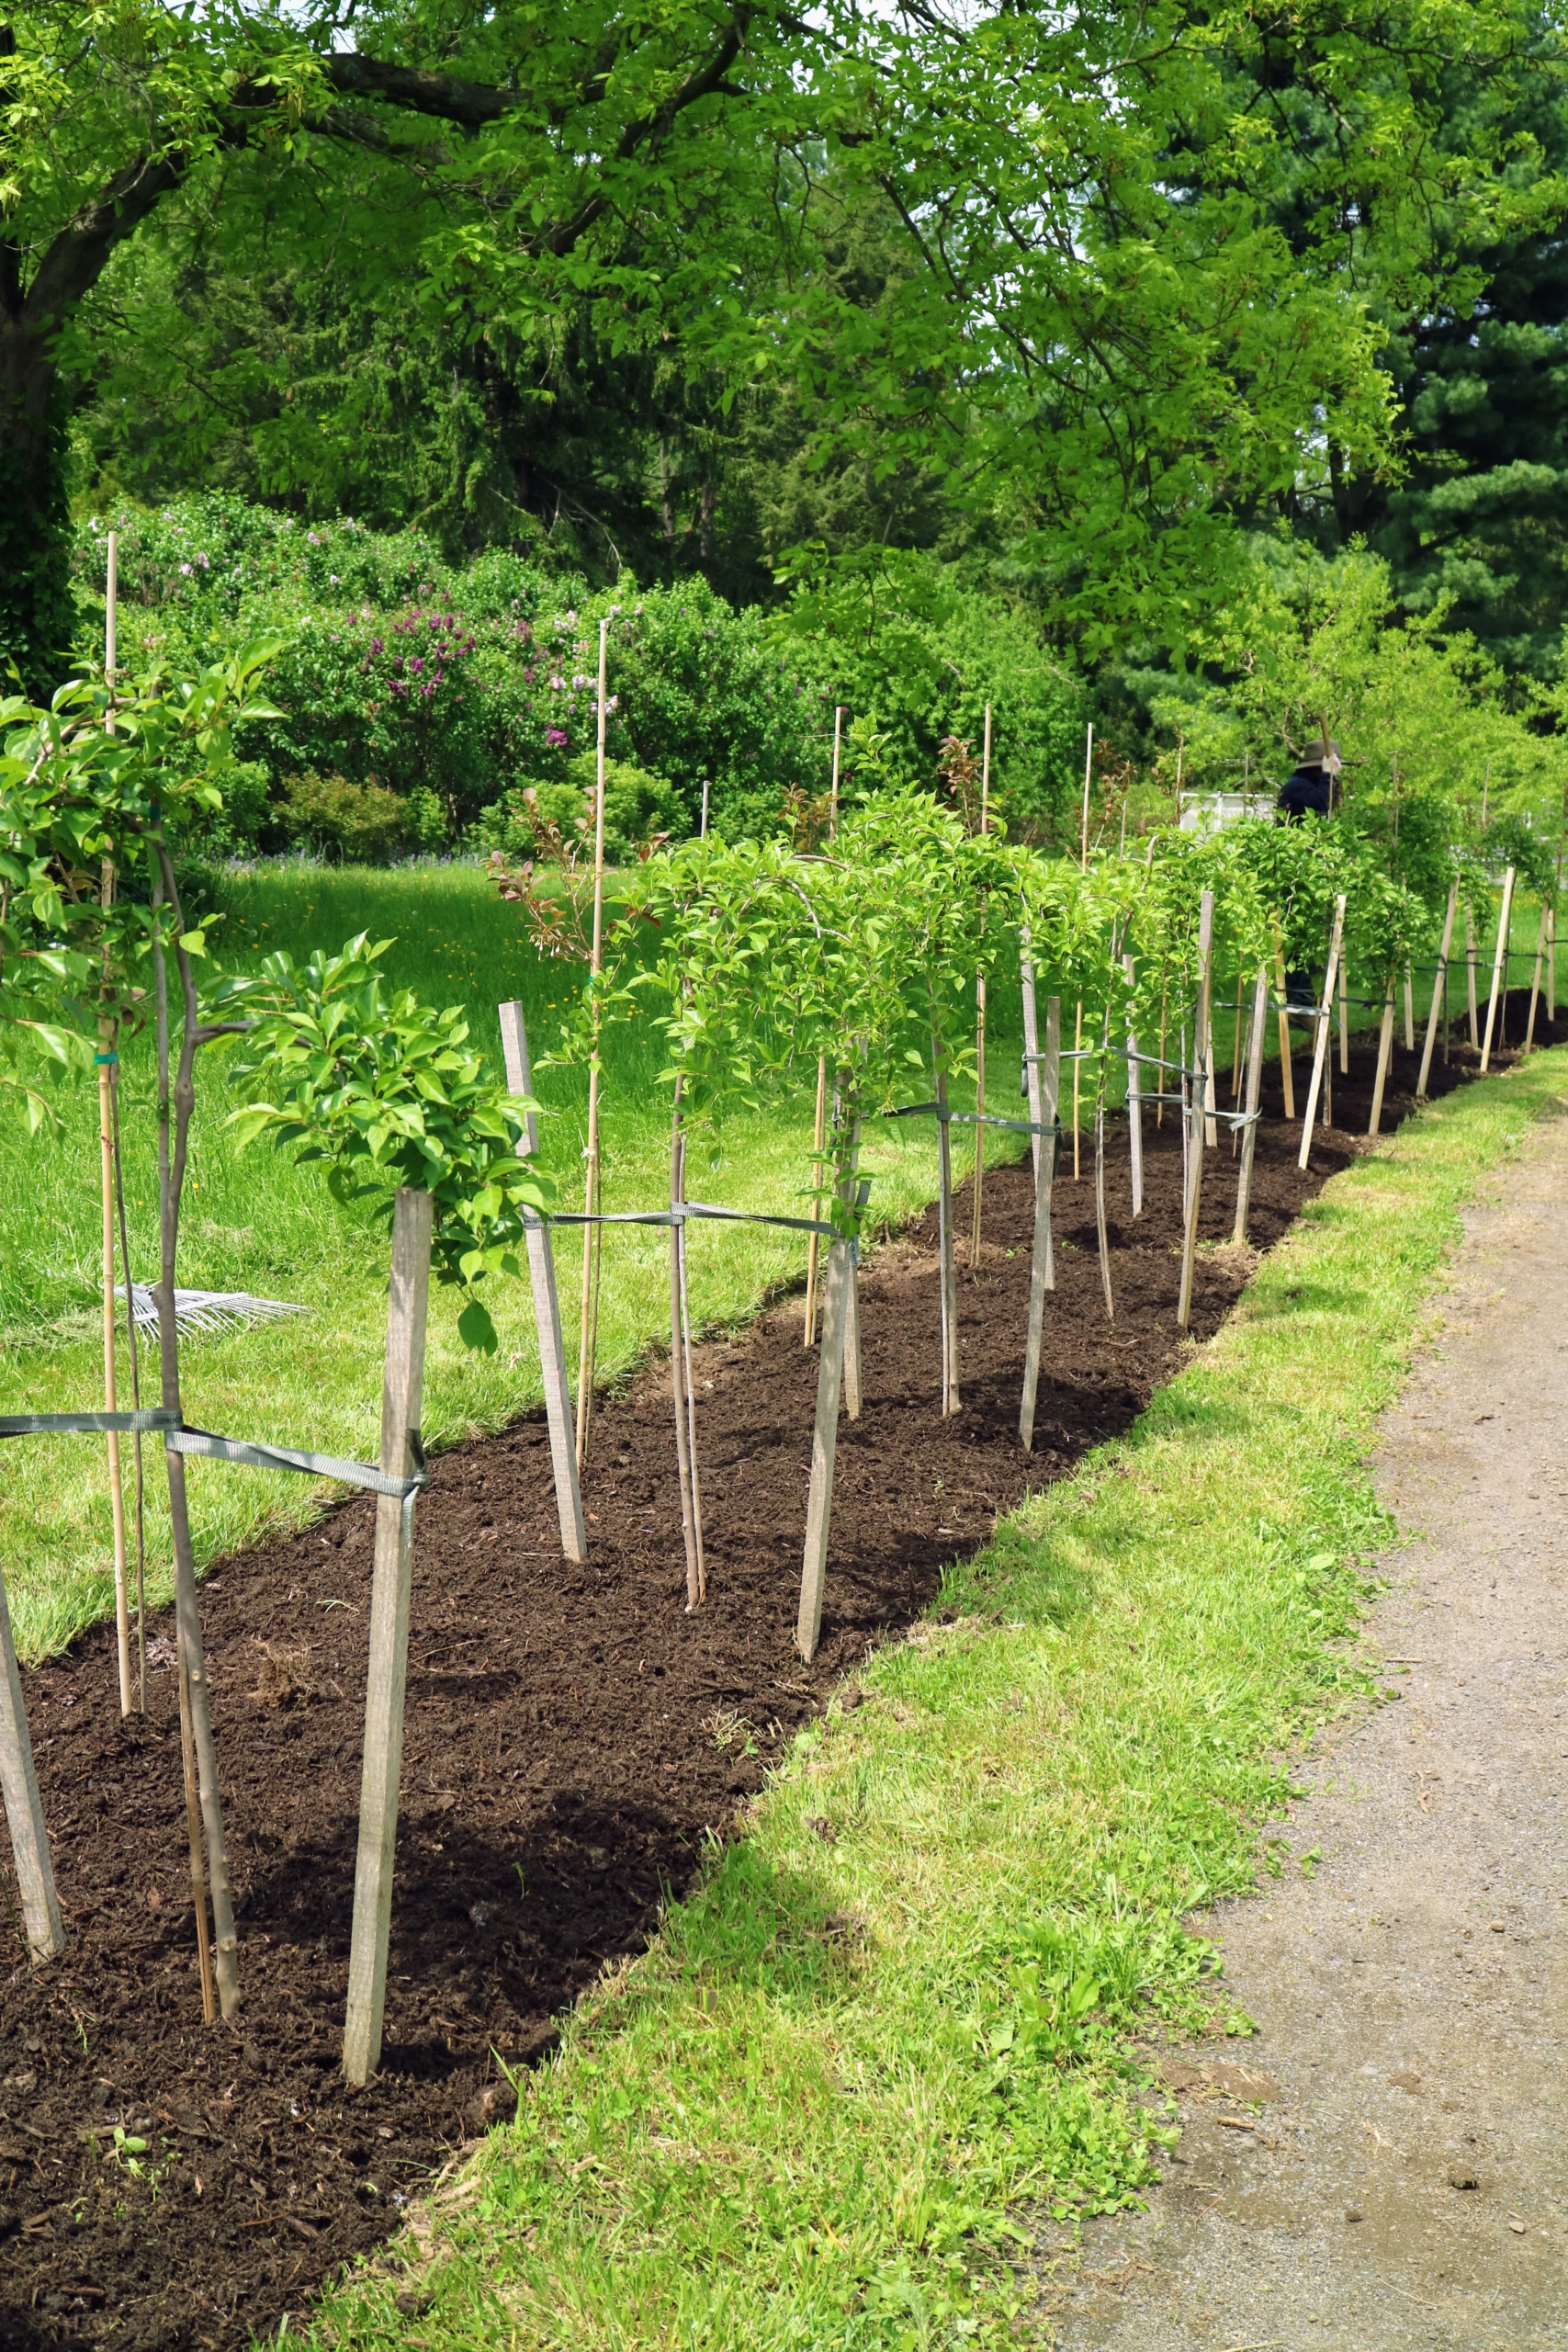
In spring of 2018, I planted Styrax japonicus ‘Evening Light’. I wanted the new row of trees to be planted slightly behind the existing row and spaced evenly between them, so they alternated in color.
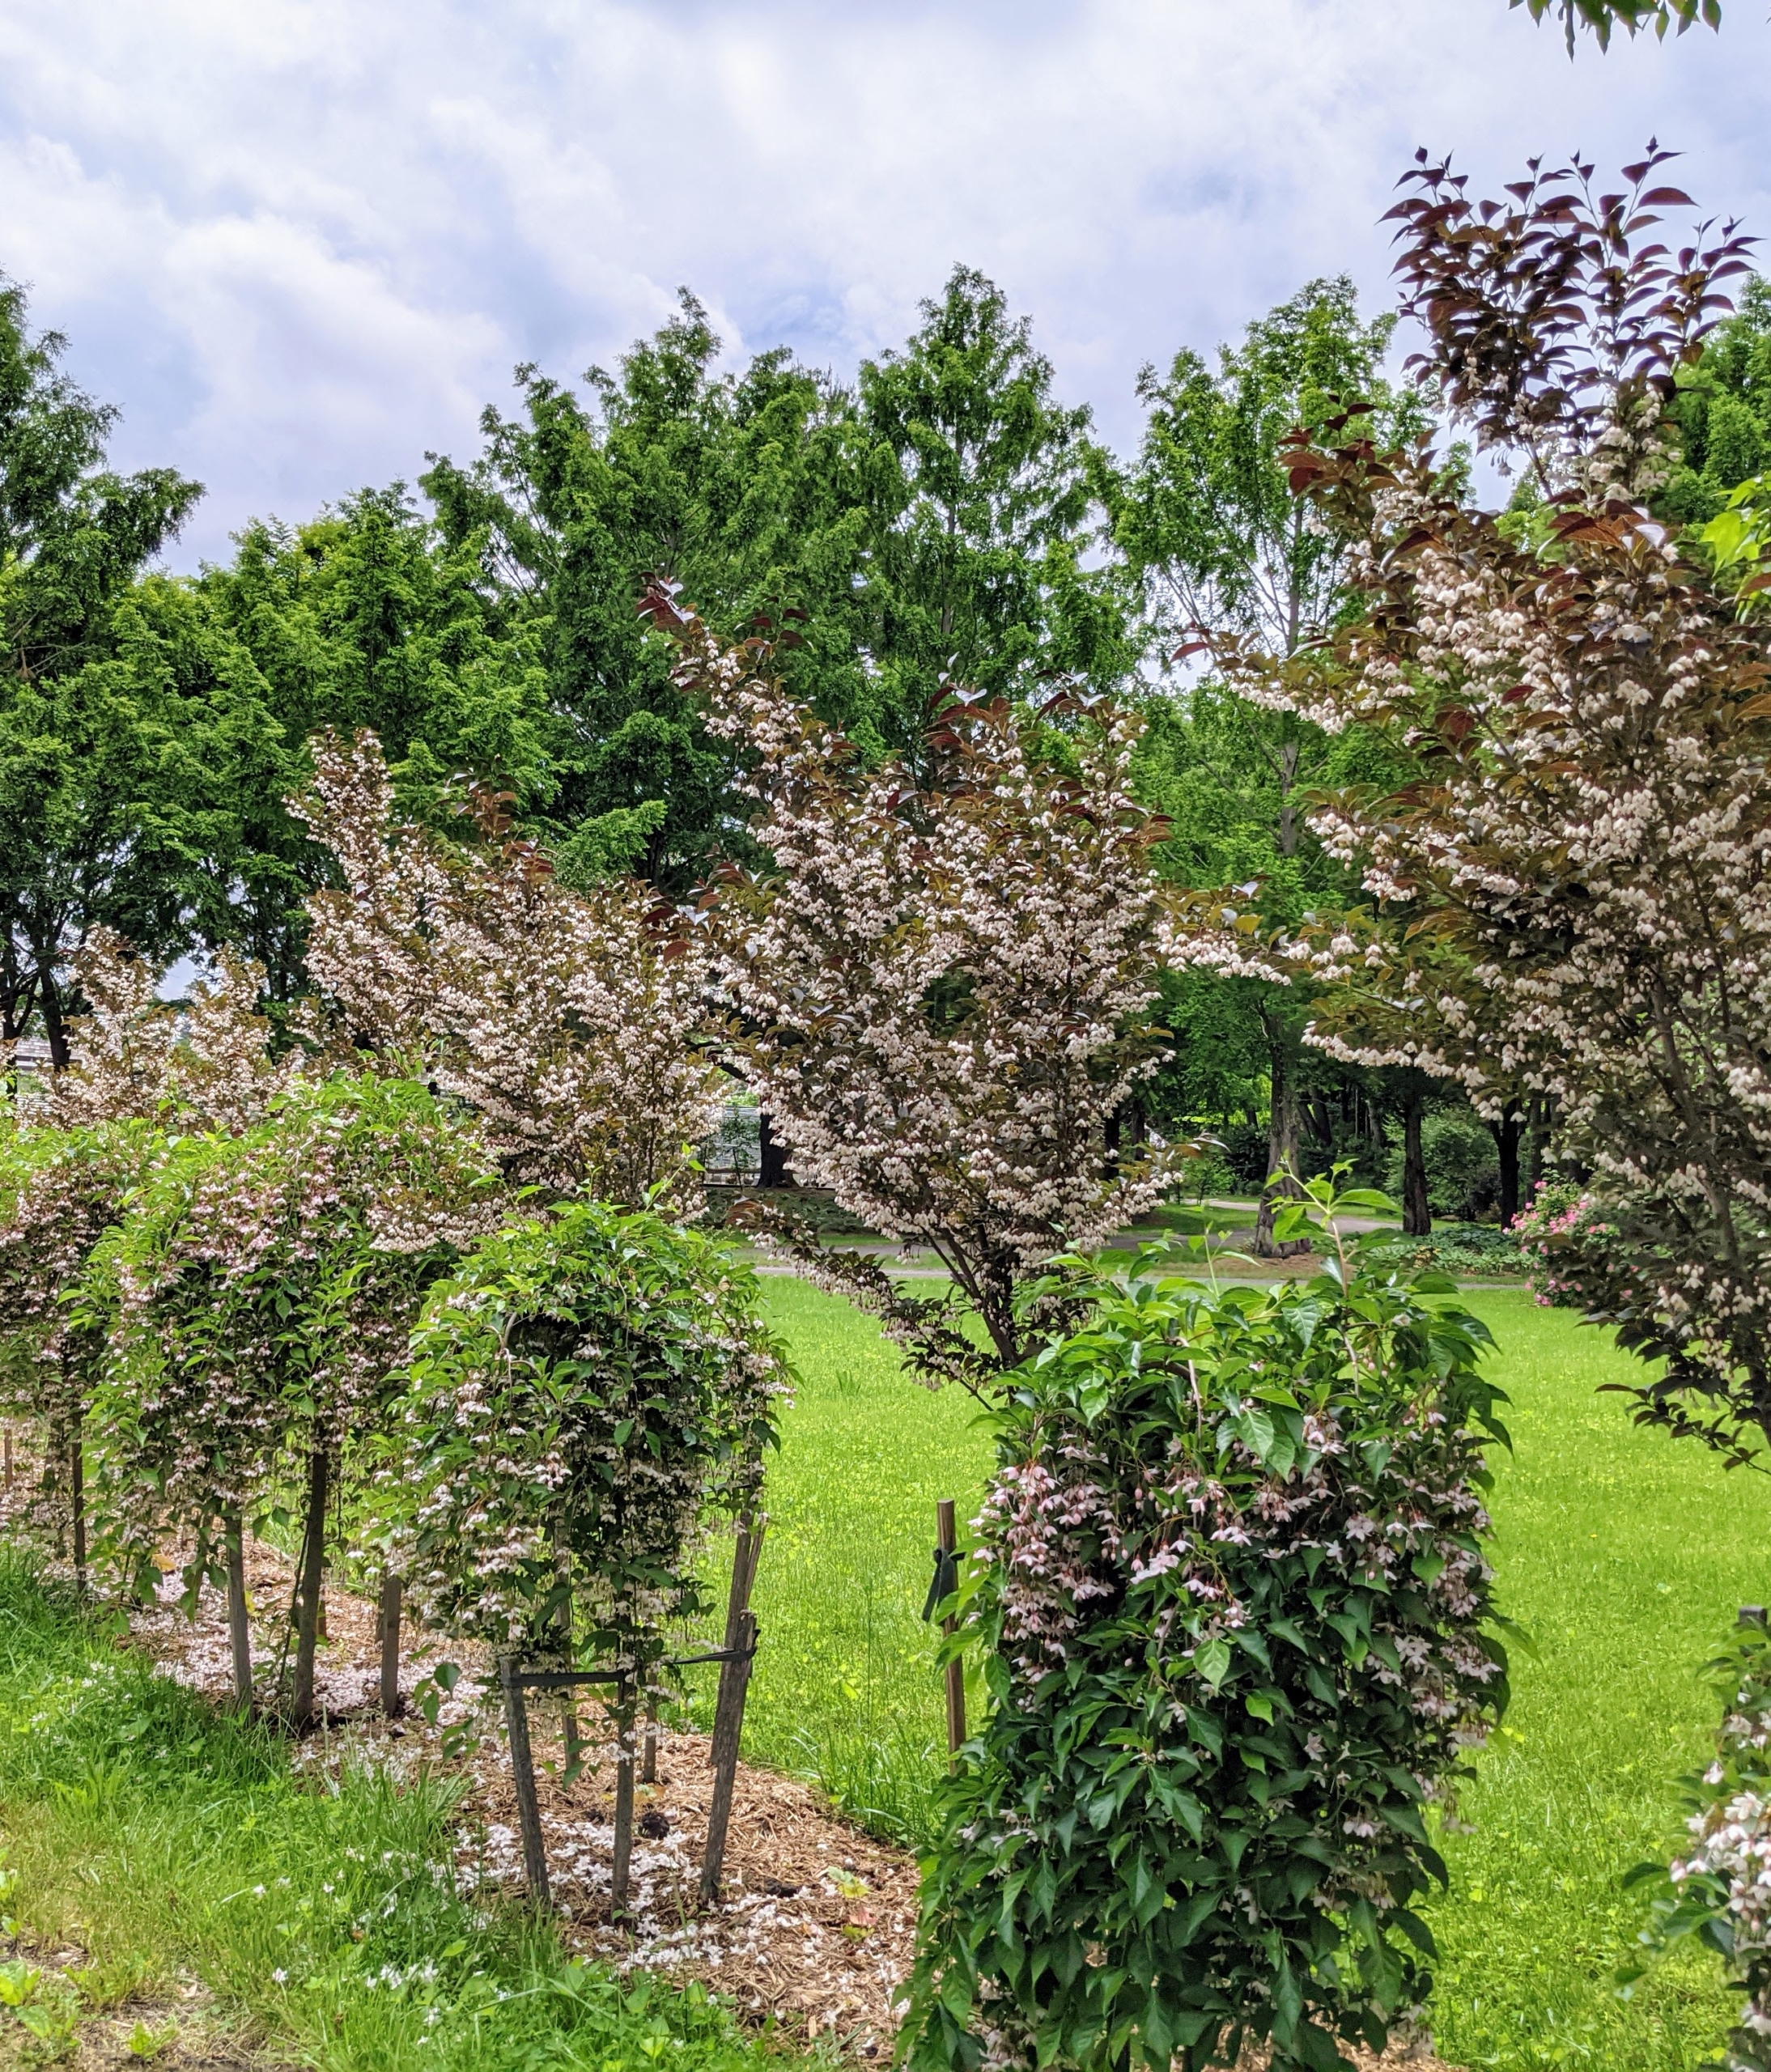
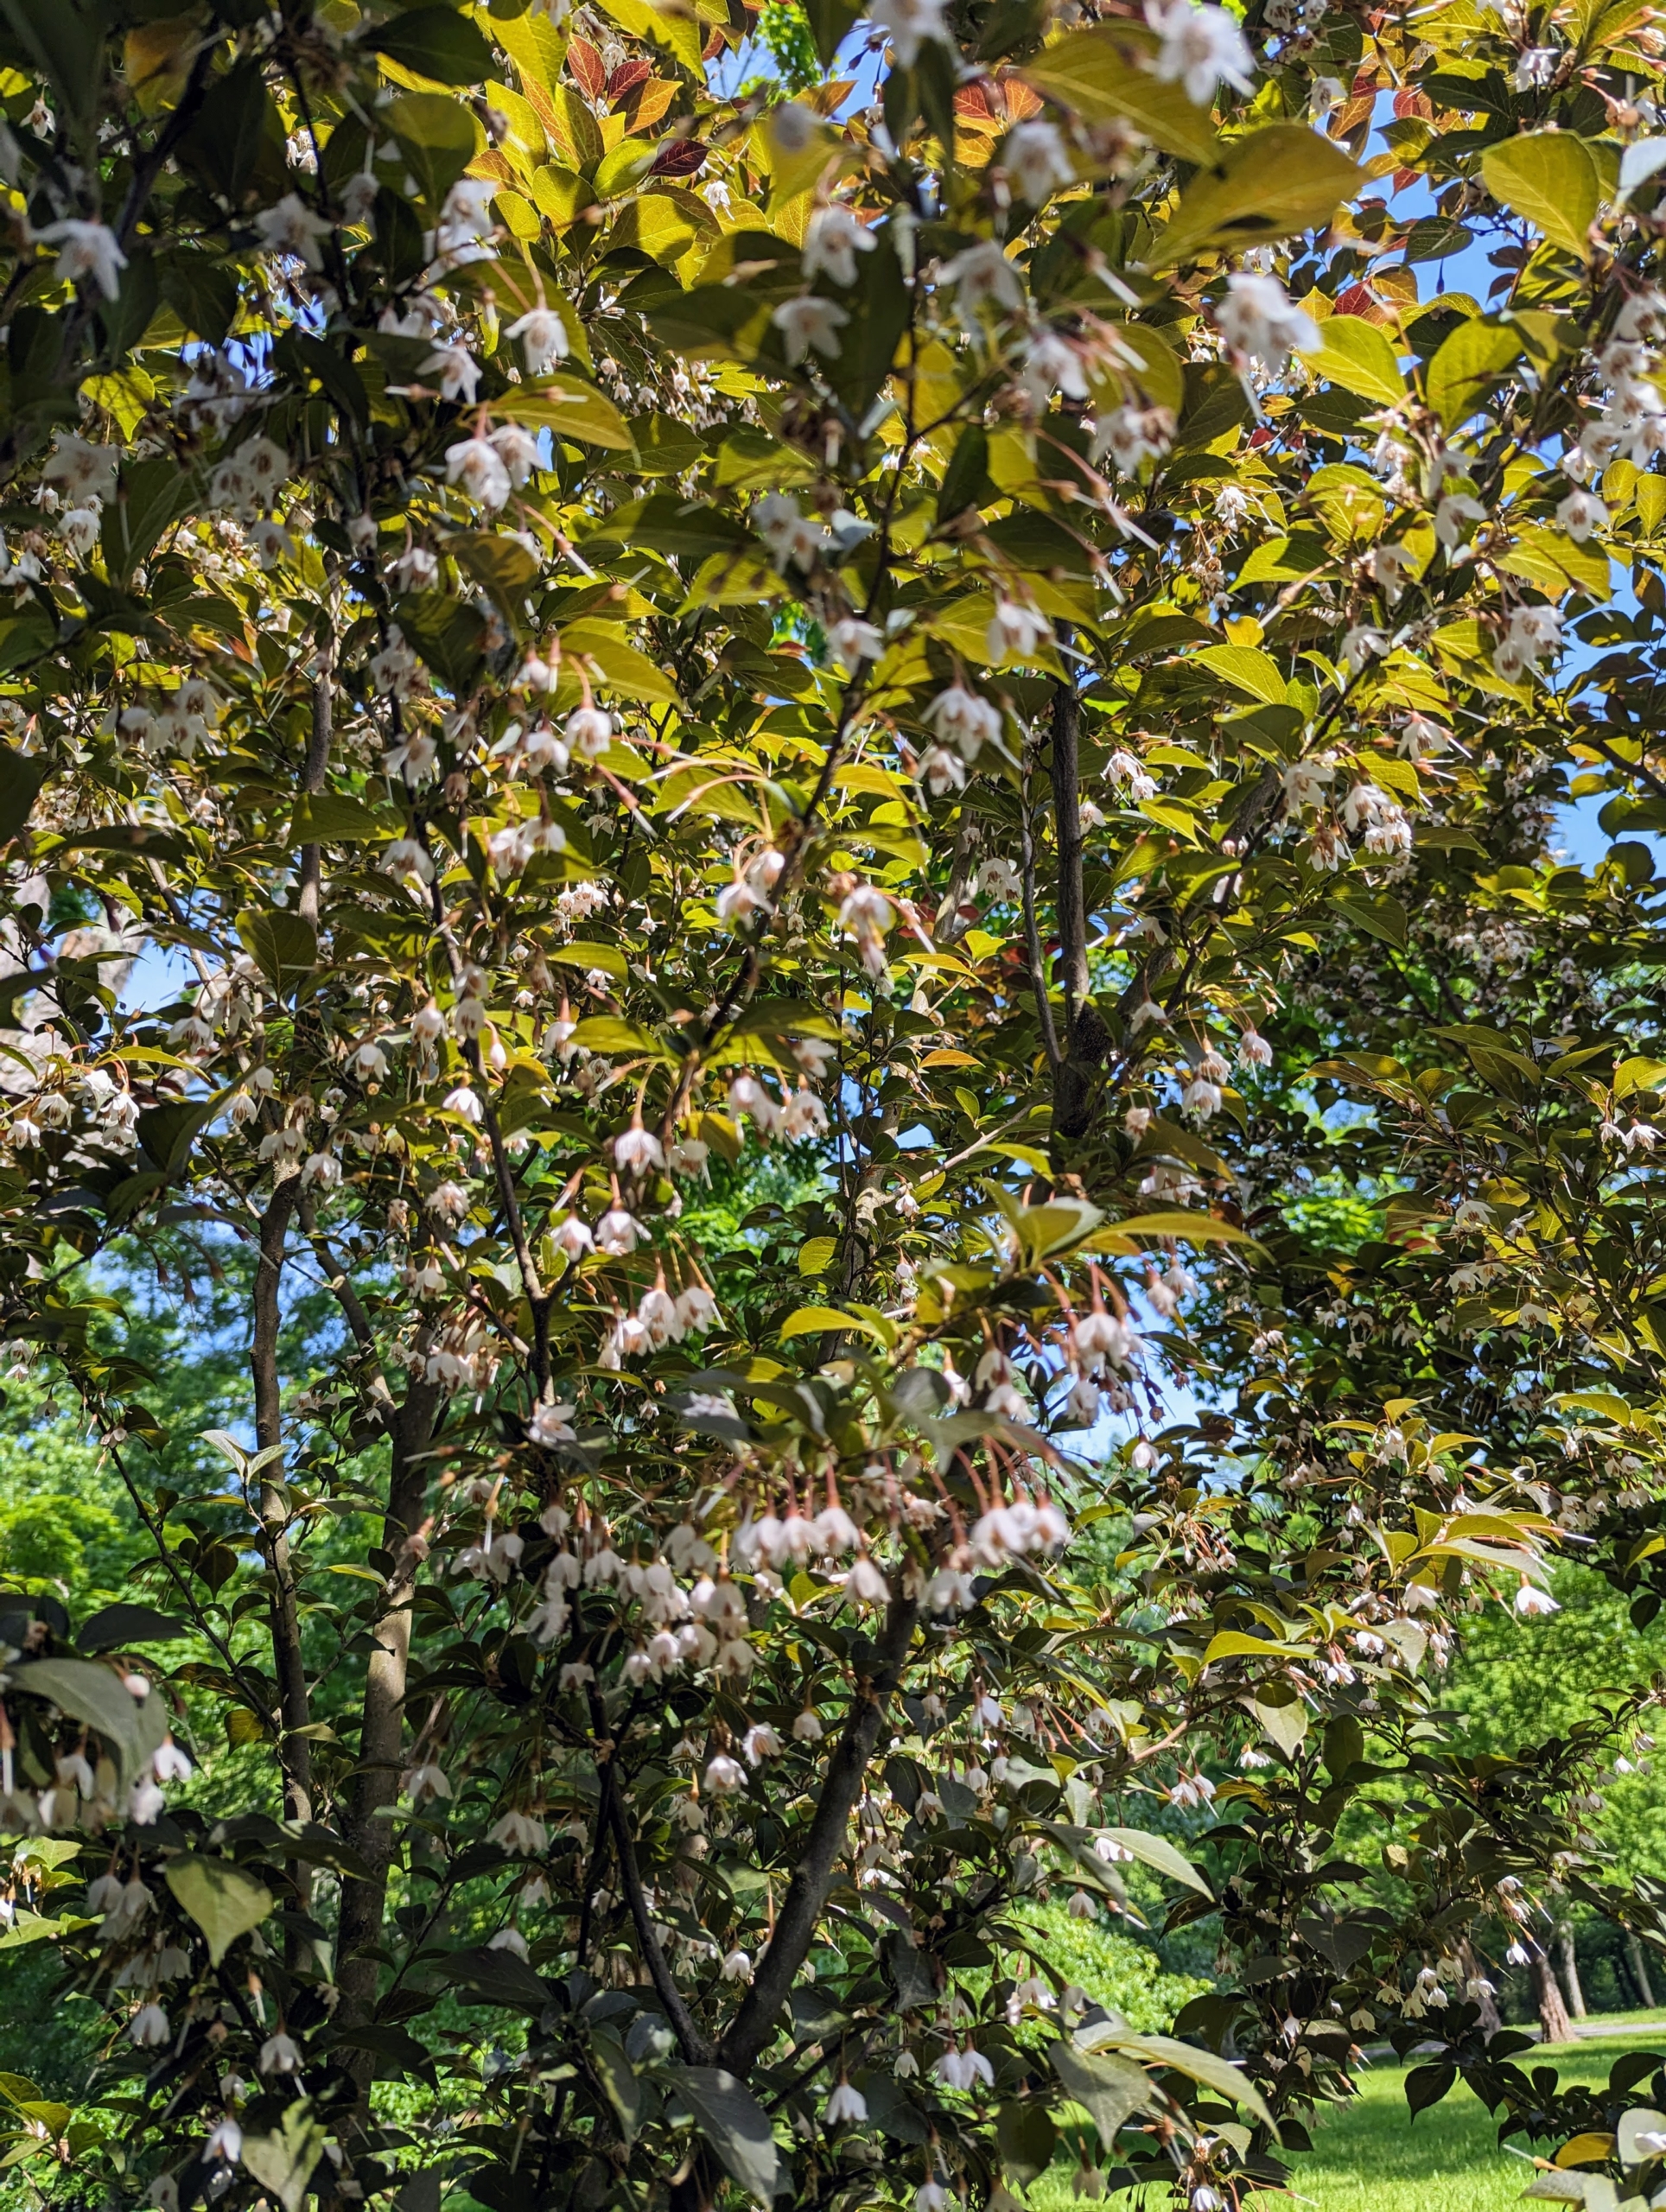
In June of 2021, the trees are healthy and established.
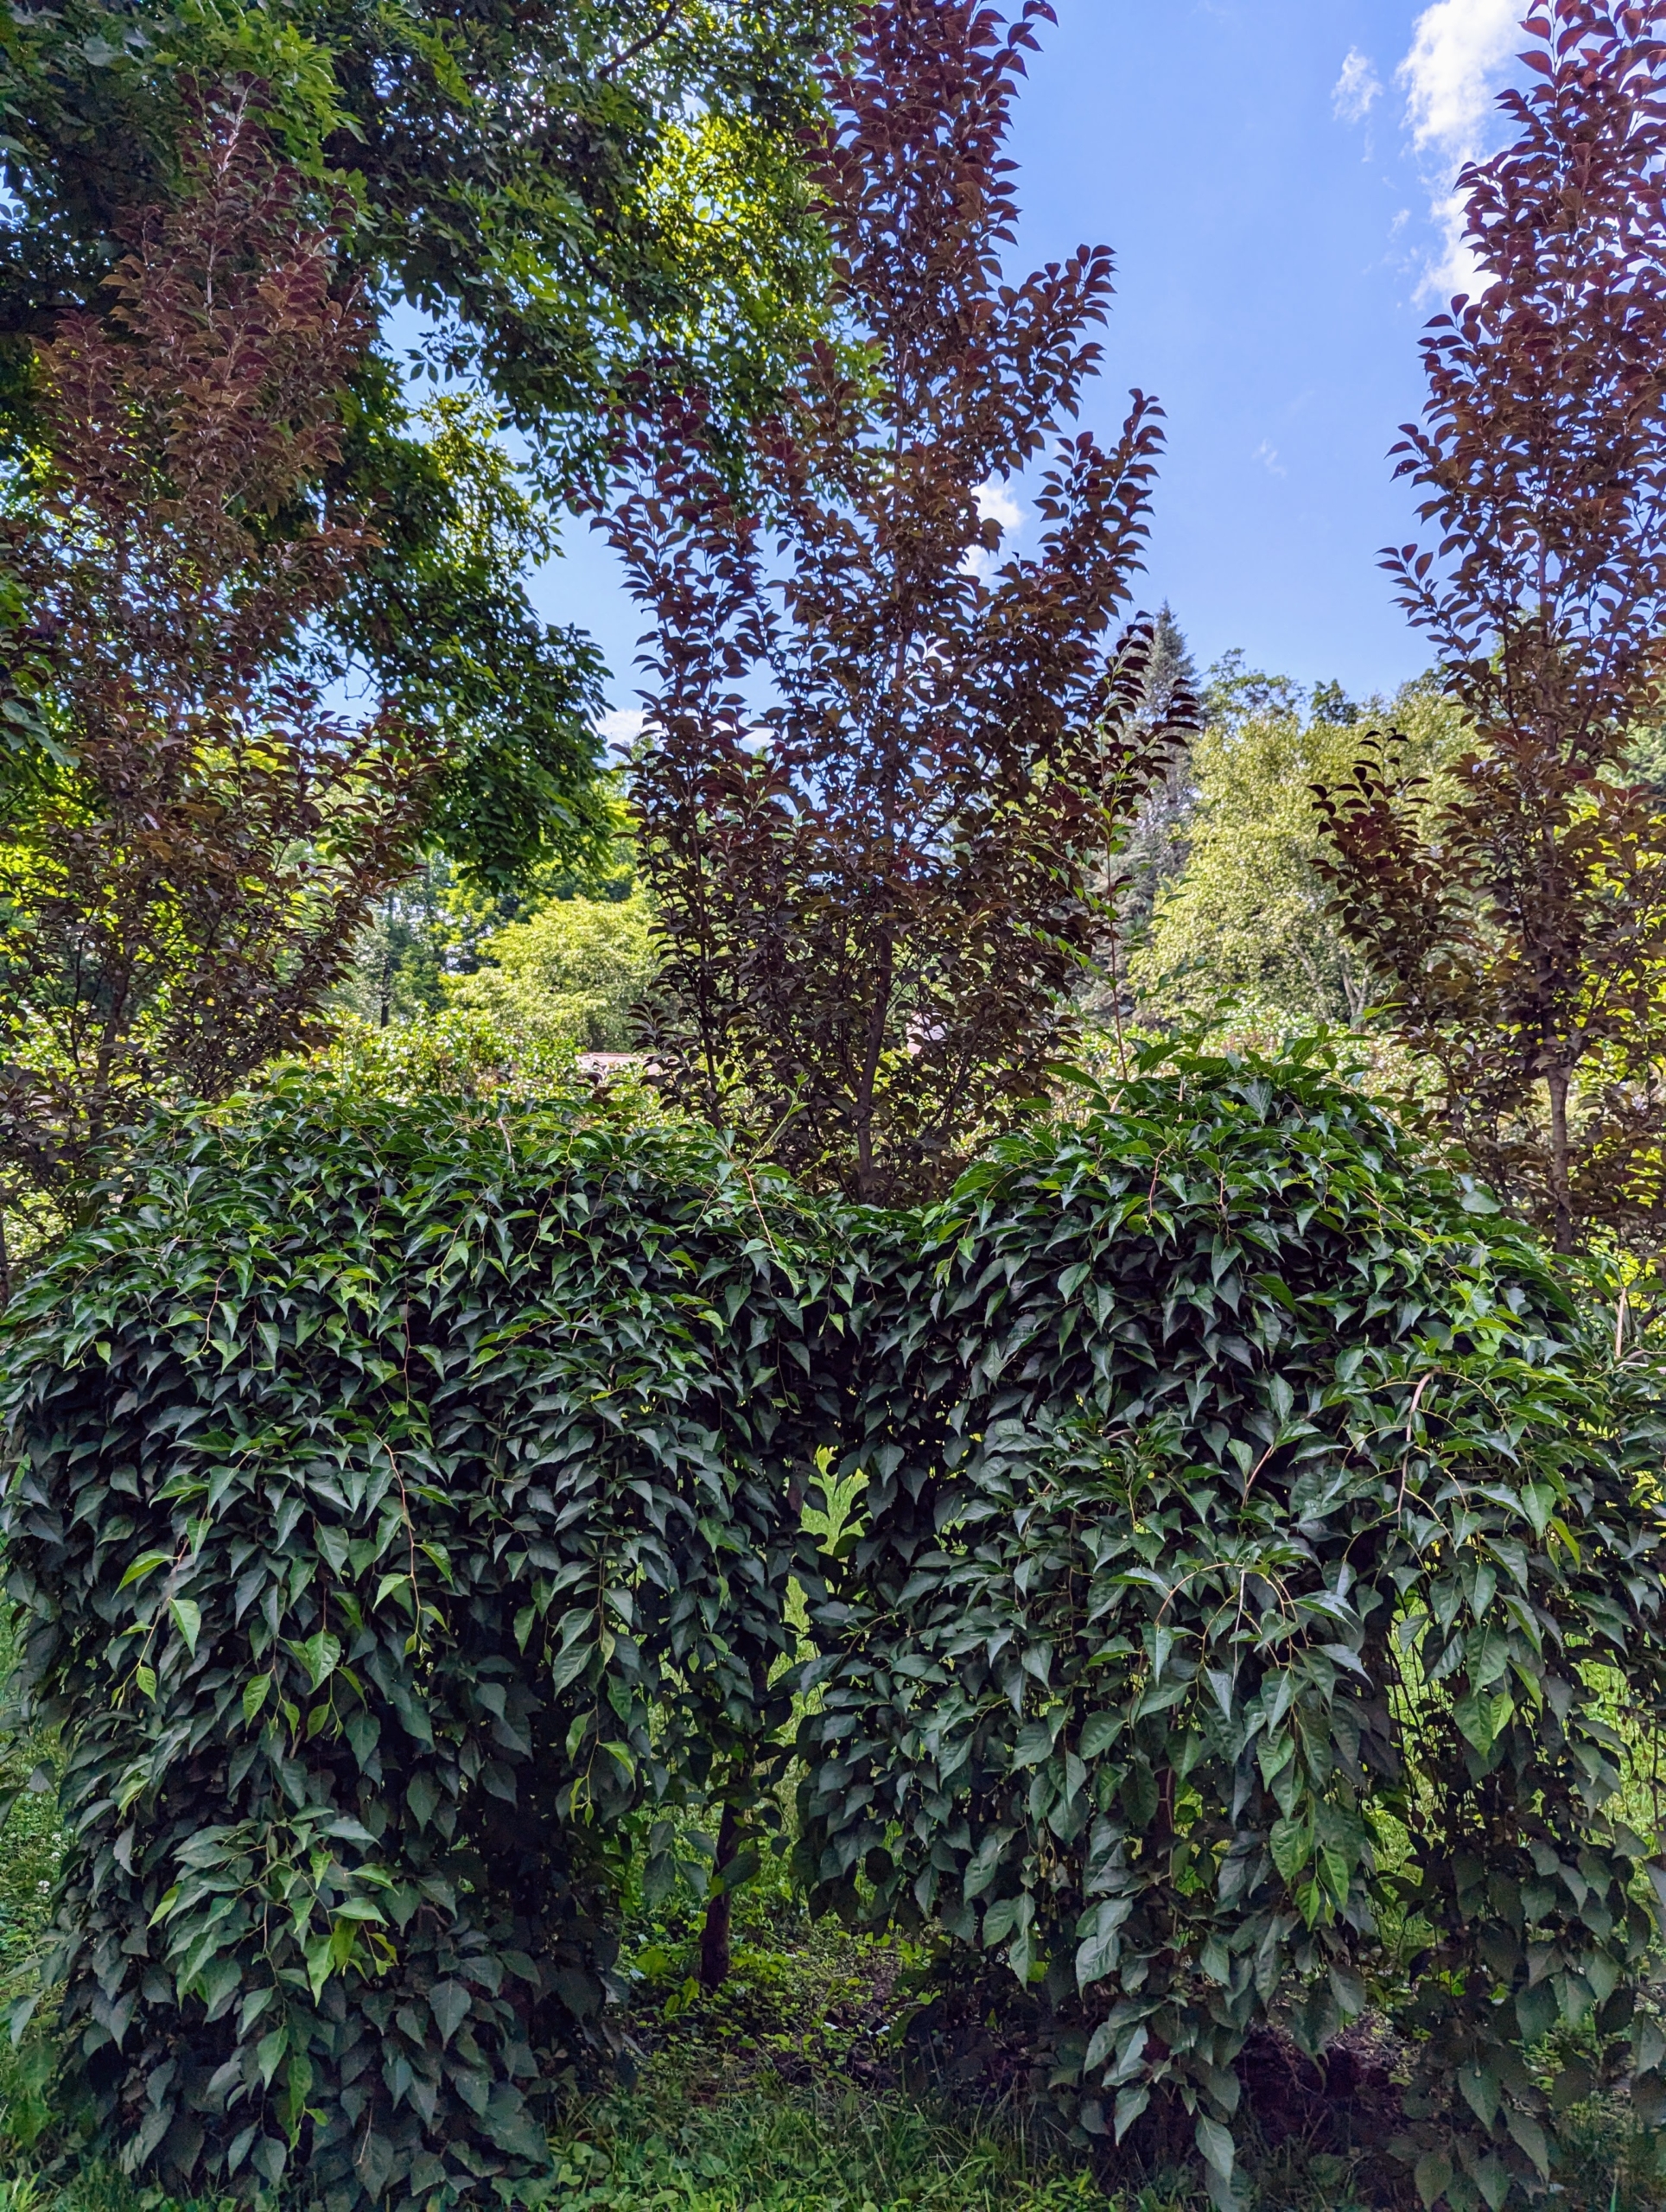
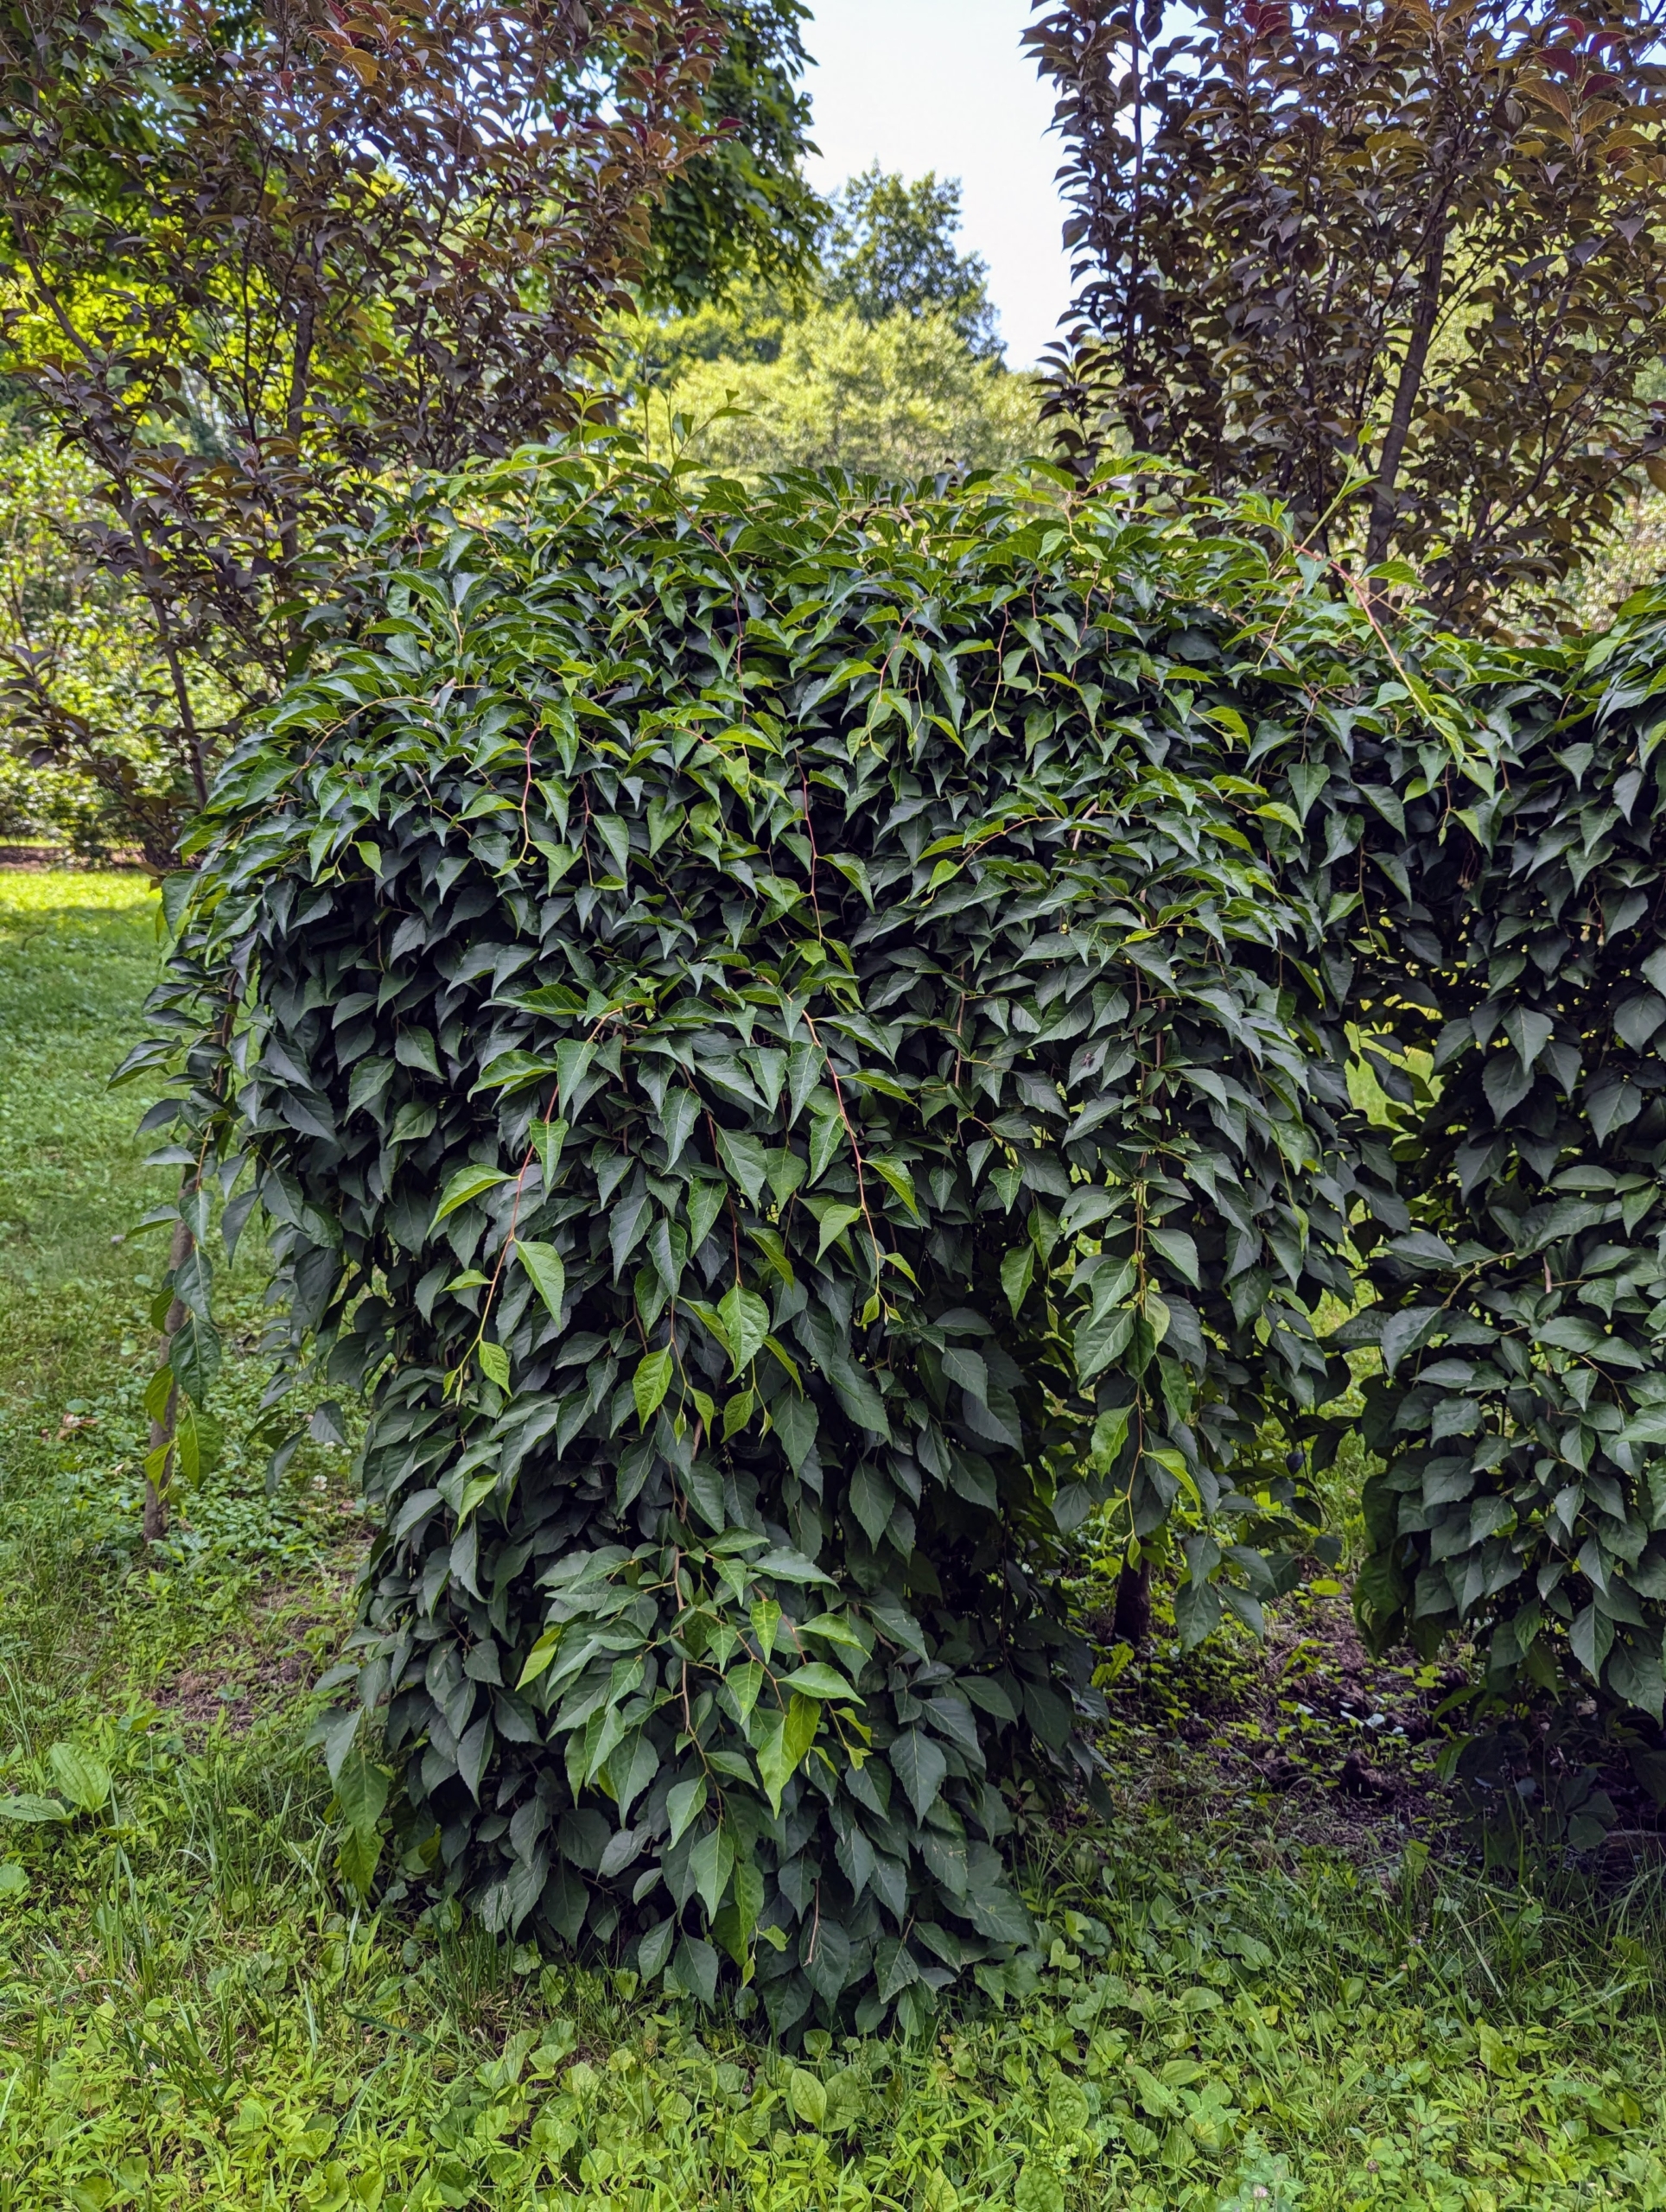
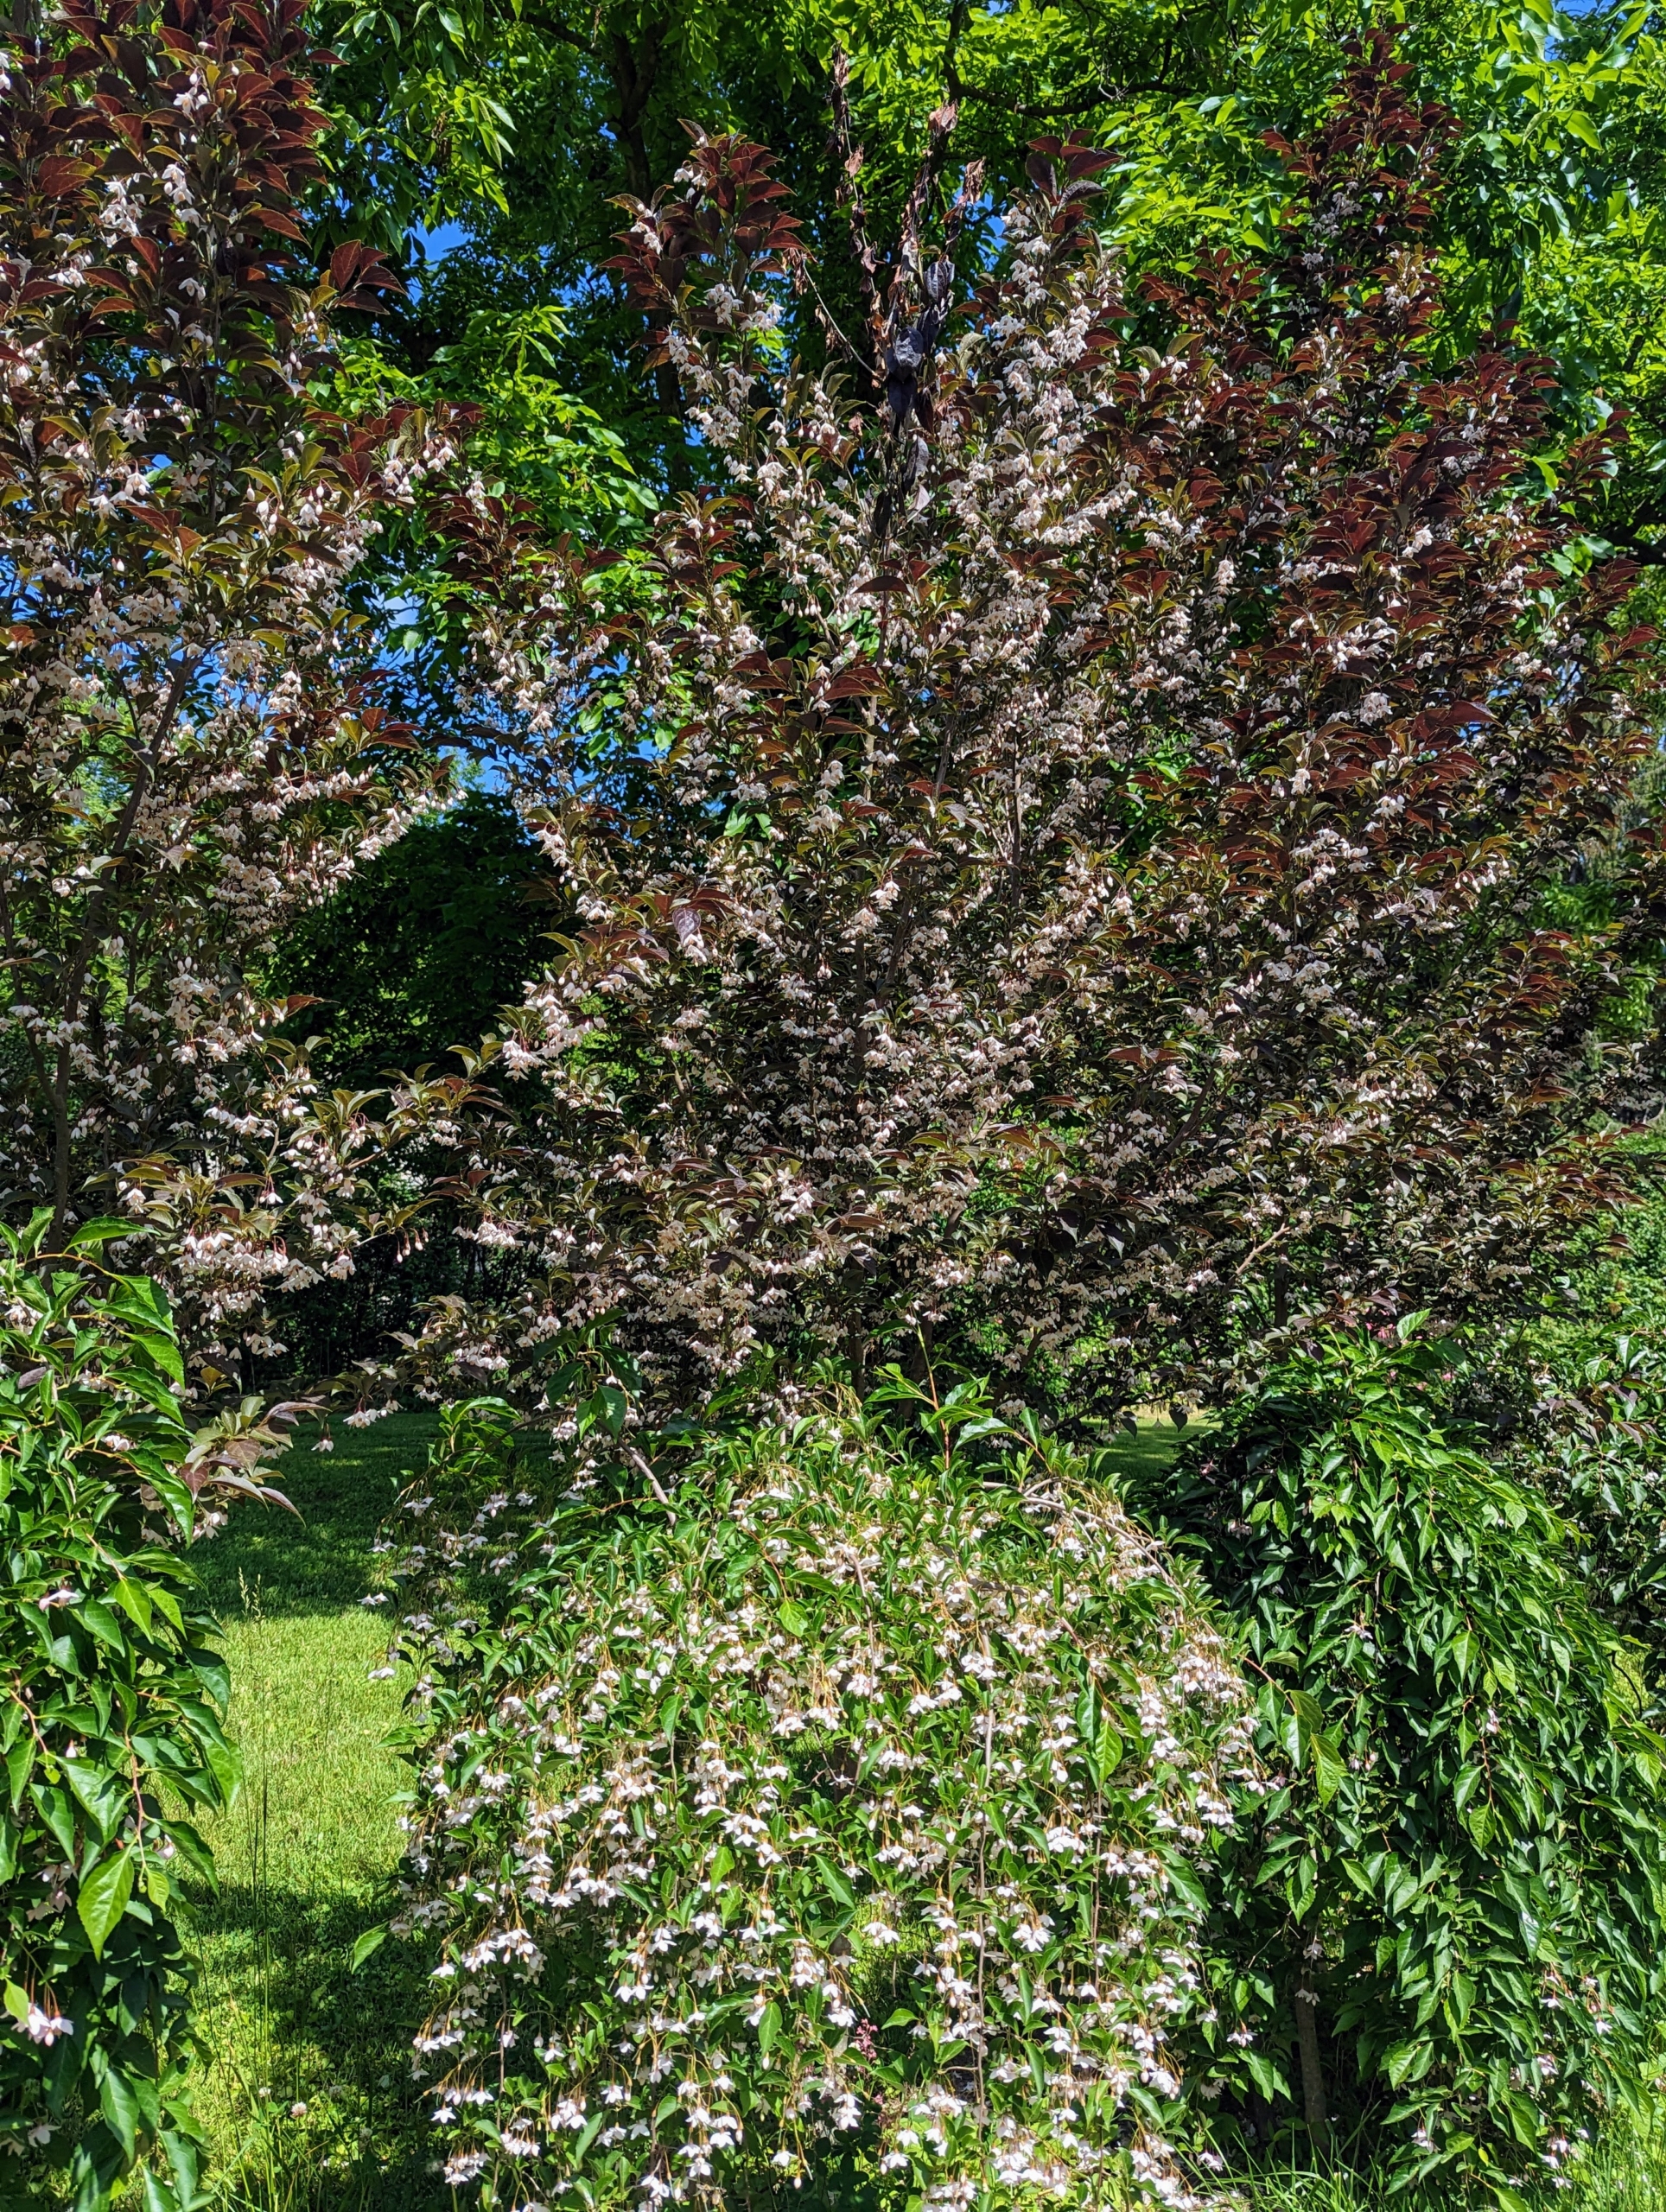
And look at these Japanese Snowbell trees now – so lush. And the green and dark purple foliage contrast so nicely.
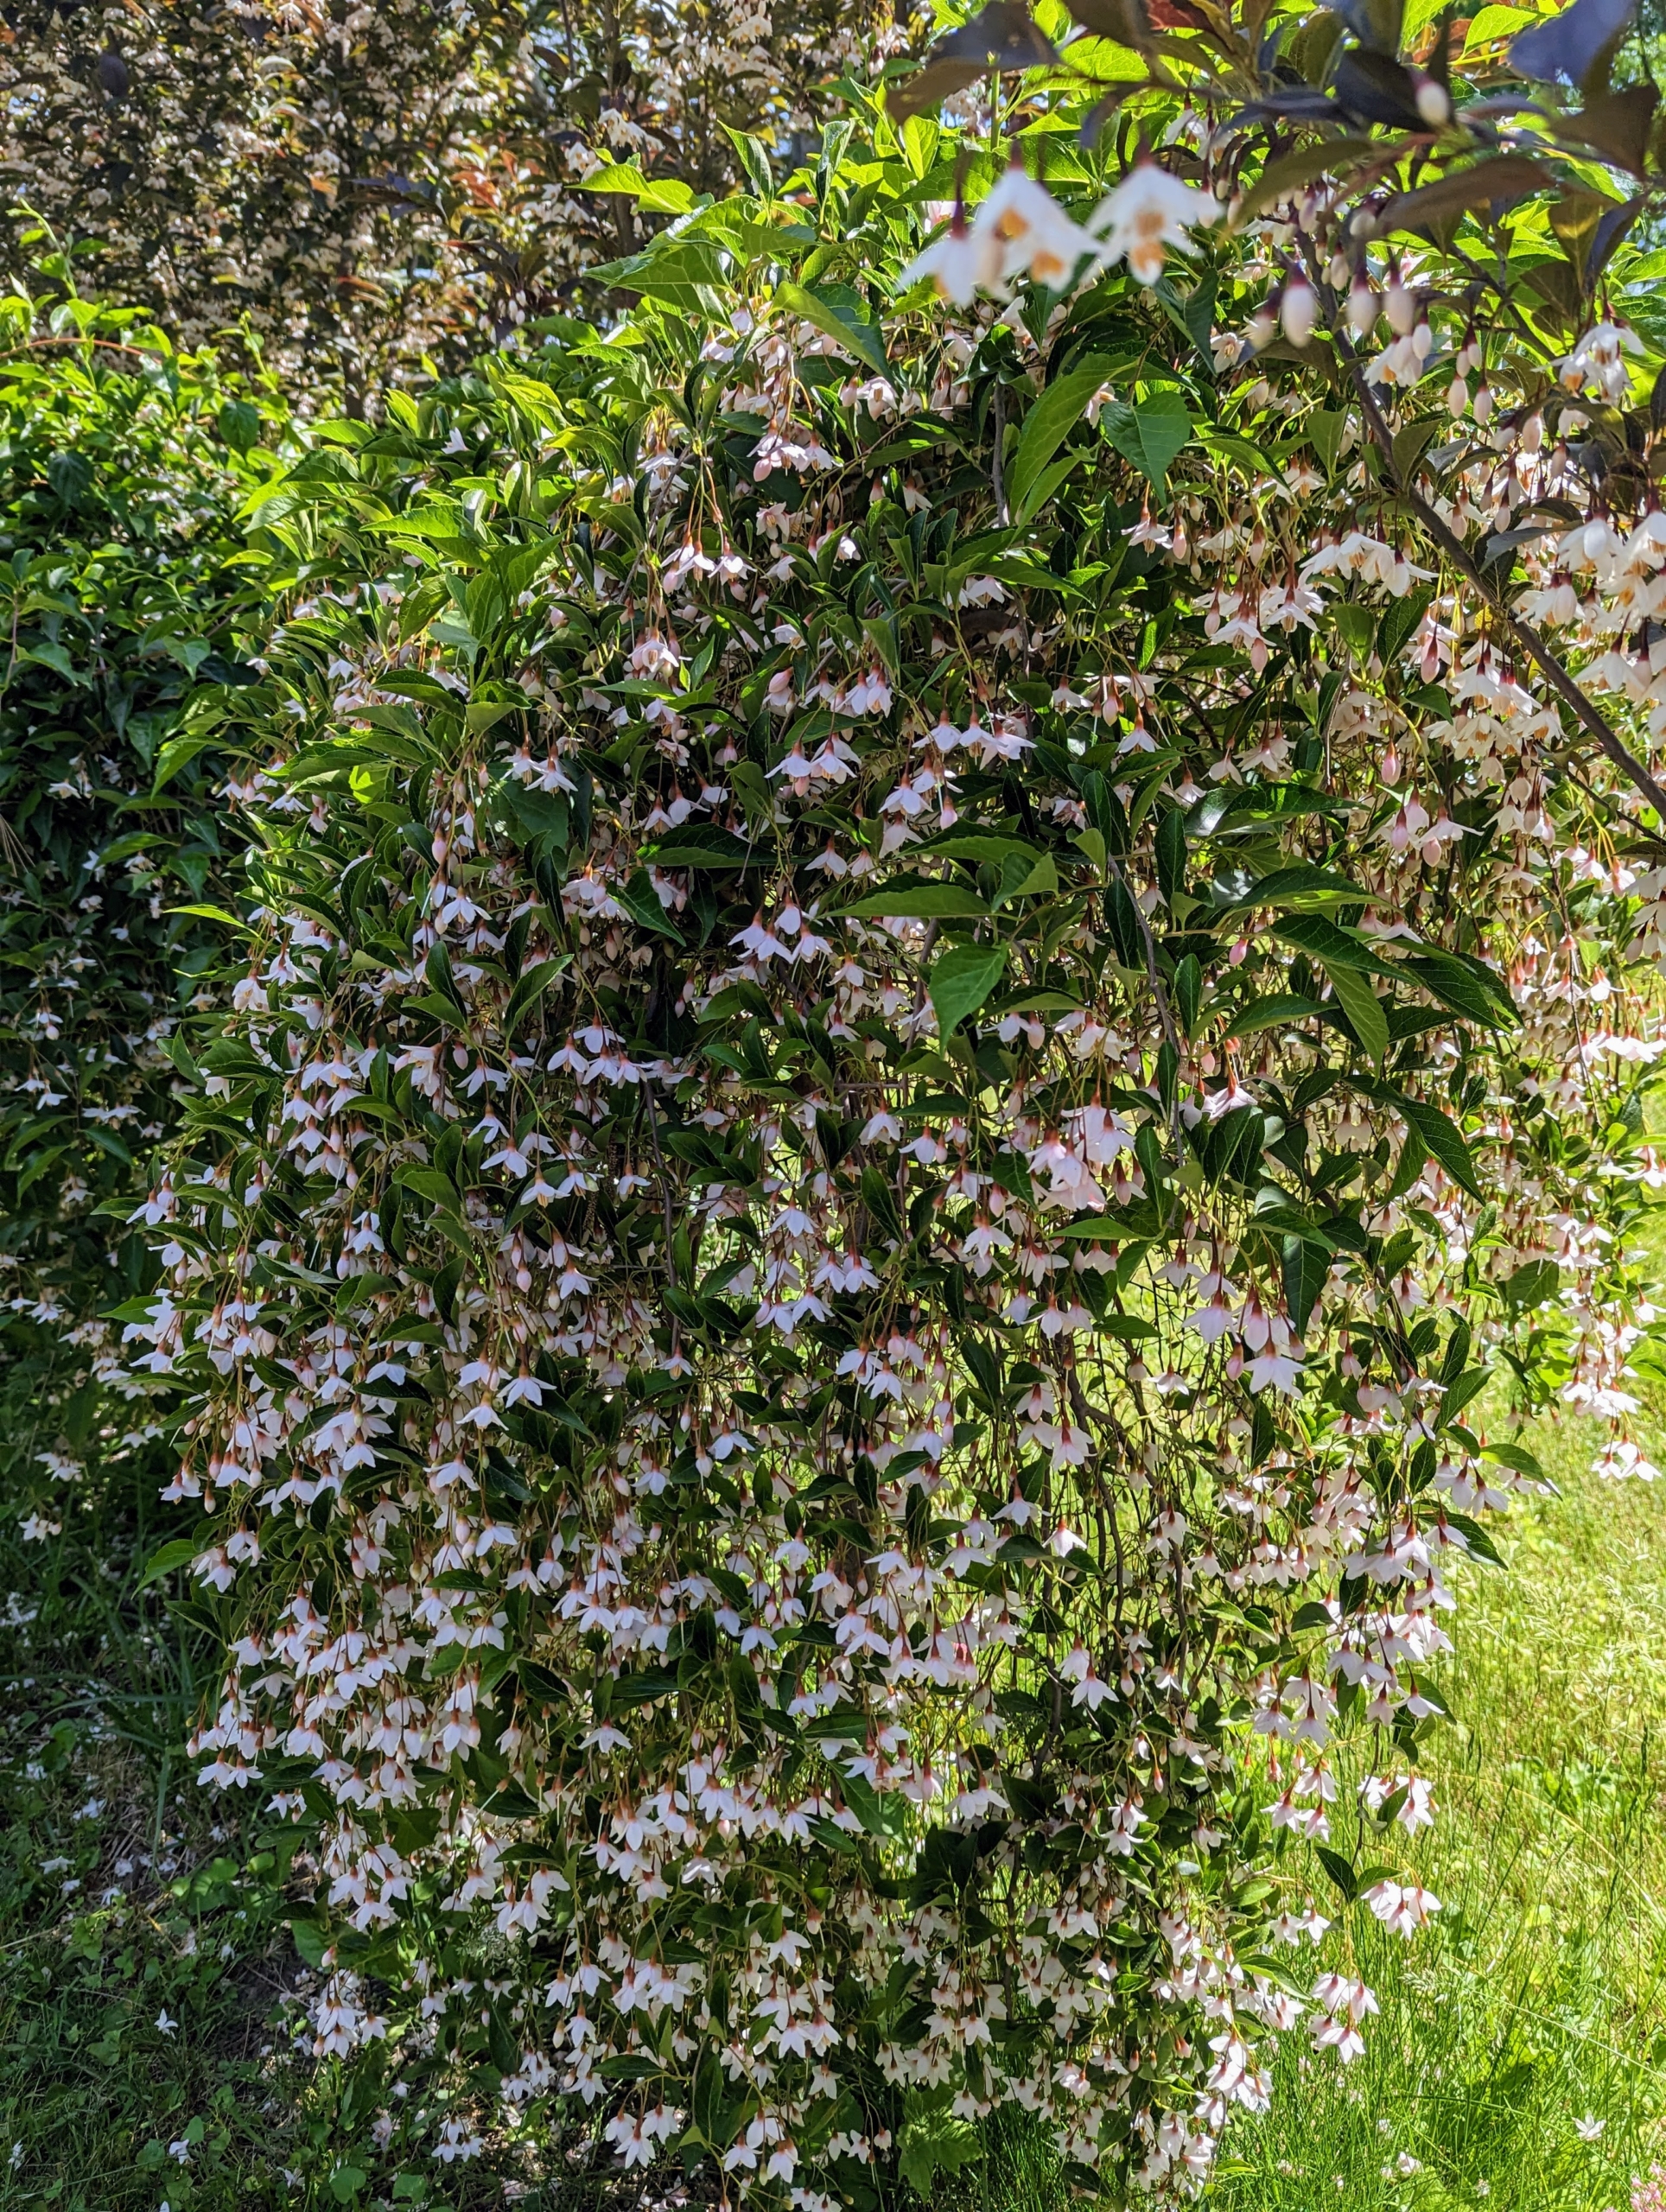
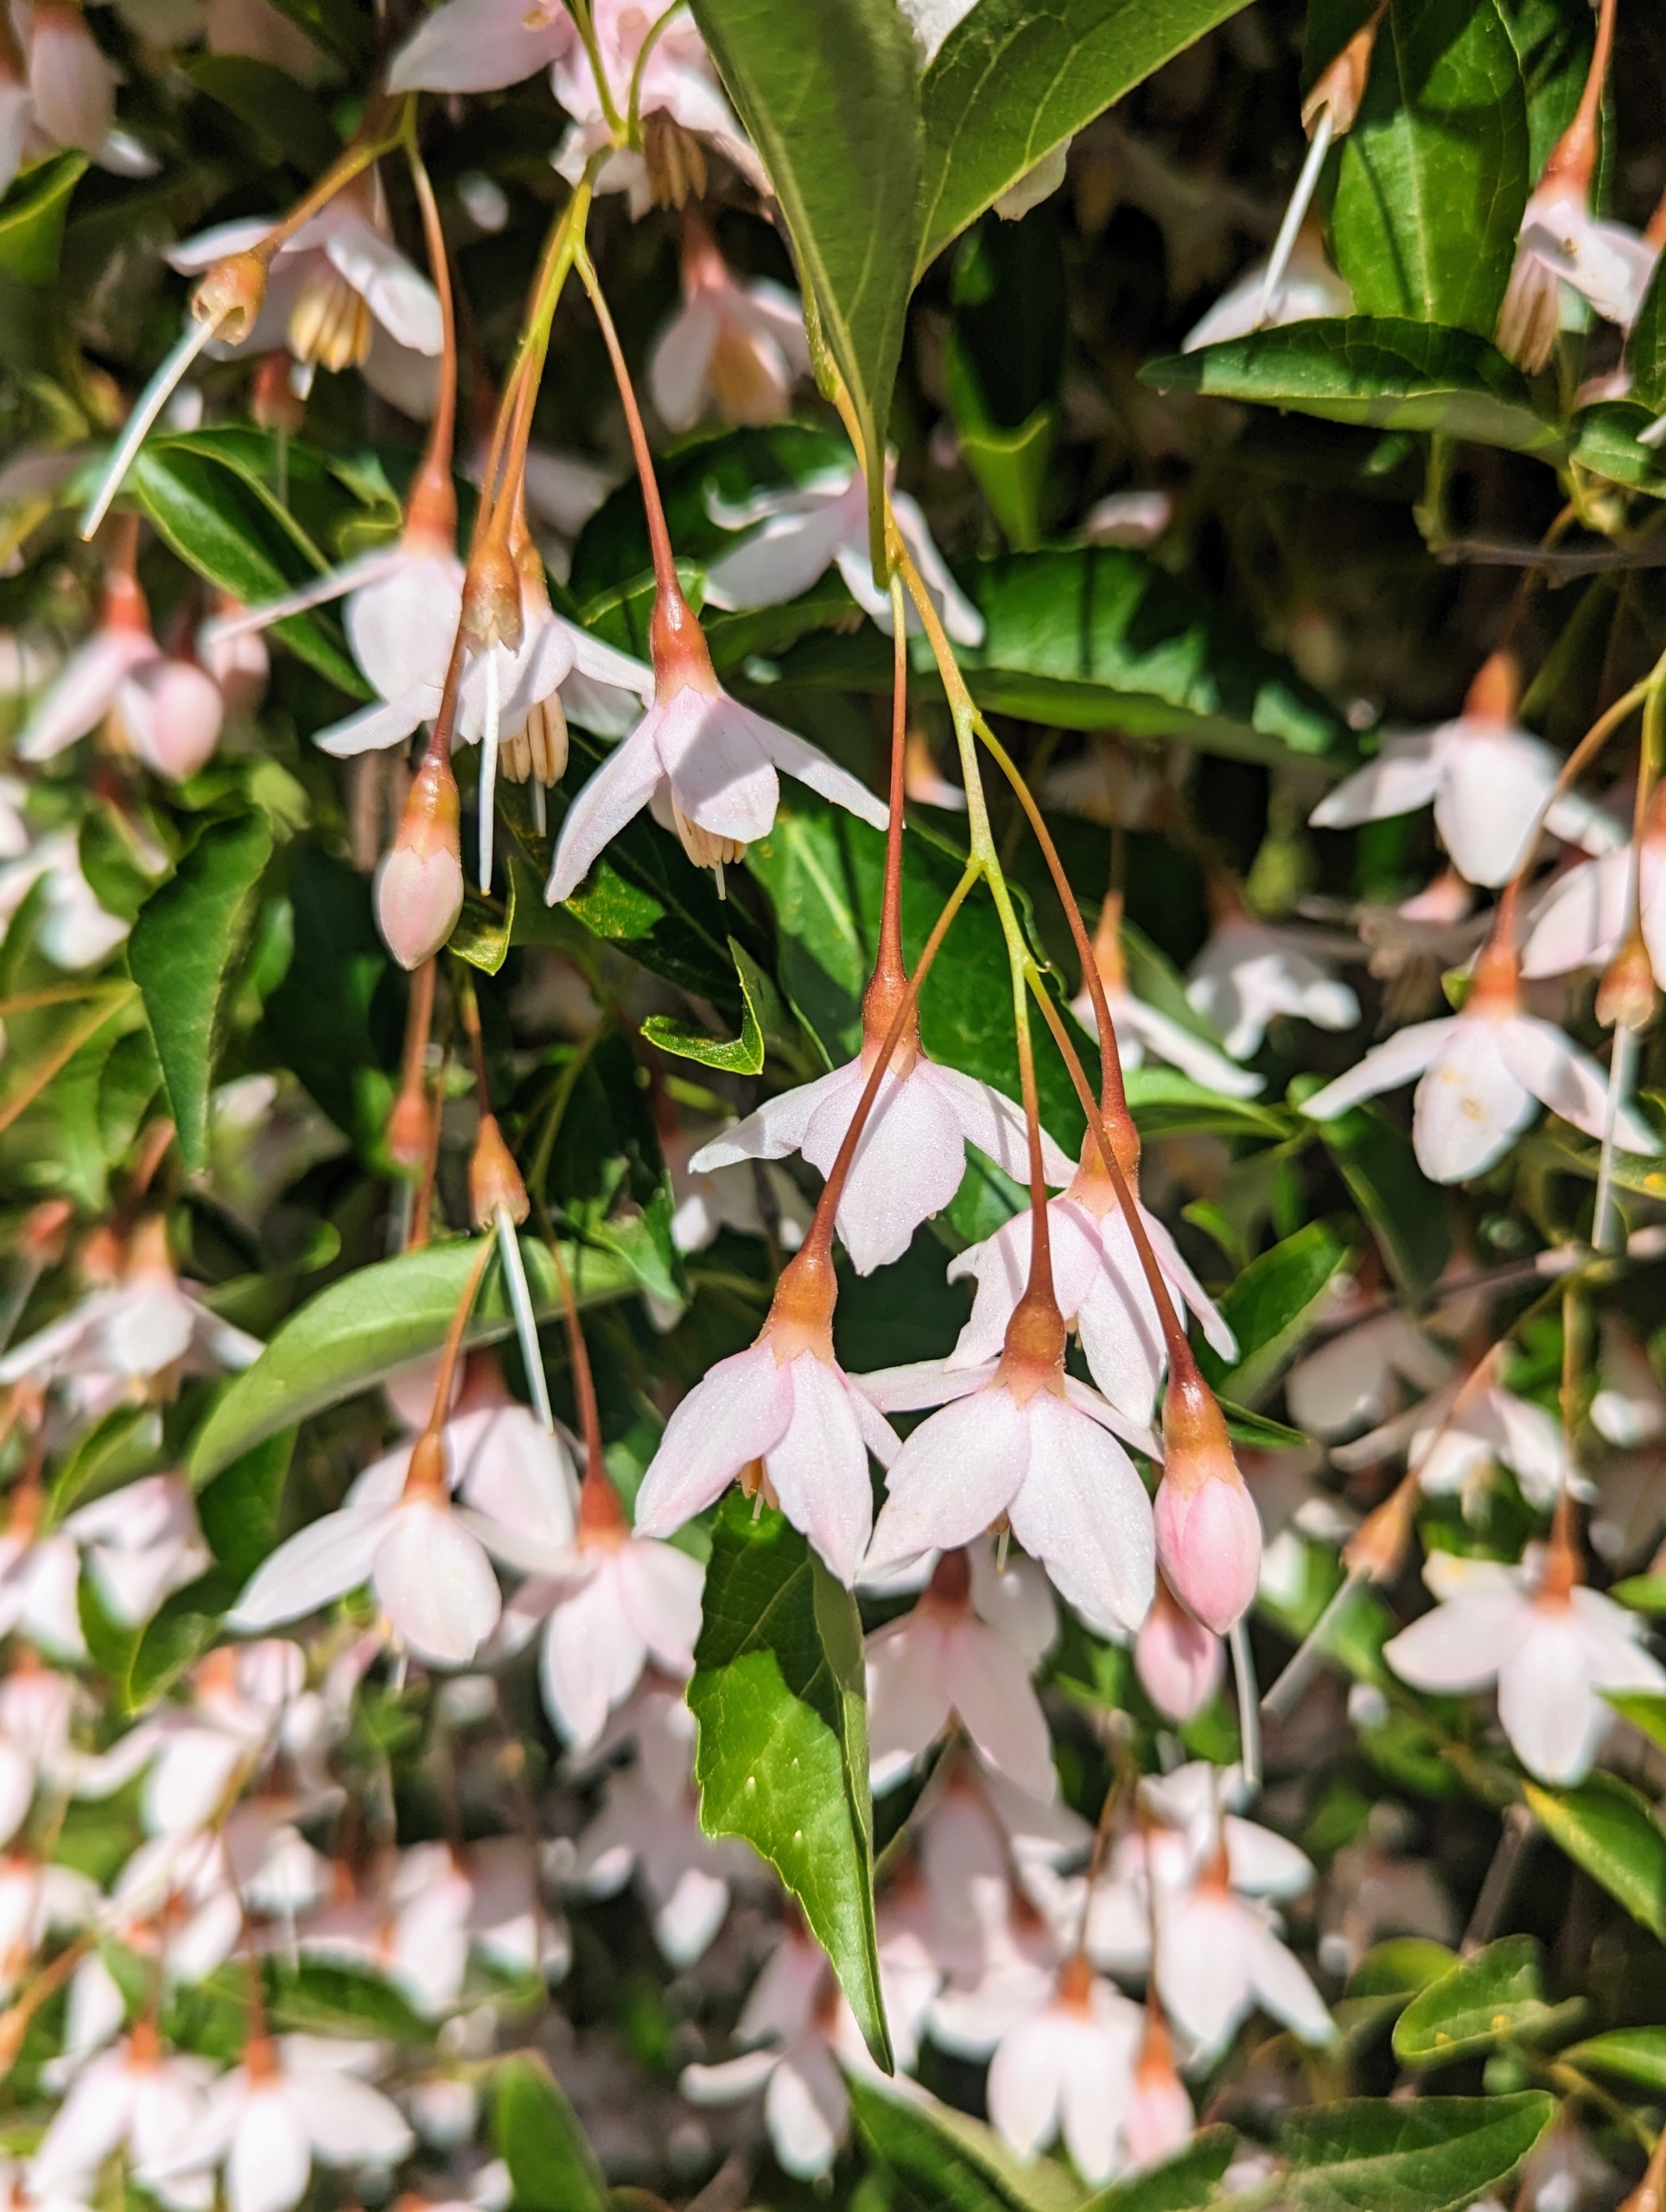
Styrax japonicus ‘Marley’s Pink Parasol’ is a dainty, weeping dwarf variety that grows eight to 10 feet tall and four to five feet wide at maturity.
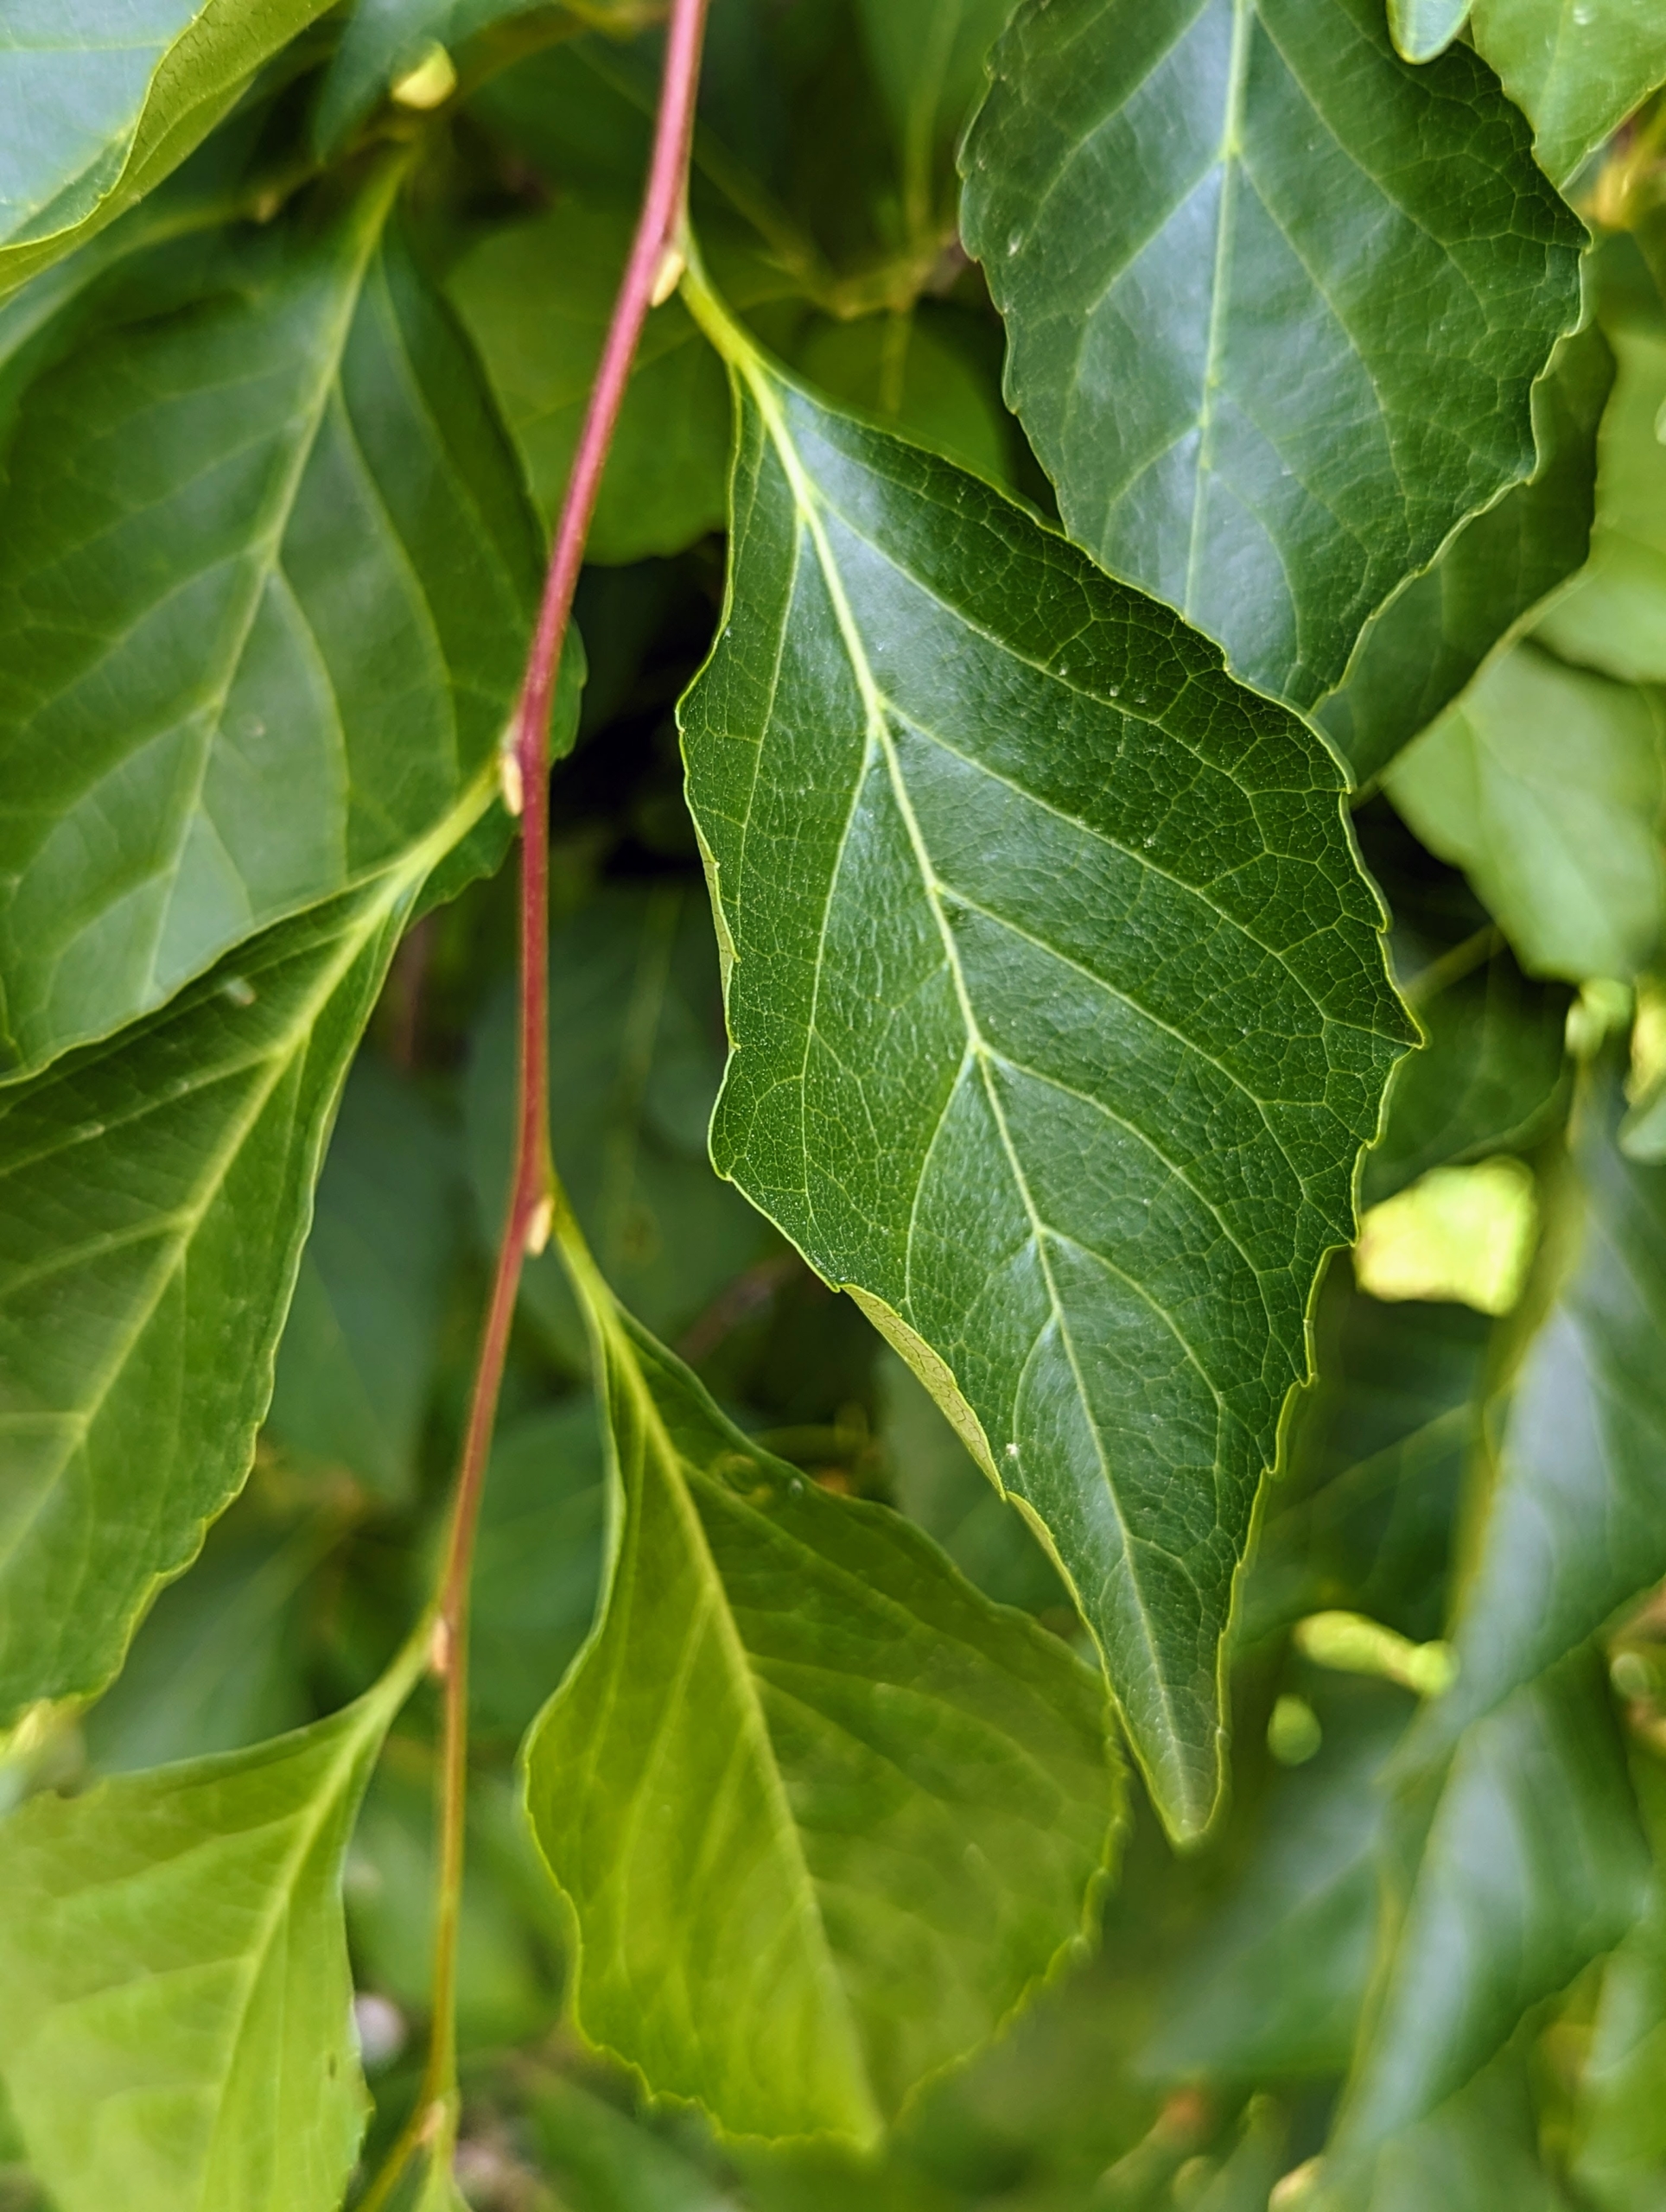
This tree has green deciduous, large glossy pointed leaves in summer that transform to a bright and cheery lemon yellow in fall.
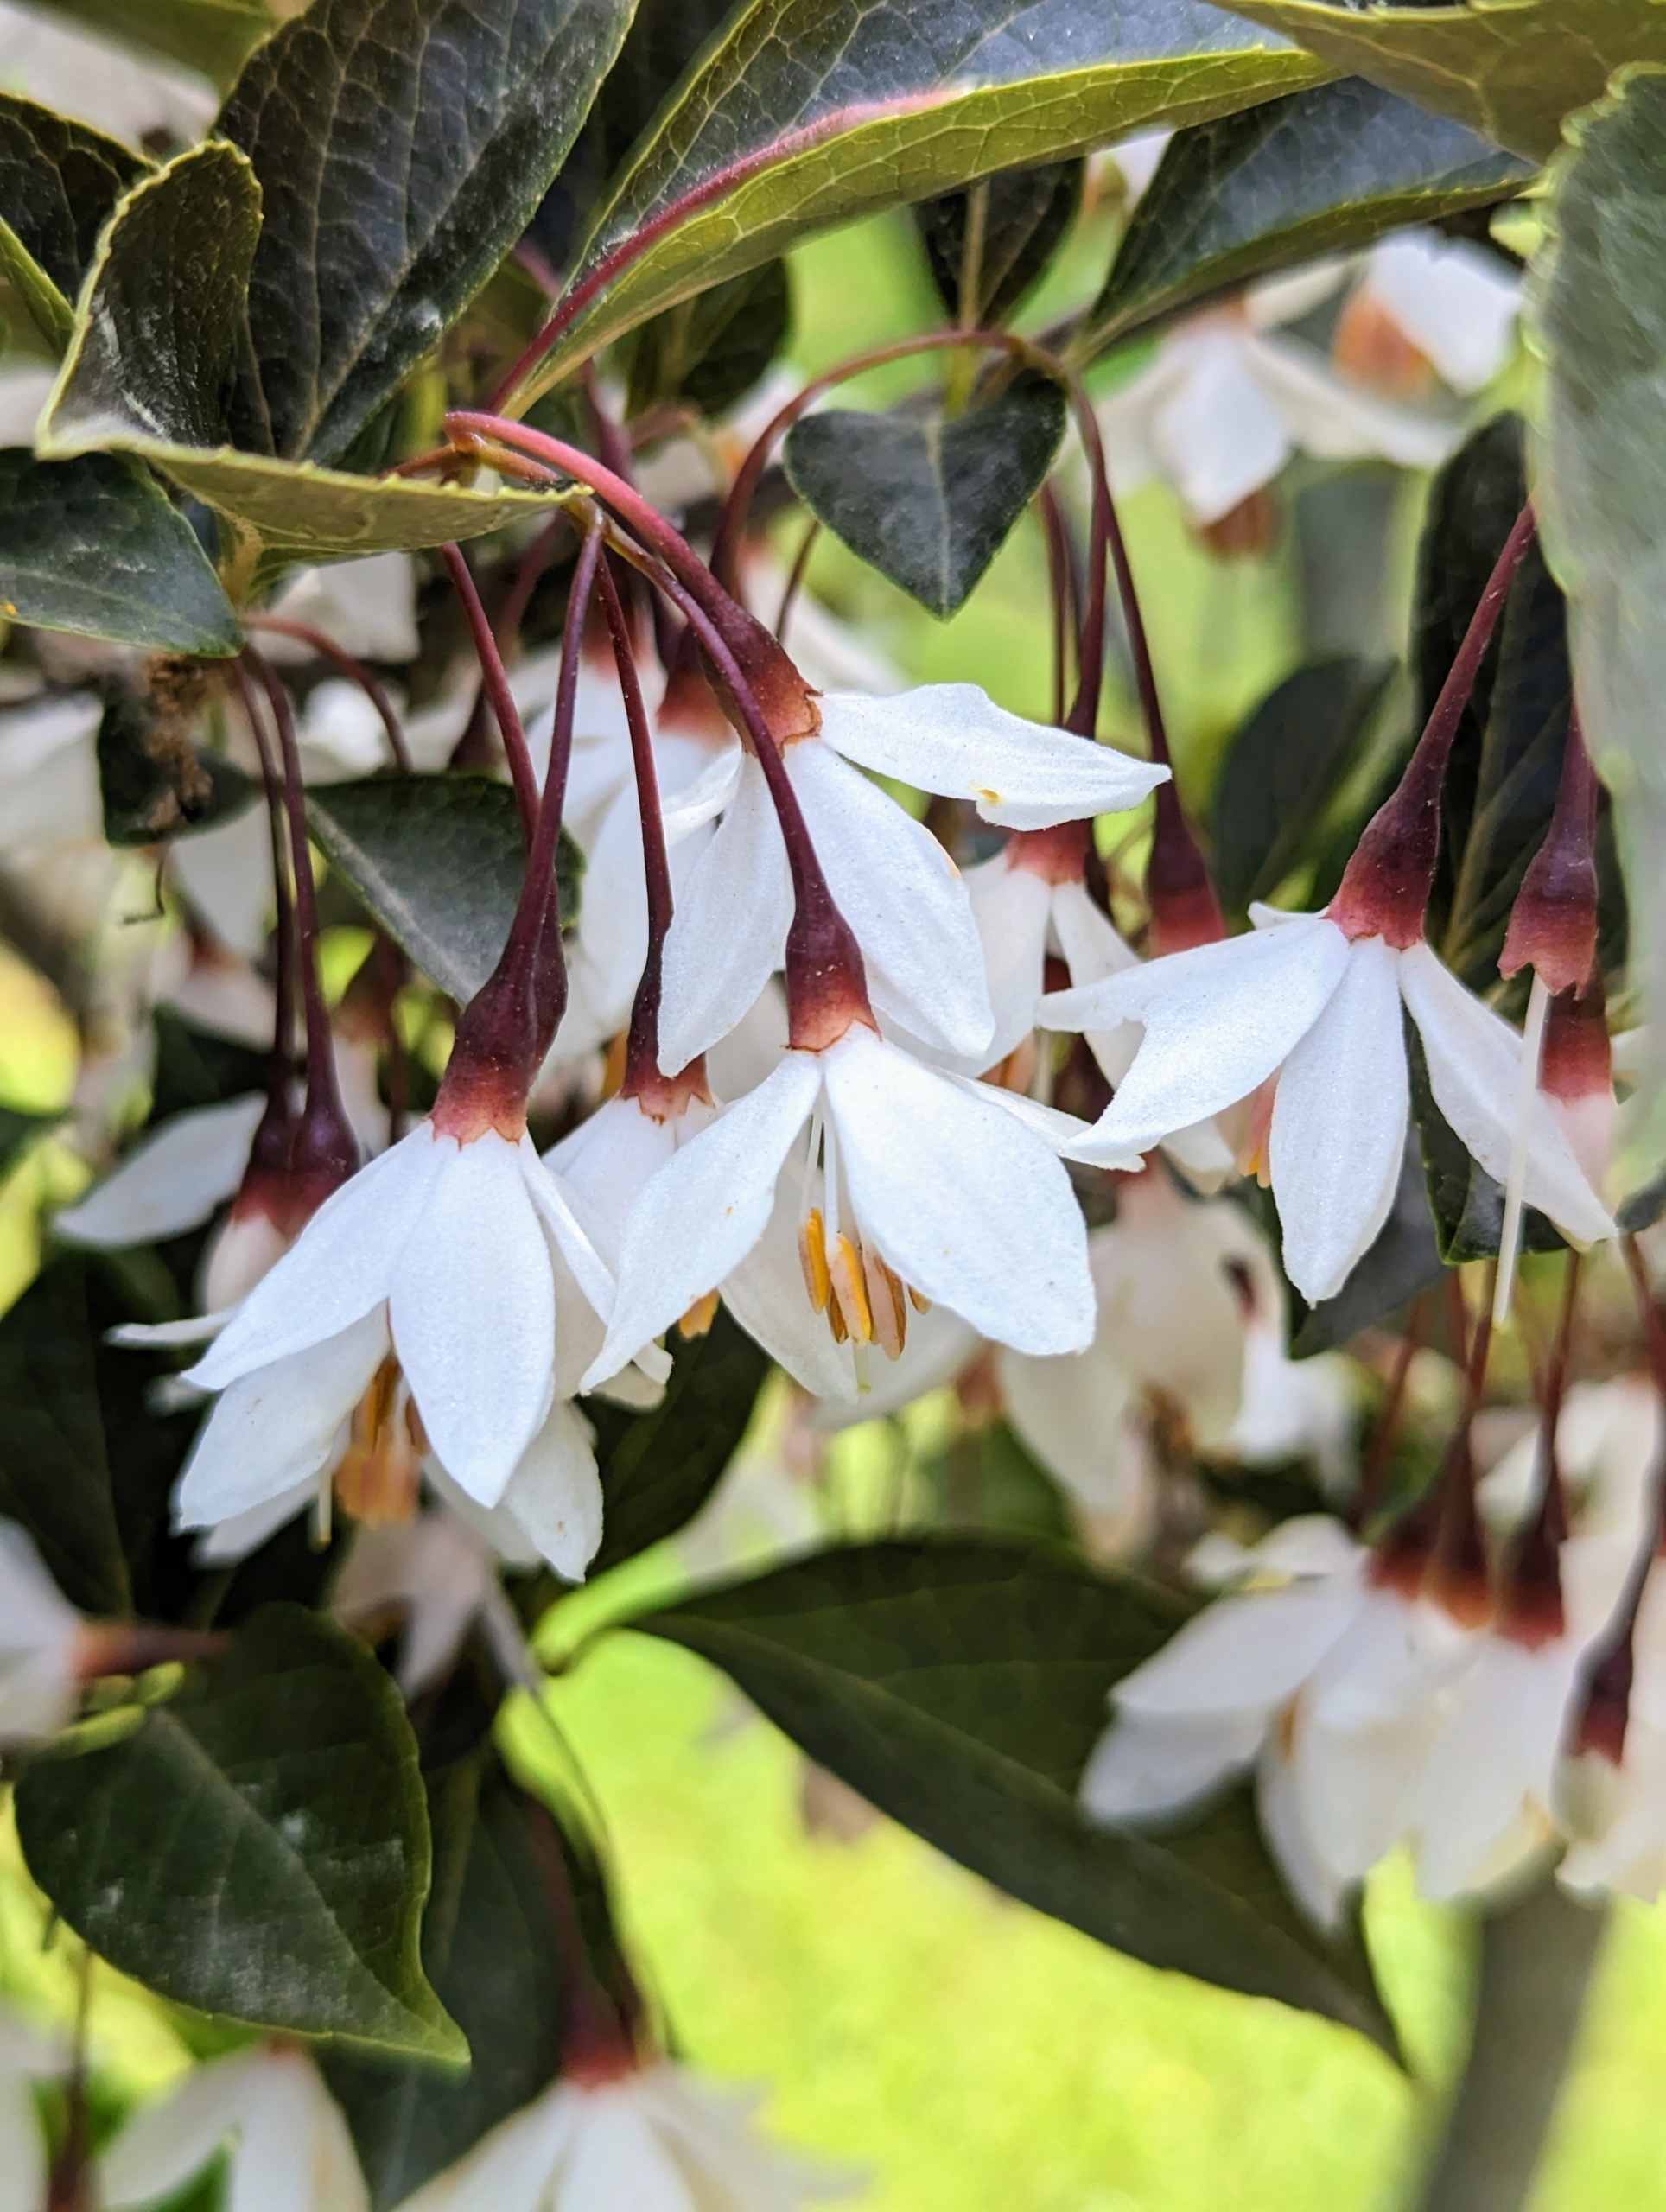
A few weeks ago, it was filled with gorgeous pale pink bell-shaped sweet-smelling flowers.
The profuse blooms hang off the weeping branches…
… and smell like cotton candy.
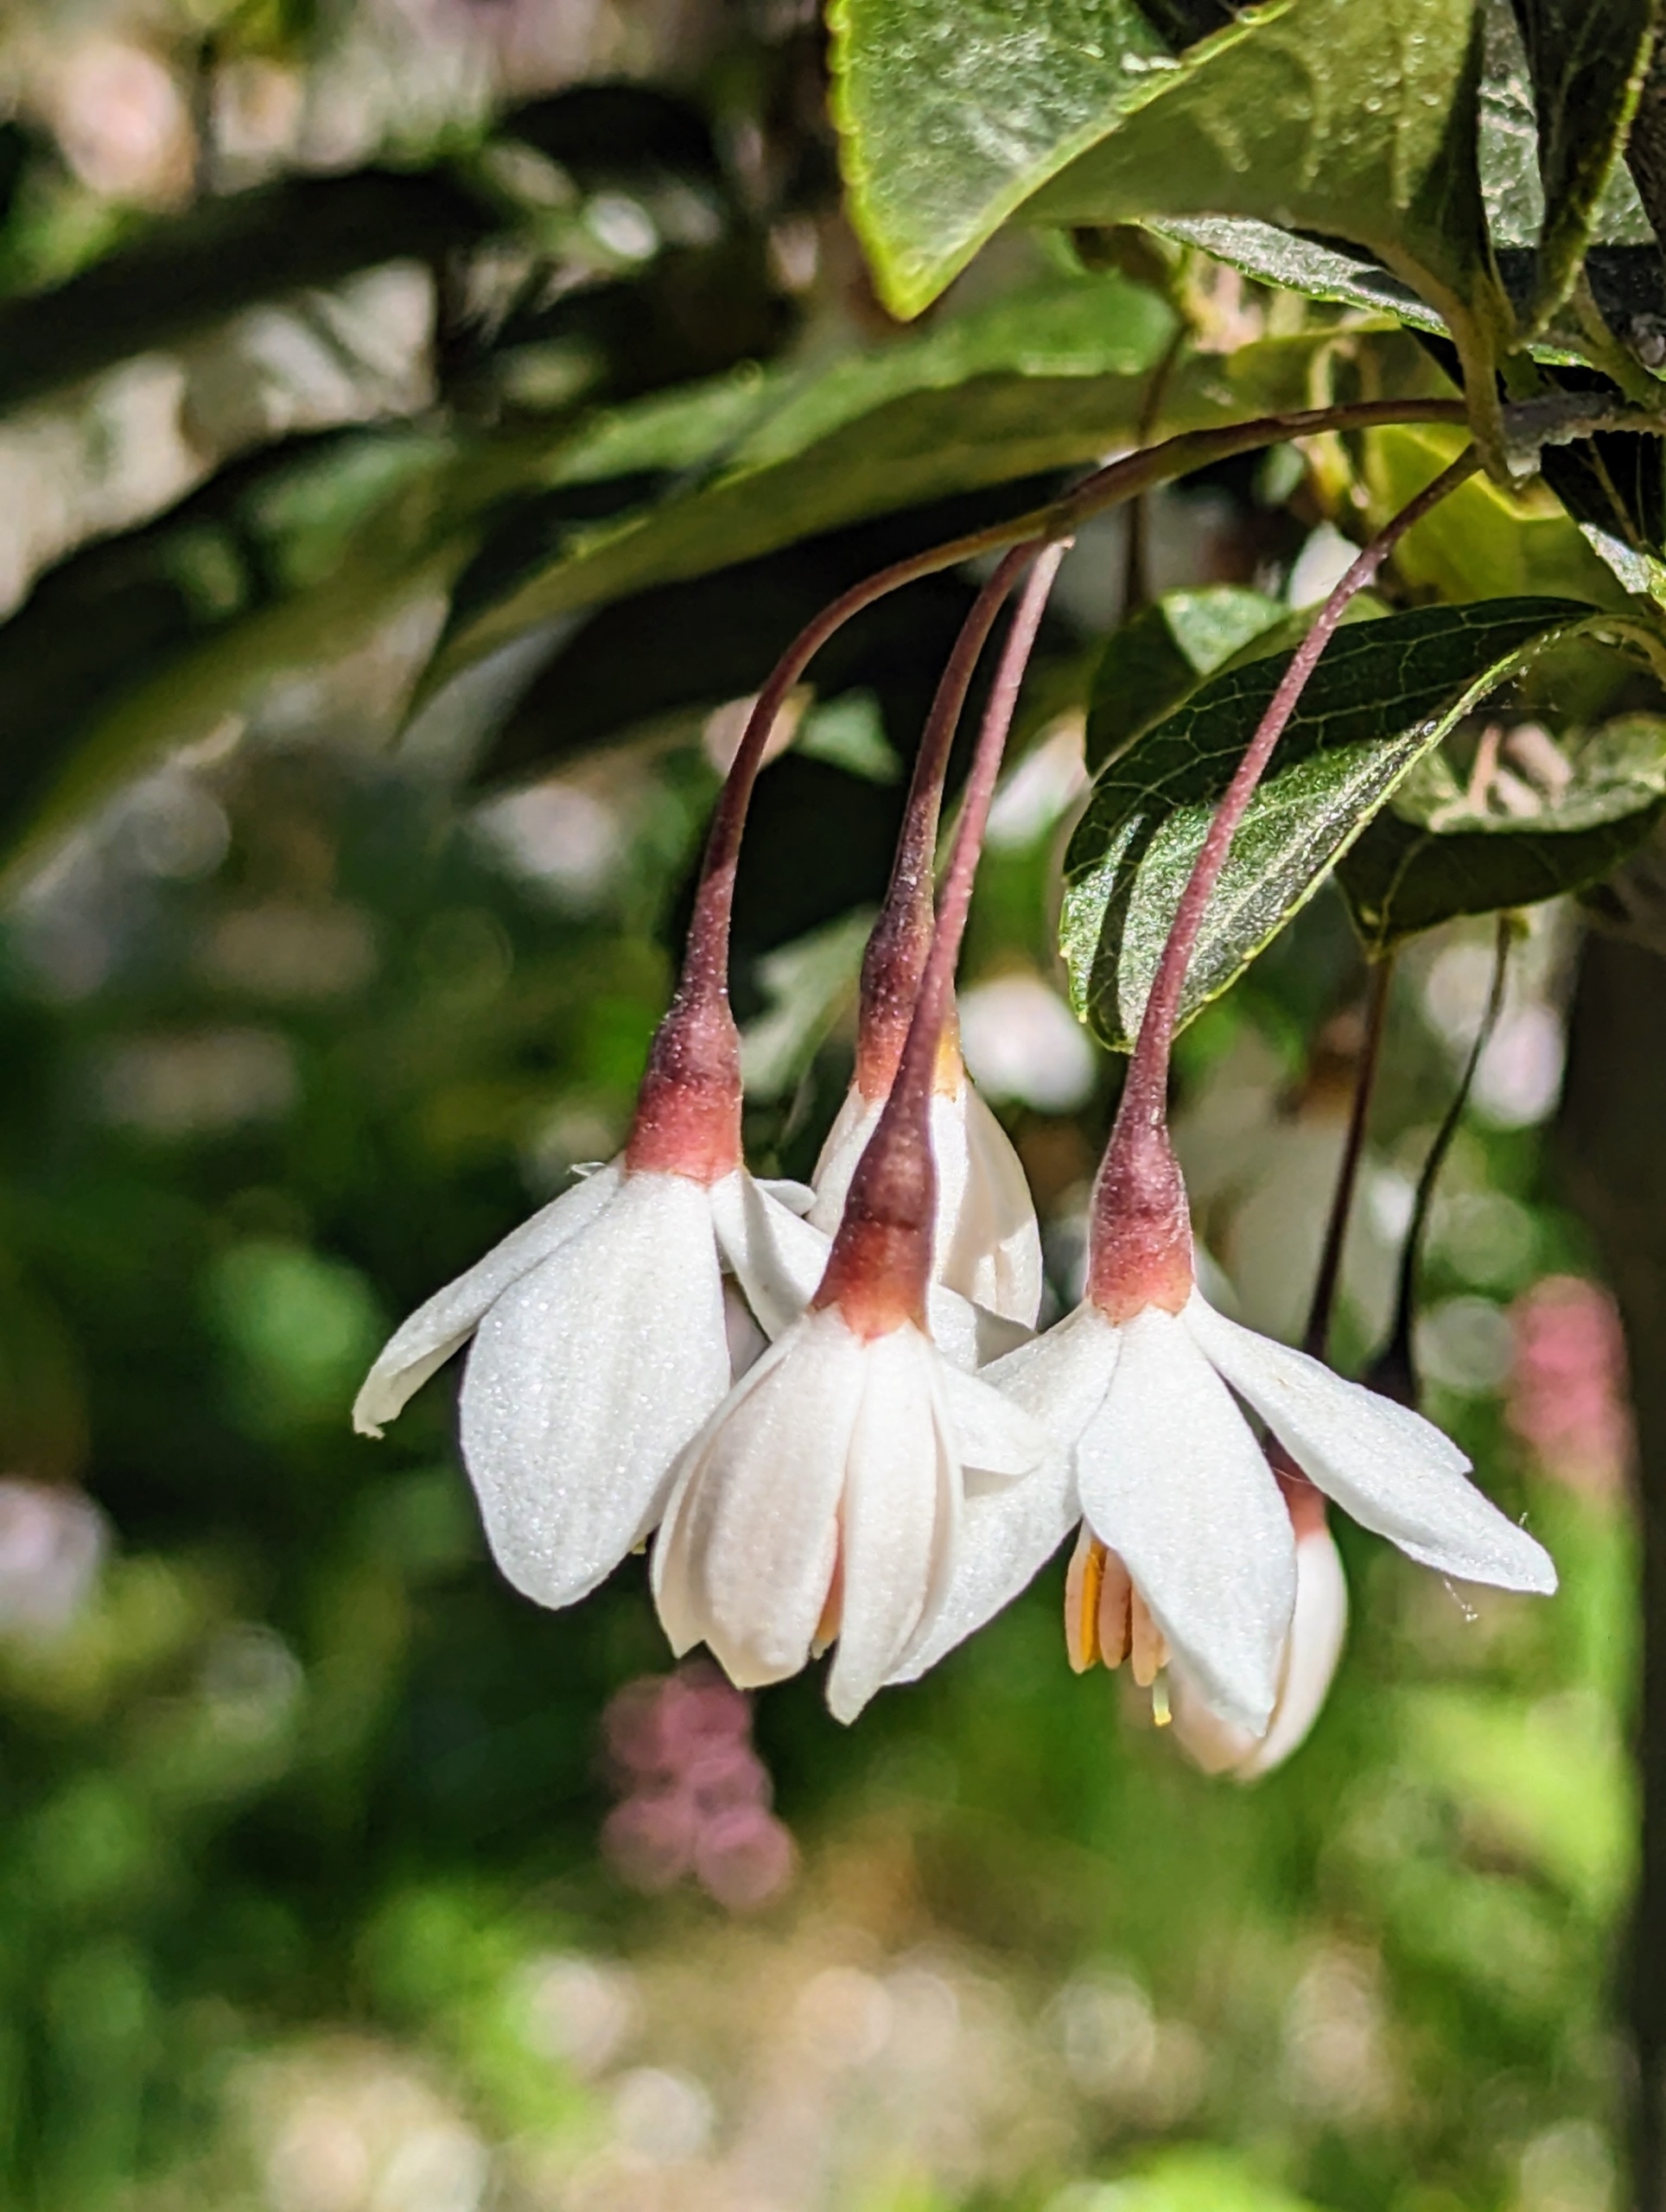
On both trees, each of the small, long-stalked flowers has five petals and prominent yellow stamens.
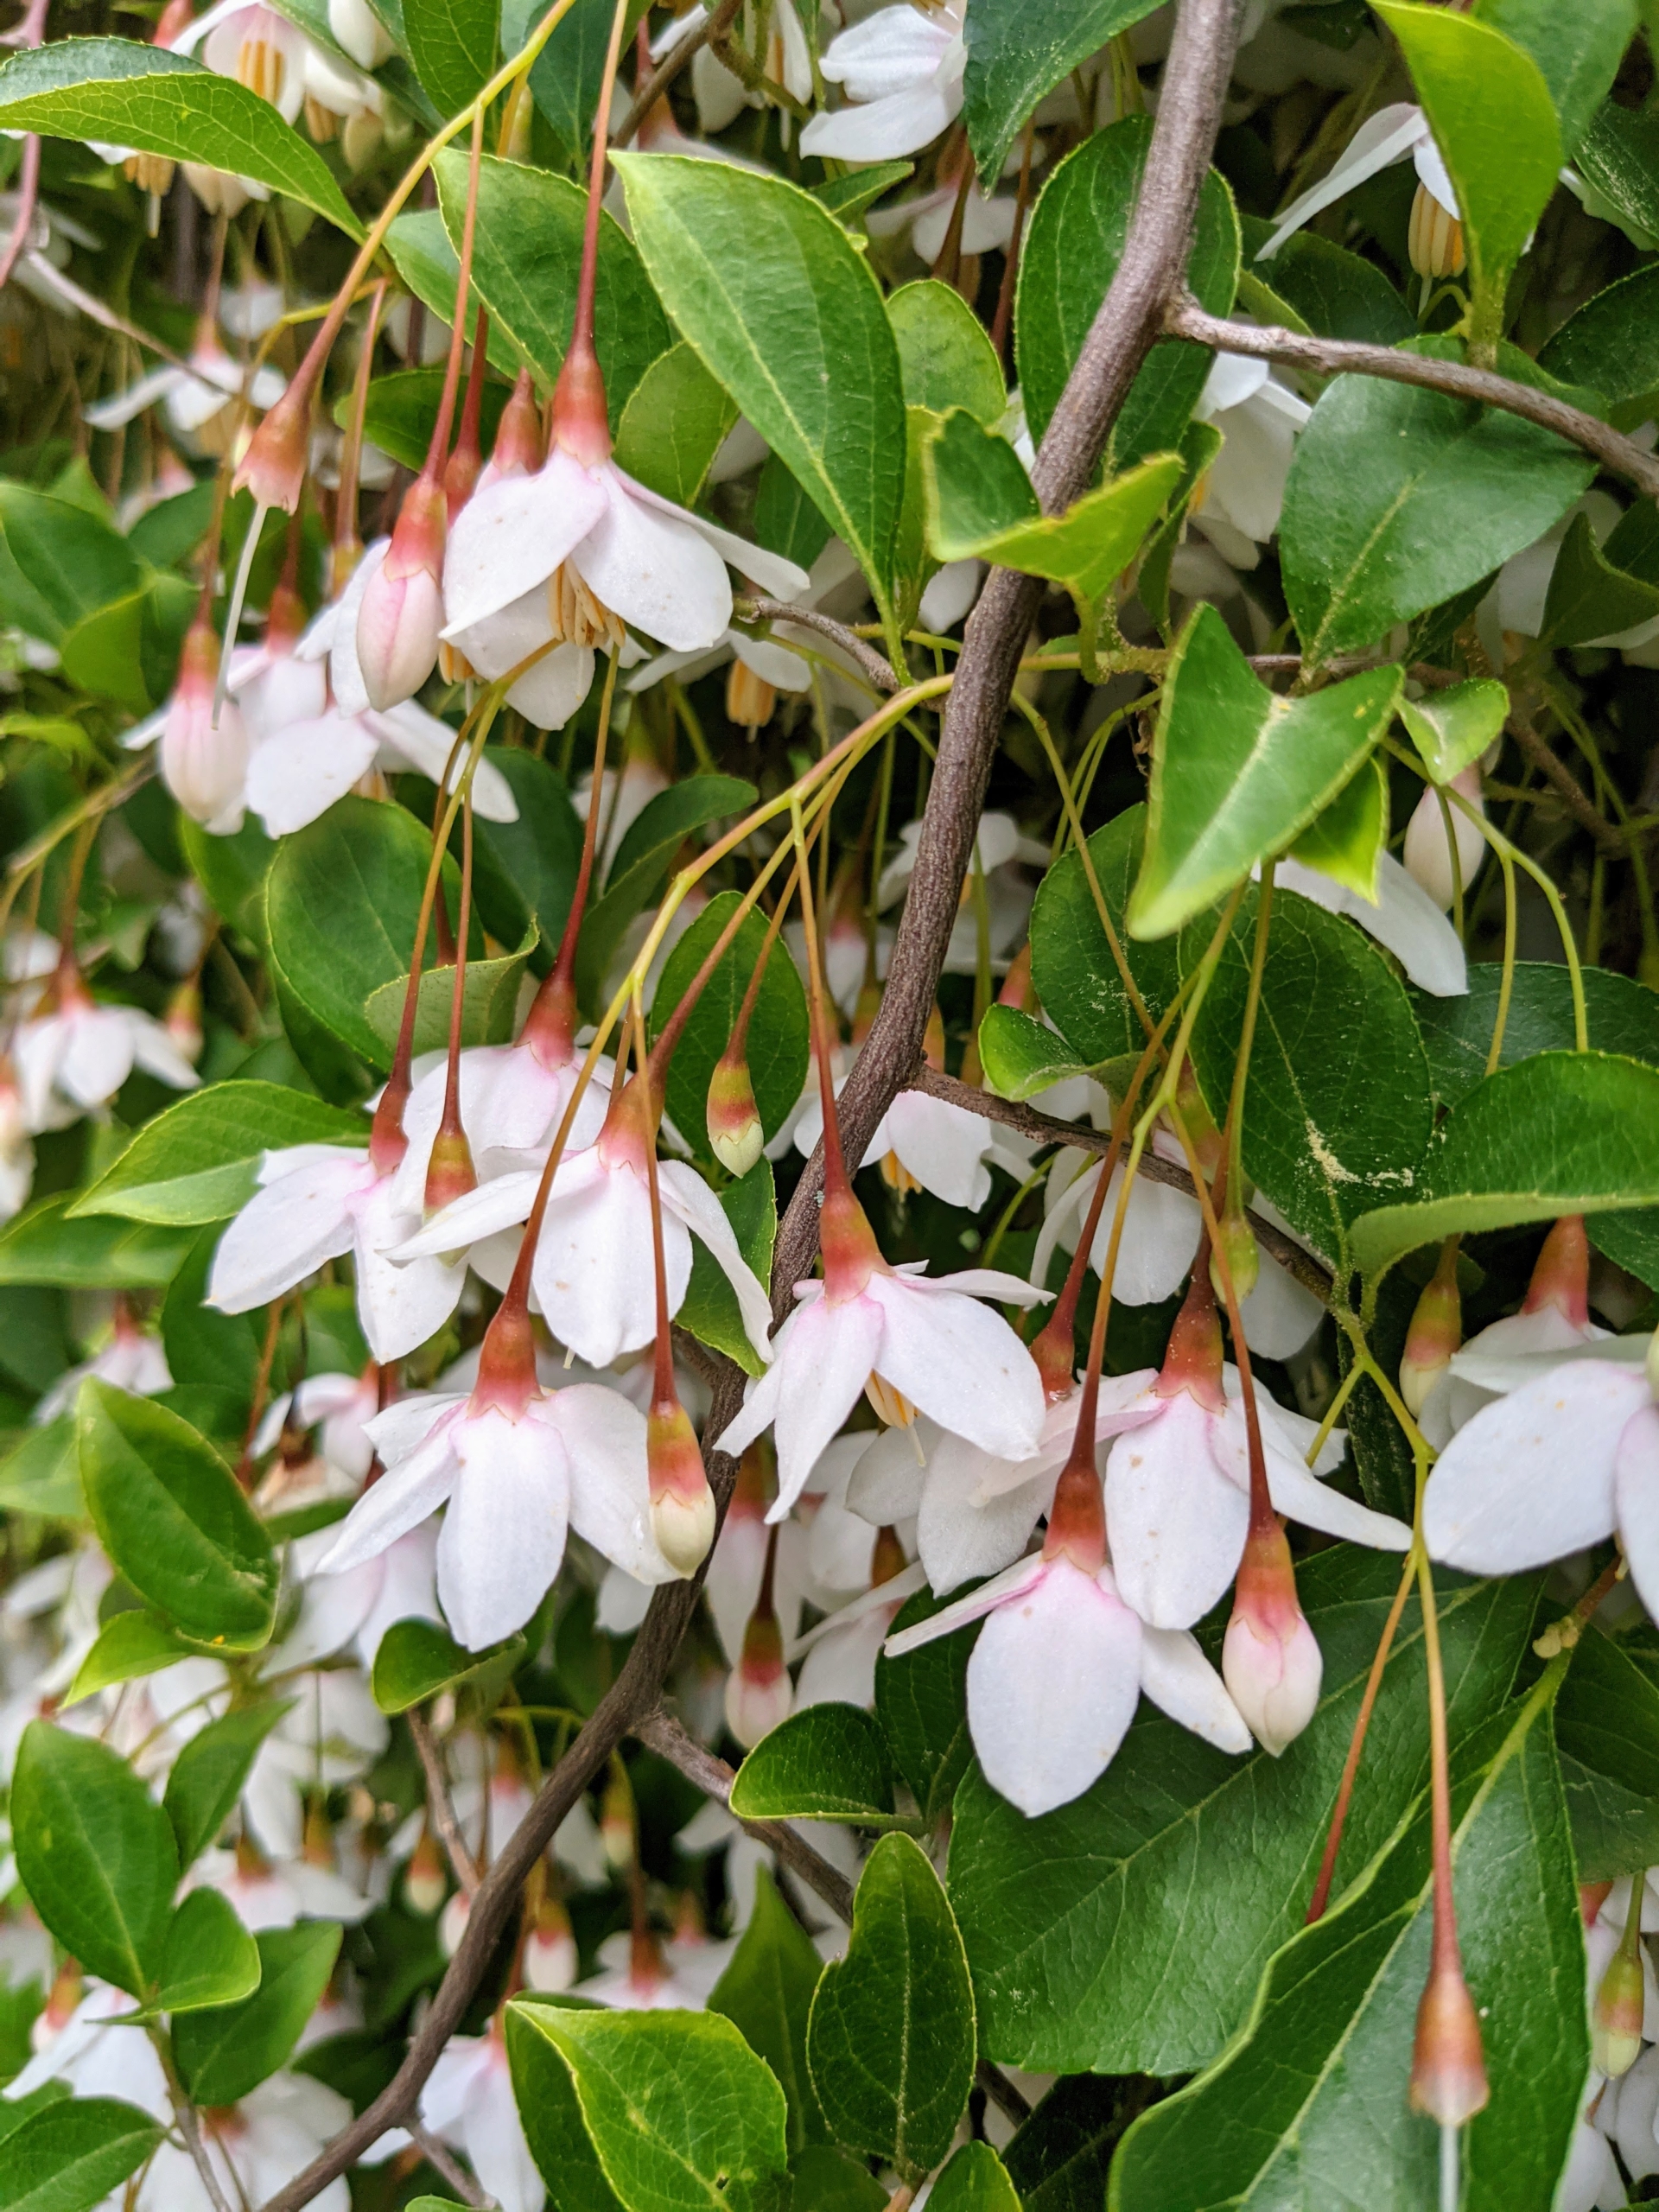
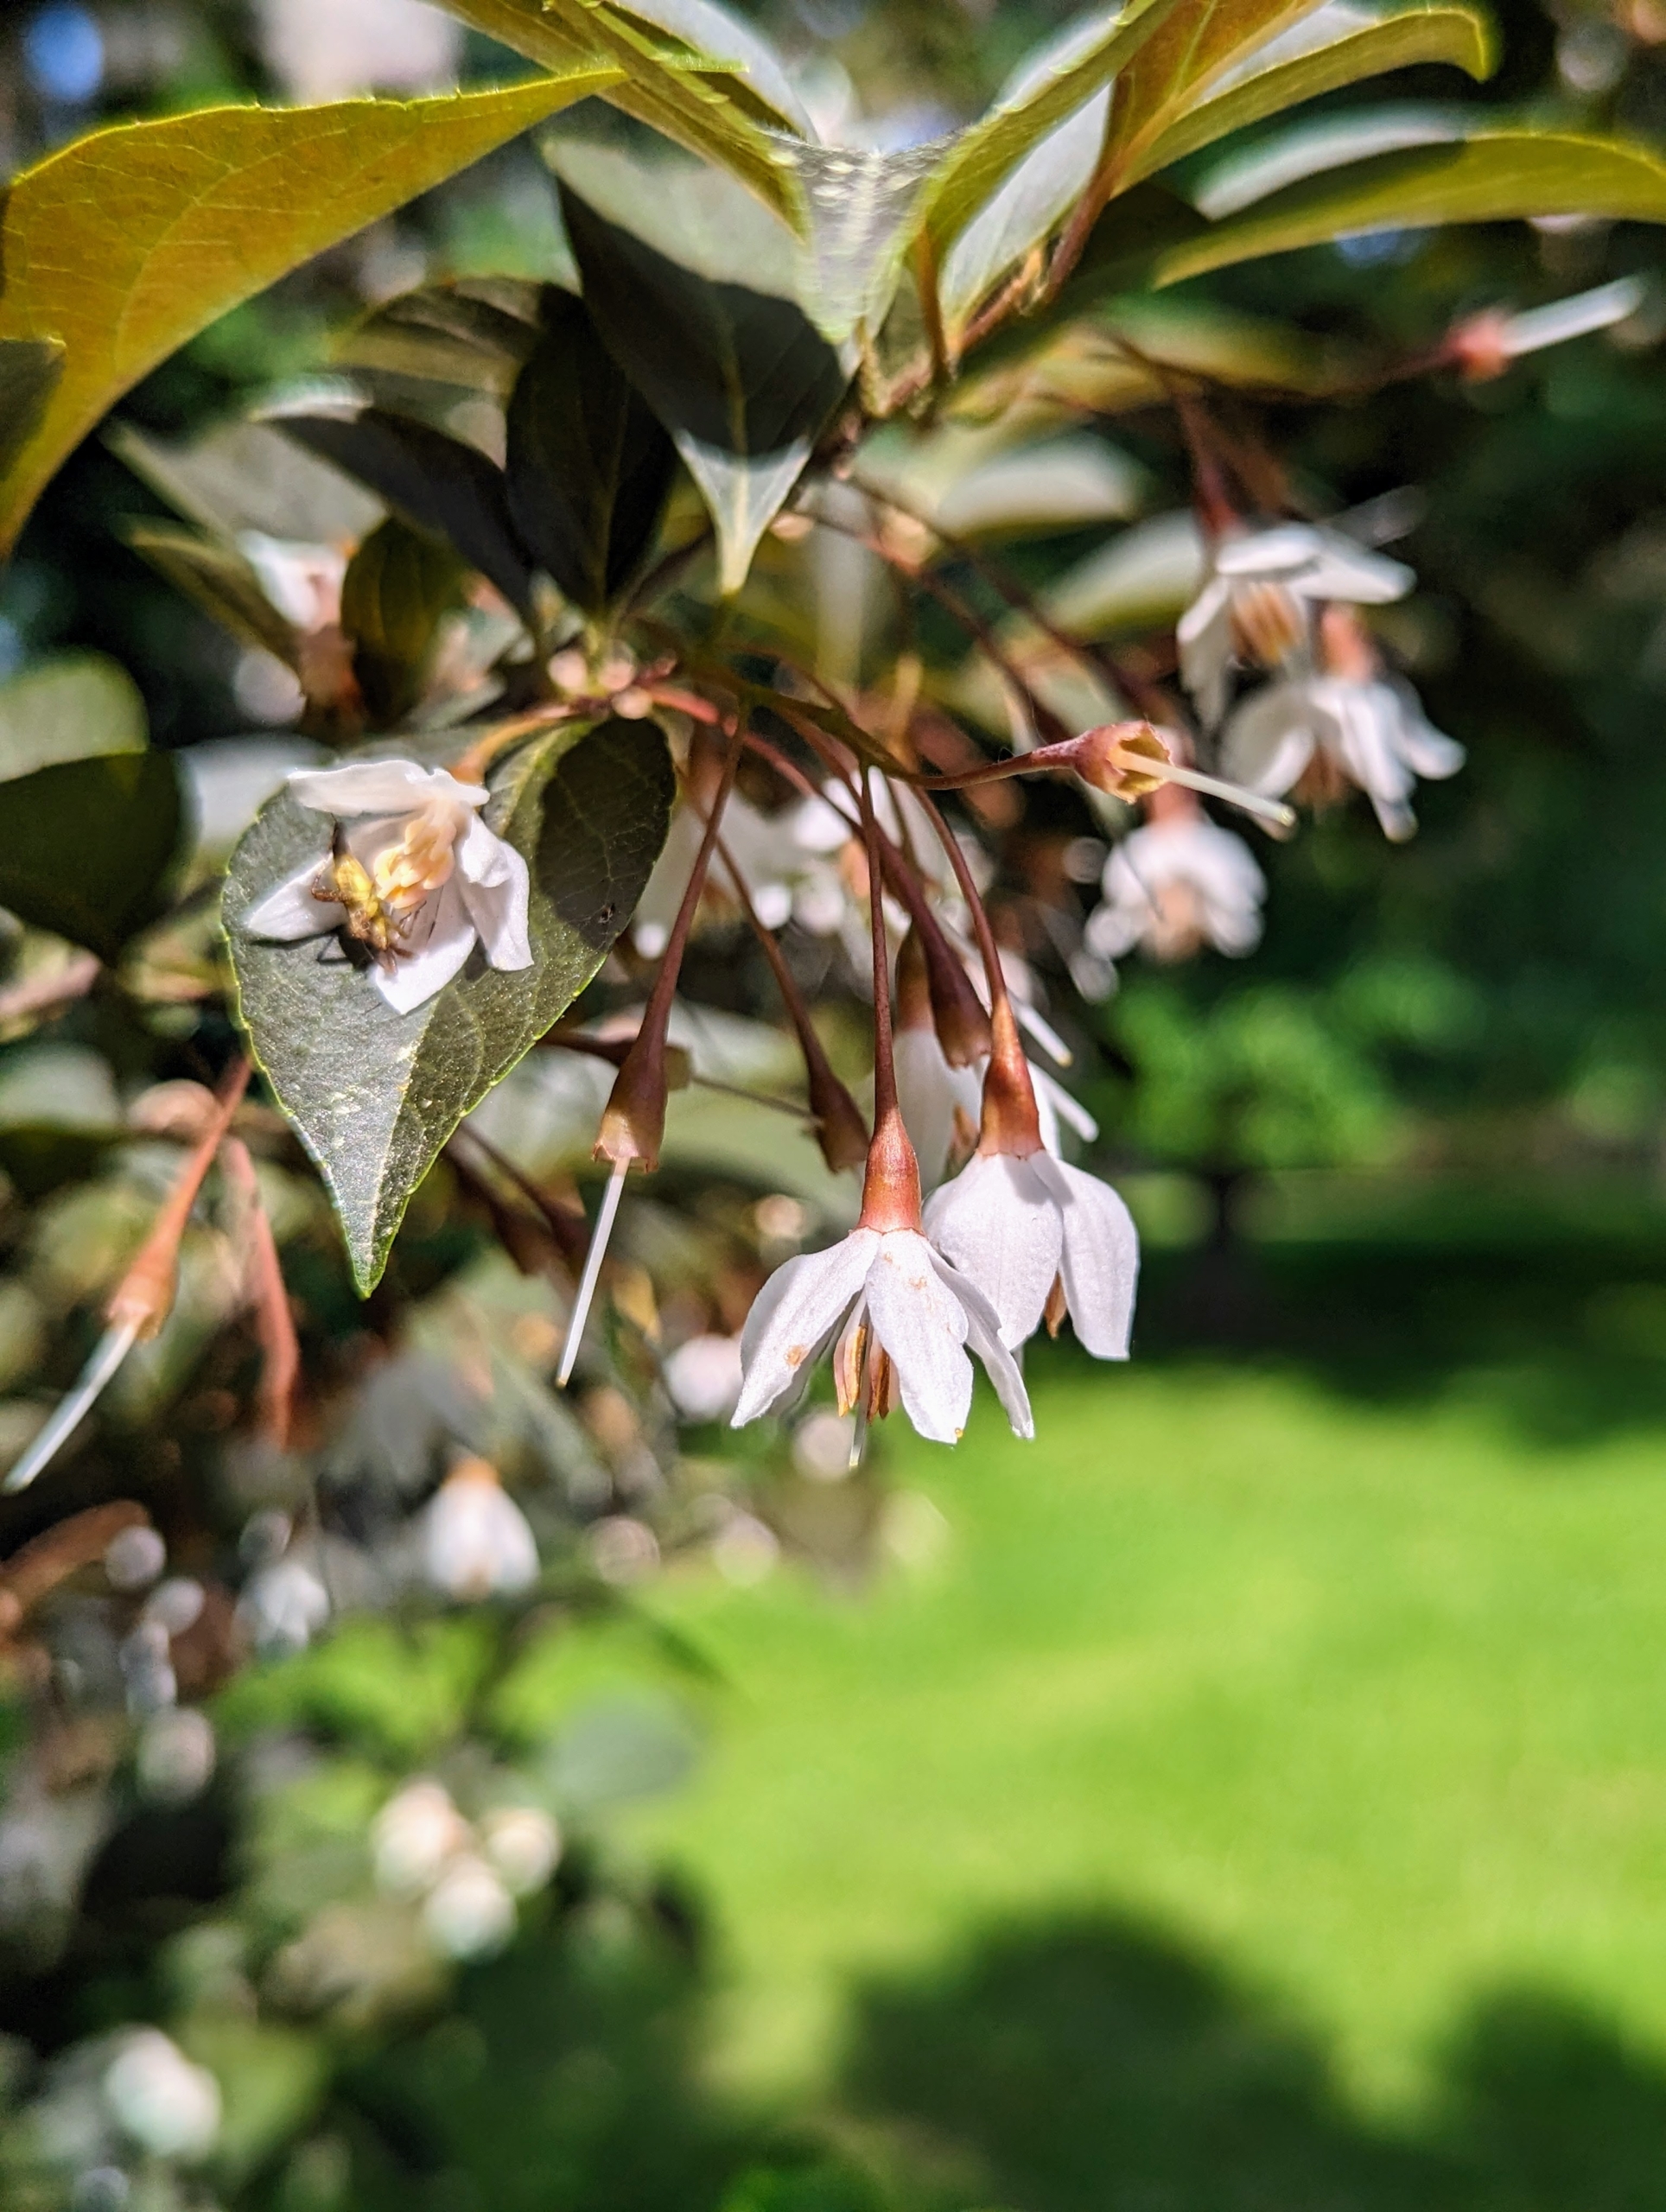
Also in bloom were the Styrax japonicus ‘Evening Light’ trees.
Its mildly scented flowers are white with brownish stems.
These drooping flower clusters are most showy in May to June.
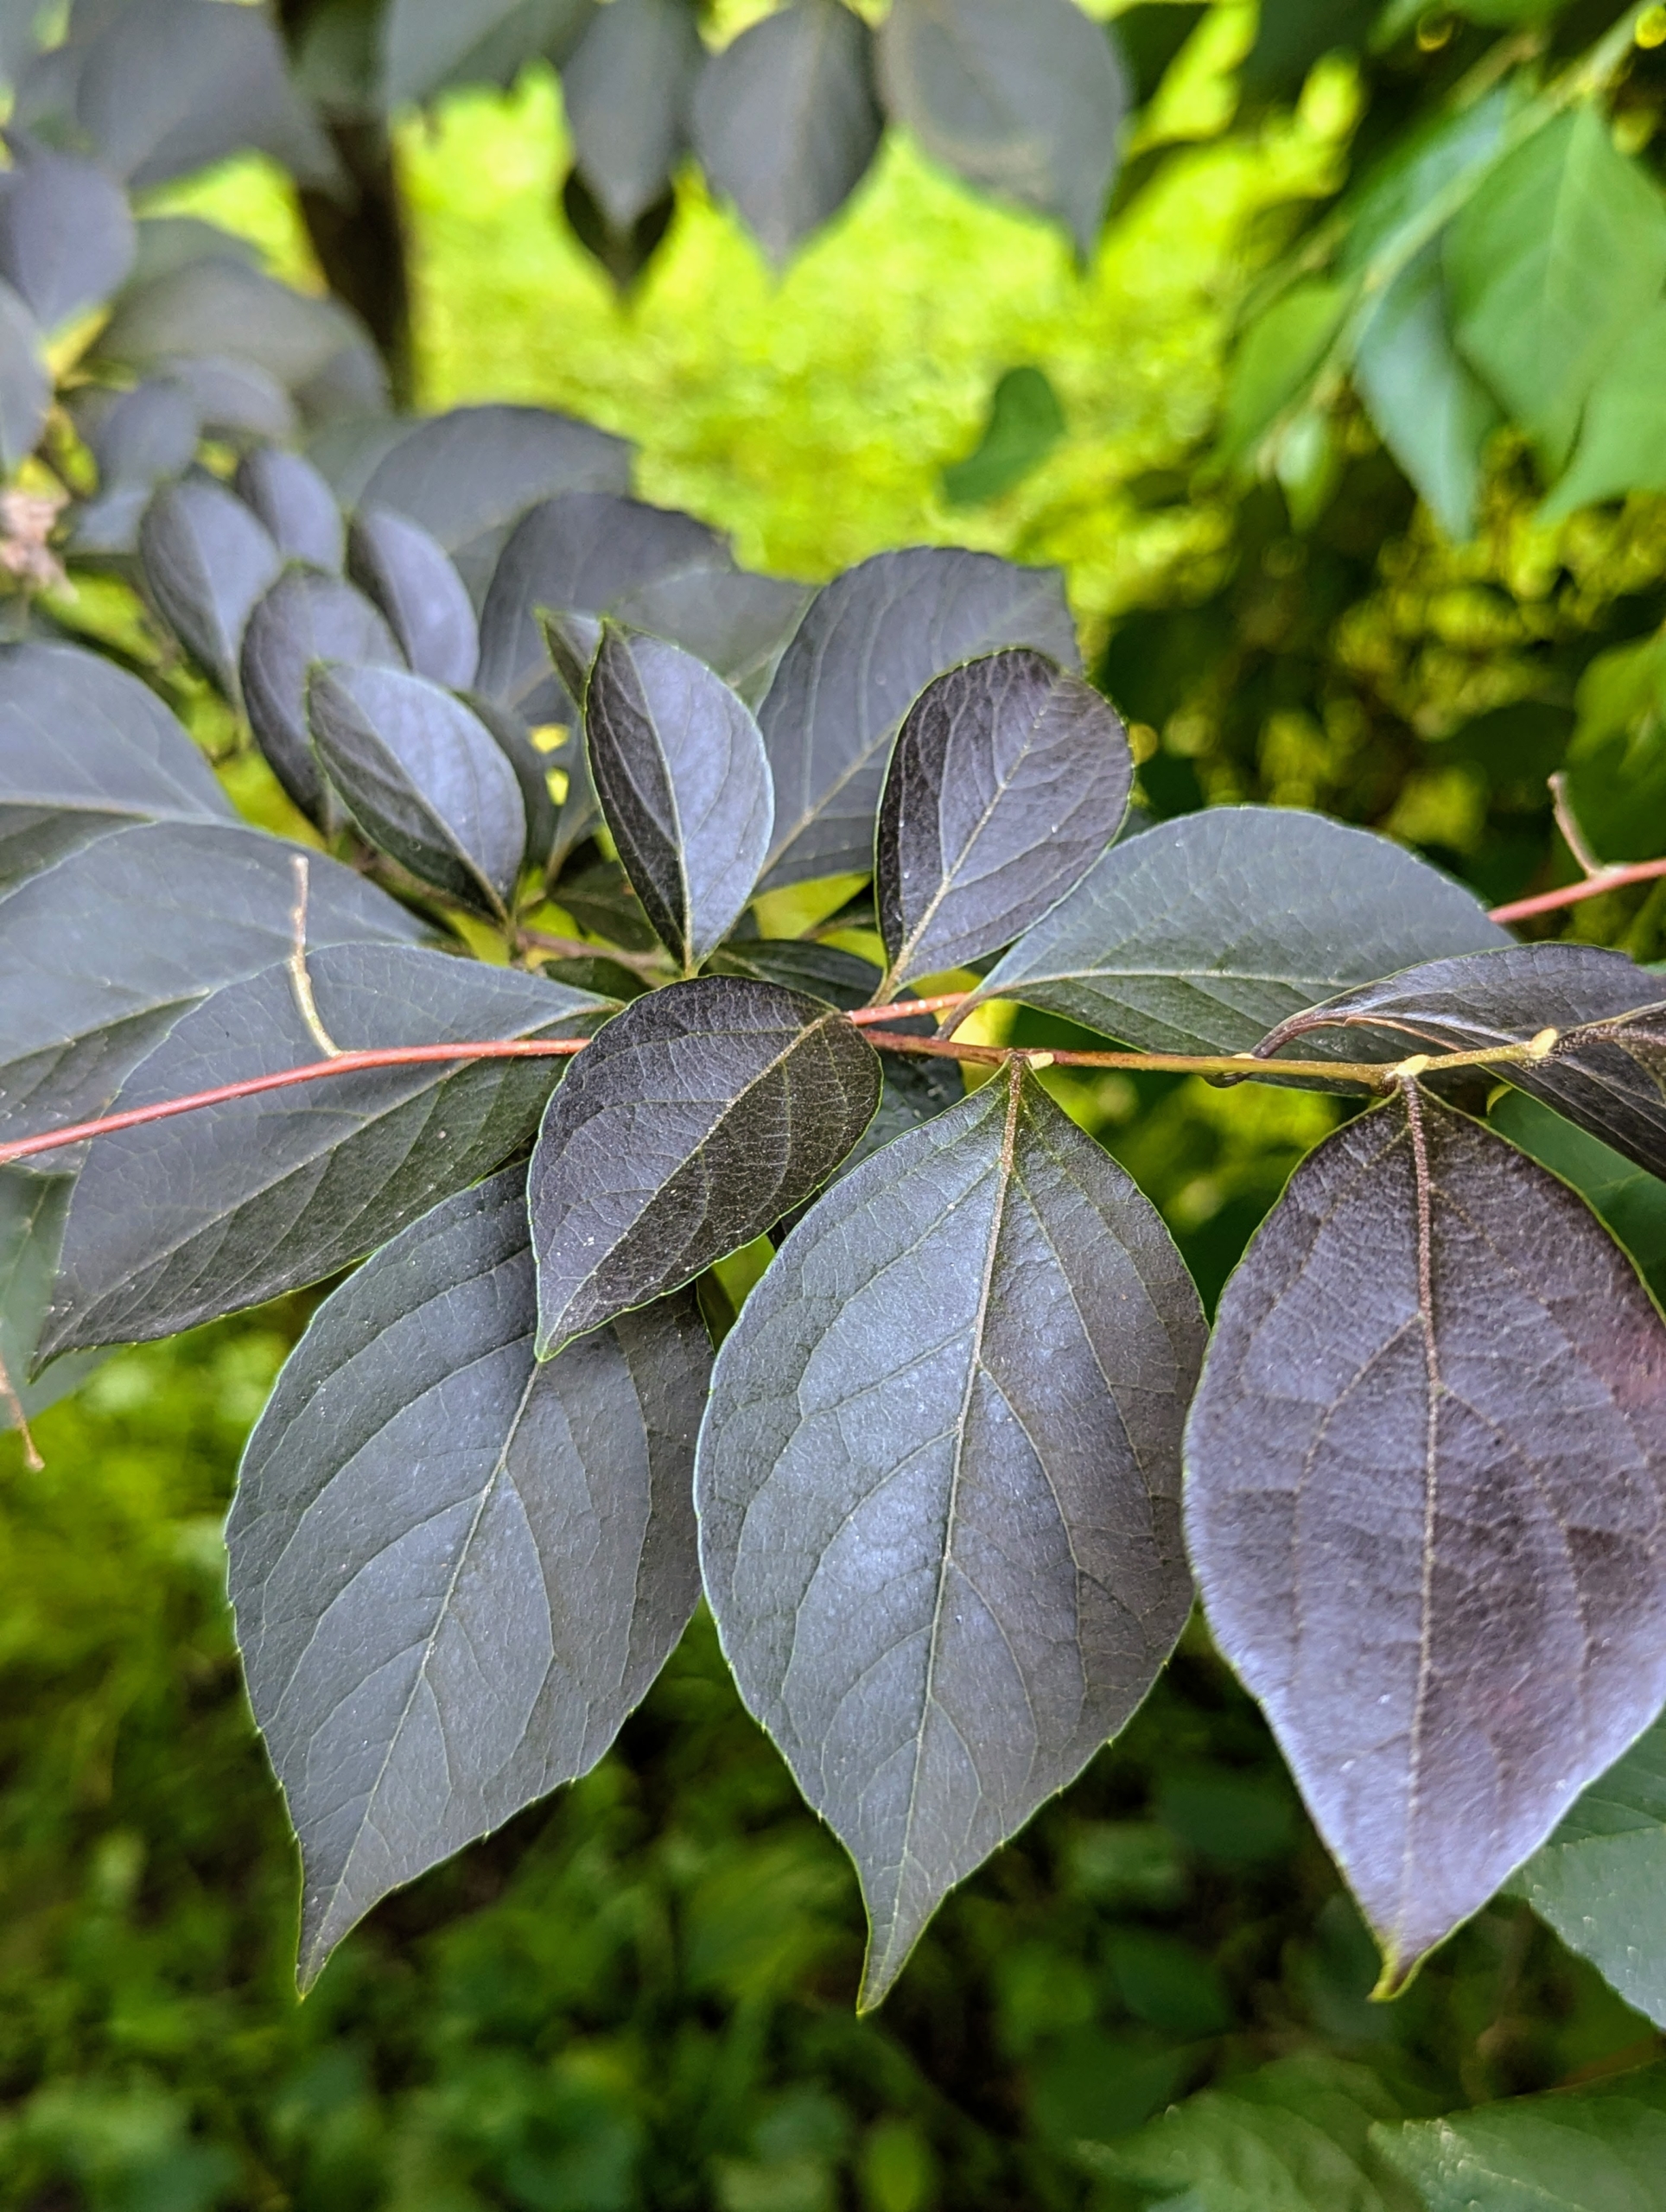
The flowers stand out against the dark, almost maroon colored foliage.
Look closely and see the drupes, or seed pods, hanging from the branches.
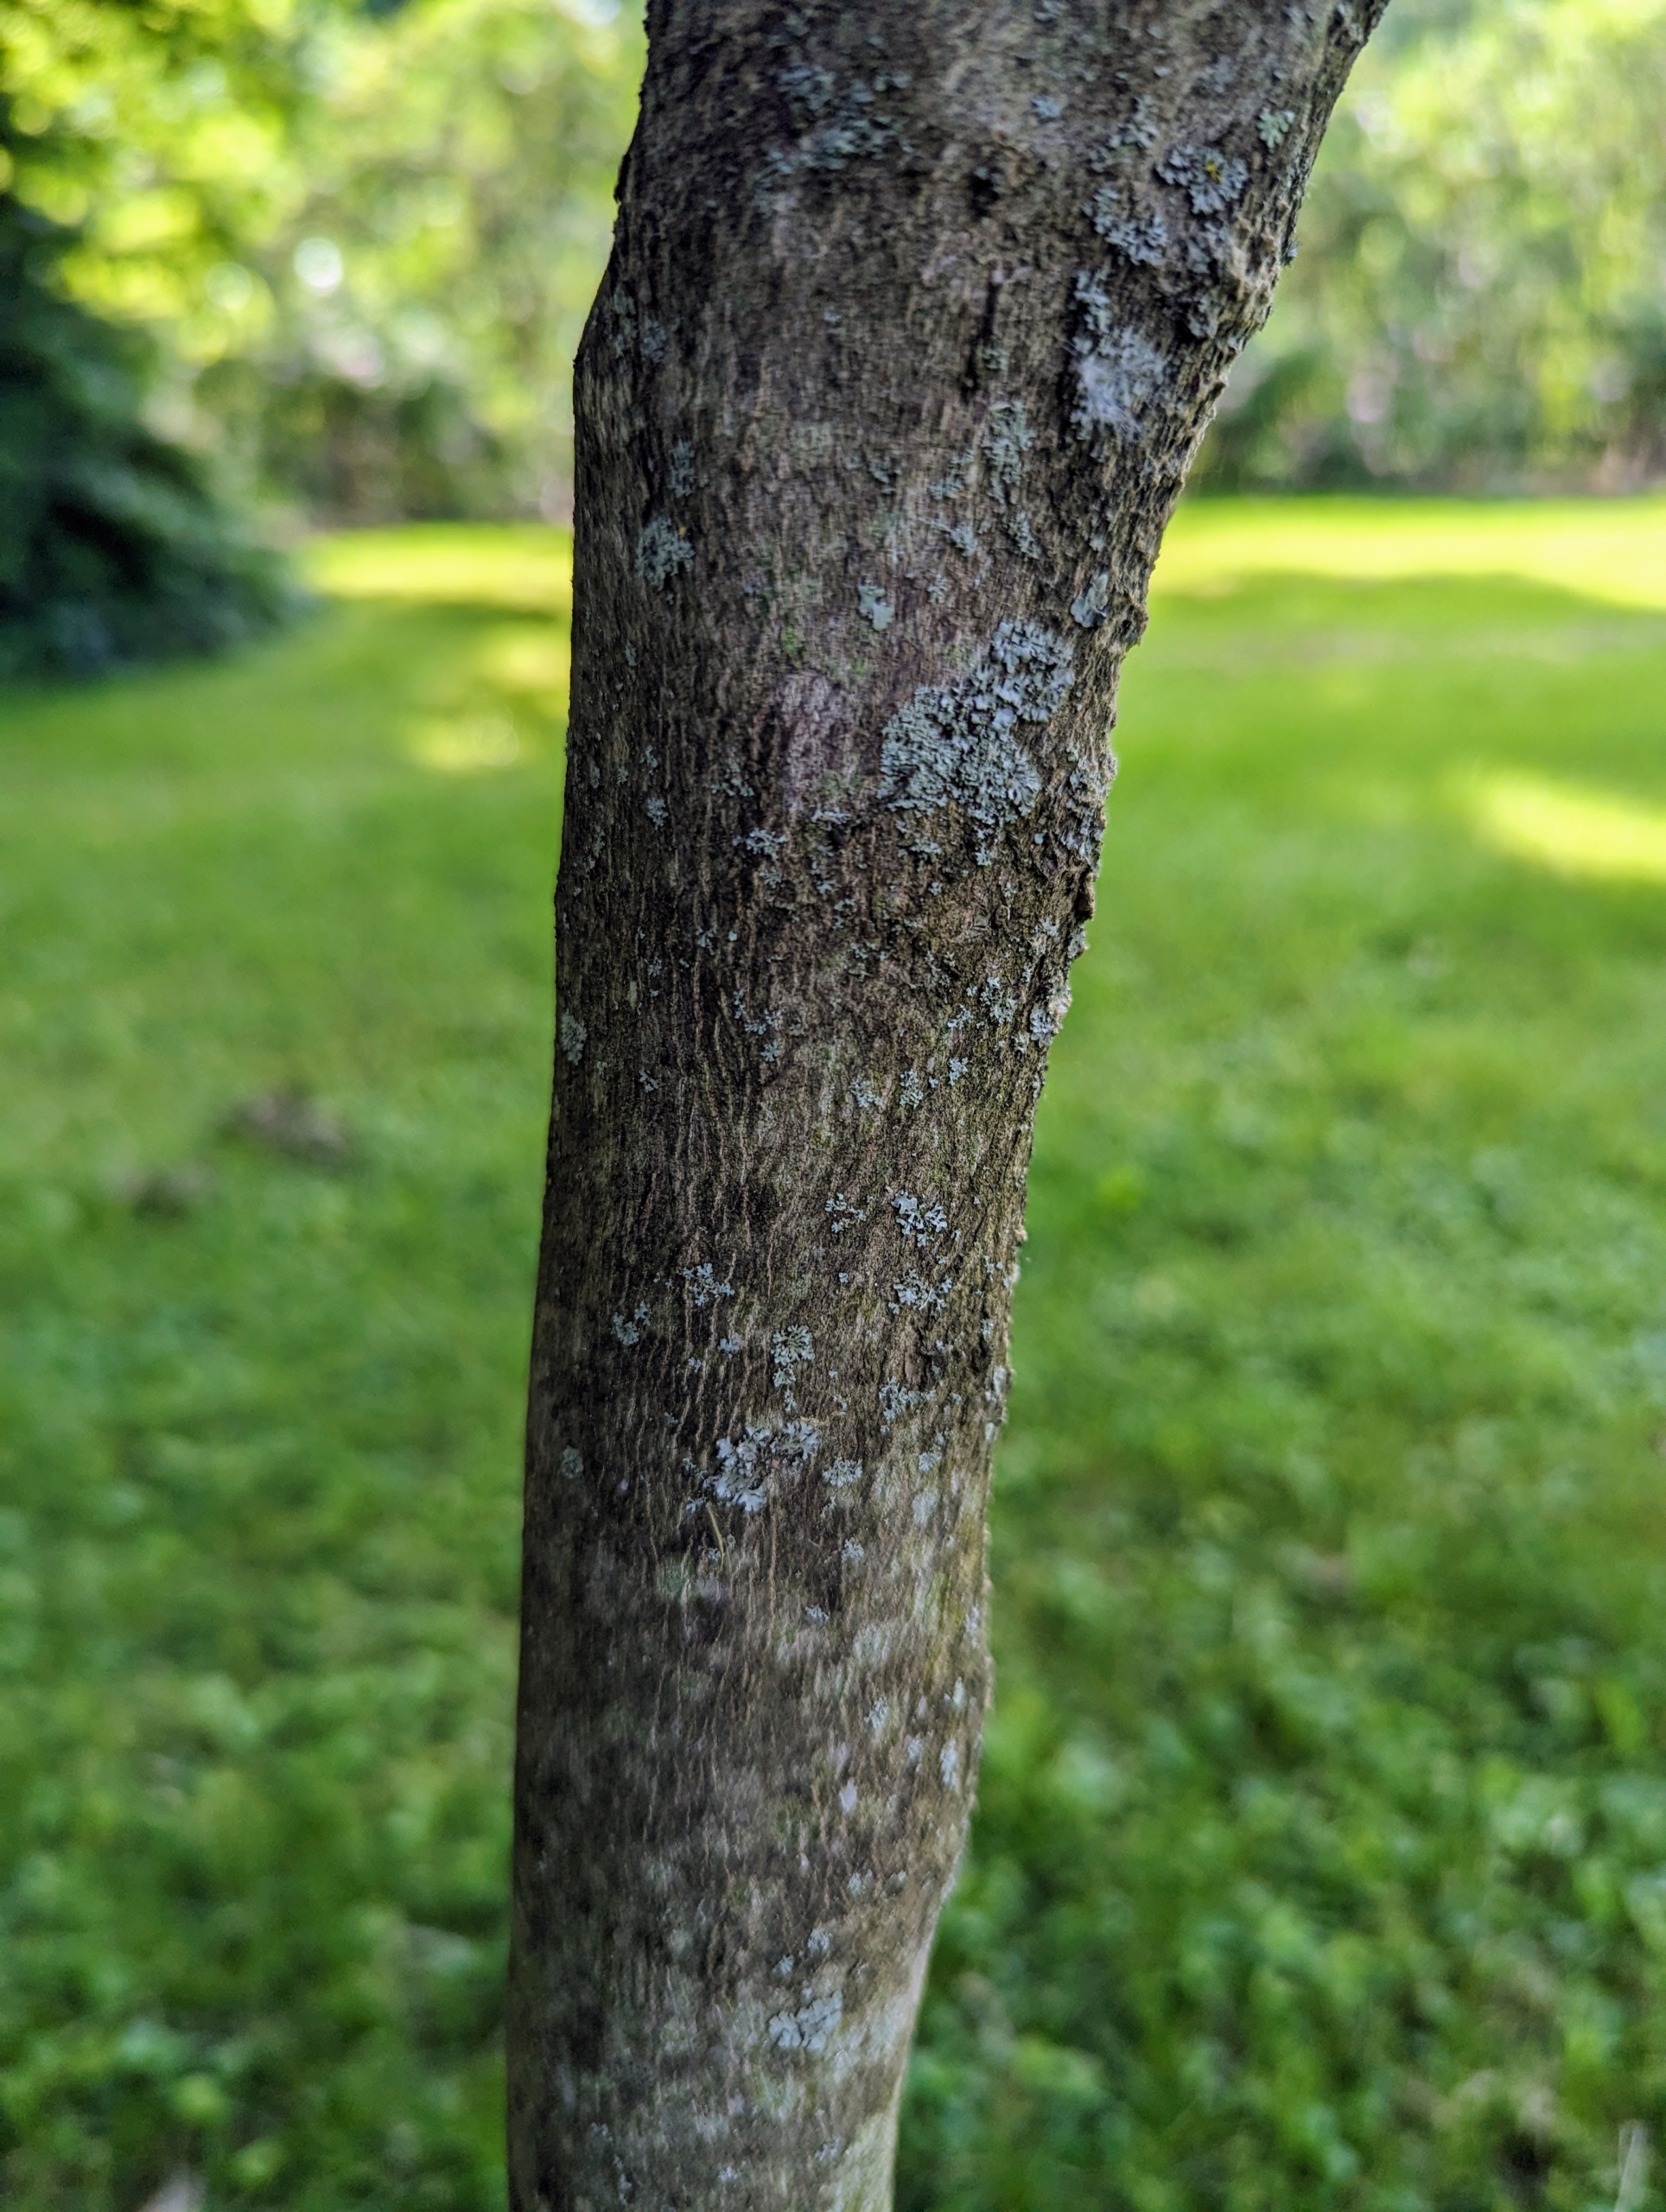
And the bark is smooth and has orange-brown interlacing fissures that are more noticeable as it matures.
The tree has an upright, oval habit and grows to 15 feet tall and 10 feet wide – different from the weeping variety below.
I am so pleased with how well these trees are doing. If you’re looking to plant any trees this year, consider a unique and elegant Japanese Snowbell.