Whenever possible I always encourage friends and family to share their photos from events and gatherings we've attended.
Last month, I went to Harvard’s Hasty Pudding, a comedy musical extravaganza that was written, performed, and produced by Harvard University students. Though the cast and crew were young, their theatrical organization, Hasty Pudding, is the oldest in the country - its first performance was in 1844. Unafraid of ruffling feathers, the Pudding Show is known for its long tradition of daring social commentary. It can boast that members, including William Randolph Hearst, Franklin Delano Roosevelt, and Jack Lemmon, appeared on its stage before becoming famous.
I received an invitation to the performance thanks to my friend Darcy Miller - artist, author, celebration expert, entrepreneur, and founding editor of Martha Stewart Weddings. Darcy’s daughter Daisy did a fantastic job co-producing the show. It’s hard to believe I’ve known Daisy since she was born; I've loved watching her grow up. In fact, her mother was just two years older when she started to work for me. Seeing what Daisy and all the students created was inspiring.
Enjoy these photos from the evening.
Here I am with Daisy and the Hasty Pudding business staff. (Photo by Darcy Miller)
The orchestral introduction is played entirely by student musicians. (Photo by Darcy Miller)
The Hasty Pudding Theatricals troupe is made up of about 50 undergraduates. (Photo by Darcy Miller)
It’s hard to believe these young men and women attend college full-time while learning and performing six weeks of shows. (Photo by Darcy Miller)
Hasty Pudding Theatricals was originally formed in 1795 as a social club for Harvard College students. (Photo by Darcy Miller)
In total, there is a cast, a band, the tech crew, and the business staff to stage a 35-show run. (Photo by Darcy Miller)
The cancan is a staple of the finale for every Hasty Pudding performance. (Photo by Darcy Miller)
Since 1951, Hasty Pudding has honored a woman of the year – chosen based on their “lasting and impressive contributions to the world of entertainment” (Harvard Gazette). Actress and “Wicked” star Cynthia Erivo was this year’s “Woman of the Year” Honoree. (Photo by Hasty Pudding Theatricals)
Hasty Pudding has also honored Elizabeth Taylor, three-time Oscar winner Meryl Streep, Halle Berry, Sandra Bullock, and Anne Hathaway and comedy legends like Lucille Ball. (Photo by Darcy Miller)
Actor John Hamm from Mad Men was this year’s “Man of The Year” Honoree. The “Man of the Year” Award began in 1967 with Bob Hope, and also includes a “who’s who” of Hollywood’s leading men. (Photo by Hasty Pudding Theatricals)
Each Honoree gets roasted on the opening night of the show and receives a pudding pot. The name “Hasty Pudding” comes from the founding students, who enjoyed the traditional English pudding at their meetings. Over time, a giant cast-iron pot filled with pudding was dragged across campus for their gatherings, eventually becoming a symbol of Hasty Pudding Theatricals. (Photo by Hasty Pudding Theatricals)
Here’s my friend and producer Daisy, and her co-producer Willow, roasting Cynthia. (Photo by Darcy Miller)
For every “Woman of the Year,” it’s a tradition to have a parade through Harvard. (Photo by Hasty Pudding Theatricals)
The parade ends in front of the Hasty Pudding Clubhouse. (Photo by Hasty Pudding Theatricals)
Inside the Hasty Pudding Club House is a wall of posters and programs from past shows. (Photo by Darcy Miller)
The tour starts in Cambridge, Massachusetts, then to New York City, and a final performance is done in Bermuda. (Photo by Darcy Miller)
Here I am with Daisy and Kevin Sharkey. What a tour de force! These kids are the new generation full of hope and displaying a great work ethic, sense of humor, and talent! Bravo, Daisy and troupe! Thanks for inviting me. (Photo by Darcy Miller)
If possible, make the most of business trips and try to fit in visits to beautiful and interesting places in between meetings and events - I do.
During my latest trip and LIVE appearances at QVC in West Chester, Pennsylvania, I had the opportunity to visit the exquisite Longwood Gardens in Kennett Square. Longwood Gardens has a rich and varied history. For thousands of years, the native Lenape tribe used the area for fishing, hunting and farming. In 1700, Quaker farmer, George Peirce, purchased 400-acres of the English-claimed land and began developing the property. His decedents eventually created an arboretum of some of the finest trees in the nation. Unfortunately, as years passed, heirs lost interest and the land suffered decades of neglect until 1906, when it was obtained by Pierre du Pont - entrepreneur, businessman, philanthropist and member of the prominent du Pont family. Pierre's passion and vision created the groundwork for what is now Longwood Gardens - home to many spectacular botanical collections including nine-thousand species and varieties of plants spread across more than 1,100 acres - all wonderfully maintained by hundreds of employees, students and volunteers. I encourage you to visit the next time you're in the area.
Here are some photos, enjoy.
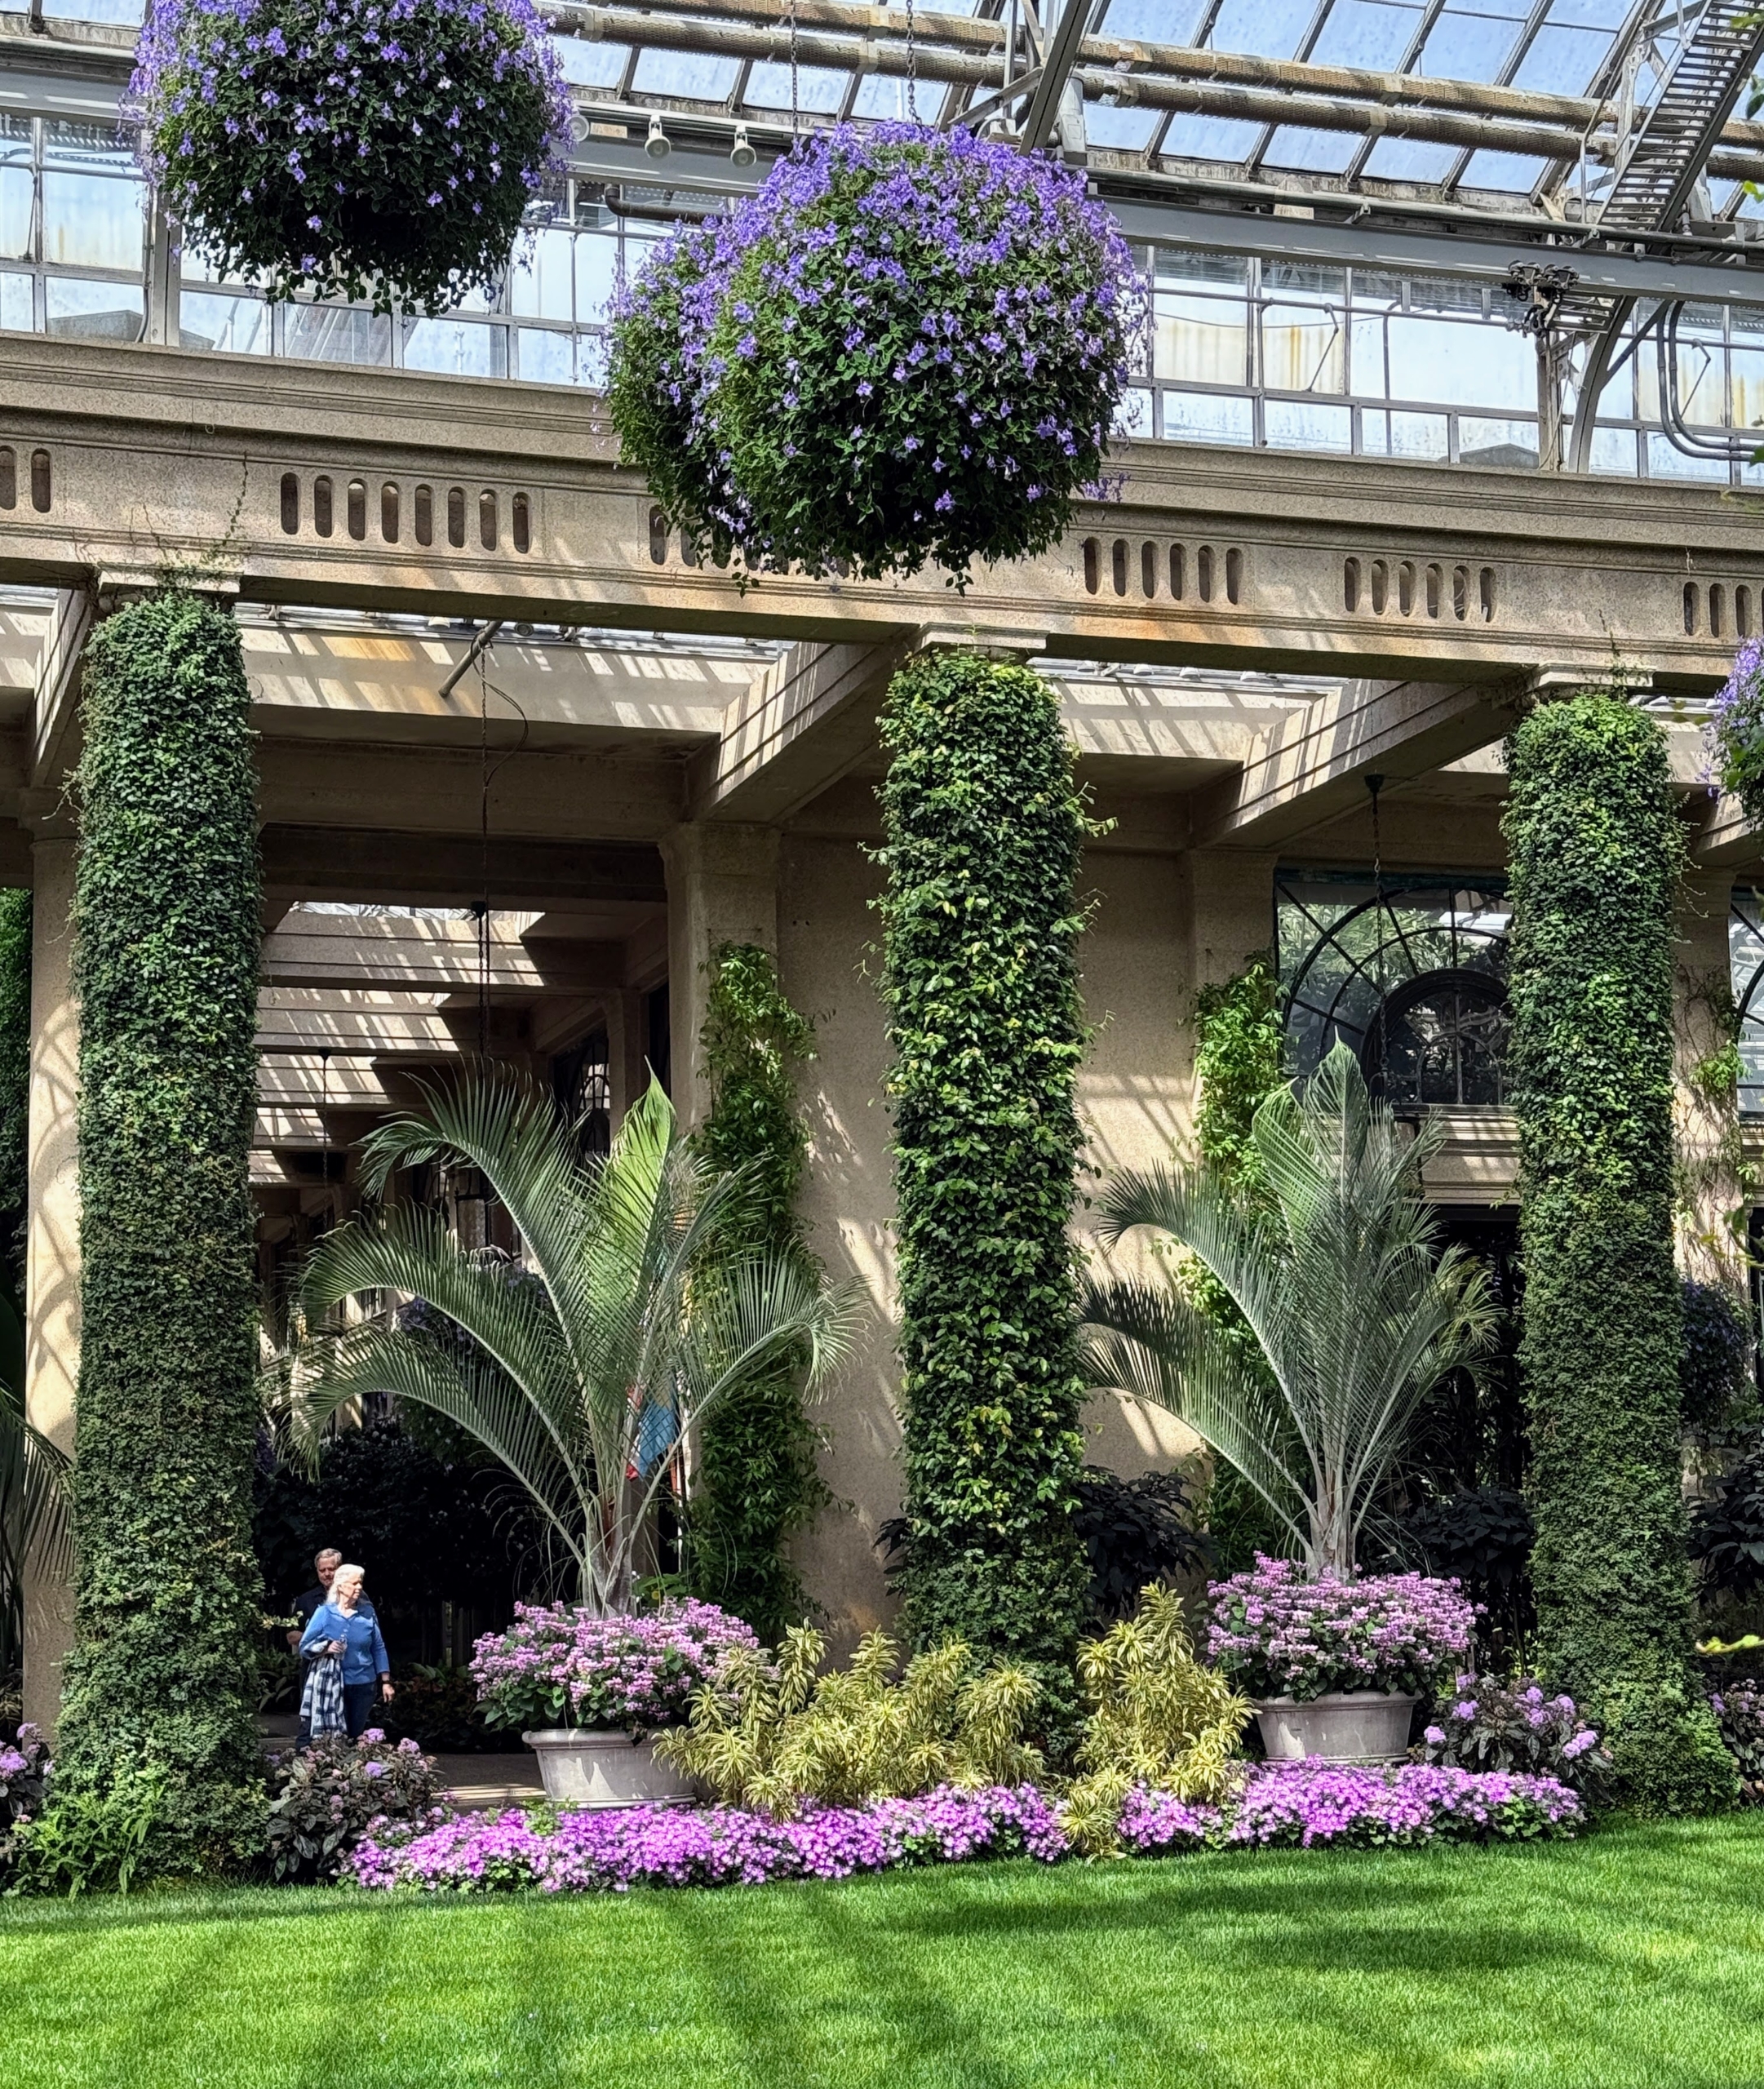
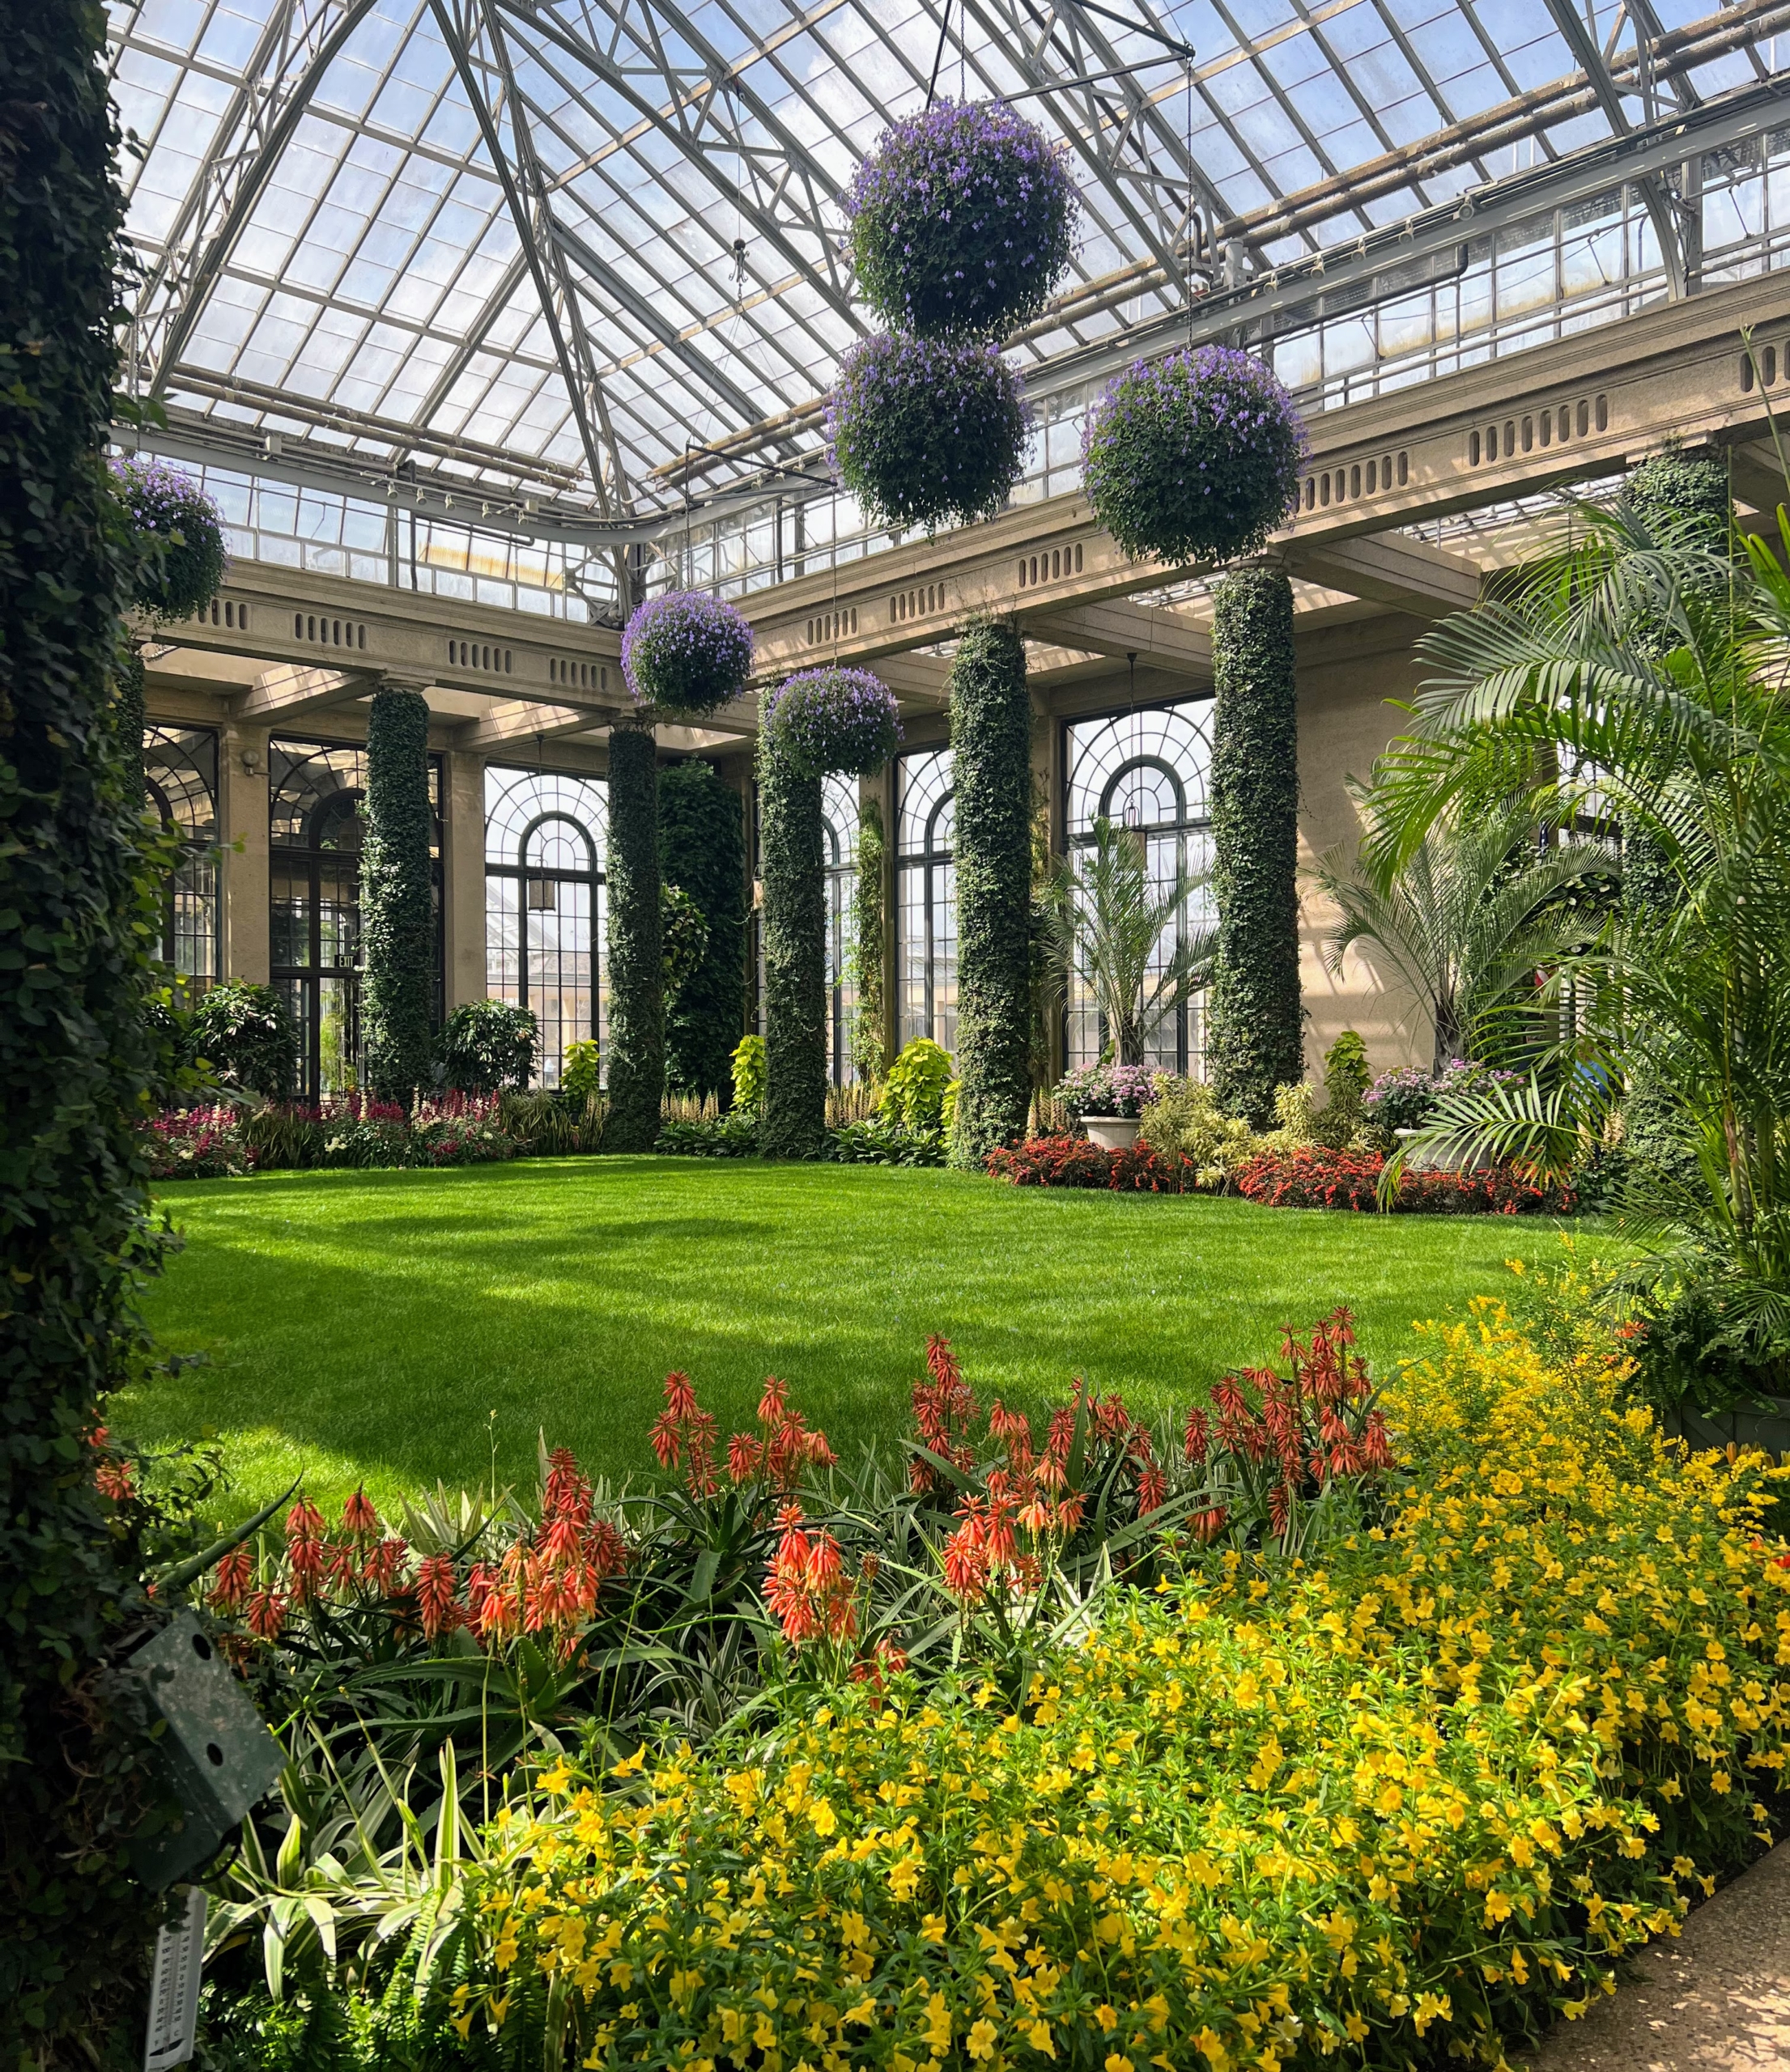
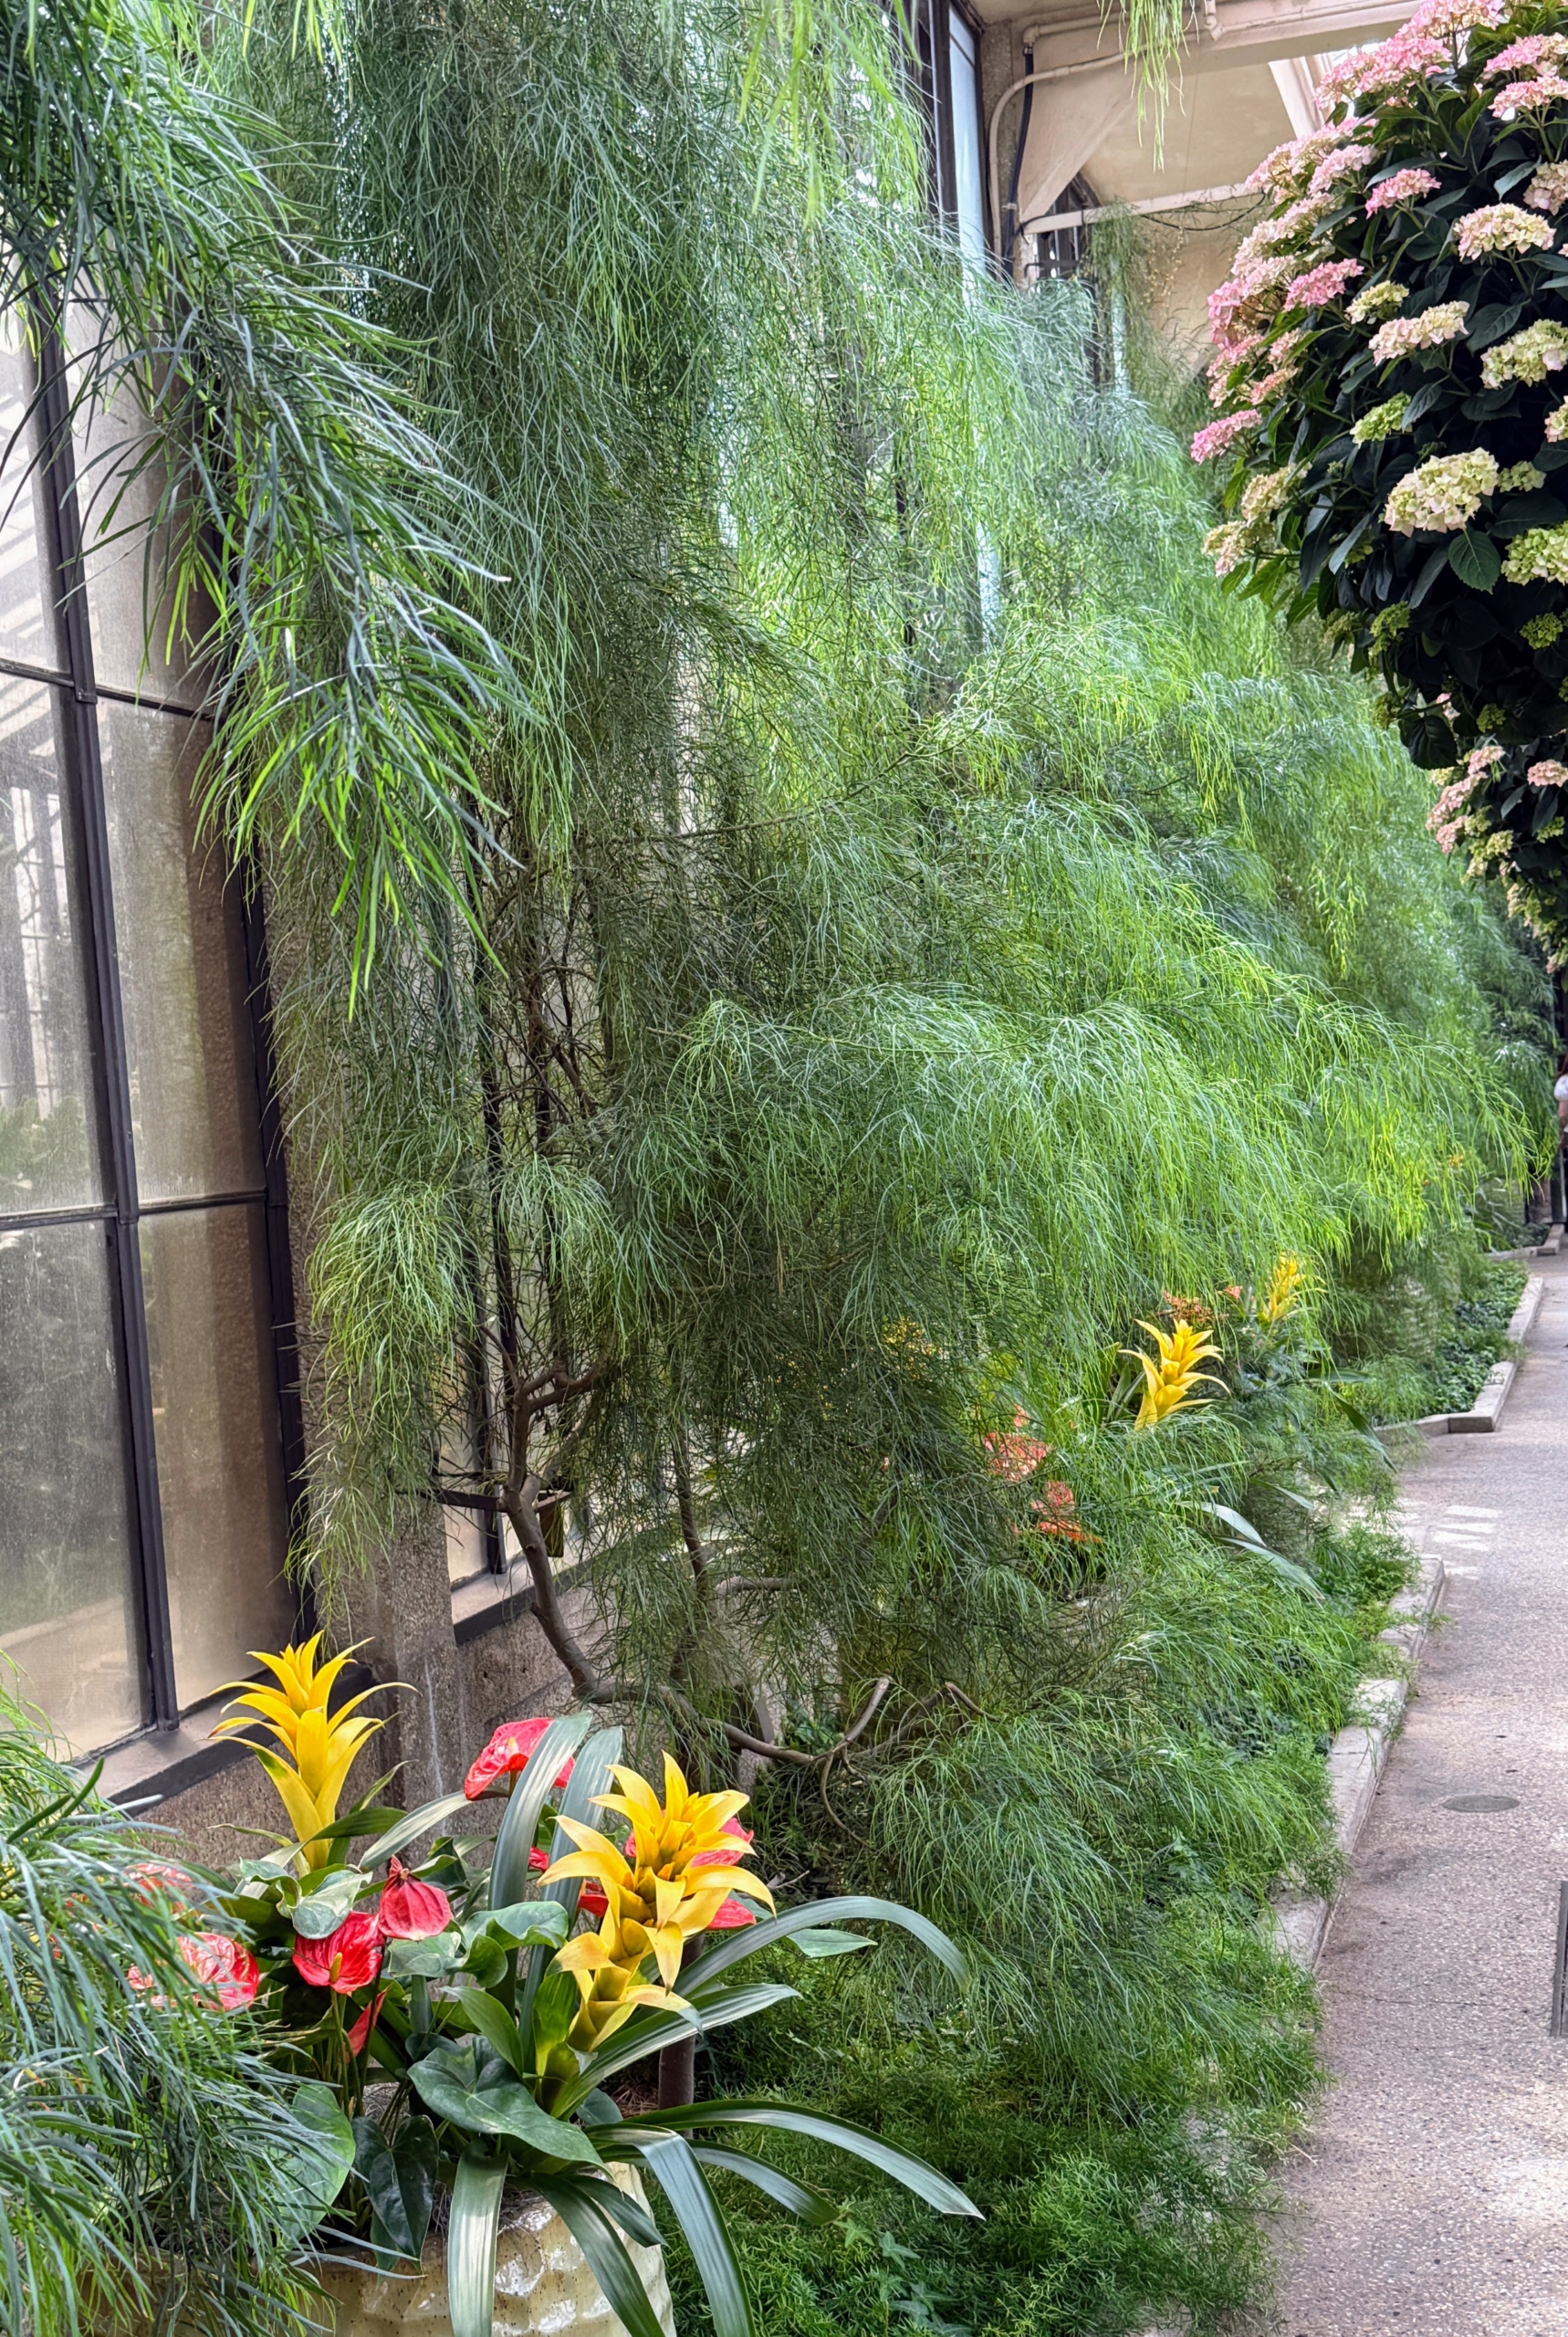
Beautiful specimens fill the main conservatory. The hanging baskets contain cape-primrose, Streptocarpus ‘Concord Blue.’ The columns are covered with Creeping Fig, Ficus pumila, Triangle Palm, Dypsis decaryi, Hybrid Cineraria, and Pericallis x hybrida ‘Sunsenepiba’ Sunetti® Pink Bicolor. And below, the turf is made from tall fescue, Festuca arundinacea ‘Jaguar 3.’
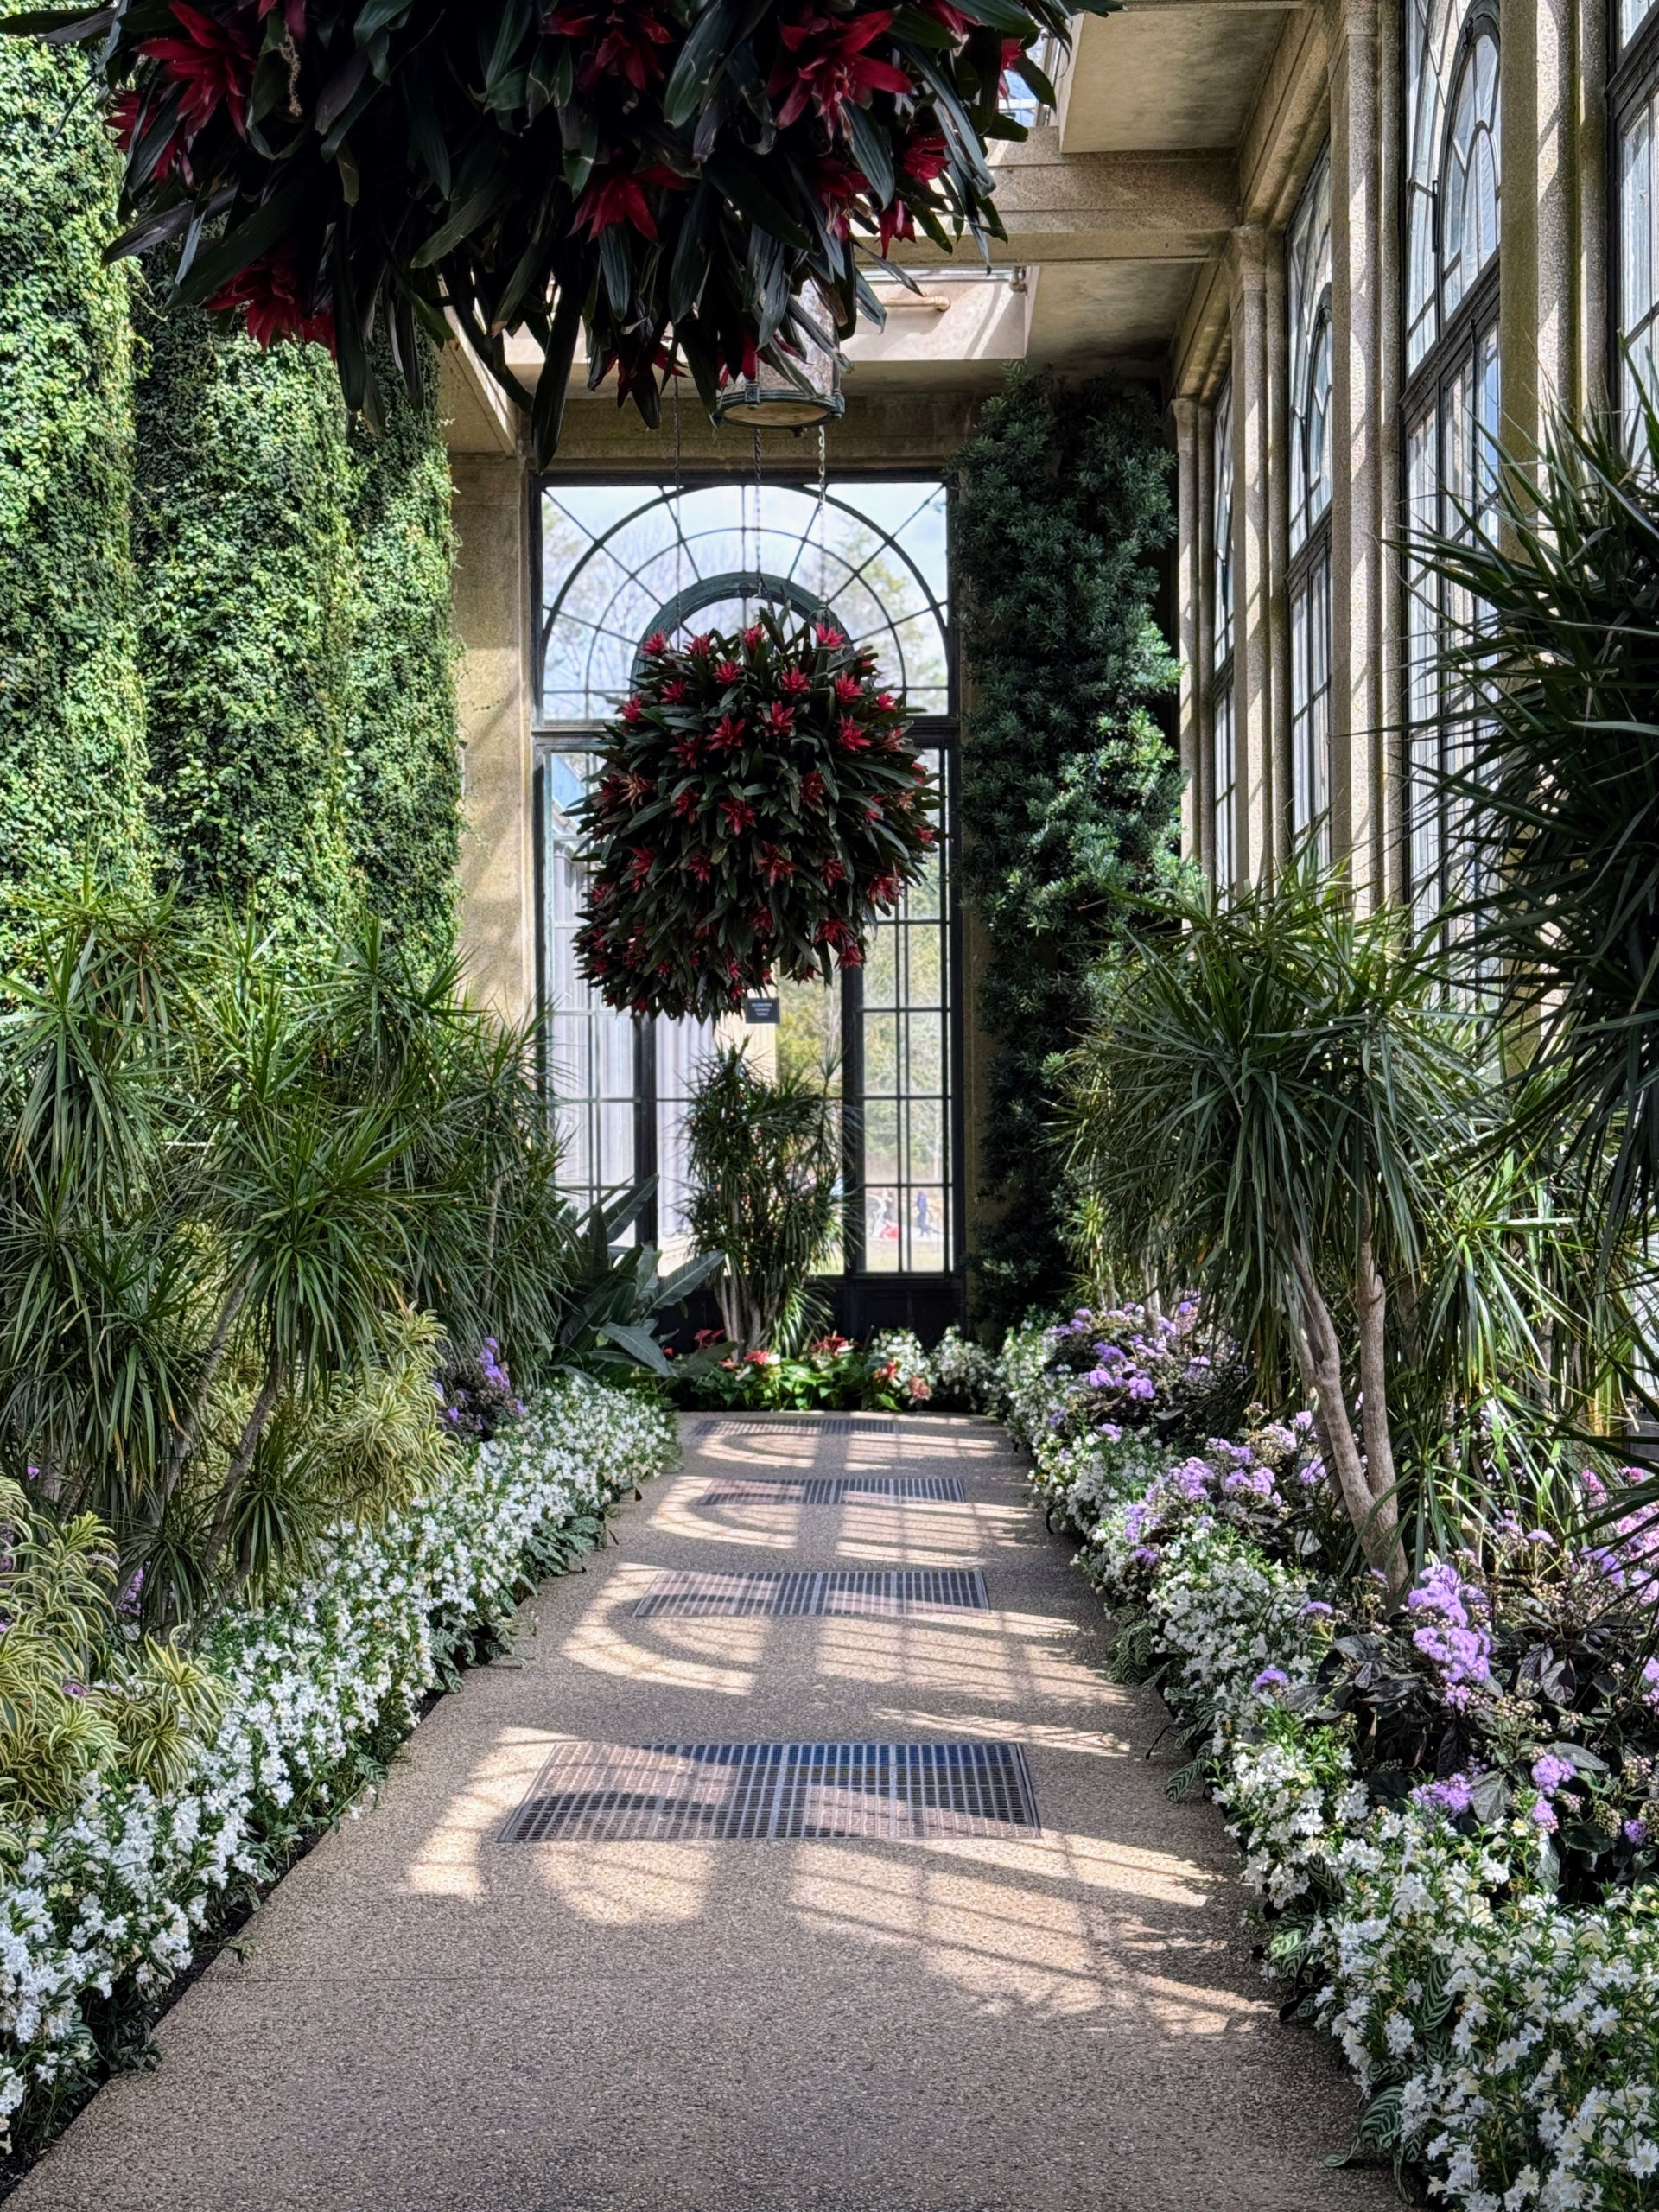
These hanging baskets are filled with Guzmania ‘Juliette,’ Dracaena marginata ‘Tarzan,’ Monkey-Flower, Diplacus grandiflorus, and Bartlettina sordida.
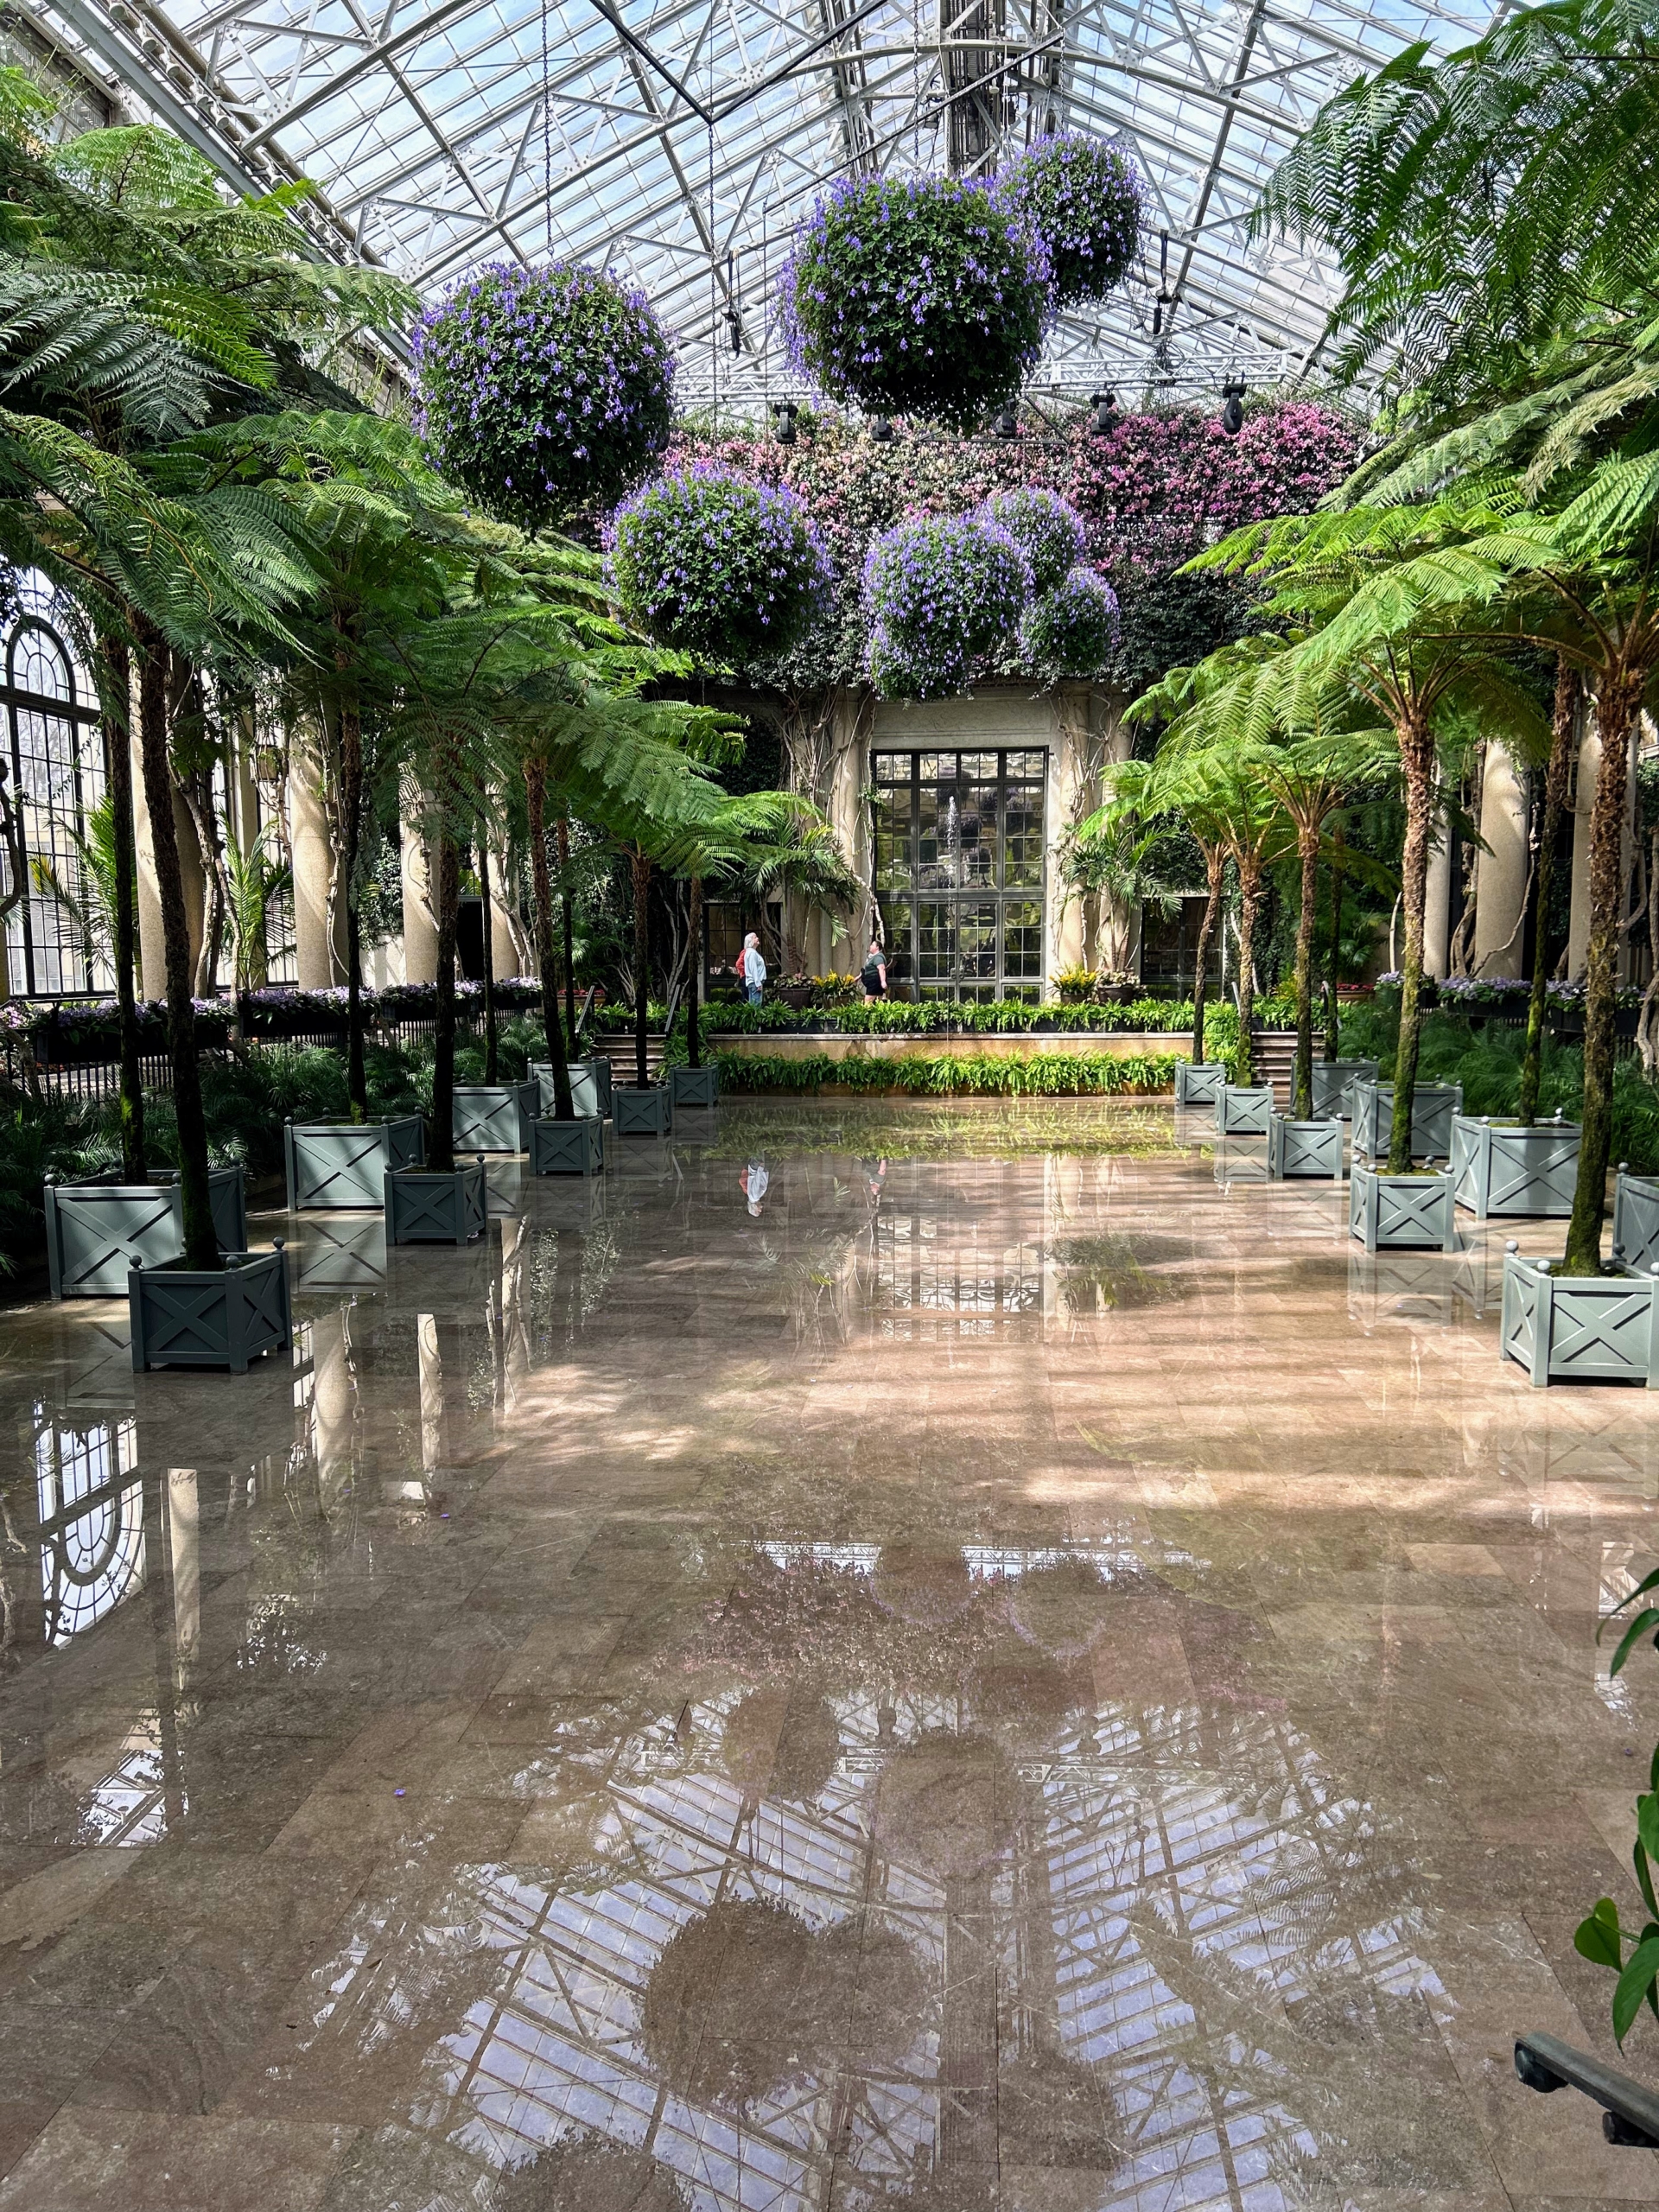
At Longwood Gardens, every space of the conservatory is filled. Here, the hanging baskets contain Phalaenopsis hybrid Areca Palm, Dypsis lutescens.
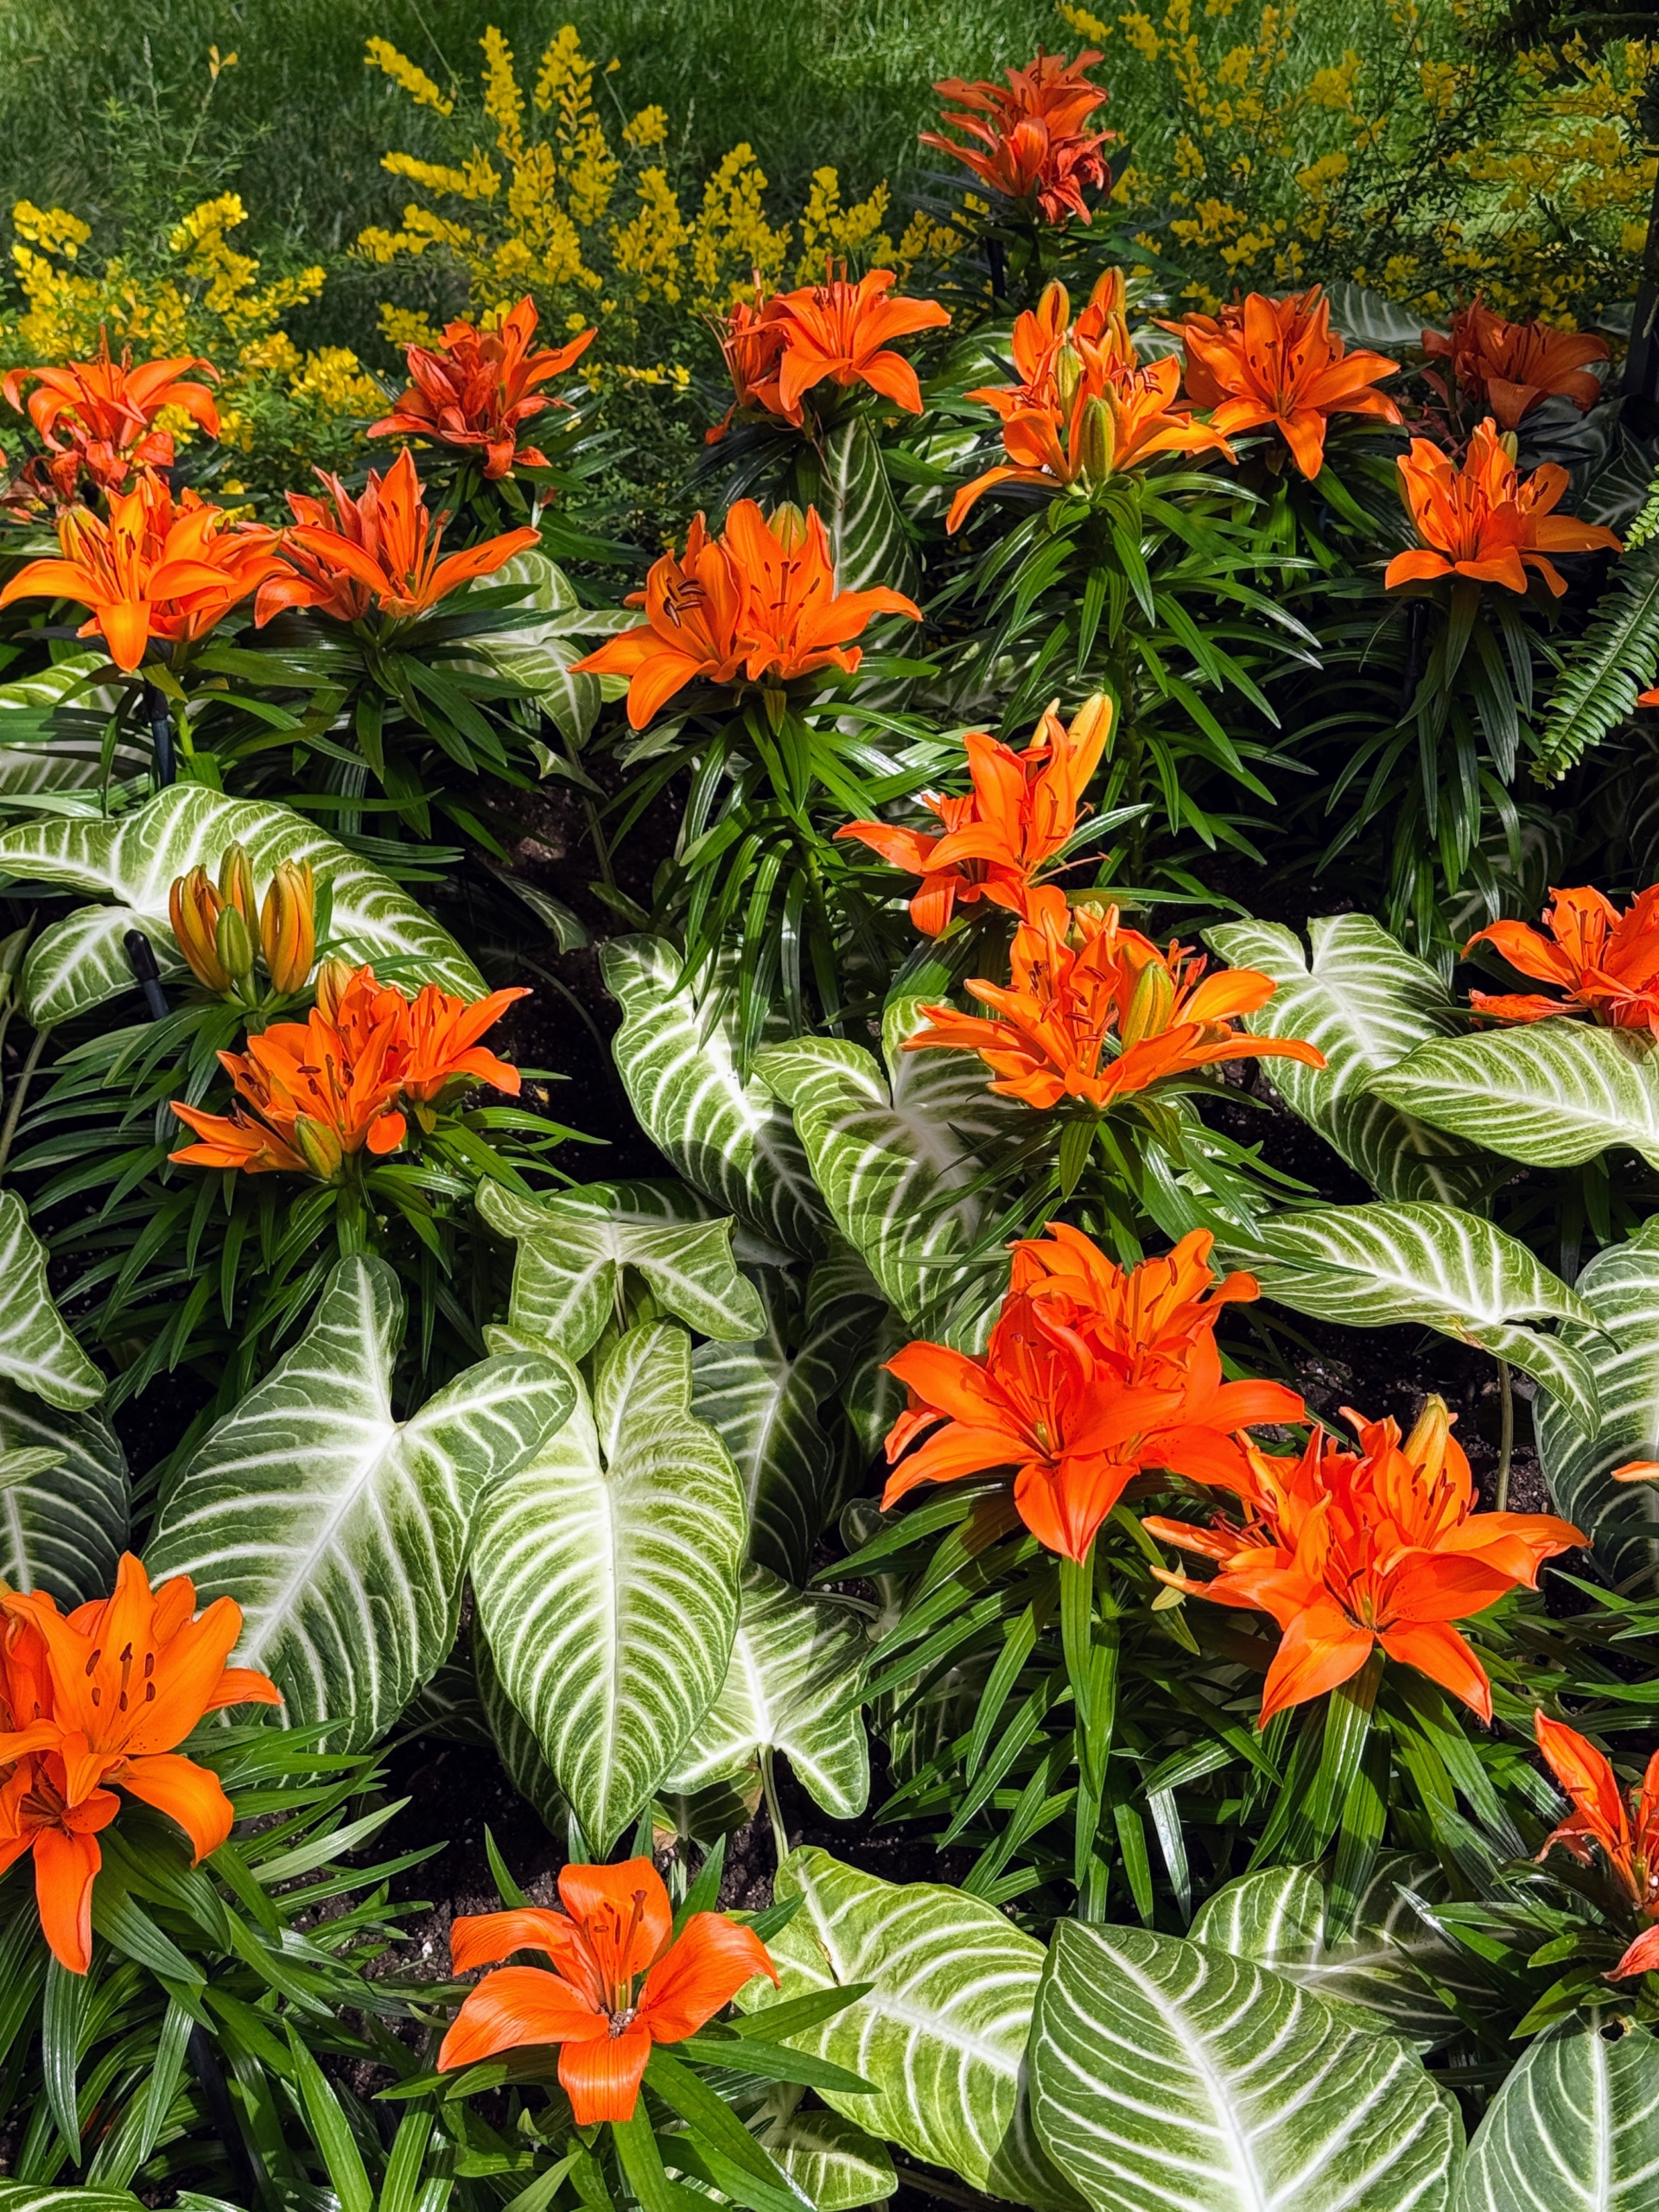
These are Asiatic hybrid Lilies, Lilium ‘Tiny Skyline.’ There are also white vein arrow leaf, Phyllotaenium lindenii, and broom, Genista x spachiana.
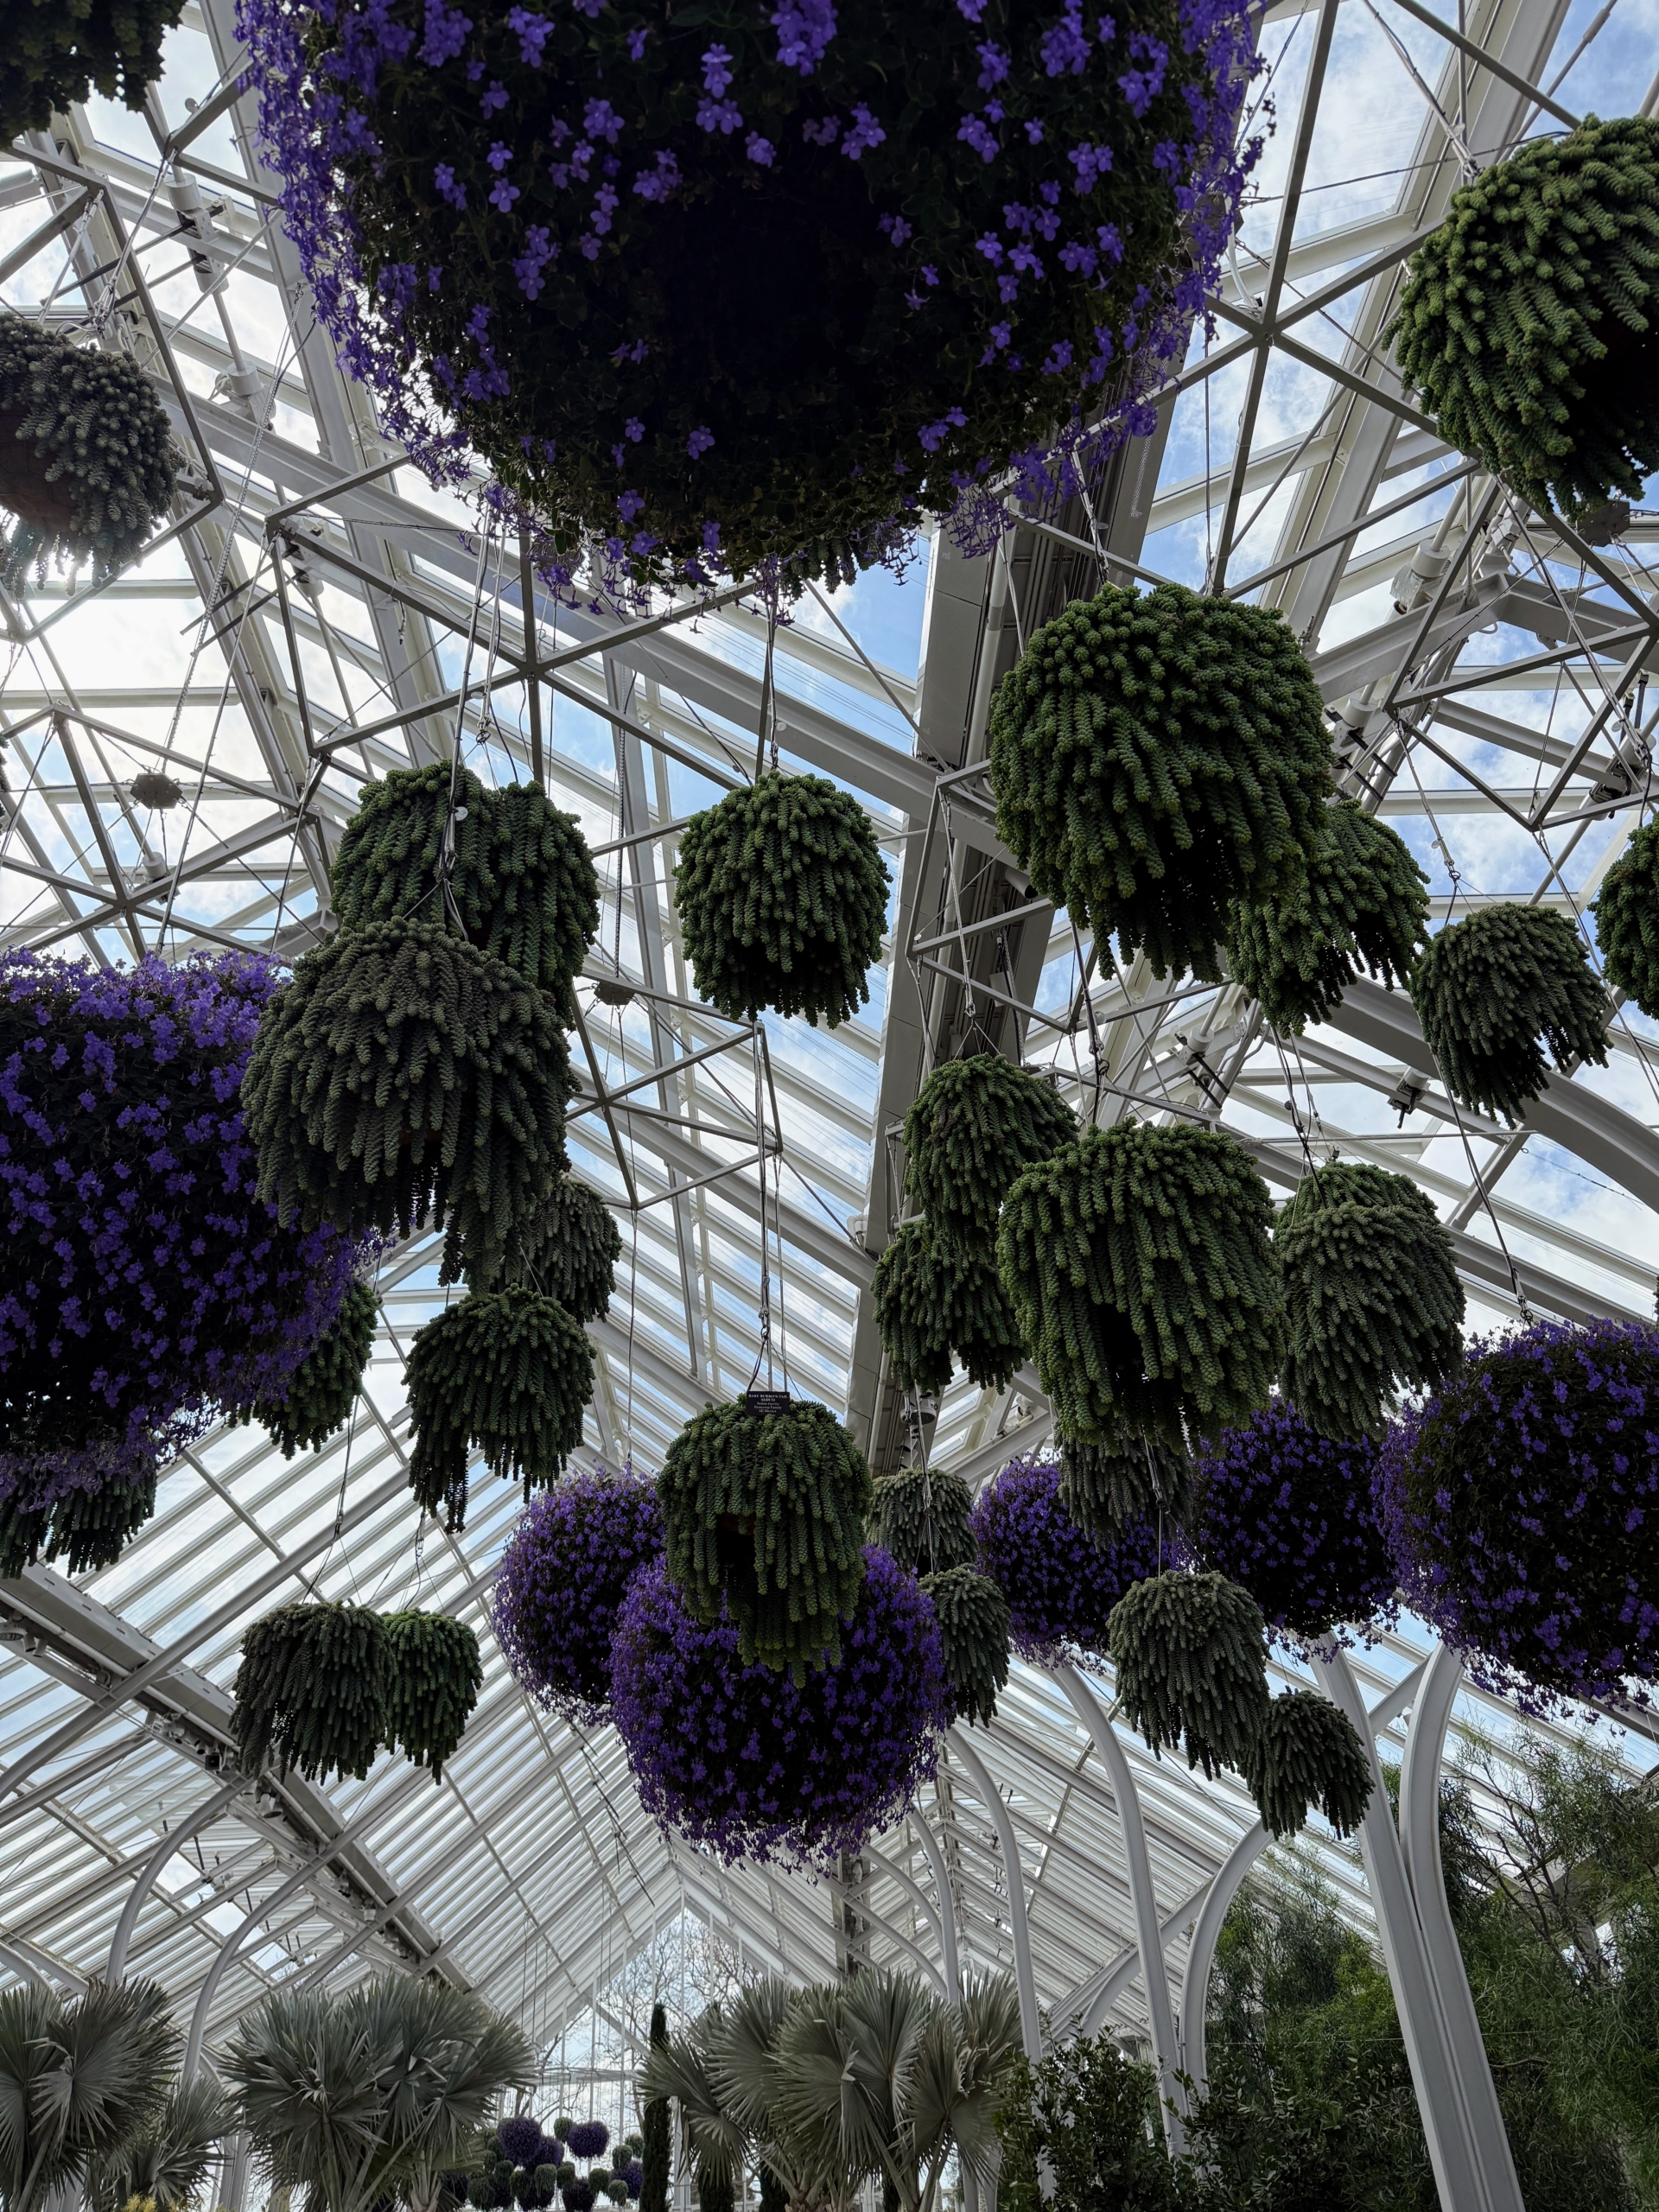
The Conservatory houses about 5,500 plant varieties in its indoor gardens – there is something to see in every corner.
Above the flooded floor of the Exhibition Hall in the Main Conservatory are hanging baskets of cape-primrose, Streptocarpus ‘Concord Blue.’ On both sides are potted Australian Tree Ferns, Cyathea cooperi. I am quite fond of these tree ferns and have several in my own collection. During the summer I love to display them outdoors.
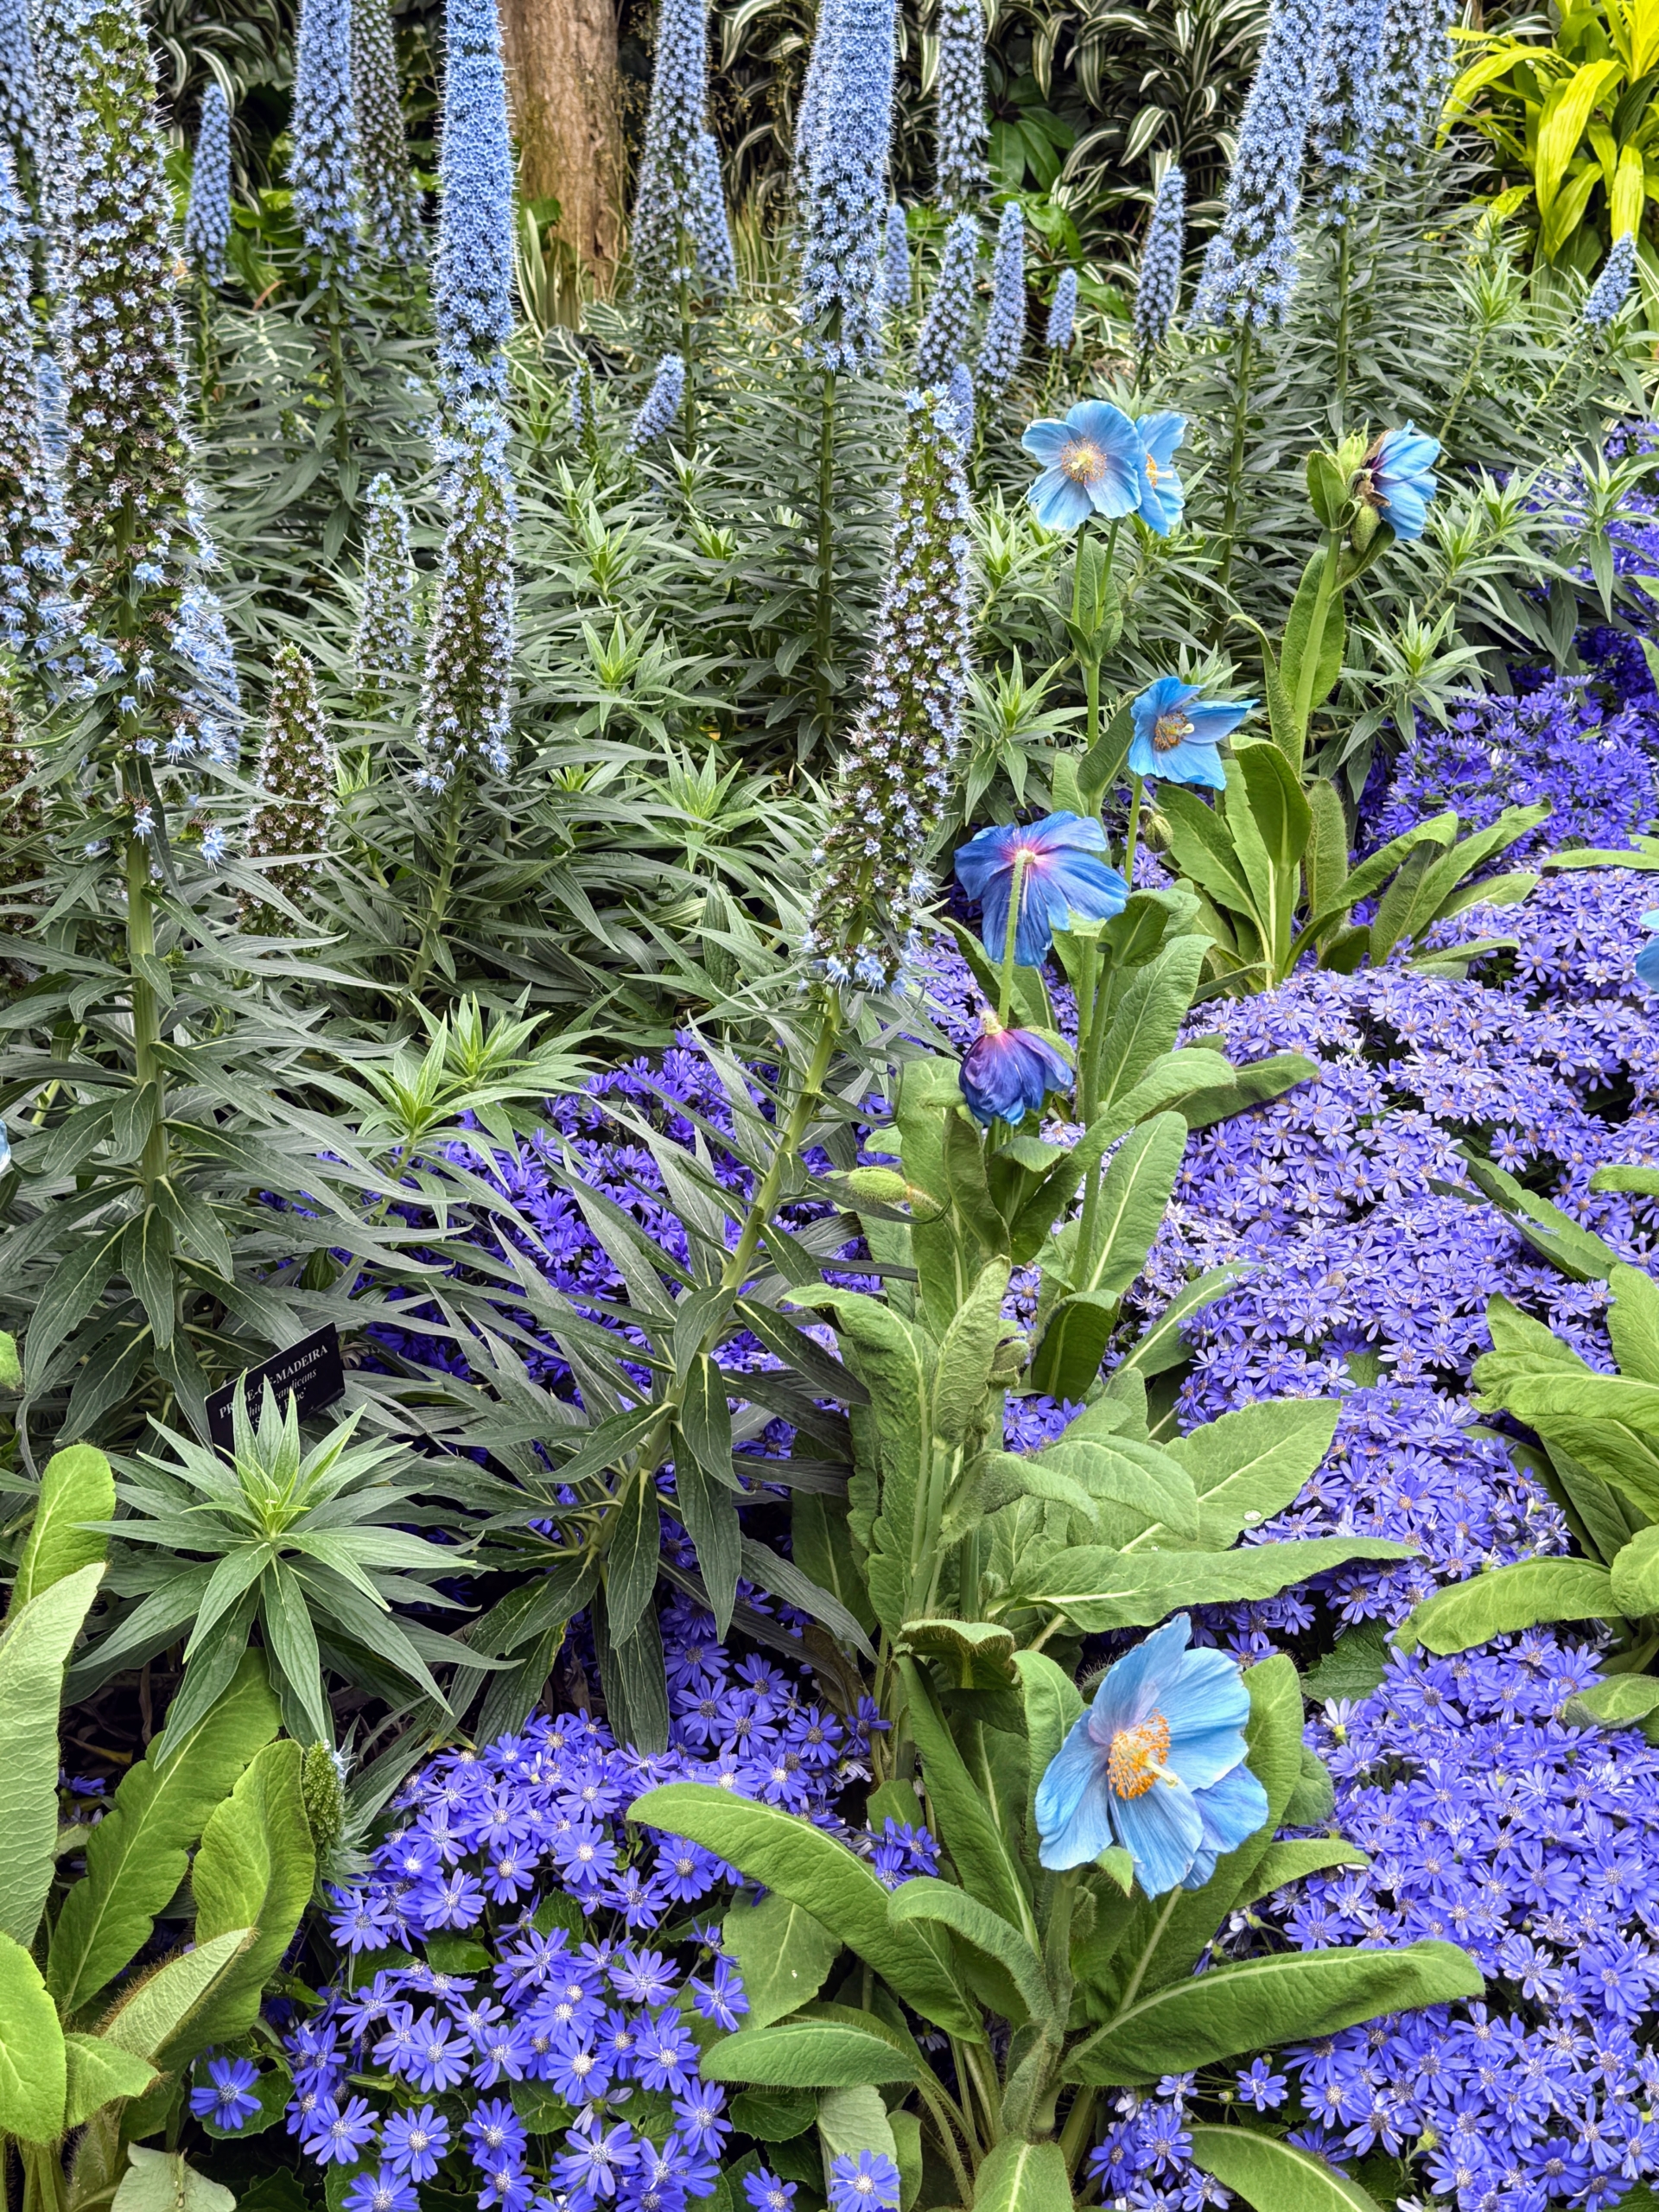
This palette of blue and purple shows Longwood Hybrid Cineraria Pericallis x hybrida, blue poppy Meconopsis ‘Lingholm,’ and Pride-of-Madeira, Echium candicans ‘Select Blue.’
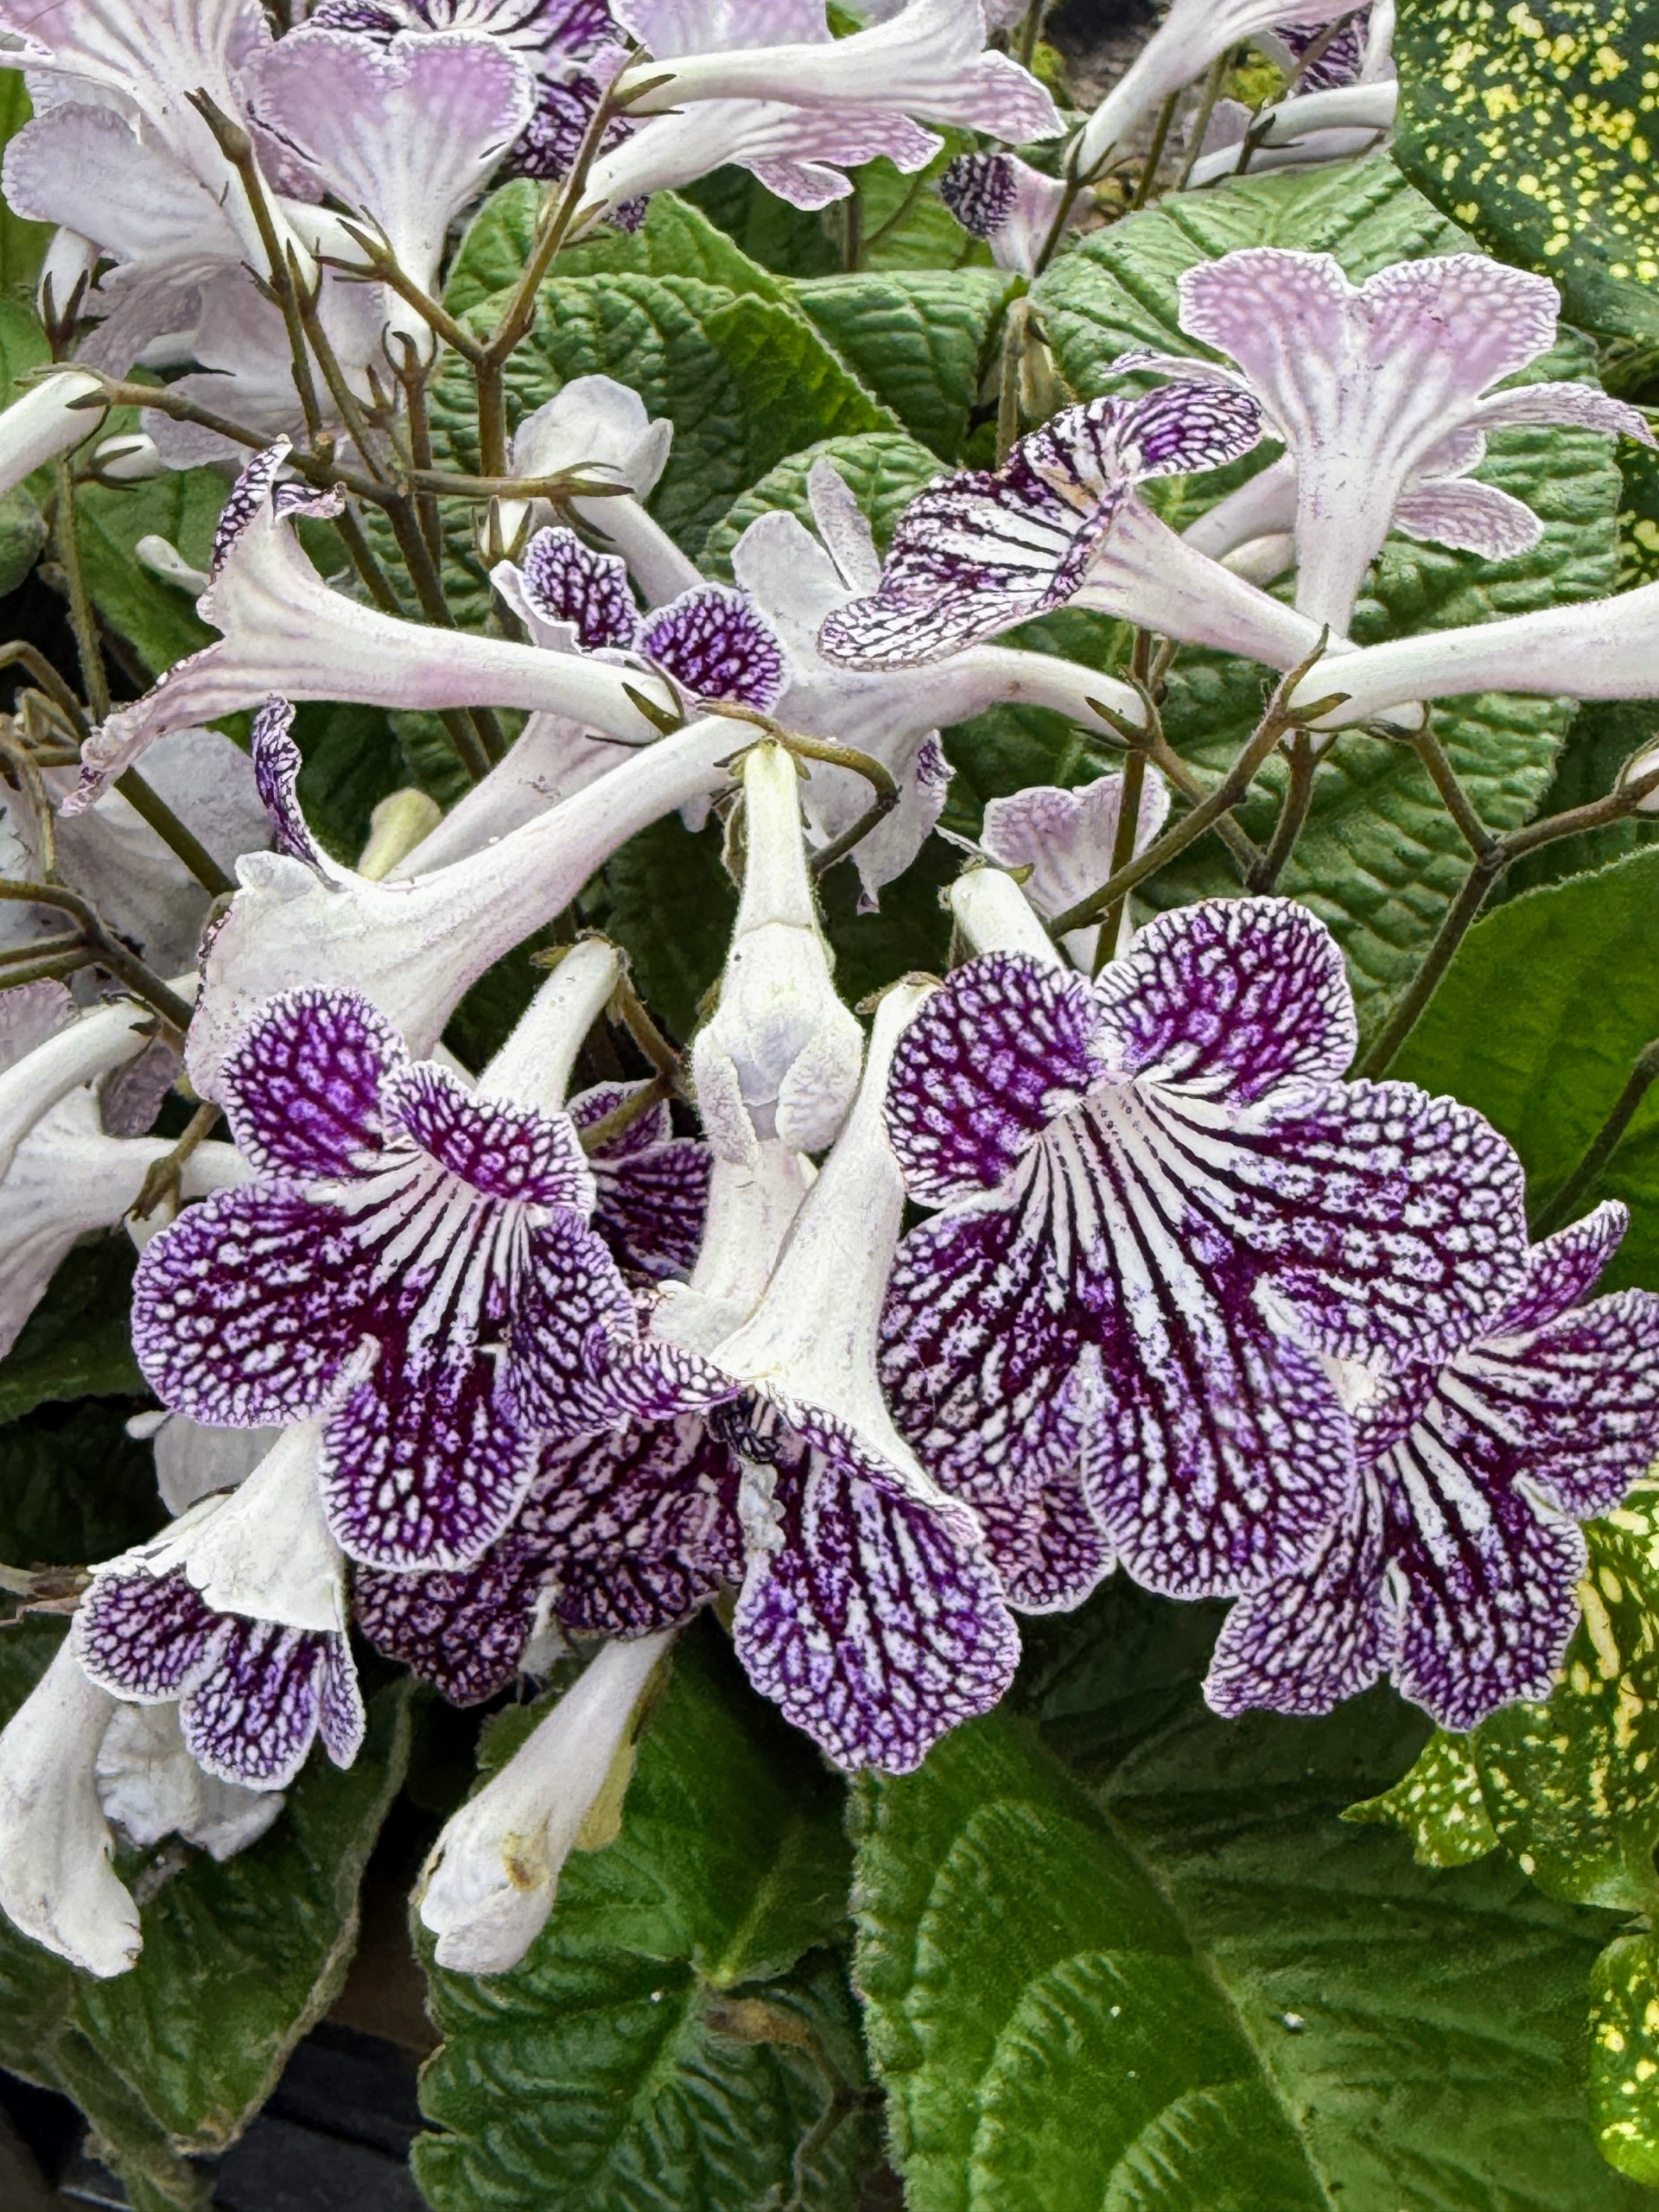
These are striking cape-primrose blooms, Streptocarpus ‘Grape Ice’ with deep purple blossoms, intricate veining, and pure white centers and petal edges.
In the Acacia Passage, one sees River Wattle, Acacia cognata, and in the containers, Guzmania ‘Hilda’ and Anthurium ‘Anthglodig’ Florida.
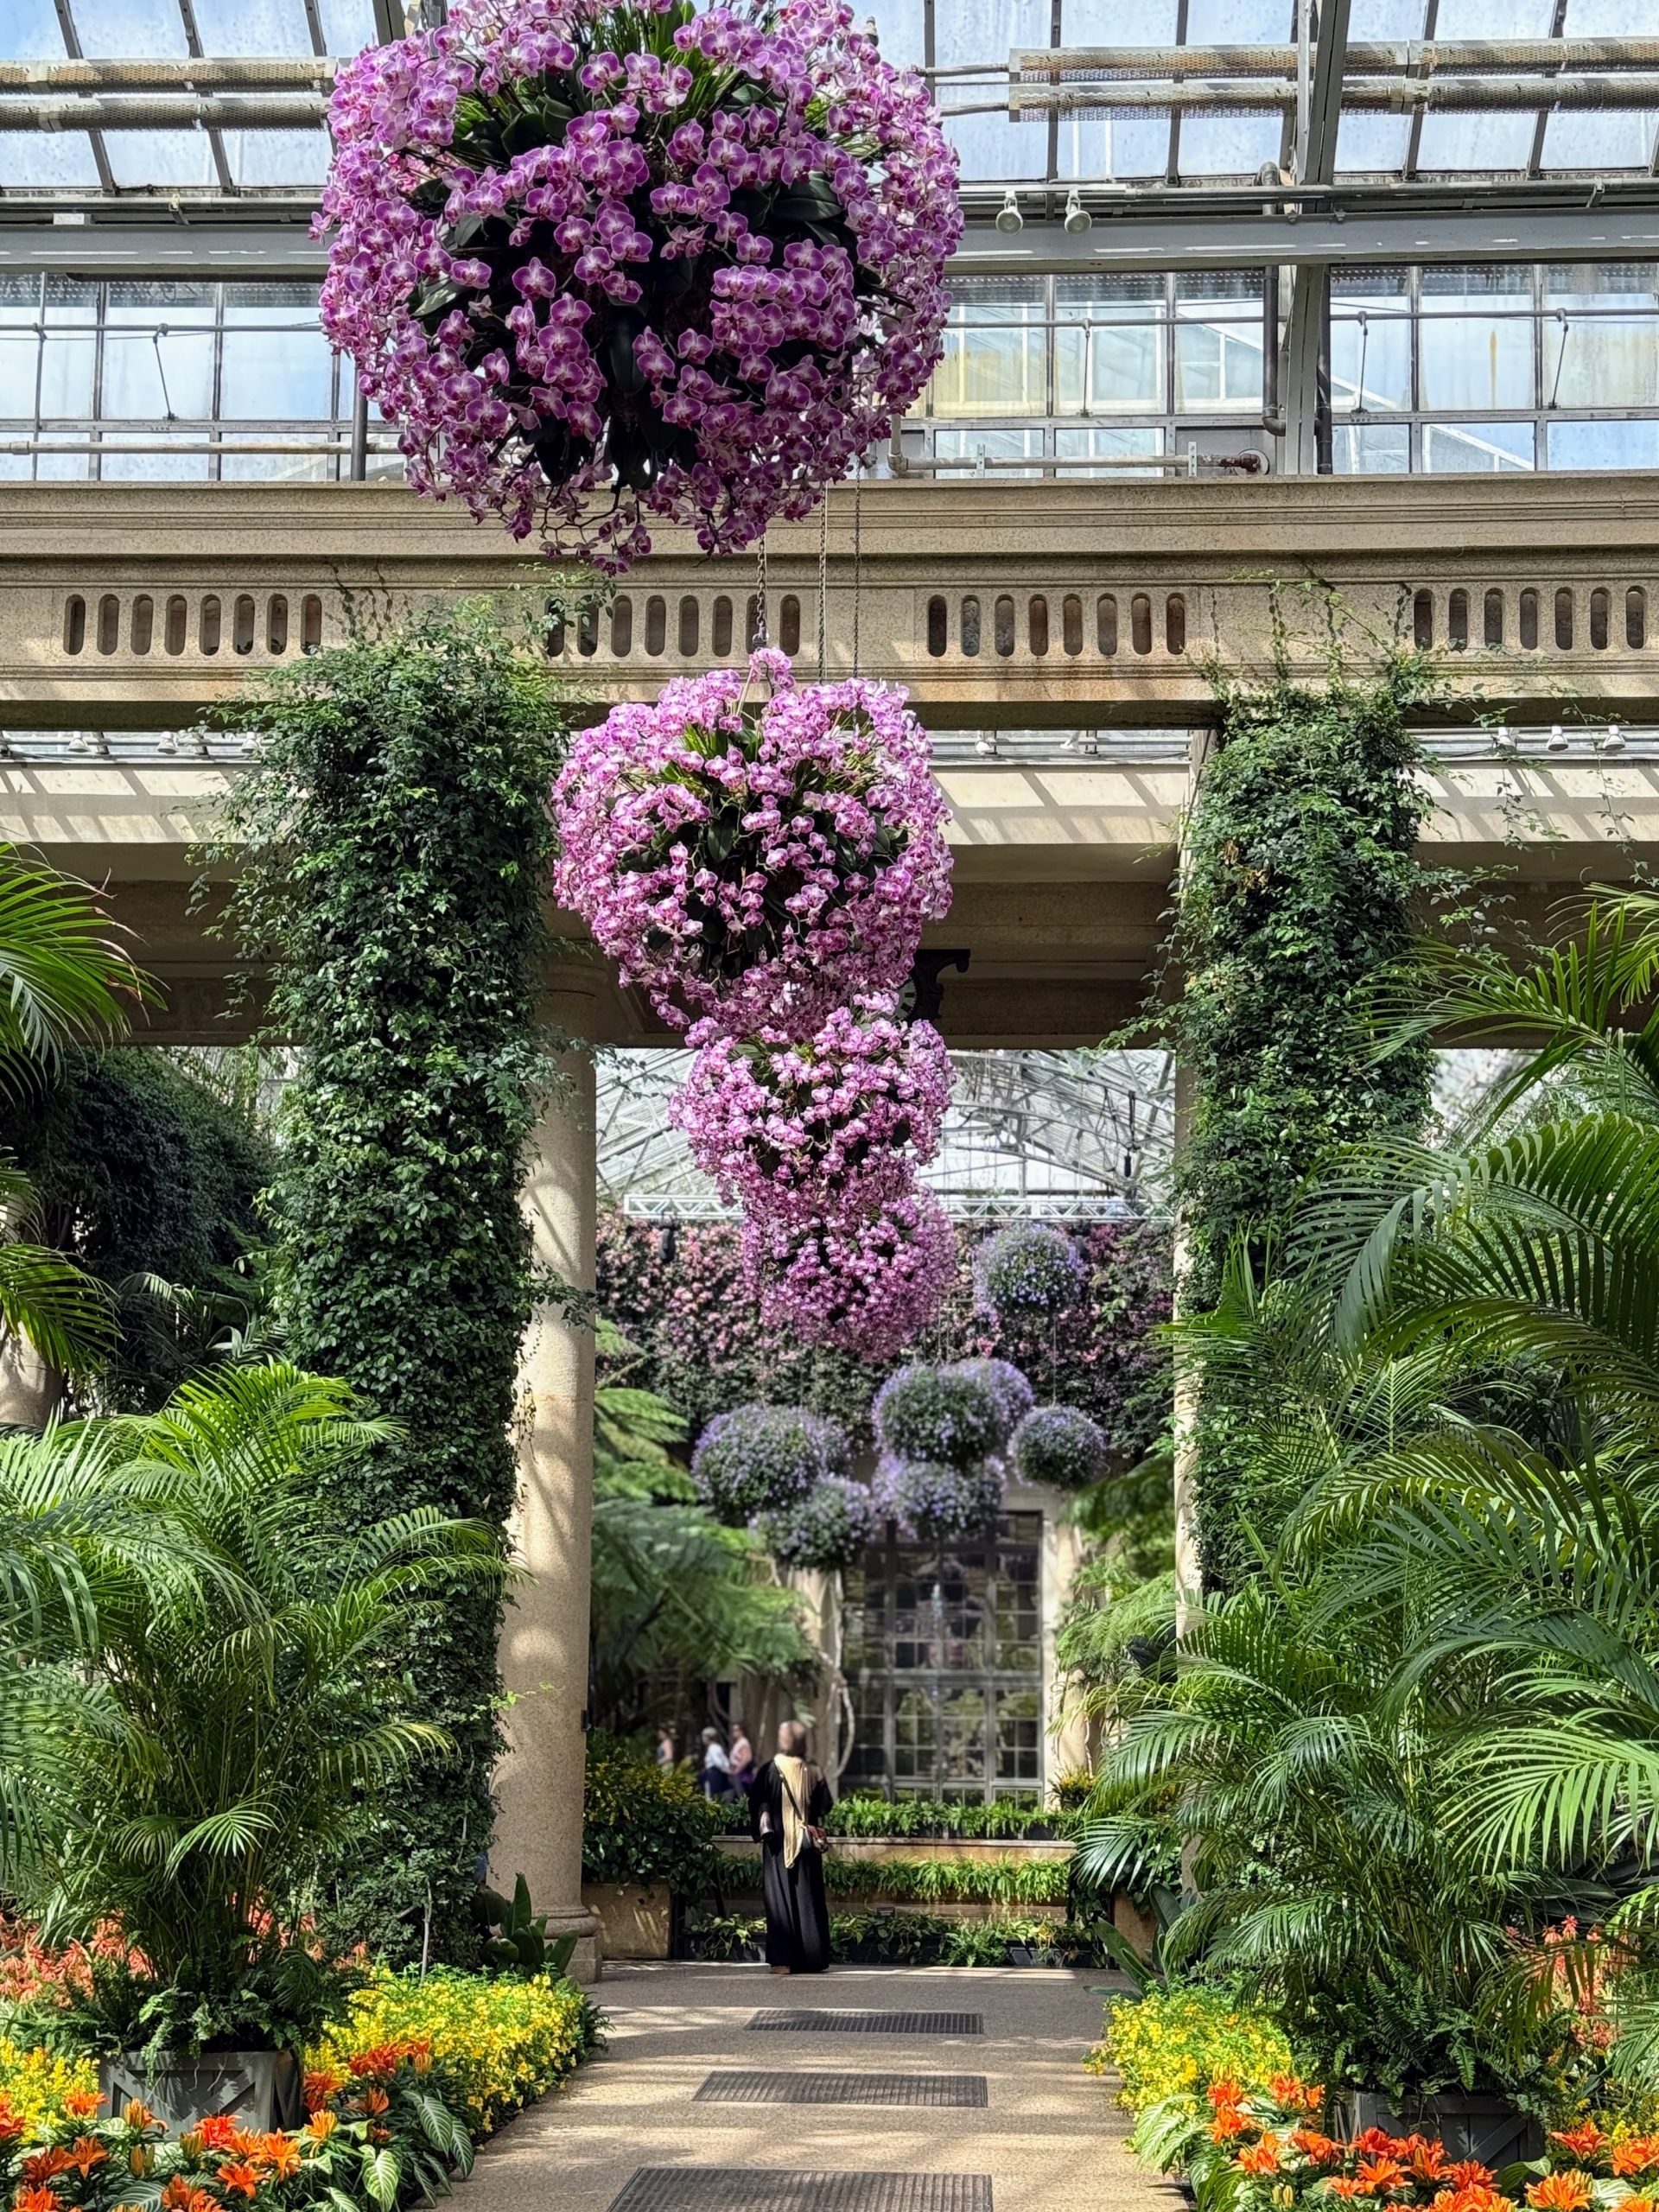
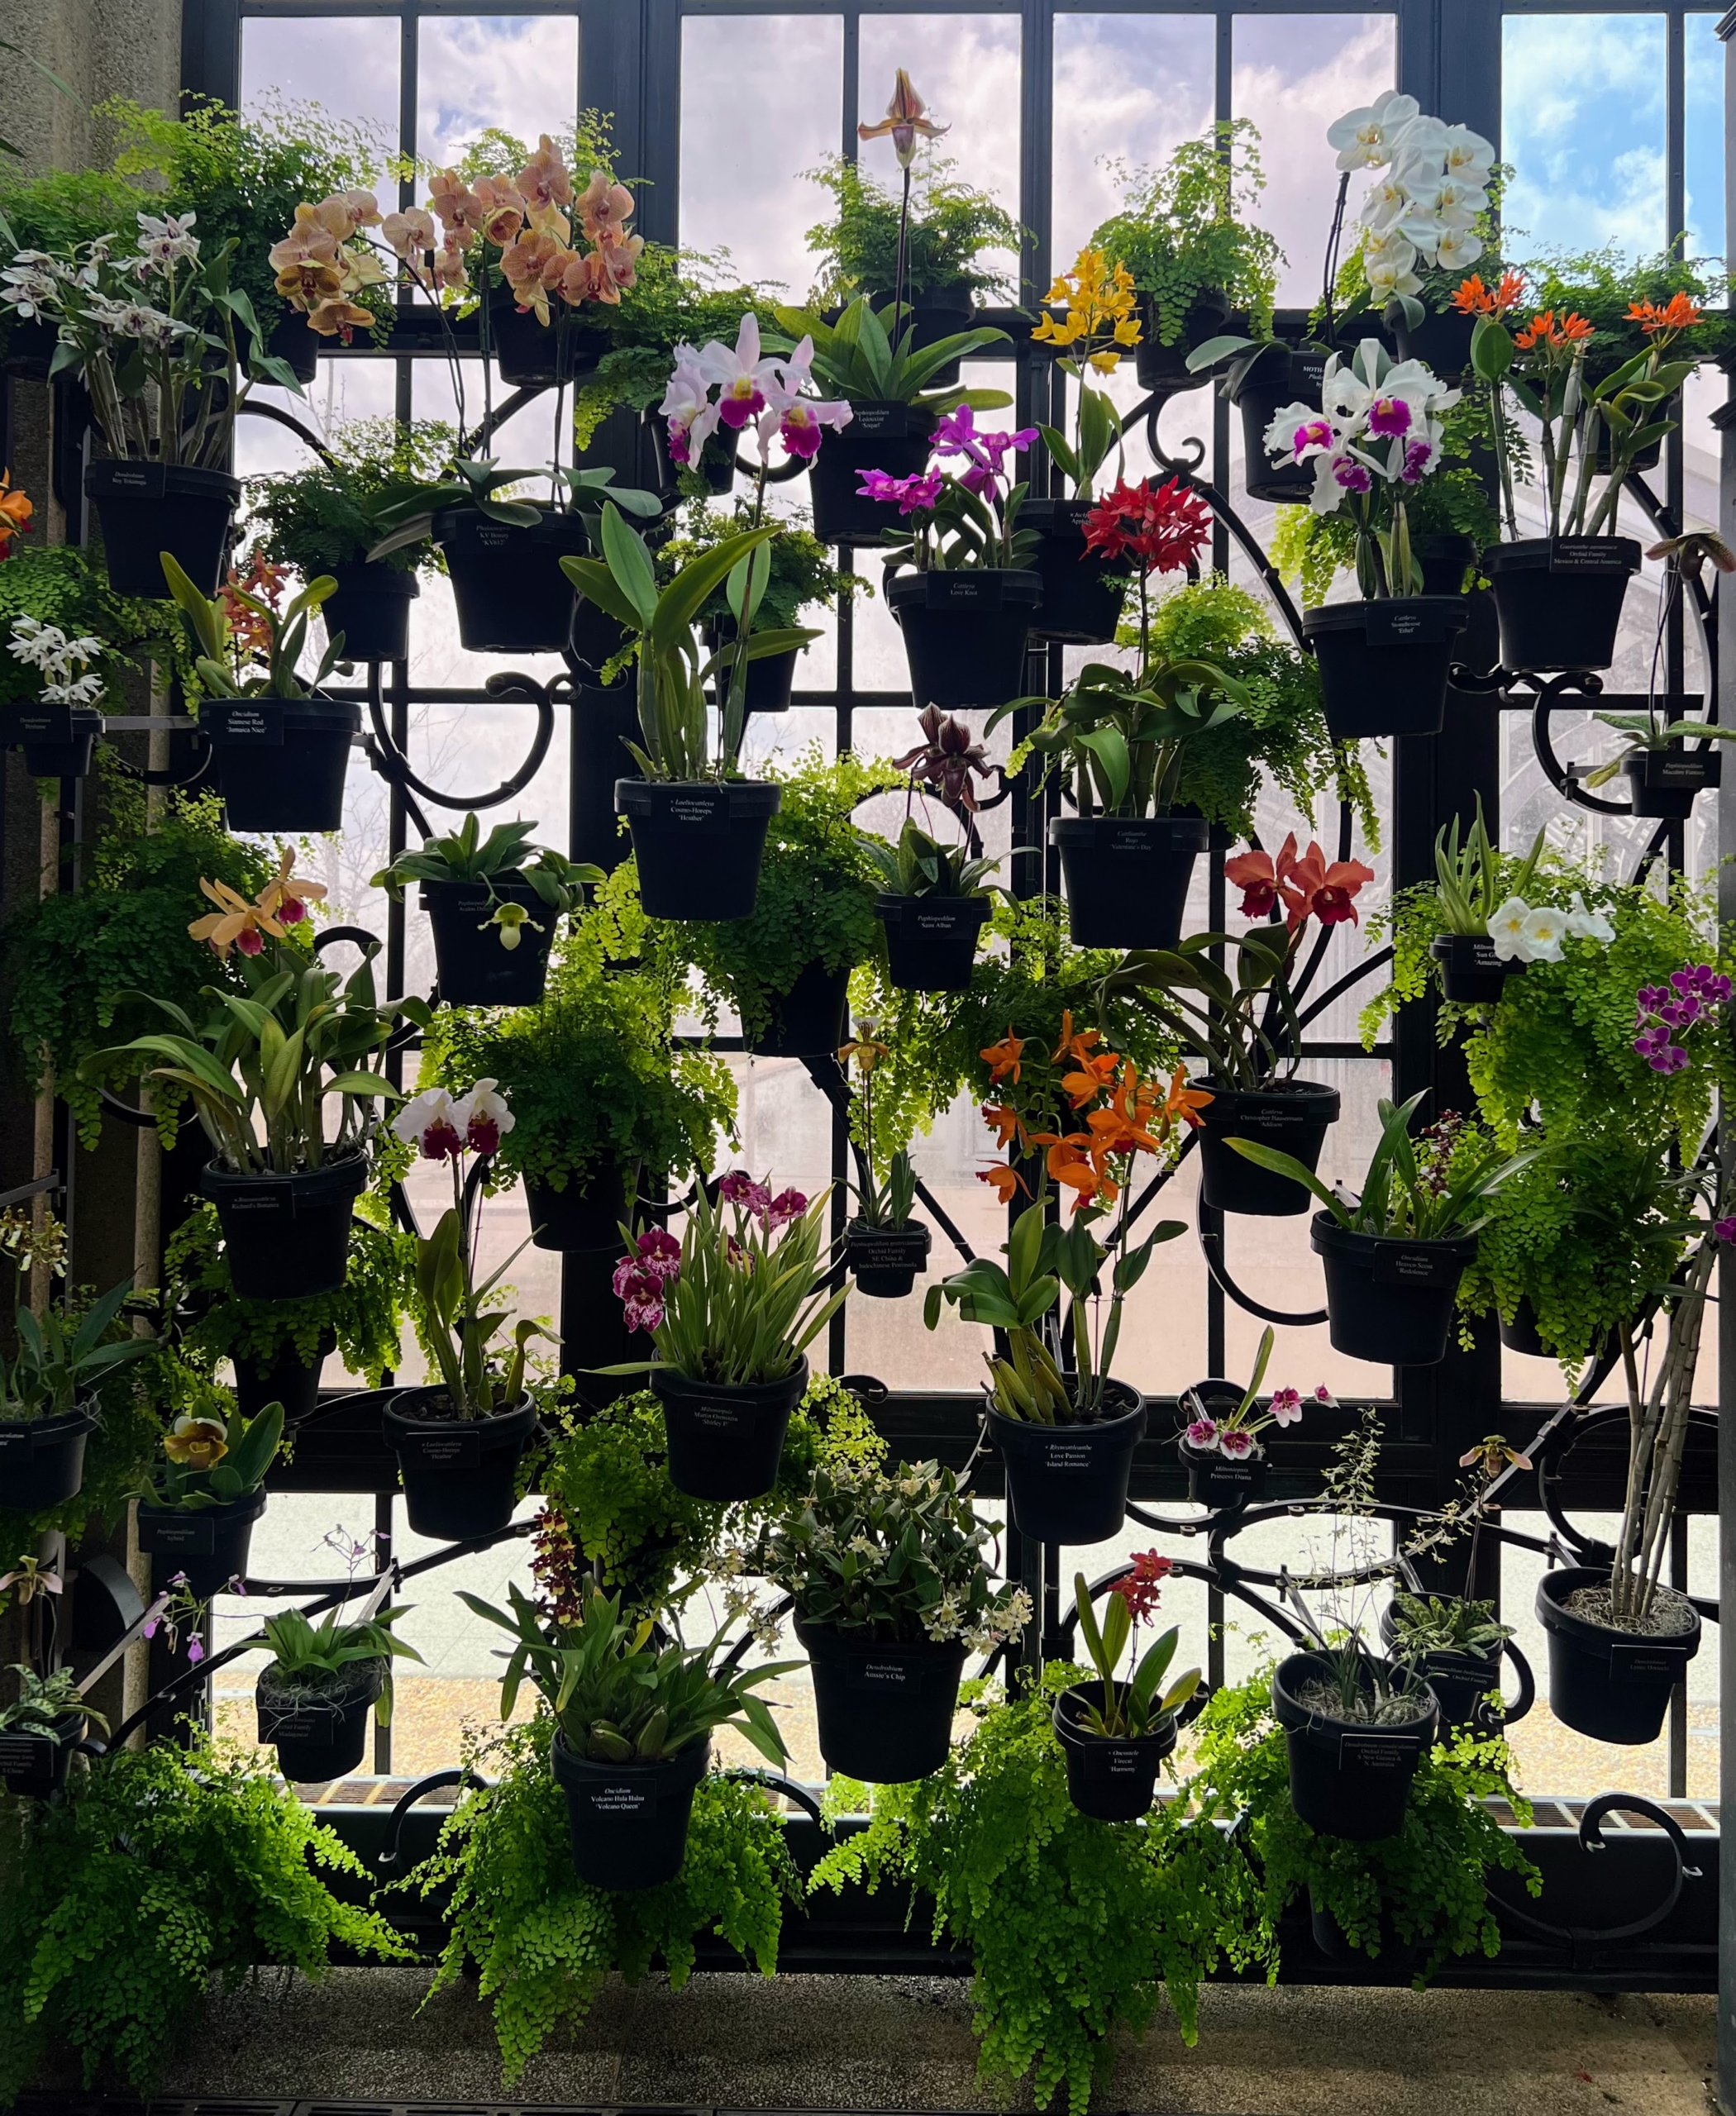
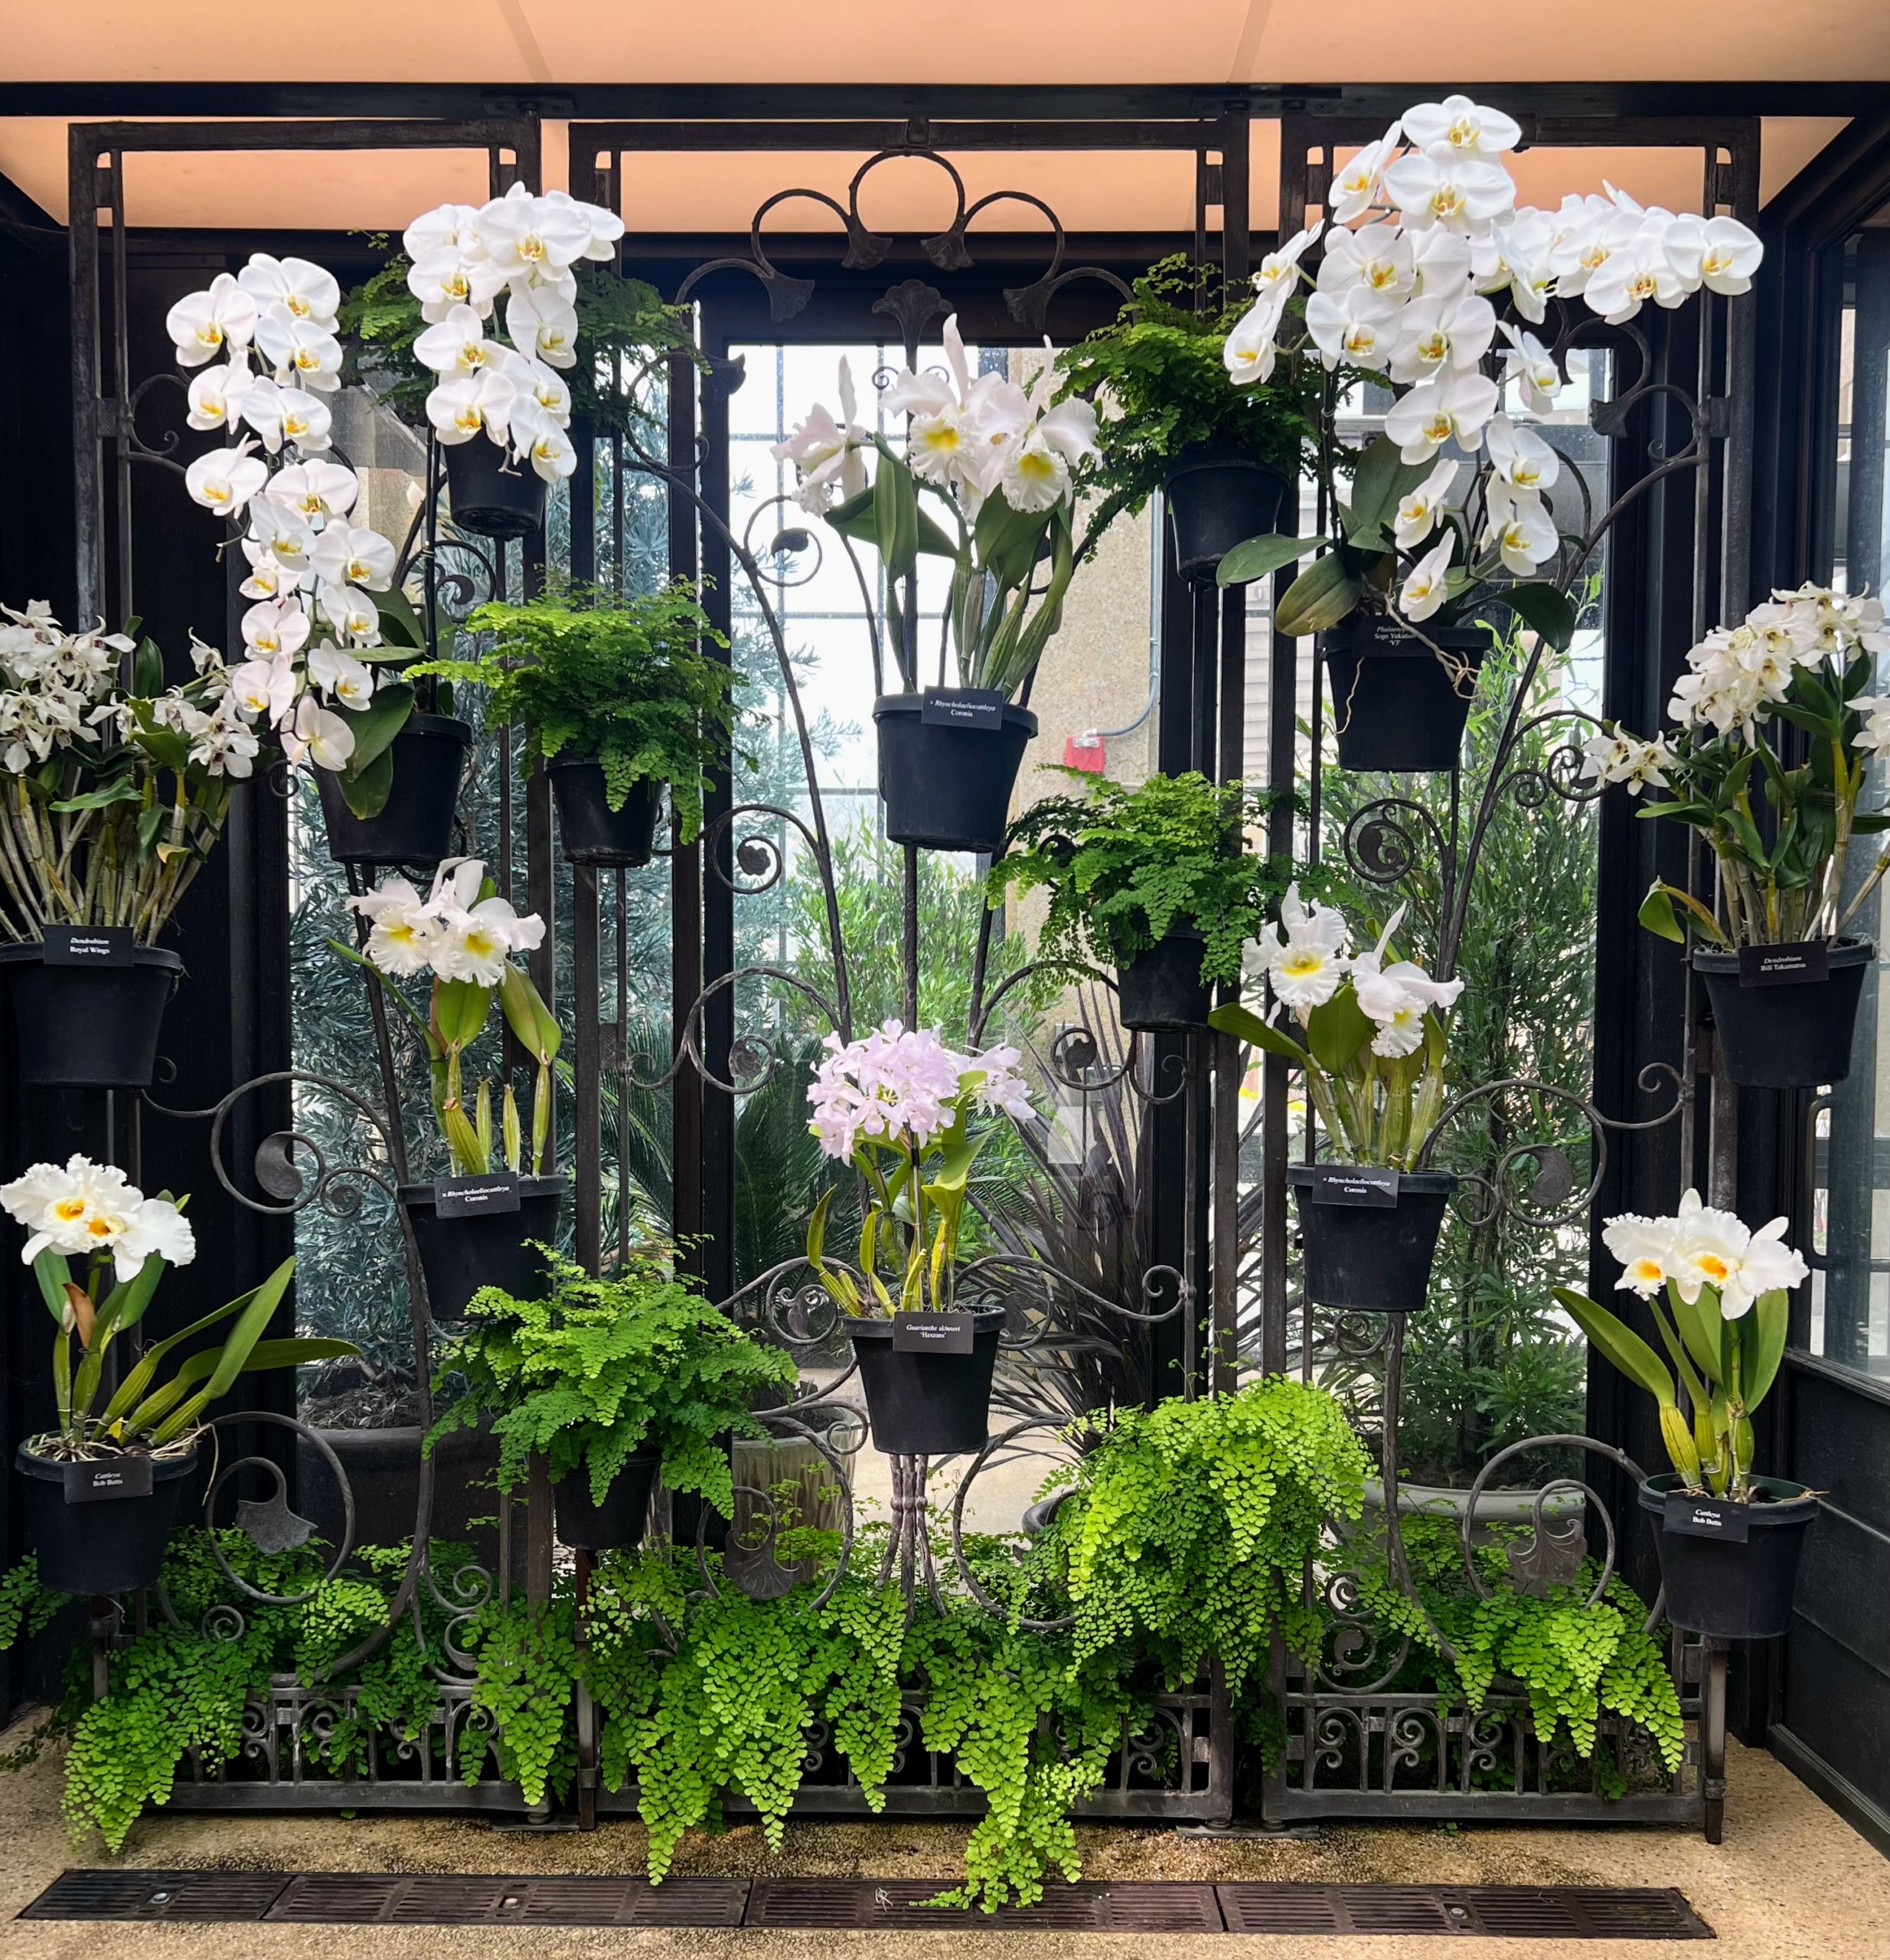
The orchid display at Longwood Gardens features at least 250 Phaleanopsis and Cattleya orchids on a wall, urns of colorful Cymbidiums in the Acacia Passage, and hundreds of Vanda orchids in the Silver Garden.
This display case shows Phalaenopsis Sogo Yukidian ‘V3’ and assorted x Rhyncholaeliocattleya orchids.
Hard to miss these hanging baskets of baby Burro’s tail Sedum, Sedum burrito, cape-primrose, and more Streptocarpus ‘Concord Blue.’
I have many Clivias in my greenhouse, so they catch my eye. This is Clivia miniata ‘Longwood Debutante.’
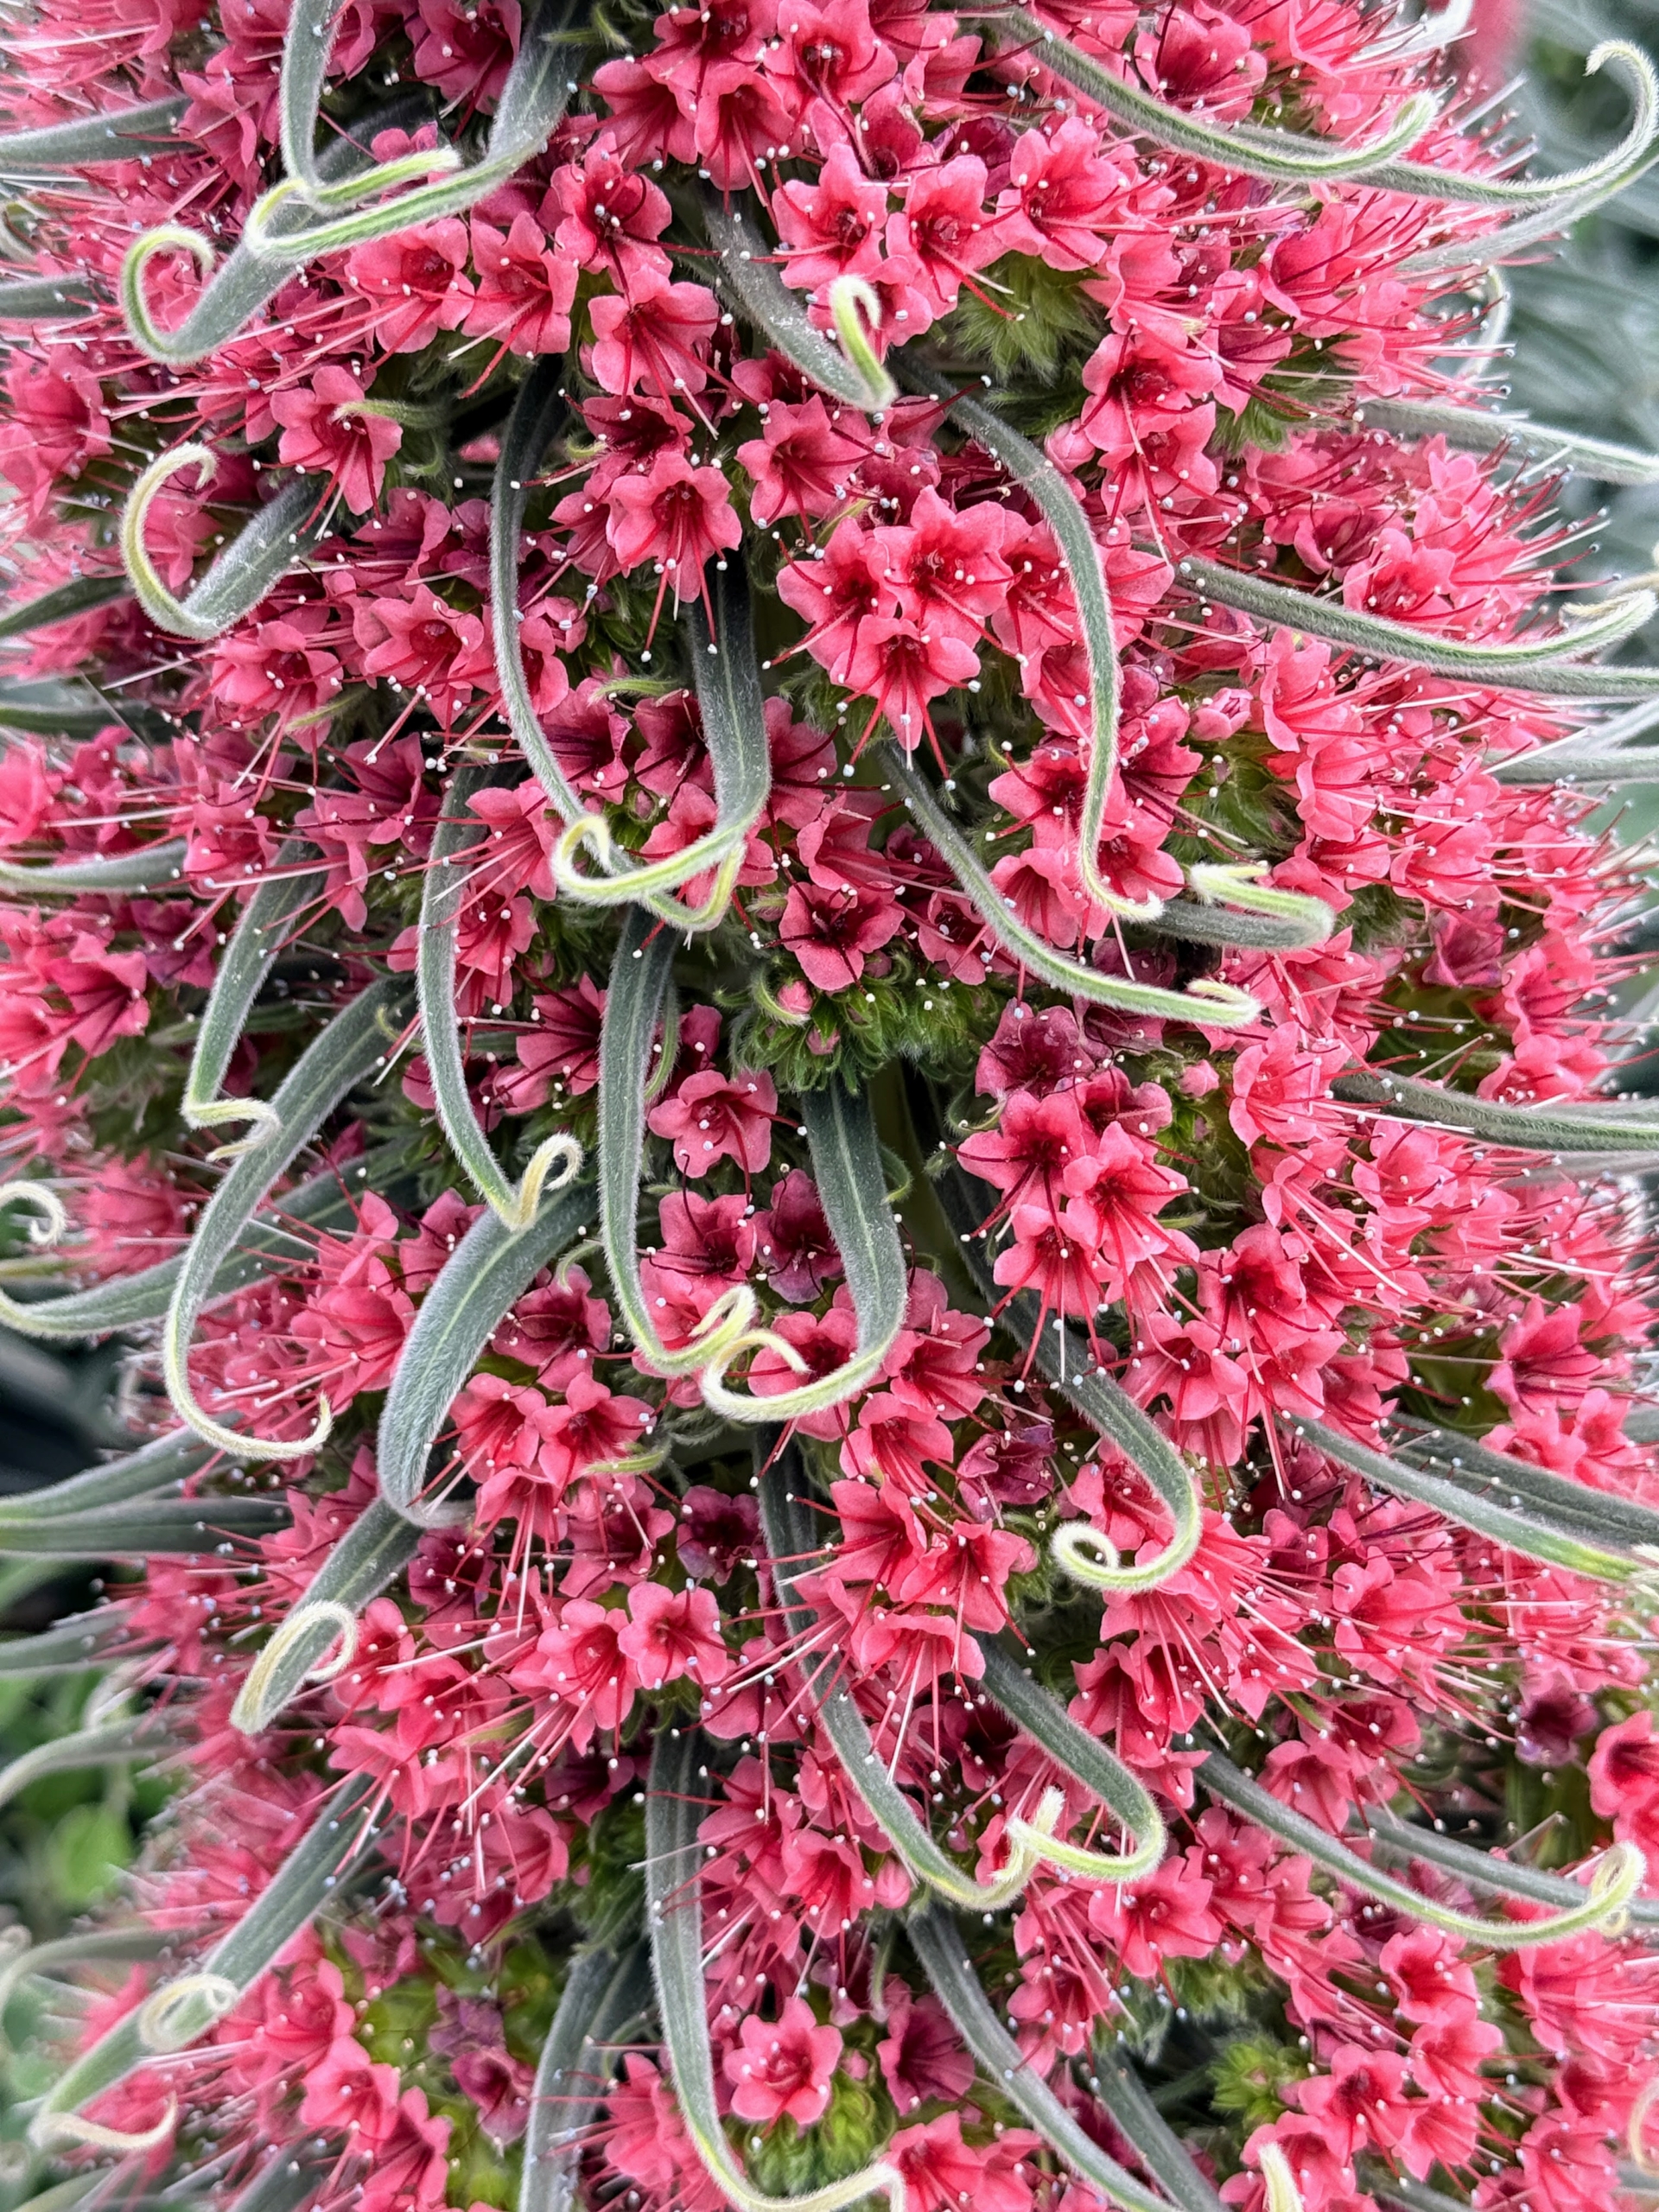
And this is called Tower-of-jewels, Echium wildpretii. Also known as red bugloss, this is a biennial flowering plant native to the Canary Islands. It can grow up to 10 feet tall and is admired for its rosettes of leaves and colorful flowers.
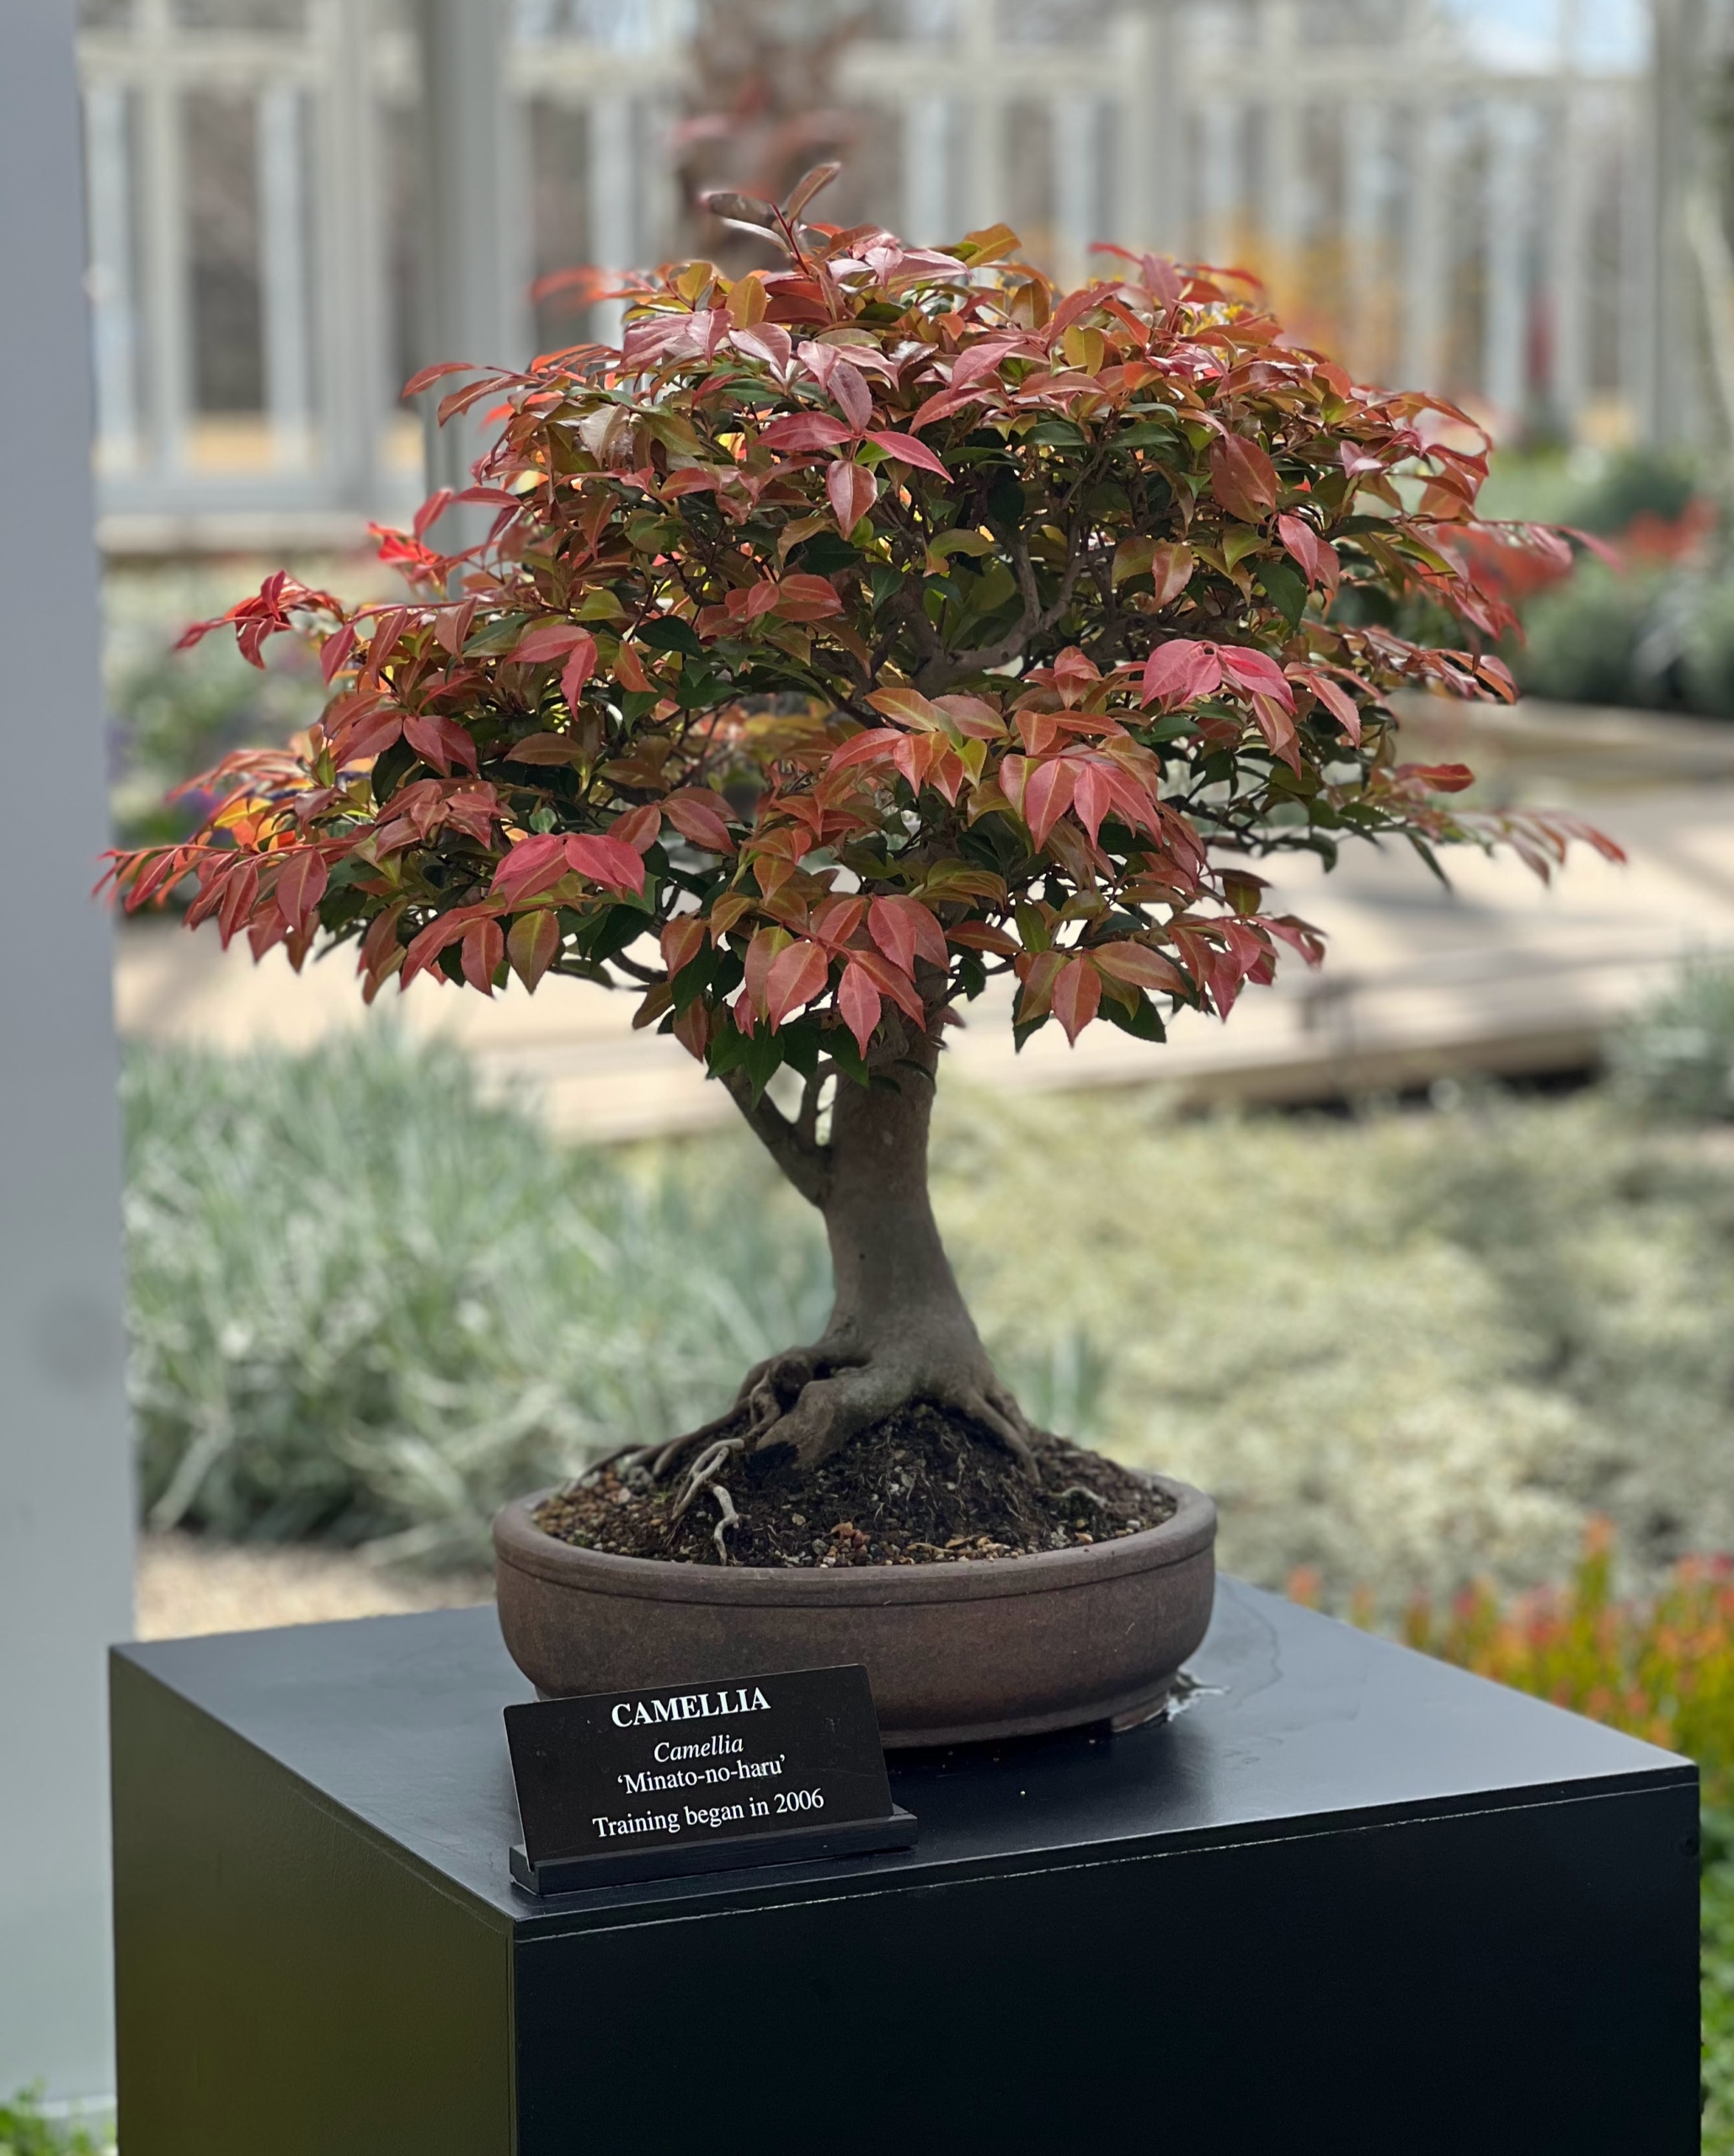
Bonsai is the Japanese art of growing and shaping miniature trees in containers. This is Bonsai of Camellia ‘Minato-no-haru.’ It was started in 2006.
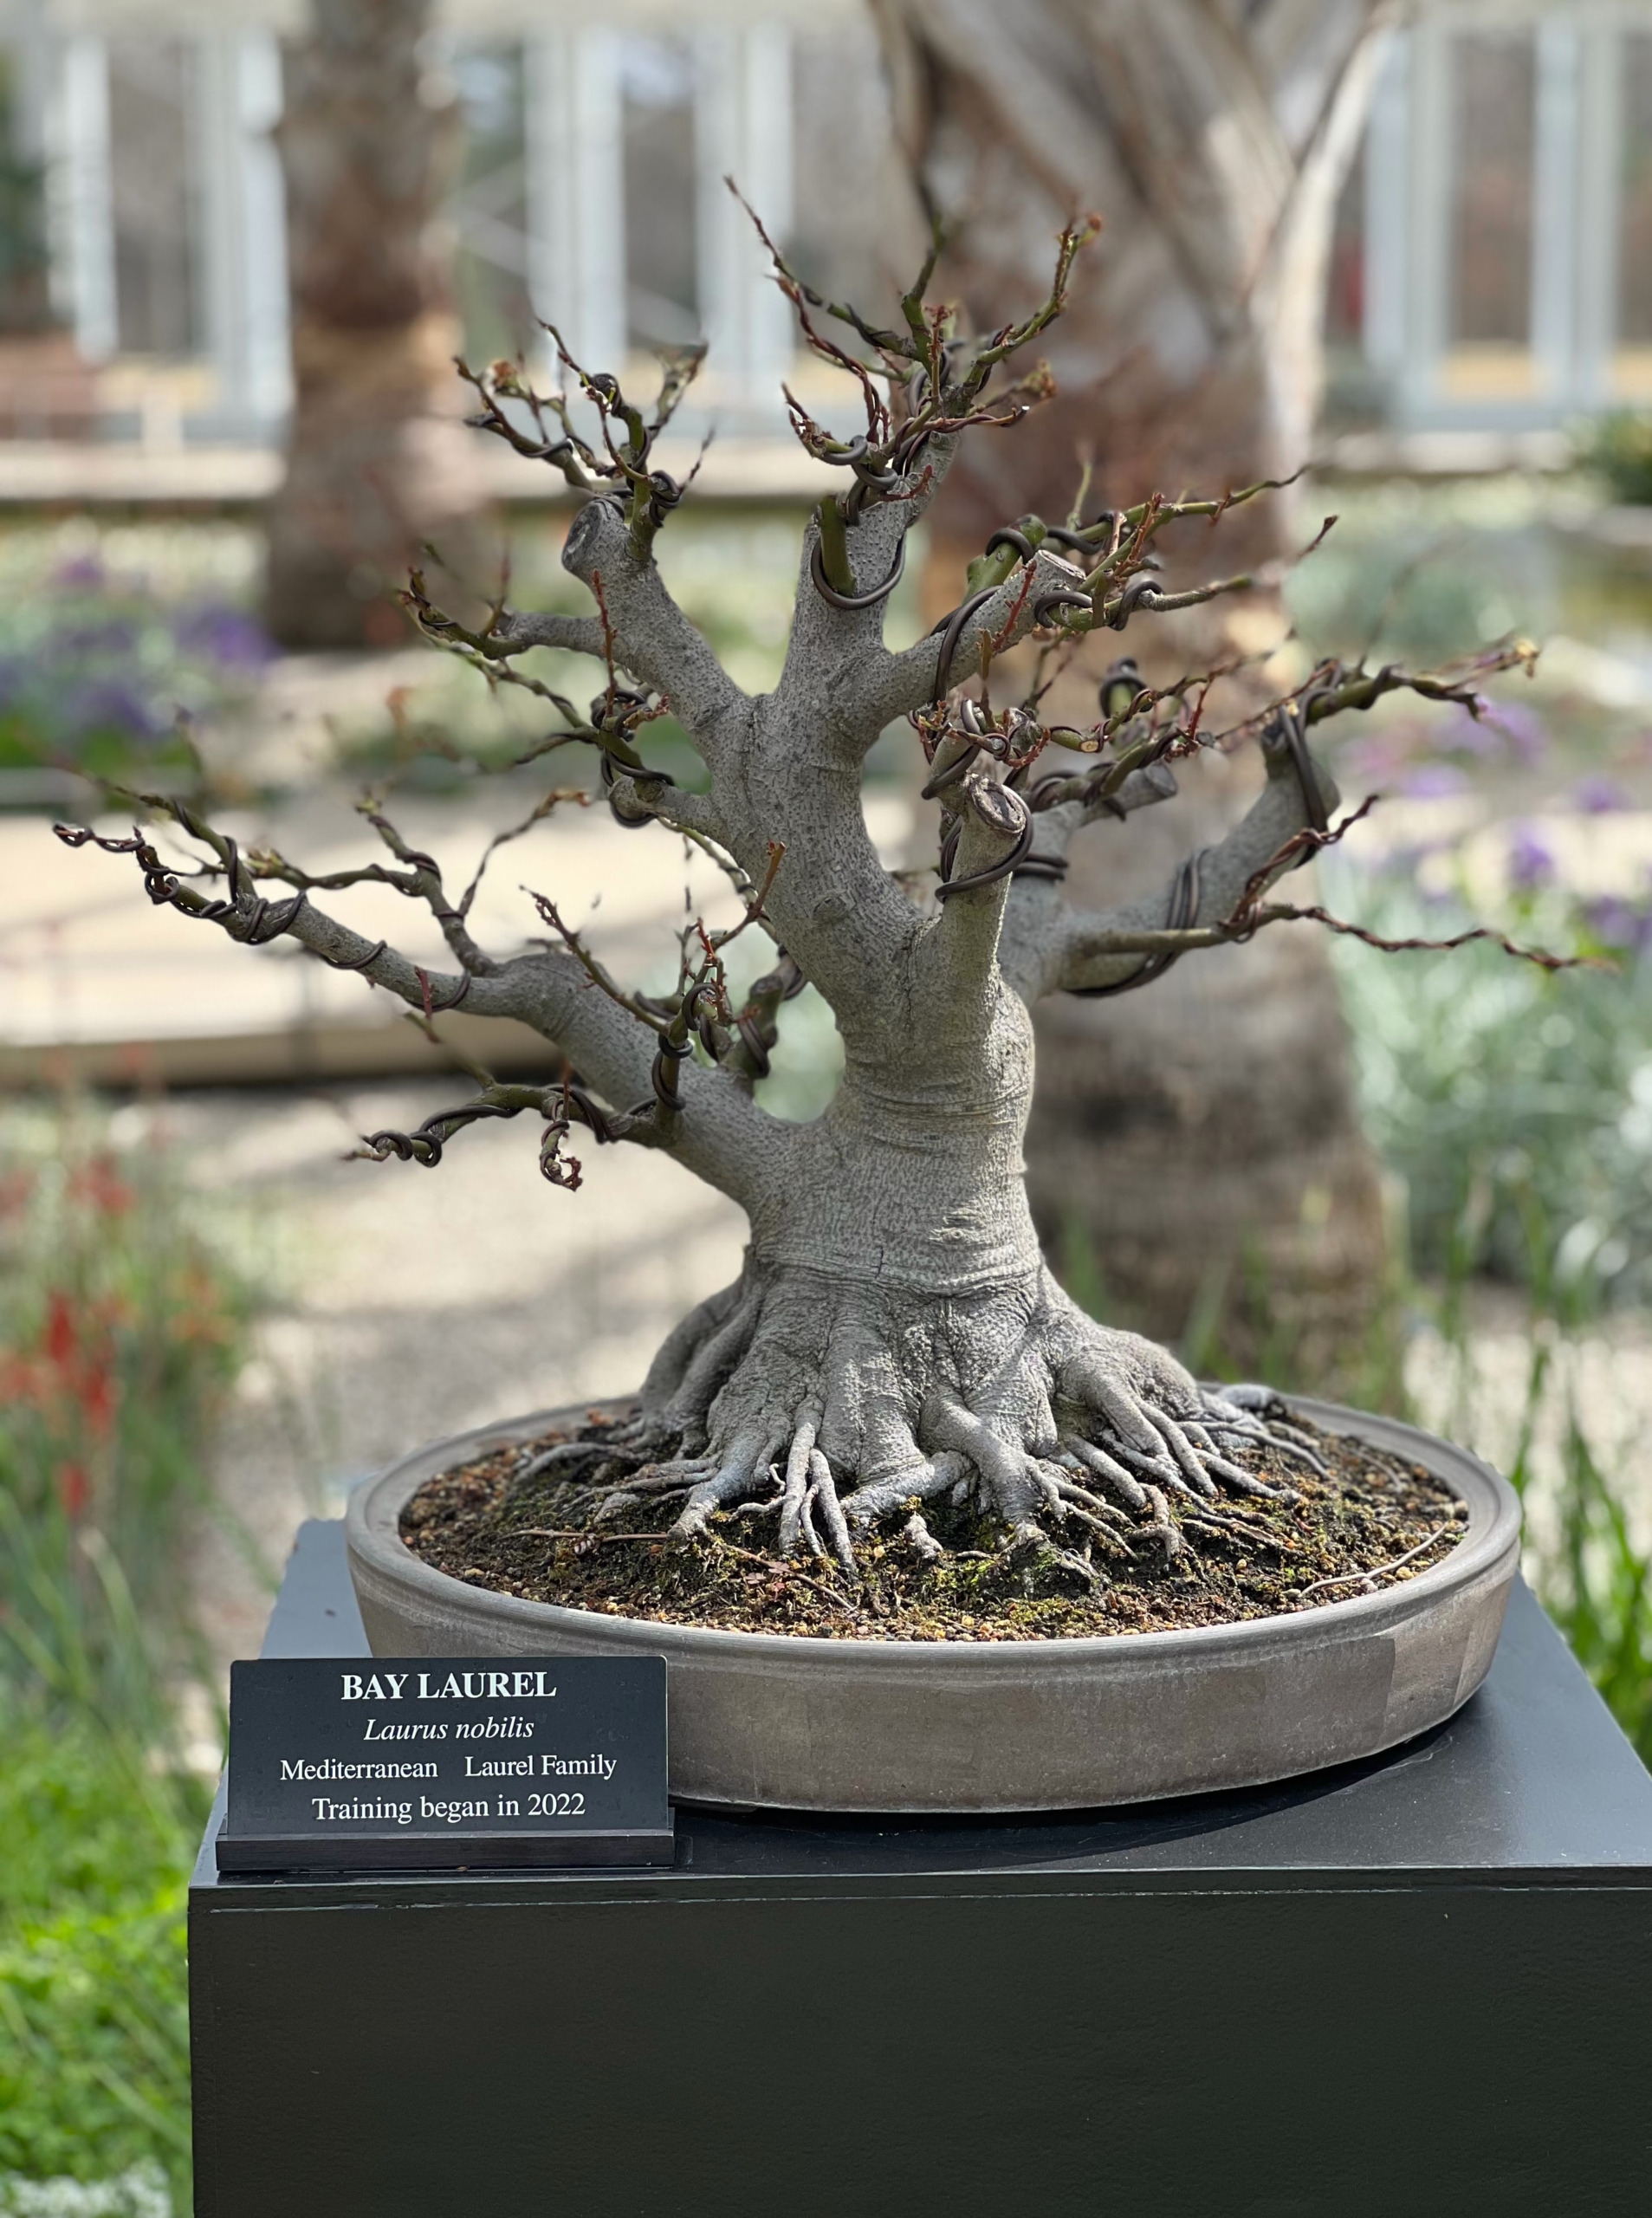
And this is Bonsai of Bay Laurel, Laurus nobilis. Training on this specimen began in 2022.
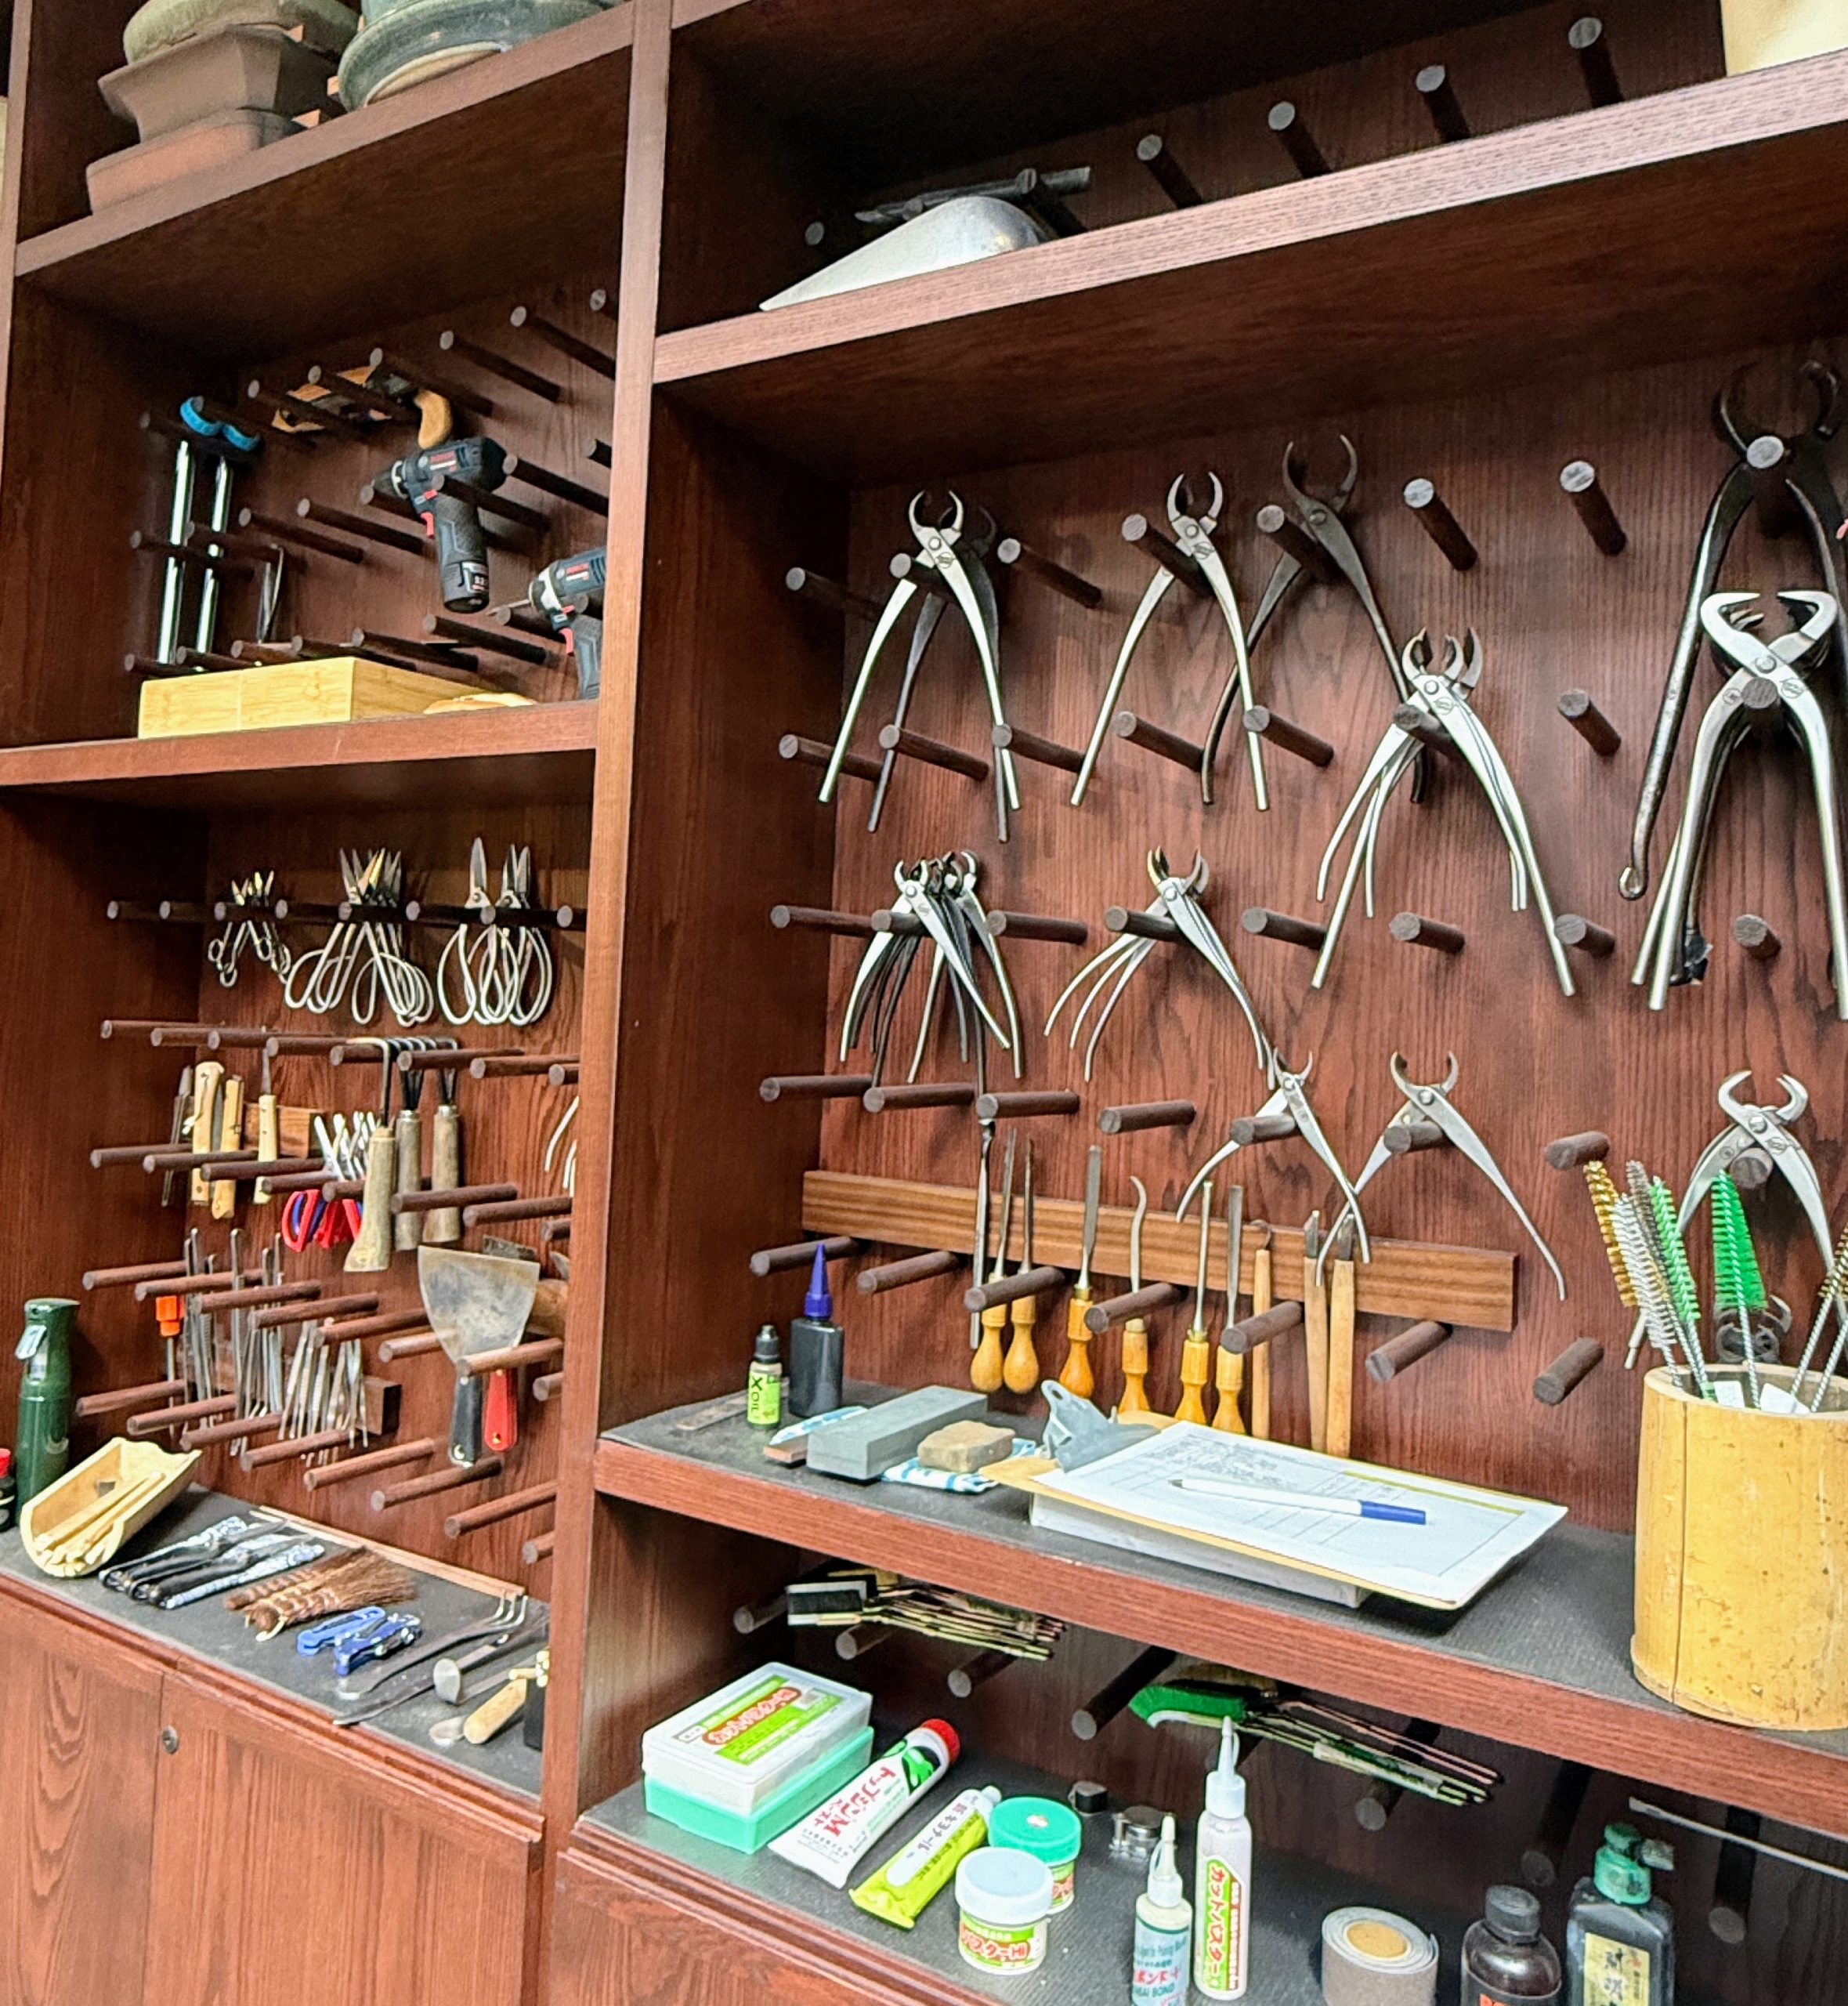
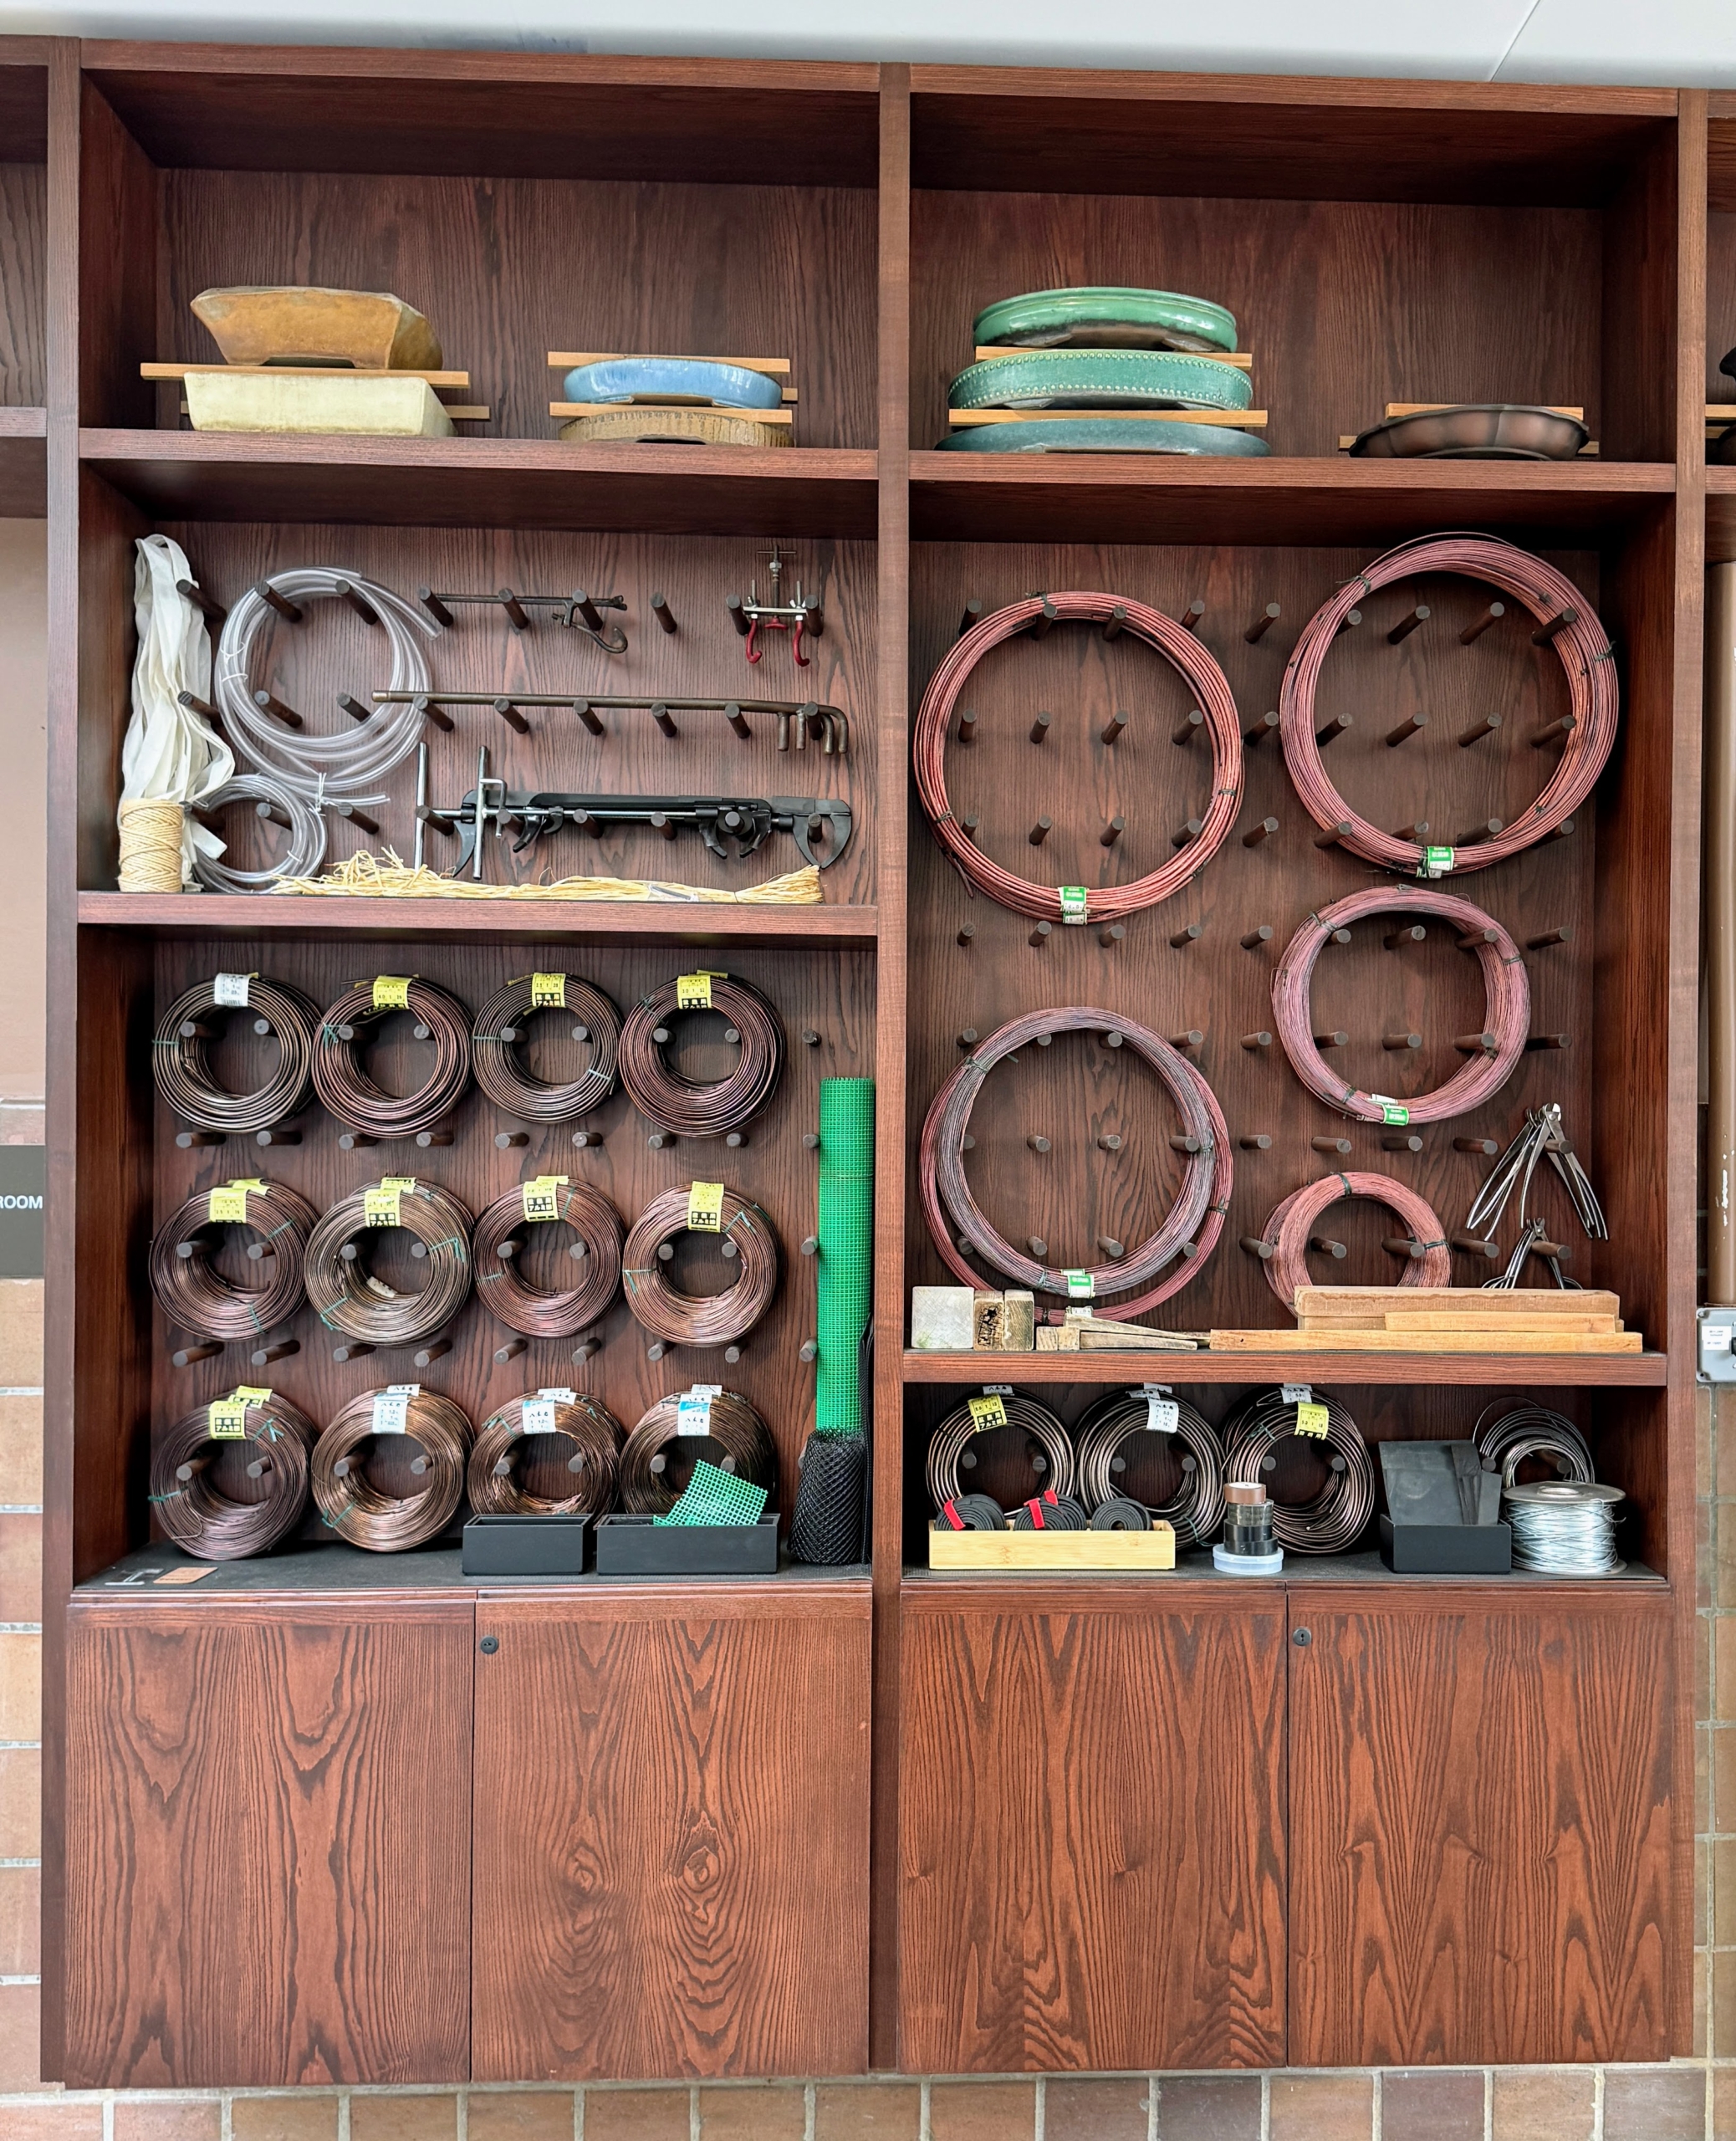
At Longwood, there is a shop dedicated to the care and maintenance of nearly 200 bonsai trees and more than 500 artisanal planters. Longwood’s experts, visiting artists, and volunteers use special tools to prune and groom the Bonsai using a variety of techniques.
Copper wire is used to guide new growth and develop each tree’s design.
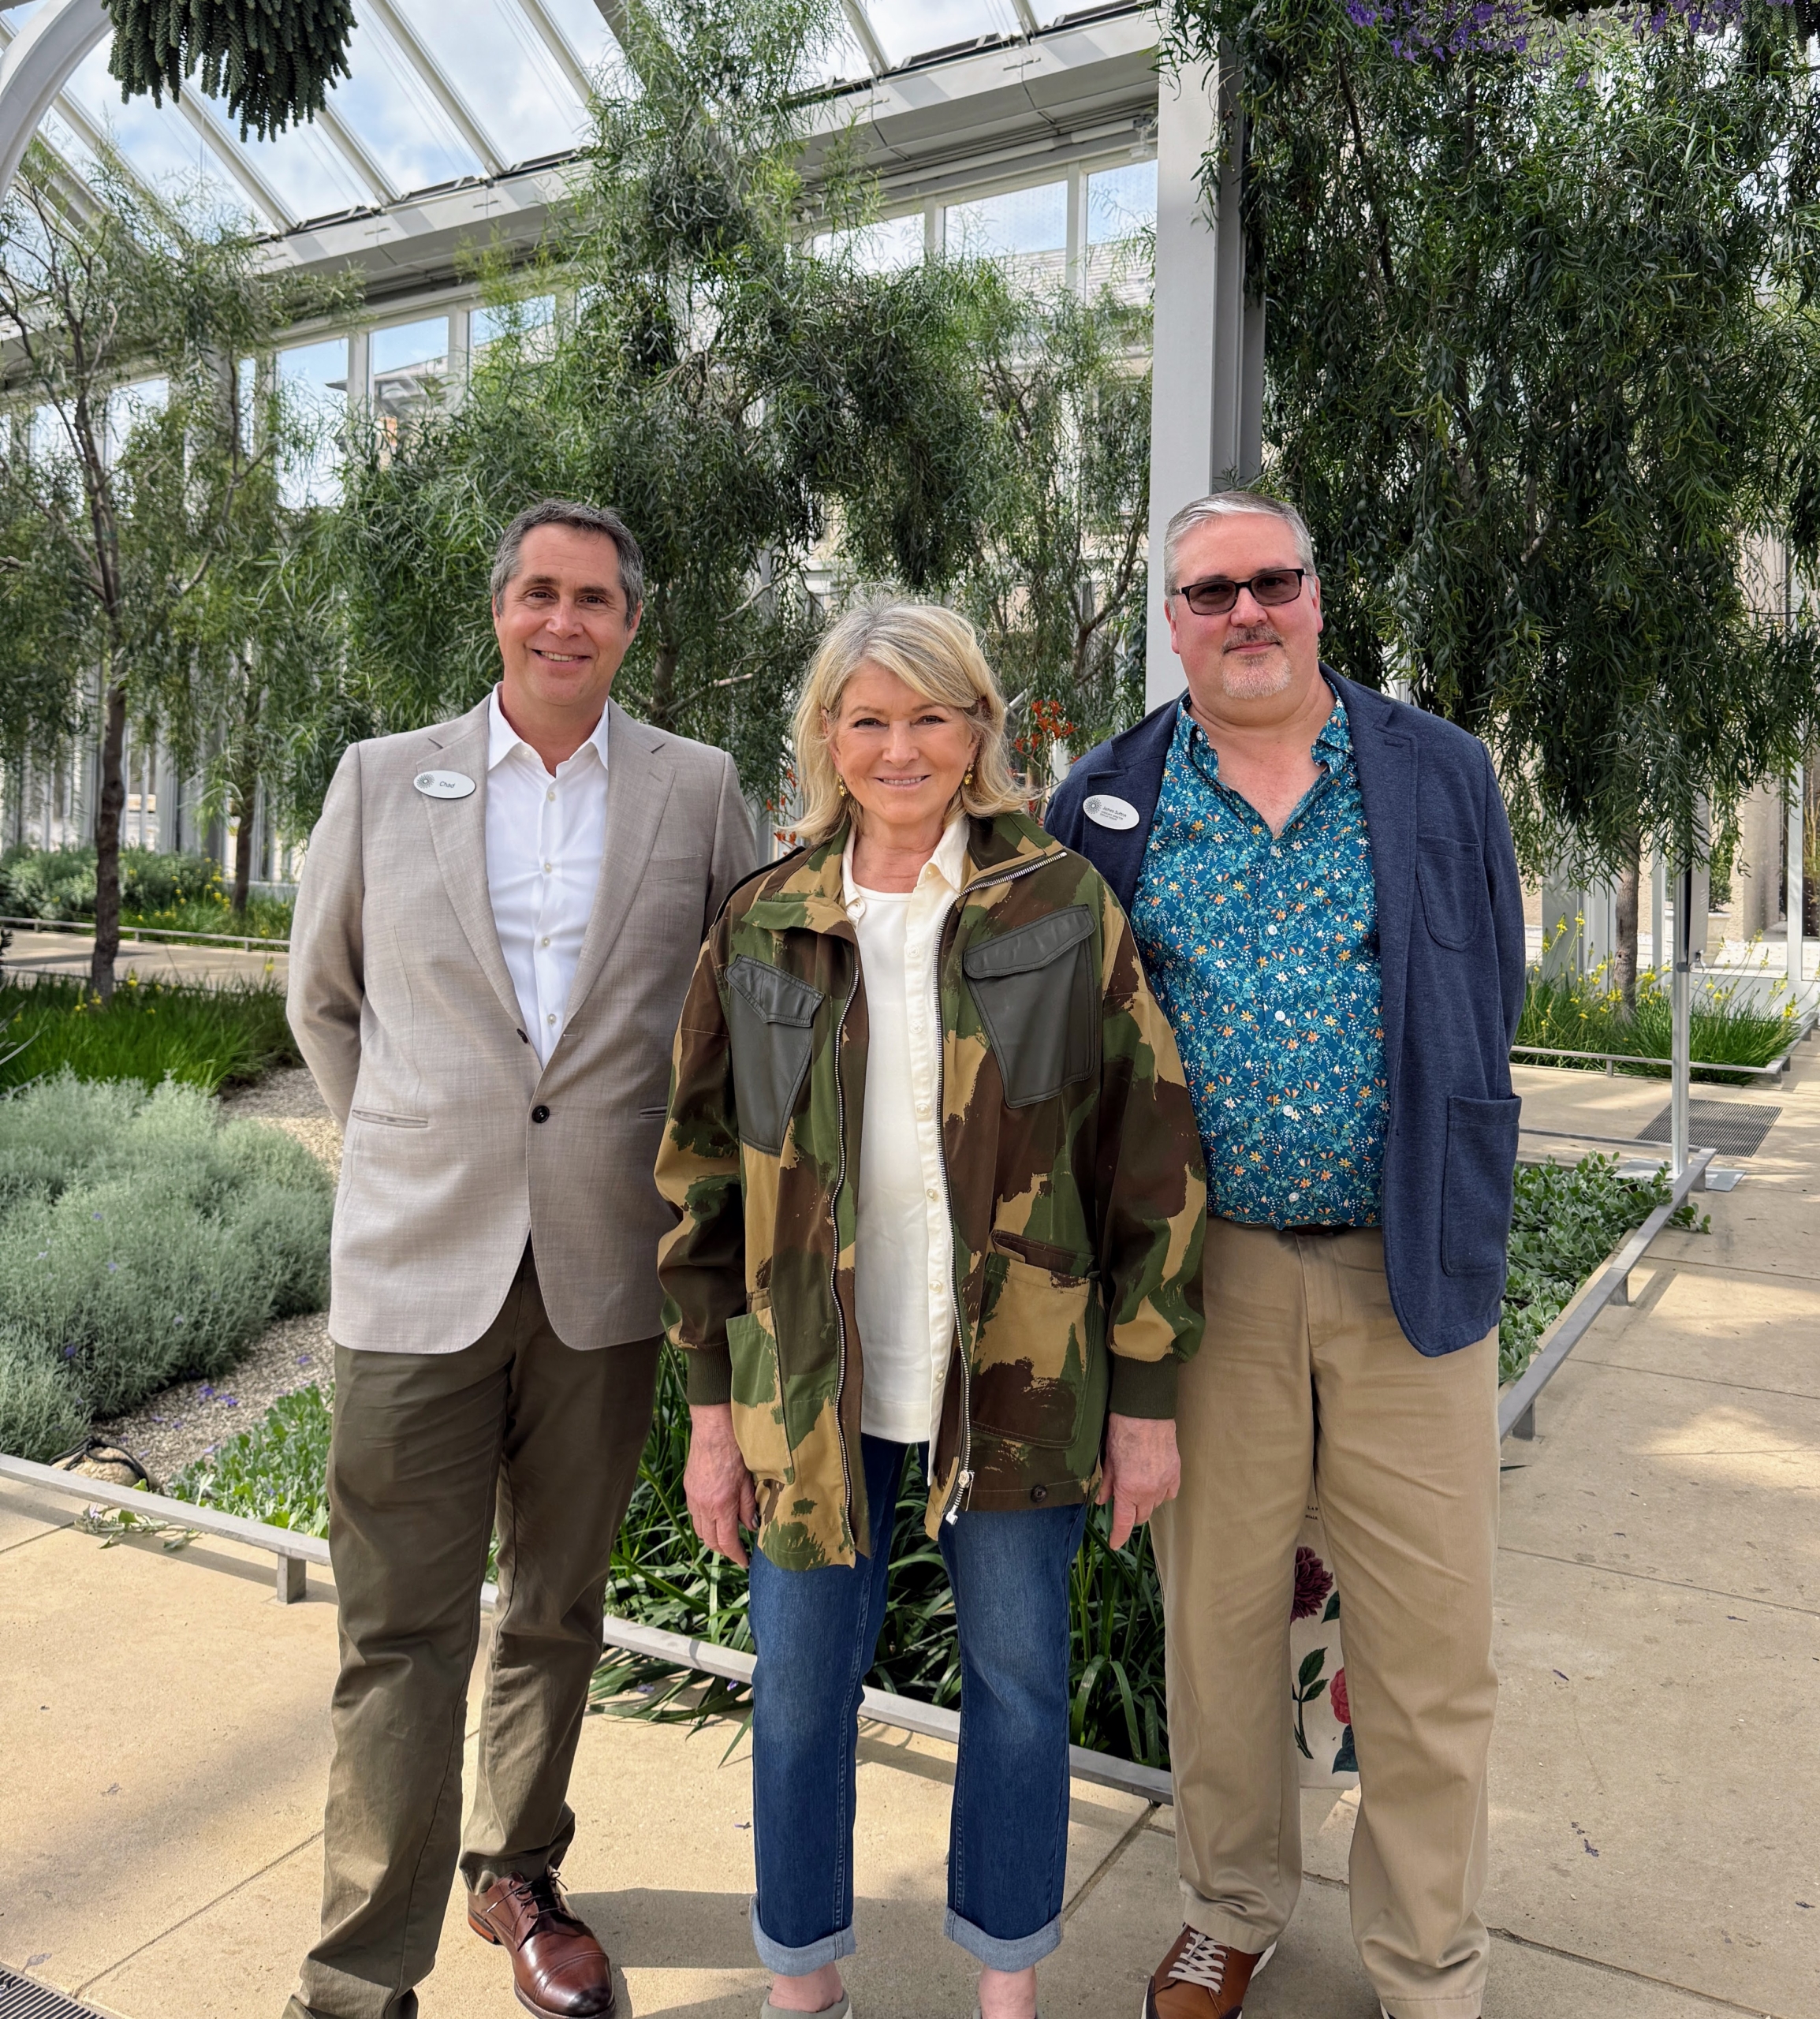
And here I am with Chad Davis, Associate Vice President of Conservatories and Jim Sutton, Associate Director of Display Design at Longwood Gardens.
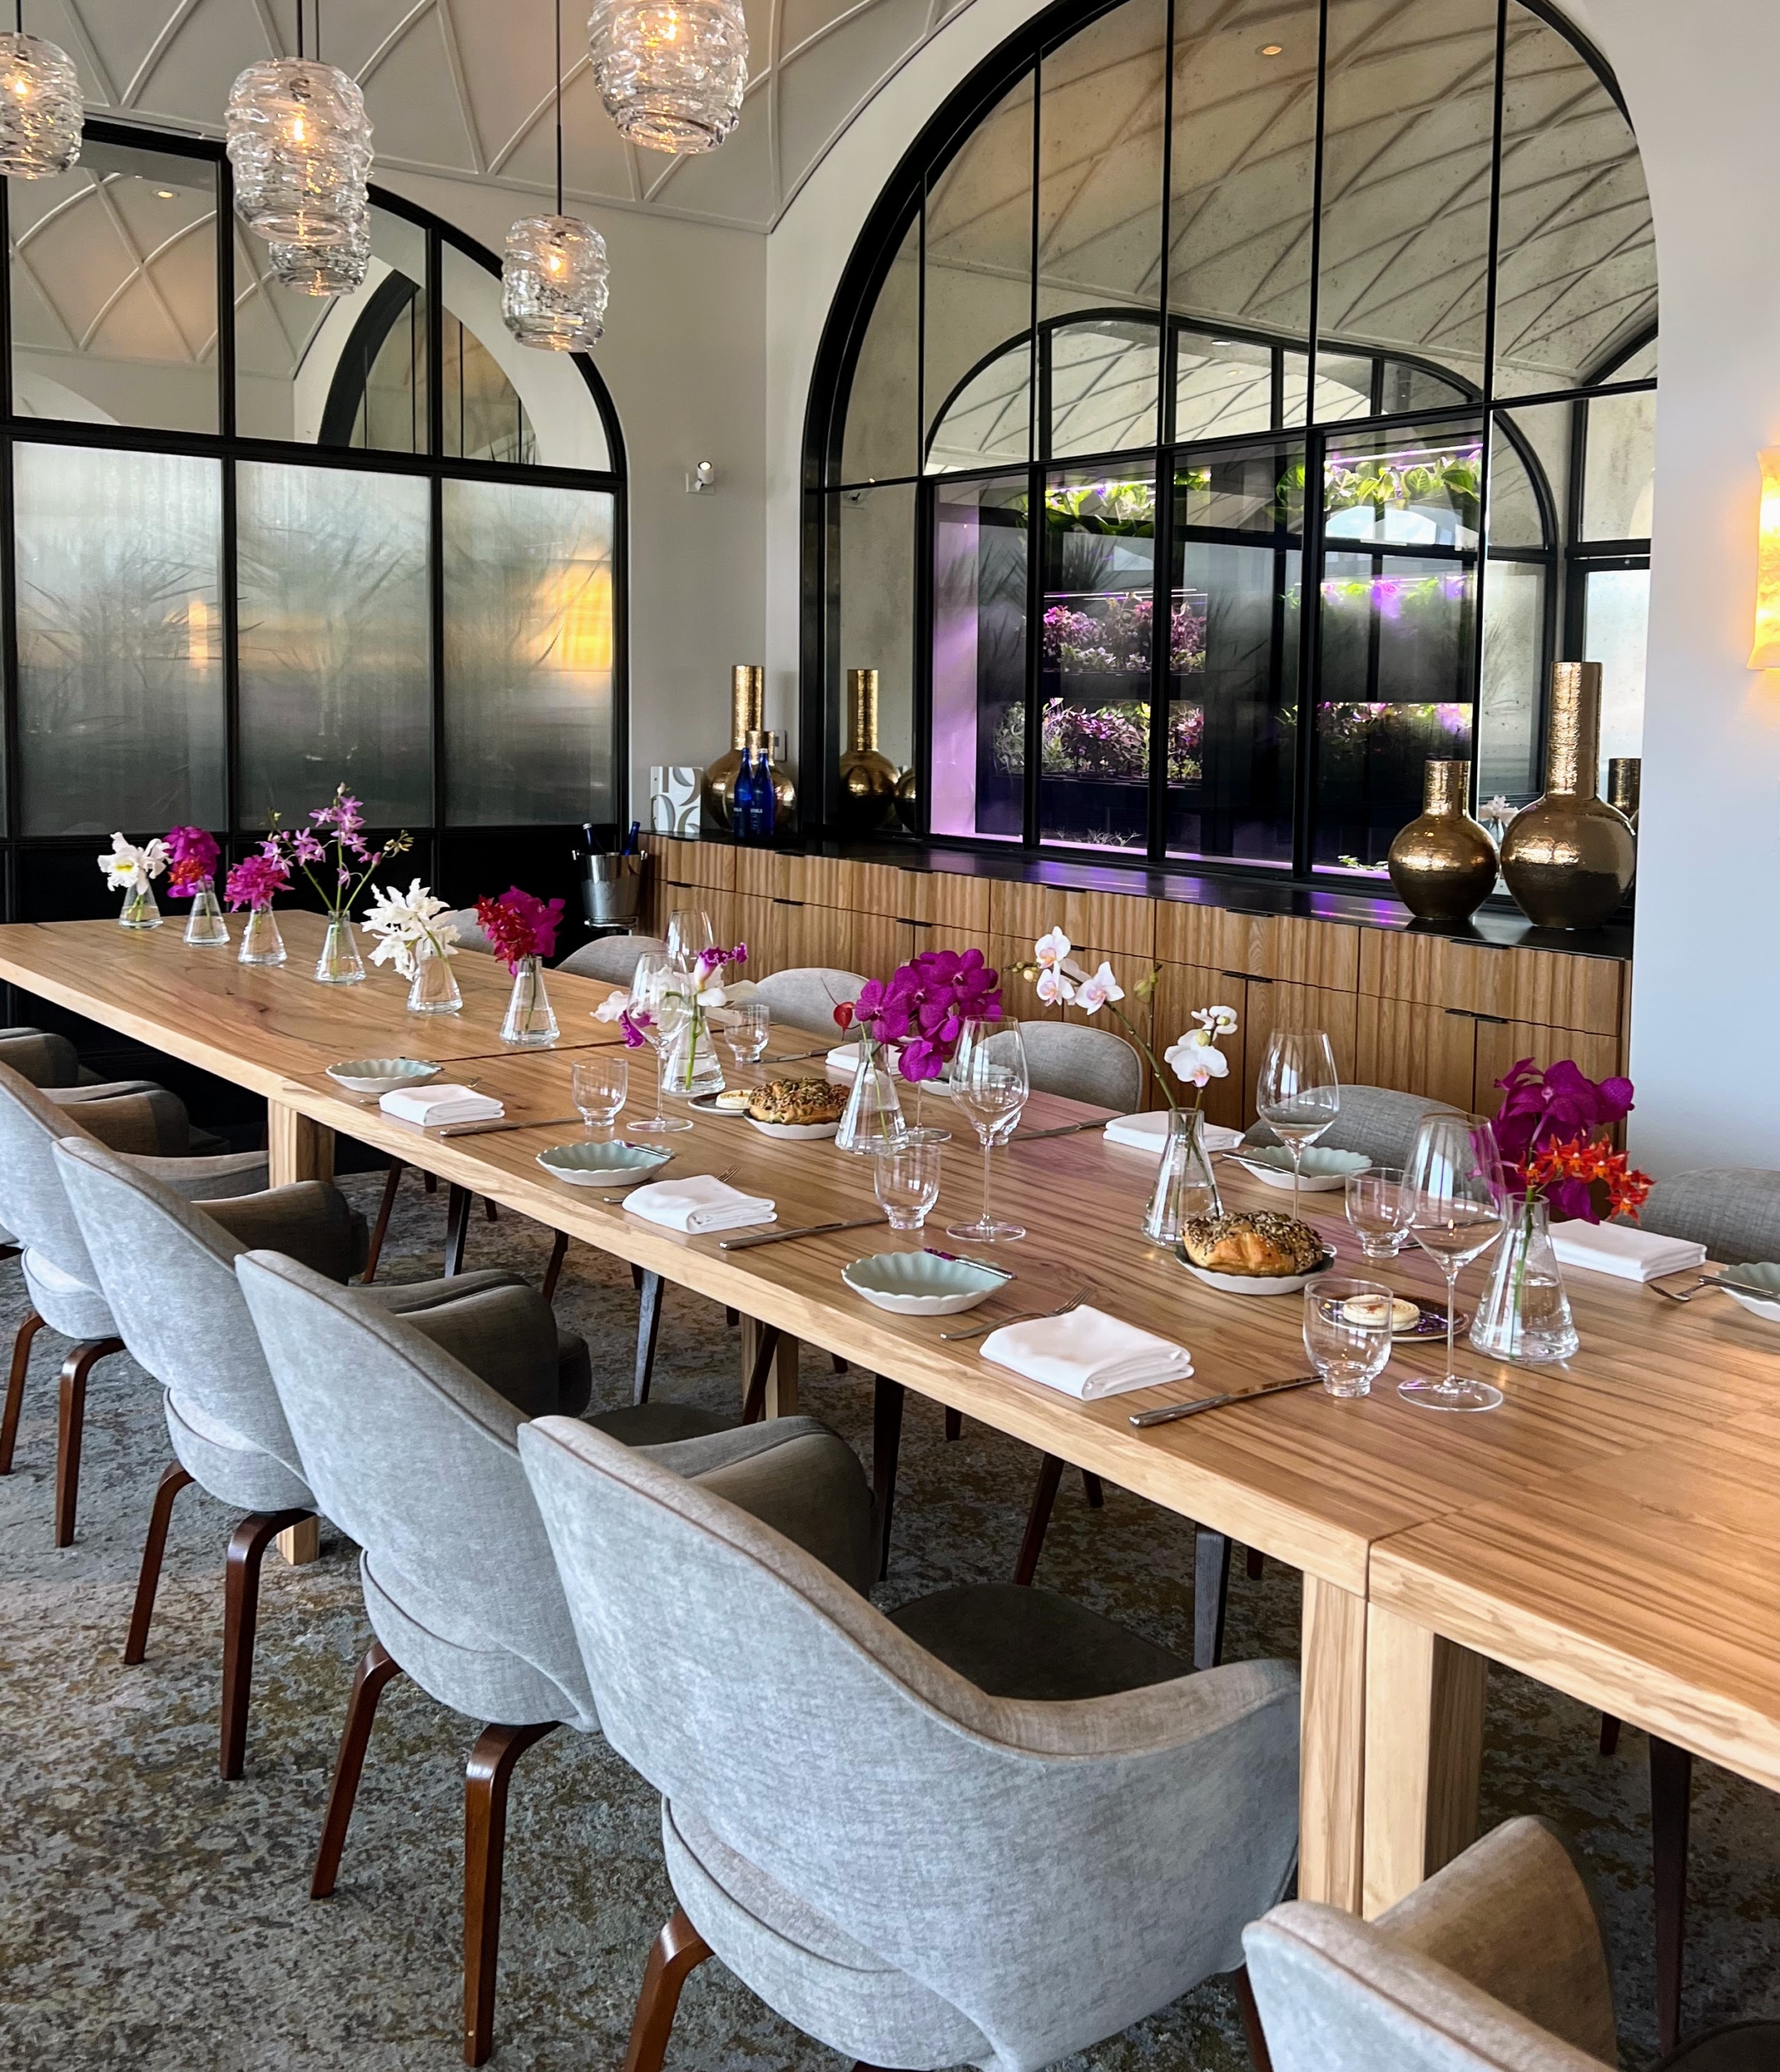
While there I also had time for a quick bite at 1906 at Longwood Gardens, a restaurant named in honor of the year Pierre S. du Pont purchased the original grounds. The restaurant is open to Longwood Gardens visitors and offers seasonal fare with locally sourced and sustainable ingredients.
This is 1906 Executive Chef, George Murkowicz.
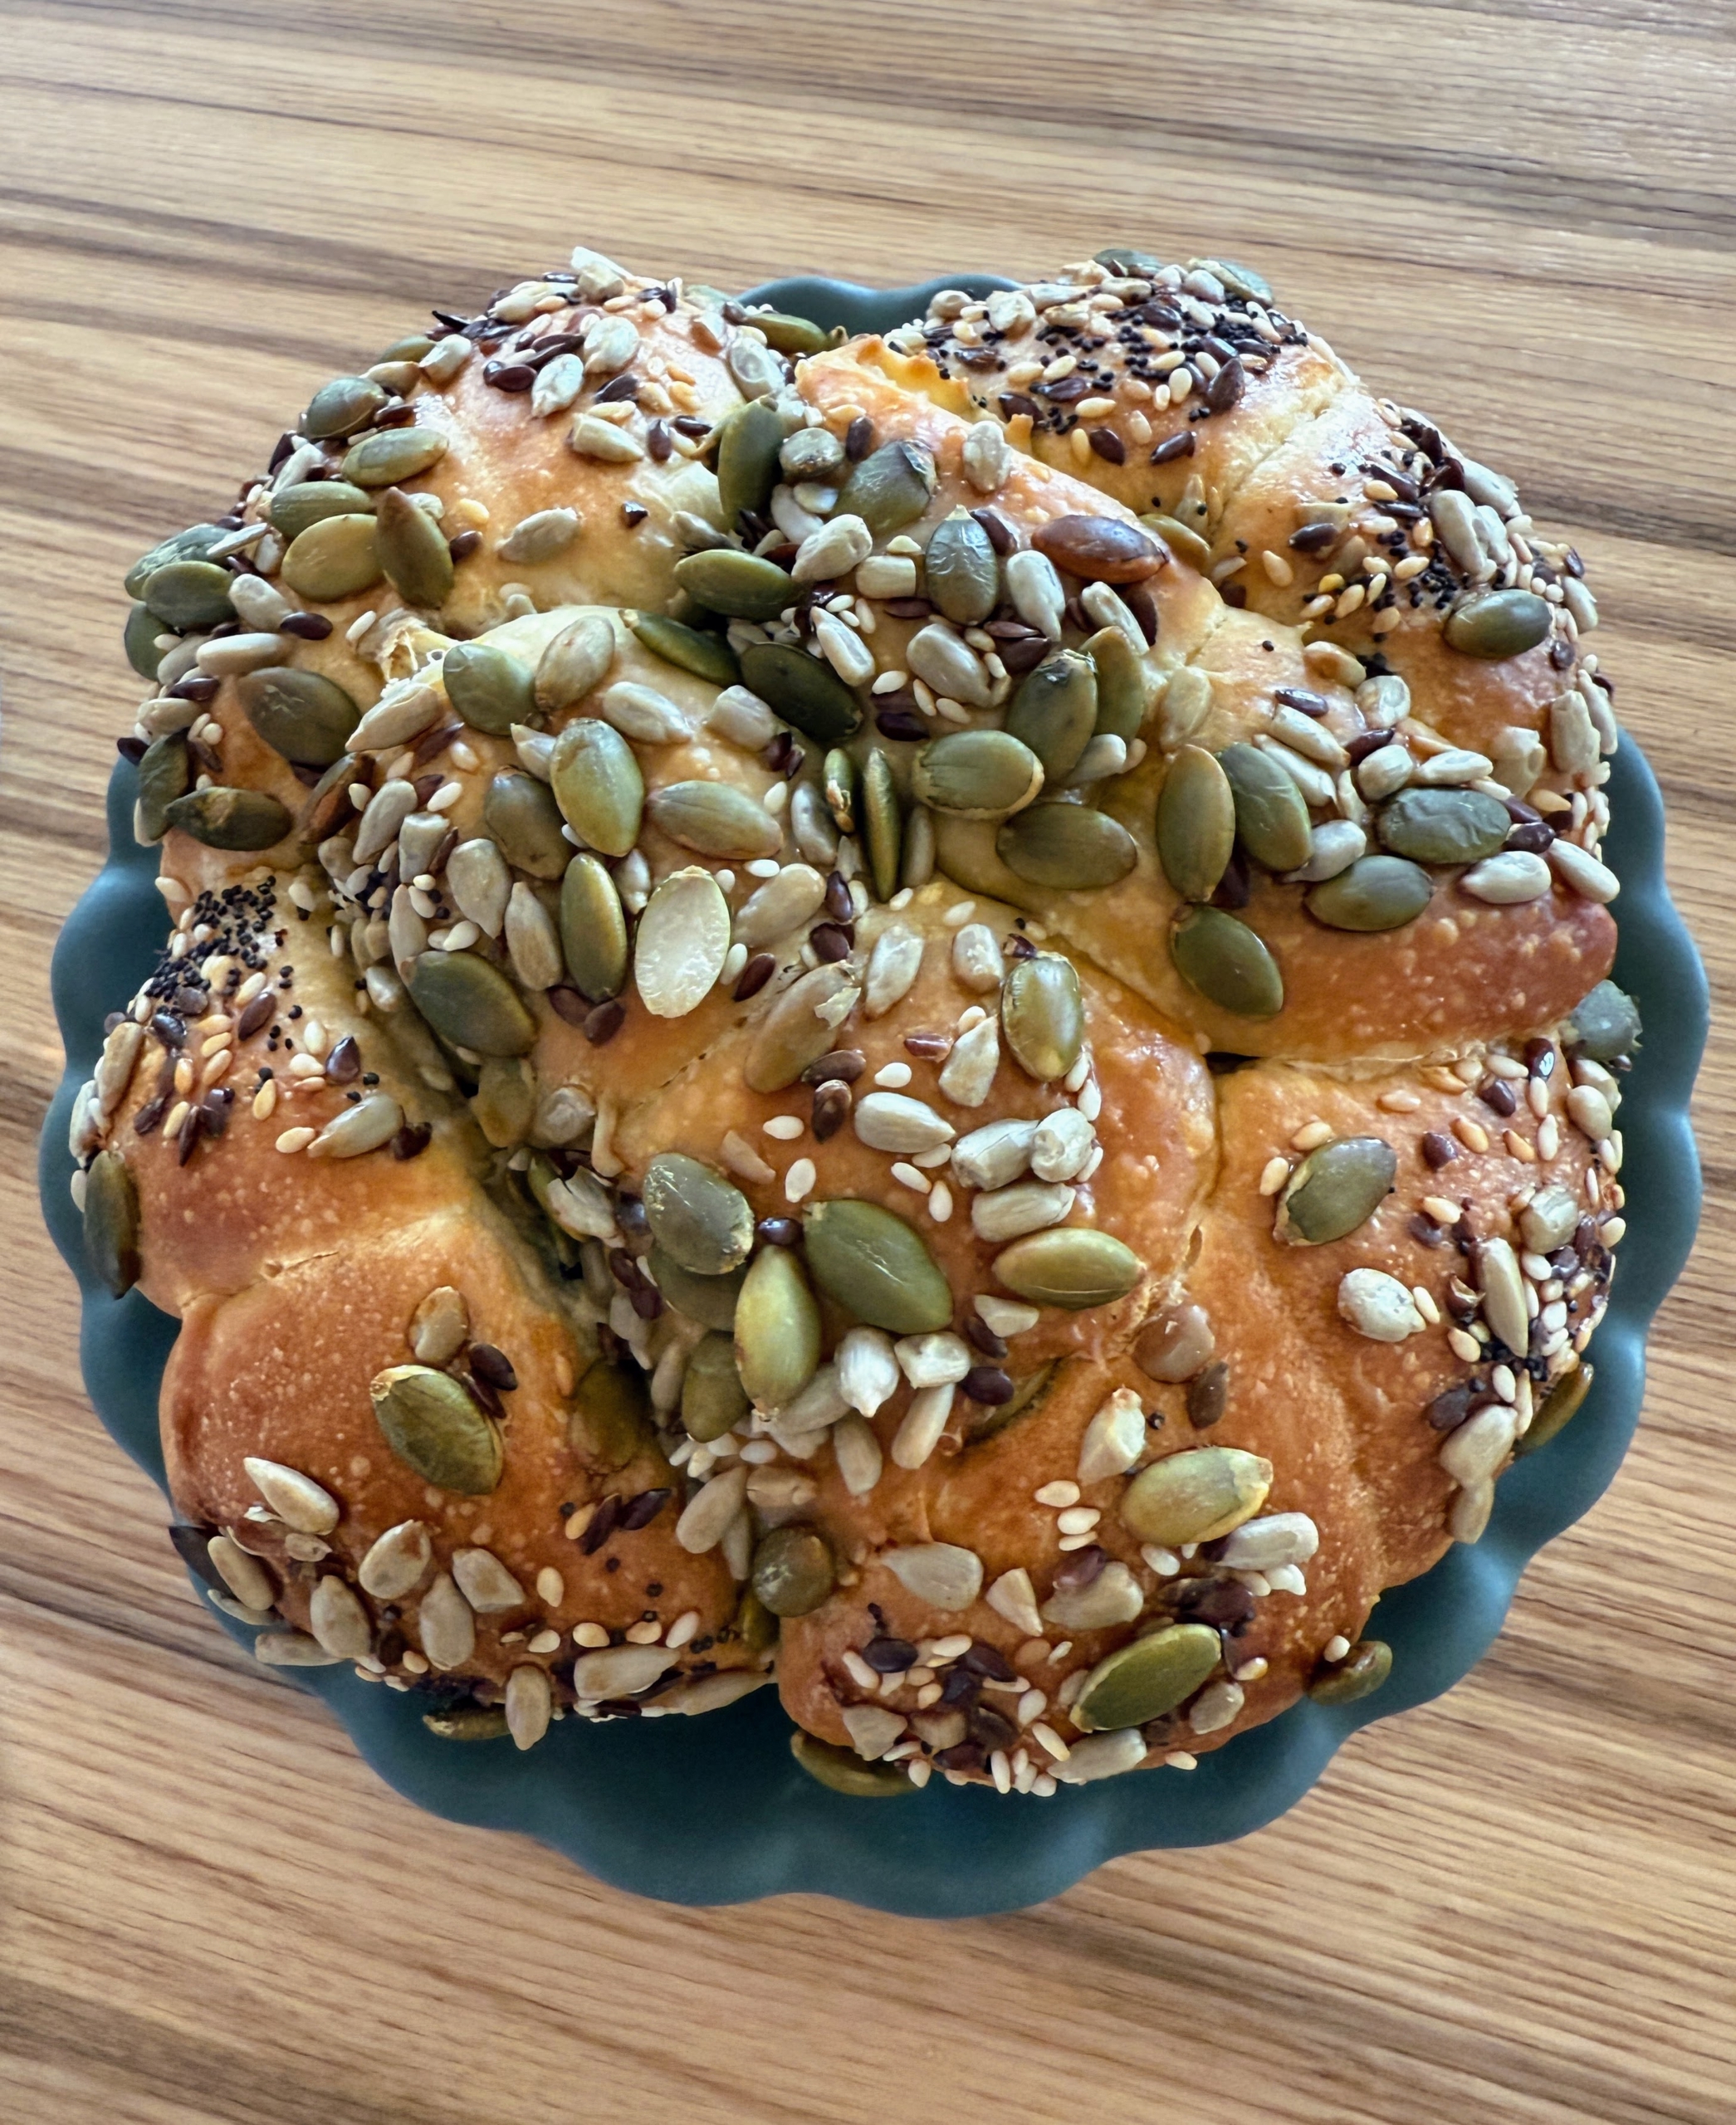
Among the delicious foods we enjoyed: this Pull-Apart Brioche with garden seeds, honey butter, and local sea salt.
This is their Little Gem Salad with green goddess herbs, artichoke, and Caesar dressing.
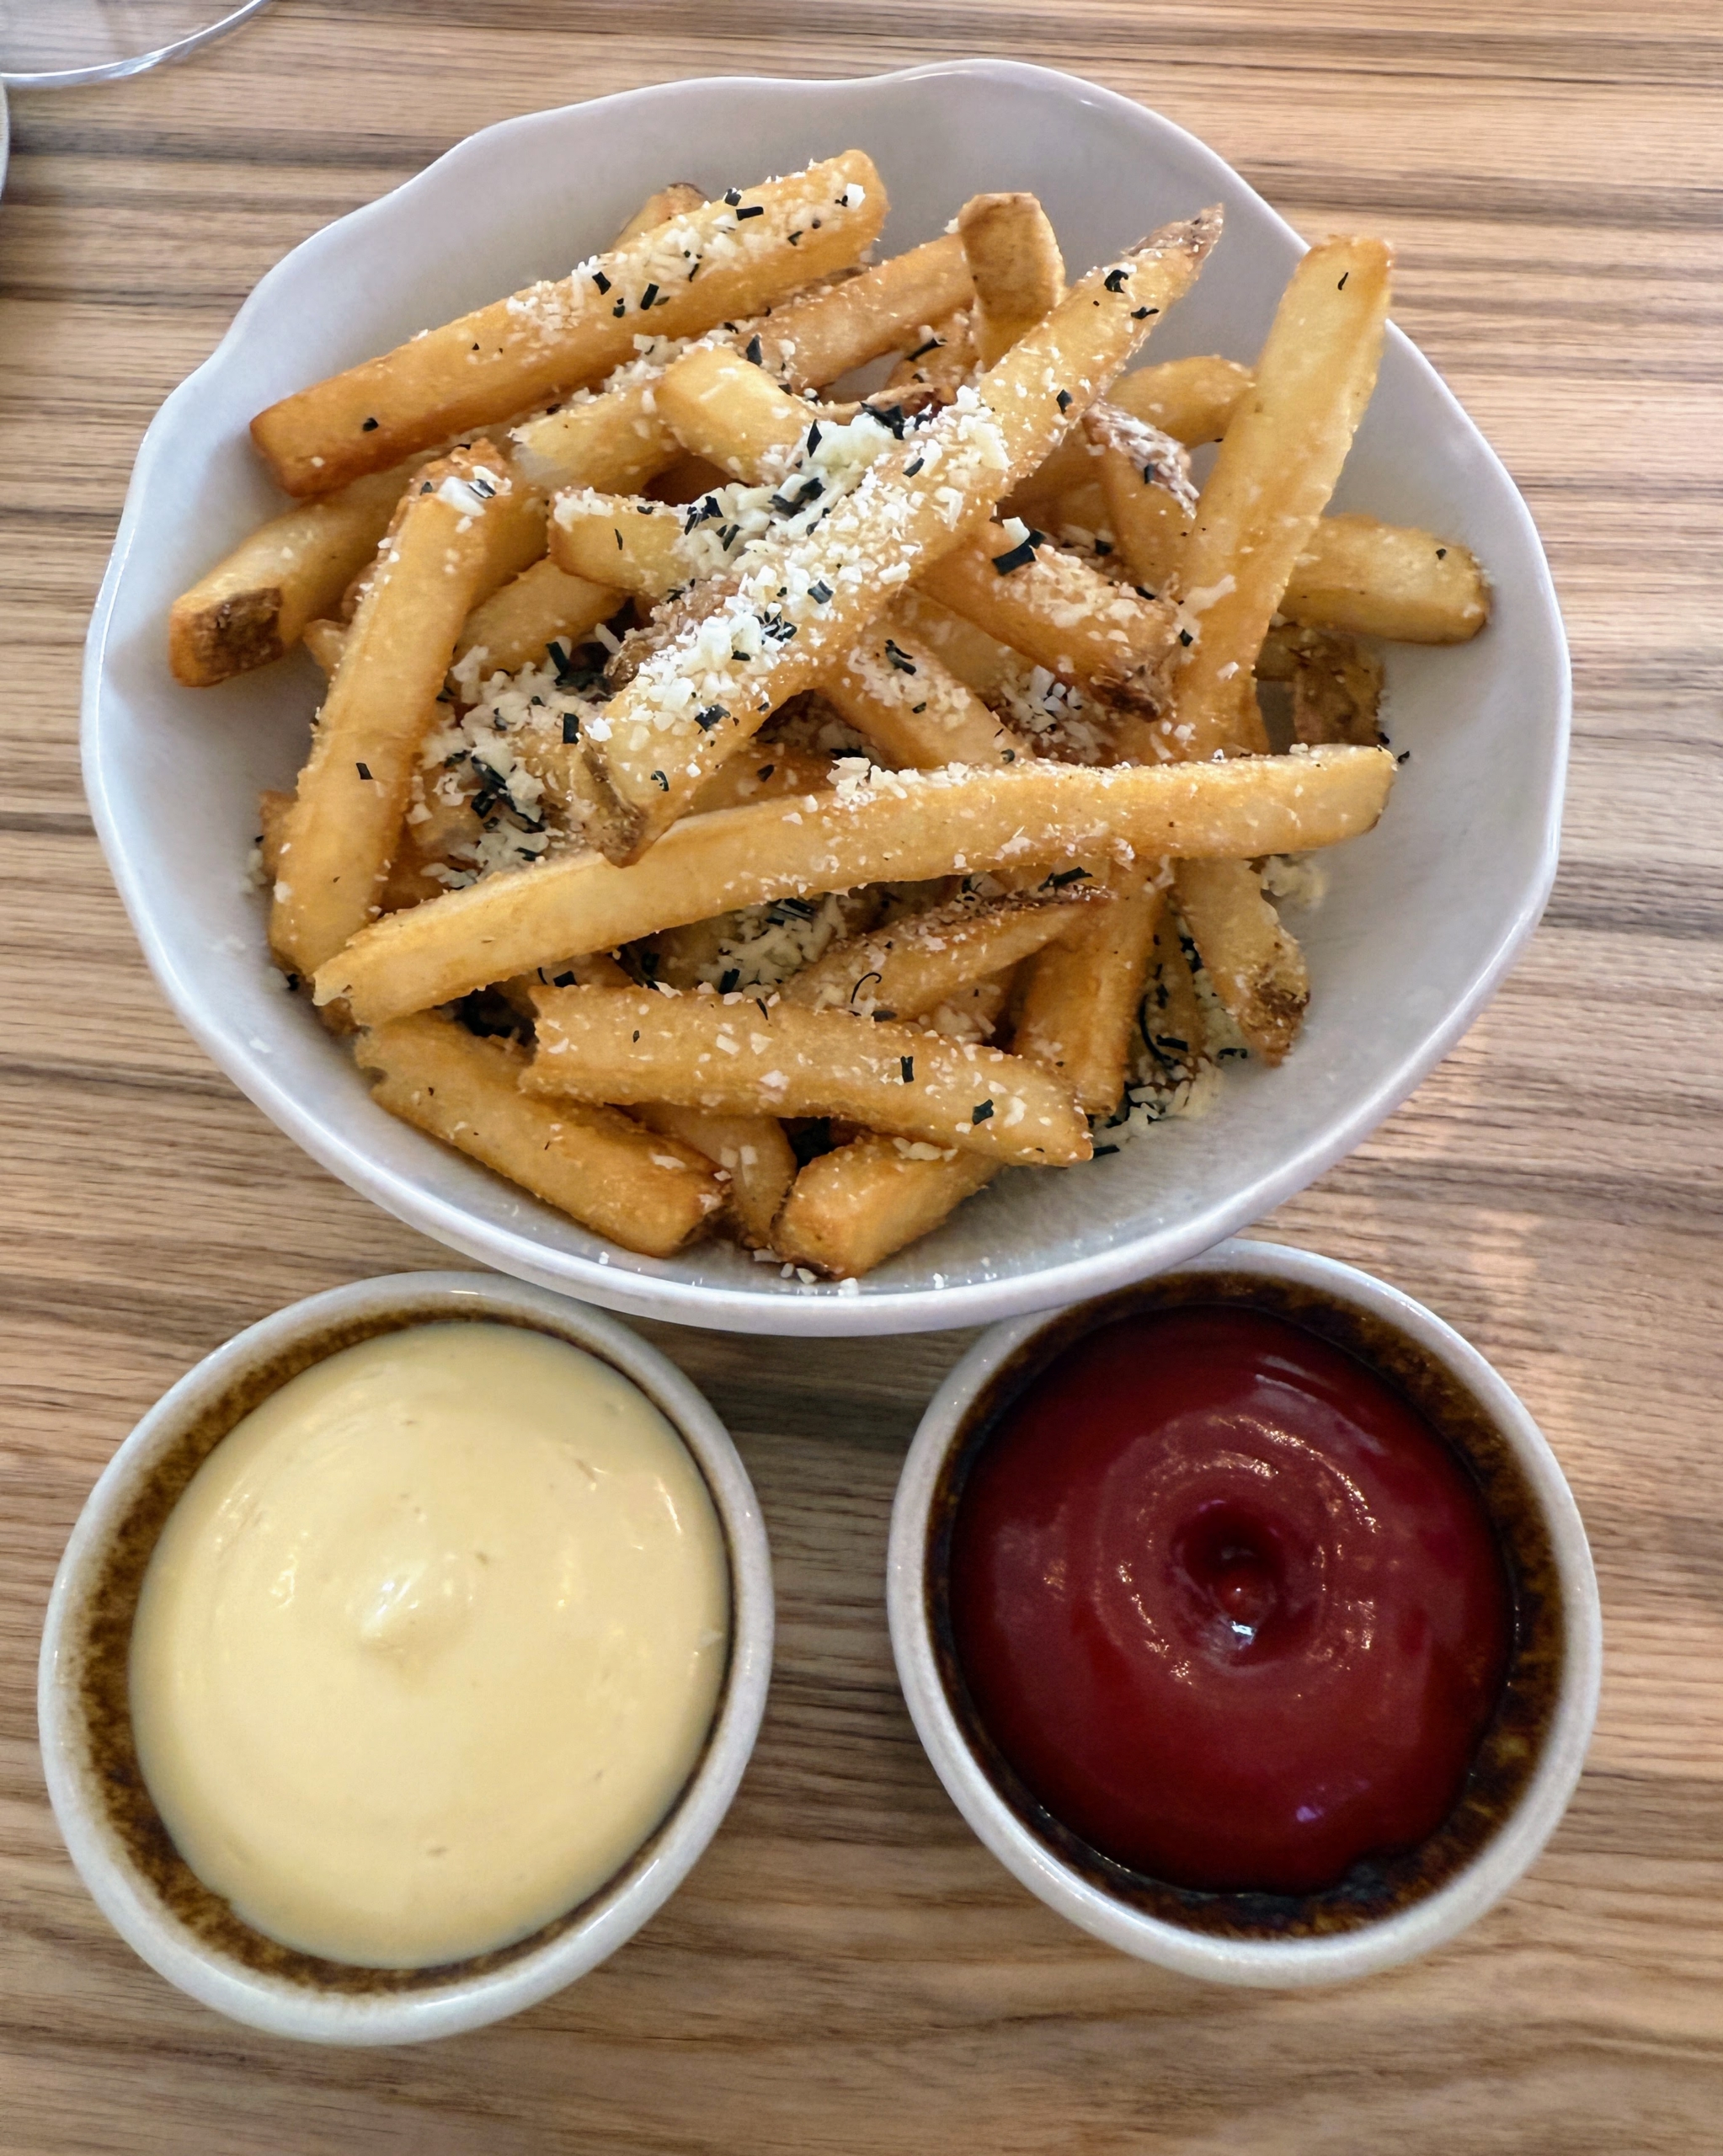
We also had the Shoestring Frites with rosemary and parmesan.
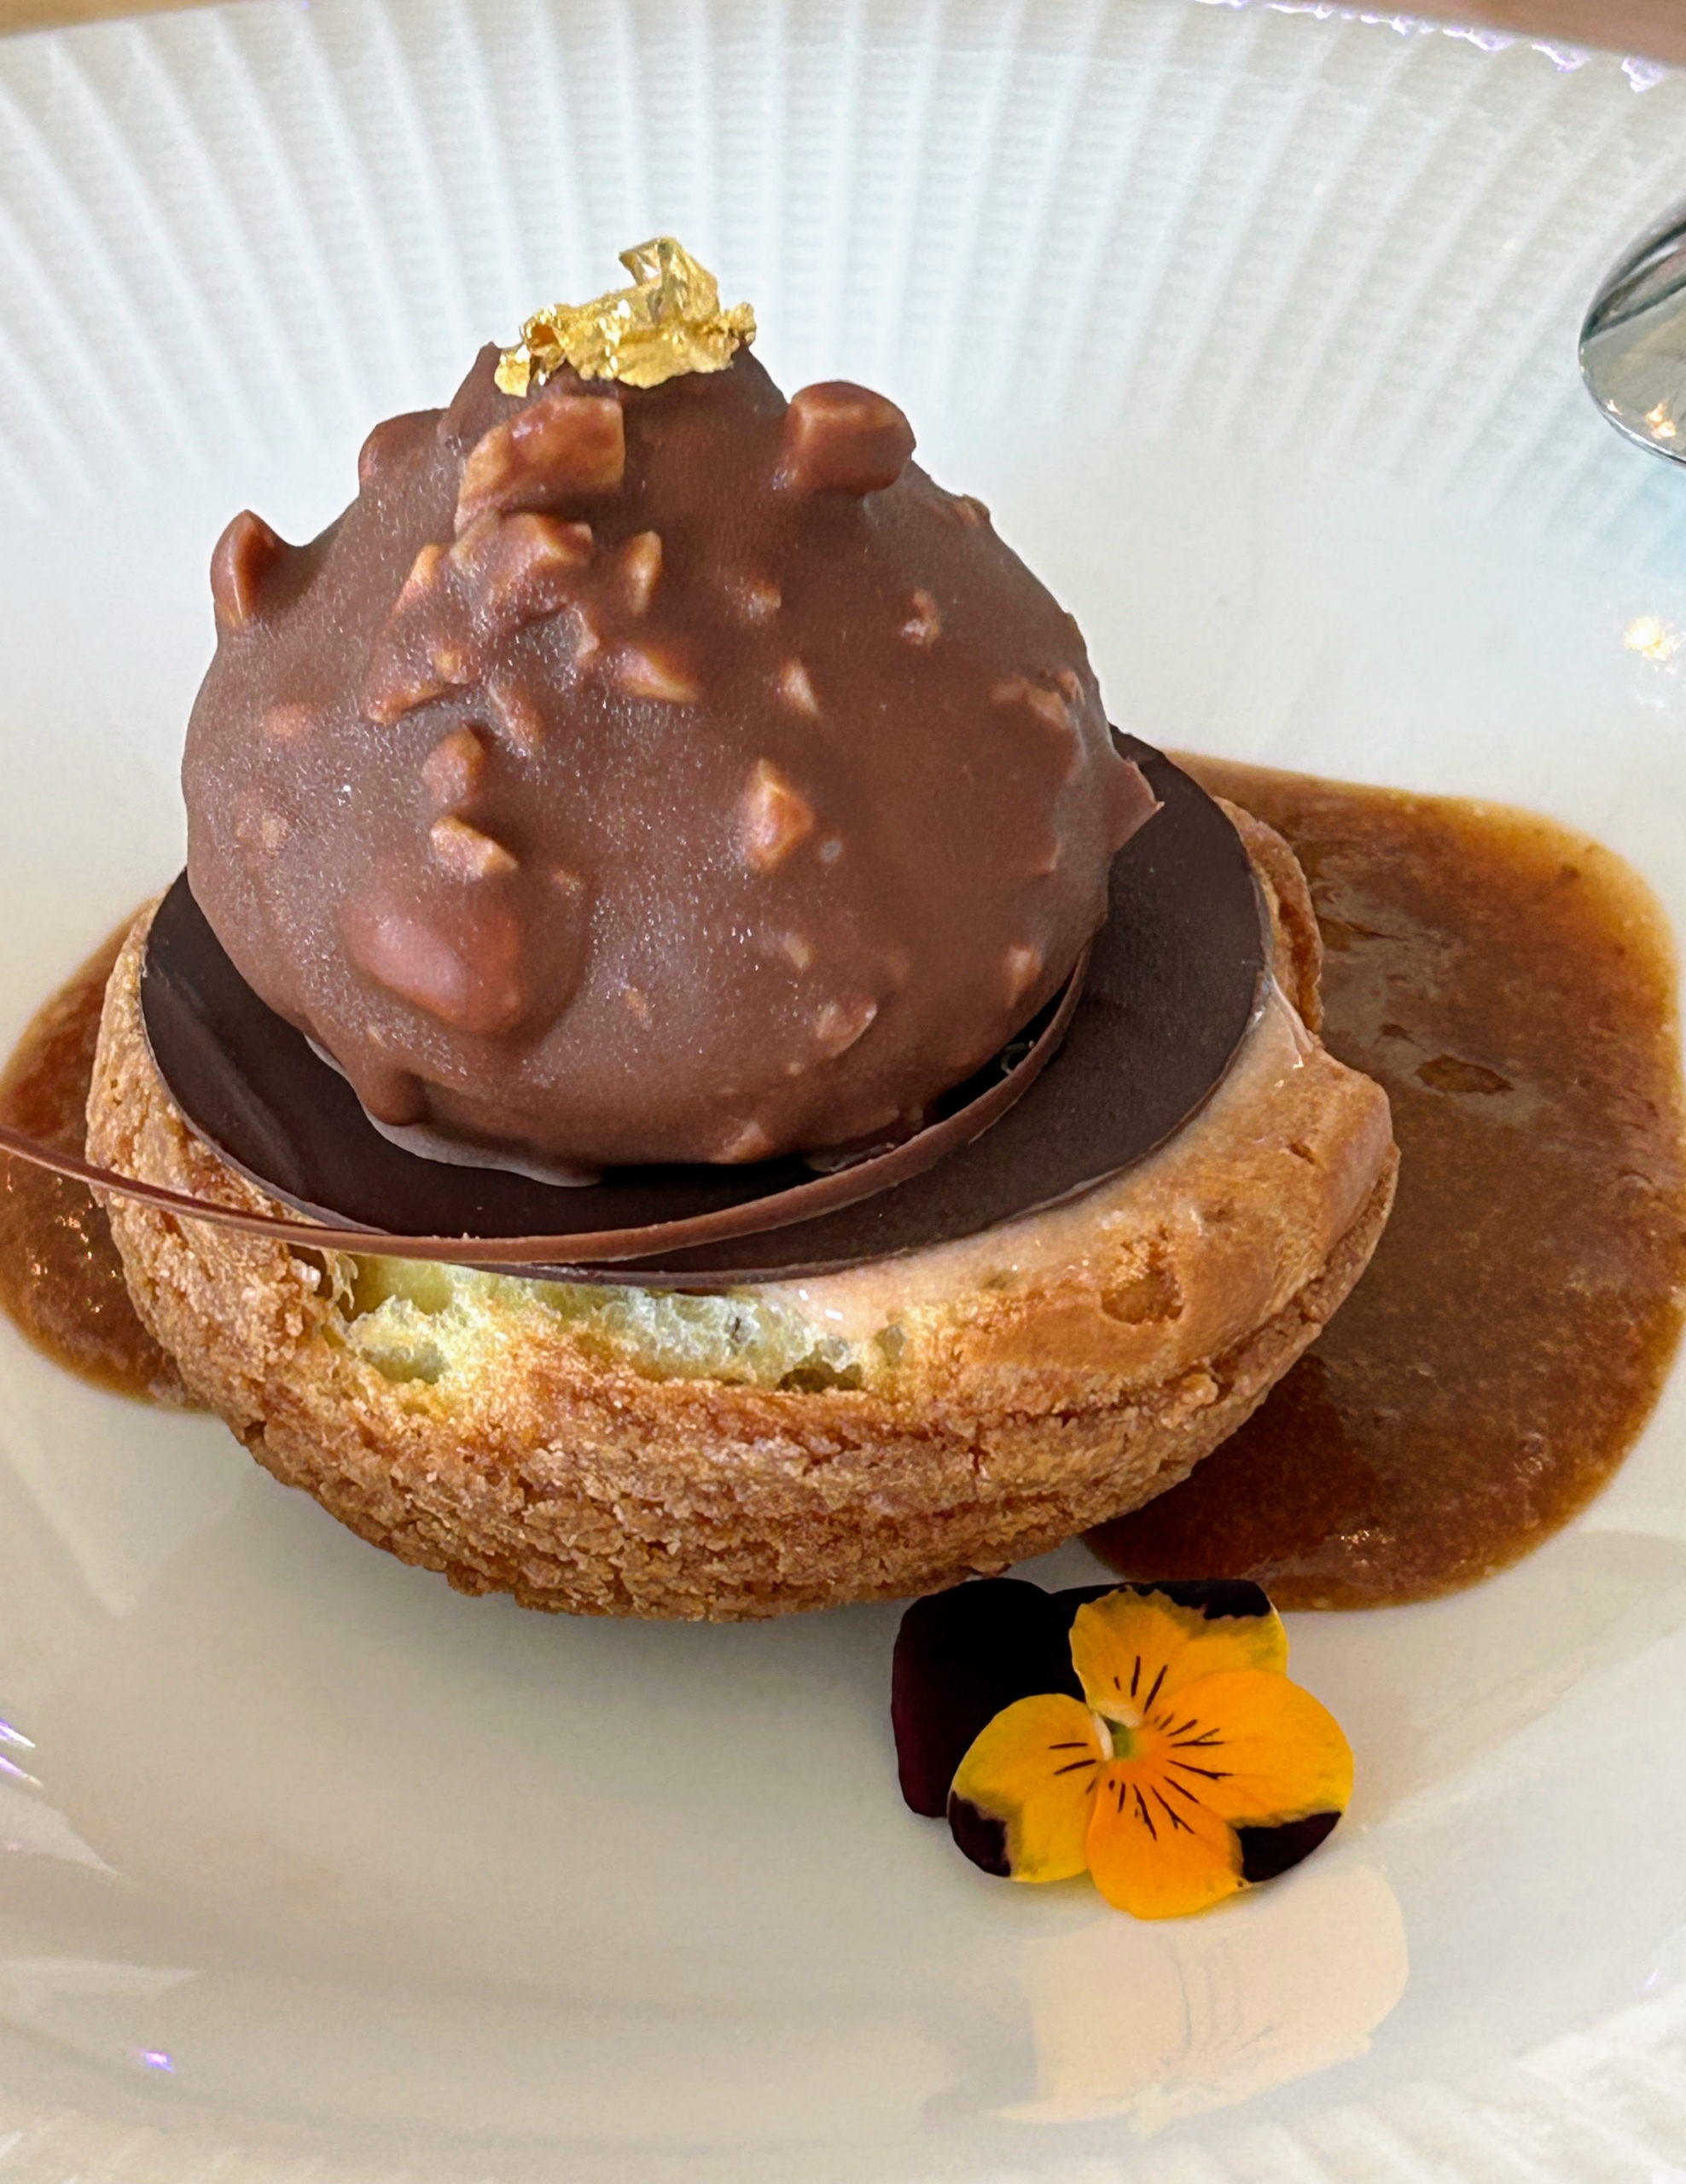
For dessert, we tried this Hazelnut Profiterole with caramel, cinnamon, and plum.
This Neapolitan includes chocolate biscotti, strawberry ice cream, and vanilla namelaka, a creamy, velvety, slightly firm style of ganache.
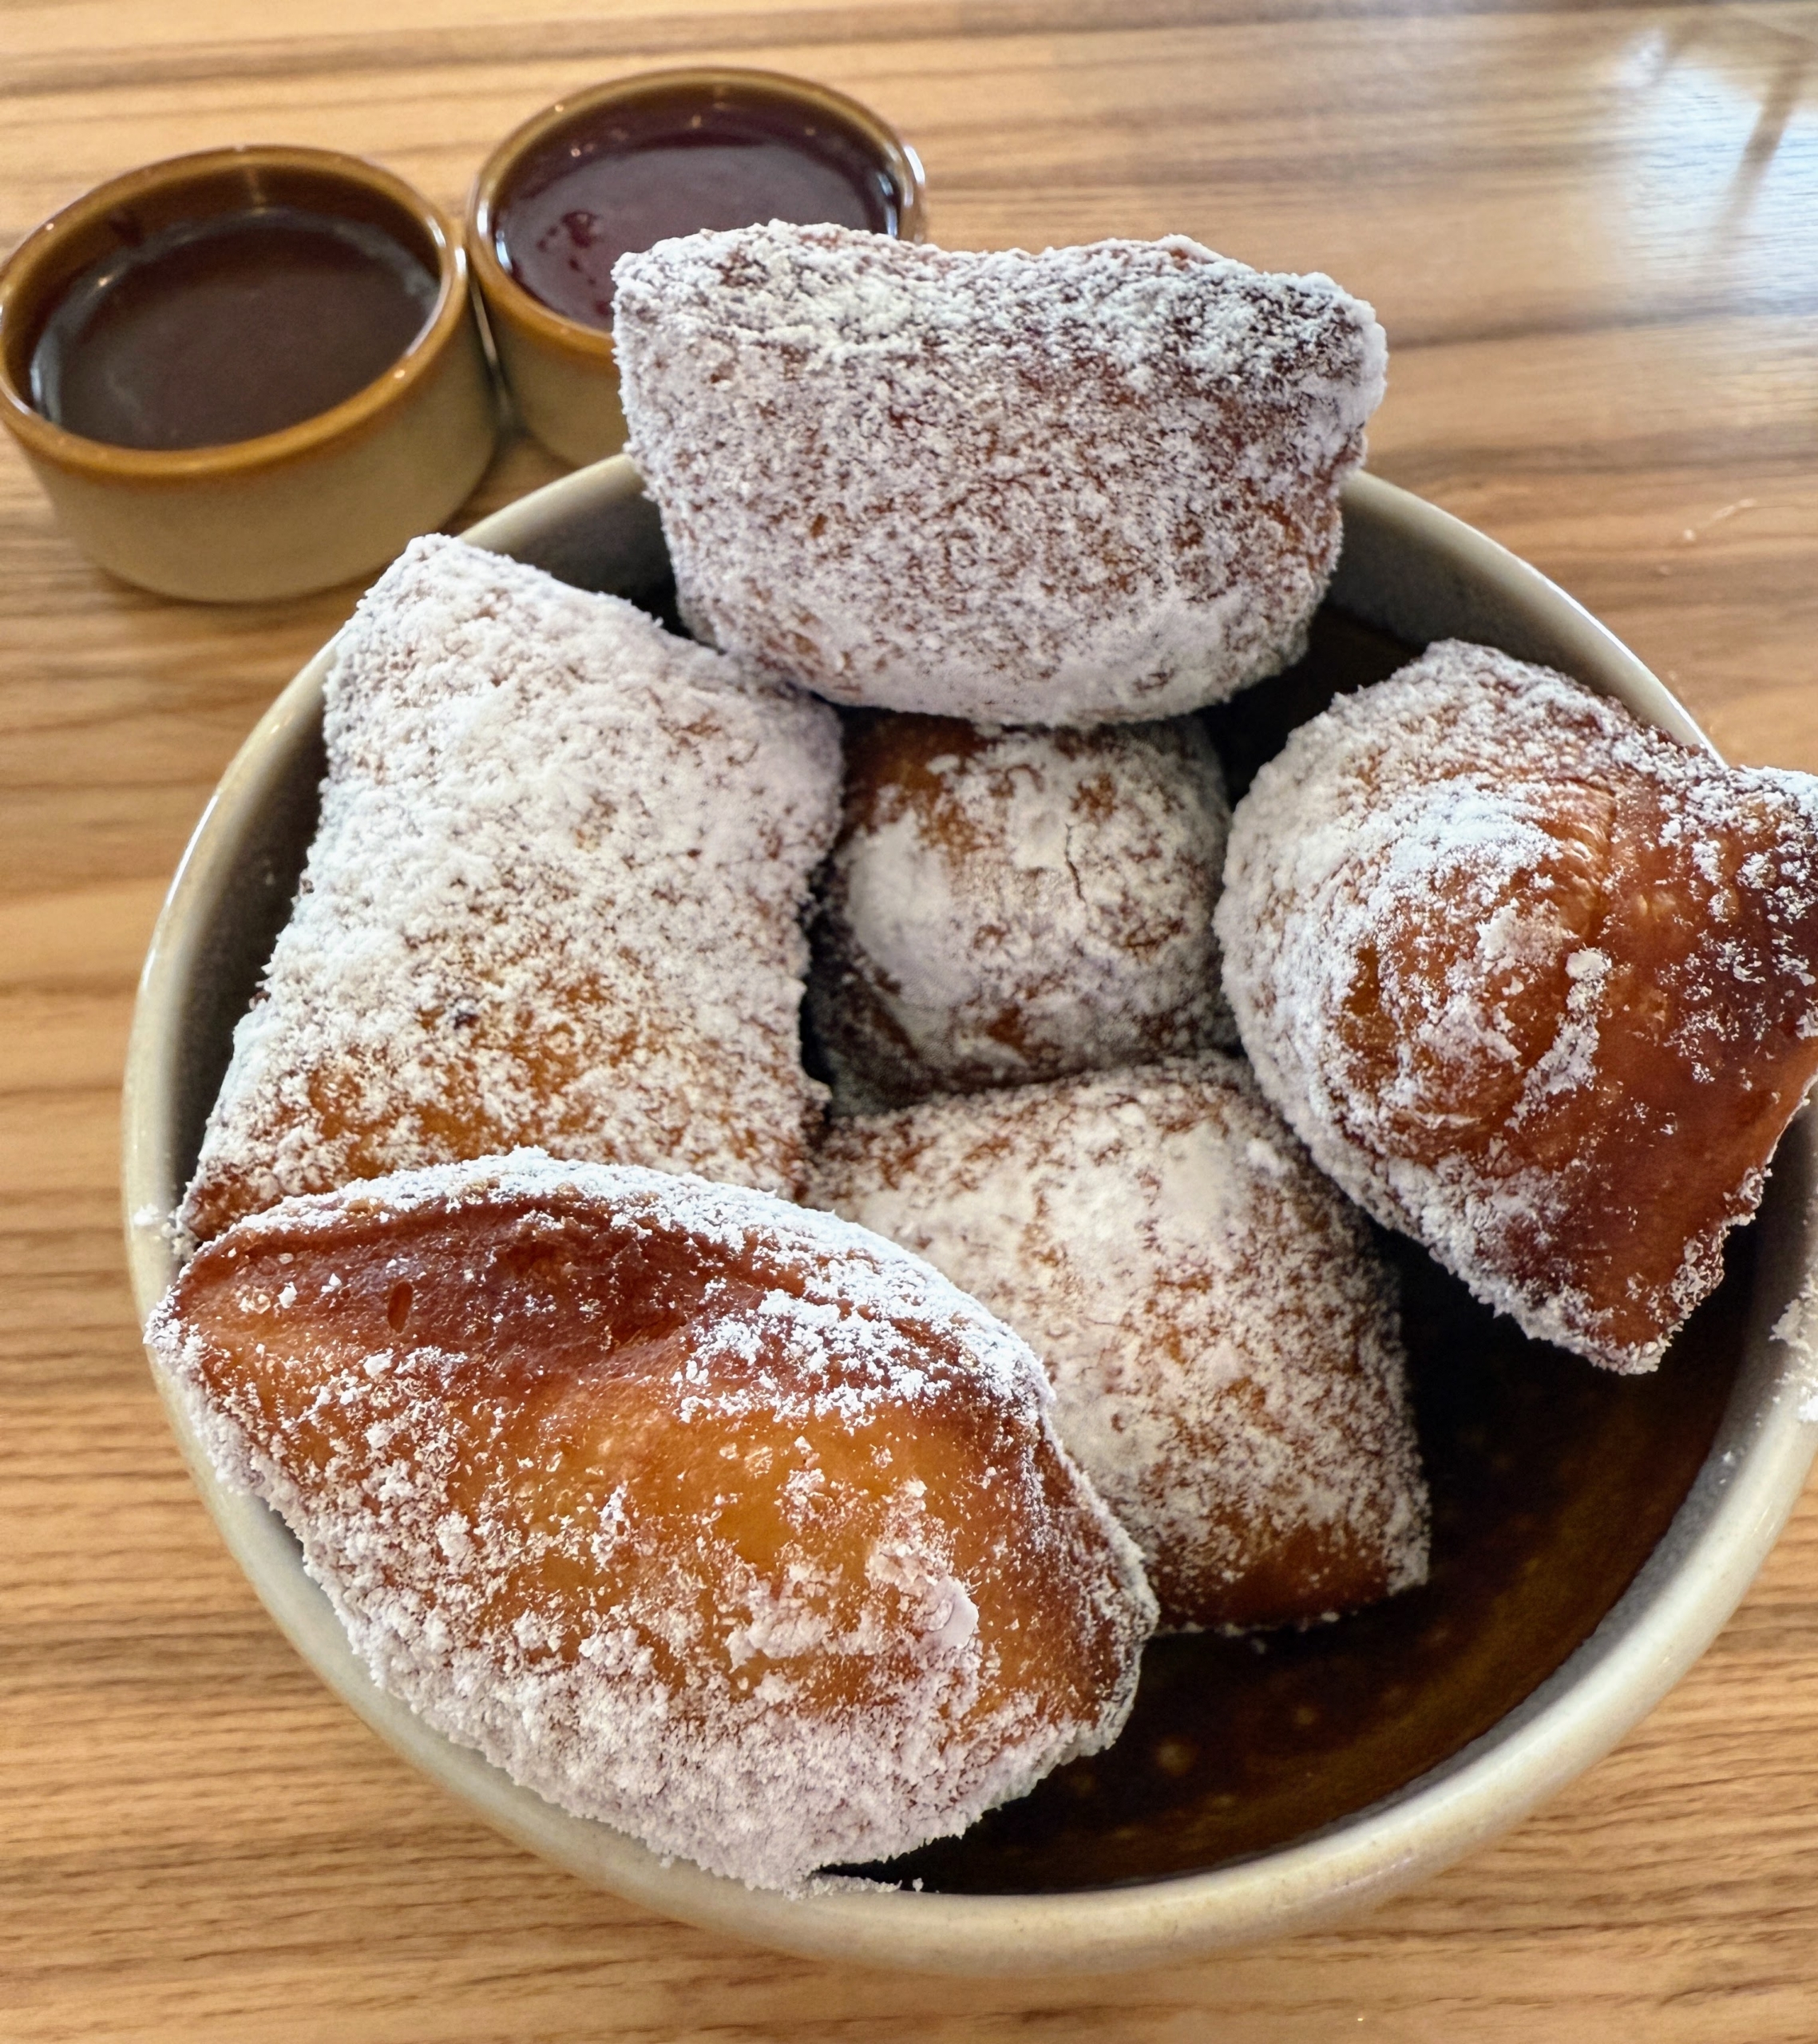
If you like donuts, you will love beignets. These were served with strawberry or peanut butter and sprinkled with powdered sugar.
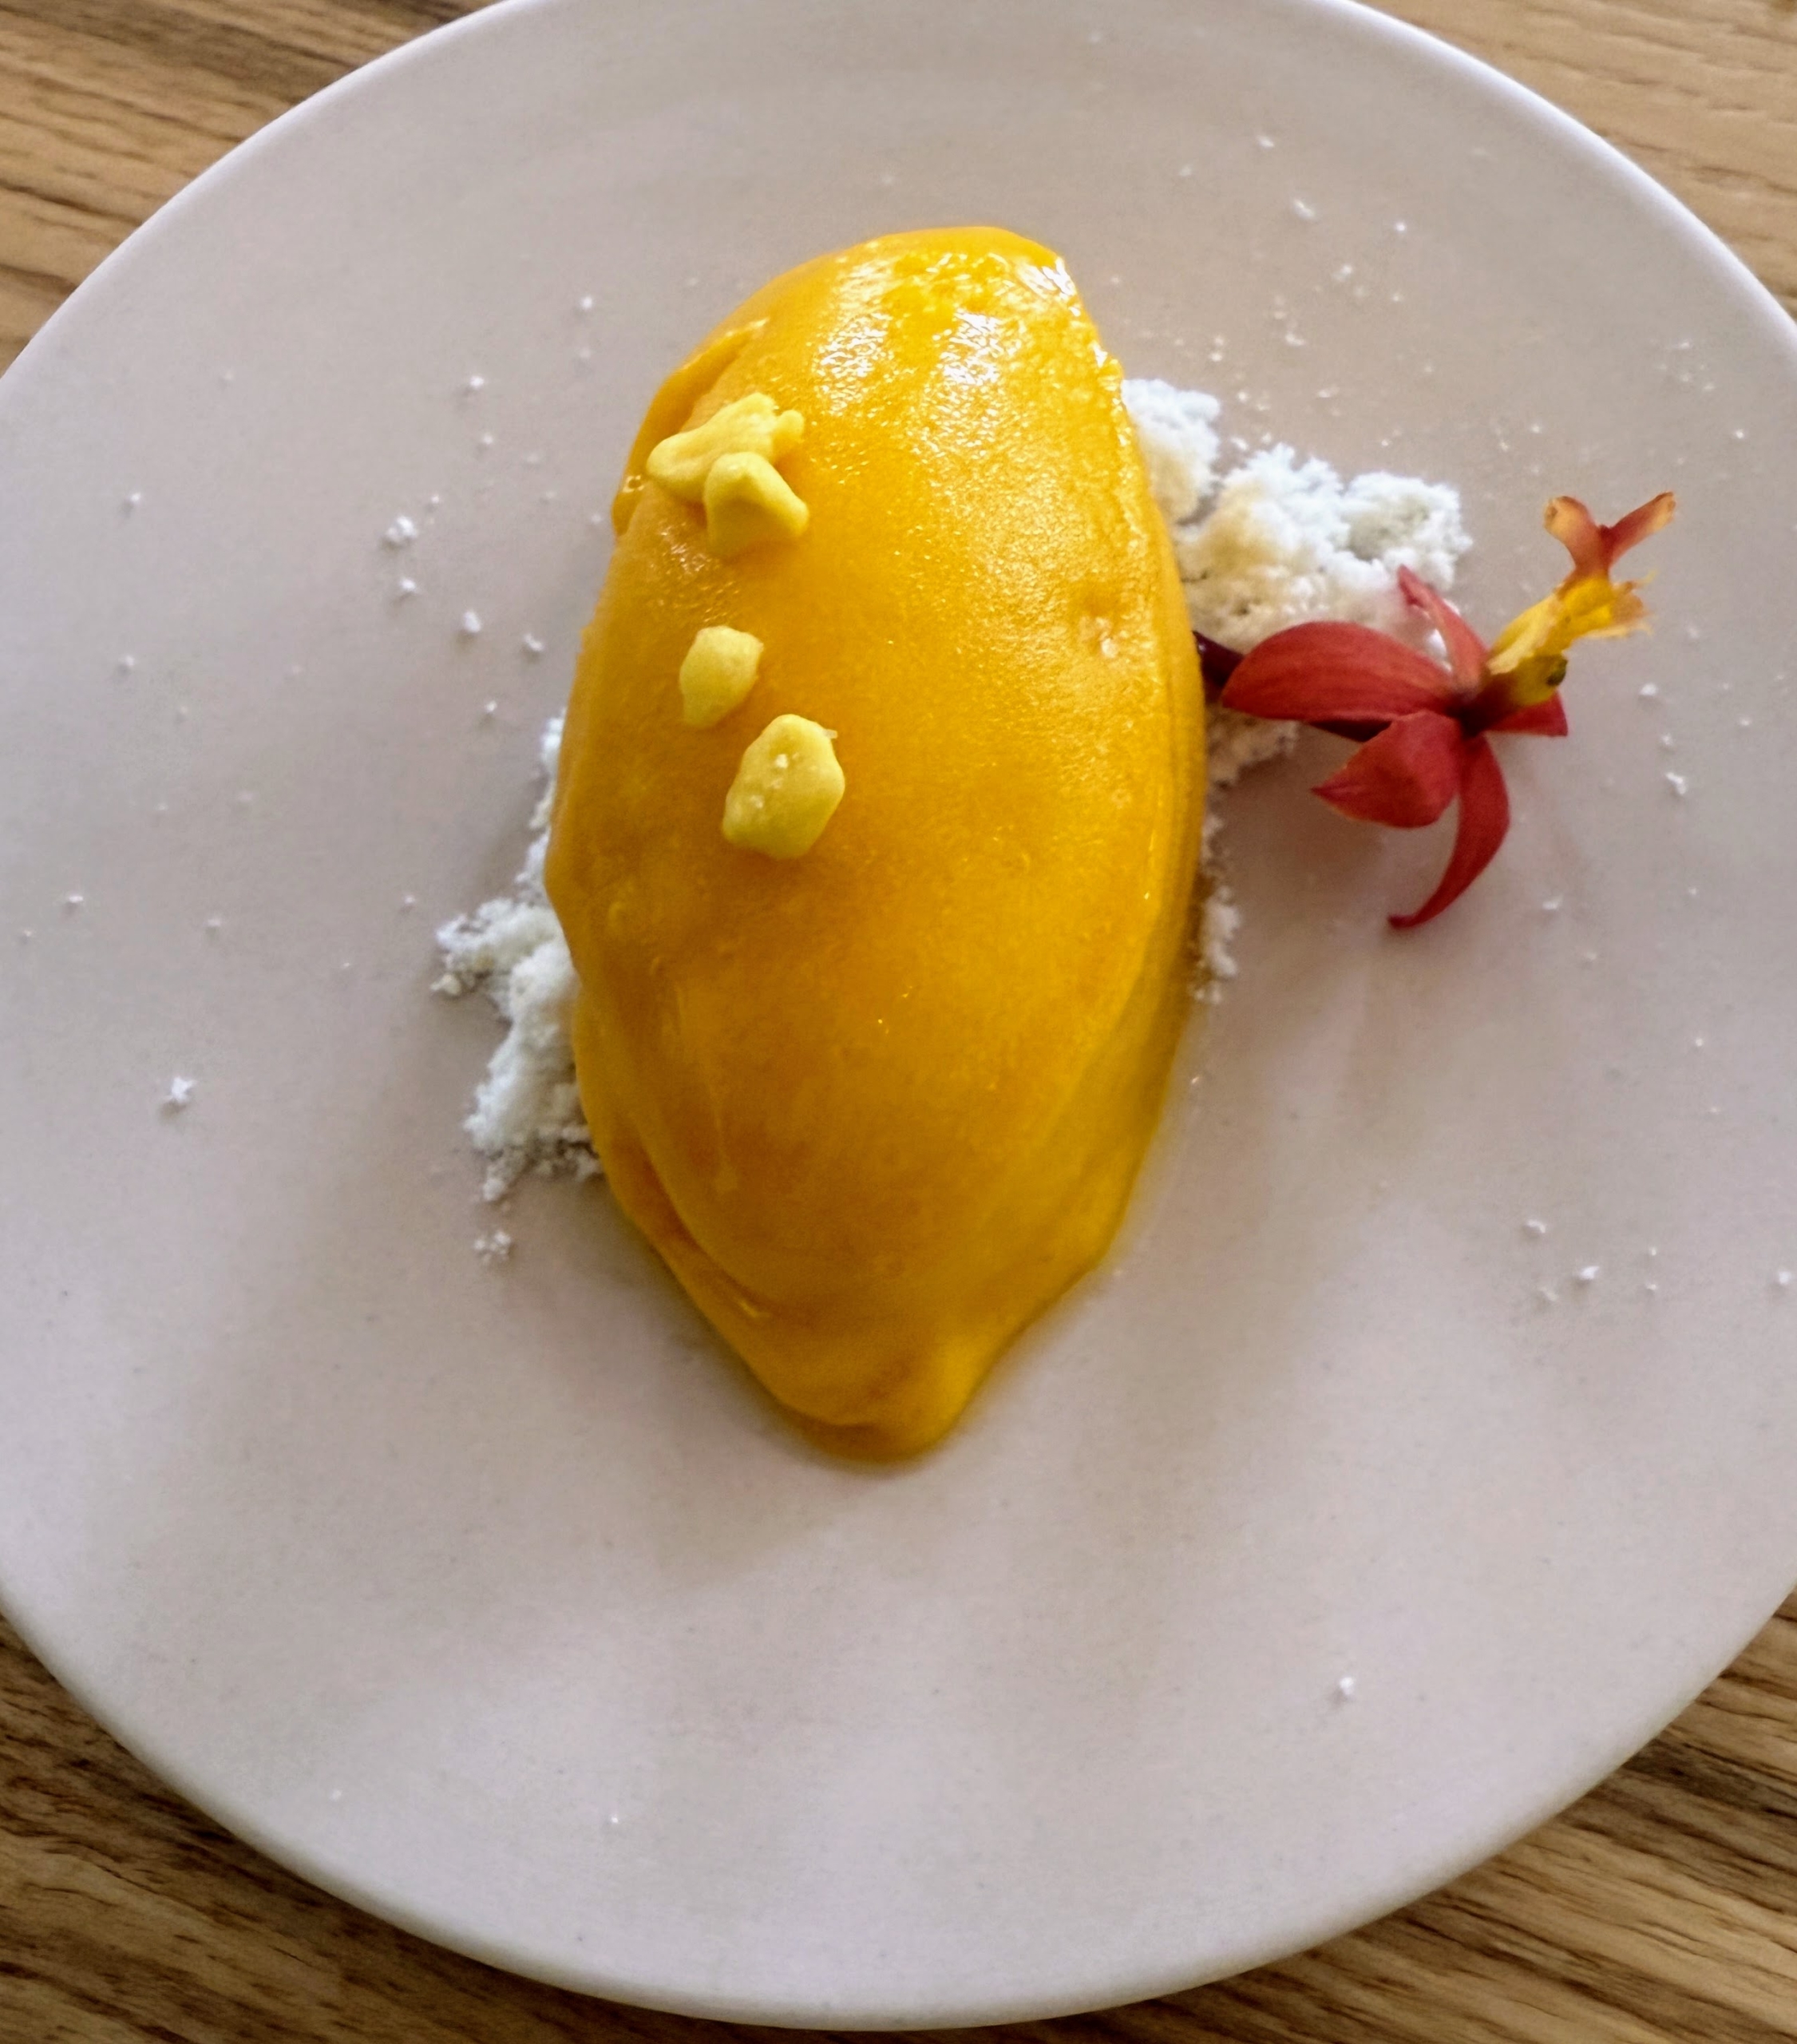
This is their panna cotta with passionfruit, coconut and a scoop of mango-Lime sorbet.
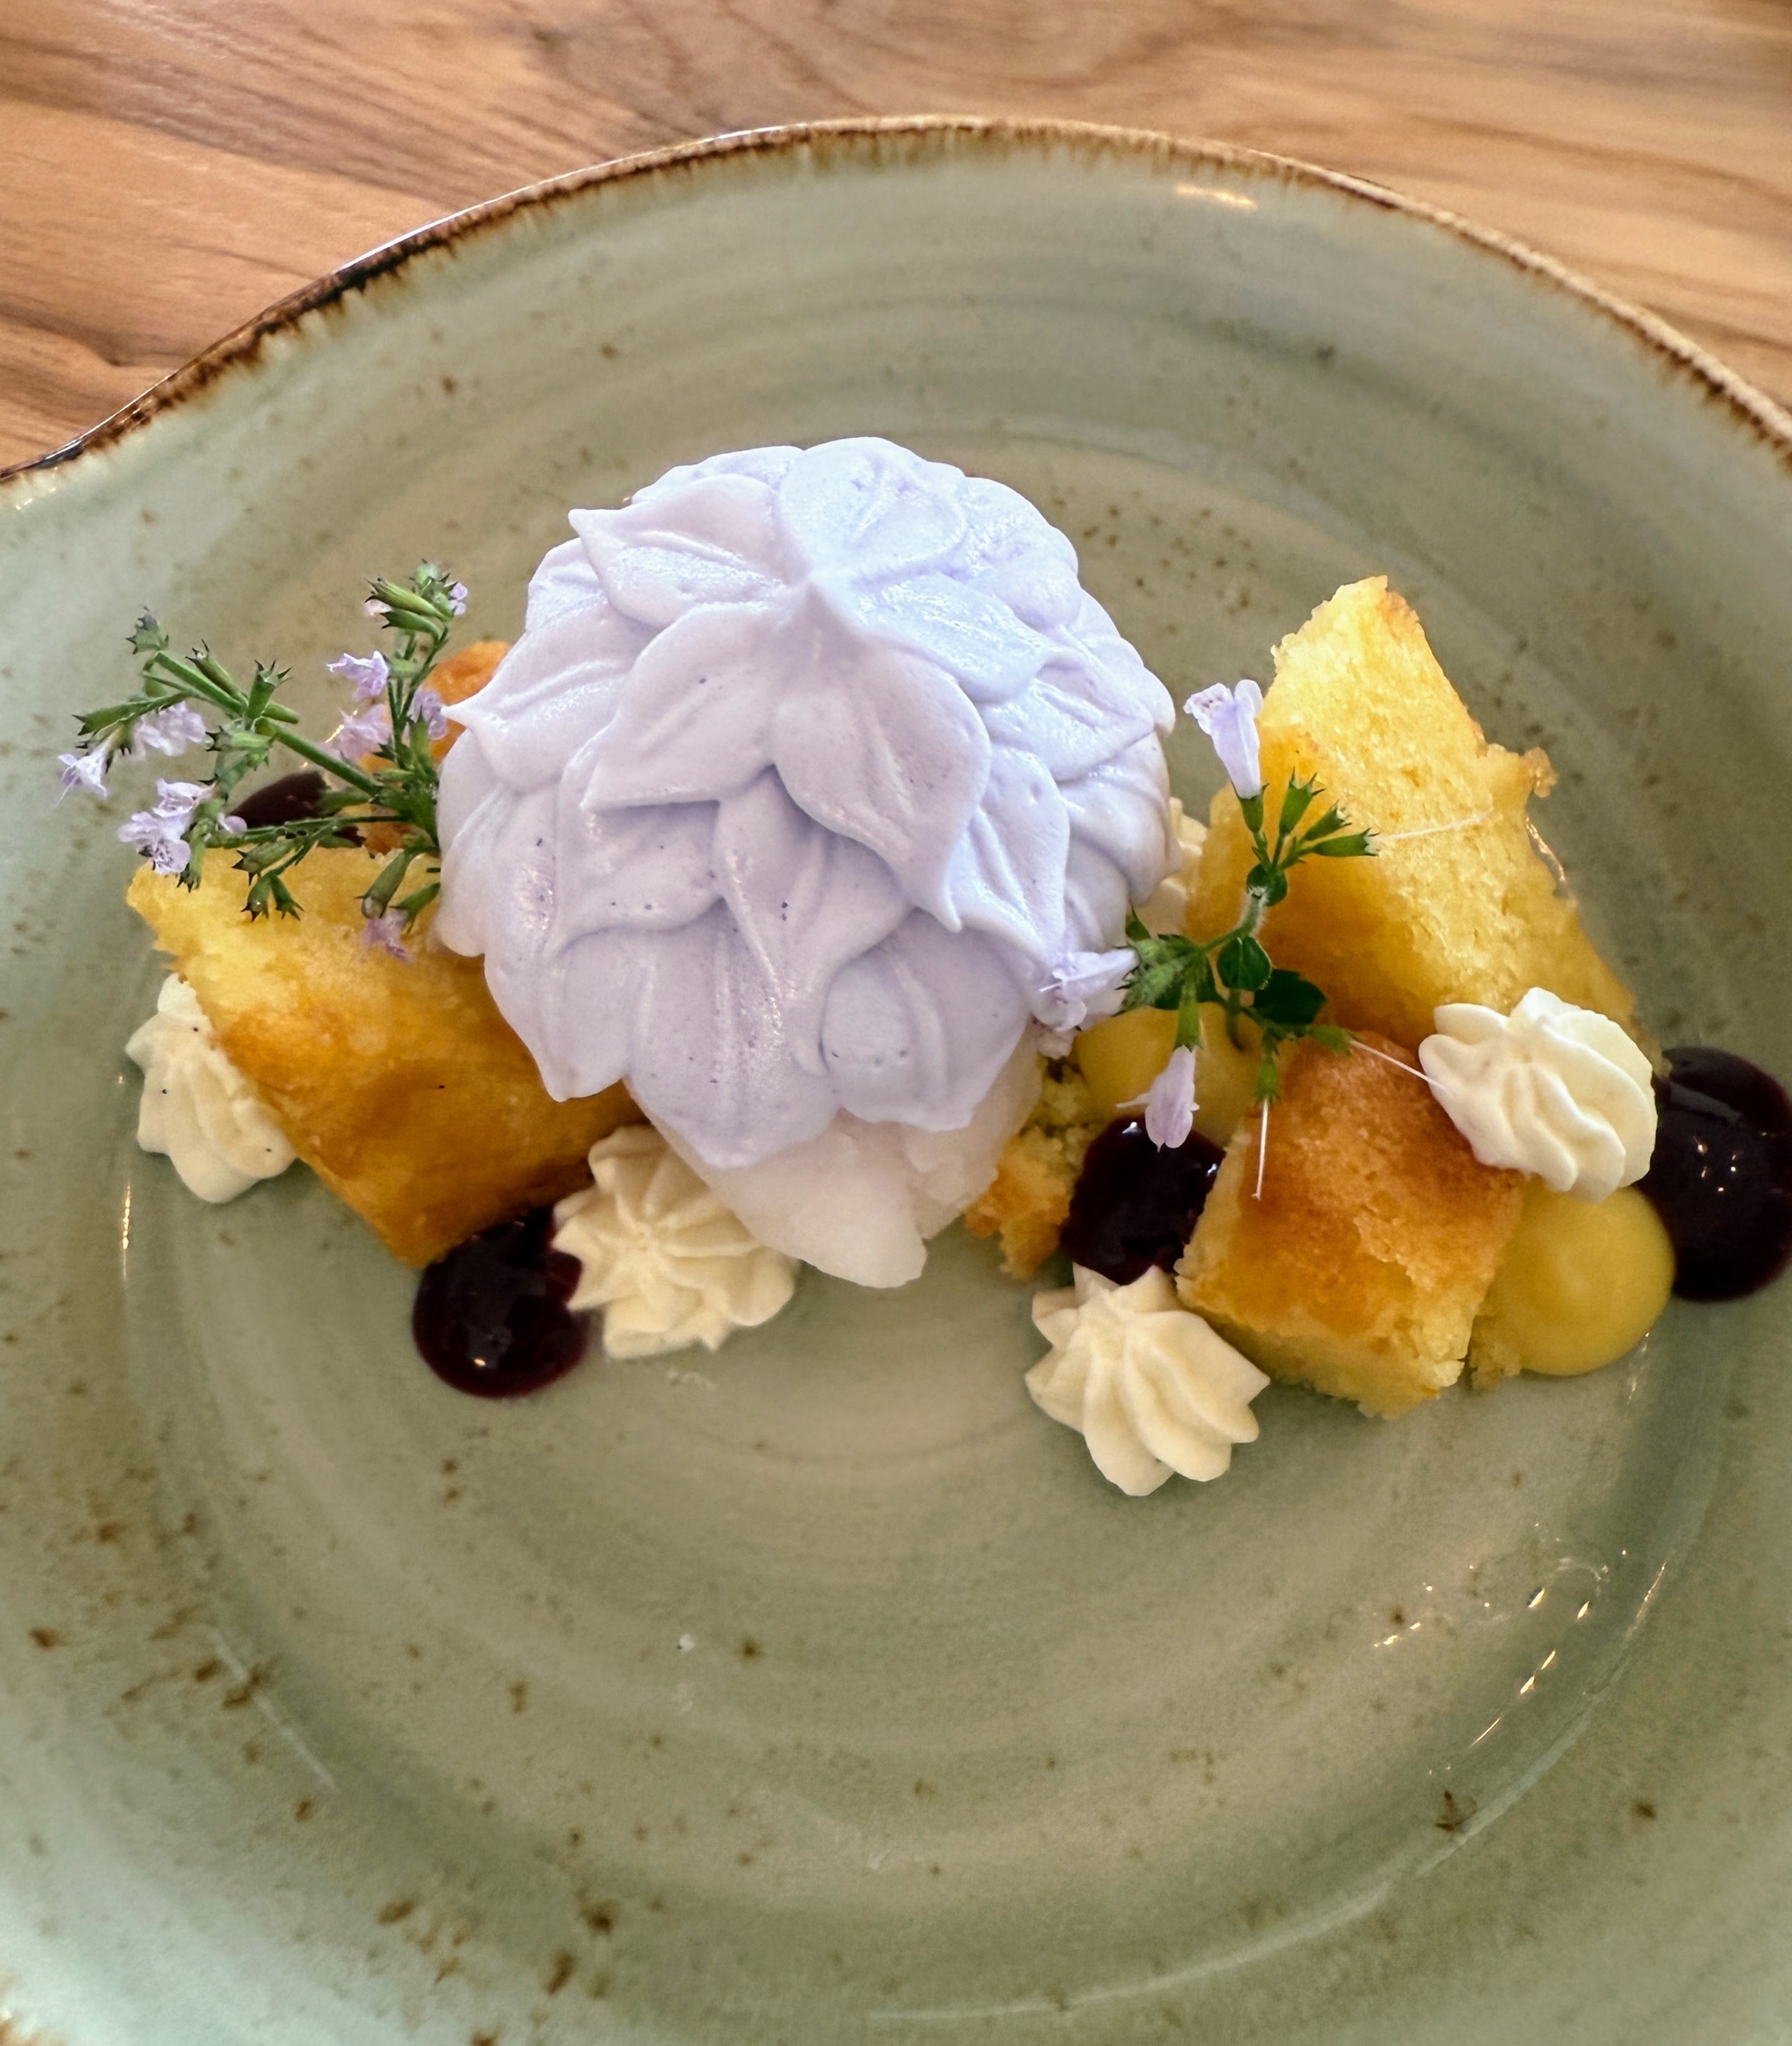
The 1906 Lemon & Lavender includes Meyer lemon almond cake, lavender sorbet, and pavlova.
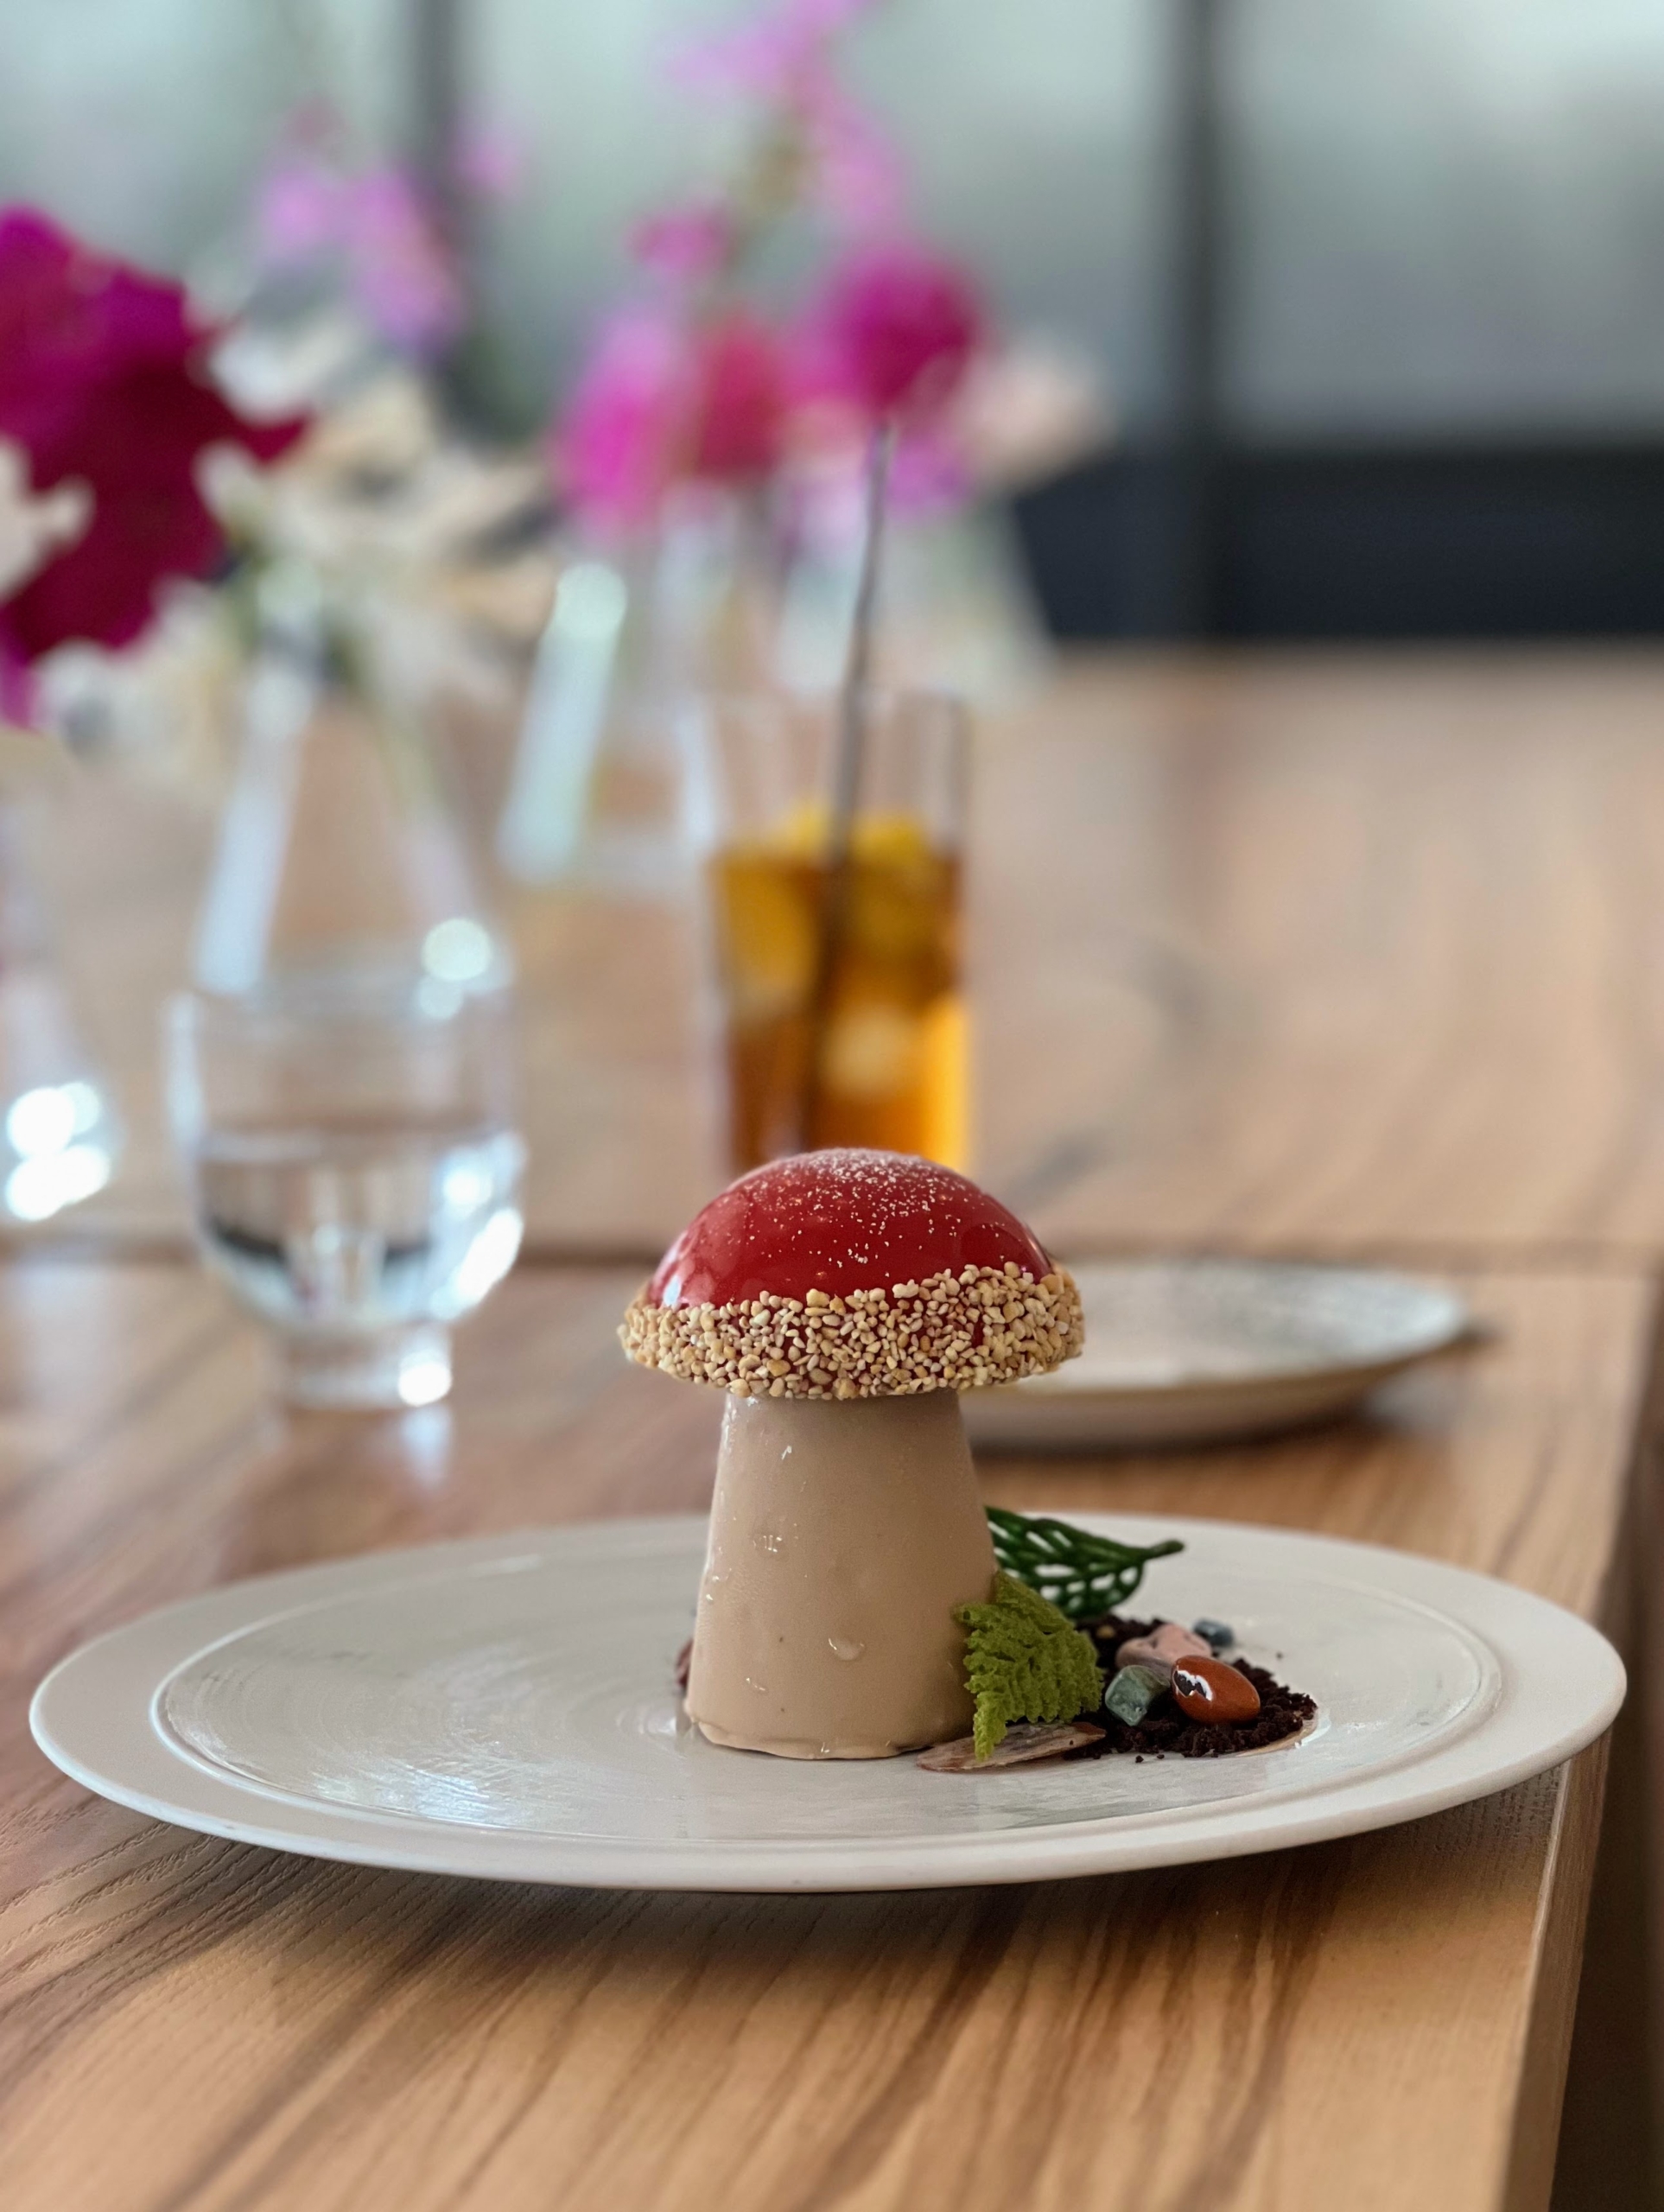
And this is called Carmelia – chocolate mousse, espresso caramel, and a bed of cocoa soil. It was a wonderful visit. If you’re in the area, please stop by Longwood Gardens this spring – it’s magical.
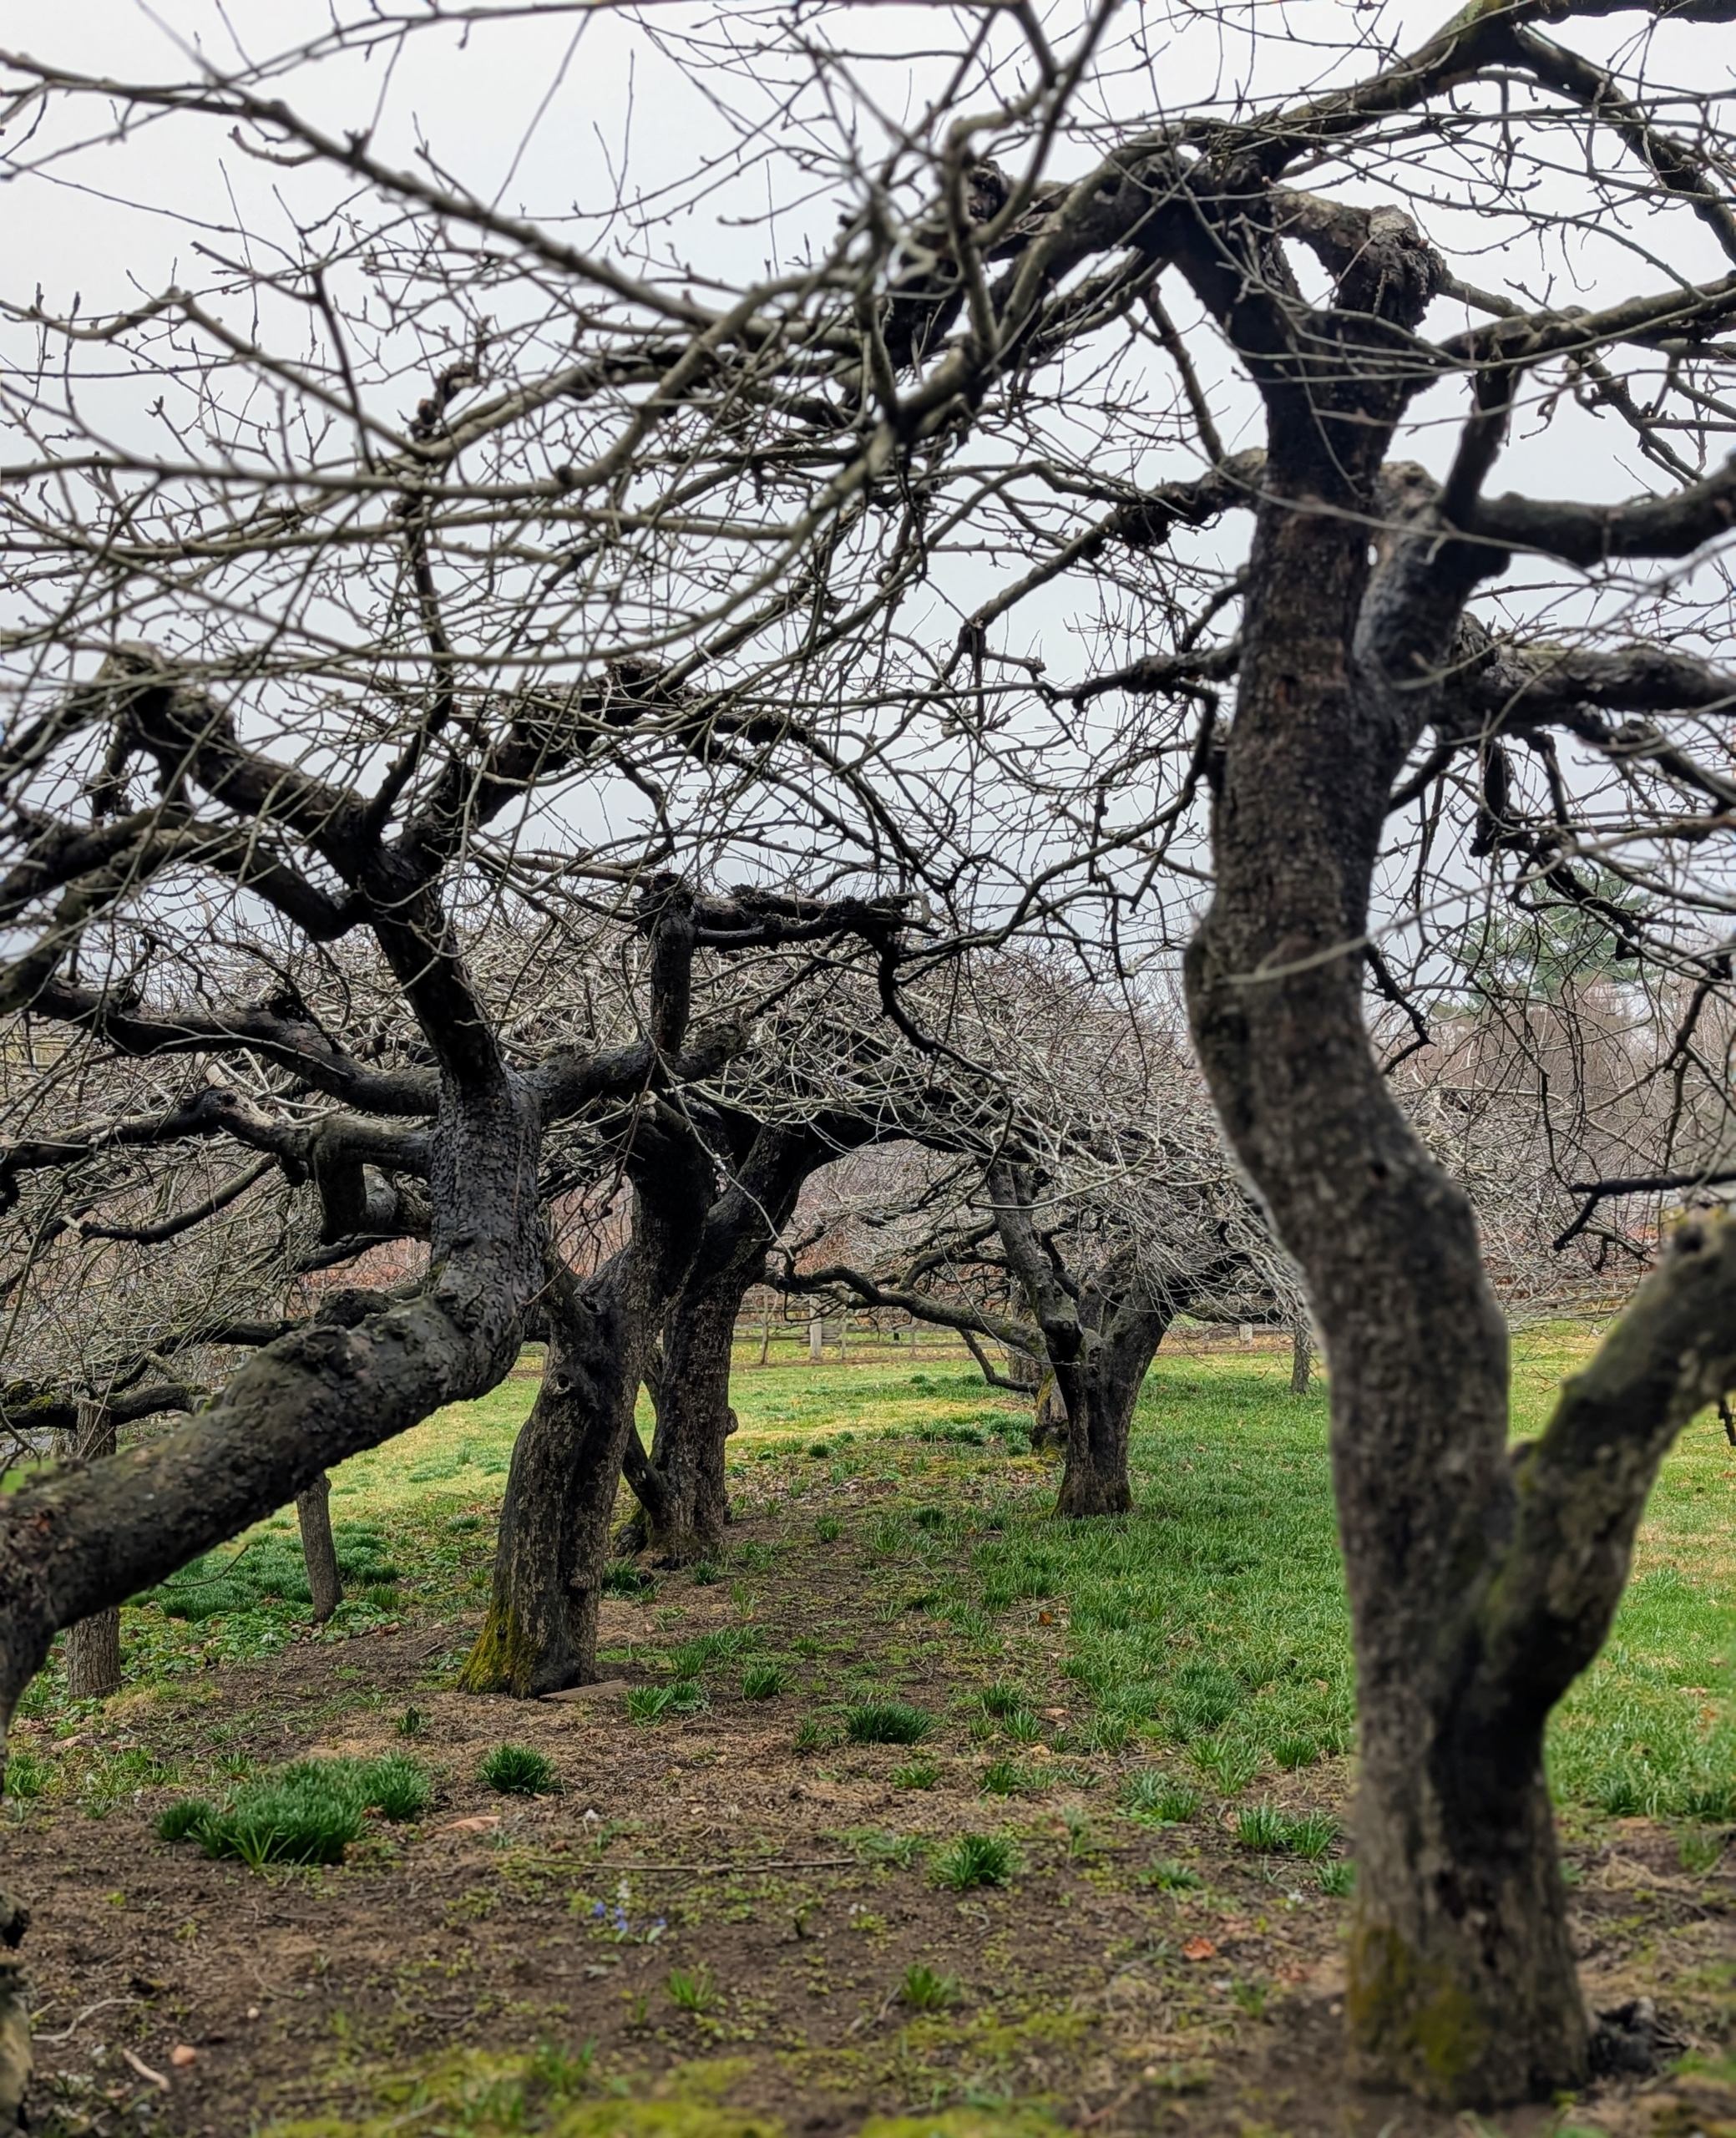
Maintaining old fruit trees sometimes requires more than just pruning, grooming, and feeding. Large, heavy limbs may also need support in order to continue holding all the many fruits they produce.
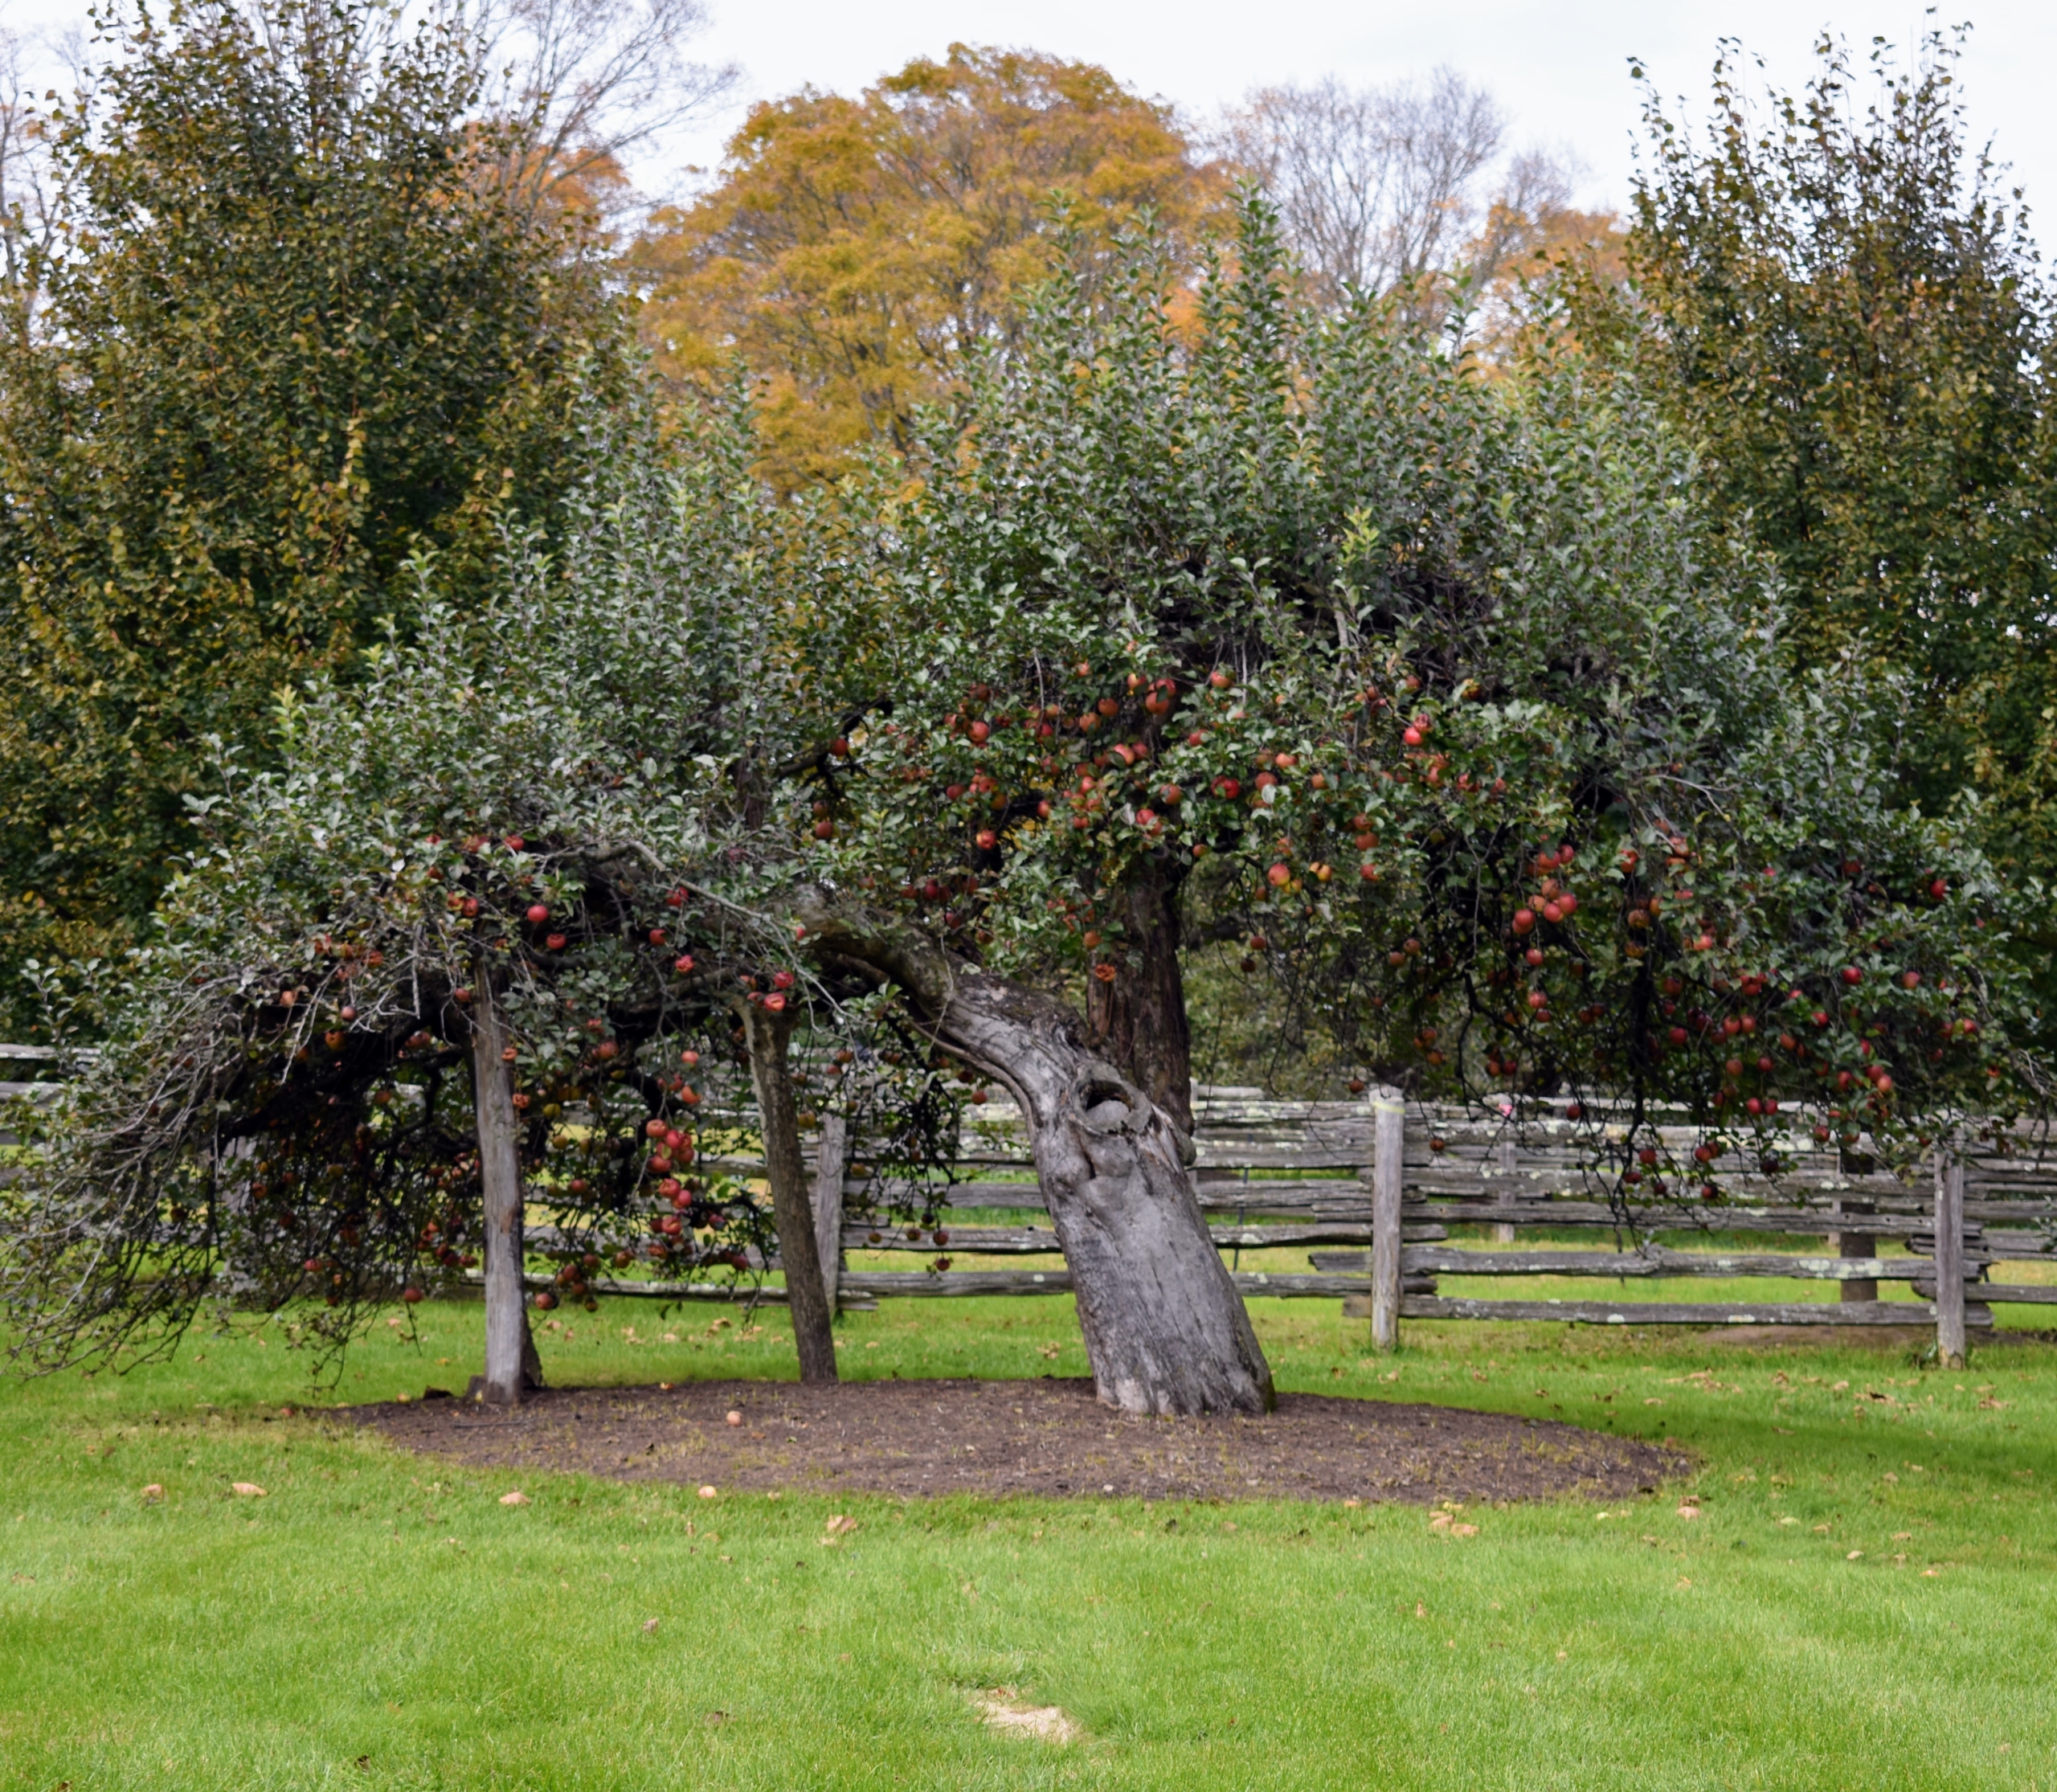
On my farm, I have some very old apple trees that were here long before I moved to the property. A few in particular are just outside my Winter House. These trees bear an abundance of crisp, juicy fruits every year. Like all my trees these are well cared for, but recently I noticed their limbs were long, heavy and in need of added support before they broke, so I asked my gardeners to prop them up right away using a simple, natural, and very successful technique.
Enjoy these photos.
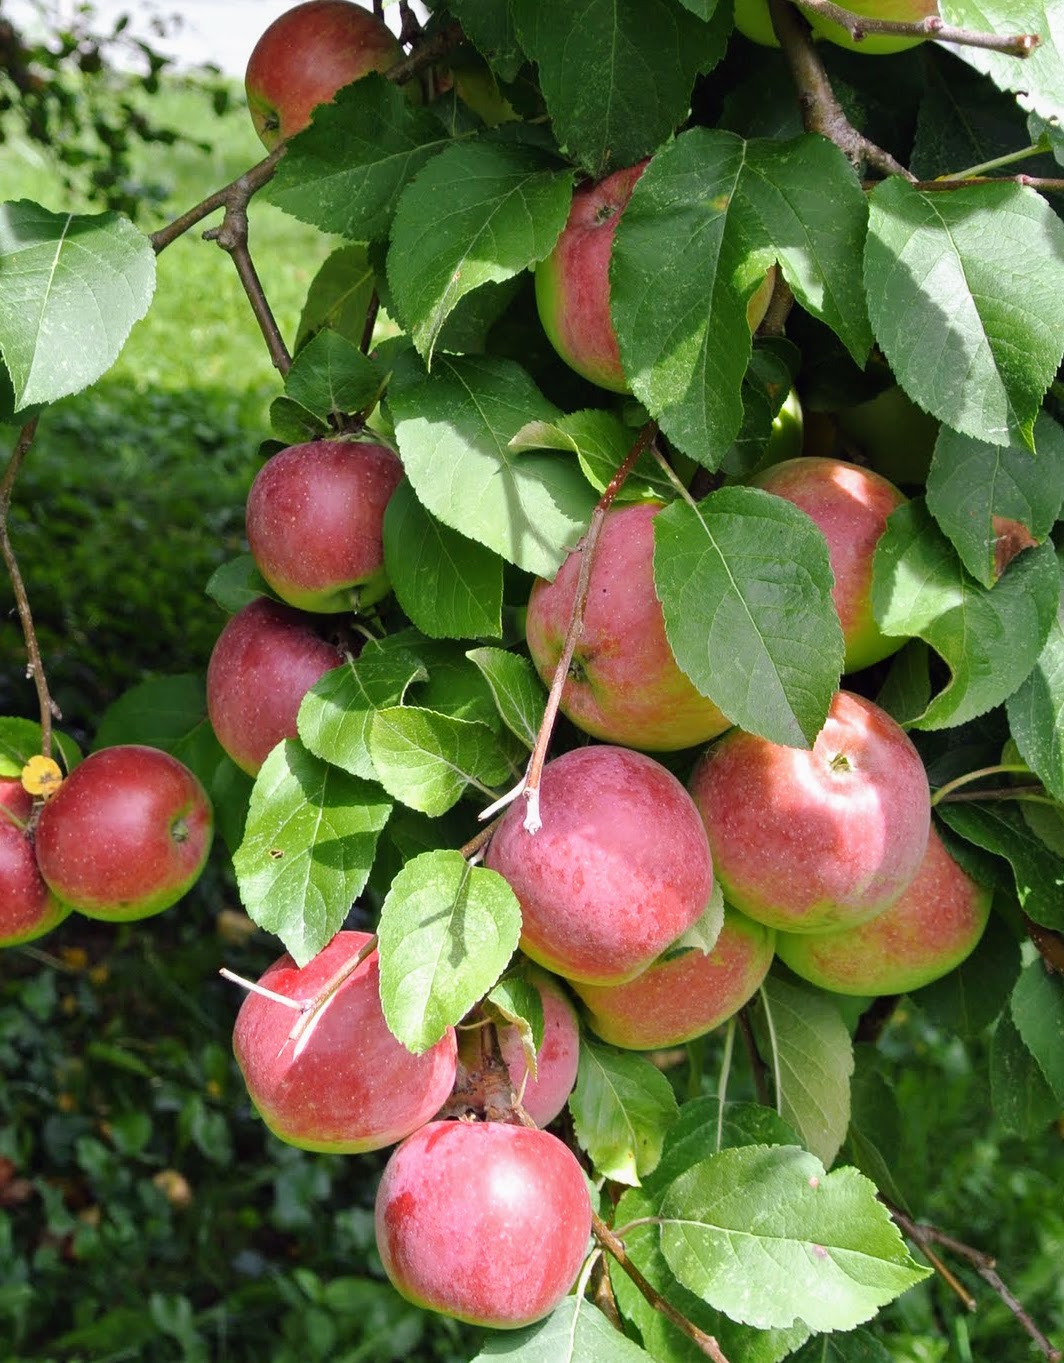
I am so proud of all the fruit trees I have at my farm. Among them – my many apple trees that bear bounties of fruits every year for all the hand pressed cider my granddaughter makes.
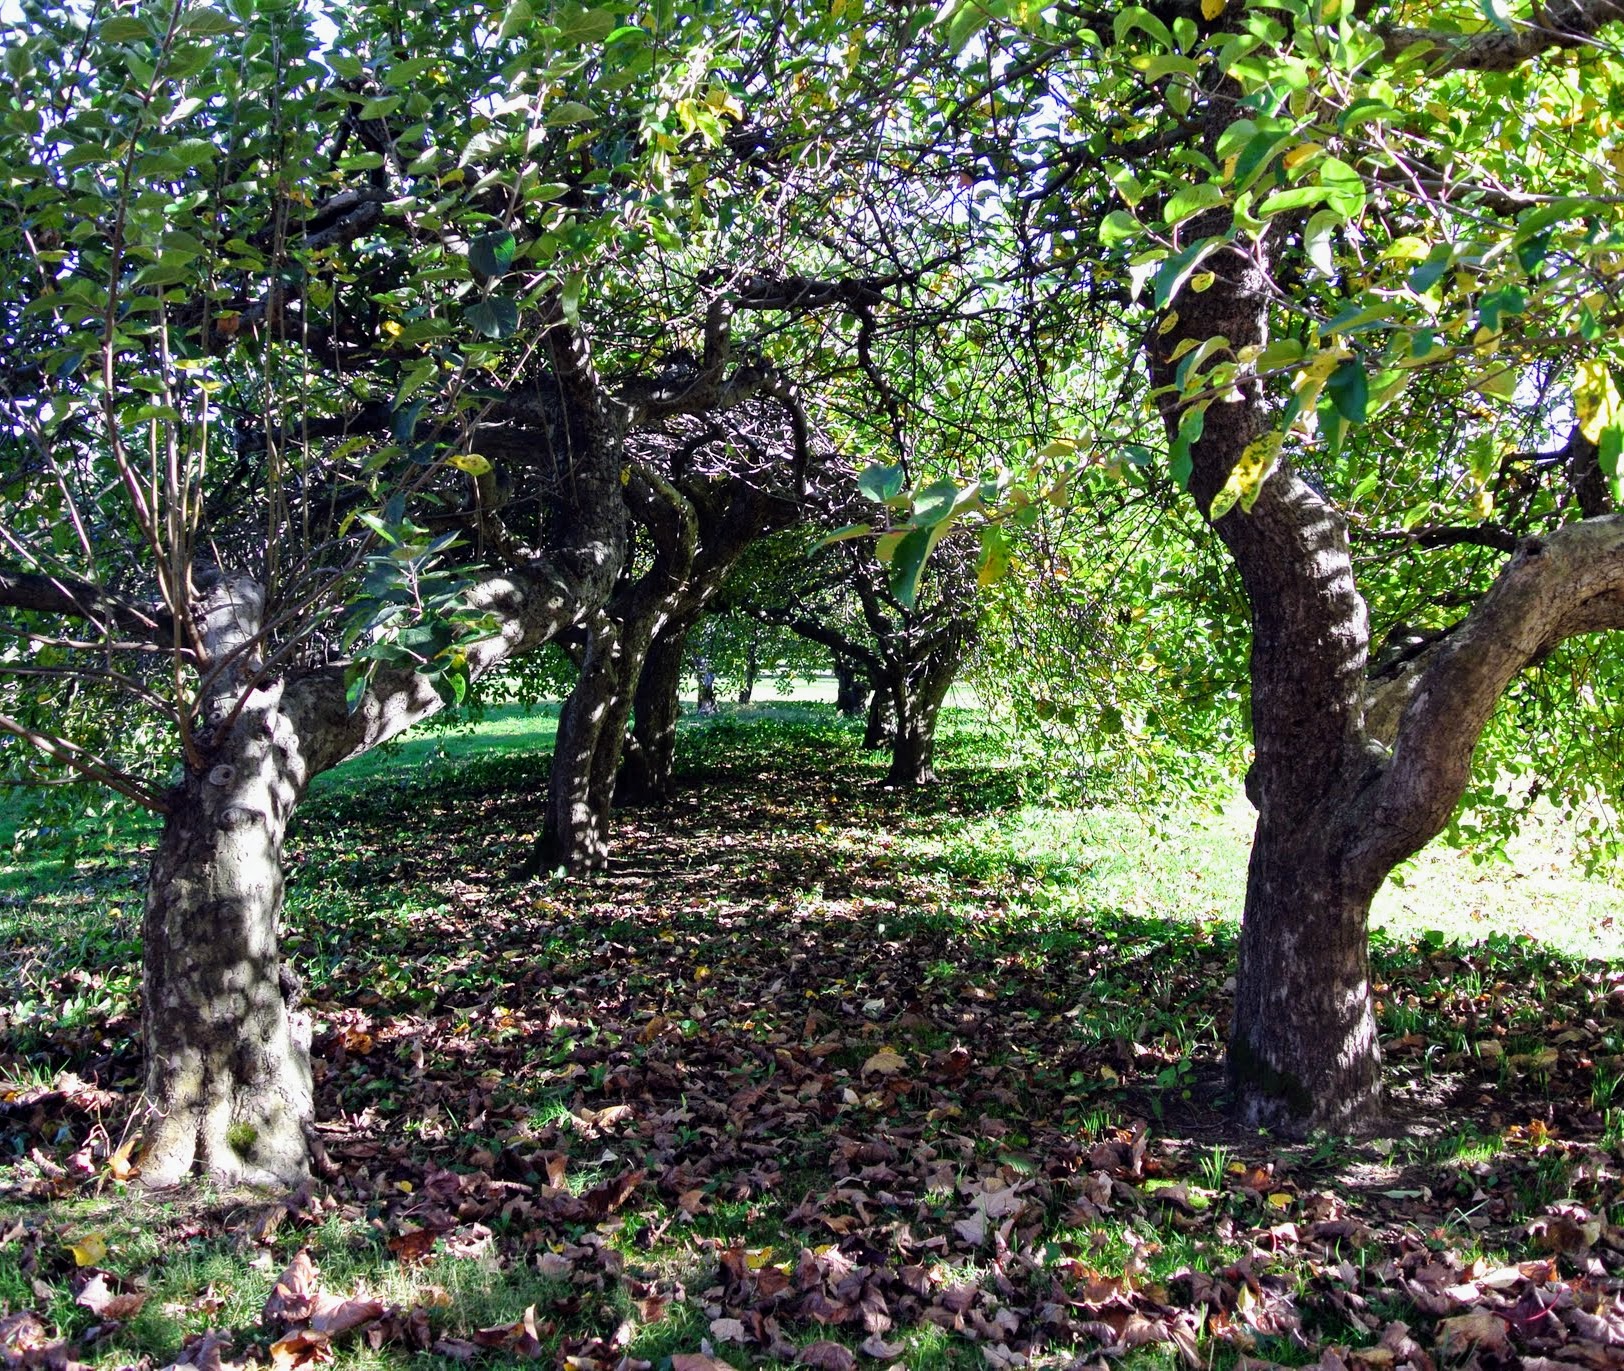
I have a corner of my orchard dedicated to all kinds of apple trees including Baldwin, Black Oxford, Cortland, Cox’s Orange Pippin, Esopus Spitzenburg, Fuji, Golden Russet, Grimes Golden, Honeycrisp, Liberty, Redfield, Roxbury Russet, Windham Russet, and more.
Some of my apple trees are original to the farm. I’d like to think that Mrs. Ruth Sharp, who owned the farm before I did, enjoyed the sweet, juicy apples that these trees bear as much as I do.
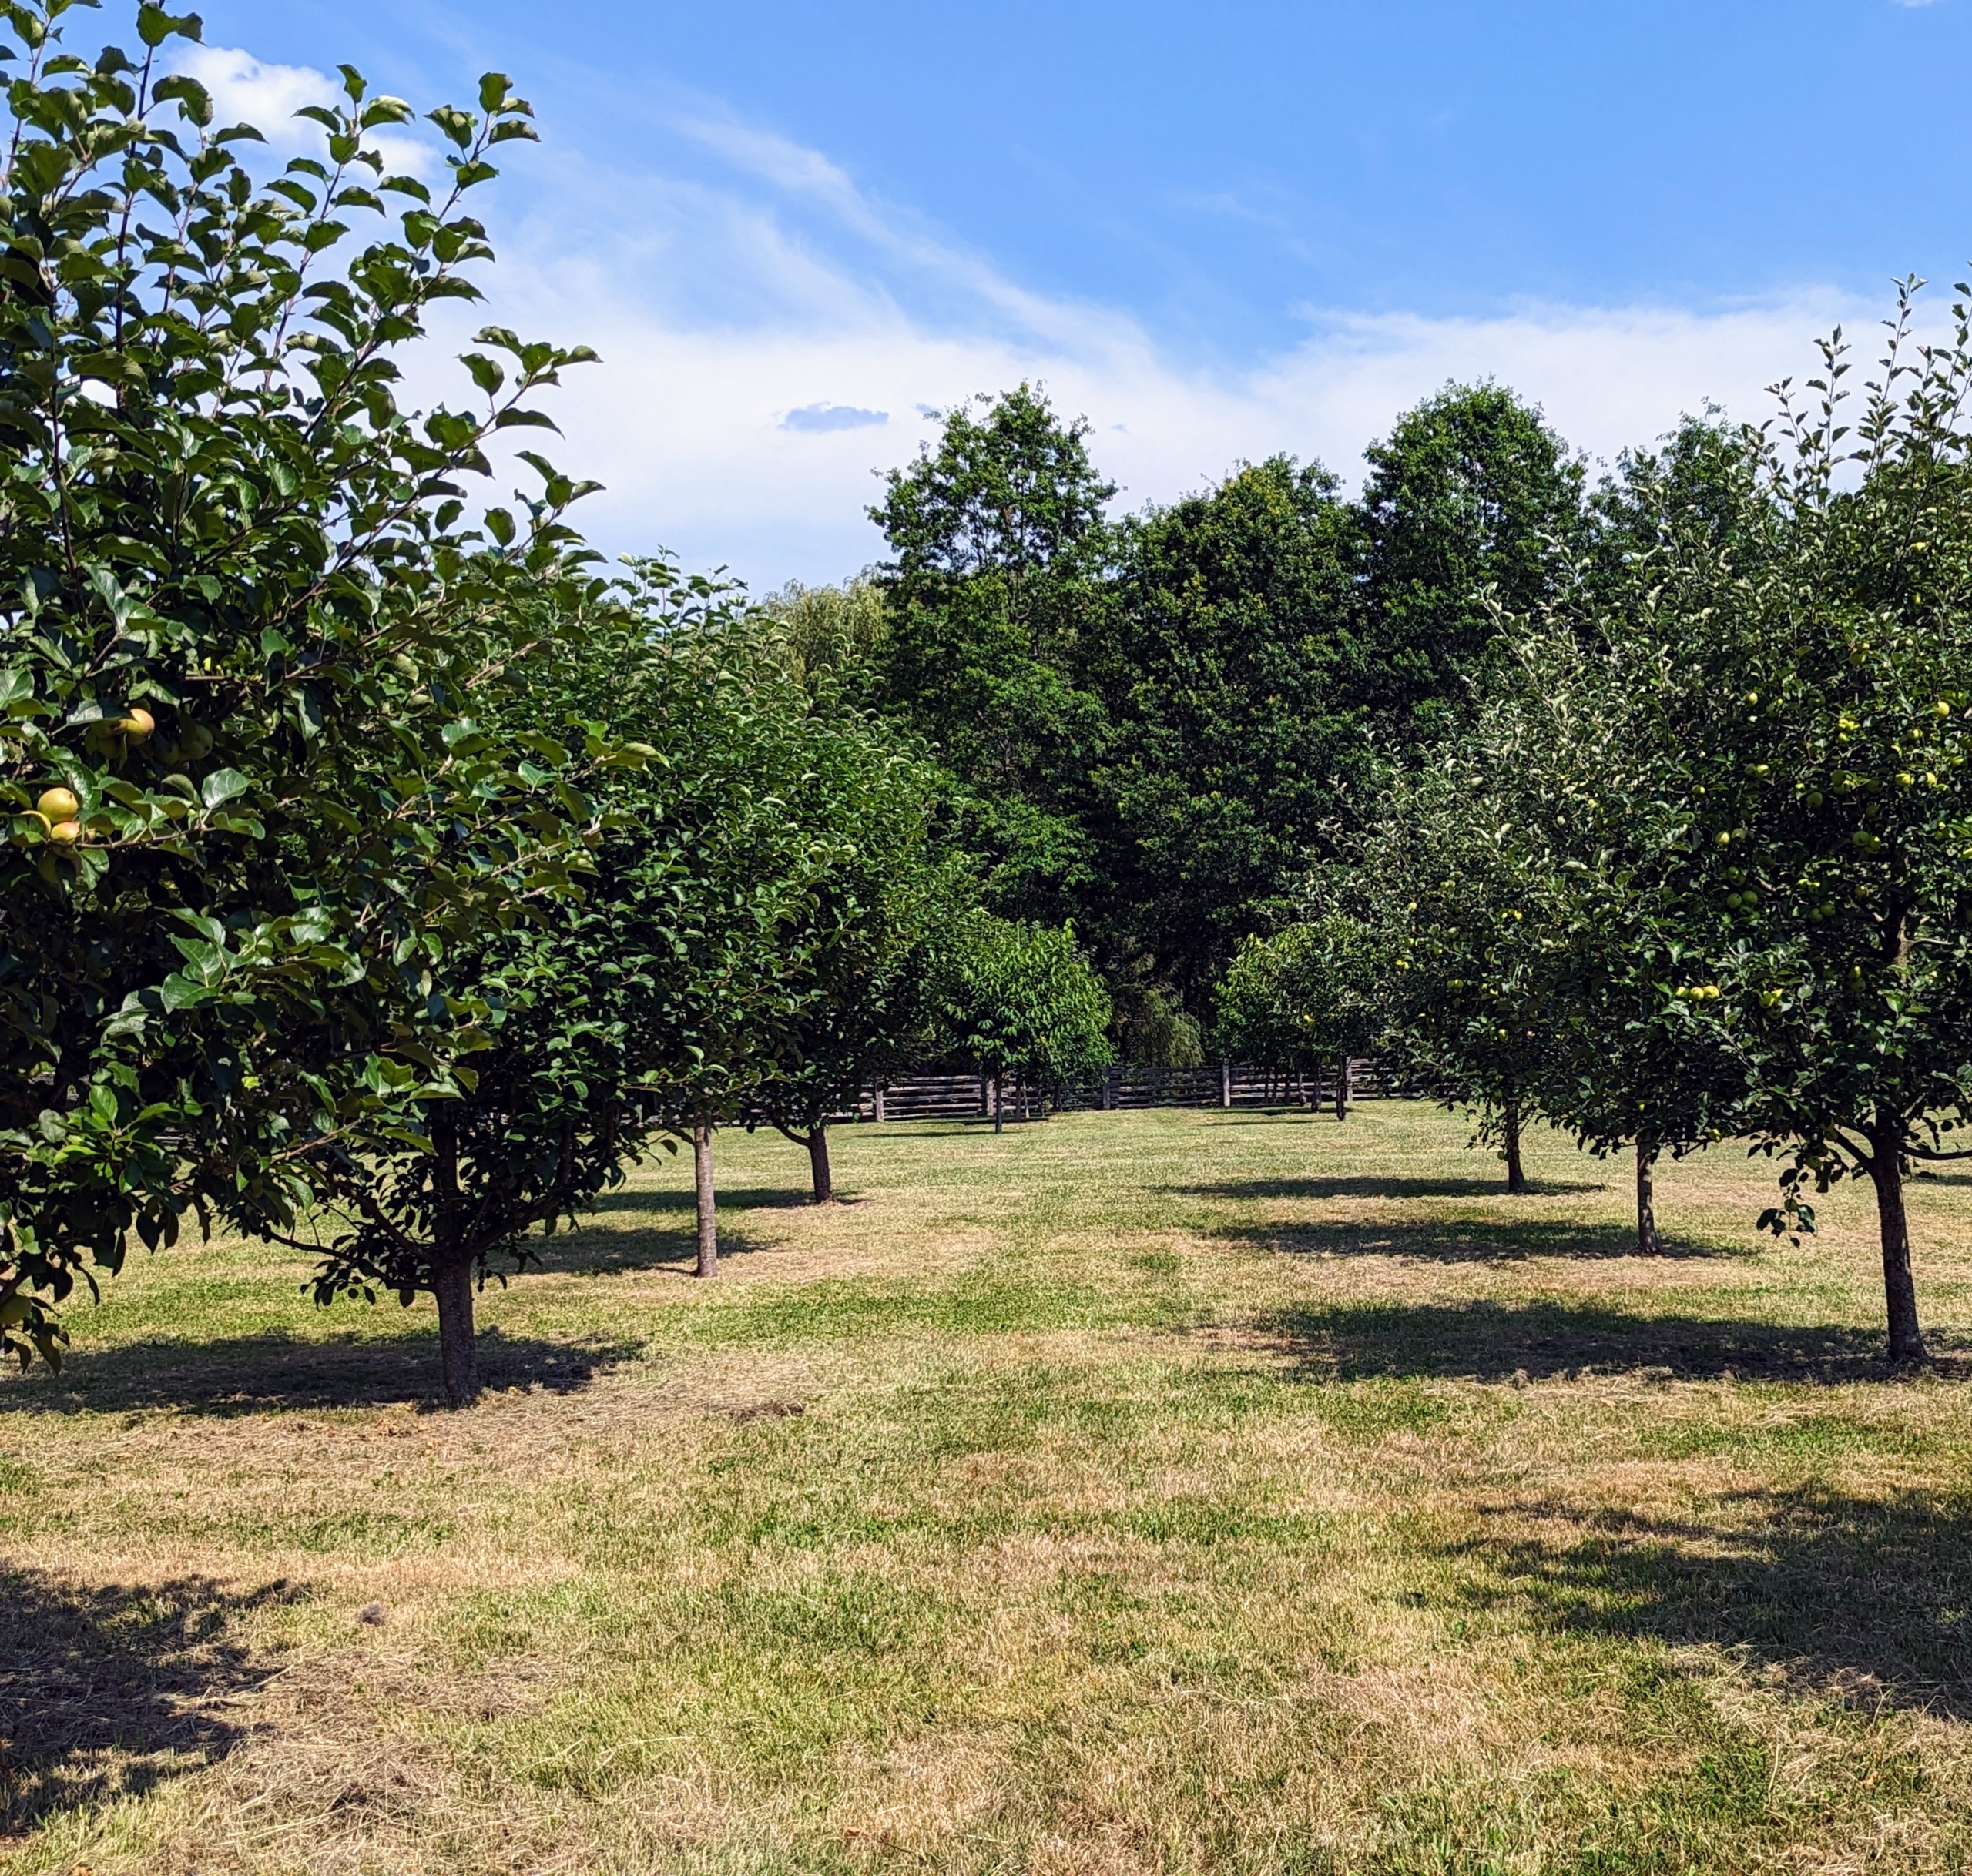
This grove is also original to the farm. It is located just behind my herbaceous peony garden.
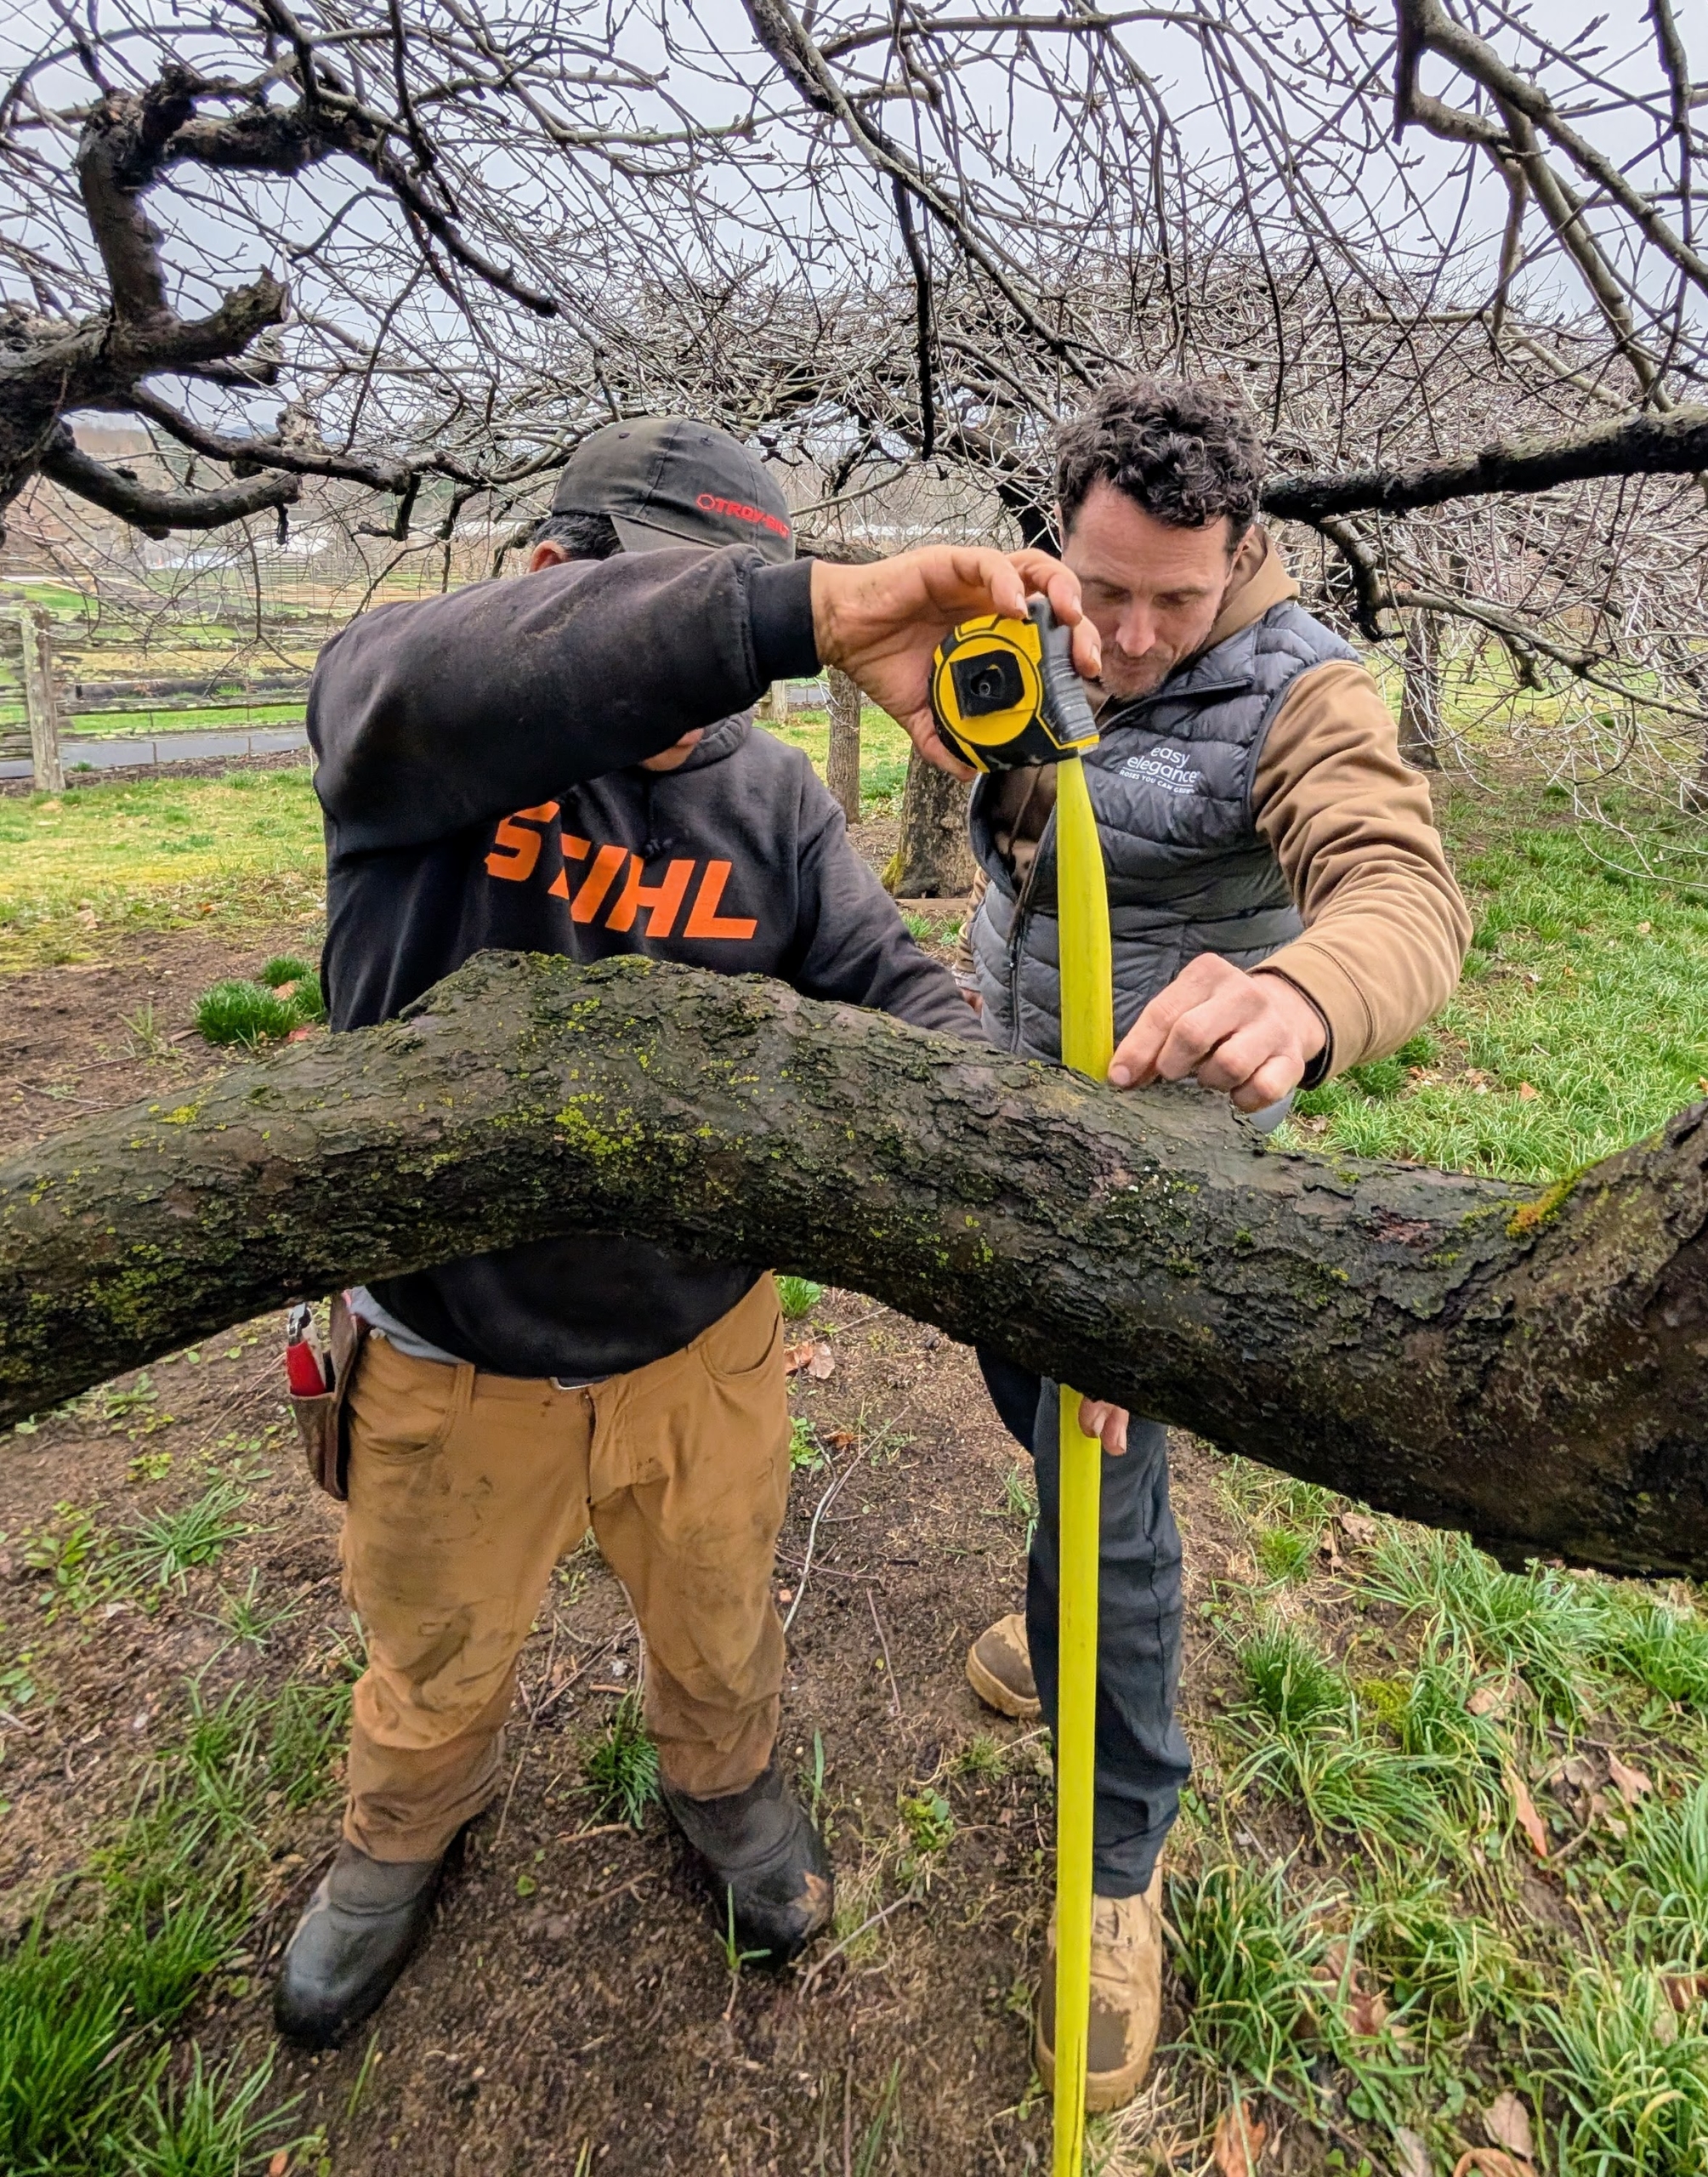
This week, I noticed the large limbs looked particularly long and heavy. As a preventative measure before any broke, I asked my head gardener to put upright supports under all the horizontal limbs.
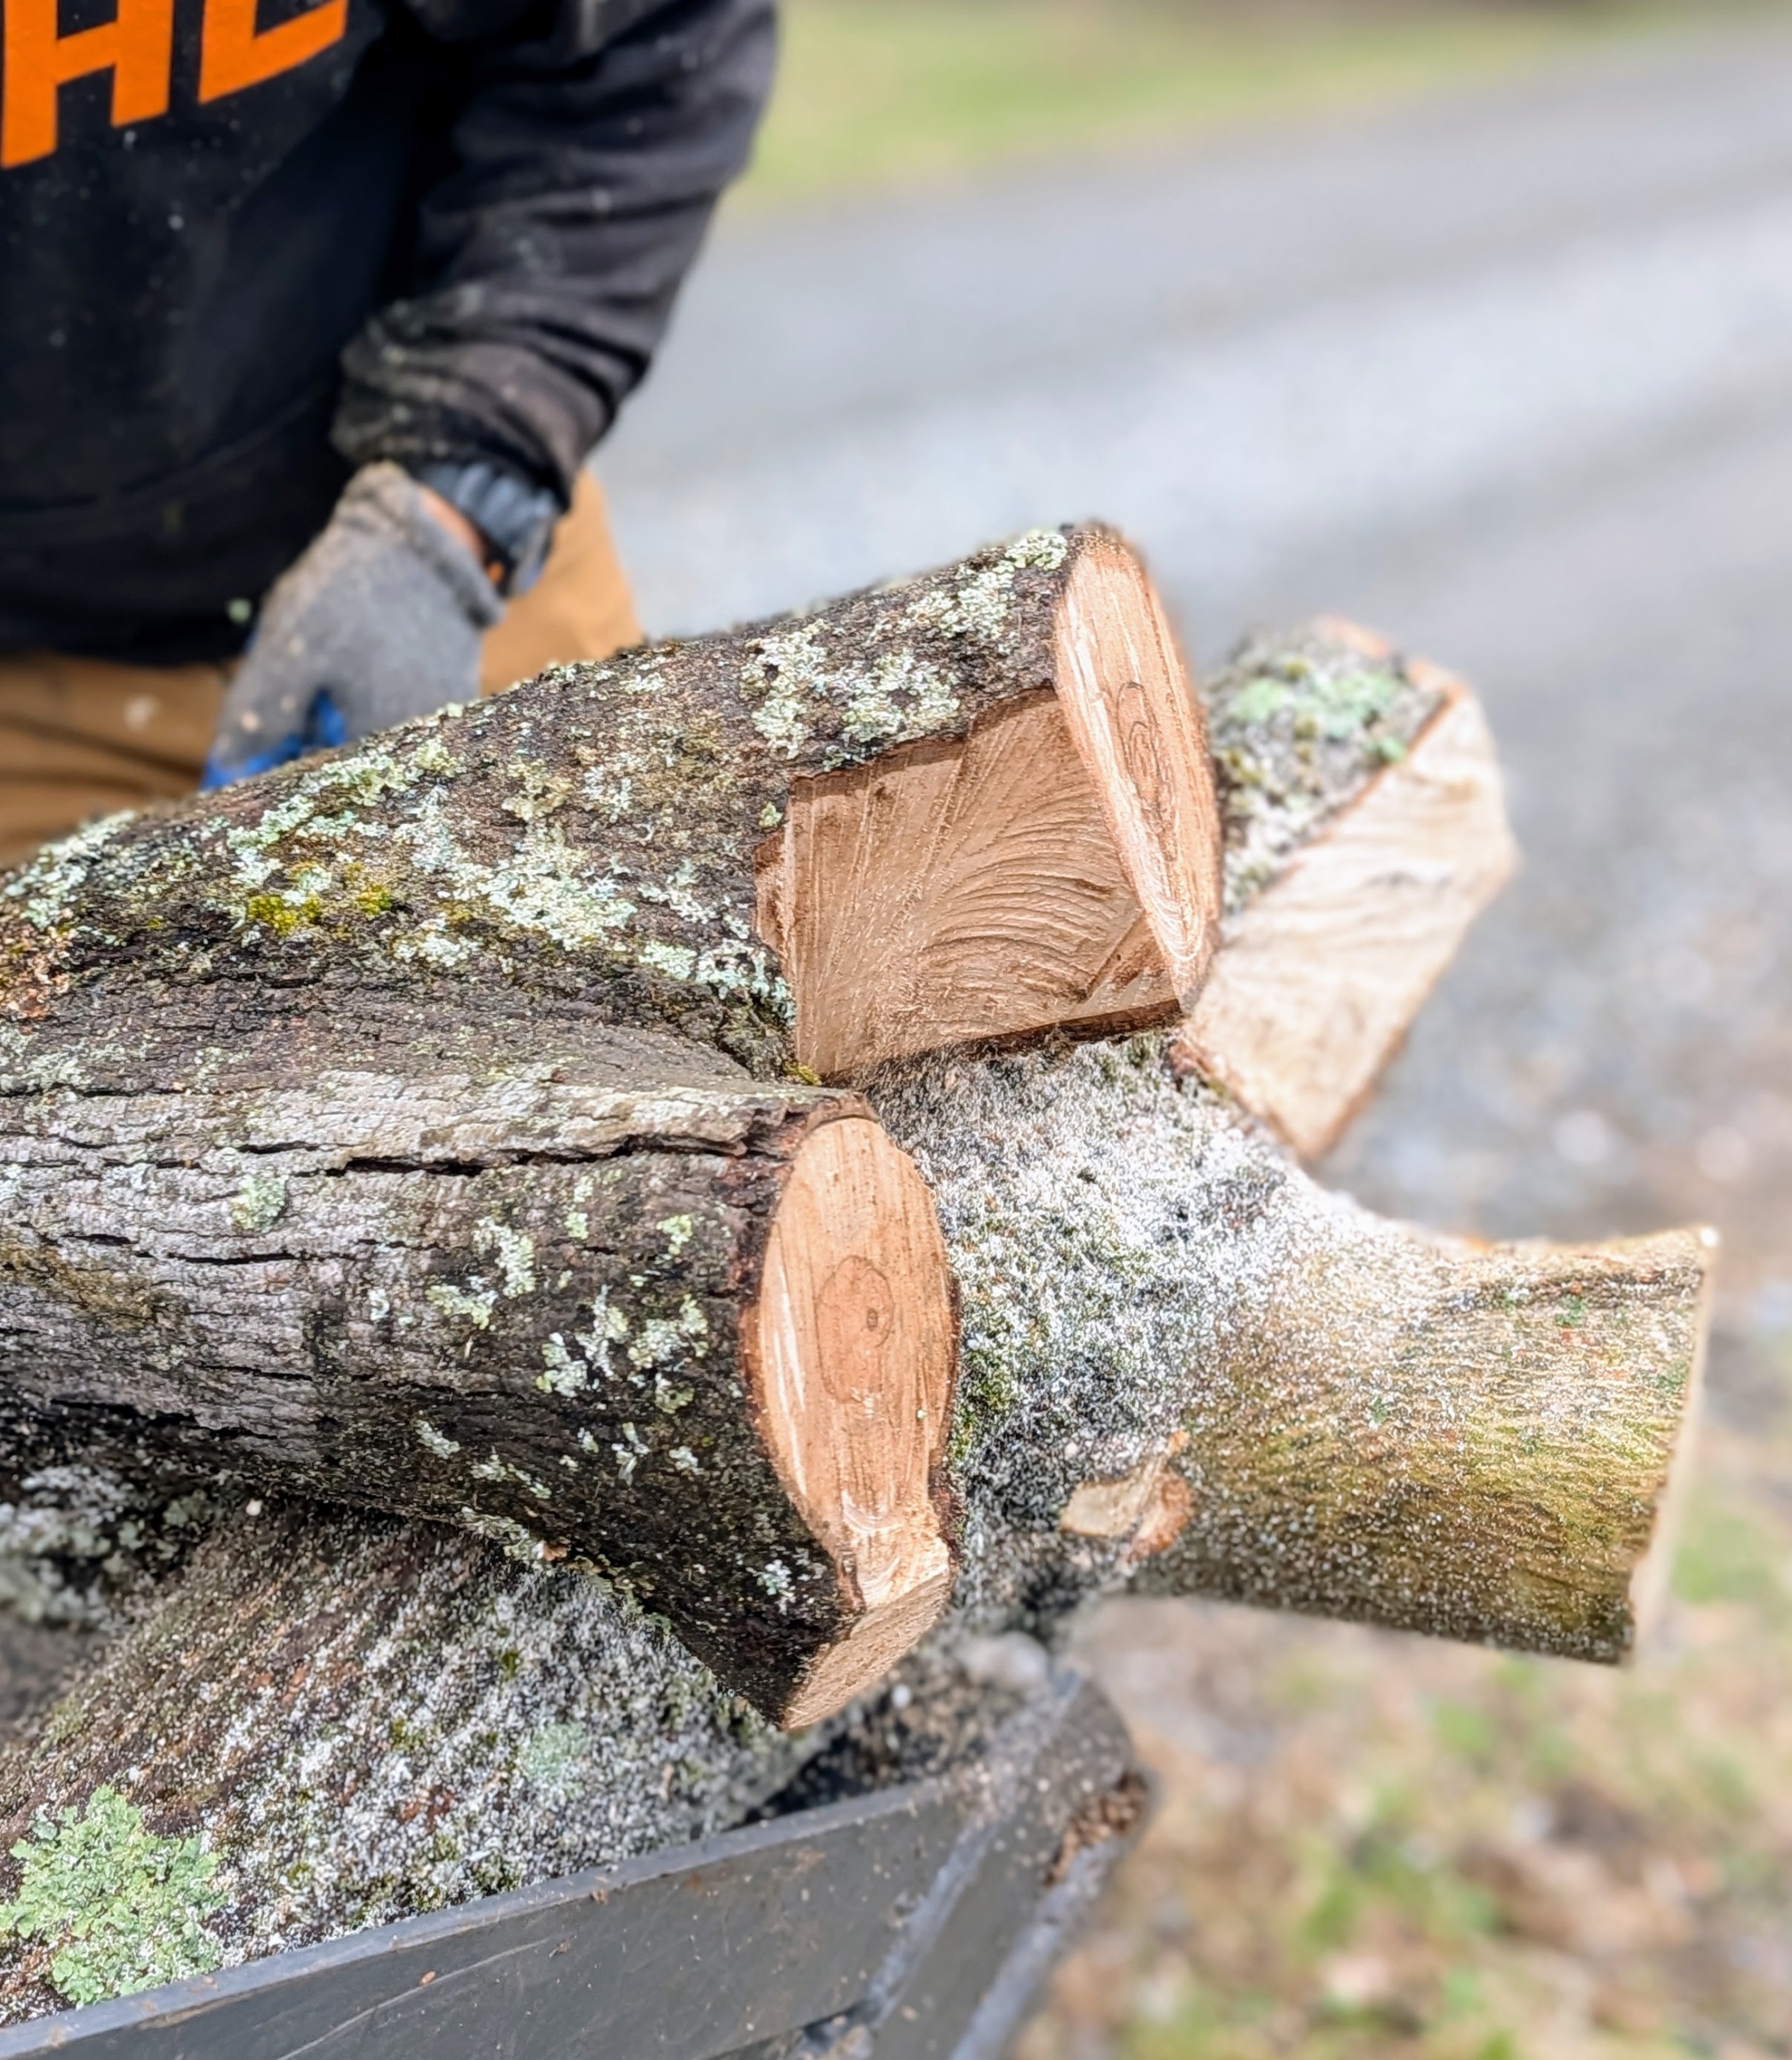
The first step is to measure the space under each limb in need of bracing.
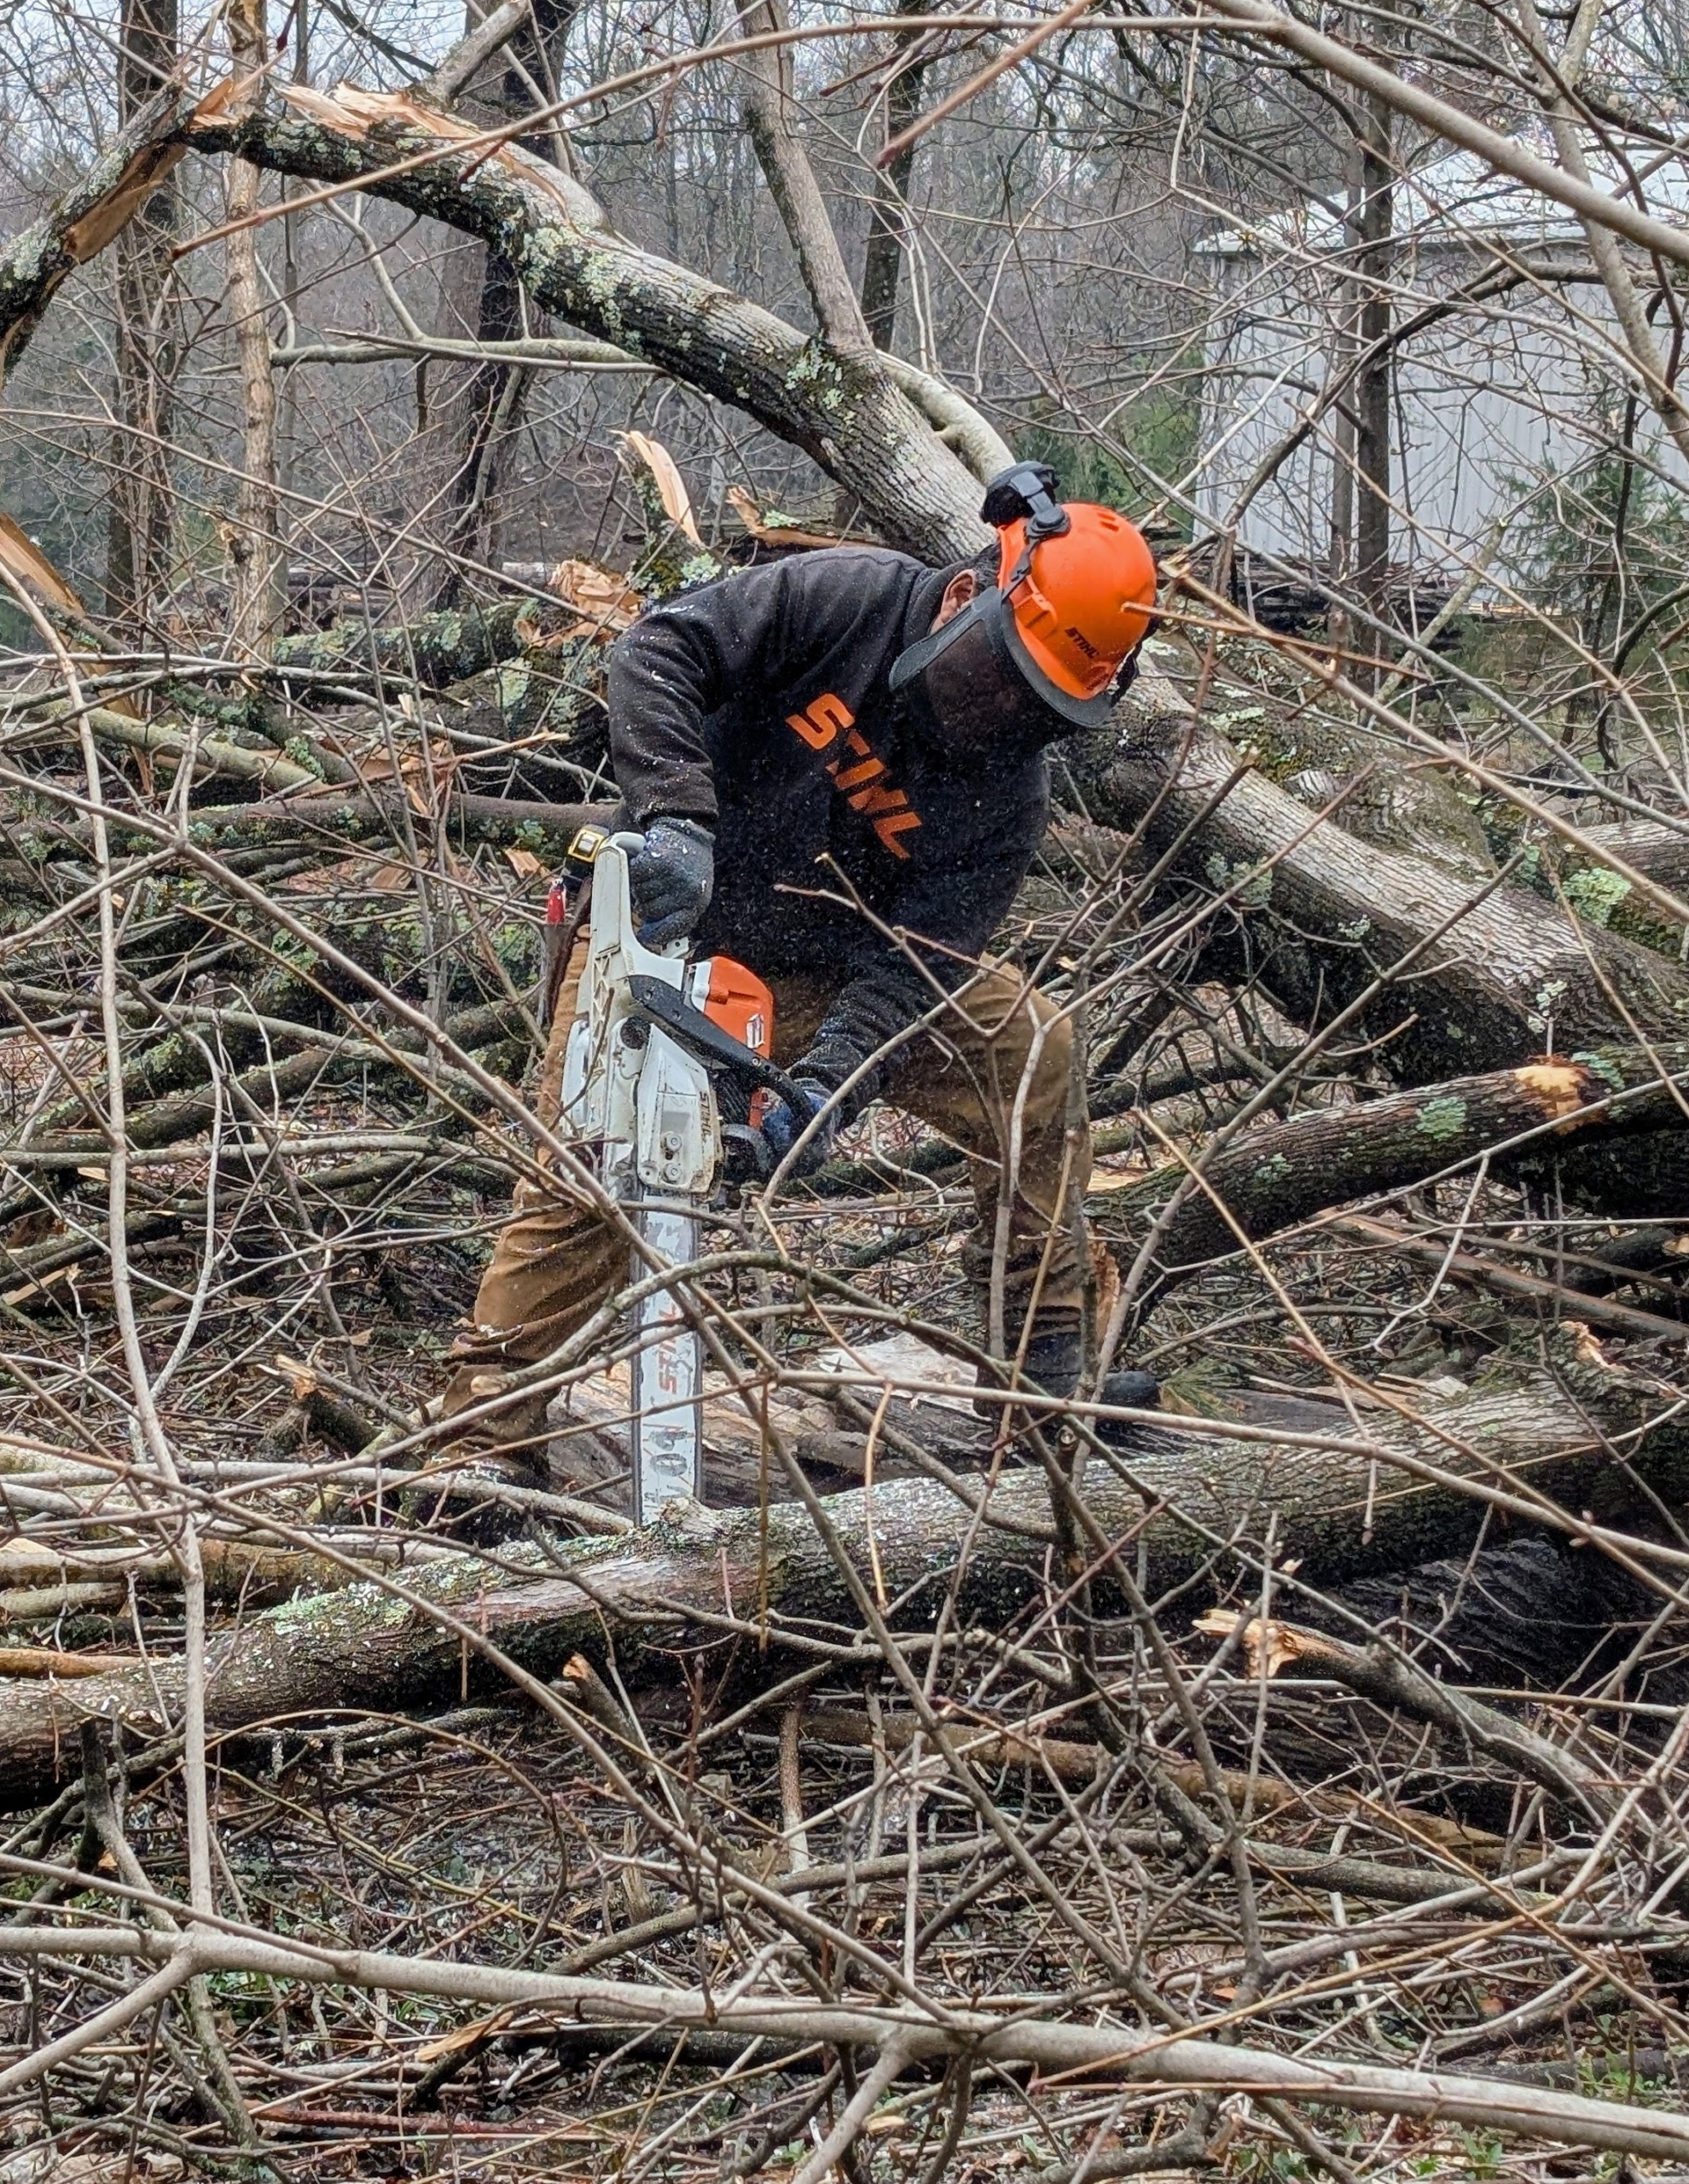
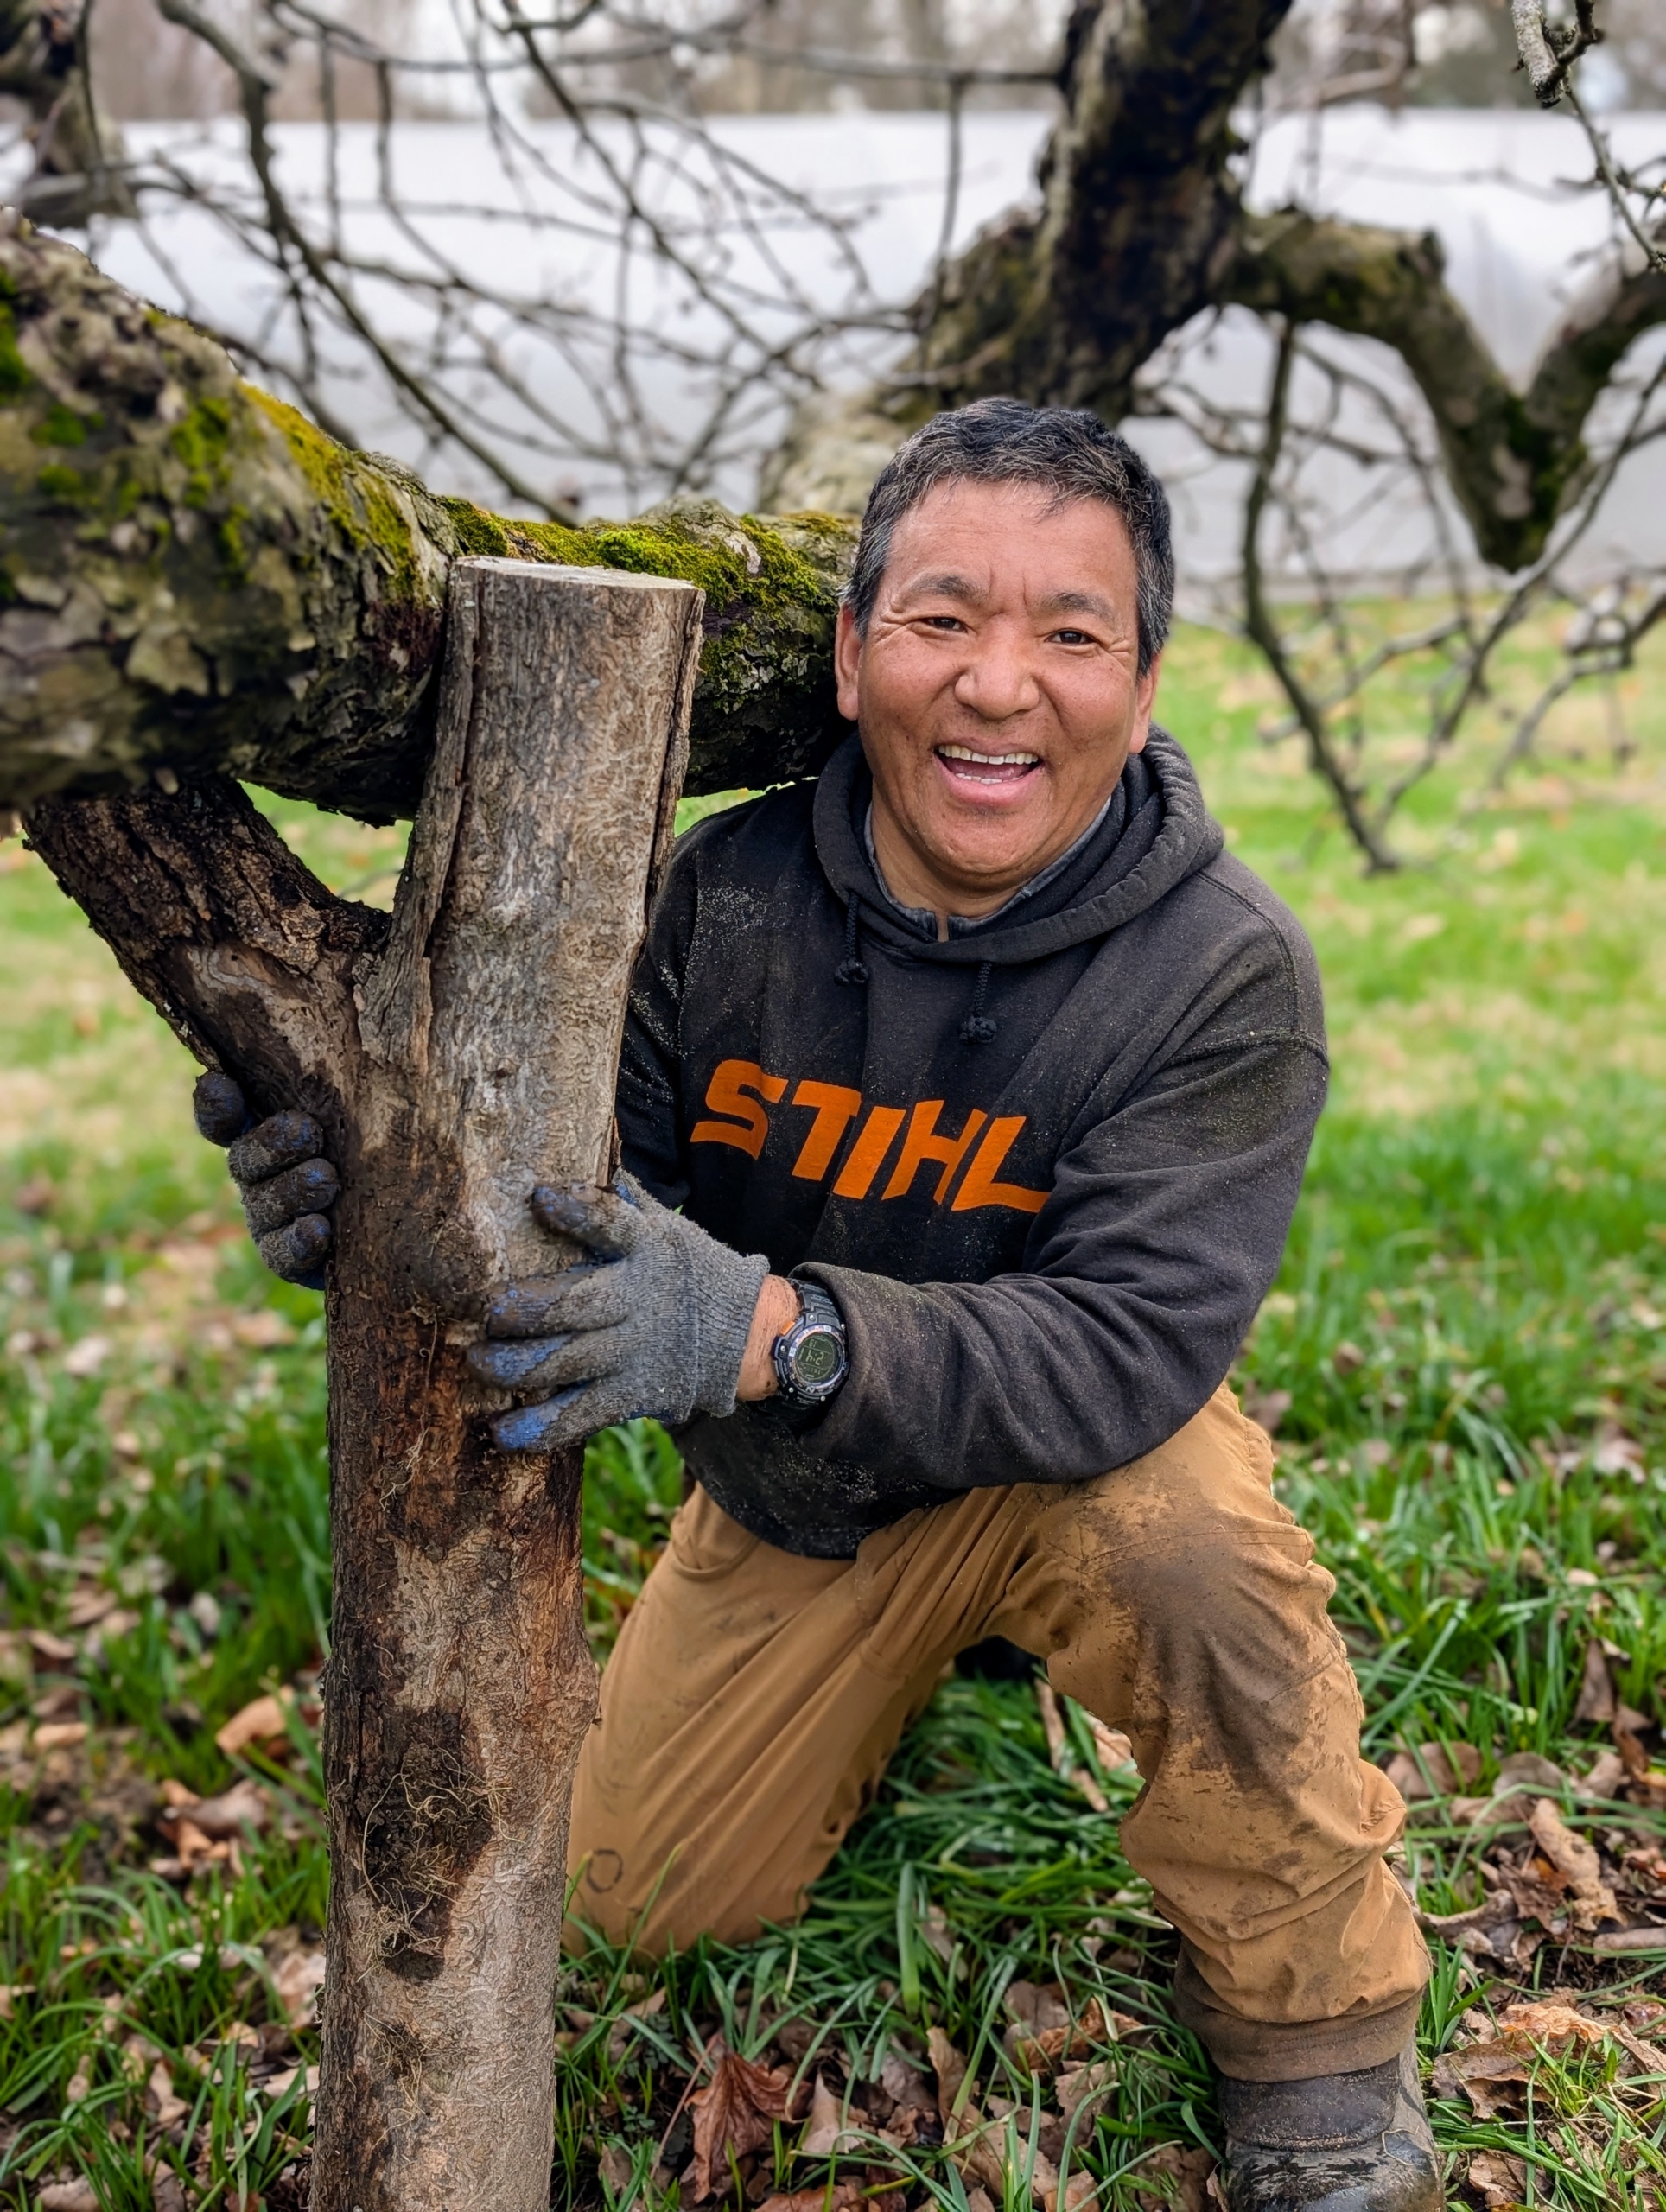
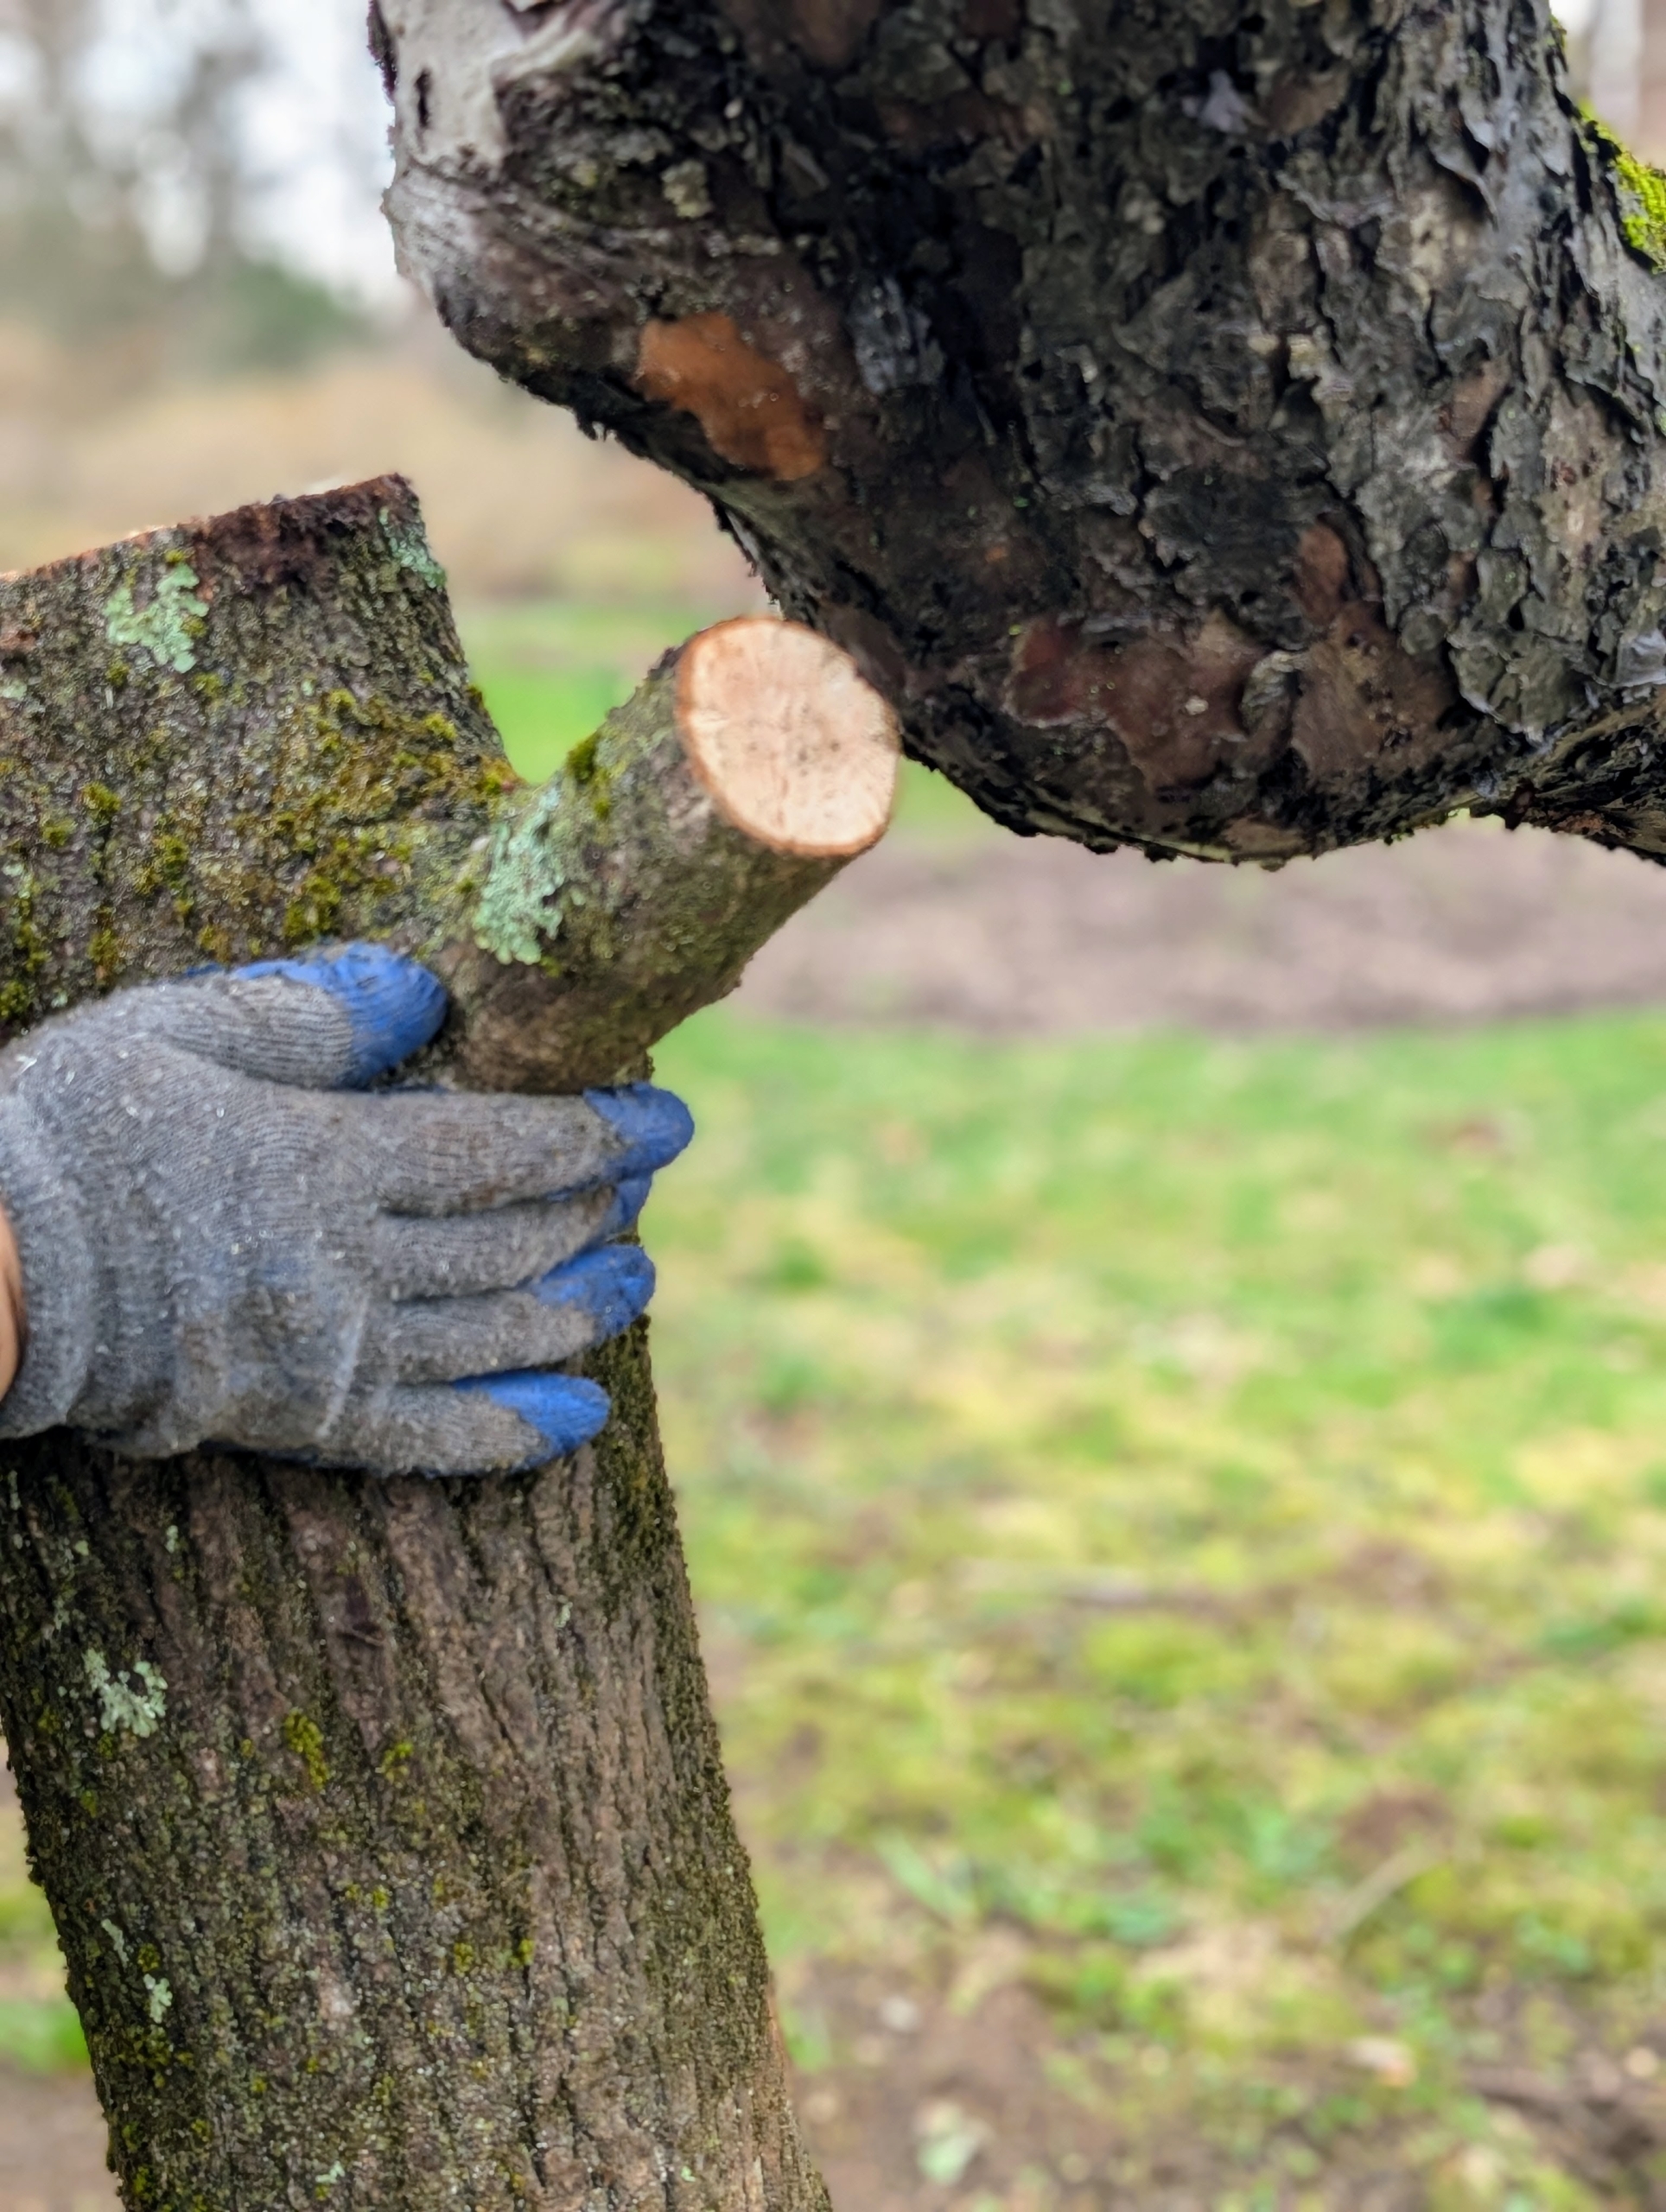
Phurba Sherpa from my outdoor grounds crew went out to the back field, where there were already several dead trees waiting to be put through the tub grinder, and cut some appropriately sized “crutches”
Phurba looked for those with natural “V” notches that could cradle the limbs.
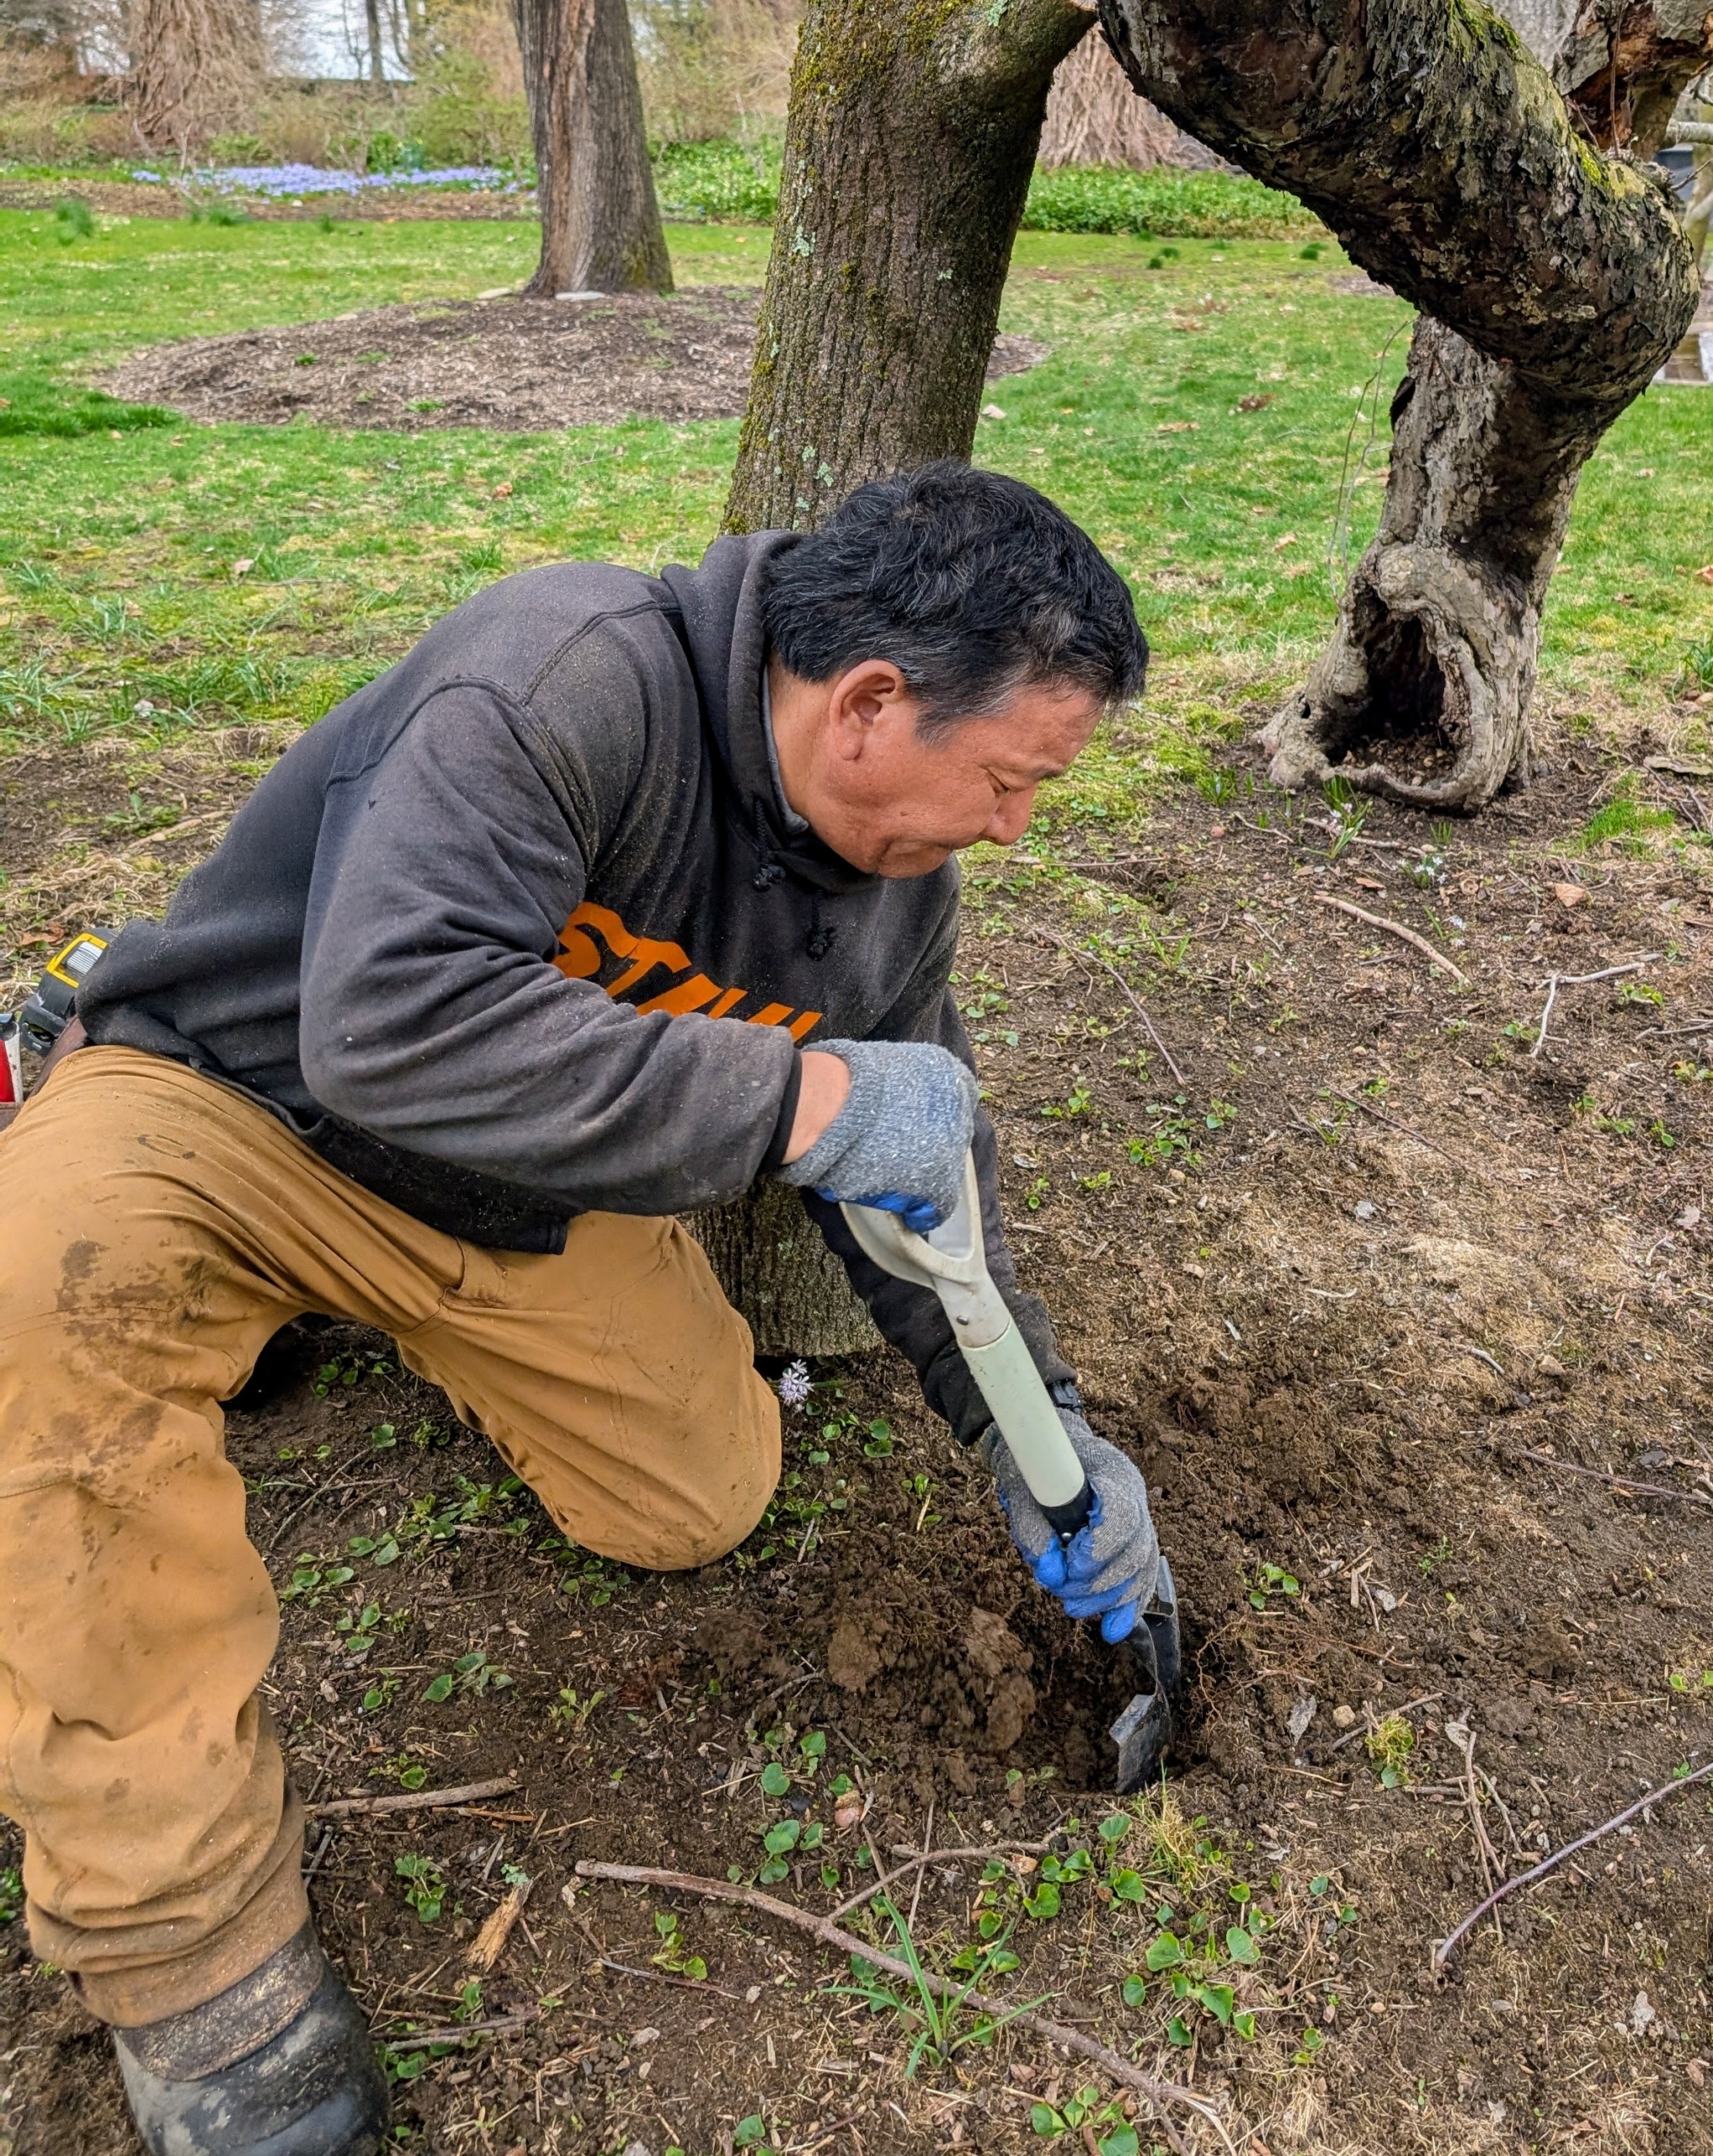
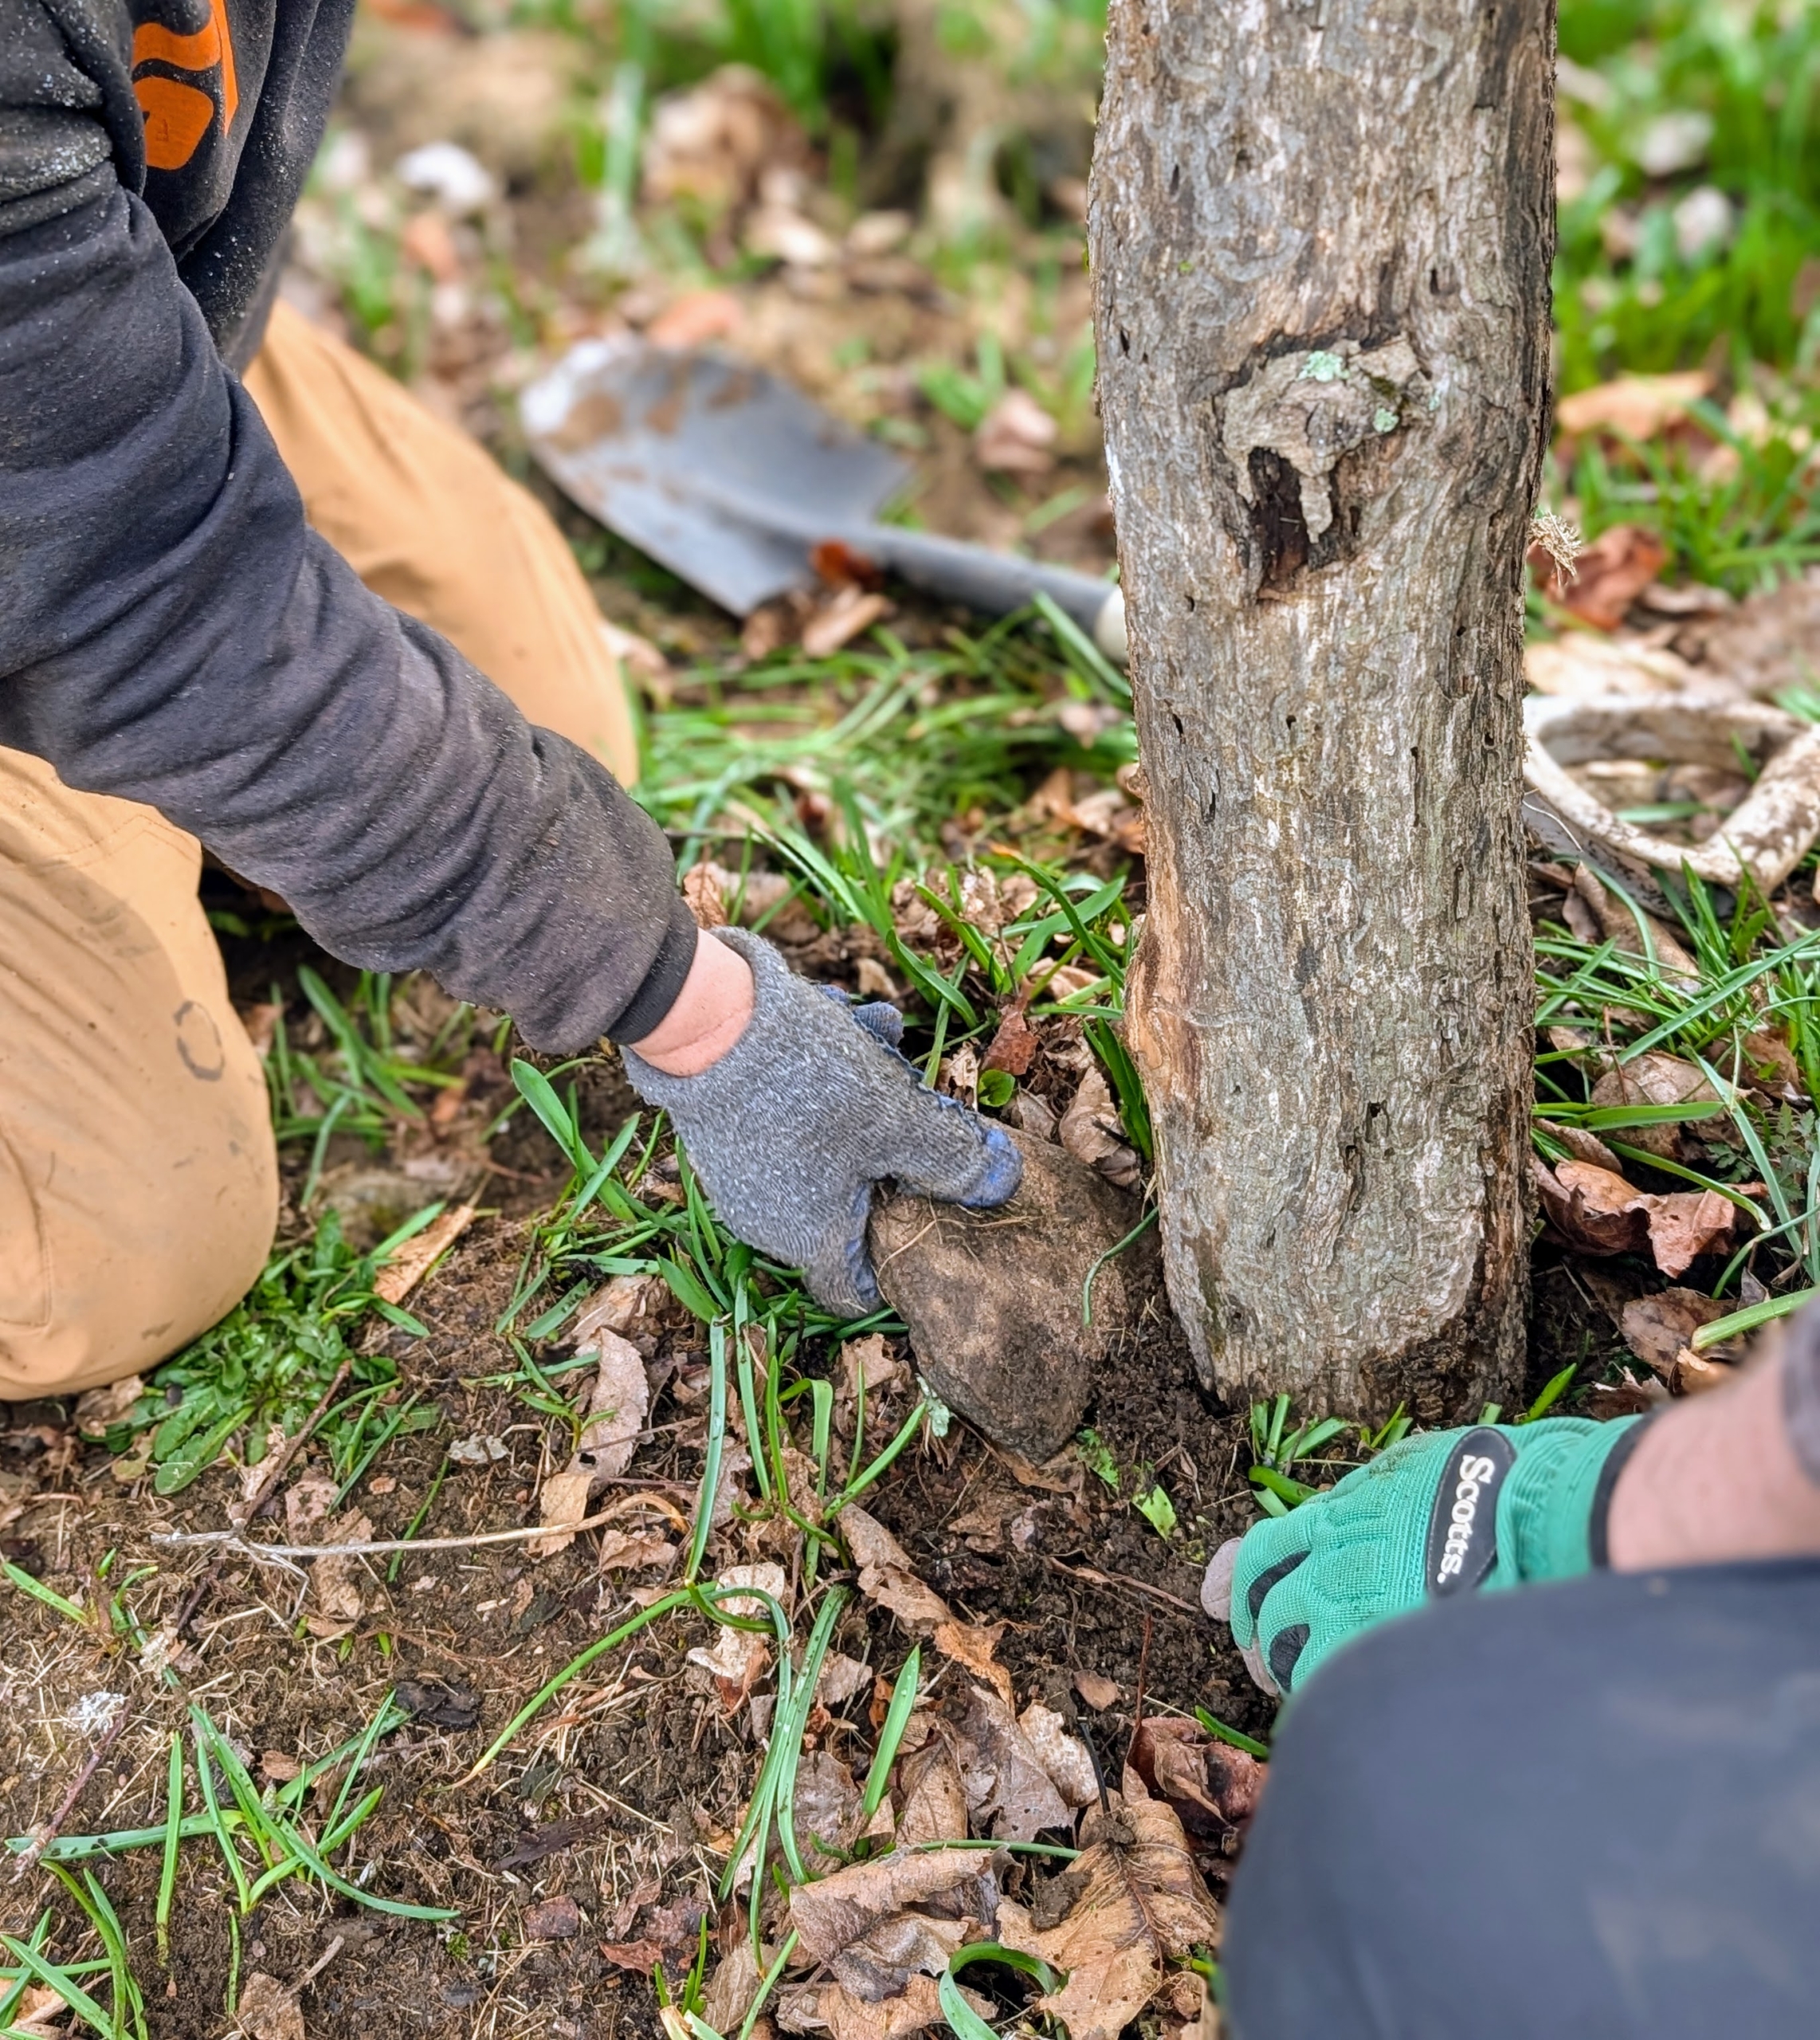
Once all the crutches were brought back to the trees, Phurba dug shallow holes where the supports would be positioned.
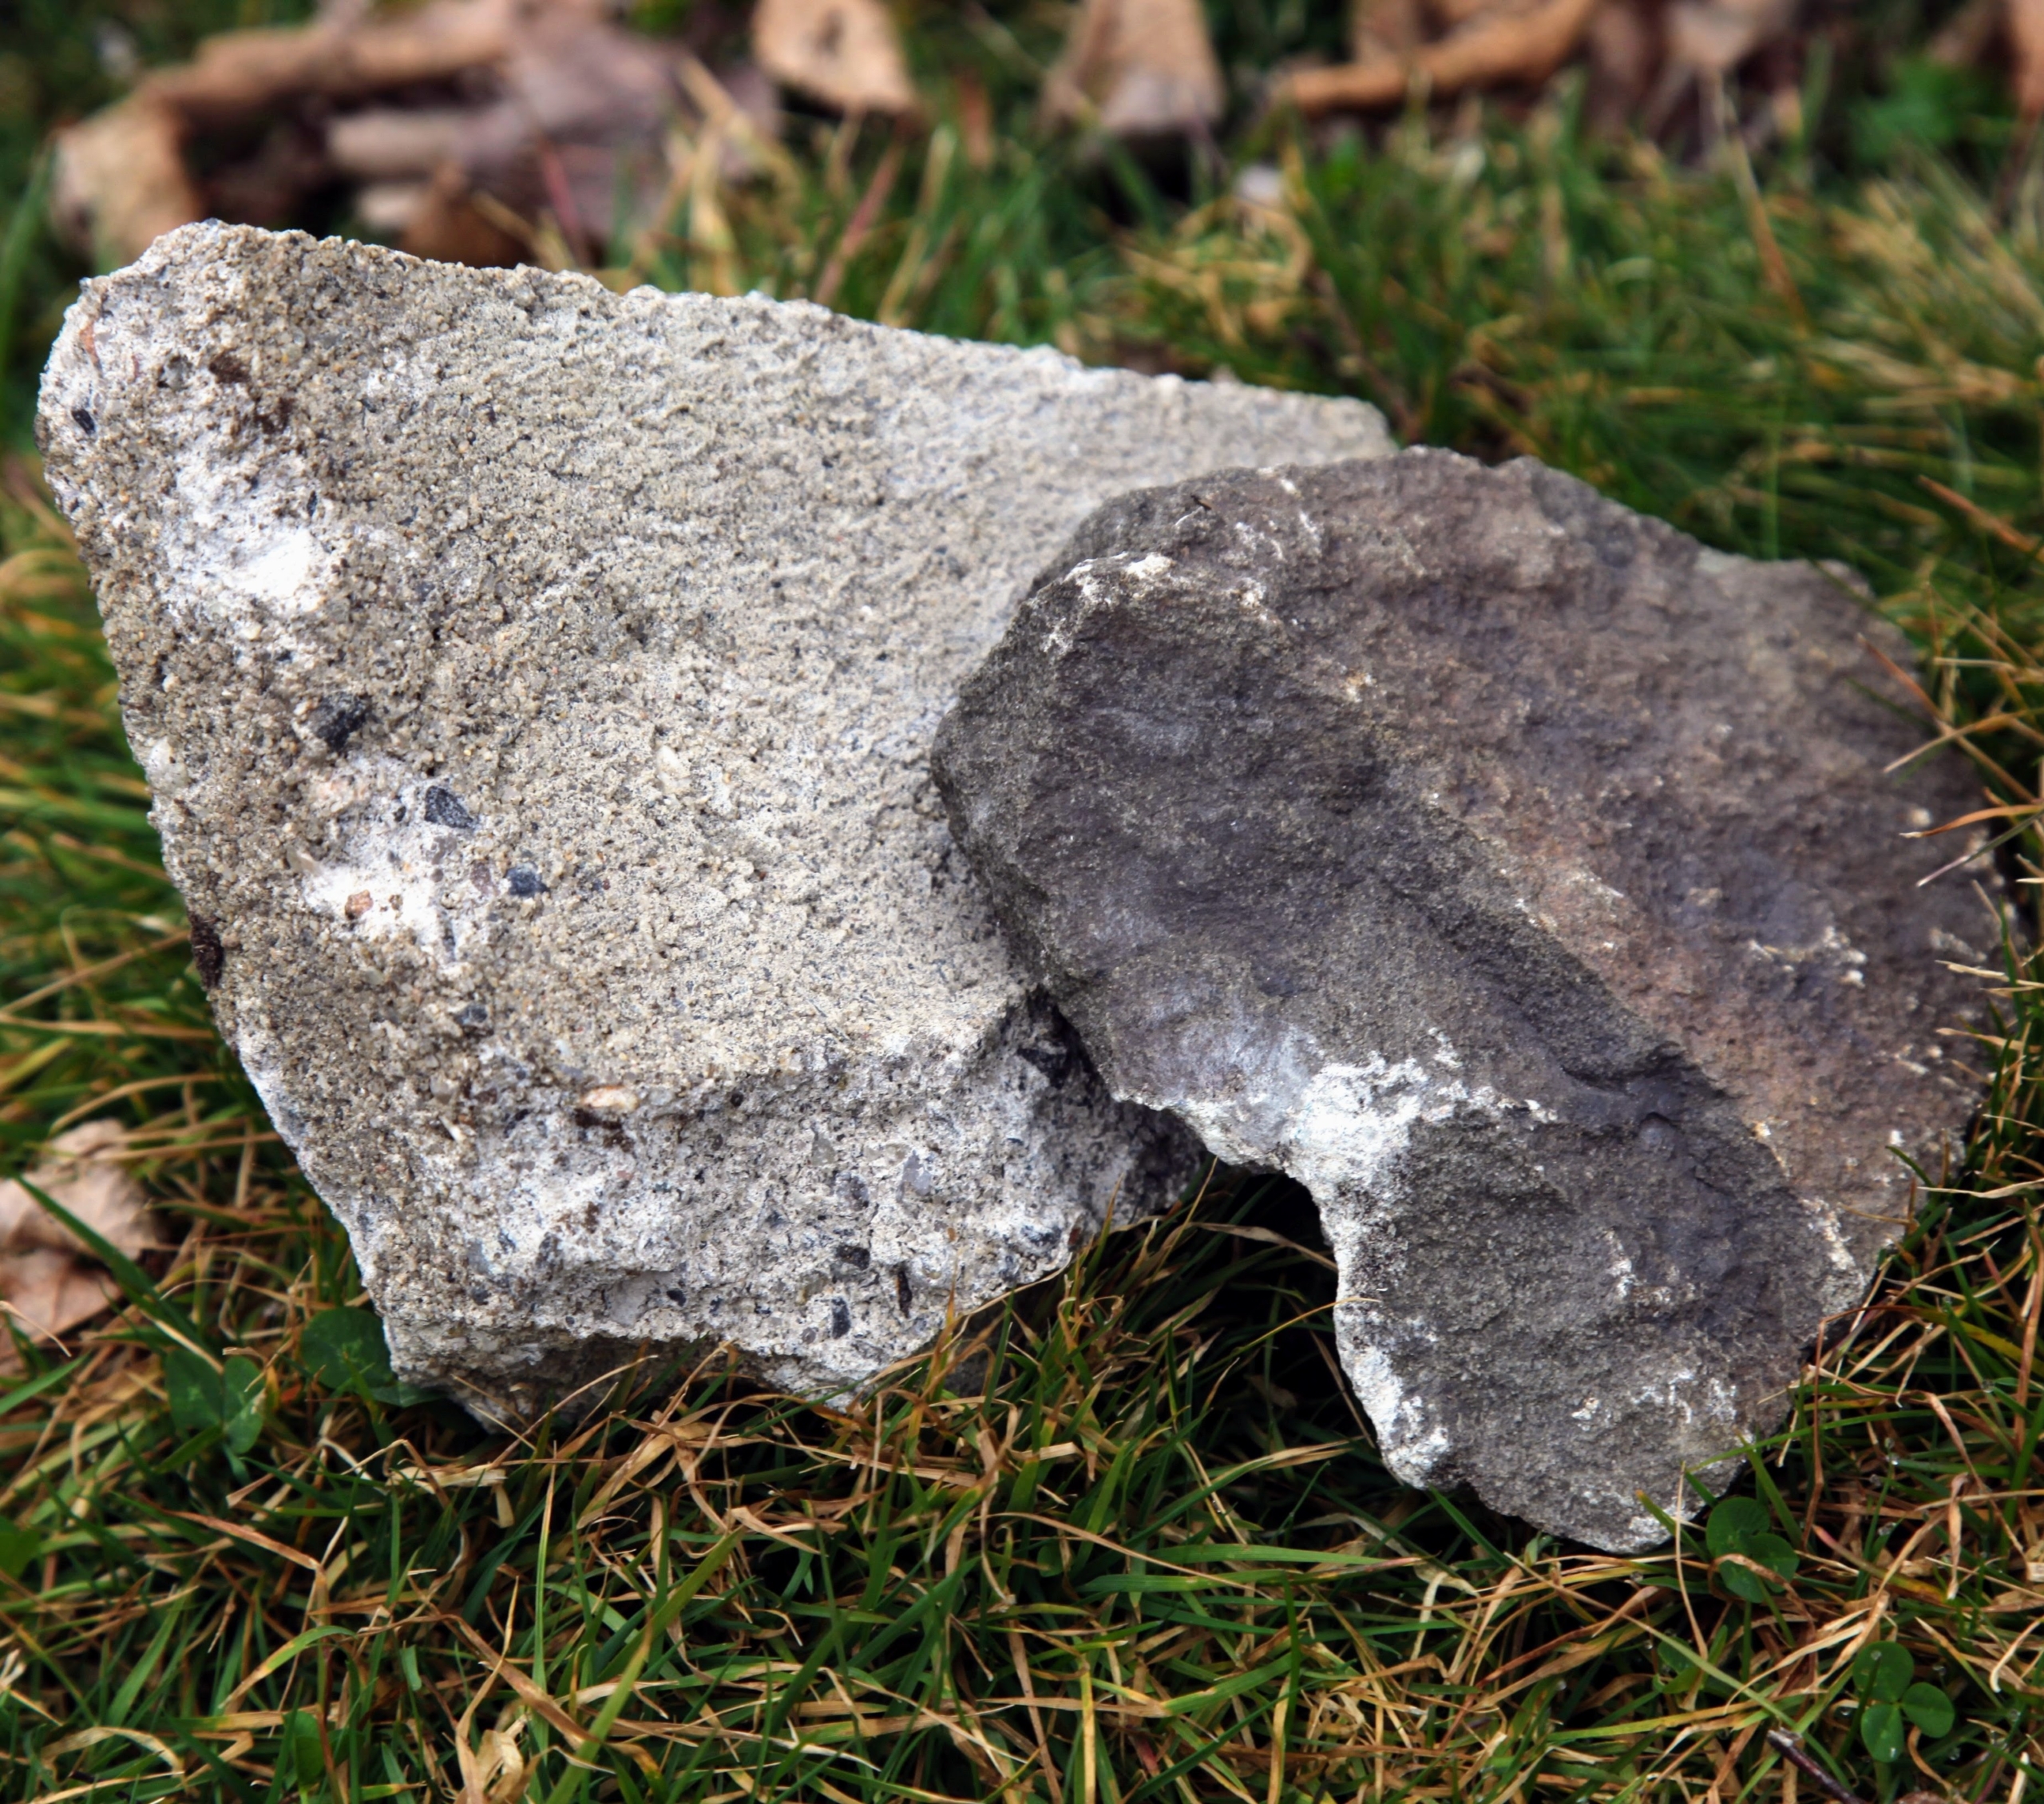
He also gathered a couple of small, flat stones to place against and under the tree support to prevent it from sinking into the loamy soil.
The stones placed strategically at the base of the support will also keep it from falling due to strong winds.
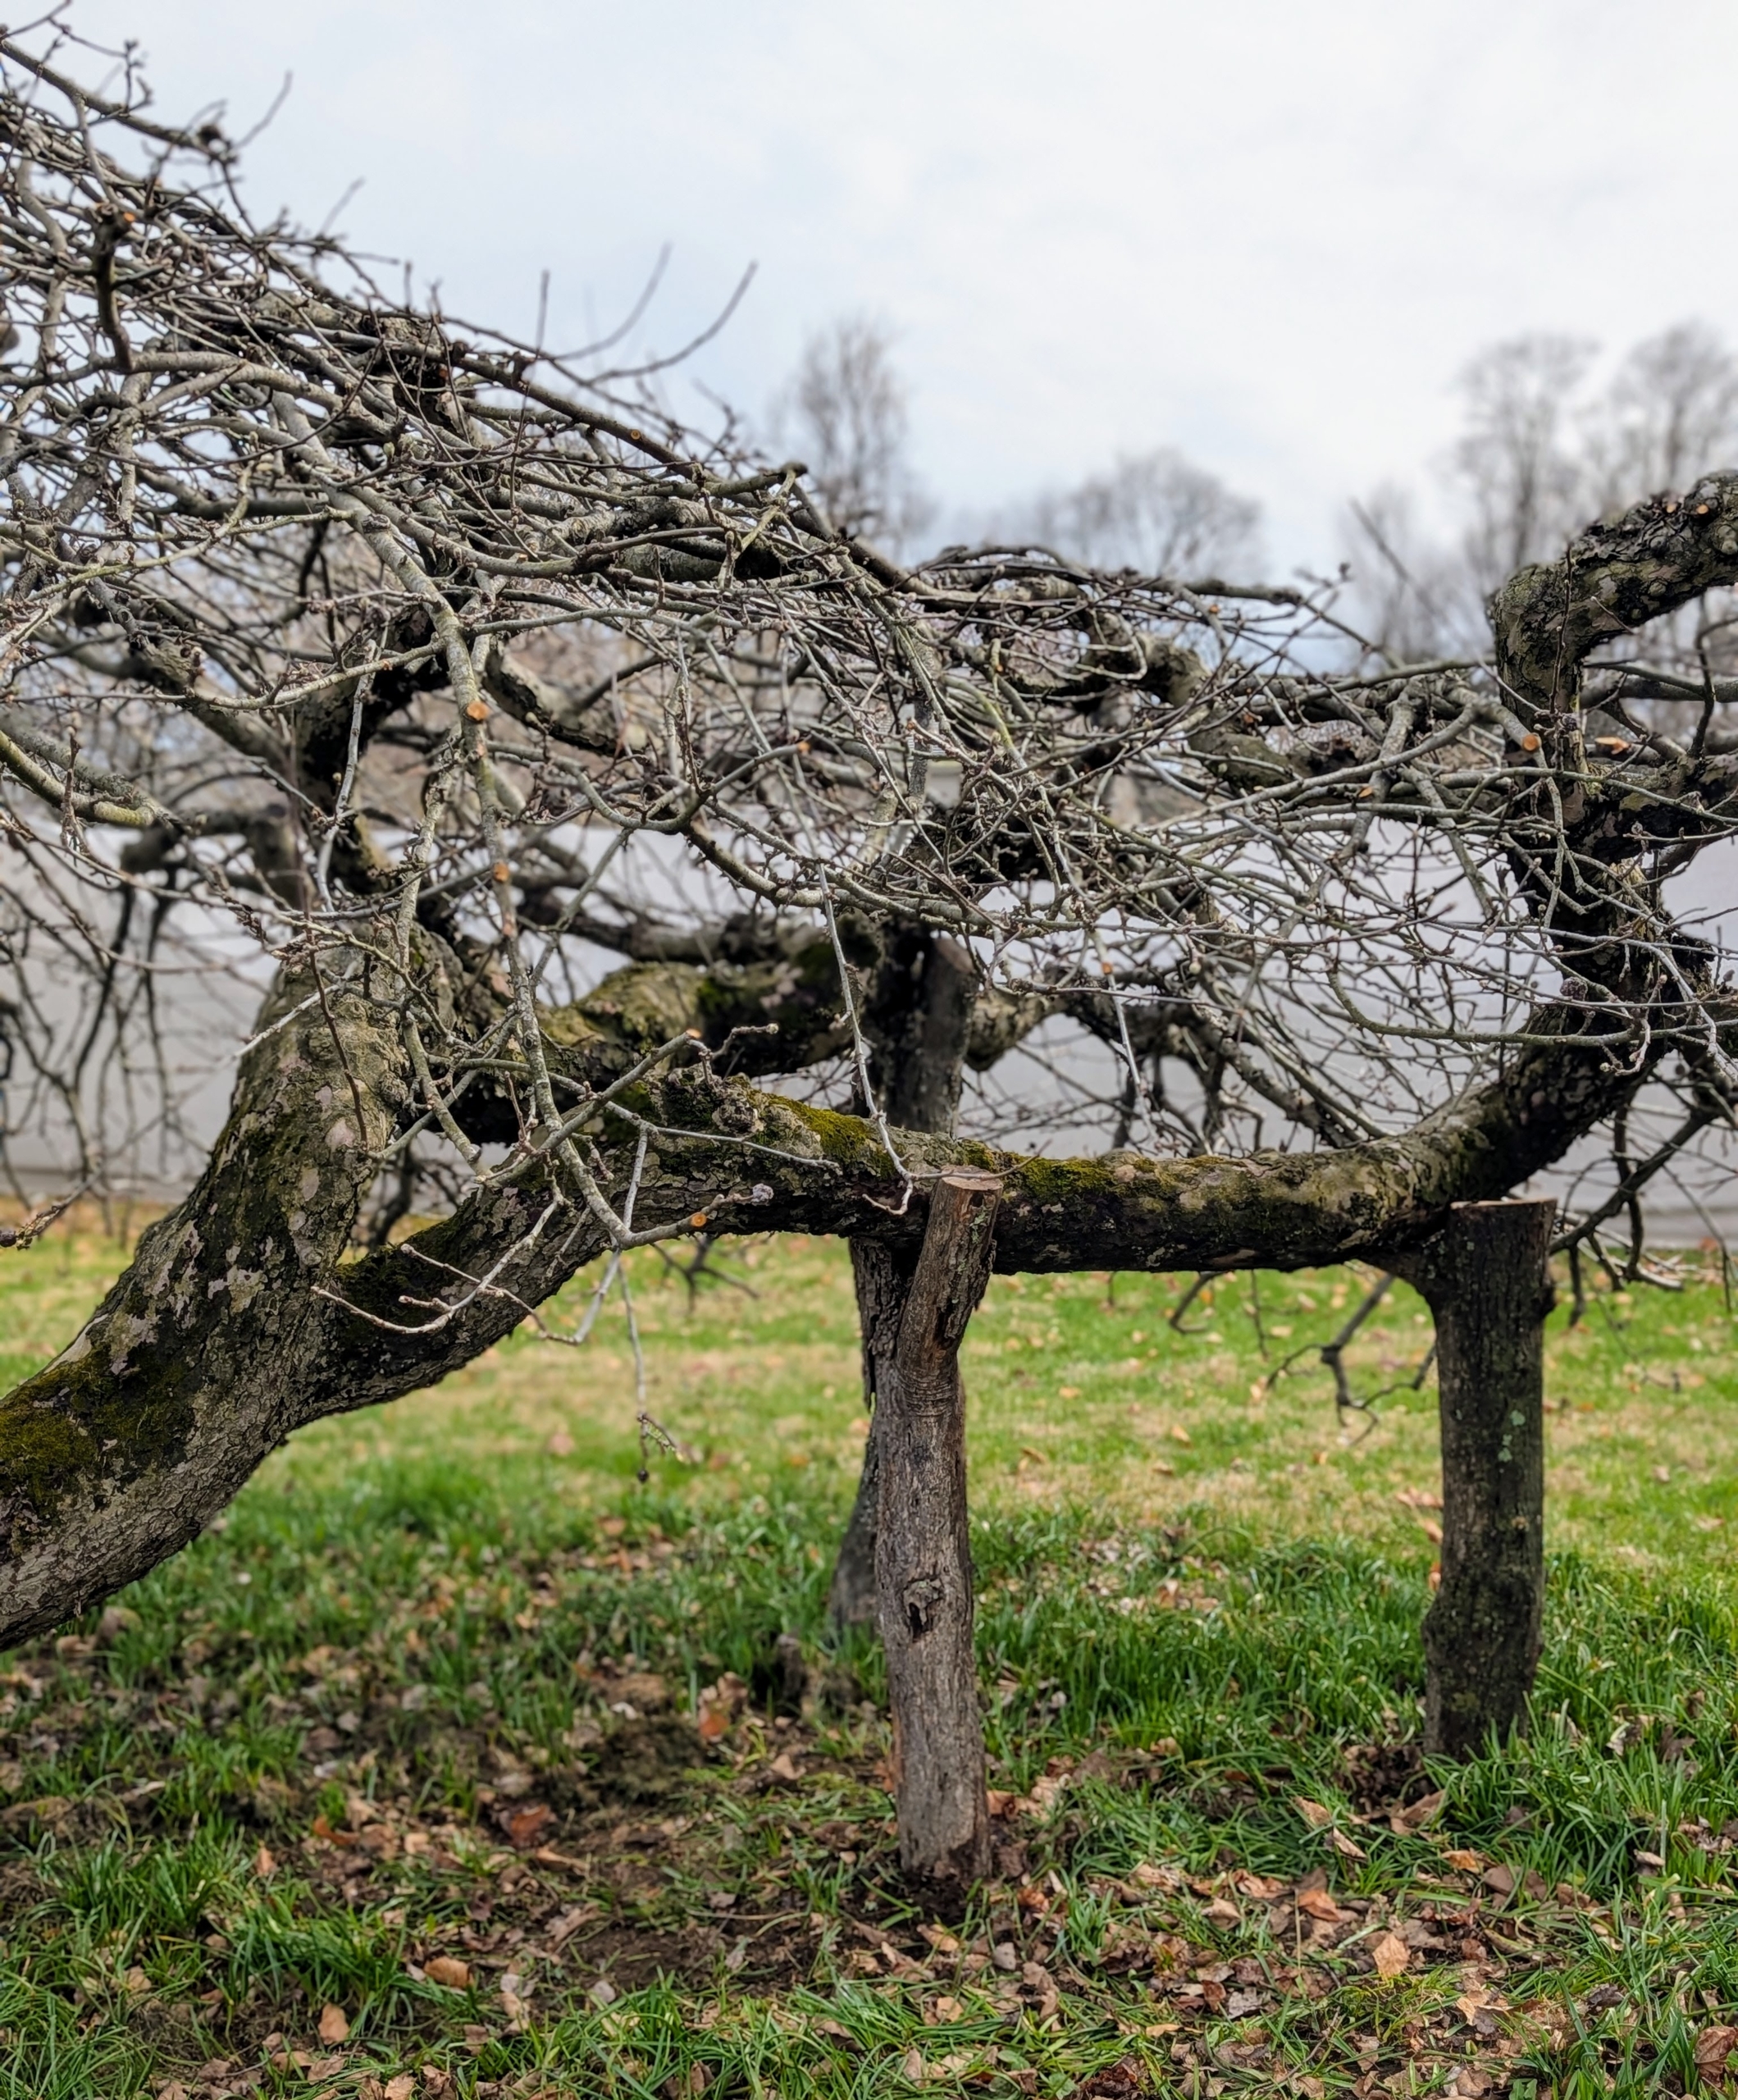
Here’s Phurba checking a crutch out for size… and it fits!
Ryan pushes a crutch under another limb.
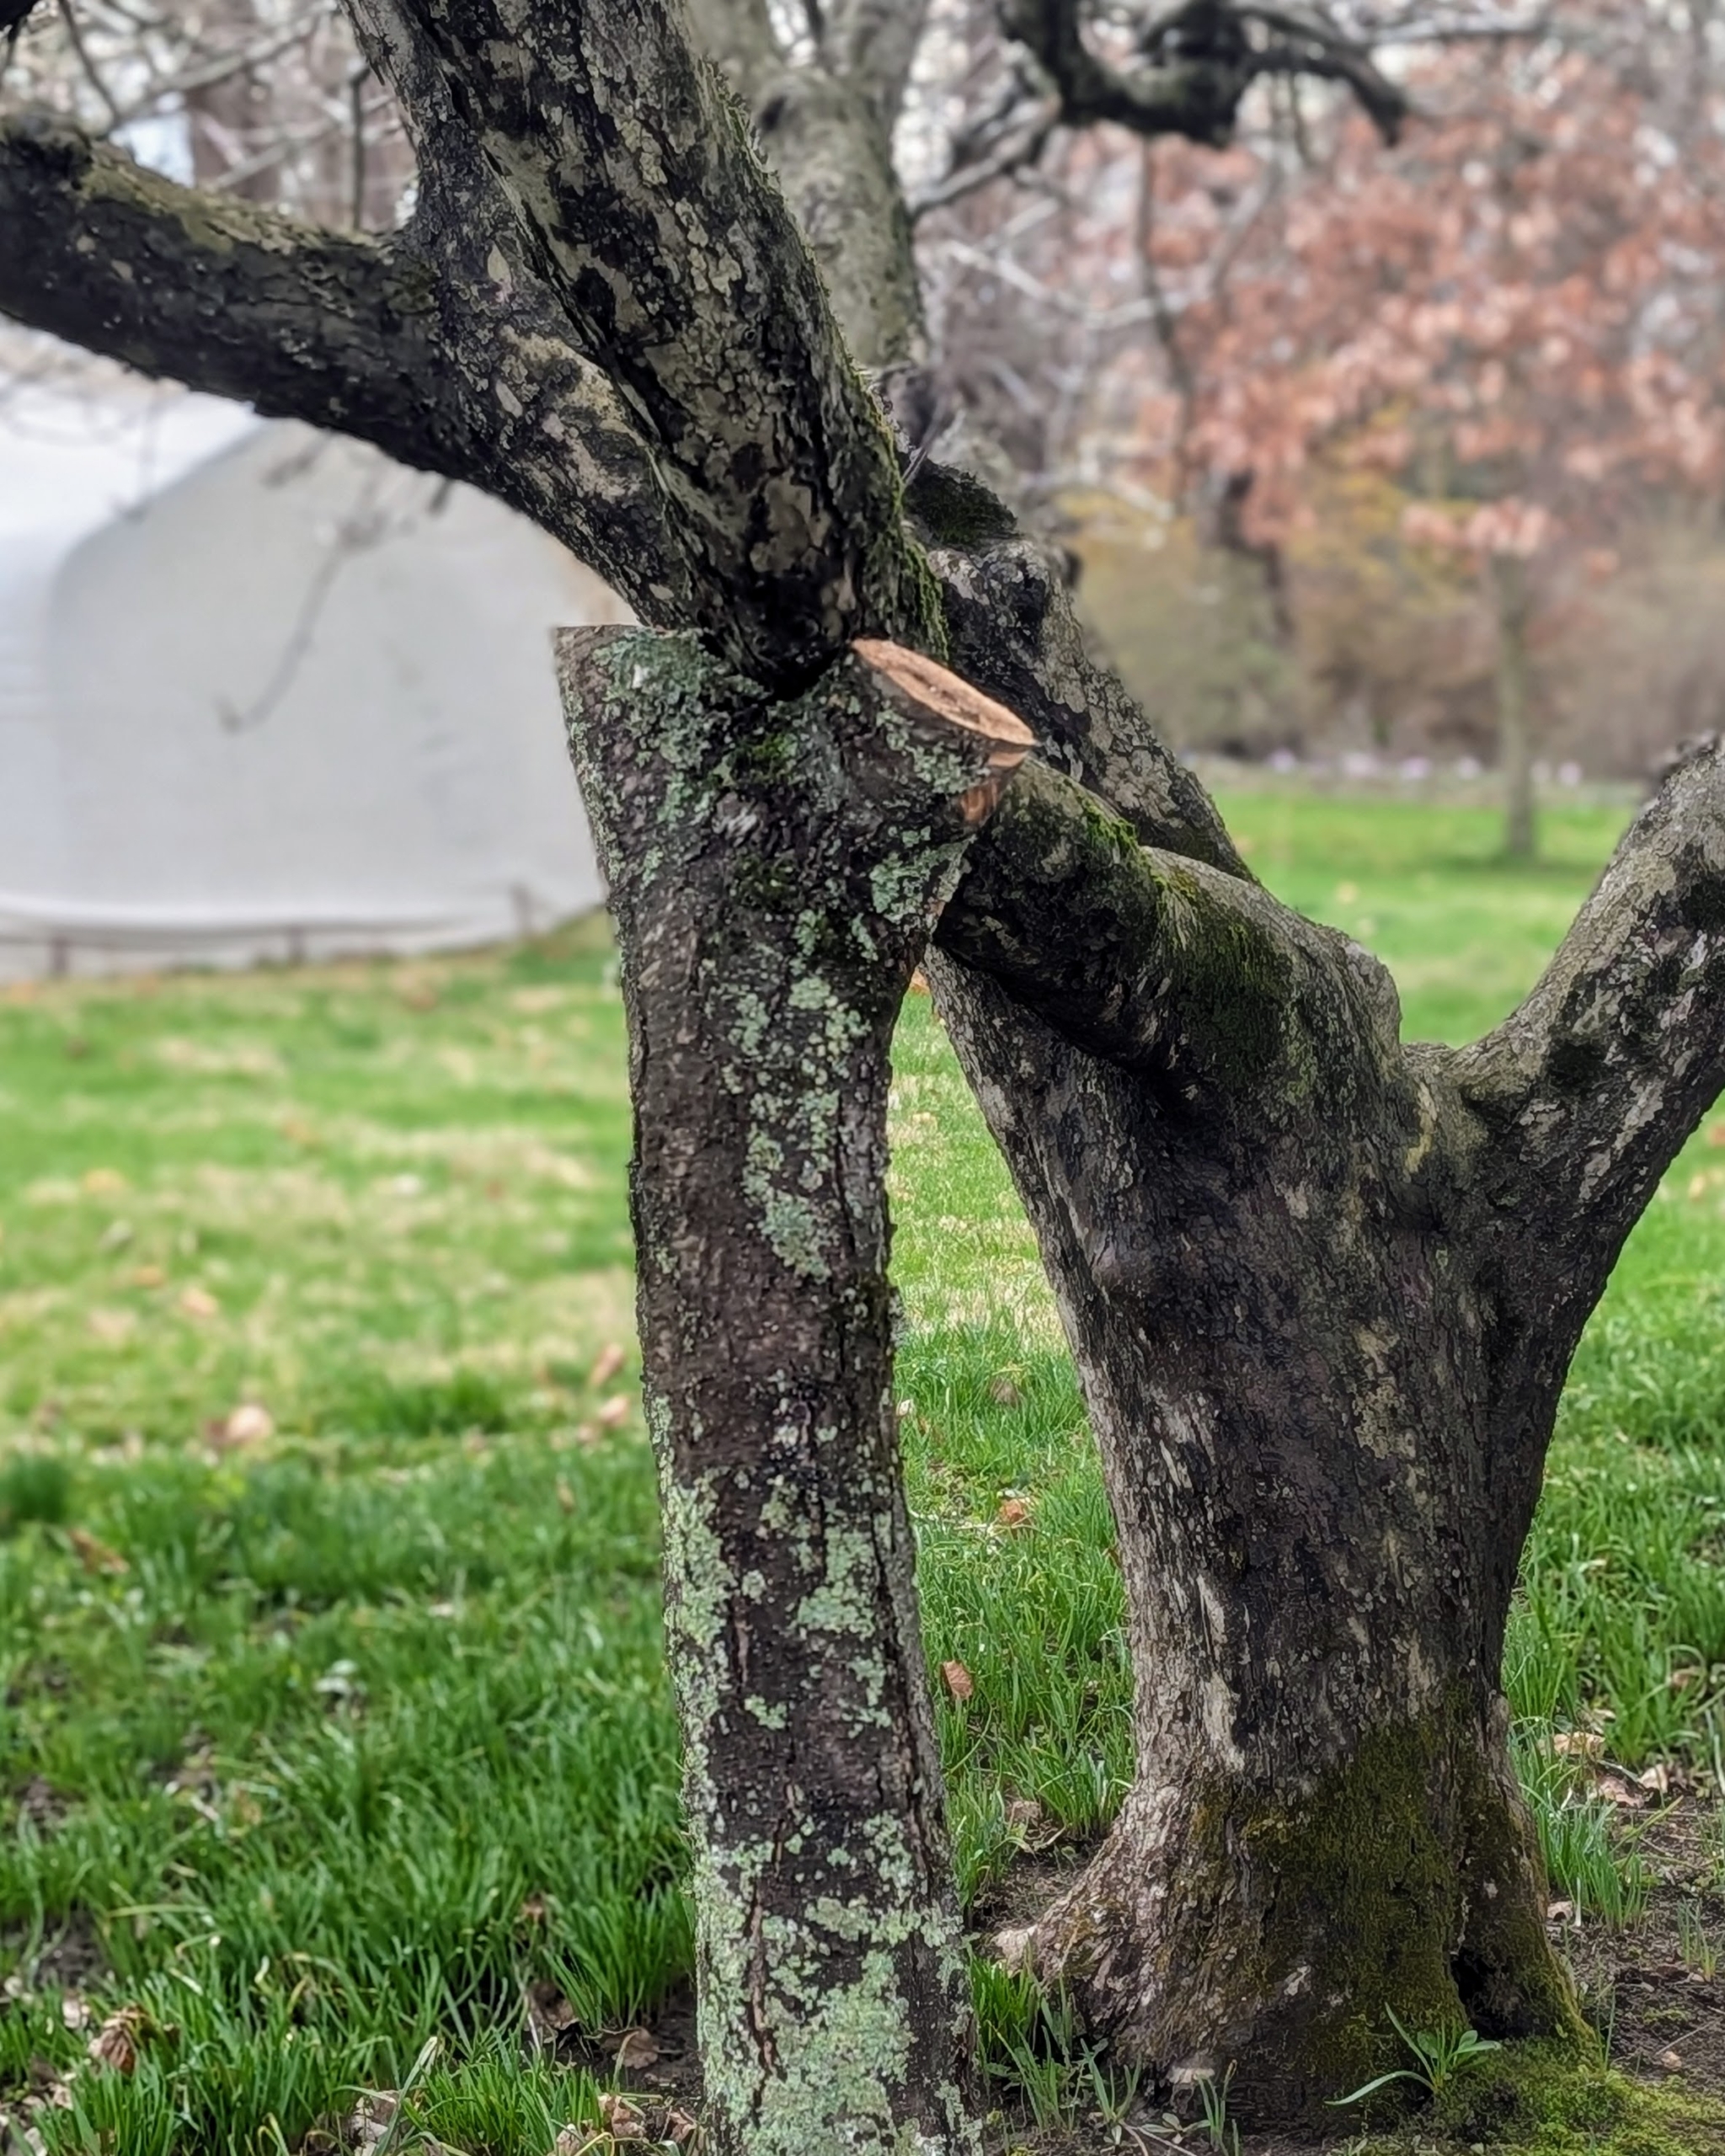
Upright supports like this made from tree branches blend right in and actually look like trees themselves.
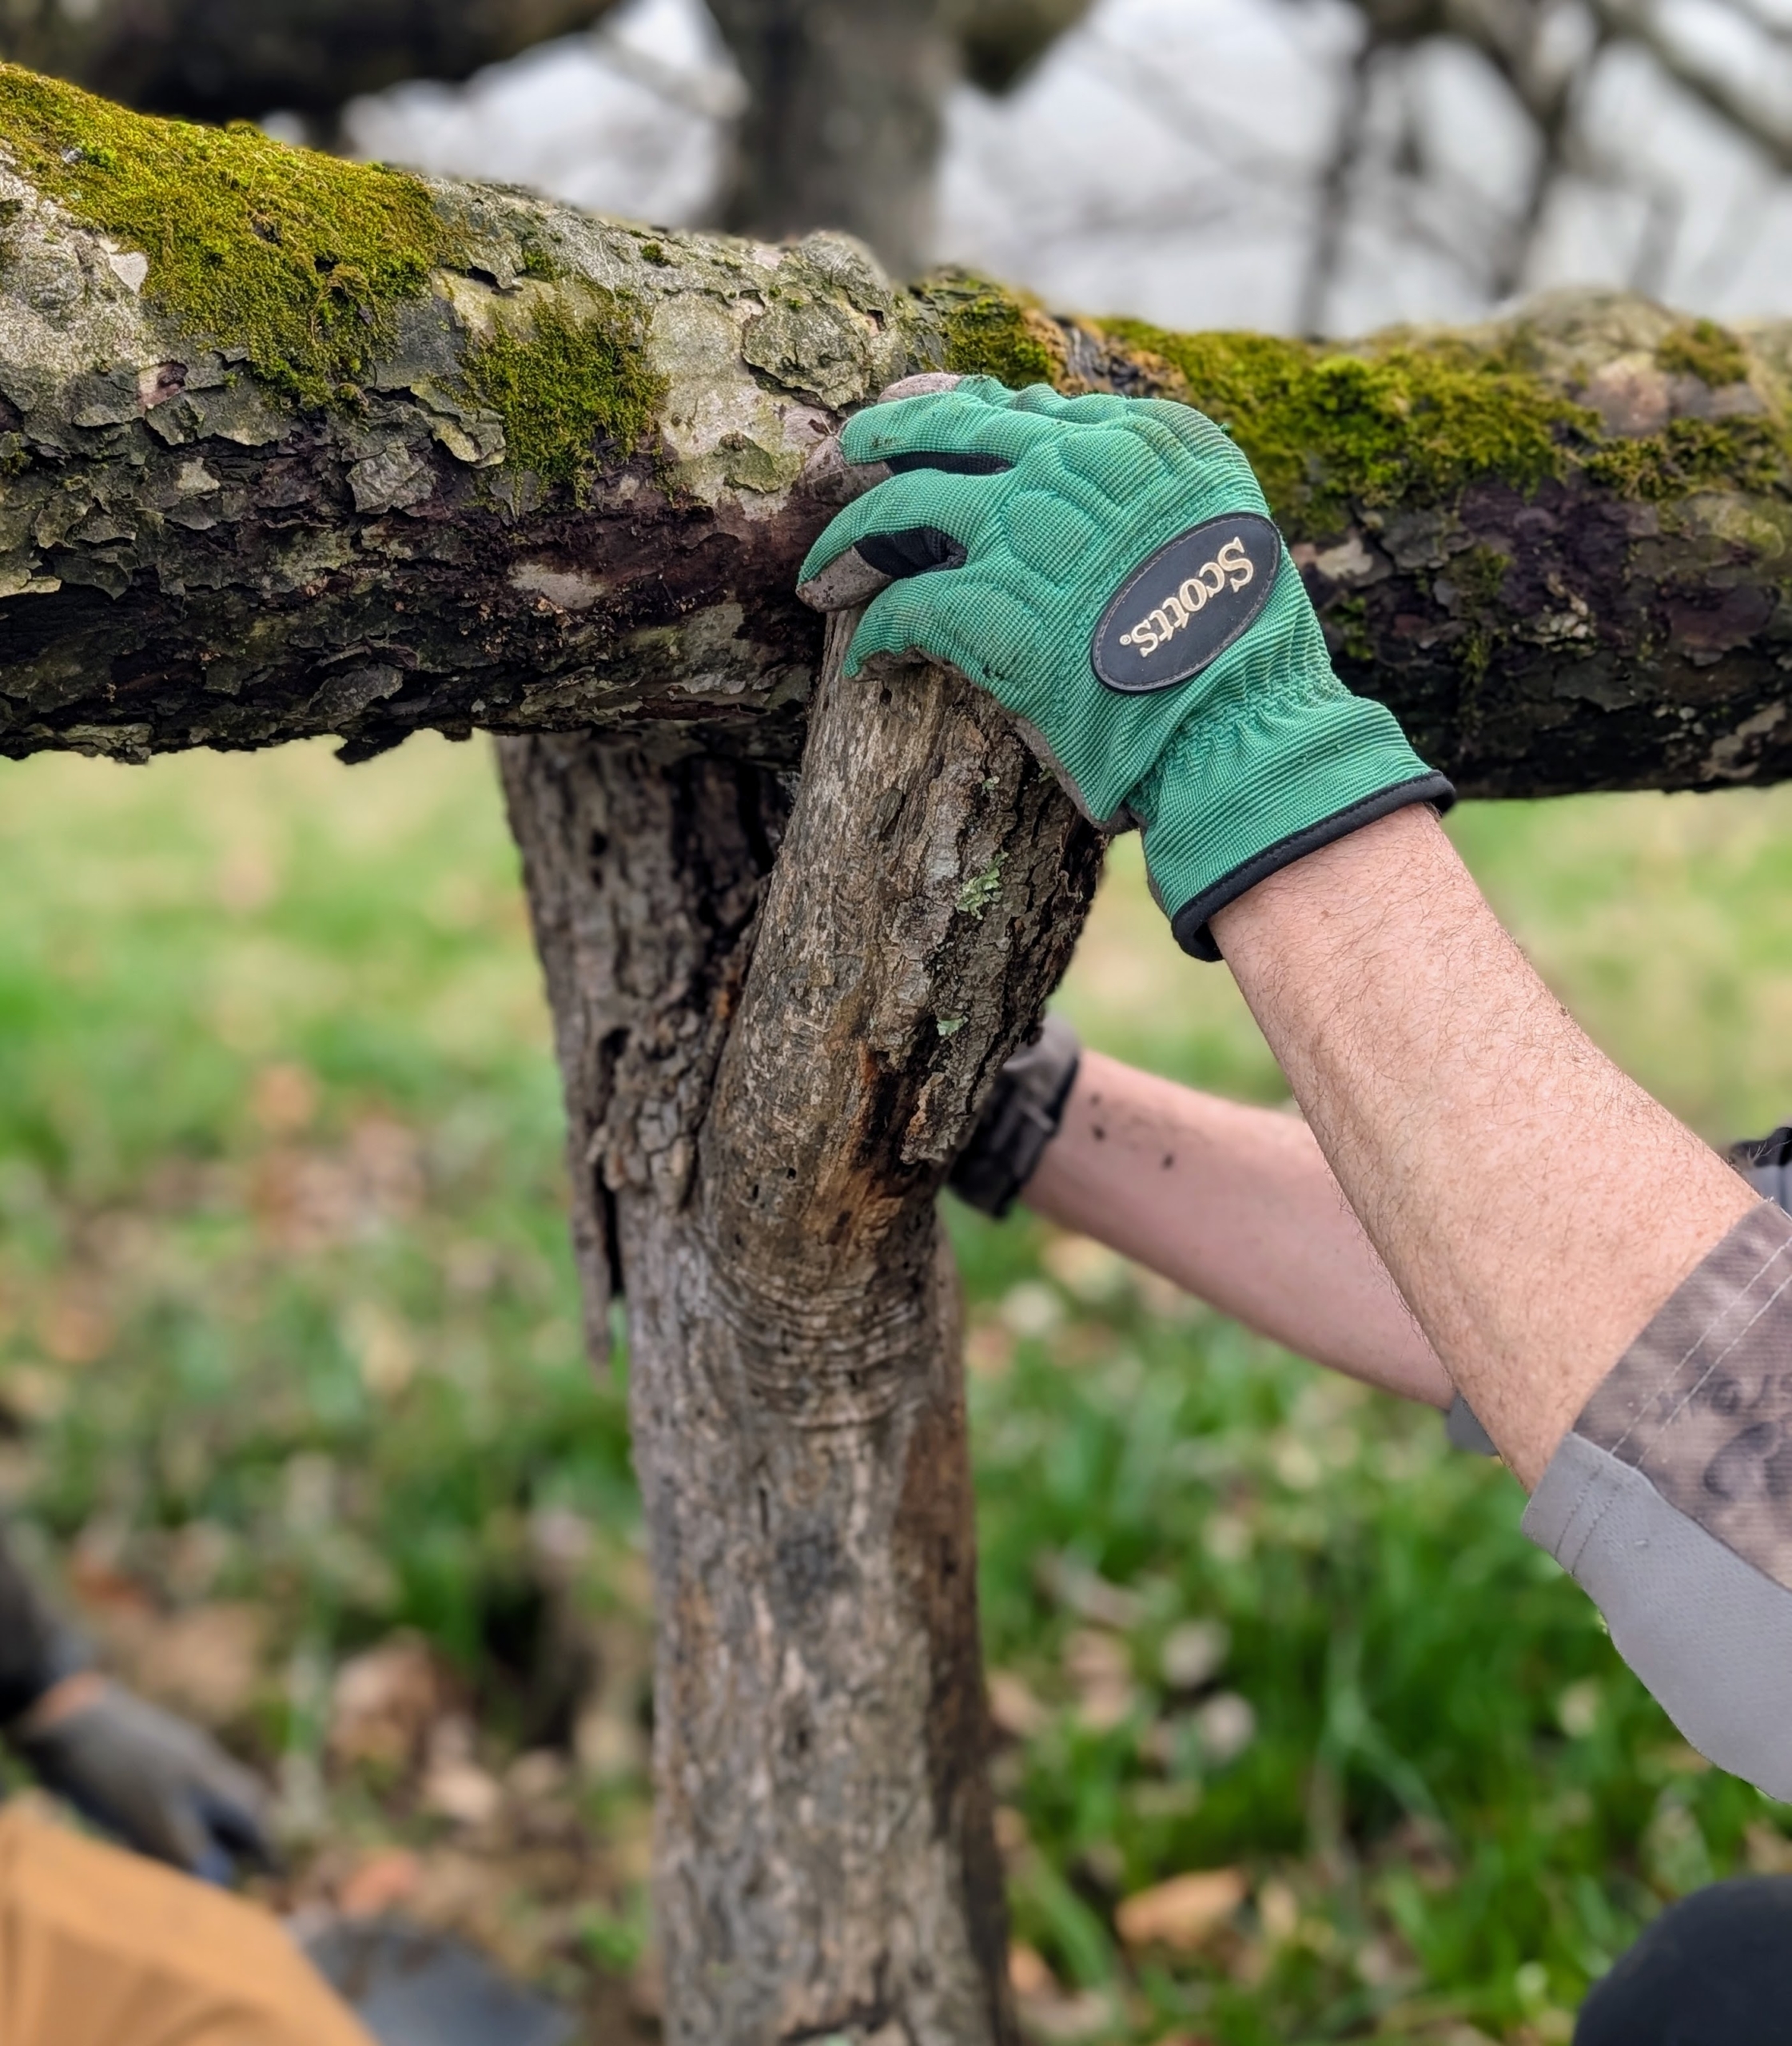
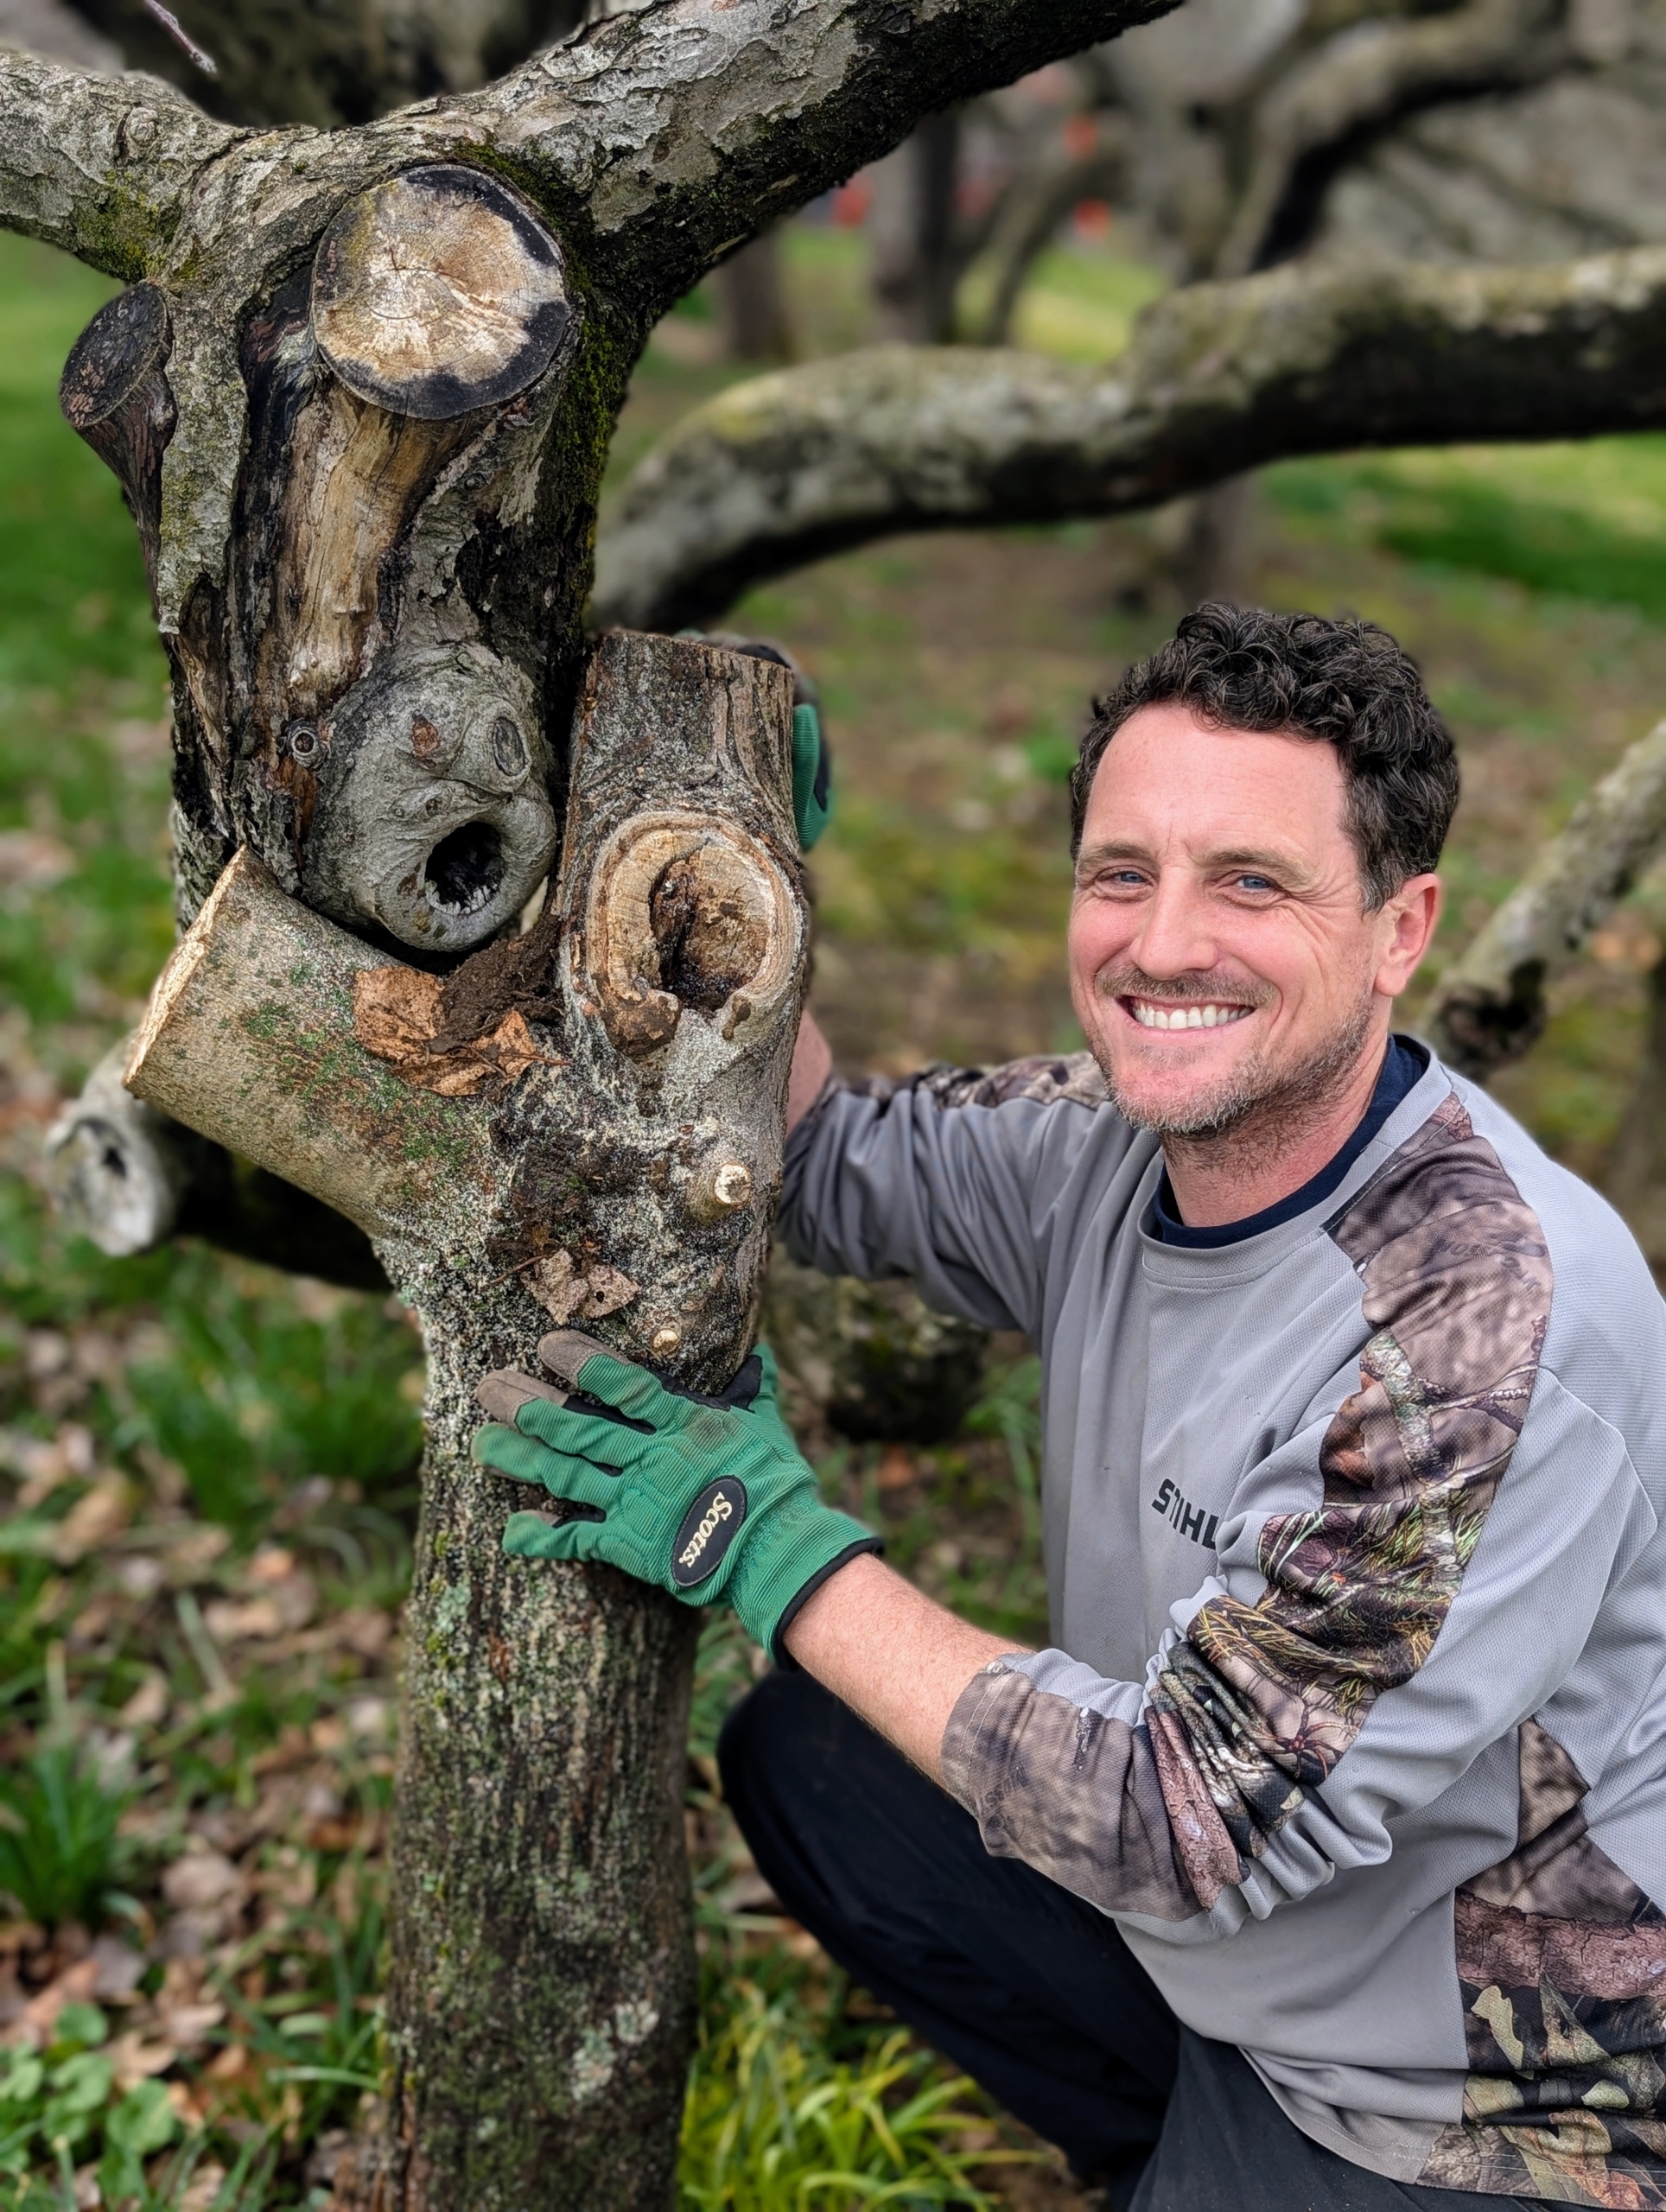
It is crucial that every new crutch be checked to ensure it is tightly in place.
Ryan was able to knock this support out of place, so he made a few adjustments to make sure it was secure.
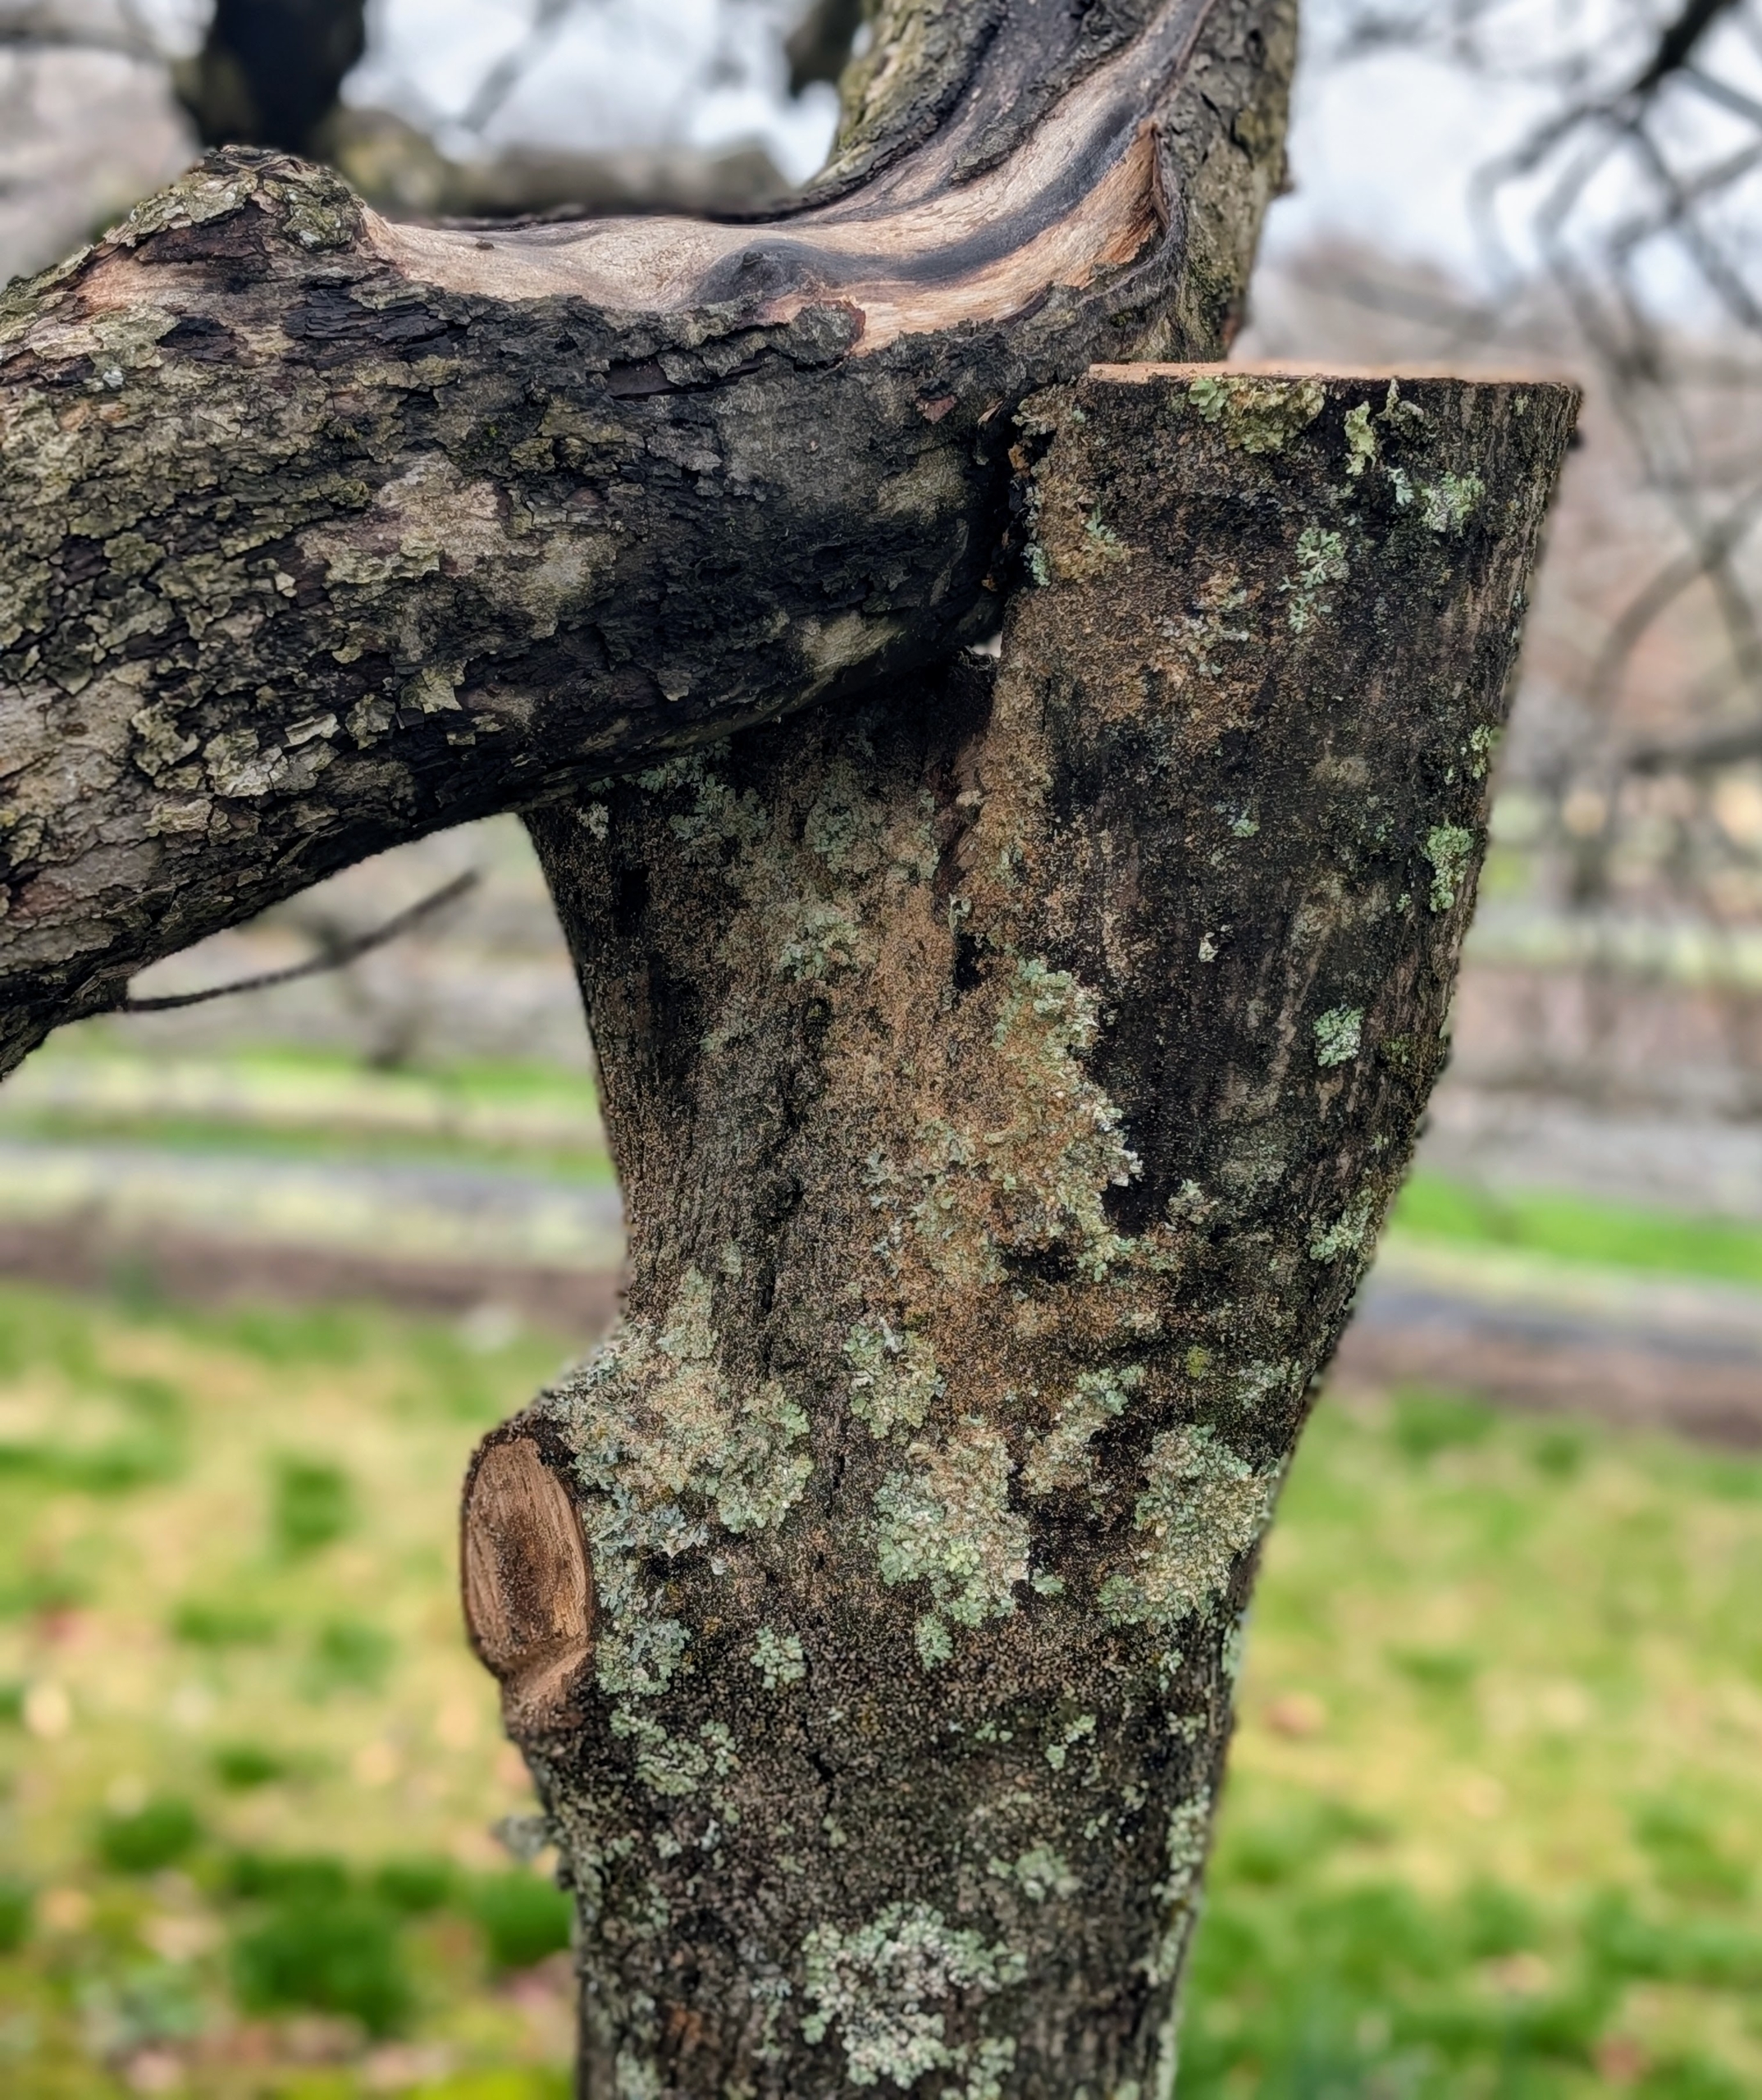
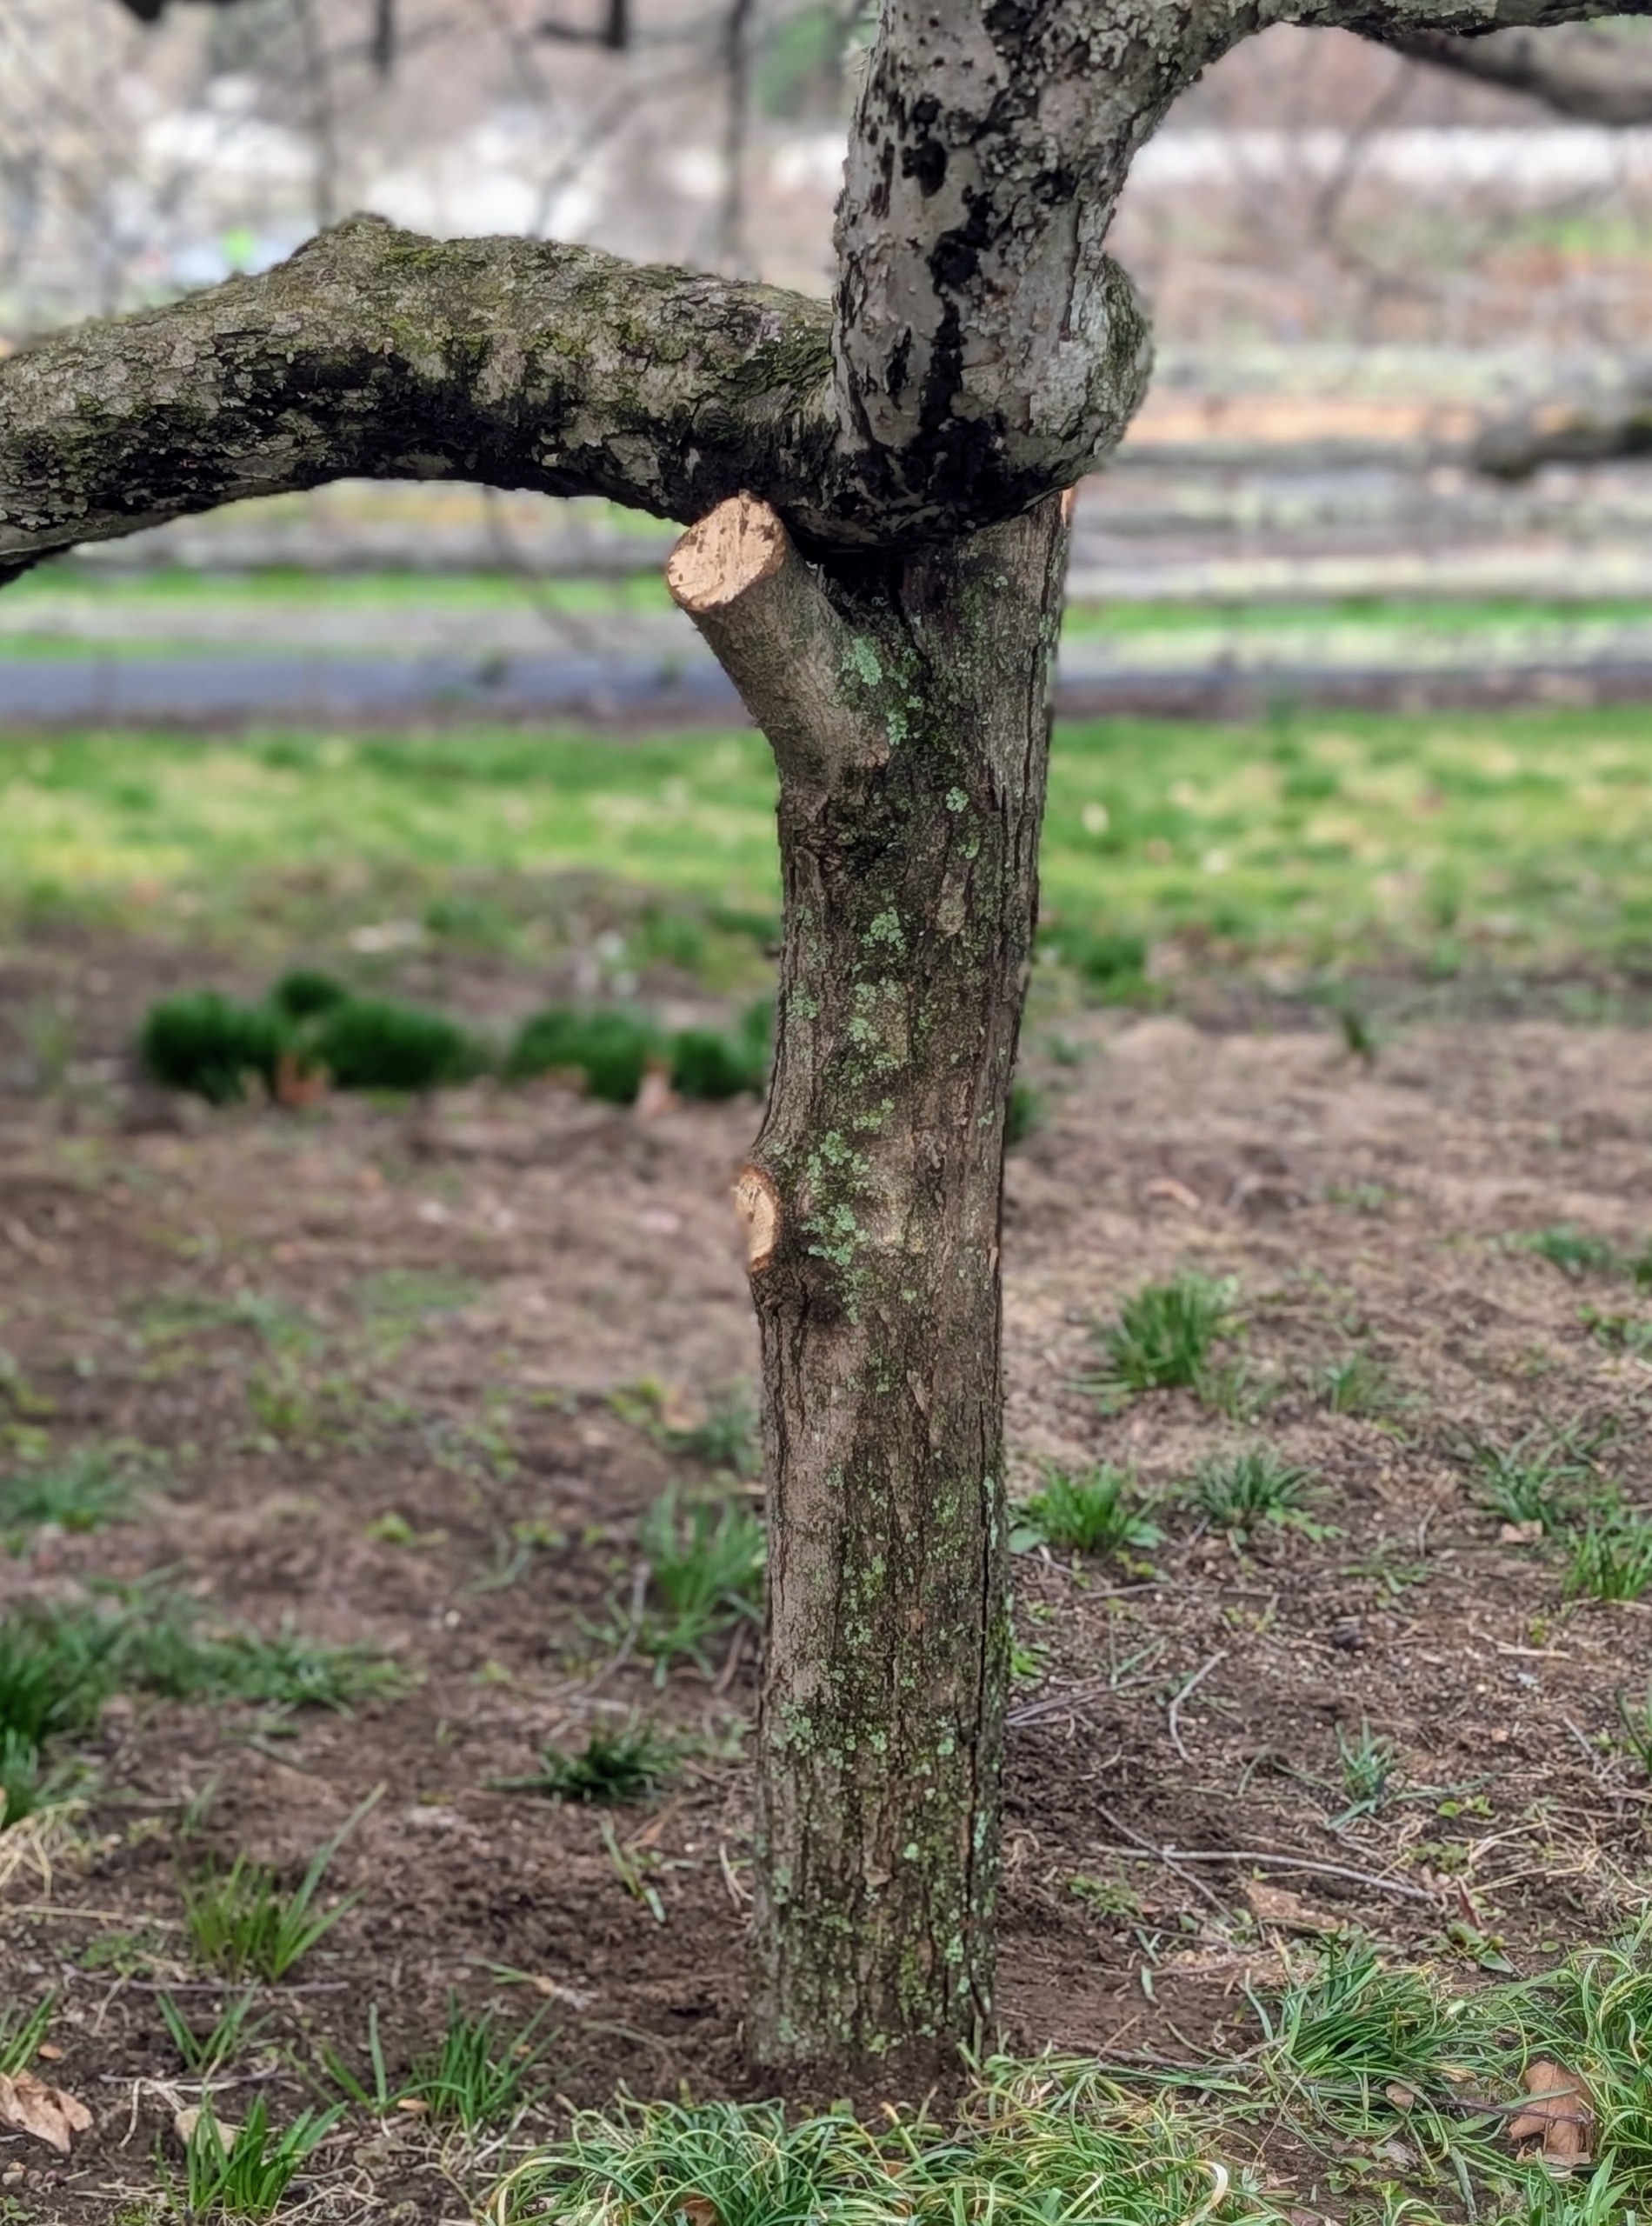
This one is wedged in perfectly – strong winds nor heavy fruits will bring it down.
The strong “V” notches will hold the limbs well for several years.
In total, Ryan and Phurba secured about seven tree supports. This did not take long at all, but will save the tree and prevent any broken limbs in the future.
These trees may need a little more support to keep them looking their best, but they give me so much more in return – good, delicious apples to eat out of hand or press into cider – they’re a good thing.