My team is at it again - potting up hundreds of bare-root trees and shrubs.
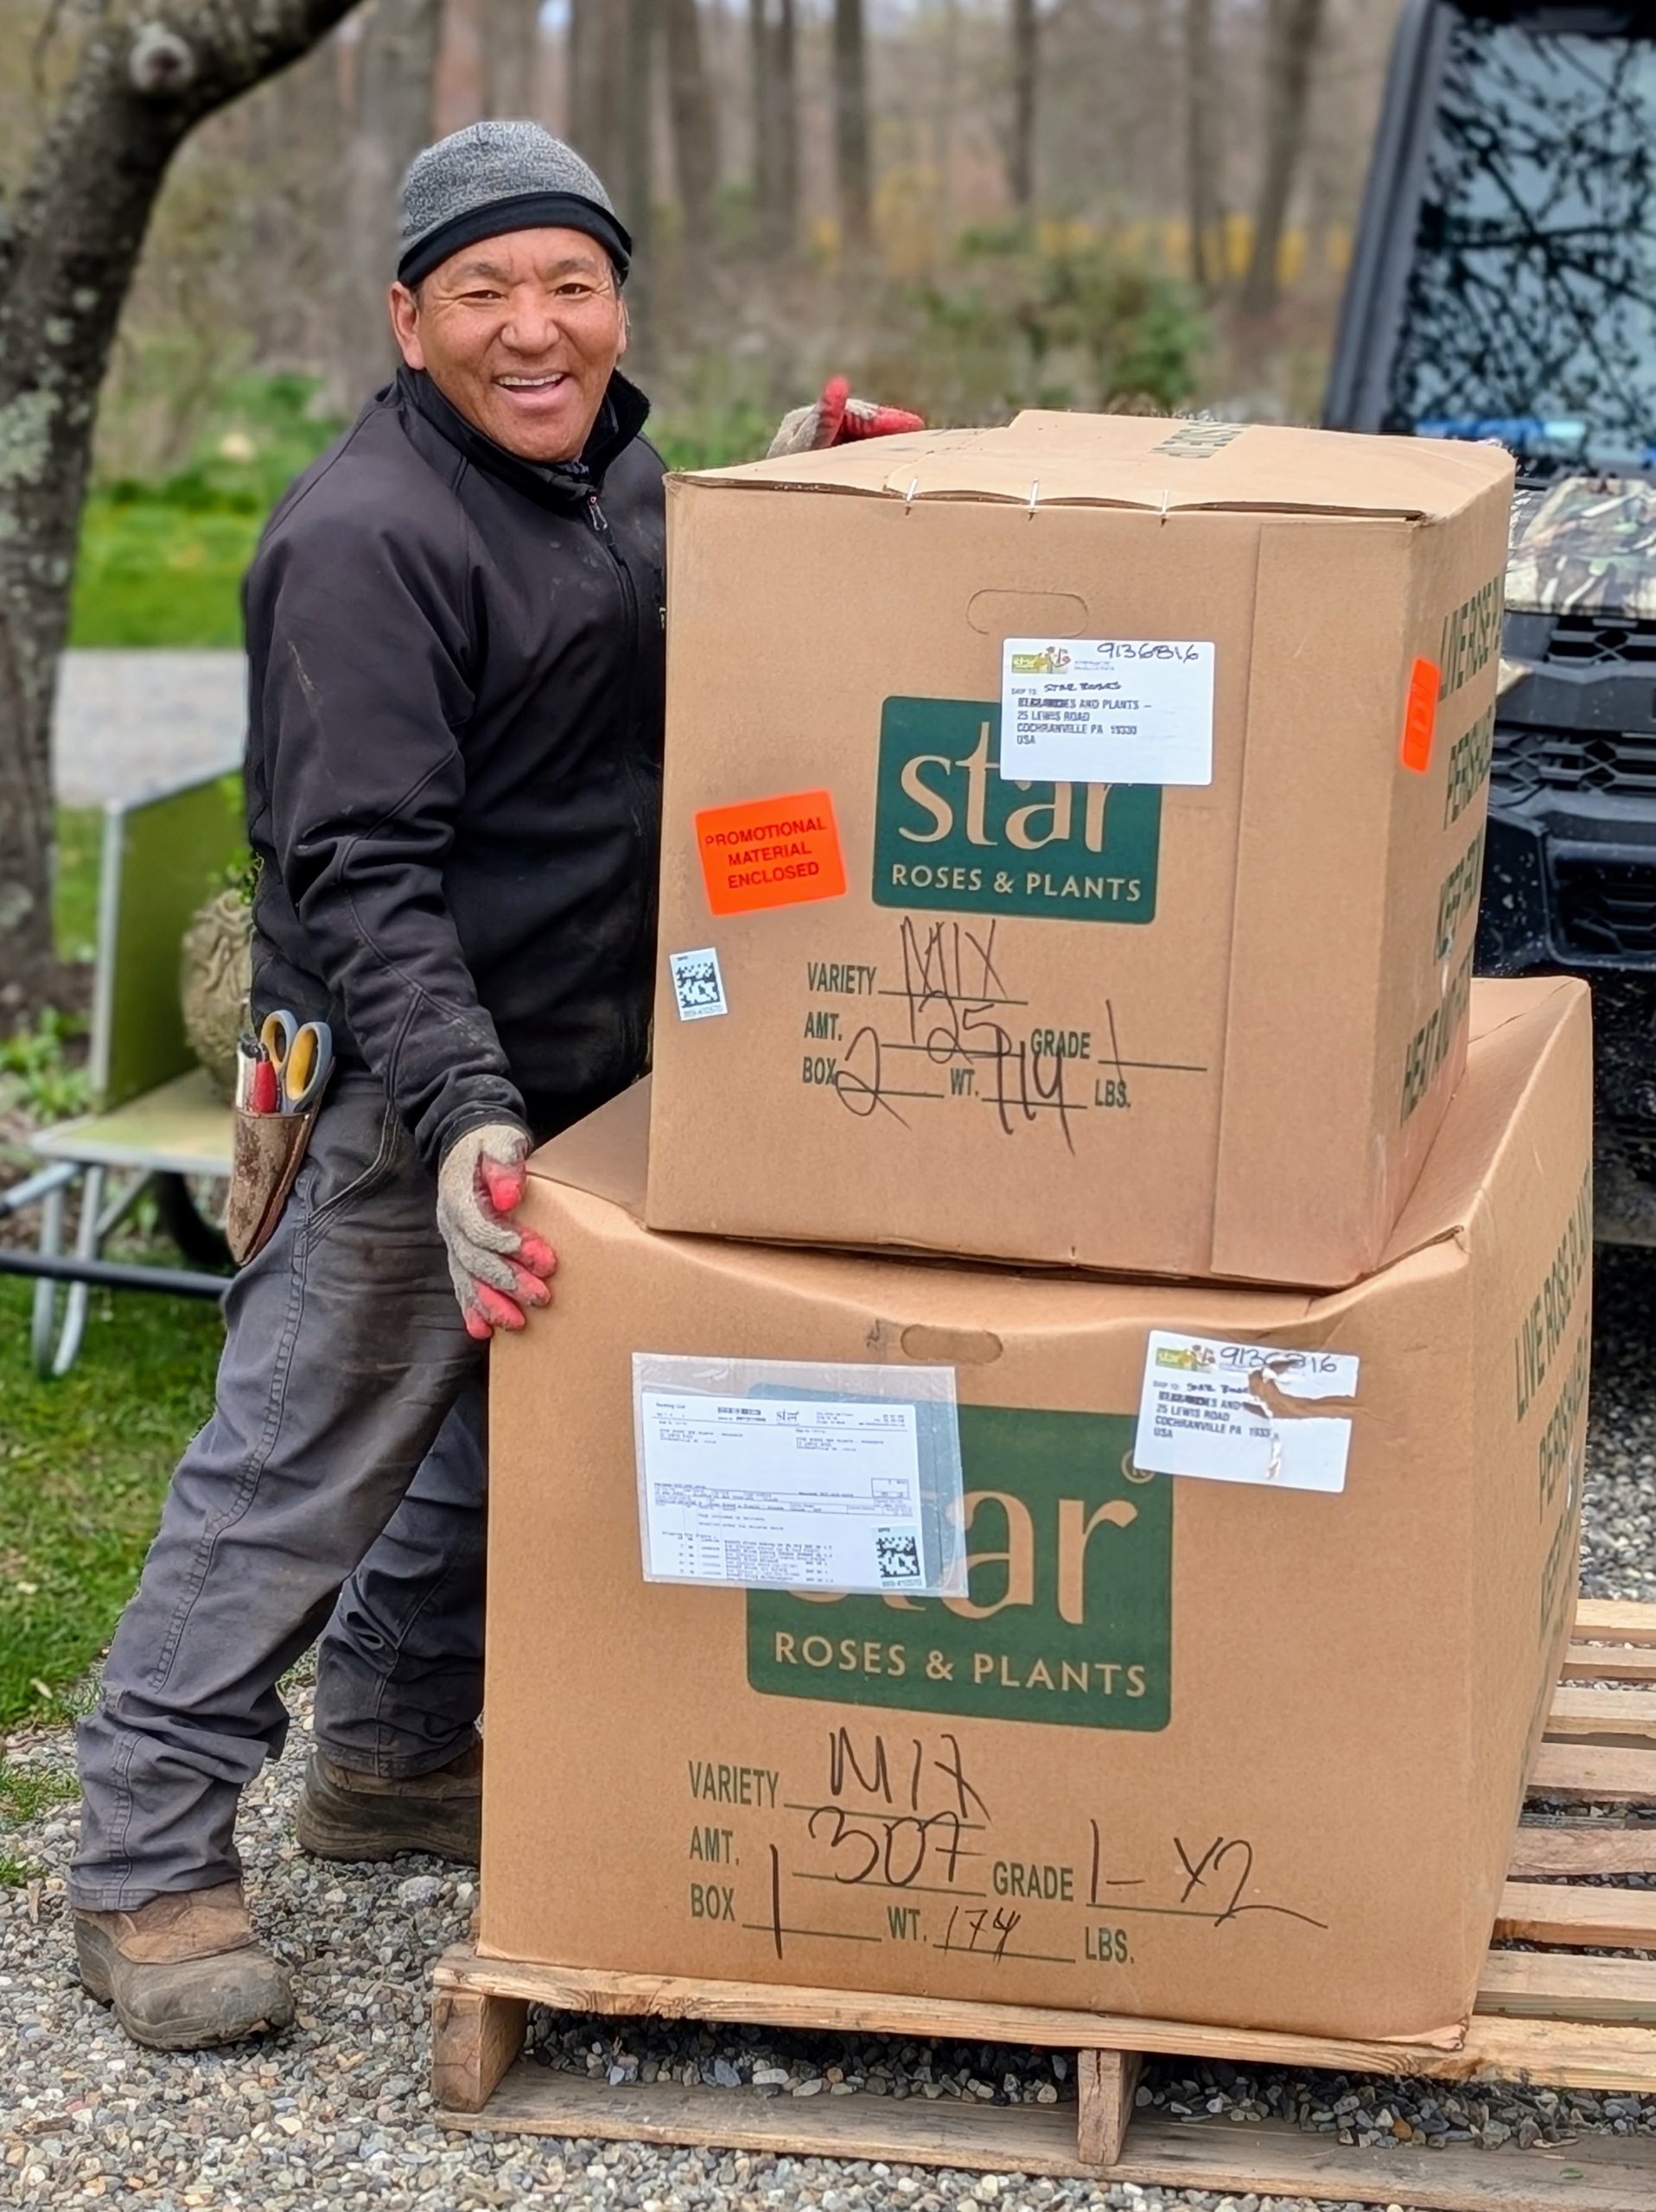
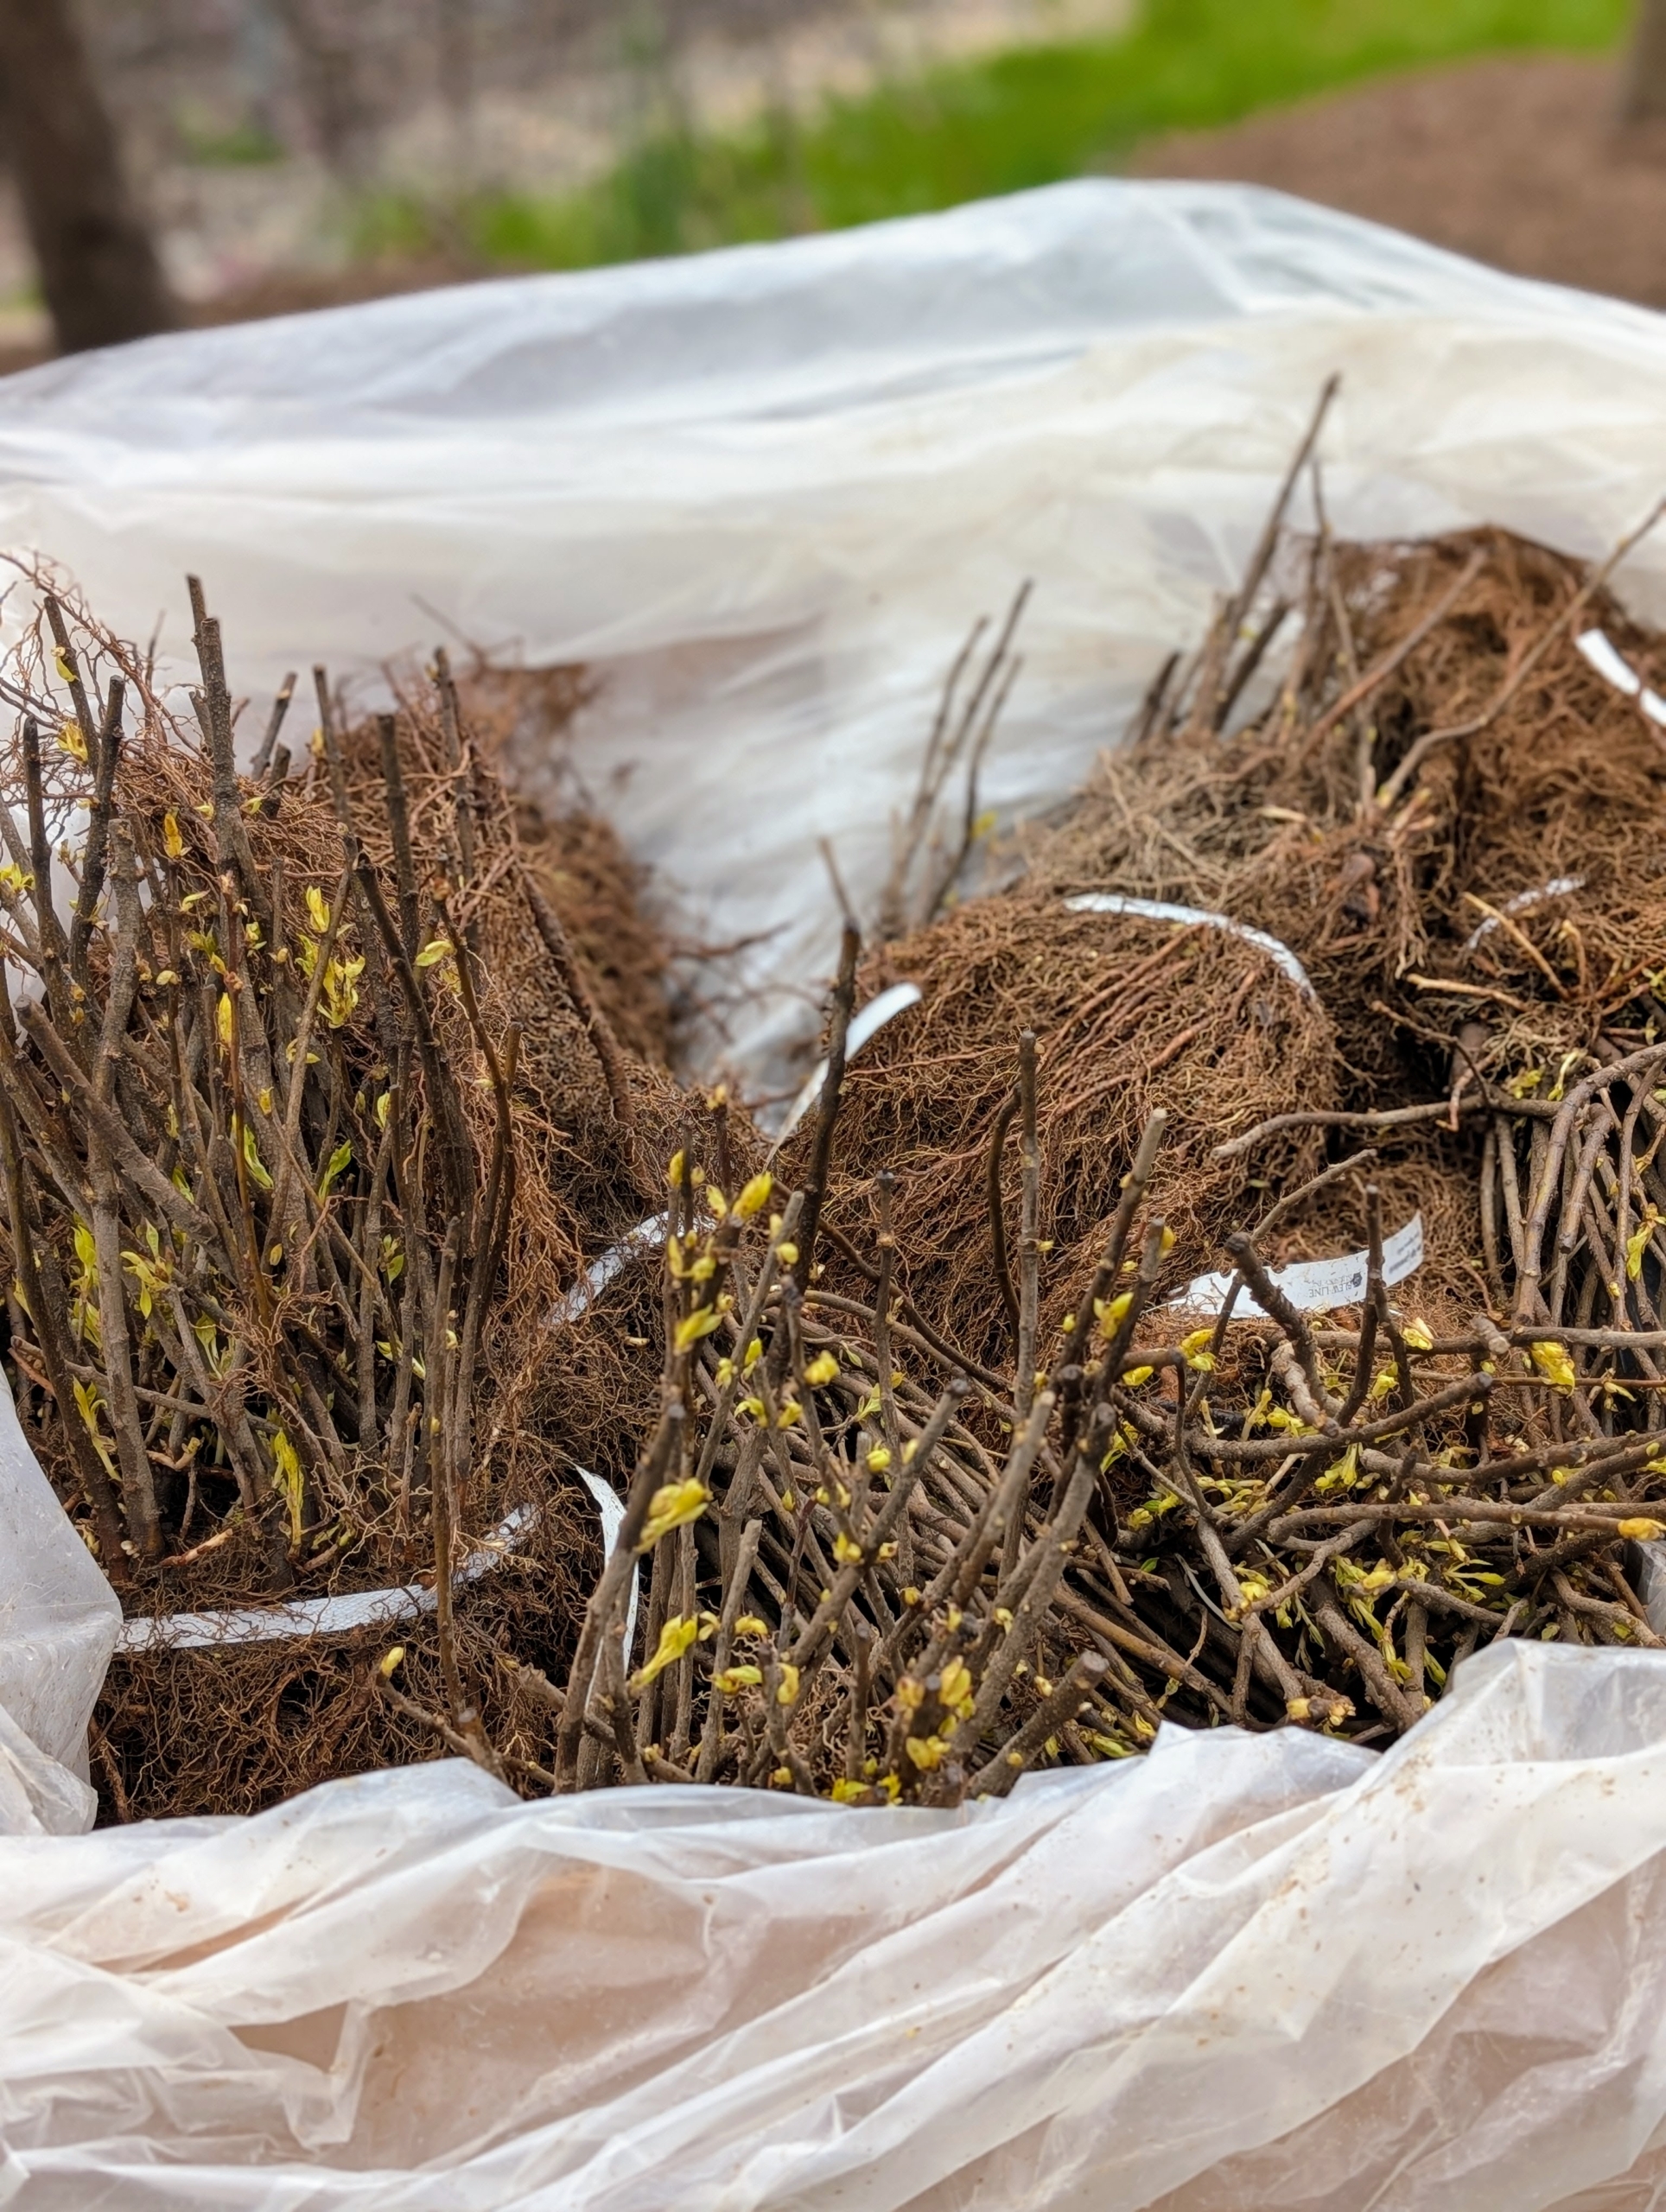
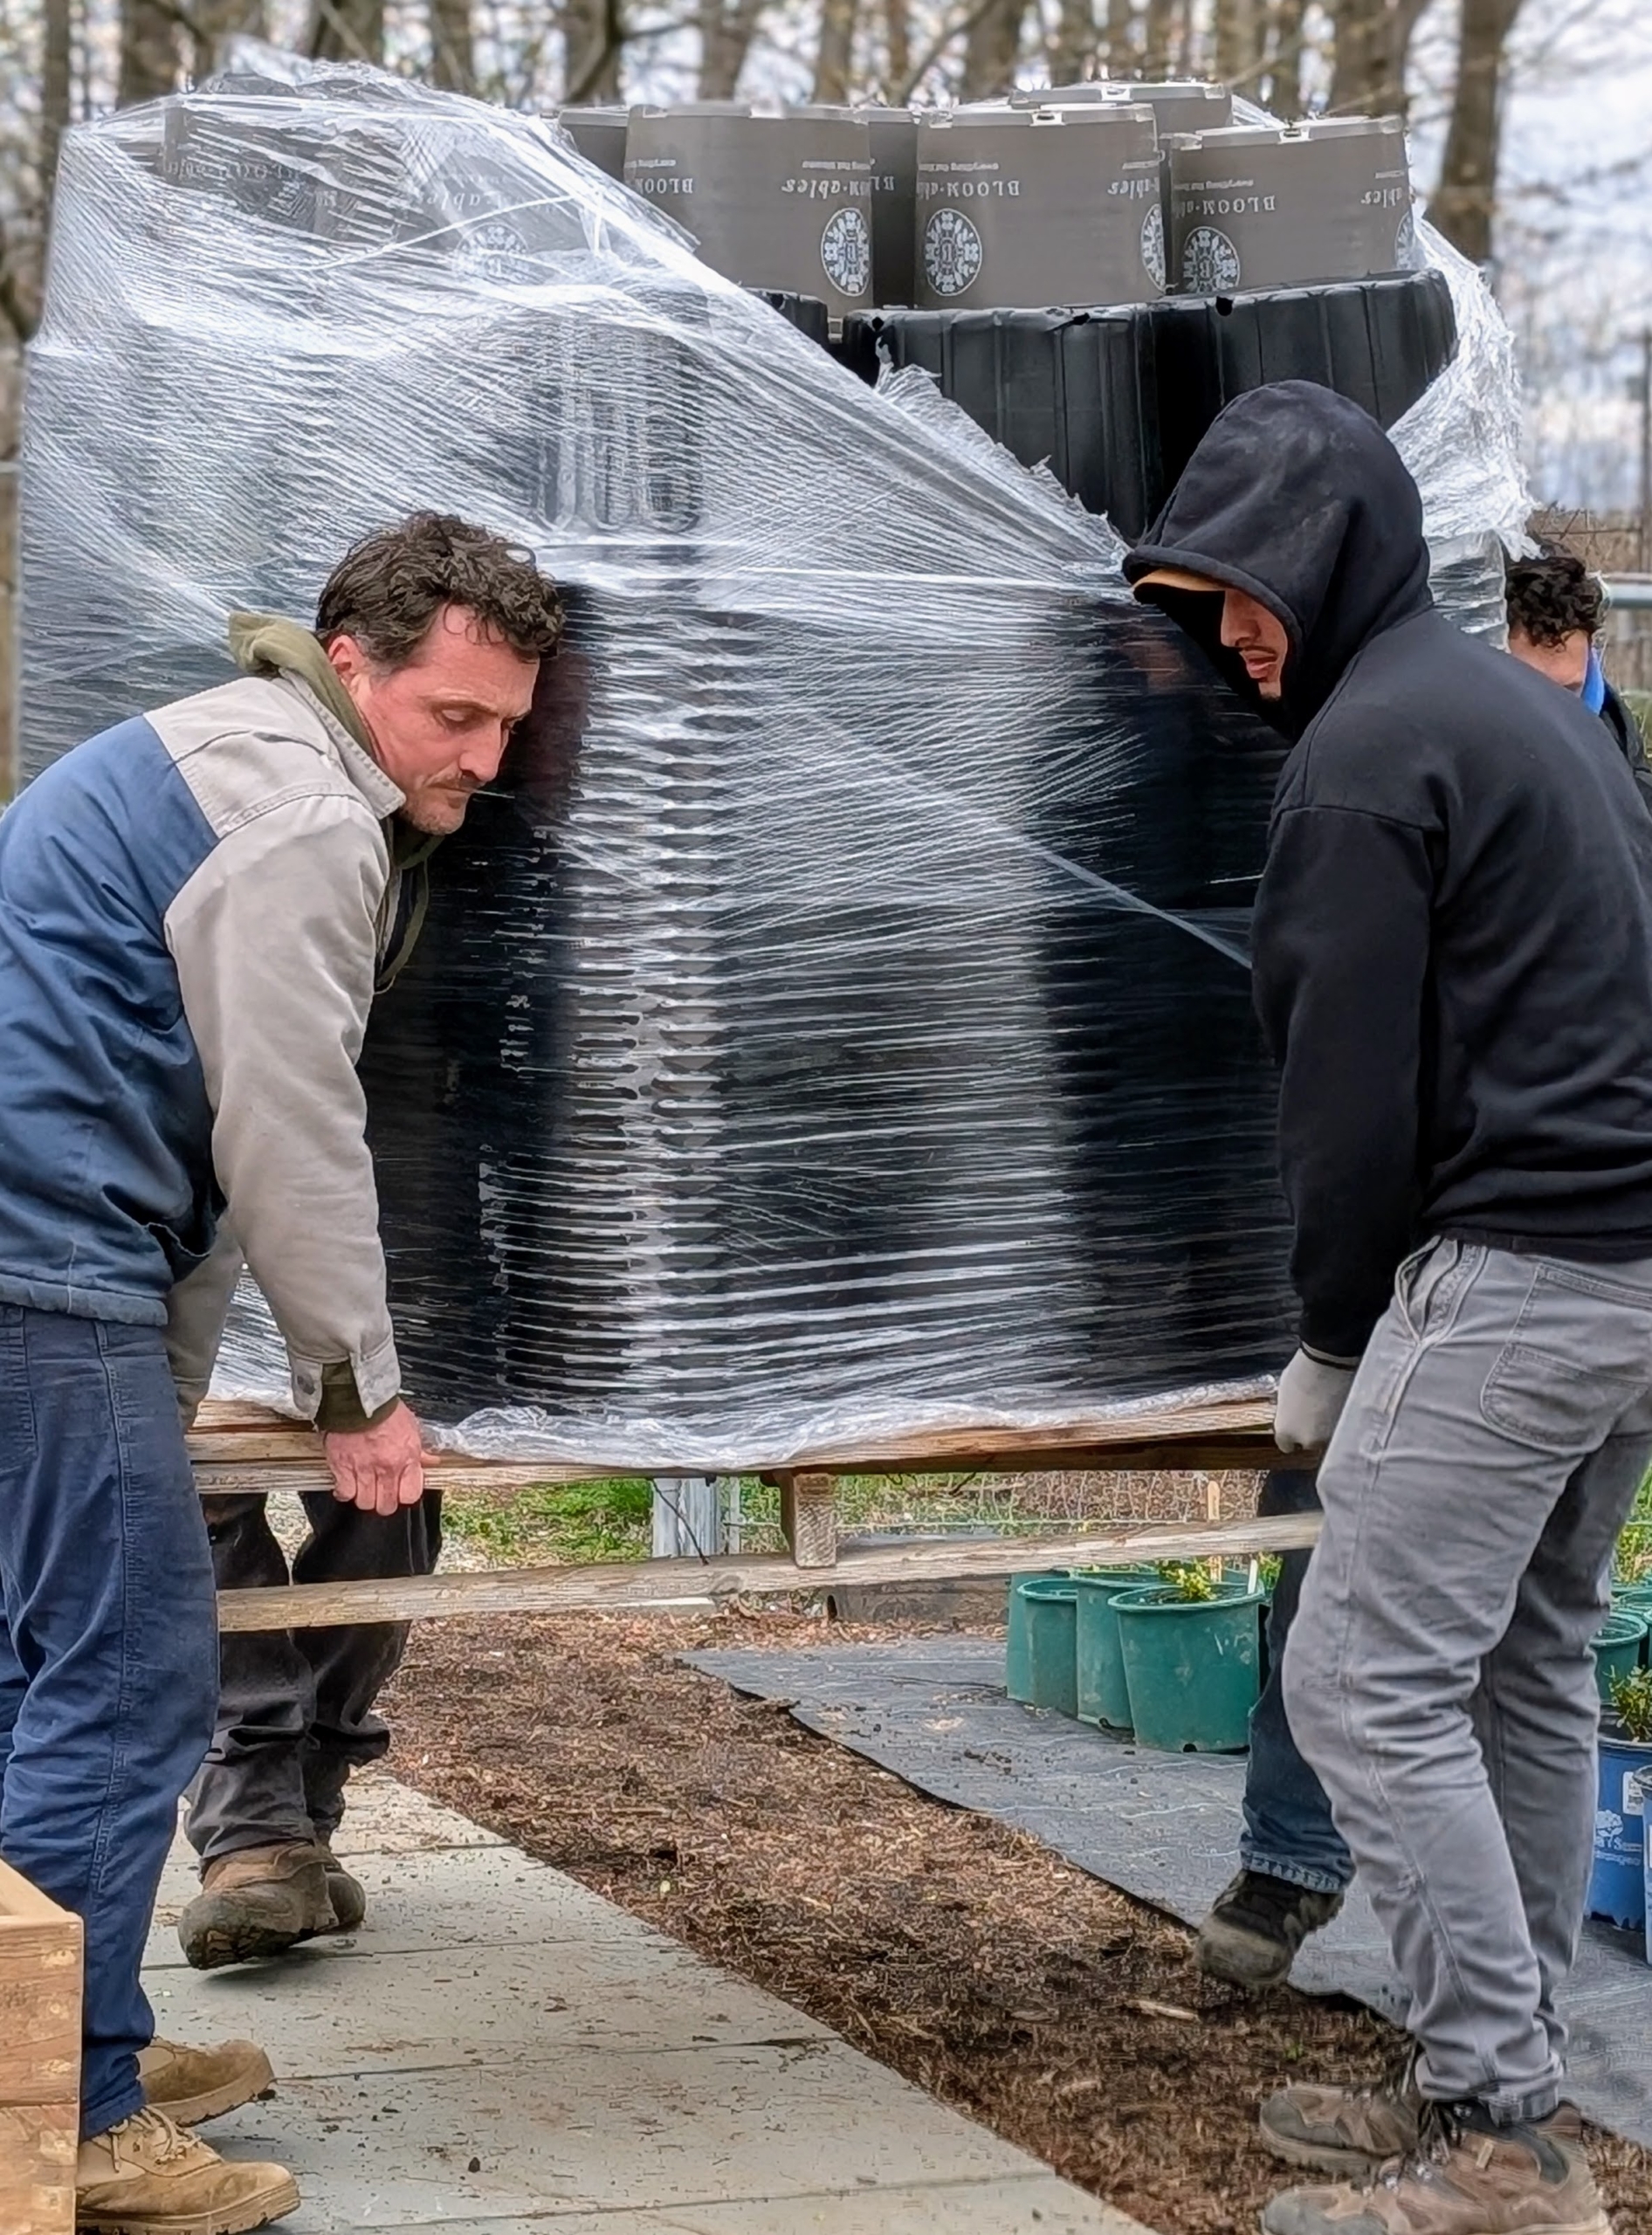
Over the last couple of weeks, my gardeners and outdoor grounds crew have been busy caring for all sorts of bare-roots - plants that are so named because they are dug from the ground while dormant and then stored without any soil surrounding their roots. Yesterday, I received a shipment of beautiful bare-root roses, hydrangeas, lilacs, dogwoods, arborvitae and others. I also received more than 100 boxwood shrub transplants - all from Star Roses and Plants, a company of brands, including The Knock Out® Family of Roses, Bloomables®, Drift® Roses, and Bushel and Berry® that focuses on breeding and introducing plants that offer disease resistance and long-lasting blooms. Once the plants arrived, it was all hands on deck.
Here are some photos, enjoy.
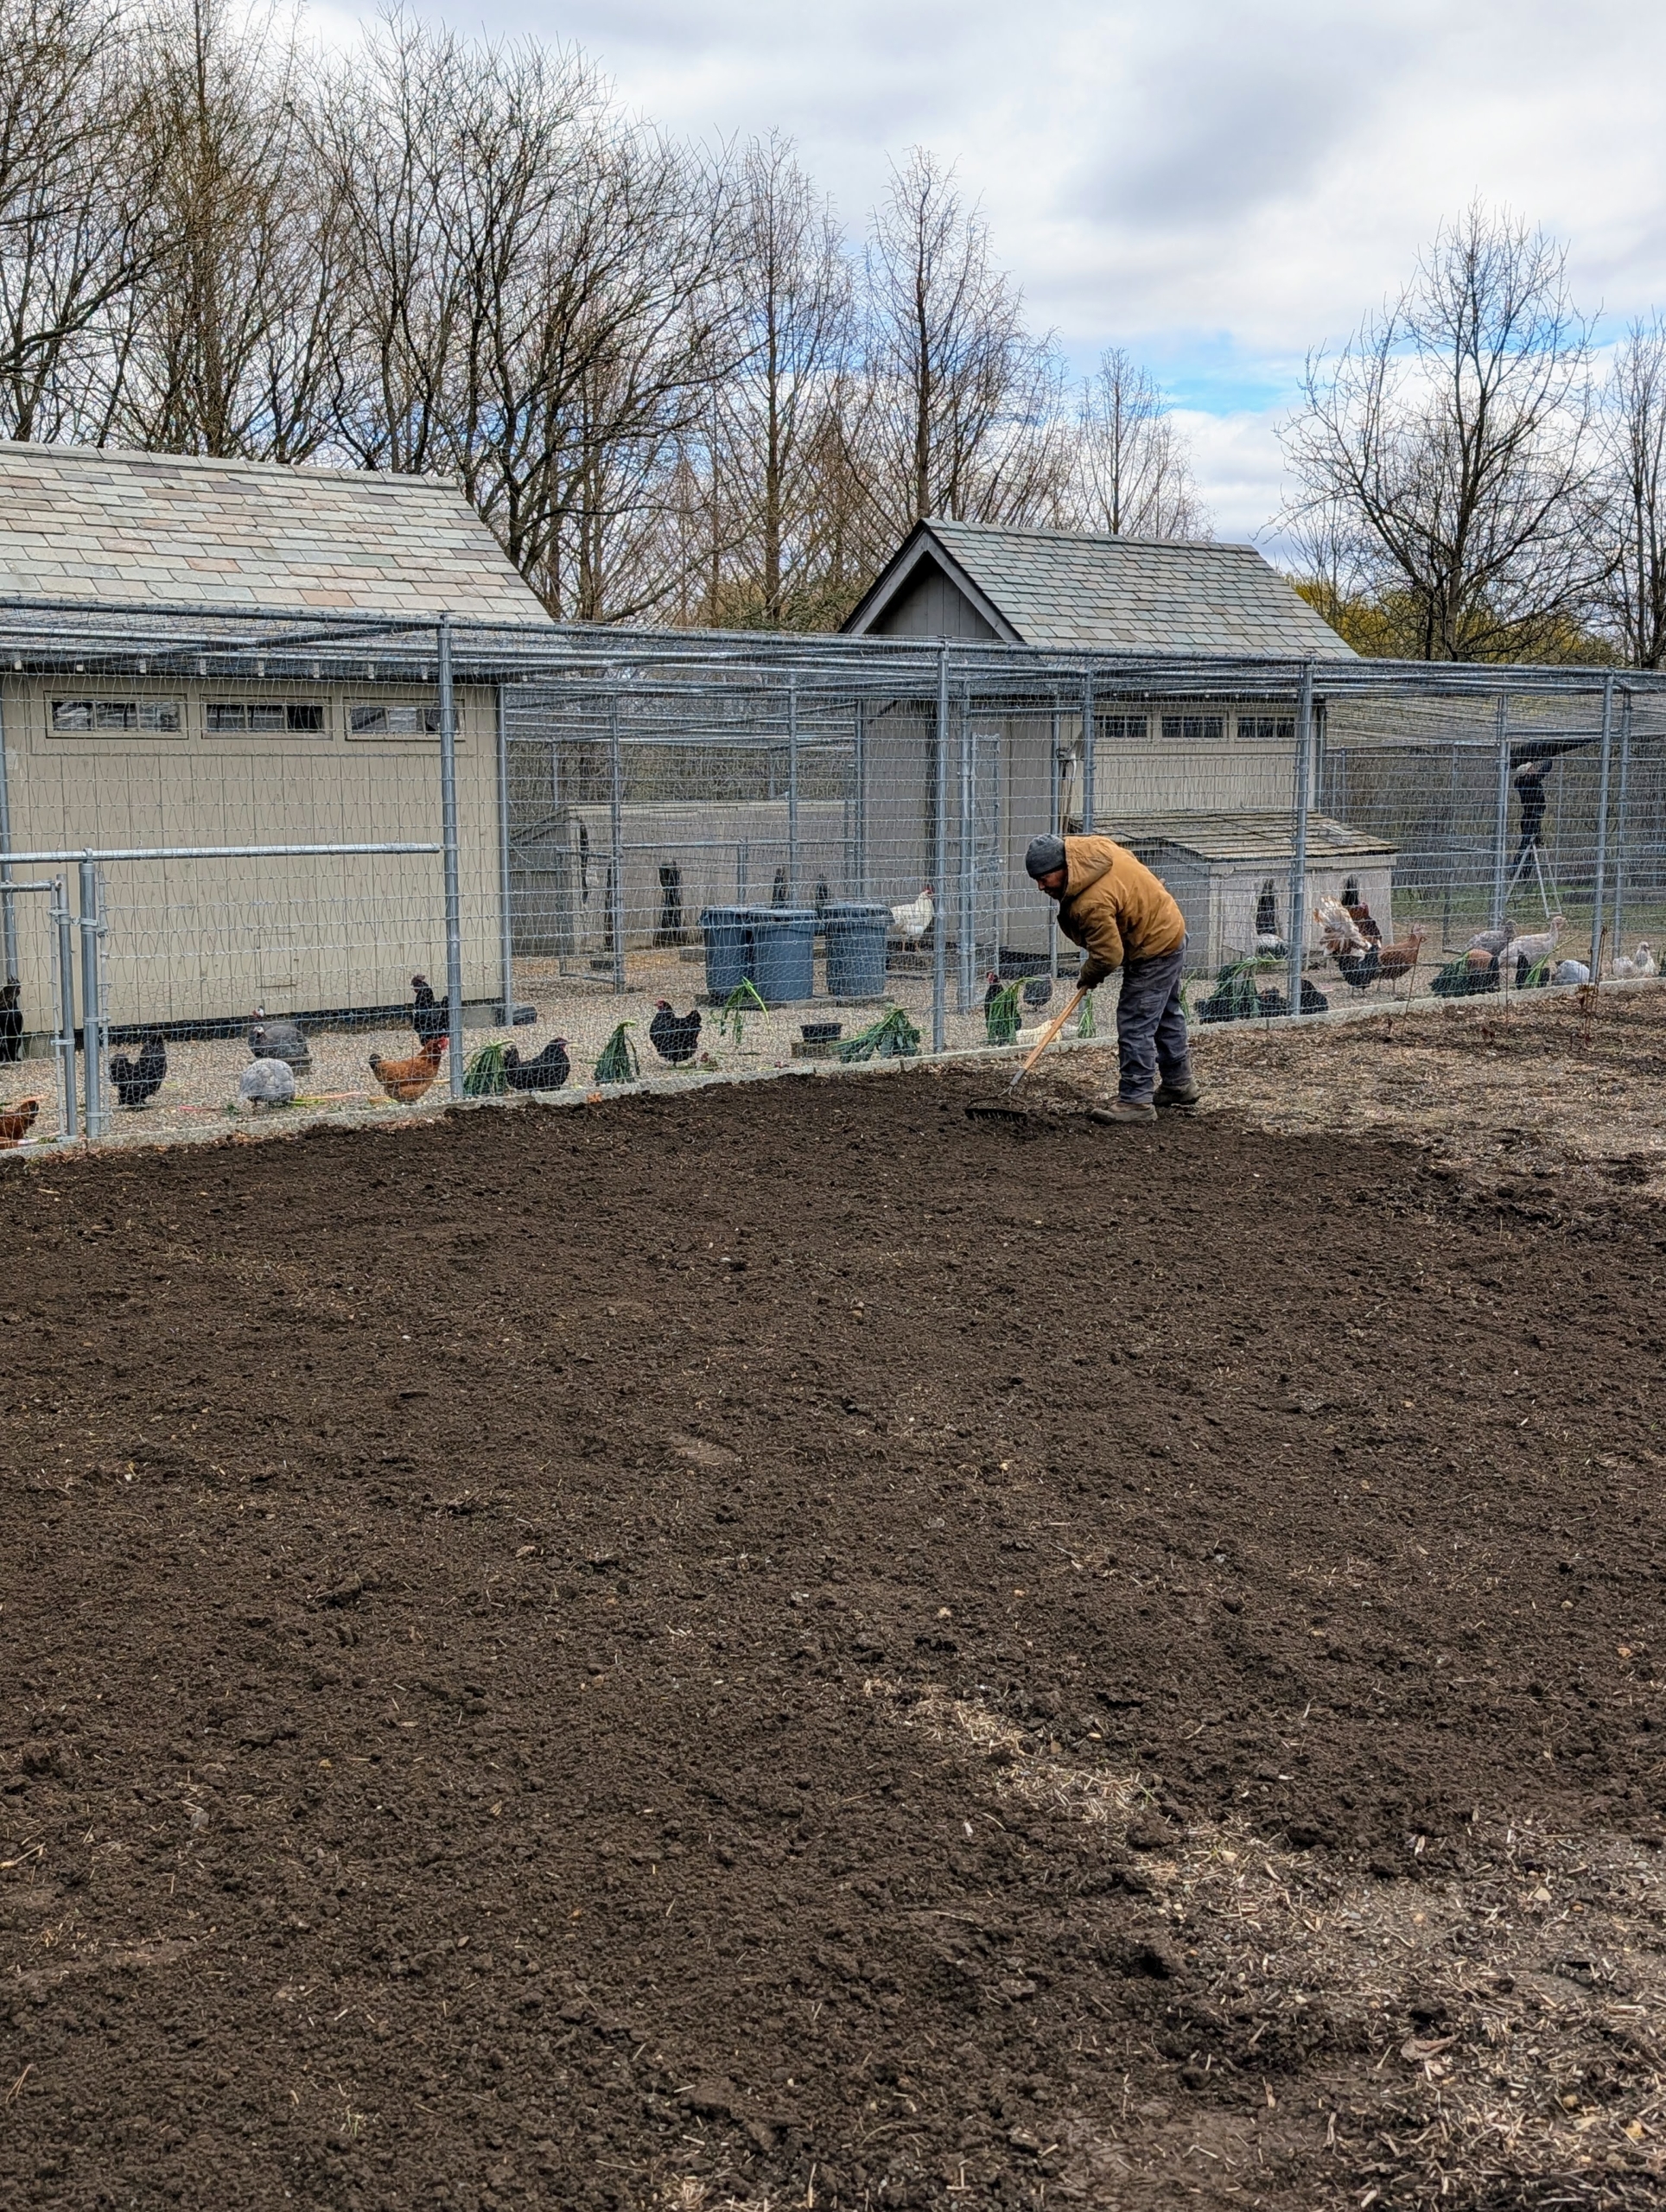
I’m using my former vegetable garden, down by my chicken coops, as a “nursery” for newly potted specimens. It’s large, flat, and completely fenced in. Here’s Phurba leveling the soil for the weed cloth.
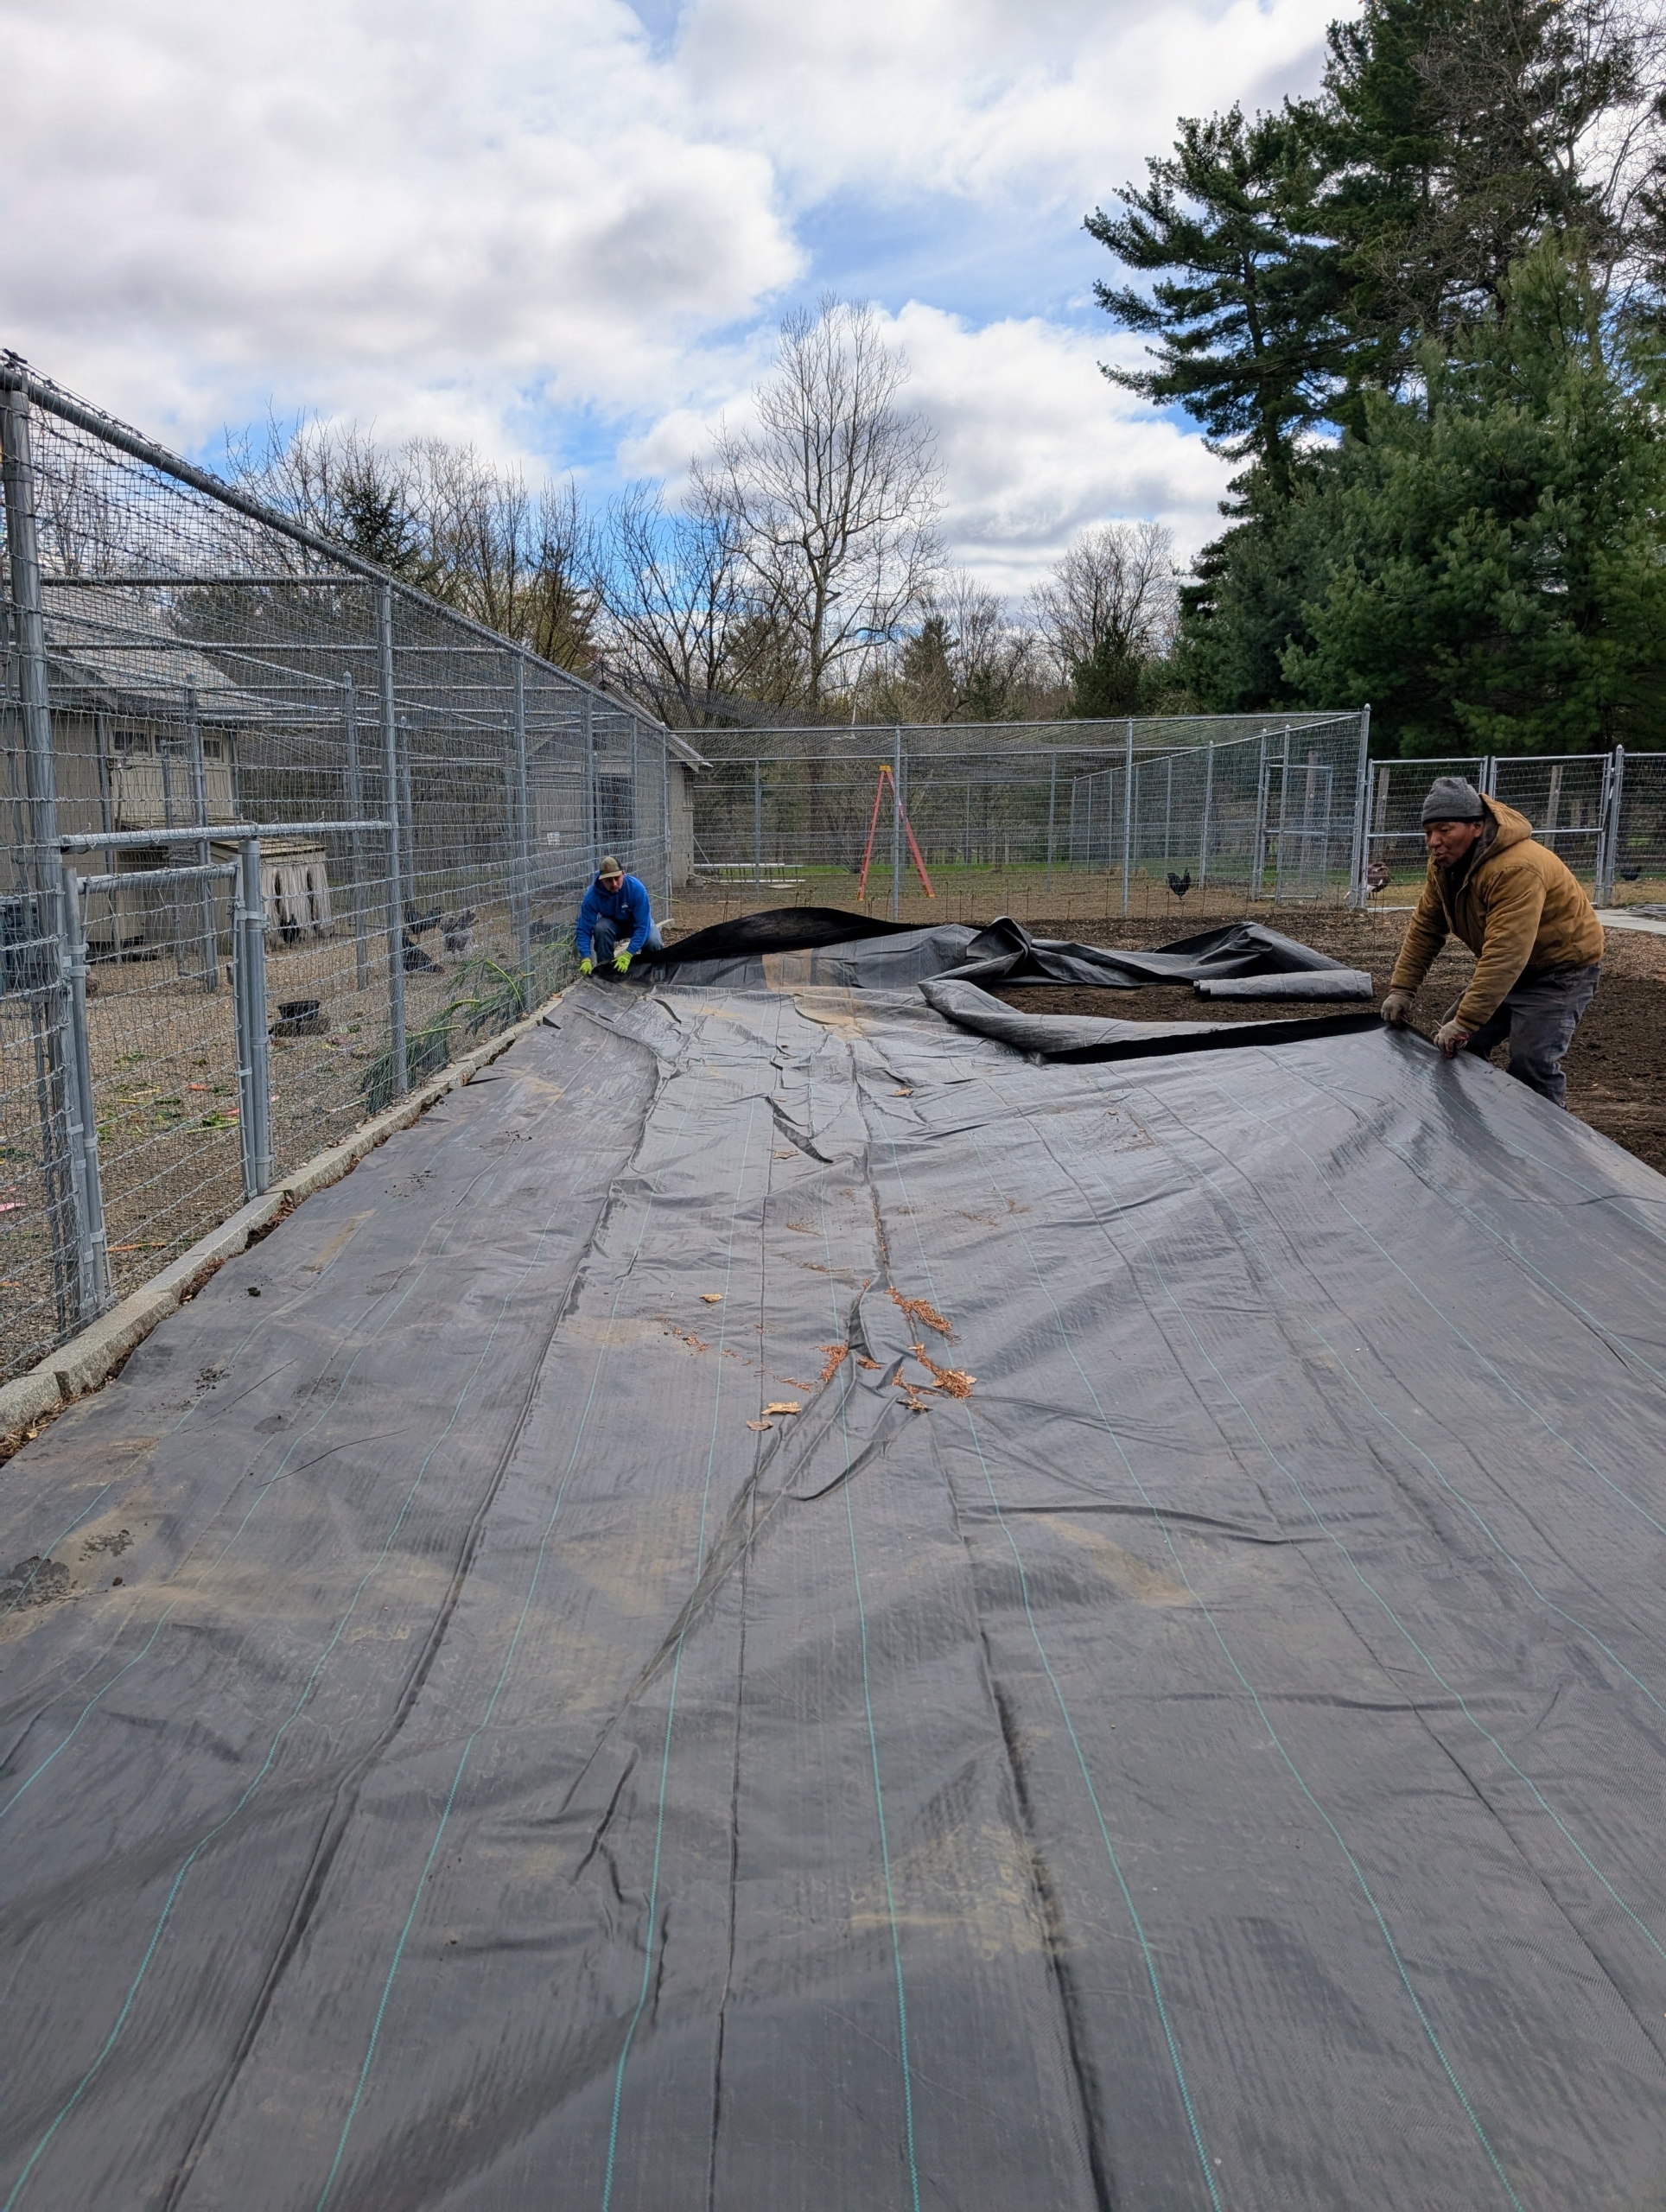
A large piece of weed cloth is put down and secured. This will keep the area looking neat, tidy and much more manageable.
Star Roses and Plants is well known first by its beautiful roses and then by all its other newly bred and developed plants. I received 426 roses.
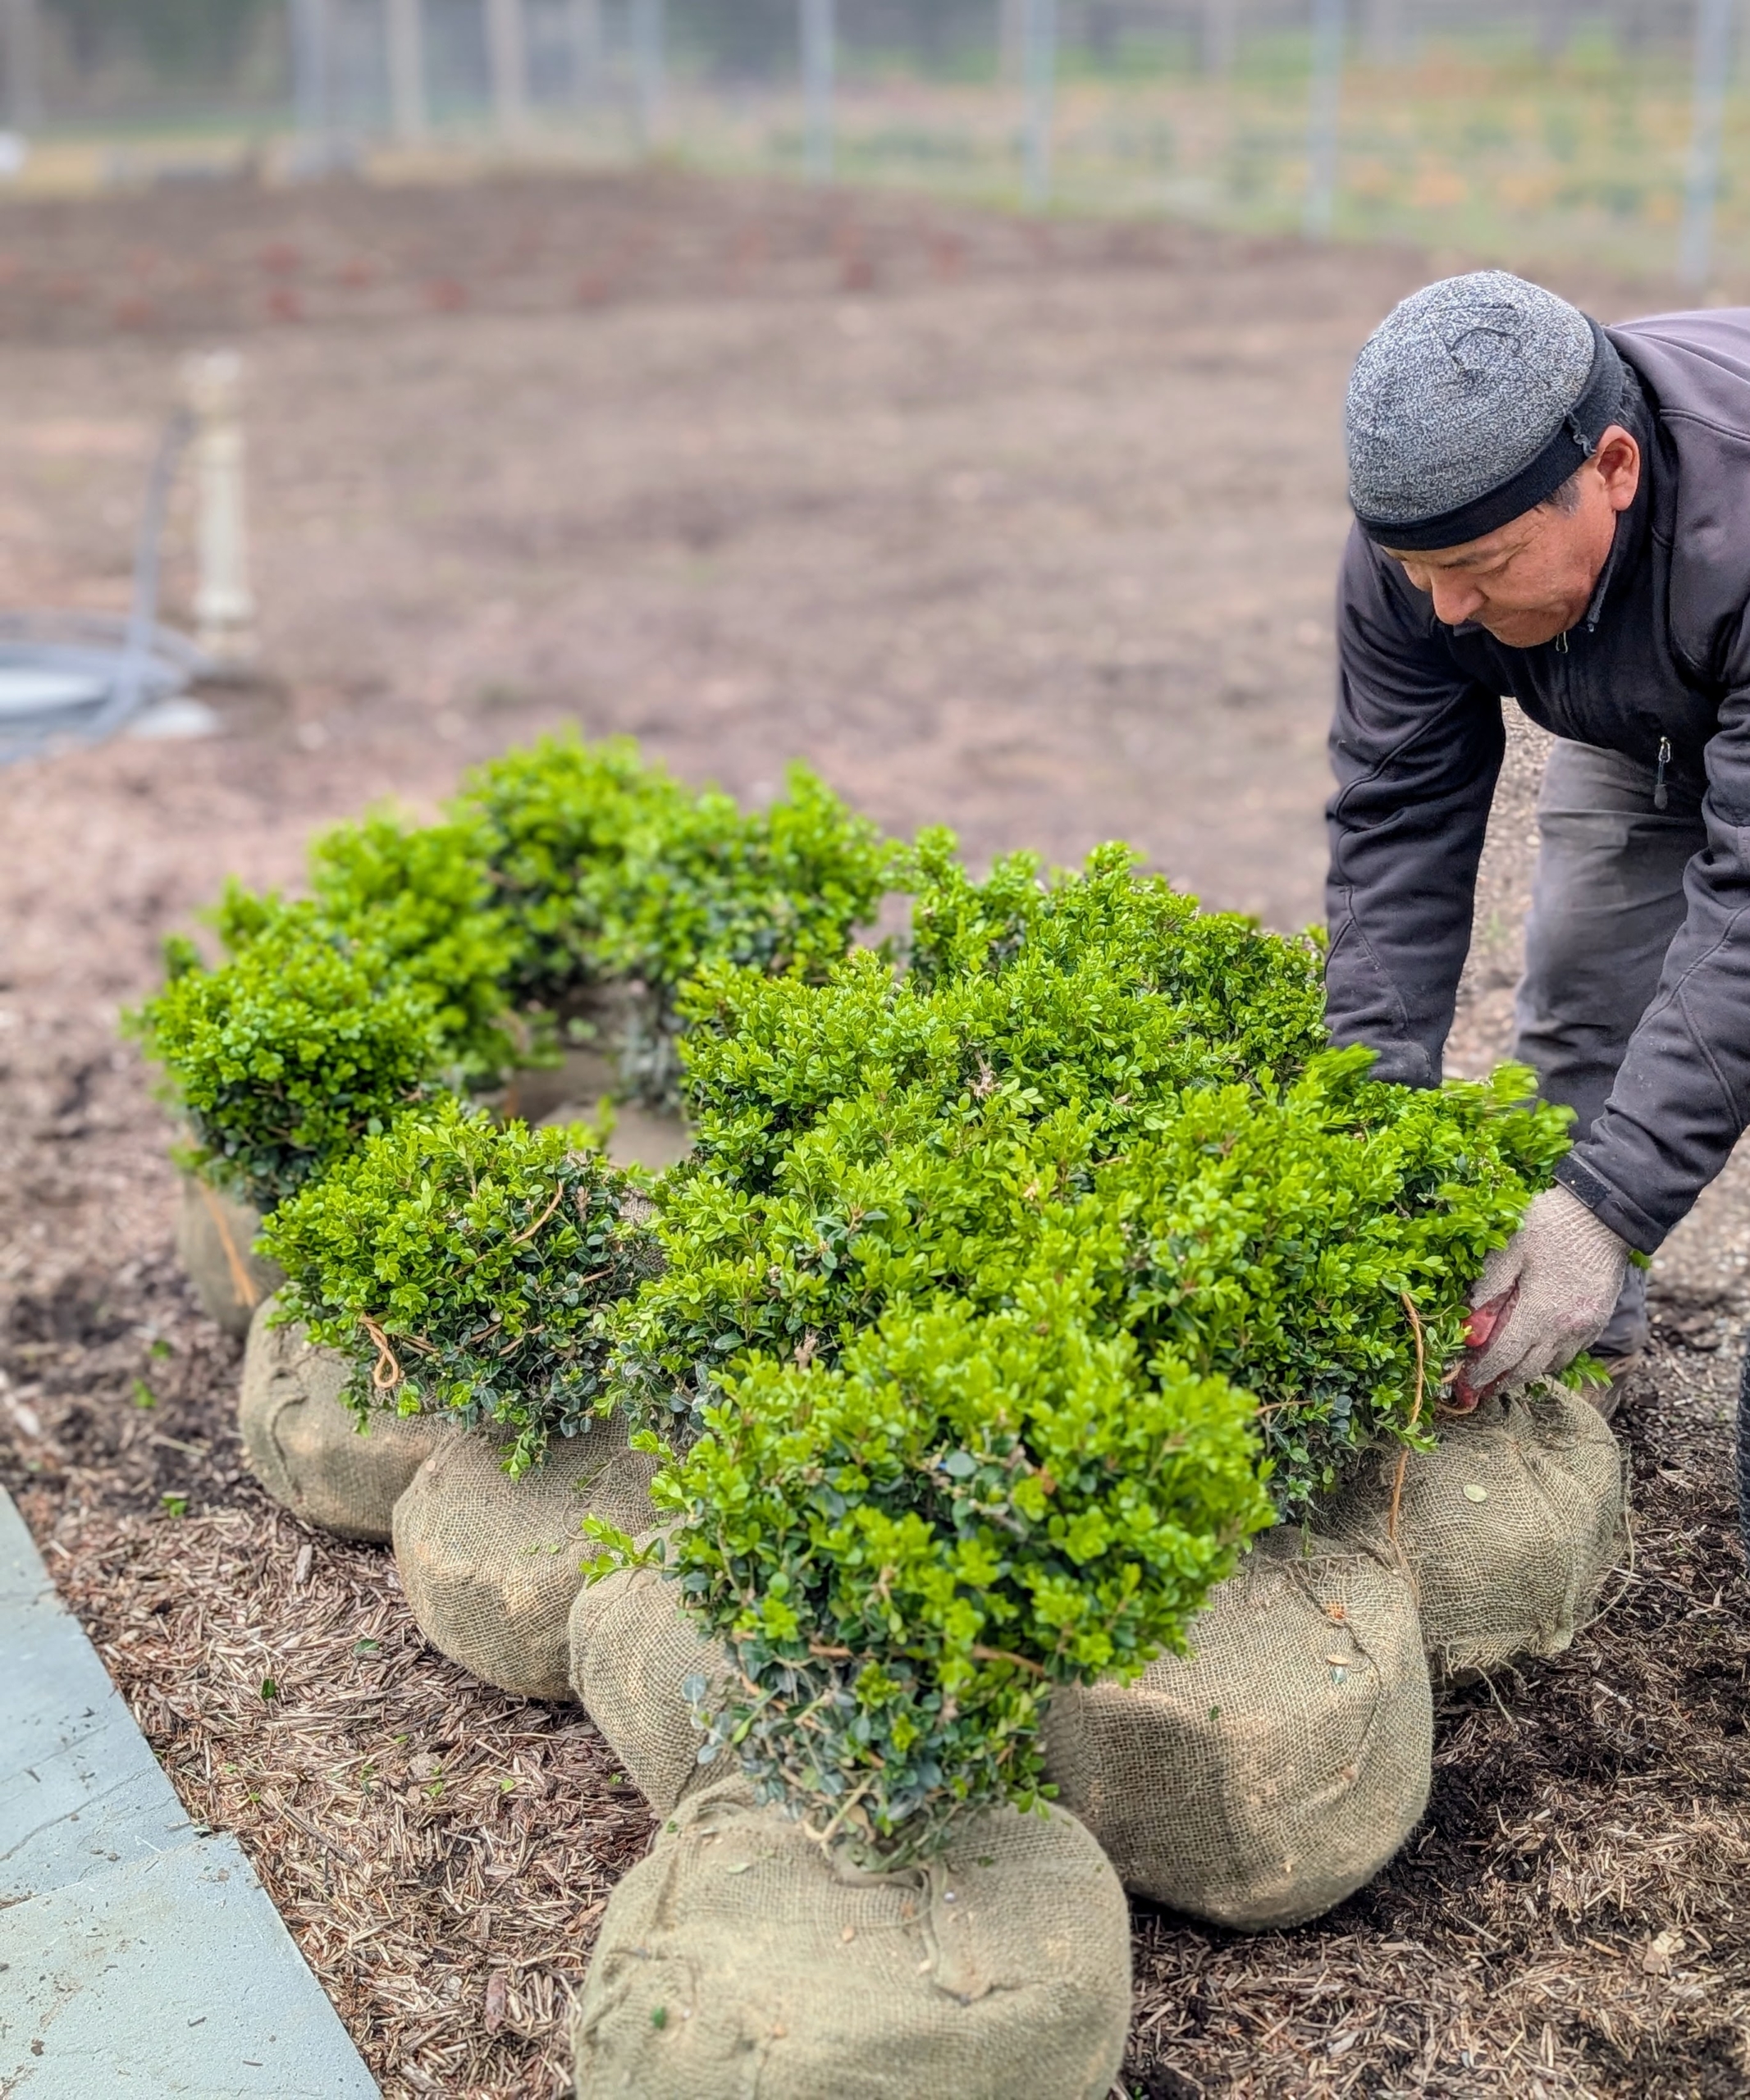
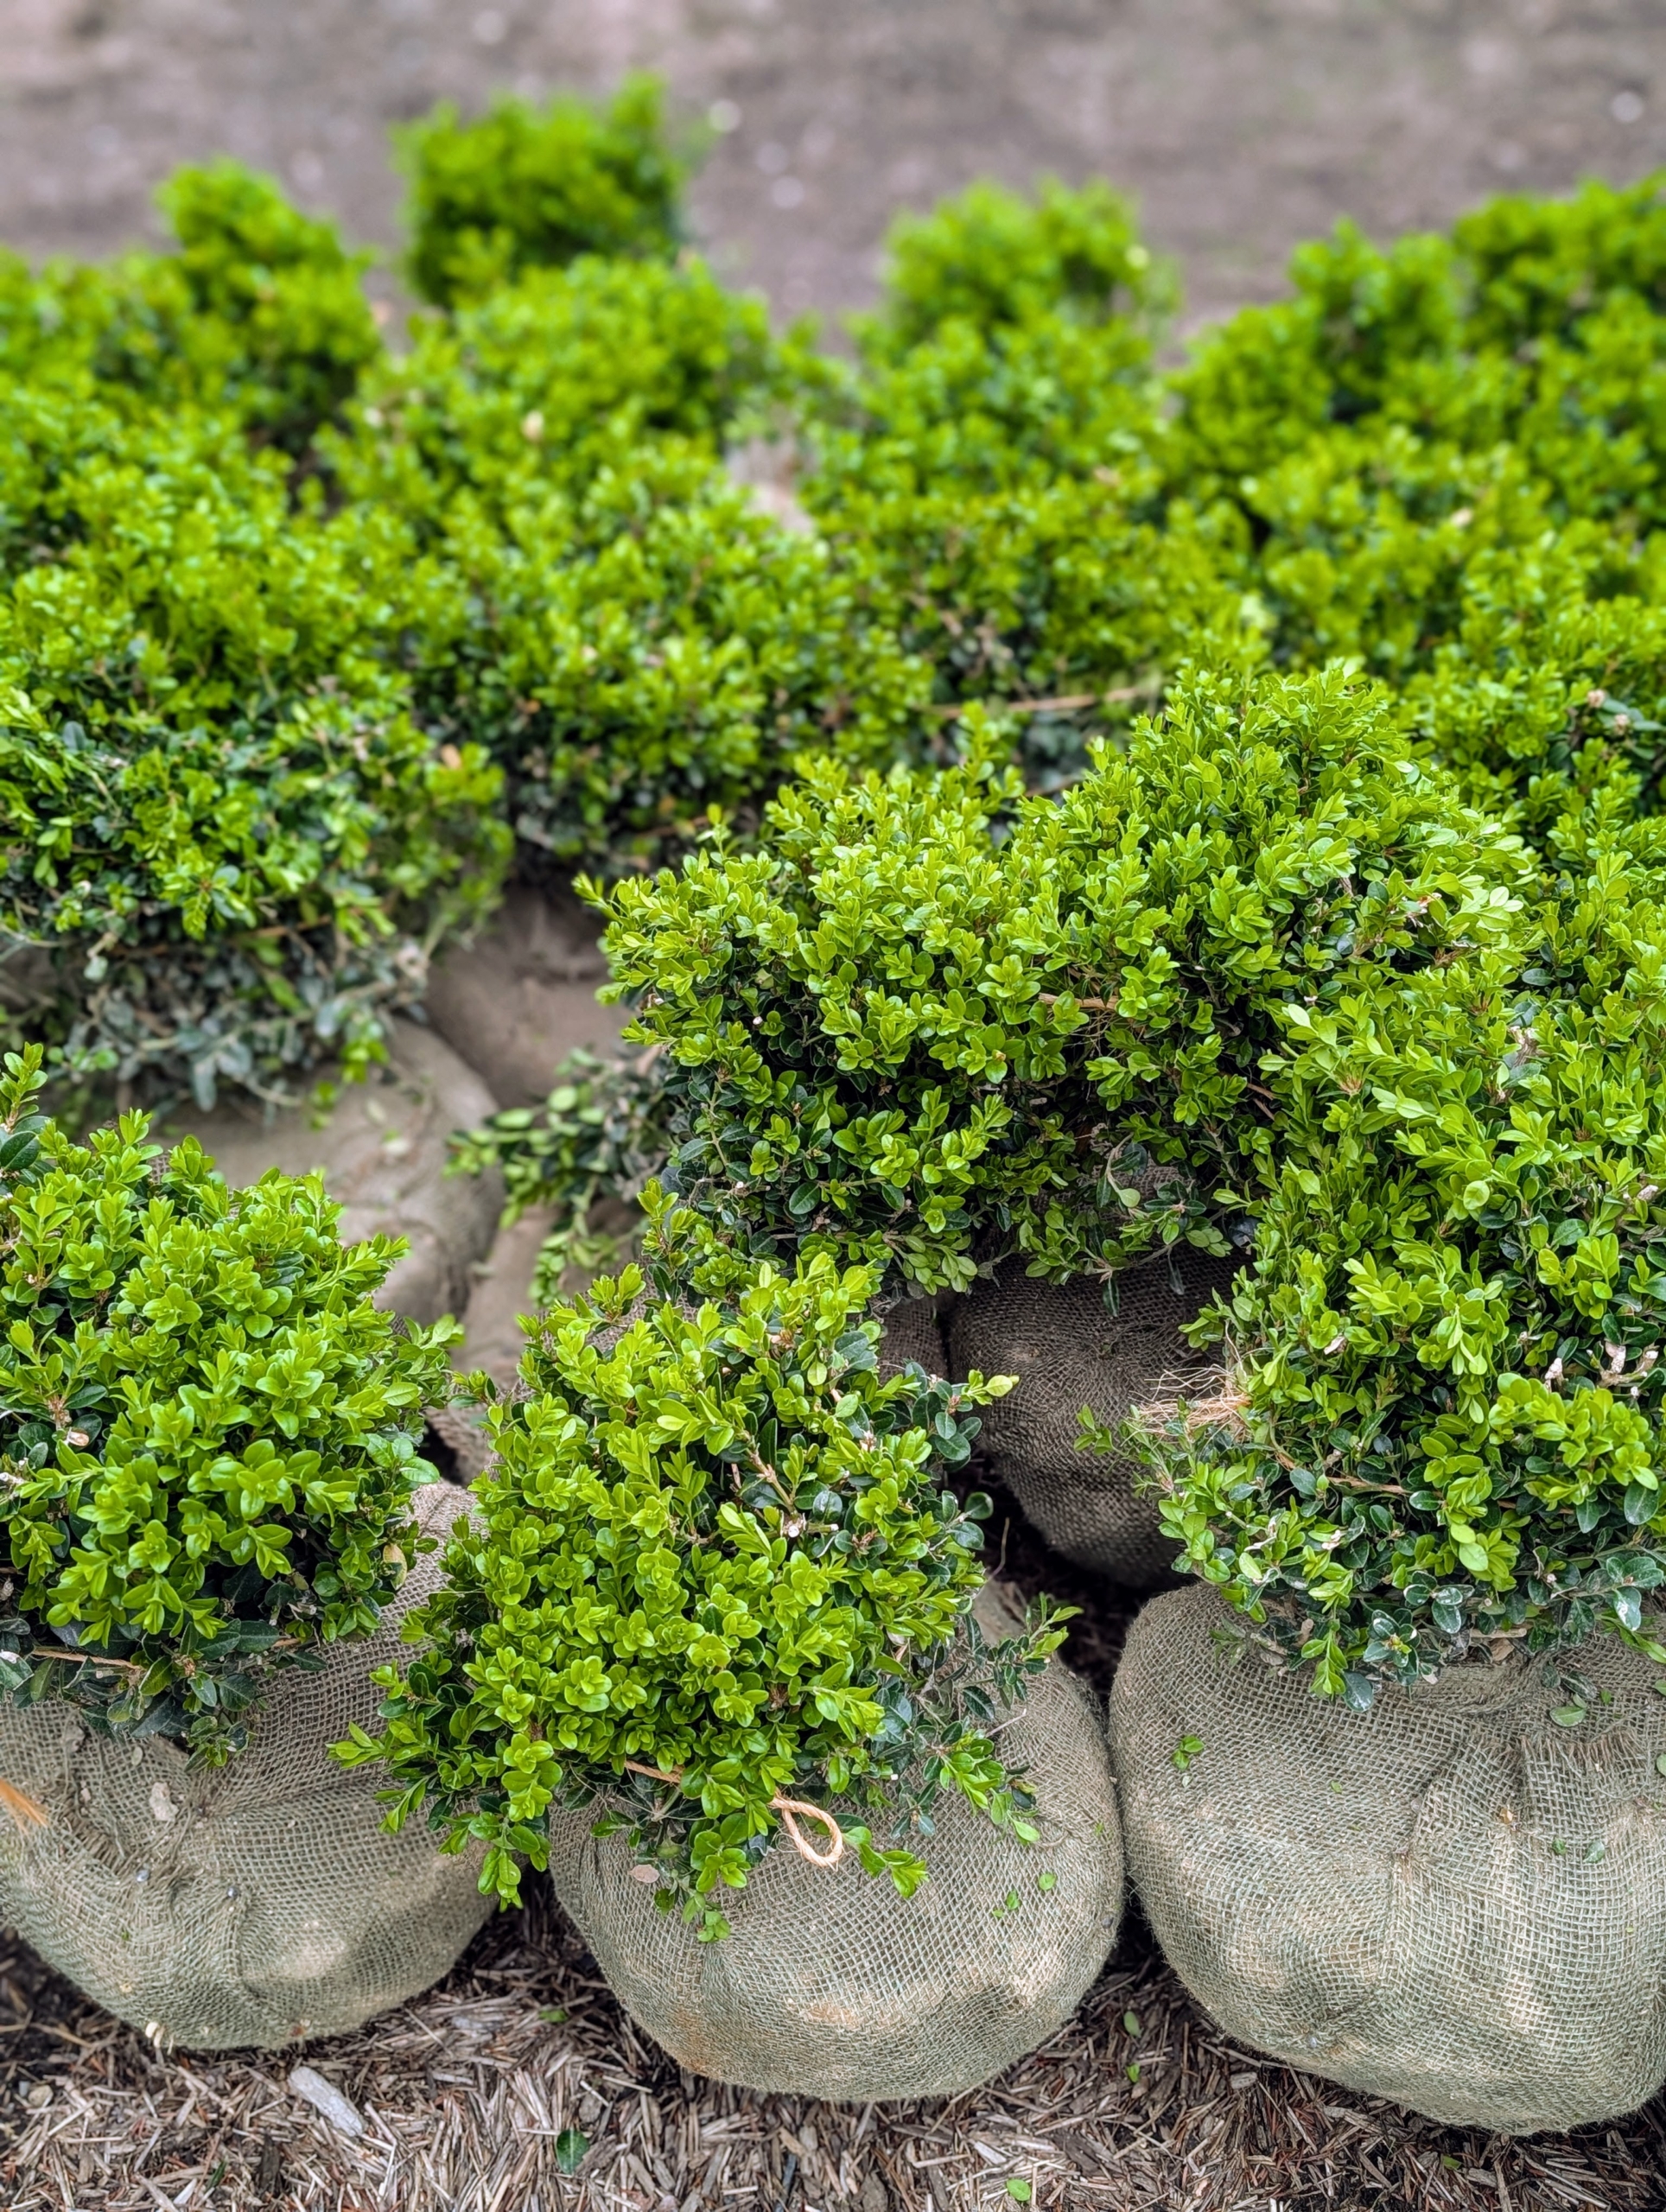
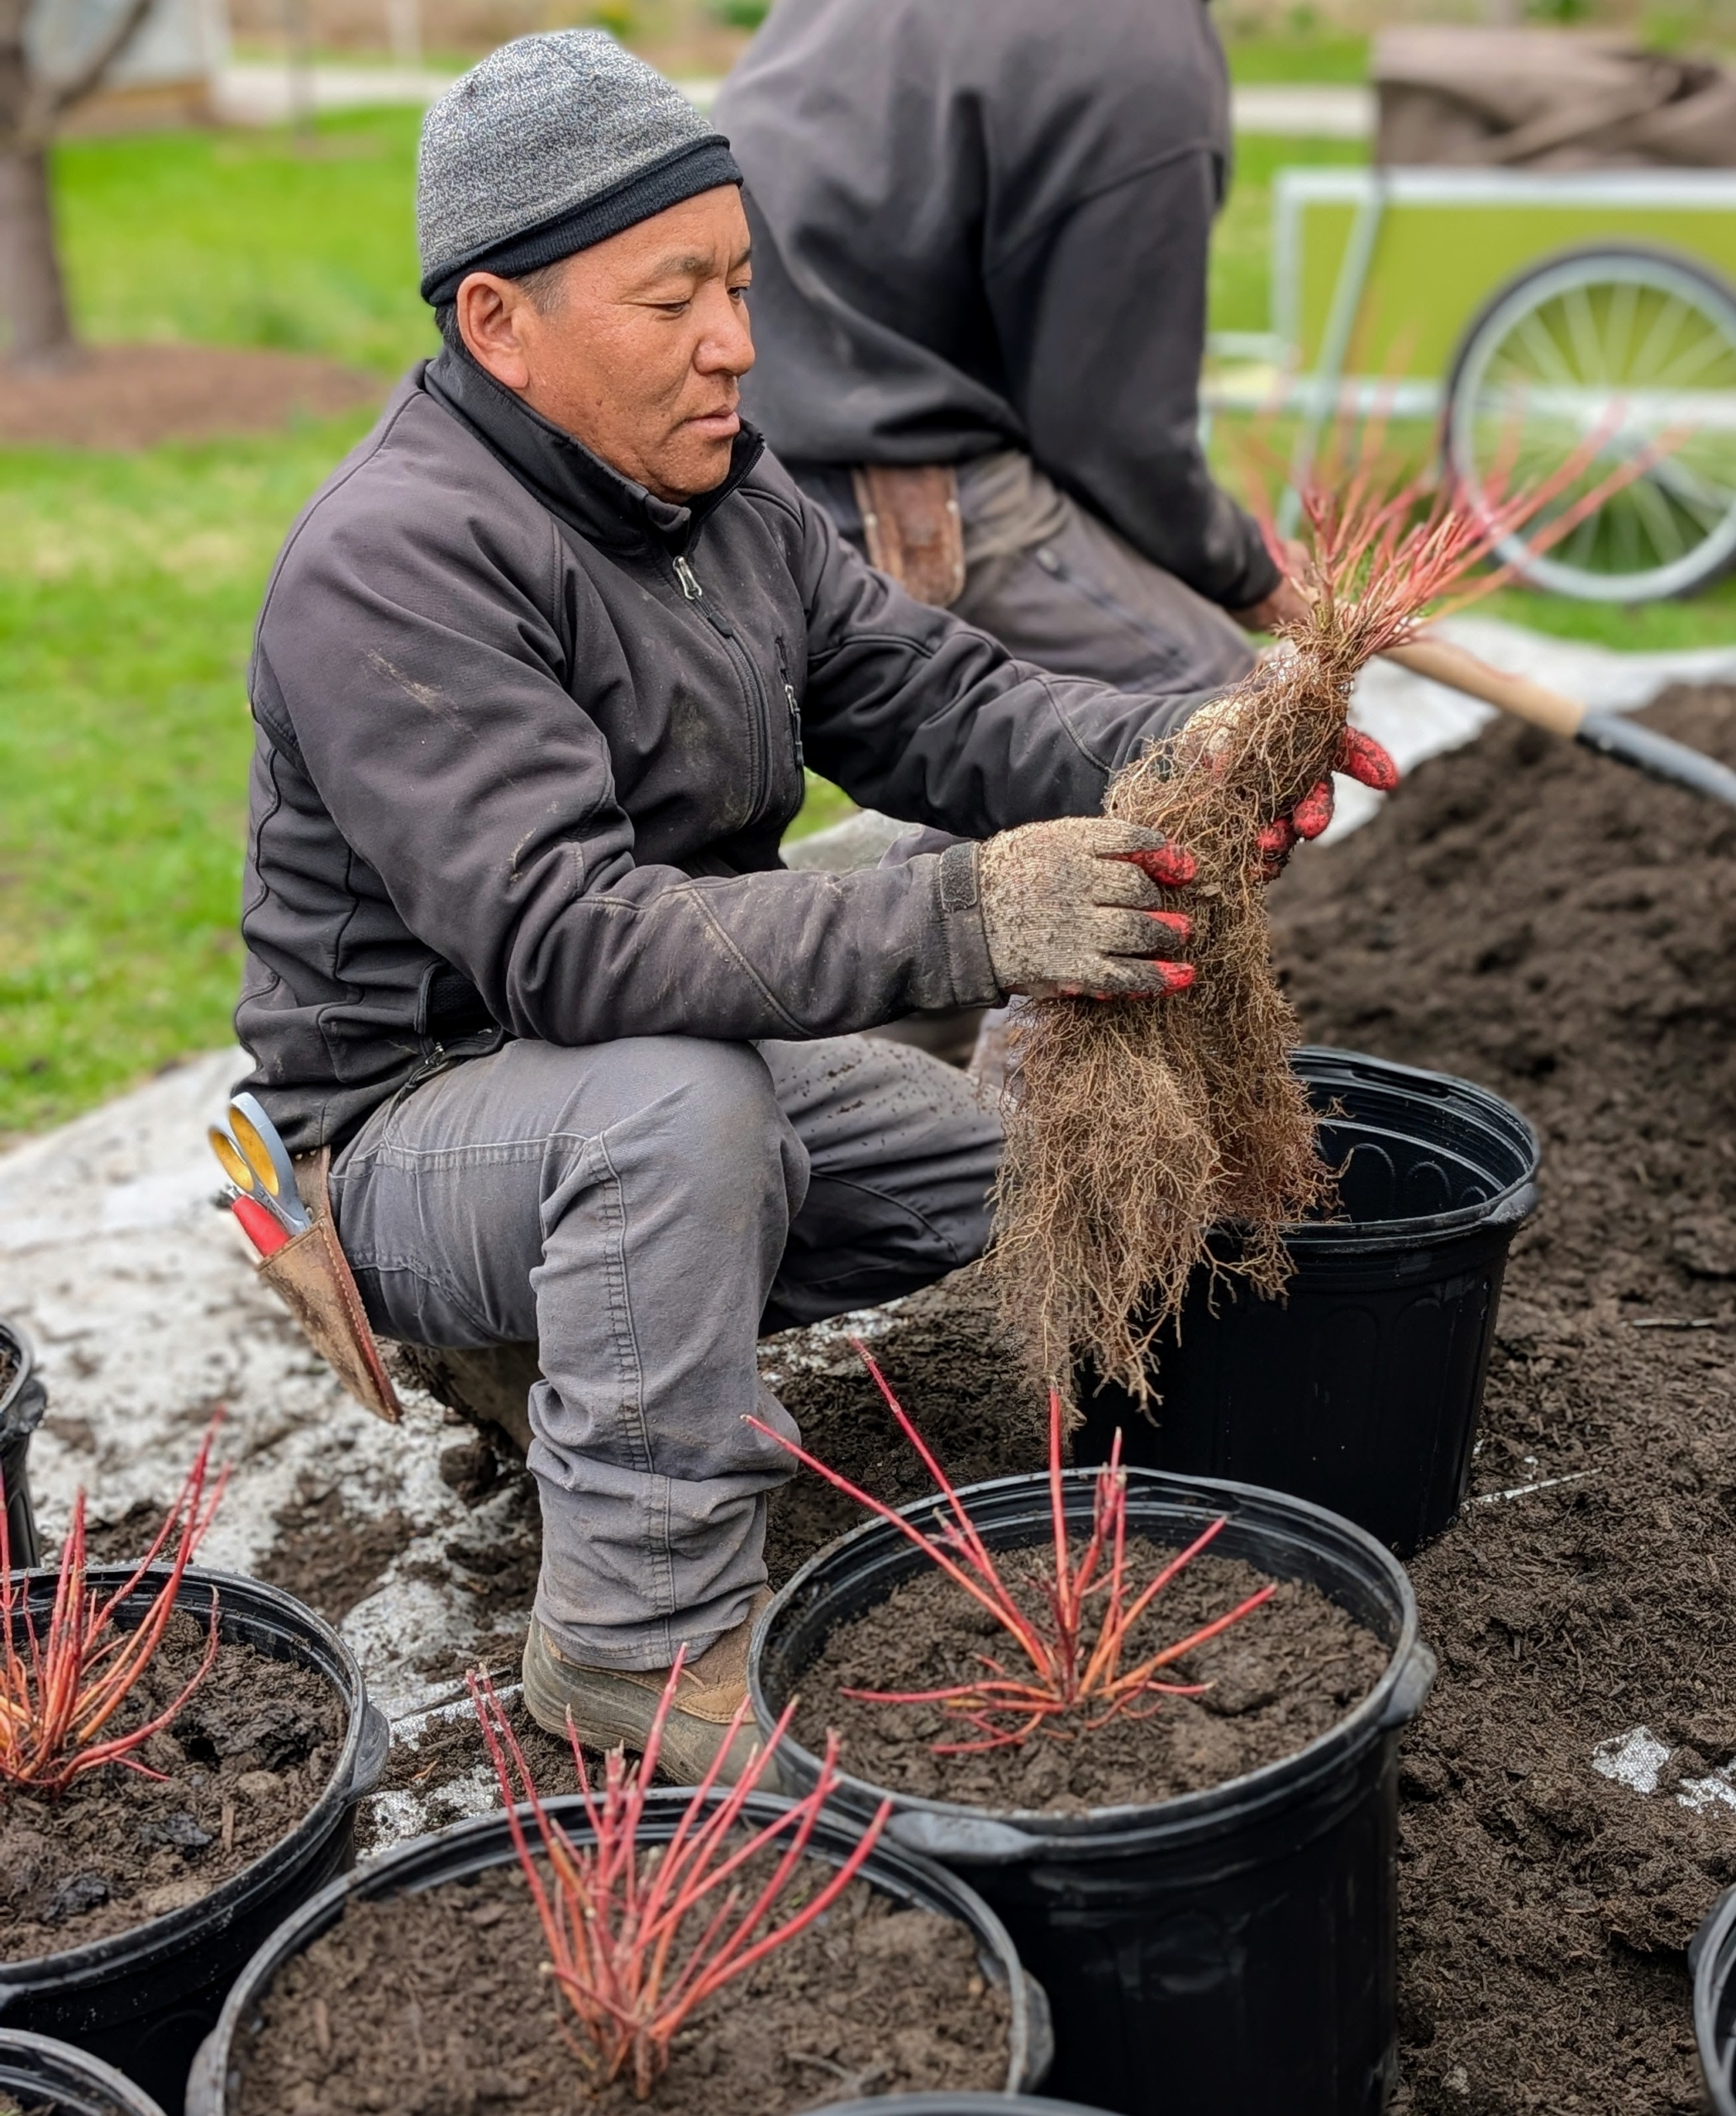
Here’s Phurba unloading the first of 100 Little Mister Buxus, Buxus microphylla.
According to Star Roses and Plants, I now have the largest collection of Little Mister Buxus shrubs.
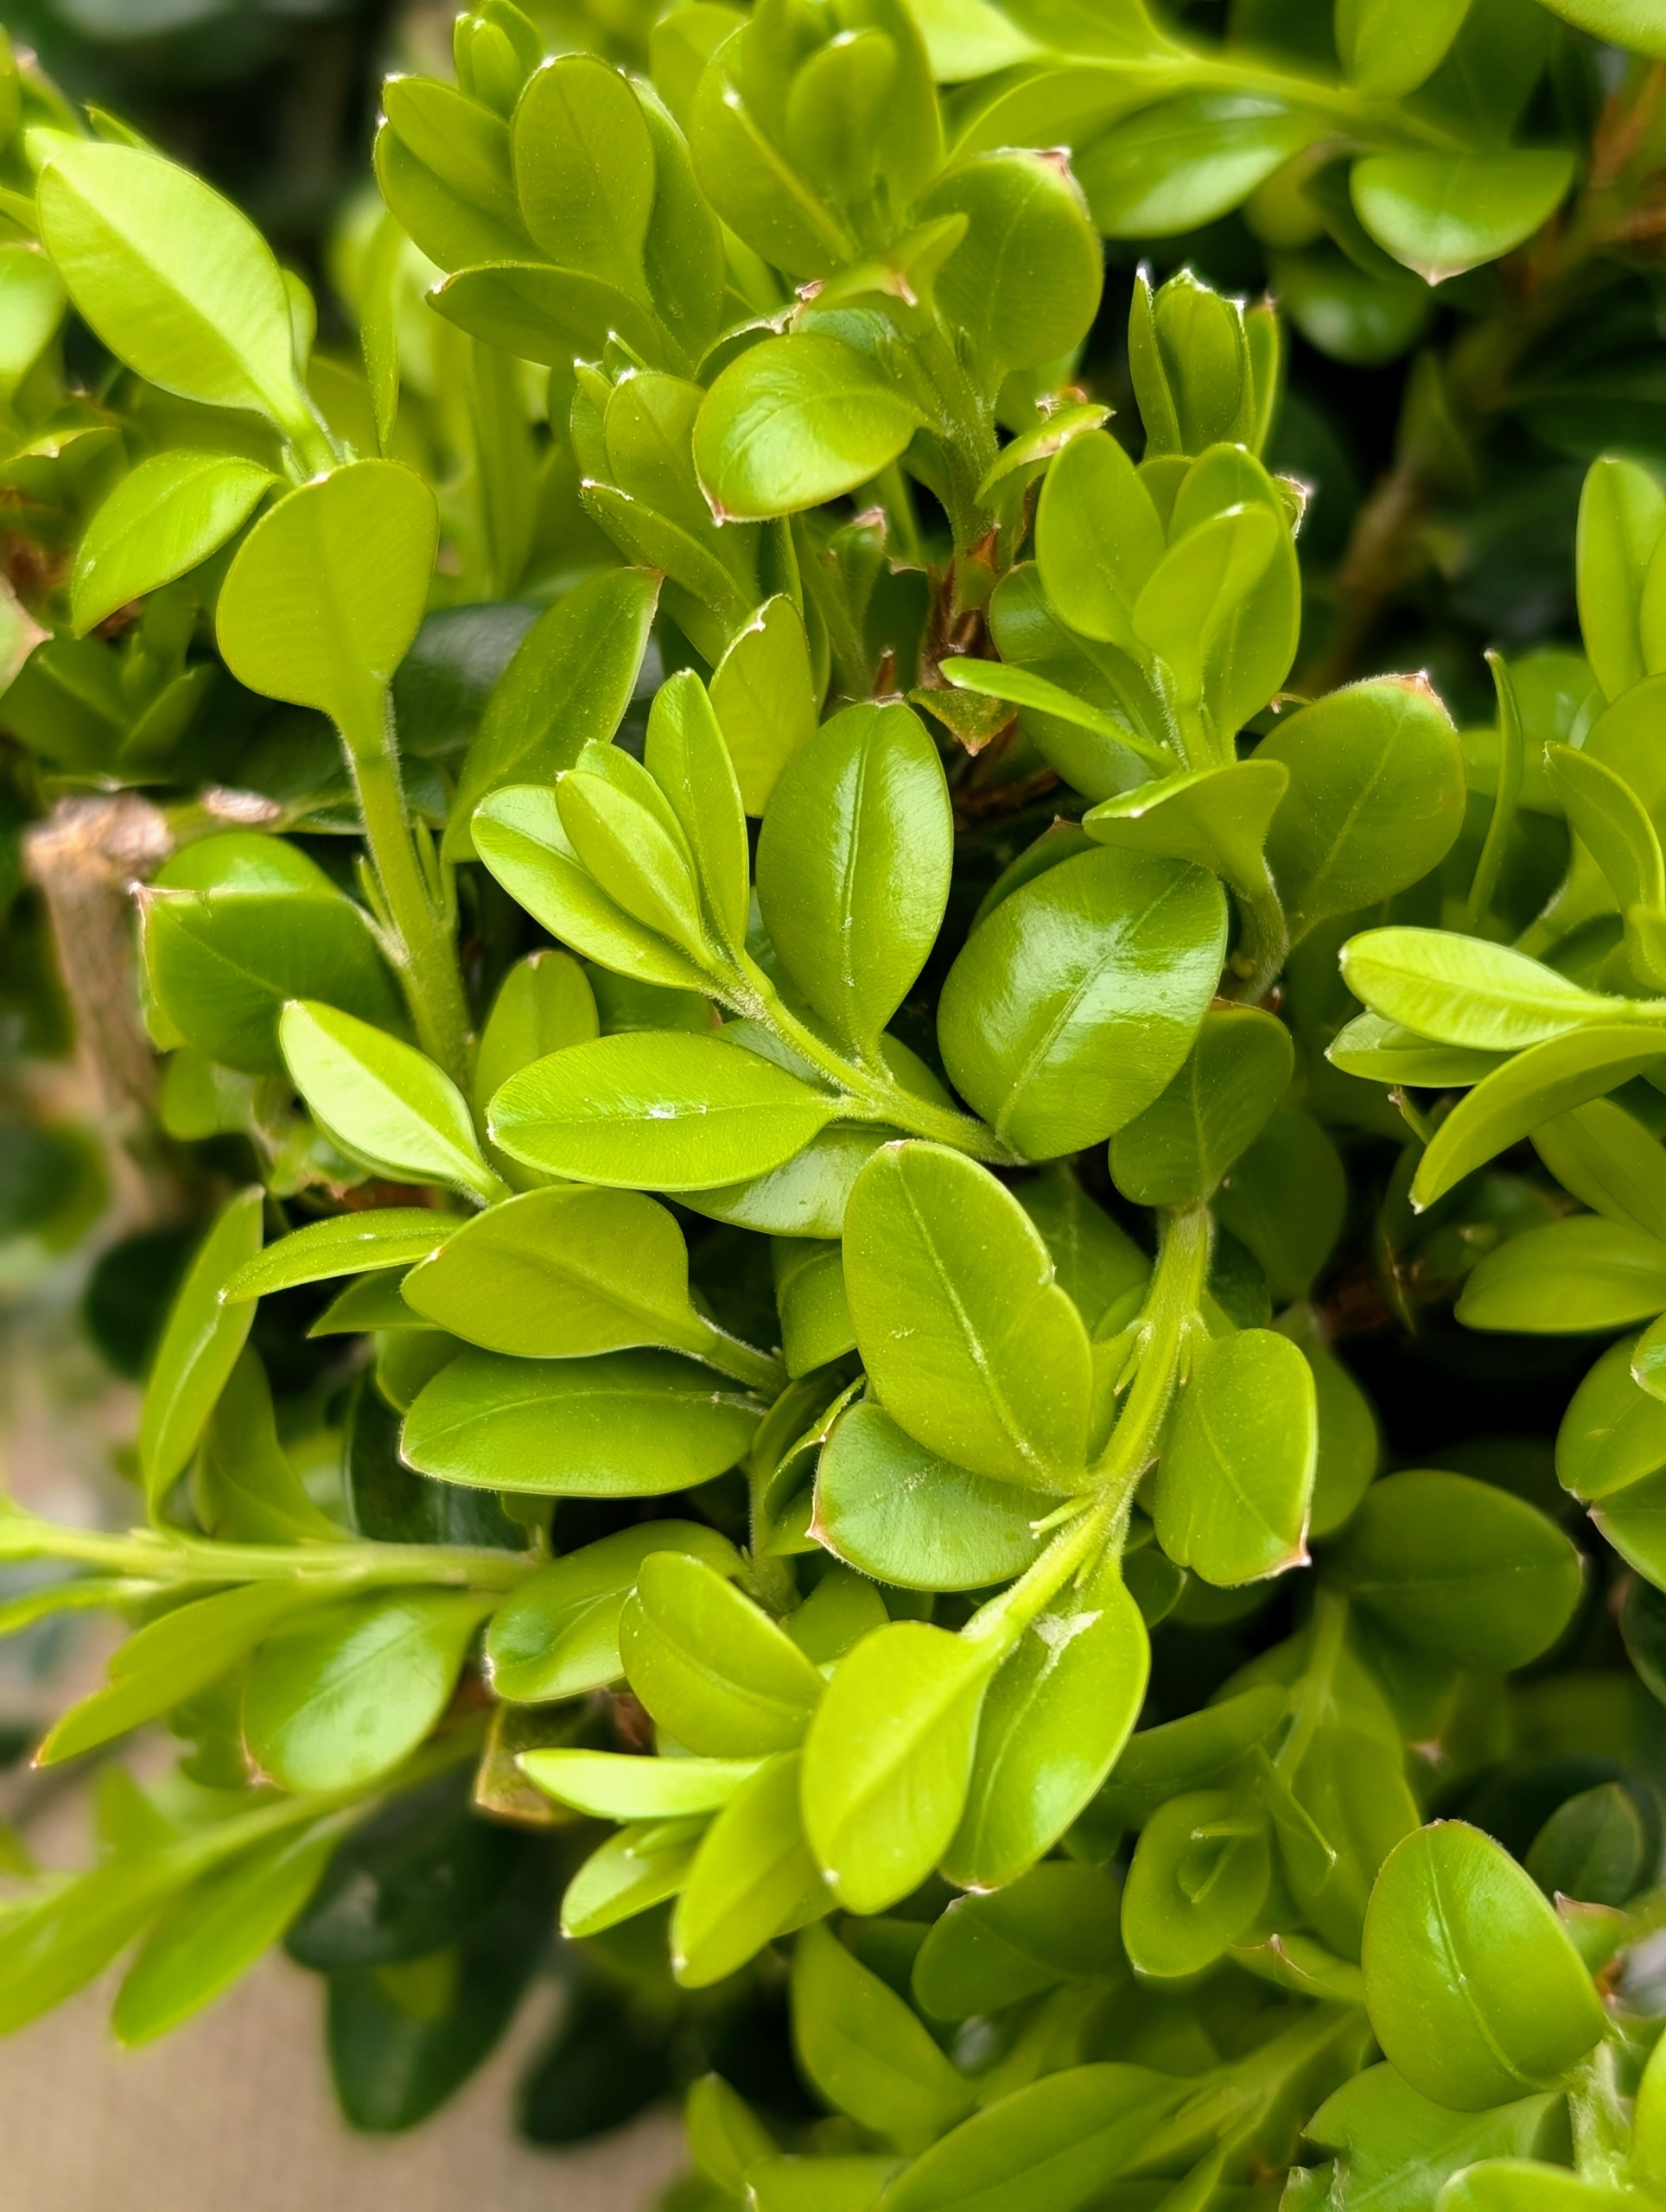
This boxwood variety has a dense and compact habit with year-round bold green foliage and blight-resistance.
Here’s one box of bare-root lilacs, Syringa Vulgaris New Age Lavender. This lilac is a compact, deciduous shrub with a rounded growth habit. It grows to about six-feet tall and wide and is very fragrant.
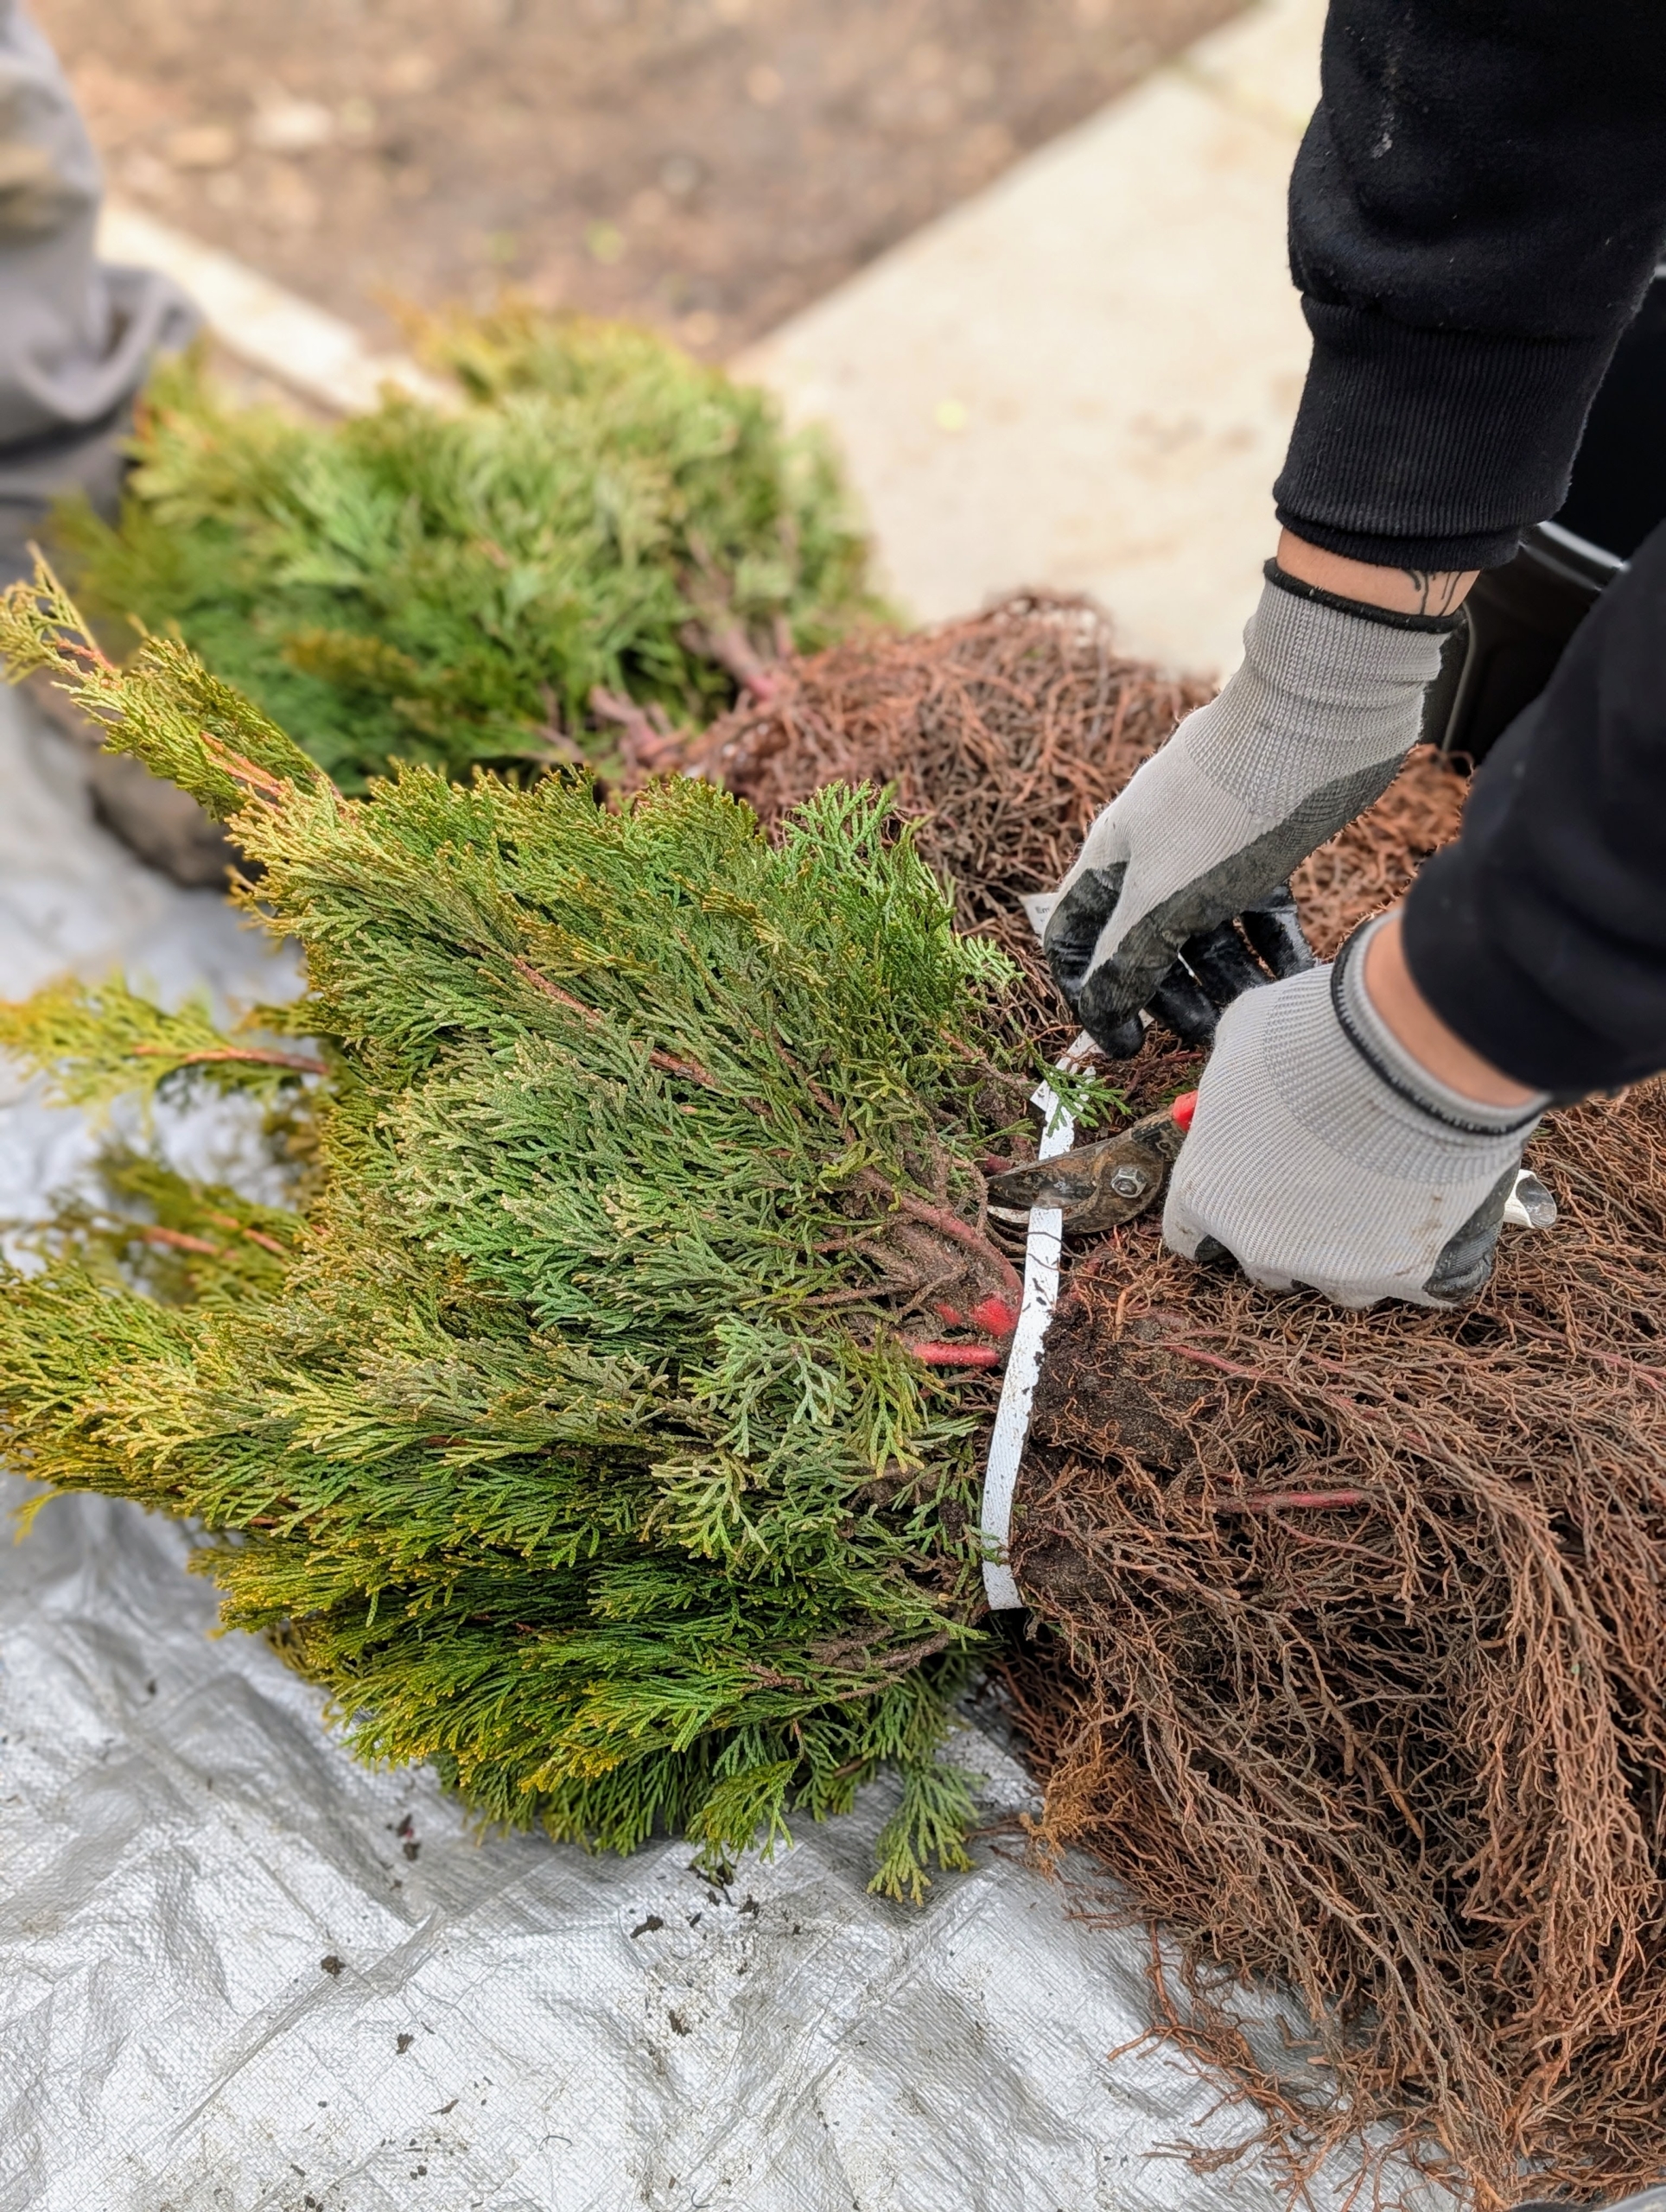
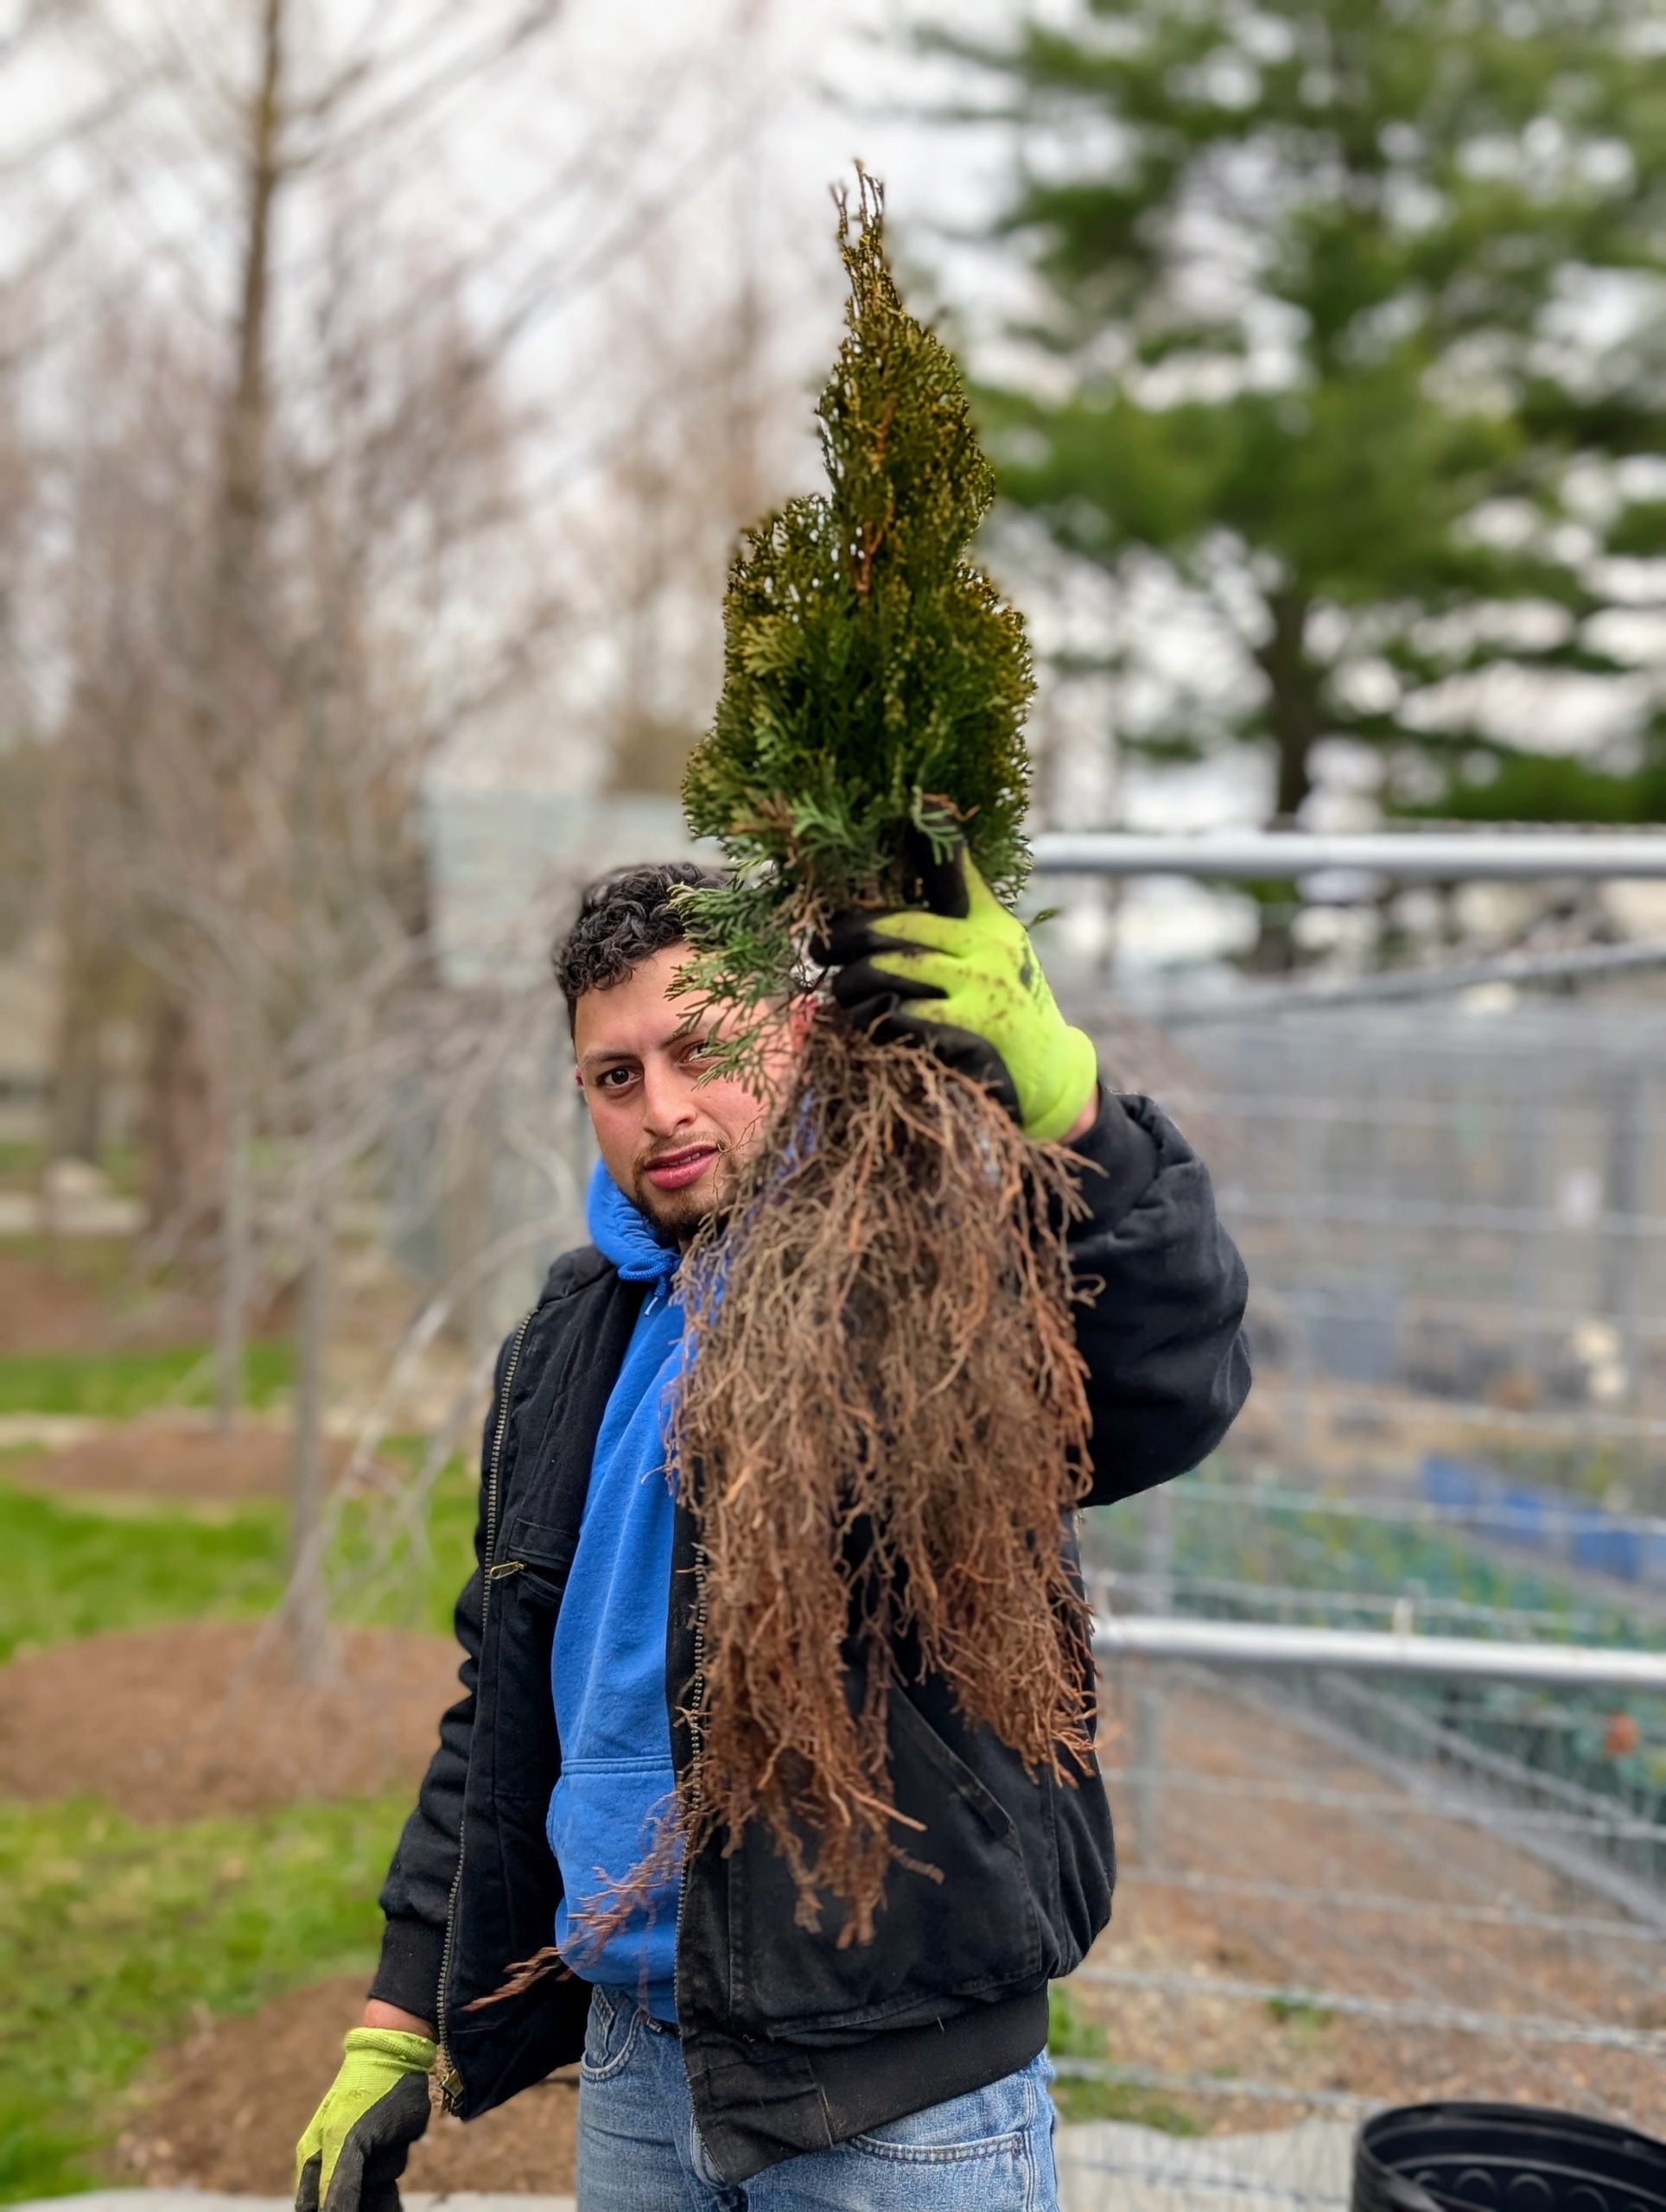
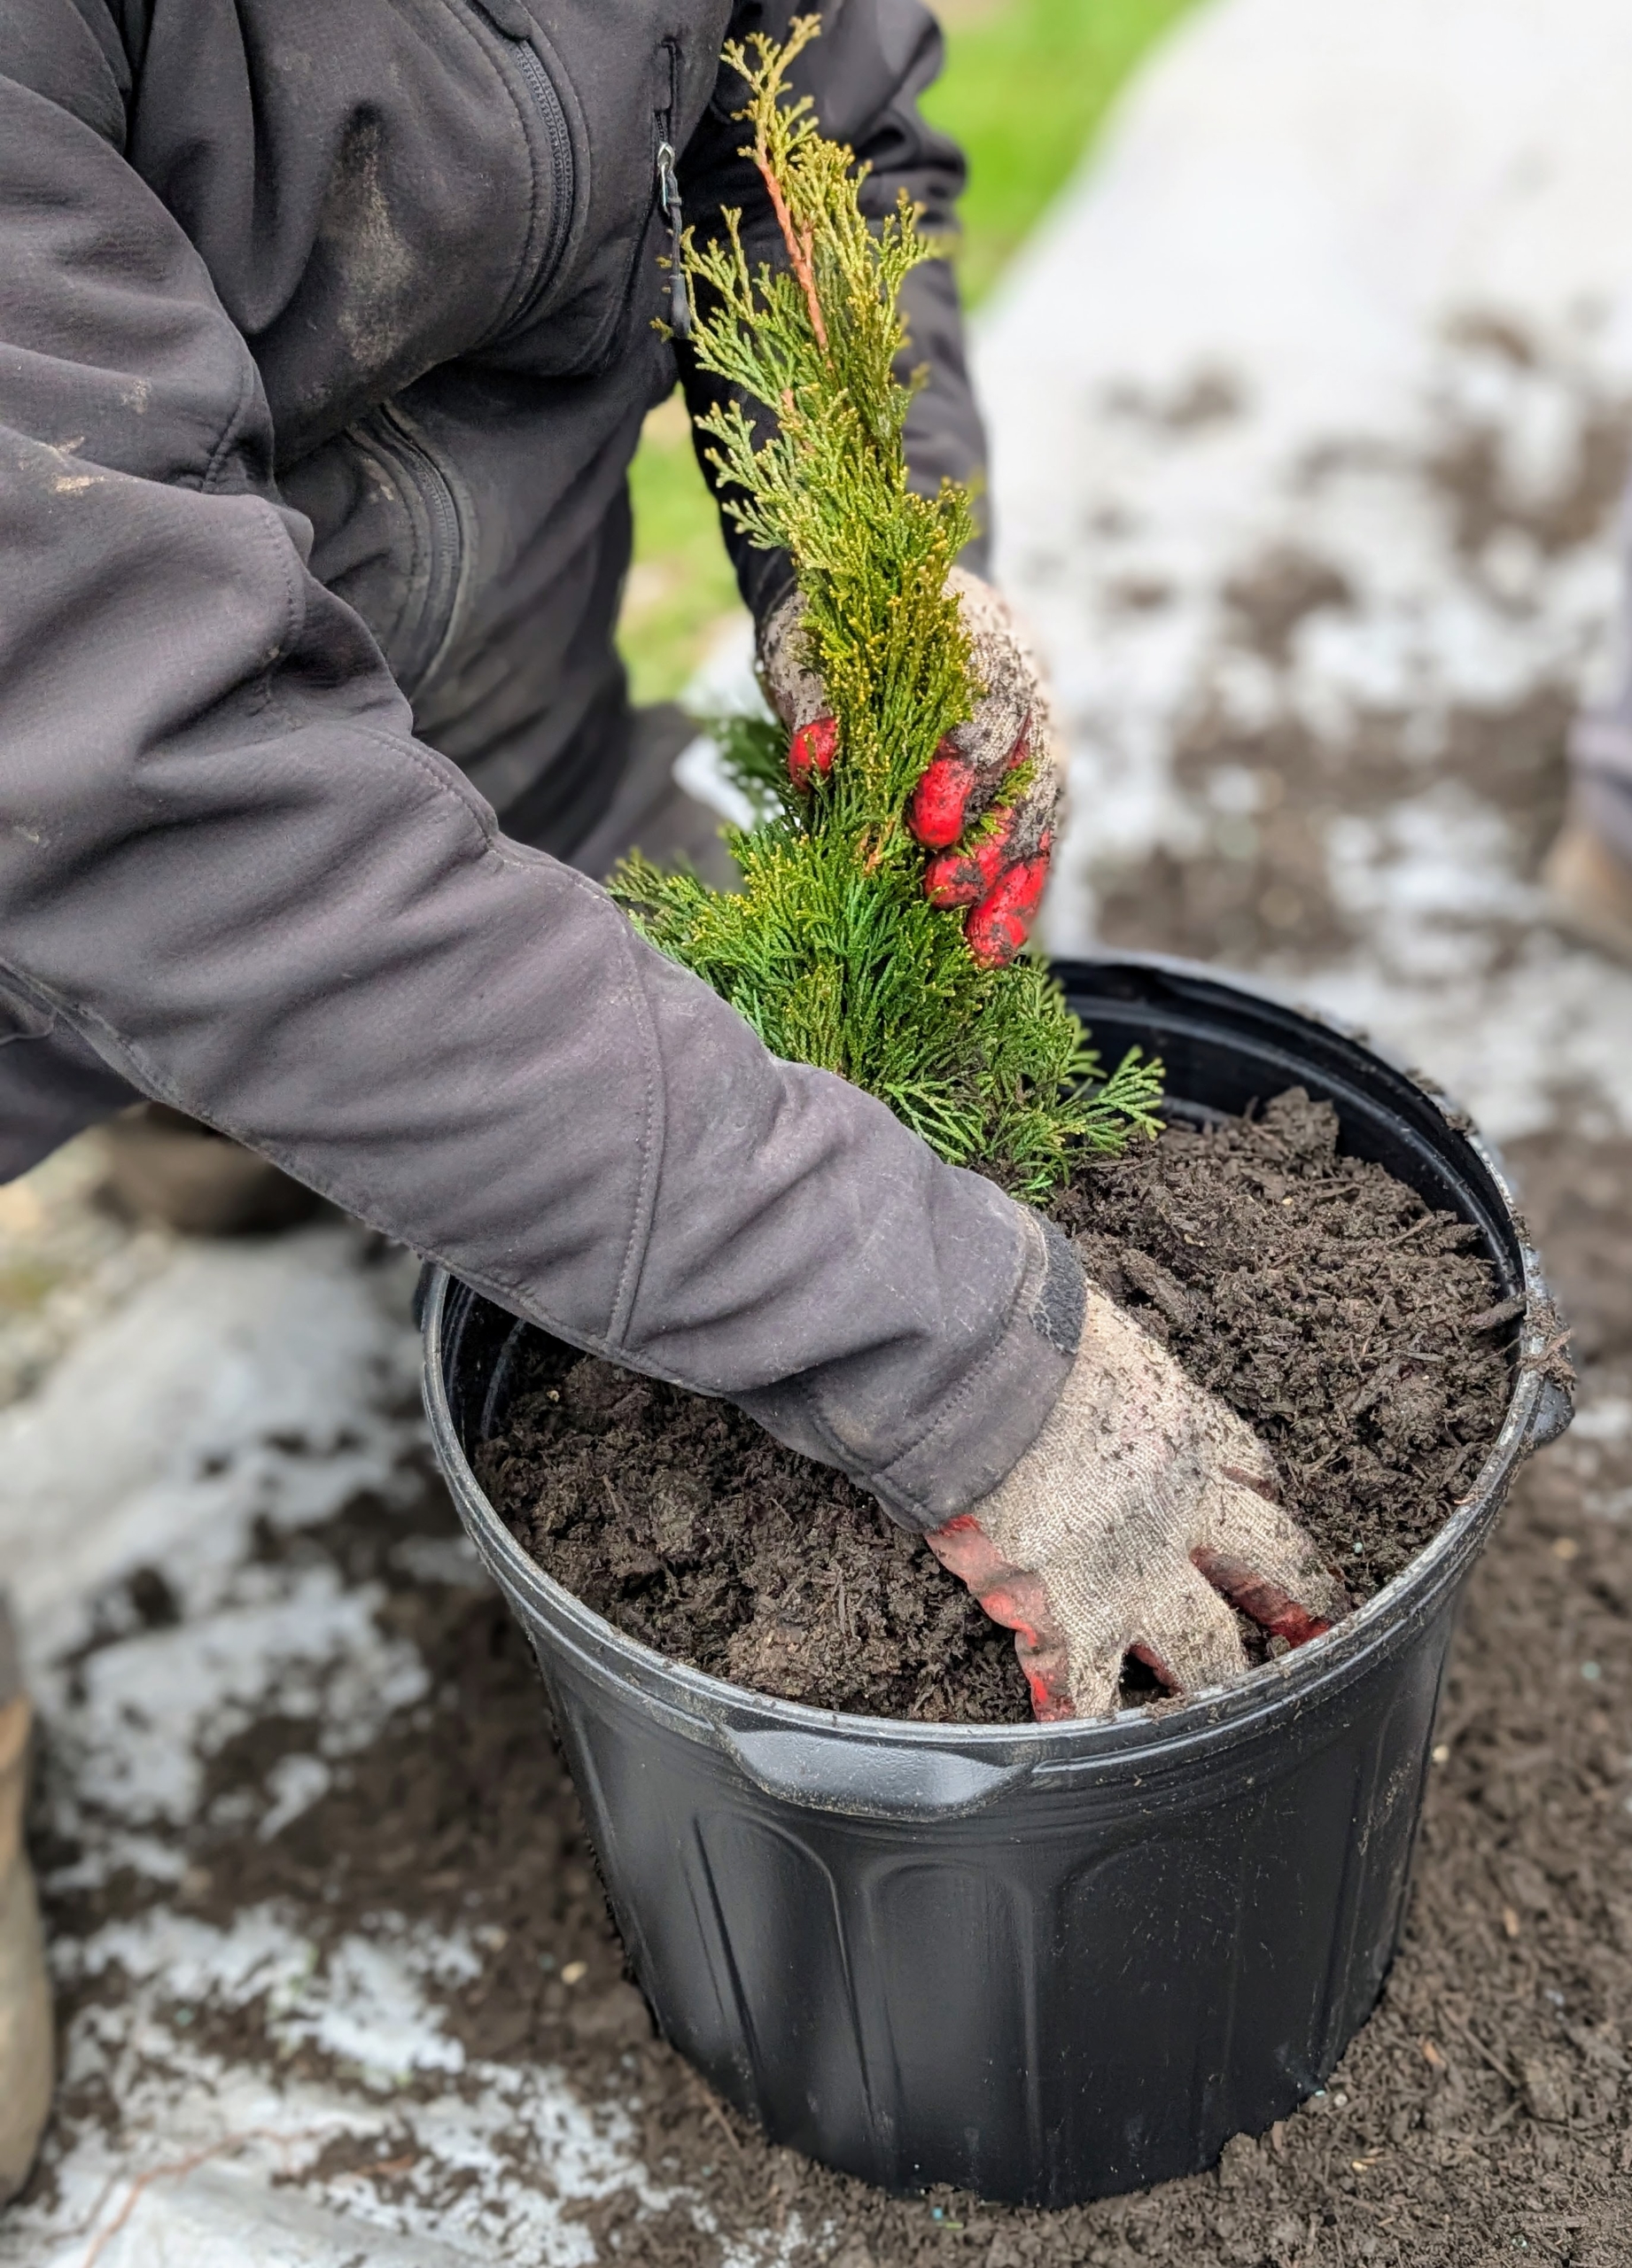
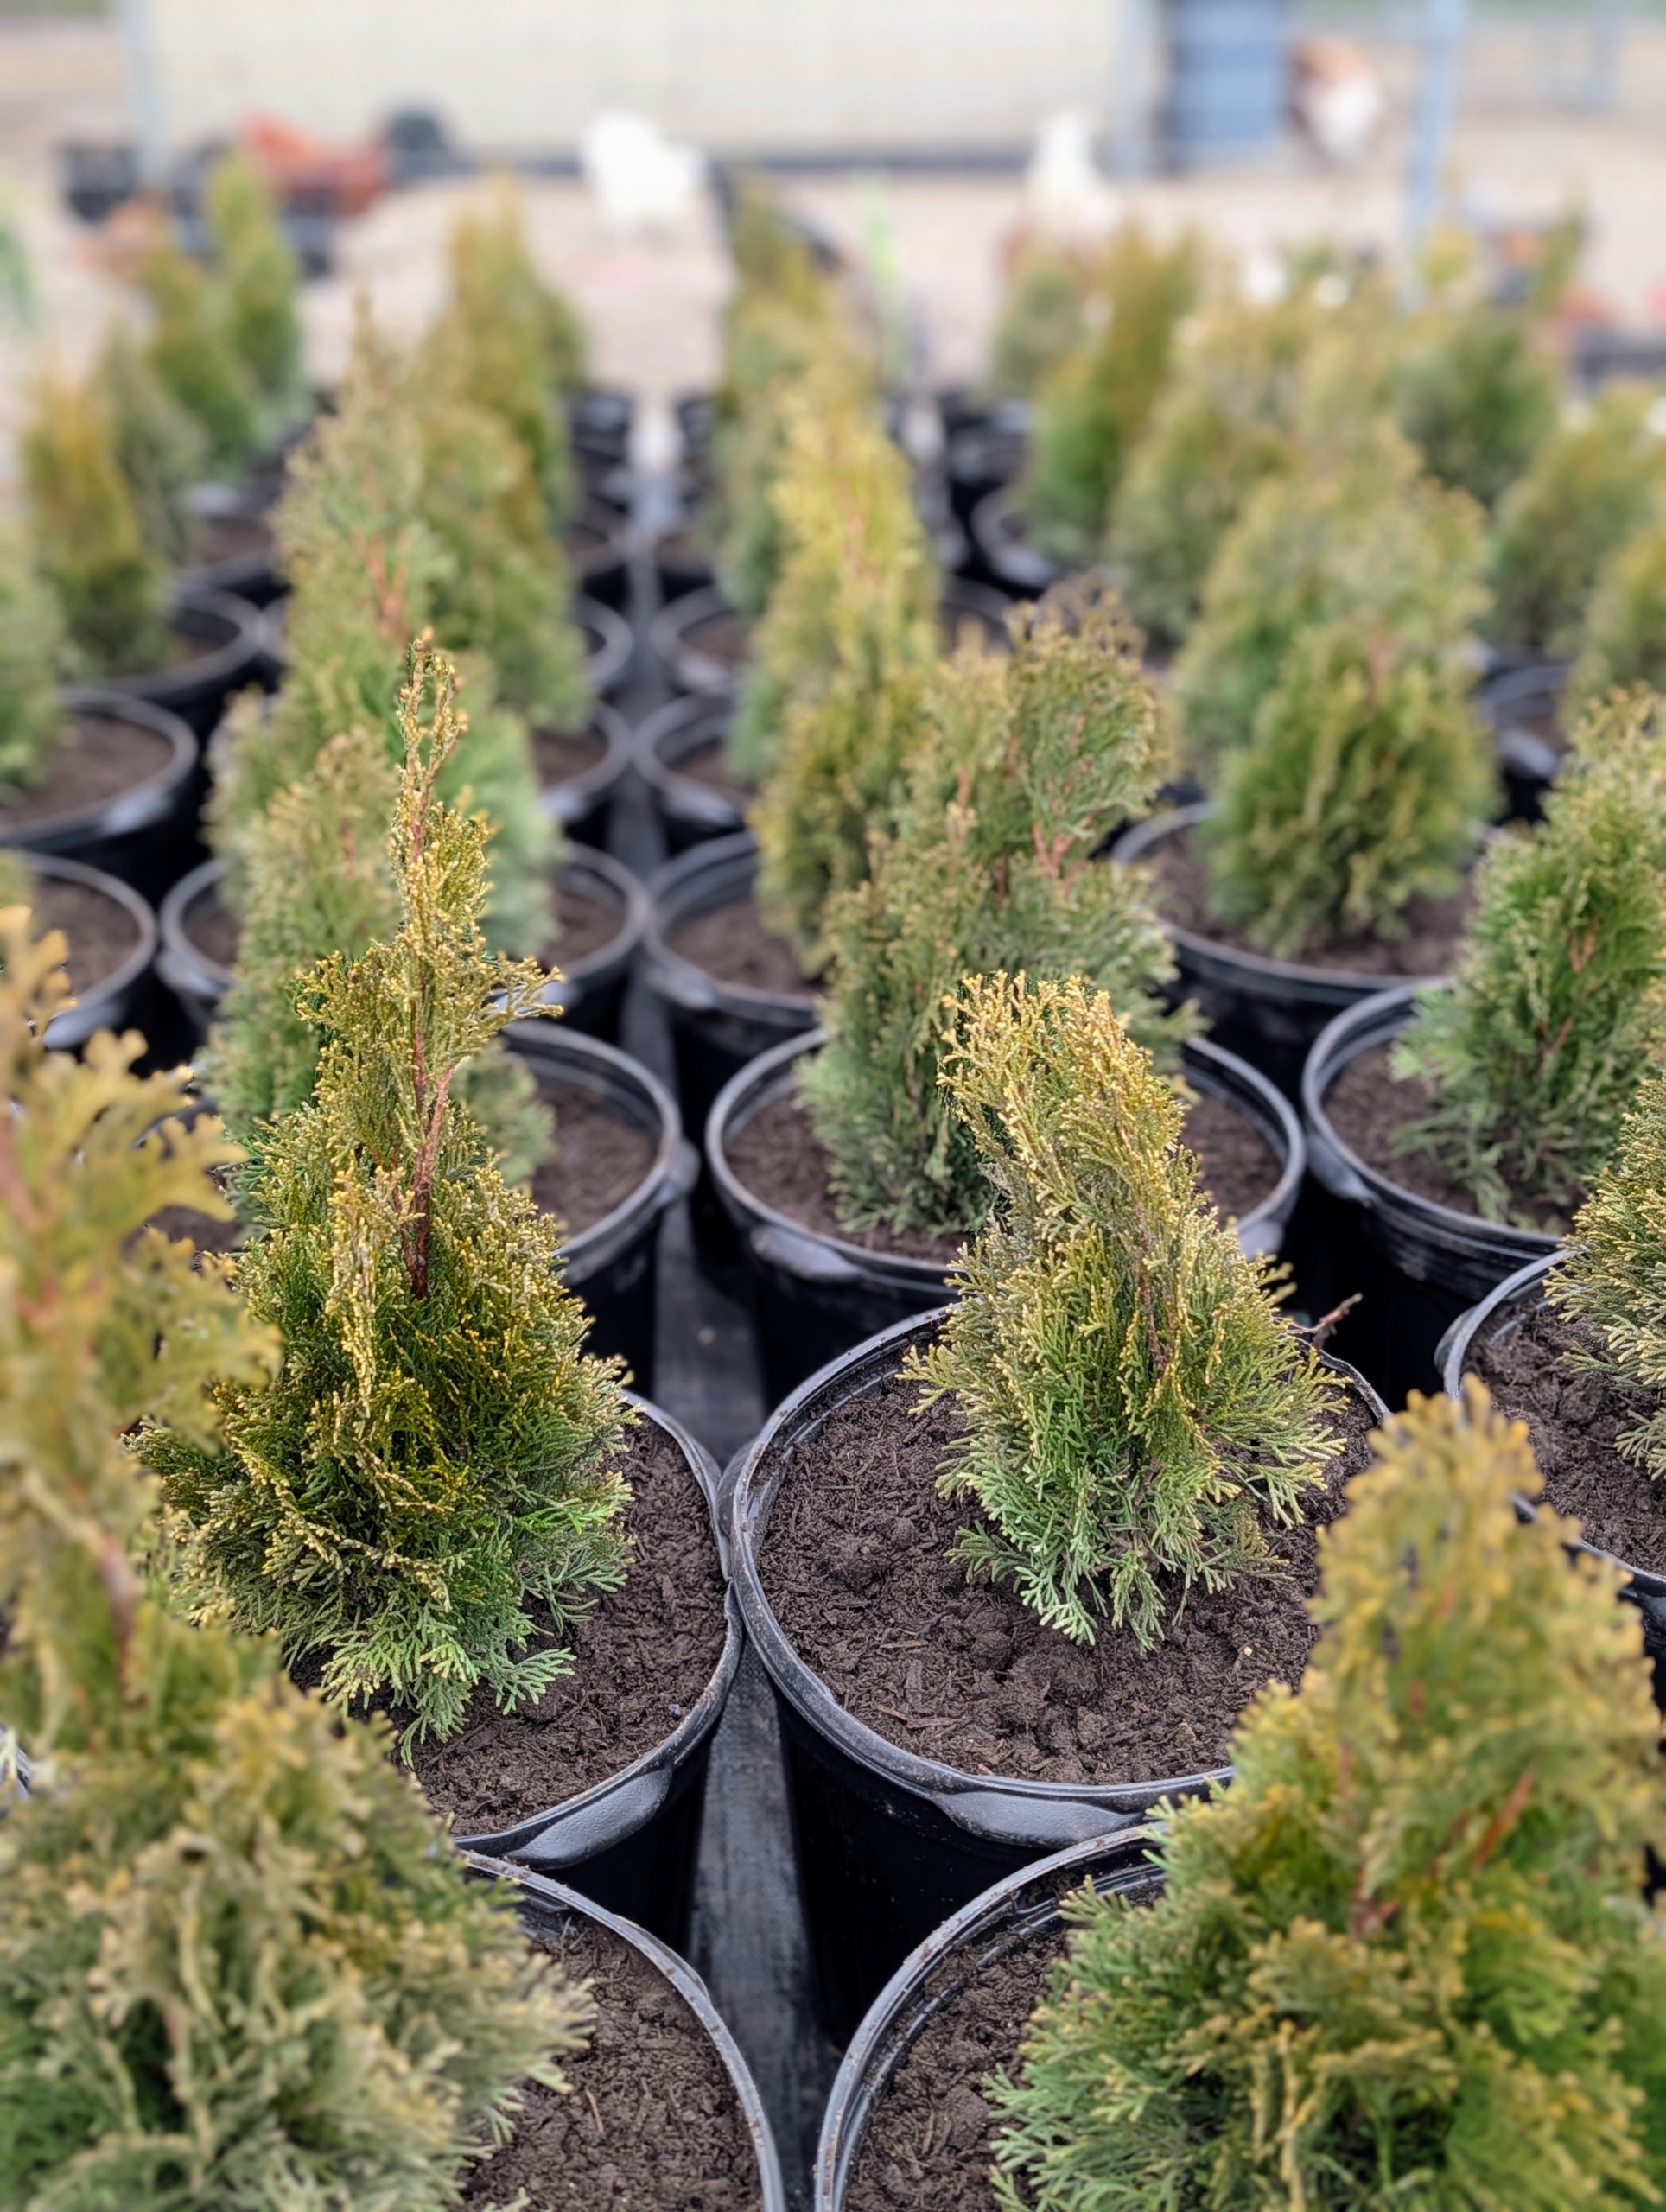
Our first bare-roots to pot are these Emerald Squeeze™ Thuja, Thuja occidentalis ‘Lilshreckthu.’
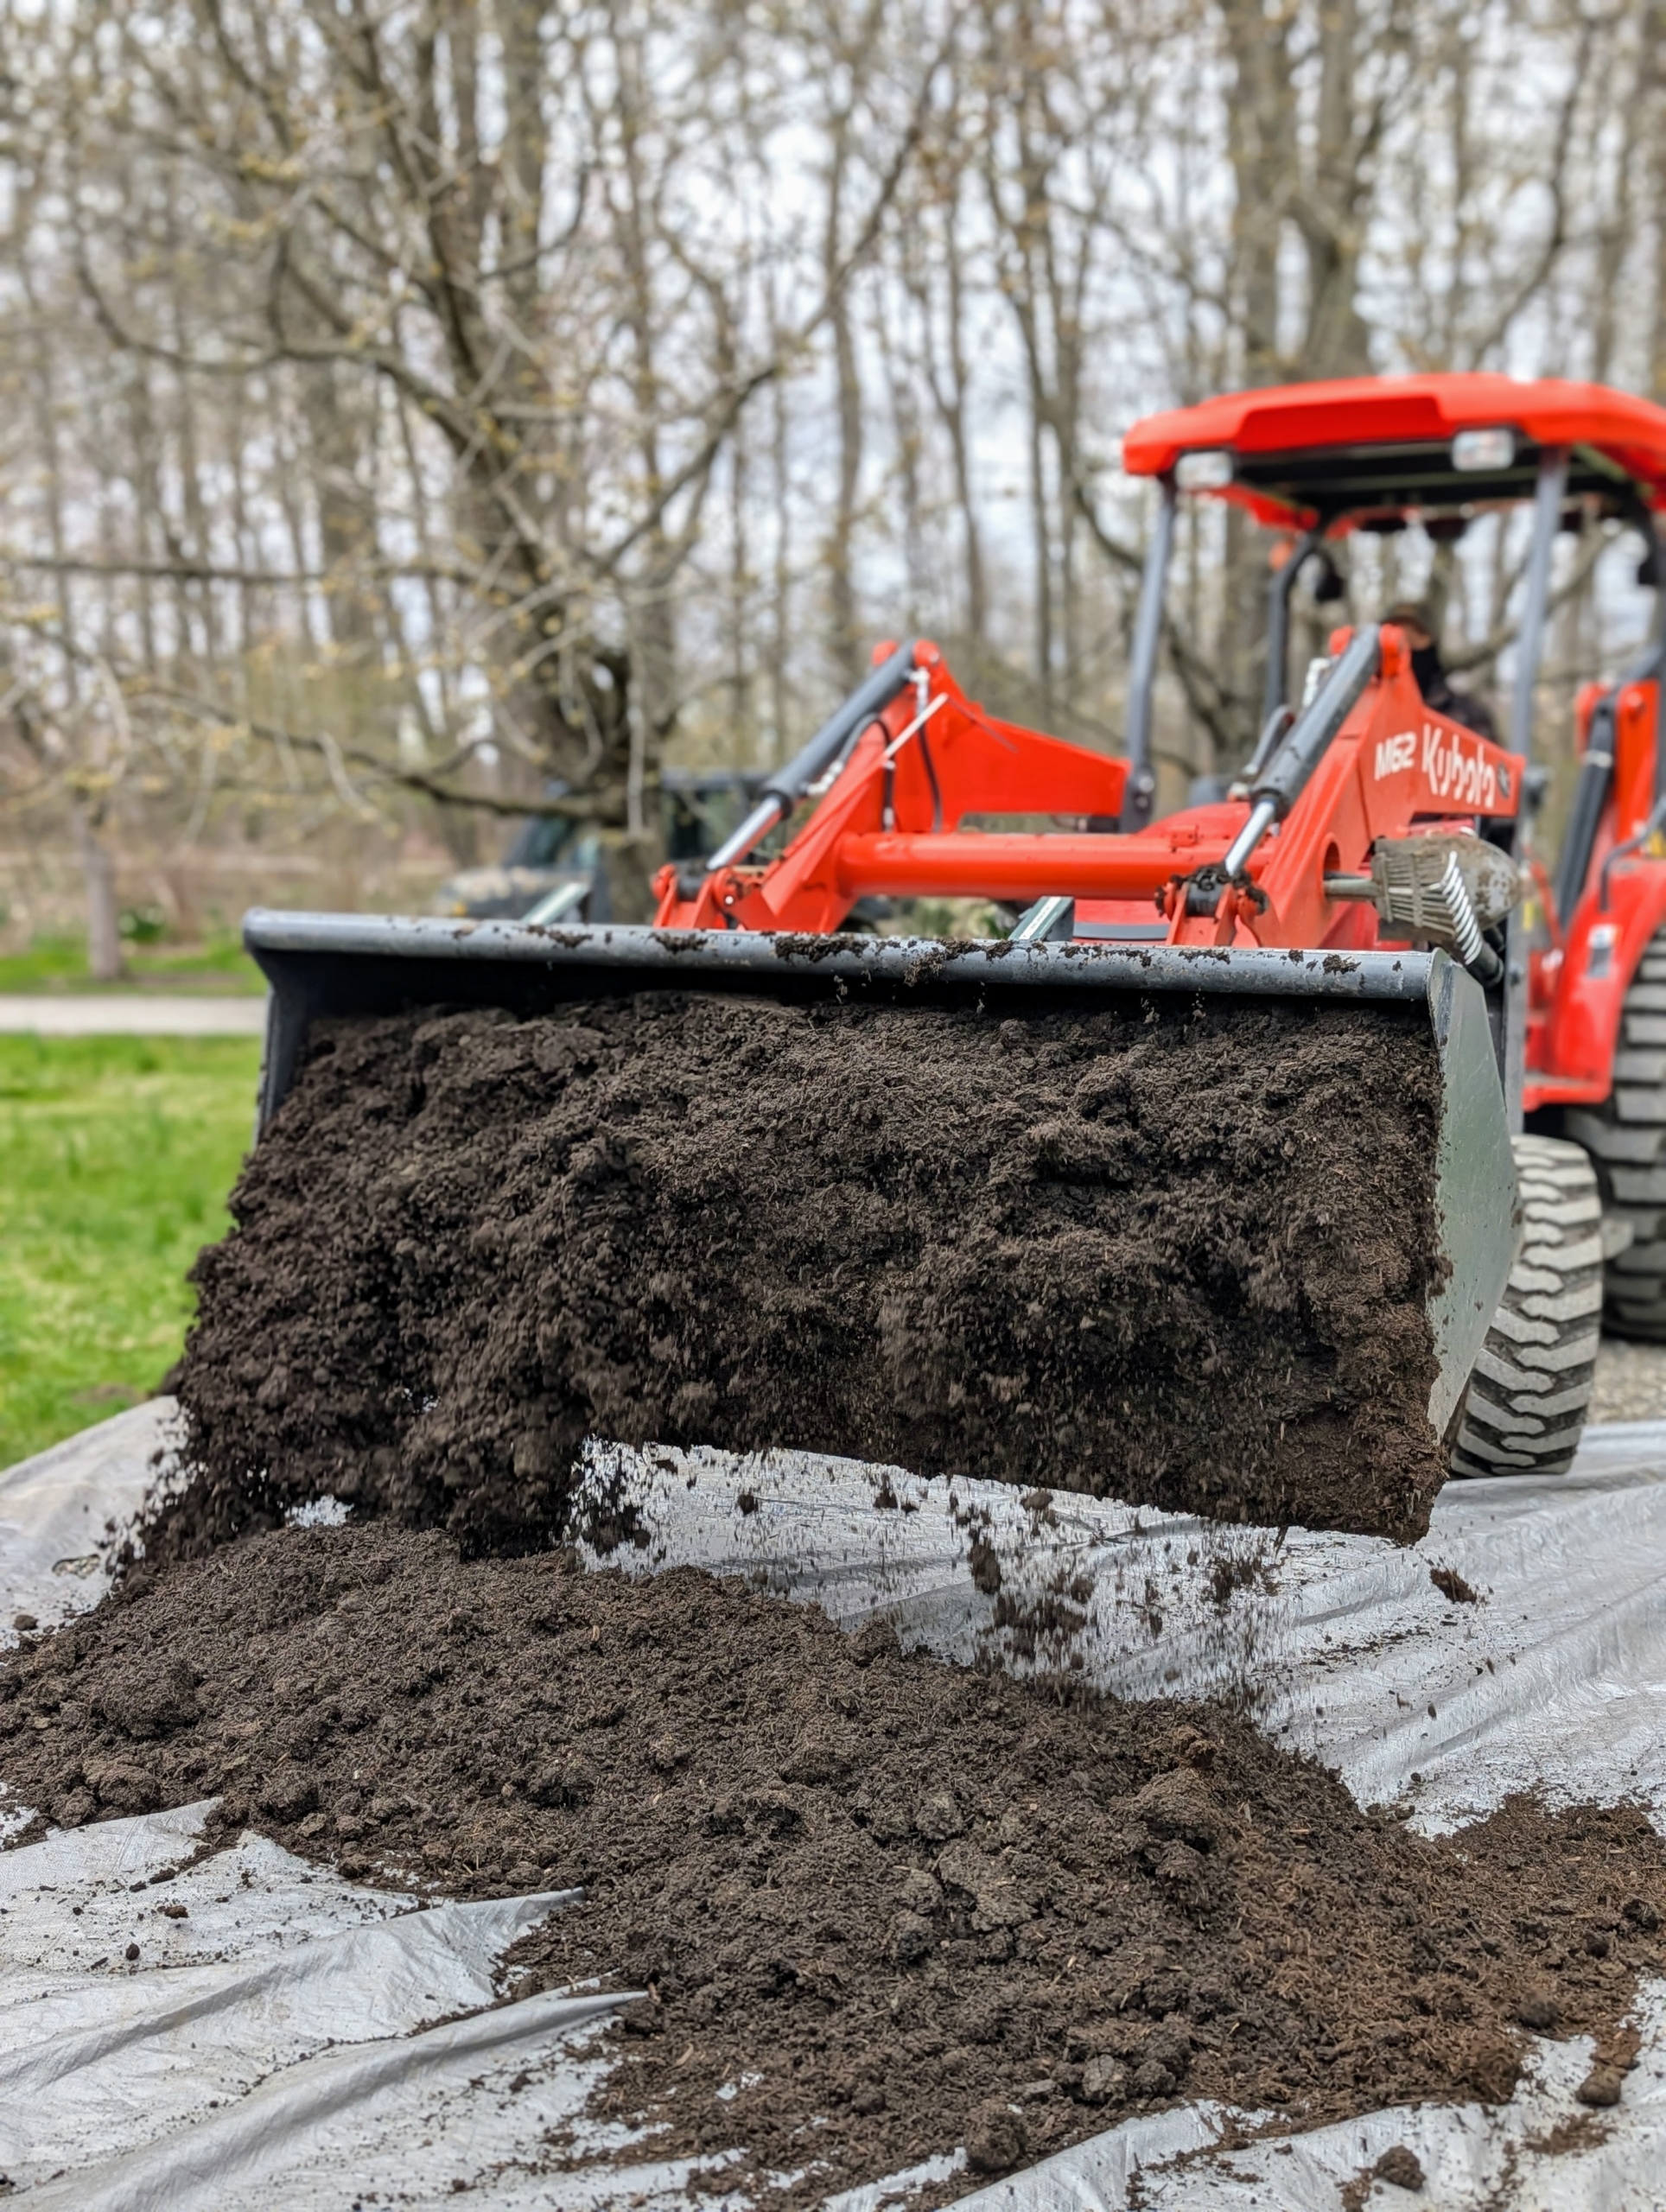
Using our trusted Kubota tractor and bucket loader, Chhiring delivers a supply of nutrient-rich soil to the potting site.
Star Roses and Plants also gifted me with enough pots for planting.
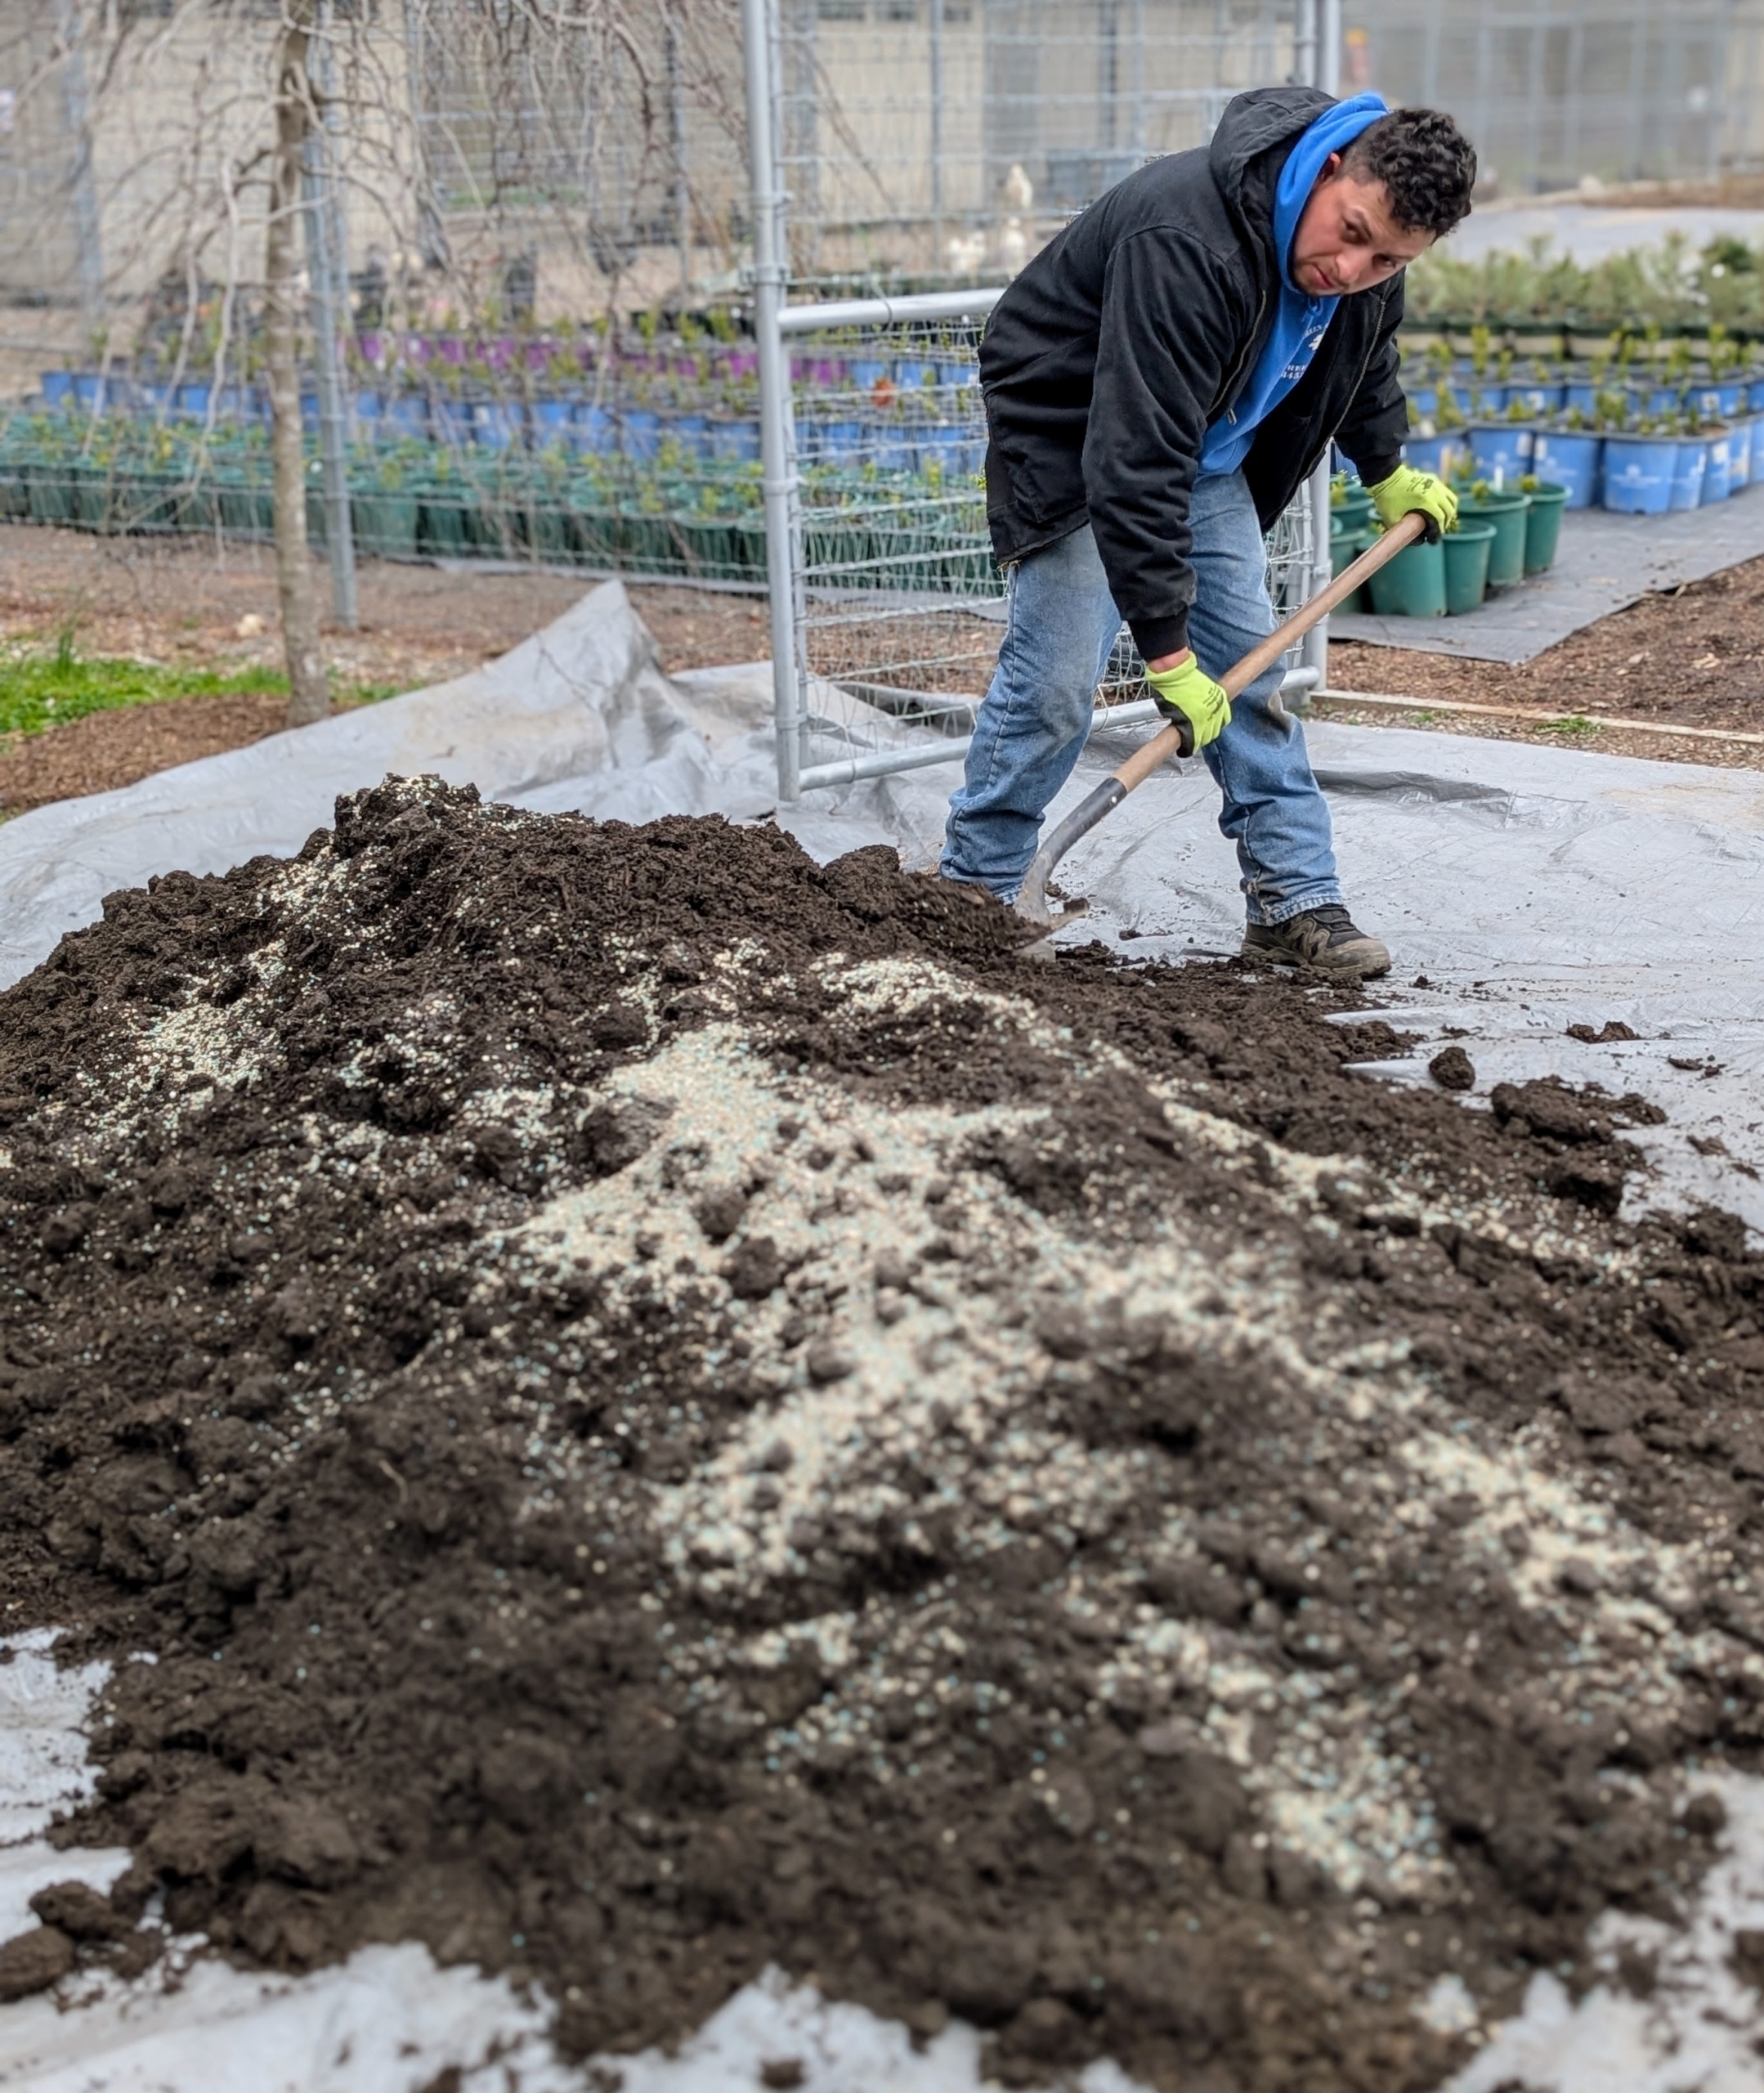
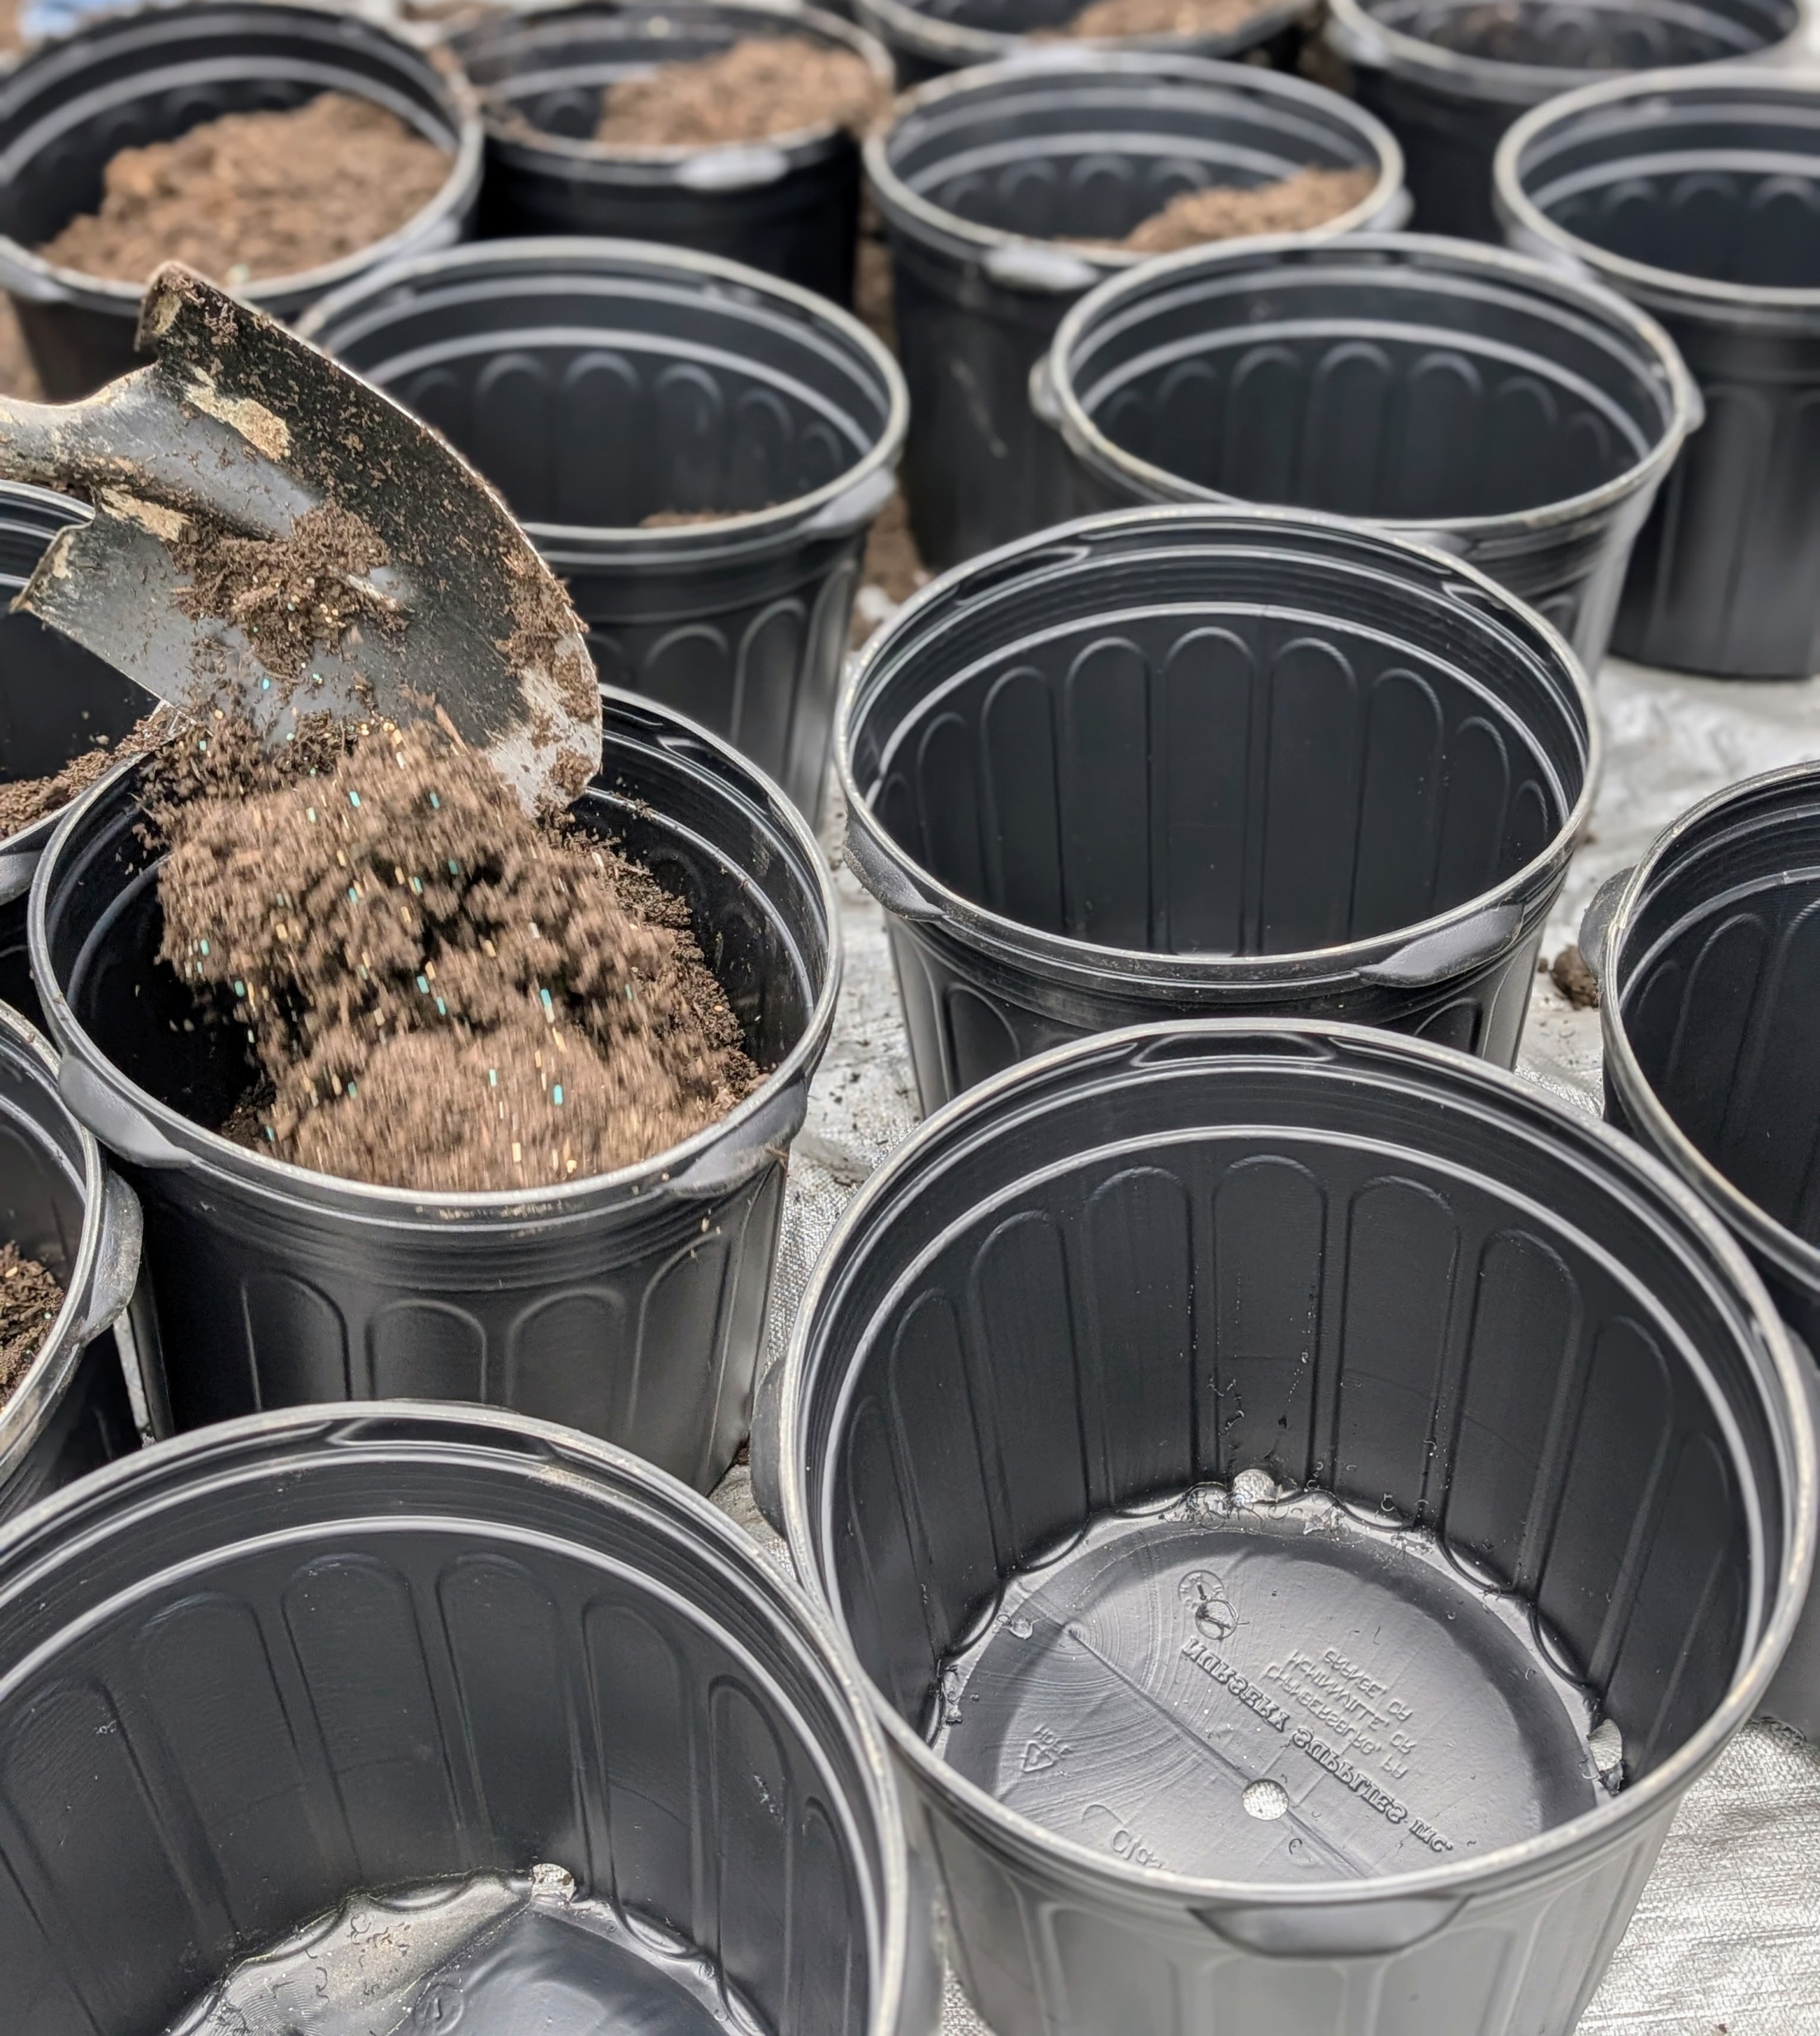
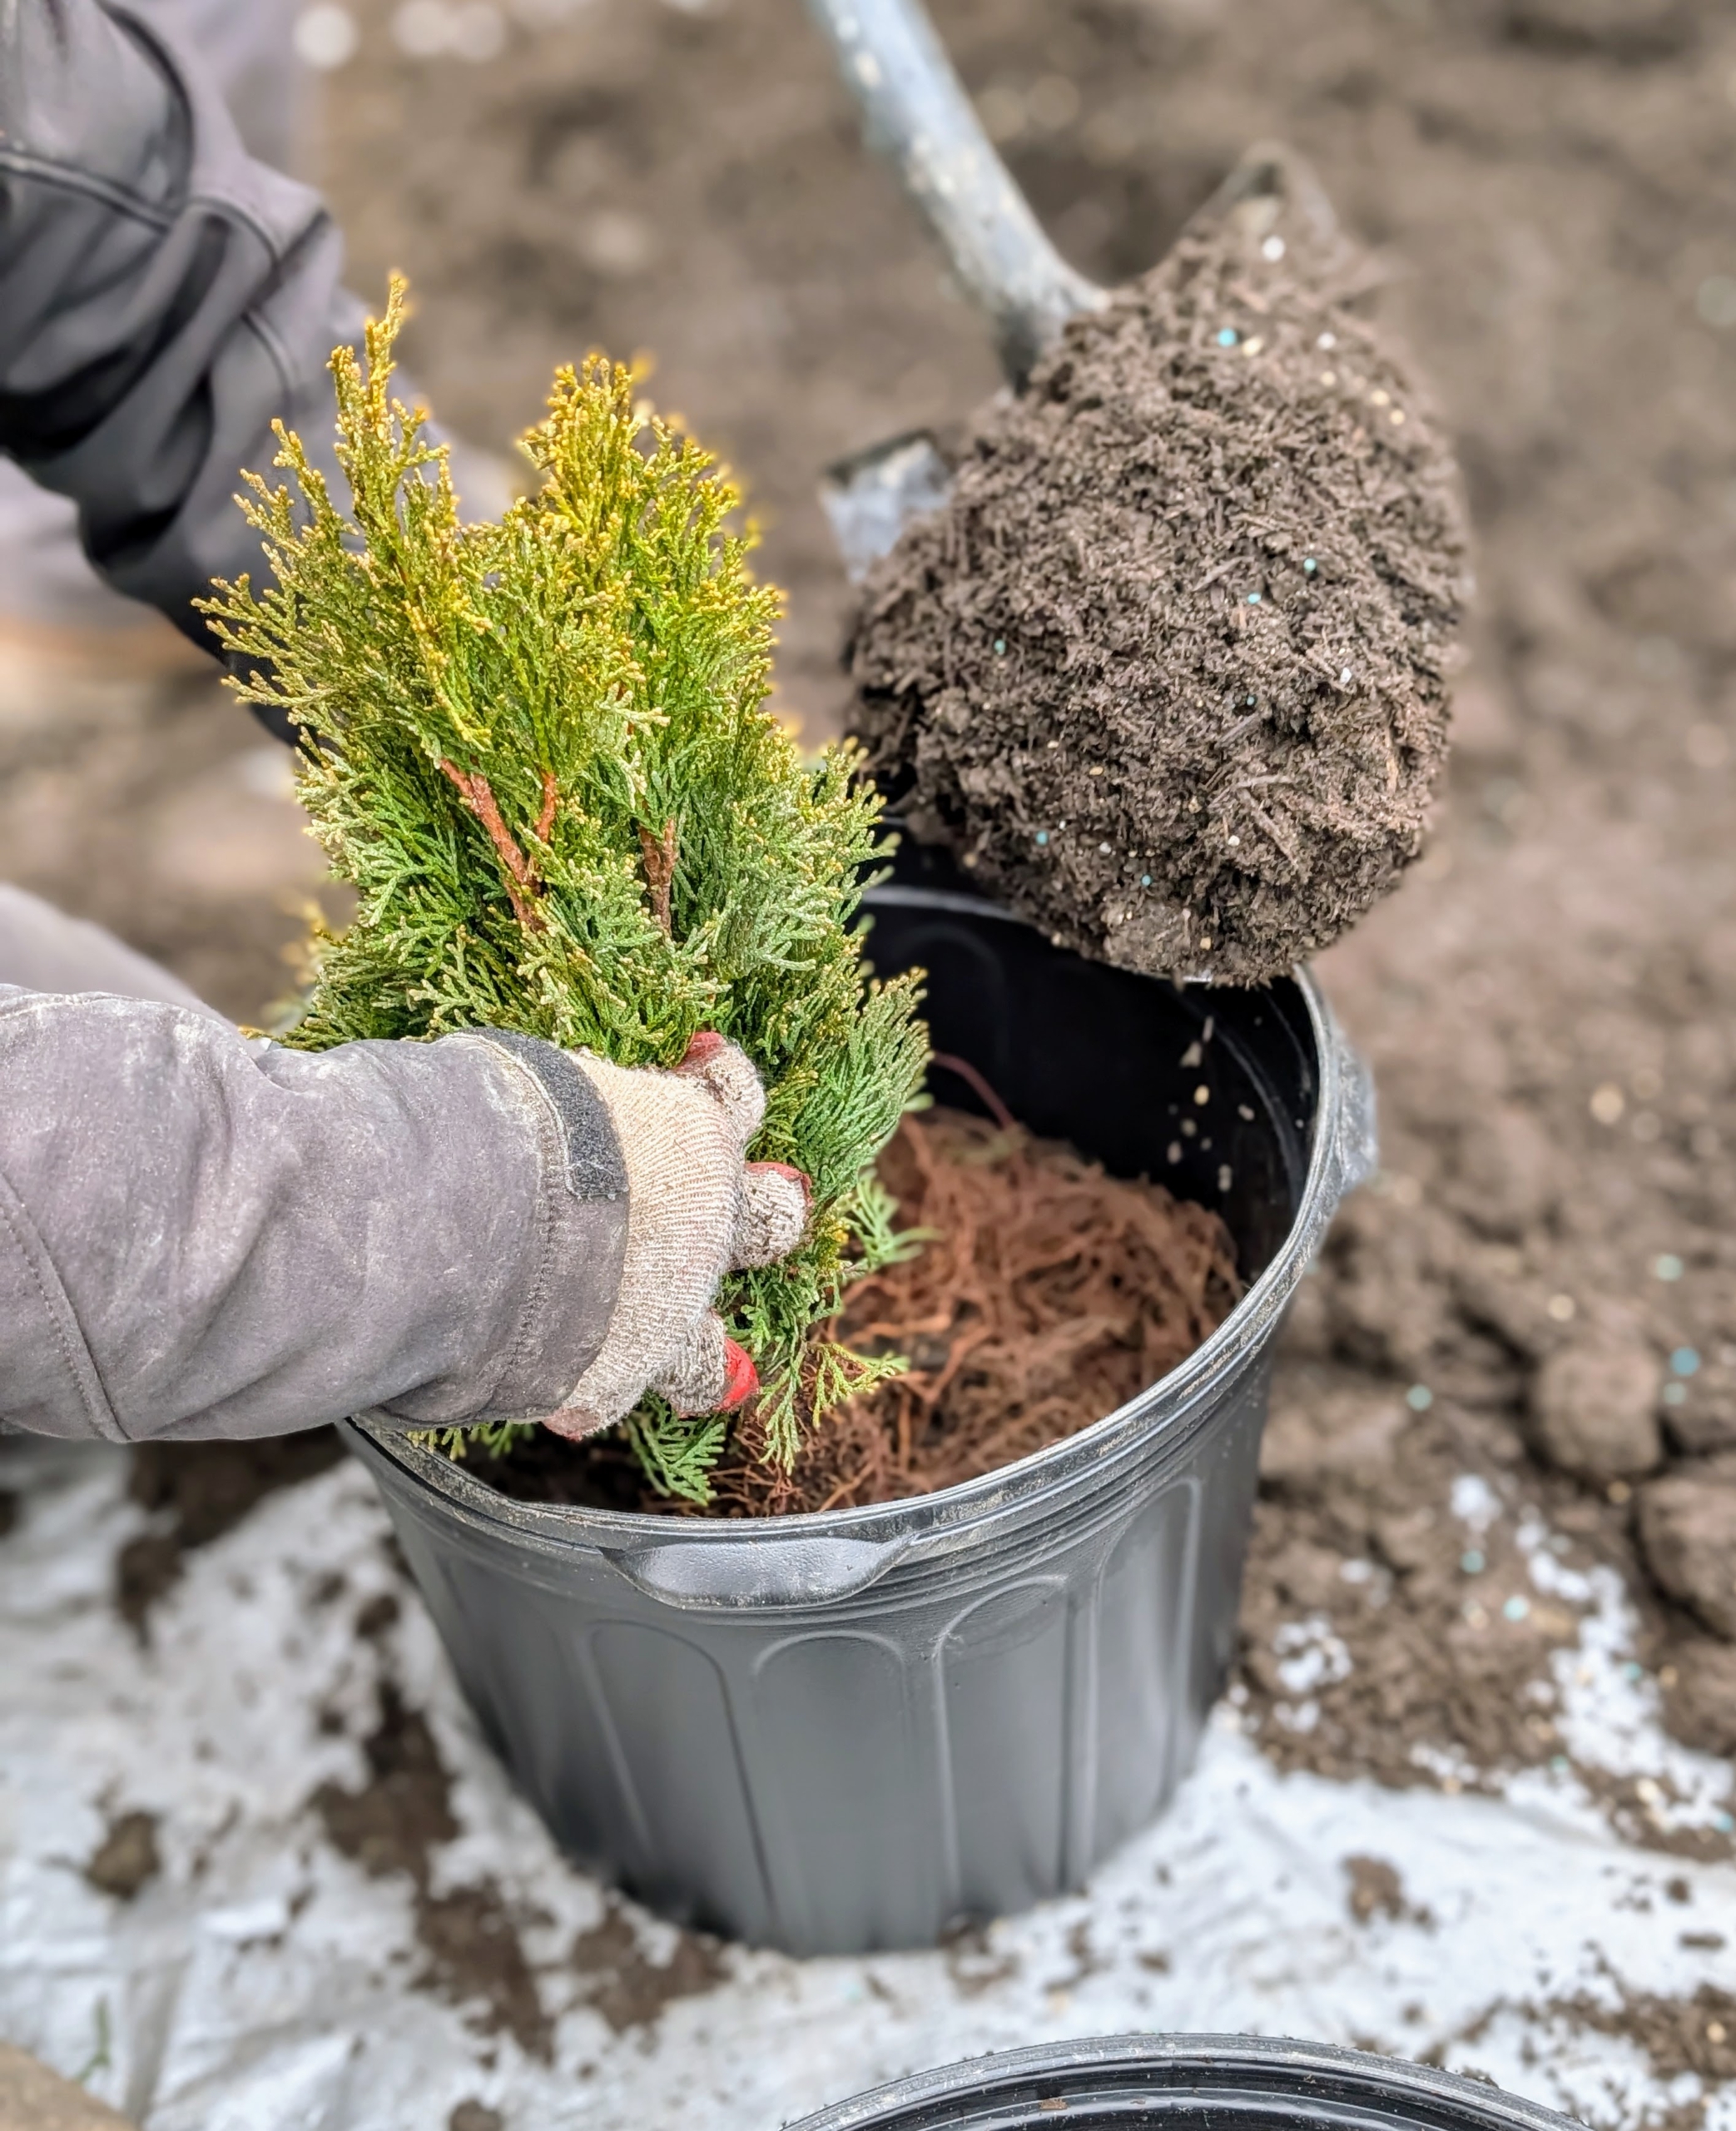
The pots are filled a third of the way full in a production line process.
Here’s Alex holding up one of the Thuja bare-roots. Bare-root plants should not have any mold or mildew. The cuttings should also feel heavy. If they feel light and dried out then the plant probably will not grow. Healthy bare-root trees get off to a more vigorous start because their abundant roots have already had a chance to develop unrestricted.
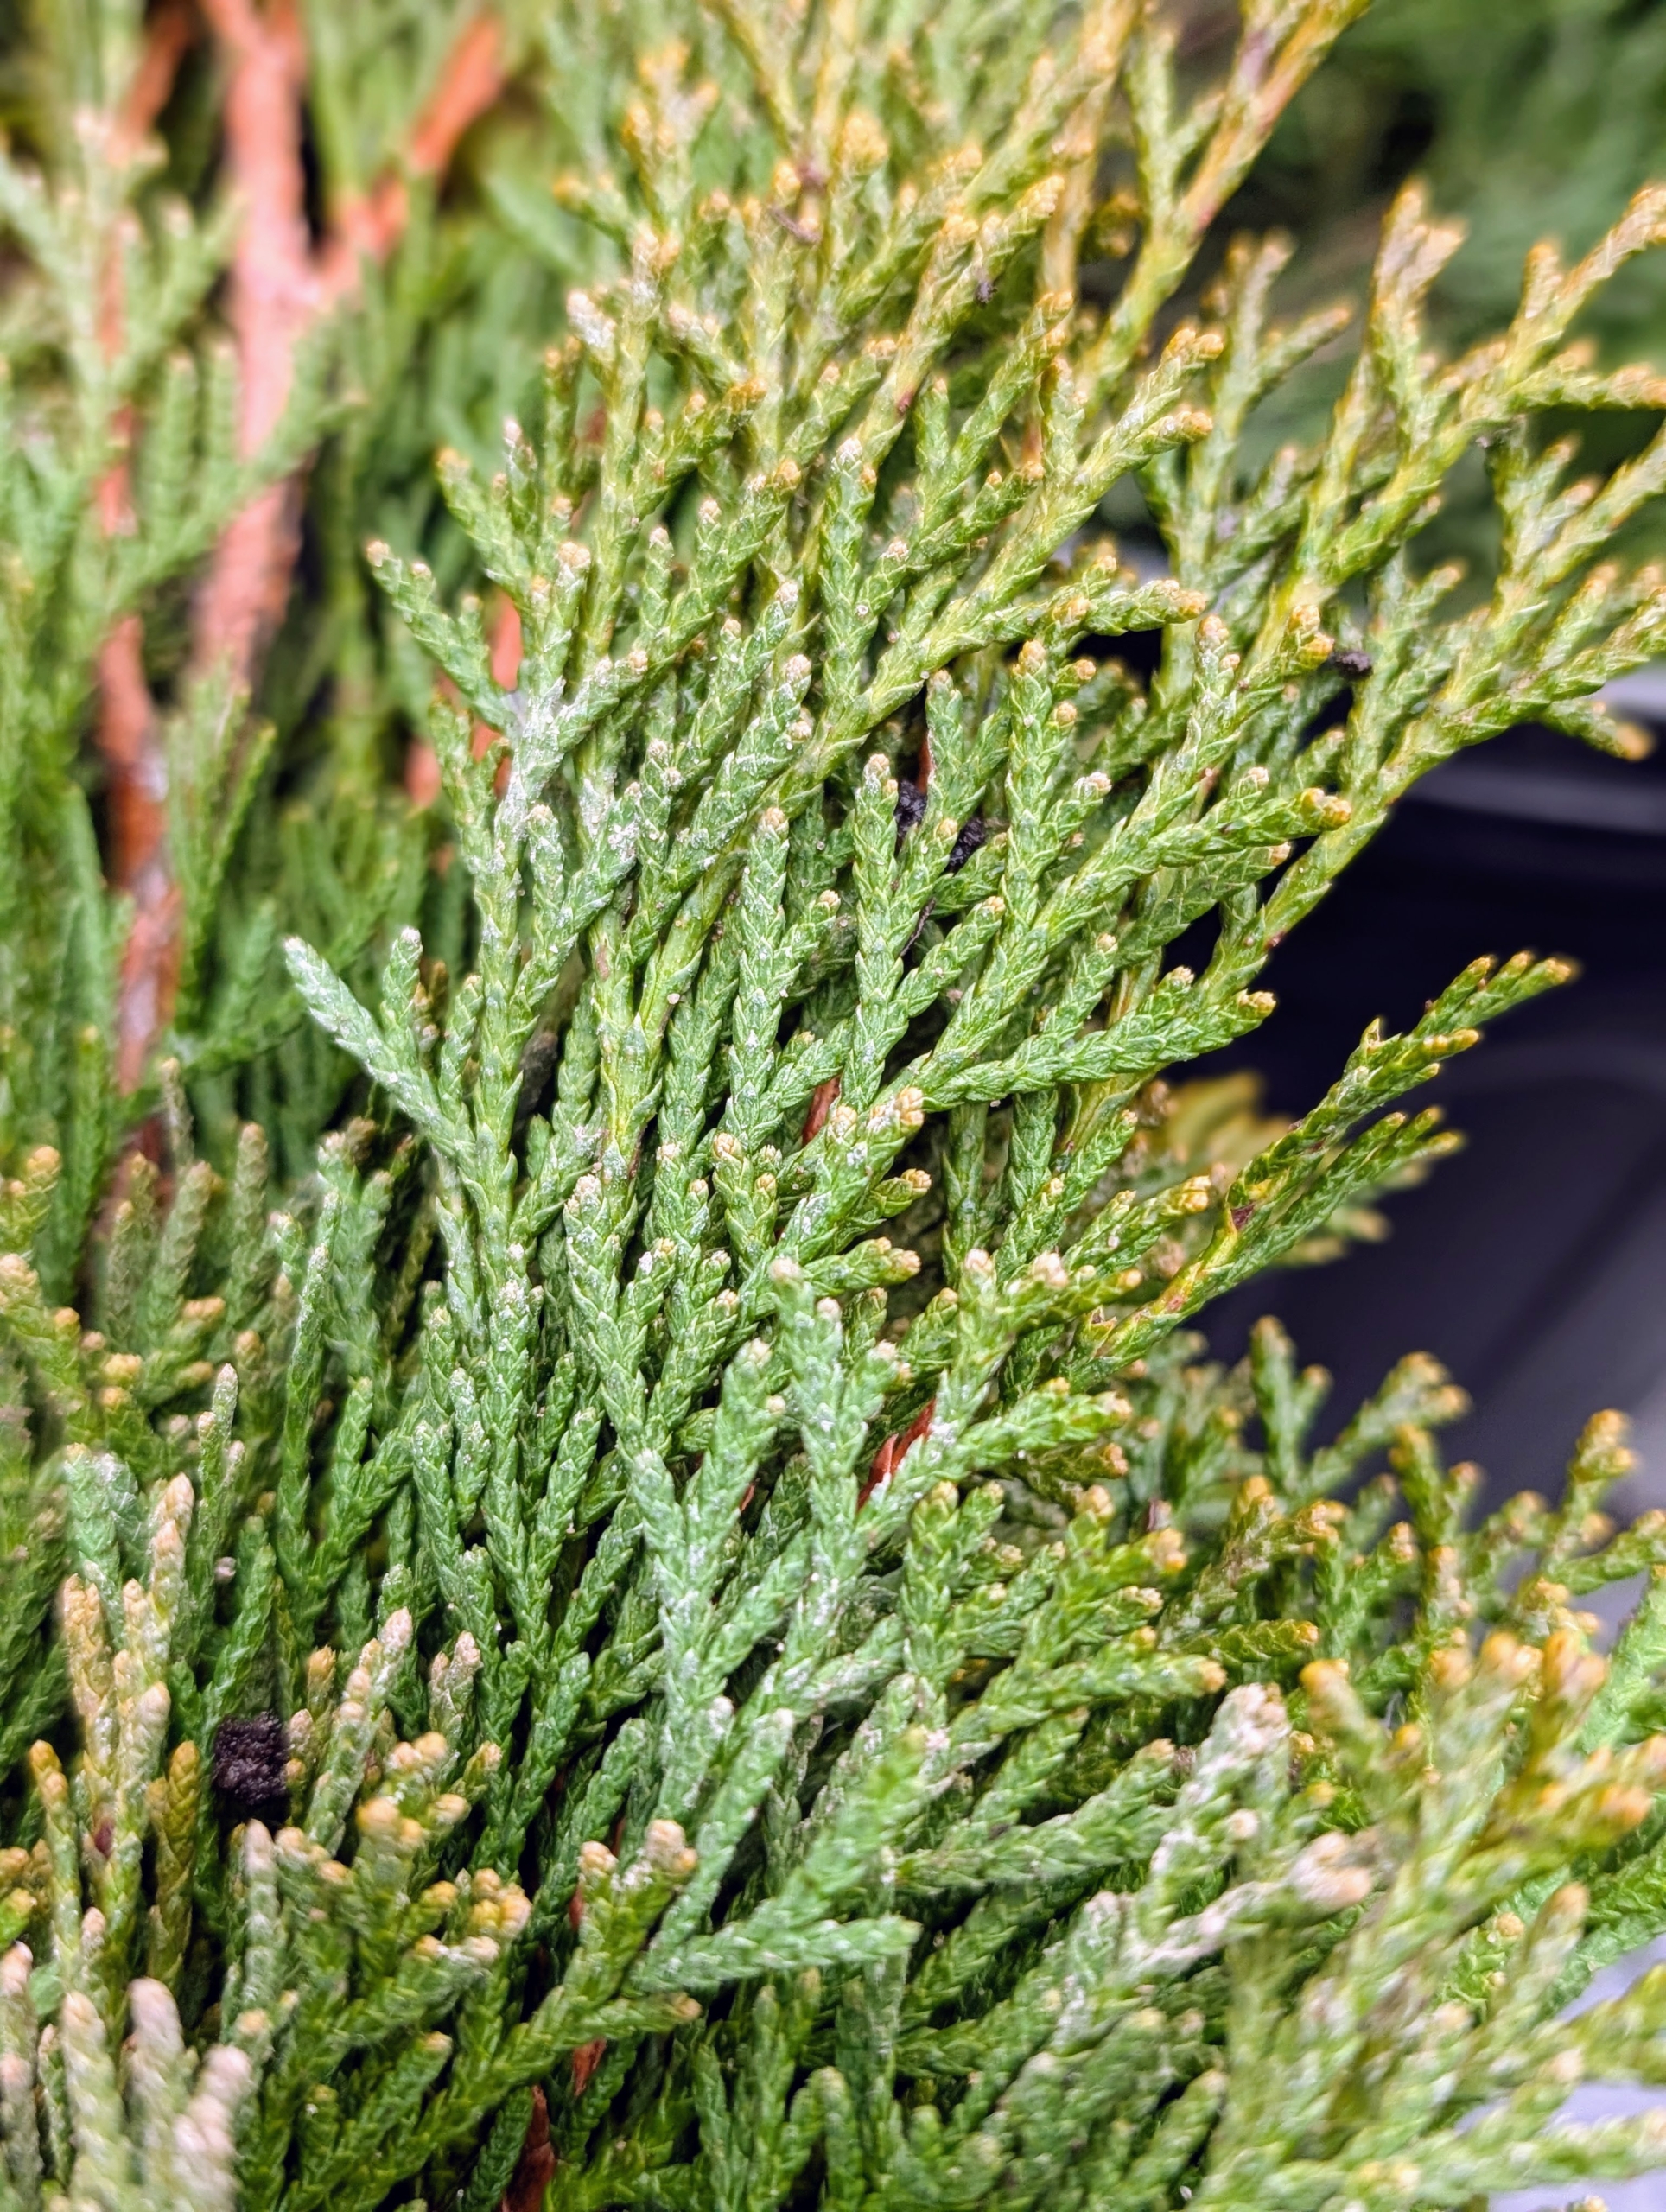
Arborvitaes have soft, dense evergreen foliage.
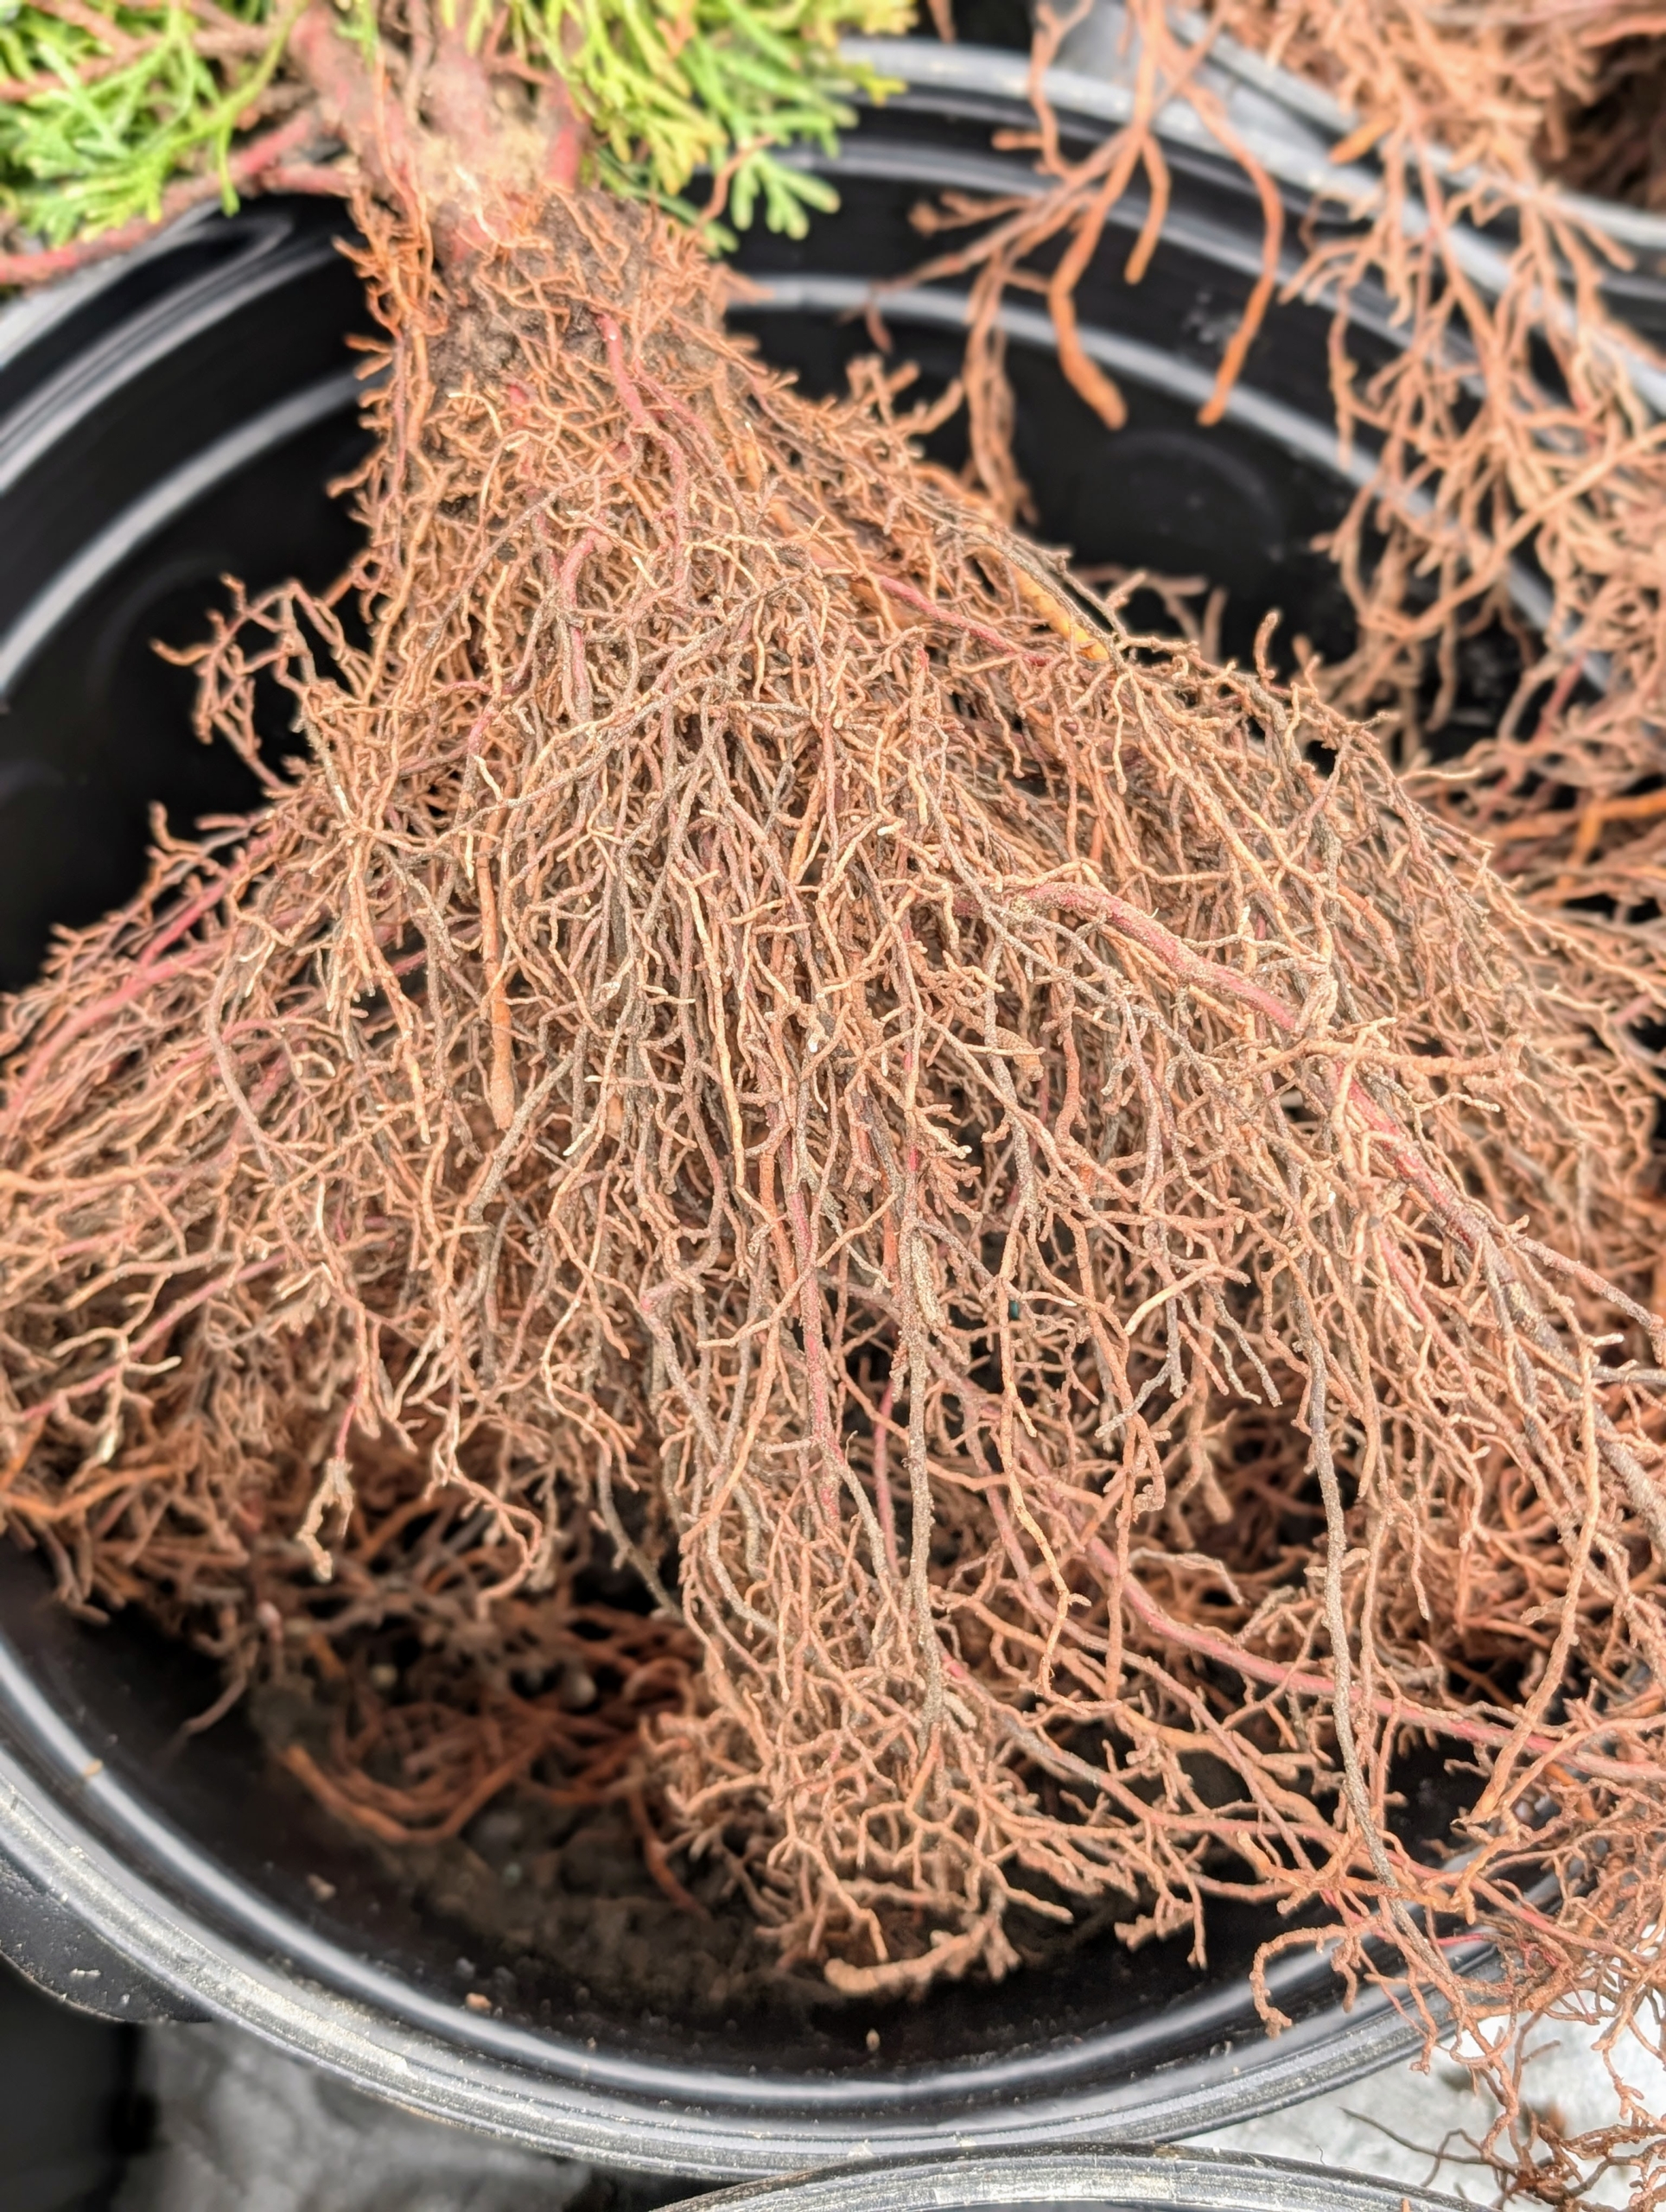
This variety also has a very strong and fibrous root system.
The bare-root is held secure in the pot as soil is dropped around its roots.
Once the pot is filled to just under its lip, Phurba tamps down carefully to ensure good contact between the soil and the plant’s roots.
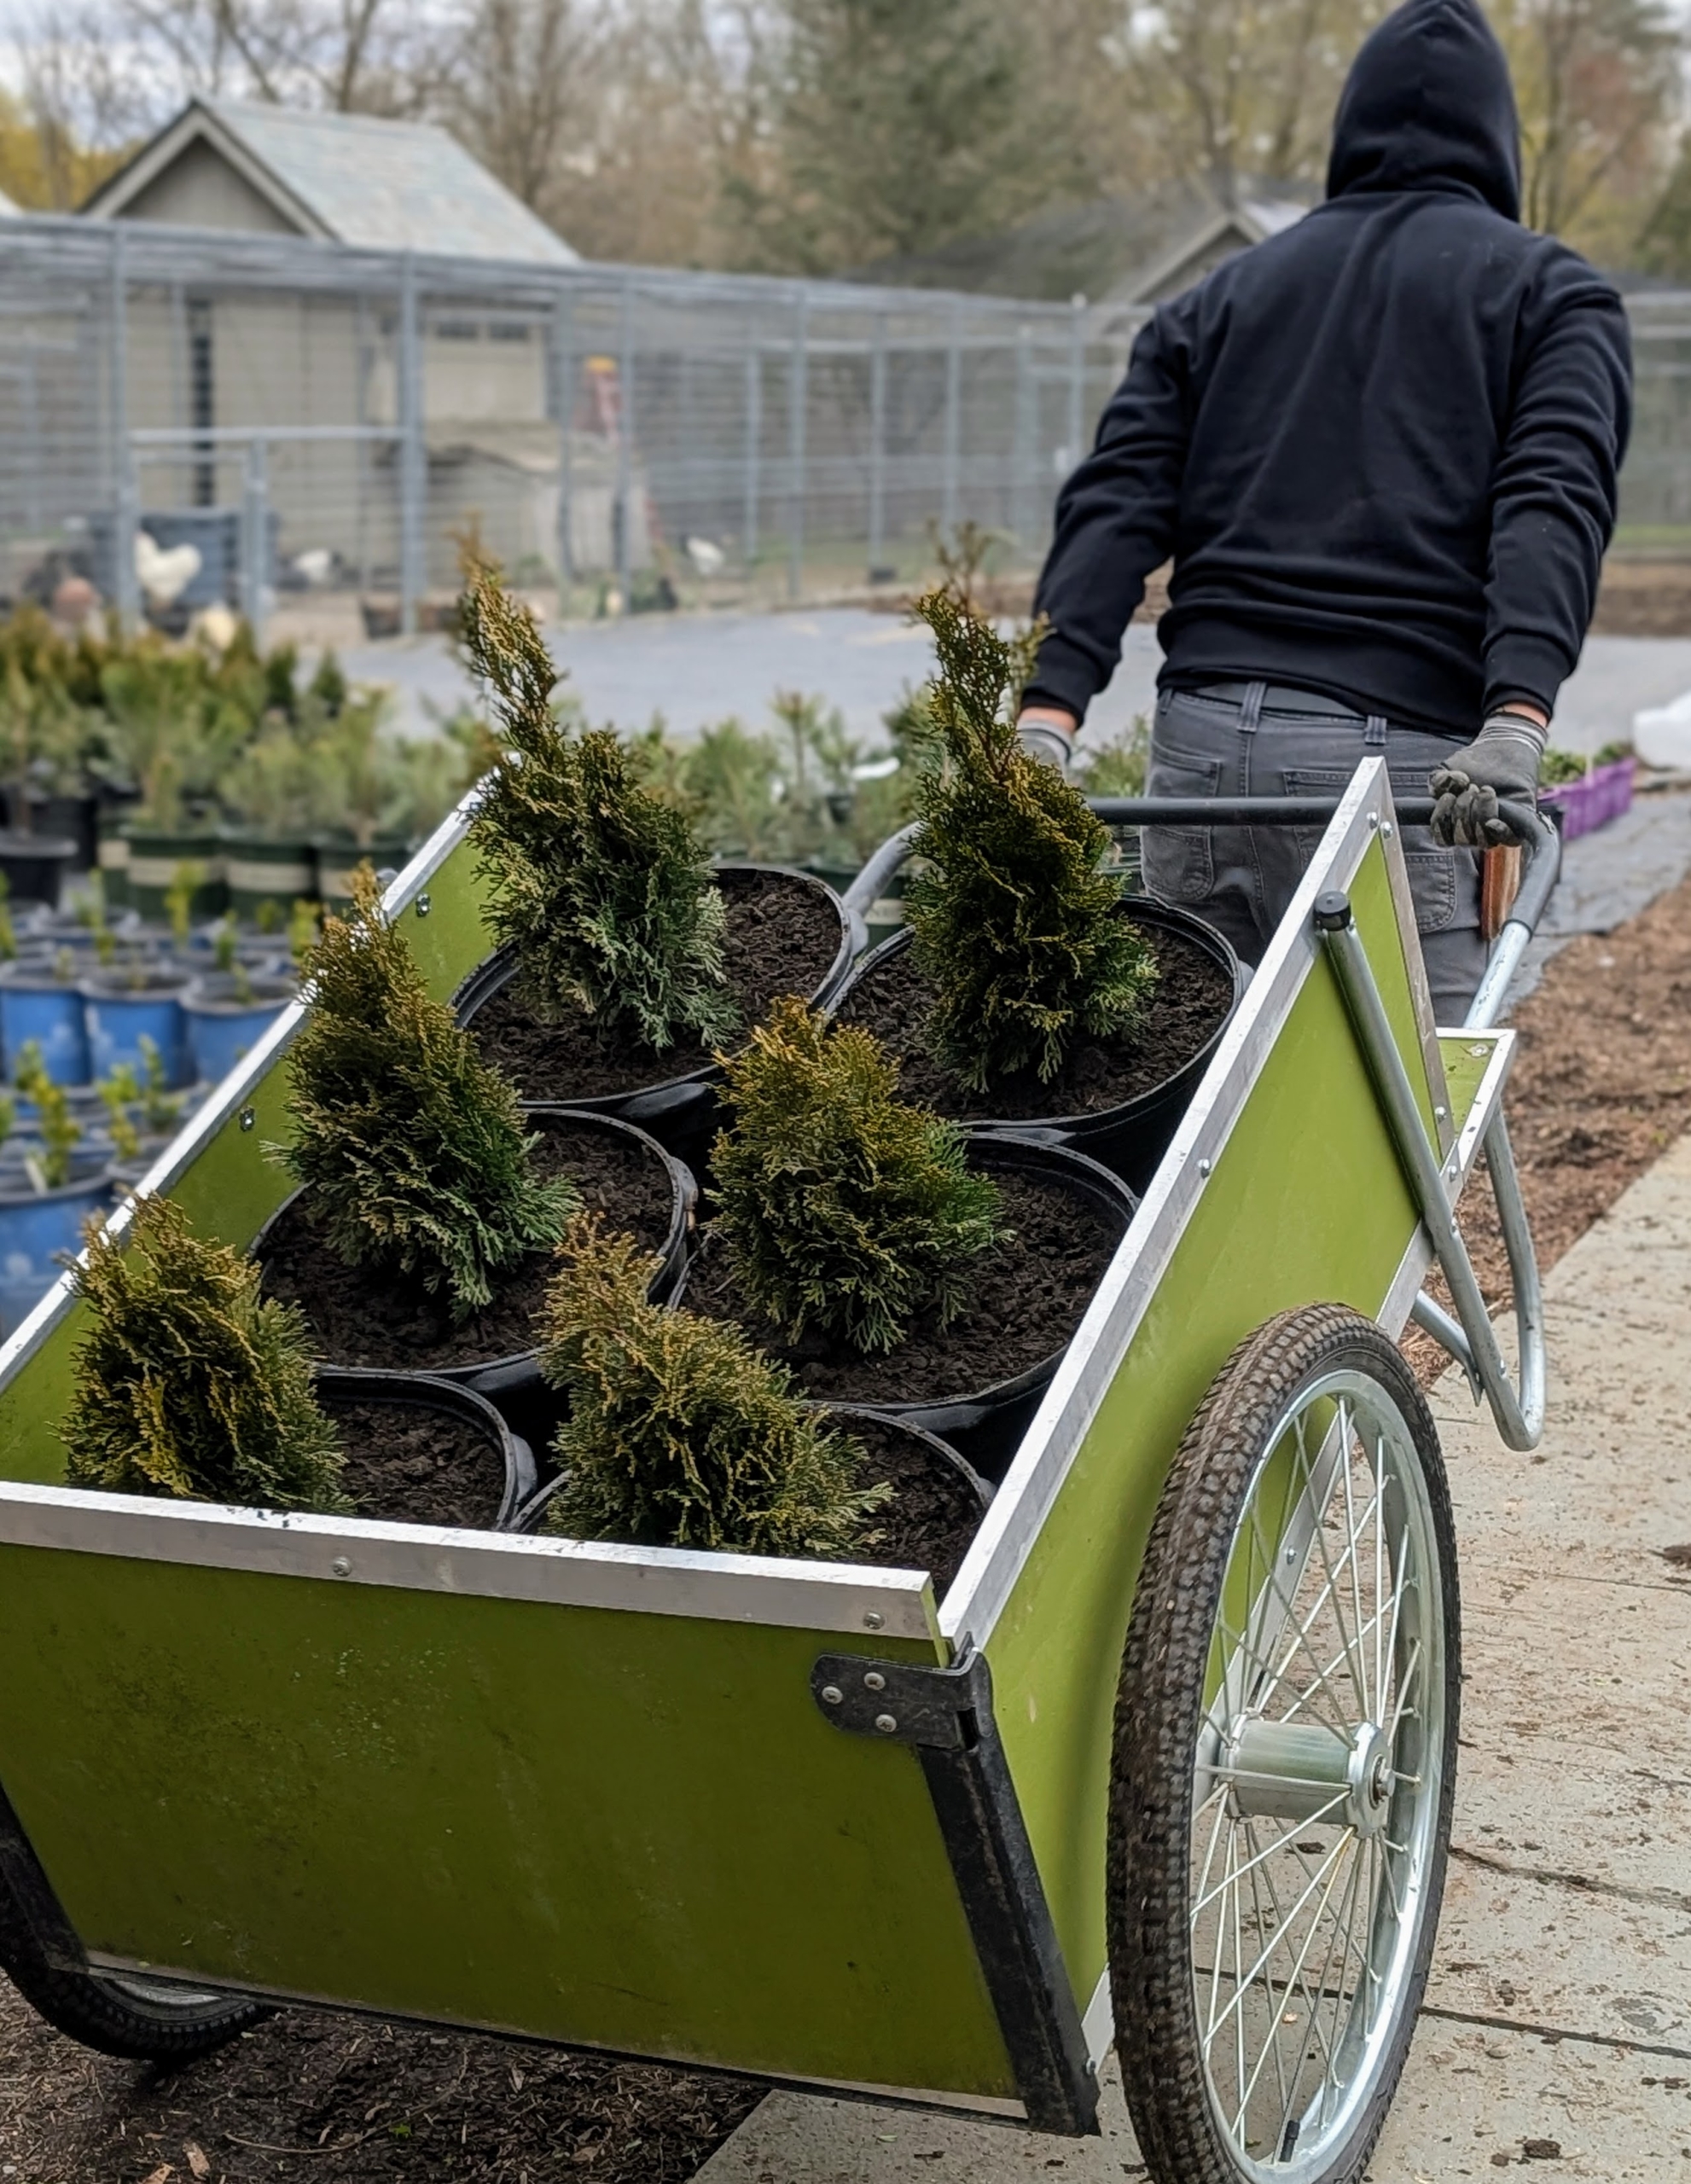
As the bare-roots are potted, they’re loaded onto a wheelbarrow and brought to their temporary growing spot in the yard.
These bare-roots will stay here for about a year where they can be cared for closely until they are ready to plant in more permanent areas around the farm.
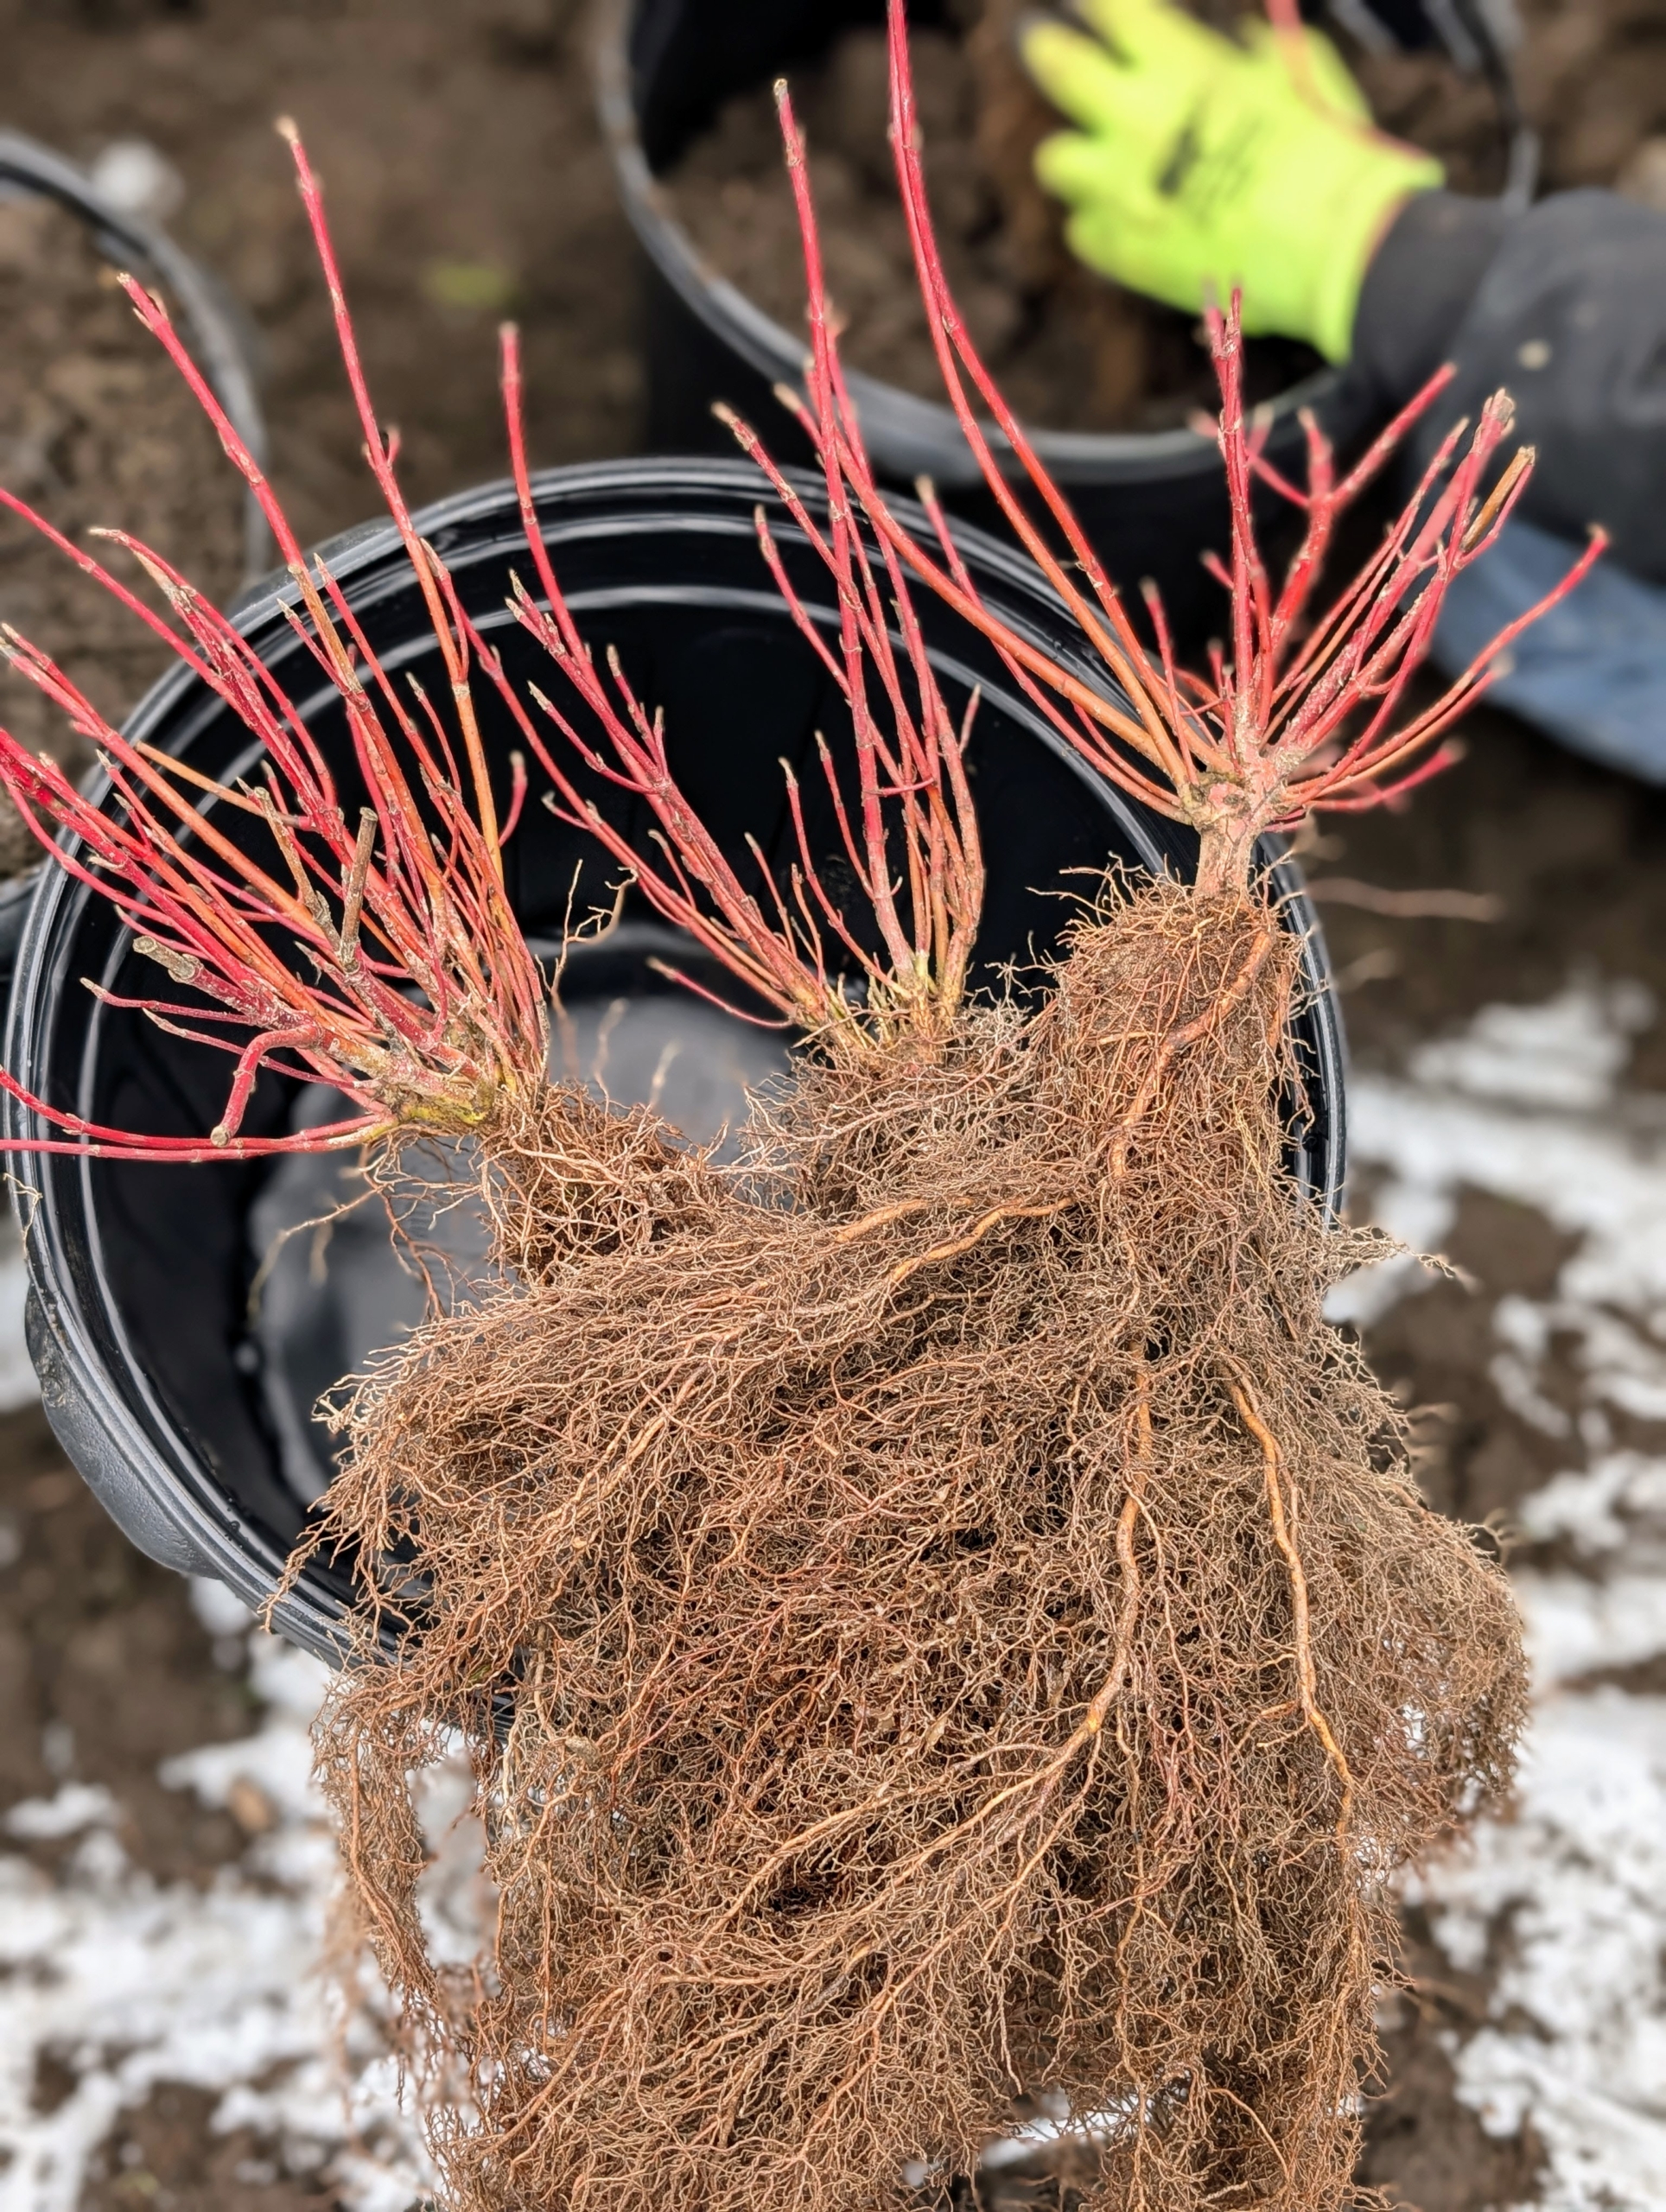
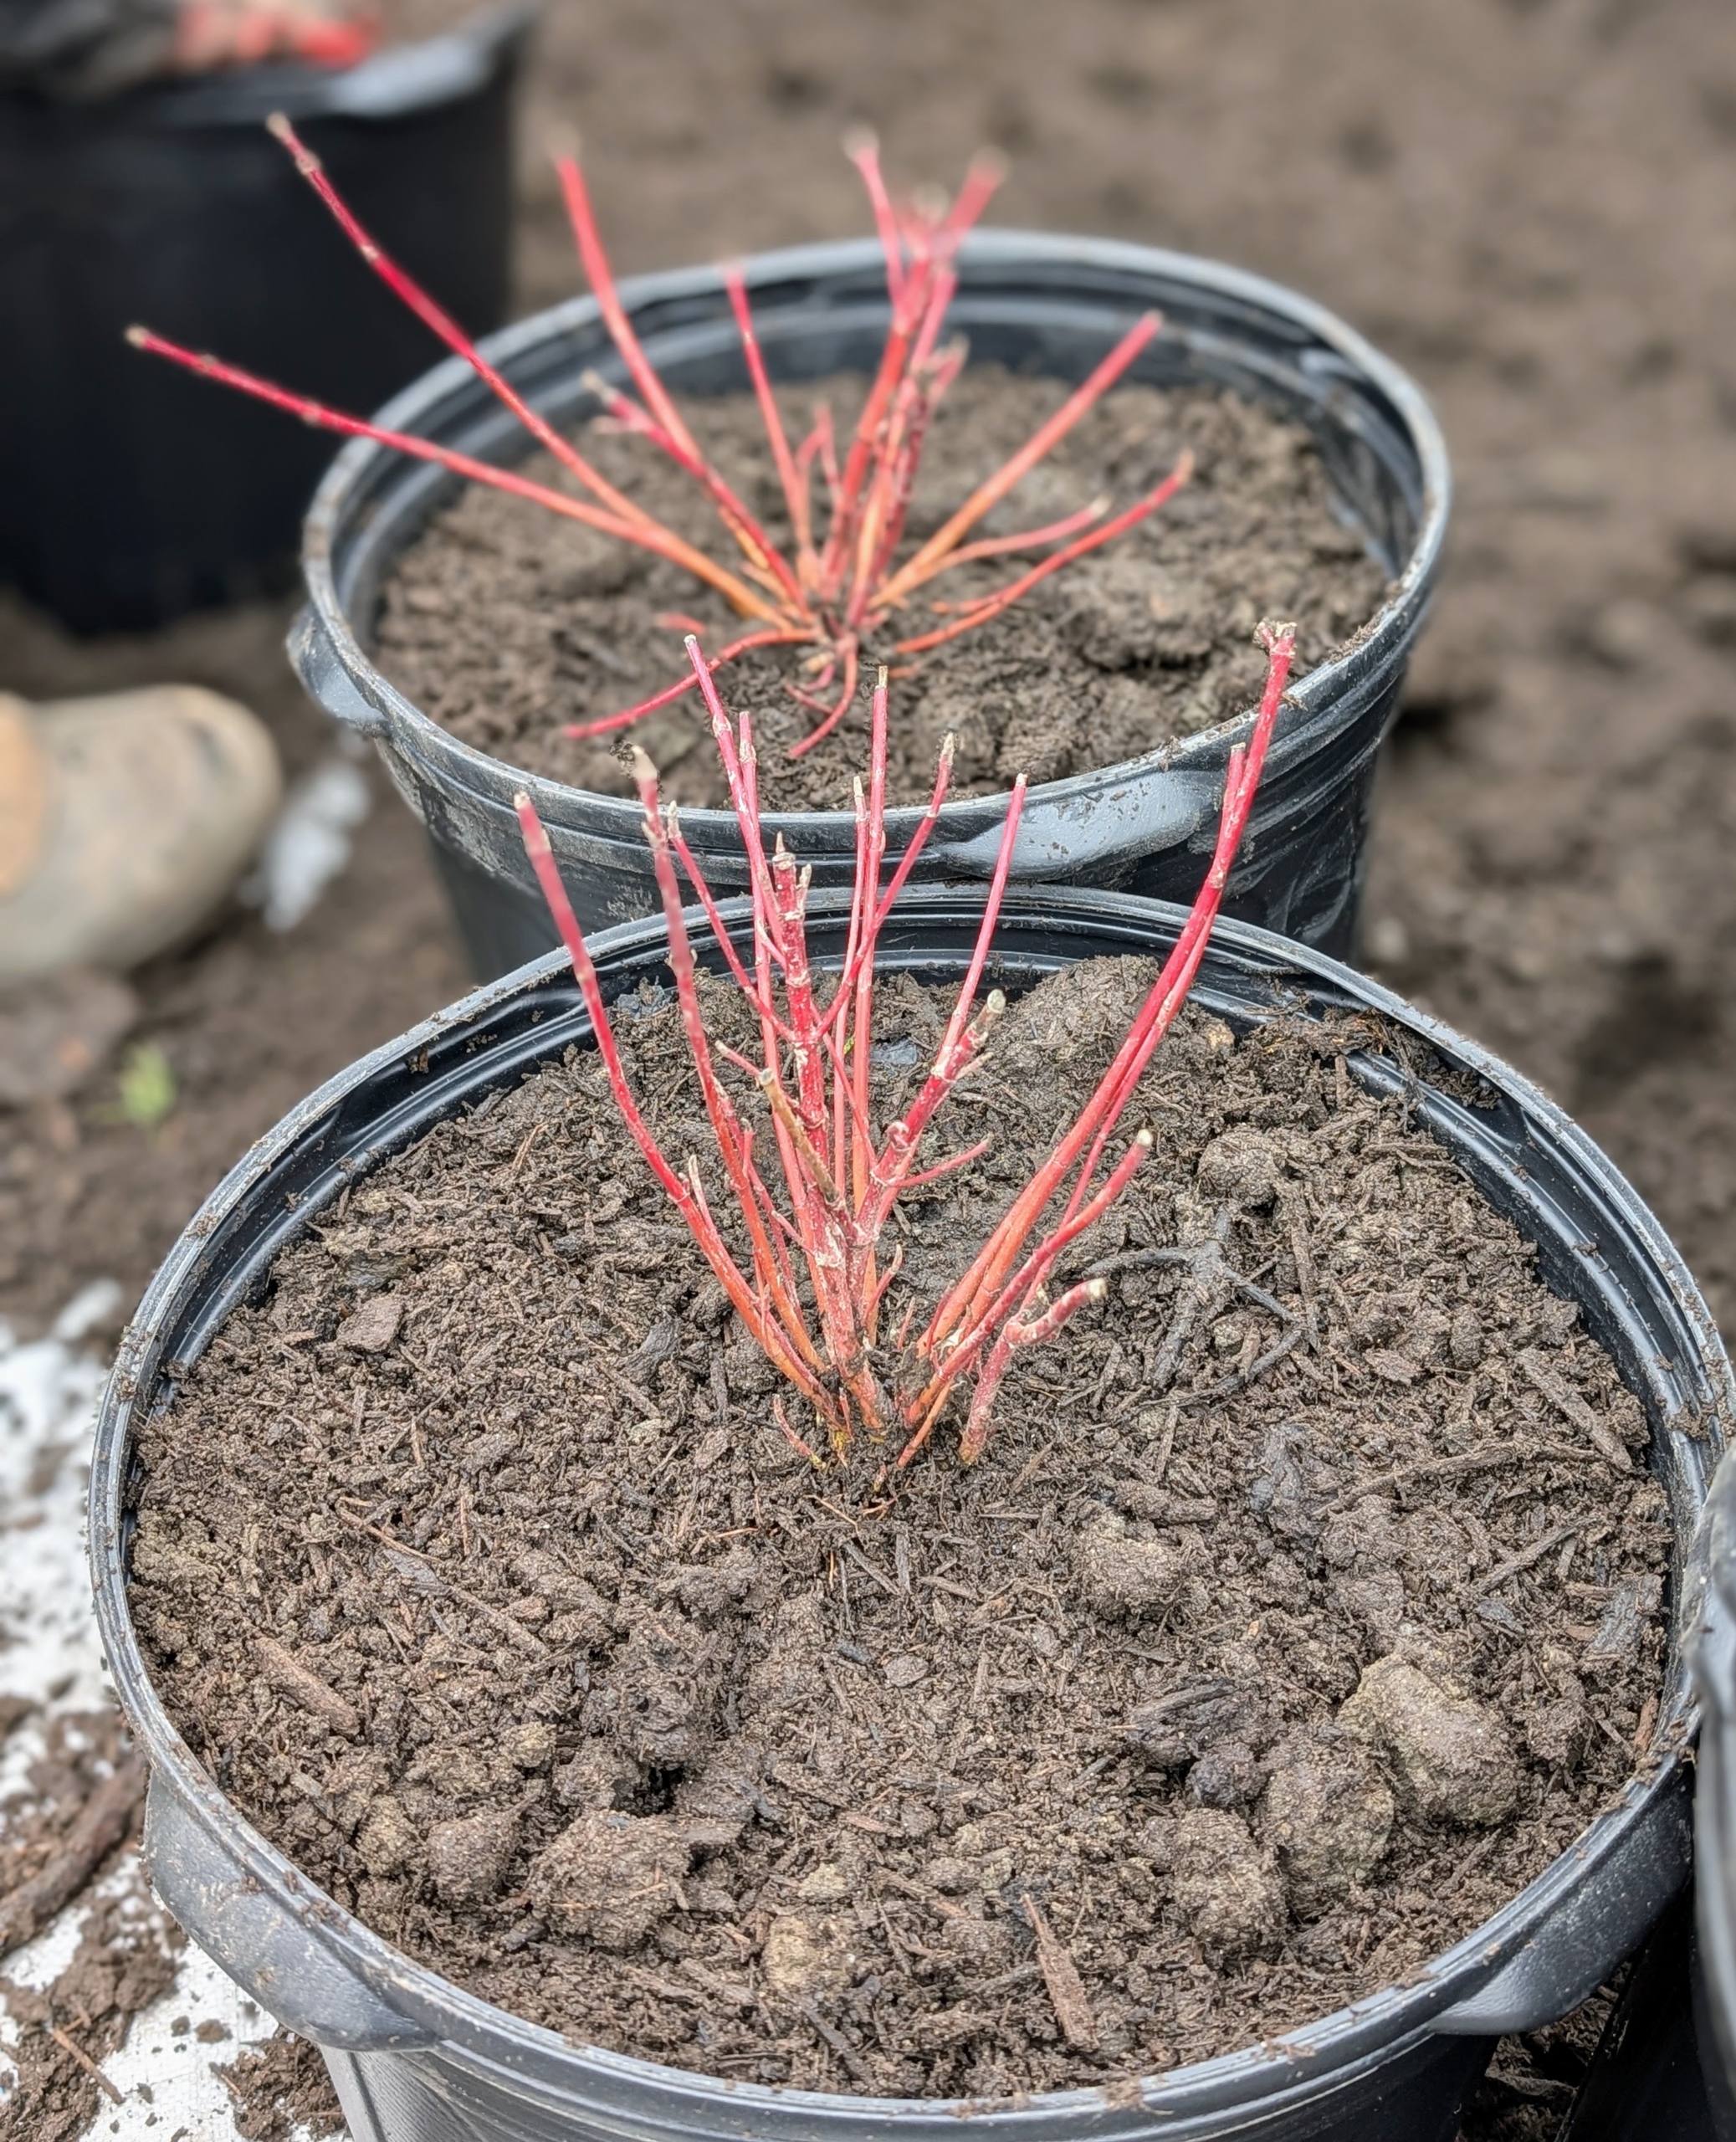
These are bare-root cuttings of Cornus sericea ‘Winter Spark,’ commonly known as red twig dogwood or red osier dogwood, an upright spreading shrub that can reach a height of nine feet if left unpruned.
Each of these bare-root cuttings is also placed into an appropriately sized pot. The root section should fit into the pot without being crowded at the bottom. Phurba checks and teases the roots before placing into the designated container.
These dogwoods will add vibrant color to the landscape when planted. It’s a busy and productive start to the planting season here at my farm! I’ll show you my bare-root roses from Star Roses and Plants in an upcoming blog.
Maintaining a productive orchard is a lot of work.
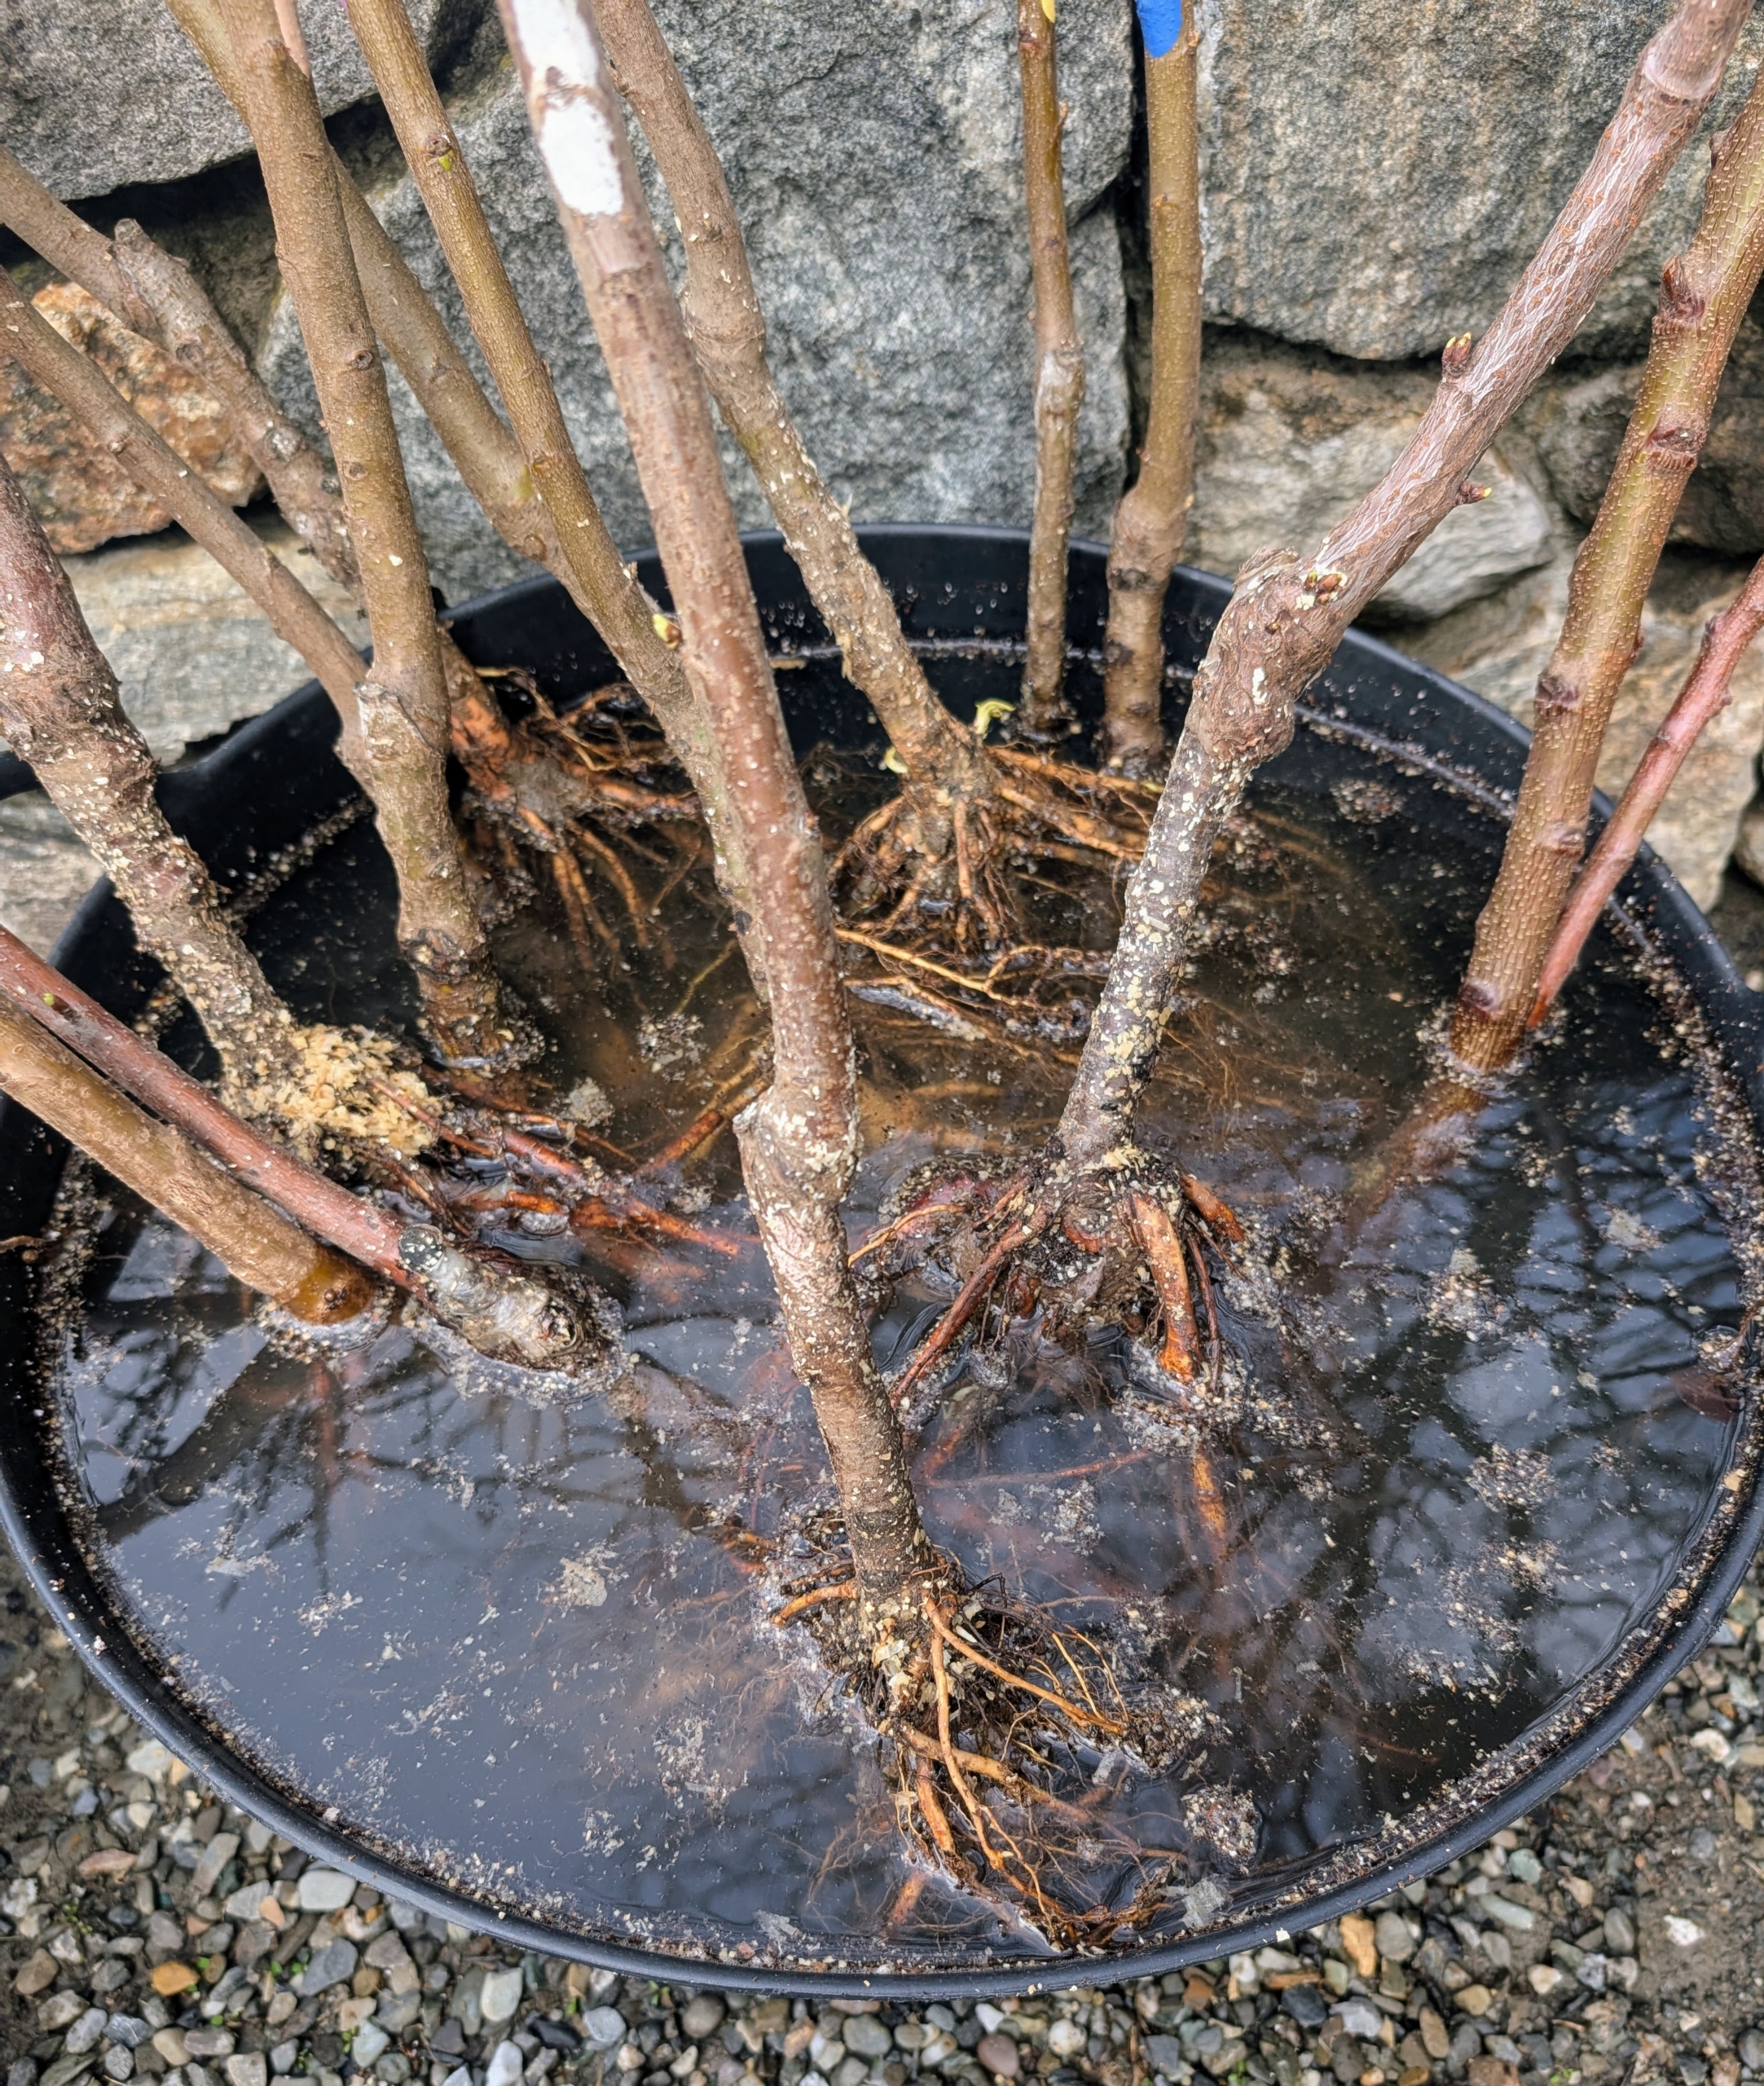
The large orchard surrounding my pool includes more than 200-fruit trees. There are apple trees, plum trees, cherry trees, peach, apricot, pear, medlar, and quince trees. Since it was first planted in 2017, these trees have provided so many wonderful fruits. They are all pruned and fed regularly through the year. Unfortunately, even with excellent maintenance and care, sometimes trees need to be replaced due to disease or damage. I also like to add trees whenever I can. This week, an order of bare-root fruit trees arrived from Trees of Antiquity in Paso Robles, California. Right away they were placed in water, left to soak, and then planted in the ground.
Enjoy these photos.
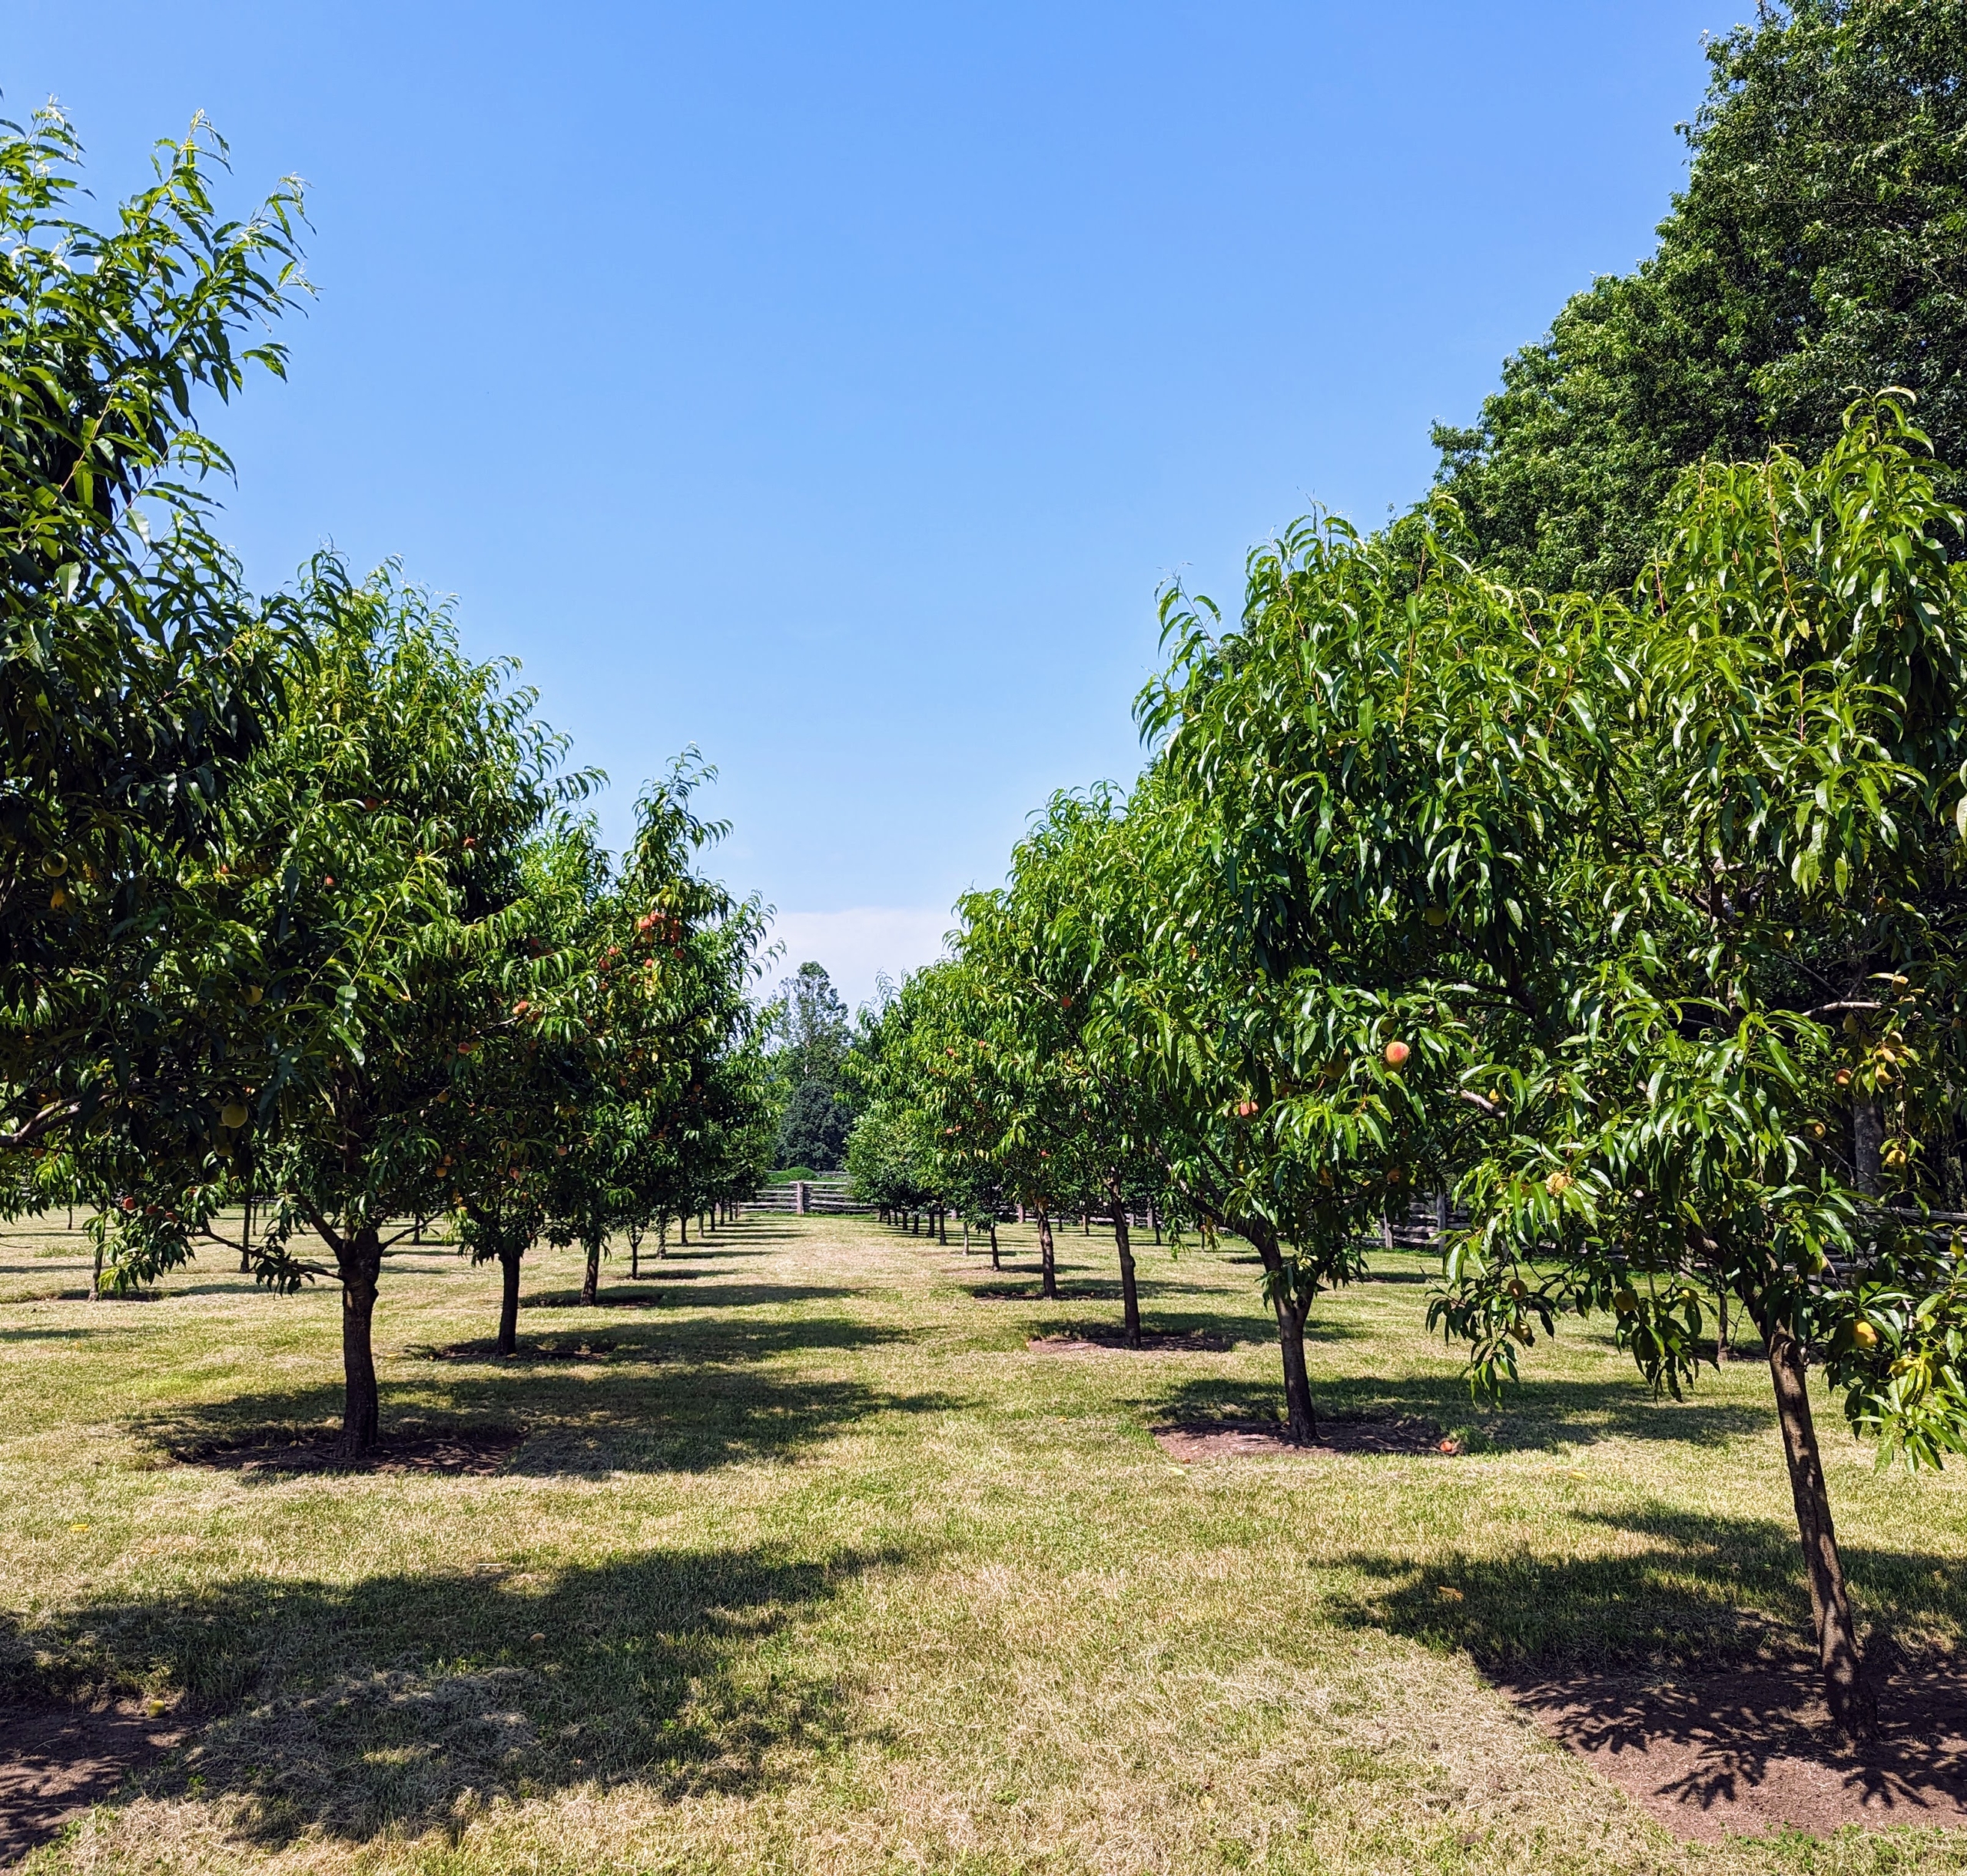
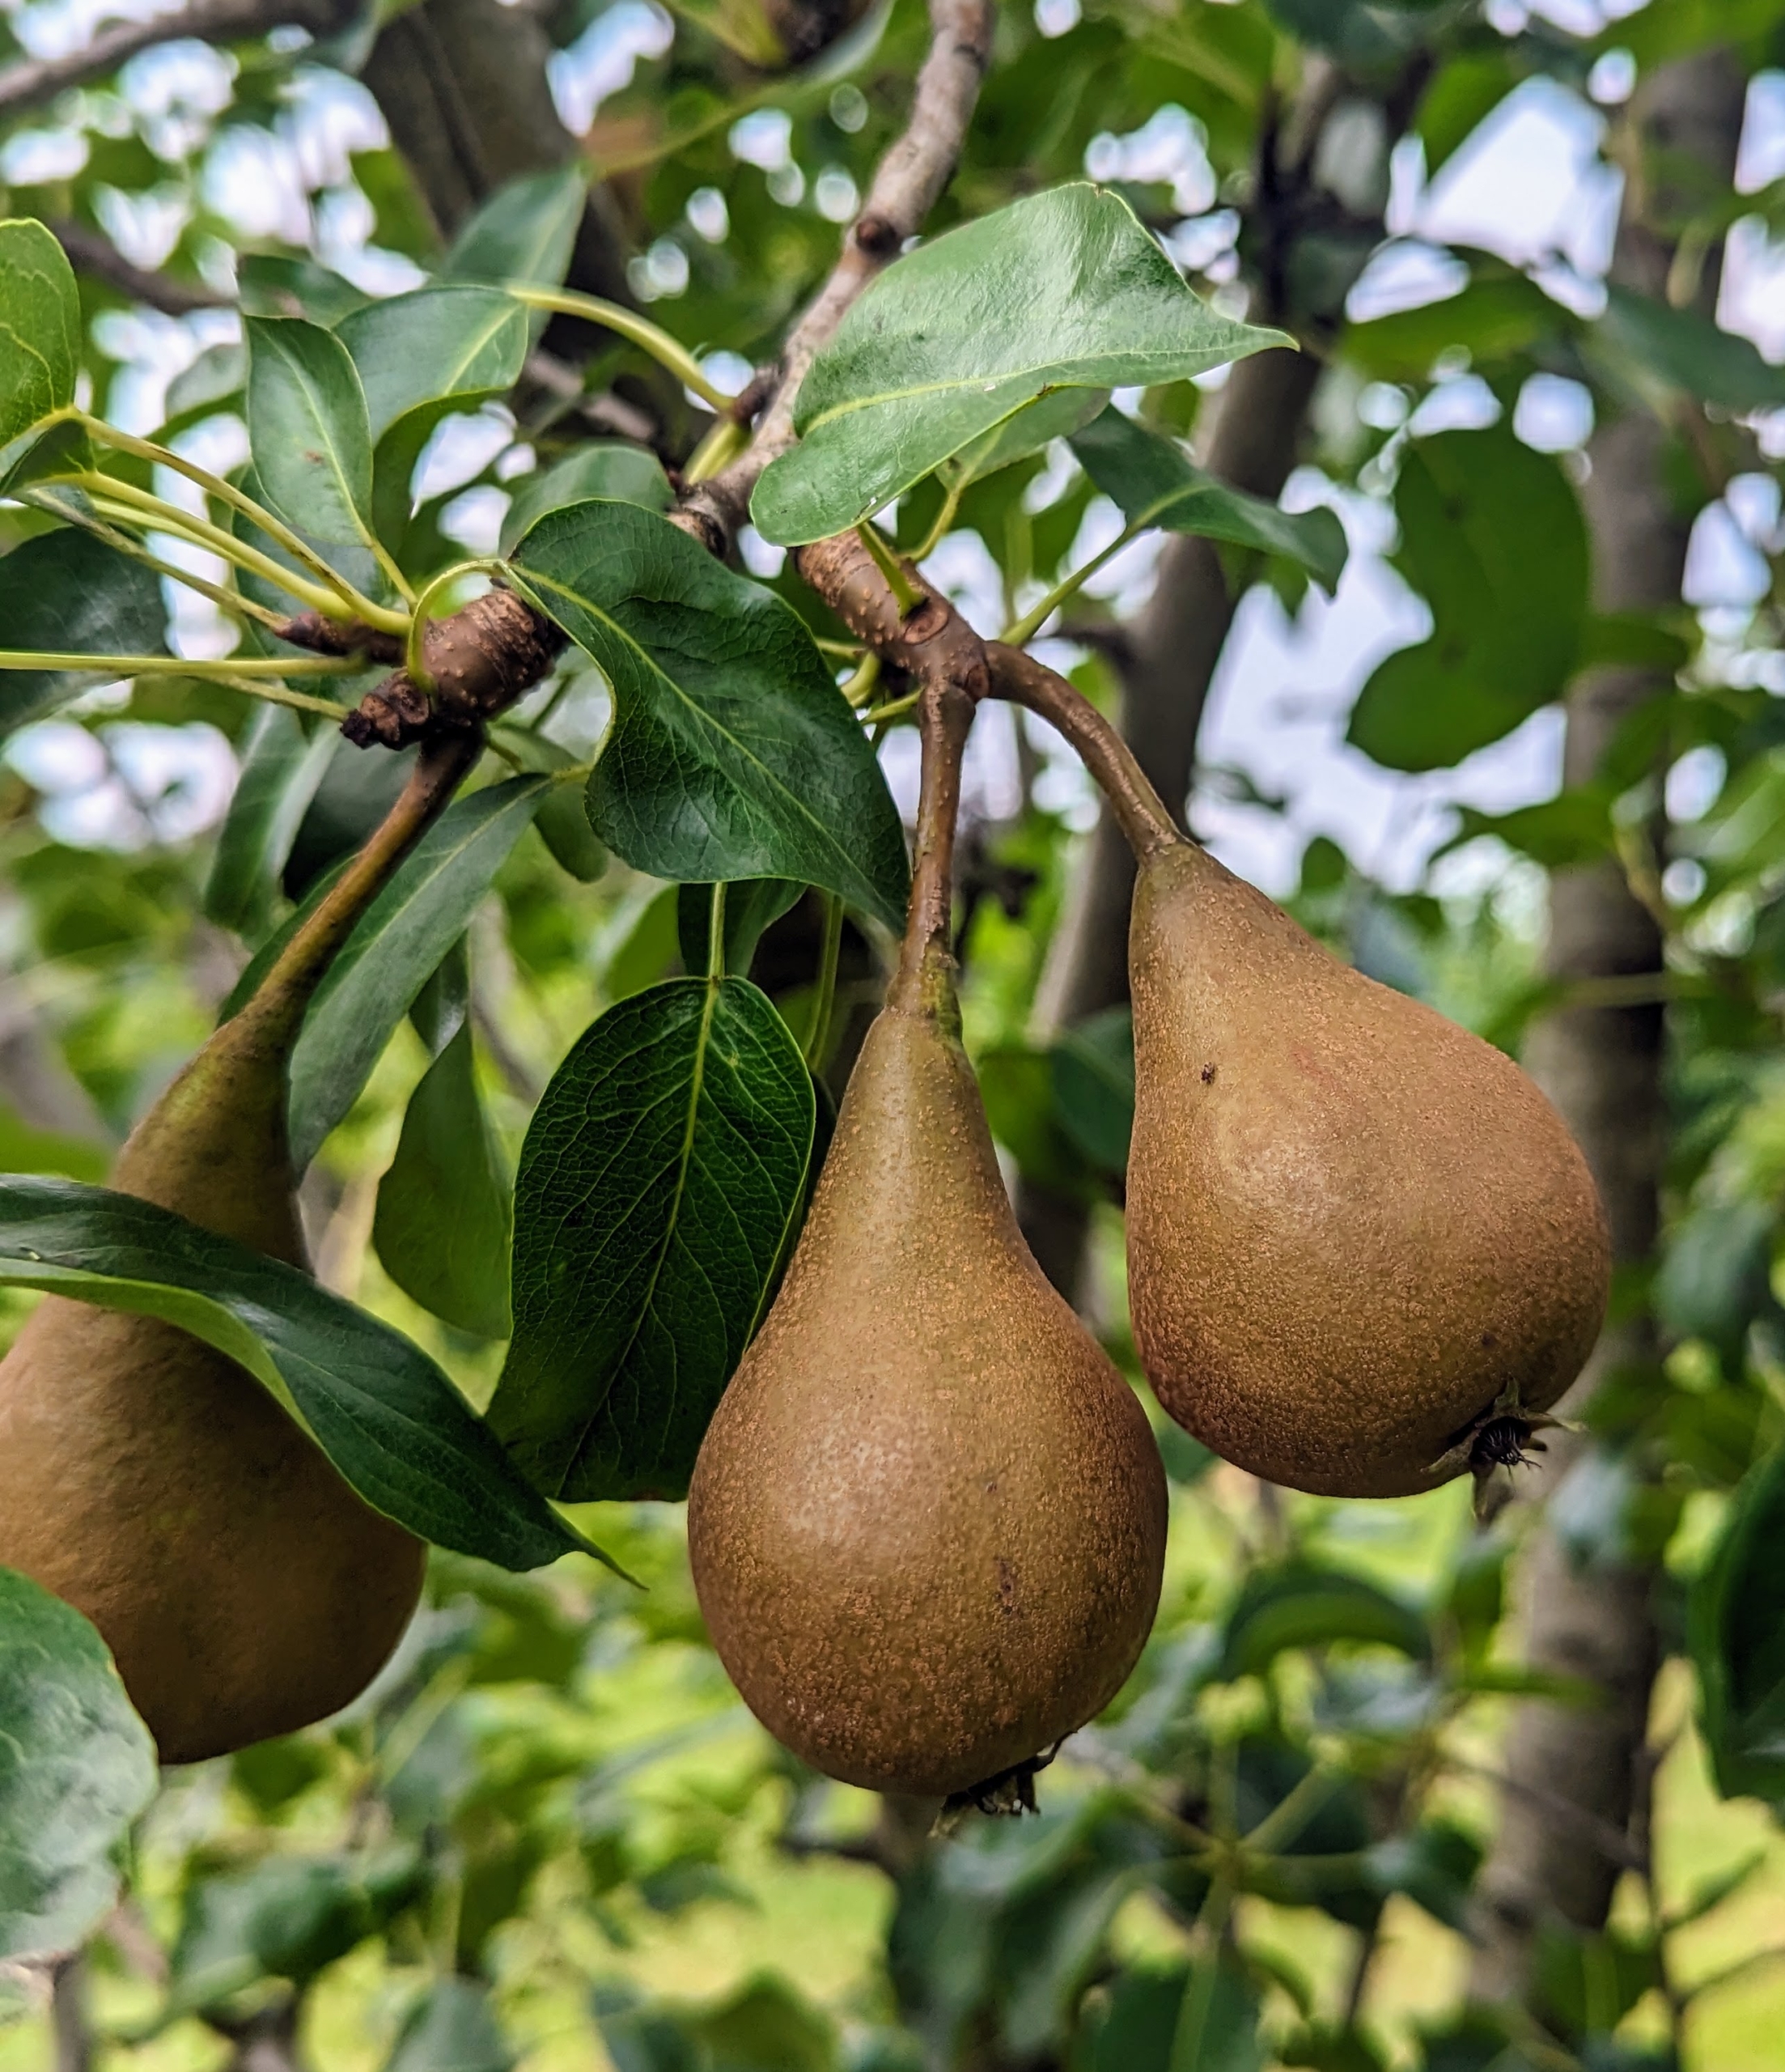
This is my orchard in summer when all the trees are leafed out and filled with sweet, juicy fruits.
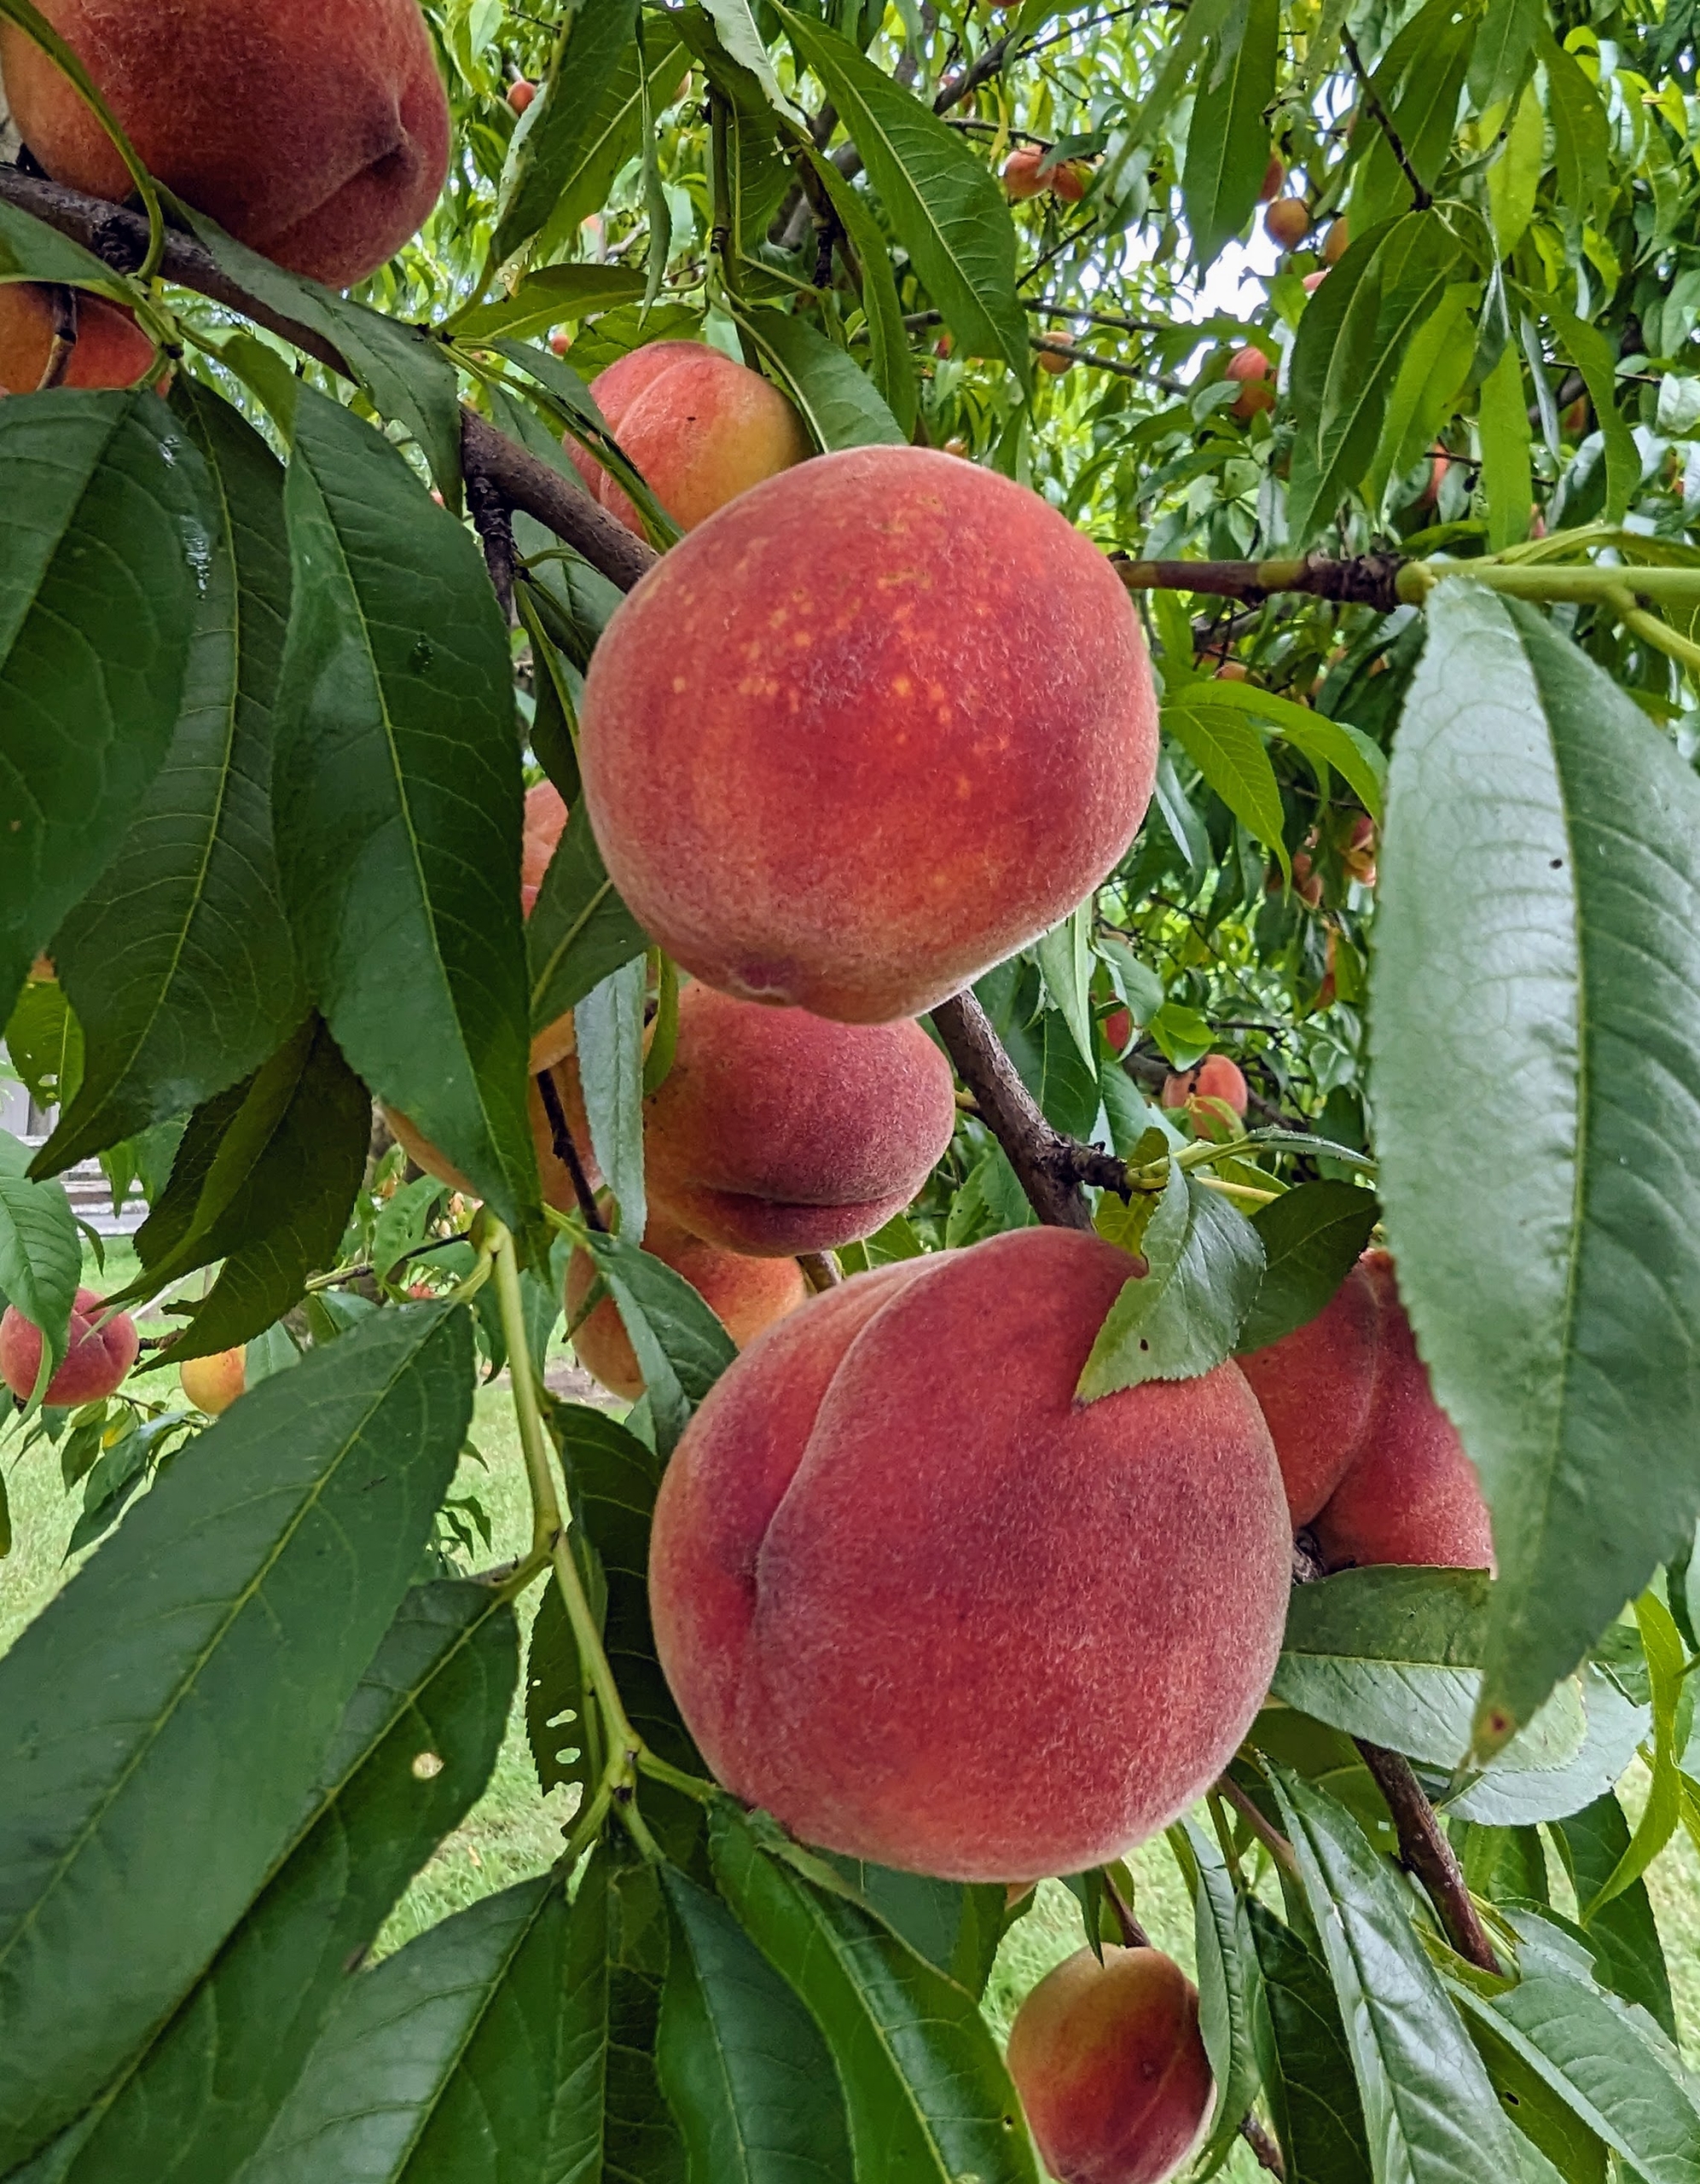
I grow lots of peaches. Peach trees thrive in an area where they can soak up the sunshine throughout the day. Growing peach trees are self-fruiting, which means the pollen from the same flower or variety can pollinate the tree and produce fruit.
Some of the many pears in the orchard are Bartlett, Columbia, D’Amalis, Ginnybrook, McLaughlin, Nova, Patten, Seckel, Stacyville, and Washington State.
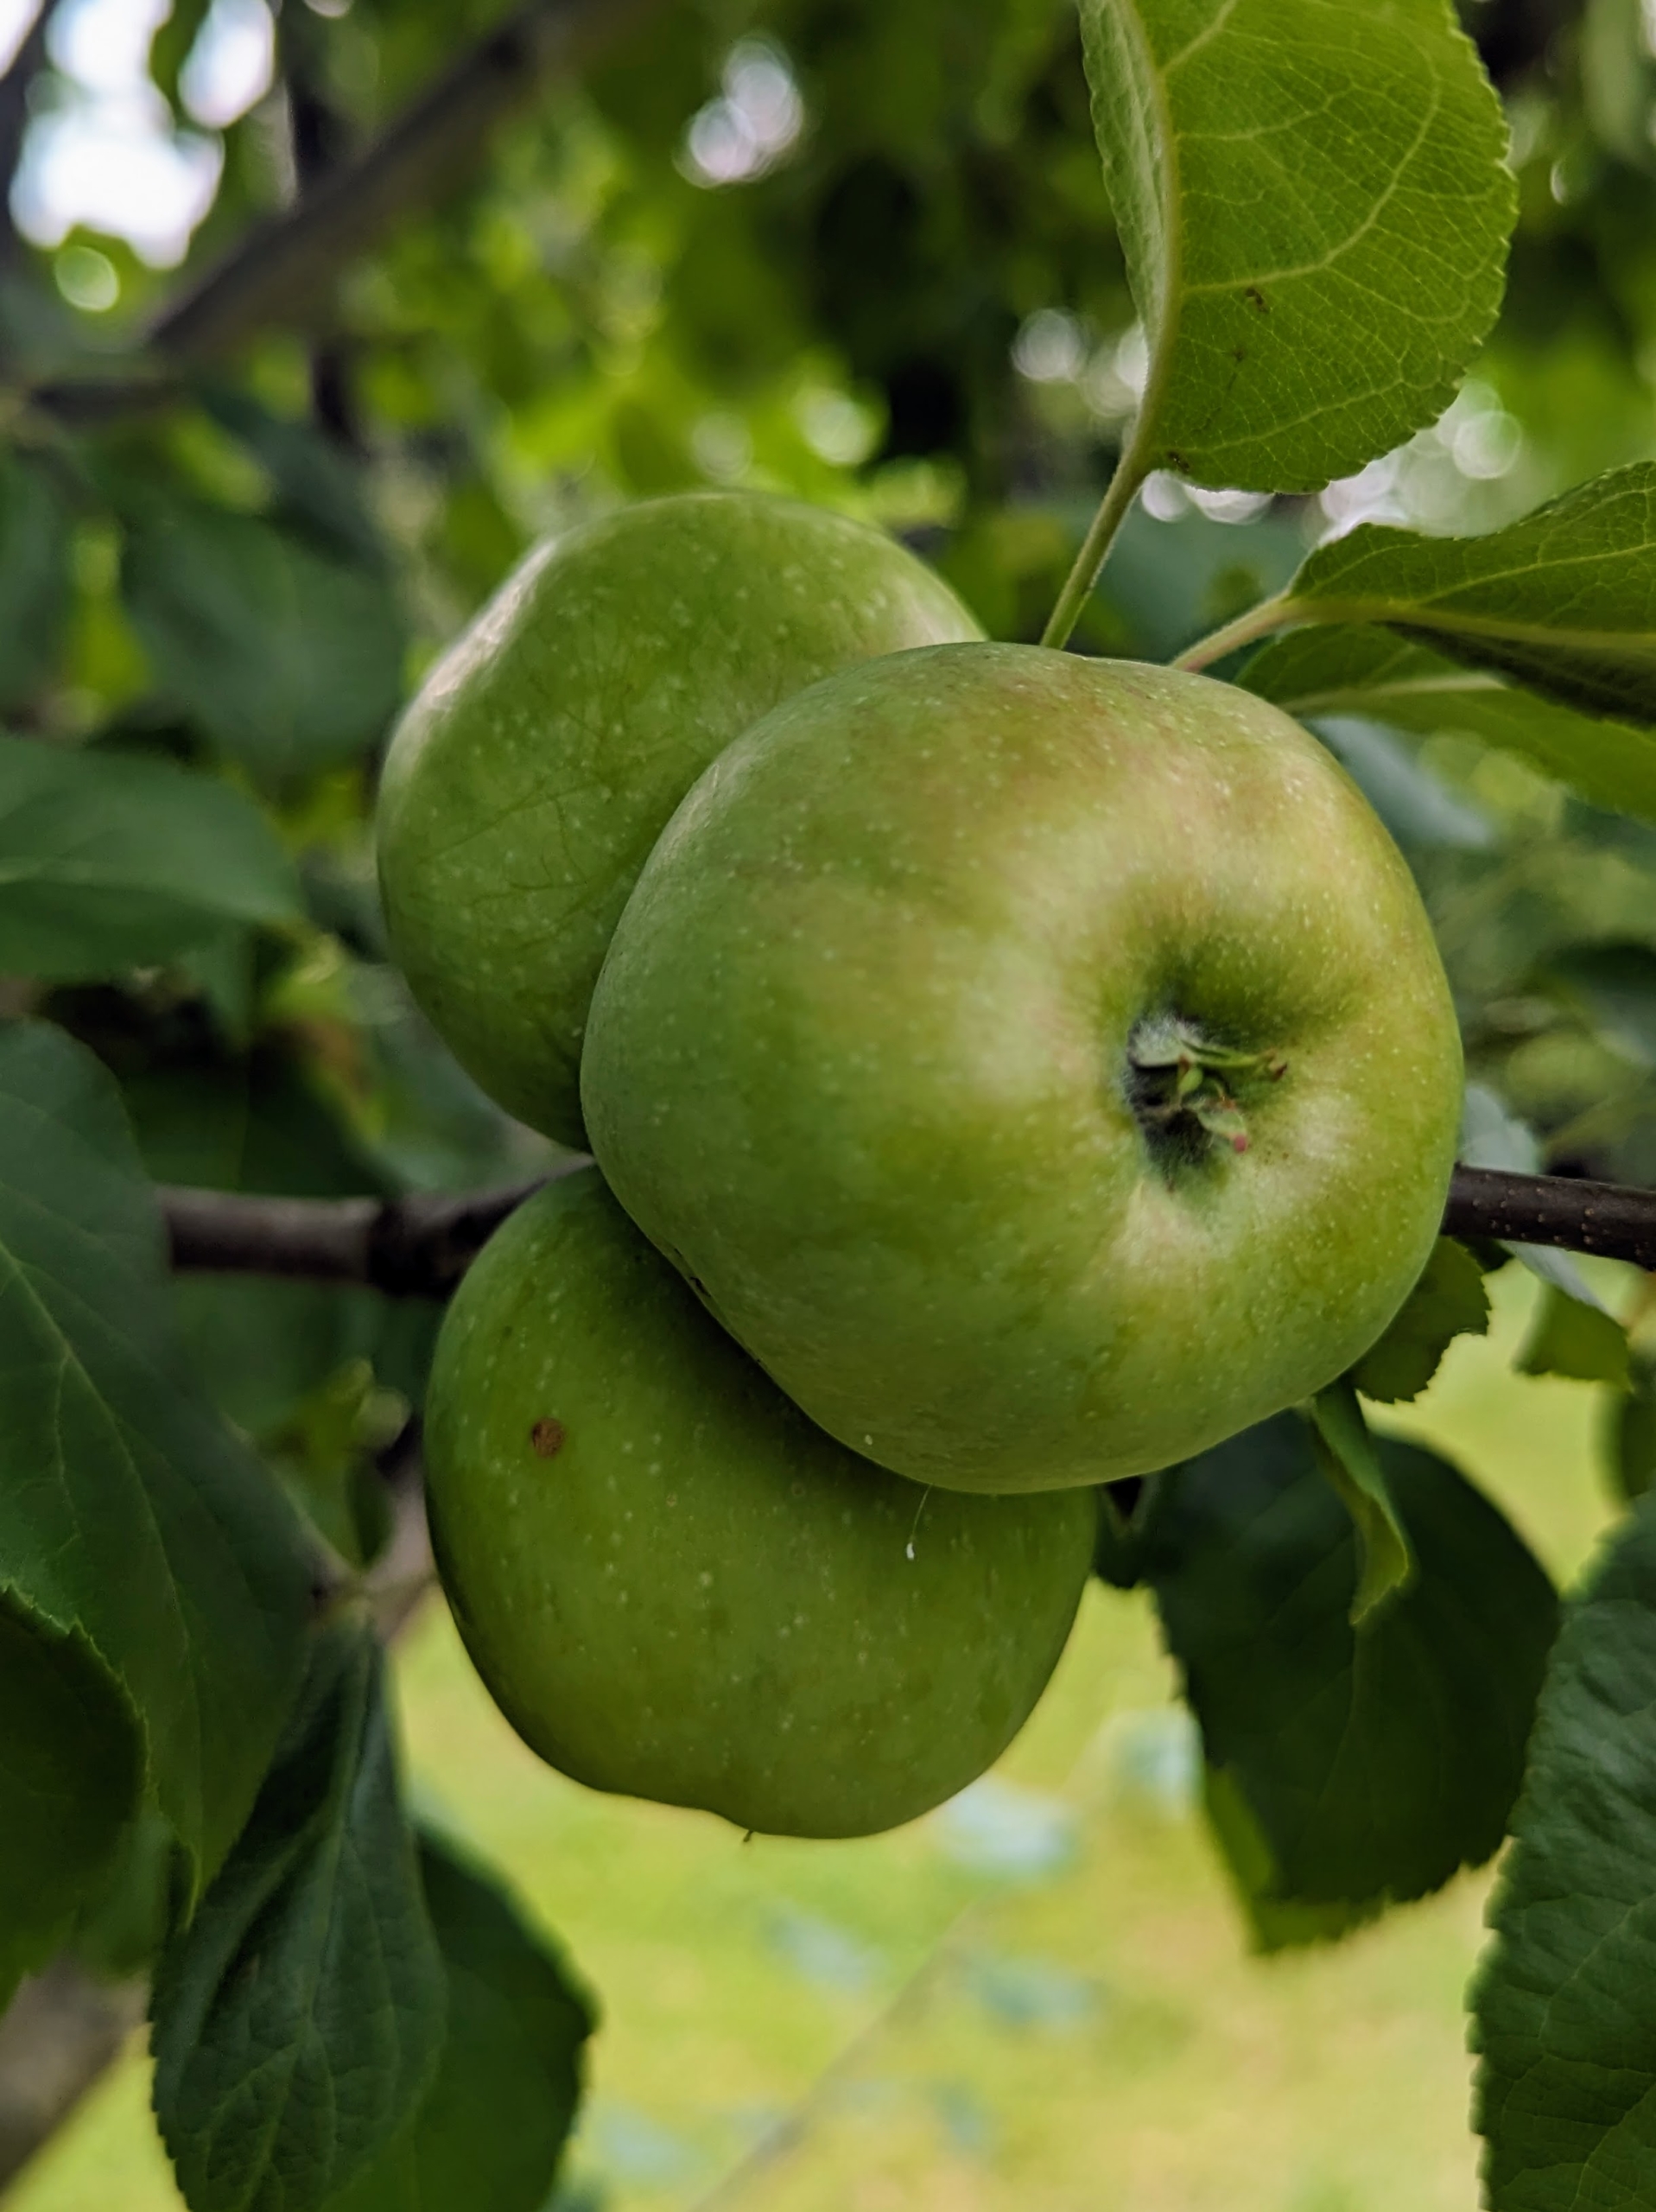
And of course, I have a section of delicious apples. I already grow hundreds of apple trees here at the farm – some that were here when I acquired the property and others I planted soon after moving here. These orchard apple trees include Baldwin, Black Oxford, Cortland, Cox’s Orange Pippin, Esopus Spitzenburg, Fuji, Golden Russet, Grimes Golden, Honeycrisp, Liberty, Redfield, Roxbury Russet, and Windham Russet.
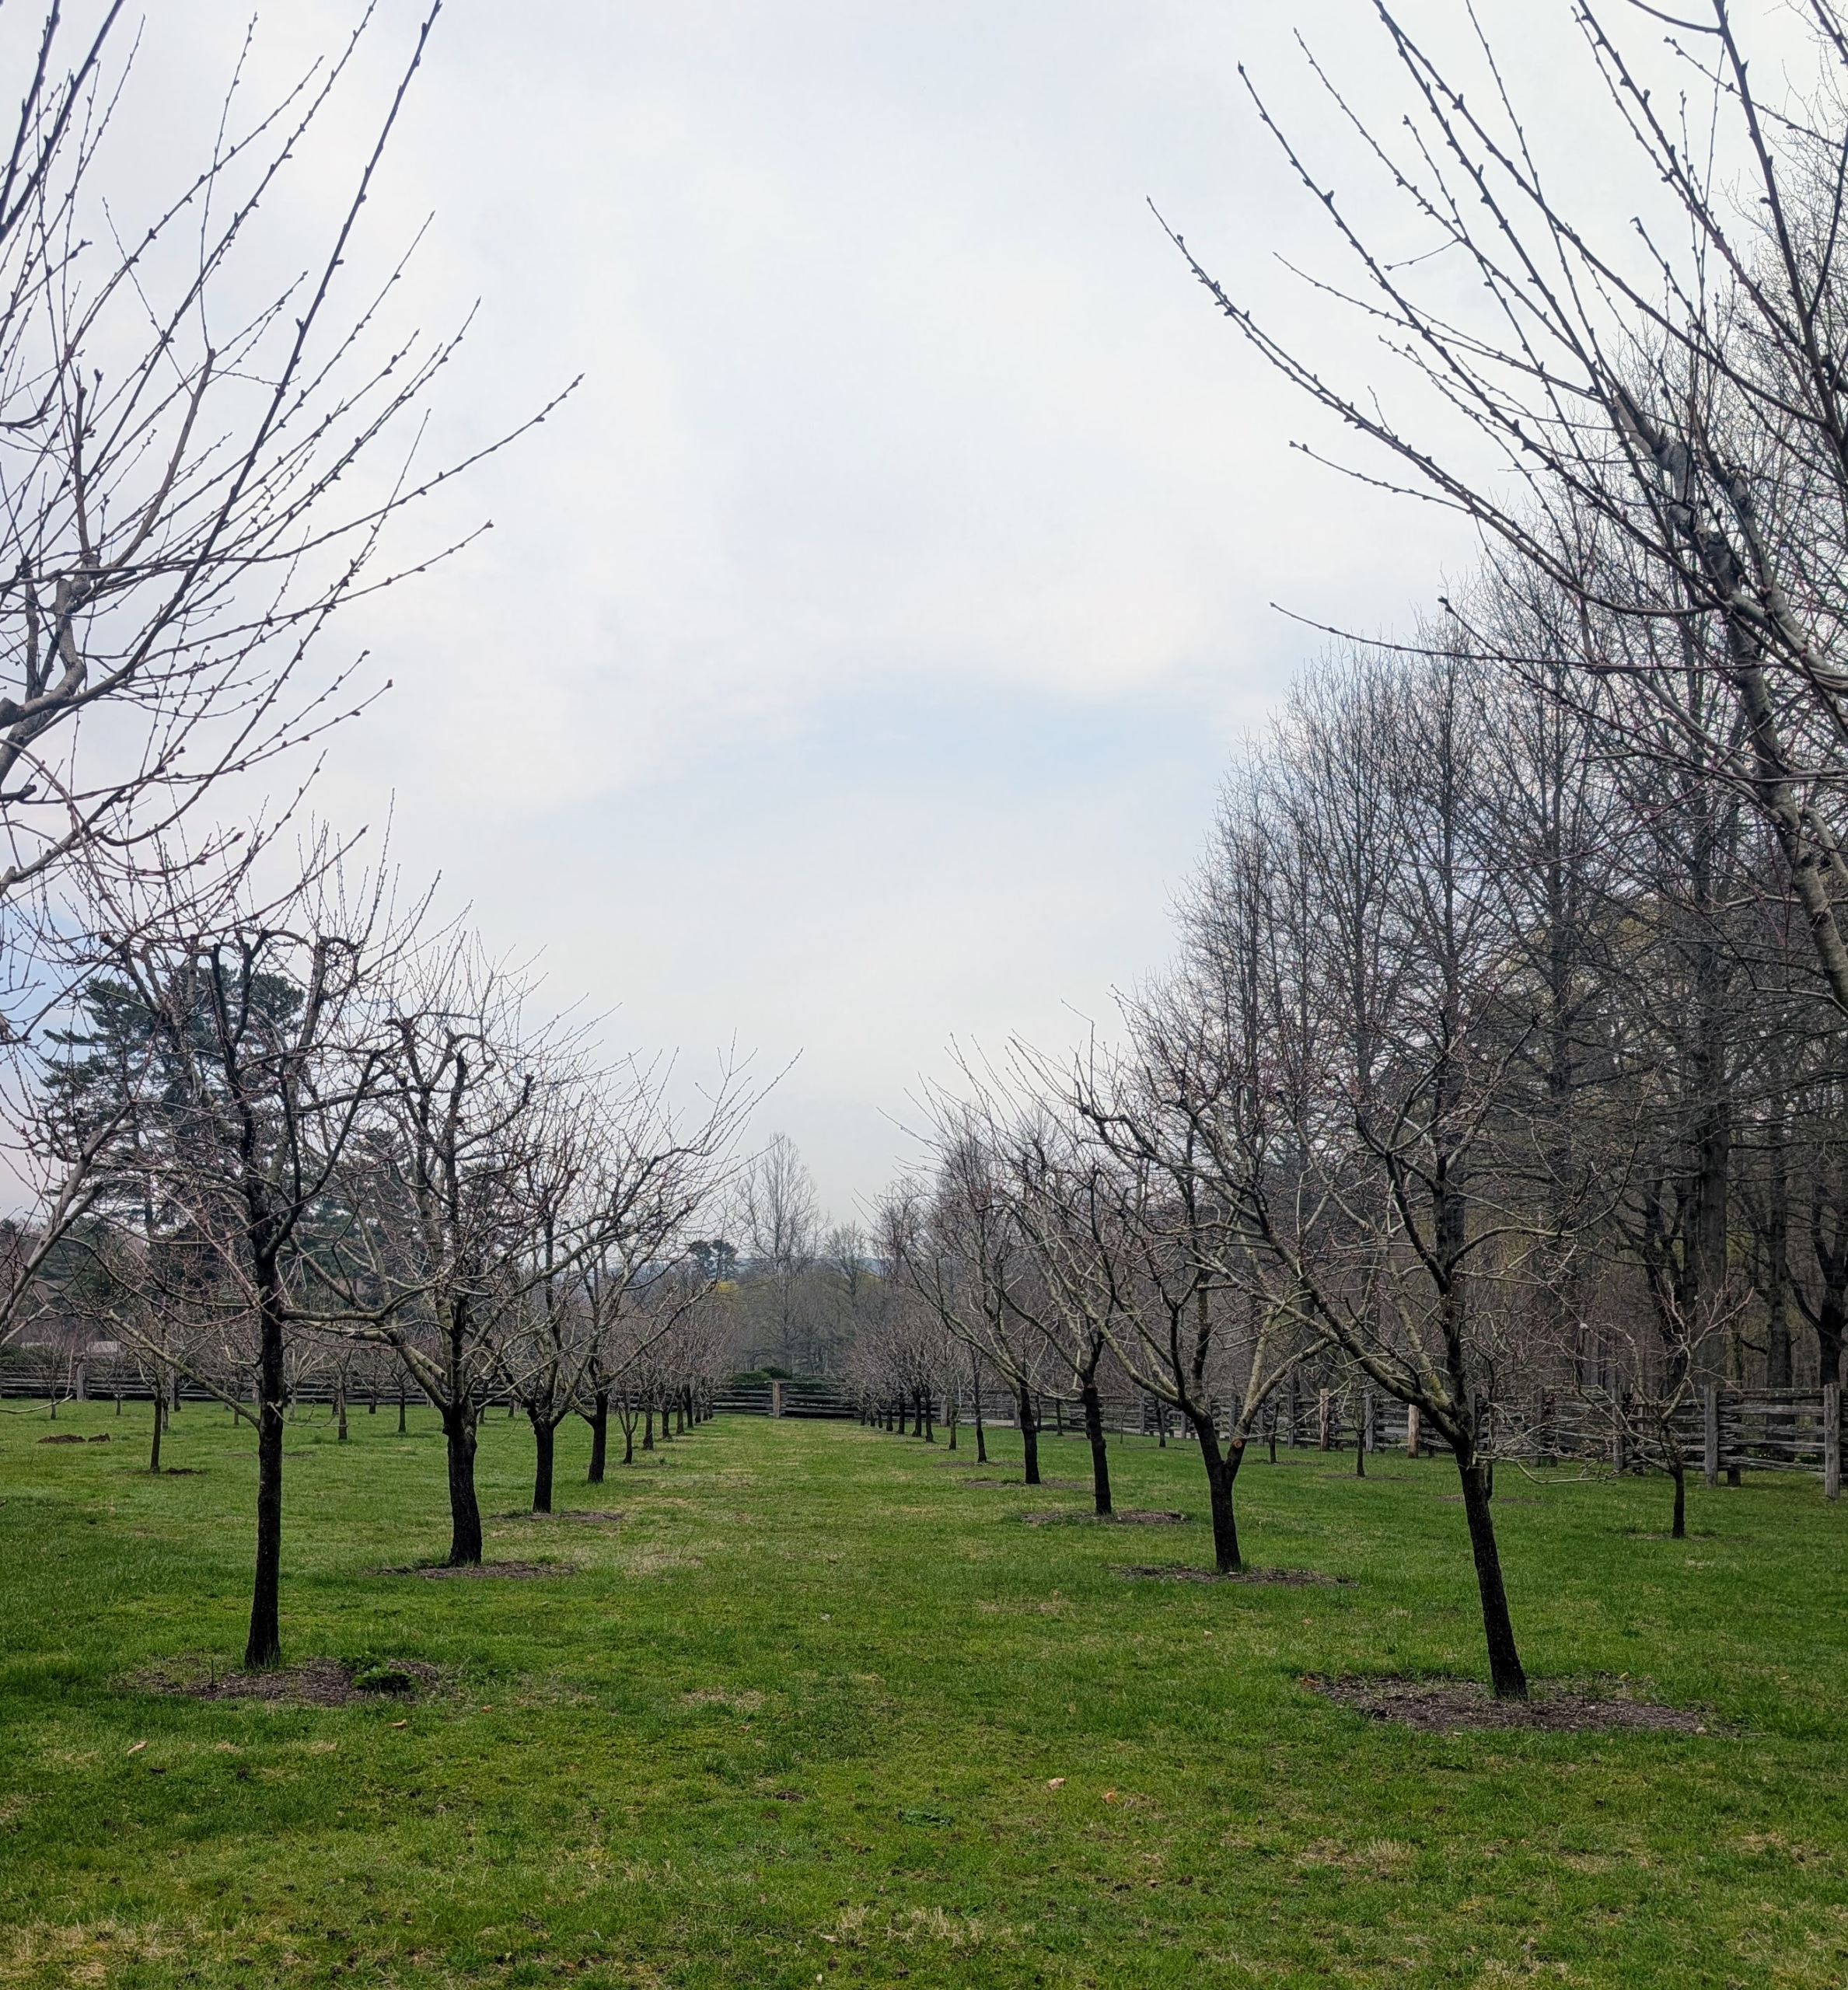
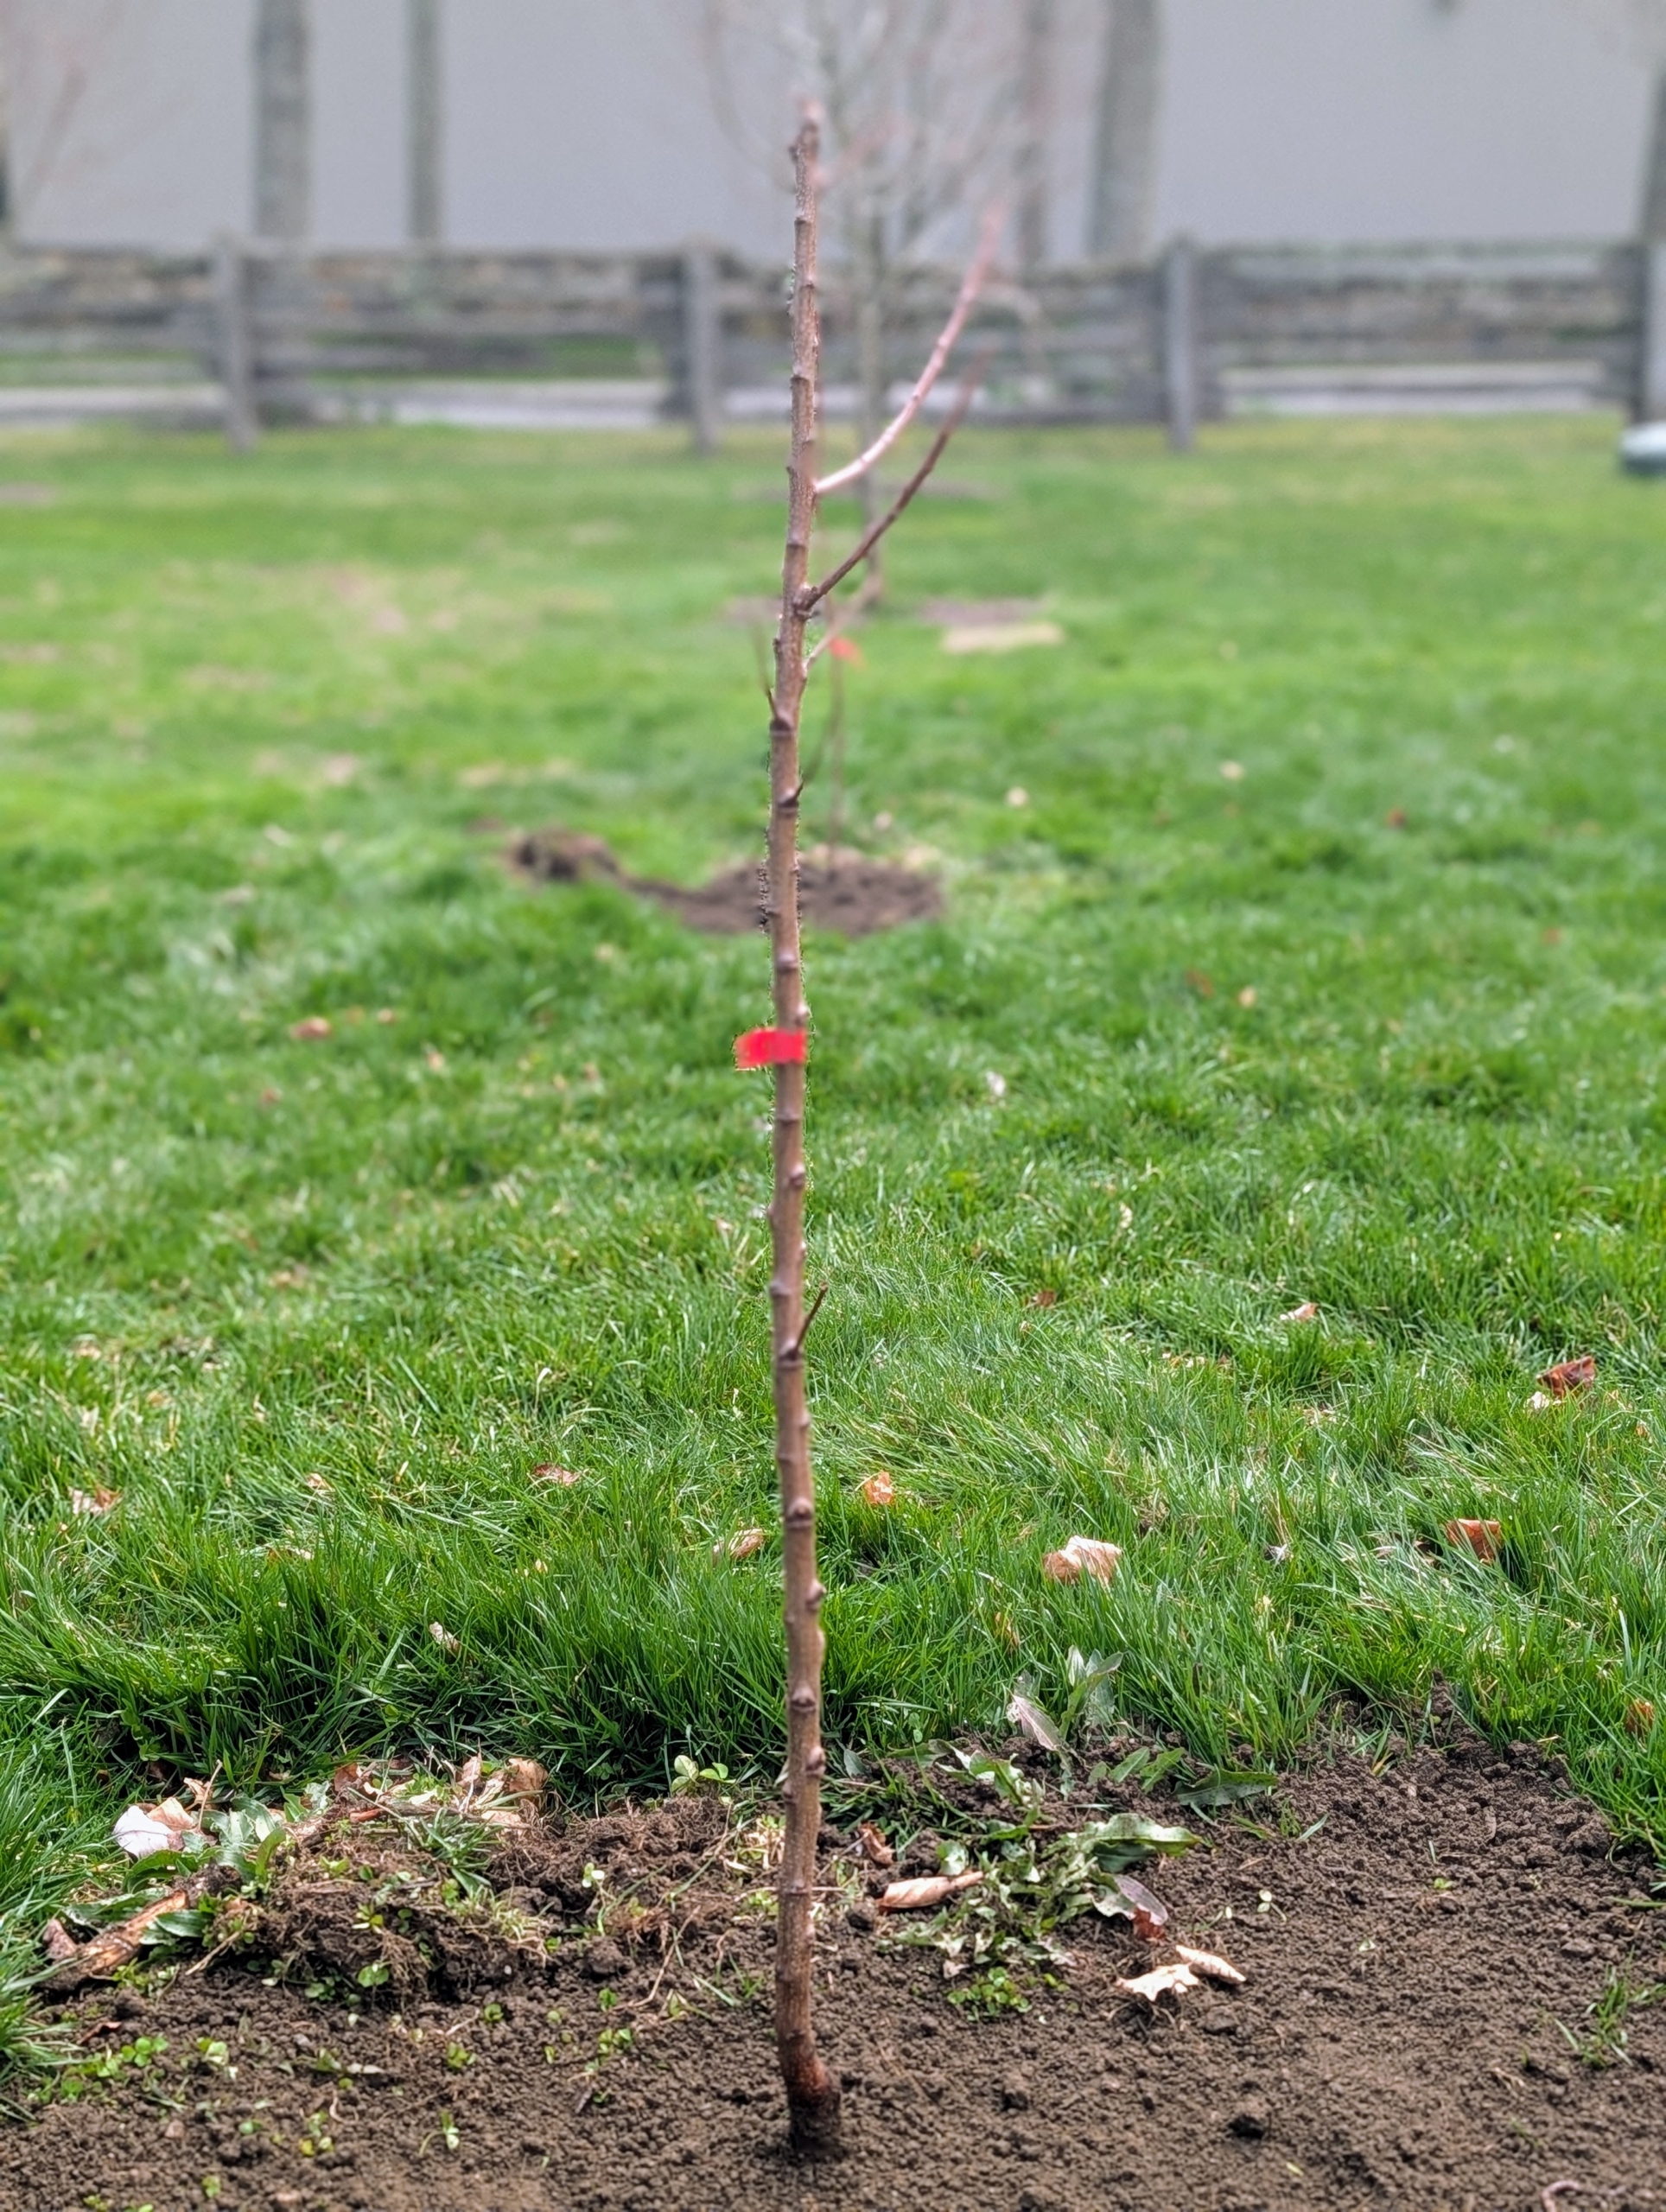
This is the orchard now. Early spring is the best time to plant bare-root trees in the ground, when it is no longer frozen and before buds break. It also gives them time to get established before the peak of spring growth.
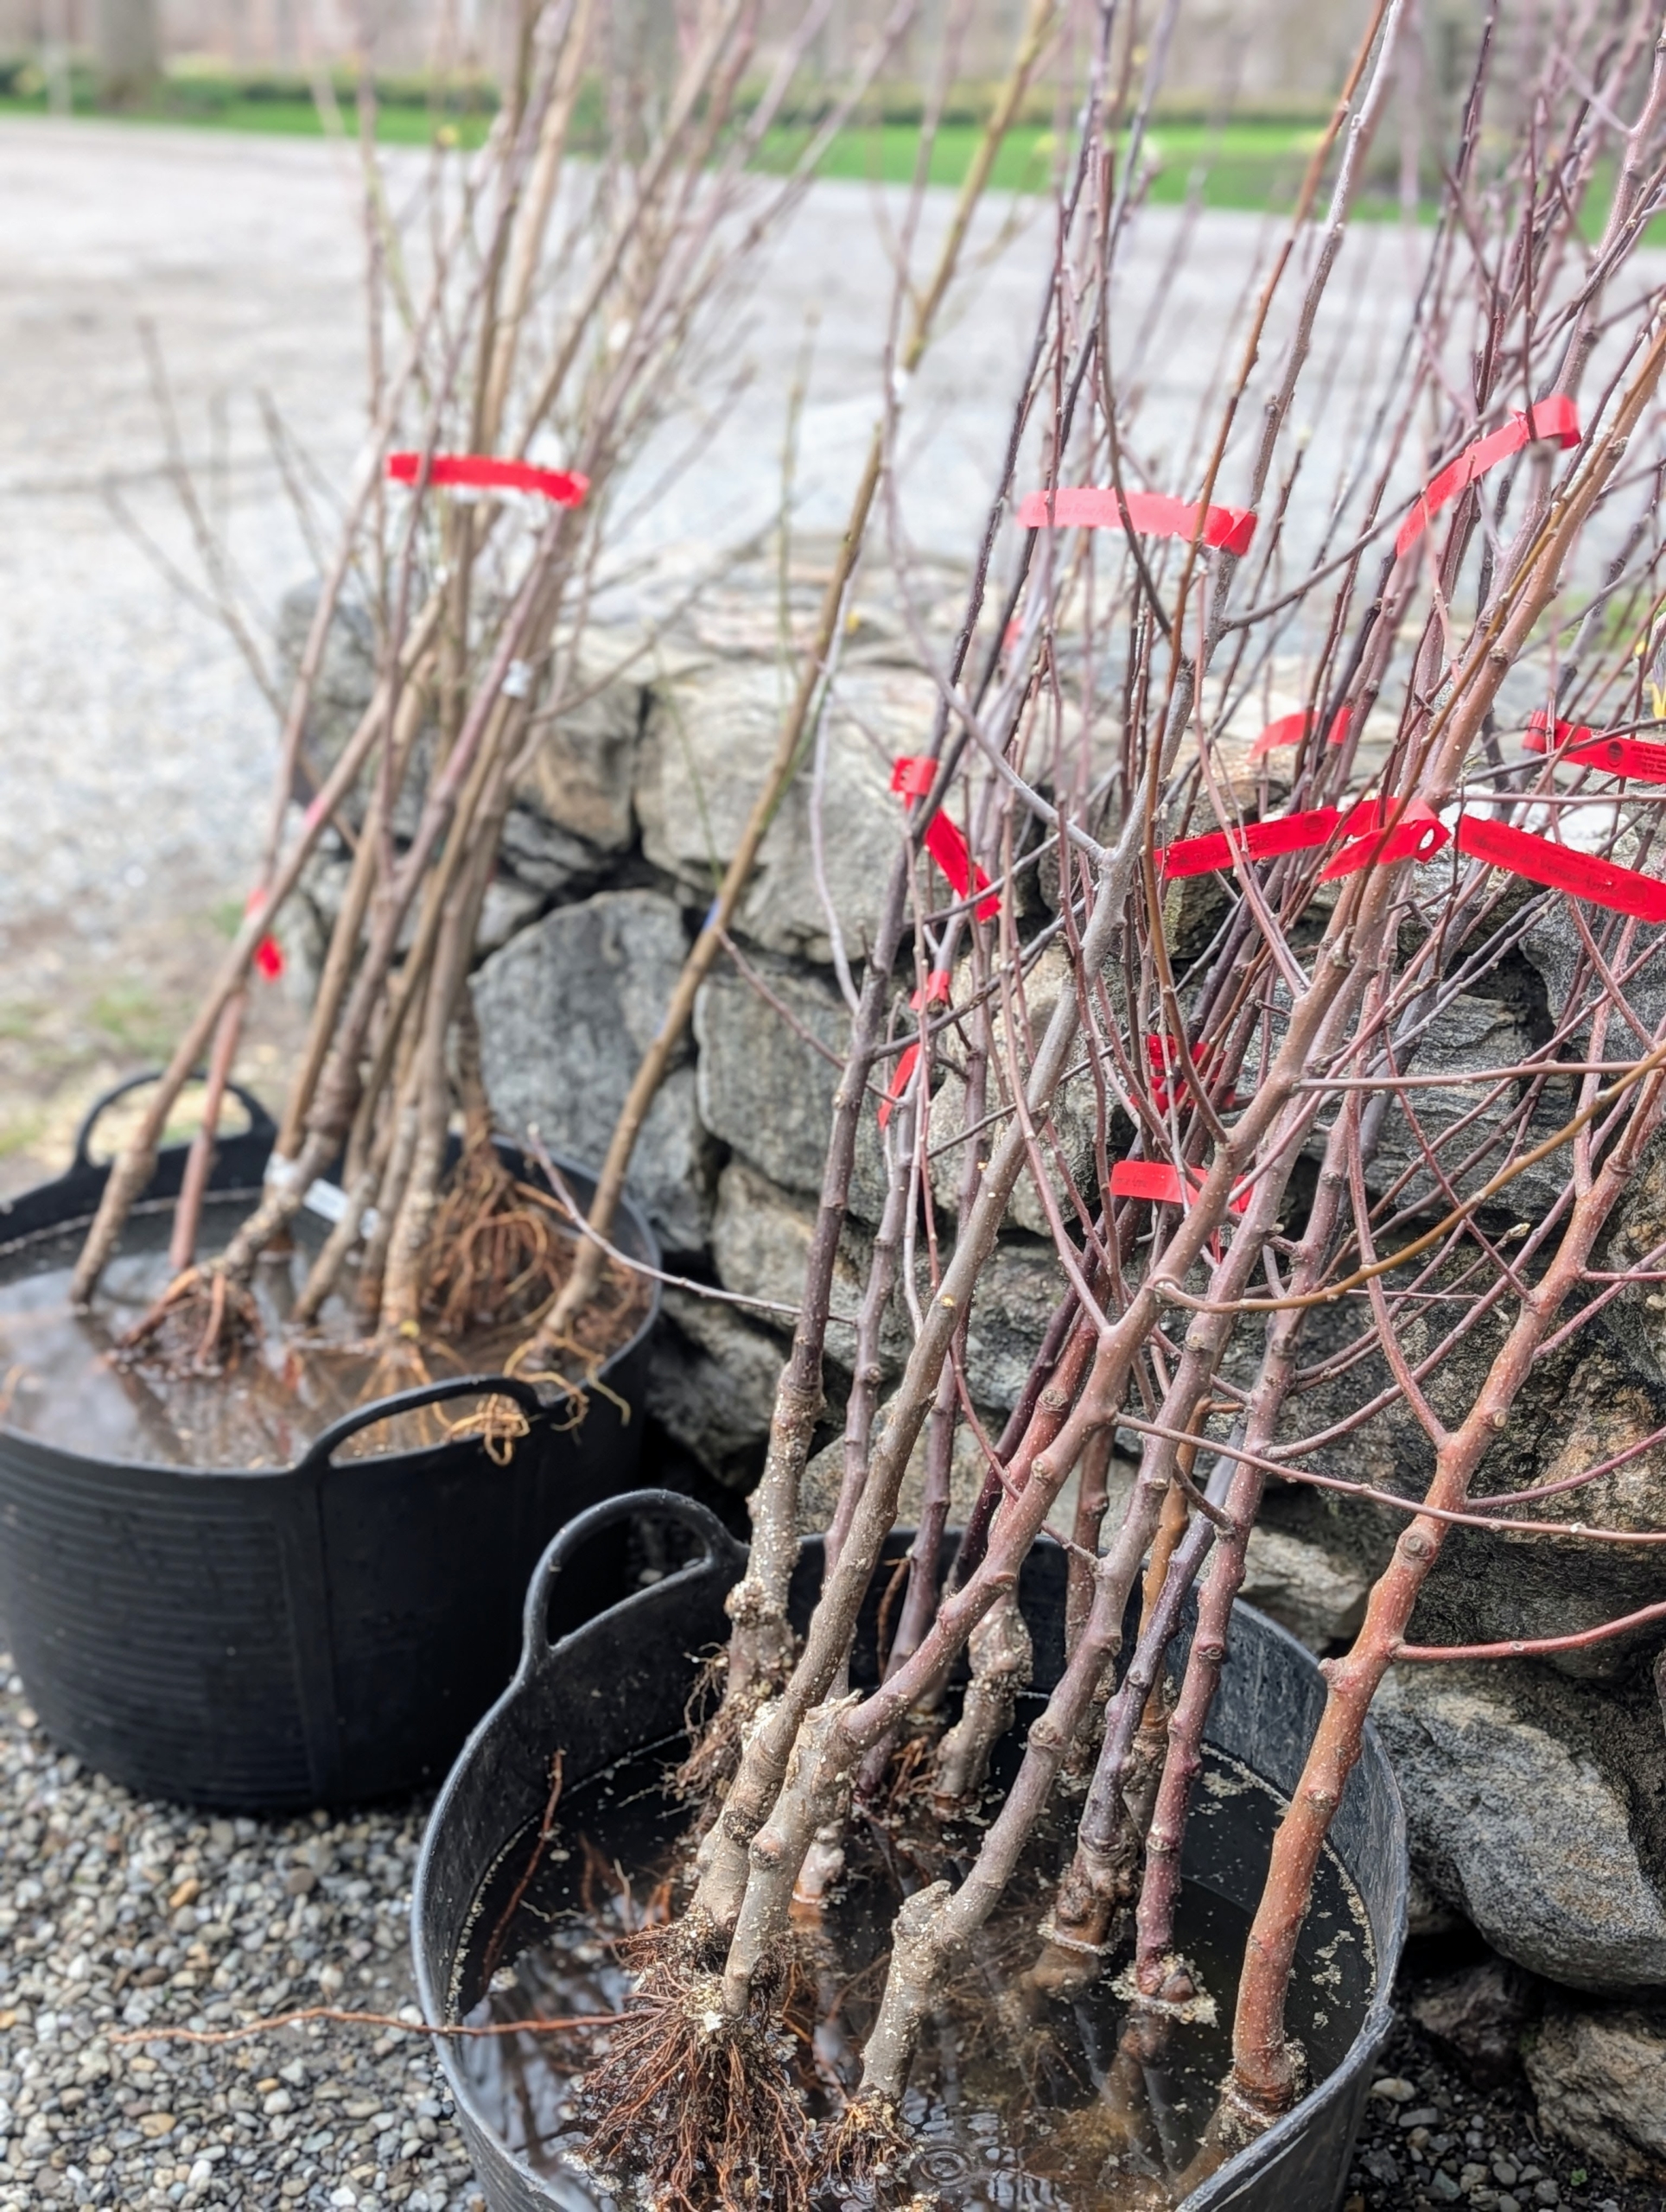
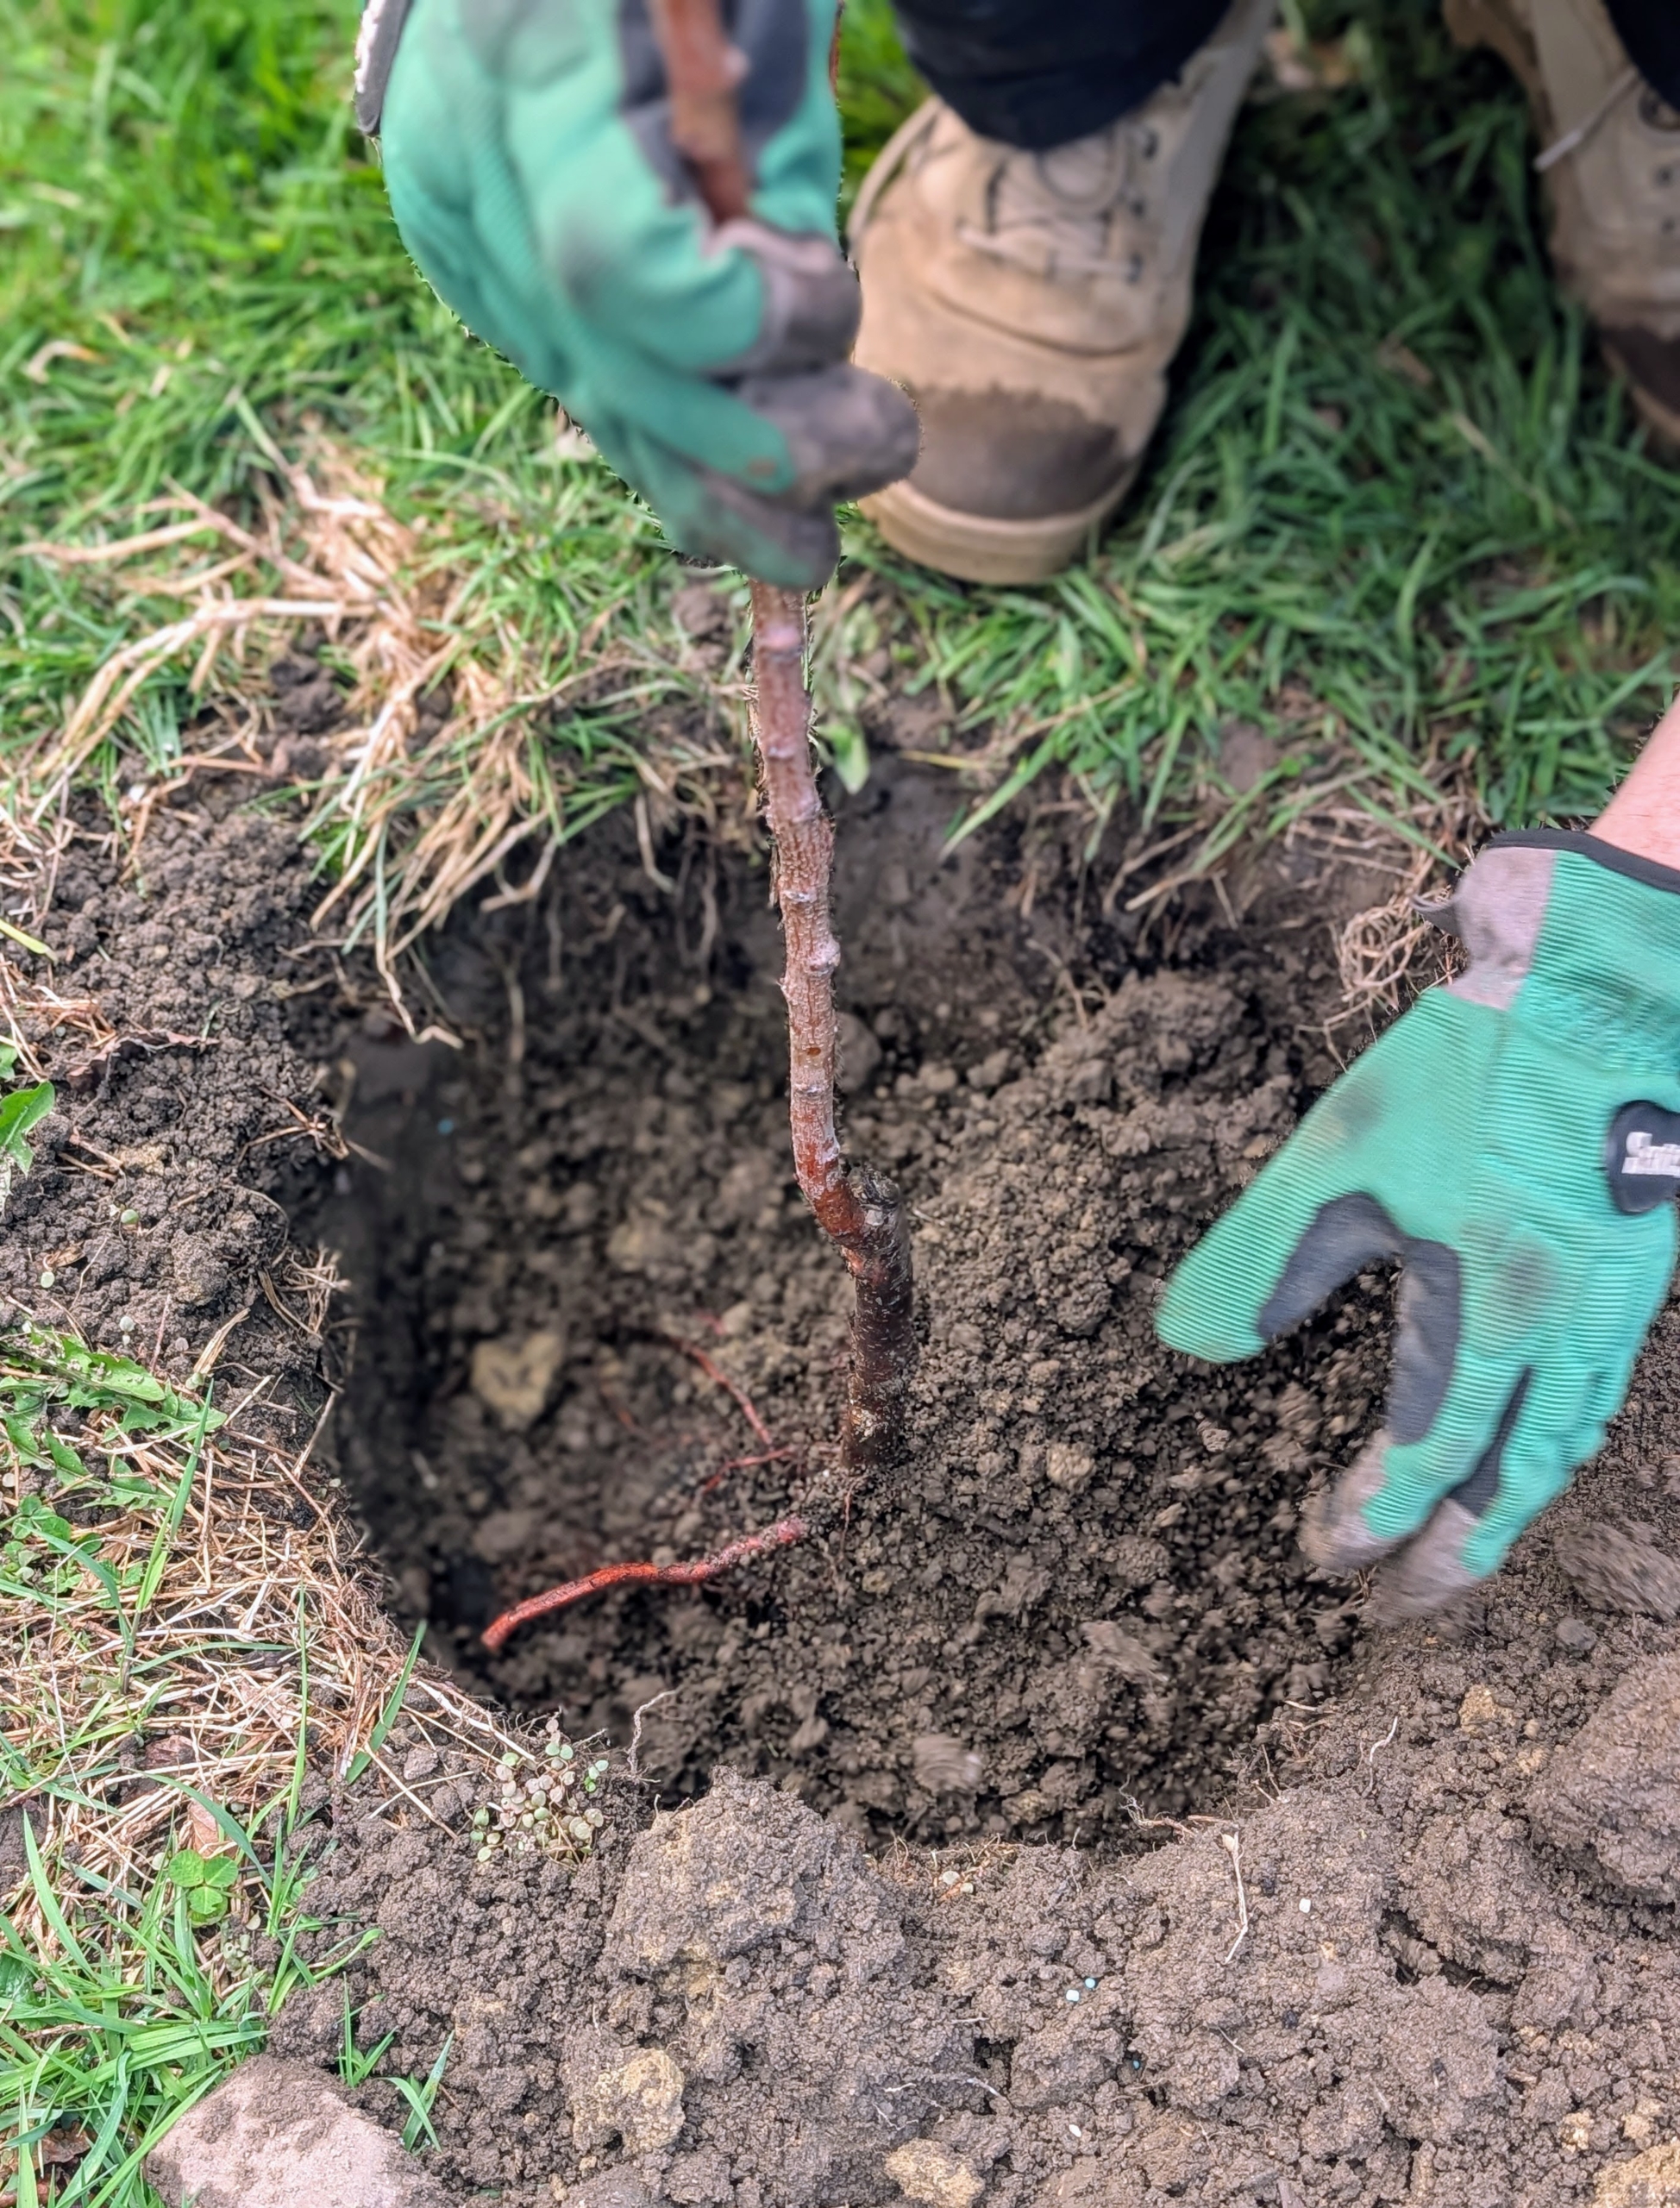
I just received my order of bare-root fruit trees to fill in spaces where trees were removed. When selecting fruit trees, be sure to get tree species and varieties that will thrive in your climate and soil conditions.
After the trees arrived, they were placed in buckets of water right away to soak. Soaking the roots for at least four to 12 hours ensures they are fully hydrated and ready to absorb water and nutrients once planted.
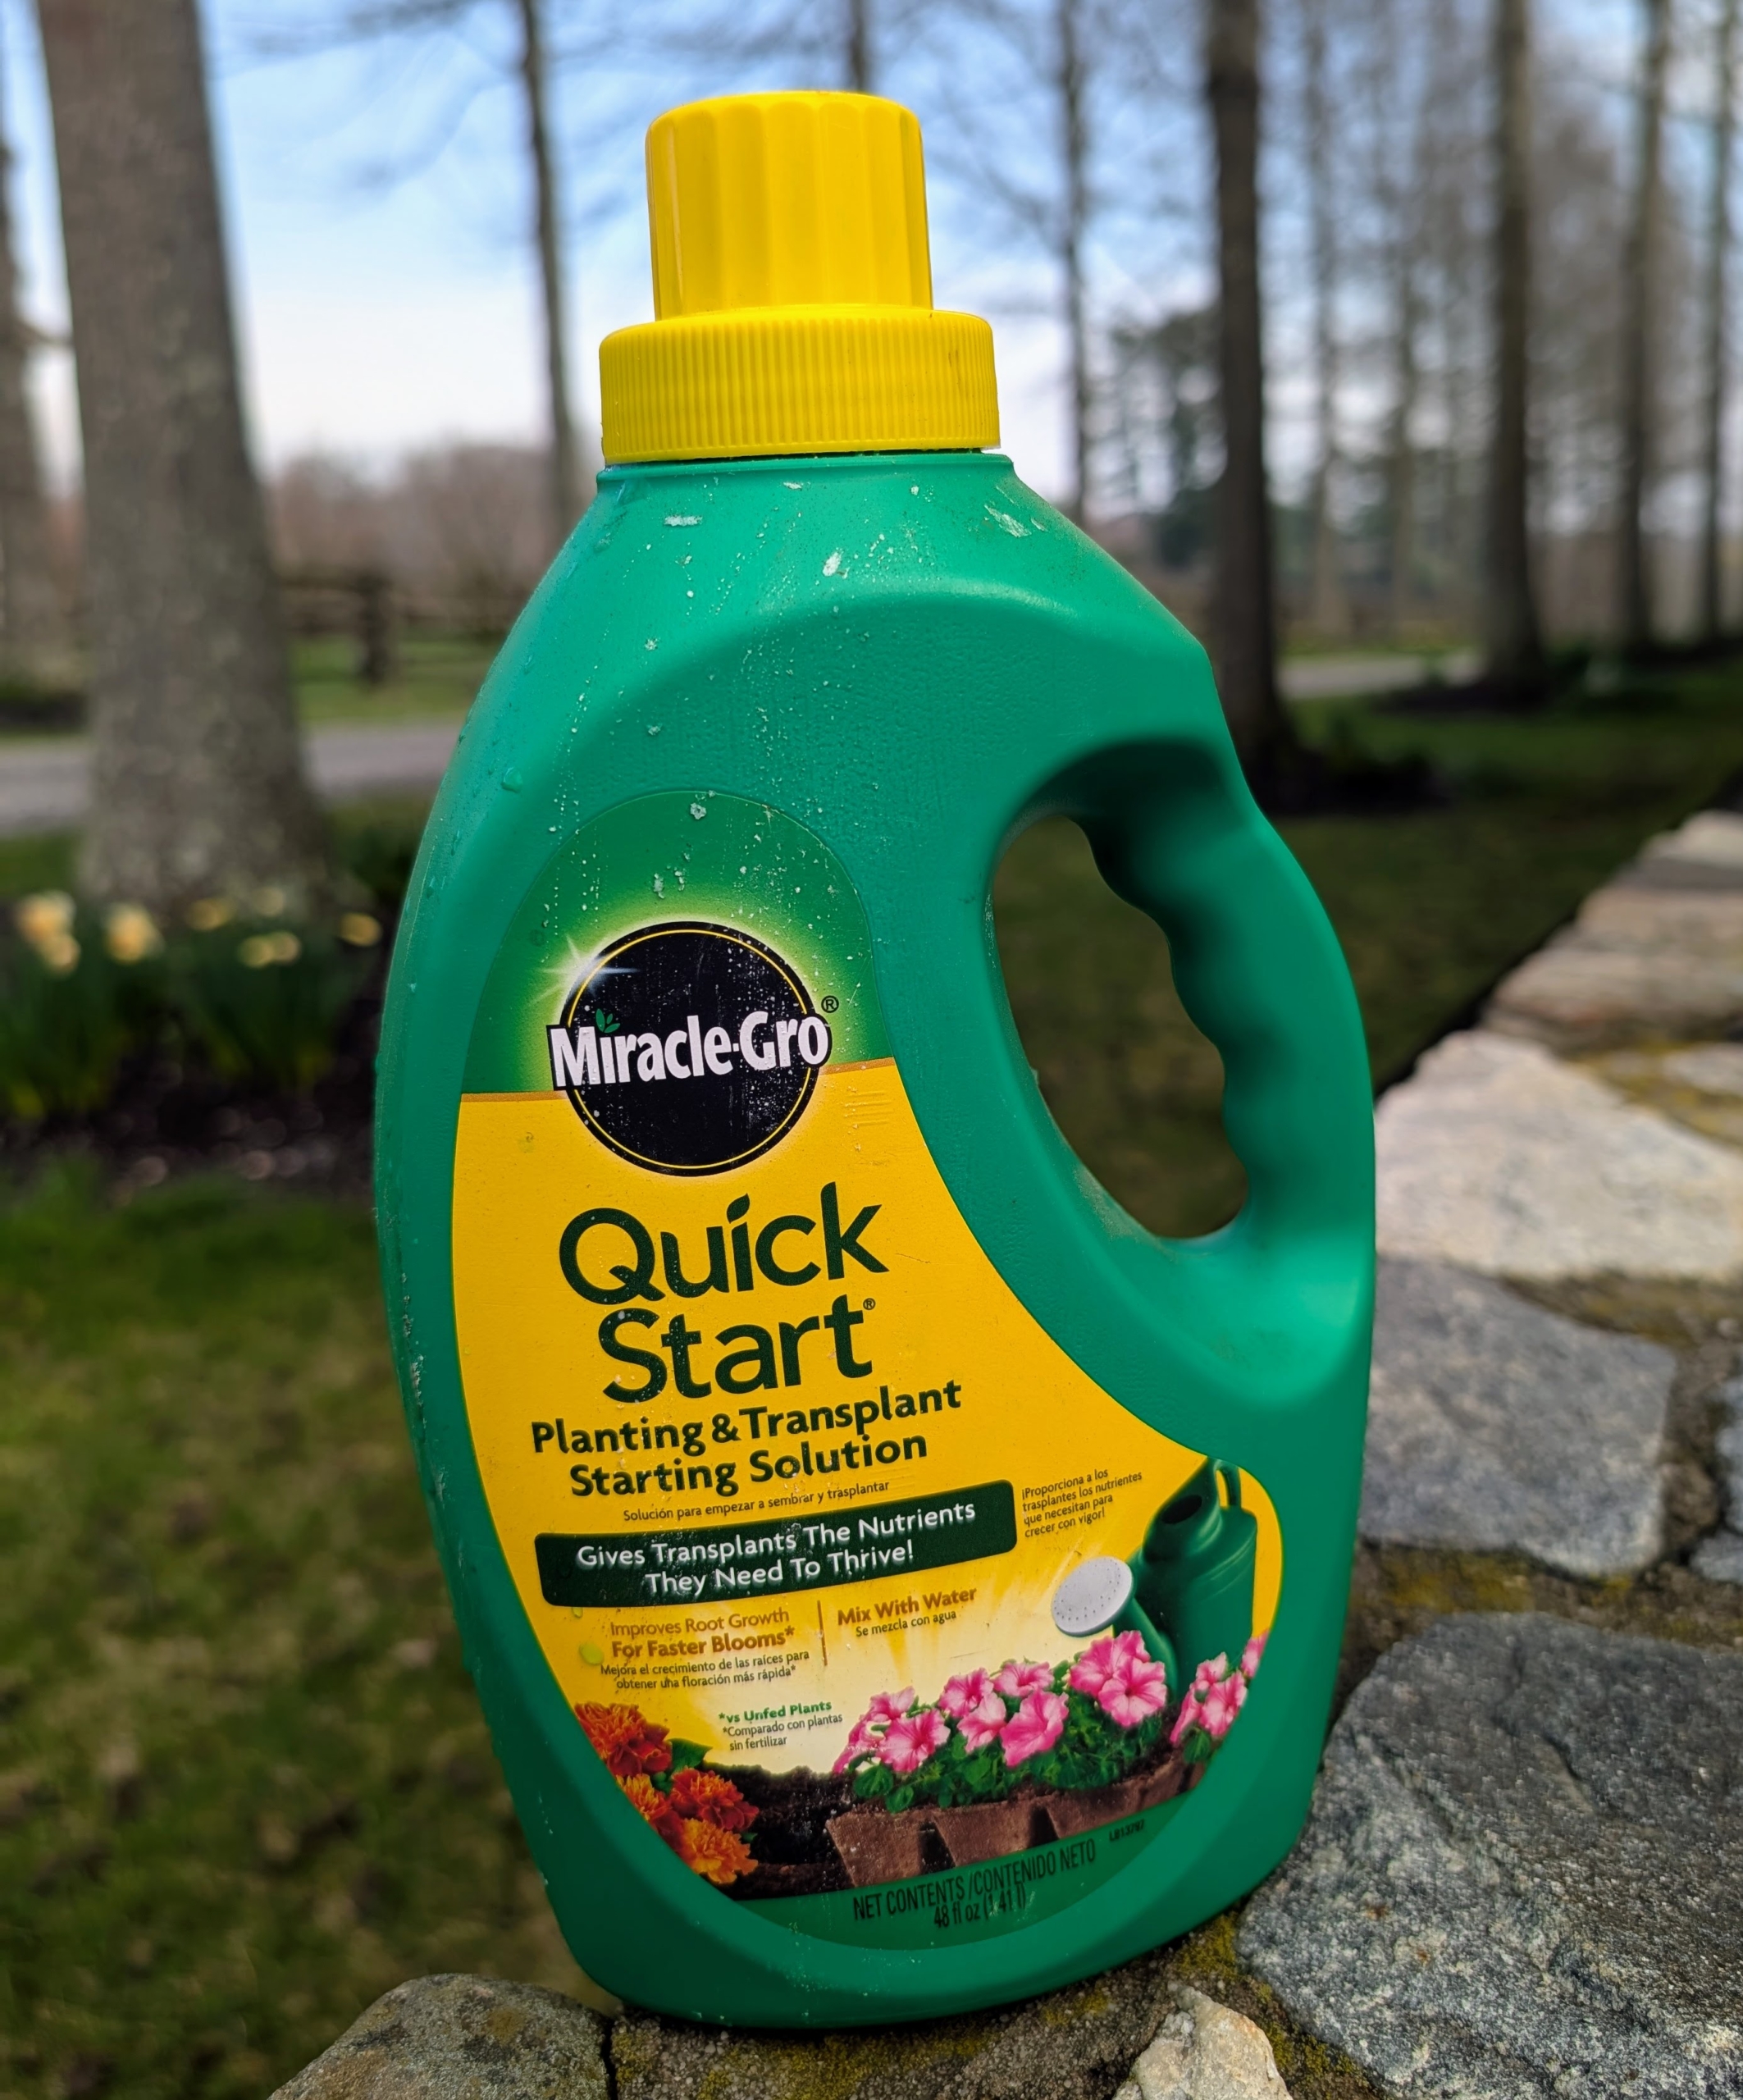
They were also given a solution specifically for transplants. This is Miracle-Gro Quick Start. It provides the nutrients they need to thrive and develop strong roots.
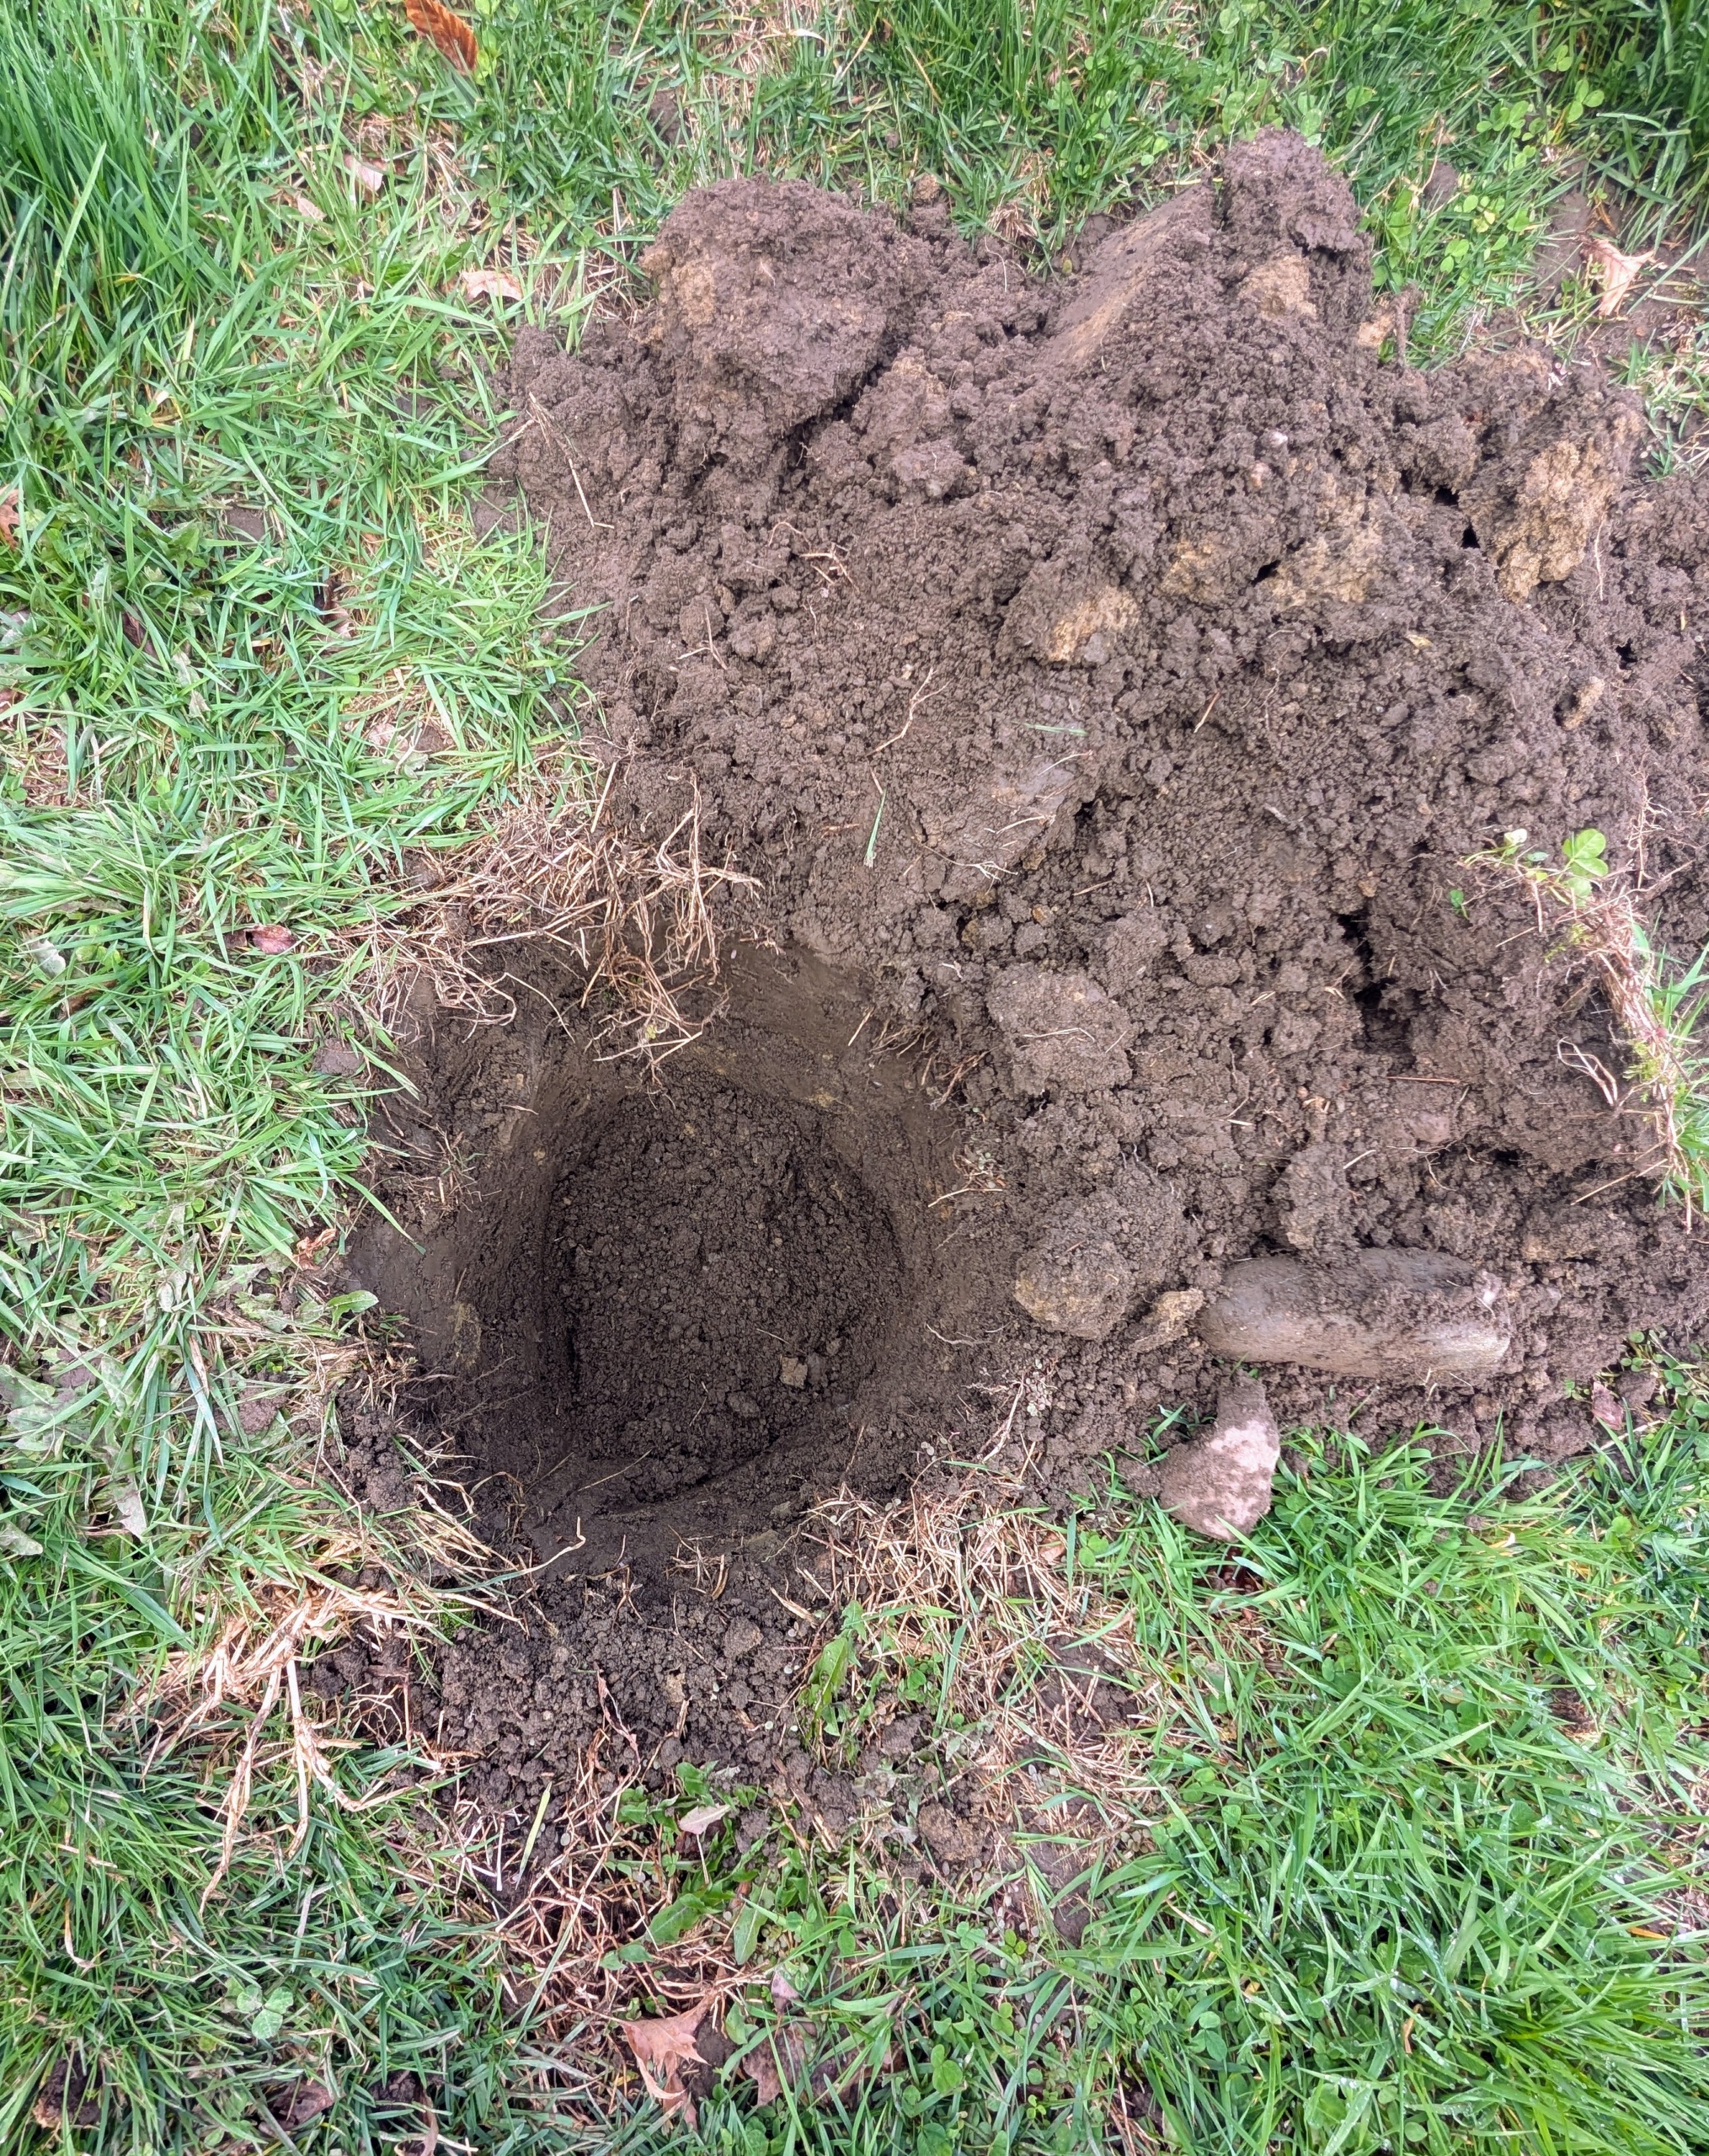
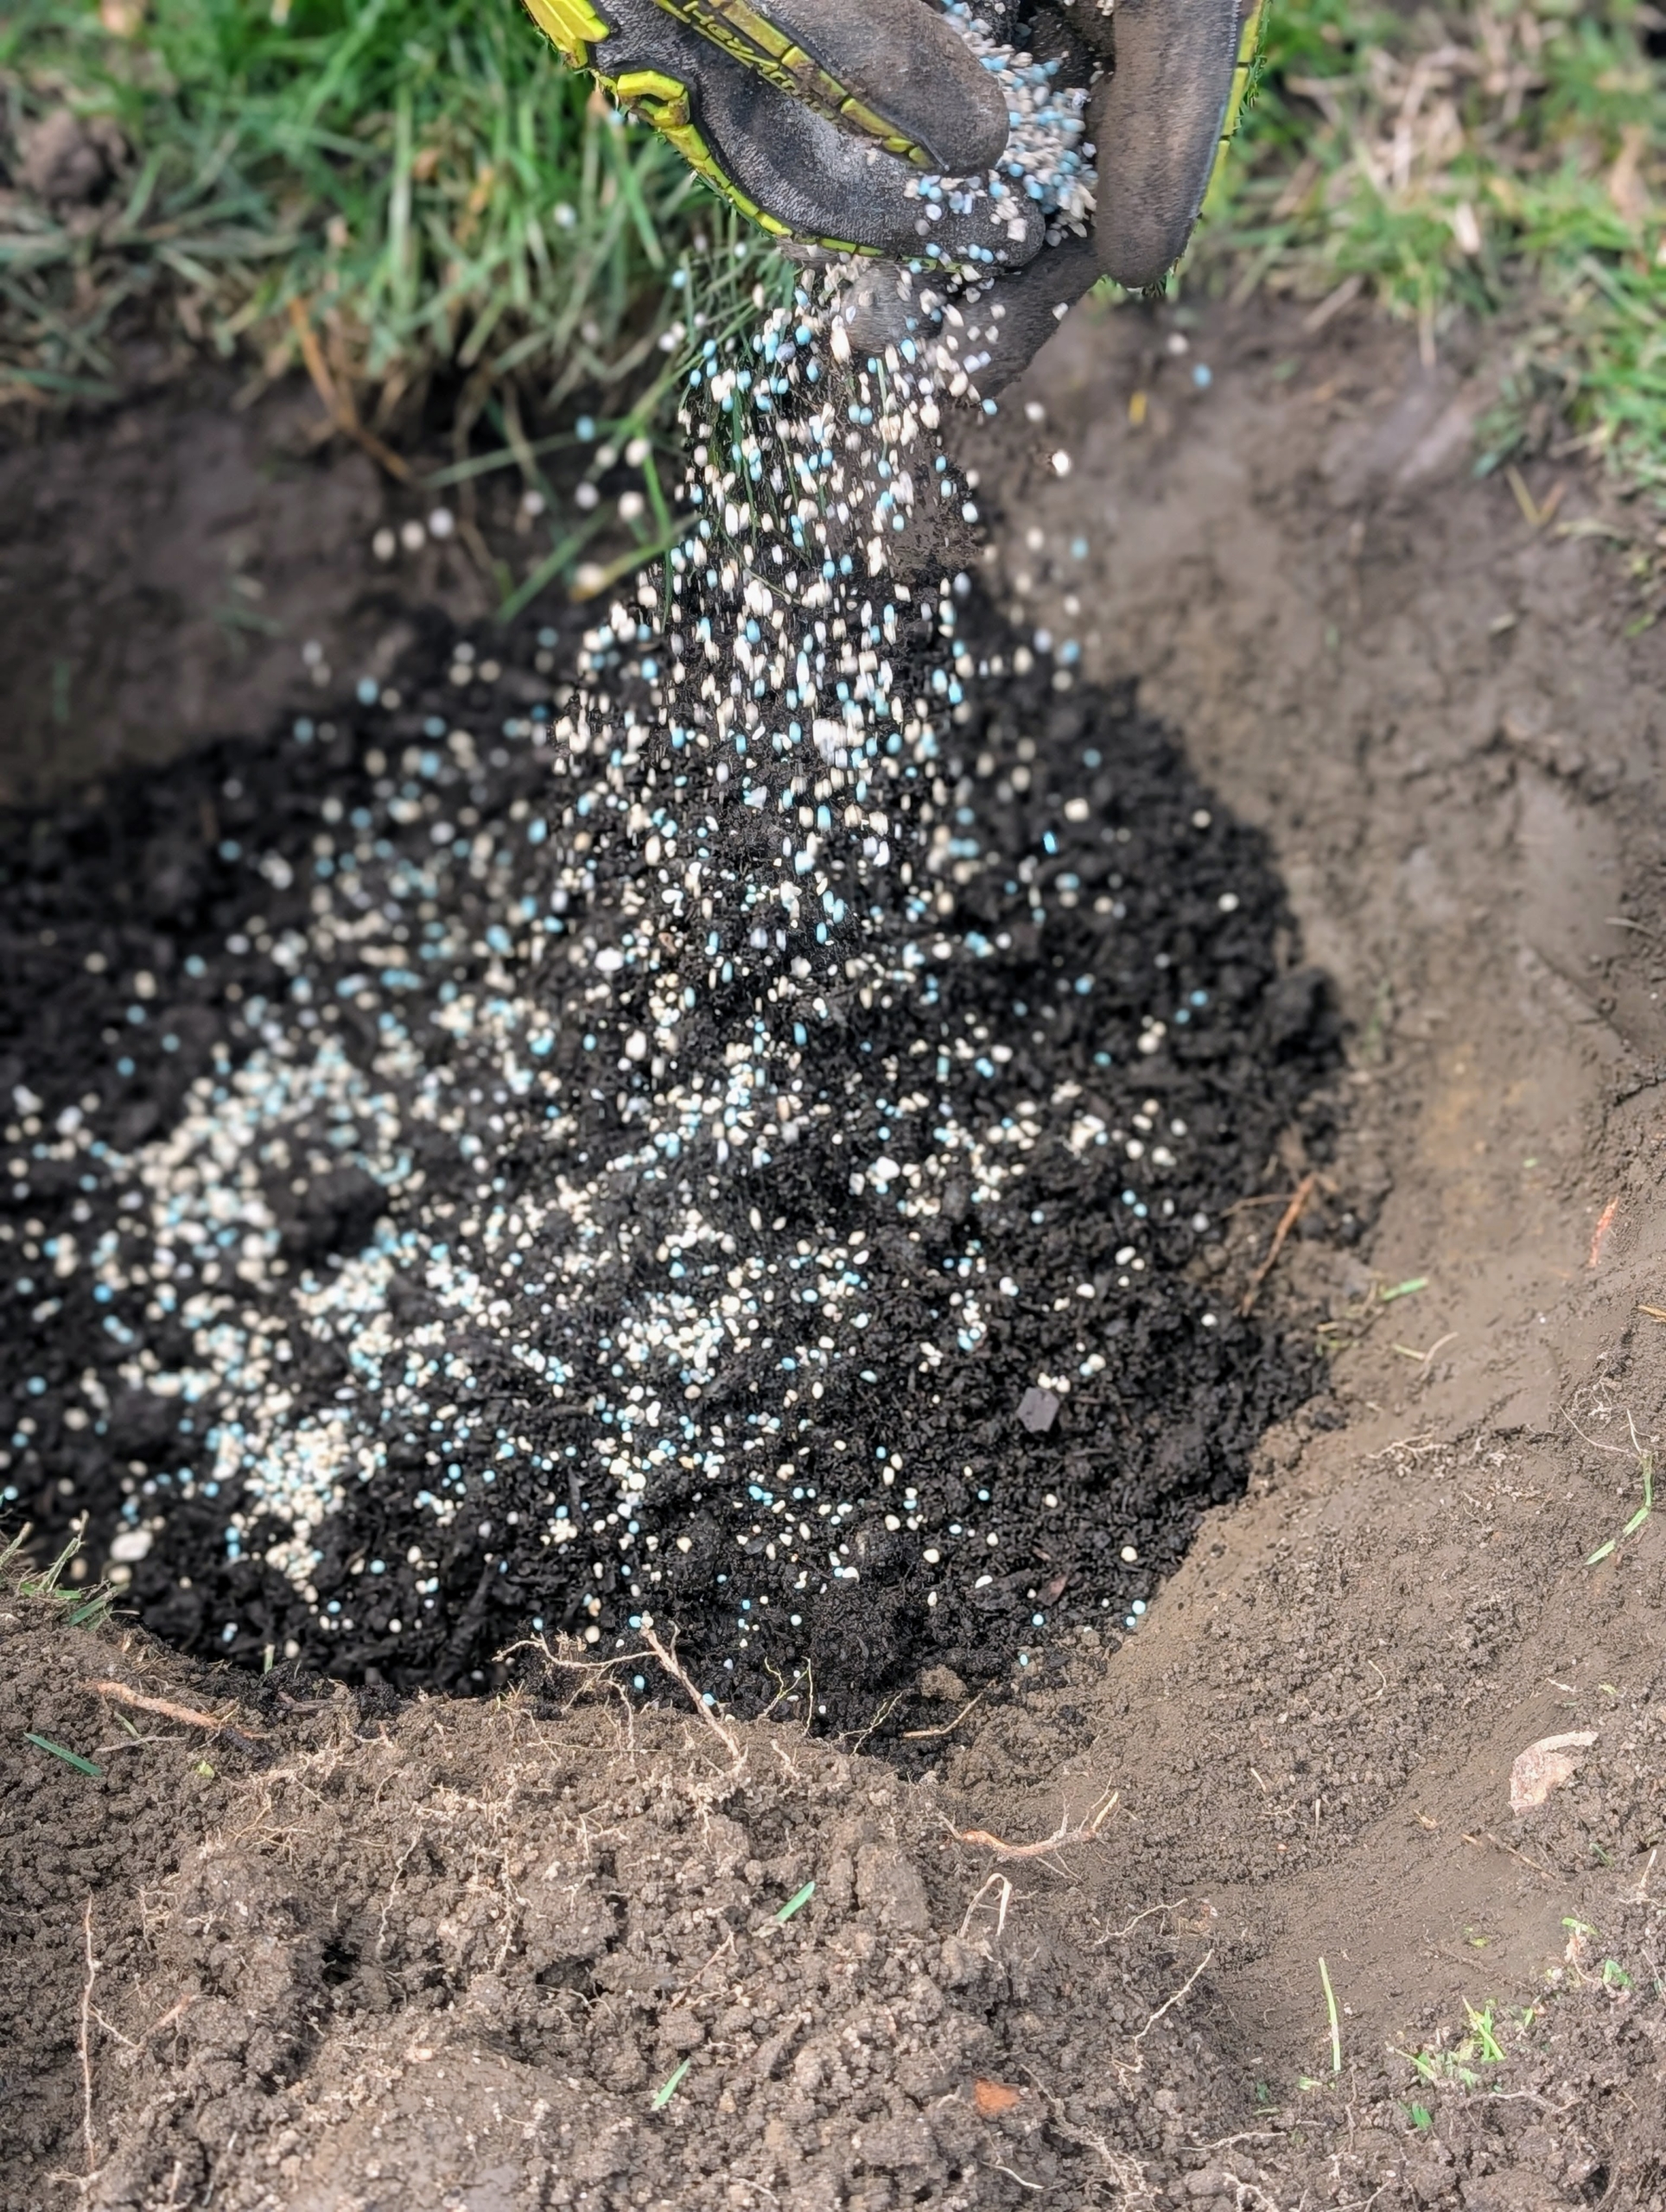
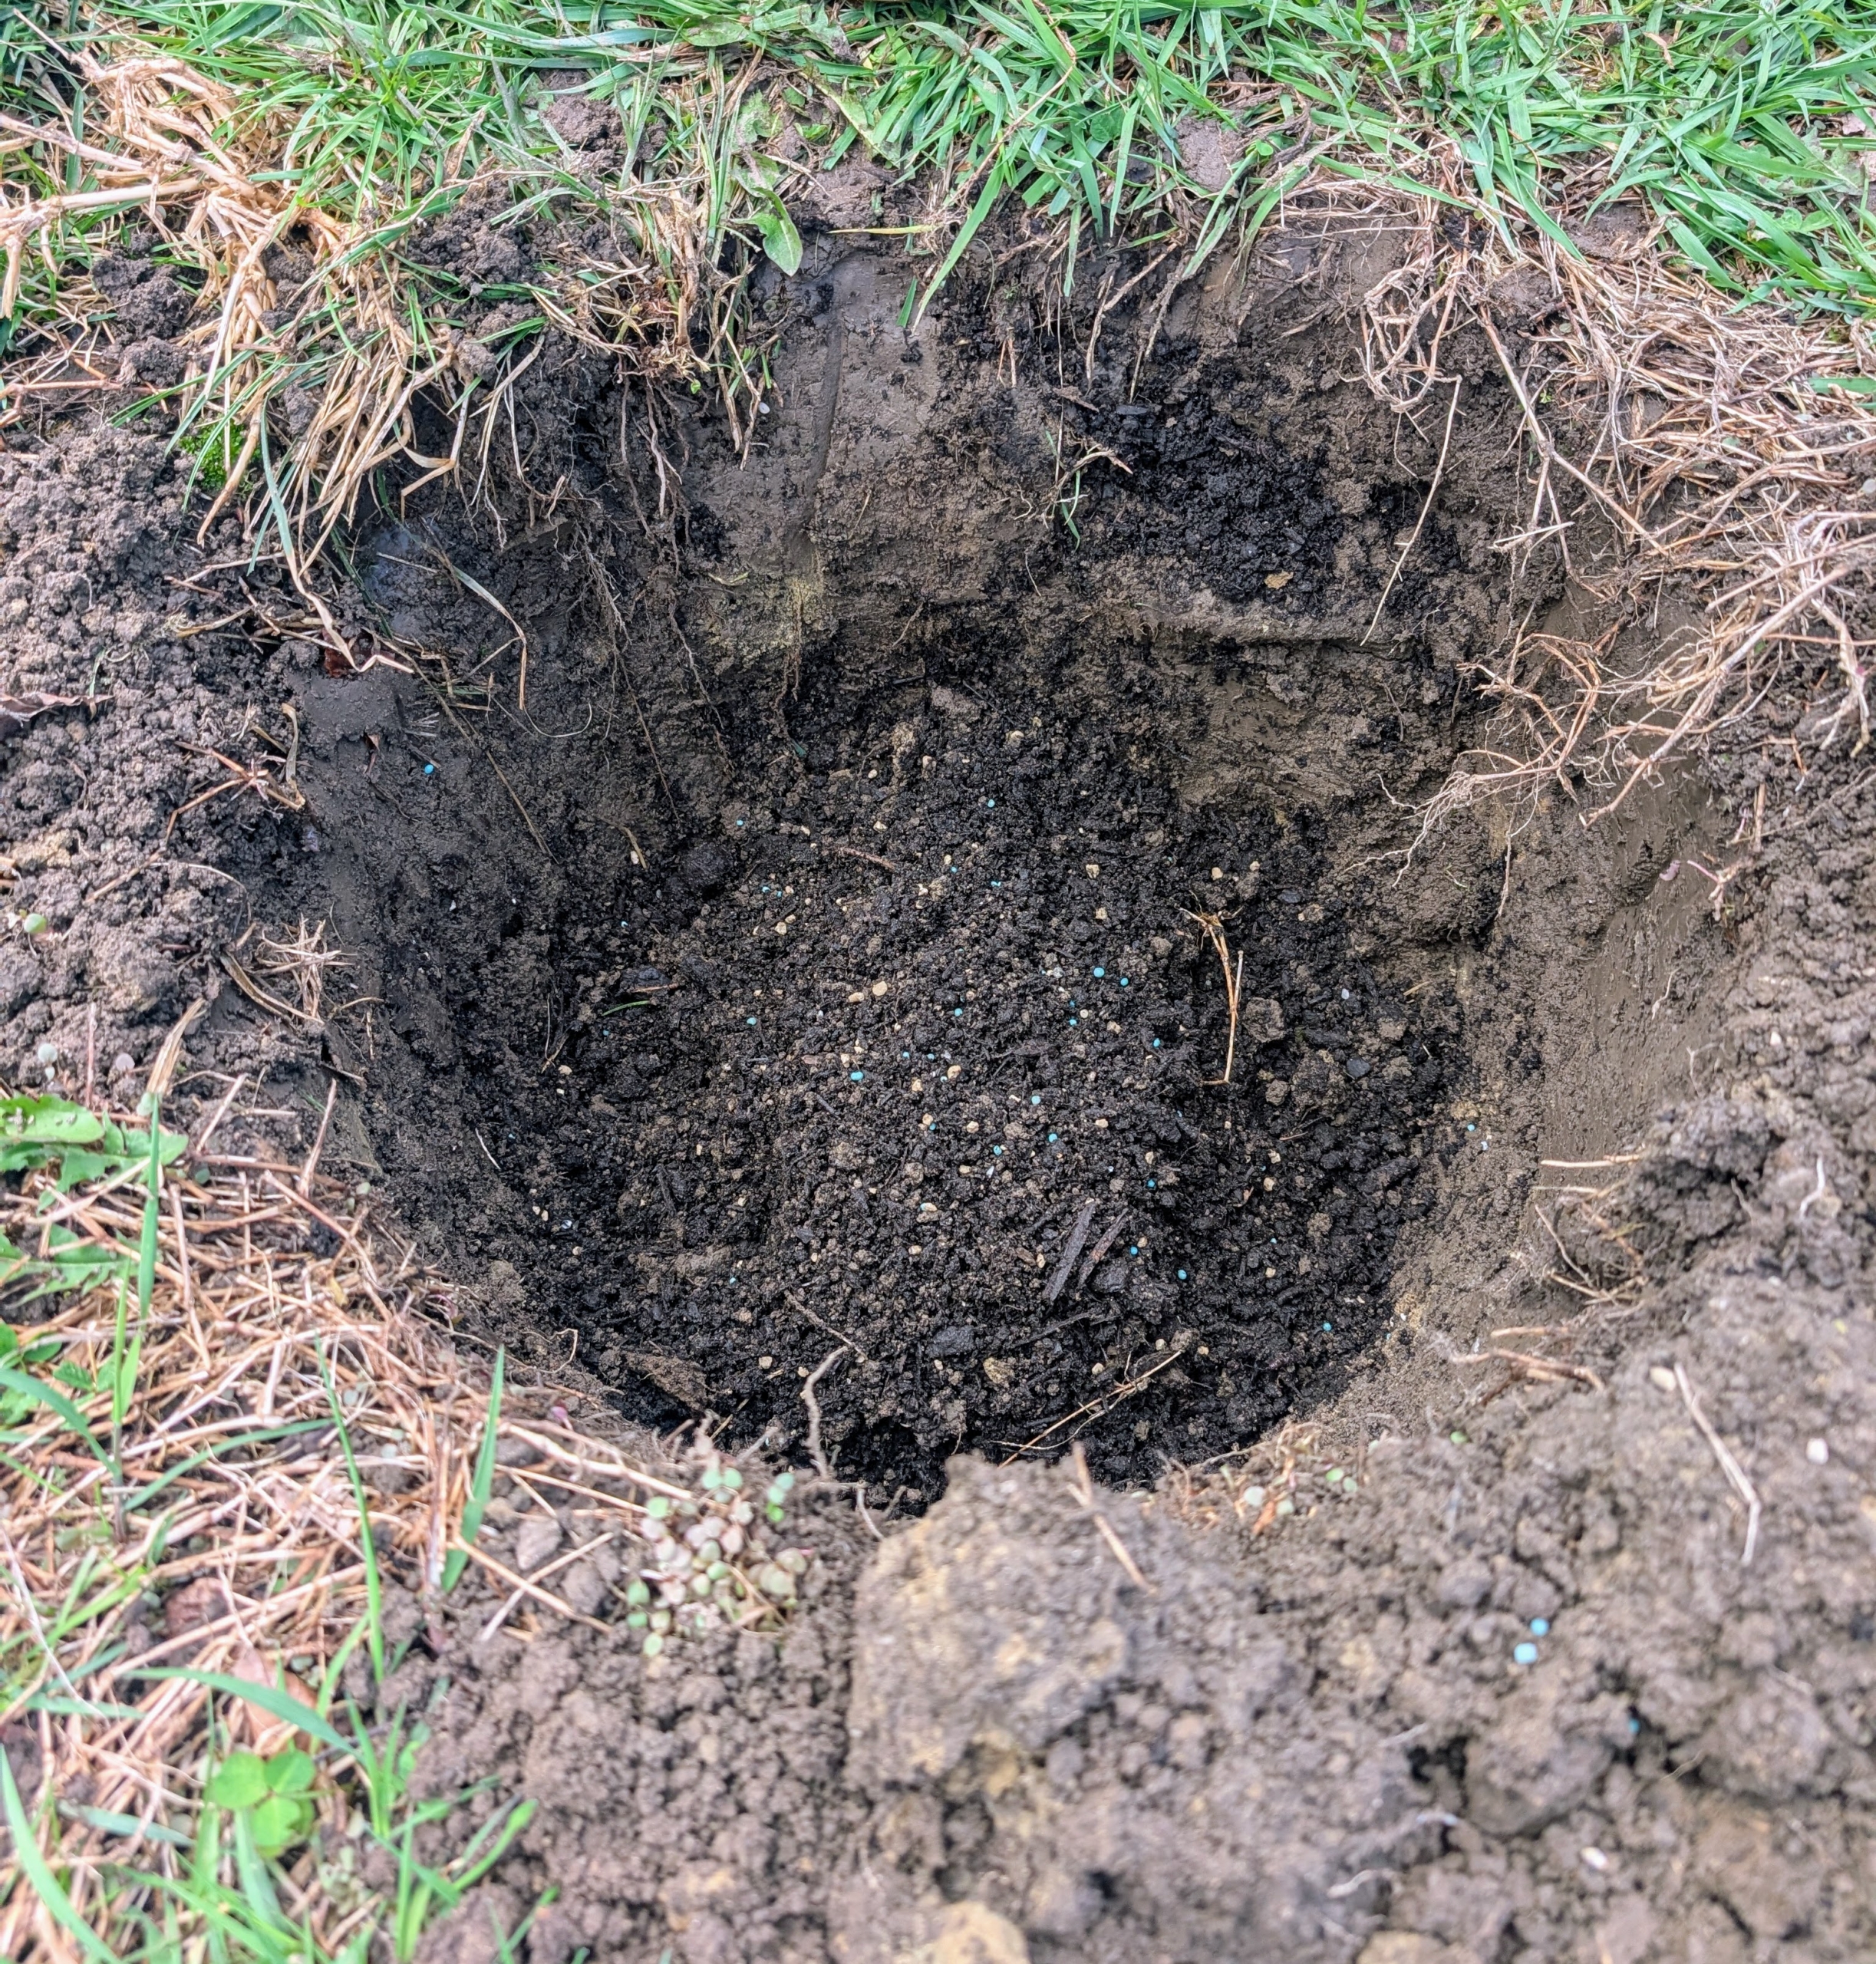
In the orchard, holes are already dug. It should be twice the width of the tree’s roots.
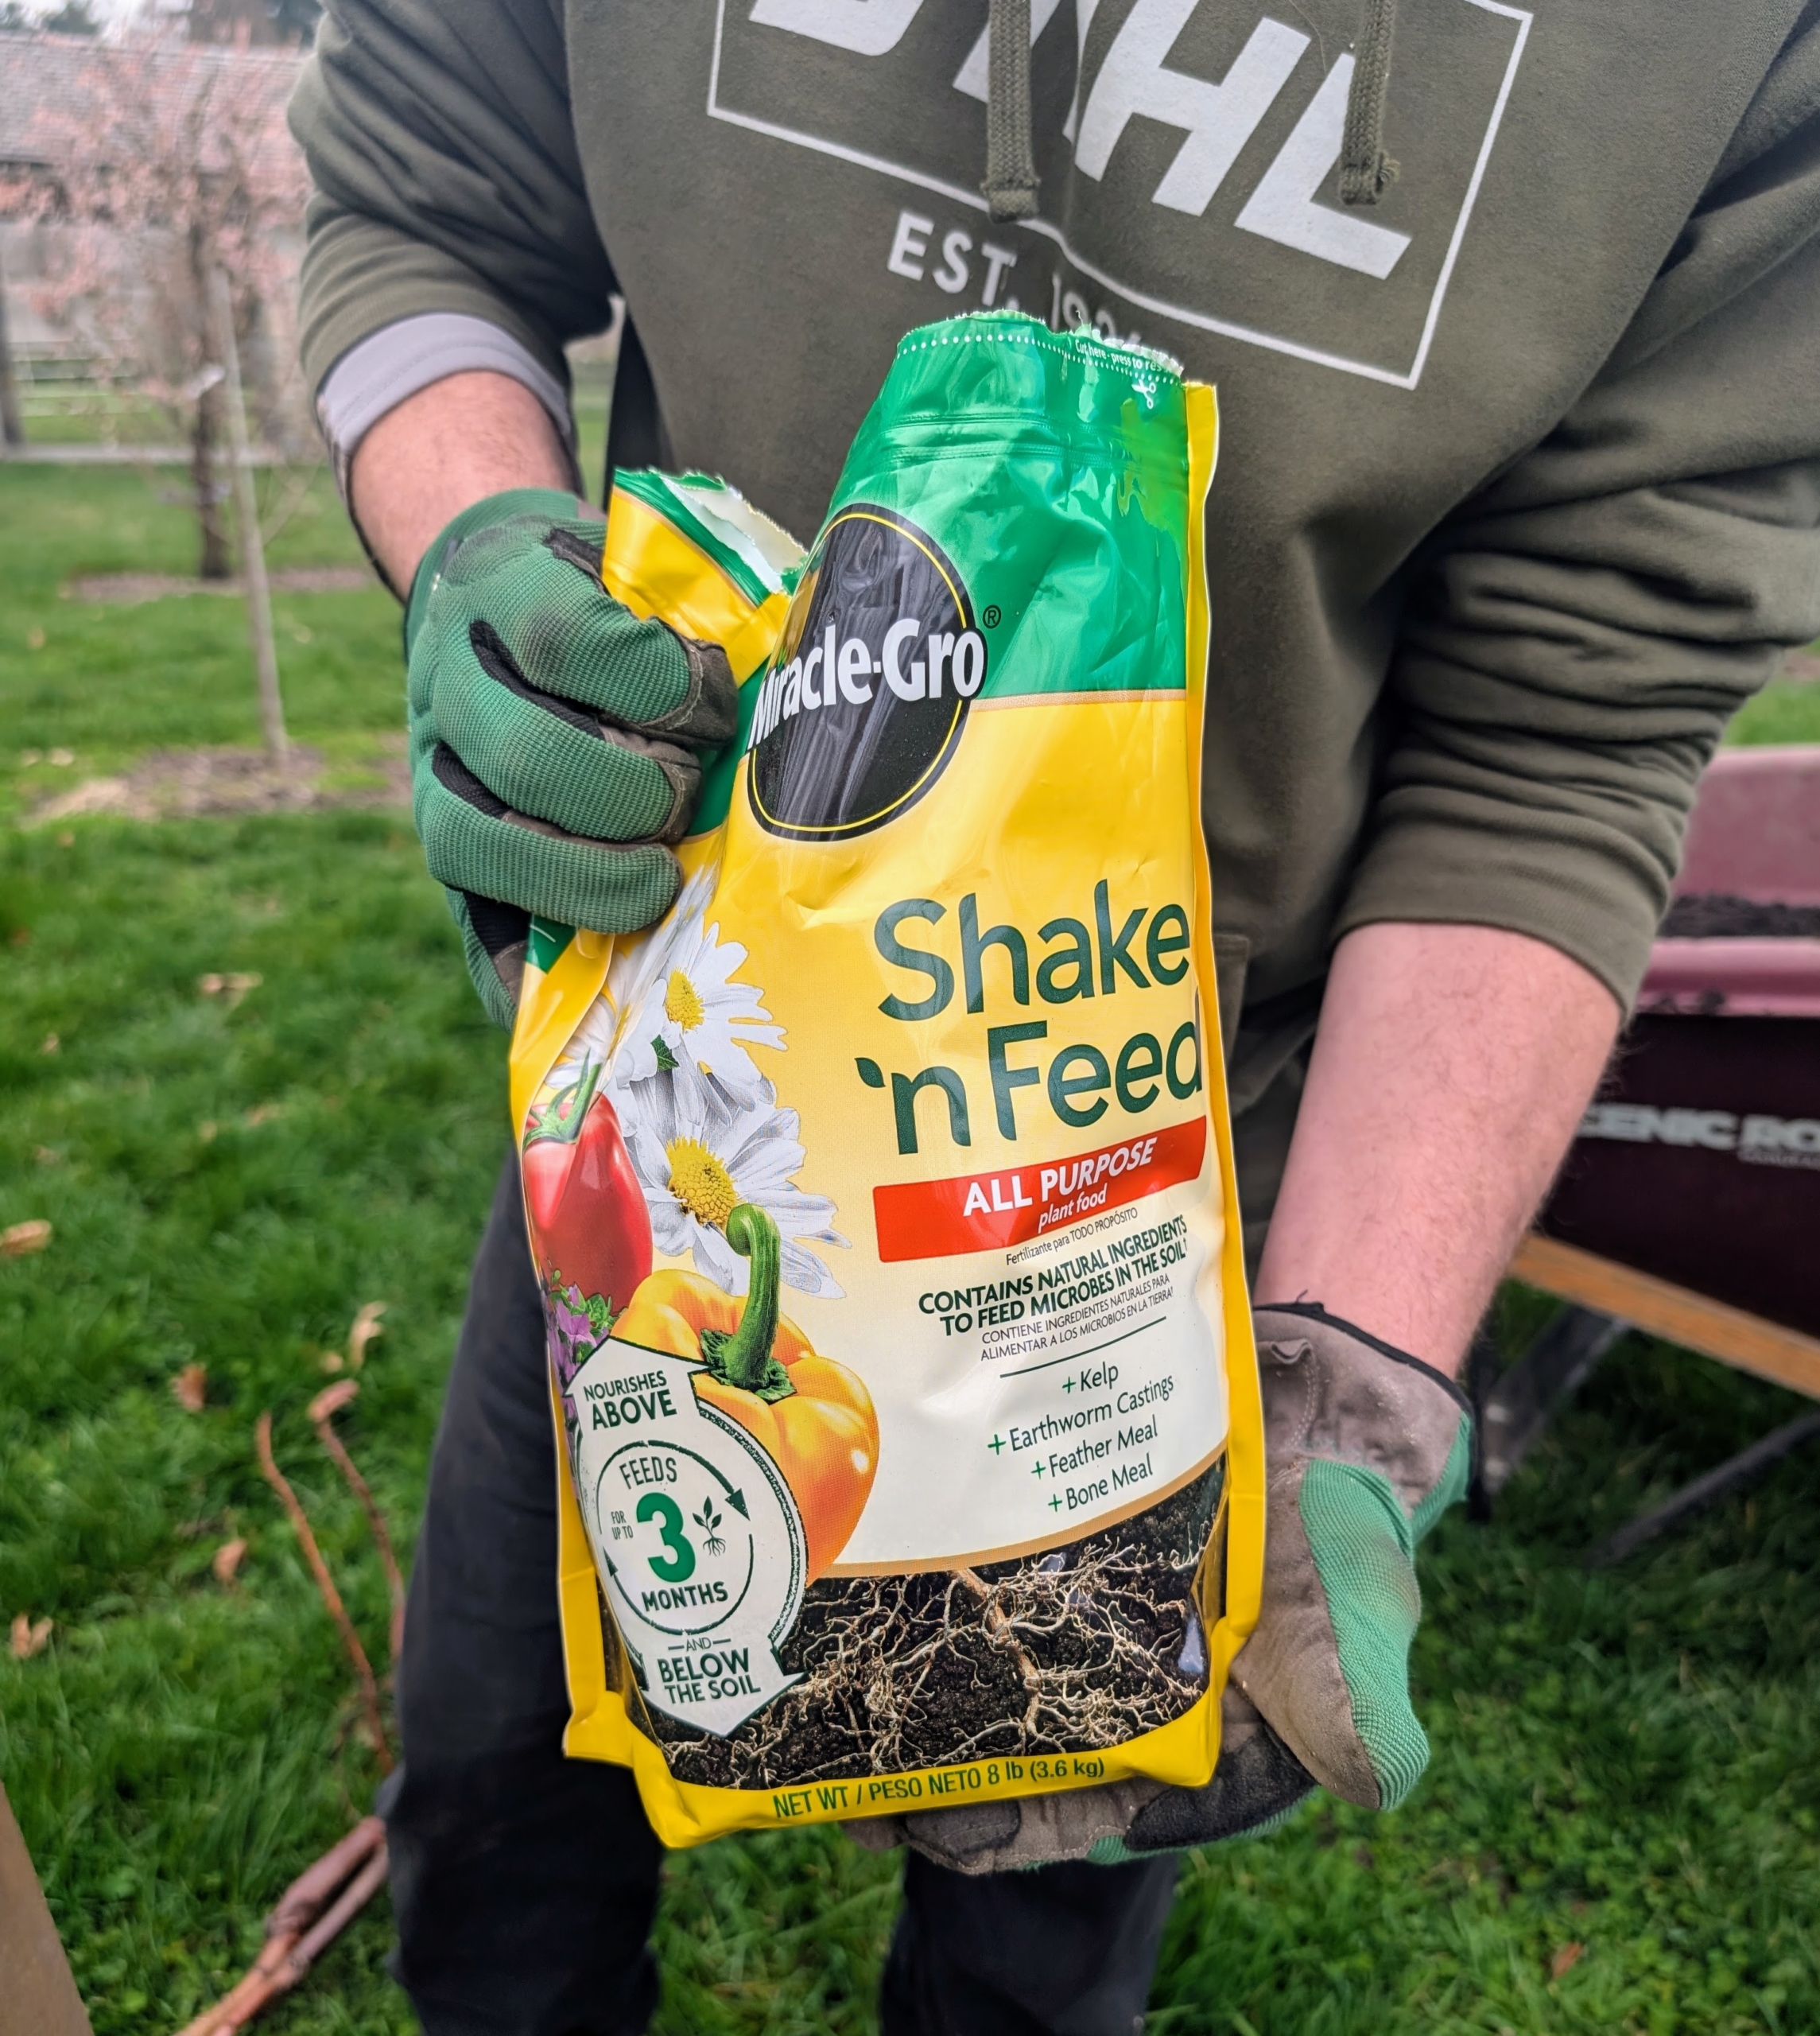
Matt sprinkles a generous handful over the composted soil.
And then mixes all the elements together. This helps ensure the tree roots will develop using all the soil in the space and not just the layer of newly added compost.
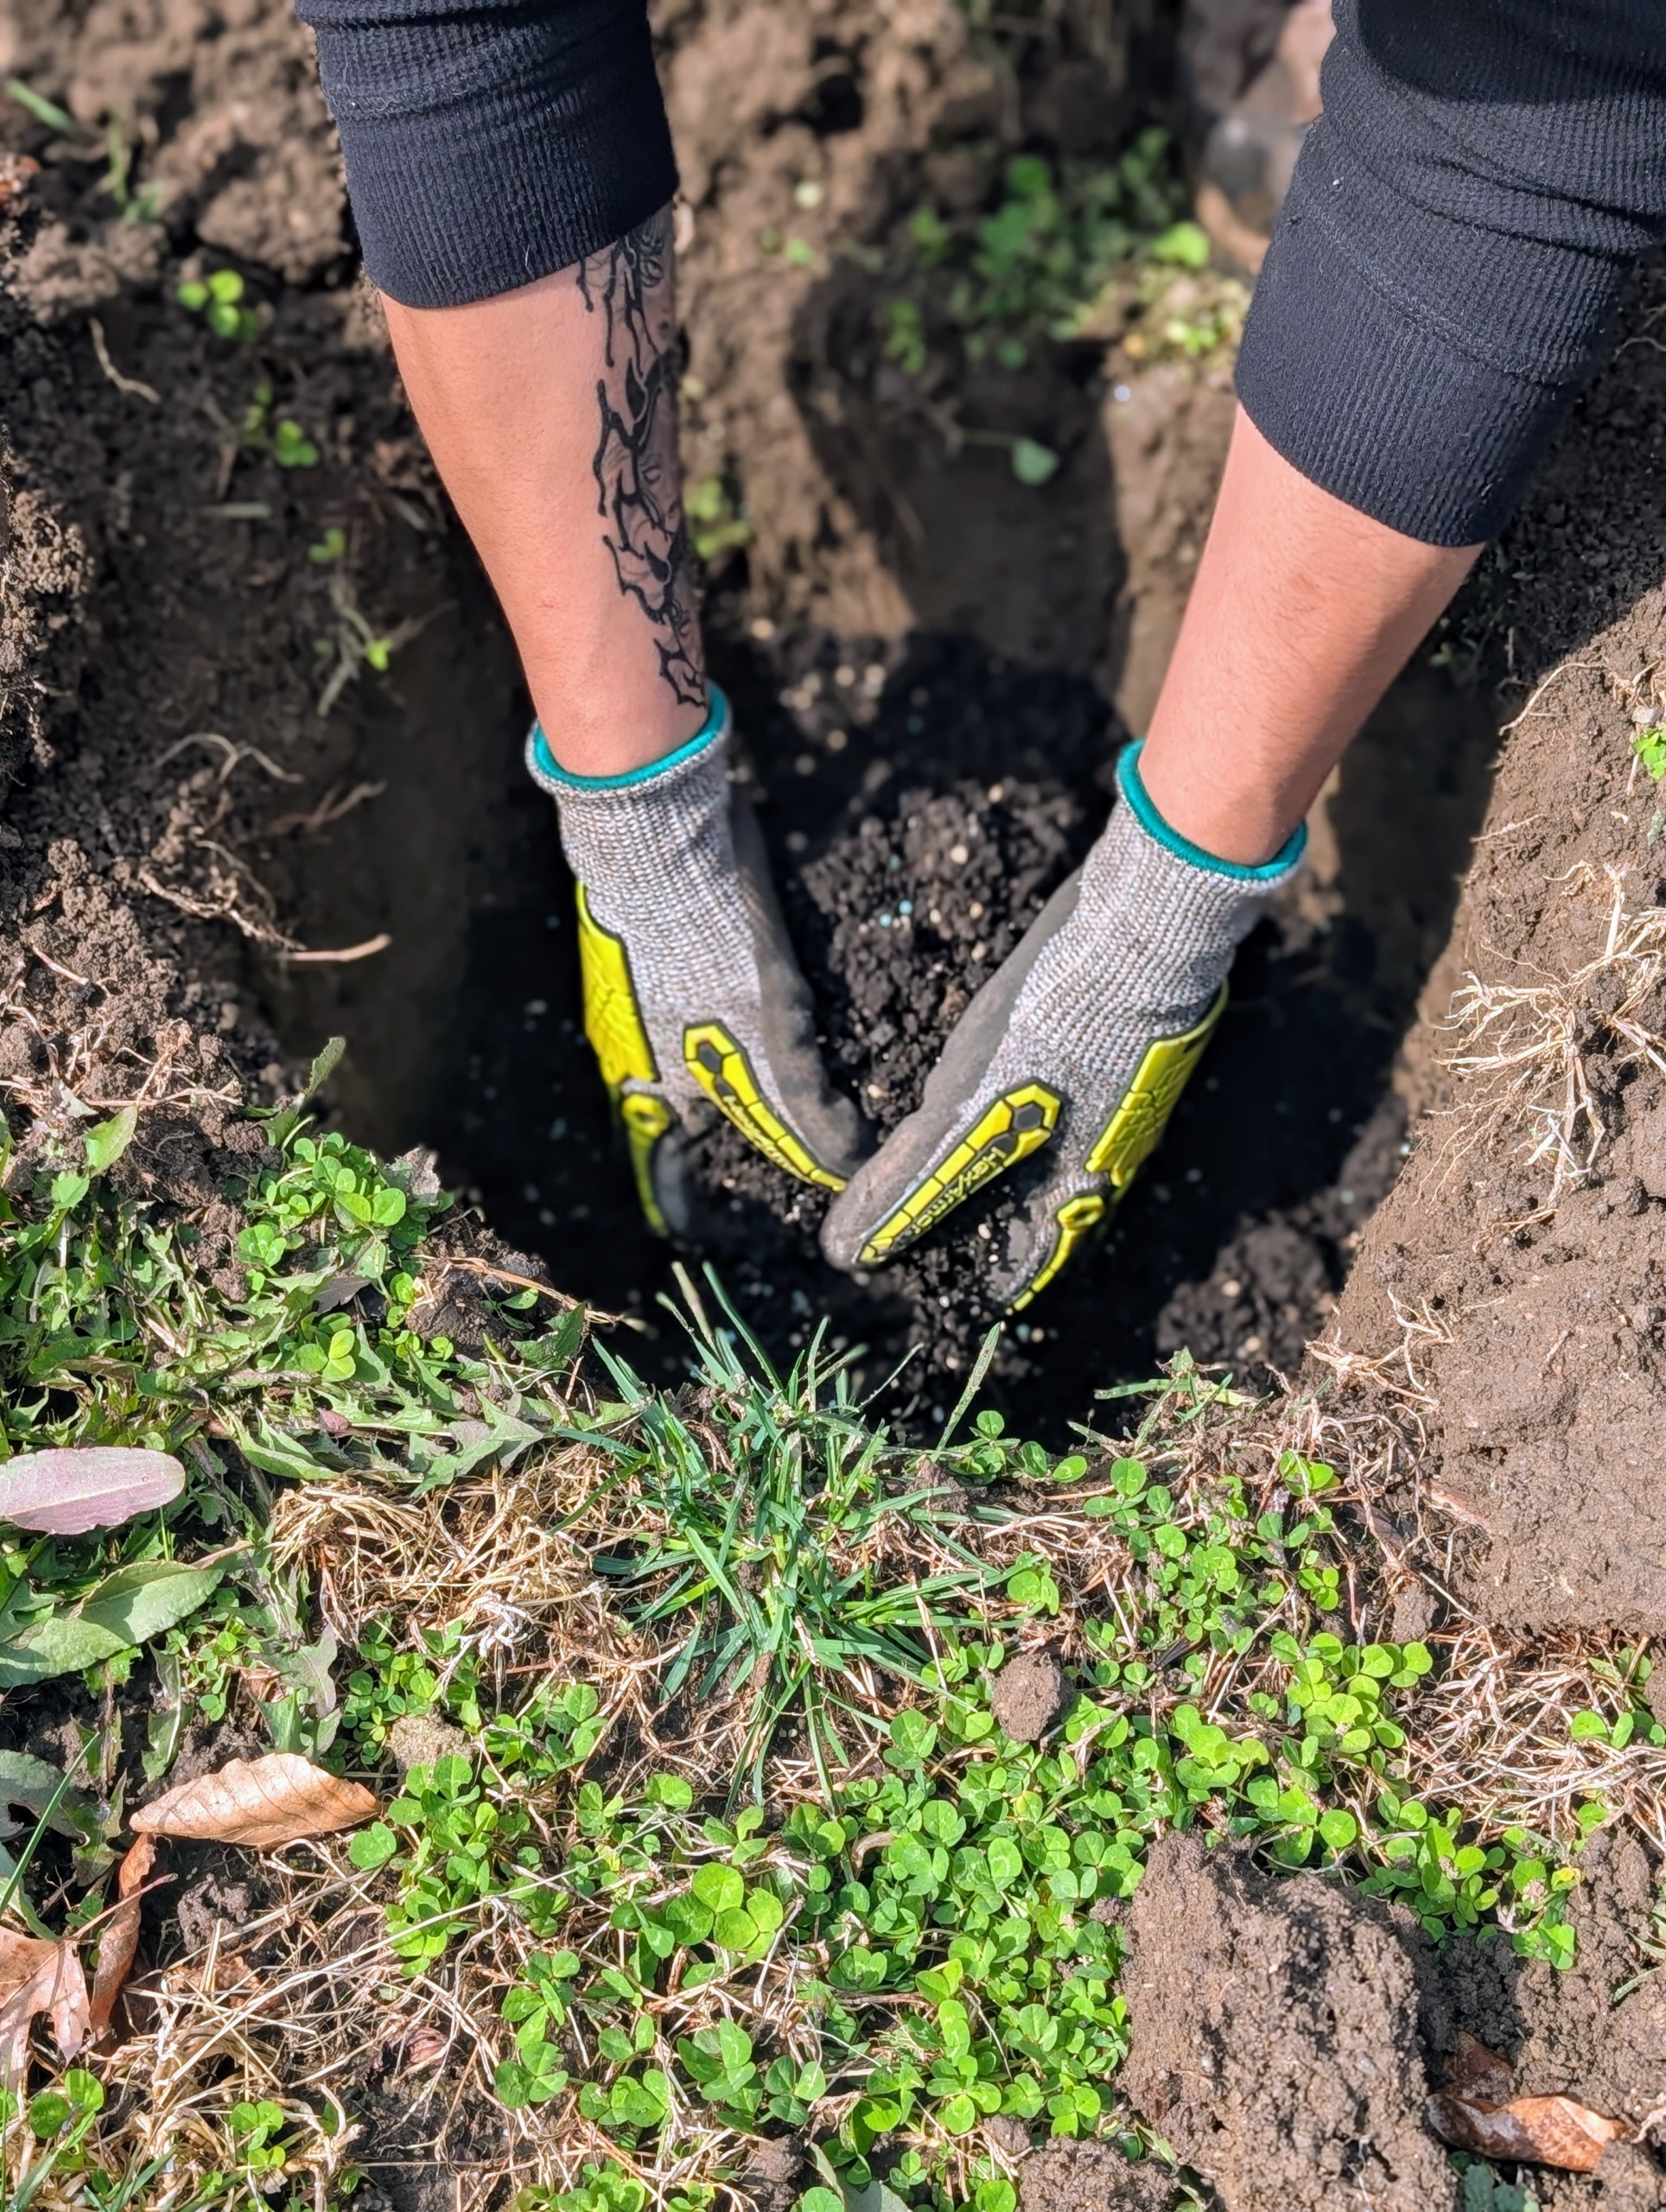
Matt also creates a mound out of the soil a few inches high in the bottom of the hole. This will give some support to the root system.
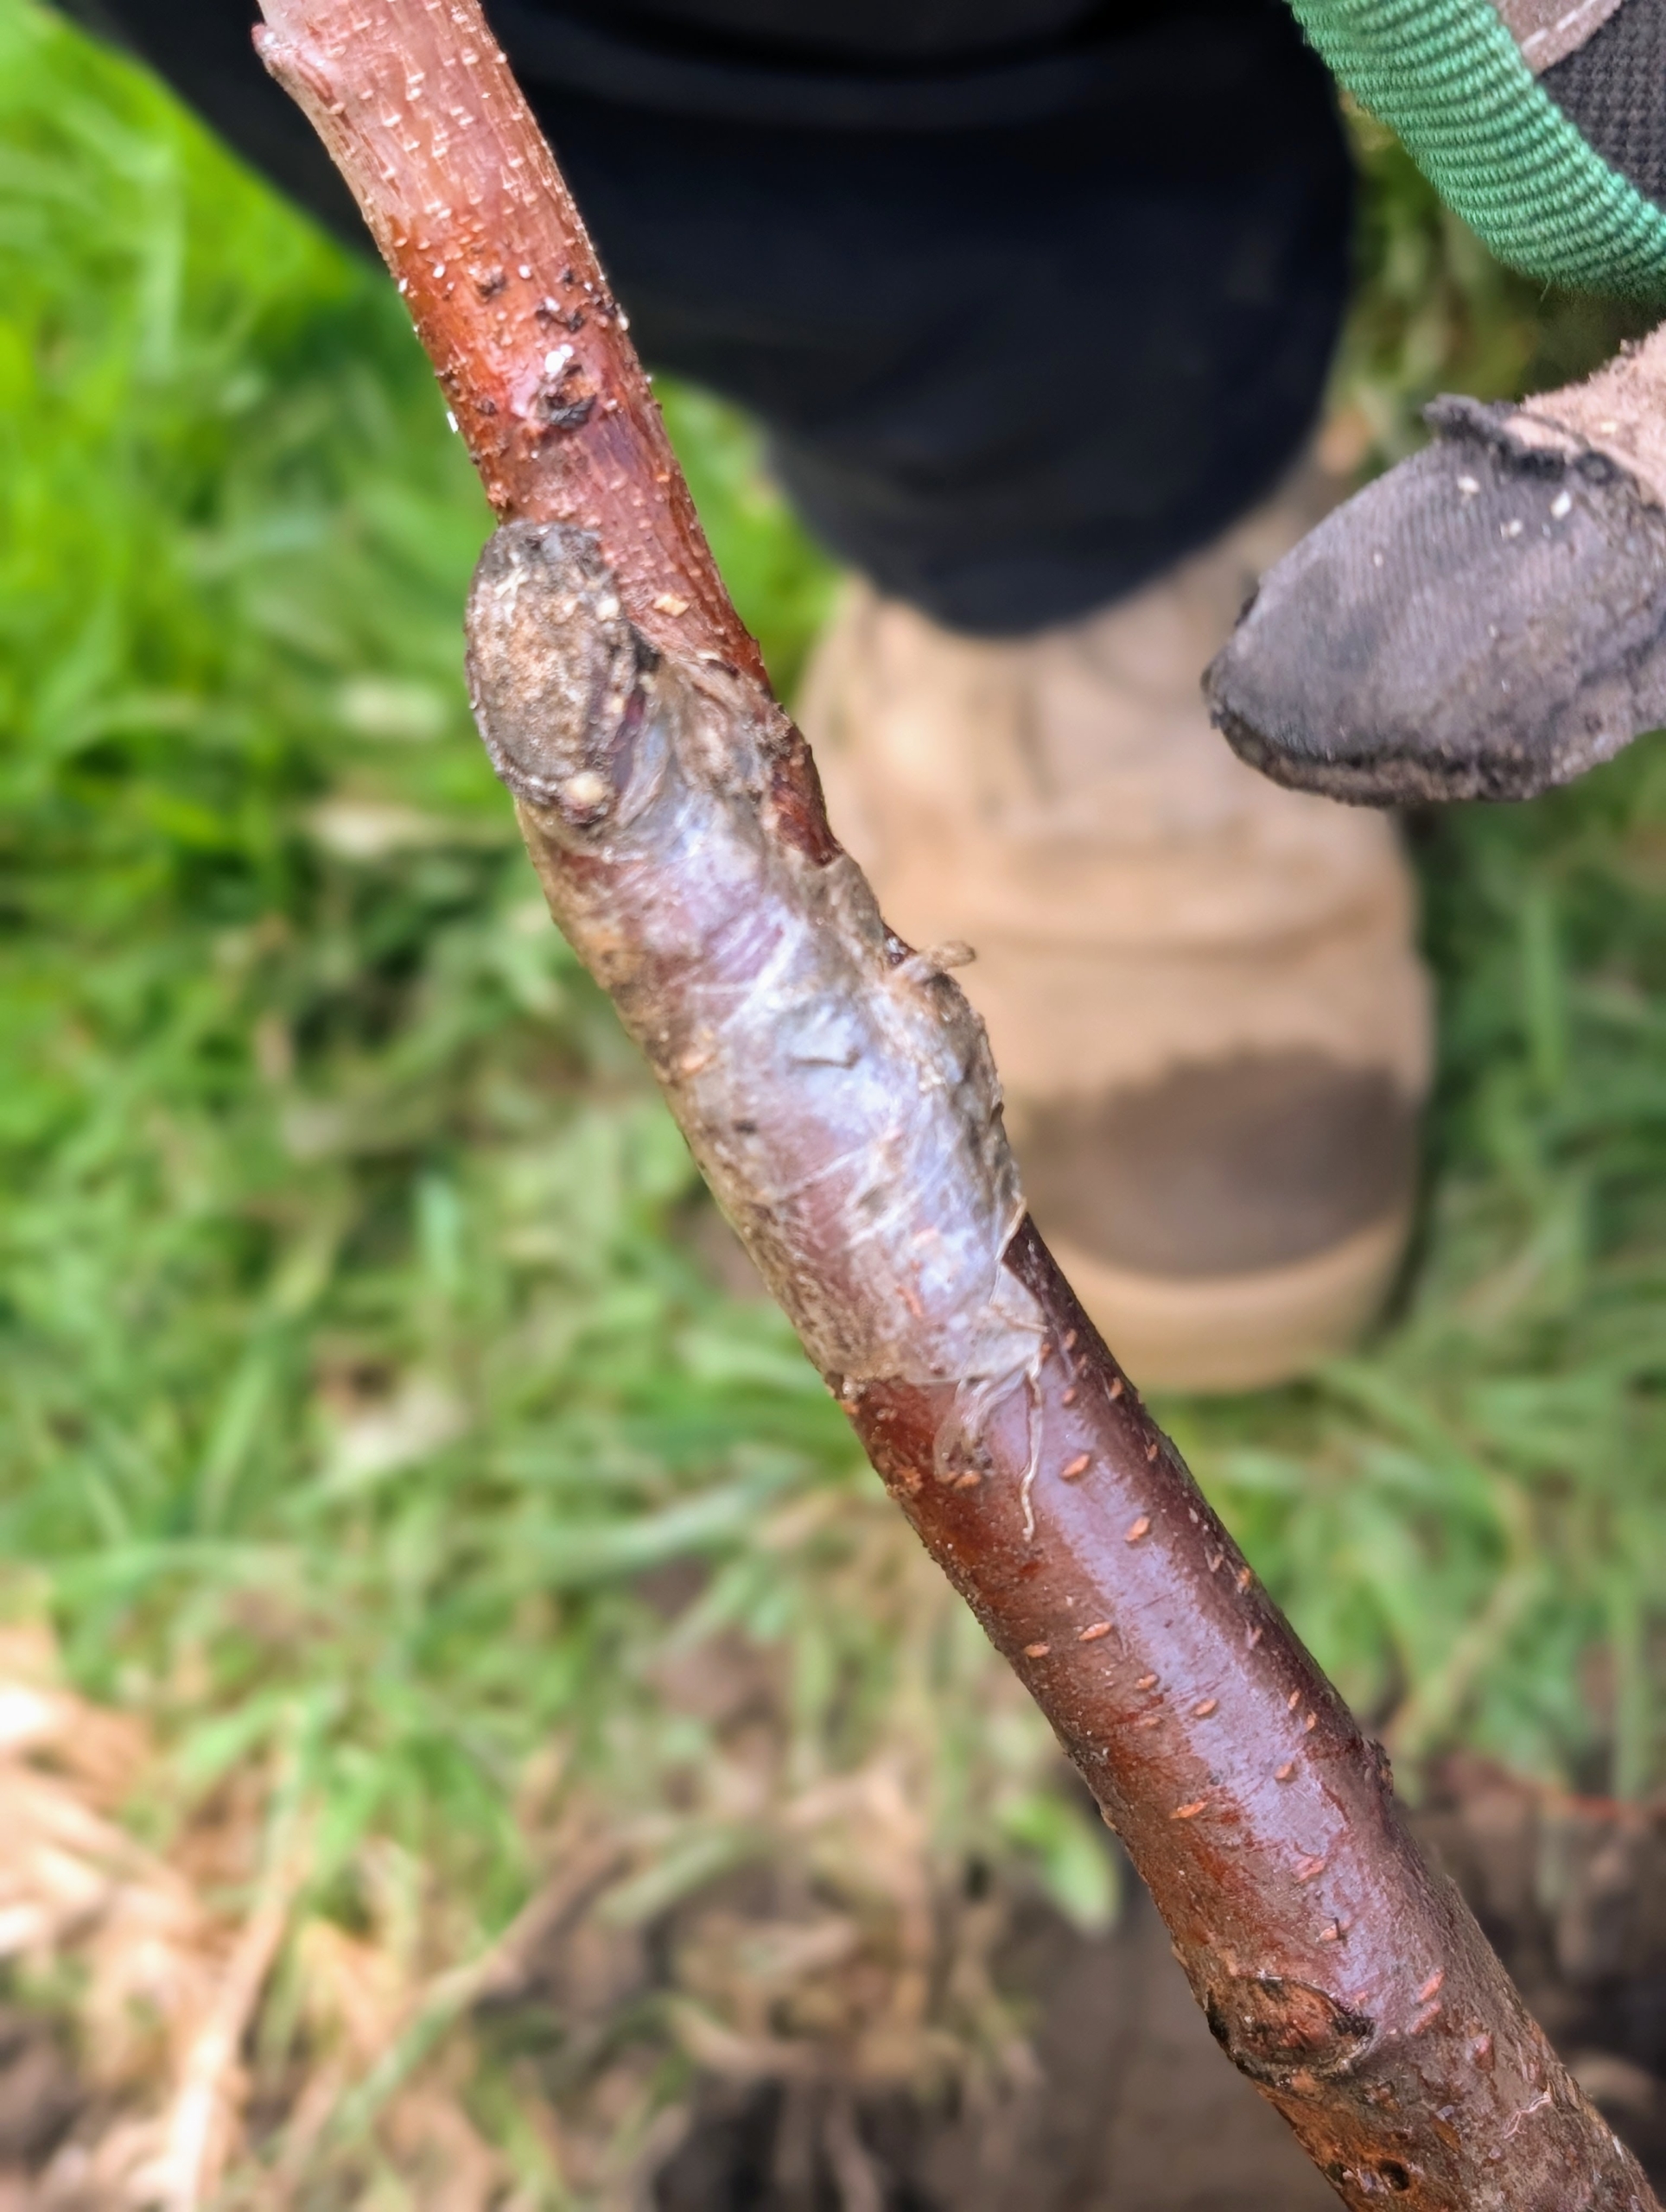
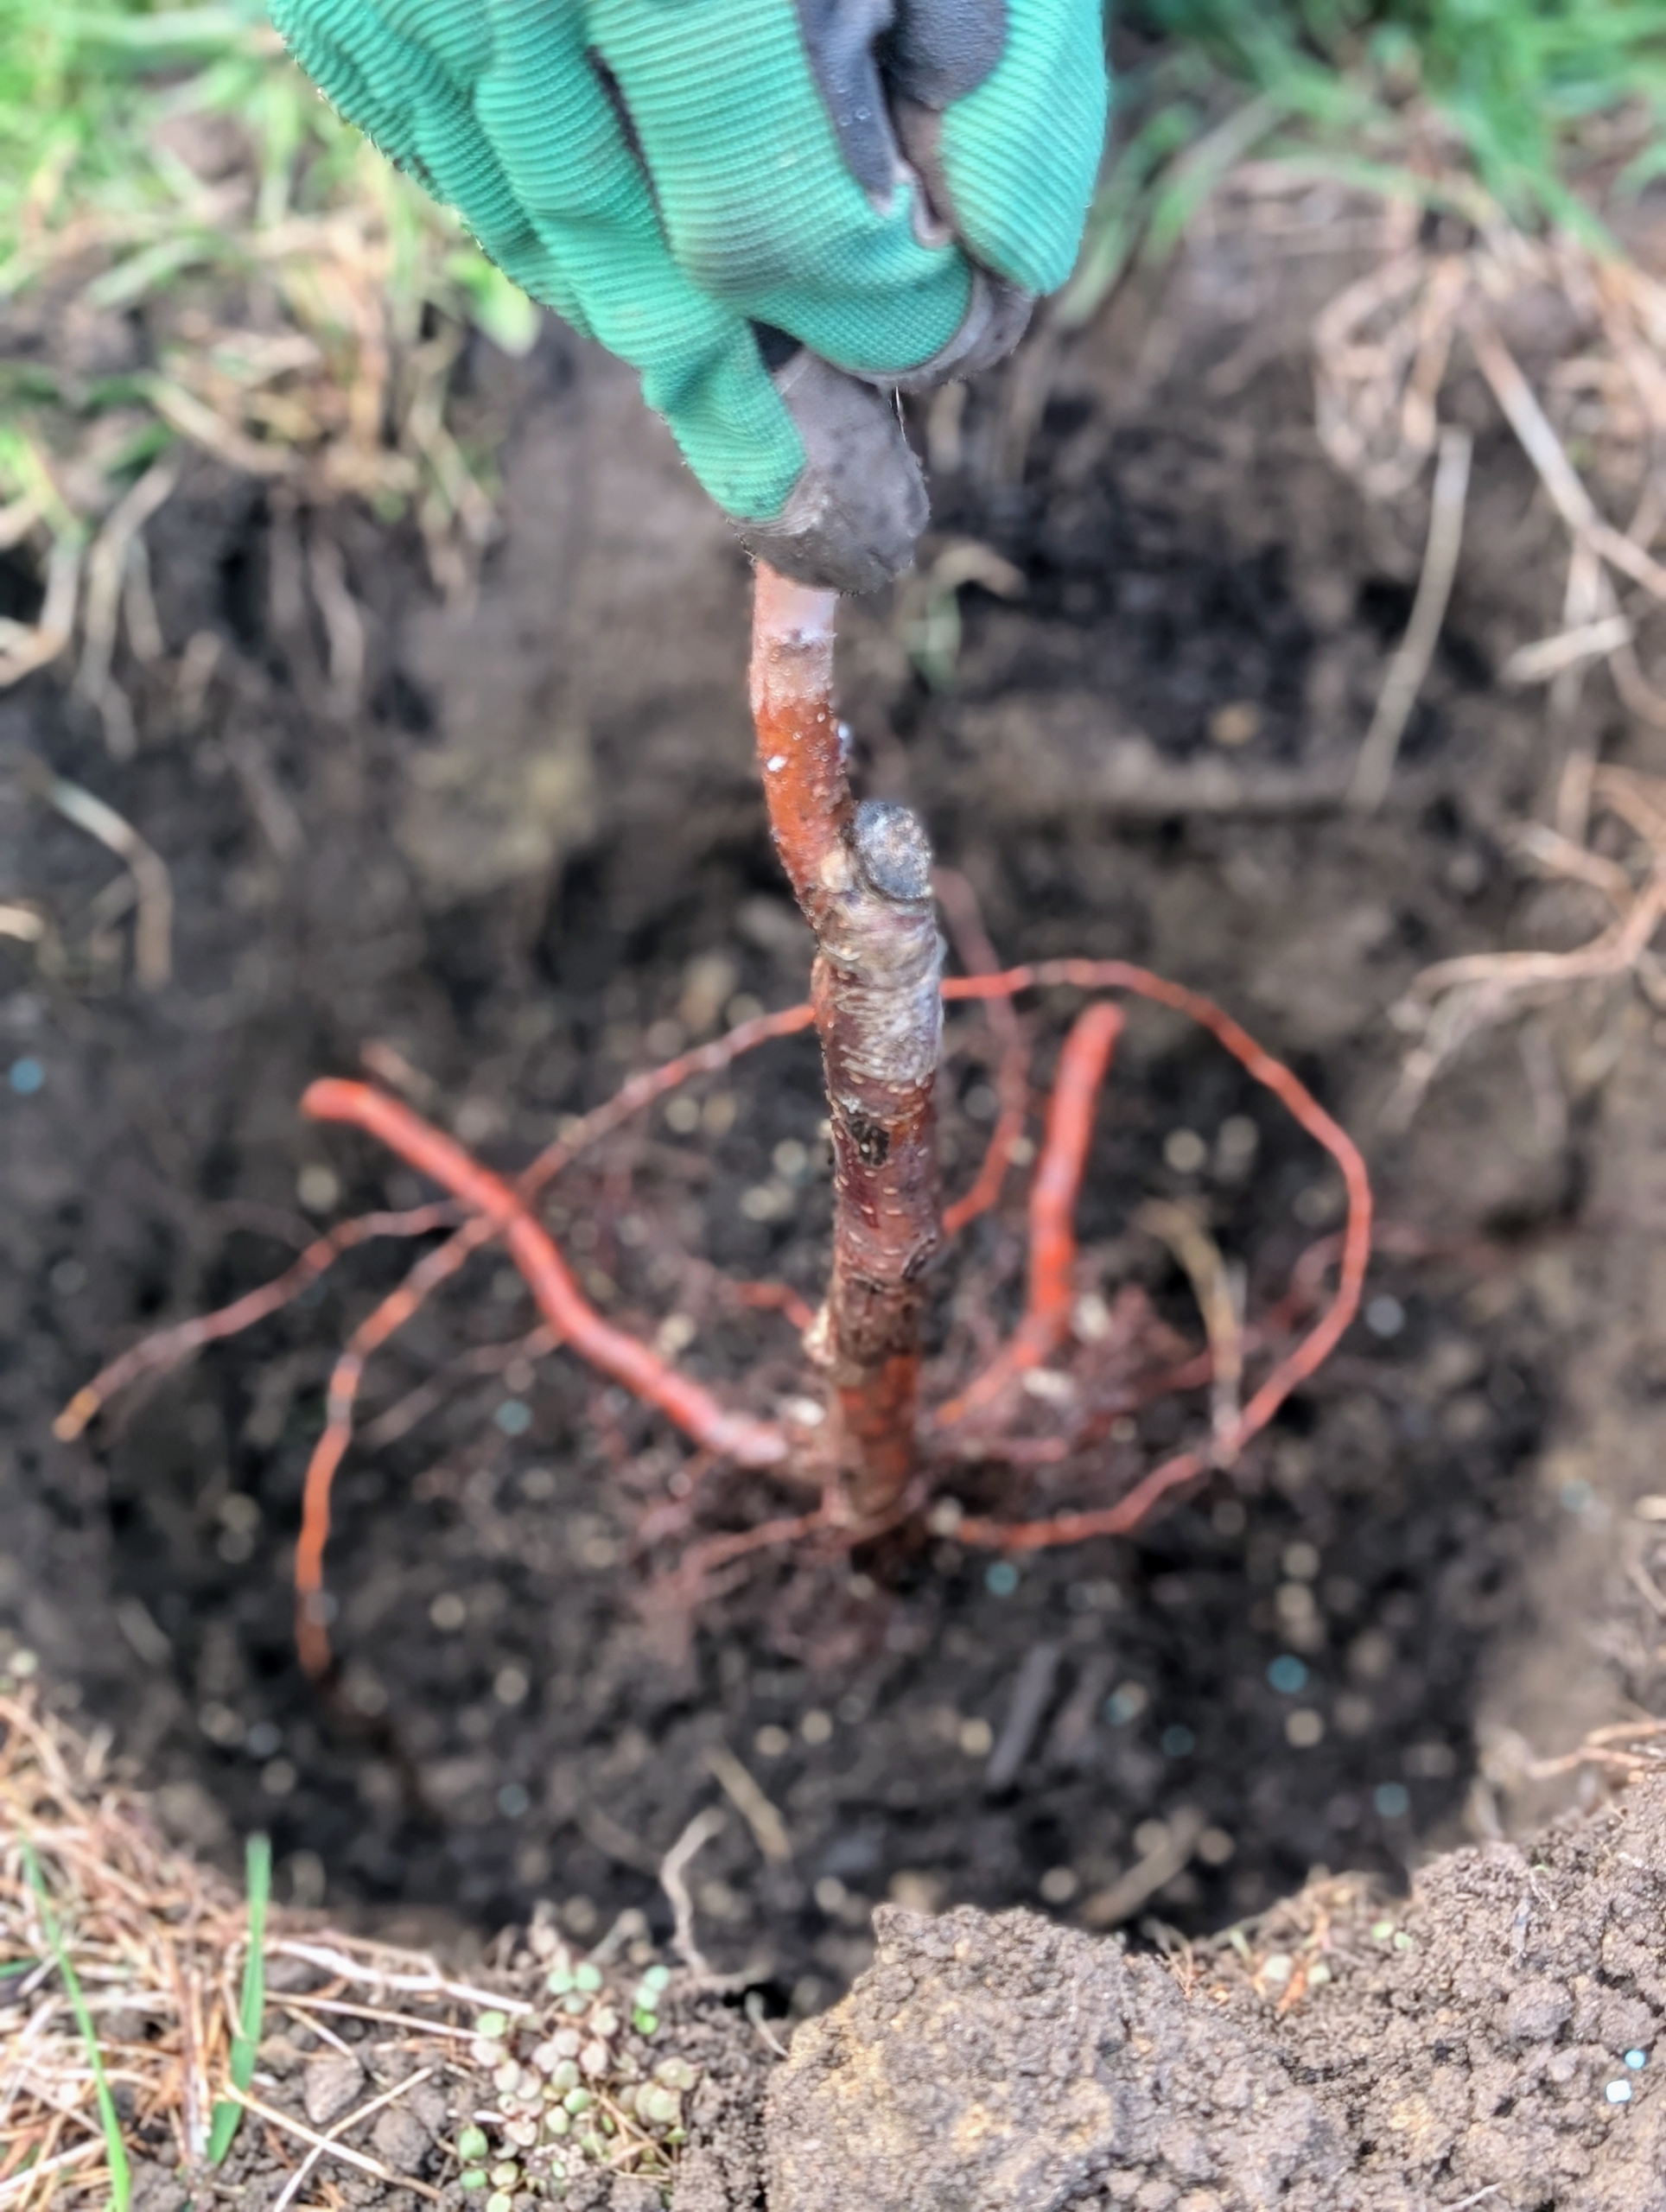
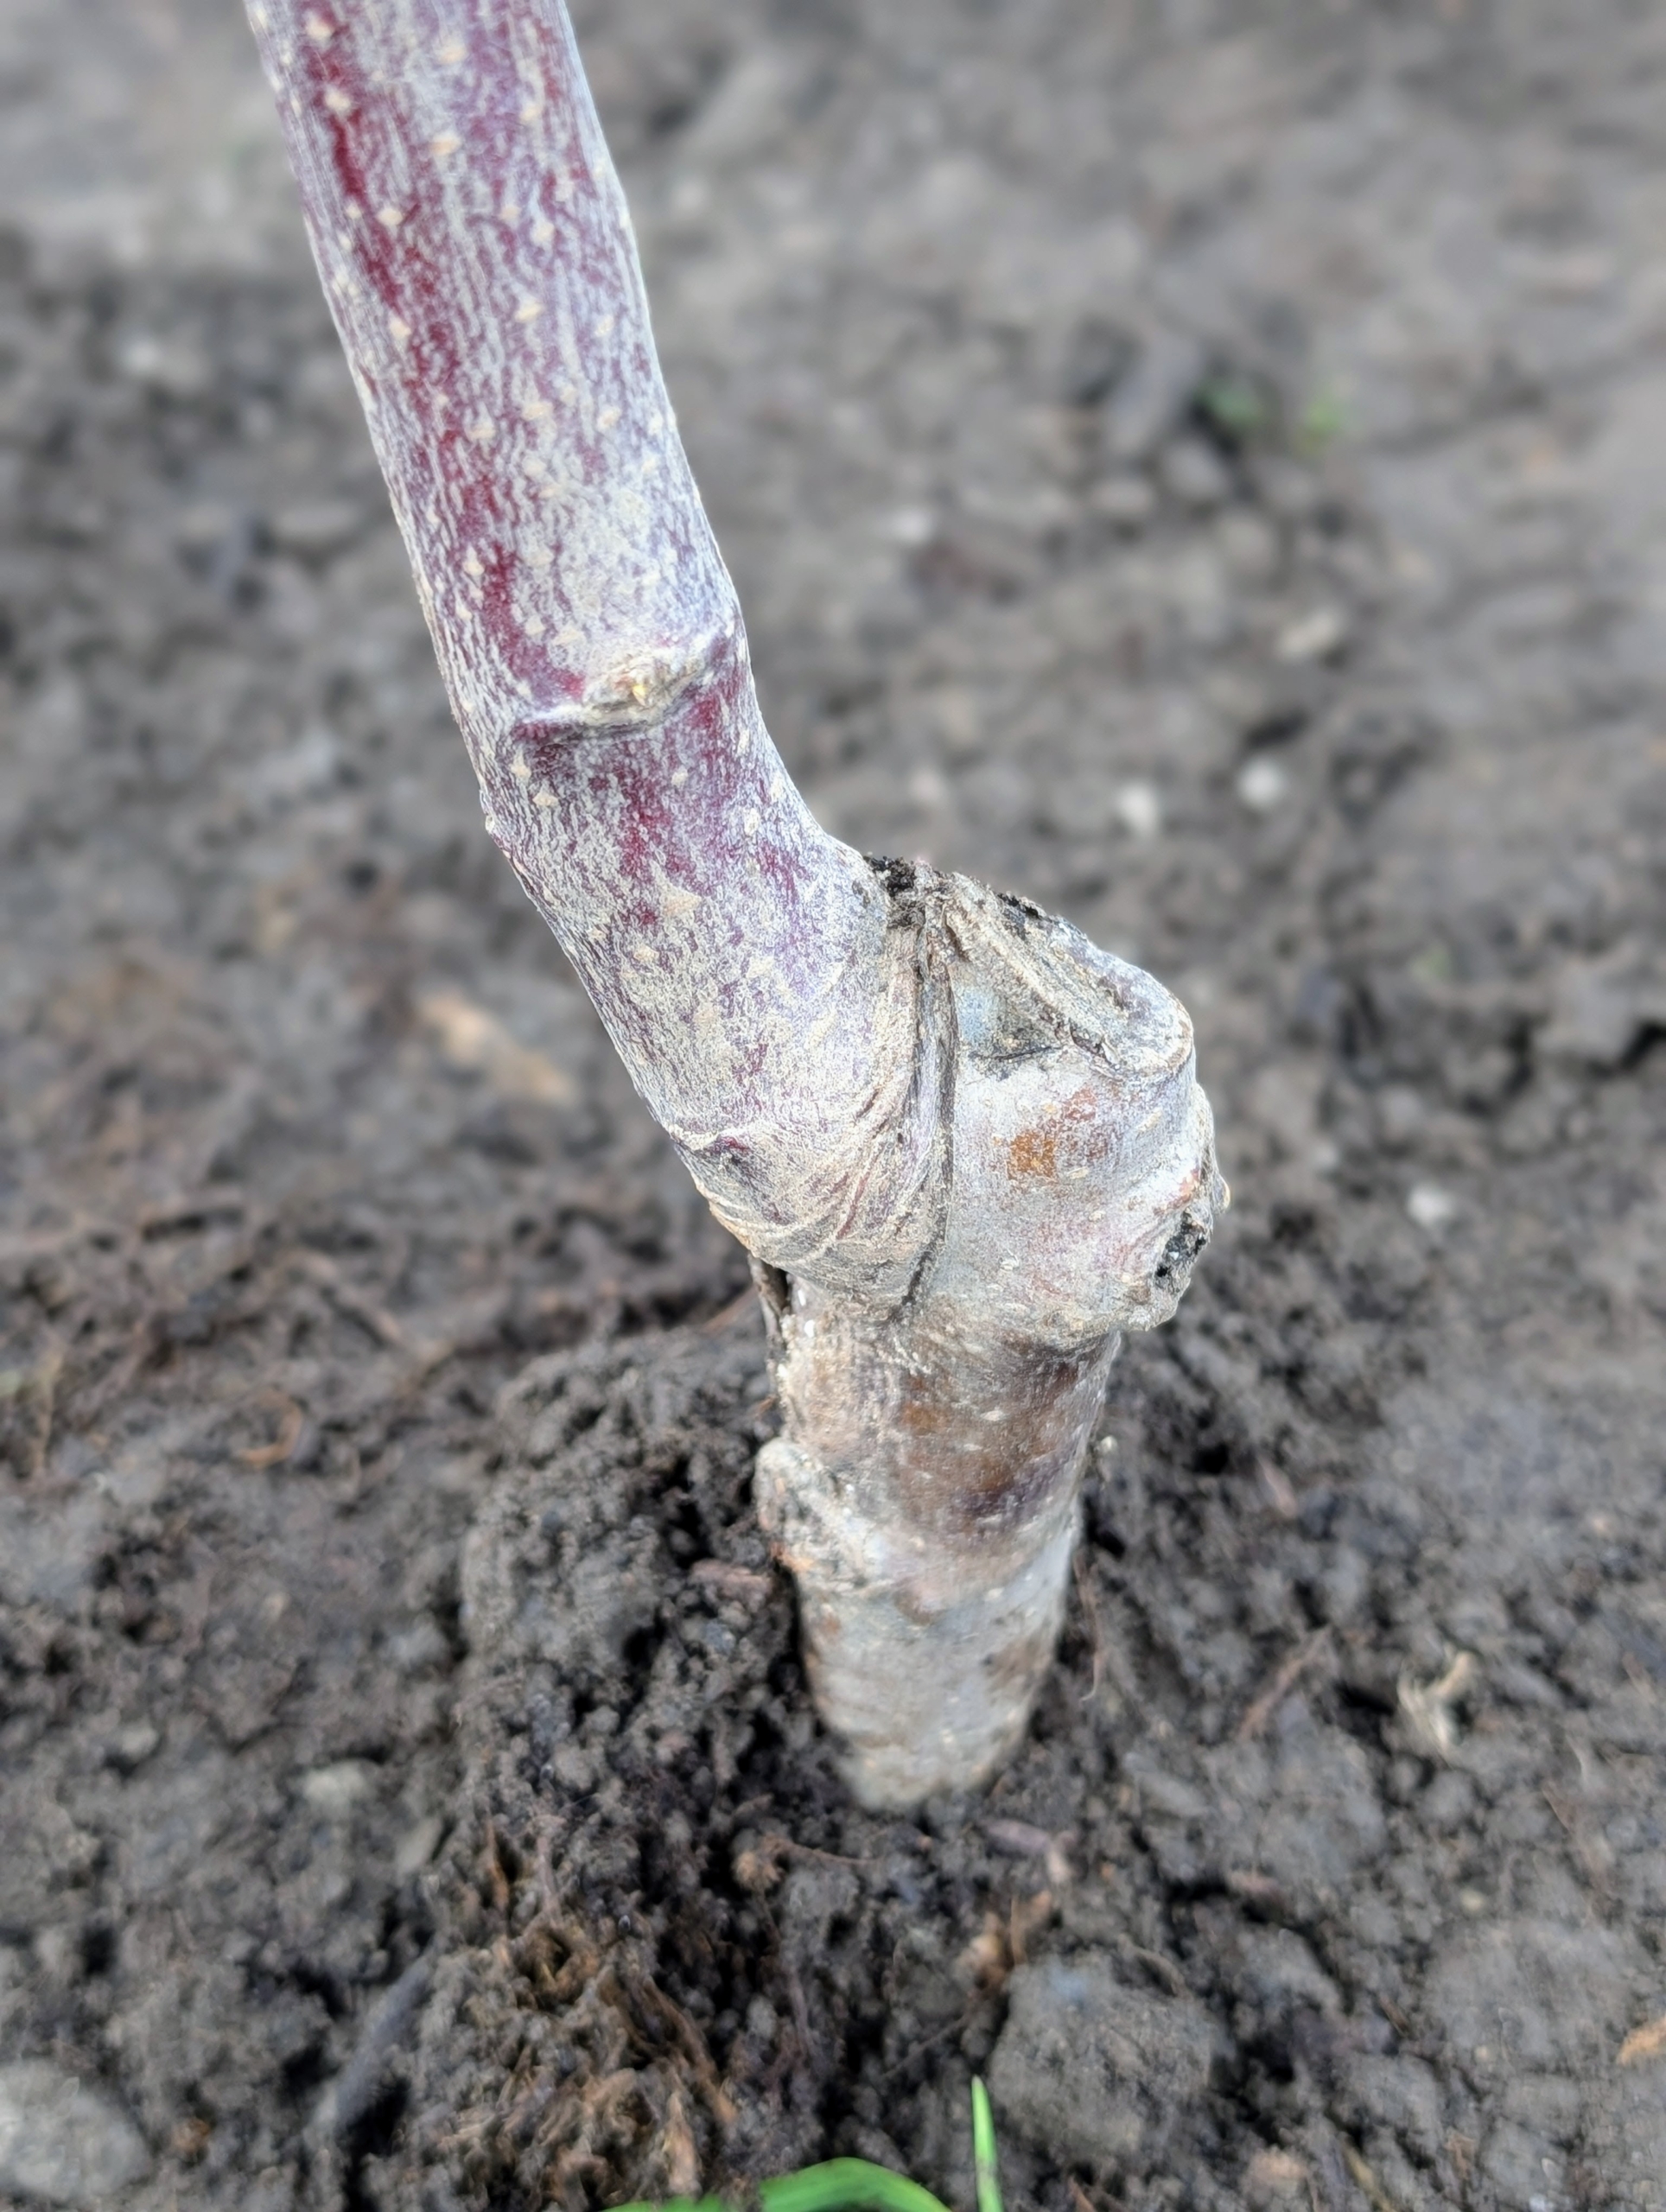
Fruiting ‘scion’ wood is often grafted onto resilient rootstocks. The graft point looks like a ‘knuckle’ at the bottom of the trunk. When planting, this point must be at least a few inches above soil level.
Here’s a closer look at the grafting point. It is pretty easy to find no matter how old or big the tree is.
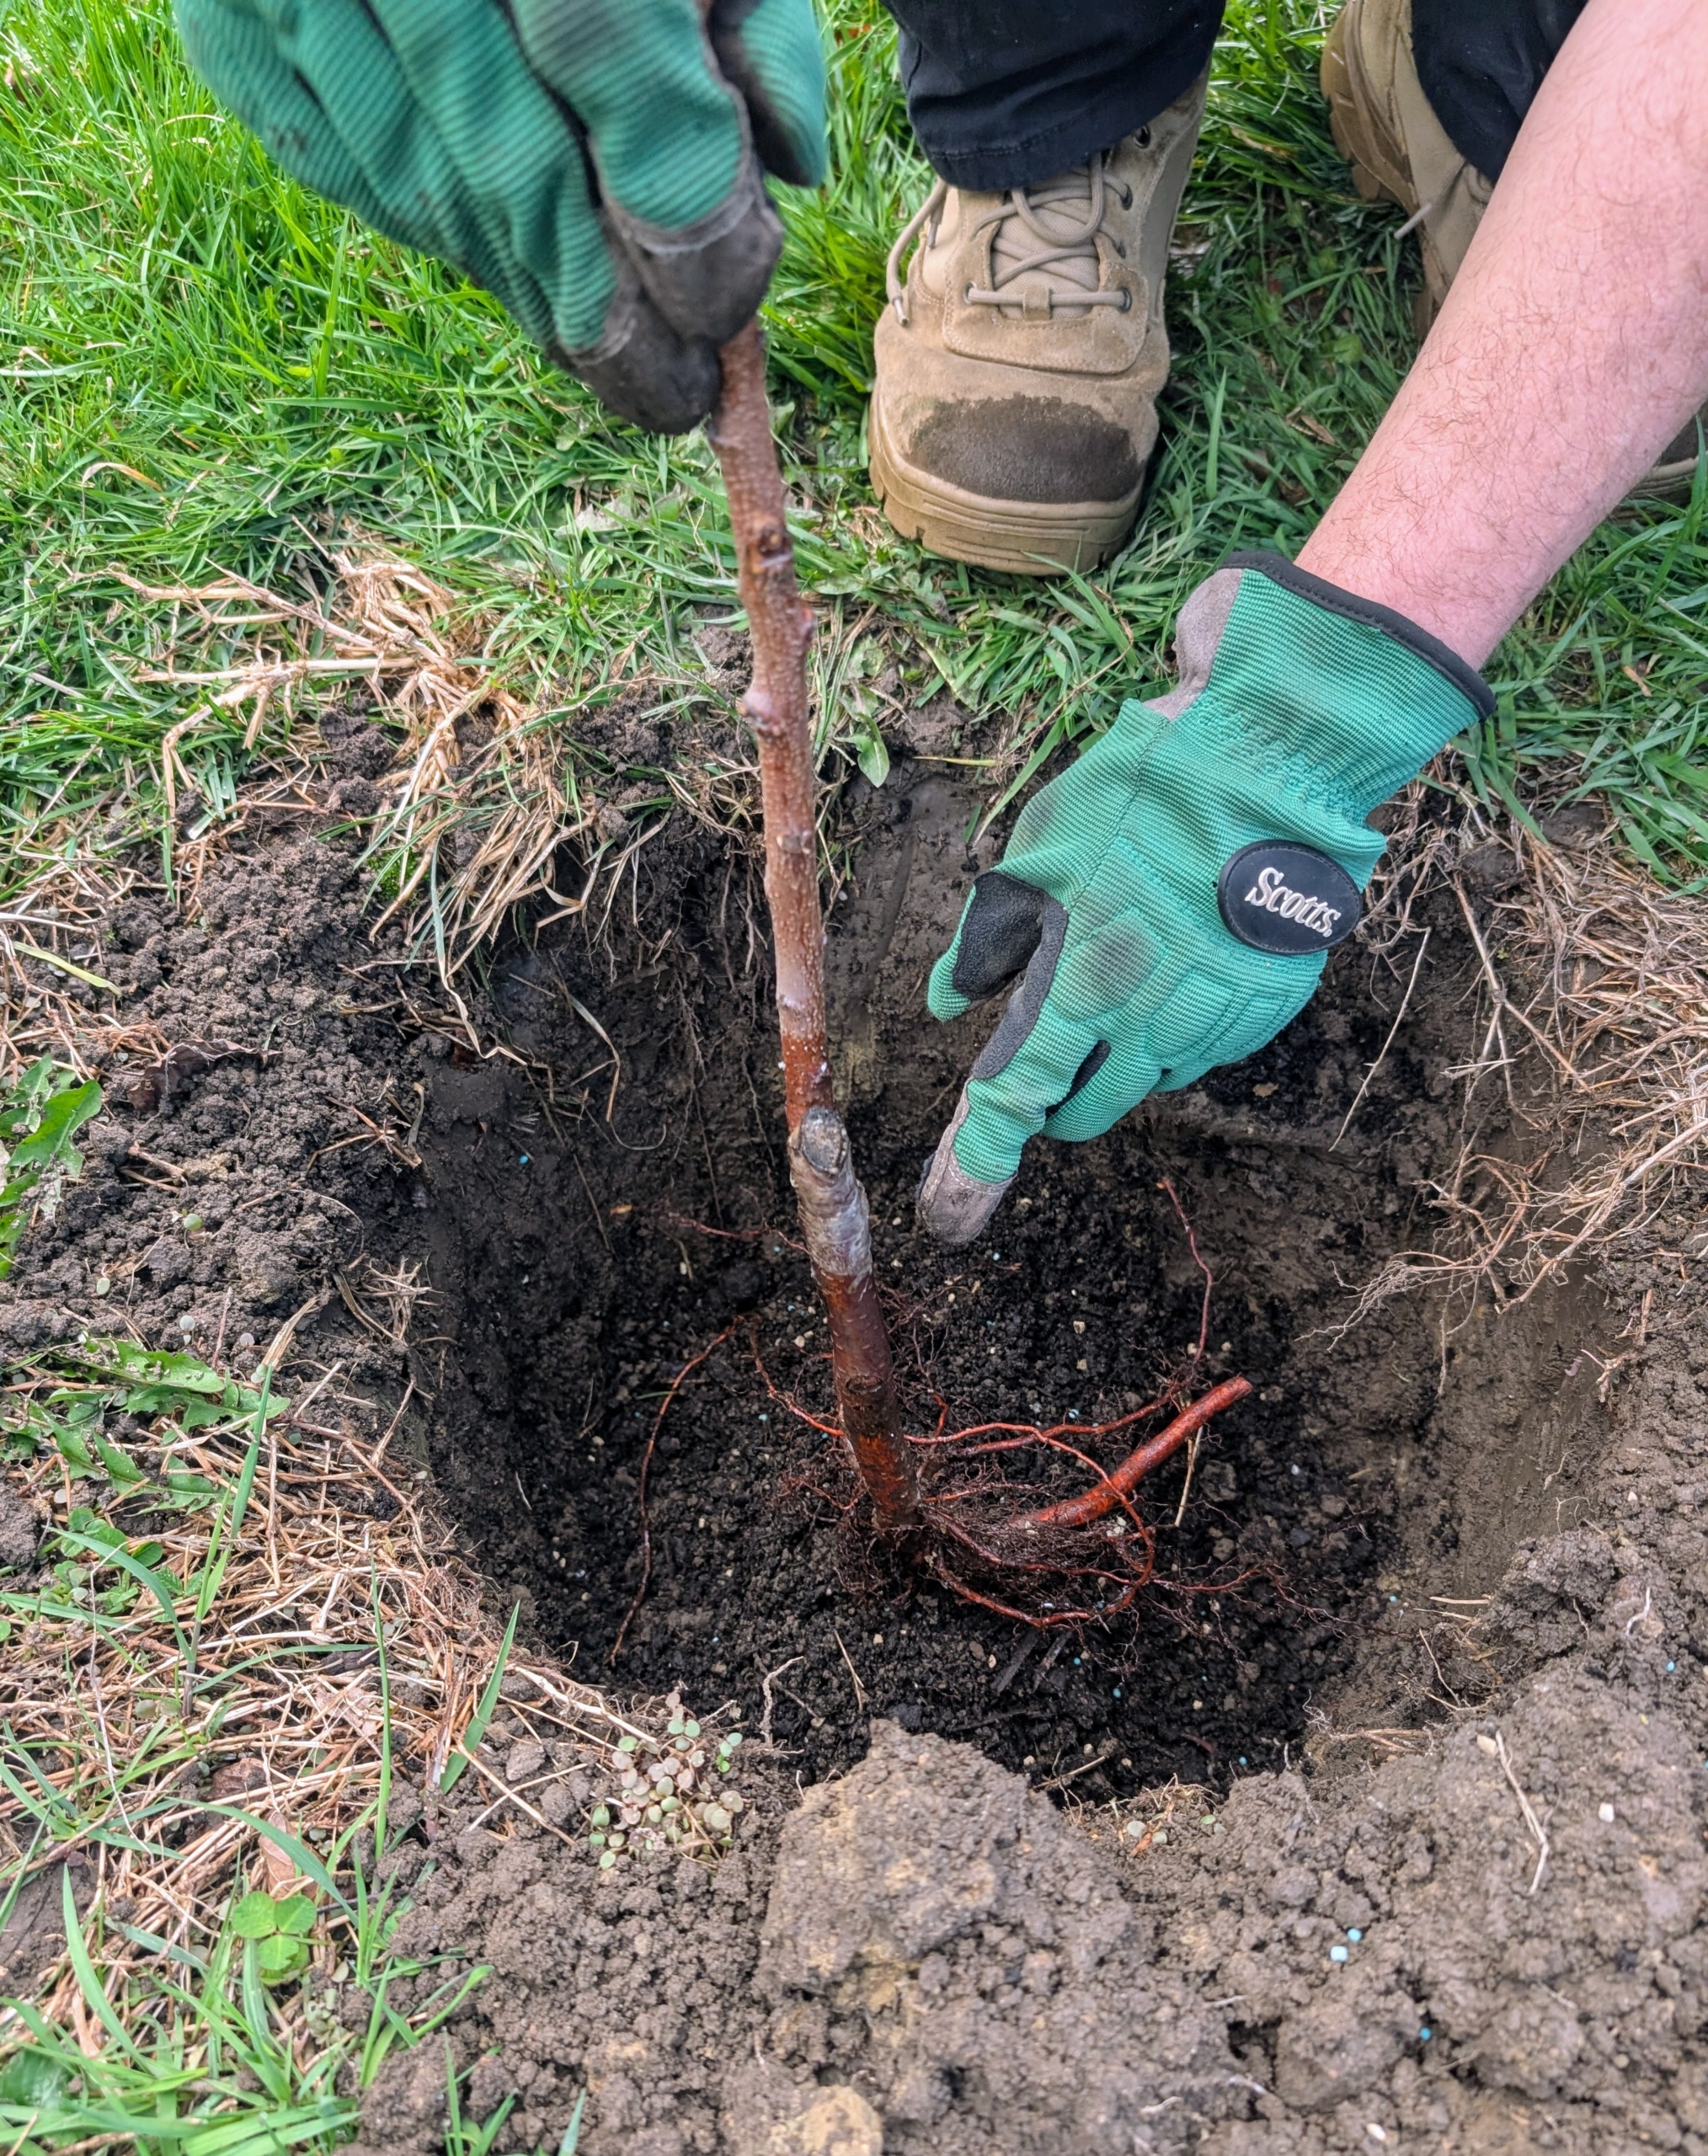
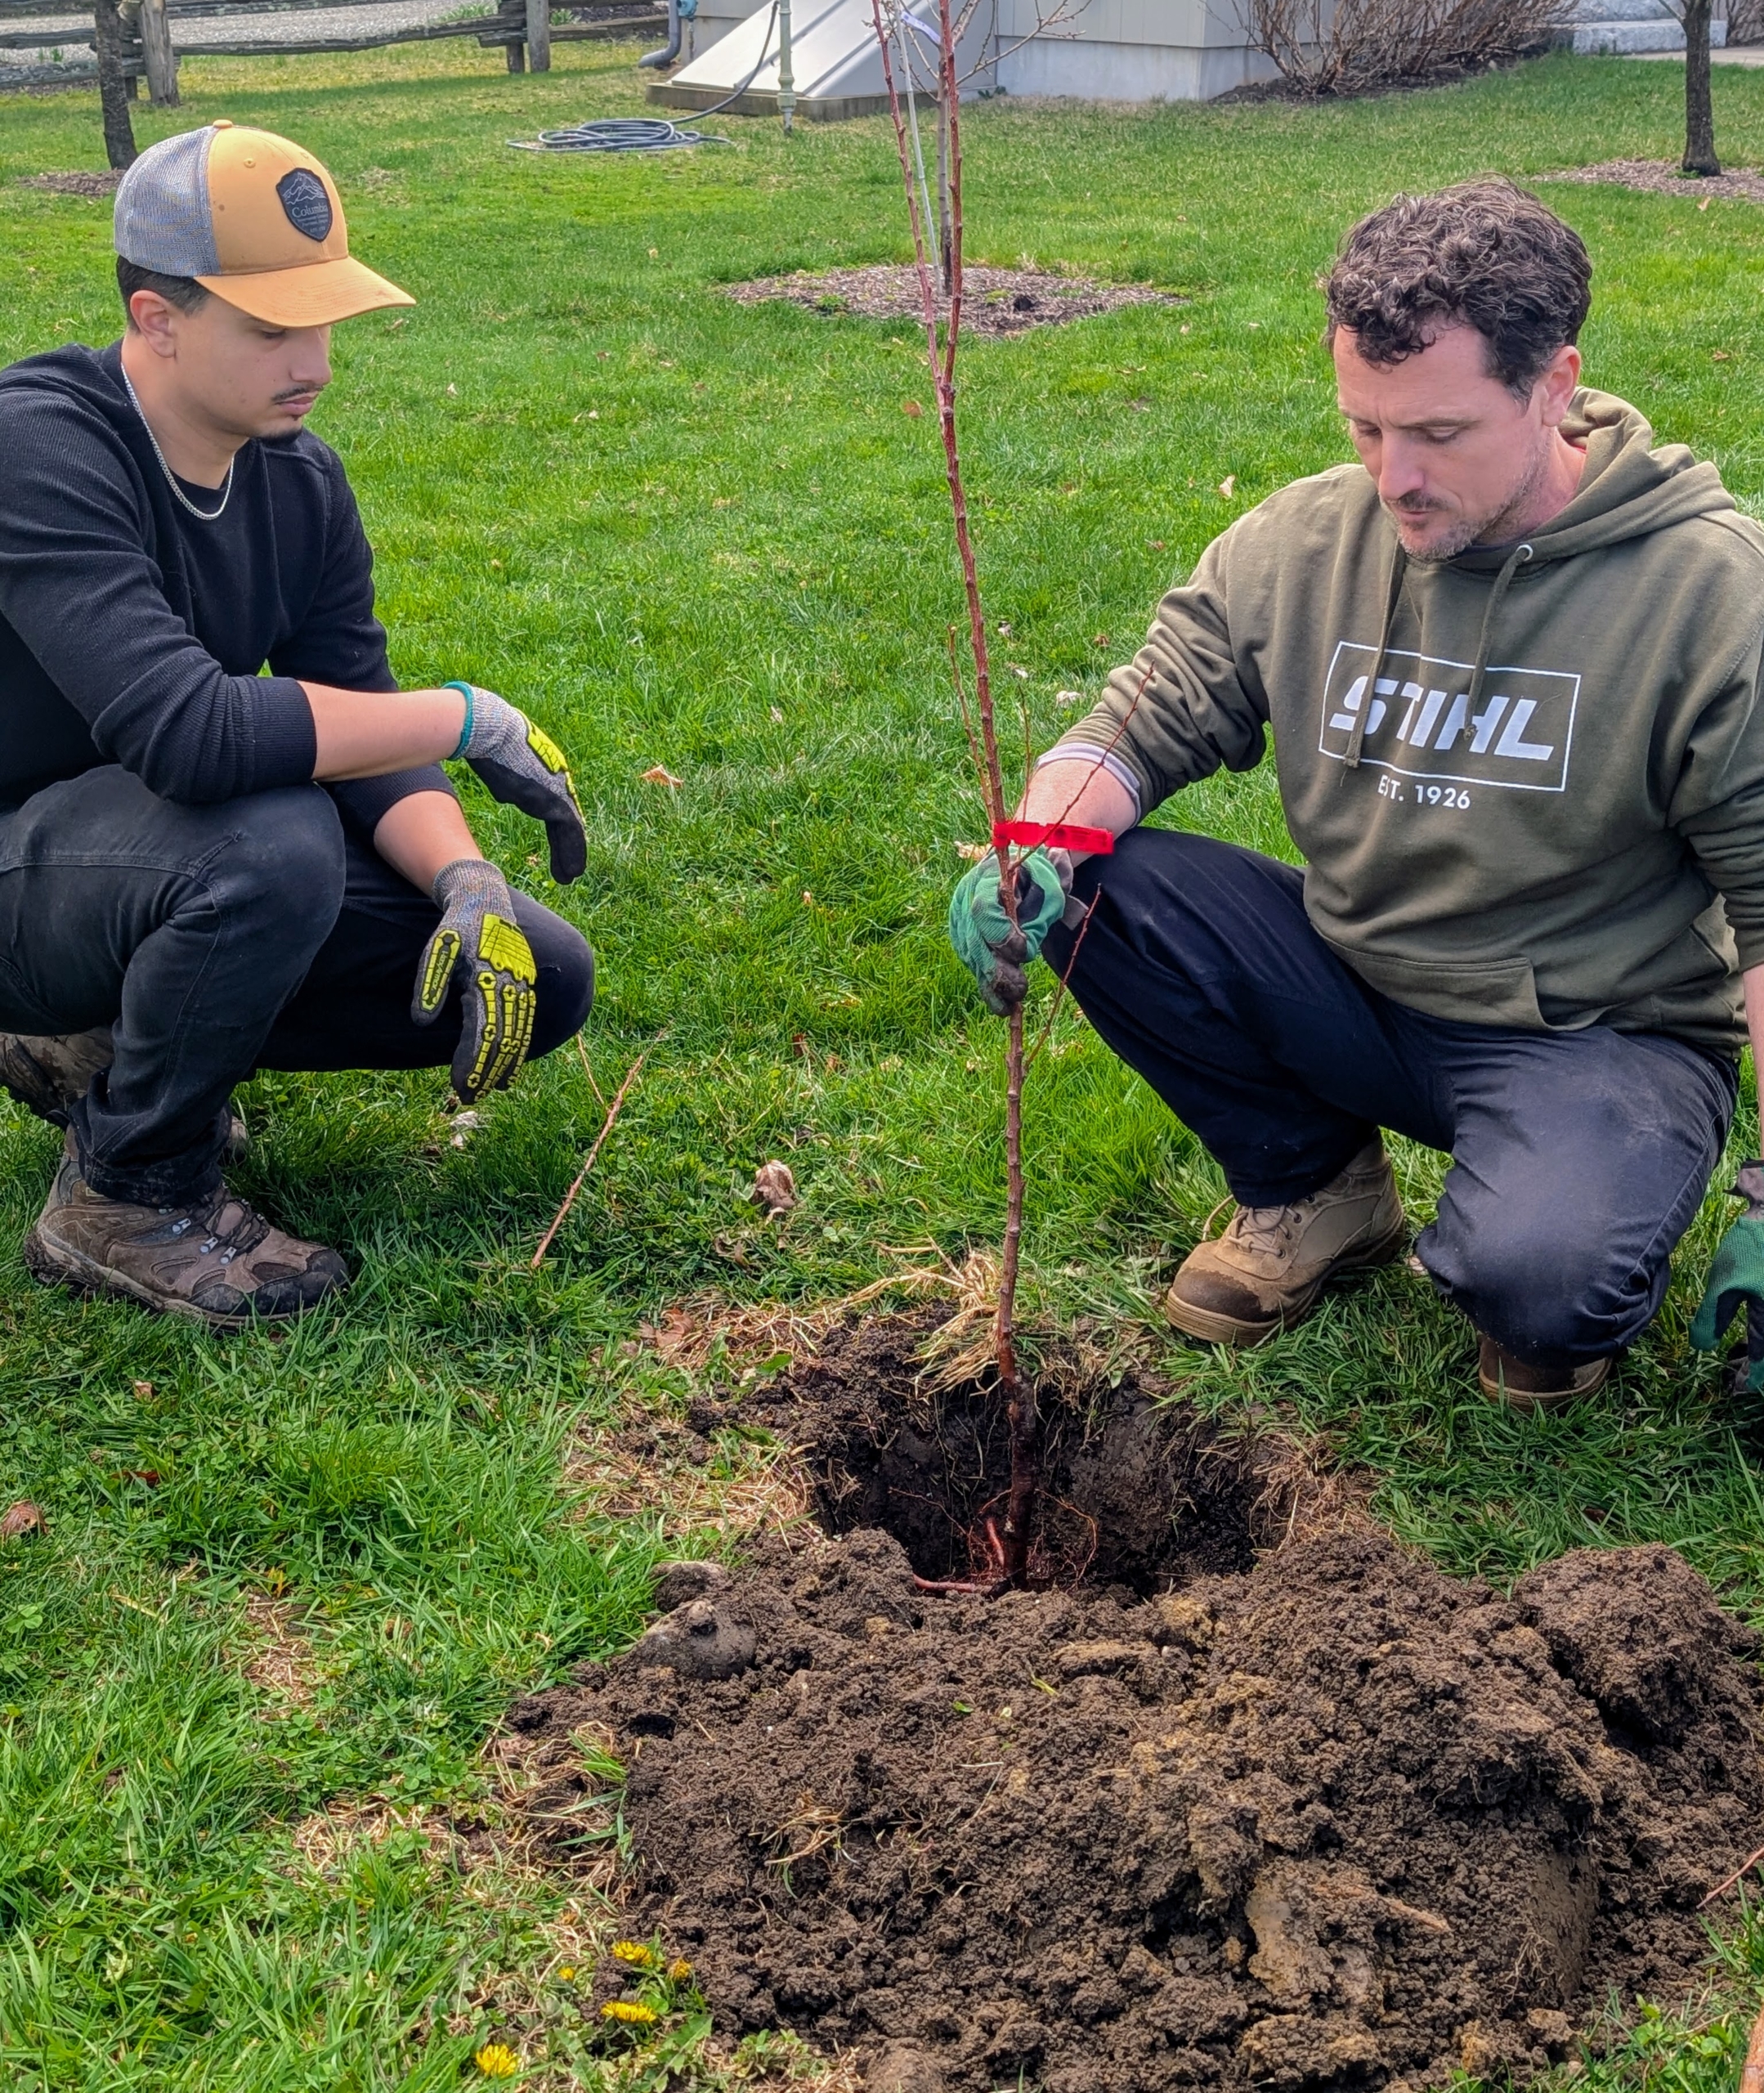
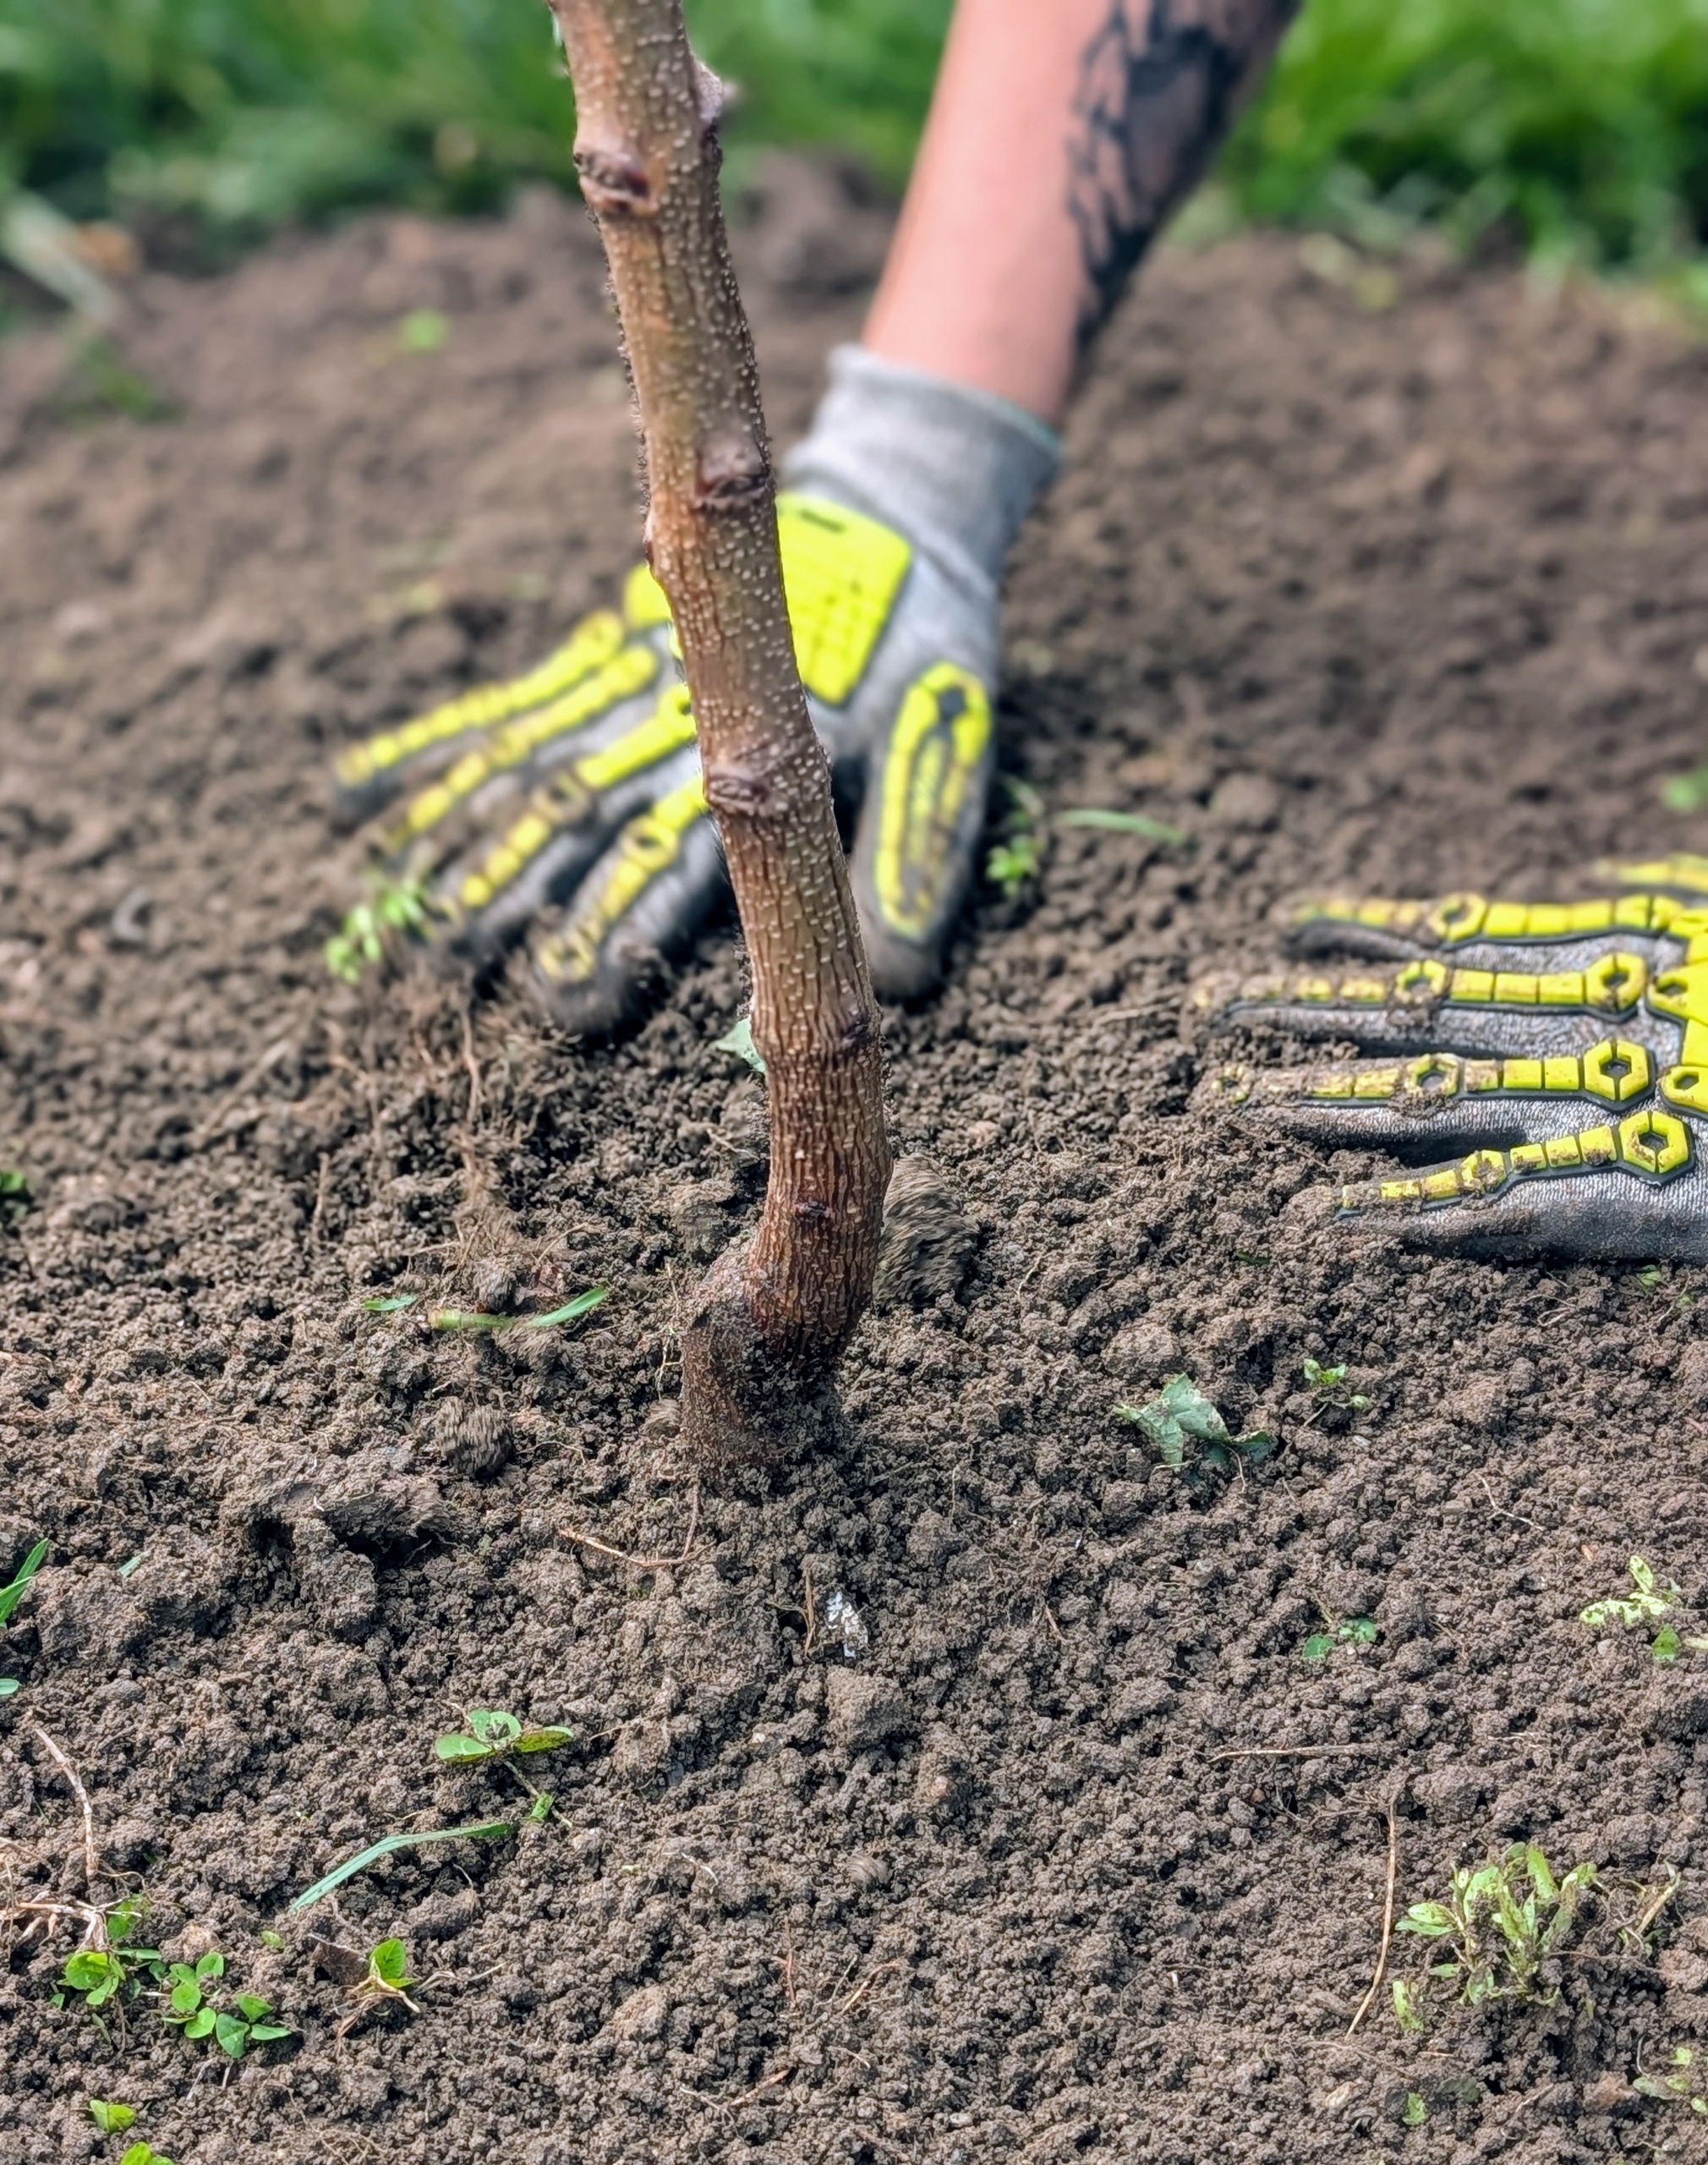
Ryan shows Matt how to position the bare-root in its hole. He also advises him to step back from the tree at several points to make sure it is planted straight.
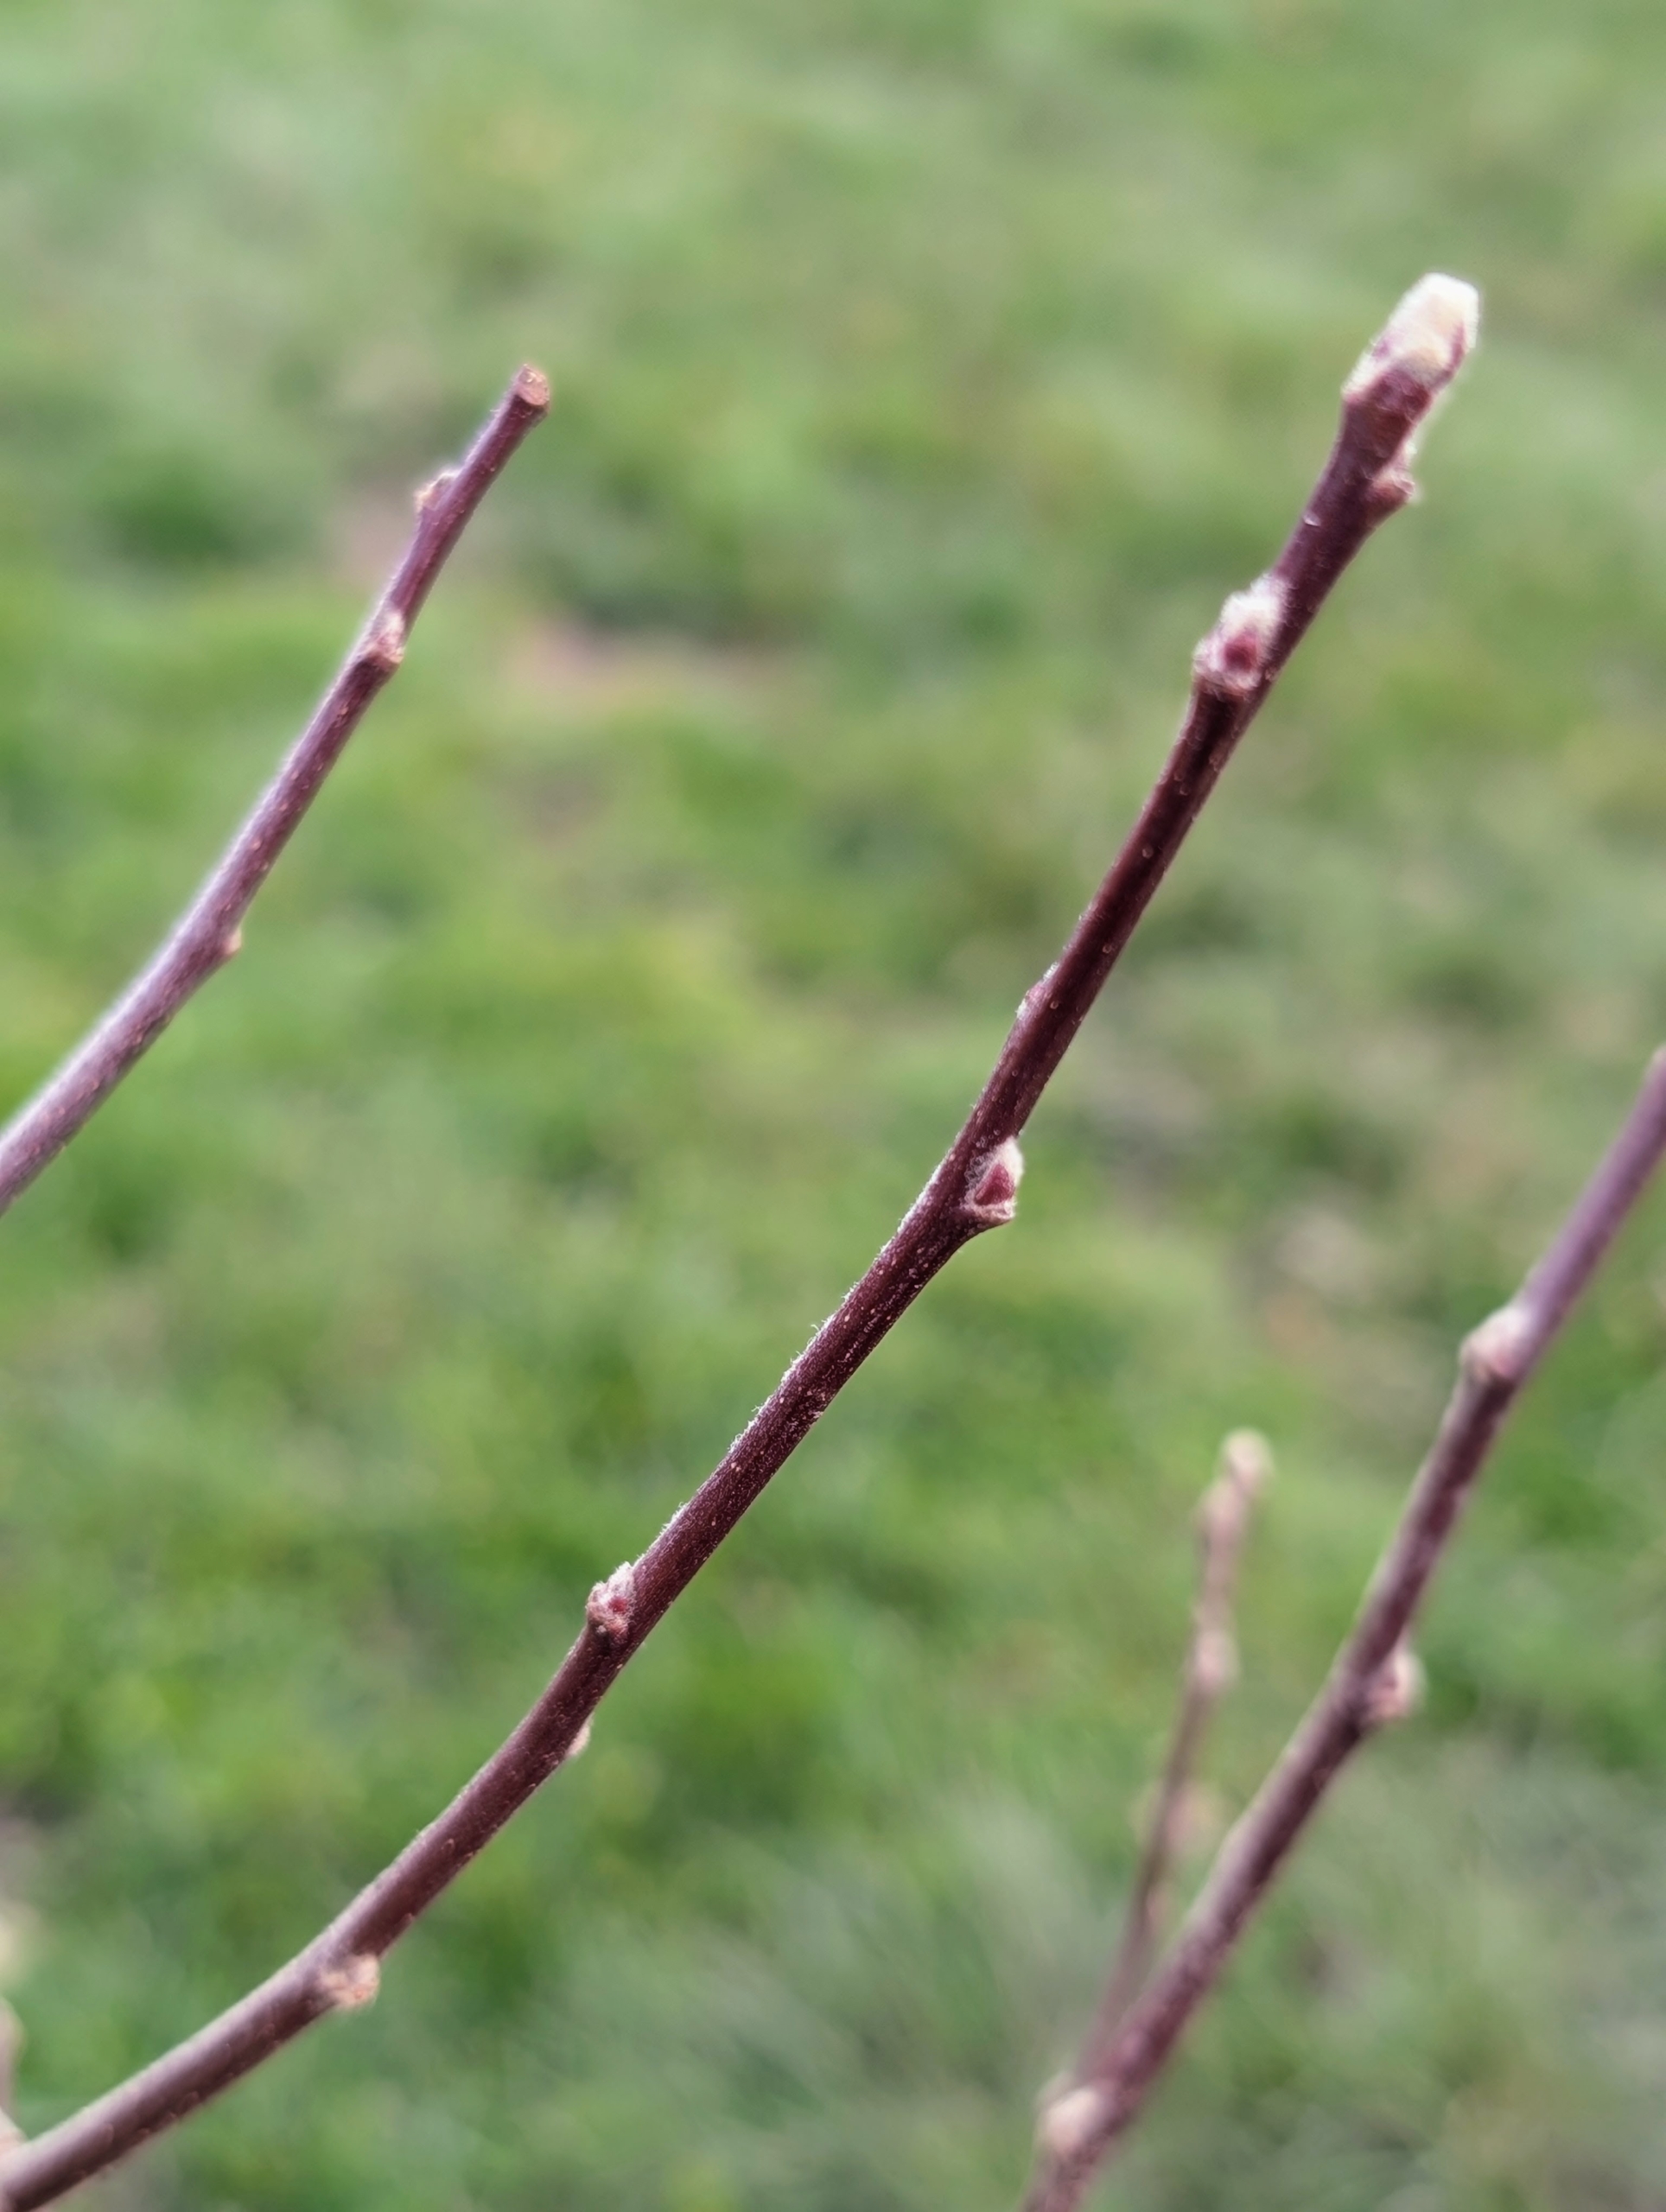
These bare-root fruit trees have strong main stems with fresh growth.
Ryan carefully places the fruit tree into the hole, centered on the mound. He spreads its roots so they grow outward.
He holds the tree upright in position with one hand and slowly backfills the hole with the other, so the soil falls back around the roots.
Here, one can see that the graft is above the soil line. This union area is delicate. Positioning the graft union above the soil preserves the rootstock and allows for better growth and productivity.
Here, Matt compacts the soil around the plant to ensure good contact around the roots.
I always try to grow interesting and unique varieties. This selection includes: English Morello Cherry, Purple Guigne Cherry, Lake Duke Cherry, Black Pearl Cherry, Sweetheart Cherry, Indian Blood Peach, Rio Oso Gem Peach, Polly White Peach, Nectar Peach, Suncrest Peach, Blenheim Apricot, Mountain Roast Apple, Christmas Pink Apple, Winekist Apple, Muscat de Venus Apple, Grenadine Apple, Pink Parfait Apple, Strawberry Parfait Apple, Niedwetzkyana Apple, Rubiyat Apple, and Surprise Apple. I’m looking forward to seeing the fruits develop and tasting each and every one.
It's always a joy to see beautiful potted plants displayed around the farm during the warm season.
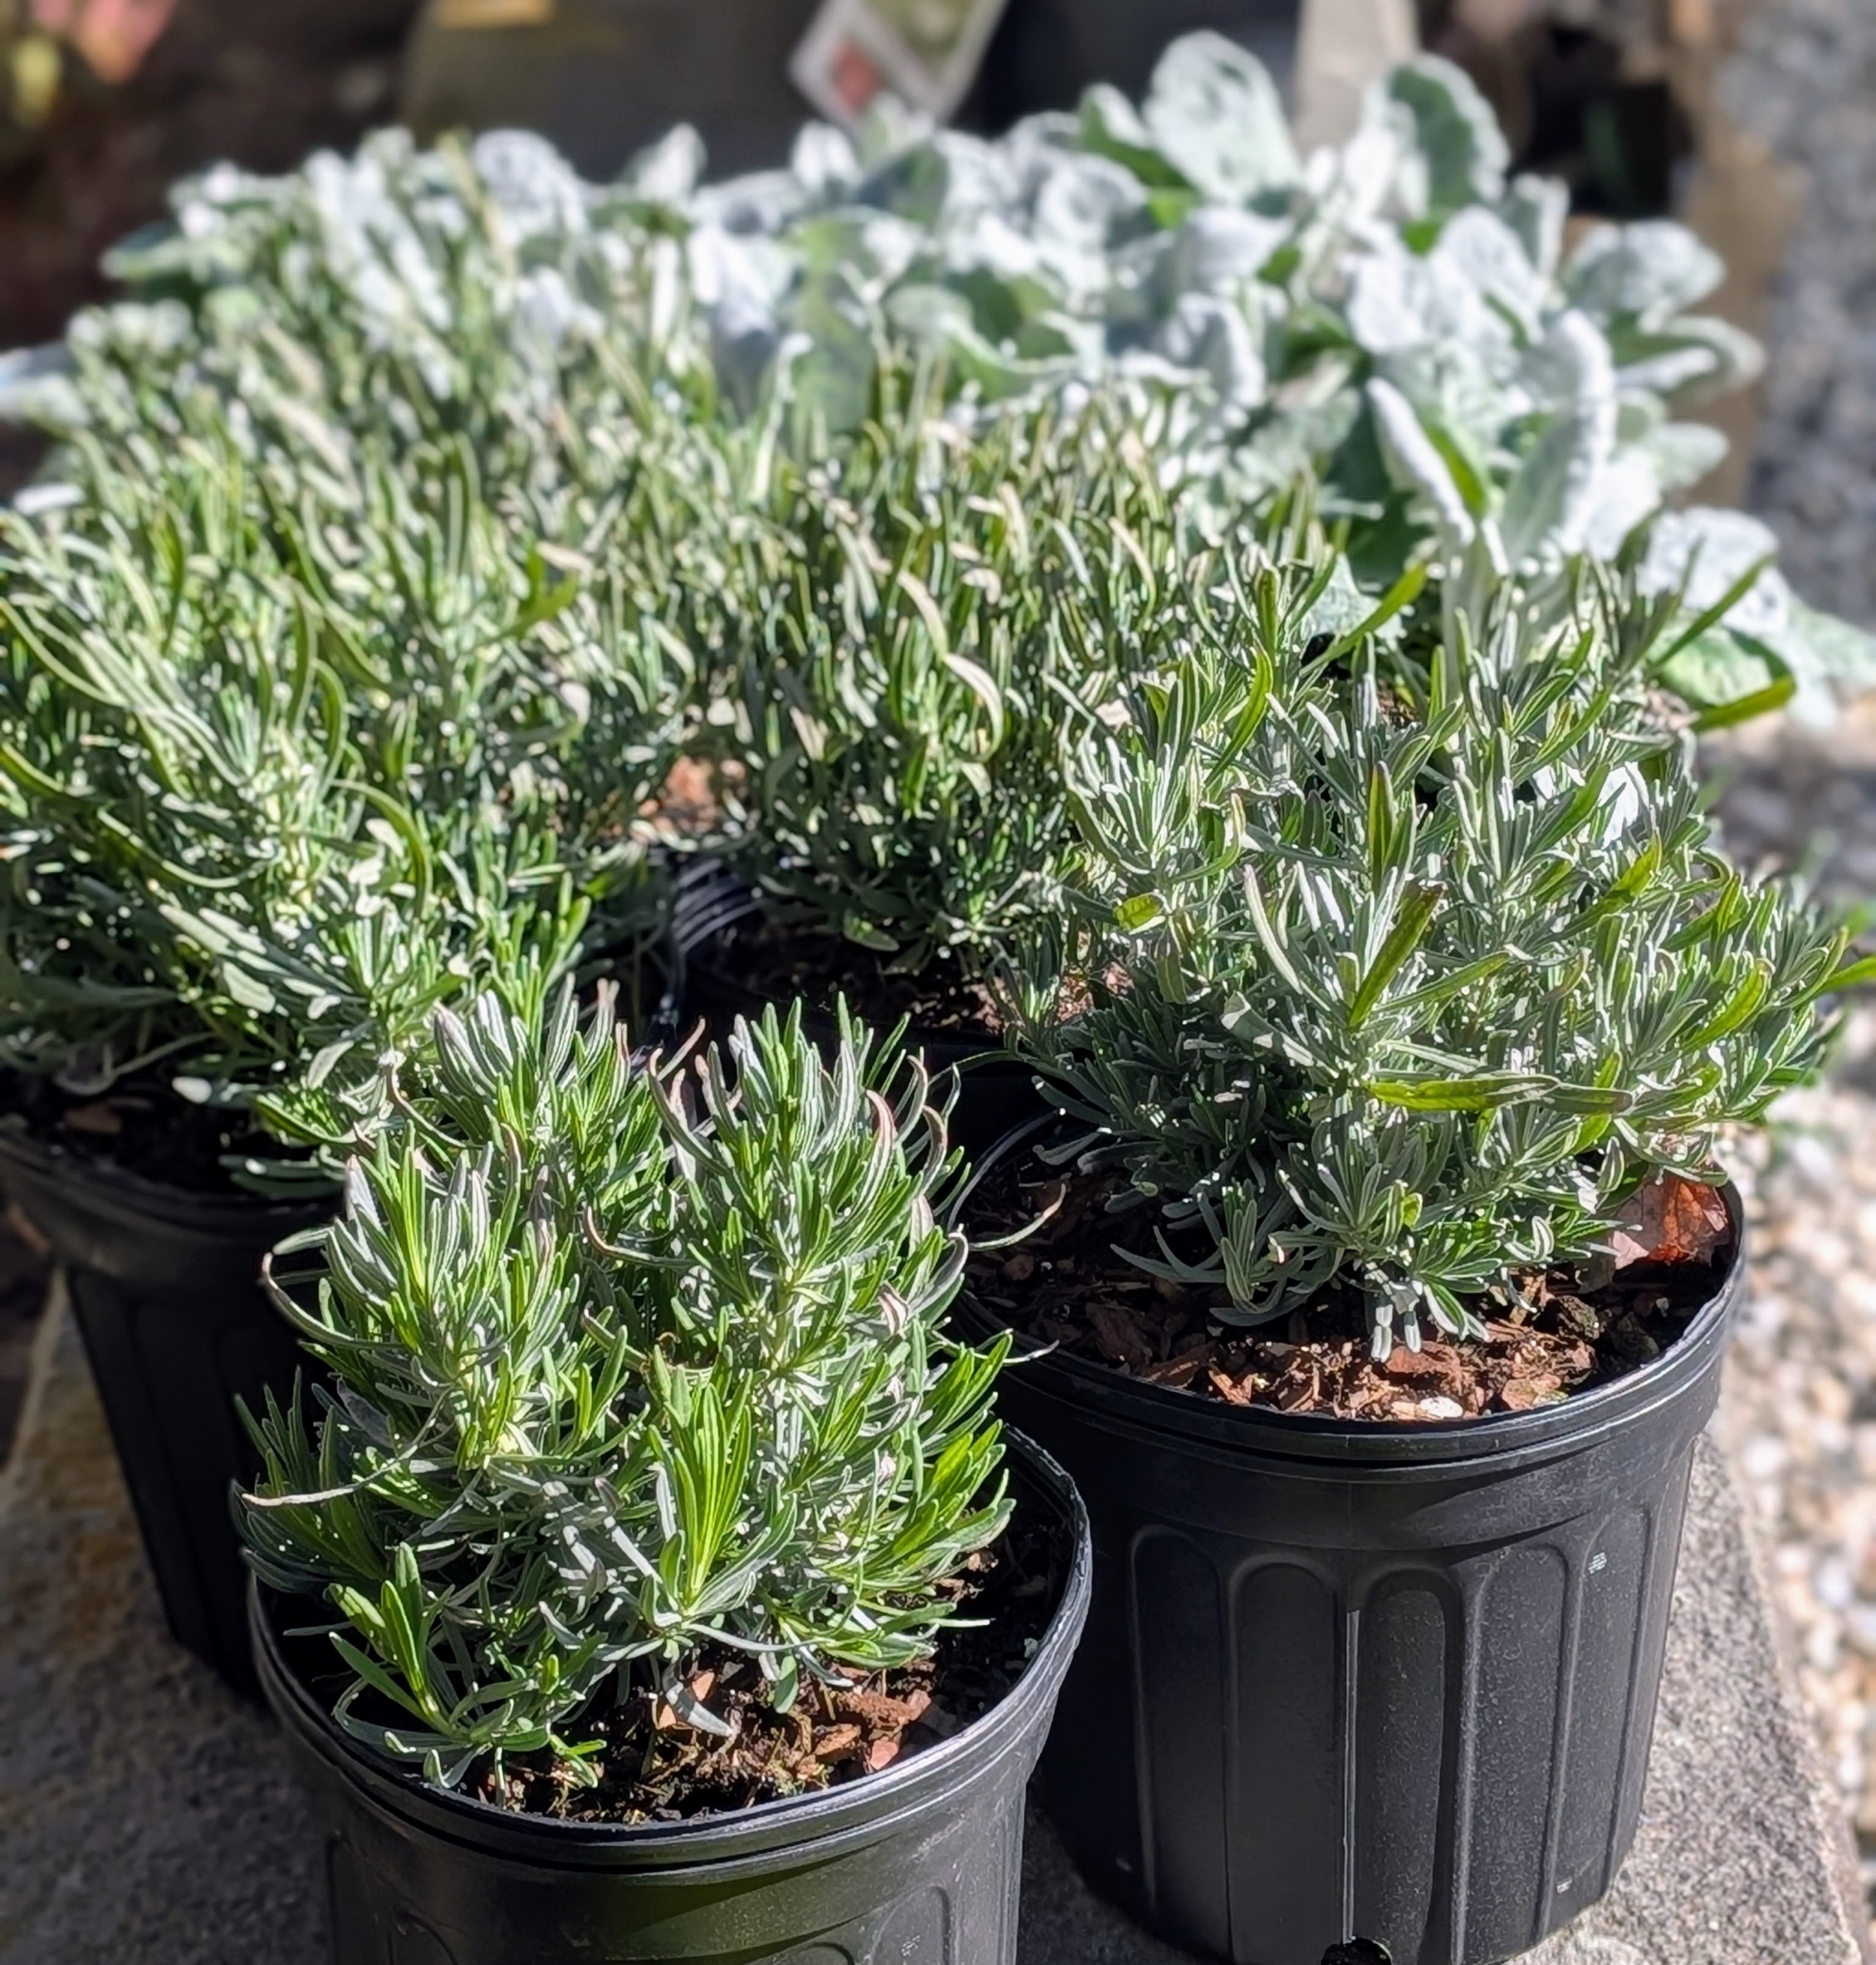
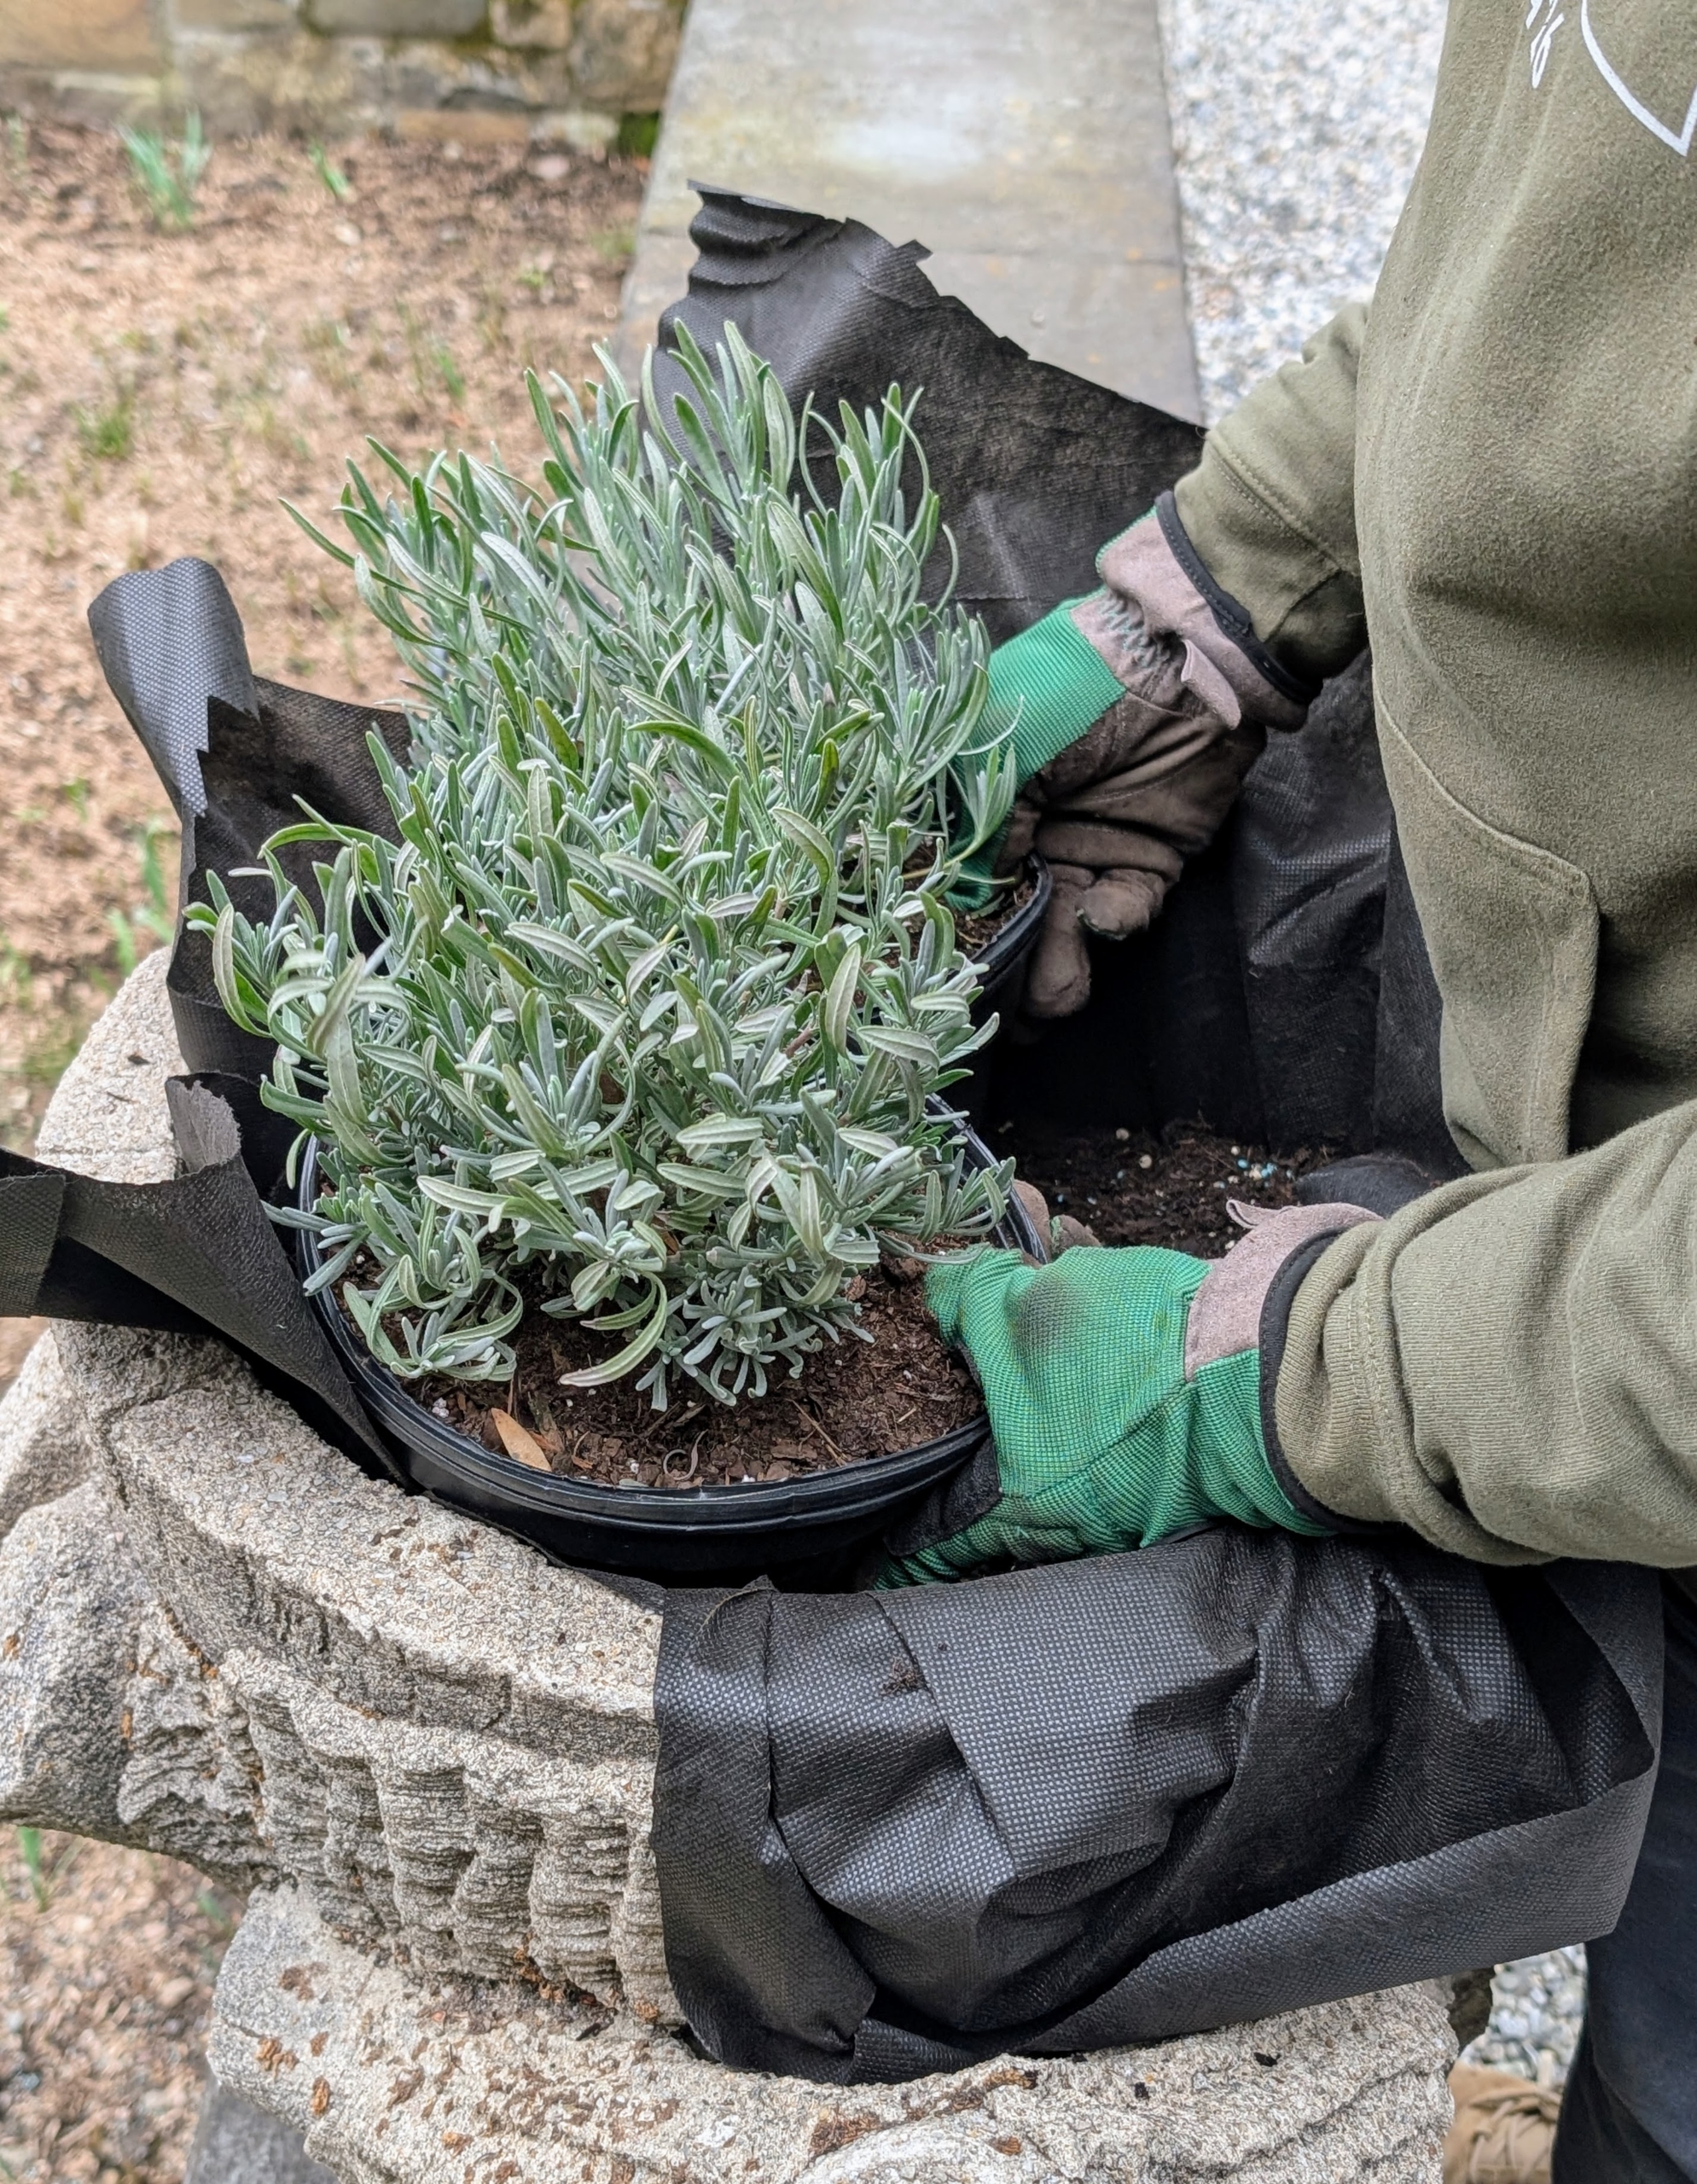
Every year, I take out many of my outdoor ornamental urns and fill them with plants. They do so well outside in the summer months and look great arranged around my home. Last week, my head gardener, Ryan McCallister, planted several containers with an assortment of plants including English lavender, Dusty Miller, Lamb's Ears, and ferns. He also planted a pair of urns with hens and chicks - those charming mat-forming succulents with fleshy pointed leaves arranged in rosettes. Planting season is here!
Enjoy these photos.
It’s always so much fun to visit local nurseries and select plants for one’s own gardens and terrace containers. Neighborhood shops sell what grows best in the area and experts on staff are there to answer any questions.
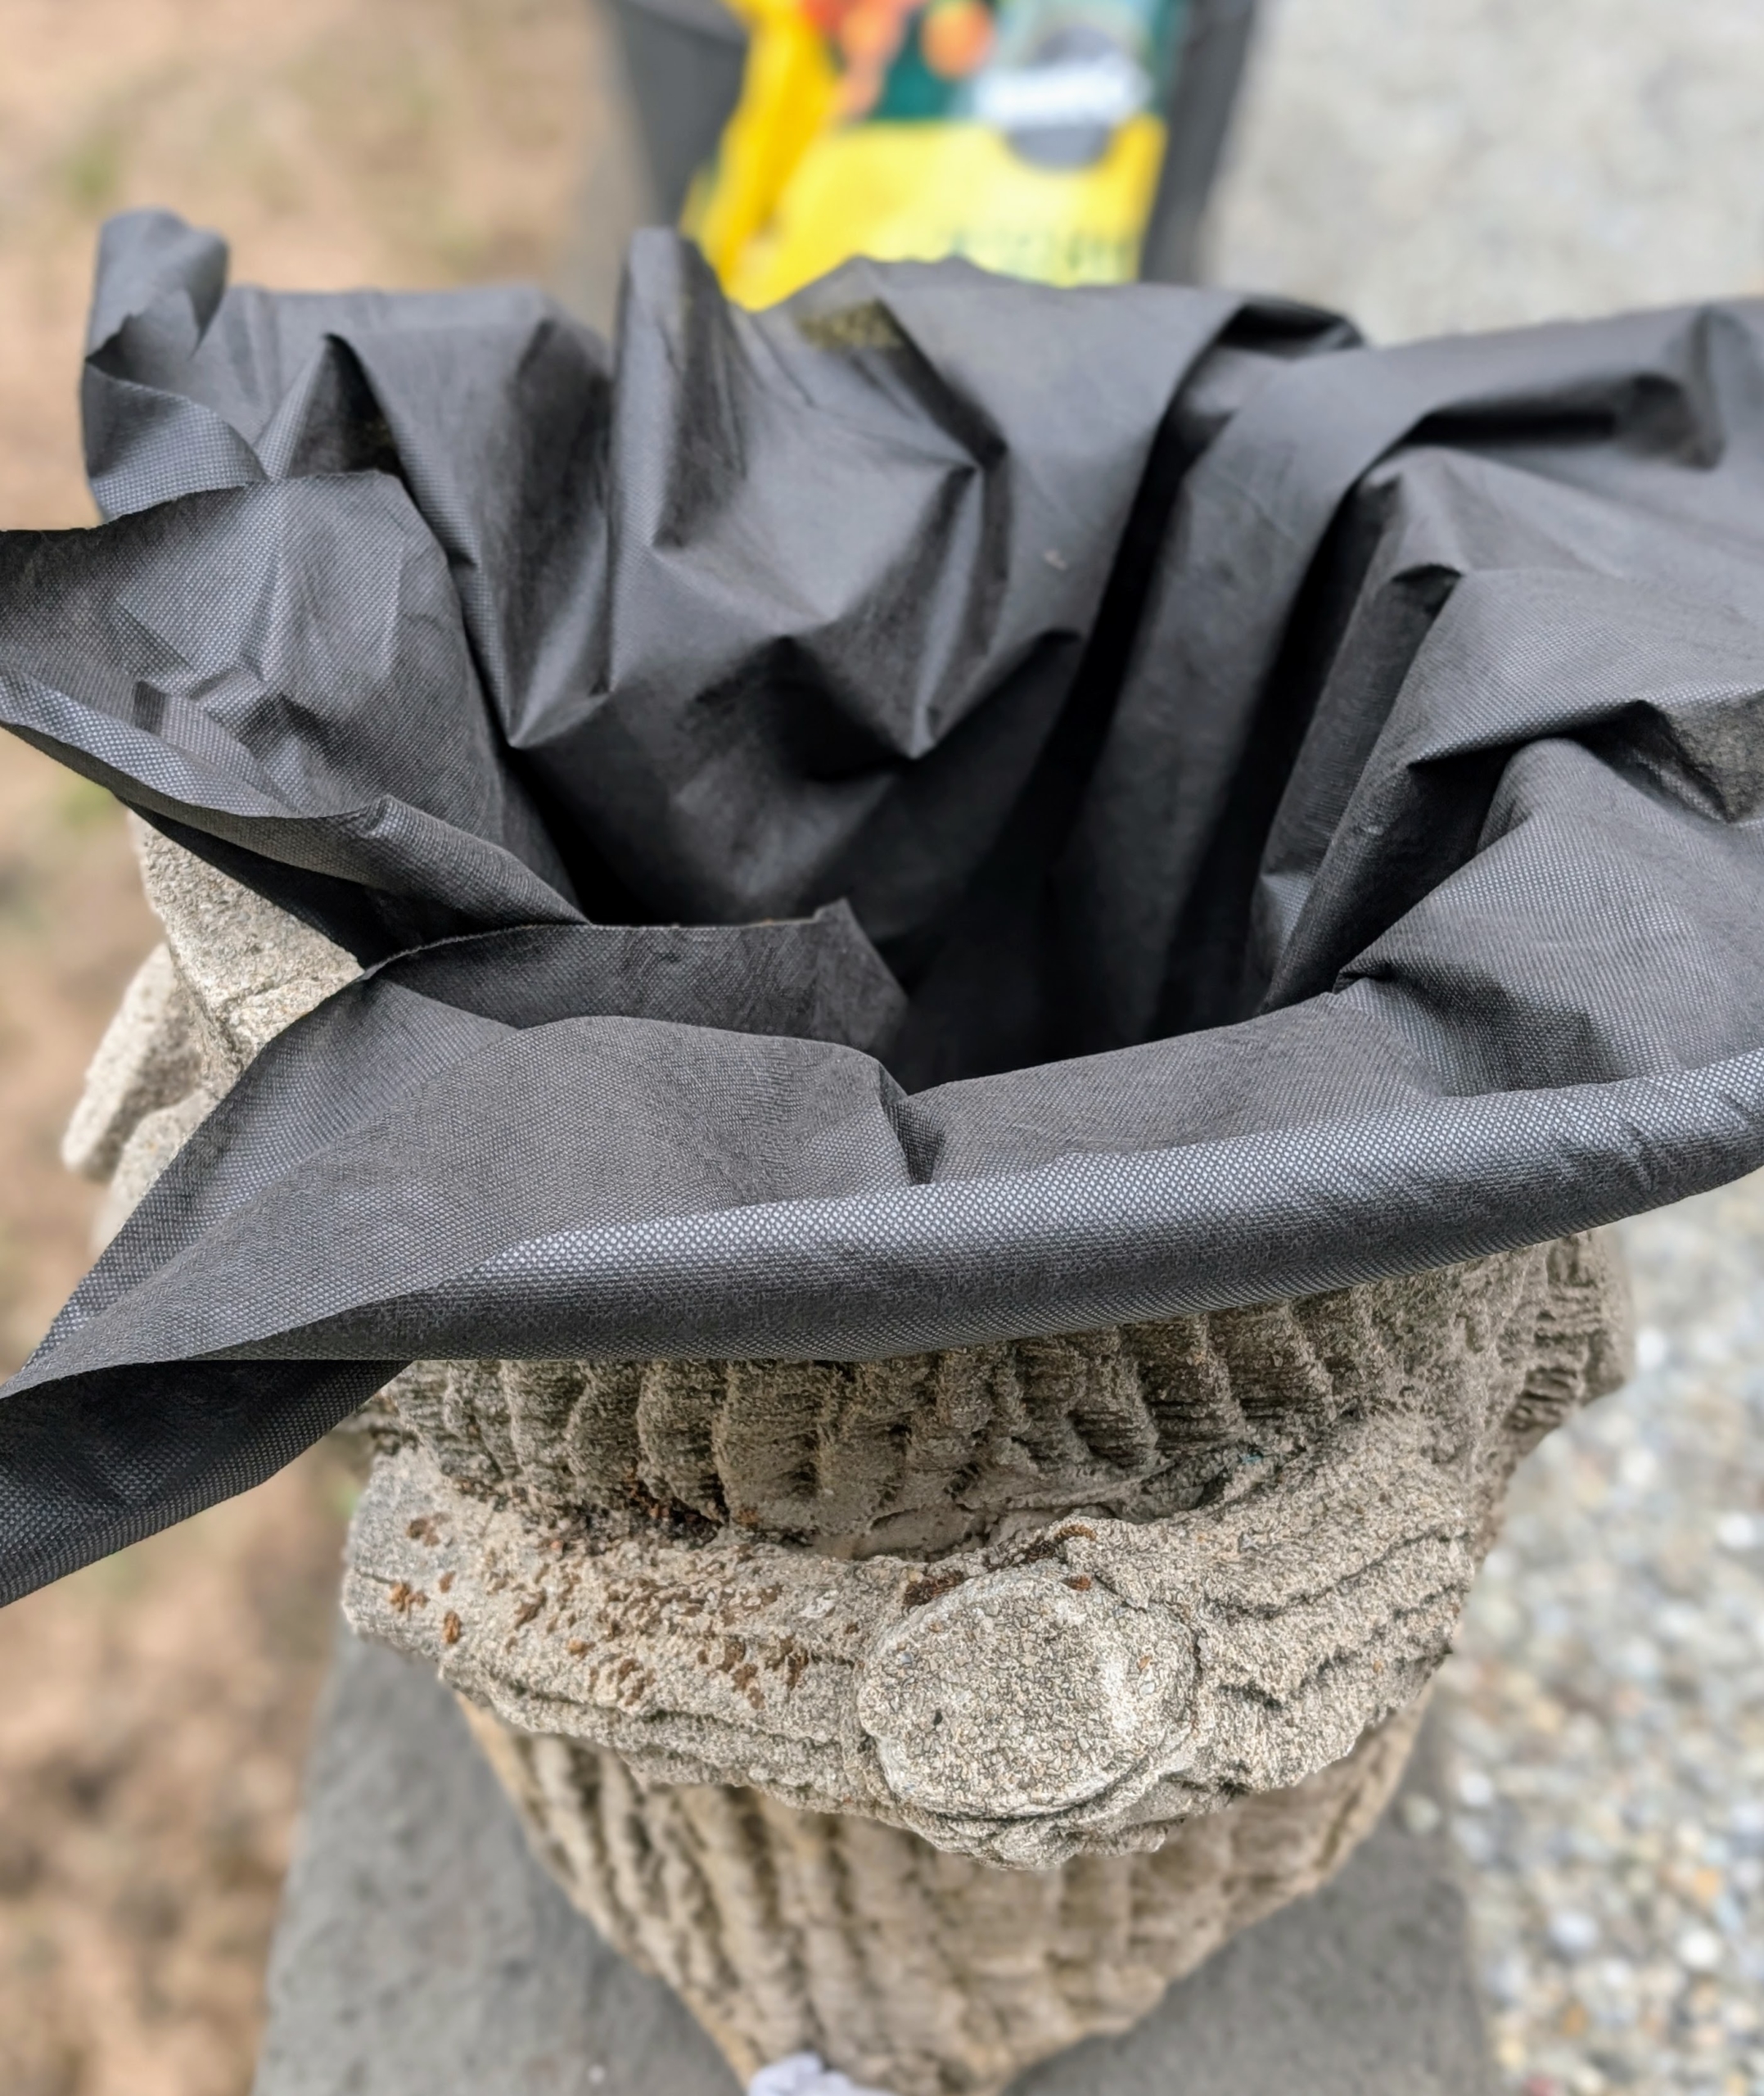
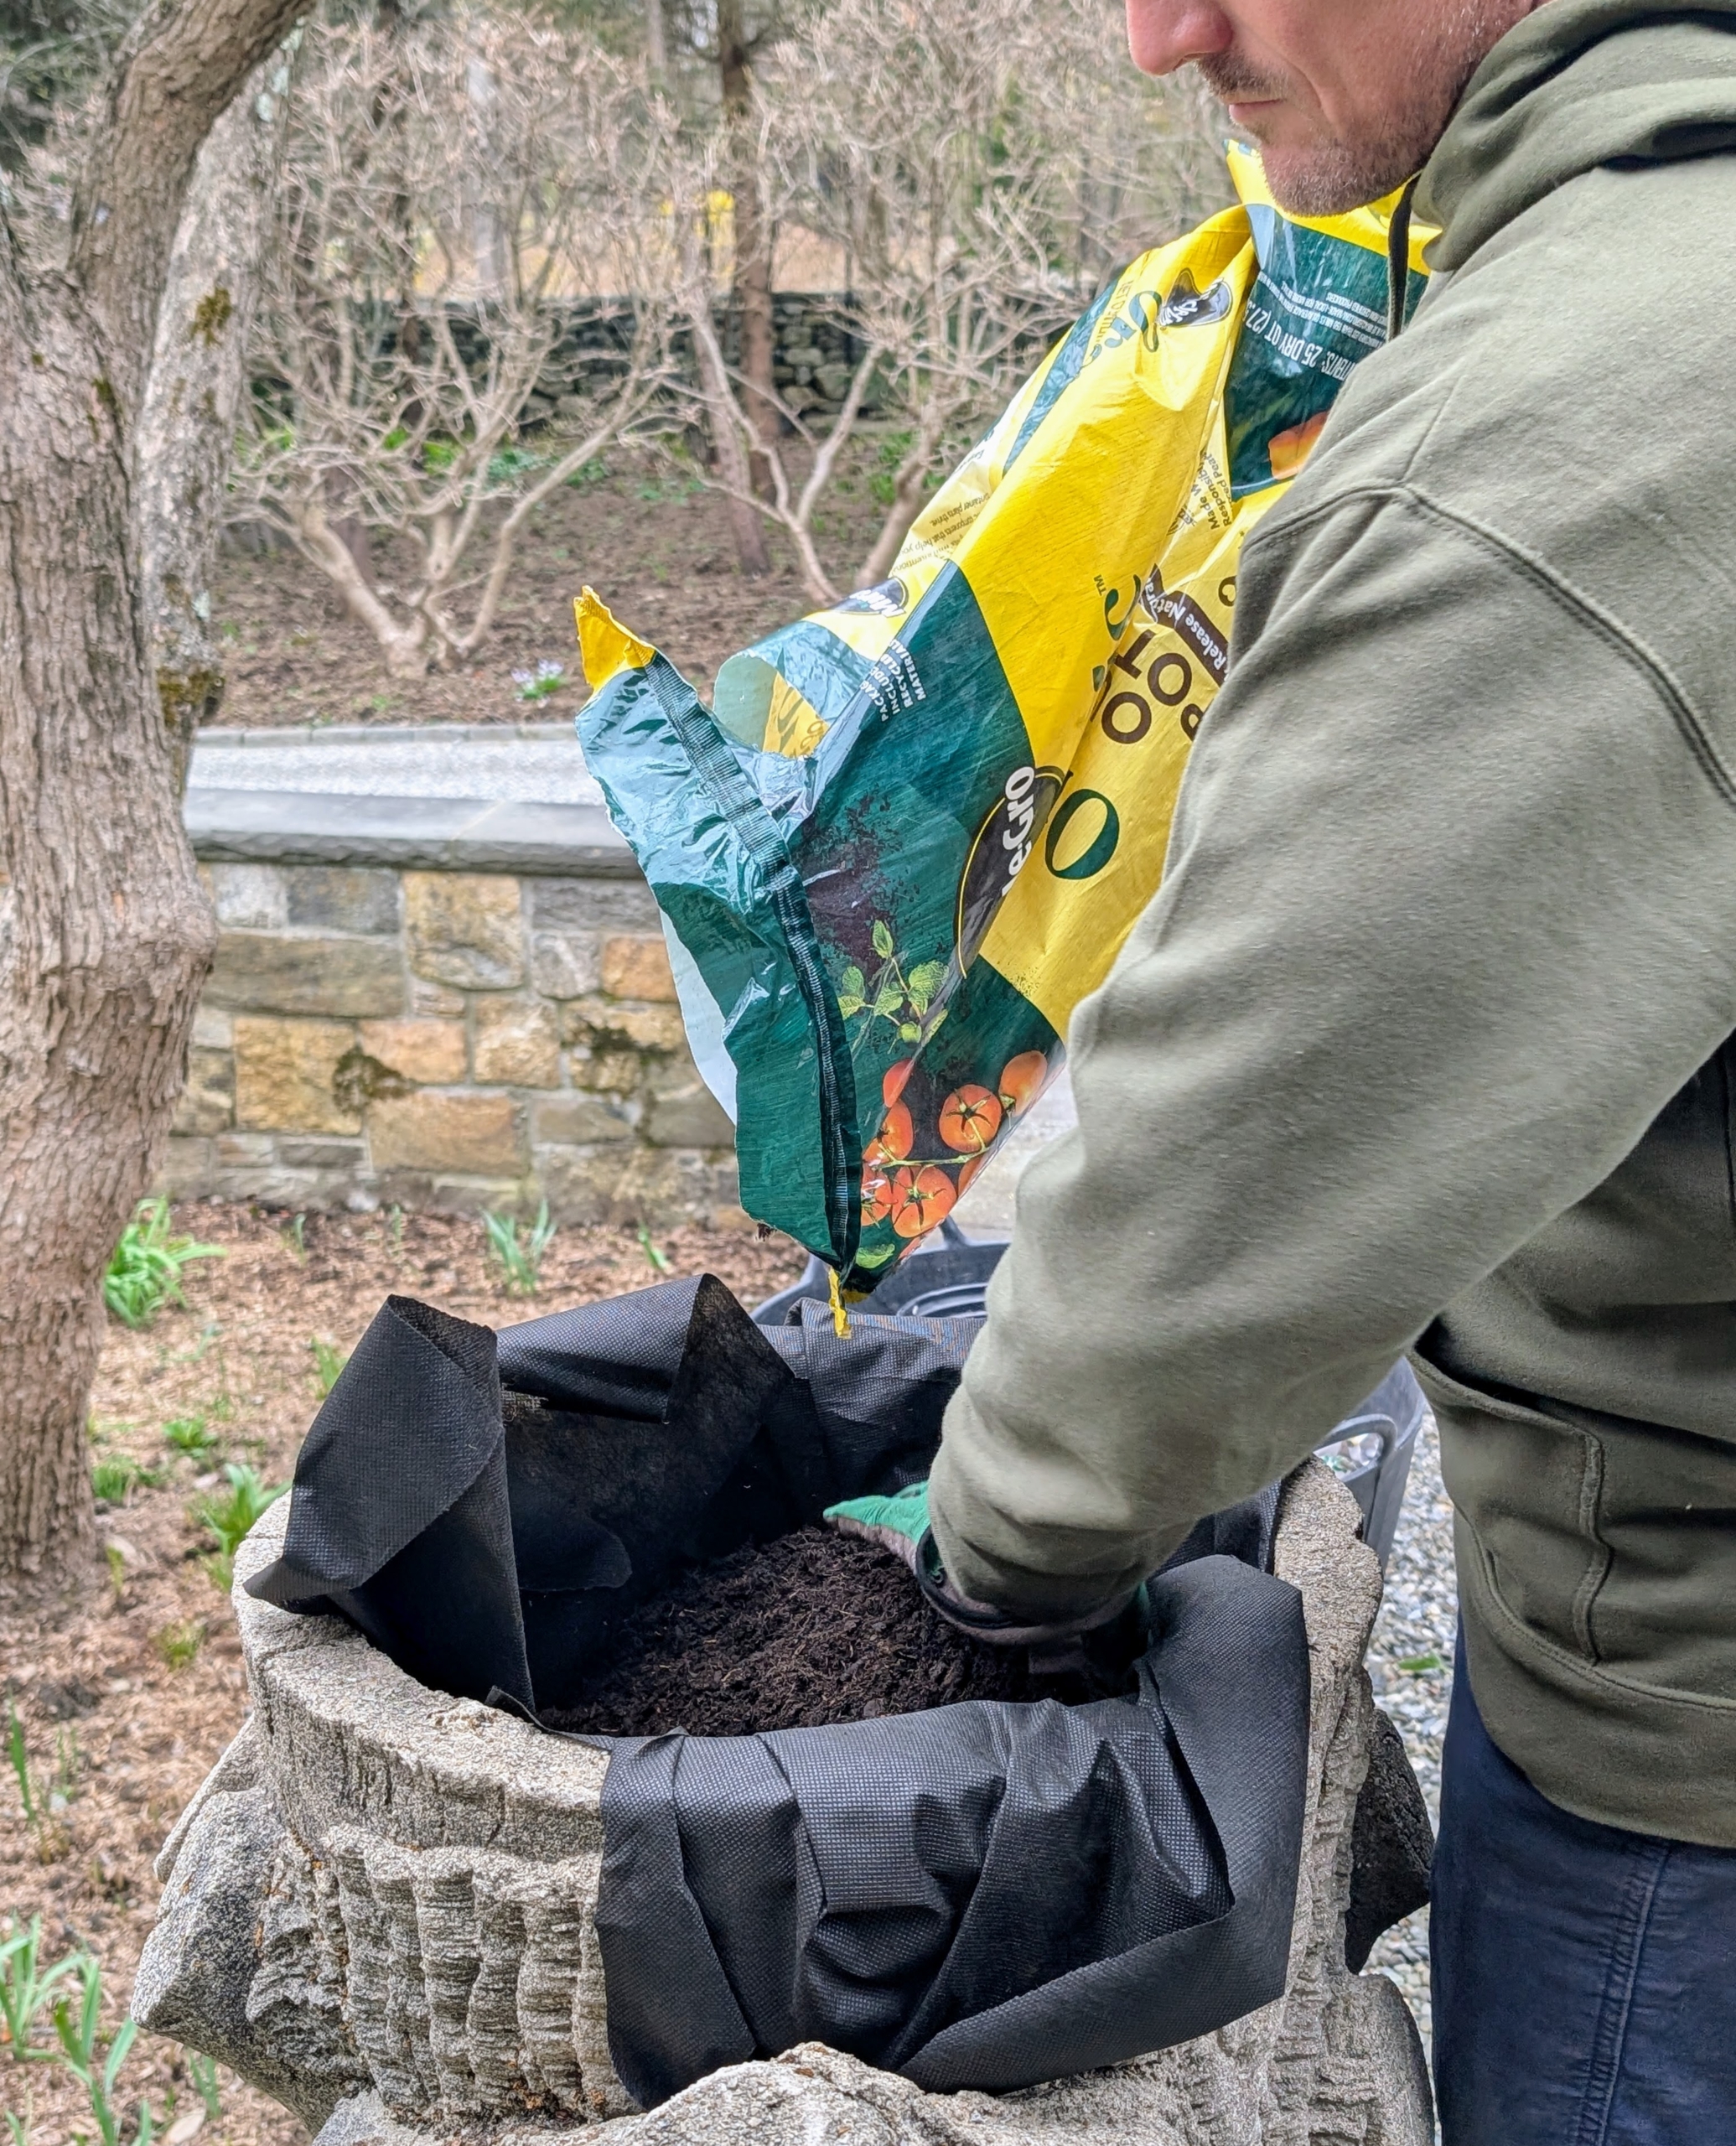
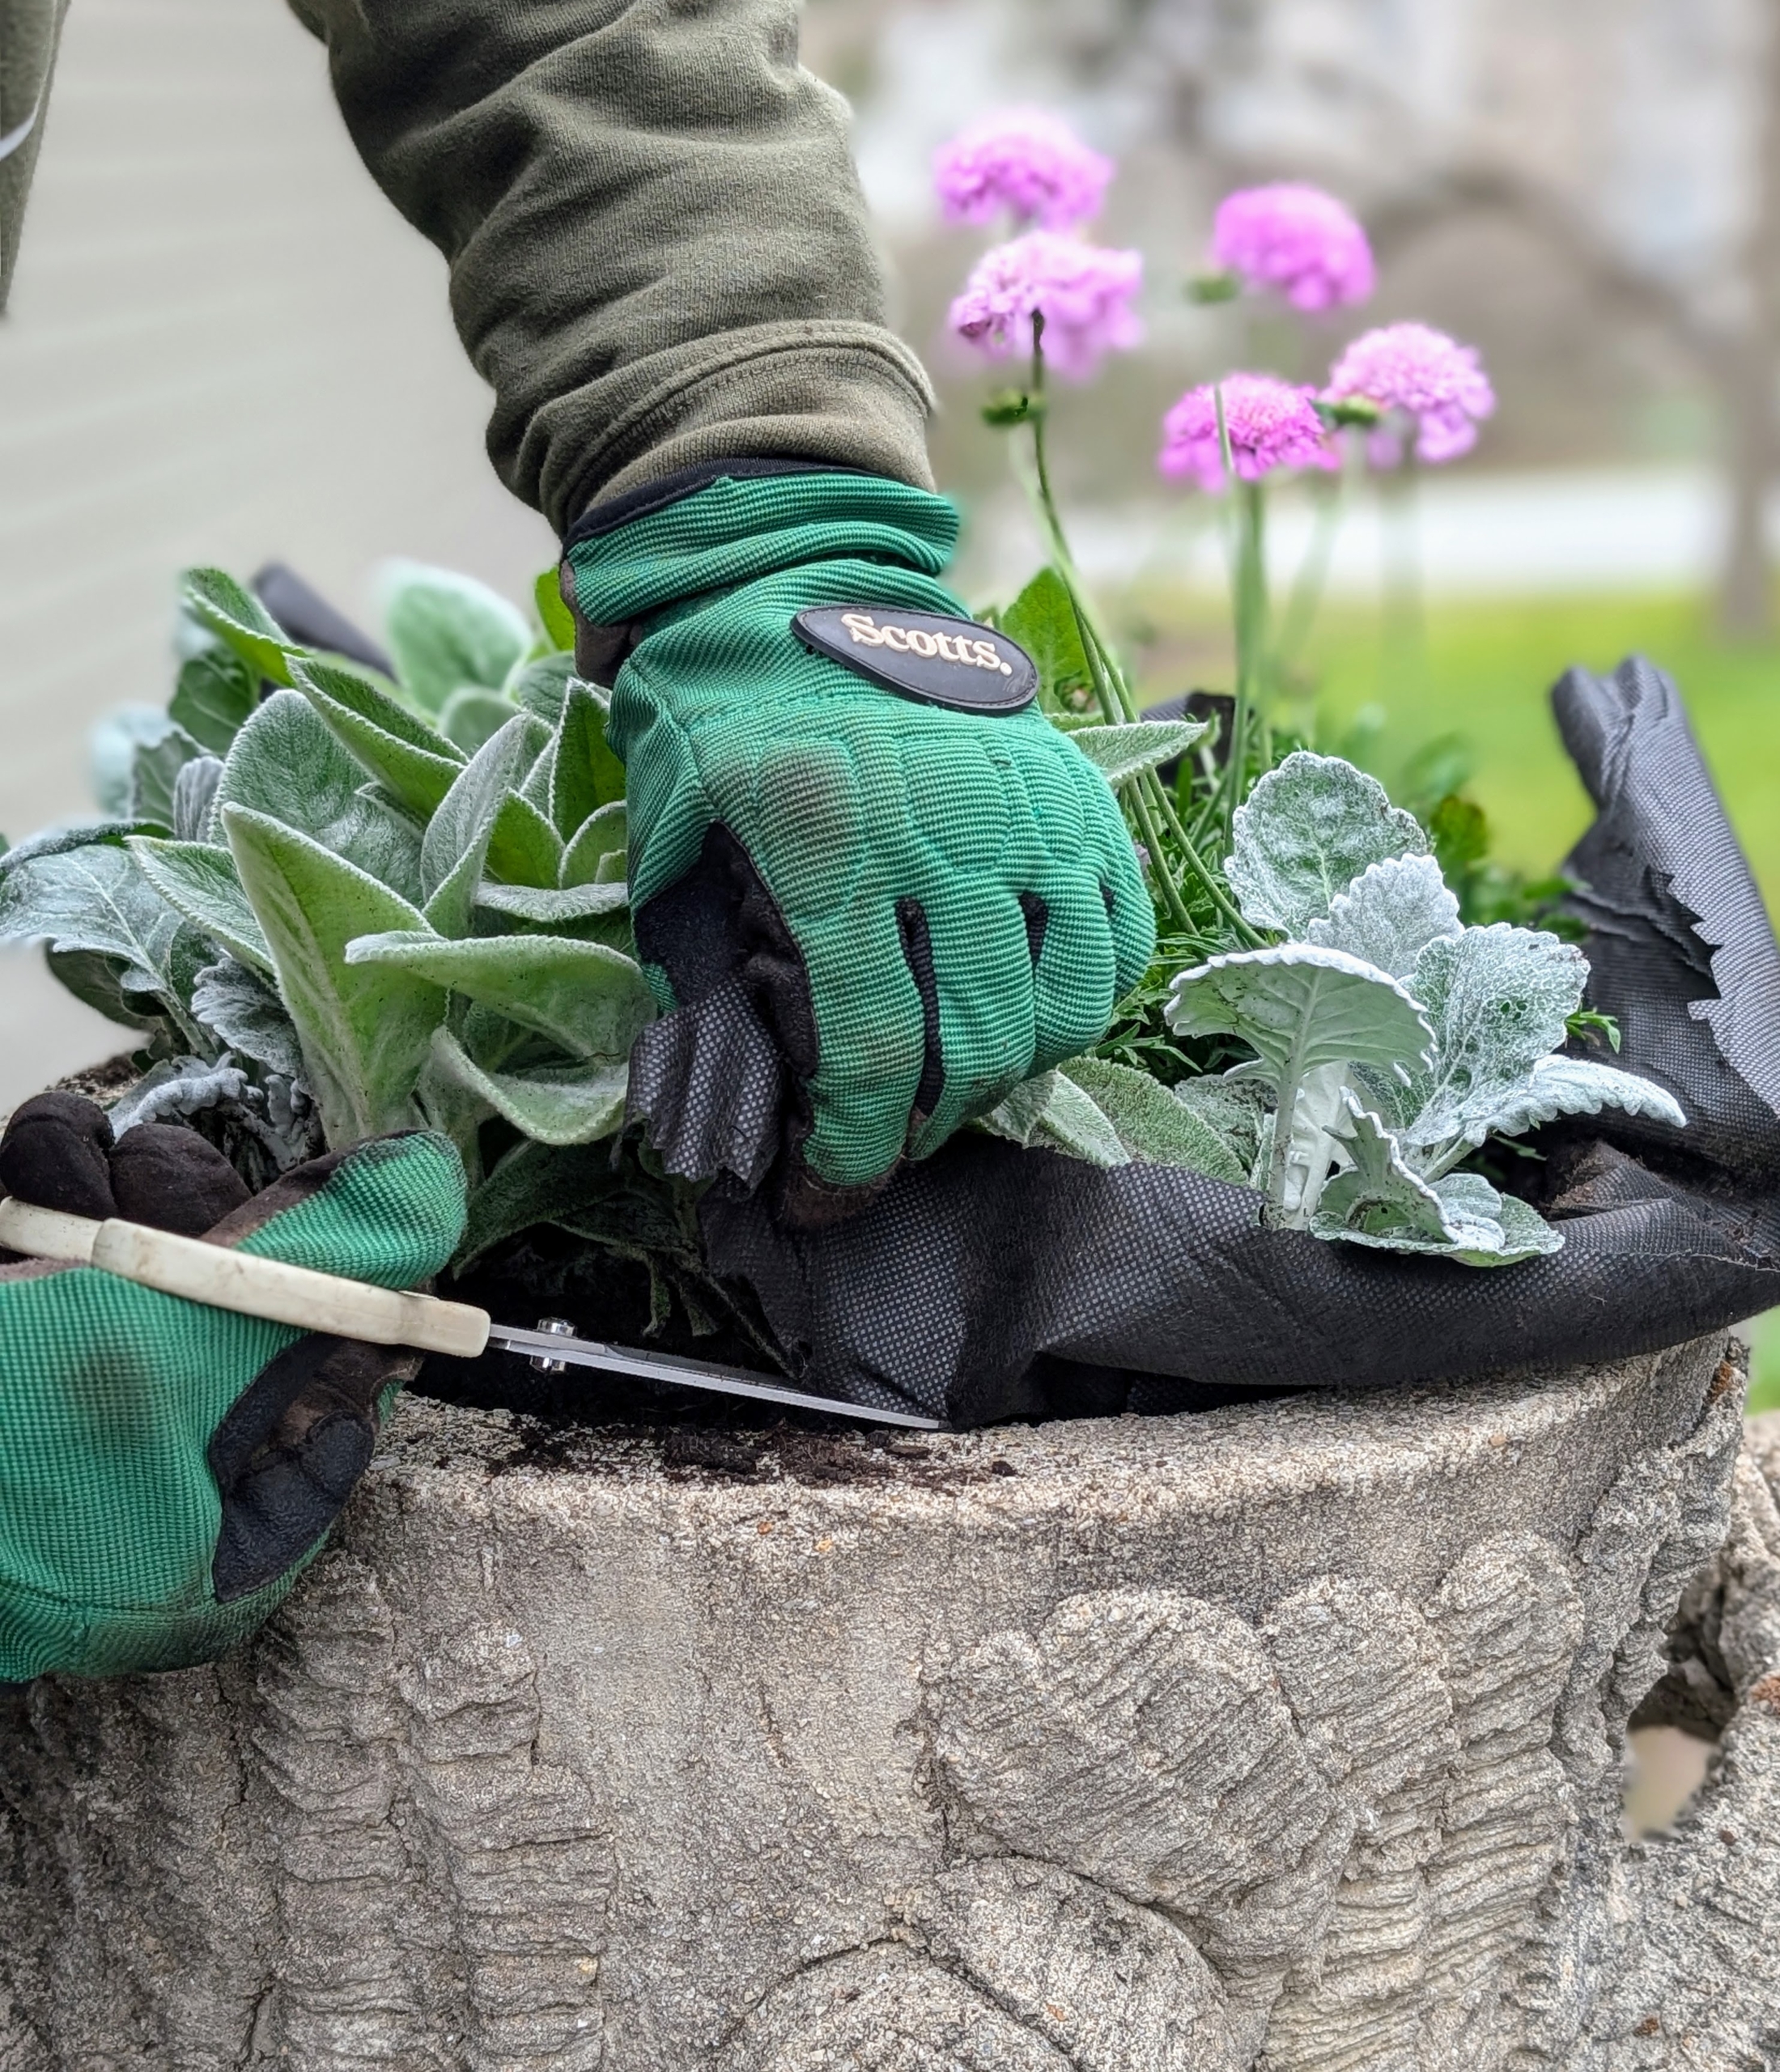
Every urn has a drainage hole at the bottom. Ryan places a layer of weed cloth first to protect the vessel itself. This will also make it easier to remove the plant next autumn, when it is put back in the greenhouse for the cold season.
The container is filled two-thirds of the way up with a good quality potting soil. Using a proper soil mix will help to promote faster root growth and give quick anchorage to young roots.
Ryan decides the plant’s placement first. Always try to arrange specimens strategically, so they look best.
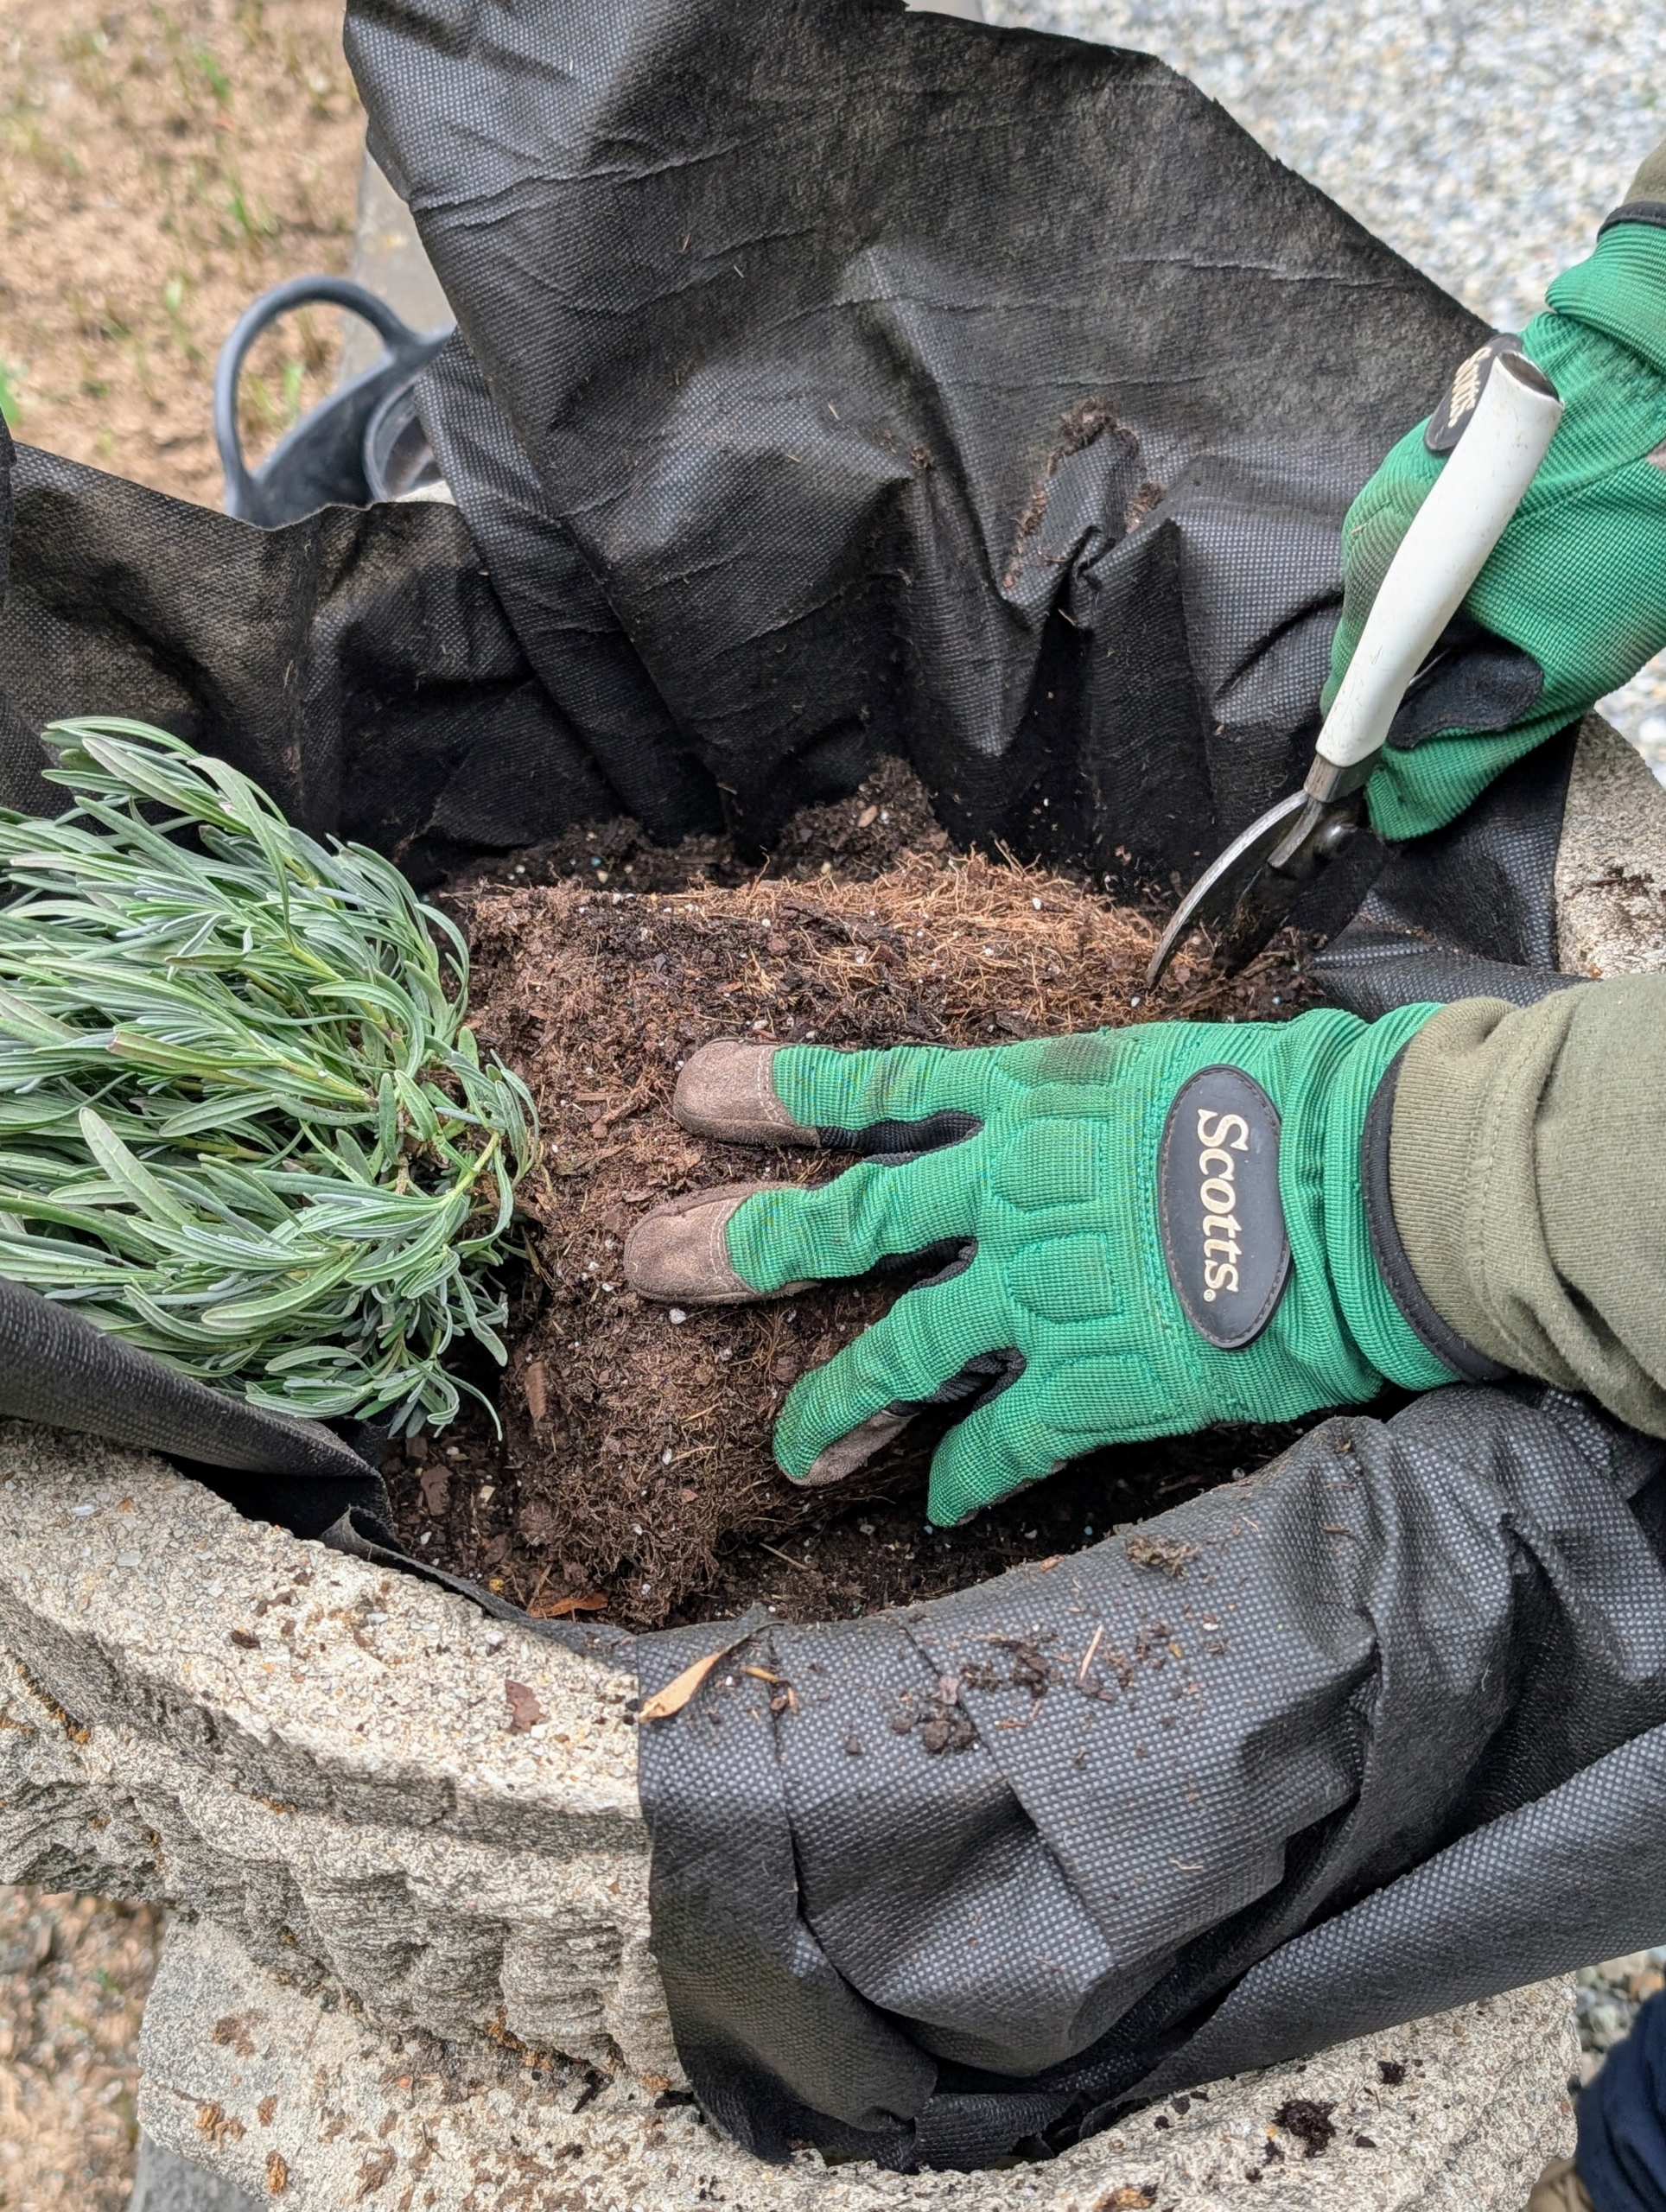
Remember, whenever transplanting always scarify the root ball, meaning tease or loosen the roots, so they are stimulated. This will help the plant roots grow and form a good foundation in the pot.
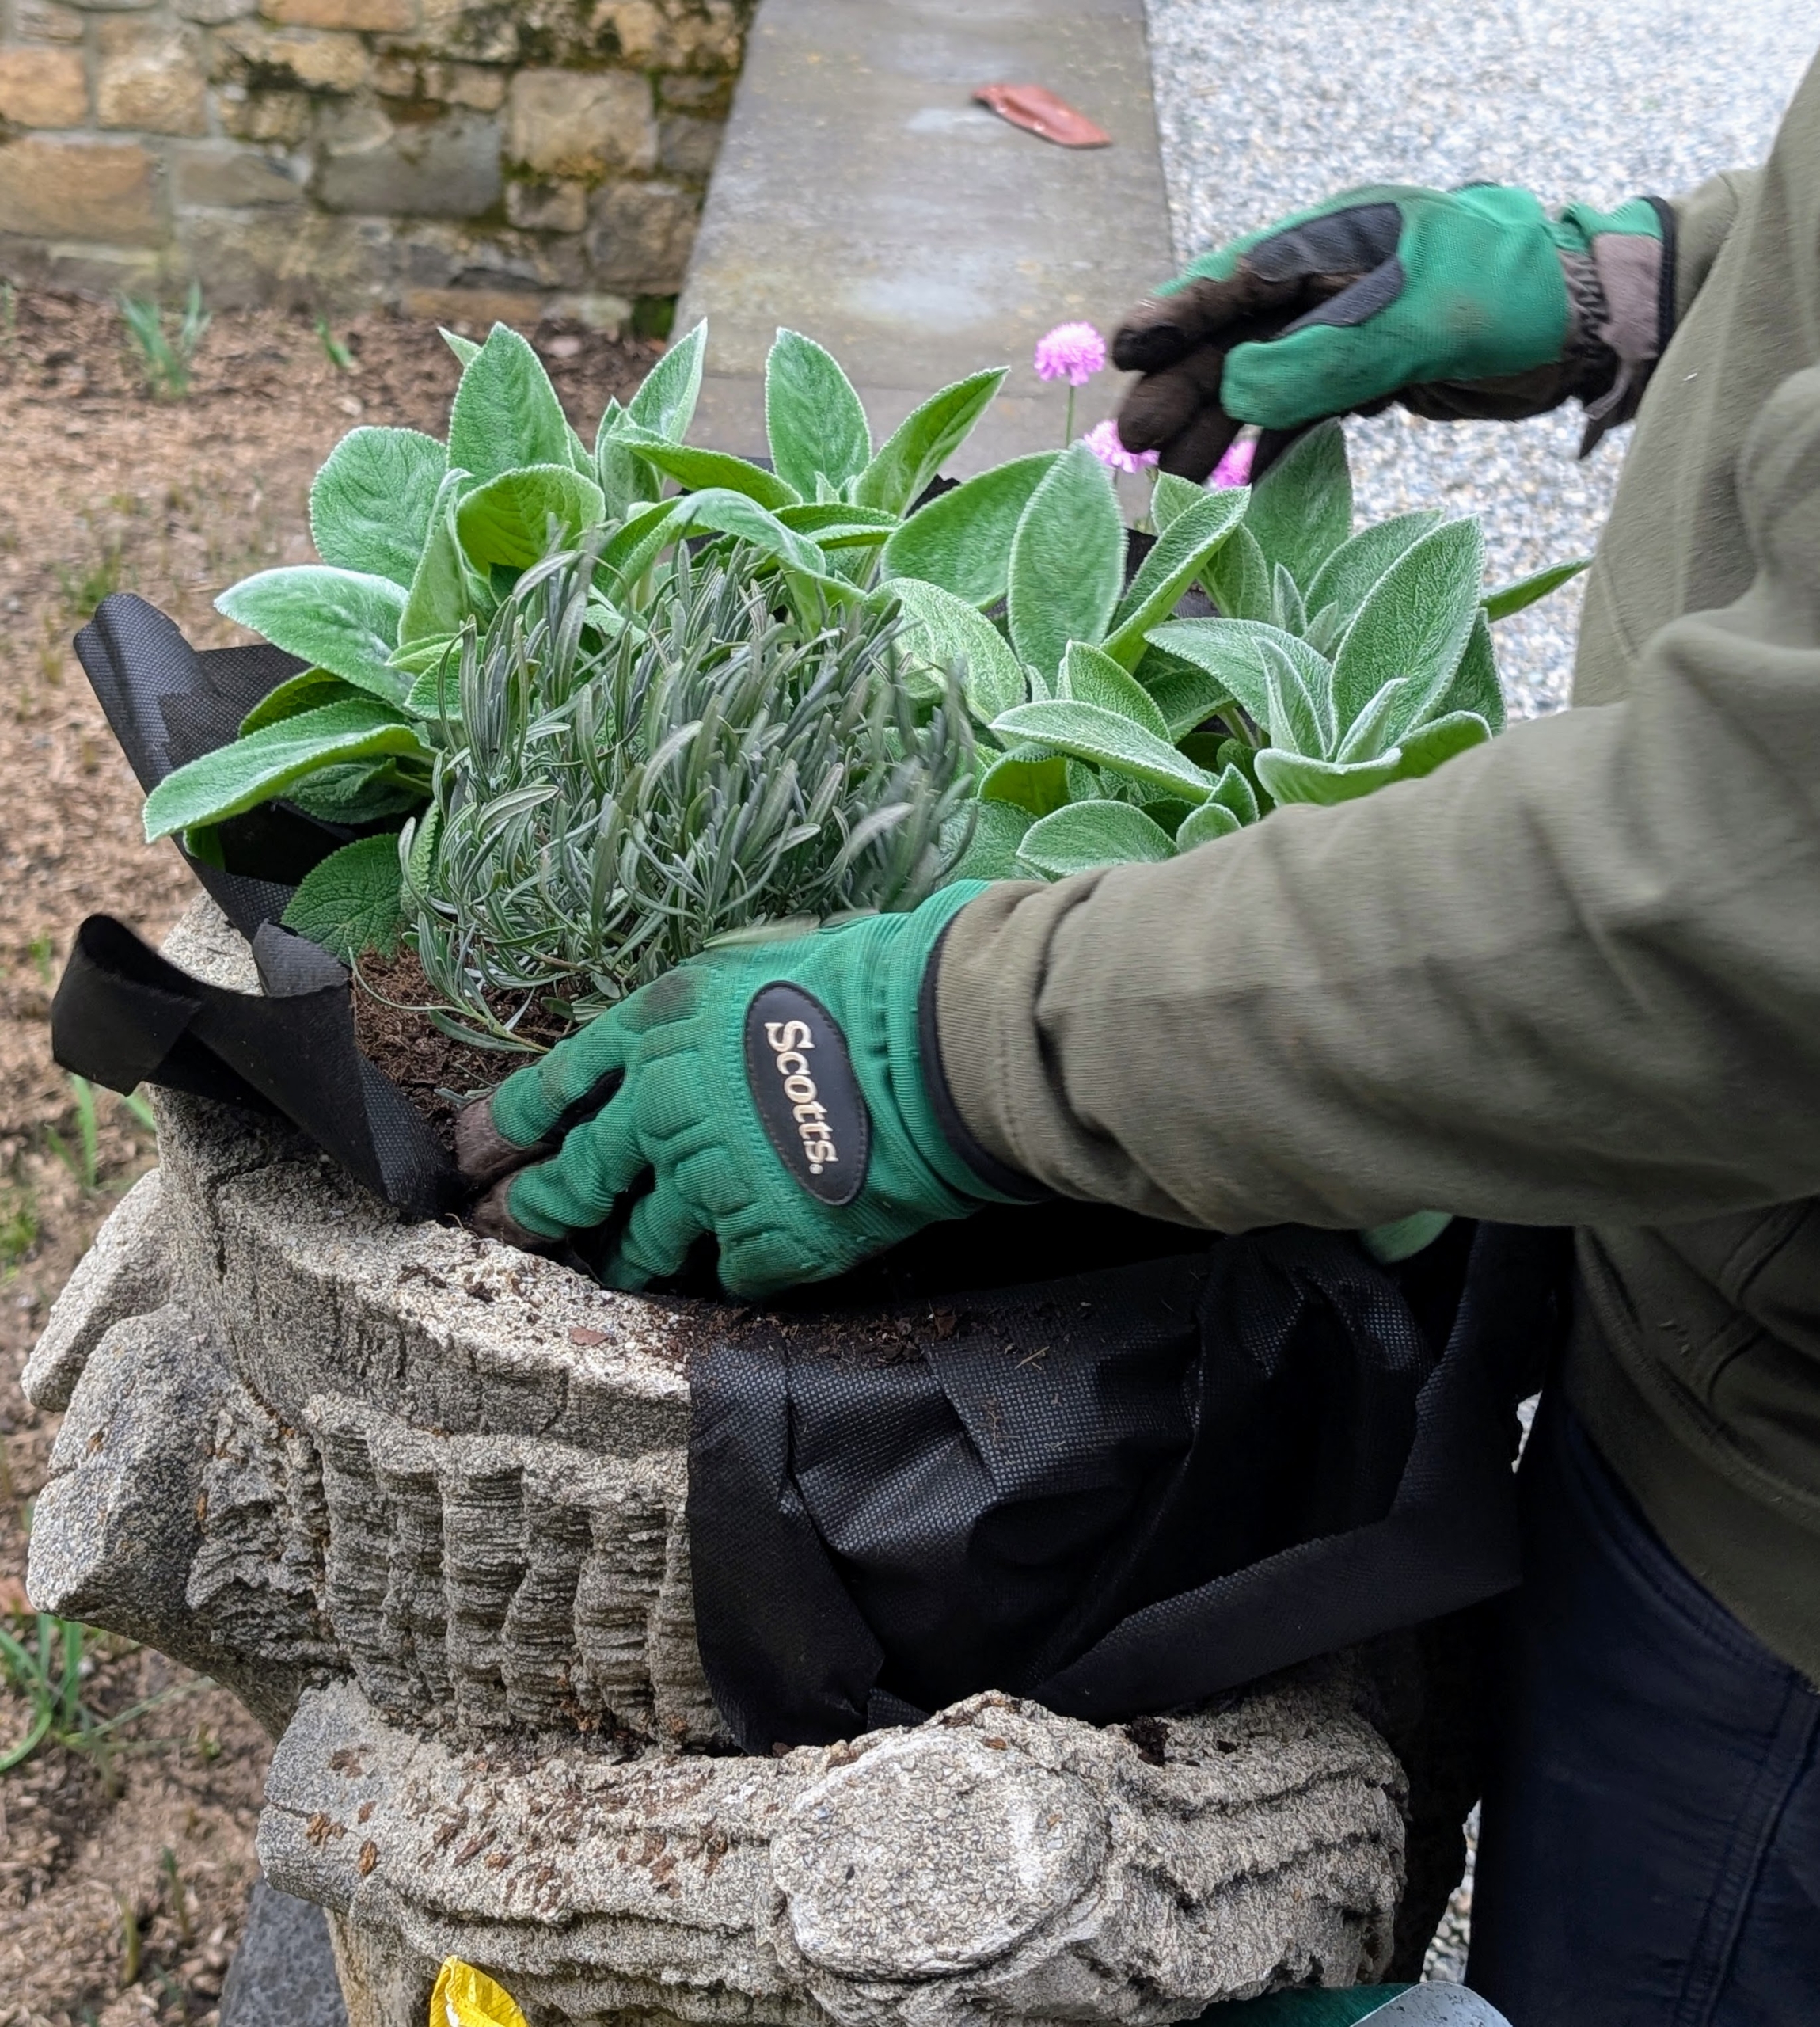
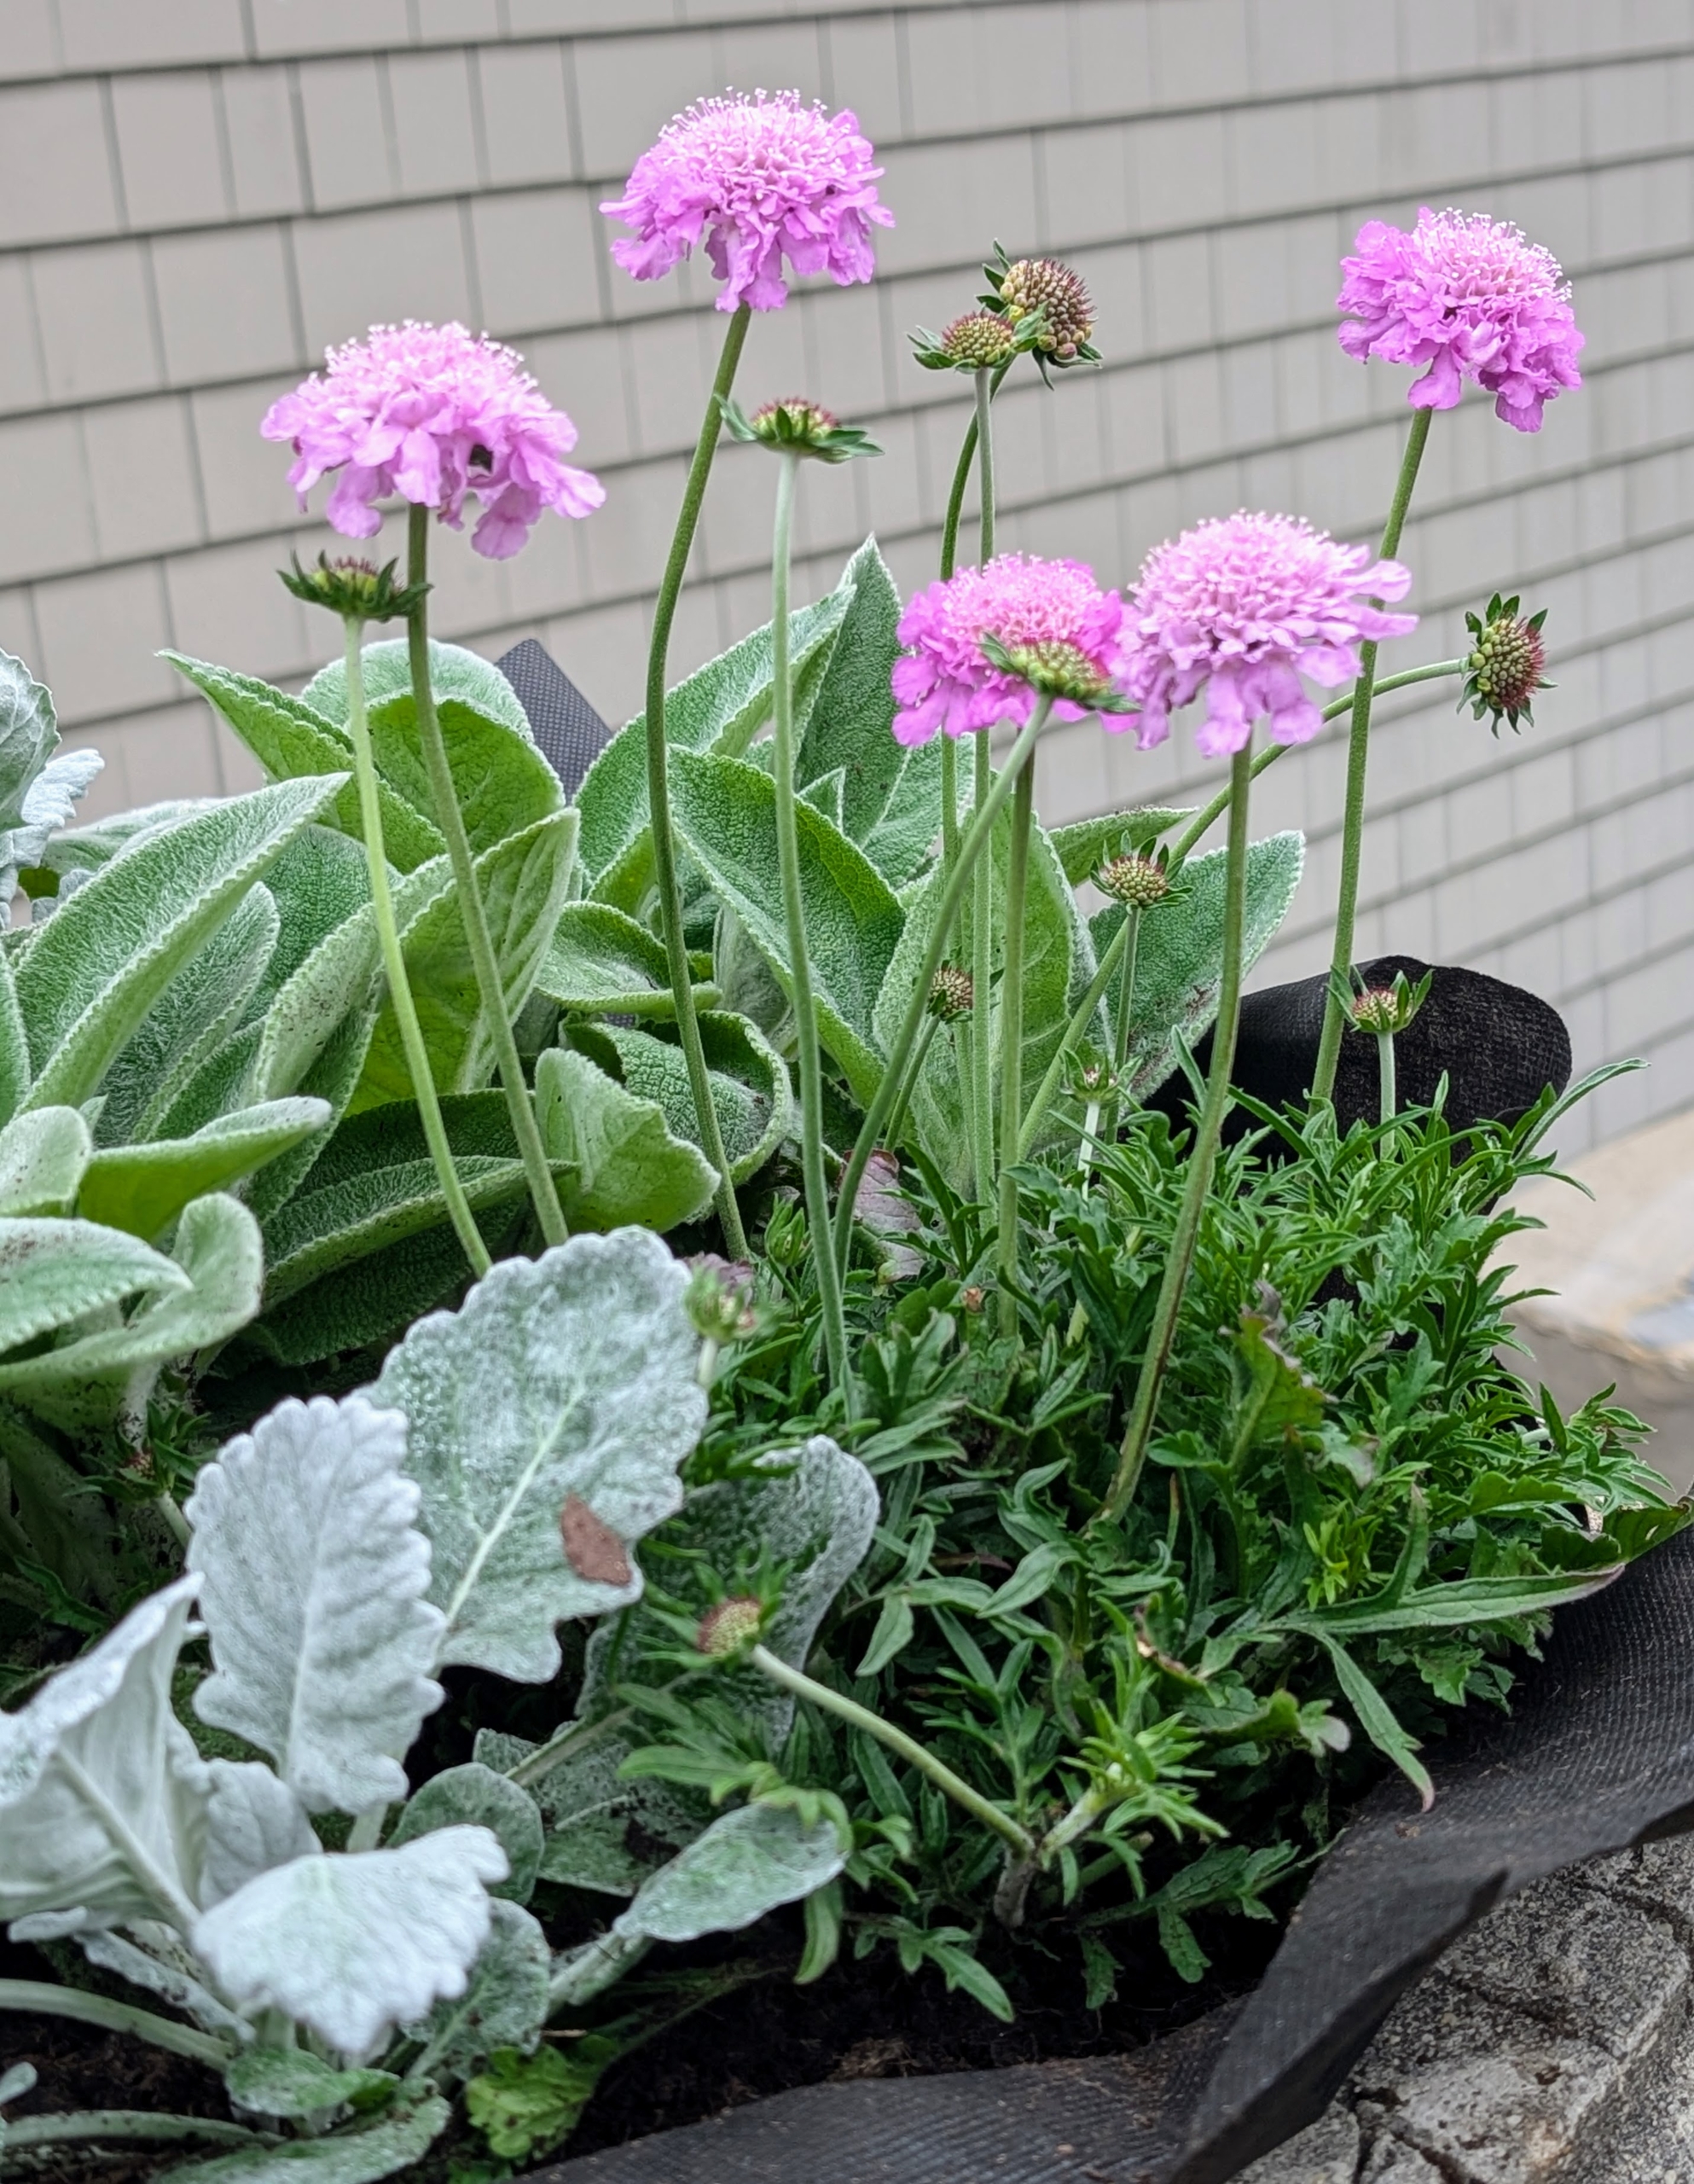
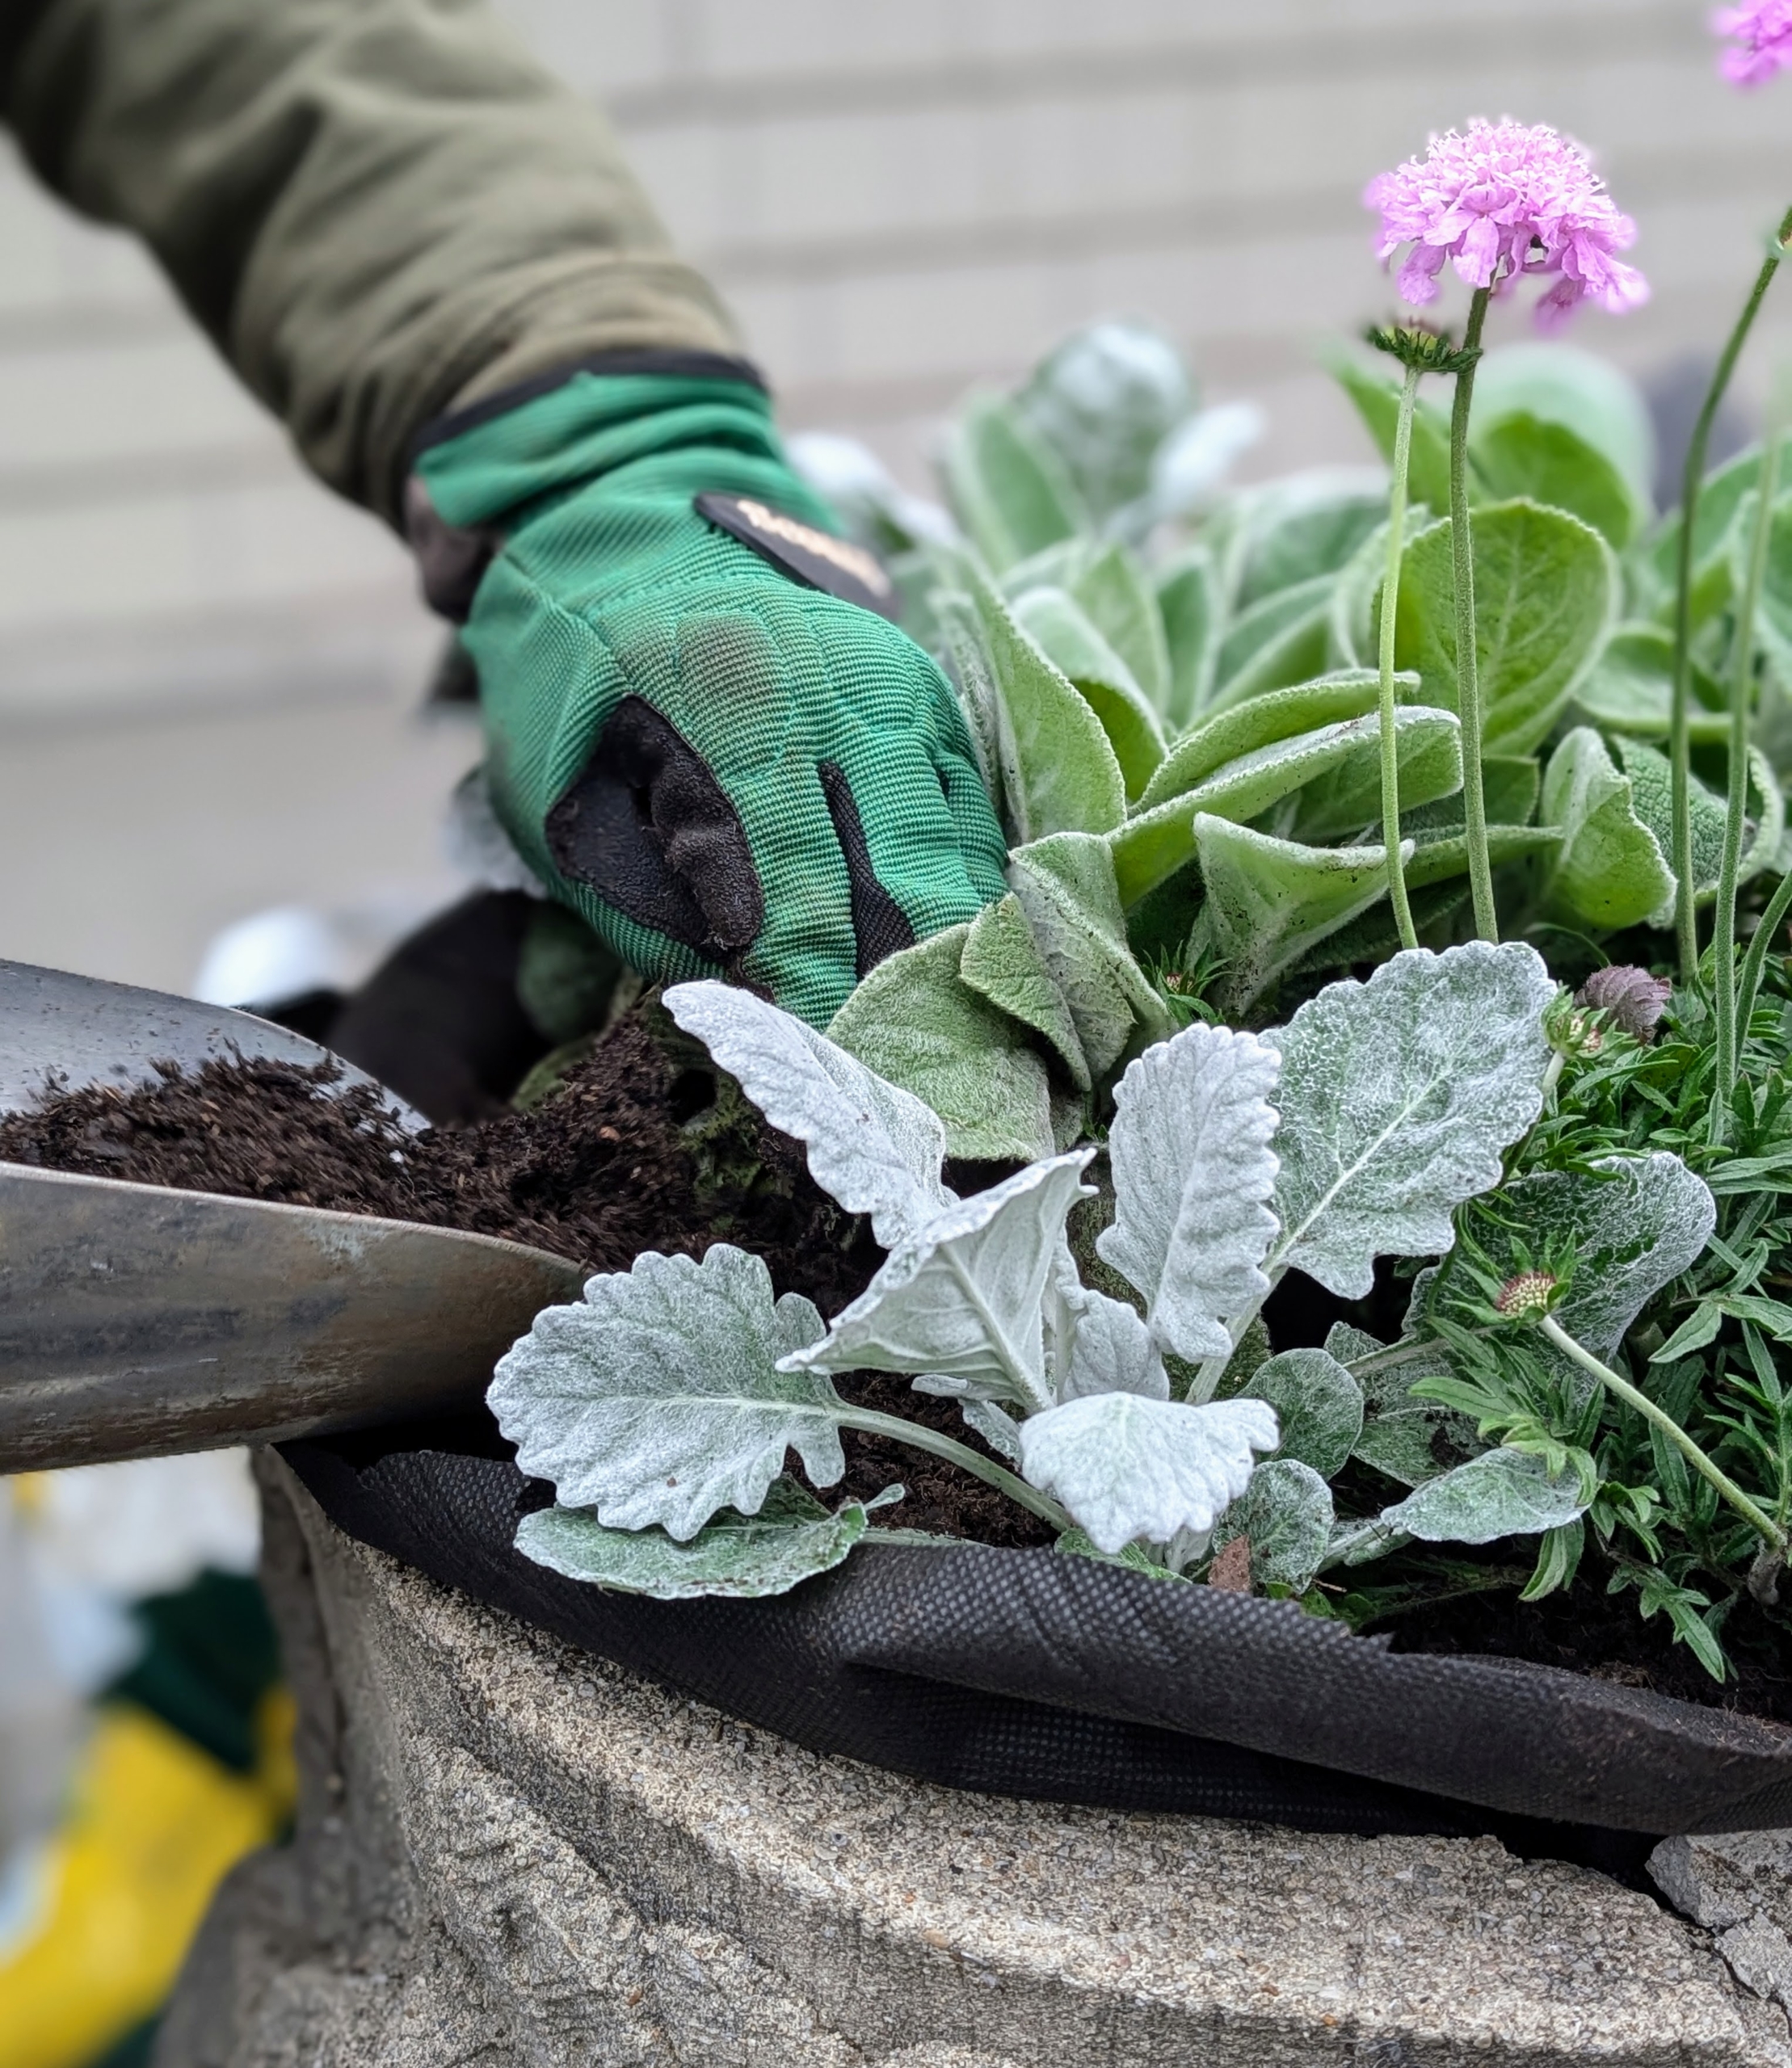
Ryan places a variety of plants in this large faux bois urn. When planting different specimens in one pot, be sure to consider the growth habits of each plant to ensure there’s enough room to last all season.
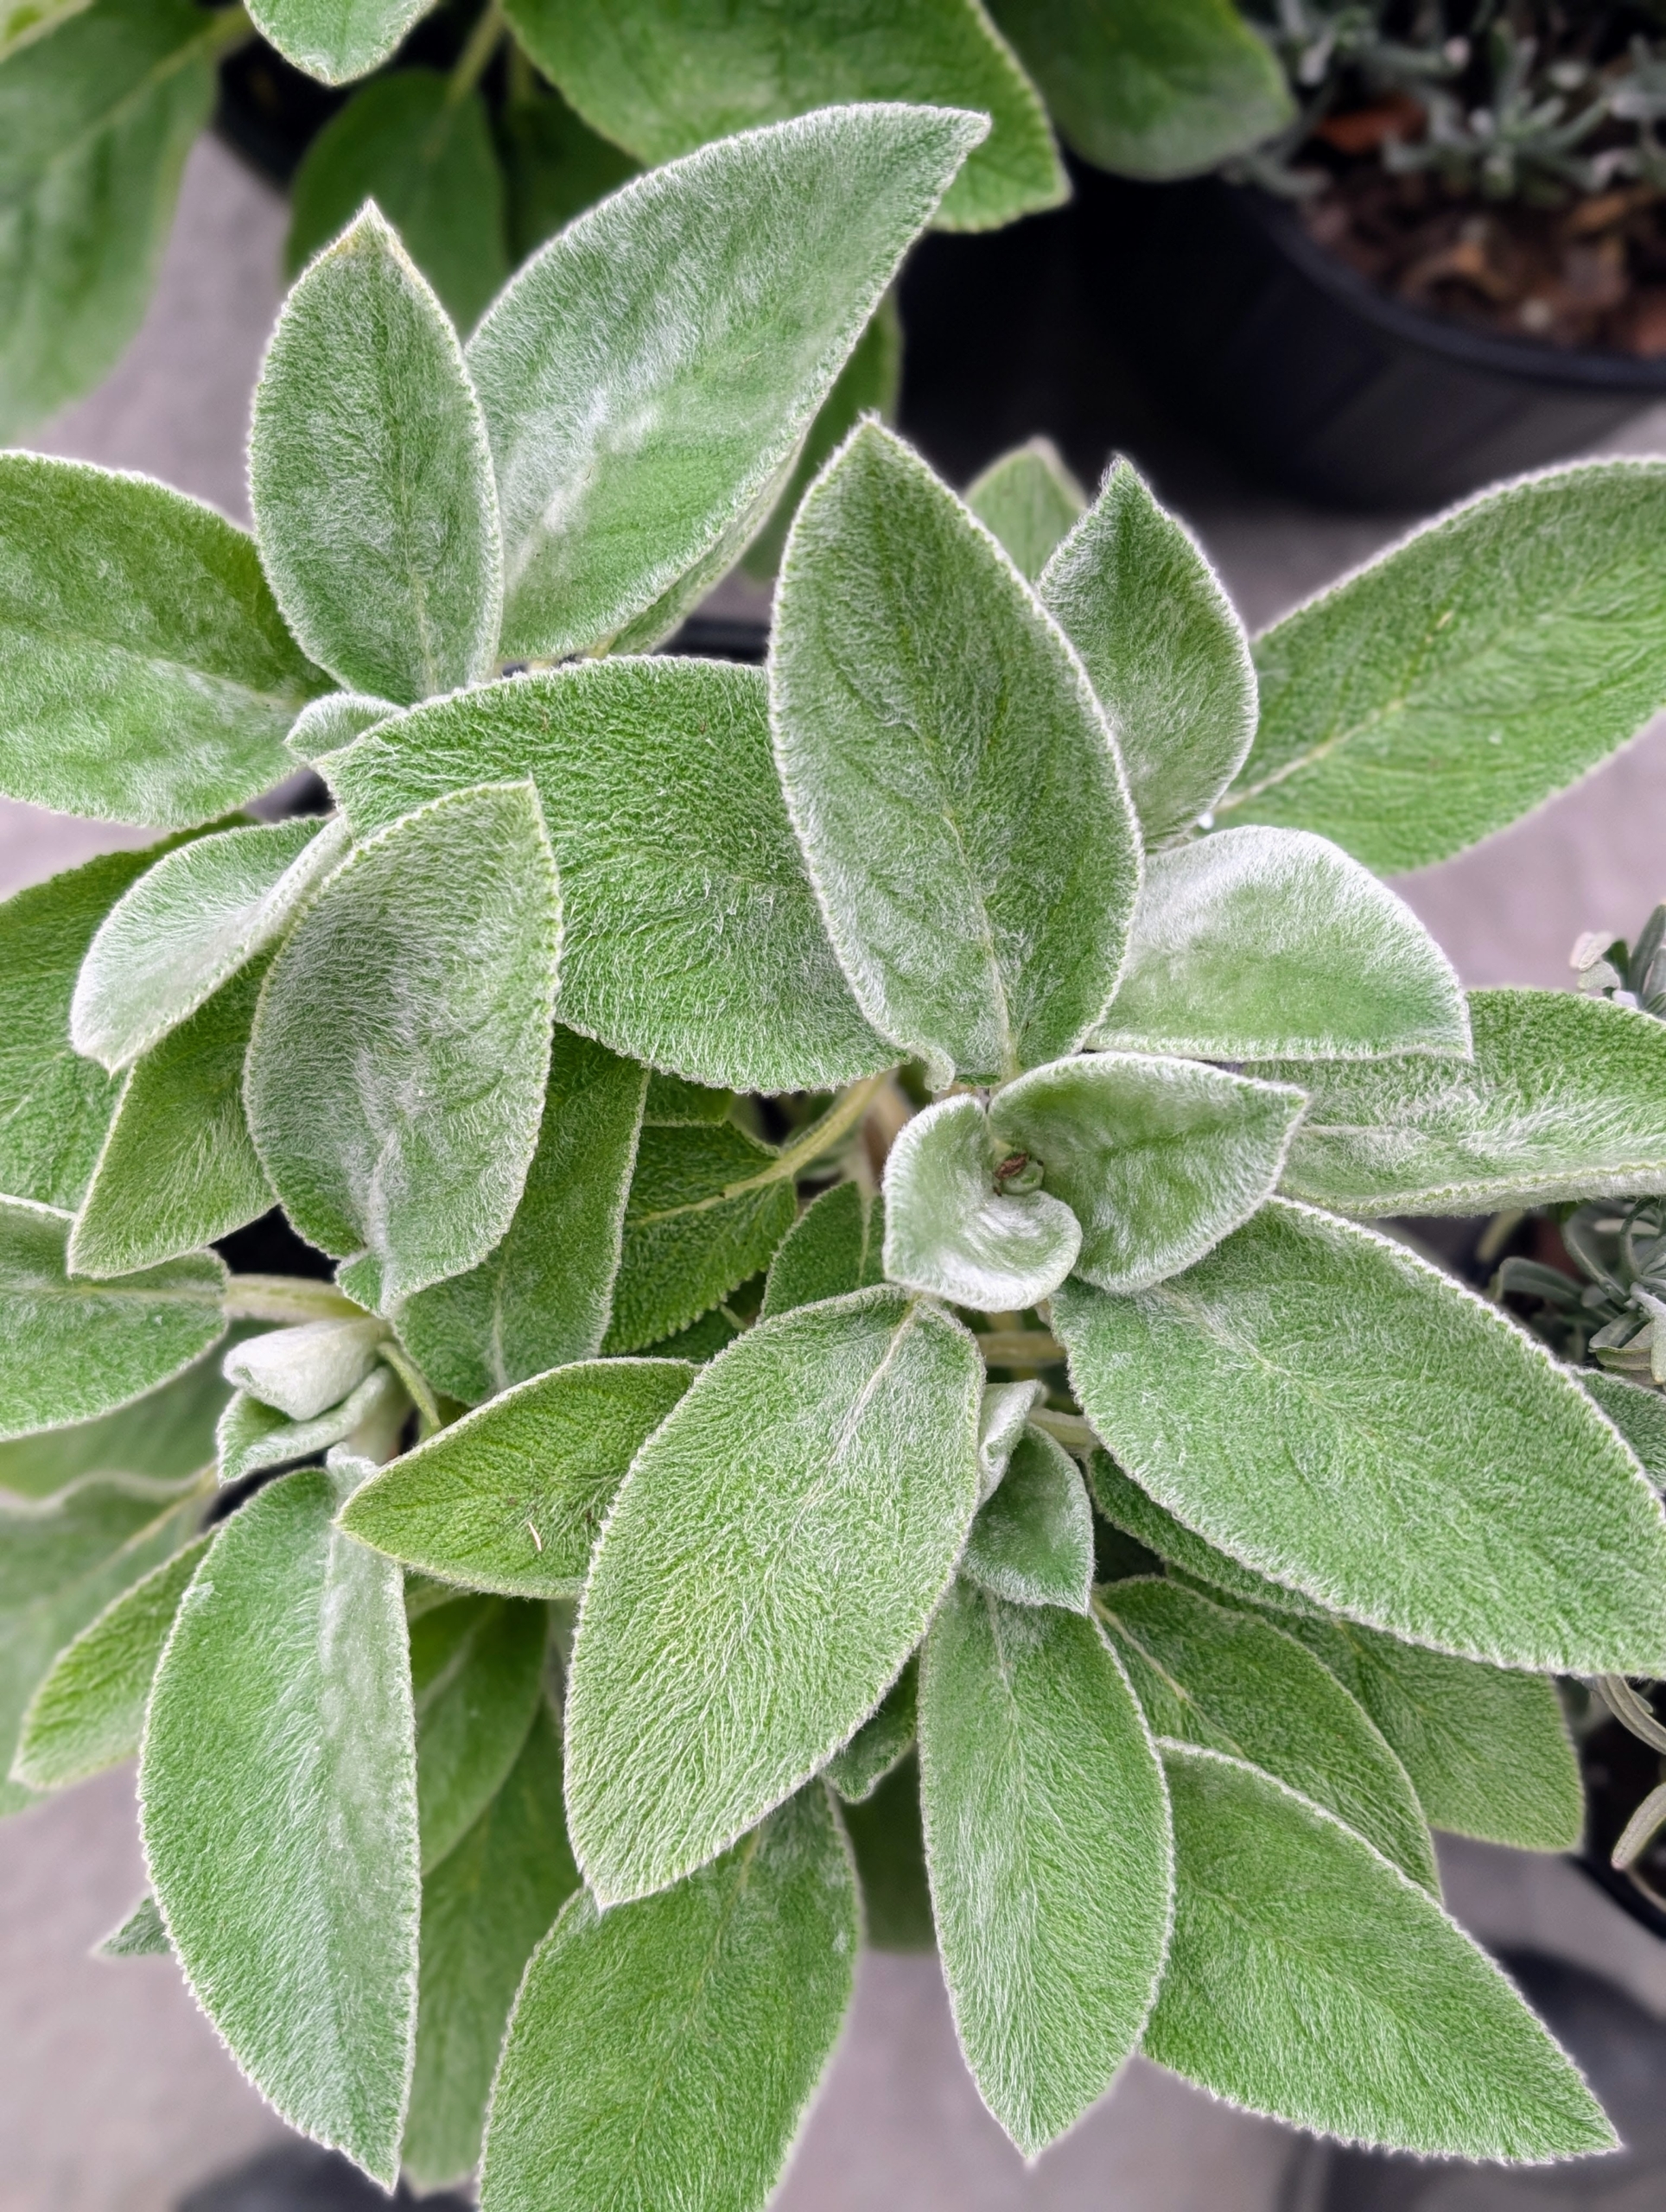
Lamb’s Ears, Stachys byzantina, is named after its soft and velvety, silver-green leaves that resemble the ears of a lamb.
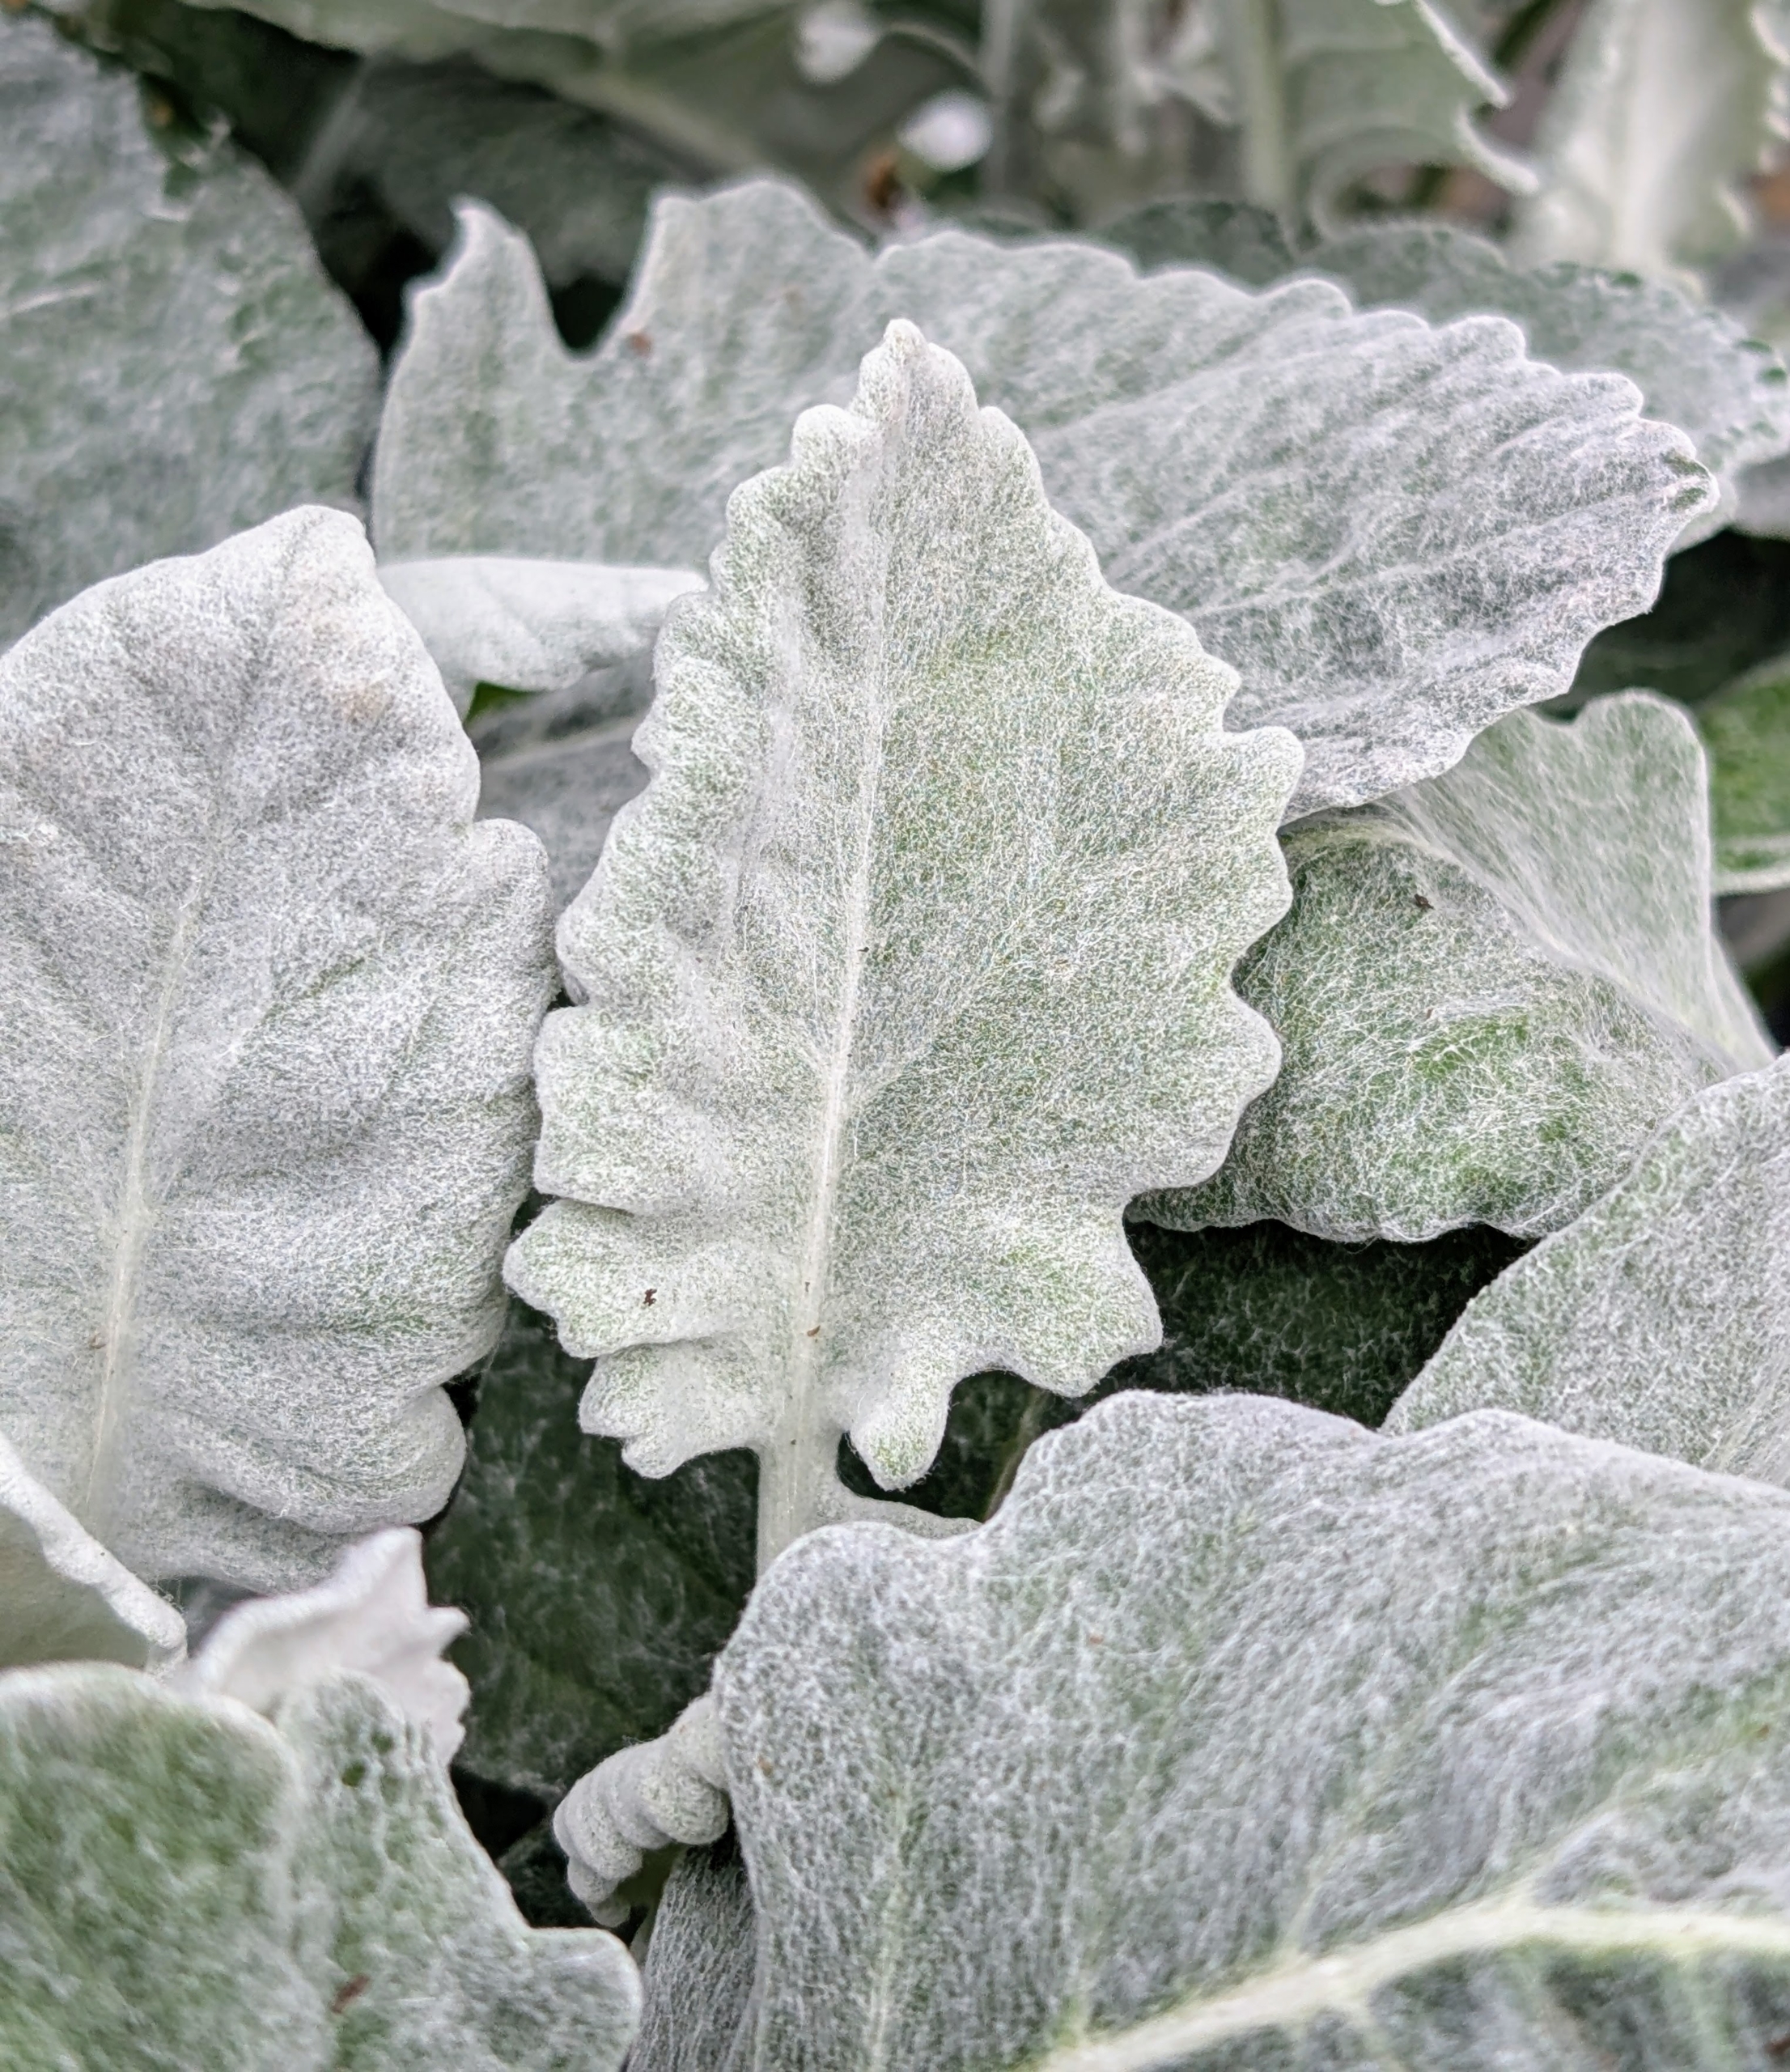
This is Dusty Miller ‘New Look,’ Senecio bicolor cineraria – an annual loved for its silvery-gray foliage. It grows about 12-inches tall and wide and will fill in the pot nicely along with the other plants.
In this container, Ryan also adds Scabiosa, the Pincushion flower, a charming perennial flowering plant.
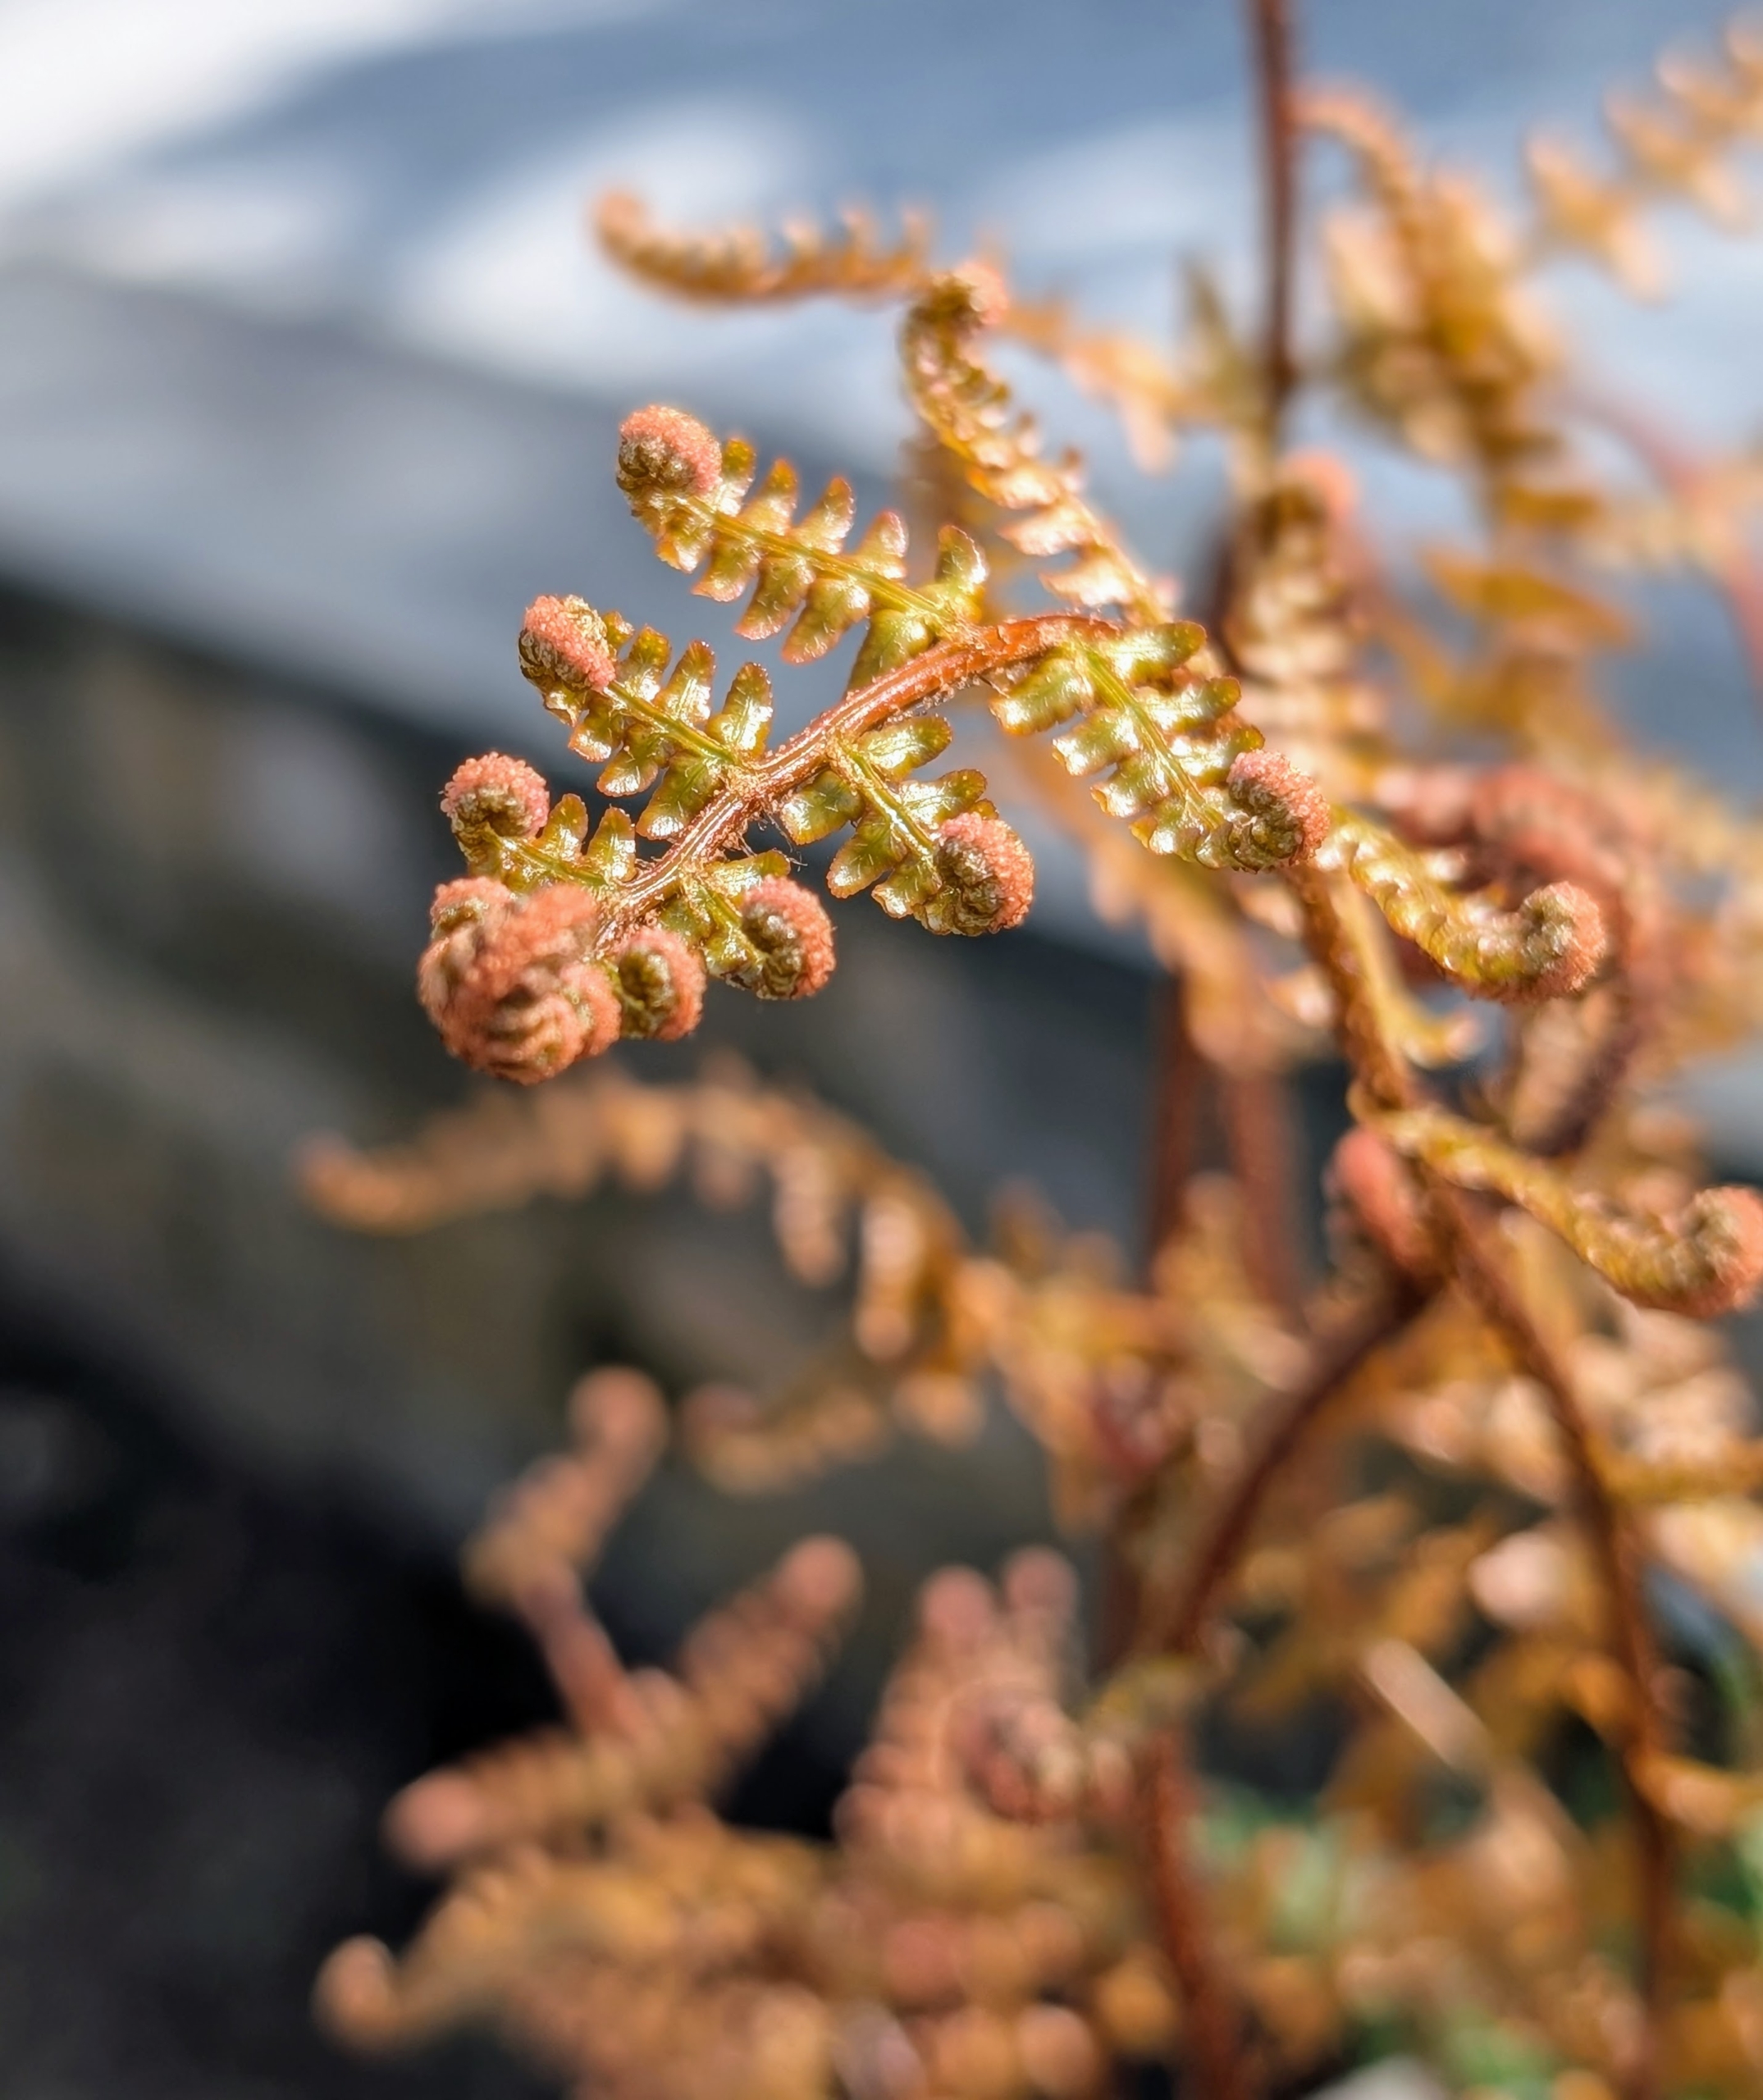
This is an autumn fern, Dryopteris erythrosora ‘Brilliance.’ It is a handsome coppery red color that matures to a dark green.
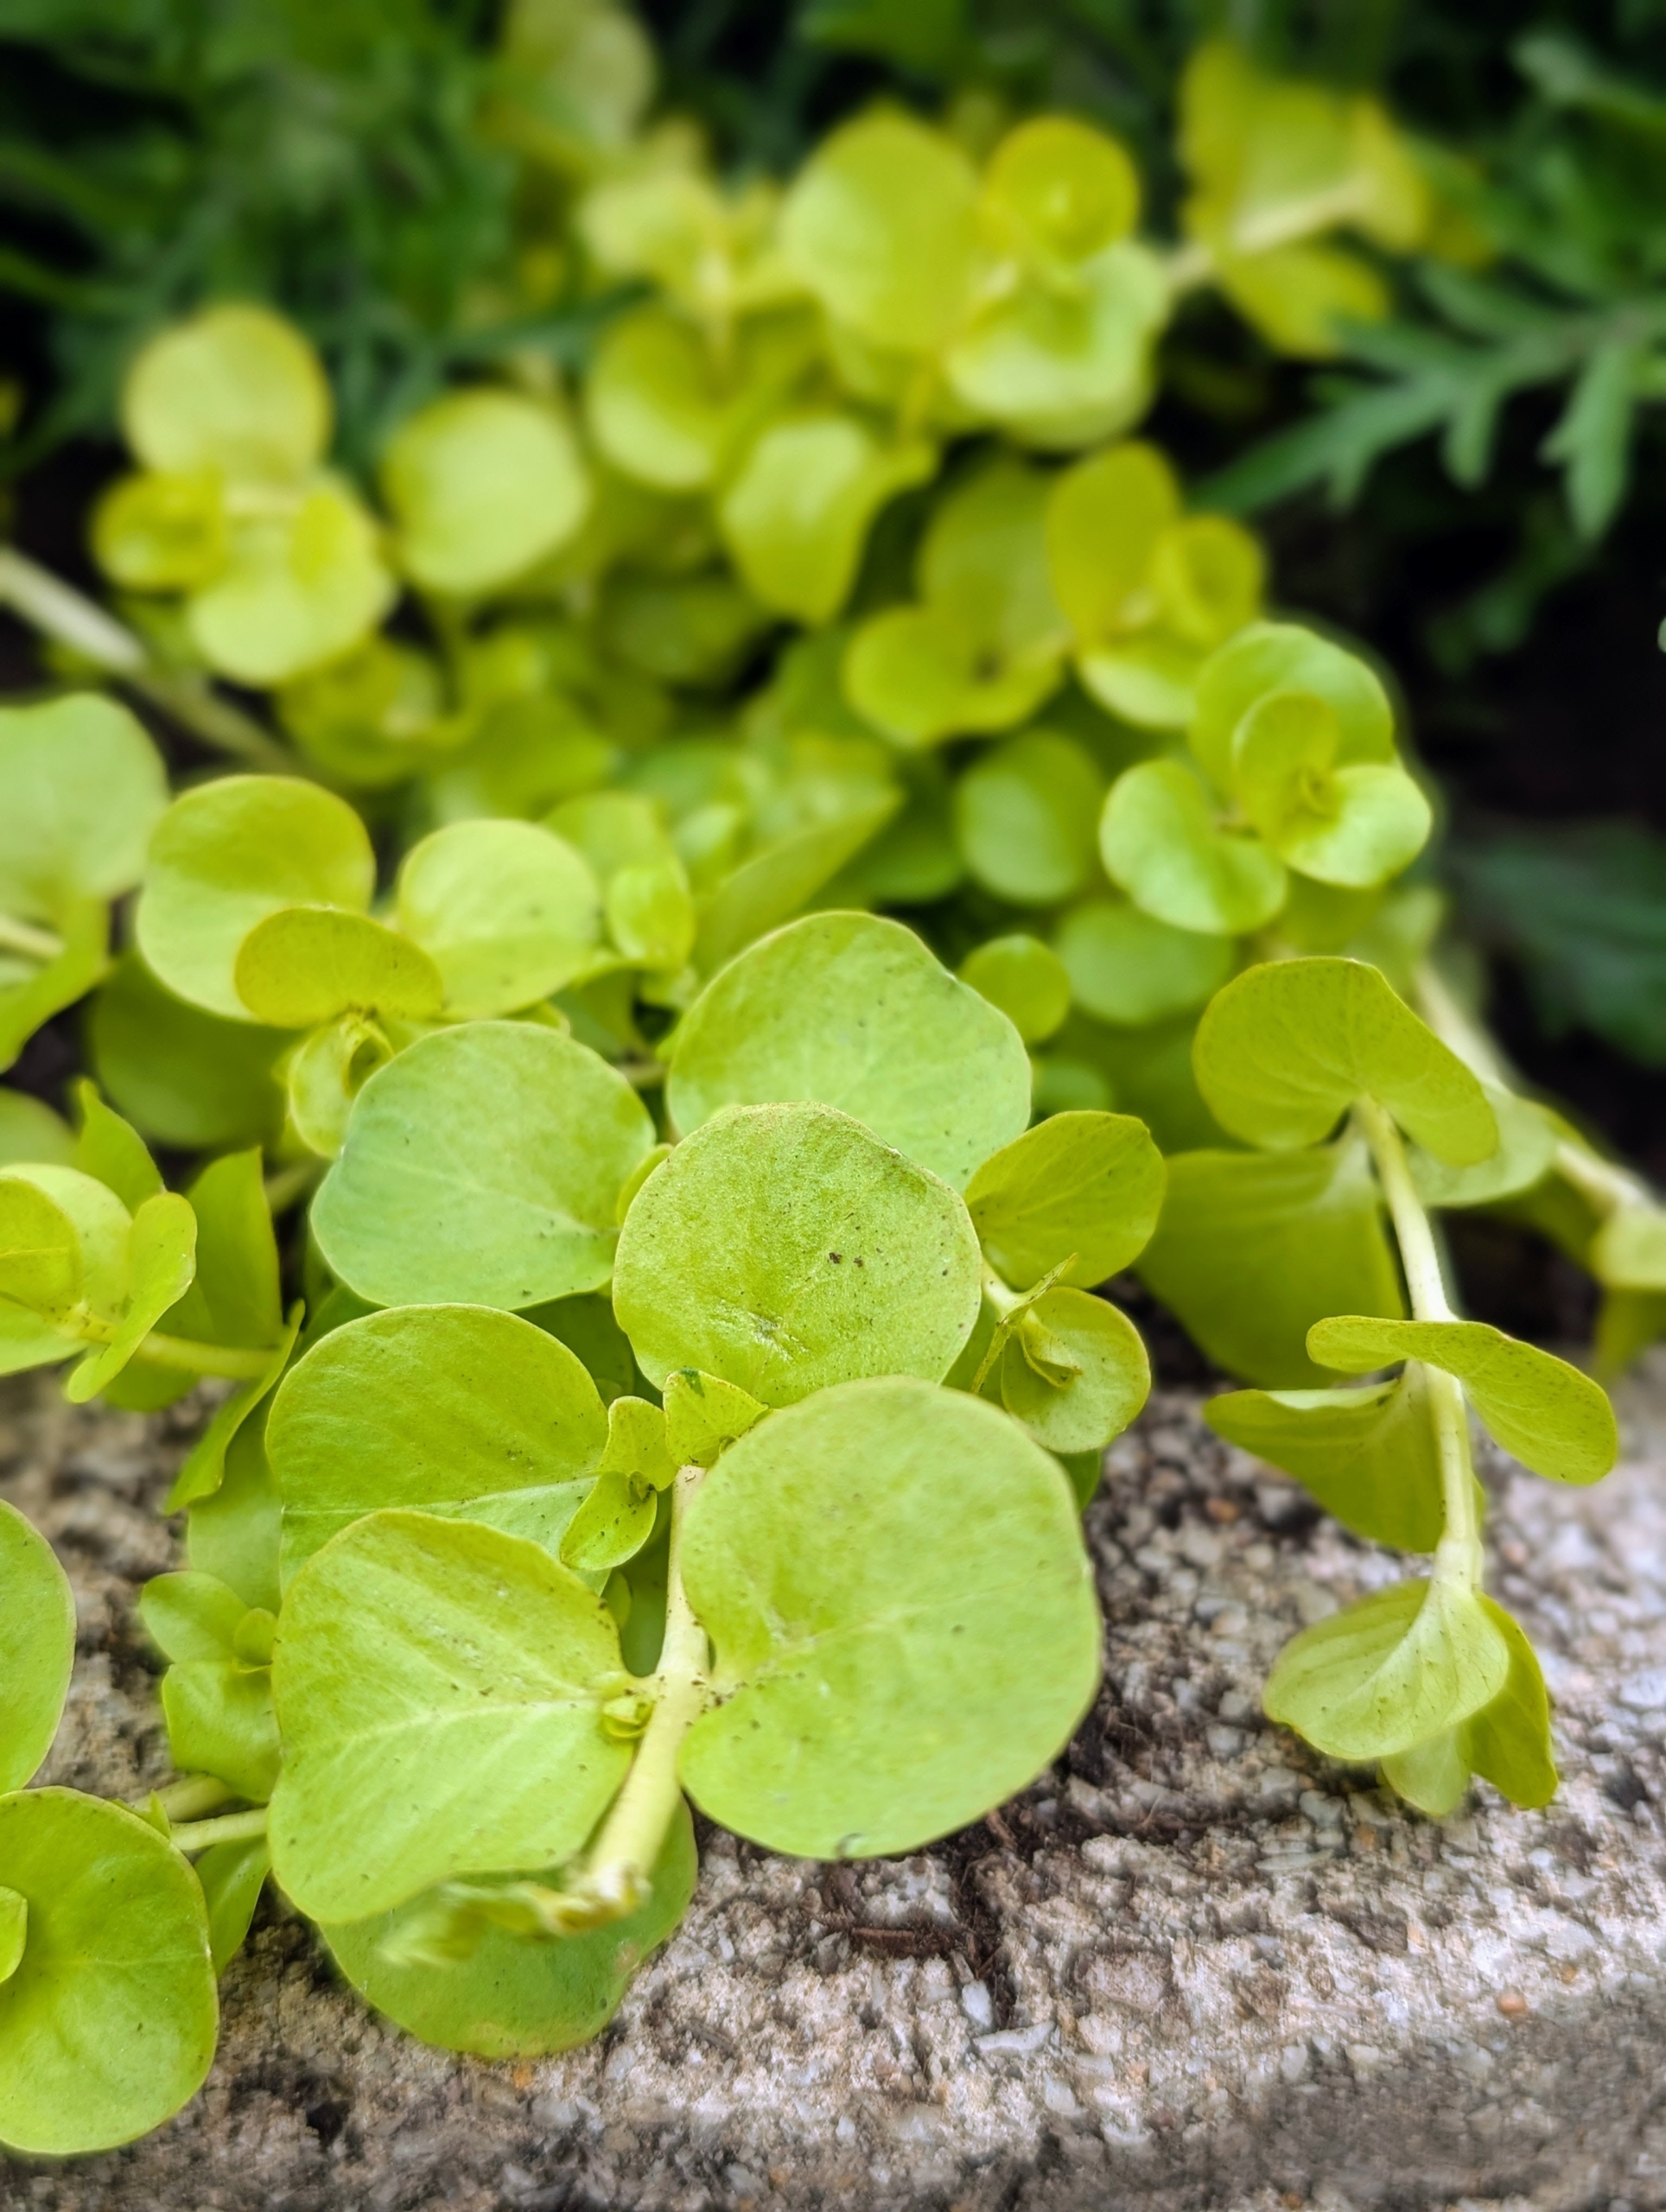
Lysimachia is a fast growing perennial groundcover with small, round, yellow-green leaves. It complements the greens and silvers in this container.
Ryan adds more soil to fill to just under the lip of the container.
The soil is gently tamped down to ensue good contact.
And then Ryan trims the excess weed cloth around the pot, so it cannot be seen.
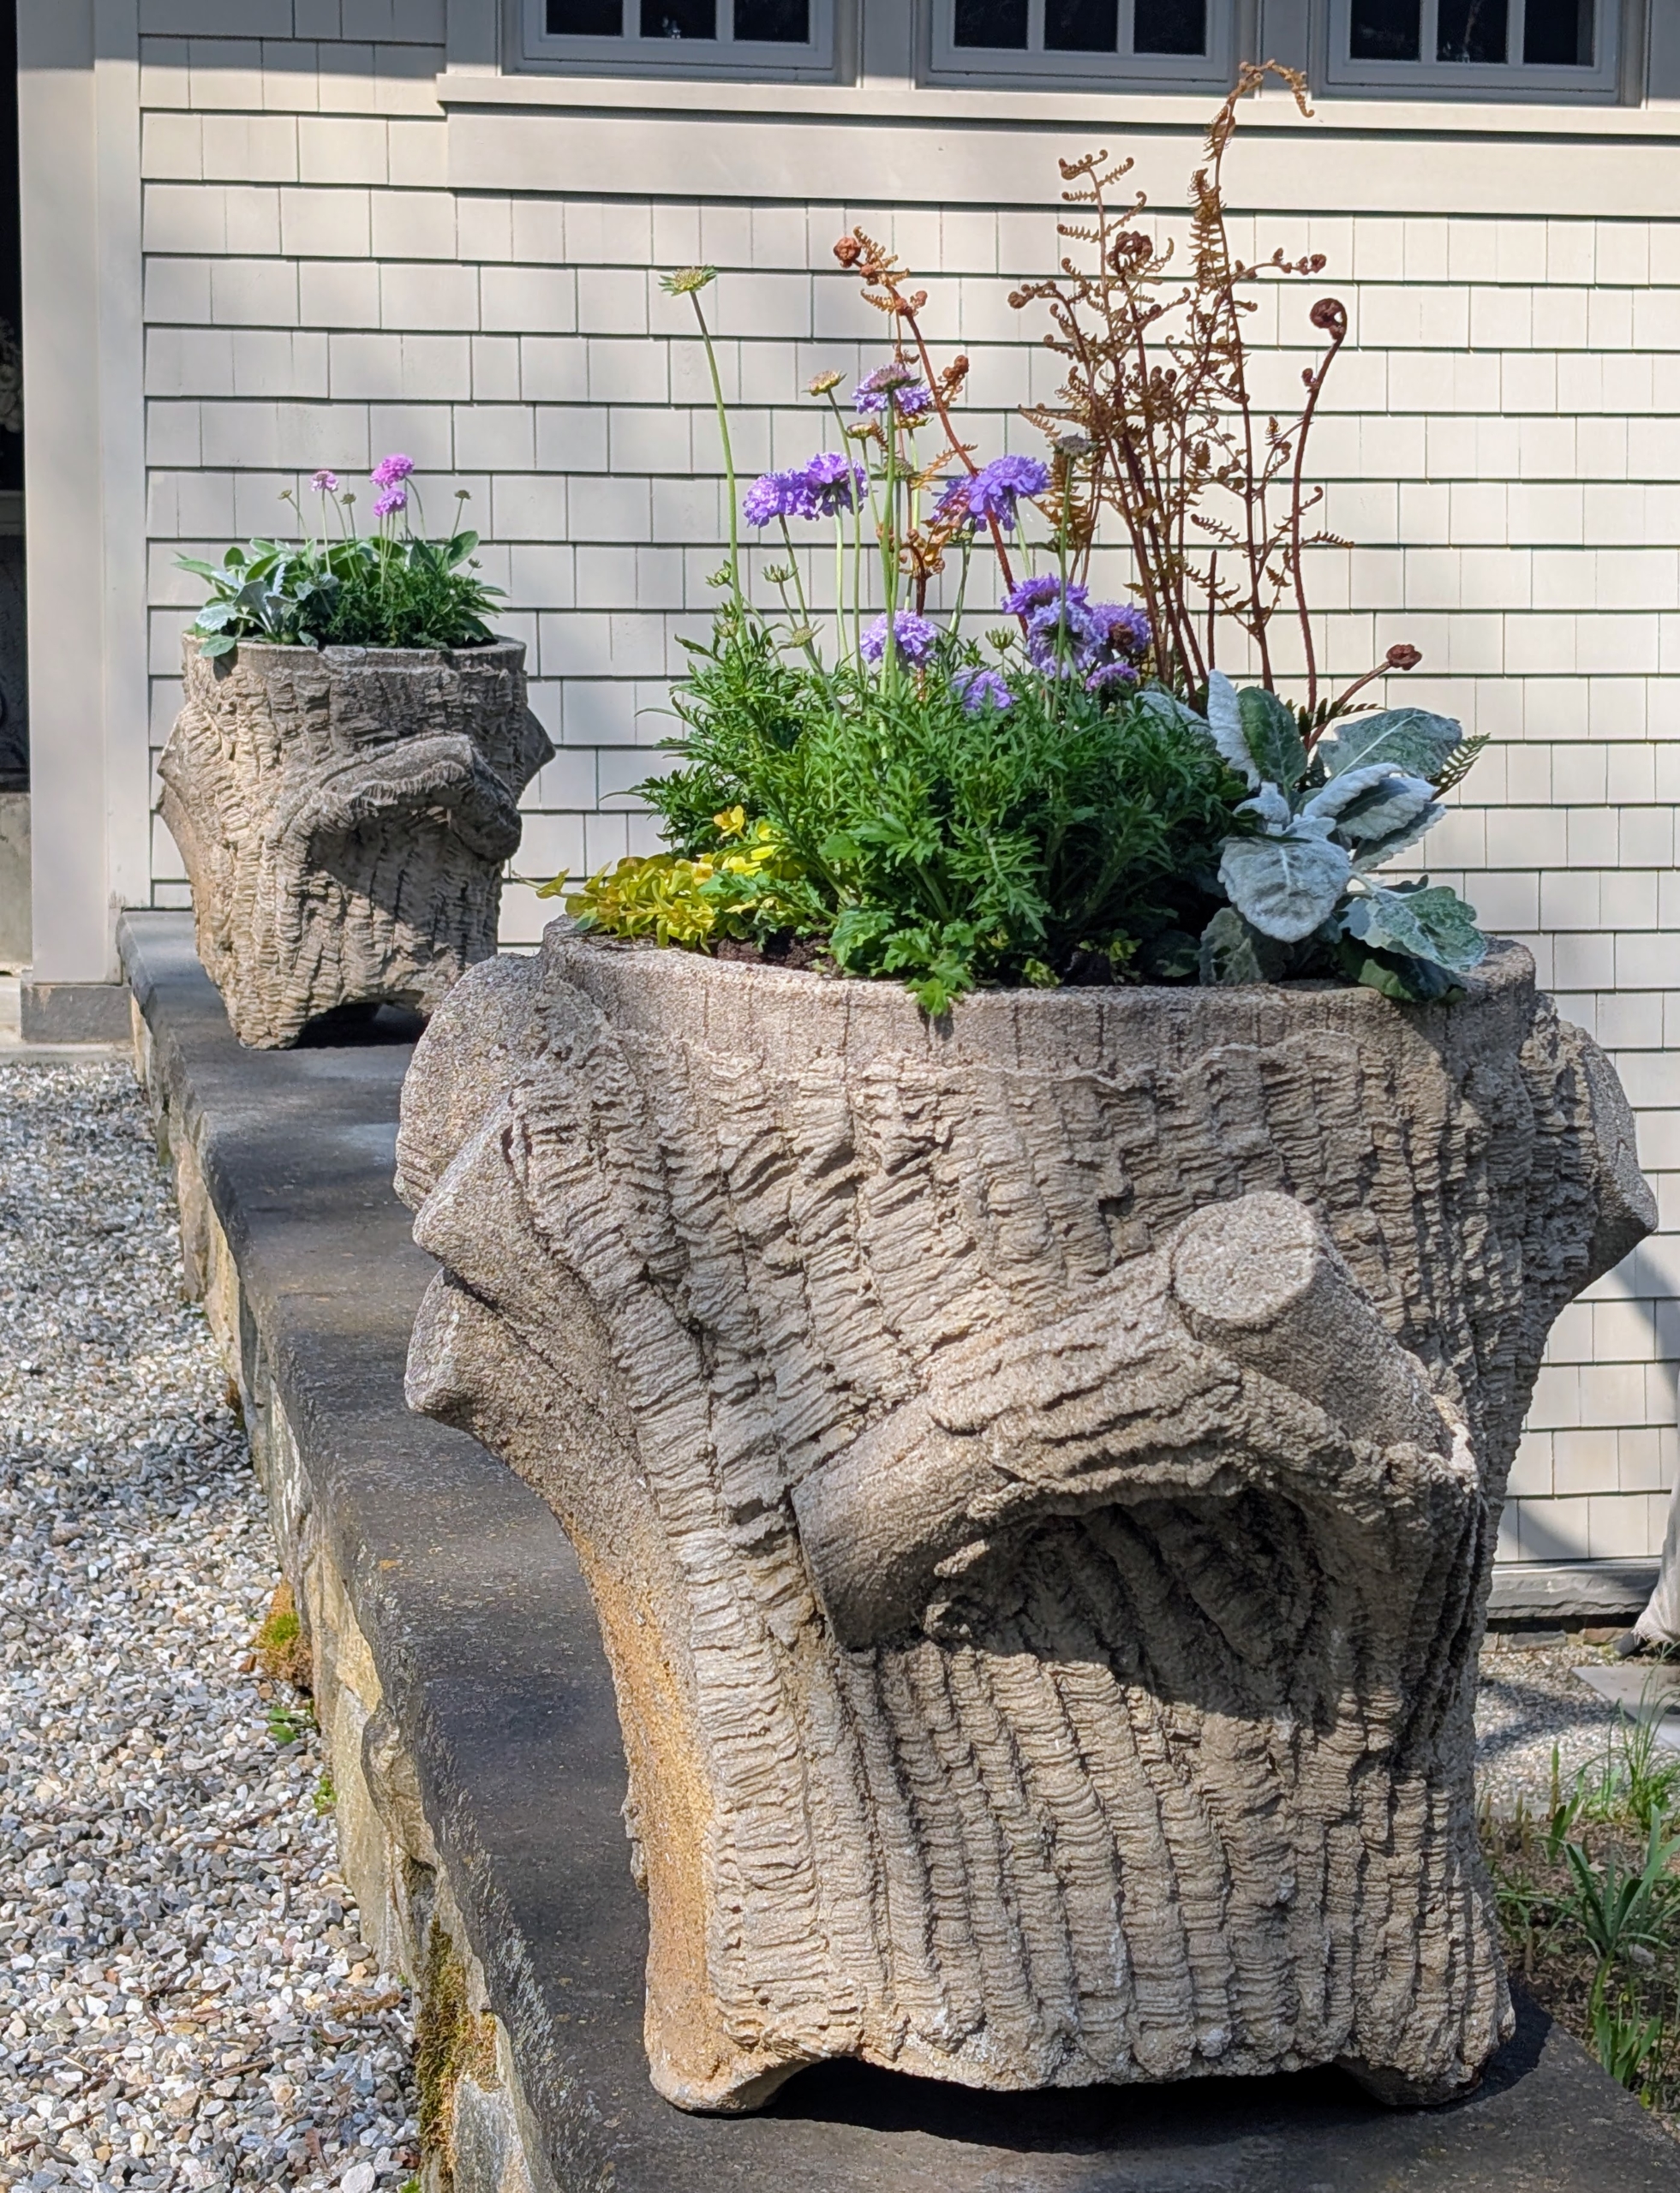
This antique faux bois planter is displayed on the wall outside my carport where it can be seen and enjoyed every day.
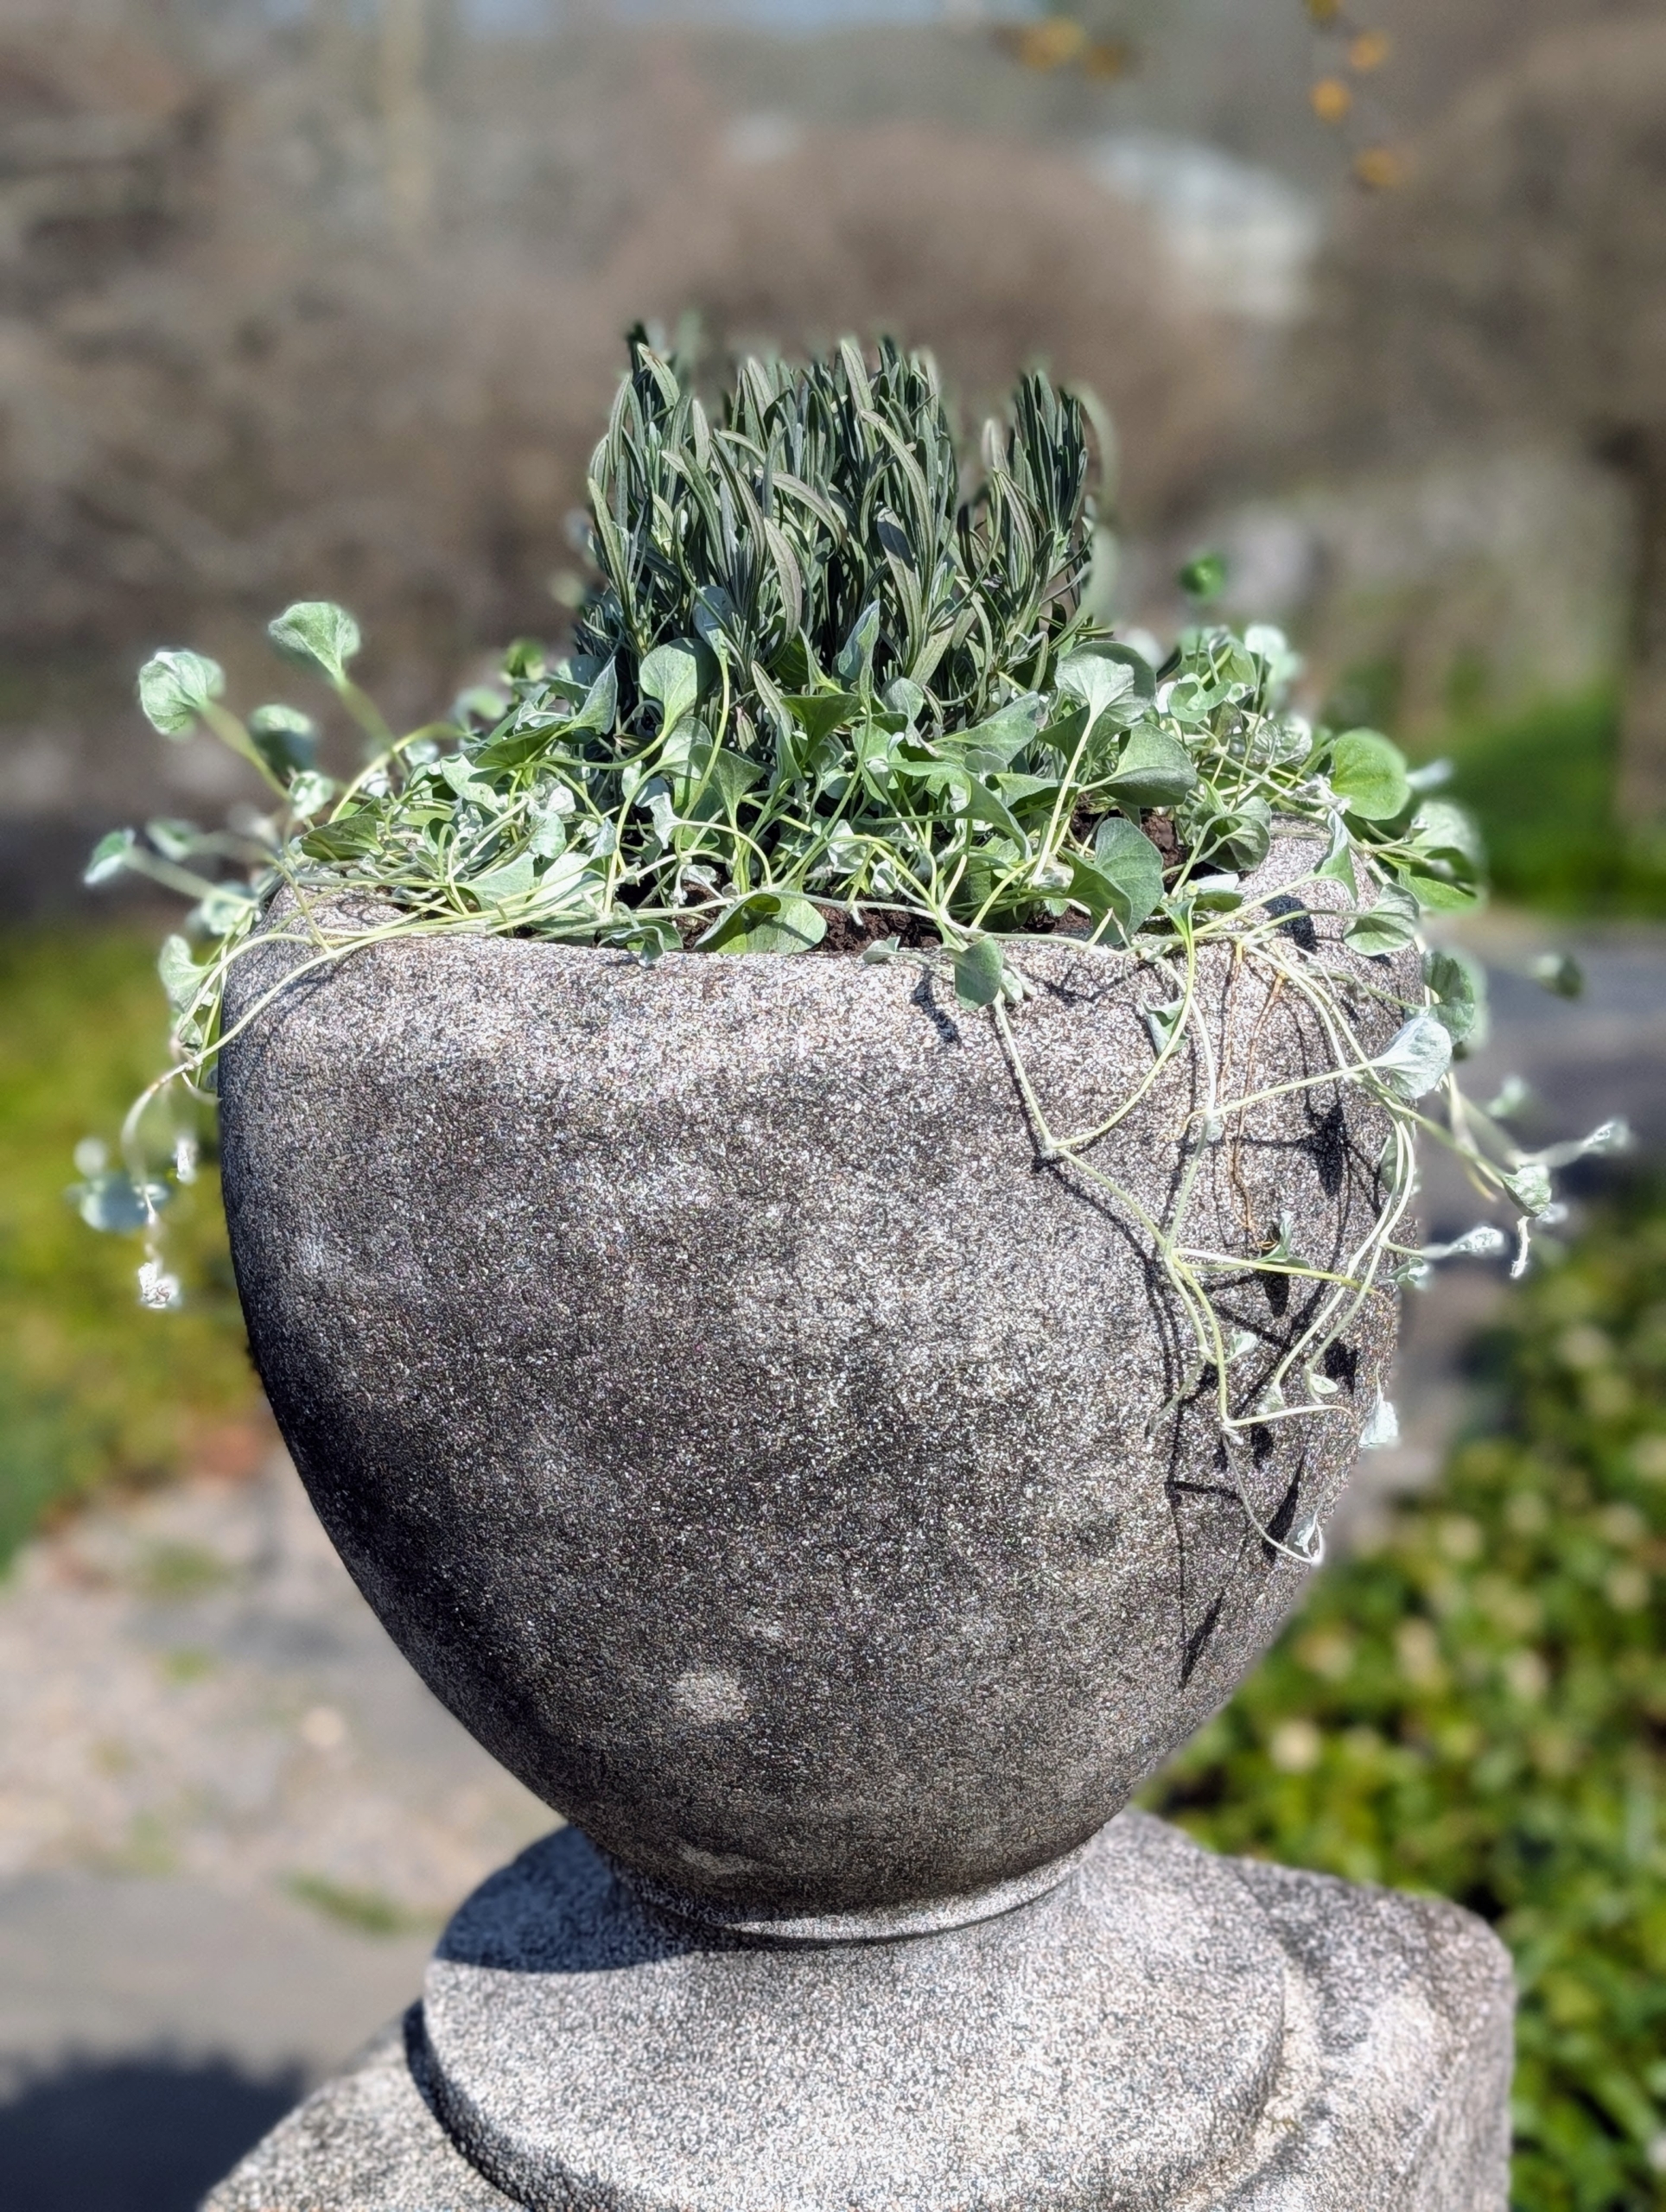
This container is one of a pair that is located on the steps of my terrace parterre outside my Winter House kitchen. It is planted with lavender and dichondra, another creeping groundcover. Displaying potted plants is an easy way to add color, texture, and nature to any space.
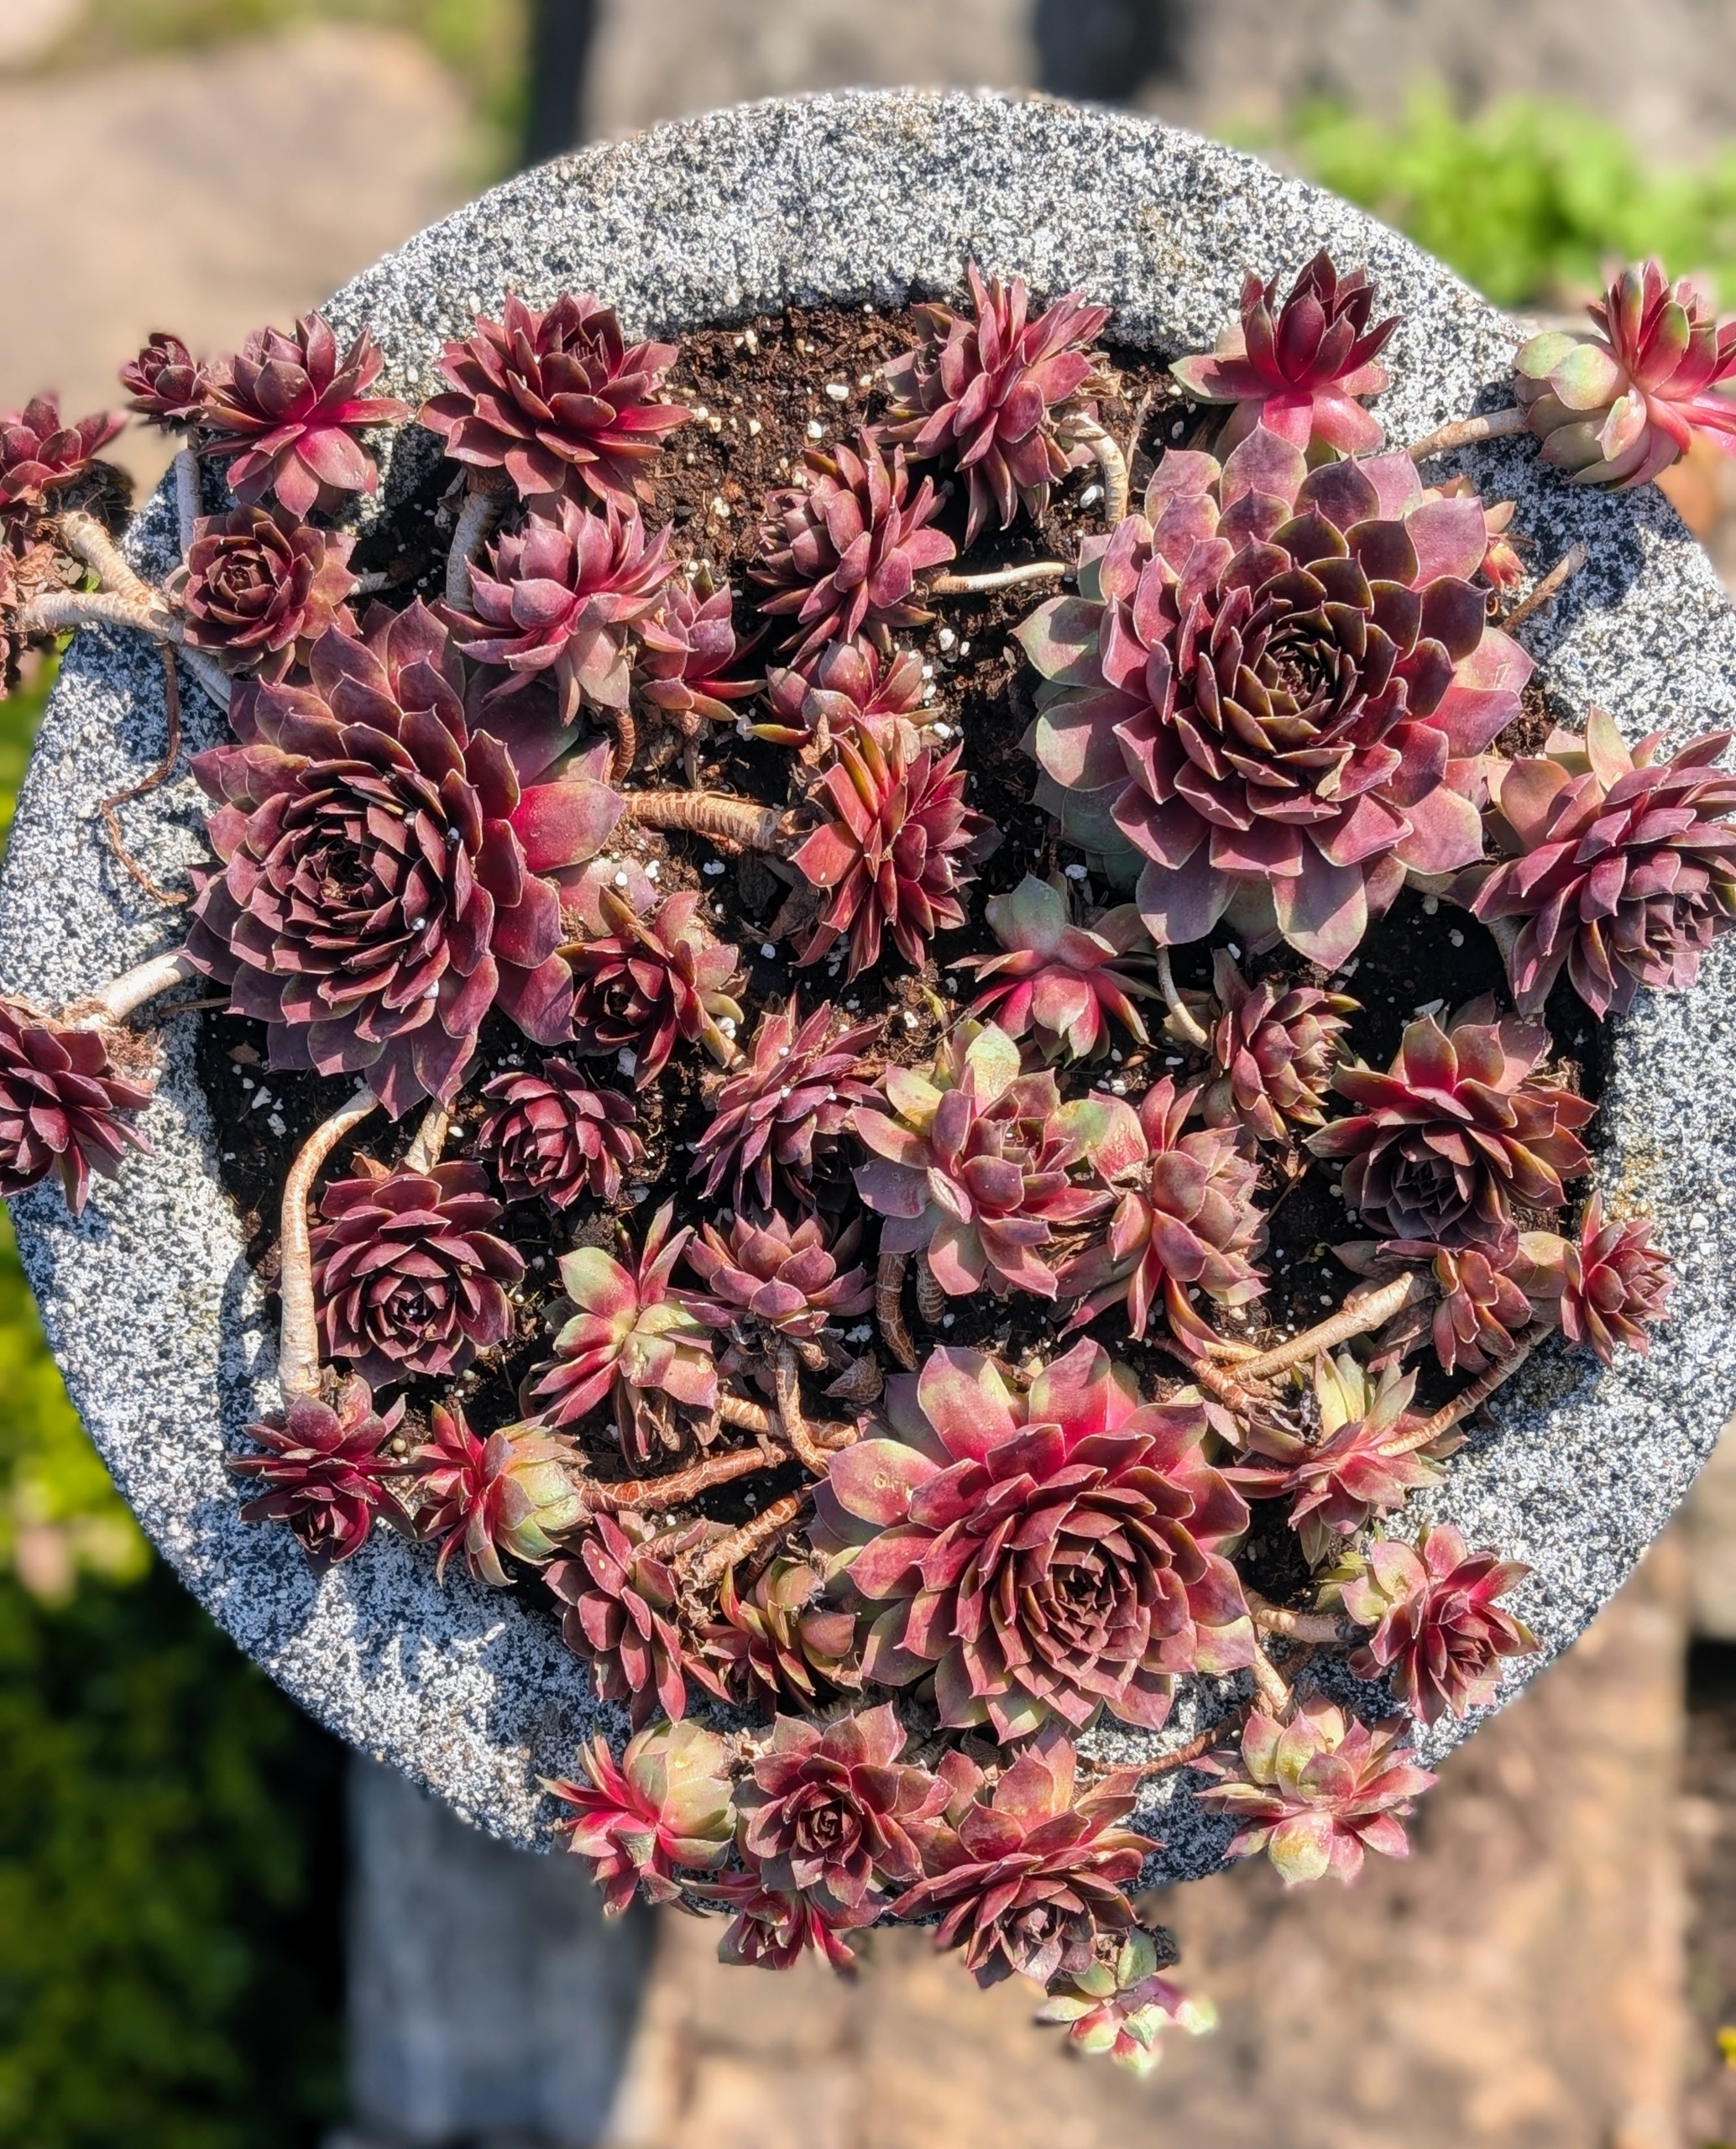
On the other side of my terrace parterre, two planters are potted with hens and chicks. Hens and chicks are members of the Sempervivum group of succulent plants. They are also known as houseleeks. Hens and chicks are so called because of the rosette shape and habit of the plant to produce numerous babies.
If you decide to display some plants outside your home, be sure to check them regularly. Weed them if needed, and don’t forget to water them if the soil is dry. Potted plants in pretty outdoor containers are a very good thing.