I always try to make the most of business trips by visiting beautiful and interesting places in between scheduled commitments. It's even better when I can combine the two.
Last week, I traveled to QVC to debut my new fall/winter 2025 apparel collection. I was on several times that day with a special LIVE appearance right from Longwood Gardens in nearby Kennett Square. I love Longwood and came up with the idea to broadcast from there - everyone enjoyed the change. If you've never been to Longwood Gardens, it is home to many spectacular botanical collections including nine-thousand species and varieties of plants spread across more than 1,100 acres - all wonderfully maintained by hundreds of employees, students and volunteers. I encourage you to visit the next time you're in the area.
Here are some photos, enjoy.
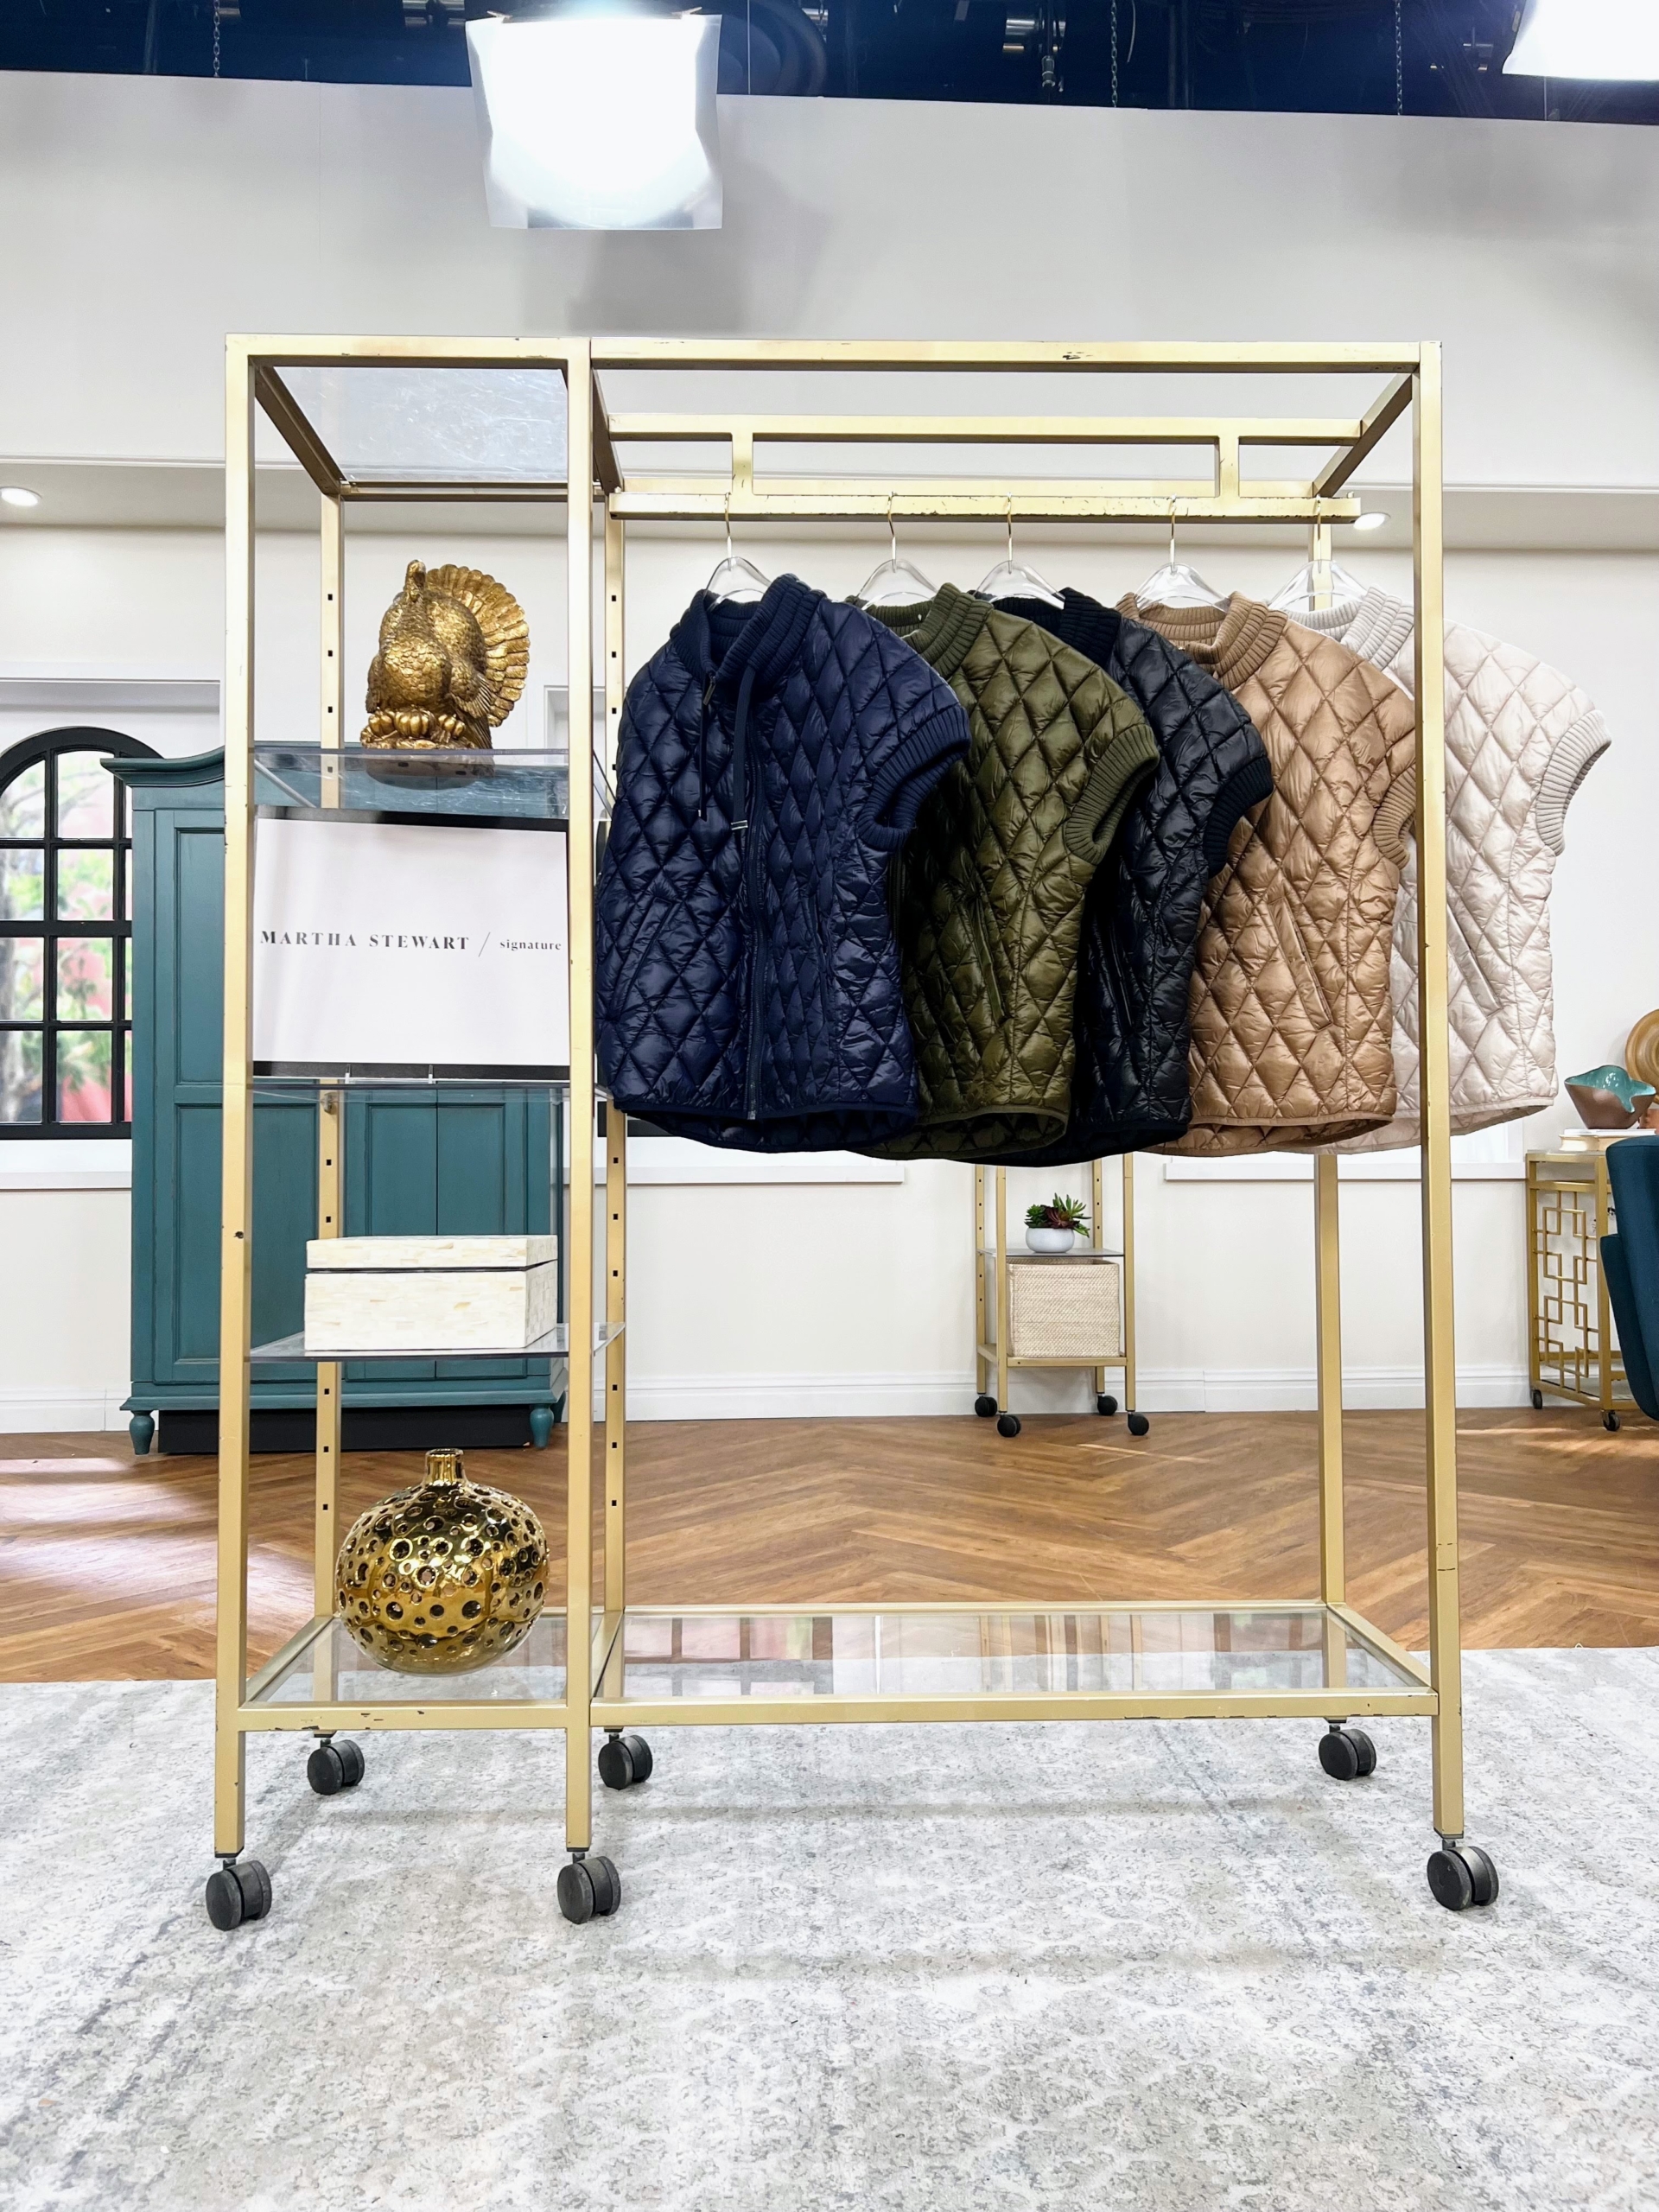
My time at QVC was dedicated to the day’s “TSV” or Today’s Special Value. Here is my latest version of my puffer vest, a quilted short sleeve jacket – perfect for this time of year, when days are still warm, but nights and early mornings have that autumn chill.
My jacket comes in baritone blue, dark olive, caviar, burro, and moonbeam. Did you order yours?
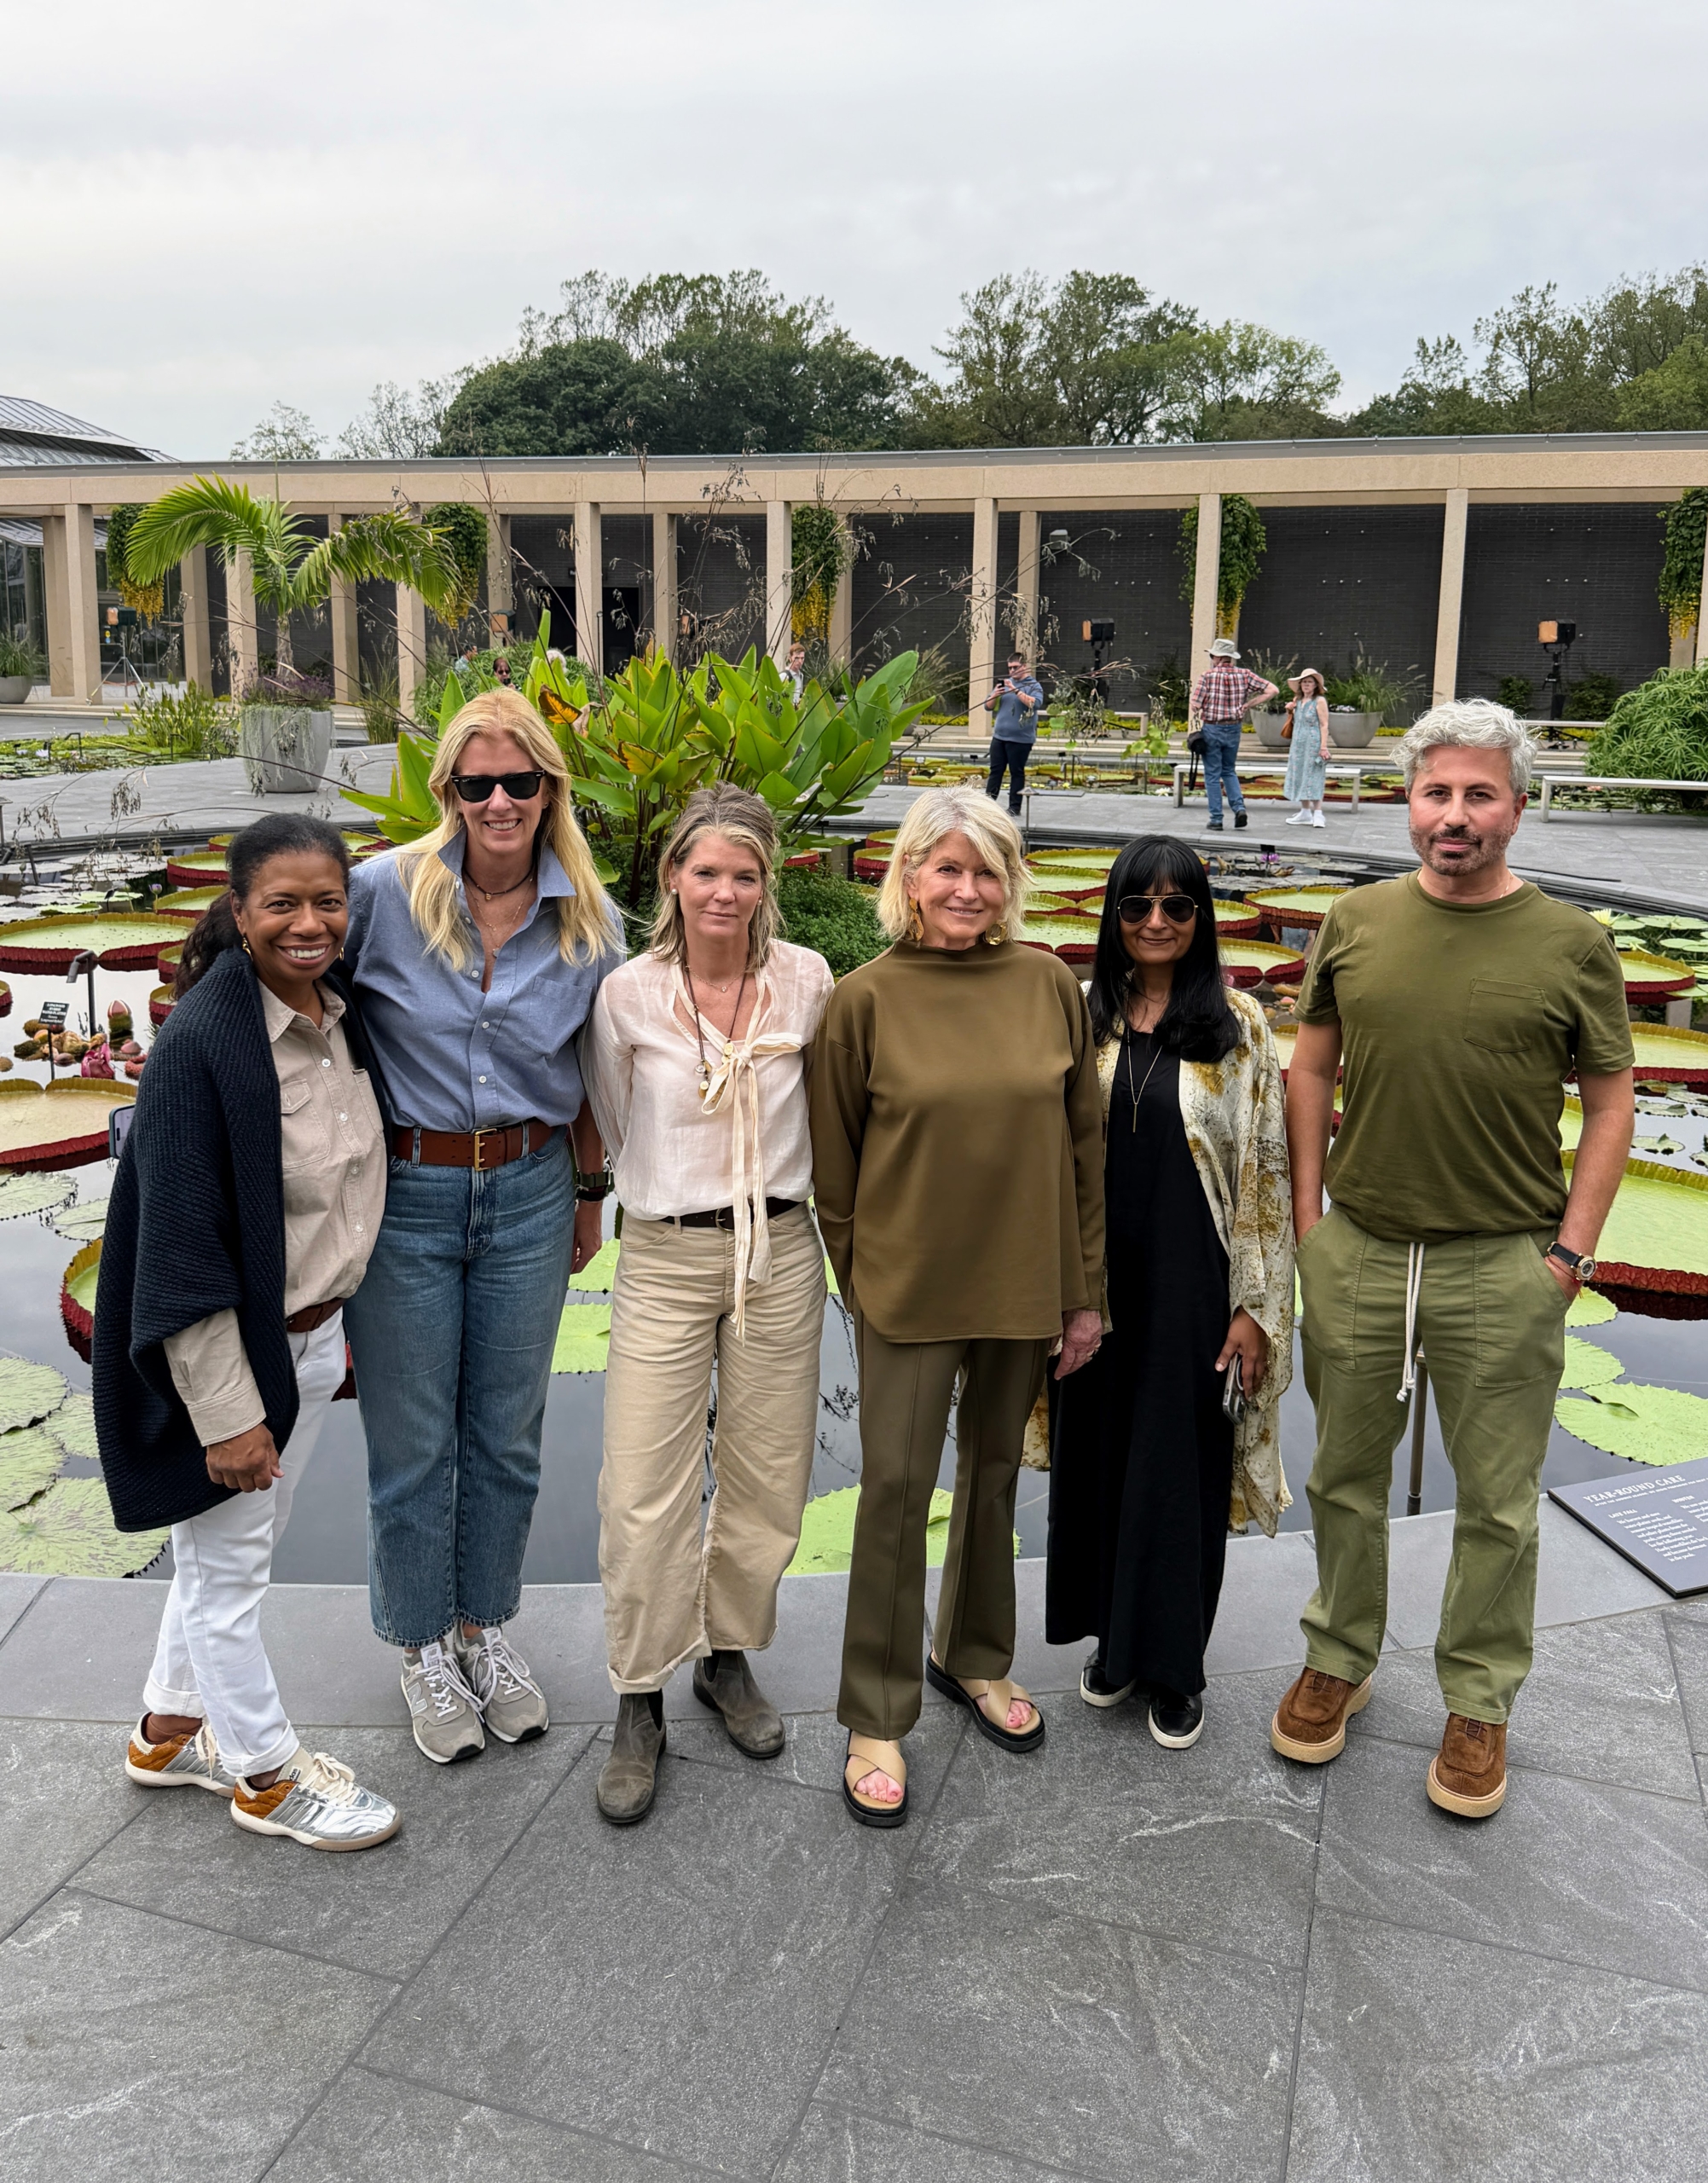
One of the day’s later appearances was at Longwood Gardens. Here I am with my hardworking team – Laura Smalls, Meegan Colgan, Judy Morris, Dipali Patwa, and Taymour Hallal.
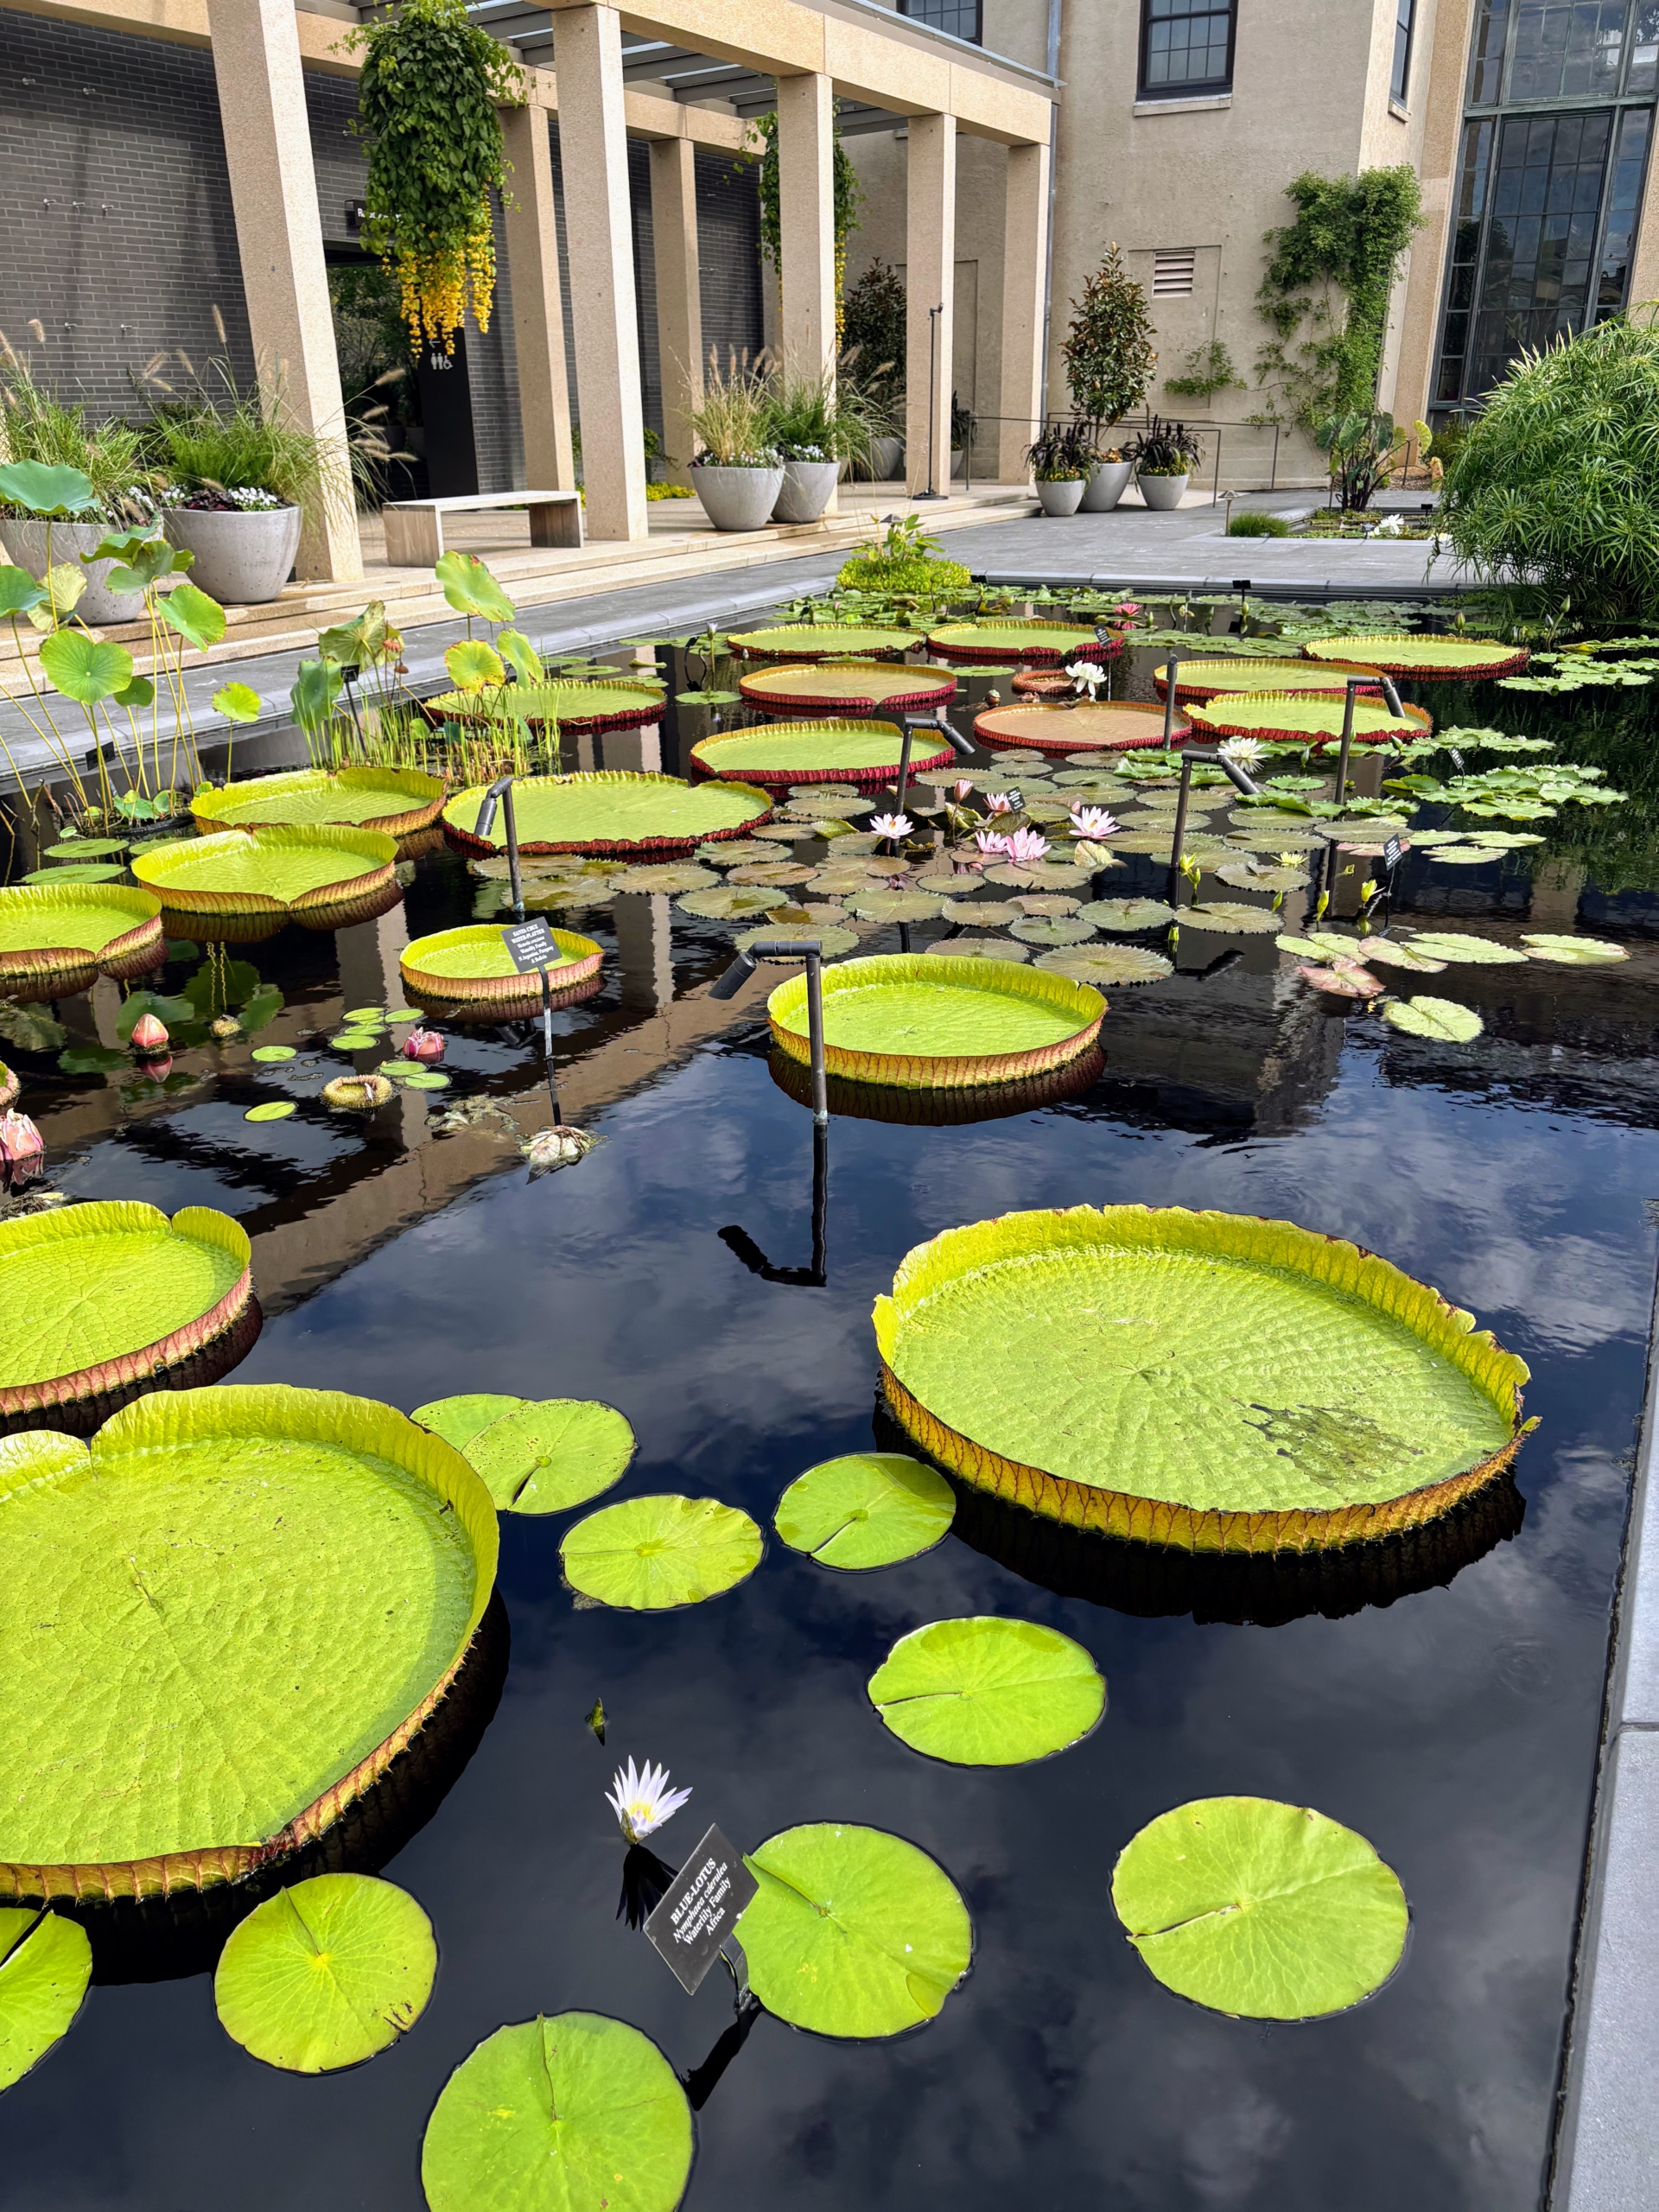
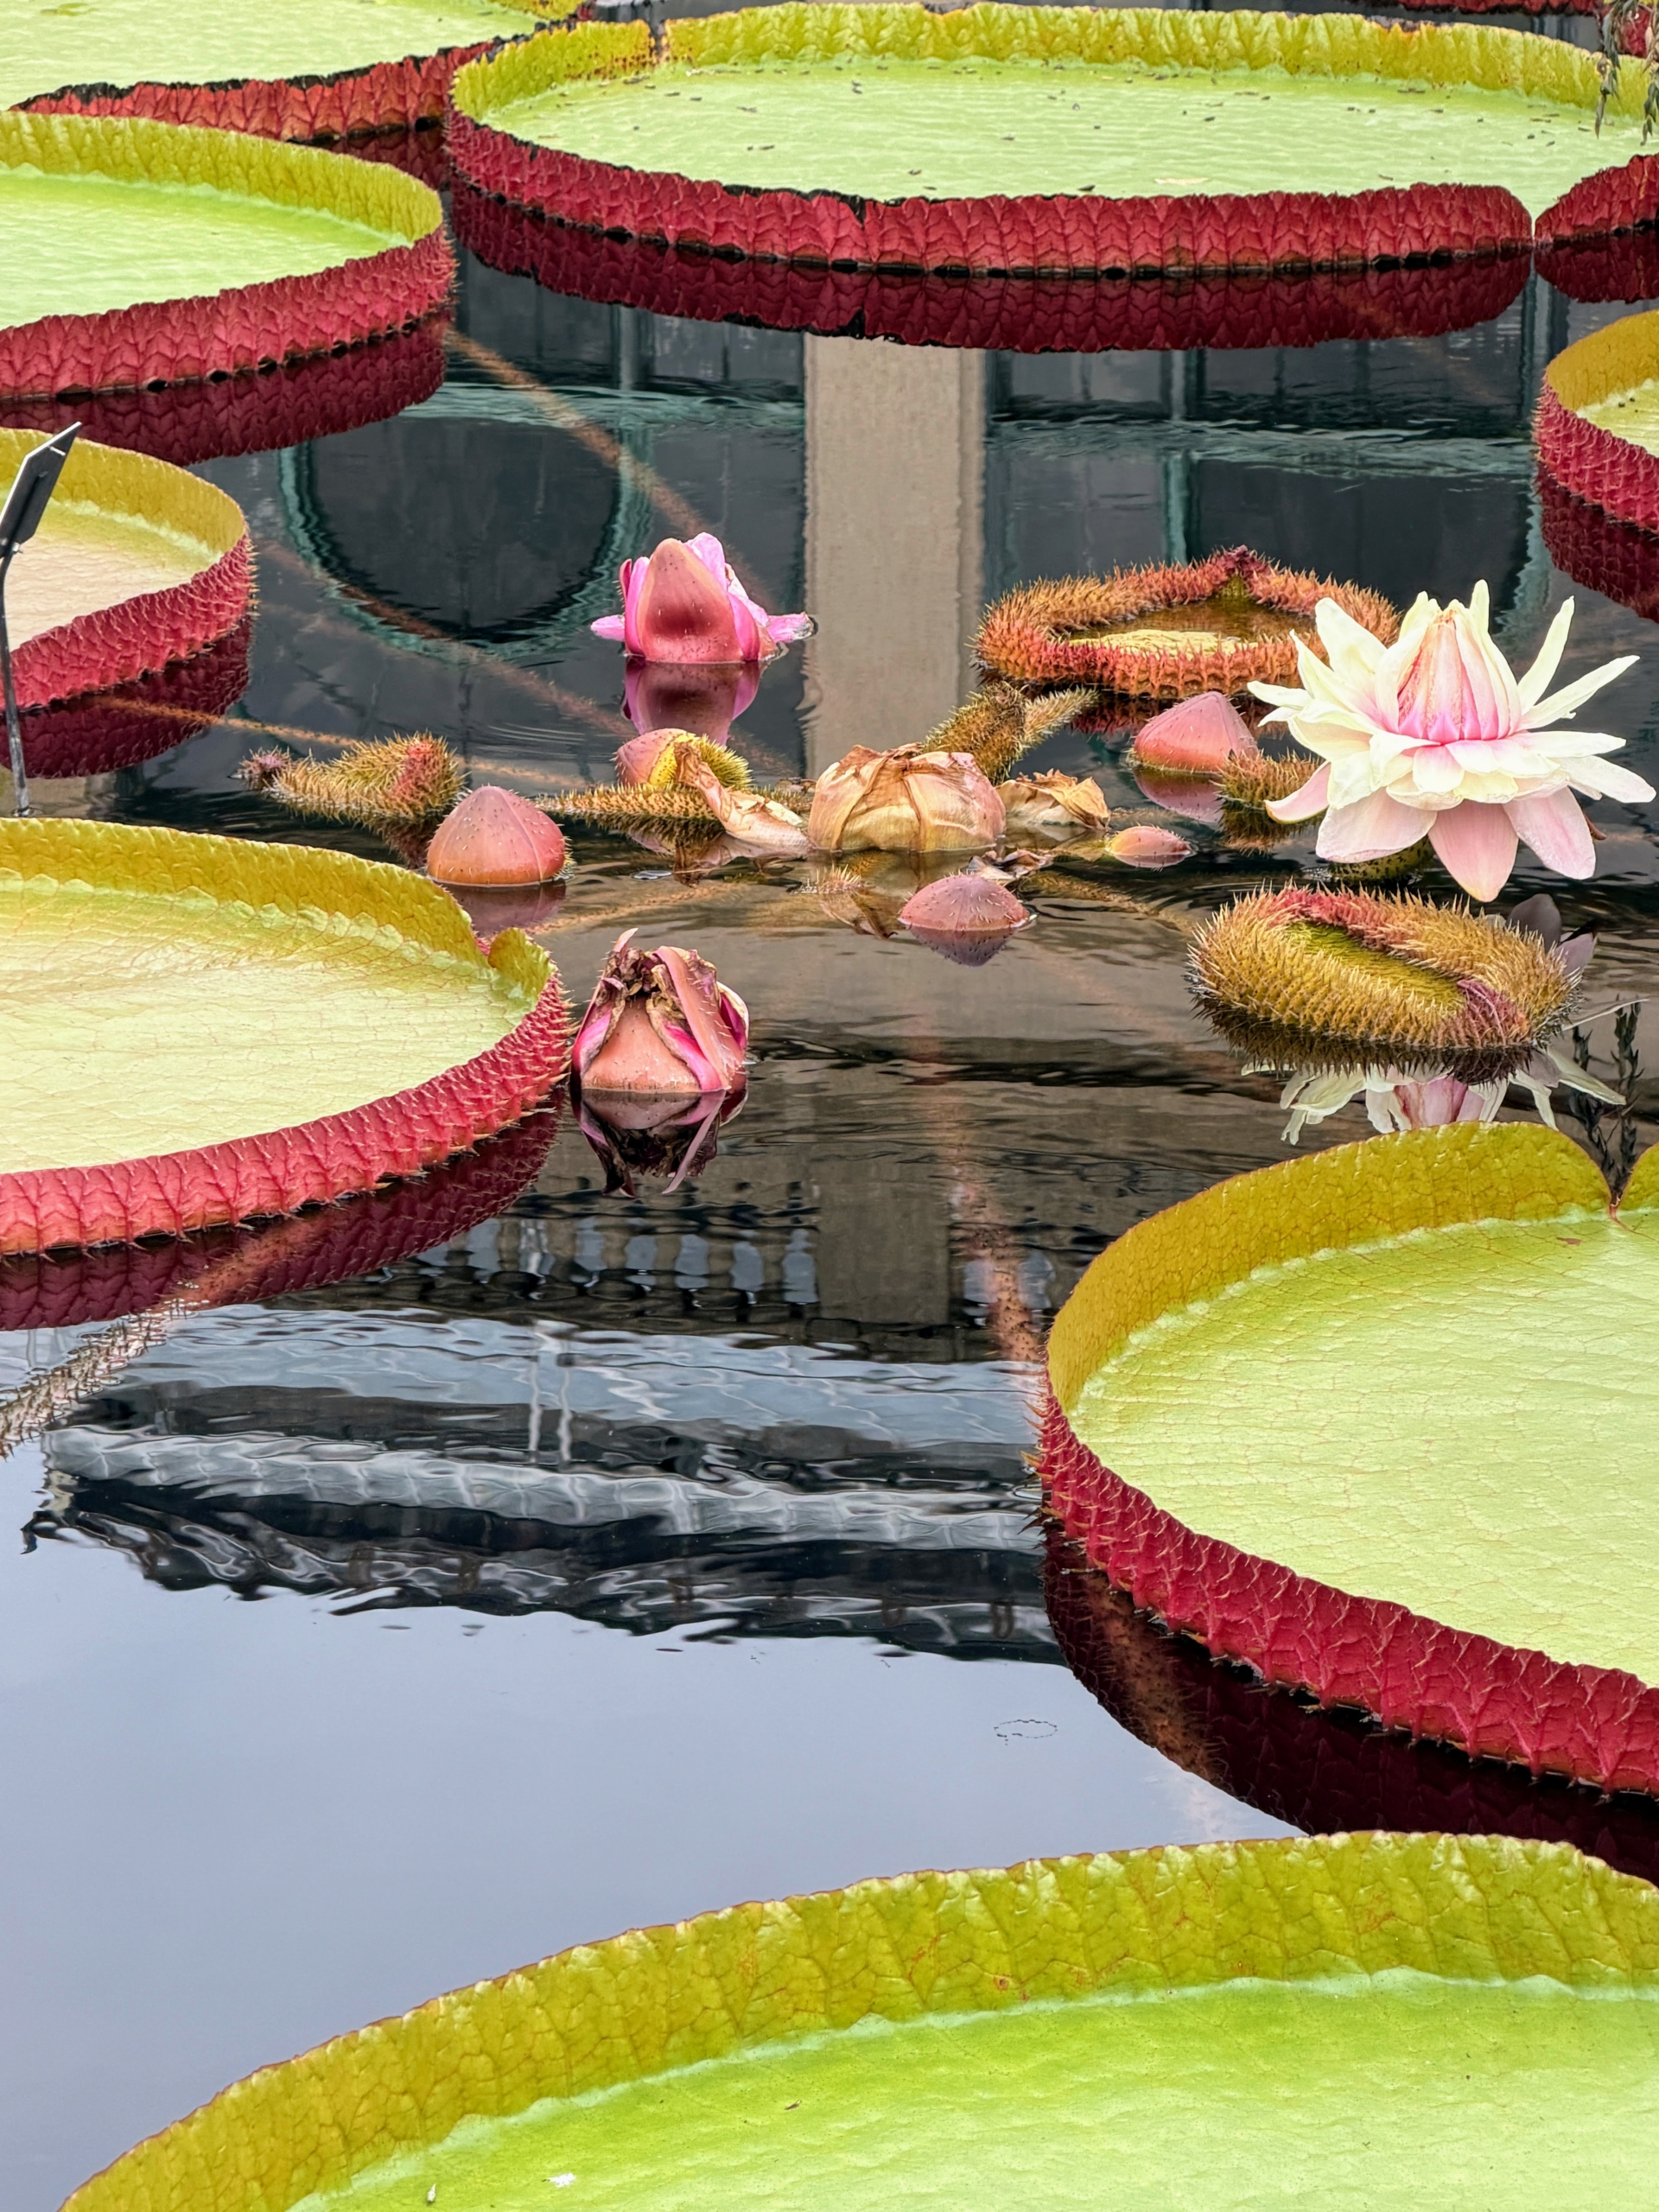
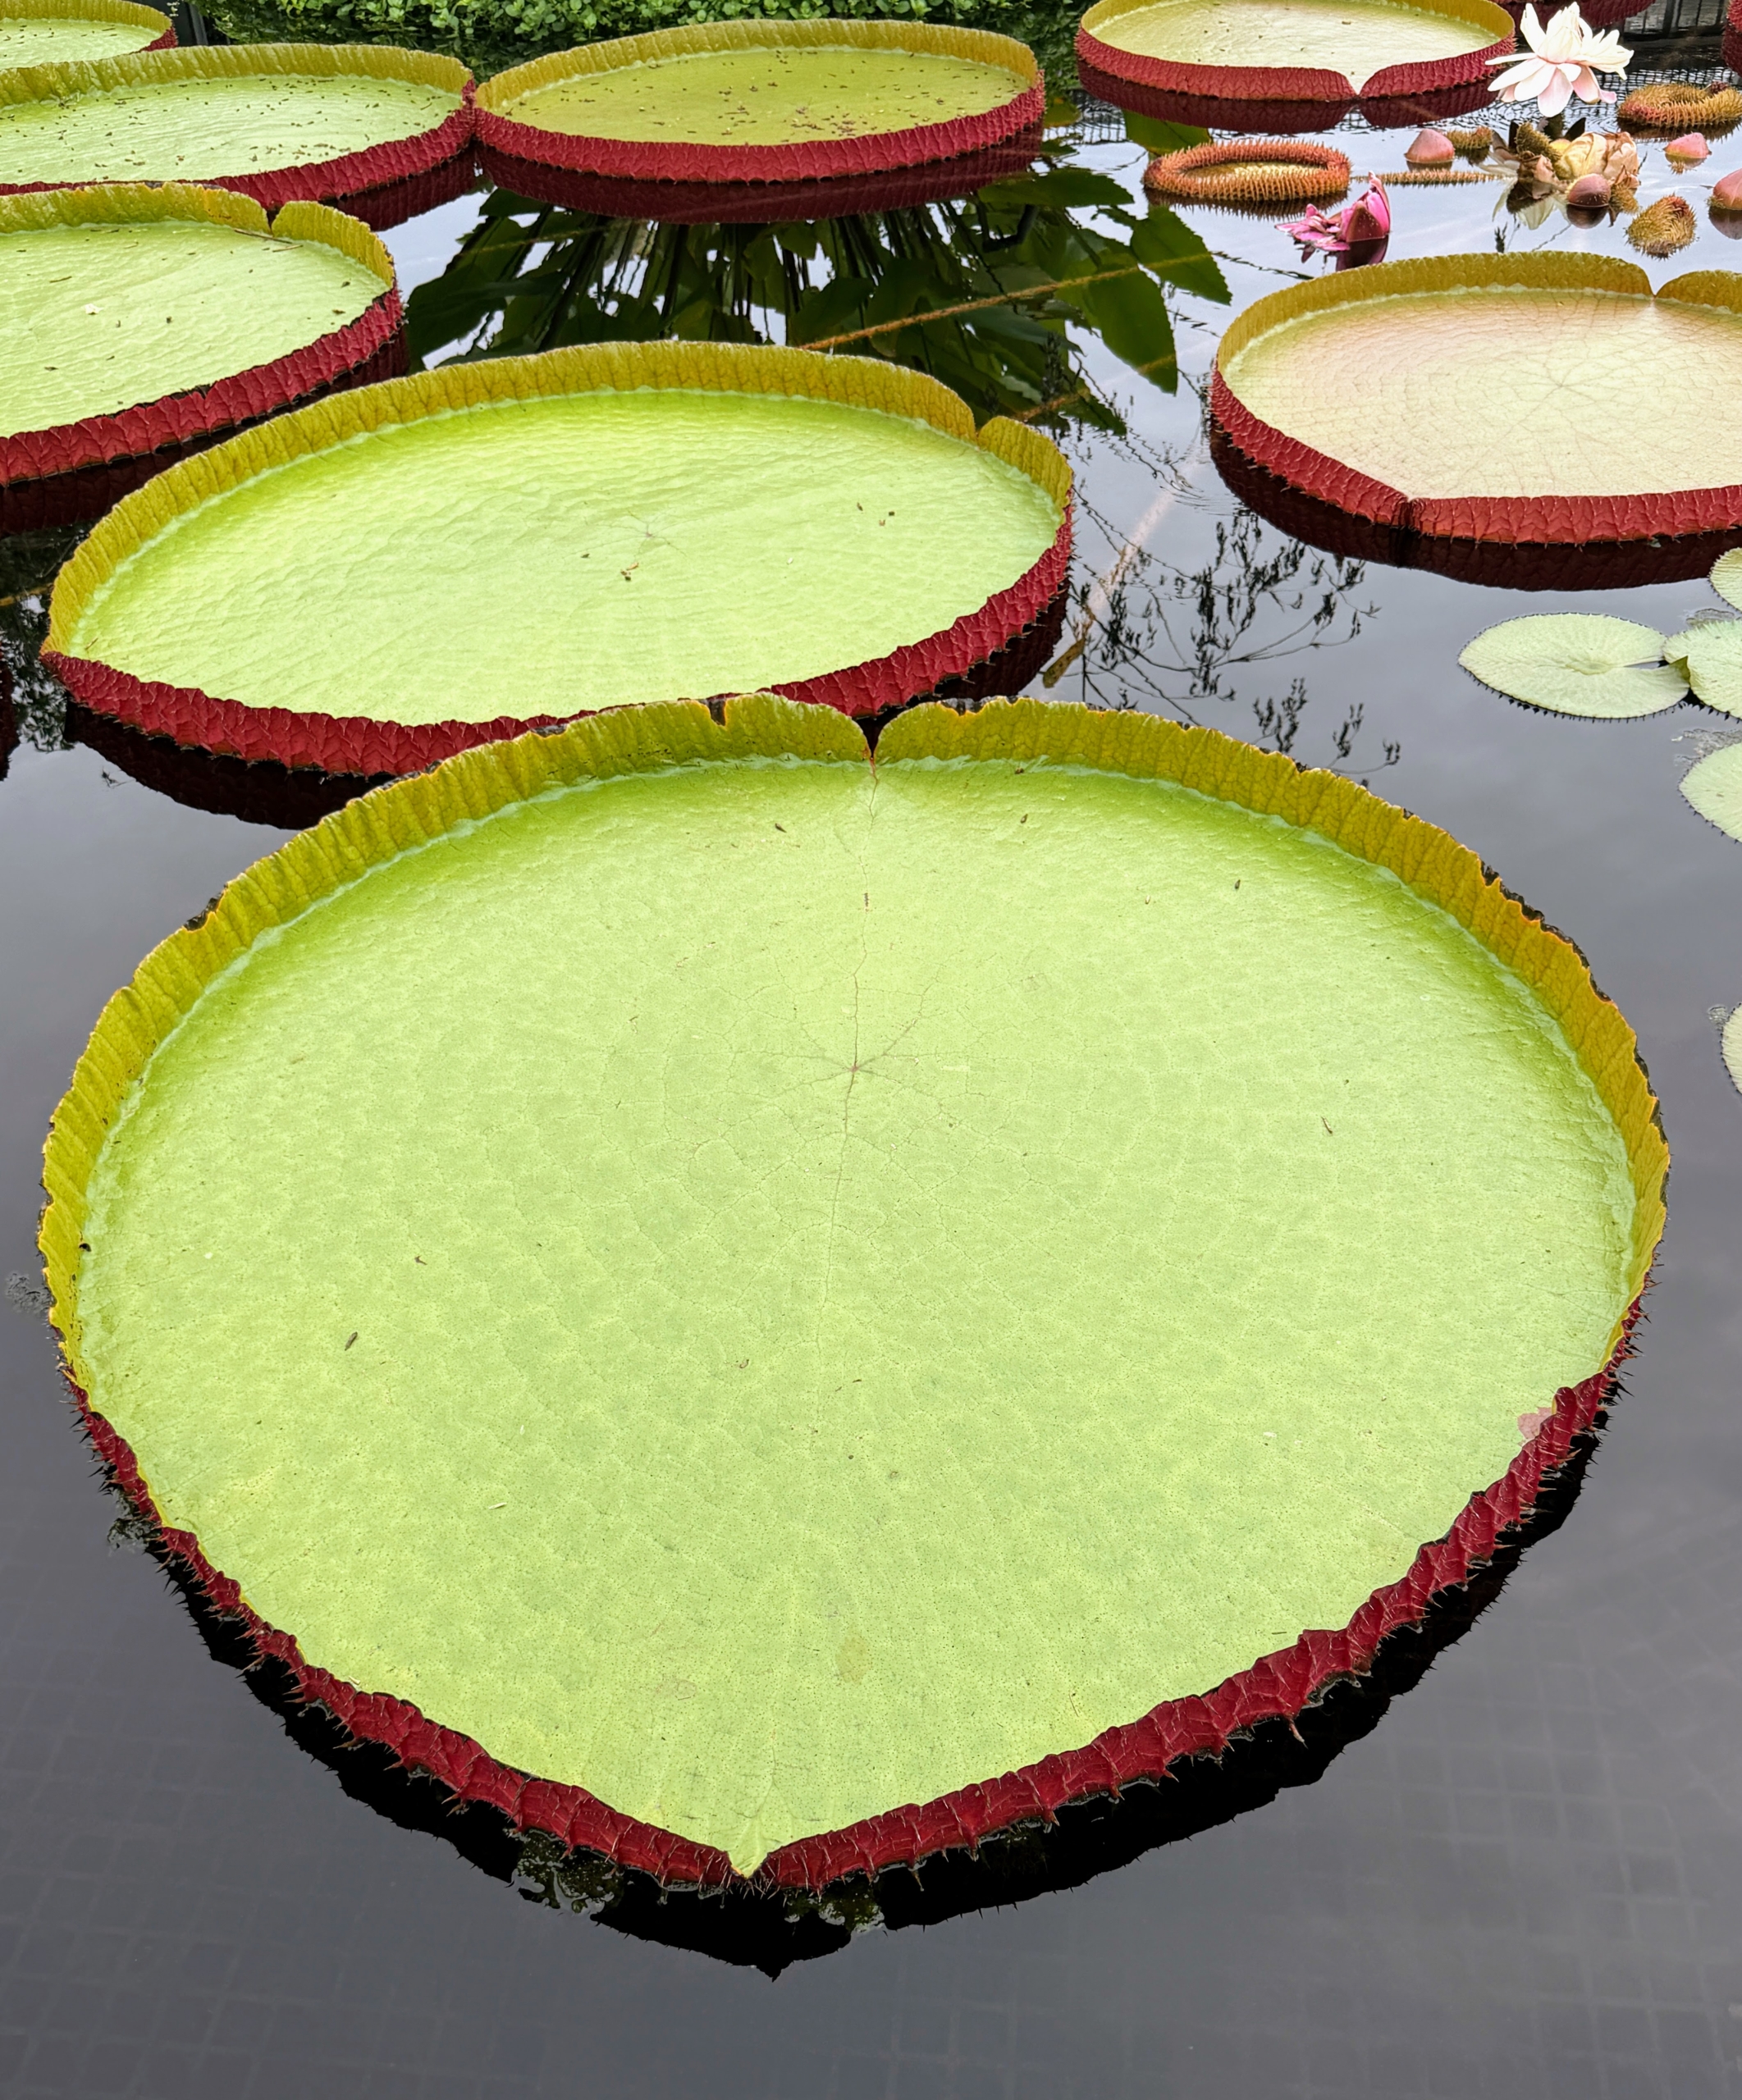
I was excited to see all the water lilies at Longwood’s newly renovated Waterlily Court. Victoria cruziana and Victoria amazonica were crossed to create these Longwood hybrids. (Photo by James Sutton)
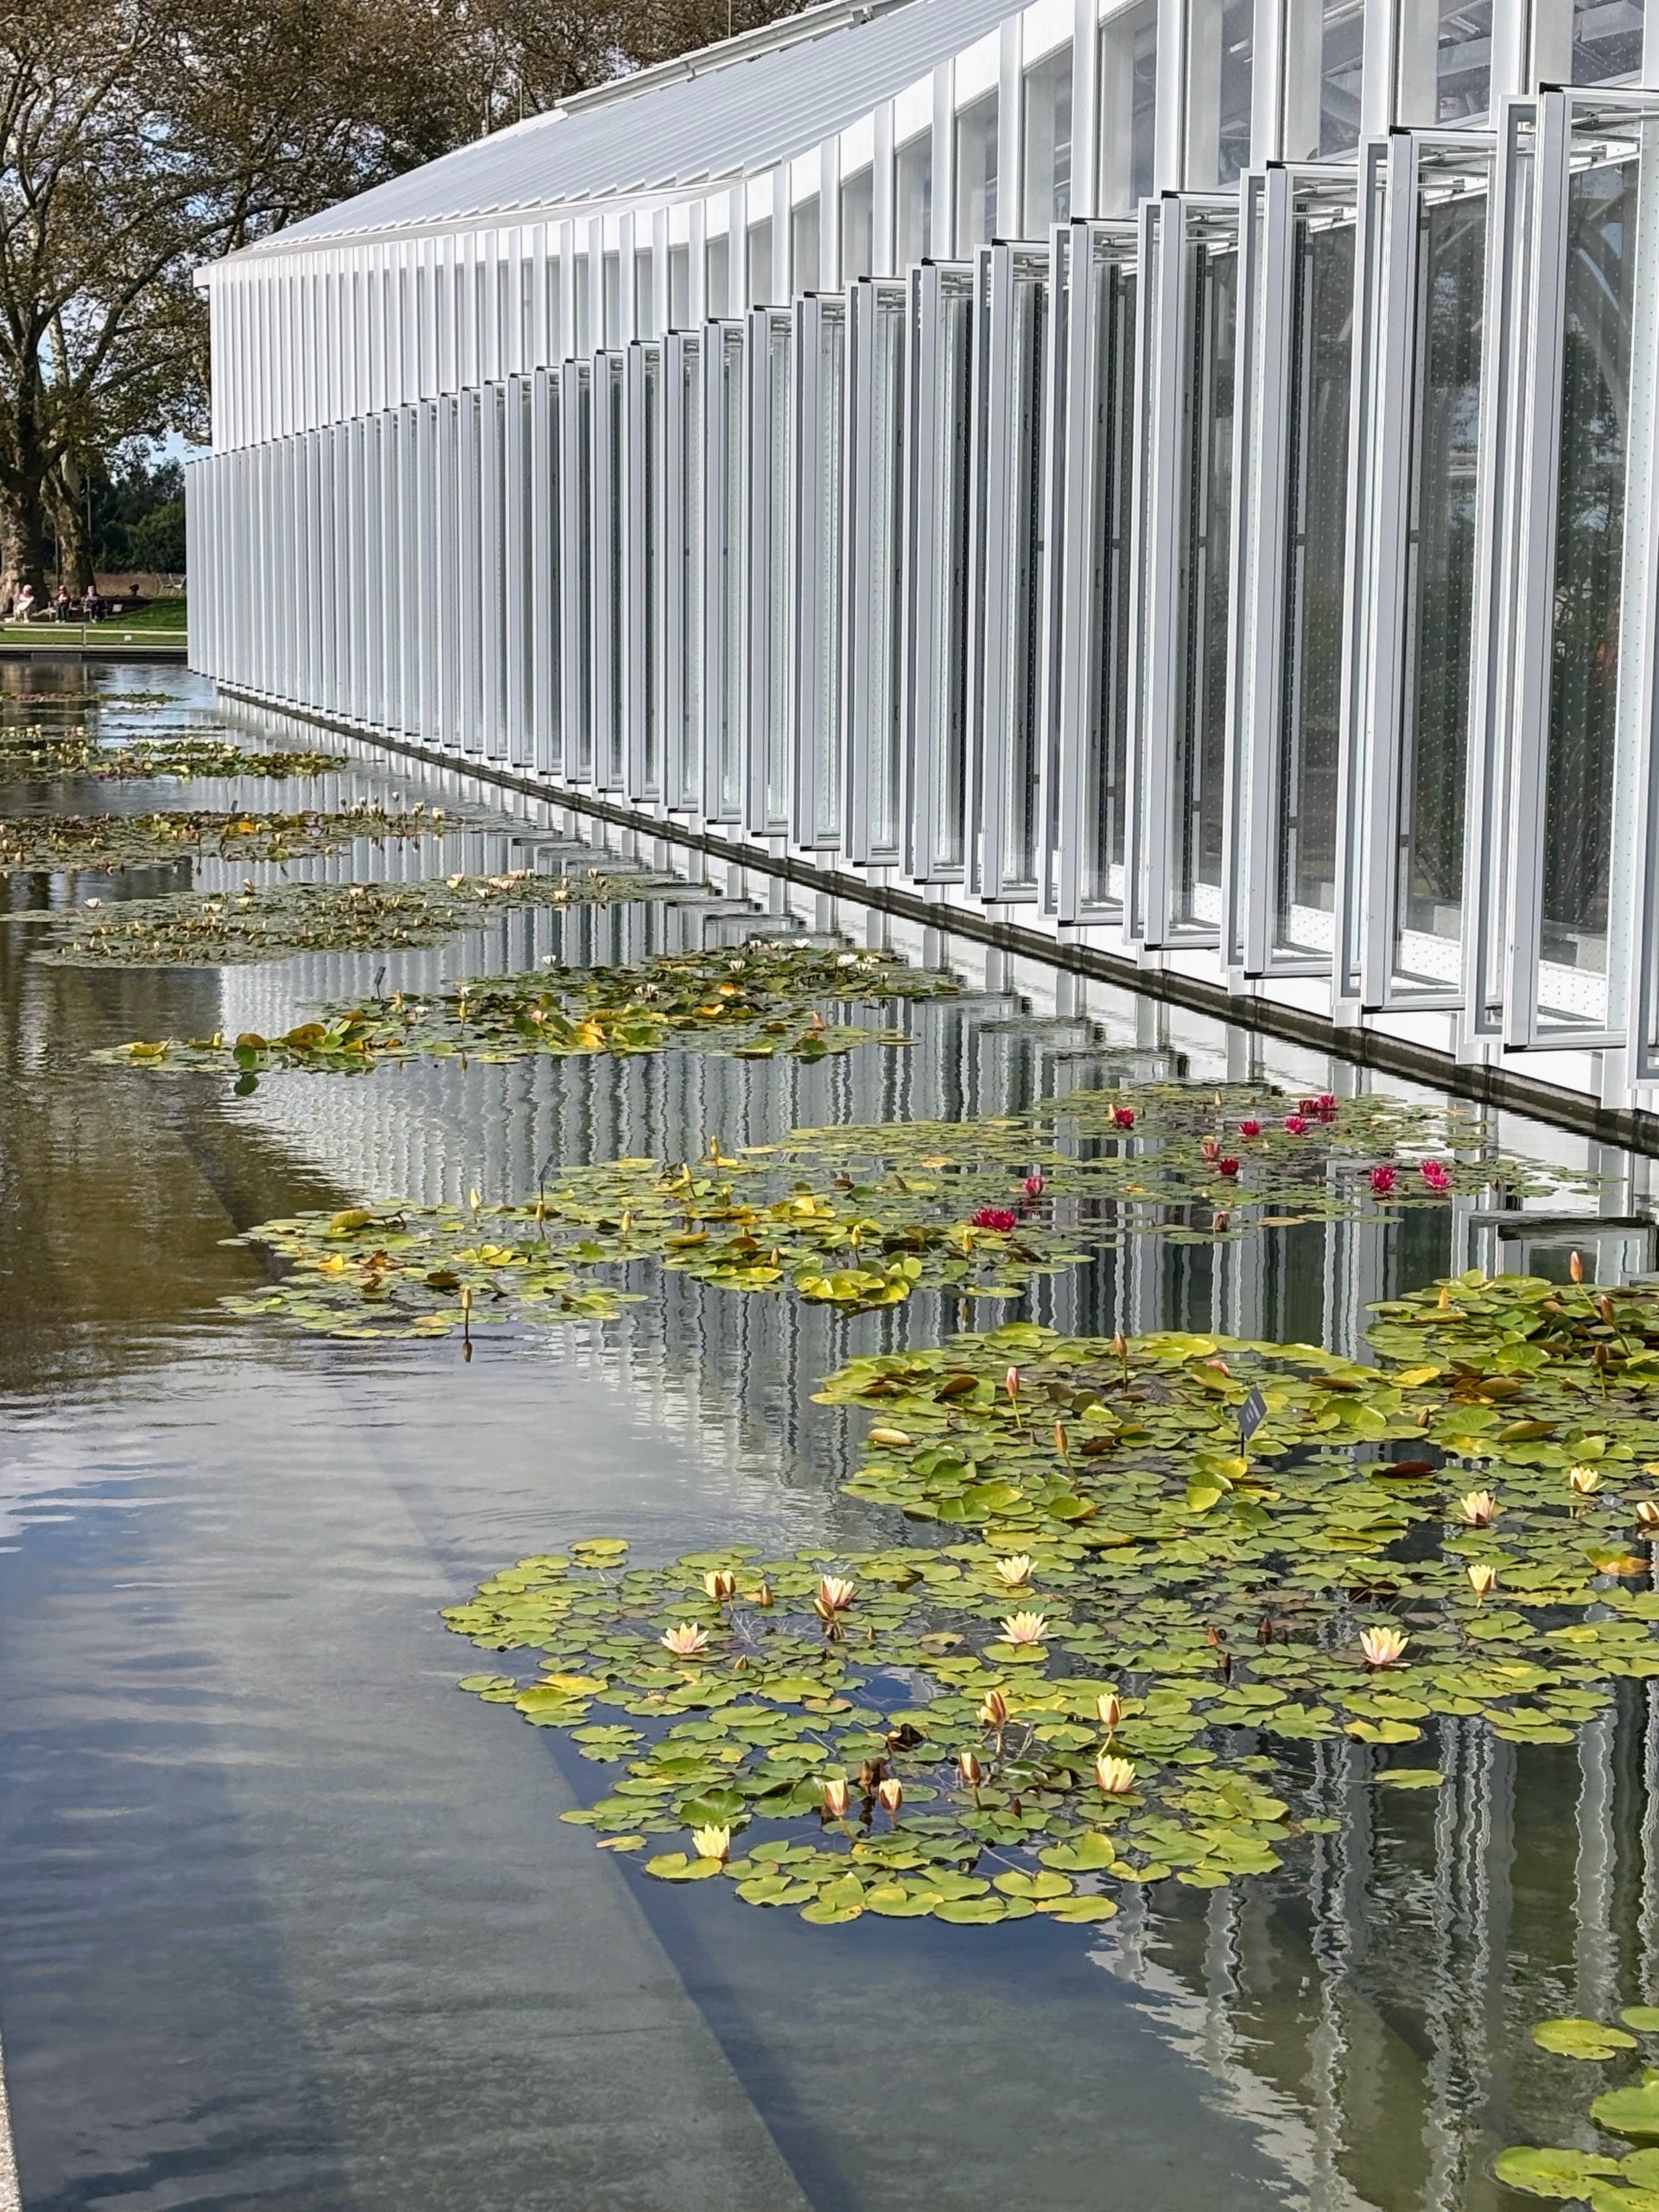
More hardy water lilies grace the south side of the new West Conservatory. (Photo by James Sutton)
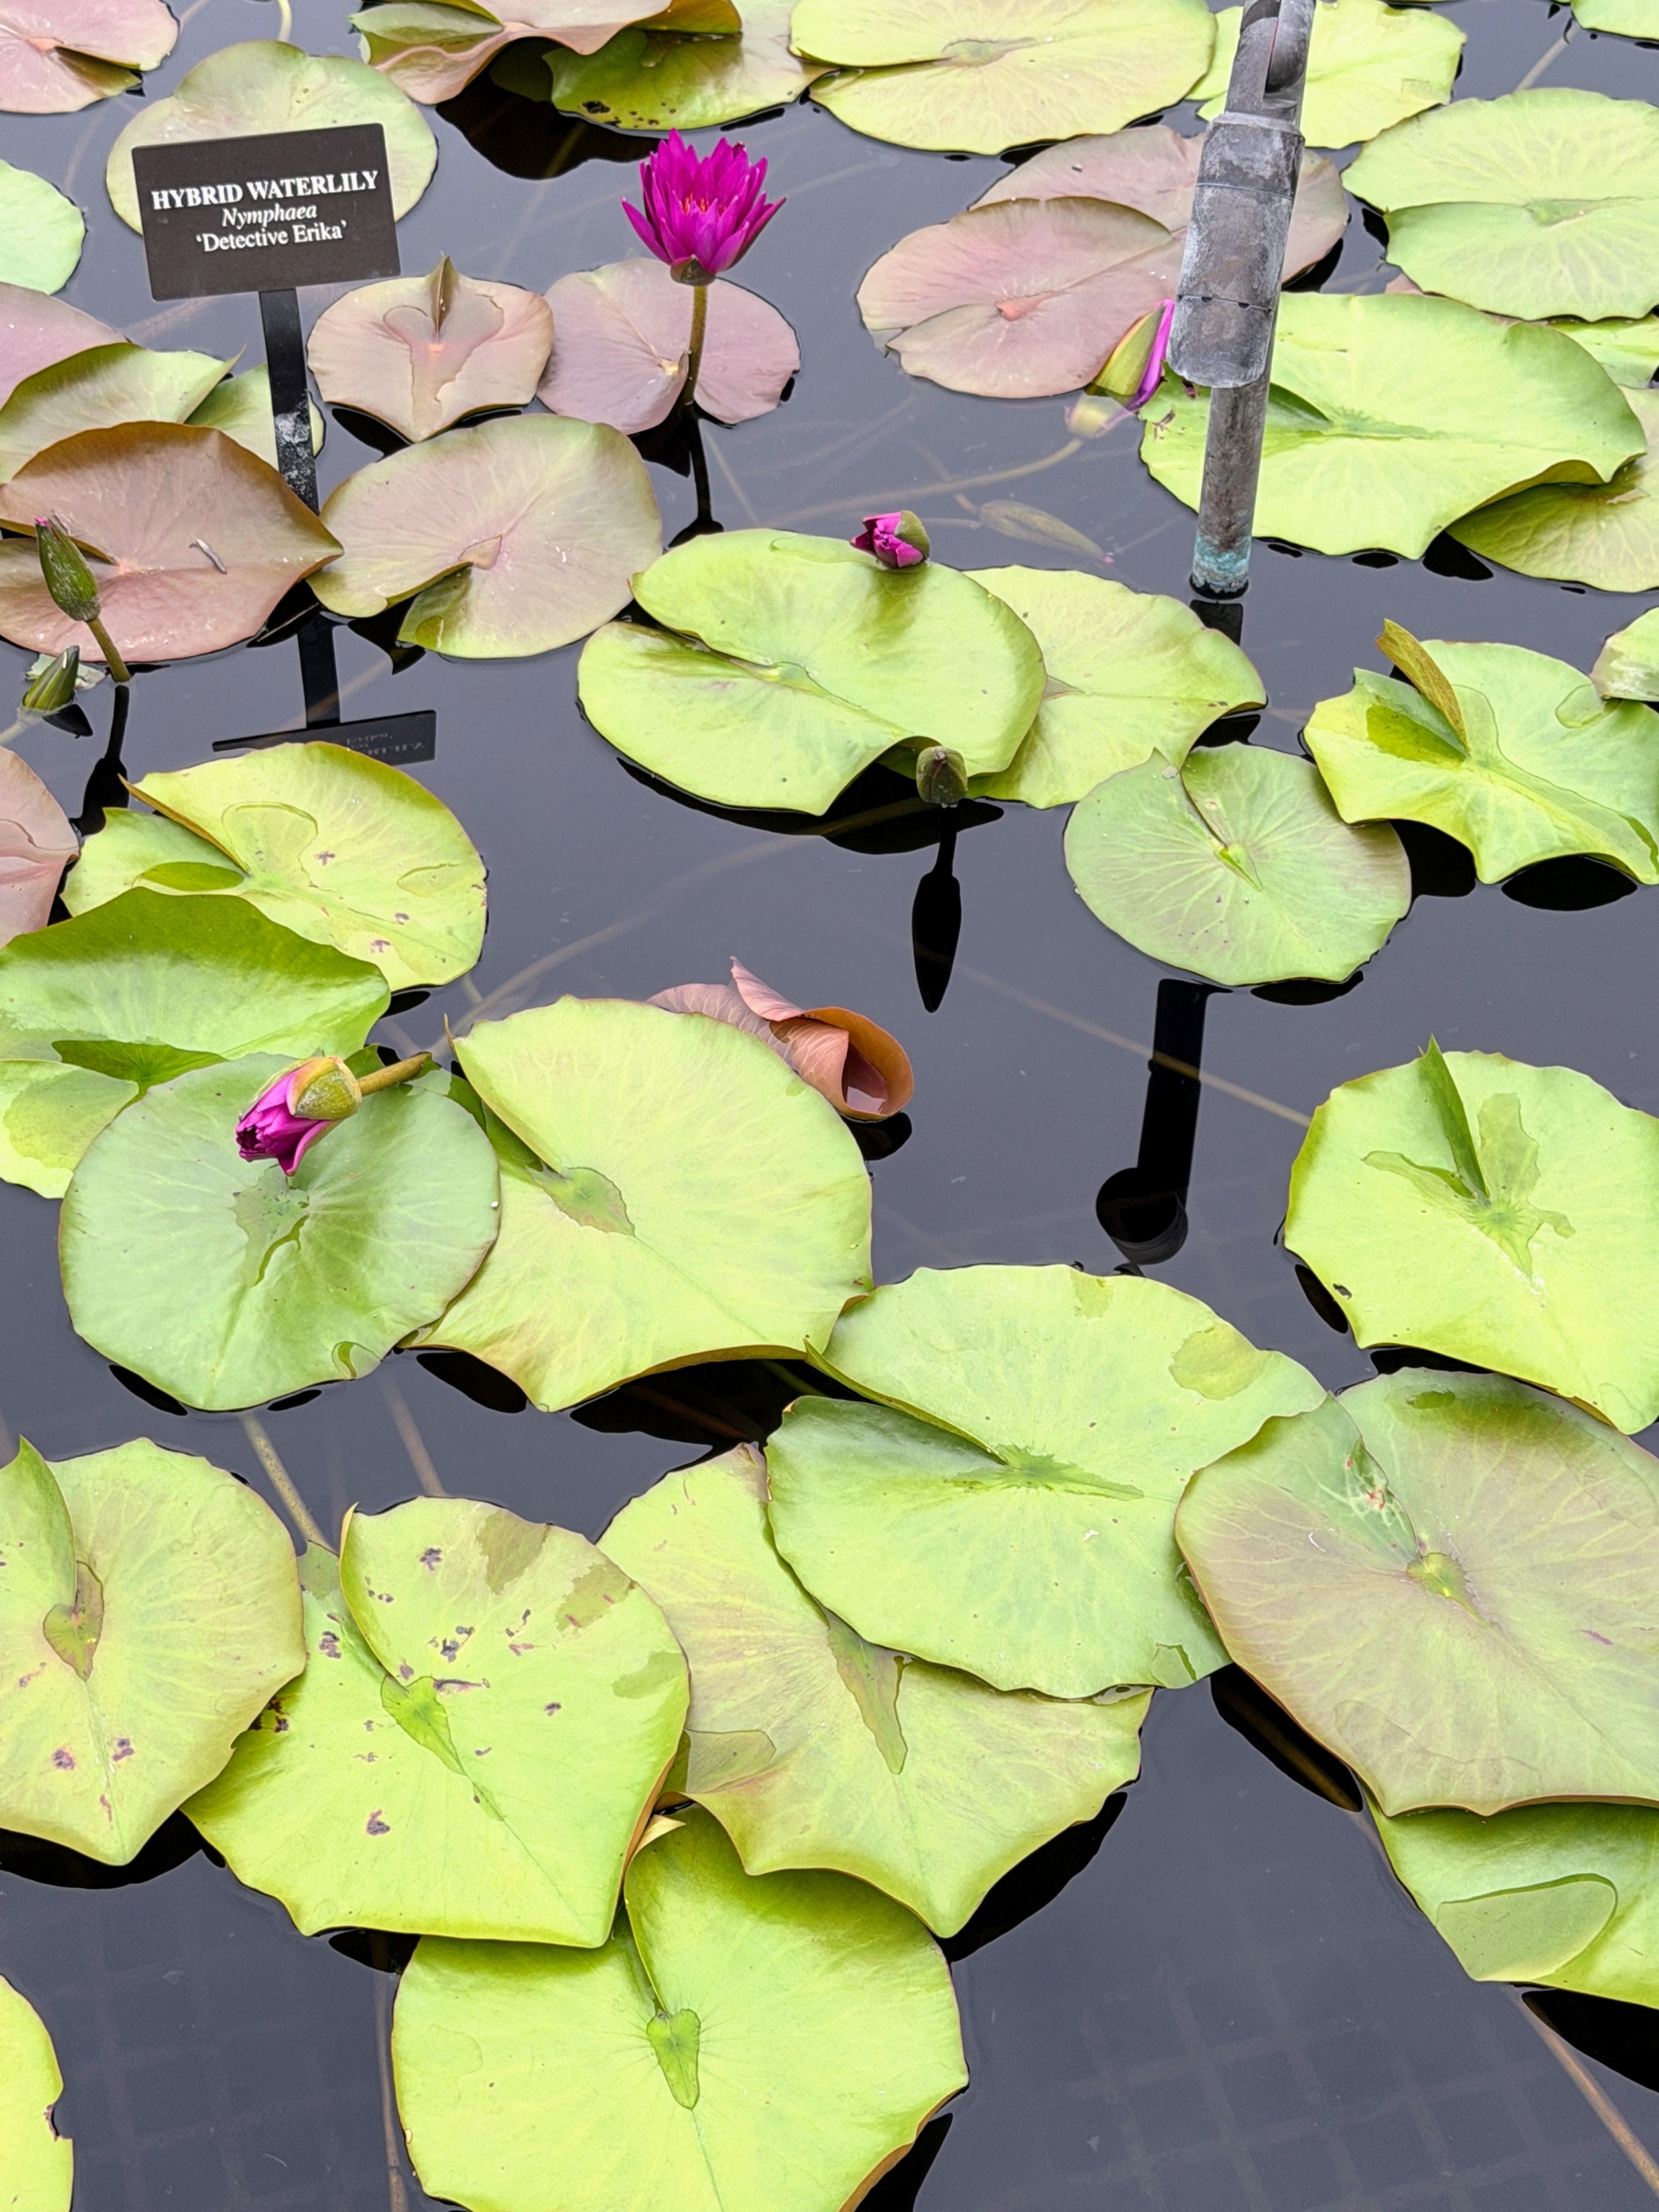
Hybrid water lily Nymphara ‘Detective Erika’ has prolific blooms that are purple and grow up to seven inches wide.
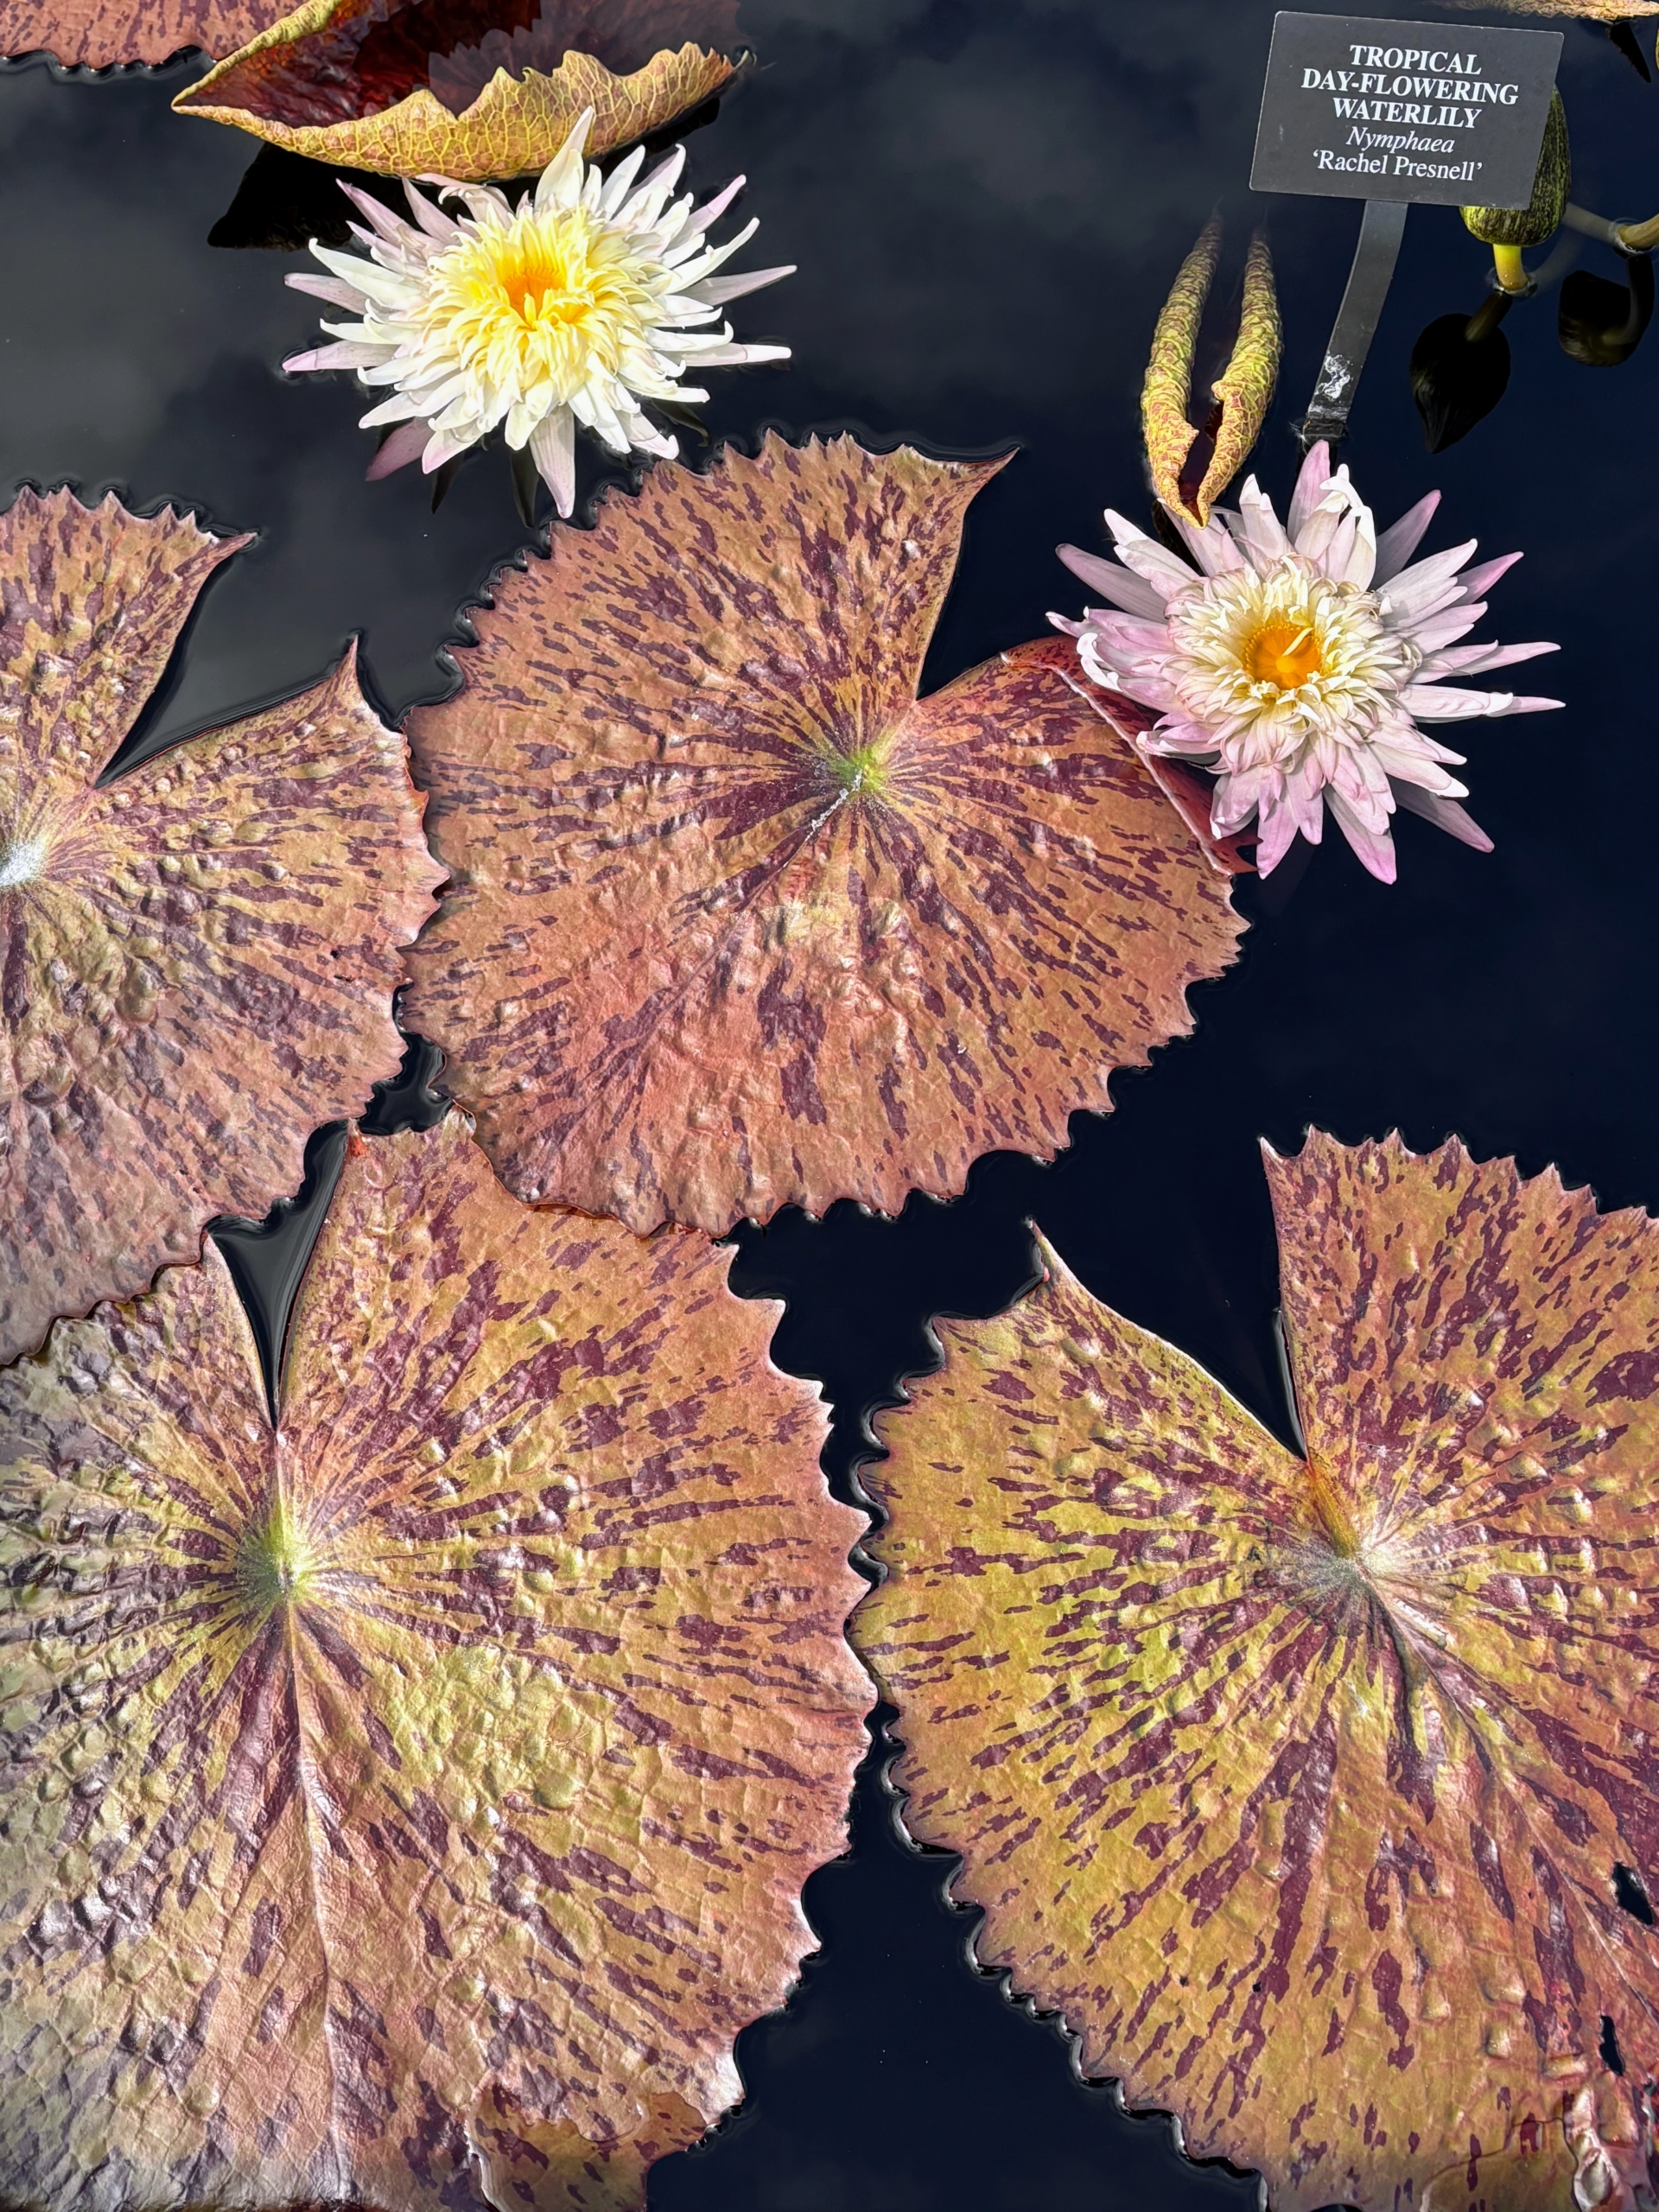
Tropical day-flowering water lily Nymphaea ‘Rachel Presnell’ has large, flat blooms and heavily mottled lily pads.(Photo by James Sutton)
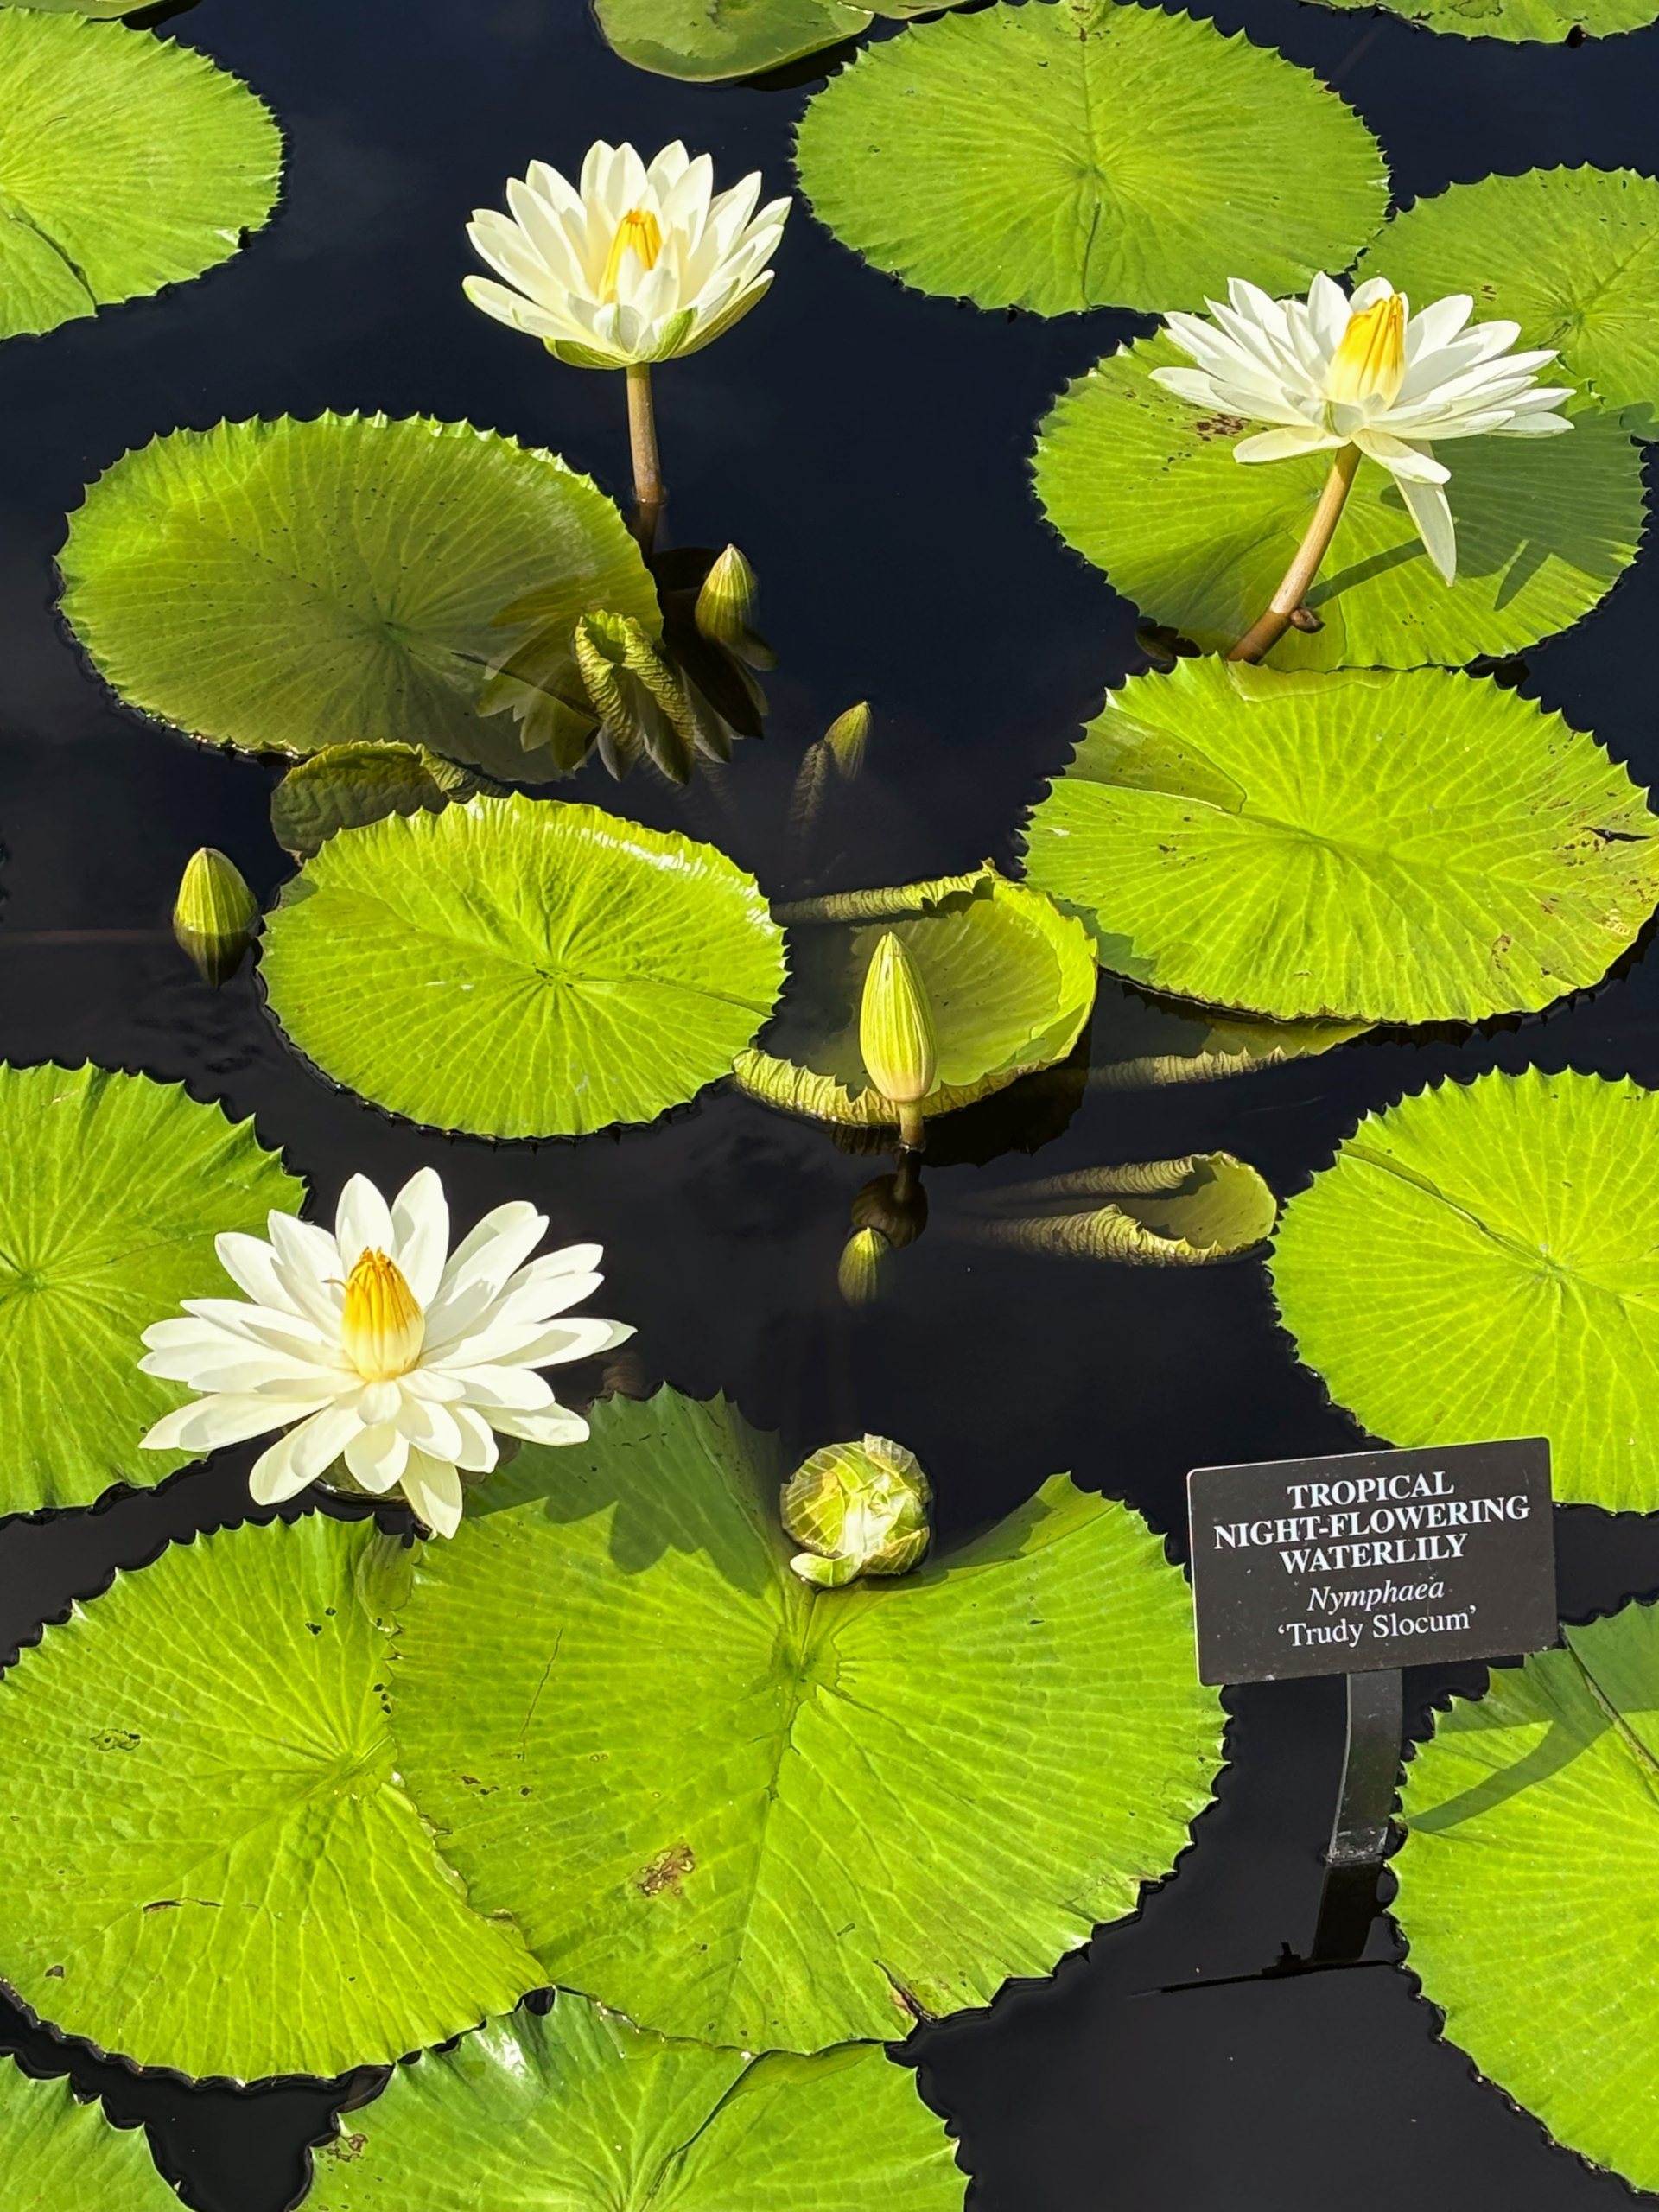
This is tropical night-flowering water lily Nymphaea ‘Trudy Slocum’ with almost perfectly round emerald green leaves and nearly flat white flowers. (Photo by James Sutton)
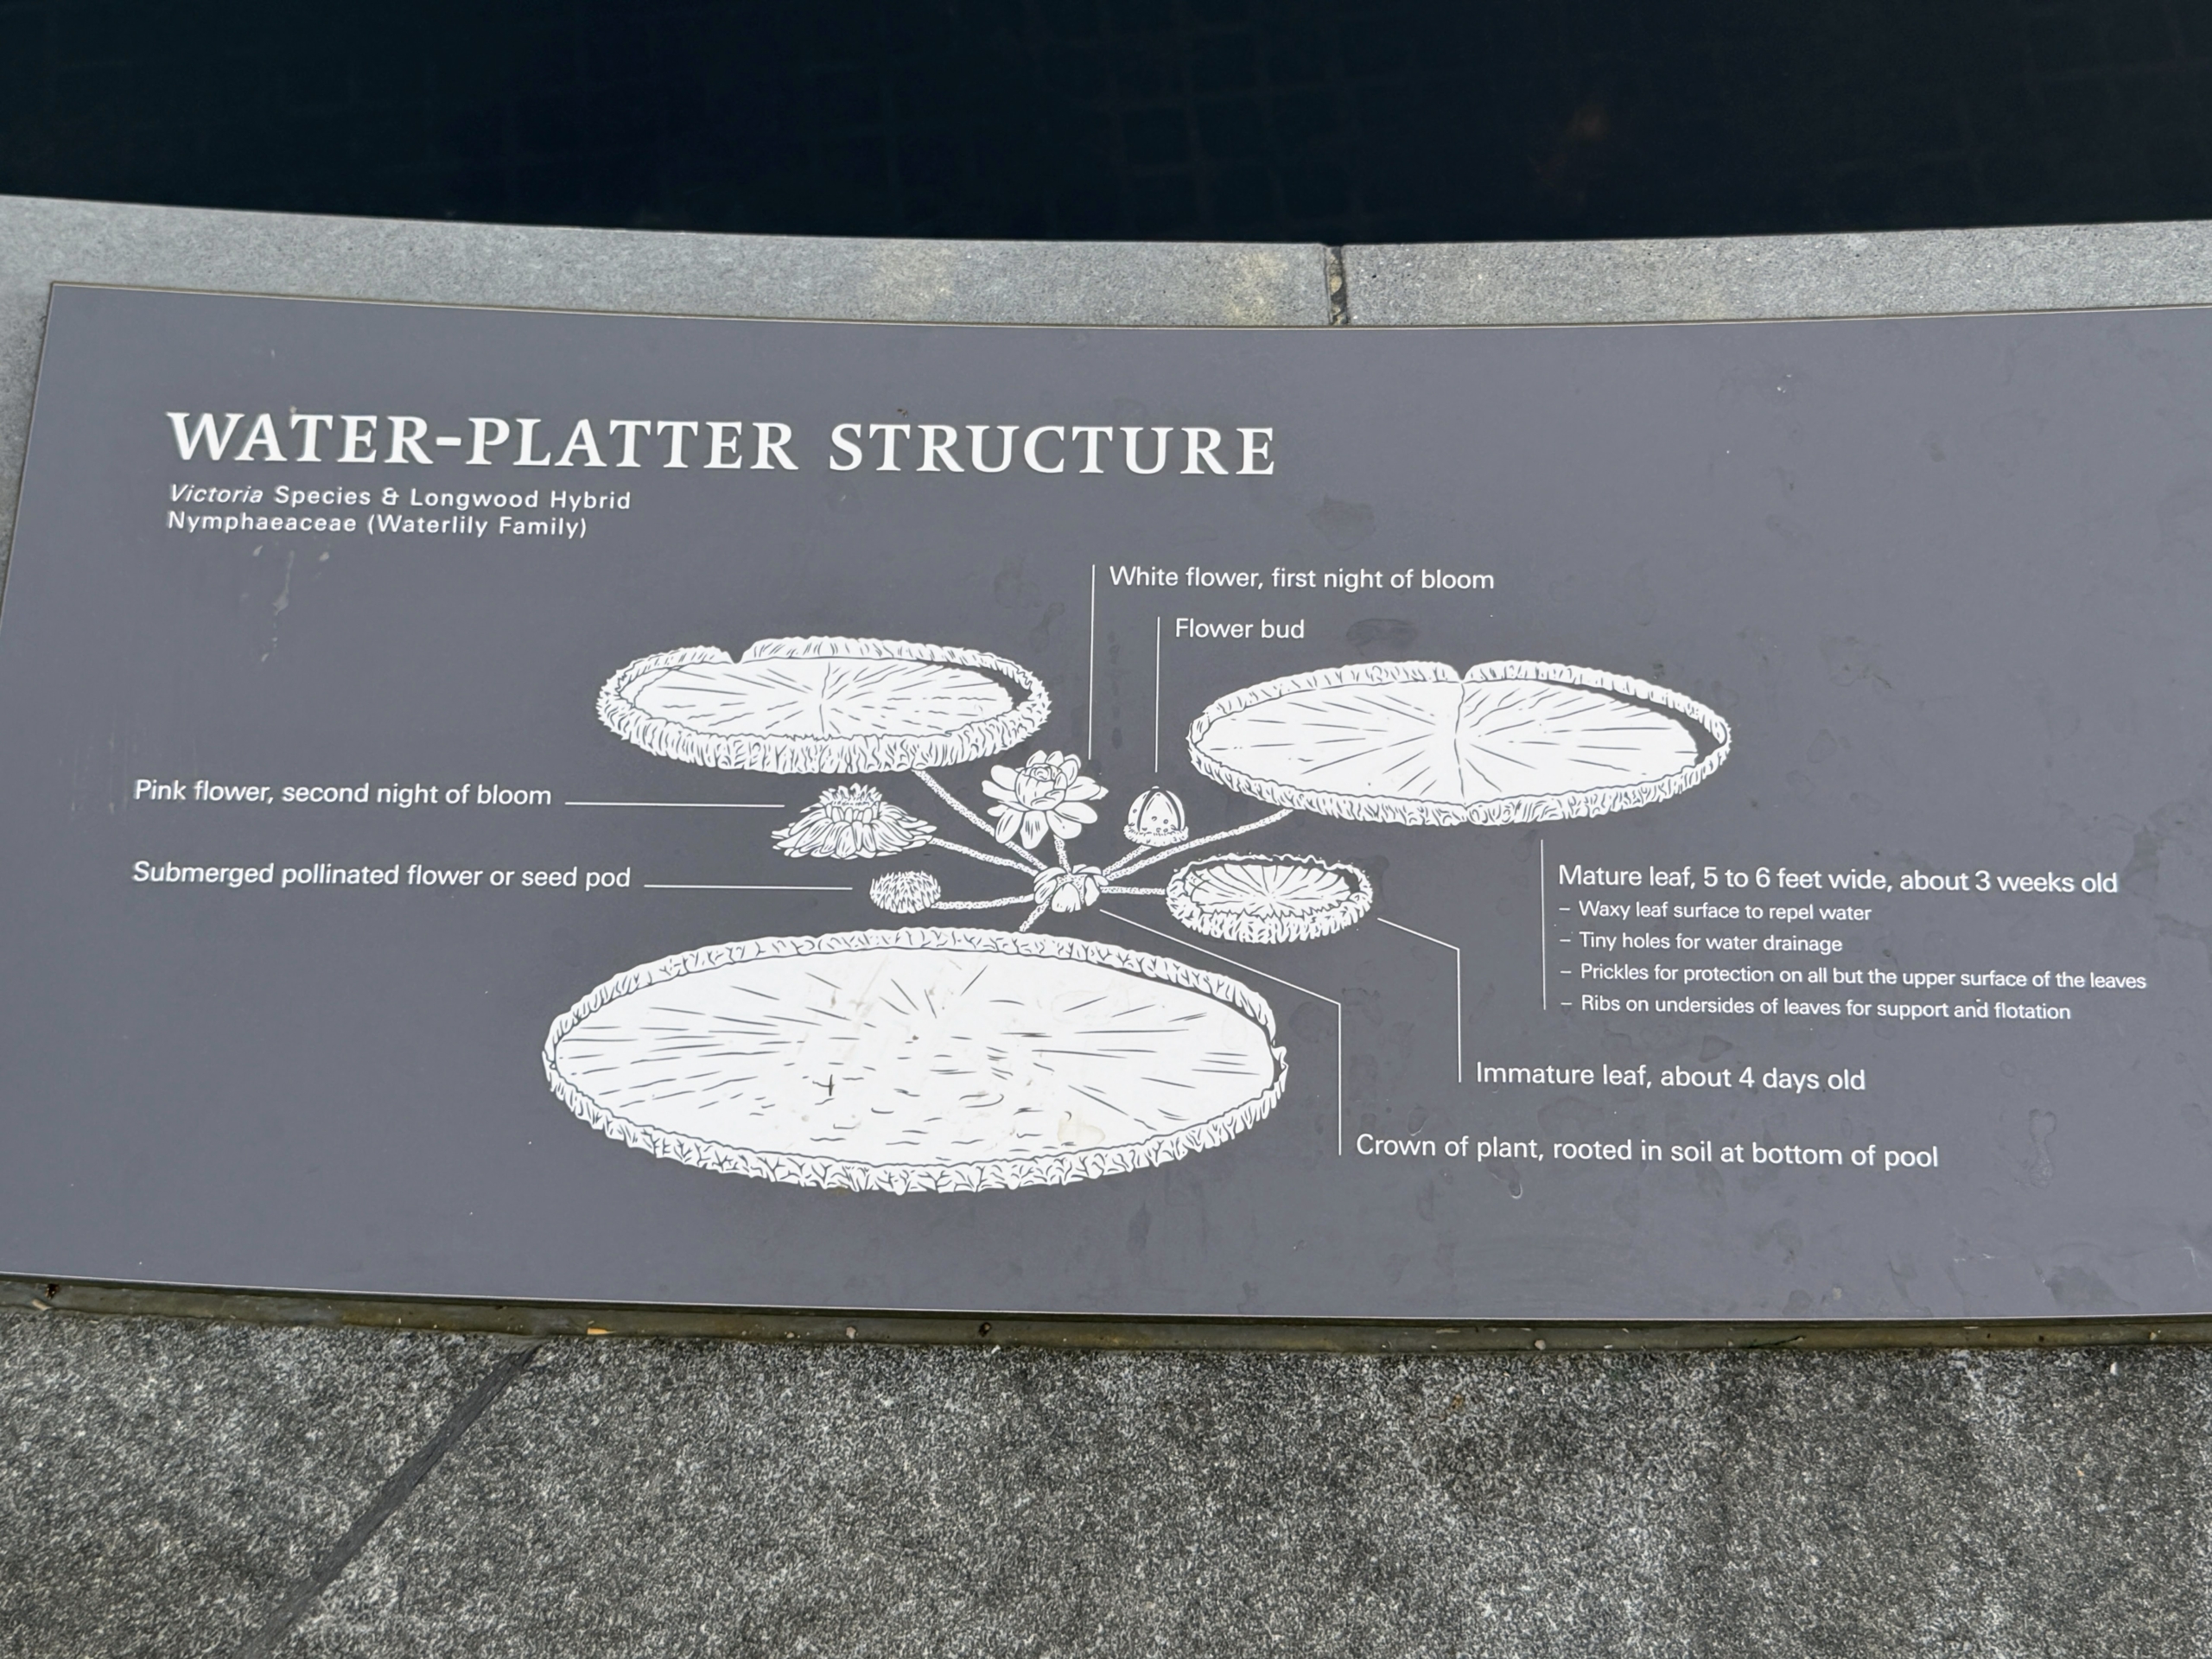
Longwood displays very easy-to-understand diagrams of how water platters or water lilies are structured. They have center mother plants with shallow, extensive roots. The stems are long and flexible and help to float the leaves and flowers to the surface.
Here is a mother plant with its offshoot leaves and blooms.
Some of these water platters can hold up to 160 pounds.
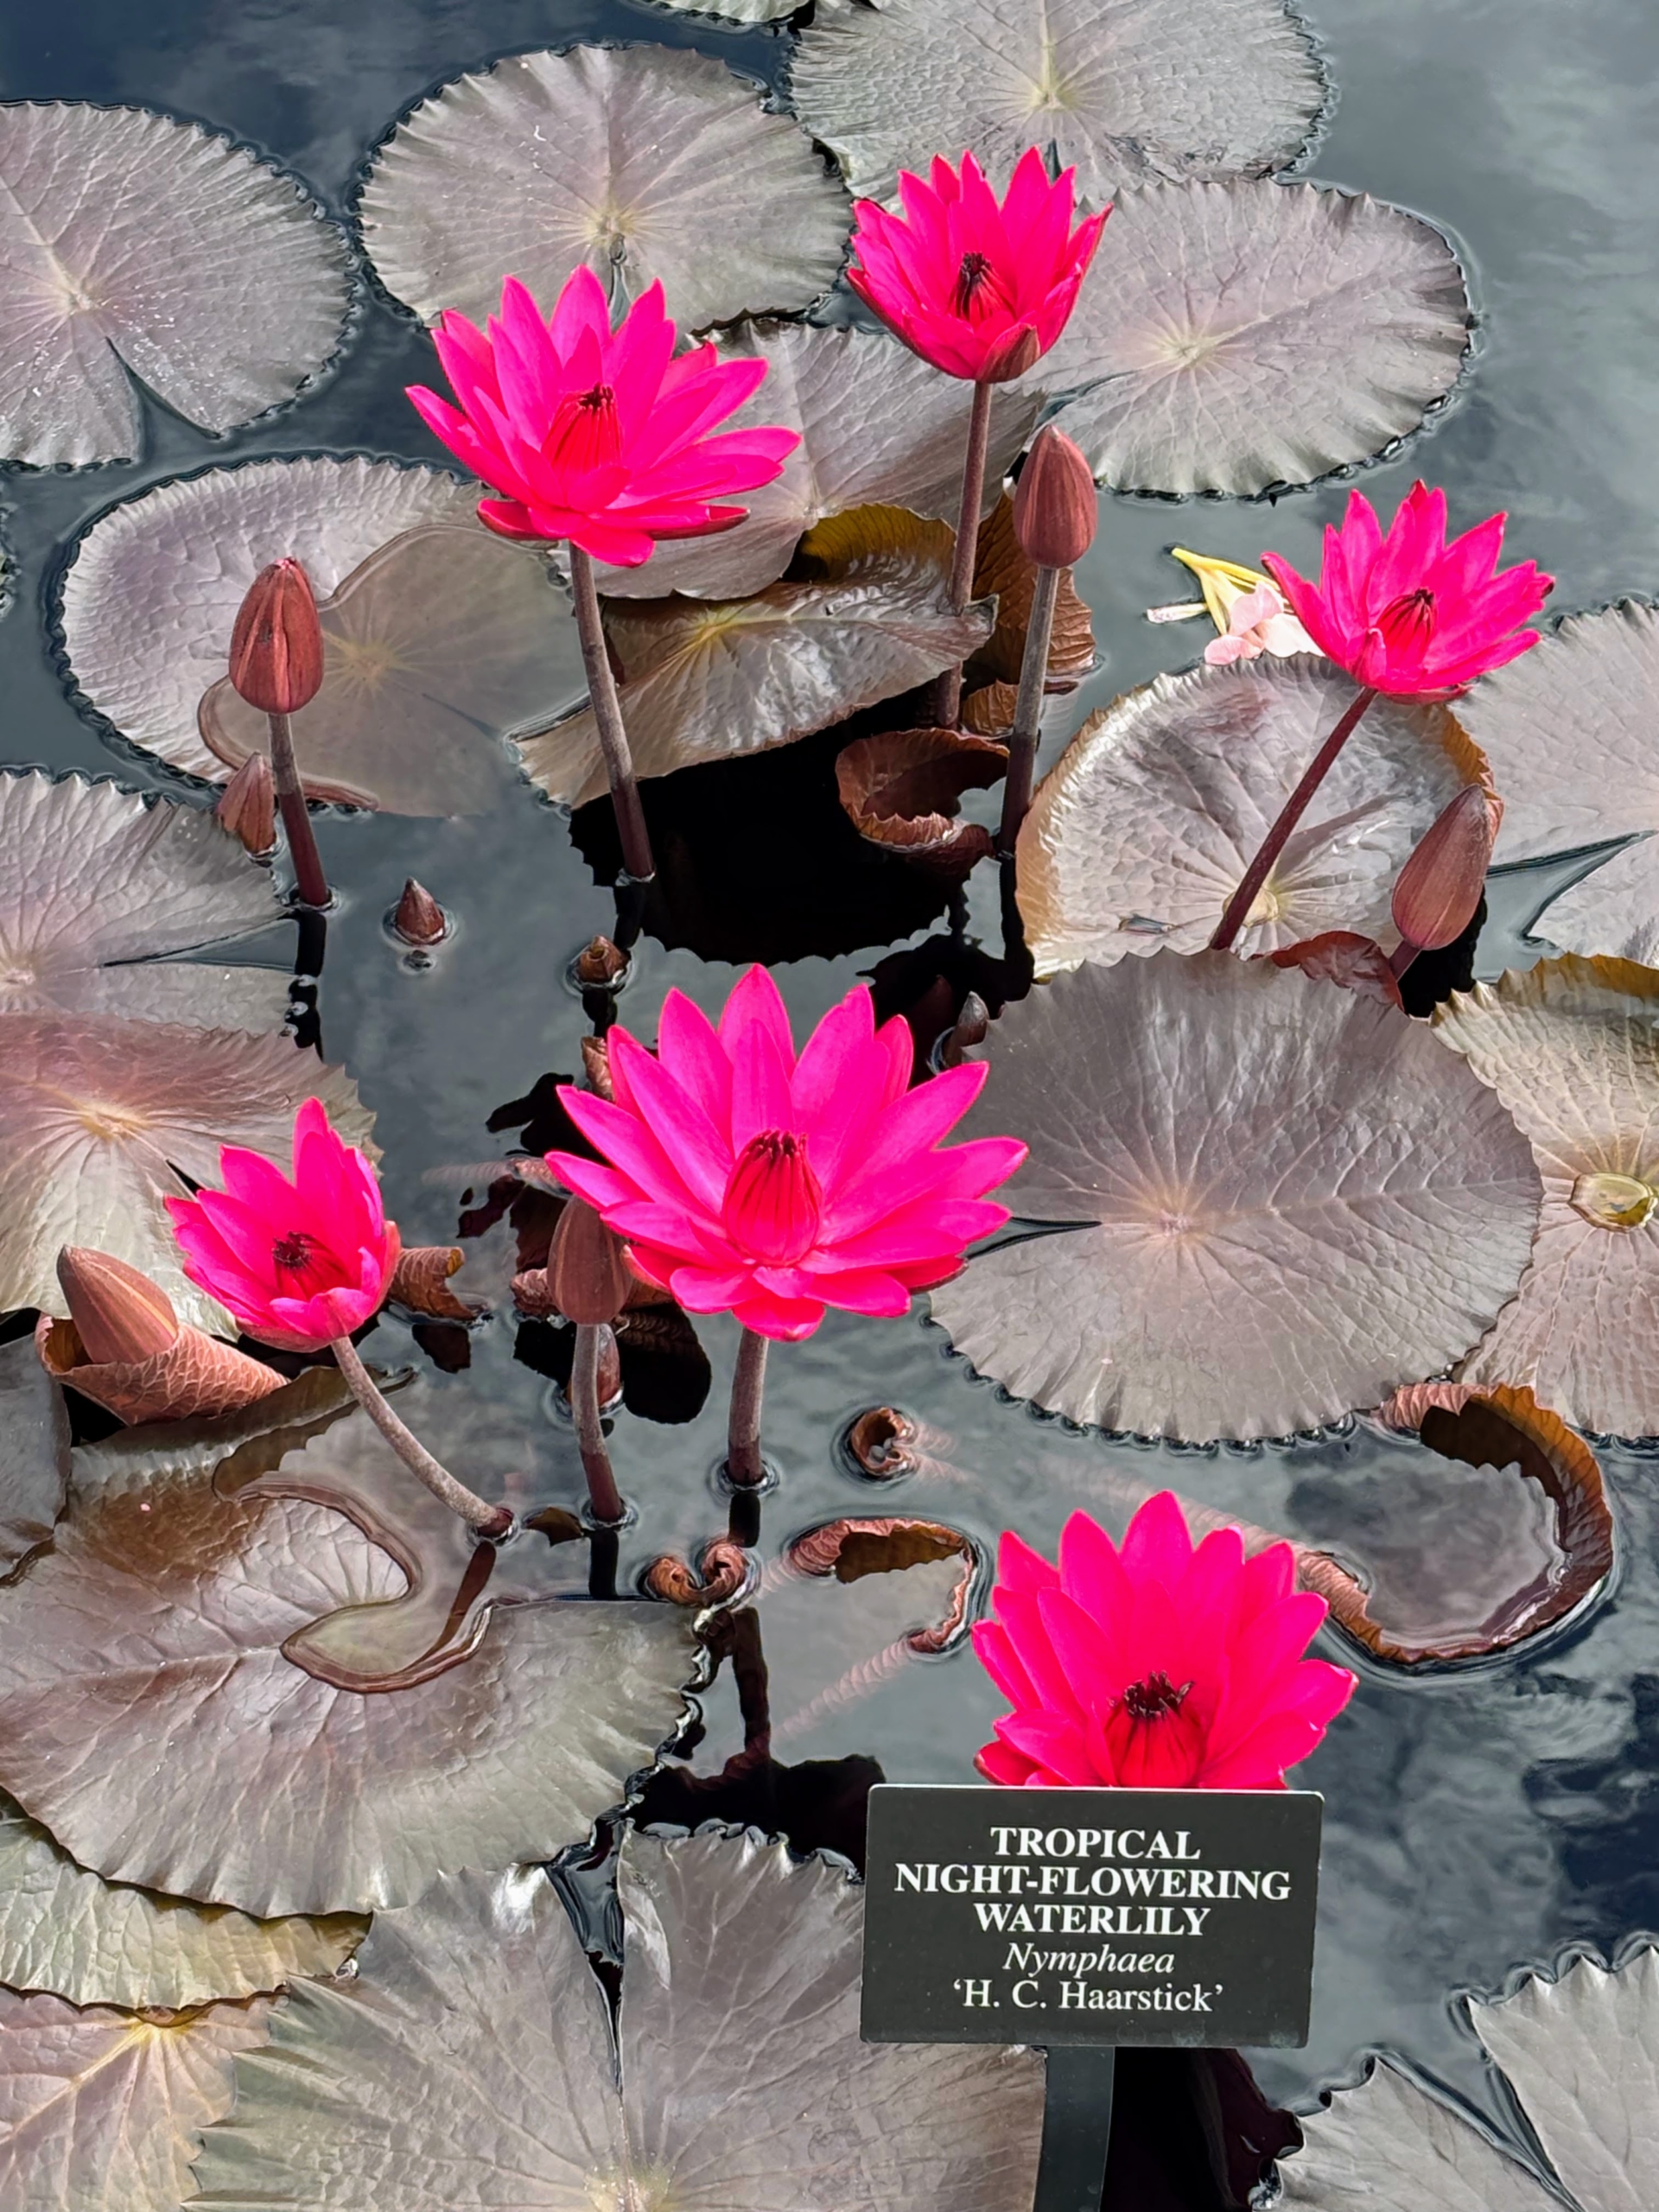
This is tropical night-flowering water lily Nymphaea ‘H.C. Haarstick’ known for its dark reddish brown leaves and bold pink flowers. (Photo by James Sutton)
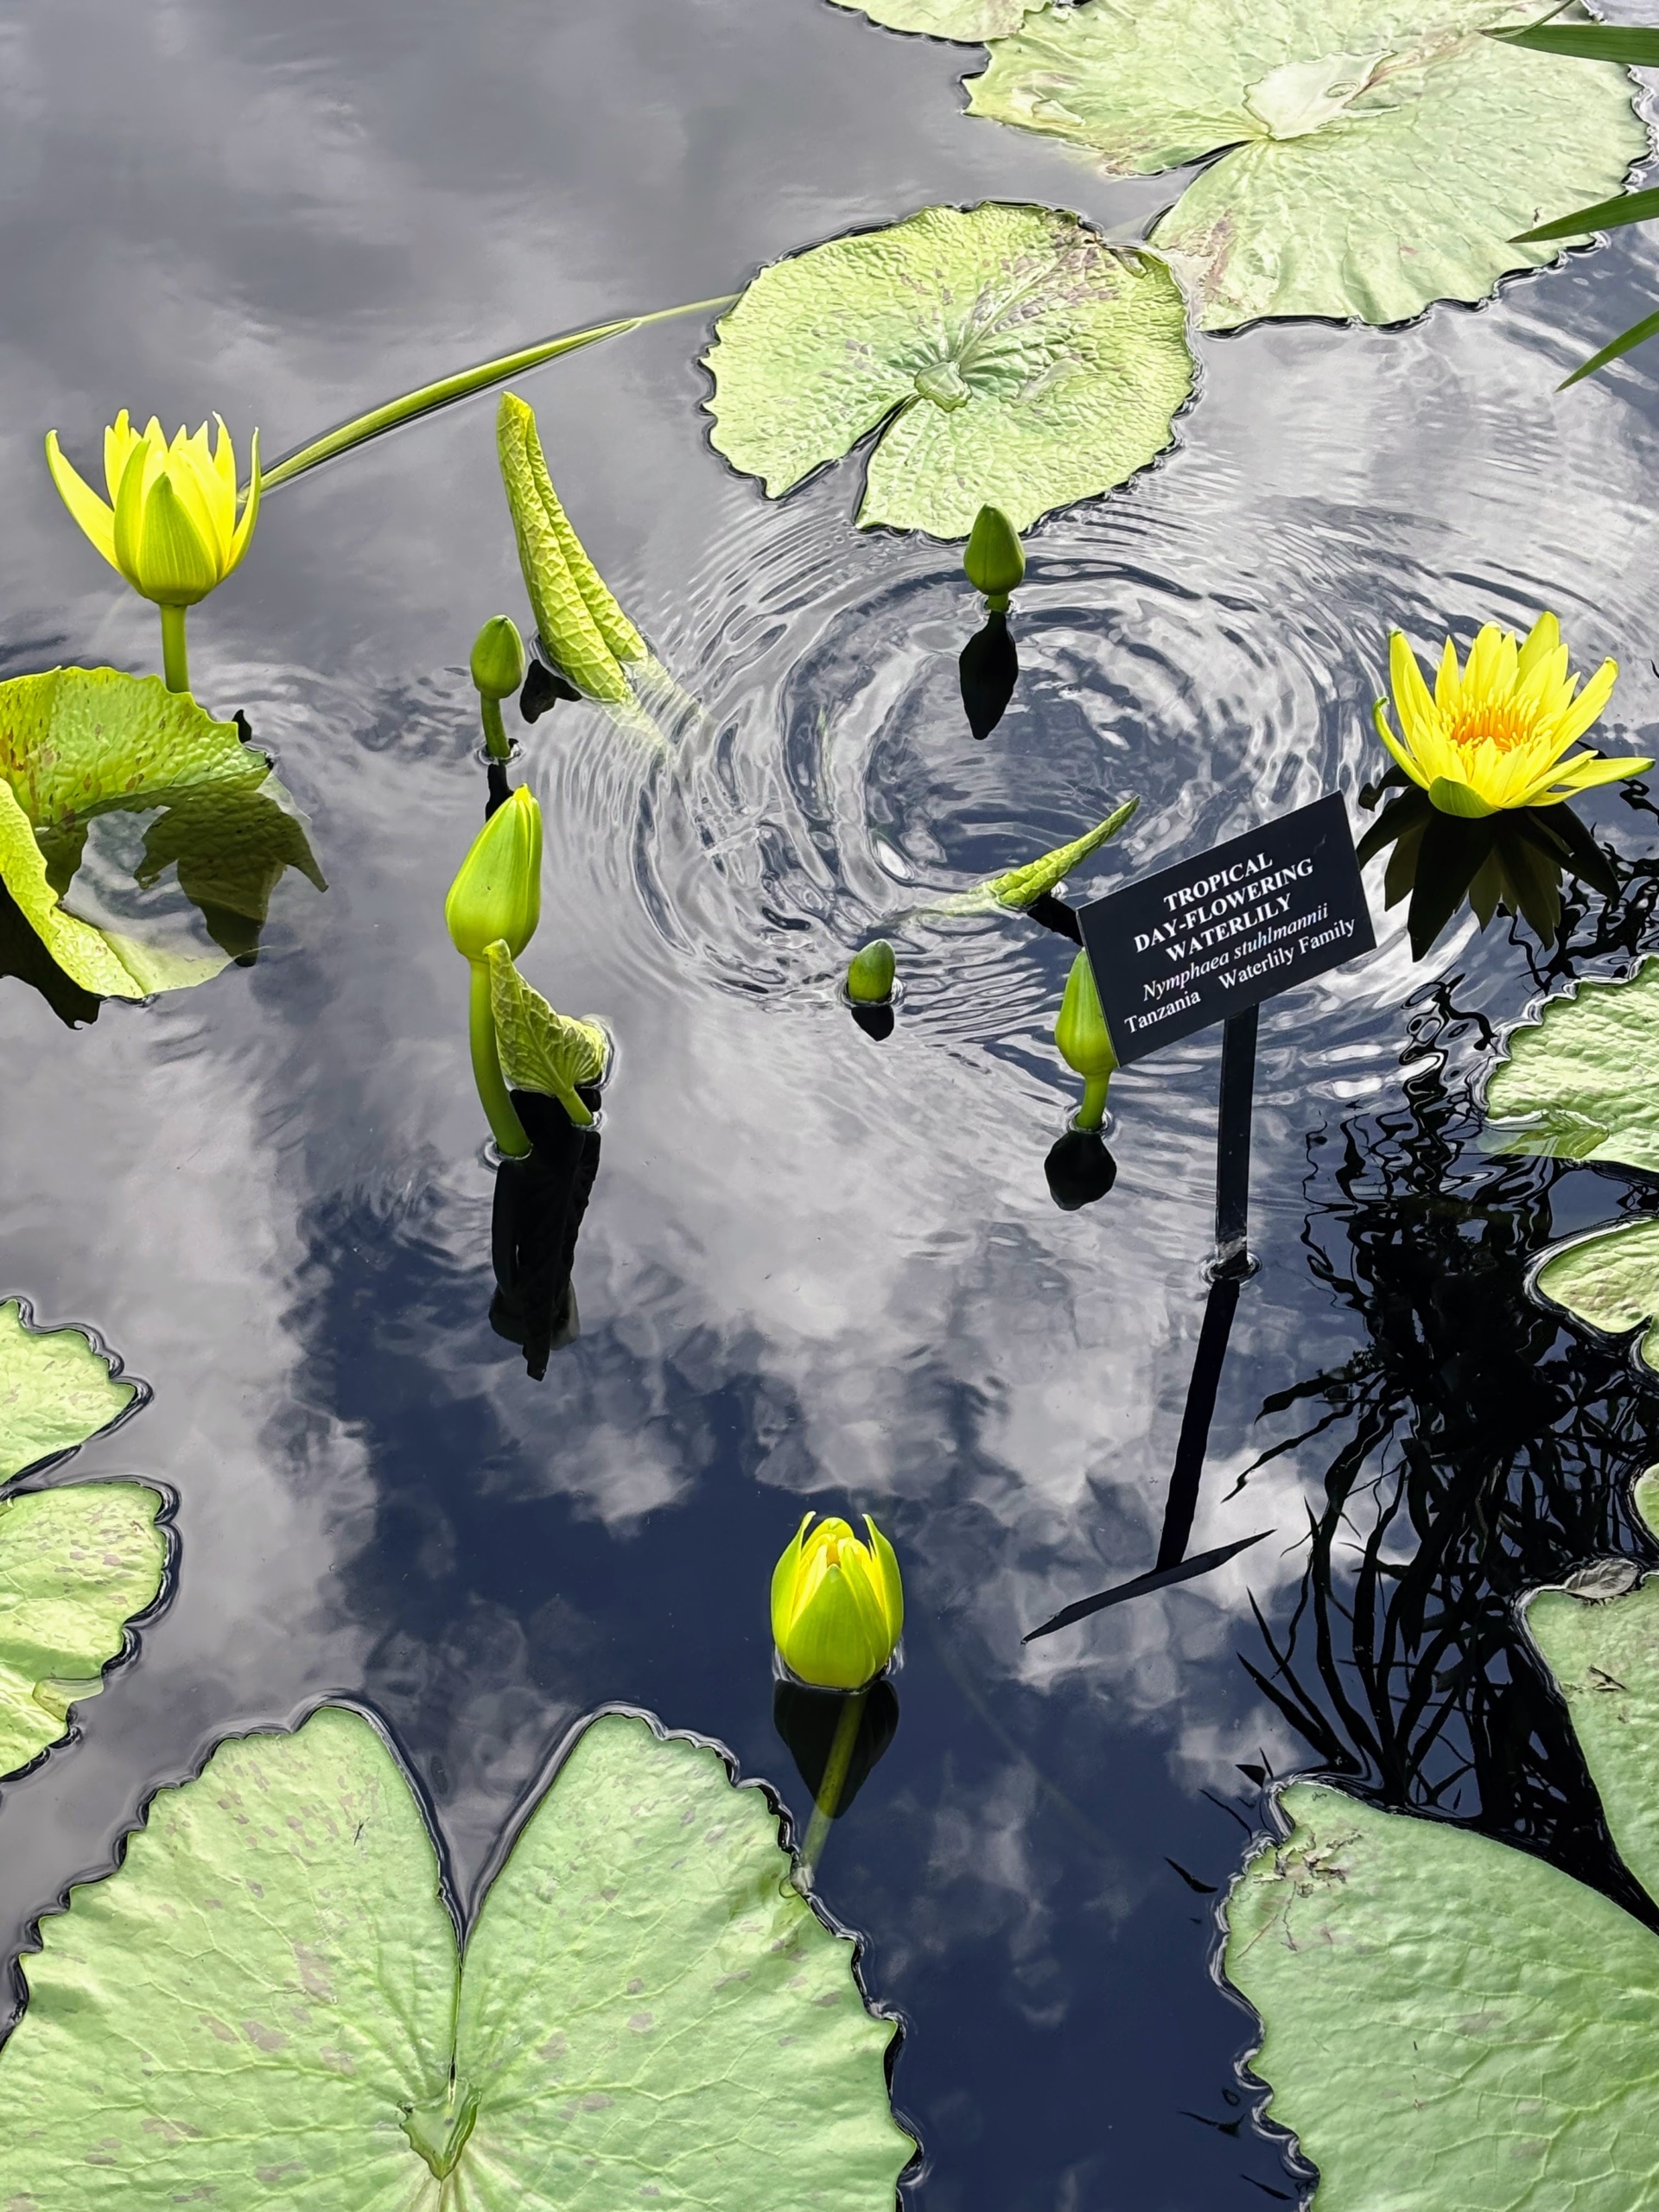
This is a rare water lily species that was recently collected in Tanzania as part of Longwood’s conservation efforts in that country. (Photo by James Sutton)
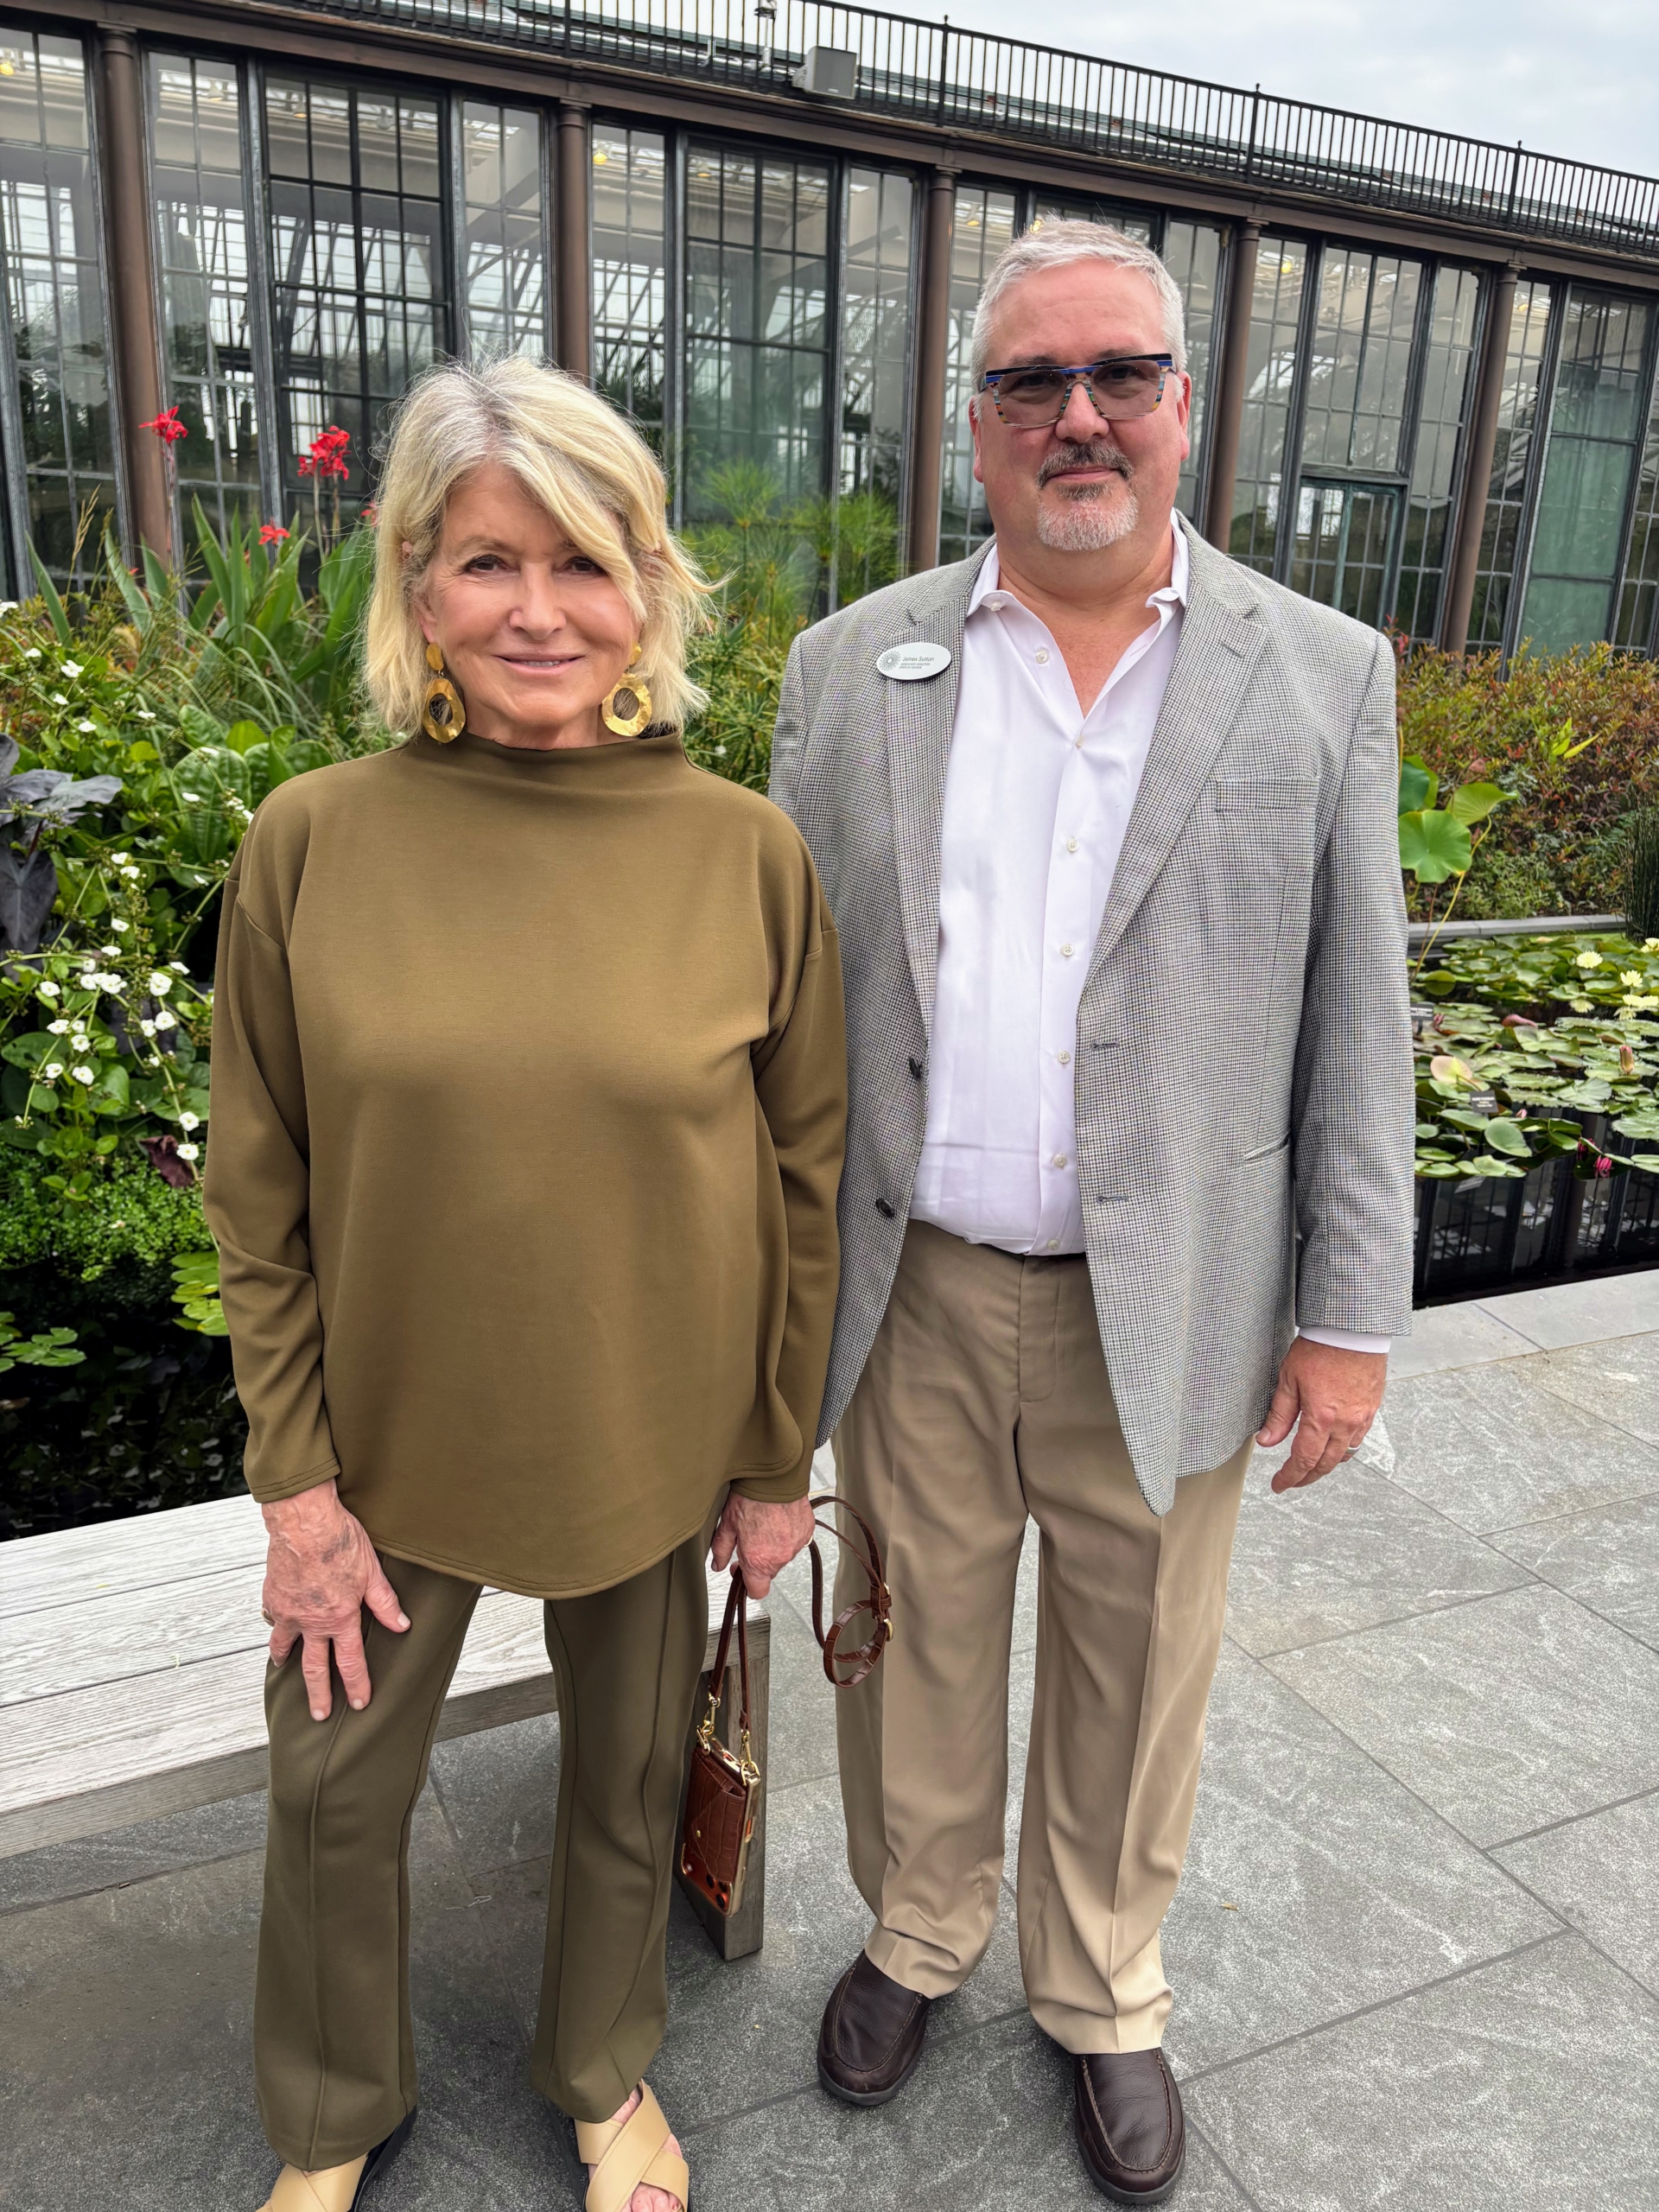
Here I am with Jim Sutton, Associate Director of Display Design at Longwood Gardens.
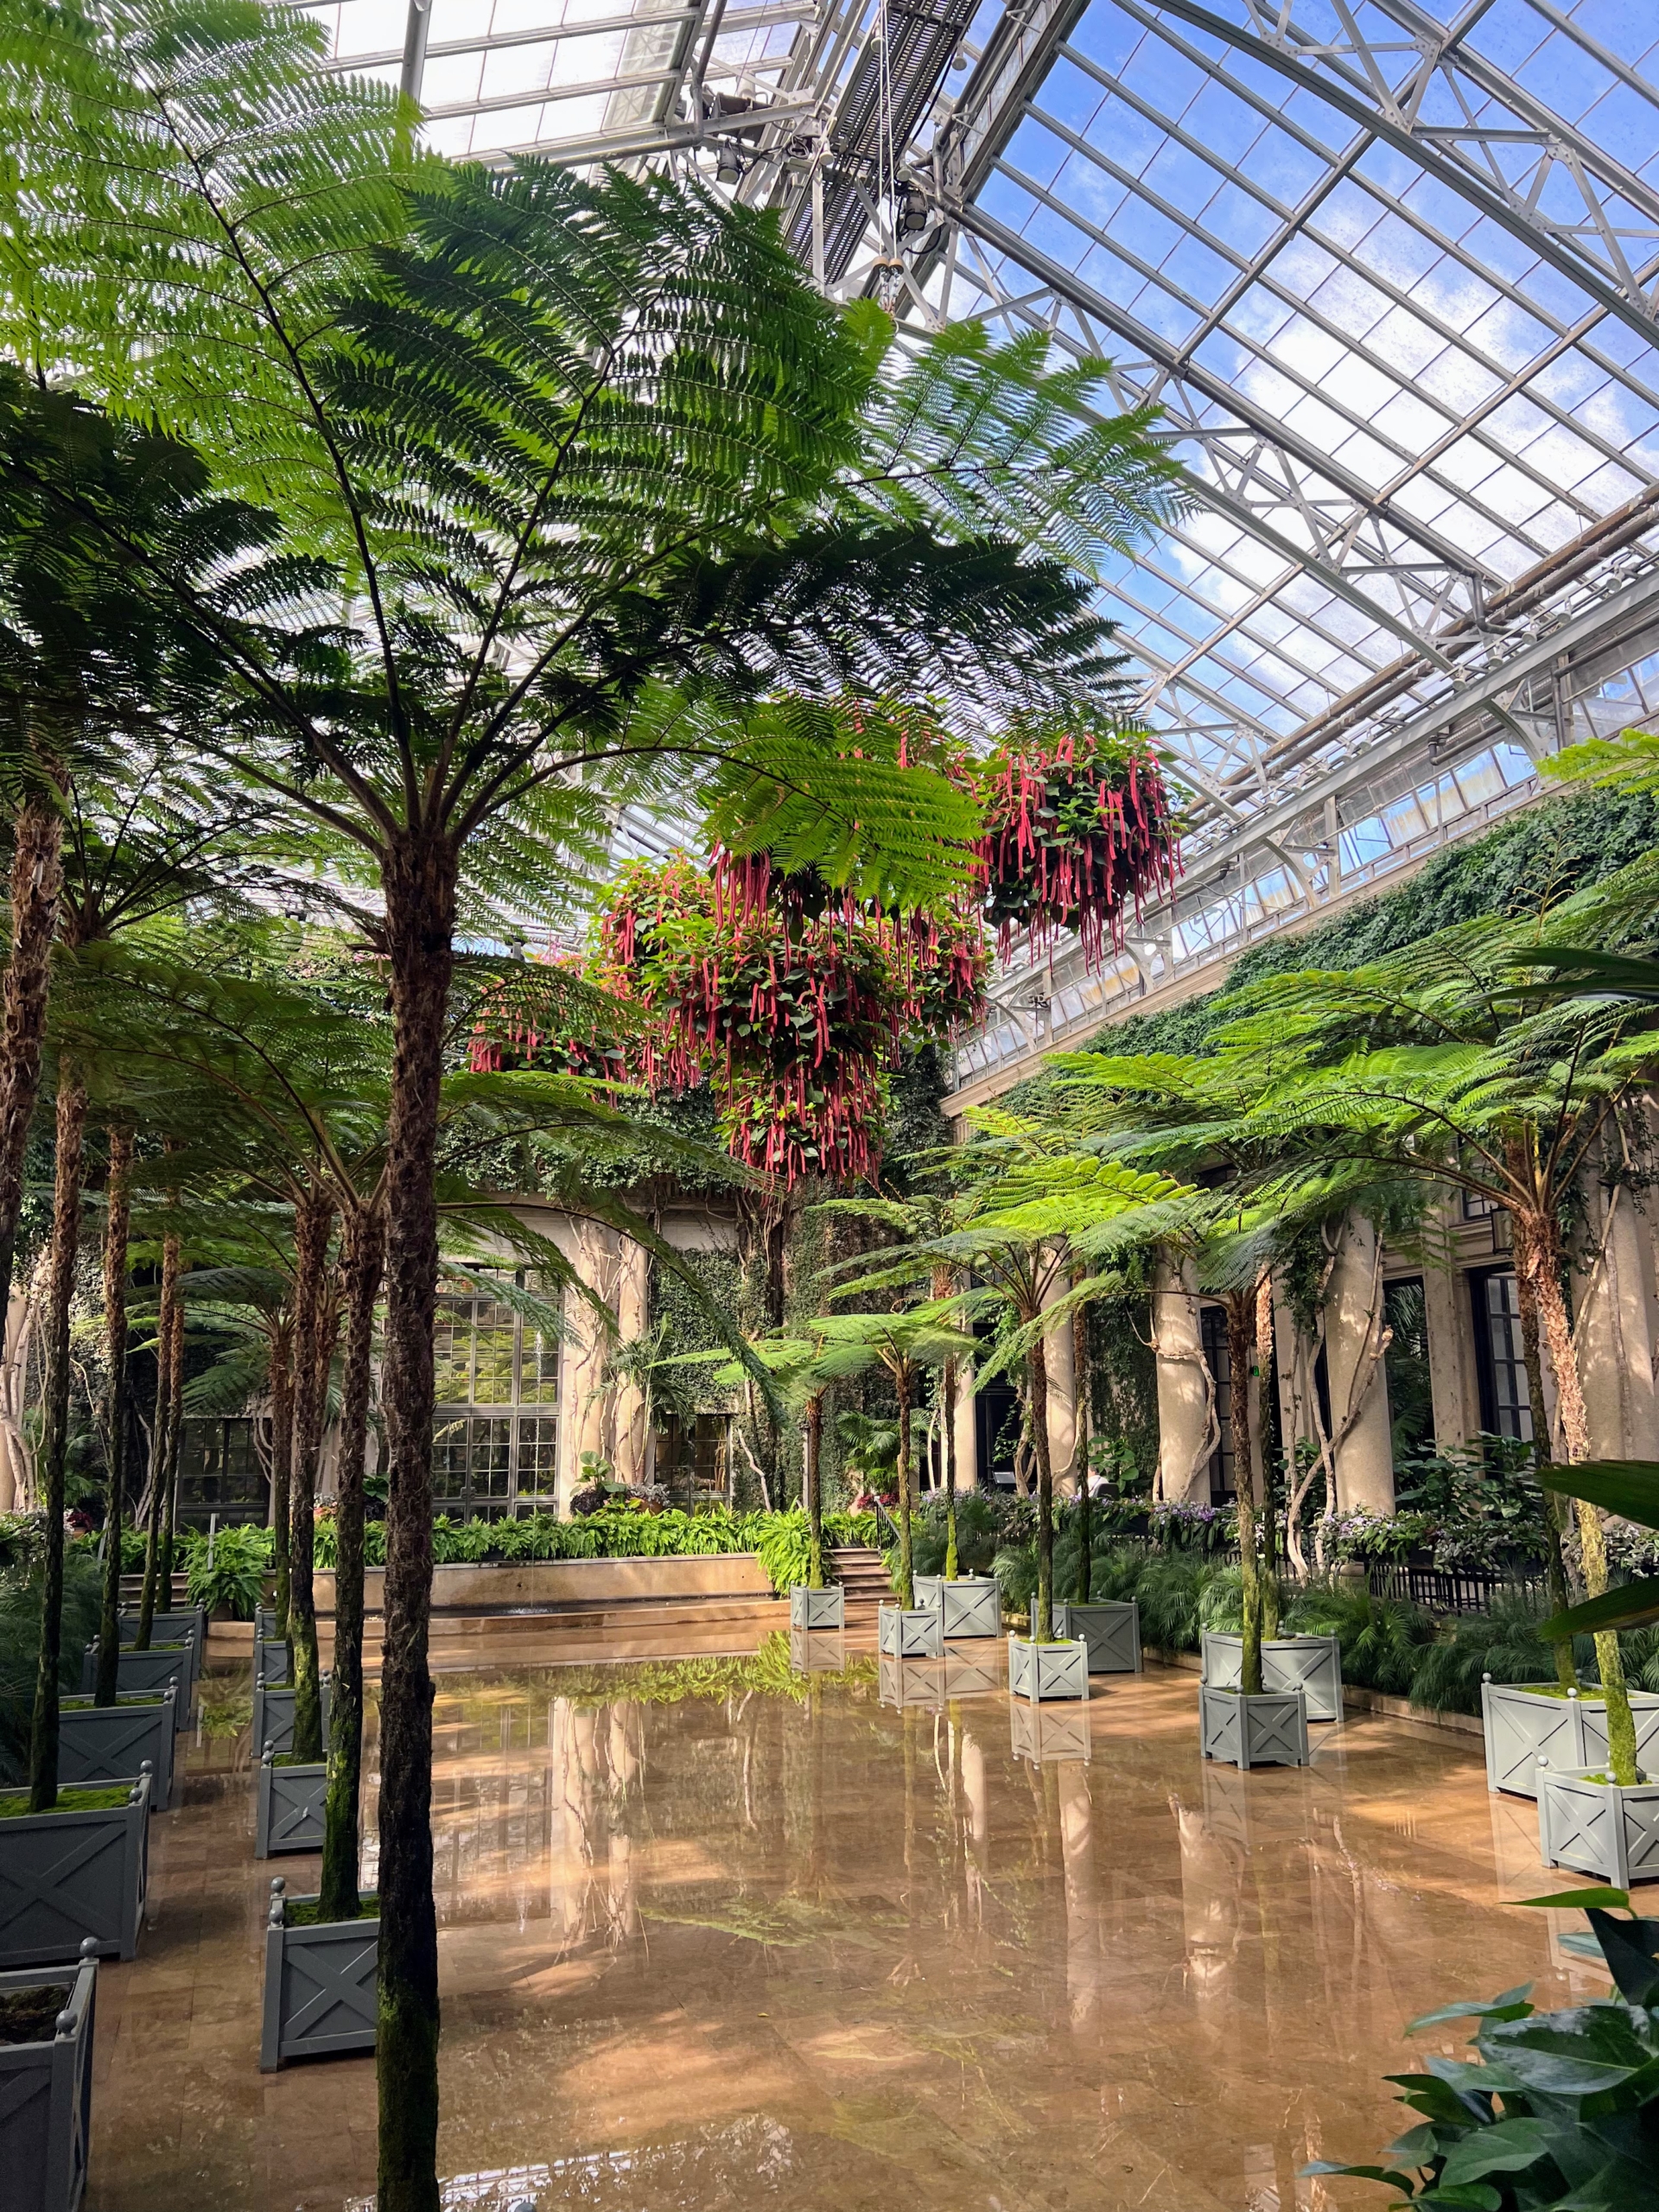
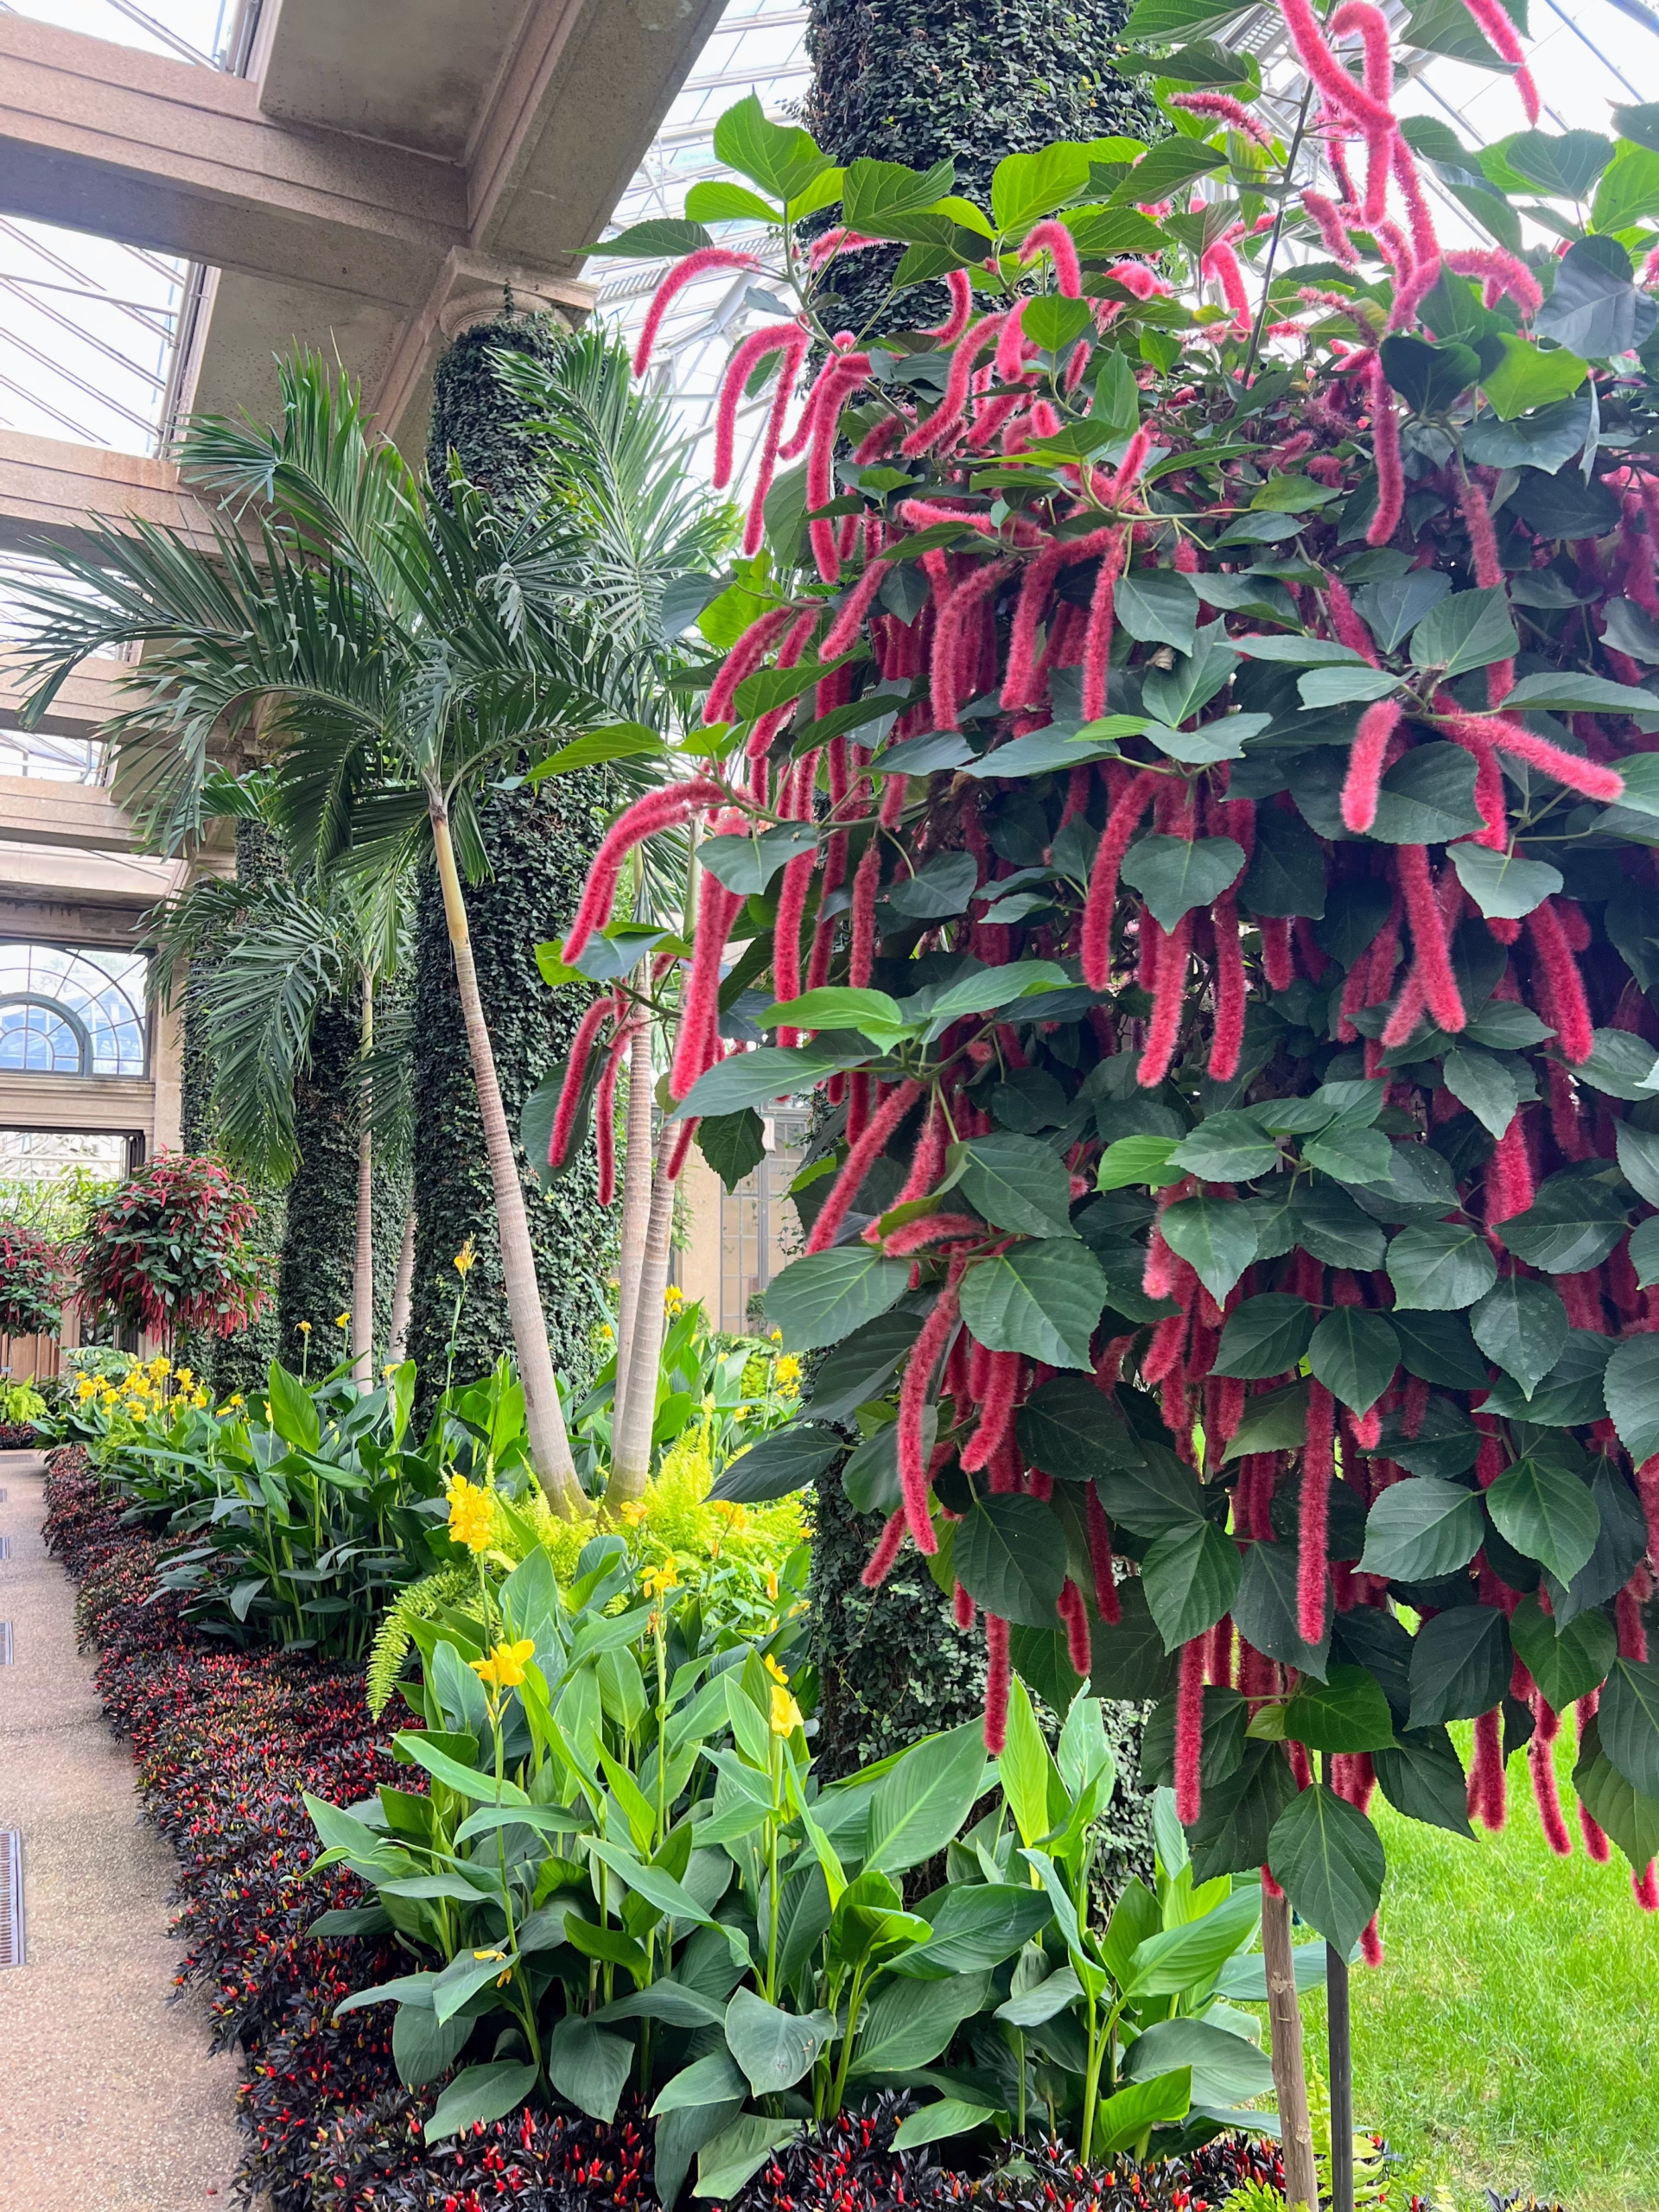
Above the flooded floor of the Exhibition Hall in Longwood’s Main Conservatory are hanging baskets of Acalypha hispida. On both sides are potted Australian Tree Ferns, Cyathea cooperi. I am quite fond of these tree ferns and have several in my own collection. During the summer I love to display them outdoors. (Photo by James Sutton)
These are Acalypha hispida standards. (Photo by James Sutton)
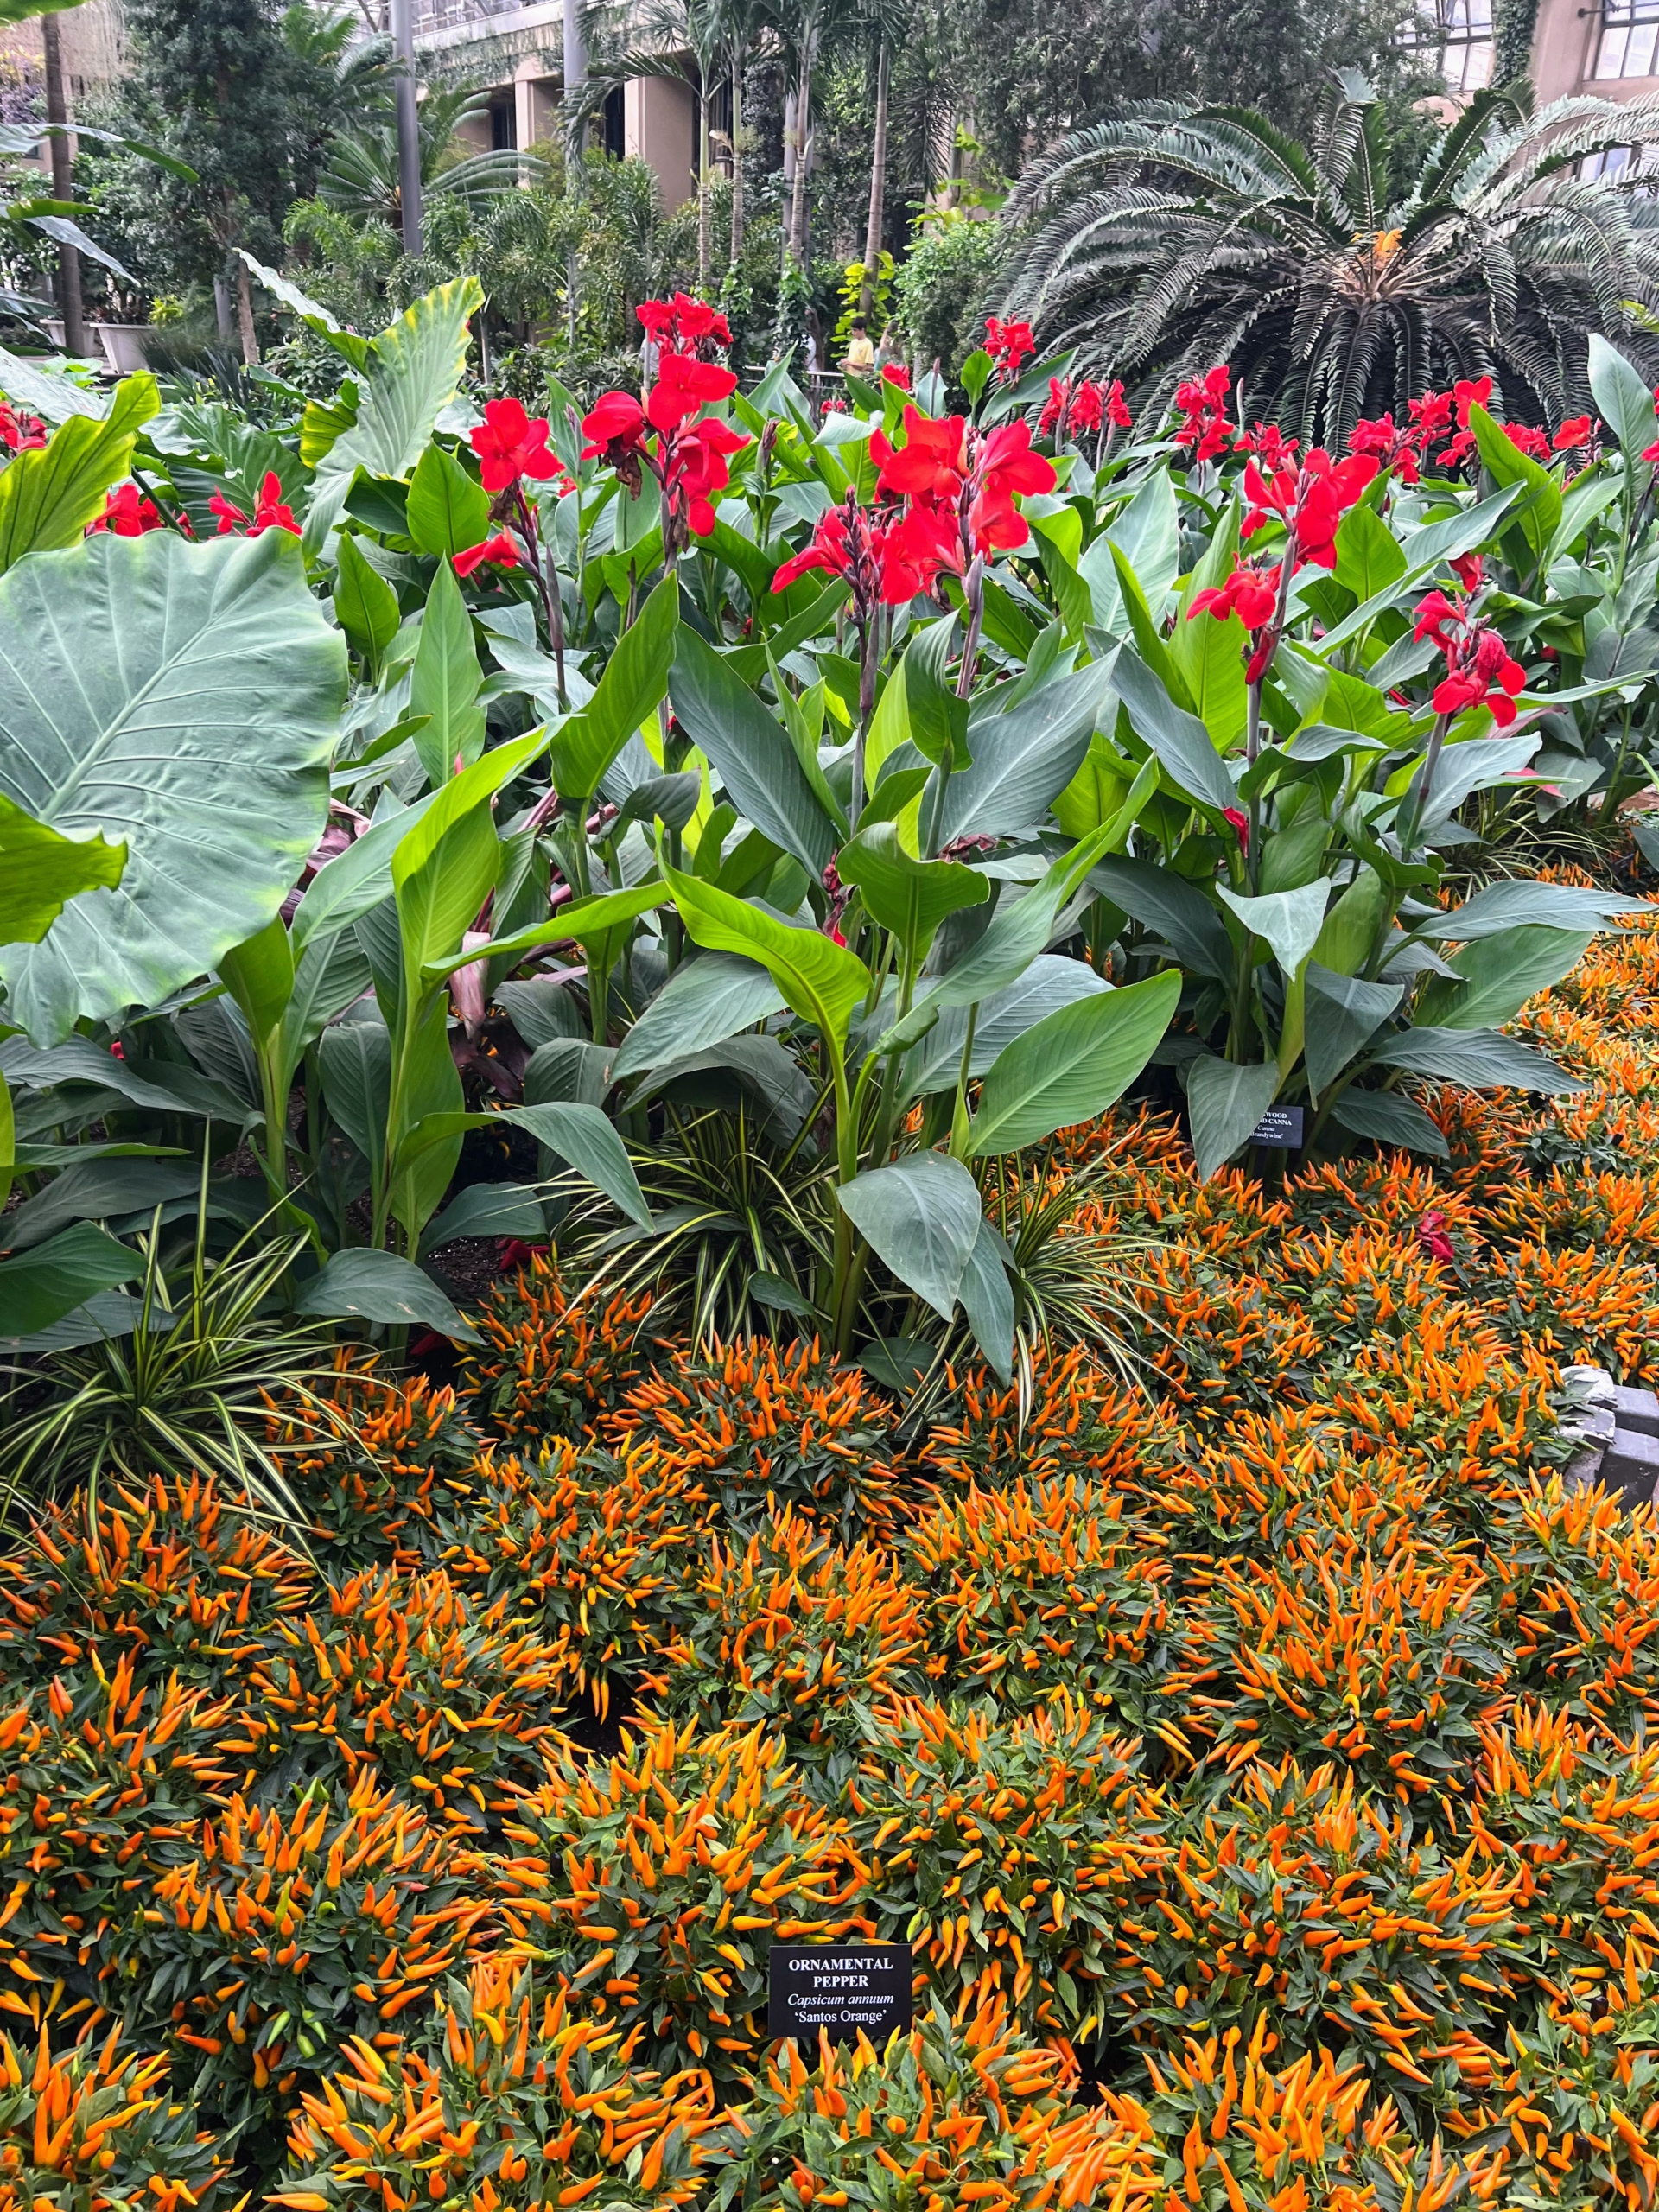
This bed is filled with Canna ‘Brandywine’ and Capsicum ‘Santos Orange.’ (Photo by James Sutton)
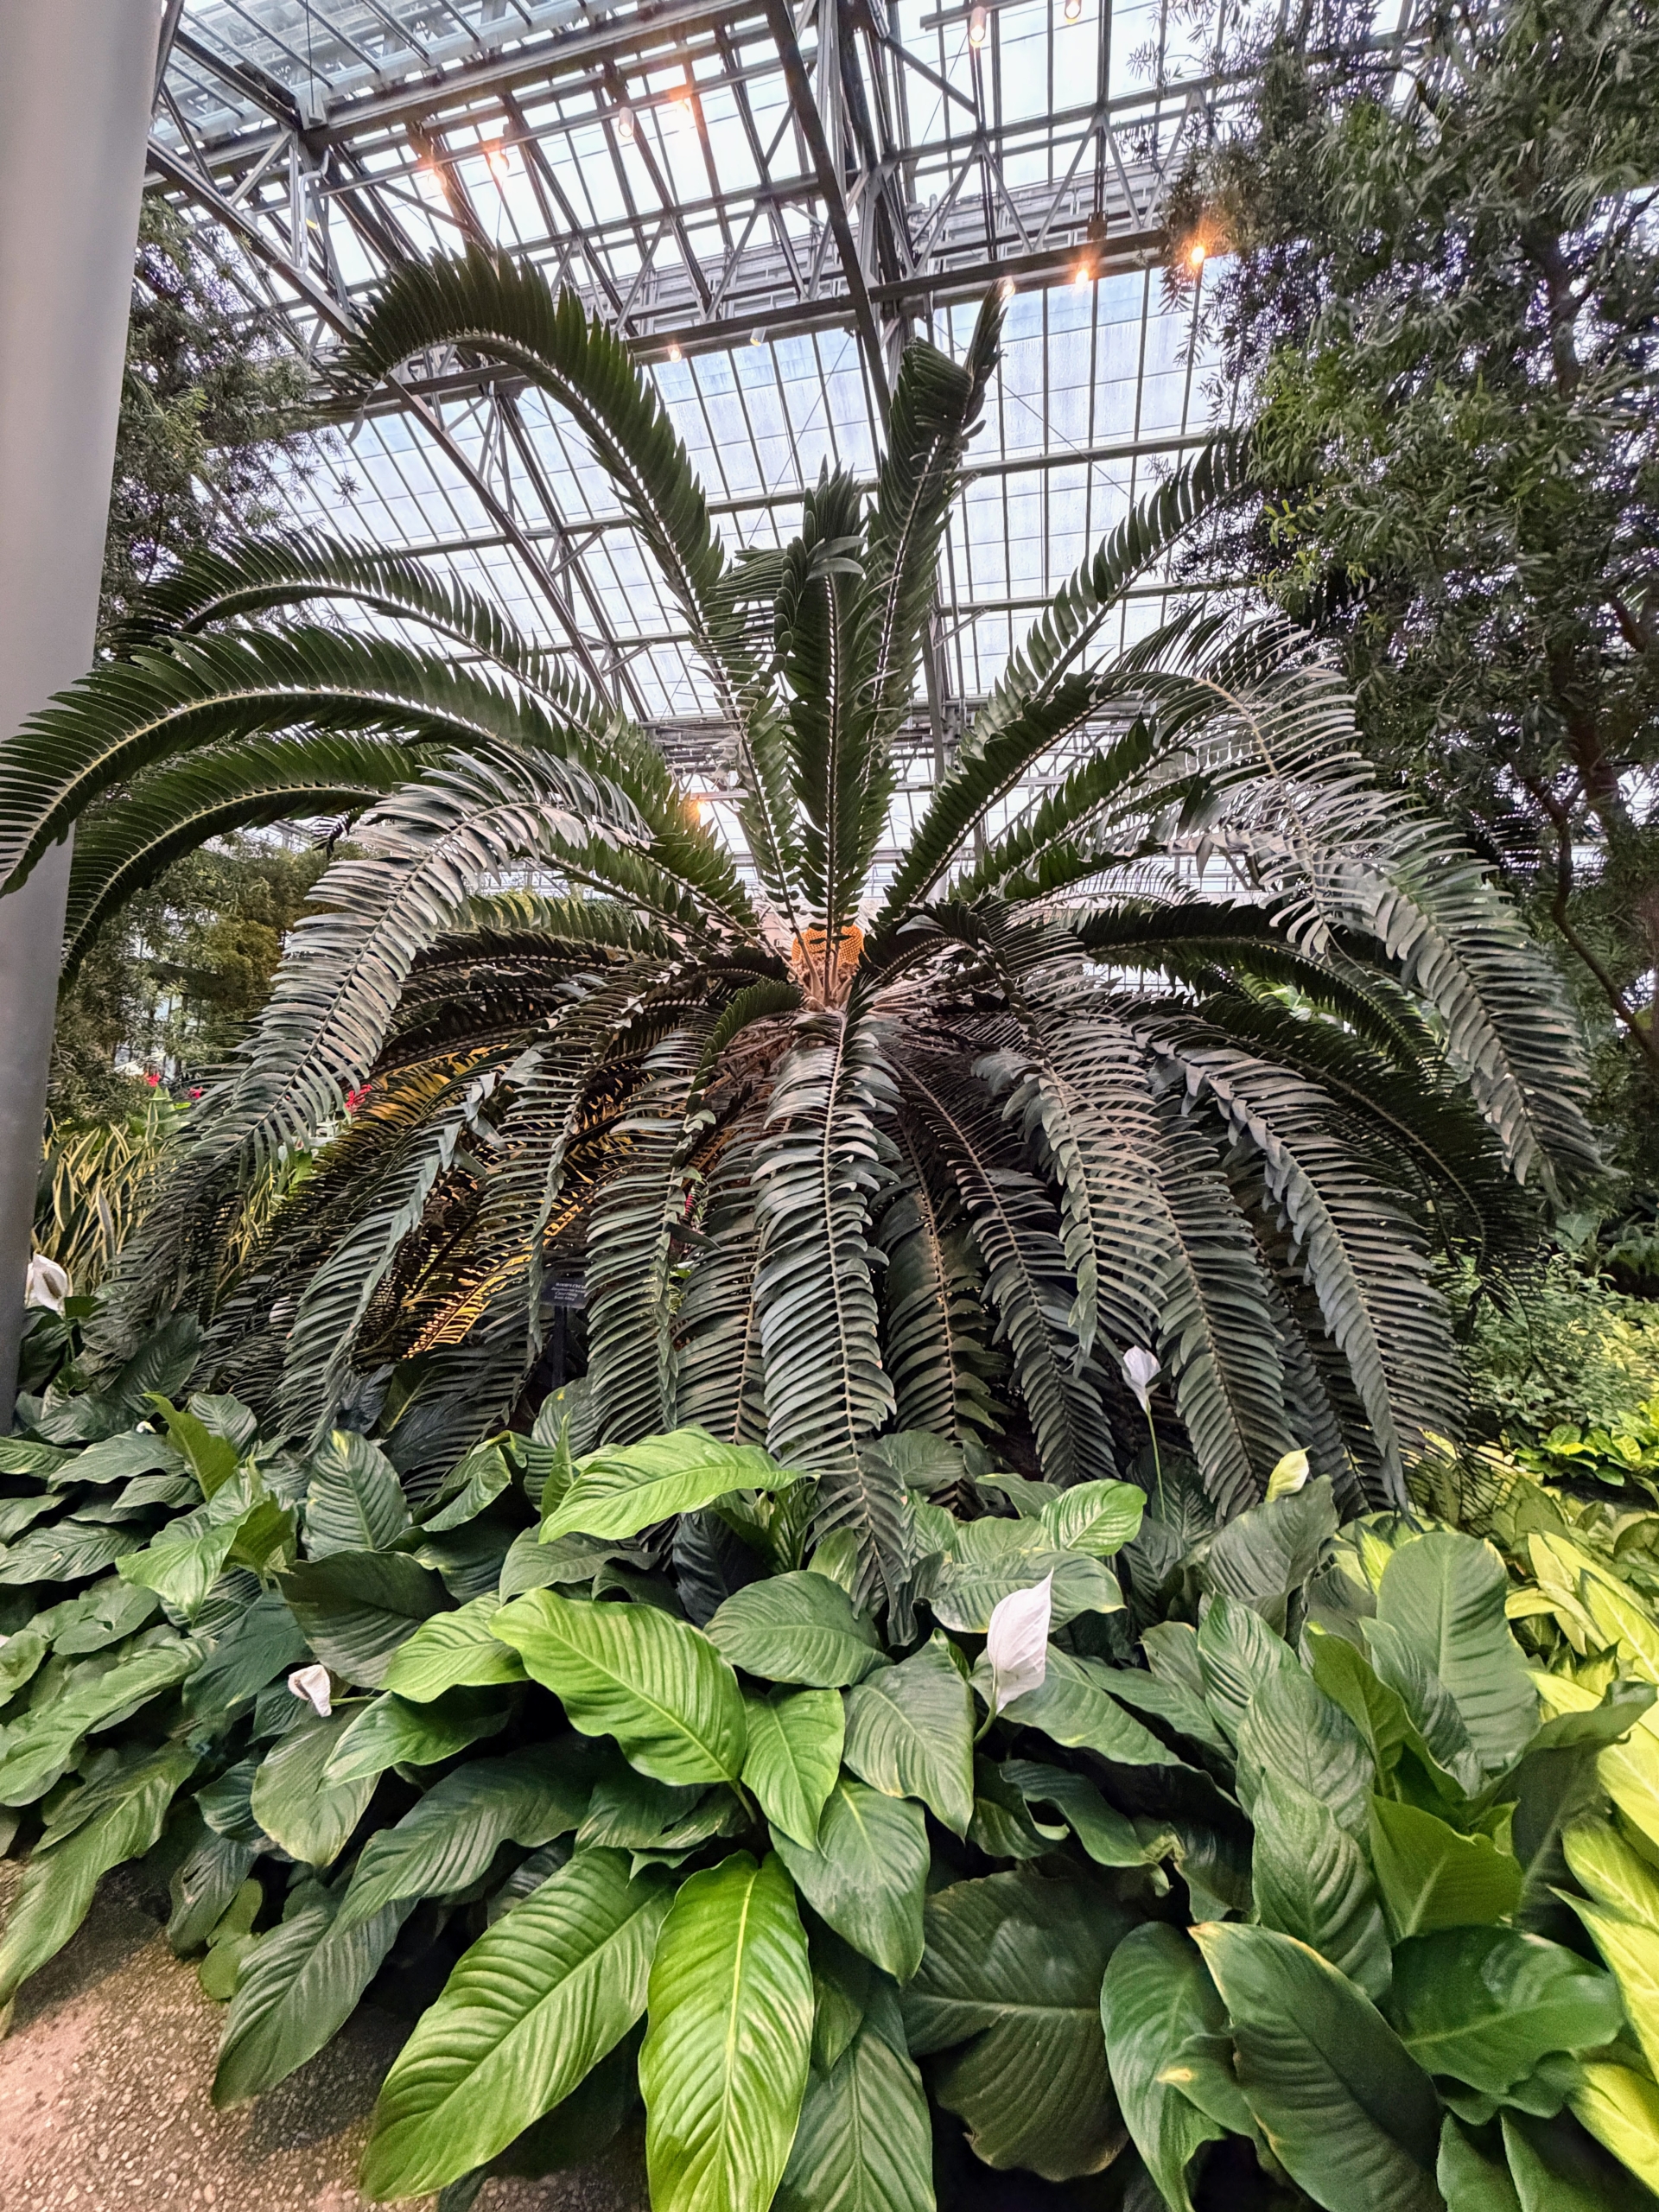
This is a Wood’s cycad, Encephalartos woodii – very striking and tall. It is actually a critically endangered plant native to South Africa, notable for being extinct in the wild and having no known female specimens.
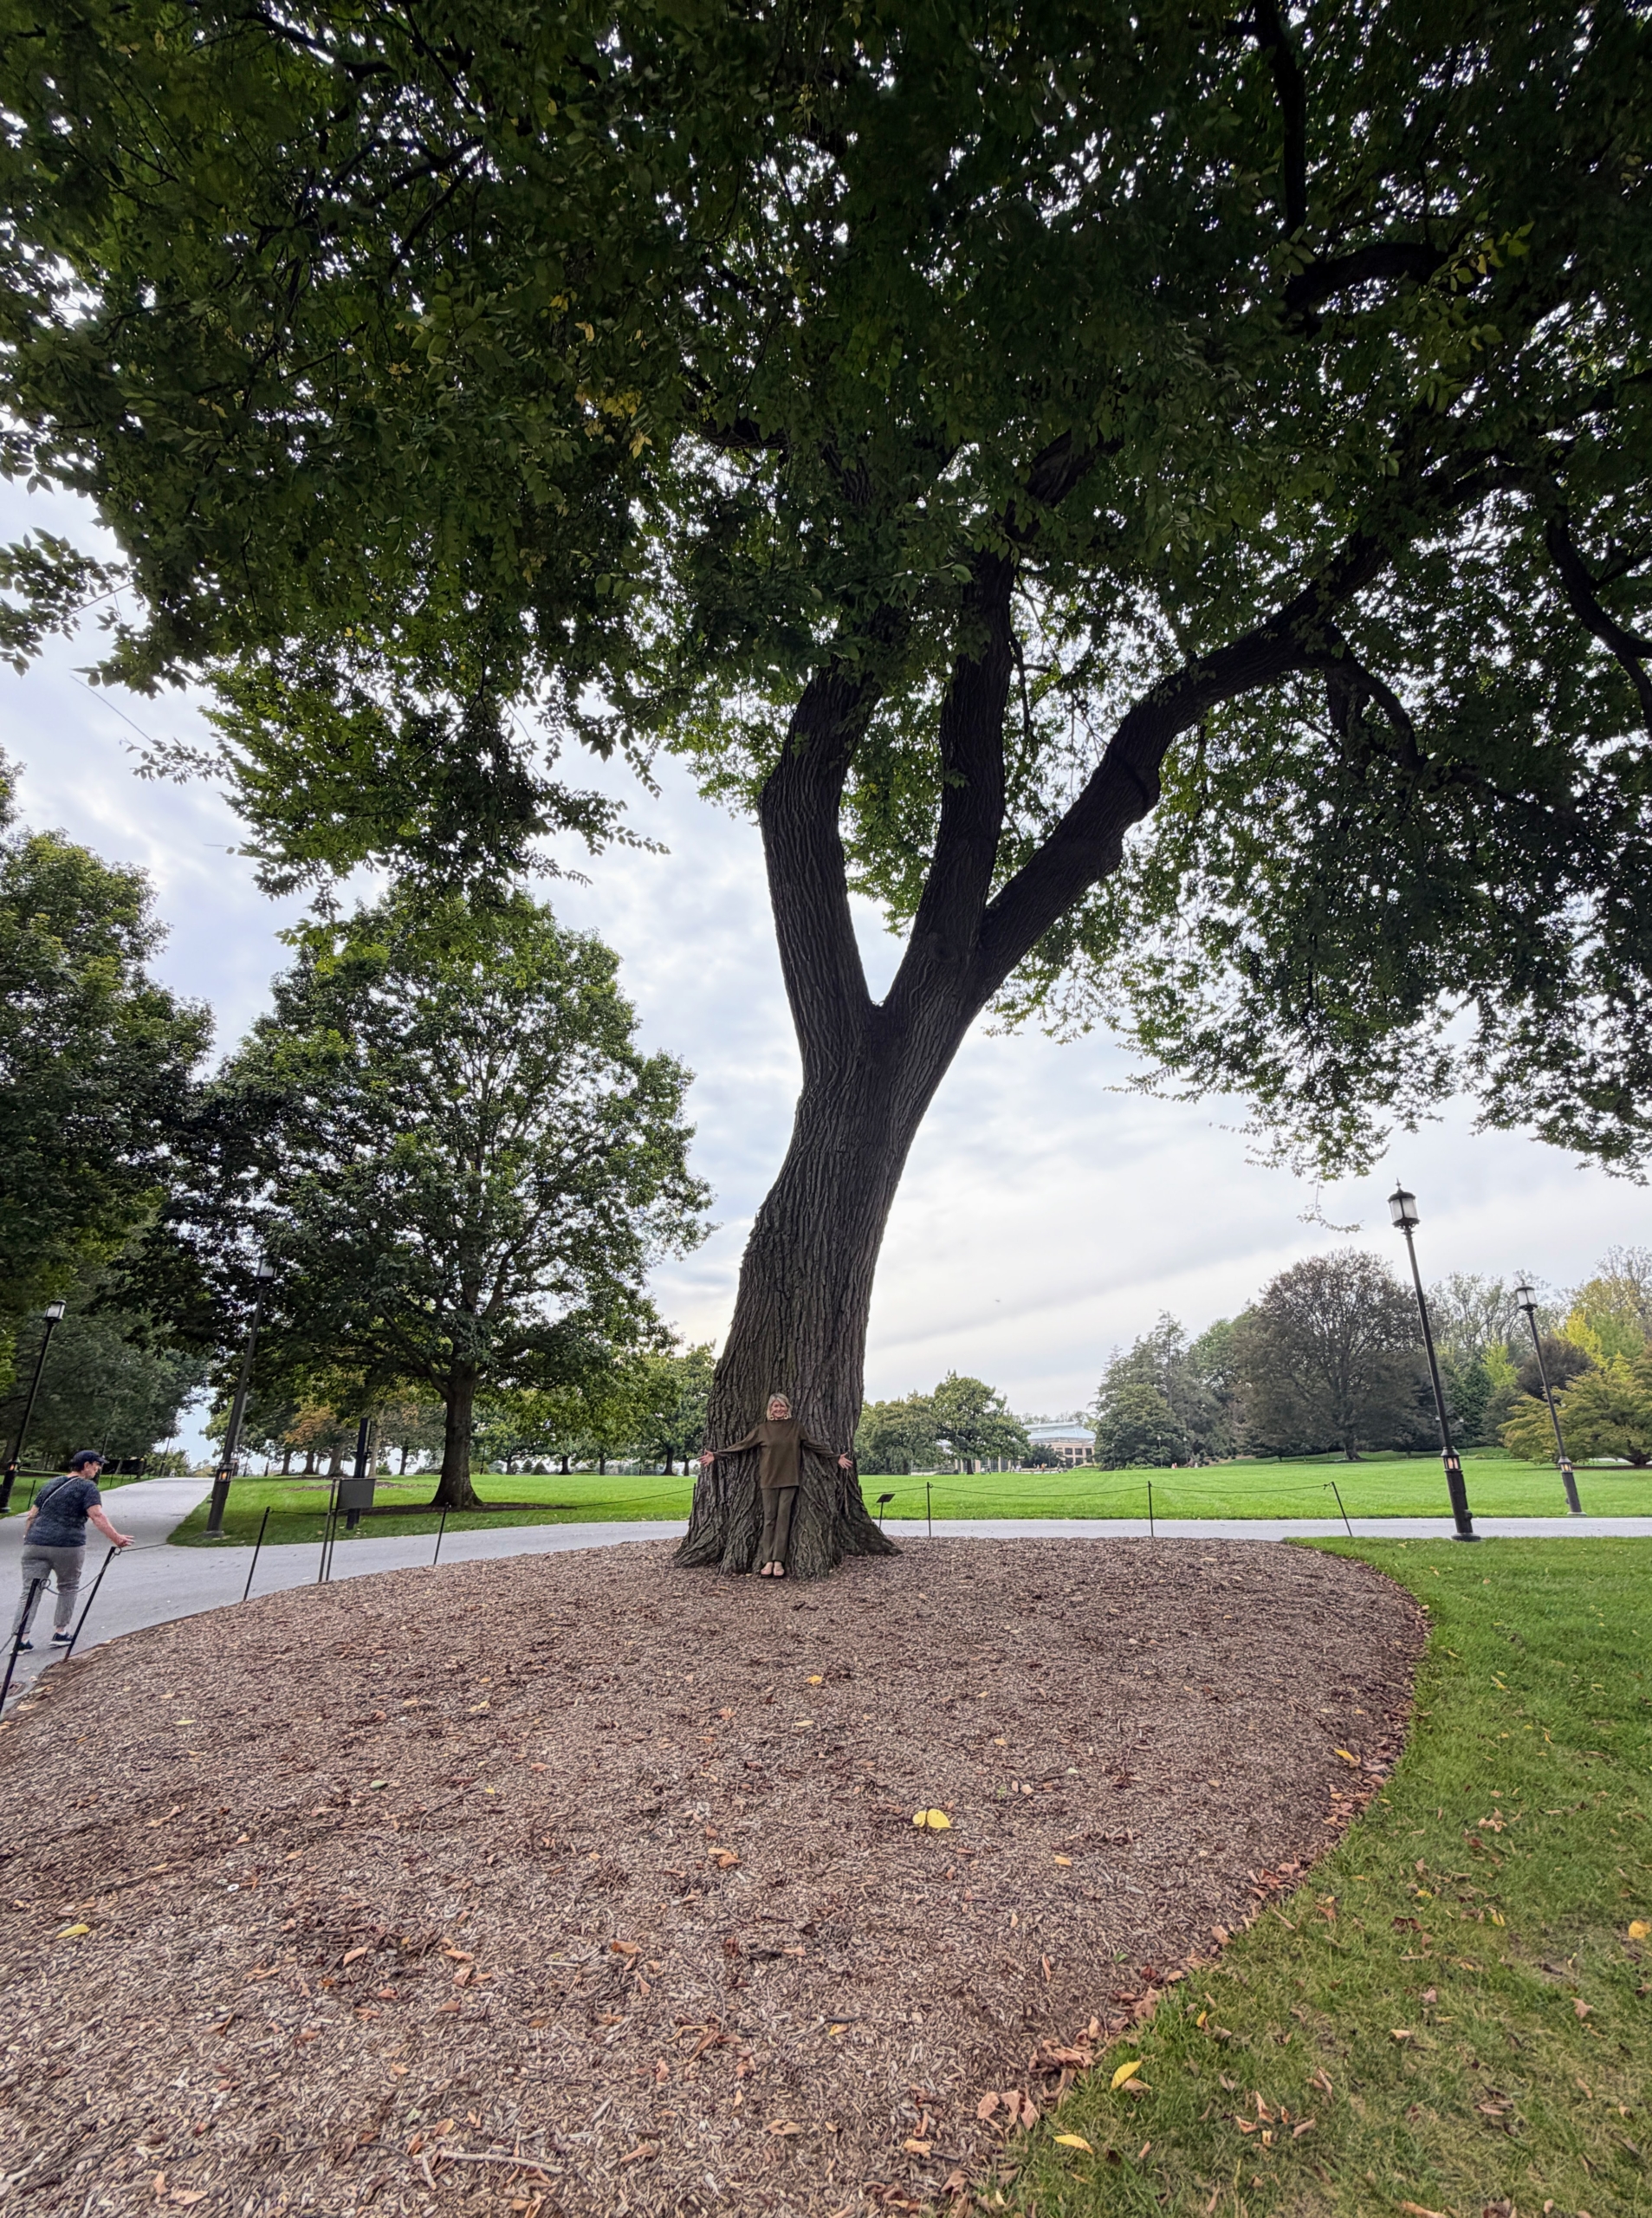
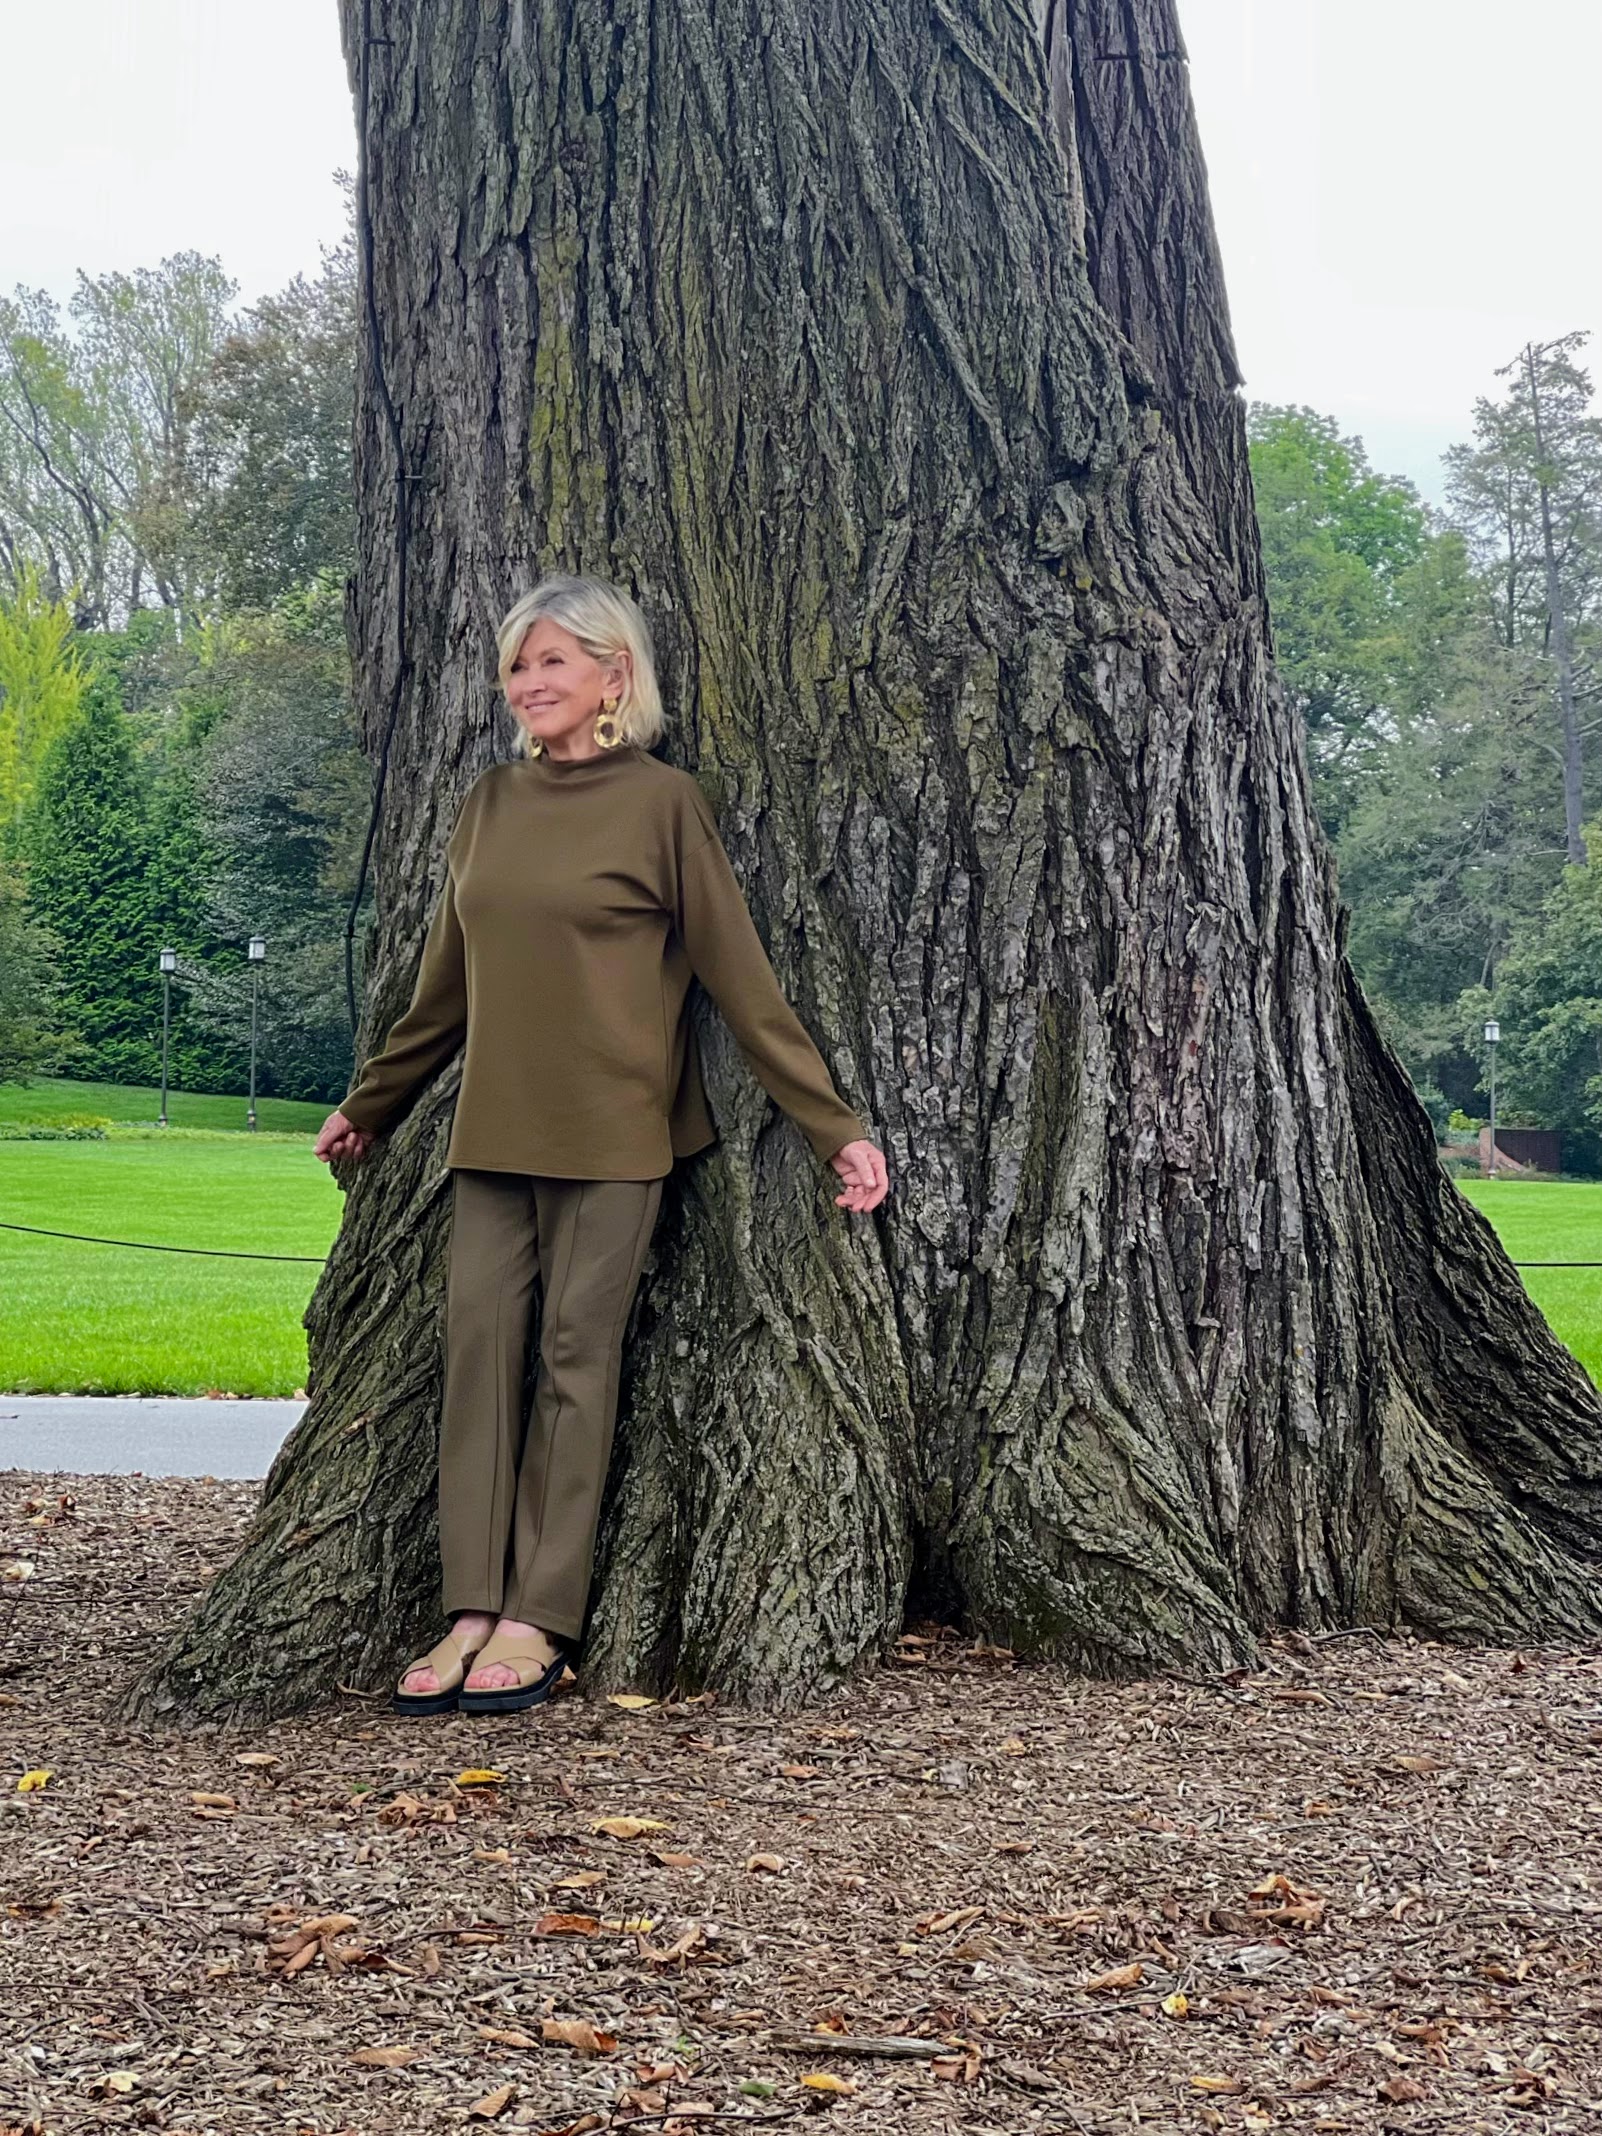
Can you see me? I am at the base of this remarkable Elm, the last American Elm at Longwood Gardens. This tree was planted in the 1930s and is the last to survive Dutch elm disease, a fungus that gums up the xylem cells, blocking the upward movement of water and nutrients to the branches.
Here’s a closer look. The American Elm was once a staple on city streets. Valued for its shade, beautiful branch structure, and adaptability, one could fine this native tree in areas from Florida to some parts of southern Canada, and spreading as far west as North Dakota and Texas.
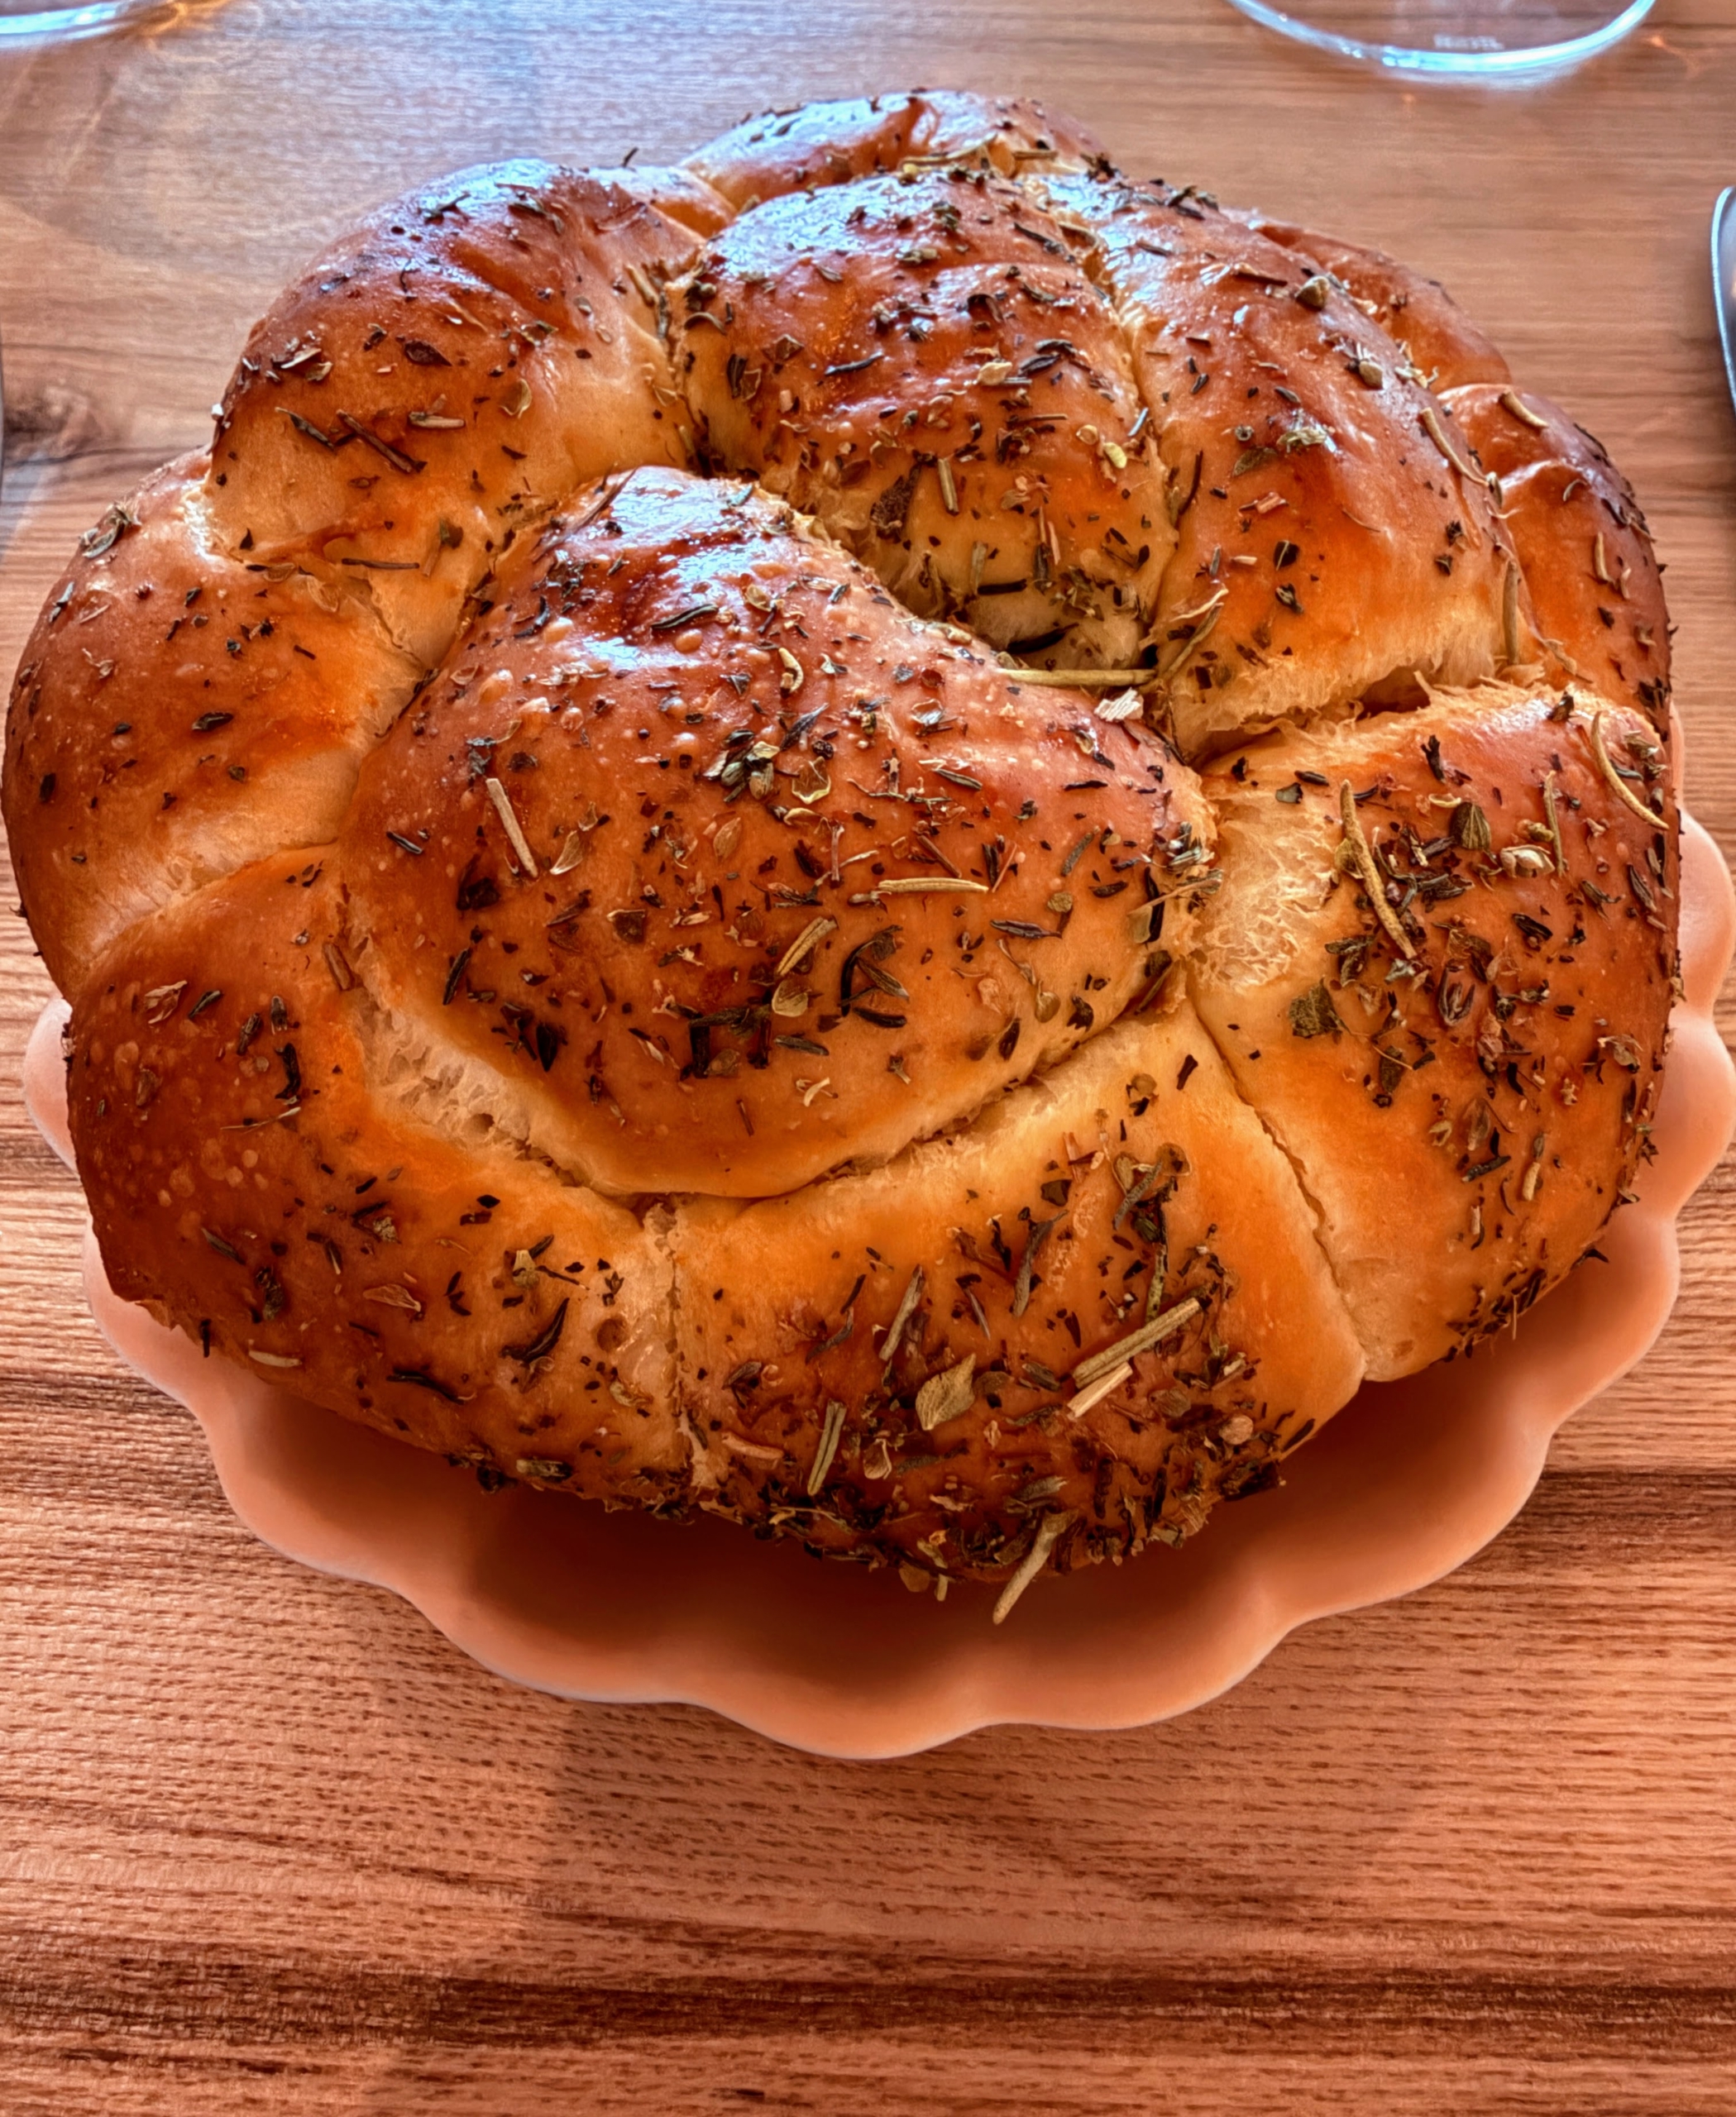
While there I also had time for a quick bite at 1906 at Longwood Gardens, a restaurant named in honor of the year Pierre S. du Pont purchased the original grounds. The restaurant is open to Longwood Gardens visitors and offers seasonal fare with locally sourced and sustainable ingredients. Among the delicious foods we enjoyed: this Pull-Apart Brioche with honey butter and local sea salt.
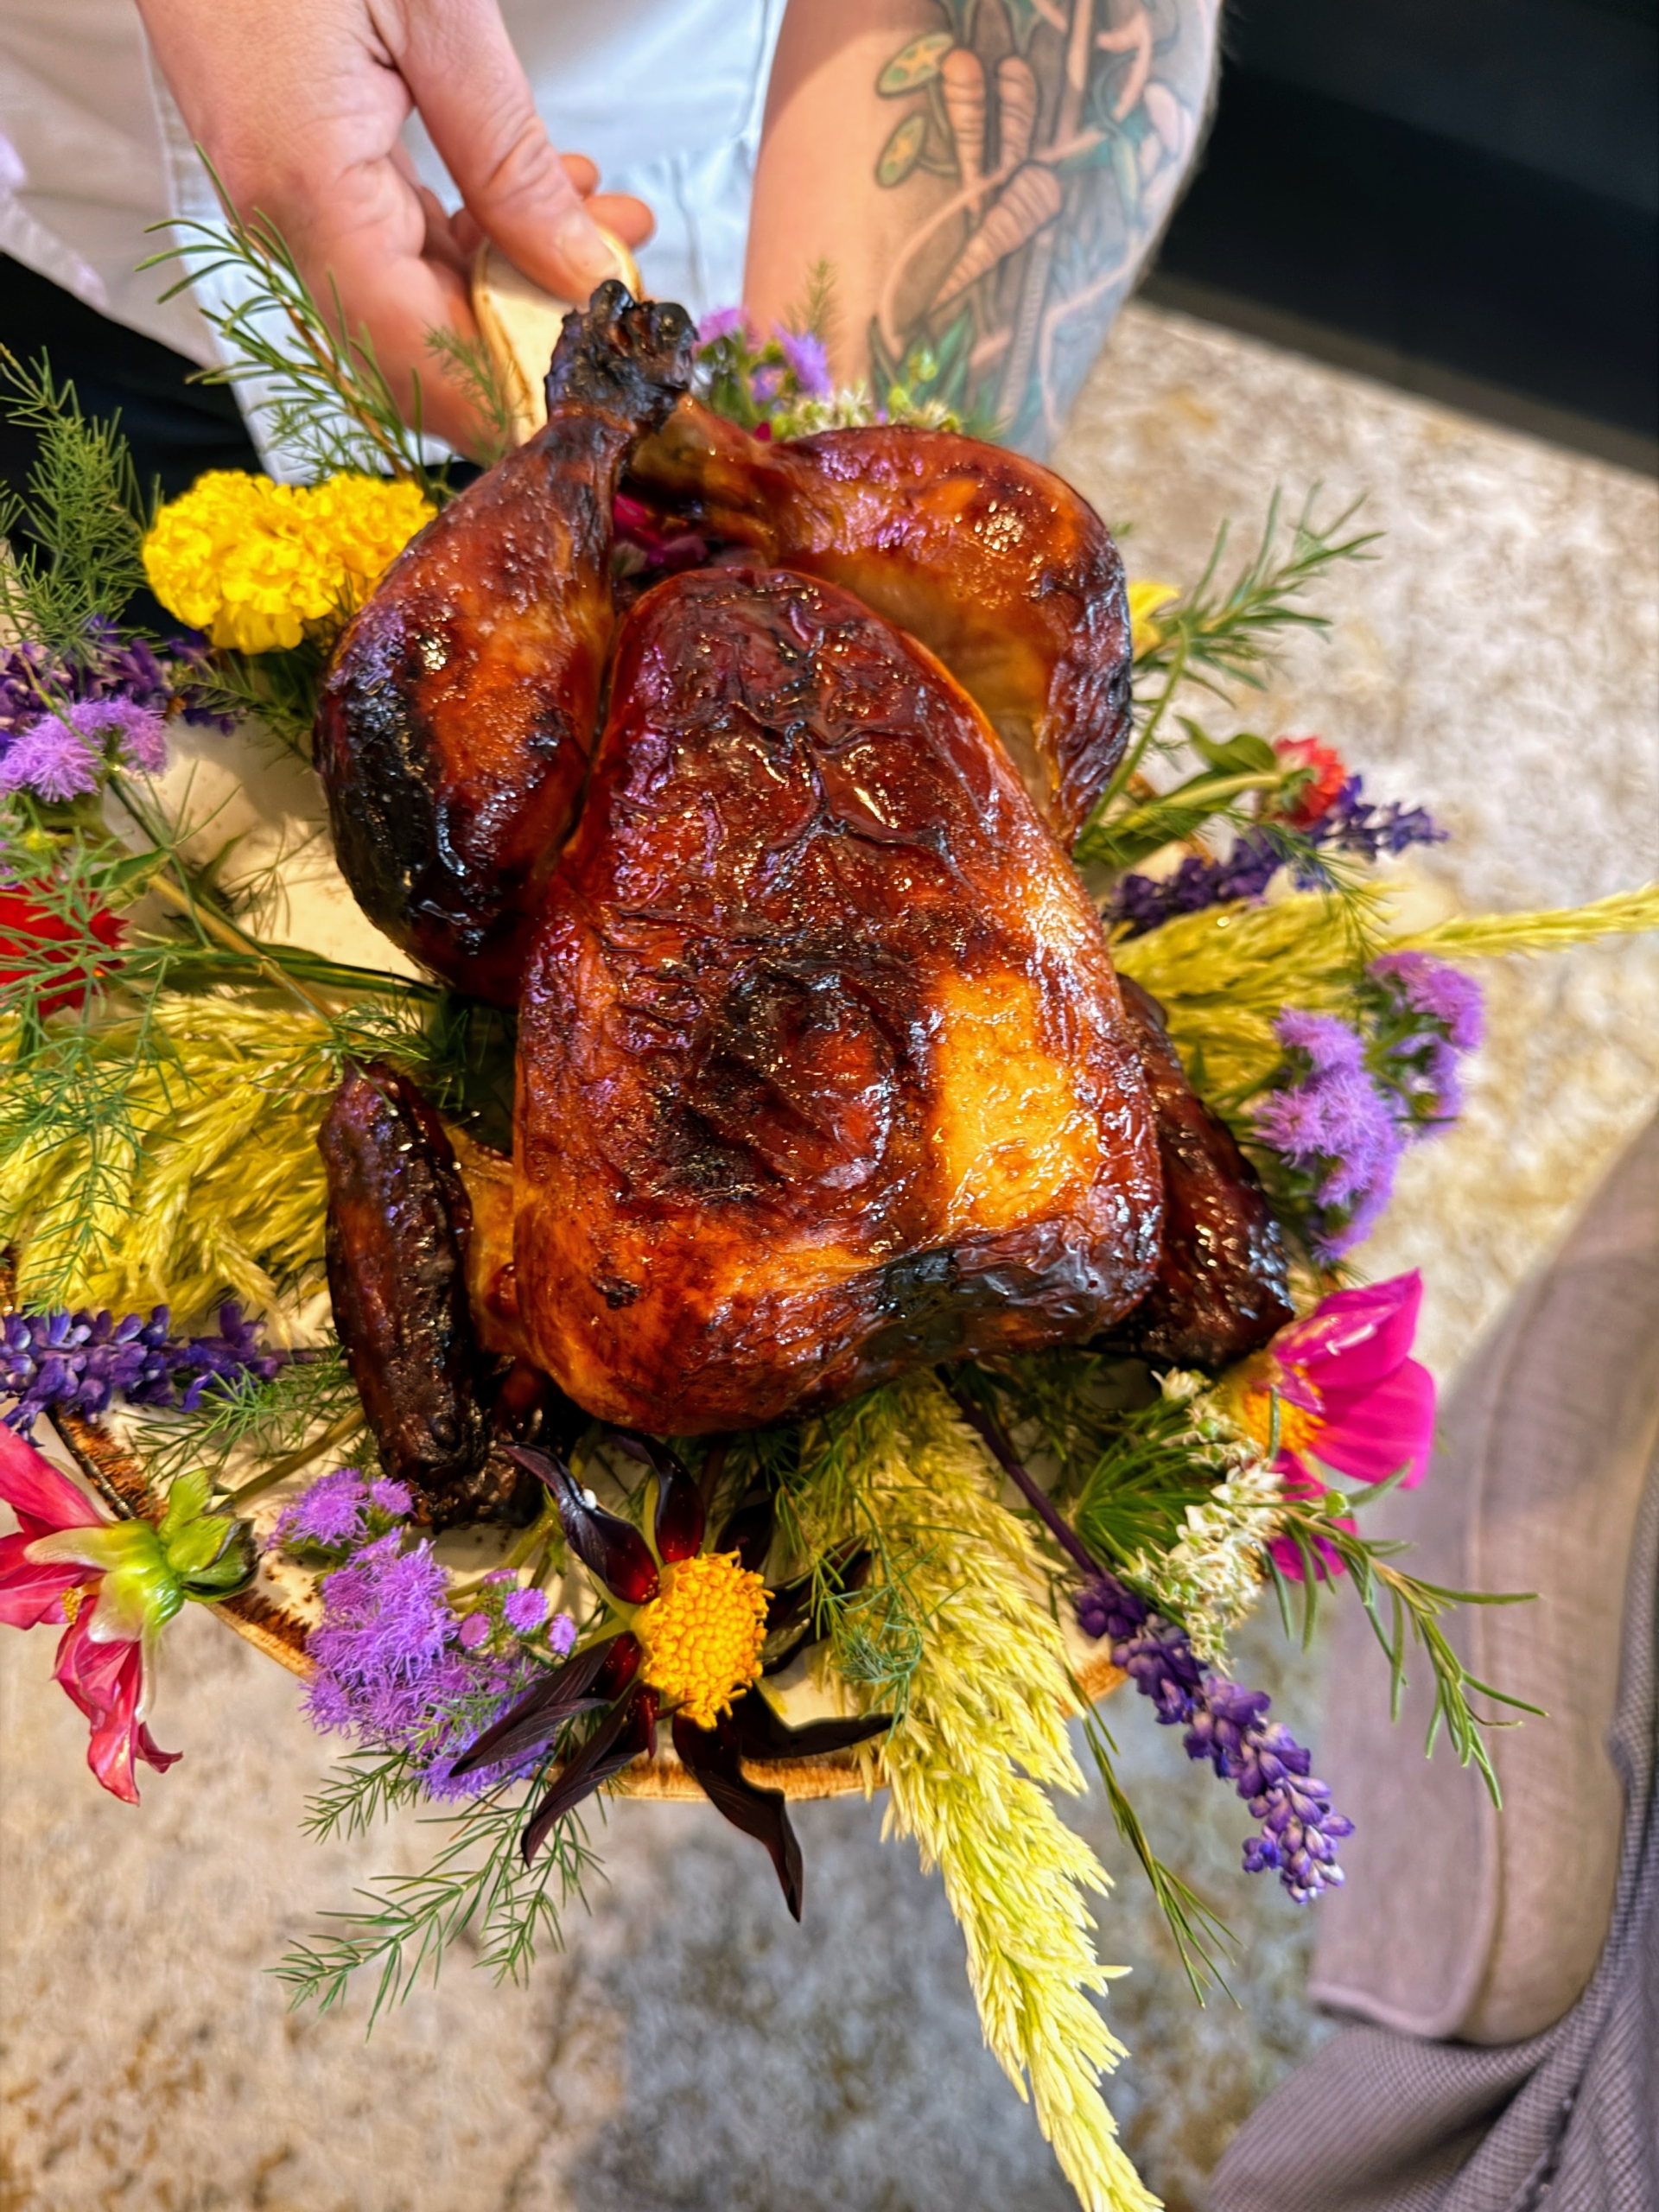
This is the Whole-Roasted Green Circle Chicken with garden lavender, and wildflower honey.
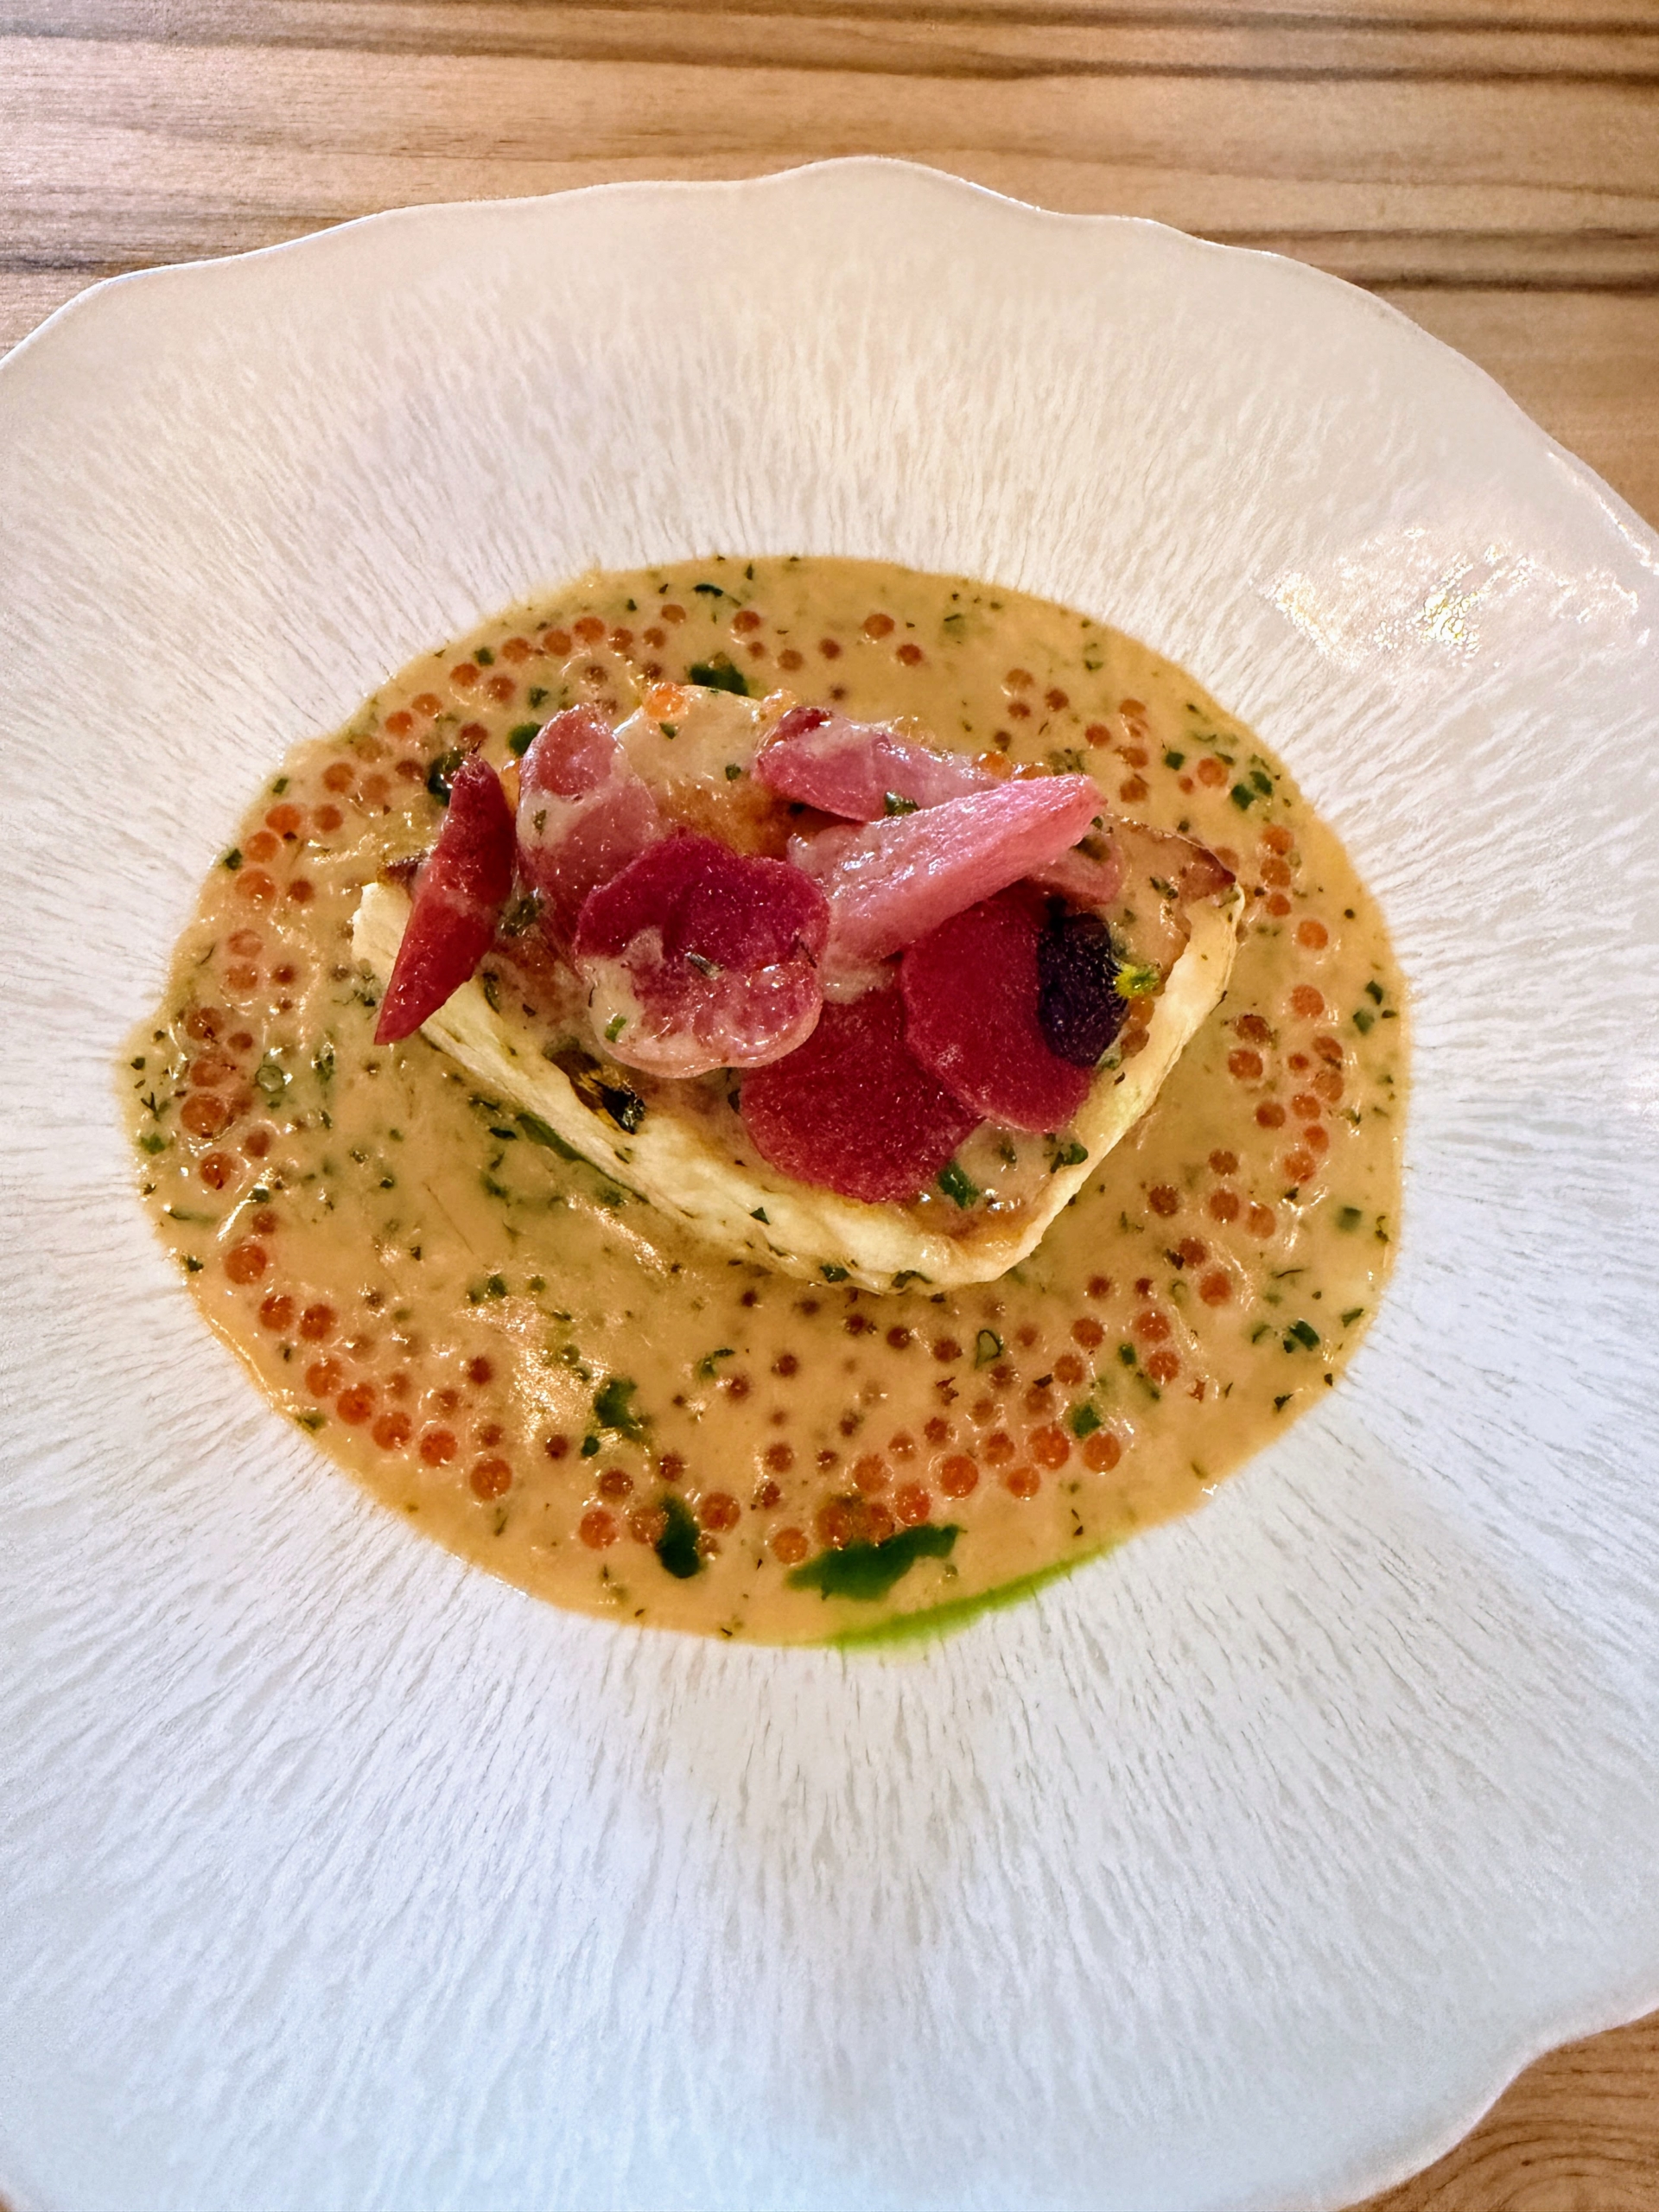
Judy had the Atlantic Halibut, with rainbow radish, ocean trout roe, and miso beurre blanc.
This is Spaghetti Alla Chitarra with Maryland and Blue crab, saffron and opal basil.
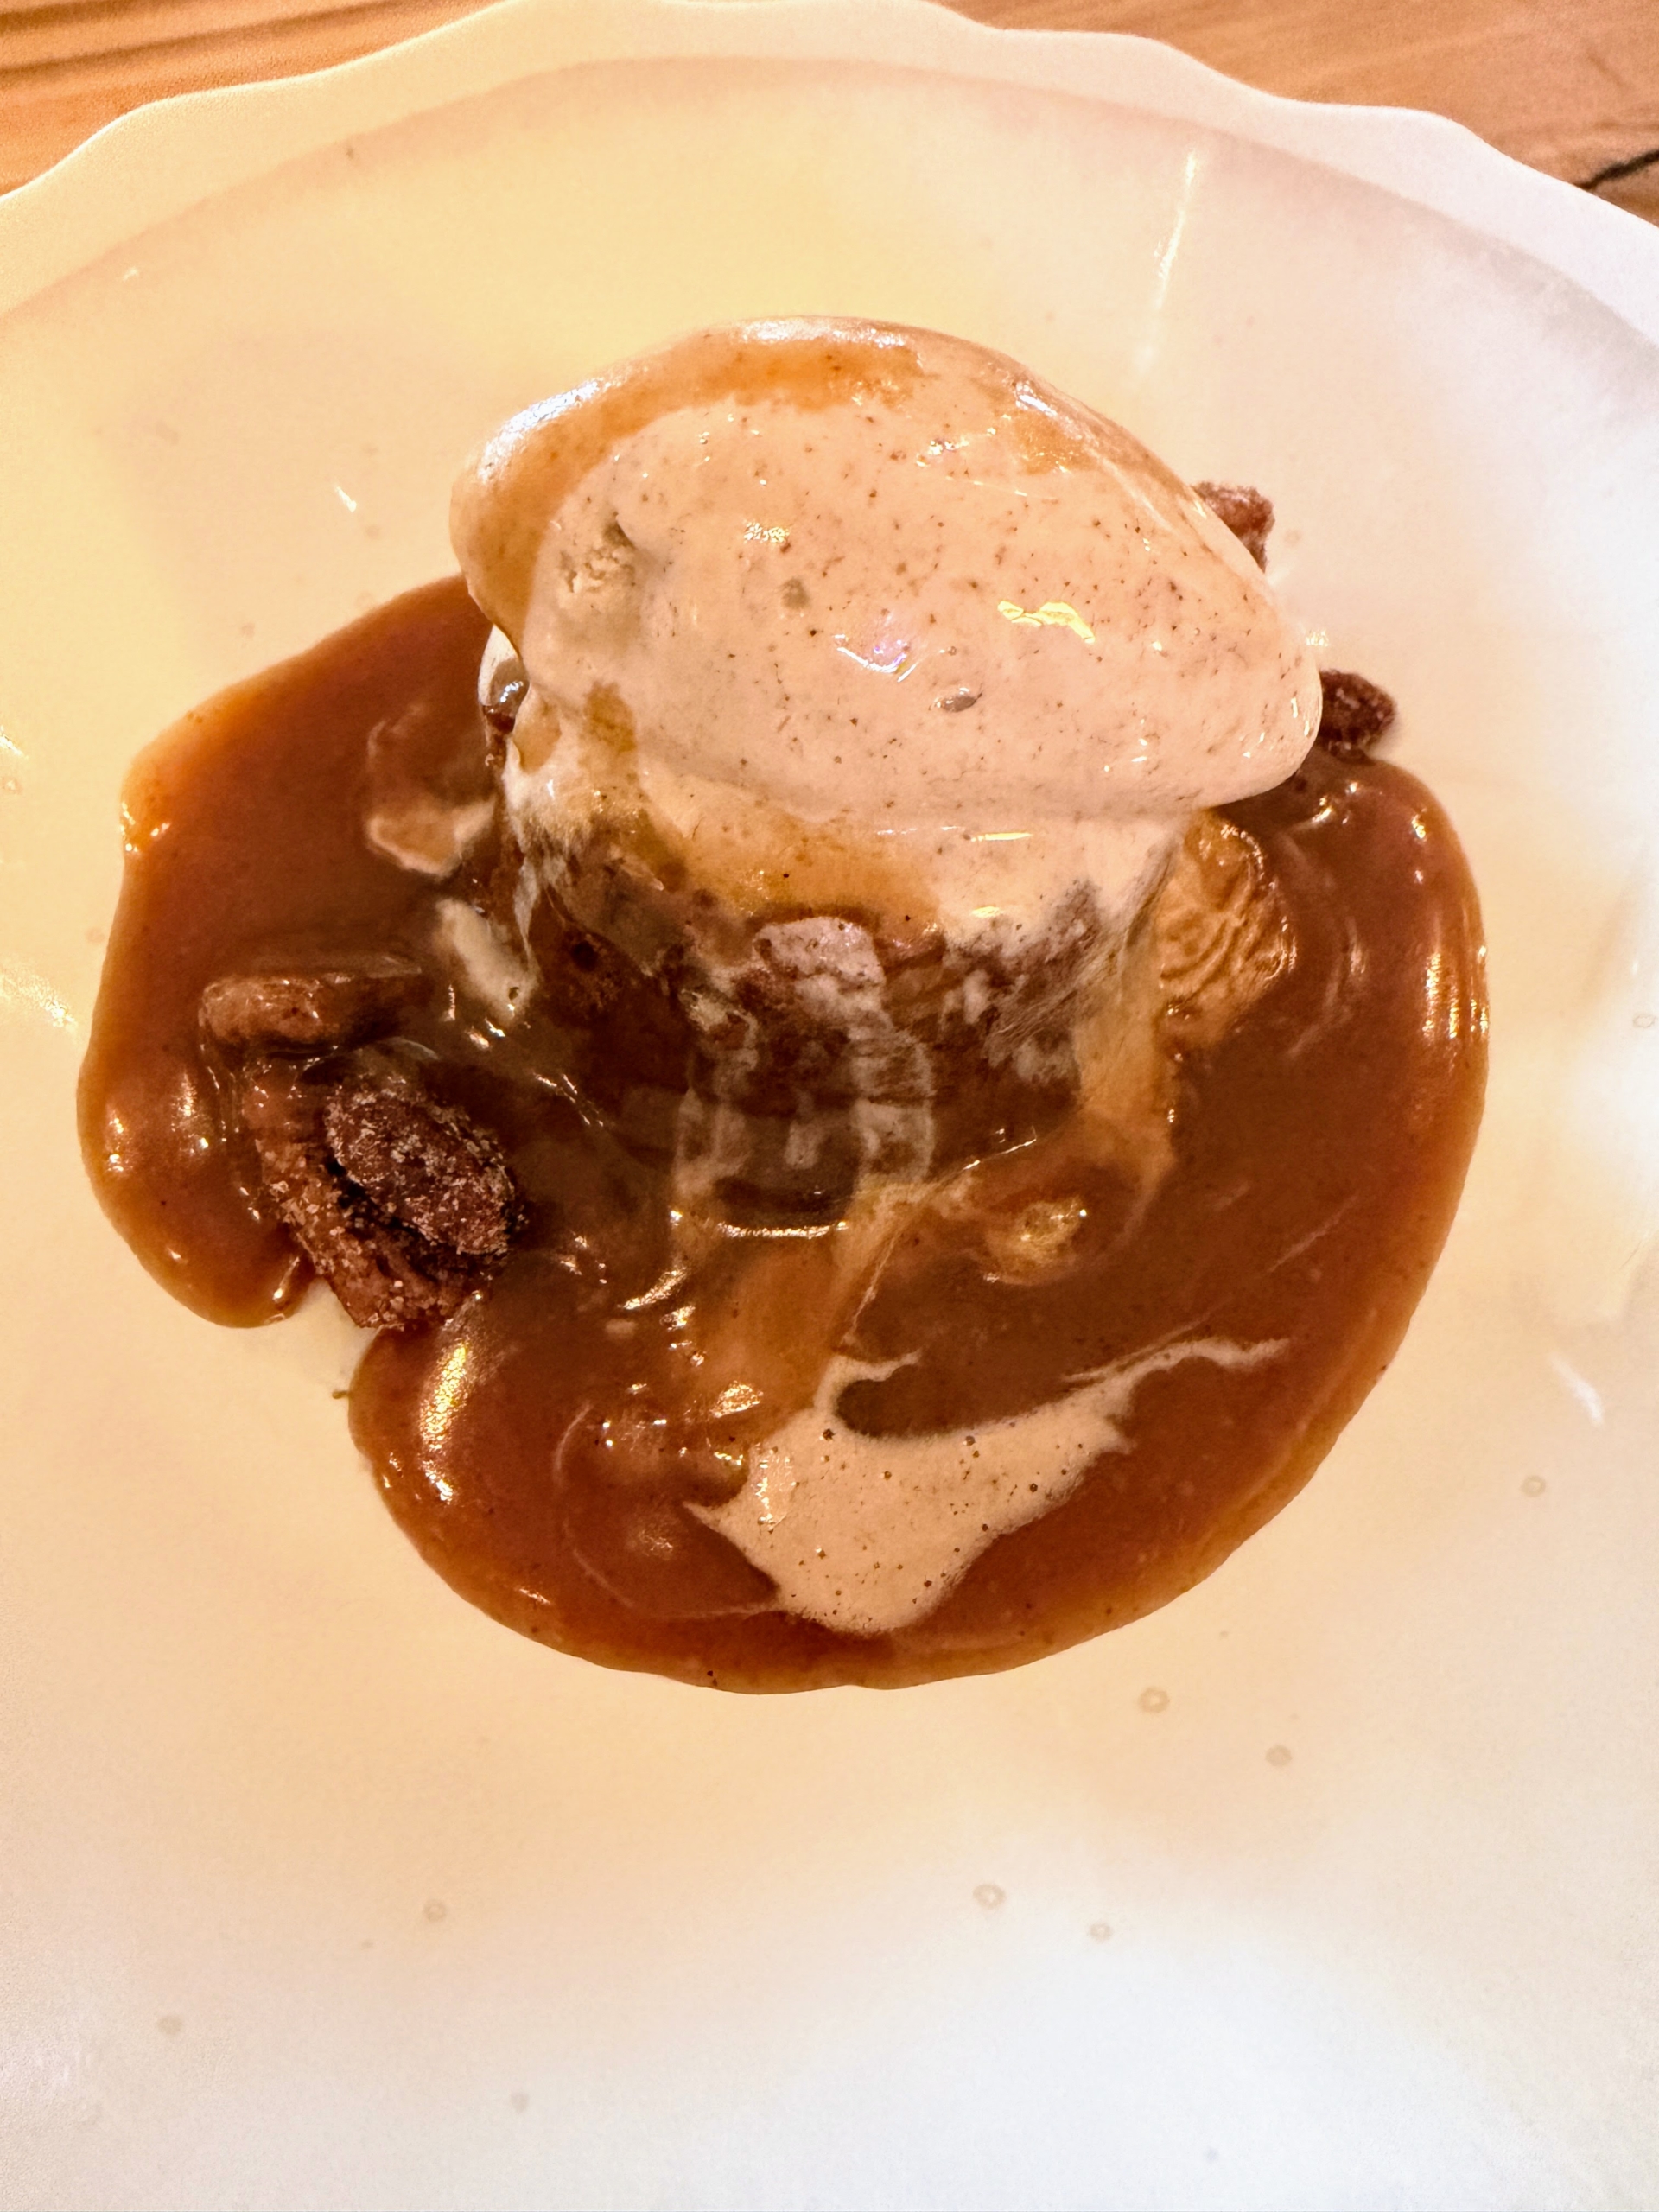
Among our desserts – Sticky Toffee Pudding with pumpkin, spiced gelato and pepitas, or pumpkin seeds.
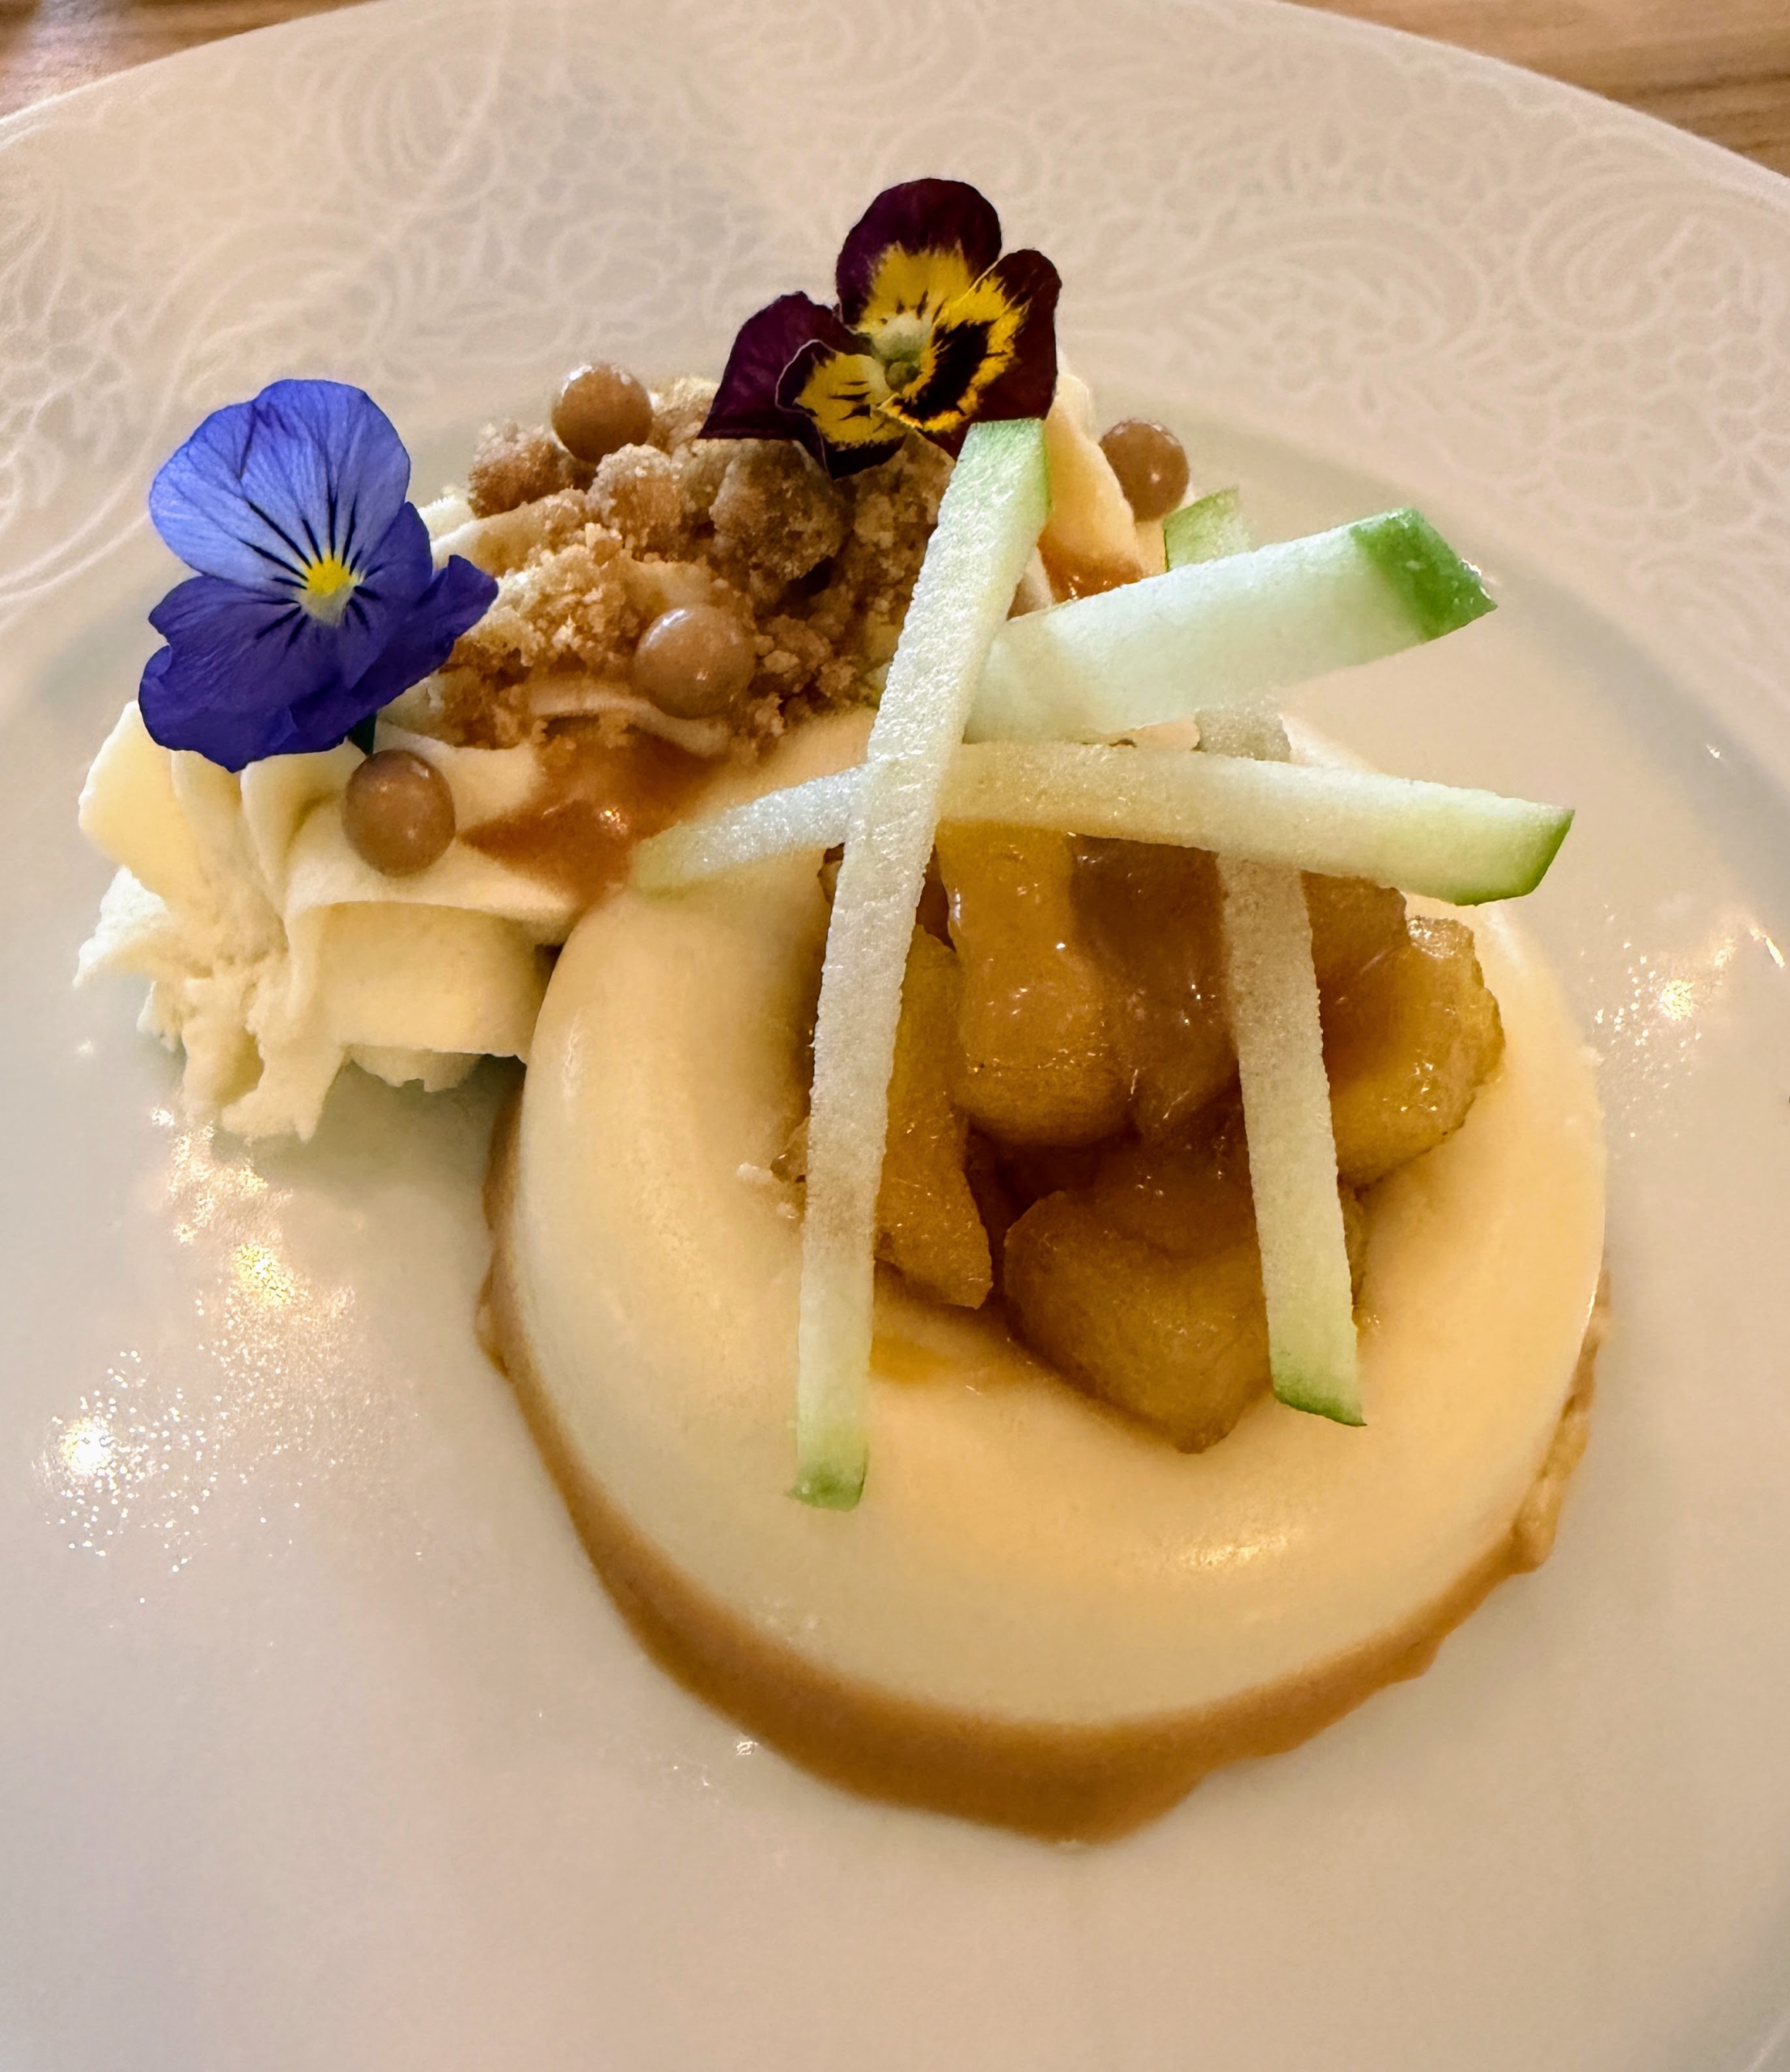
And Cheesecake with honey, pear compote, and candied apple.
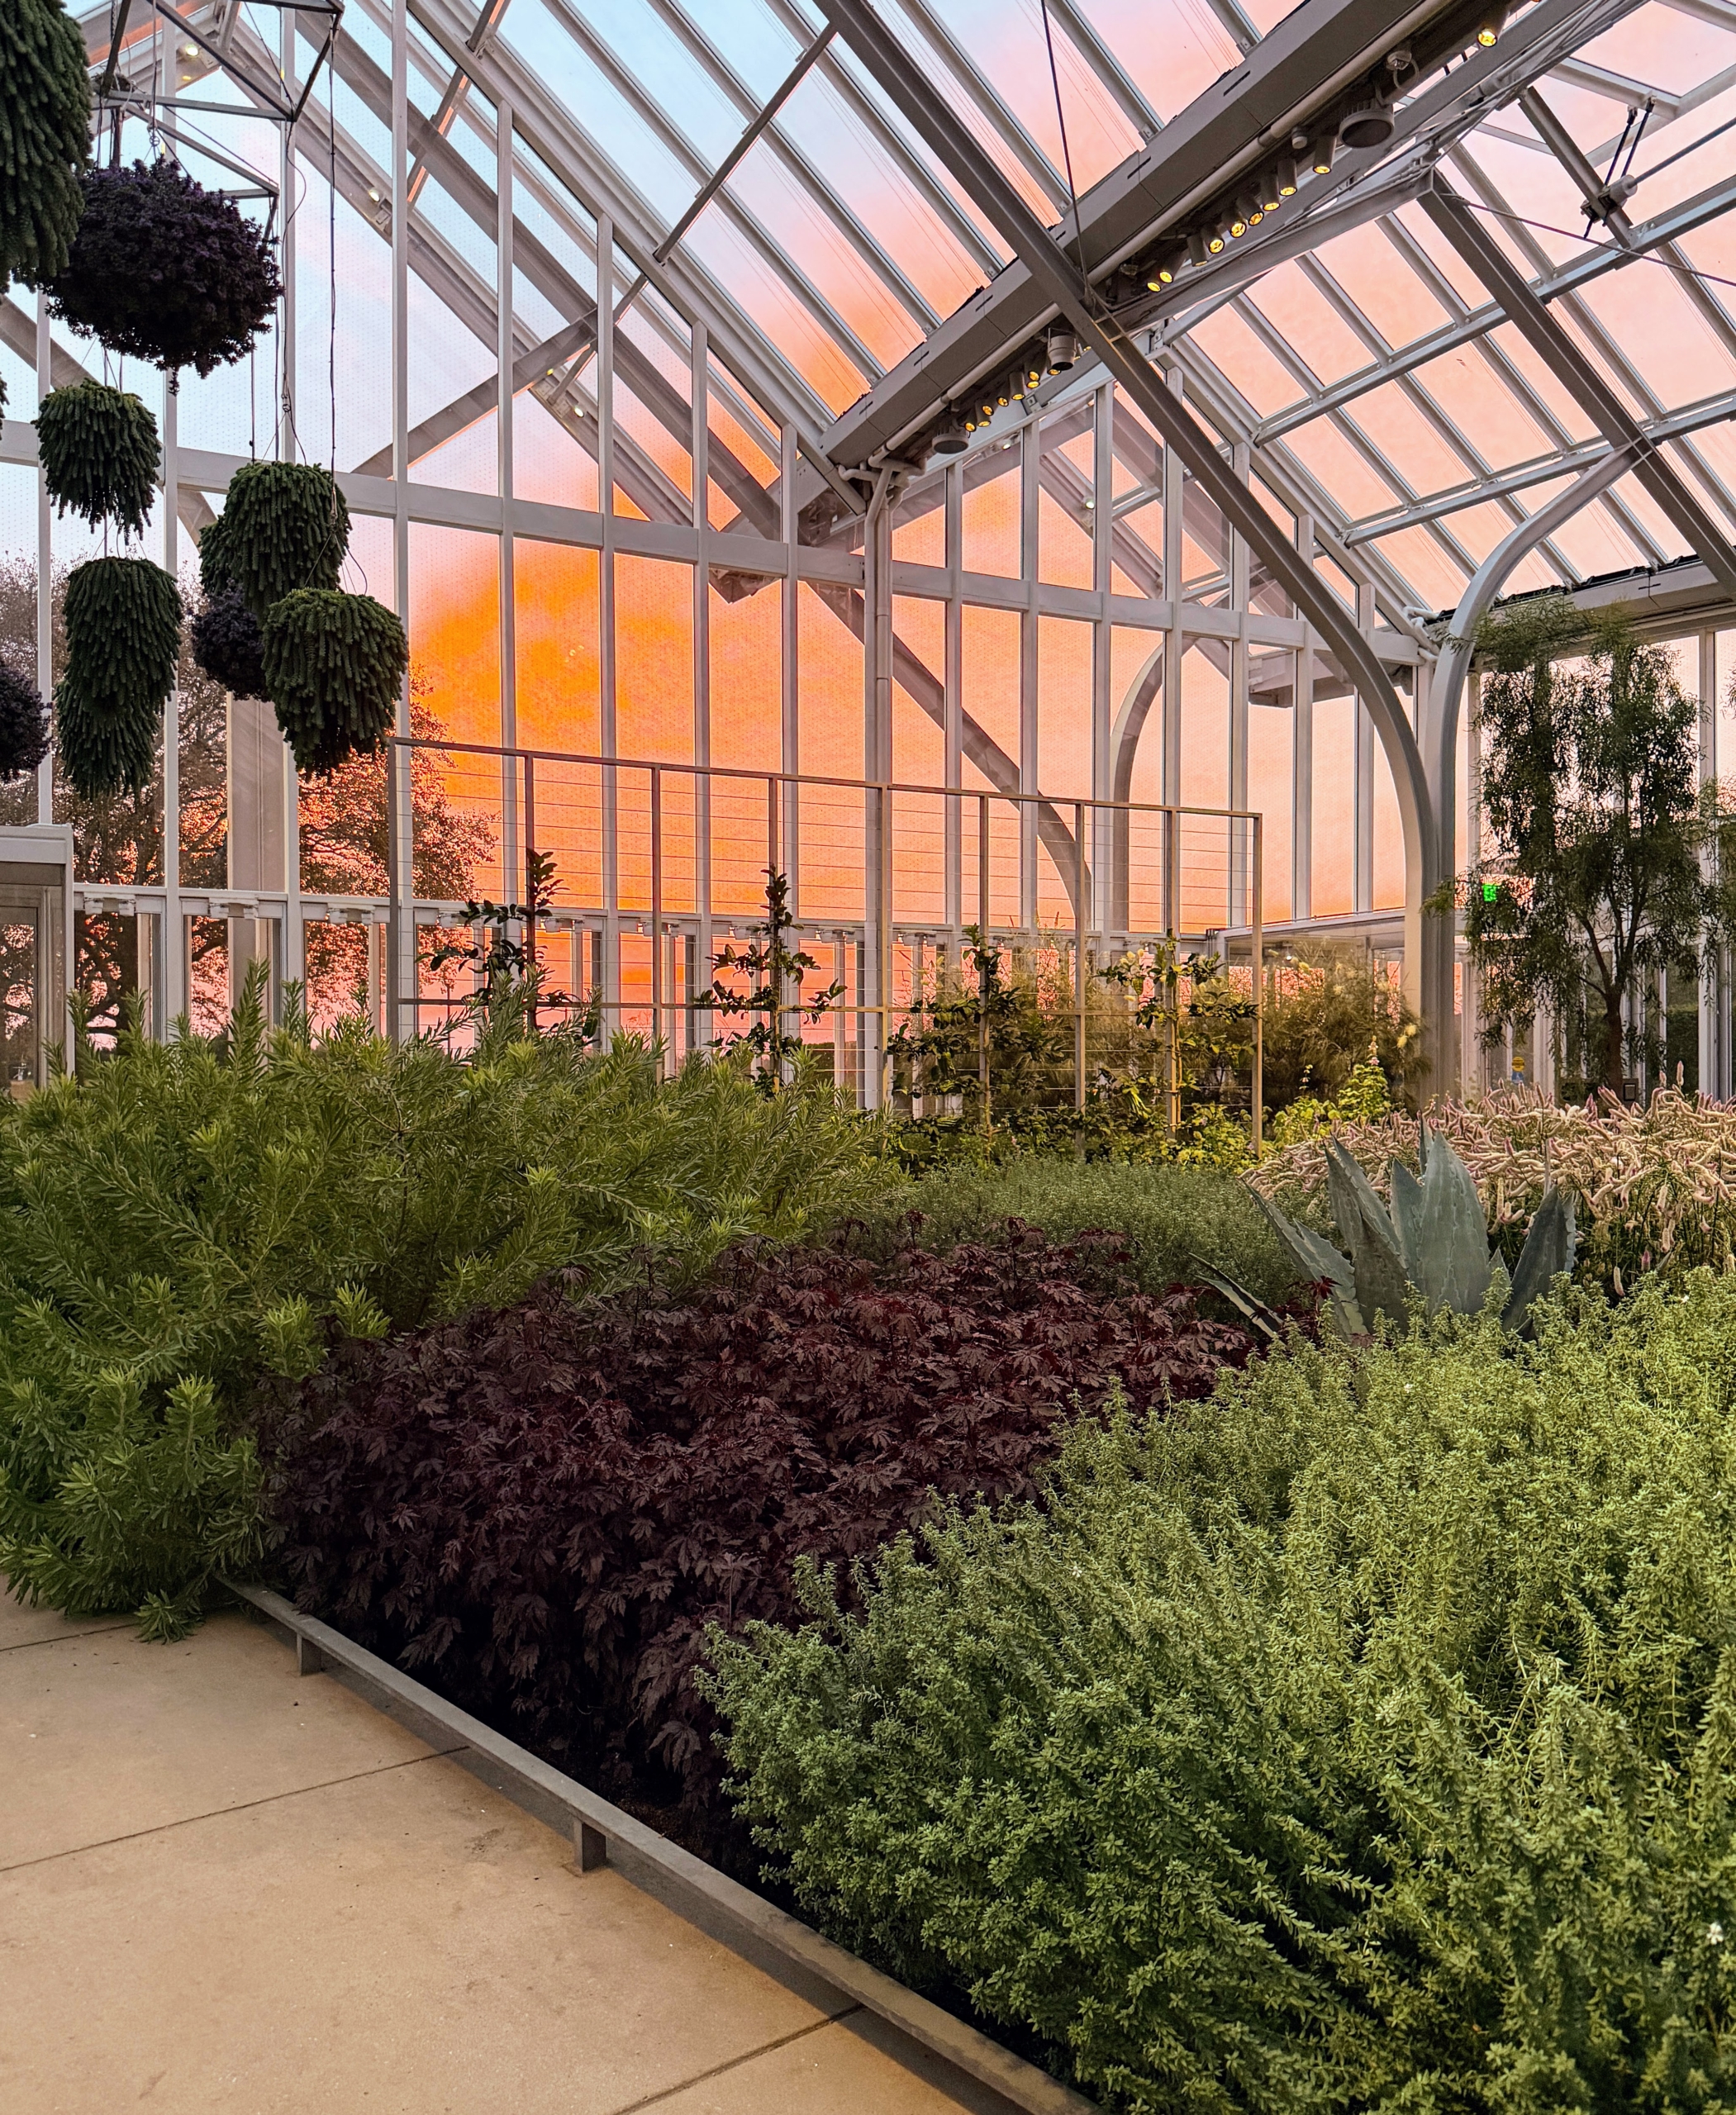
Here’s a view of the sunset from inside the new West Conservatory.
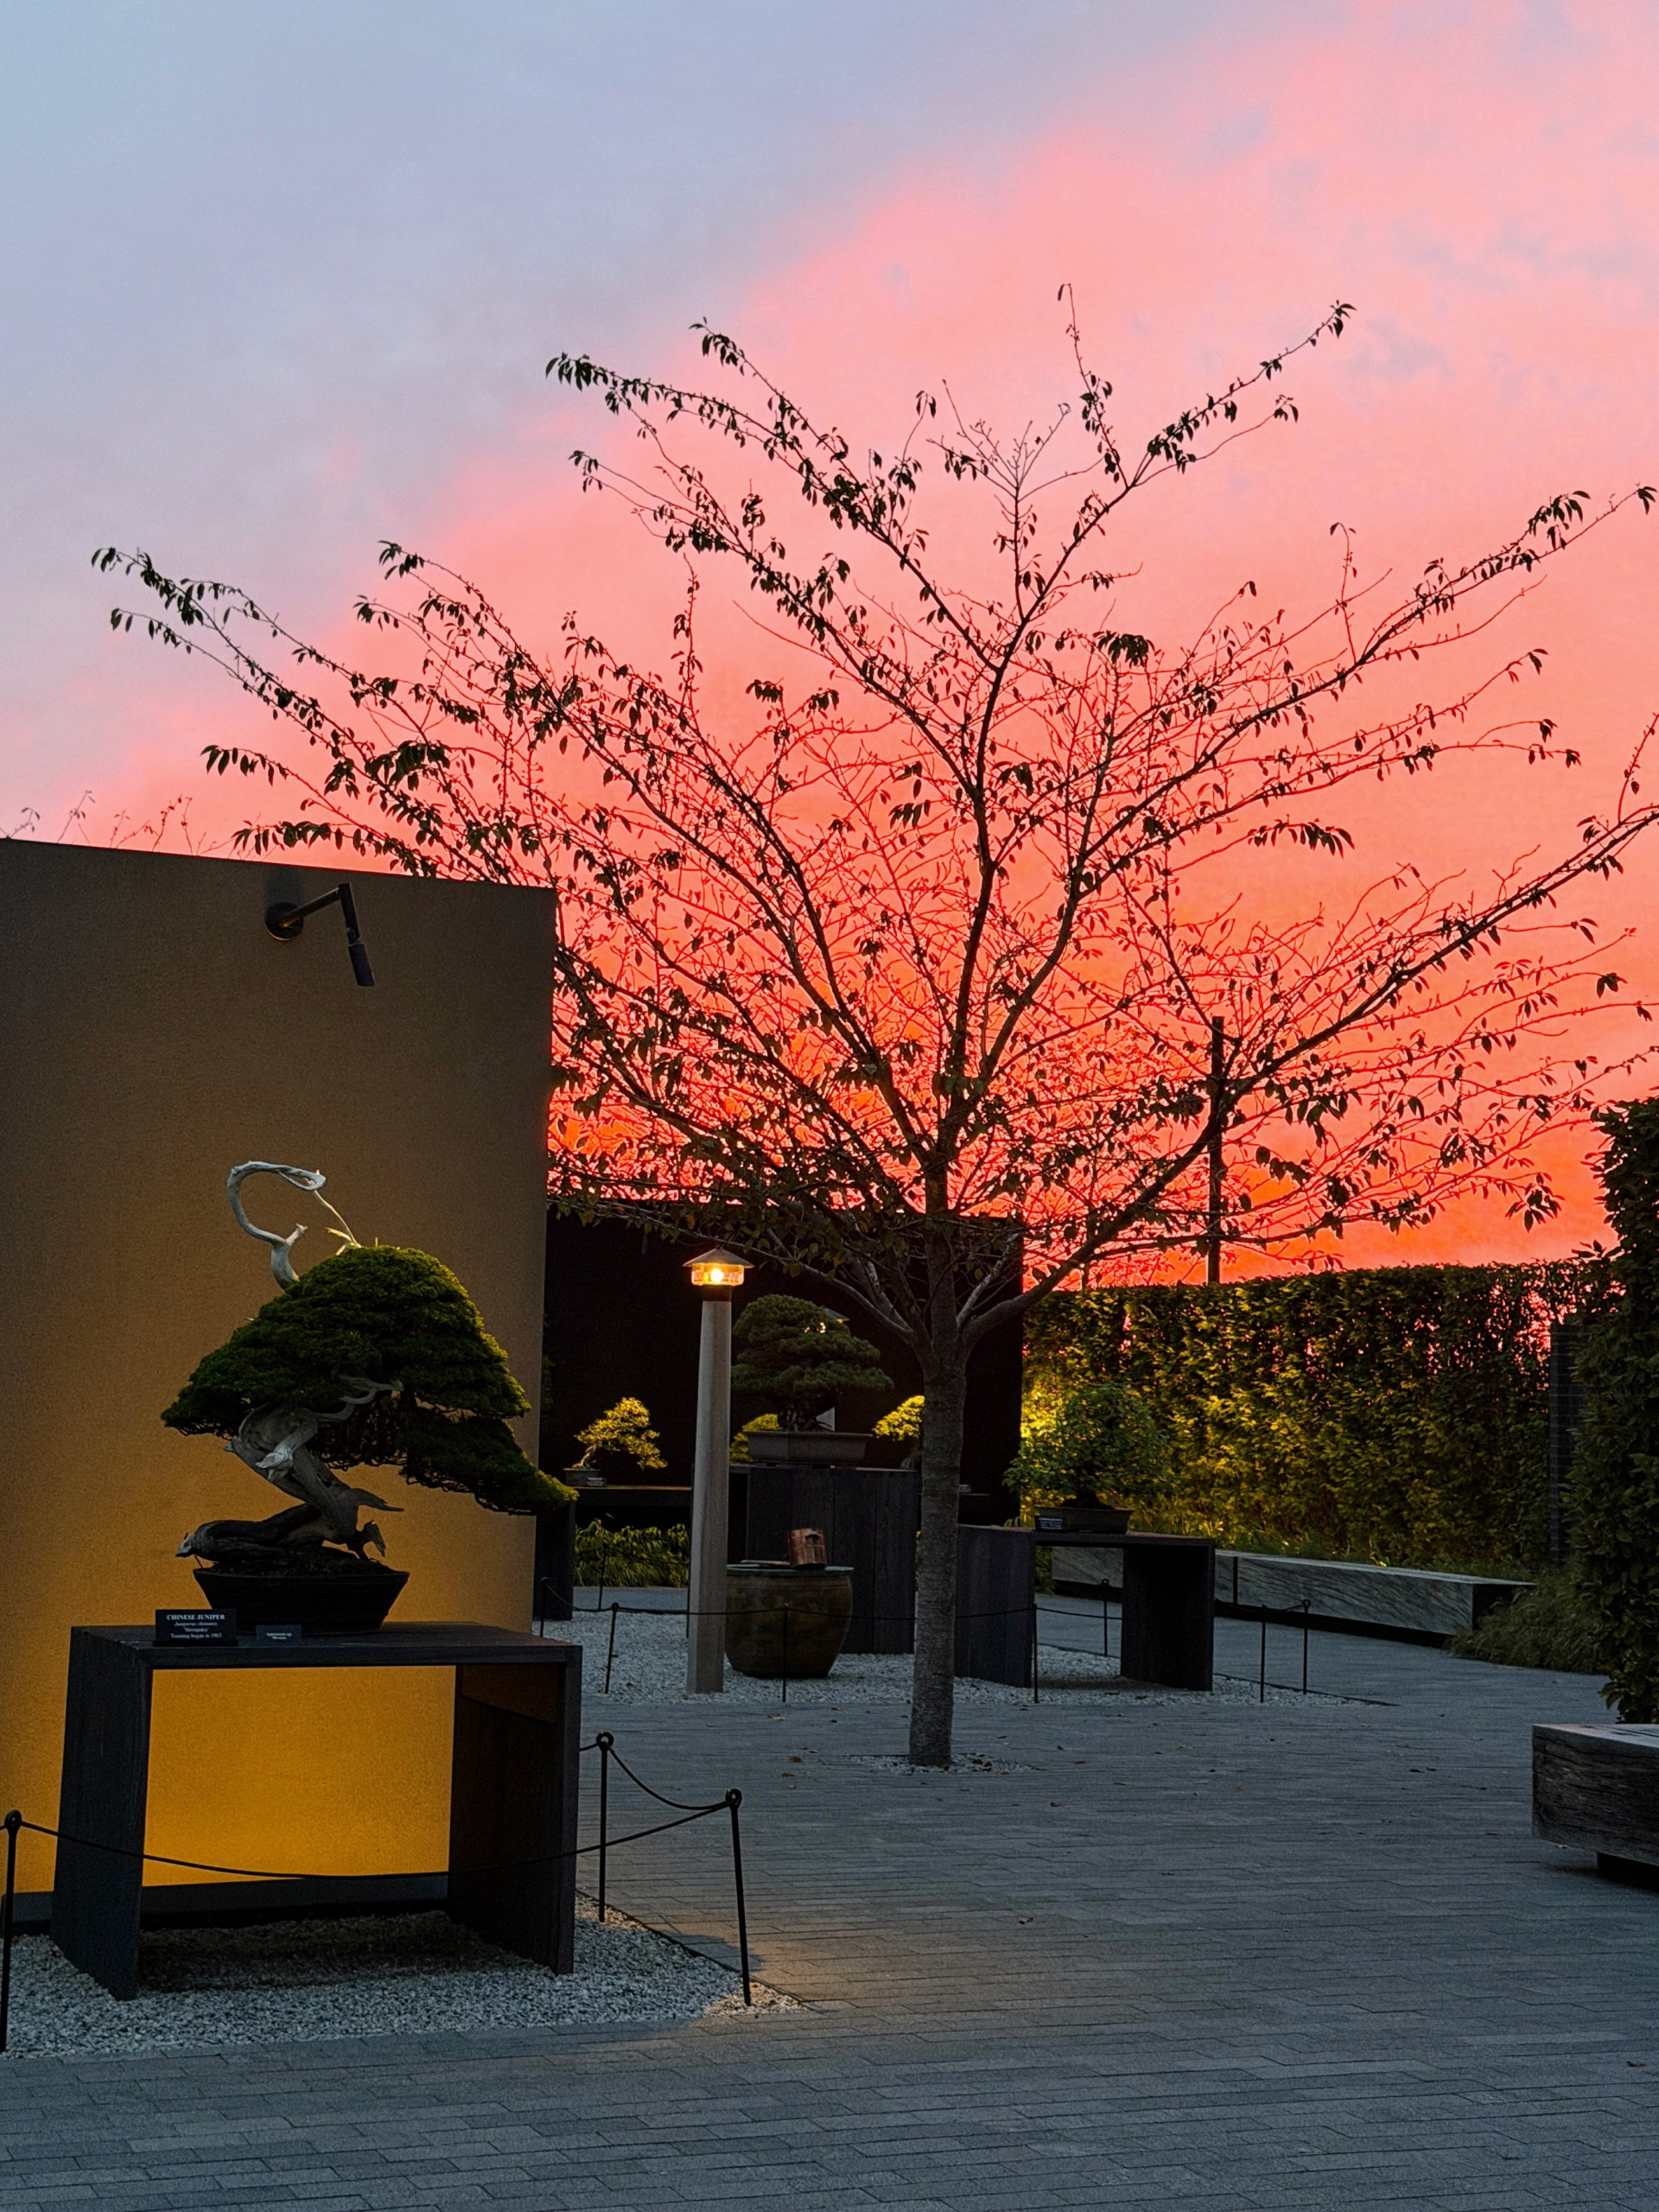
This view is from outside in the new Bonsai Courtyard. It was a very successful day at QVC paired with a wonderful early evening at Longwood Gardens – please visit when you can. You’ll love it there.
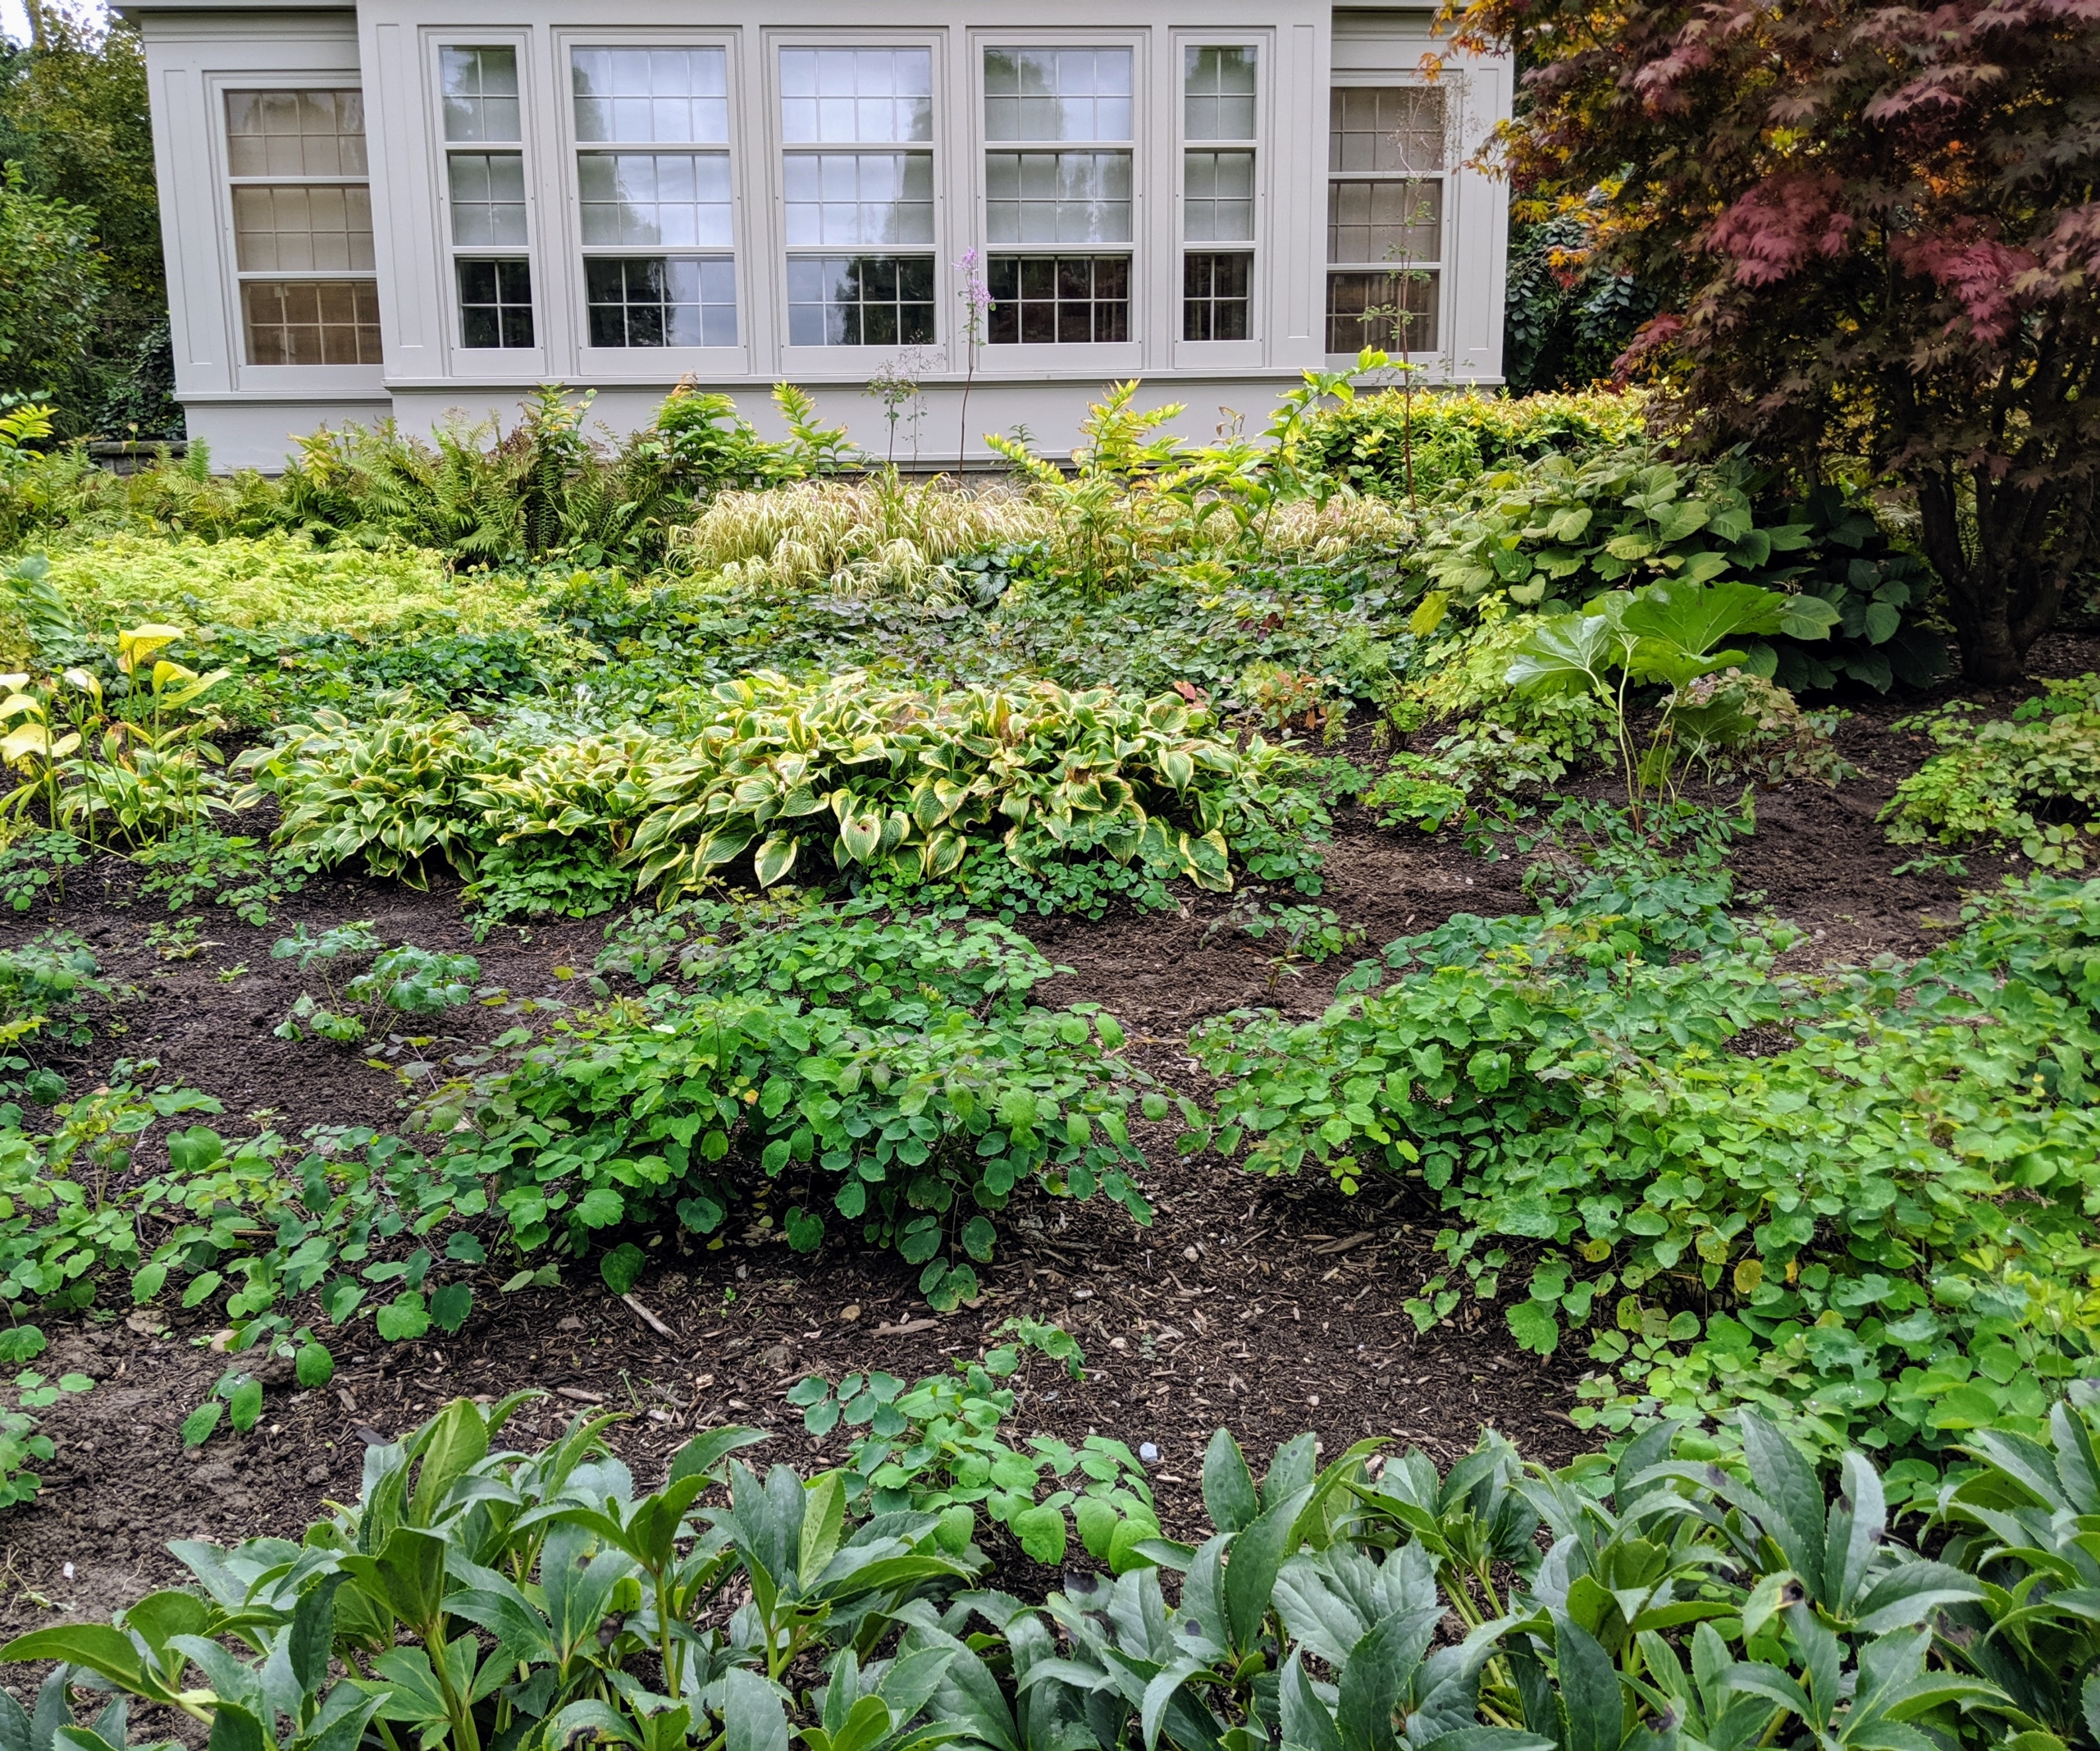
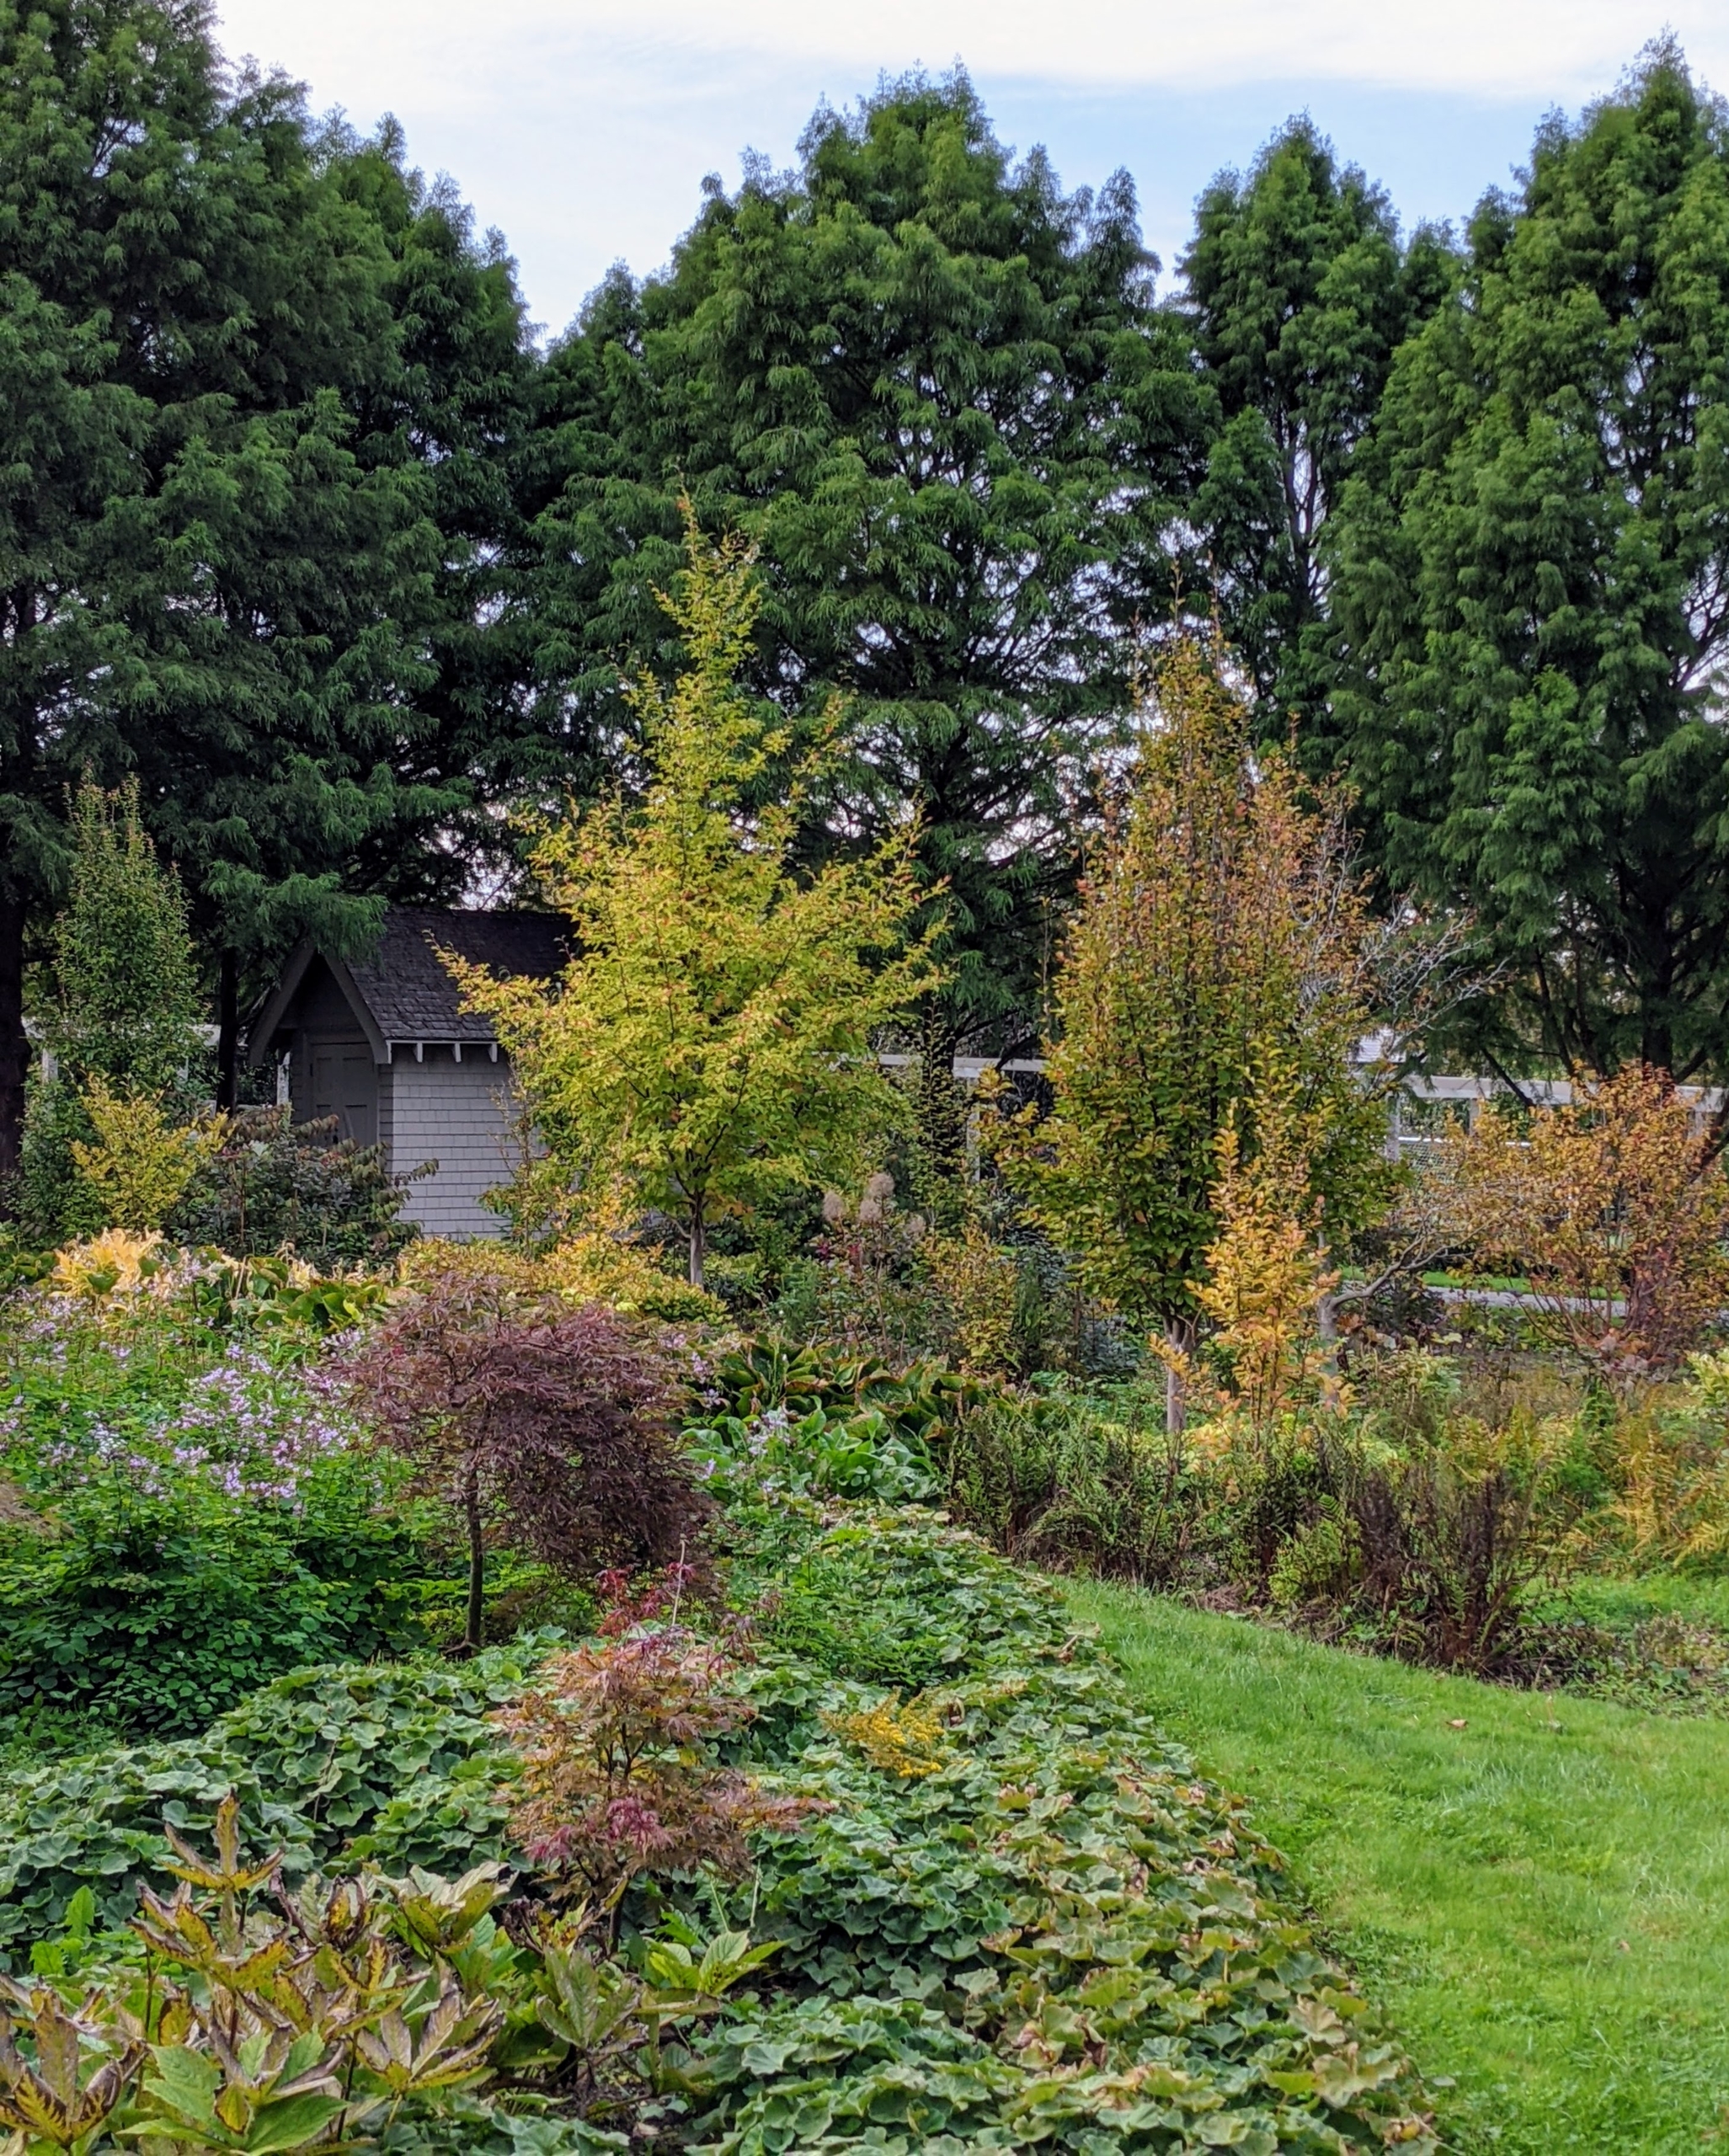
I am constantly looking for ways to change and improve the gardens around my farm. The area behind my Tenant House and across from my long clematis pergola is now in its third iteration. When I moved here, I planted it with rows and rows of beautiful ferns and tiger lilies. In 2018, I filled it with Stewartia trees and lush, green shade-loving plants. The following winter, I had several trees taken down - six 125-foot trees that were leaning dangerously close to the house and had to be removed for safety reasons. Doing this took away much of the shade and many plants suffered. Since then, I added several Japanese maples and smoke bushes hoping they would provide more shade to the specimens below. But now I am transforming the space once again - clearing old, overcrowding plants and adding more Japanese maple trees and plants that will thrive better under the sun. Changing a garden to keep it young and vibrant... it's a very good thing.
Enjoy these photos.
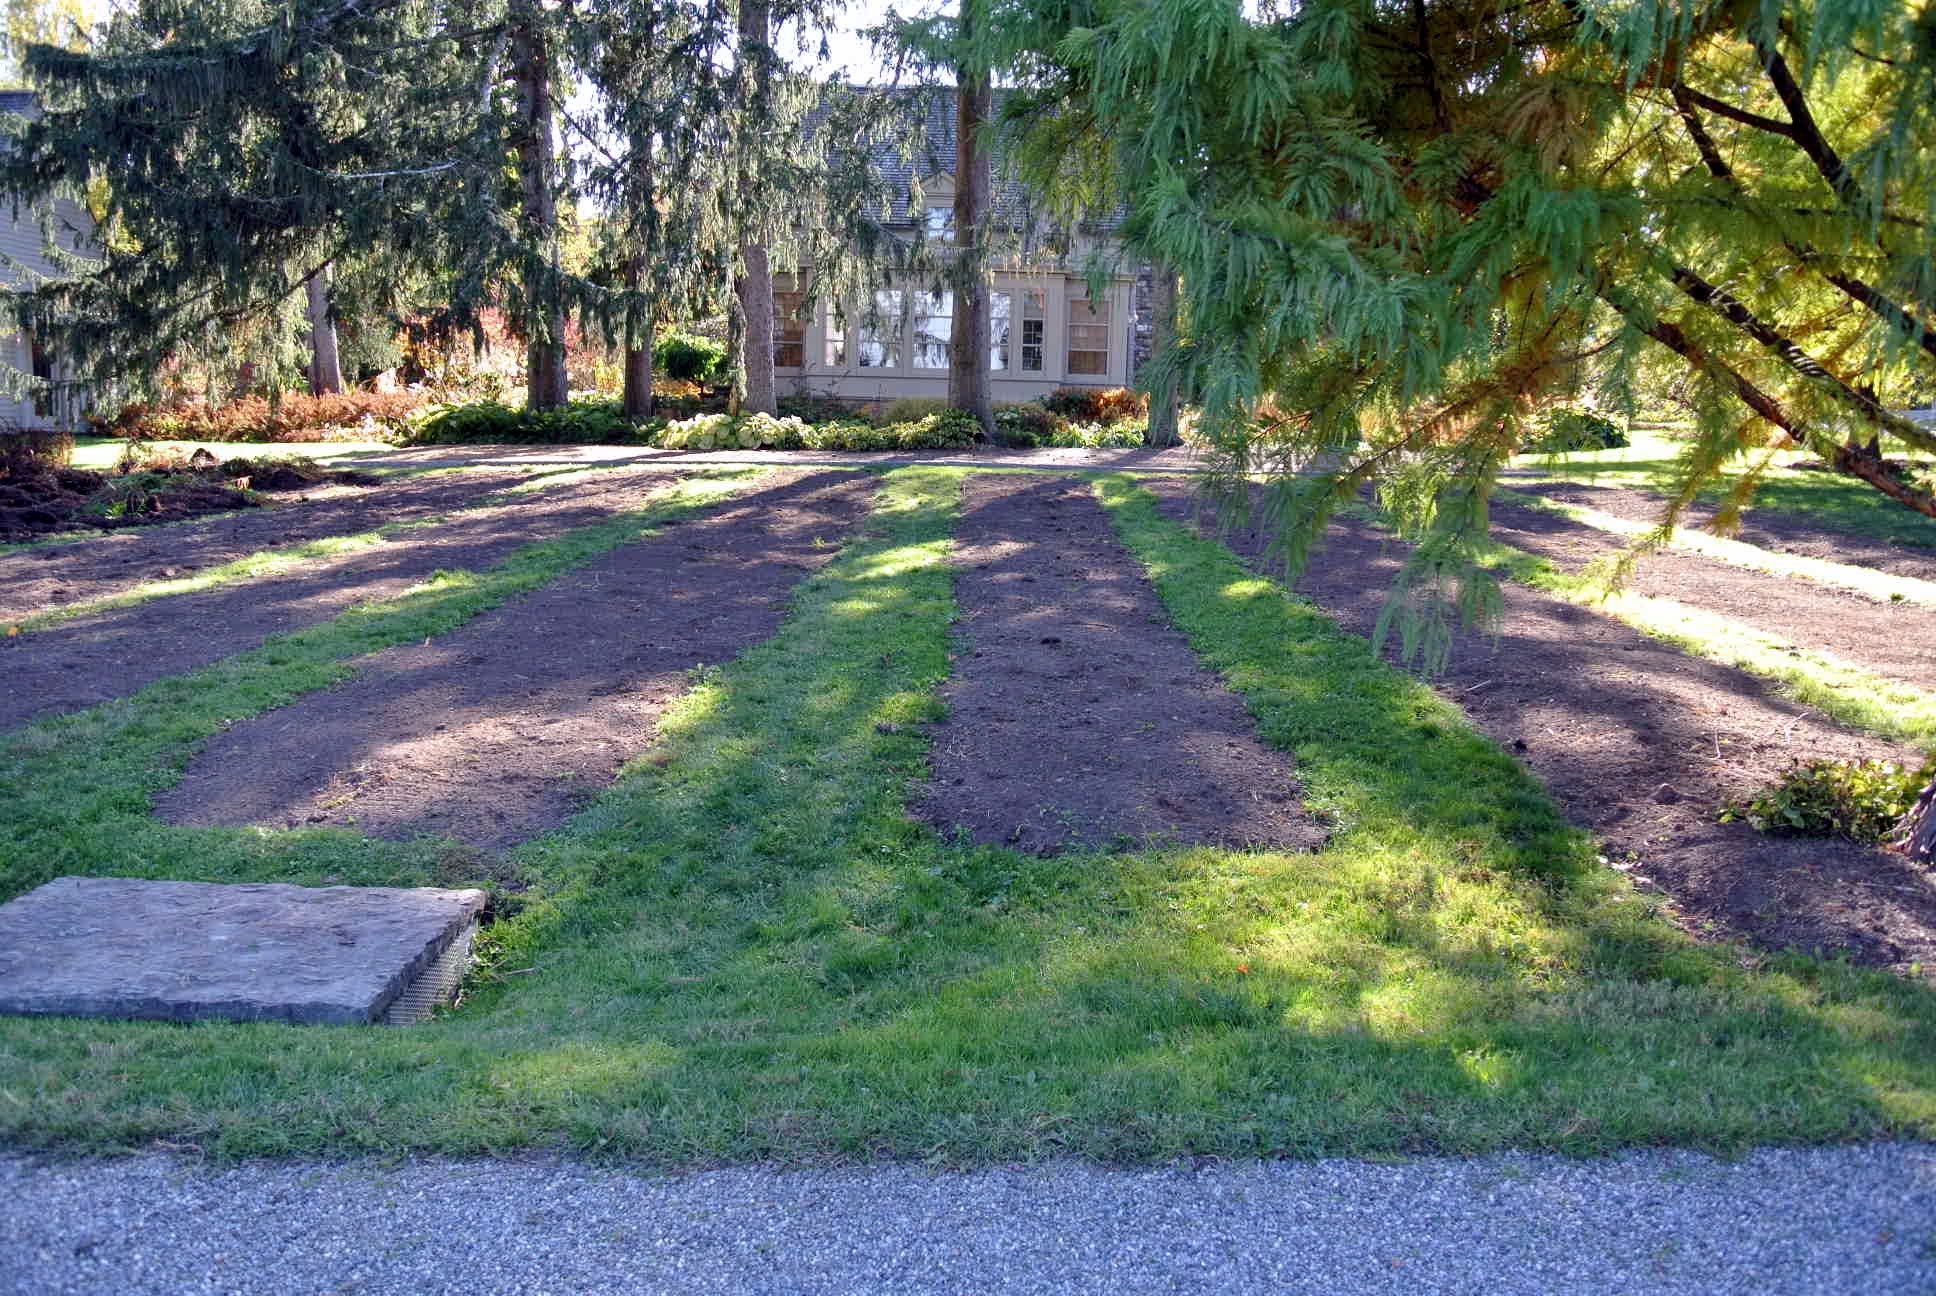
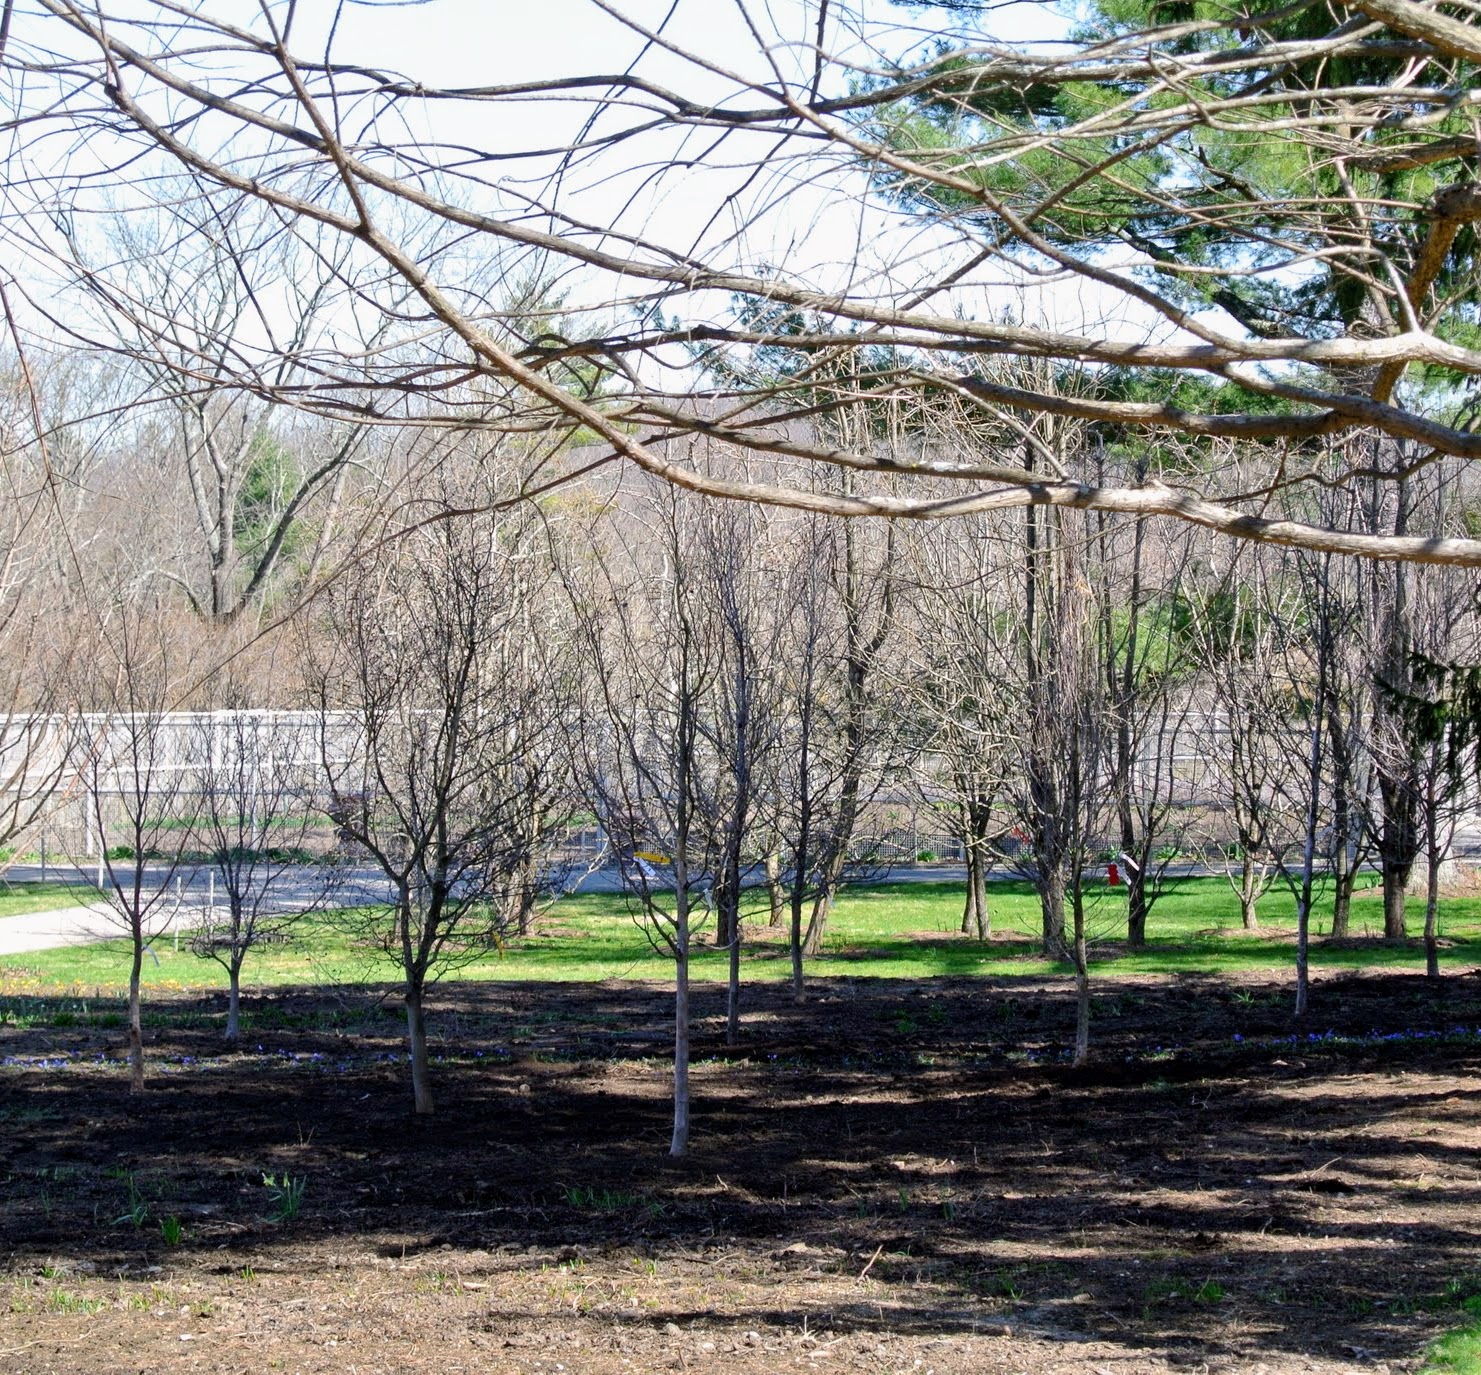
In the fall of 2015, I removed rows and rows of ferns and lilies and relocated them to new areas.
Here, the beds are clean, free of any bulbs, and ready to be replanted.
In the spring of 2016, I planted the area with a collection of Stewartia trees. Stewartias are native to Japan, Korea, and the southeastern United States. All are slow-growing, all-season performers that show off fresh green leaves in spring, white flowers resembling single camellias in summer, and colorful foliage in autumn.
The varieties I chose include: Stewartia gemmata, Stewartia x. henryae, Stewartia pseudocamellia ‘Ballet’, Stewartia monadelpha, Stewartia rostrata, and Stewartia henry ‘Skyrocket’.
My head gardener, Ryan McCallister, and I began filling the space with shade-loving plants including Epimediums, Syneilesis, Polygonatum, and Astilboides and others.
The plants thrived and developed nicely in this partly shaded area.
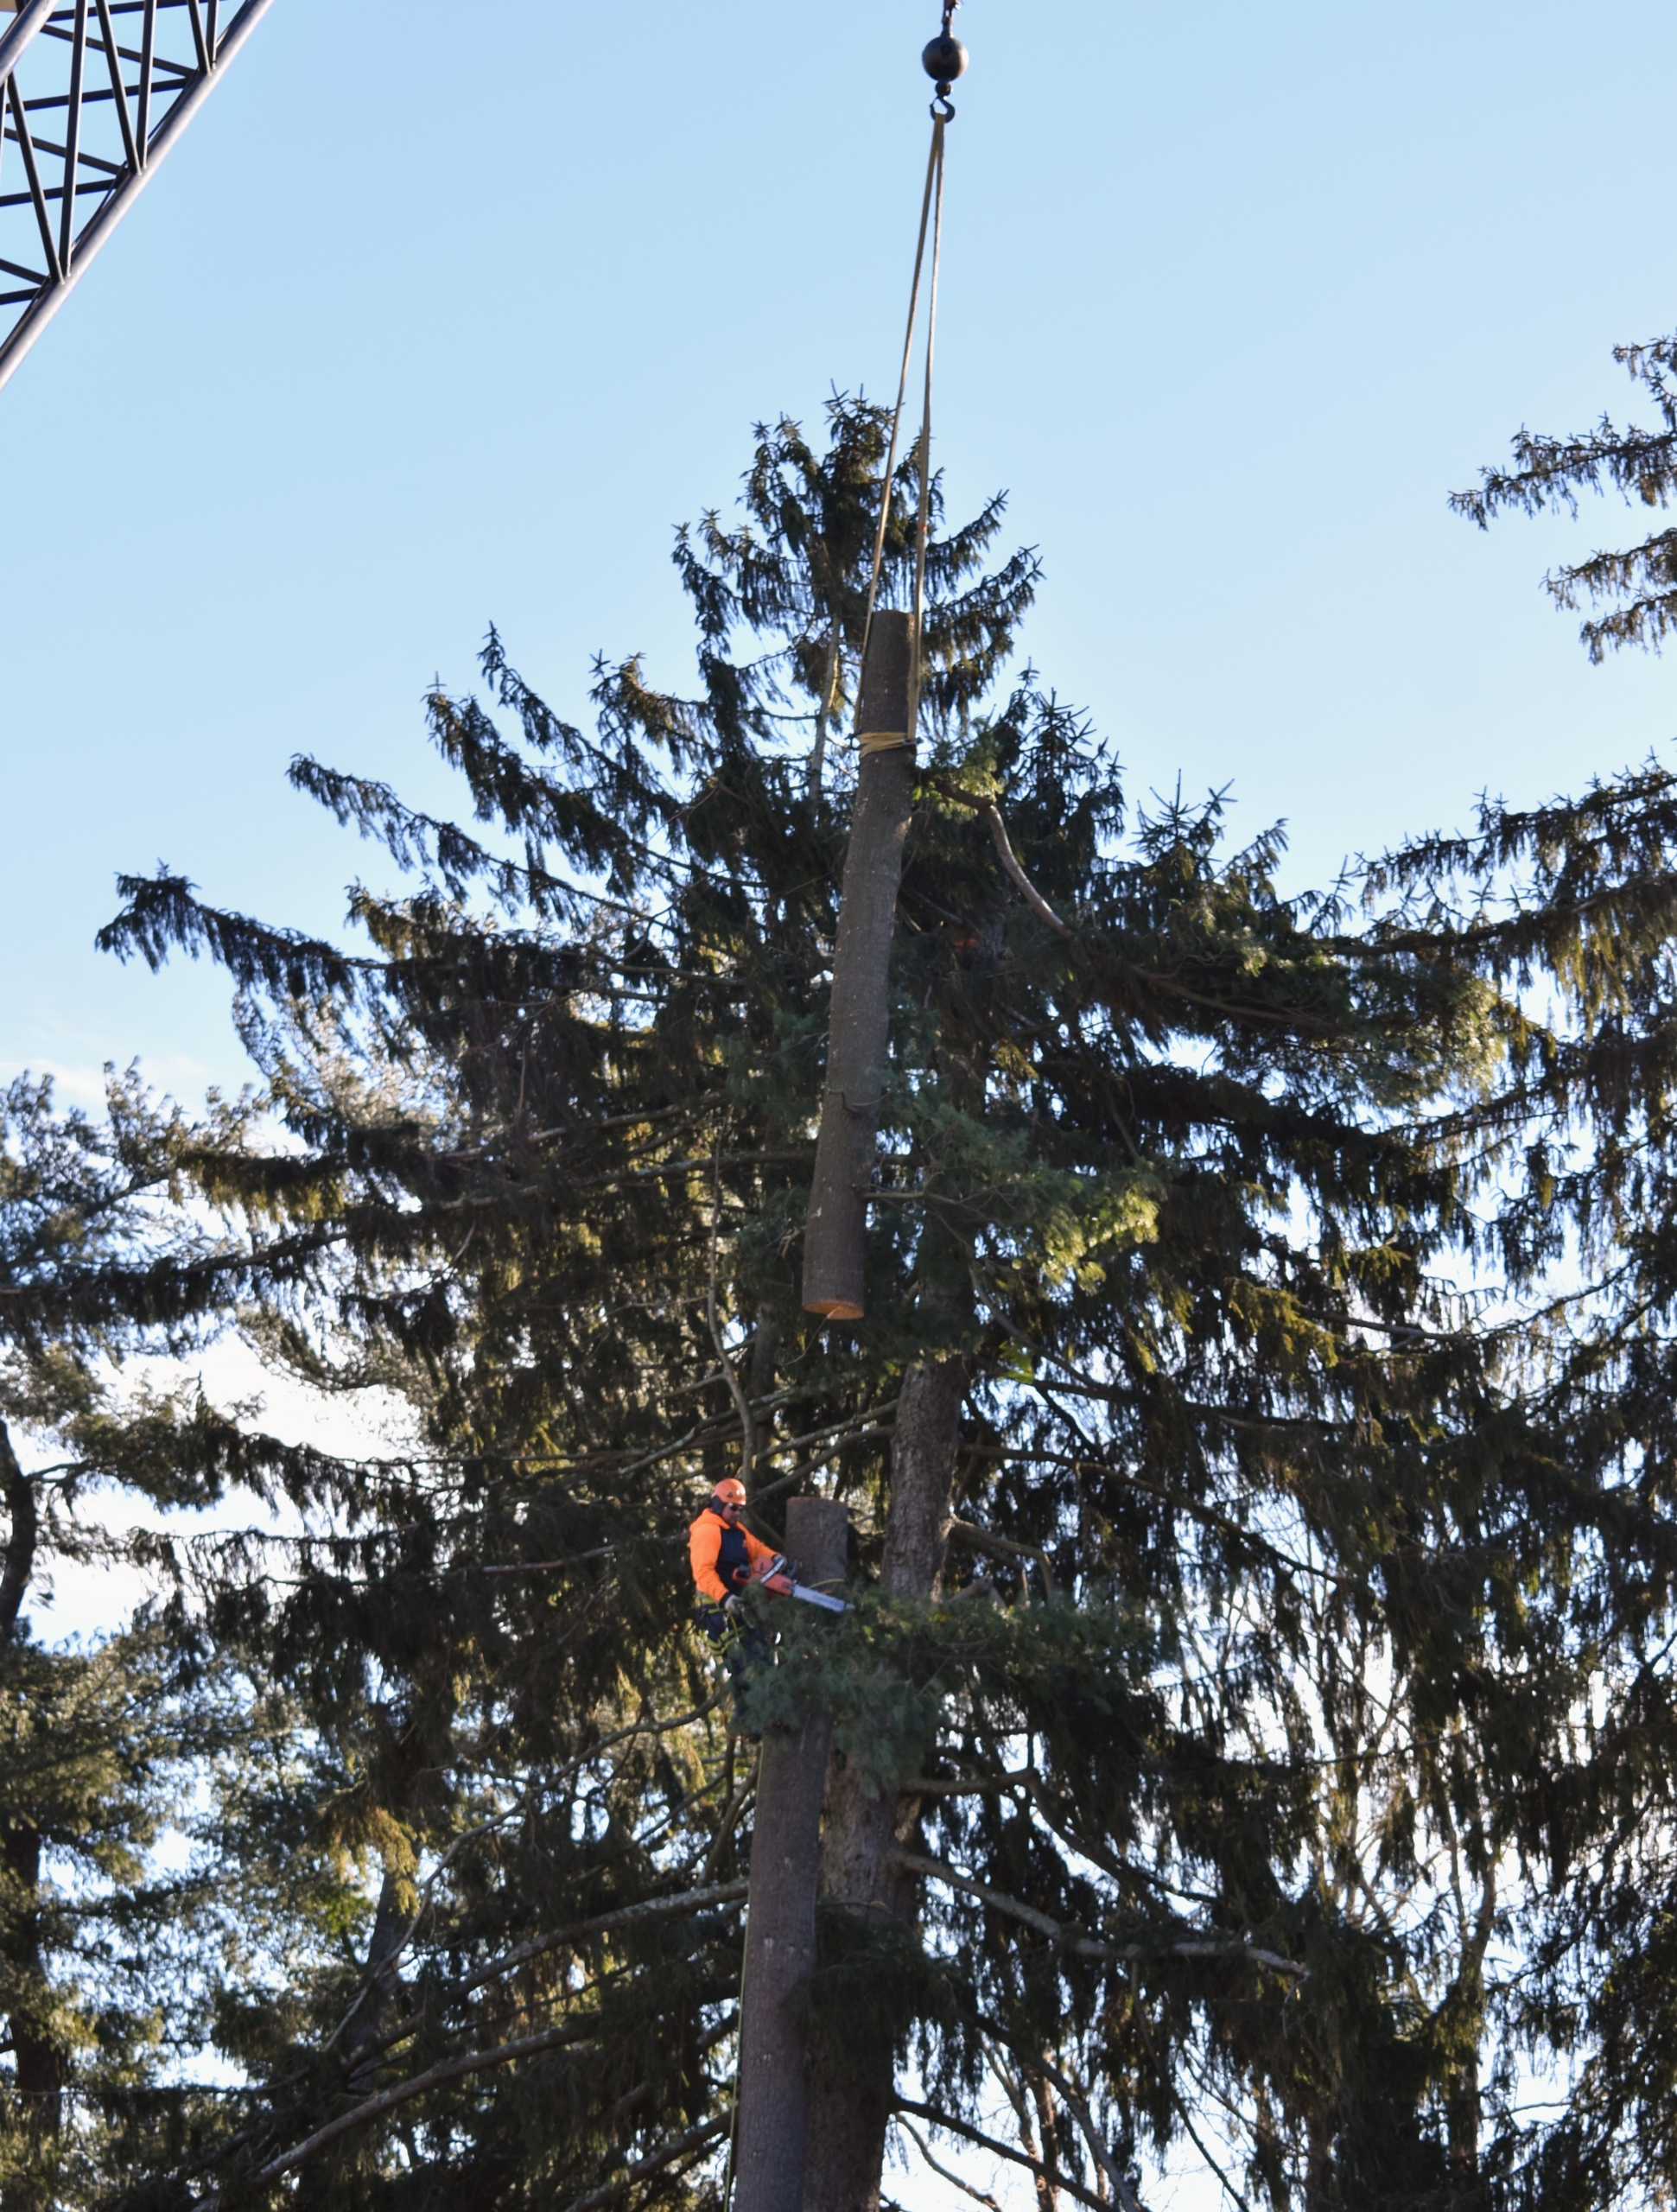
But in January 2019, I had to remove six 125 year old trees – five Norway spruce and one white pine.
It makes me very sad to see any large trees taken down, but they were leaning very close to my Tenant House where my daughter and grandchildren stay when they visit. It had to be done for safety.
Here is the garden without those towering evergreens.
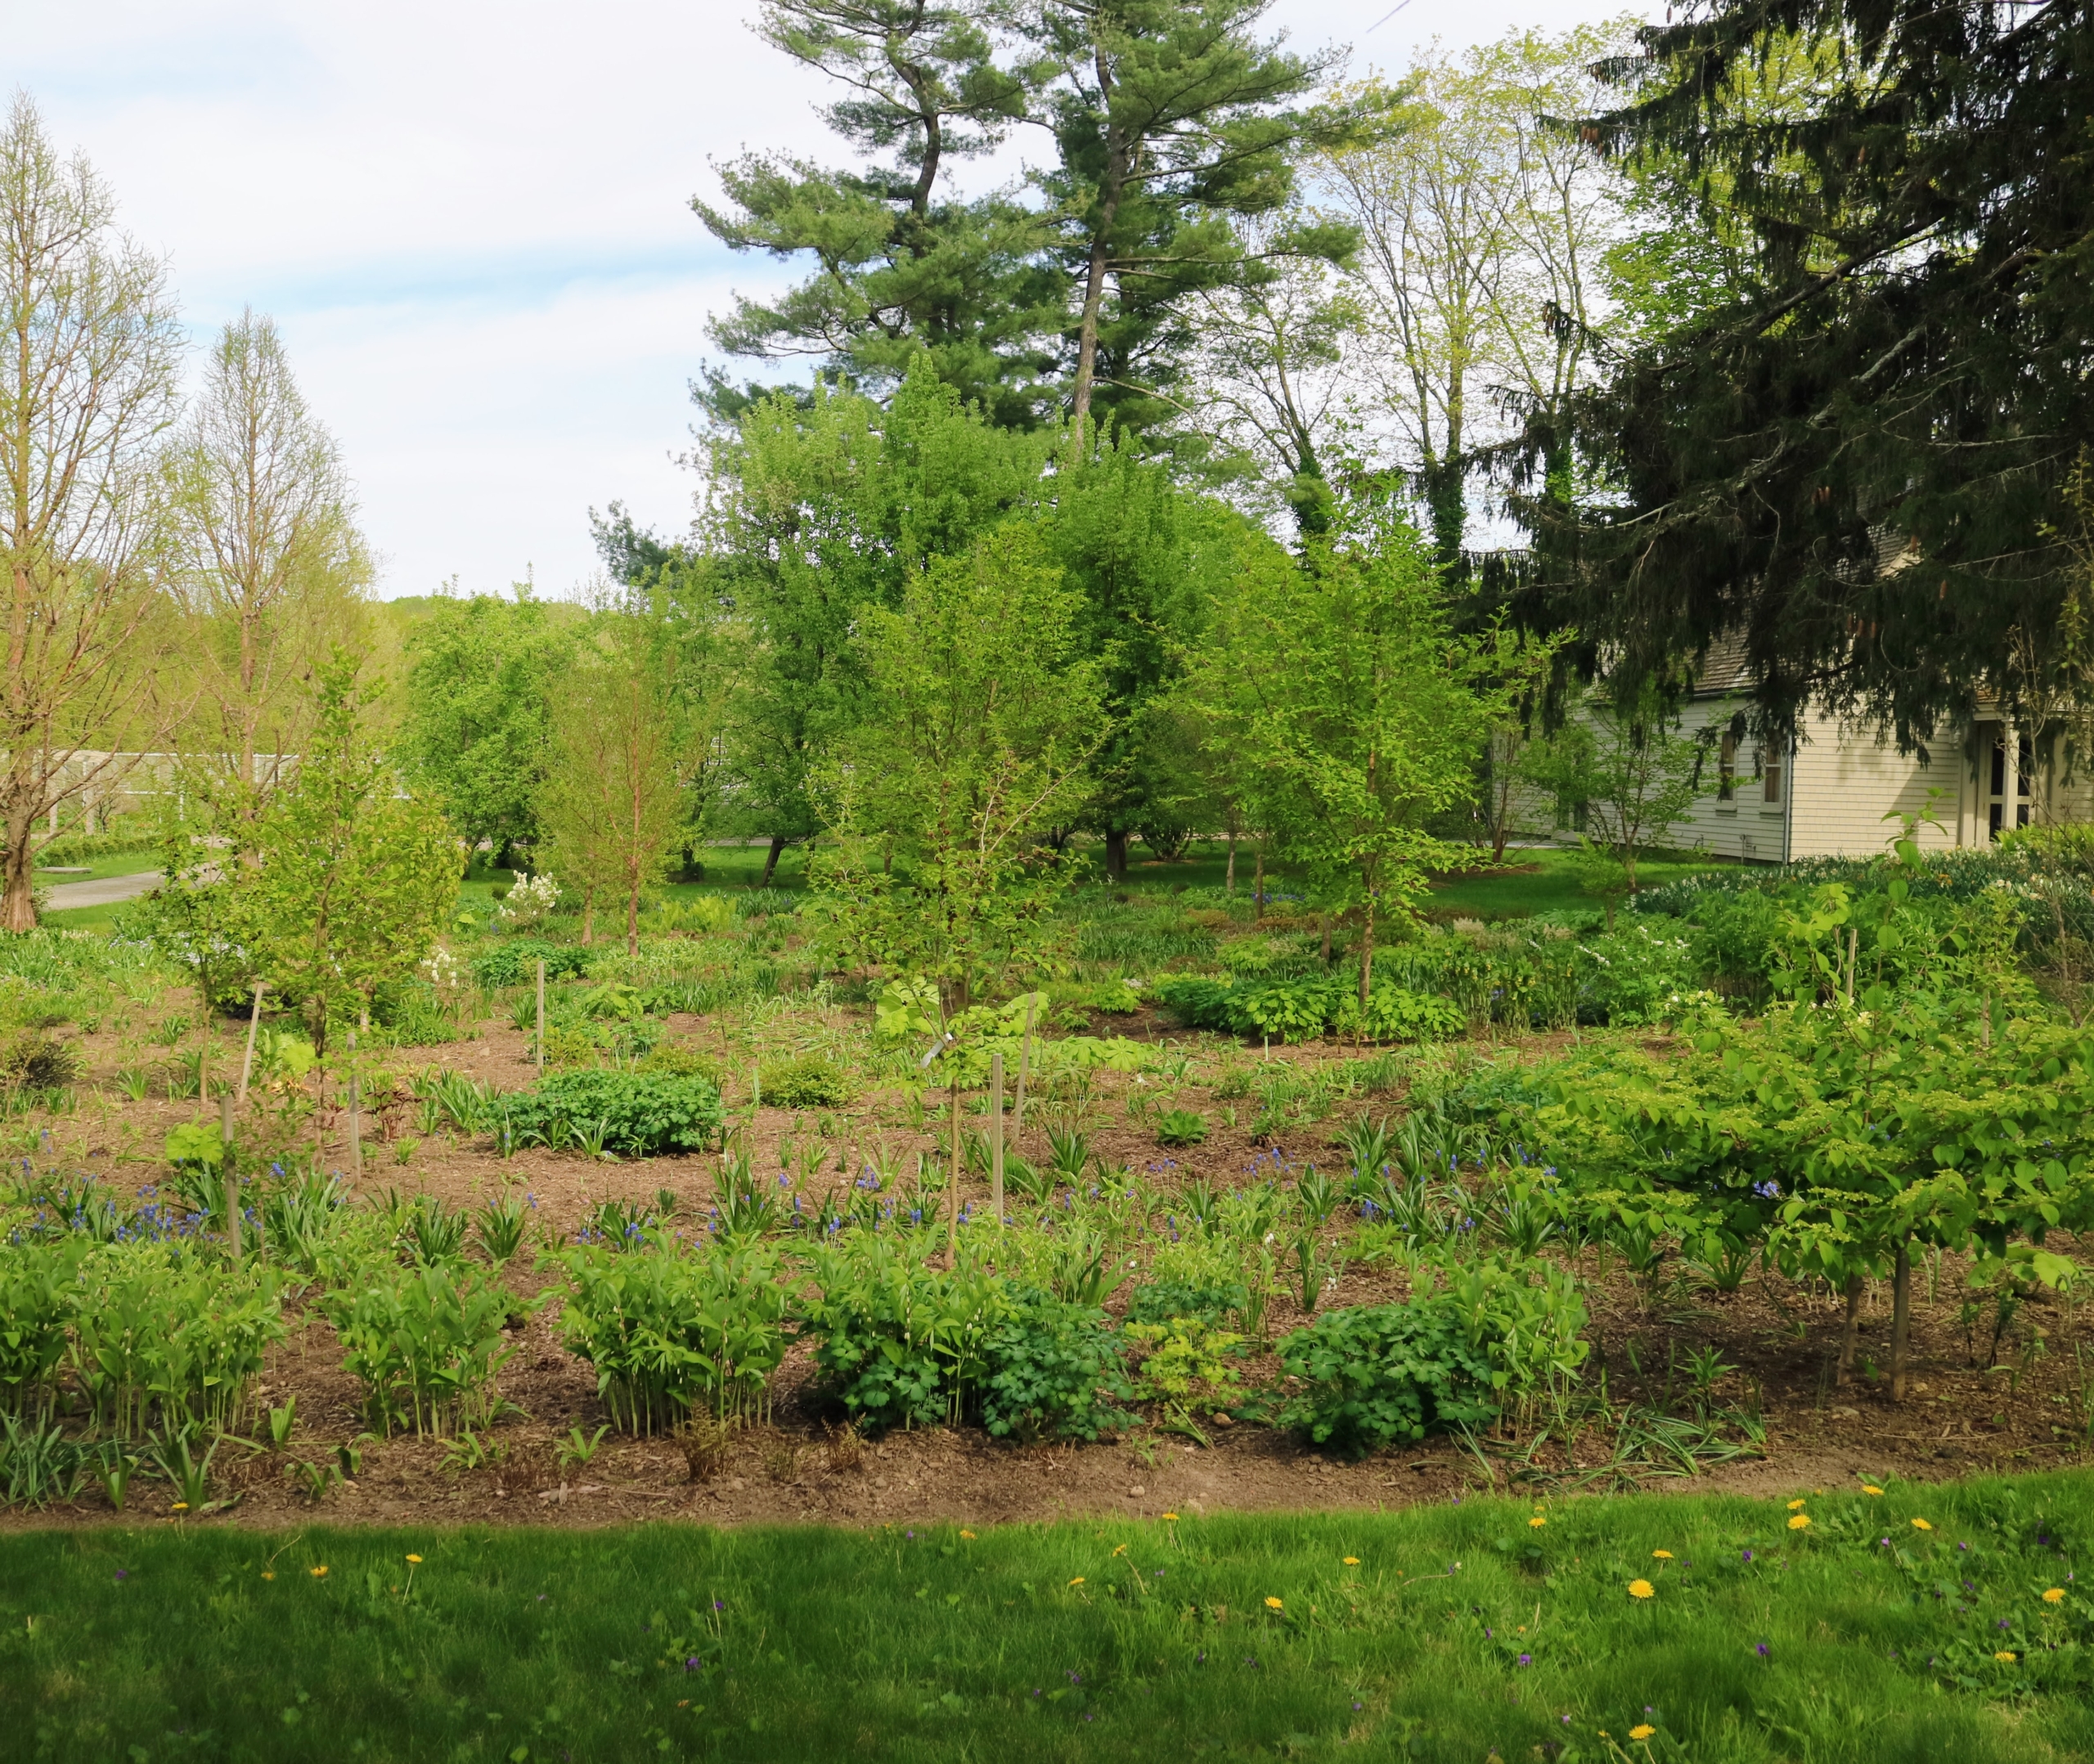
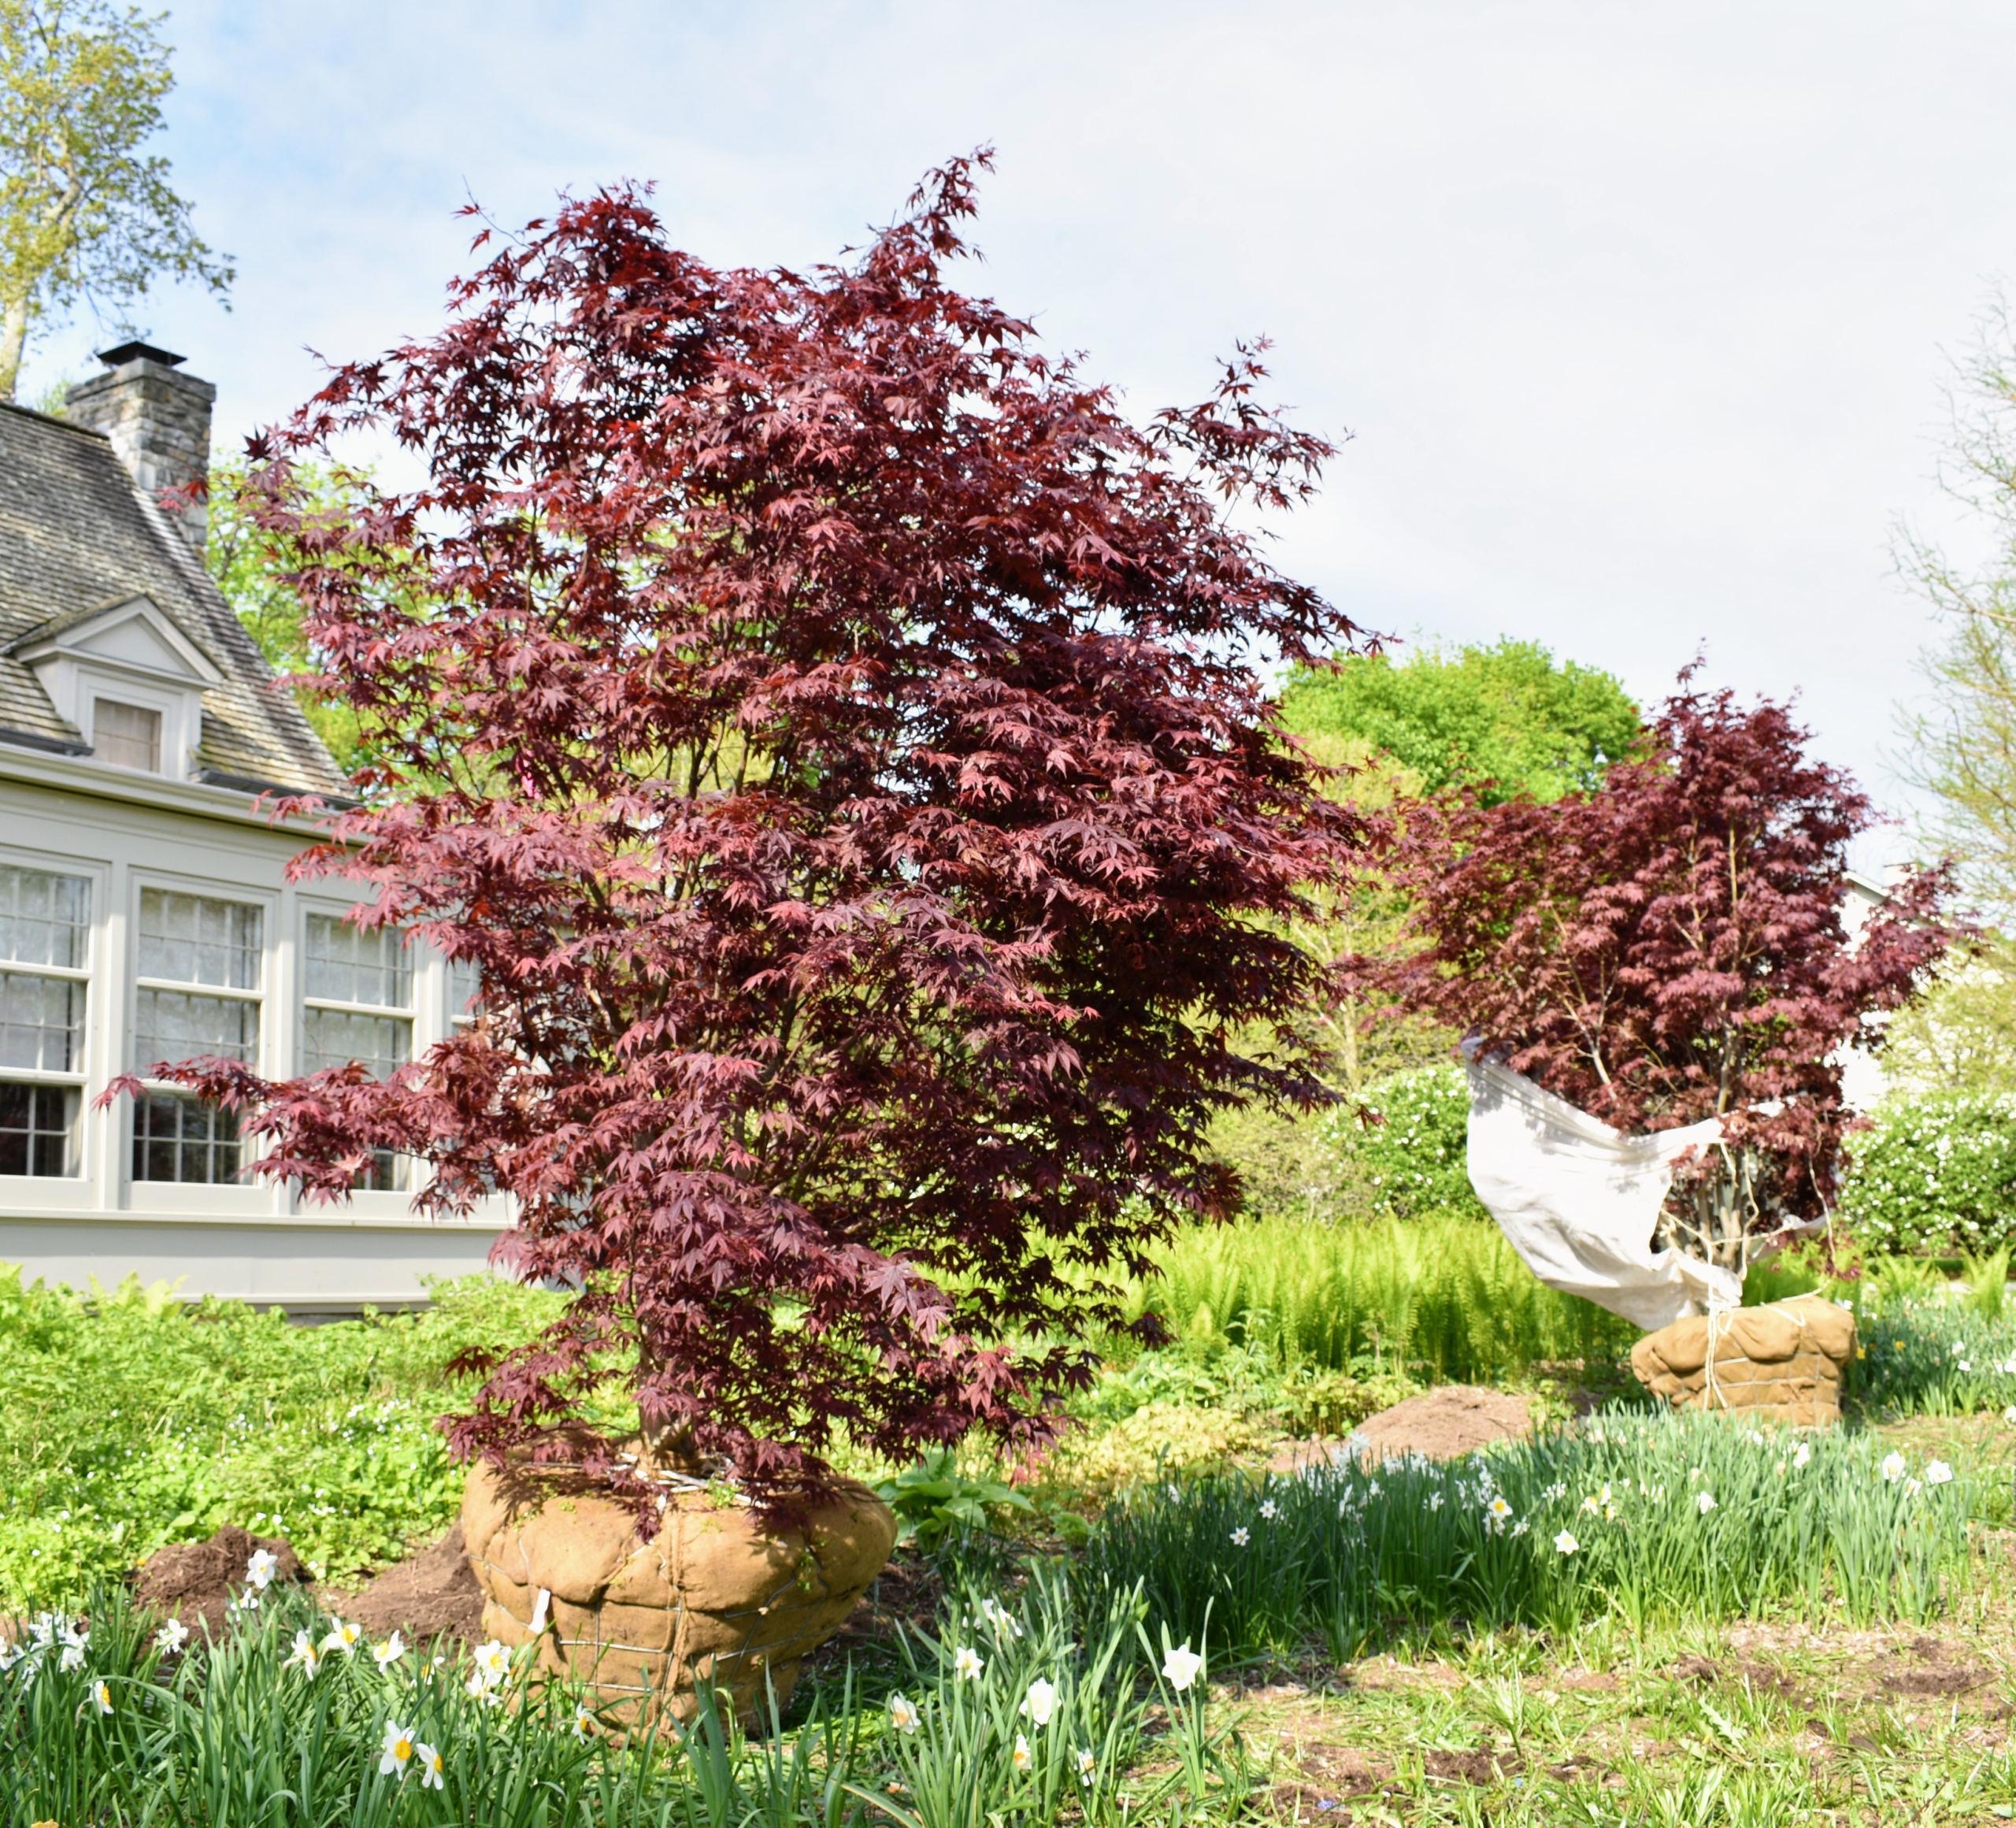
The area looked very pretty without the trees, but the plantings below still needed adequate shade to thrive. That spring, I planted two 10 to 12-foot Japanese maples.
Red-leafed cultivars are the most popular of the Japanese maples. Red and variegated leaves need relief from the hot afternoon sun but need the light to attain full color. These trees are still doing very well.
Here is a photo form 2019 – the plants are filling the area in nicely.
Smaller Japanese maples were added to fill in any bare spots. Gardens take a lot of planning and patience. And remember the old adage, “the first year they sleep, the second year they creep, the third year they leap.” One must give a garden time to mature.
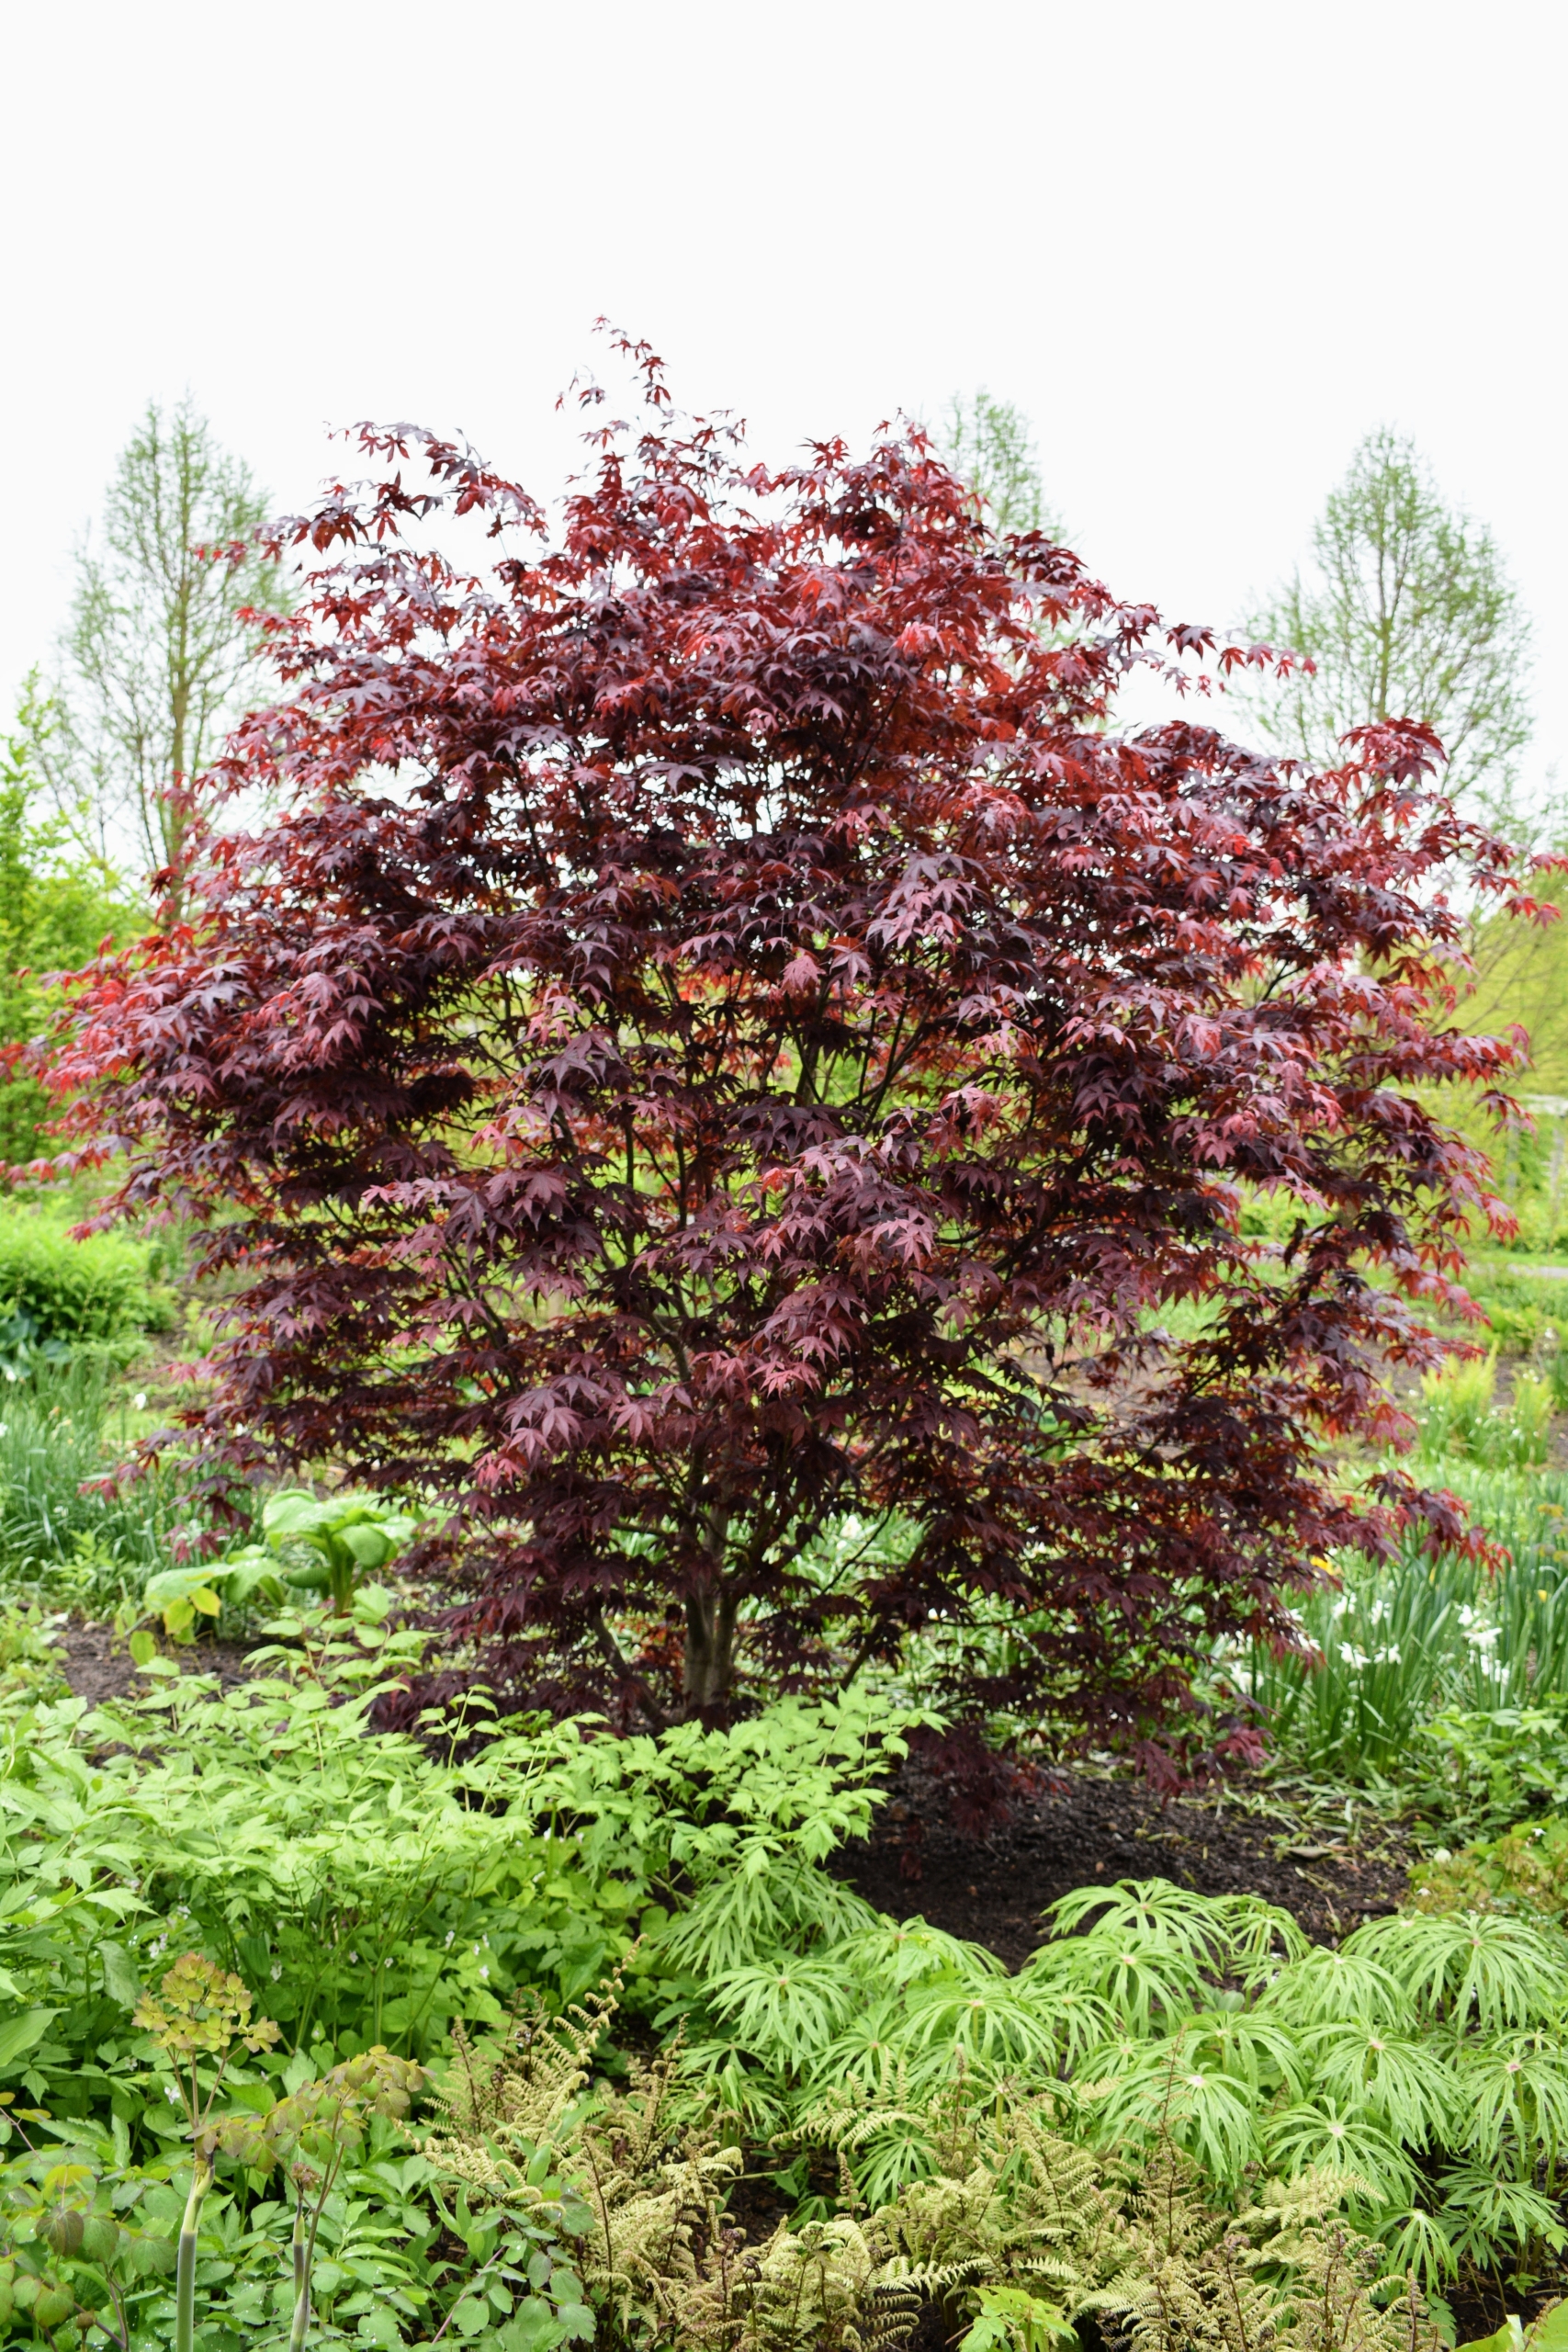
Here it is in 2021 – more growth. I continued to add interesting plants.
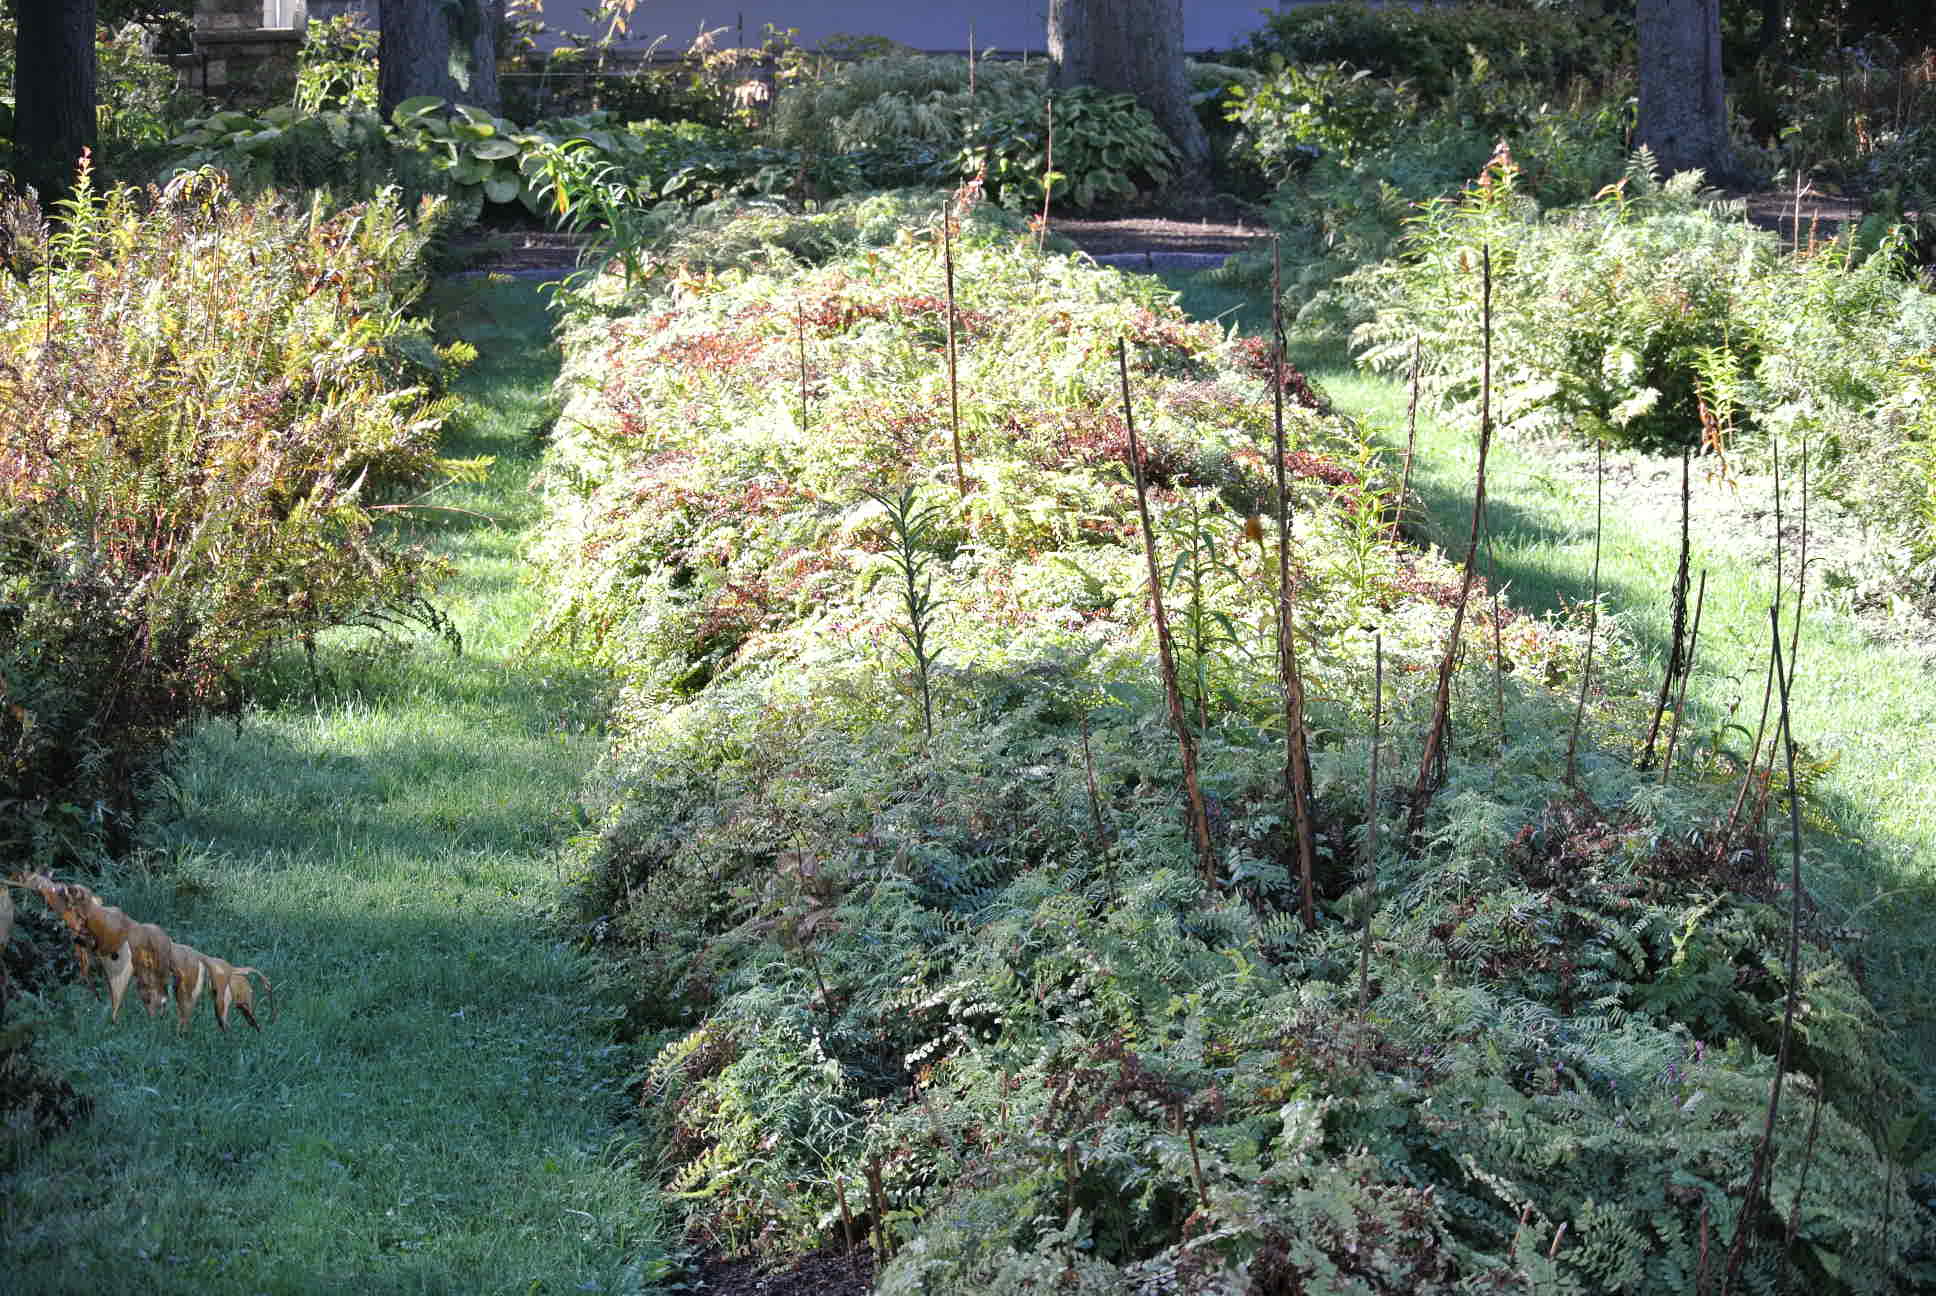
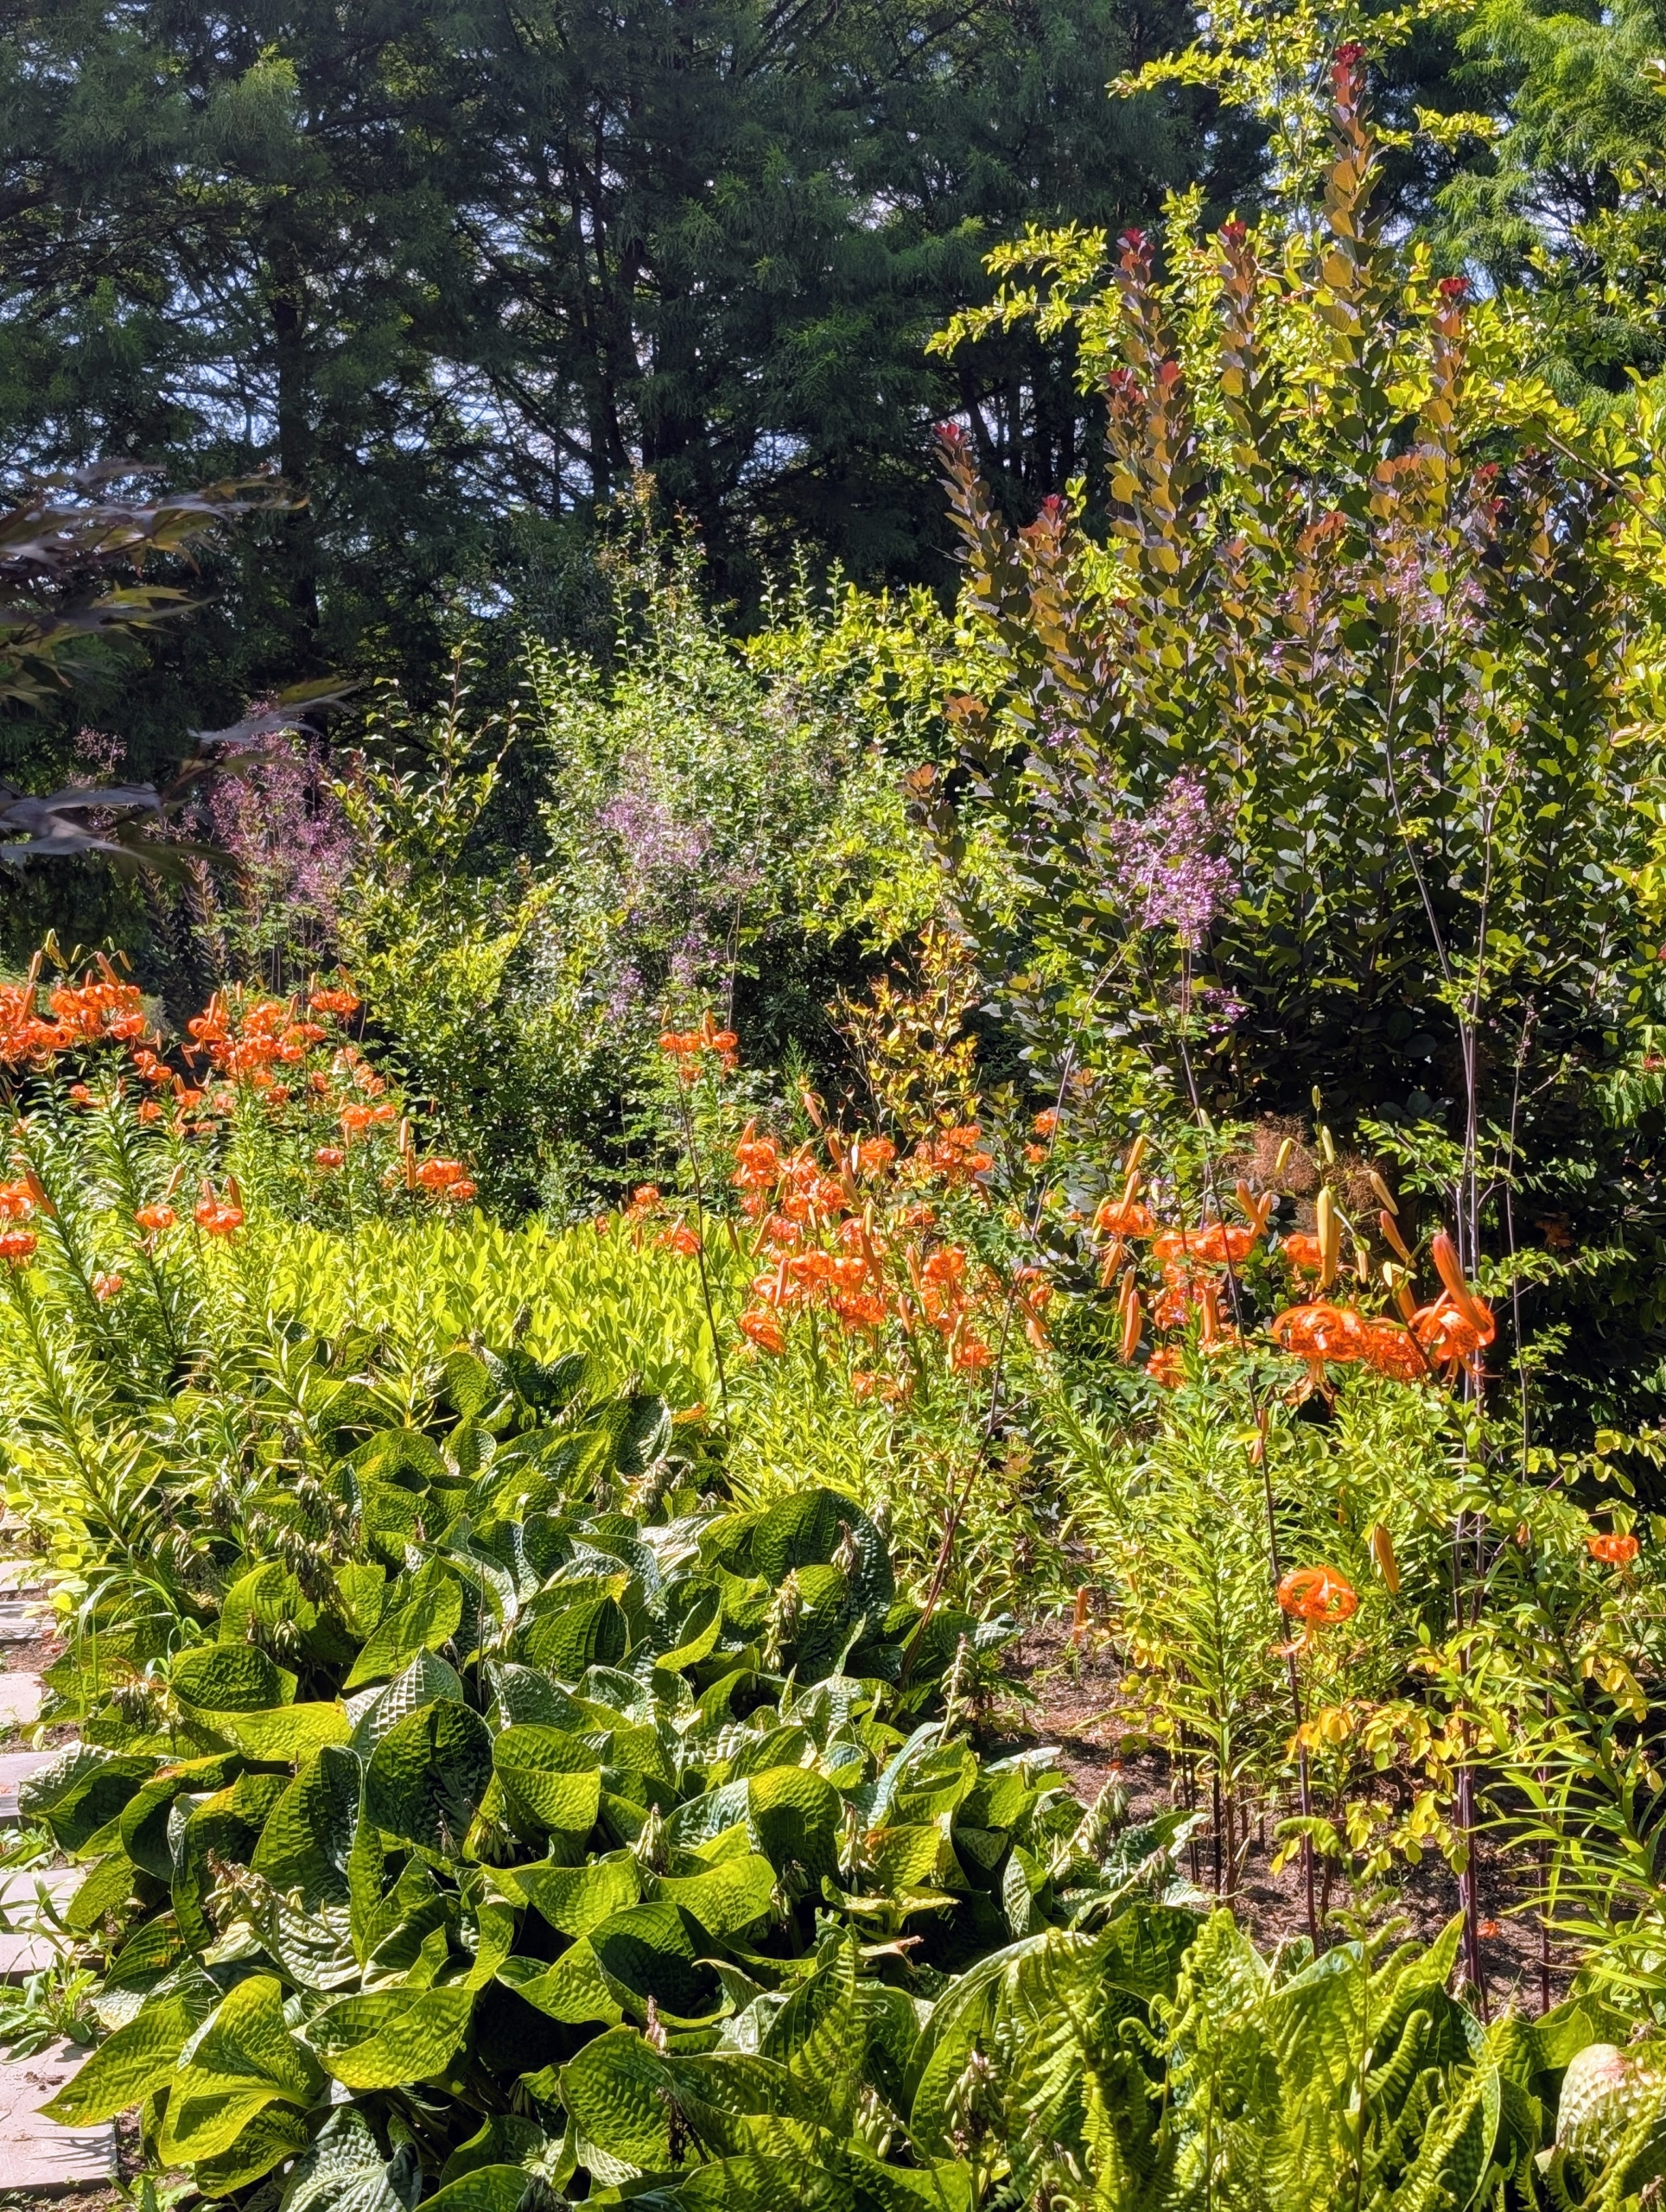
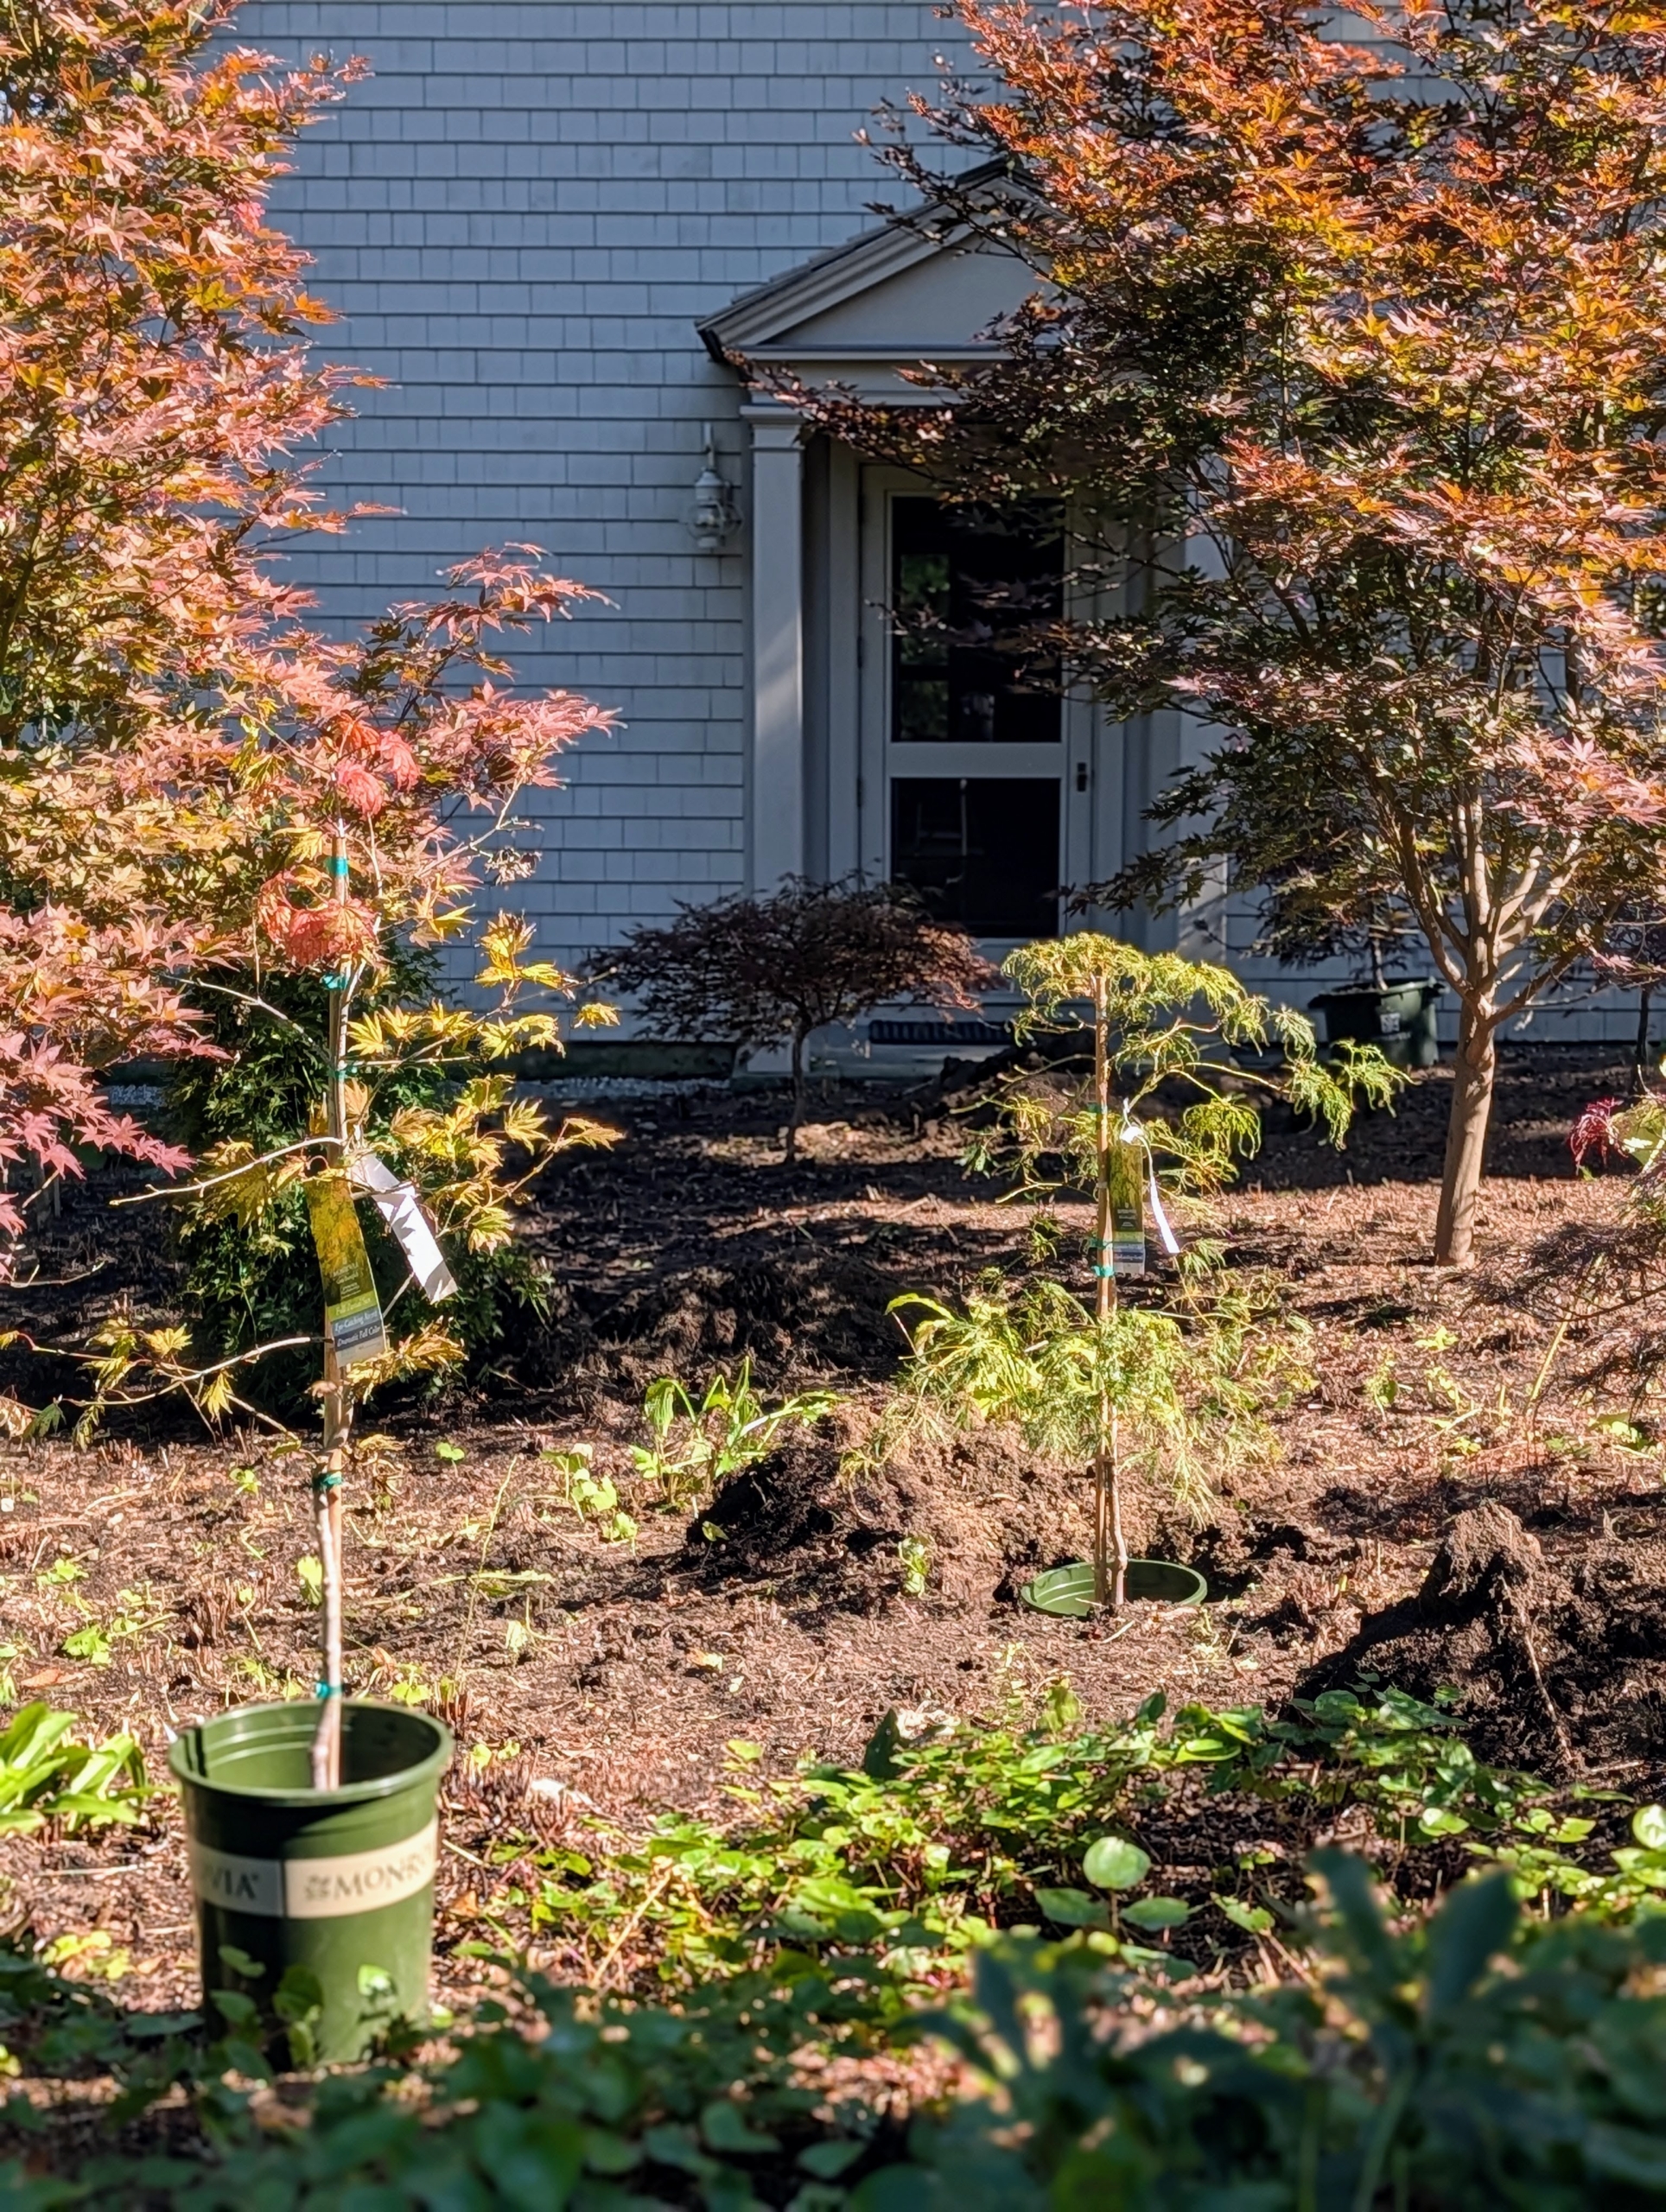
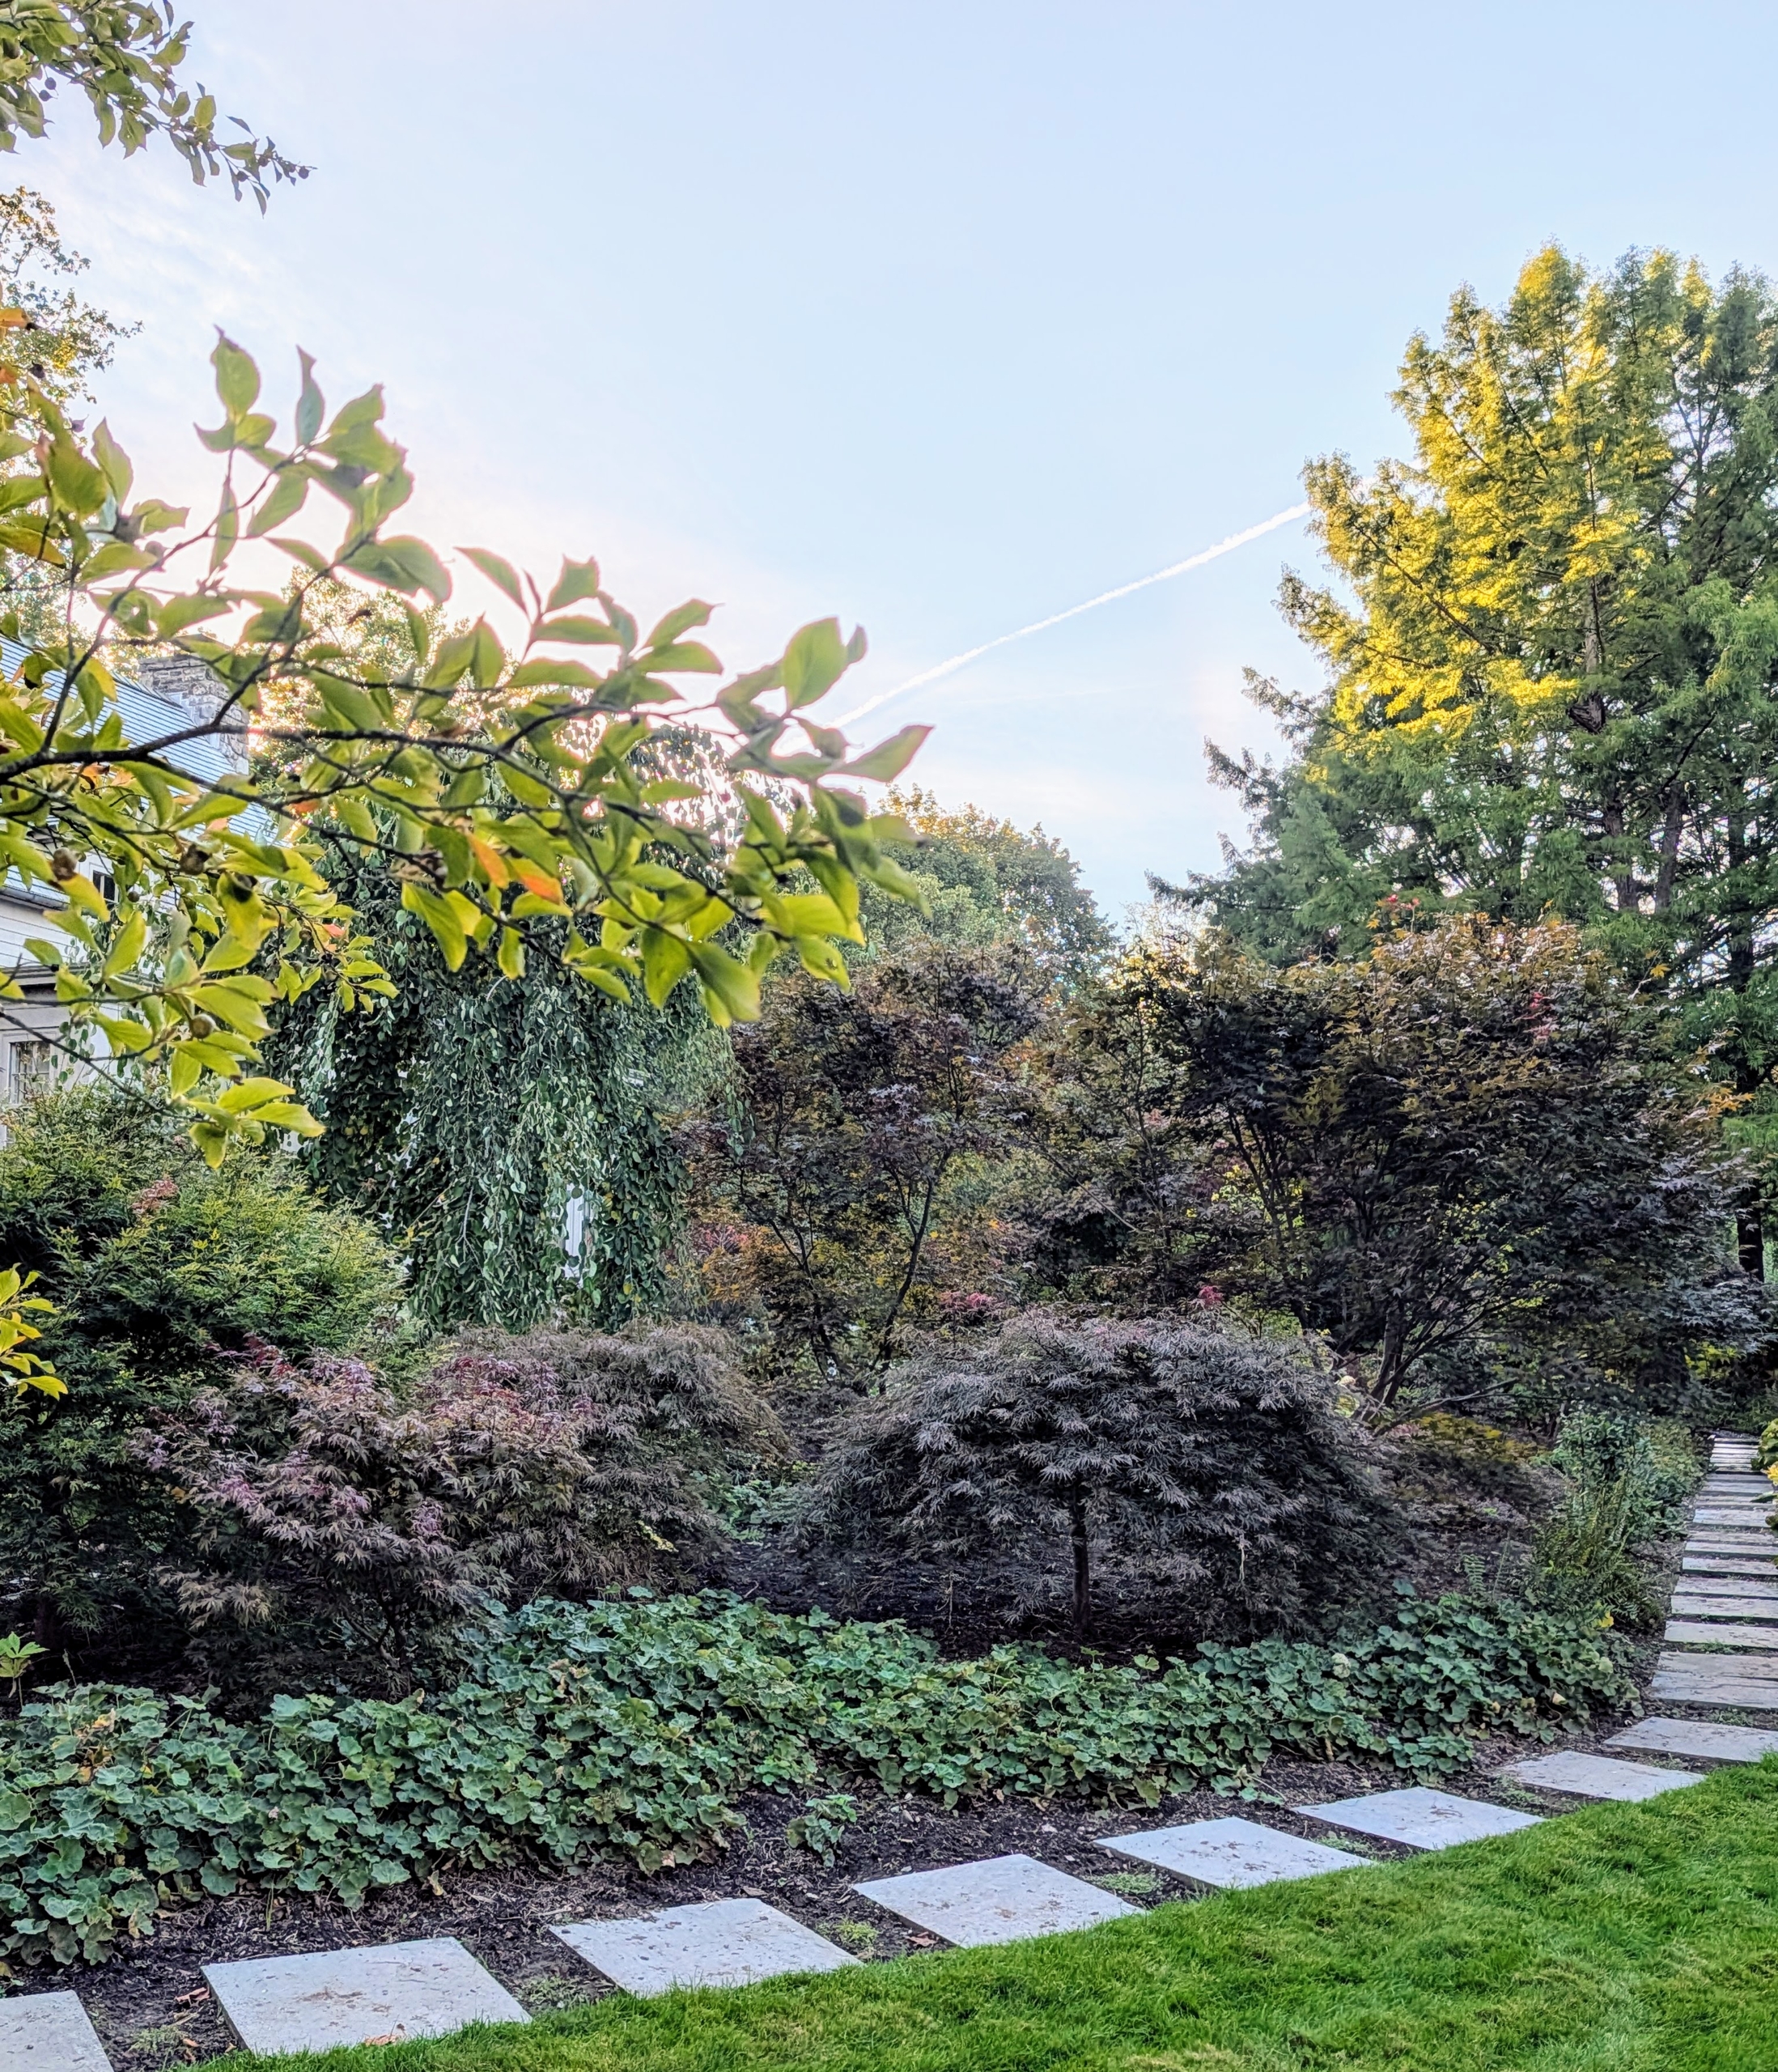
This is the garden last July. There are still some tiger lilies that pop up, but the shade loving plants were failing. It needed a change.
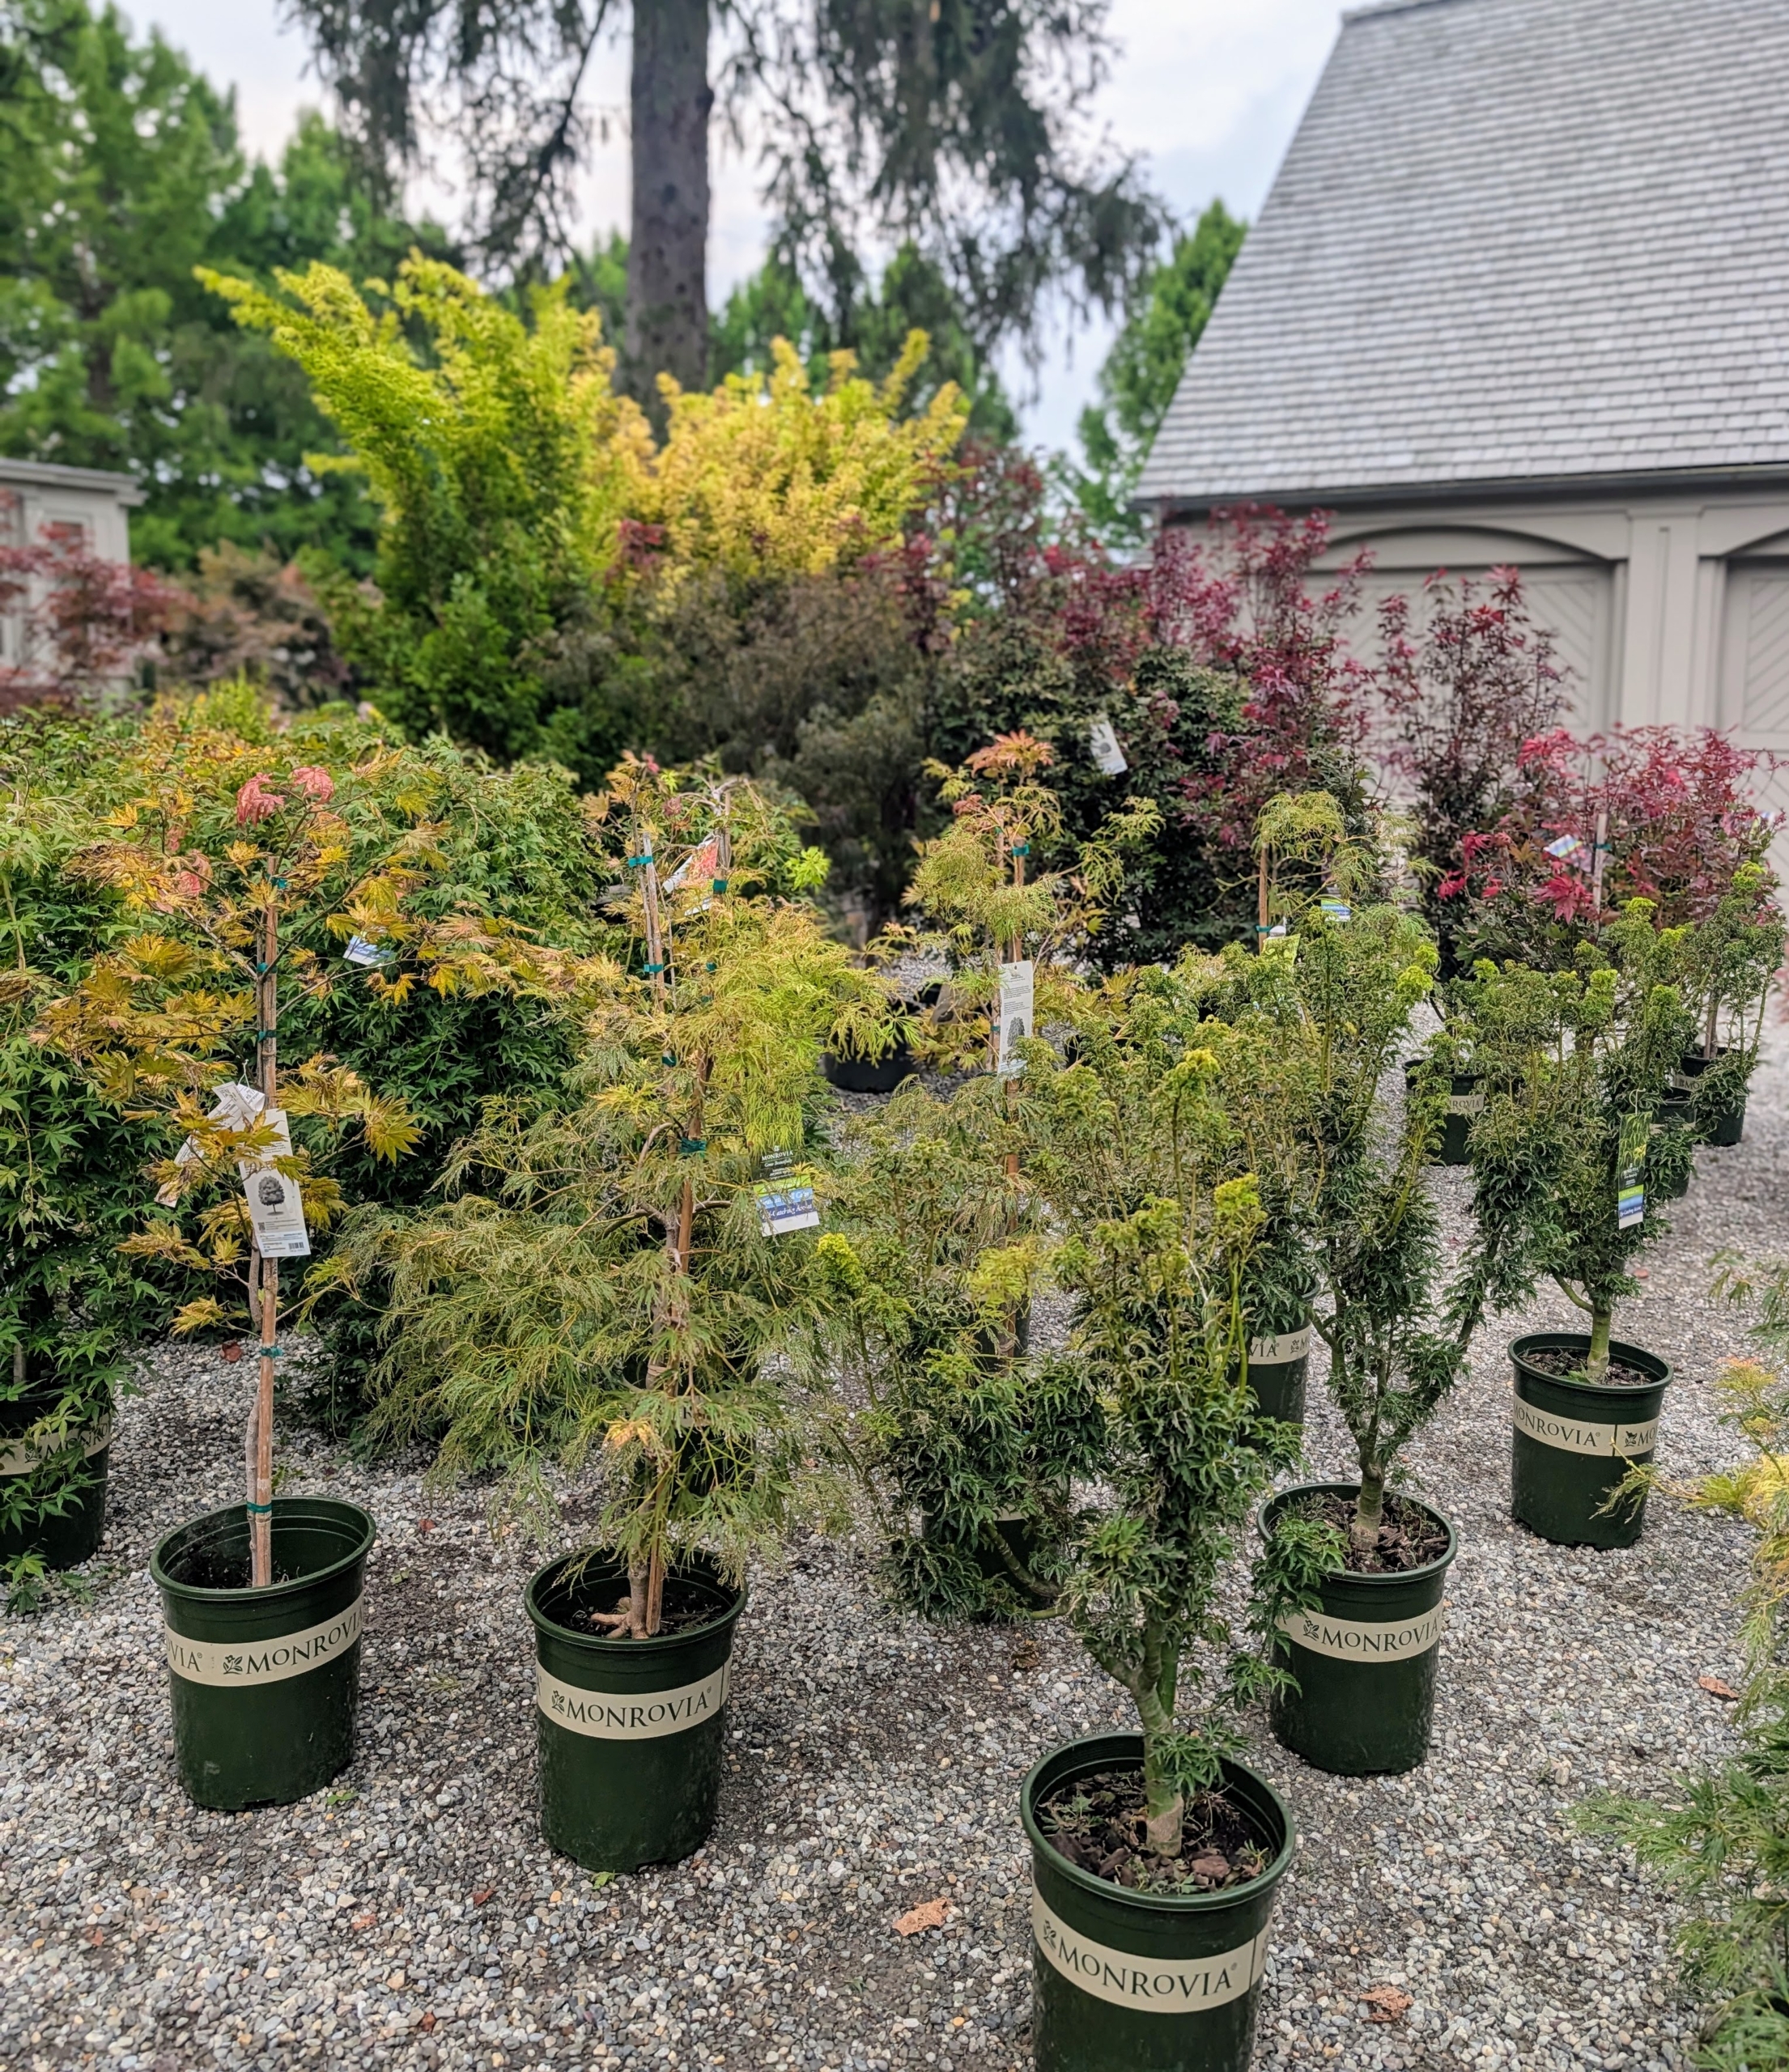
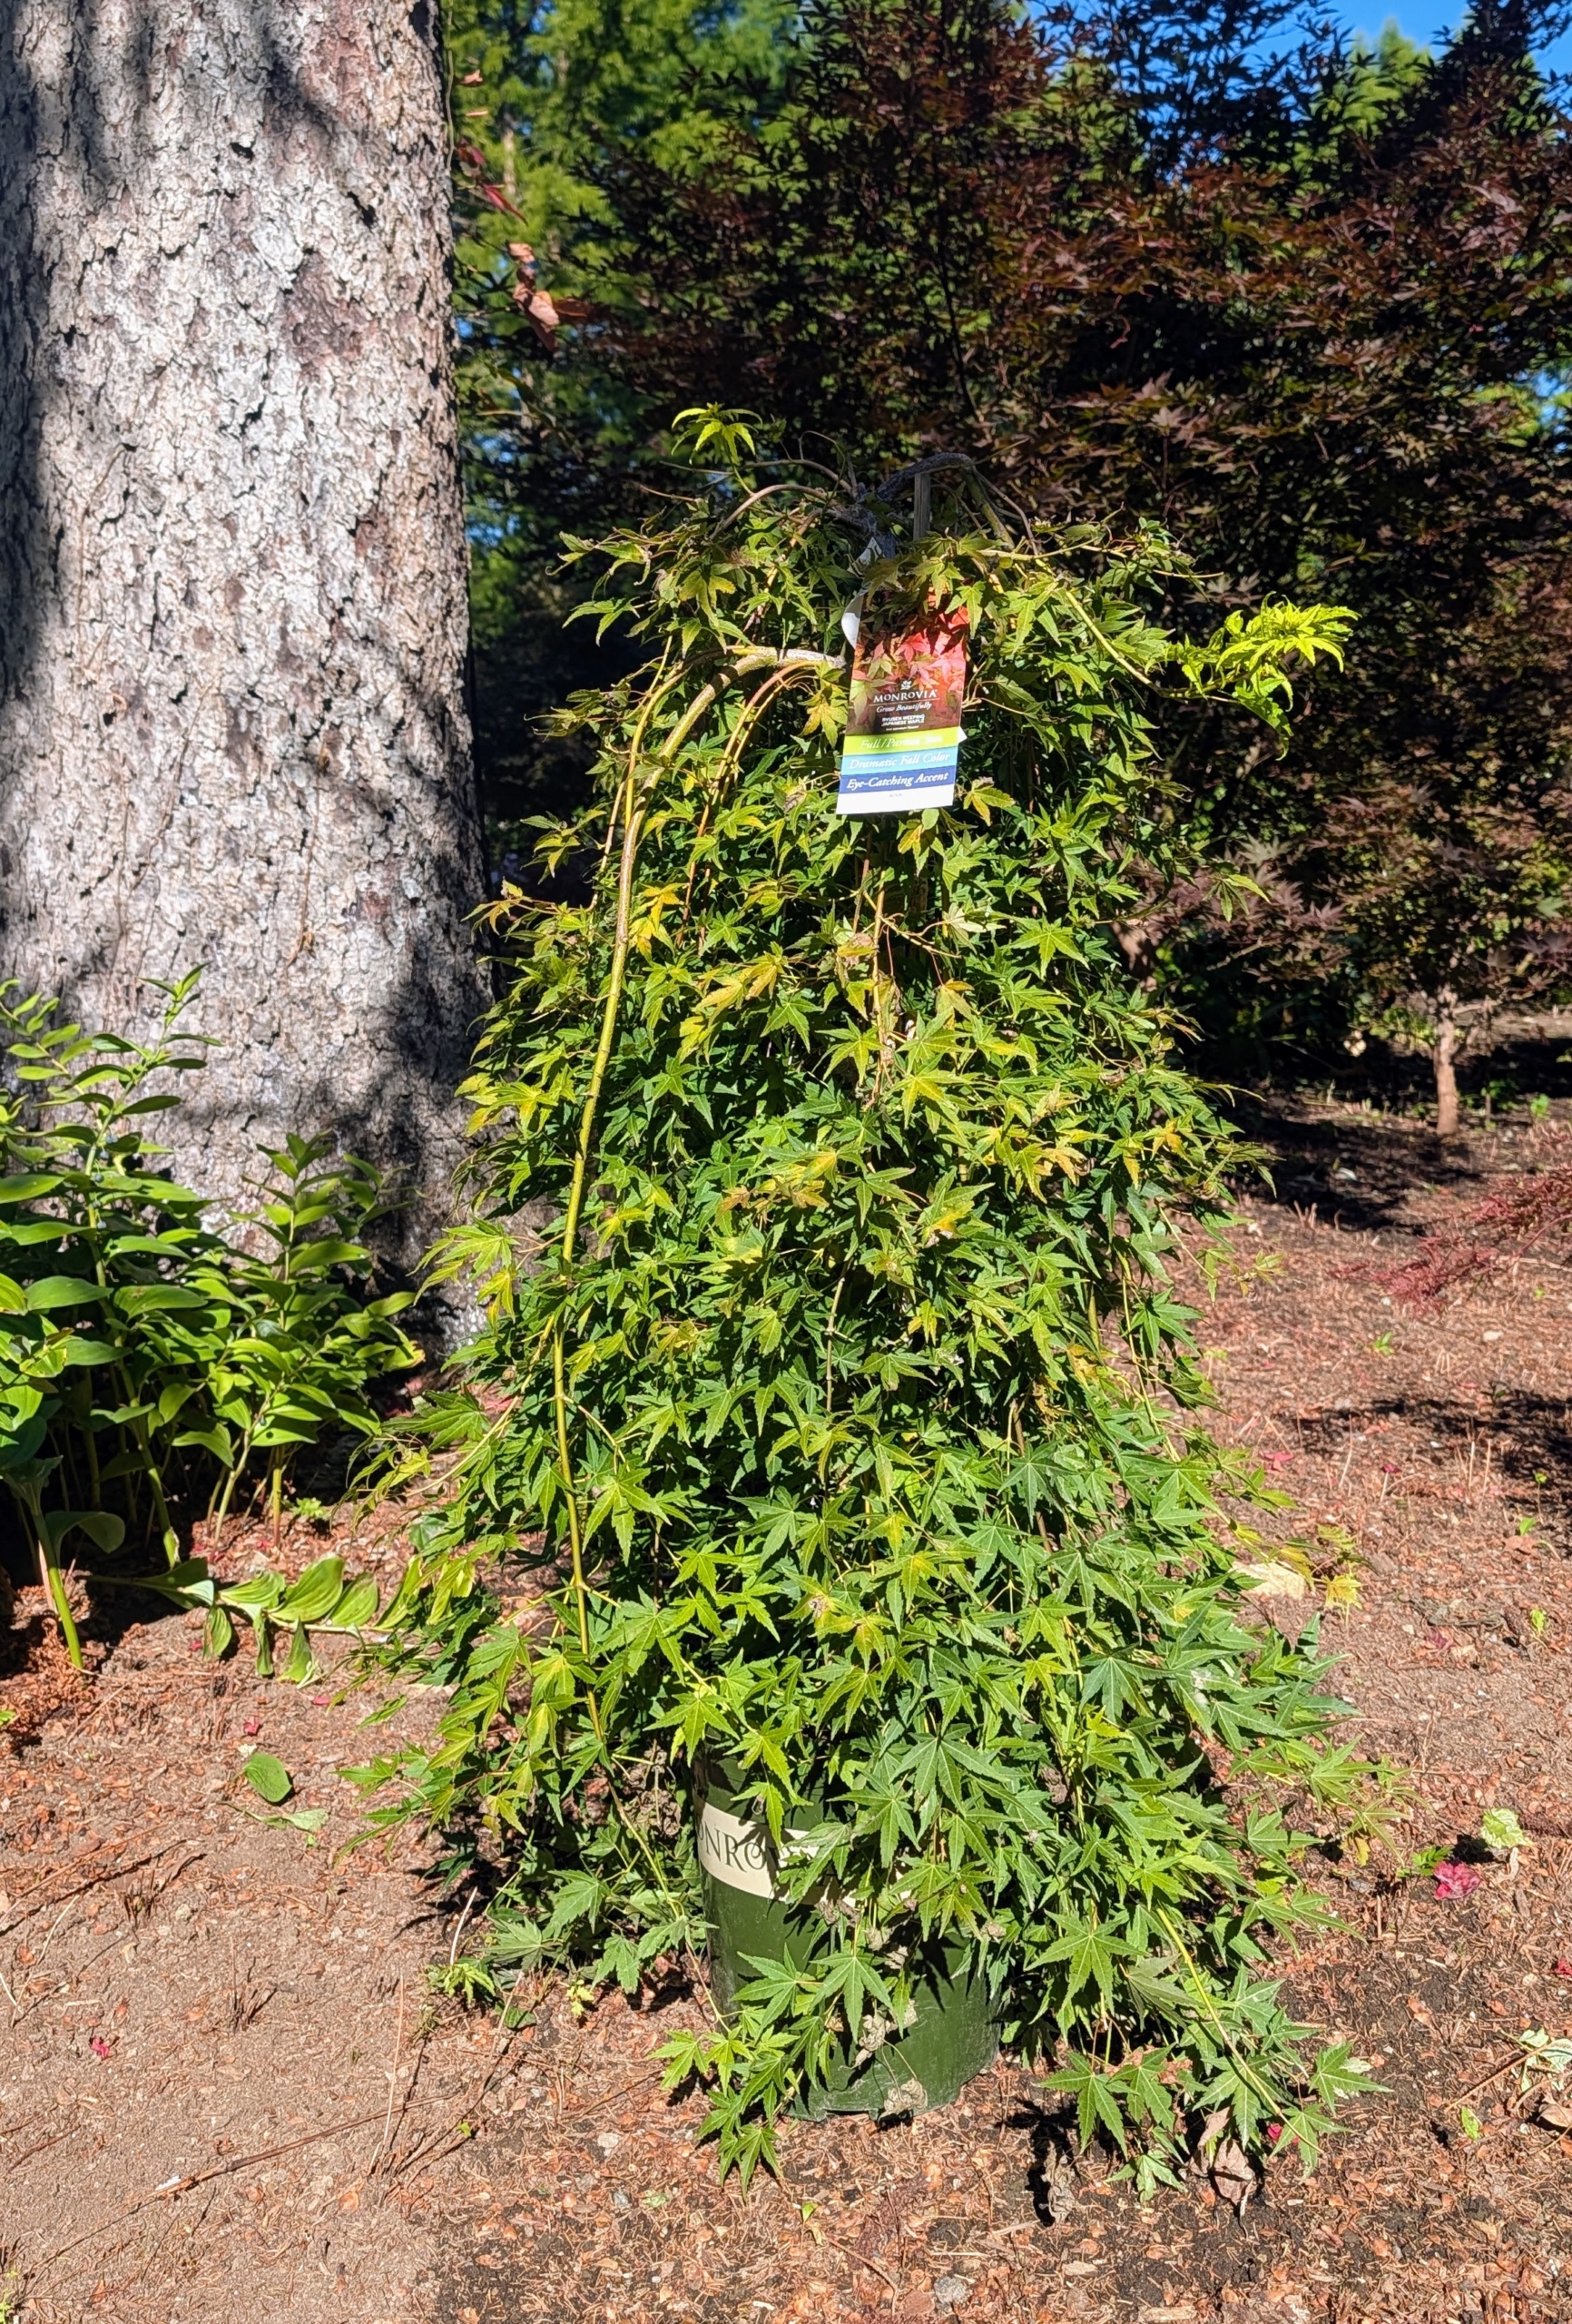
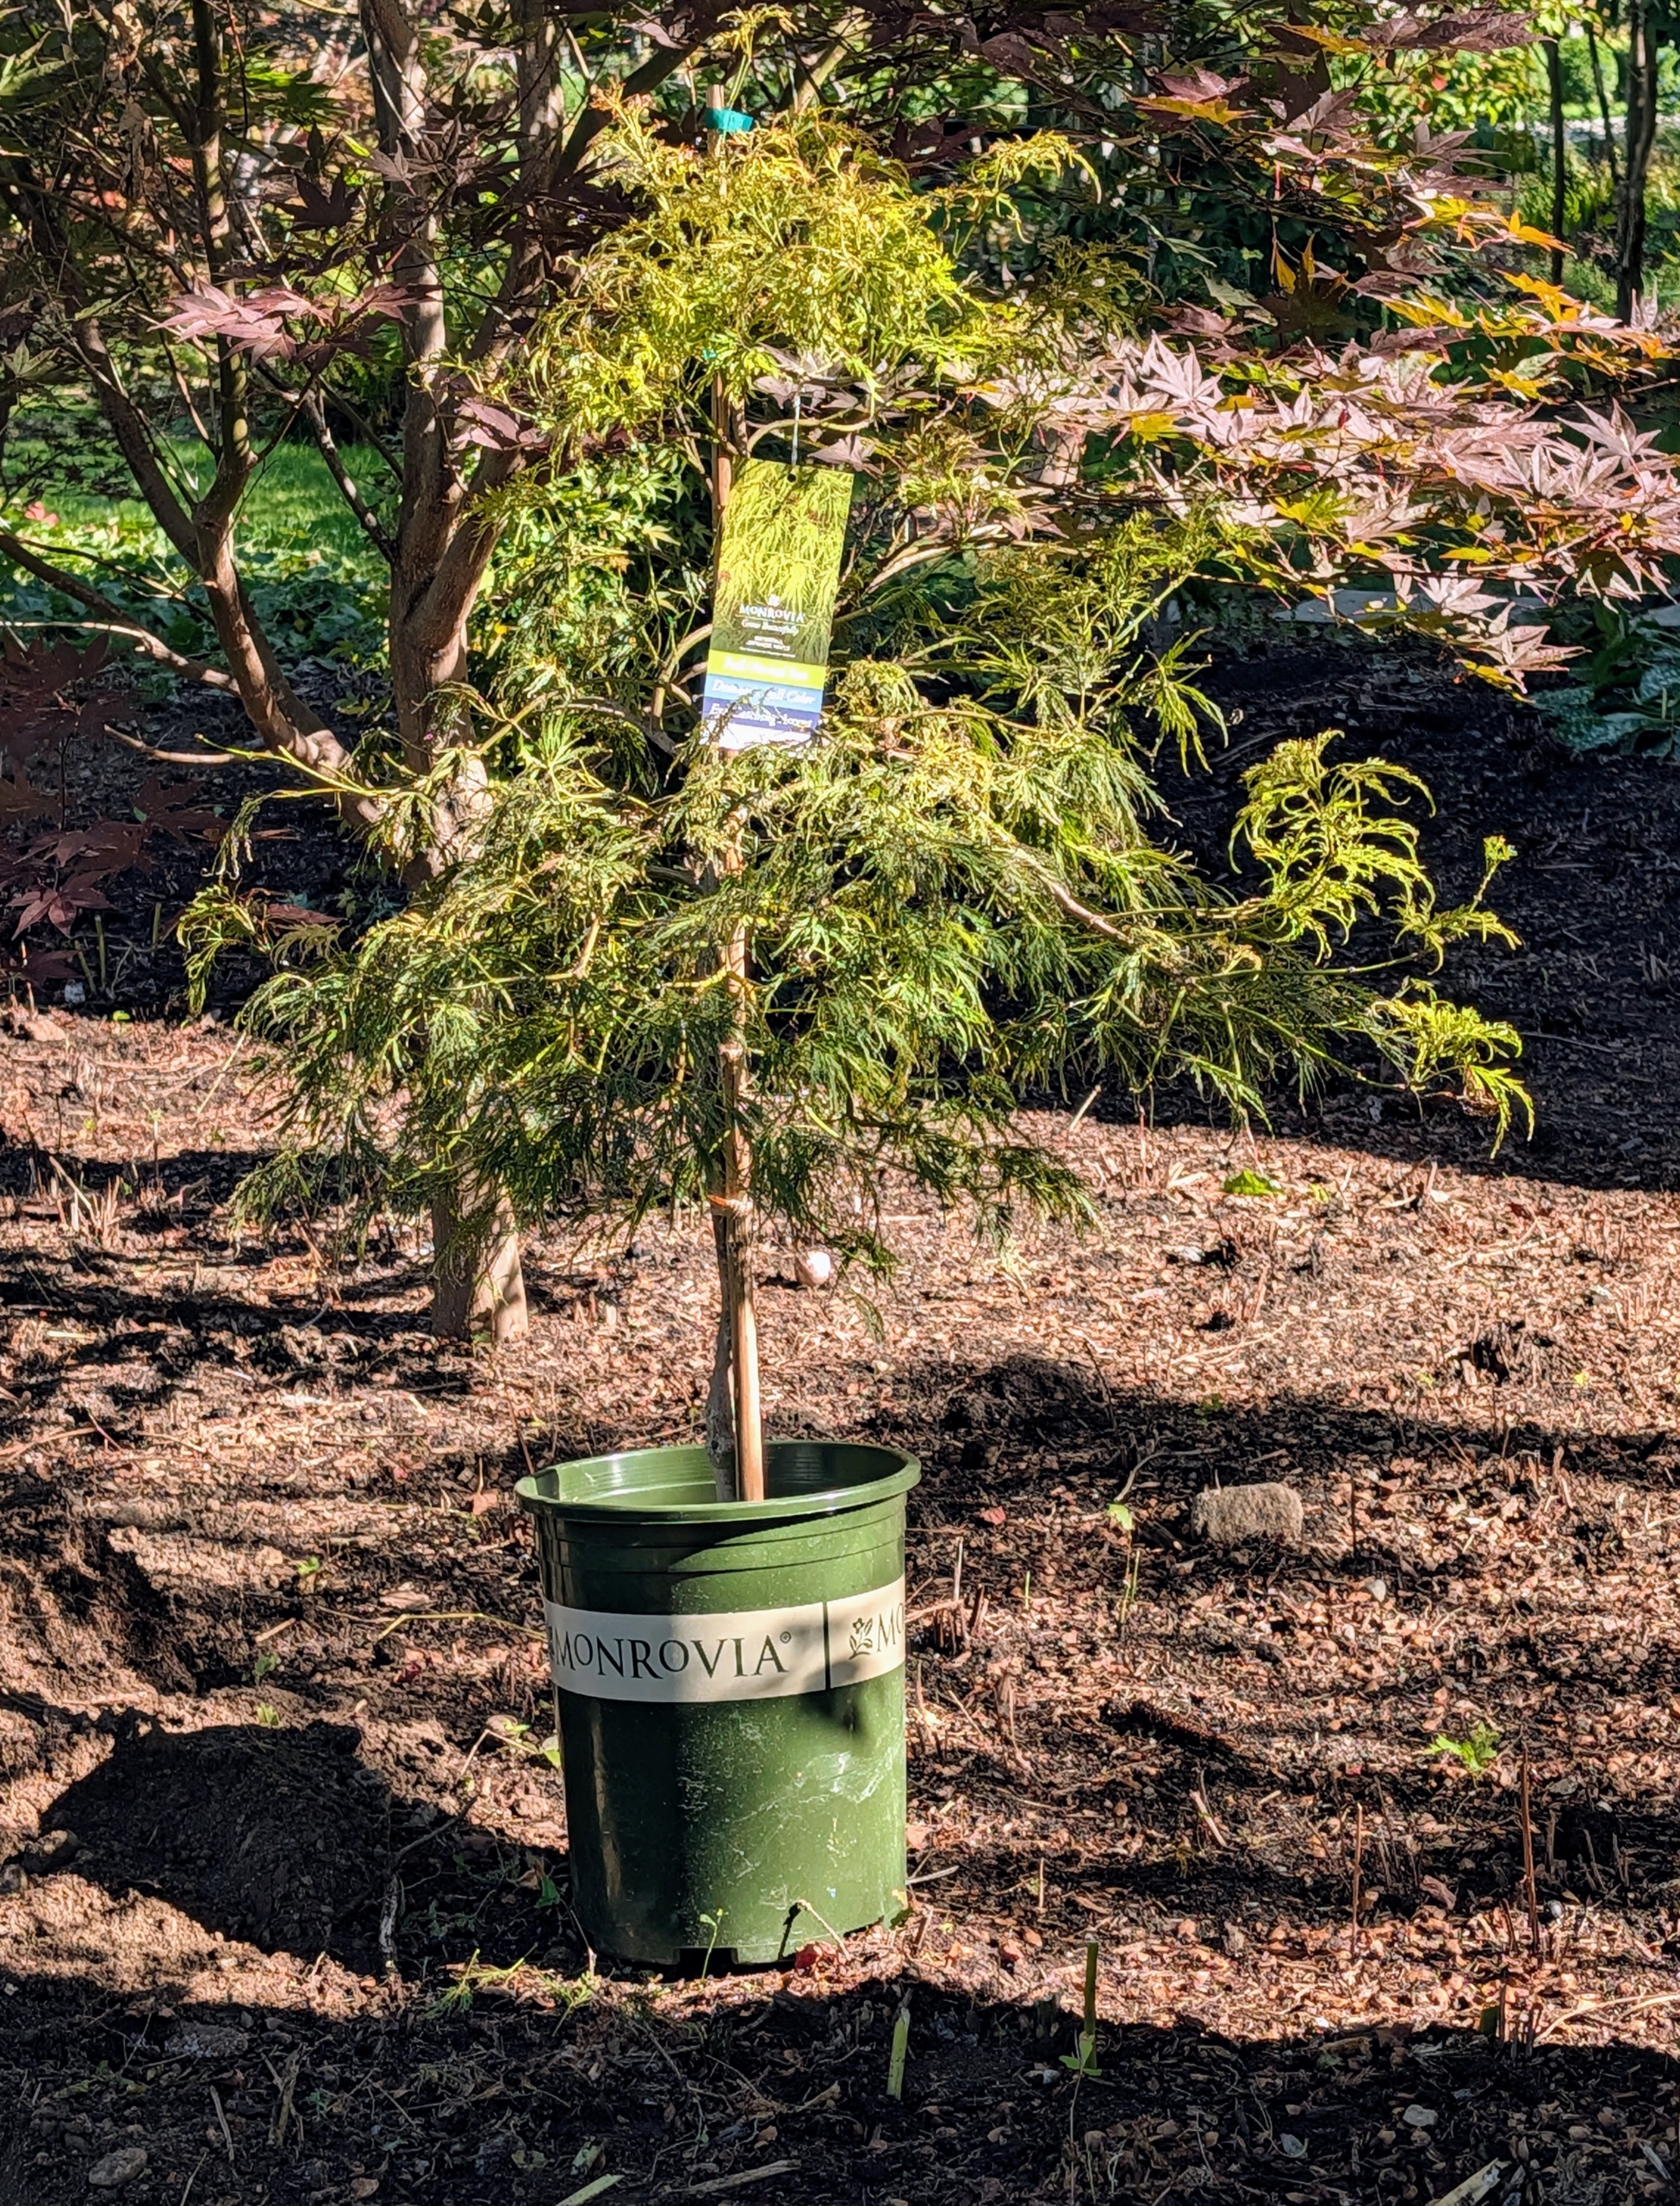
Recently, I received a delivery from Monrovia, a wholesale plant nursery specializing in shrubs, perennials, annuals, ferns, grasses, and conifers with several nursery locations across the country. I decided to plant many of them in the Tenant House garden. Among them – Ryusen Weeping Japanese maples, Waterfall Japanese maples, Coral Bark Japanese maples, Shaina Japanese maples, Autumn Moon Fullmoon Japanese maples, and more.
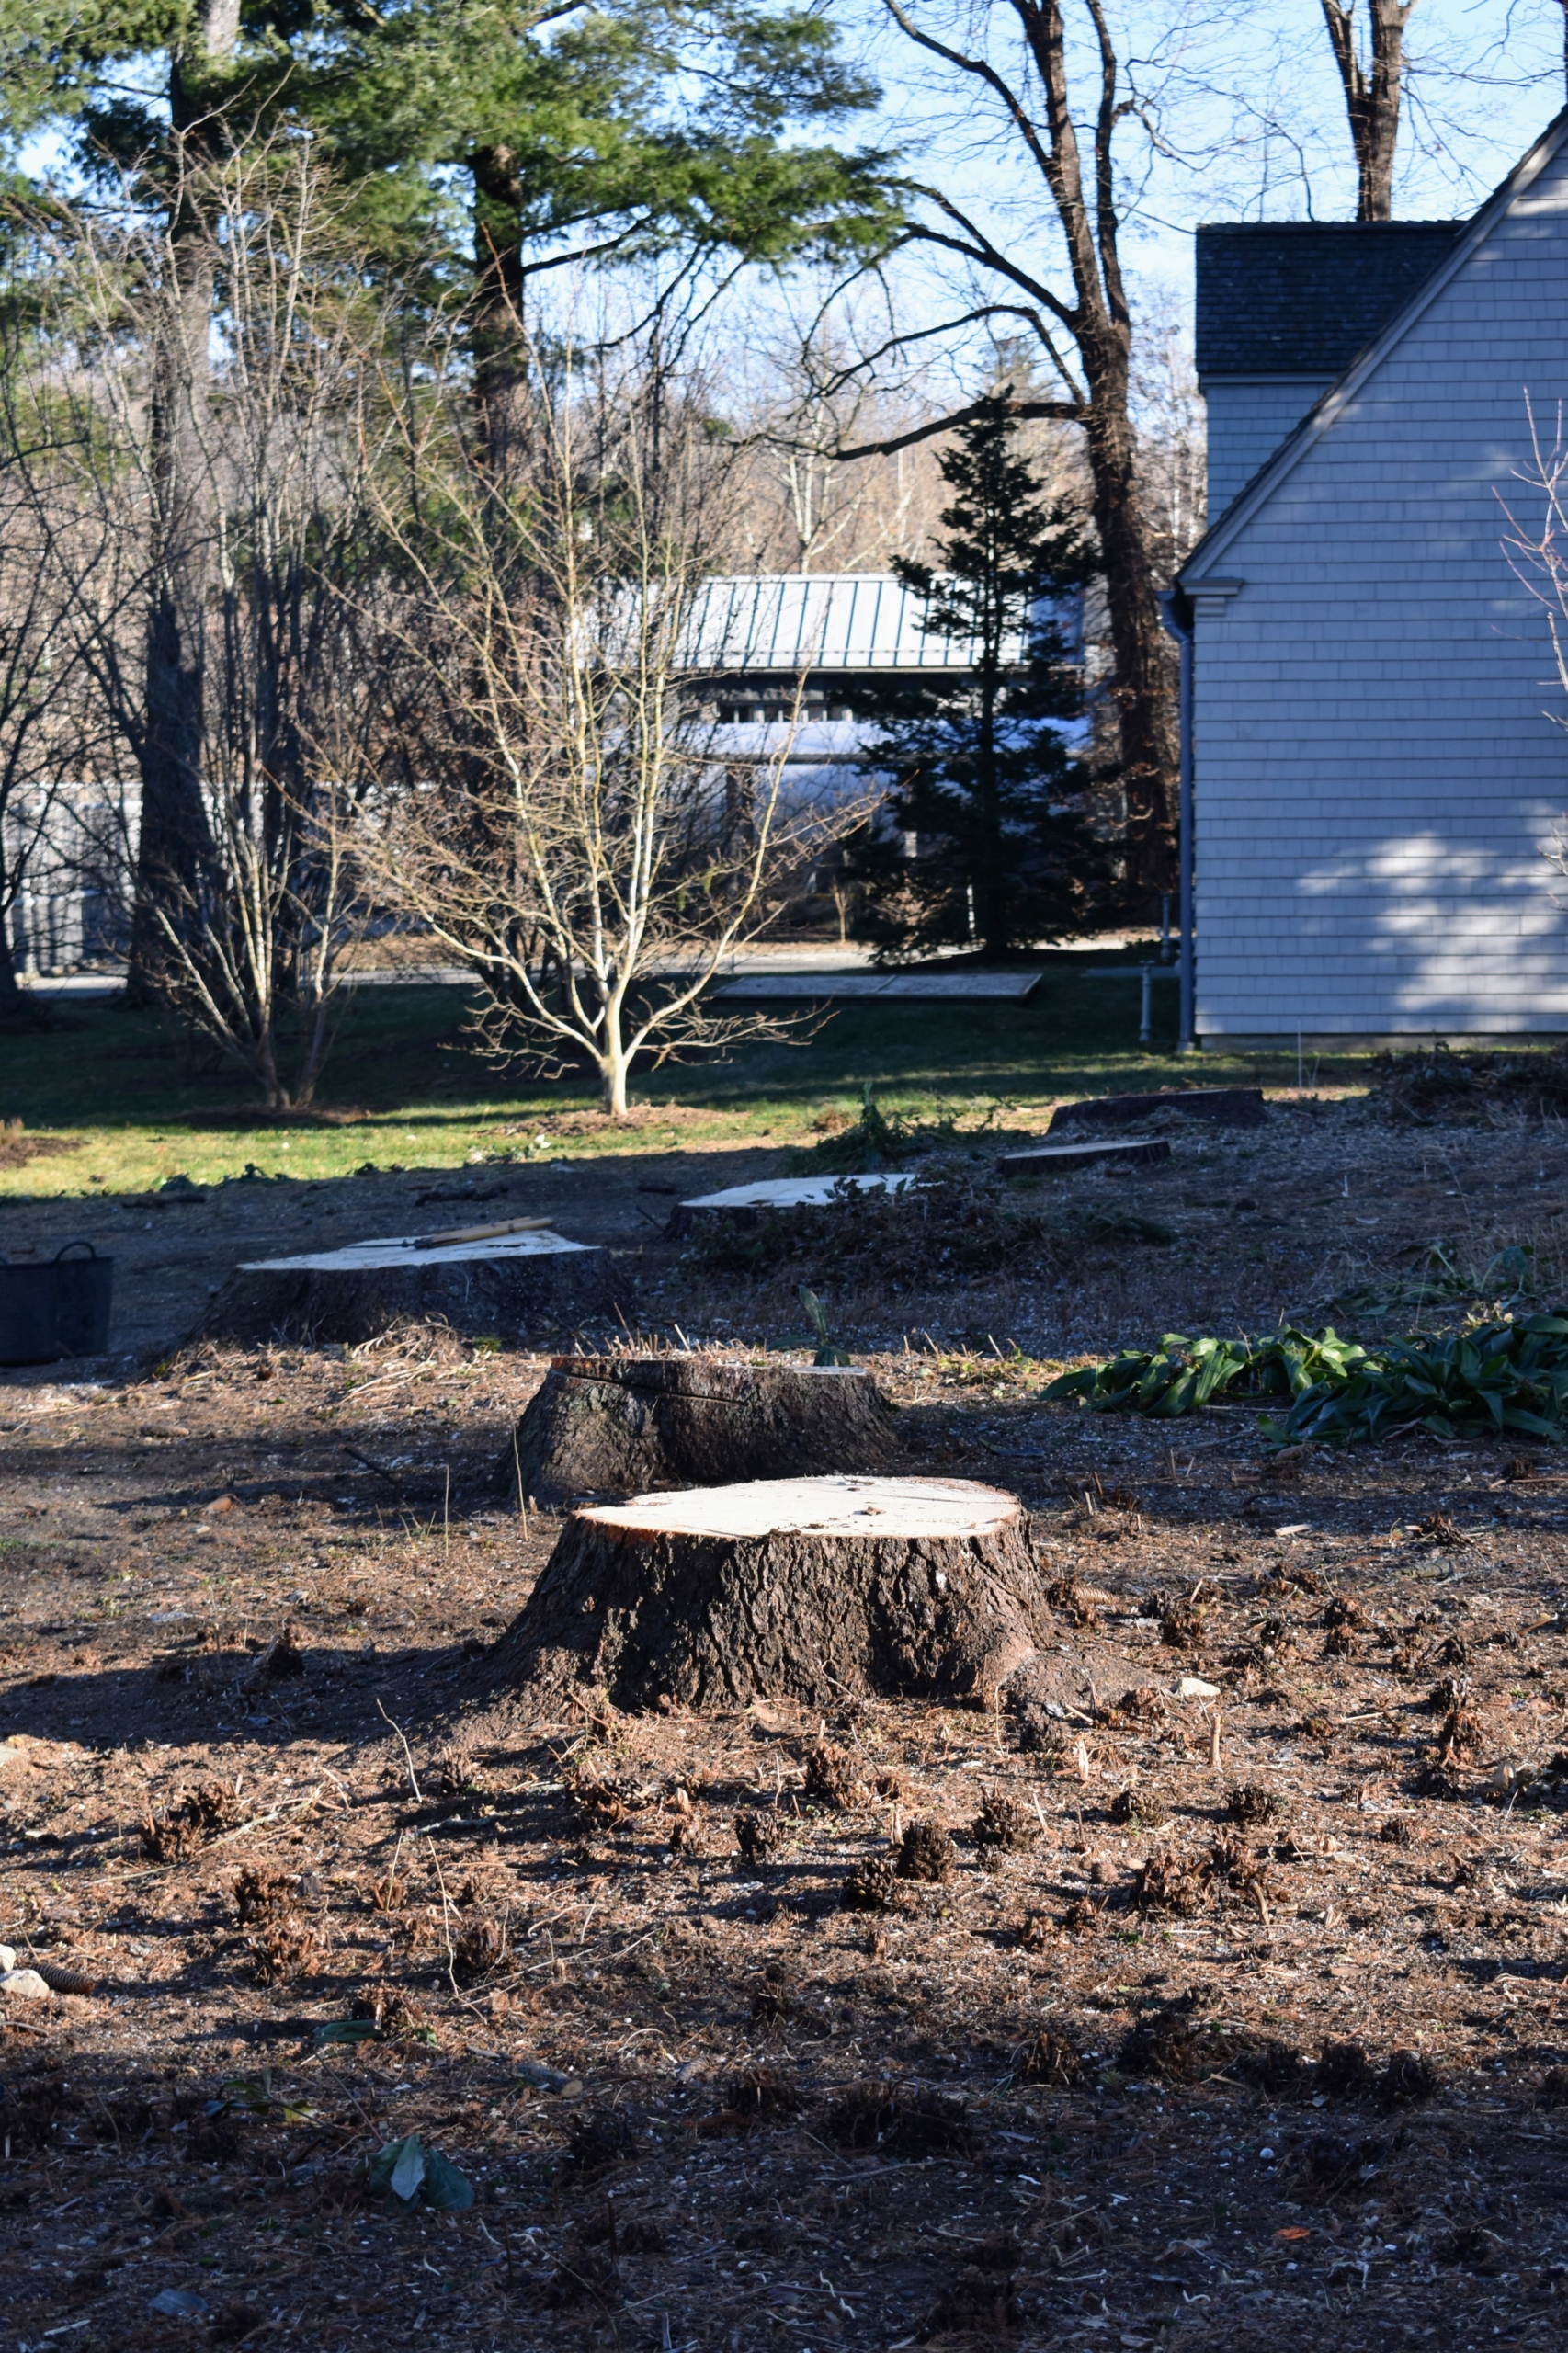
Areas were cleared of plants and trees were strategically placed.
Whenever planting, always consider spacing needs. Be sure to plant with the specimen’s mature size in mind.
And then my outdoor grounds crew got started. This collection included both red and green leafed cultivars.
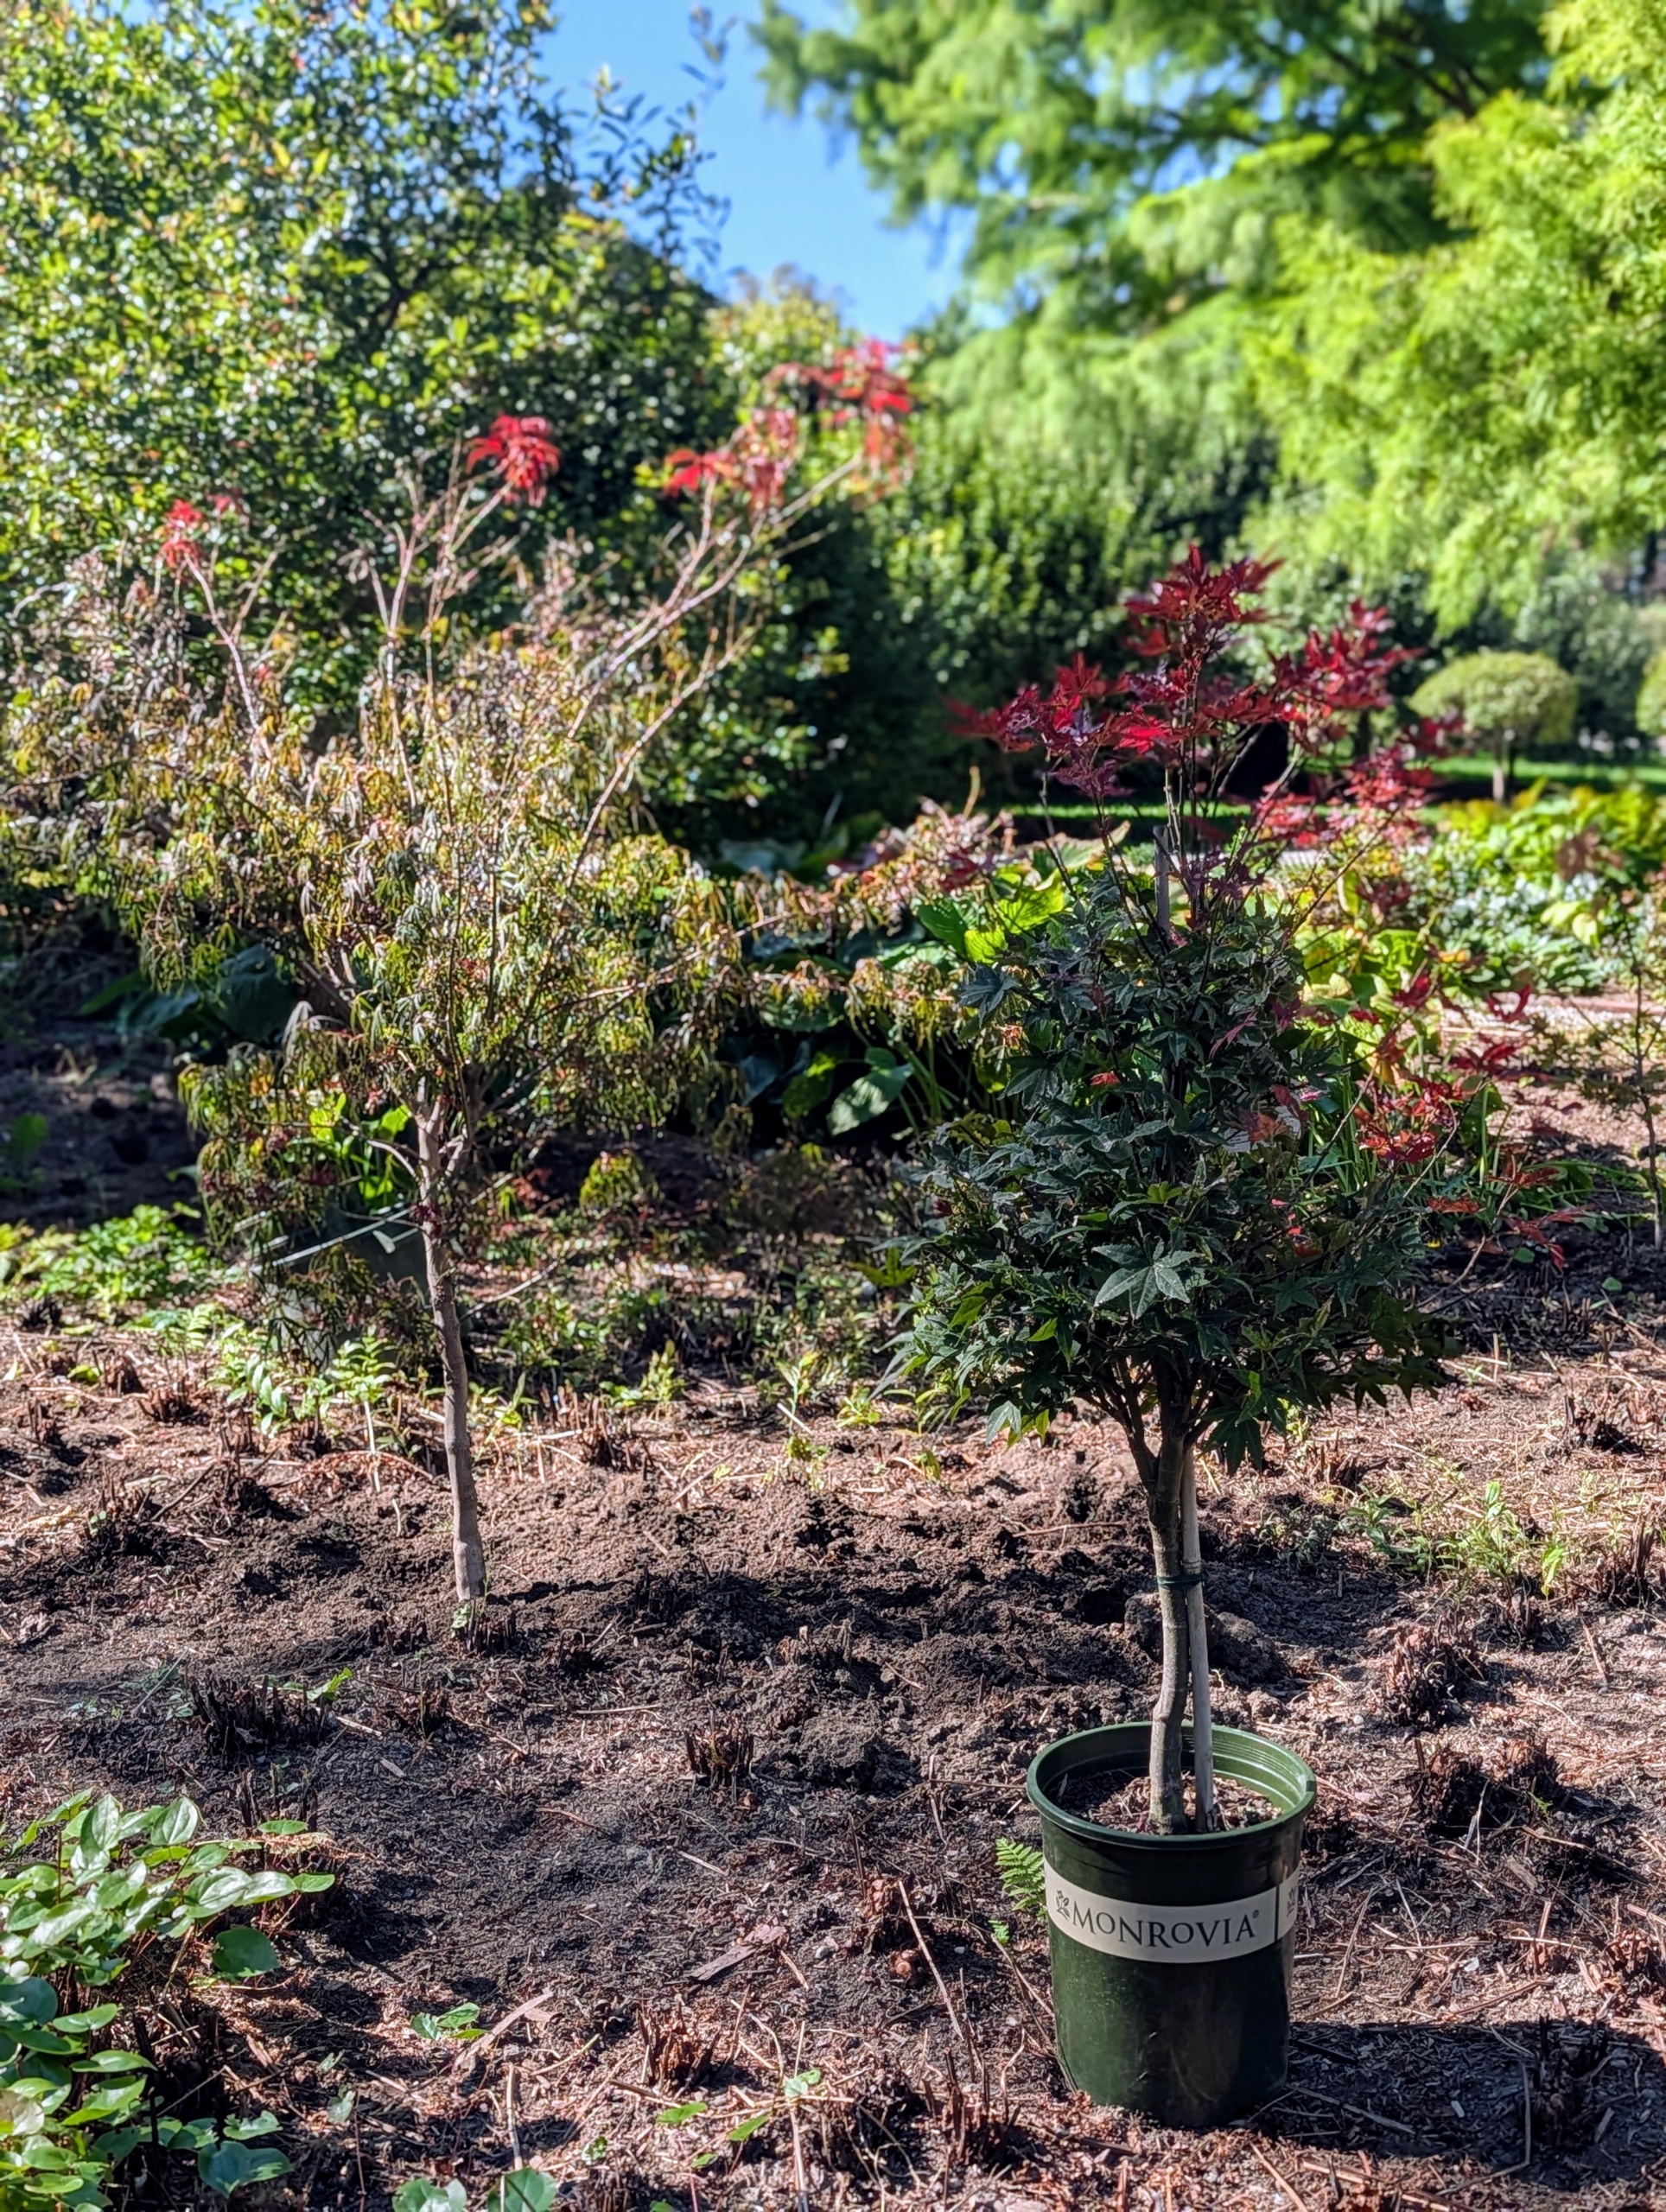
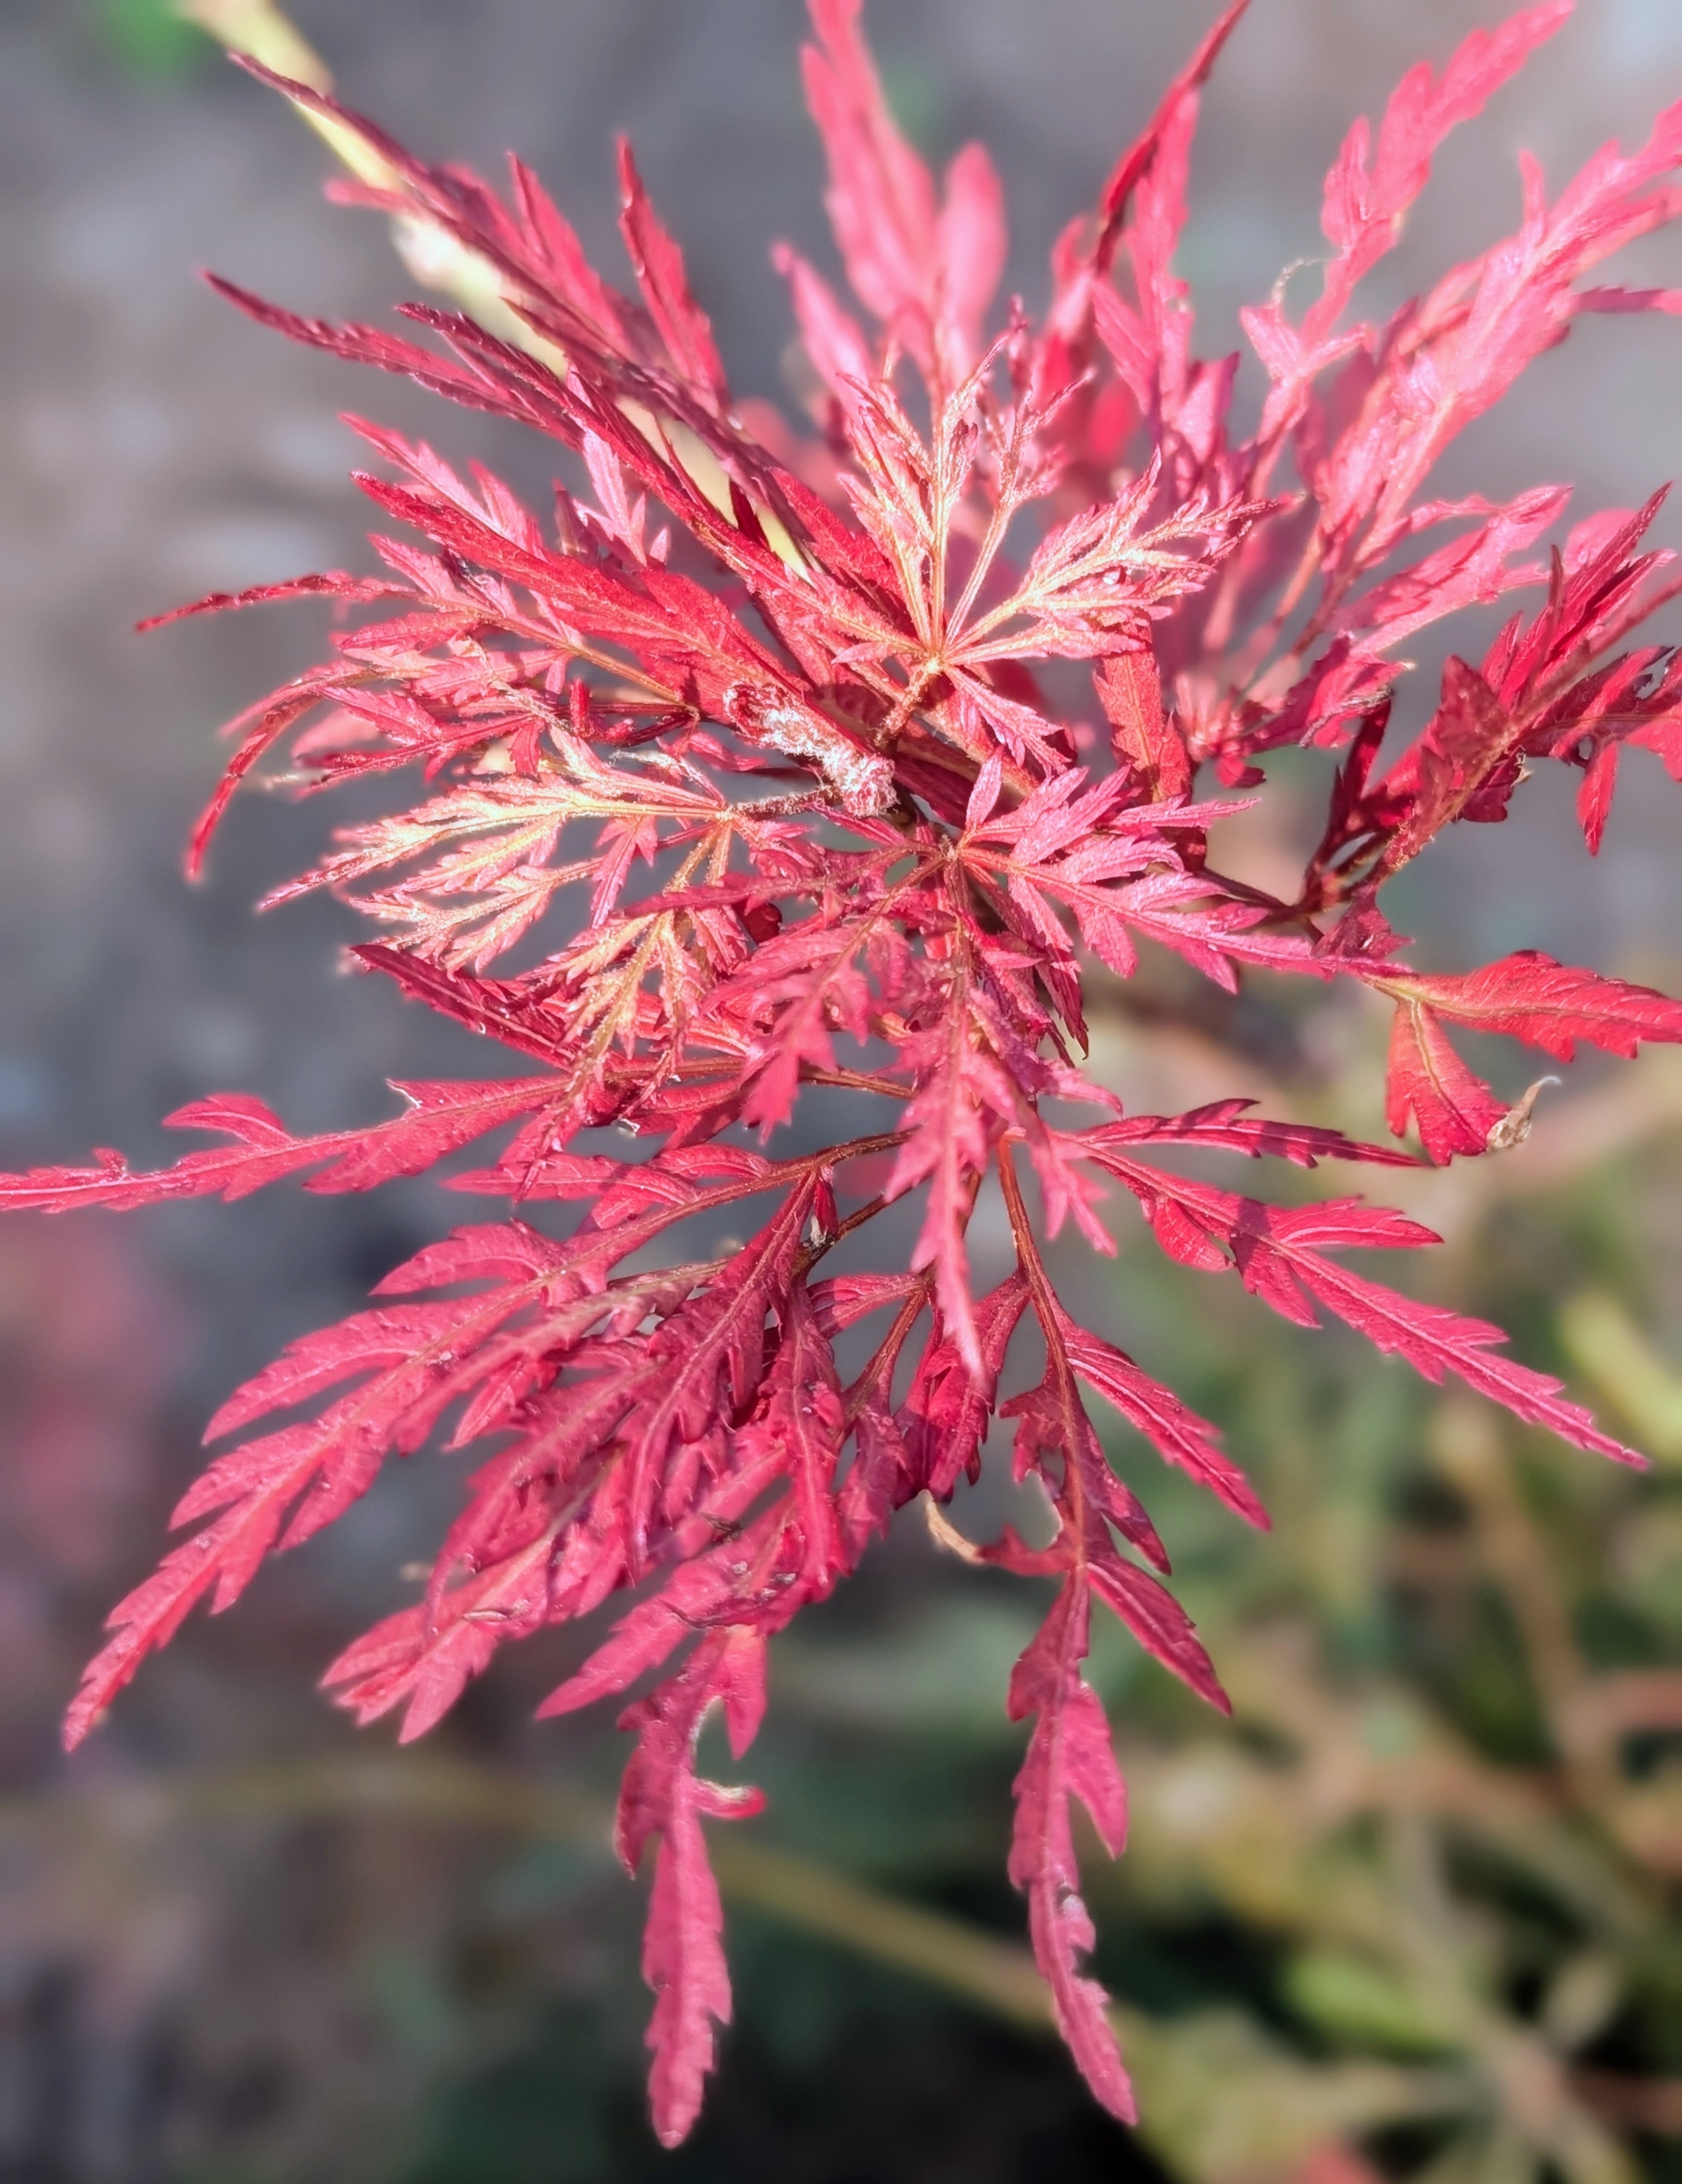
This is an Orangeola Japanese maple, Acer palmatum ‘Orangeola.’ Its foliage changes from green to purple and then a brilliant shade of orange-red in autumn.
Its leaves are already changing.
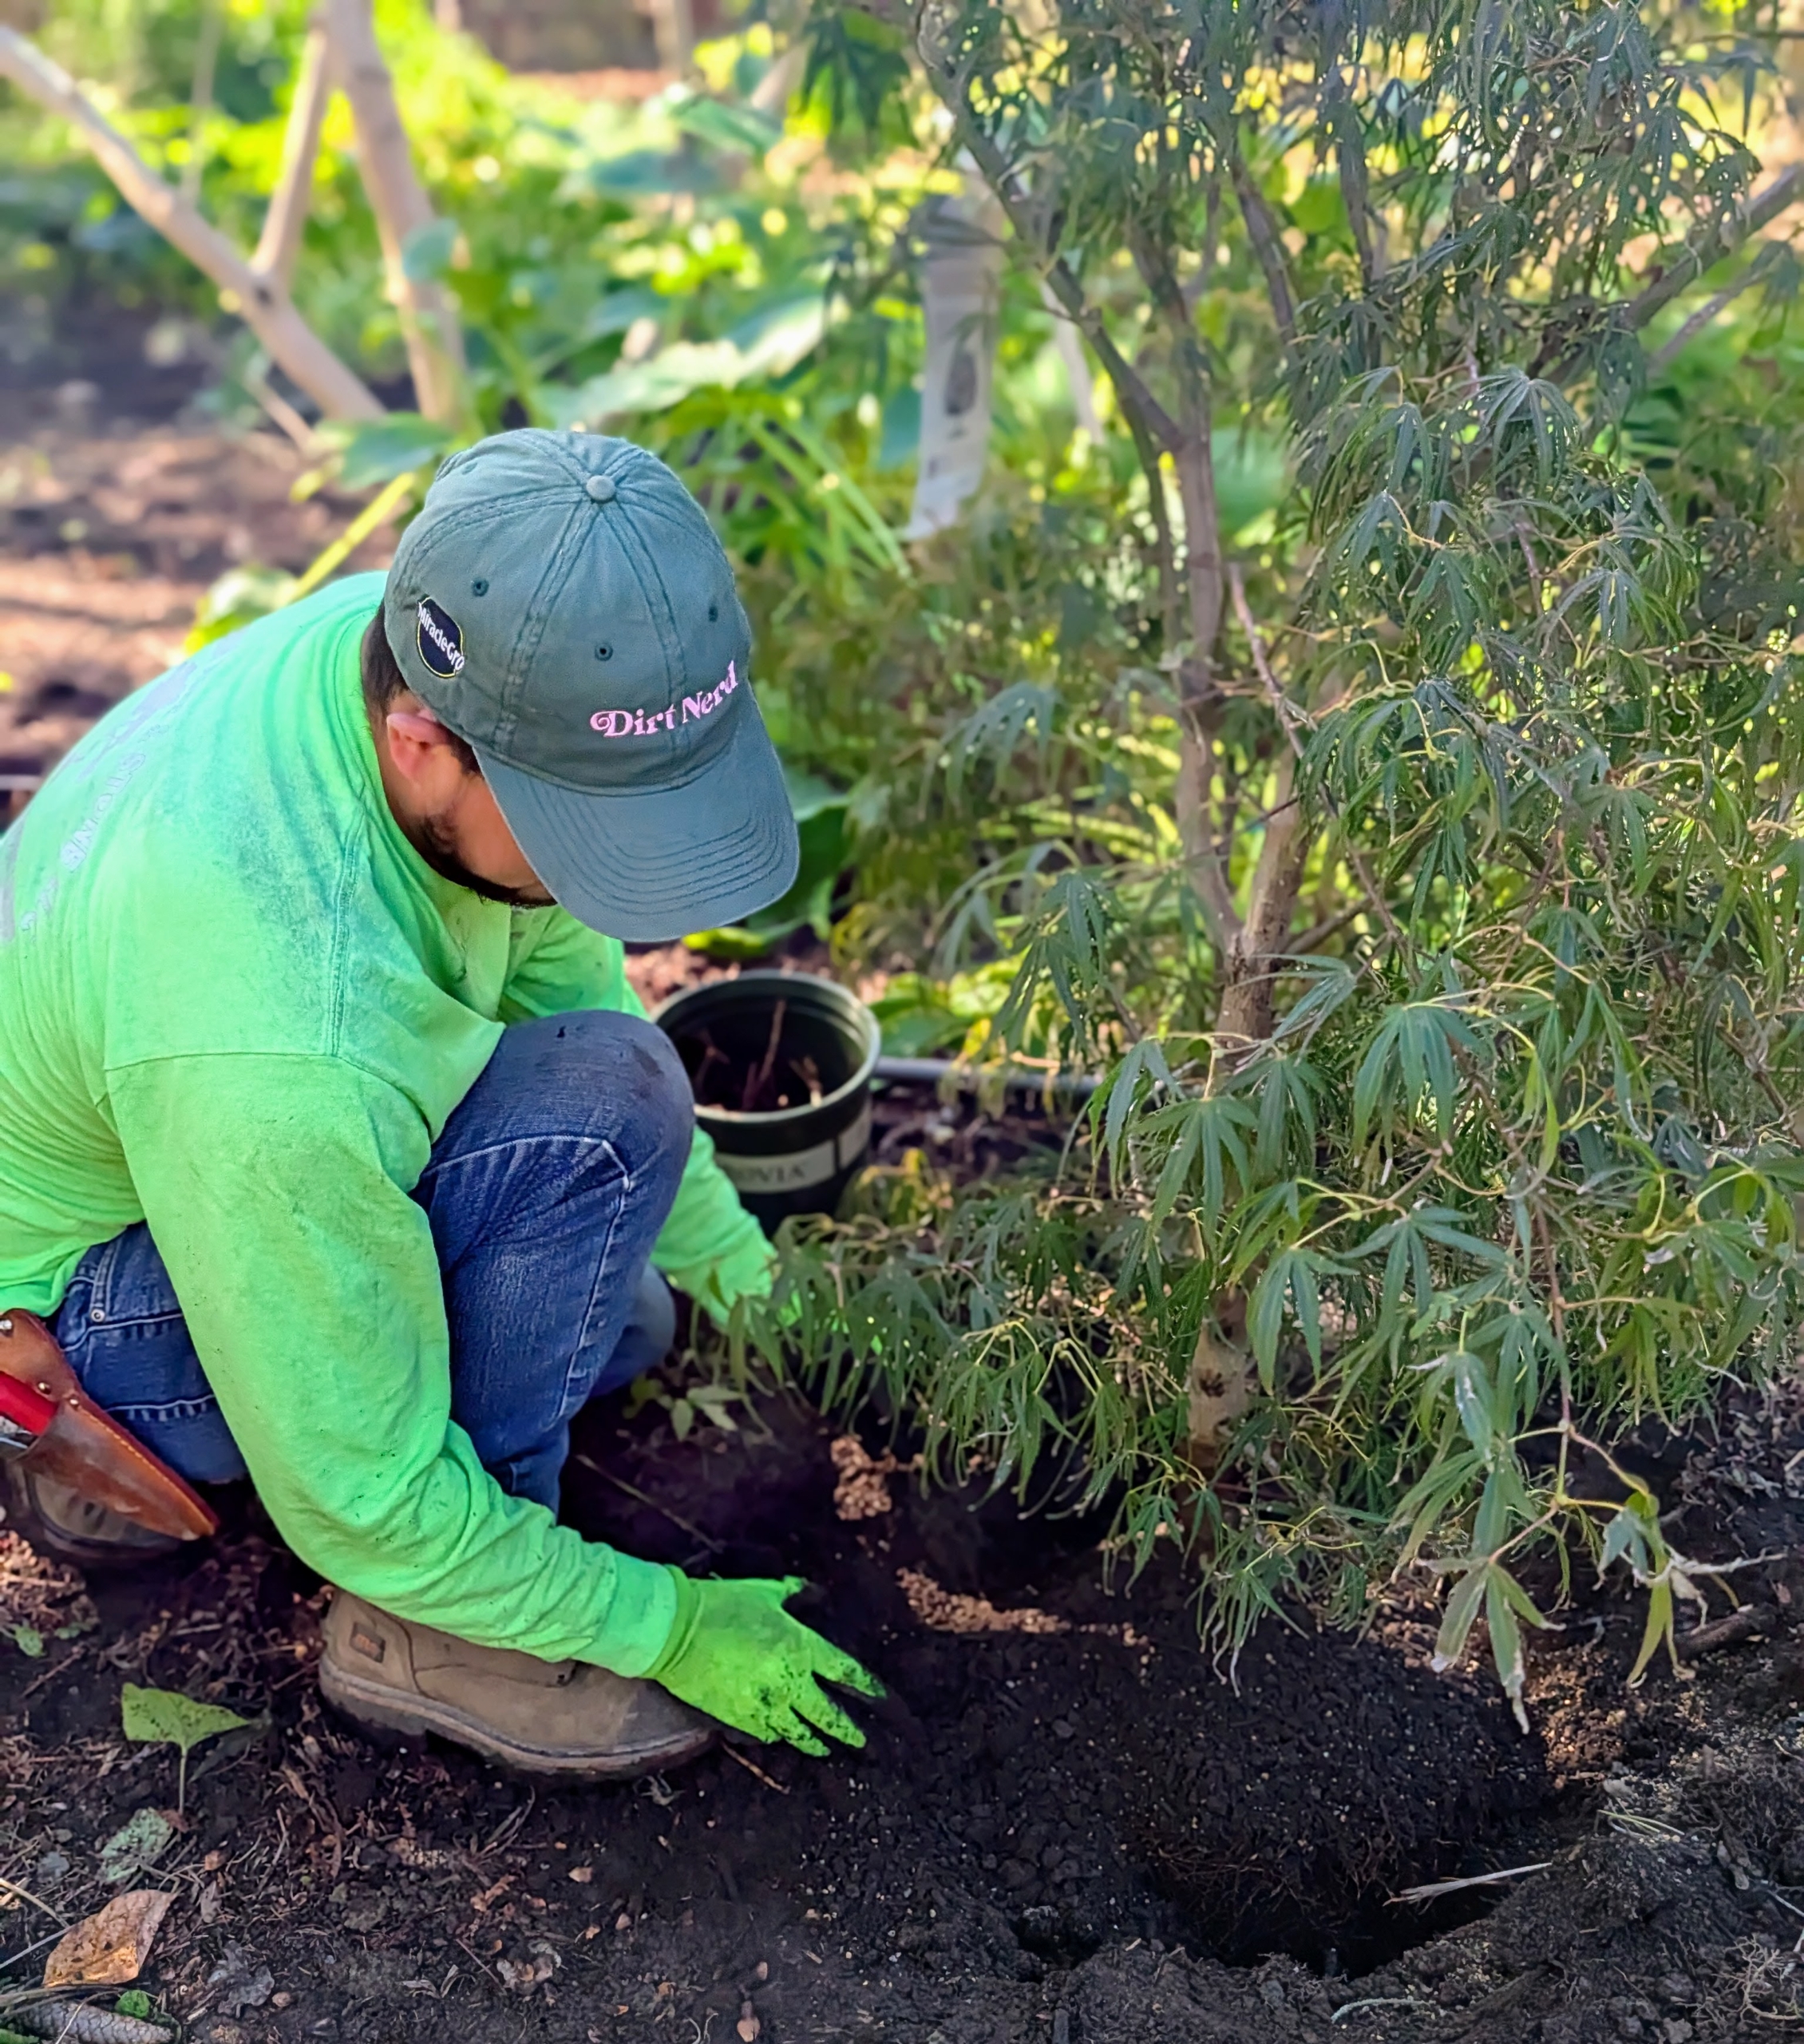
Here, Pete is planting a Coral Bark Japanese maple, Acer palmatum ‘Sango Kaku,’ – a beautiful small deciduous tree that thrives in bright dappled and shade.
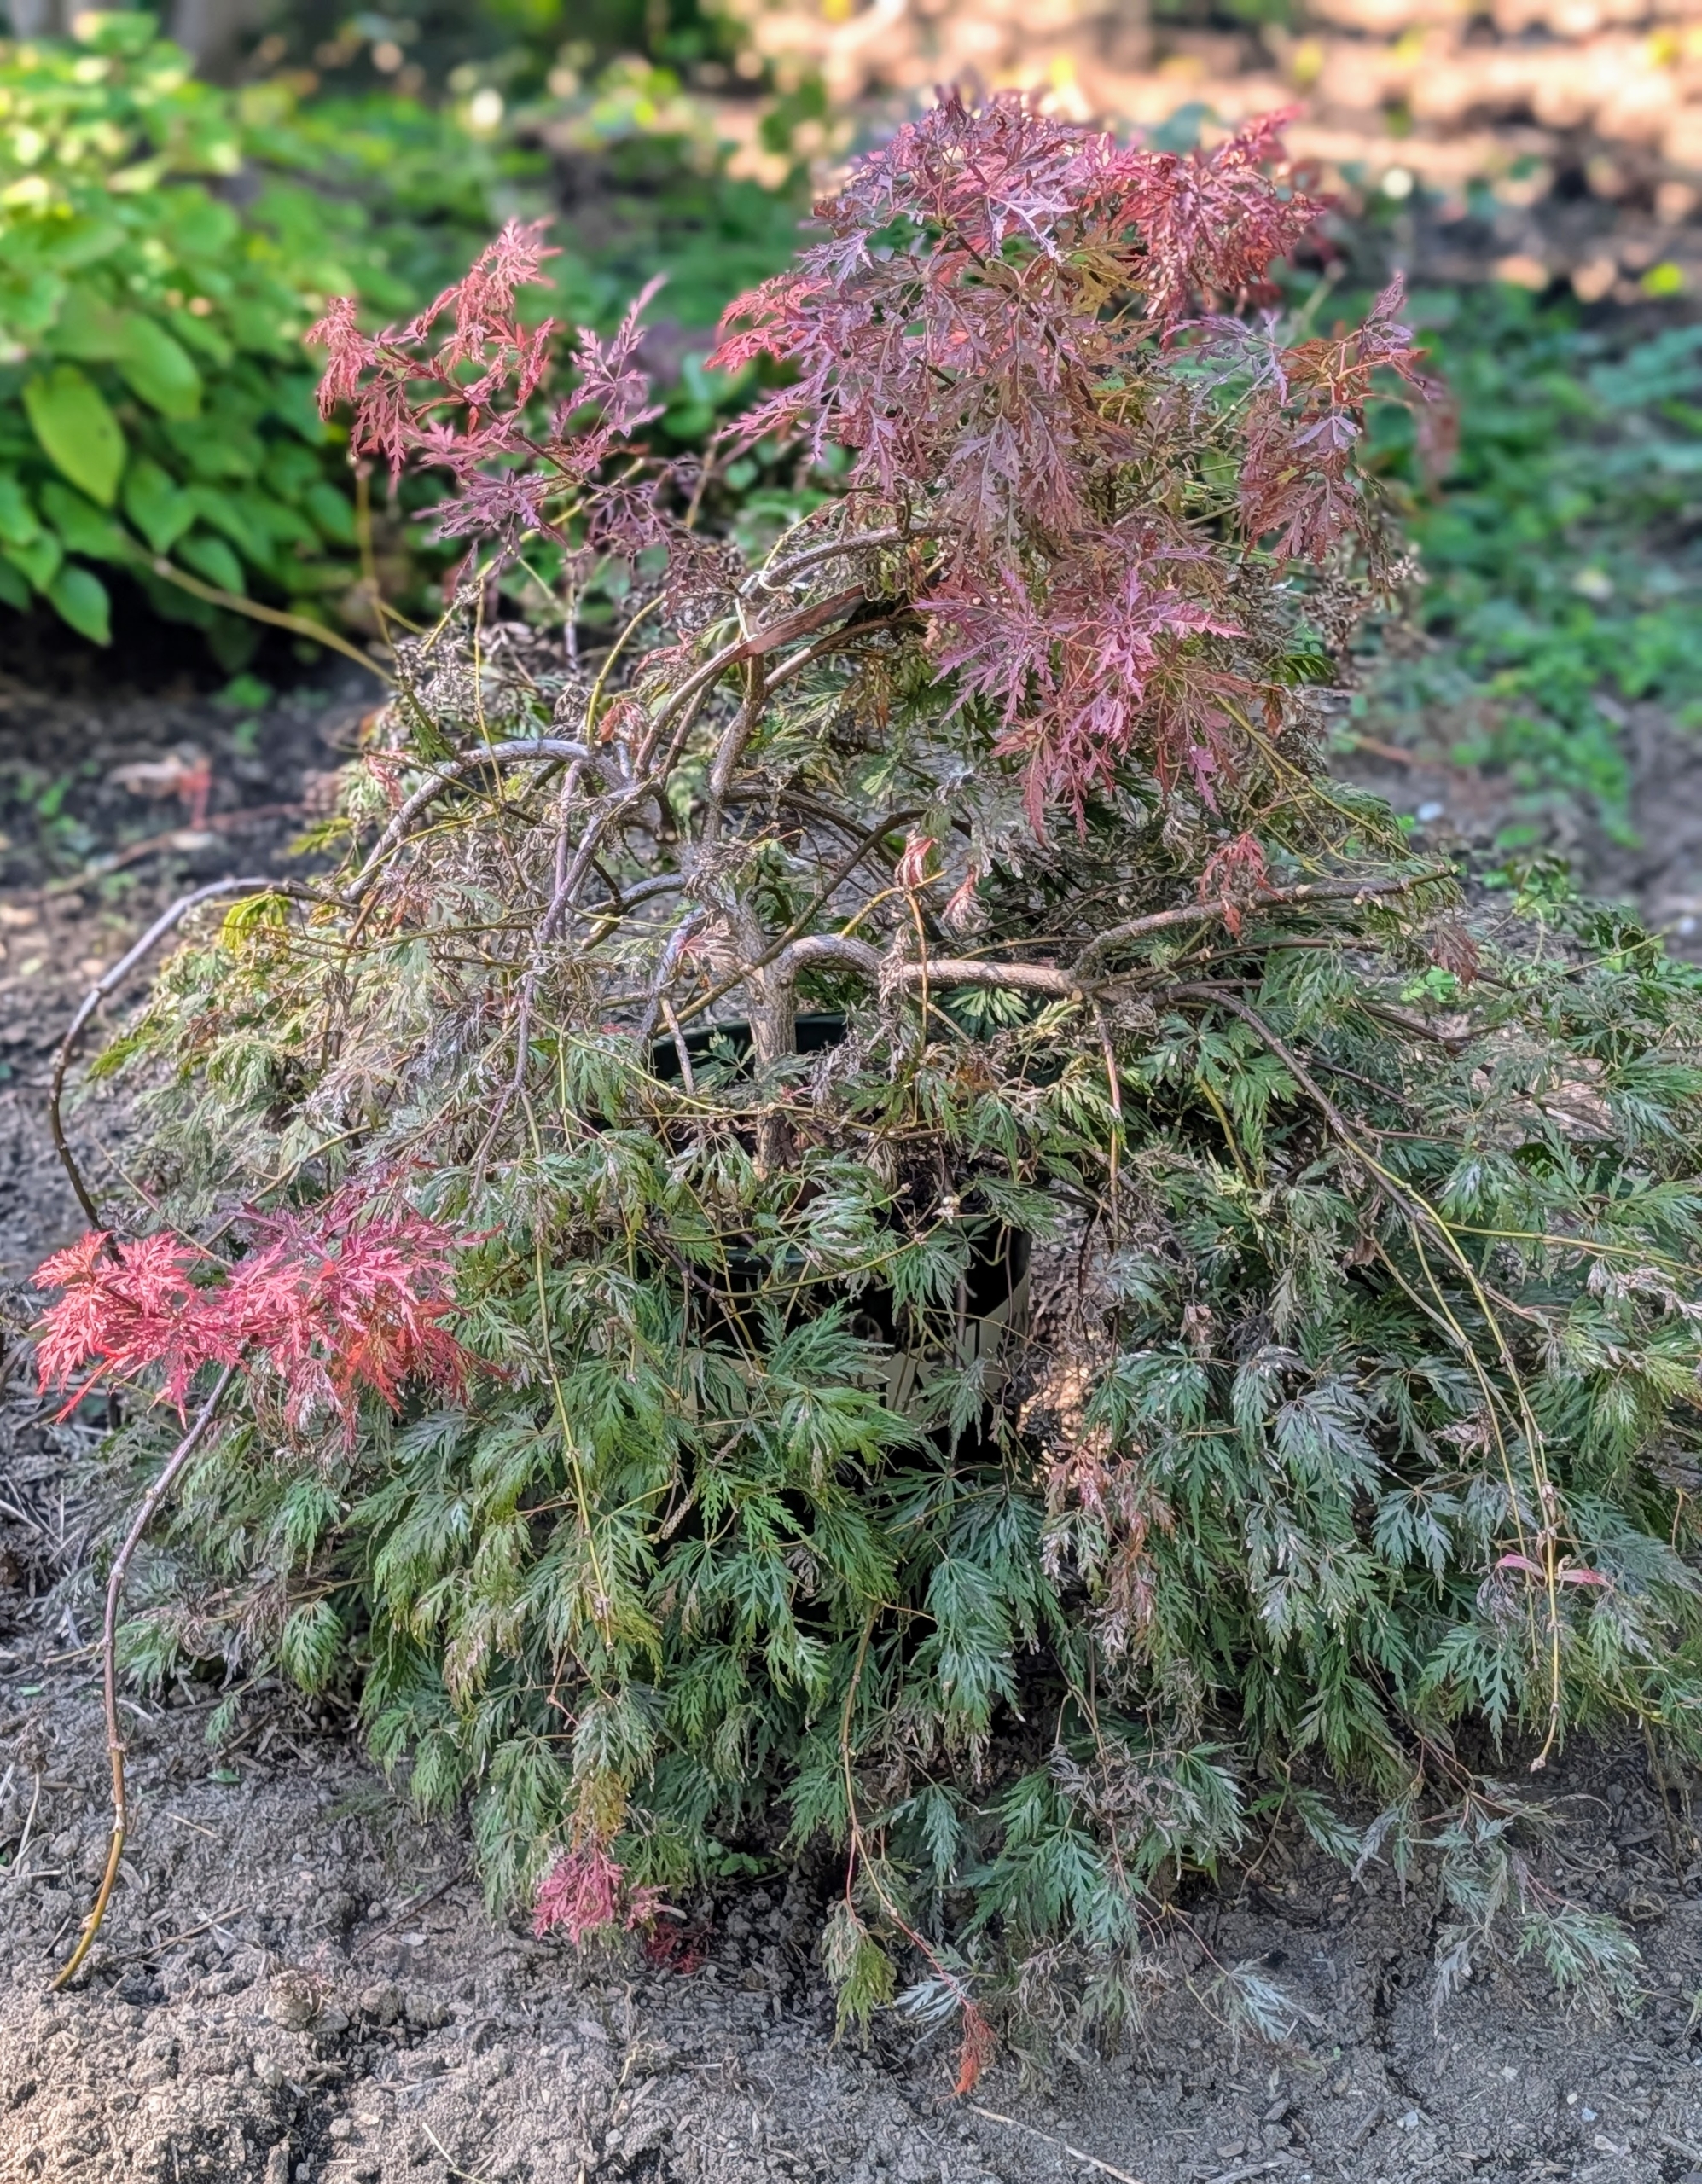
This is a Ryusen Weeping Japanese maple, Acer palmatum ‘Ryusen.’ It is known for its cascading branches and vibrant seasonal foliage.
The Waterfall Japanese Maple, Acer palmatum var. dissectum ‘Waterfall,’ is loved for its cascading green foliage, and elegant weeping form. It will grow nicely here.
By late afternoon everything was planted and watered. A well tended garden is always a work in progress. I am looking forward to adding more interesting greenery and seeing this transformed garden flourish.
Among the many benefits of growing one's own flowers - they can be enjoyed both inside and out.
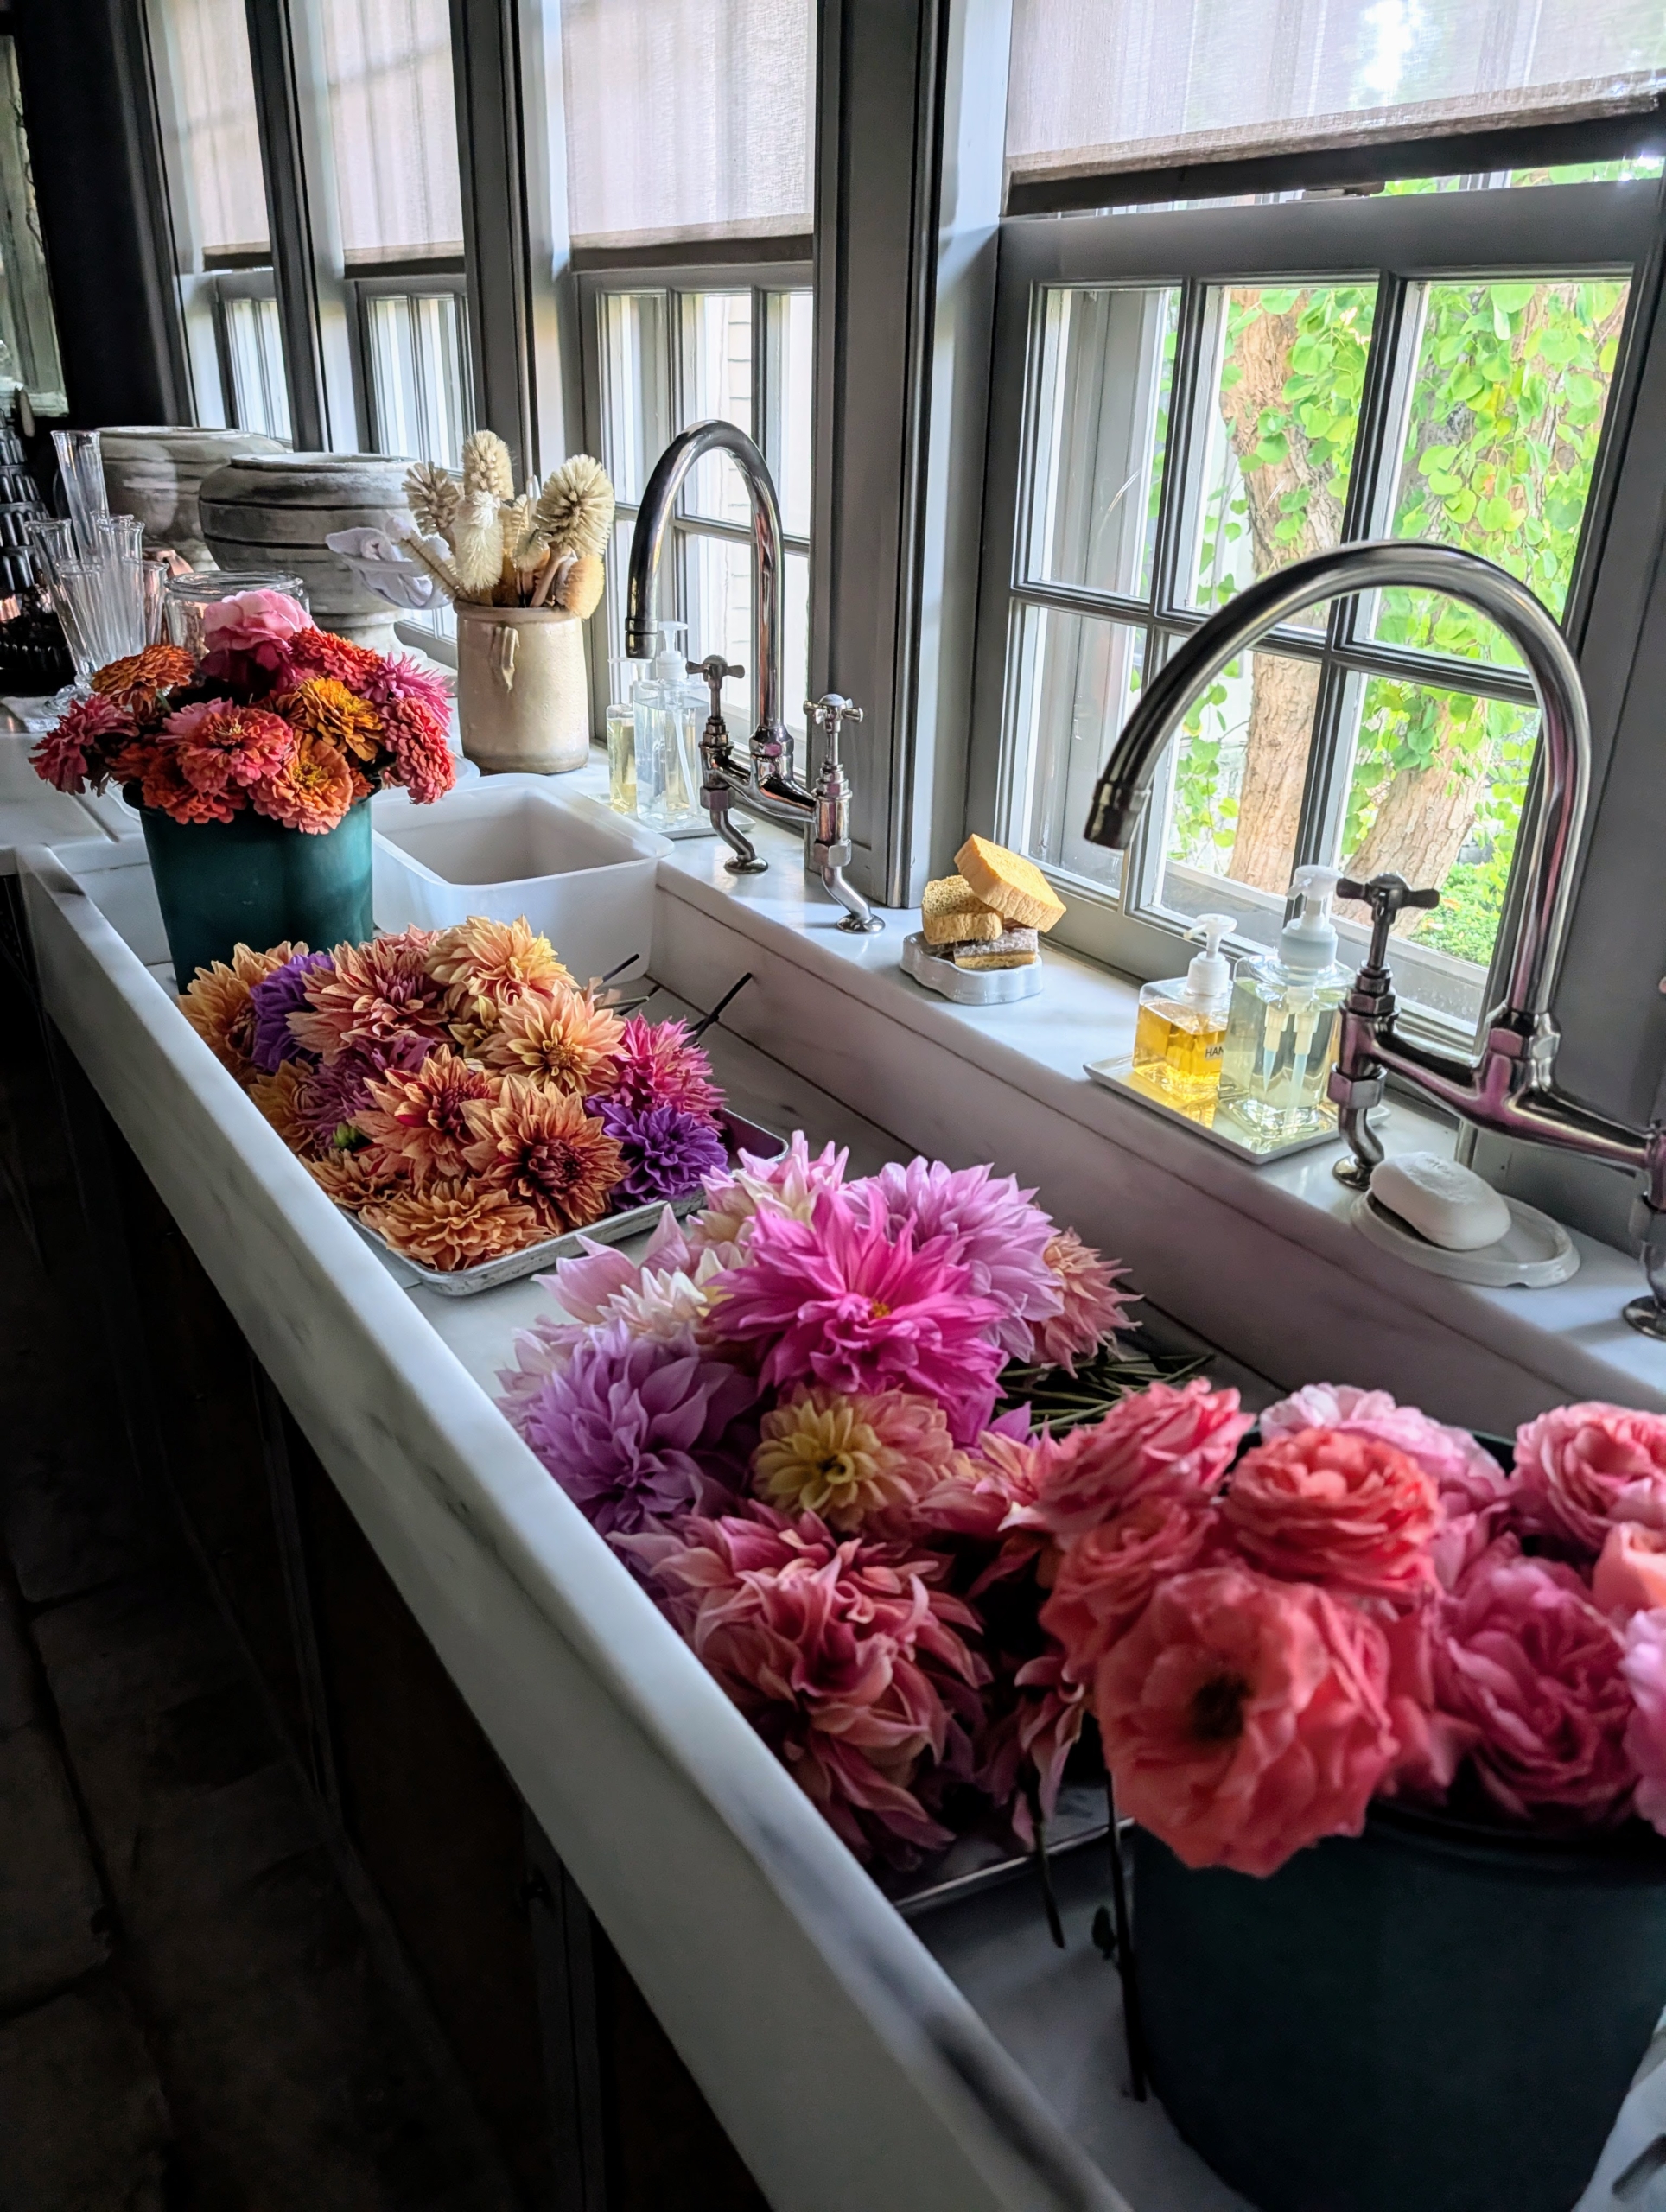
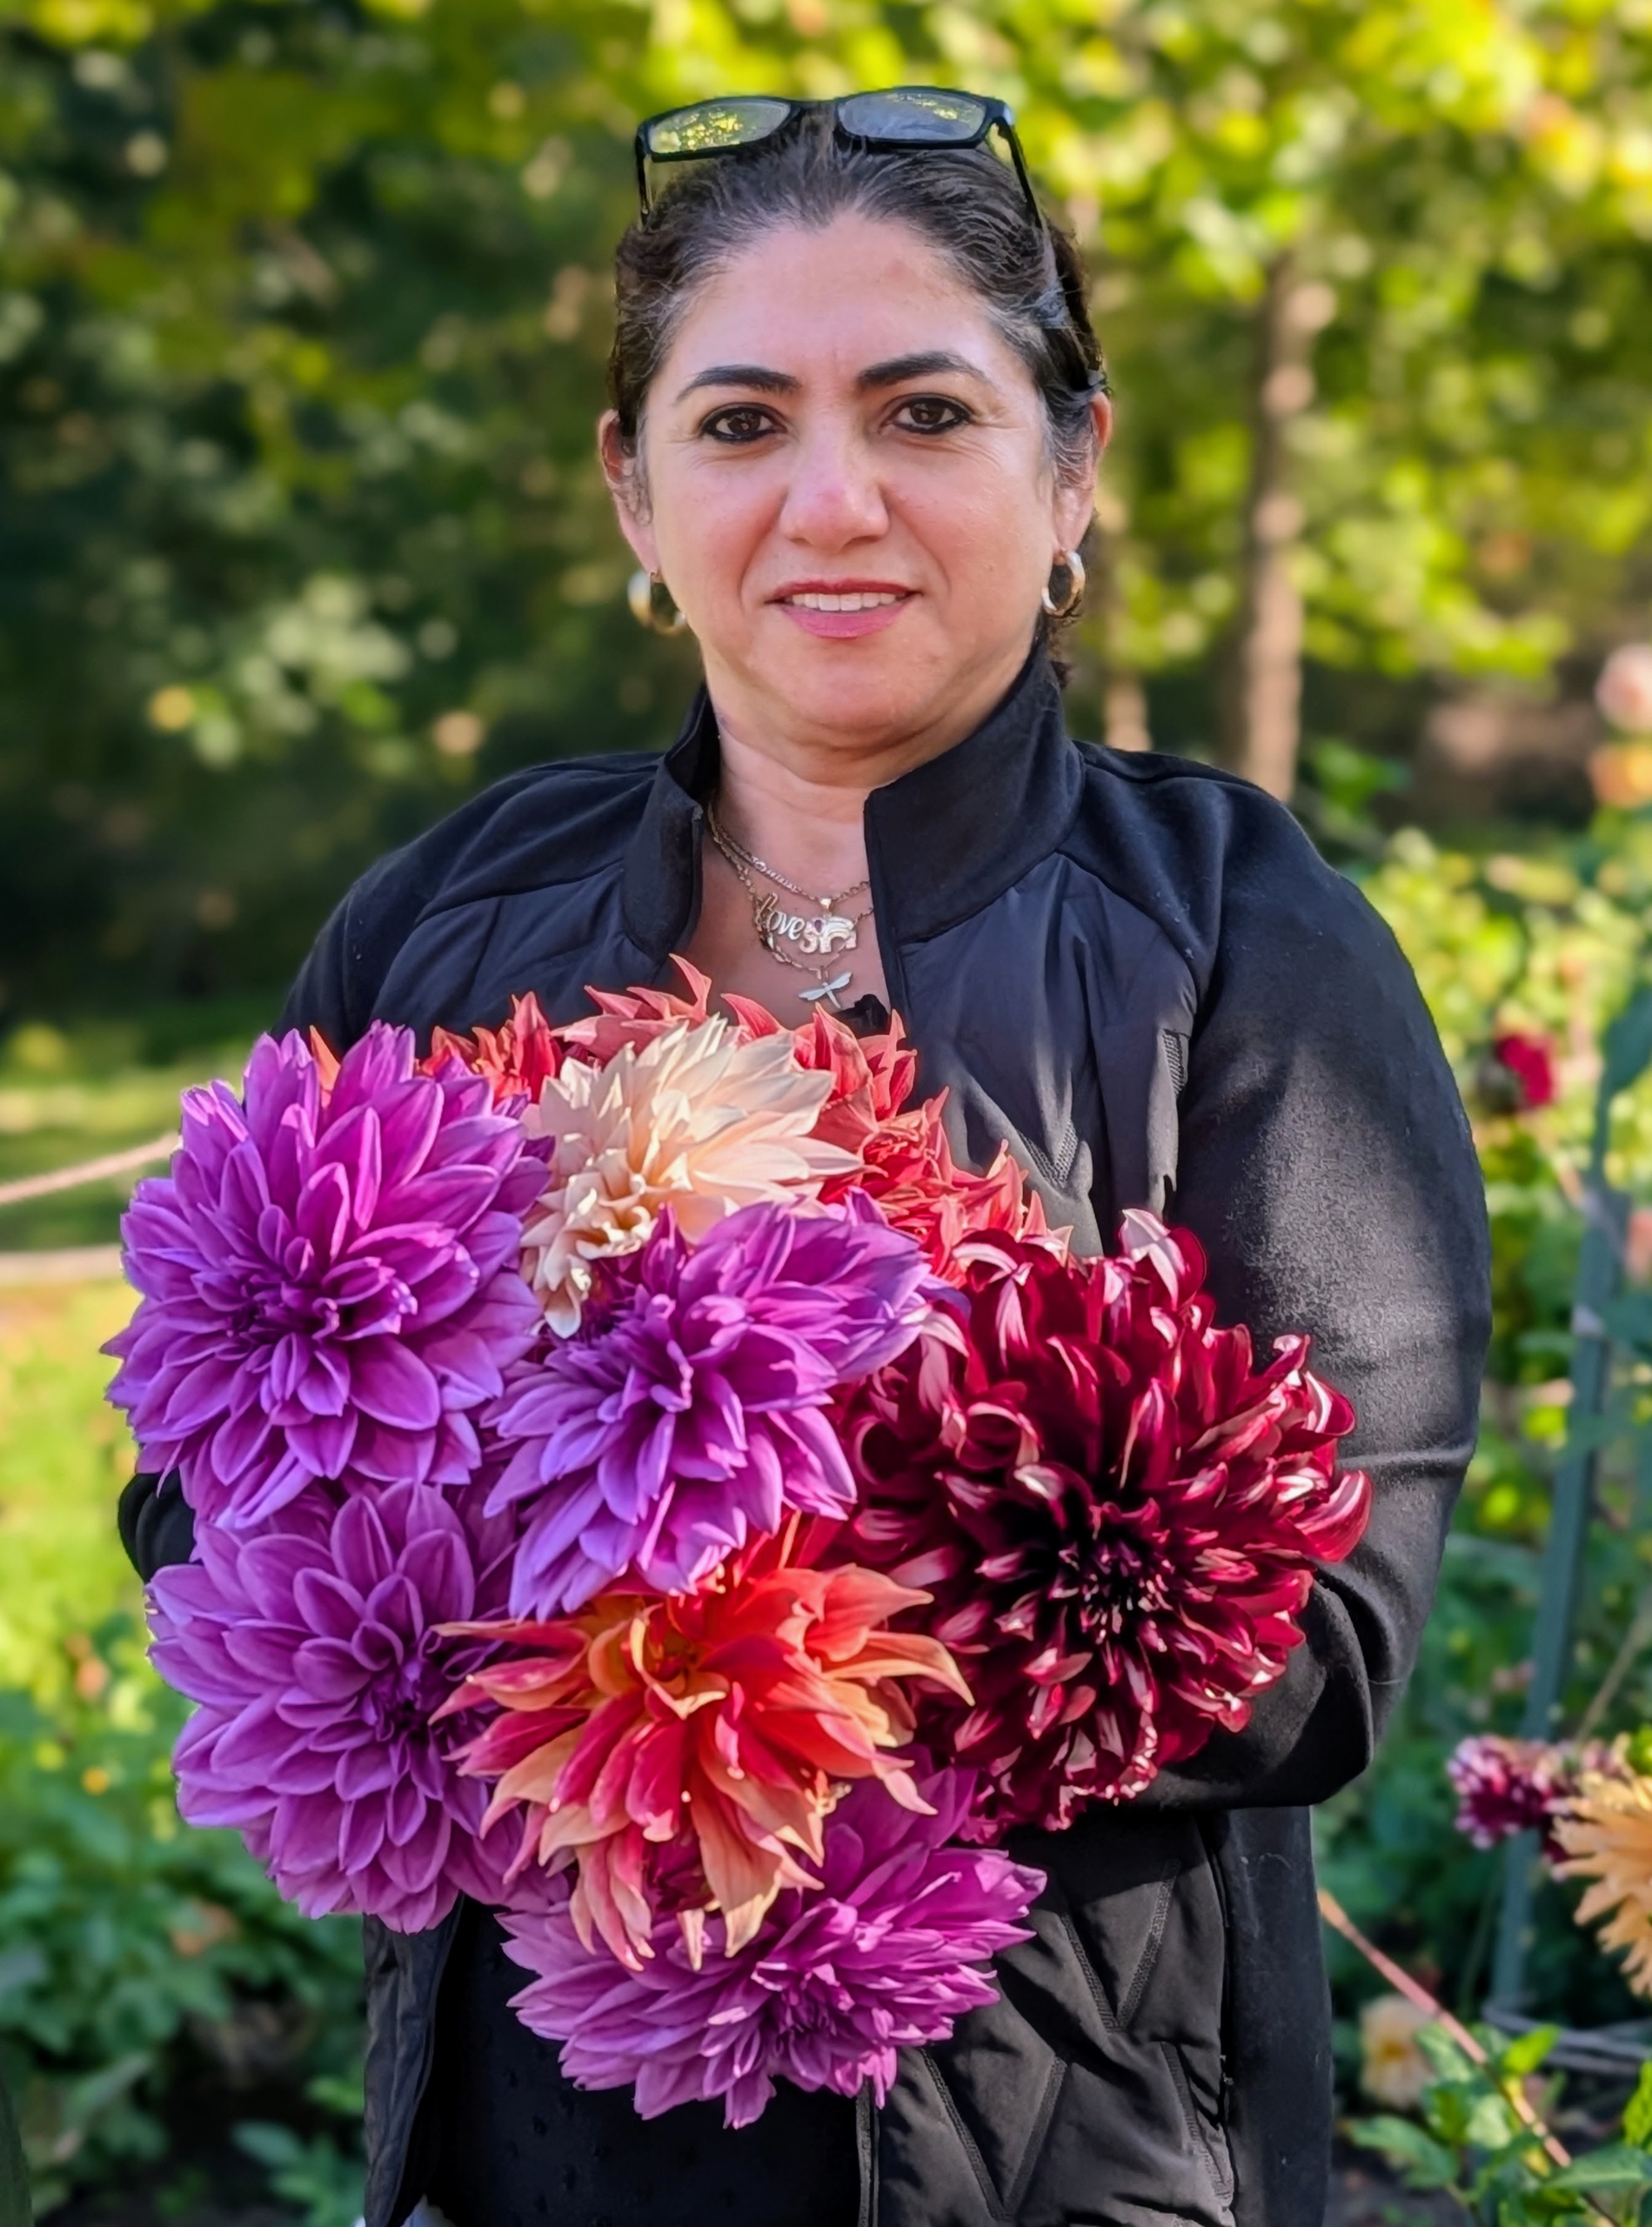
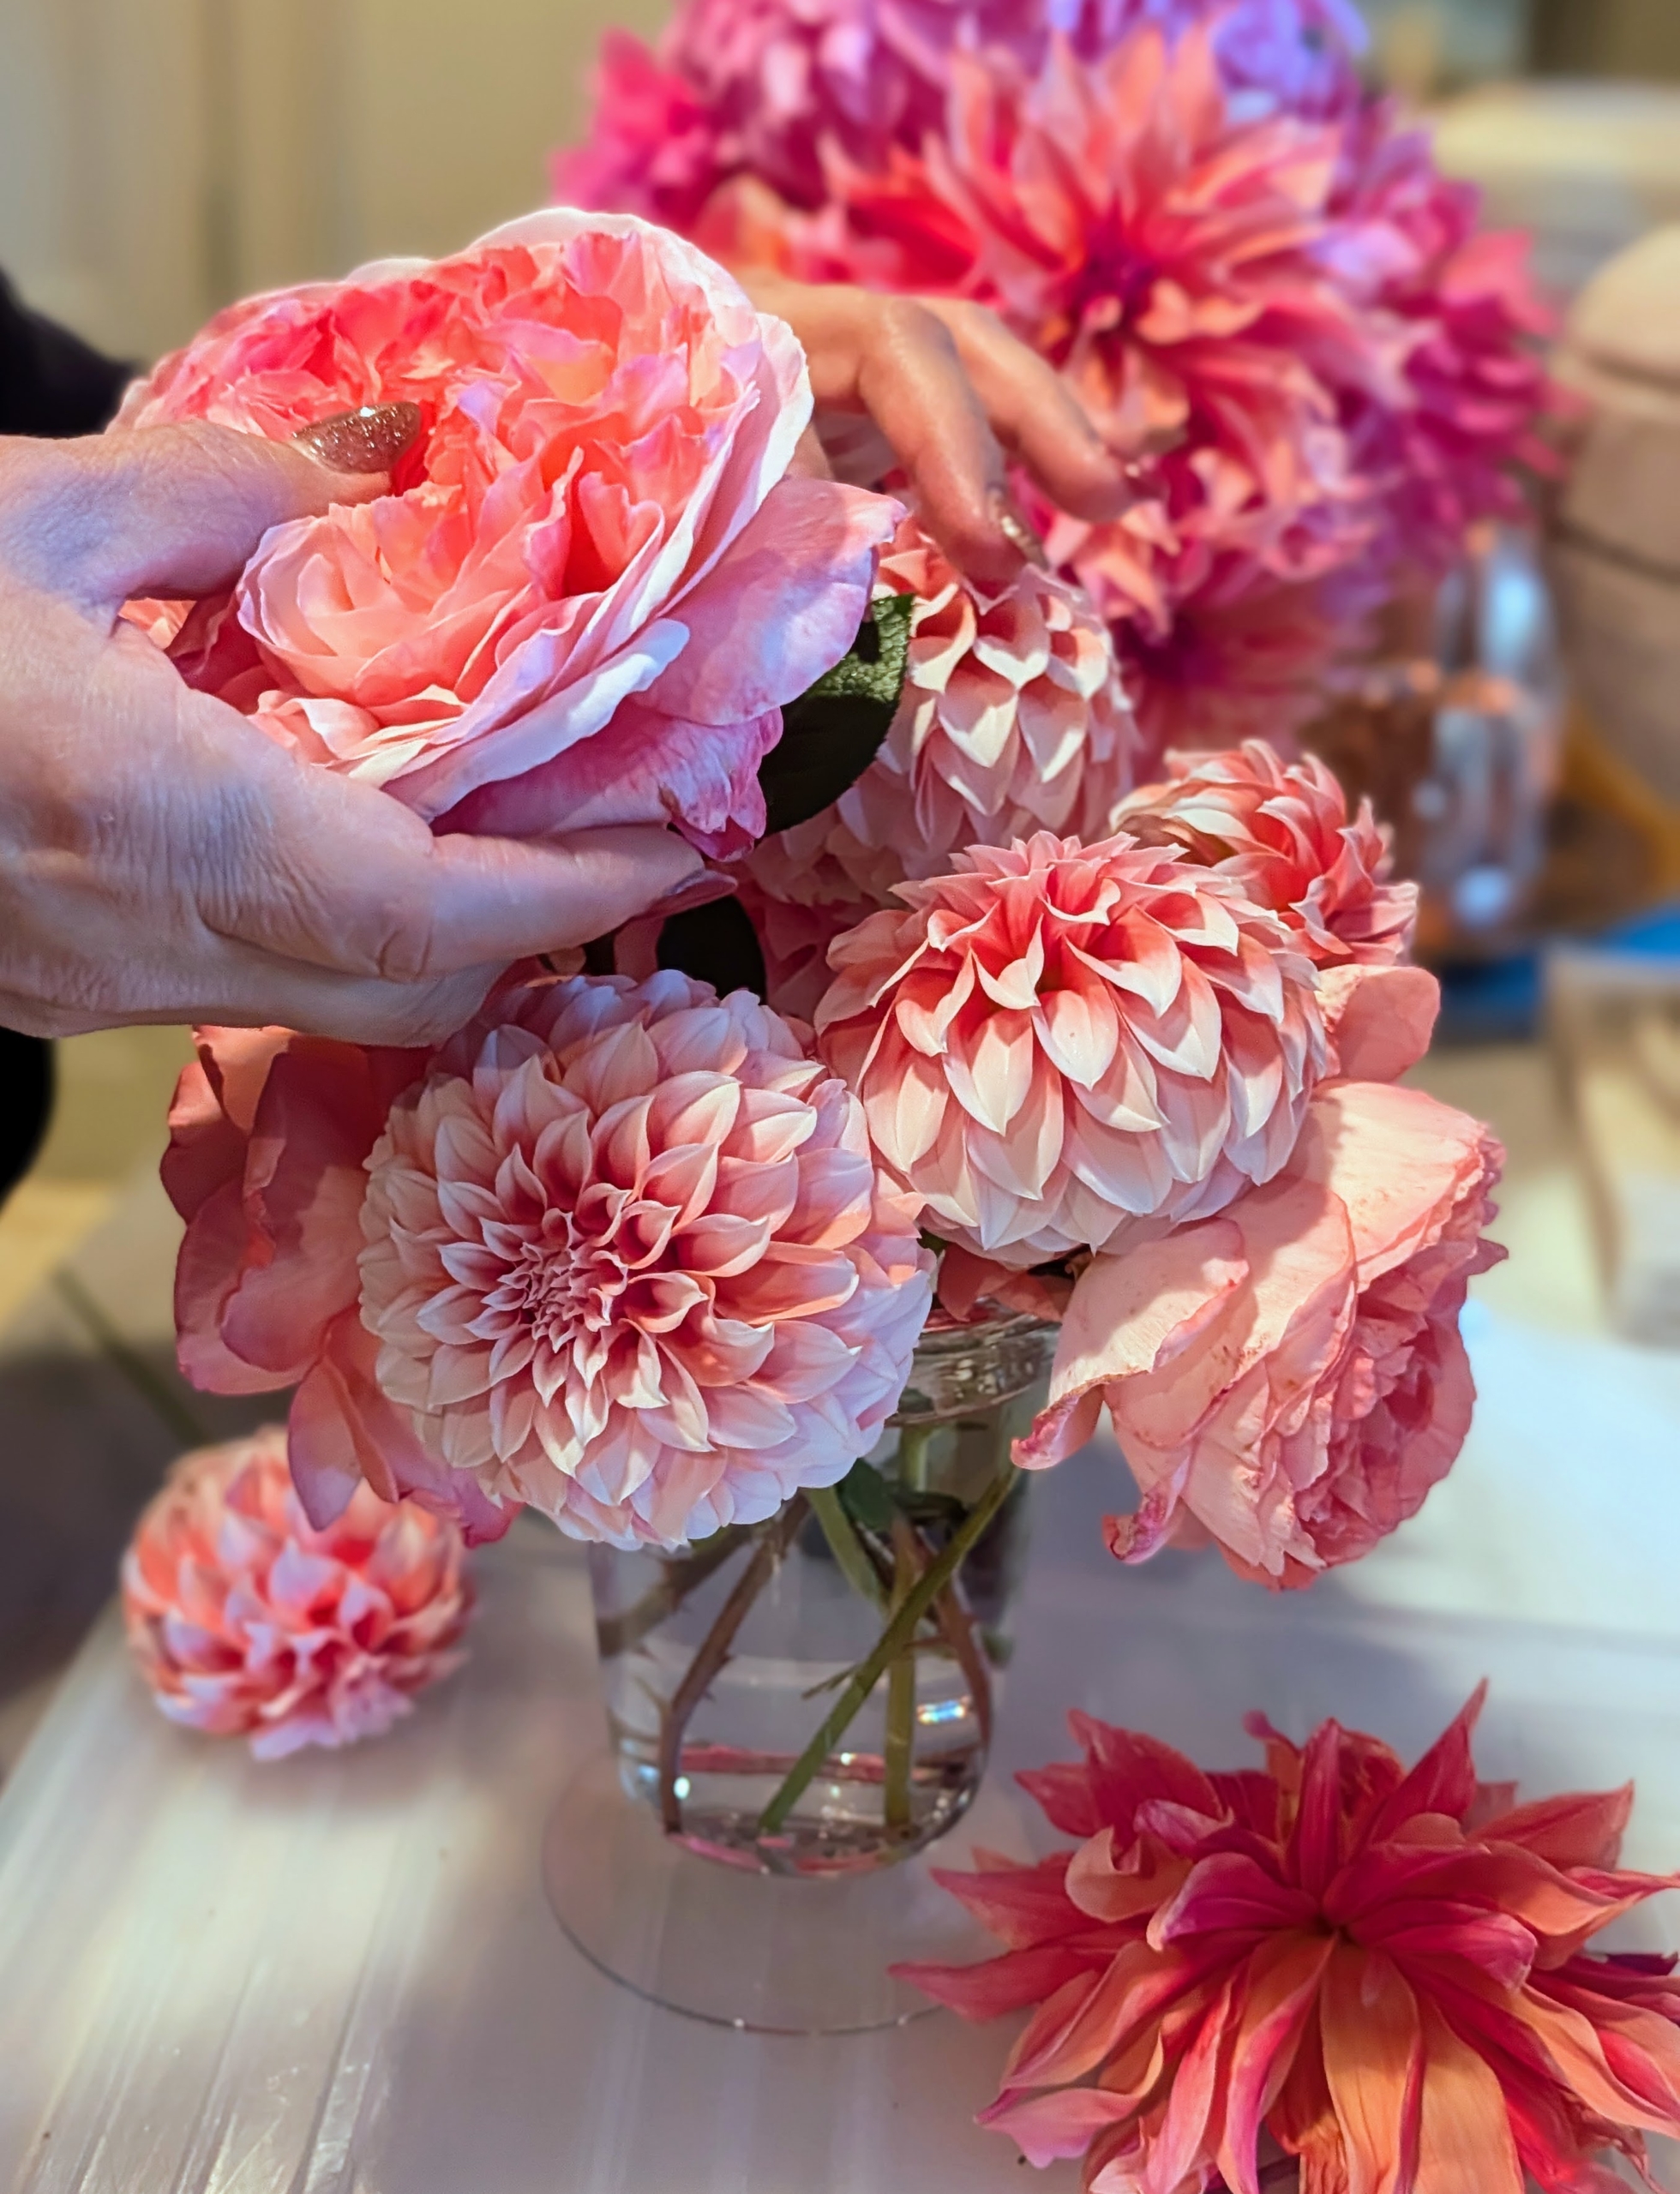
It's always so nice to walk through the gardens and see a multitude of beautiful and colorful blooms. I also love using fresh, fragrant flowers to display in my home. Yesterday, my housekeeper, Enma Sandoval, made several arrangements using some the gorgeous flowers still going strong - the dahlias, the zinnias, and the roses.
Here are some photos, enjoy.
I grow many flowers every year, so they can be cut and used for photography shoots, videos or to display in my kitchen, servery, and sitting rooms.
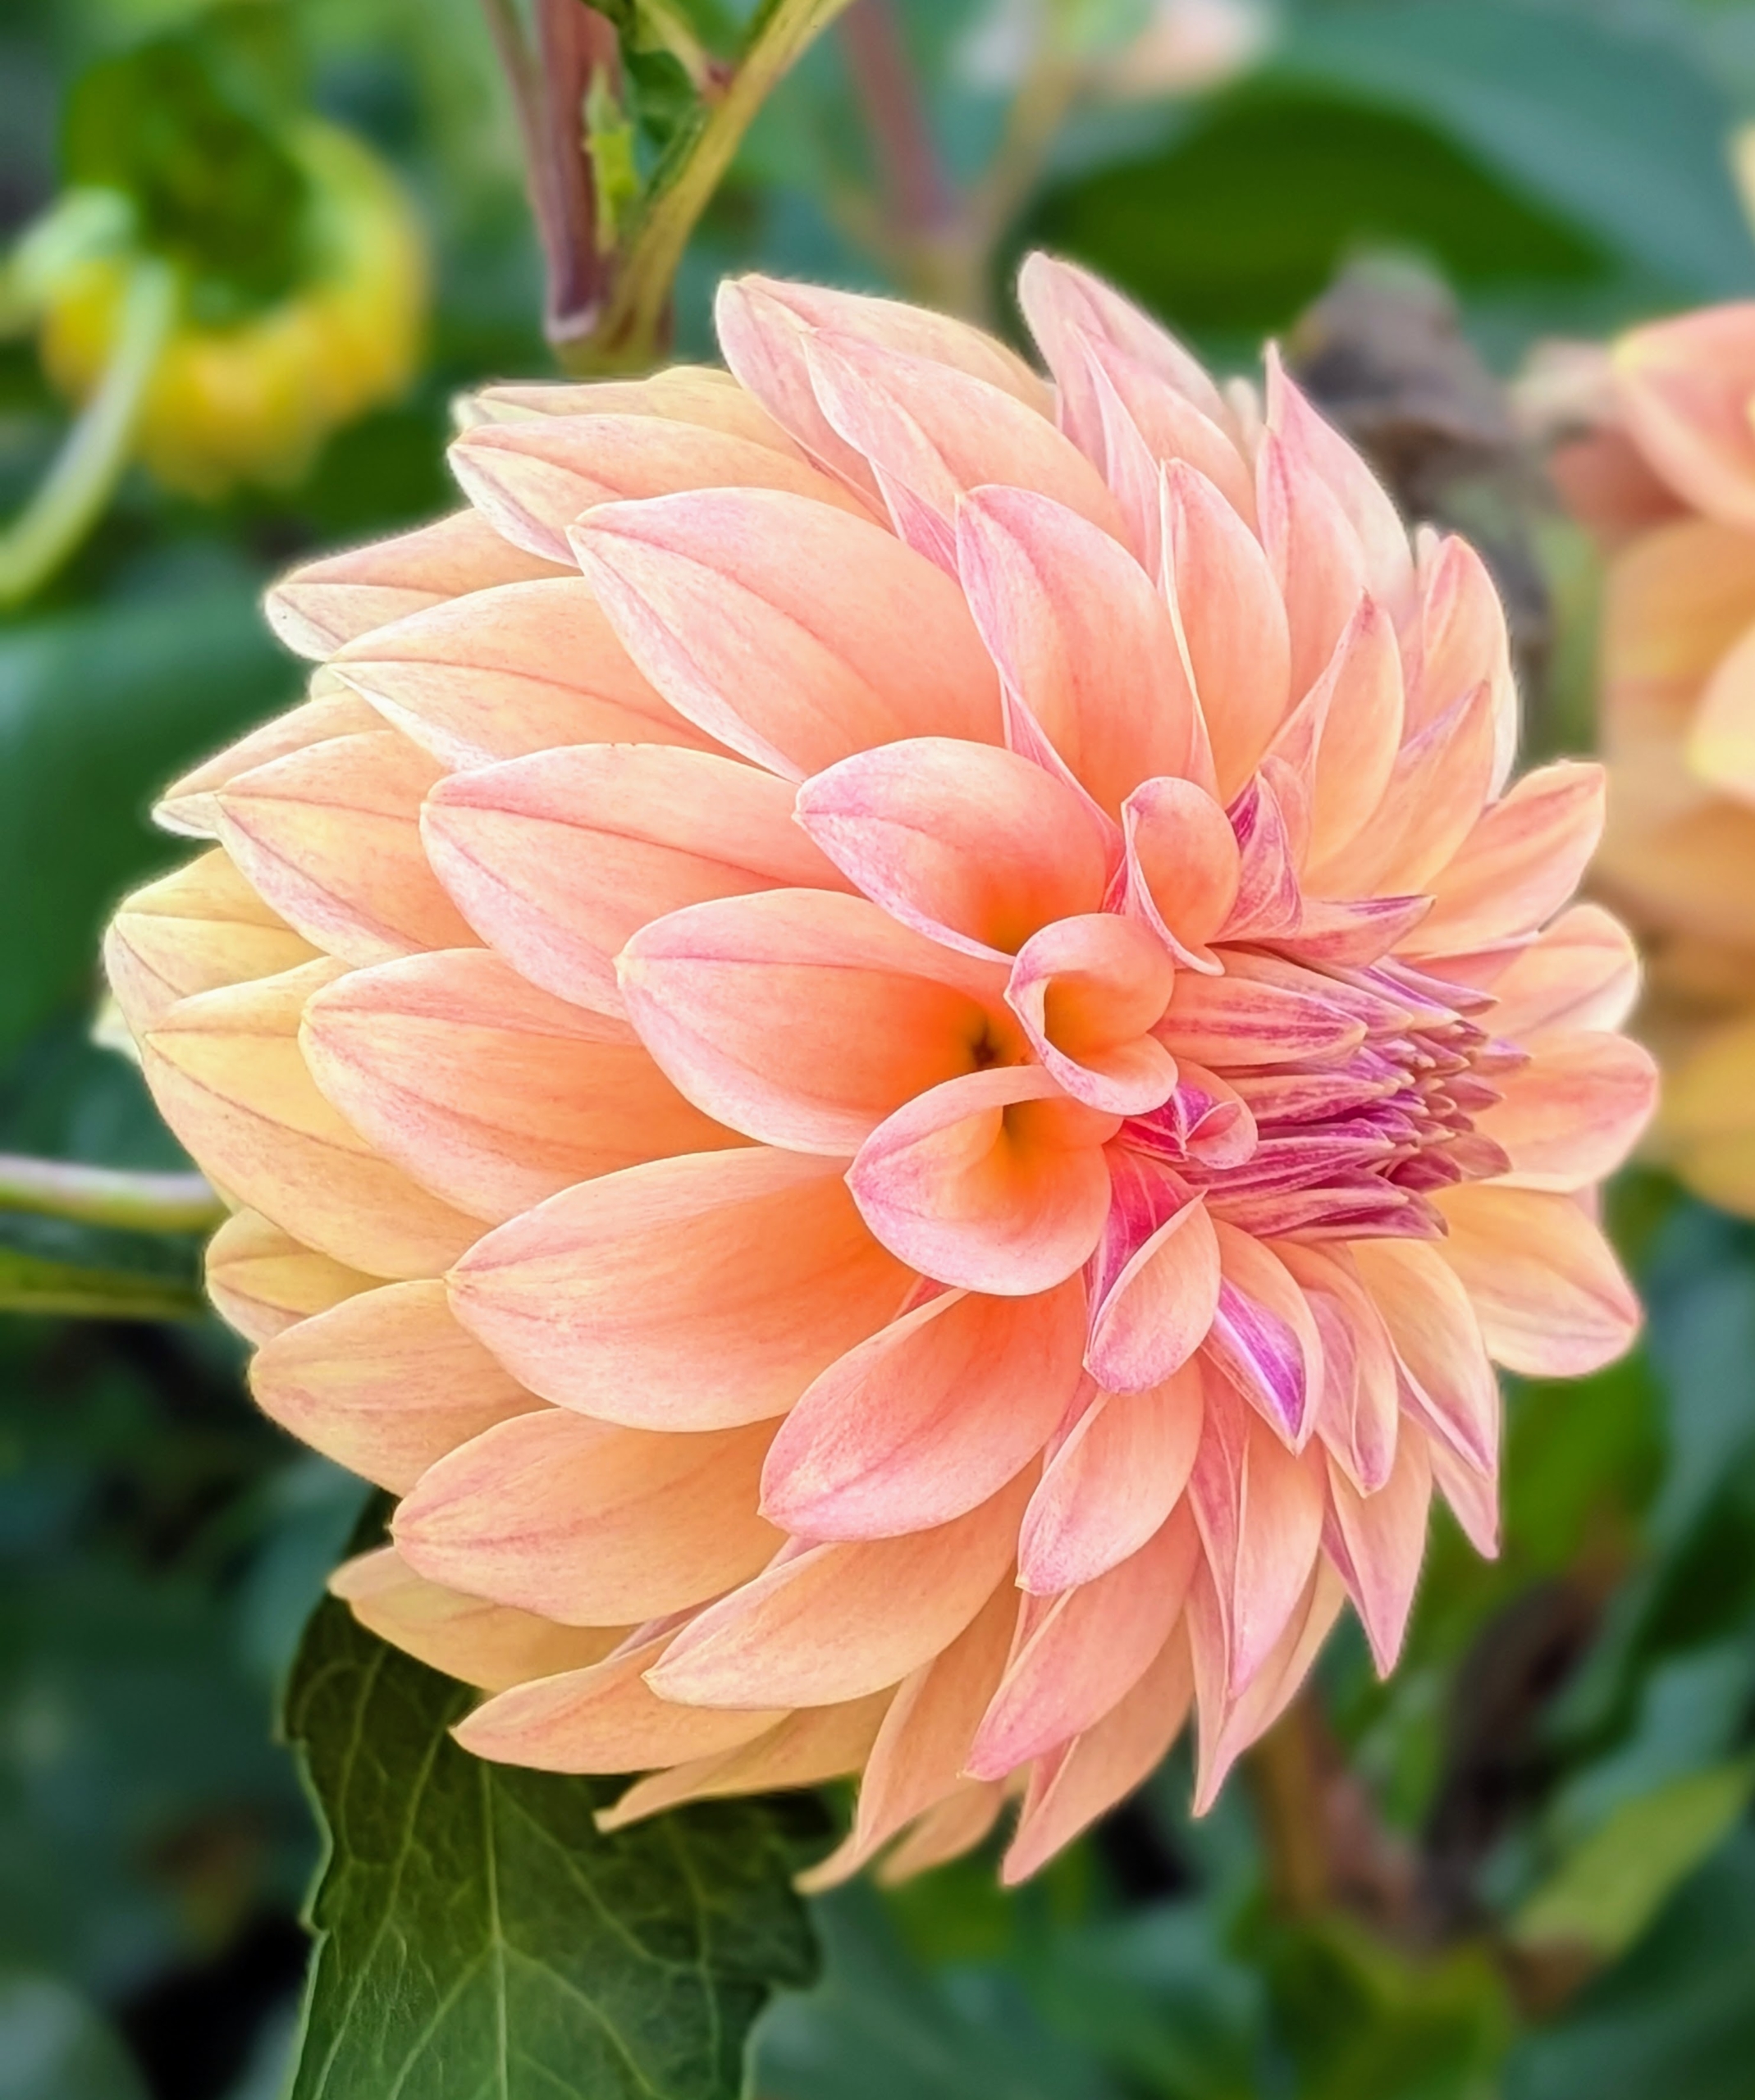
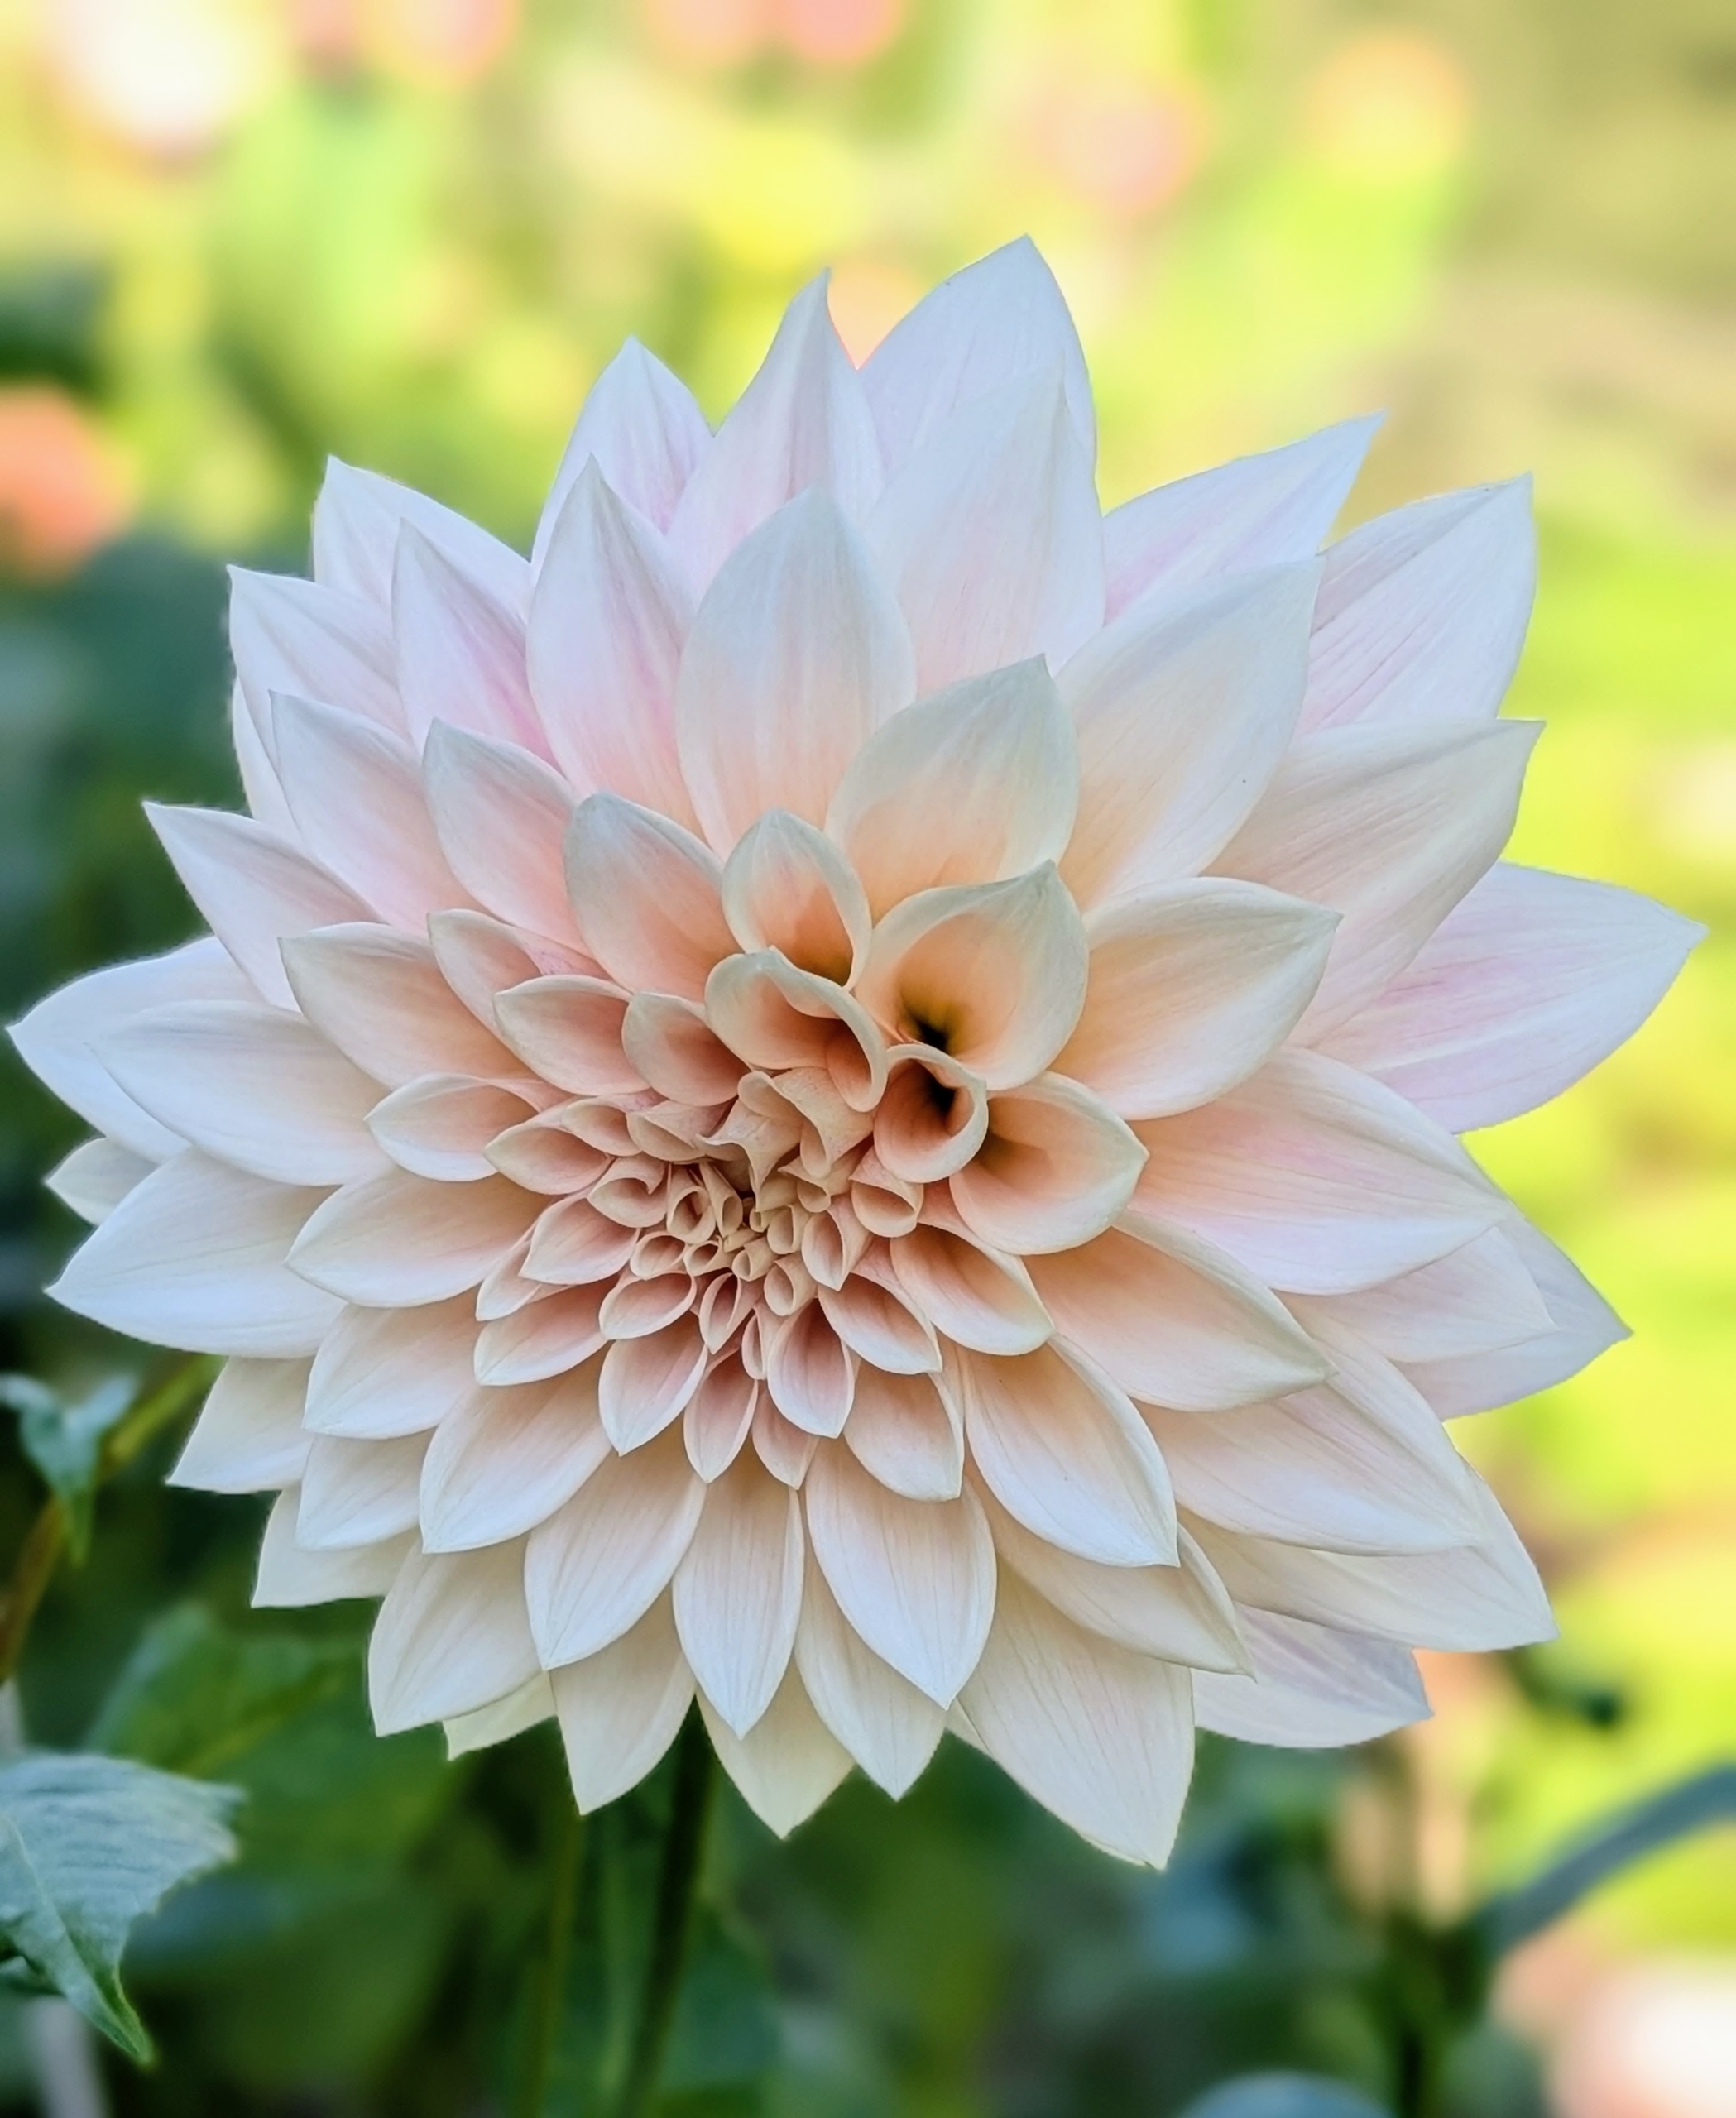
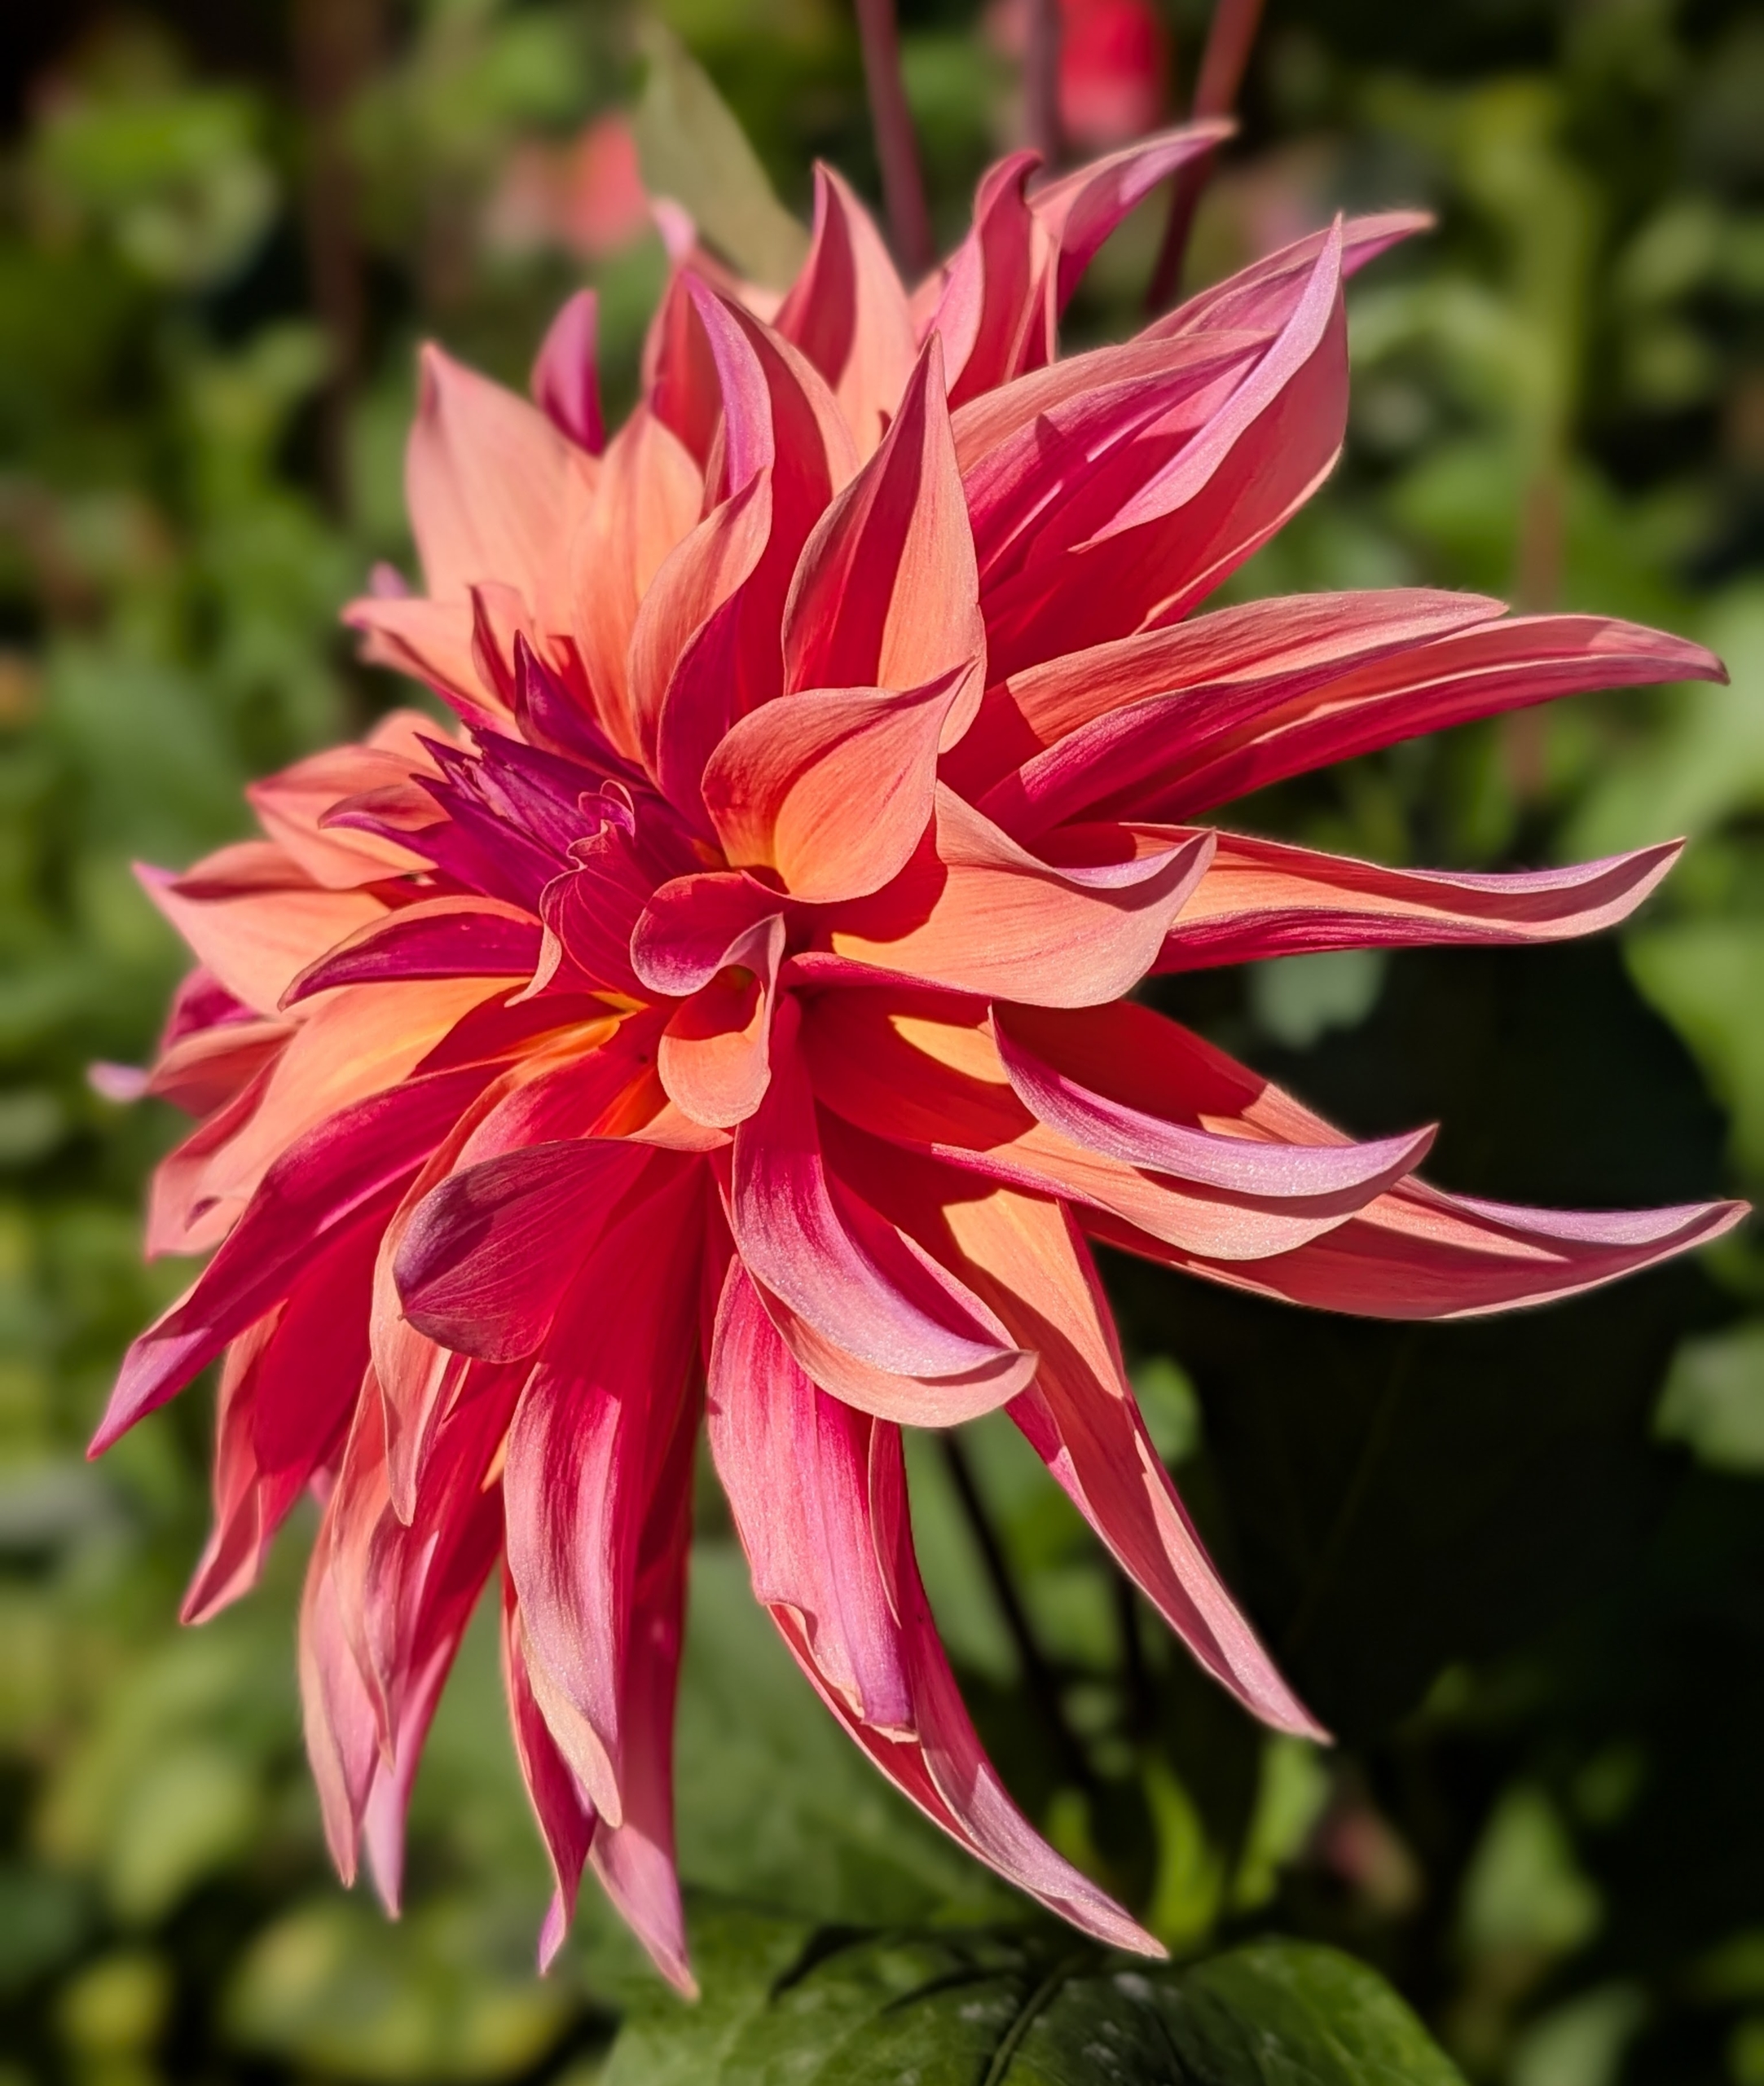
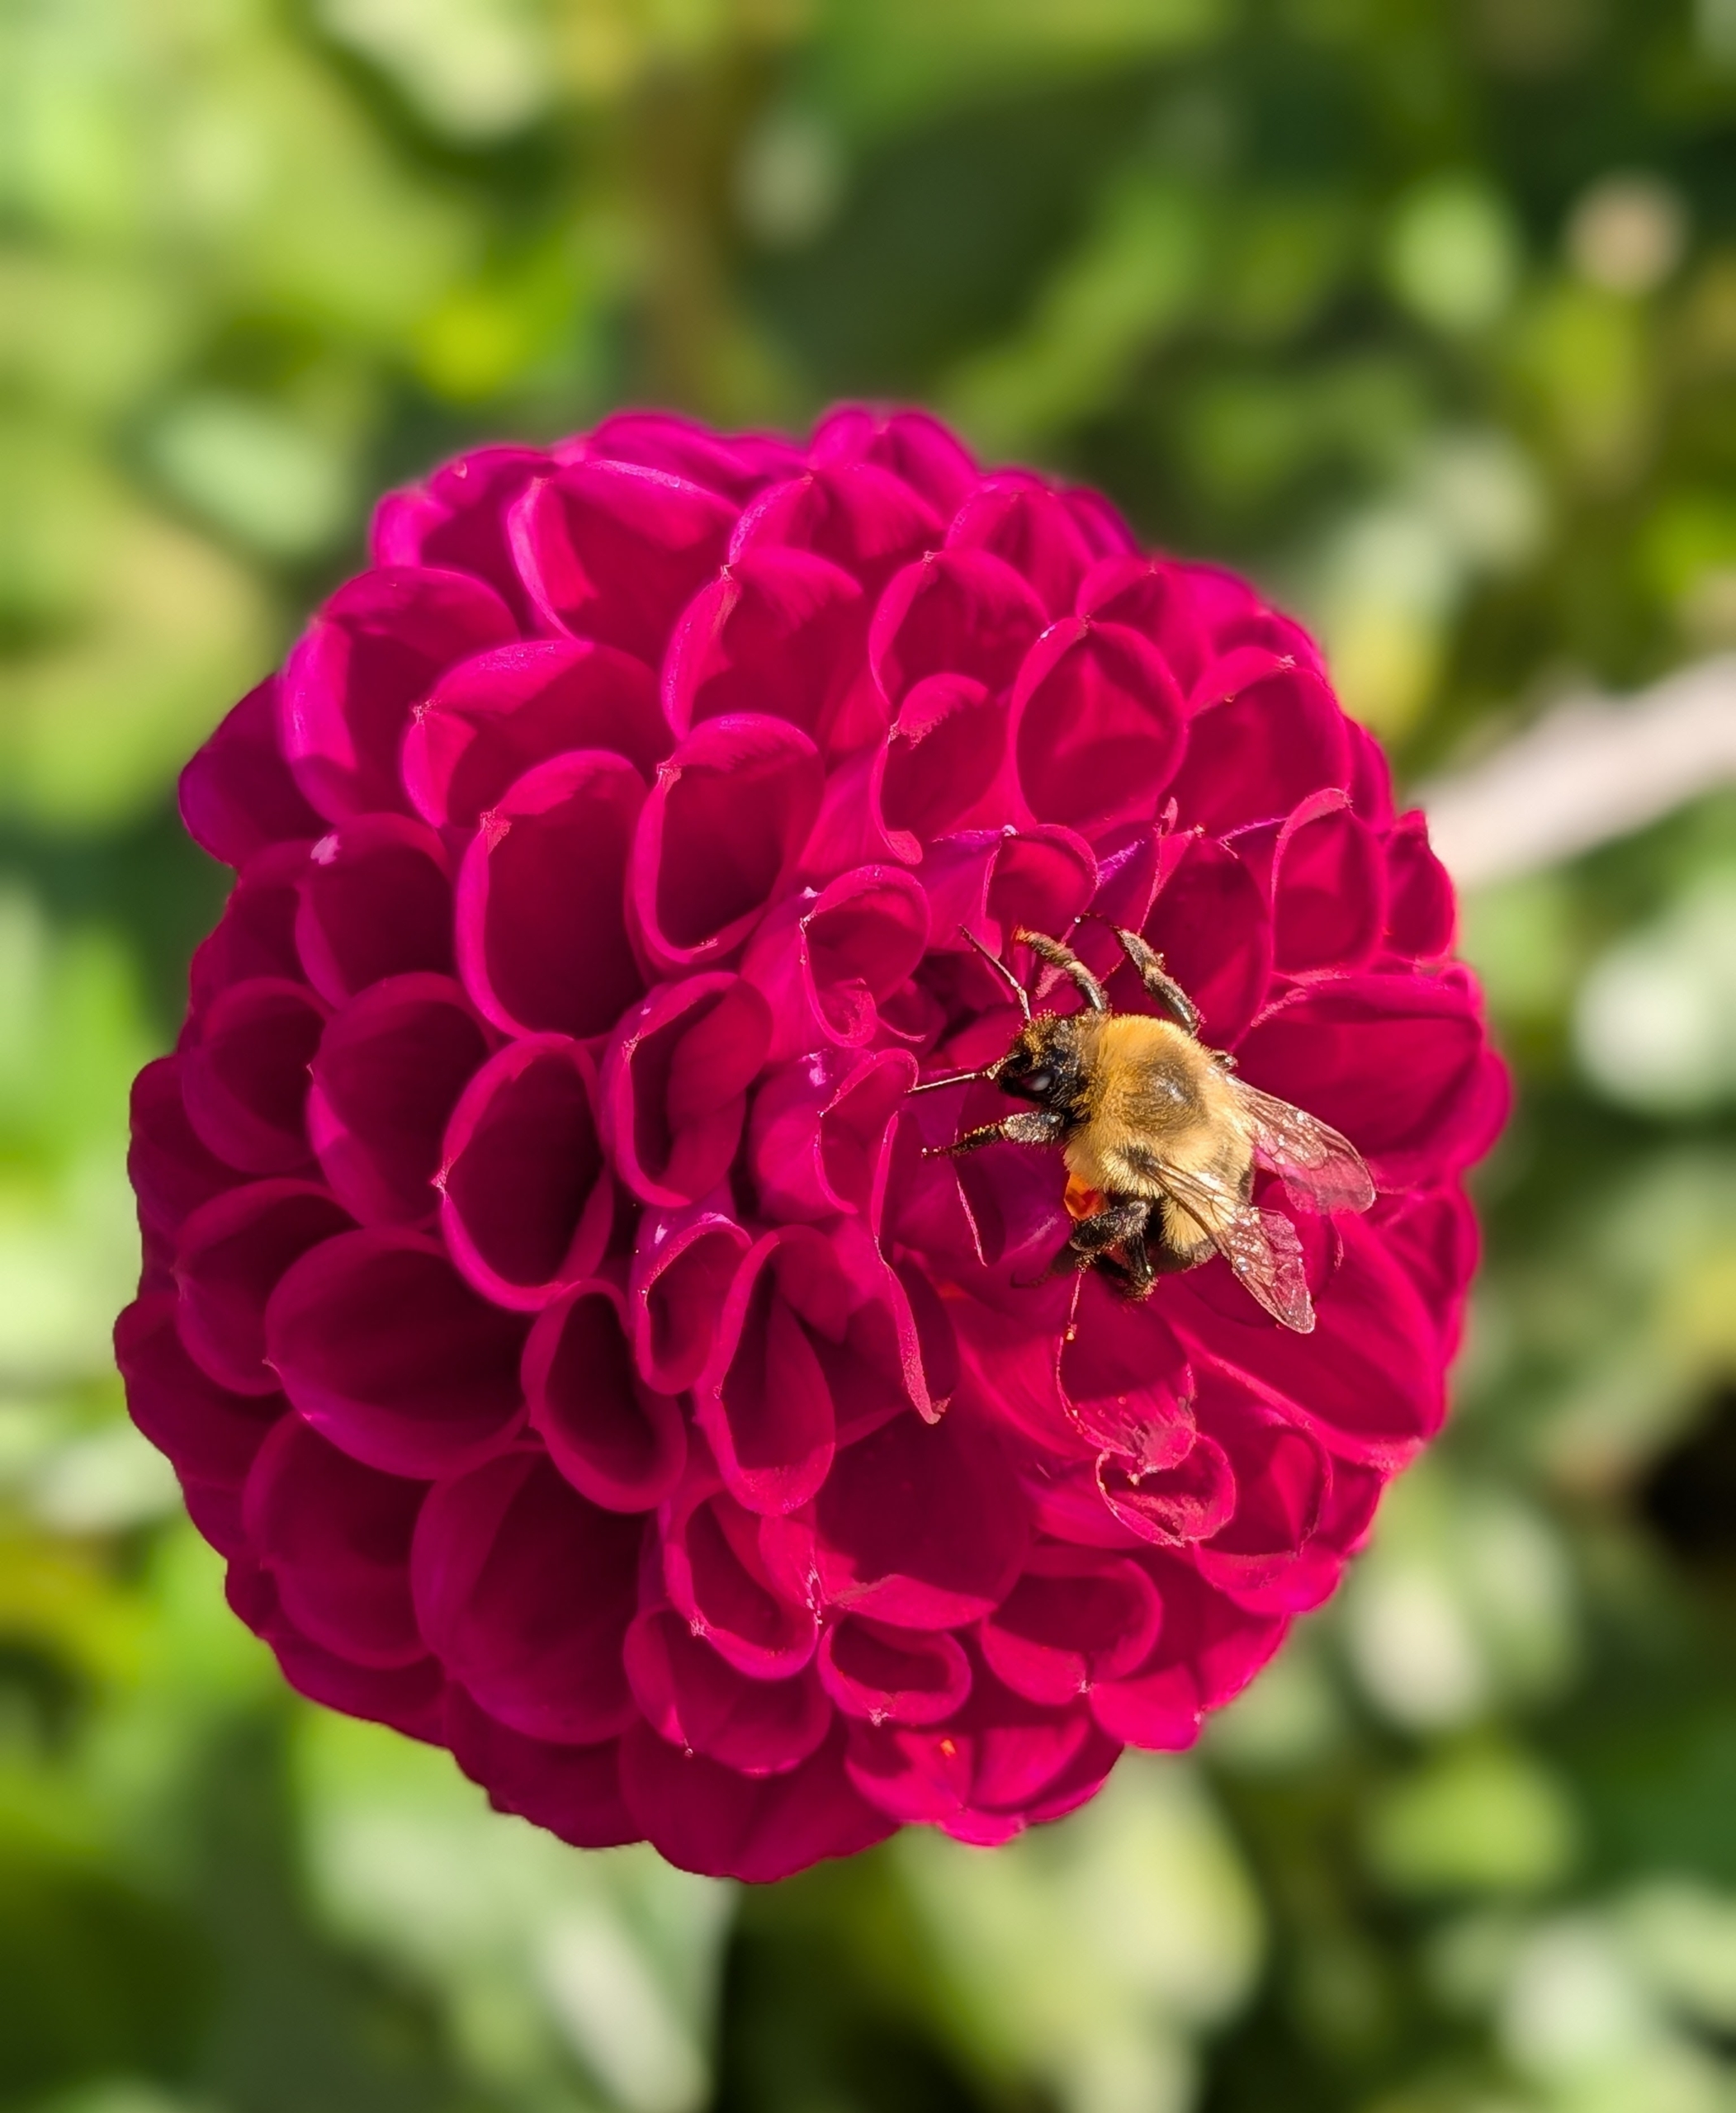
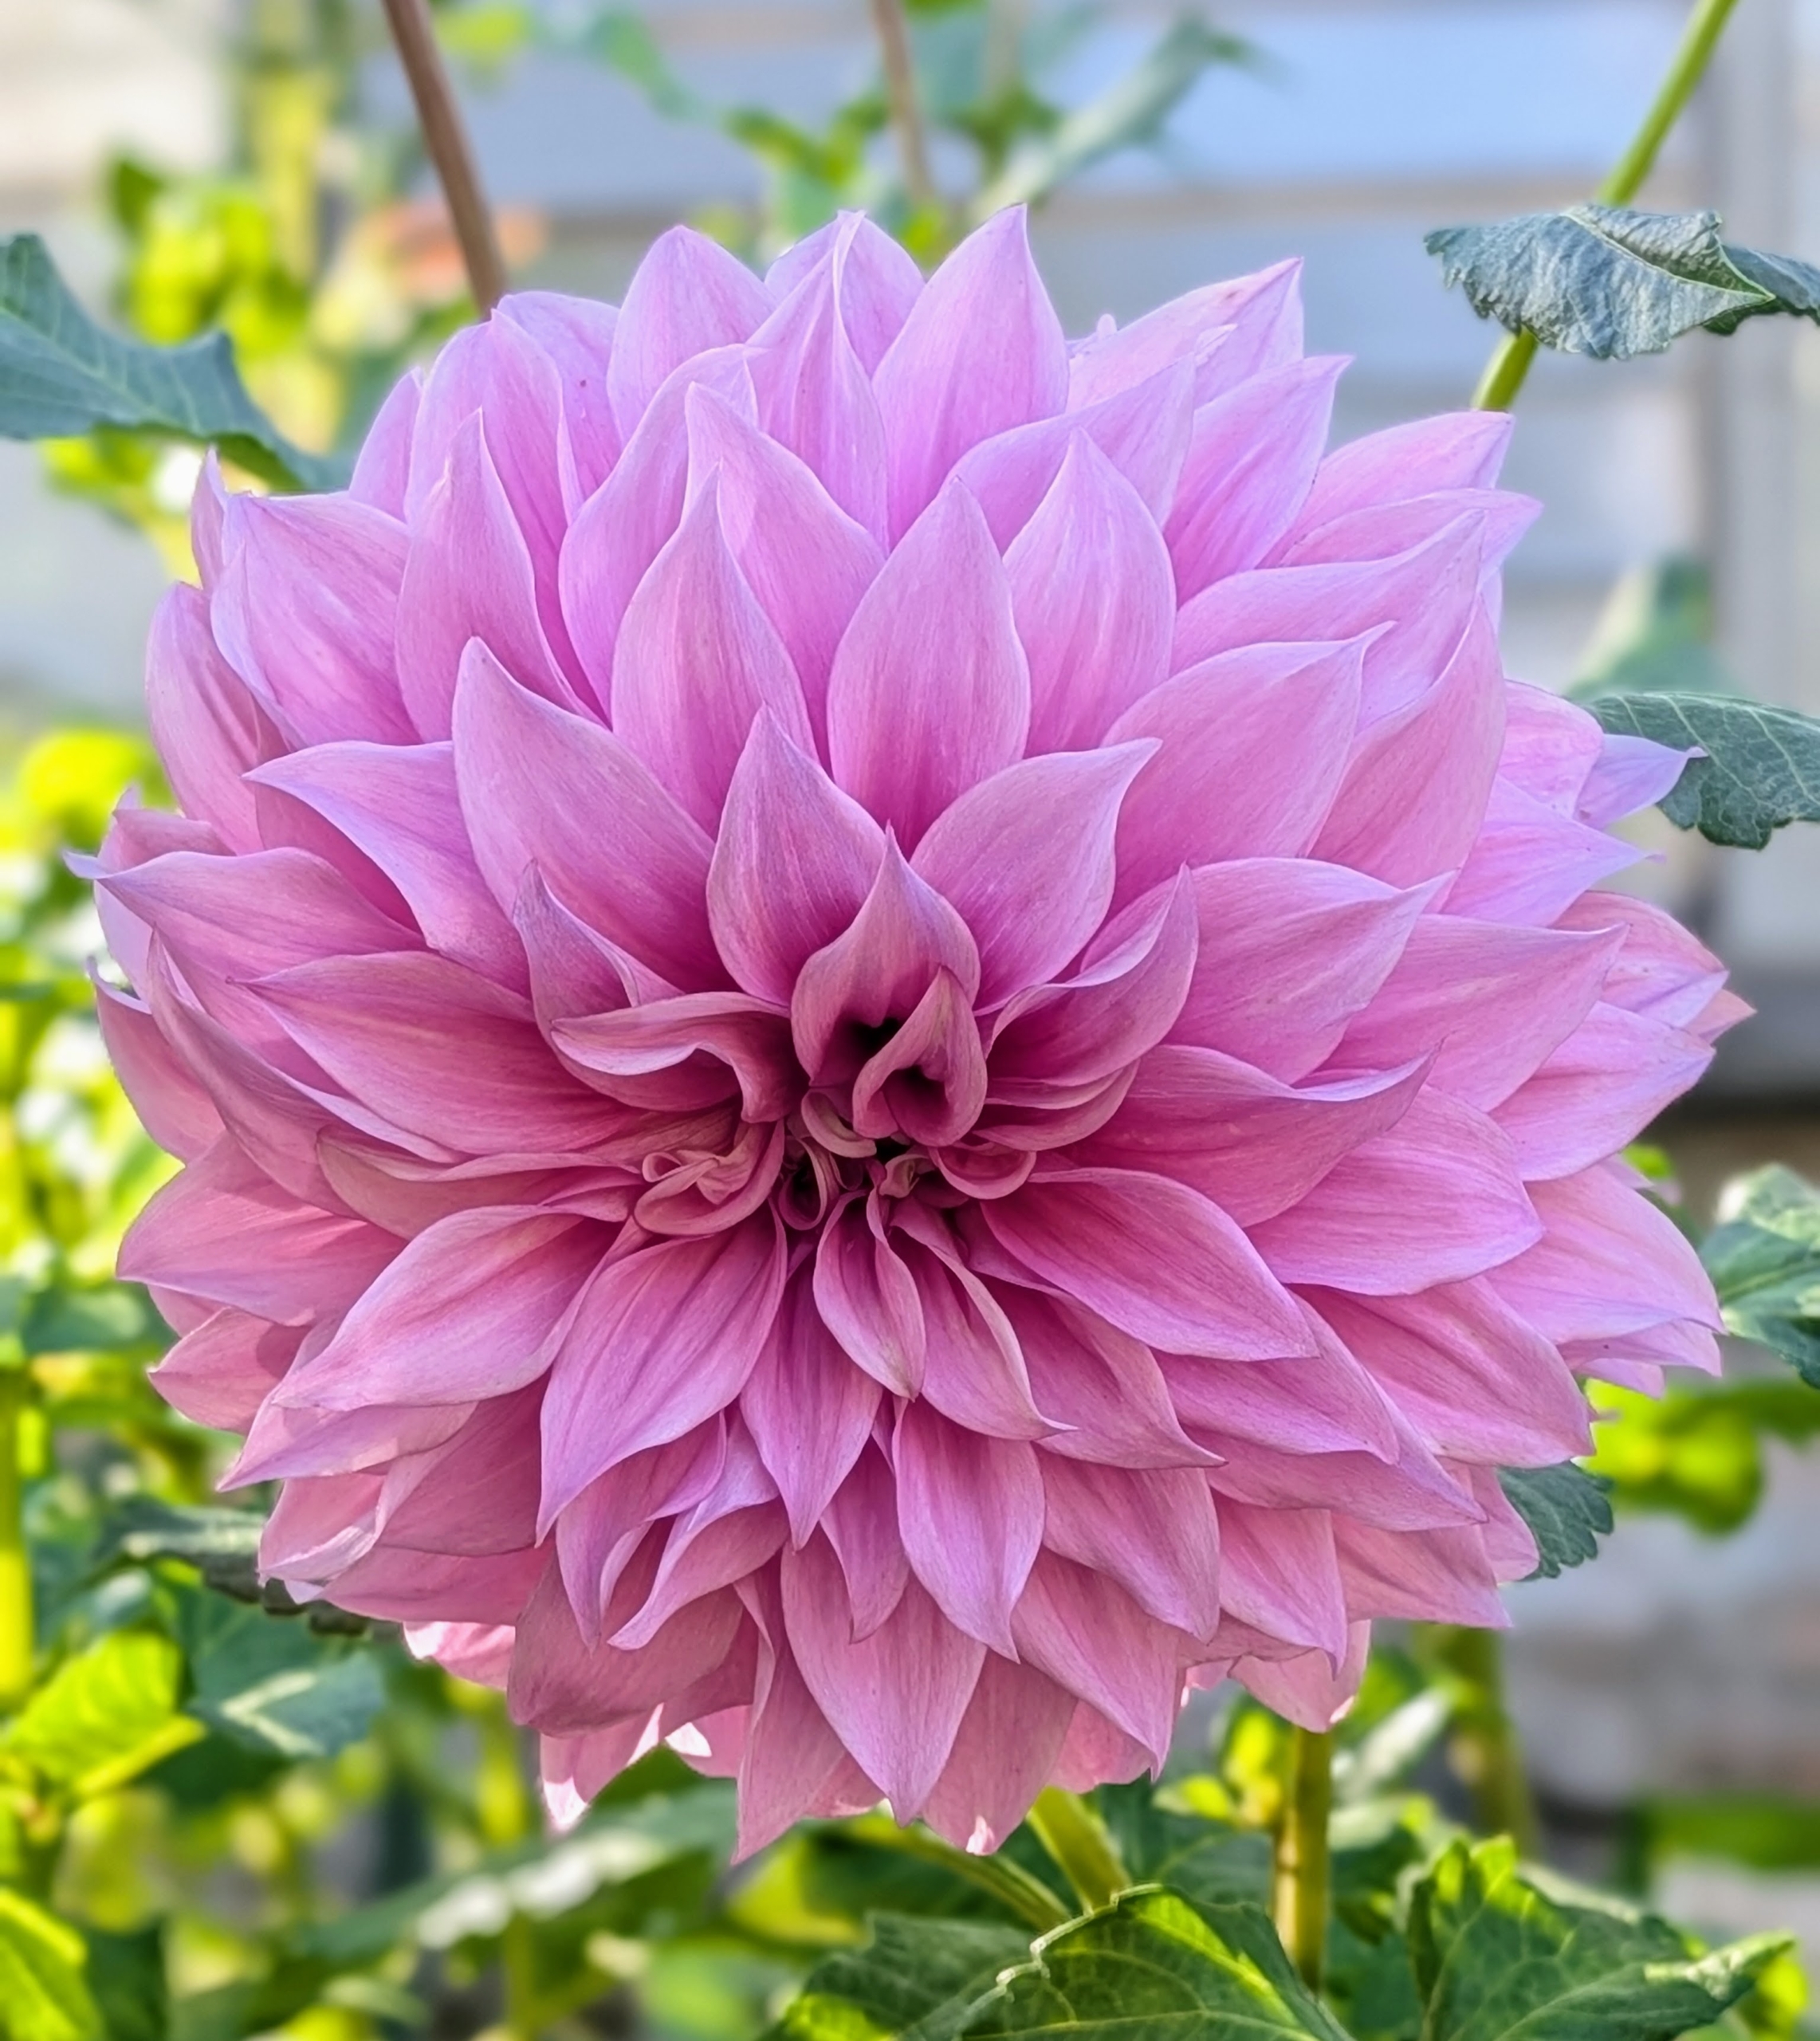
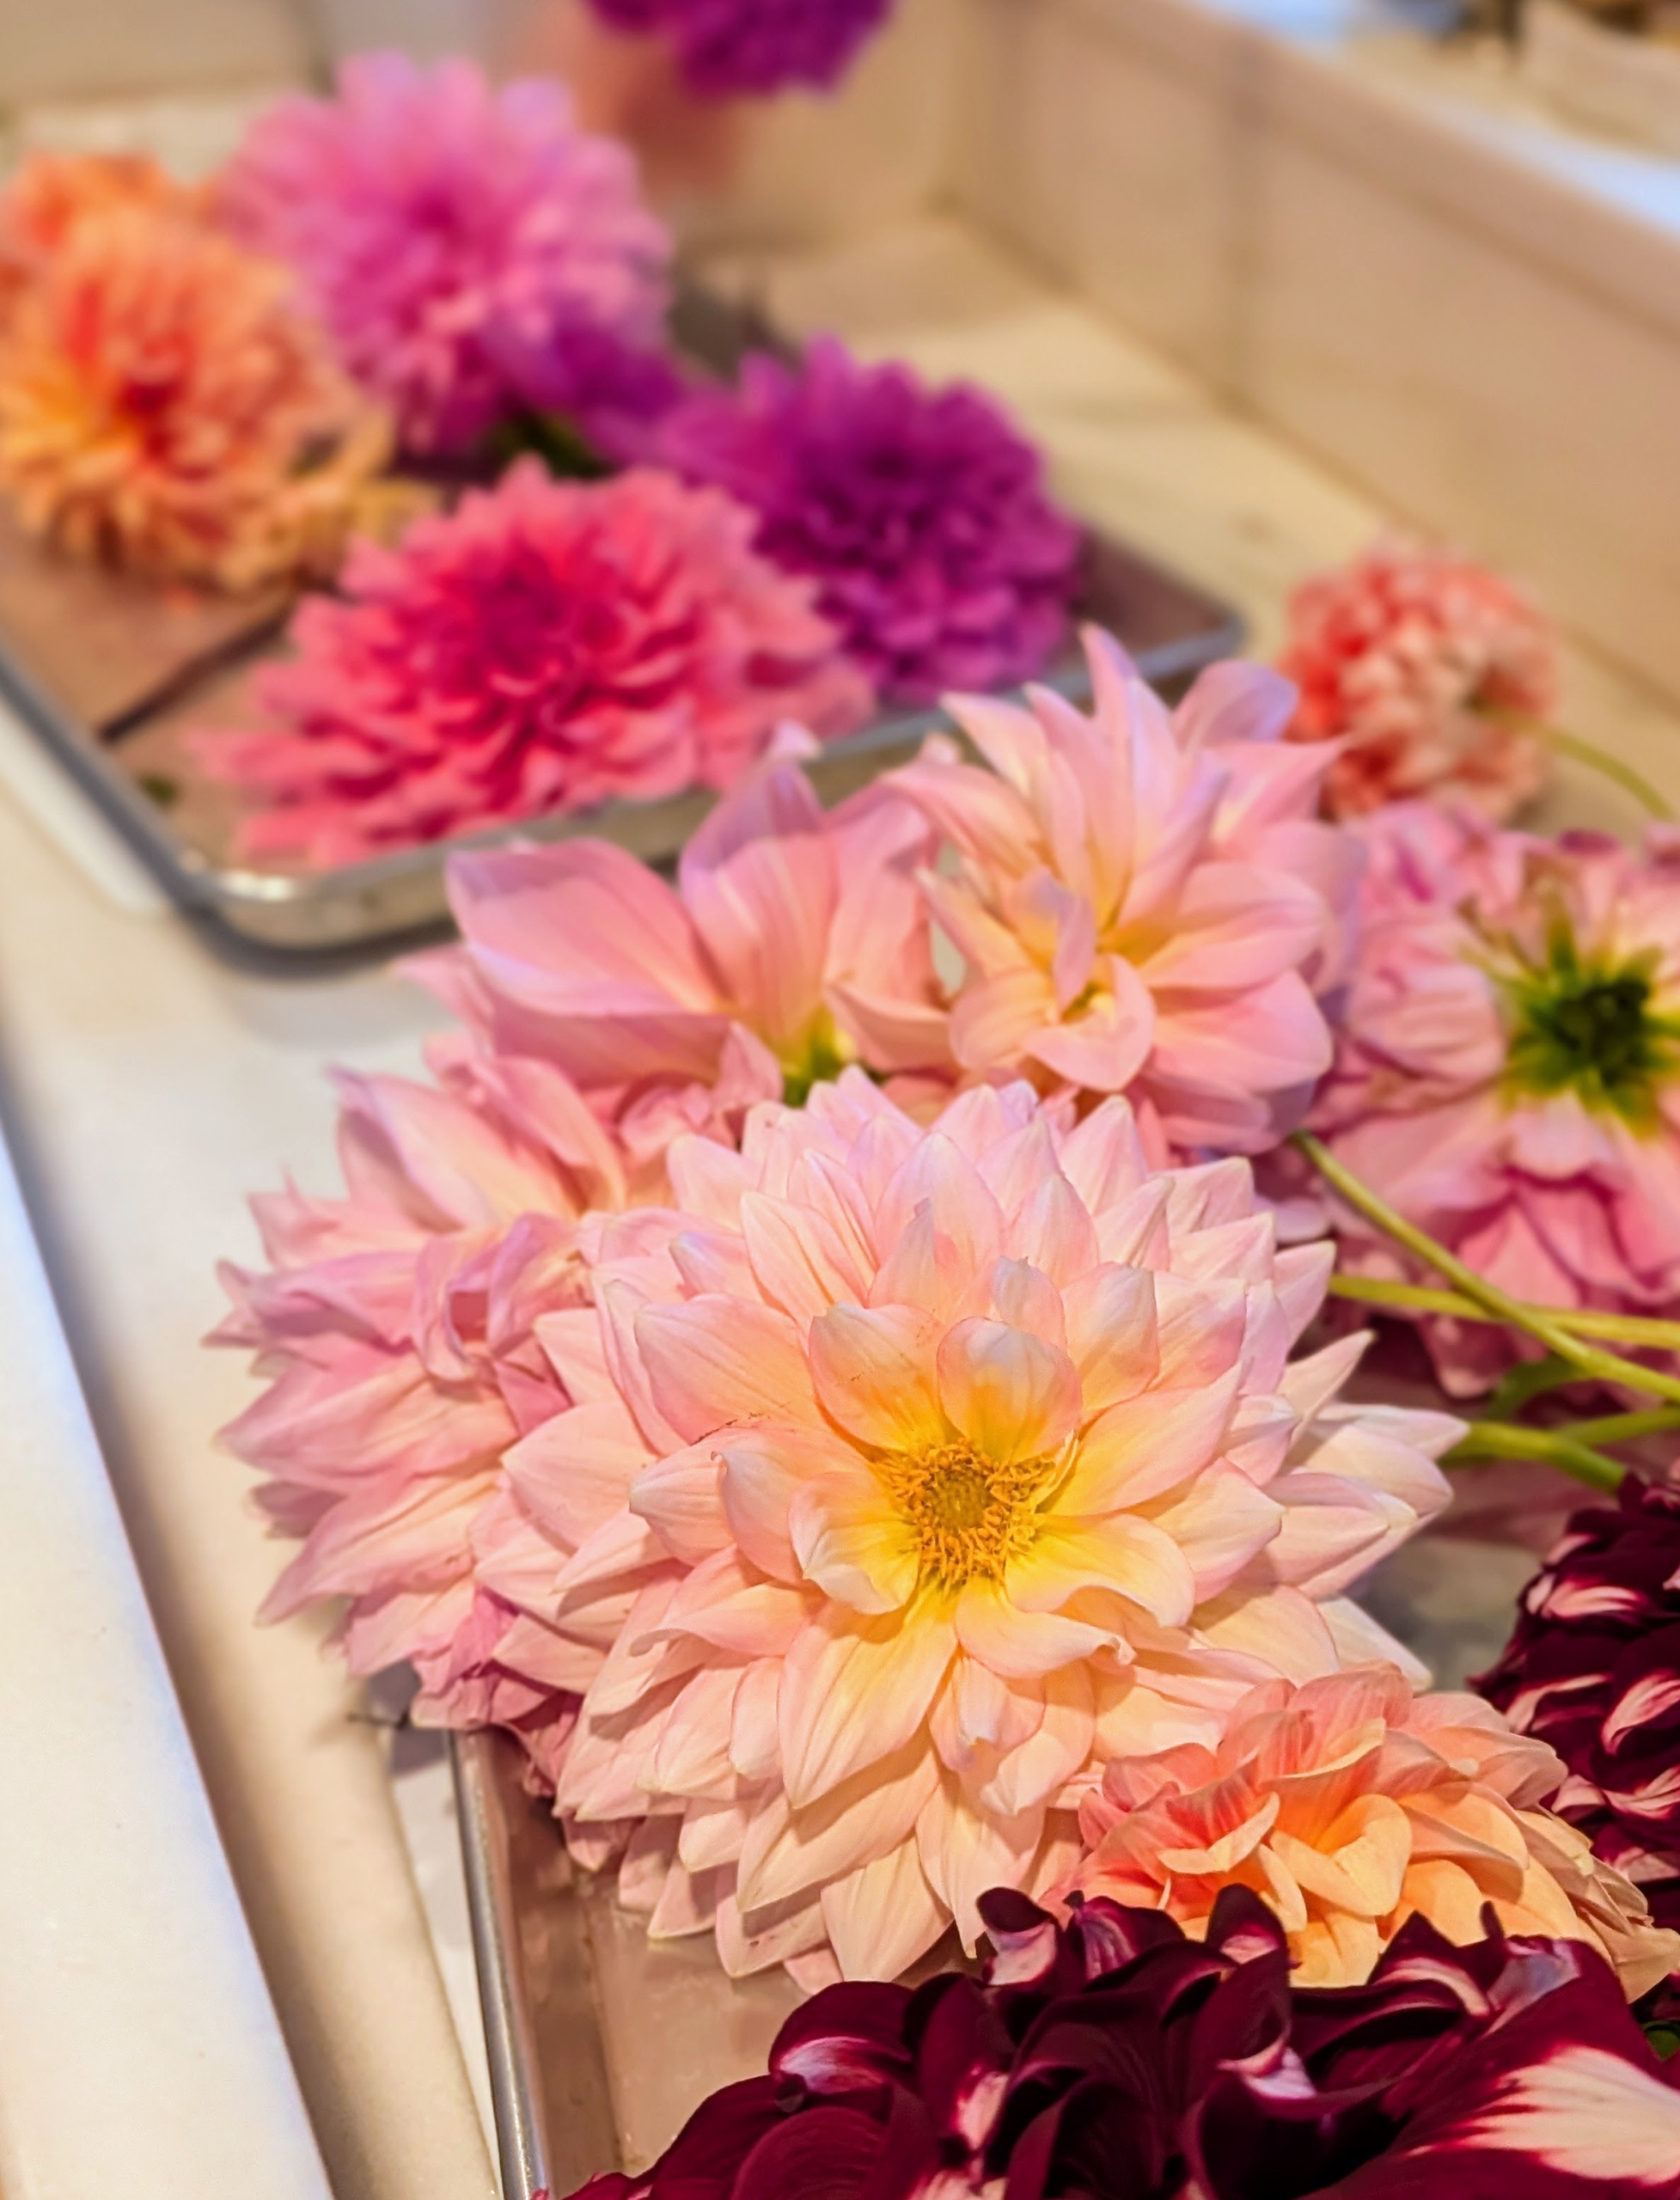
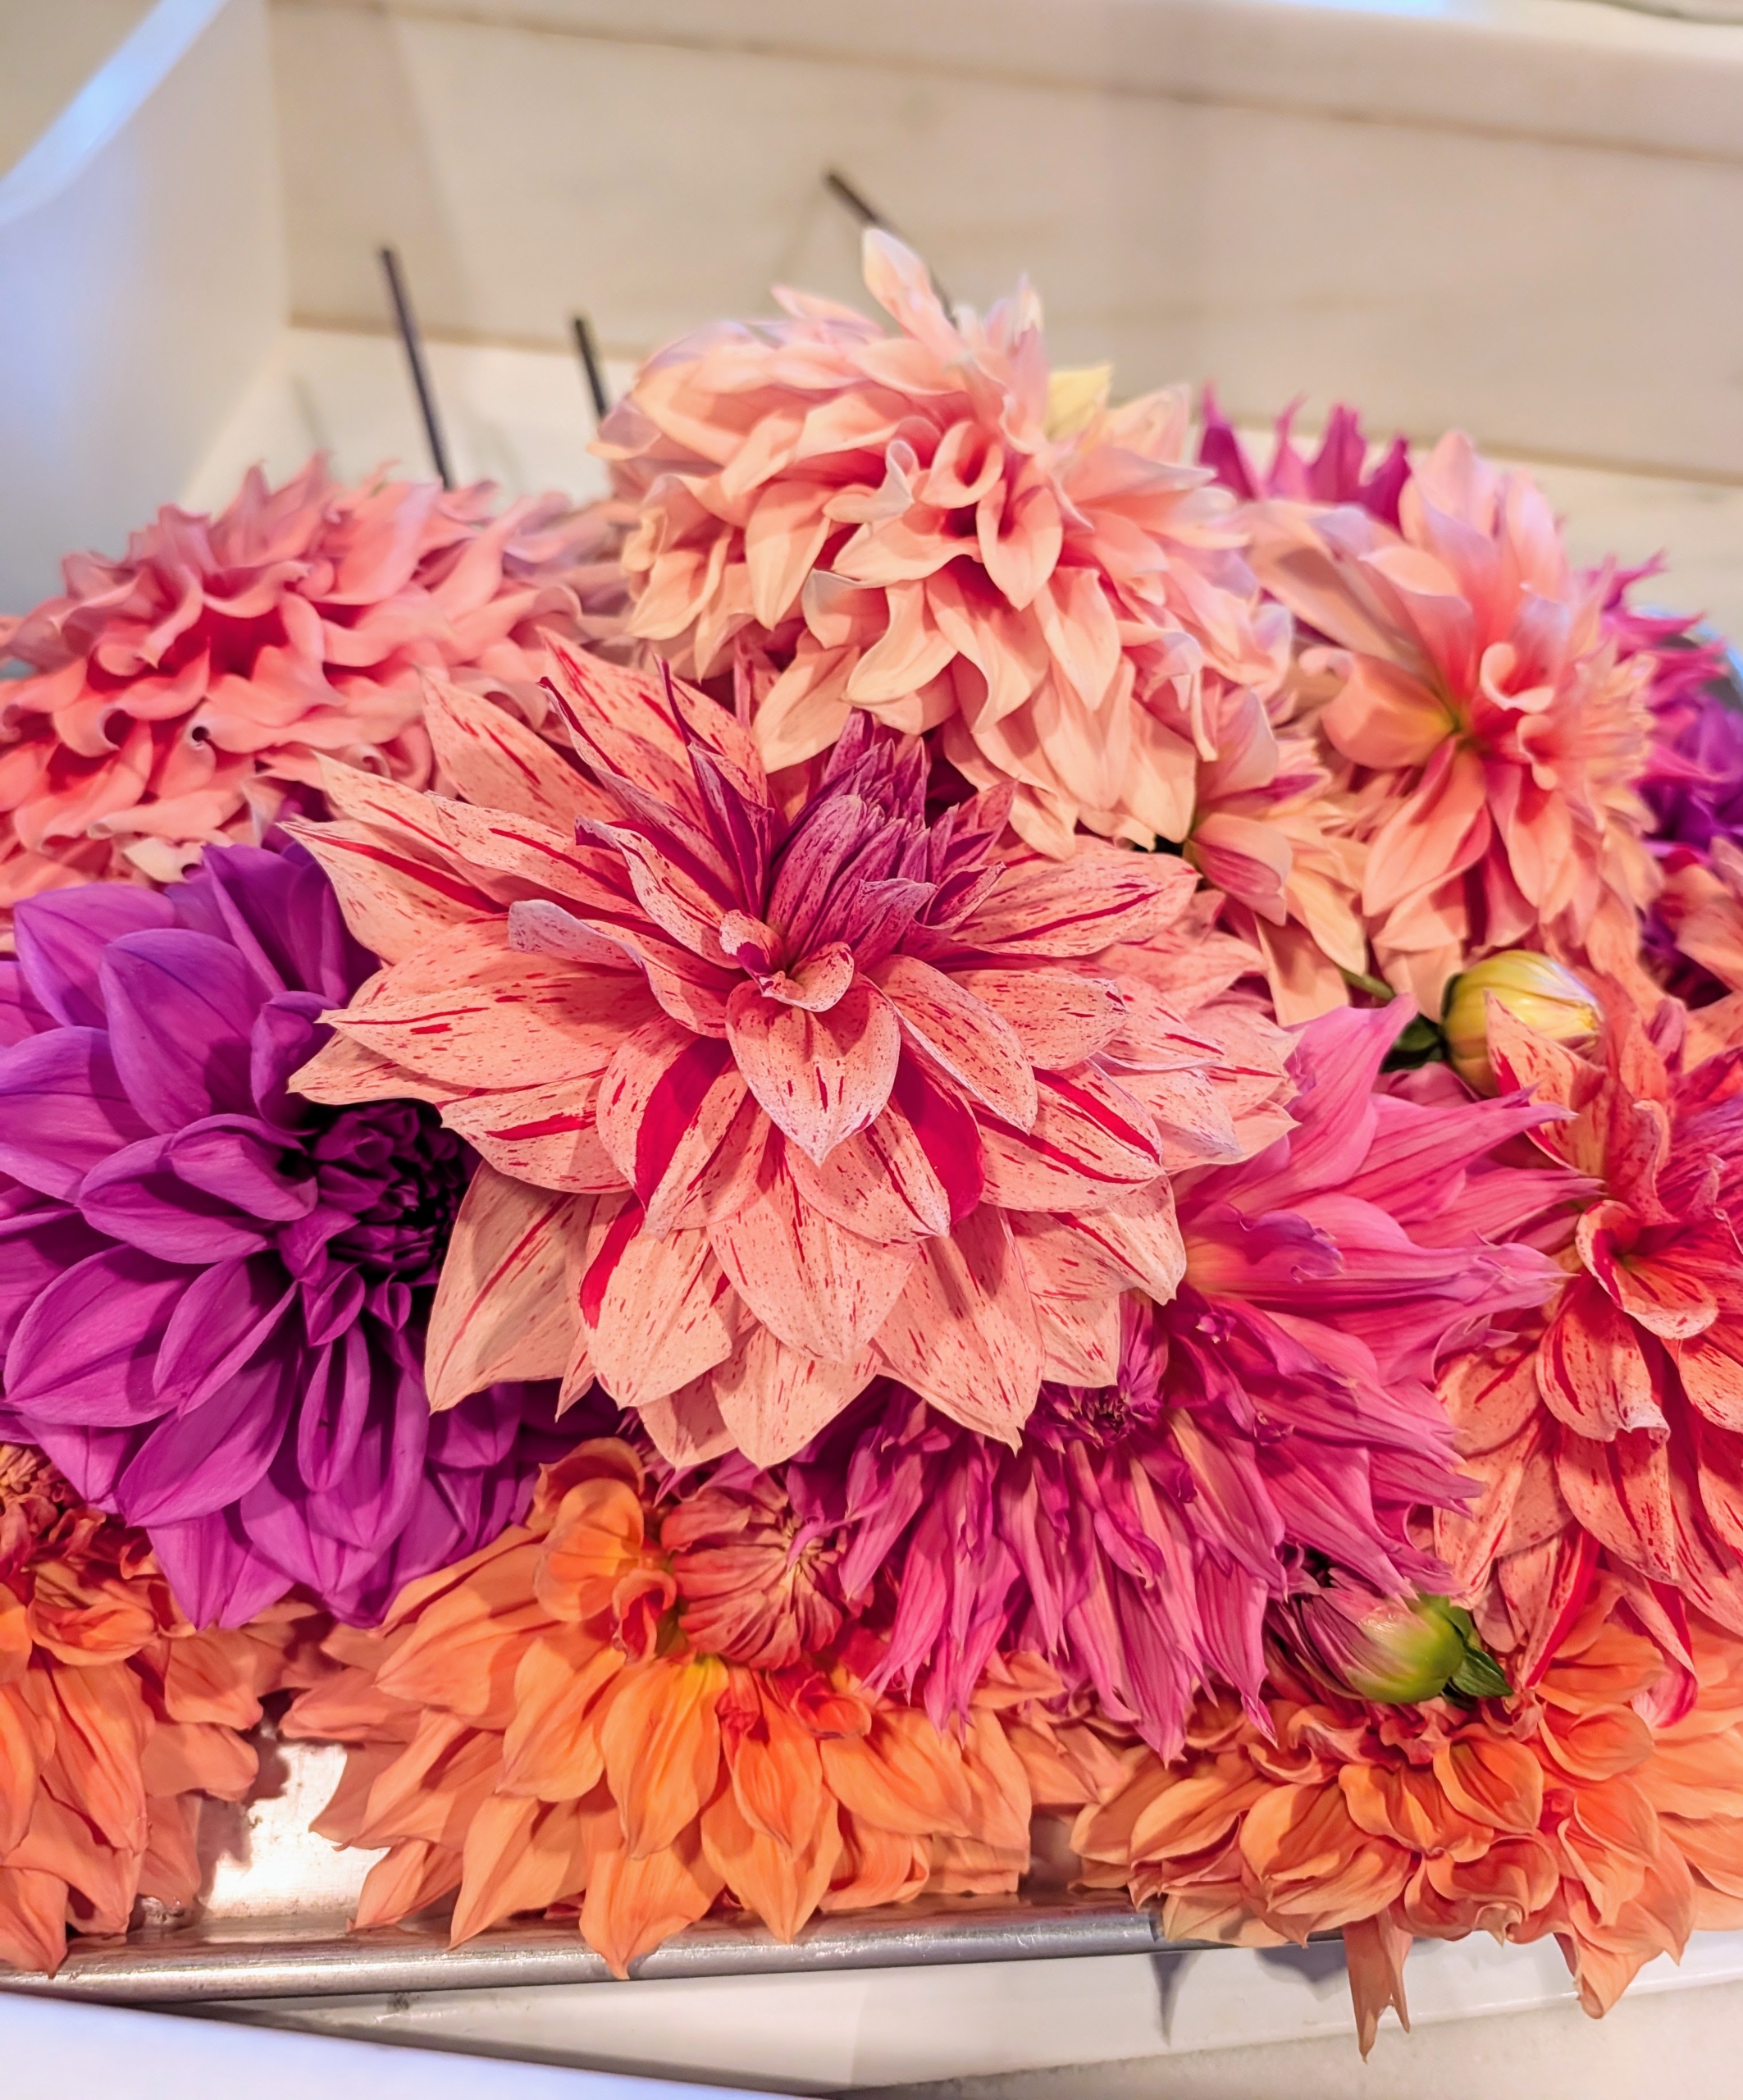
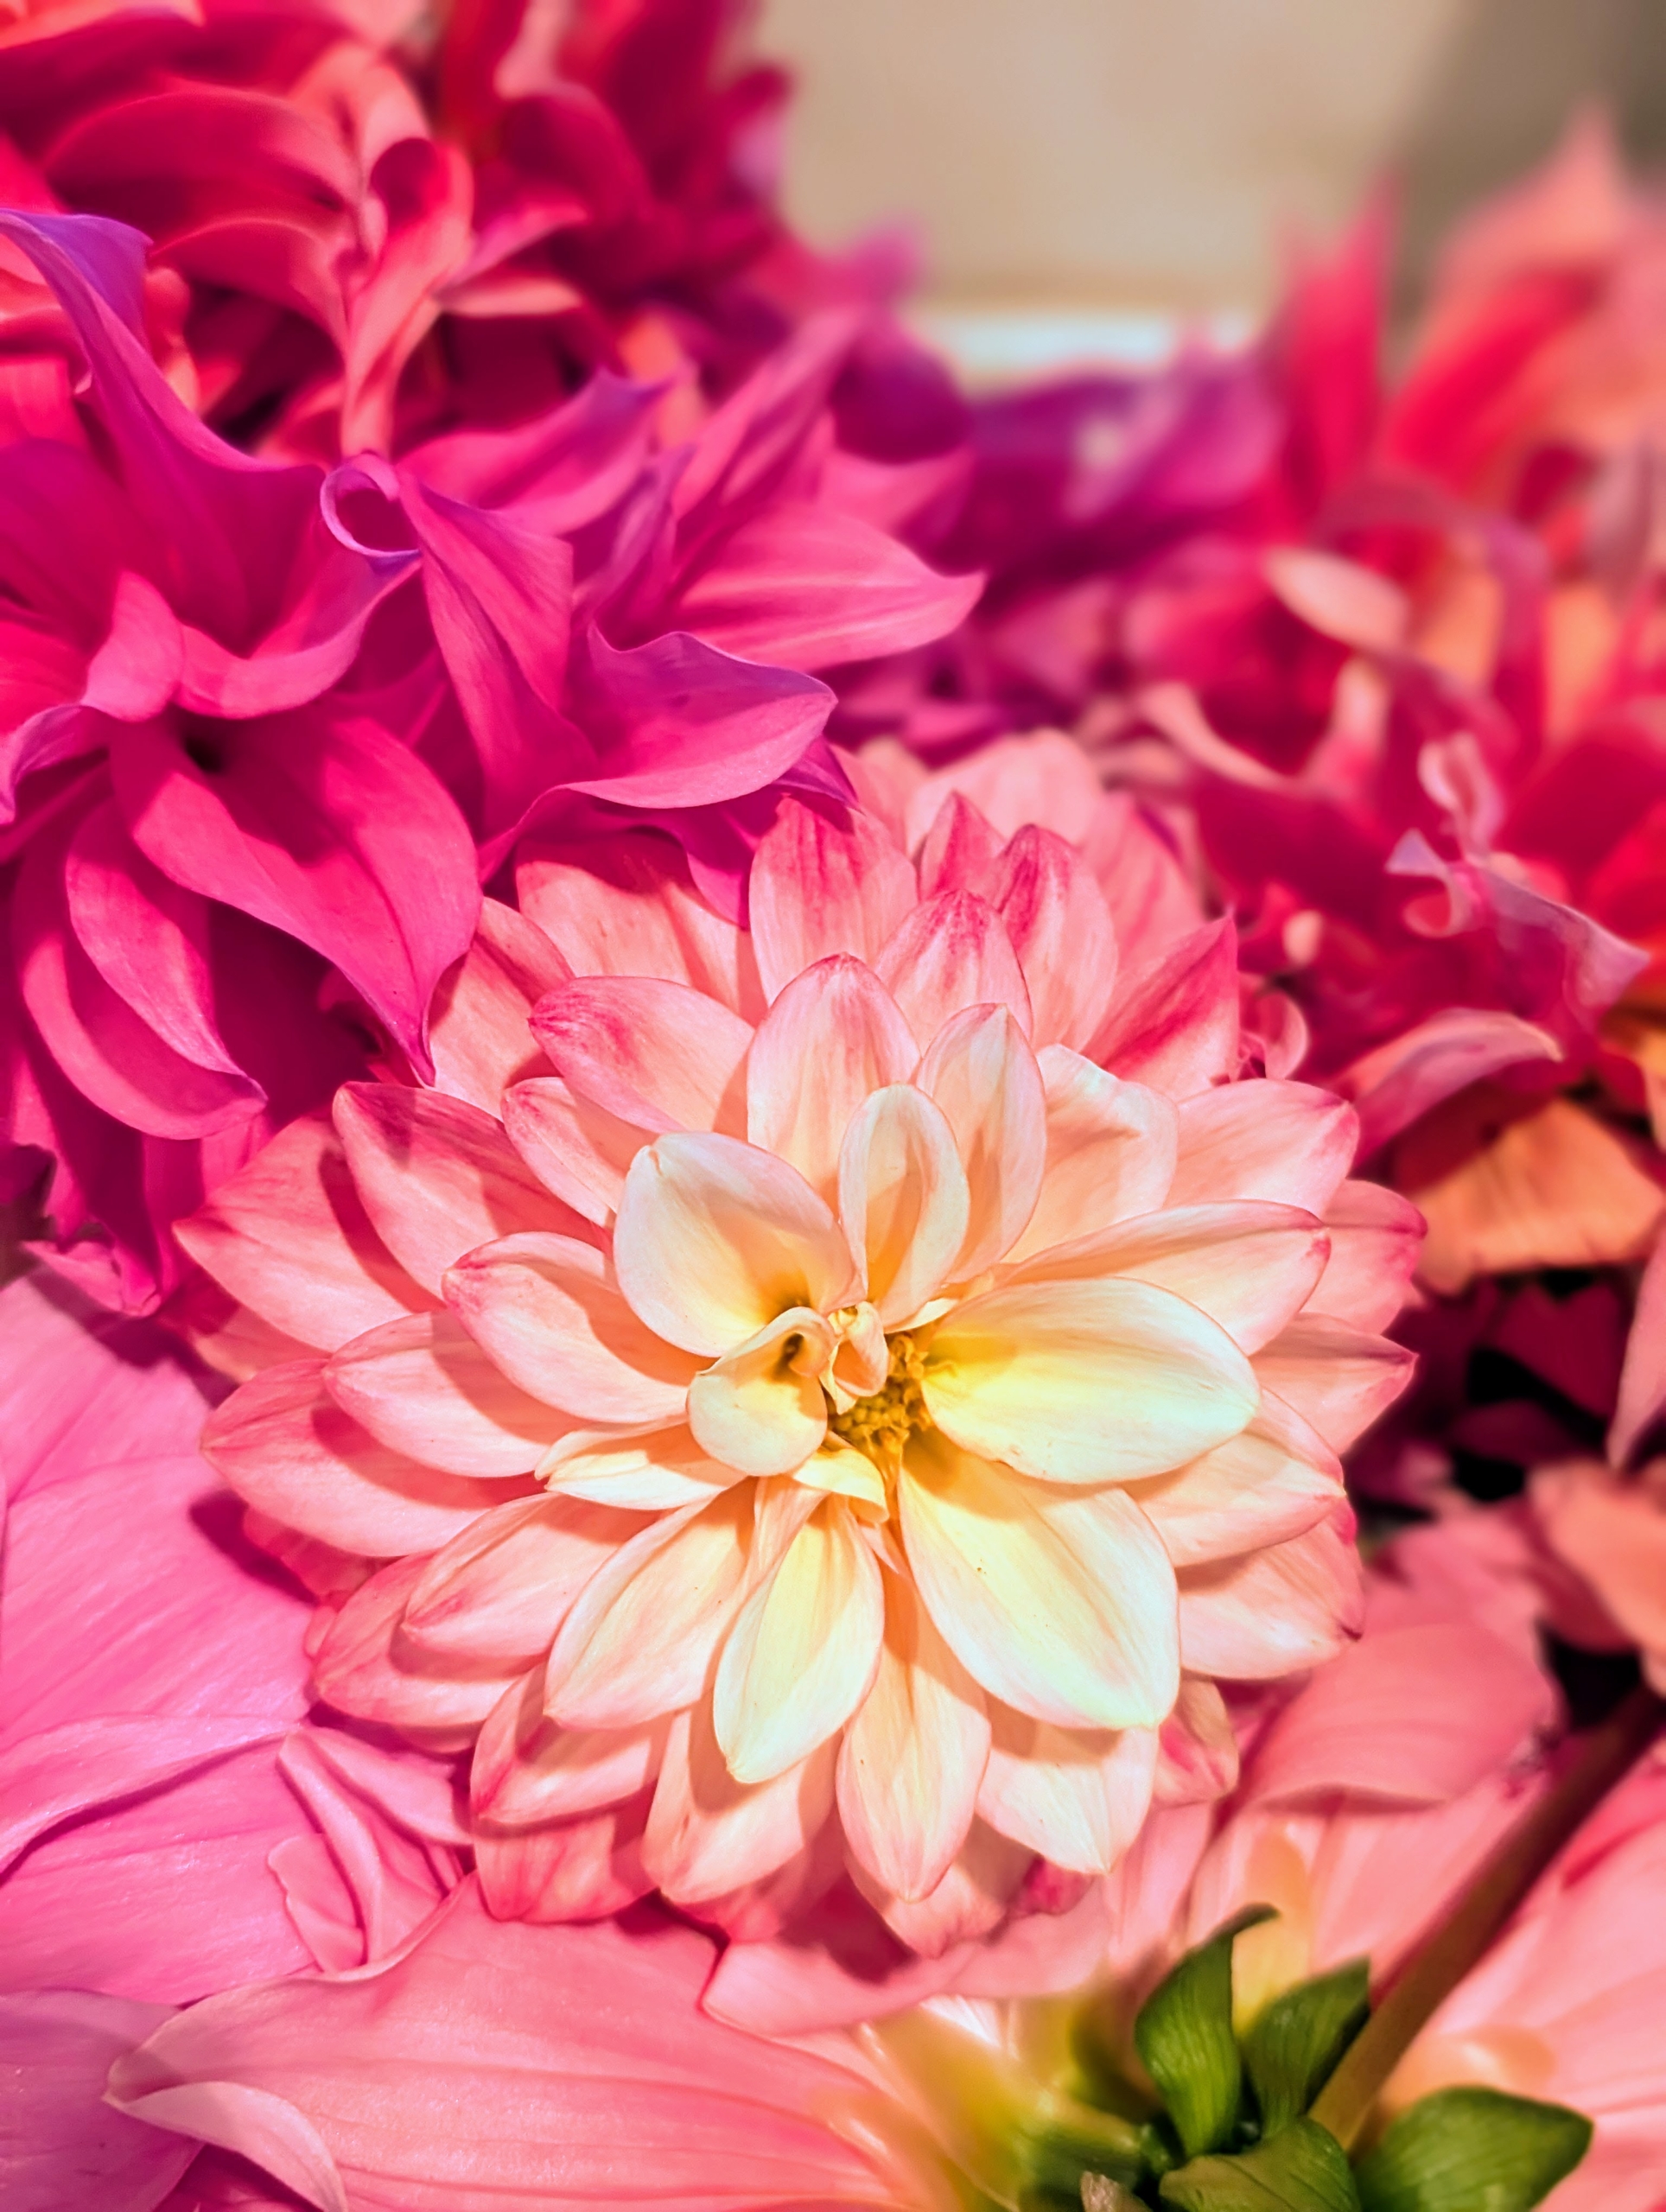
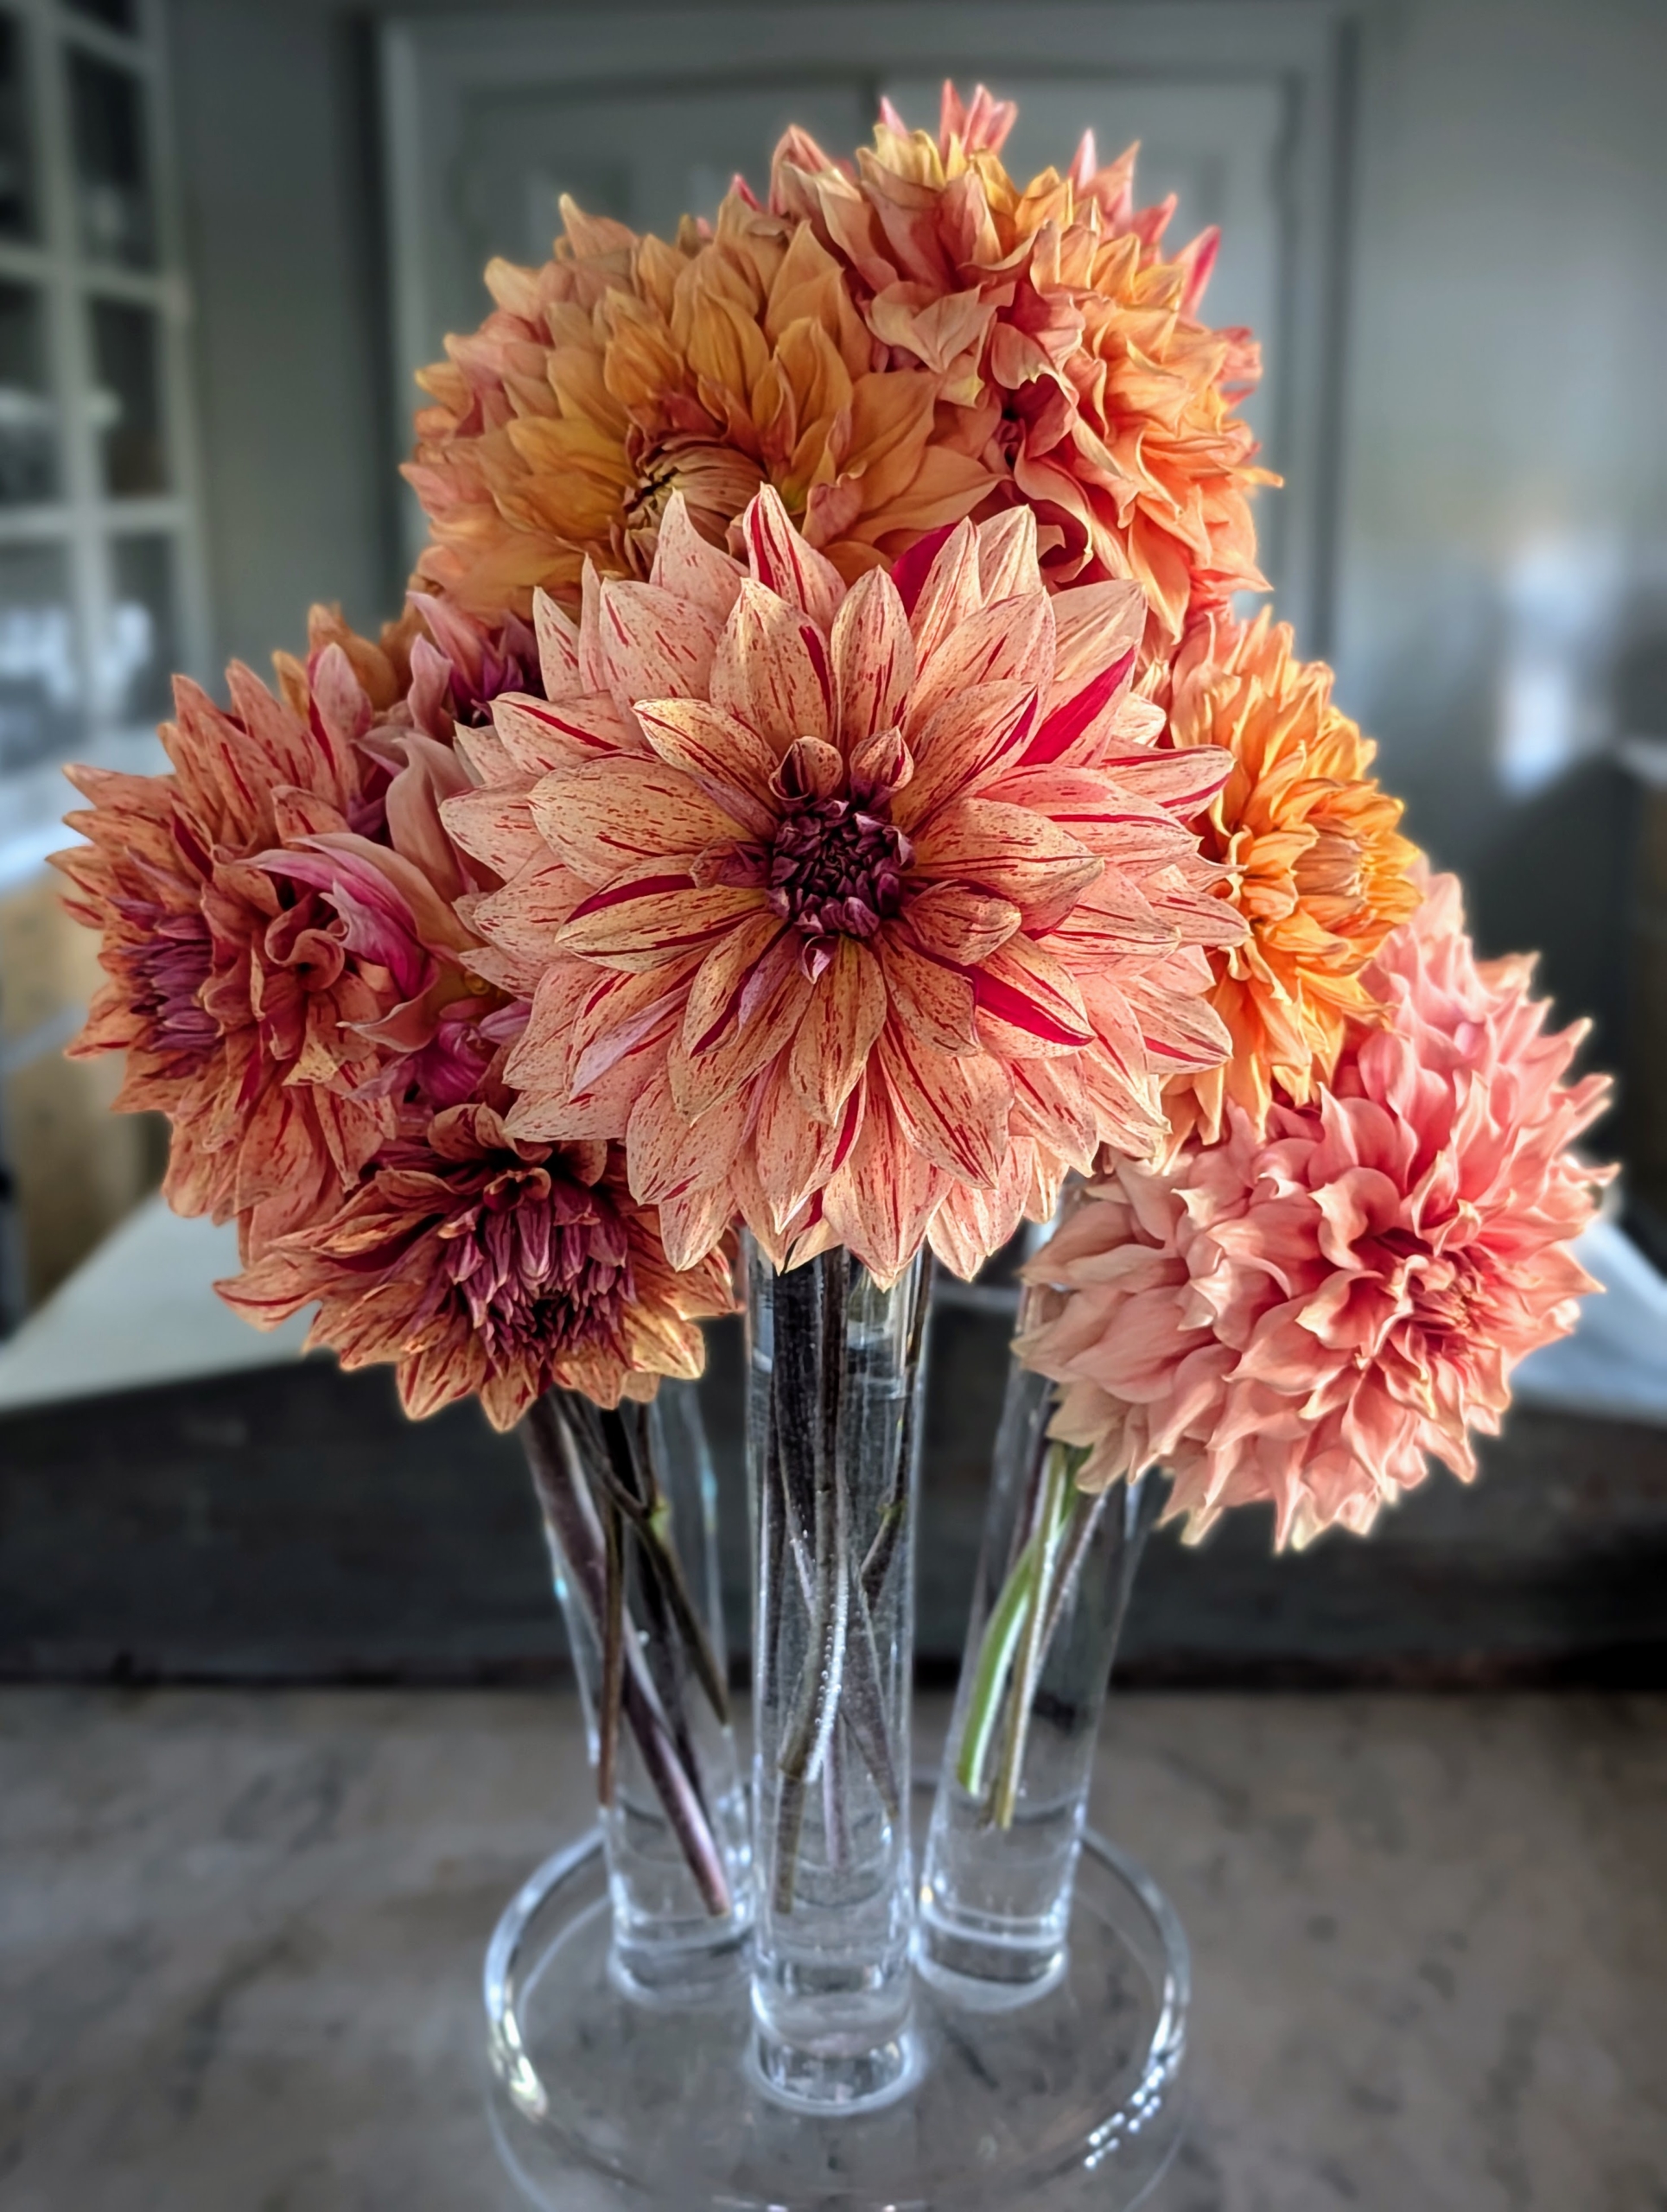
There are new dahlias popping up every day. Dahlias come in shades of pink, red, yellow, orange, purple, white, and various combinations of these colors.
Dahlias produce an abundance of blooms throughout early summer and again in late summer until the first freeze.
The various forms range from charming single, daisy-like flowers to the popular double varieties which can range from the two-inch-pompons to 12-inch dinner plate size. They are divided into 10 groups: single, anemone, collarette, waterlily, decorative, fall, pompon, cactus, semi-cactus, and miscellaneous.
The majority of dahlia species do not produce scented flowers, but they are brightly colored to attract pollinating insects such as bees and butterflies.
To prevent wilting, cut only in the early morning or late afternoon. And only cut them after they open to mature size – dahlias will not open after cutting.
Enma cut so many beautiful blooms – hard not to cut more; they are all so pretty.
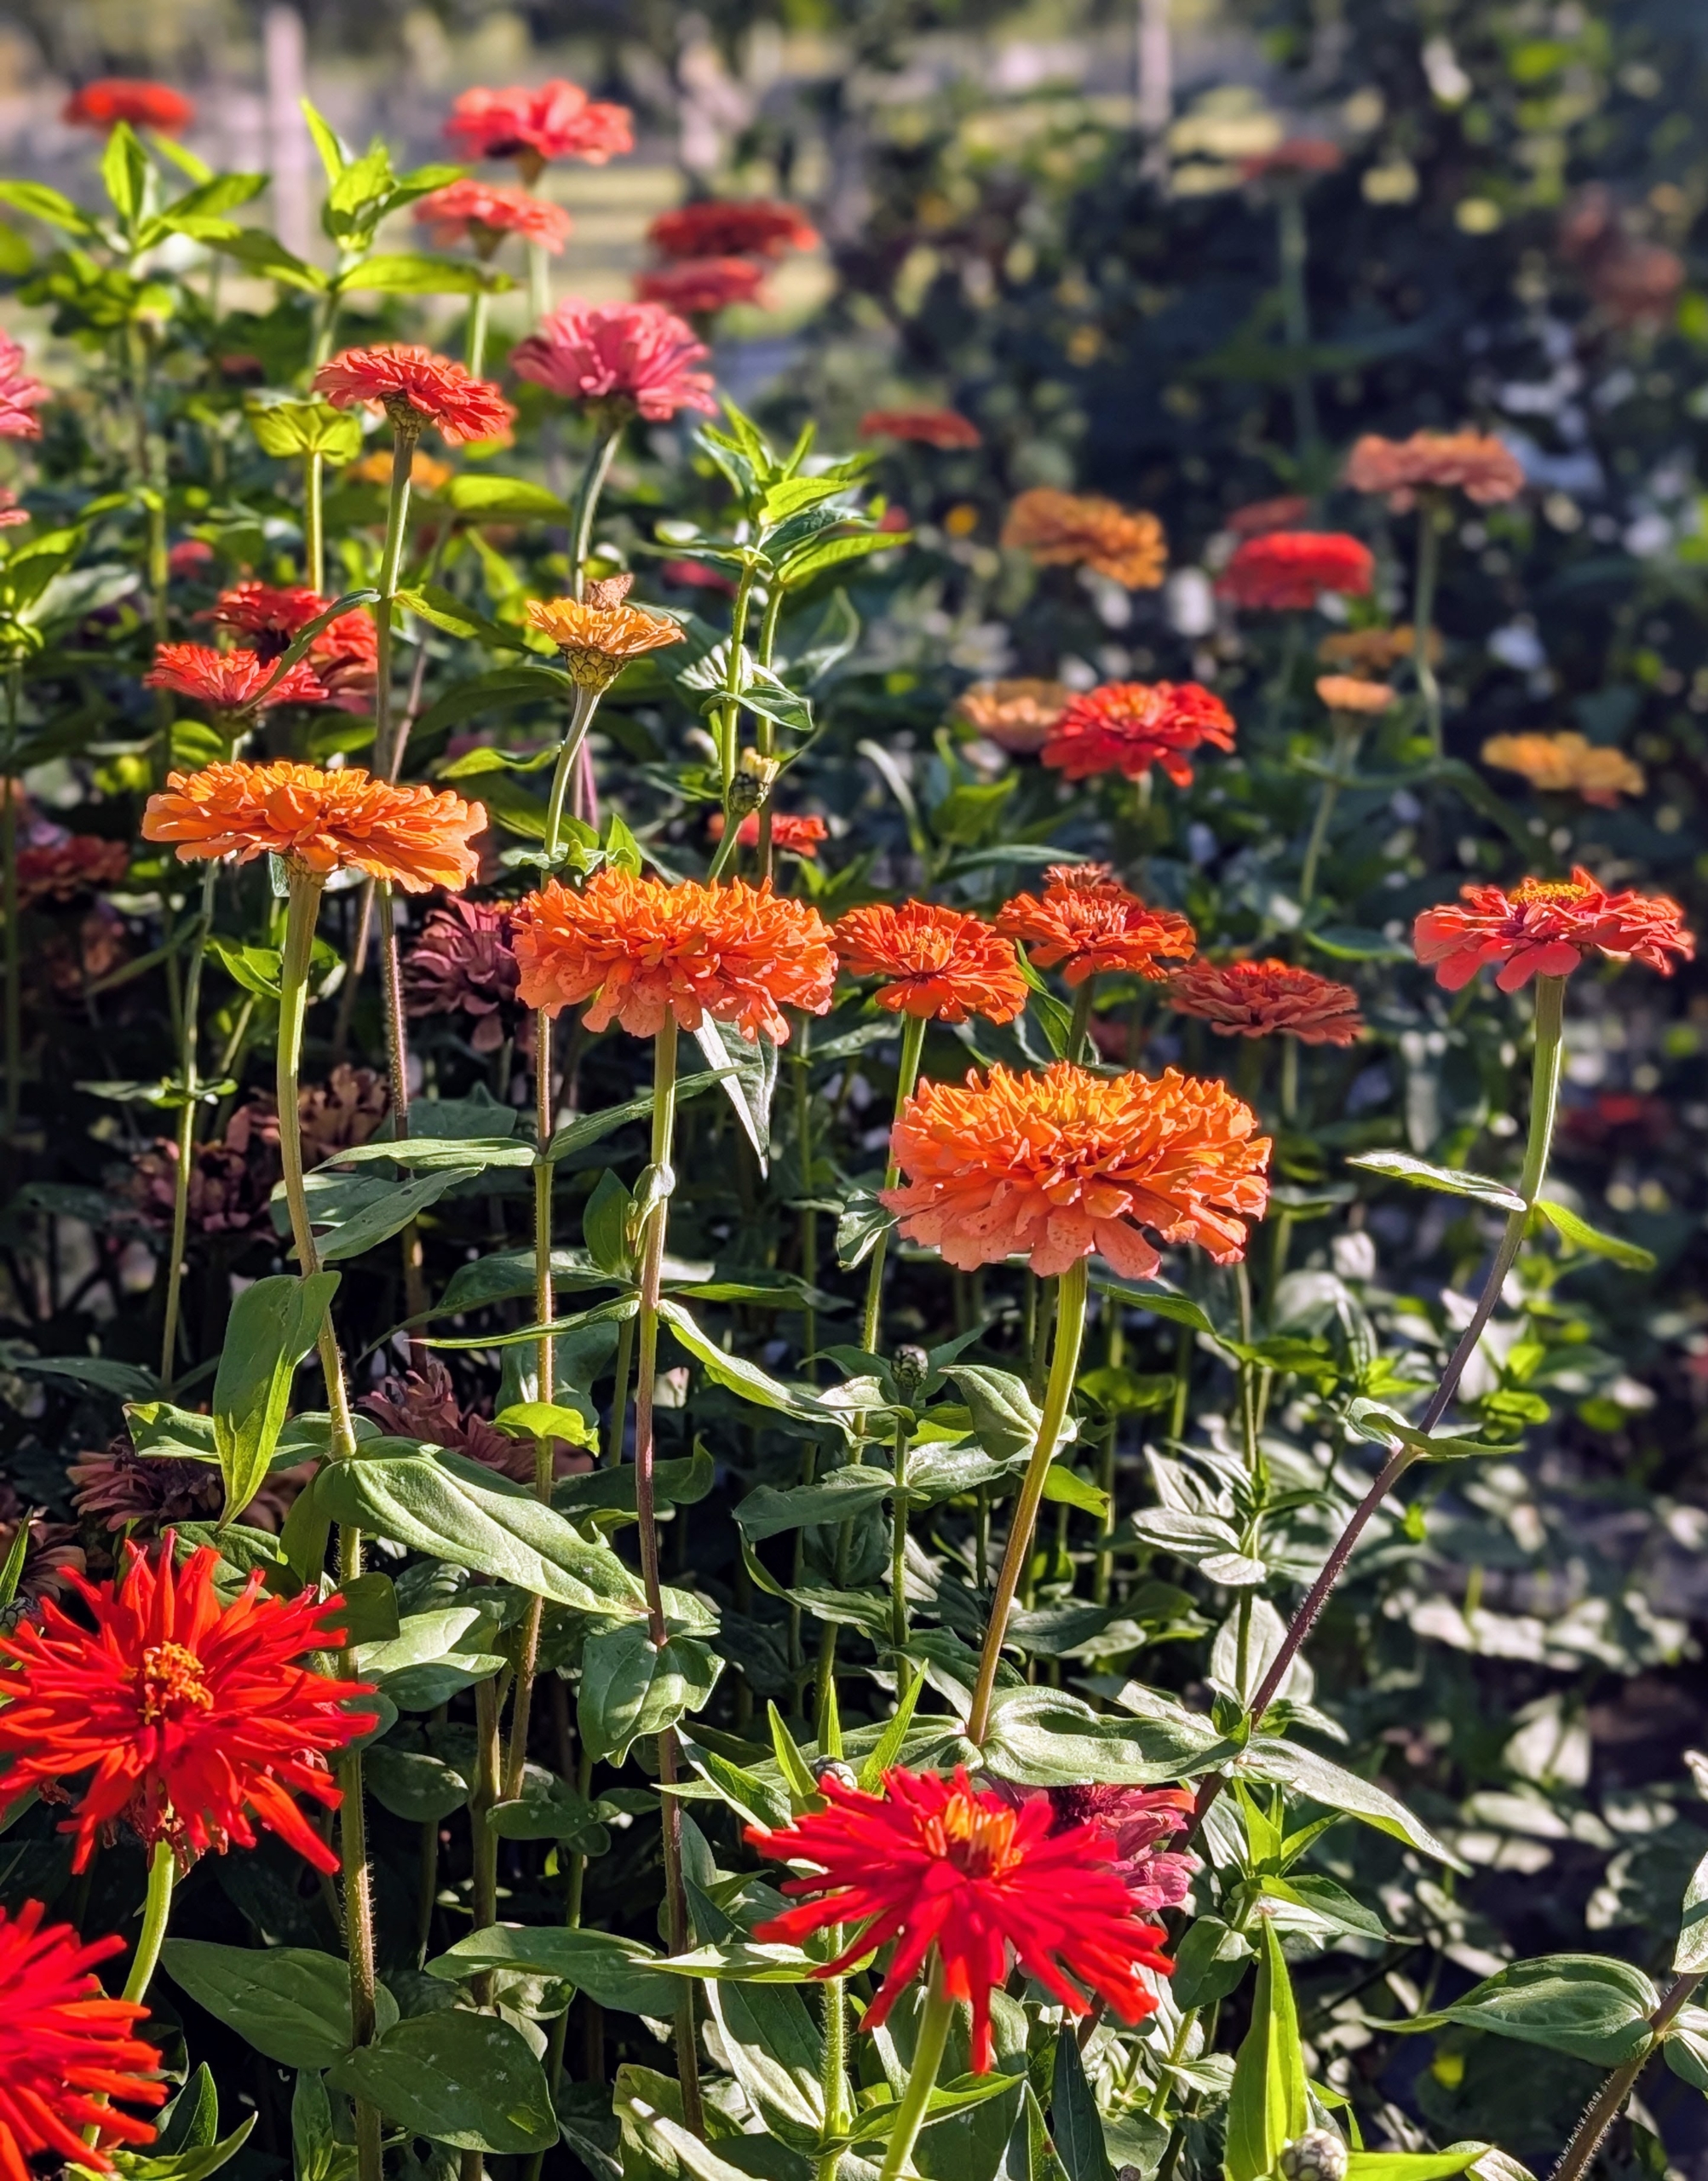
Down by my chicken coops in my former vegetable garden, I now have a space dedicated to annuals, where varieties could be organized in beds by size, color, and bloom time. This week, some of the big showers are these zinnias.
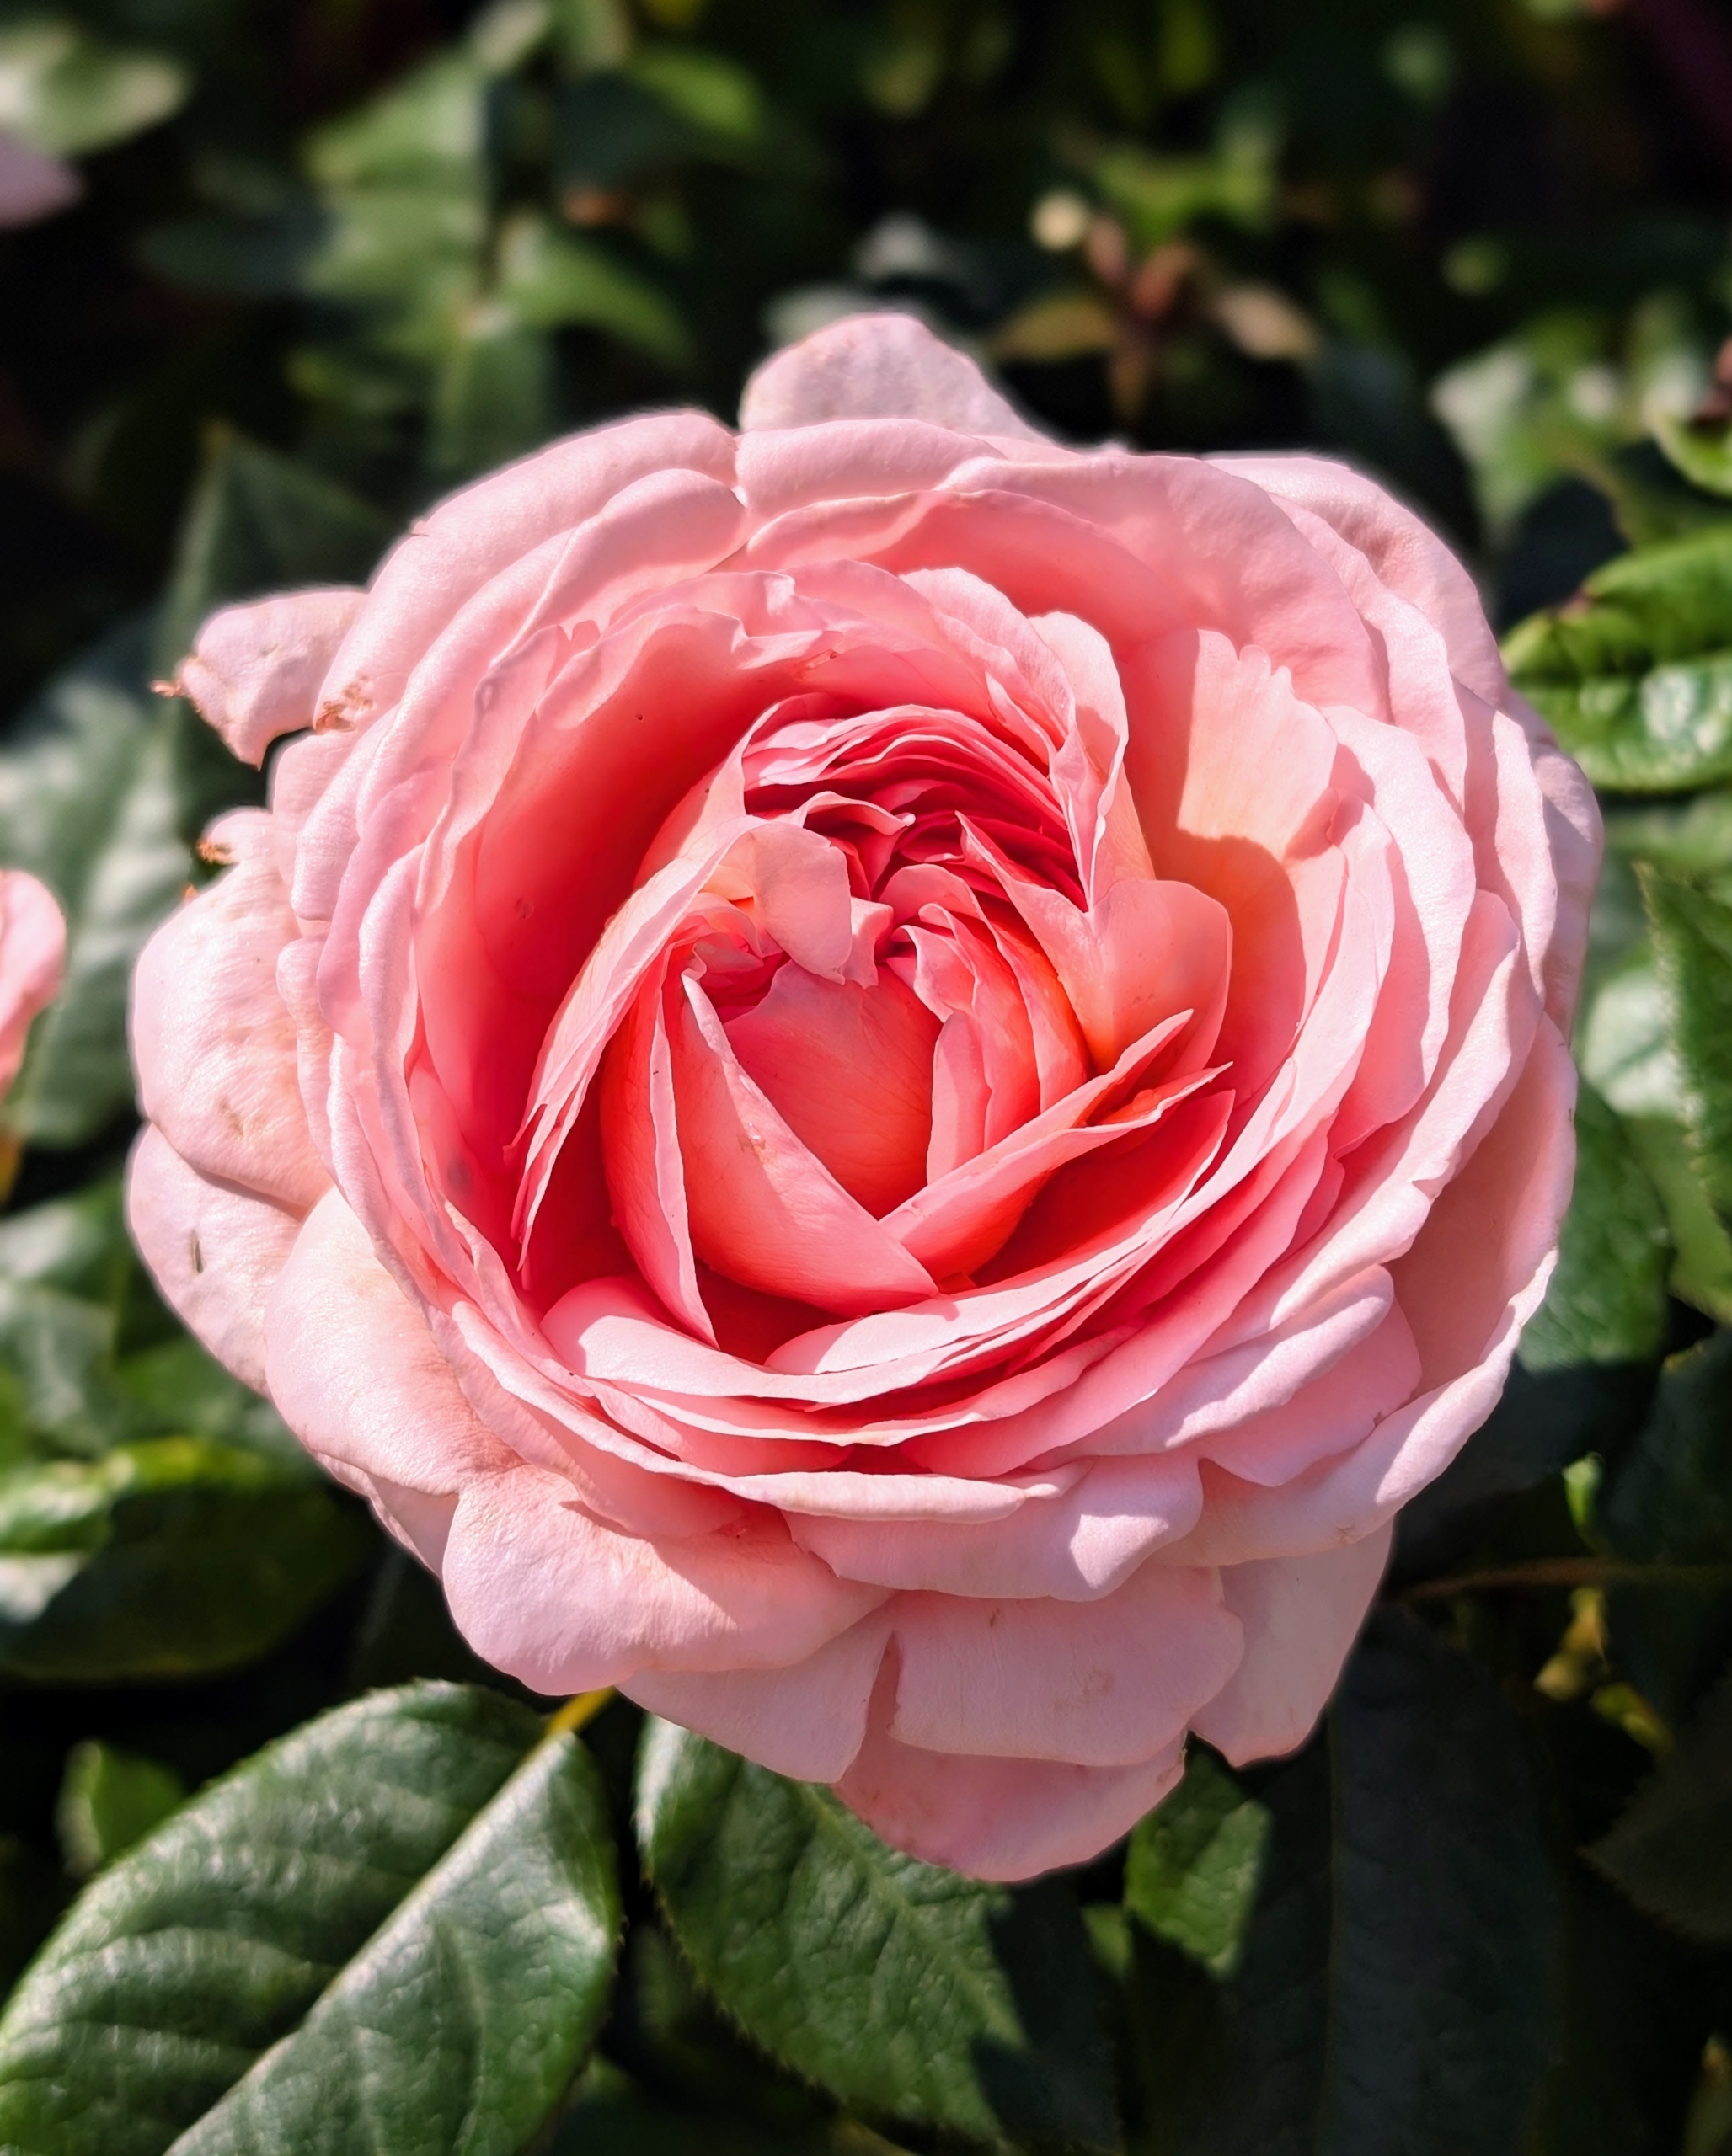
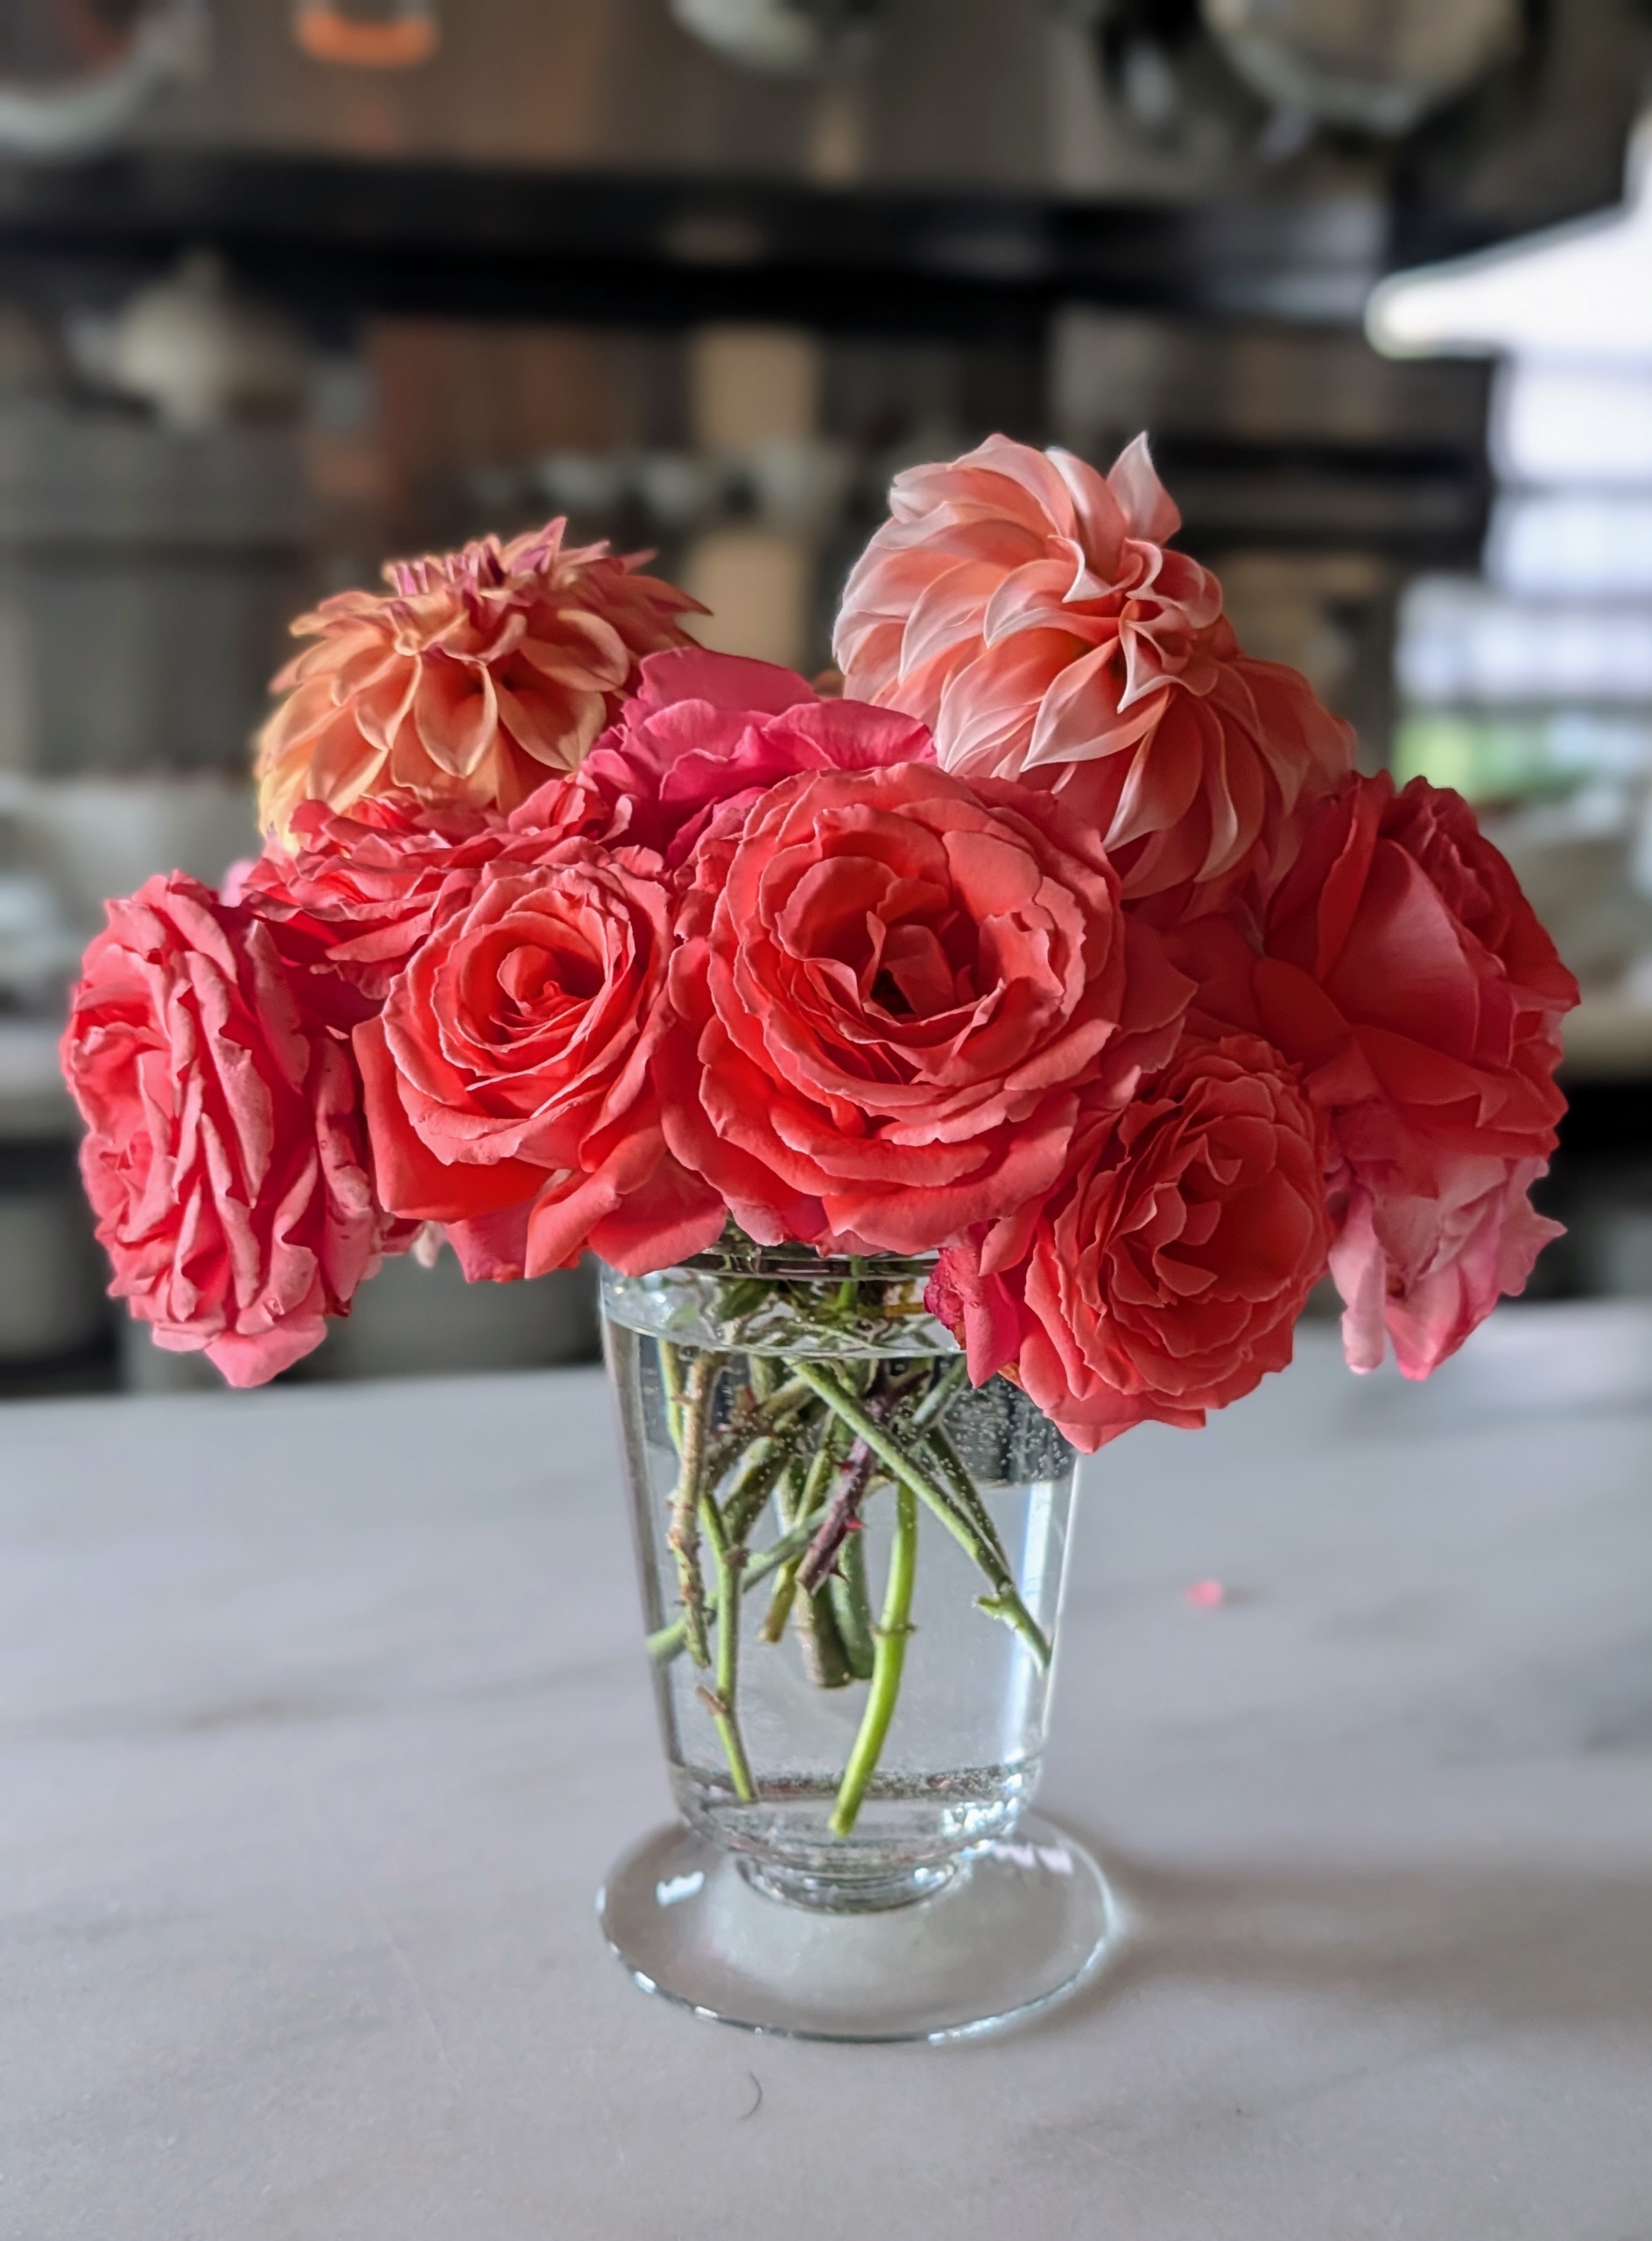
Also showing wonderfully are the roses. My Martha Stewart hybrid tea rose has large pink blooms and a most intoxicating and sweet fragrance.
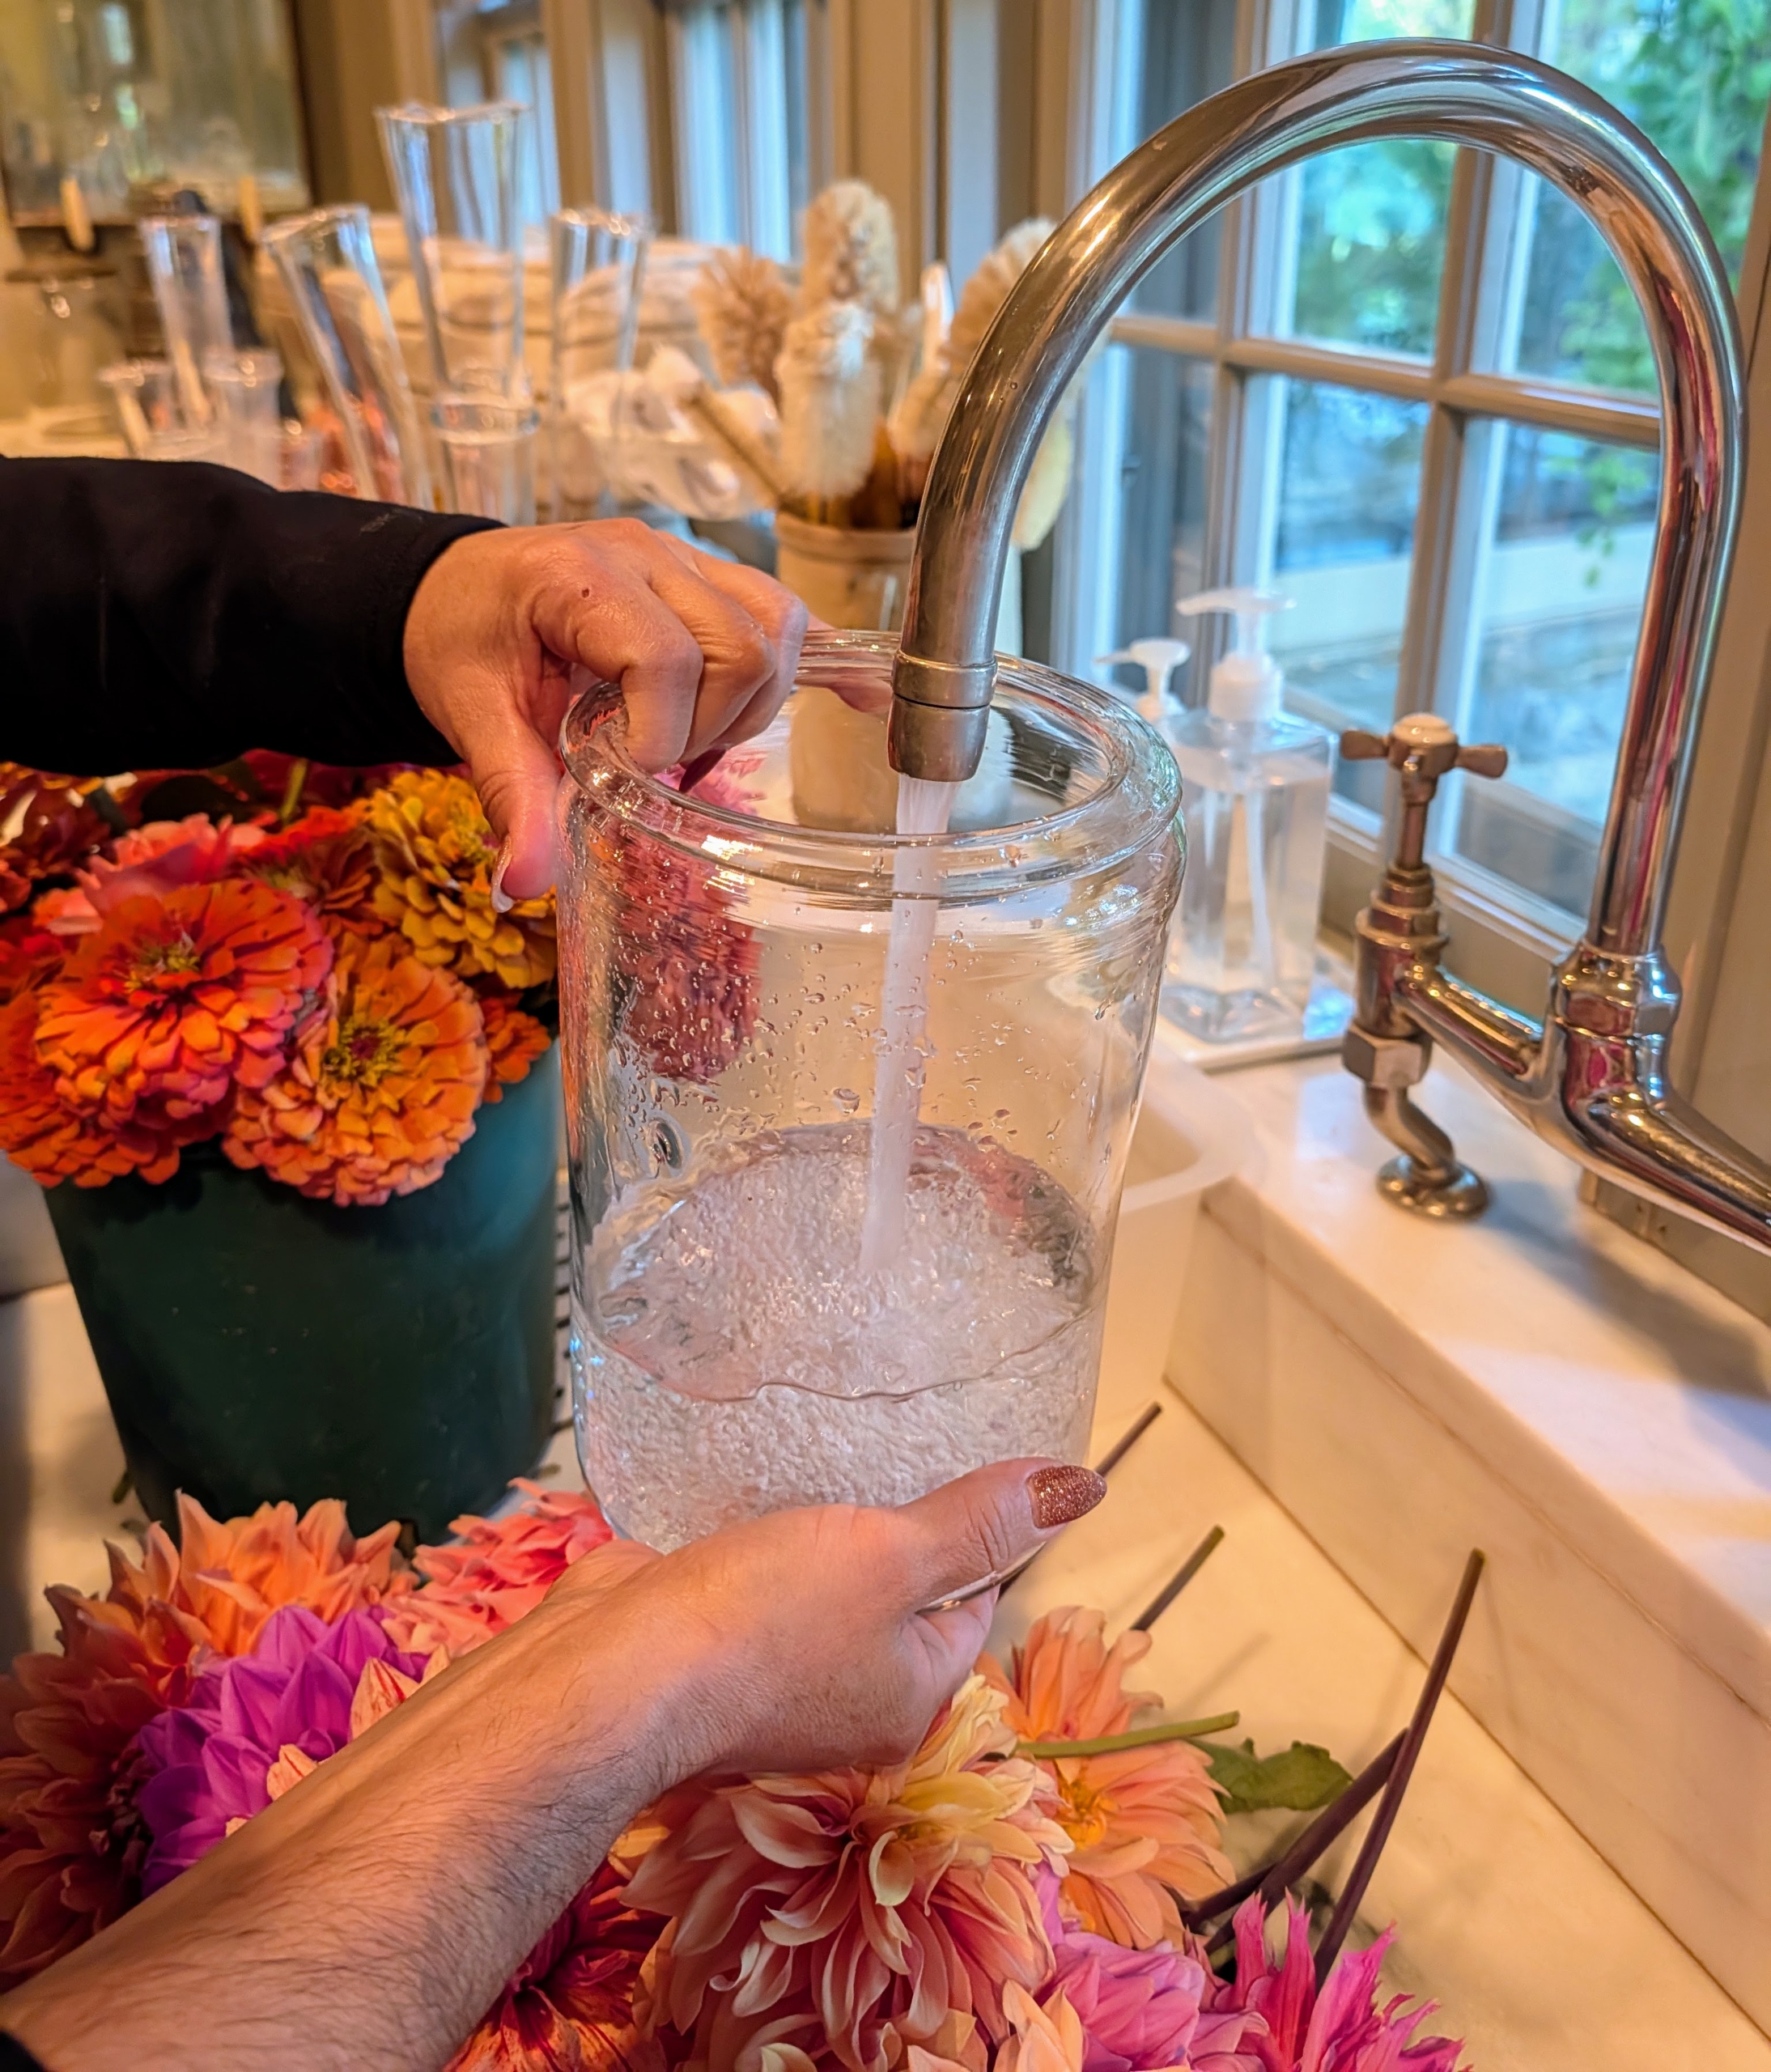
After bringing the flowers inside, it’s important to get them in water right away. Enma removes any leaves that would otherwise end up below the water line. Leaves and flowers that sit below the water line can rot.
Then she carefully pours water into the vase as quickly as possible. Fill the vase to about three-fourths of its height. This amount allows the flowers to absorb enough water to stay healthy and vibrant. And be sure to keep it filled and change the water regularly.
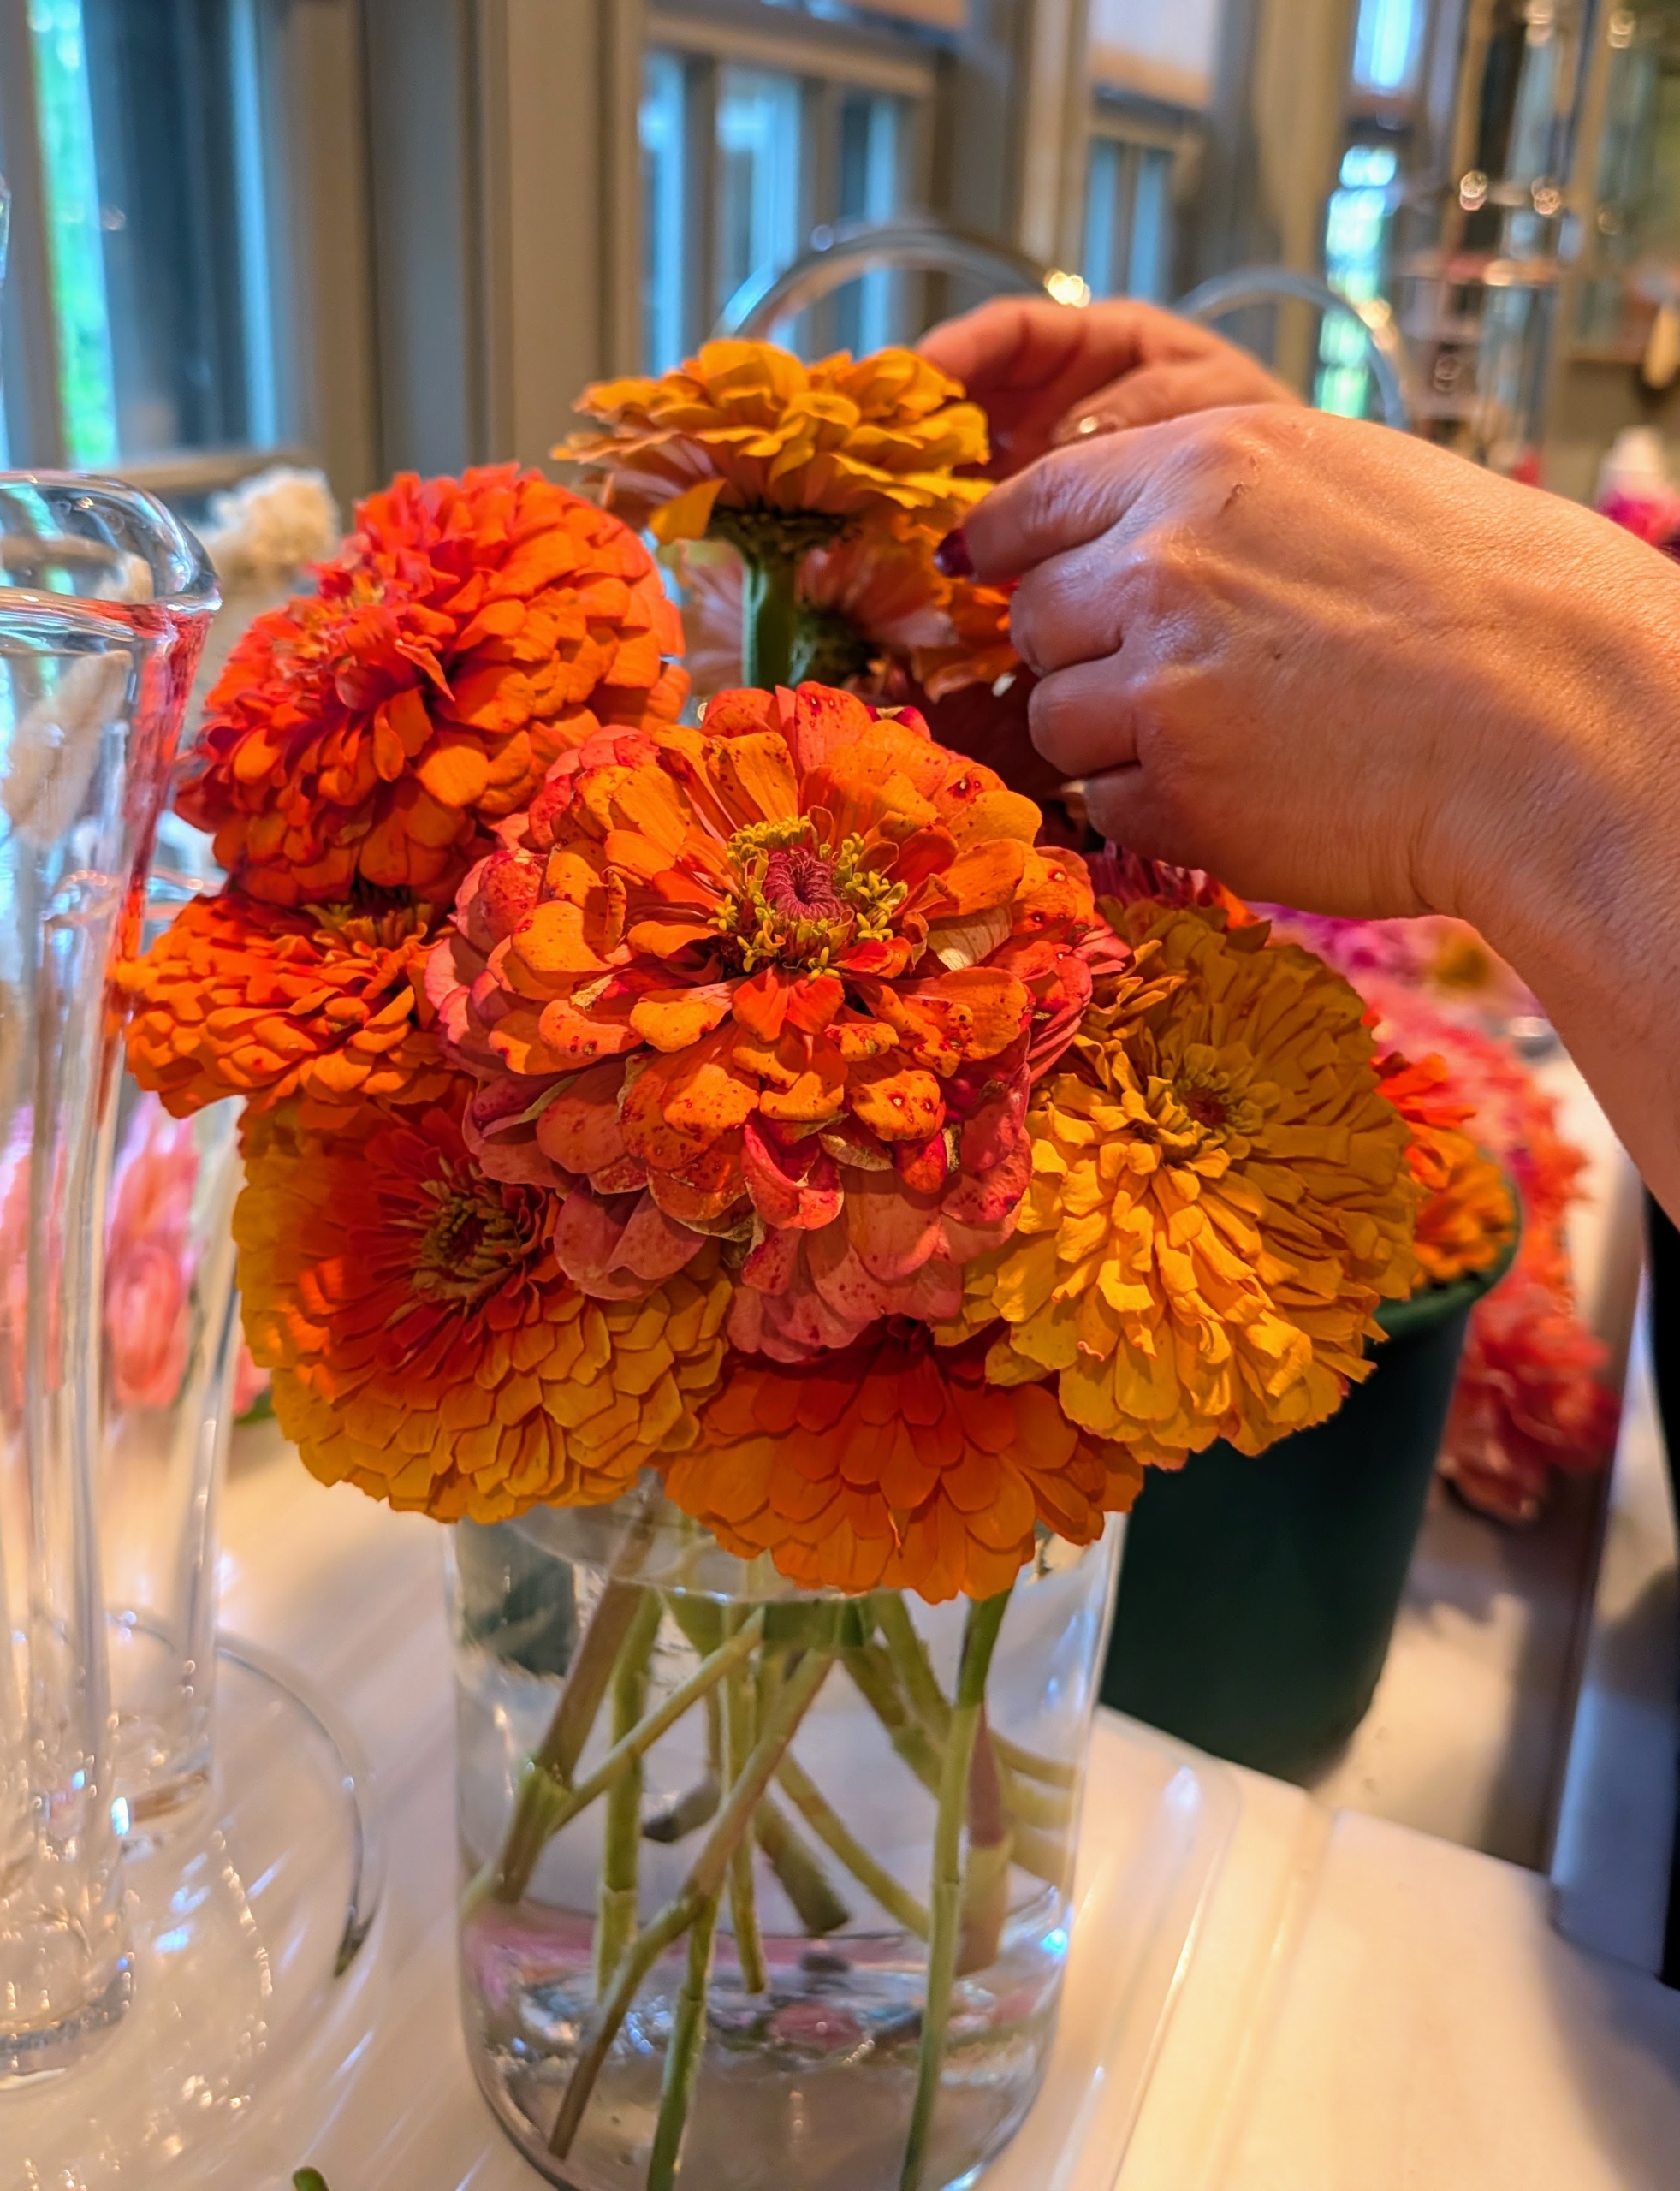
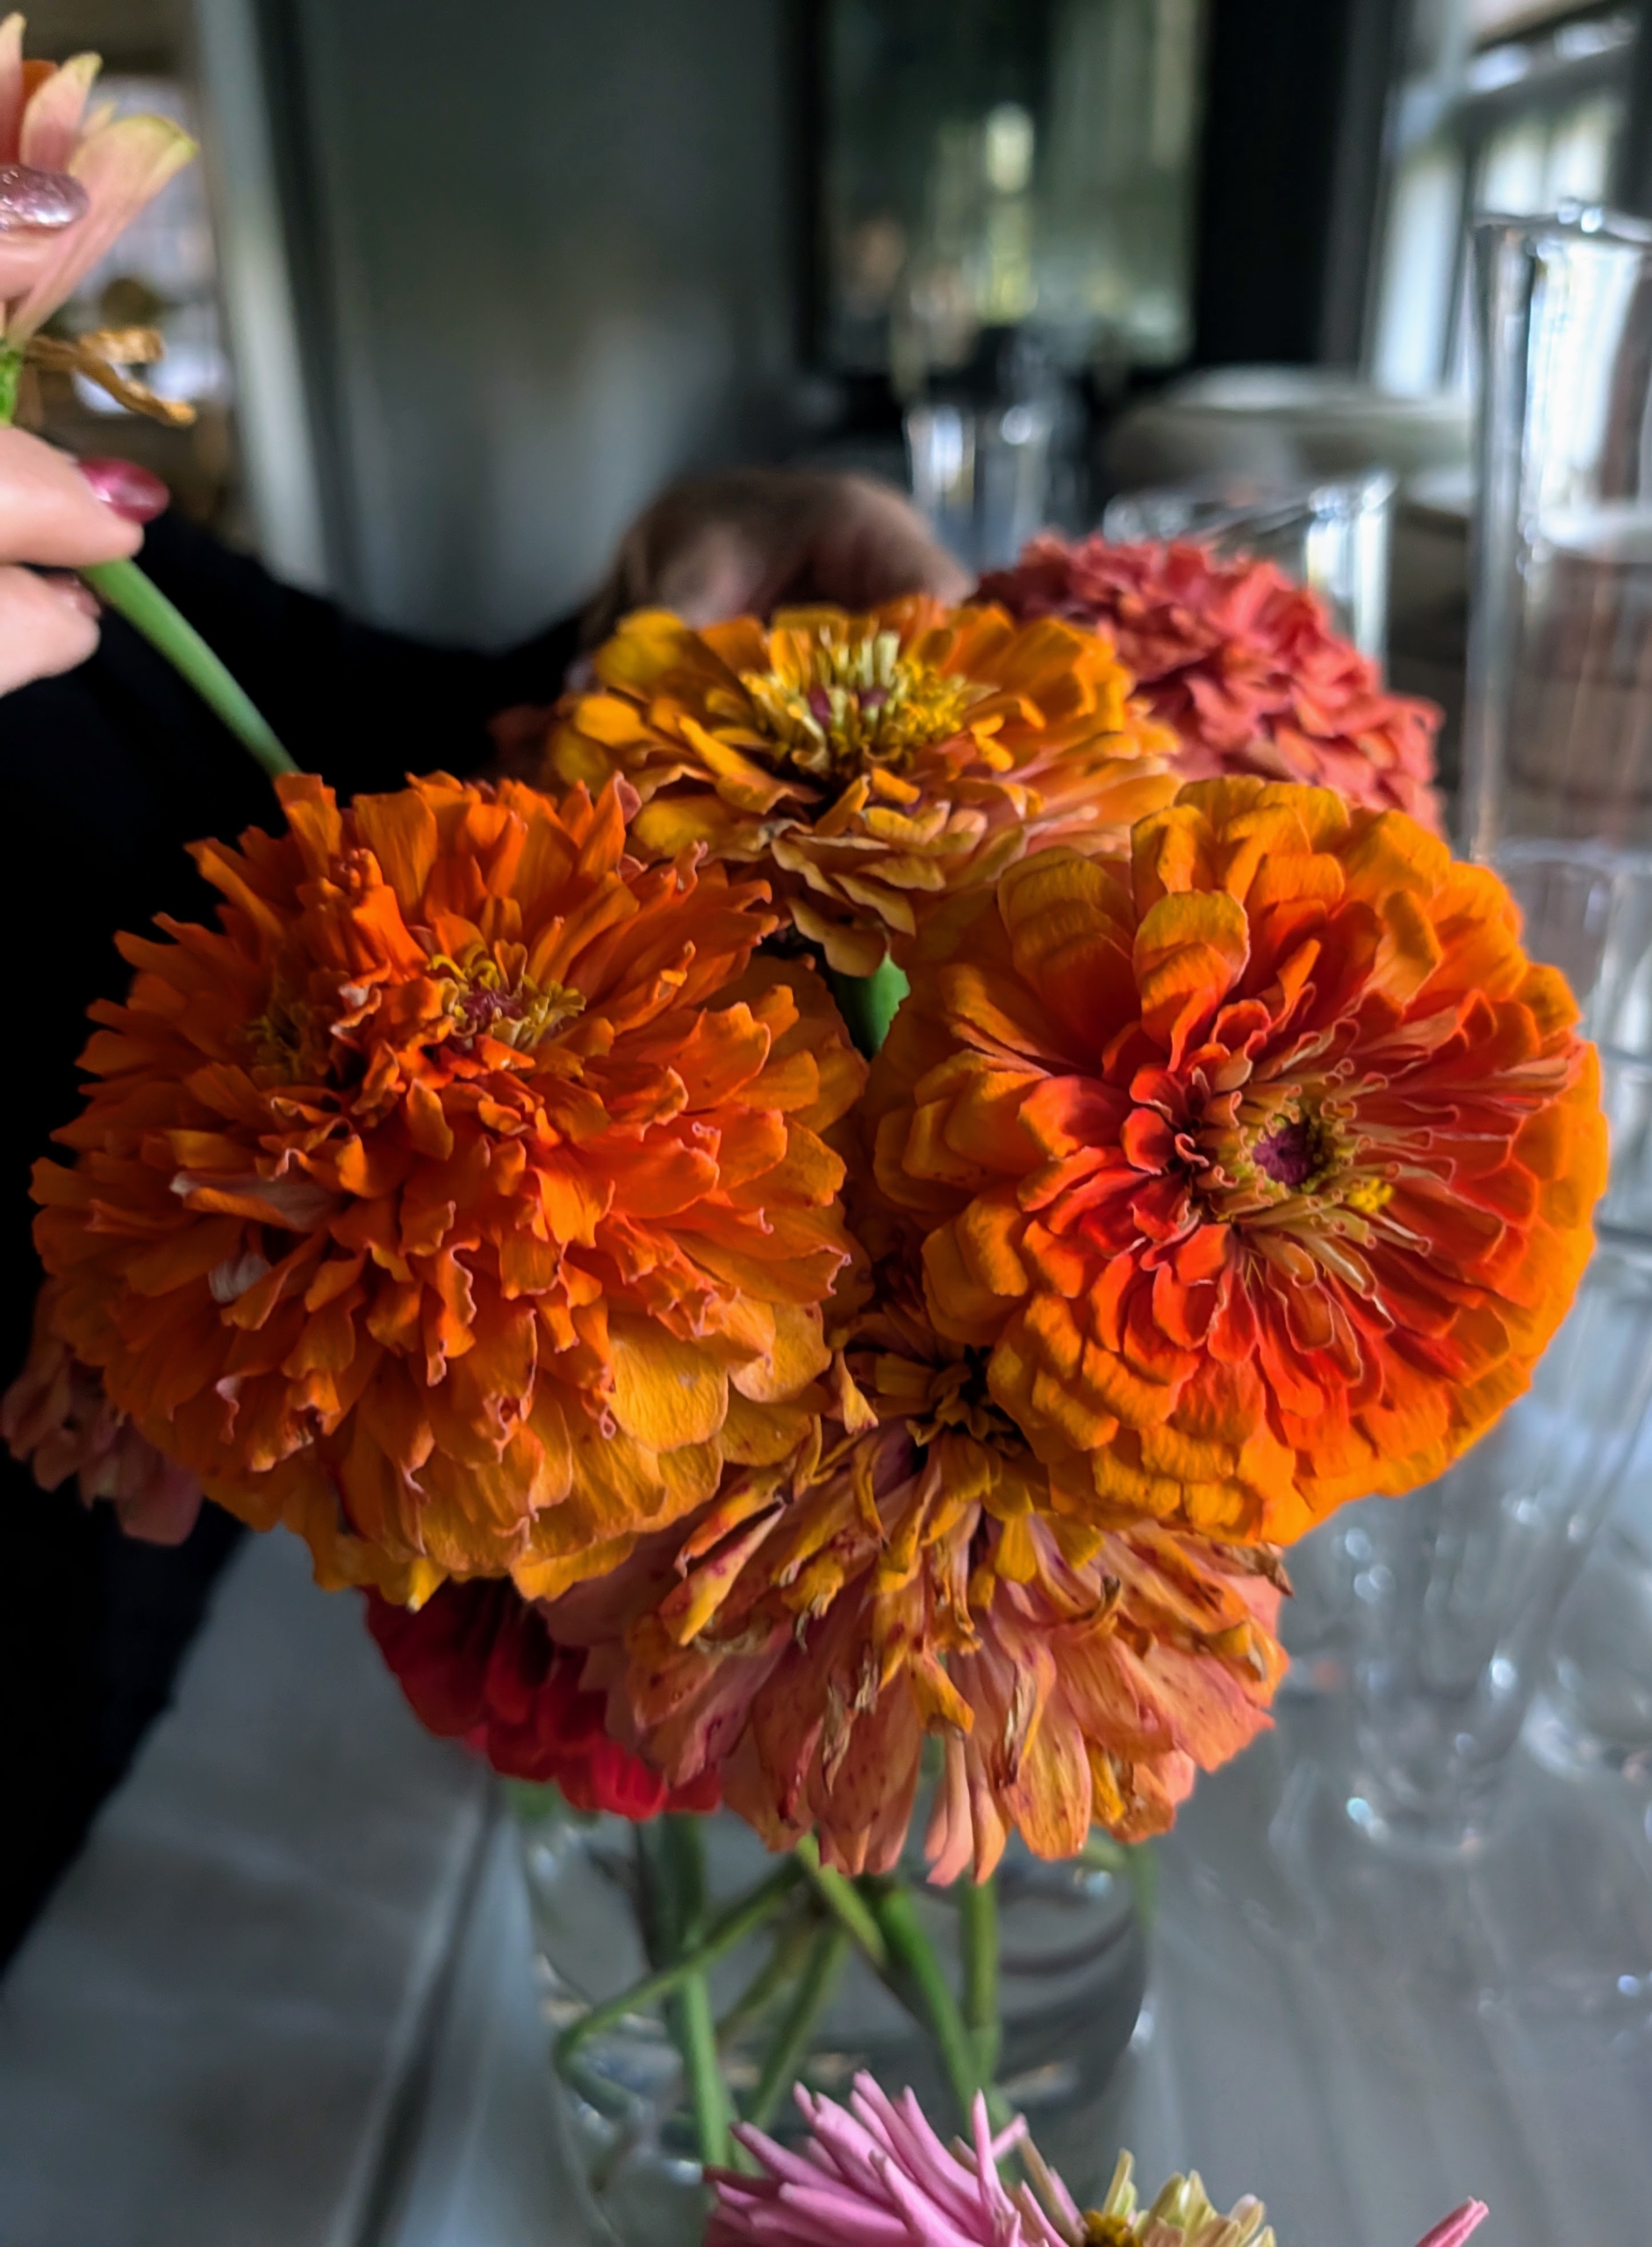
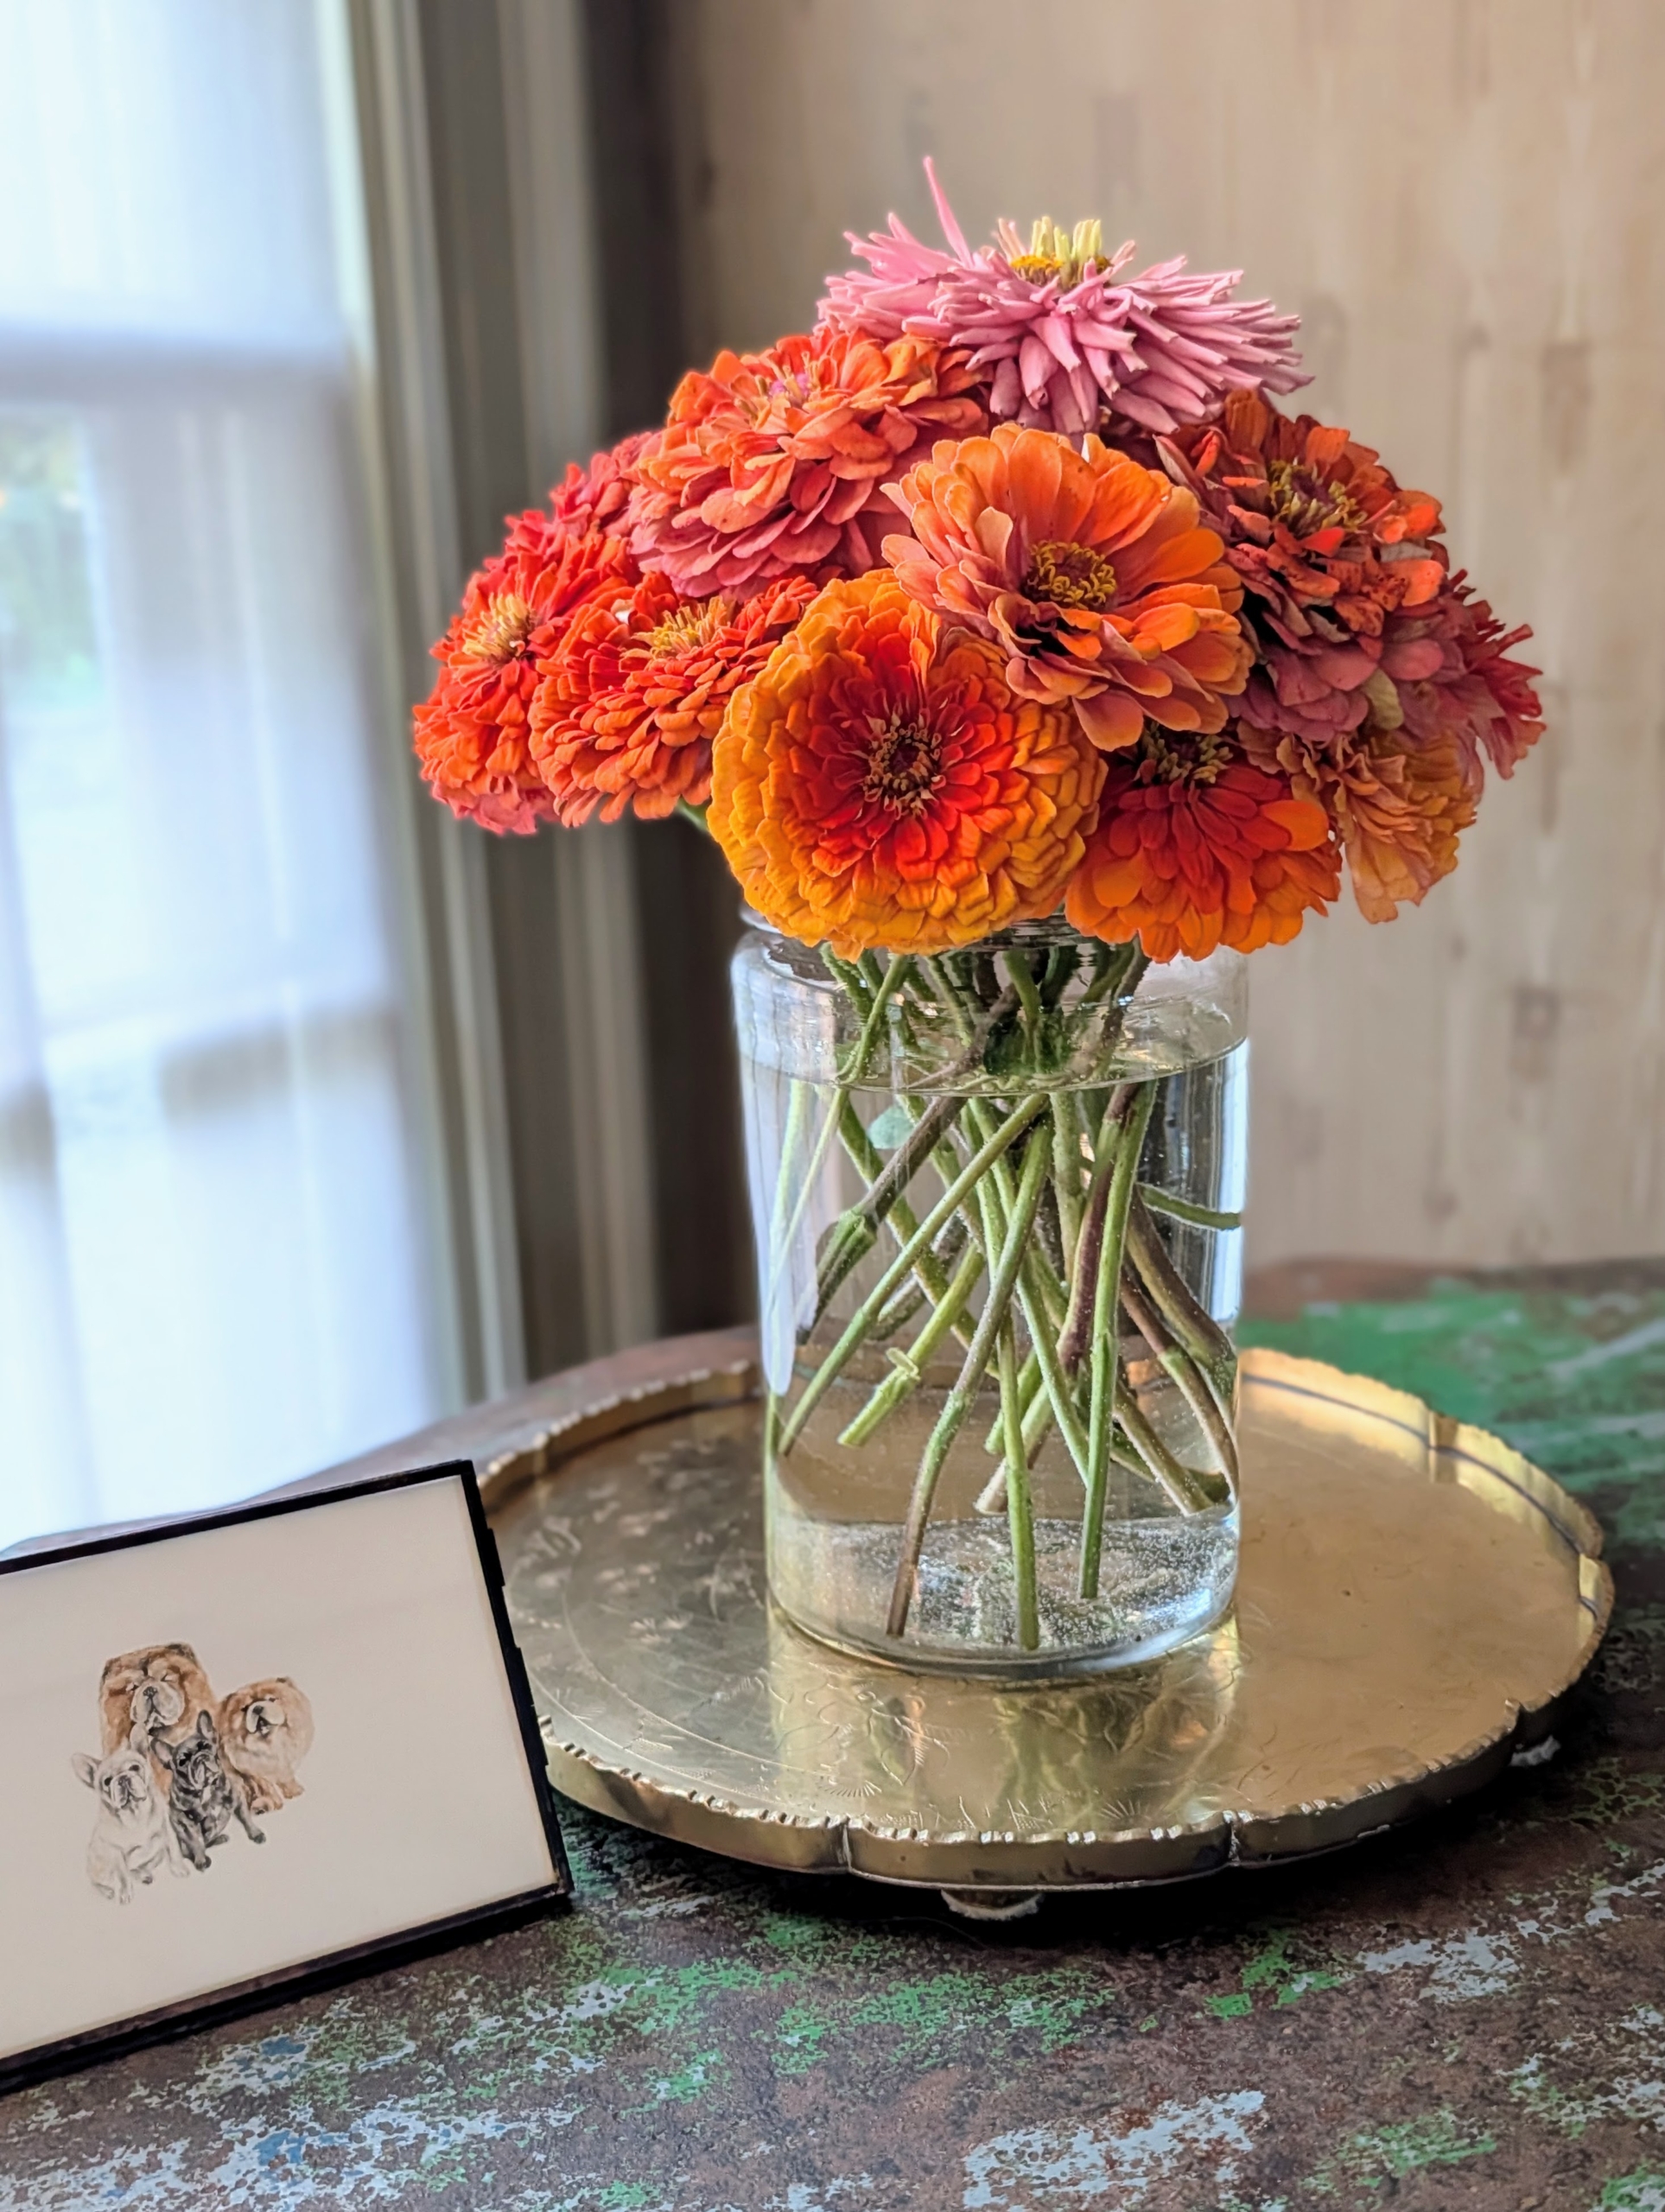
For this arrangement, Enma chooses shades of orange and gold zinnias. Zinnias are native to Mexico and Central America. The Aztecs originally called them “plants that are hard on the eyes” because of their colorful flowers. Zinnia is named after Johann Gottfried Zinn, a German botany professor who discovered the plants and brought them to Europe in the 1700s.
Zinnias are the simplest of flowers – a favorite of my dad. They come in extraordinary colors and sizes and shapes and are easily grown in one short season.
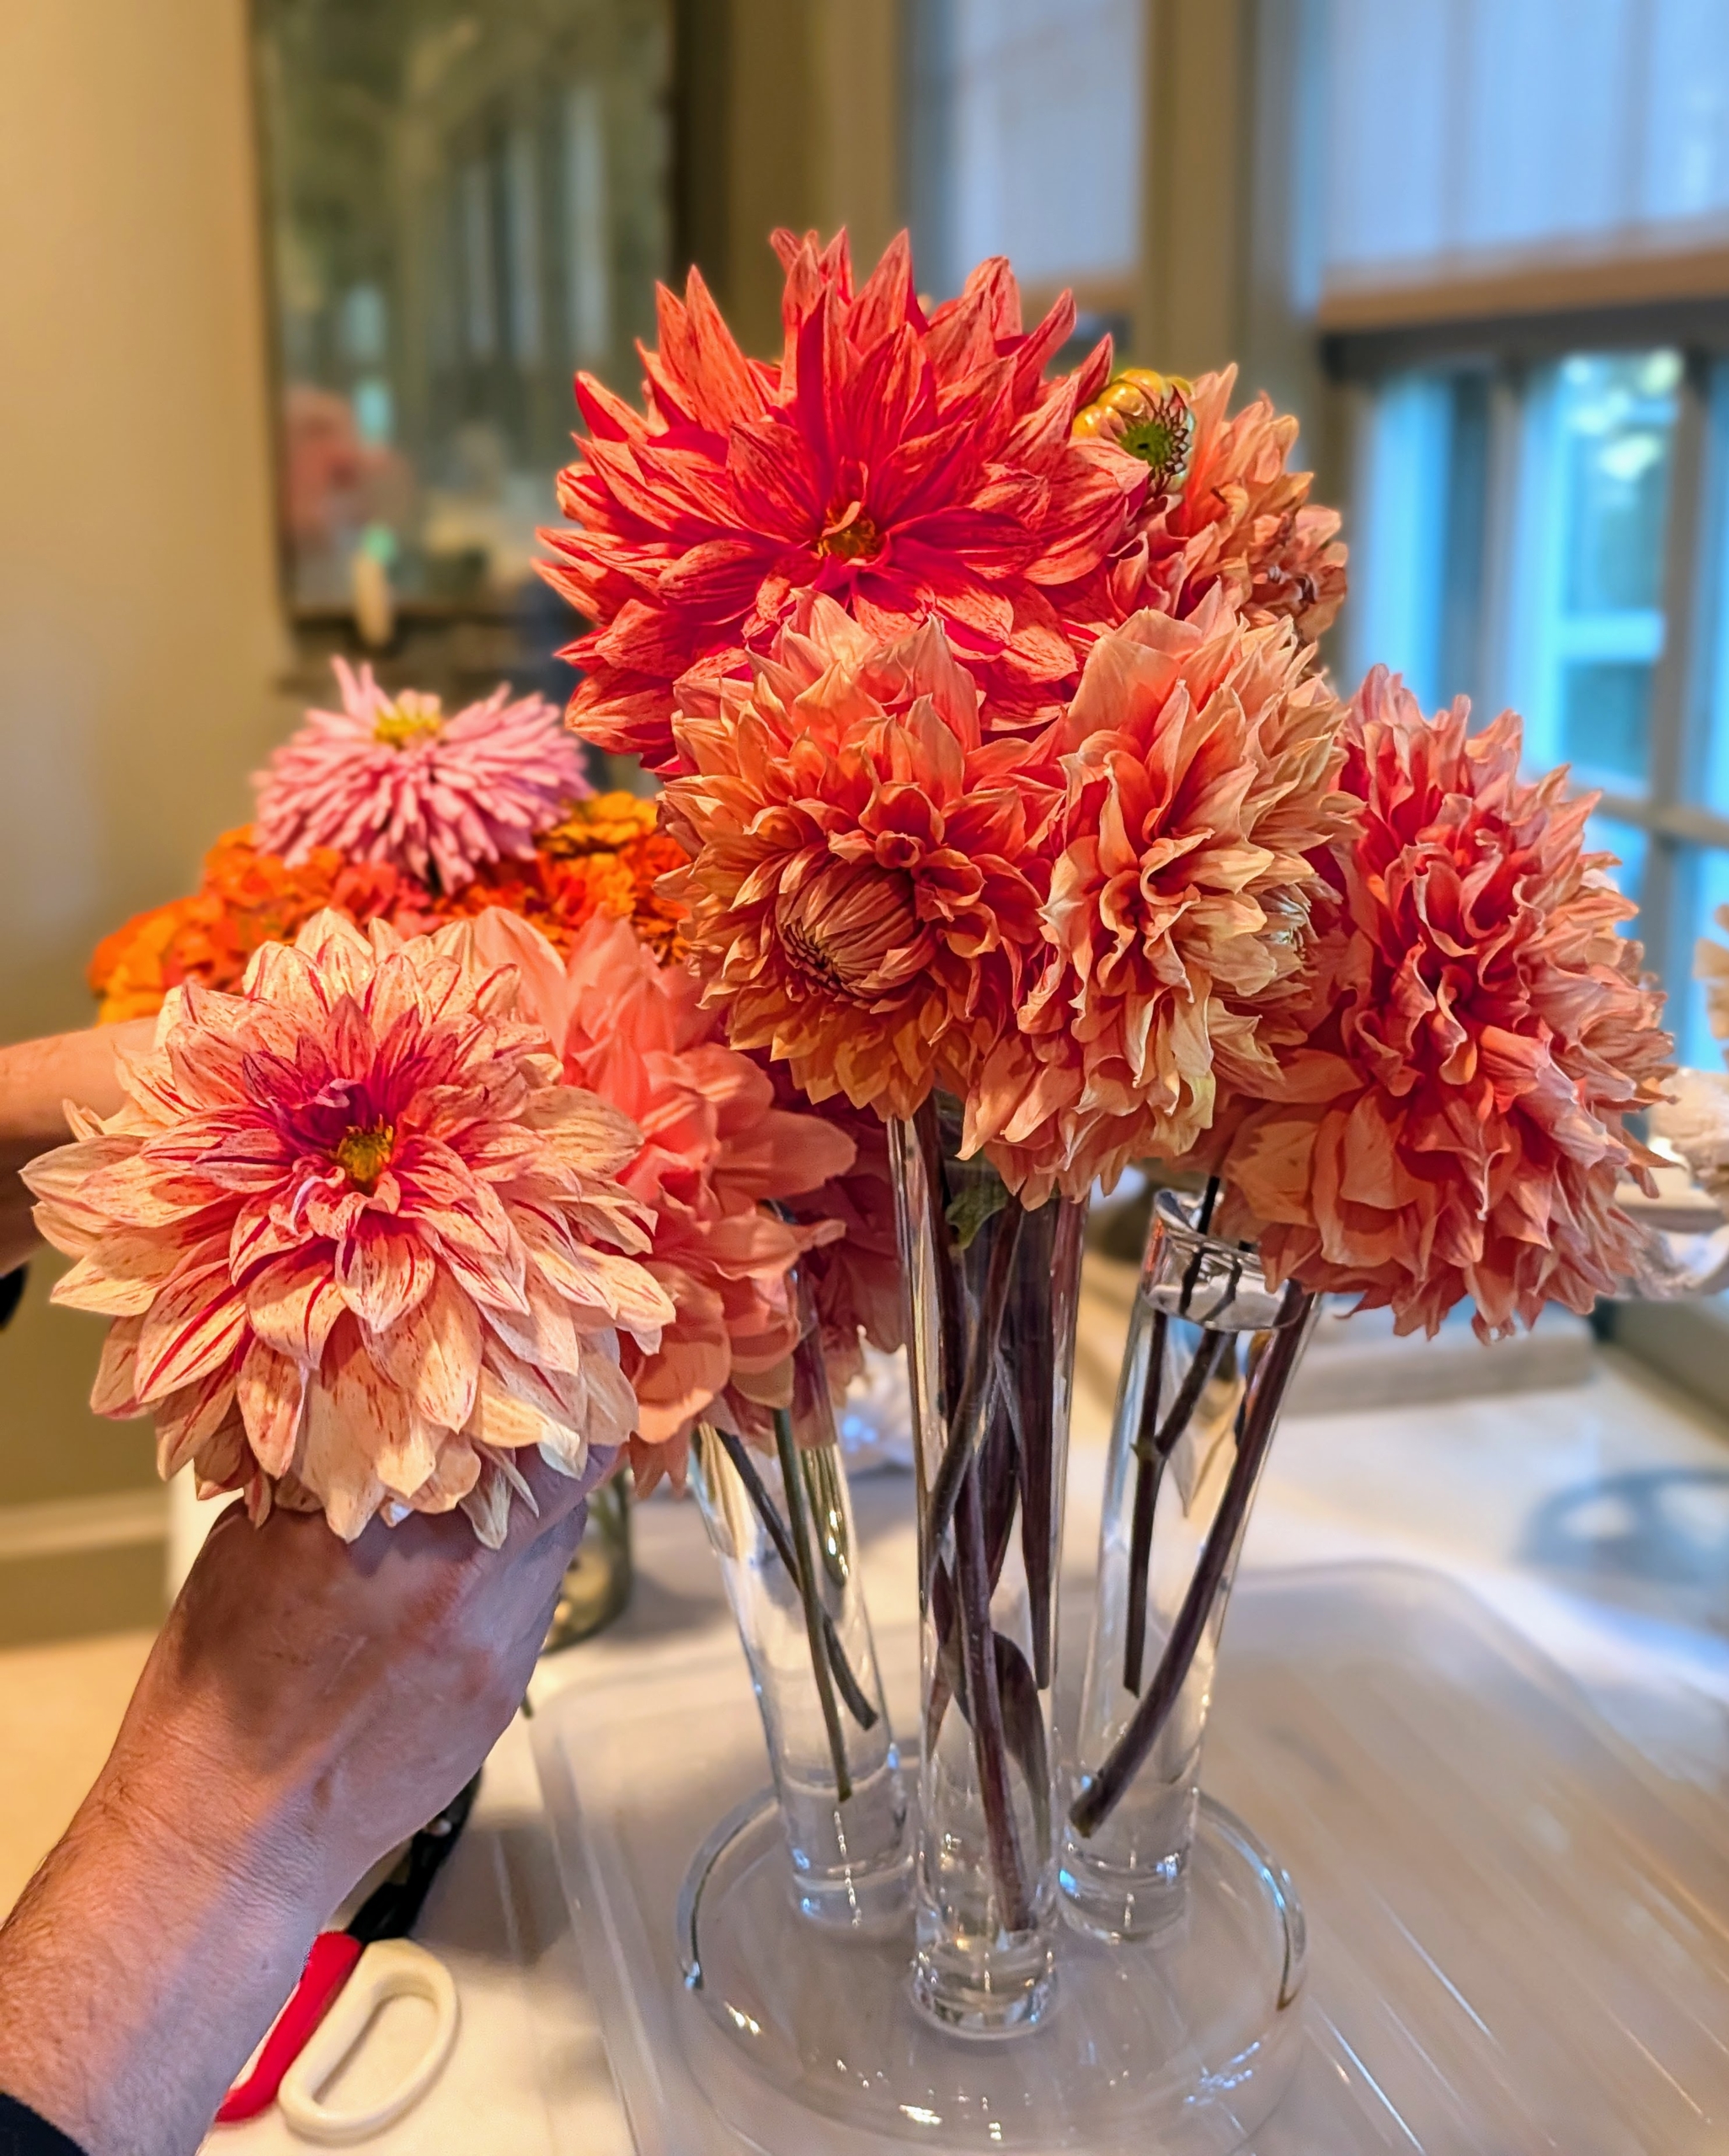
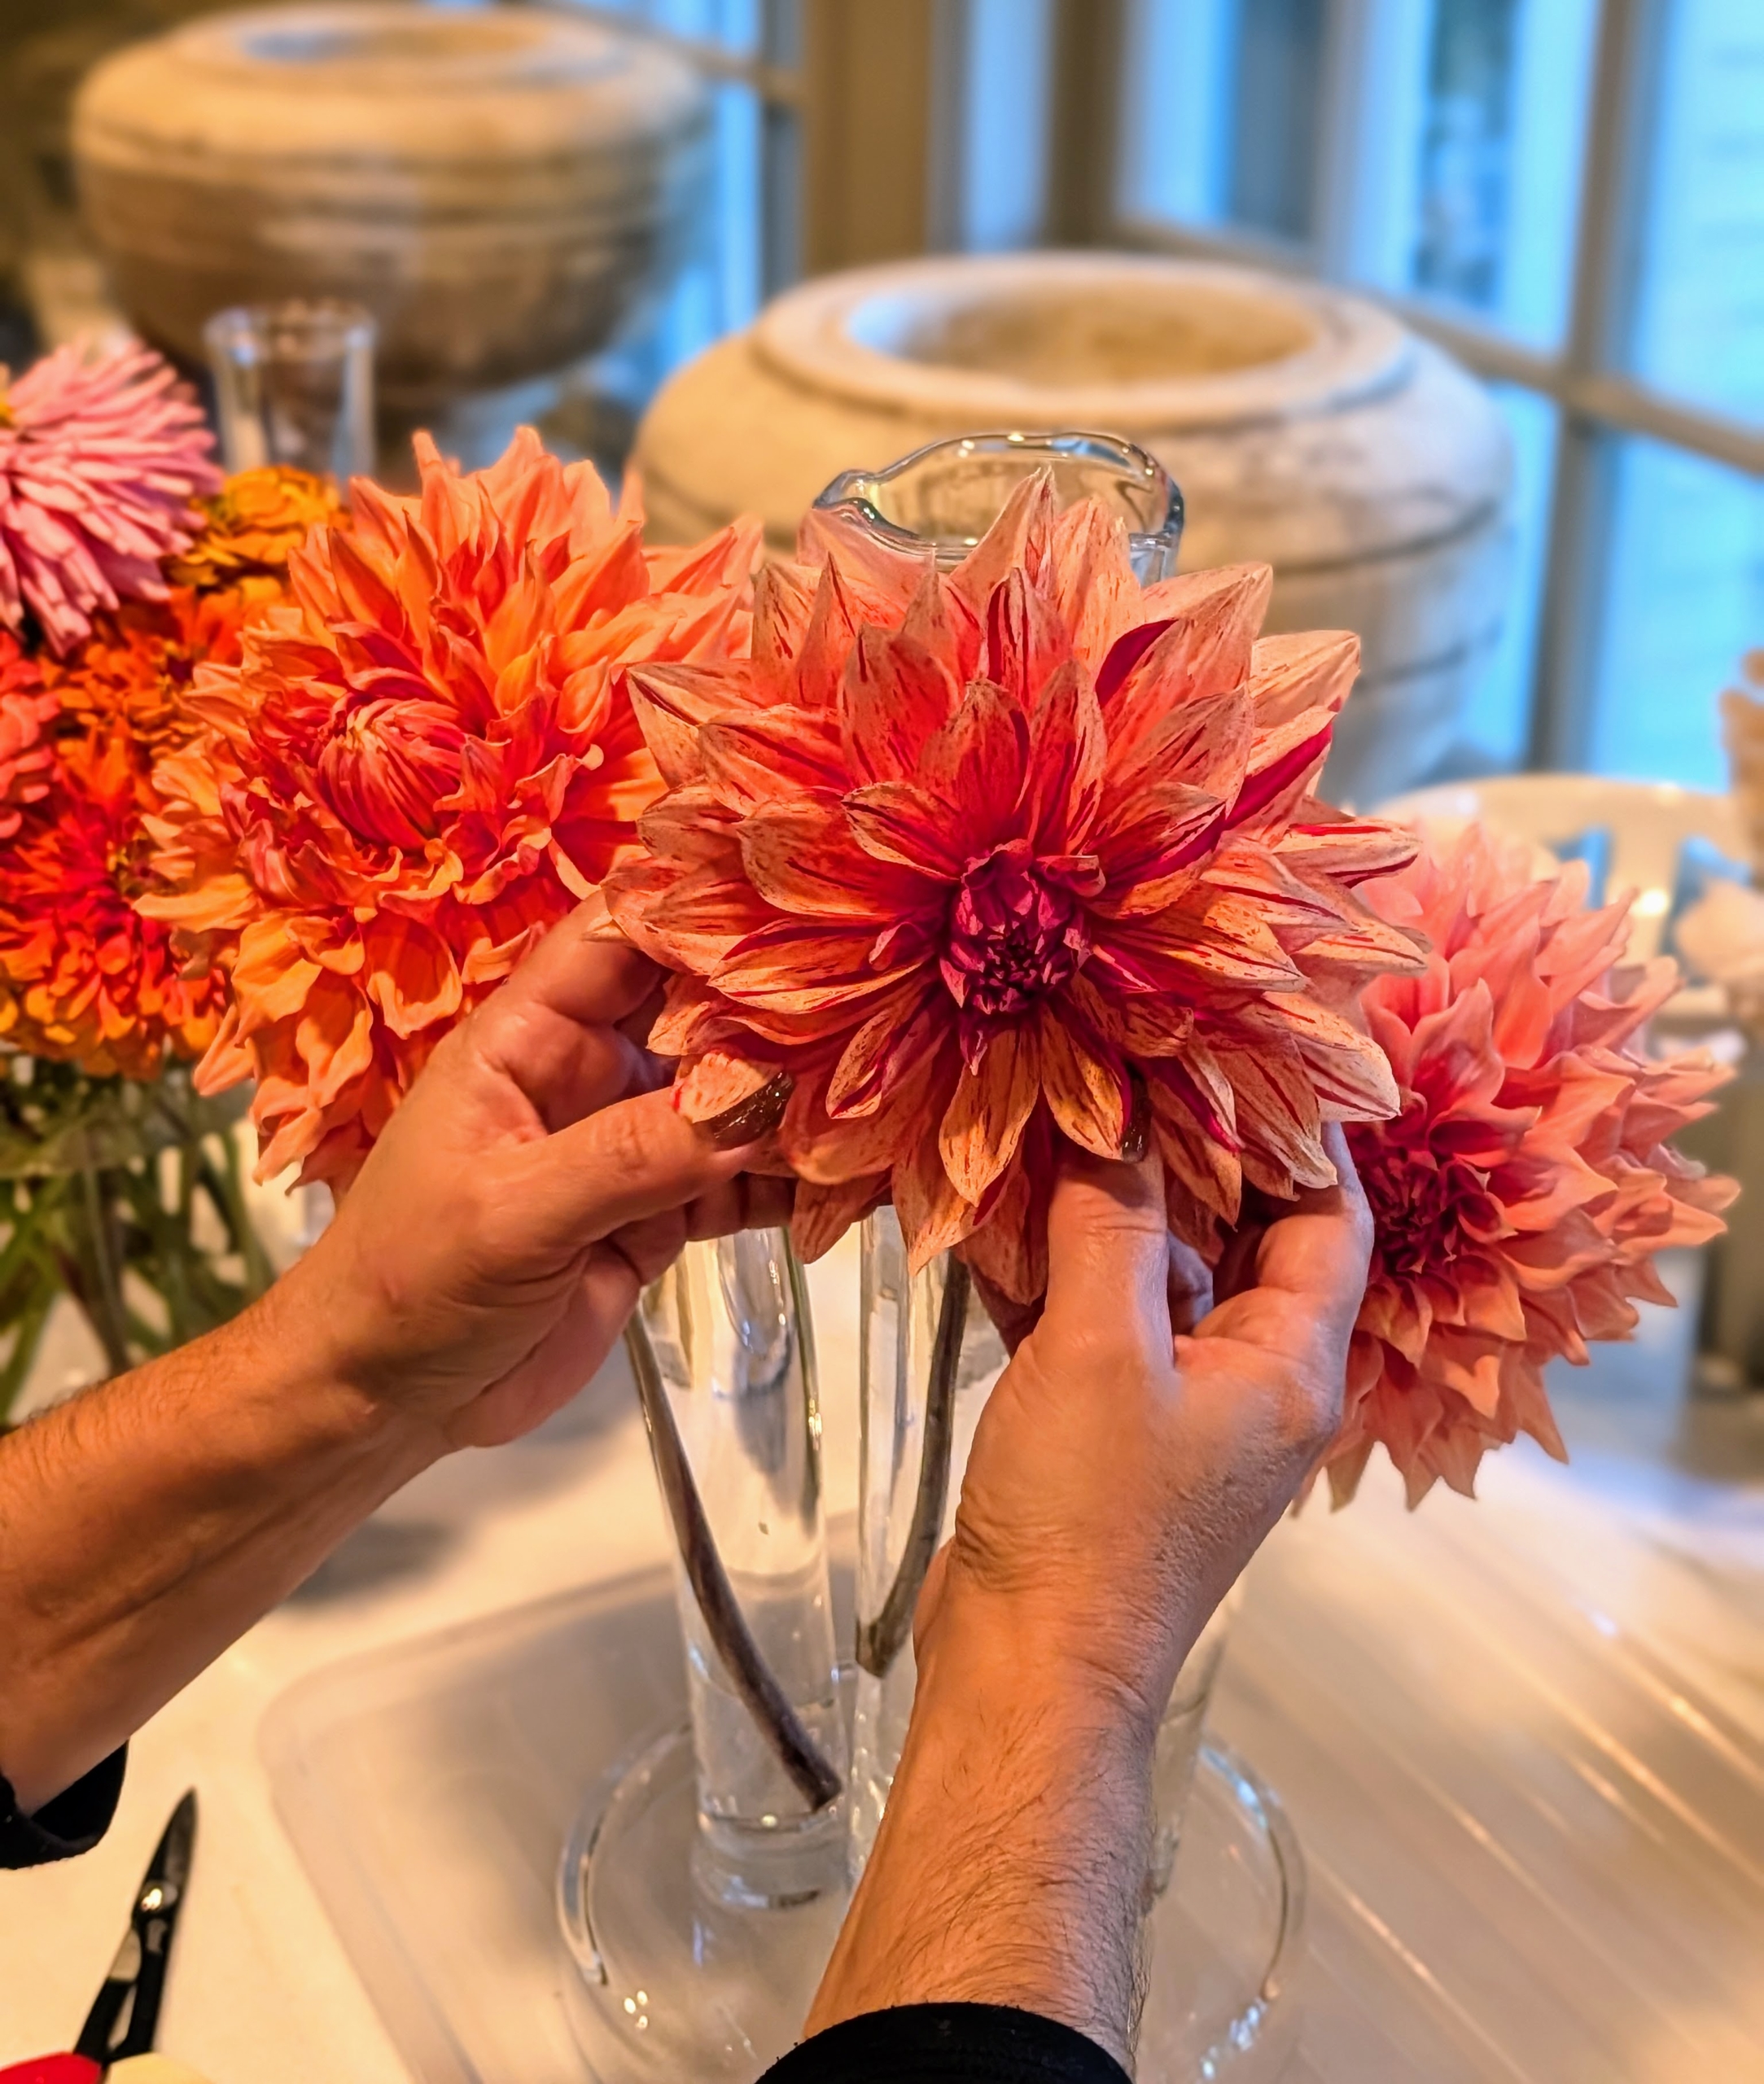
The next arrangement – dahlias. The dahlia is named after the Swedish 18th century botanist Anders Dahl, who originally declared the flower a vegetable, as the tubers are edible, but eating dahlias as a delicacy never grew popular.
Enma selects the largest and most striking flowers to be the focal point of the arrangement.
Then she follows up with other blooms to fill surrounding spaces. Dahlia stems are hollow, so they absorb water quickly through the outer layers.
Out in the garden, cut the stems long and then trim to adjust for the vase being used. Enma cut these just right to fit my vessels.
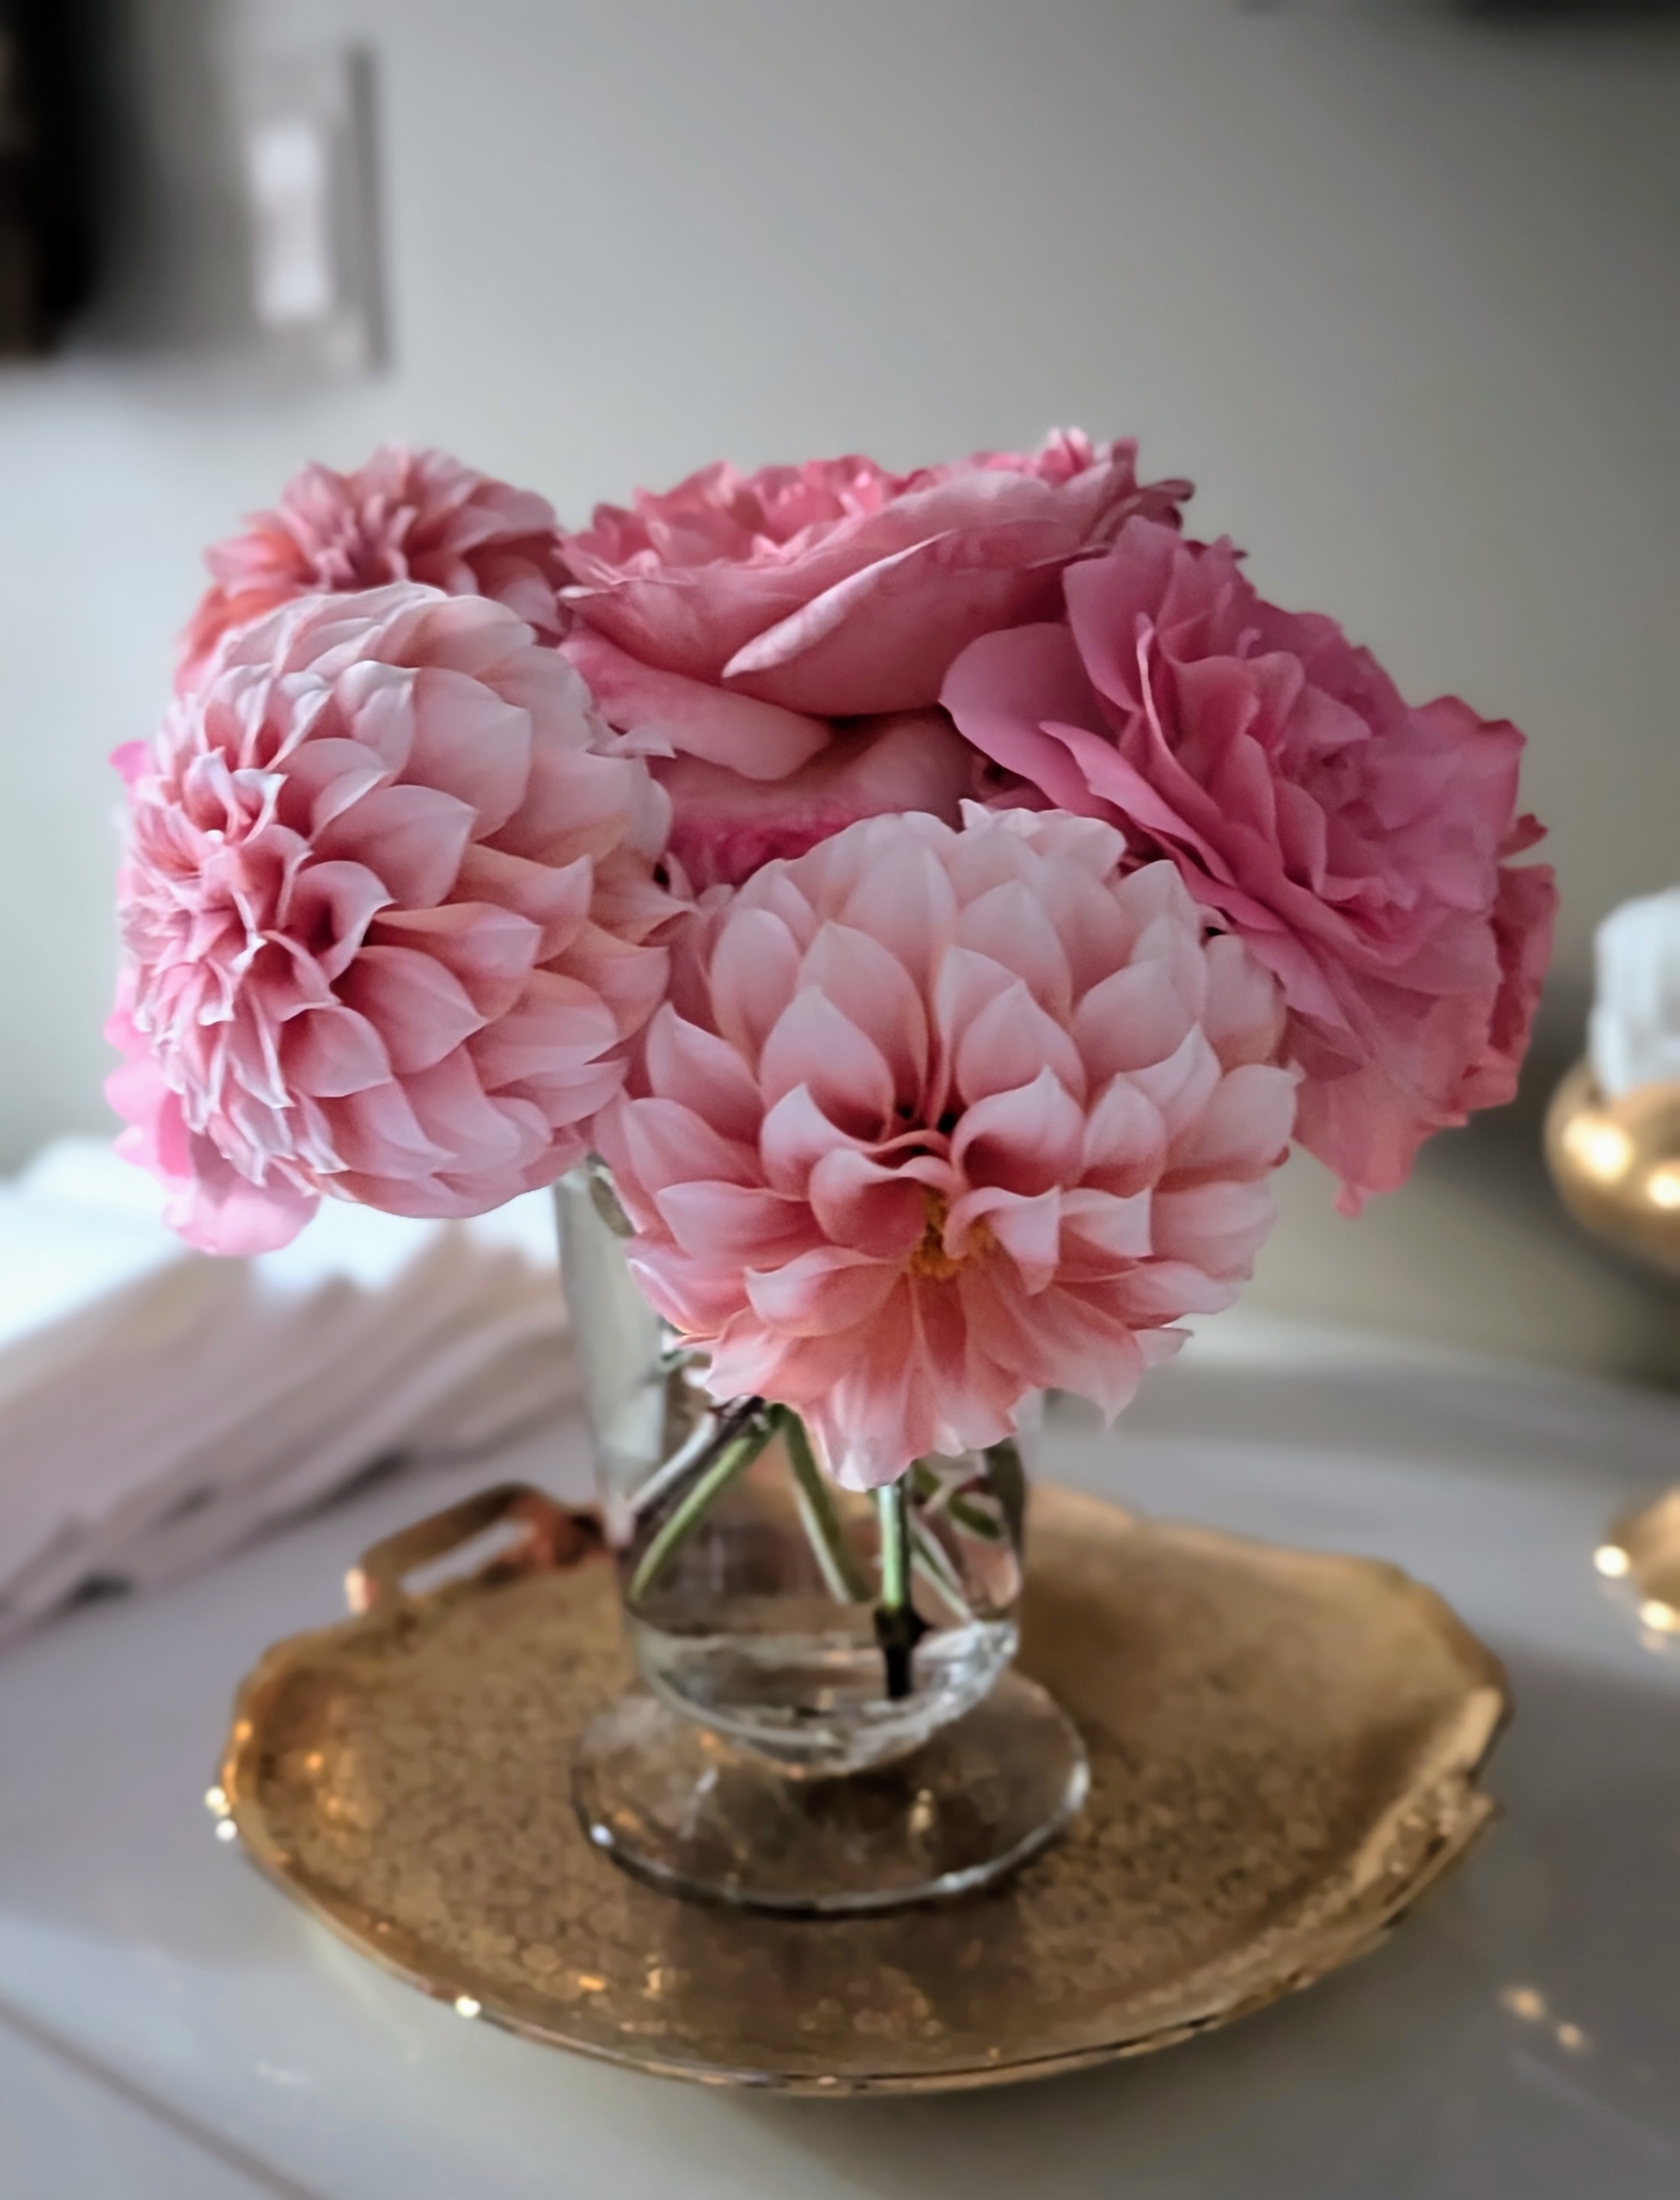
The next arrangement uses dahlias and roses. Do you see the beautiful Martha Stewart hybrid tea roses?
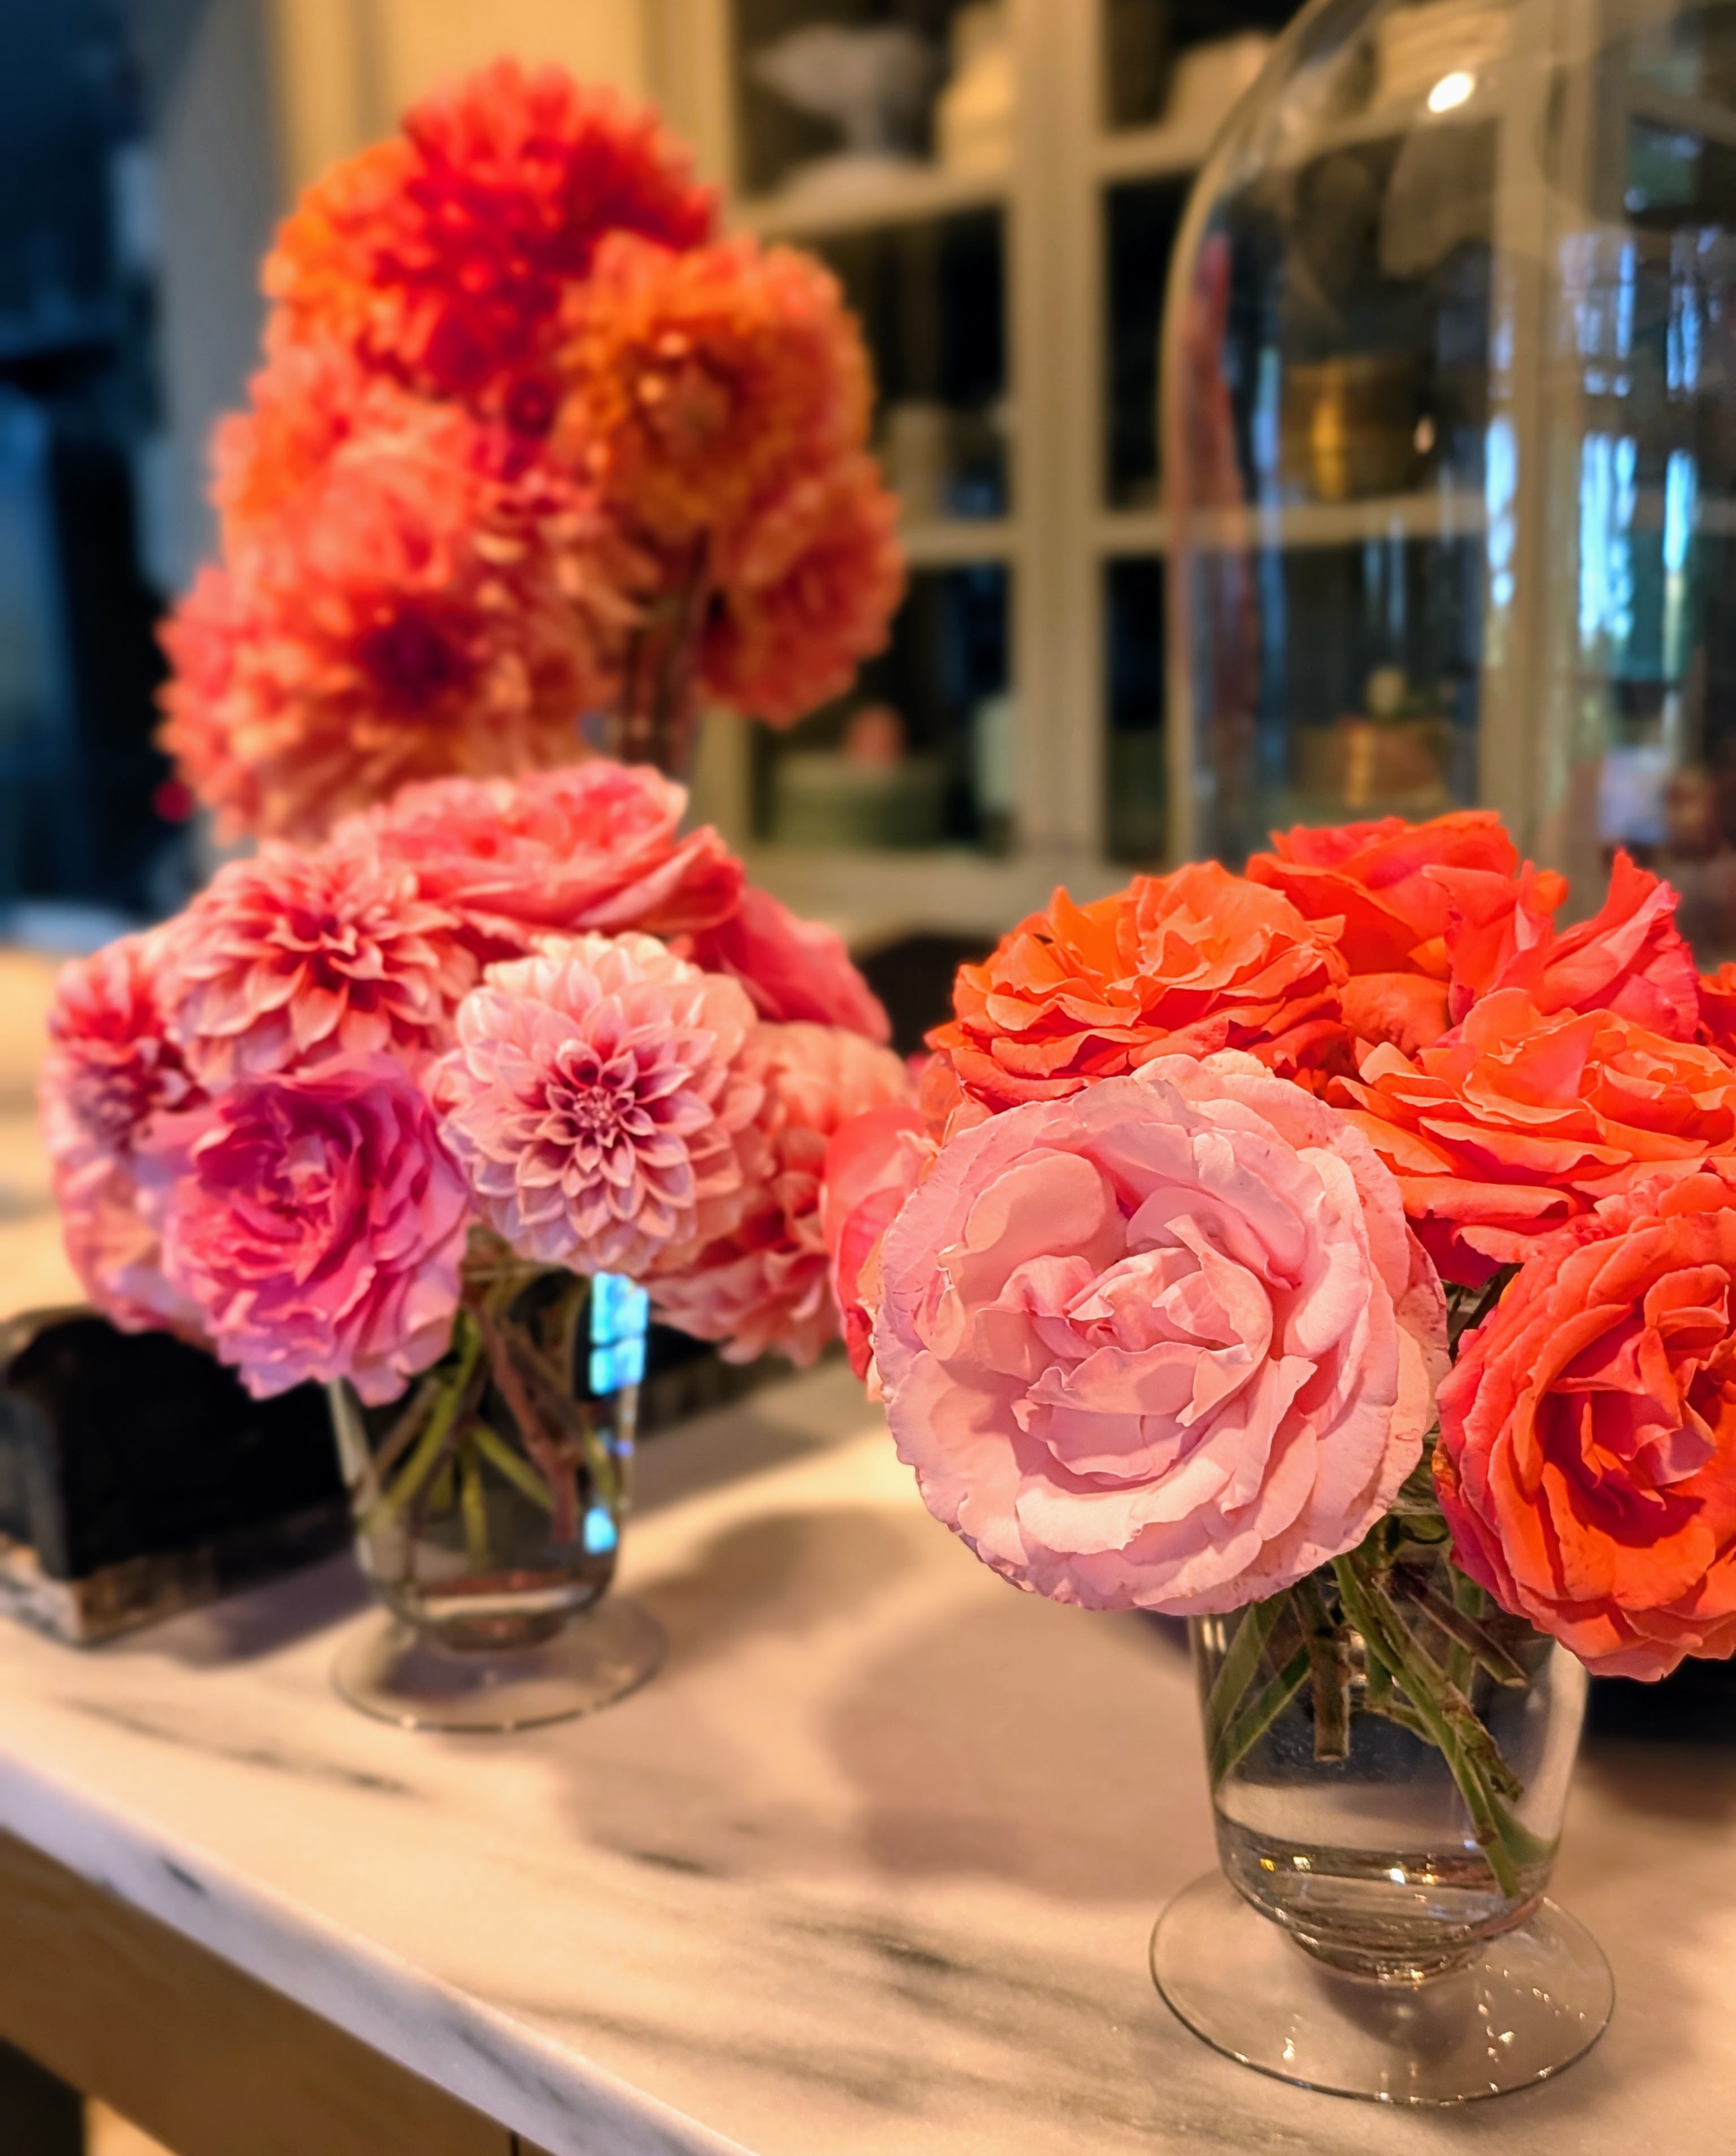
Enma made big arrangements and small. Sometimes, just a handful of flowers in a smaller glass vase is all one needs. Flower arrangements do not have to be huge or elaborate to be stunning.
These dahlias are on my kitchen counter, which like yours is the hub of my home, where I often take calls, have meetings, and gather with guests – everyone can enjoy the flowers as soon as they come inside.
This dahlia arrangement is on the center island in my servery.
The zinnia arrangement was placed on a table in my sitting room.
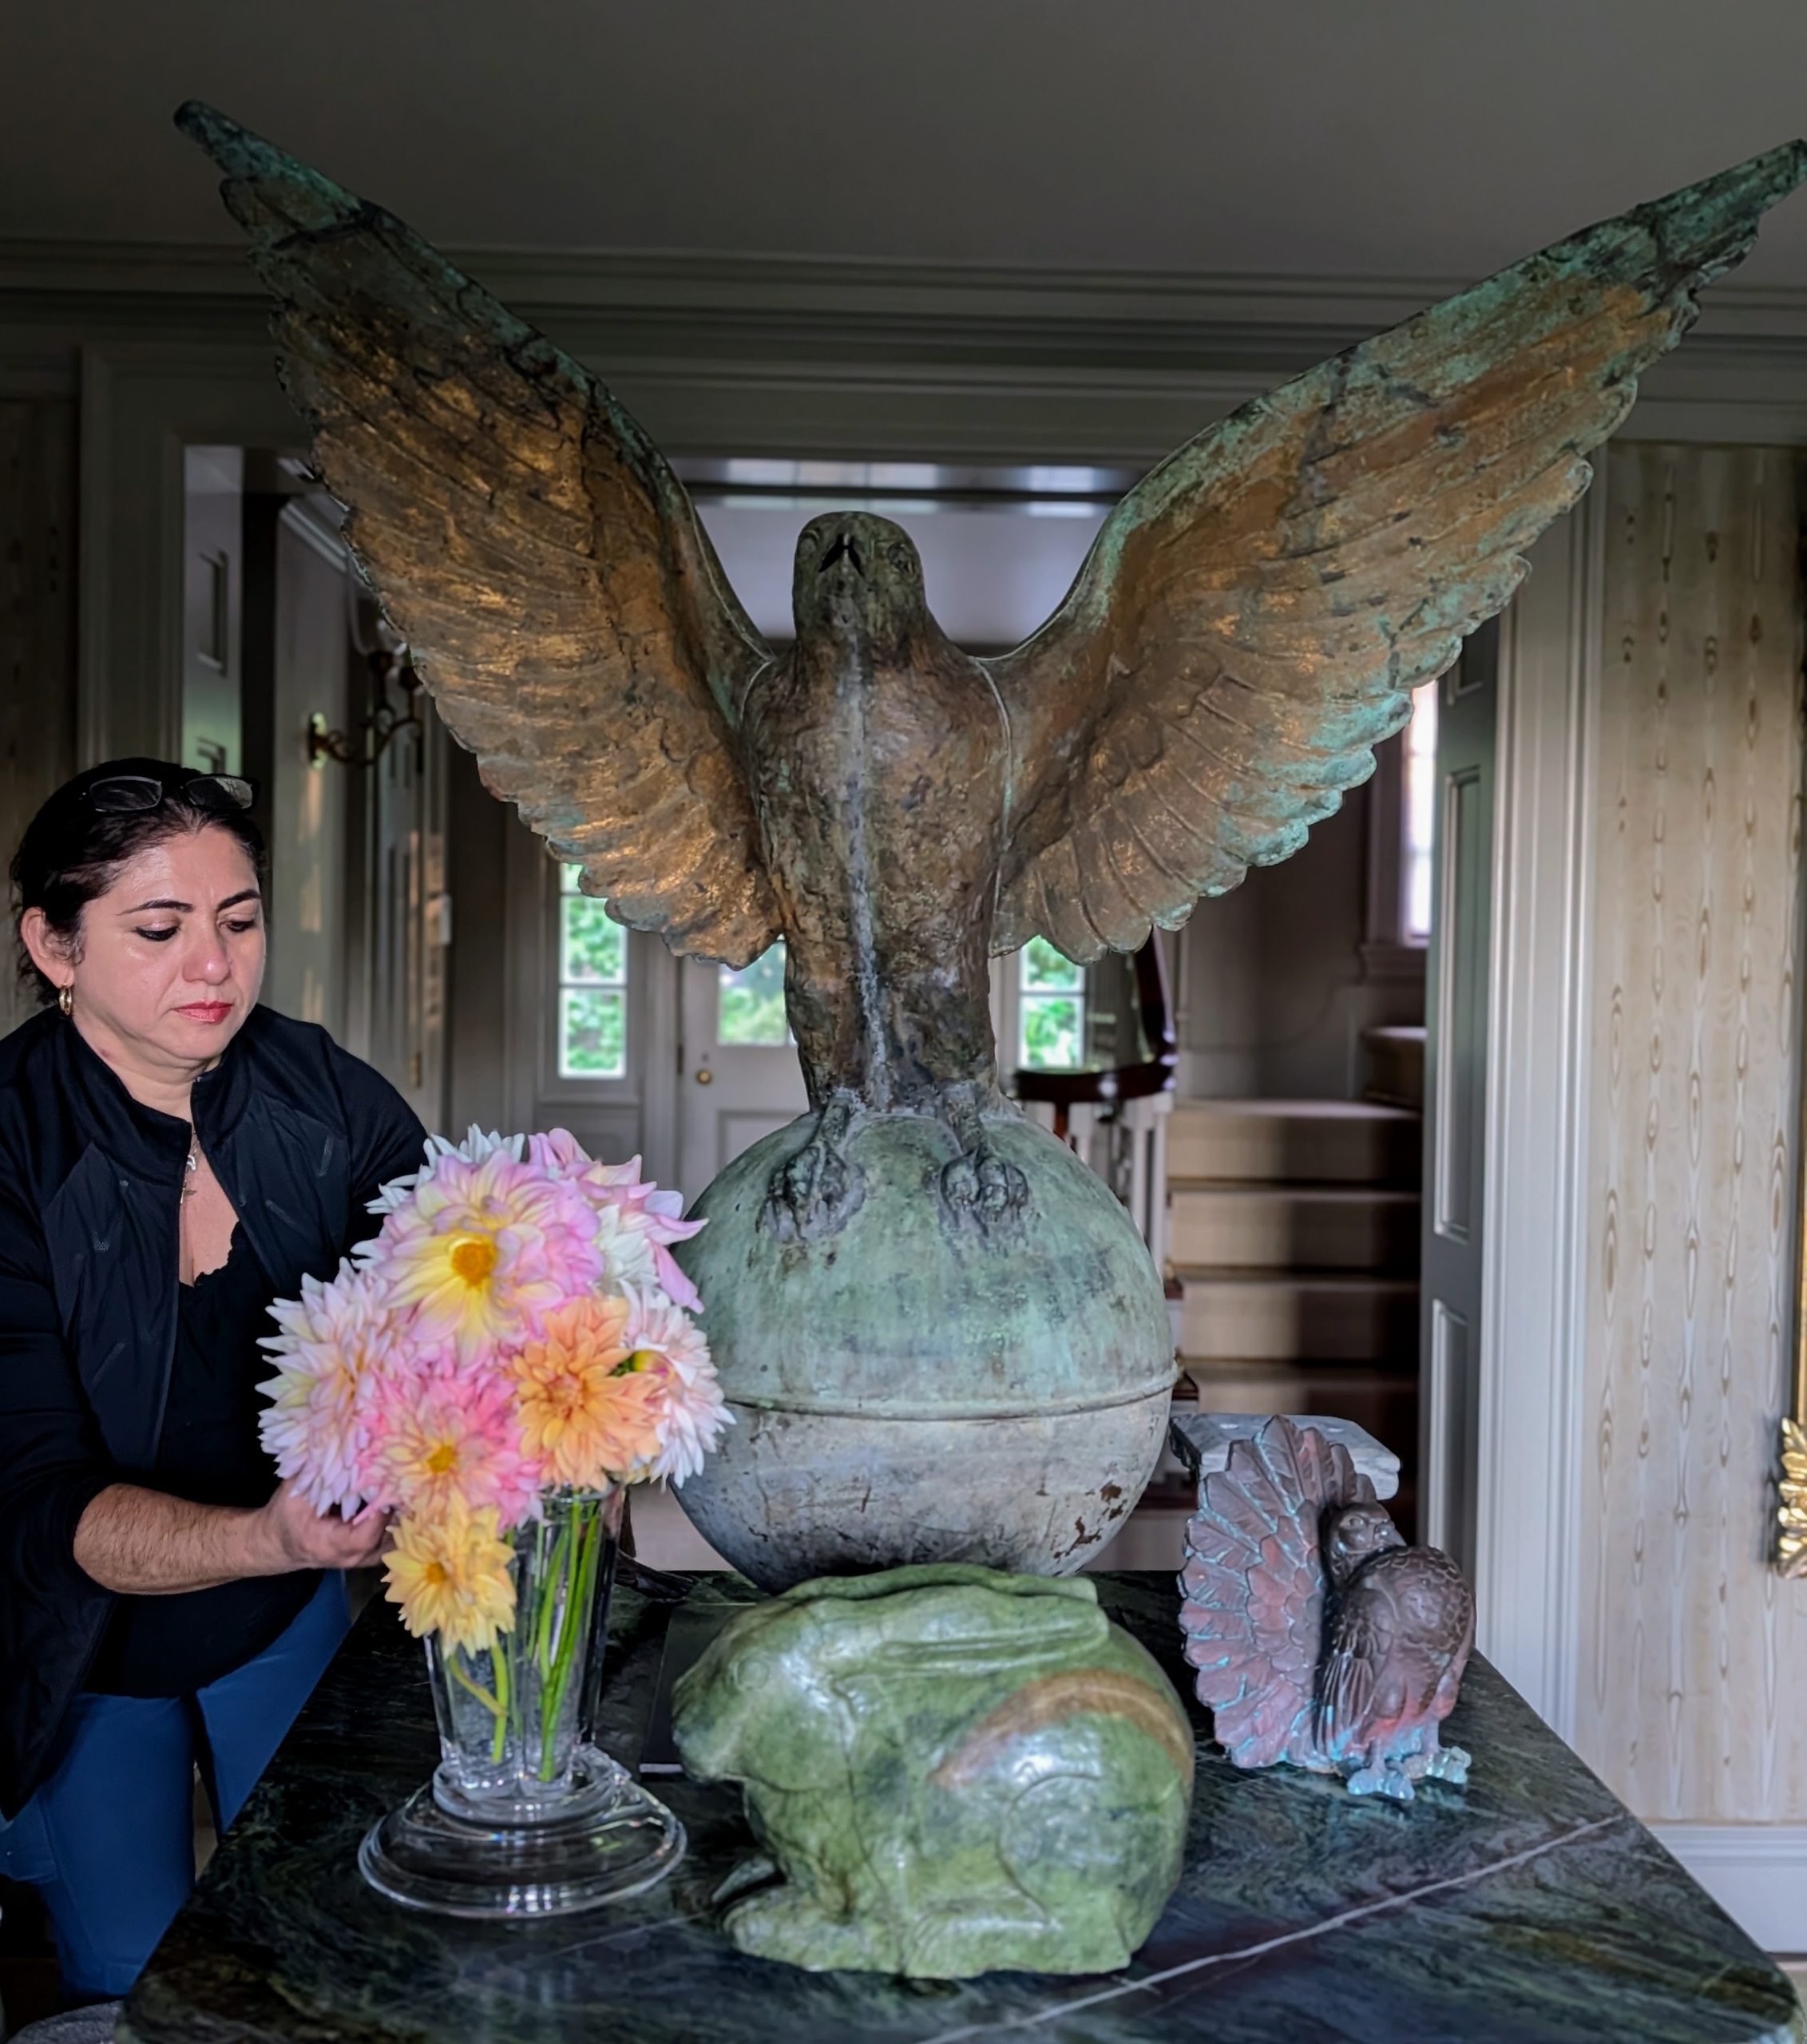
Here is Enma placing dahlias on my entrance hall table under the wing of my falcon.
I hope you can bring in some of the beauty of the outdoors inside, and enjoy the colors and fragrances of your garden’s flowers.