And with a little patience and elbow grease, my pond garden is all planted.
Last week, my gardeners and outdoor grounds crew worked tirelessly to get more than 100 lush and healthy azaleas, ferns, and trees in the ground. All the azaleas are from White's Nursery in Germantown, Maryland. White’s Nursery specializes in azaleas as well as rhododendrons. Of all the shrubs that flower in spring, azaleas provide some of the most brilliant displays, so I wanted the area filled with shades of yellow, cream, and orange azaleas. Together with the bold greens of the other perennials and trees, this garden is sure to be amazing when it matures.
Enjoy these photos.
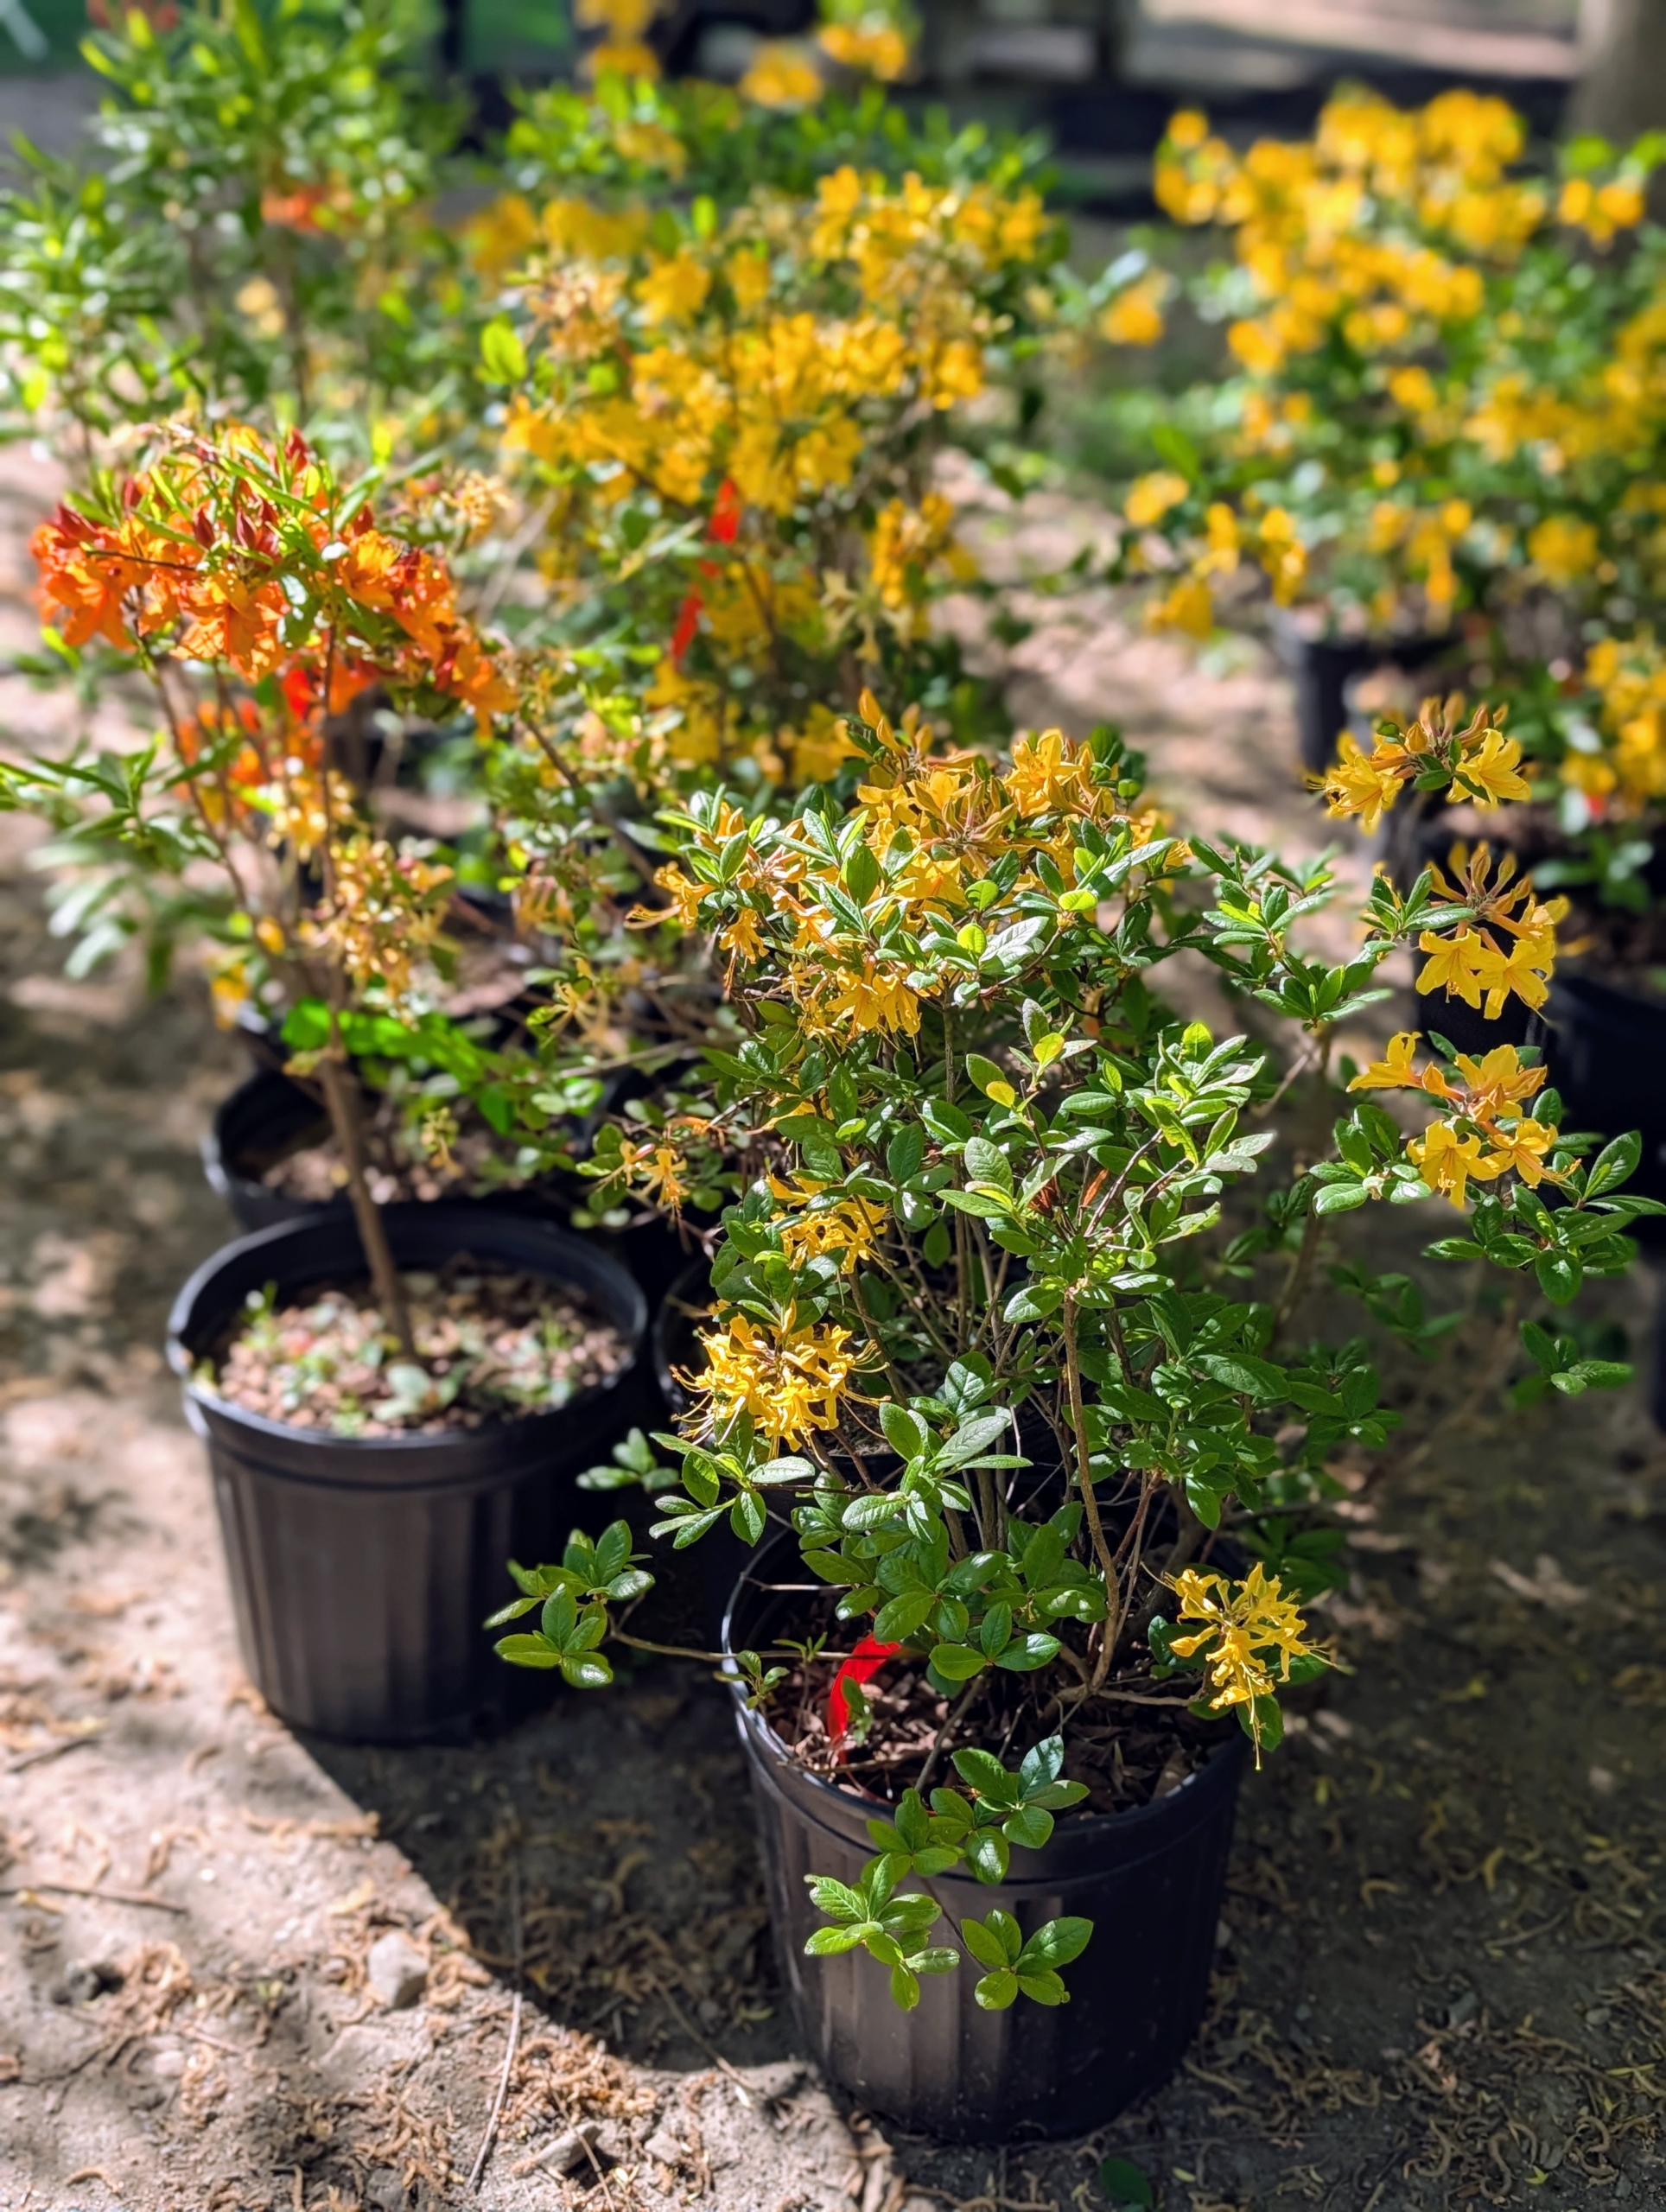
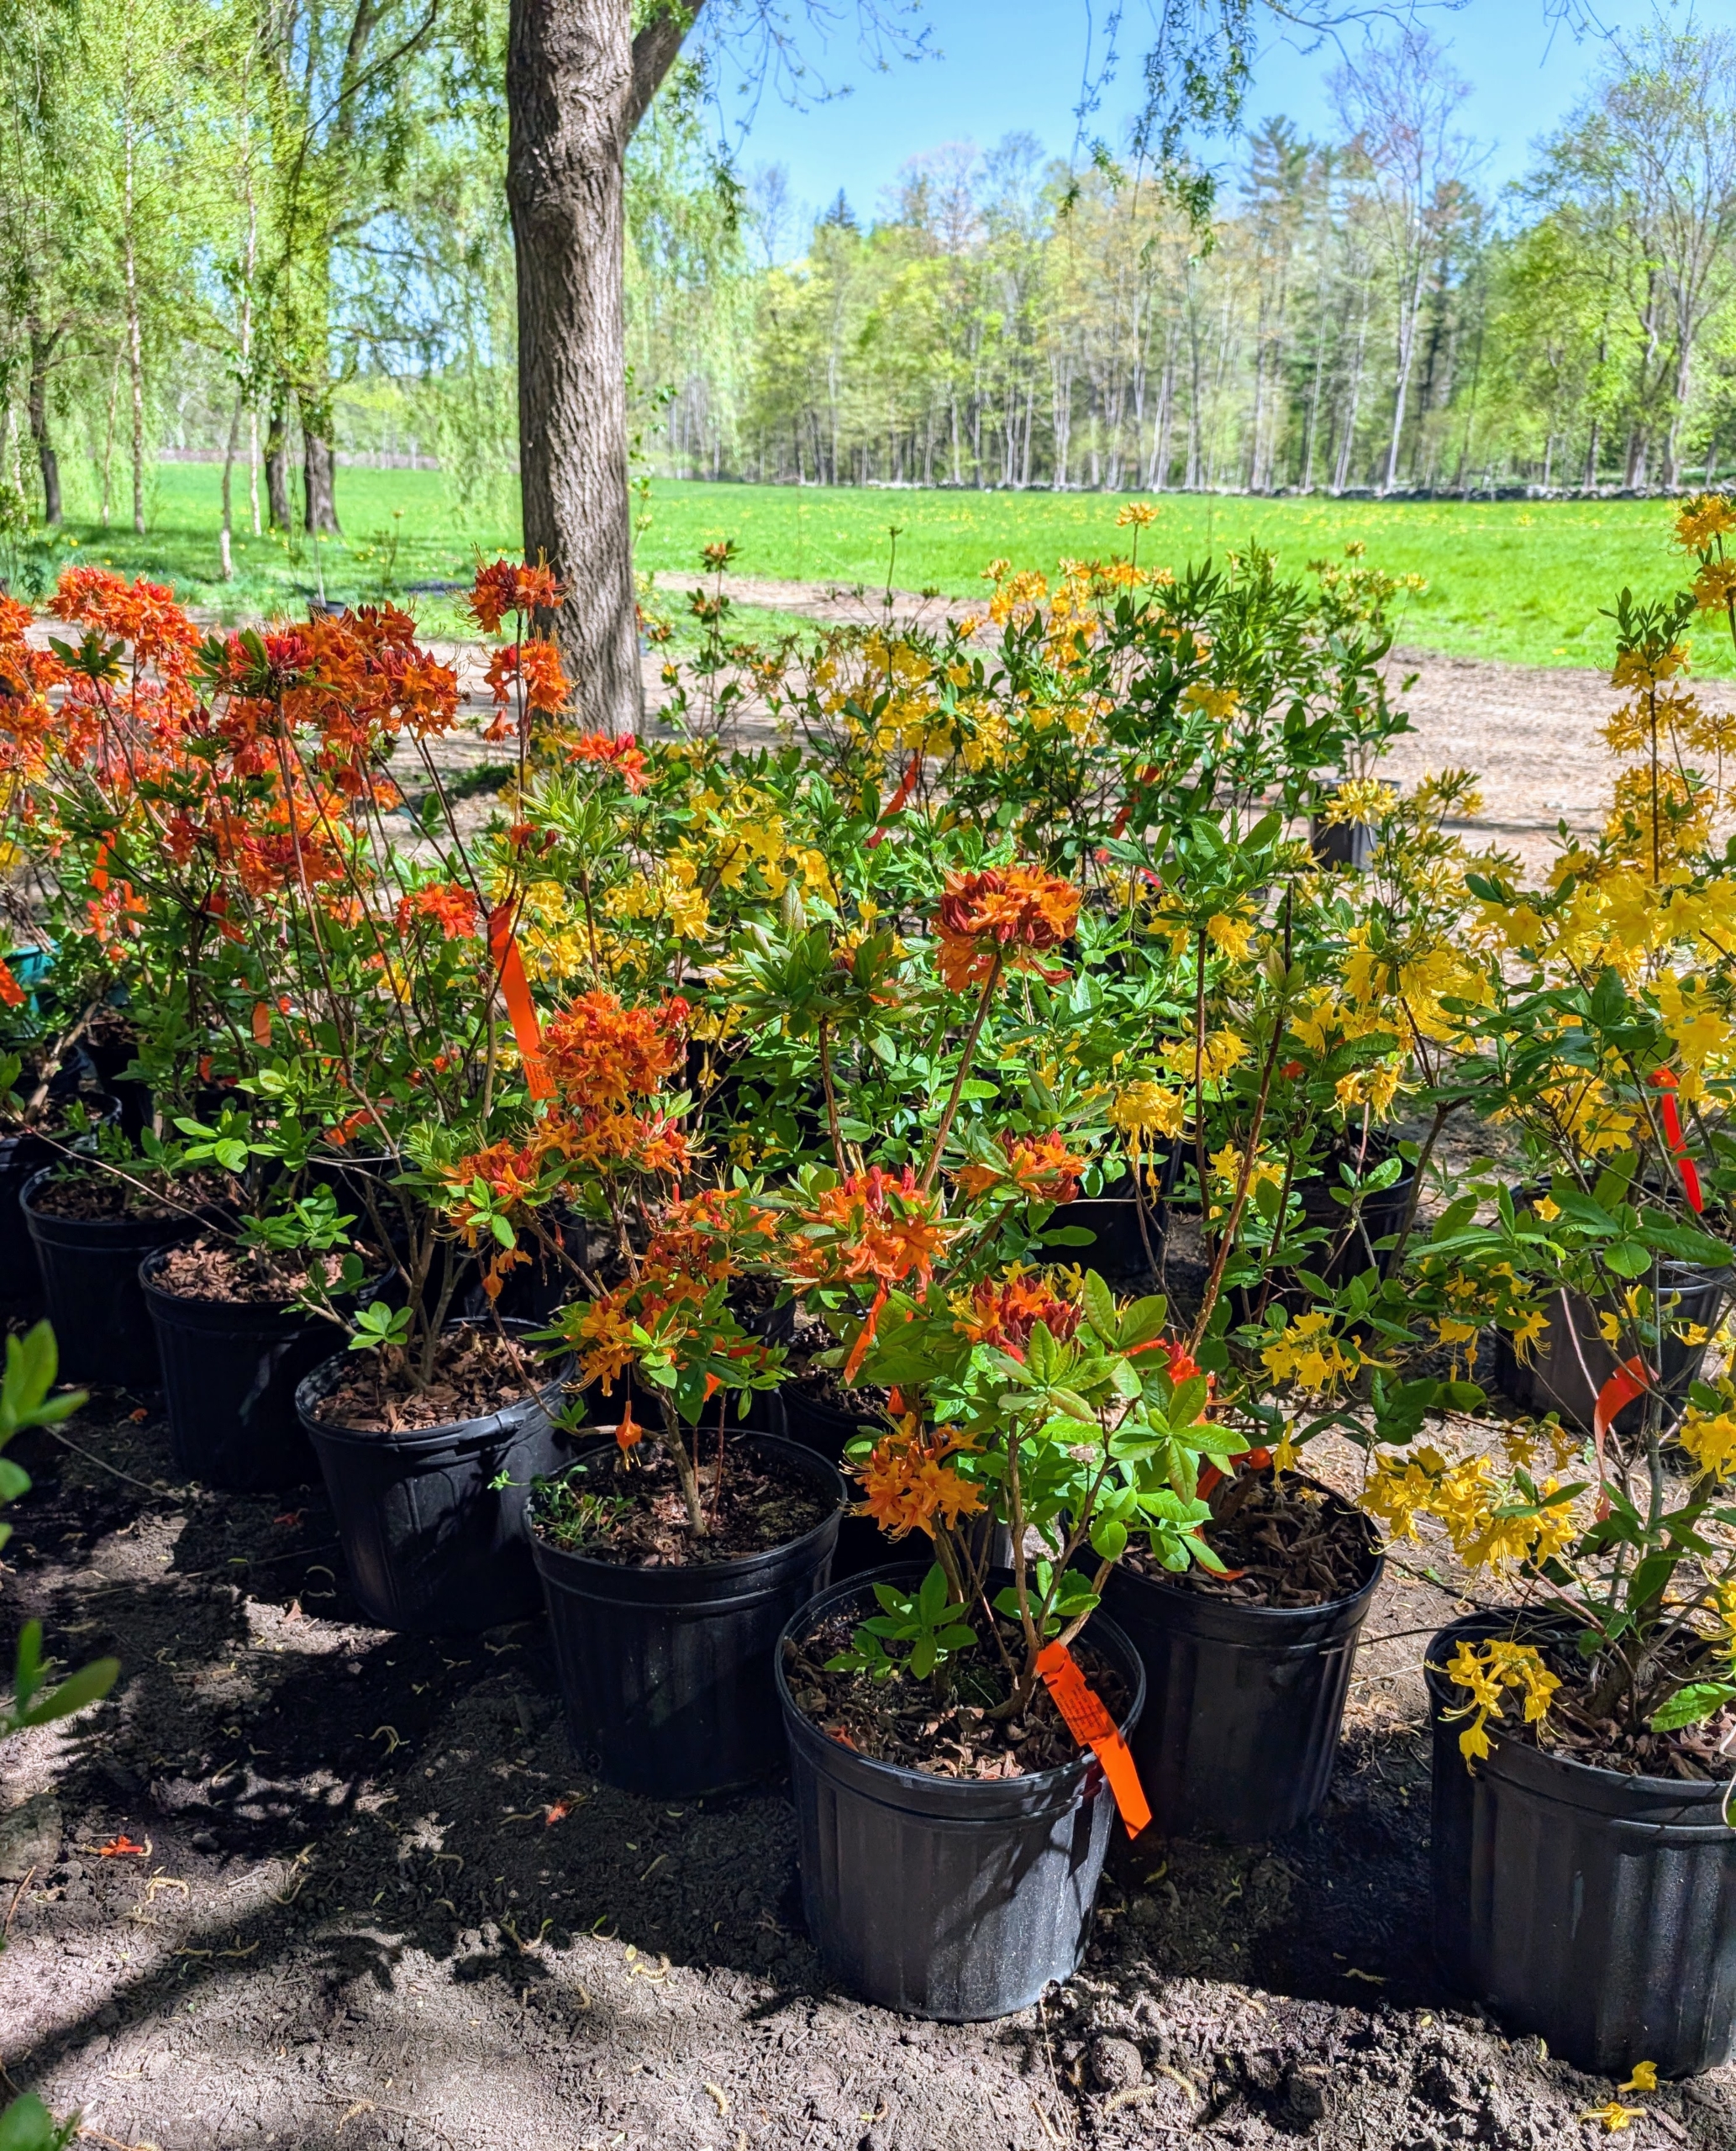
The best time to purchase azaleas is in spring when they are in full bloom. That way, one can see the flower colors and plan a garden design. Many of these are blooming so wonderfully now.
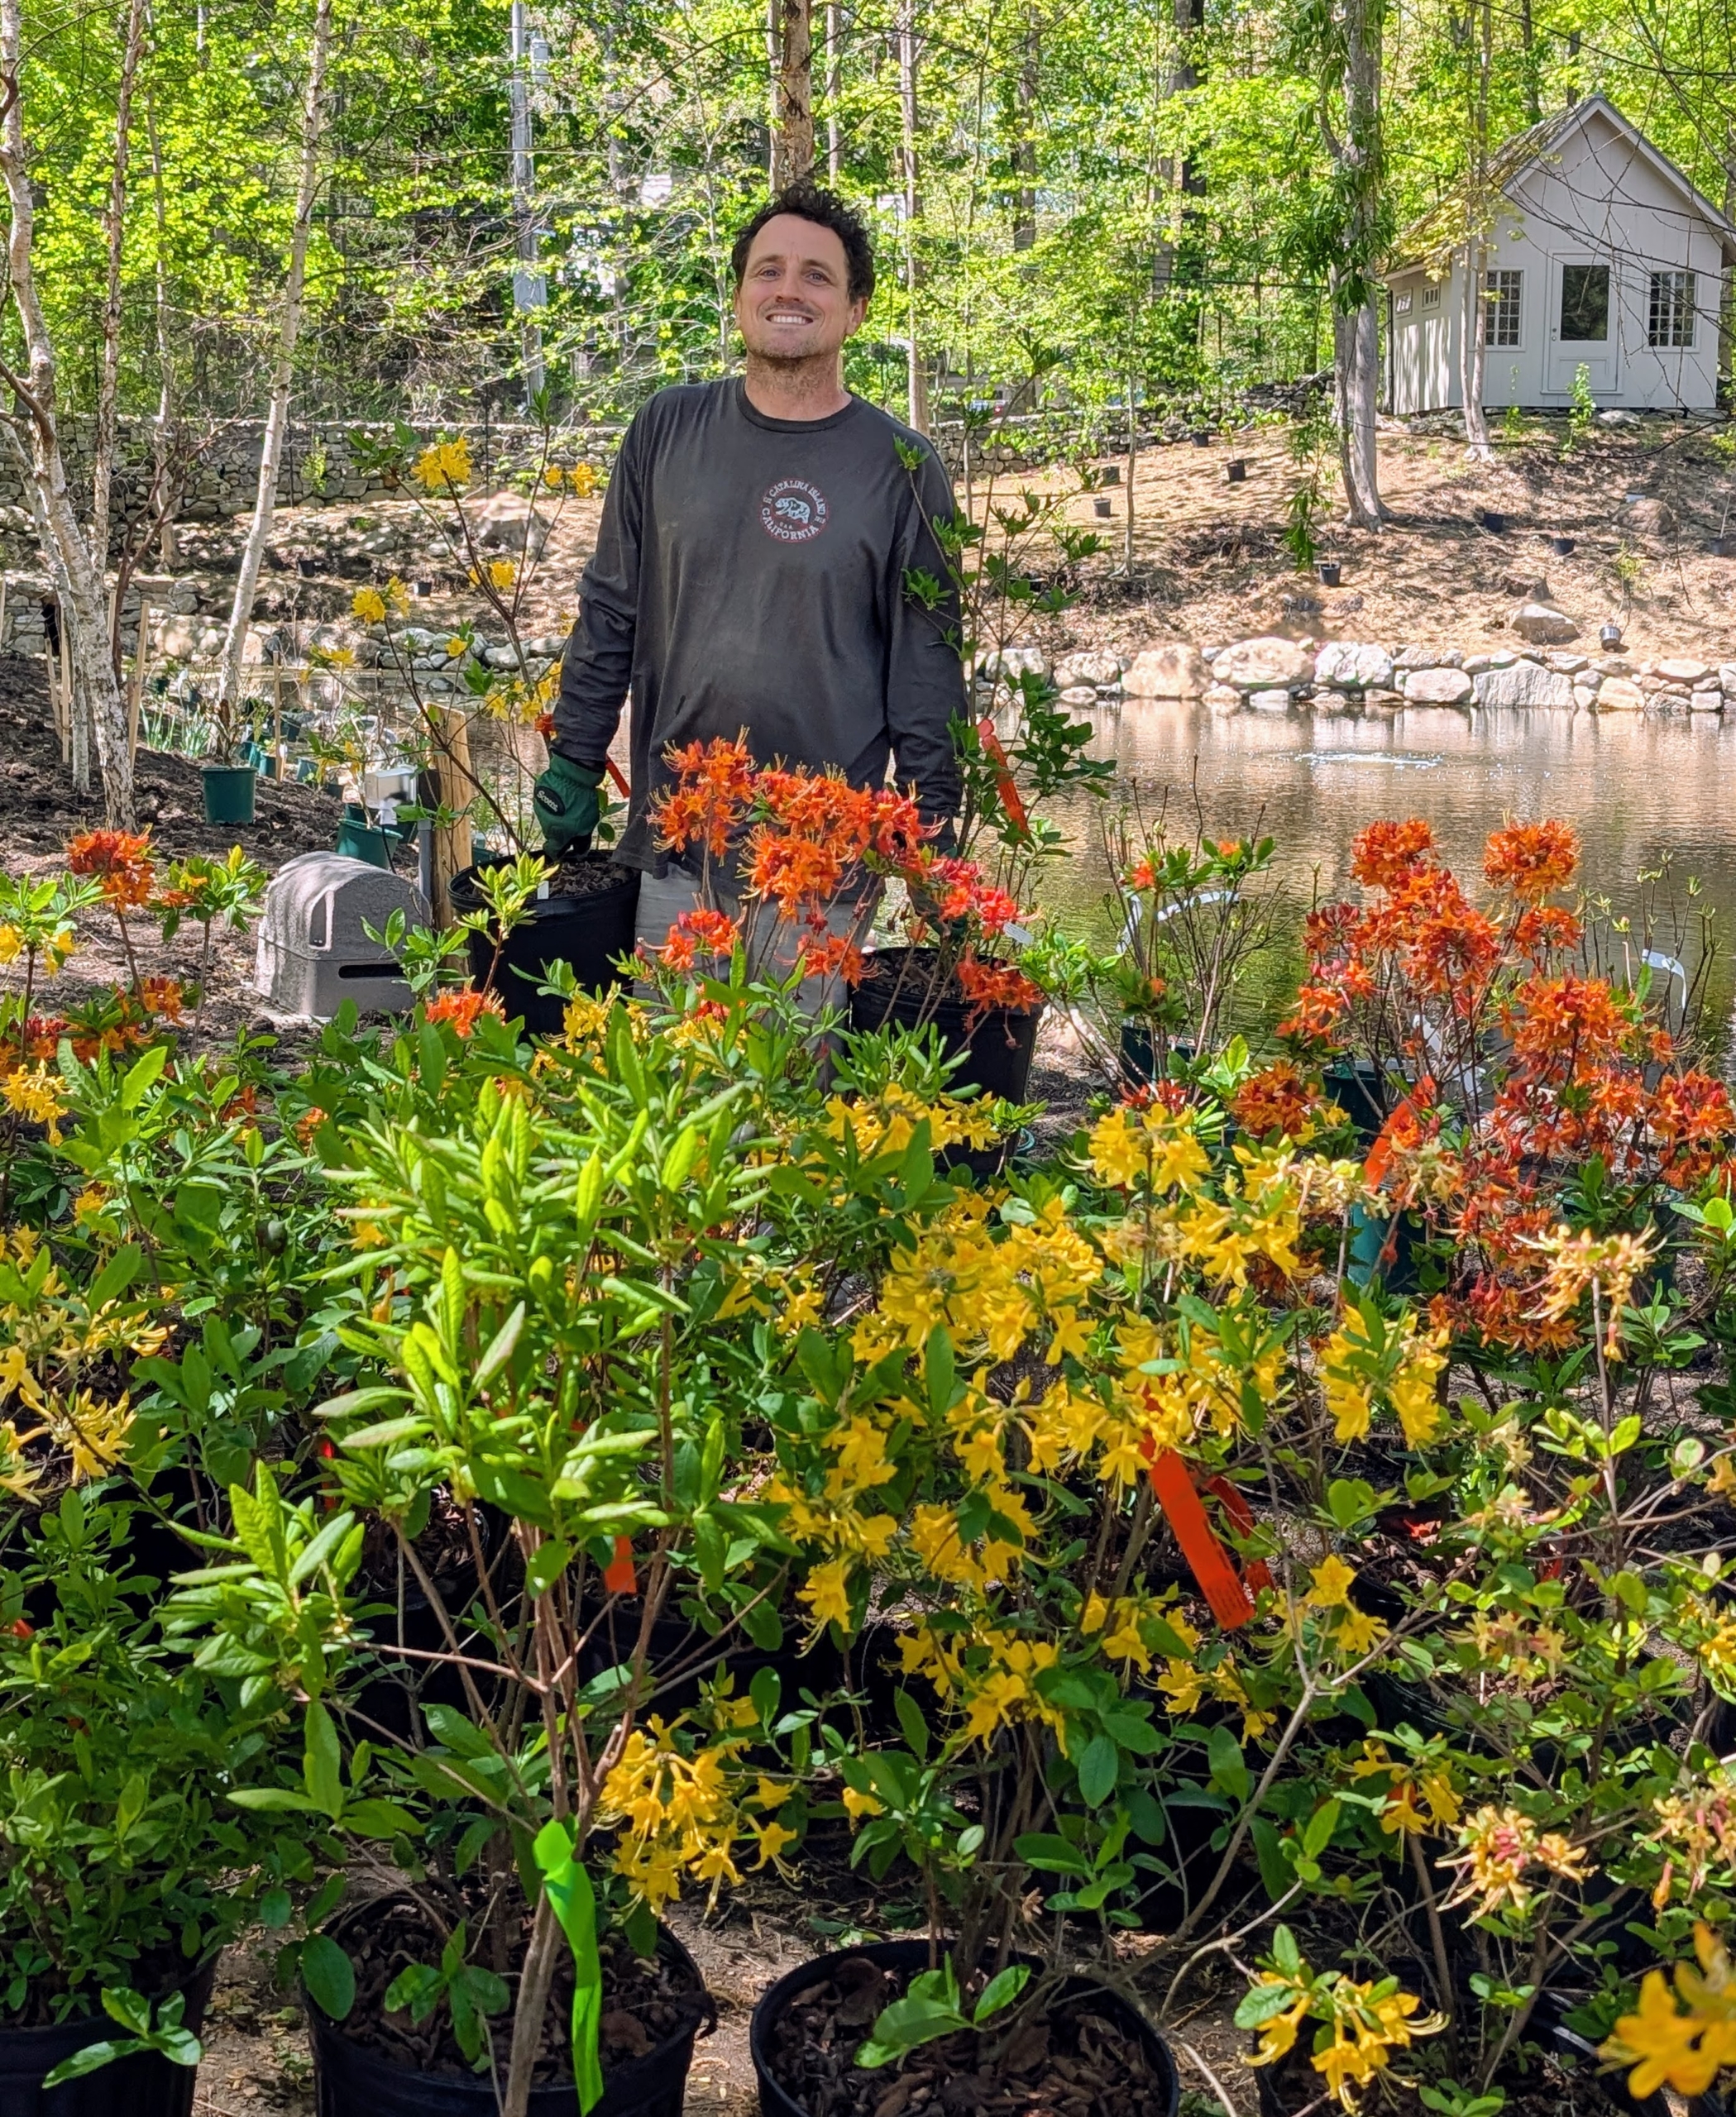
Here’s Ryan placing all 70 of these colorful orange, yellow, and cream colored azaleas. Azaleas prefer morning sun and afternoon shade, or filtered light. Hot all-day sun can stress the plants and make them more susceptible to pests.
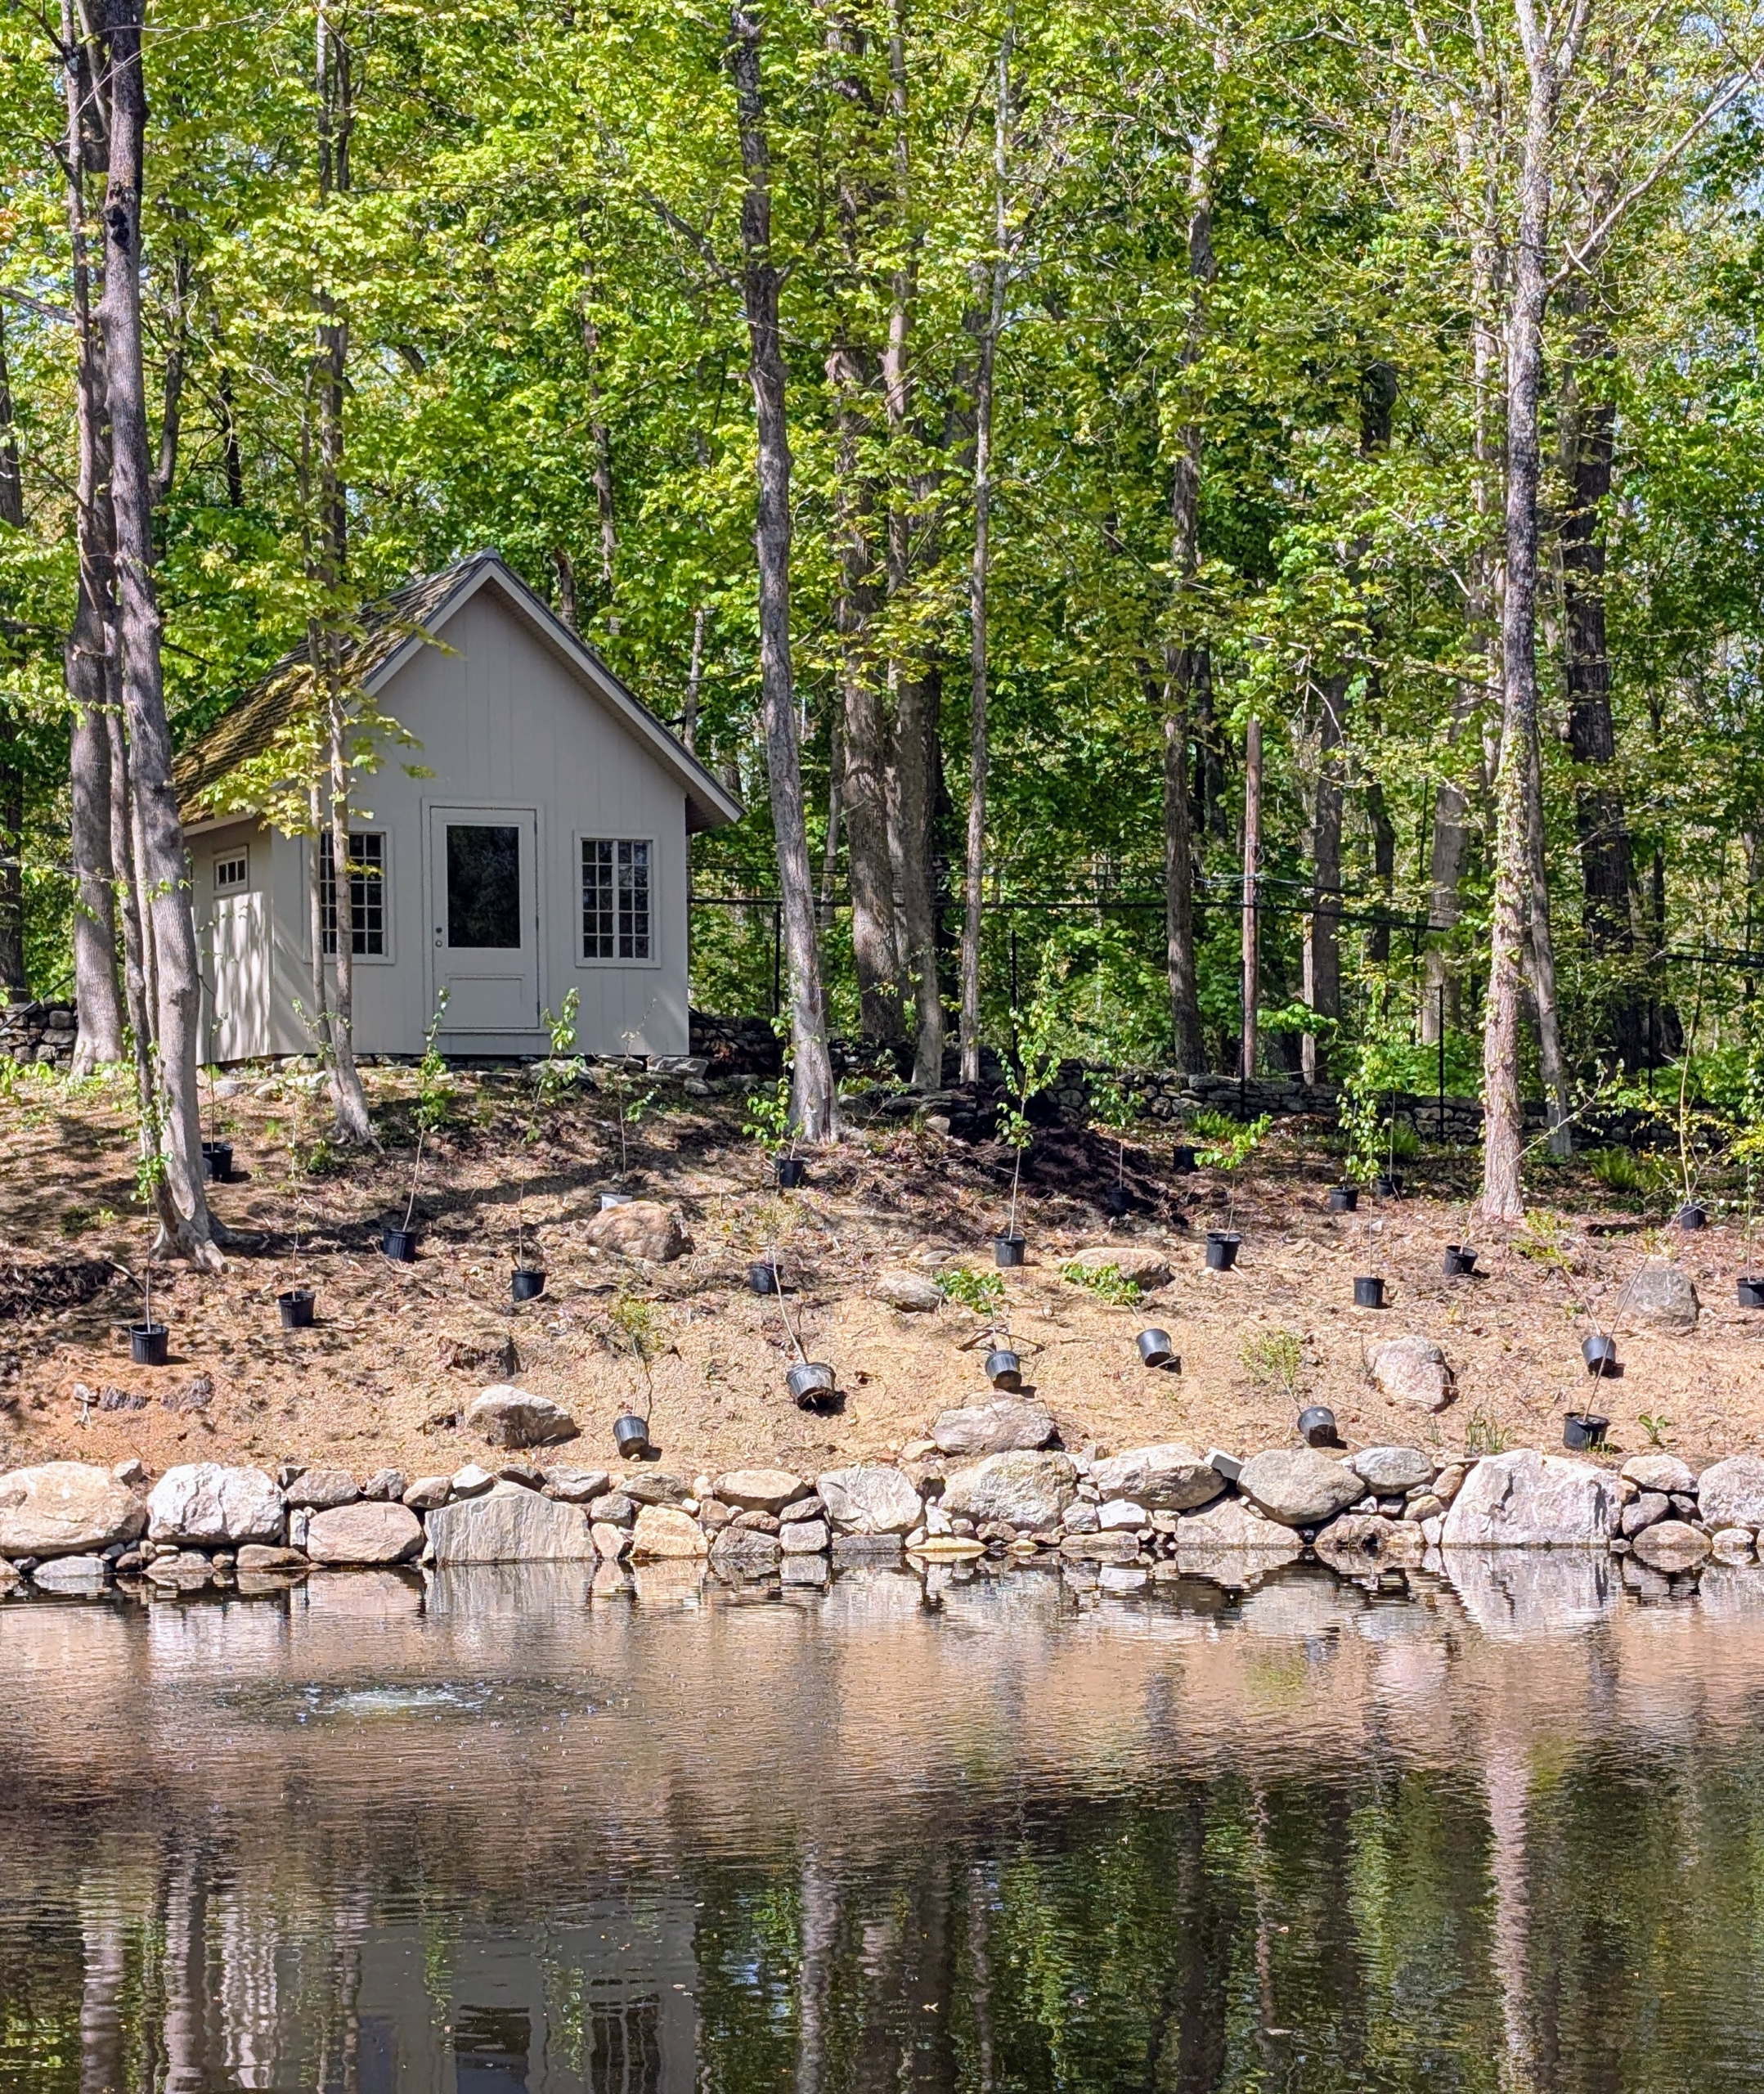
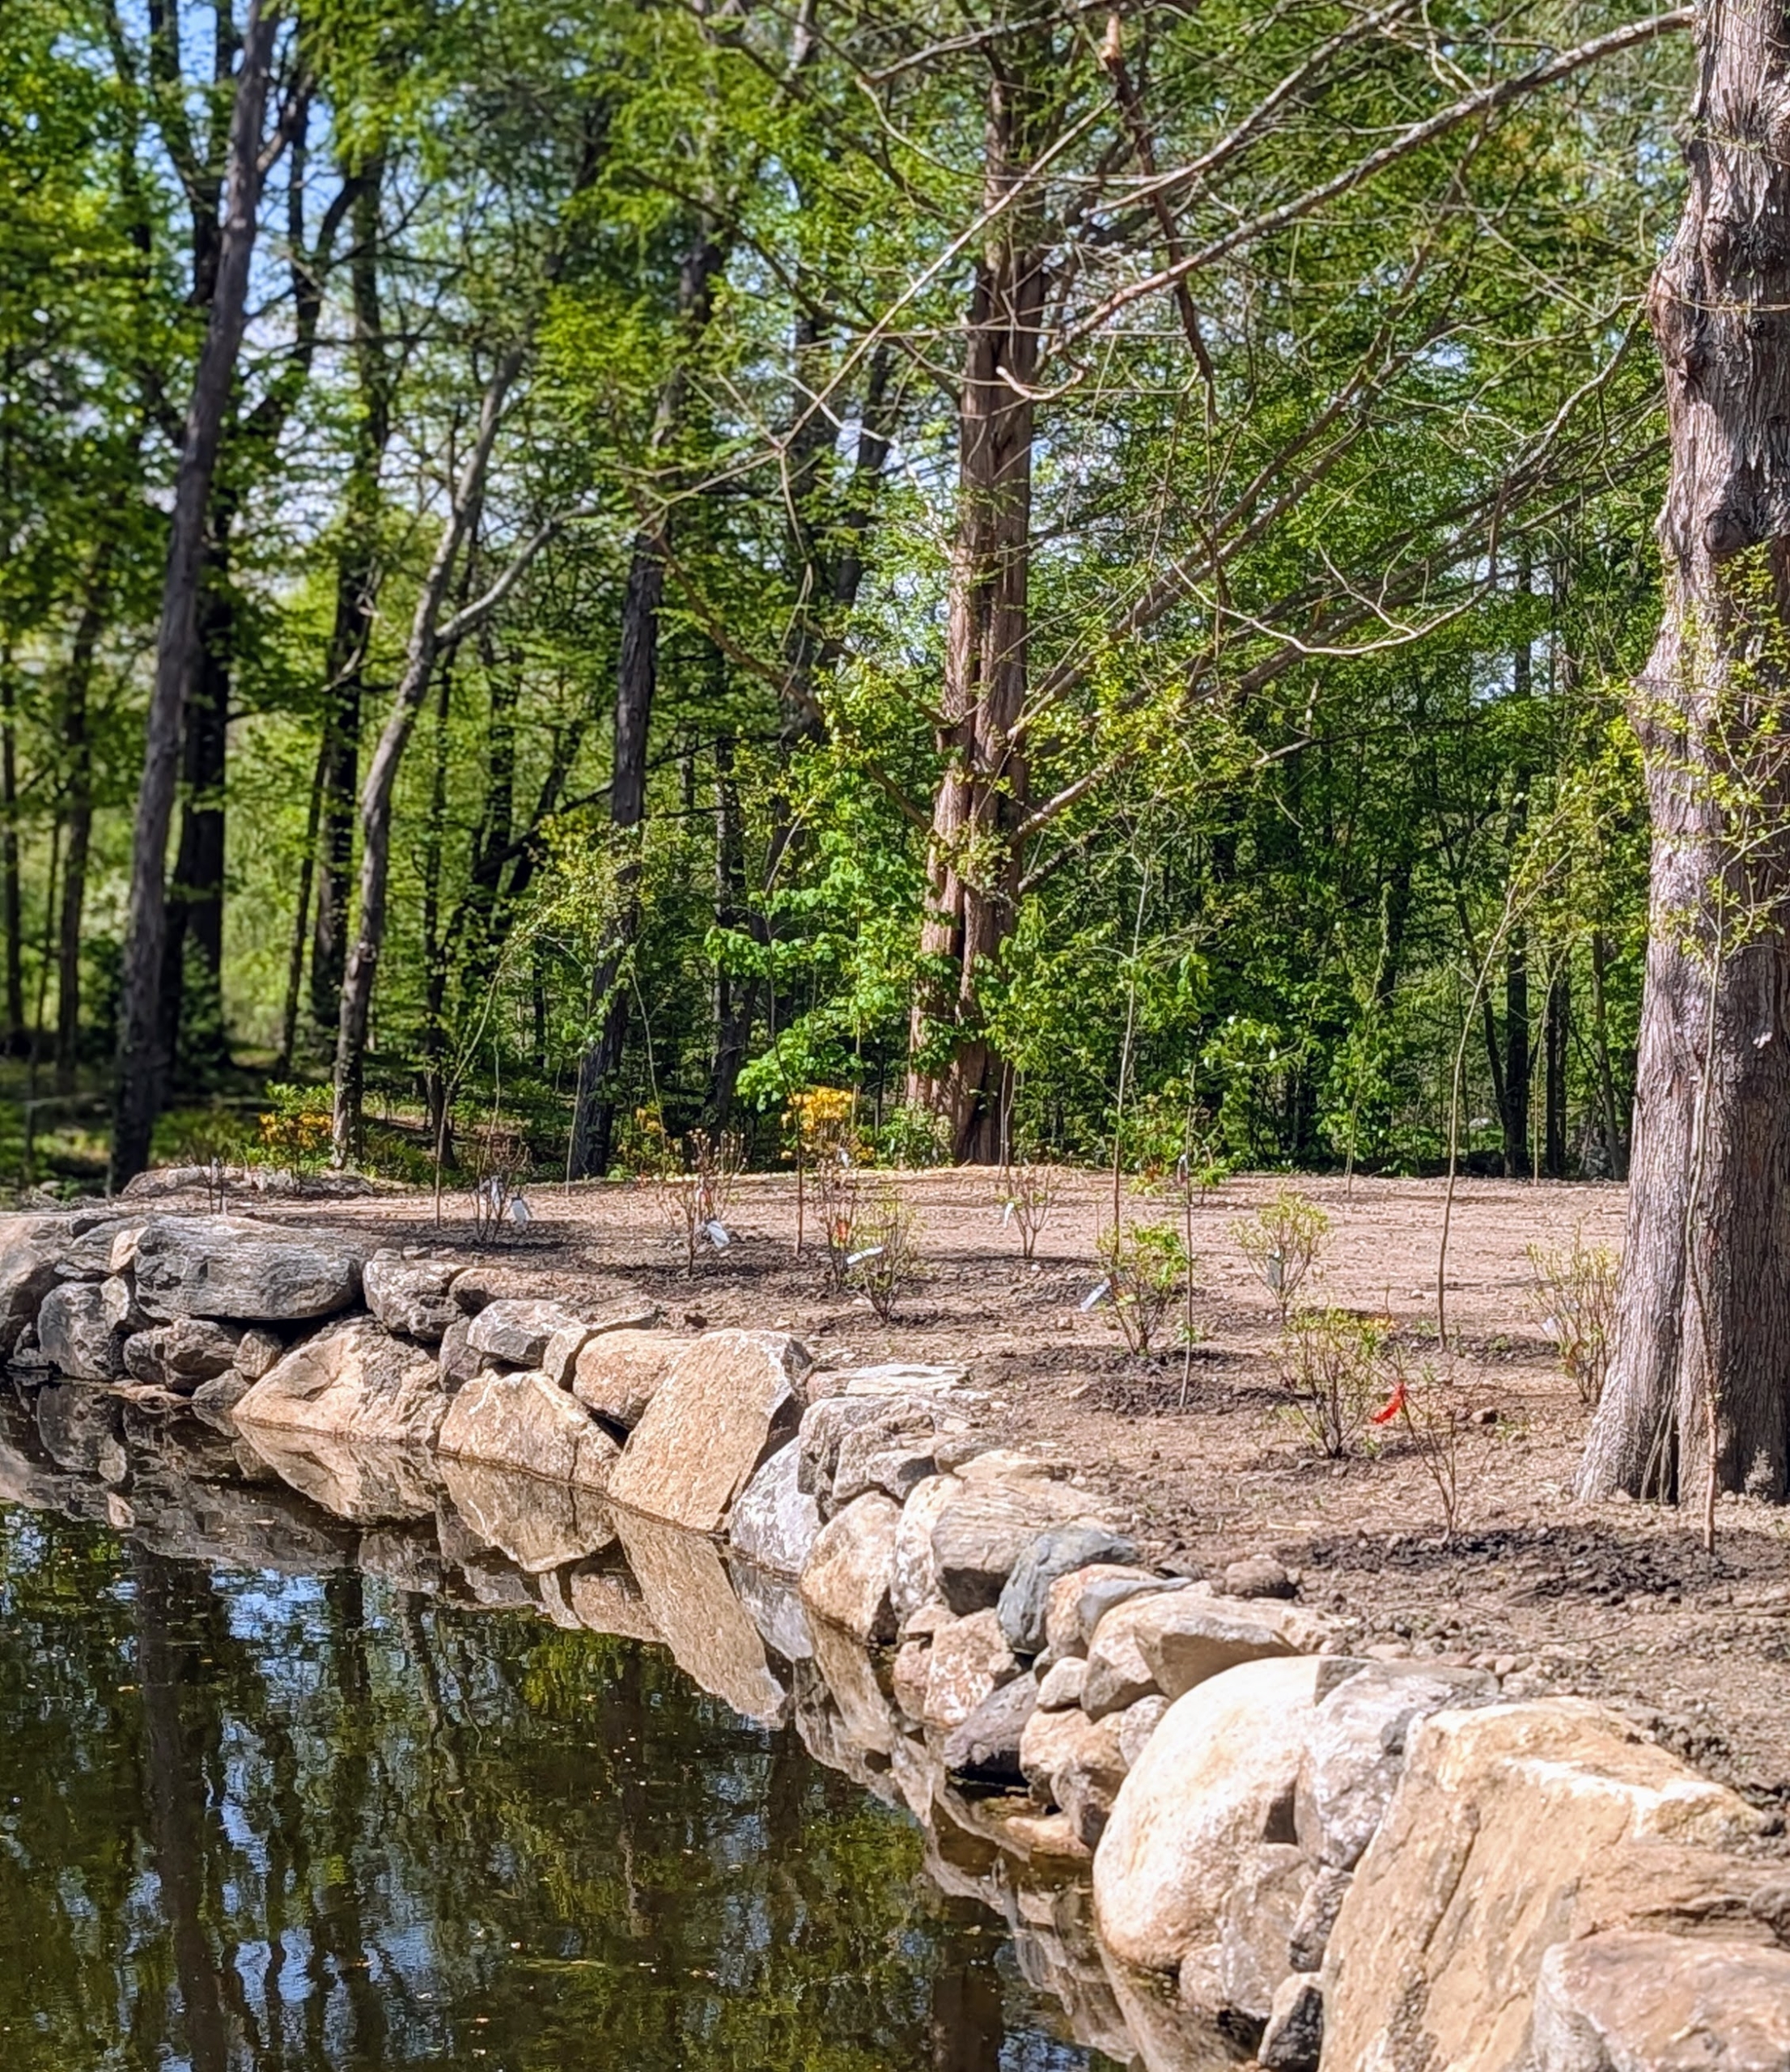
I wanted the pond to be surrounded with gorgeous trees and plants. They will shade the charming pond house so nicely.
I selected both river birch and paper birch trees for areas that get full sun to partial shade. I already have many birch trees thriving in this area.
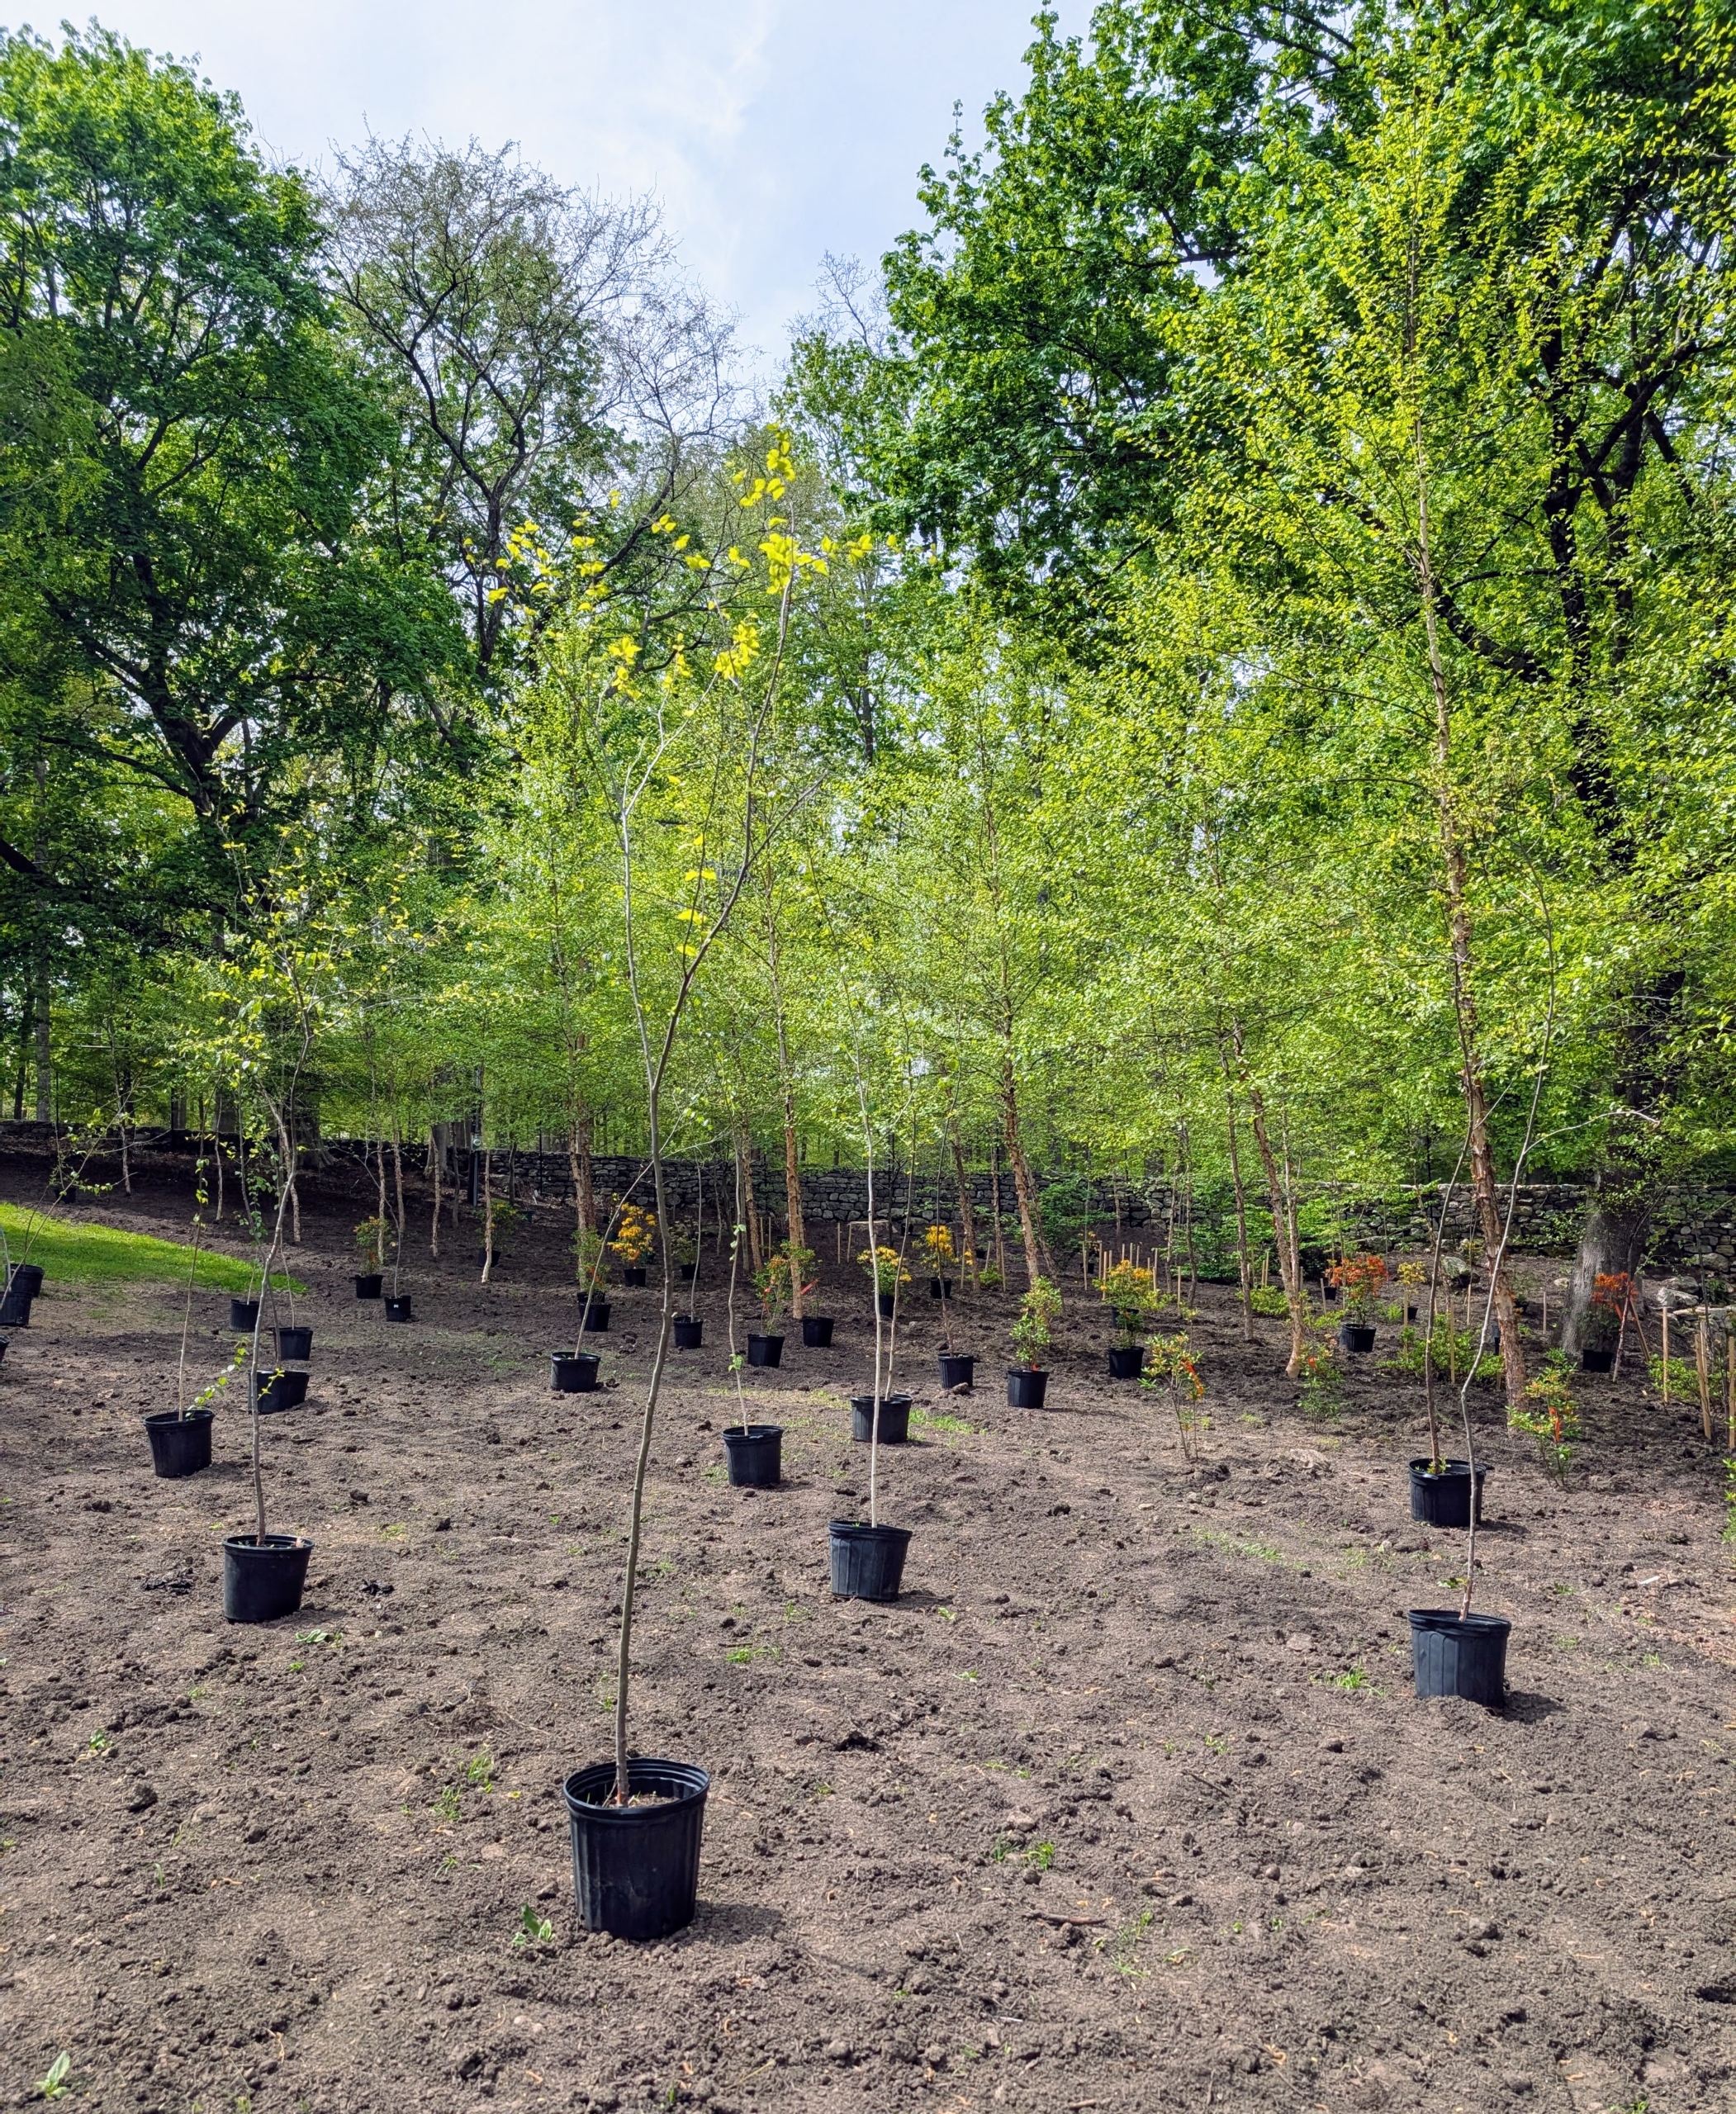
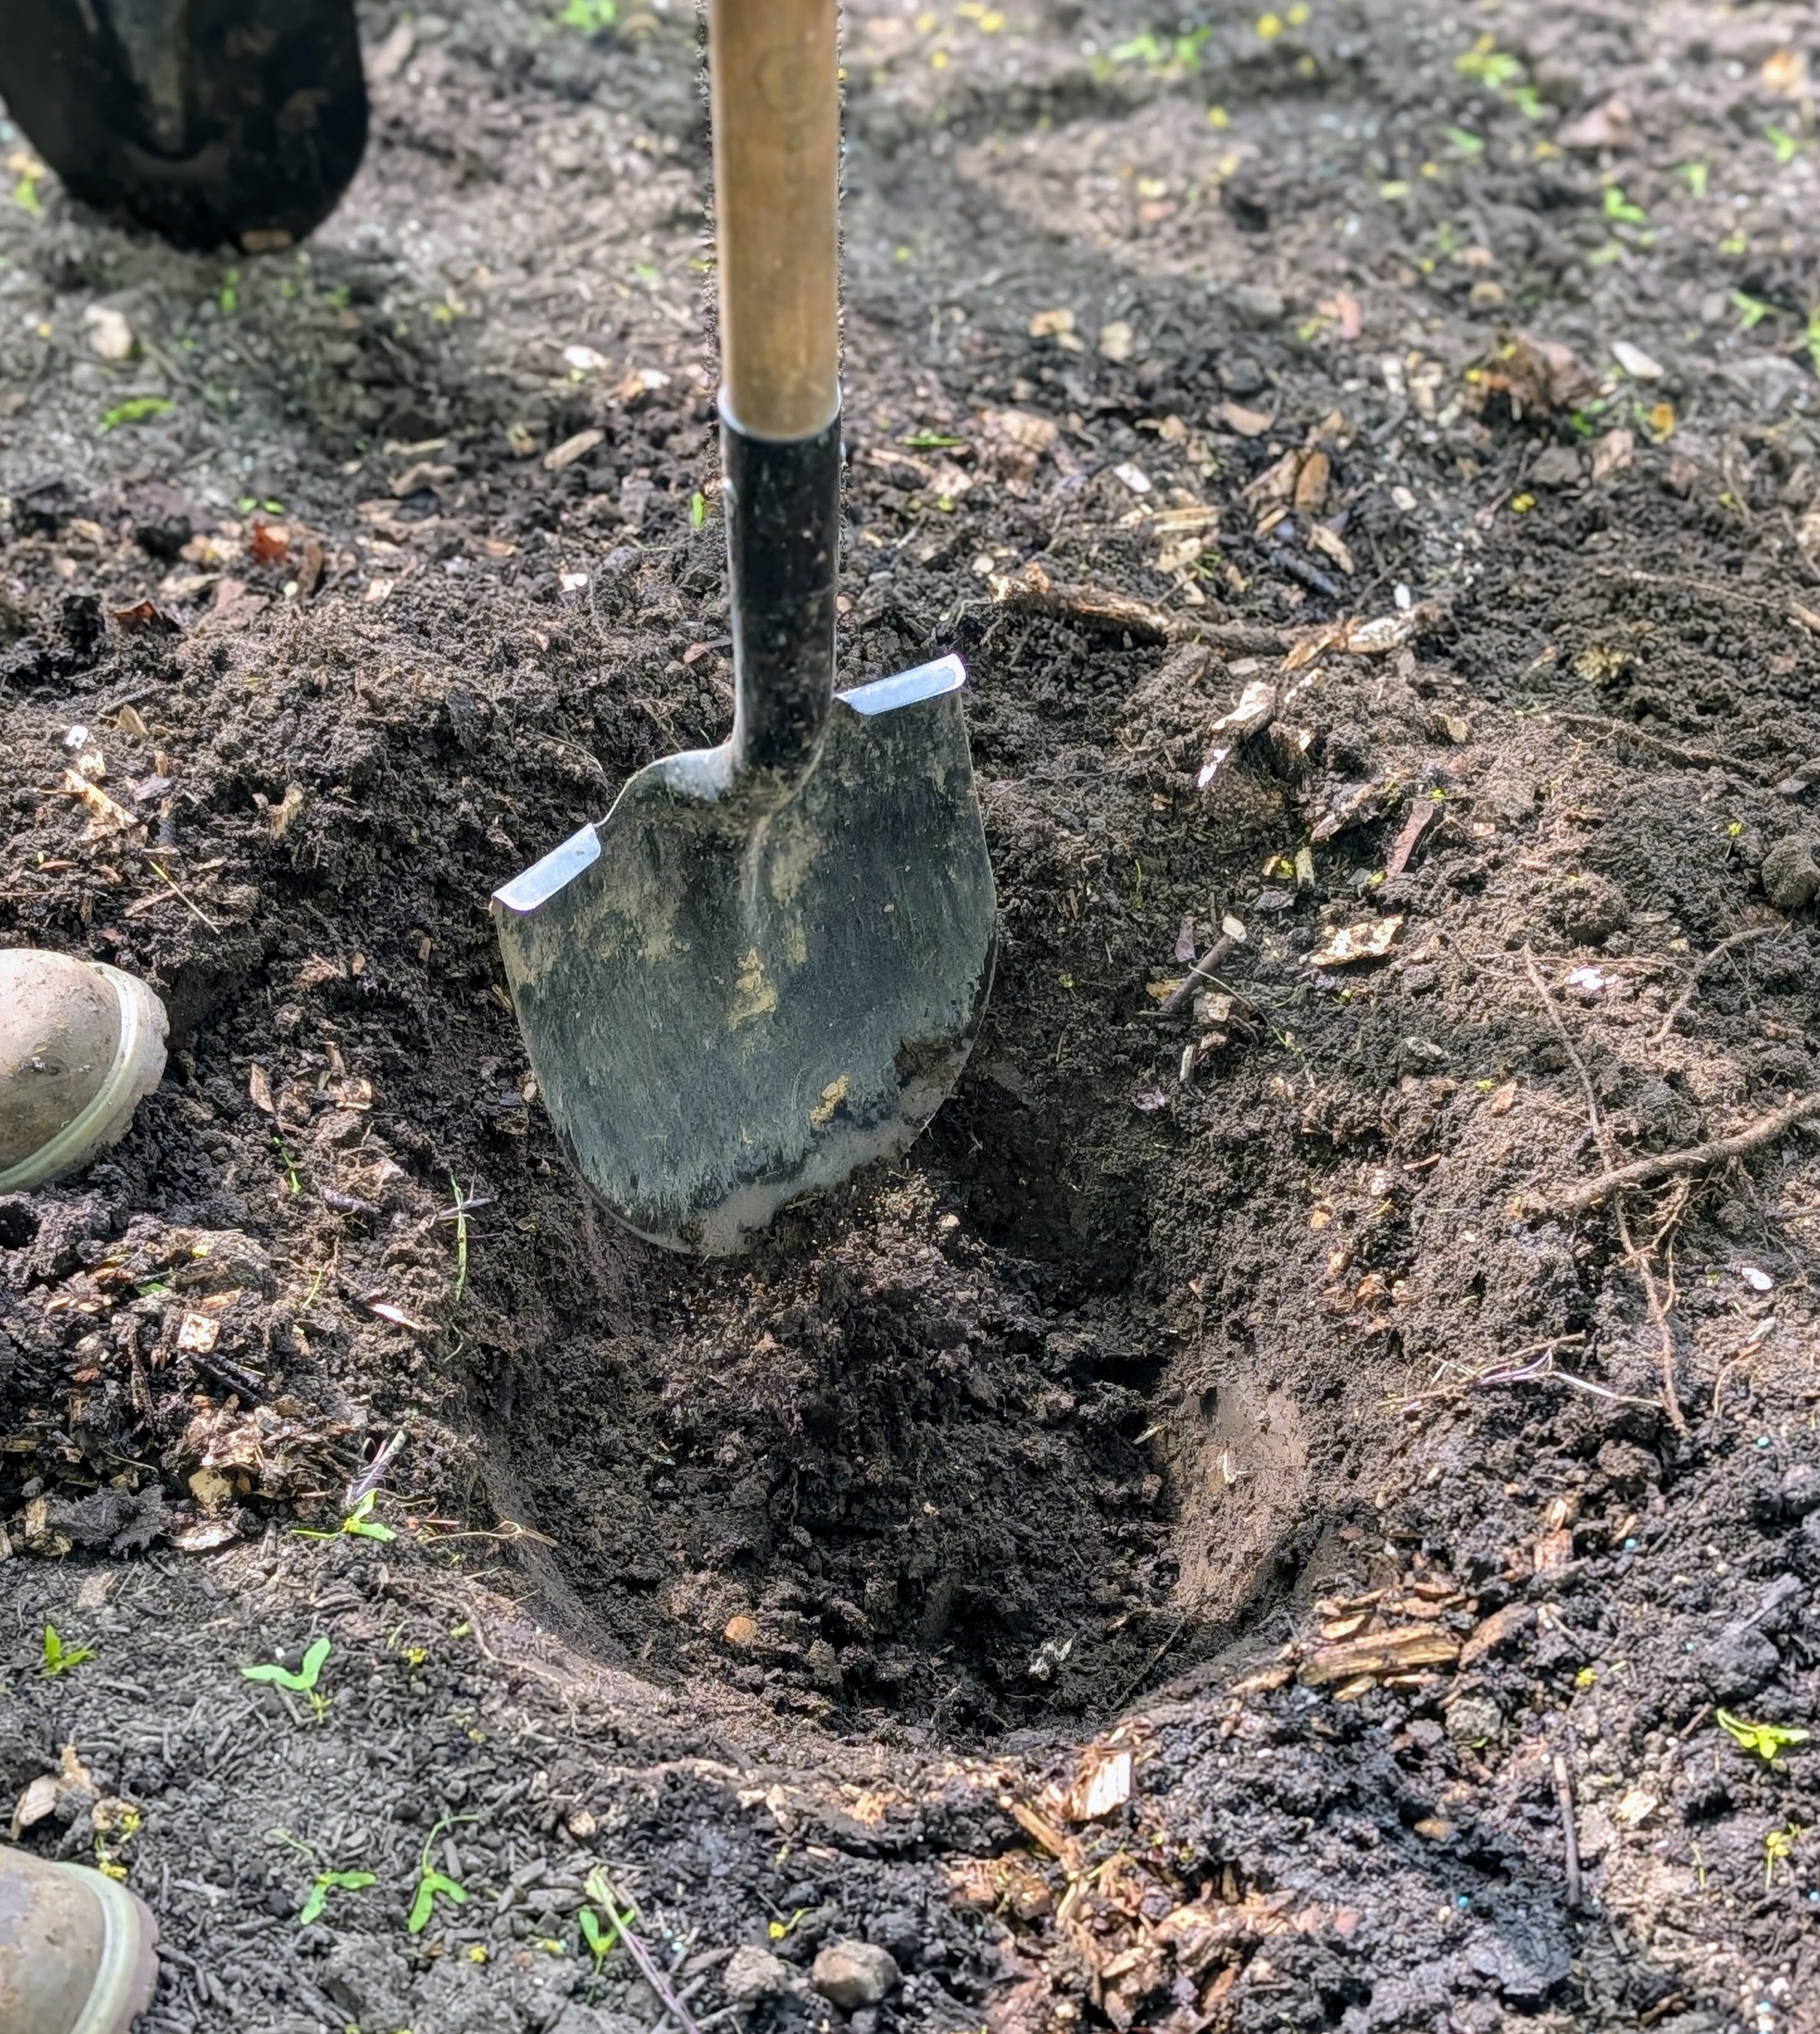
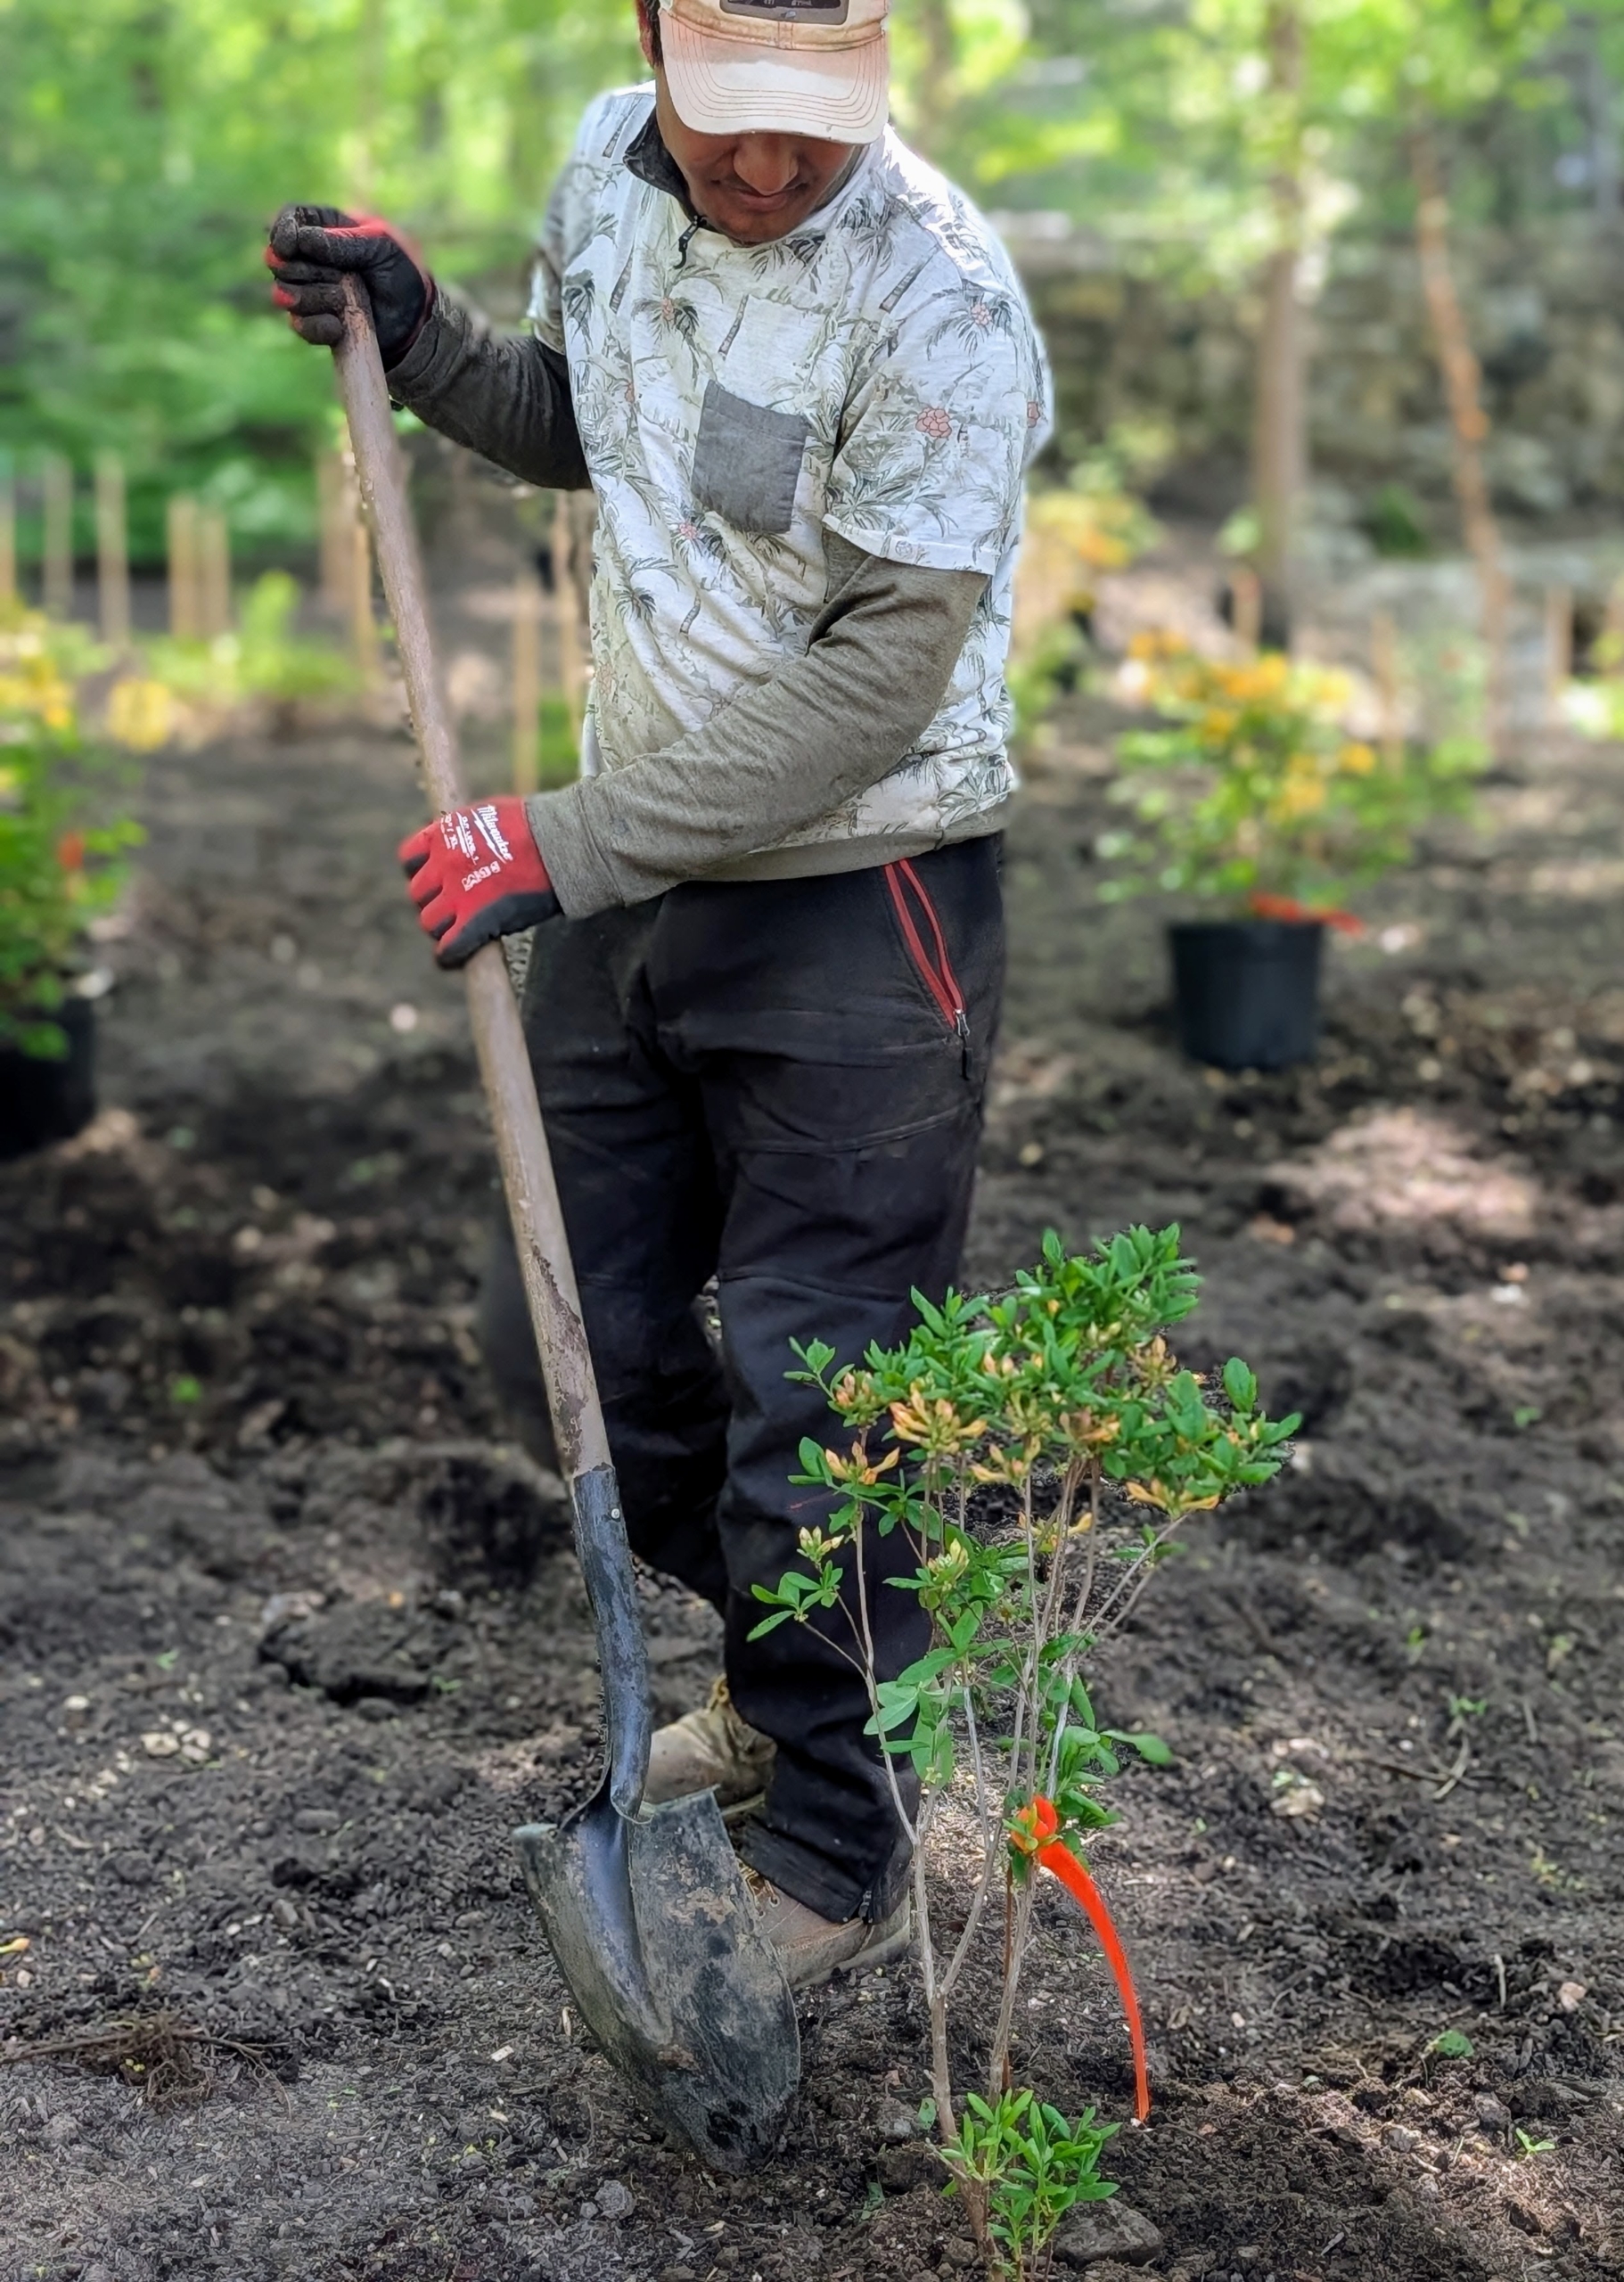
Once all the potted specimens are placed, the digging begins. With so many plants to get in the ground, it is important to work quickly and efficiently.
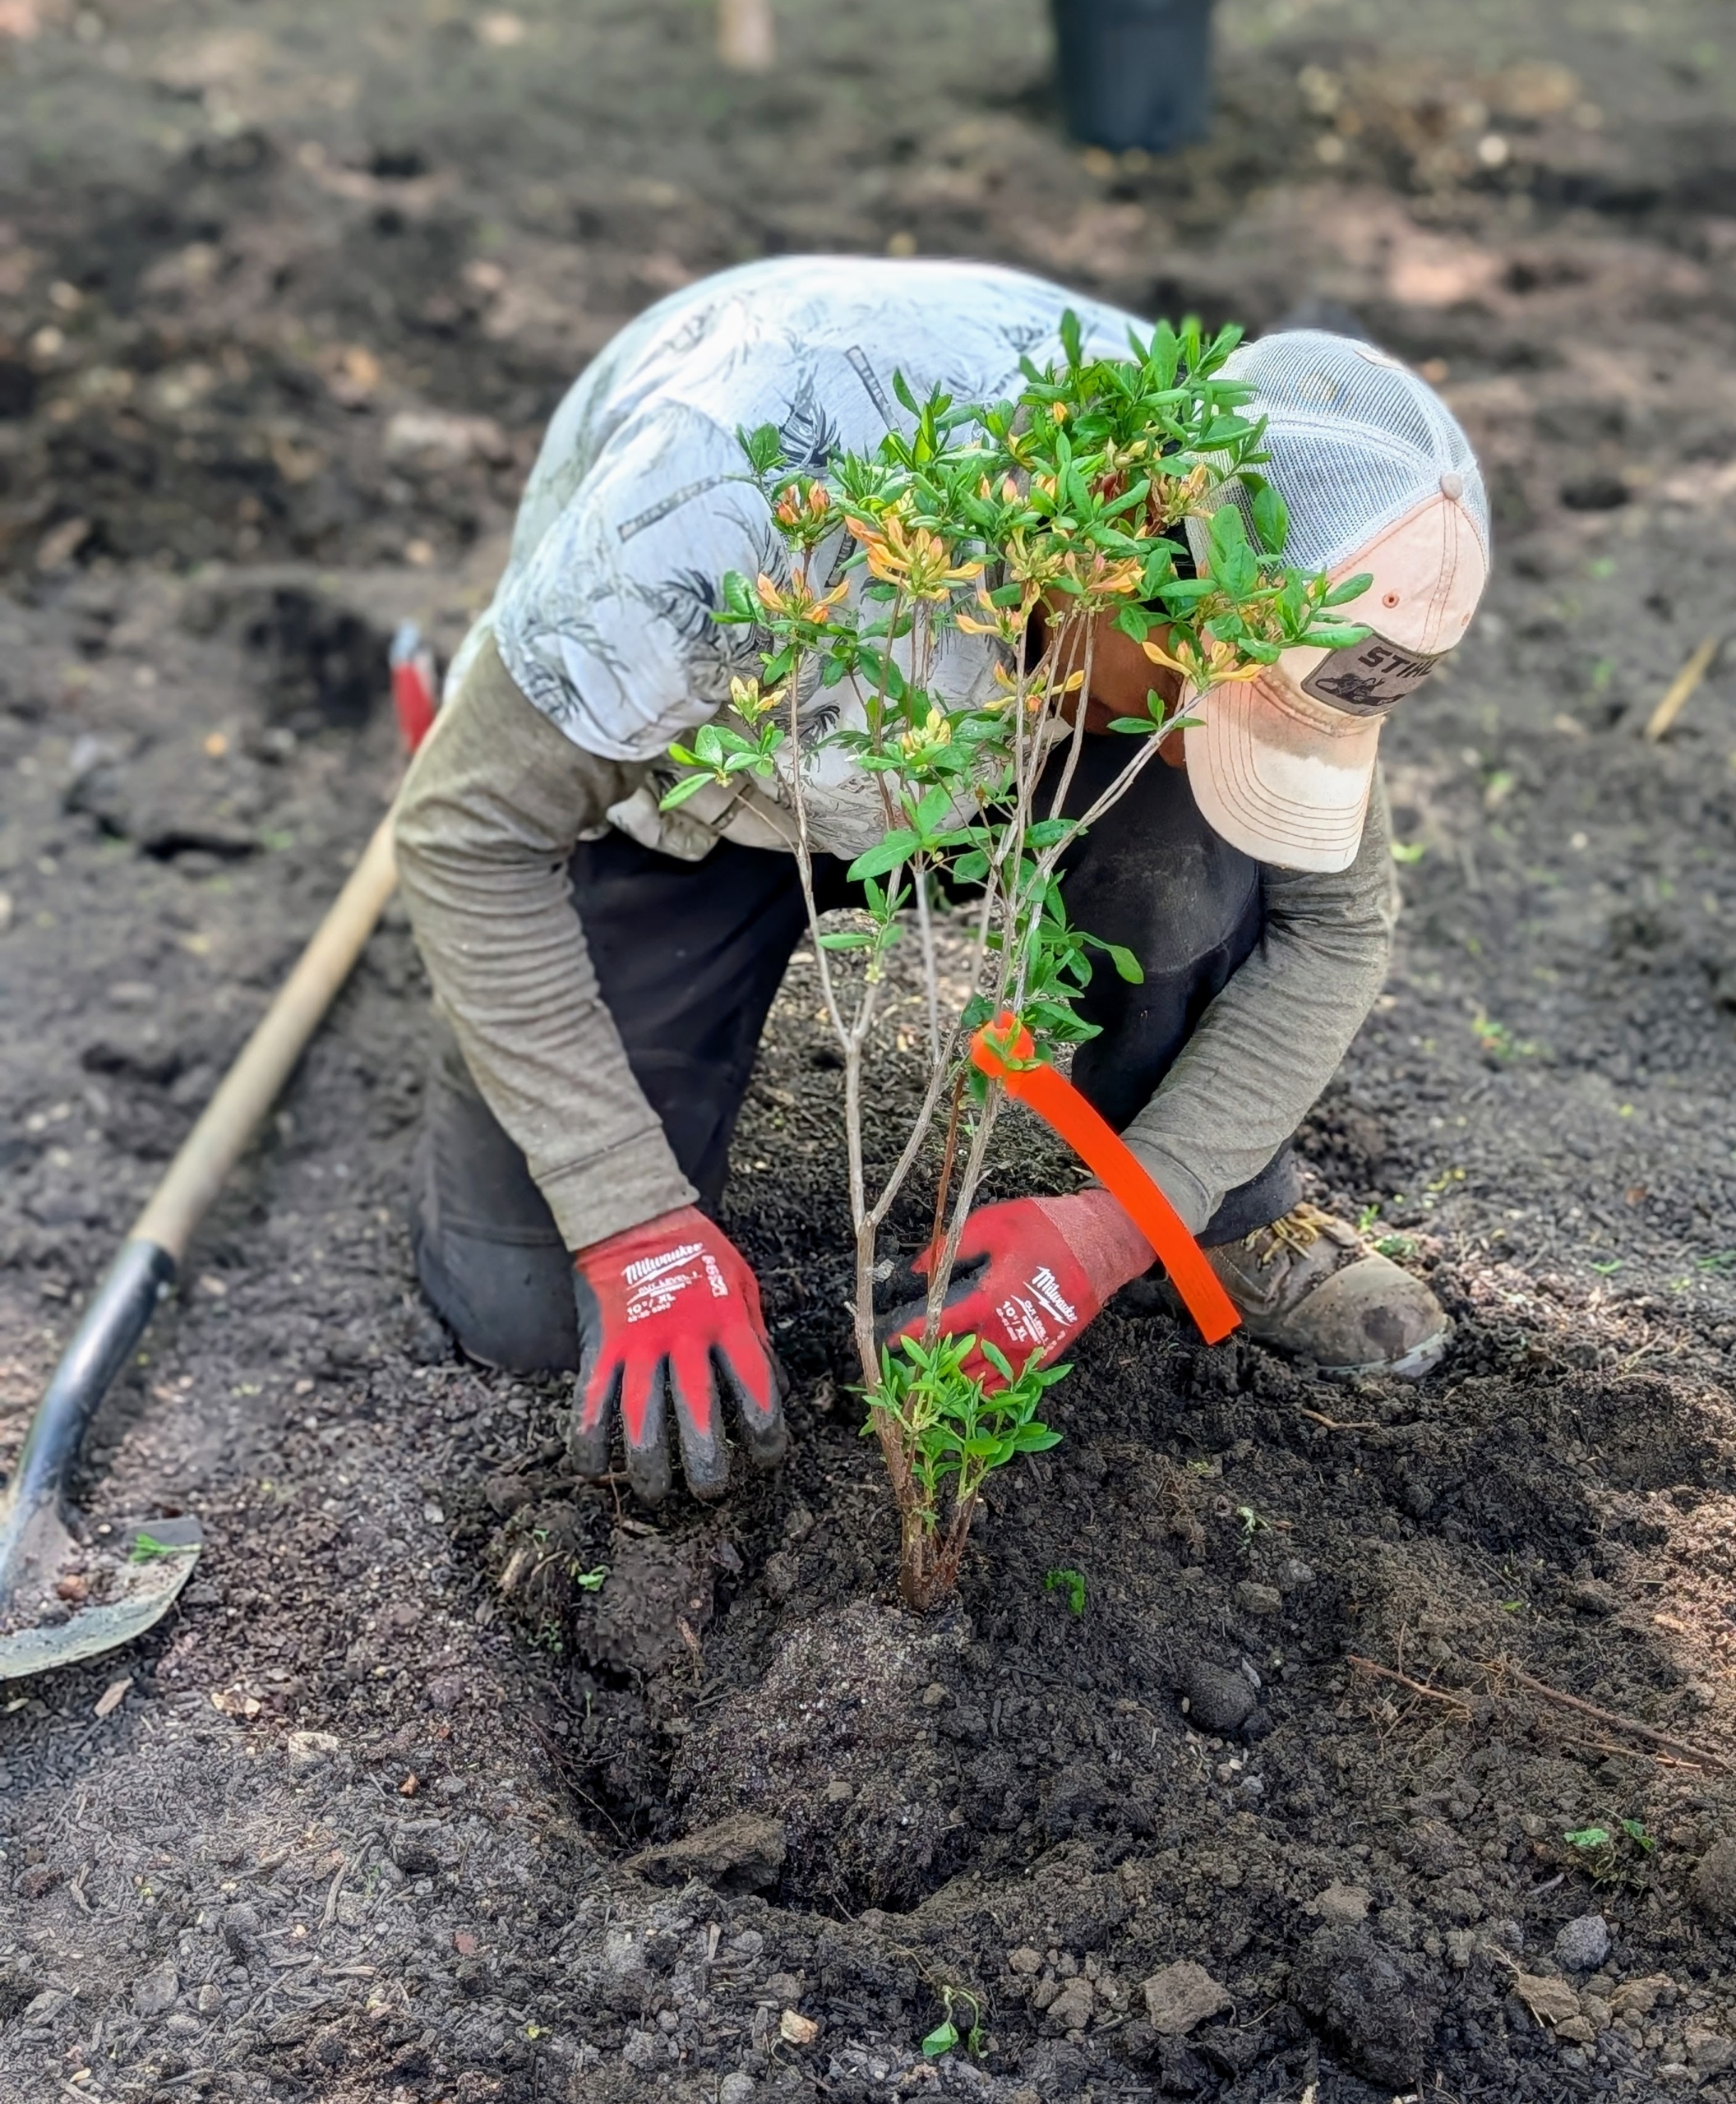
Where each pot is placed, a hole is made. Each hole is about two to three times the size of the root ball and at least as deep as the root ball. Digging the right sized hole is crucial for proper root development and drainage.
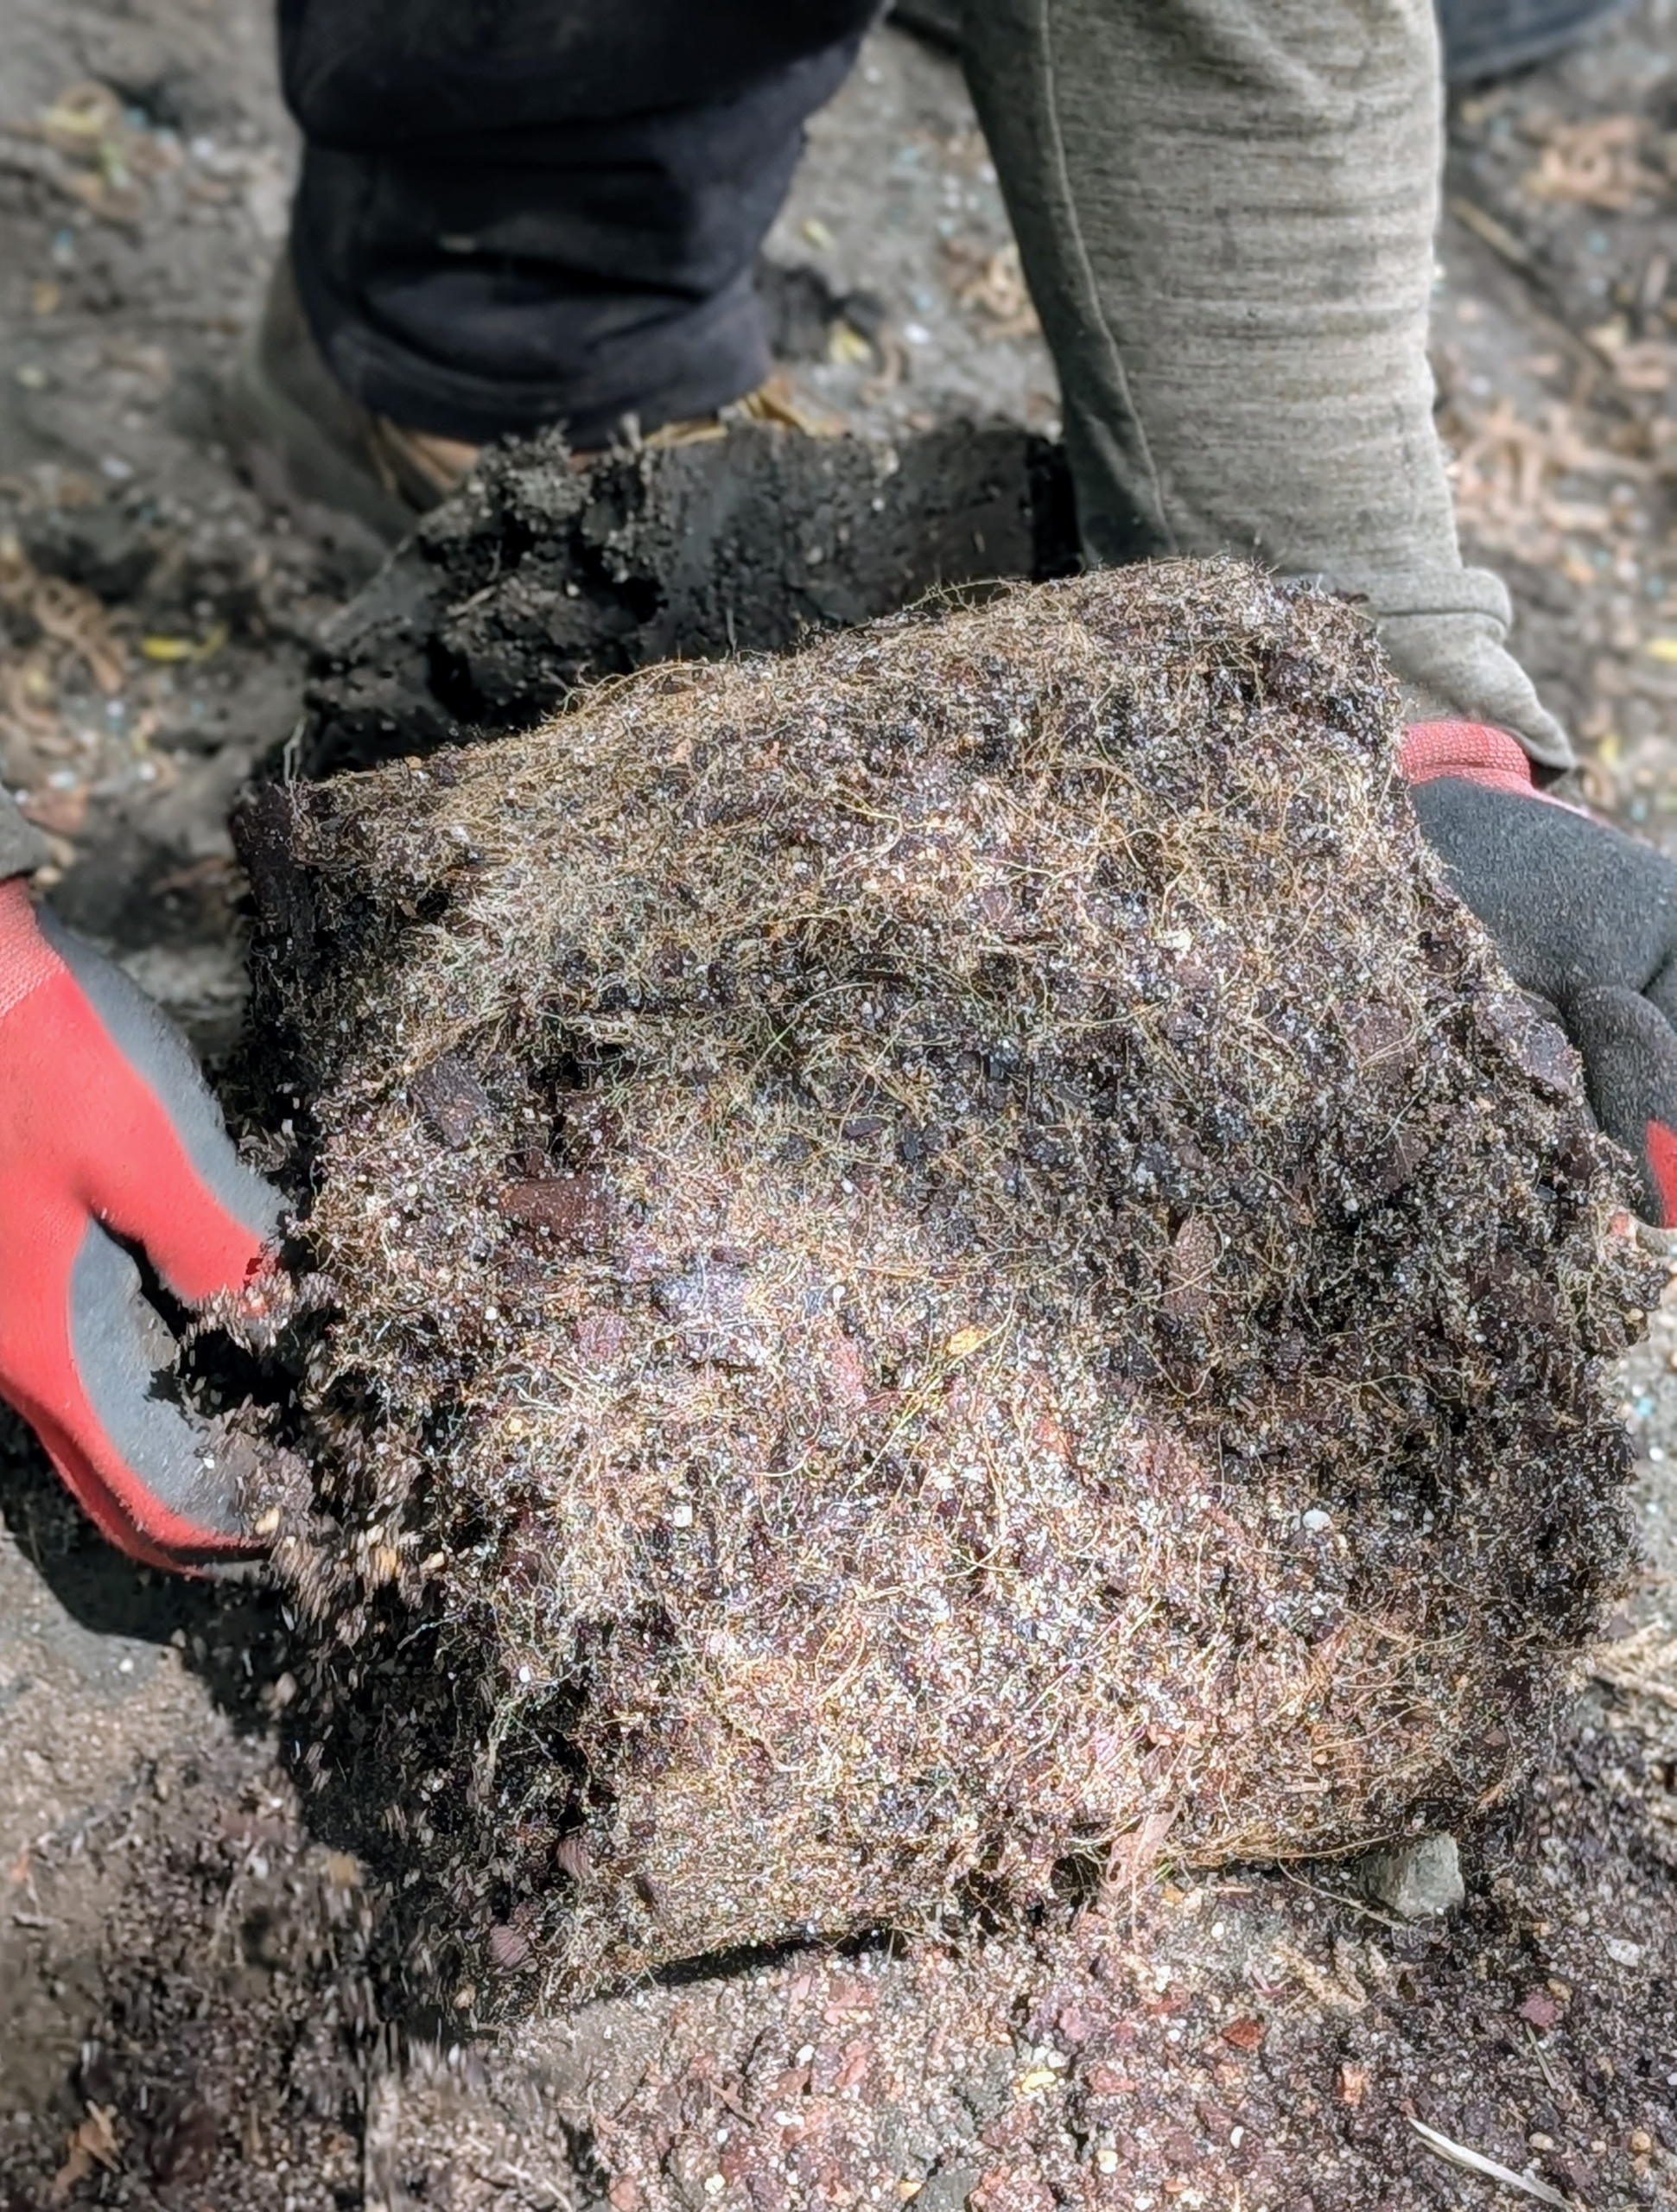
As each plant is removed from its pot, Pasang teases the roots to stimulate growth. He manually breaks up the bottom to loosen the roots and create beneficial injuries. This helps the plant become established more quickly in its new environment.
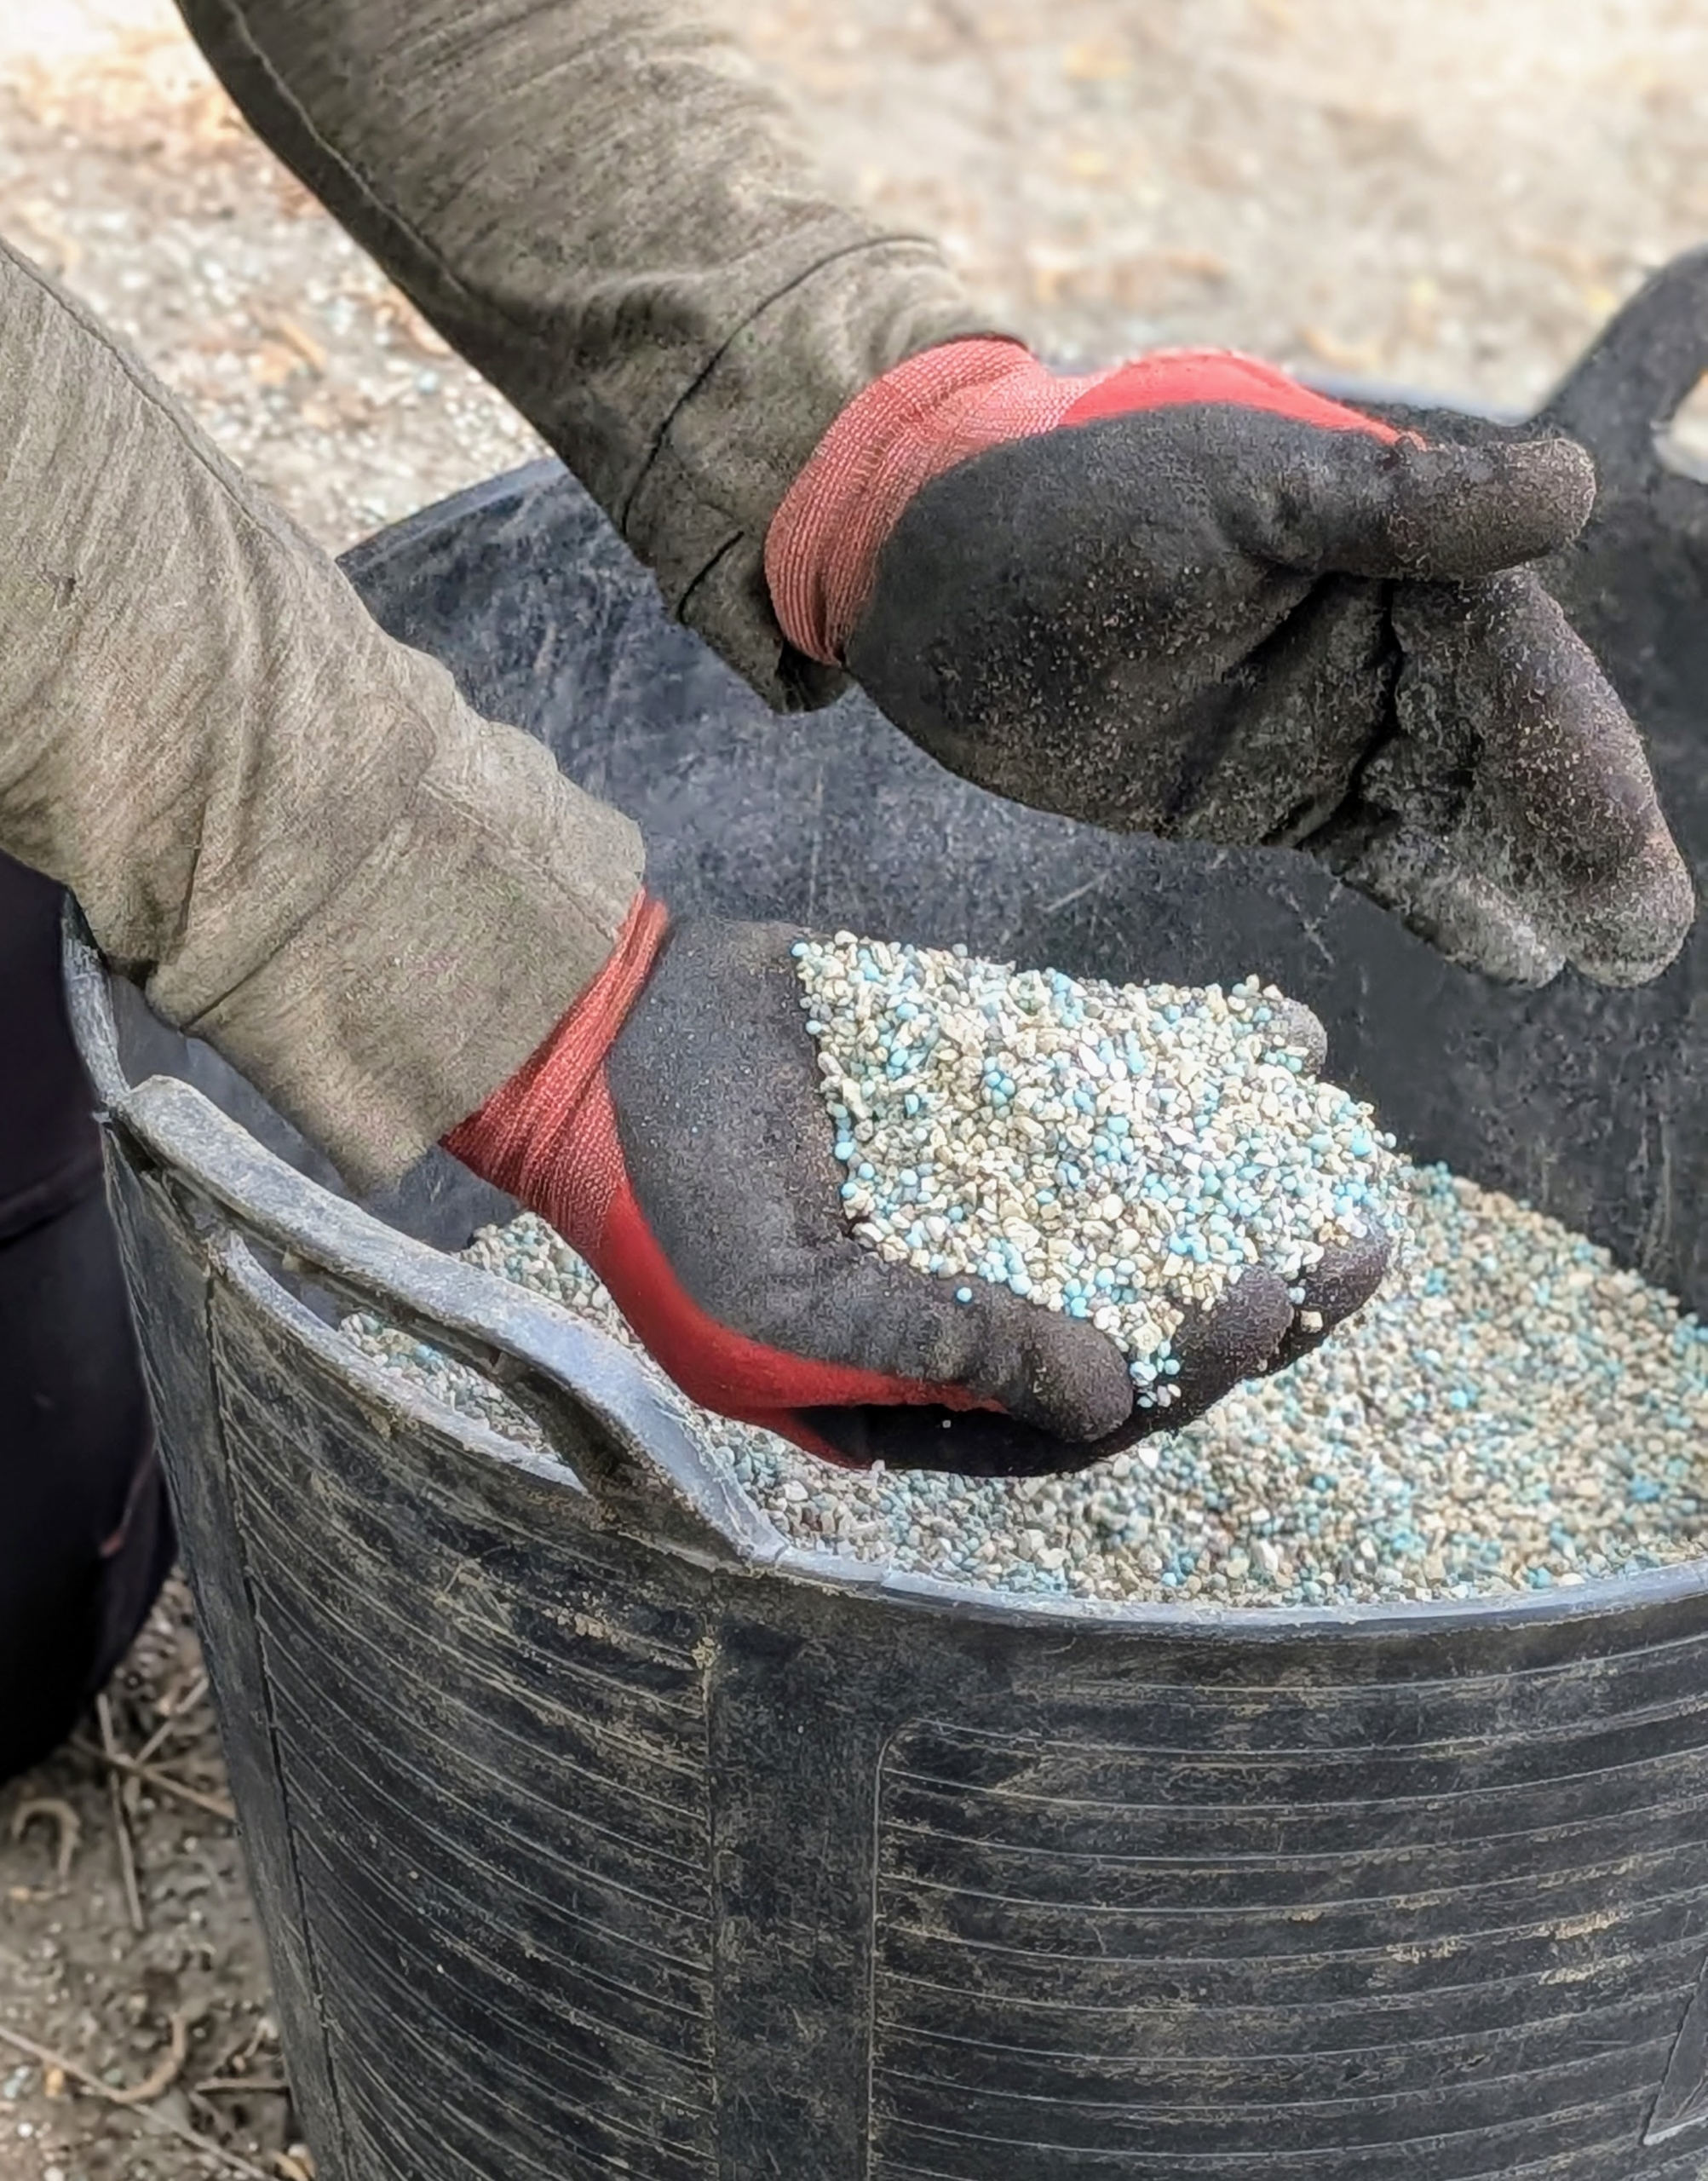
As each specimen is planted, a good handful of fertilizer is dropped into the hole and mixed with the existing soil. I always use a quality fertilizer to aid transplant survival and increase water and nutrient absorption. This is Miracle-Gro Shake ‘n Feed All Purpose Plant Food.
Pasang plants the azalea at the same height it was in the pot and then backfills. Azaleas have short root systems, so they can easily be transplanted in spring or early fall.
Finally, Pasang uses a shovel to lightly level the soil around the plant and tamp down to establish good contact. Some azaleas, including native types, can reach towering heights of 20 feet or more. Dwarf azaleas grow two to three feet tall, and many garden azaleas stay four to six feet in height with as wide a spread.
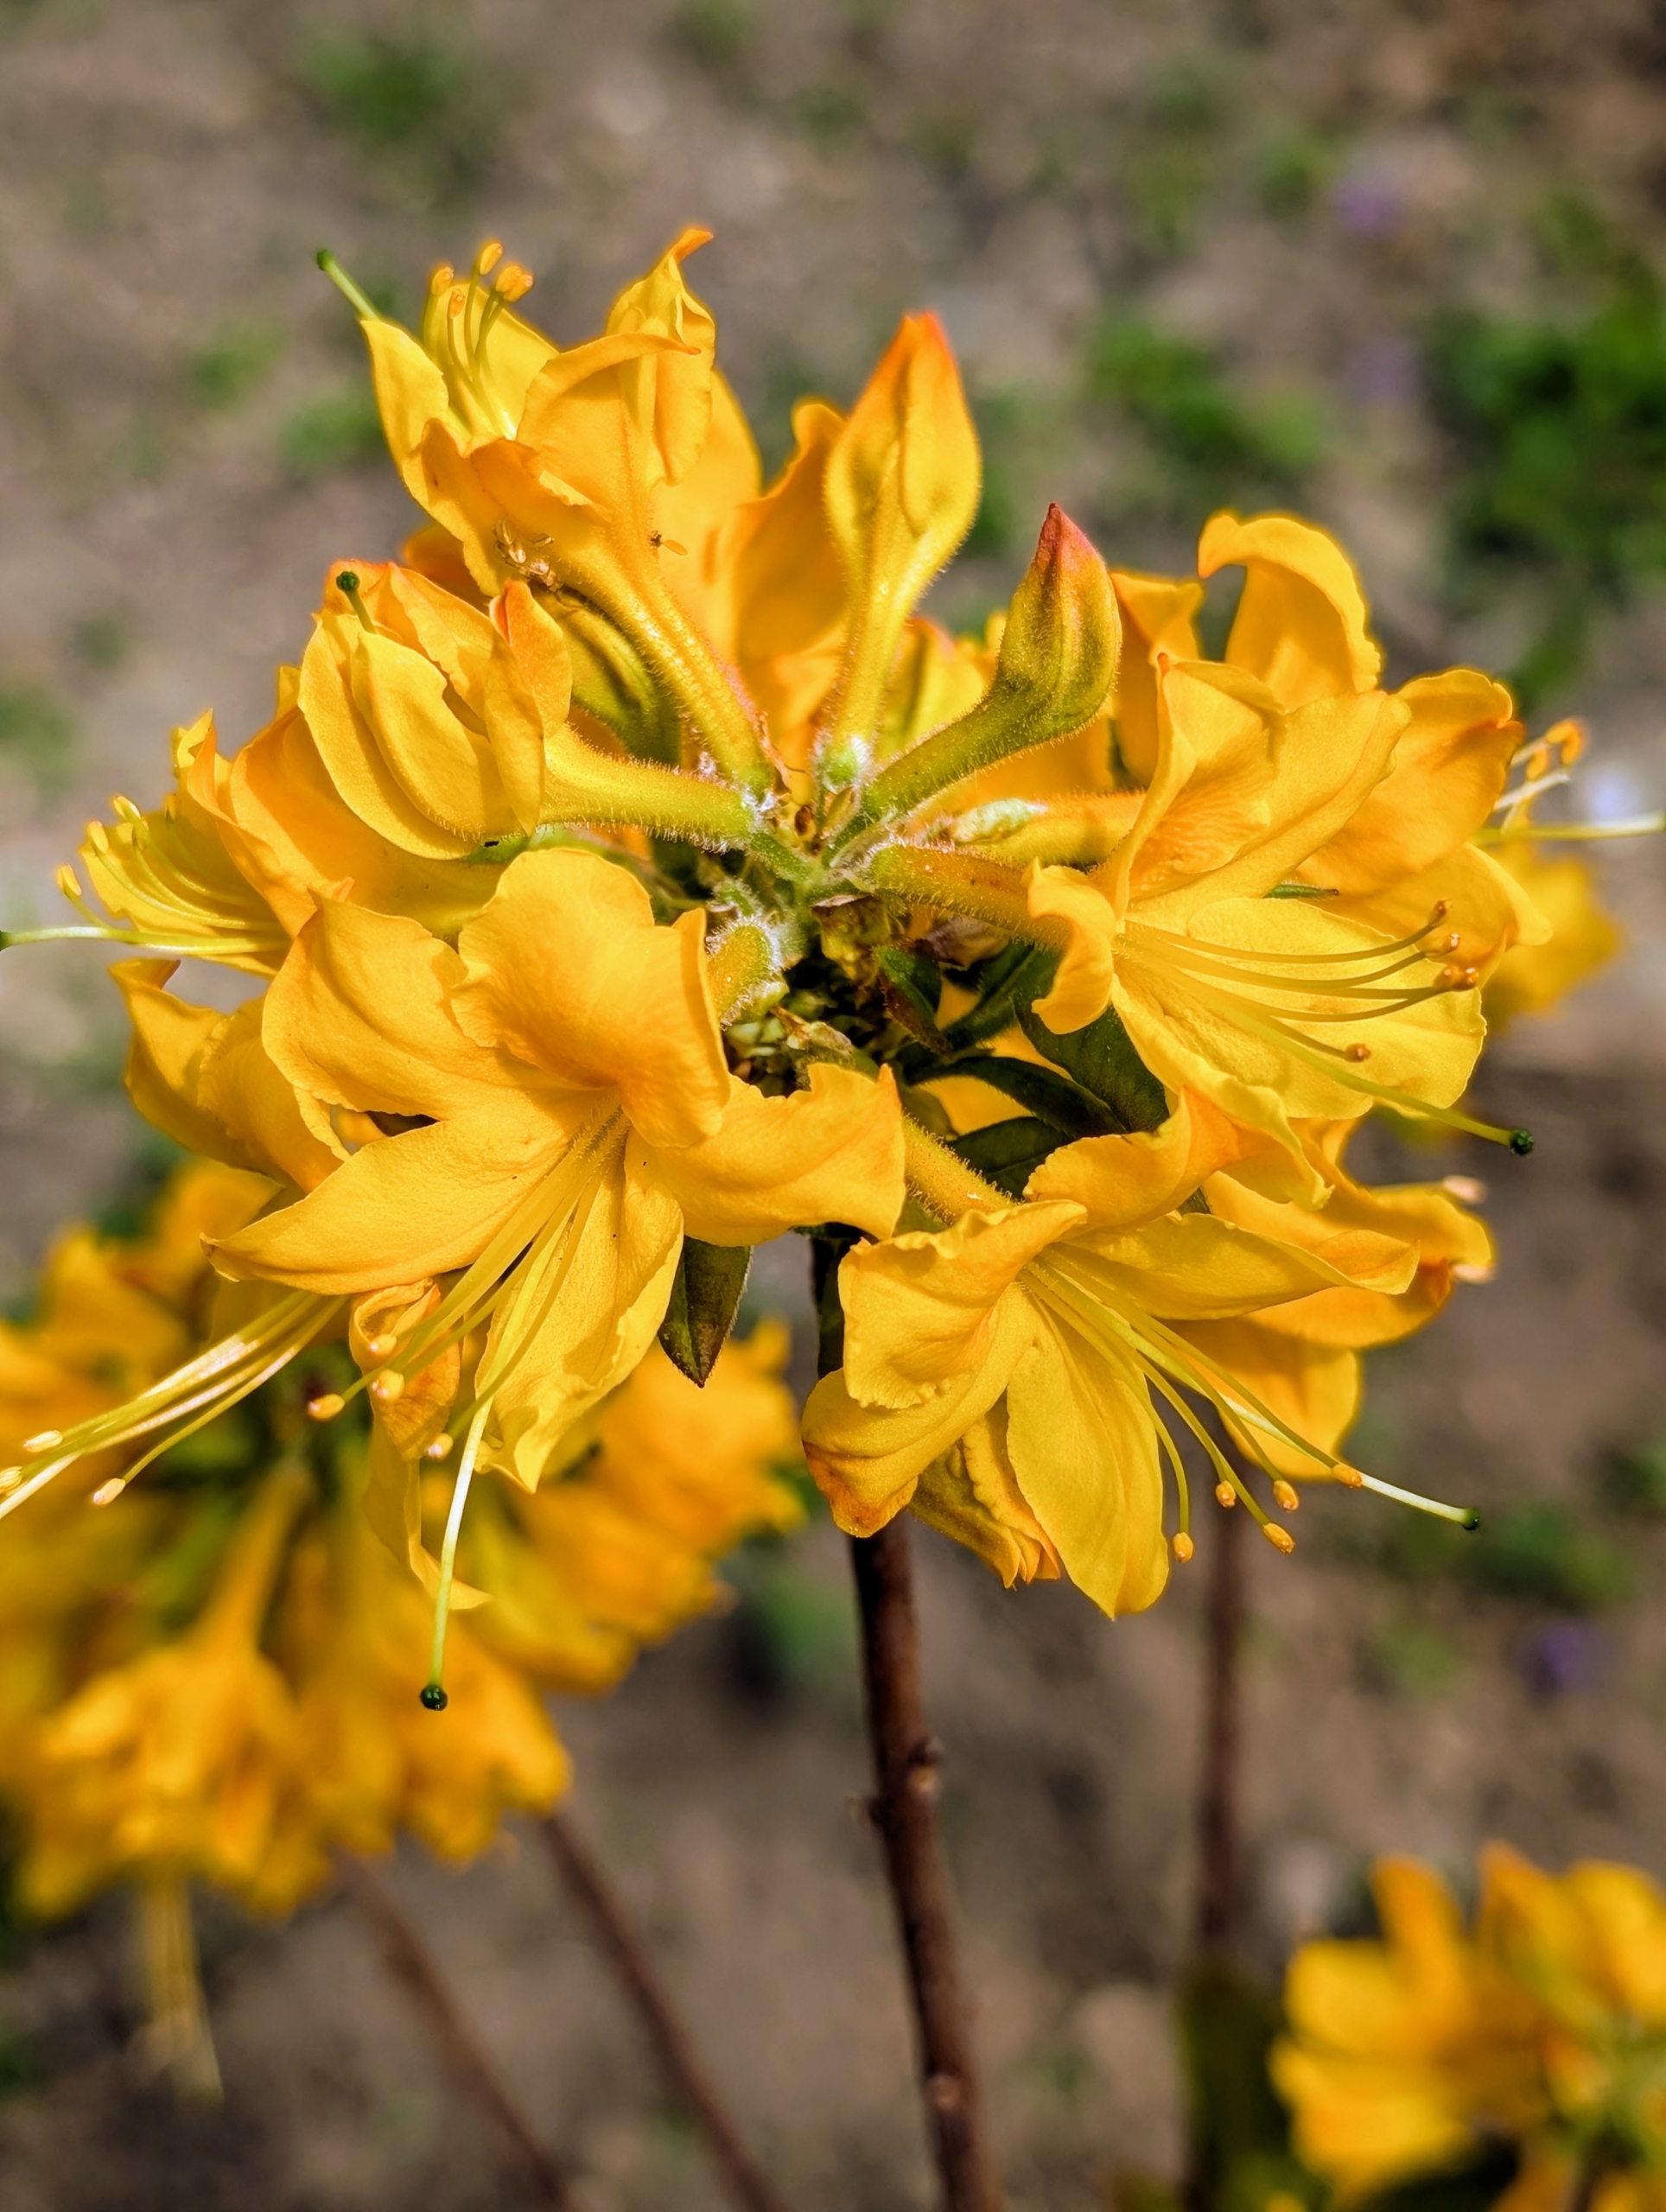
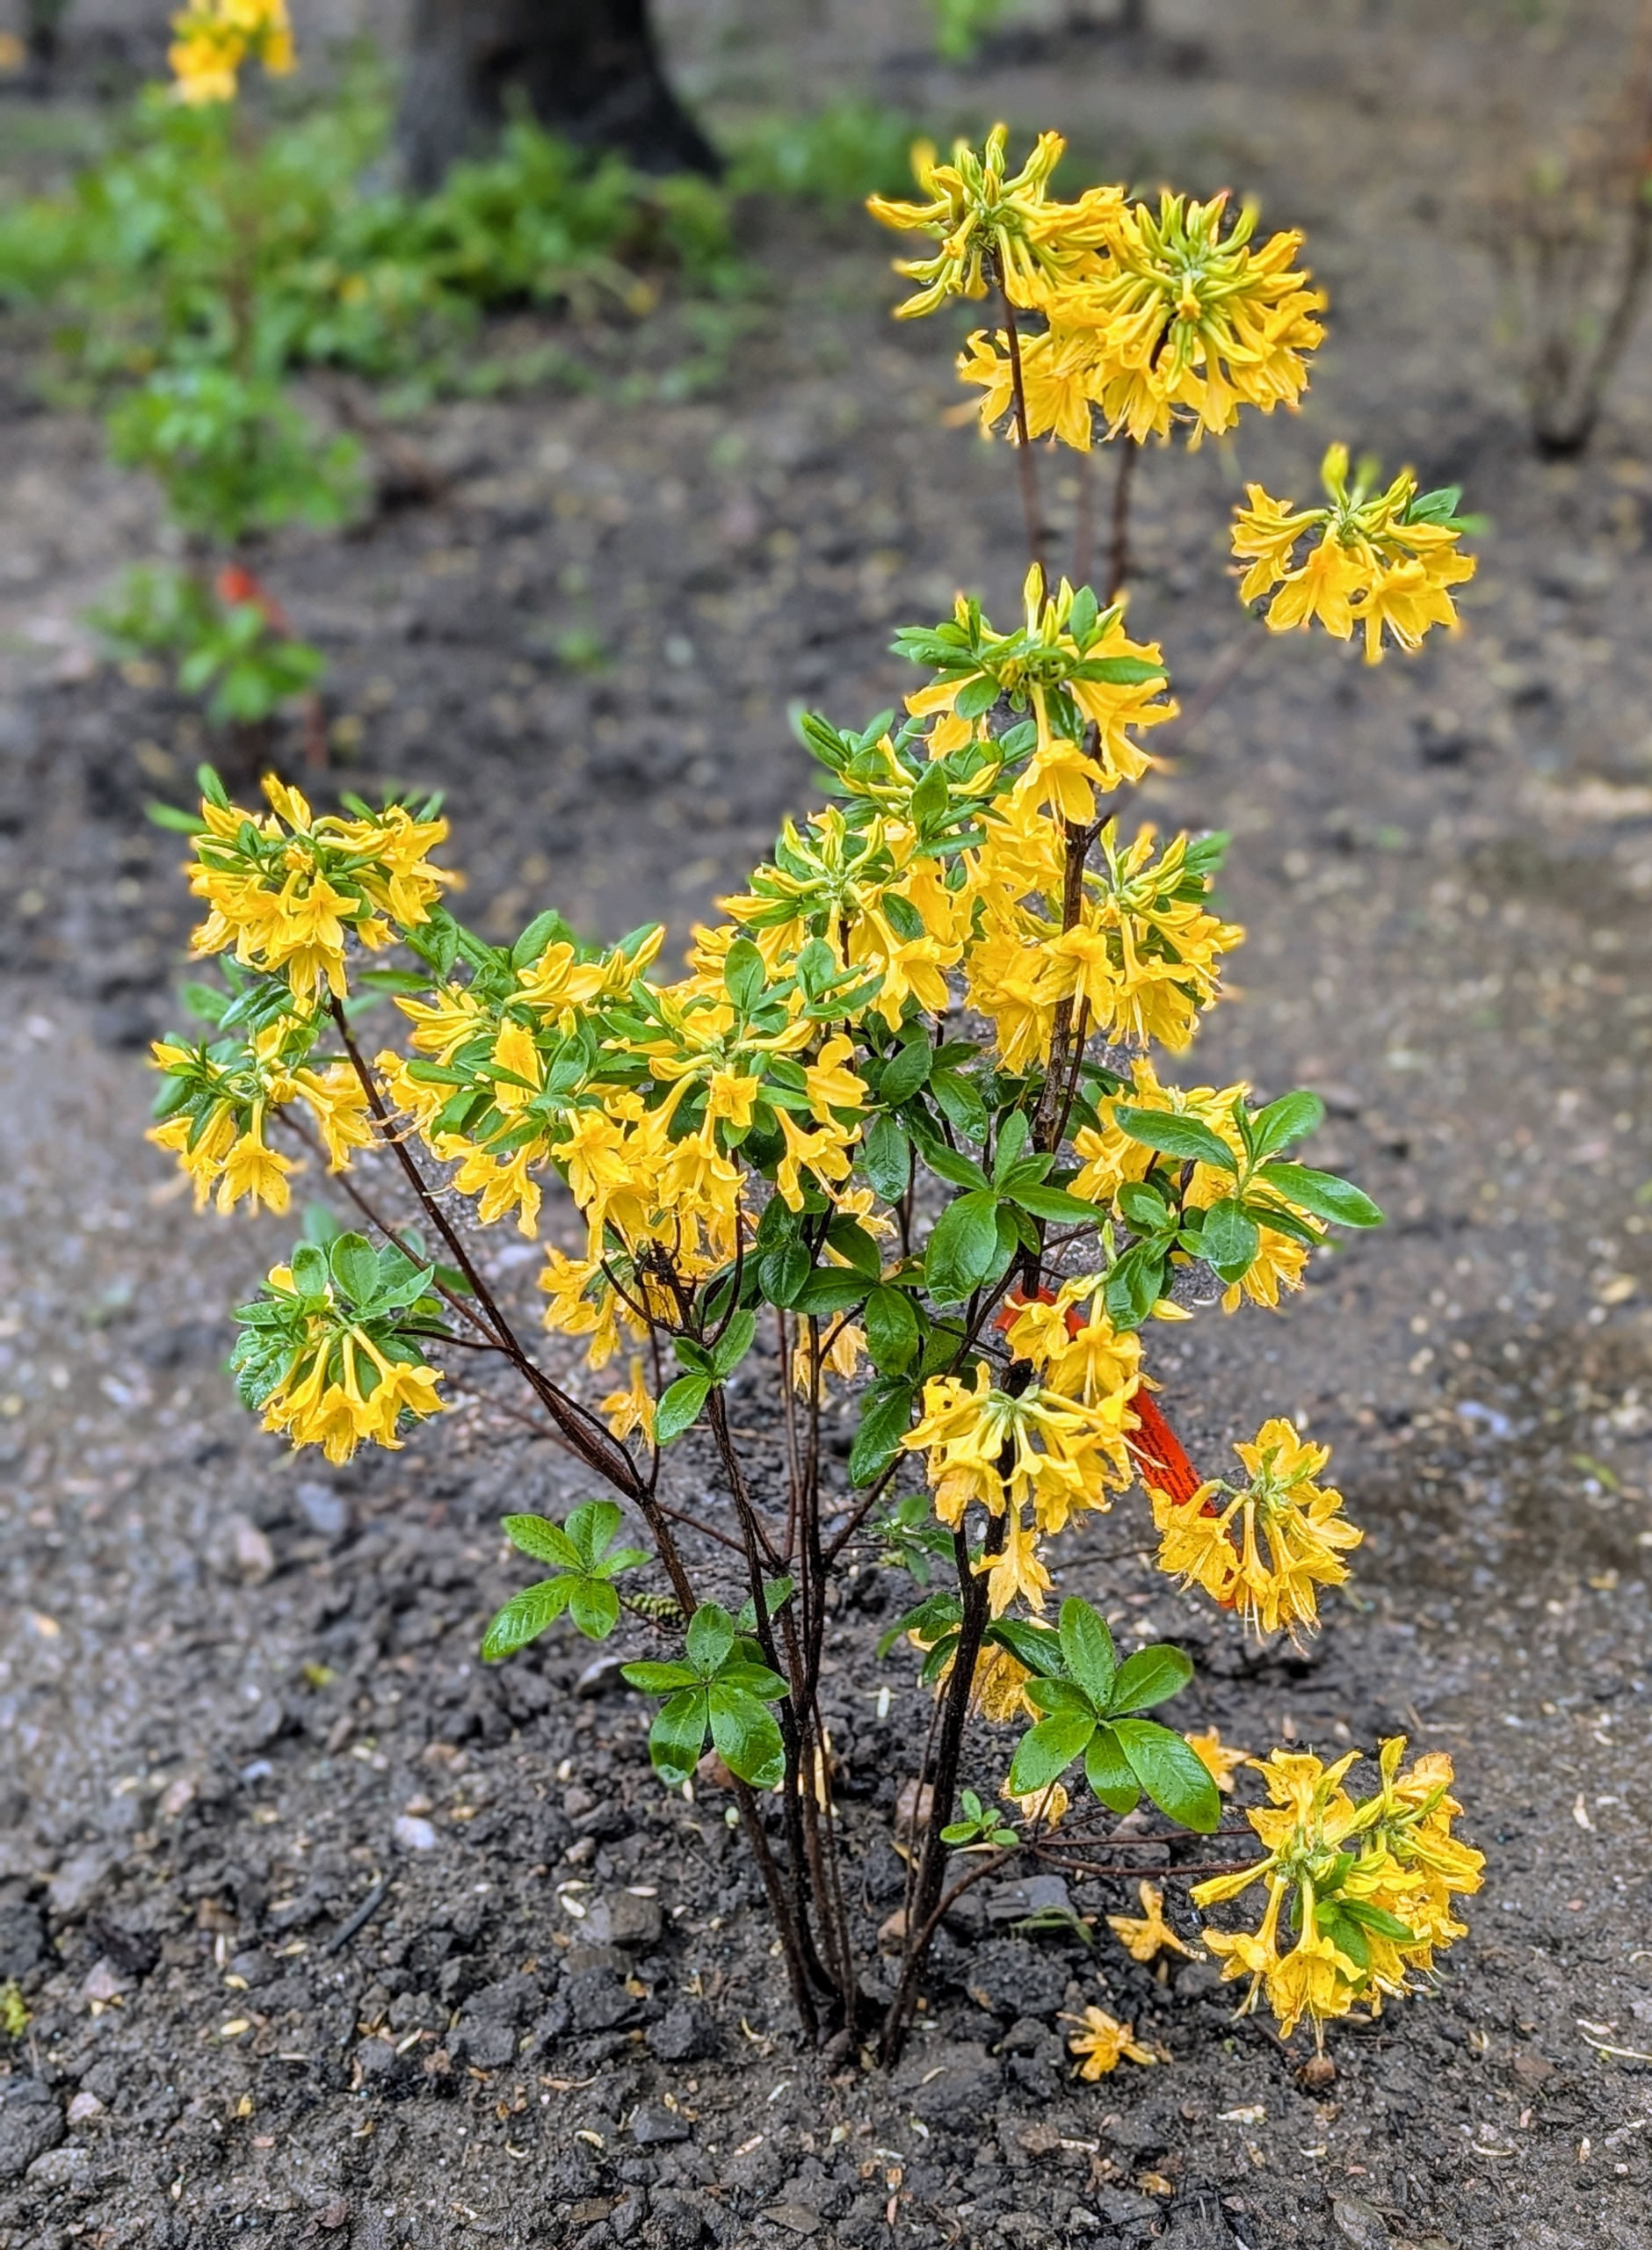
Some of the azaleas in this grouping include this ‘Appalachian Gold’ – an Aromi hybrid that produces abundant, large clusters of rich golden buds tipped in orange that open to sweet scented flowers with bright golden-yellow petals.
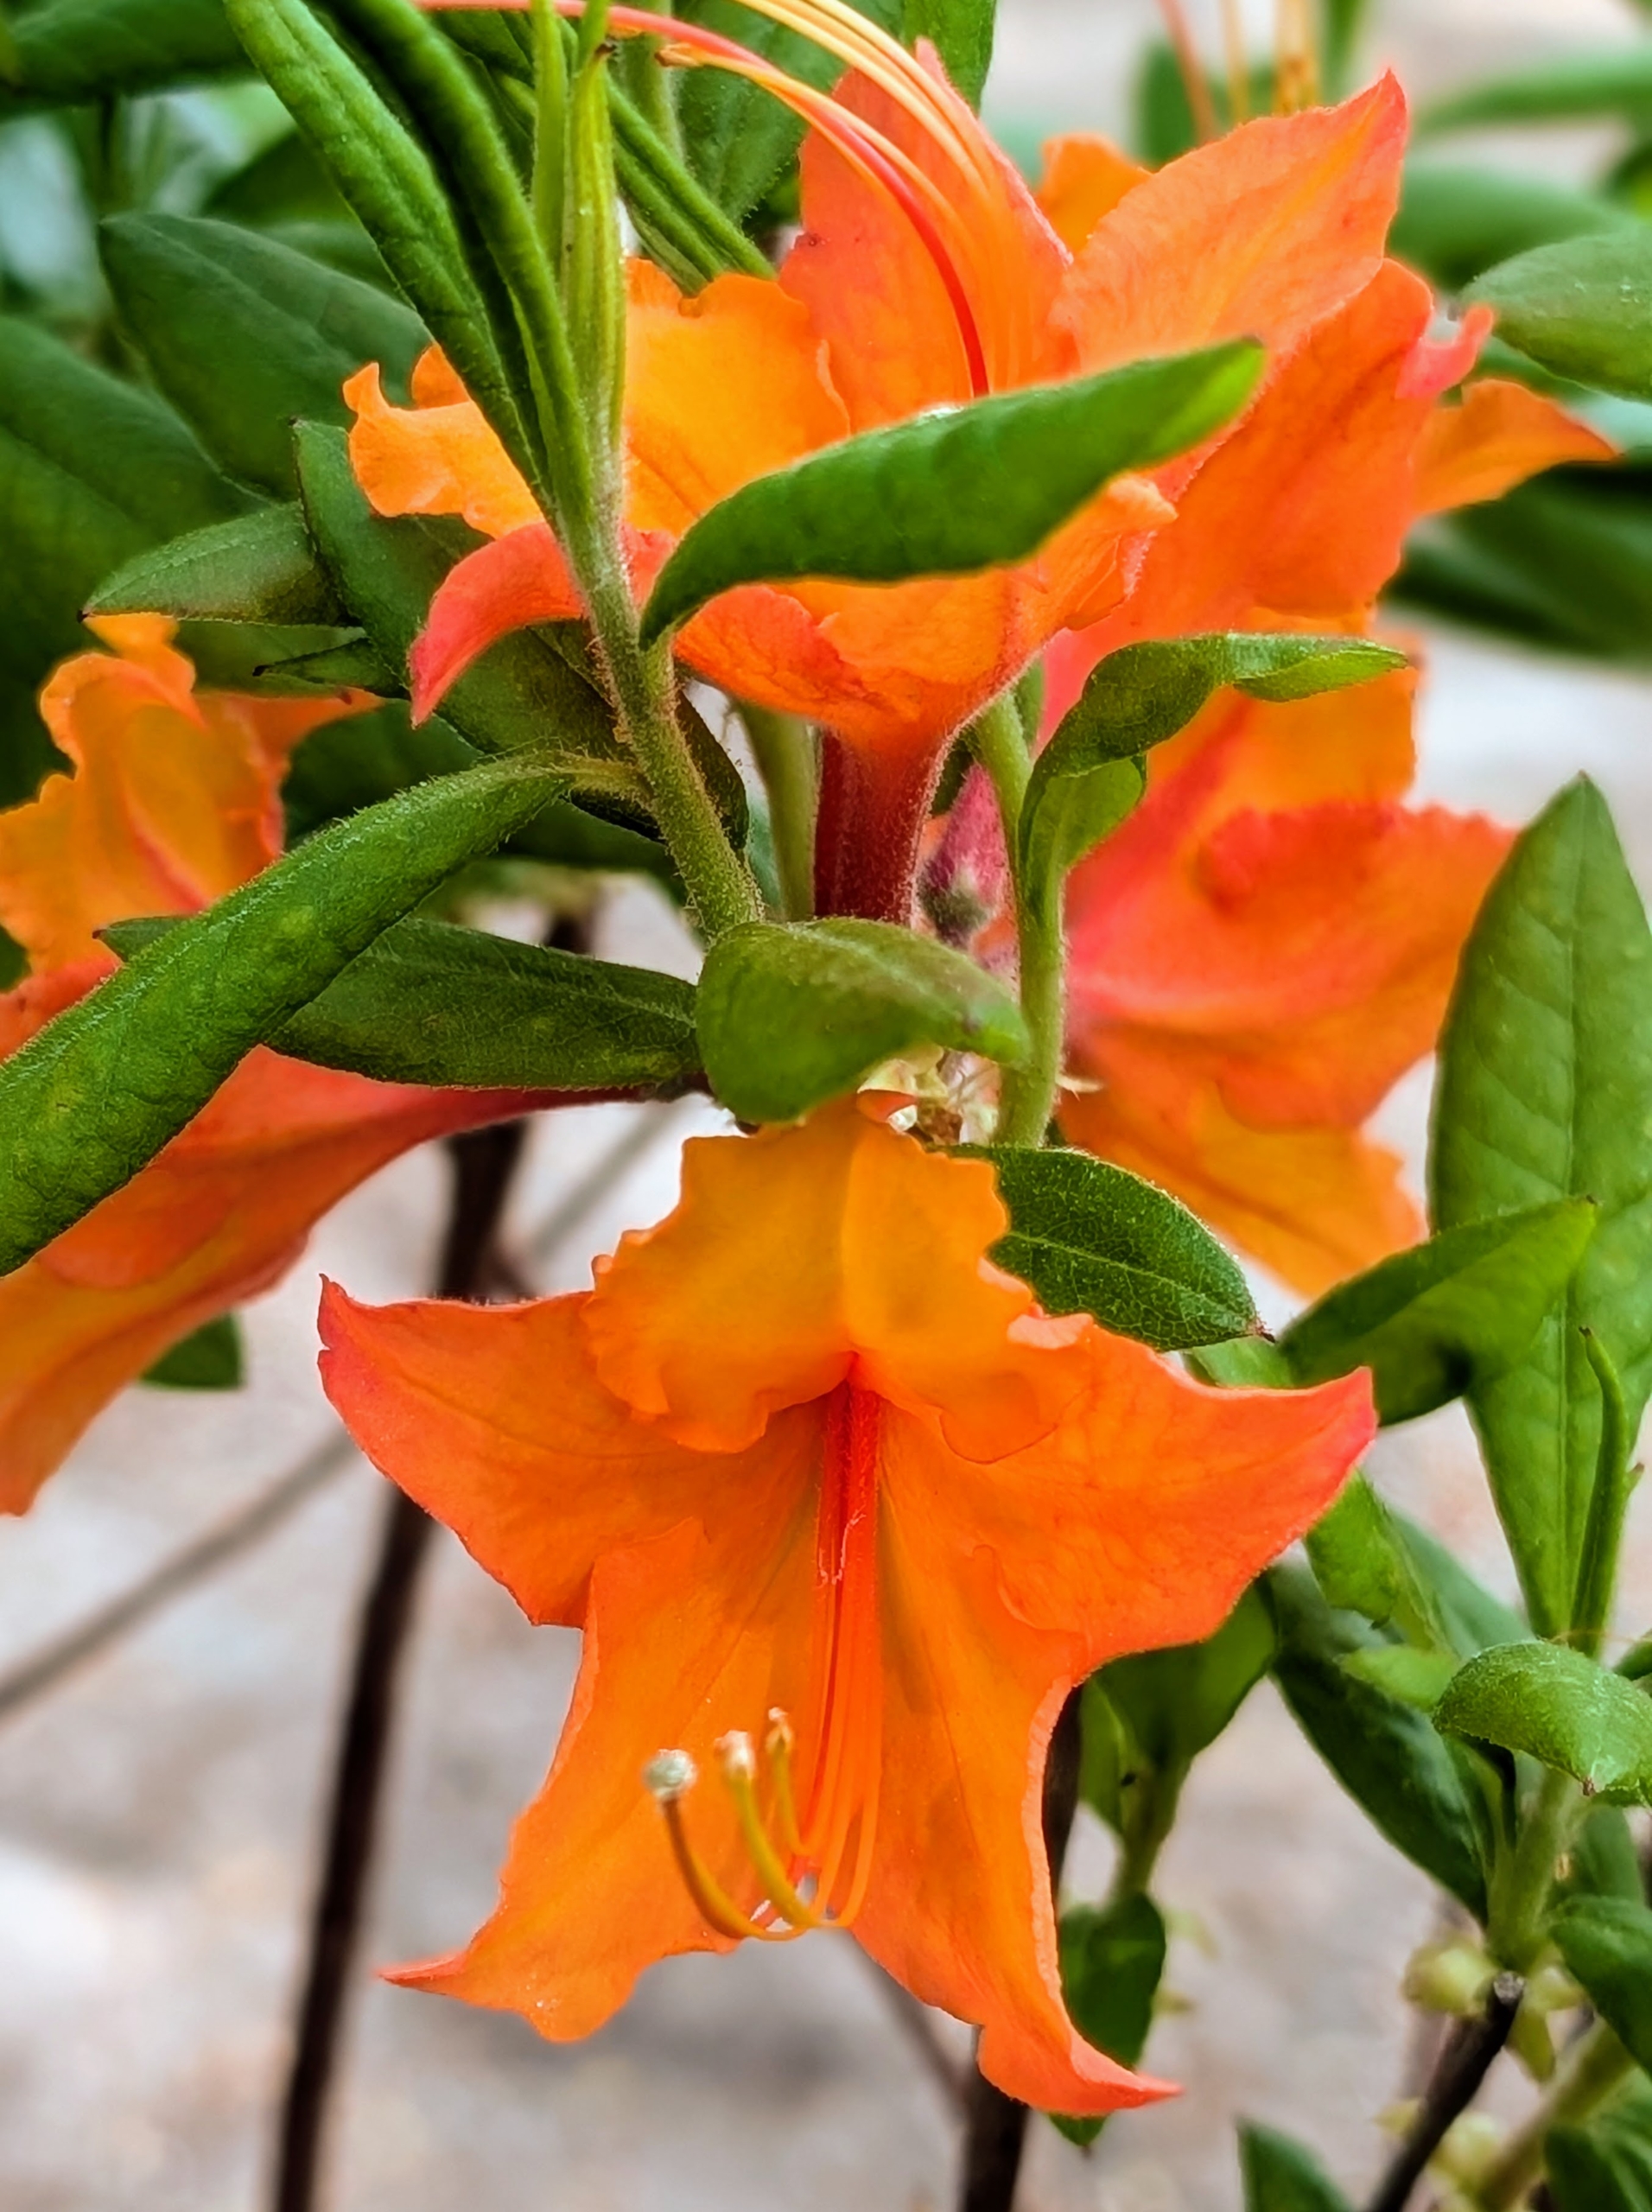
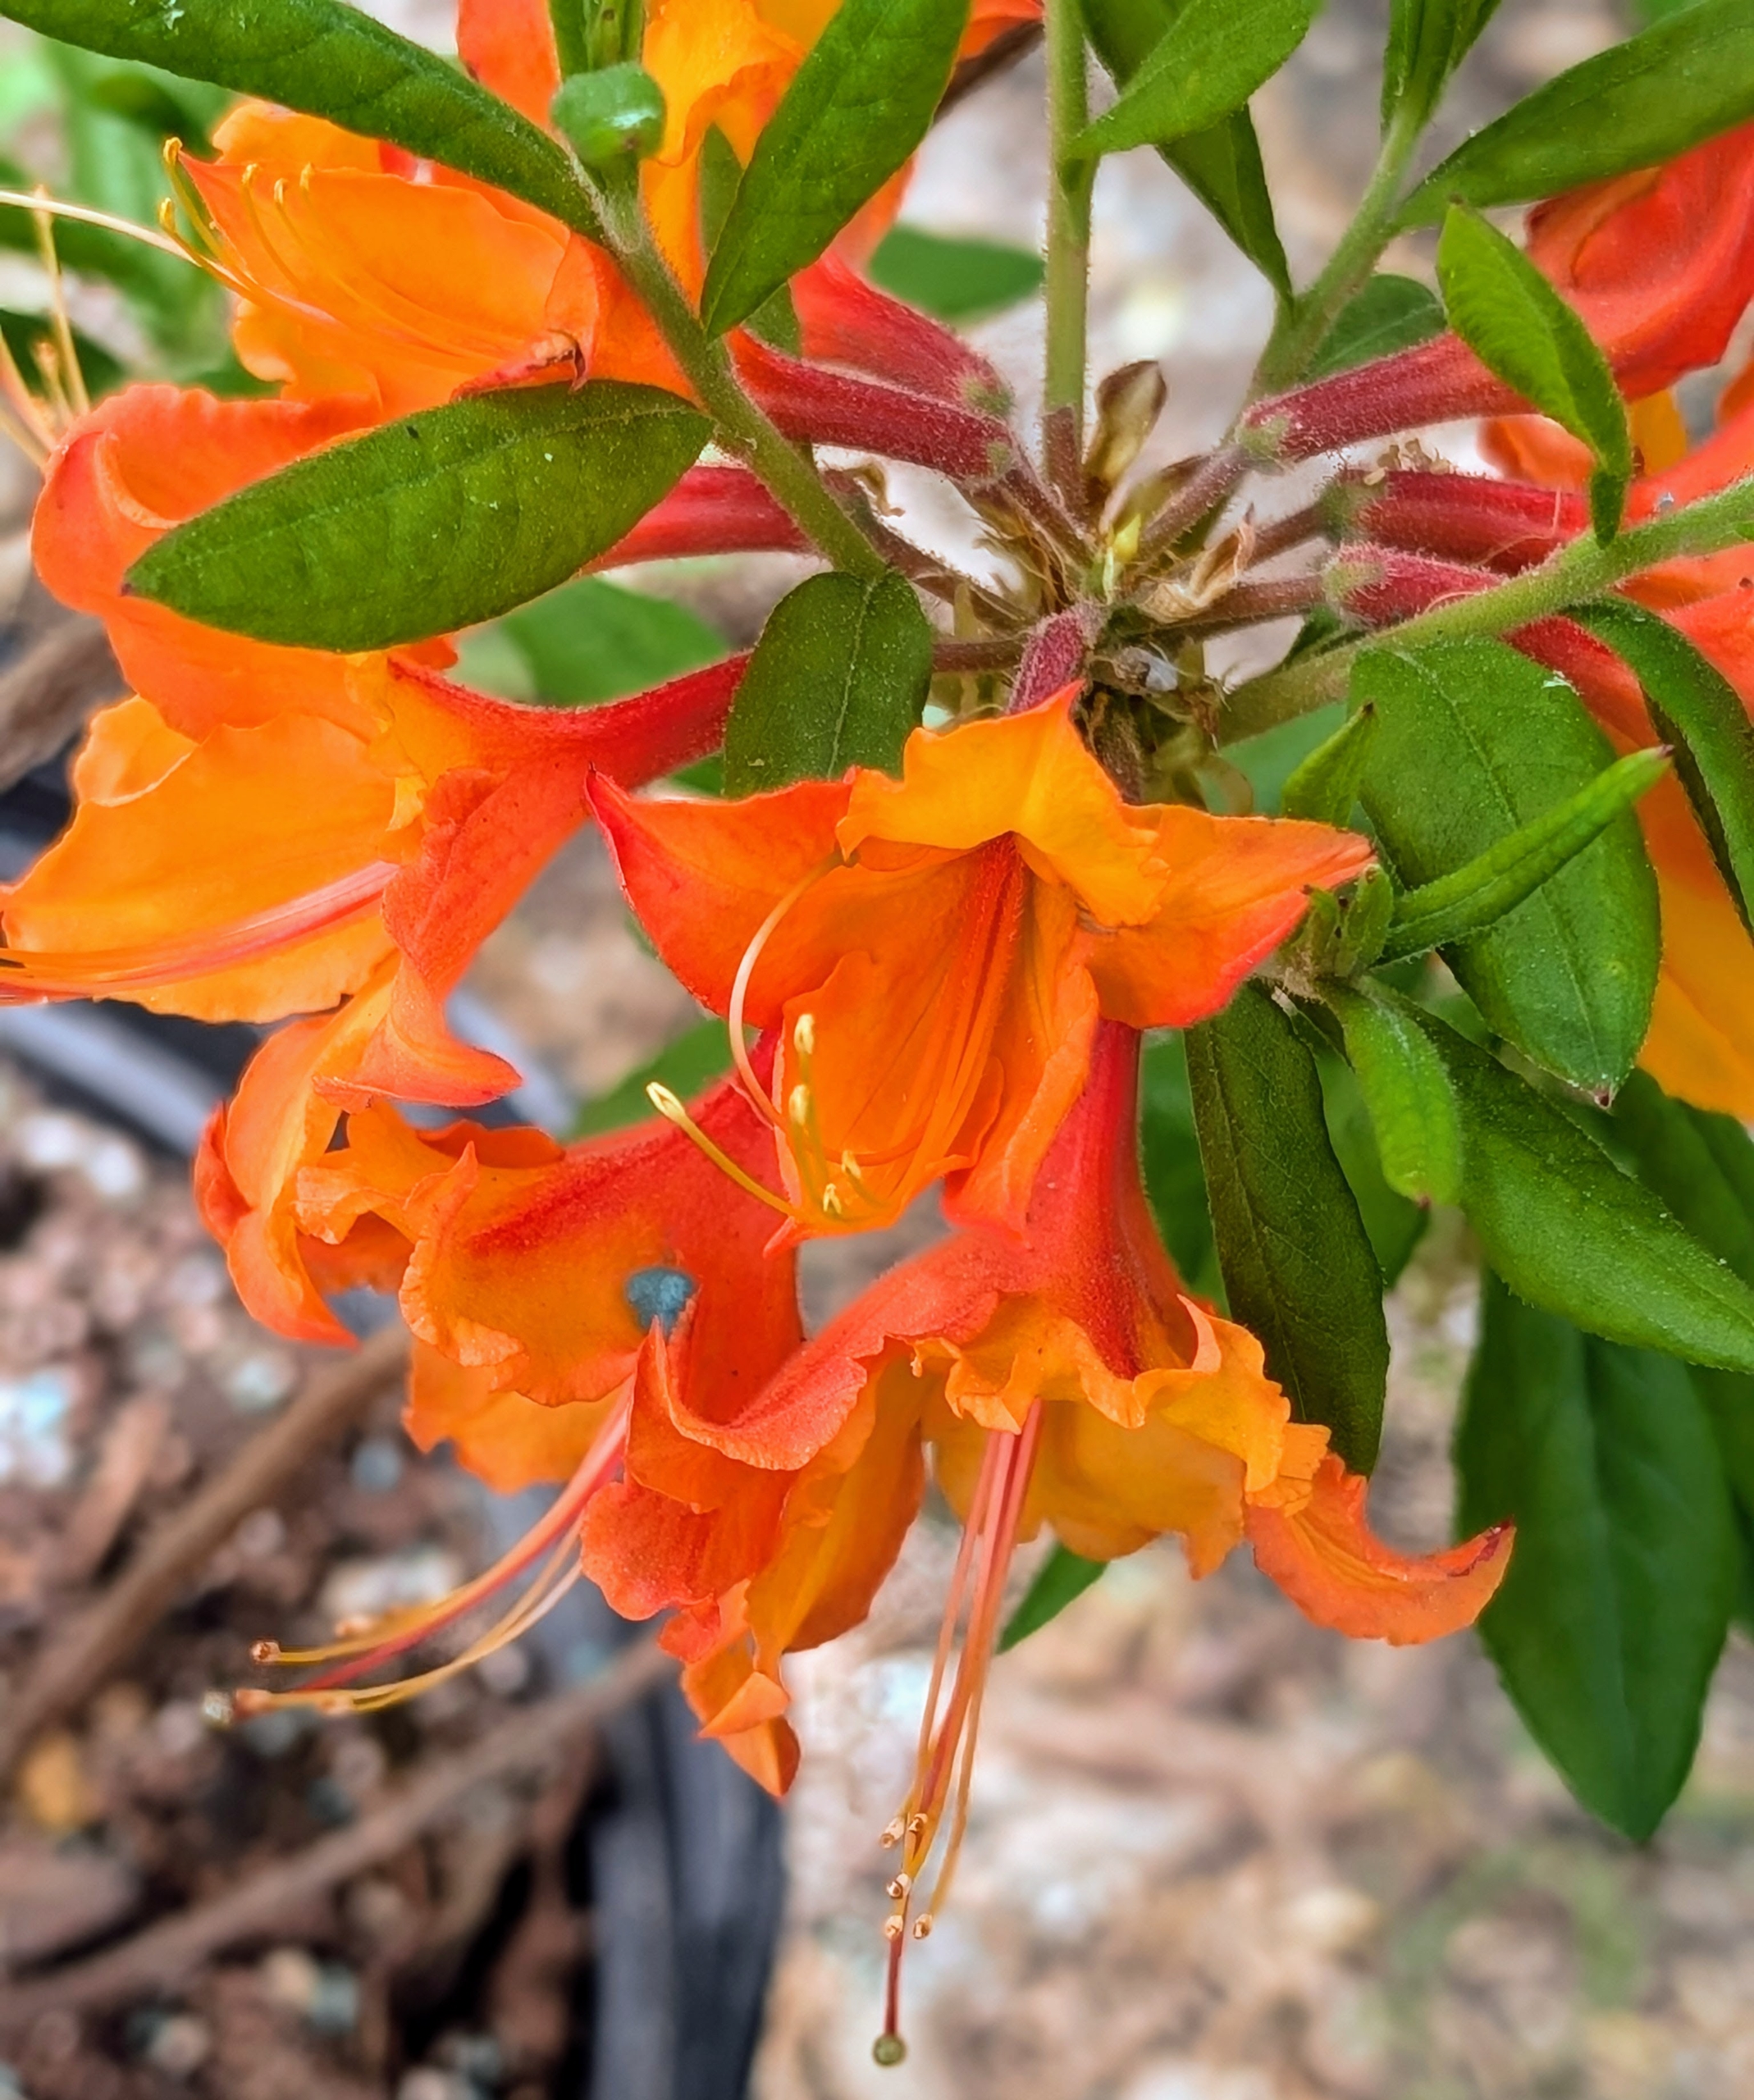
This is Azalea ‘Red Pepper.’ This native azalea is an Aromi hybrid with deep red buds in early spring that open to these brilliant, ruffled orange flowers.
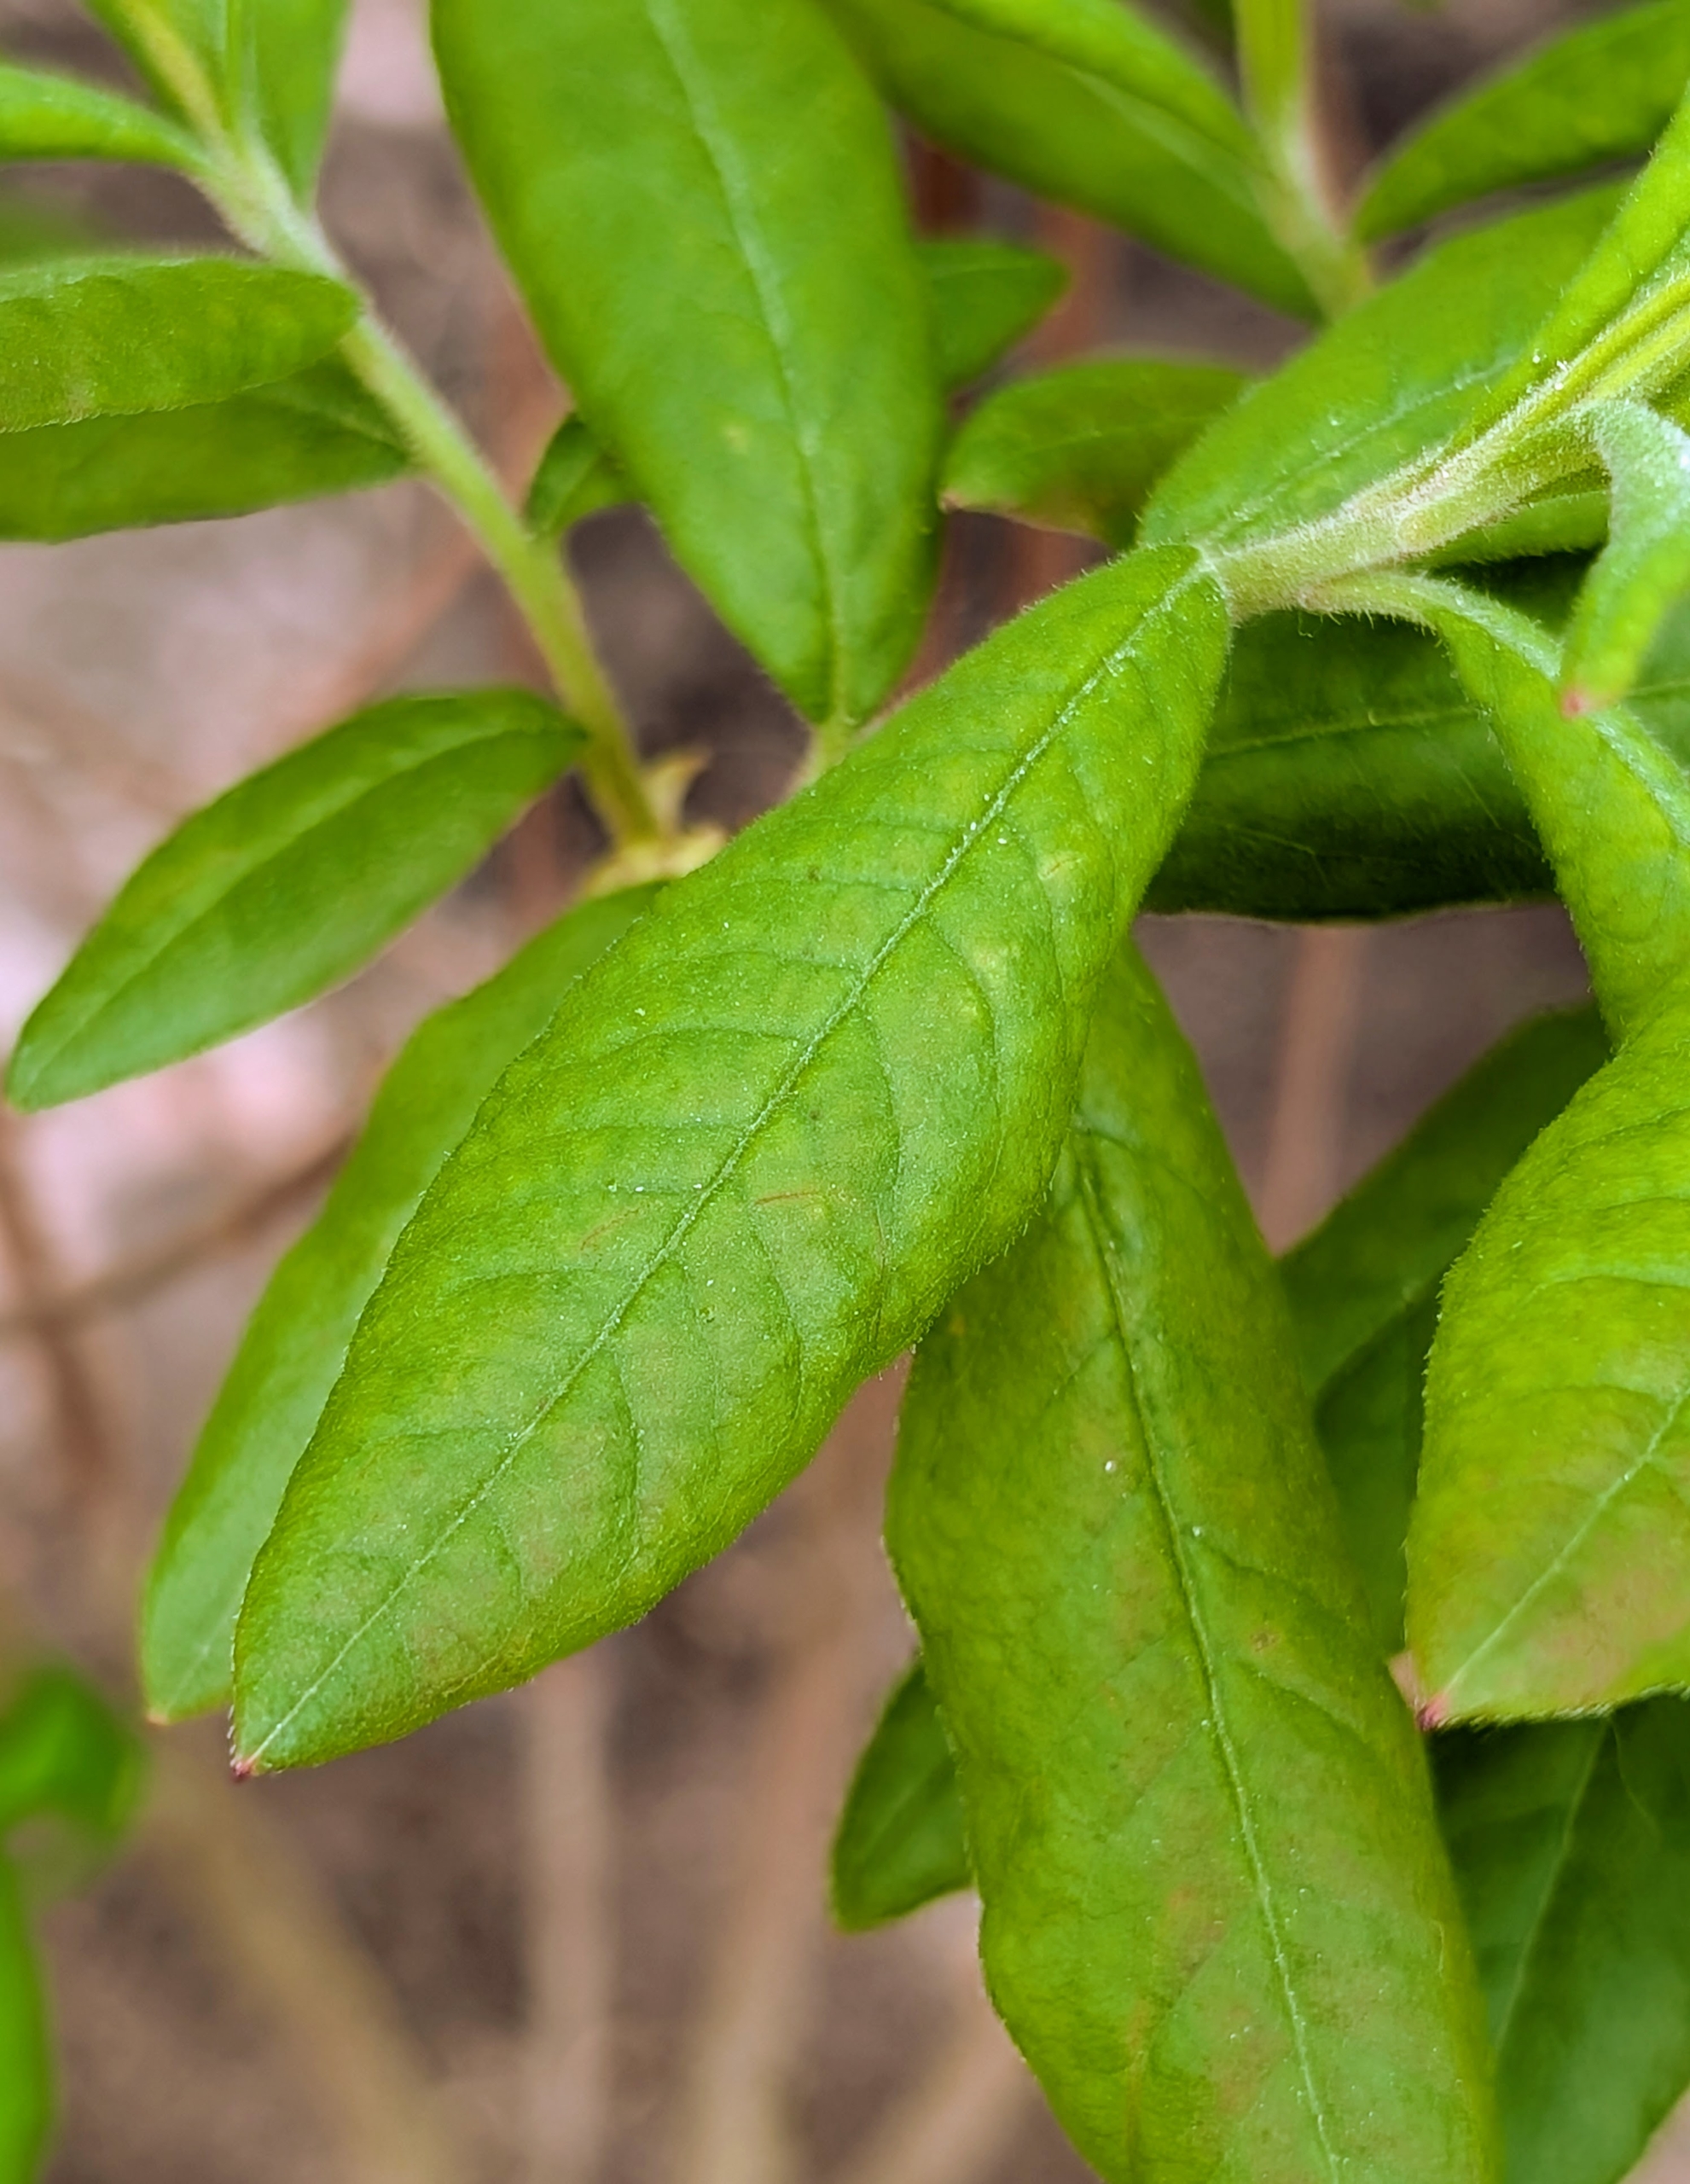
Azalea leaves are green, thin, pointed, and smaller than rhododendron leaves.
This one is called Azalea ‘Great Balls of Fire.’ It is a rare deciduous rhododendron hybrid that produces abundant, rounded flower clusters in fiery red to deep orange.
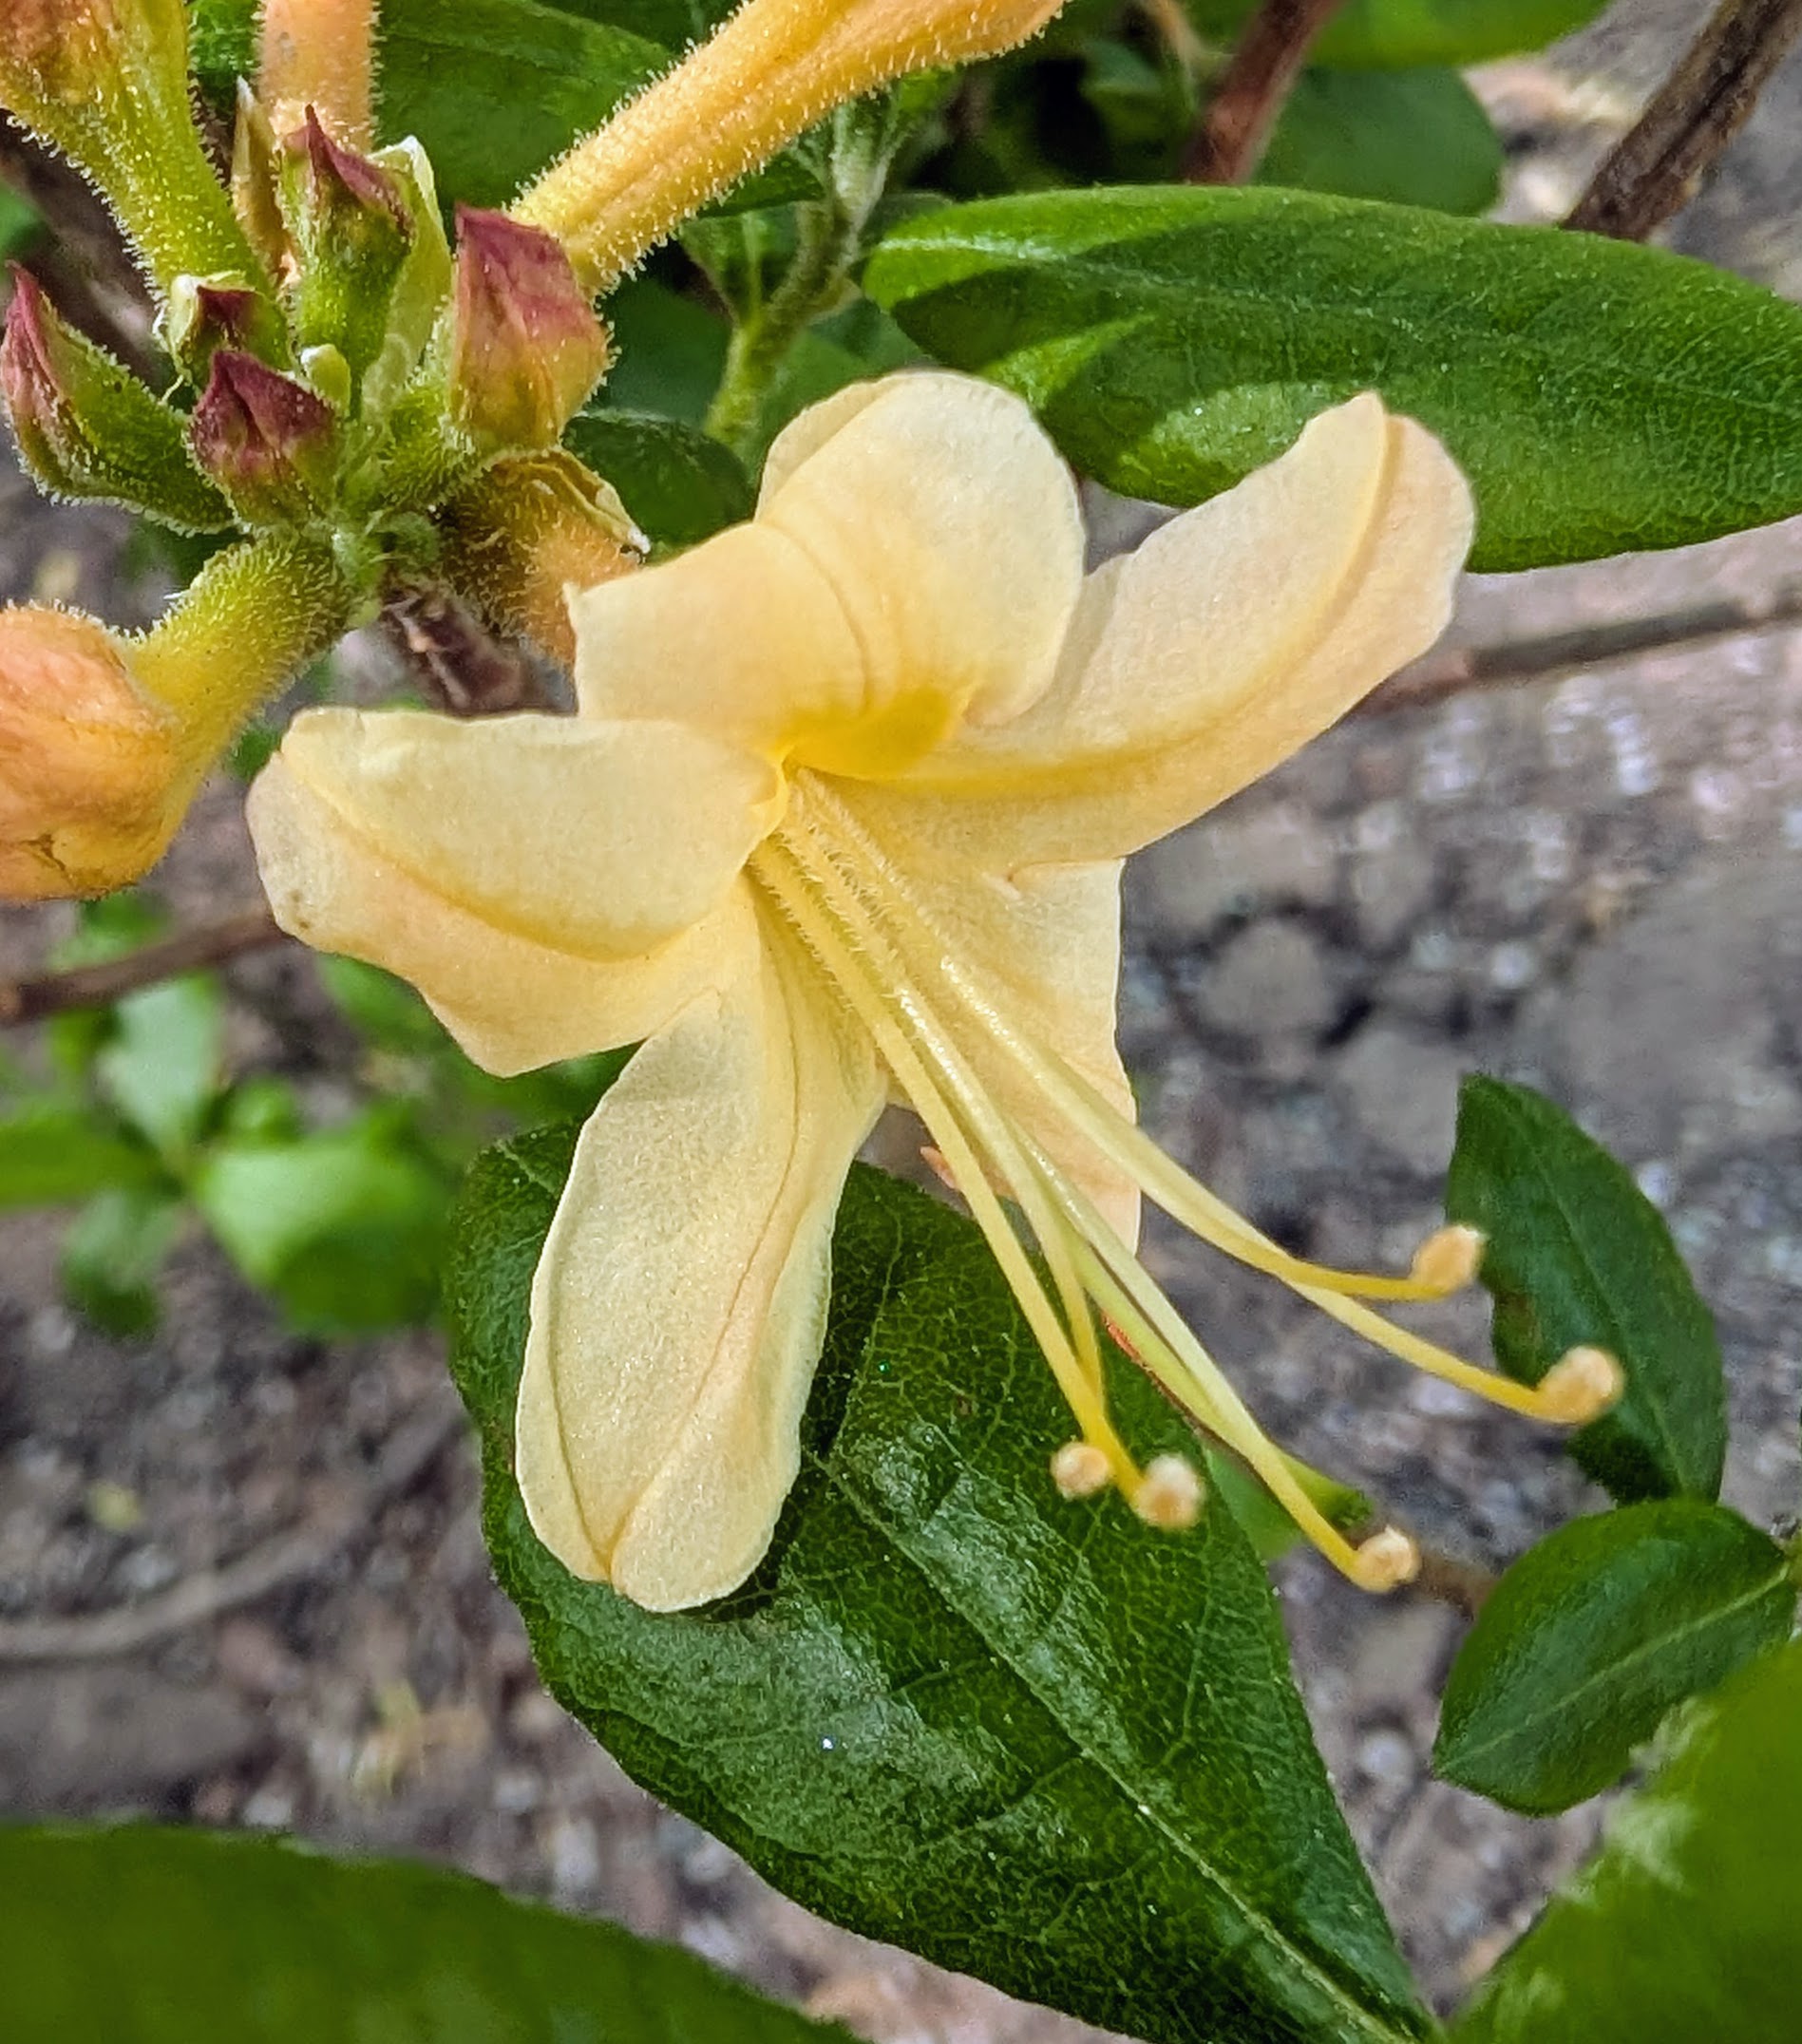
In contrast, this creamy yellow azalea is ‘My Mary’ – another native azalea hybrid that produces abundant and fragrant blooms in shades of soft to light yellow.
‘Sunstruck’ is a bit bolder in color. It features tubular funnel-shaped, wavy-edged lobes in vivid yellow.
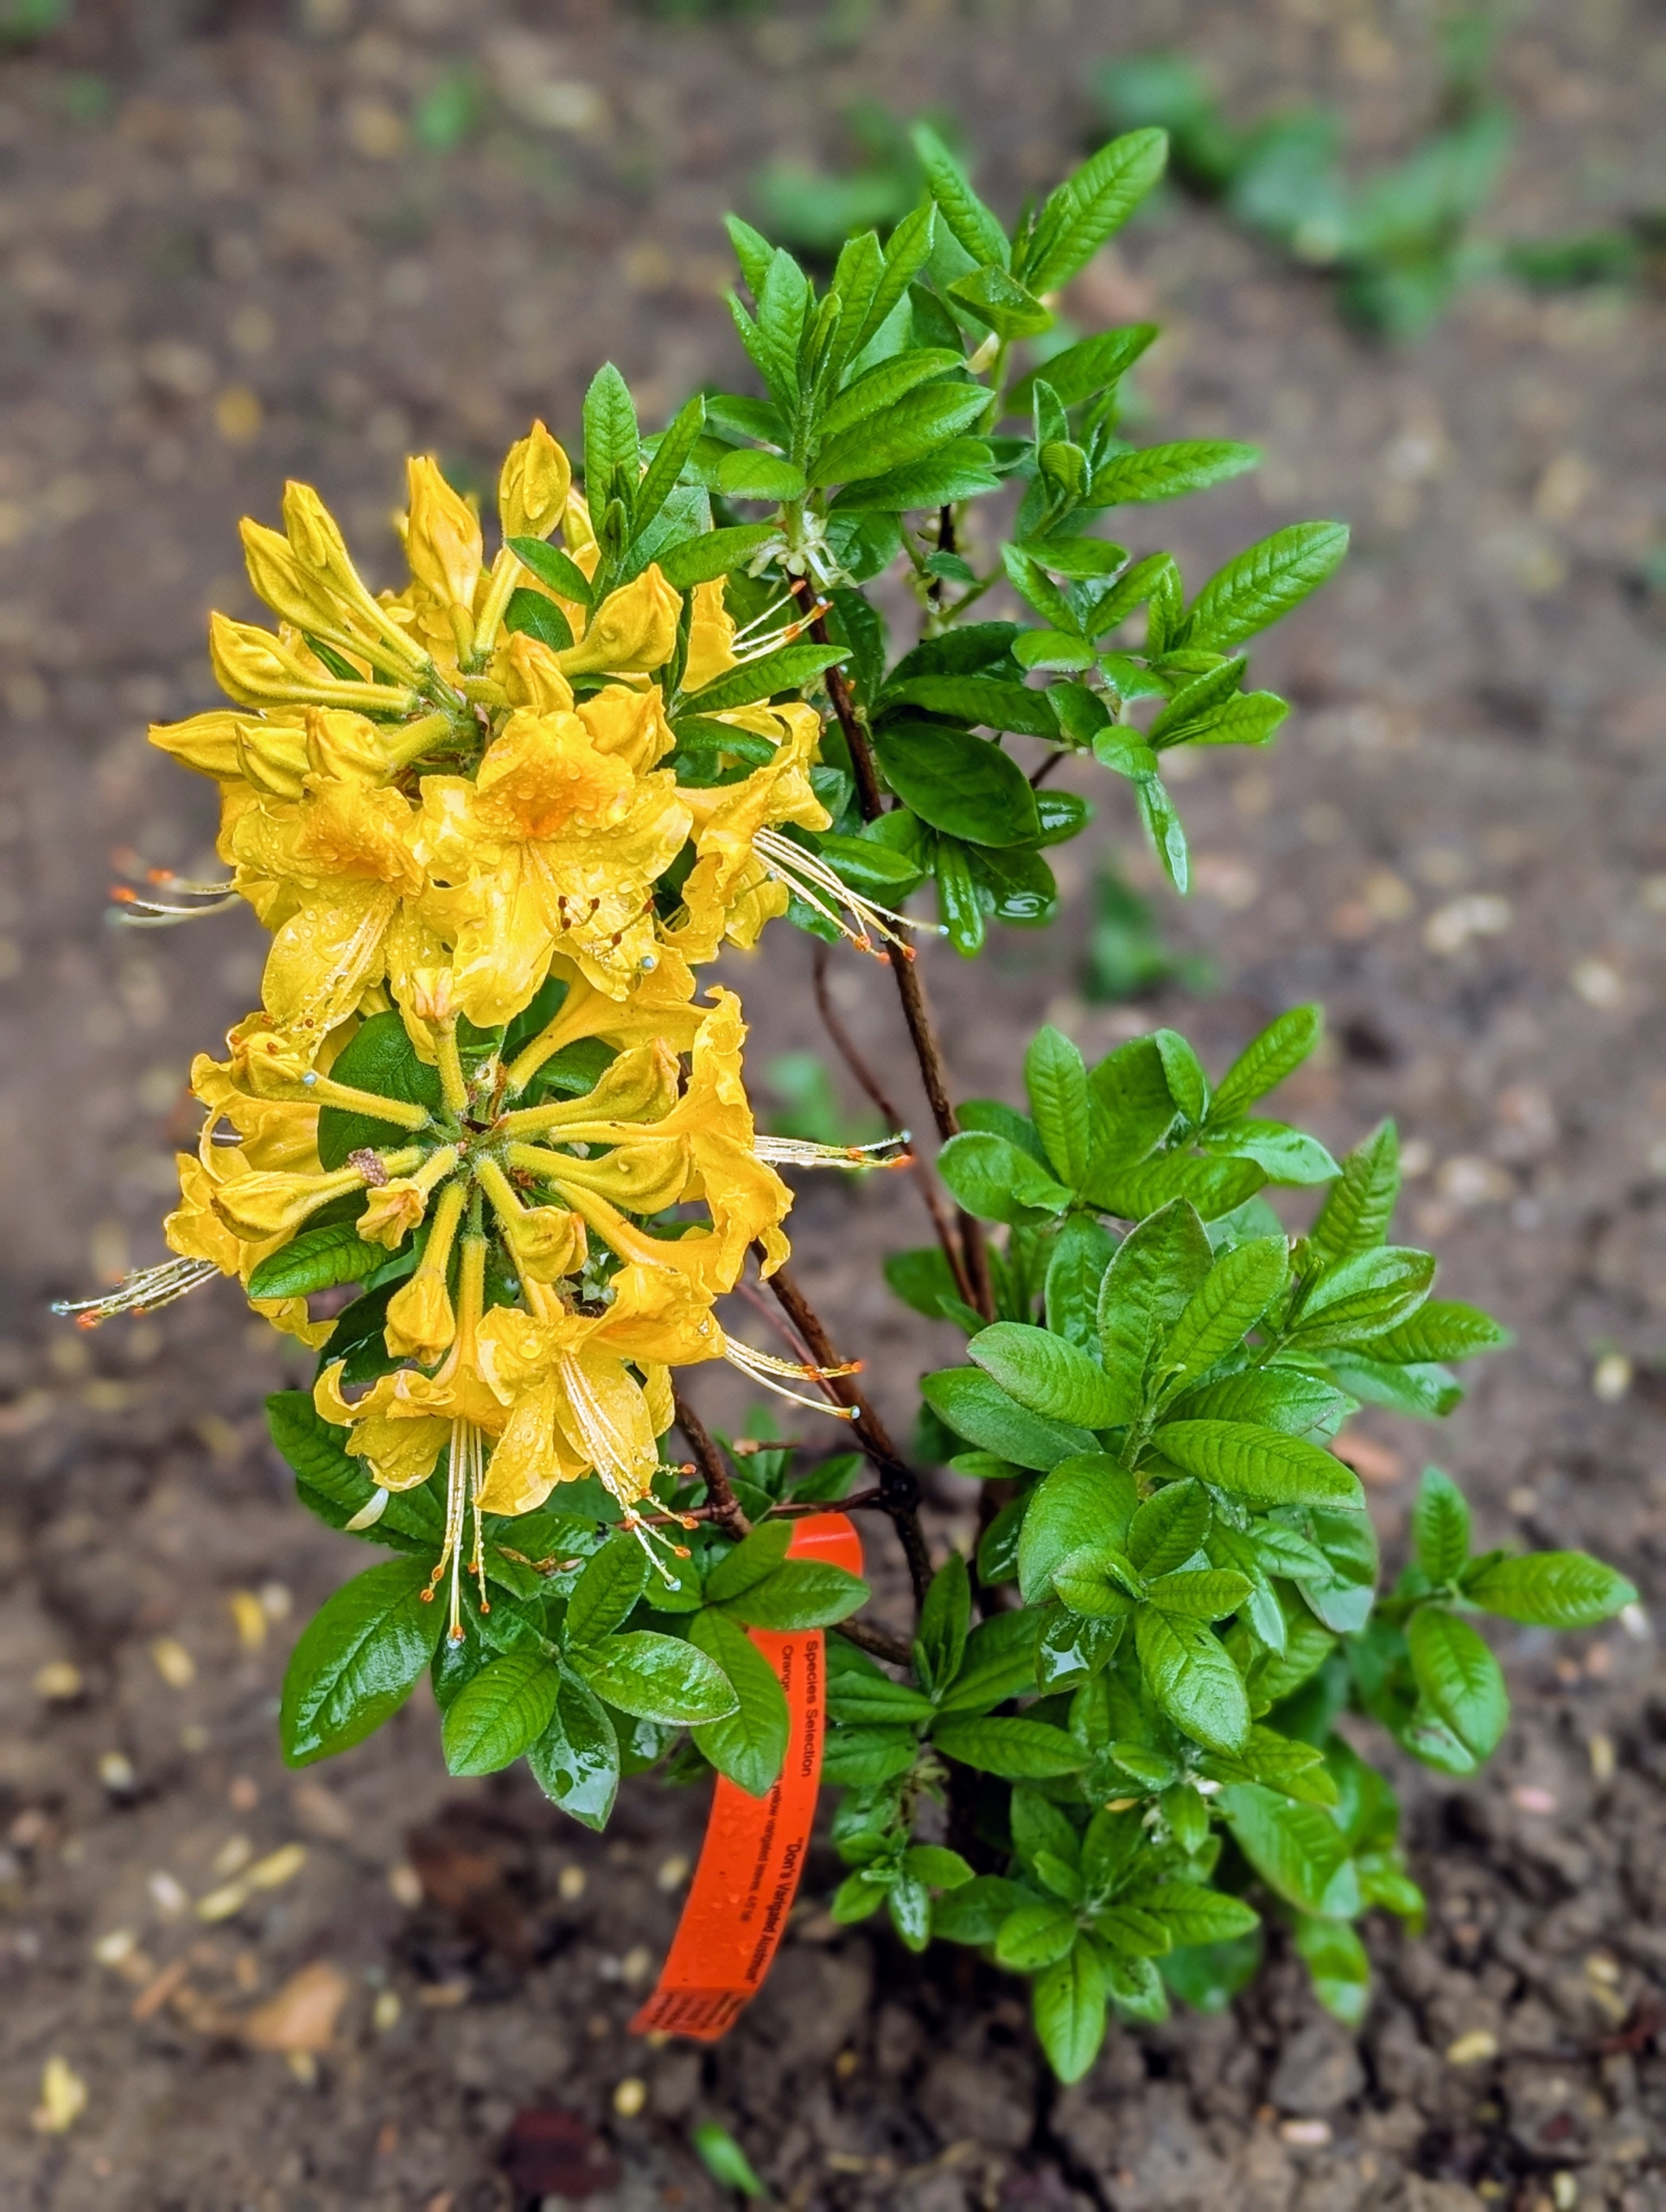
And this azalea is ‘Don’s Variegated Austrinum’ with warm golden flowers.
Some of the deciduous azaleas are unknown varieties, but still so beautiful and lush.
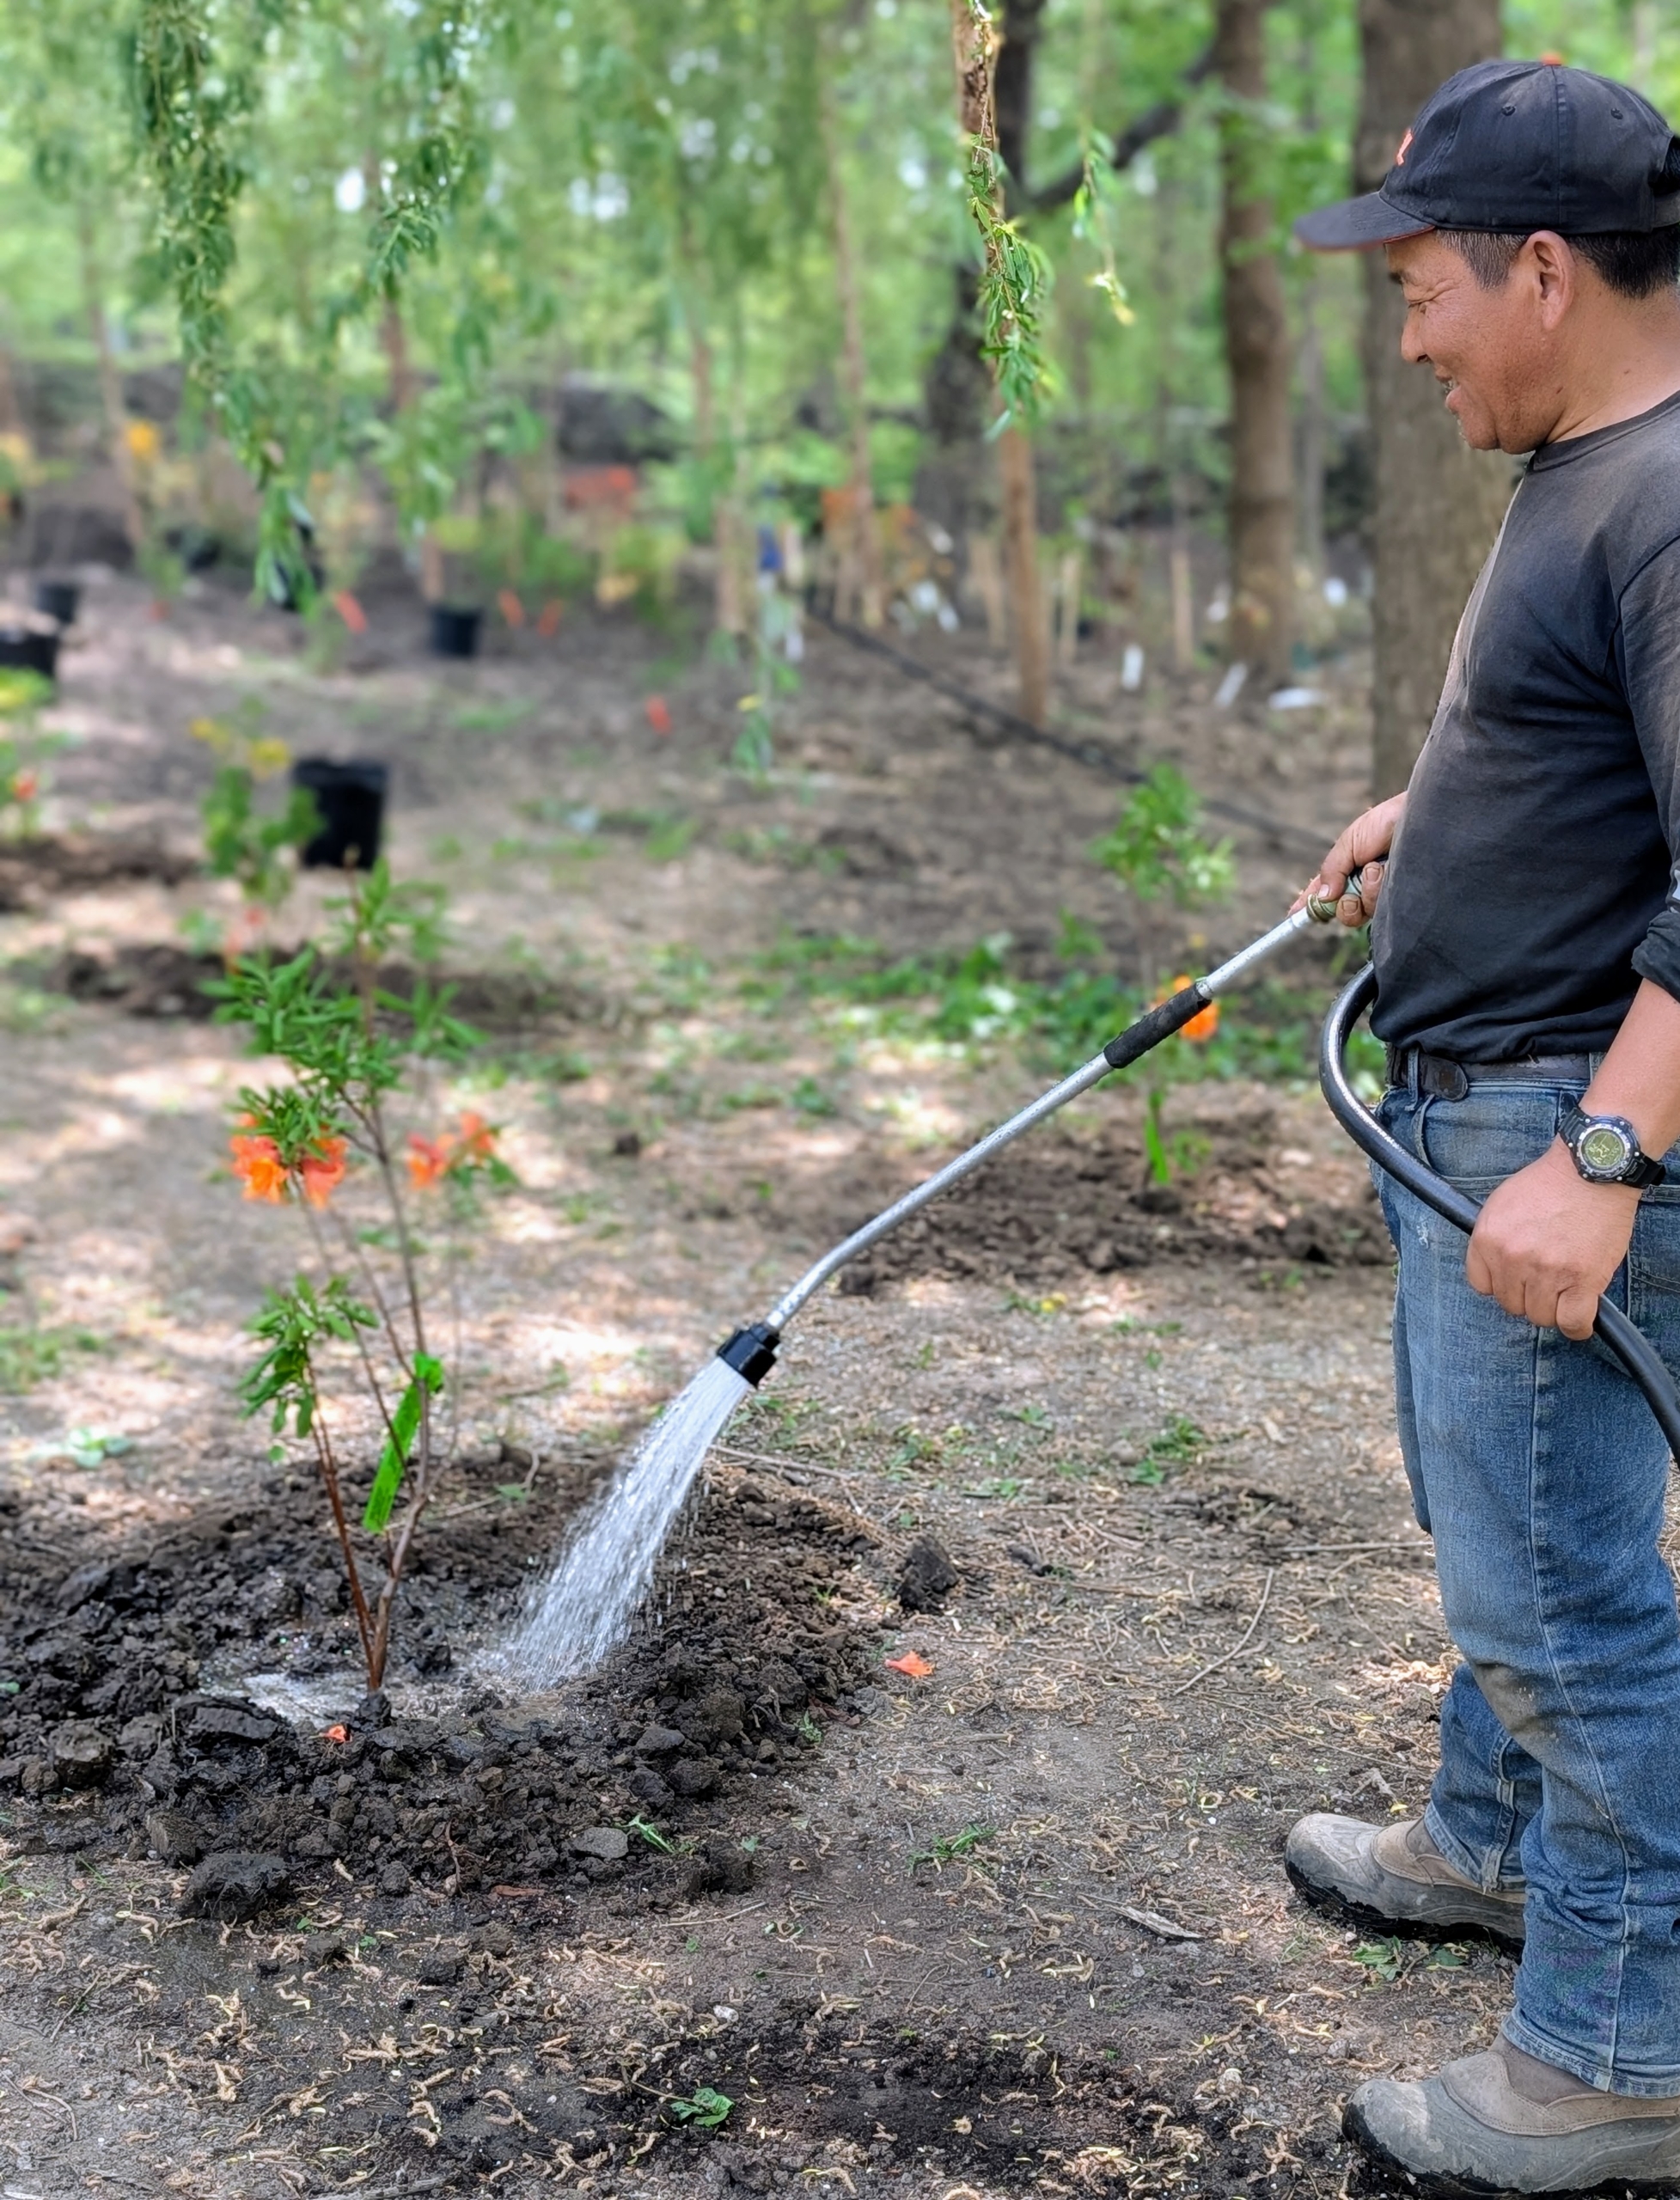
As each one is planted, Phurba gives it a good, thorough drink. After planting, these azaleas will be watered every day for a week and then once weekly until the roots are established. The soil should remain moist, but not overly saturated.
Newly planted trees are also staked with bamboo to provide additional support as they get established.
After a couple of days, all the specimens are properly planted and watered.
When planting anything, always consider space needs. Azaleas under three feet tall do best at least two feet apart. For plants three to five feet tall at maturity, leave at least three feet between plantings. For large azaleas eight to 10 feet tall, plant them a minimum of six feet apart.
This entire area will mature so beautifully. I can’t wait to see it fill out and flourish.
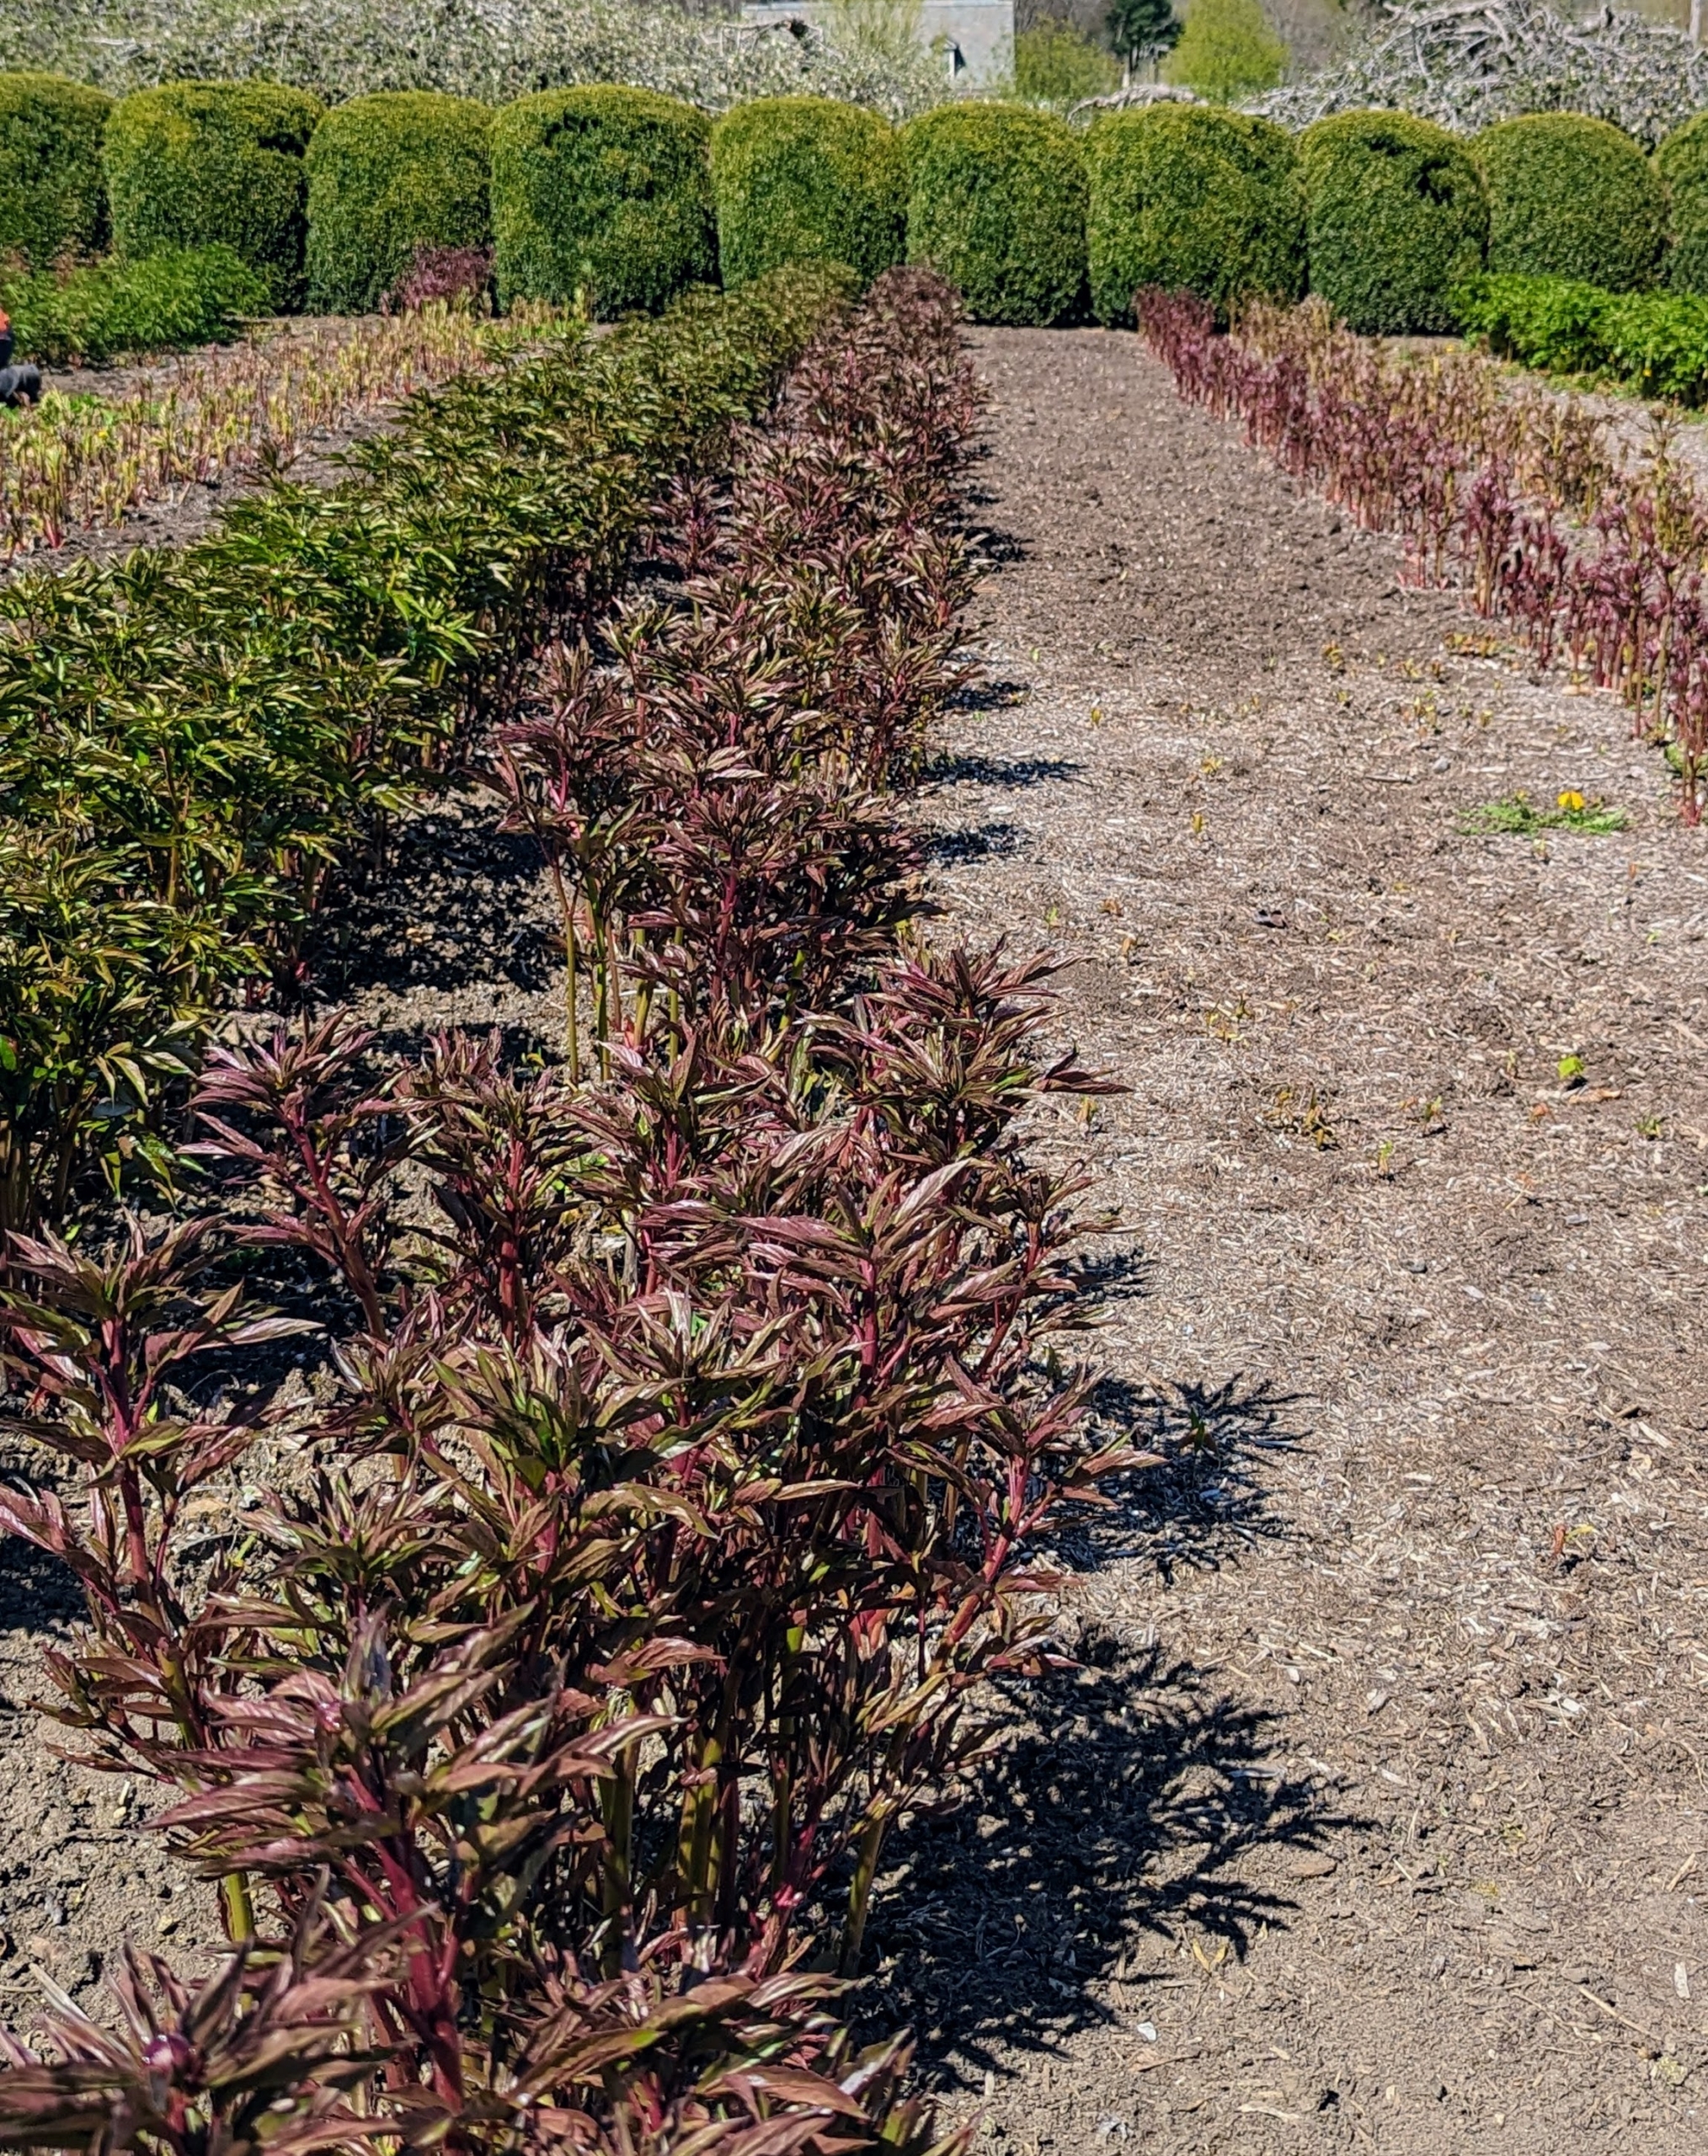
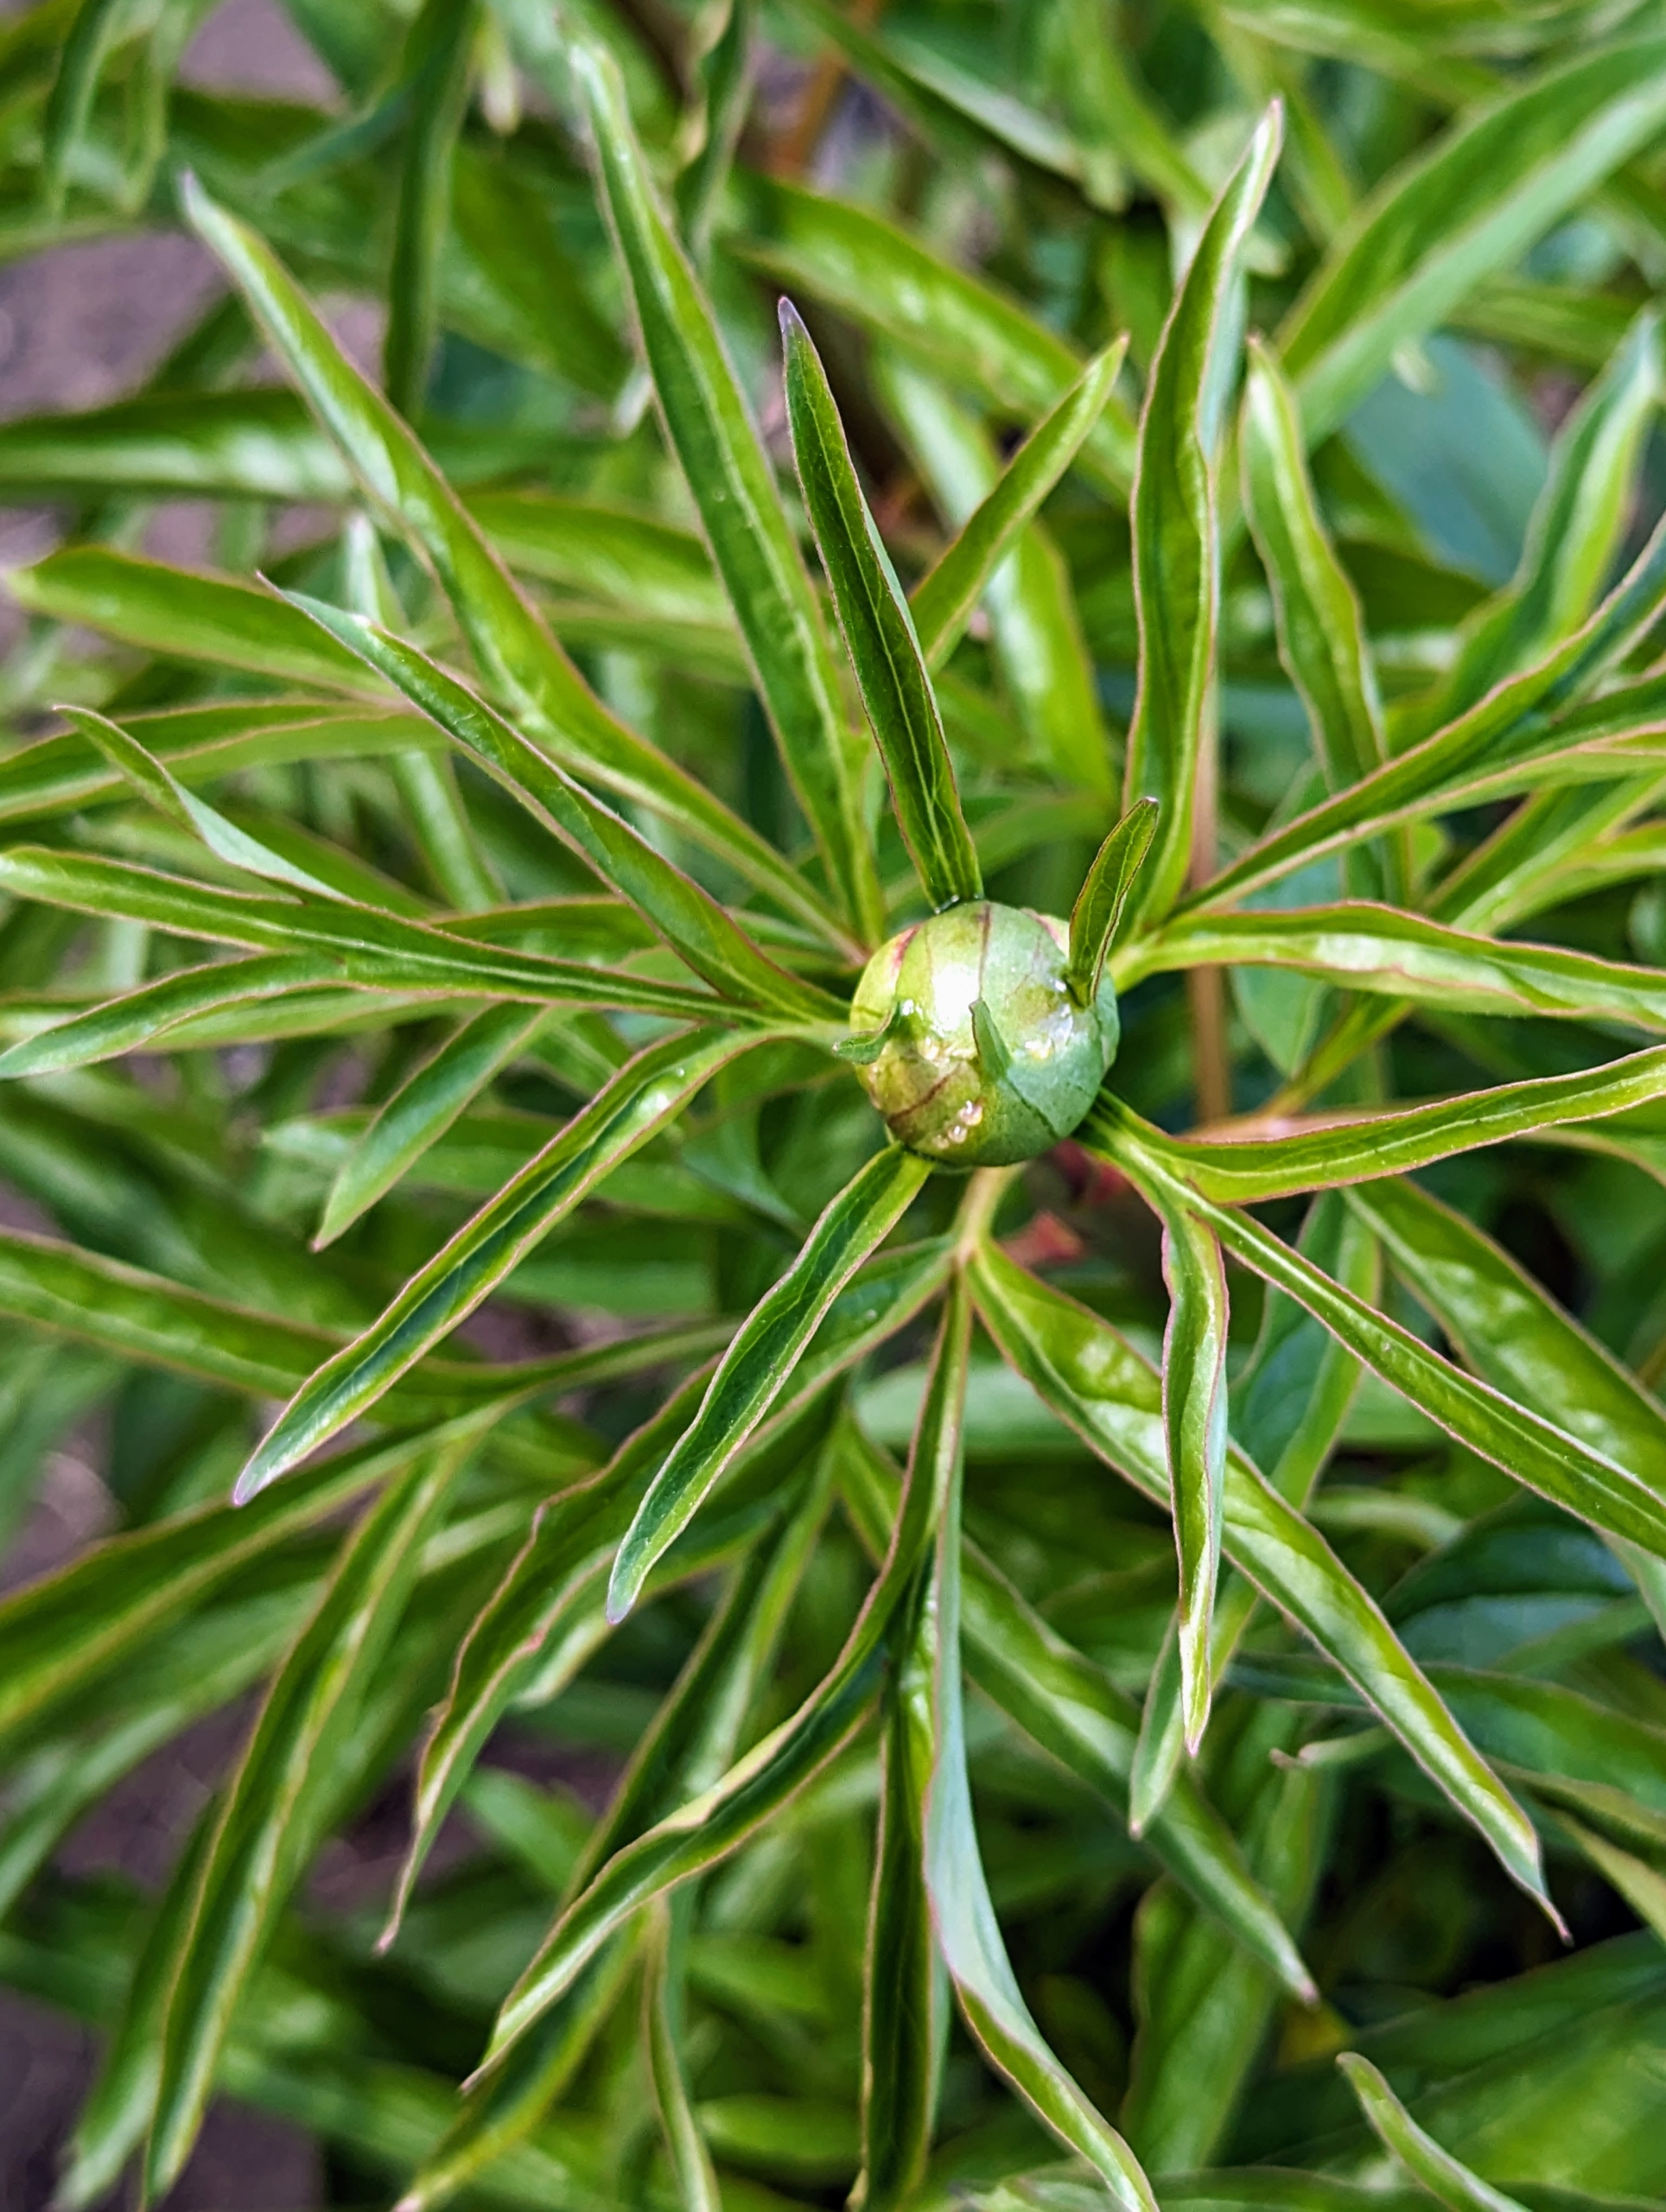
The peony stakes are up, which means the countdown to bloom is on!
It's one of the most anticipated sights on the farm - when my herbaceous peony garden is in full bloom. It's usually late May or early June when the beds are filled with large, imposing flowers. True perennials, herbaceous peonies can live for 100-years, becoming more impressive over time. As soon as the peonies are a few inches tall, my gardeners and outdoor grounds crew put up the stakes that support them through the season - stakes I designed myself. At maturity these plants, which grow to about three-feet tall, need propping up, so their massive flower heads don’t droop to the ground.
Here are some photos, enjoy.
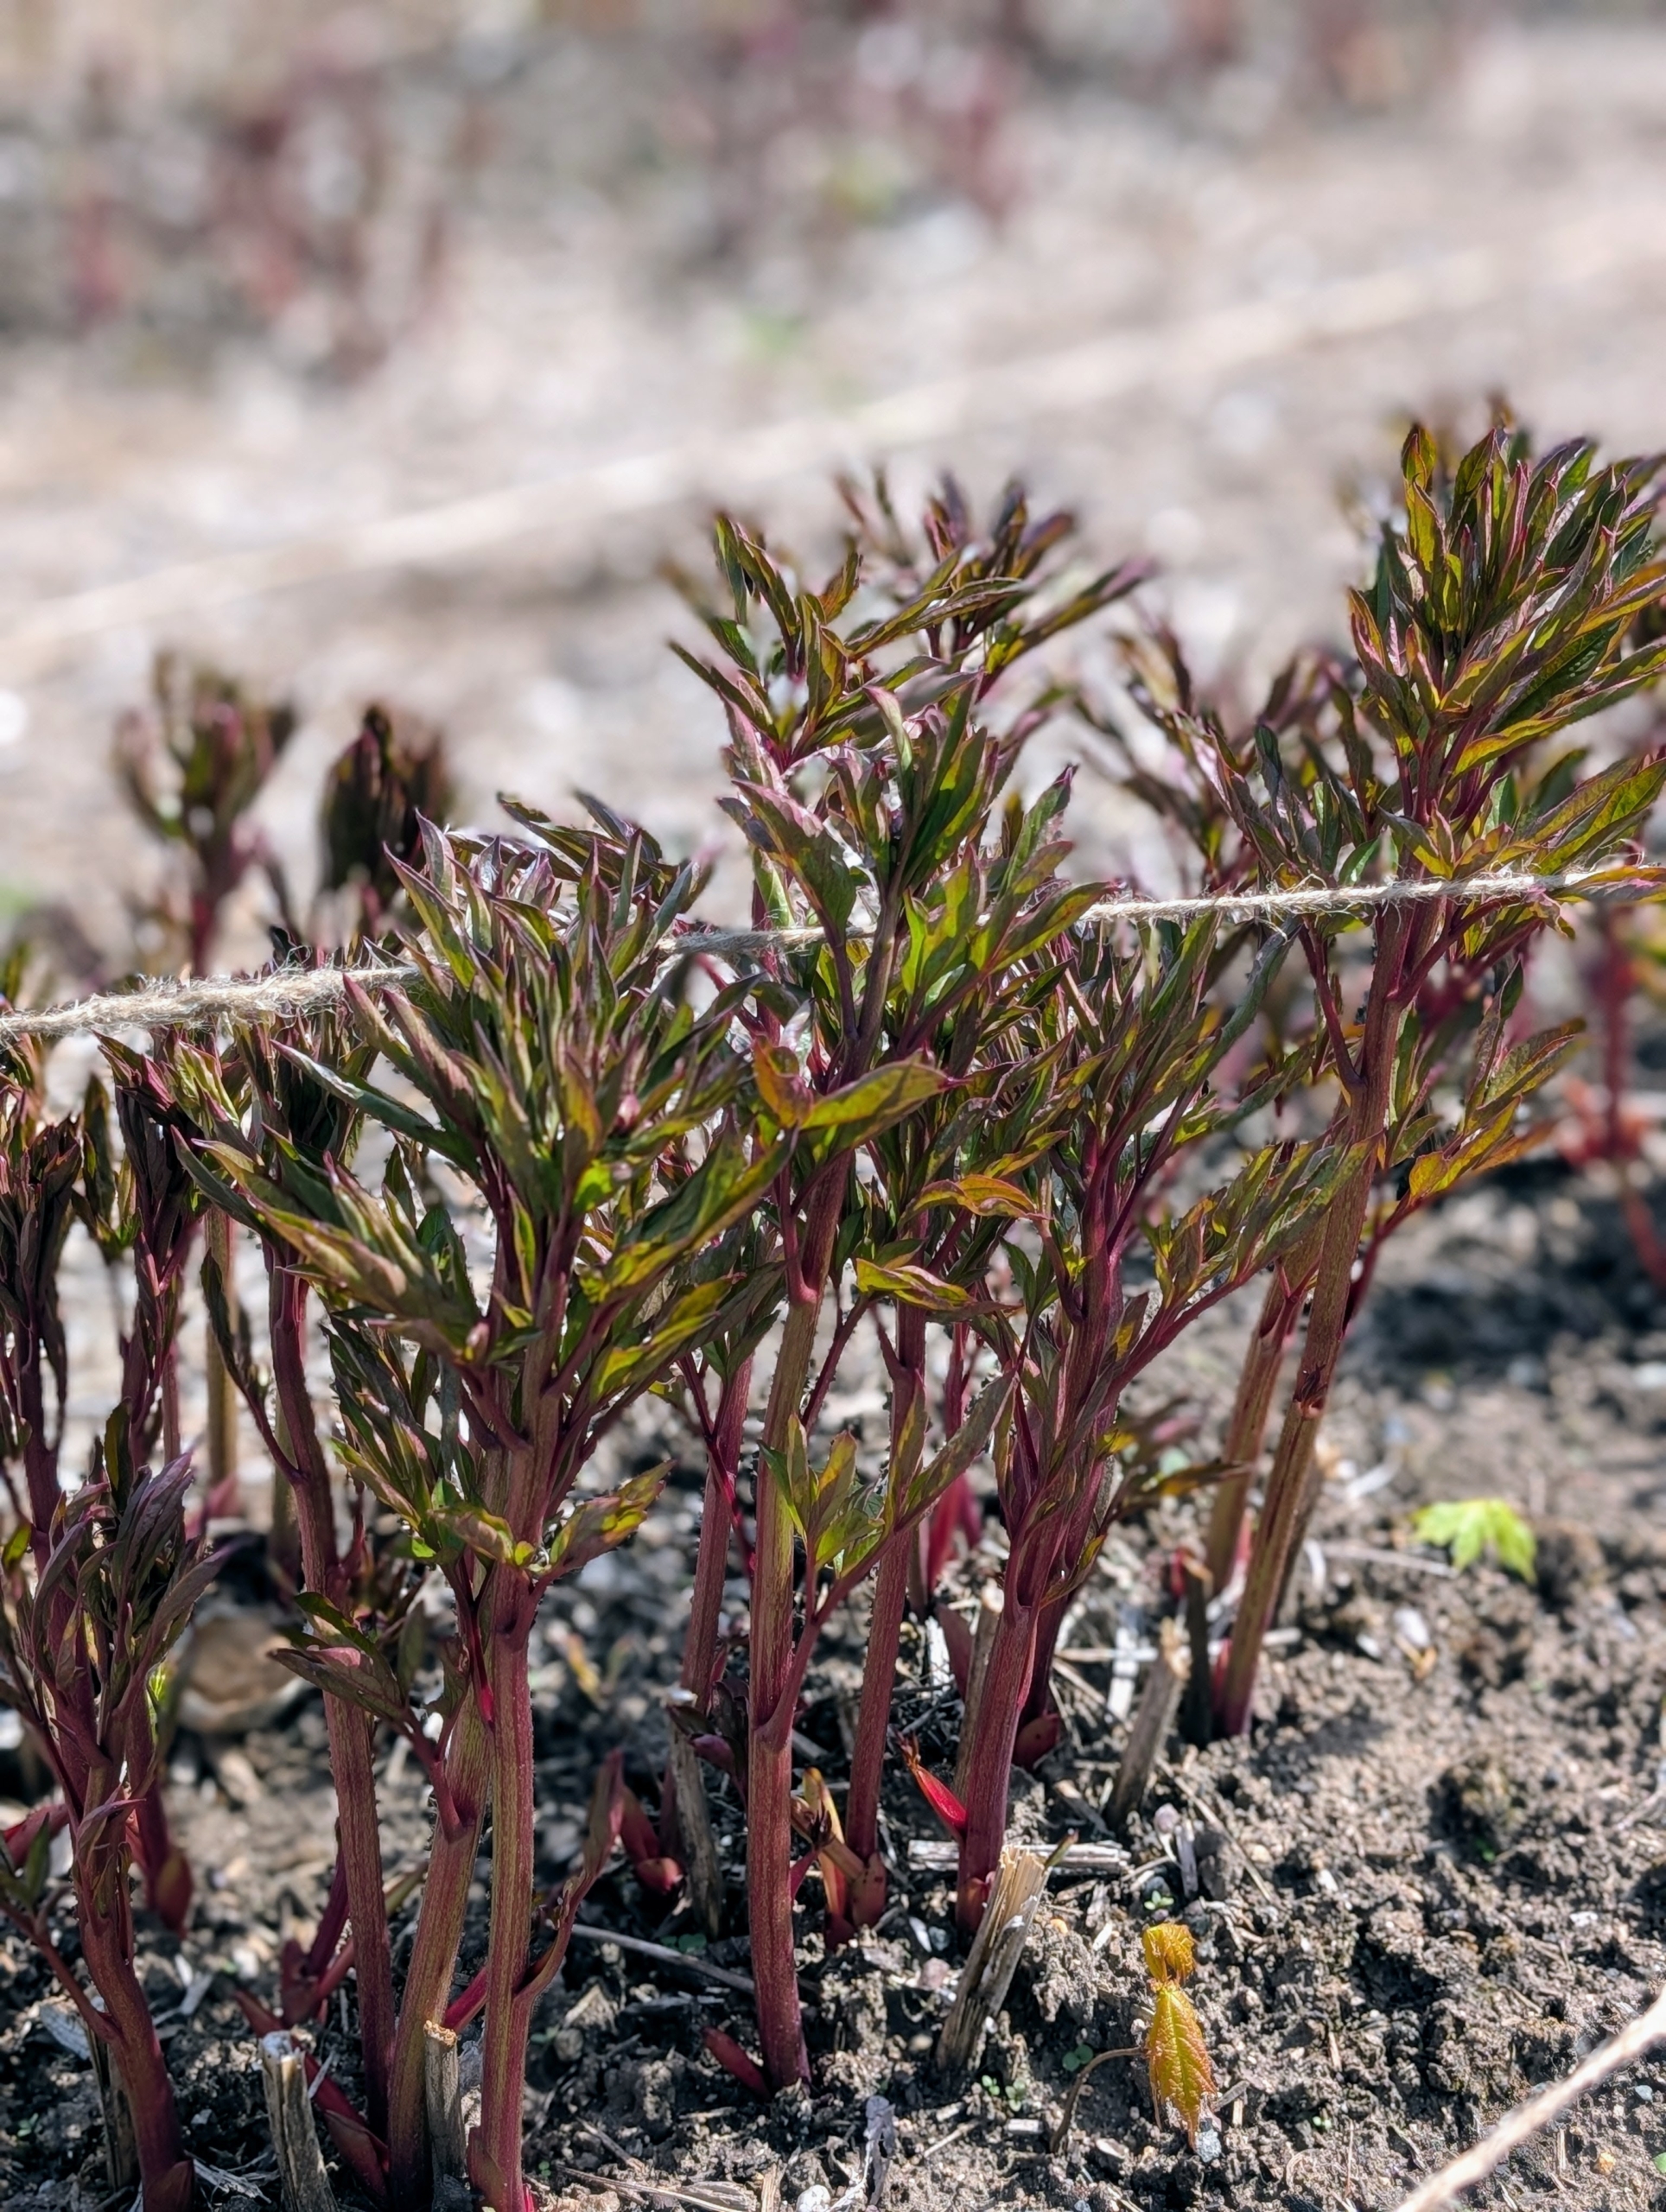
Have you staked your peonies yet? Herbaceous peonies are very hardy perennials and thrive in USDA zones 3 to 8. In early spring, most of the herbaceous peonies begin emerging from the ground, but they grow very quickly and need to be supported to protect the large heavy flowers.
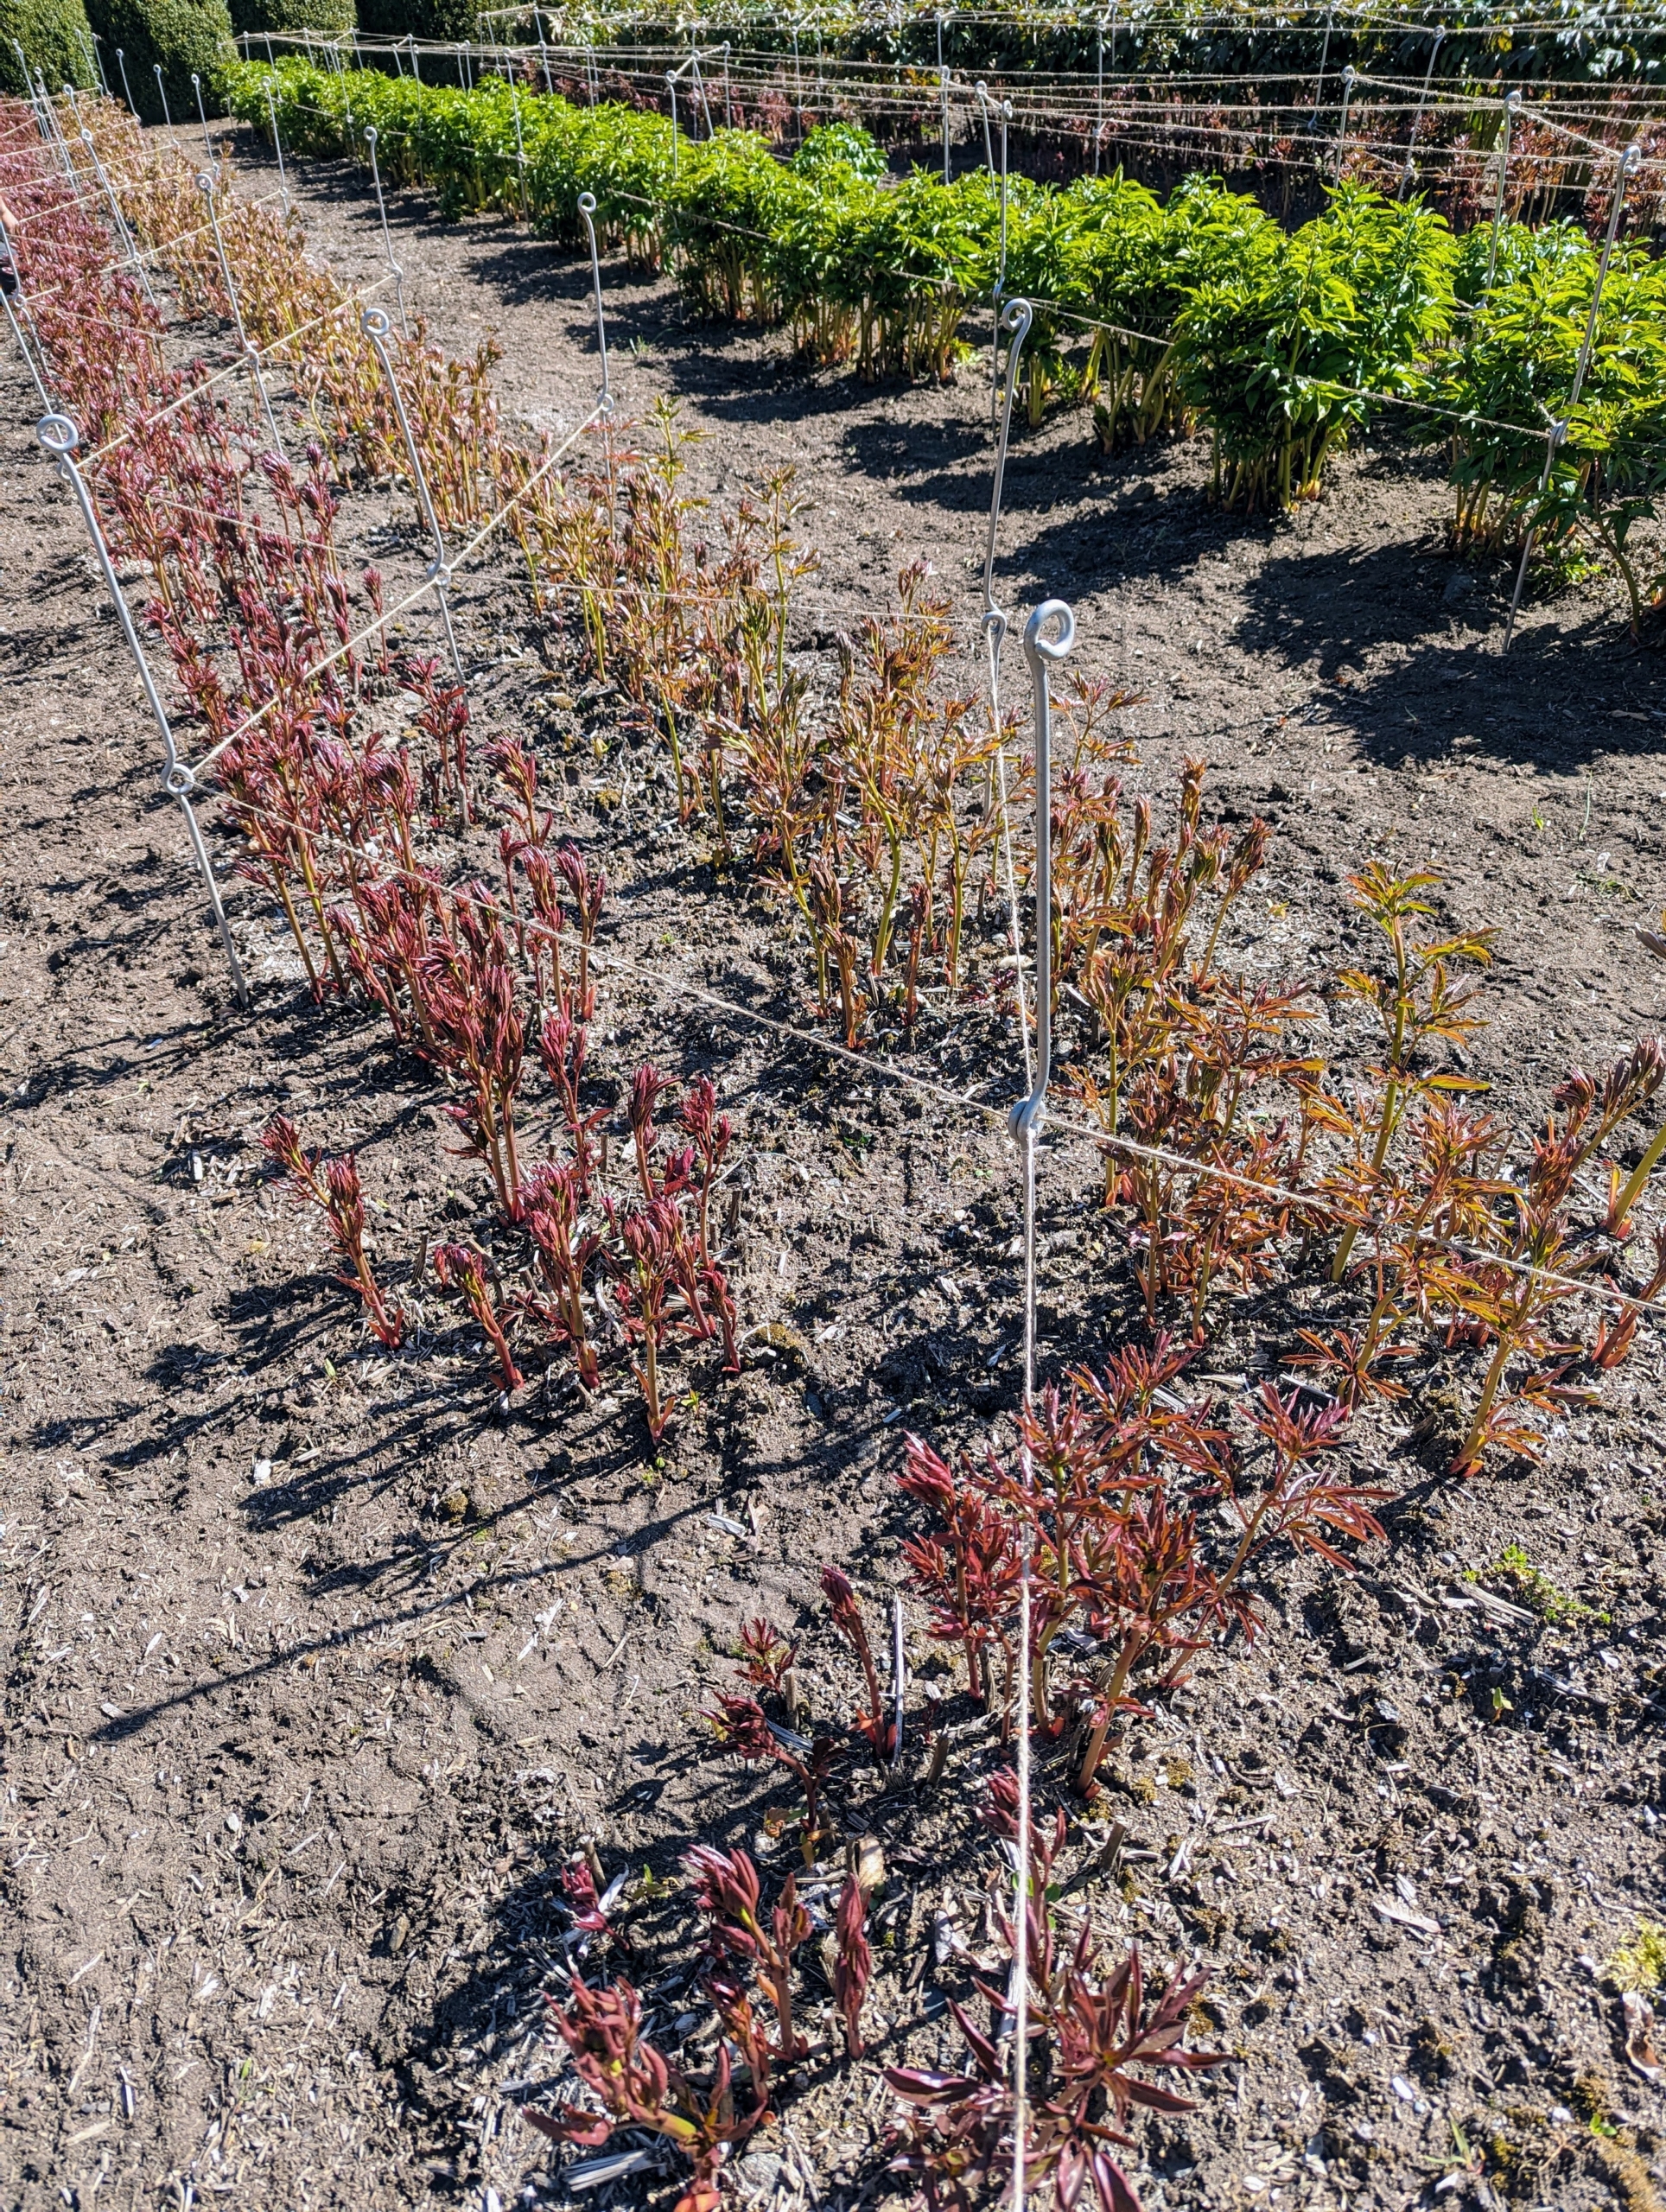
Once the stems are several inches tall, it’s time to stake each of the rows of peonies, so they are well-bolstered as they mature. I planted various peony flower types in this bed: single, semi-double, double and anemone-type blossoms.
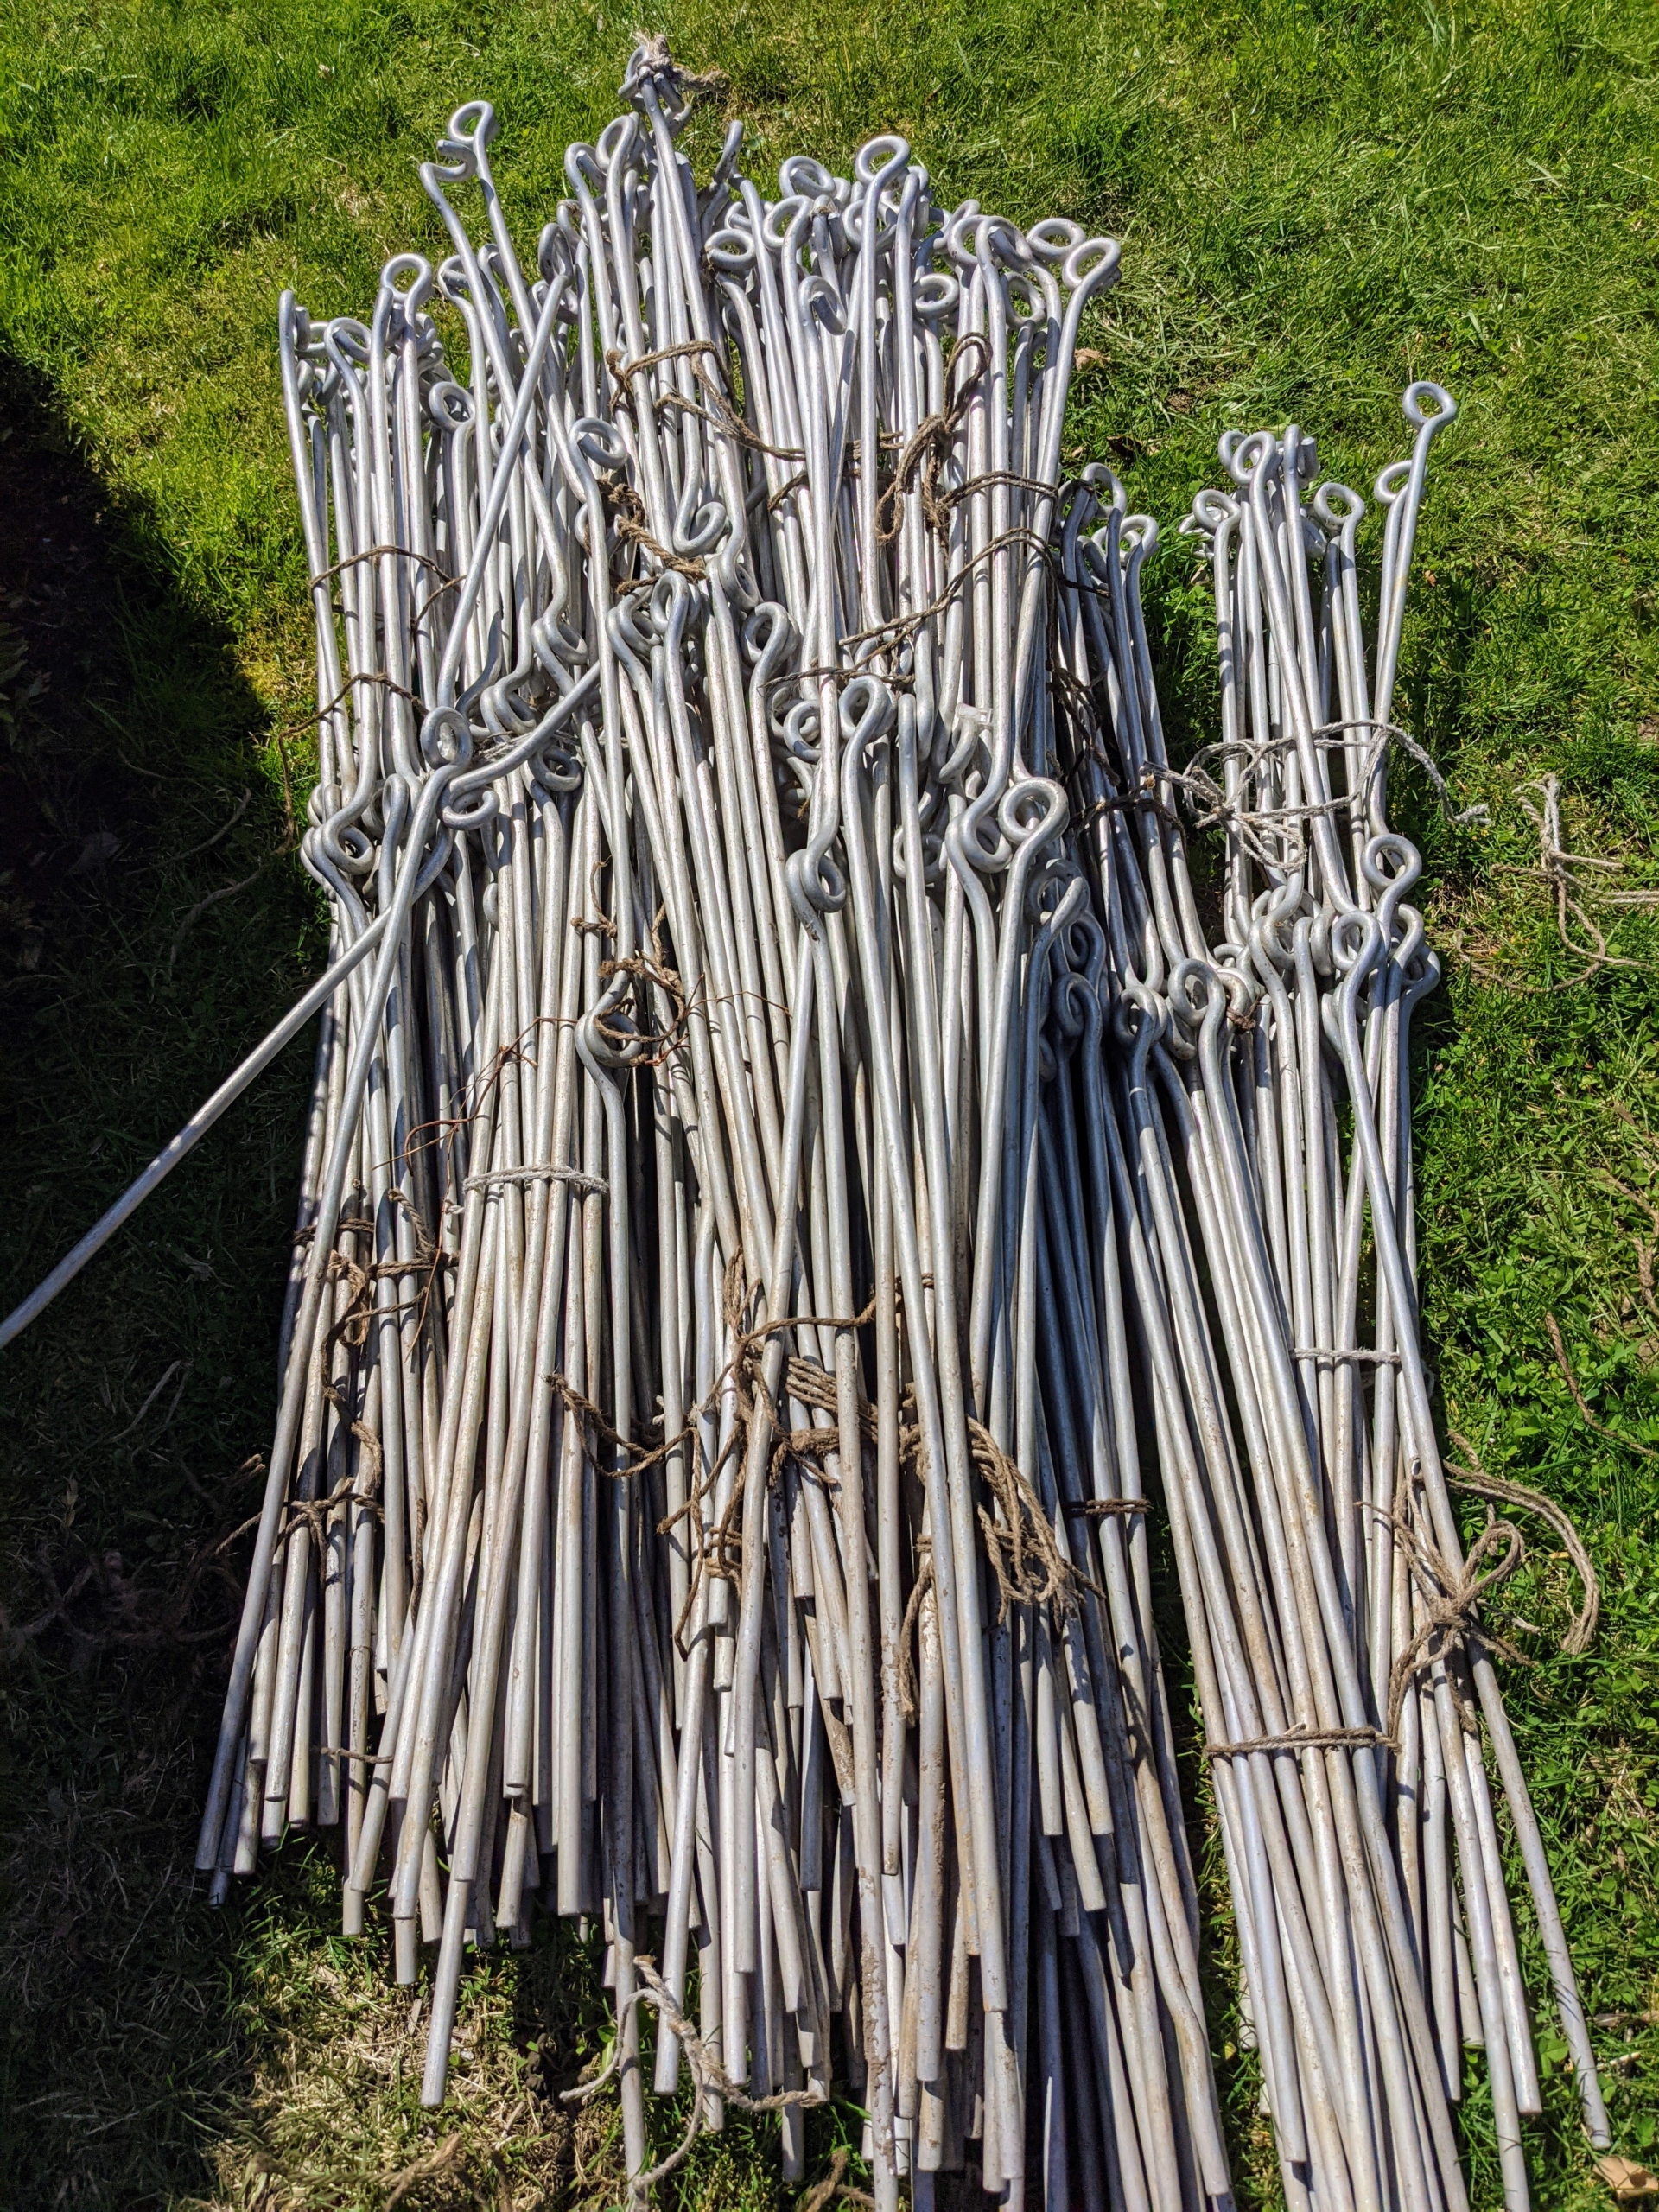
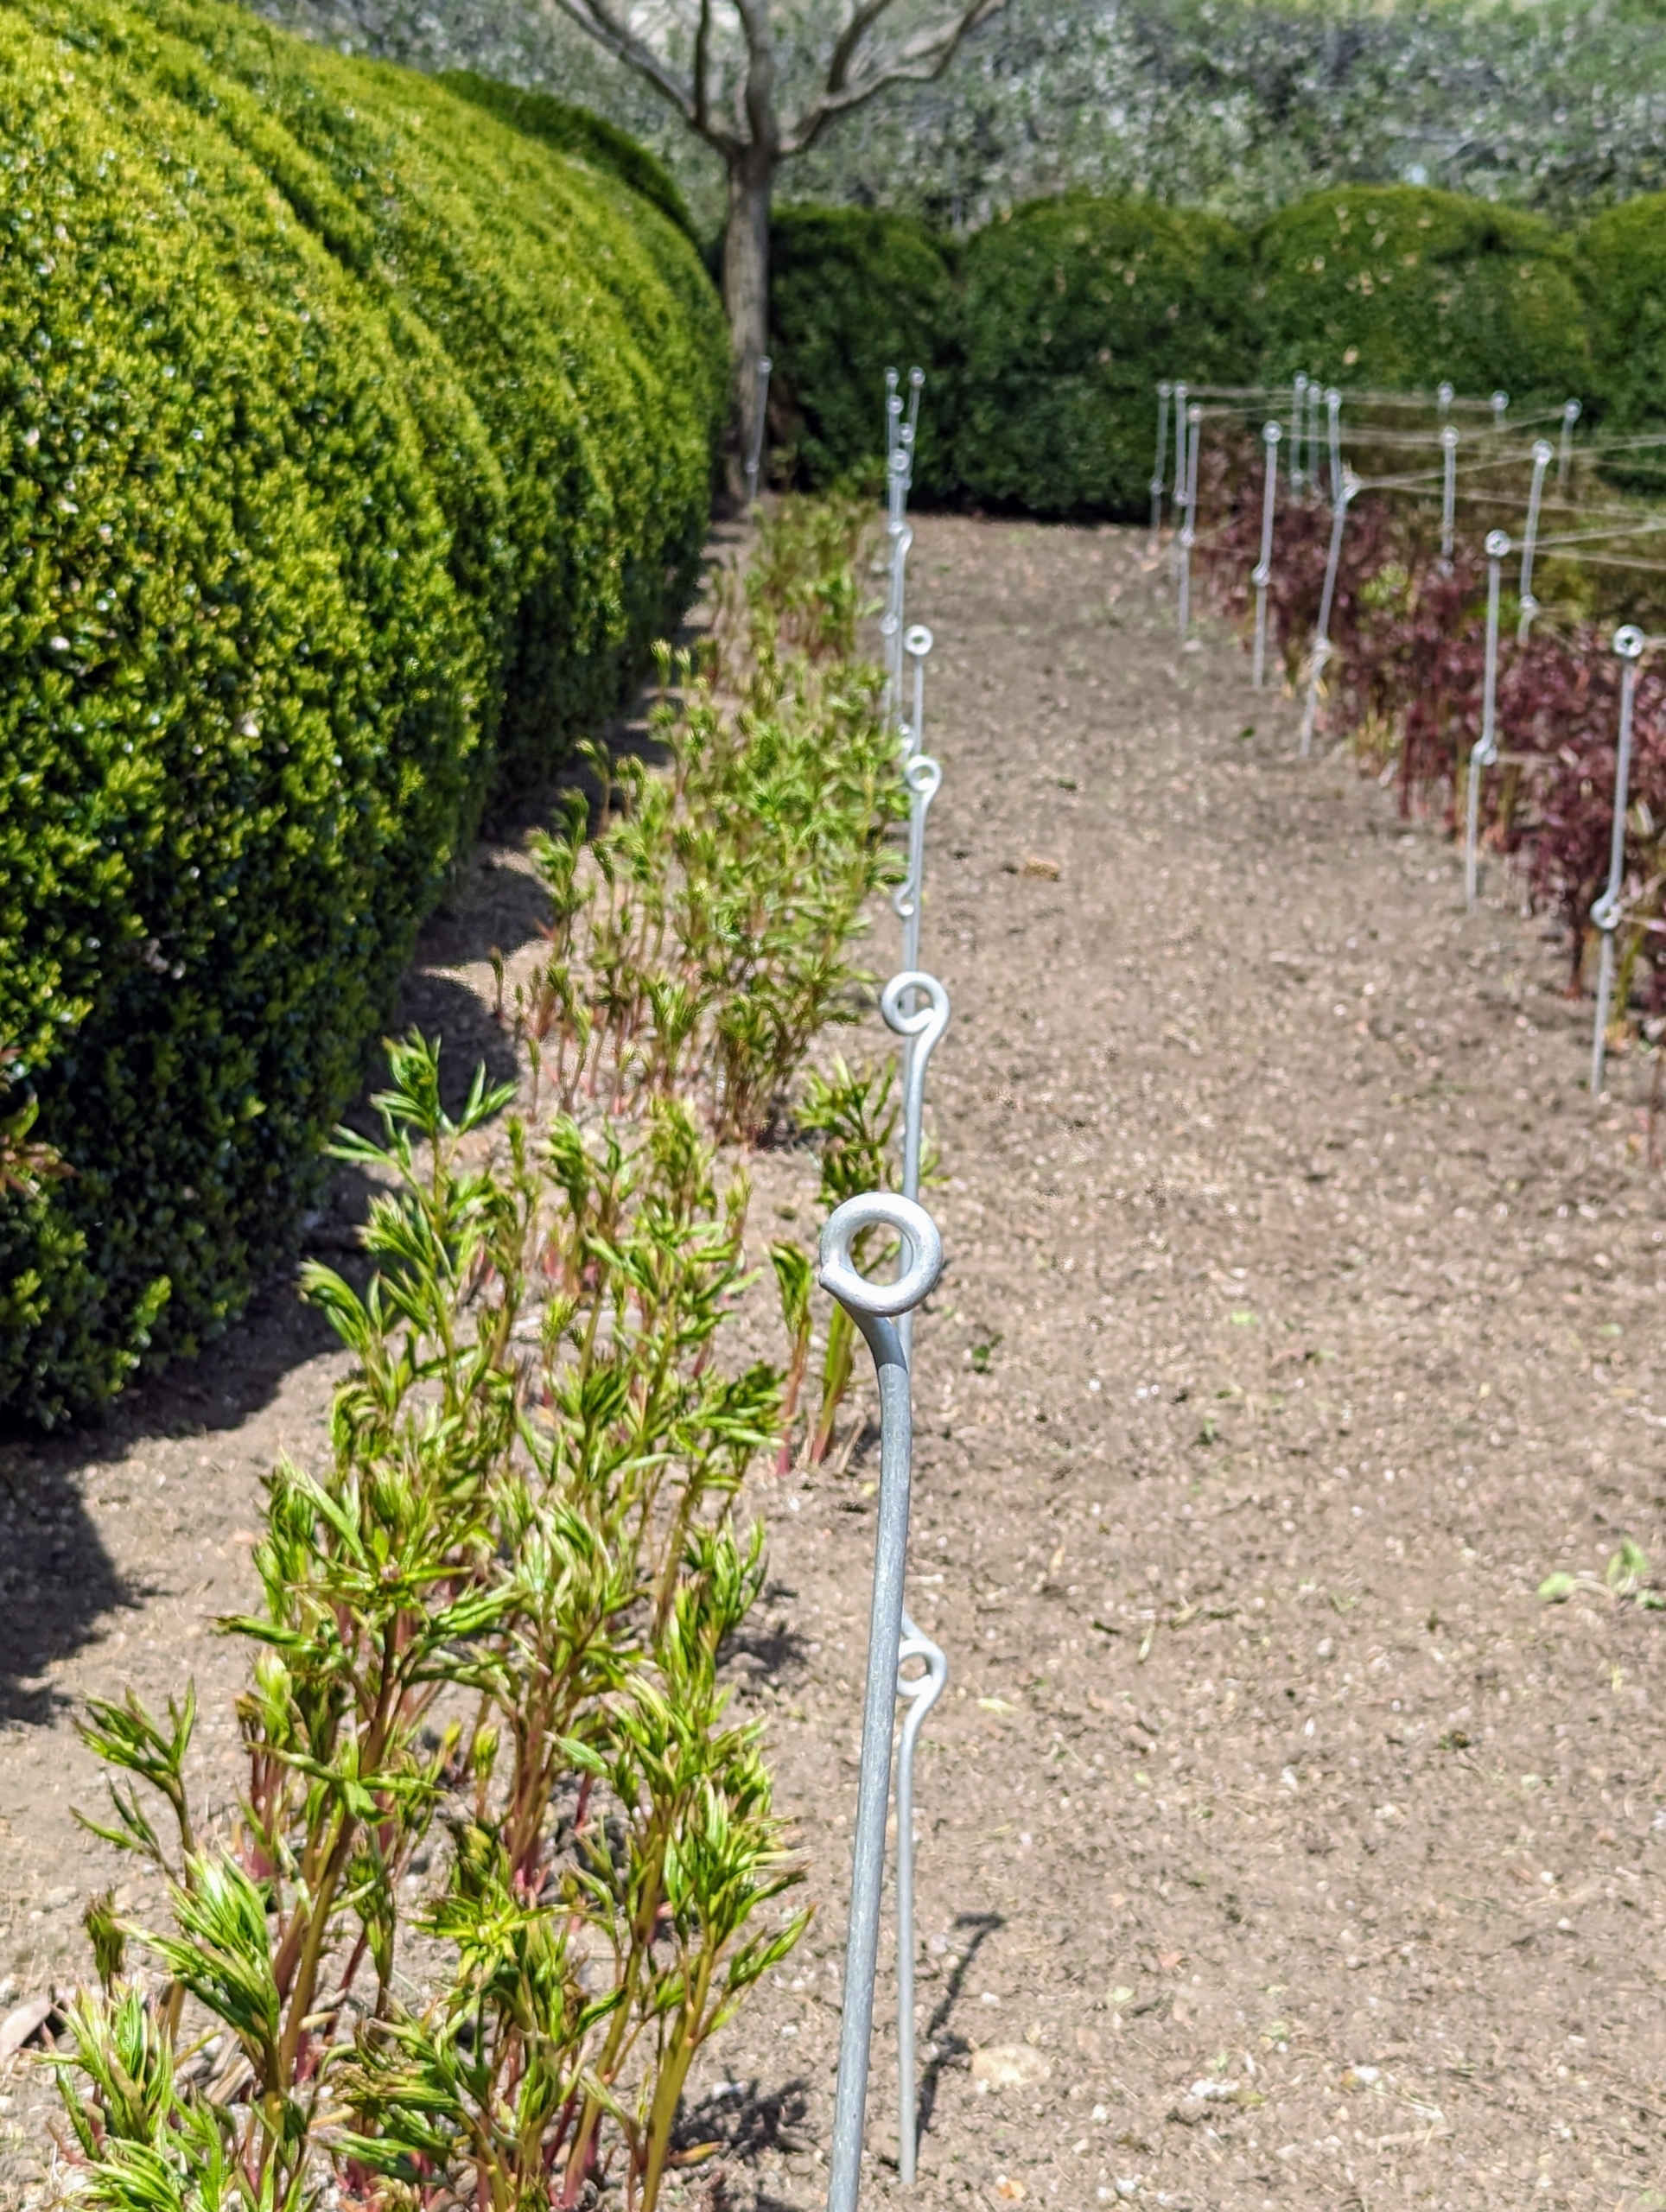
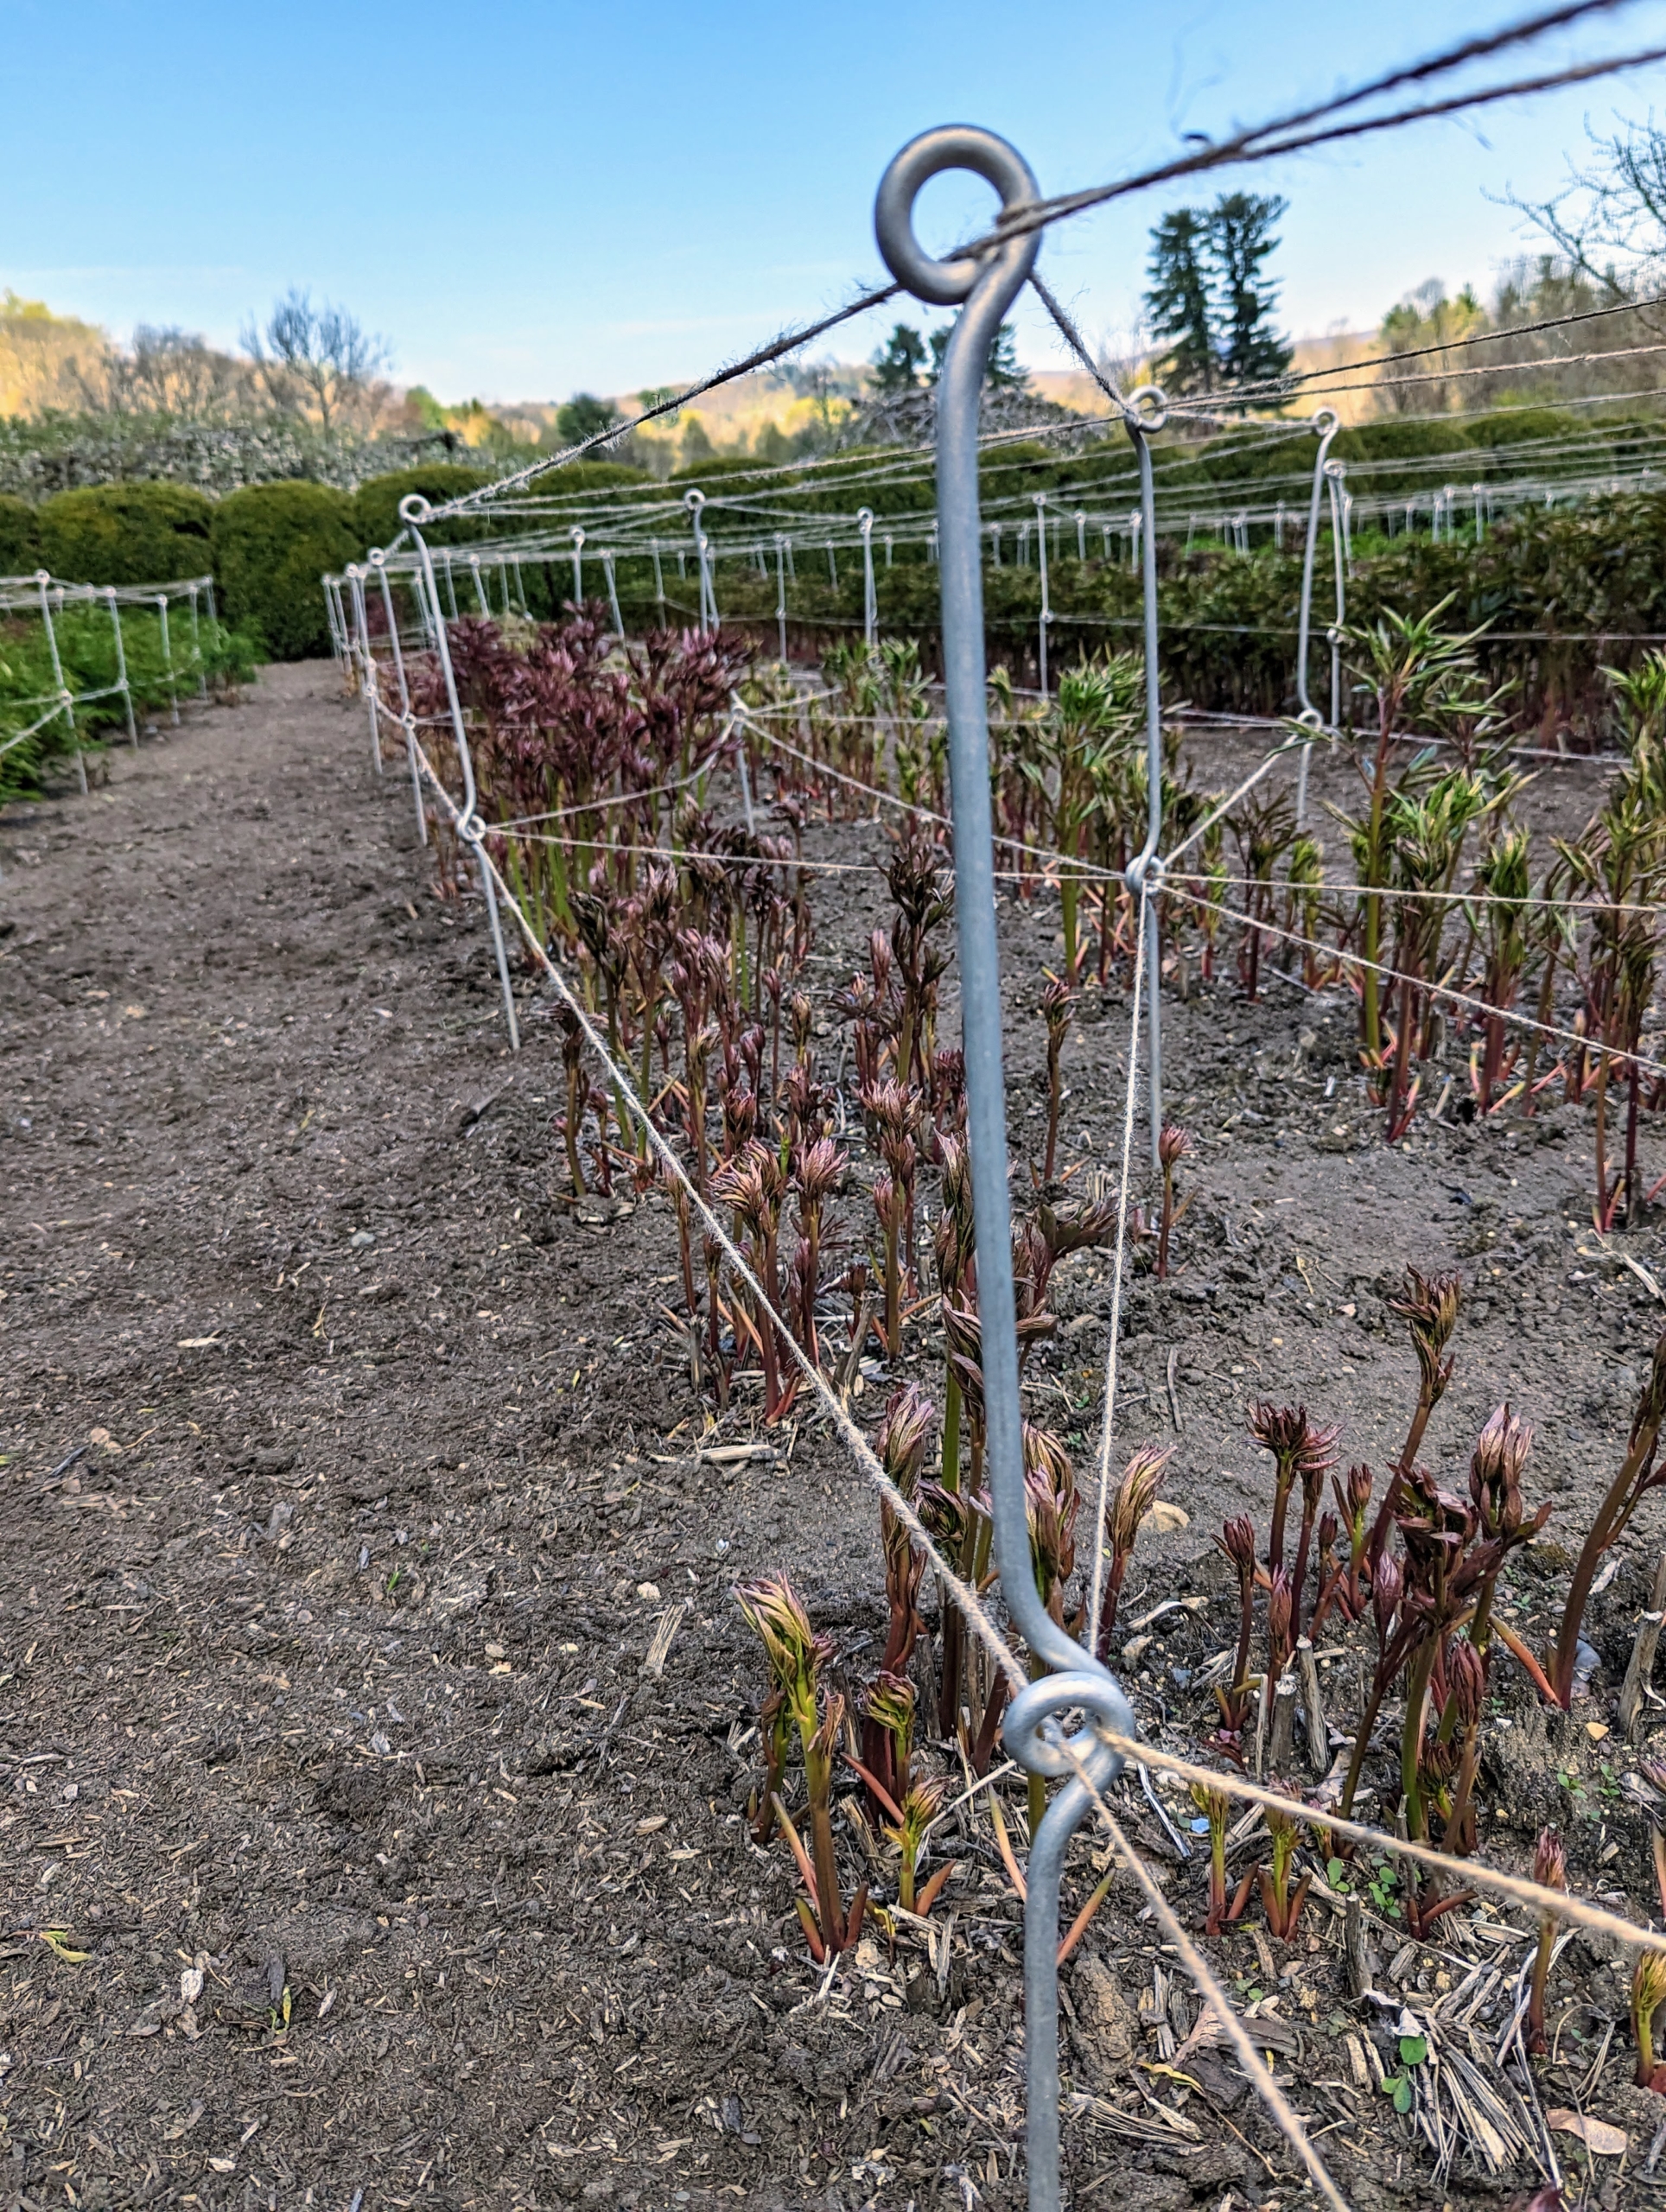
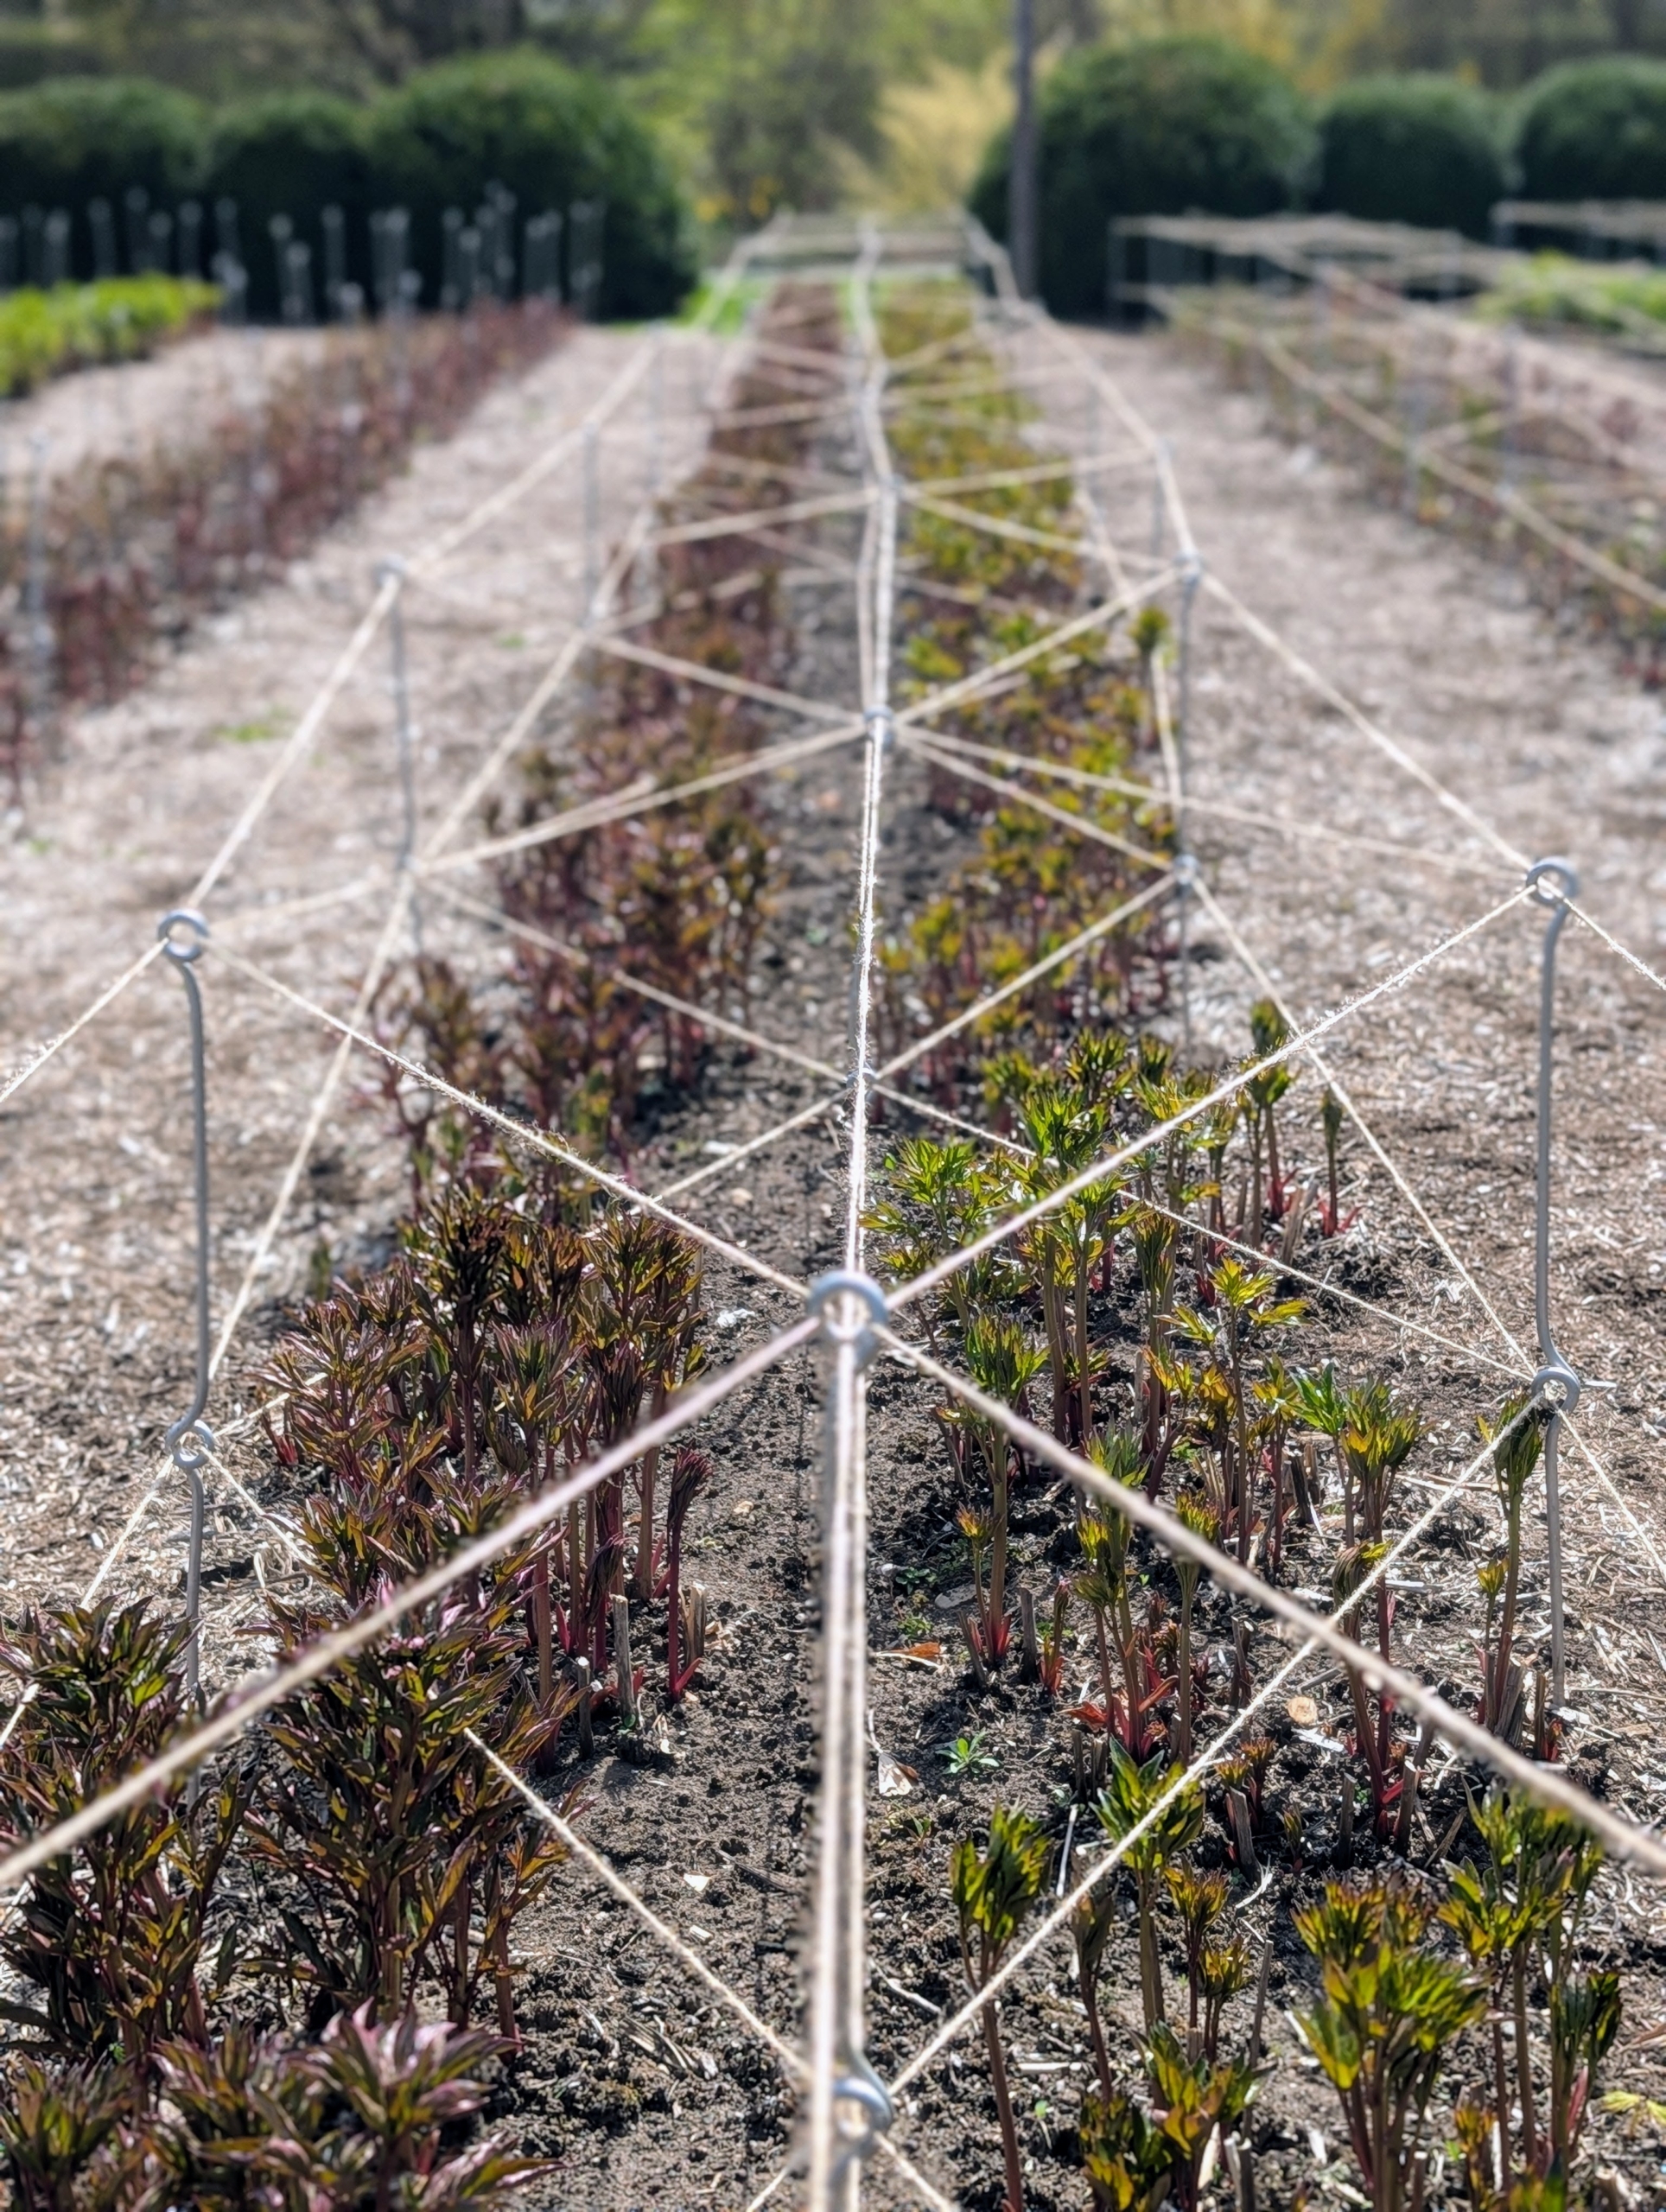
Instead of rings that are available at many garden centers, I use these metal stakes I designed myself for my farm. Each metal support has two eyes, one at the top and one in the middle. The stakes are about three feet tall.
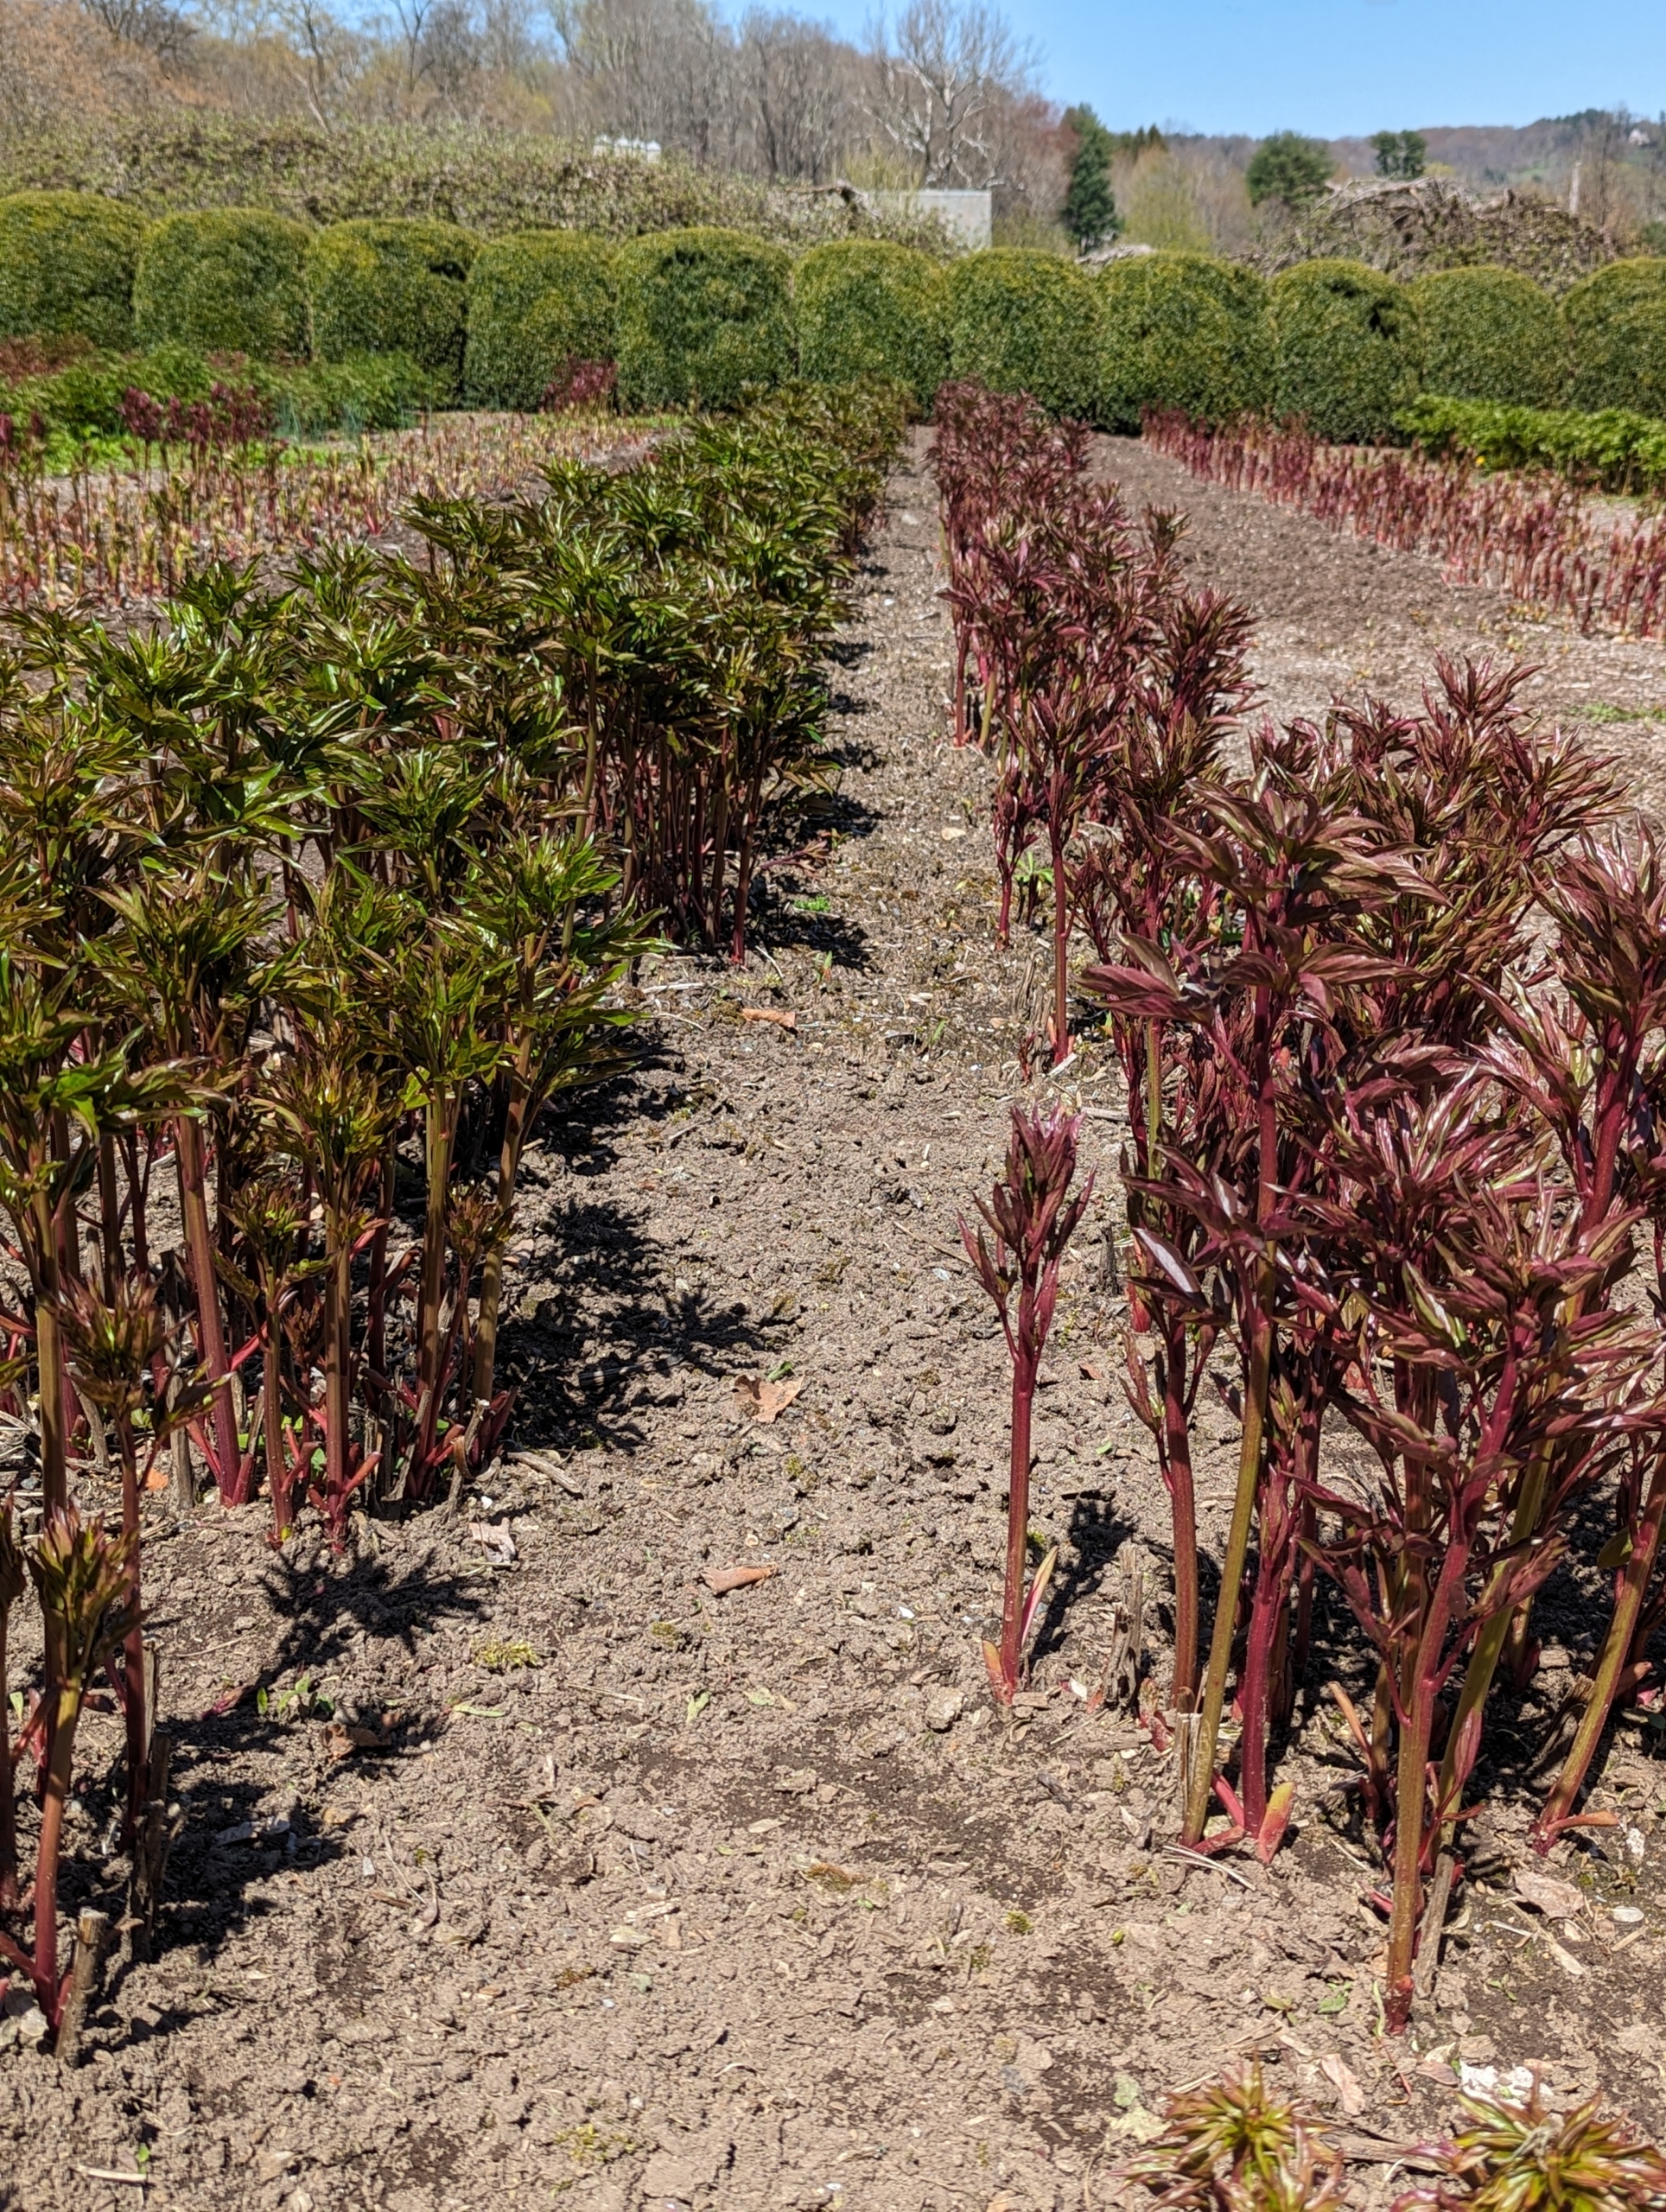
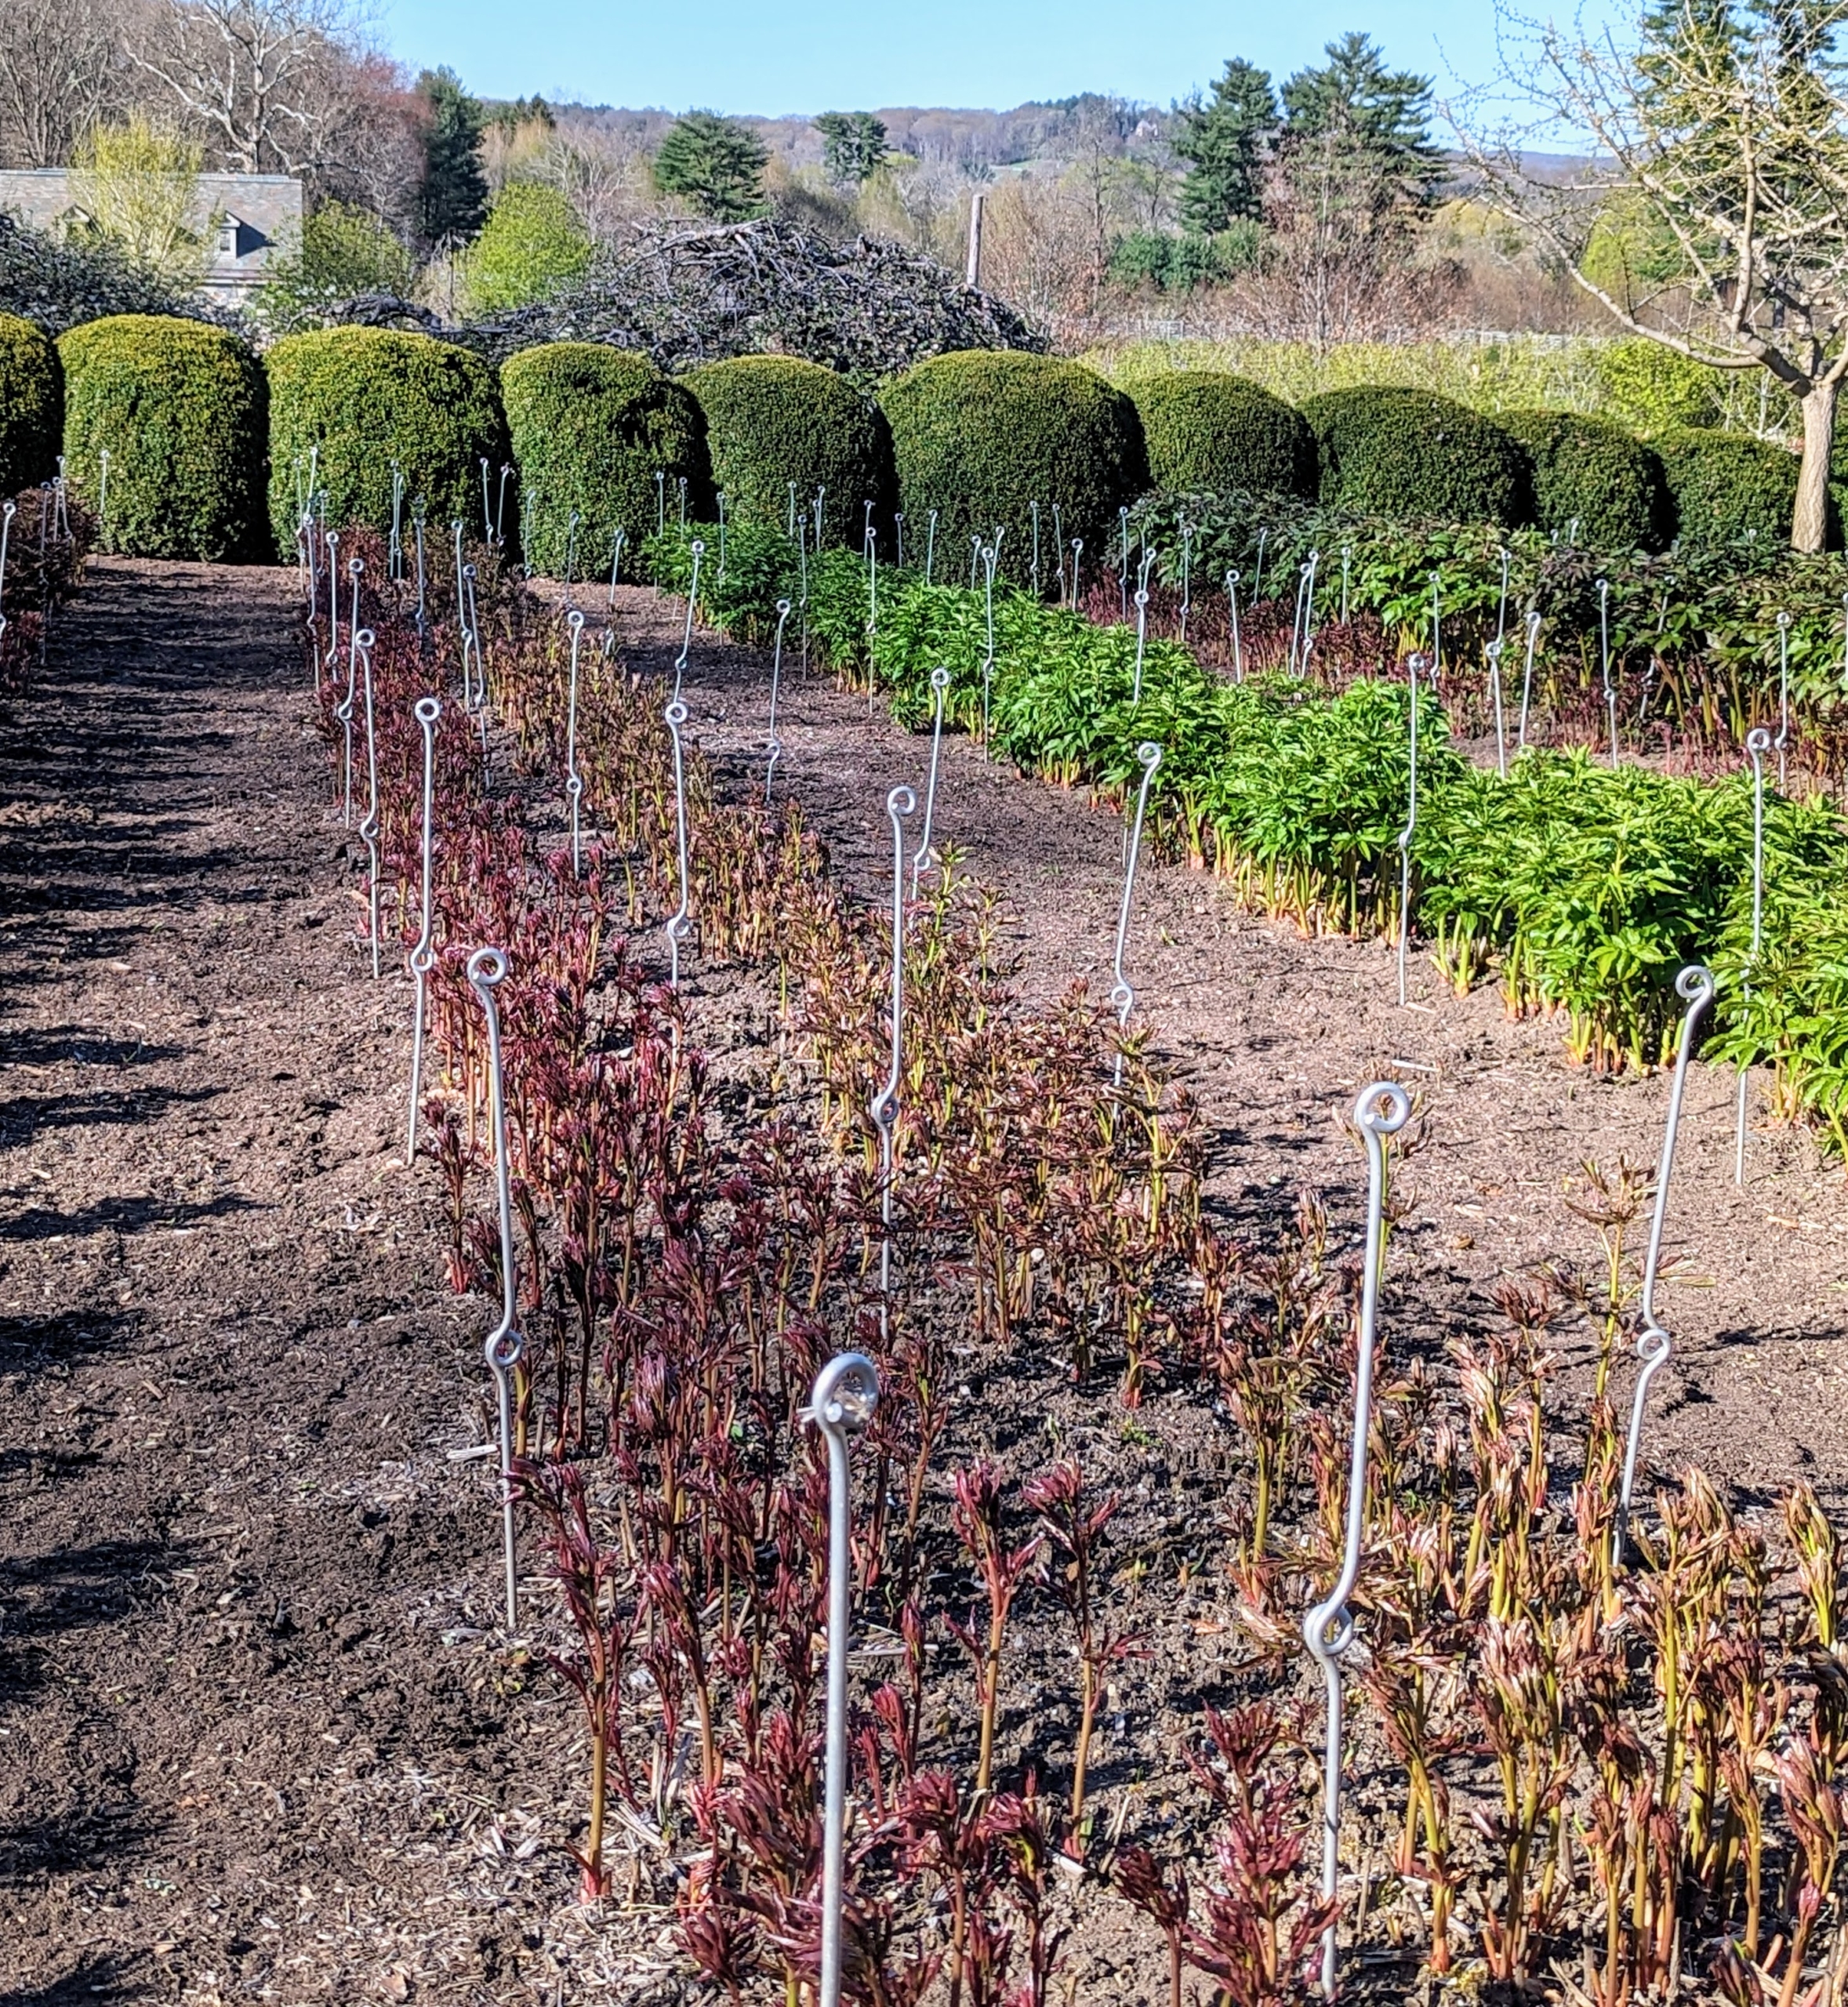
The first step is to insert a stake every four-feet around the perimeter of each row. My peony garden is planted with 11 double rows of 22 herbaceous peony plants, 44 in each row of the same variety.
Once they are in position, they are pushed down several inches deep into the ground. These herbaceous peonies are all surrounded in the garden within a hedge of rounded boxwood shrubs, making it a focal point on the property and in the overall landscape.
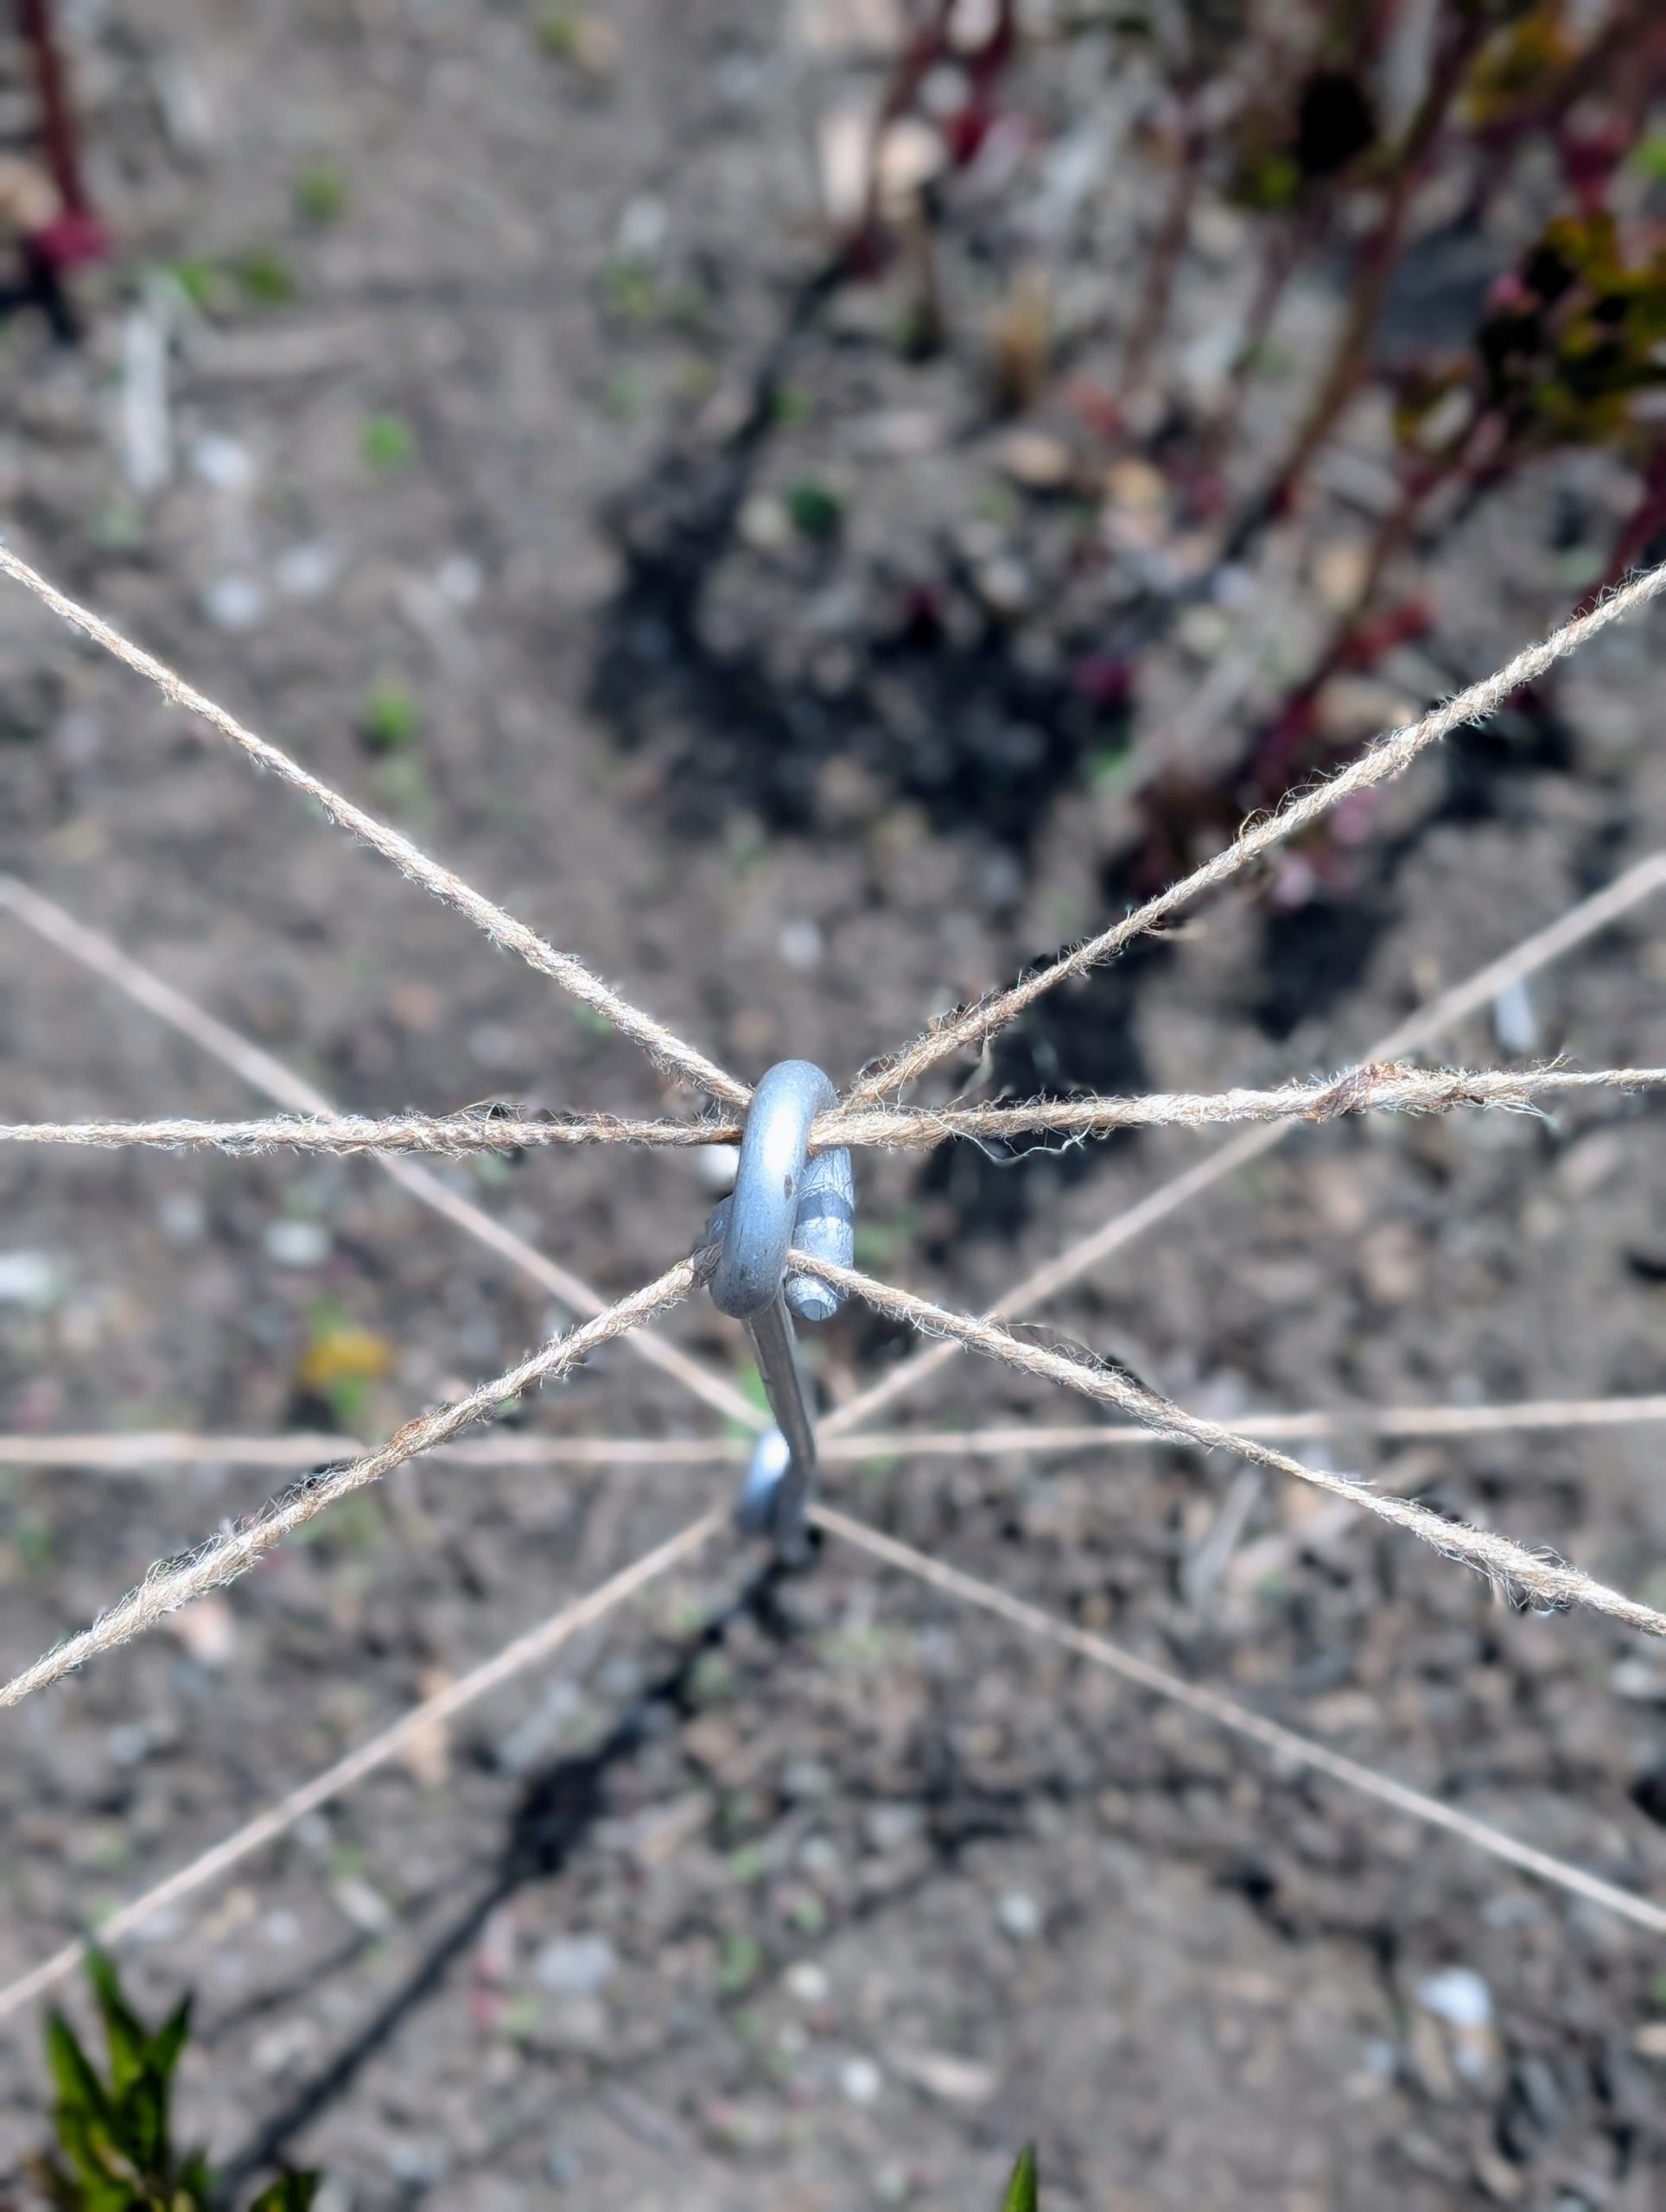
Each of the stakes is faced in the same direction, so the eyes are also lined up uniformly.
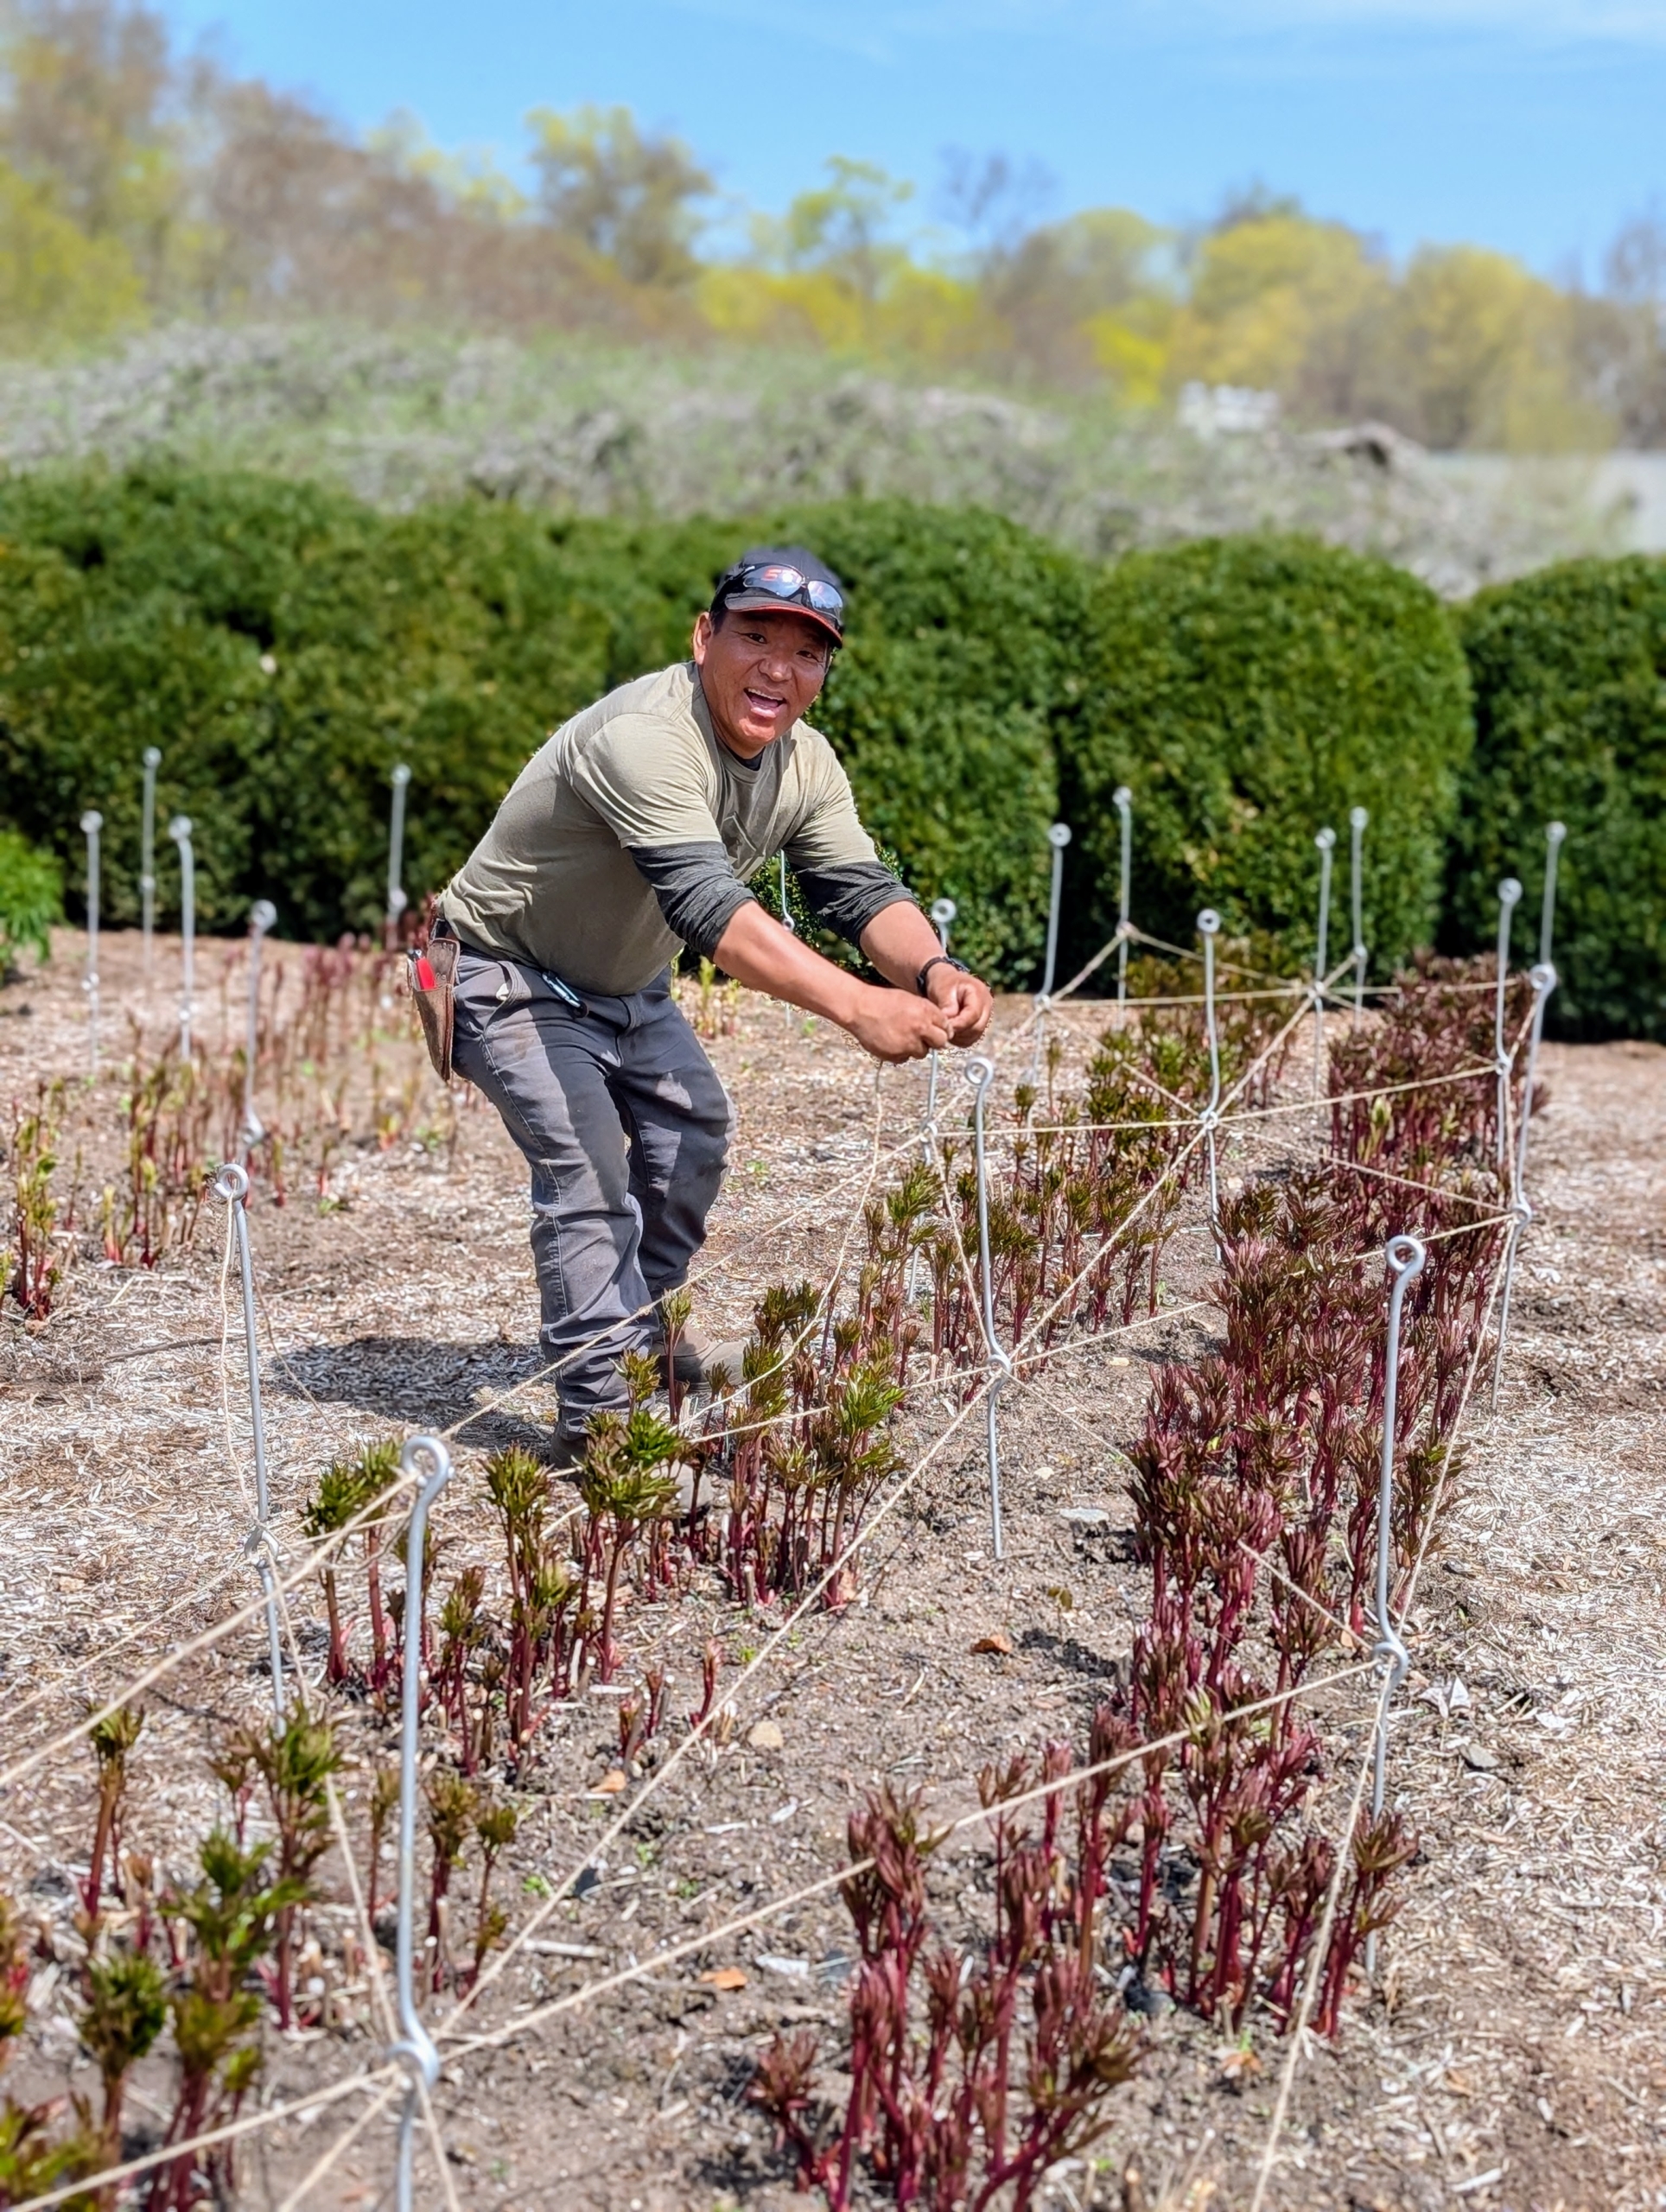
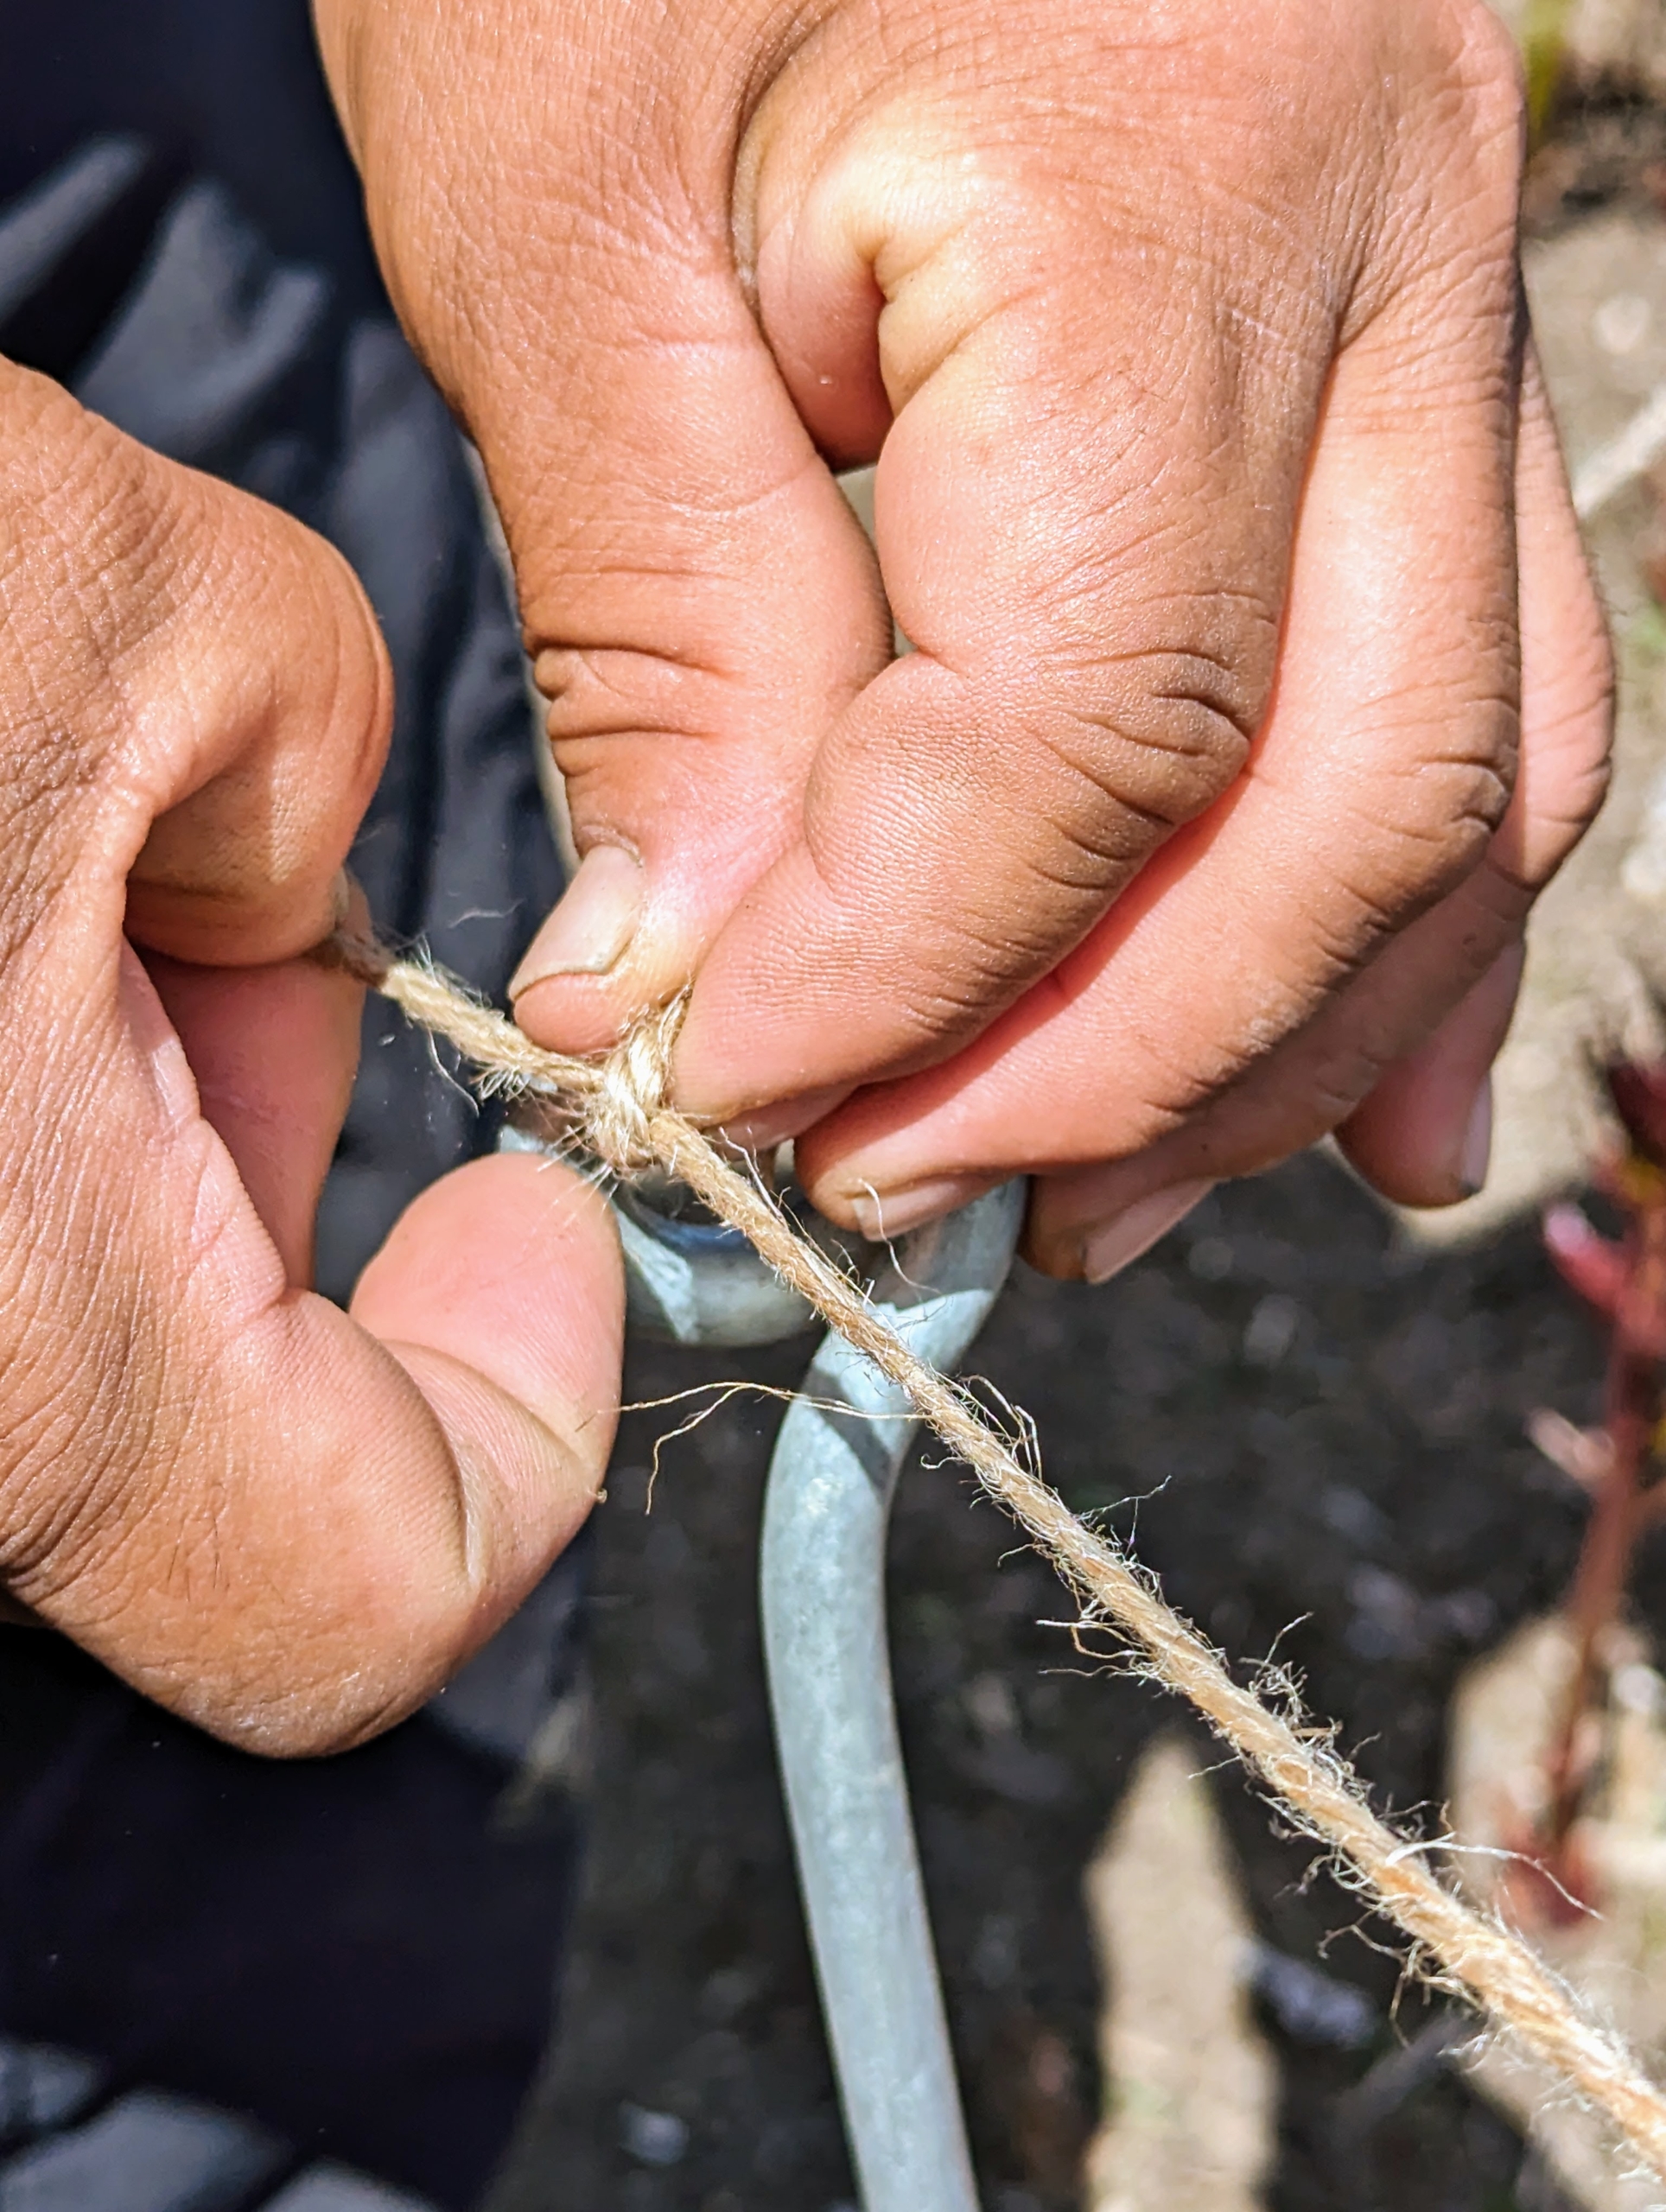
Phurba begins lacing twine through the middle stake eyes in a zigzag pattern all the way down the row. Herbaceous peonies need an area with fertile, well-drained soil and full sun.
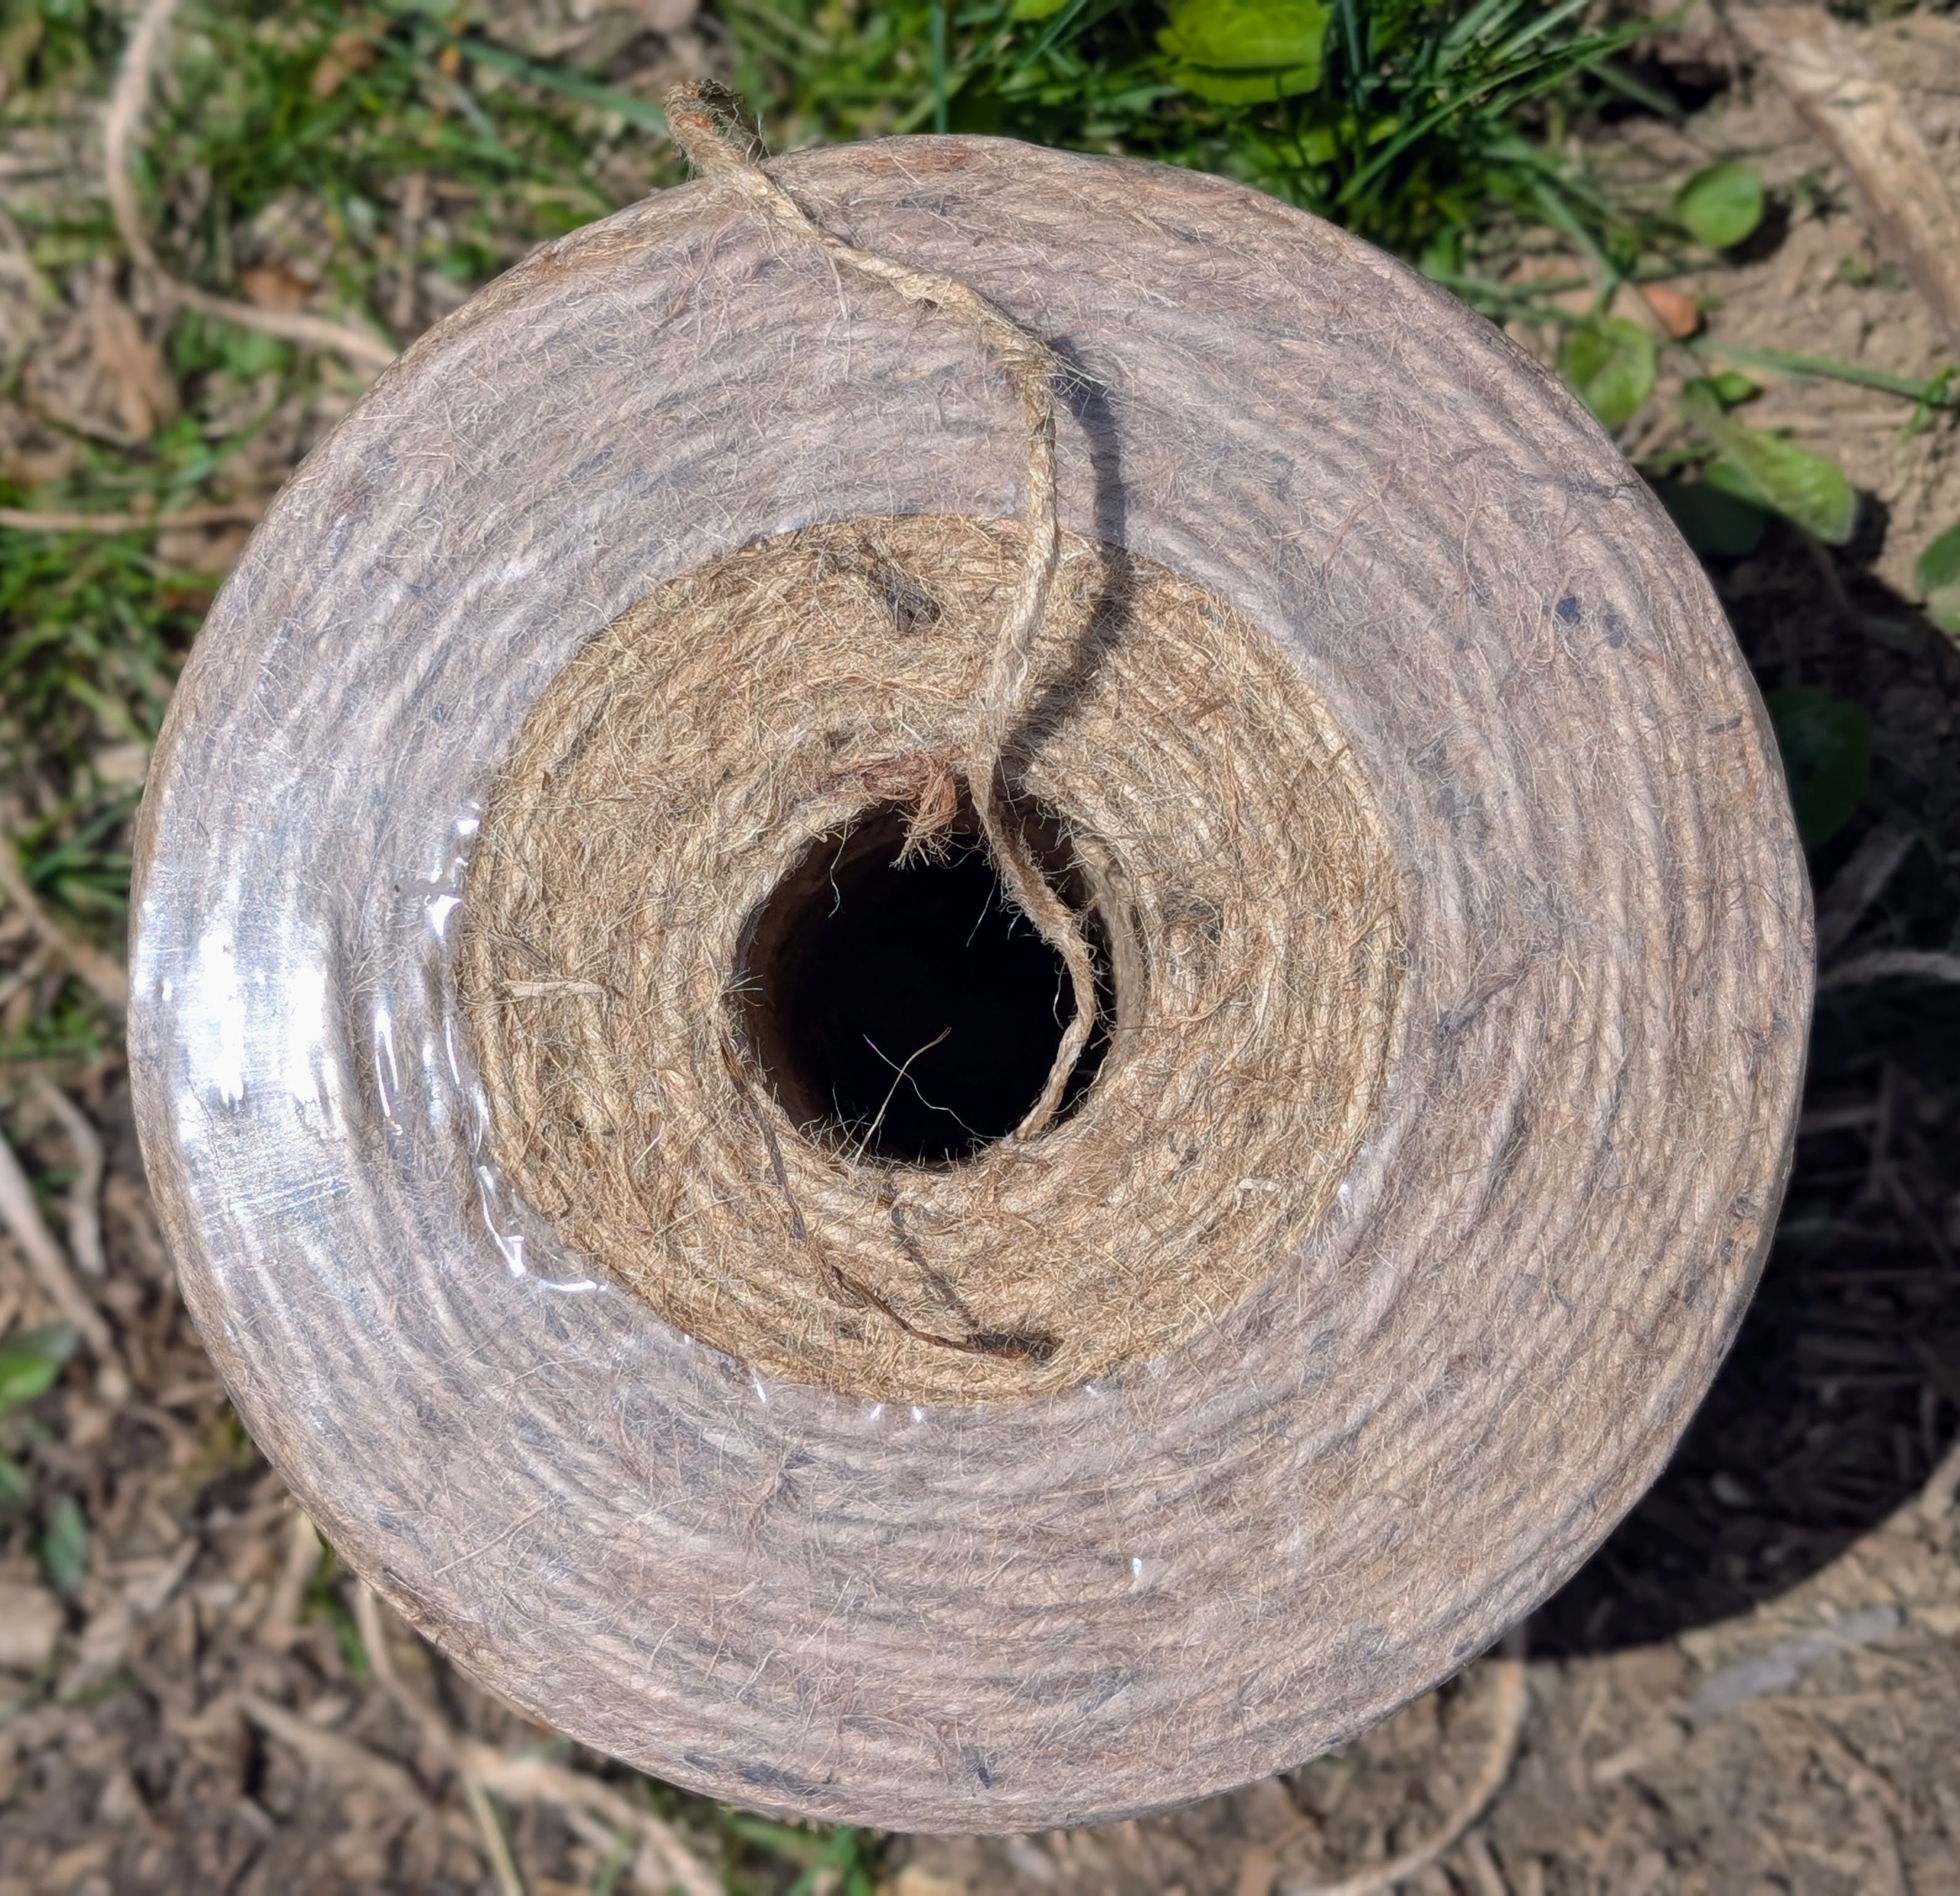
We use a natural jute twine for this project and for many gardening projects around the farm. Twine like this is available in large spools online and in some specialty garden supply shops.
The first pass looks like this, but there is still a lot more to do.
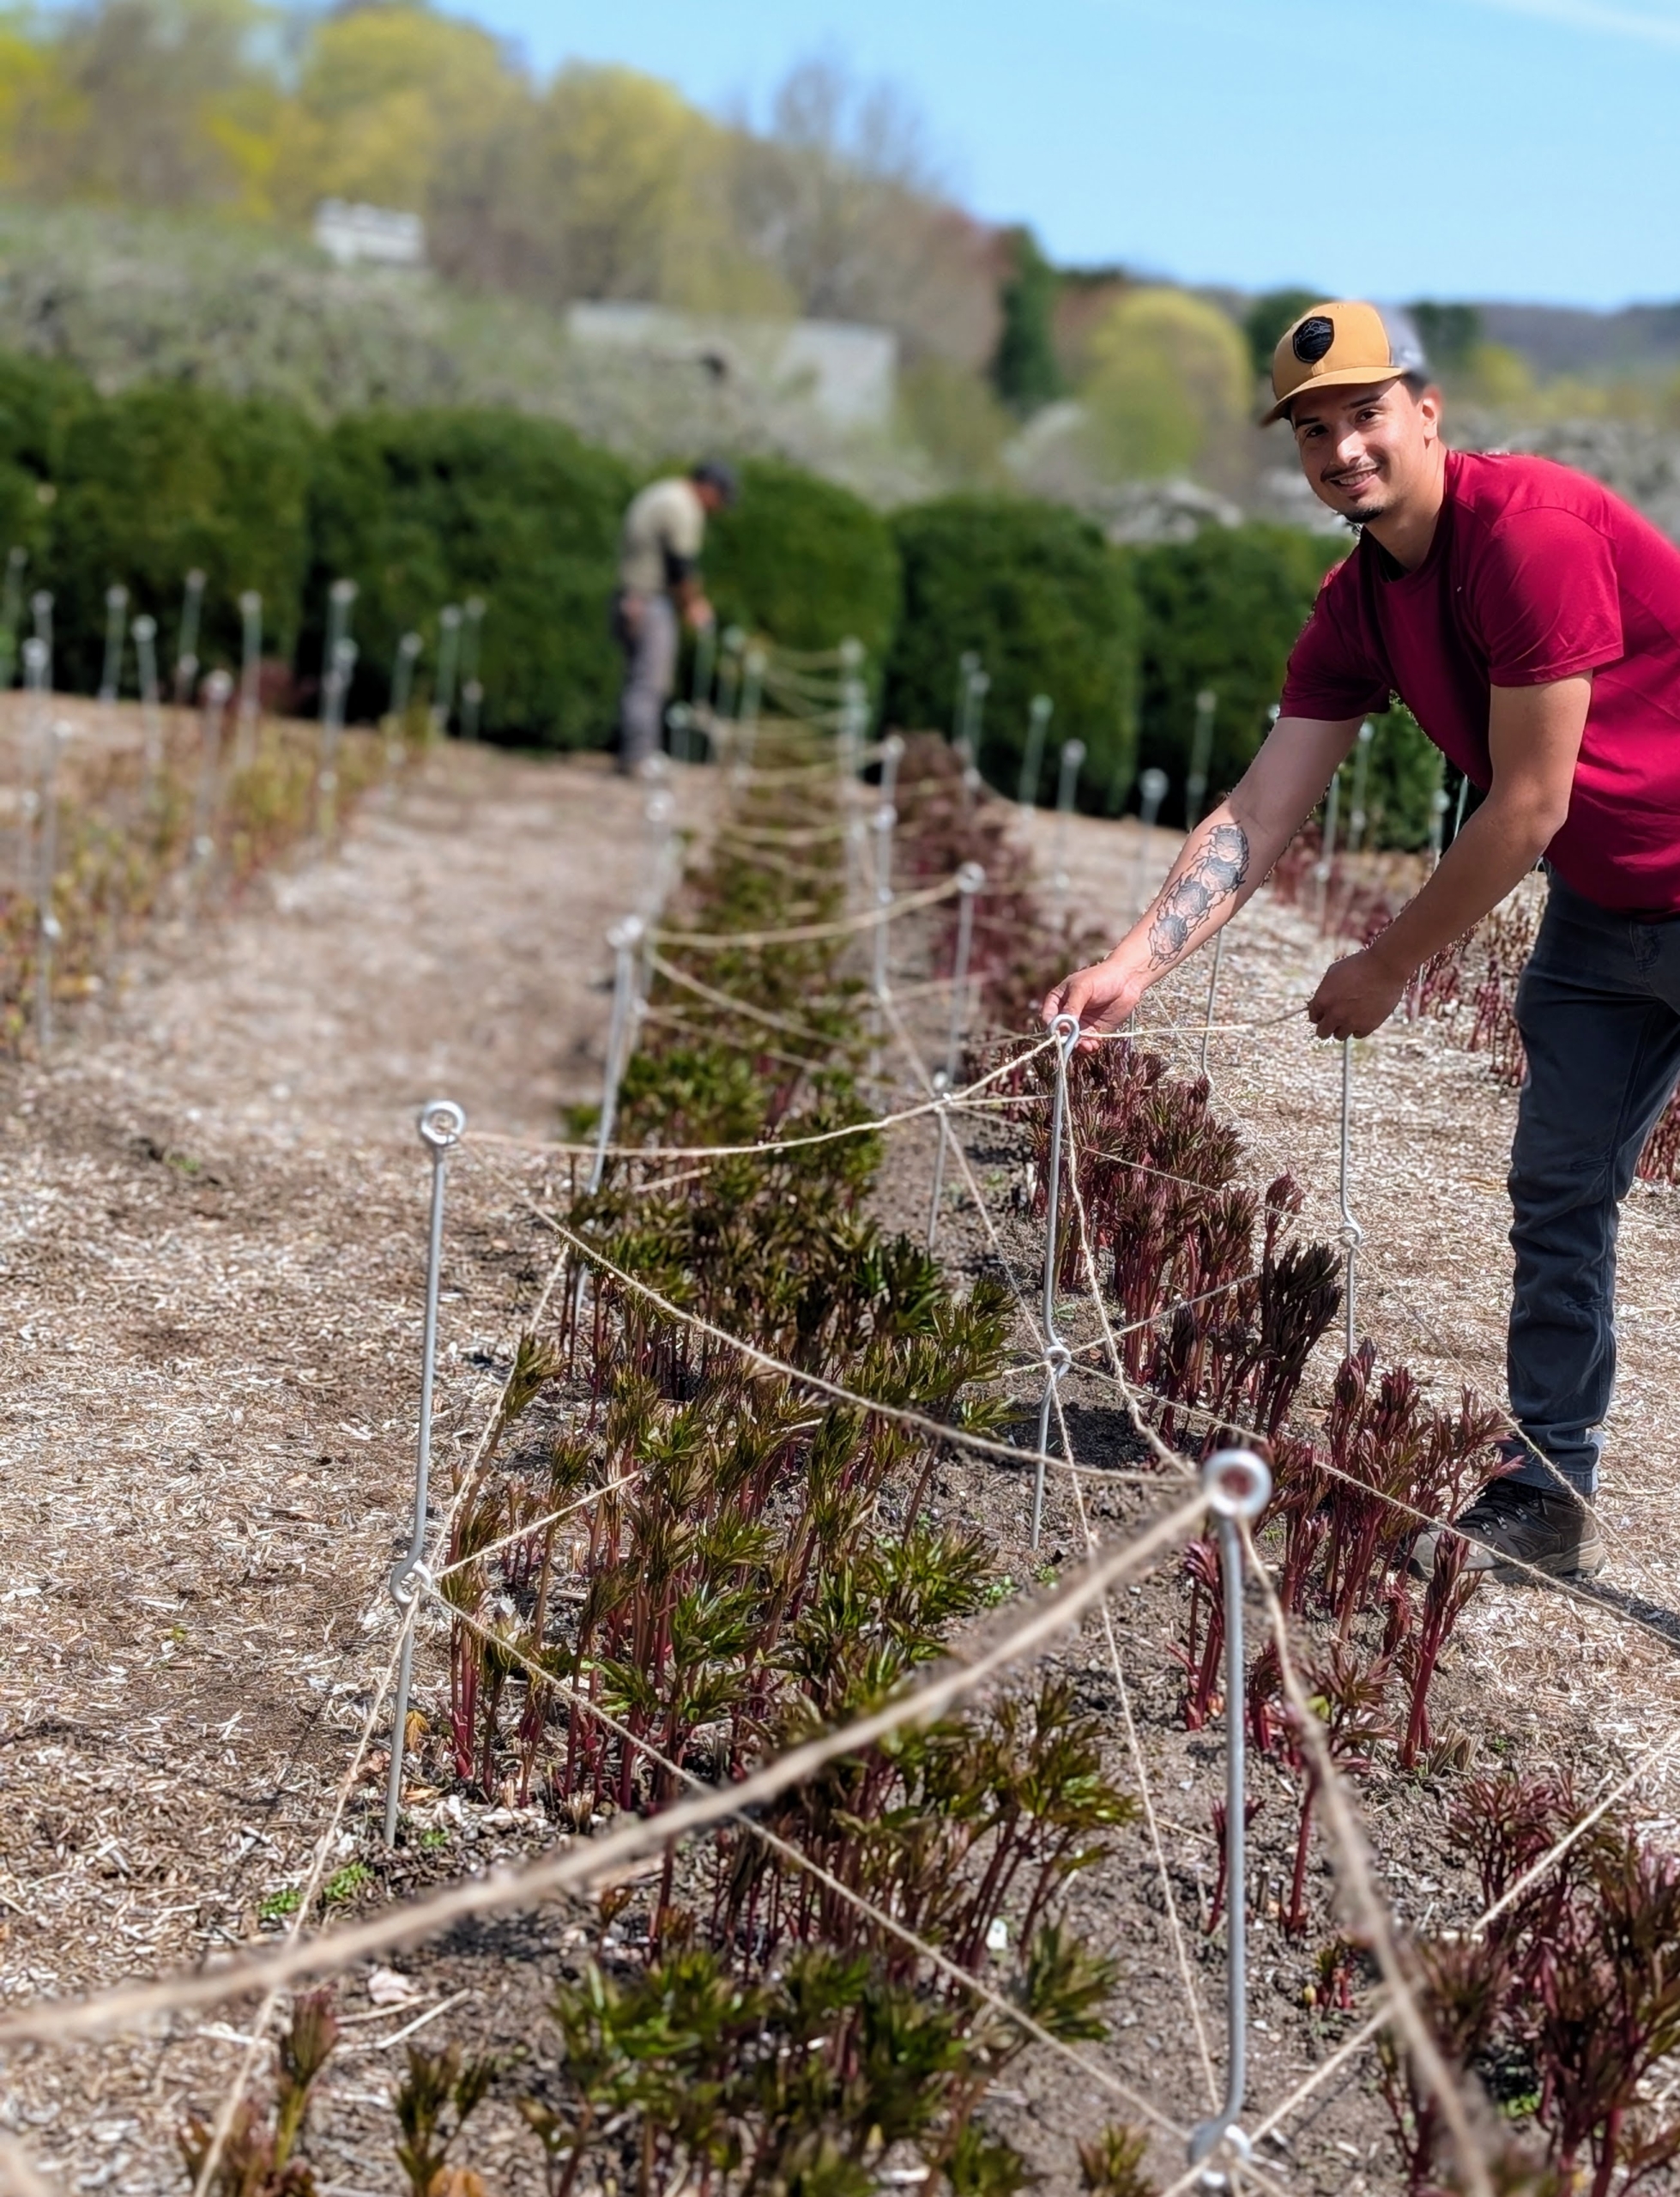
Once the bottom is done, Phurba laces the top row in the same manner.
Matthew works from the middle to make sure nothing gets tangled in the process.
A line of twine is also run down the center. It takes several hours to do all the beds, but it’s the perfect time to stake them since they are not yet full height.
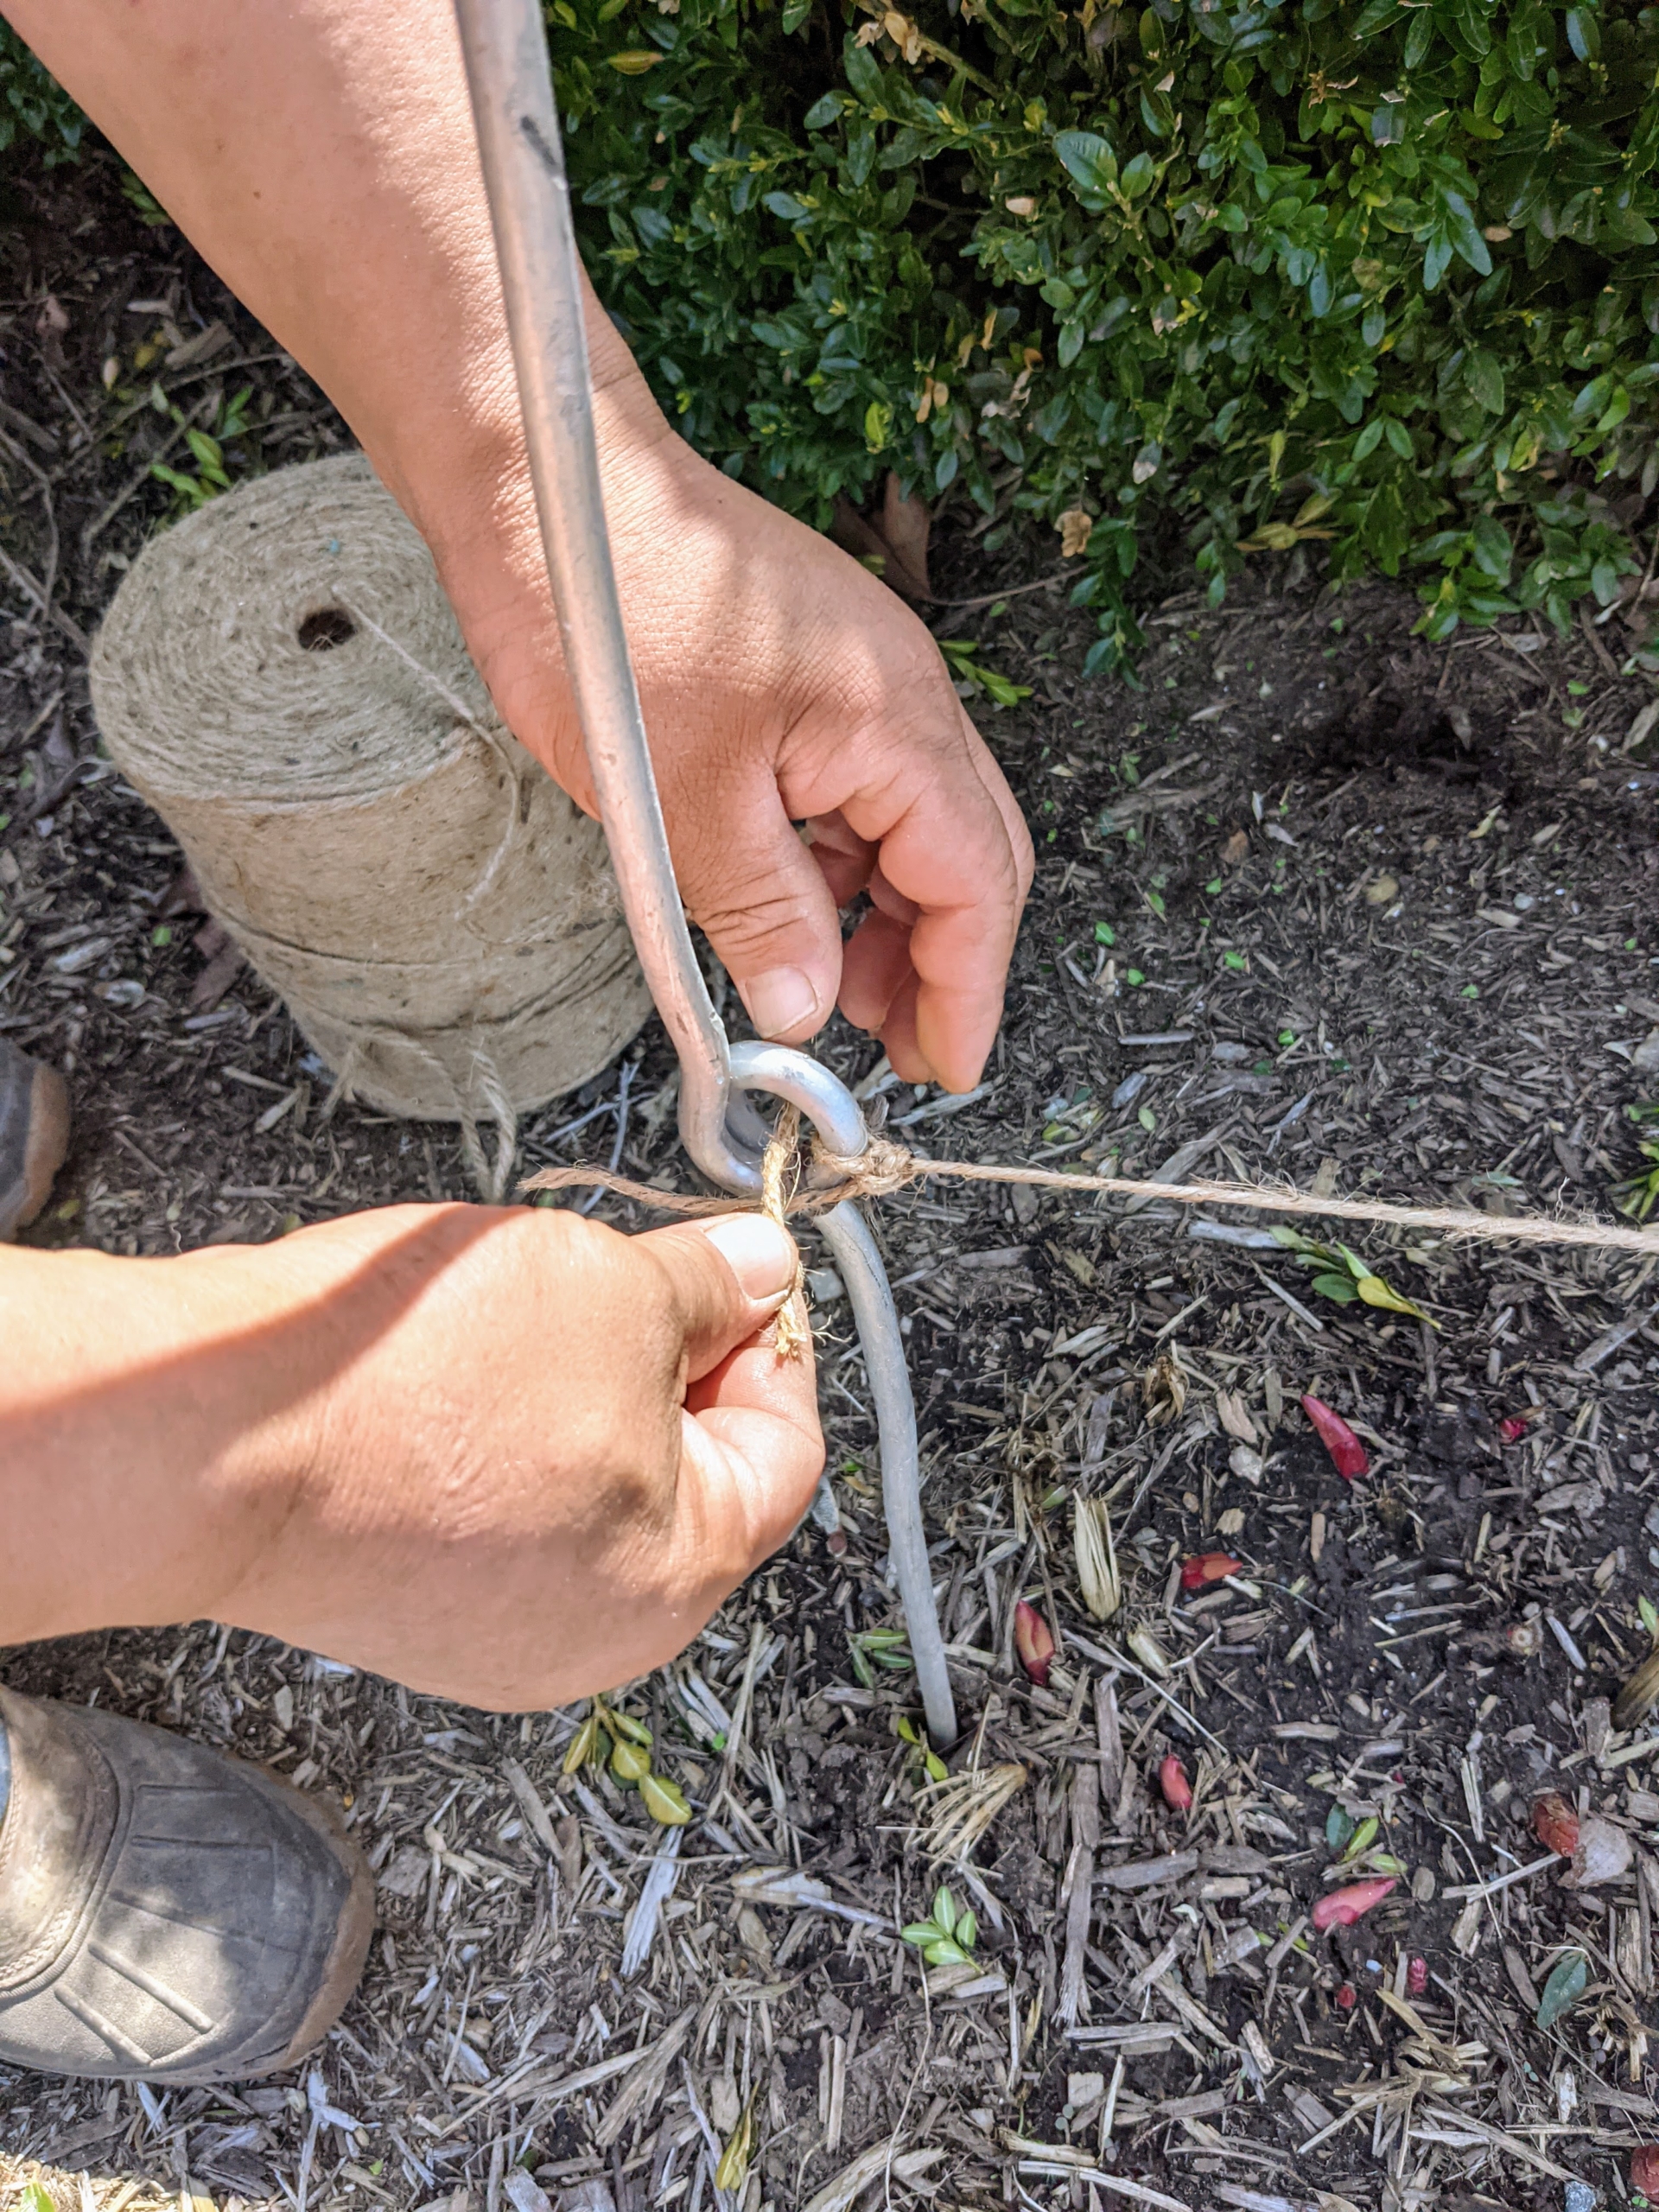
At the end of the bed, the twine is secured to one of the eyes.
Another line of twine is also secured around the entire row to hold all those heavy blooms at the edge.
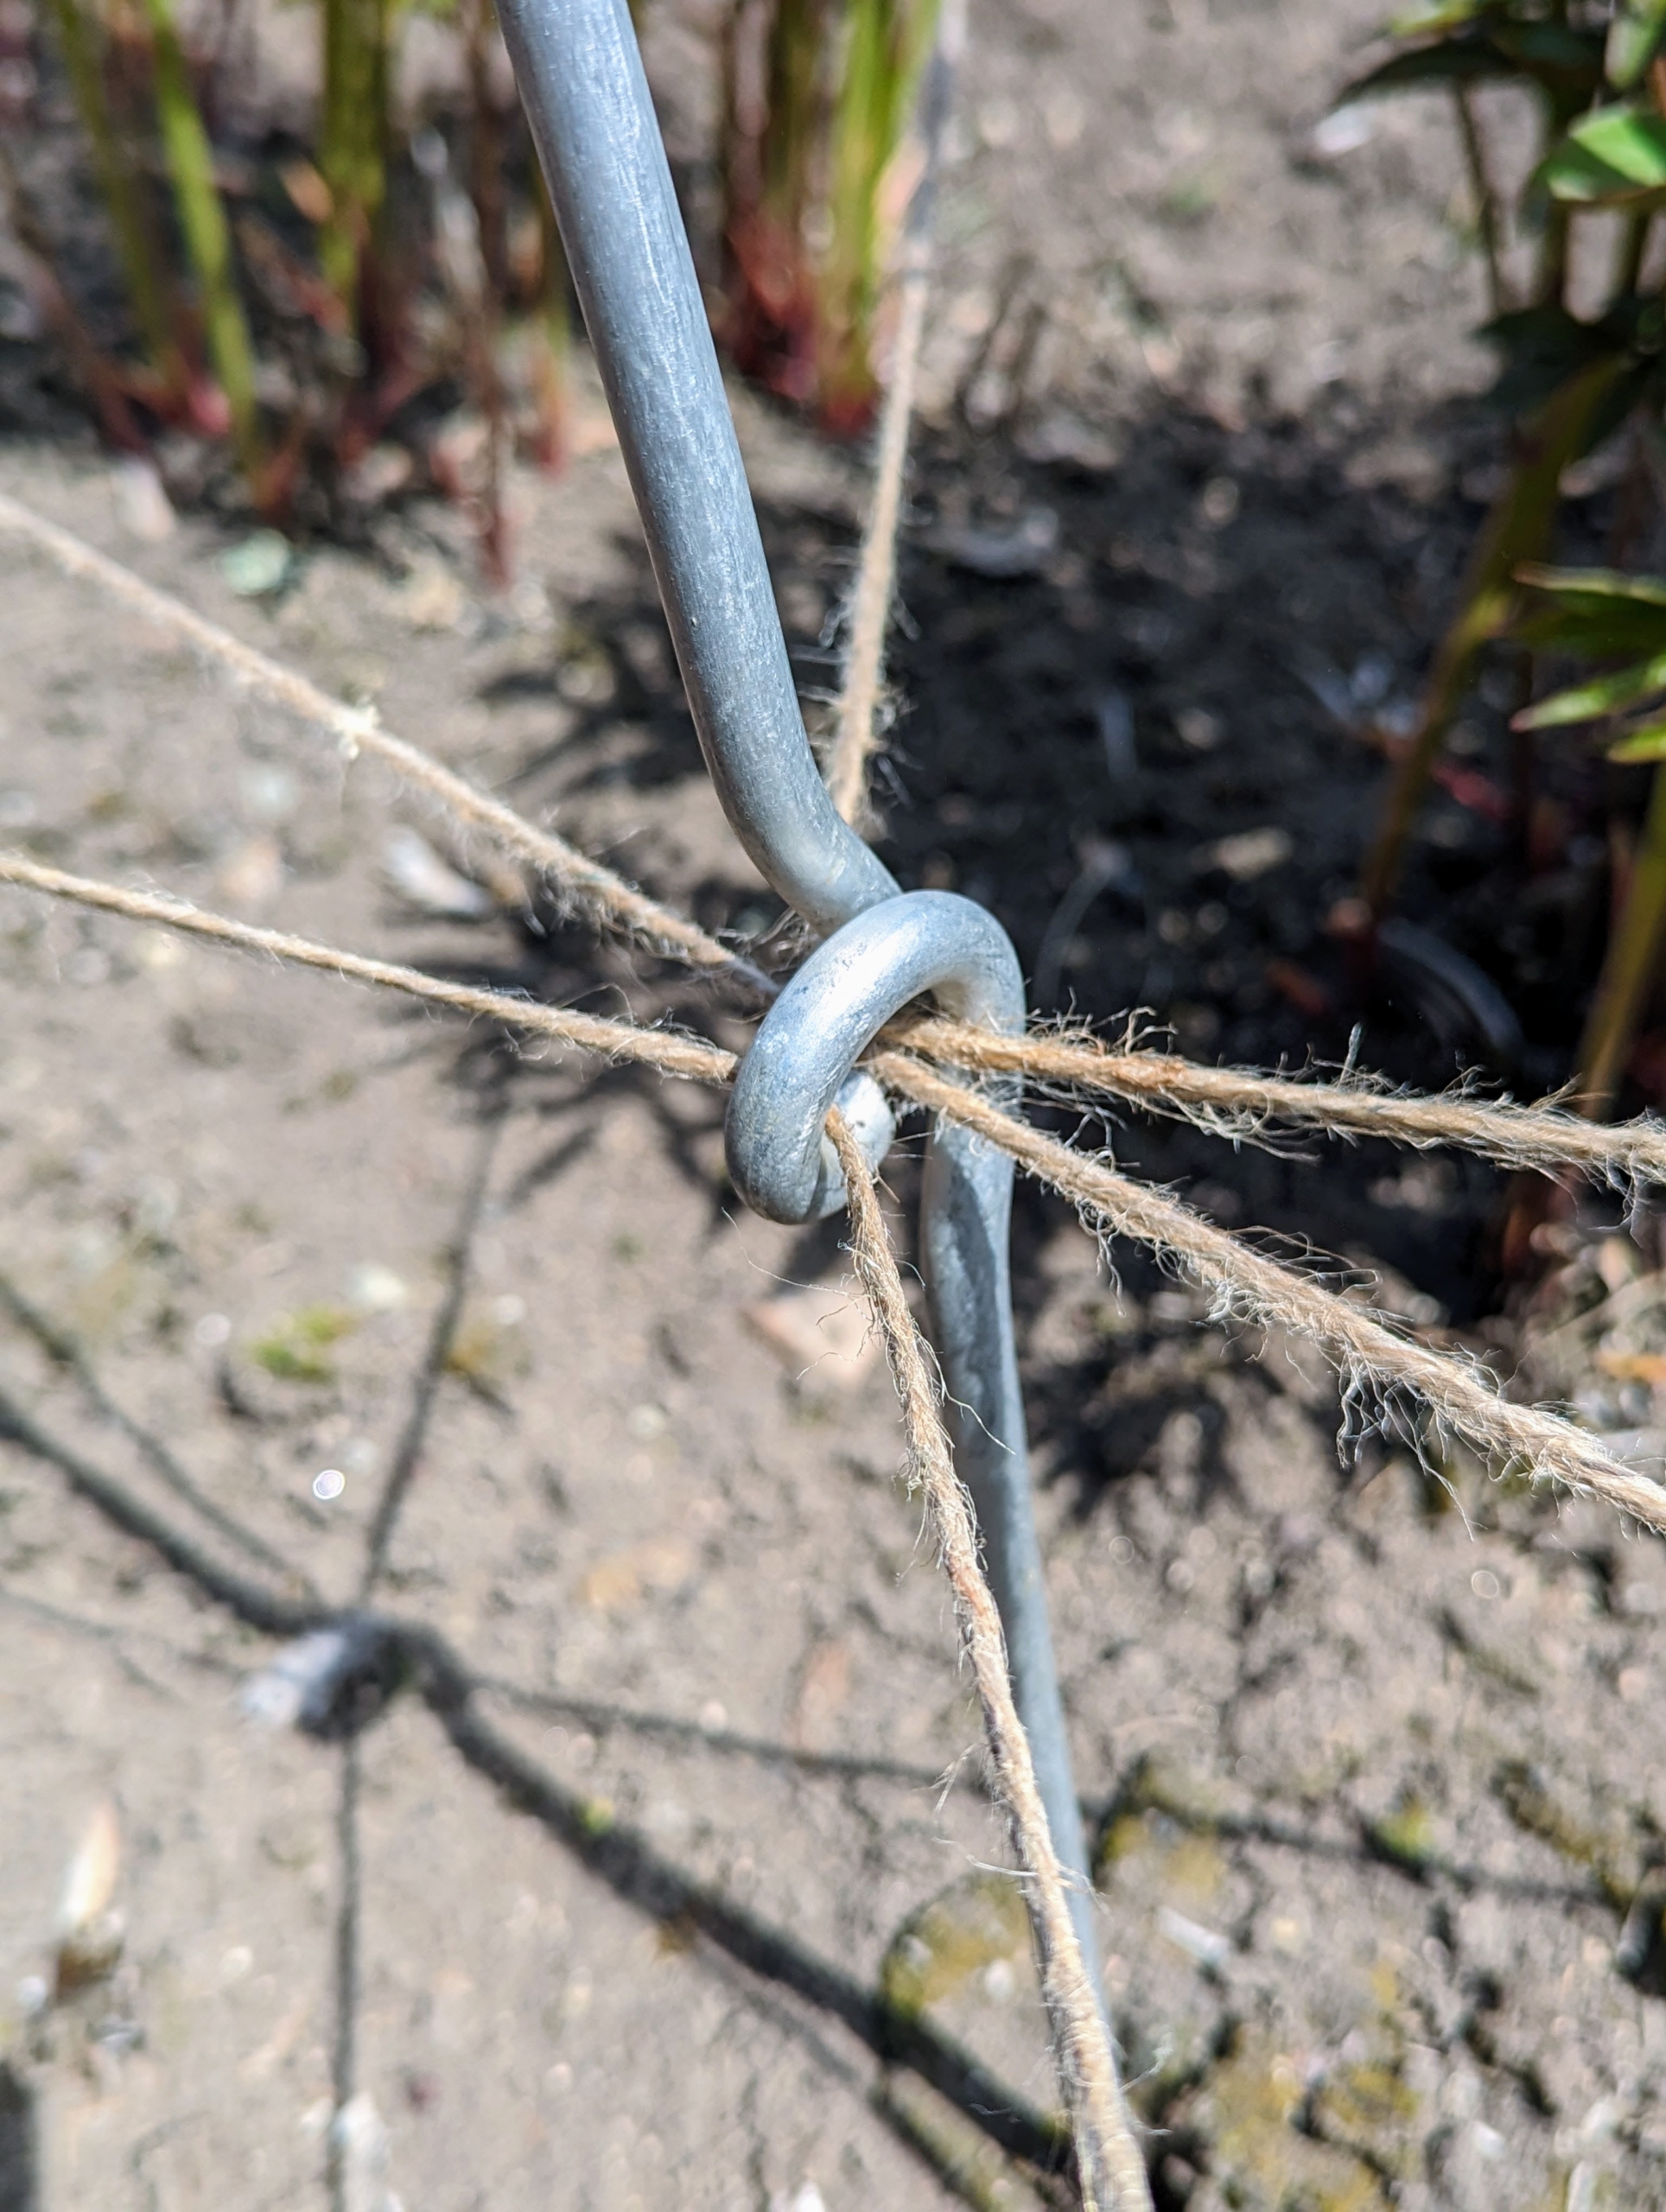
I designed the eyes to be big enough for the many threads of twine. These have worked so well for me over the years.
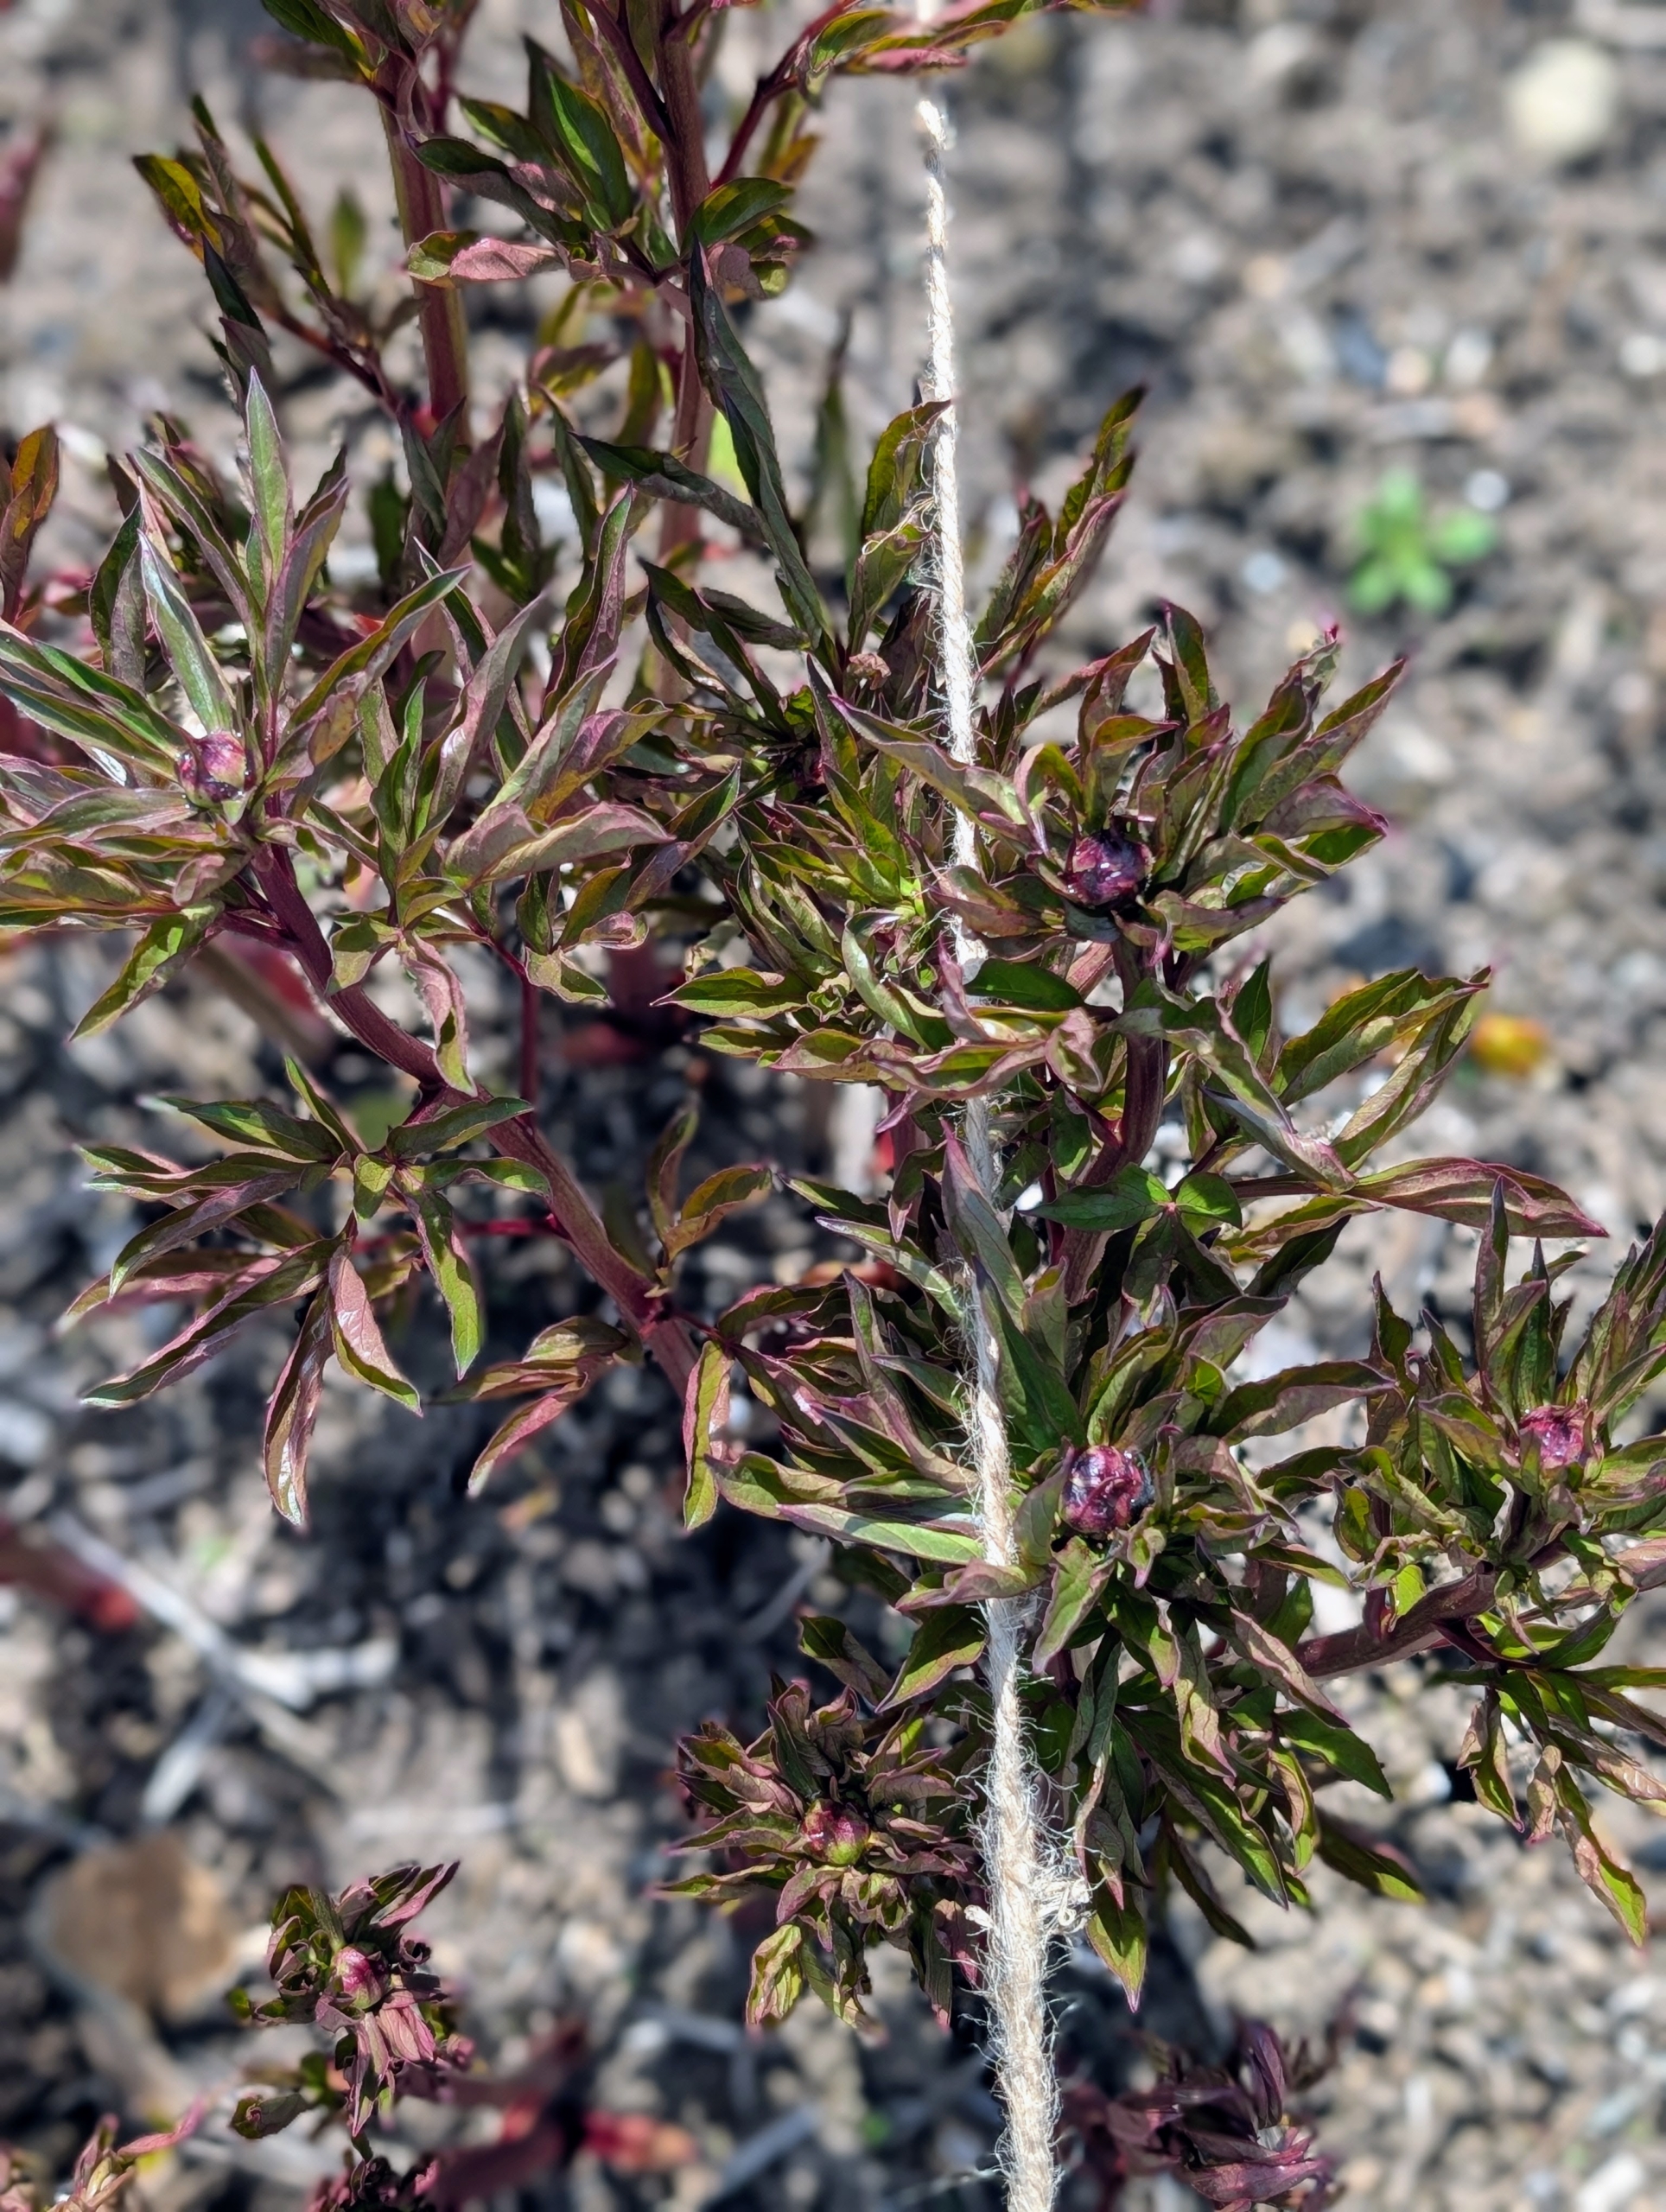
Here, one can see there is about a foot of space in between the top and middle eyes – enough room to support the stems at different levels.
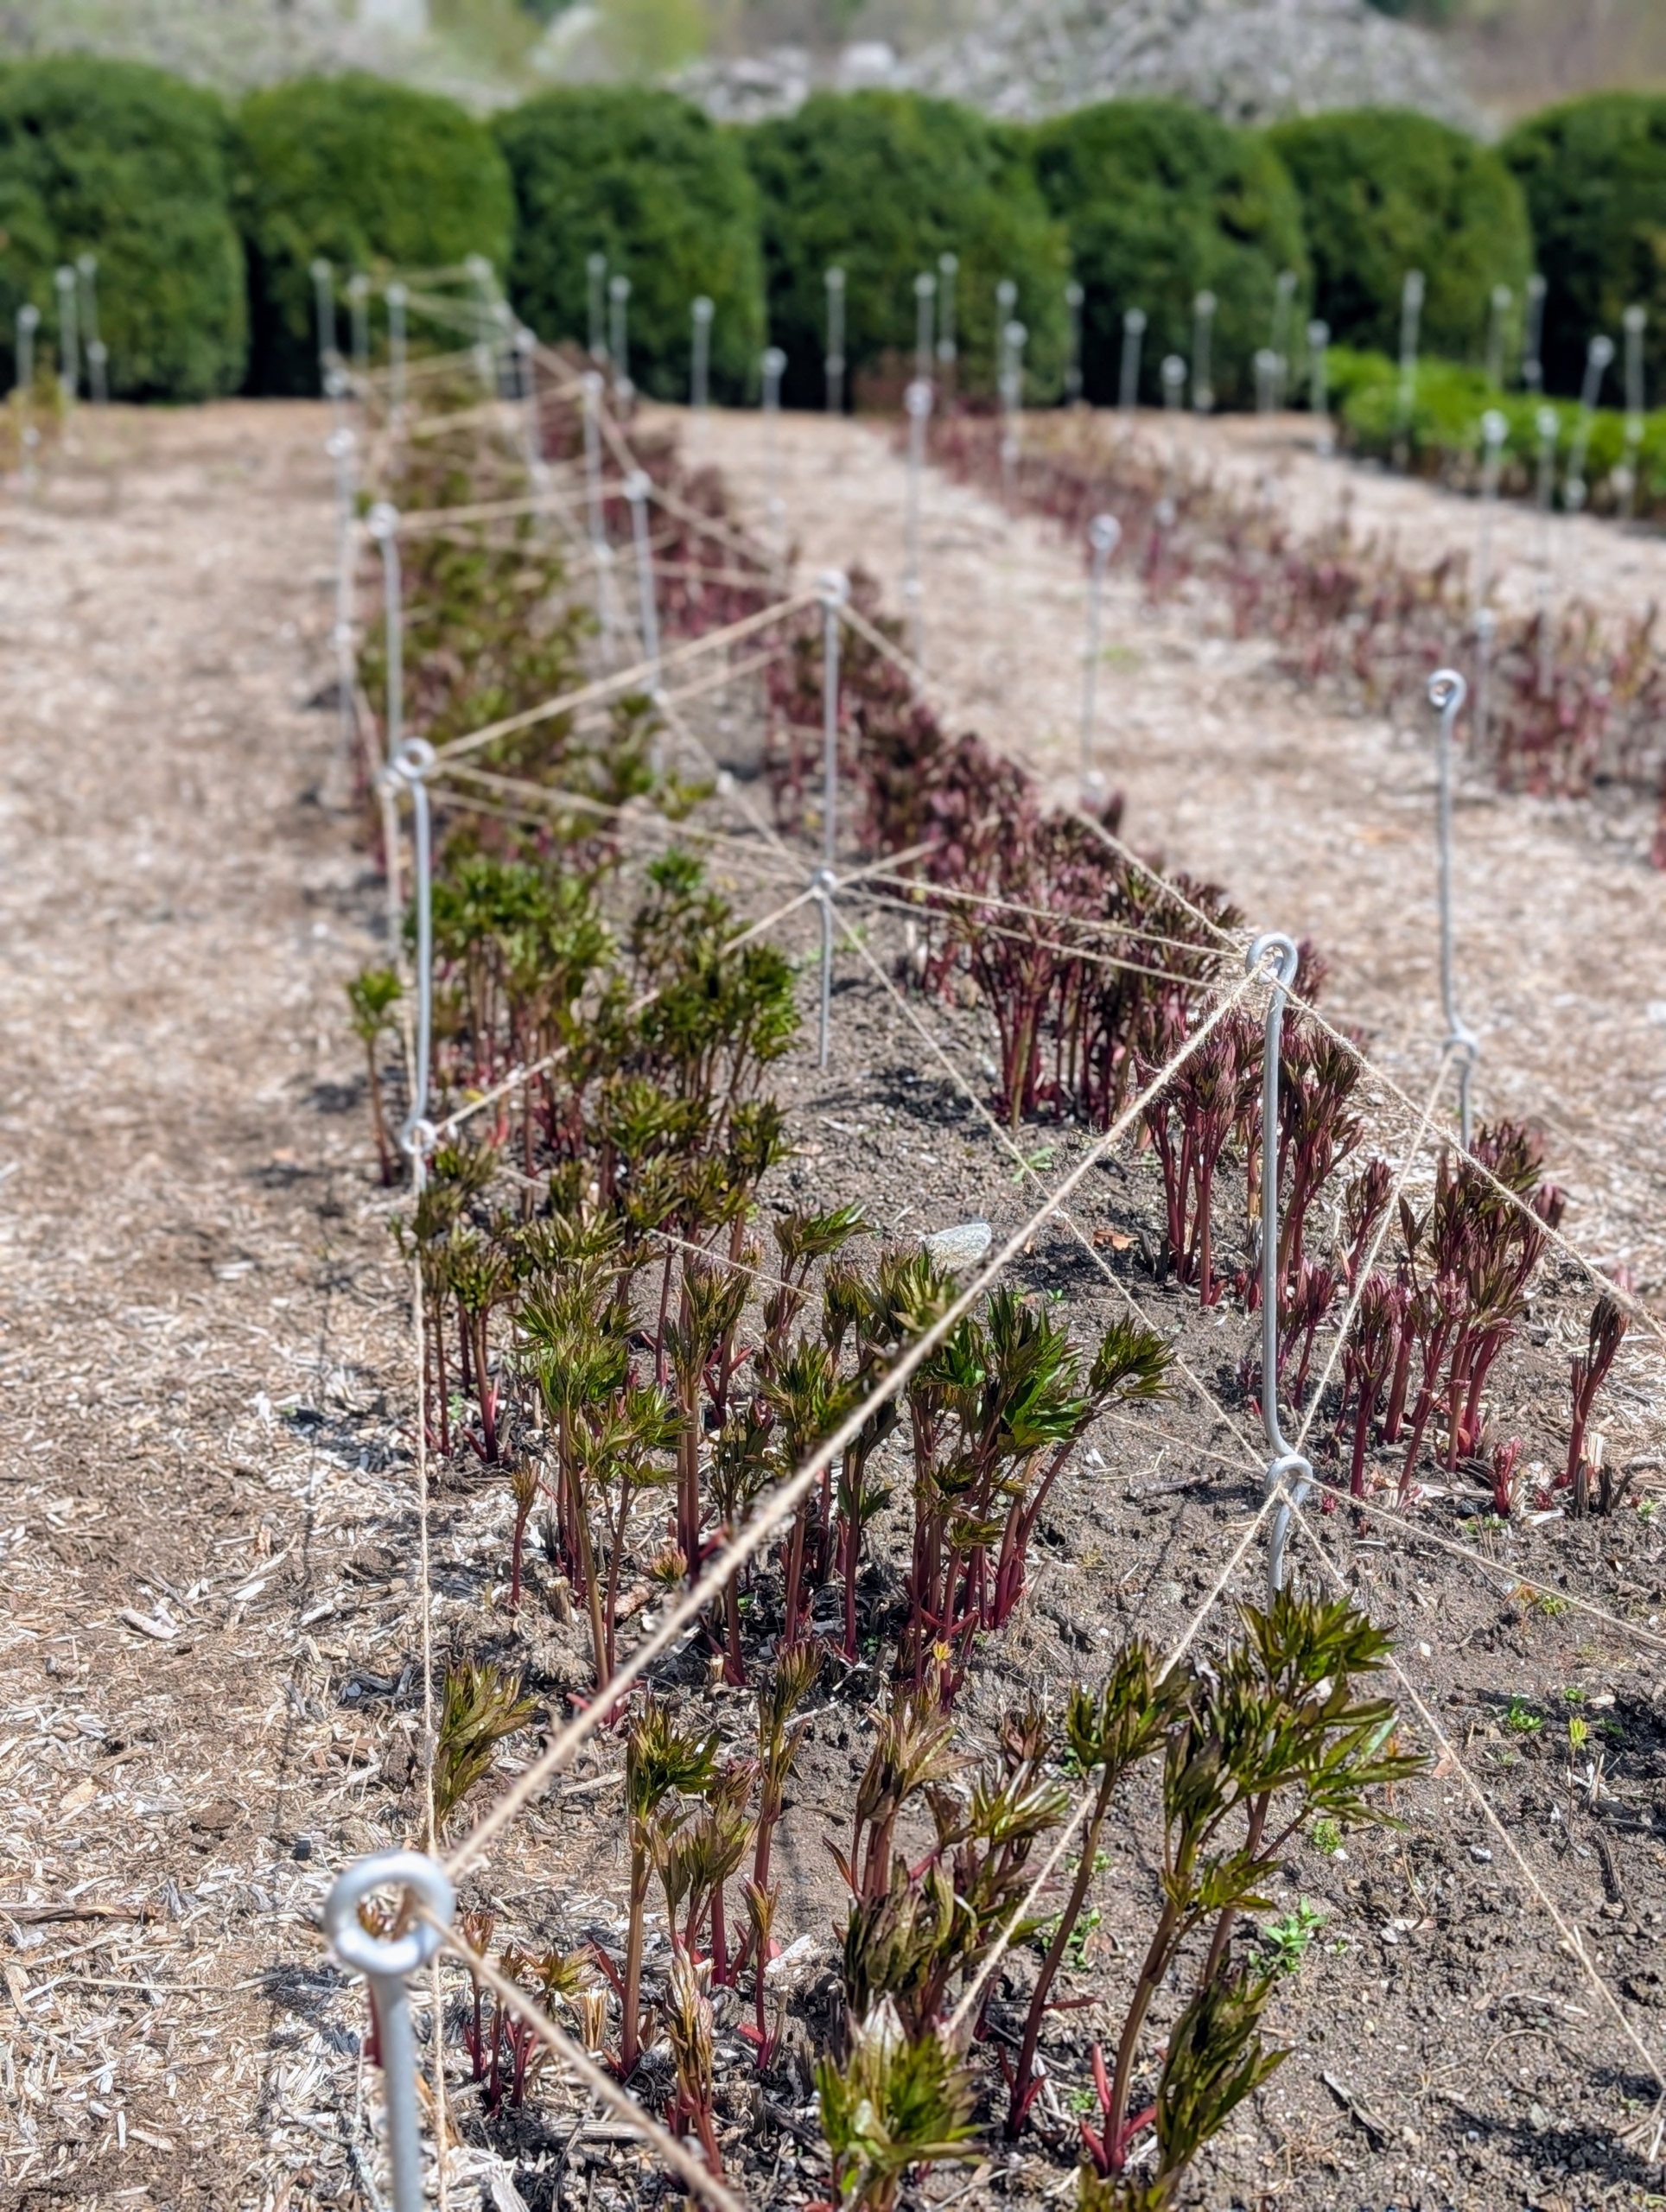
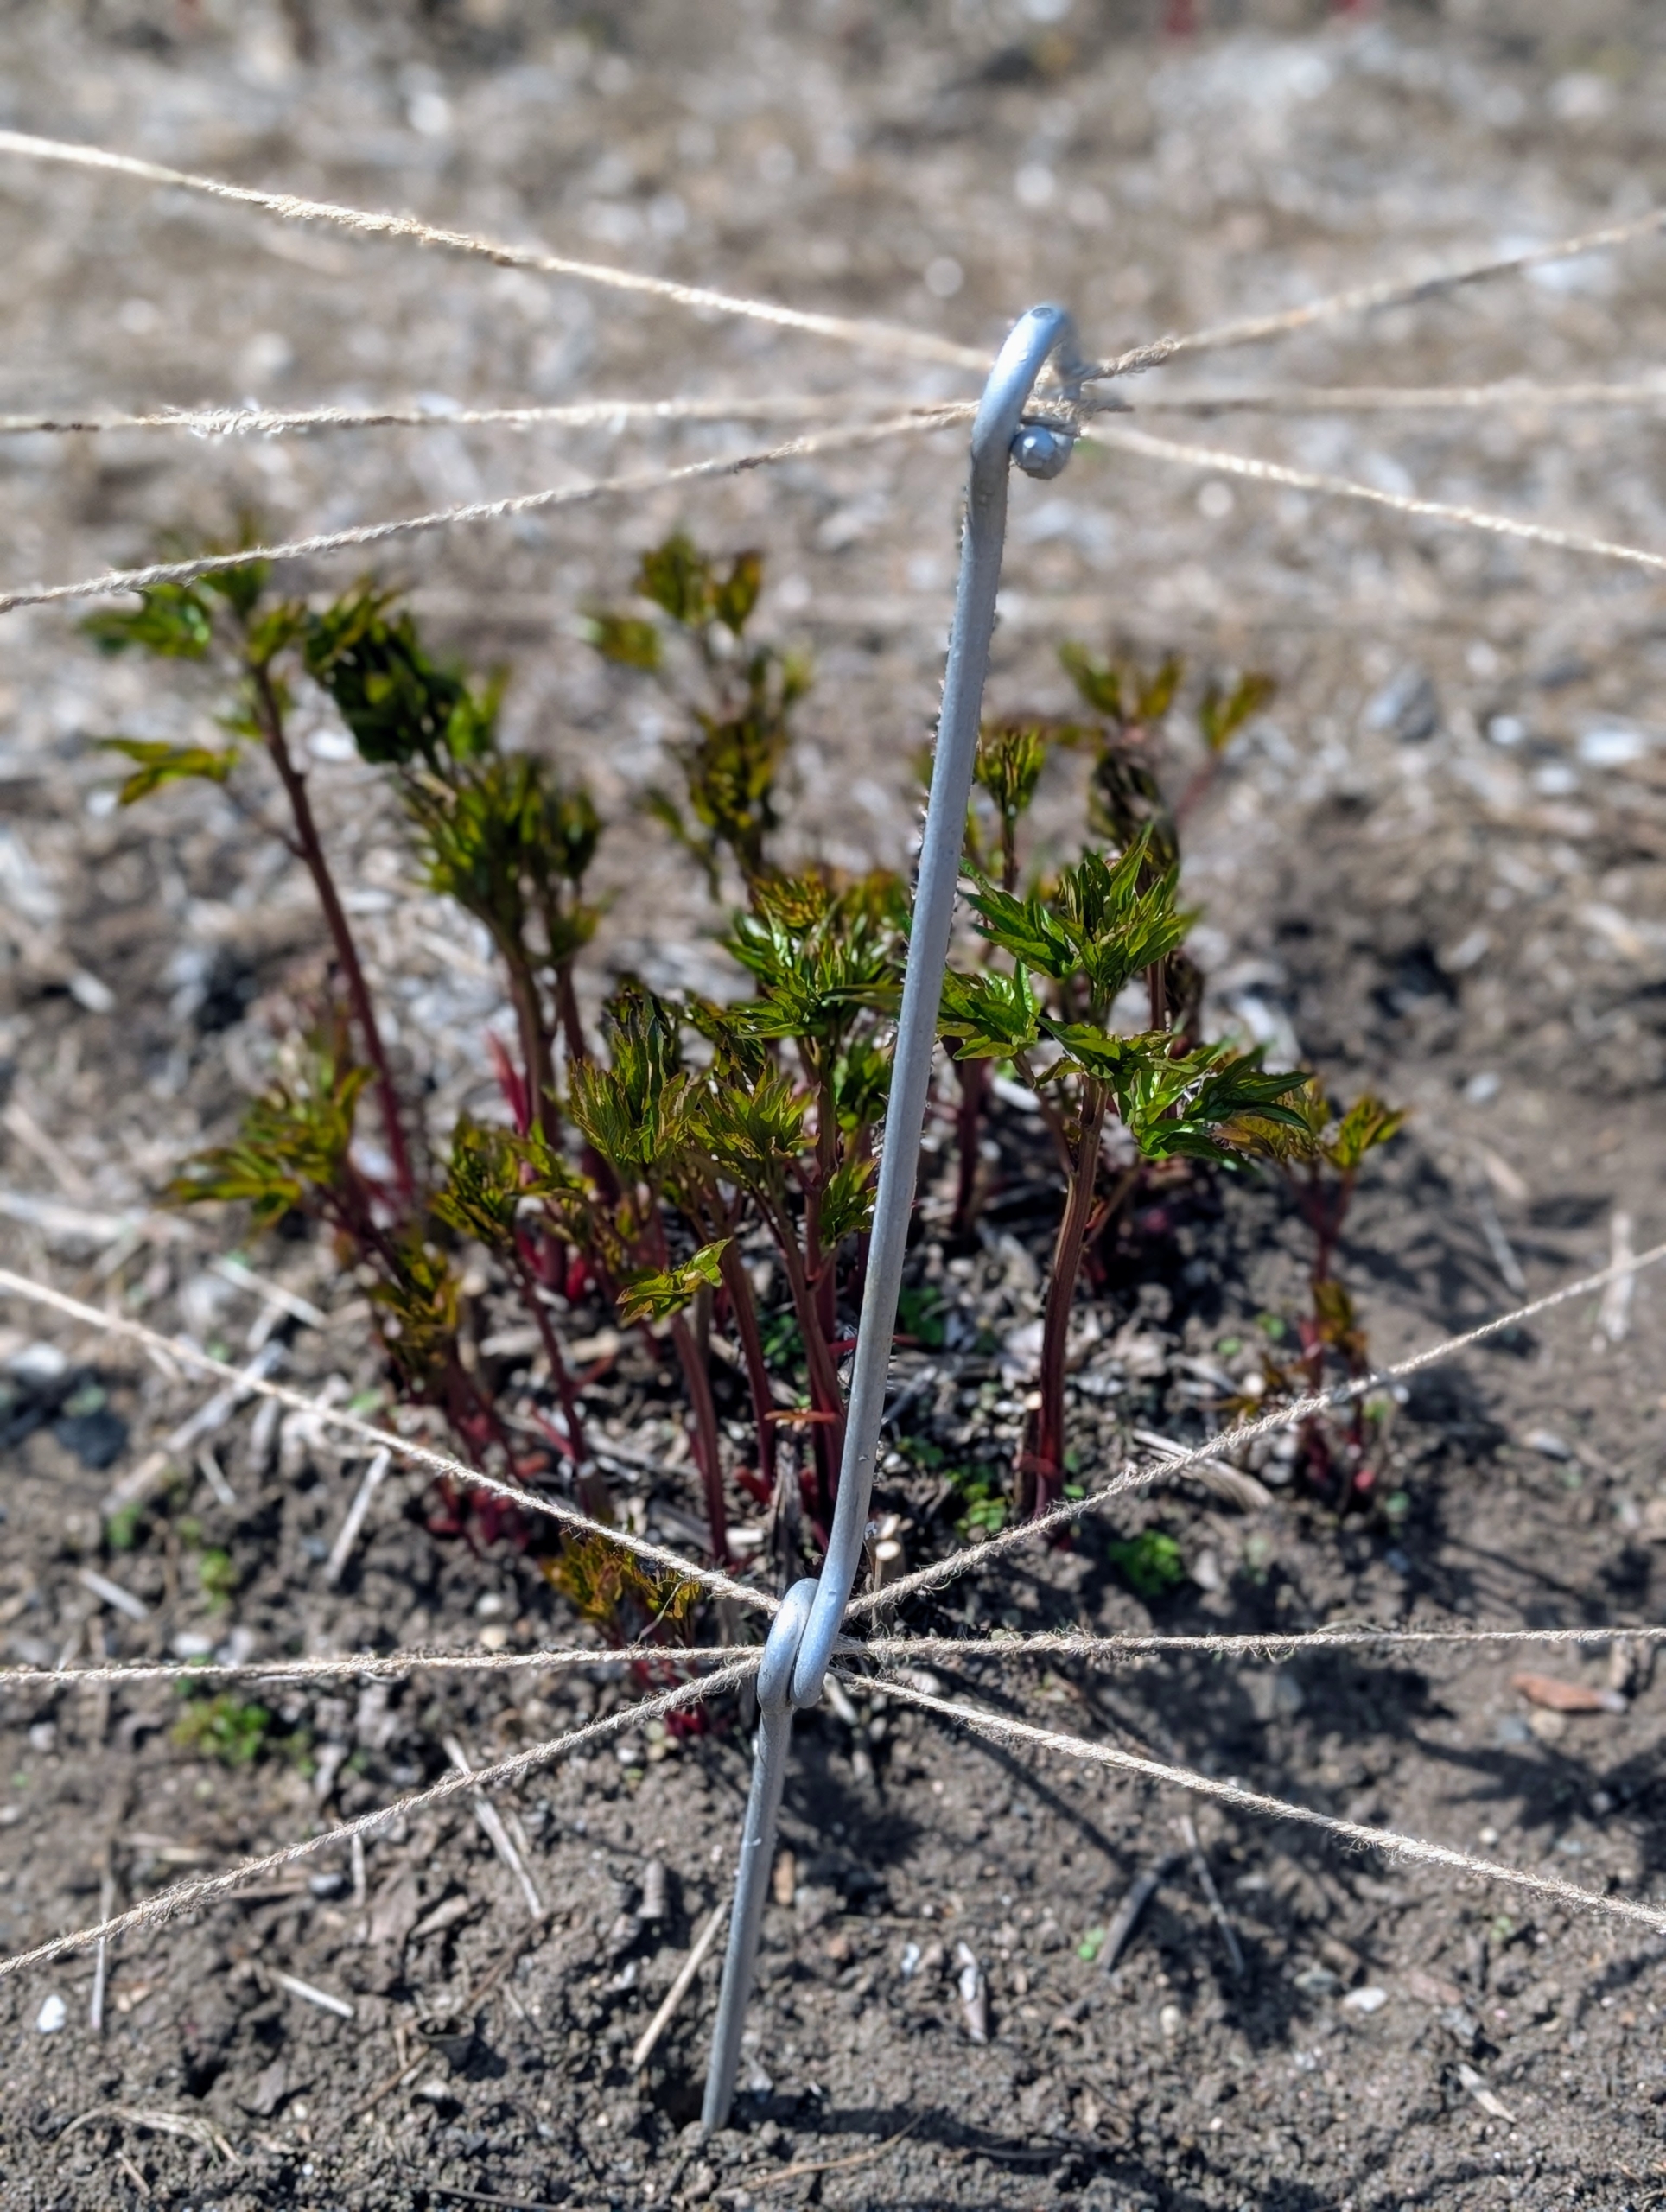
Here is what a row looks like all done – very neat and tidy, and every peony plant supported by twine. The stakes and twine create such an artistic and geometric pattern.
This technique allows support from every direction.
Herbaceous peony stems are soft and flexible, allowing them to bend. They grow annually, producing new growth from the crown in spring.
The growing stems are already well positioned in between the strands of twine.
And like clockwork, the buds are now forming. In just a few short weeks, this garden will be filled with stunning shades of pink and white. I am so happy this garden is such a huge success every year.
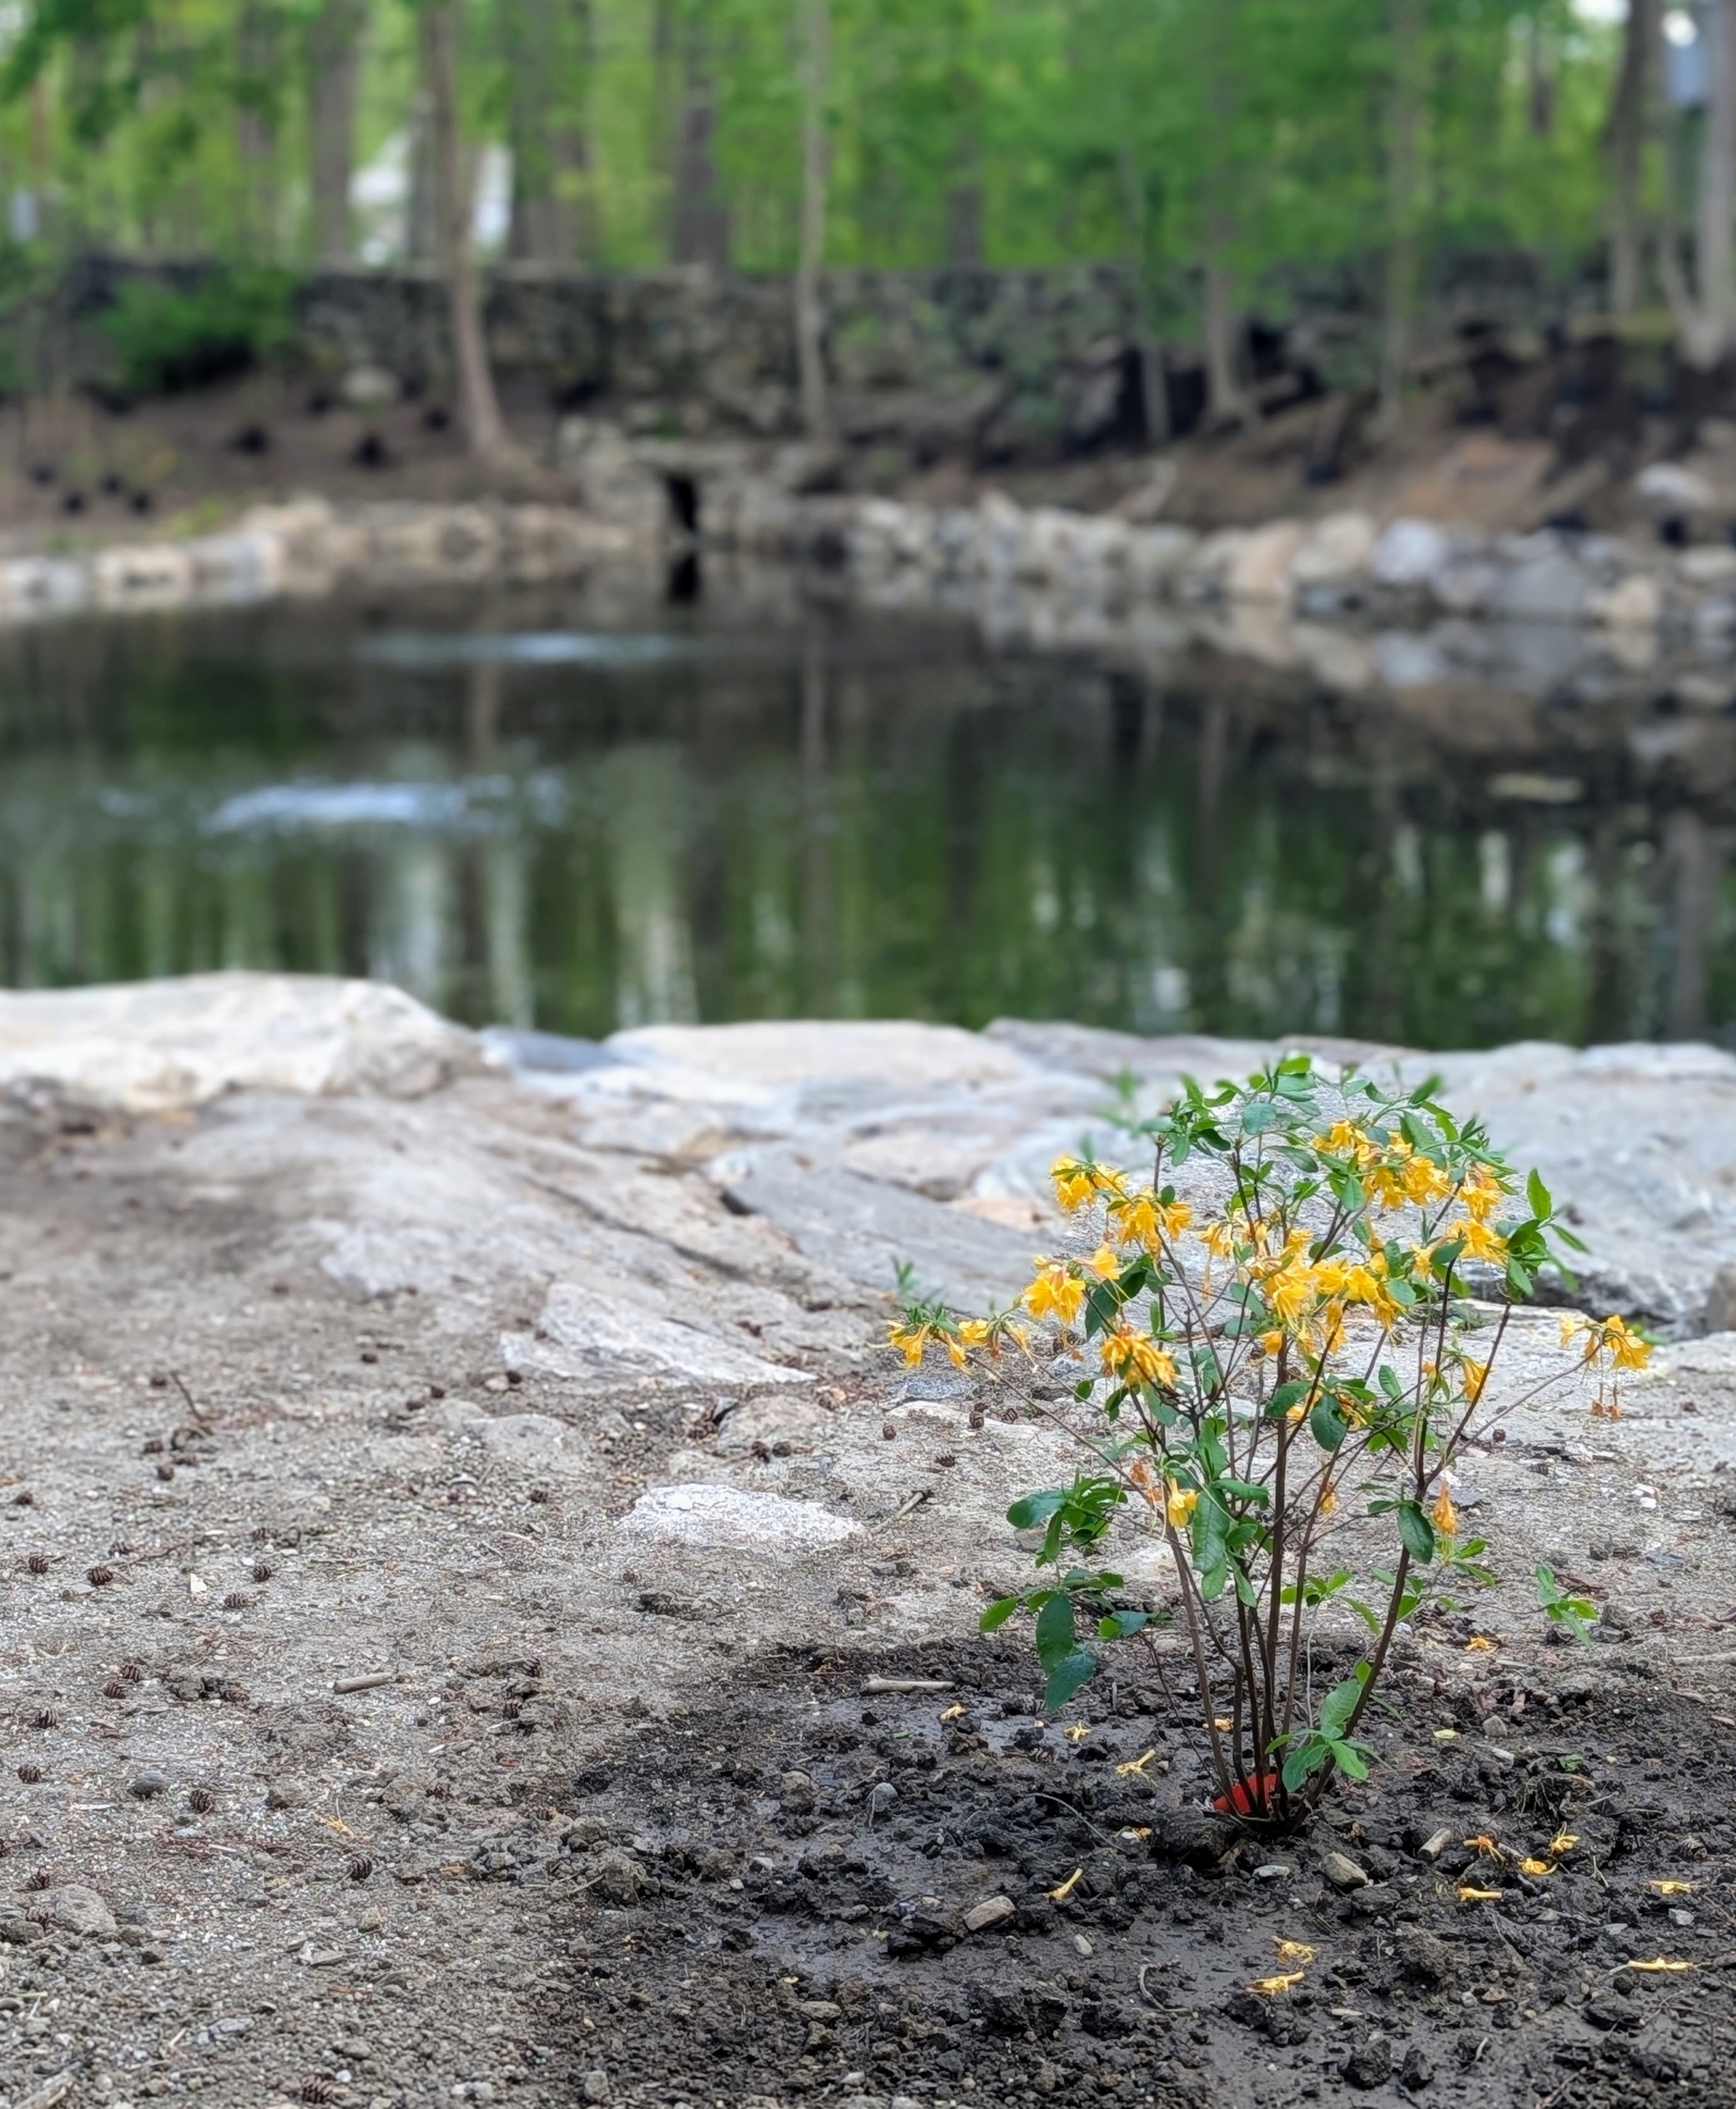
Another beautiful garden is being planted at my Bedford, New York farm.
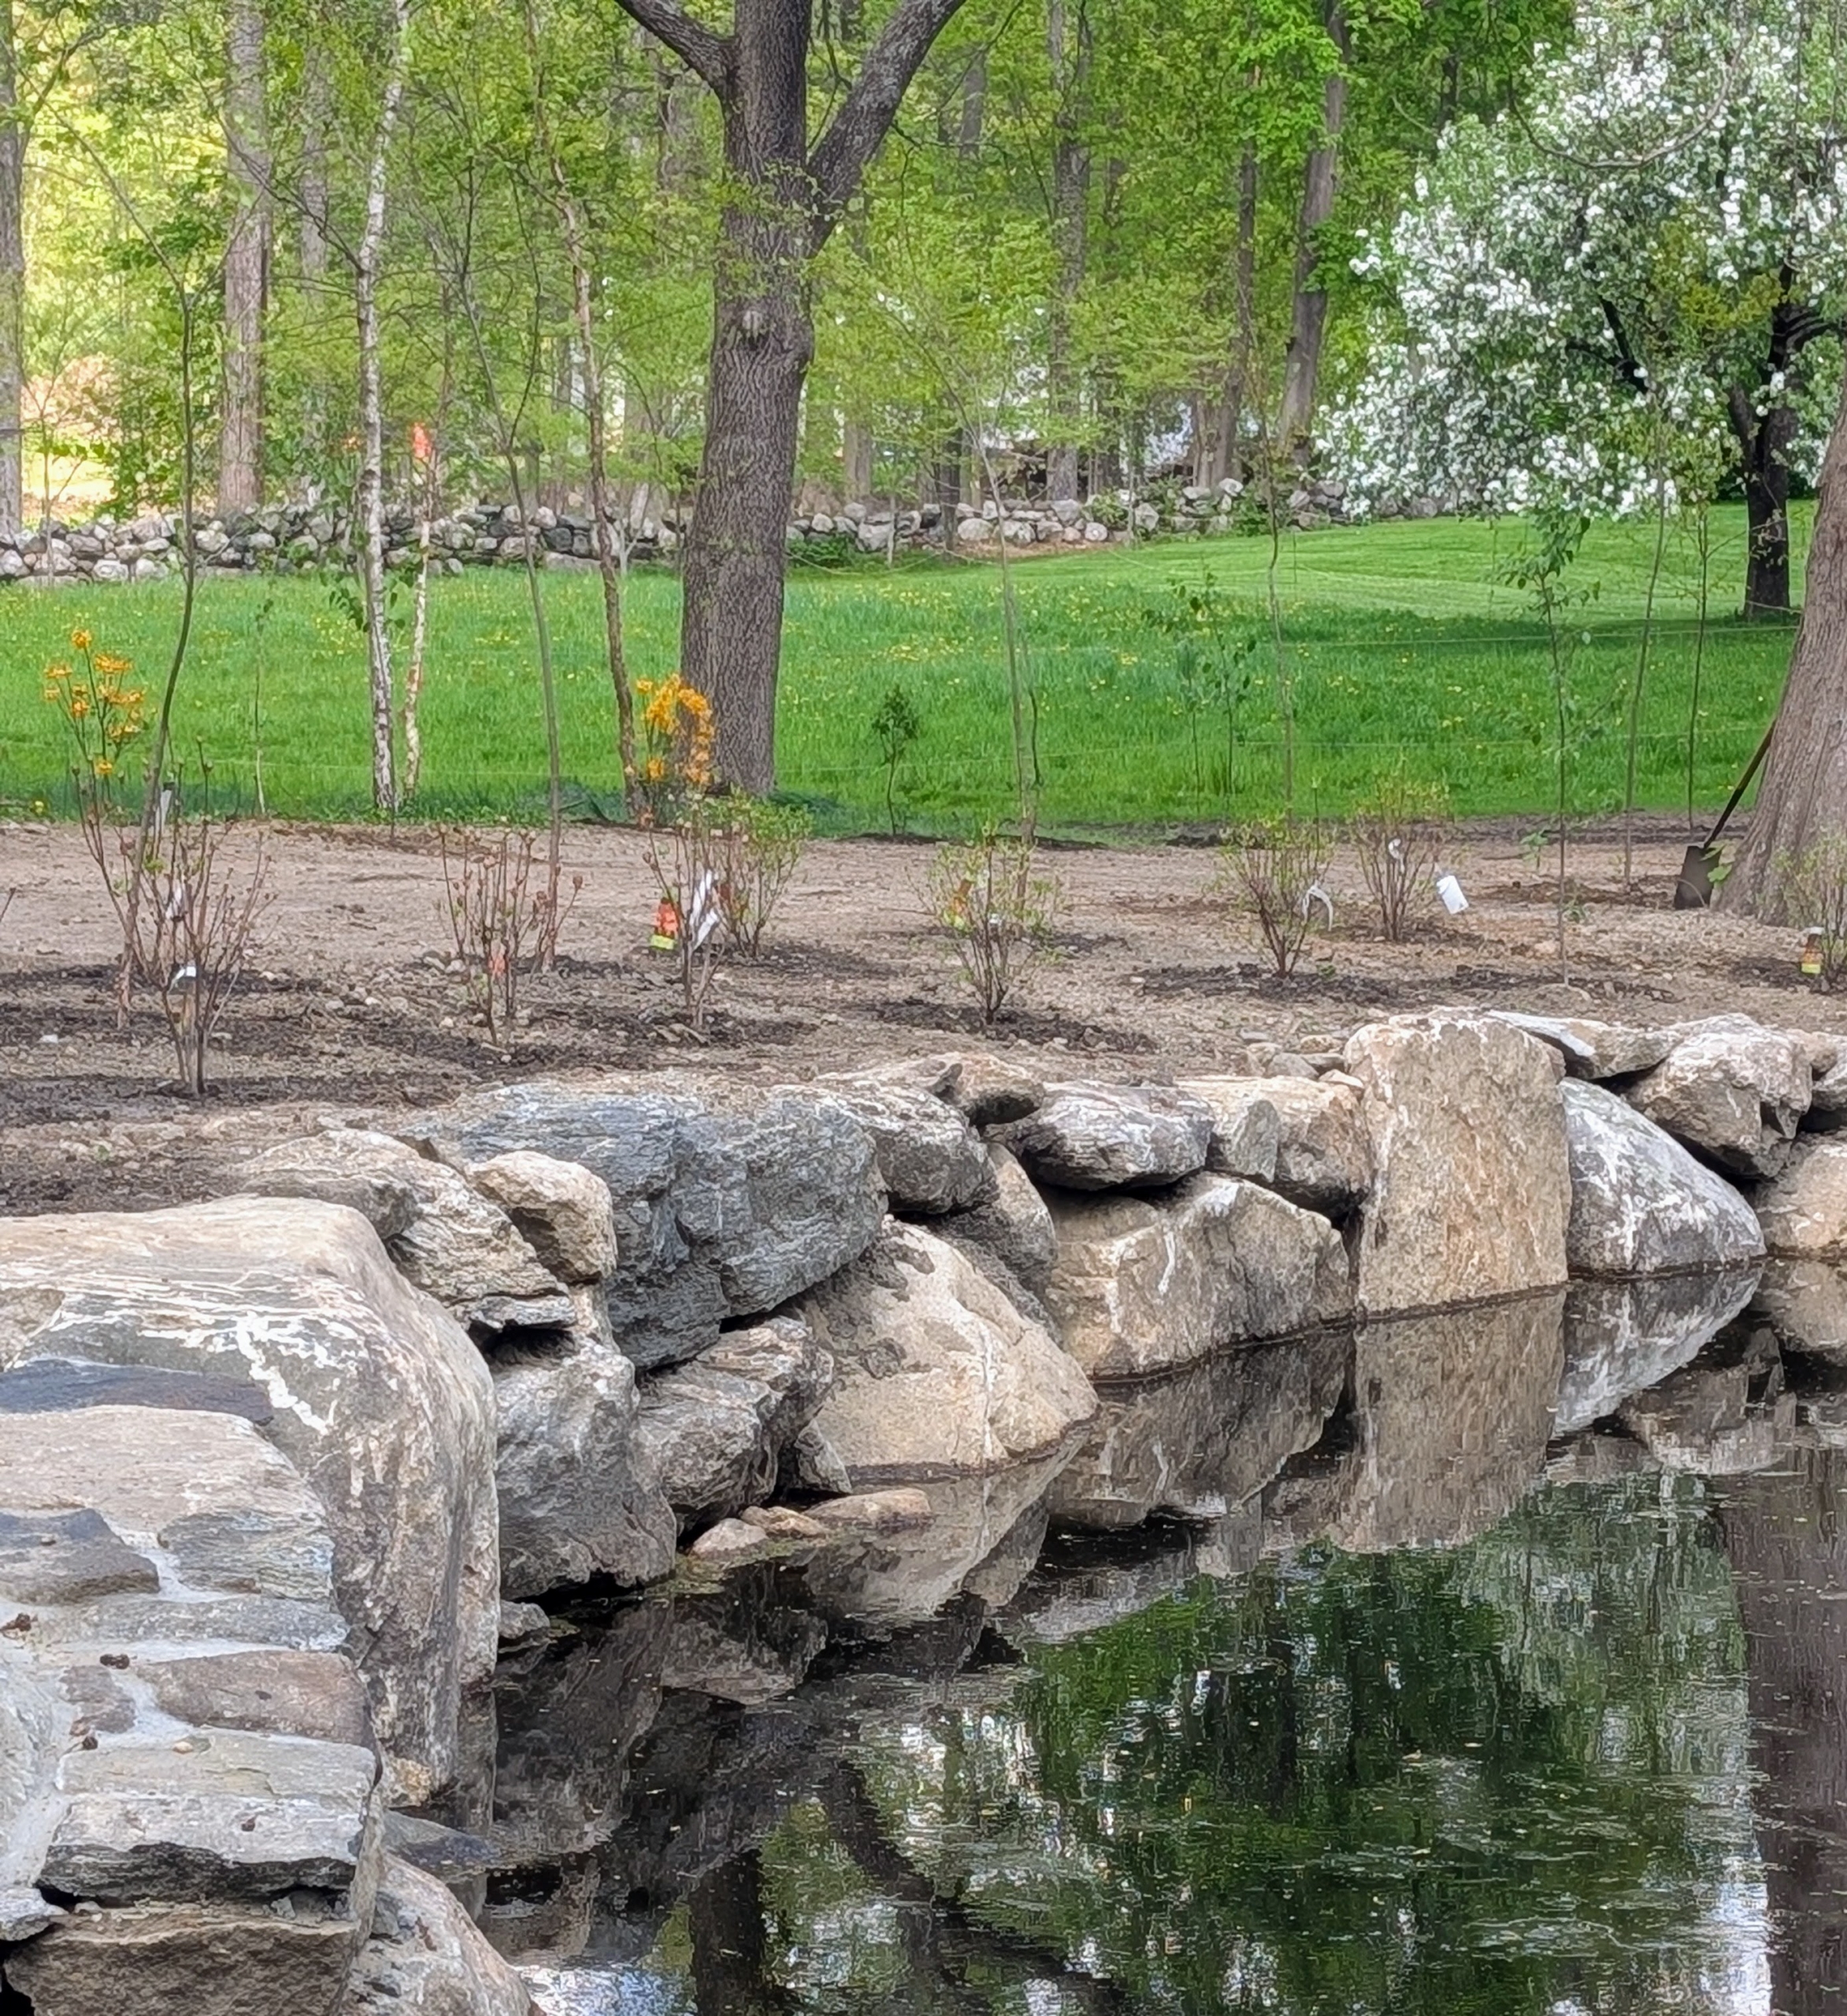
For months I've been restoring an old pond on my property - removing surrounding unstable trees, dredging decades of pond silt, repairing the spillway, and reinforcing the walls with huge rocks and boulders already here at my farm. Next, the pond water was tested and aerating bubblers were installed. And then compost was laid down and the entire area was prepared for planting. I wanted the pond garden to be filled with beautiful shady trees and bright, colorful azaleas. I planned a variety of unique specimens in yellow and orange hues to mix with the bold glossy green foliage of ferns and birch trees. I am so excited - it will look spectacular in the coming years.
Enjoy these photos of the next phase of my pond project.
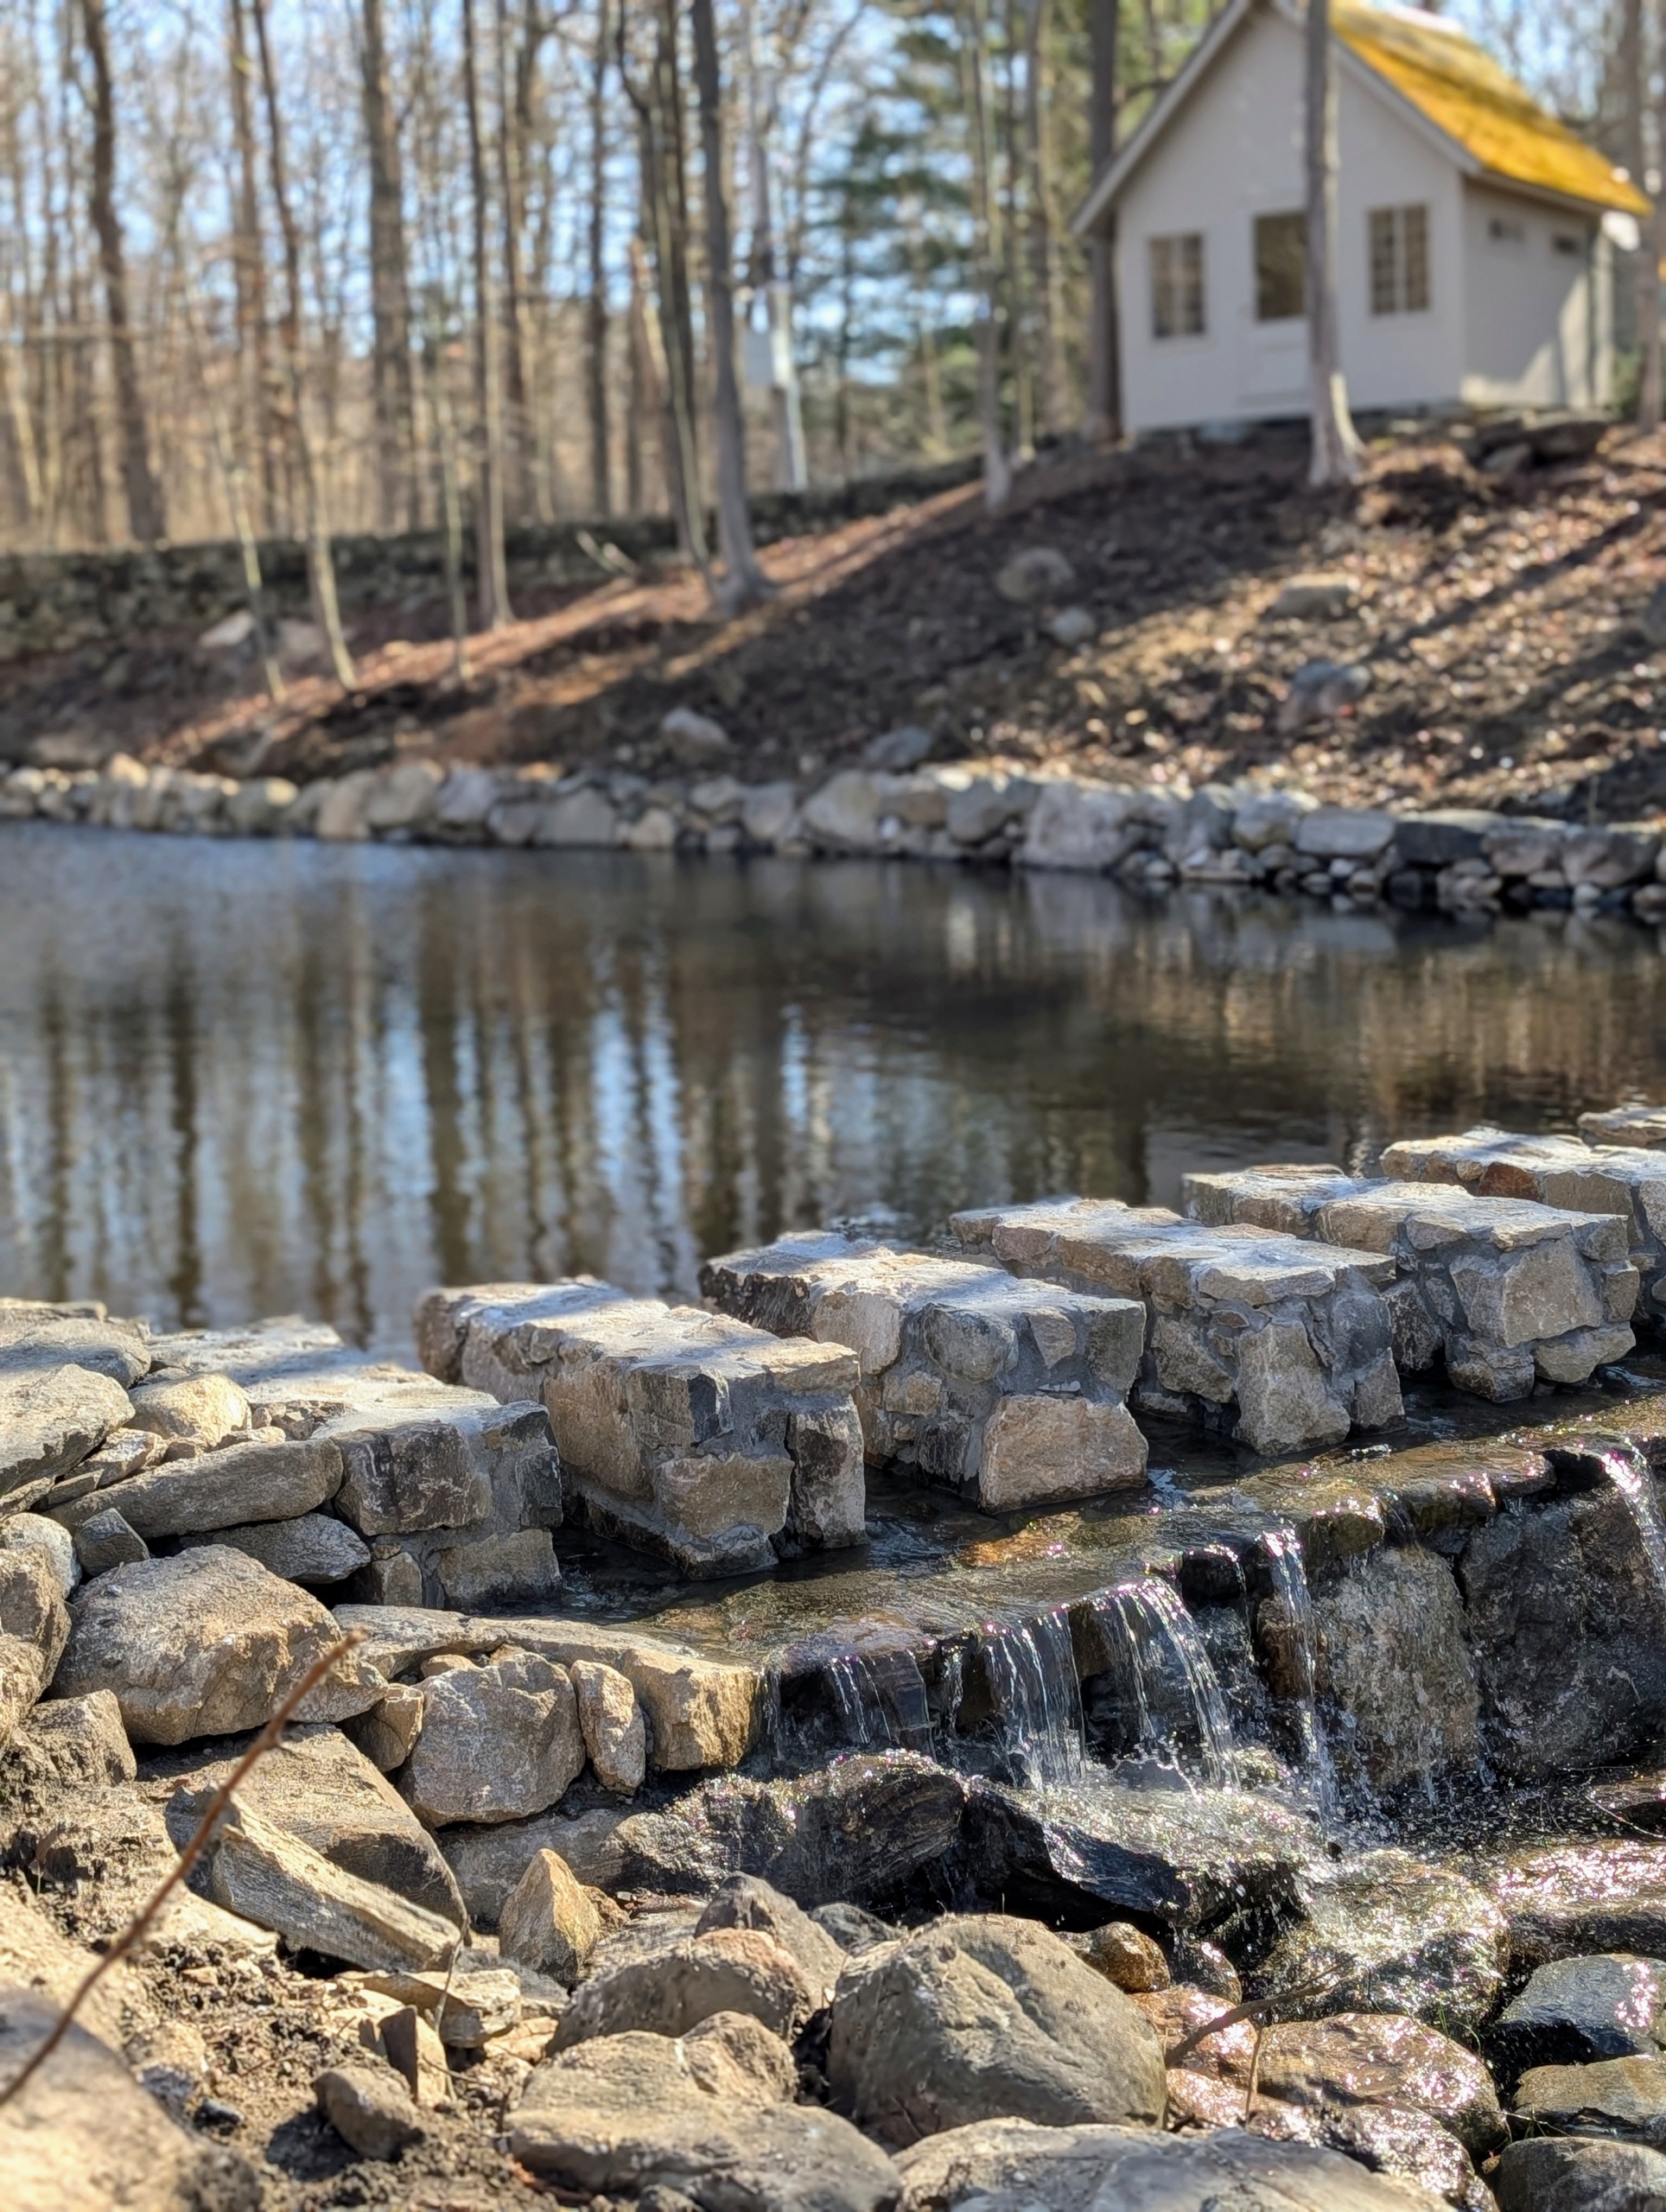
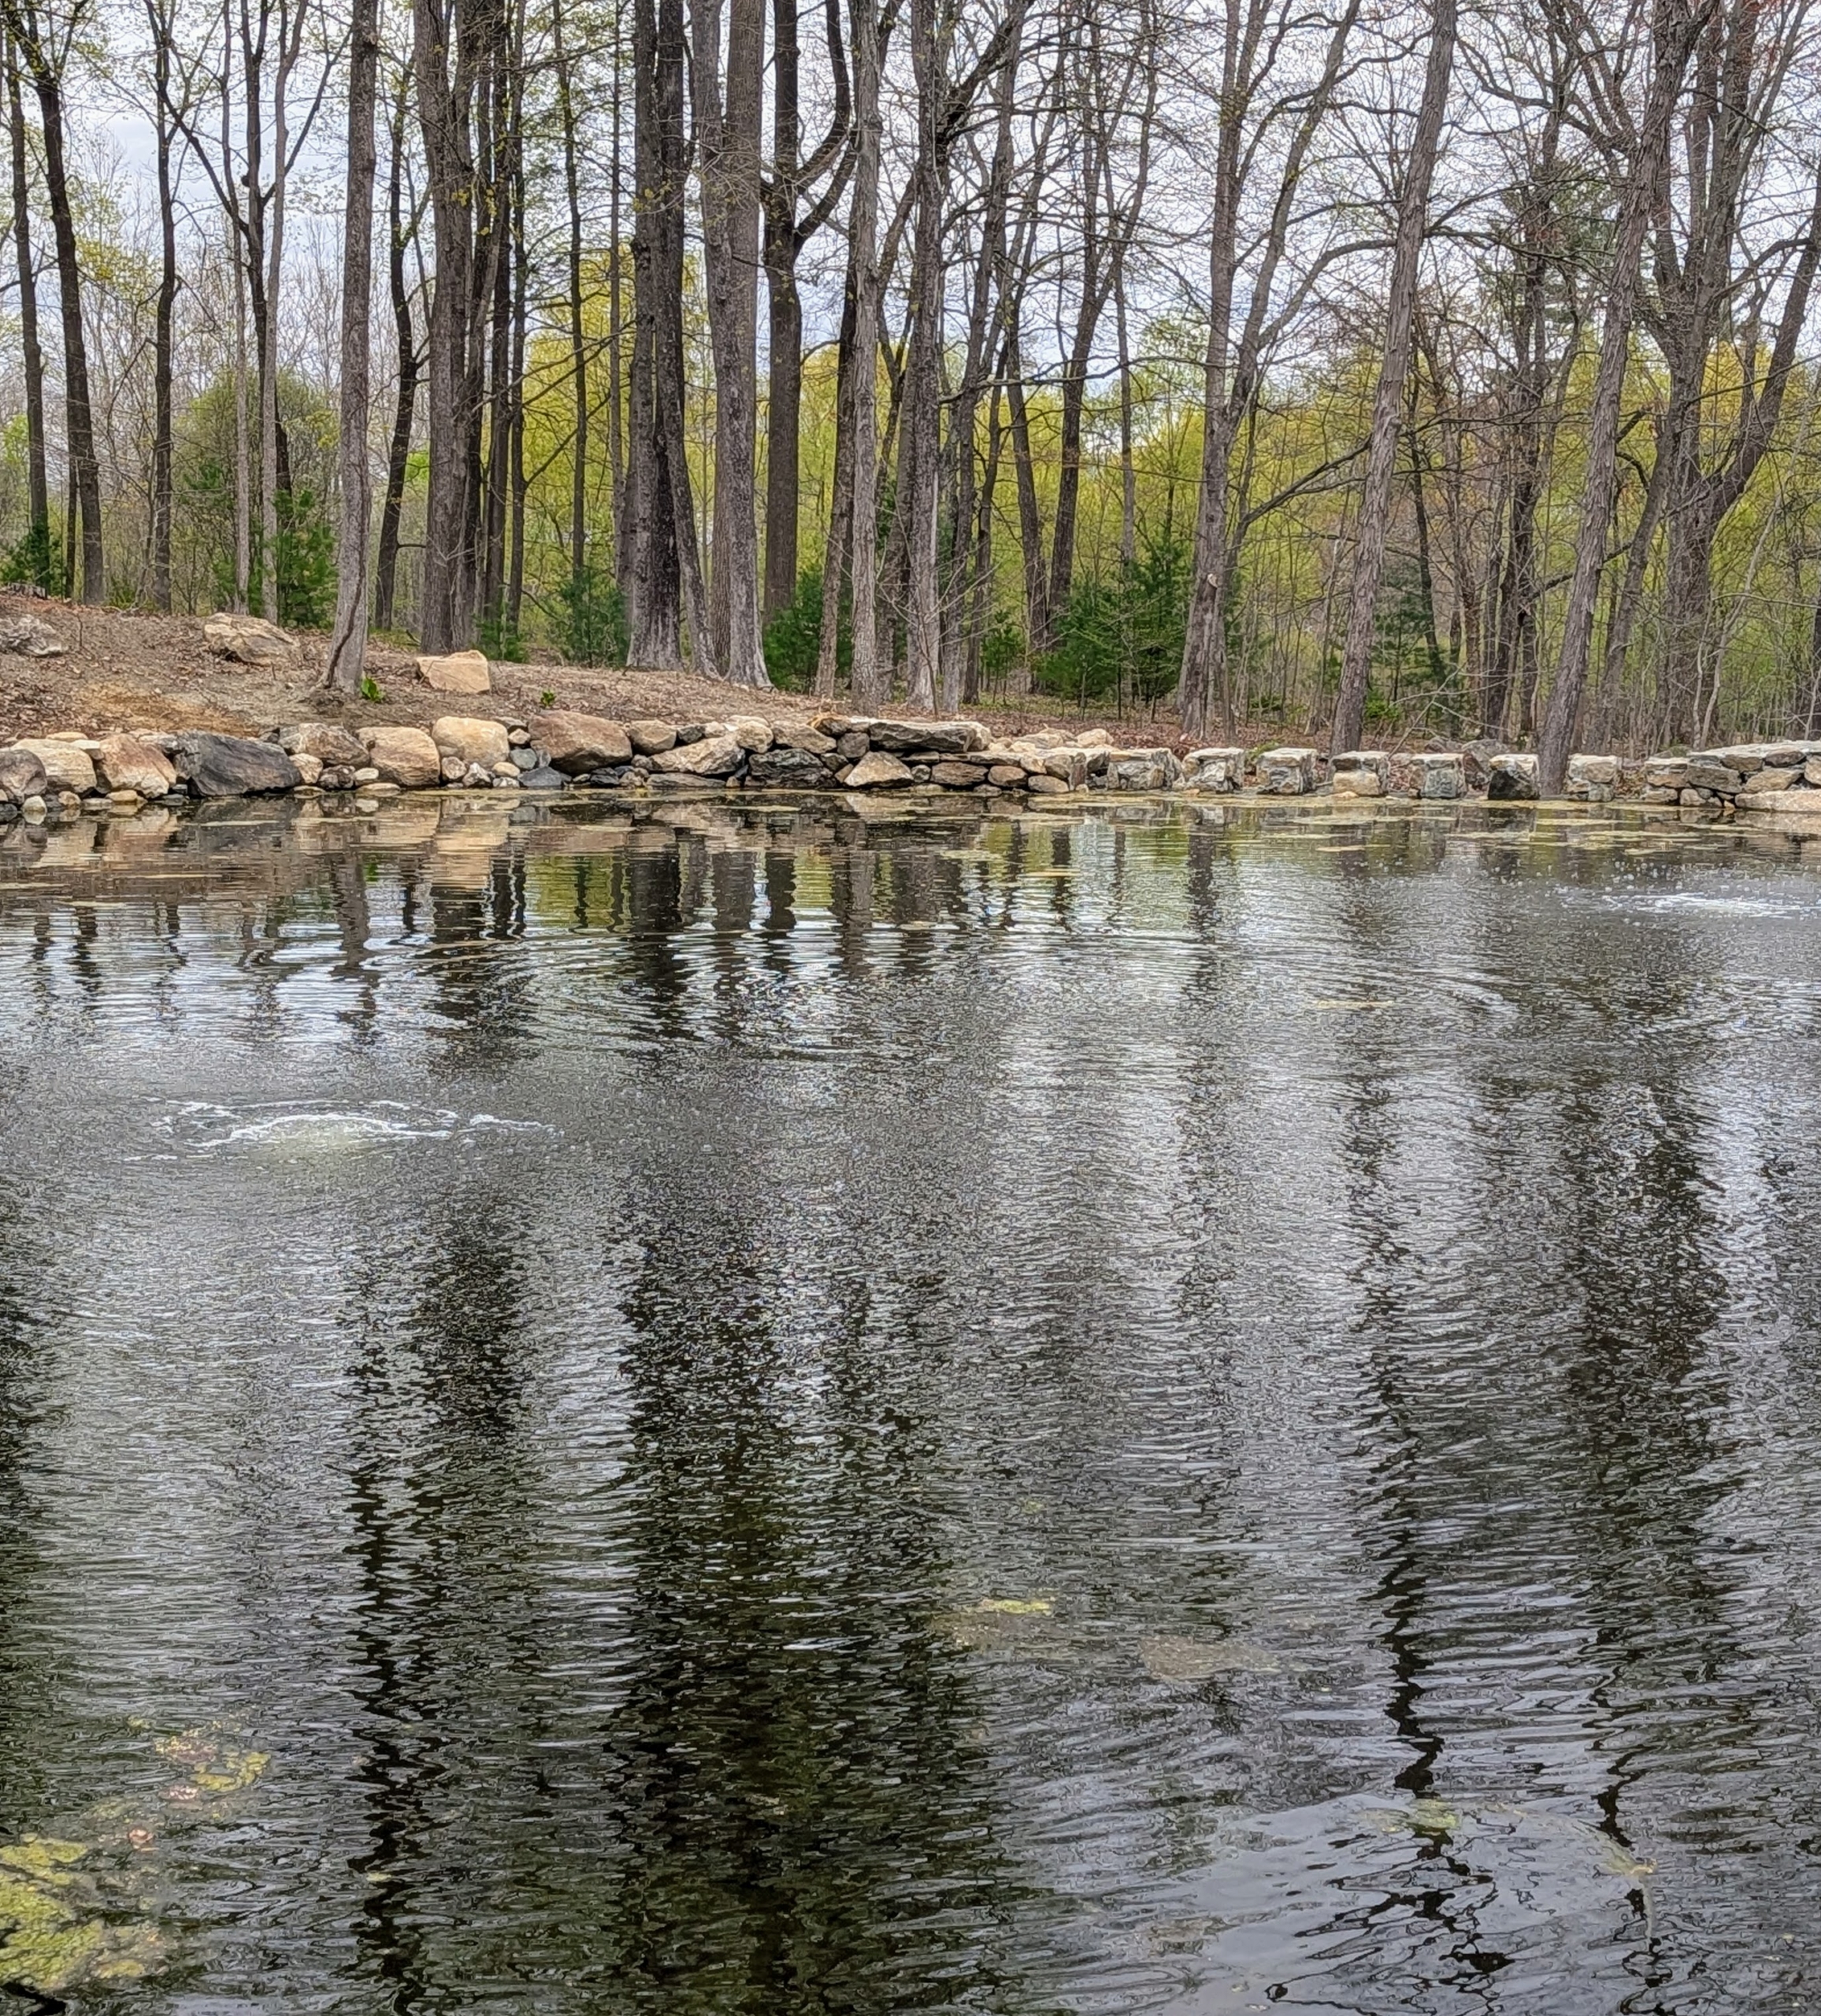
Last month, the heavy work in and around the pond was completed. This is the newly repaired spillway I designed – a crenellated wall to allow the water to pass through easily and naturally. Spillways are crucial for water control. They ensure surplus water flows through safely and efficiently, preventing any flooding.
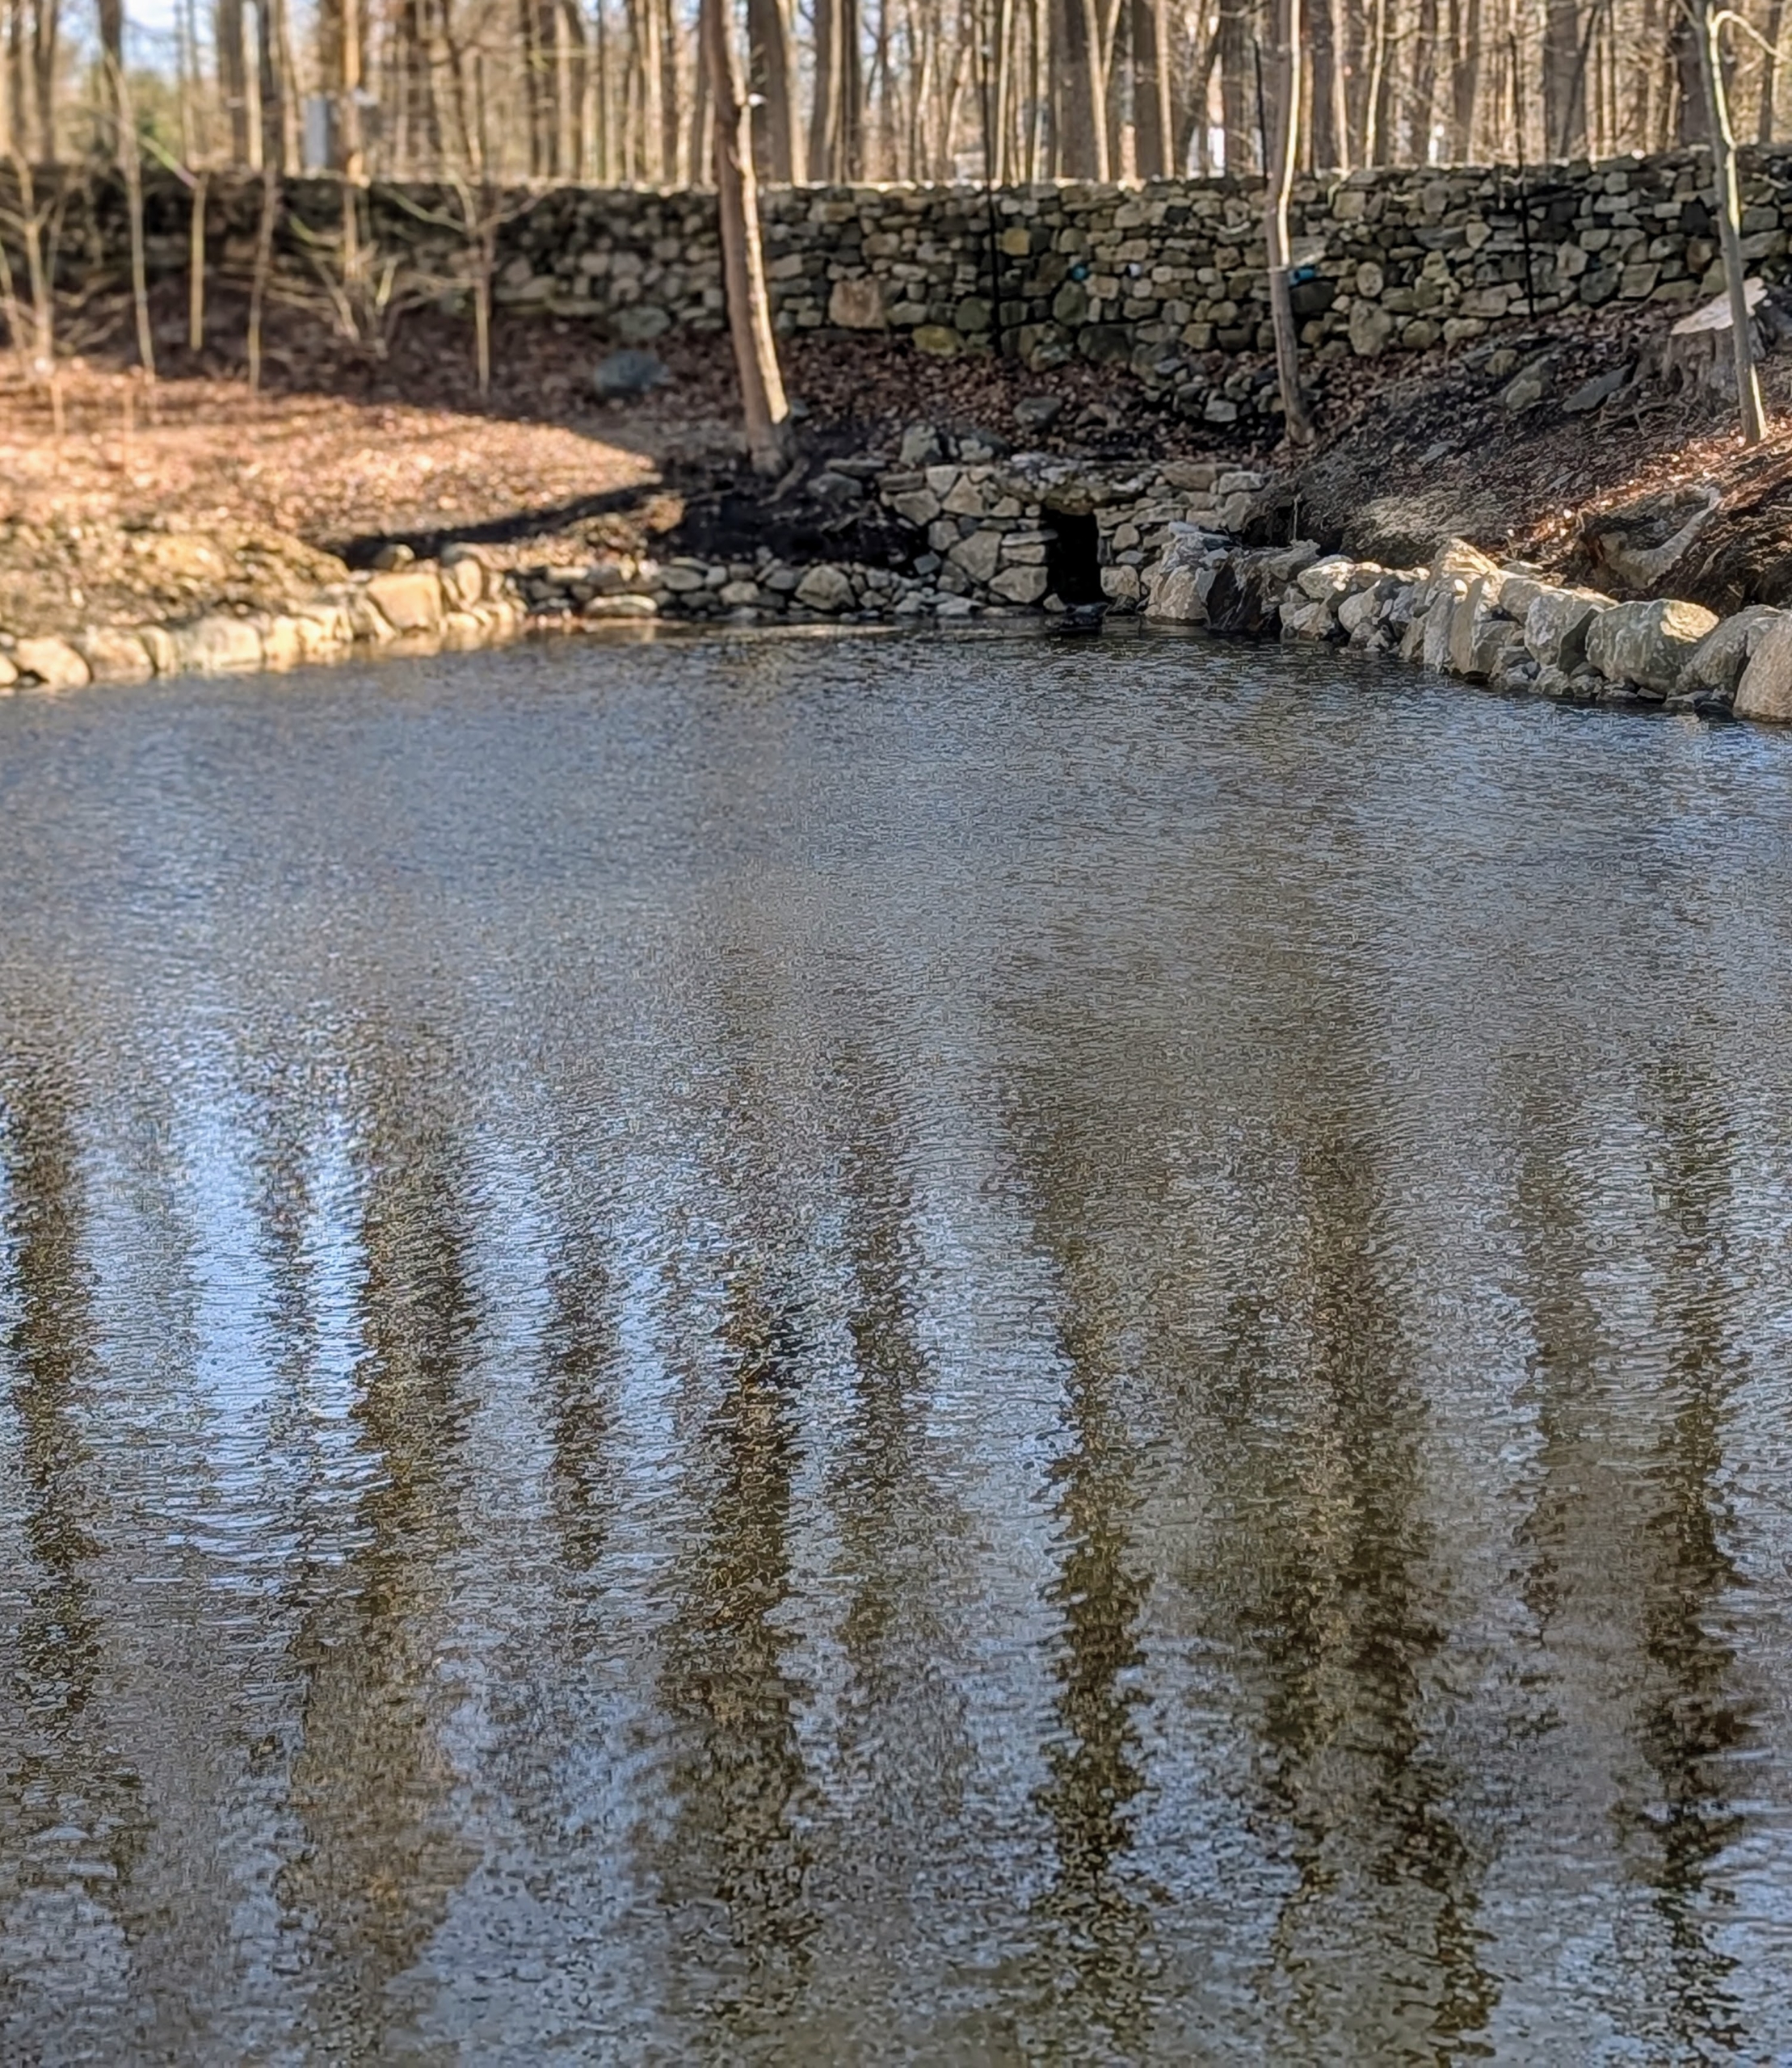
The pond is now clear of debris and silt. Reflections of the bare trees can be seen in the water.
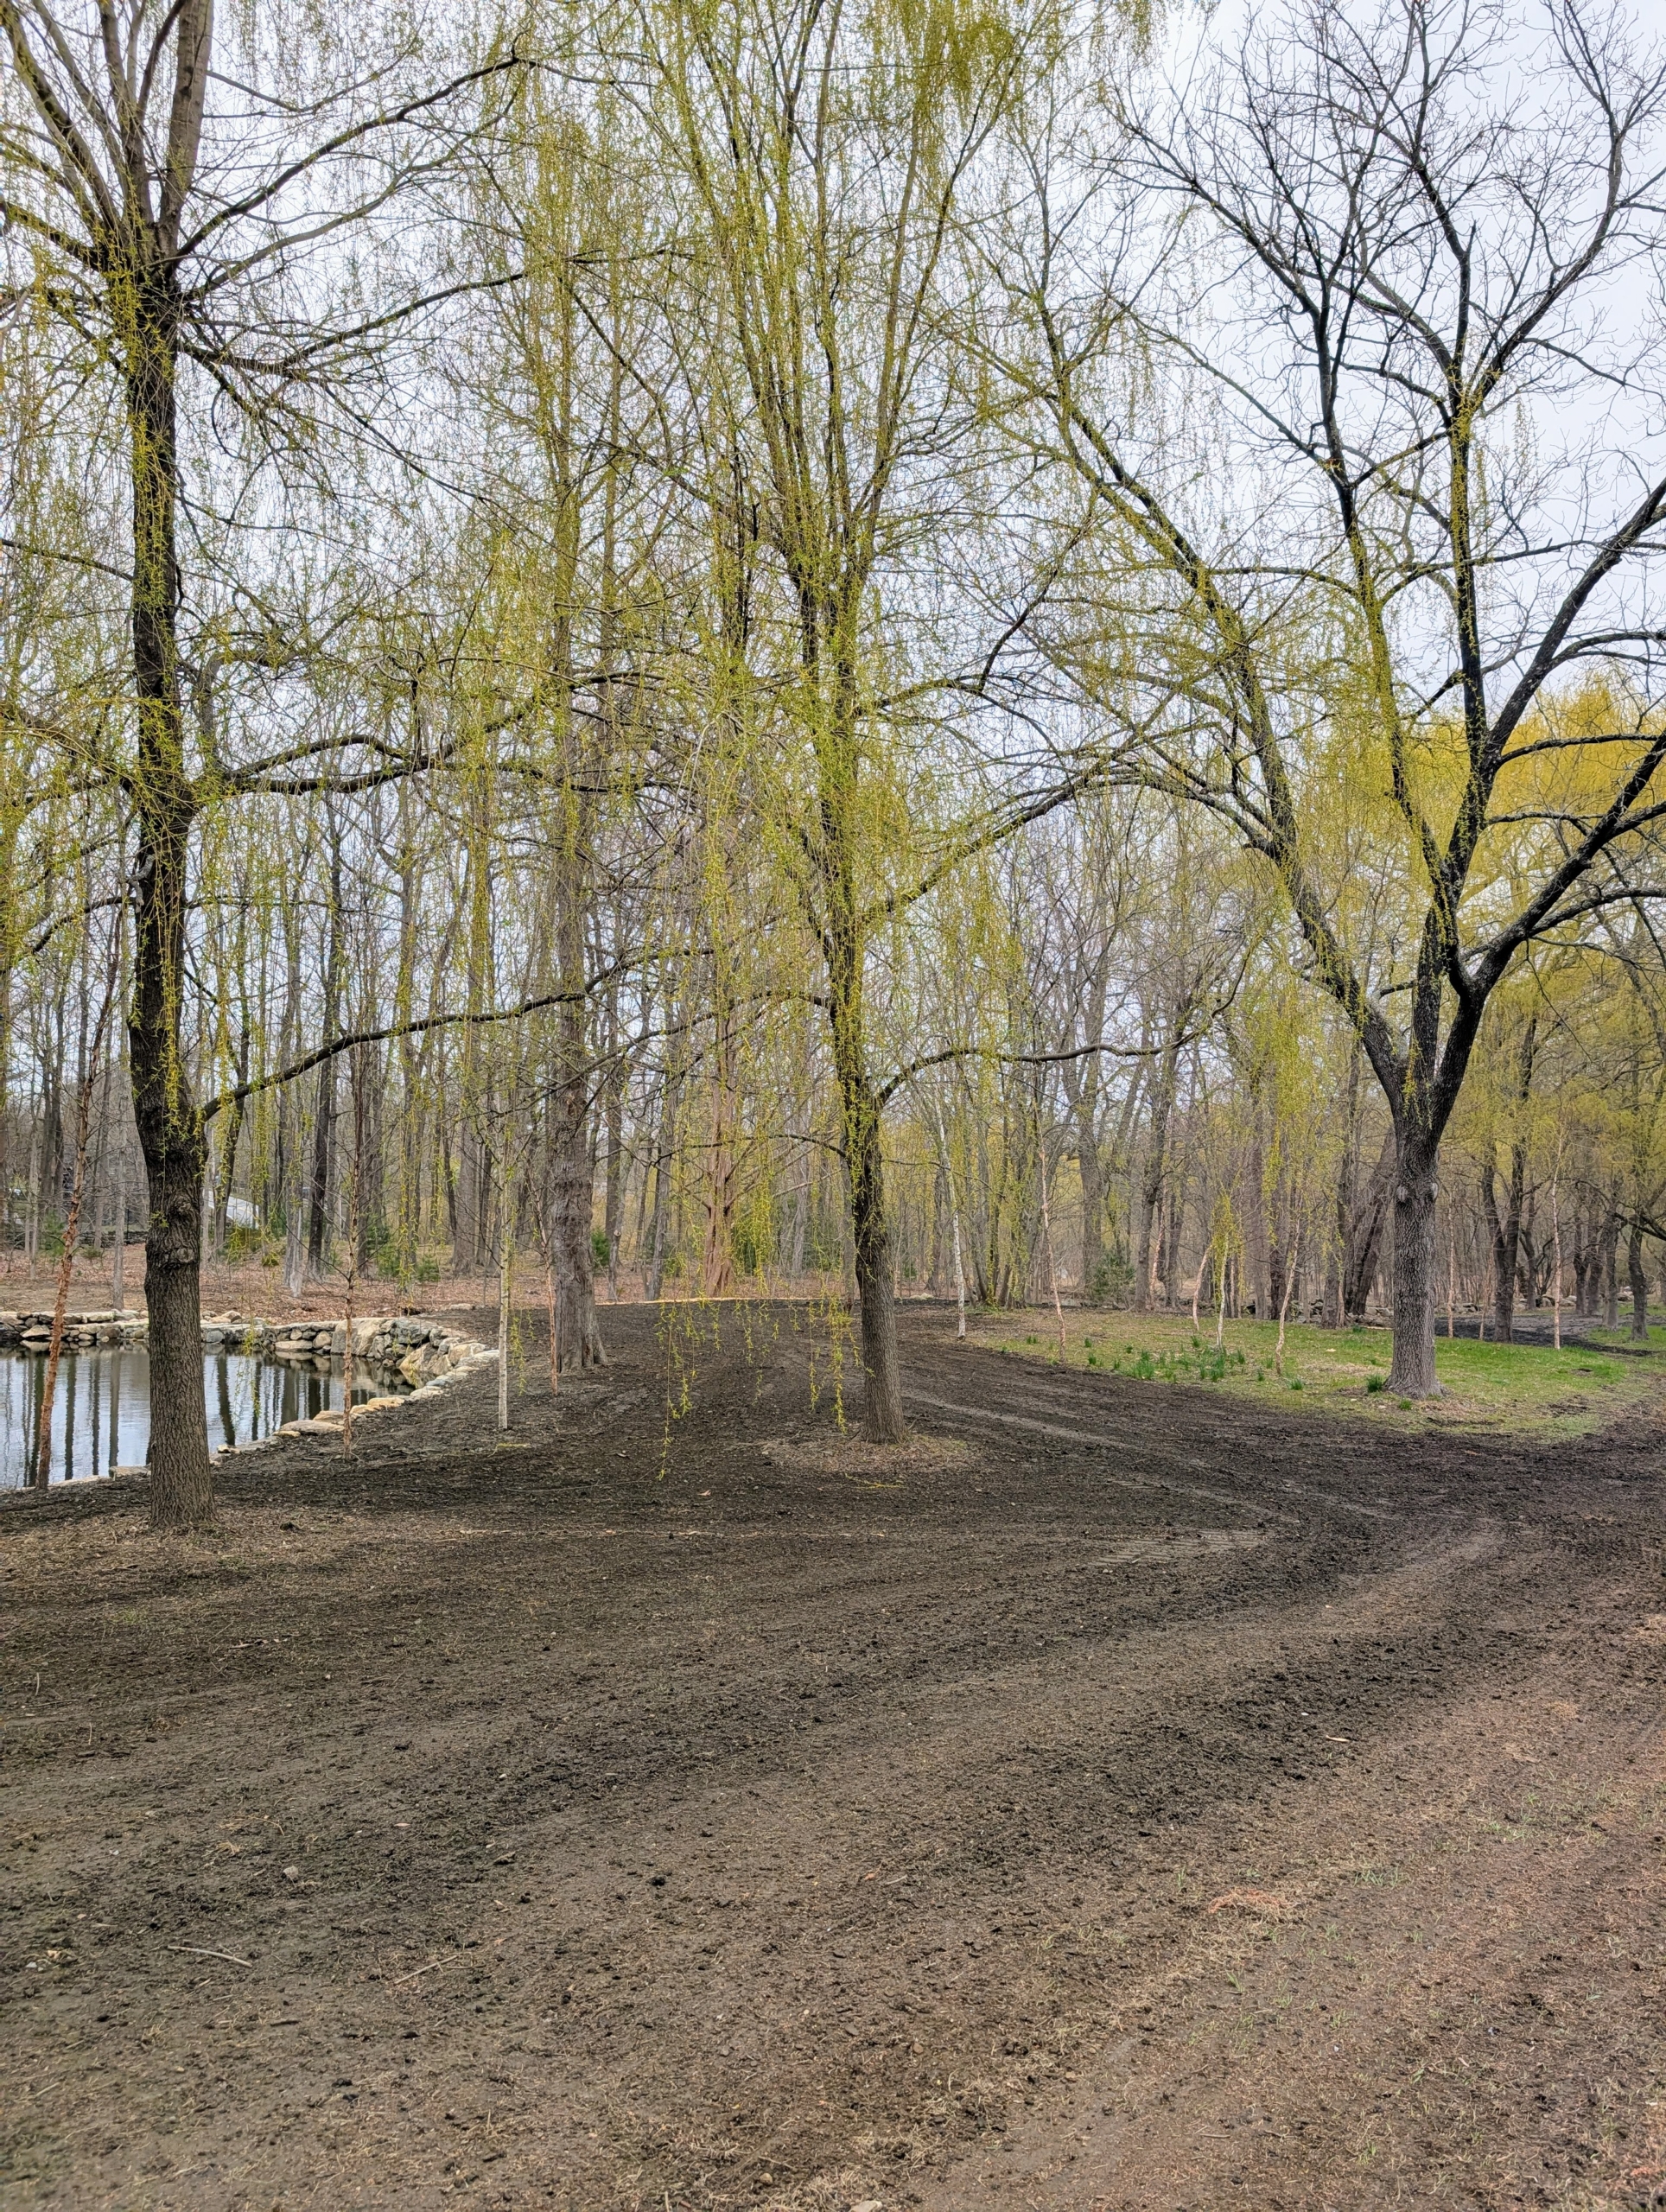
The surrounding landscape is also cleared and leveled.
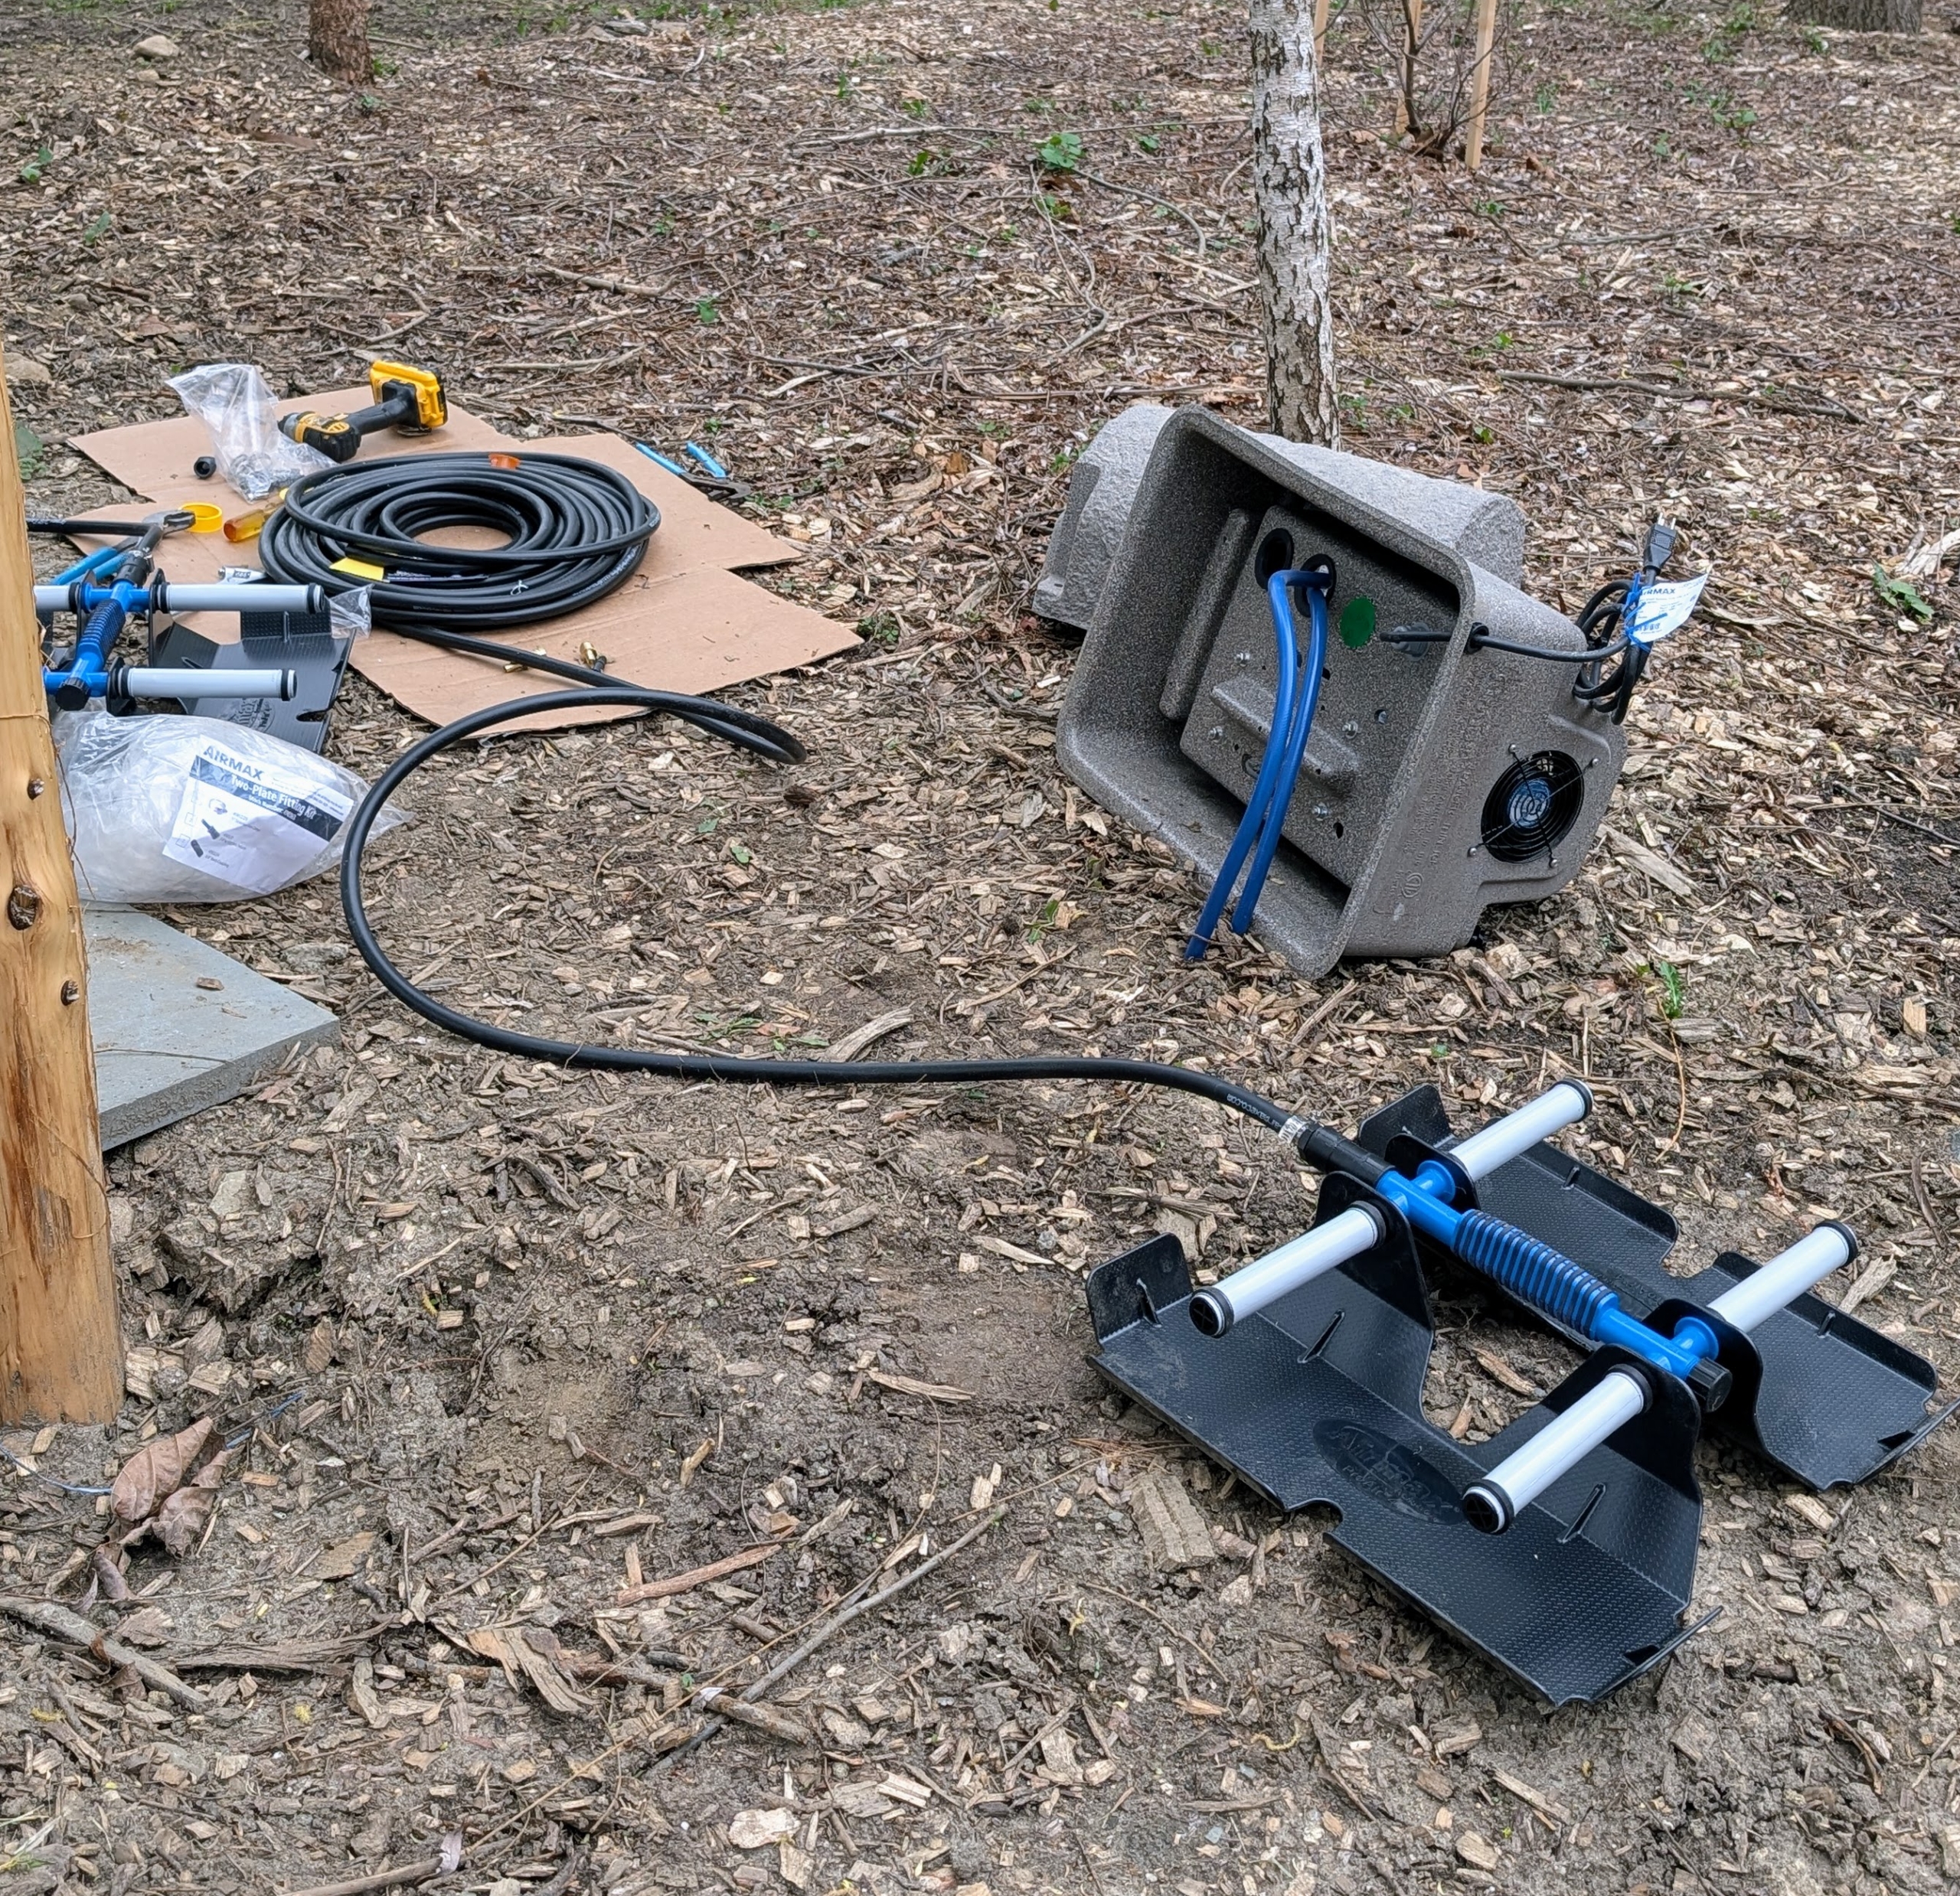
Next, an aerating system is installed to keep the water moving and to control mosquitoes, minimize algae, and increase oxygen for pond wildlife.
This is a rocking piston compressor that creates the air pressure needed for oxygenating the pond.
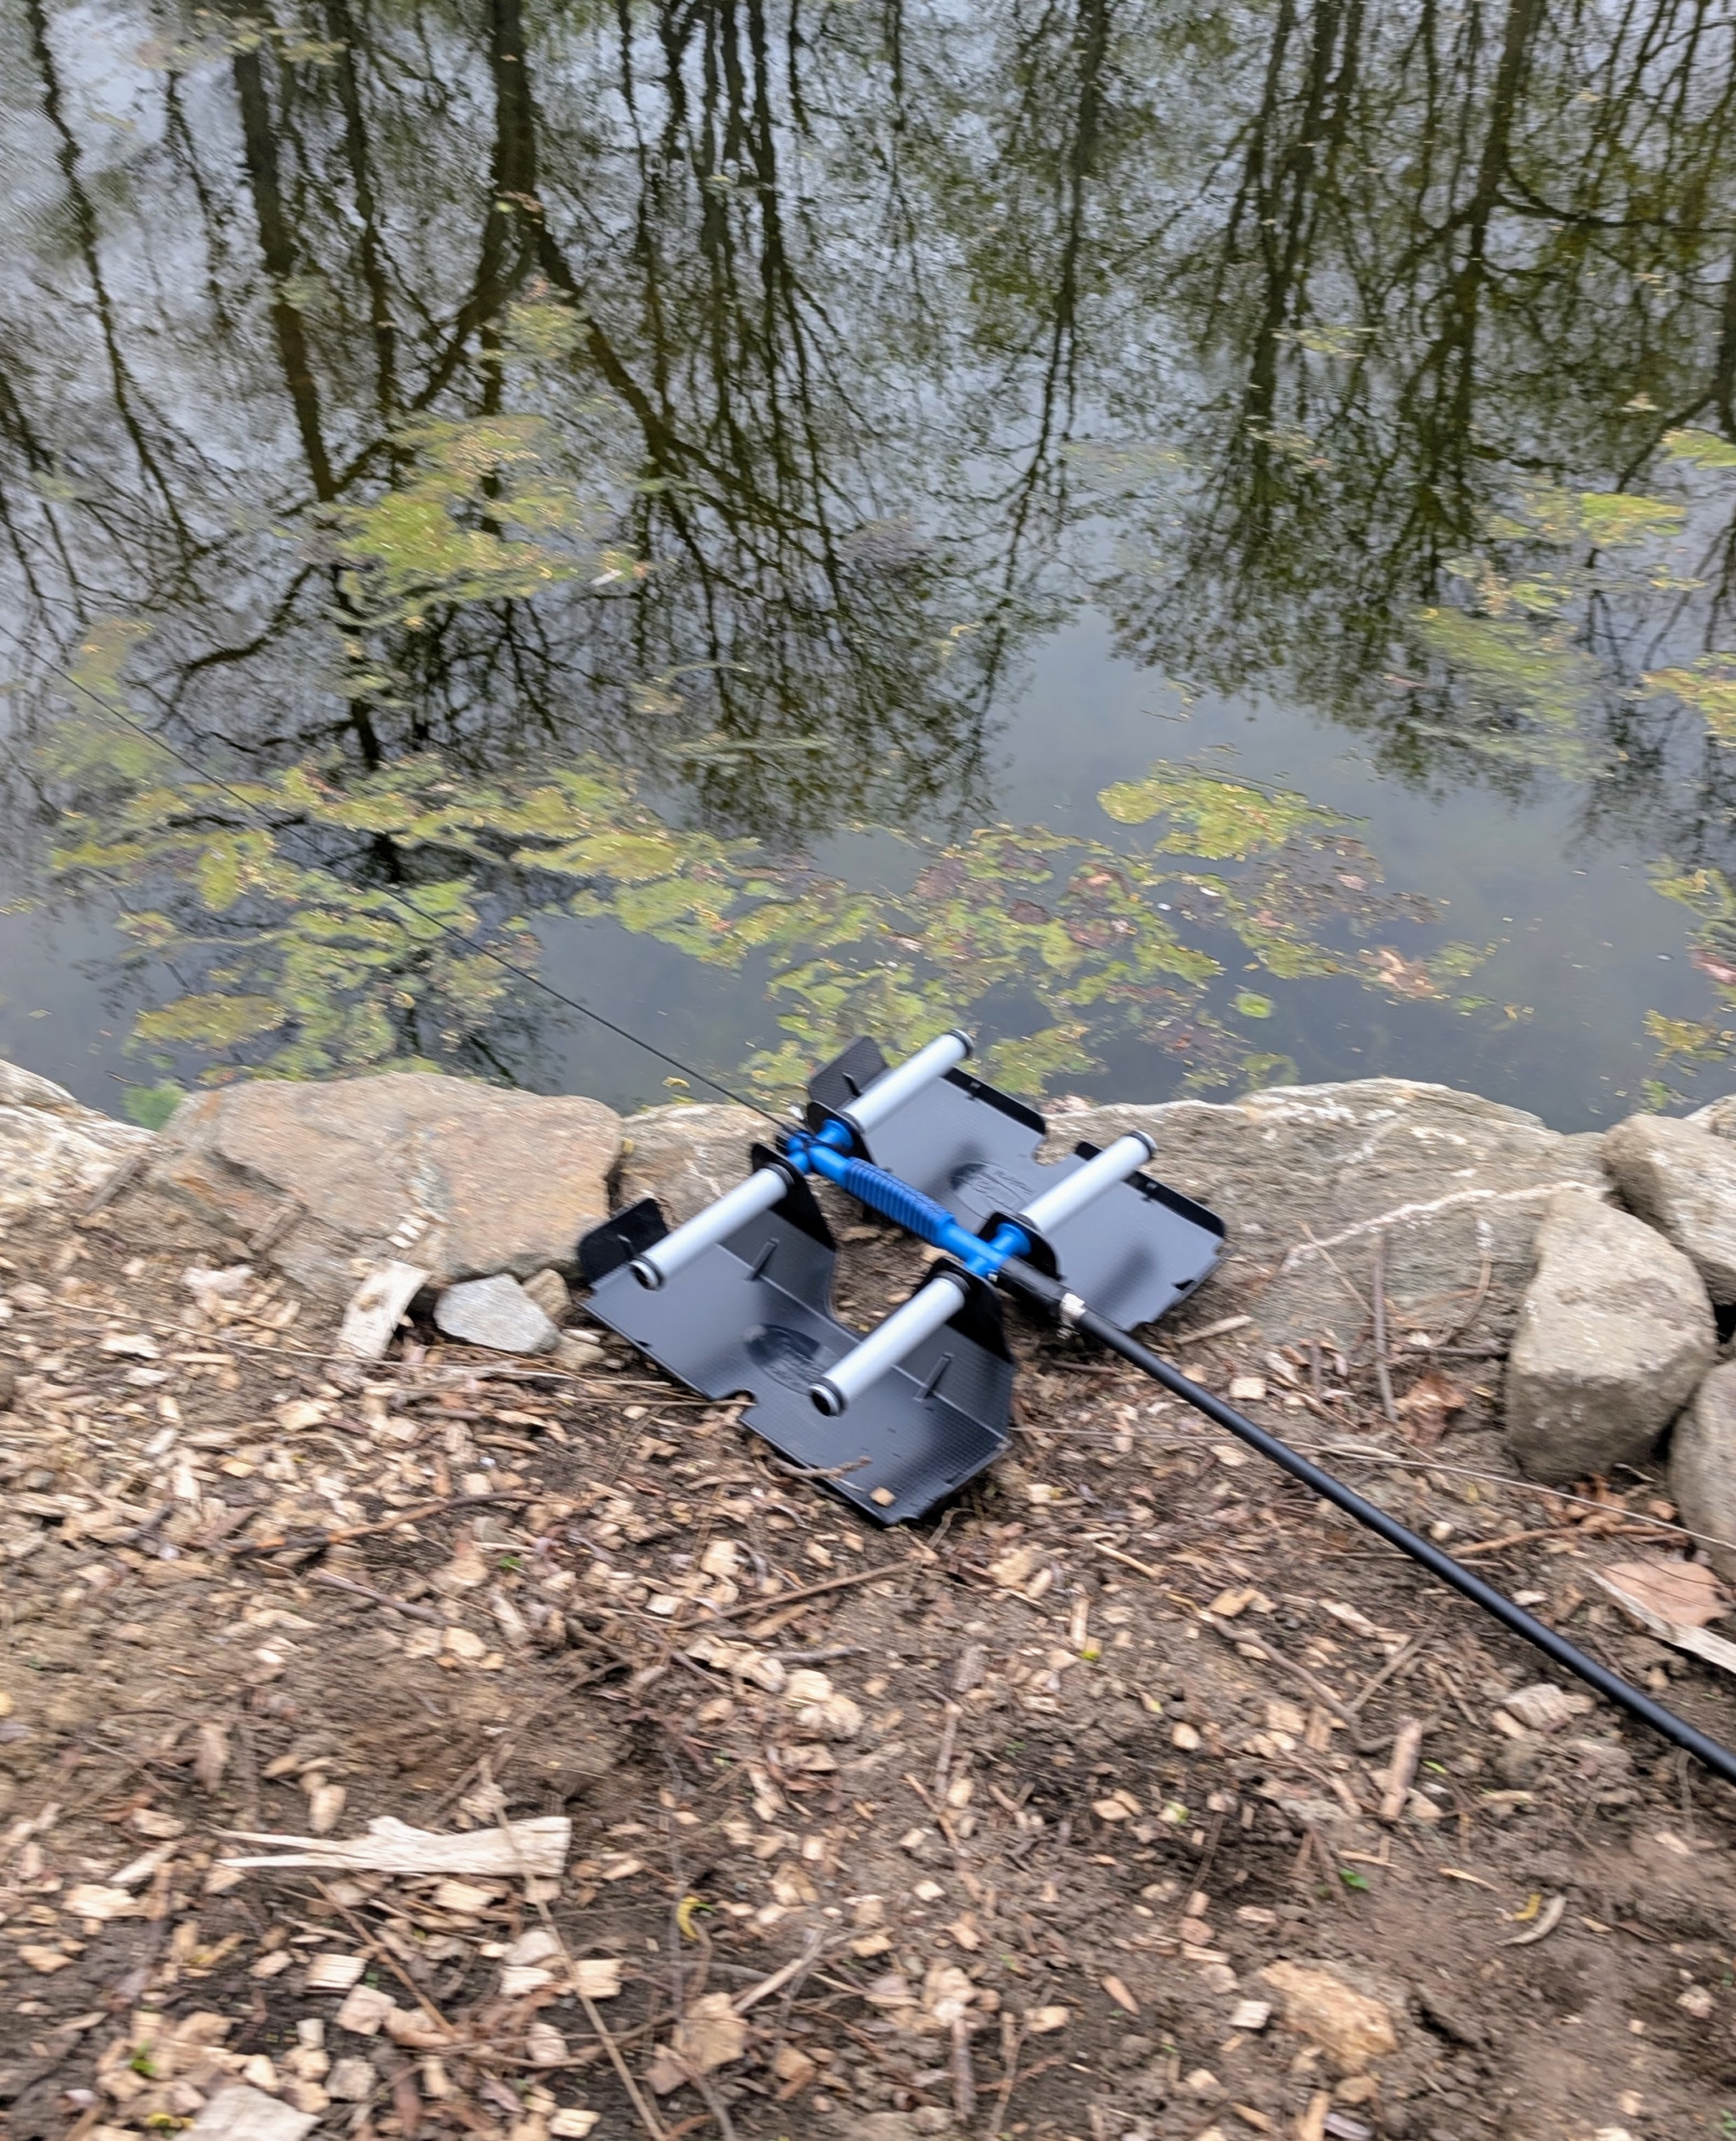
And this is a weighted diffuser plate which is installed under water to create the air bubbles.
One can see the bubblers working – these provide continuous operation to maintain proper circulation through the water.
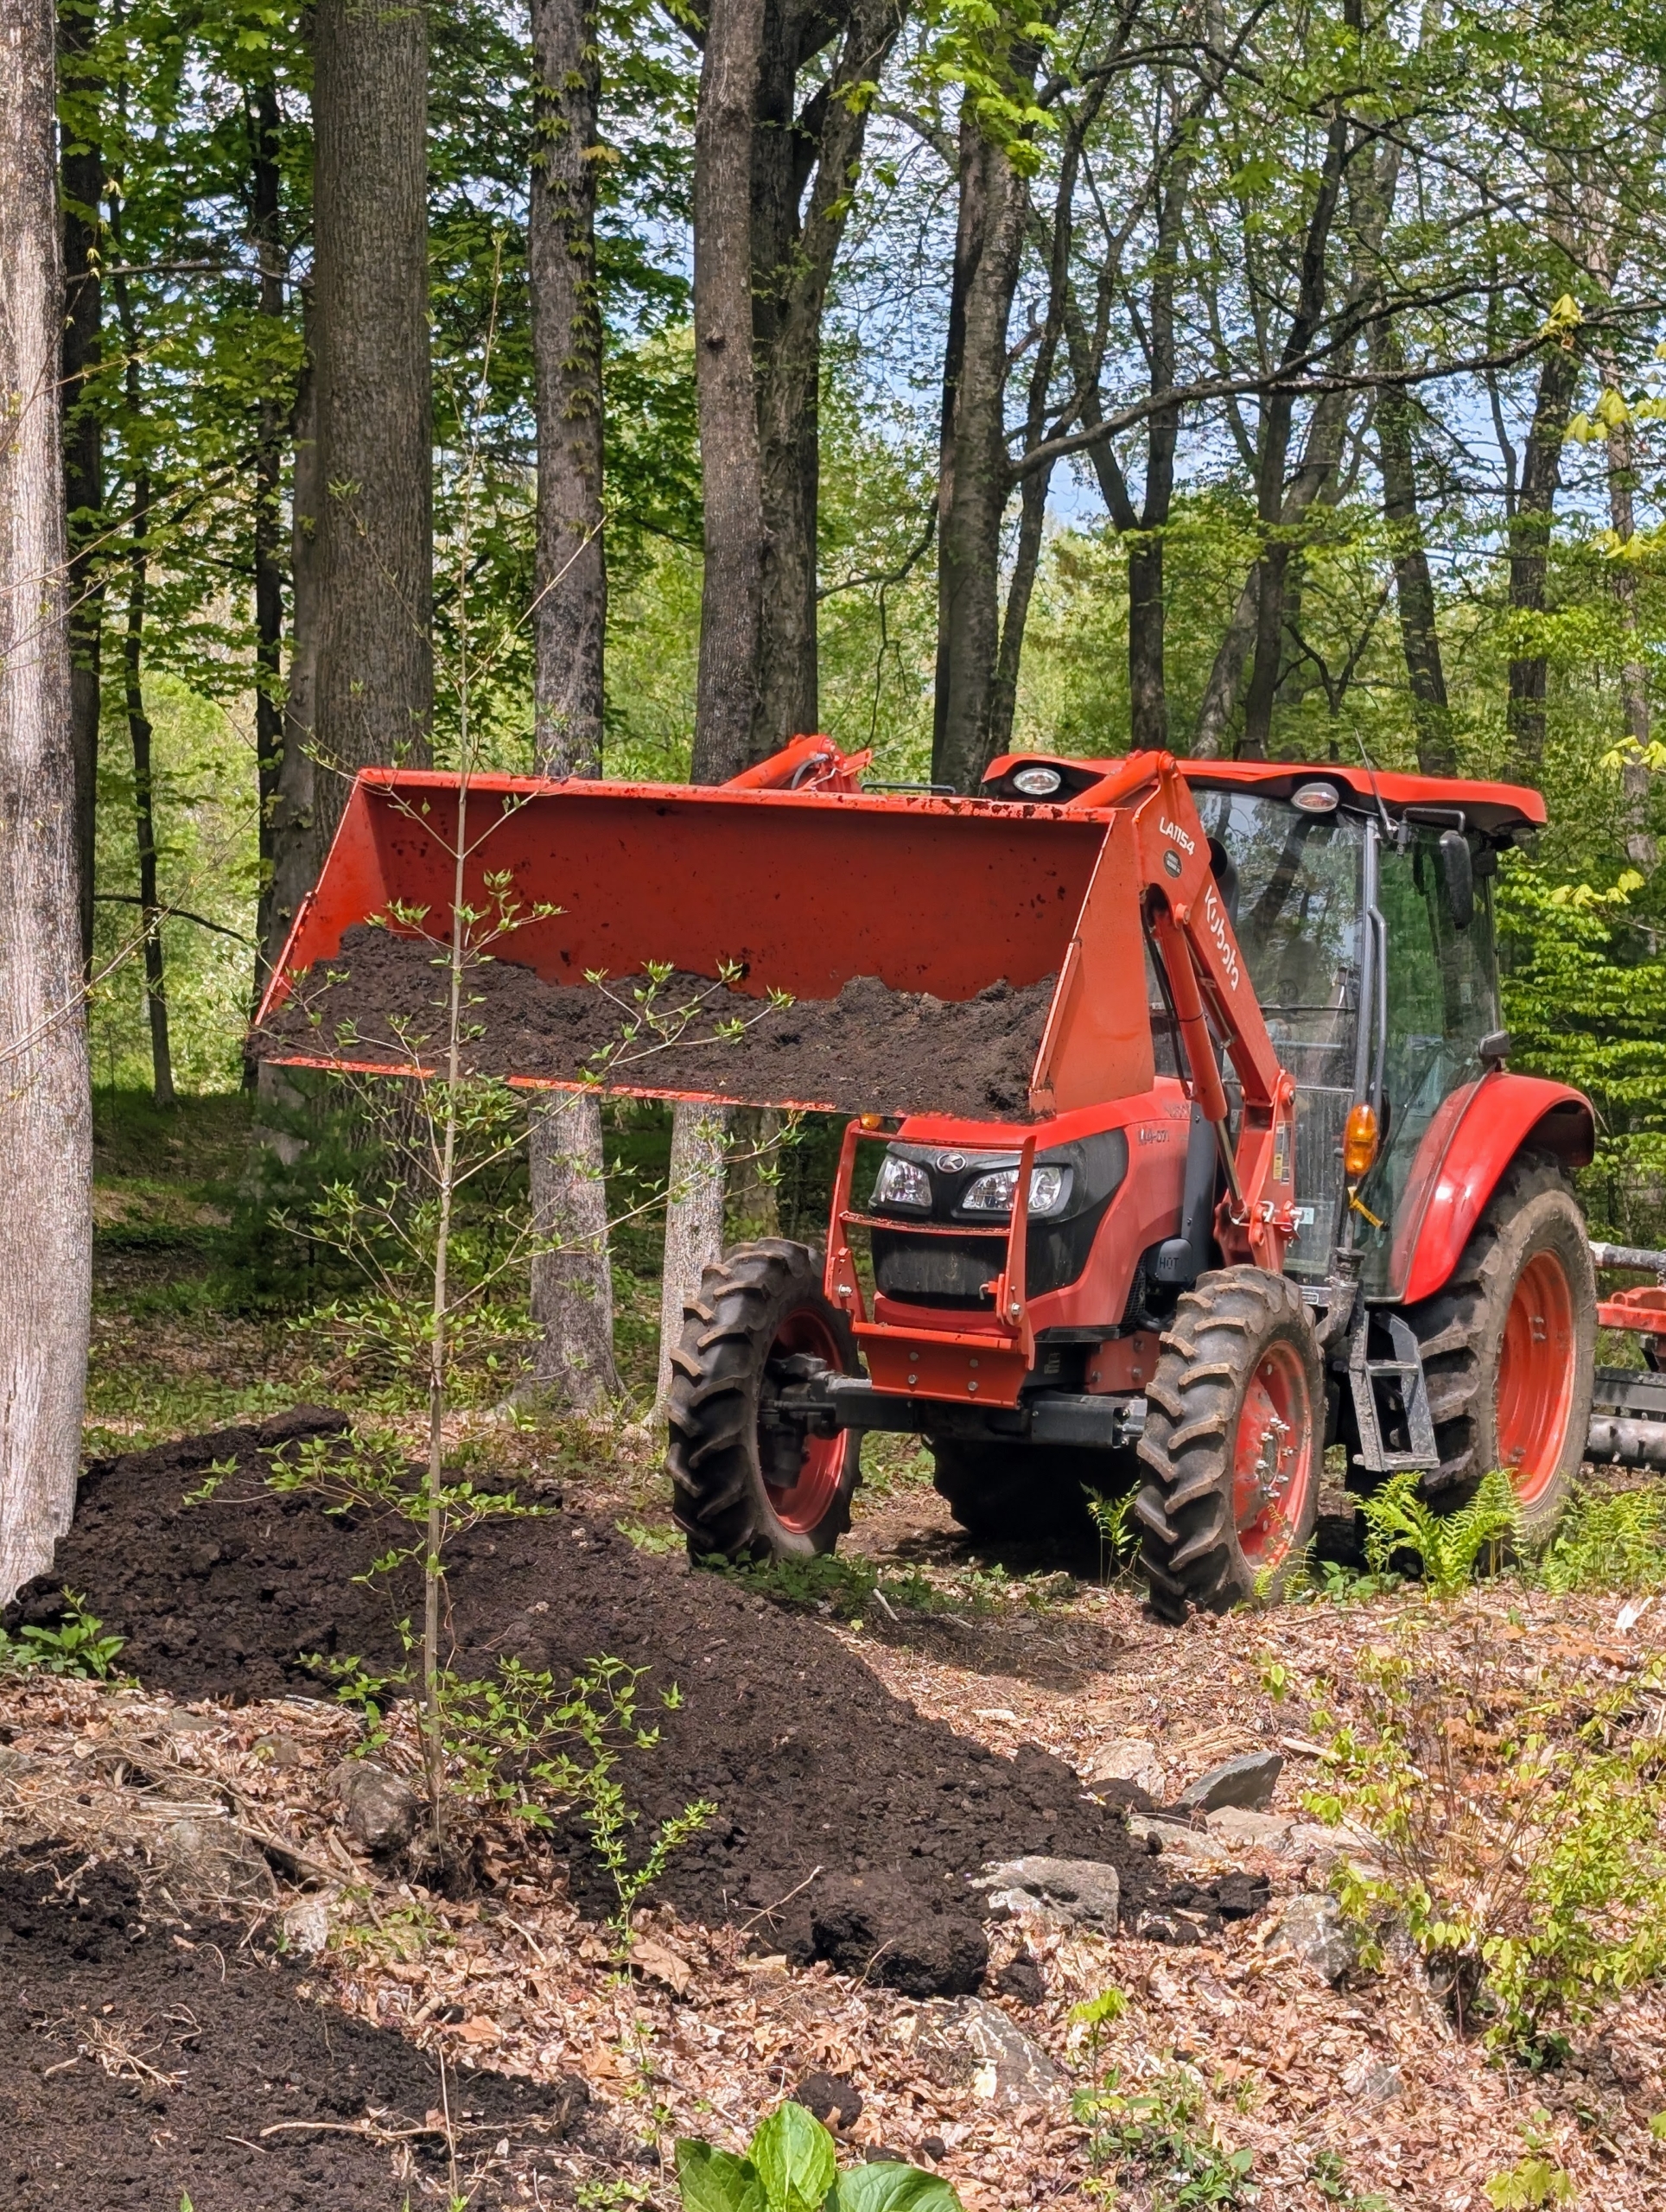
Chhiring transports compost to the planting areas using our trusted Kubota tractor and loader. I am so fortunate to be able to make my own nutrient rich compost here at the farm.
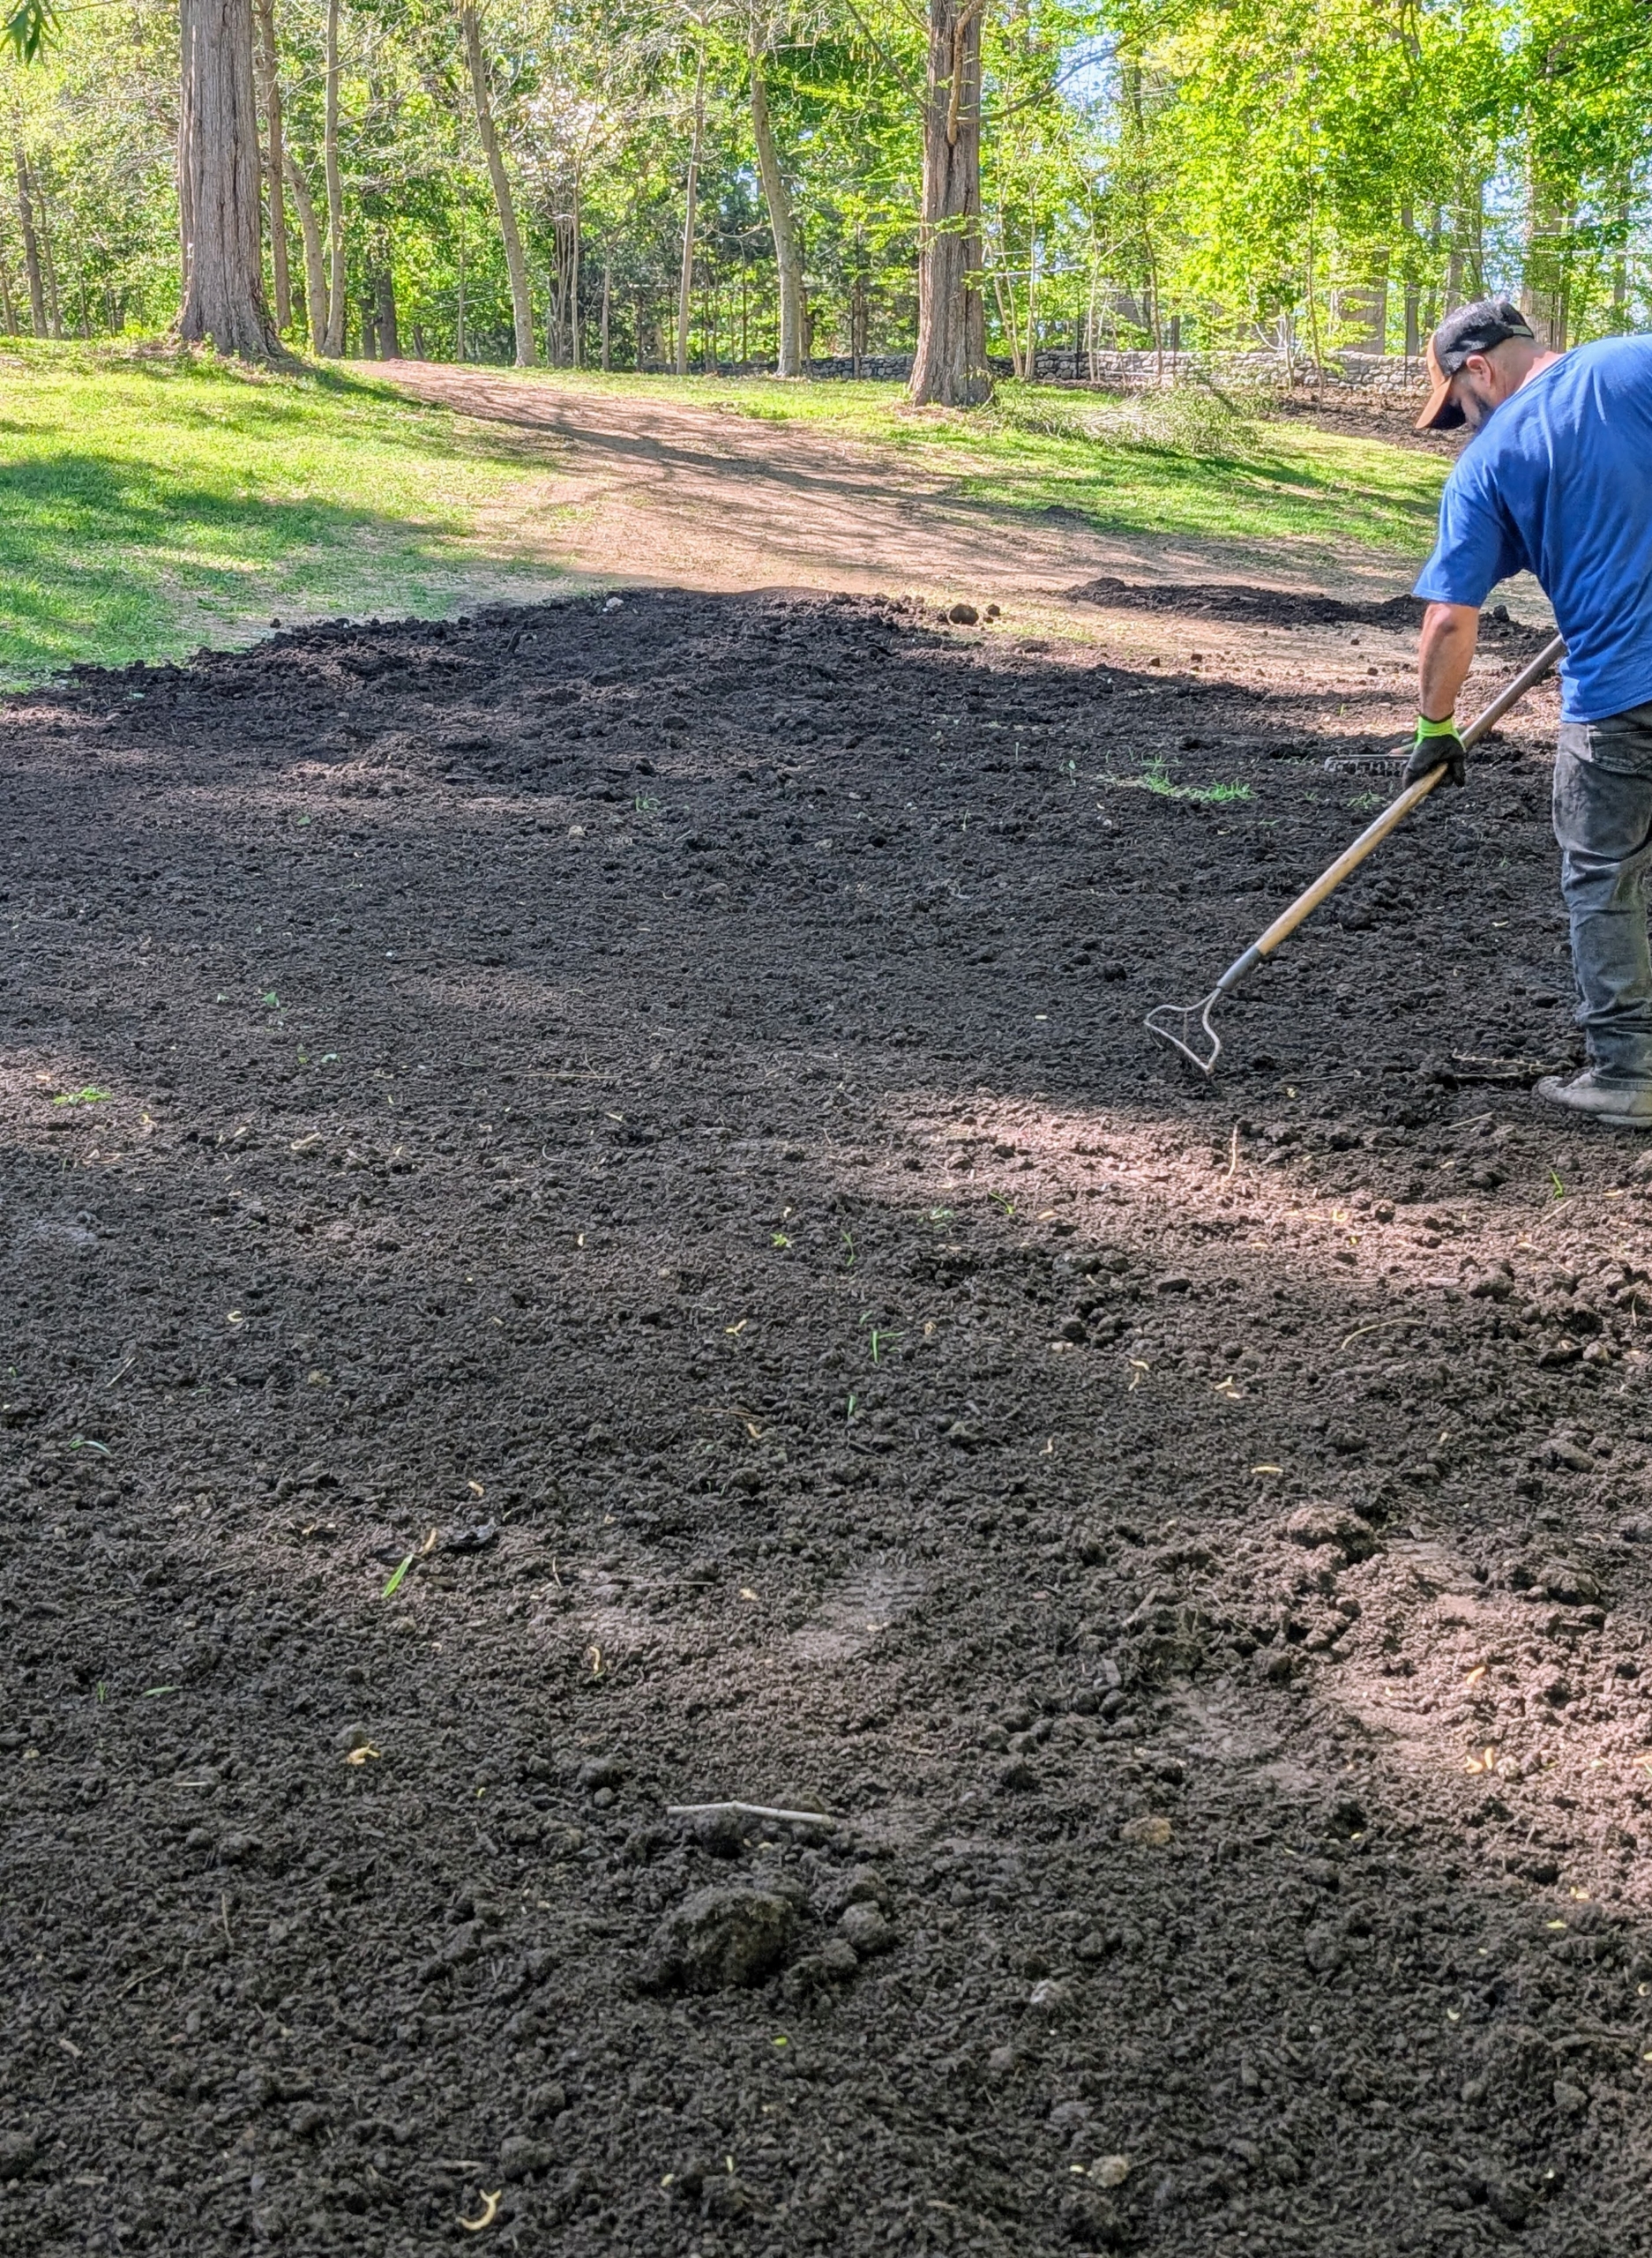
Using a hard rake, Adan spreads a layer of compost in the areas to be planted.
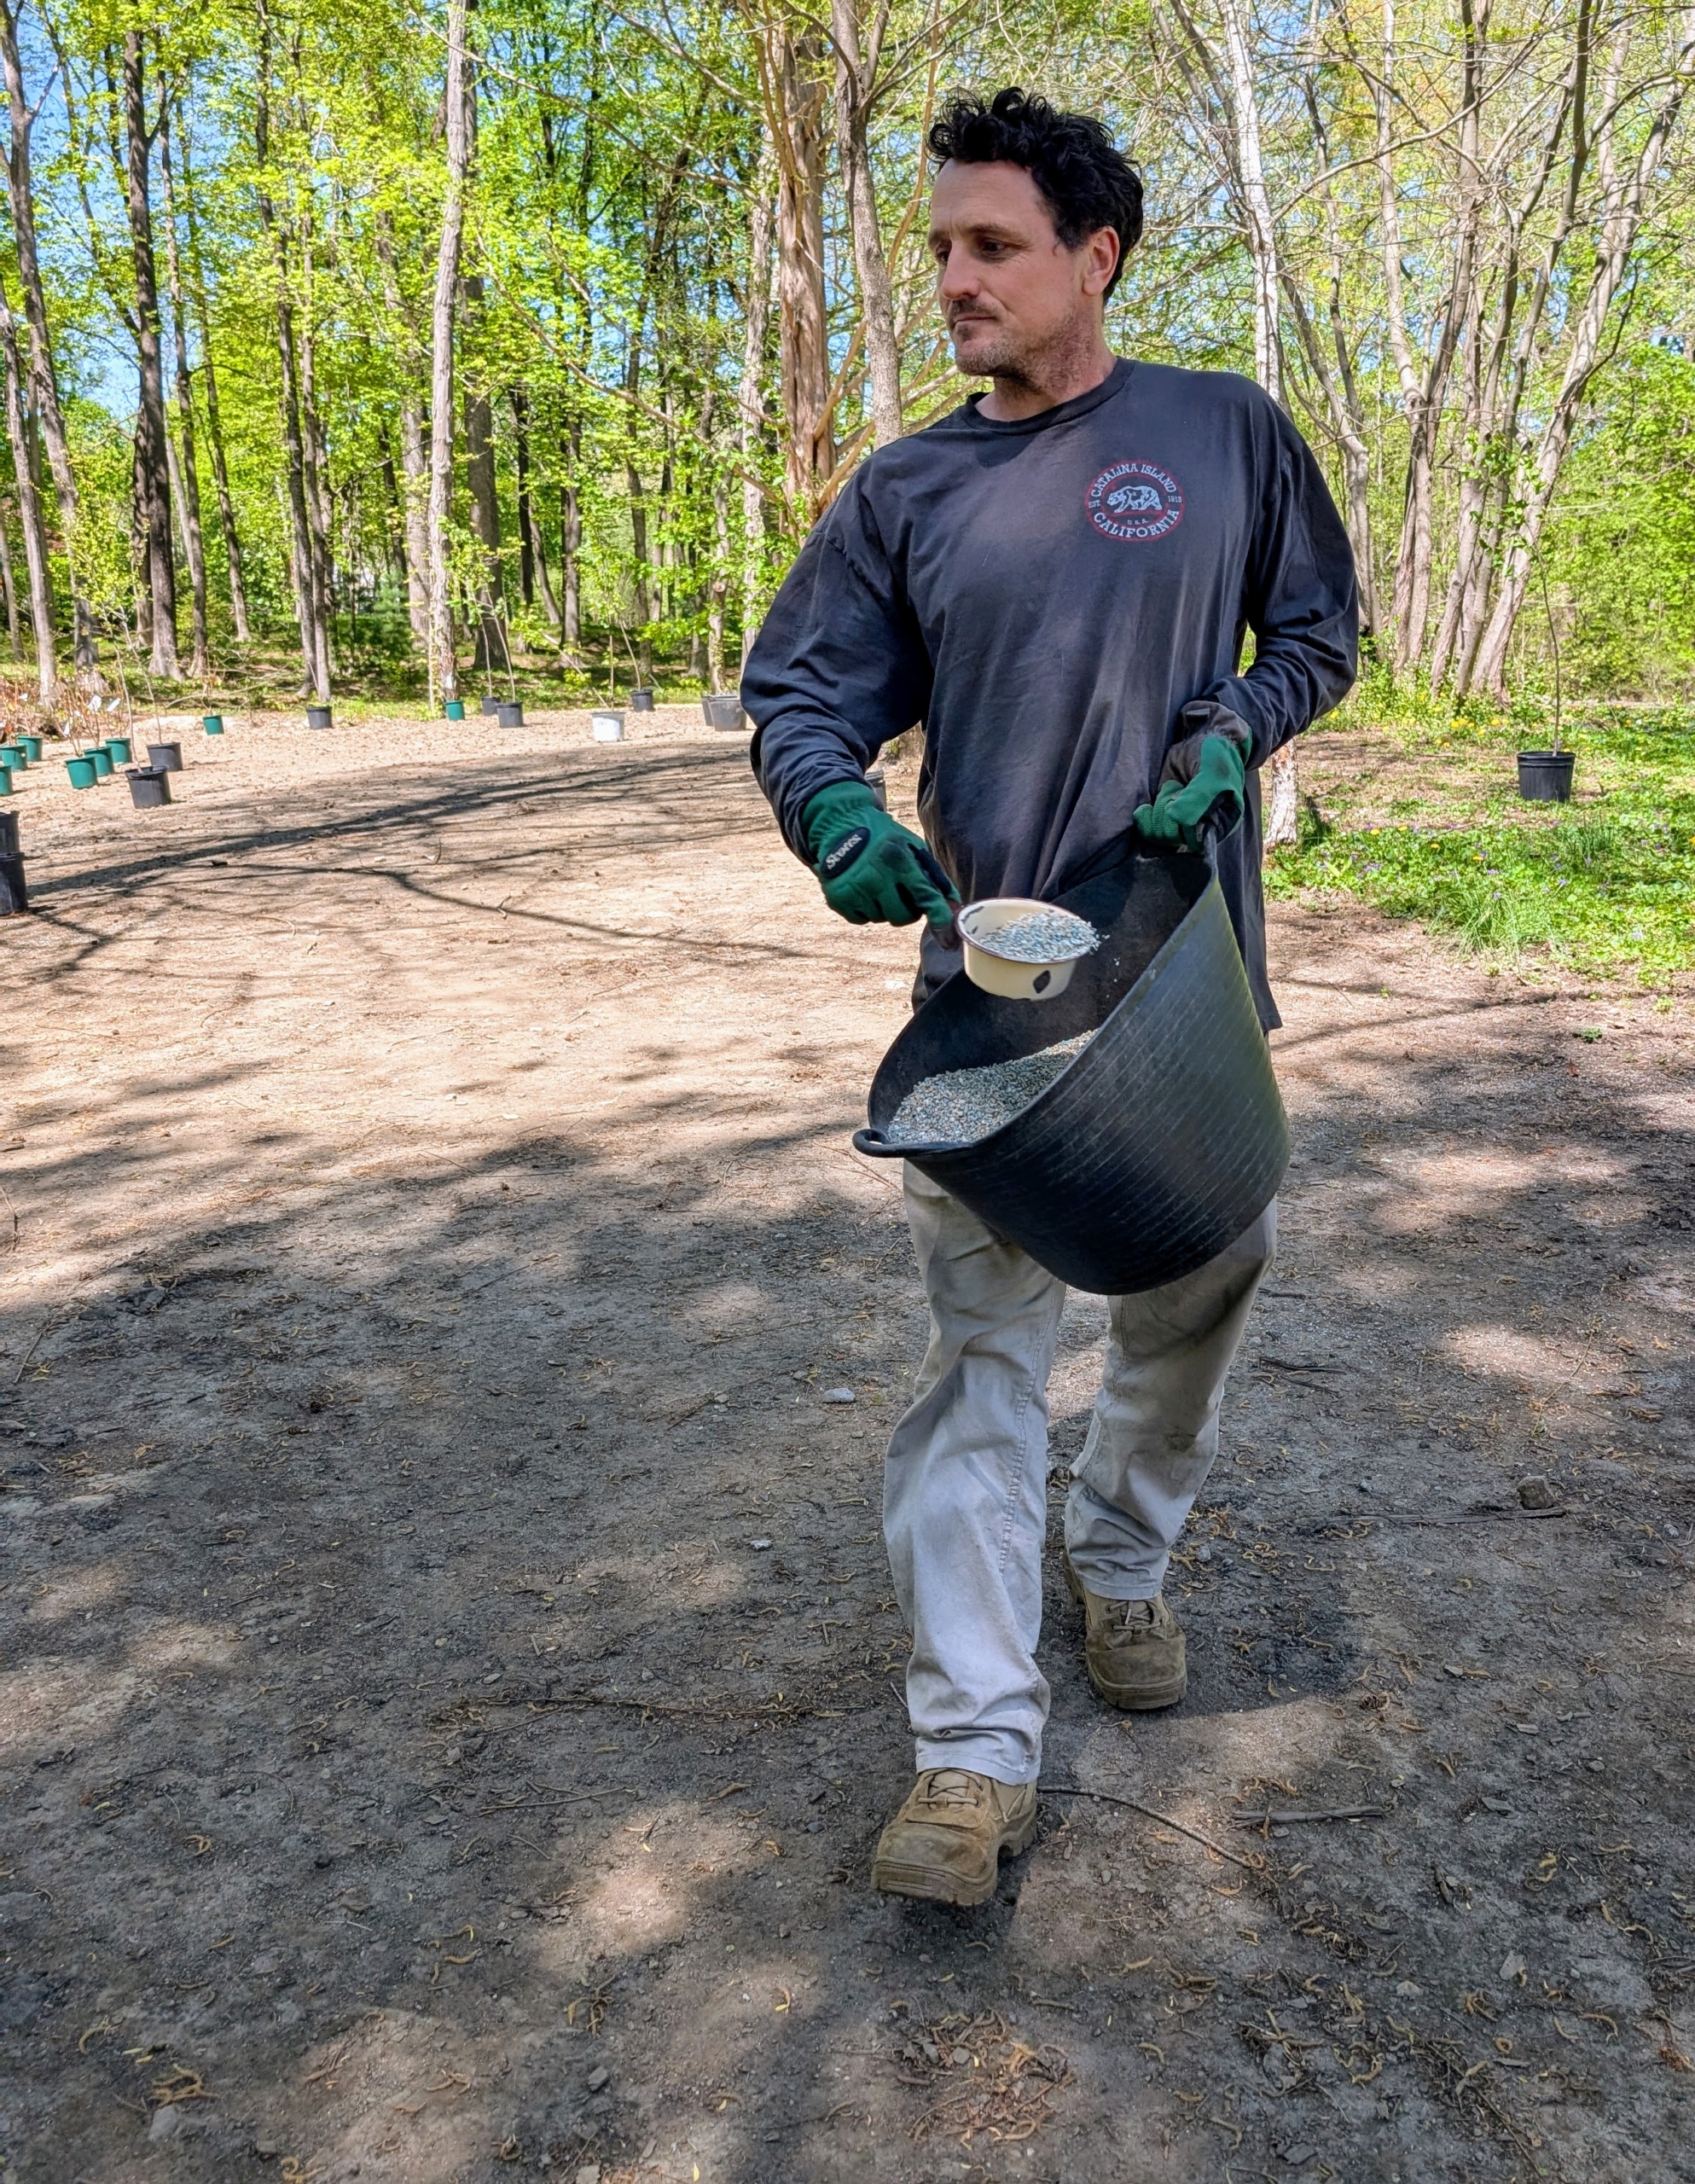
Ryan sprinkles fertilizer all around the planting area.
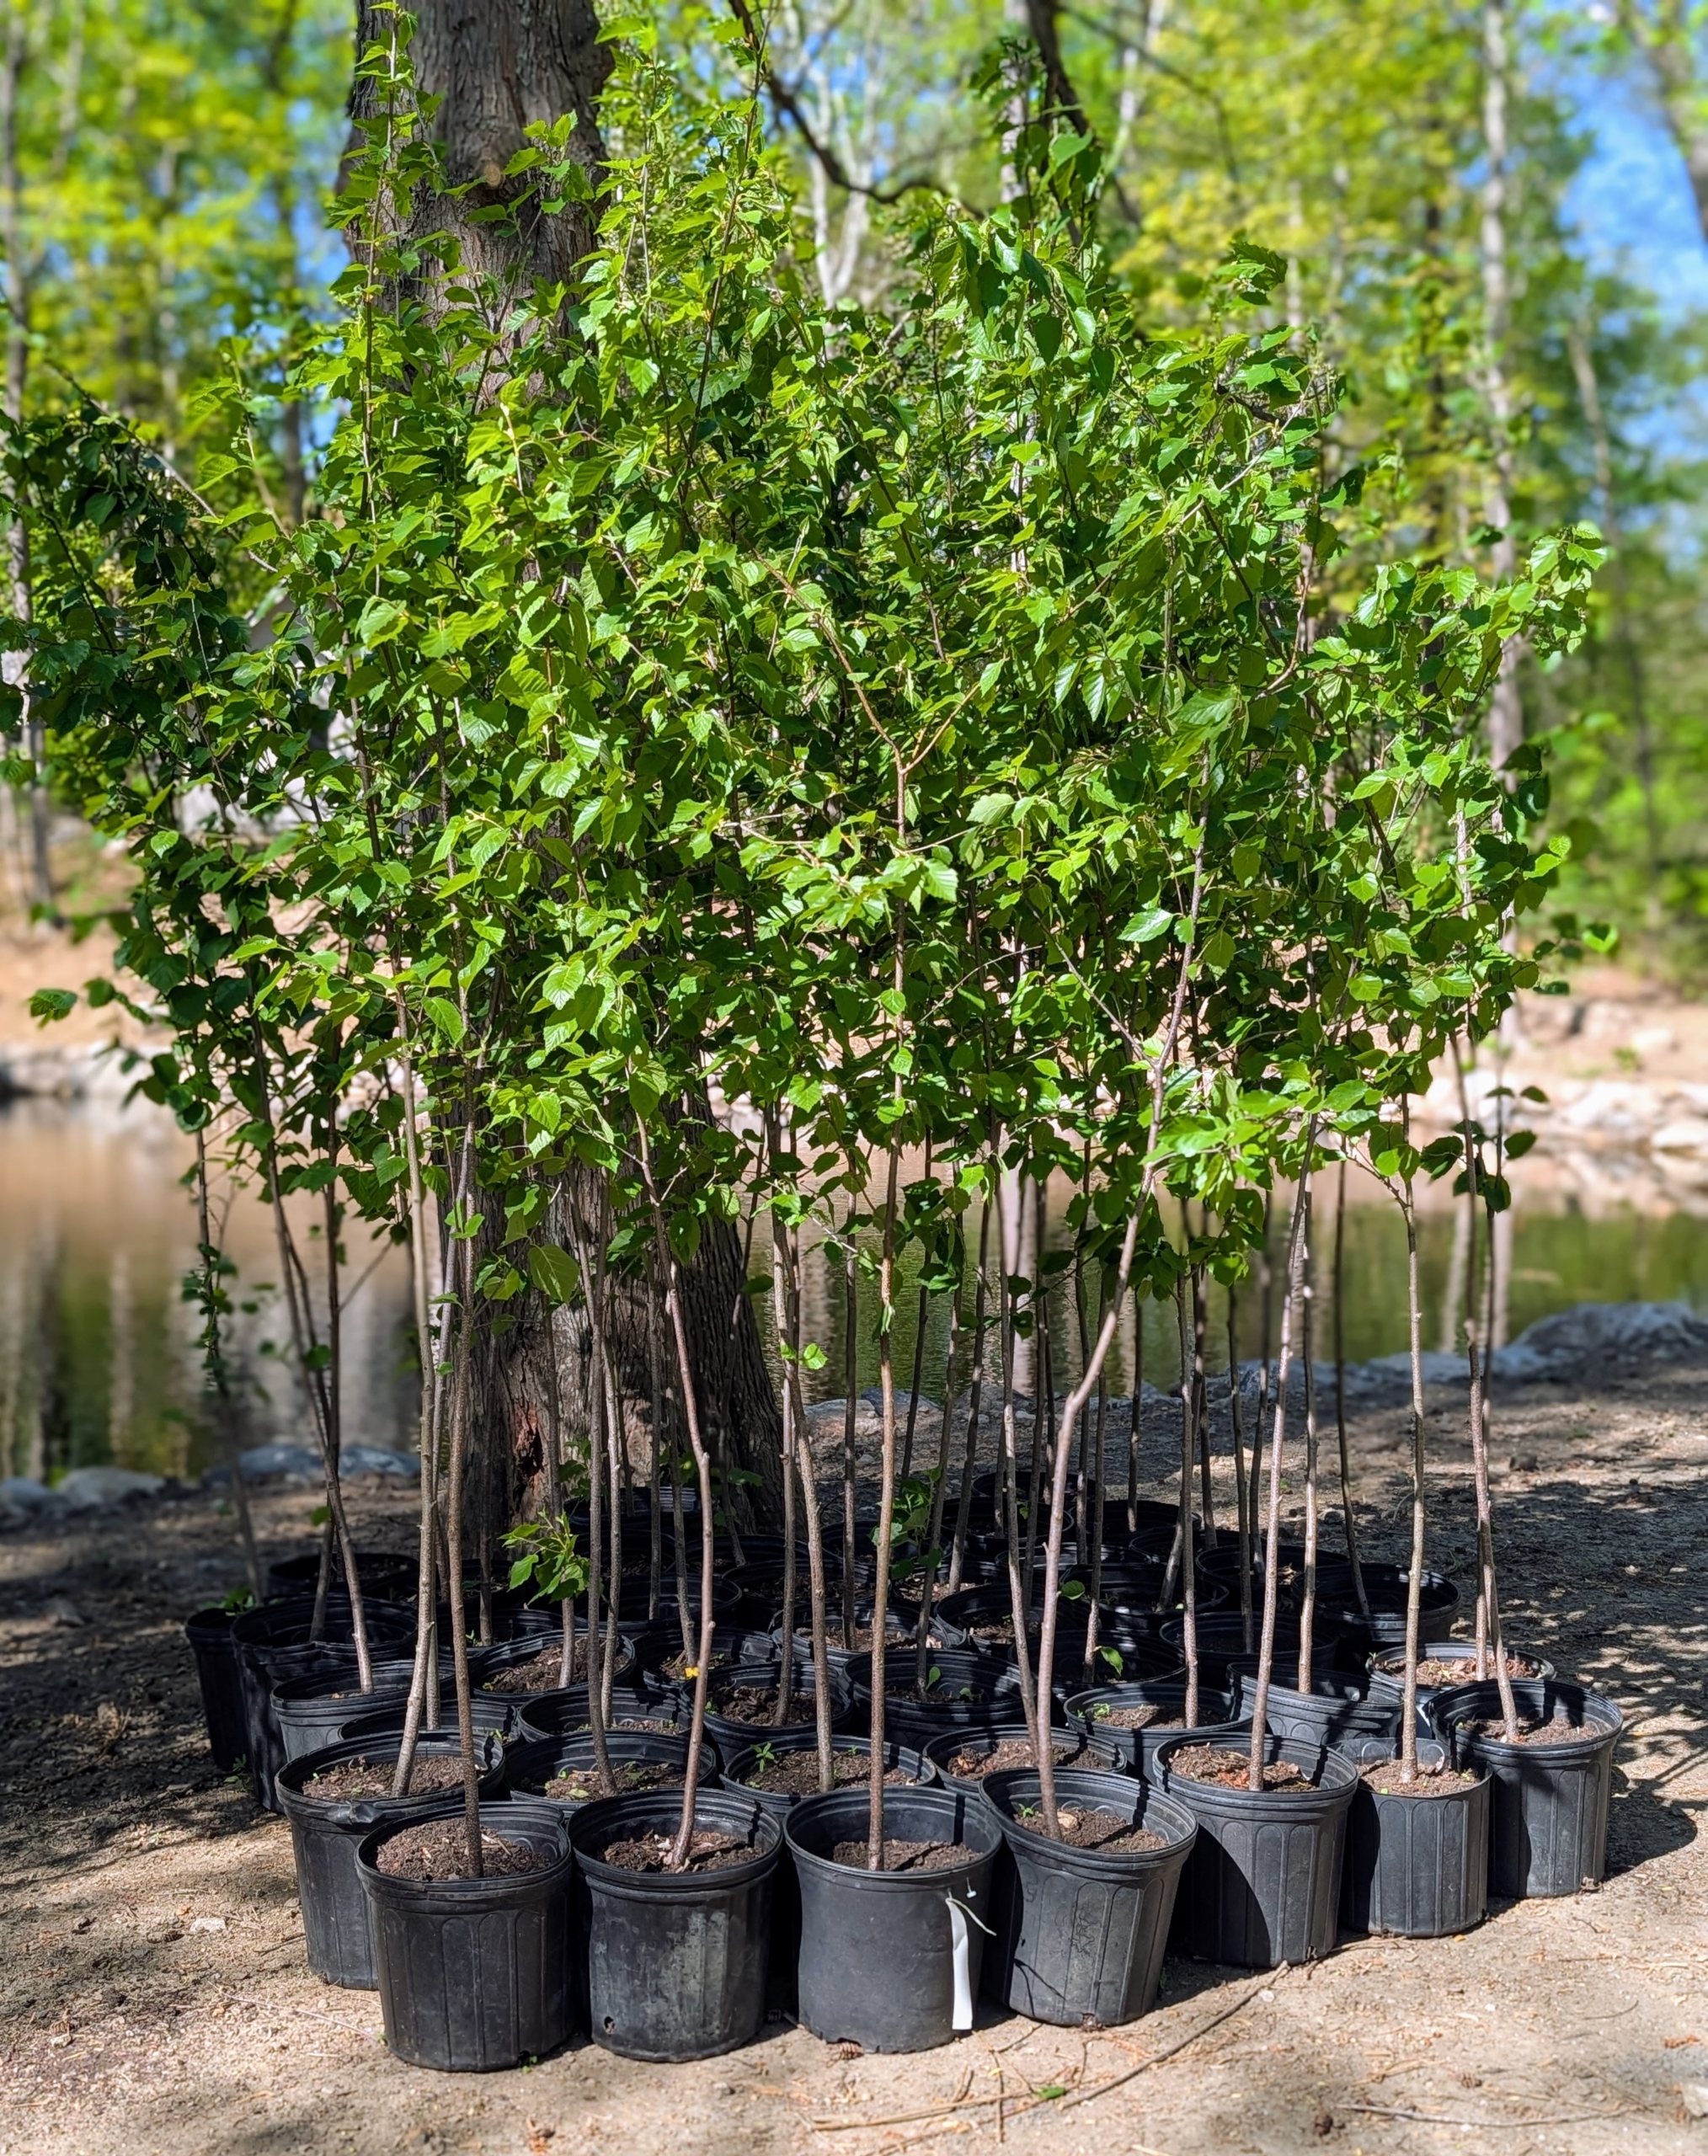
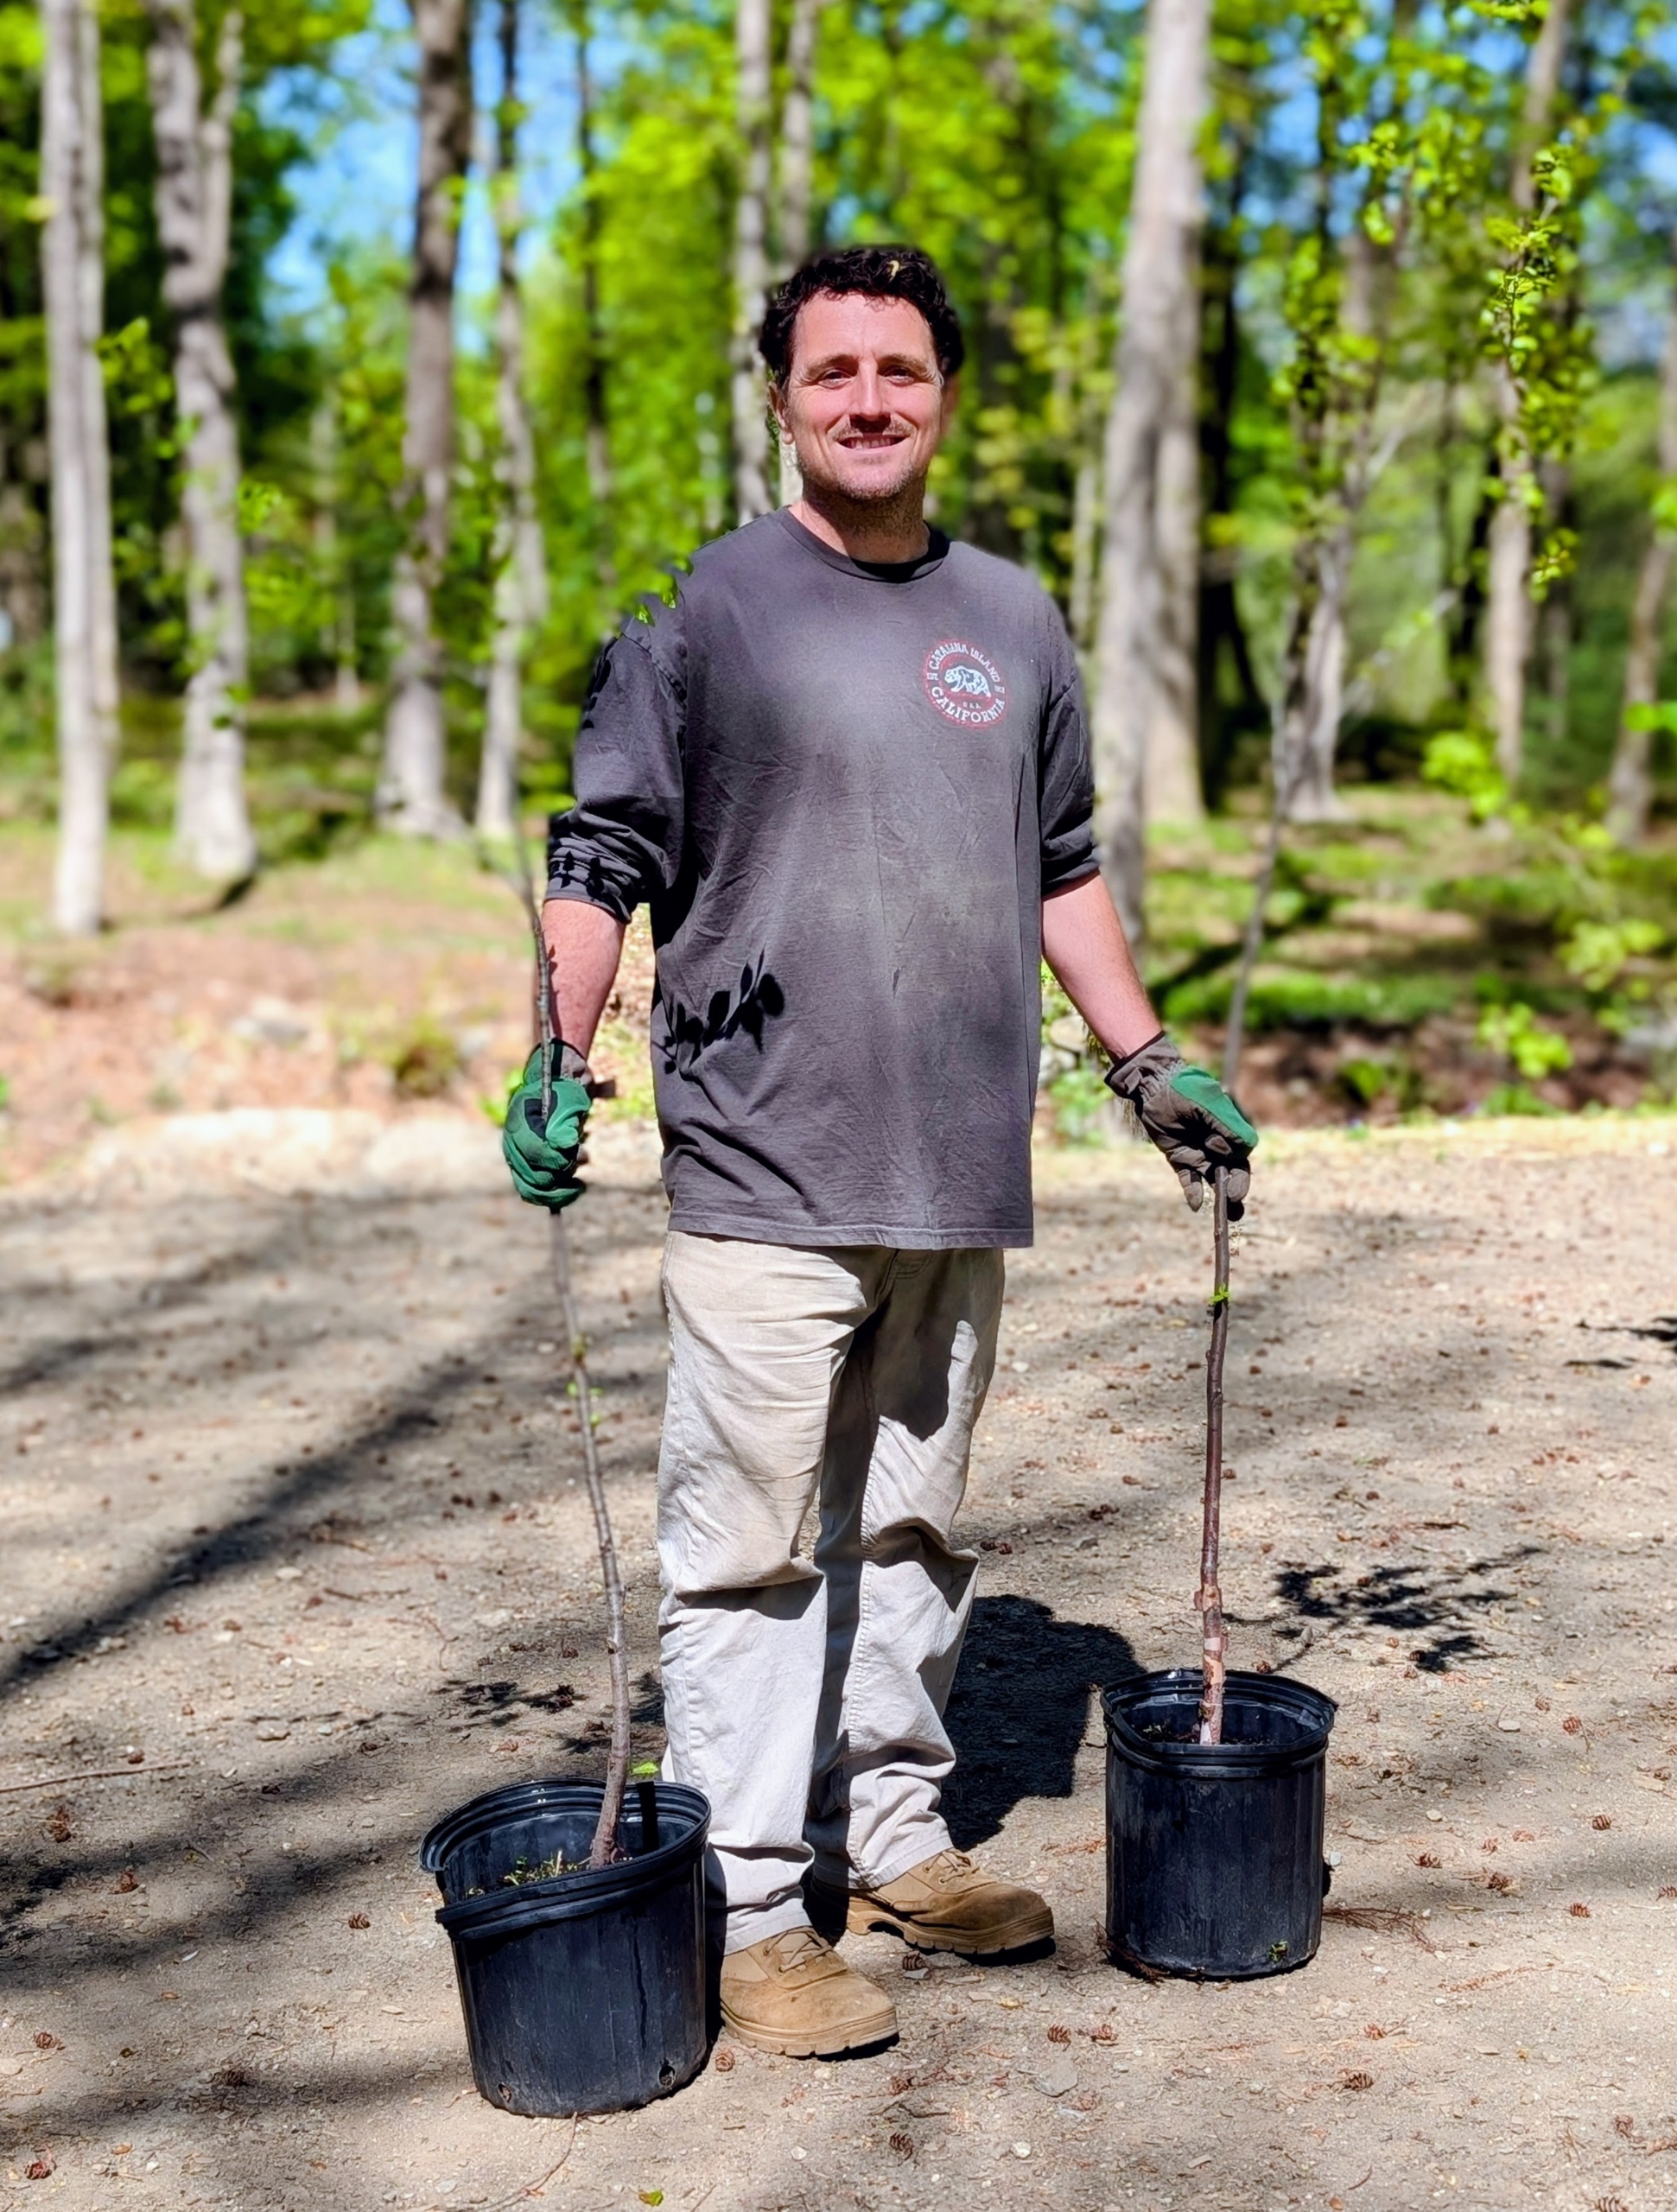
These birch trees are now about six to seven feet tall, but they started out as bare-roots about a foot in height. I prefer to nurture bare roots in pots before they are planted in more permanent locations. And one can see why my method works – these trees are so beautiful and lush.
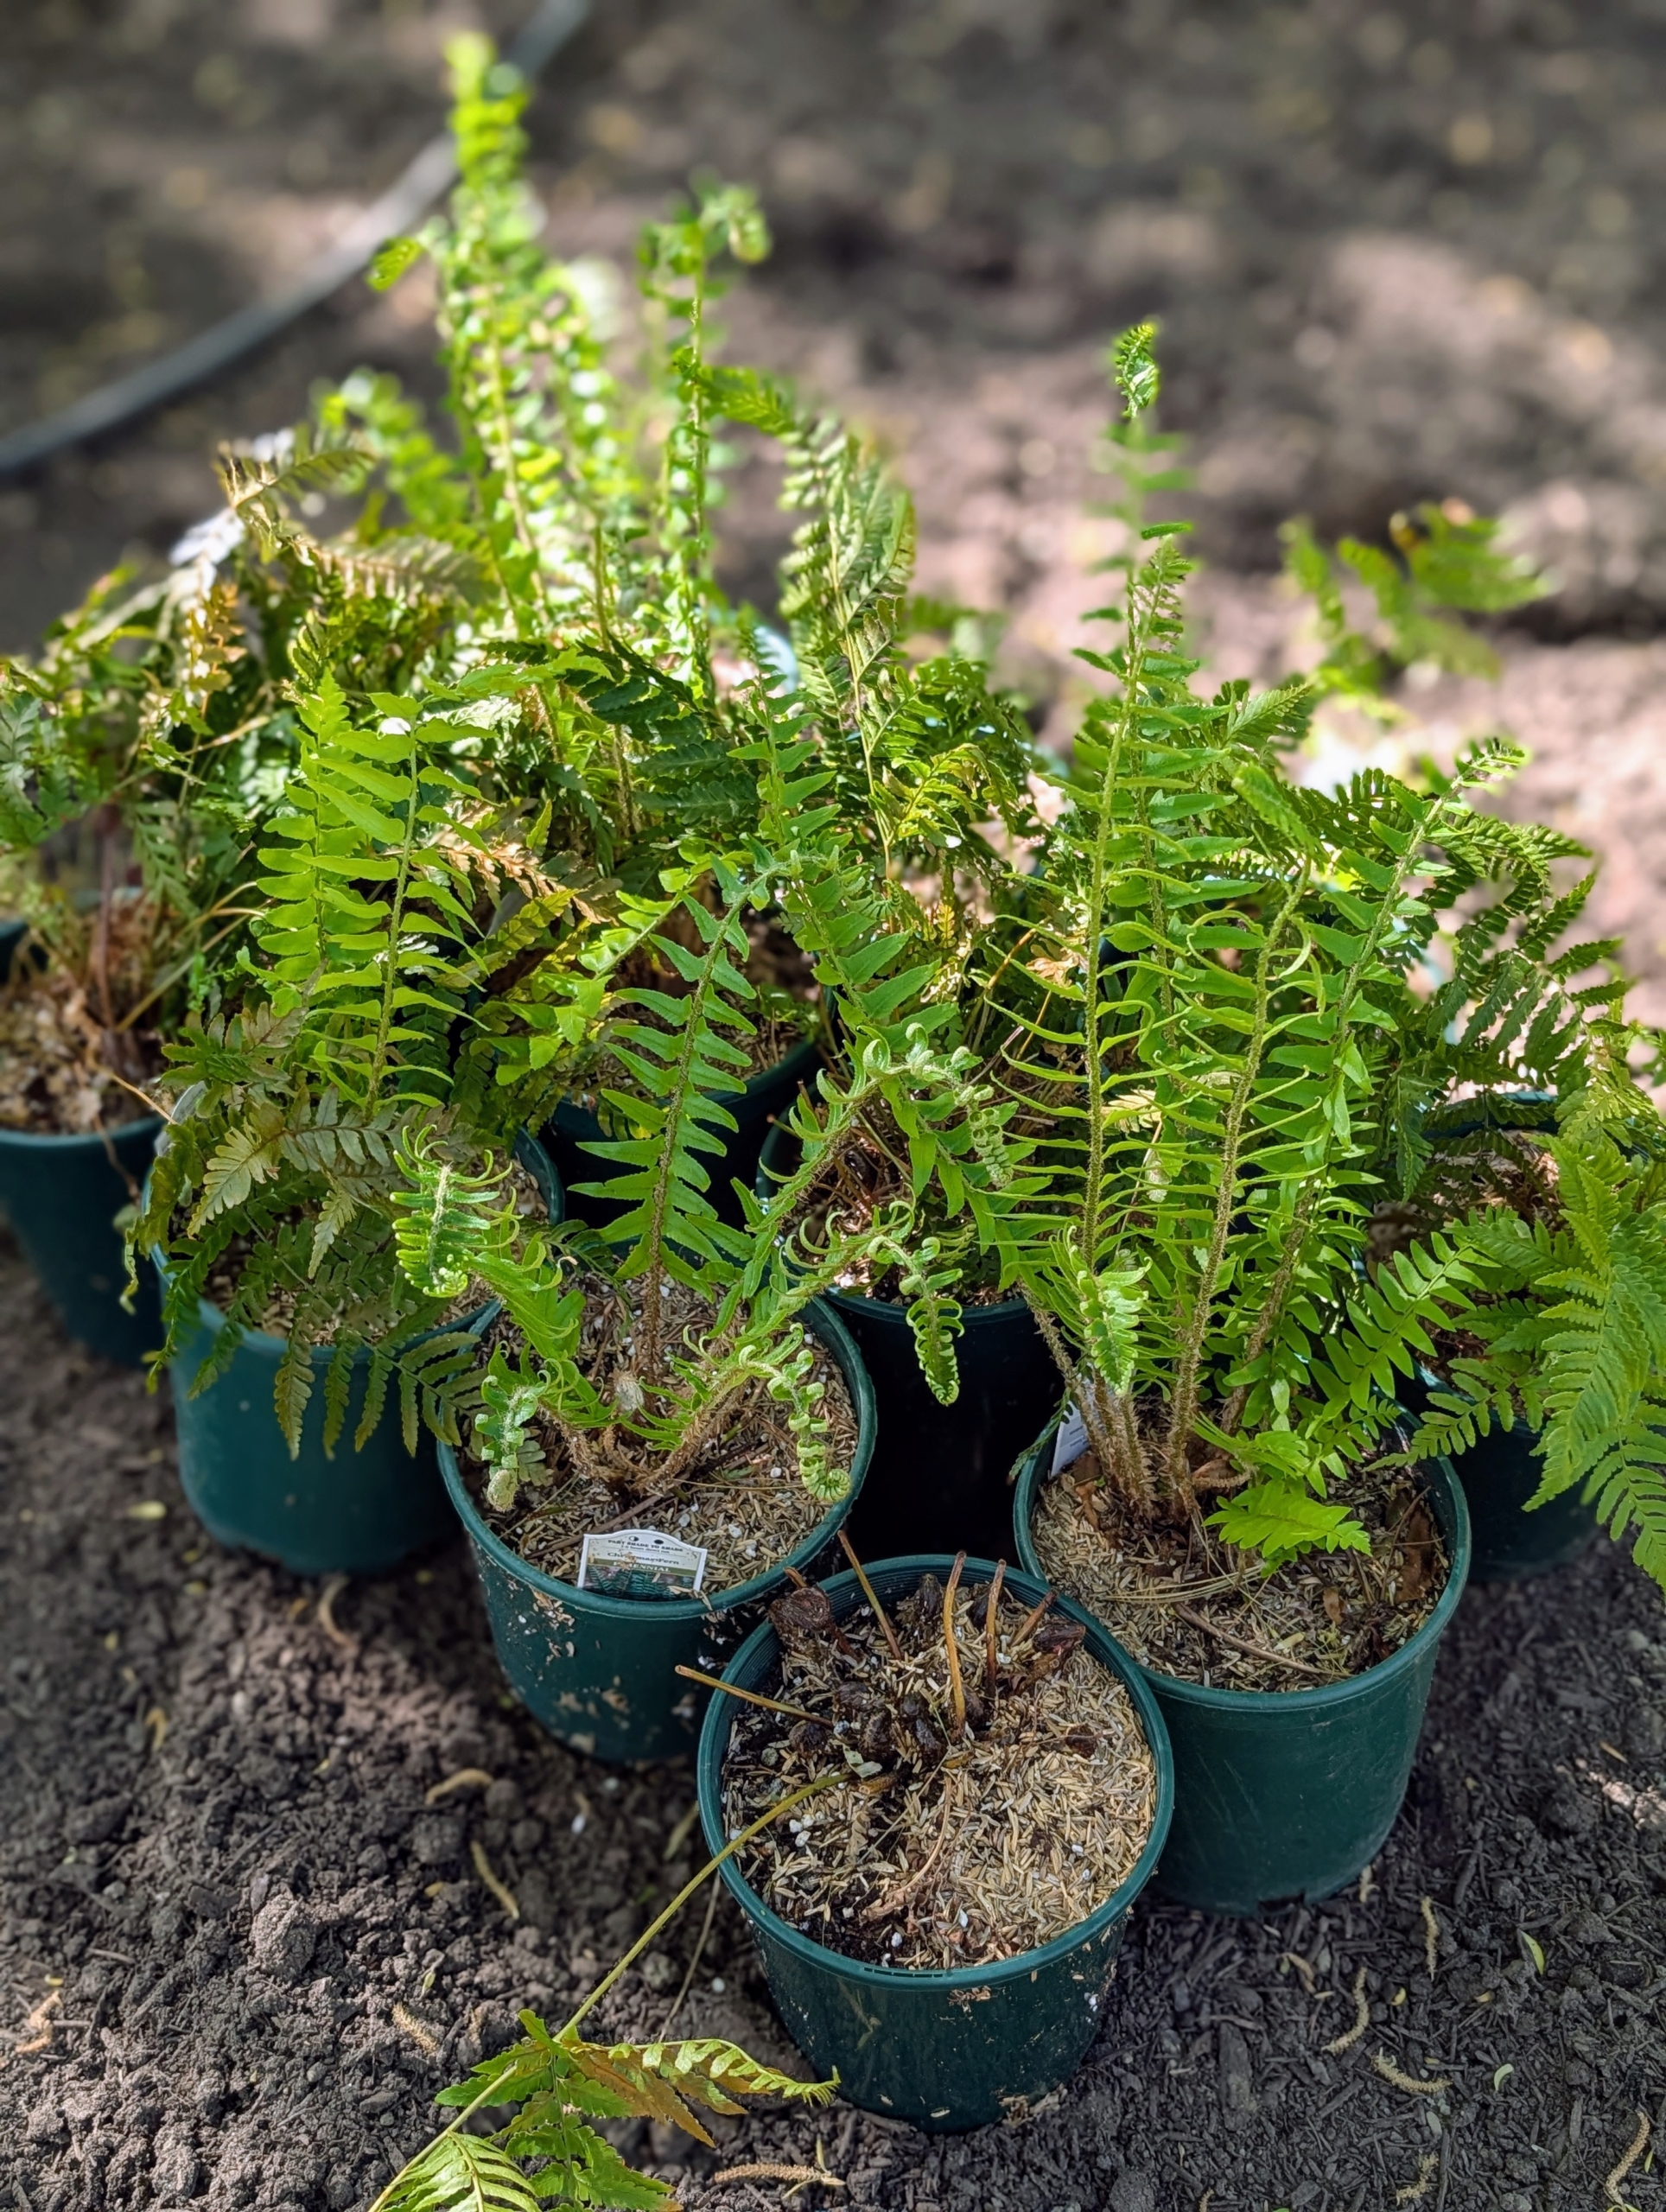
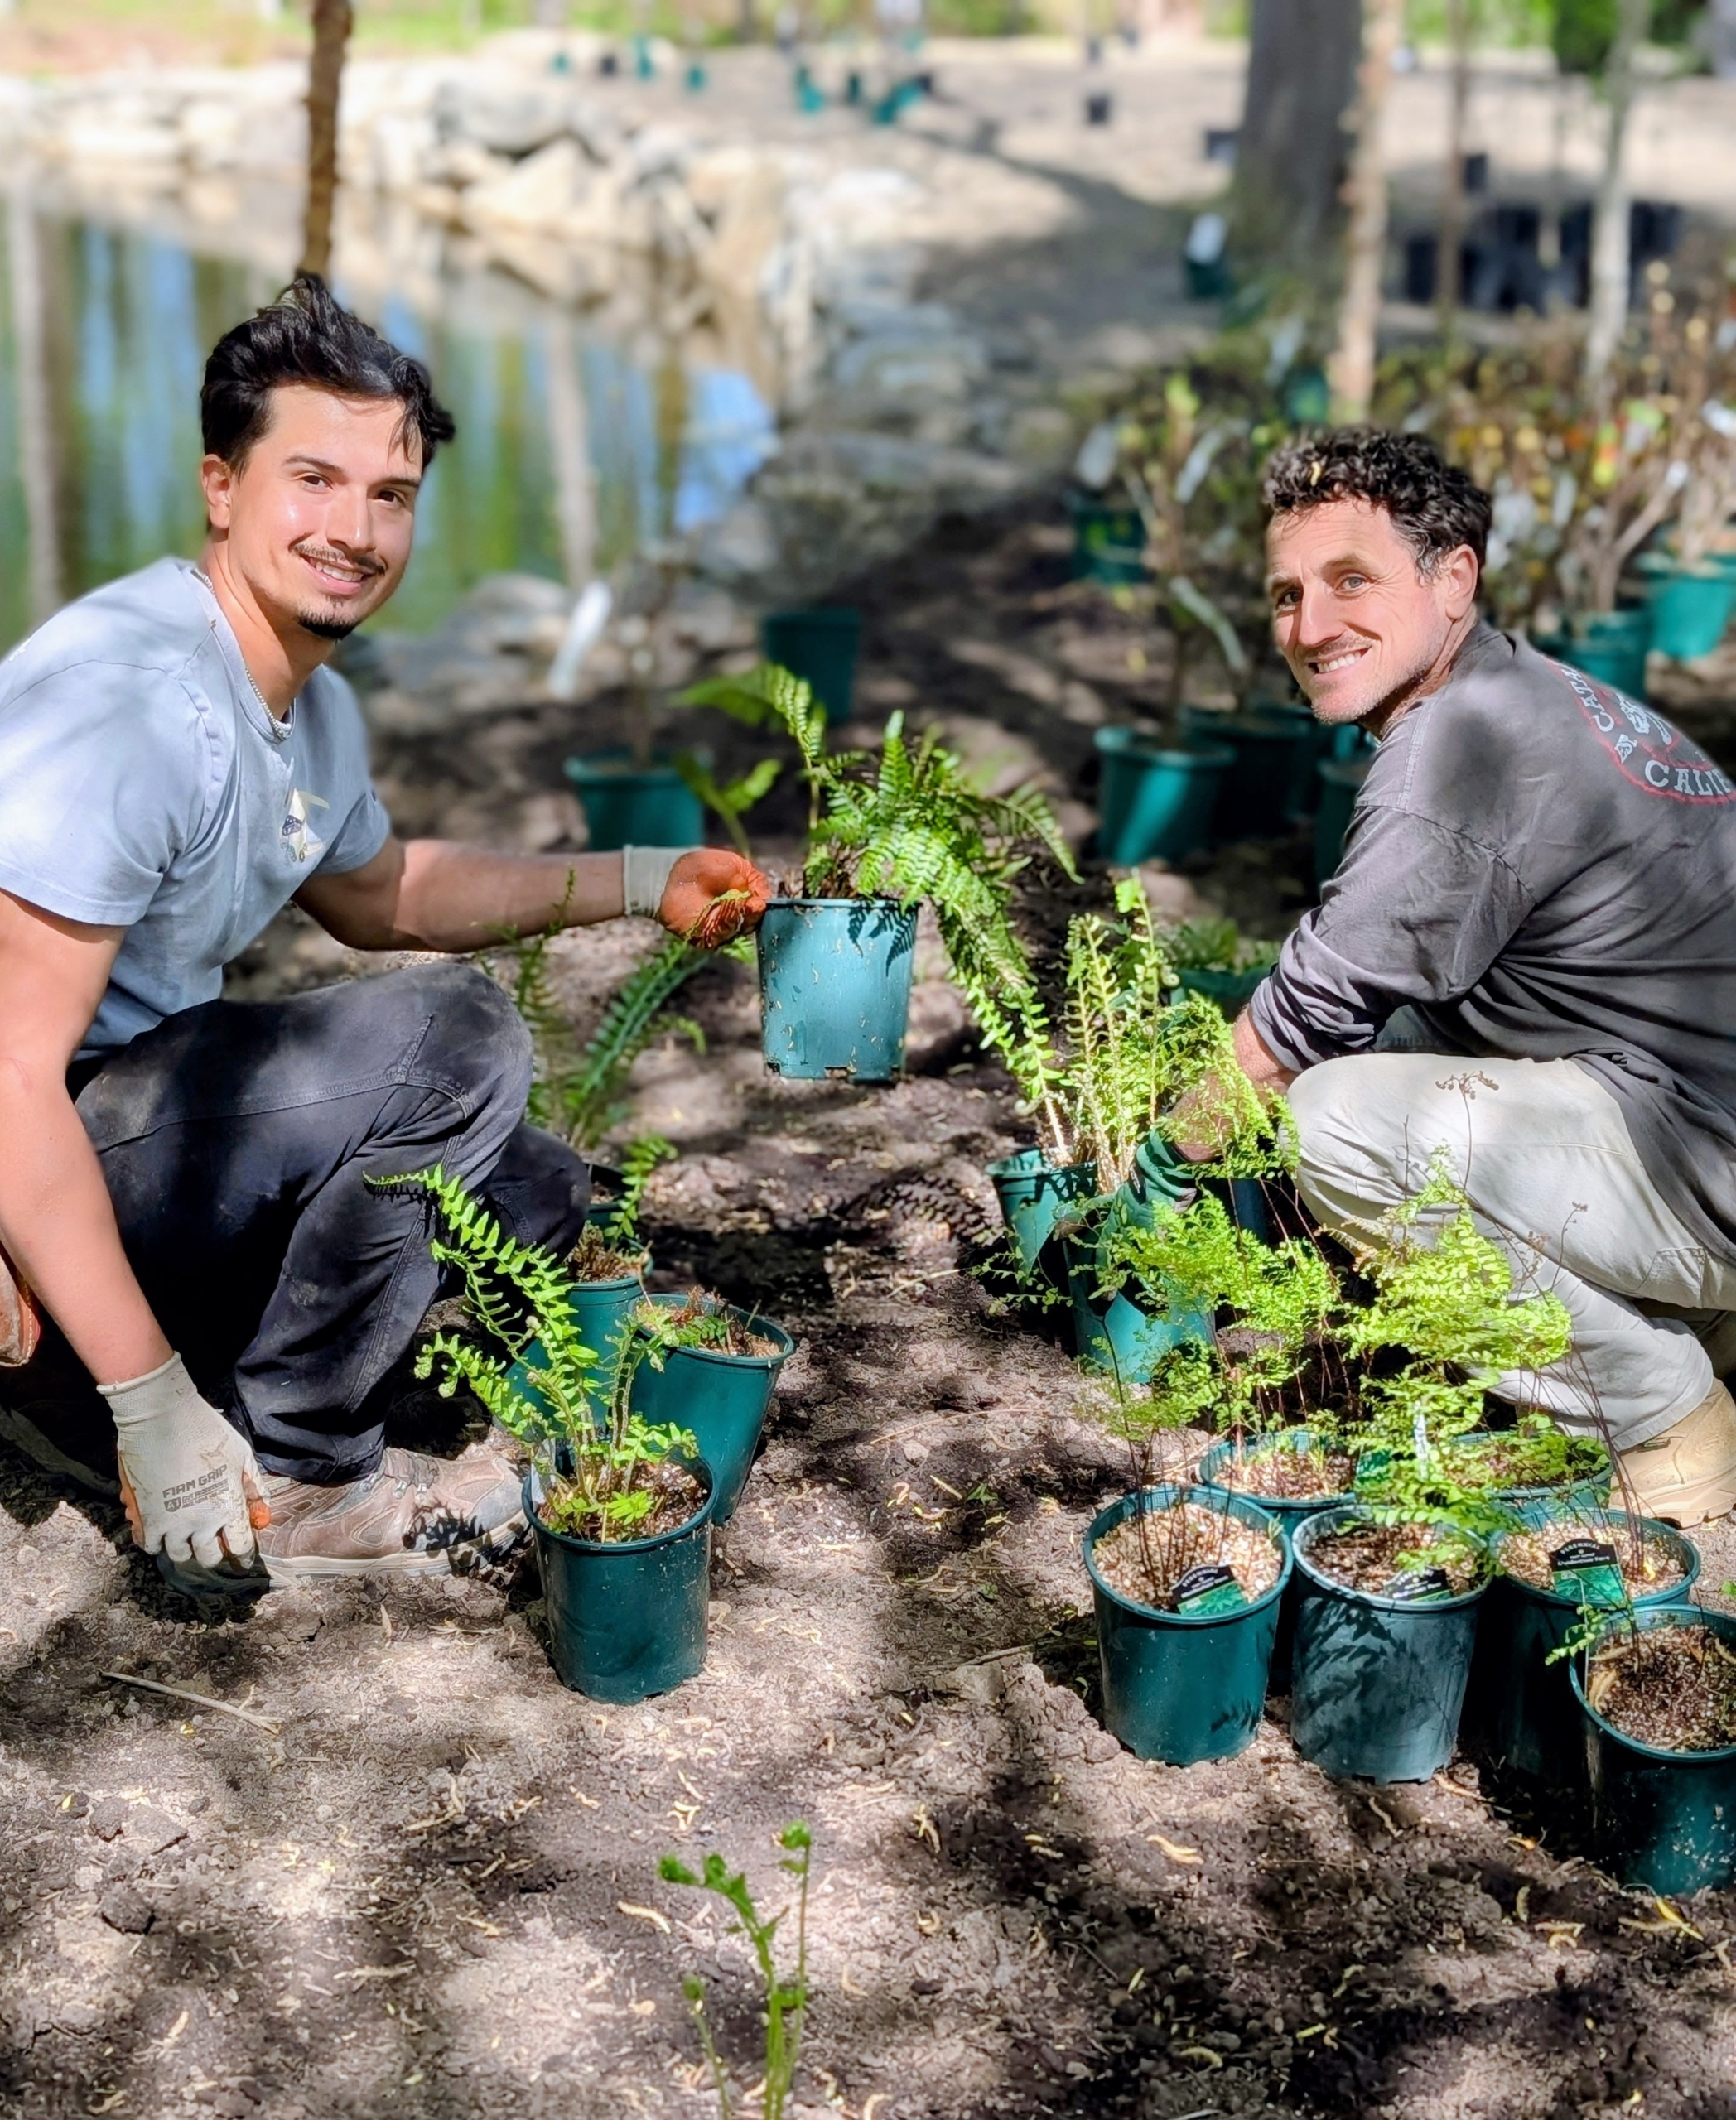
I purchased ferns for the pond’s edge. Most ferns prefer dappled or shaded areas. Be sure they are also protected from strong winds.
And here are lots and lots of azaleas in shades of creamy to crisp yellow and orange.
These stunning azaleas are from White’s Nursery, LLC in Germantown, Maryland. White’s specializes in evergreen, deciduous, and native azaleas as well as rhododendrons.
Owners Mike and Debra White grow all their plants and nurture them in their greenhouses.
Here is one Mike grew from seed with light and dark orange flowers.
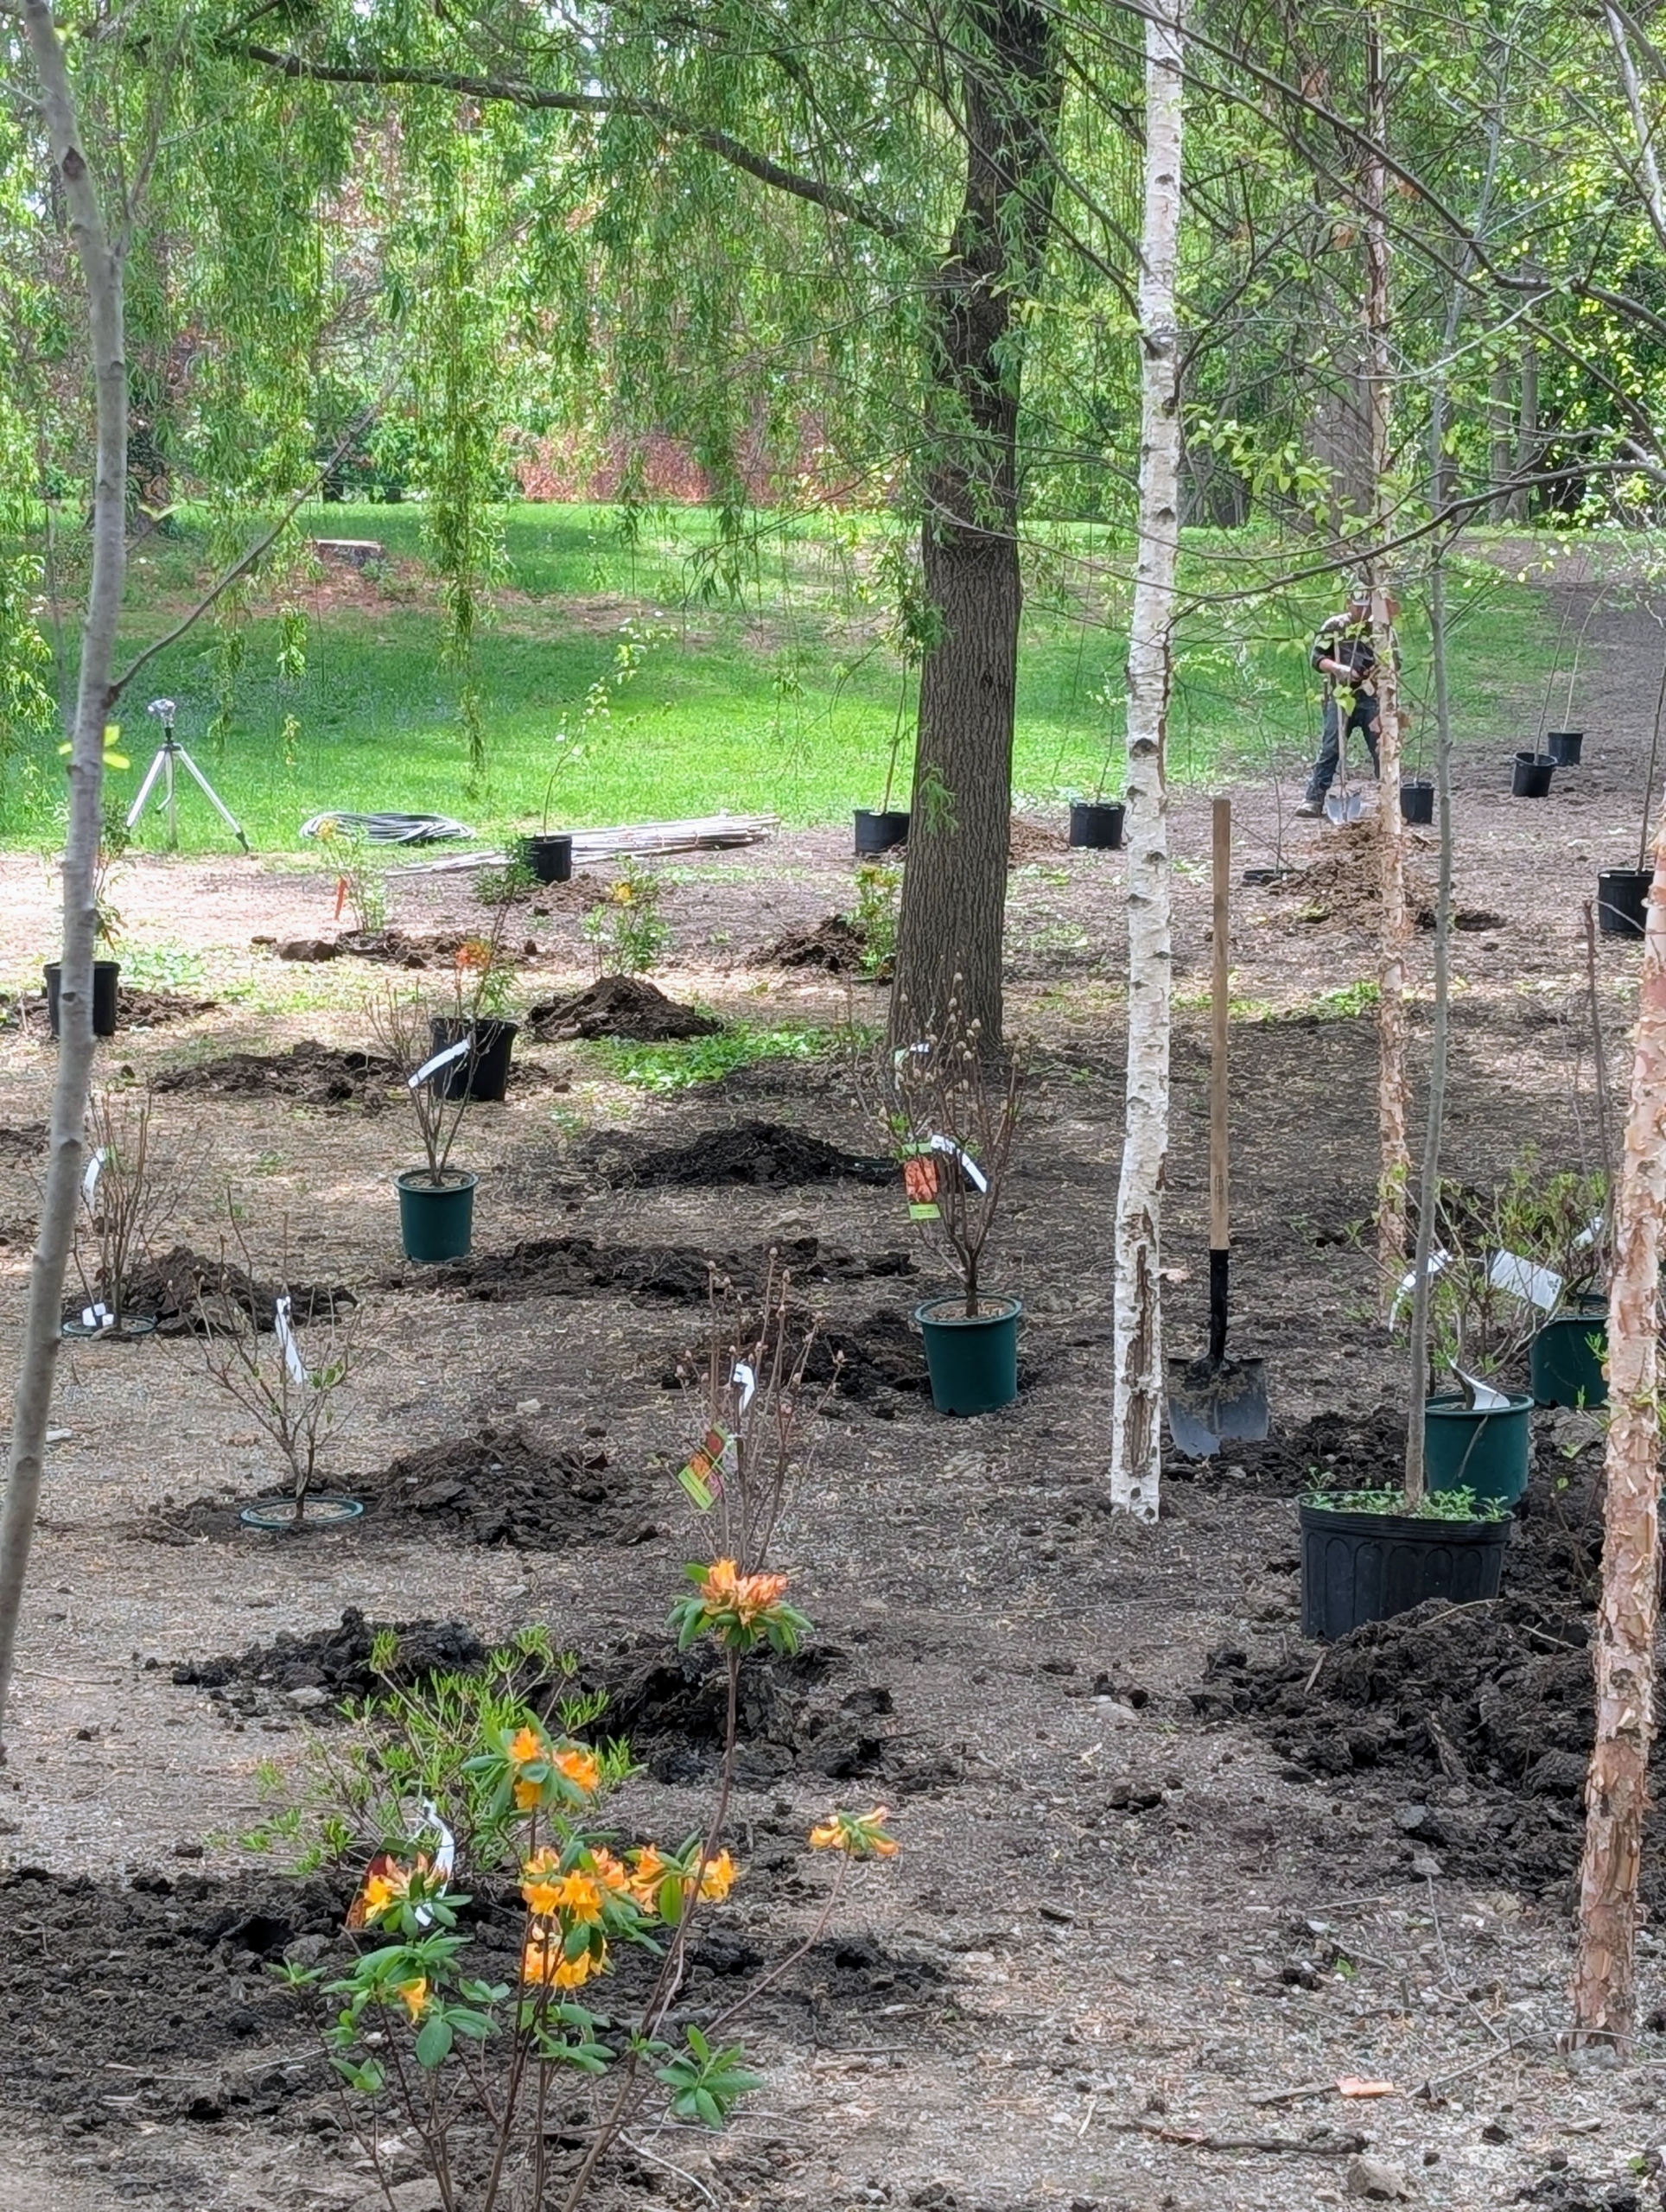
Here are Matthew and Ryan sorting all the plants for the area. When planning a garden, it is important to consider size of inventory, light needs and growth habits of the plants, and the location of any necessary footpaths.
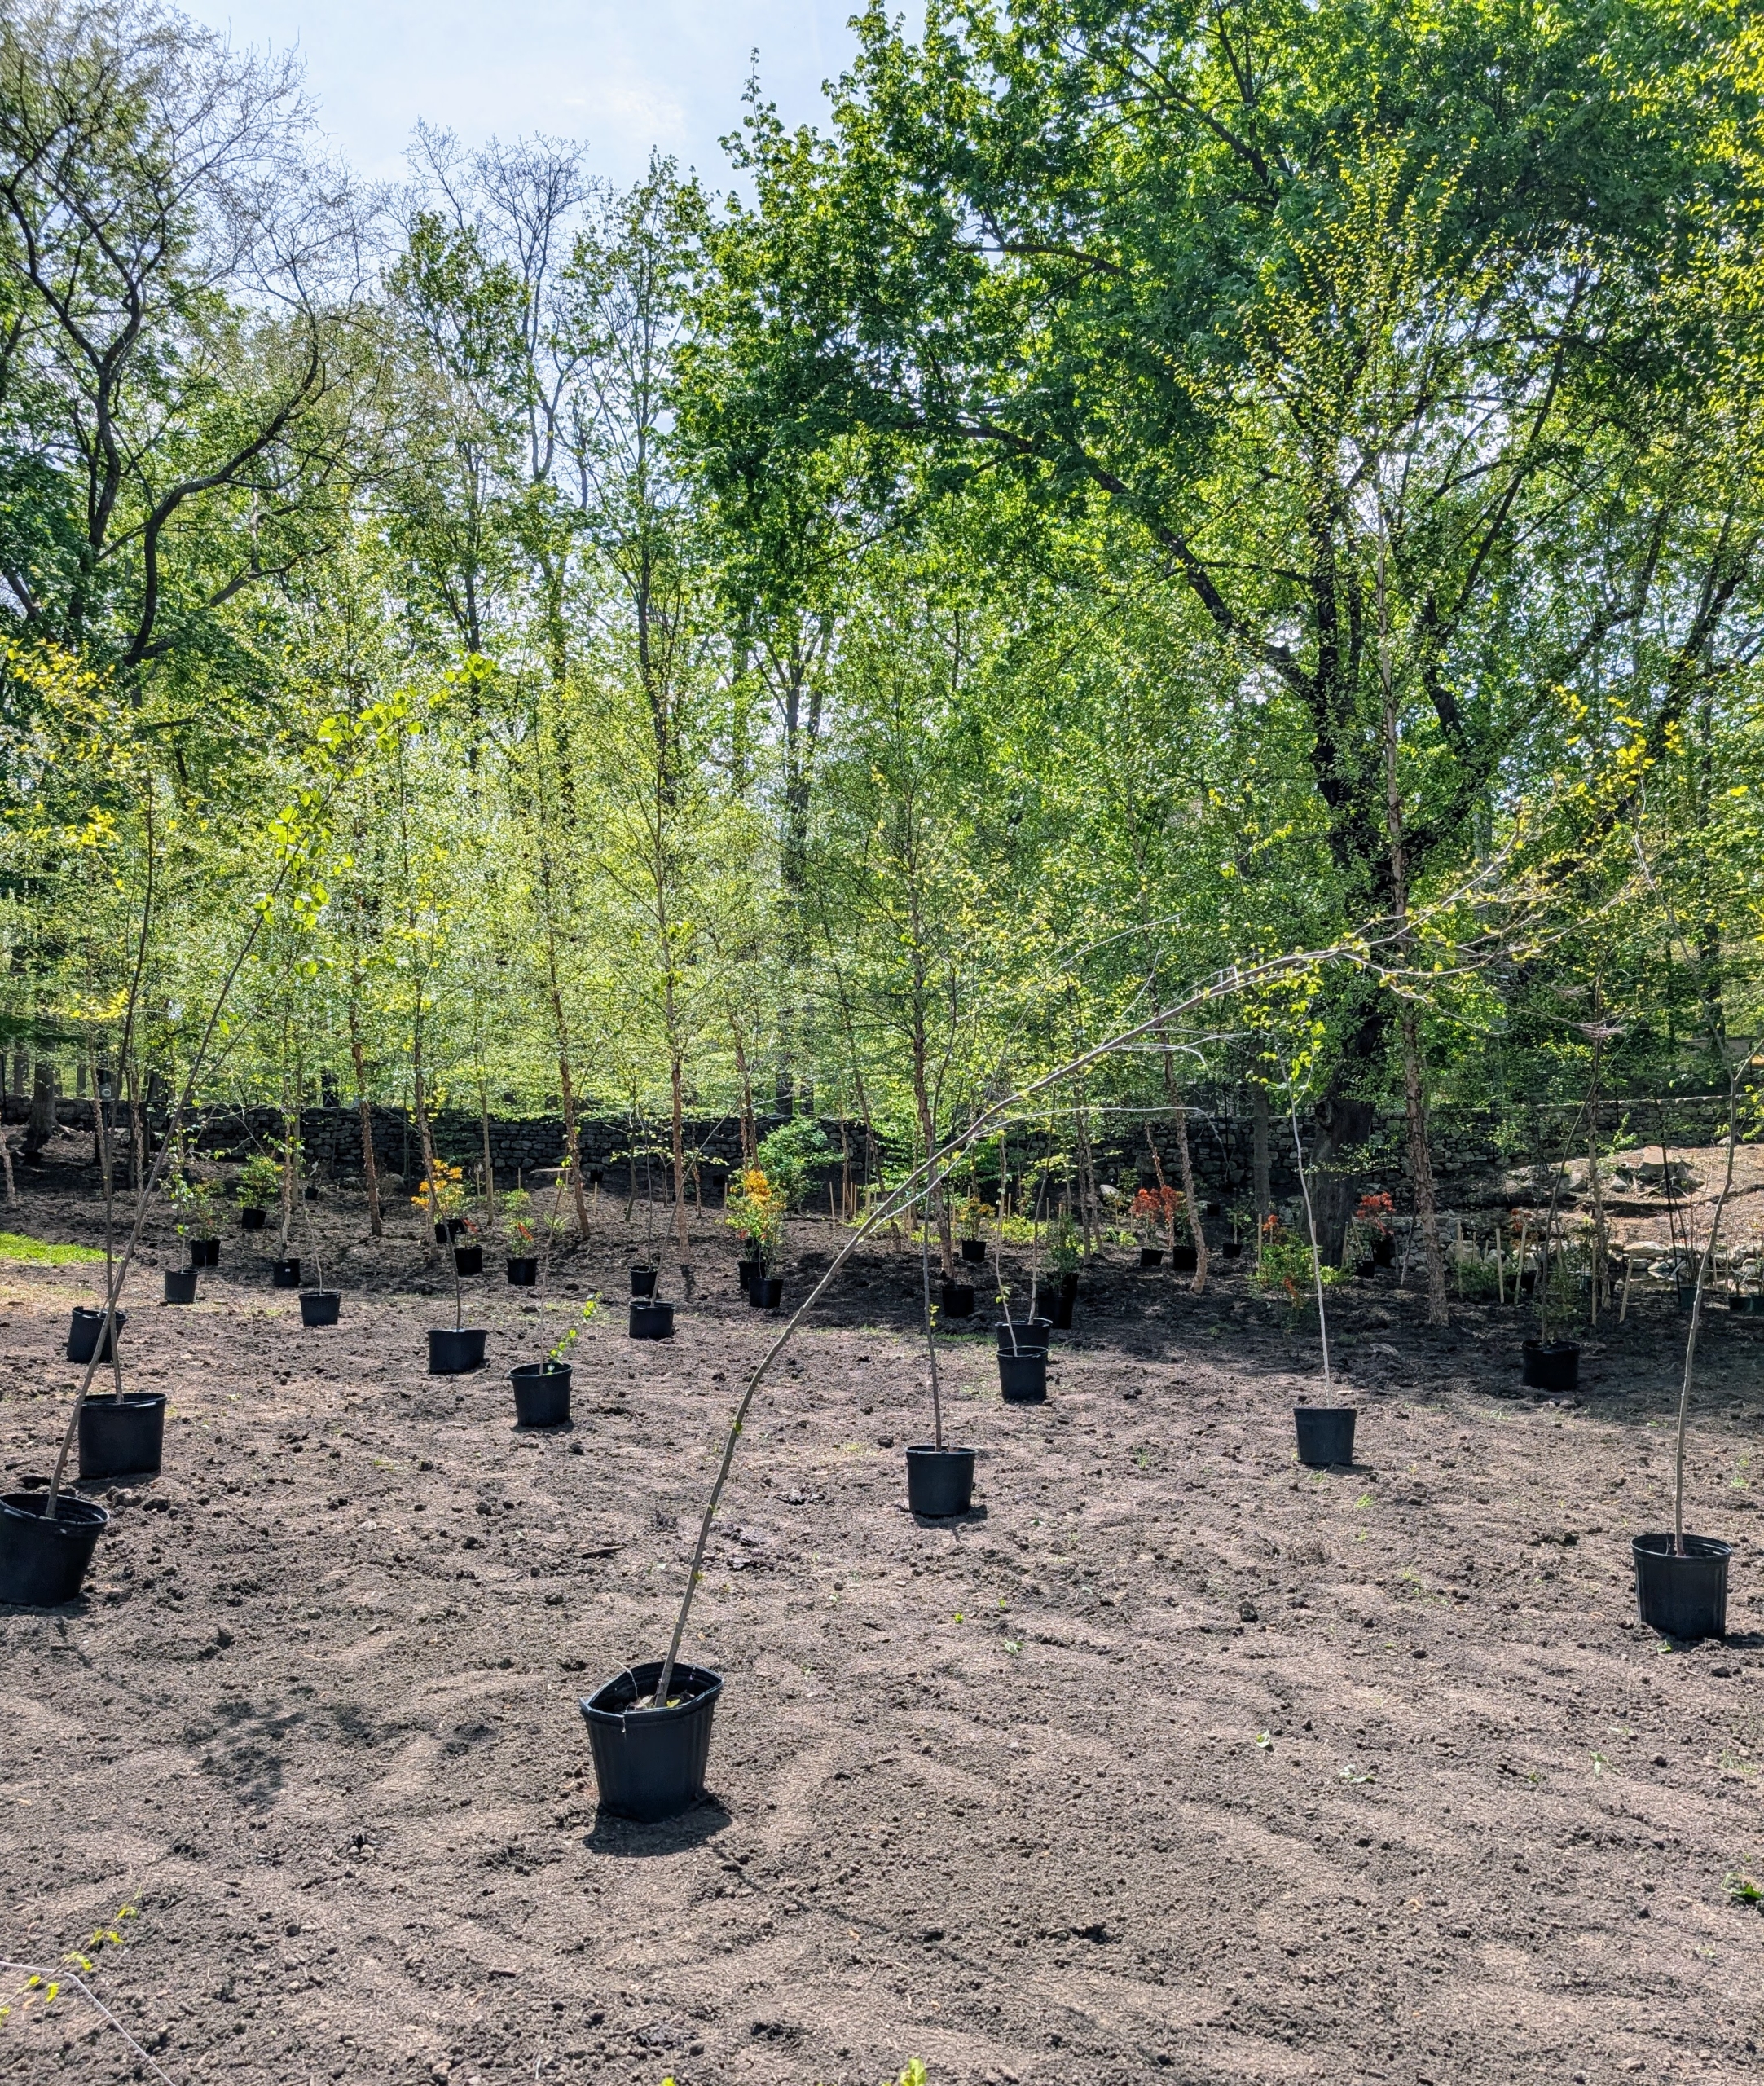
Ryan positions the trees first, followed by the azaleas and then the smallest plants by the pond’s edge.
There are a lot of trees and plants to place. It is exciting to see this new garden take shape. Keep following…