Inside my main greenhouse, we've already planted lots of seeds for the coming gardening season and they're all growing so nicely.
Starting from seed is not difficult to do, but it does require careful attention and patience. And once the seedlings start to develop, it’s important to keep up with maintenance care - thin out seedlings that are weak, prick out those that are growing too big for their seed starting trays, and transplant them into larger pots and flats.
Here are some photos, enjoy.
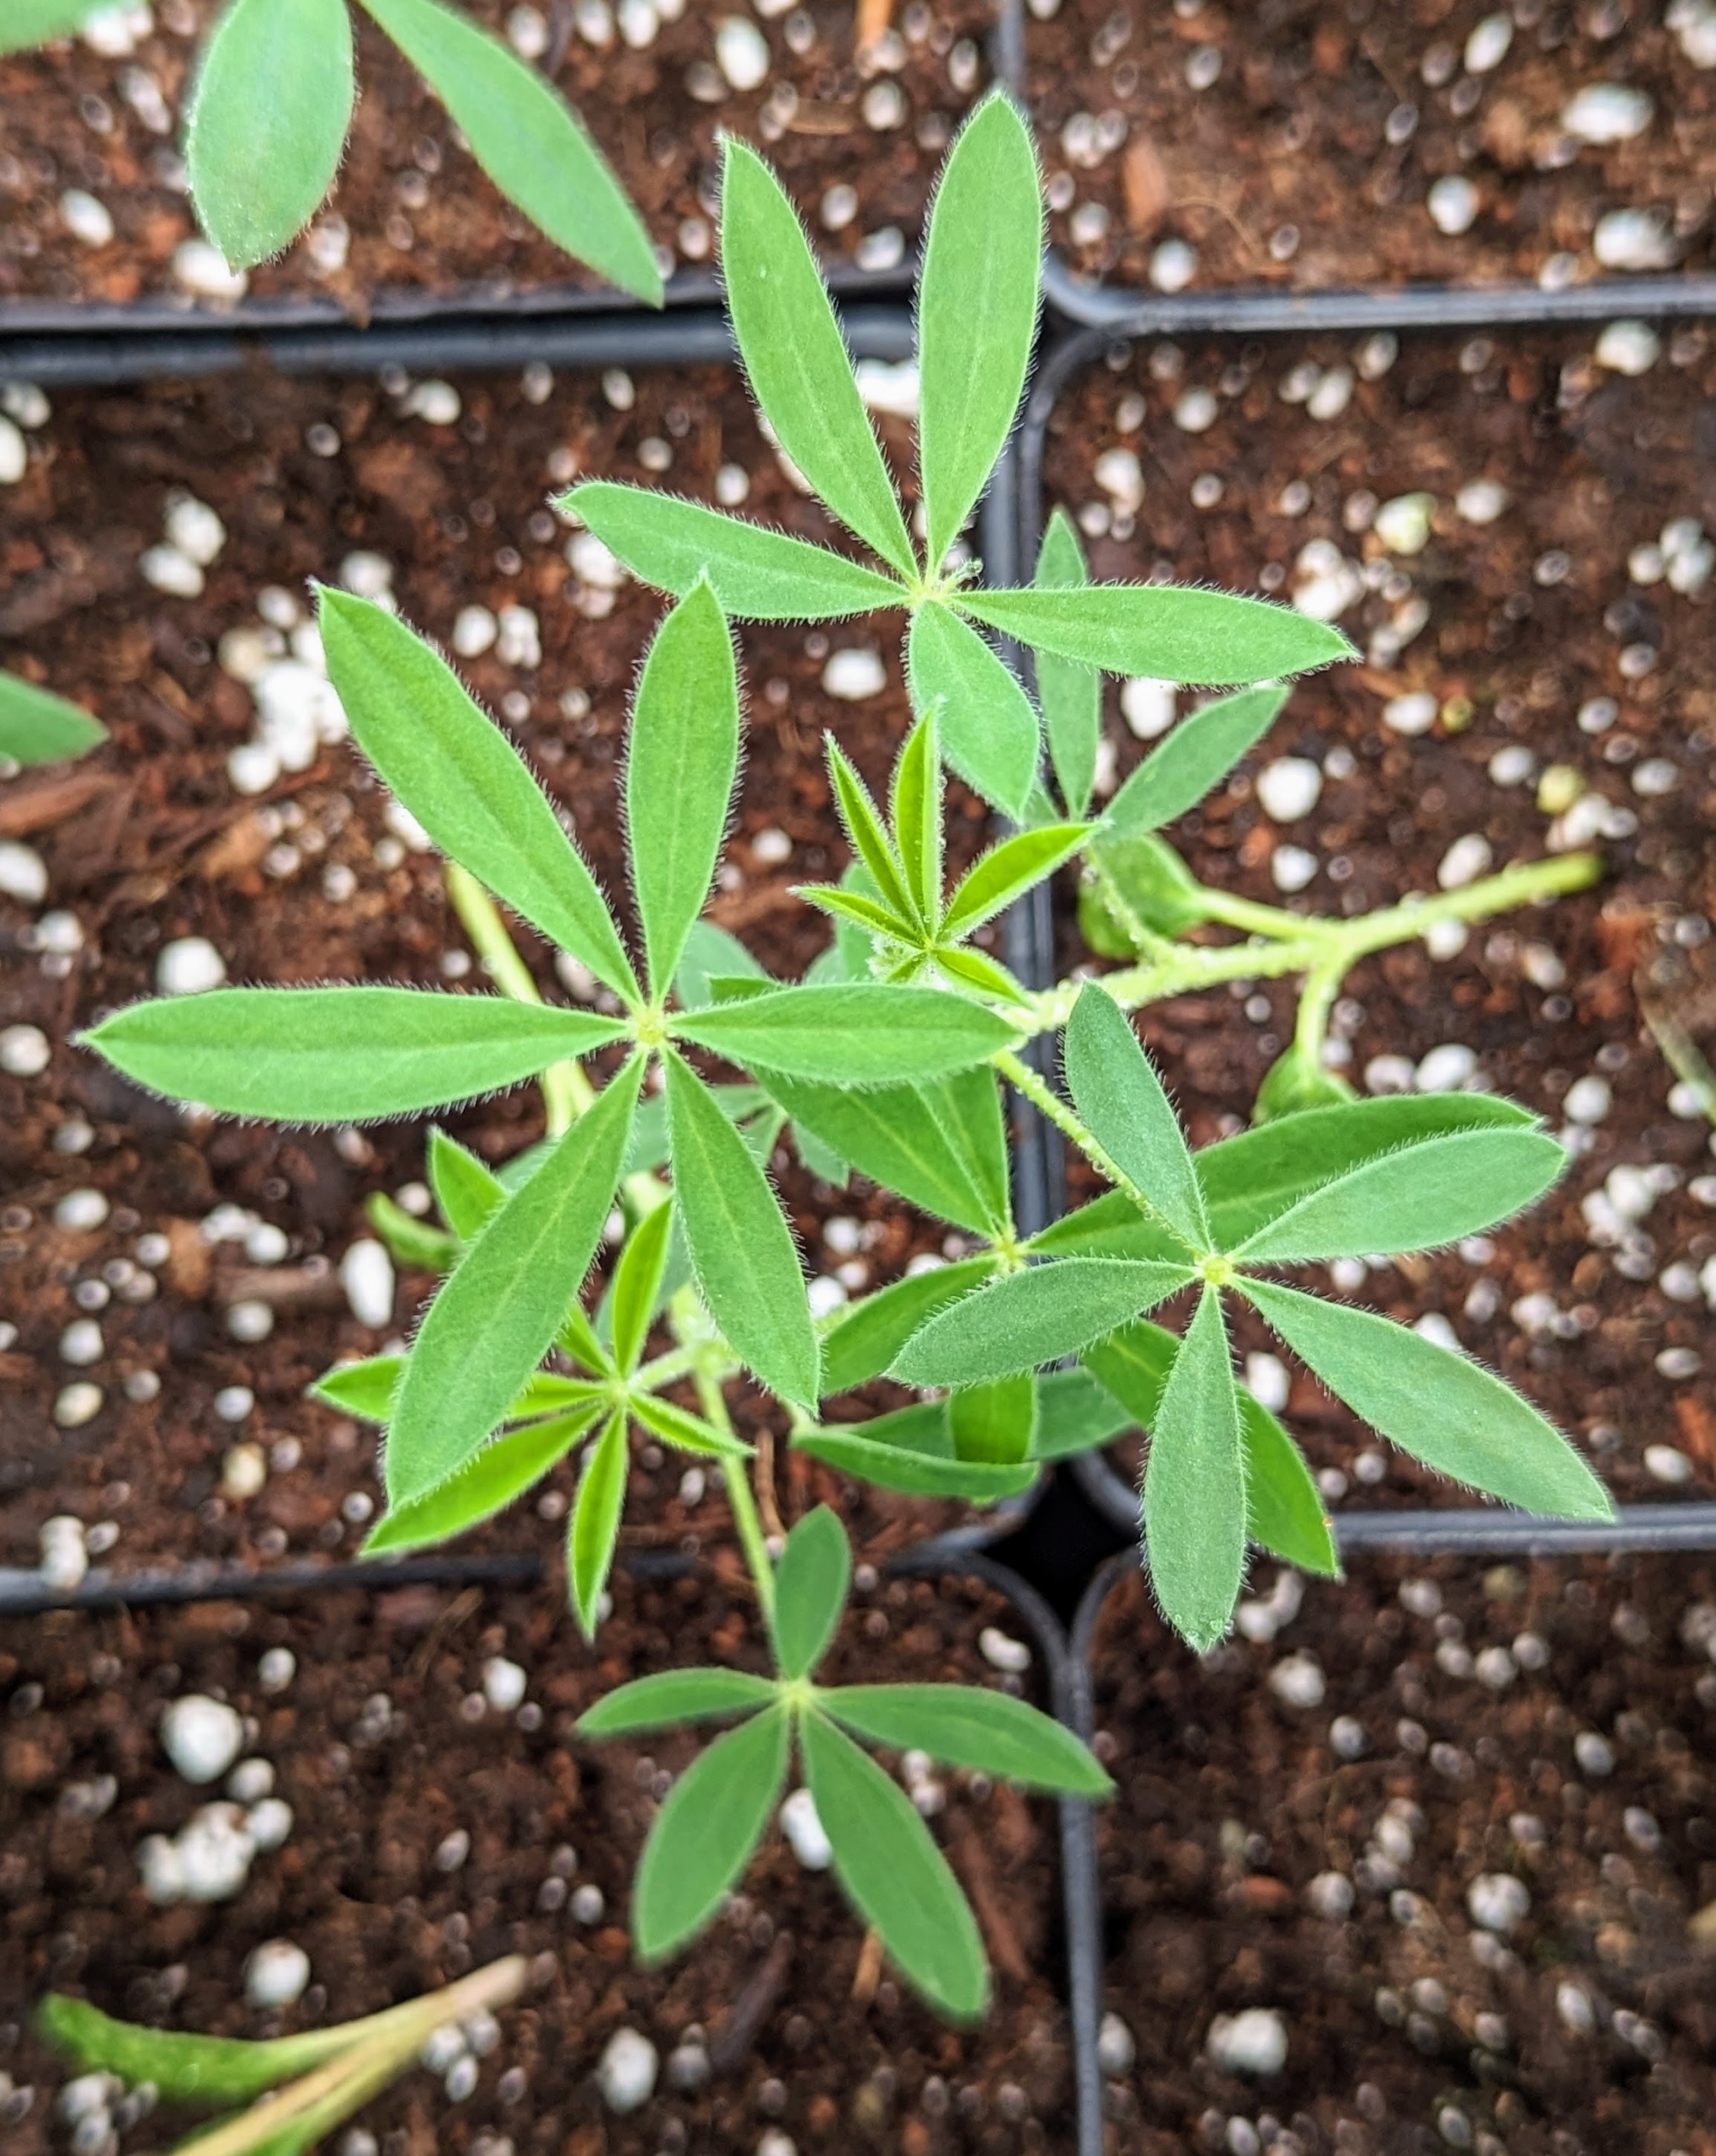
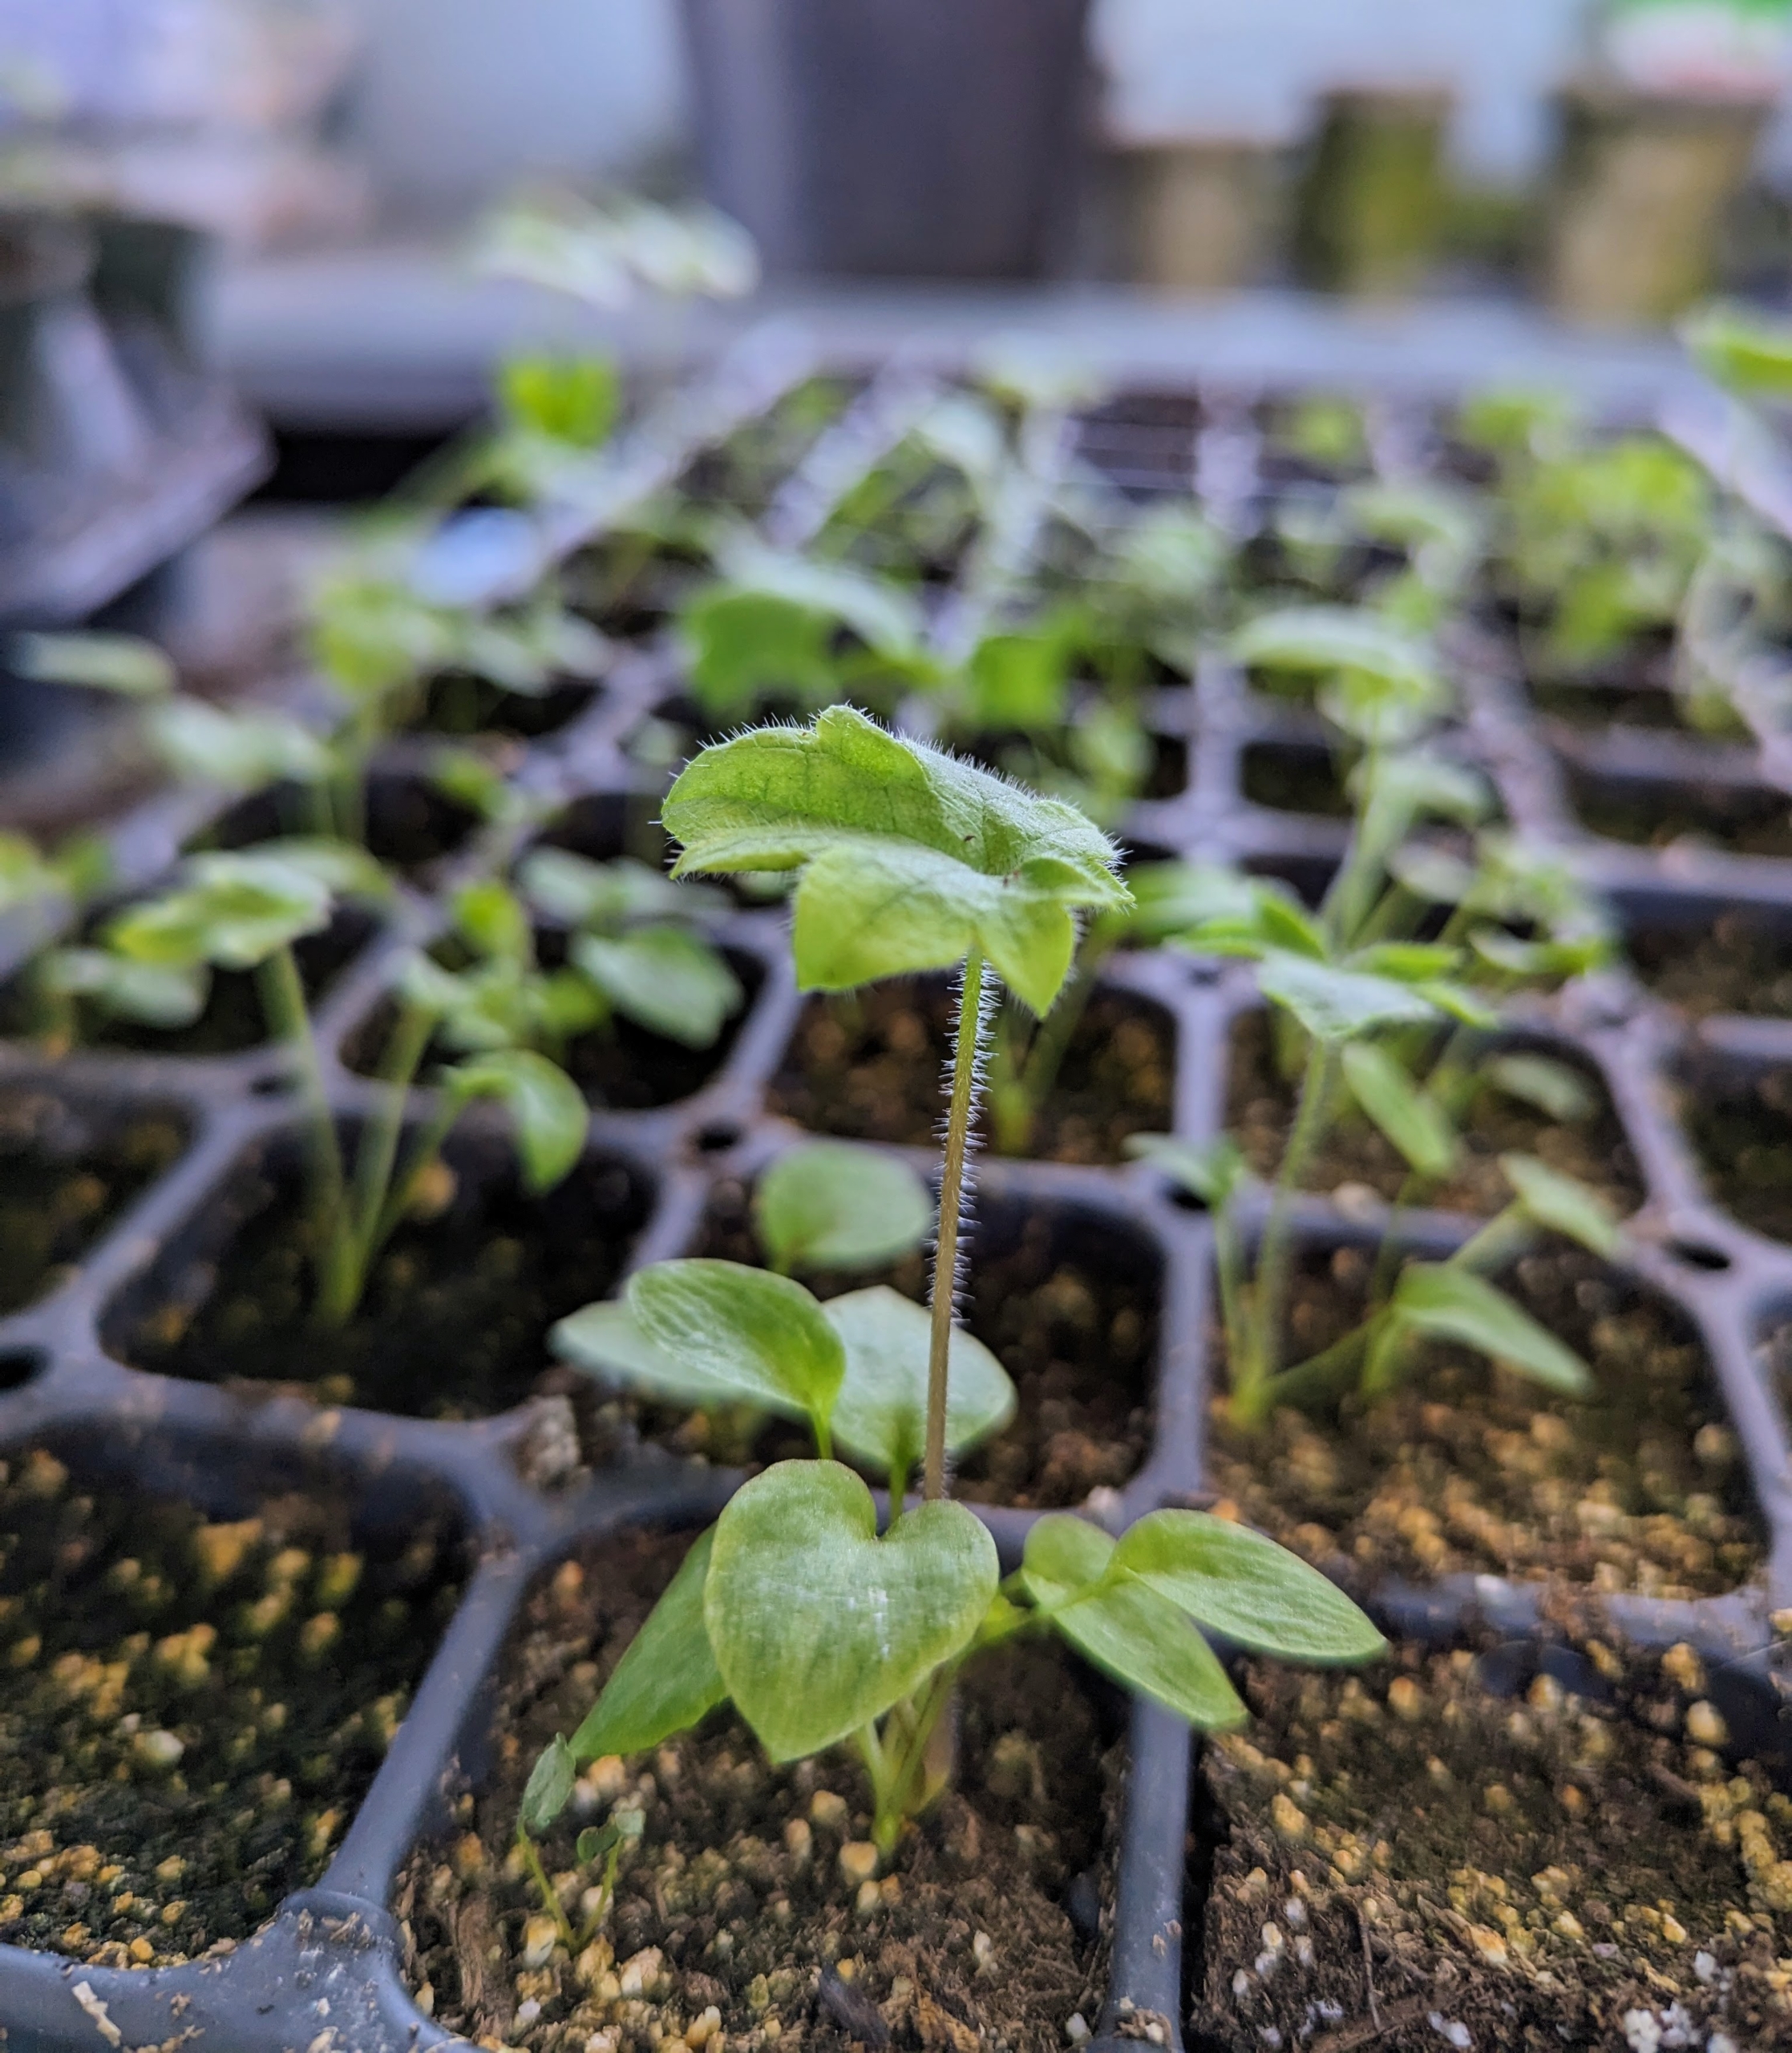
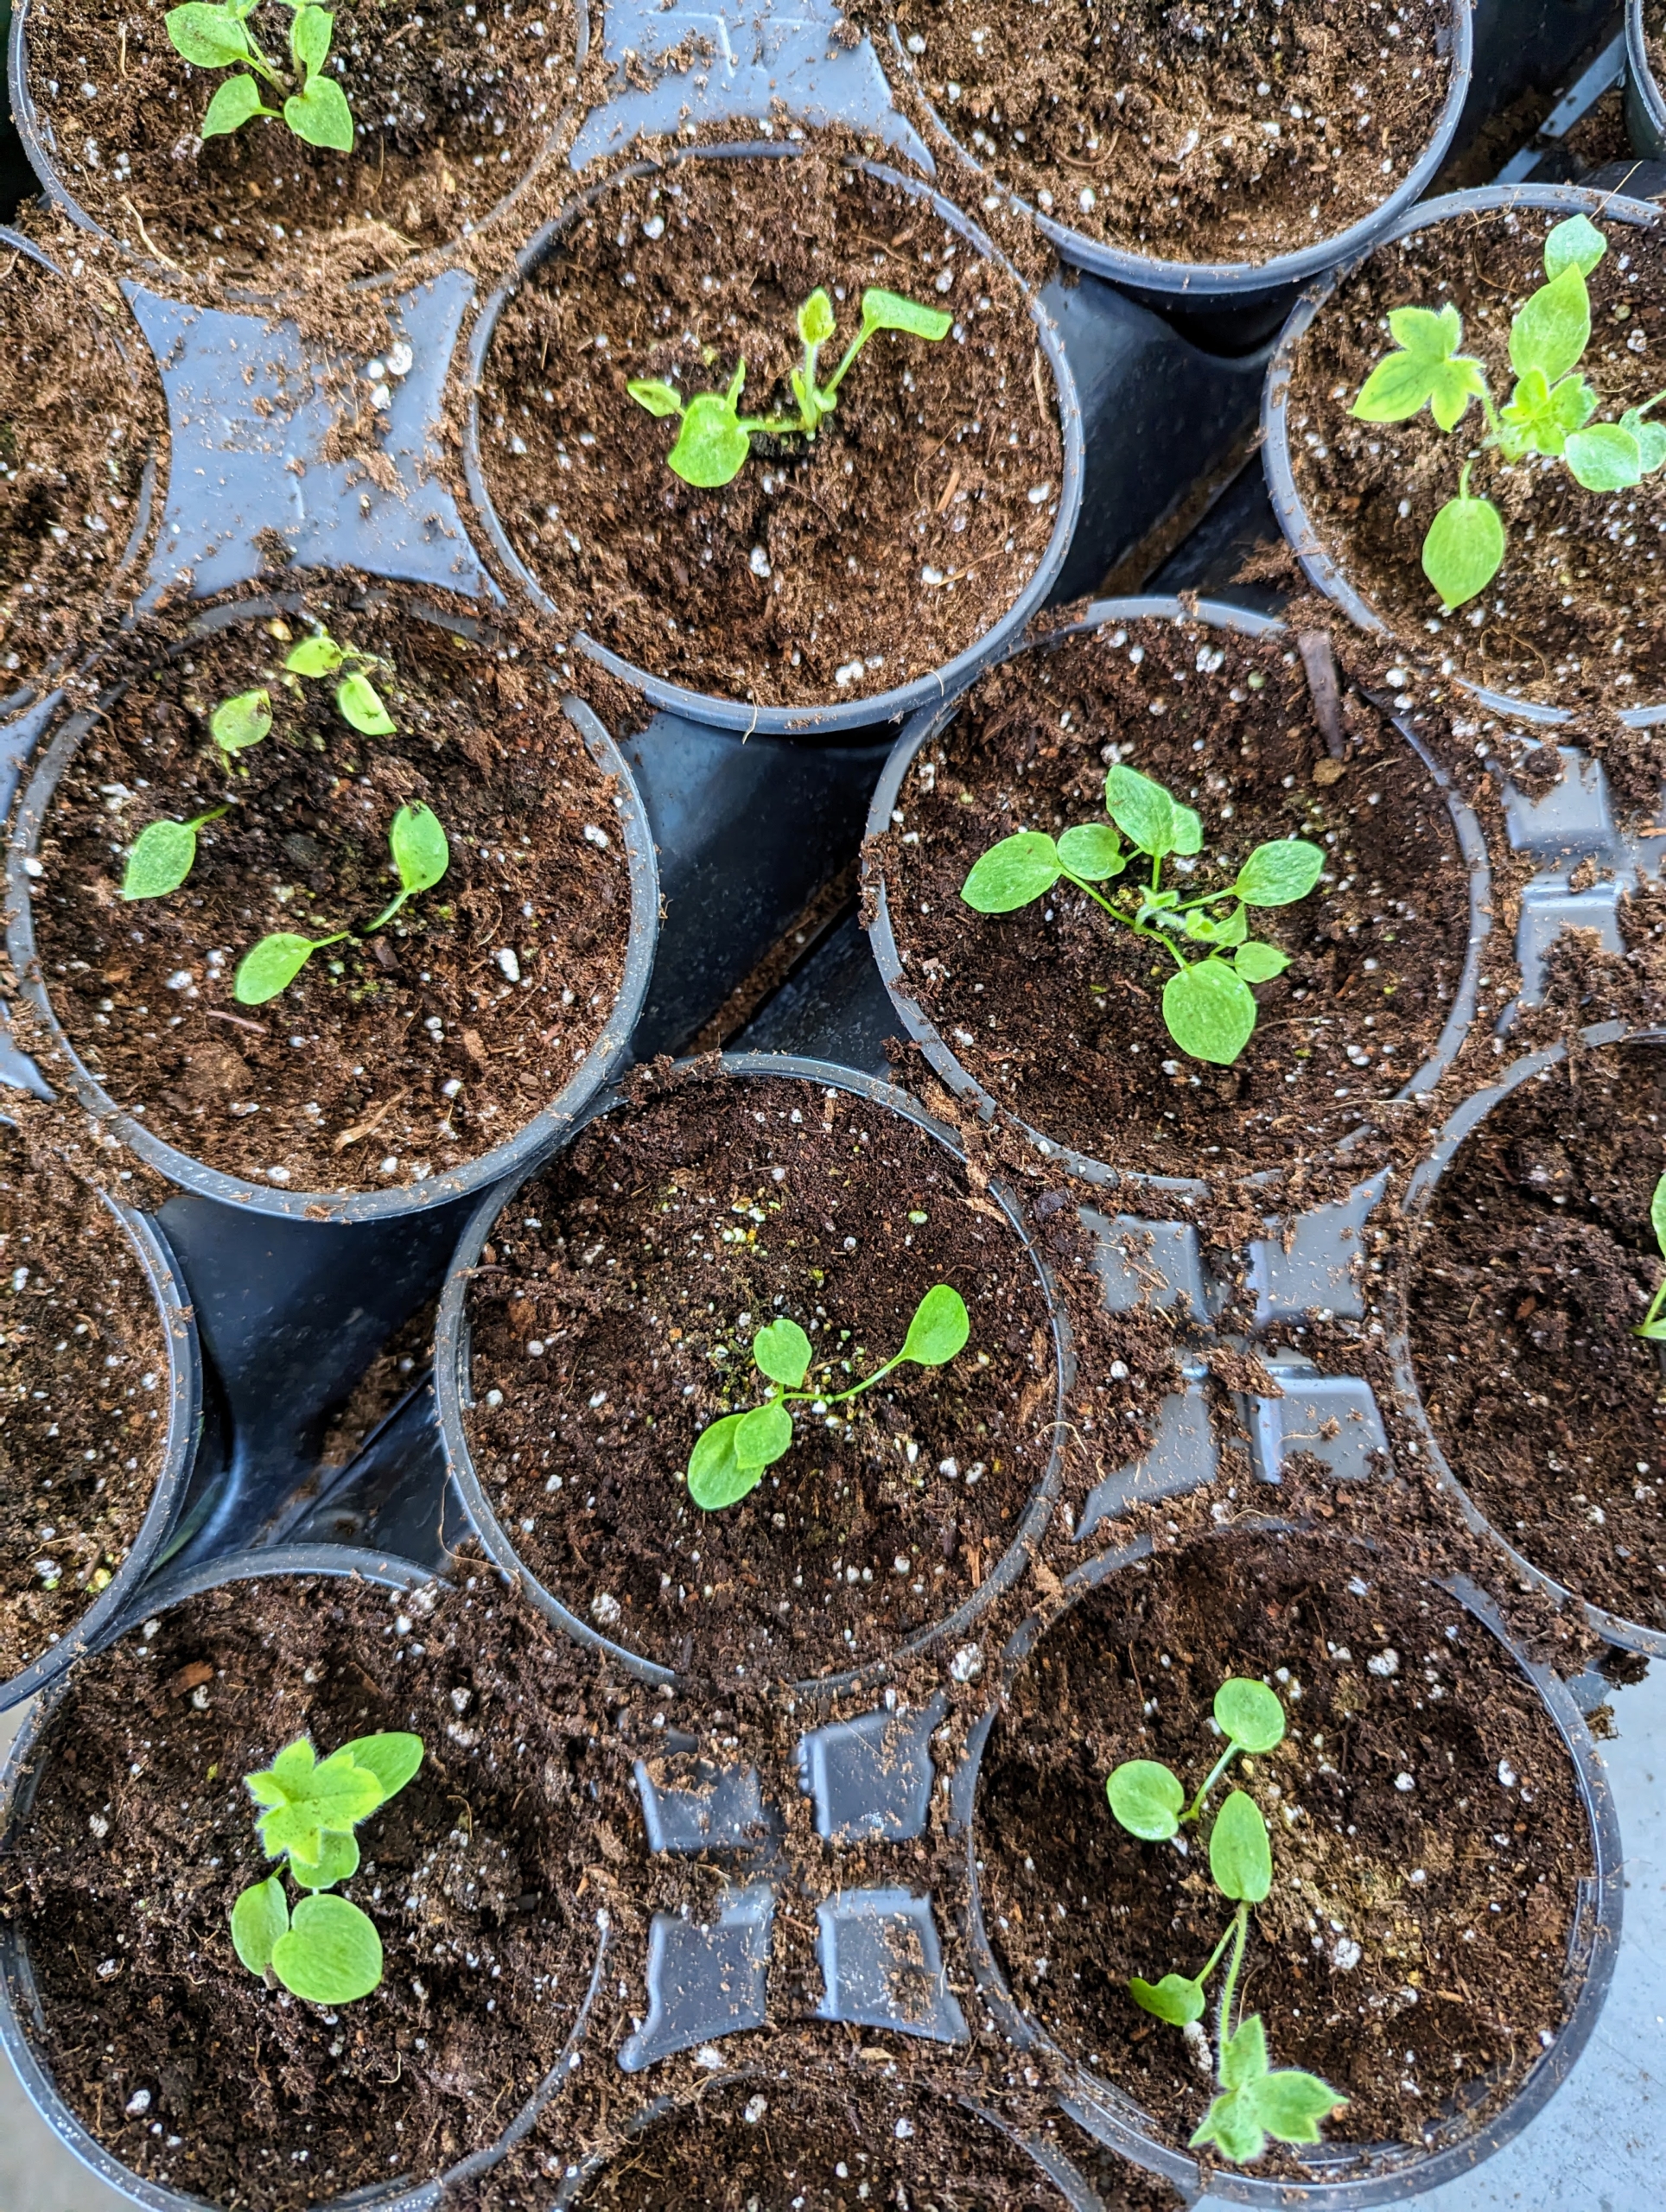
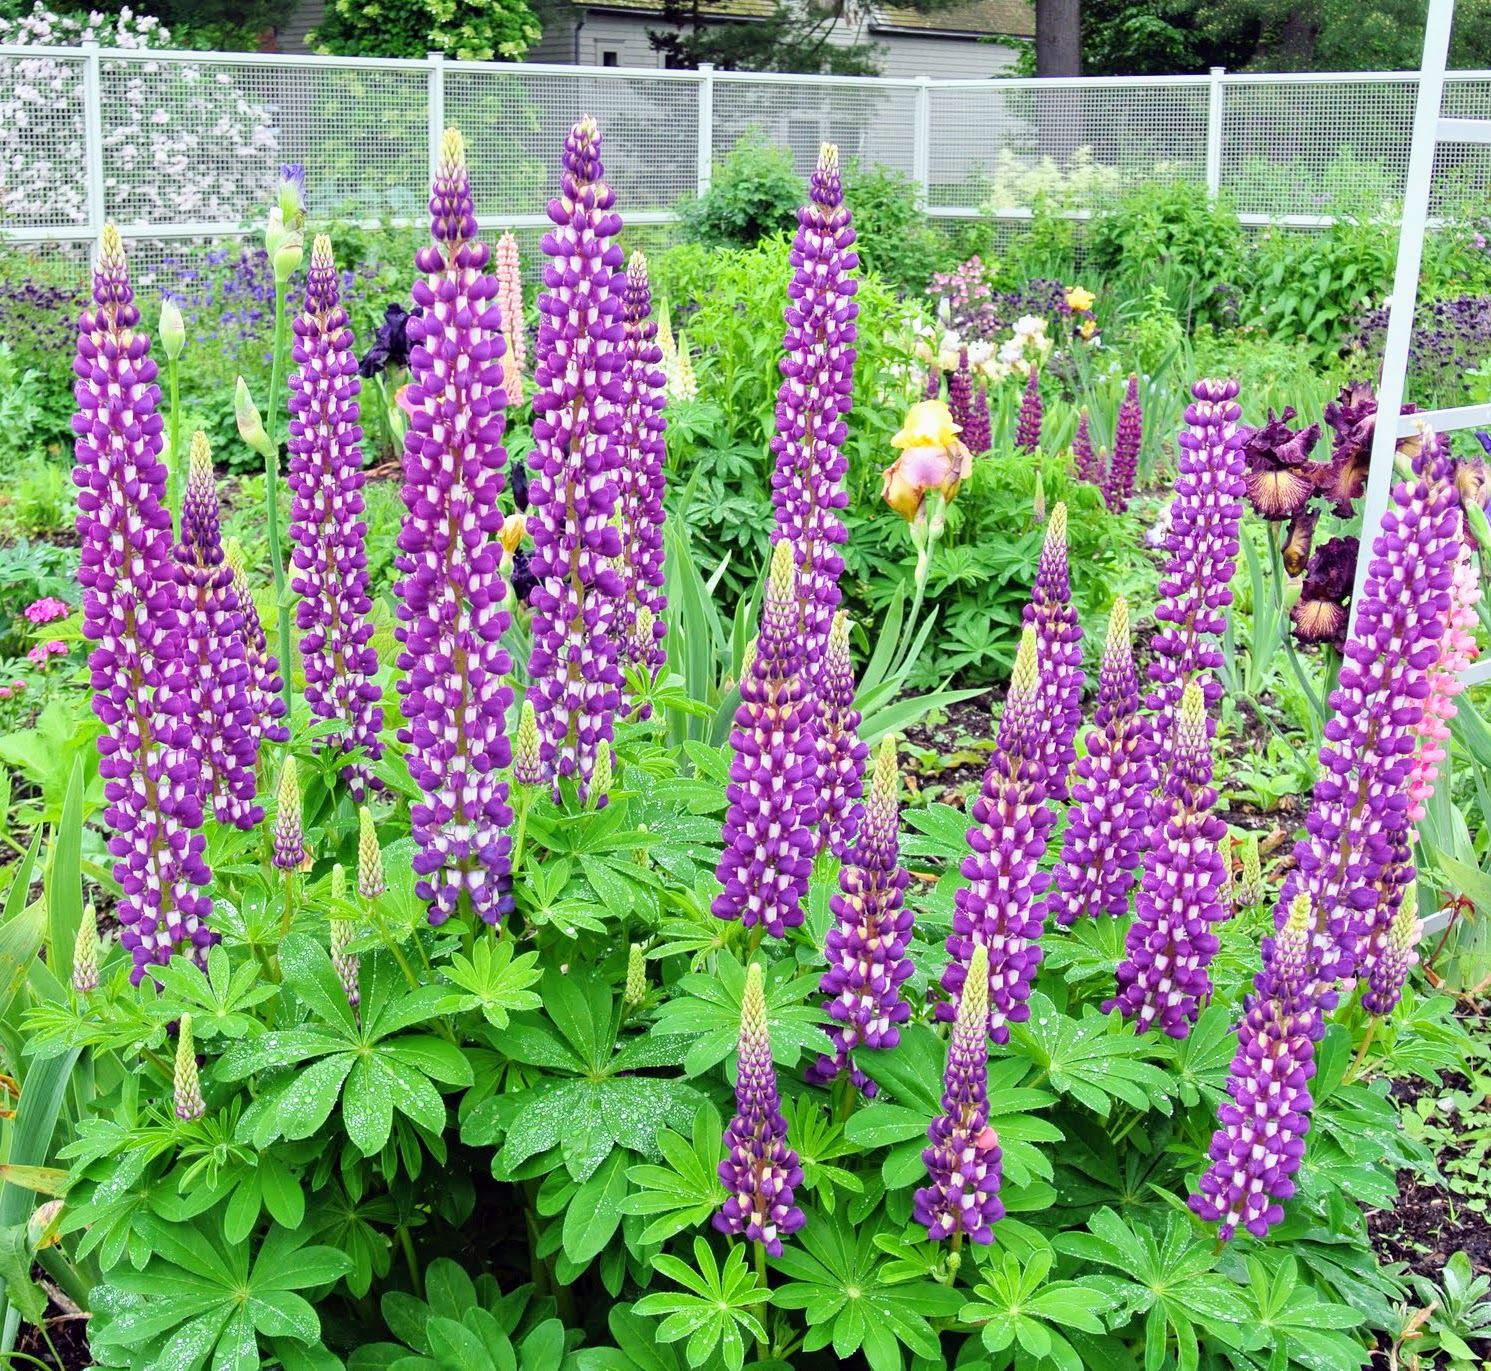
The tiny seeds we planted just a few weeks ago are already sprouting and ready to move. These seedlings are lupines – those colorful pea-like flowers with an upper standard, or banner, two lateral wings, and two lower petals fused into a keel.
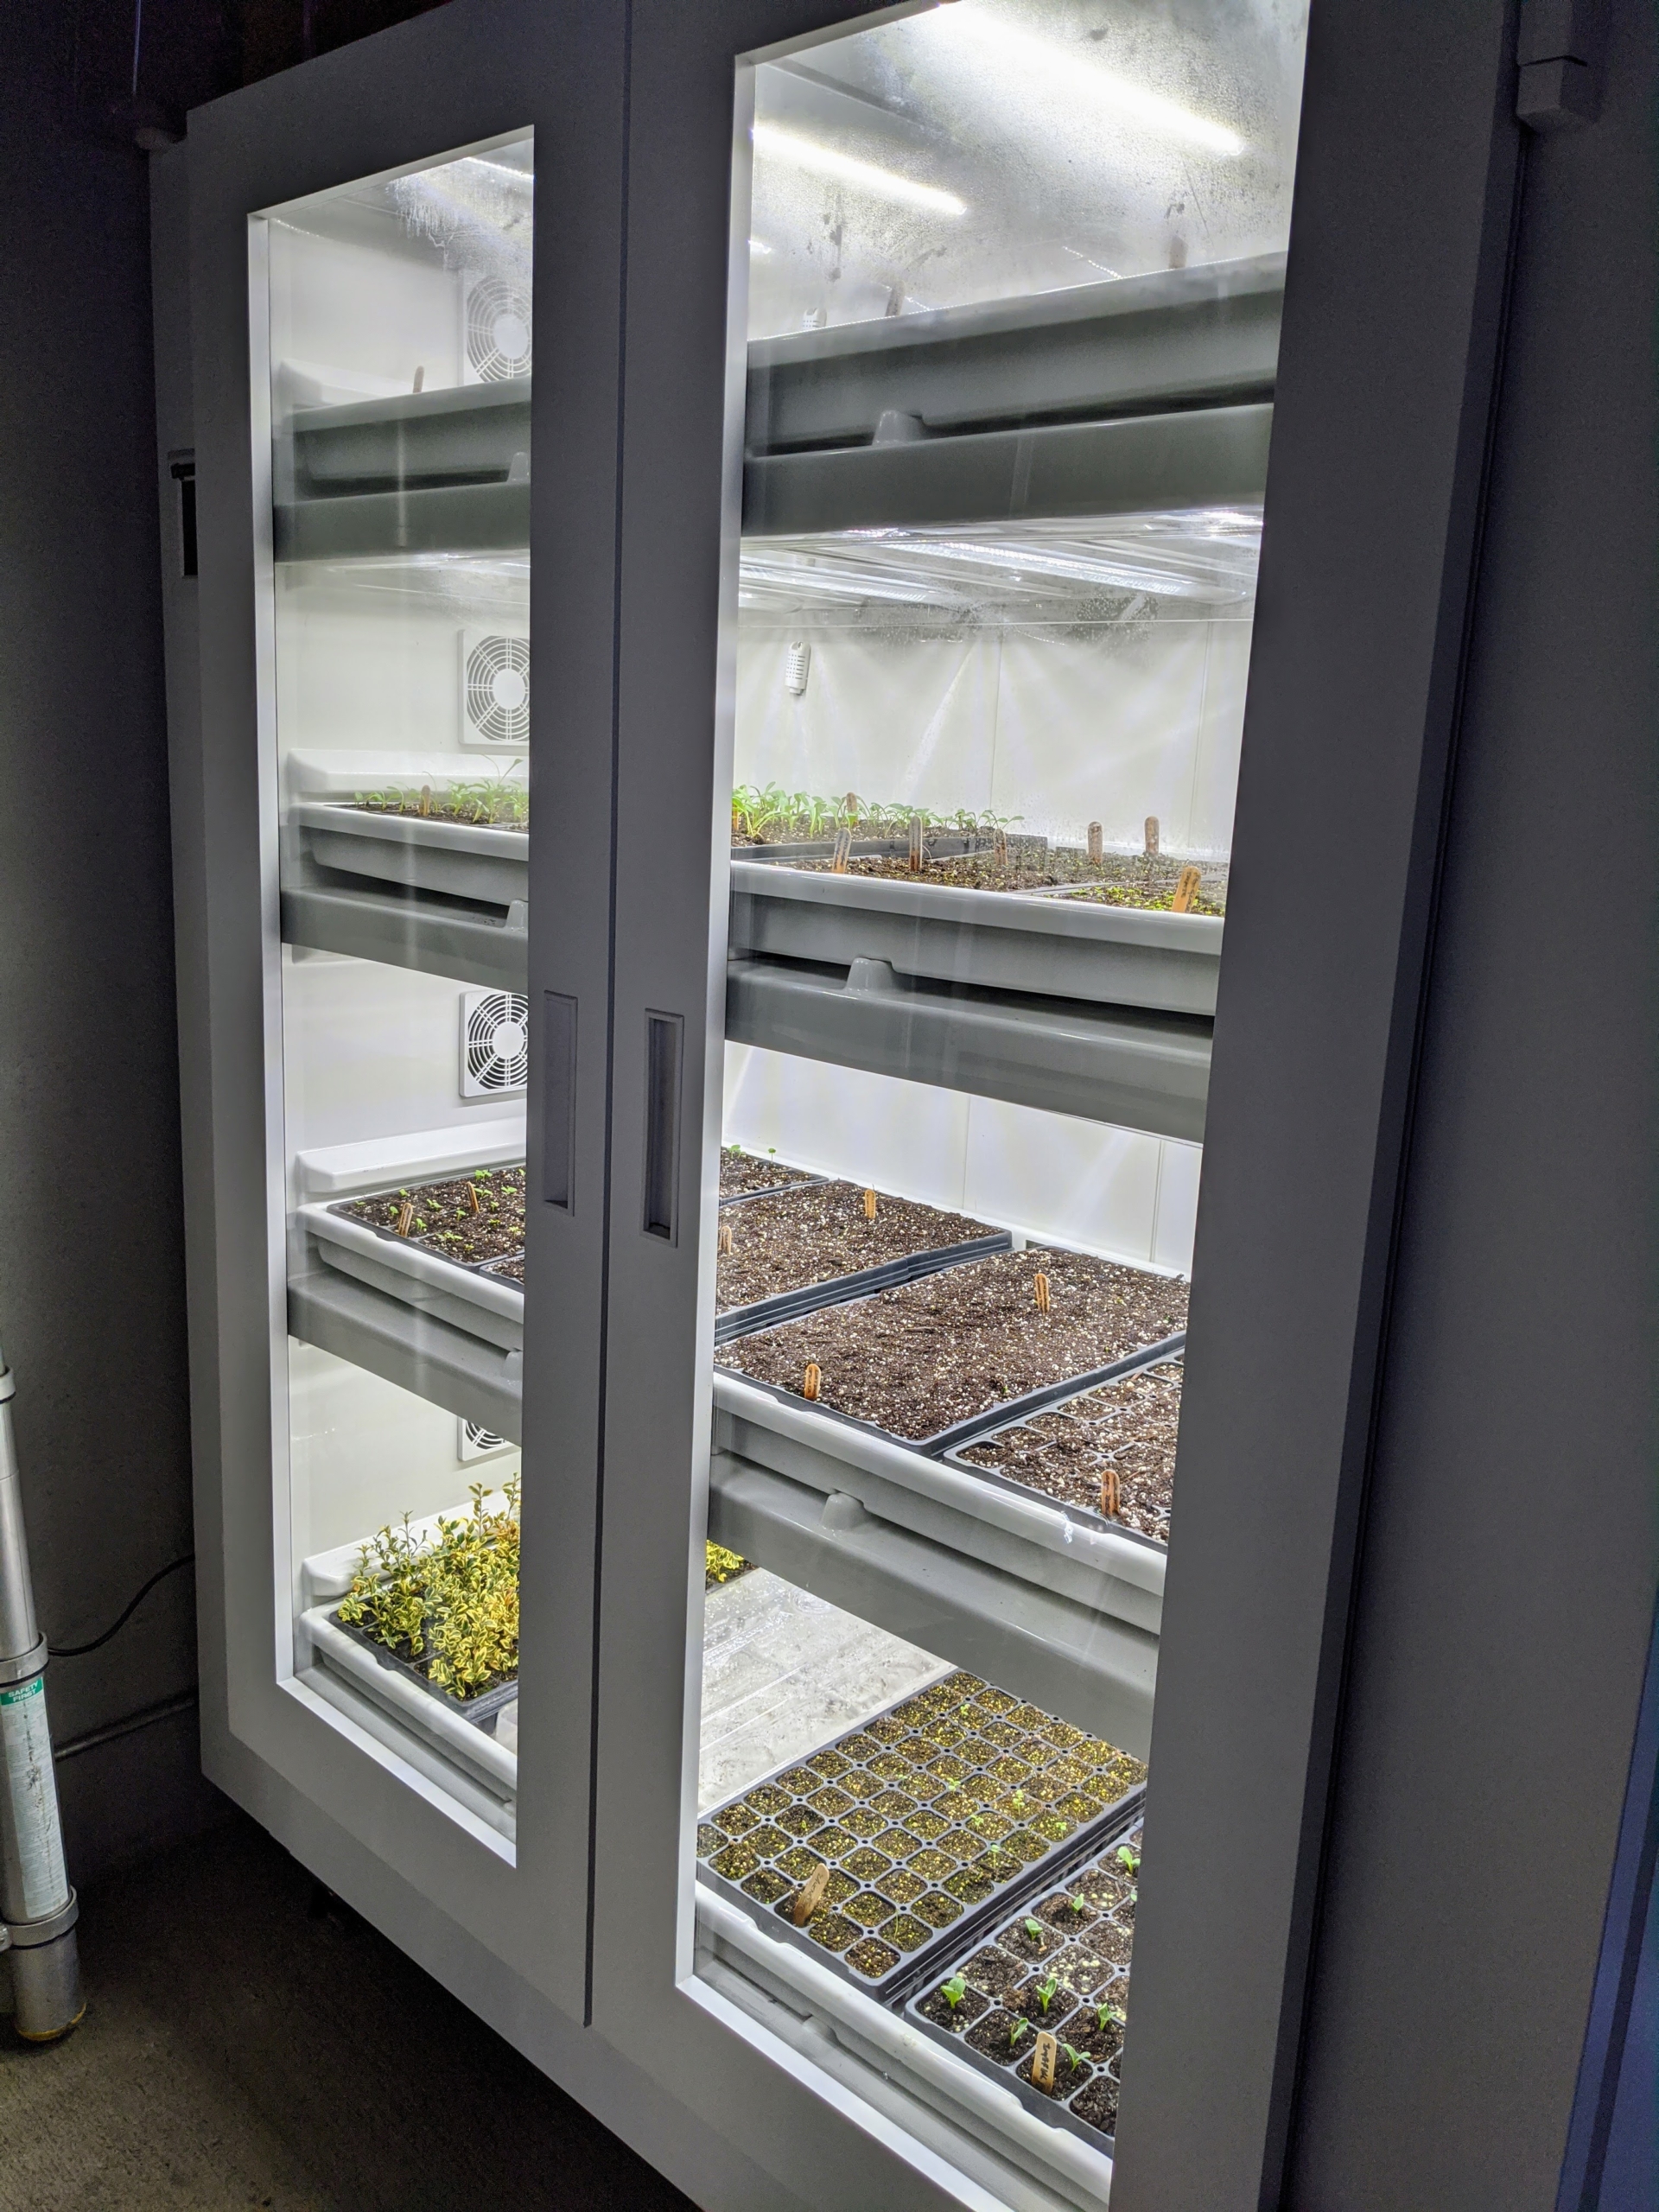
Here at my farm, most of the seedlings start off in our commercial-size Urban Cultivator. The automated system provides a self-contained growing environment with everything the plants need to thrive.
The seed trays sit over reservoirs and are automatically watered from the back of the unit. The trays receive about 18-hours of light a day.
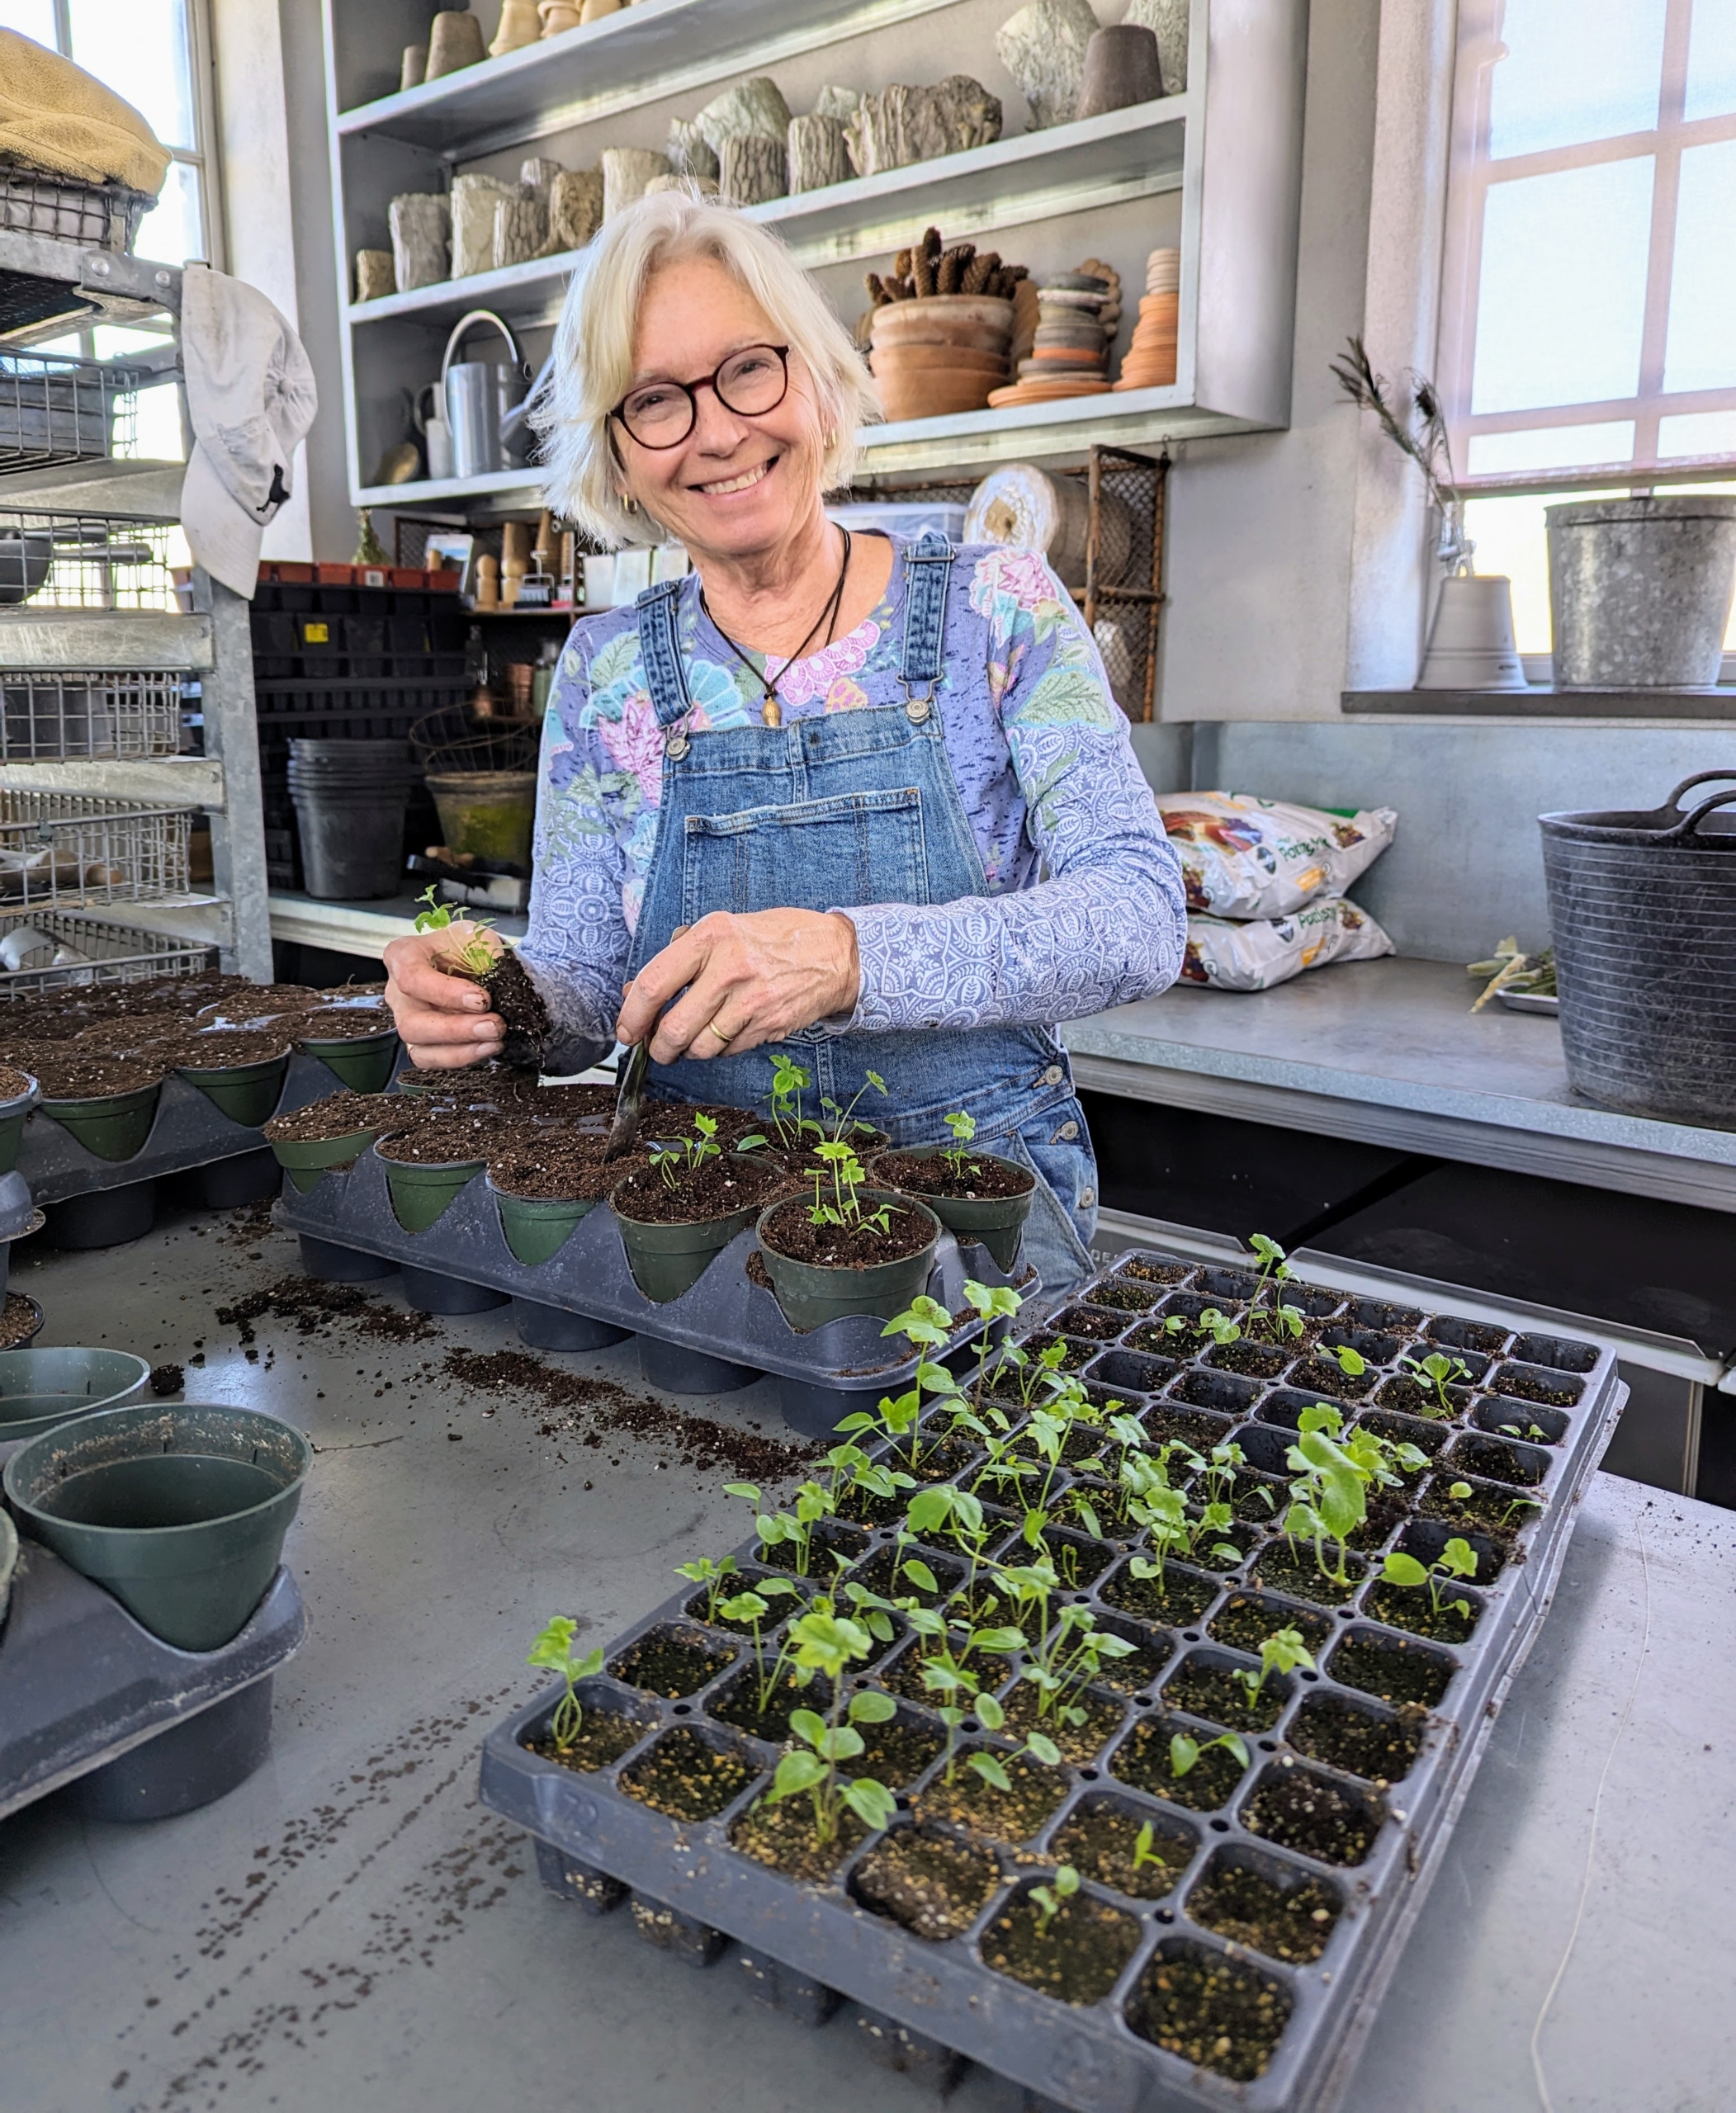
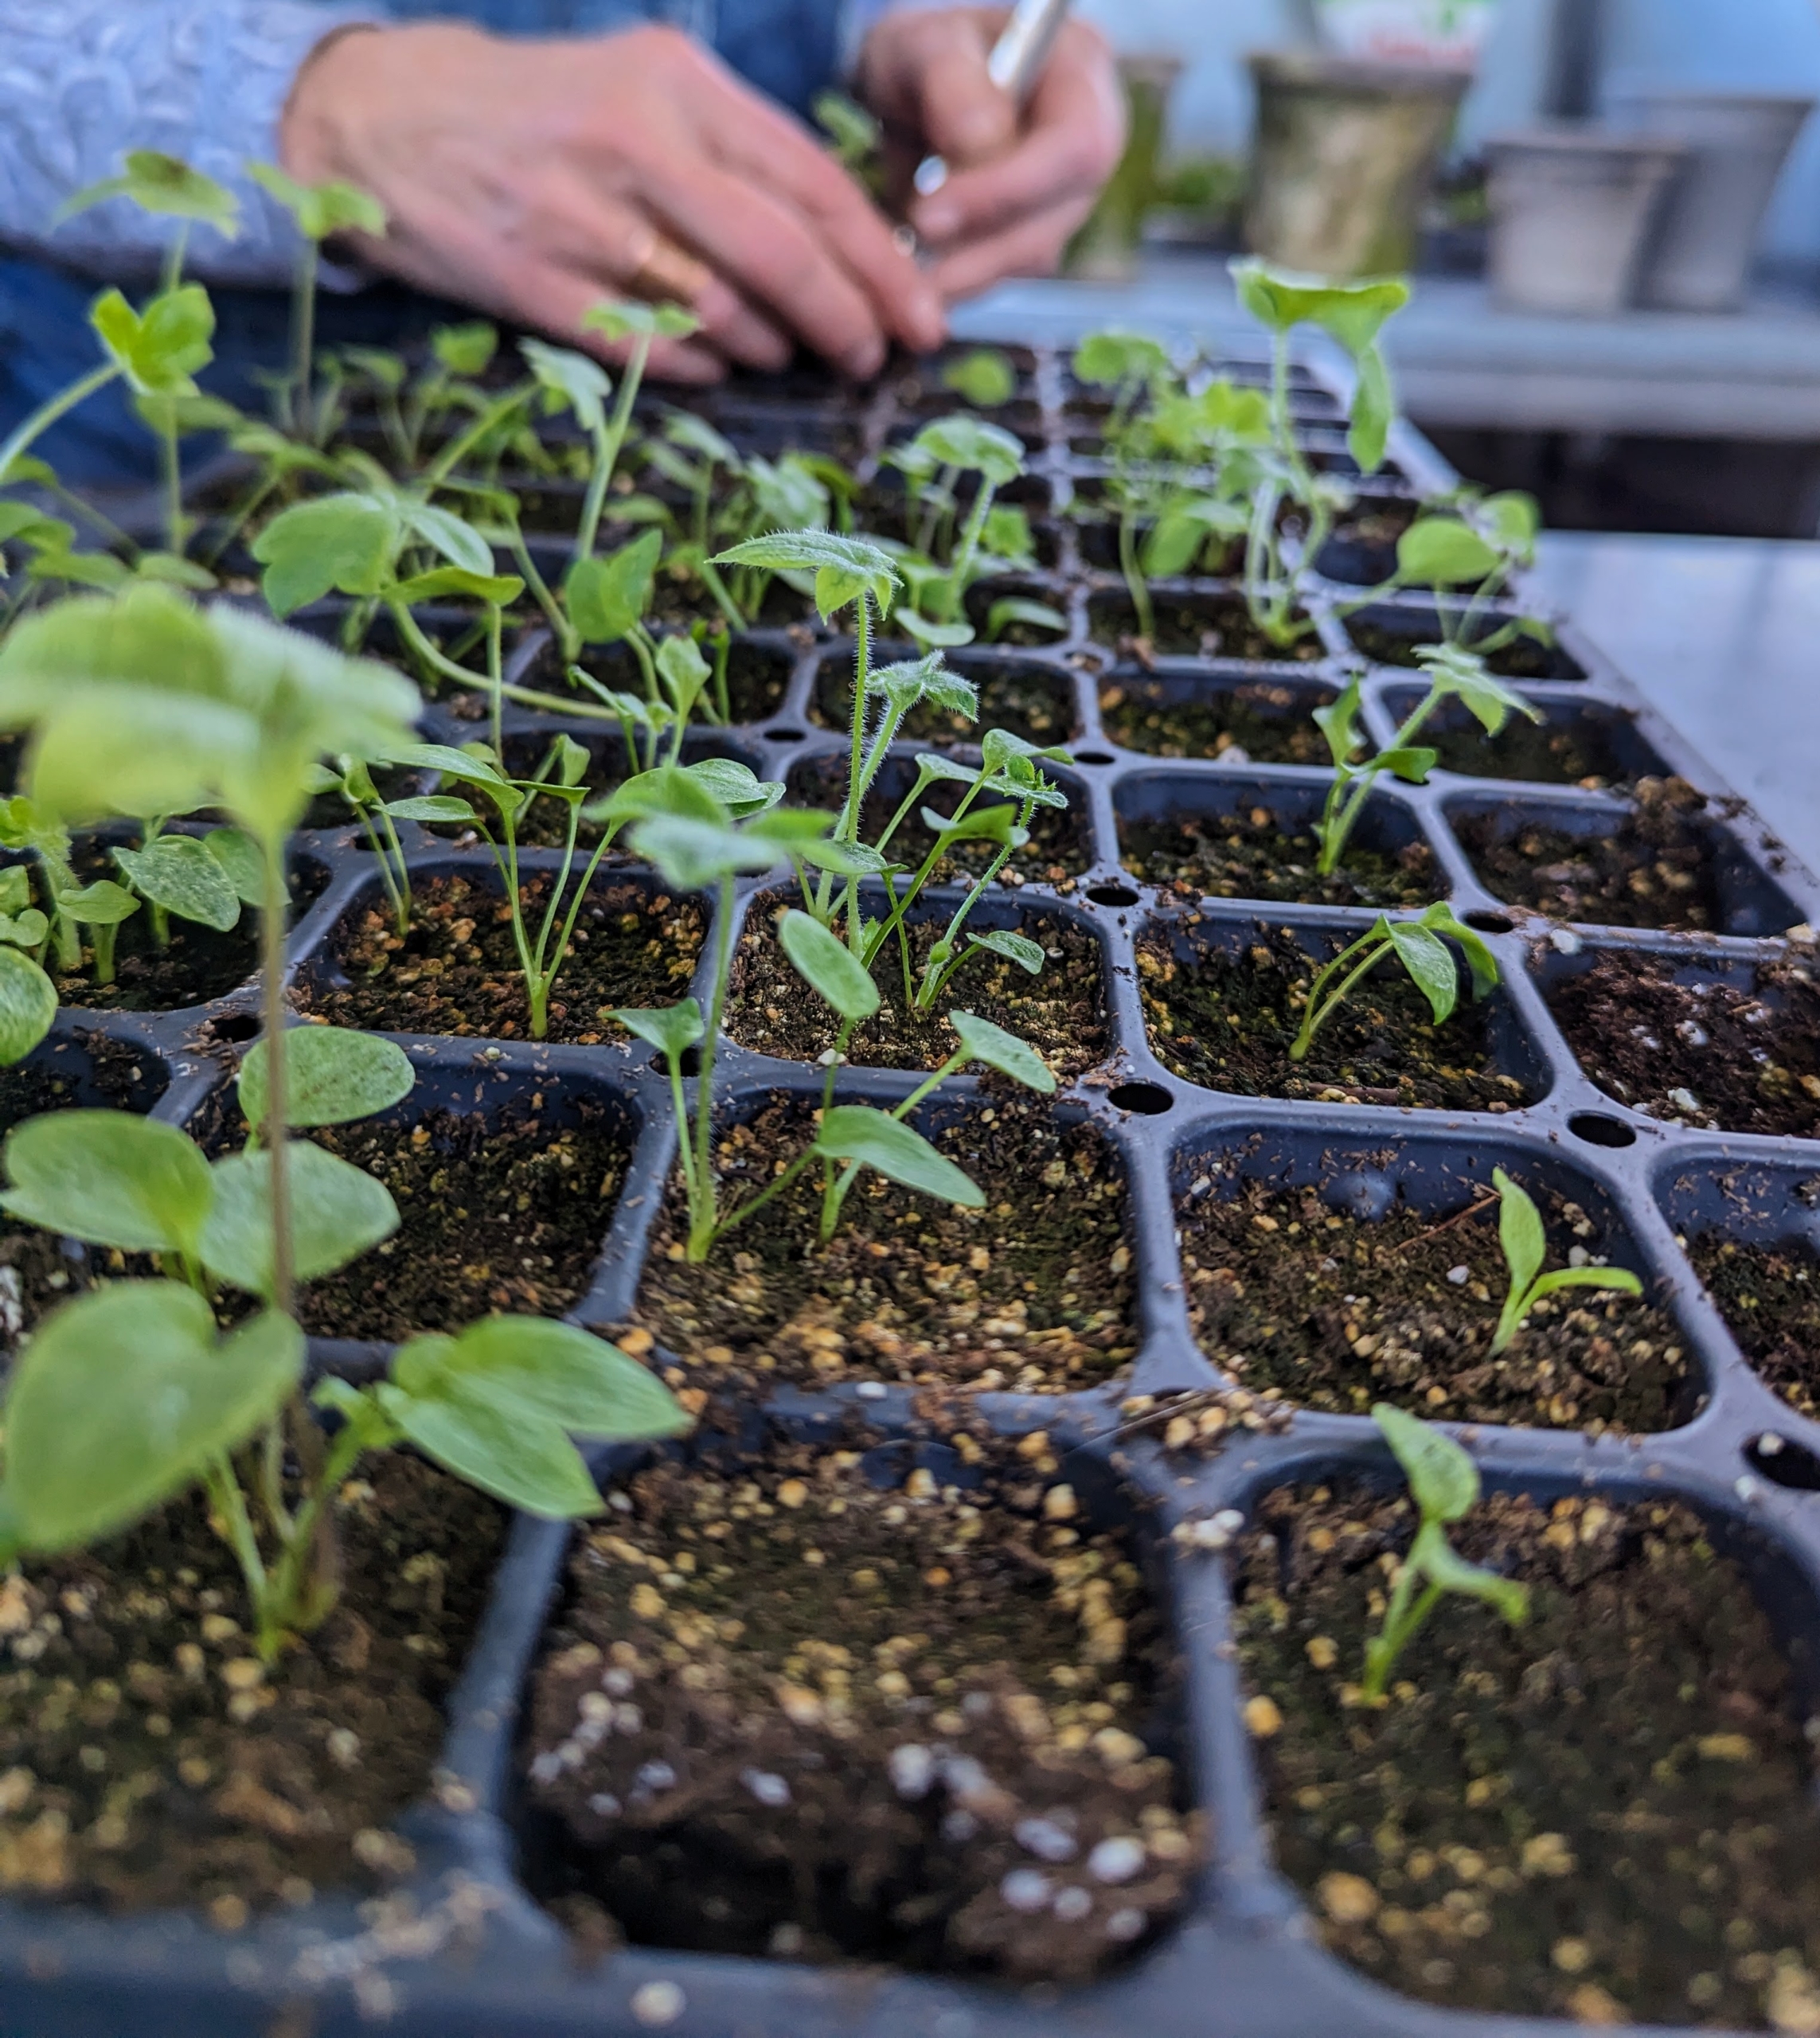
Every winter my Skylands gardener, Wendy Norling, comes down to help at the Bedford farm. She comes just in time to transplant hundreds of growing flower seedlings. It’s a great way to learn about my farm and how its growing season differs from the one up in Maine.
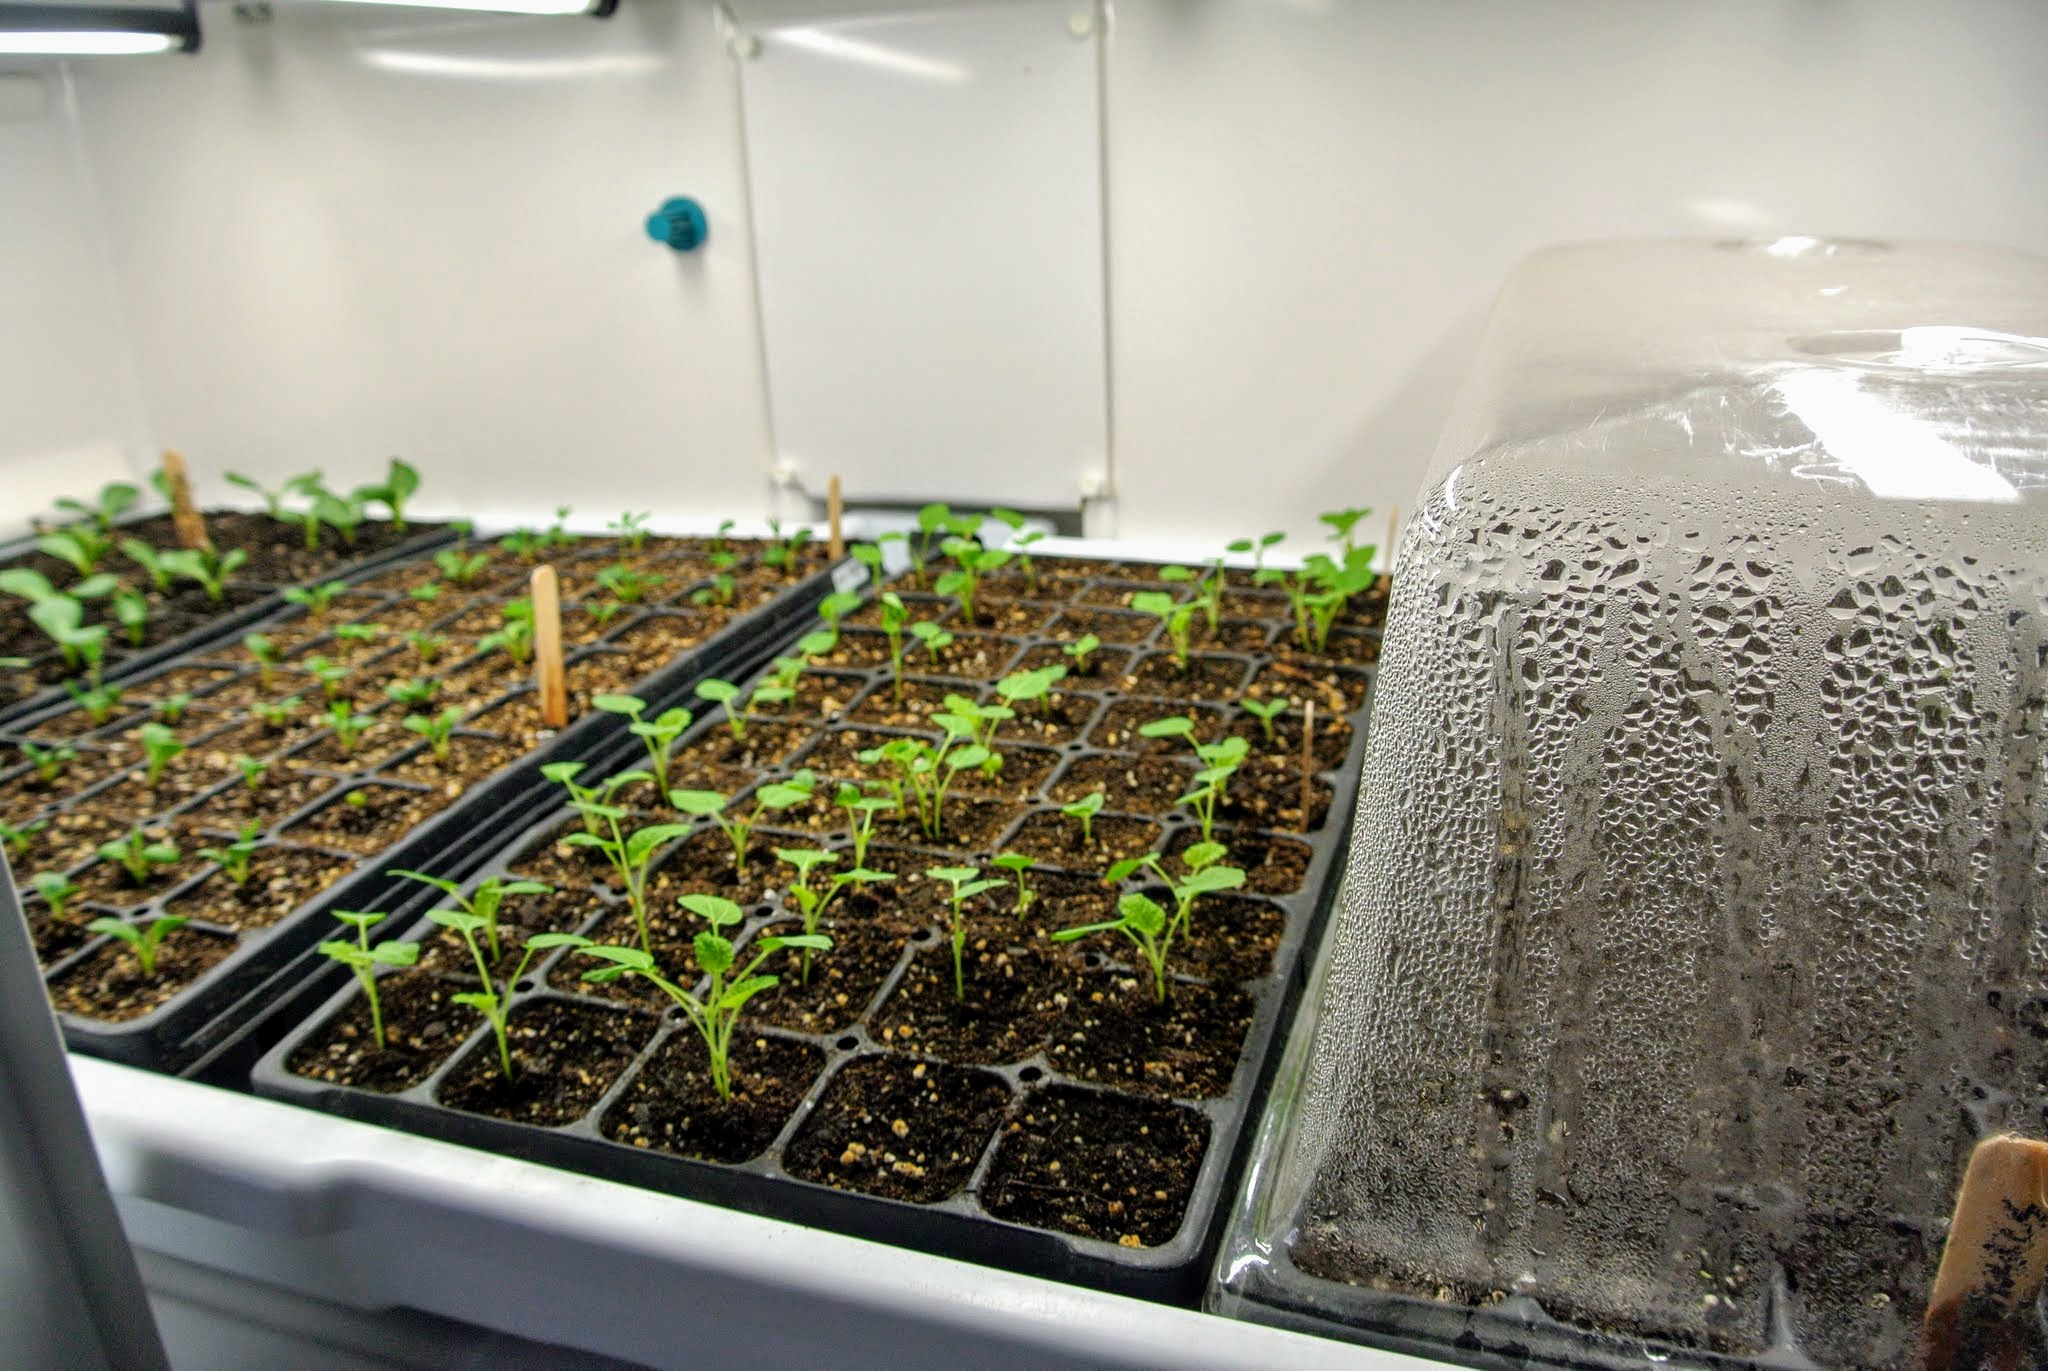
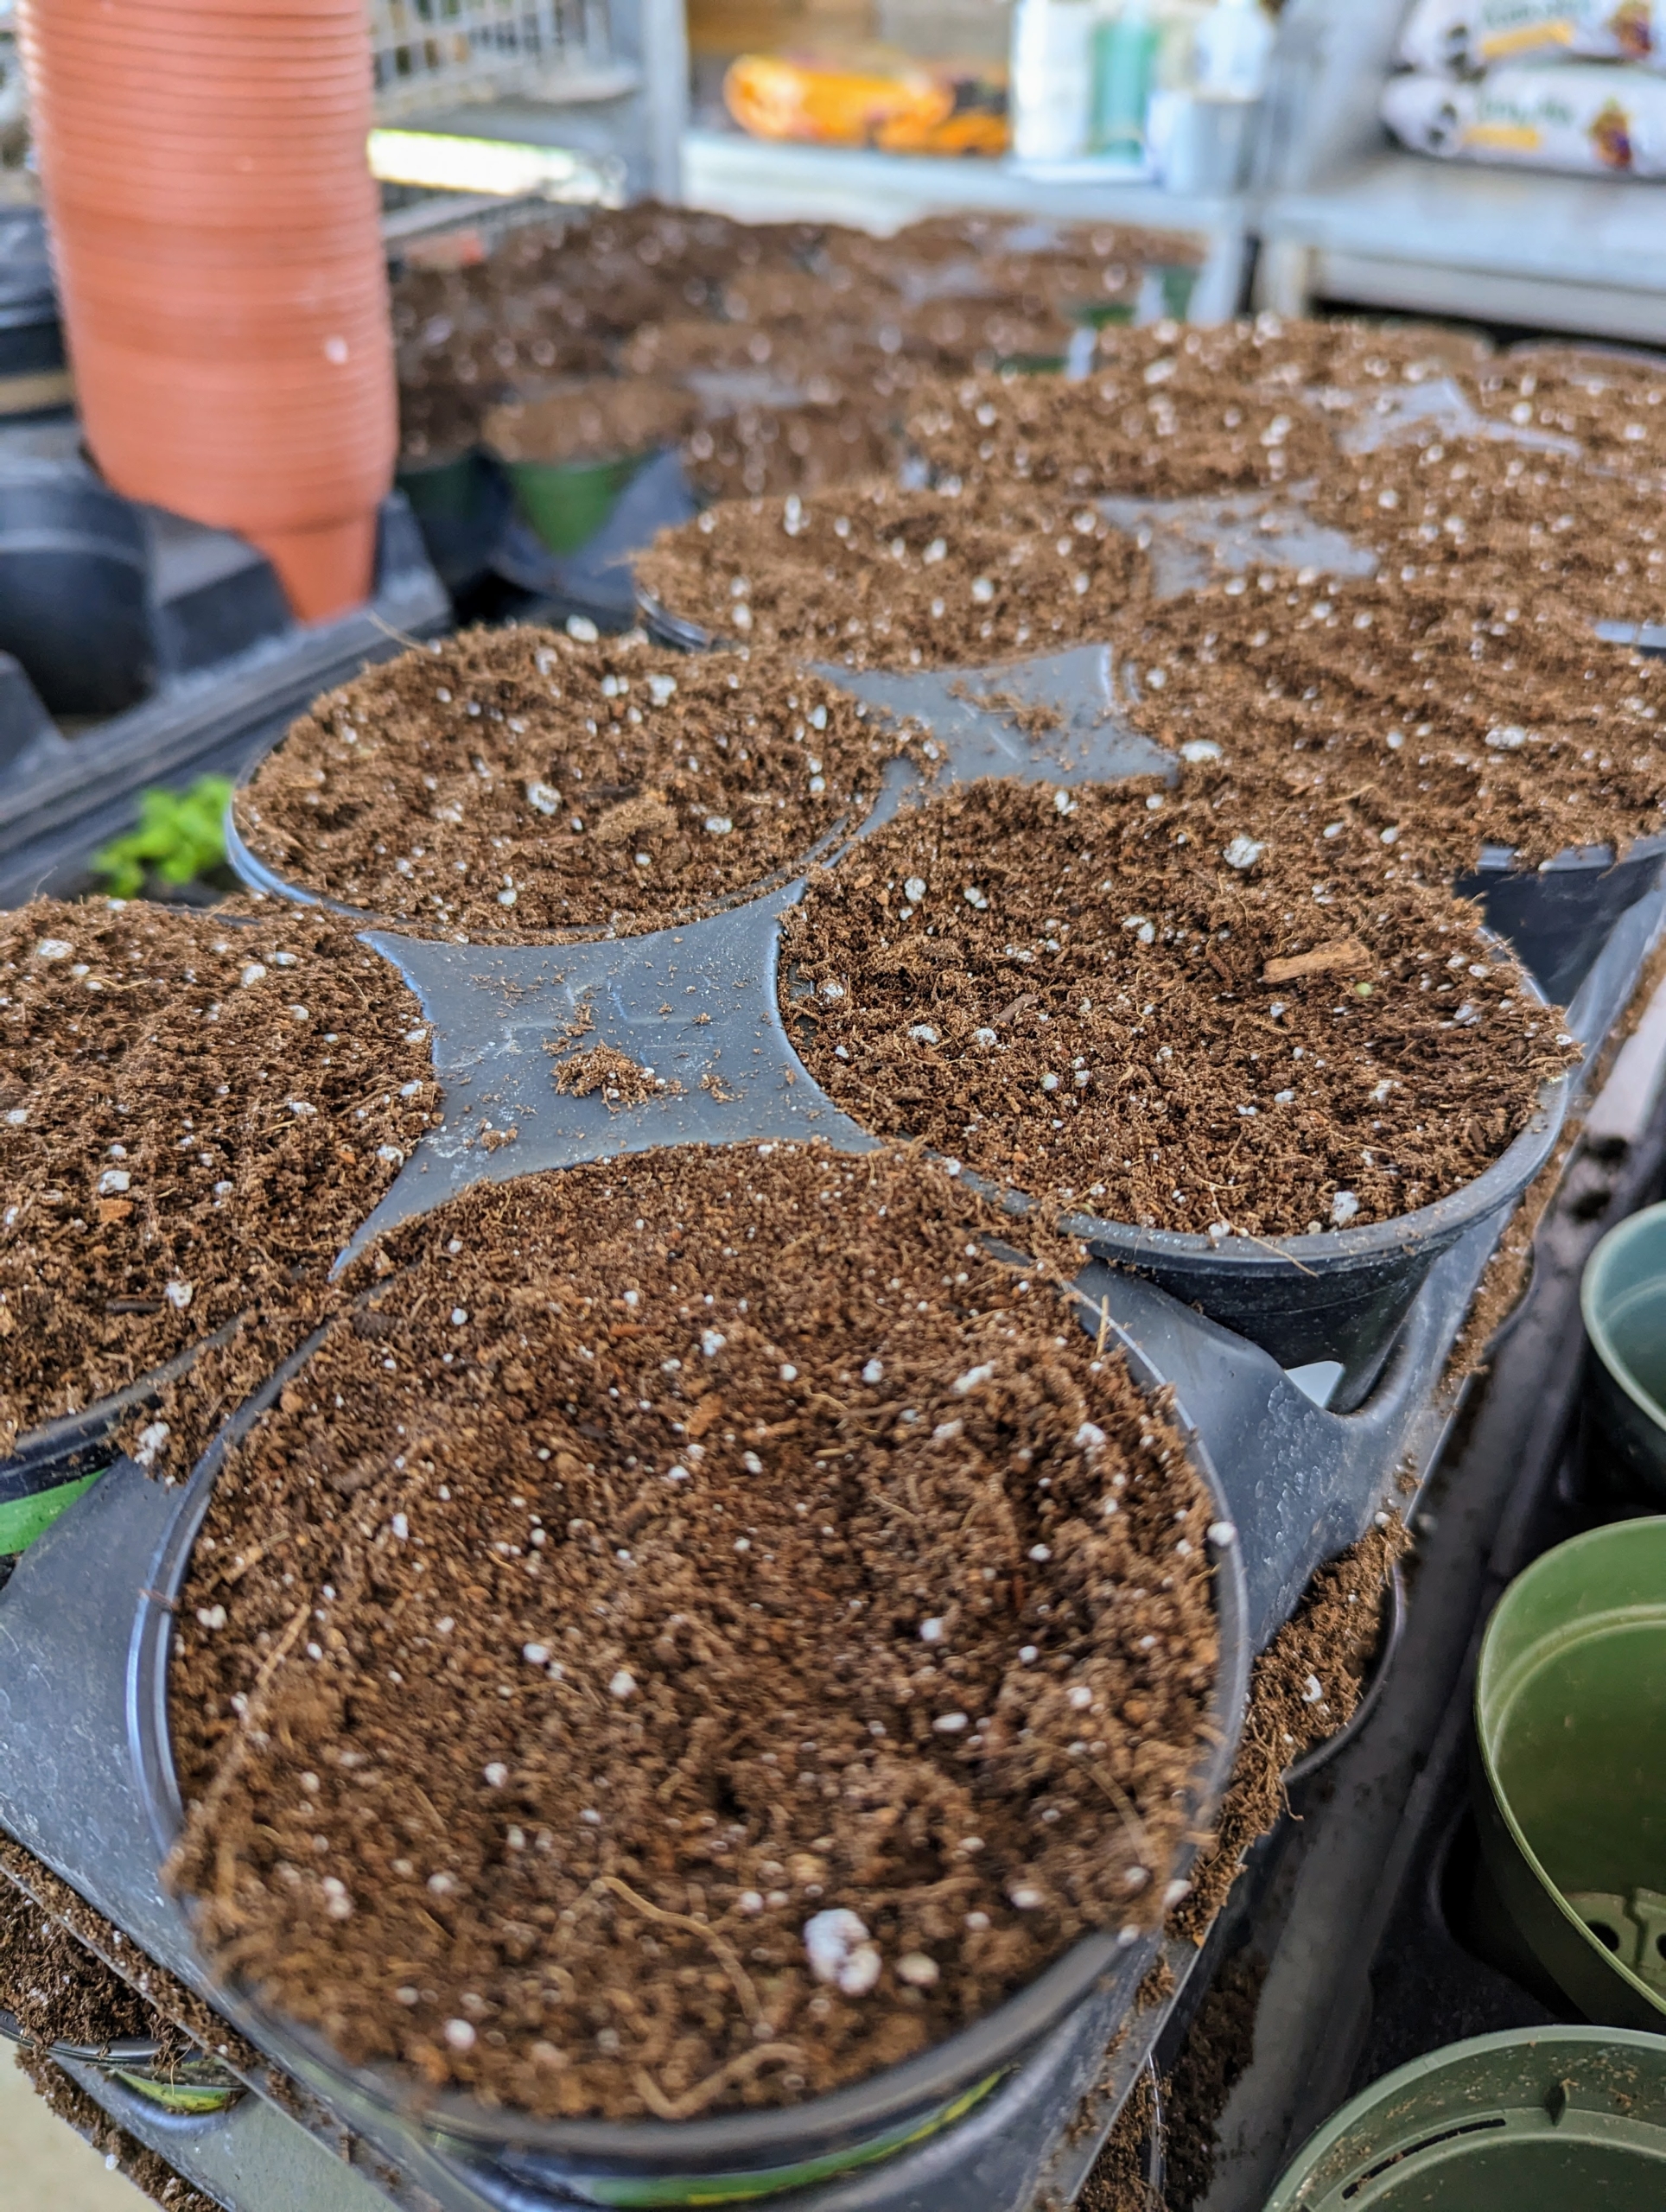
As the seeds germinate and begin to mature, it’s important to check their development, so they continue to thrive. Regardless of how perfect seeds may appear, germination is never guaranteed, so multiple seeds are always planted in each seed starting tray cell. This provides a better chance at least one in each cell will take root.
When the seedlings are a couple inches tall and have reached their “true leaf” stage, which is when each seedling has sprouted a second set of leaves, it’s time for a process called selective thinning. Selective thinning prevents overcrowding, so seedlings don’t have competition for soil nutrients or room to grow.
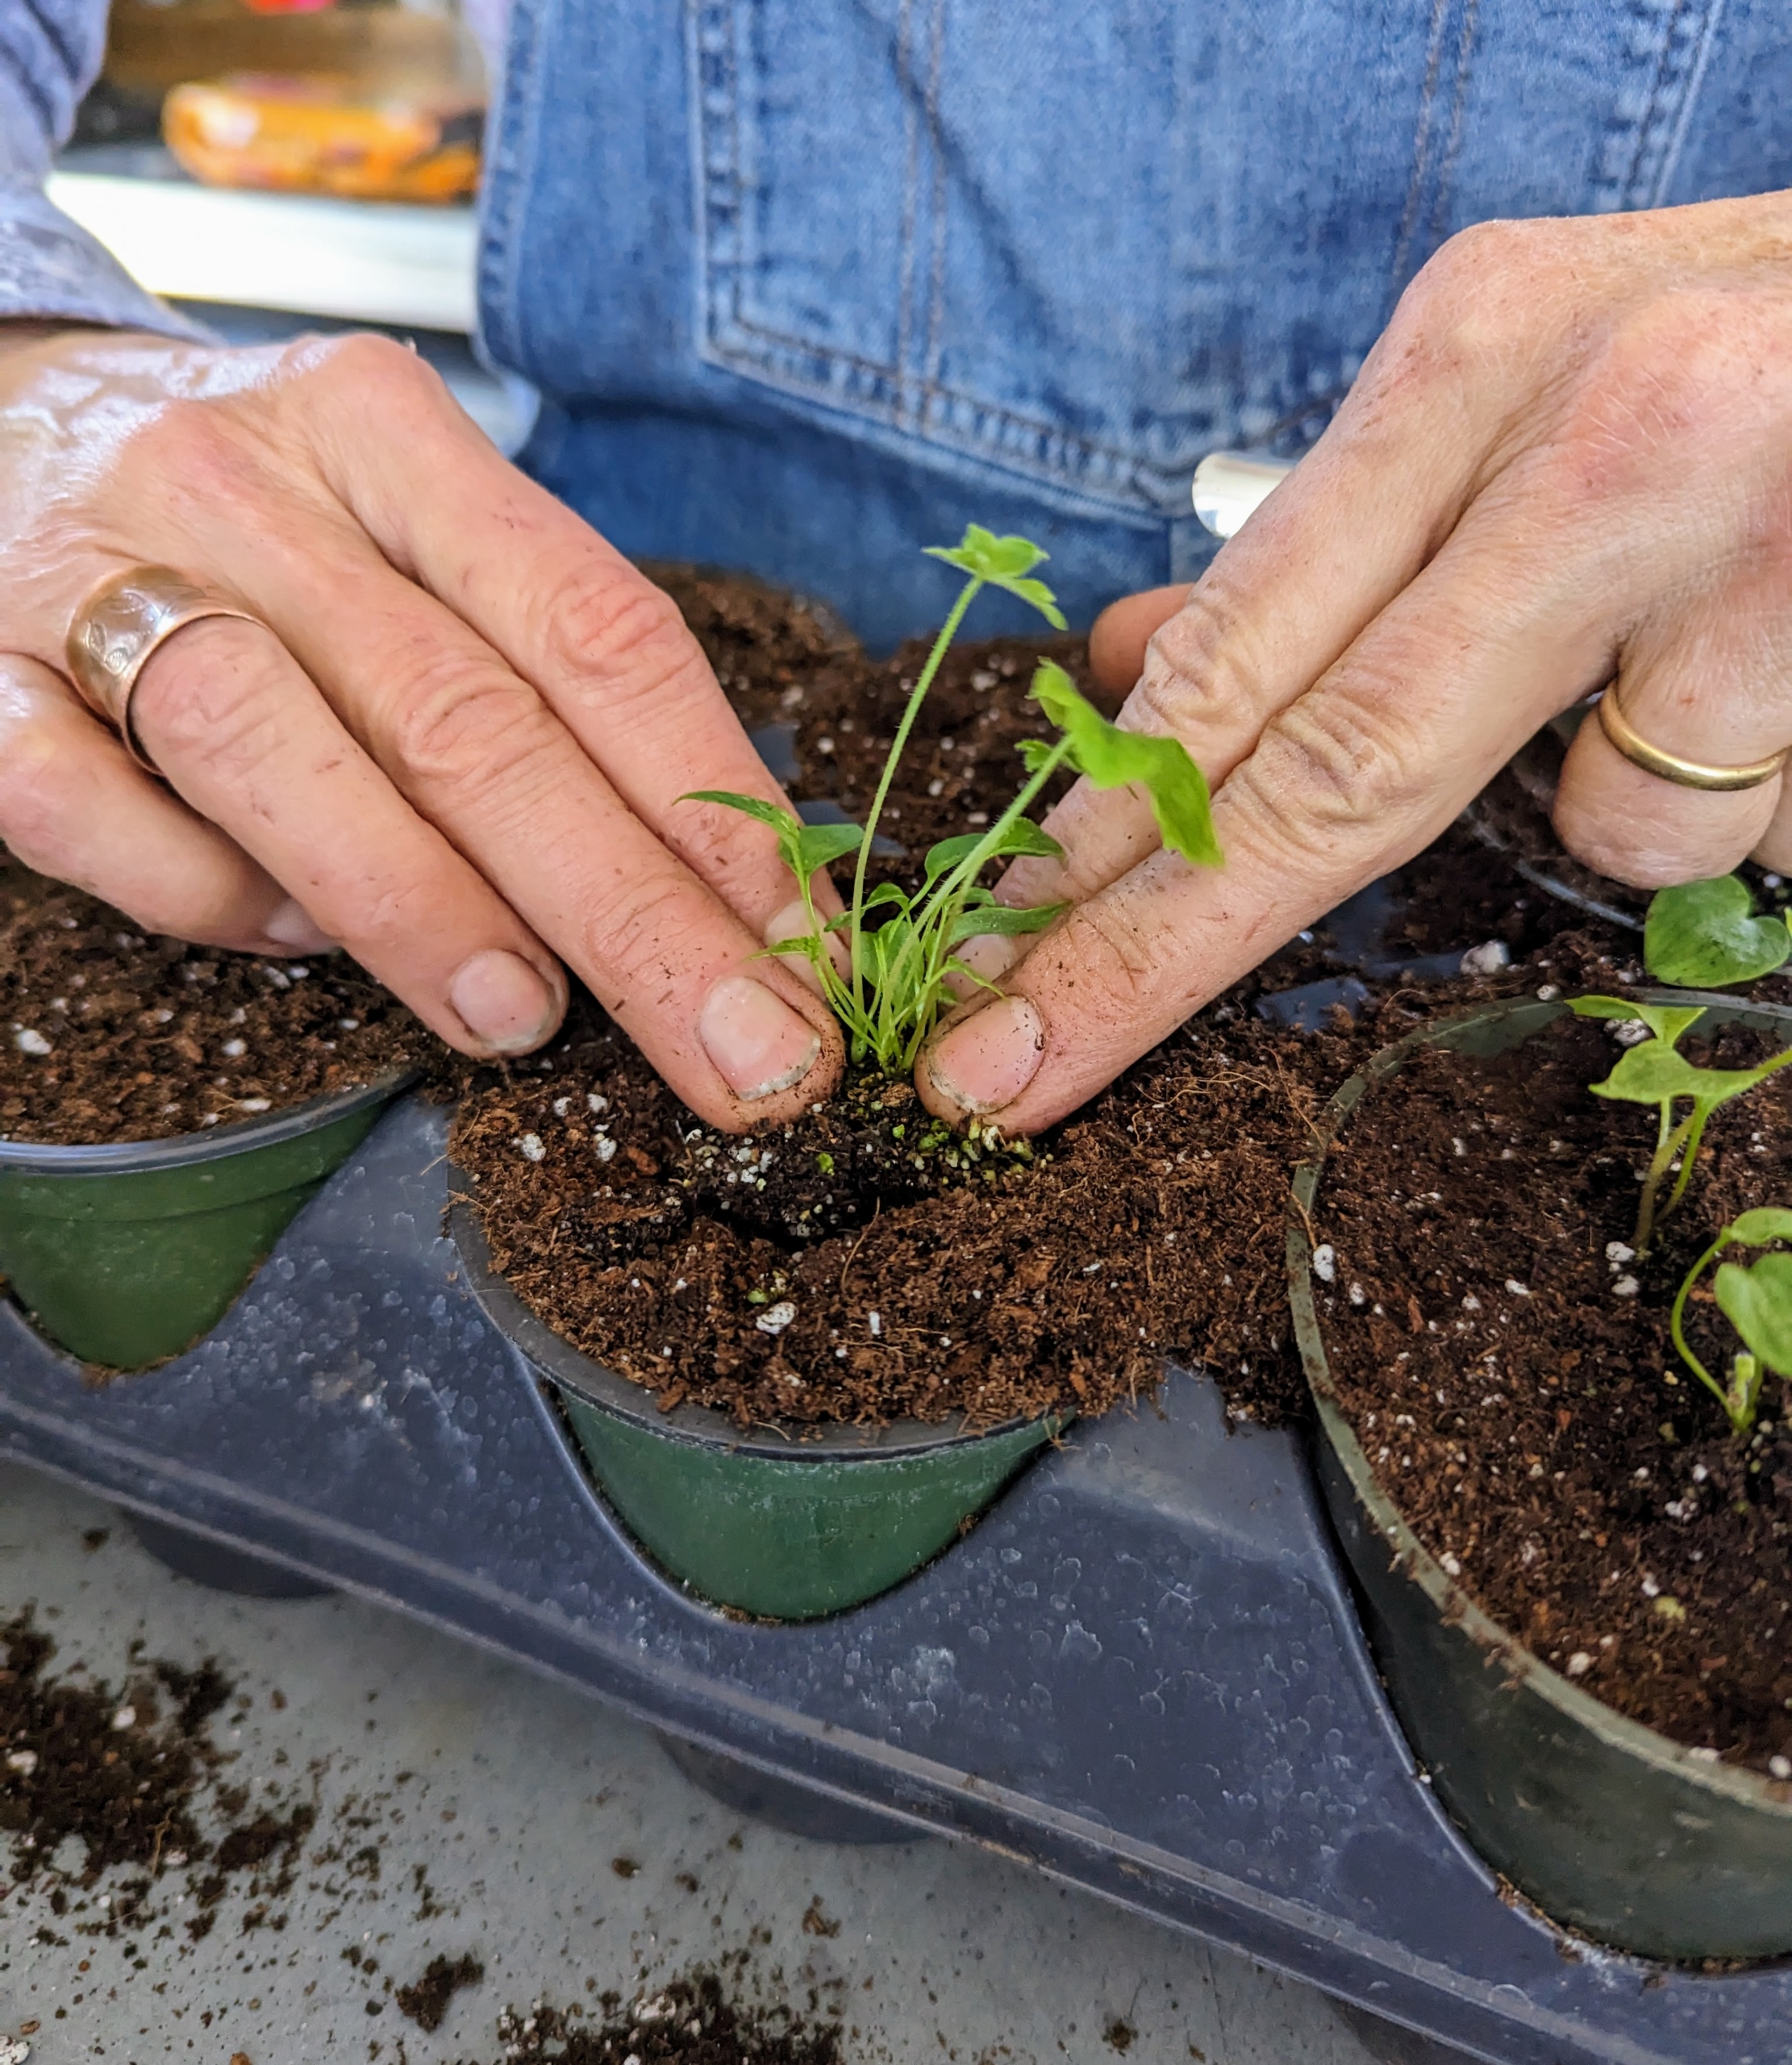
When thinning, Wendy carefully inspects the seedlings and determines the strongest ones. She looks for fleshy leaves, upright stems, and center positioning in the space. The smaller, weaker, more spindly looking seedlings are removed, leaving only the stronger ones to mature. These stronger specimens will be transplanted into larger cells or pots.
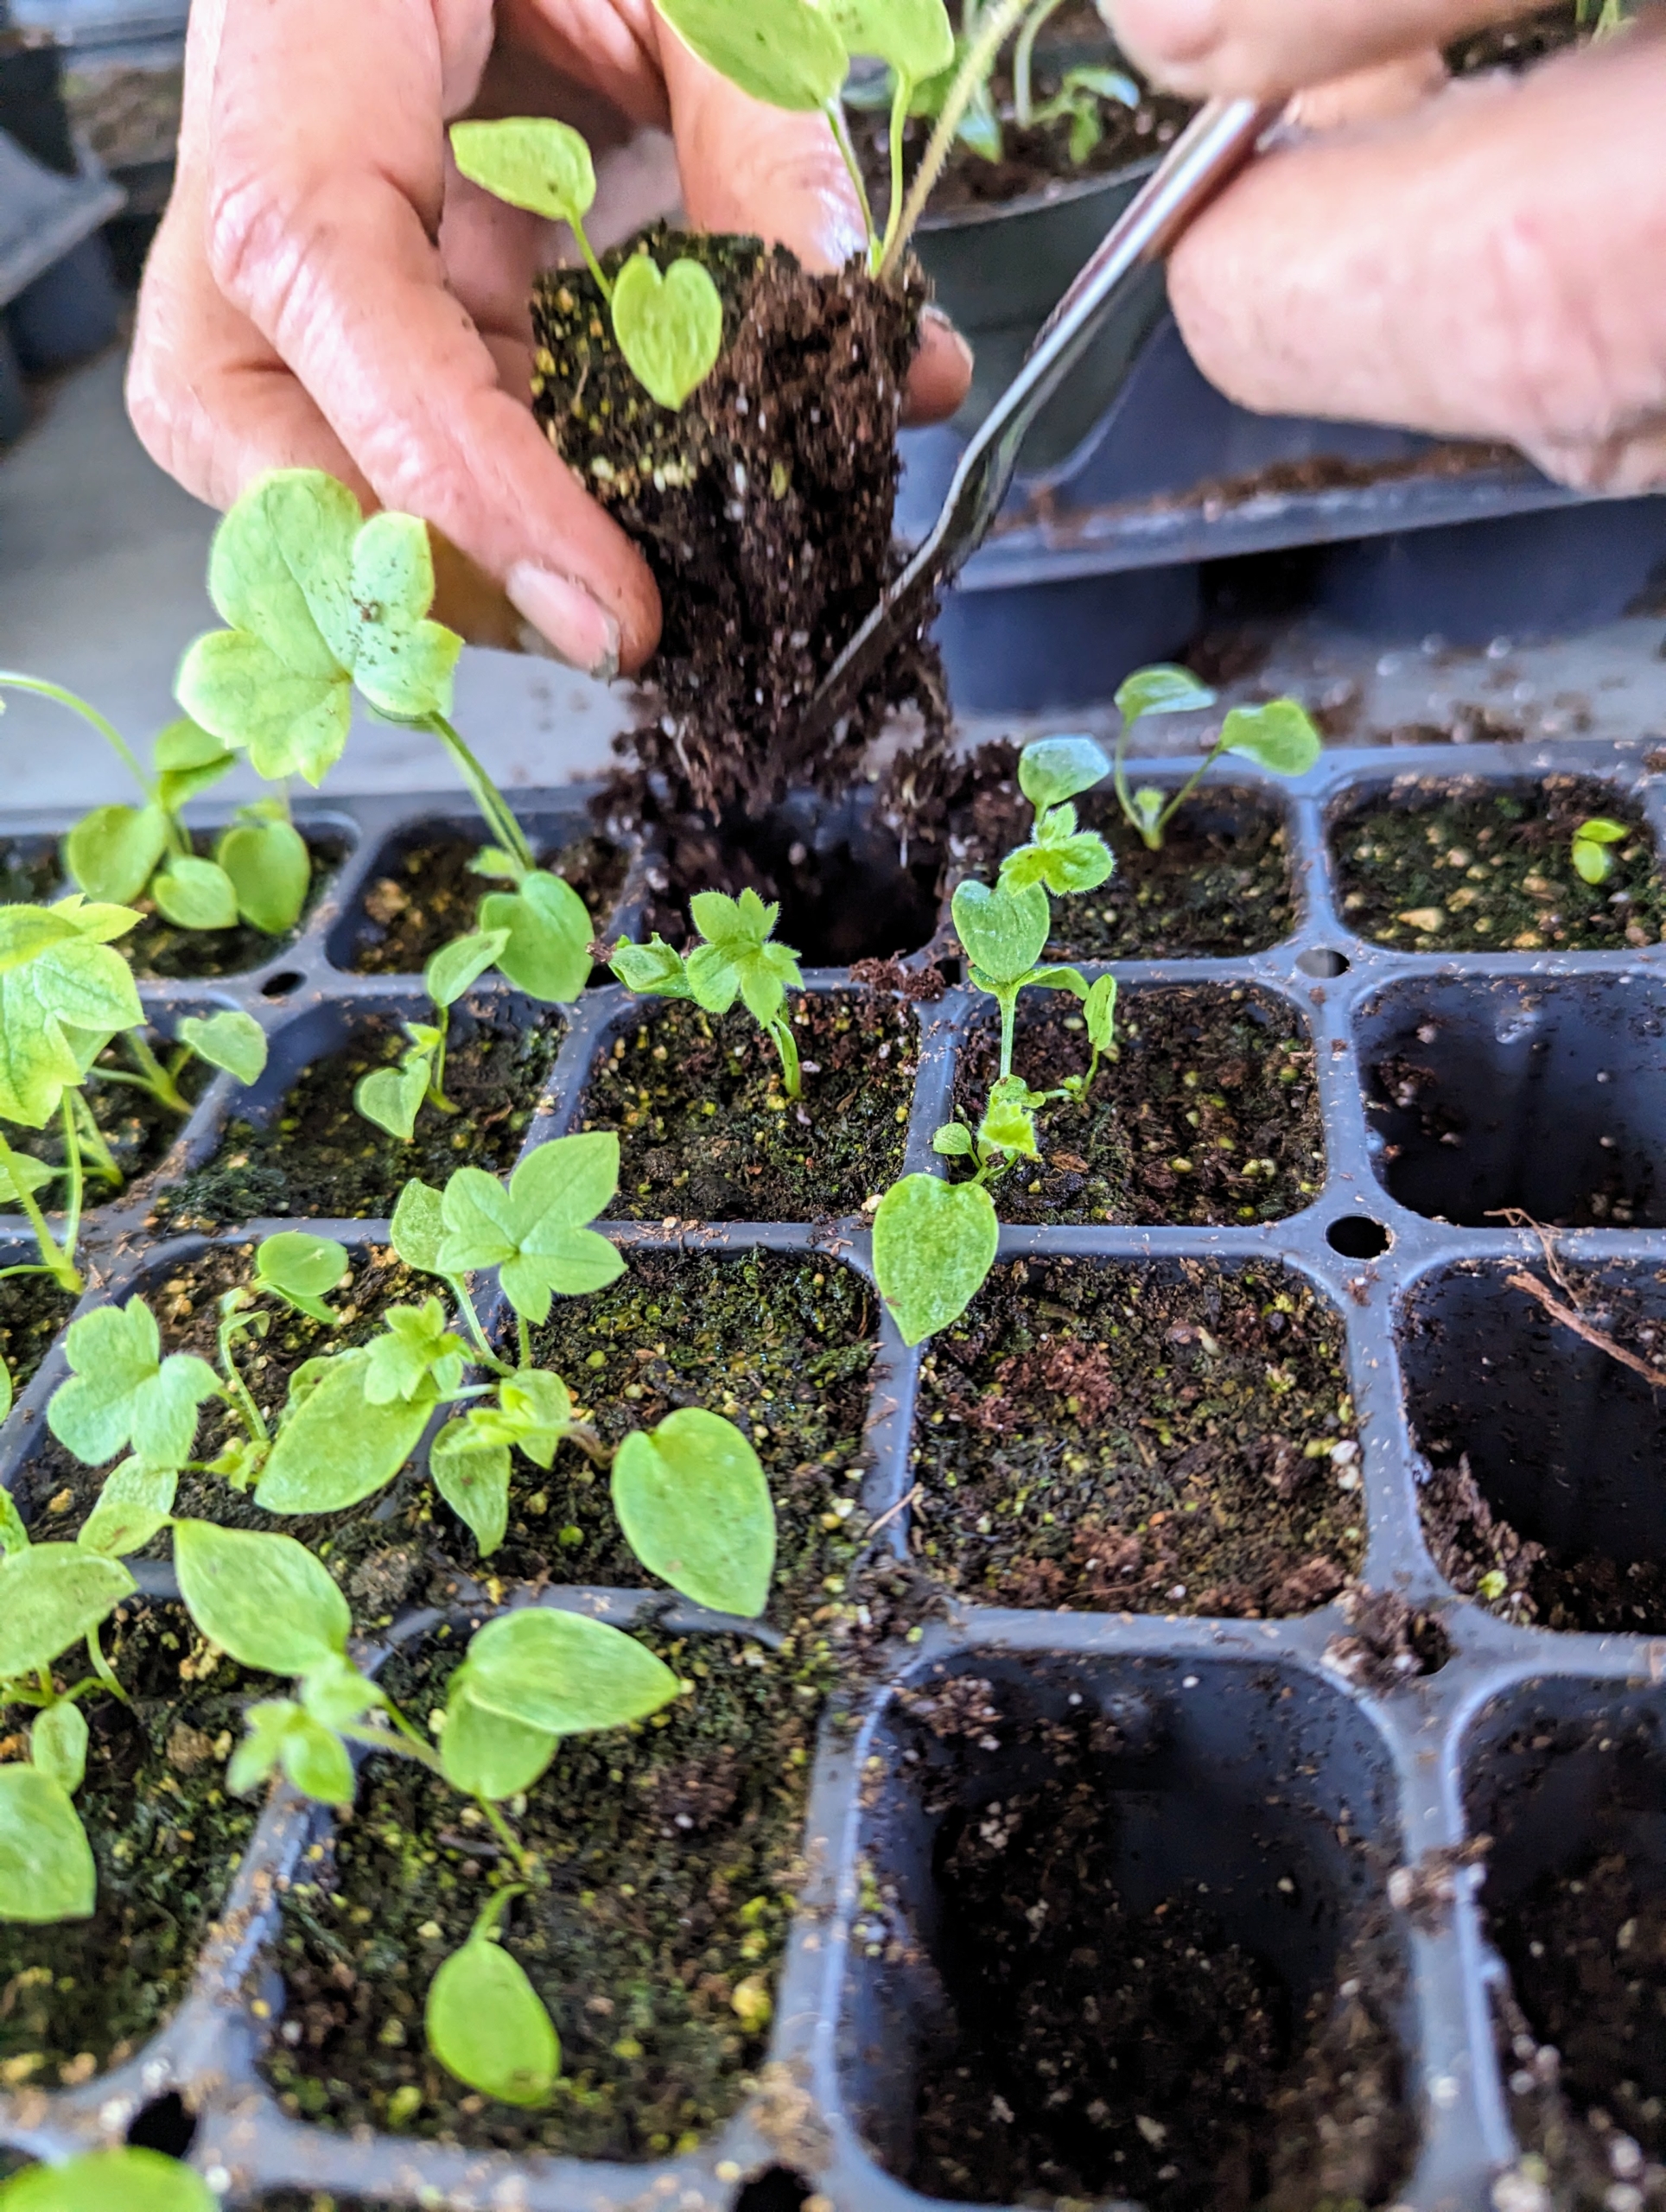
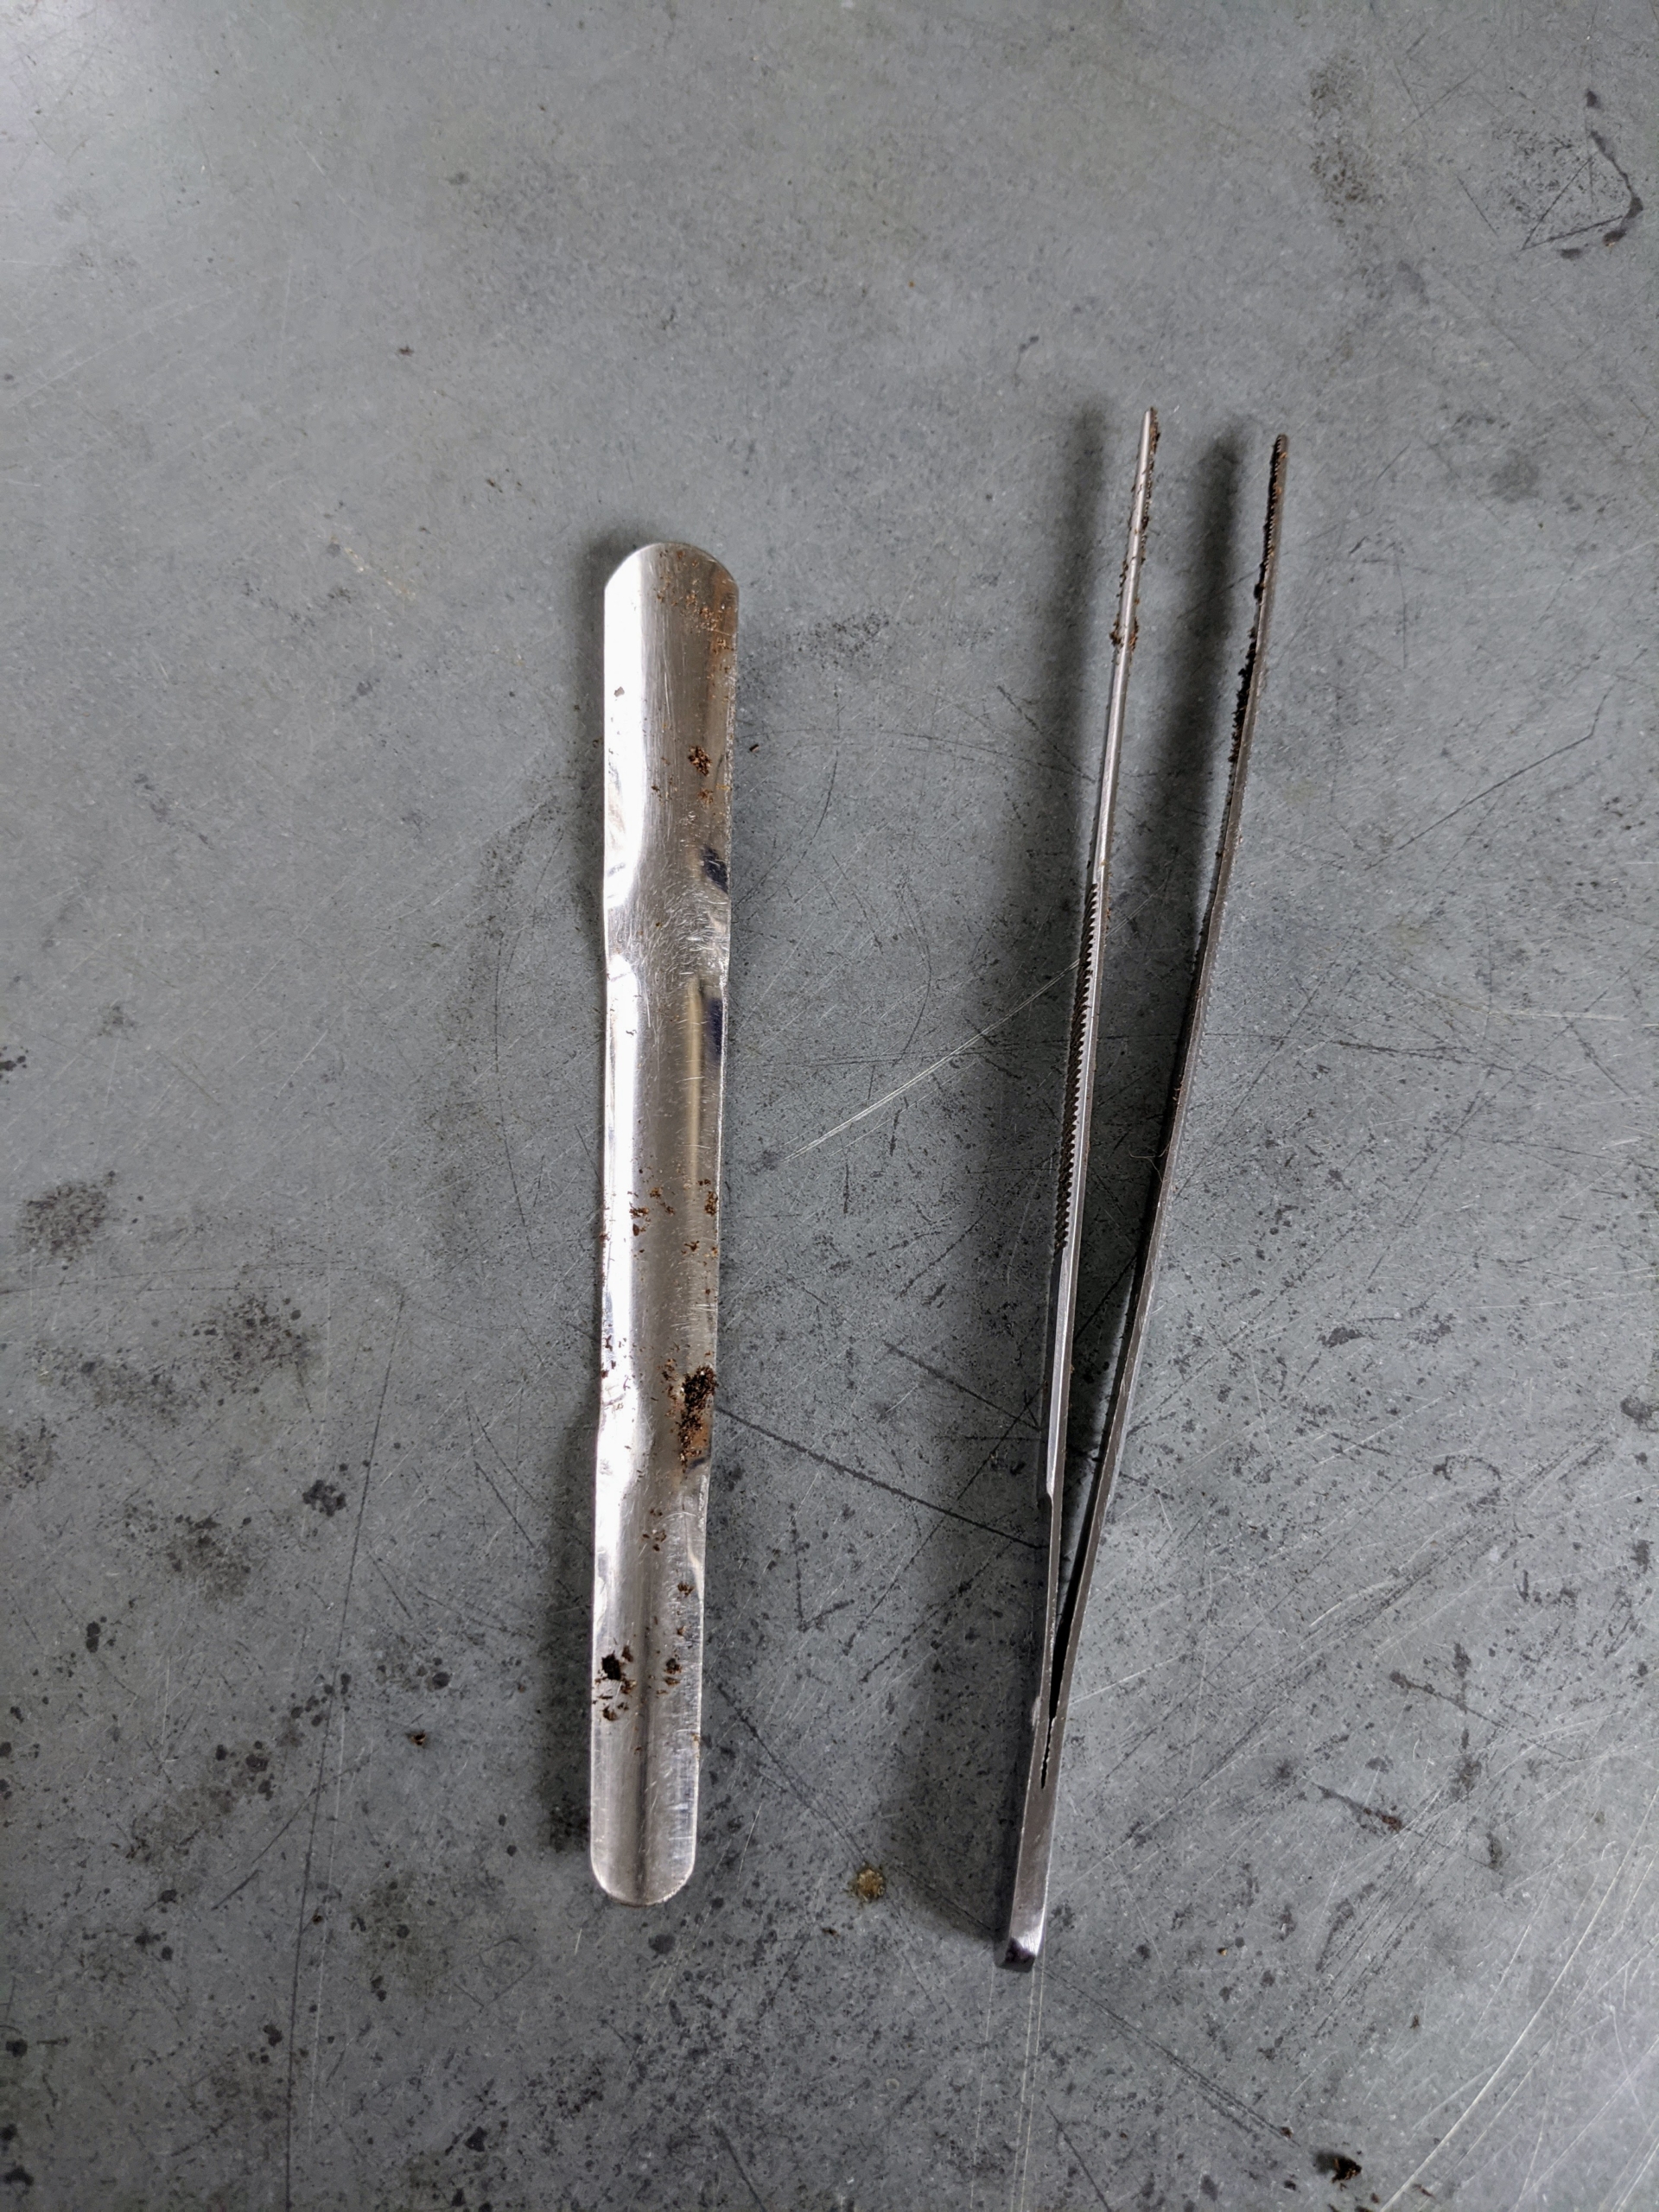
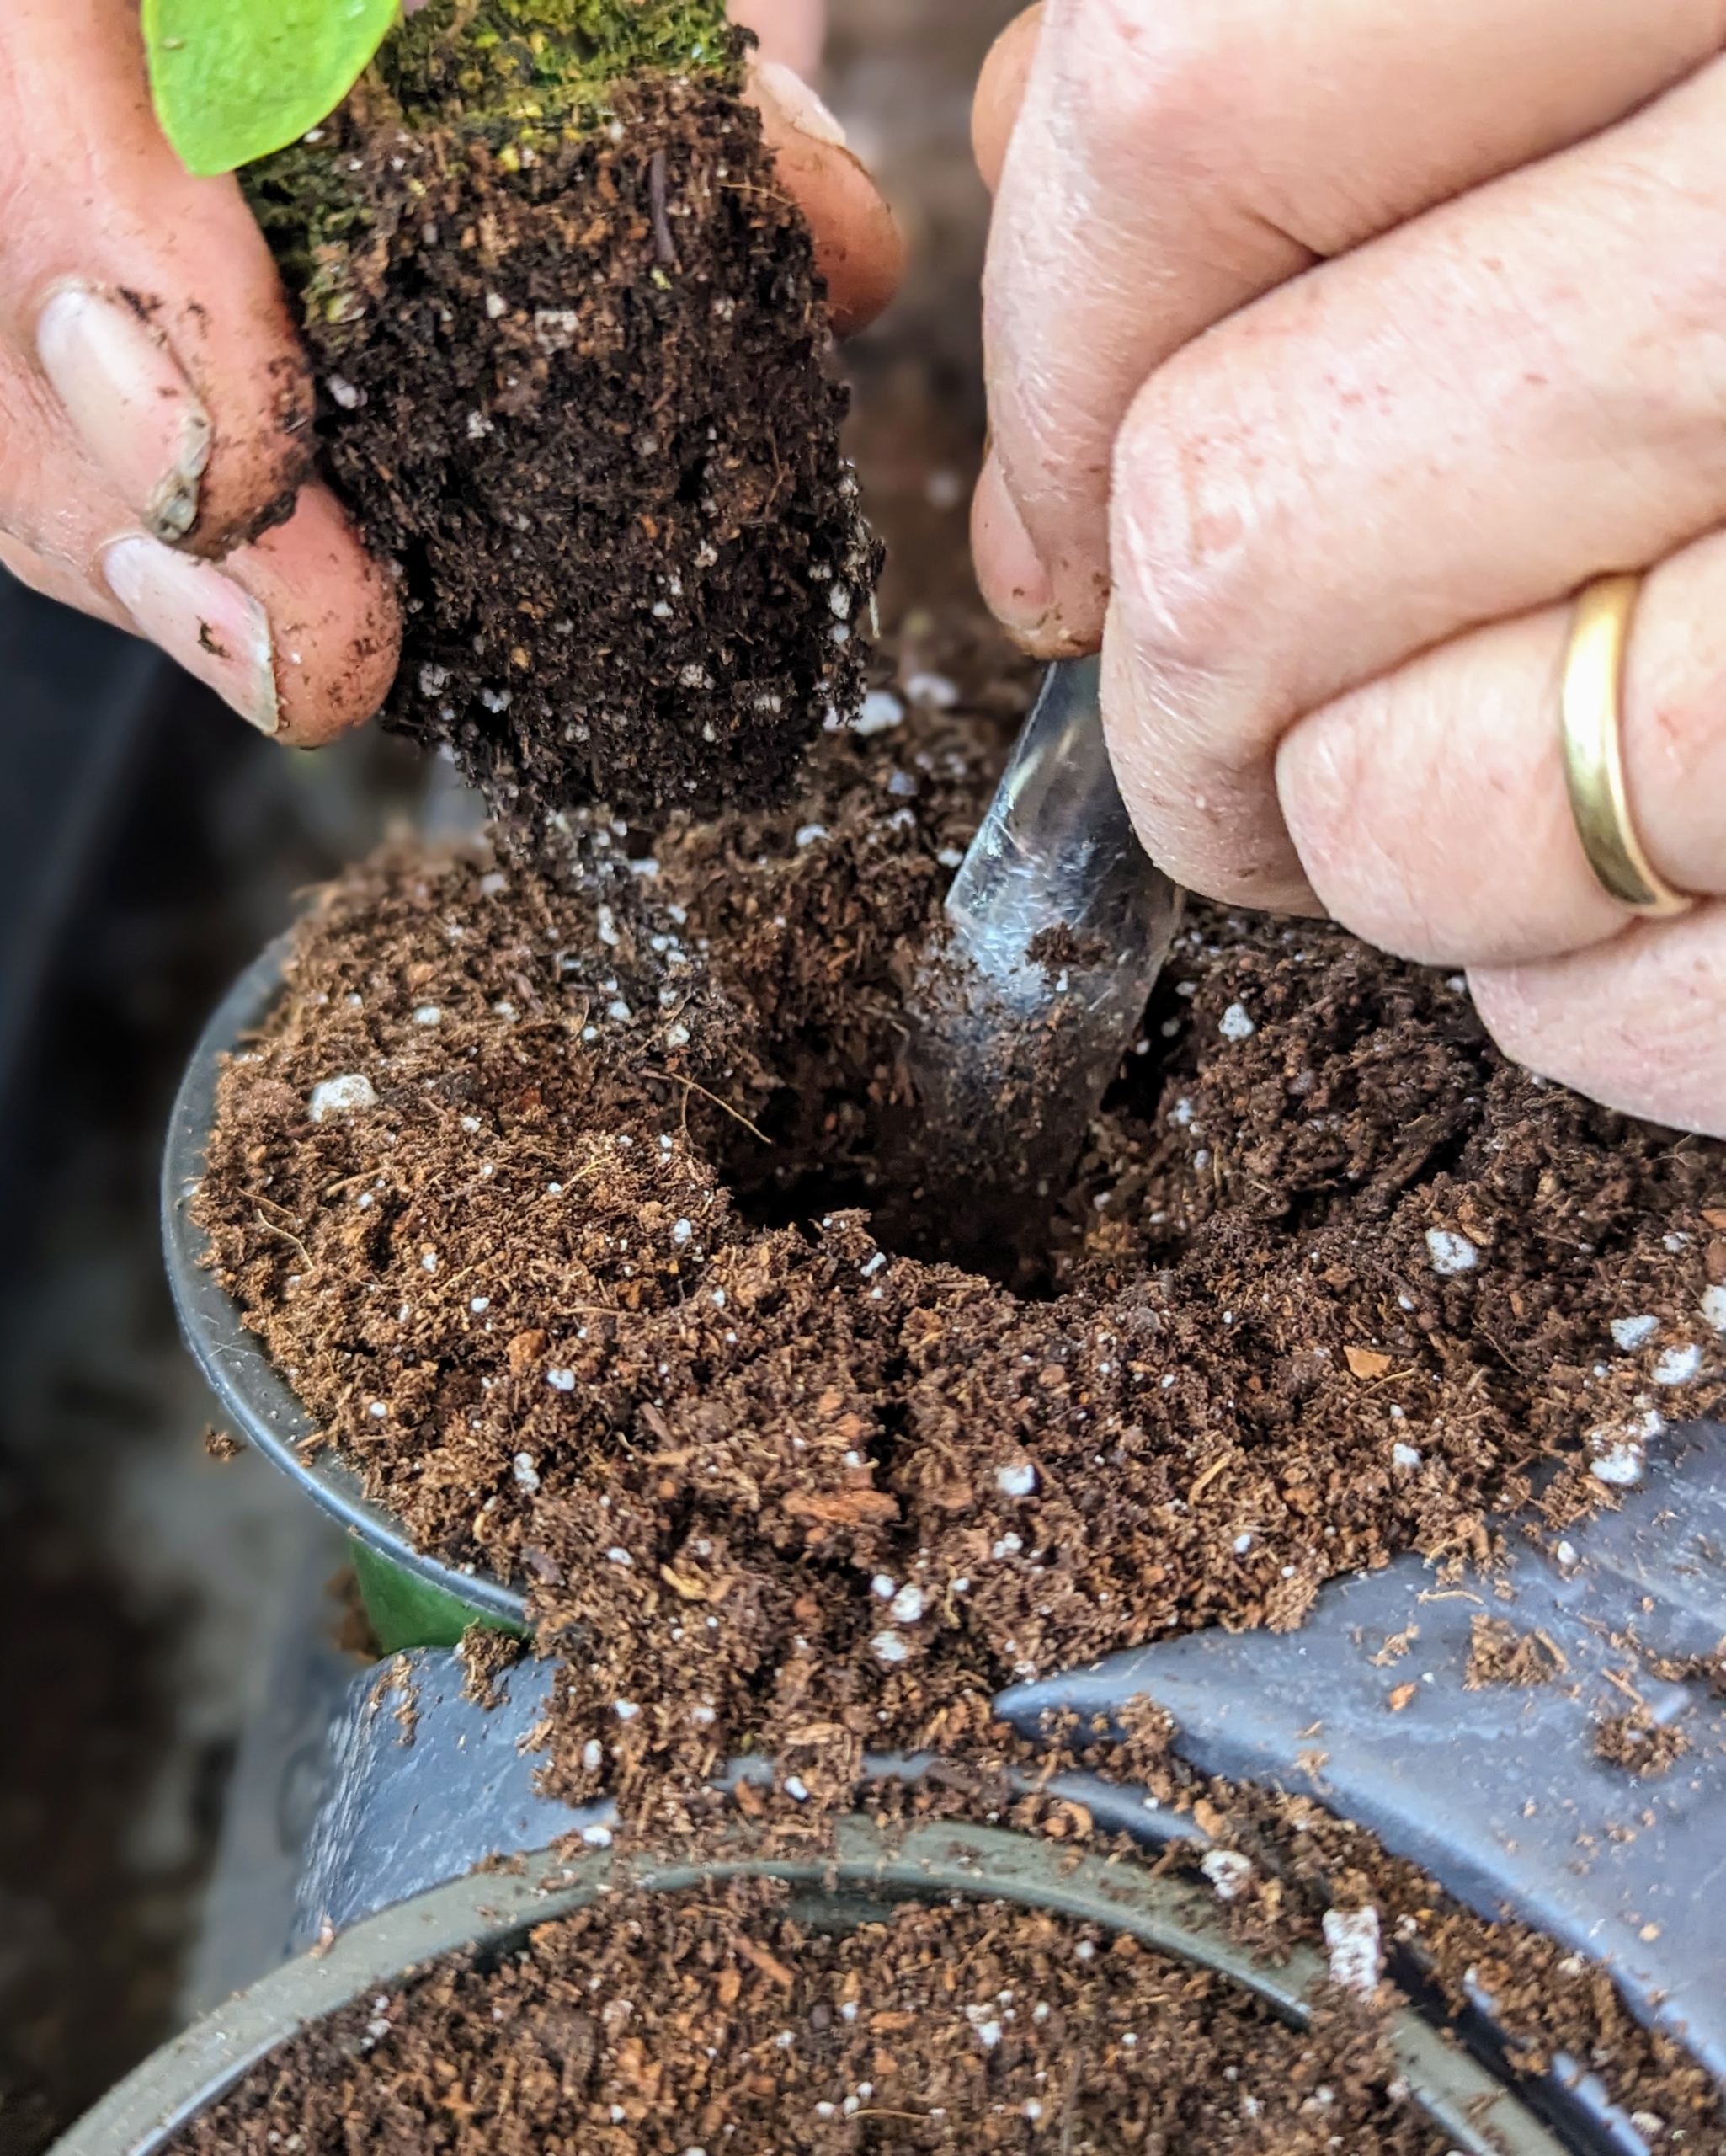
These tools are great for transplanting seedlings. The tool on the right is a pair of extra large tweezers. The one on the left is from Johnny’s Selected Seeds. It’s called a widger. It has a convex stainless steel blade that delicately separates the tiny plants.
A good quality organic mix designed for seedlings will be fast draining and light. These mixes are formulated to encourage strong, healthy growth in new plants.
Using the widger, Wendy carefully moves the seedling from the tray to its new and larger pot. The widger also helps to avoid damage to the plant’s leaves or roots.
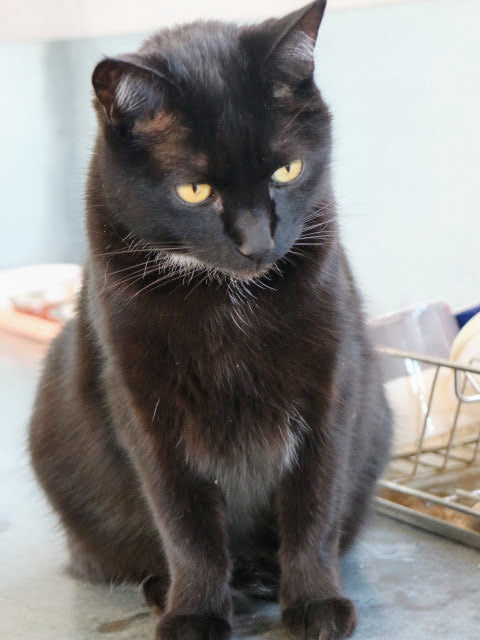
Our greenhouse cat, Blackie, loves to watch from the nearby counter.
Wendy gently firms up the surrounding soil. She avoids handling the seedling by its tender stems, which can bruise easily. The stronger plants now have more room to grow before getting transplanted into the ground.
The purpose of transplanting is to provide enough room – overcrowding can stress the sprouts.
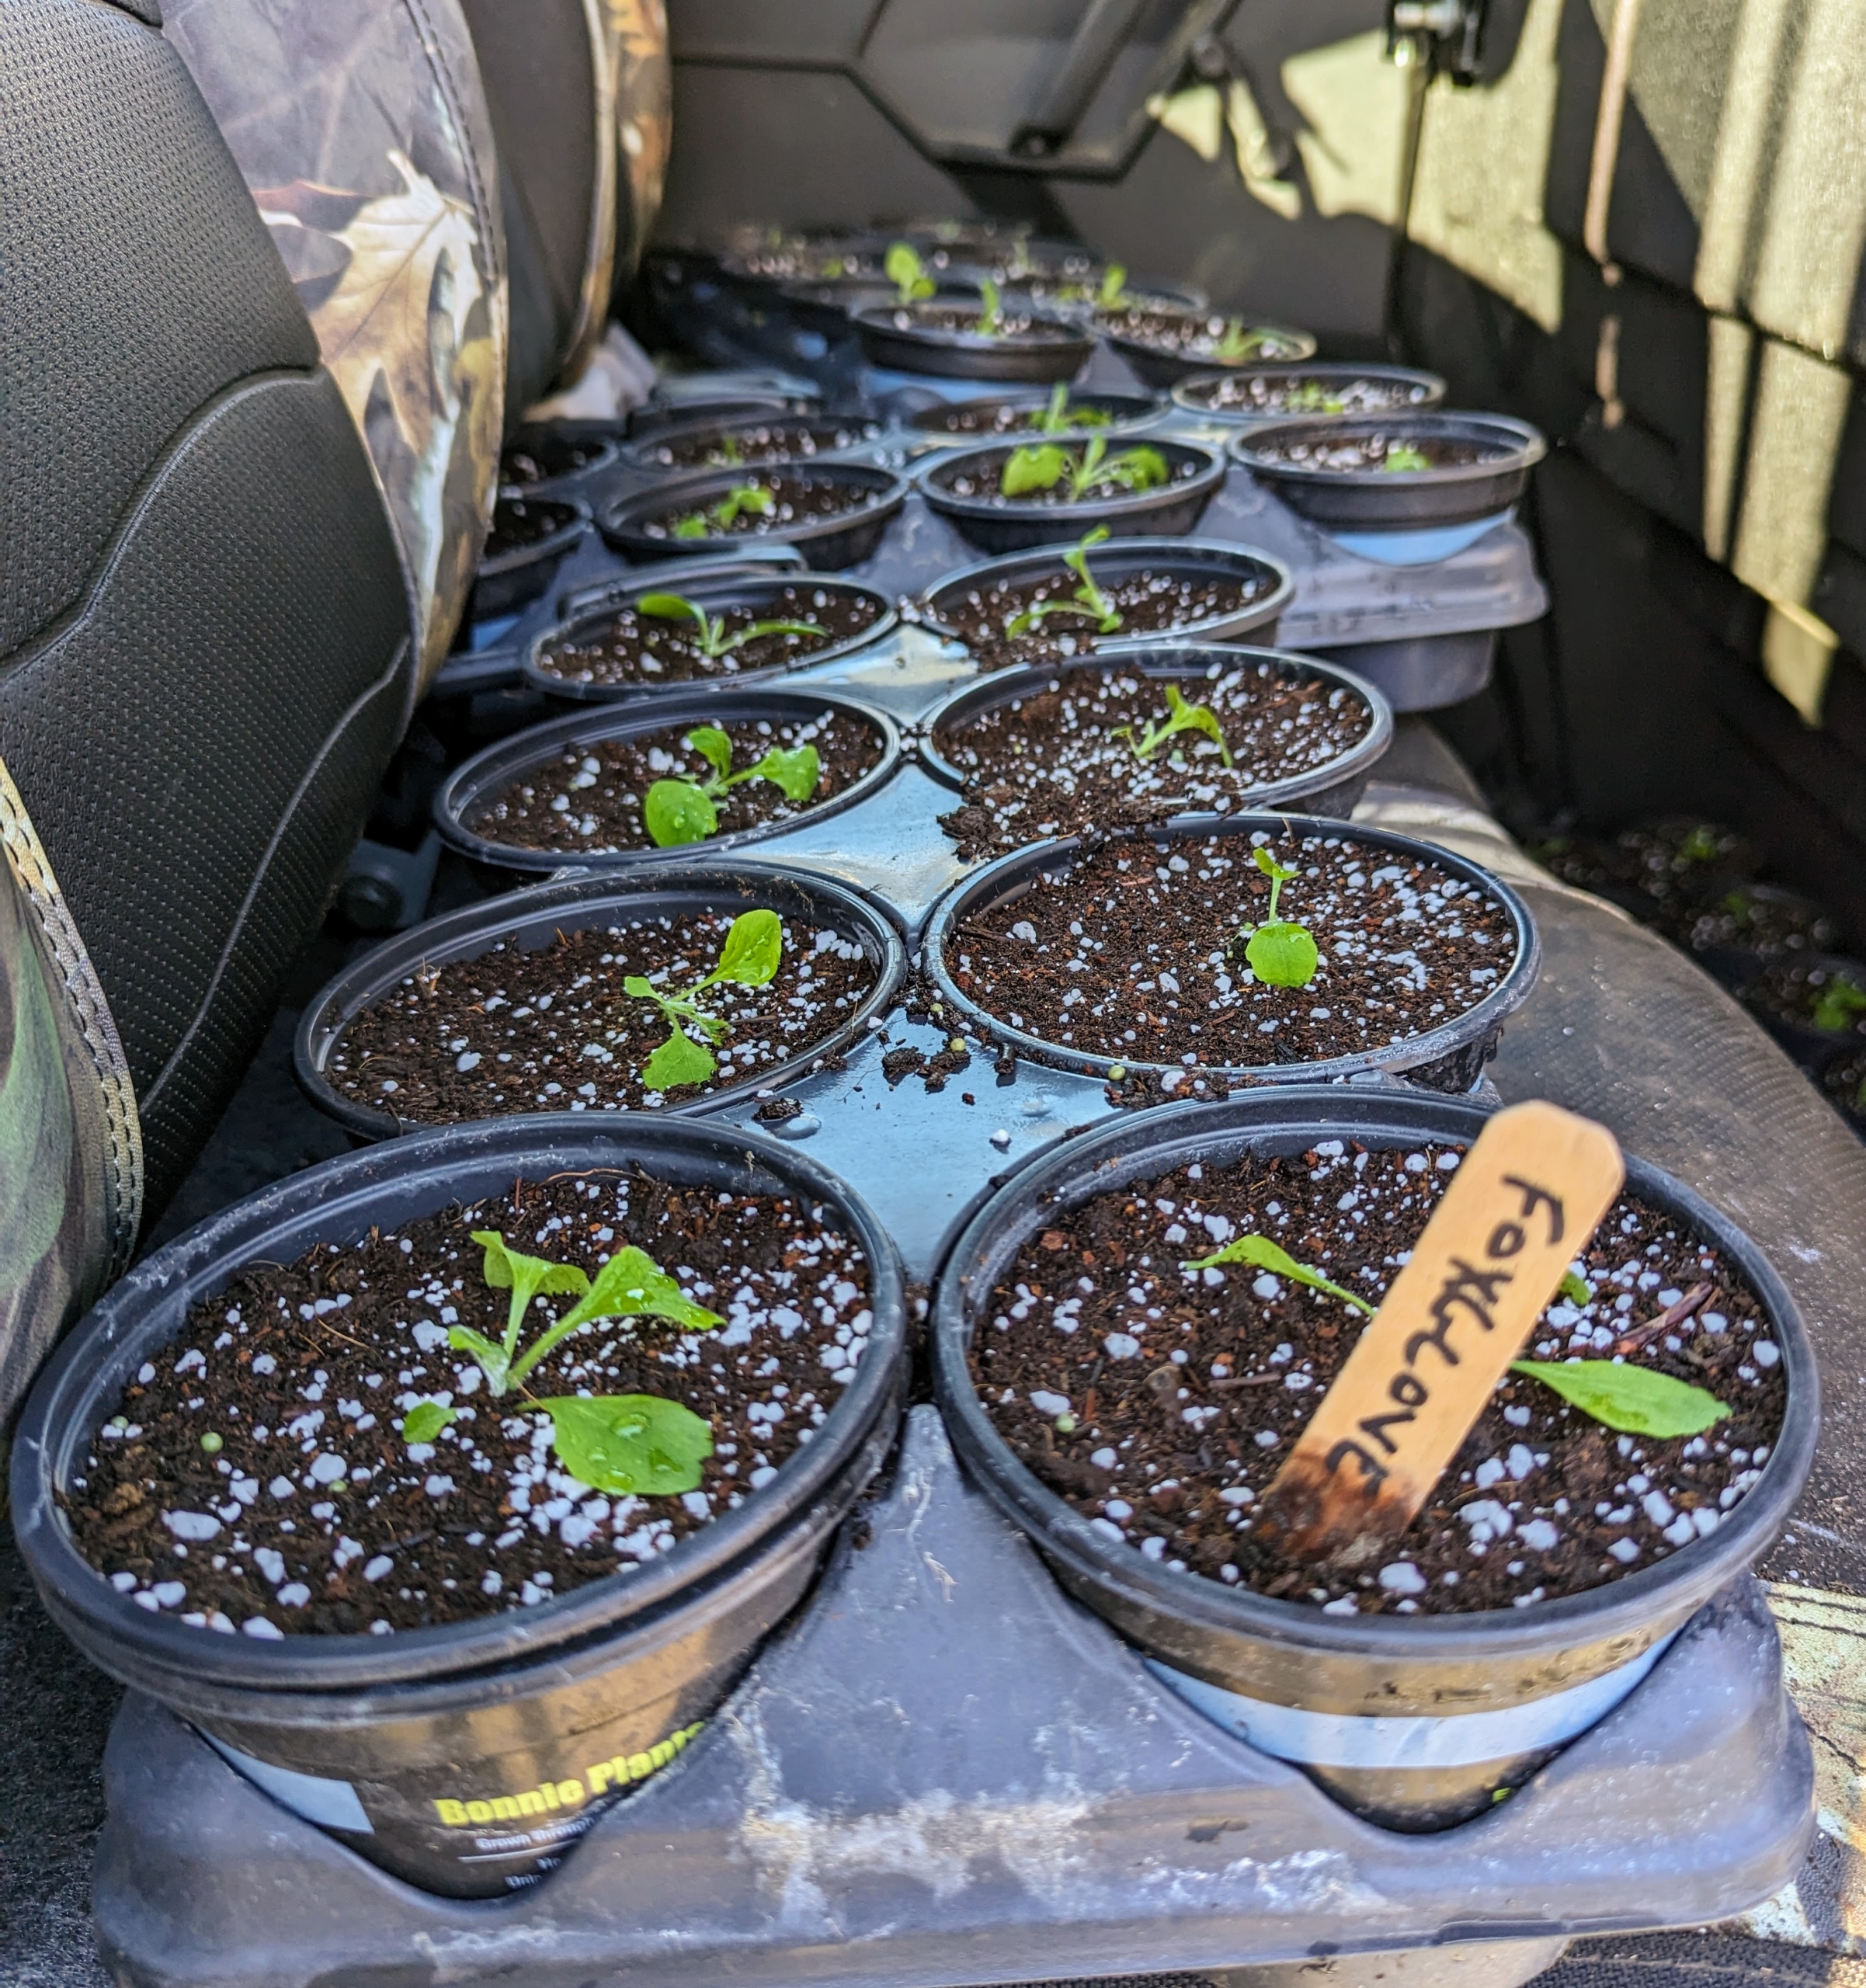
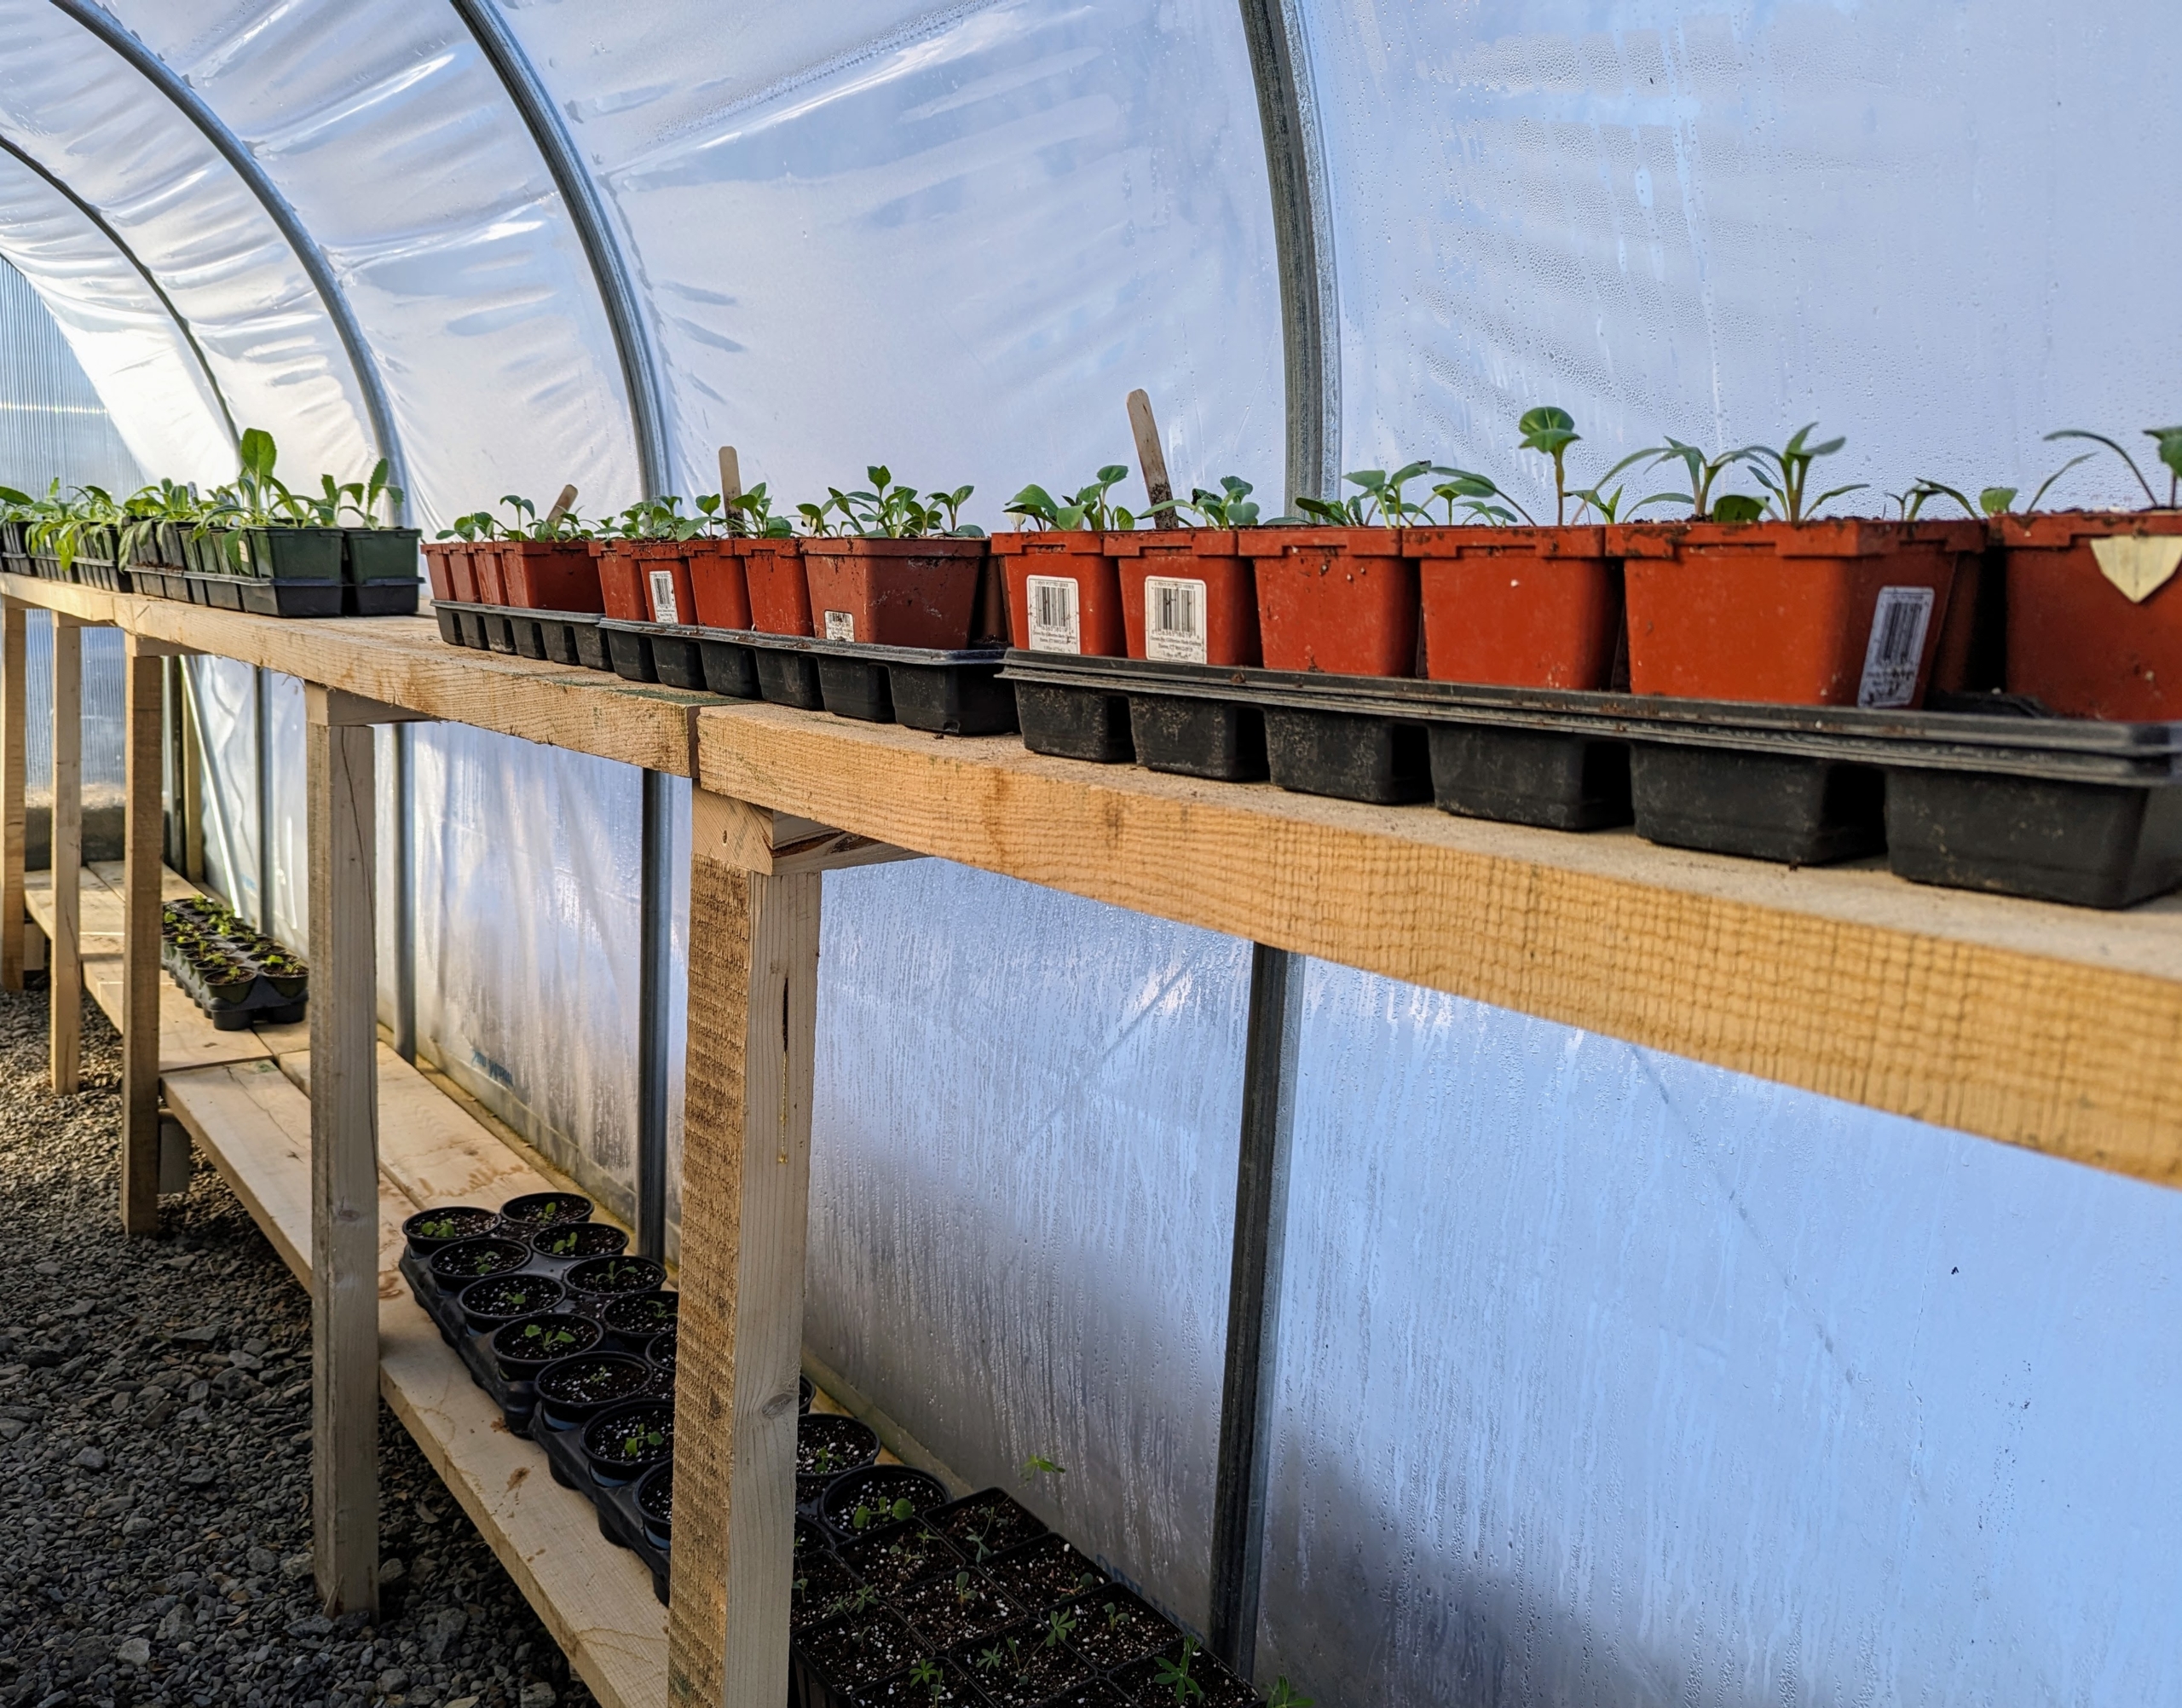
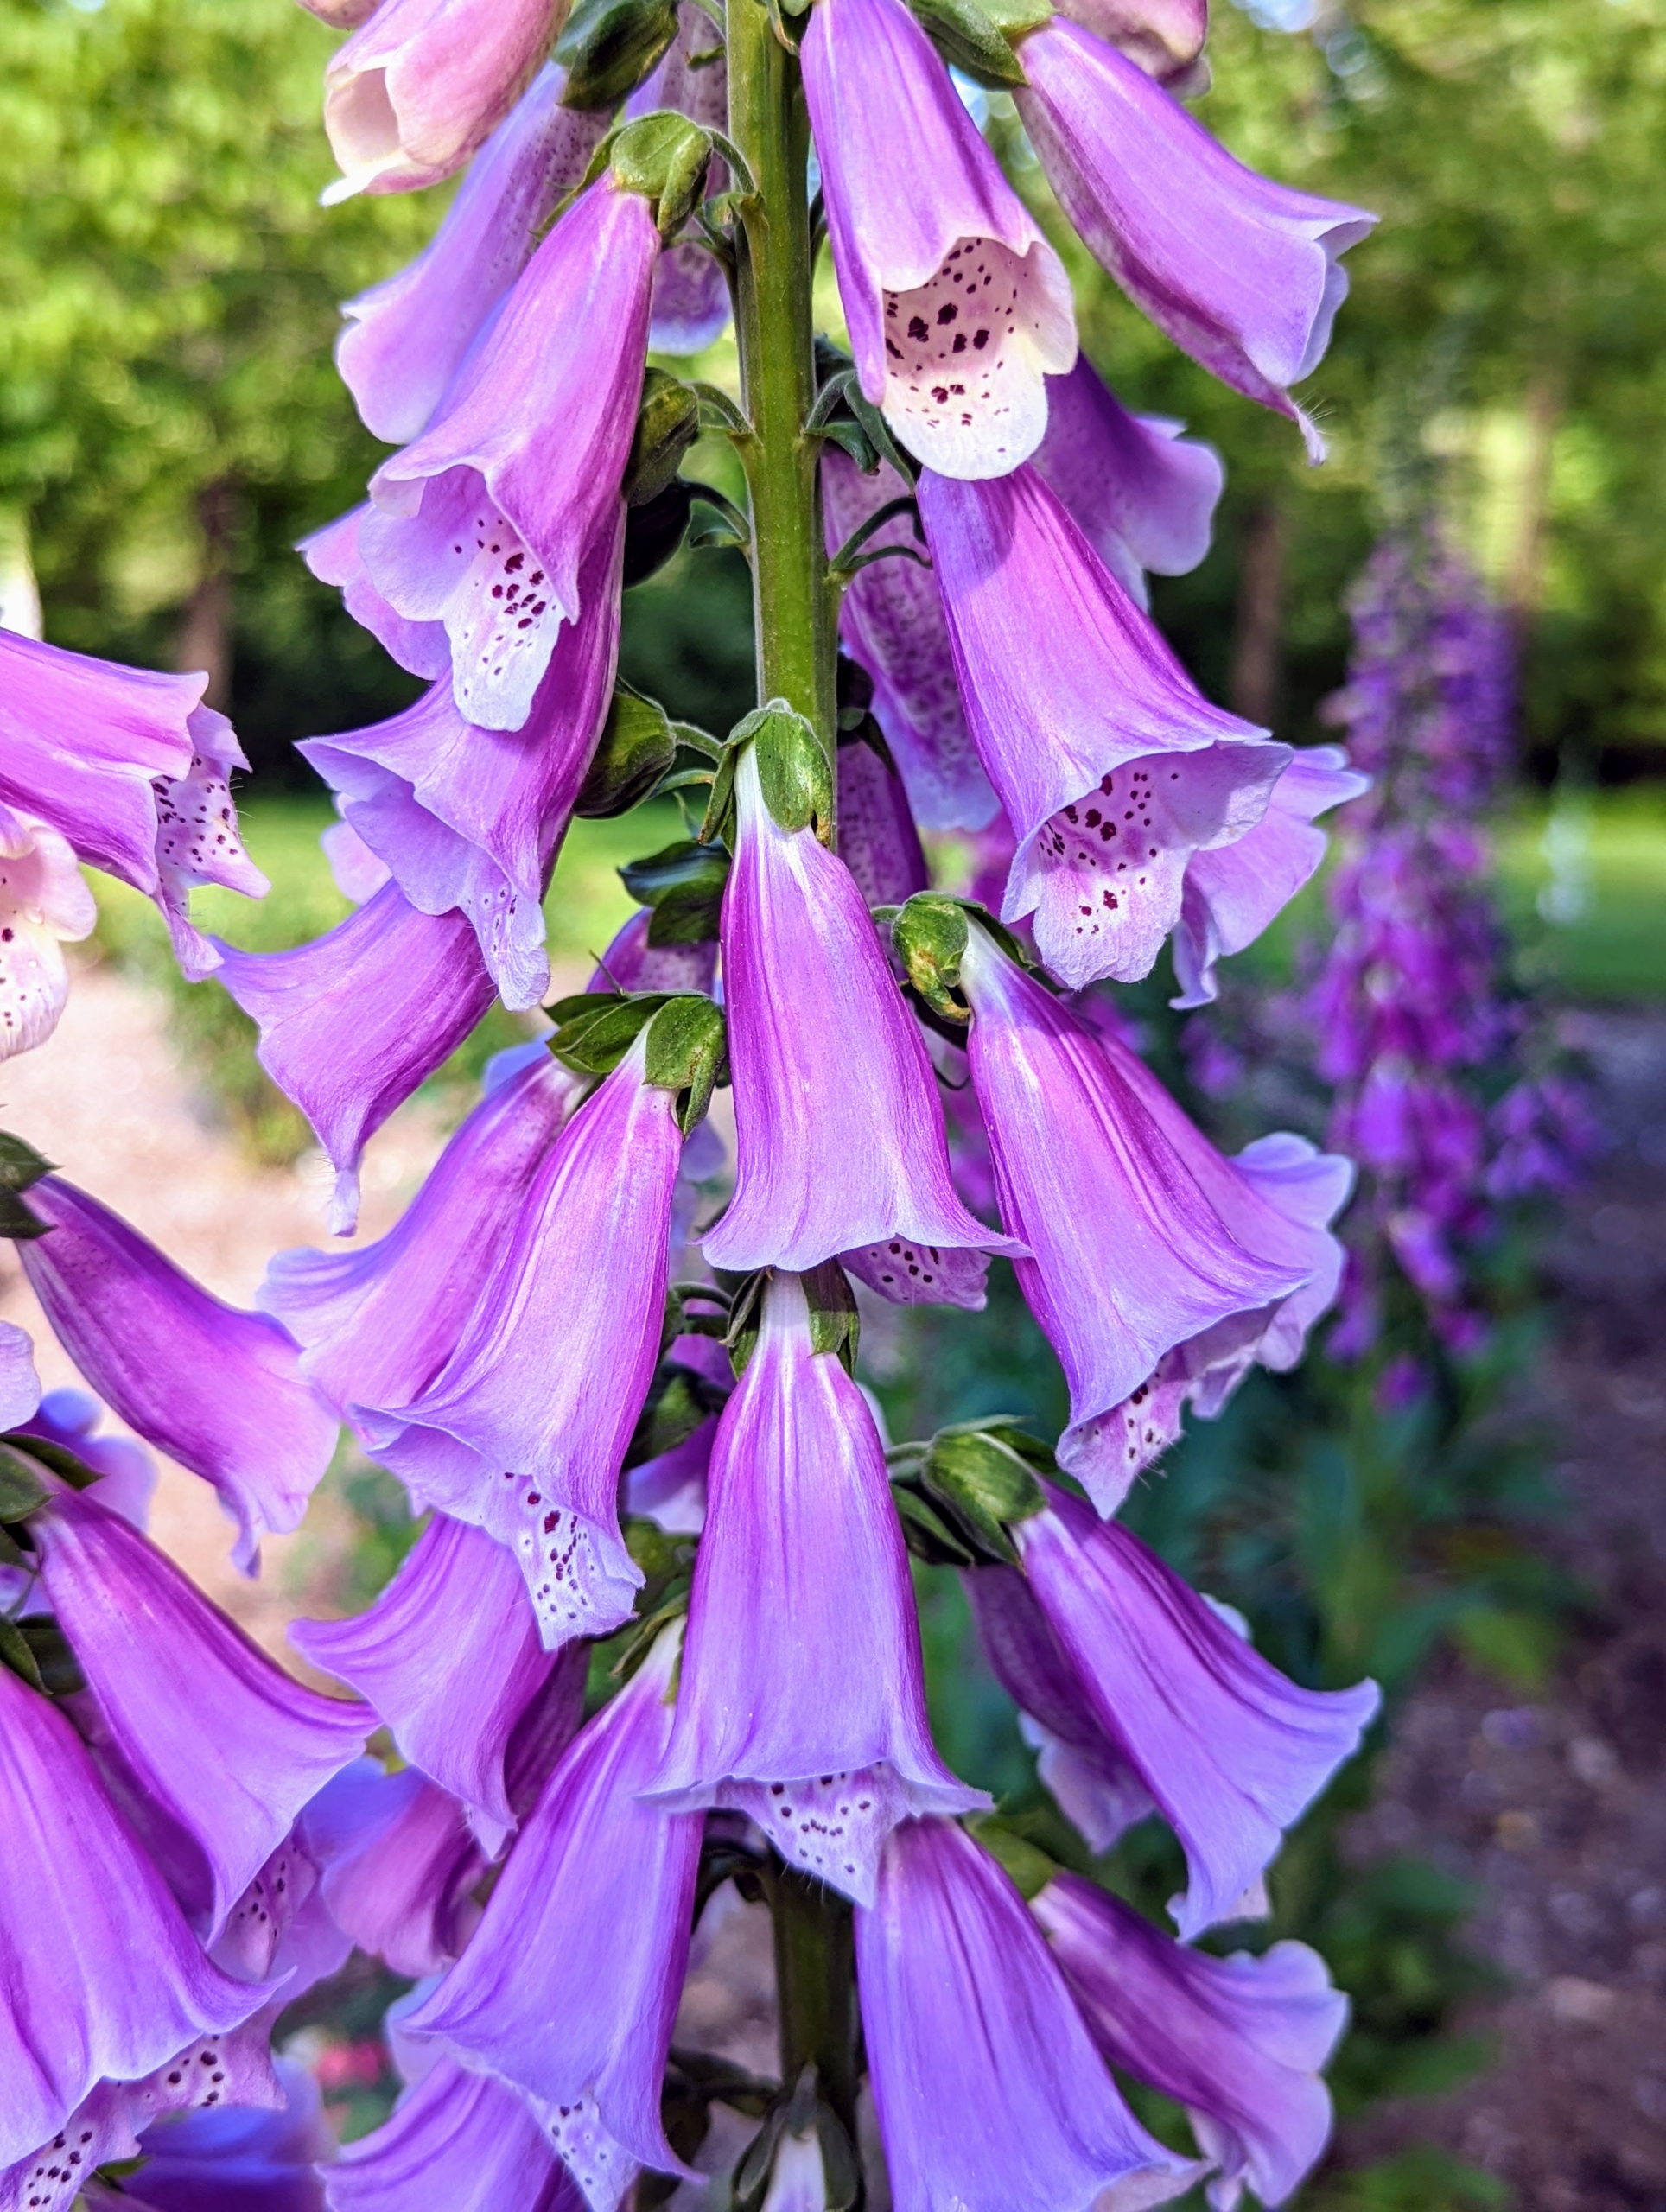
The seedlings are then loaded into our trusted Polaris vehicle, so they could be transported to one of my hoop houses, where they can continue to grow. Foxglove, Digitalis, is an attractive plant that grows throughout the United States. It grows in the wild and is cultivated in private gardens for its beauty. Its bell-shaped flowers are usually bright purple but can sometimes be white, cream yellow, pink, or rose and generally bloom in the spring.
Ryan places the trays where they have good exposure to the light. I have several hoop houses here at the farm. A hoop house is a semi-circular-like structure covered in polyethylene, which heats from incoming solar radiation to warm the plants.
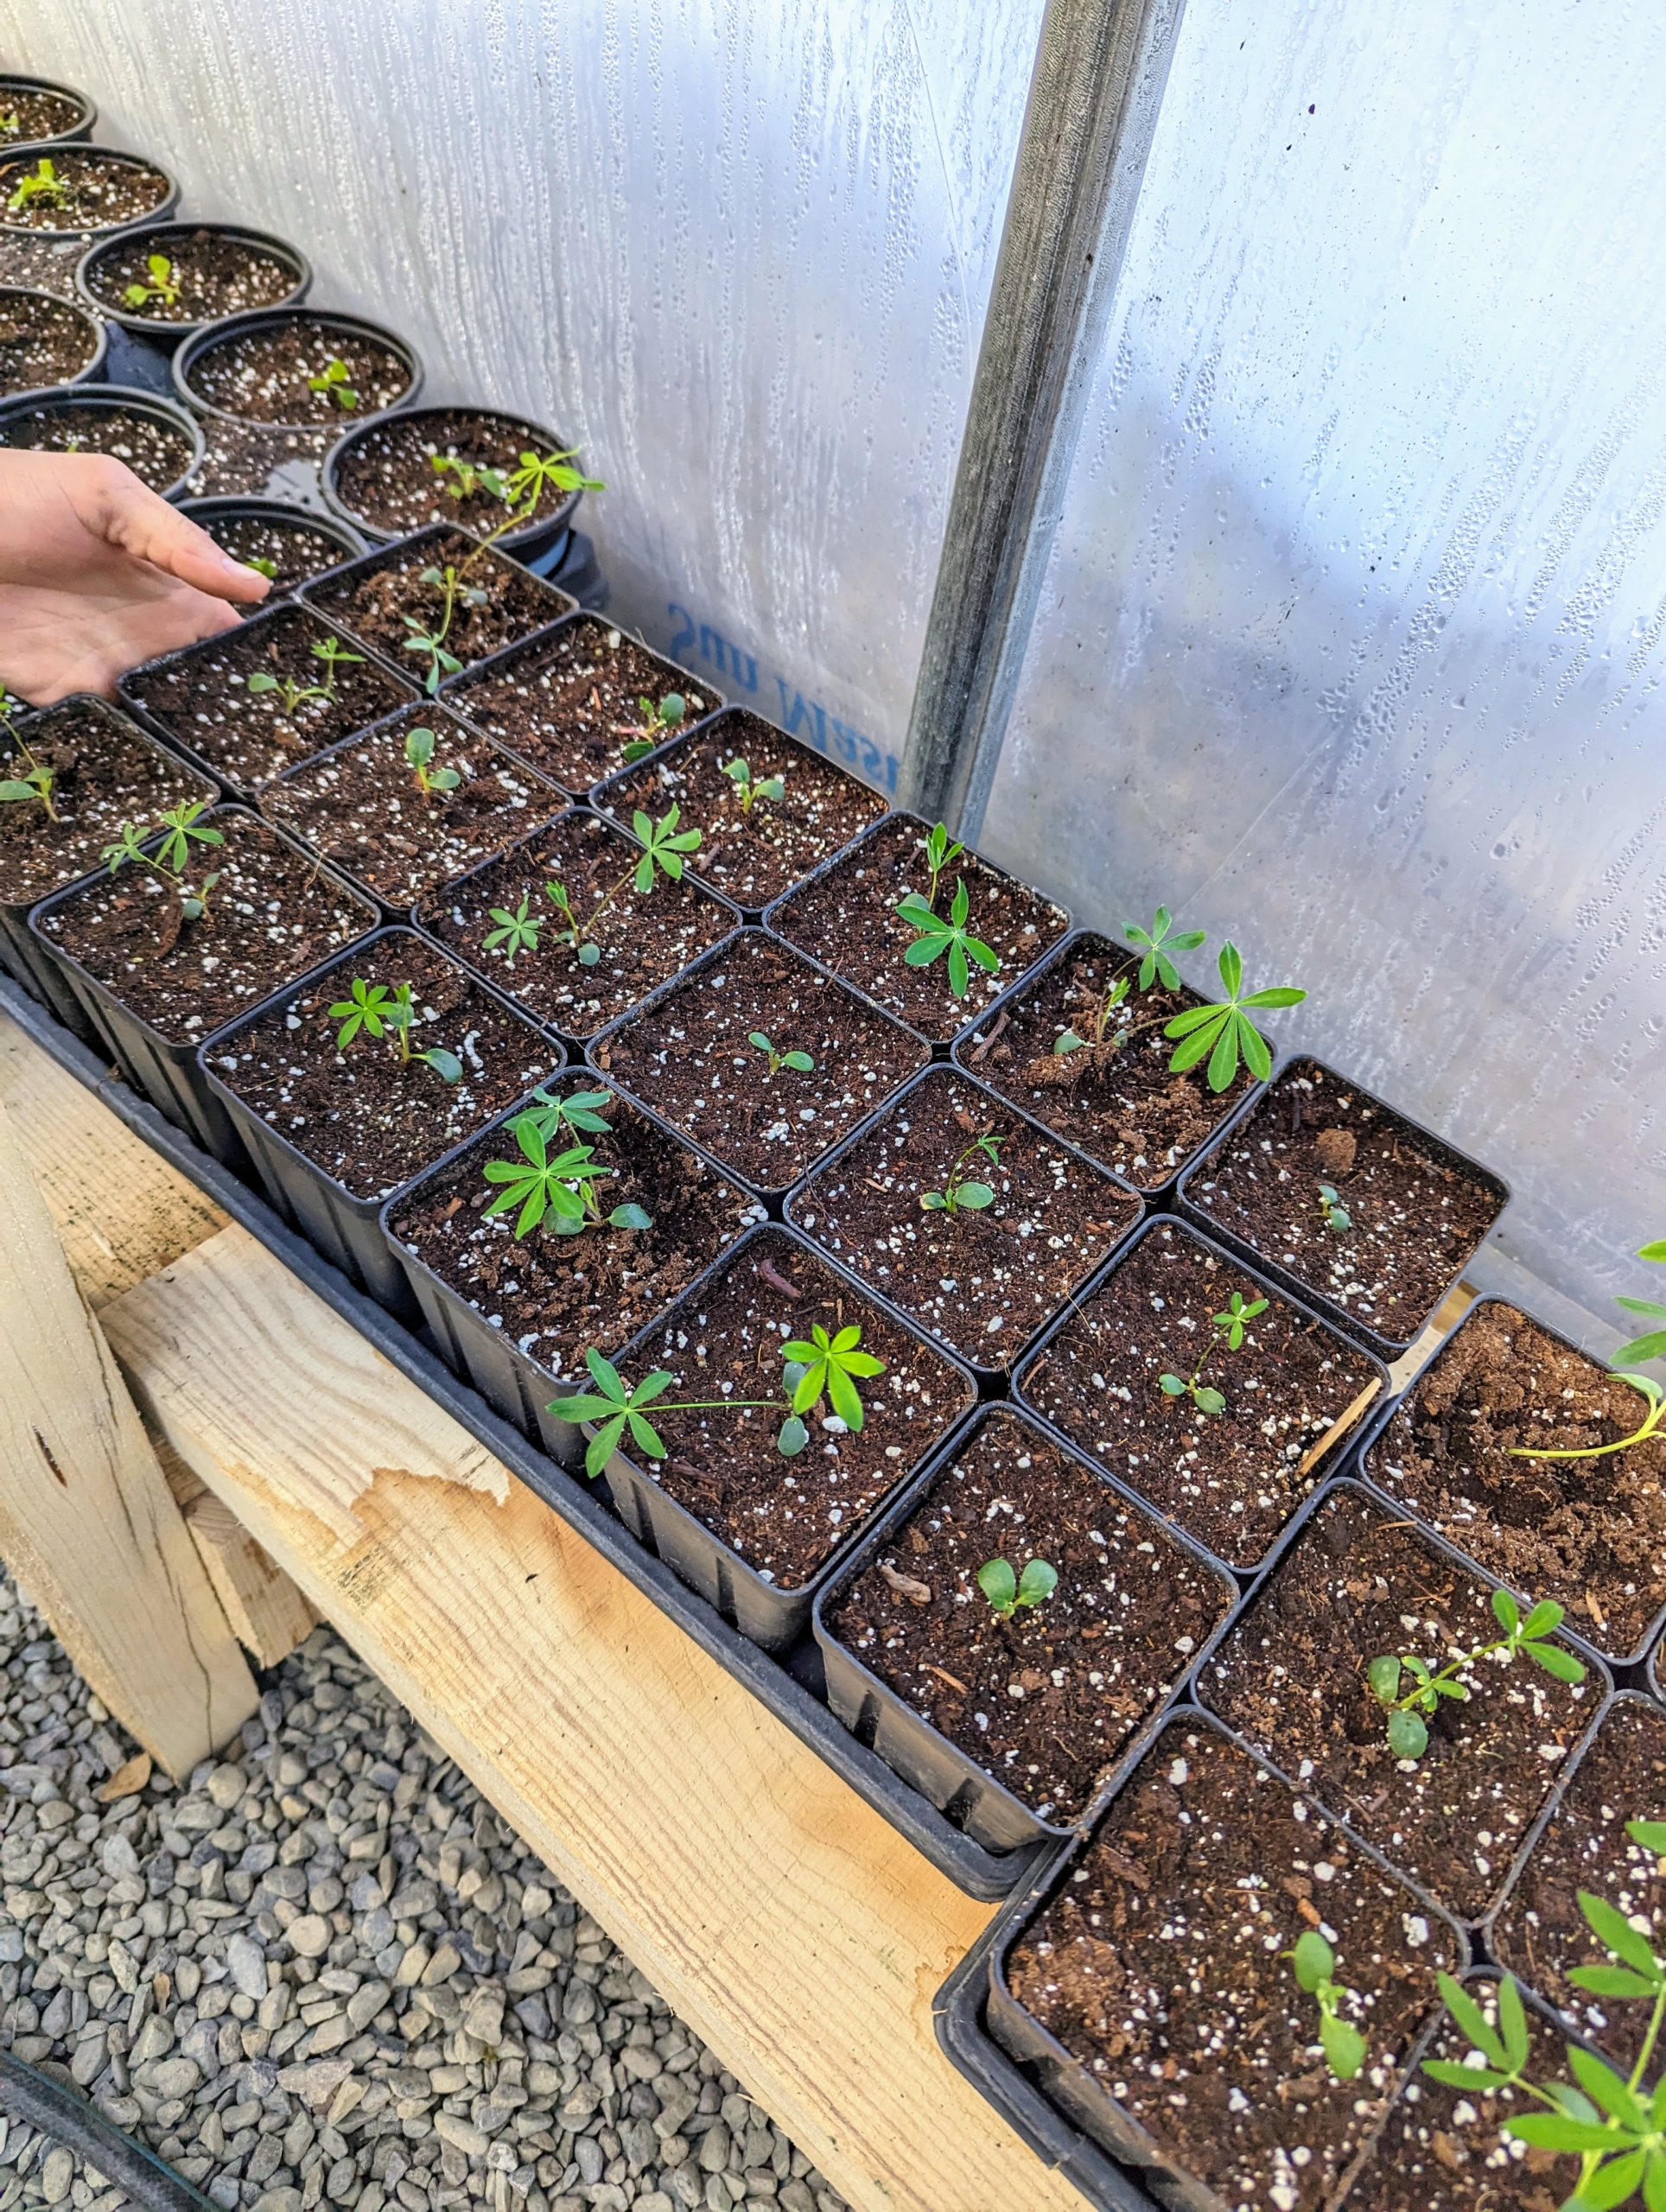
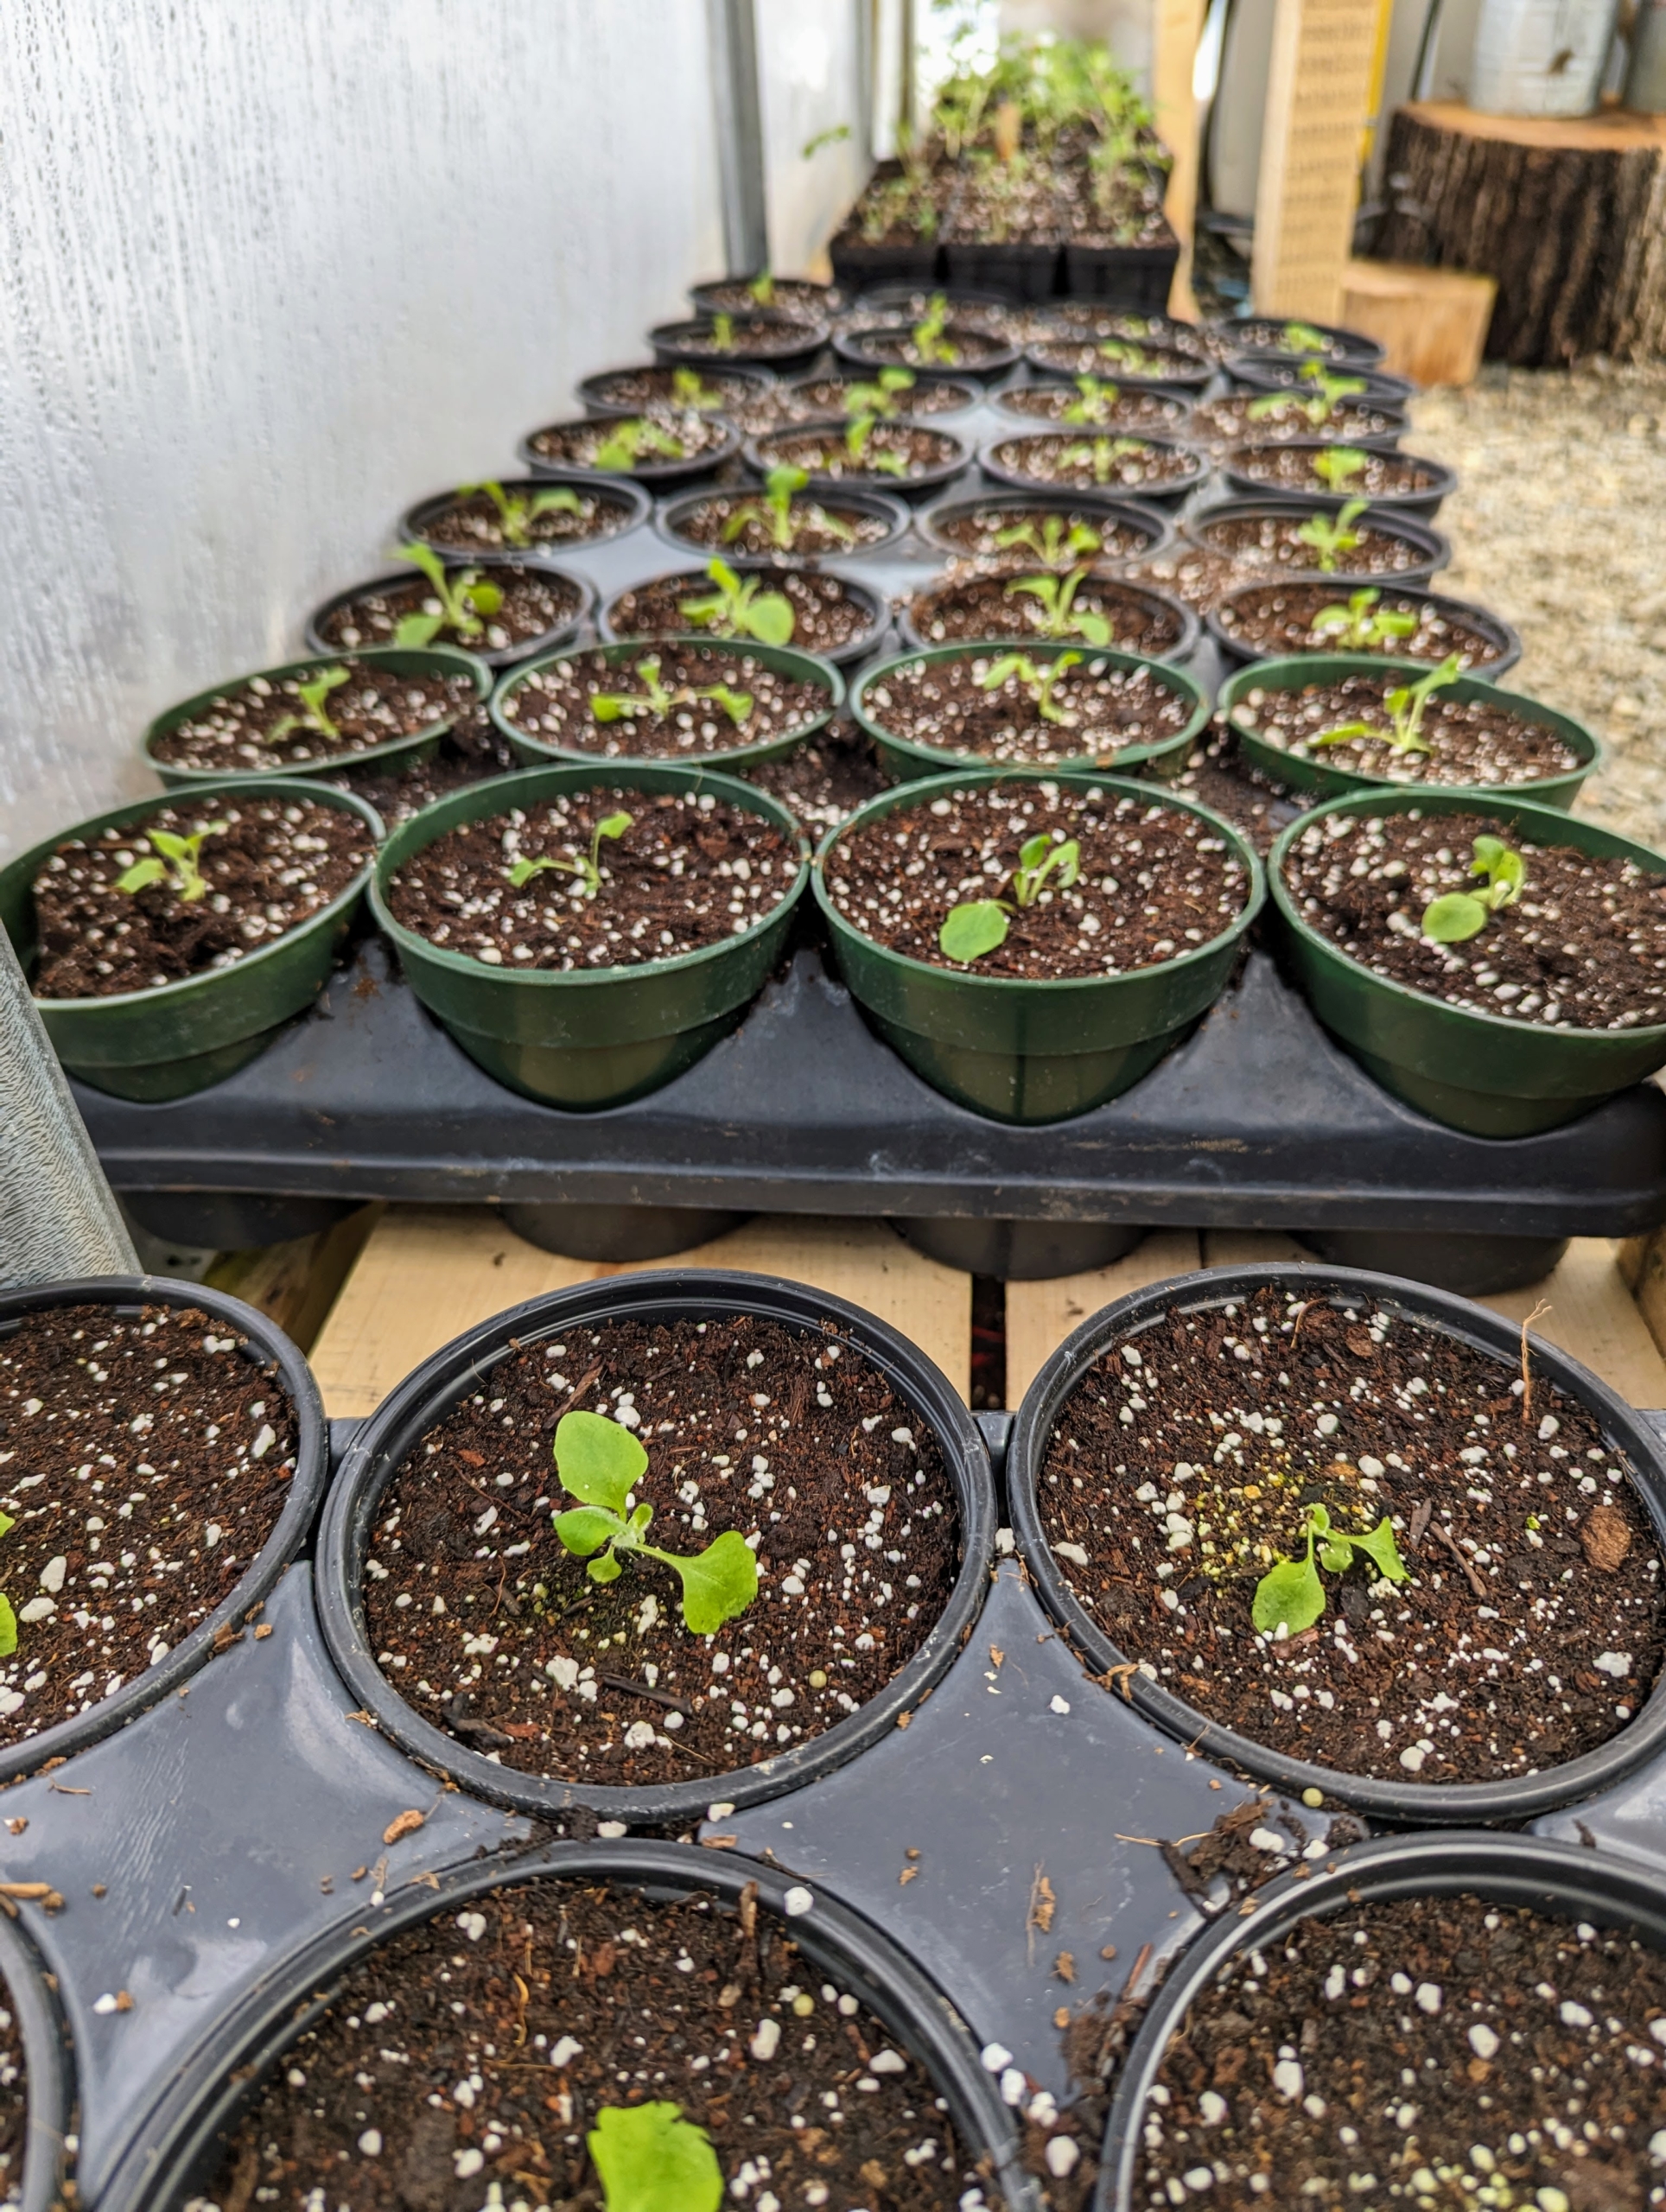
These seedlings will remain here until spring when they are transplanted outdoors.
Right now, these shelves still have room, but it won’t be too long before they are all filled with healthy strong flower and vegetable plants for the garden.
And then come June, the gardens will be bursting. Remember my lupines? They grow so wonderfully here at the farm.
And here is a foxglove in bloom – completely grown from seeds right here at Cantitoe Corners.
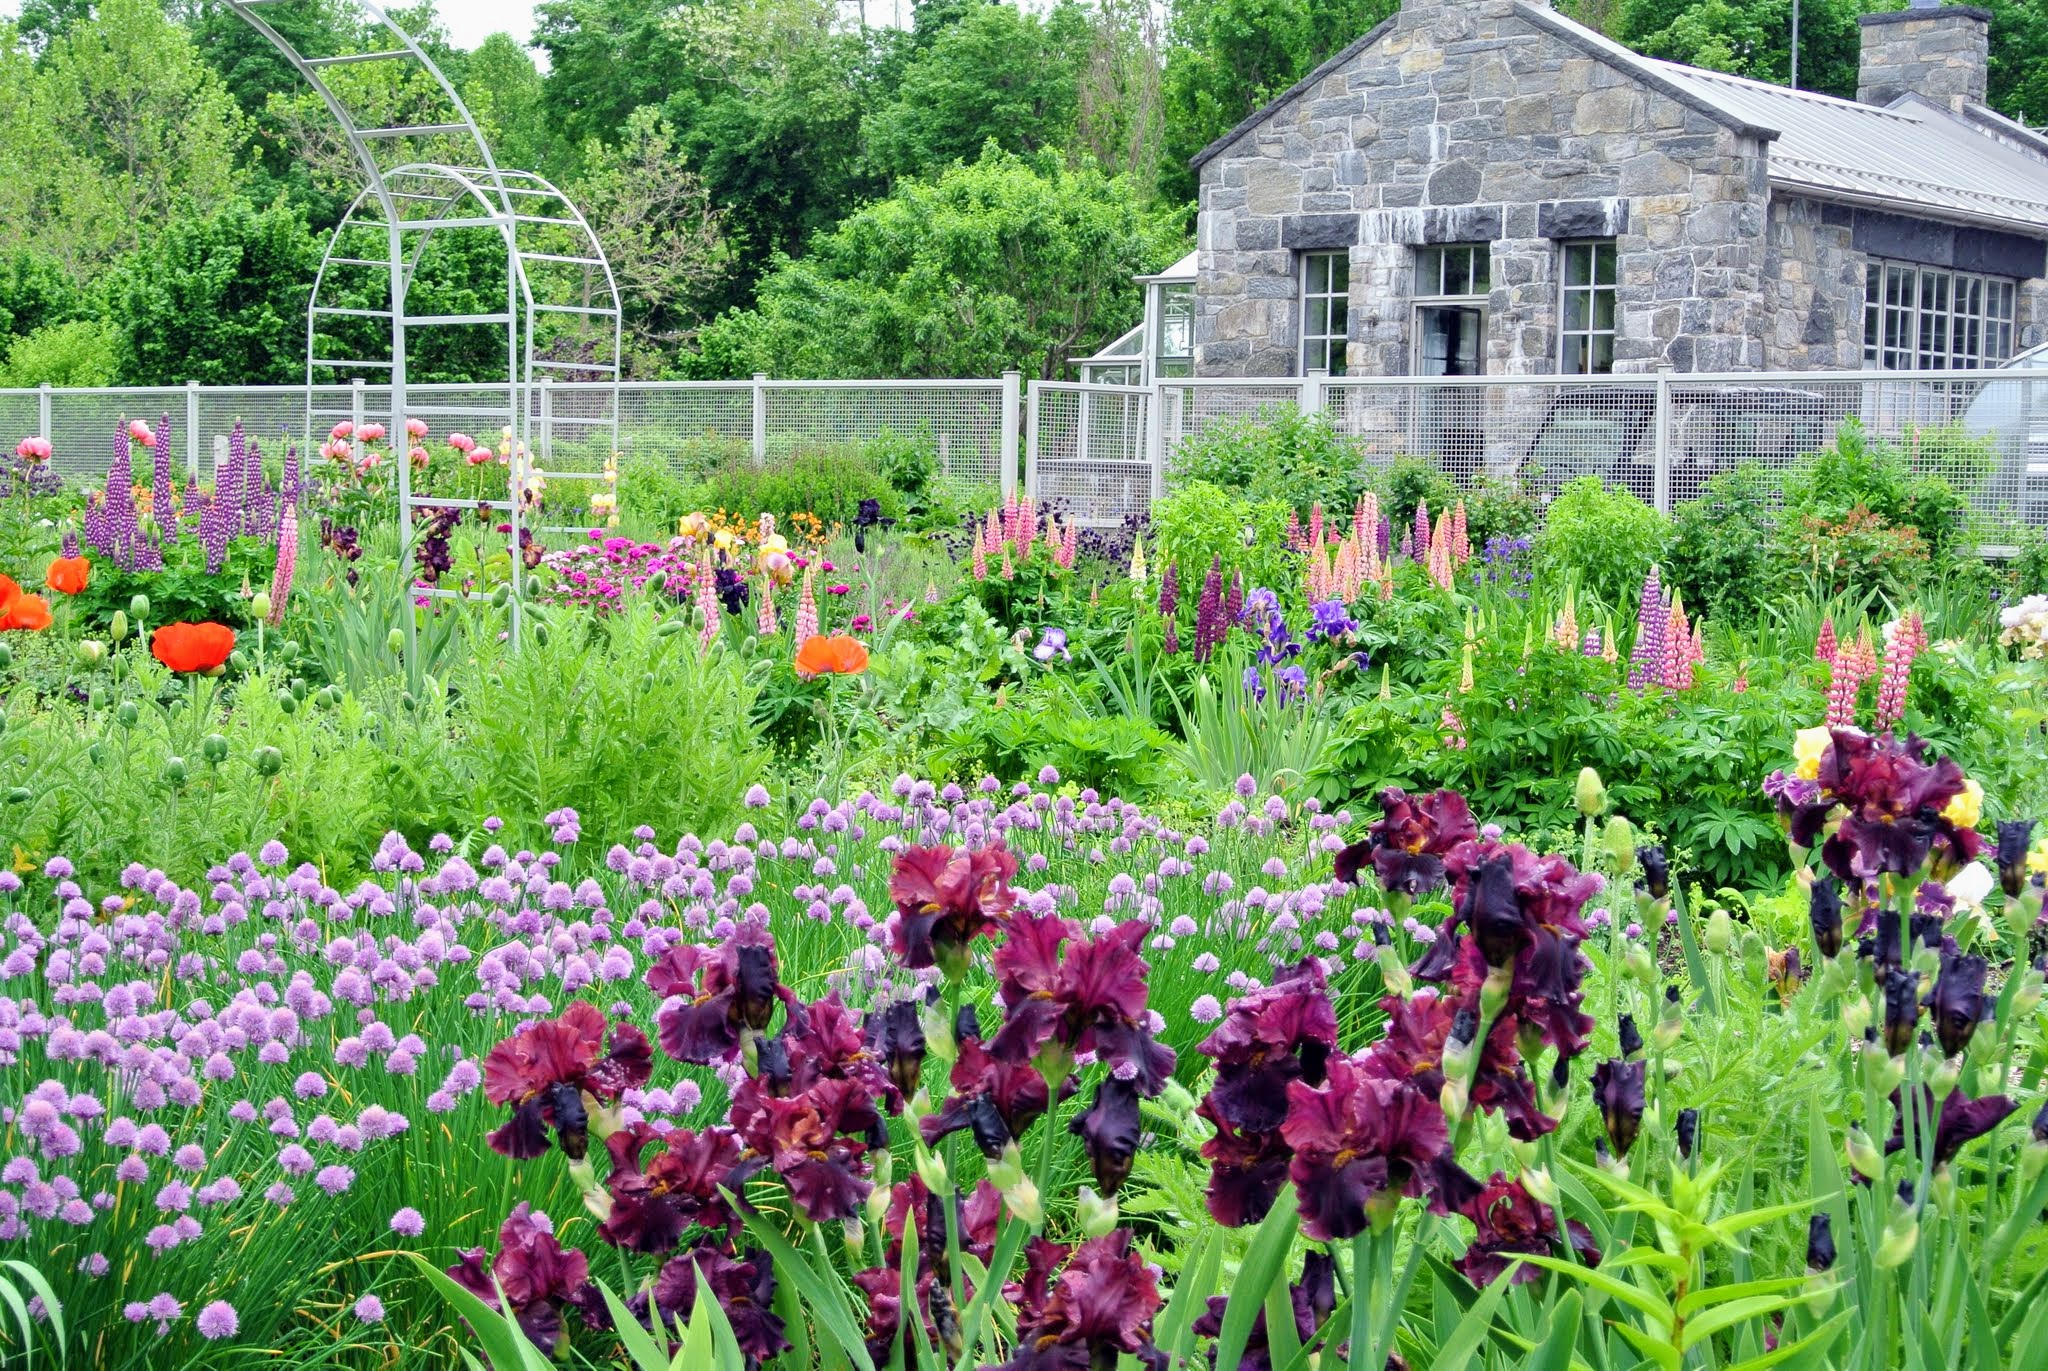
Here is my garden in early summer. When I started it, I wanted the plants to be mixed, so every bed is planted with a variety of specimens. Every row of flowers is interesting and colorful – a beautiful sight every year.
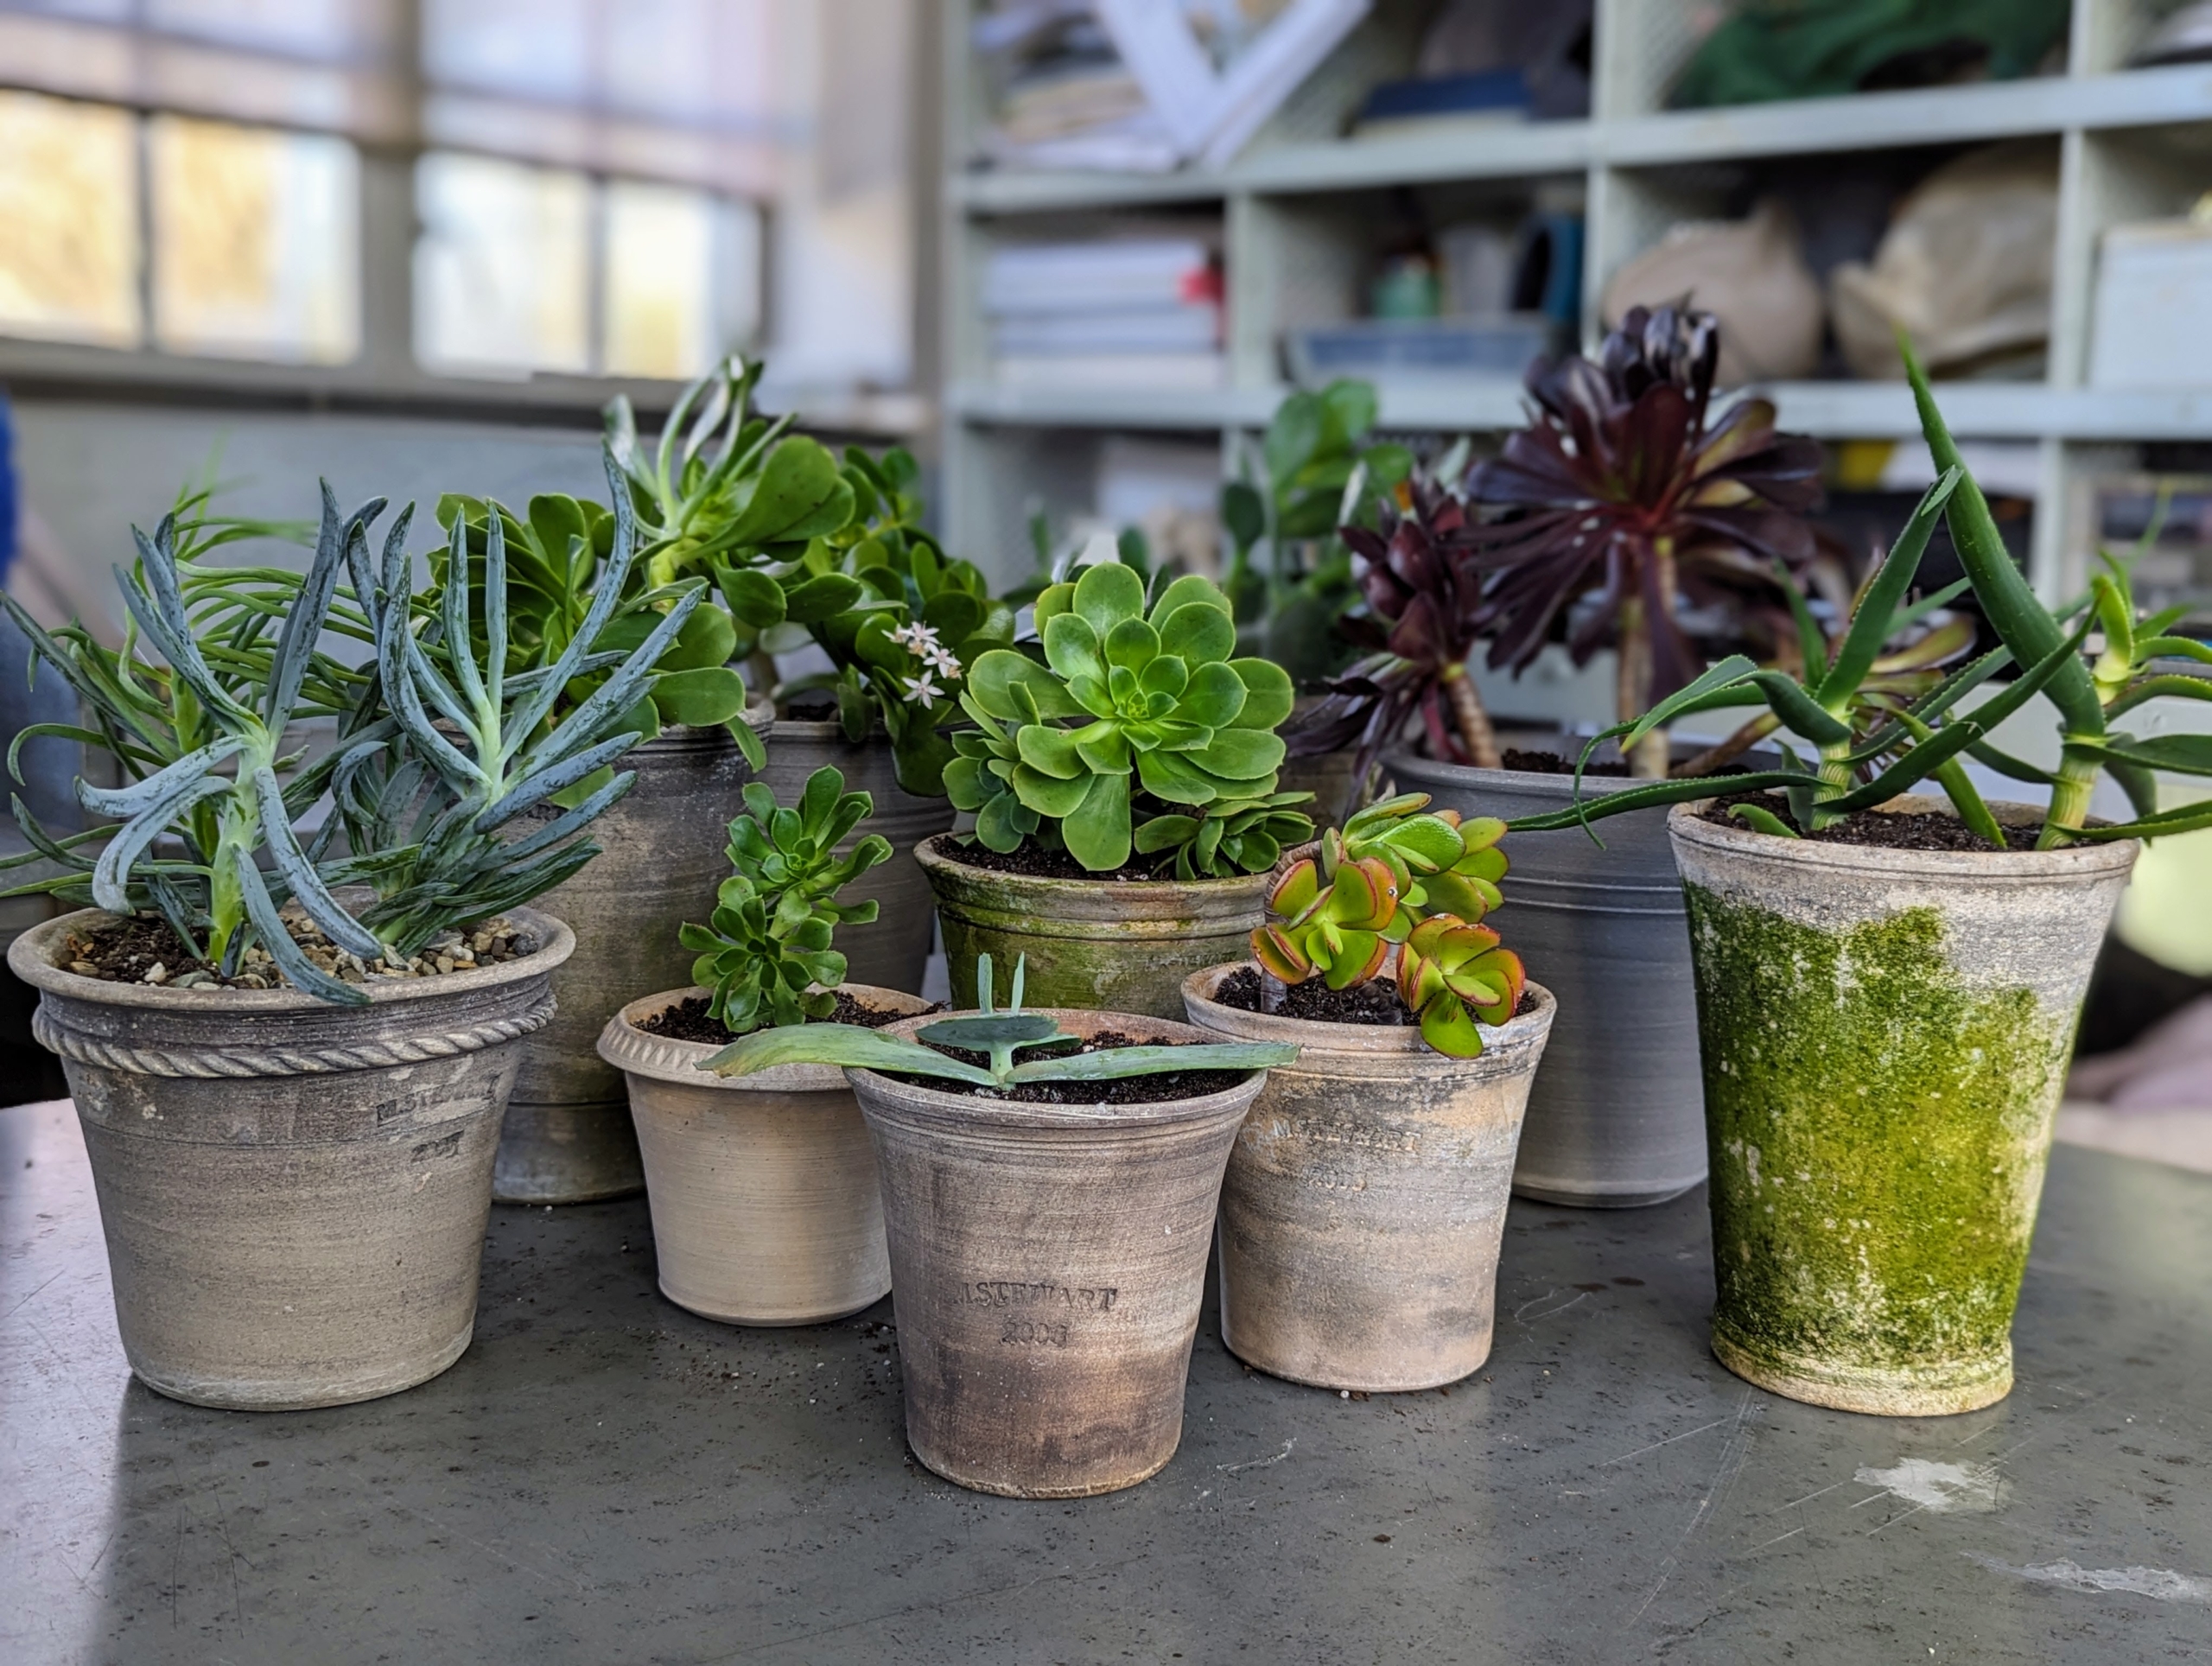
Among my favorite plants are the exotic forms of succulents - they make excellent container specimens.
If you like growing plants, but don’t really have the time to care for them properly, I encourage you to consider growing succulents. Succulents are so easy to maintain and are able to survive prolonged drought because they store moisture in their fleshy stems, roots, and leaves. Some succulents look like smooth stones, while others display perfect rosettes or puffing, crescent moon-shaped leaves on long stems. Not long ago, I was gifted some beautiful succulent cuttings to add to my growing collection.
Here are some photos.
Succulents are often grown as ornamental plants because of their striking shapes. Succulents, or fat plants, are those that store water in fleshy leaves, stems, or stem-root structures for times of drought. Most varieties need lots of light, at least half a day to a full day of sunlight.
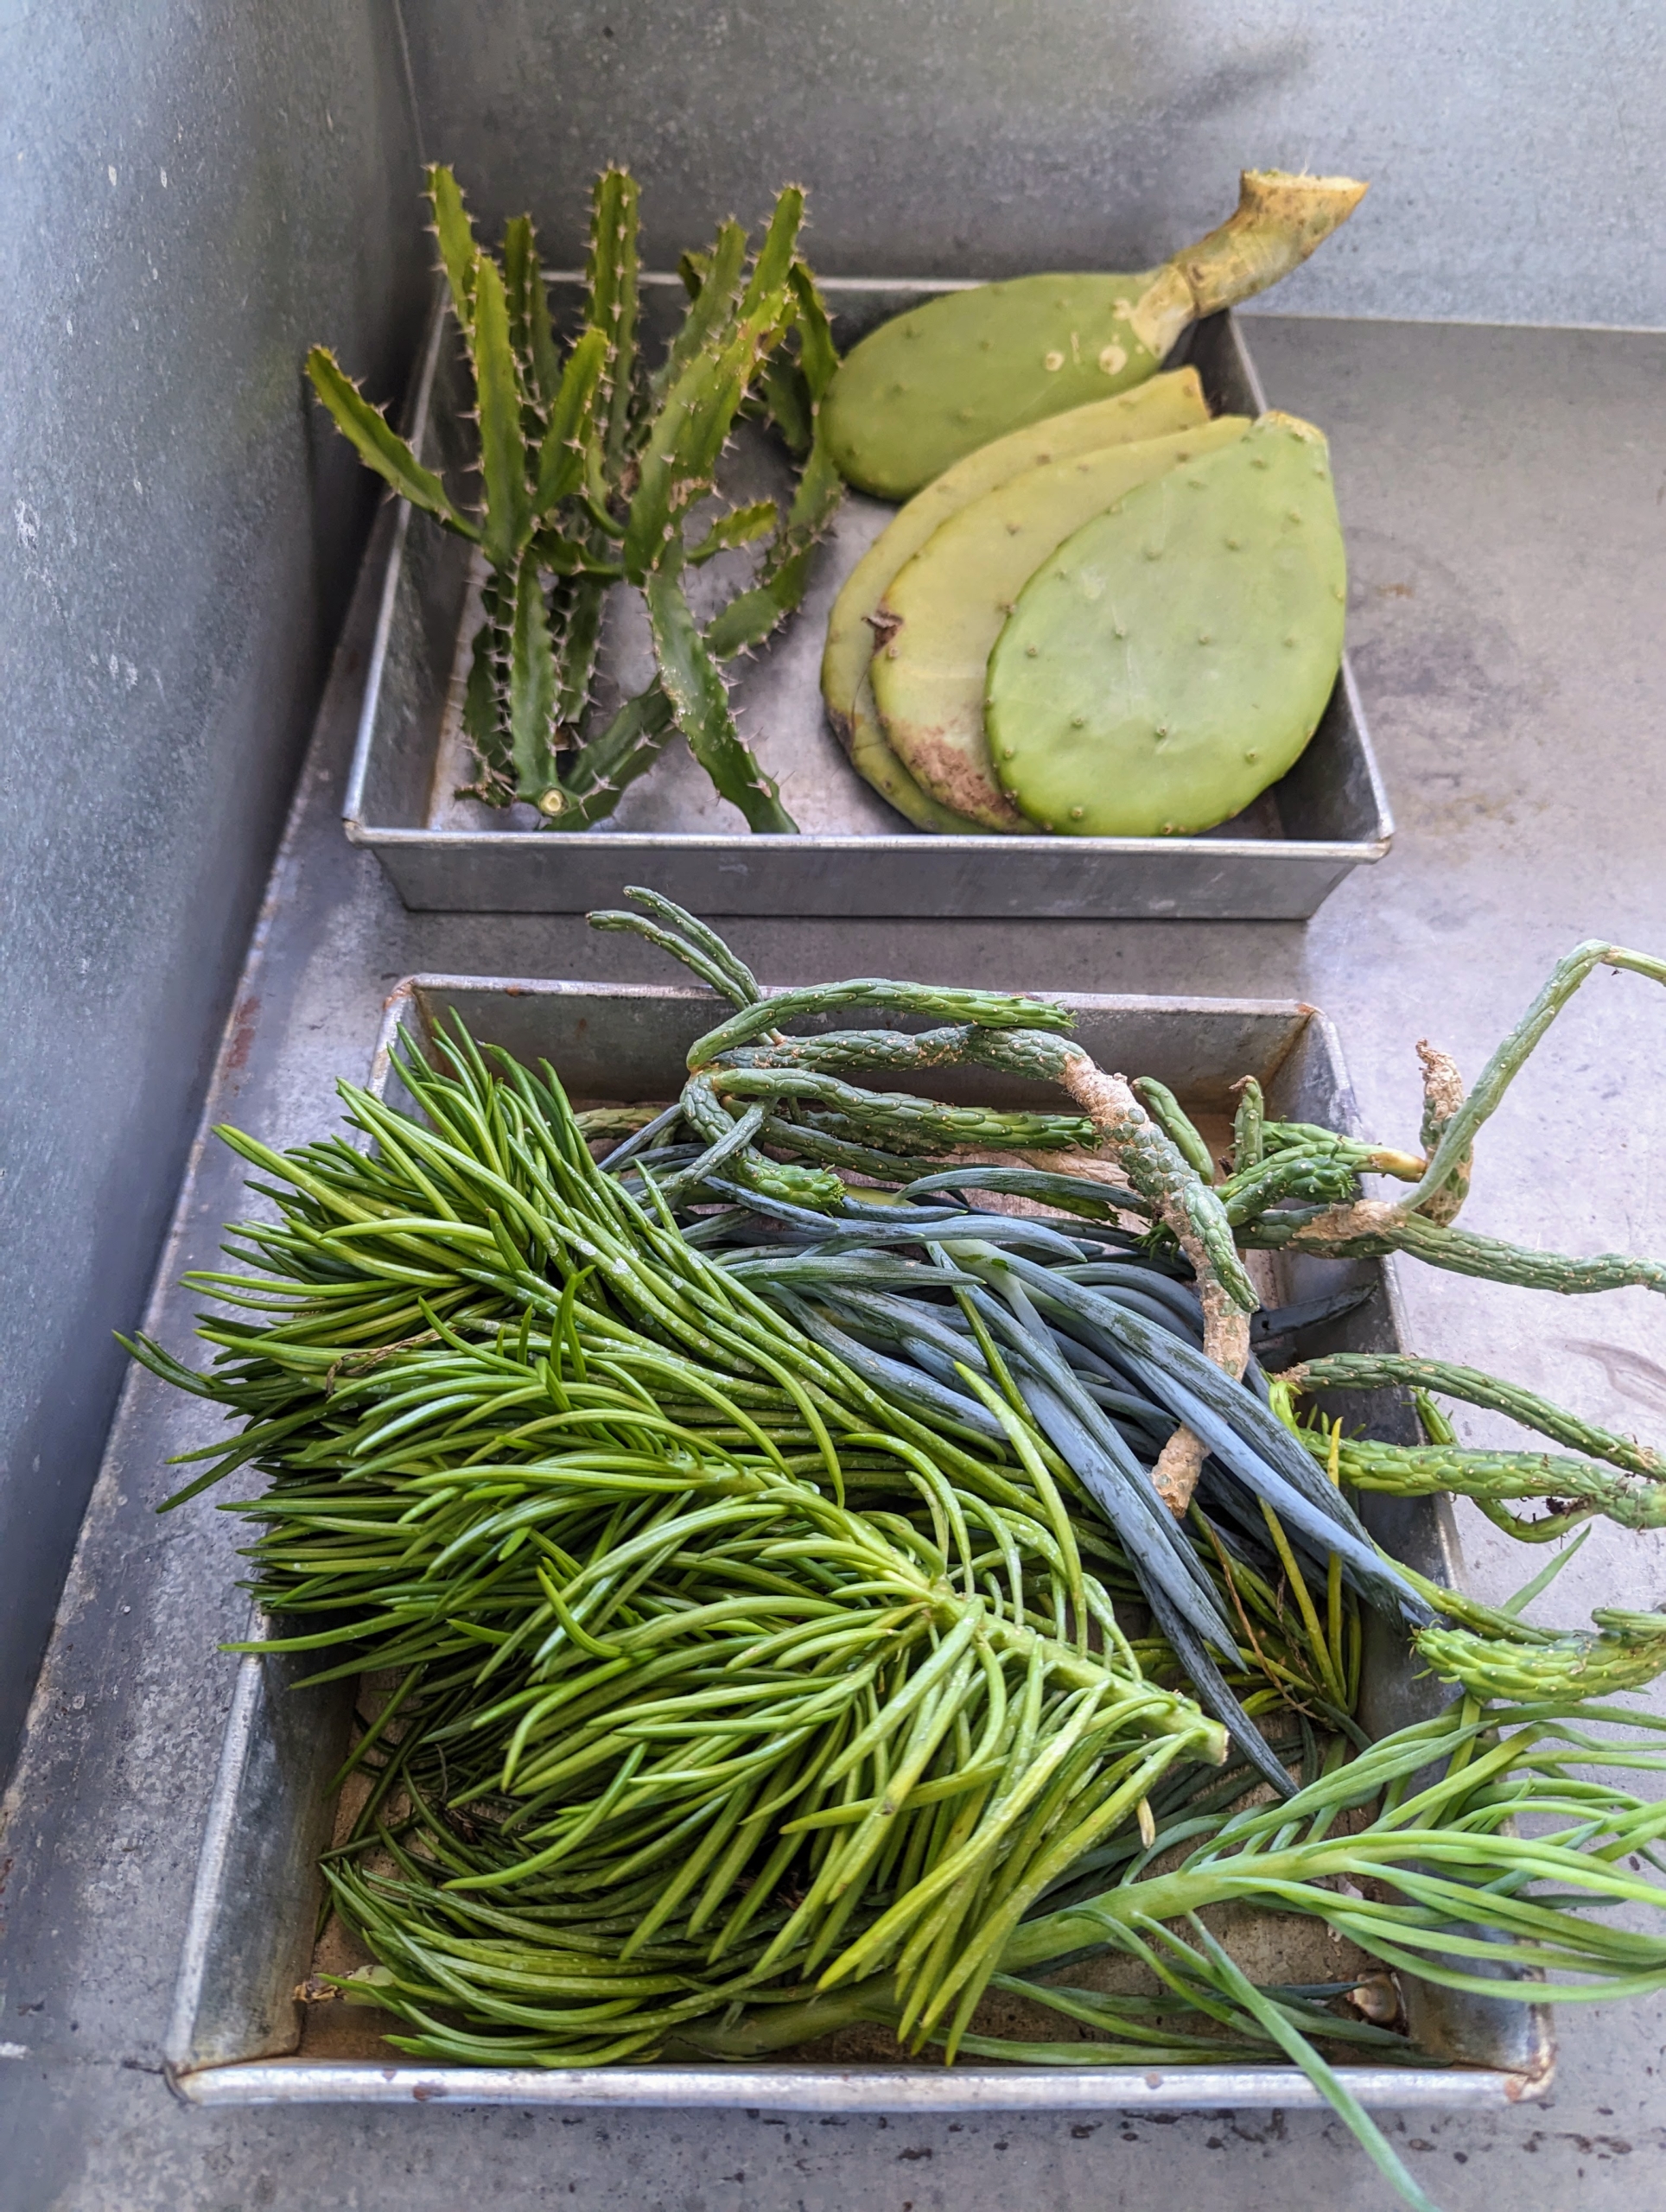
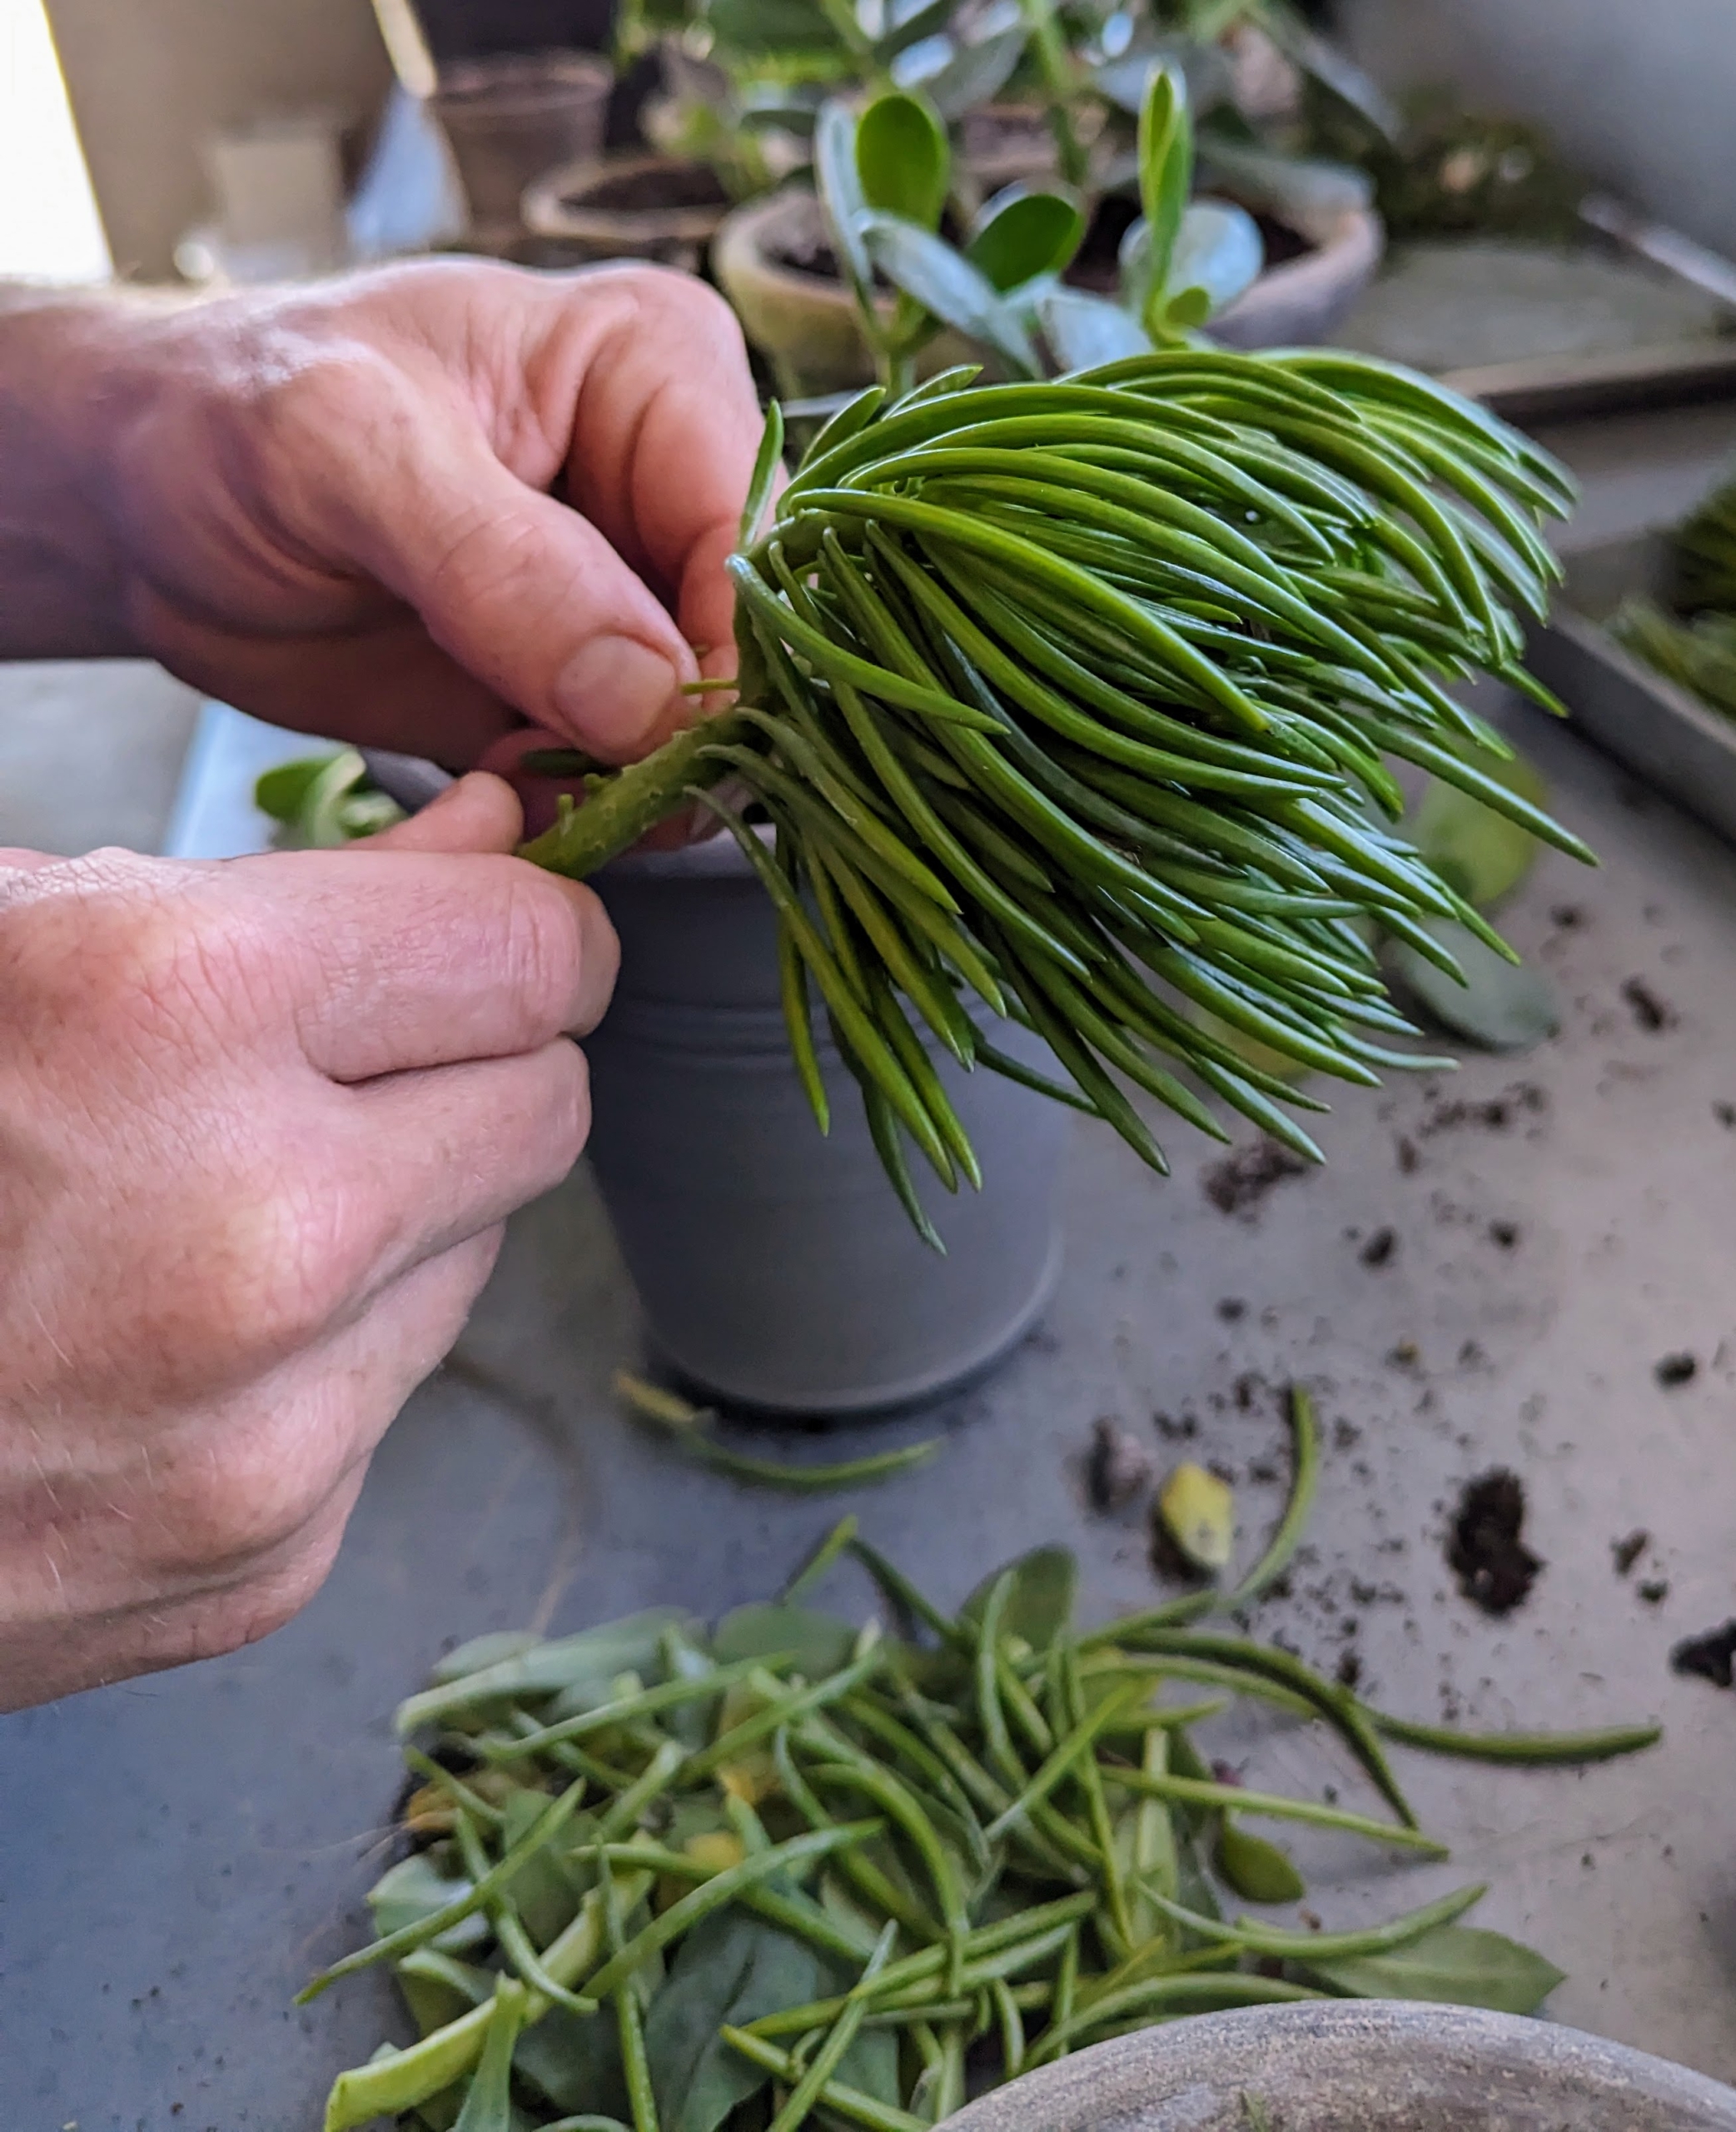
Recently, I was gifted a nice selection of cuttings. Most succulents root easily in the right container and soil. As soon as I got these cuttings back to the farm, I gave them to Ryan to pot up.
Among these beautiful succulent cuttings – aeonium, euphorbia, senecio, jade, prickly pear cactus, and aloe.
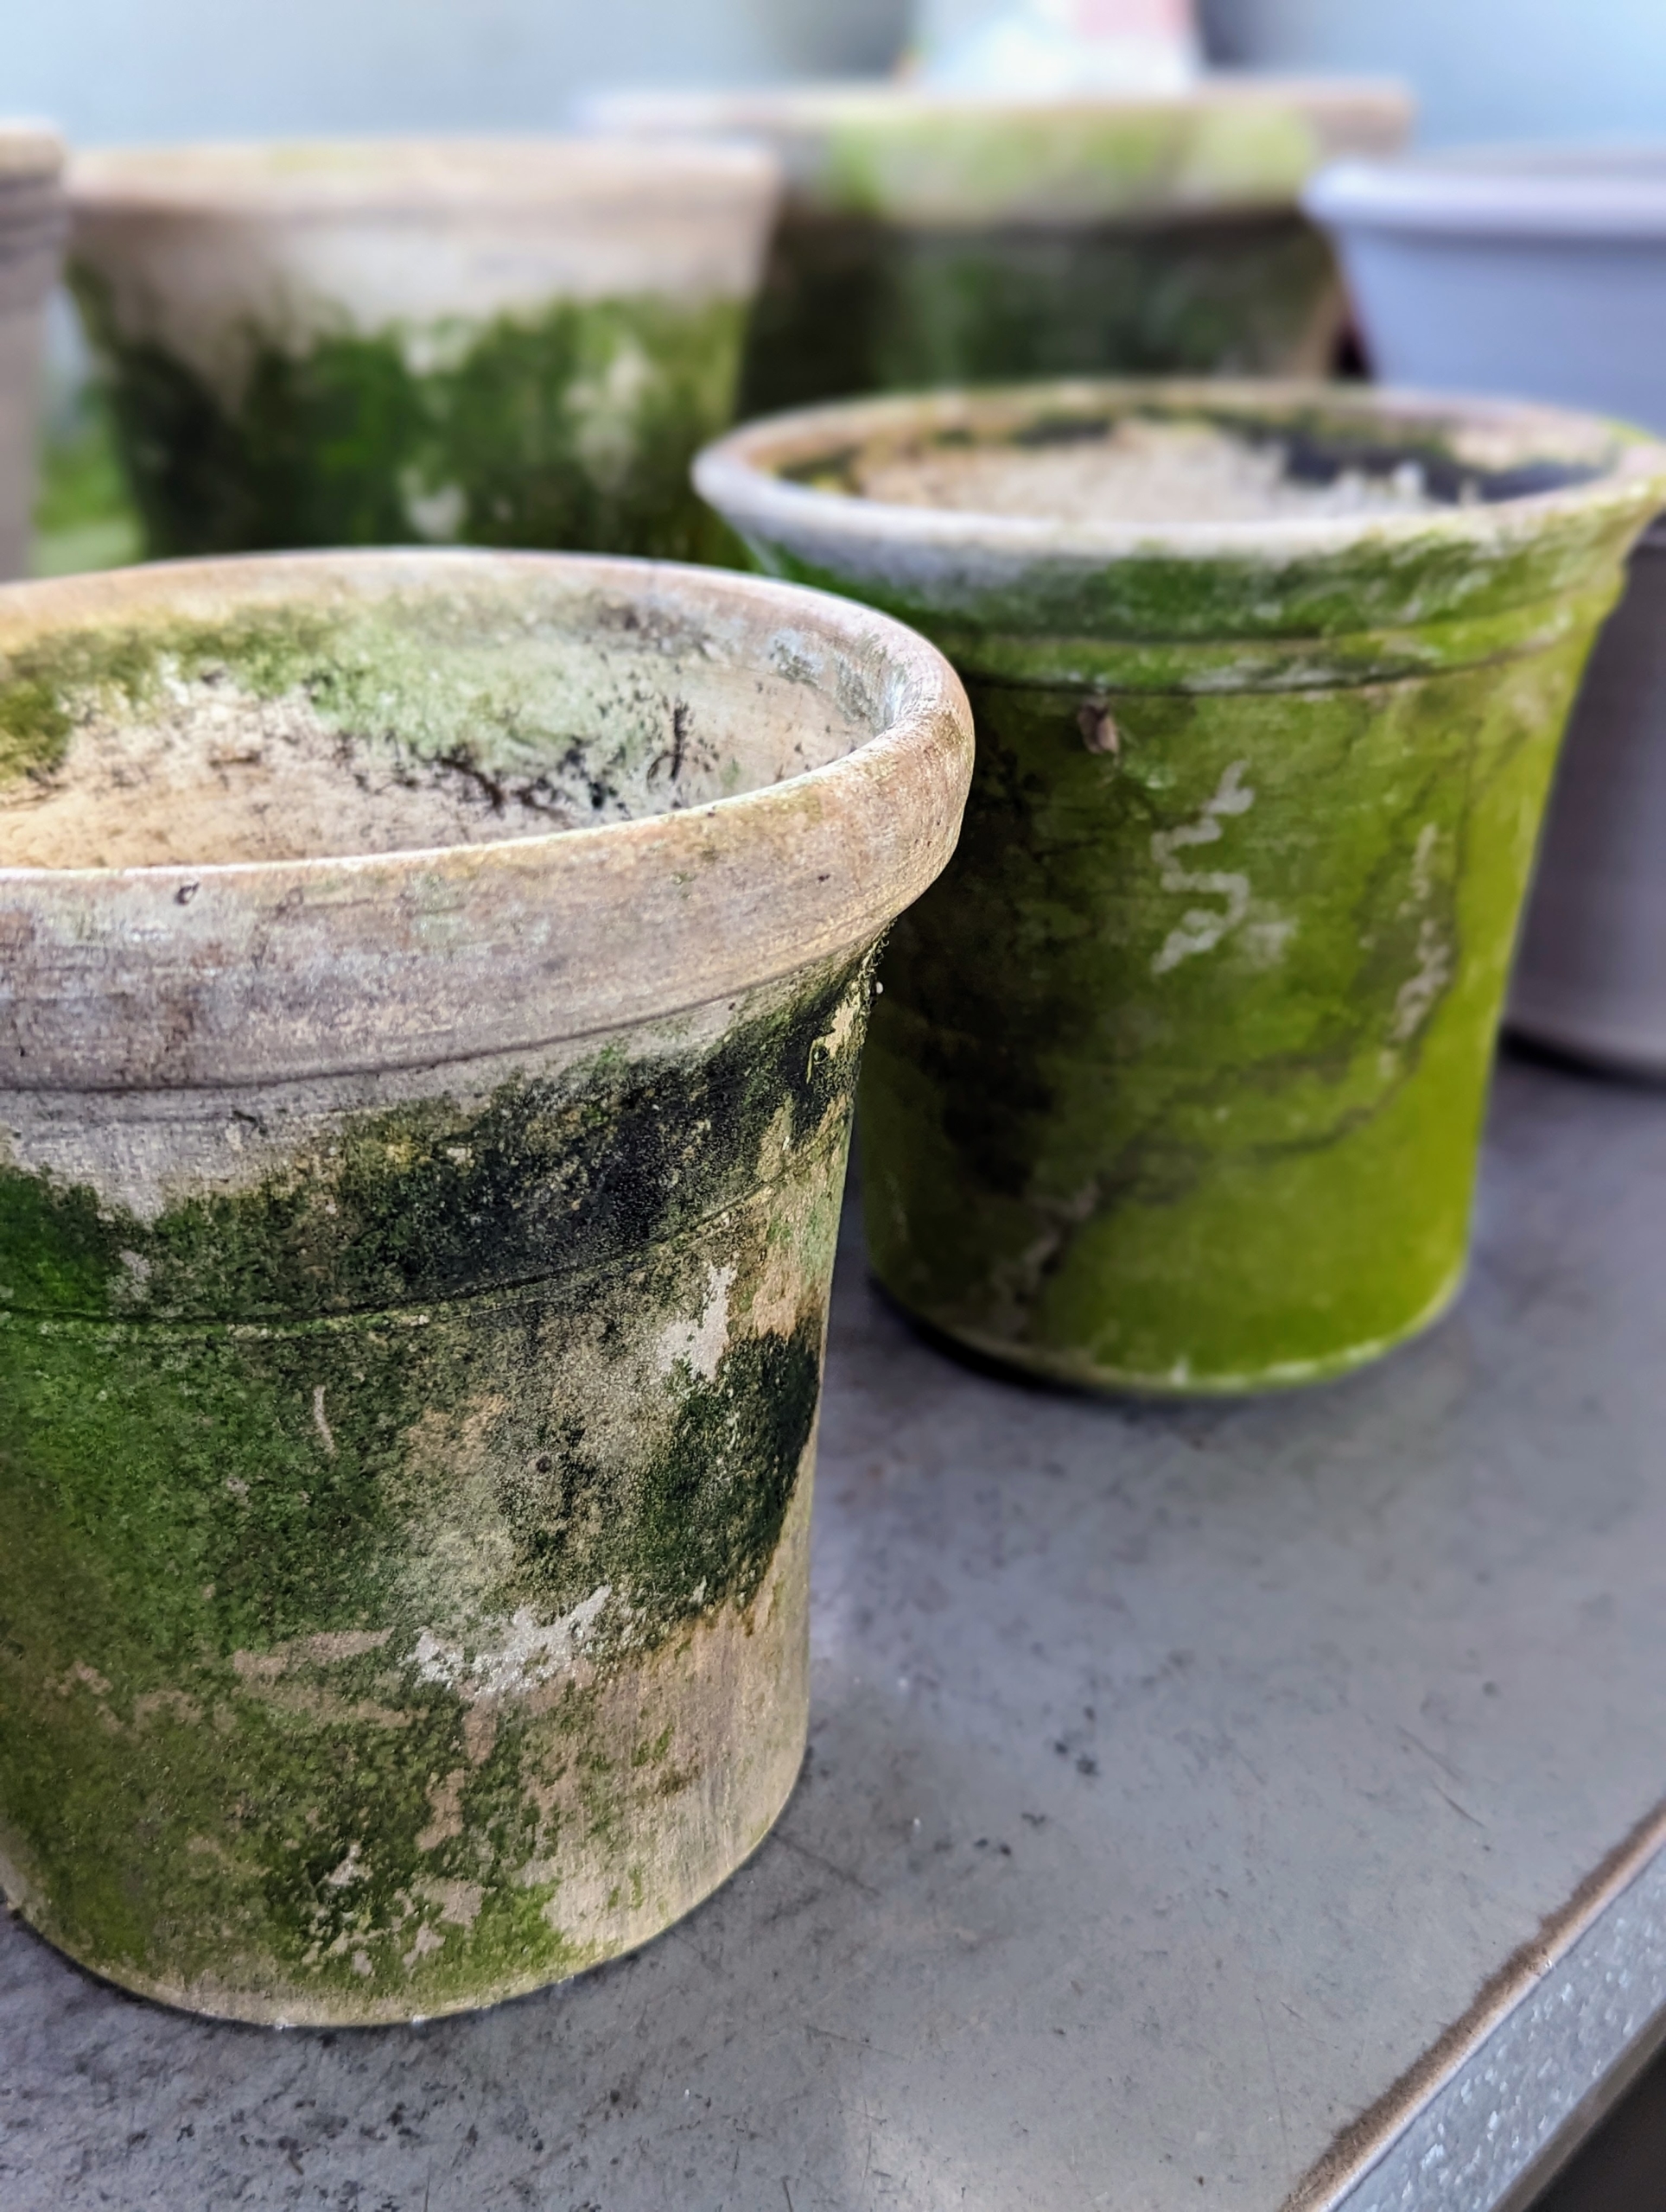
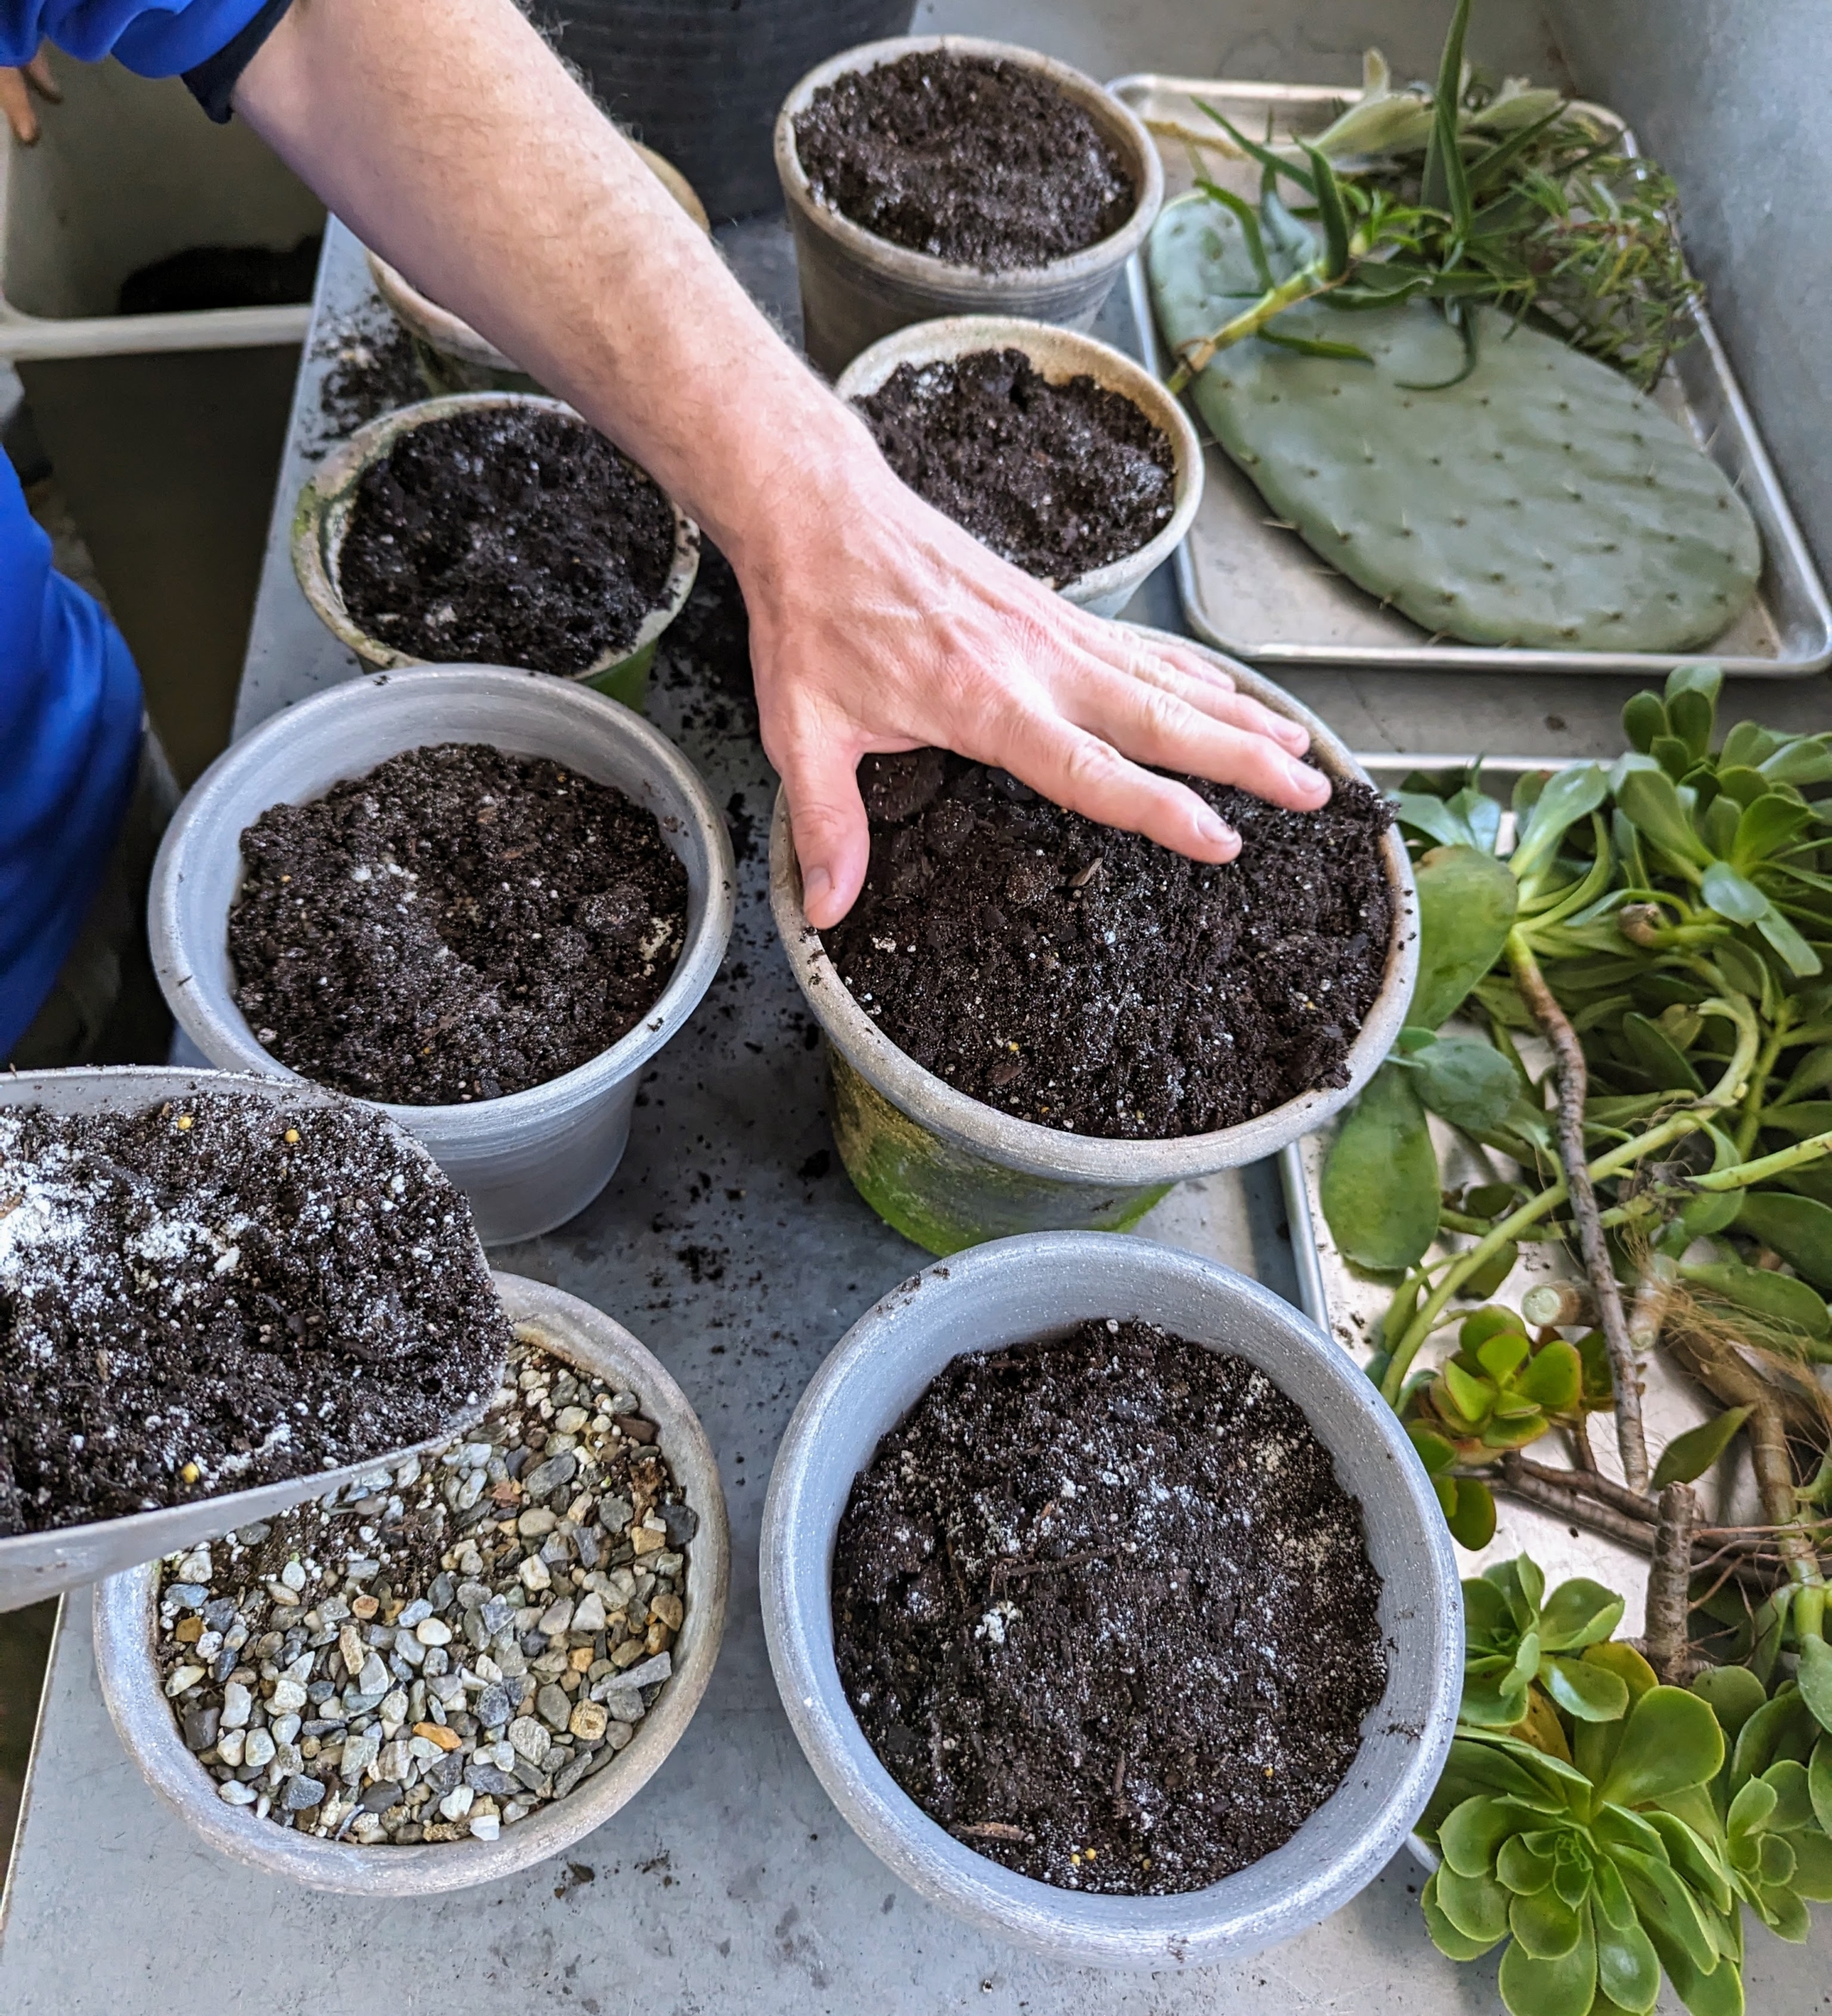
Ryan chooses the appropriate size container for each specimen. I’ve been using Guy Wolff pots for many years – he makes every one of them by hand. I love the patina on these vessels.
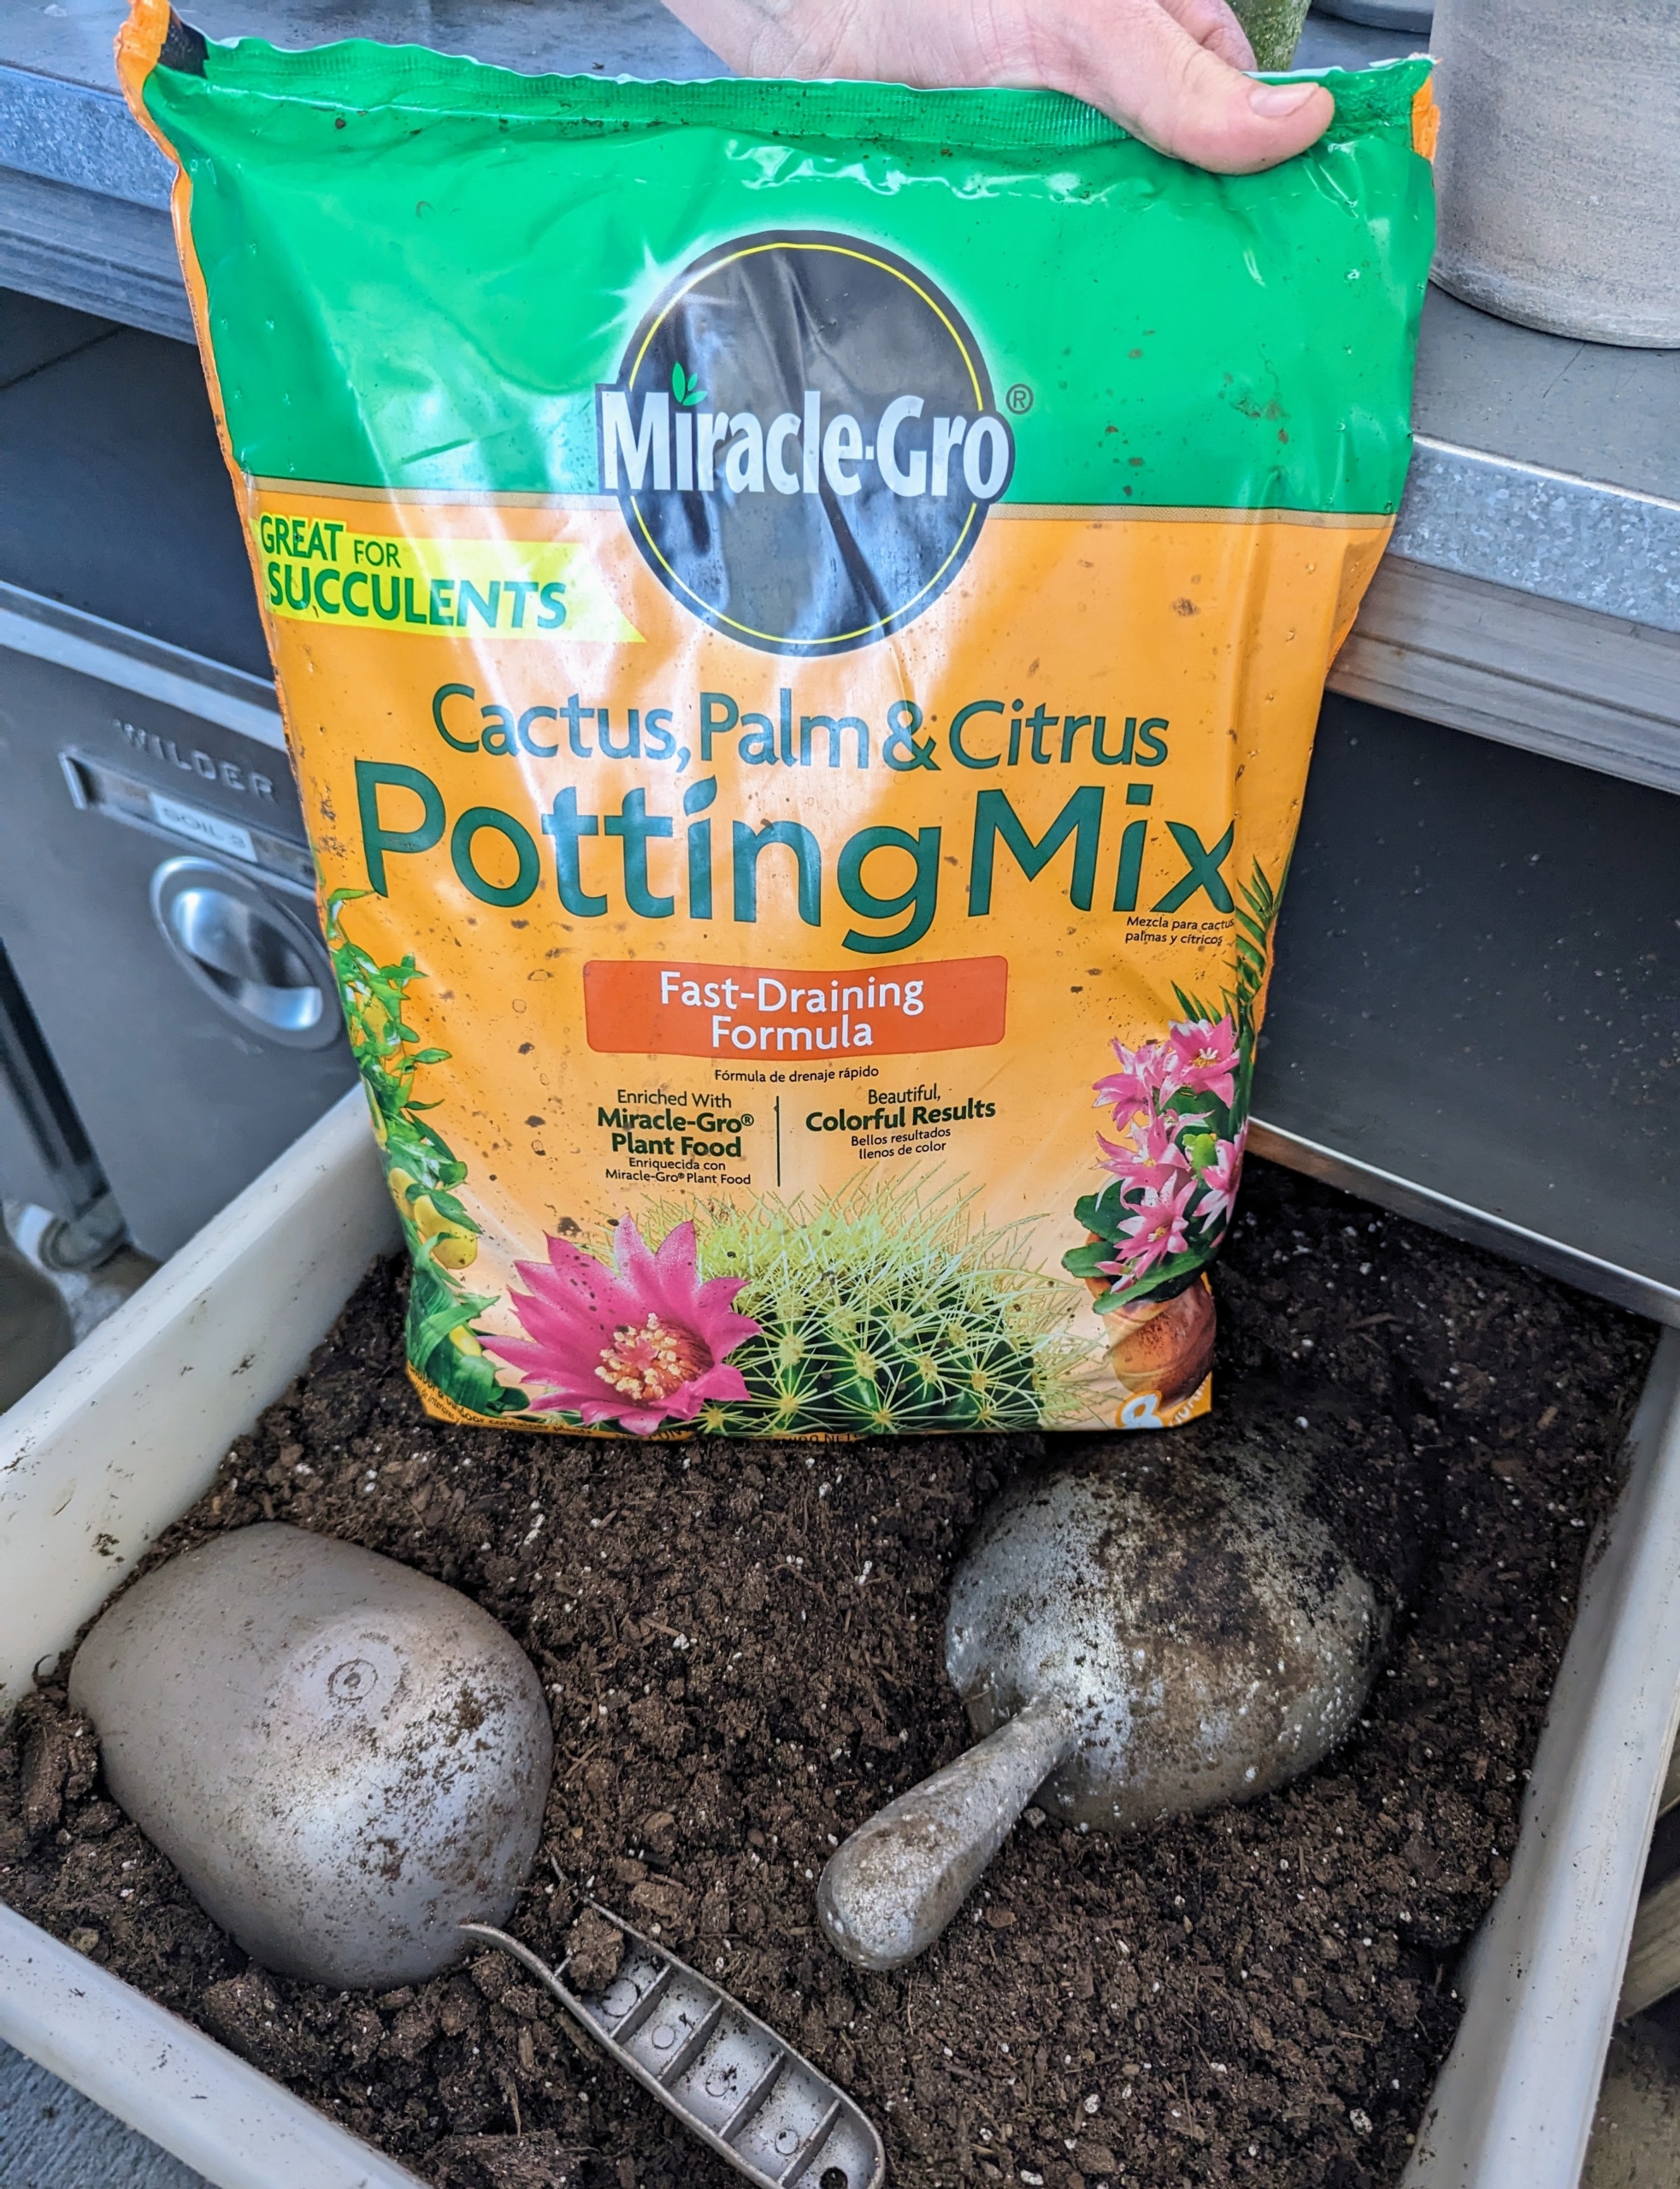
For succulents, we use a mix specifically formulated for succulents. This mix contains sand and perlite to help prevent soil compaction and improve drainage. The right soil mix will help to promote faster root growth and provide quick anchorage to young roots.
Ryan also adds in some horticultural sand, a very gritty sand made from crushed granite, quartz, or sandstone. Horticultural sand is often known as sharp sand, coarse sand, or quartz sand.
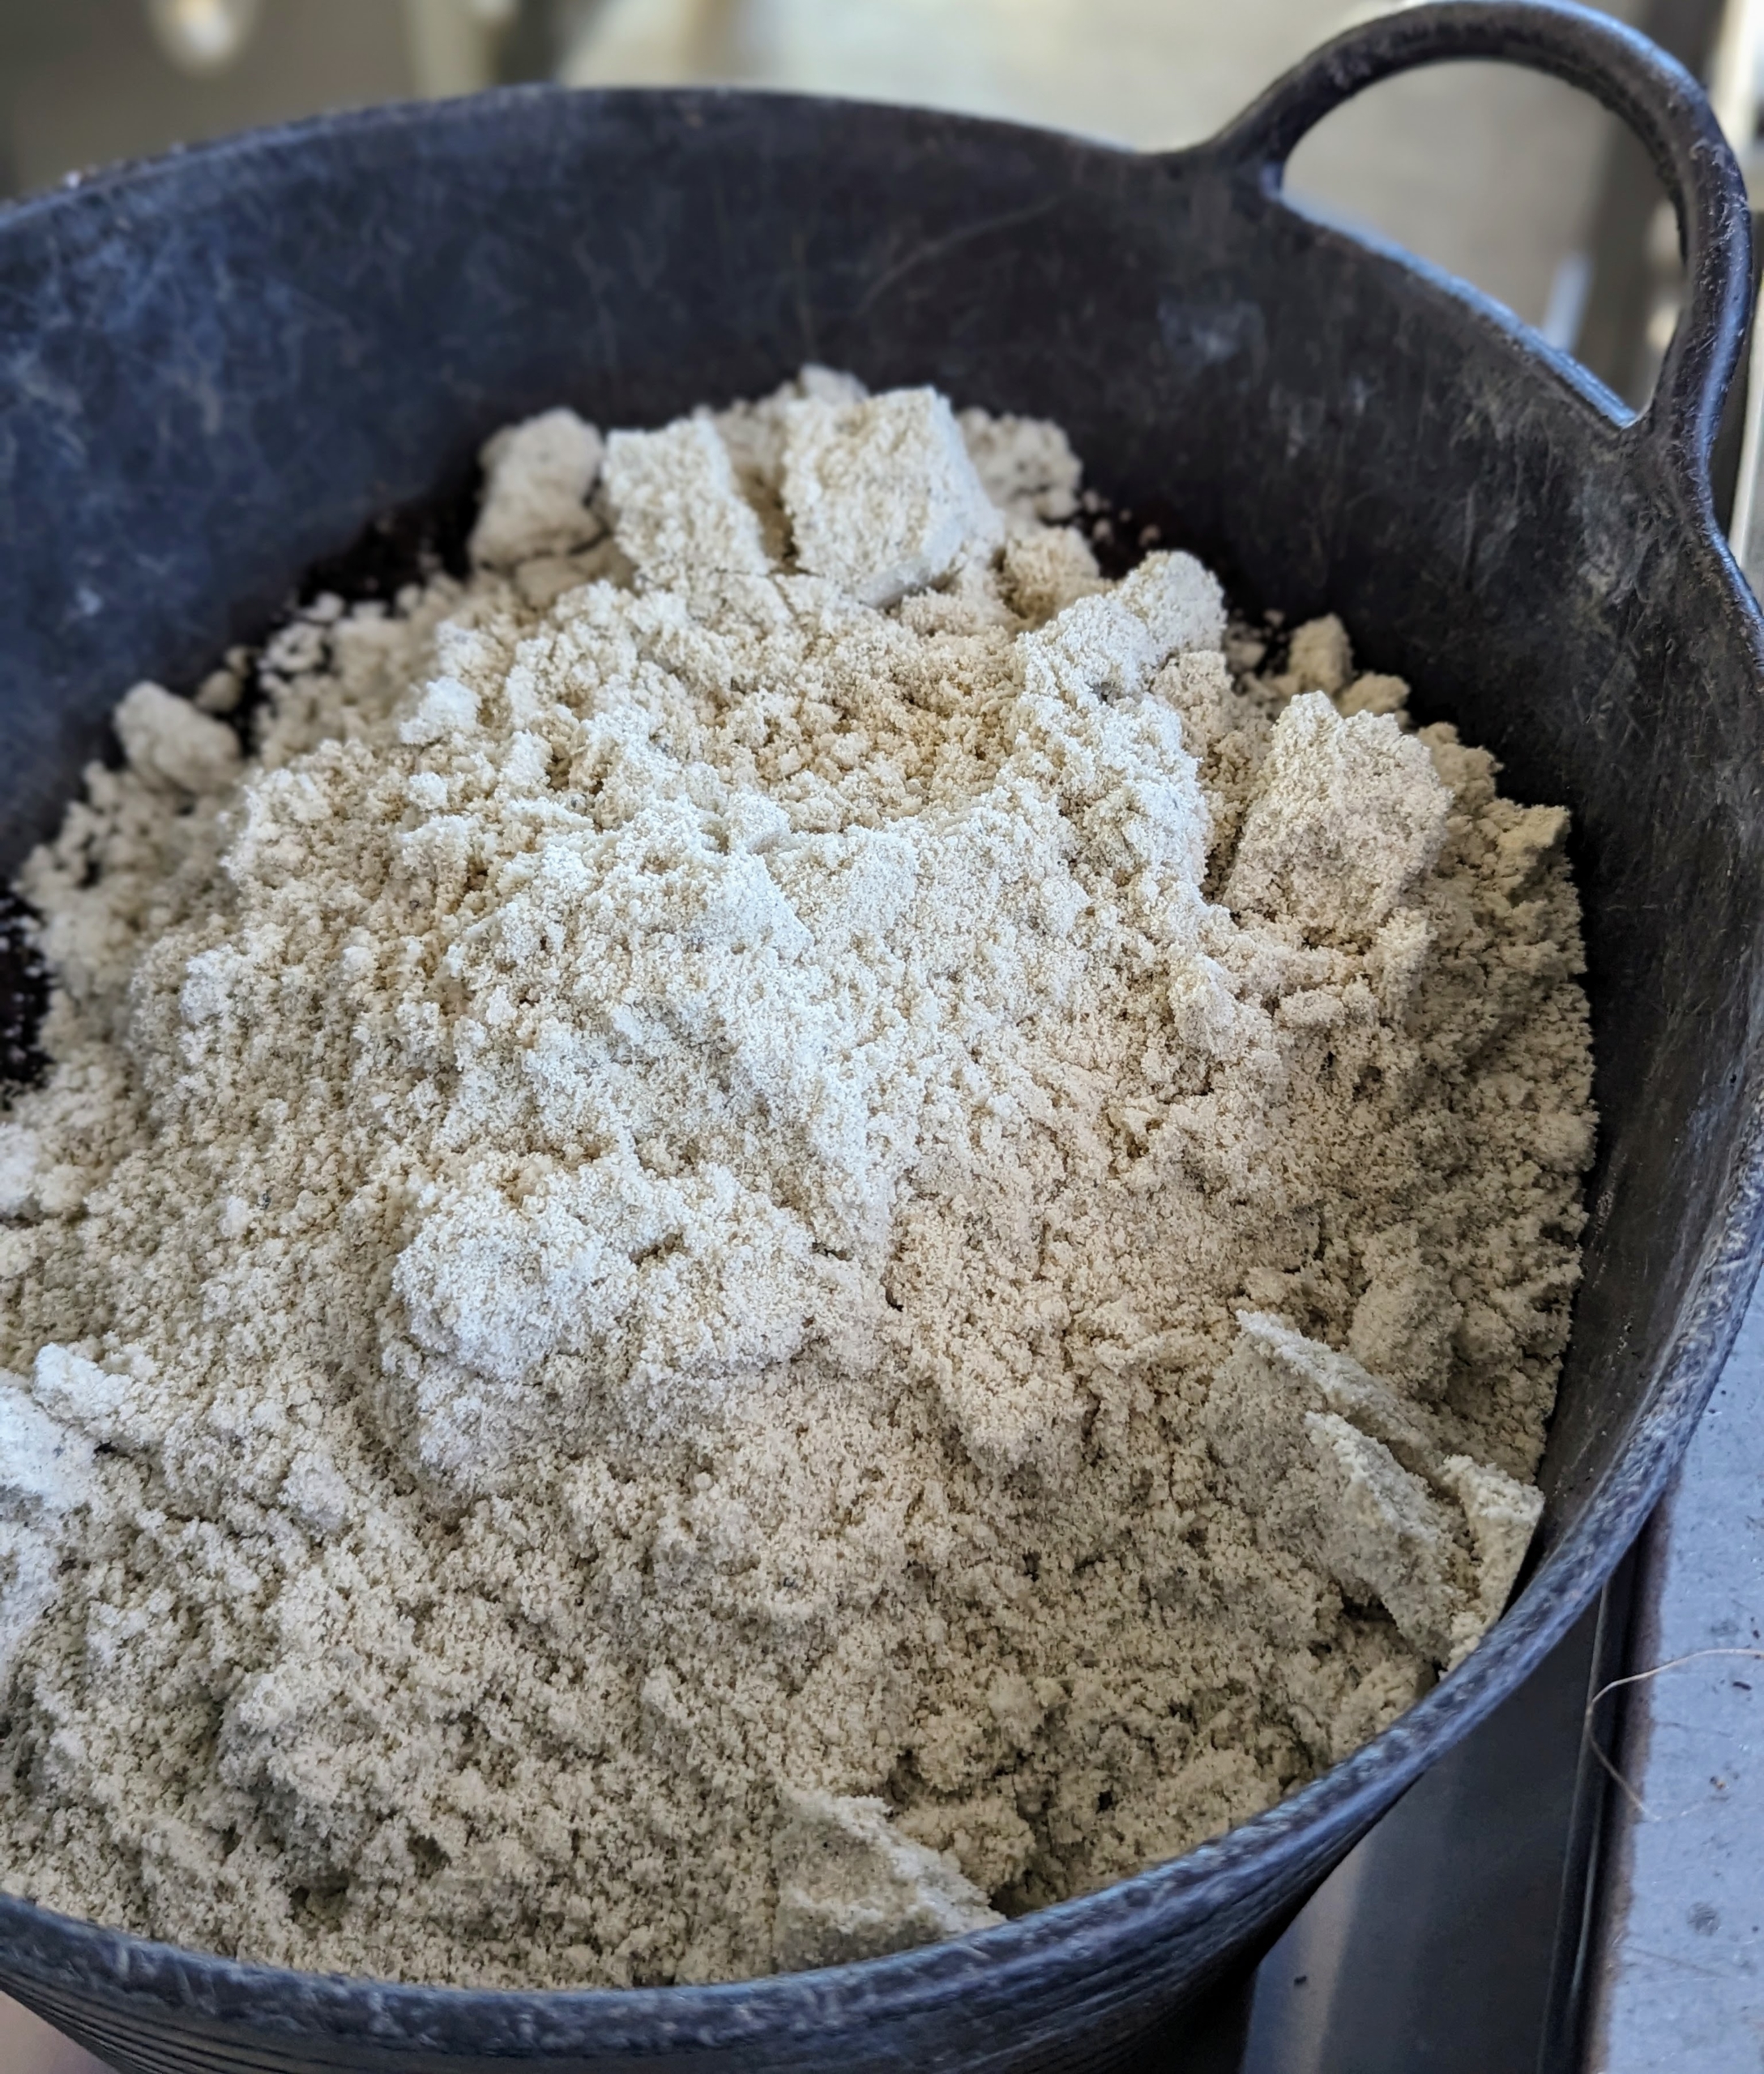
Ryan sprinkles some Osmocote fertilizer with the soil and sand. Osmocote particles include a core of nutrients – nitrogen, phosphorus and potassium.
Ryan thoroughly mixes all the elements in a trug bucket. Because succulents don’t like wet roots, it is important to use a soil mixture that is appropriate and will drain well.
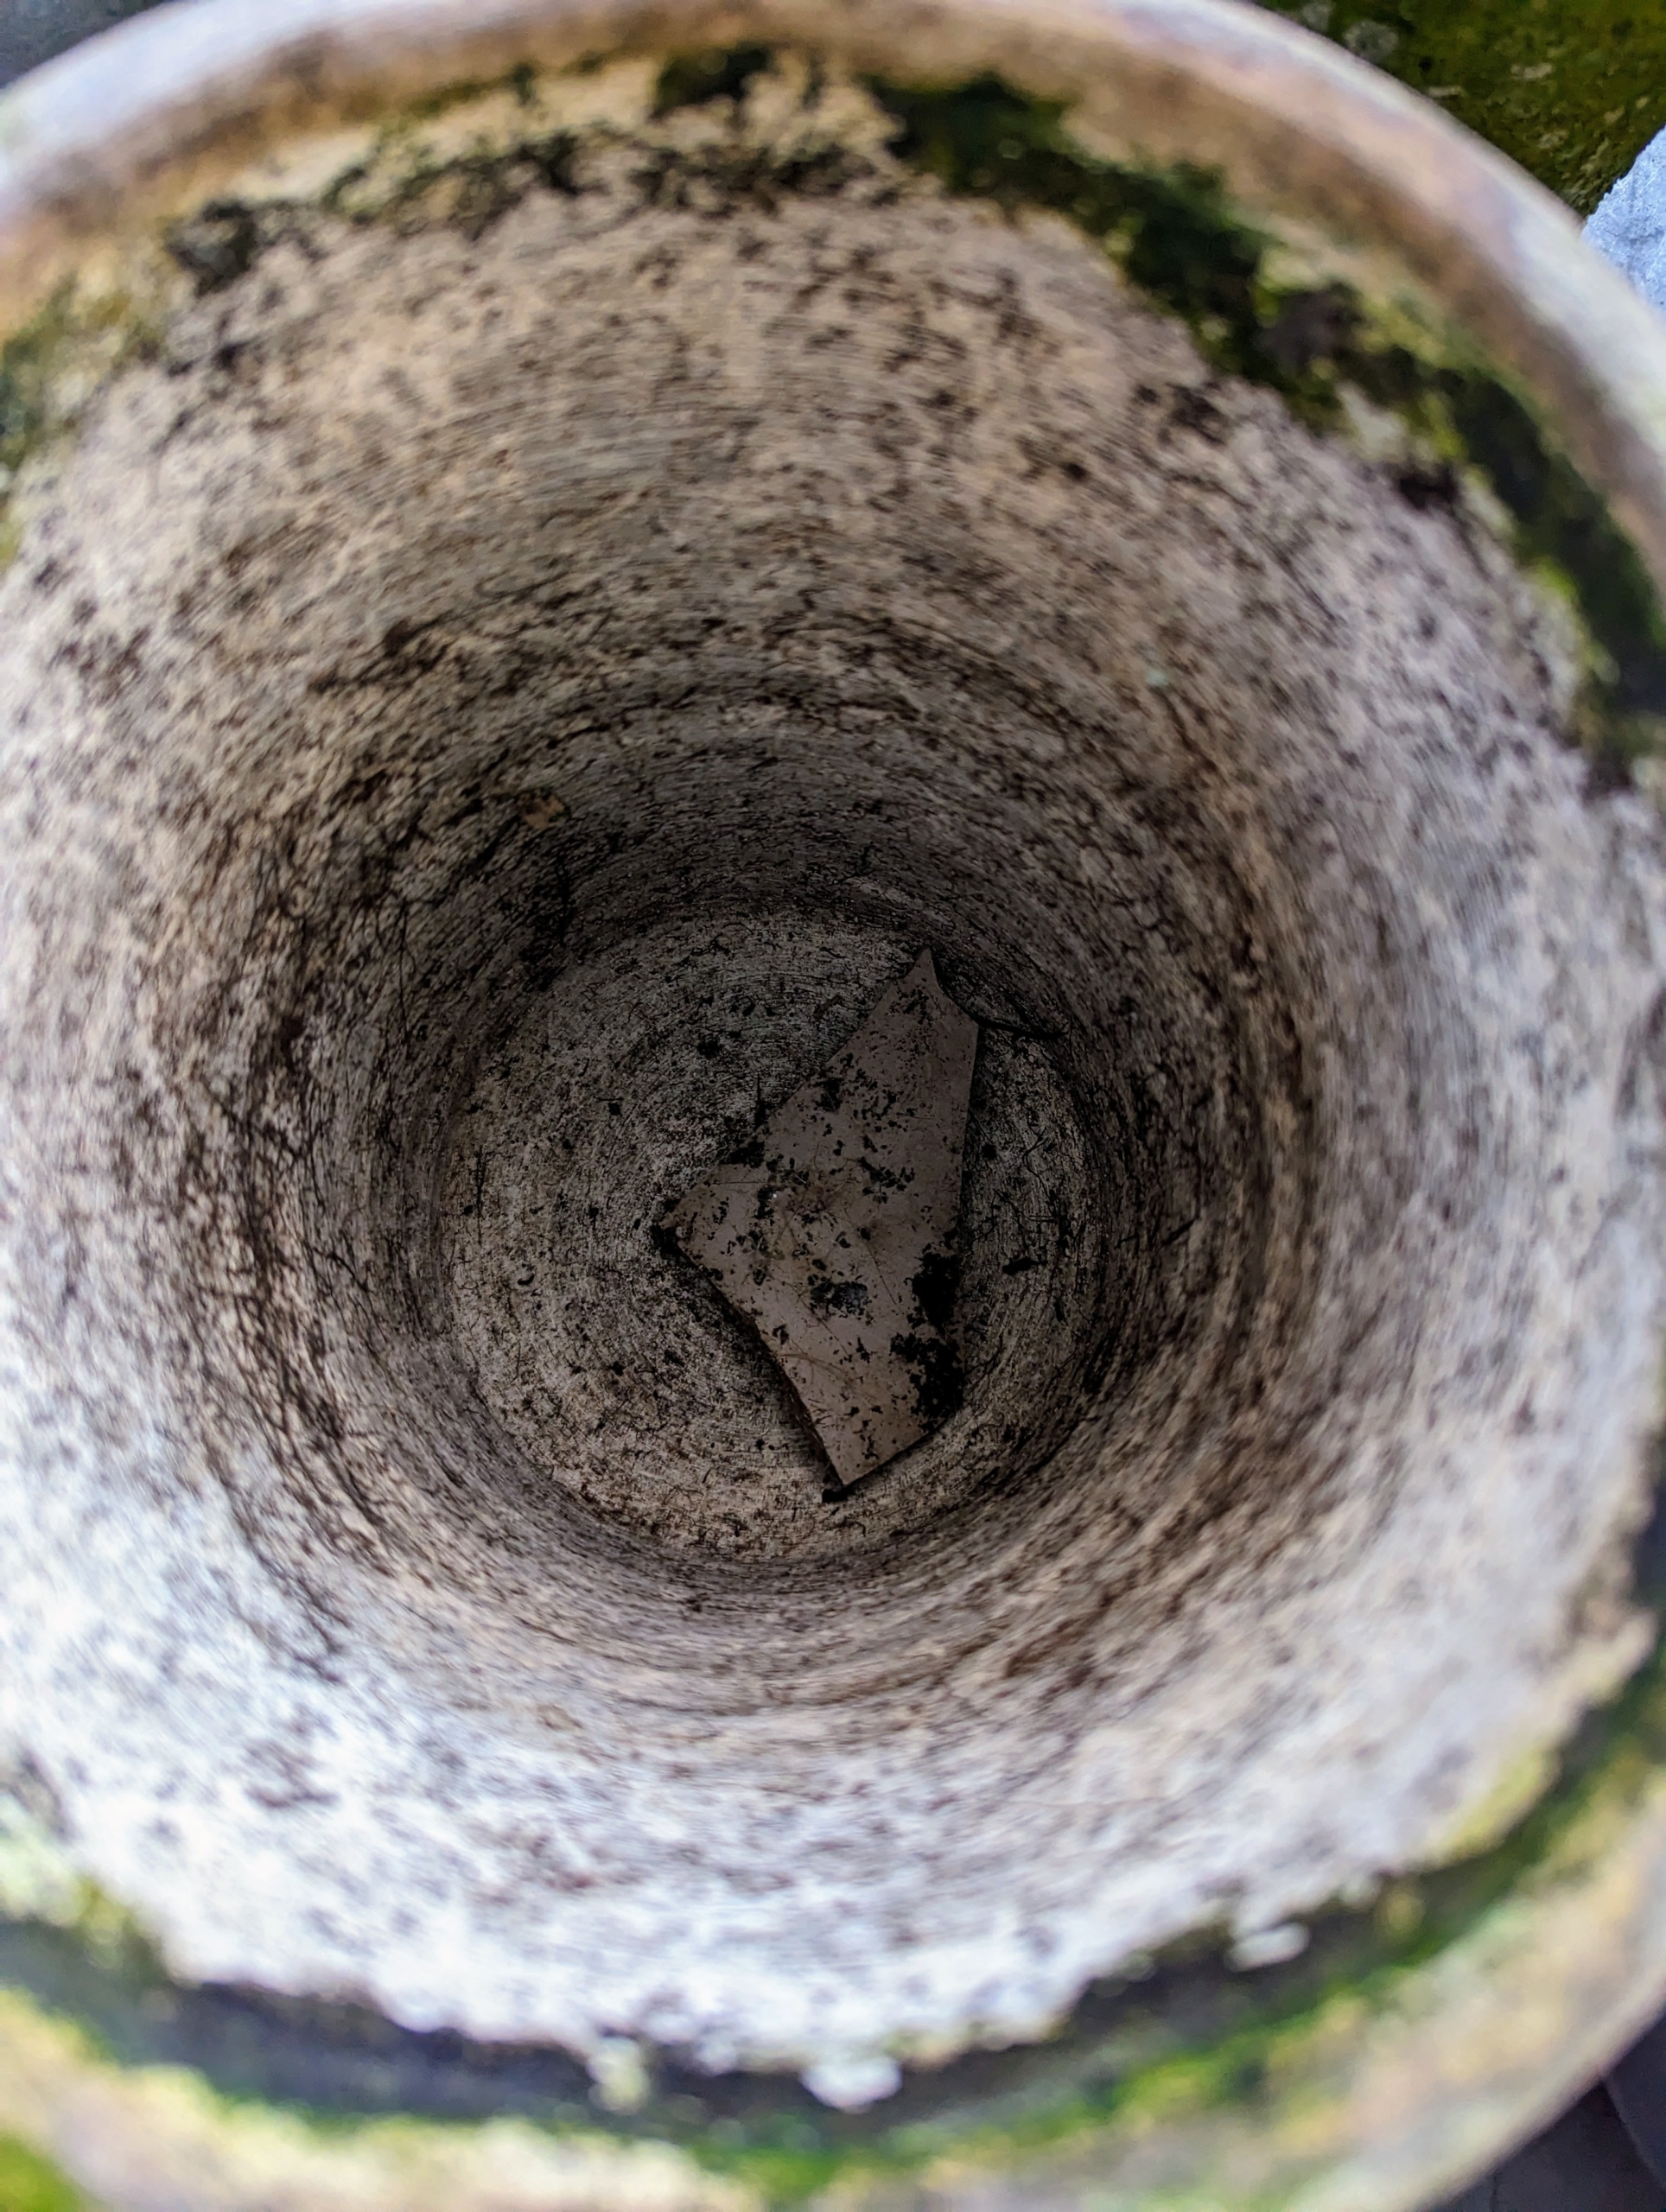
Each pot has a drainage hole. A clay shard is placed over the hole to help with drainage. I also like to use clay pots because they allow proper aeration and moisture to penetrate through the sides and to the plant.
Ryan fills the pots with the soil mix, adding just enough so it is filled up to a half inch below the top of the pot. He also lightly taps on the soil, so it packs into the container for added support.
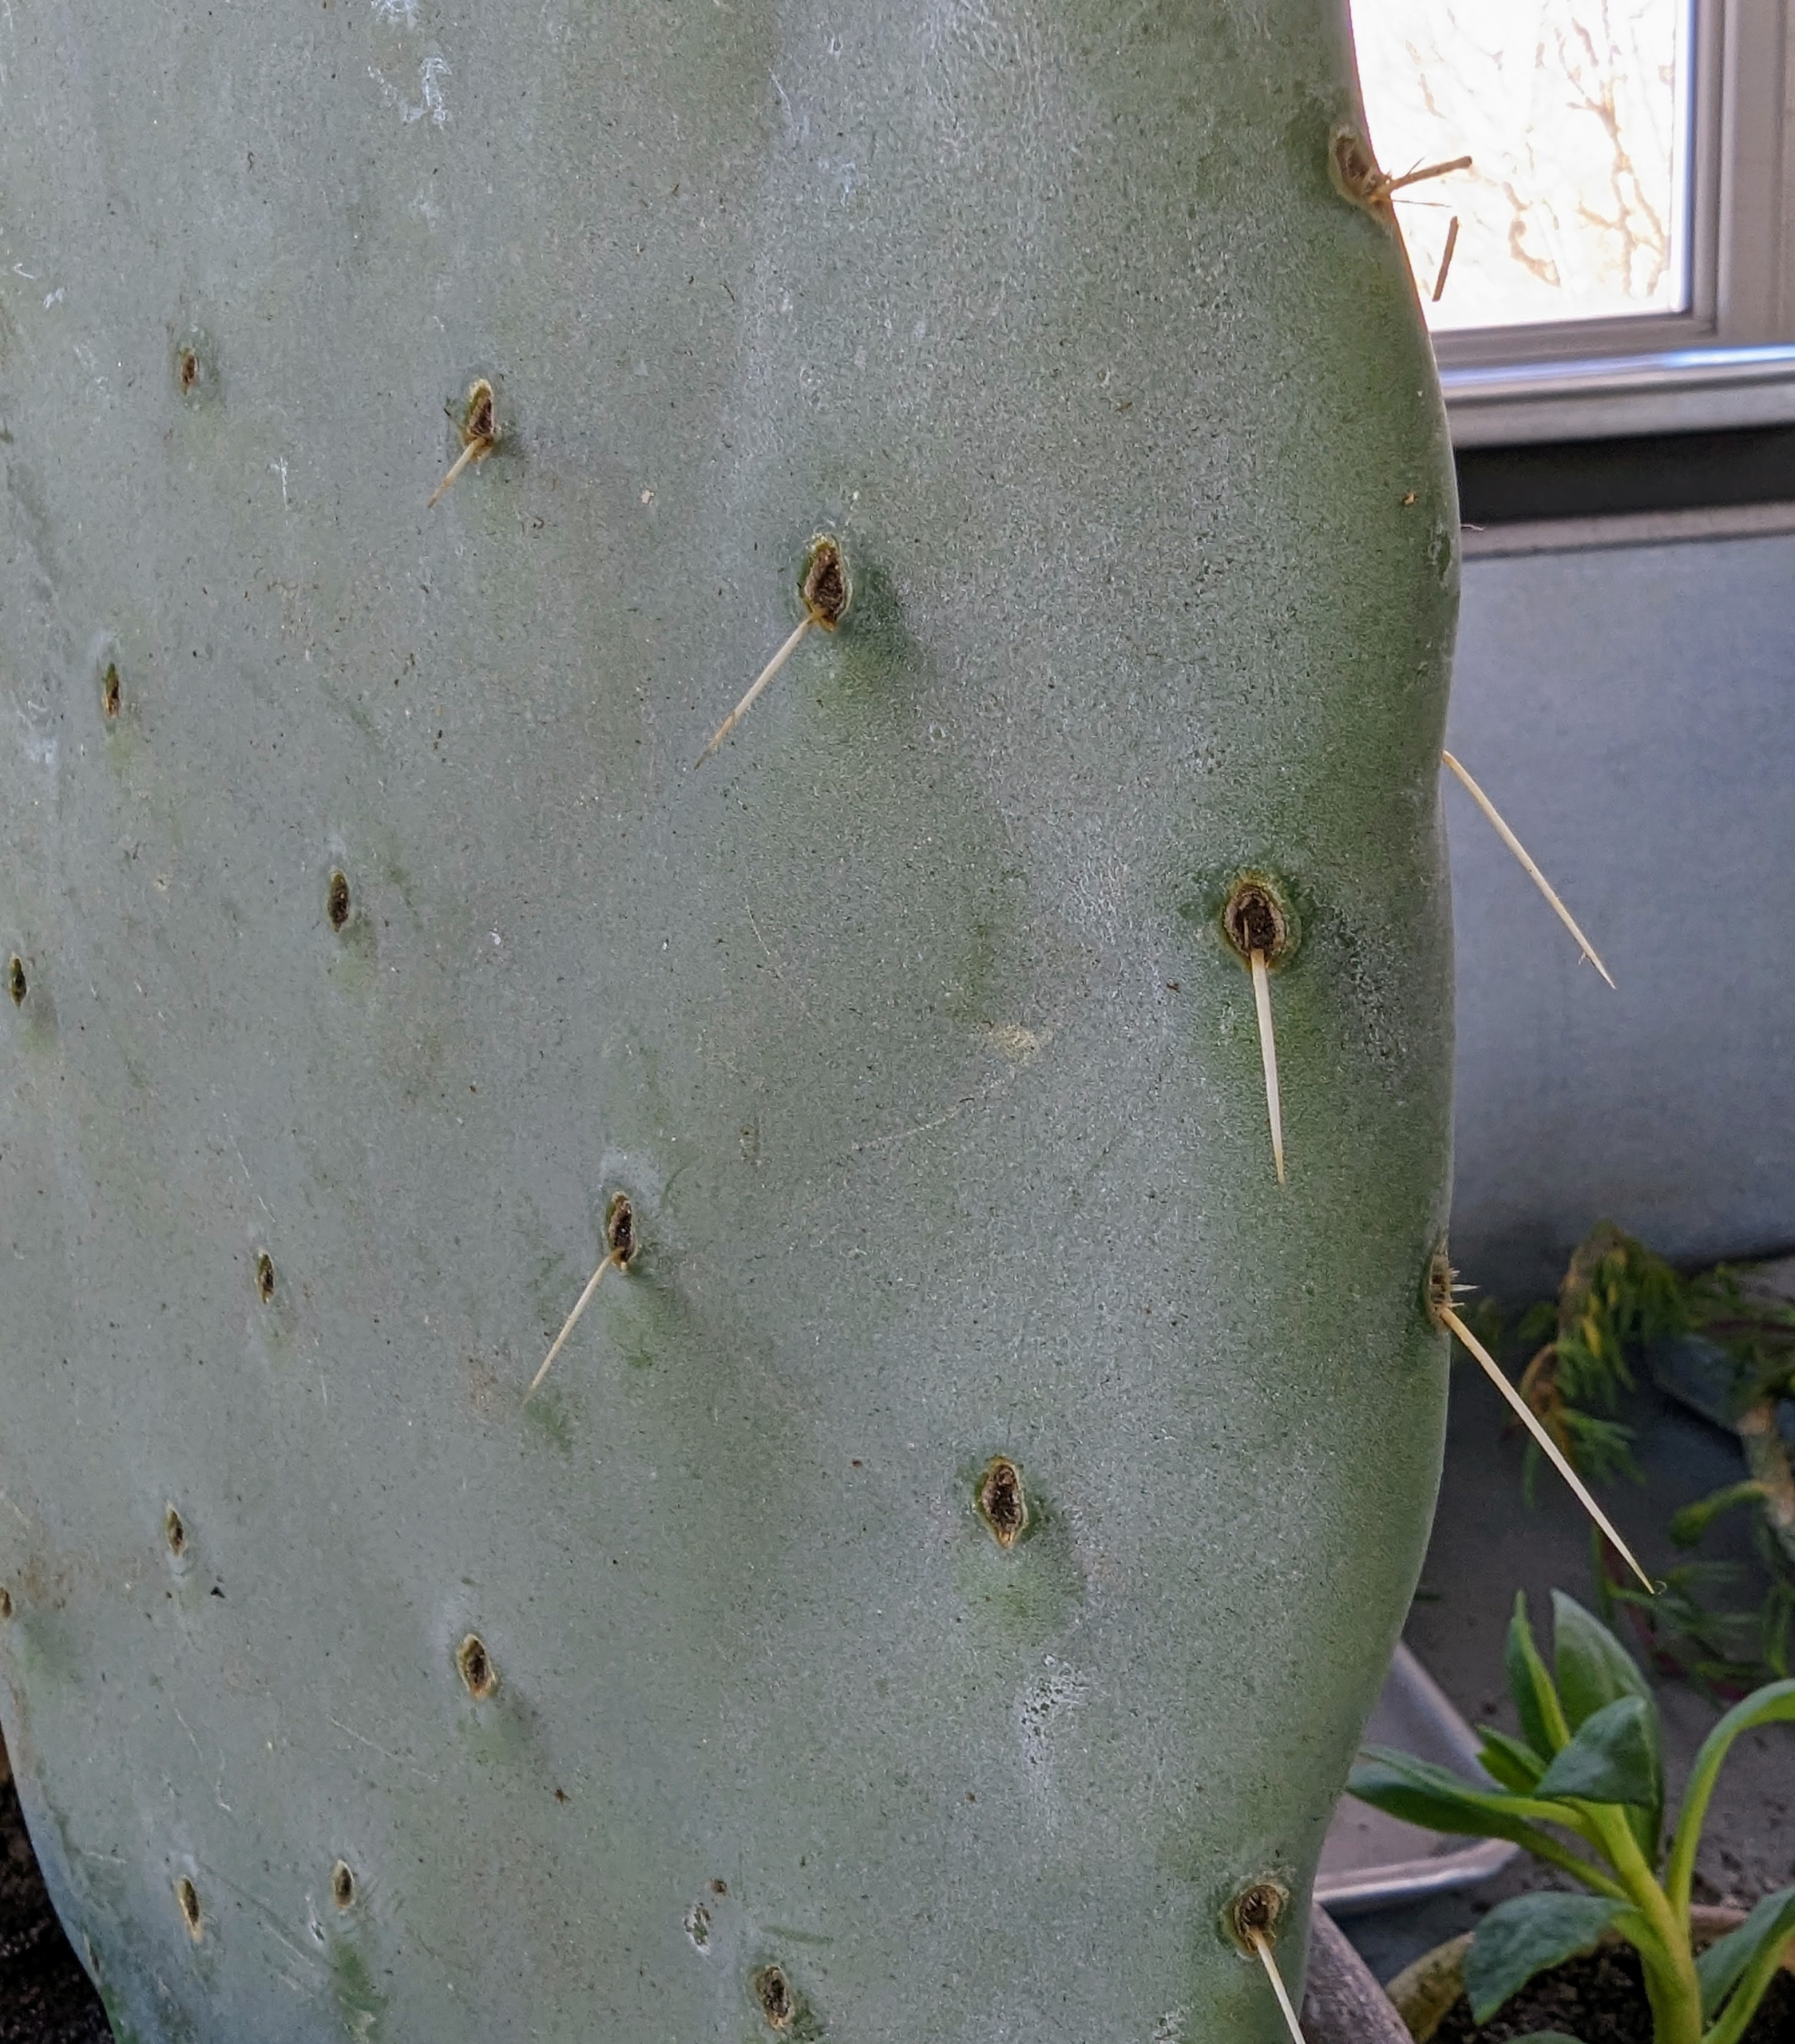
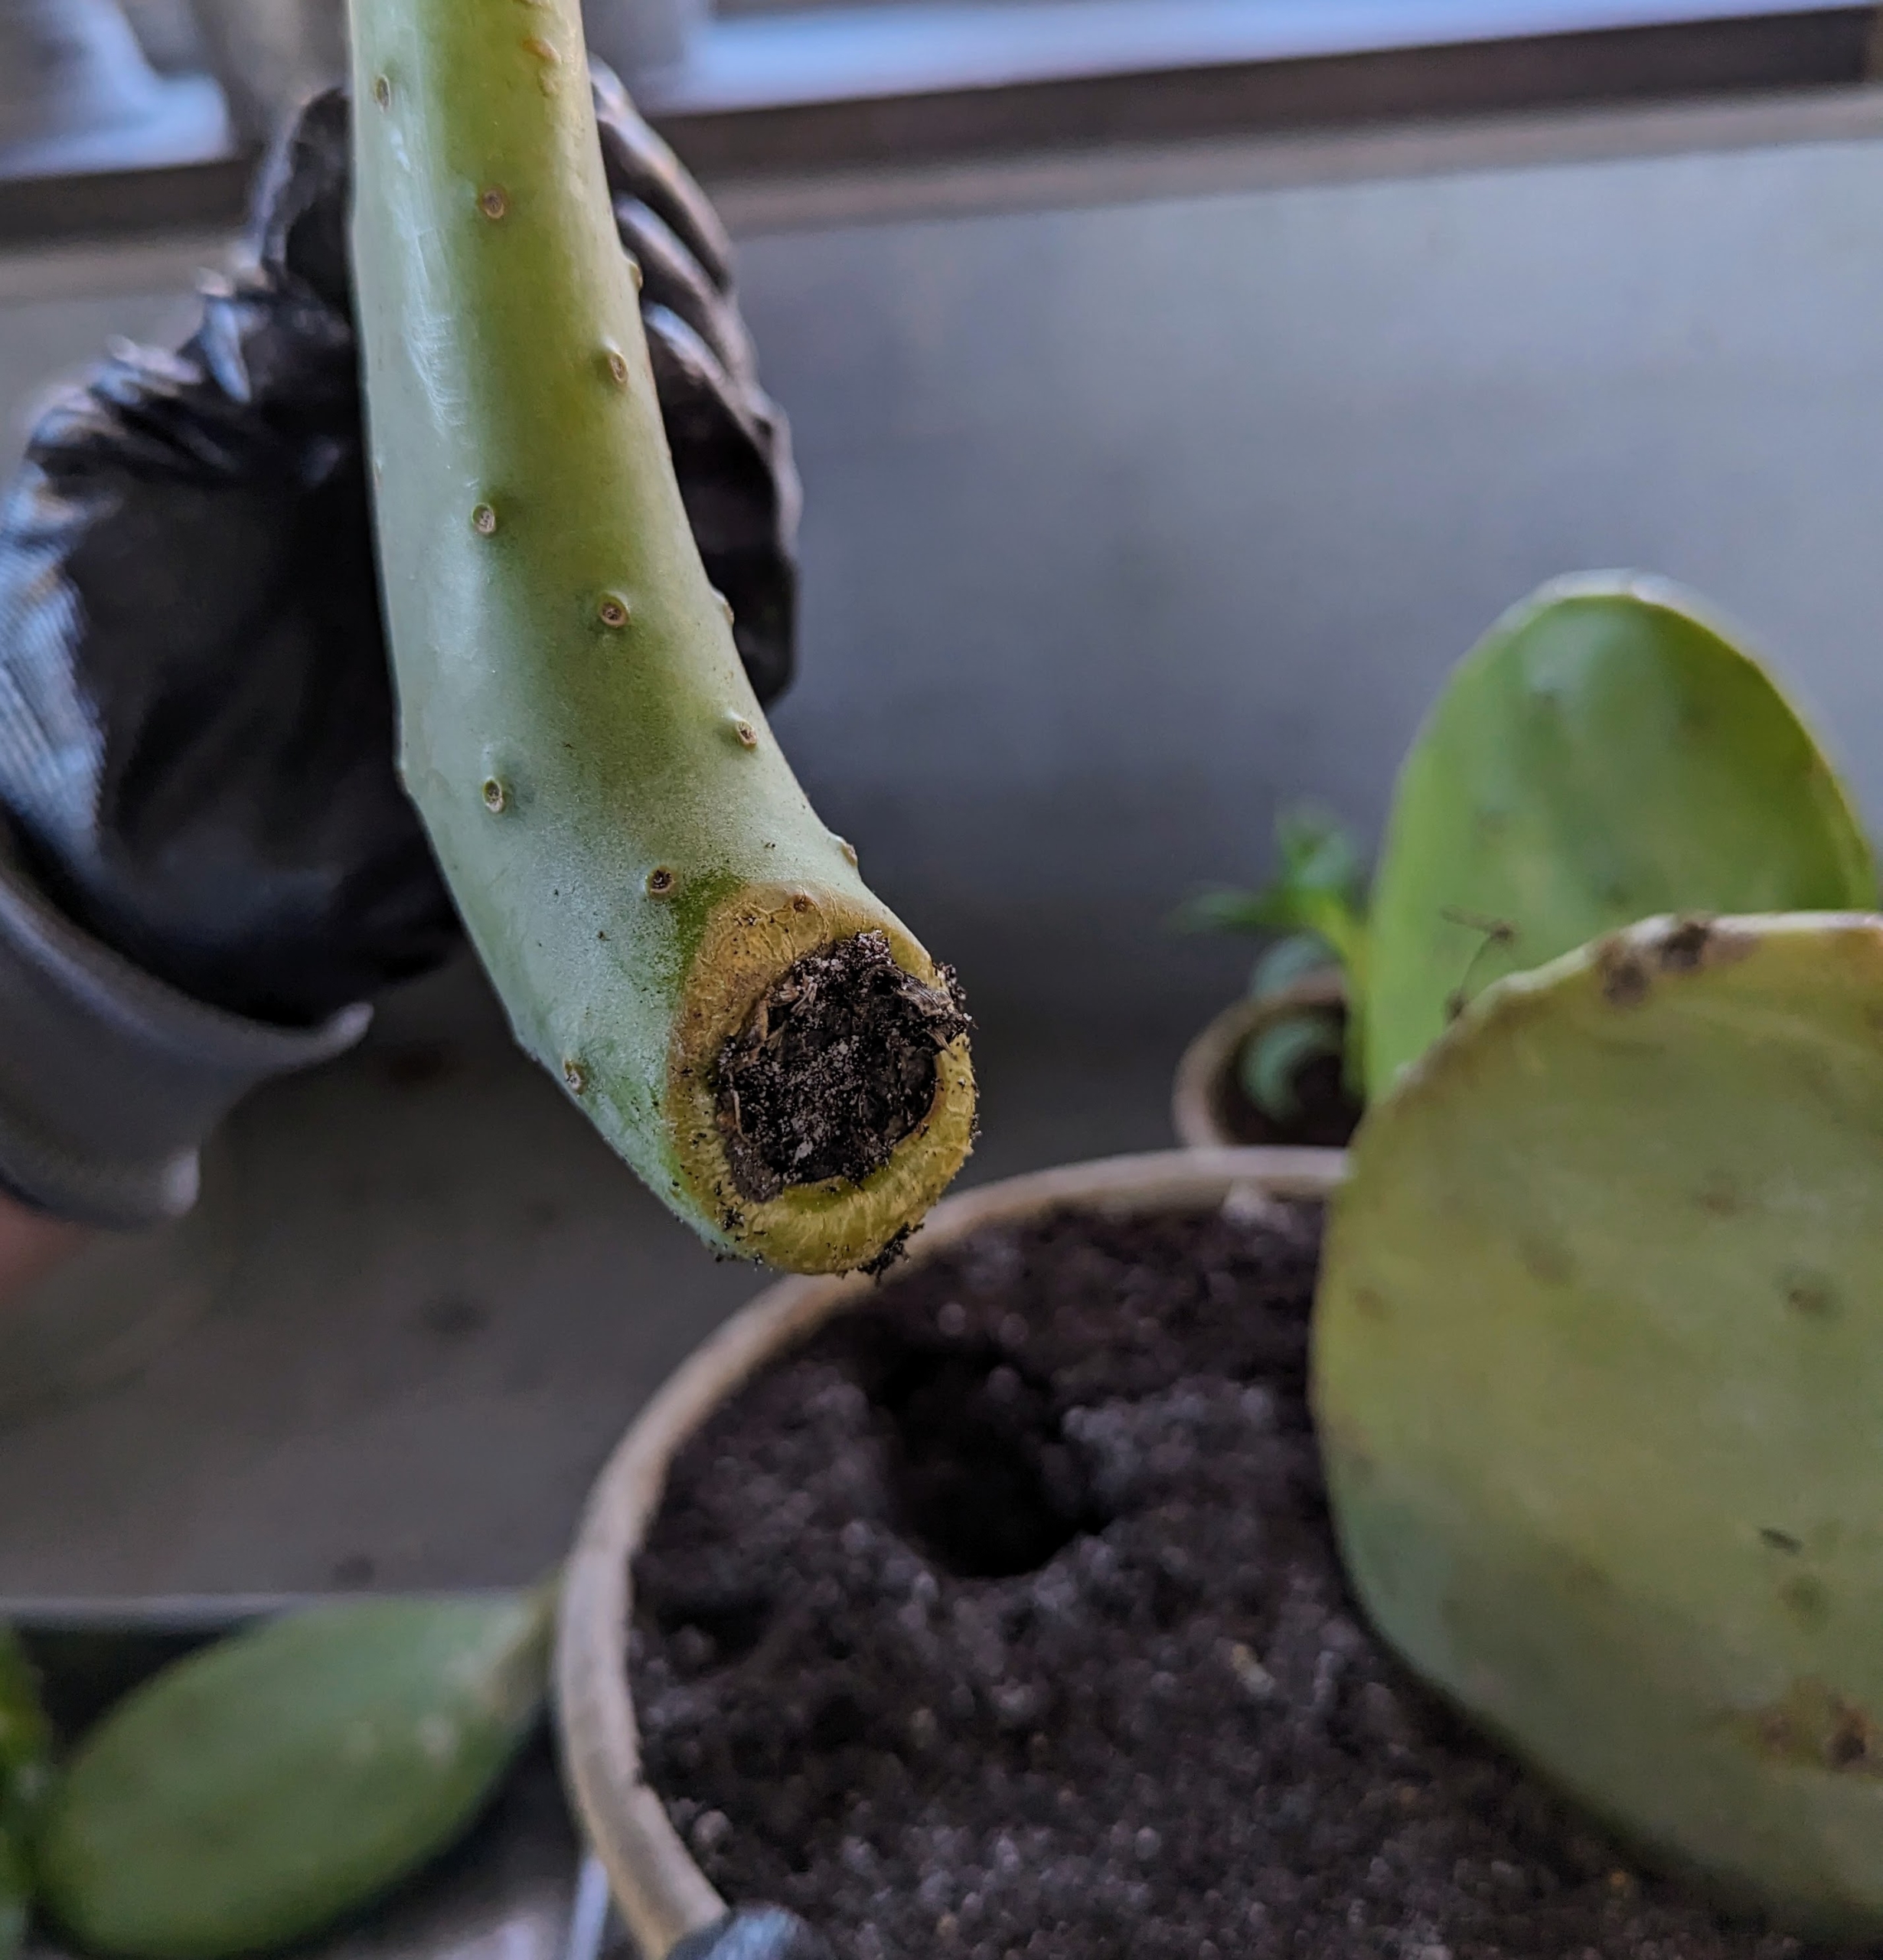
Opuntia, commonly called the prickly pear cactus, is a genus of flowering plants in the cactus family Cactaceae. Prickly pear cactus is easily identified by its broad, flat, green pads. They also have tiny, sharp, and irritating barbed hairs on the pads known as glochids.
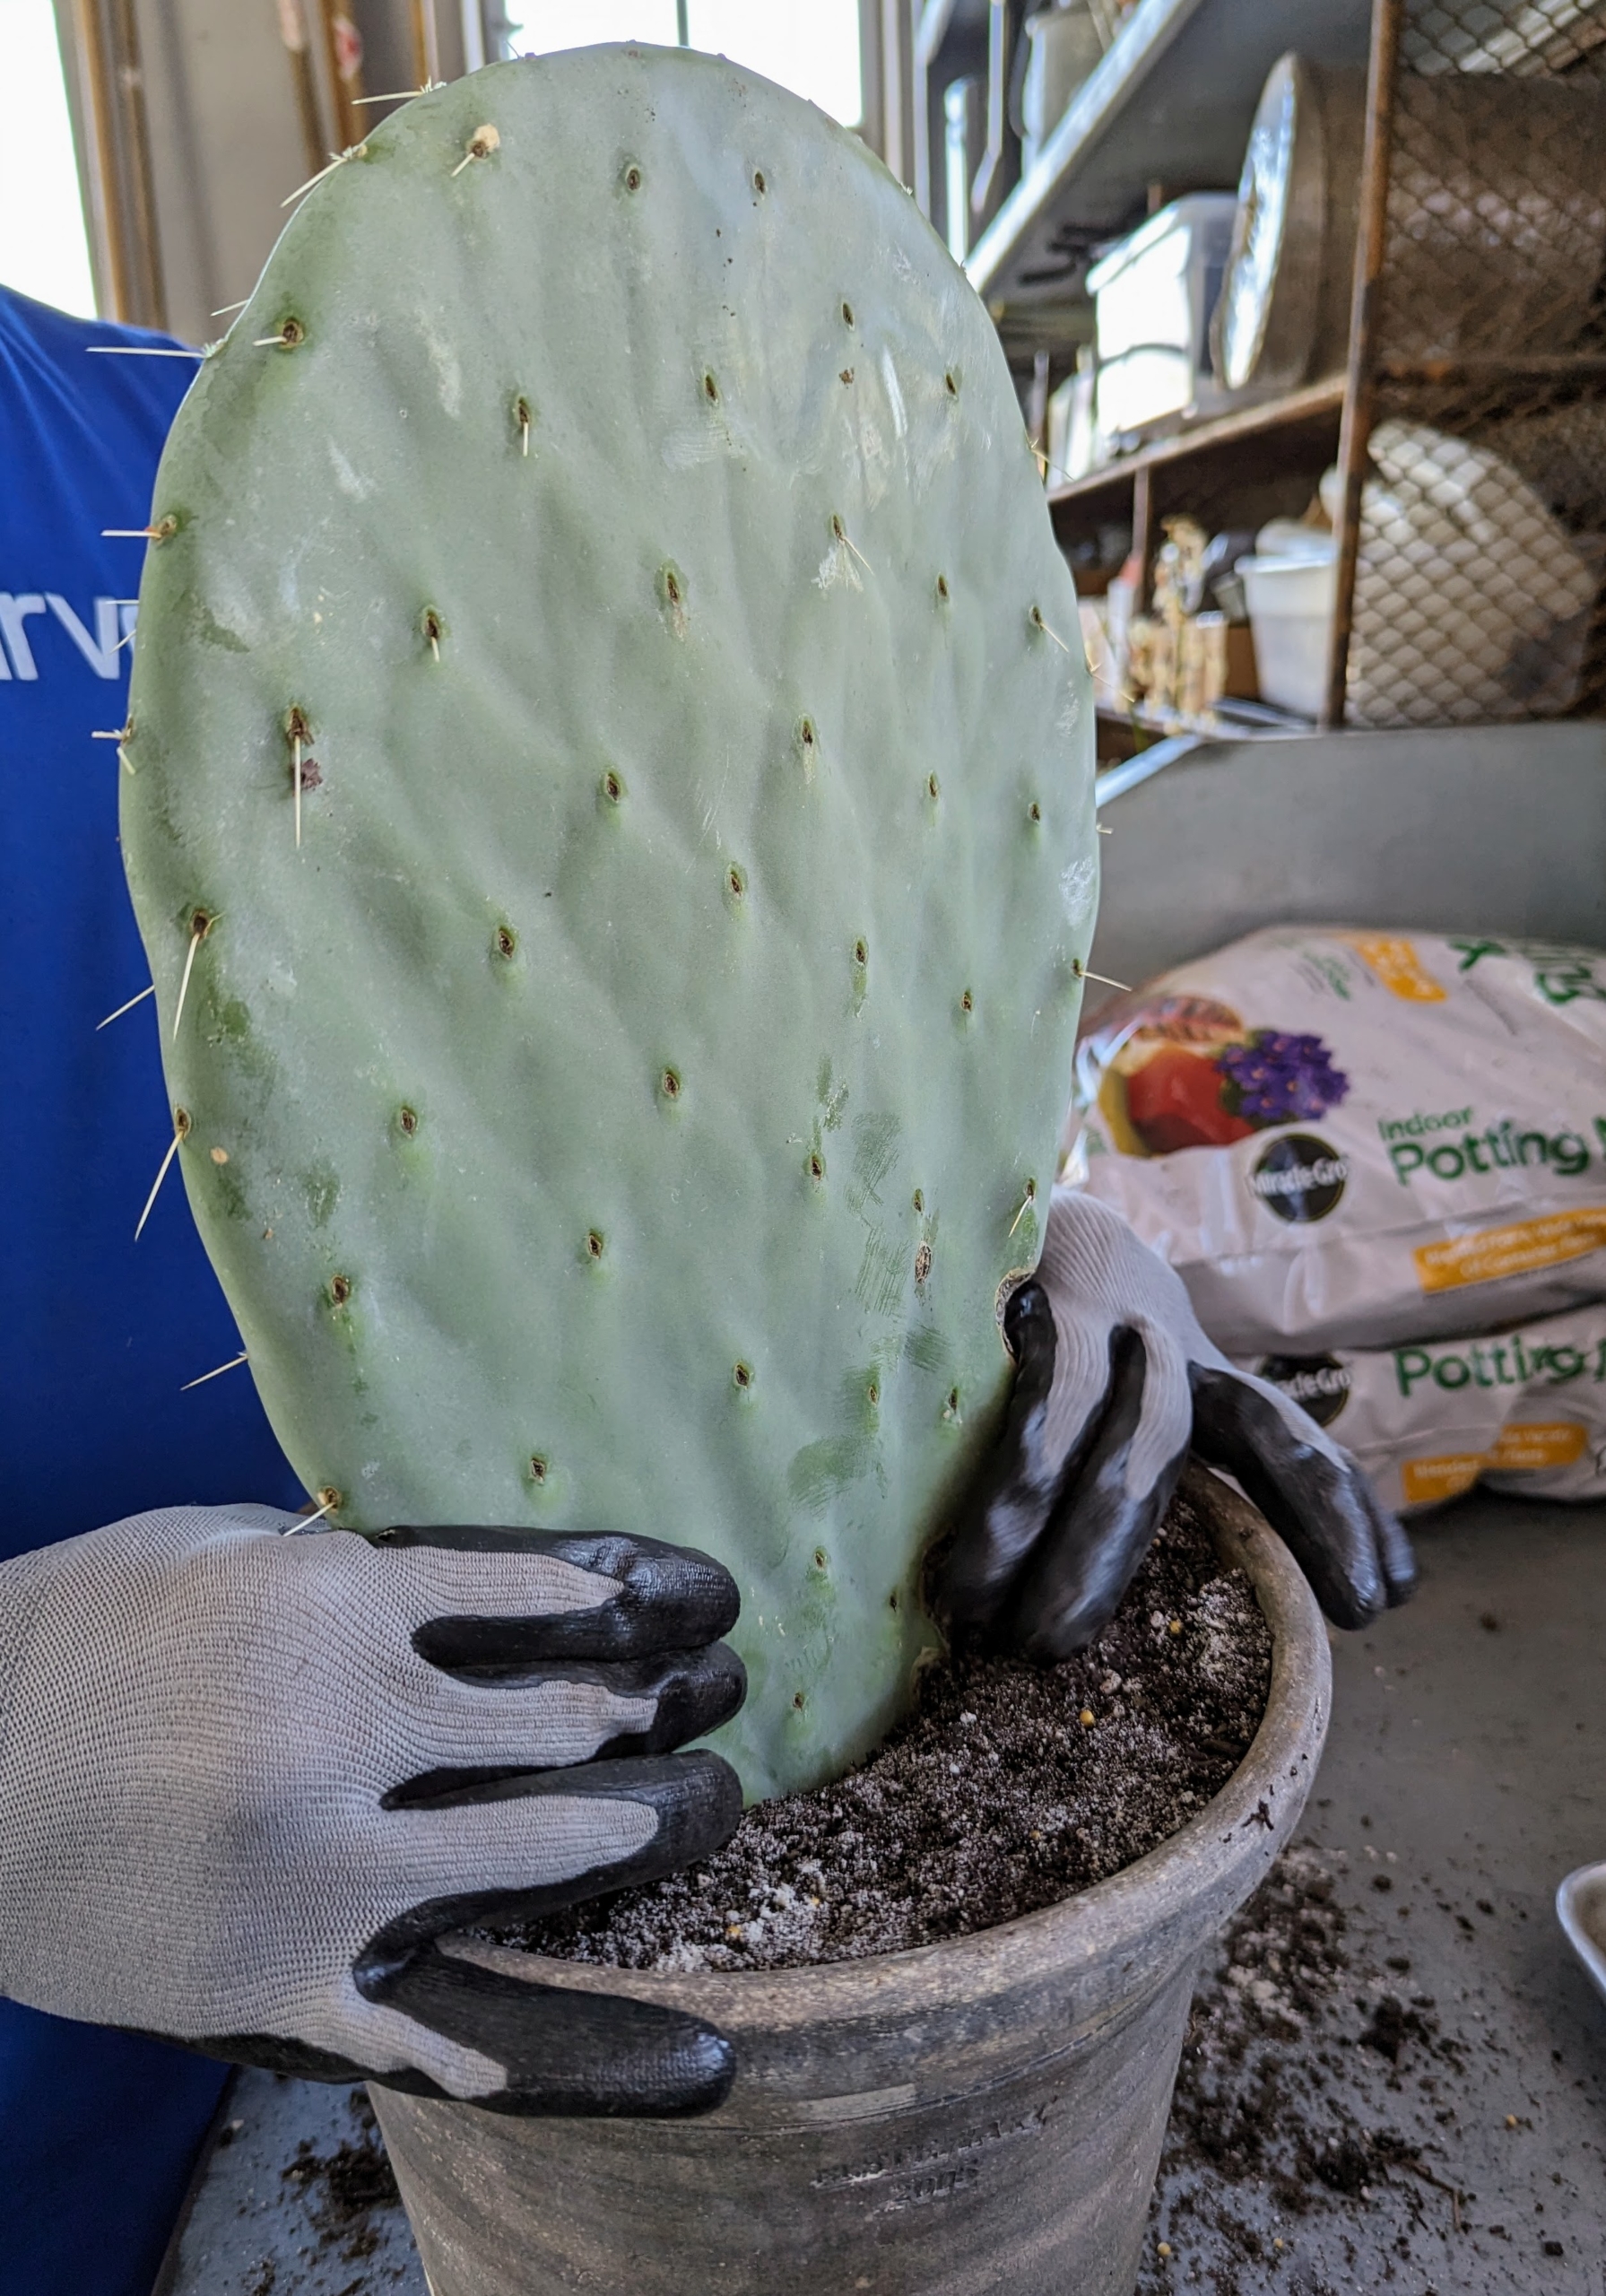
The butt end of the cactus pad is left alone for a couple days to heal and dry before setting it in sandy, well-drained soil. In fact, all the new succulents were left to form calluses where they were severed from the mother plants.
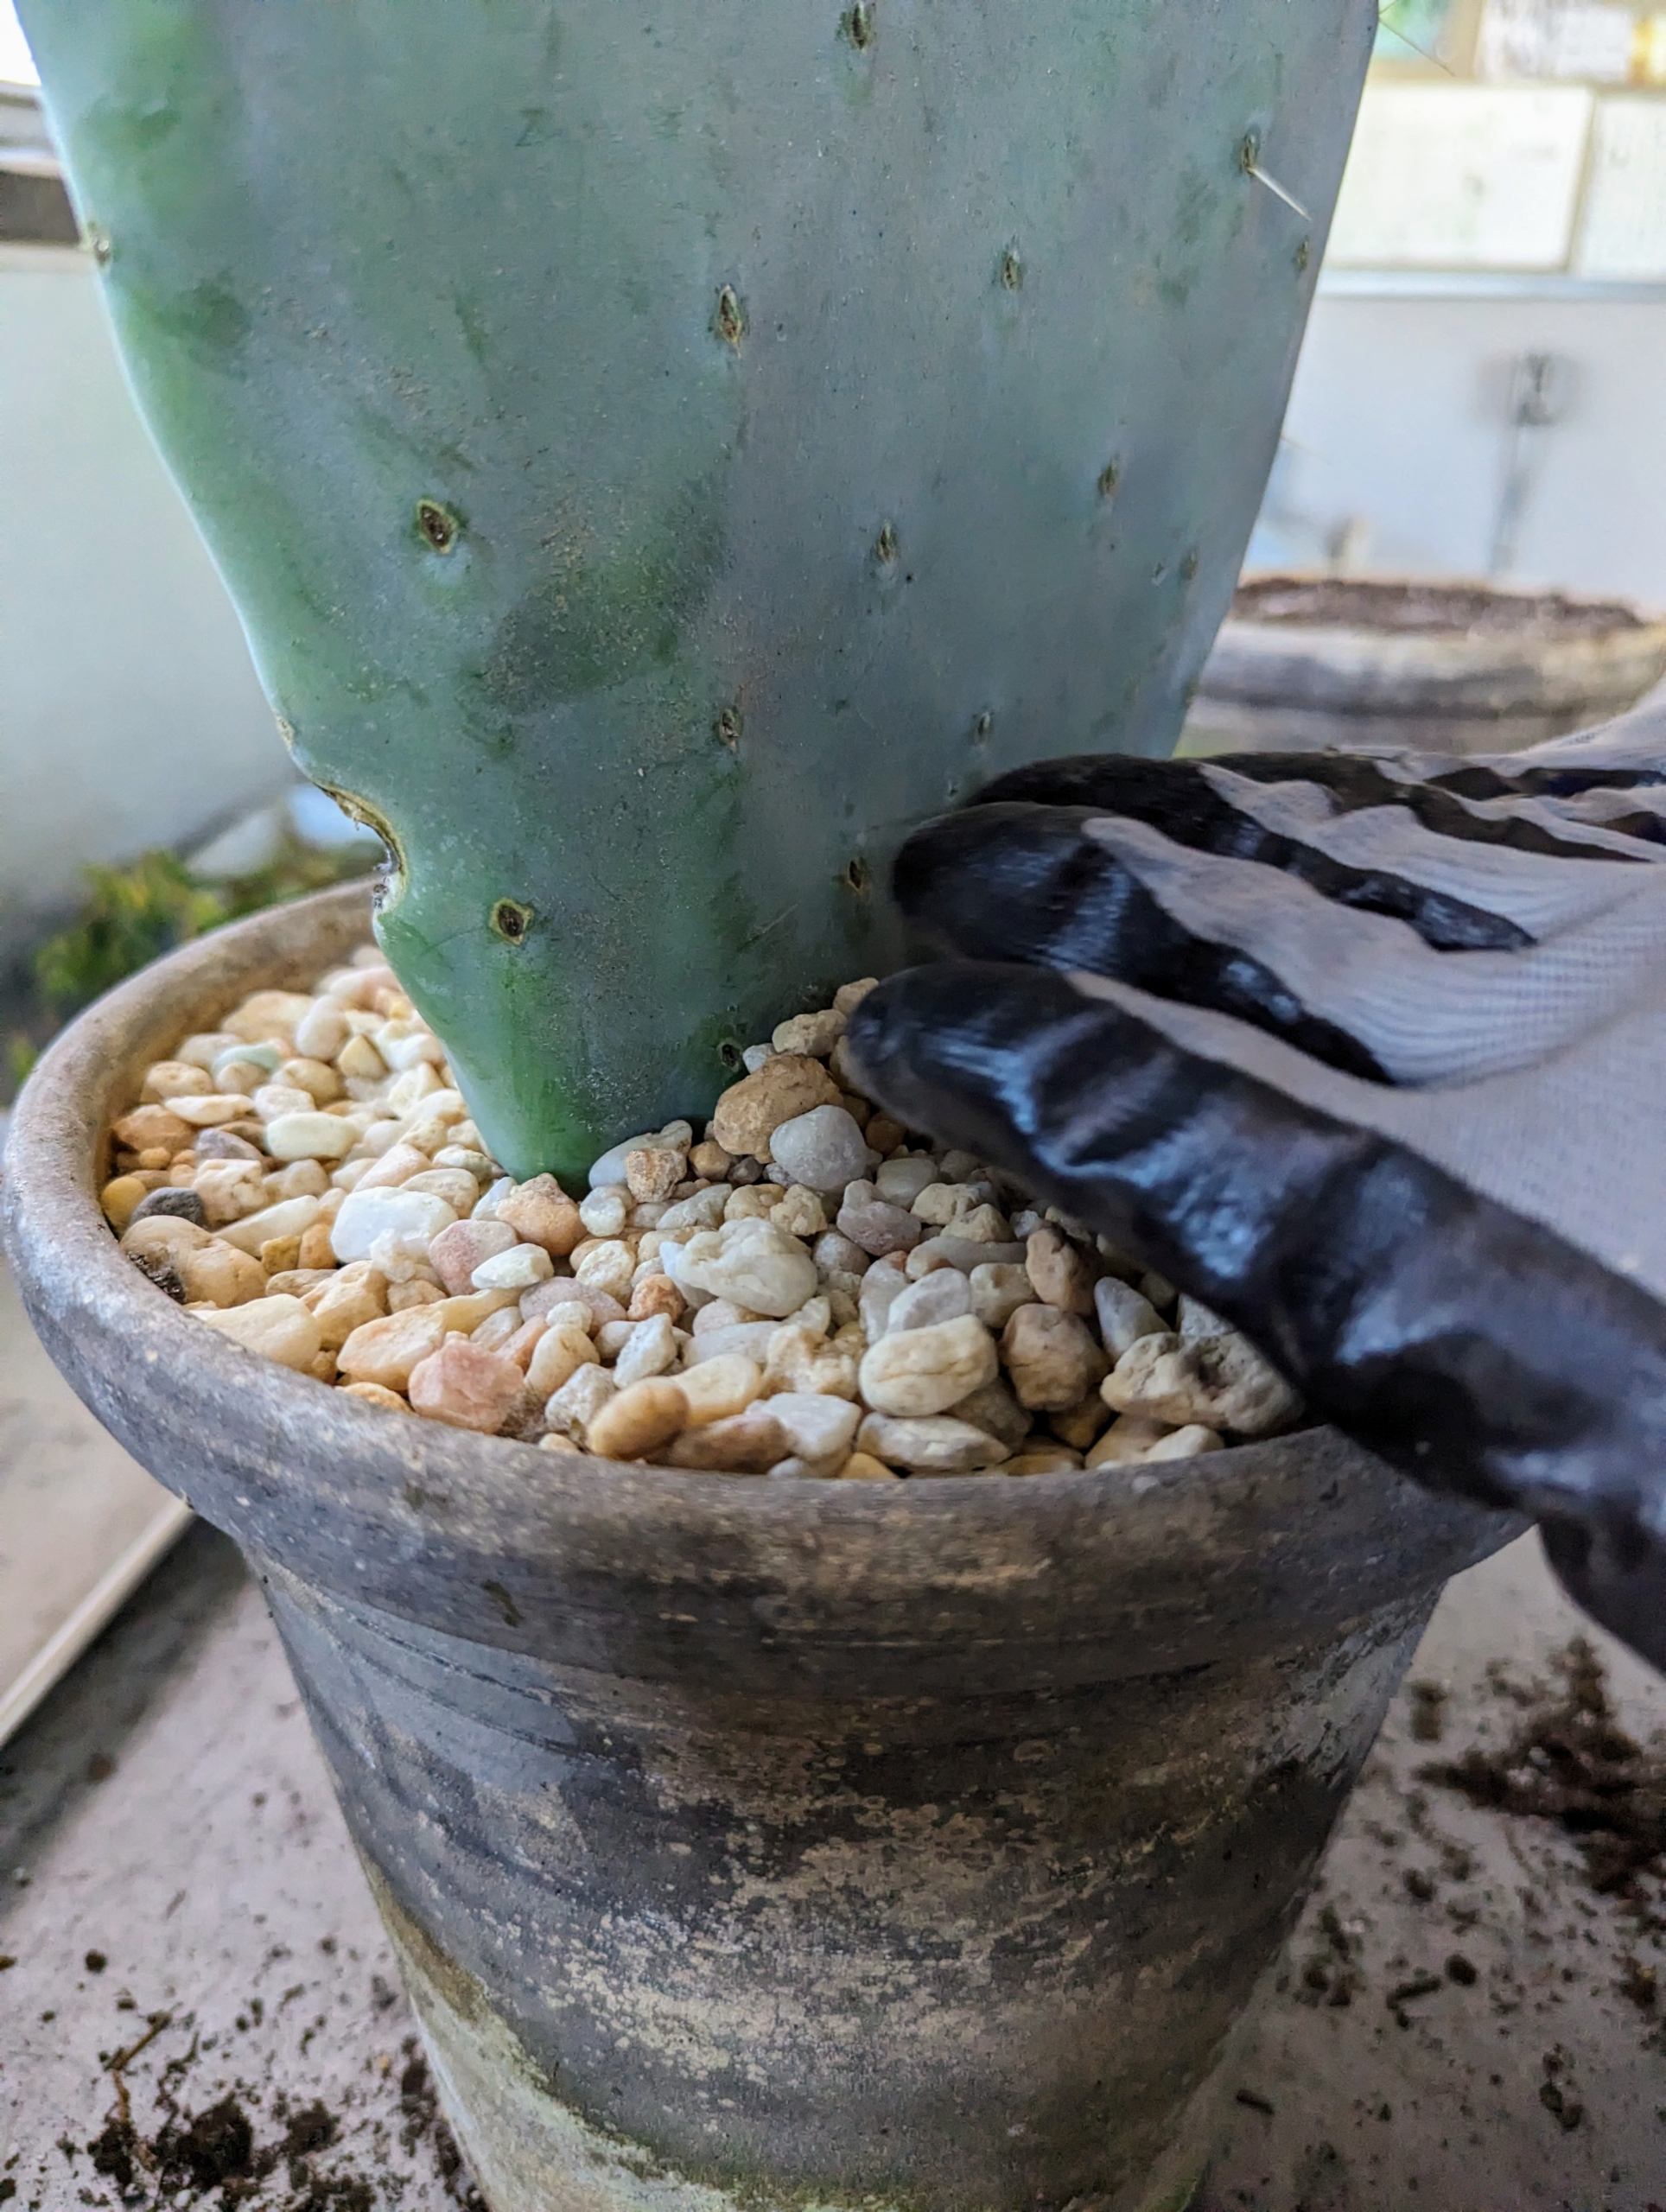
Then, using thick protective gloves, Ryan inserts the base end of the prickly pear cactus into the pot just enough so it stands upward.
Ryan adds some pea gravel to the top of the pot. Pea gravel, so named because the pieces are pea-sized, is available at garden centers and comes in different colors.
Here are four smaller specimens planted in one pot. Succulents grow in so many different and interesting formations. I often bring succulents into my home when I entertain – guests love seeing and learning about the different varieties.
Senecio is another succulent grown for its decorative foliage. It is a great plant for trailing over a planter. Before planting, Ryan trims off anything unsightly, along with any leaves that are too close to the bottom of the stem and then just presses the stem into the soil mix.
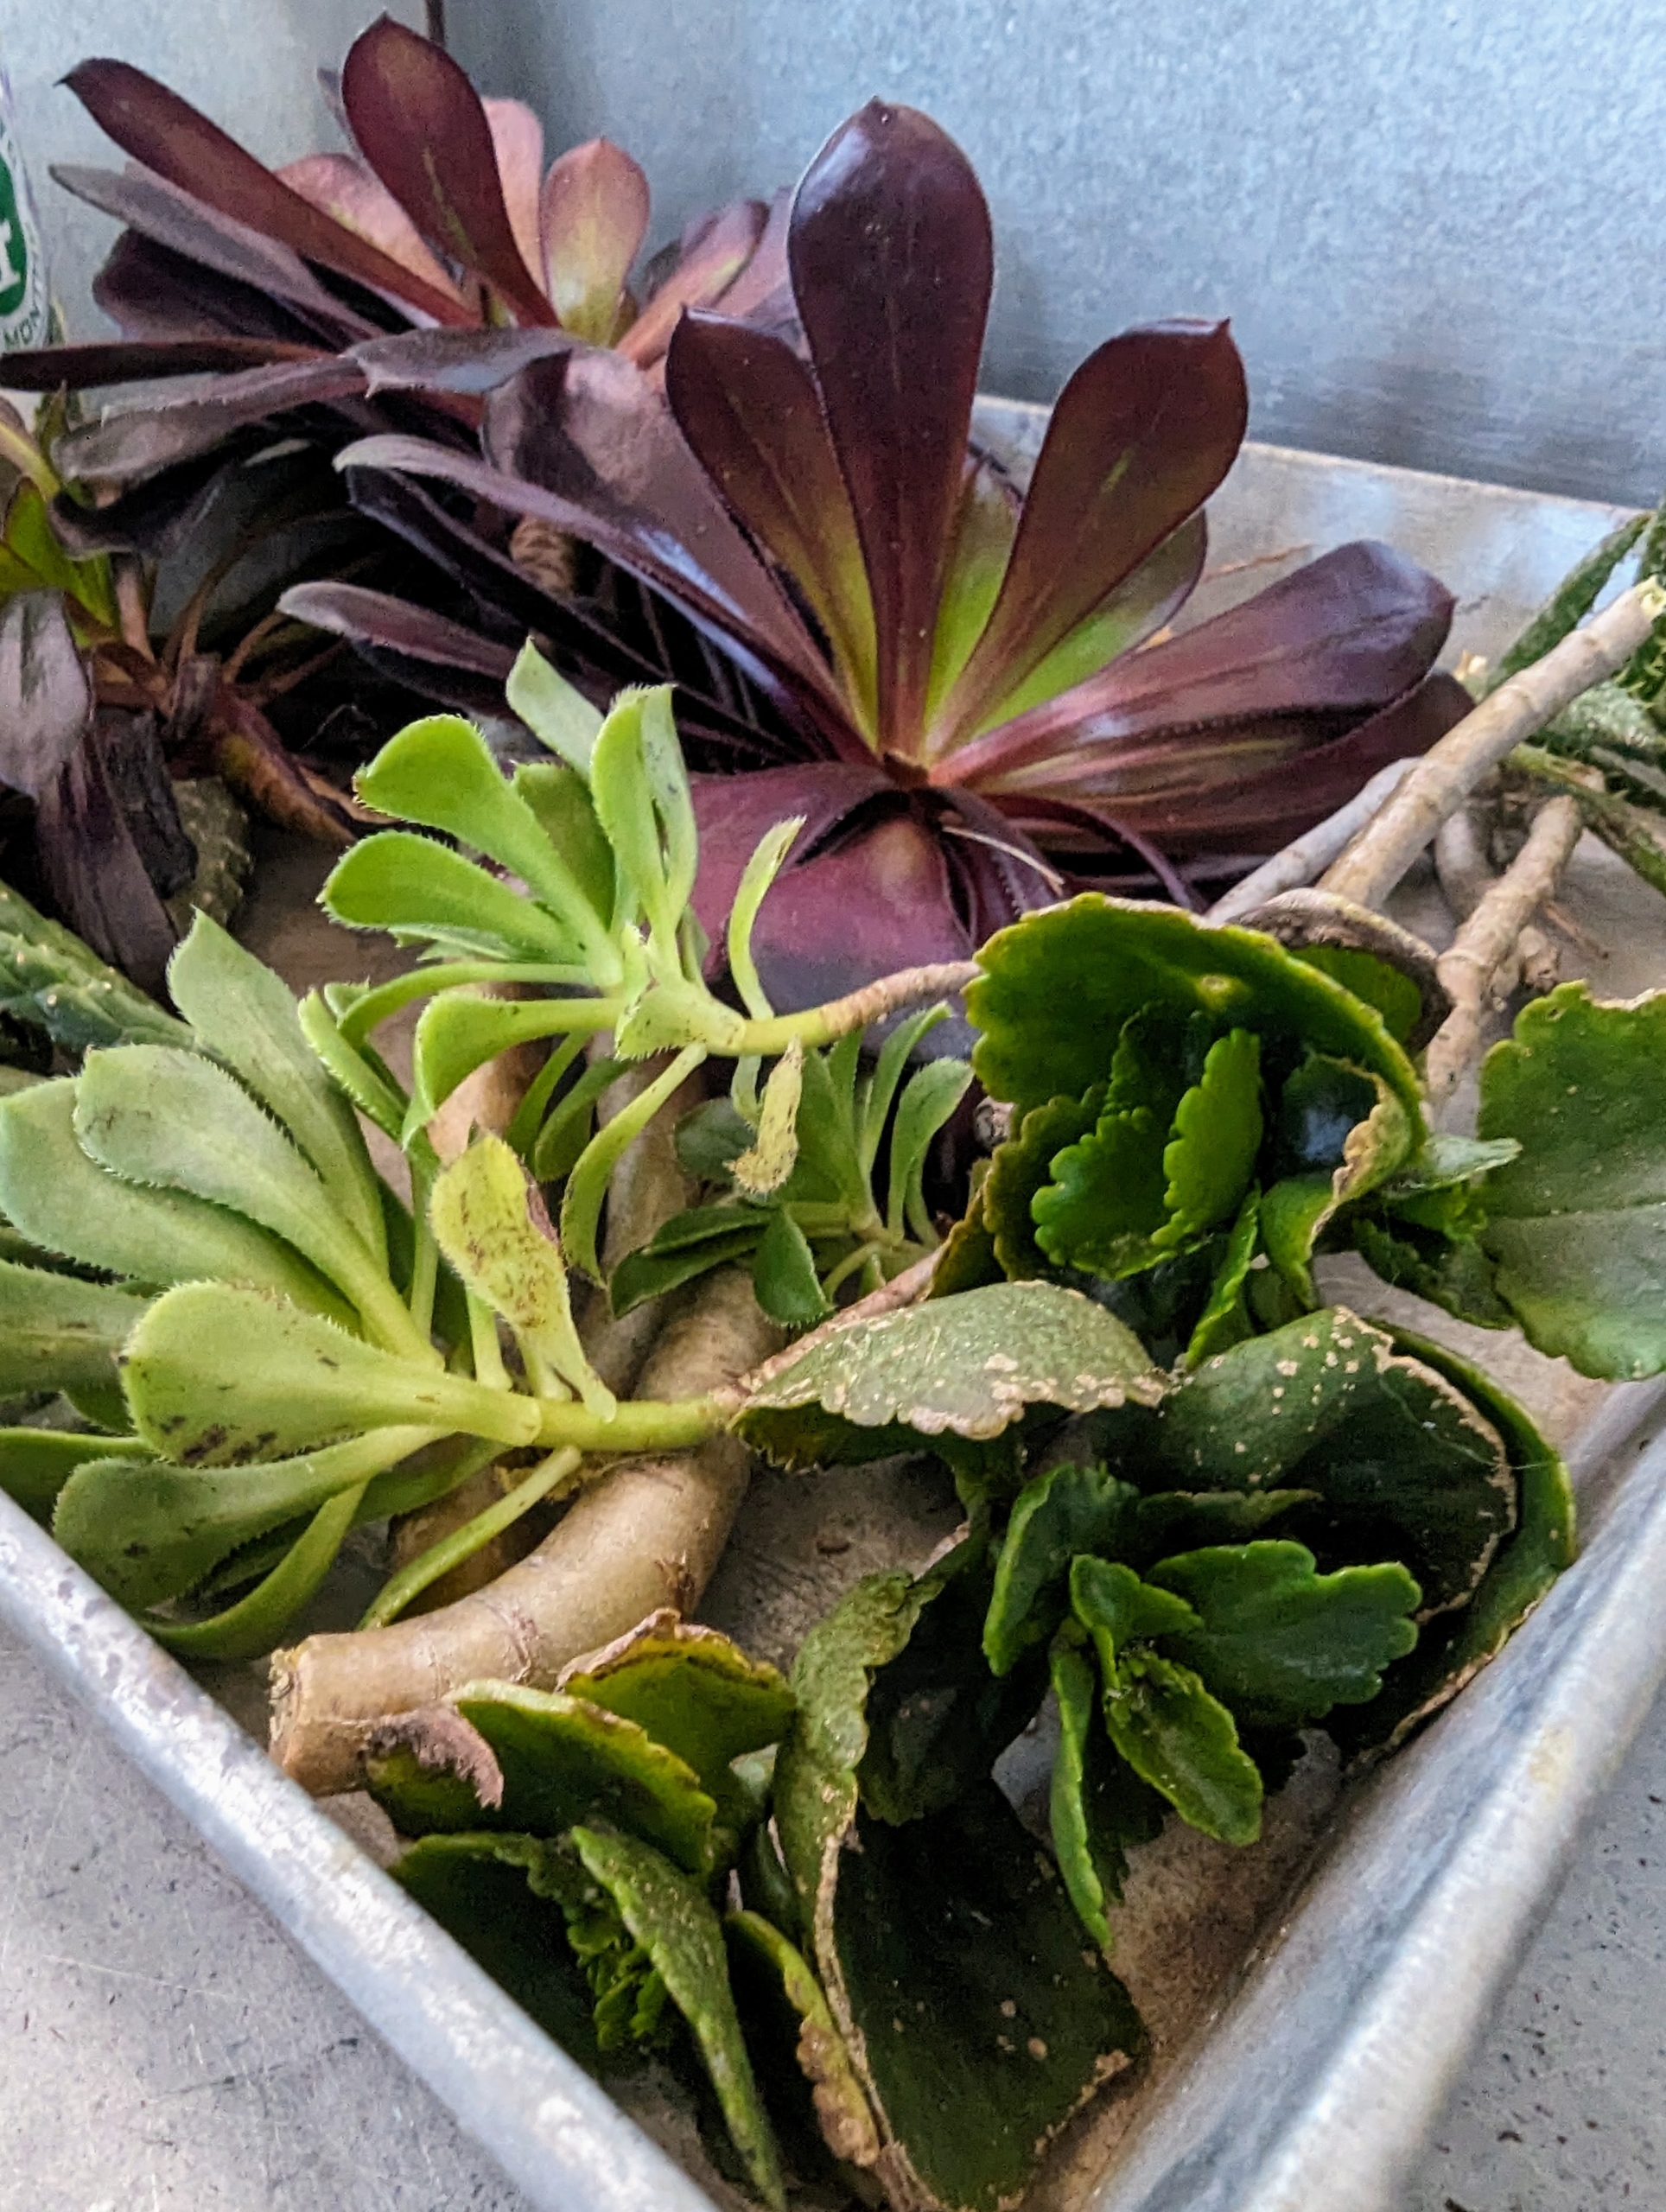
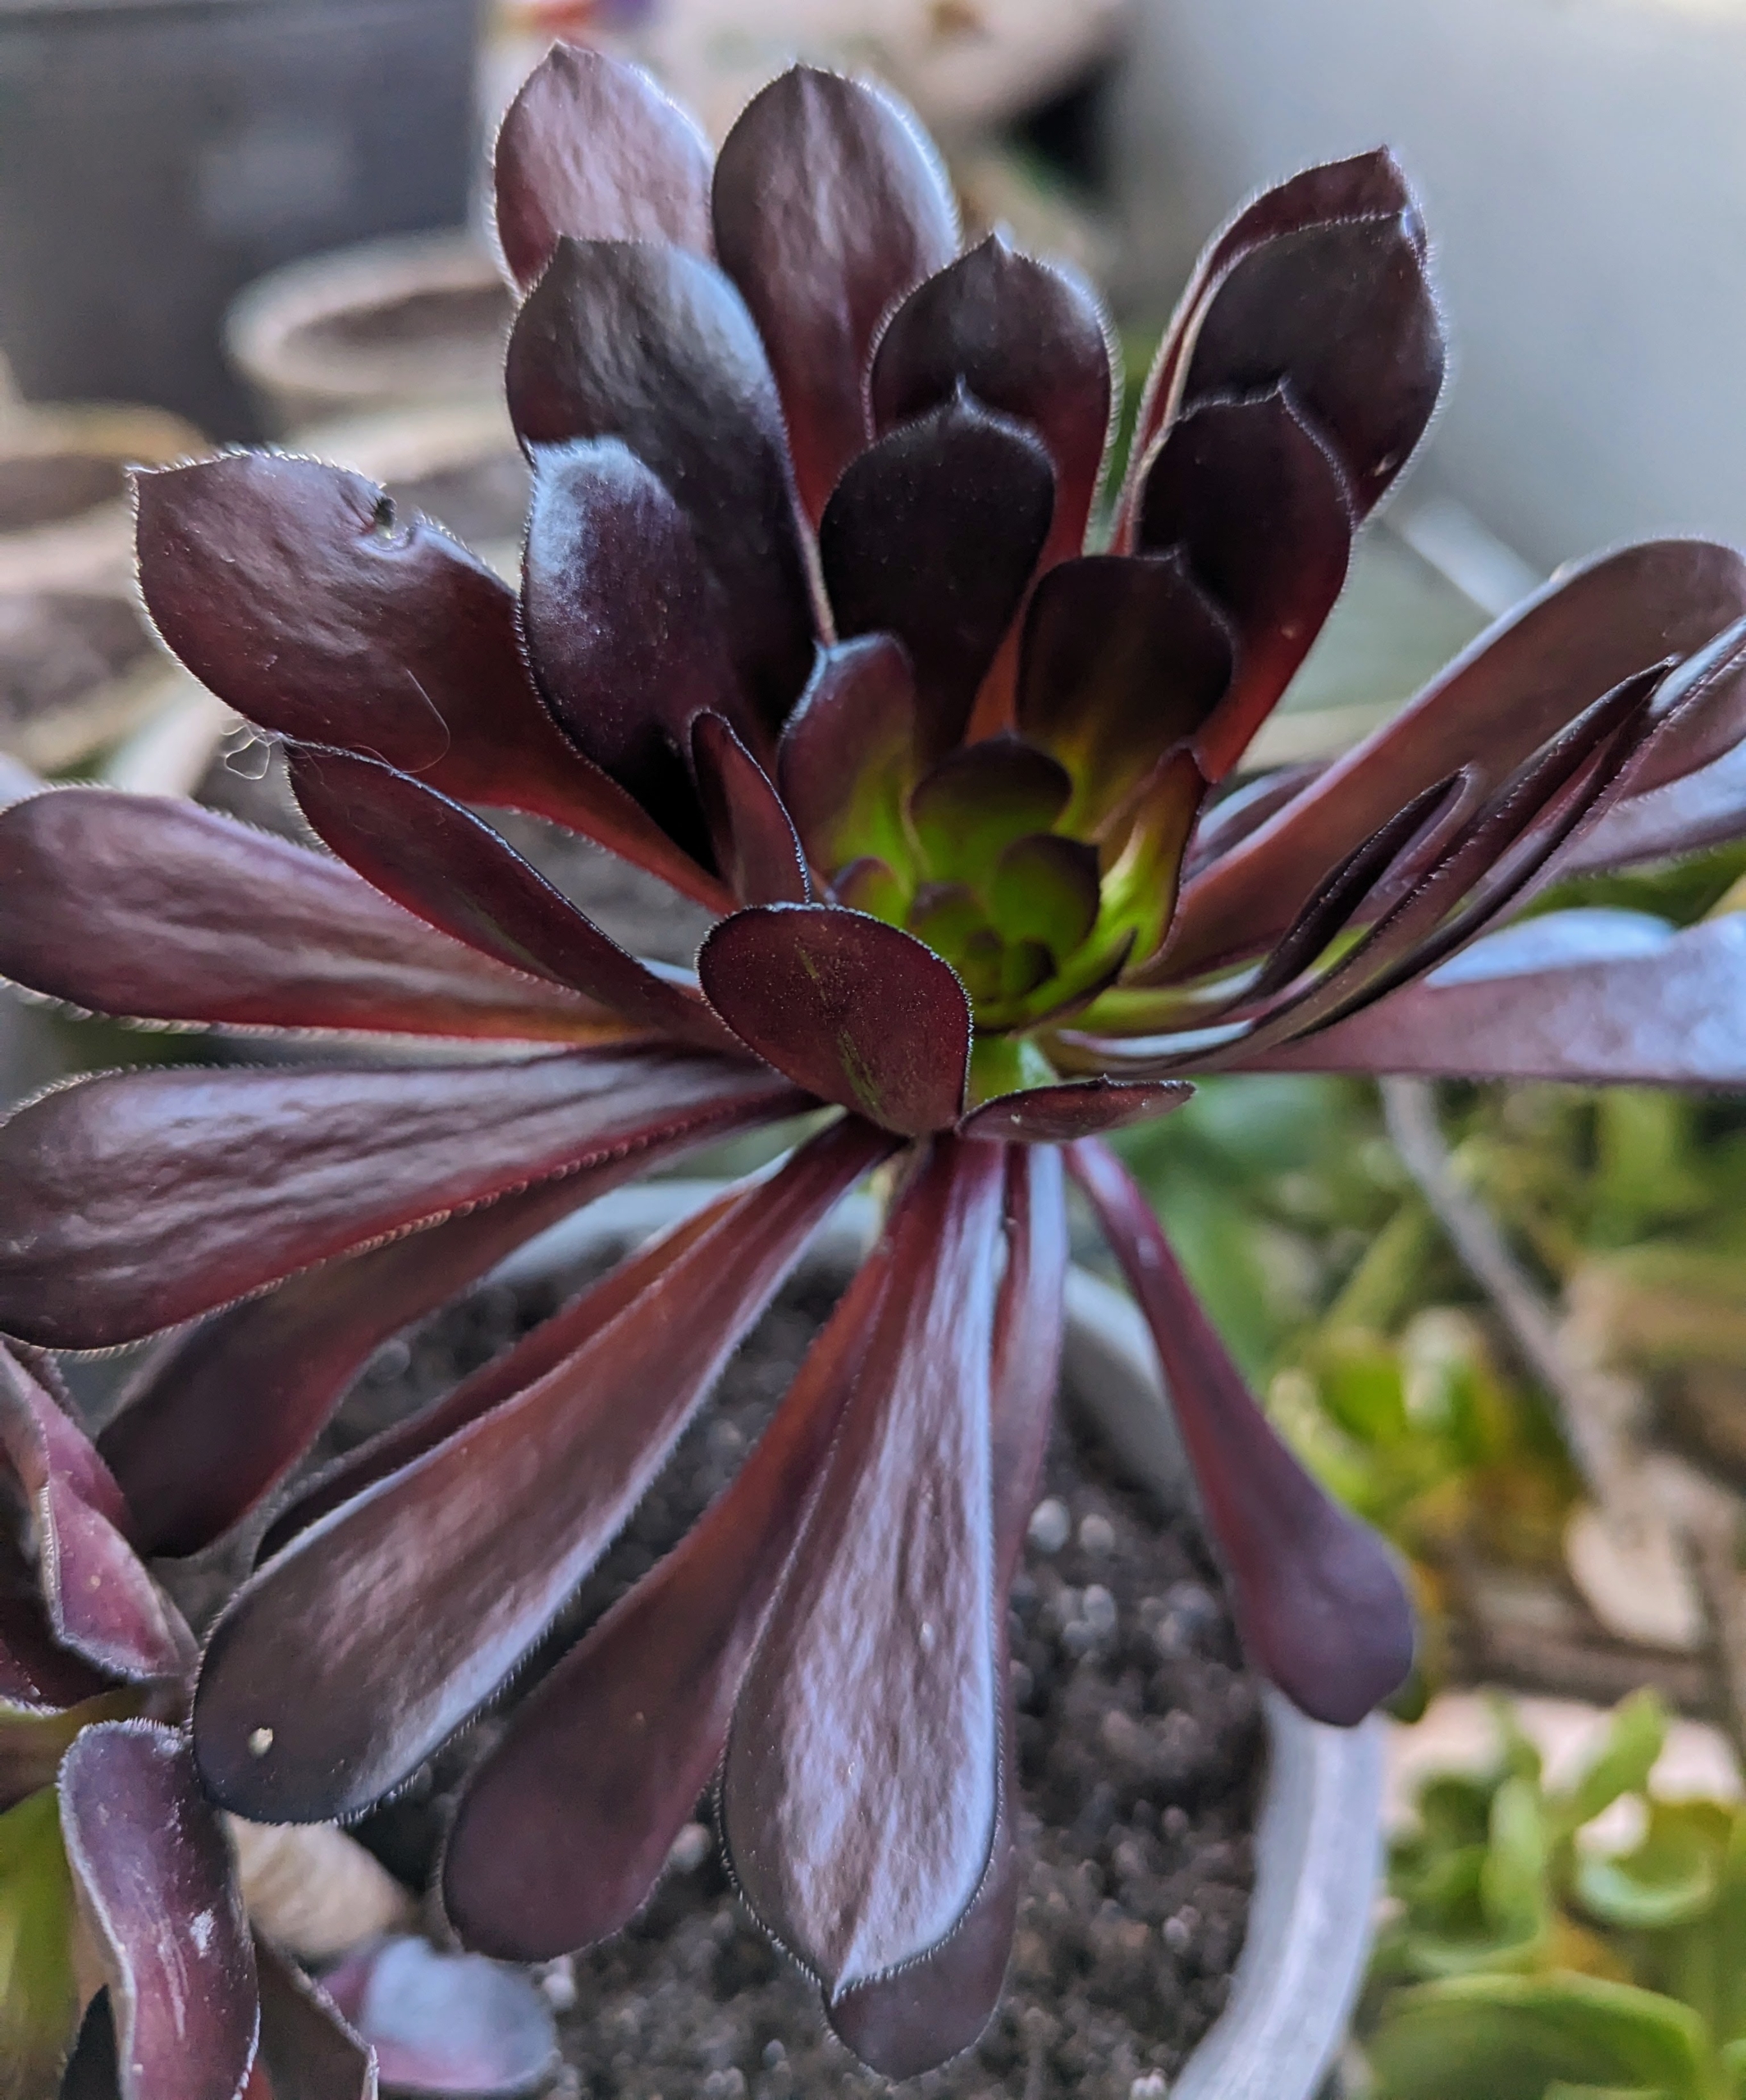
Aeoniums are fleshy, succulent plants native to Madeira, the Canary Islands and North Africa. Members of the Crassulaceae family, they have rosettes of glossy, waxy leaves.
Aeoniums are mostly grown for their distinctive, unusual shapes and foliage that comes in shades of green or purple-black or variegated in shades of white, yellow, and red.
Here is one in dark purple with a deep green center.
Succulent roots are light in color, long enough to hold the dirt in the pot, and veiny. Healthy roots will appear moist and will taper in thickness the further they get from the plant.
This is a jade plant, Crassula ovata. These succulents look like little trees, with a thick central stem, branches, and oval, green succulent leaves.
A stem cutting should be a few inches long. Ryan also cut off the lower leaves before inserting into the pot.
In the front is euphorbia, a genus of more than 2000 species commonly called spurge. About 1200 of them are succulents, some with unusual shapes and wide, fleshy leaves. After potting, these plants are placed on a table where they can drink in lots of natural light even when the sun isn’t directly over their pots. I am so happy to add all these to my growing collection of succulent specimens.
One of the easiest and most beautiful ways to observe and appreciate wildlife is by feeding the wild birds. During this time of year, the bird feeders at my farm are filled with chirping hungry creatures.
I have a number of bird feeders at my farm, and all the birds love to come by and feast on the seed I provide. I also set out fresh water and cut holes in the burlap covers over the boxwood, so birds are able to take shelter during inclement weather. Helping the wild birds is important to sustain local wild bird populations, especially during the harsh winters and challenging migration periods.
Enjoy these photos.
I have long fed the wild birds that visit my farm. Feeders are set up where they are easy to see, convenient to fill, and where seed-hungry squirrels and bird-hungry cats cannot reach them.
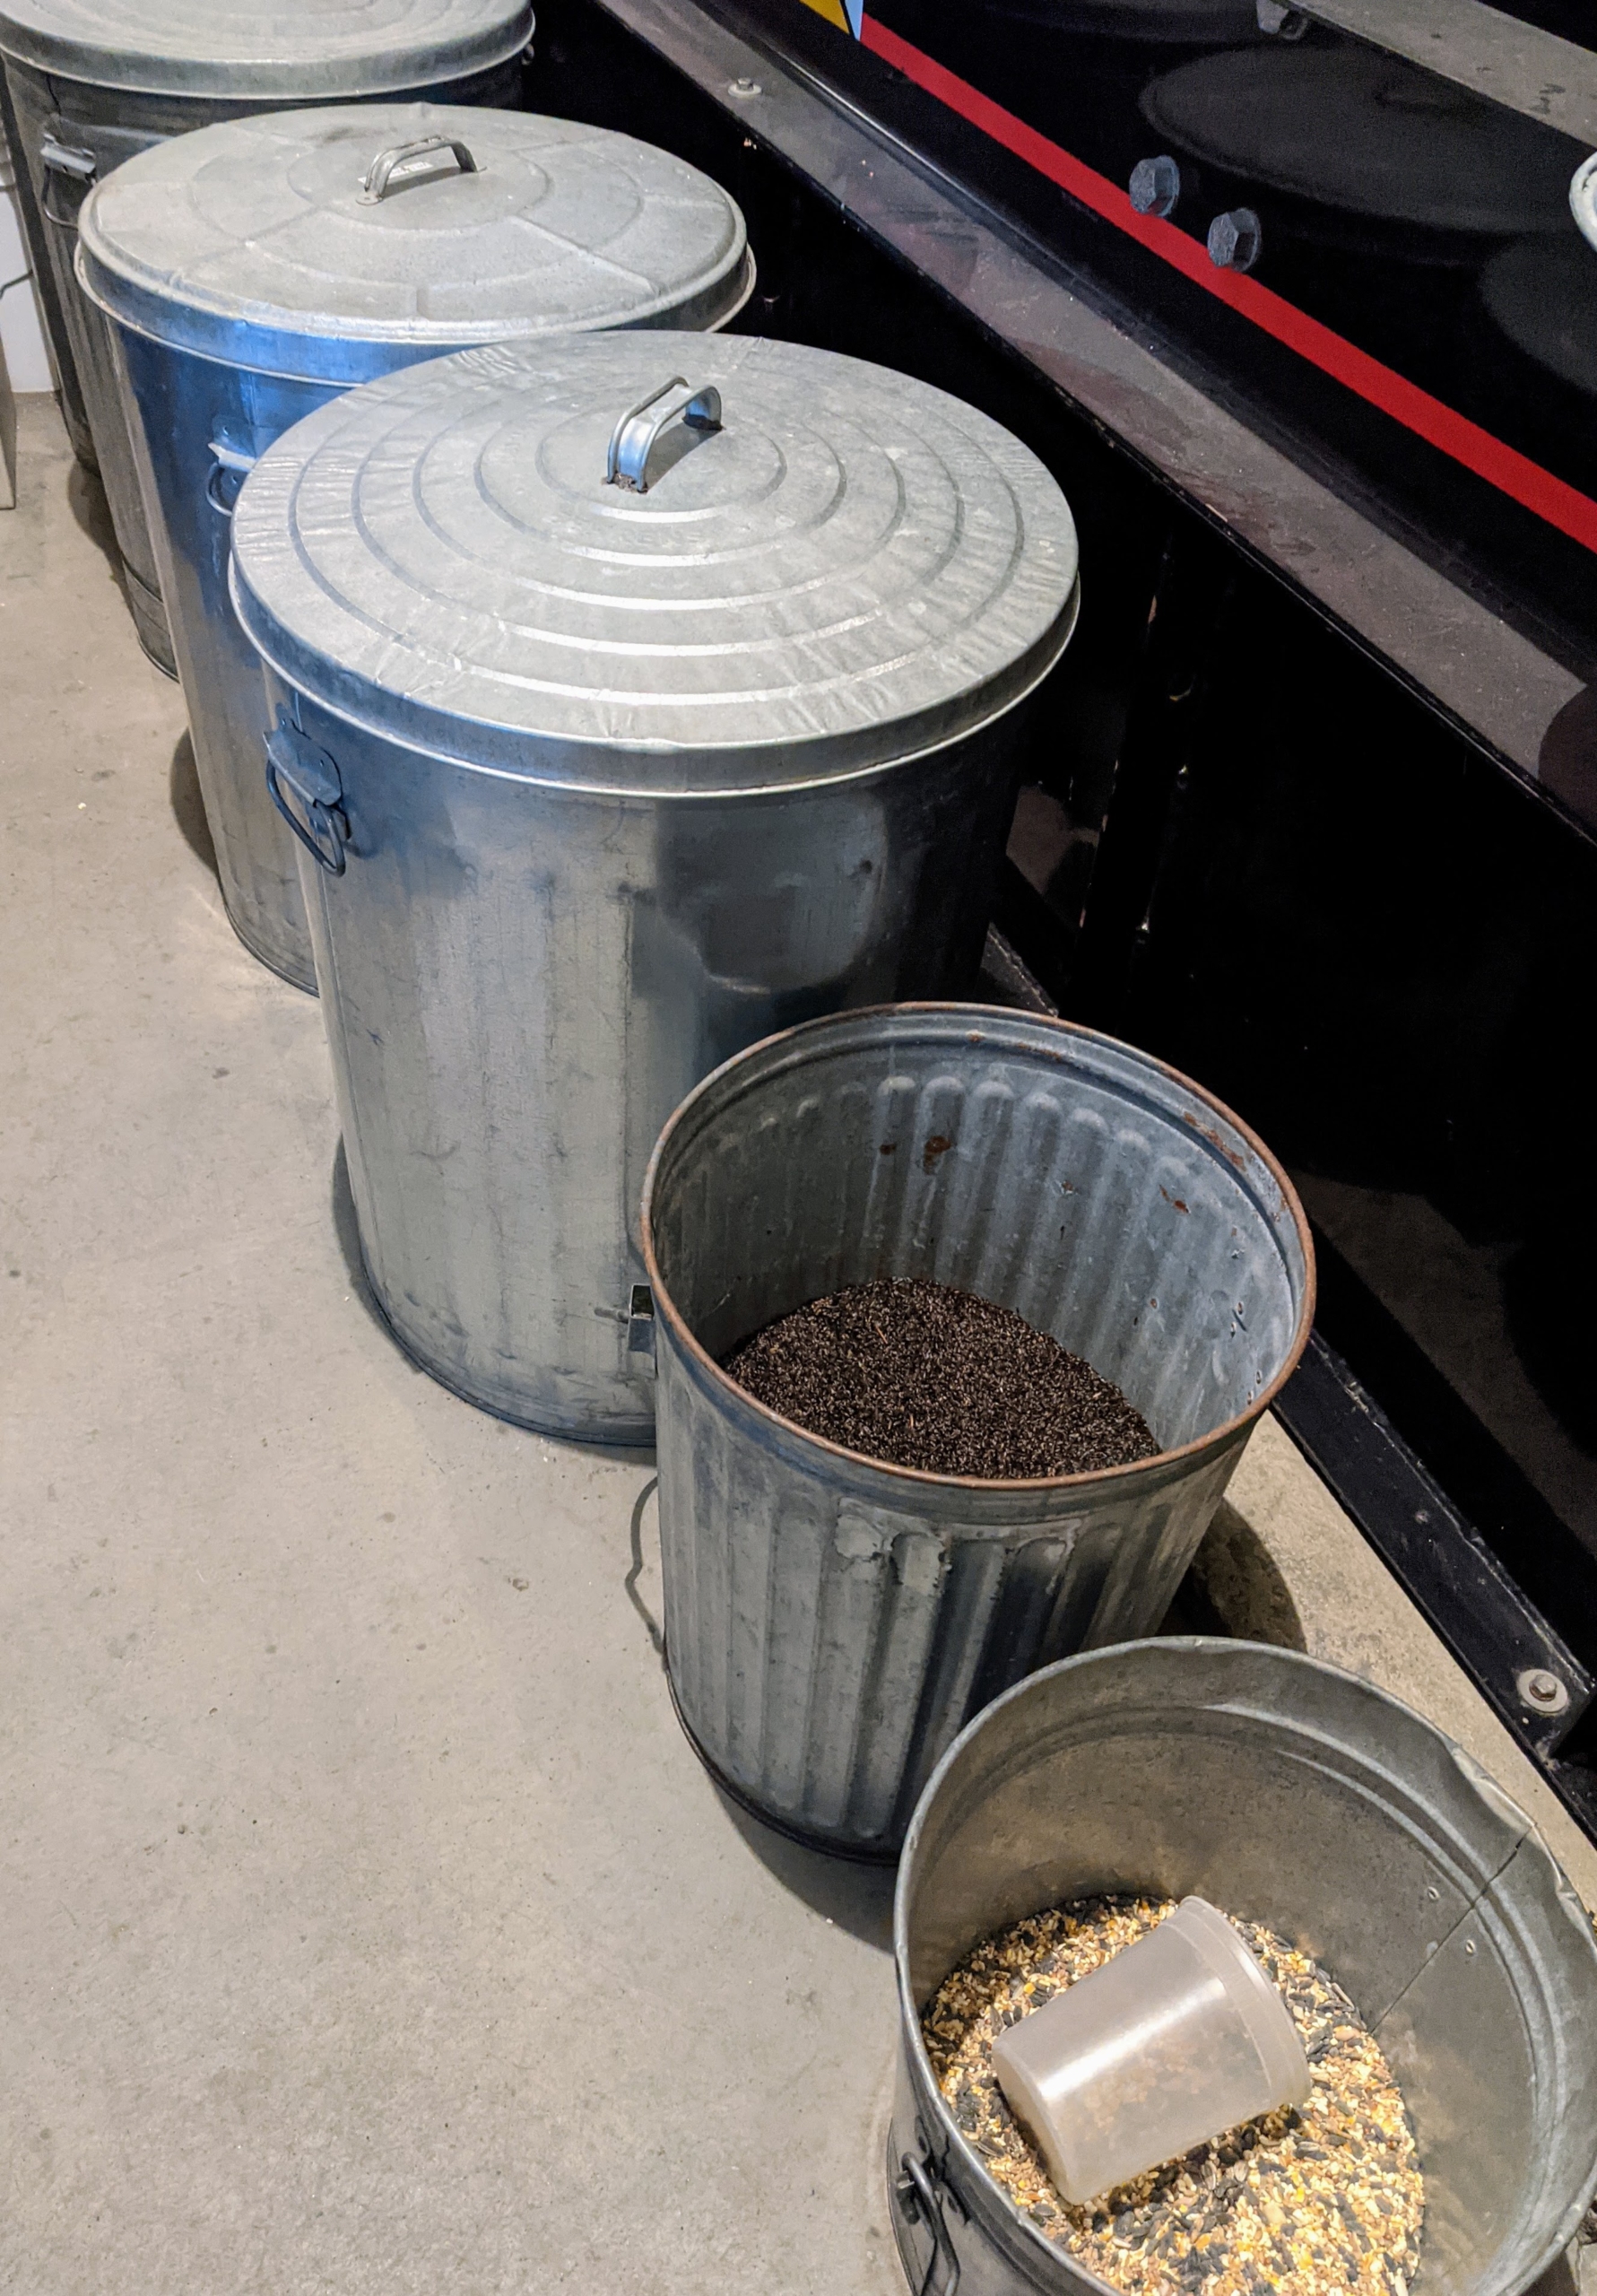
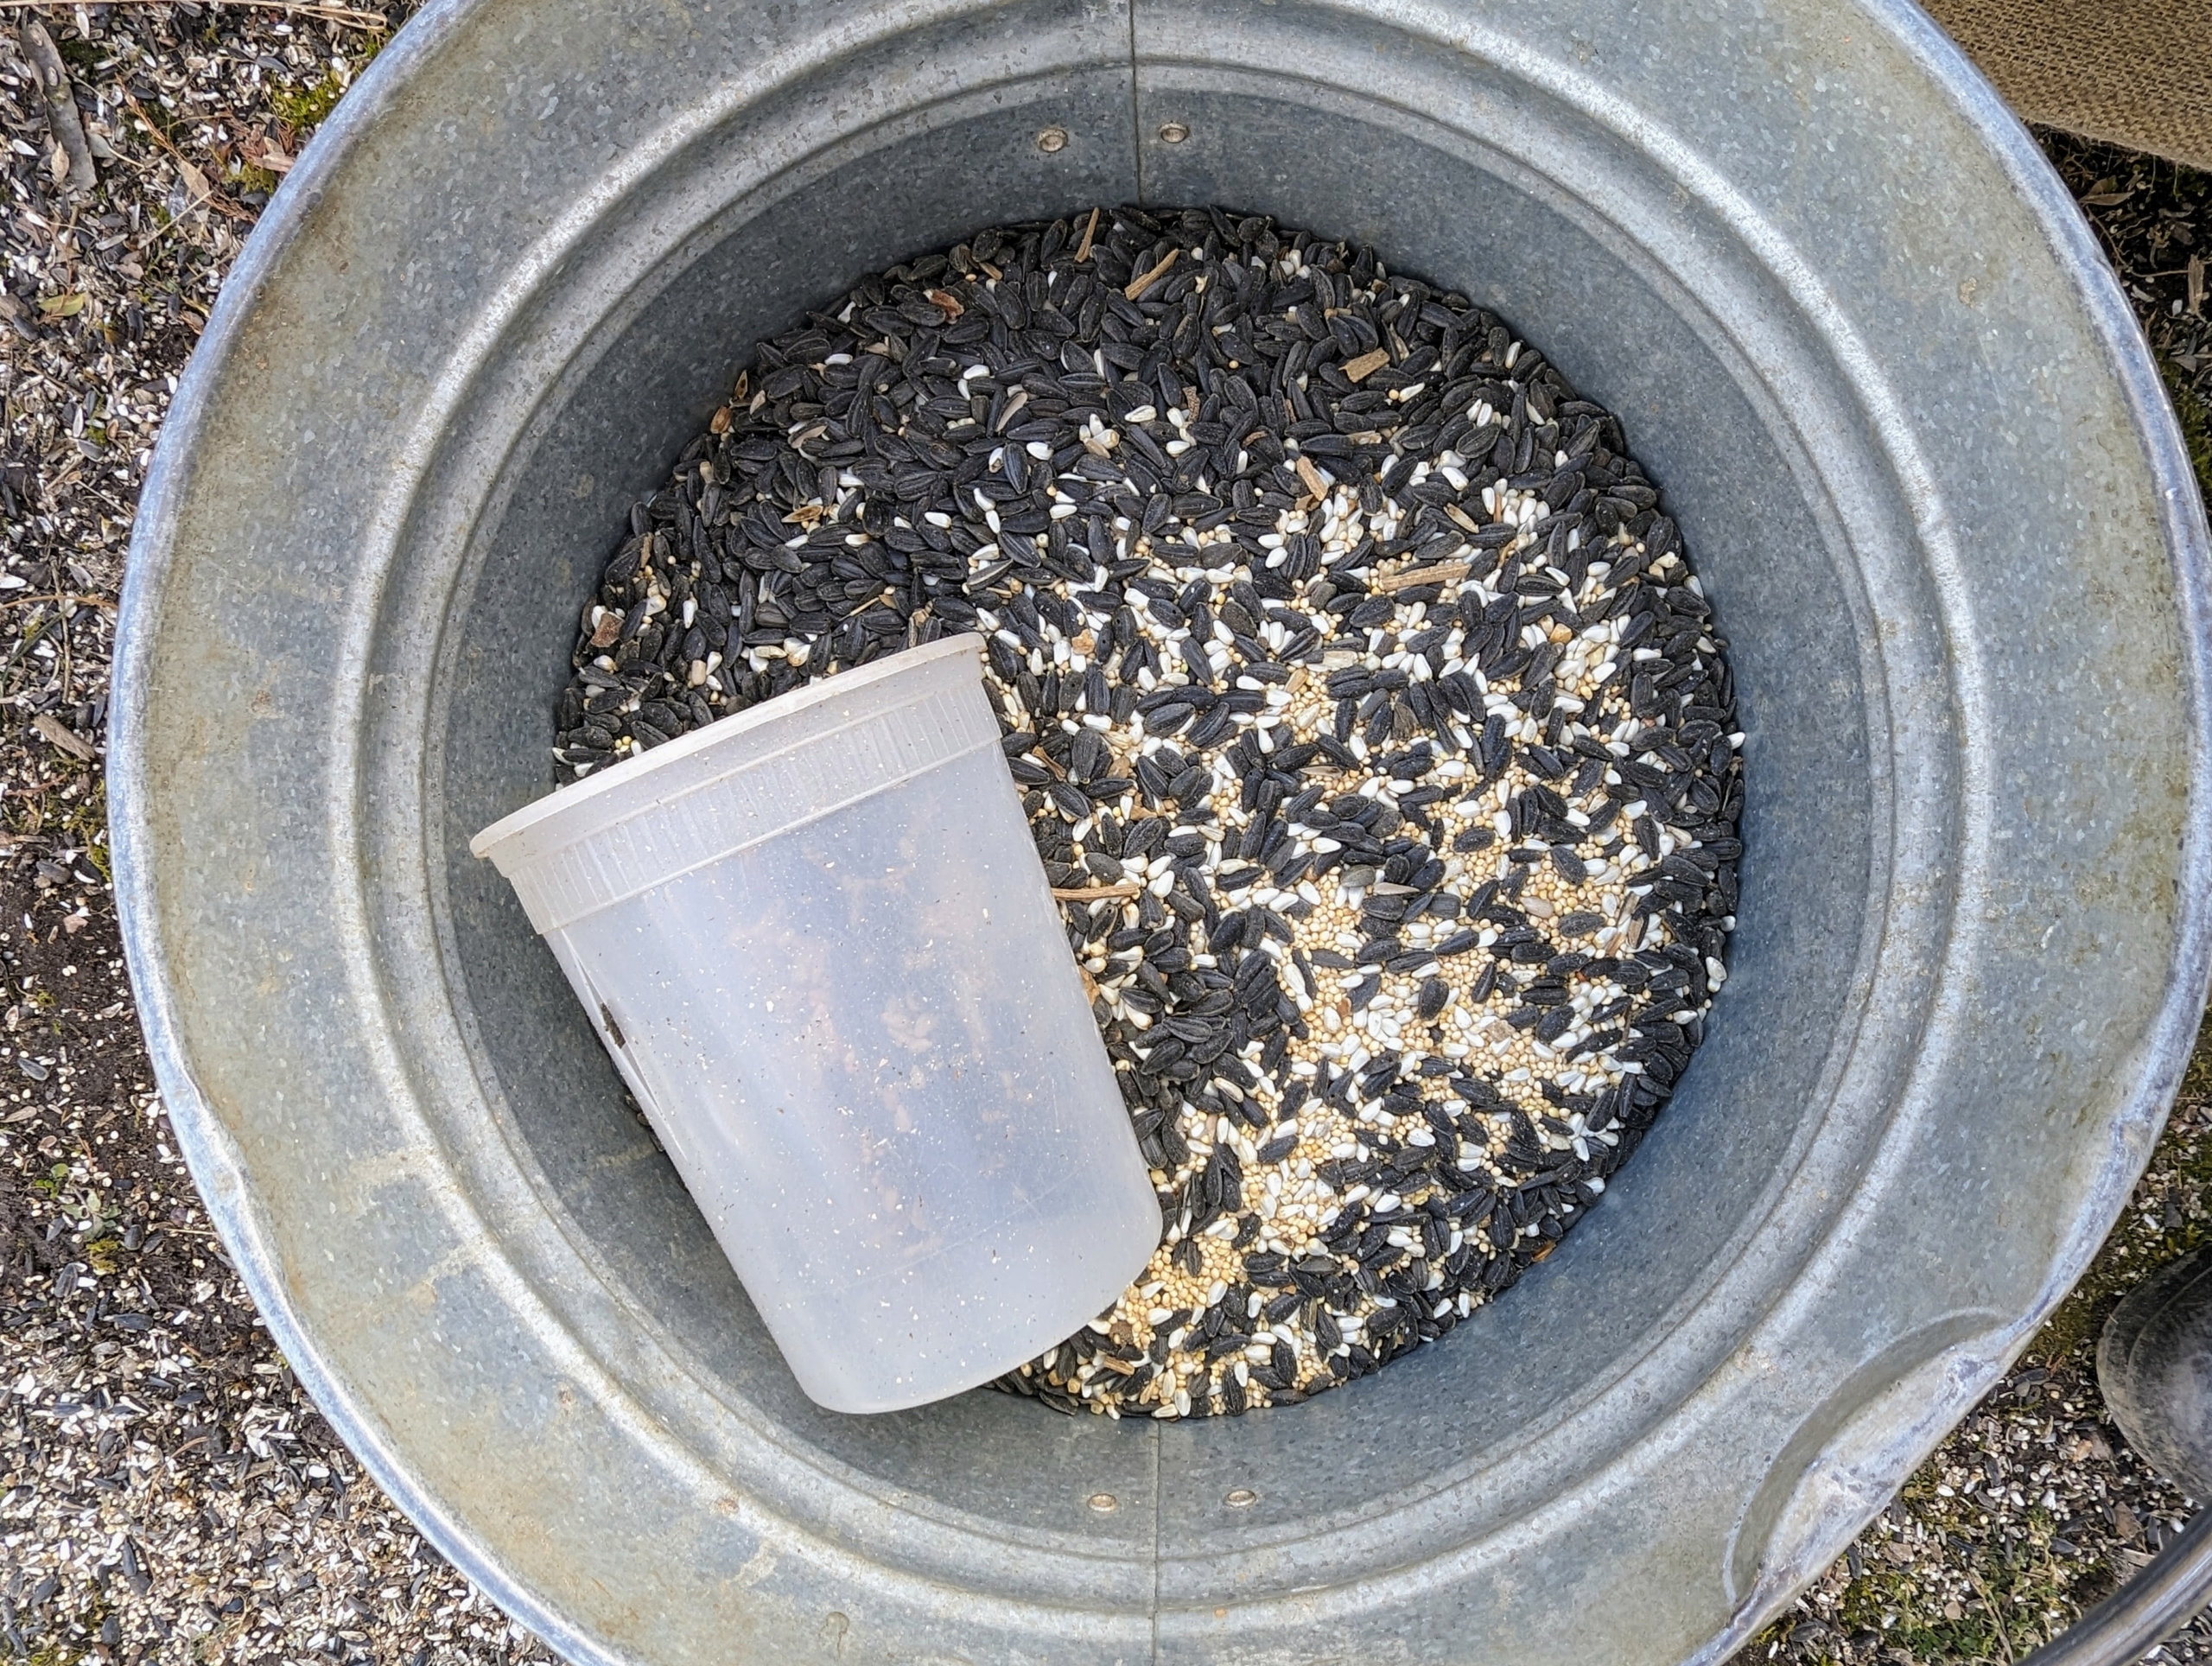
All my wild bird seed is stored in galvanized metal cans and kept inside my generator room next to the carport.
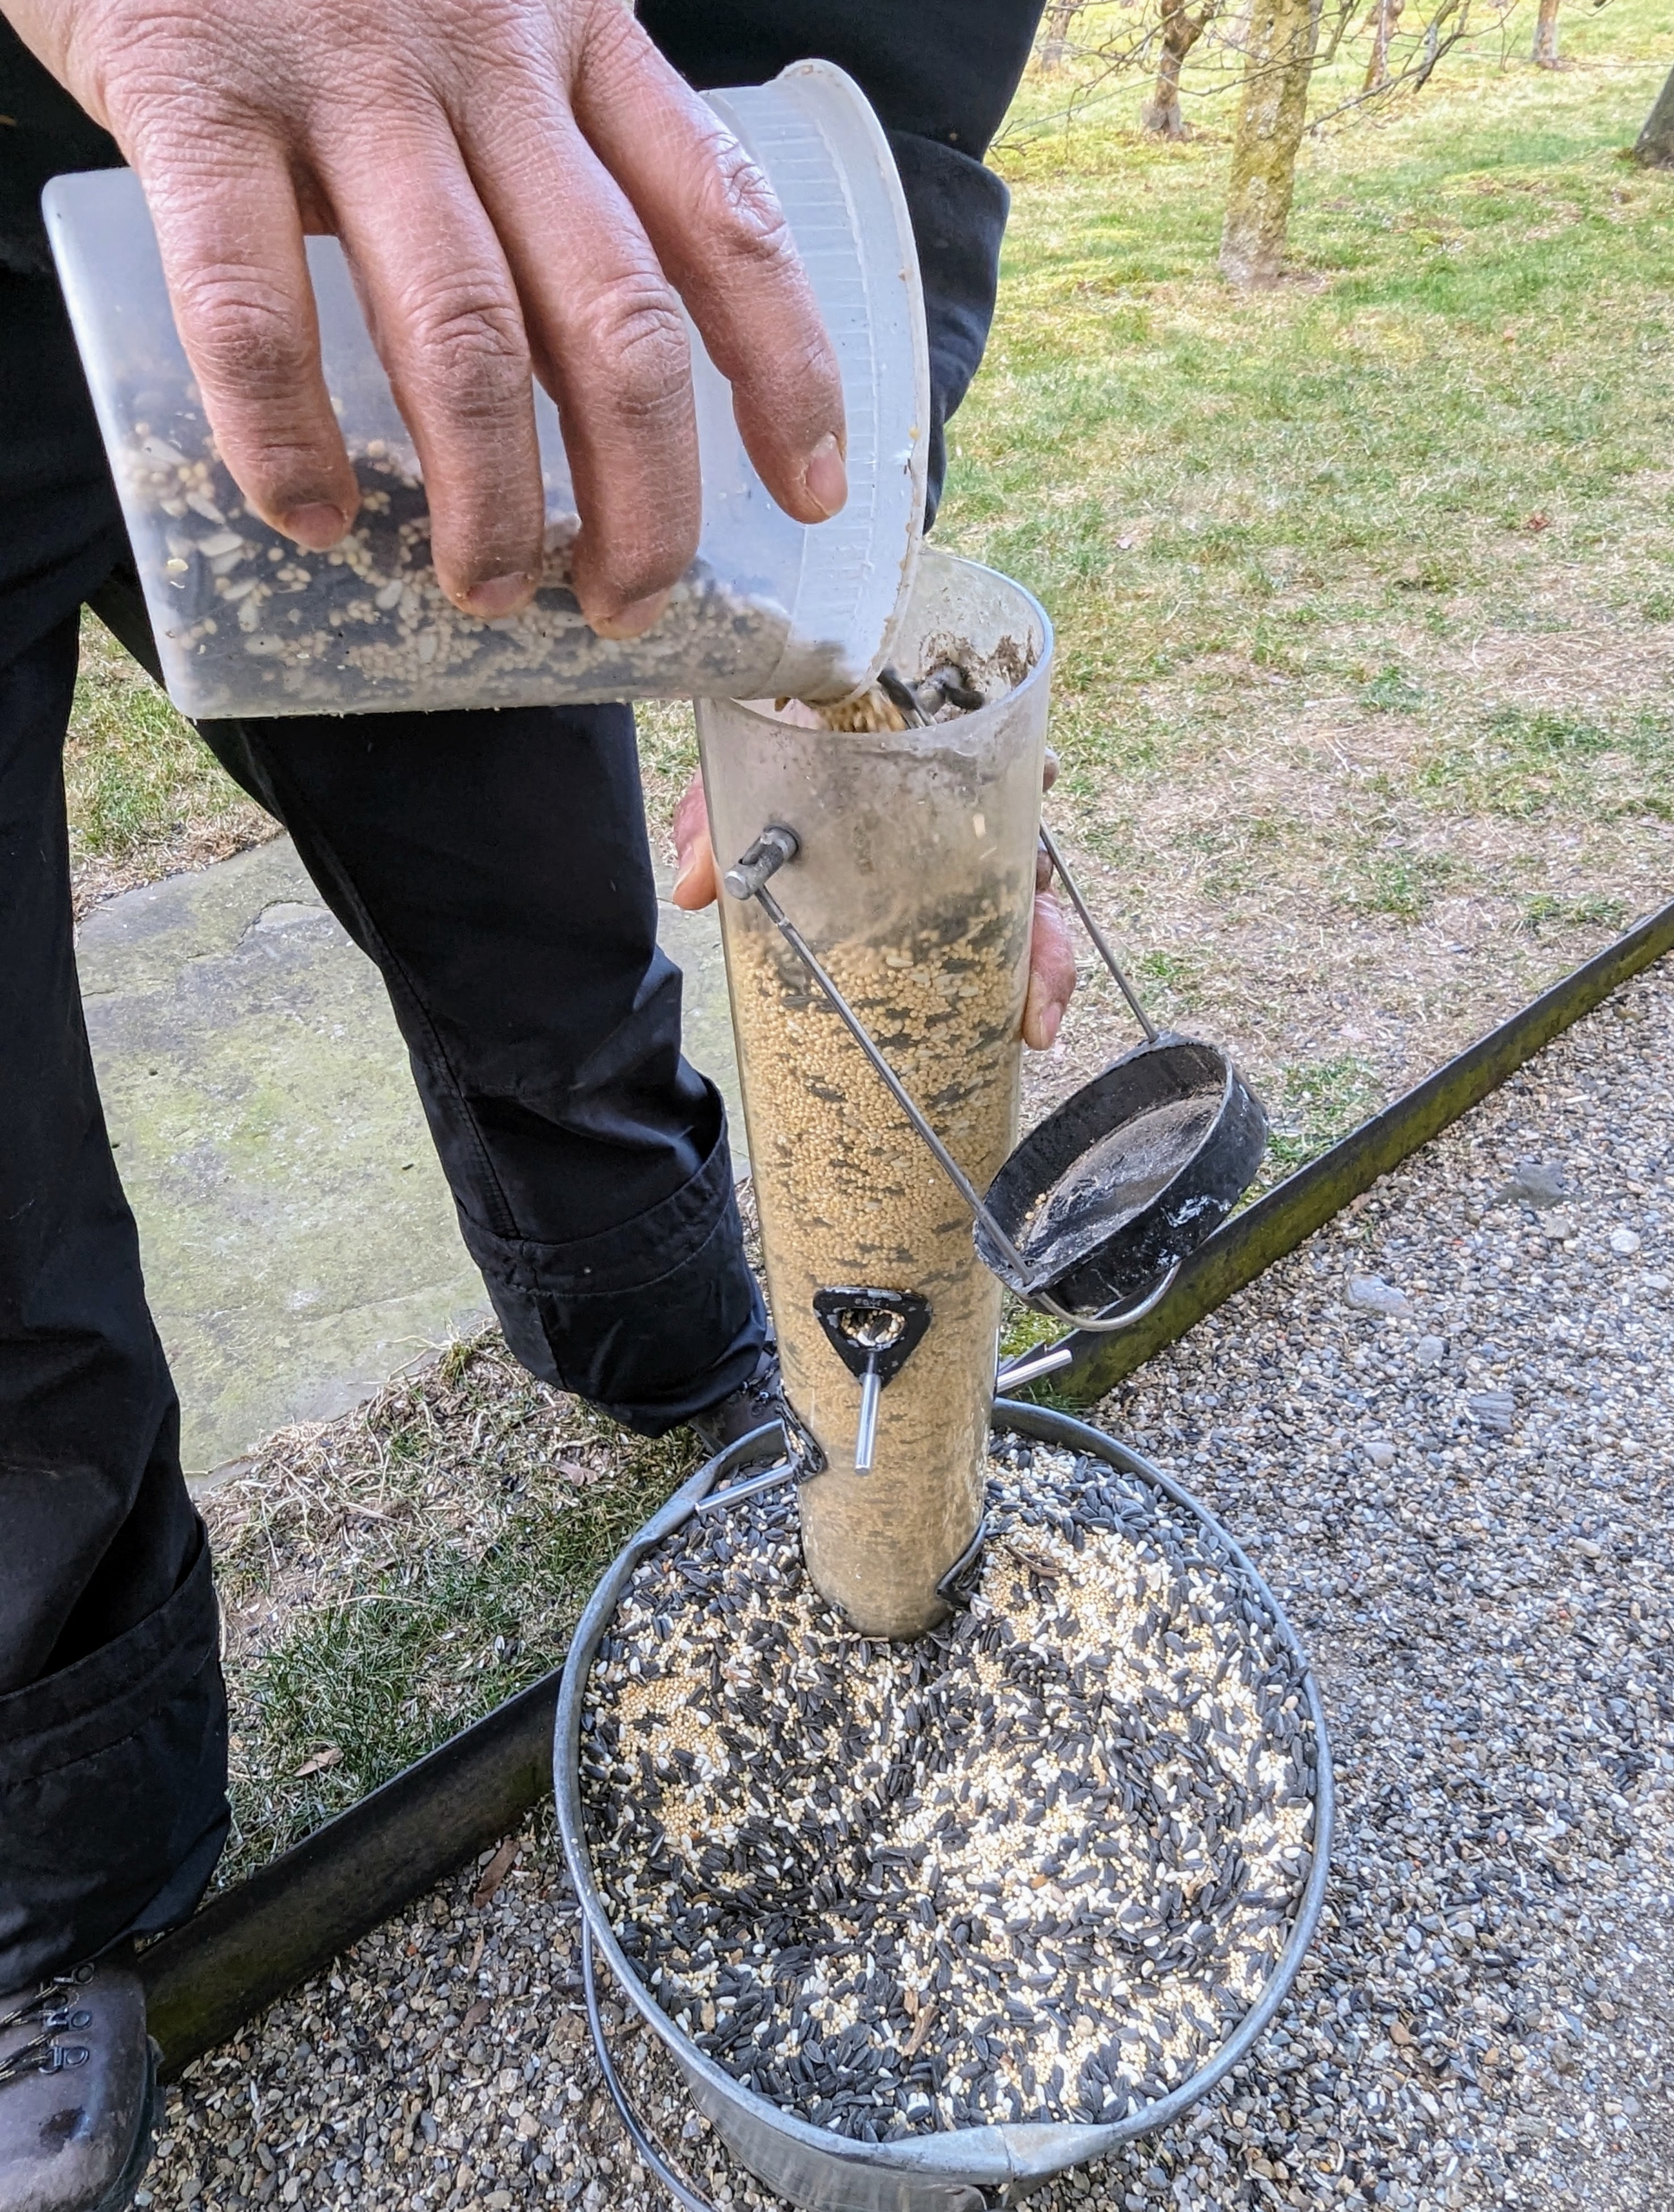
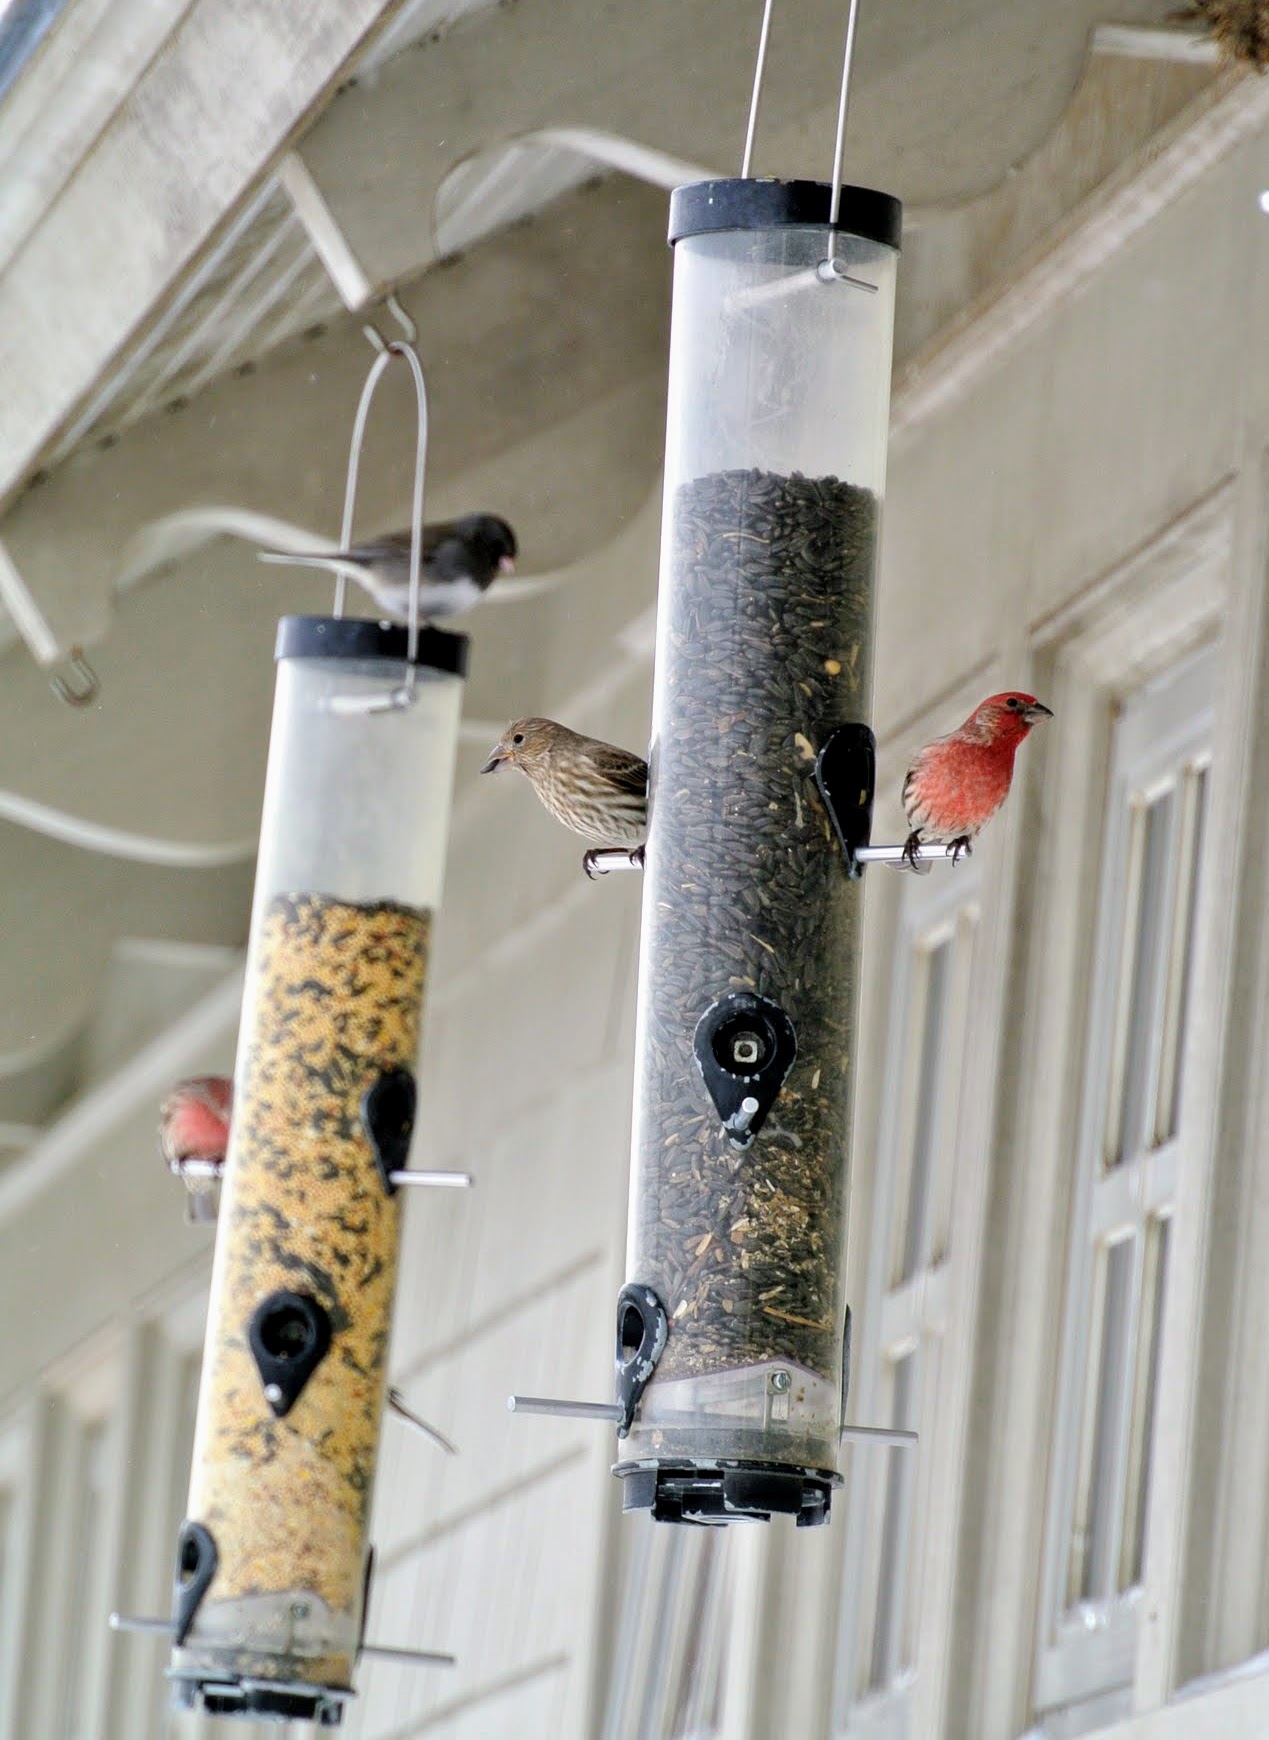
This is a wild bird seed mix. This includes white millet, black oil sunflower seeds, striped sunflower seeds and cracked corn. The birds love this seed.
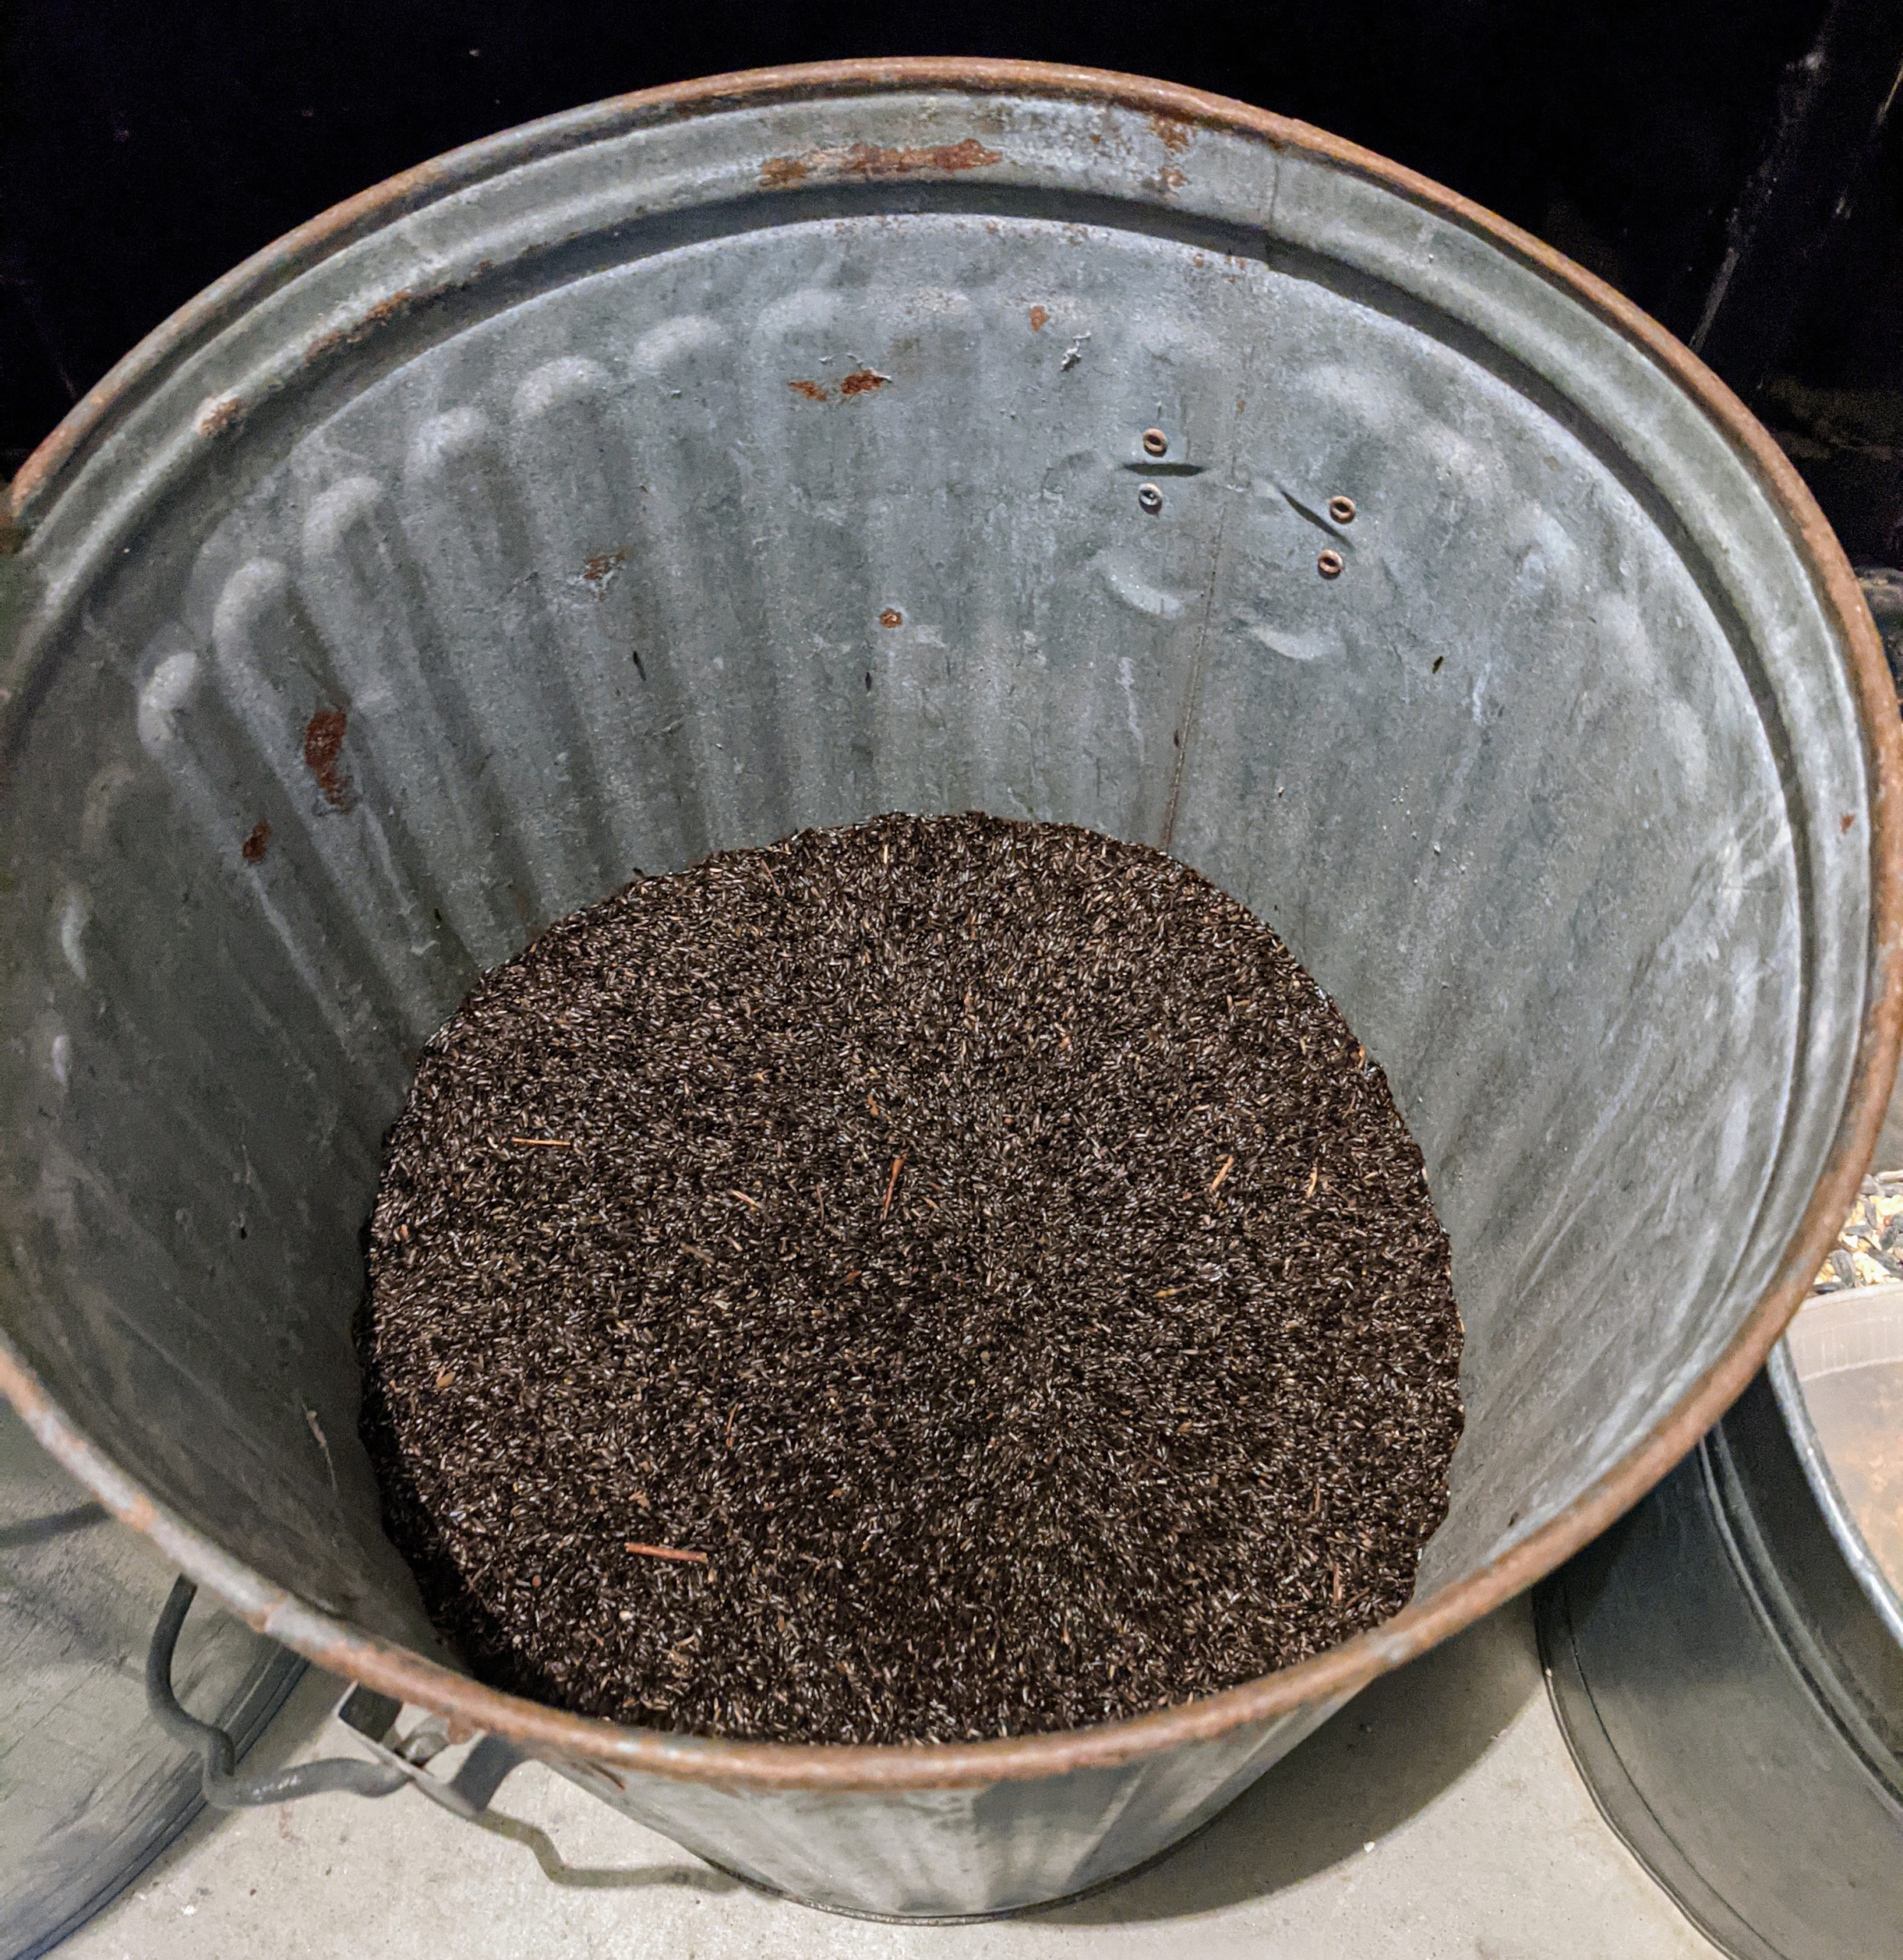
Nyjer is a great seed to offer birds, especially in winter because it contains more oil, and a higher calorie content, so birds can store fat to survive the season.
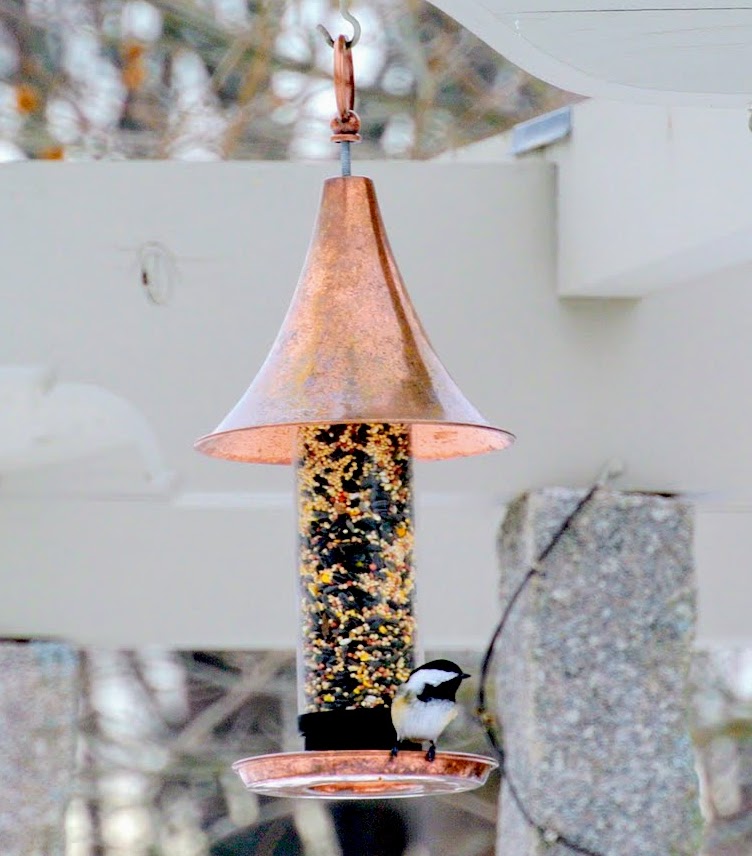
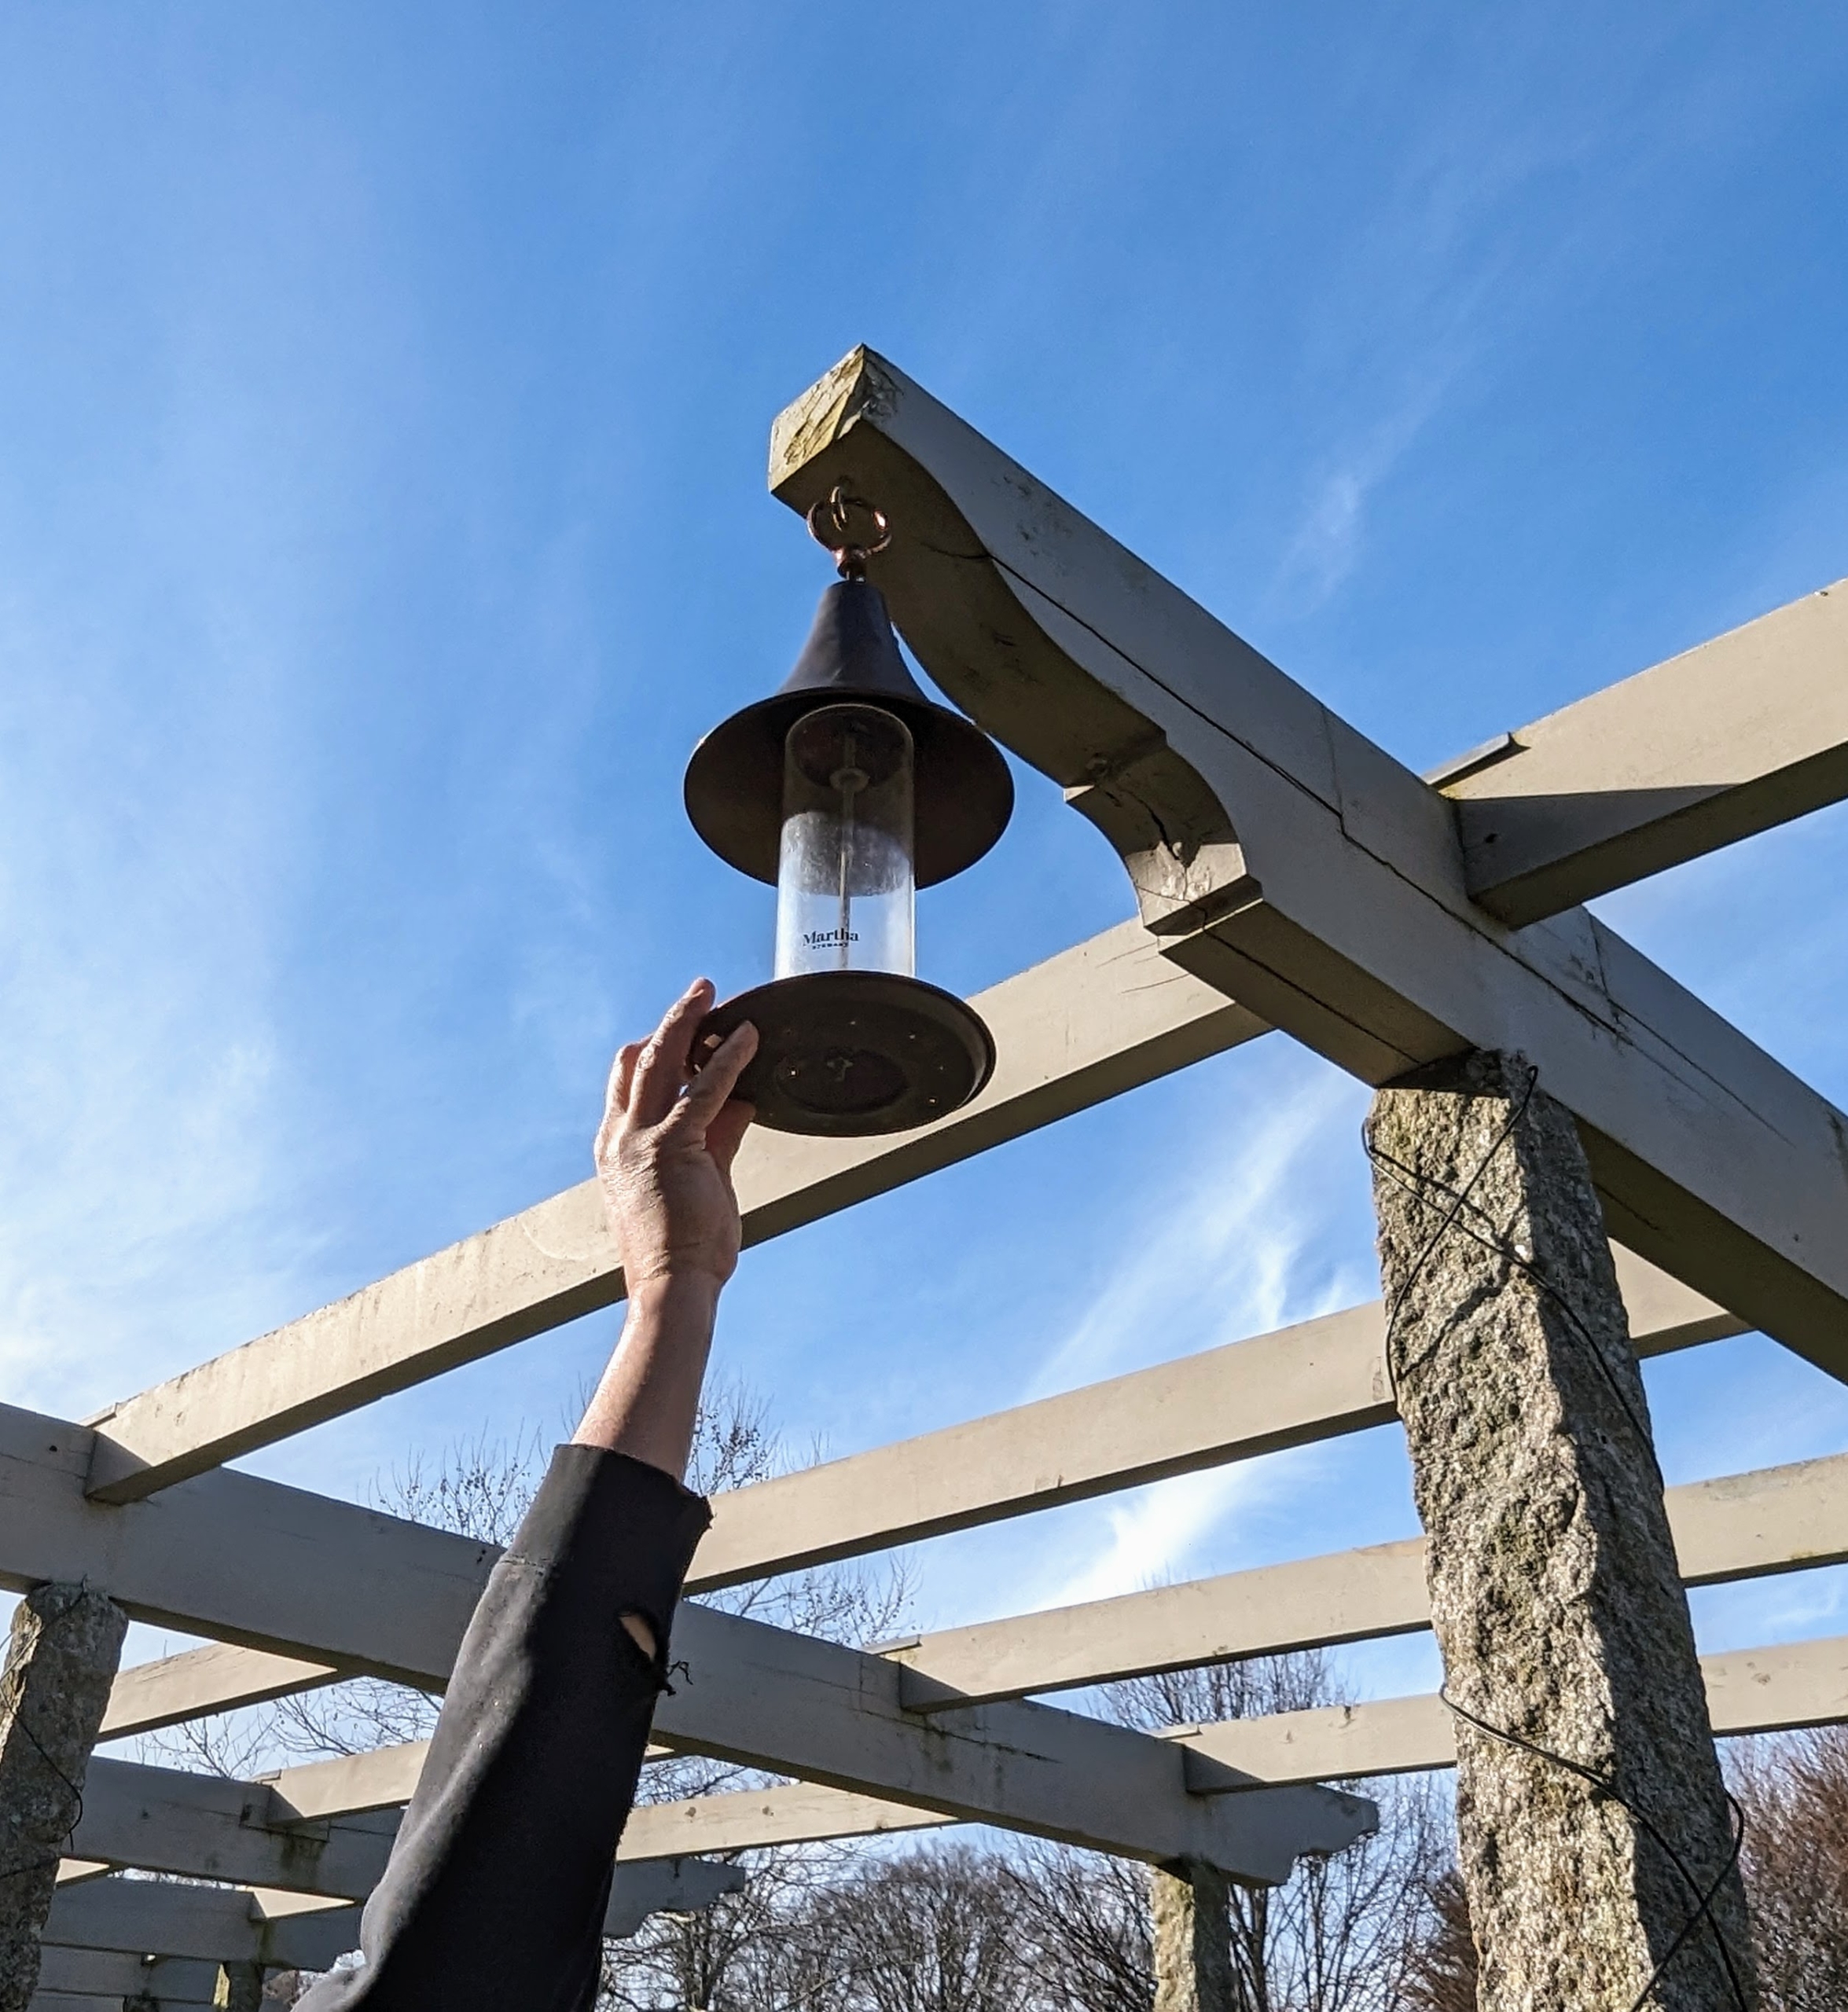
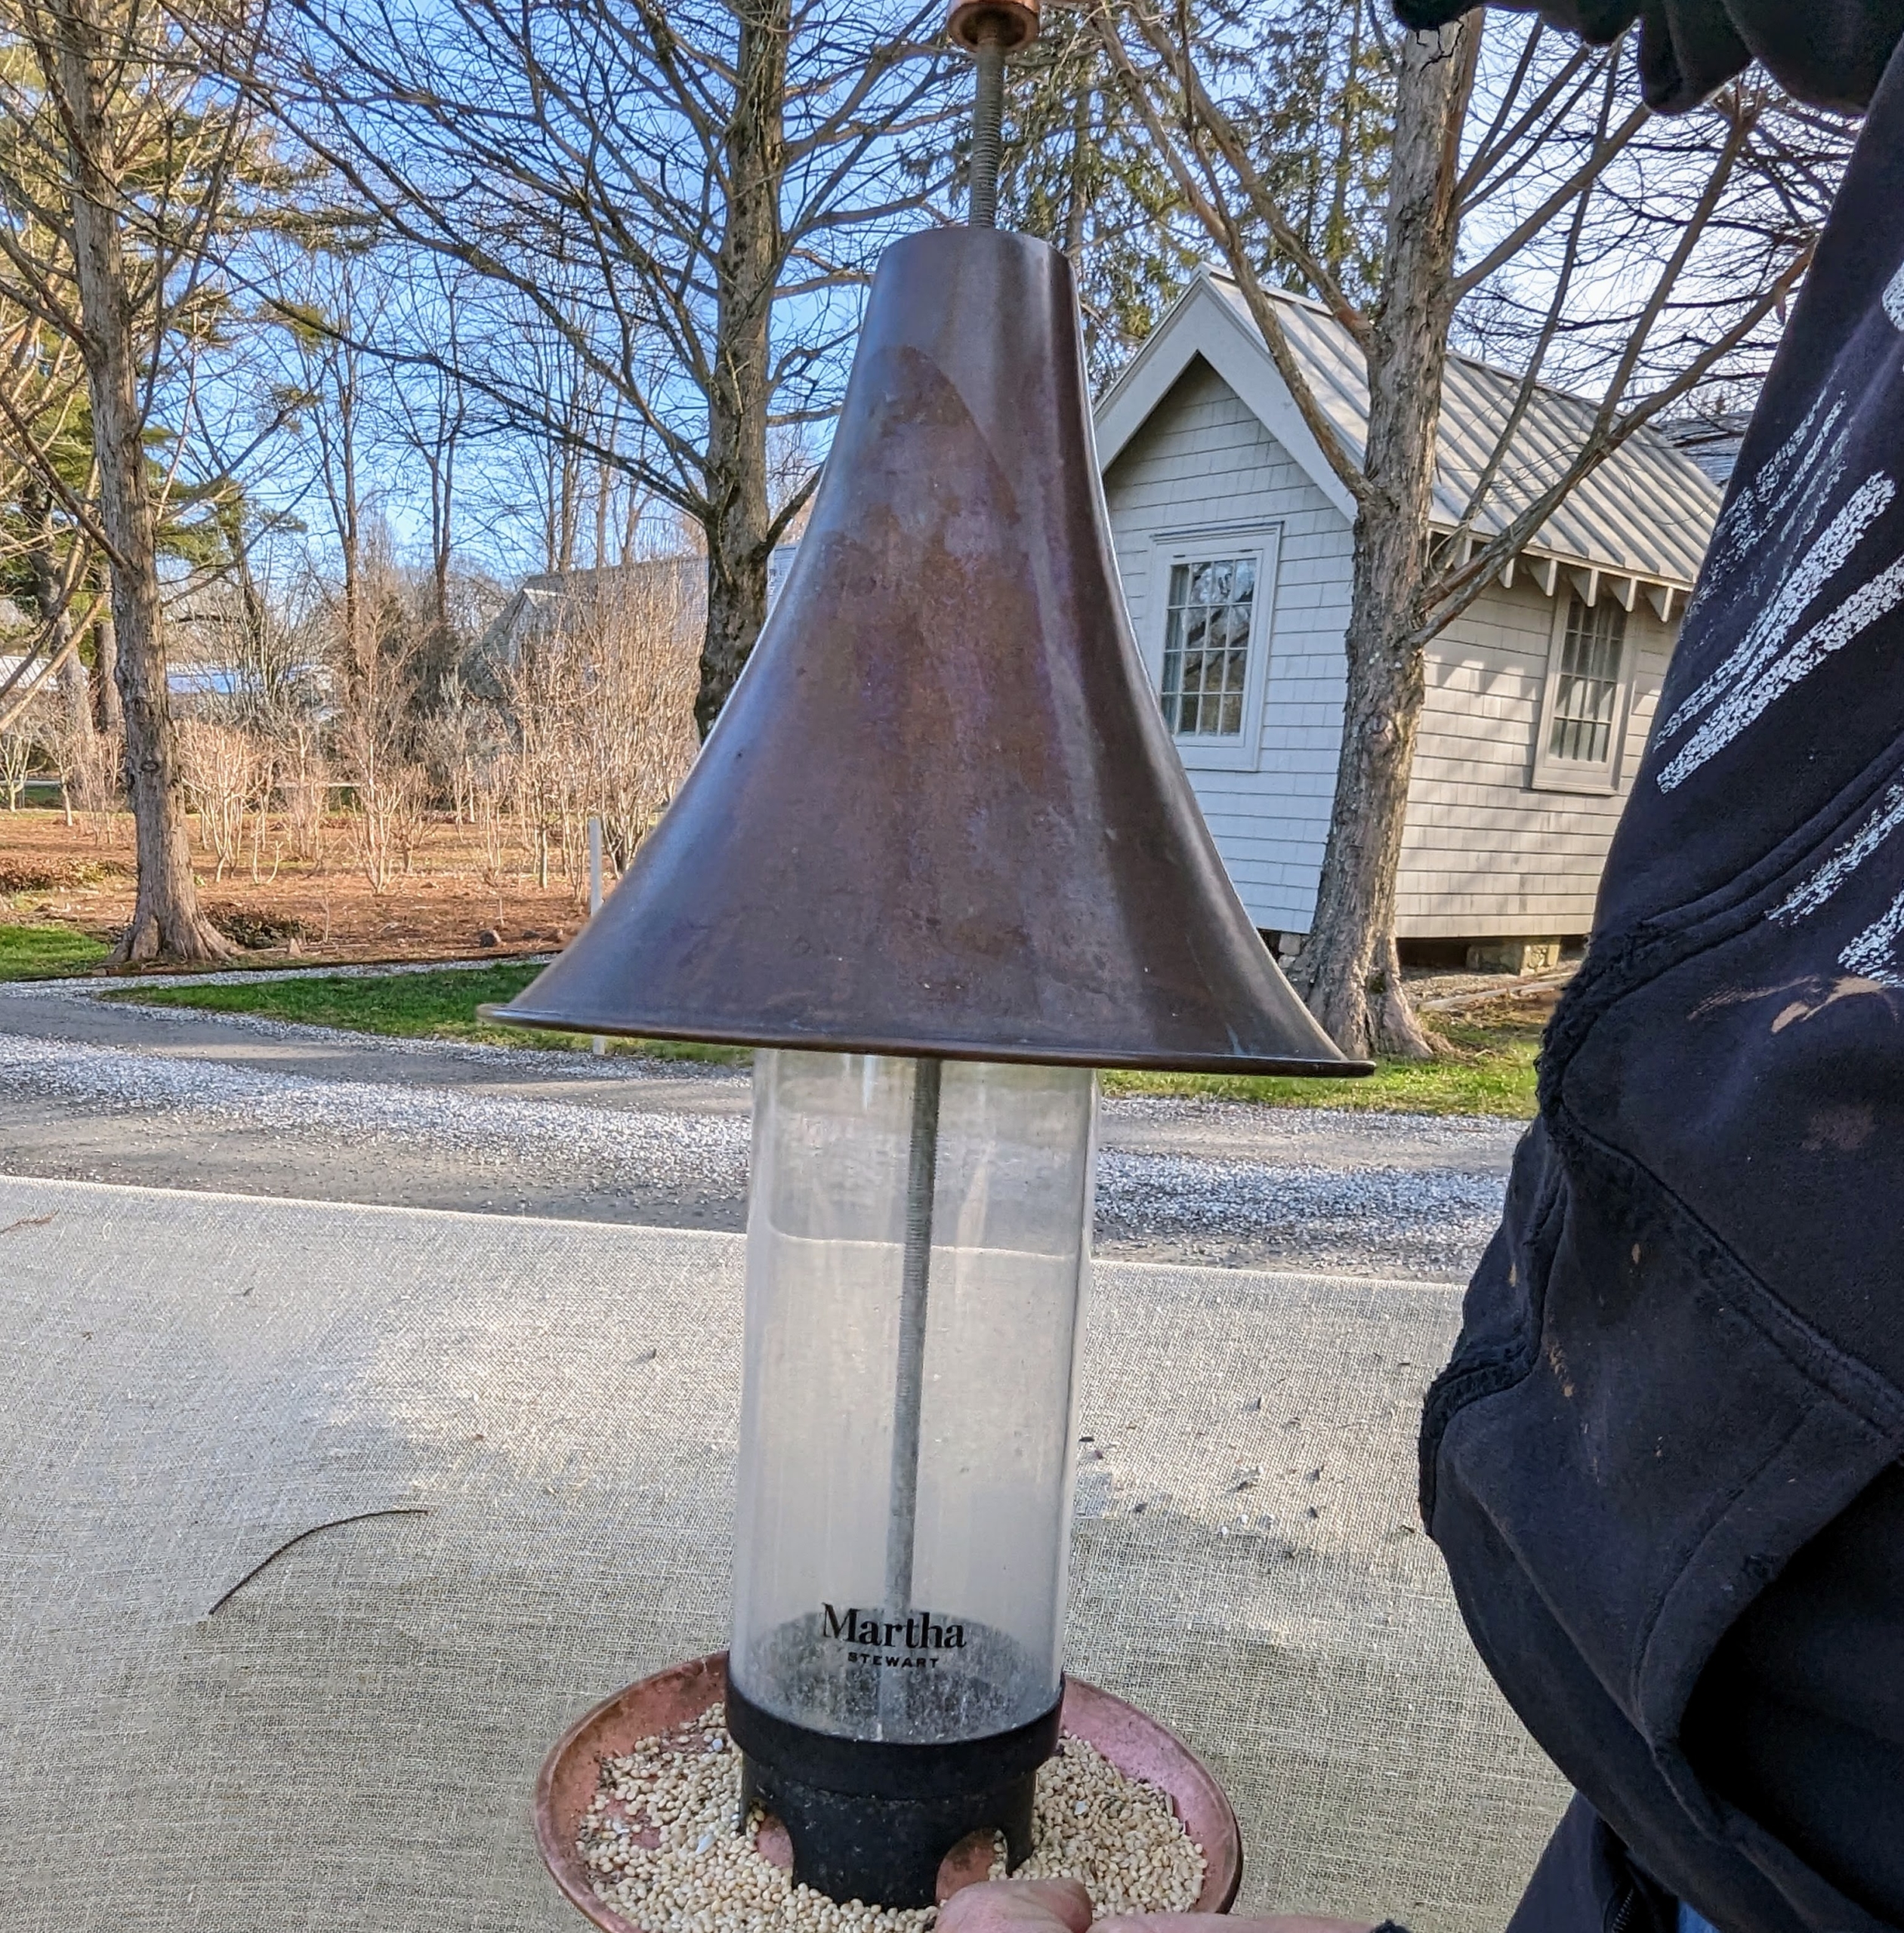
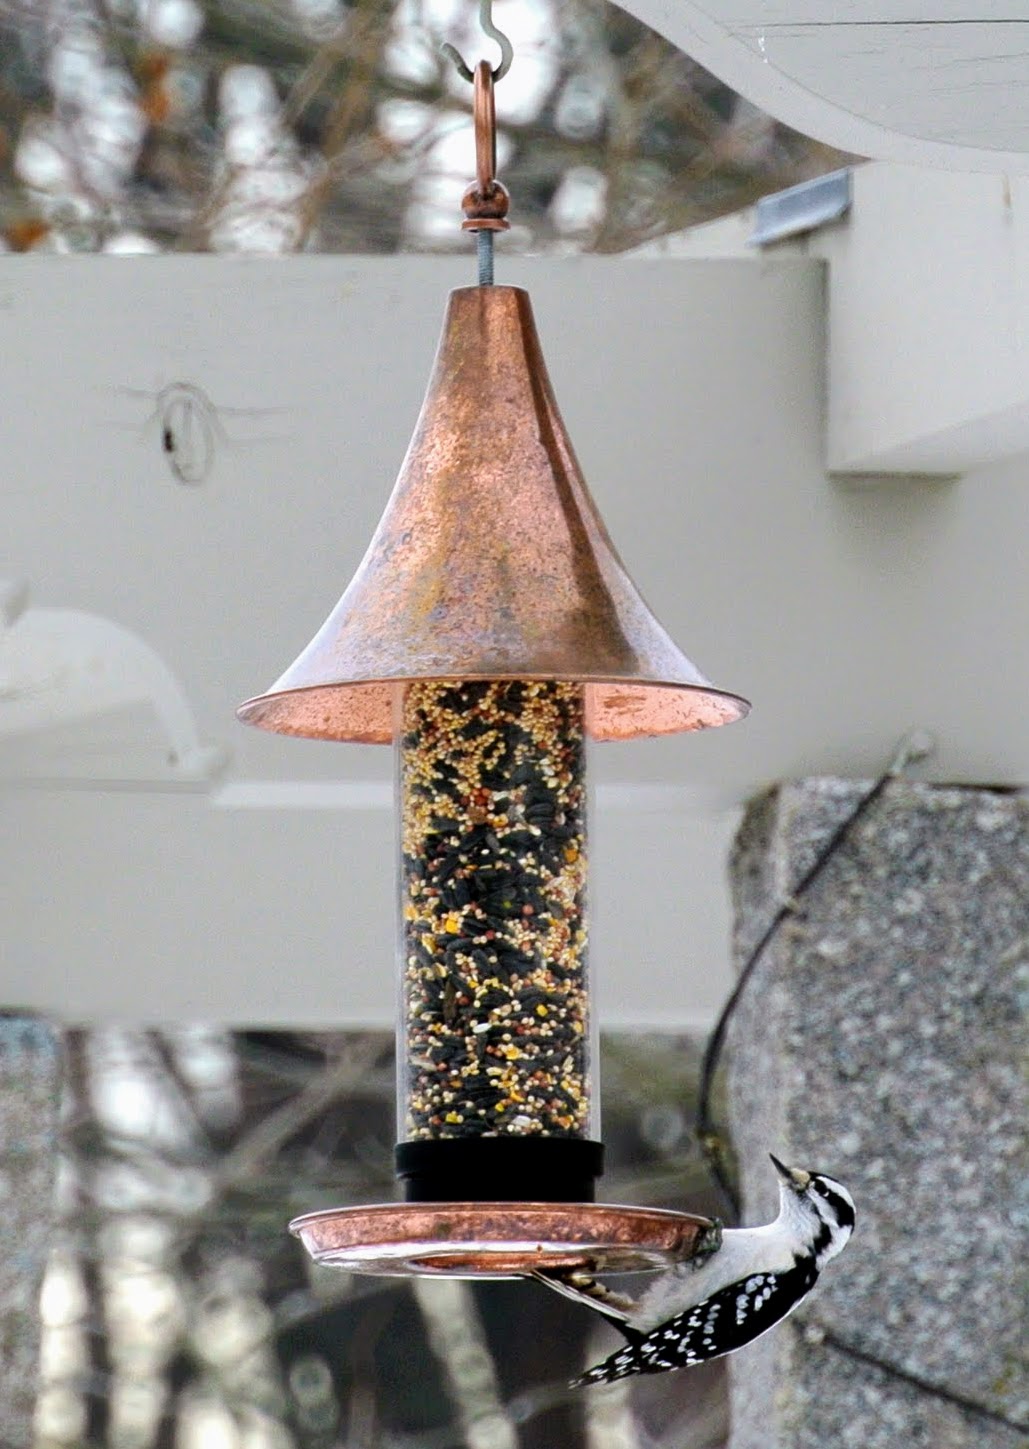
I have several feeders under my clematis pergola. This is a Martha Stewart Copper Bird Feeder from one of my previous collections – very durable and attracts many avian visitors through the day.
These feeders are the first to empty. Birds just love to eat from here and perch on the copper lipped tray and watch the activities around the farm.
This feeder has four feeding ports aside from the lipped tray to catch any fallen seeds.
When starting to feed birds, it may take time for new feeders to be discovered. Don’t be surprised if the feeding station doesn’t get birds right away. As long as feeders are clean and filled with fresh seed, the birds will find them.
In winter, we fill the feeders in the morning, and then check them again in the afternoon. Once refilled, it doesn’t take long before birds start arriving again.
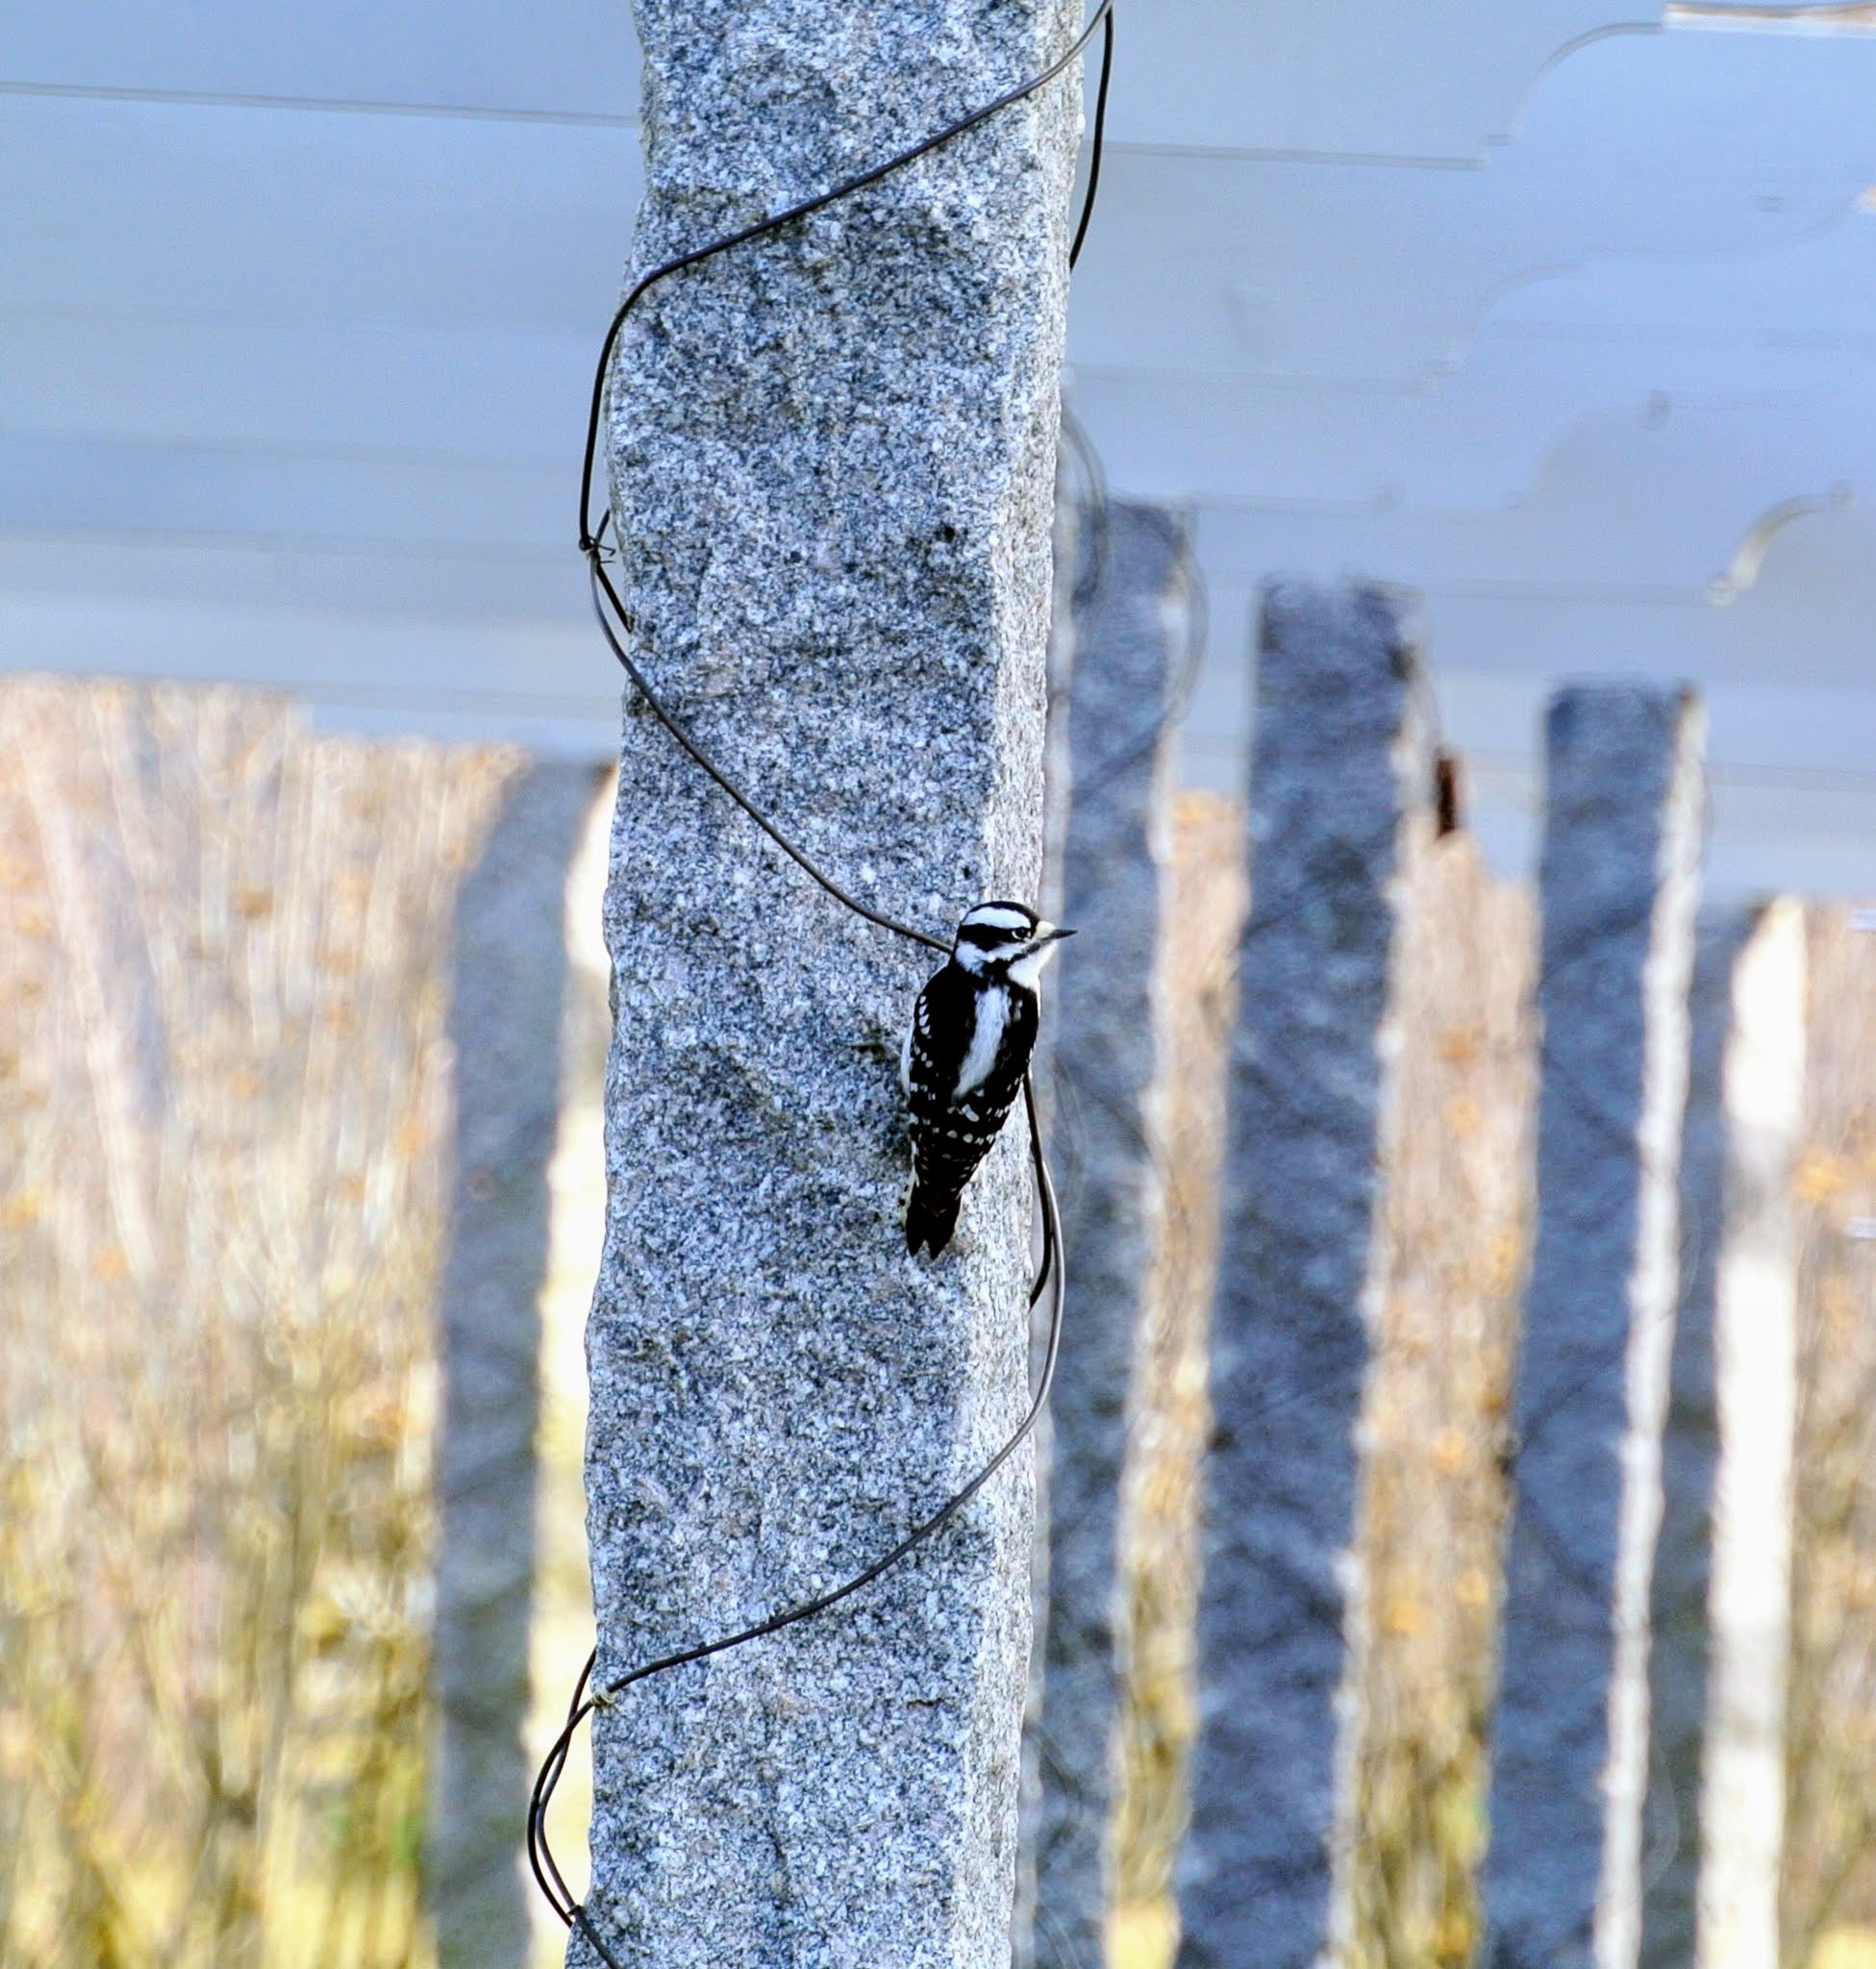
Here’s a downy woodpecker on the granite upright of my pergola. This is the smallest type of woodpecker in North America.
During this time of year, I also help provide shelter for the visiting birds. I purposely create these holes in the seasonal burlap covers that protect my boxwood. They love to go in and out, especially when it is windy.
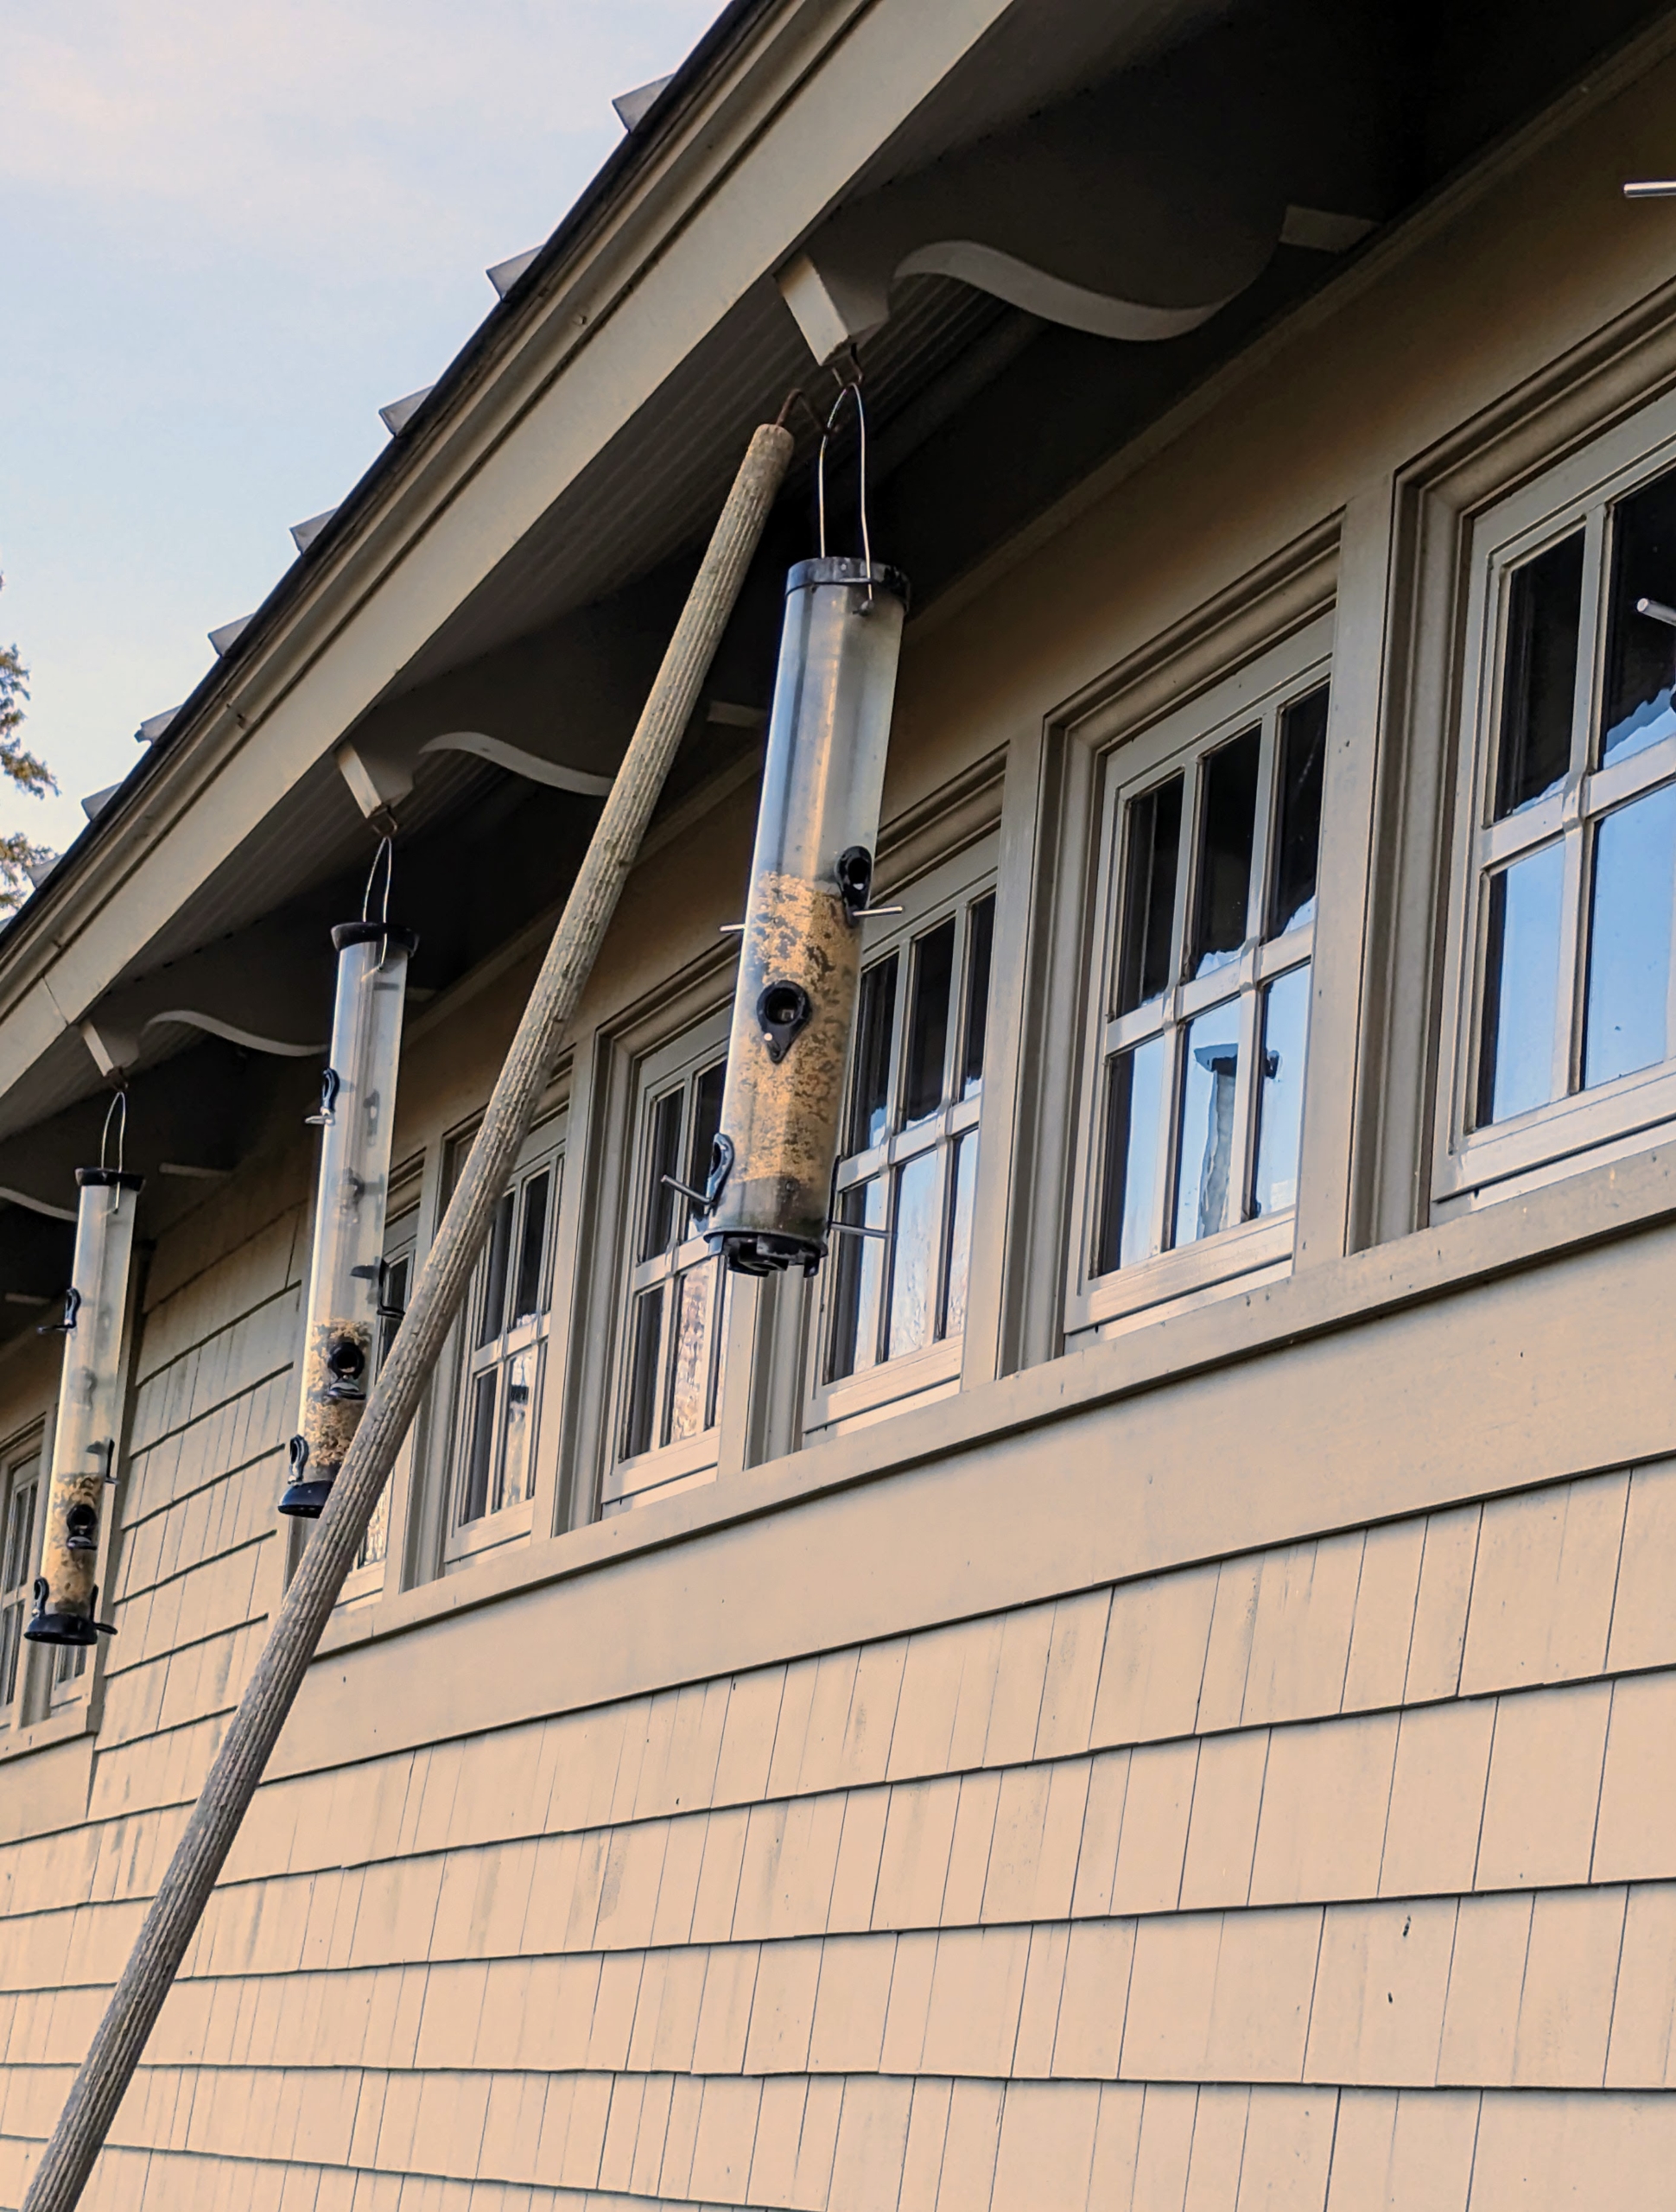
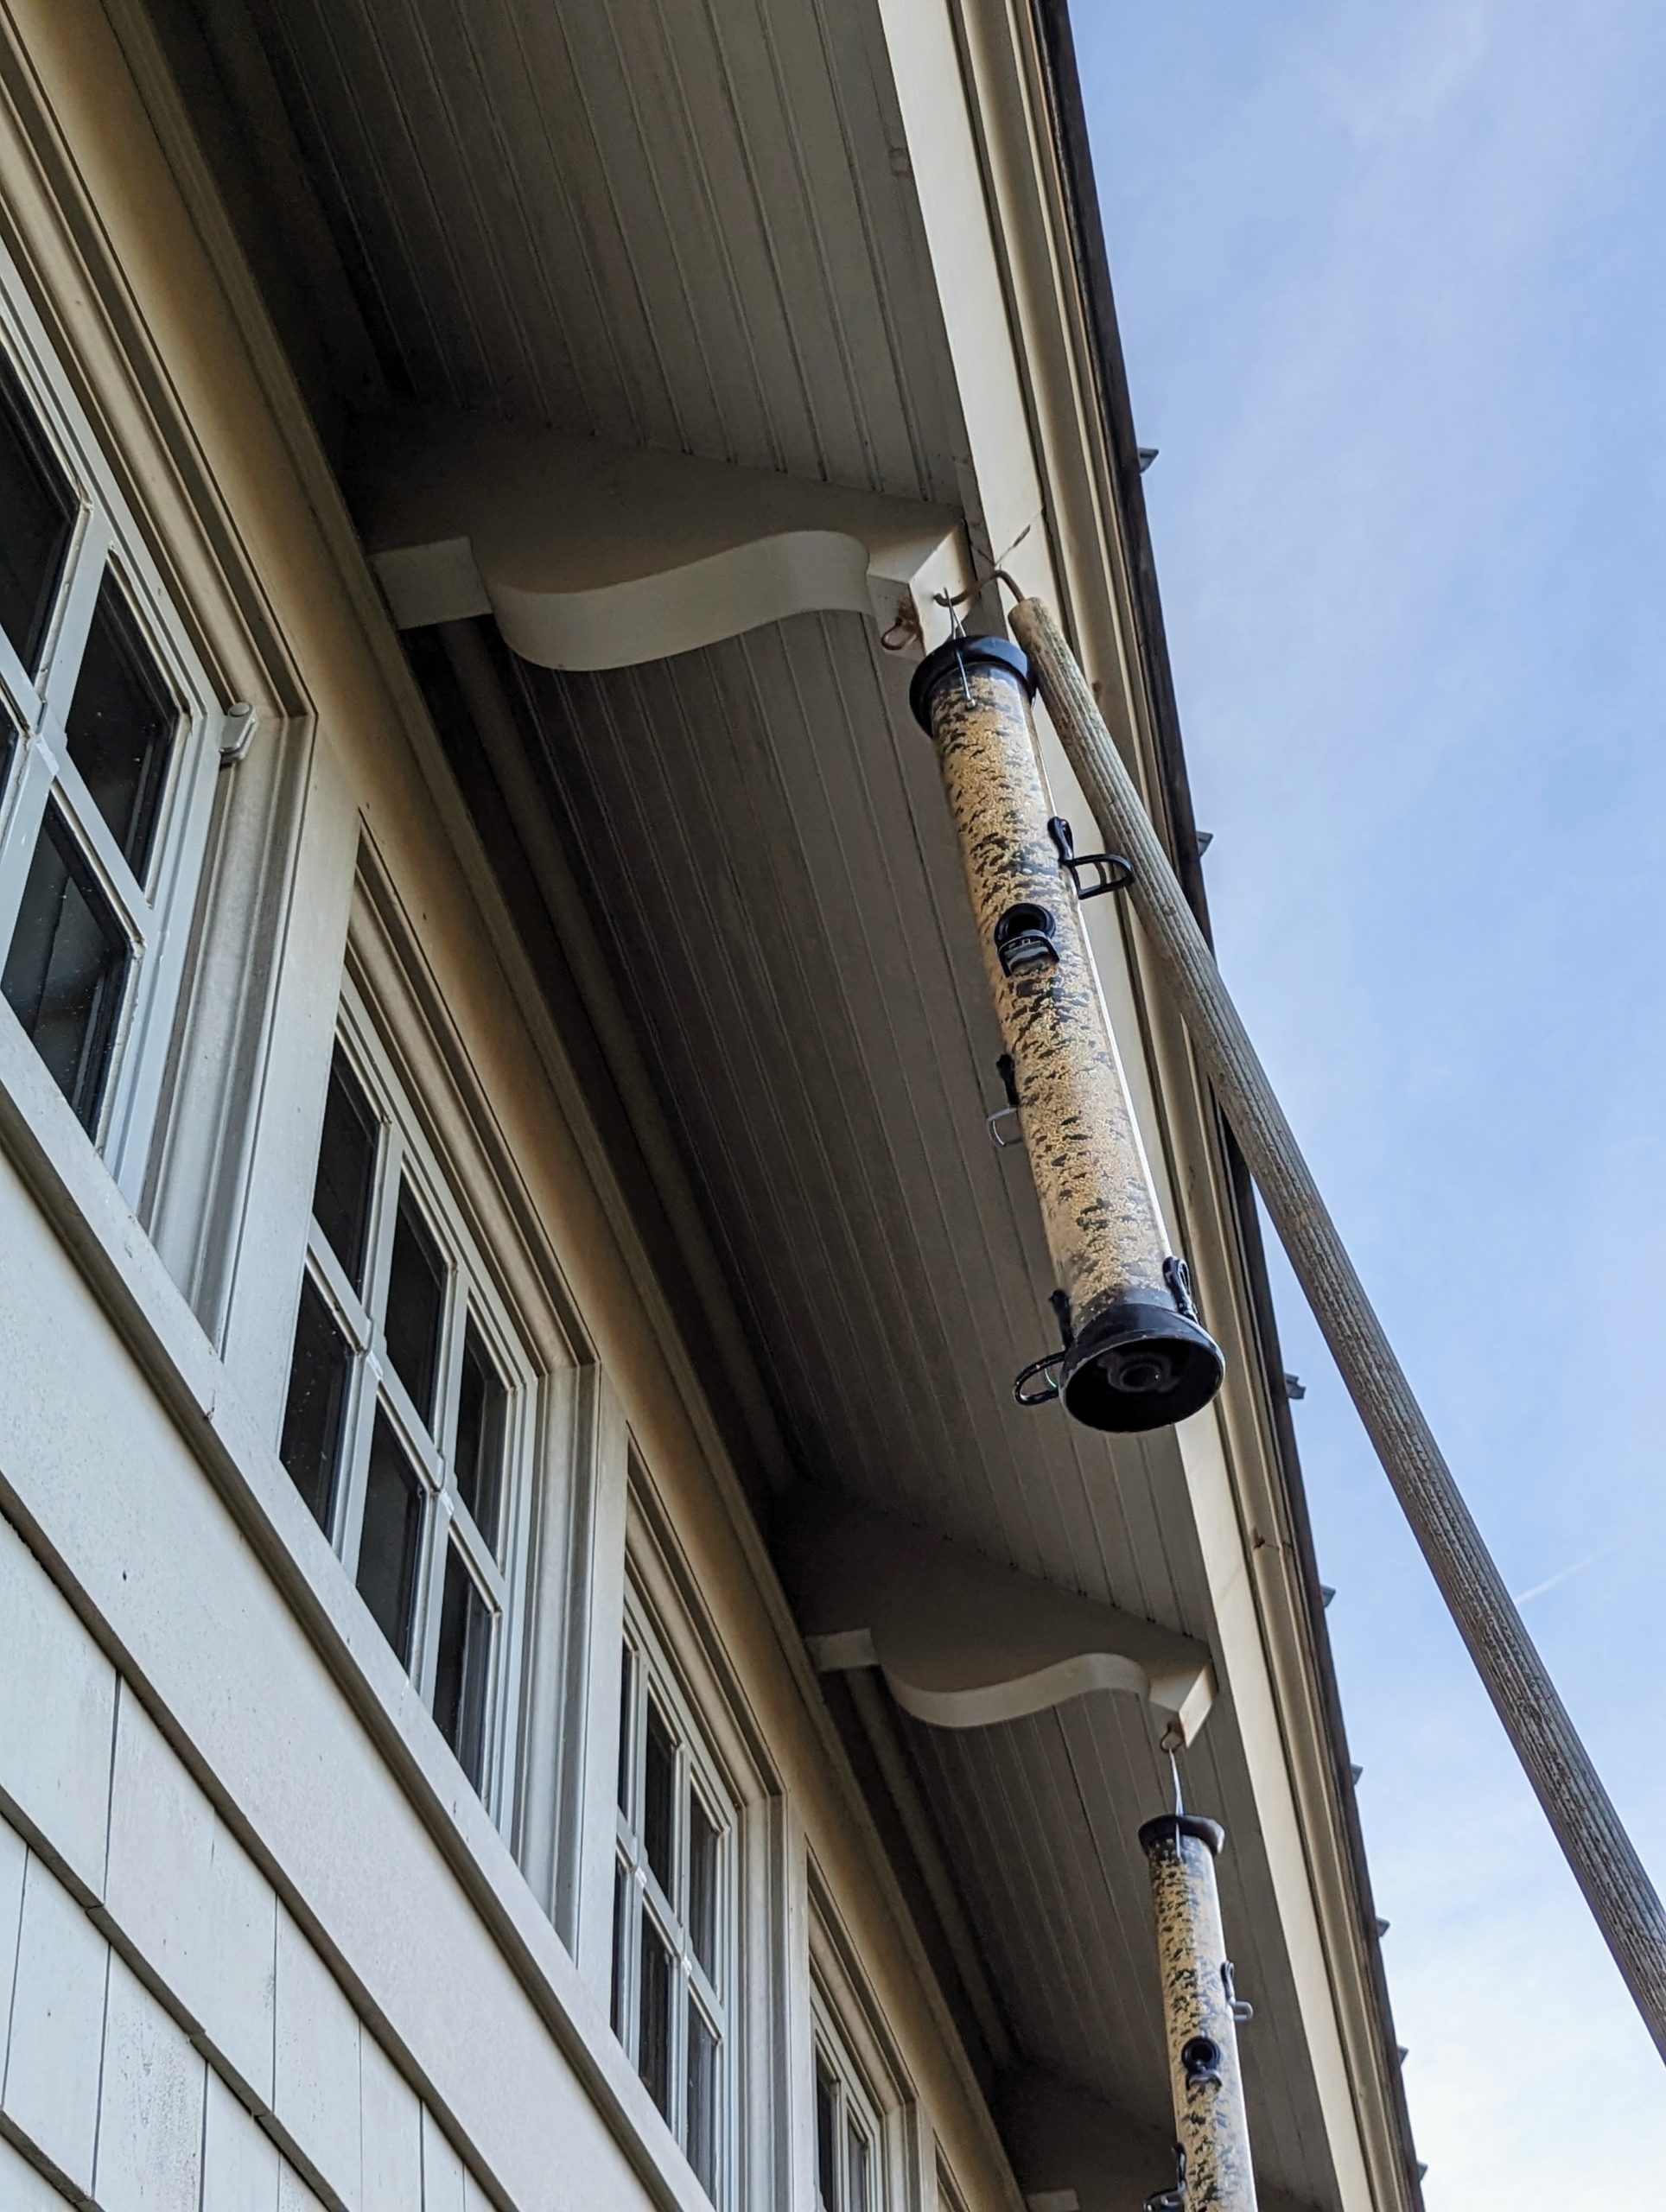
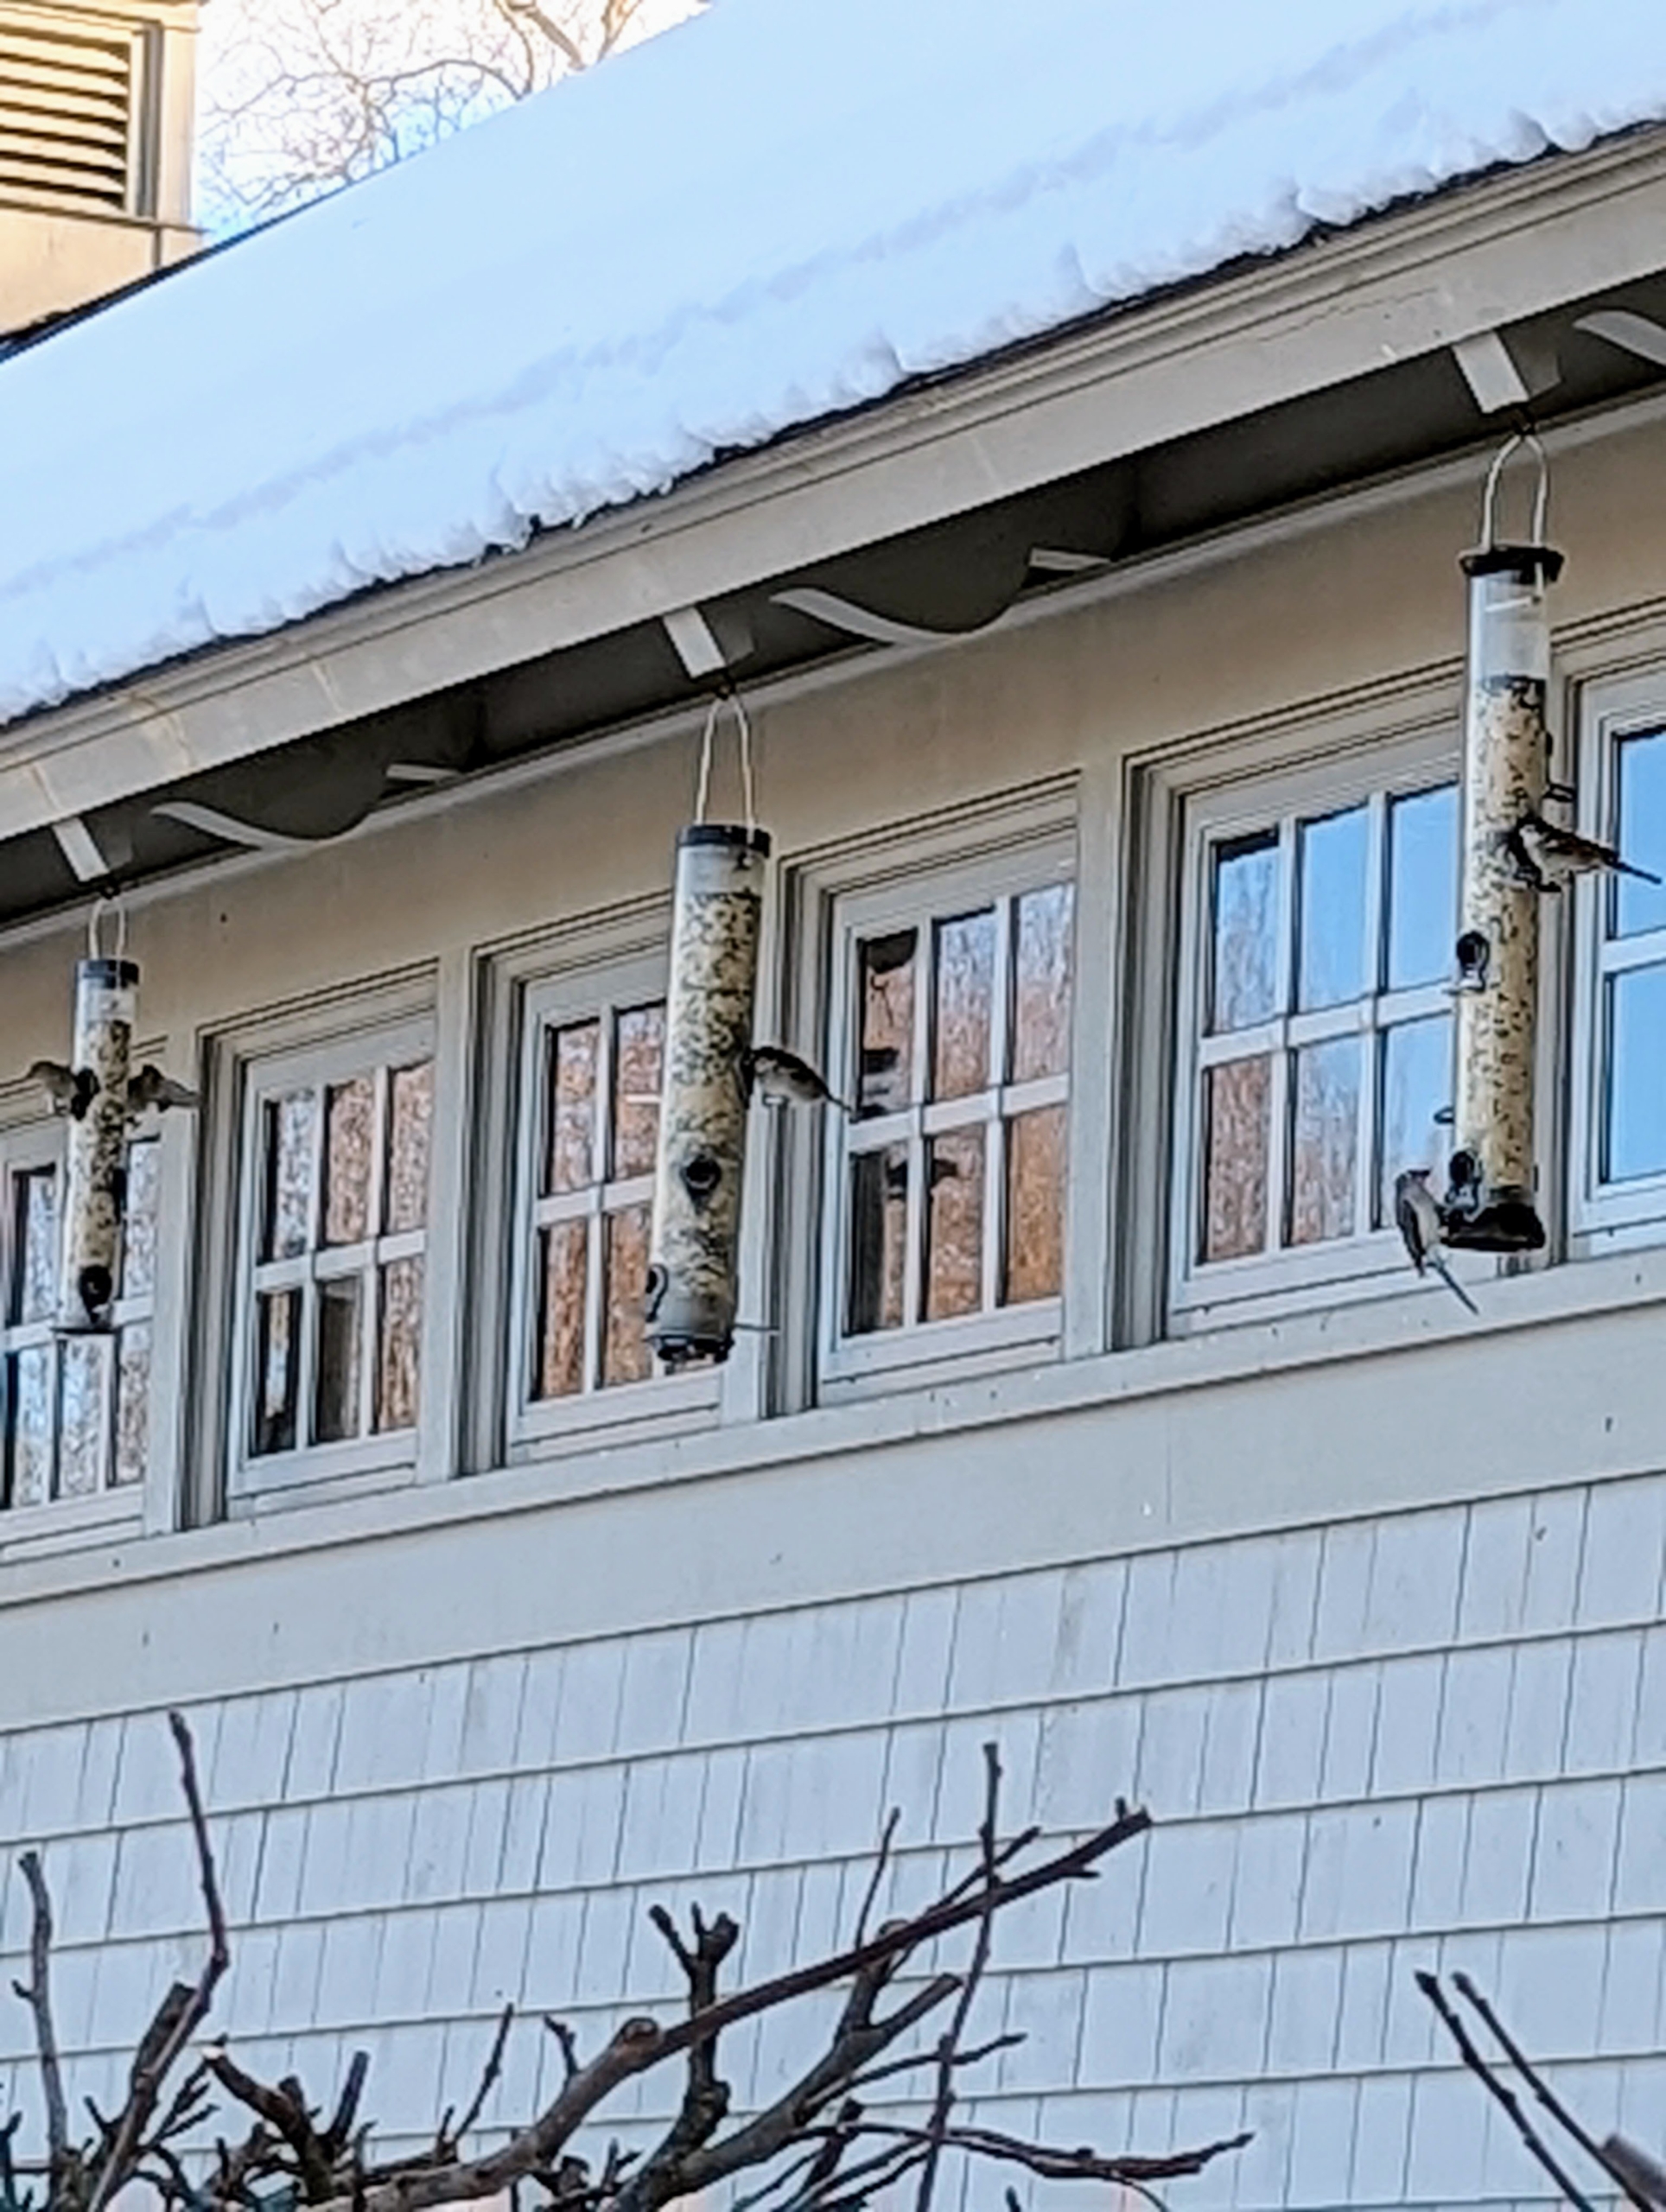
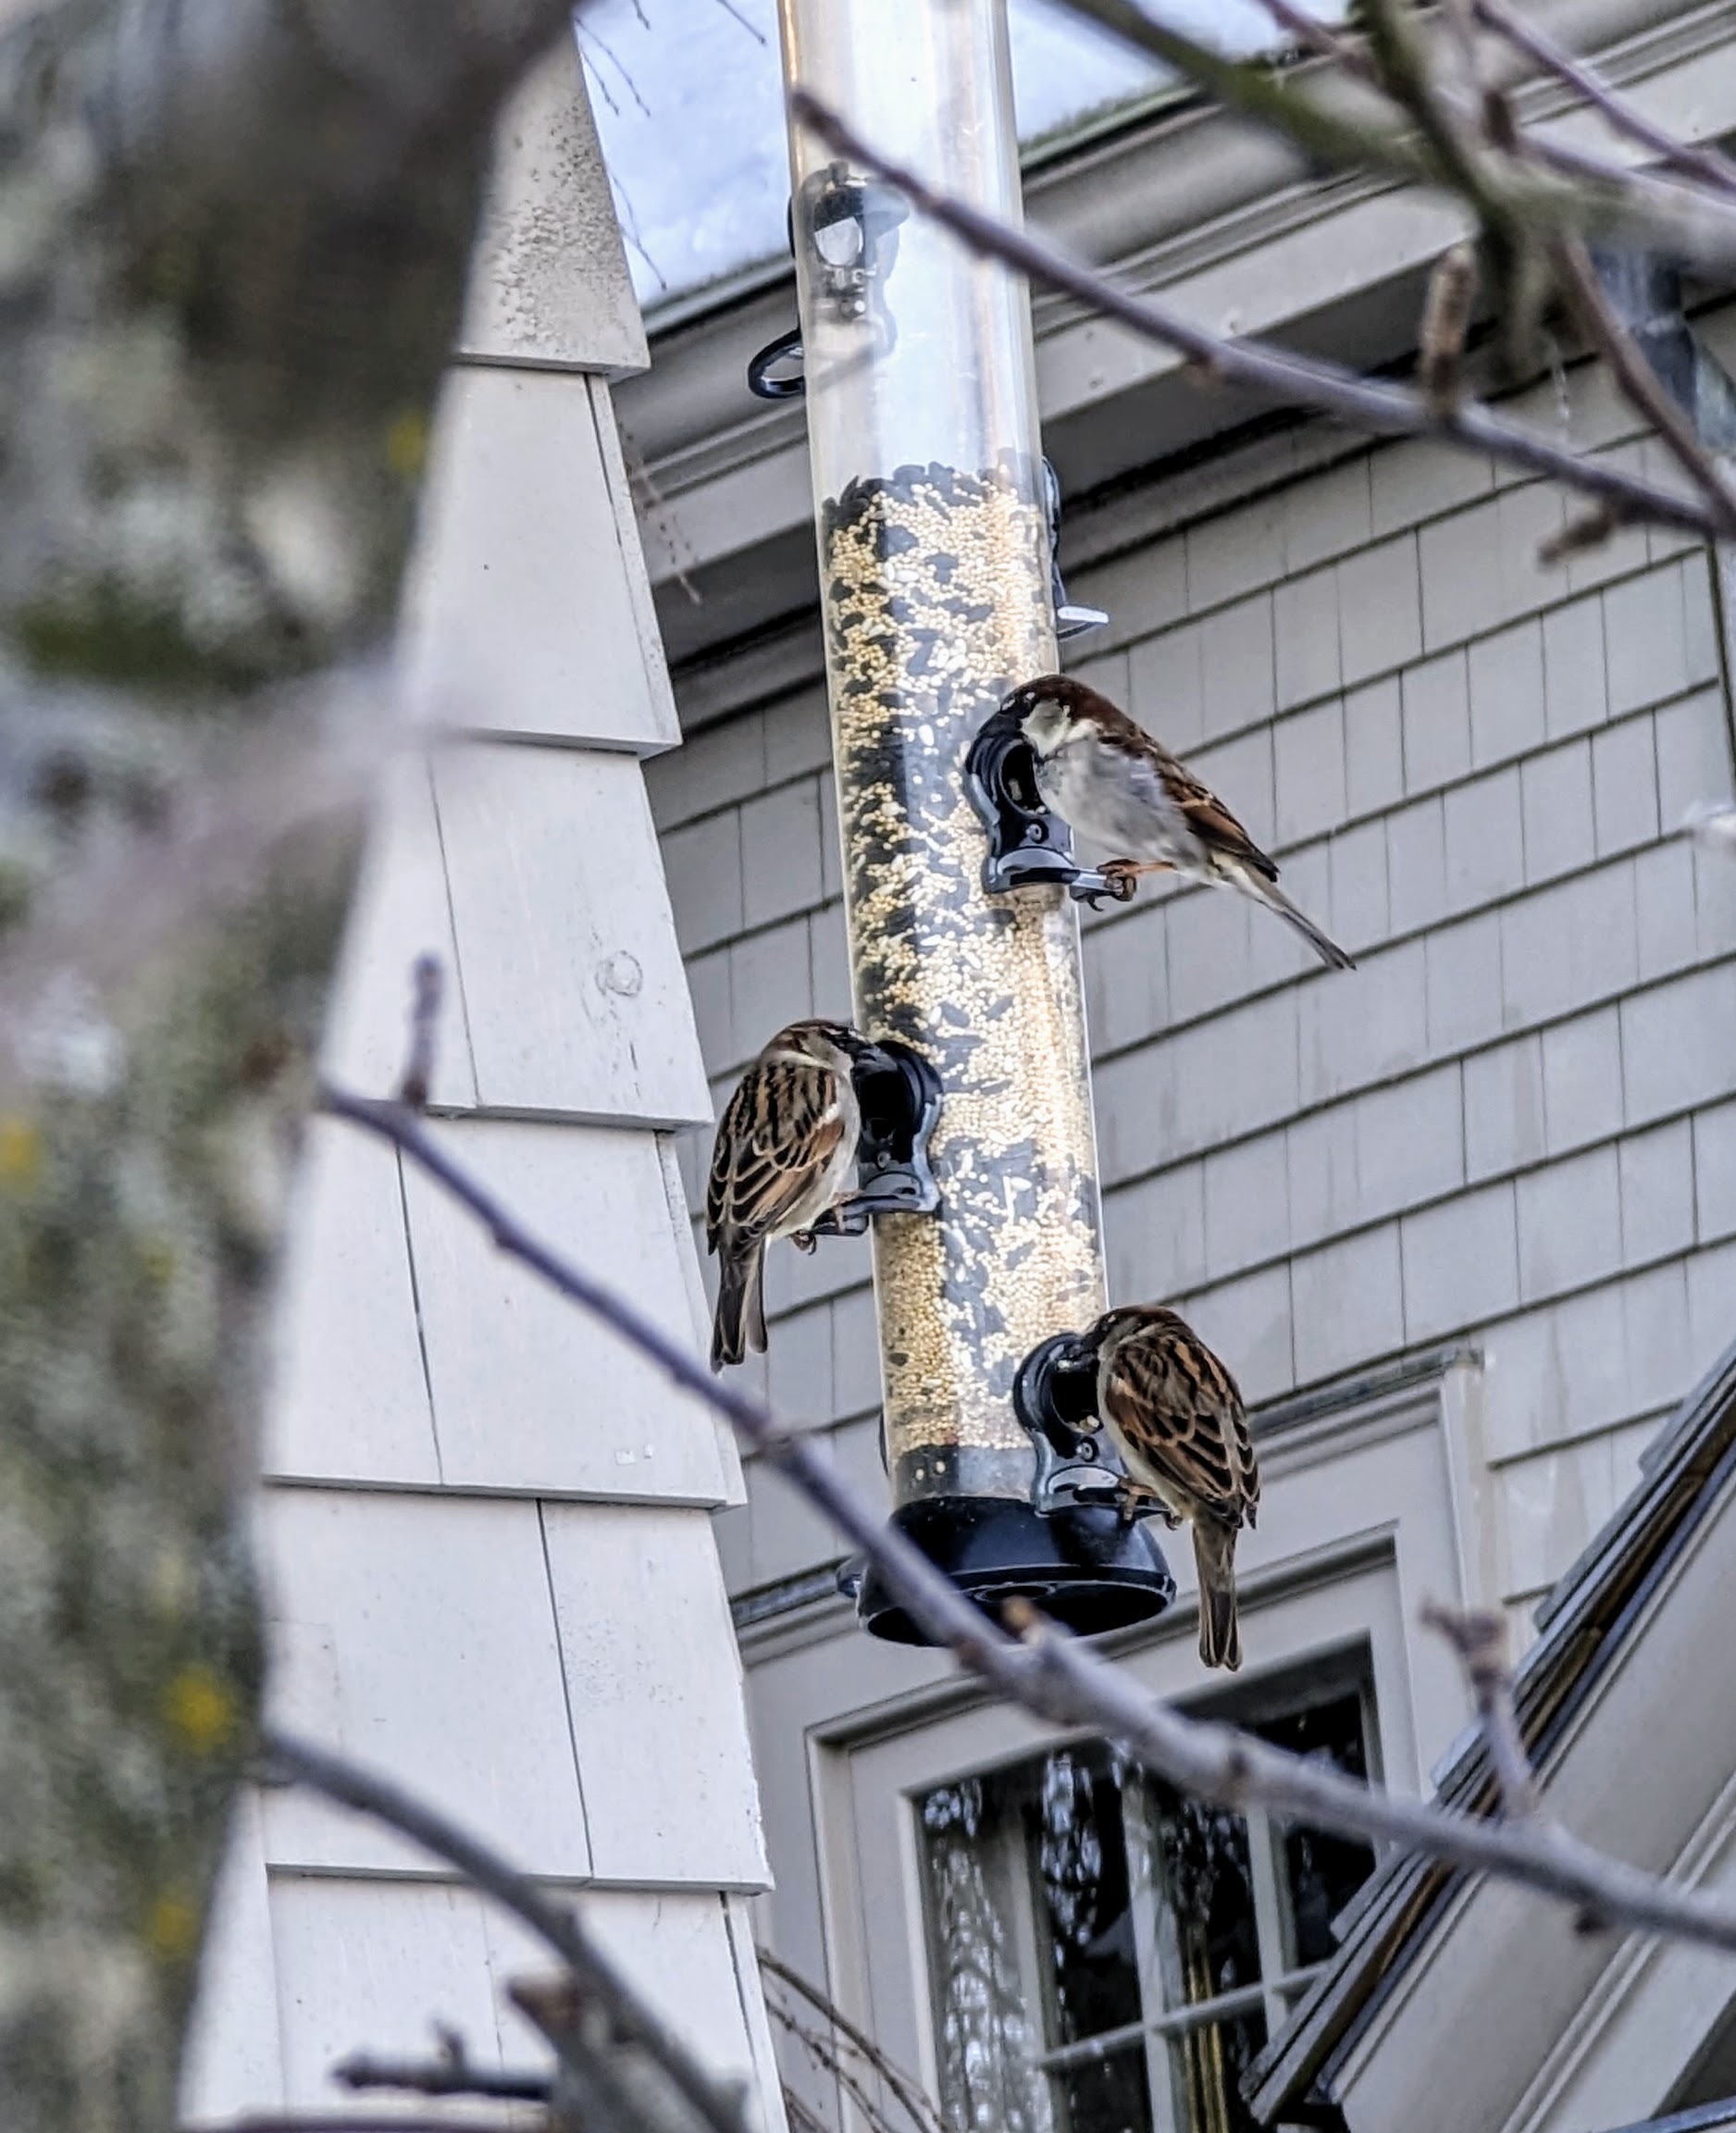
A long row of bird feeders are hung behind my carport. Currently, there are more than 10 here – in spring, there are a few less. It’s important to feed the birds consistently as they become accustomed to looking for food here at the same times every day.
Some of the birds perch patiently in nearby trees until they’re ready to feast.
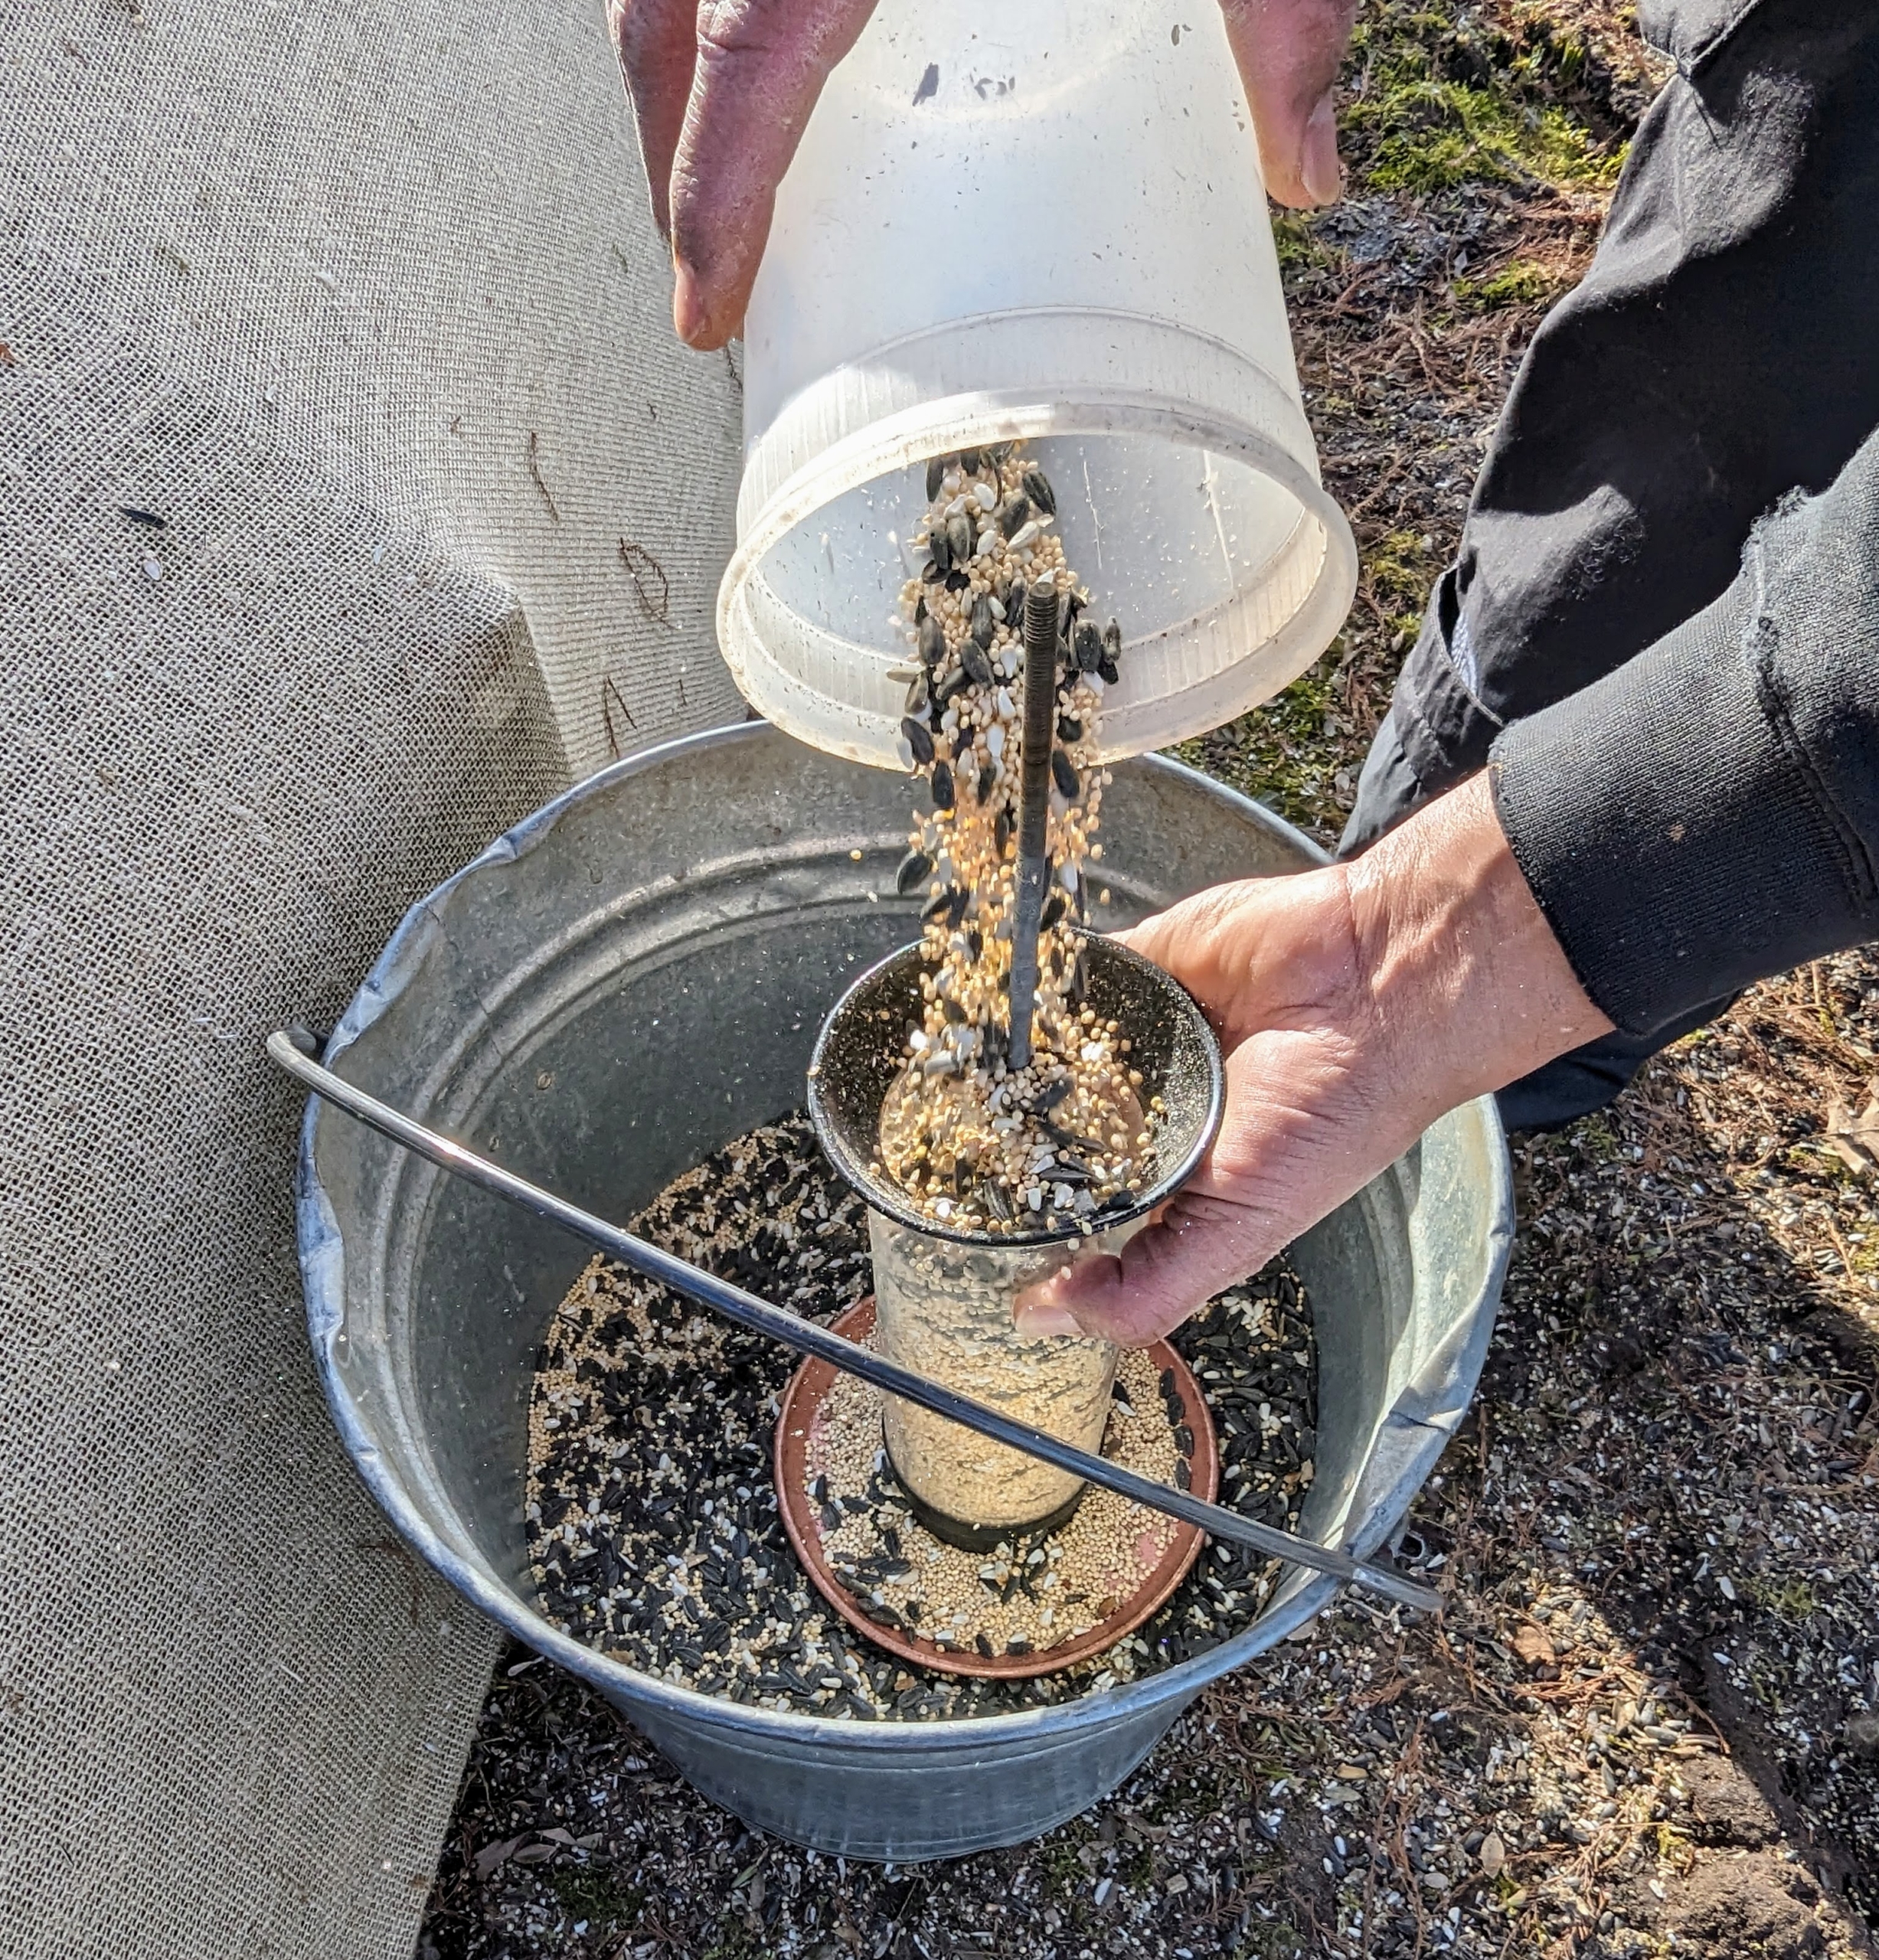
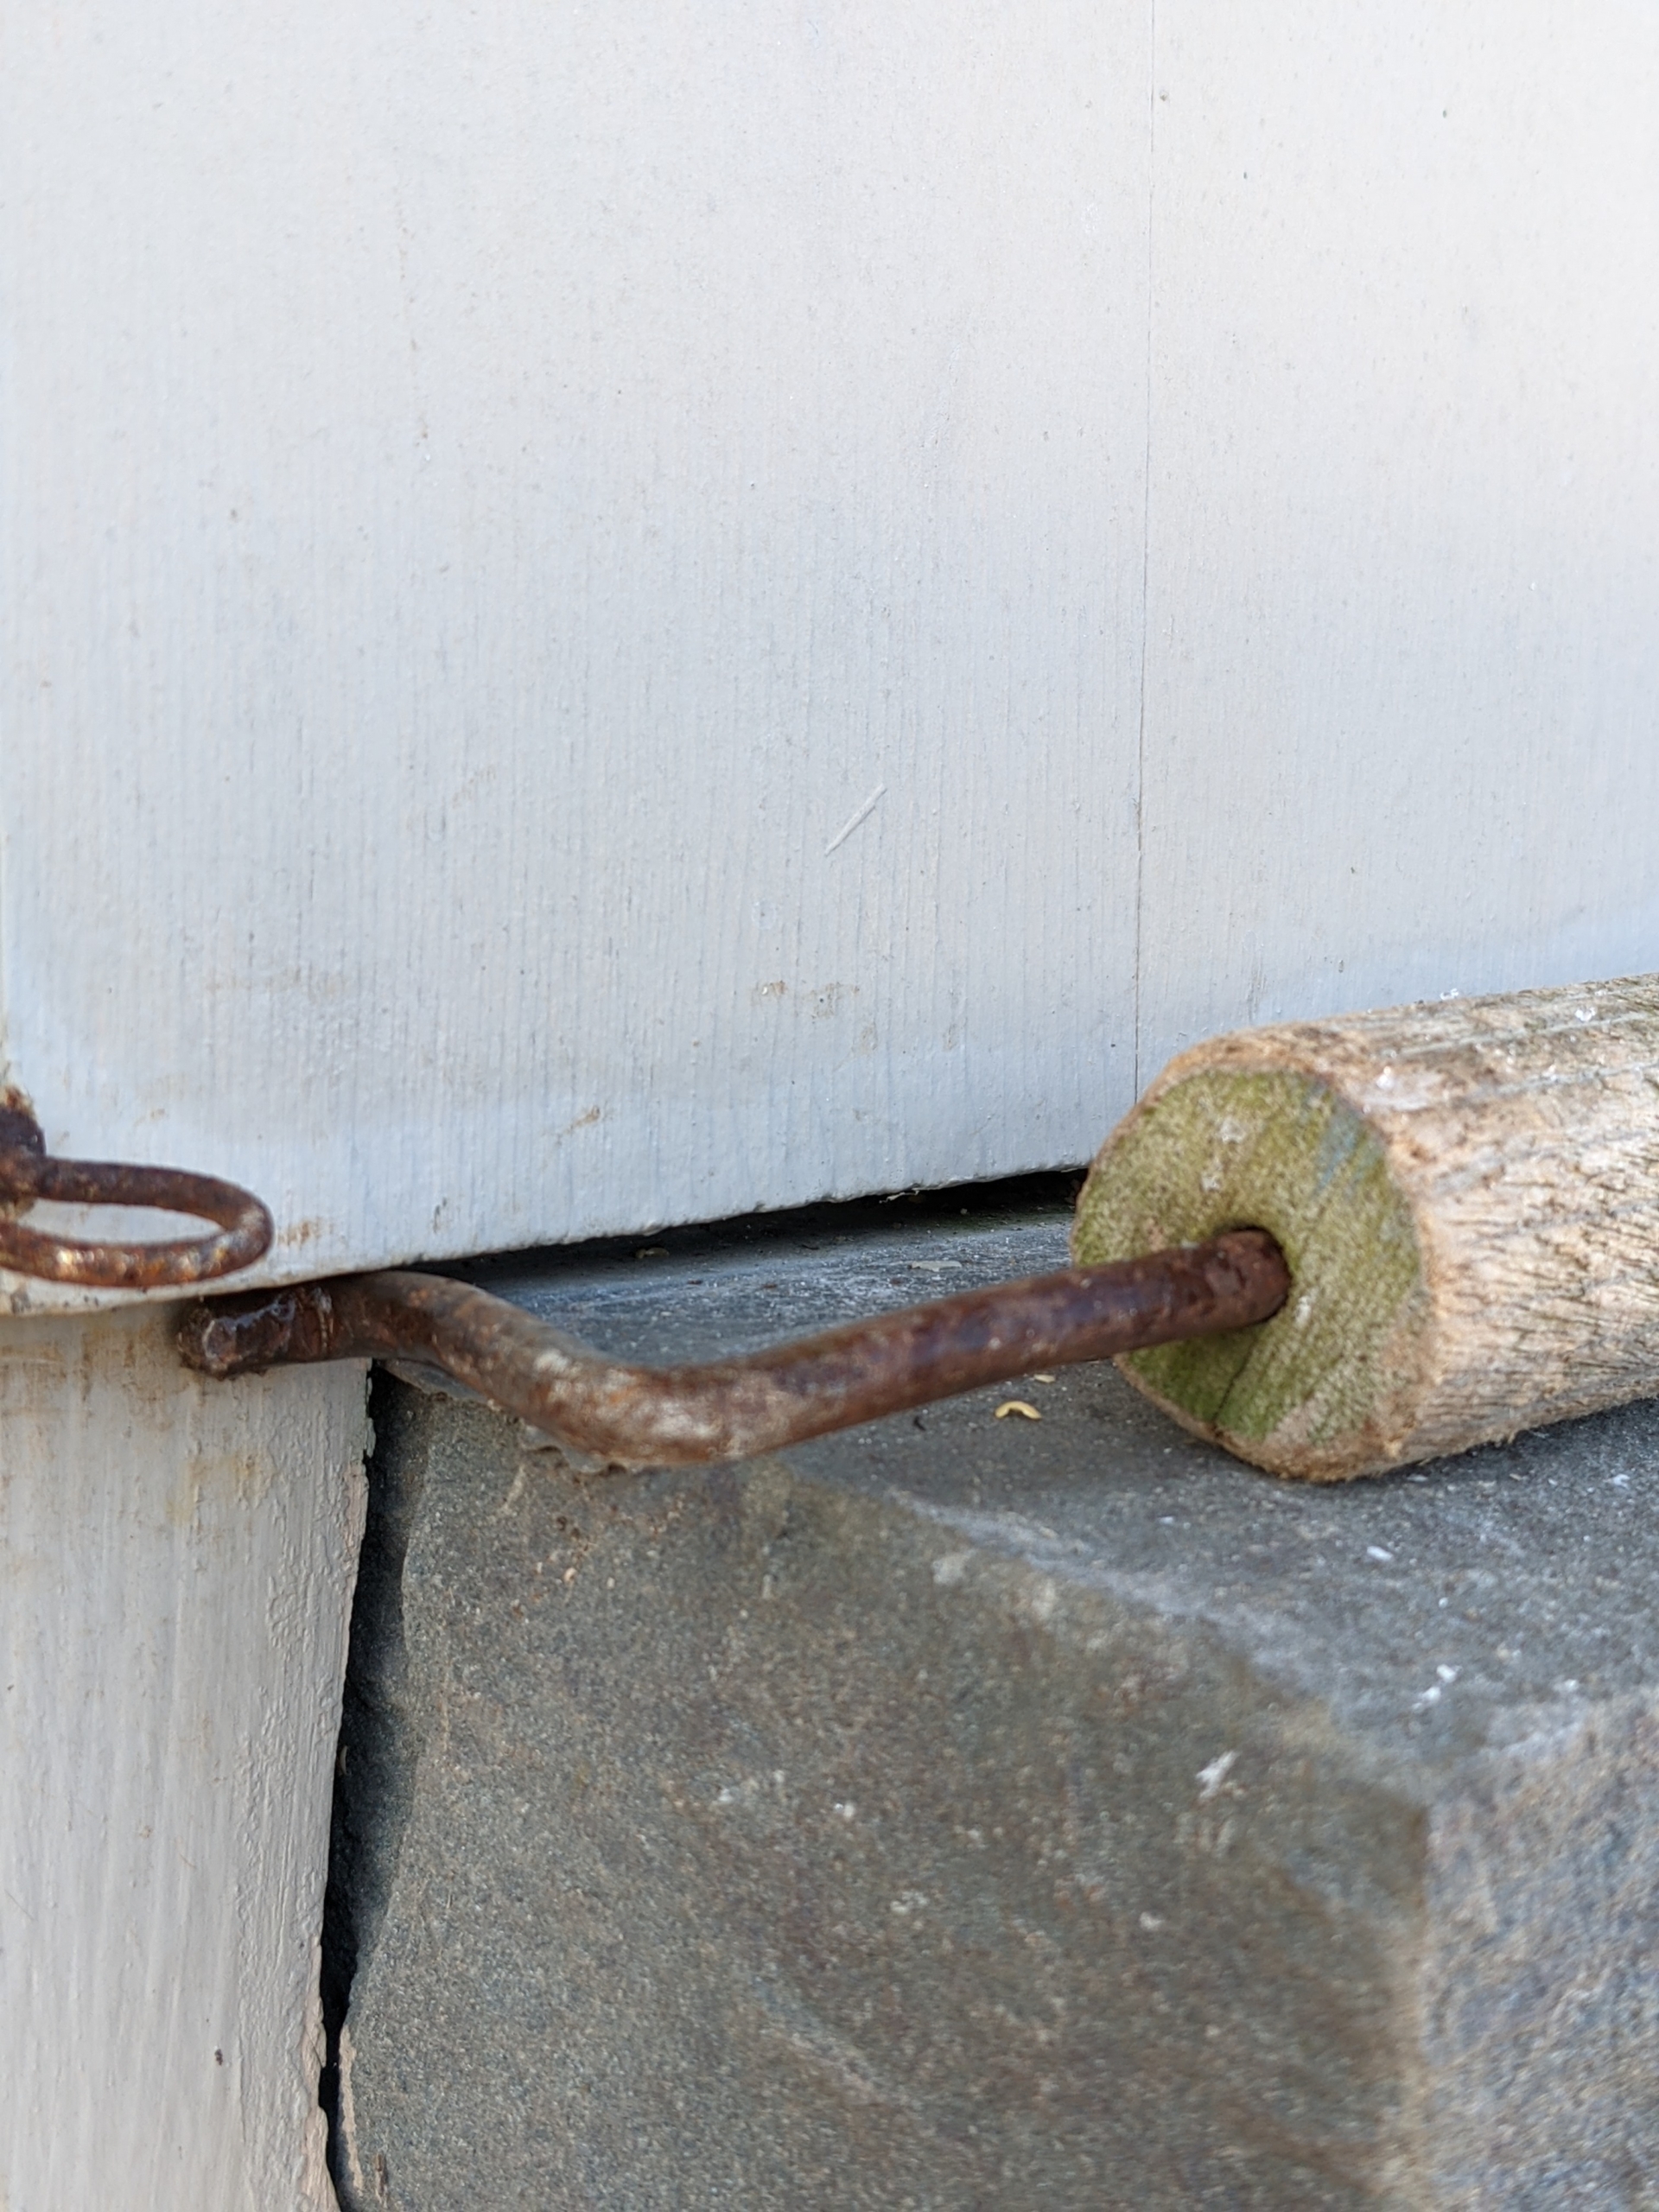
When filling these high feeders, we use a pole with a hook on one end. Each feeder is carefully removed from its hanging location and refilled on the ground.
Here is a closer look at the pole with the handy hook at the top – it works very well and makes filling these feeders very easy.
Every feeder is filled to the top depending on the time of year, these feeders can quickly empty. Each of these tube feeders holds about three quart-sized containers of seed.
These tube feeders allow the seed to flow only when birds peck at it, which helps keep any spillage to a minimum.
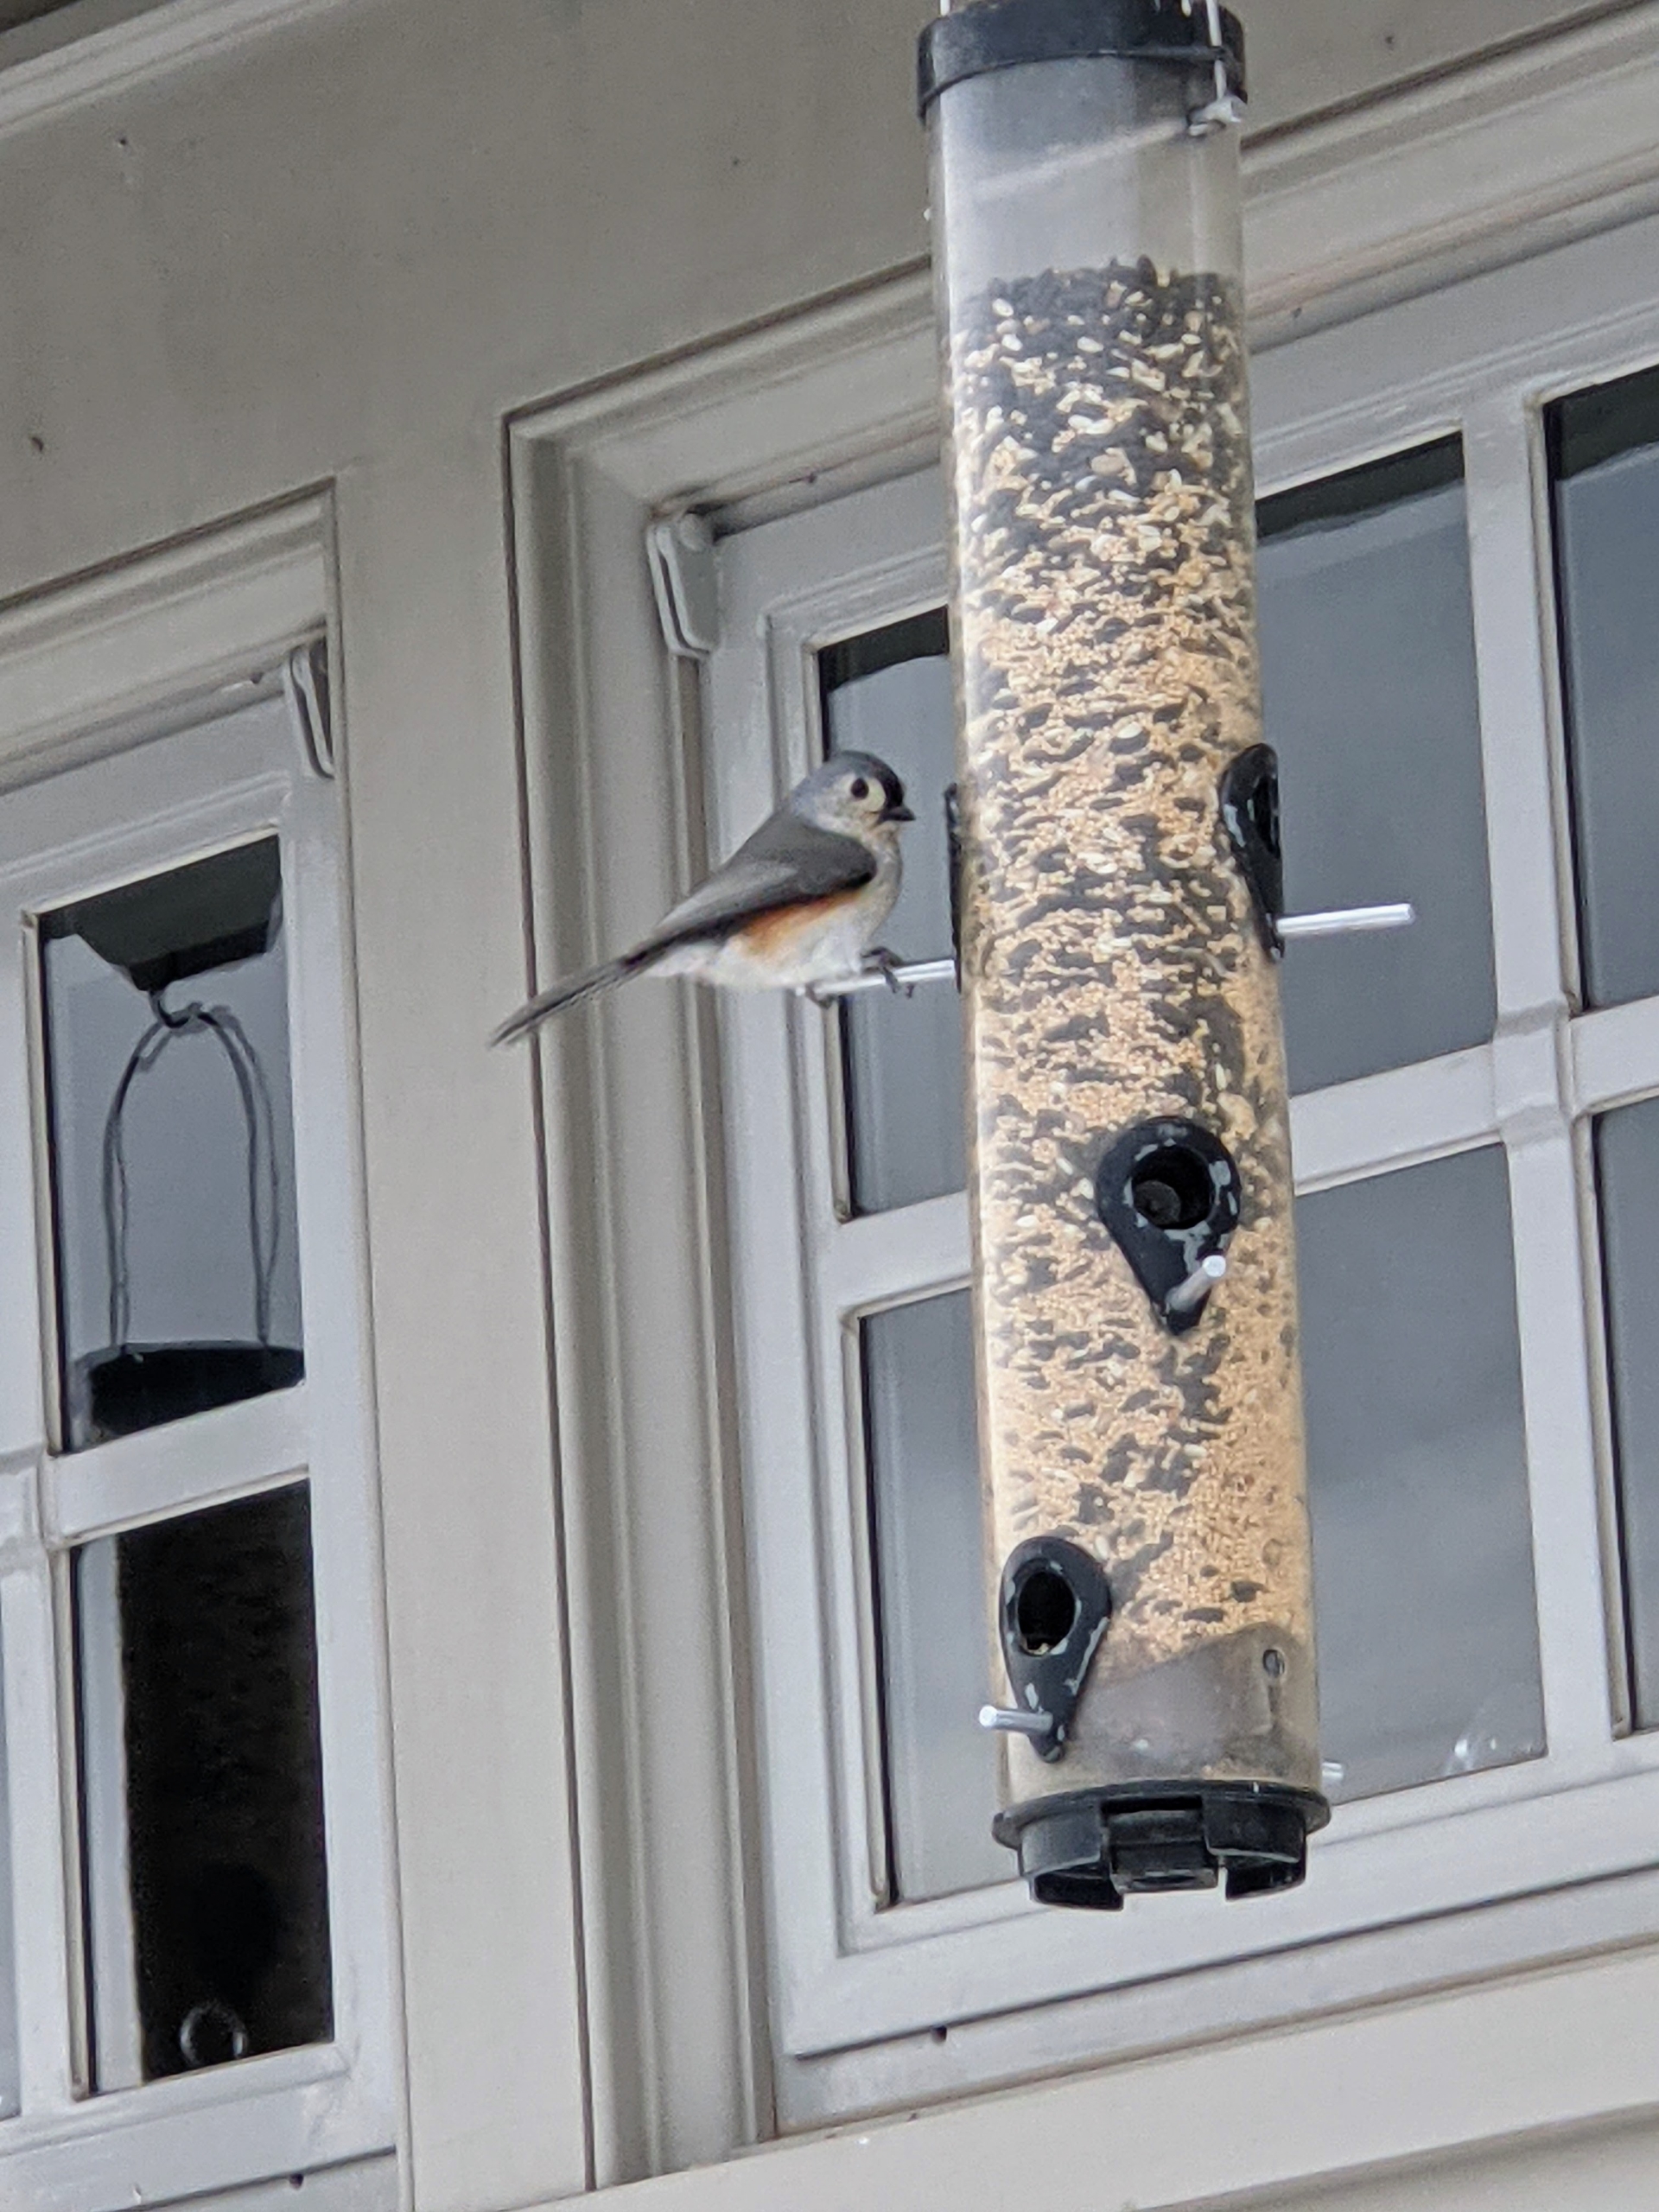
Many birds prefer tube feeders – hollow cylinders with multiple feeding ports and perches. Tube feeders attract small perching birds such as finches, goldfinches, titmice, and chickadees.
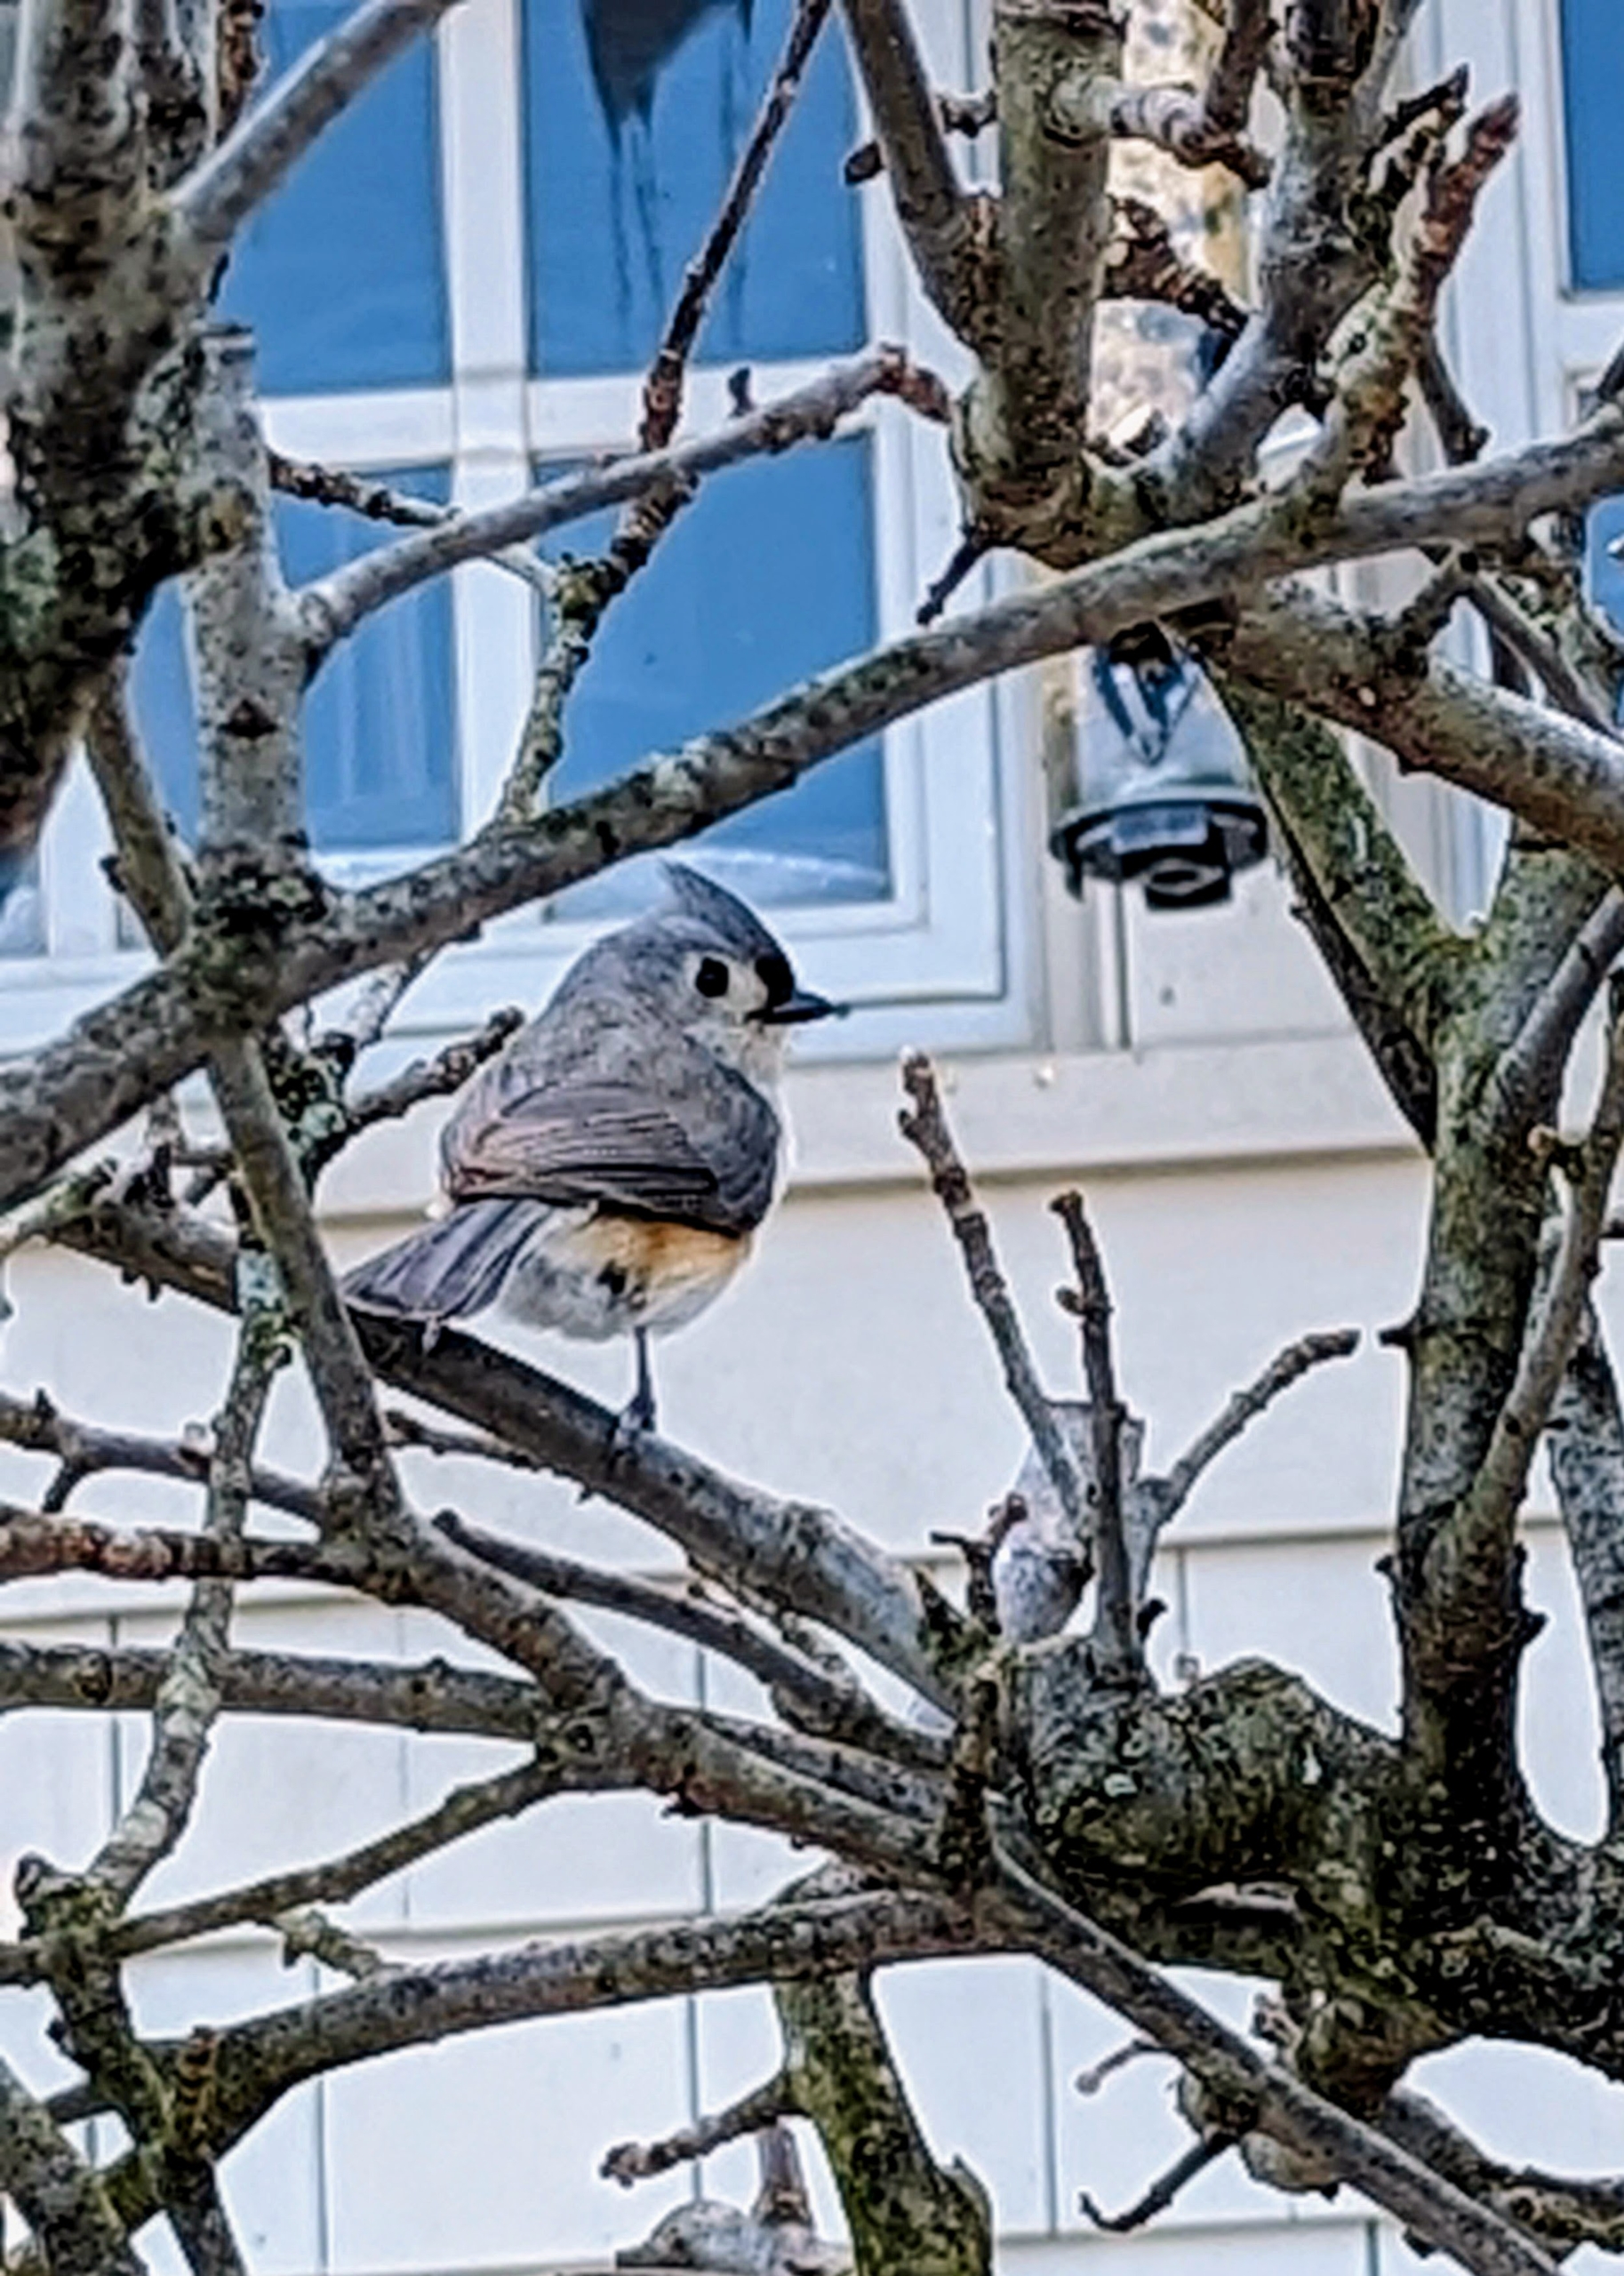
The tufted titmouse is a small songbird from North America. It is rather tame, and active, with an echoing voice, and can often be found near bird feeders especially in winter.
The feeders are visible from my Winter House steps – it’s always so nice to see what birds come to eat. I have up to 125 different birds visiting the farm every day.
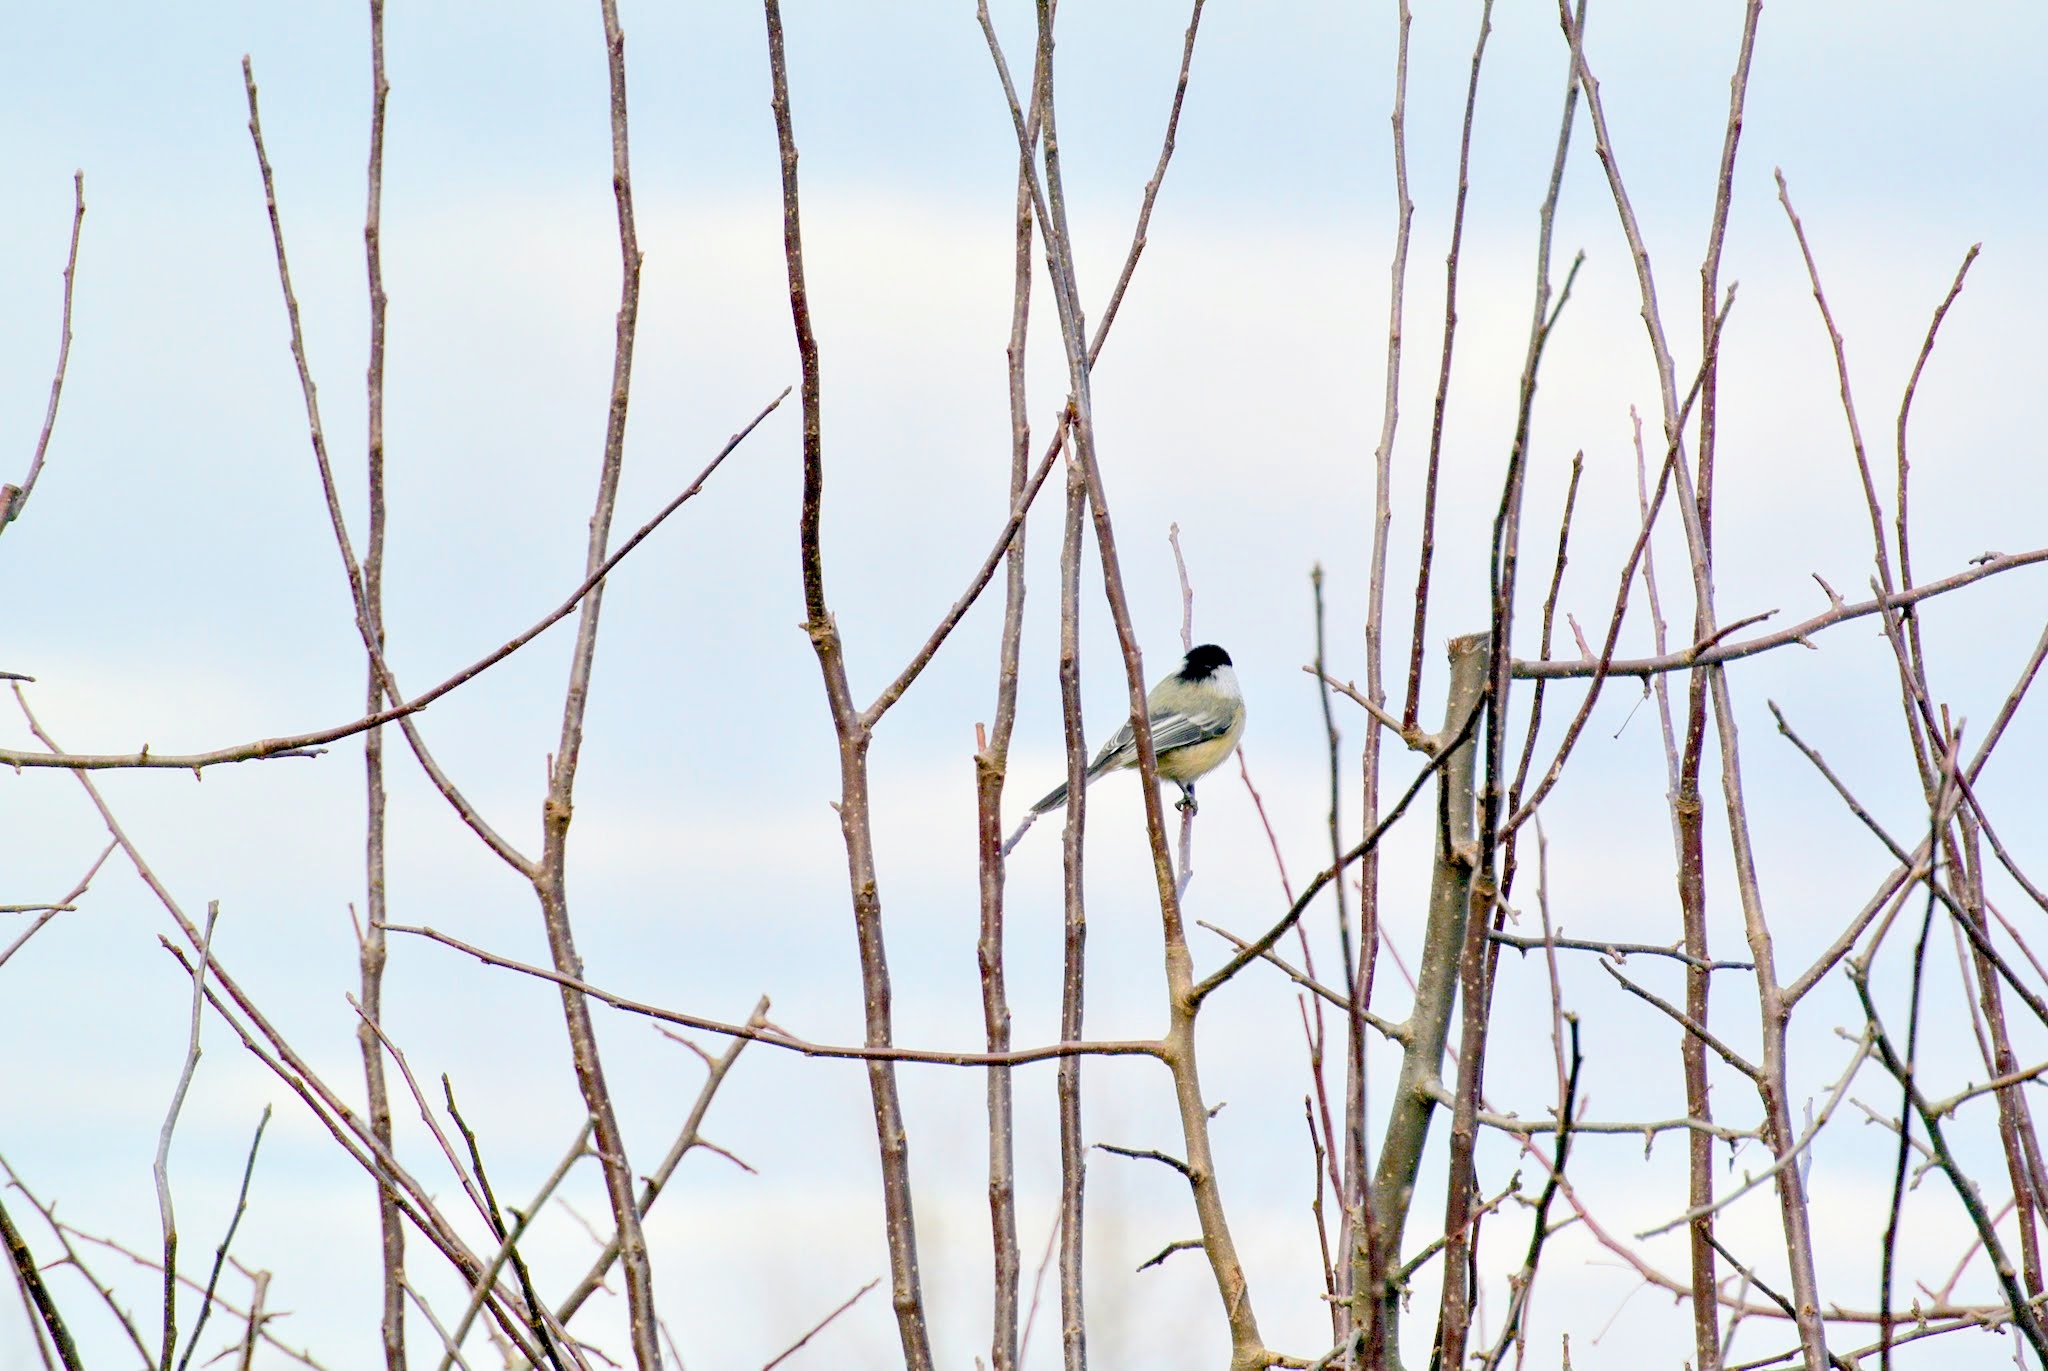
This is a black-capped chickadee. These birds are highly curious about everything, including humans. Its black cap and bib, white cheeks and gray back, wings and tail make it an easy bird to distinguish and identify.
When feeding birds, take note of which type of seed is eaten most often. And always discard any seed that has become wet, moldy or foul smelling.
Here’s another chickadee sitting on a branch nearby – safe and hopefully full. What birds do you see outside your home?