Anyone who owns a horse knows how important it is to stay up-to-date on all the ever-changing trends and products in the horse industry.
Earlier this month, my stable team attended the Equine Affaire in Springfield, Massachusetts, North America's premiere equestrian exposition. First established in 1993 for the purpose of creating a first-class, education-oriented horsemen's convention, the event offers attendees the opportunity to talk to trainers, coaches, and other experts, participate in various clinics, meet dozens of breeds of horses from around the world, and shop the many vendors.
Here are some photos, enjoy.
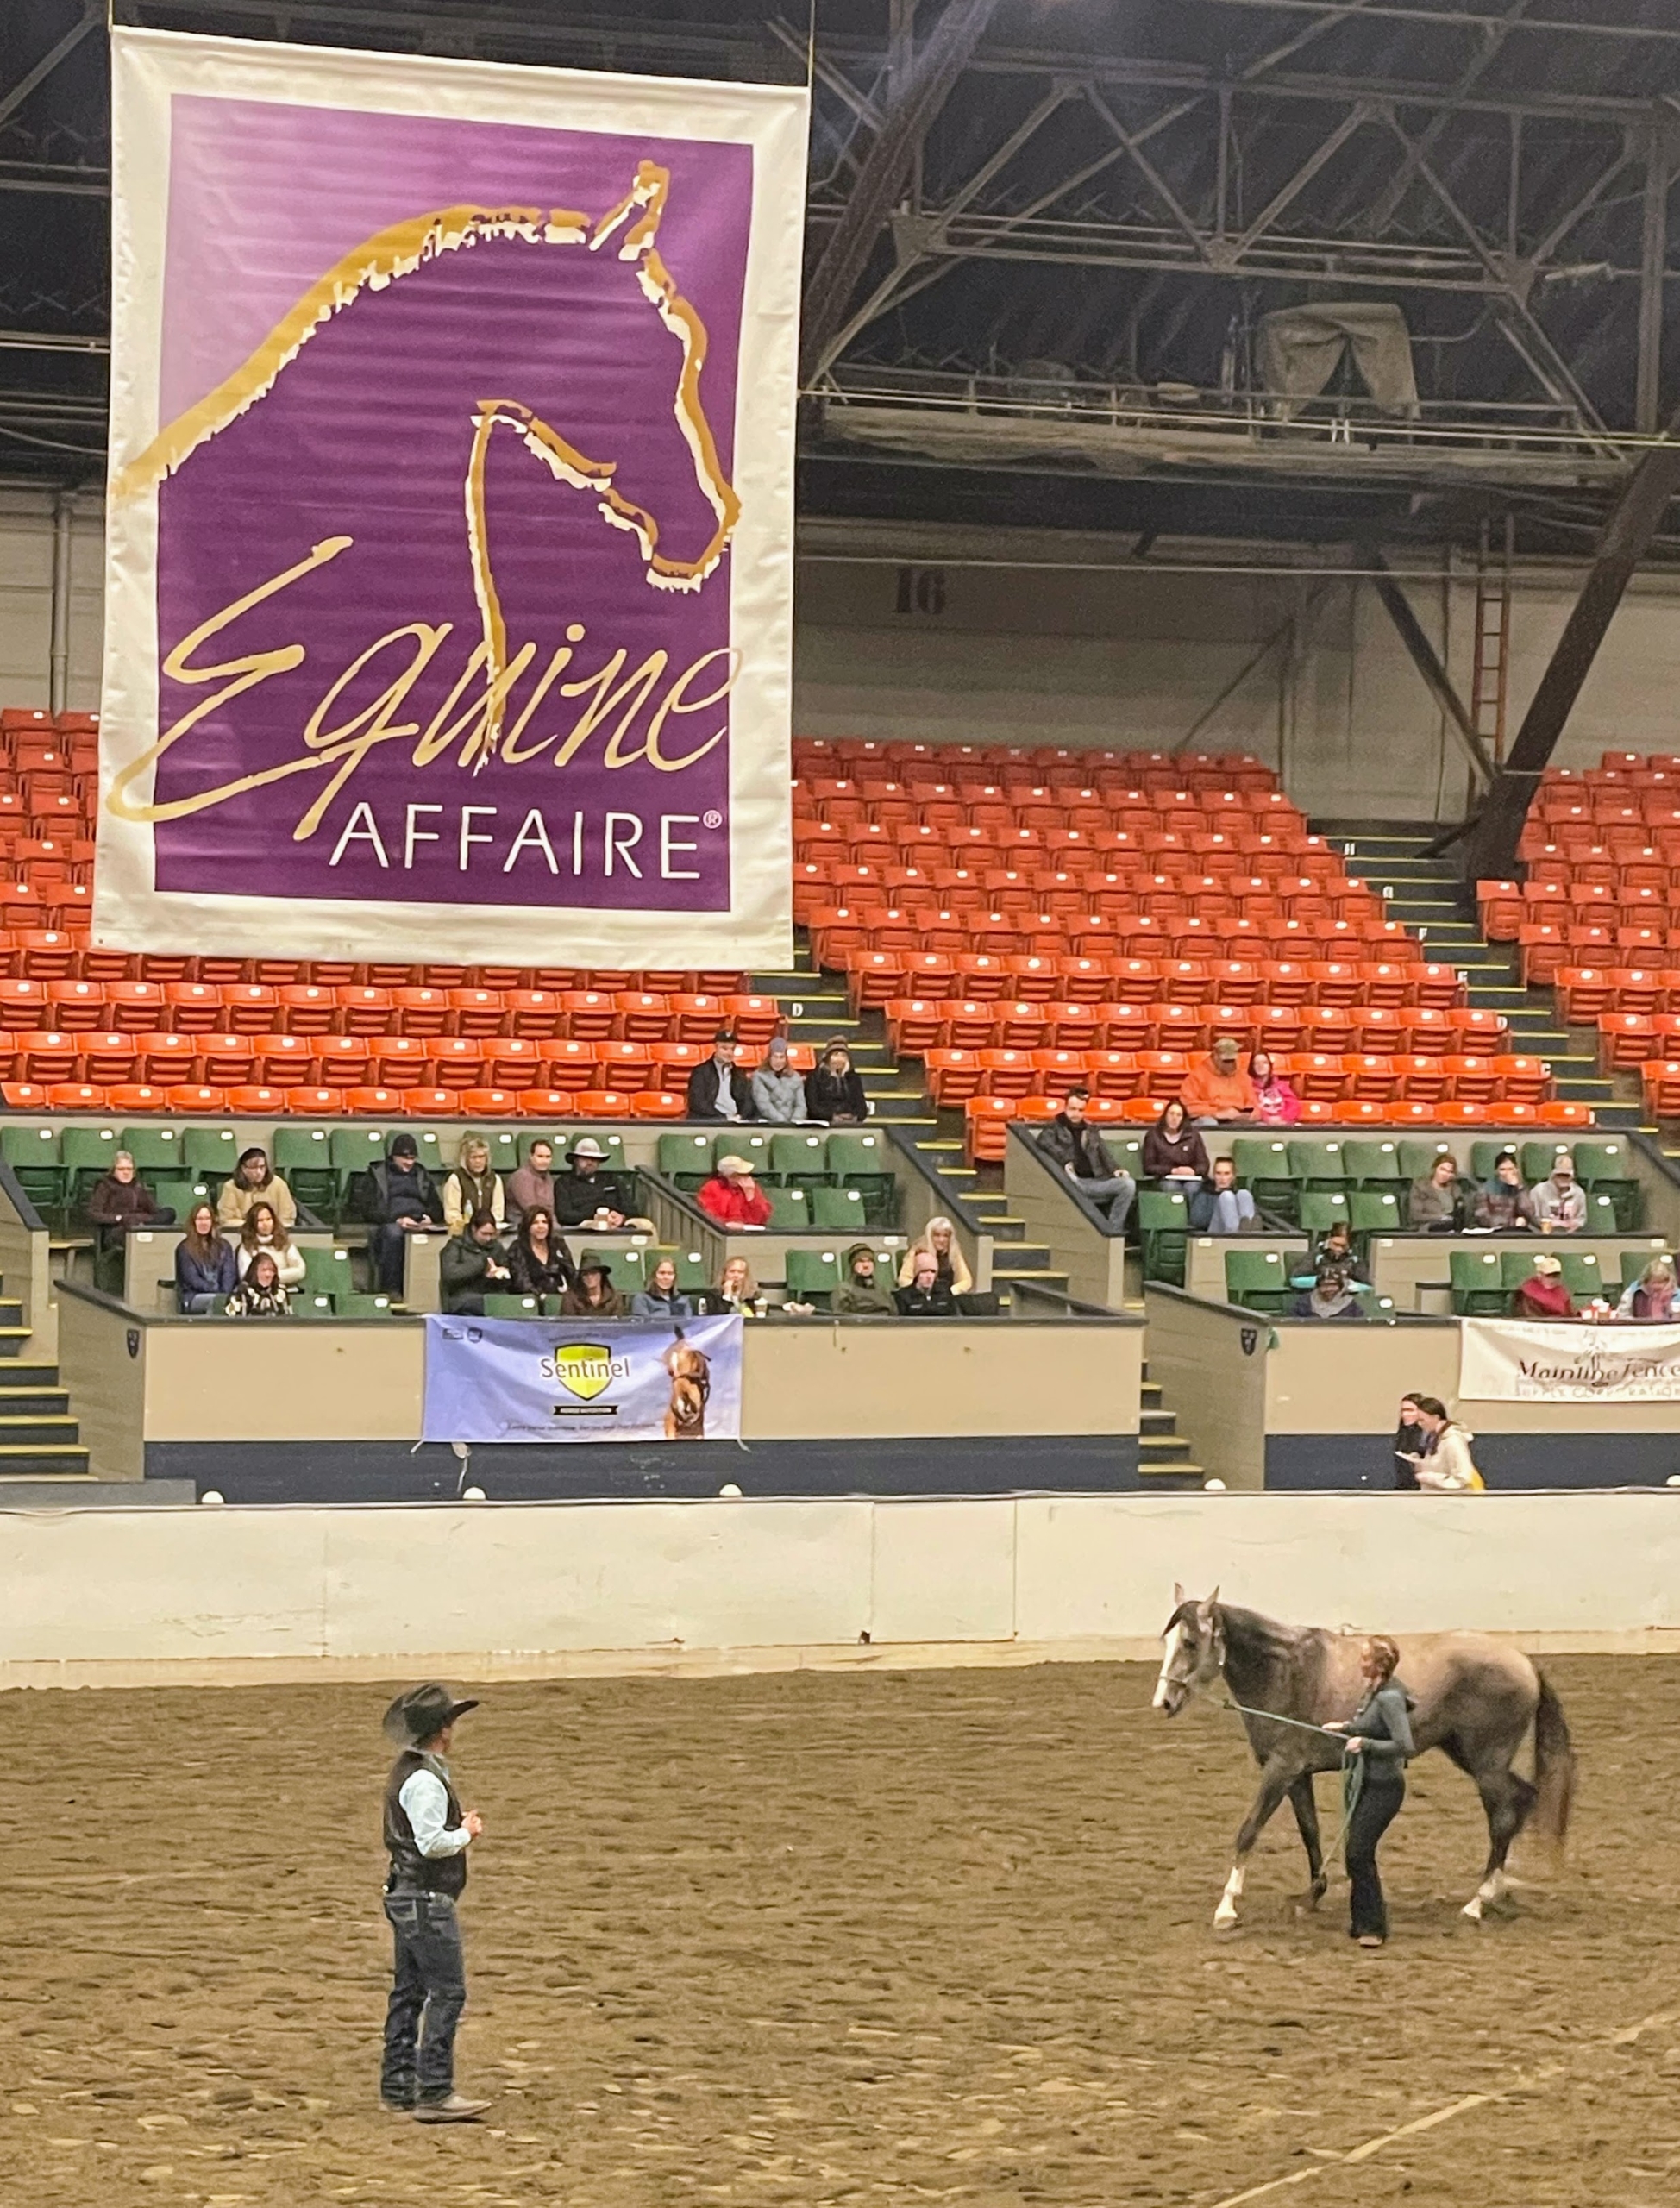
The main mission of the Equine Affaire is to help educate and improve horse management and care, training, and equestrian riding skills. The event is held twice a year – once in Massachusetts and once in Ohio. More than 30-thousand horse enthusiasts attend the four day event annually. This is the coliseum at Springfield’s Big E where classes and shows are held.
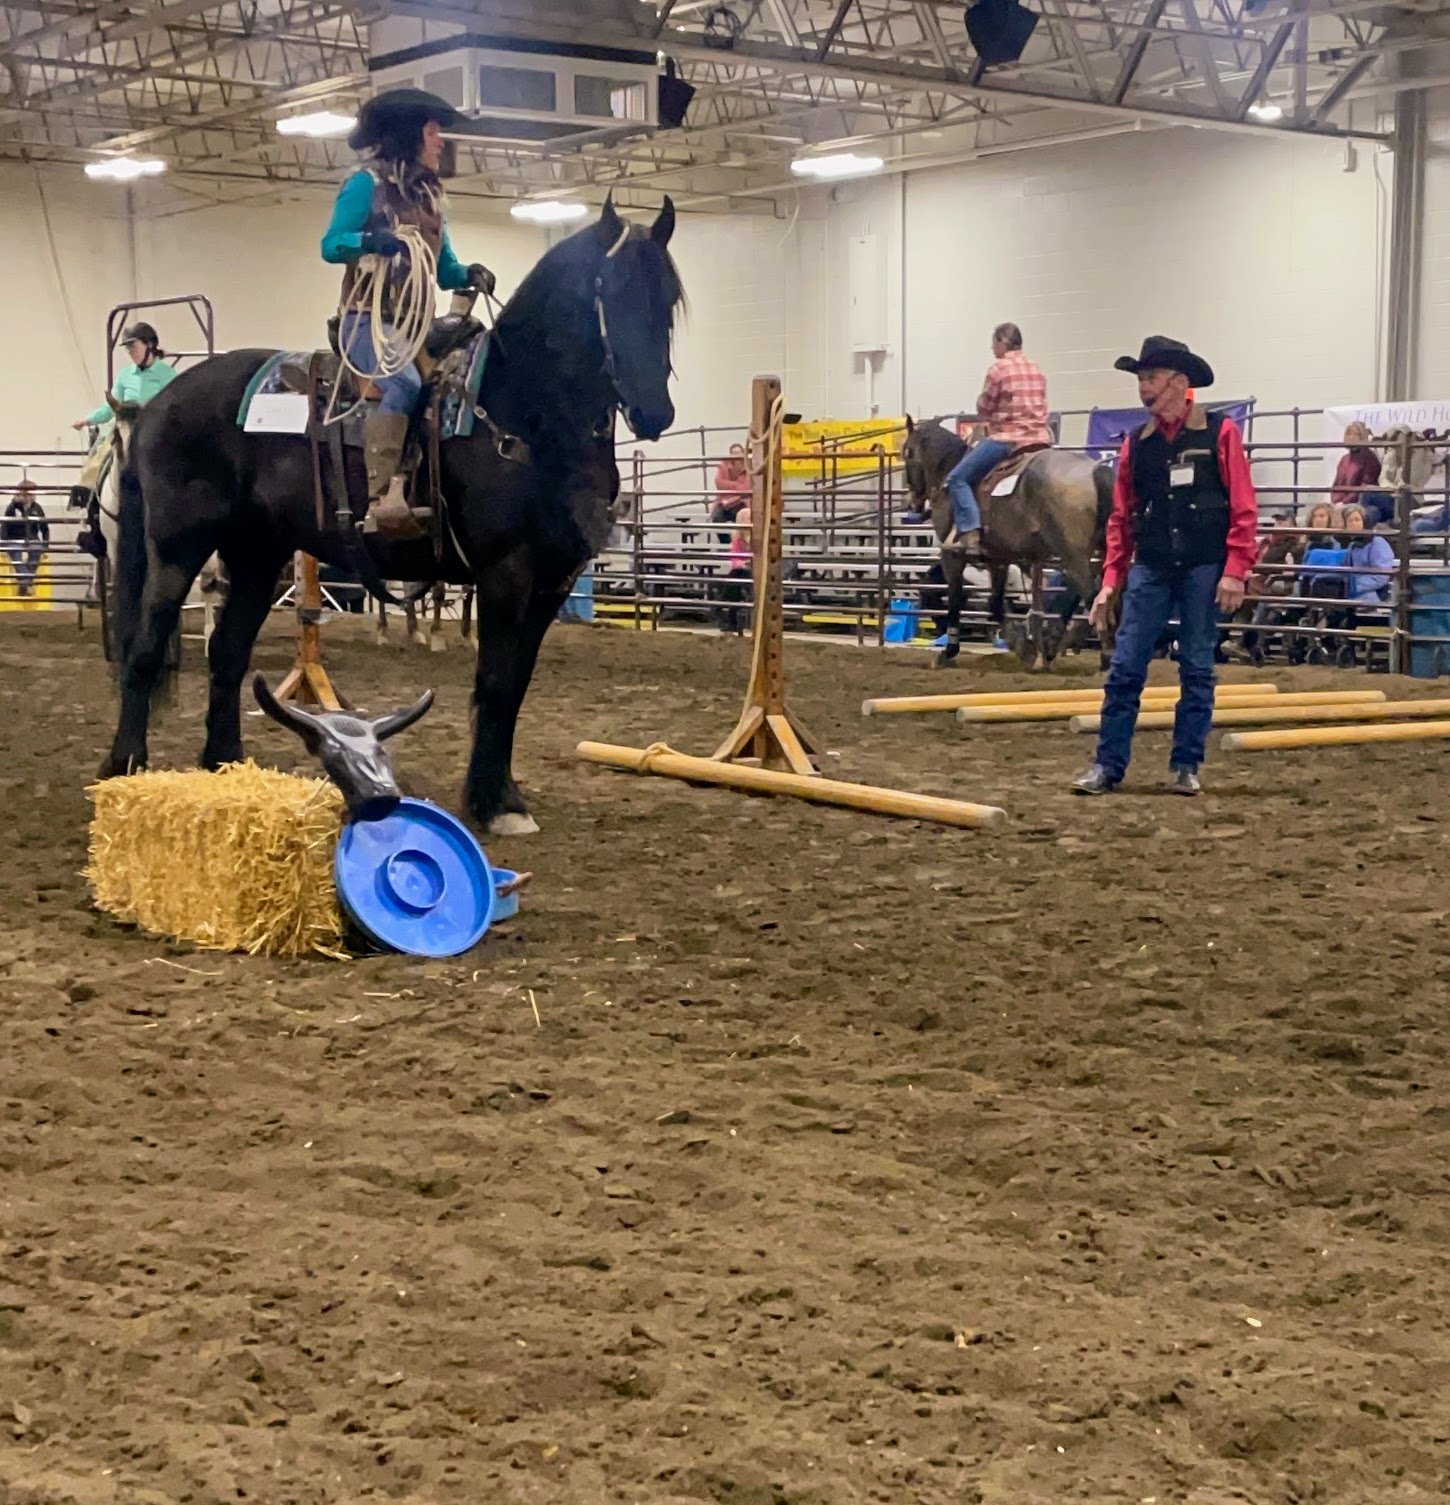
The event features all of the major equestrian sports from dressage, reining, cutting, jumping, driving, eventing, and barrel racing to team penning and sorting, distance competition, western dressage, trail, polo, and sidesaddle. It’s a great way for all riders to gain more information and talk to experts.
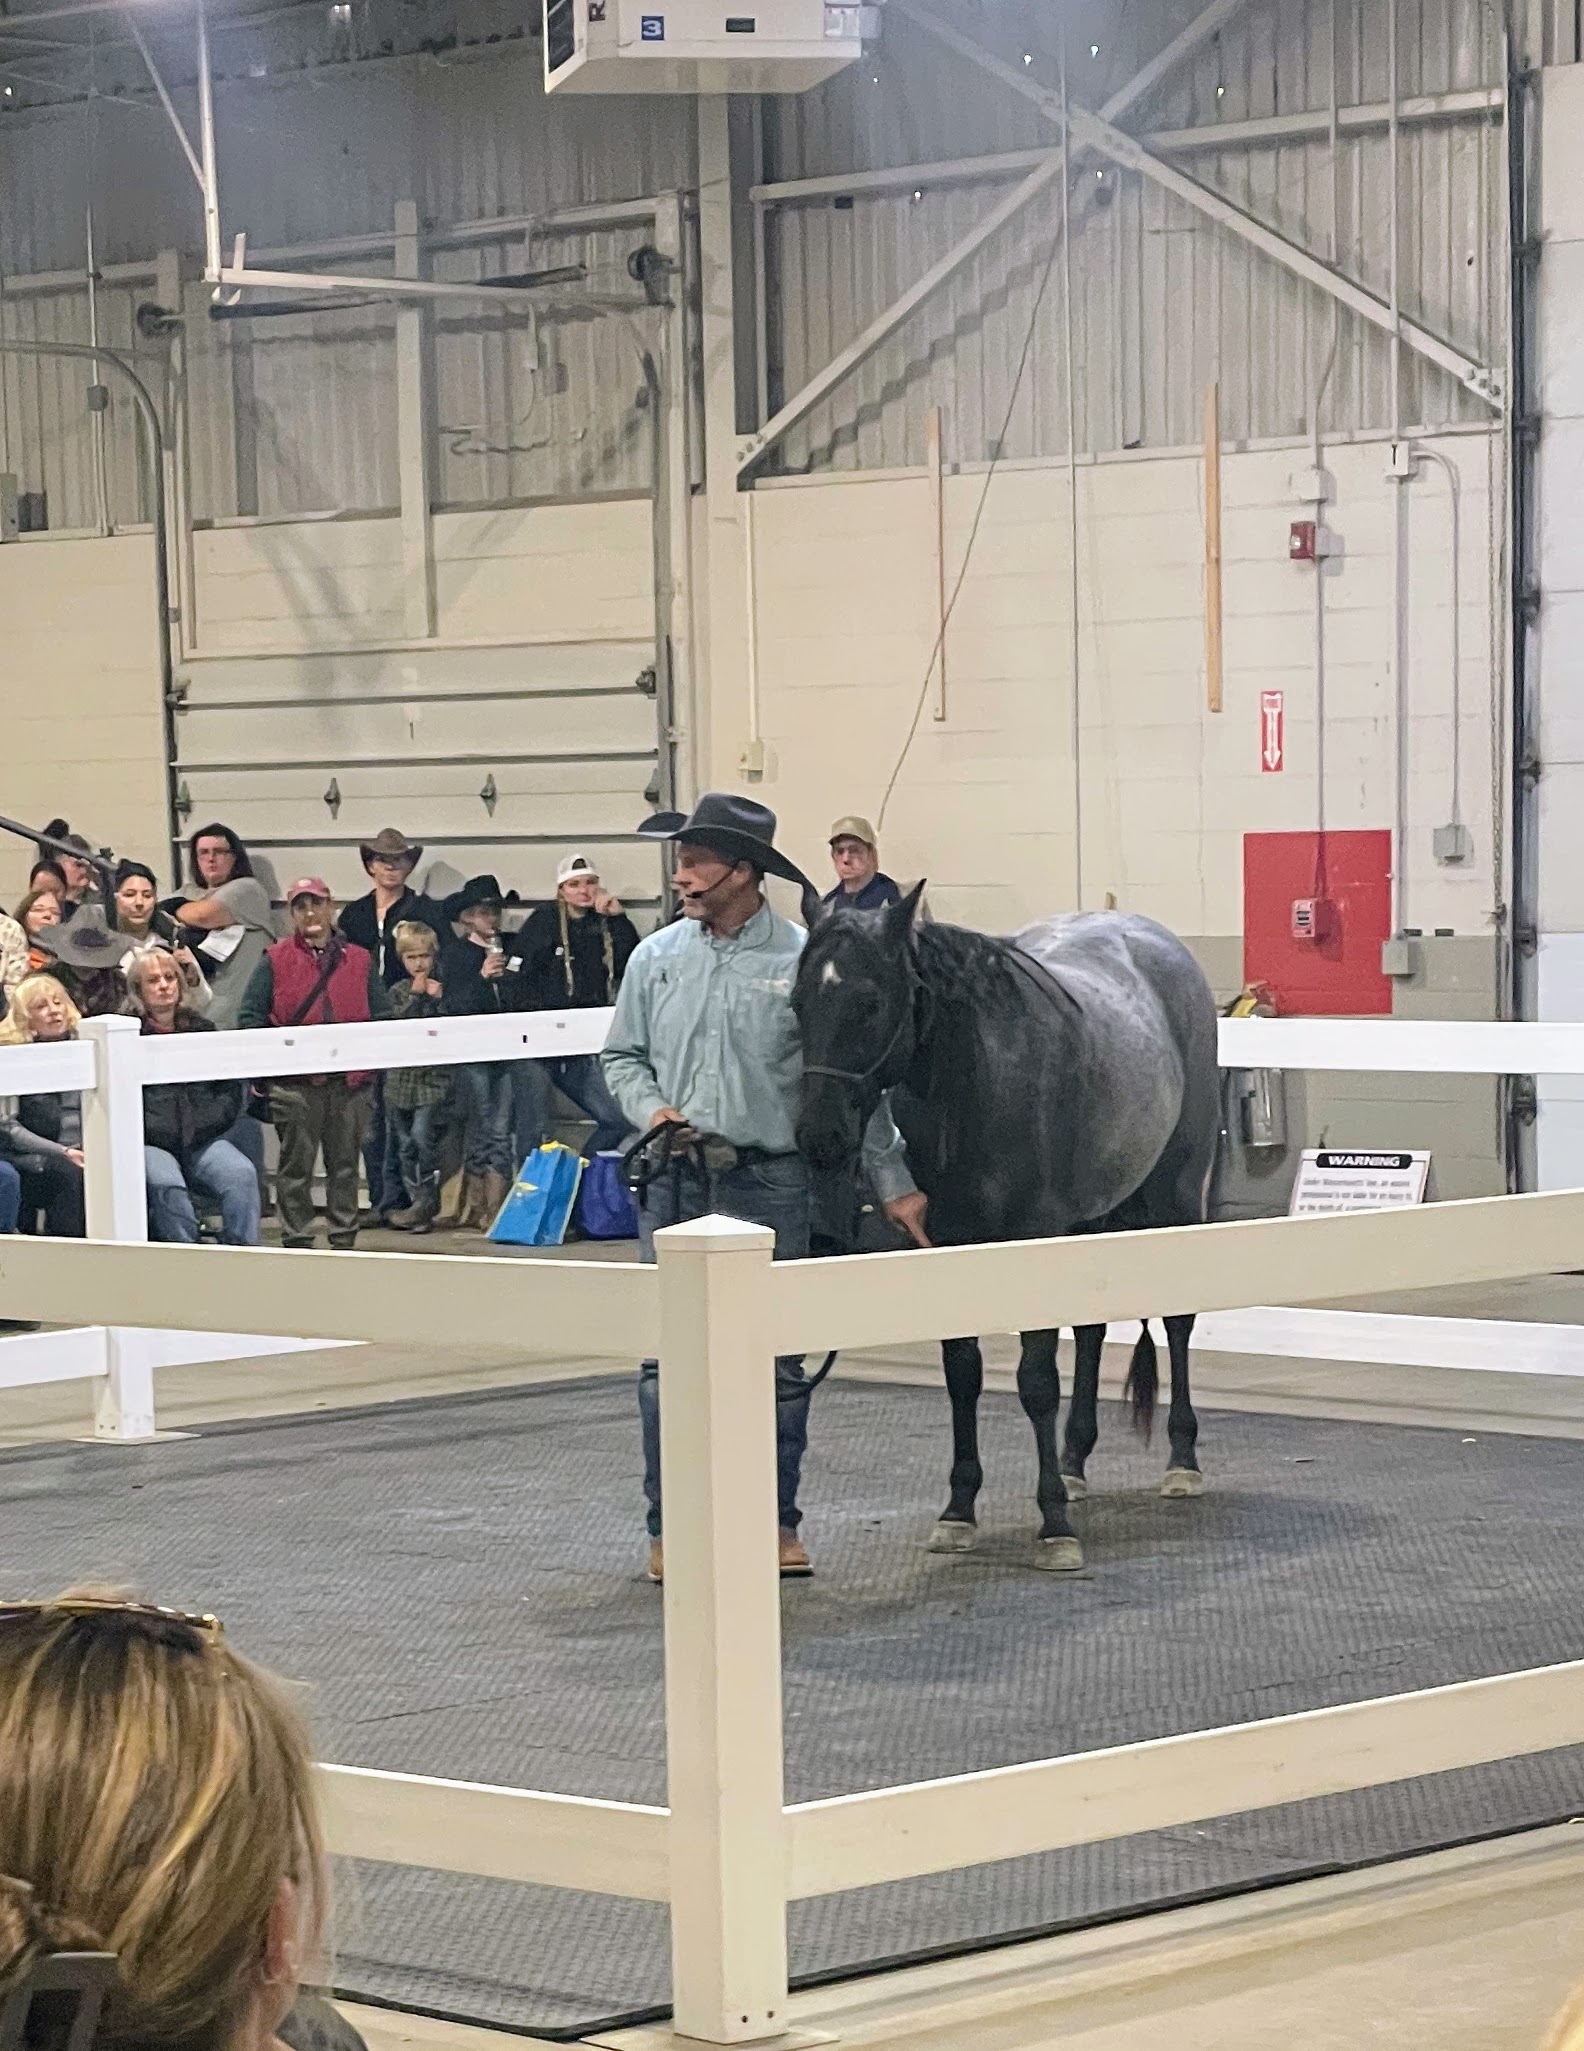
Different breeds of horses from around the world participate at Equine Affaire.
Educational programs and clinics remain the cornerstones of the events. Helen and Juan tried to view as much as they could during their visit.
Here is Helen looking at one of the newest trailers, which offers more room and tack storage space.
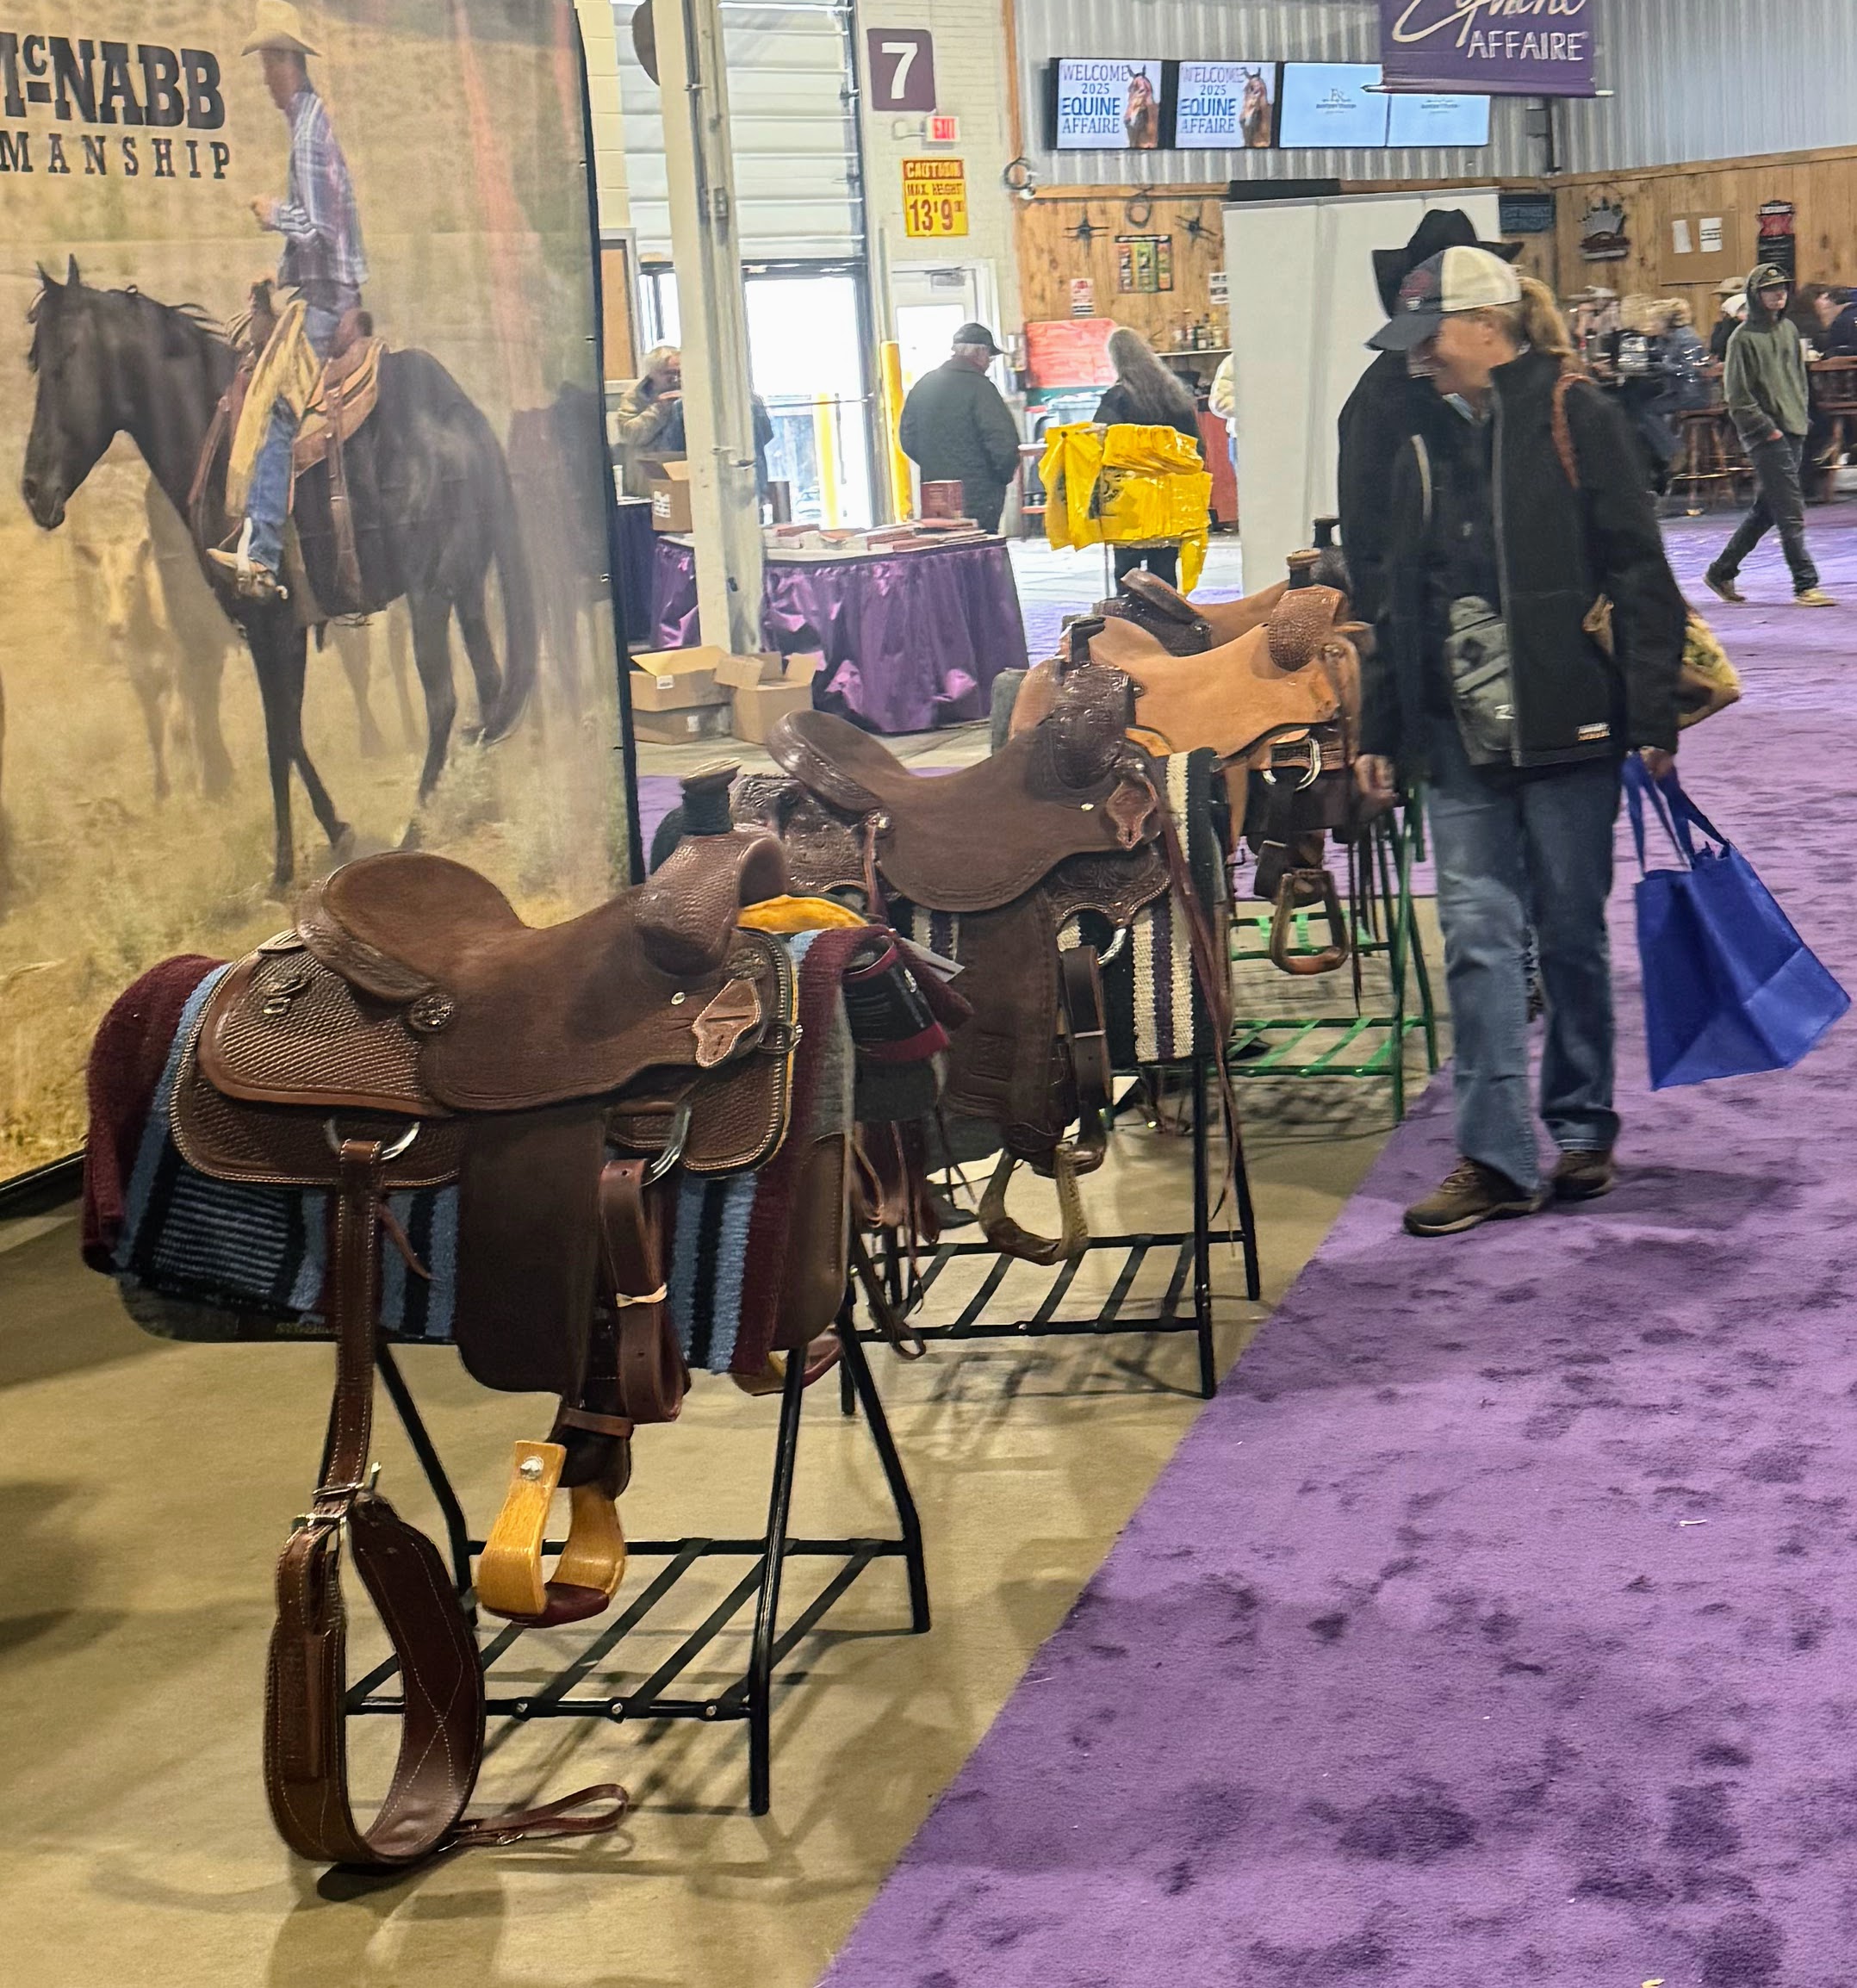
There is always a mad rush for equine product shopping. Dozens of saddles were available for both English and Western riders.
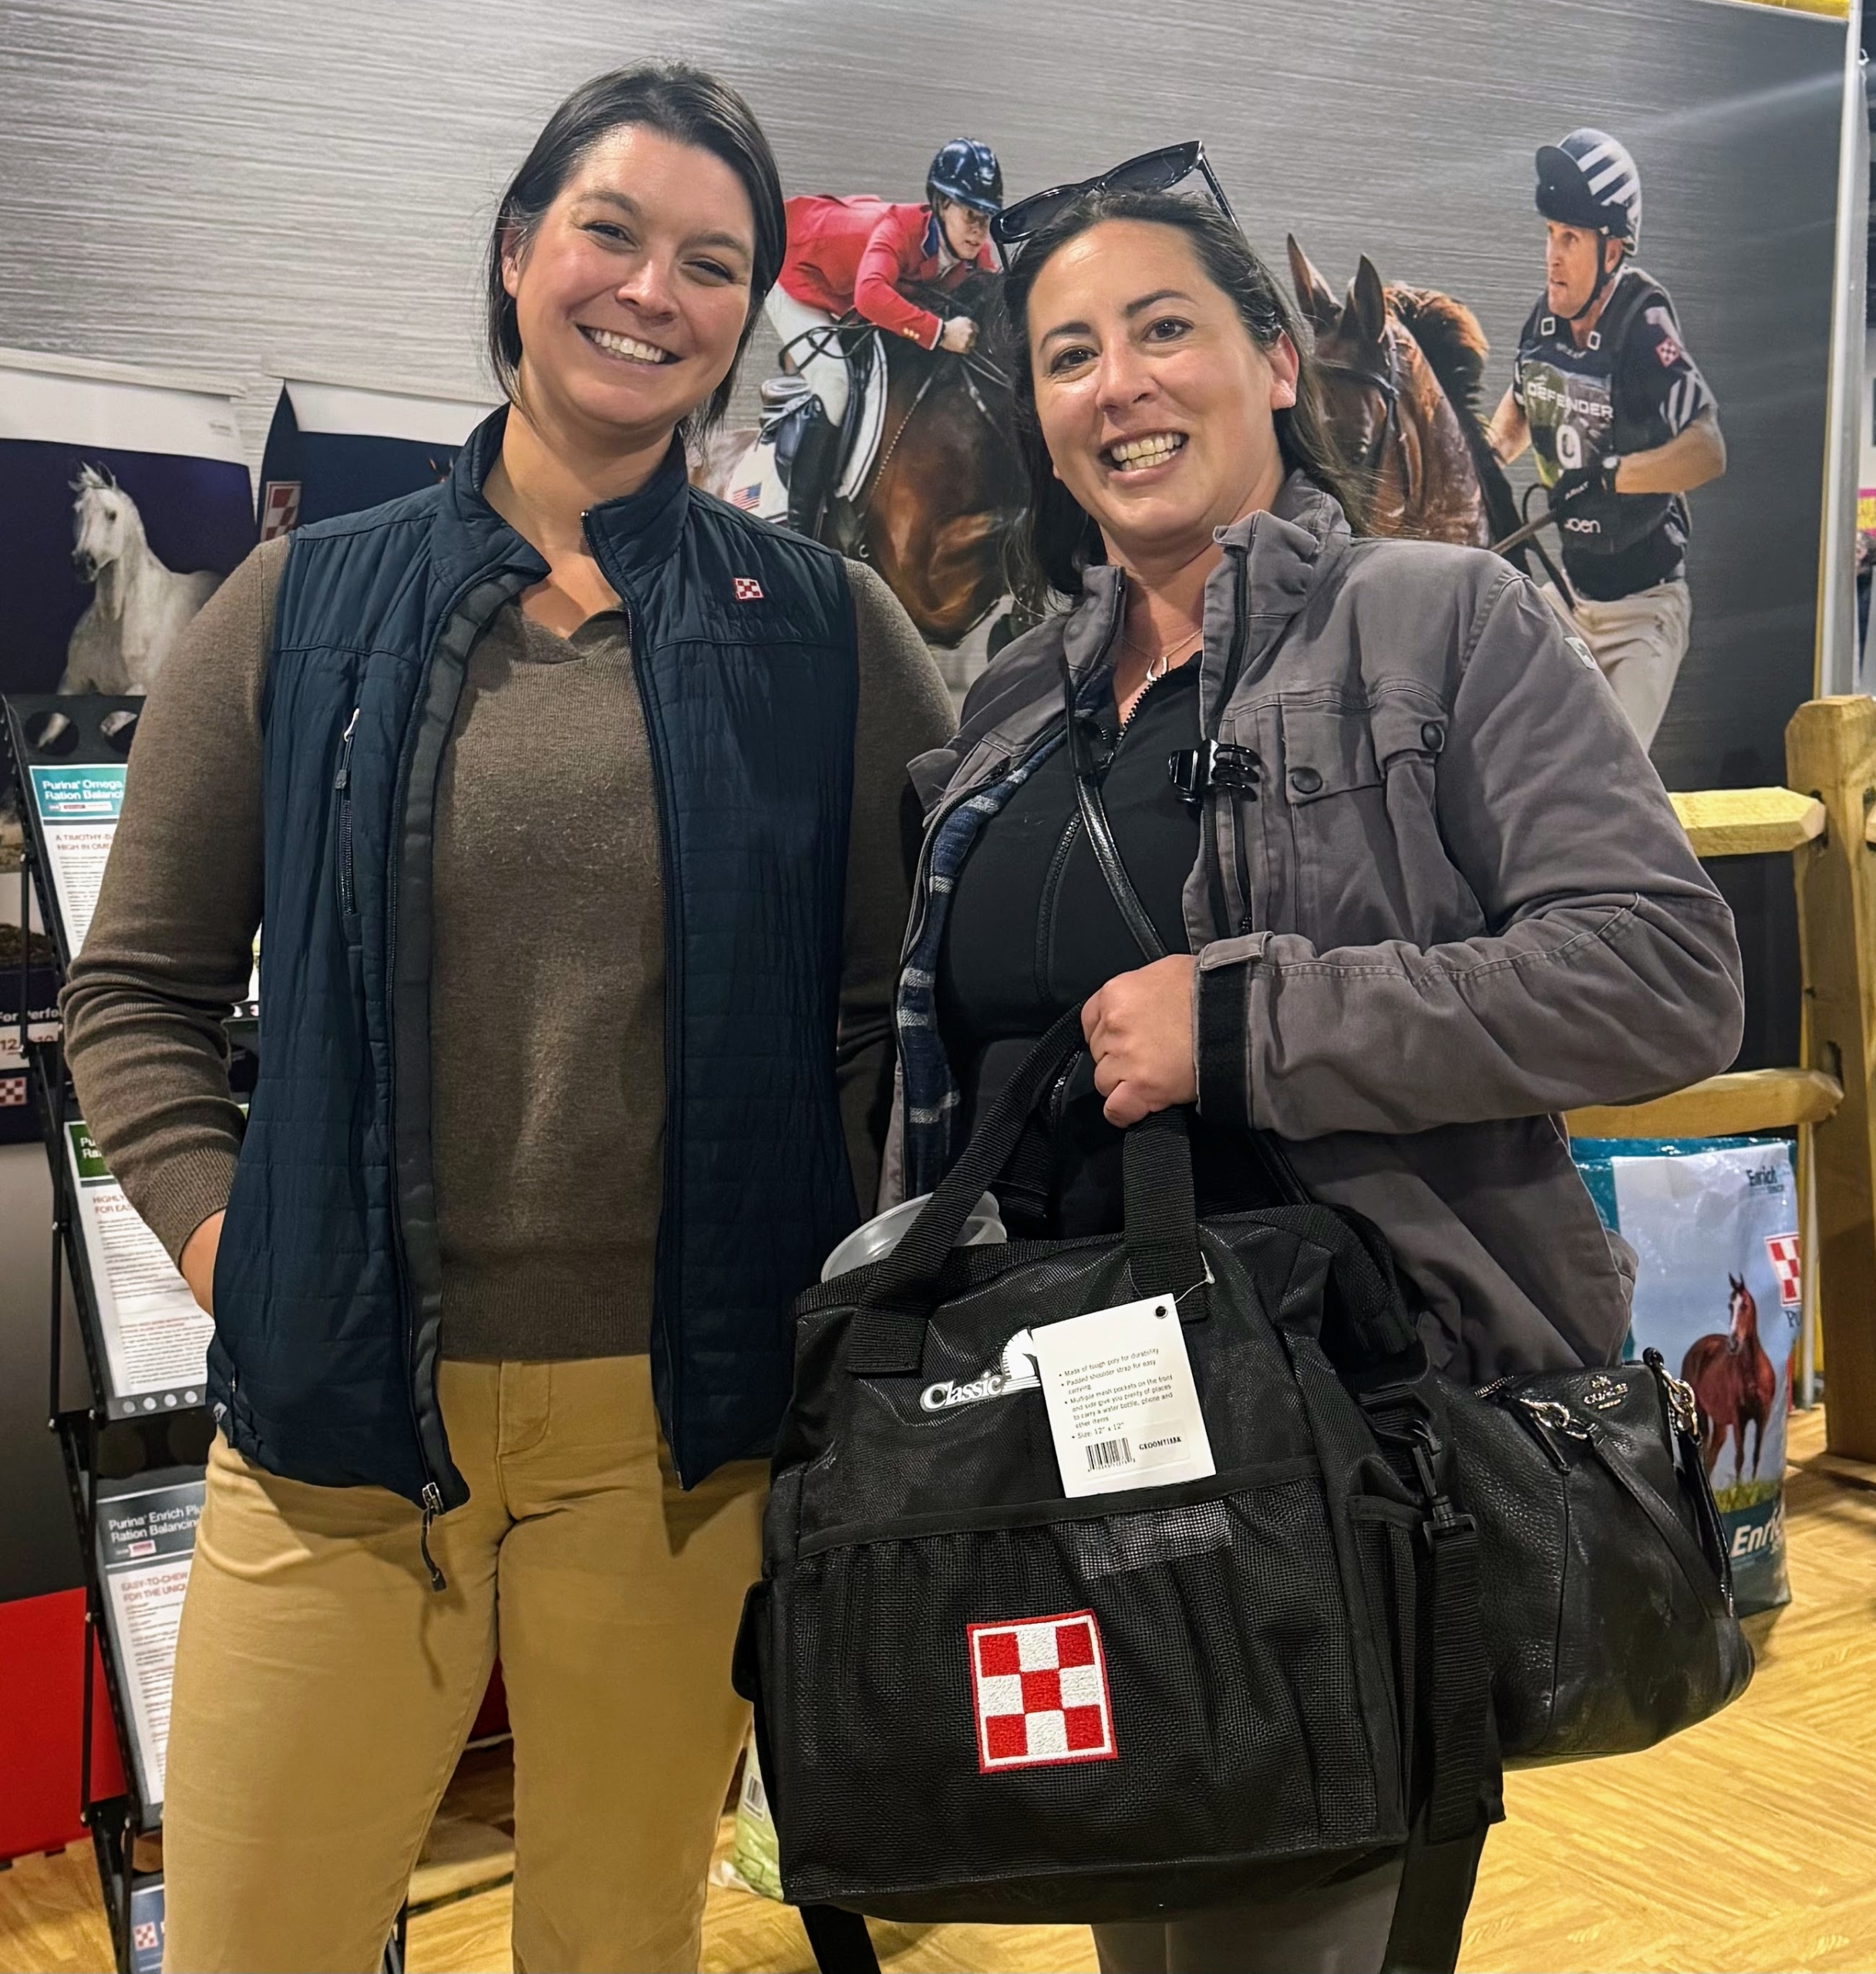
Here is Helen with Meghan Crout, equine nutrition specialist for Purina.
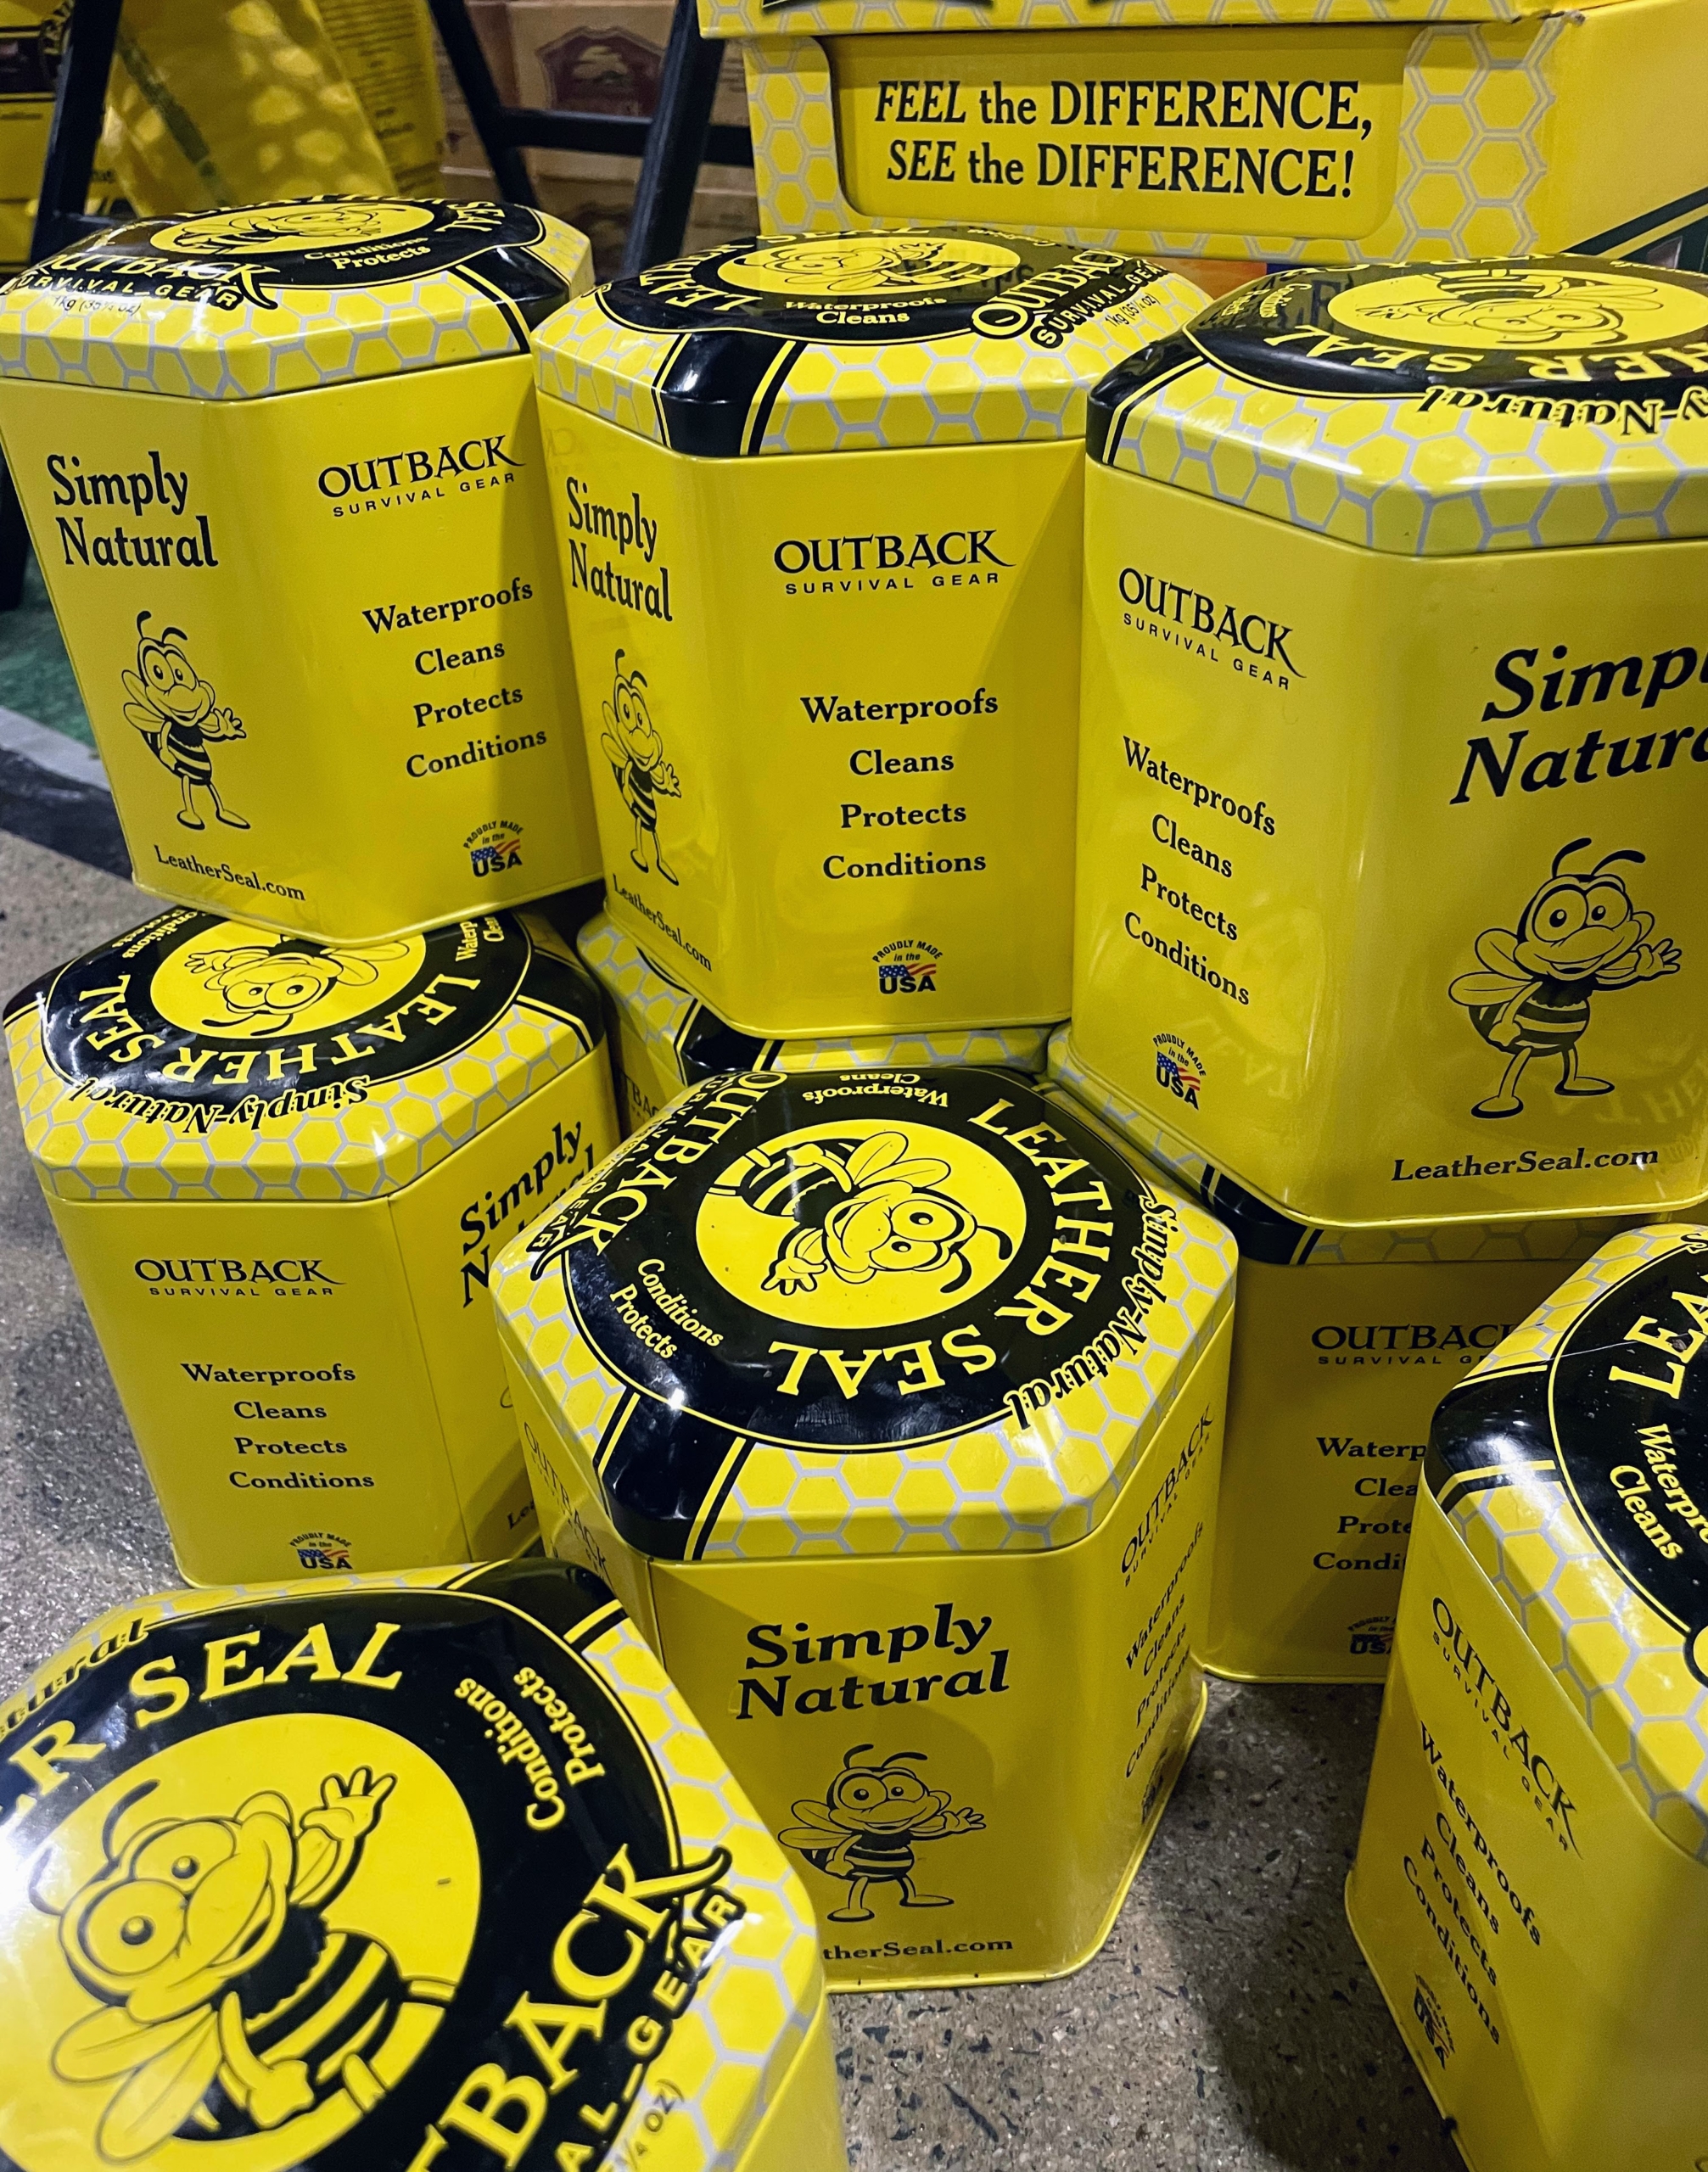
This Outback Survival Gear Leather Seal is a natural cleaner and conditioner that is designed to rejuvenate and protect leather iterms. It contains beeswax, eucalyptus, avocado oil, lavender oil, and vitamin-E oil.
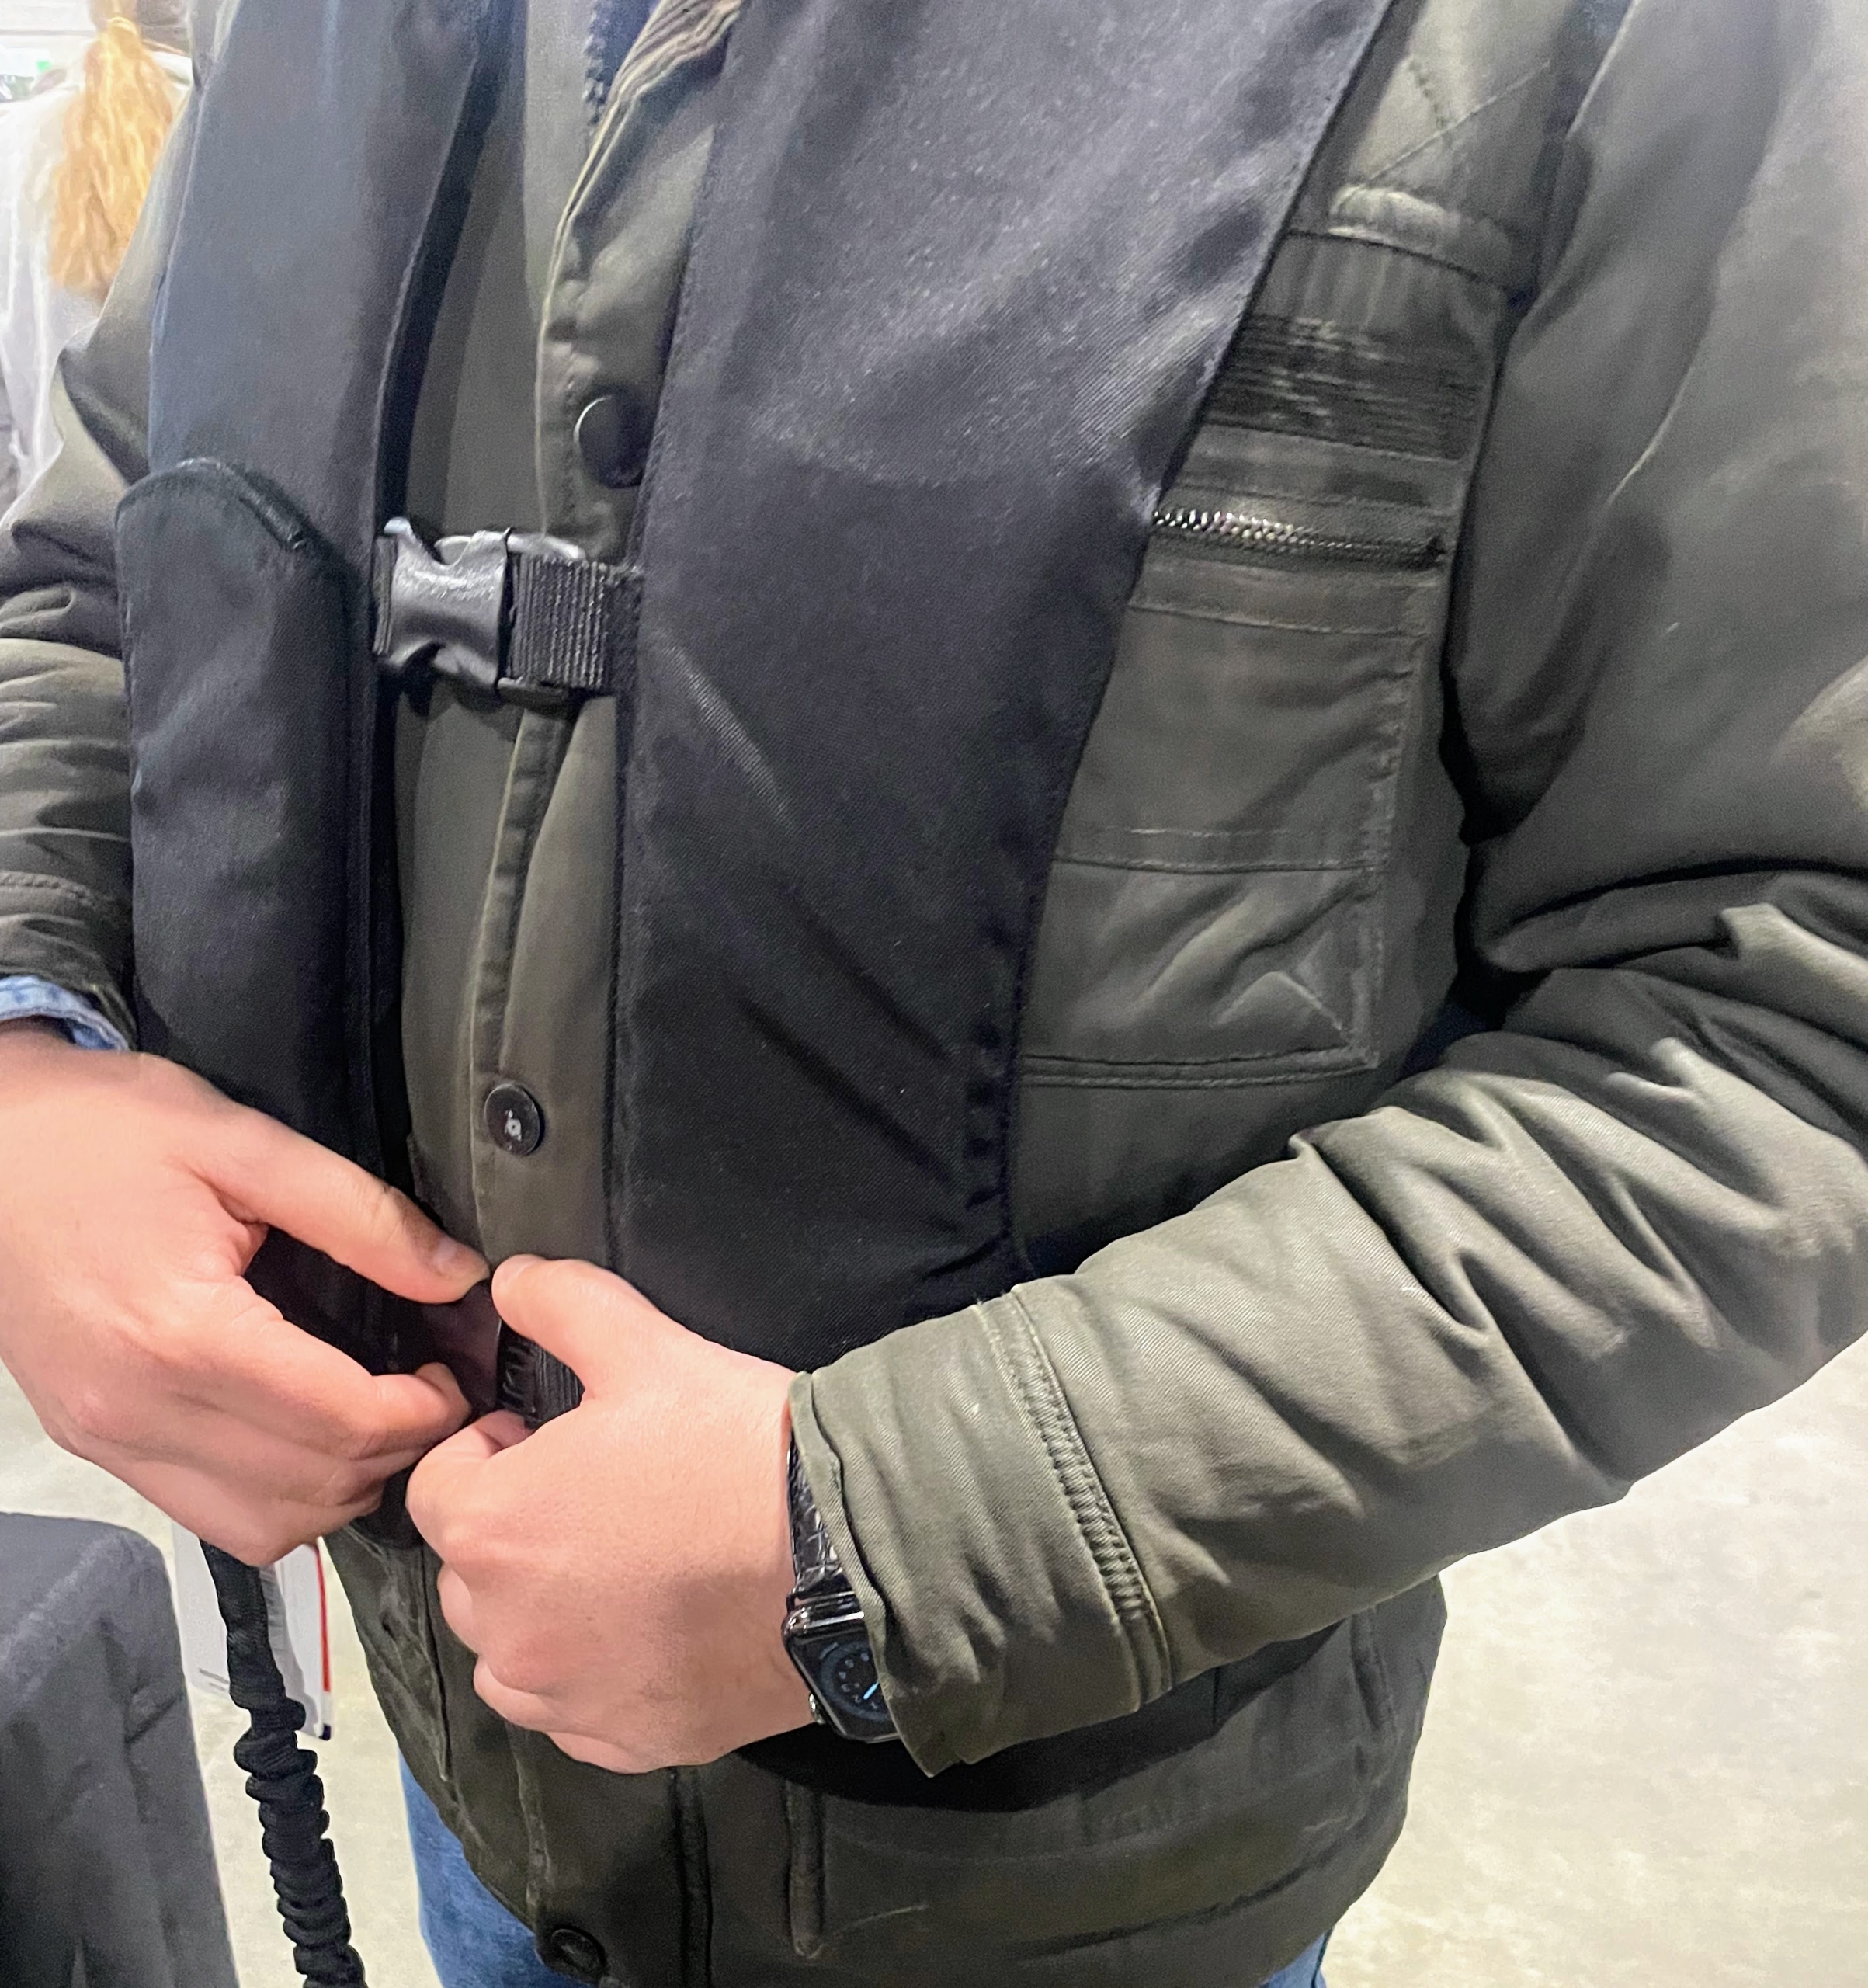
Helen and Juan also stopped by the Hit-Air booth to check out the safety vests.
This vest is made to protect the areas most prone to serious injuries during a fall. It uses a shock buffering system that works on impact.
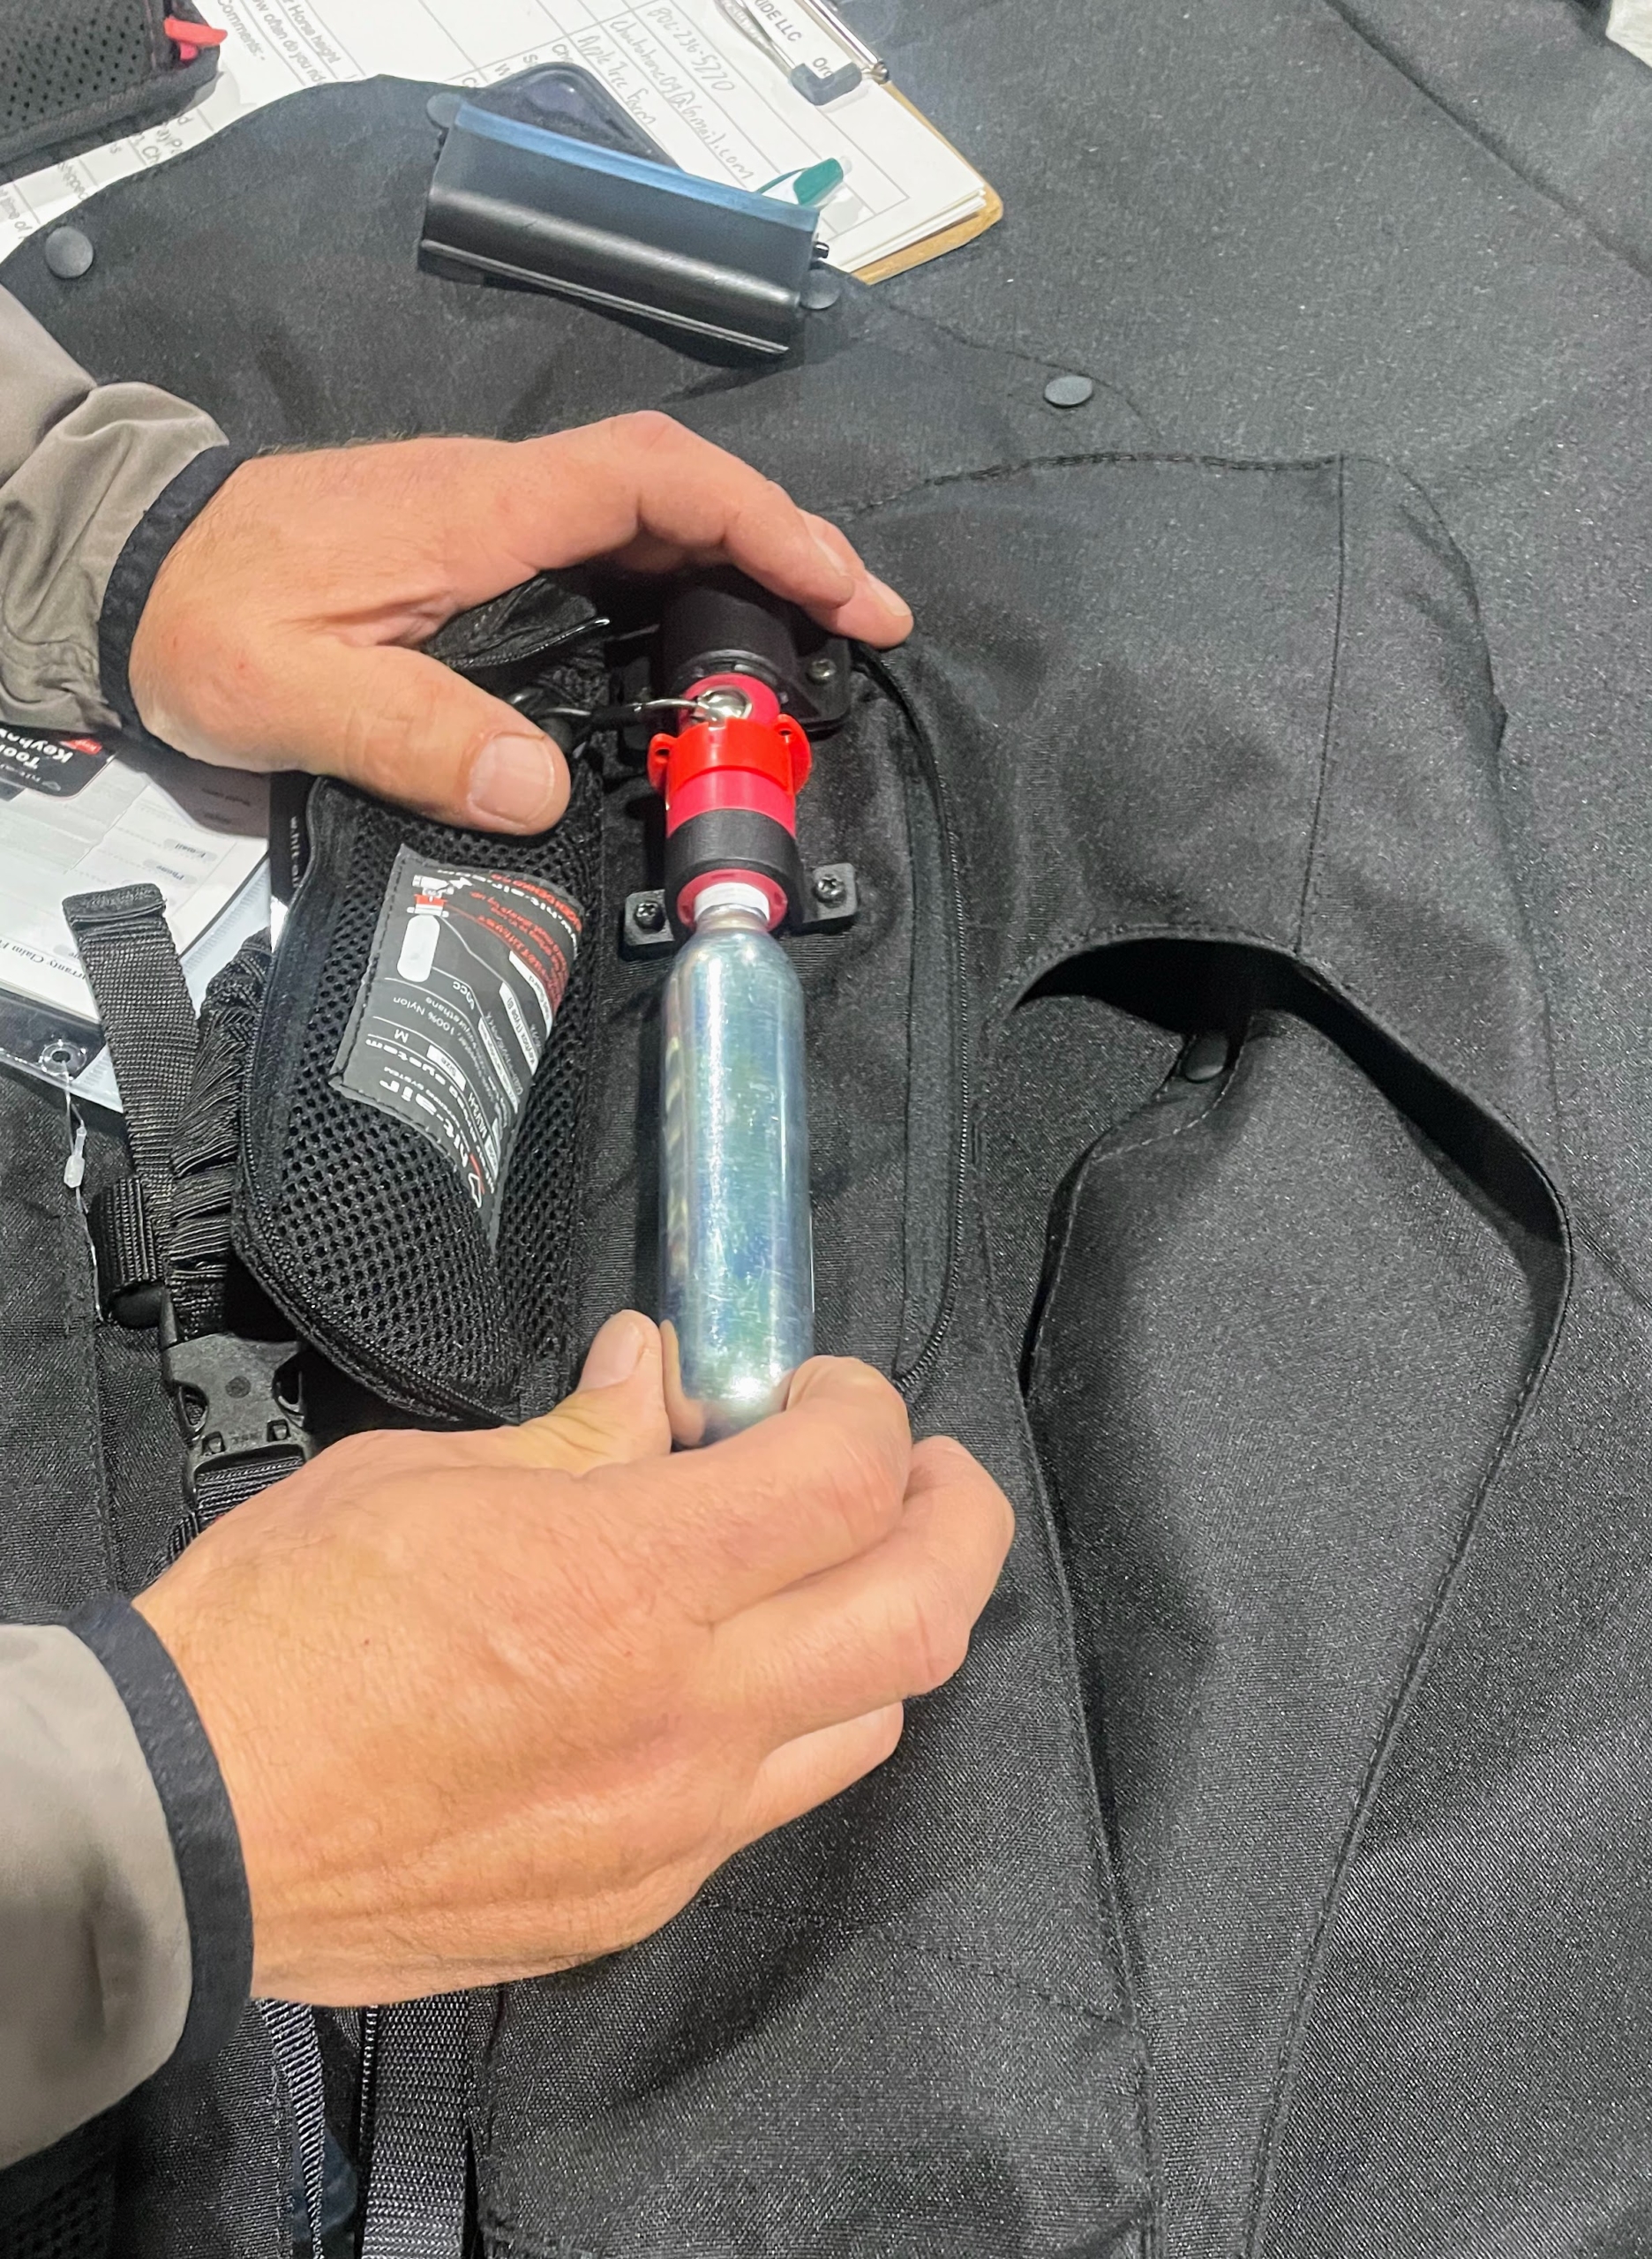
CO2 cartridges inflate immediately to create air cushions just before the rider hits the ground in a fall. The air cushions protect the neck, spine, chest, ribs, and lower back.
These are Nelson horse waterers for use inside the stalls and outside in the paddocks – they are durable, reliable, and easy to maintain. They also have a heating feature which prevents water from freezing during cold months.
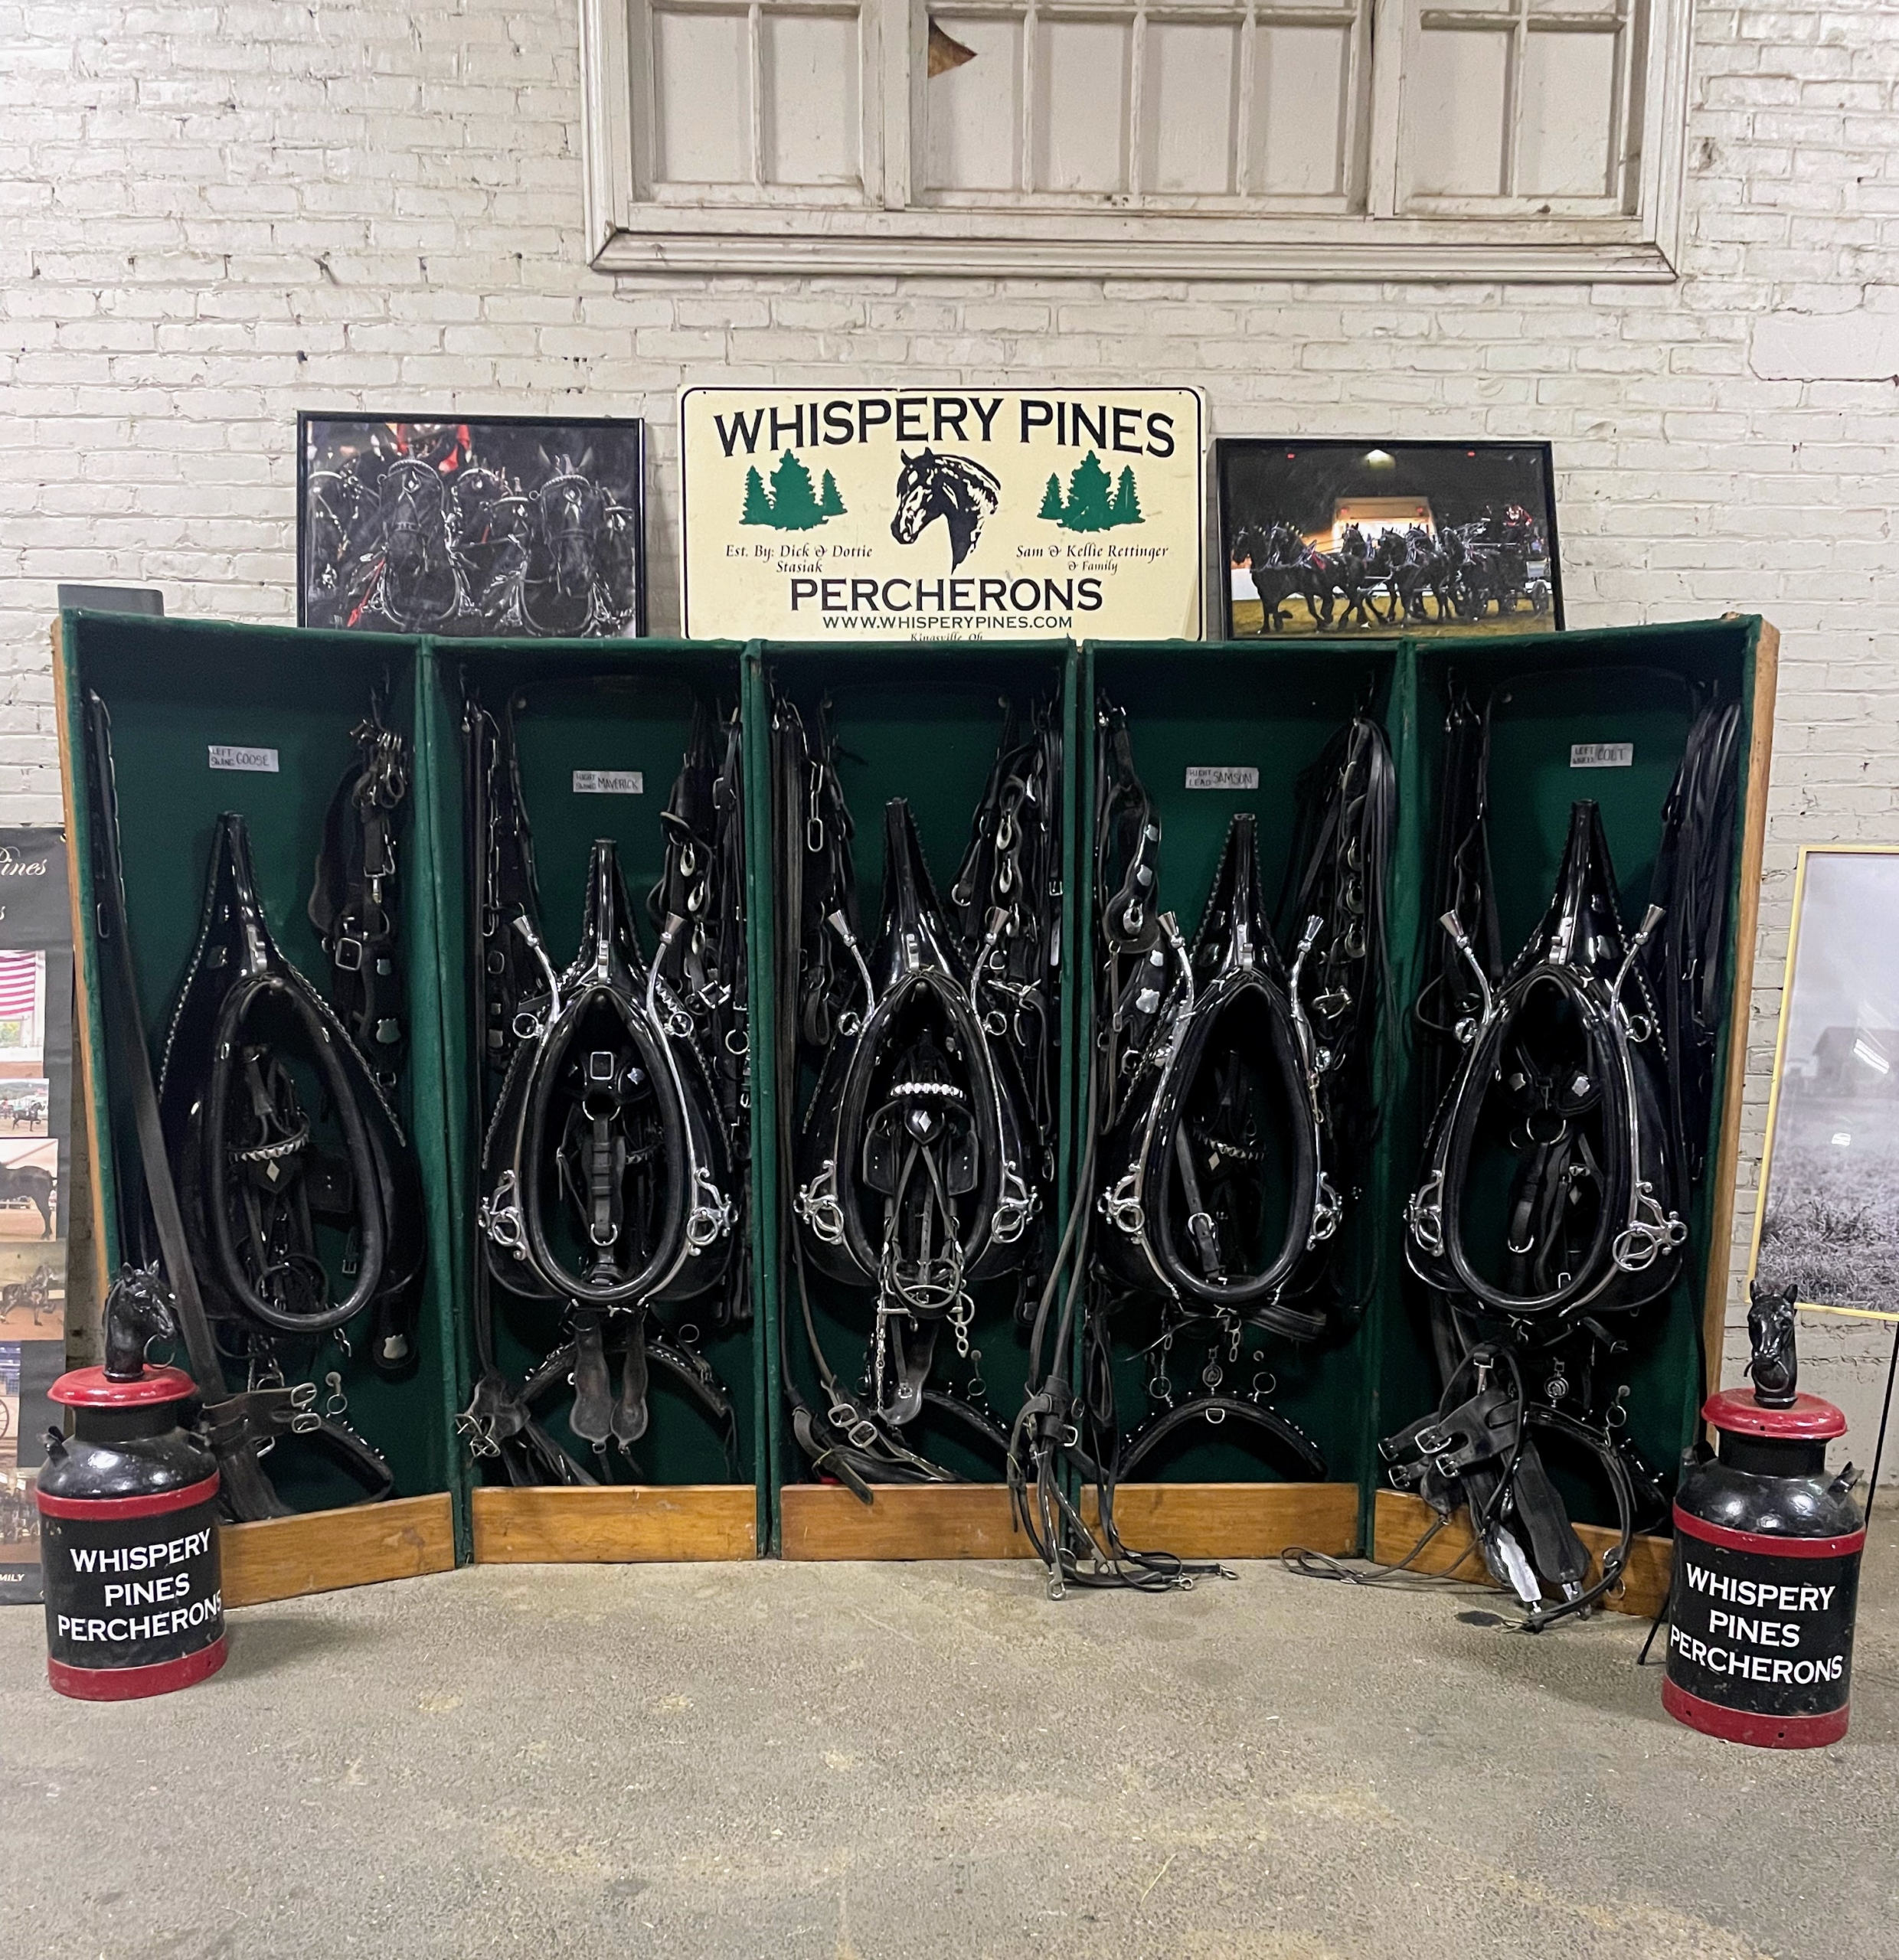
Representatives from well known Whispery Pines Percherons in Kingsville, Ohio, were also there offering different hitch and riding classes.
Here’s Juan in front of the Whispery Pines carriage.
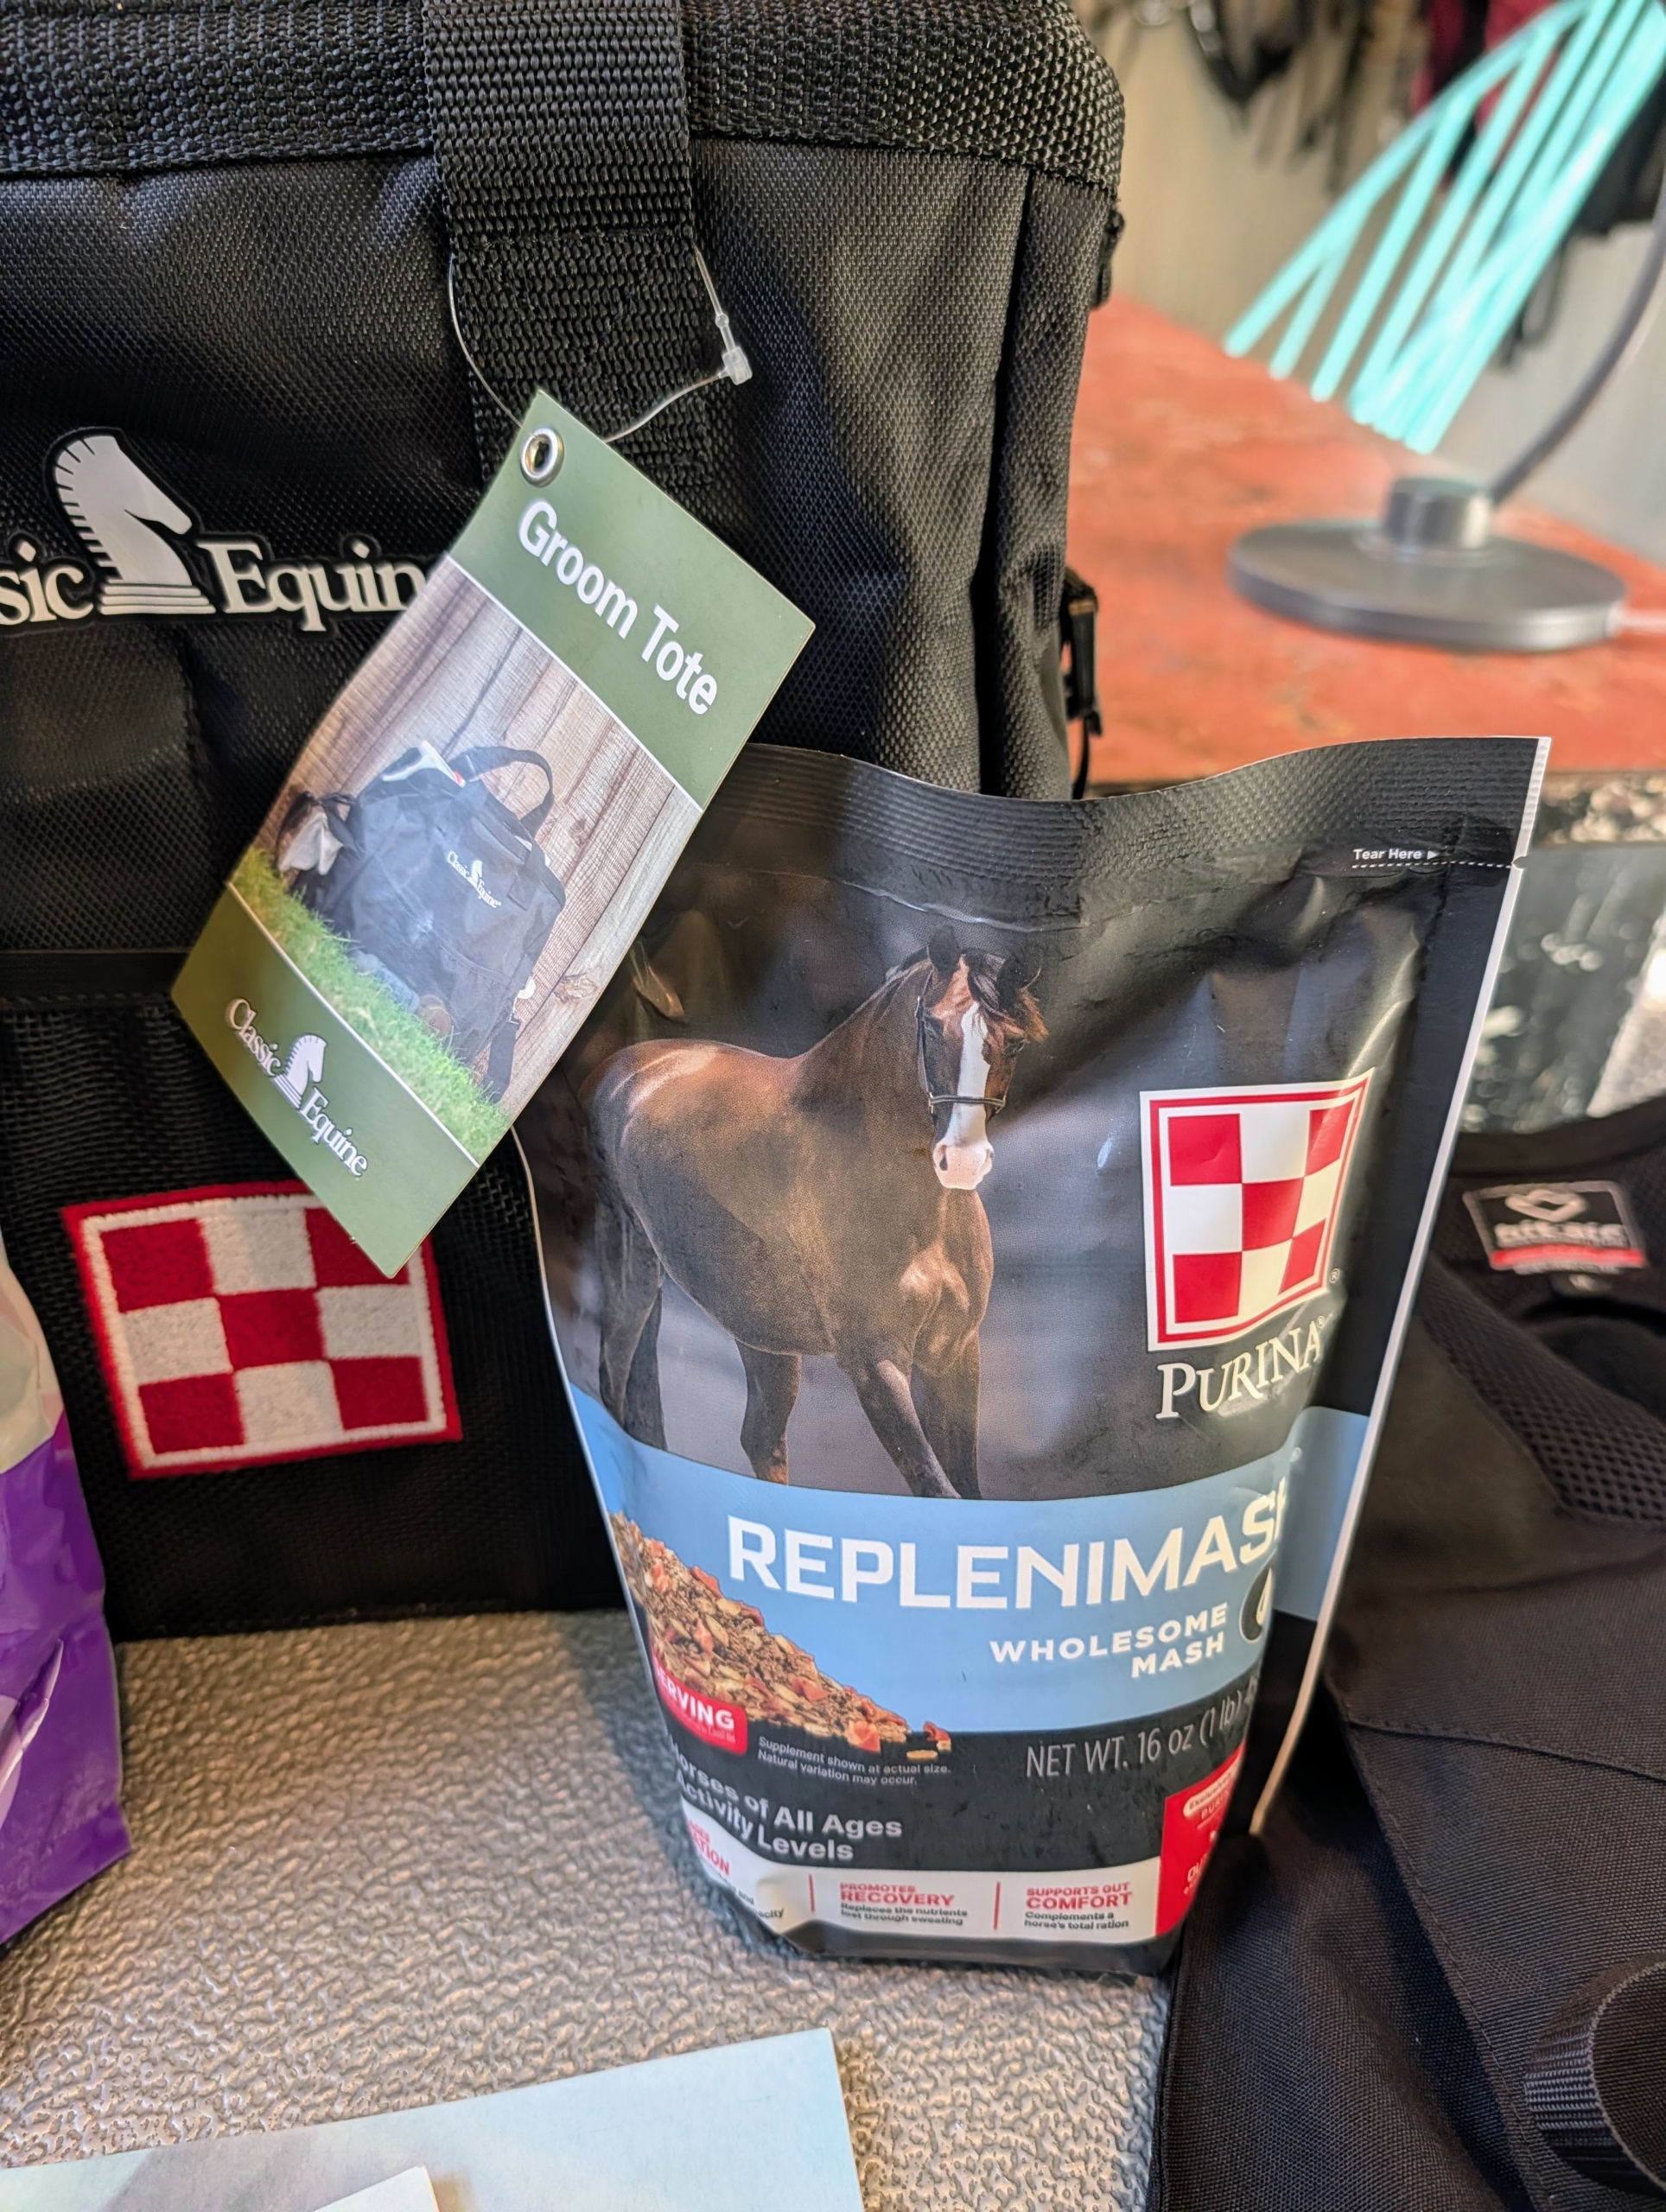
Once back at my stable, Helen tried some of the items she brought home including the Purina RepleniMash for horses, a nutritionally balanced mash designed to support hydration, recovery, and comfort.
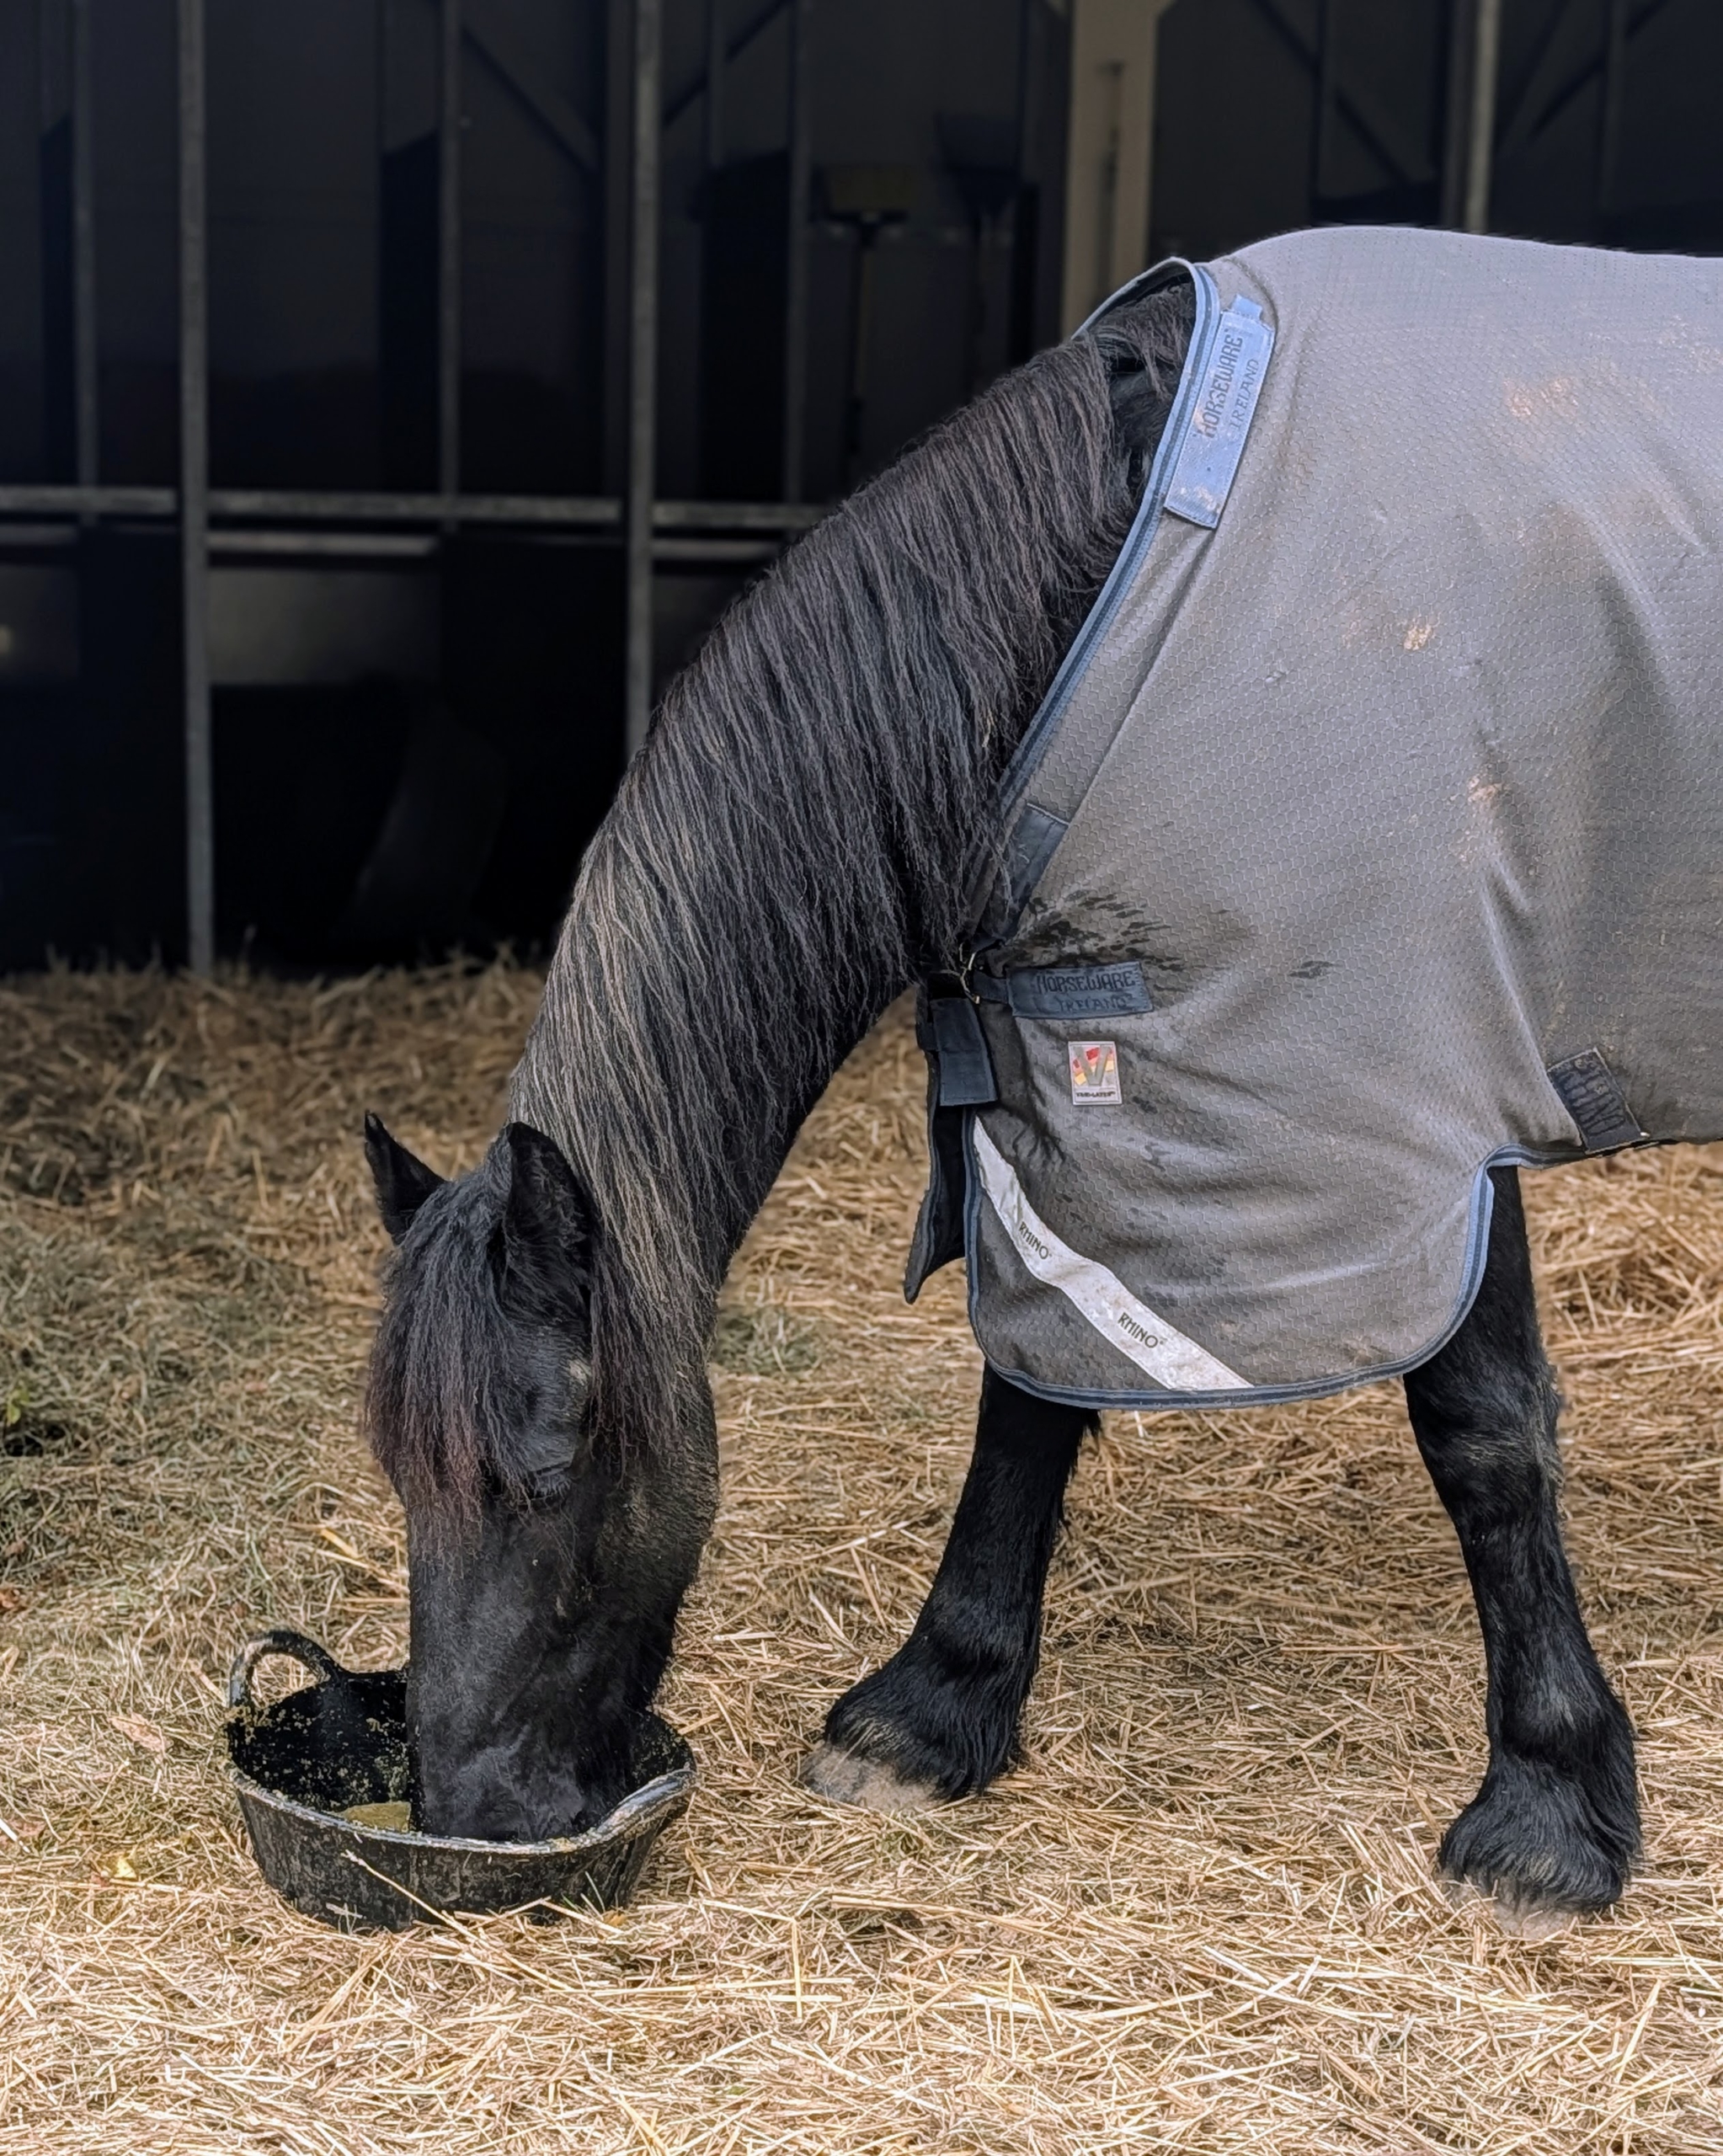
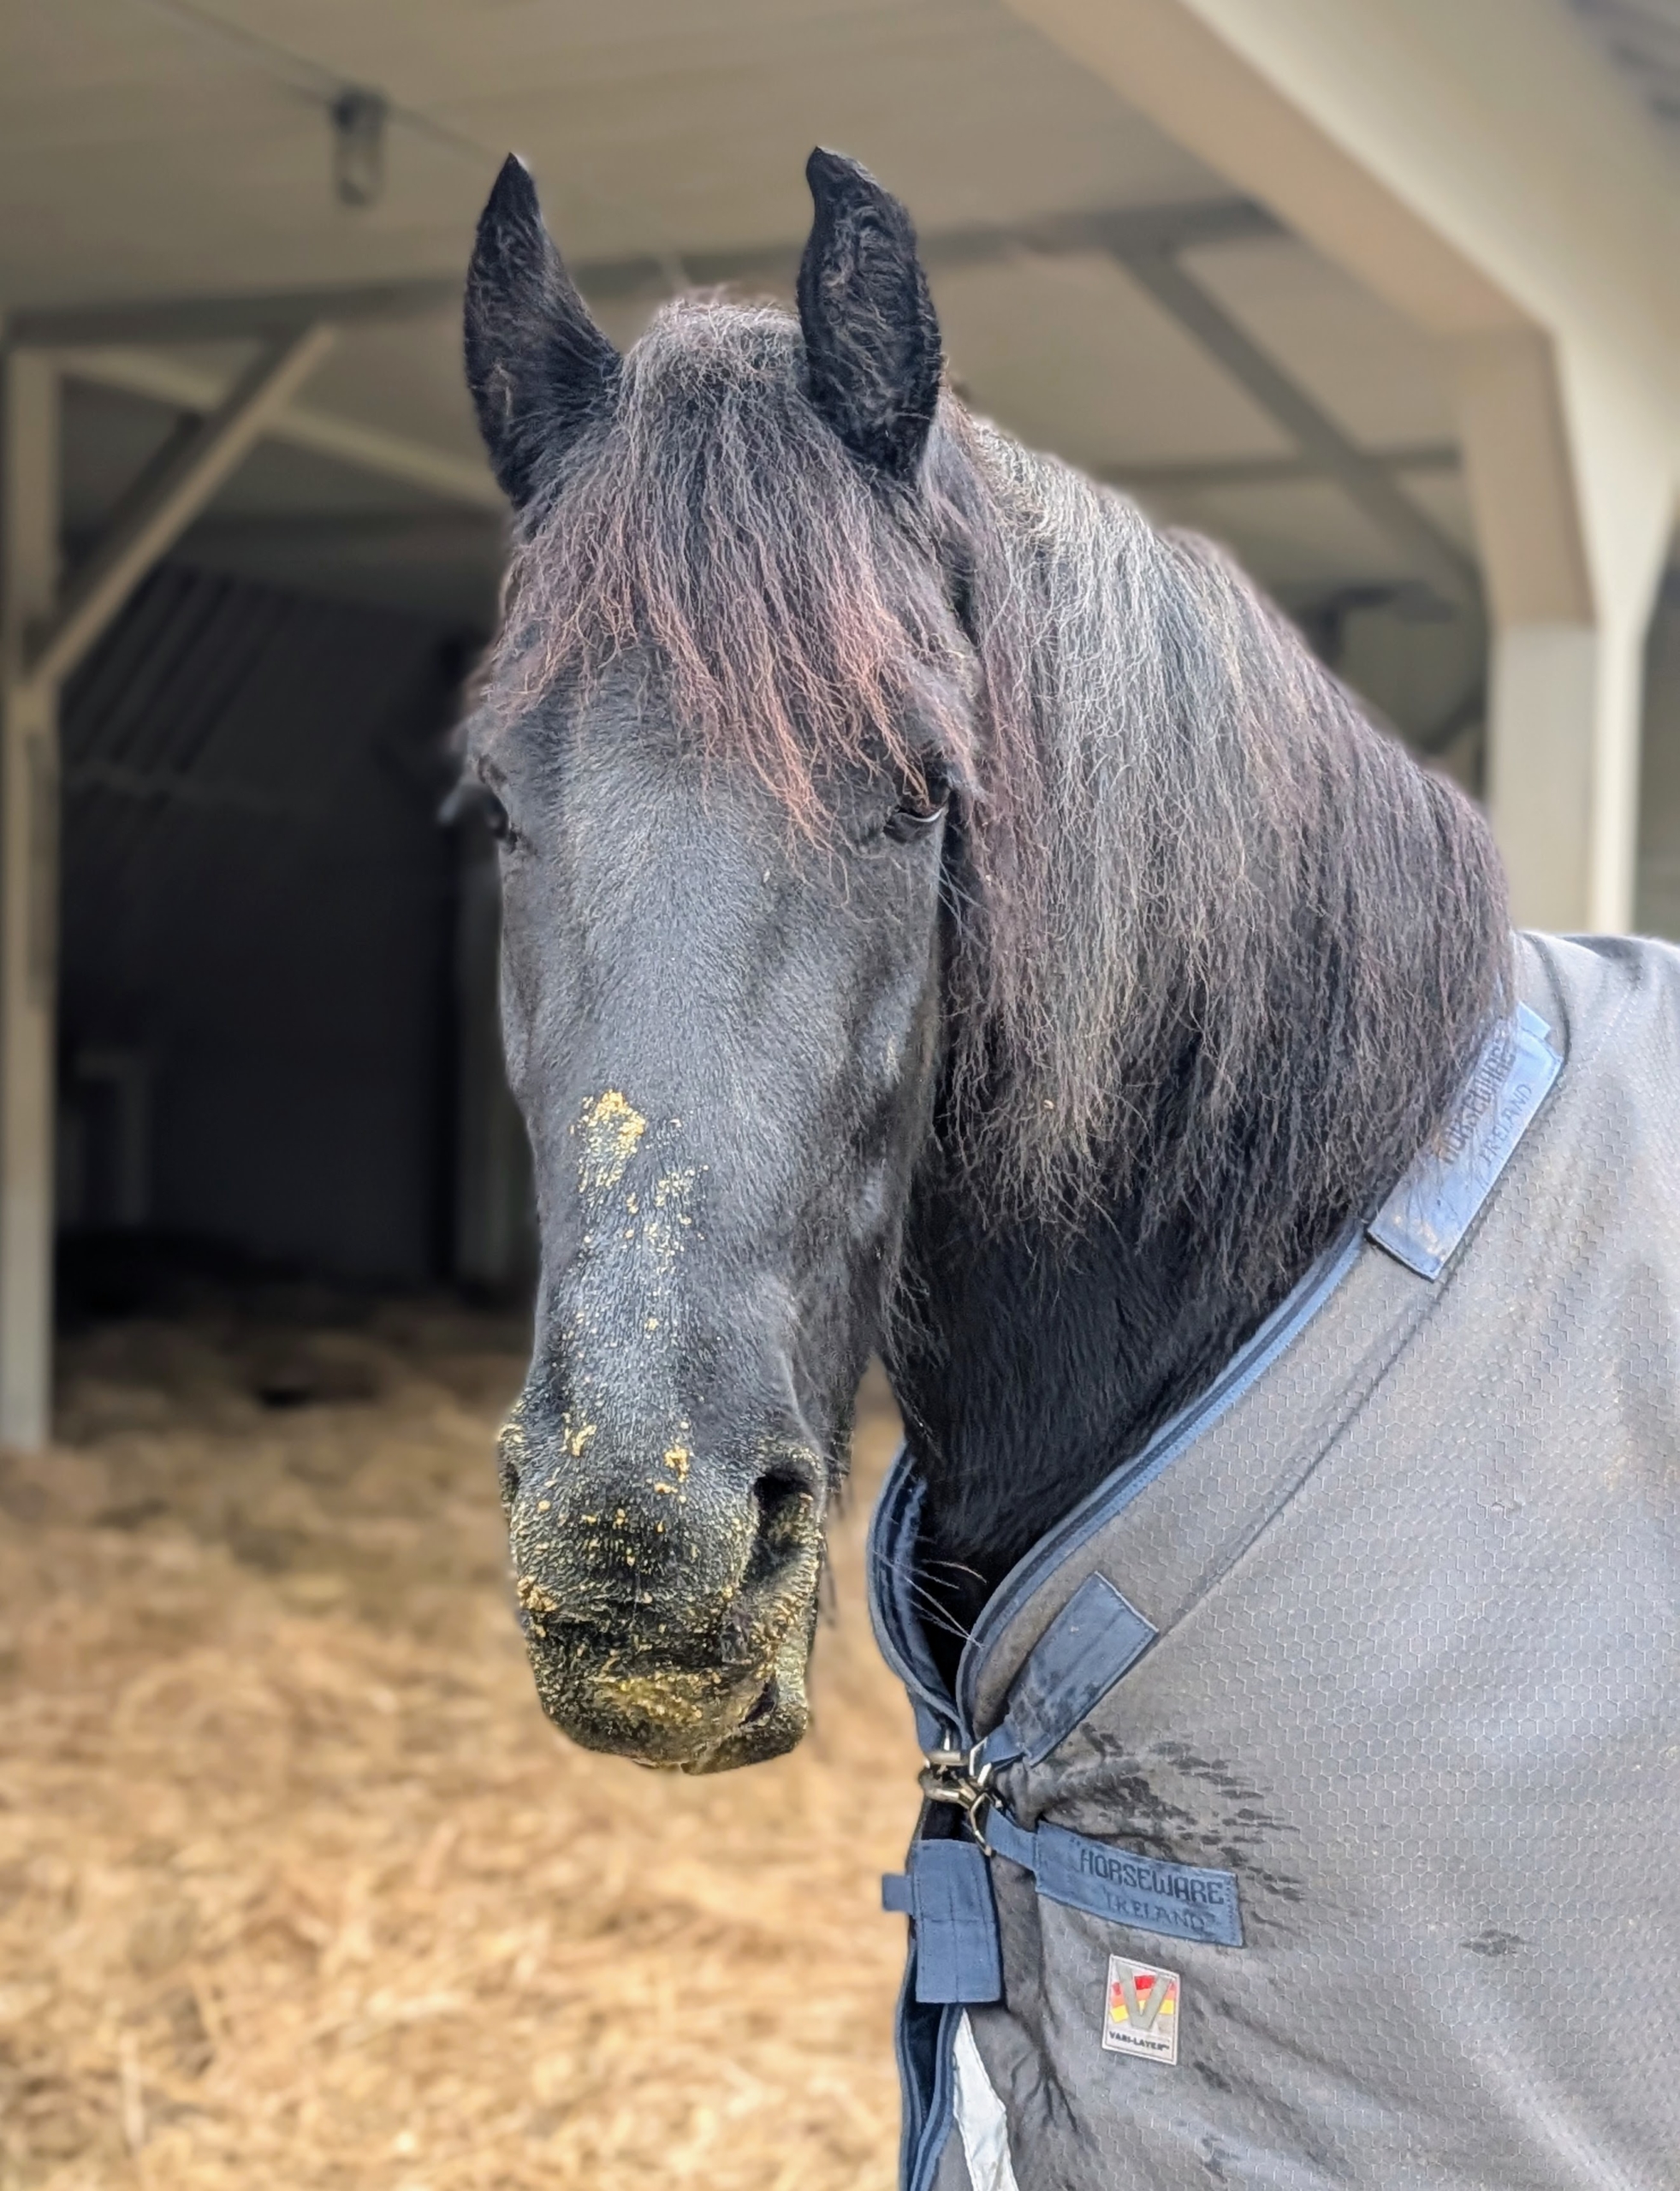
Ulysses, one of my new Friesian rescues, loves it.
It’s good, right Ulysses?
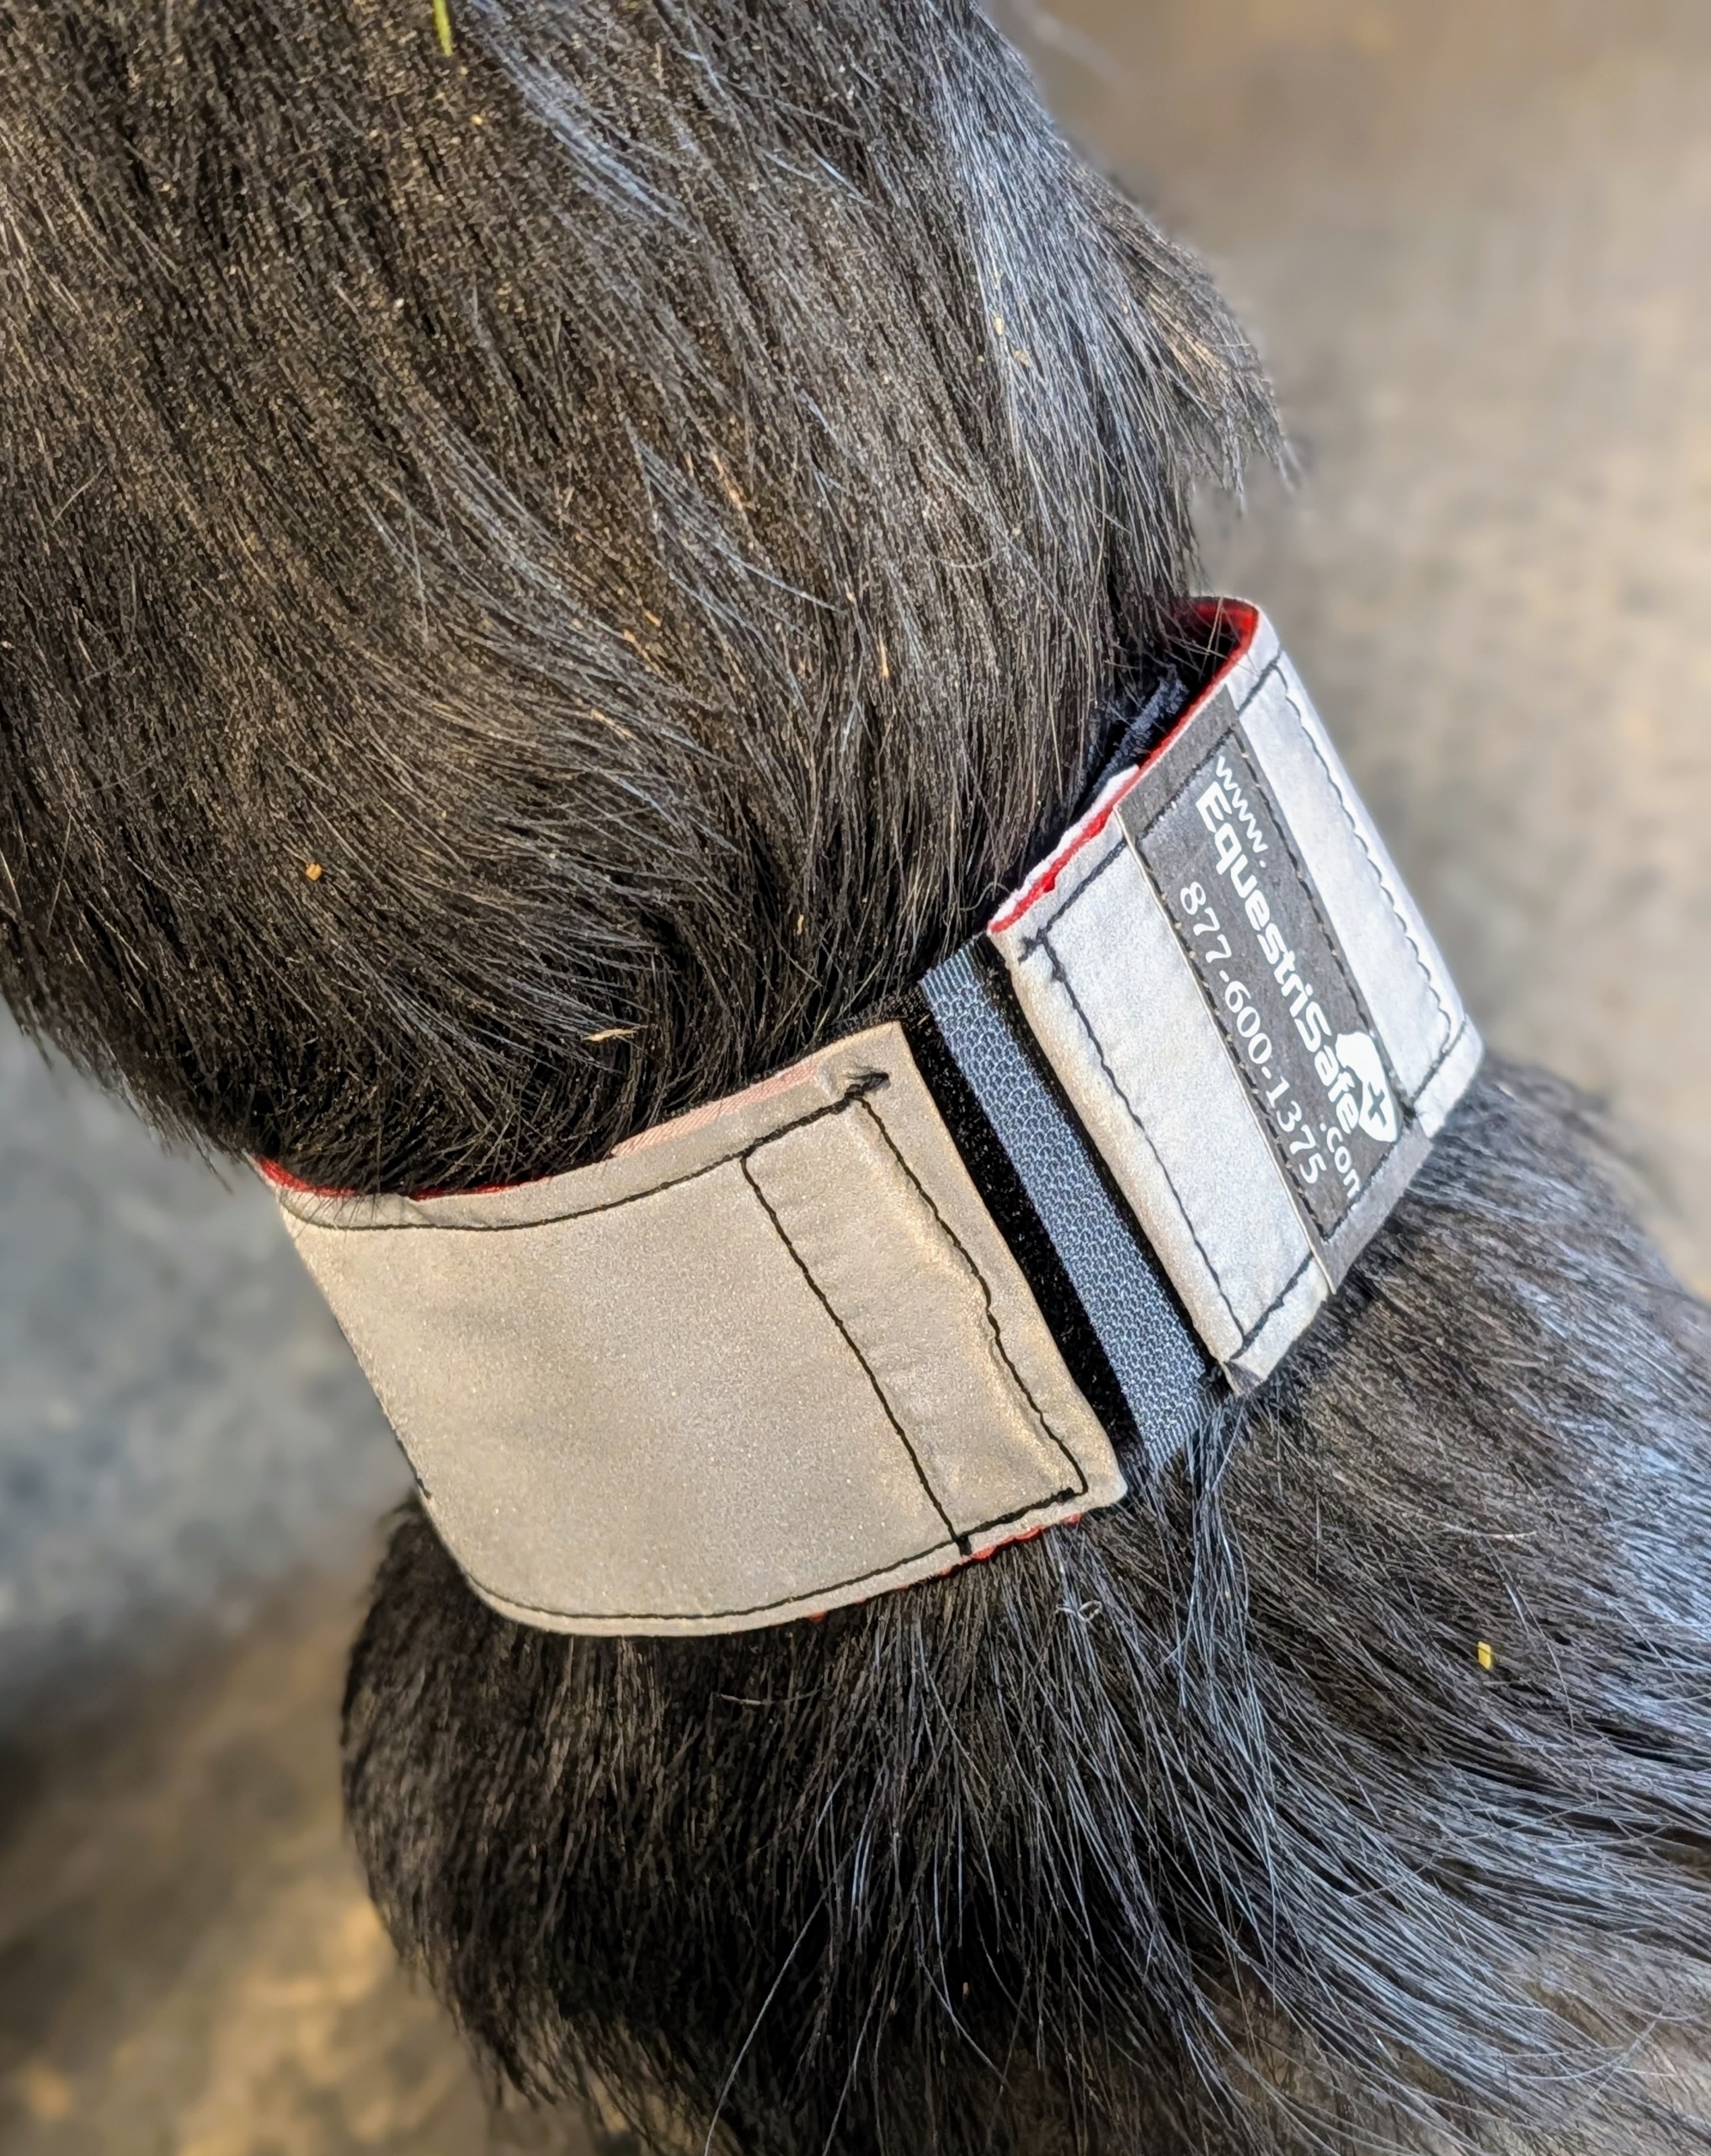
Helen also brought back some safety signs and reflective bands from EquestriSafe. These signs ensure property and trailers are clearly marked and compliant during emergencies.
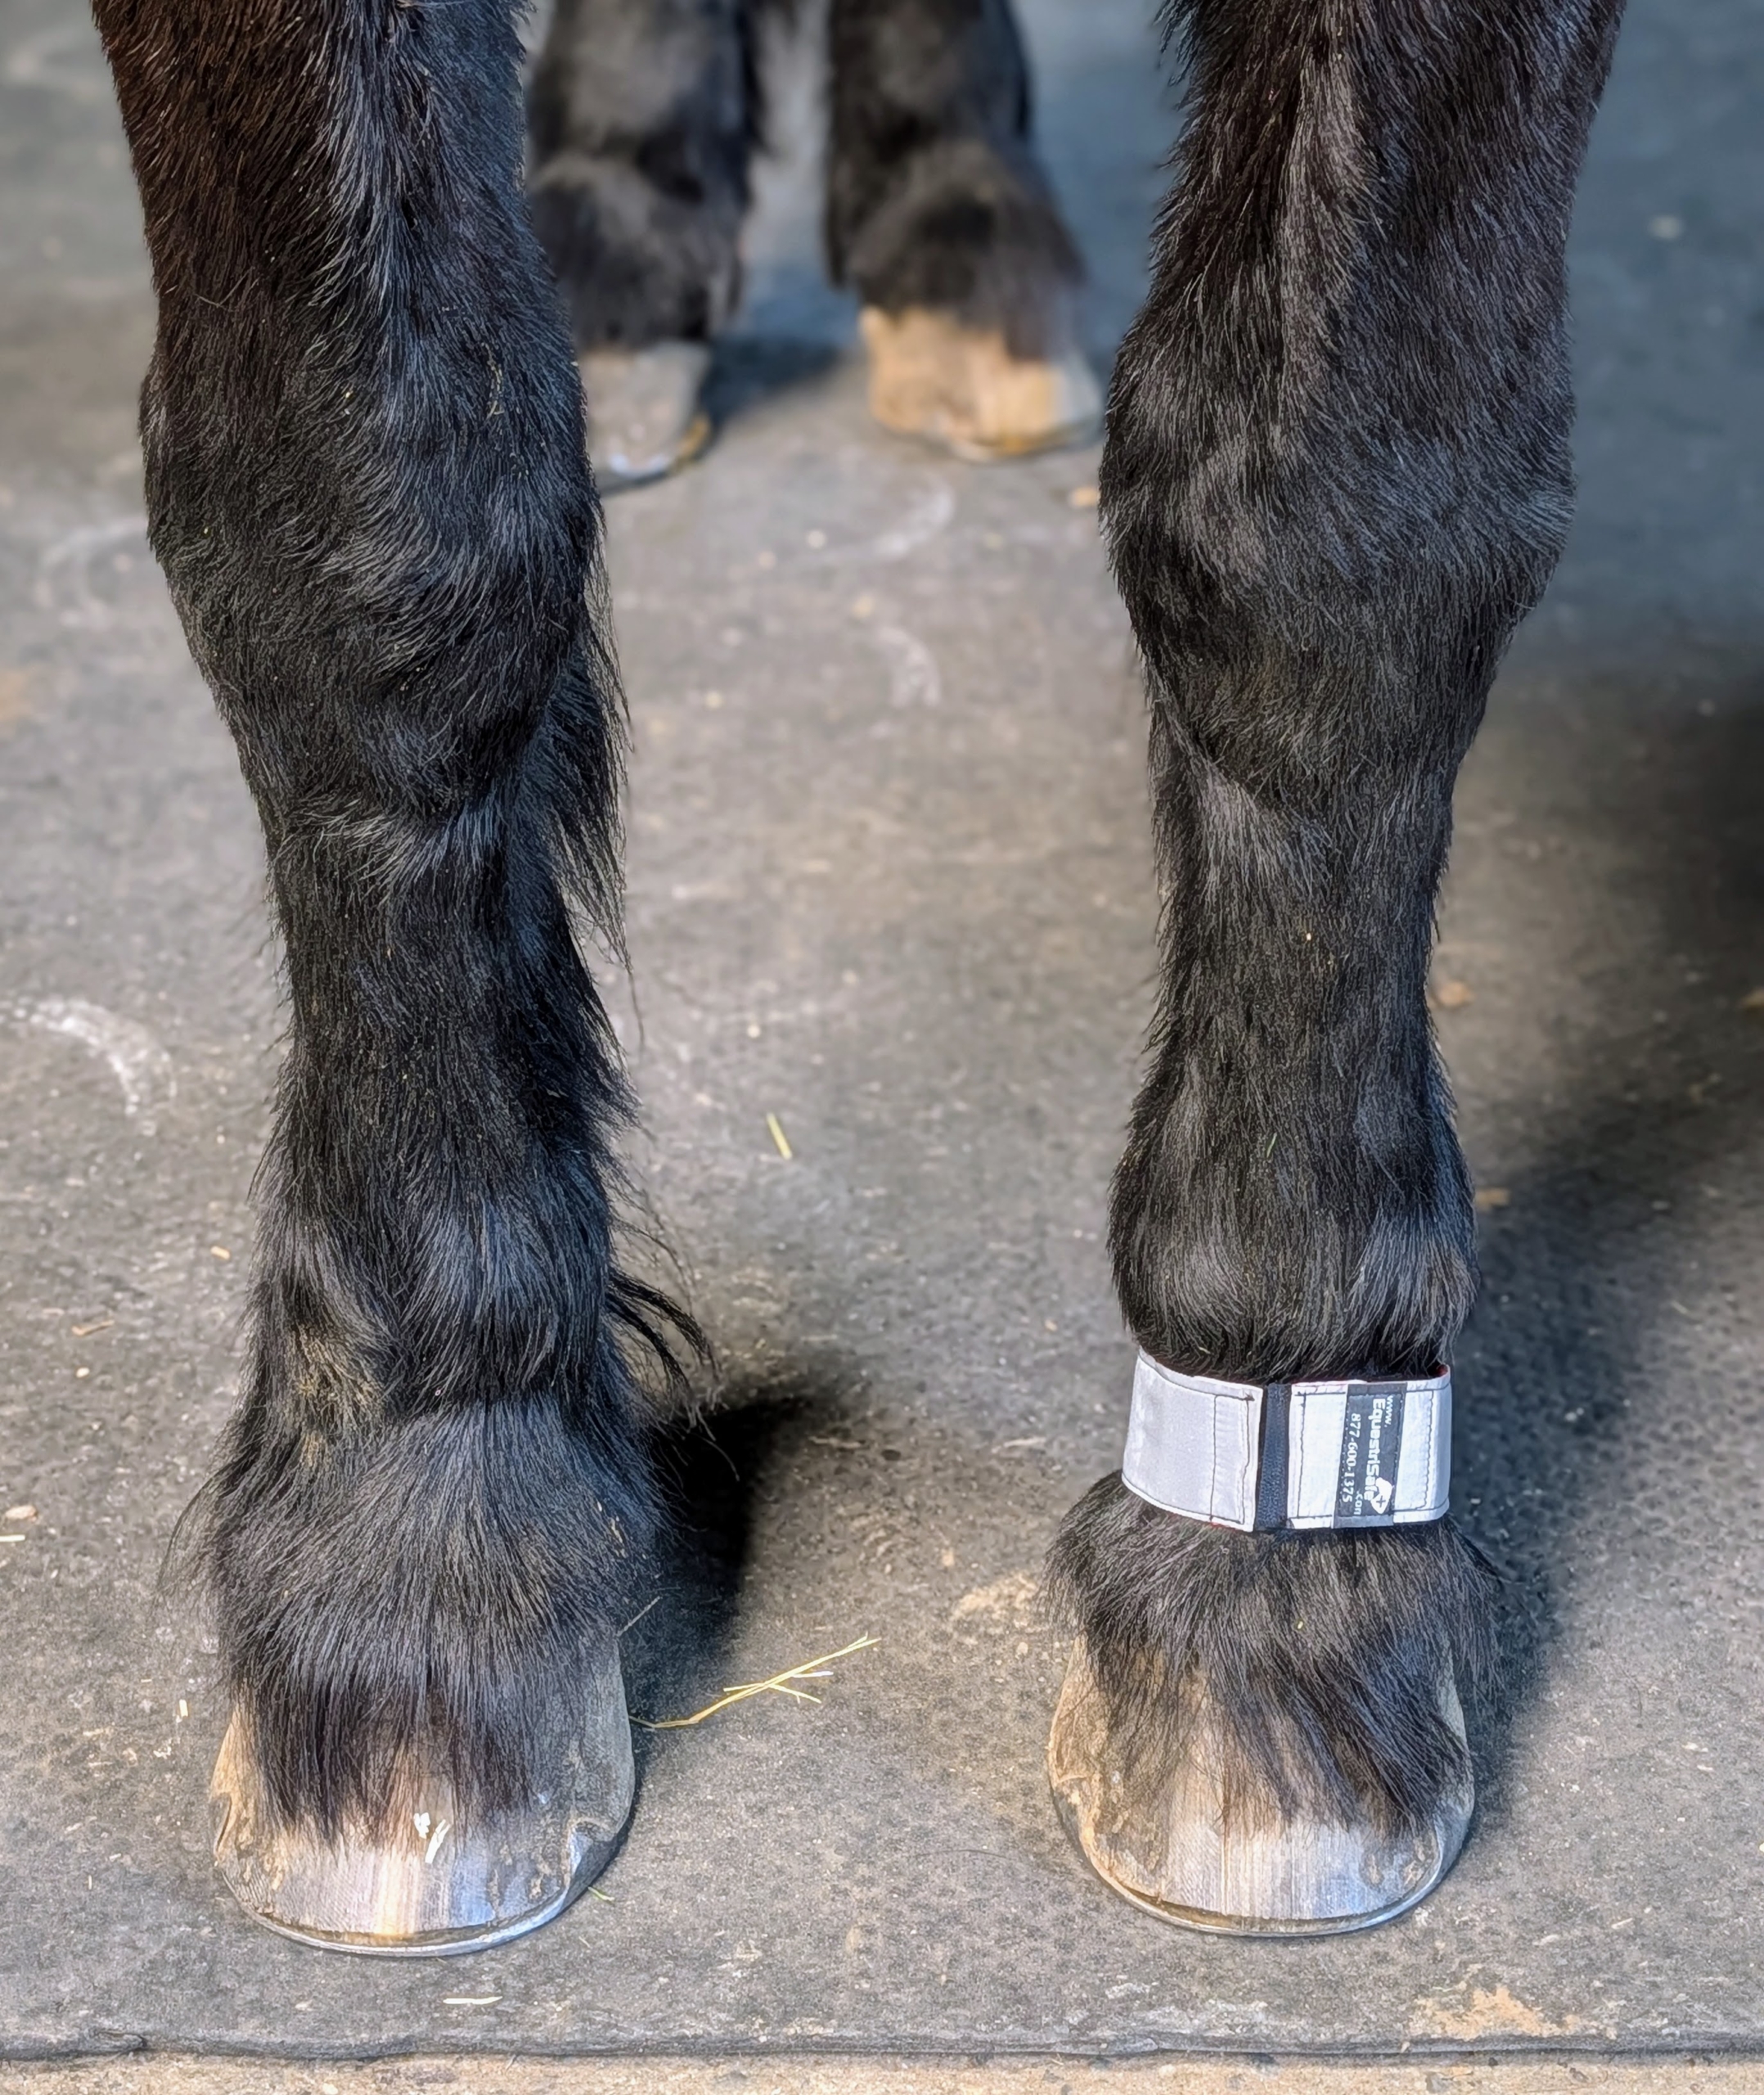
Equine reflective leg wraps are lightweight and easy to secure. It’s also possible to have an emergency phone number embroidered on the band.
Rinze modeled them – he doesn’t mind them at all. These are highly reflective and can help see a horse in the dark up to a quarter of a mile away.
I am always on the lookout for quality equipment, food, and supplies for all my animals. It’s important to me that I provide what I can to keep them in the best condition.
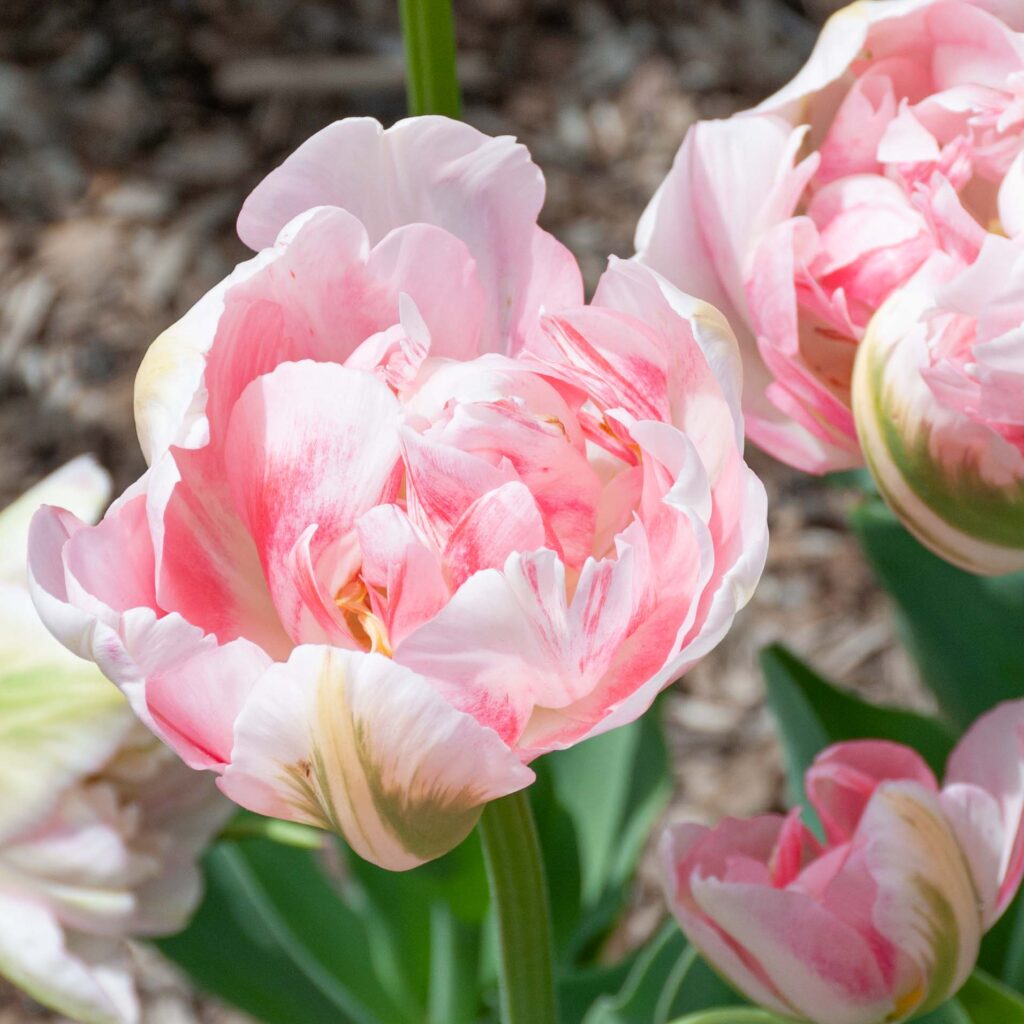
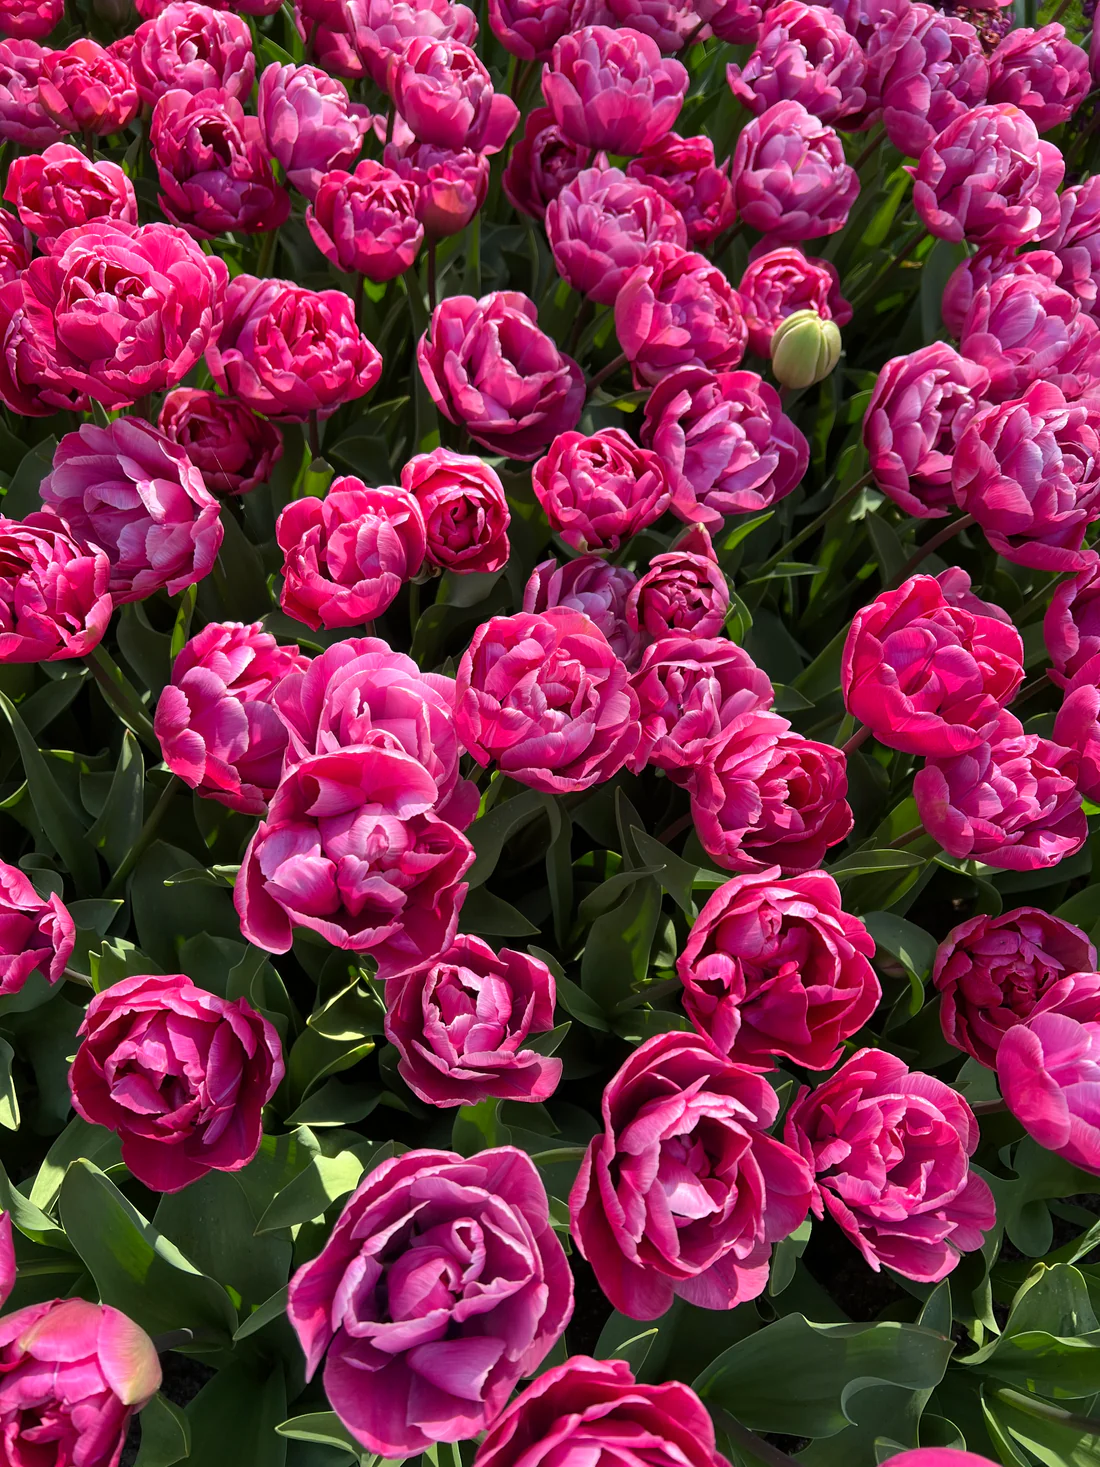
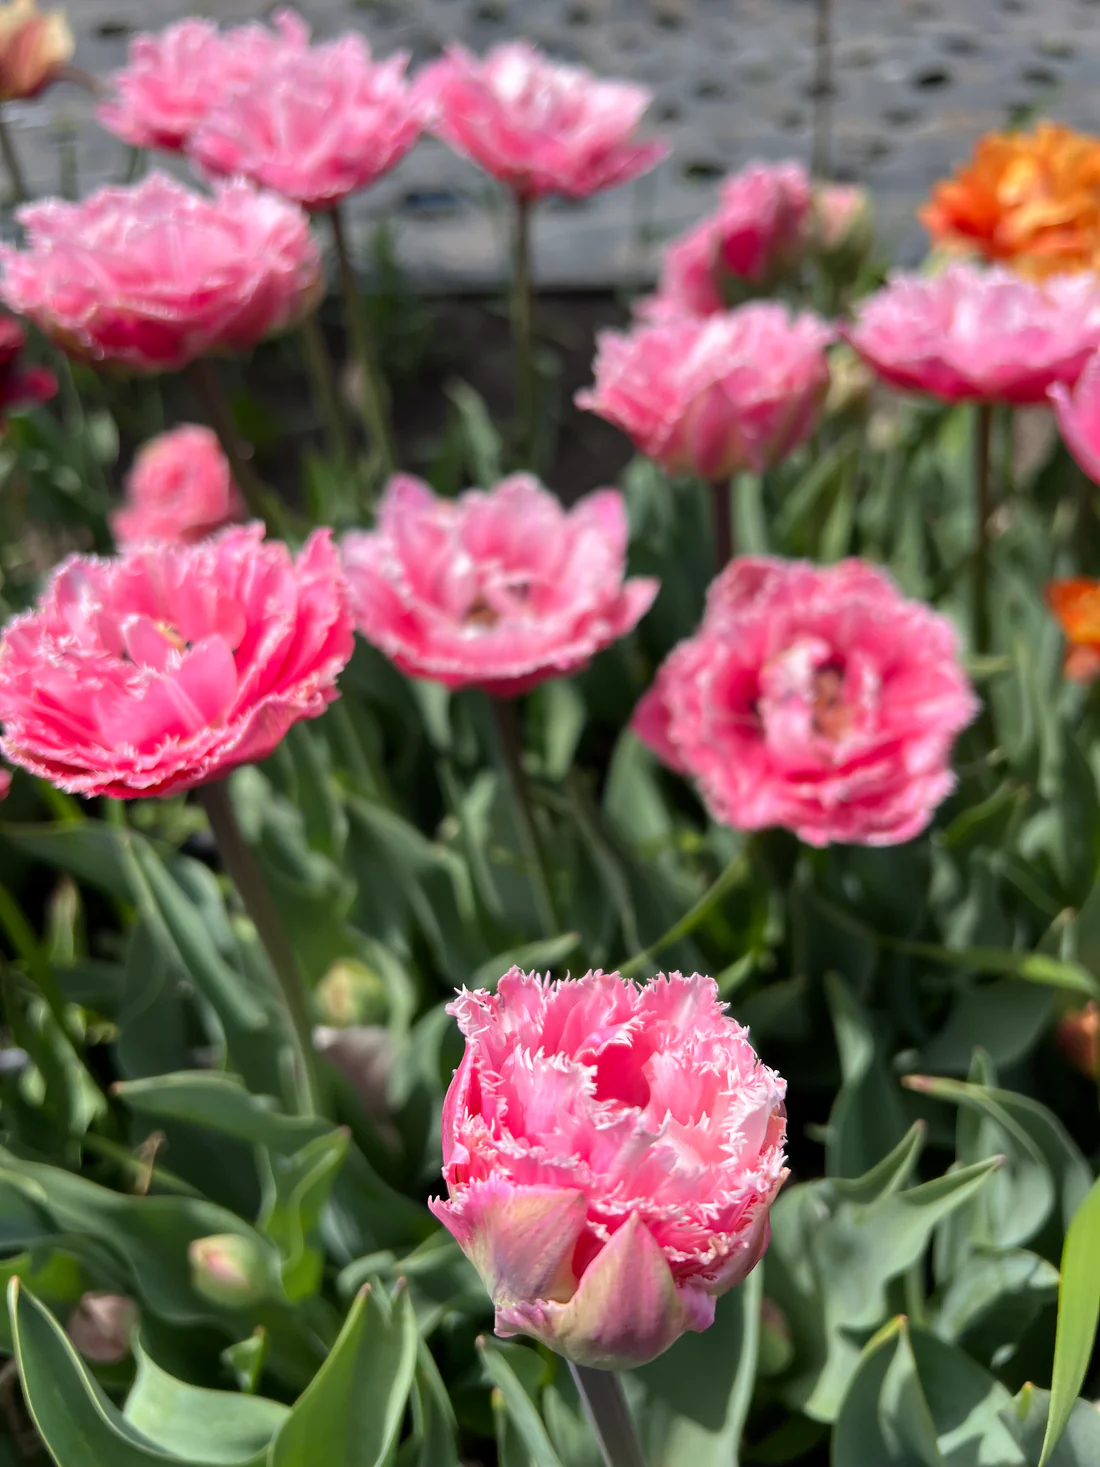
More spring-flowering bulbs are planted at the farm. The latest batch - hundreds of gorgeous and colorful tulips!
If you like spring flowers in your garden, autumn is the time to plant the bulbs because they require a sustained dormant period of cold temperatures in order to stimulate root development. I plant lots of bulbs every year - daffodils, Dutch Iris, Camassia, alliums, etc. It’s exciting to see the swaths of color in the garden beds after a cold, dreary winter. This year, my tulips are from Colorblends Wholesale Flowerbulbs in Bridgeport, Connecticut and The Flower Hat, a floral design studio and farm in Bozeman, Montana. The bulbs were planted in several raised beds in my vegetable garden. They will look marvelous come spring.
Enjoy these photos.
If you’re planning to have beautiful tulips blooming in your garden next spring, get your bulbs planted now. We had some good weather this week to plant bulbs at my farm – temperatures were in the 50s. This tulip is ‘Sanne’ with large, tapered flowers that open in deep rose-pink and creamy-pink edges that mature to lilac-pink with pink-ivory edges. (Photo courtesy The Flowerhat)
The bulbs came from Flowerhat. I received a great variety of different tulip bulbs, all in excellent condition.
Among the varieties I am planting this year – ‘Finola’ with stunning pink-and-white blooms. (Photo courtesy Colorblends)
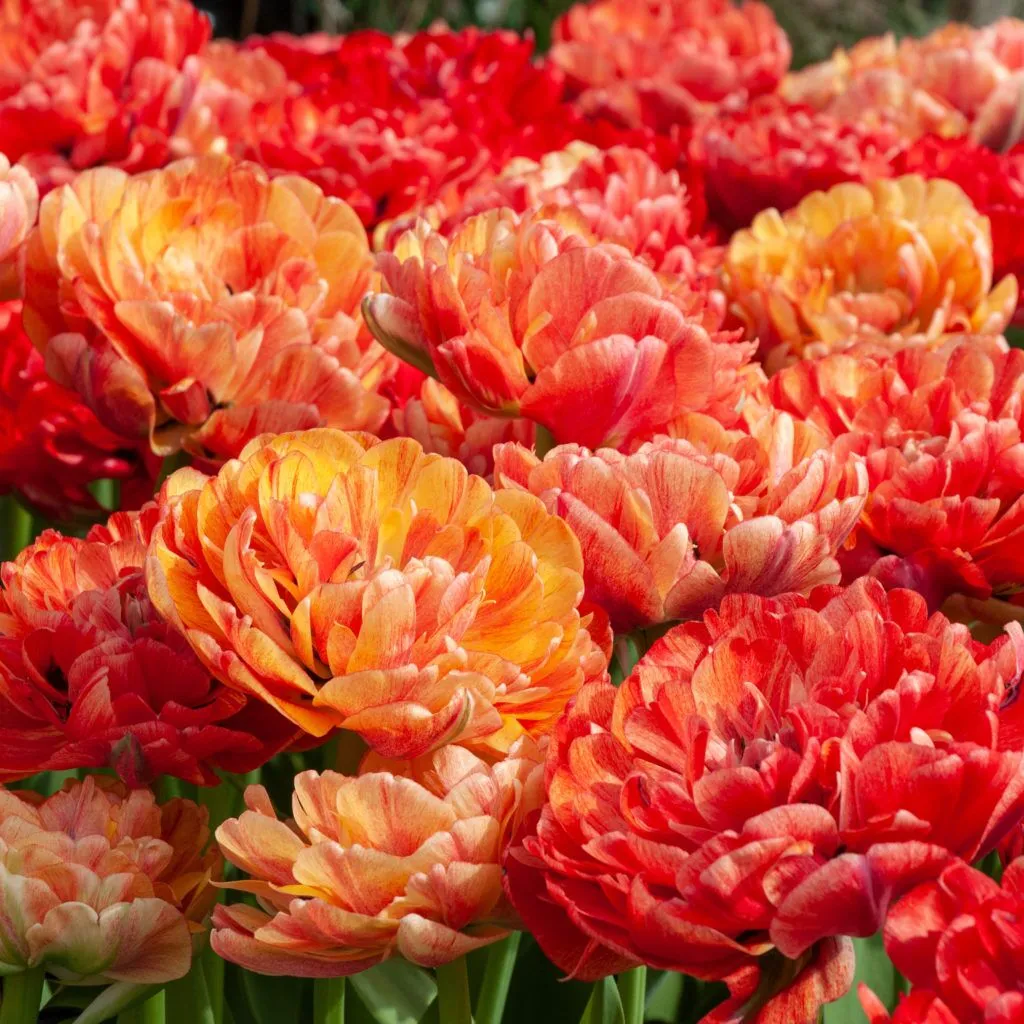
‘Moris Gudanov’ has big, blooms filled with peach and red petals that are sometimes streaked and sometimes solid. (Photo courtesy Colorblends)
‘Rosy Diamond’ has double blooms in shades of rose-pink splashed with tones of magenta. (Photo courtesy The Flowerhat)
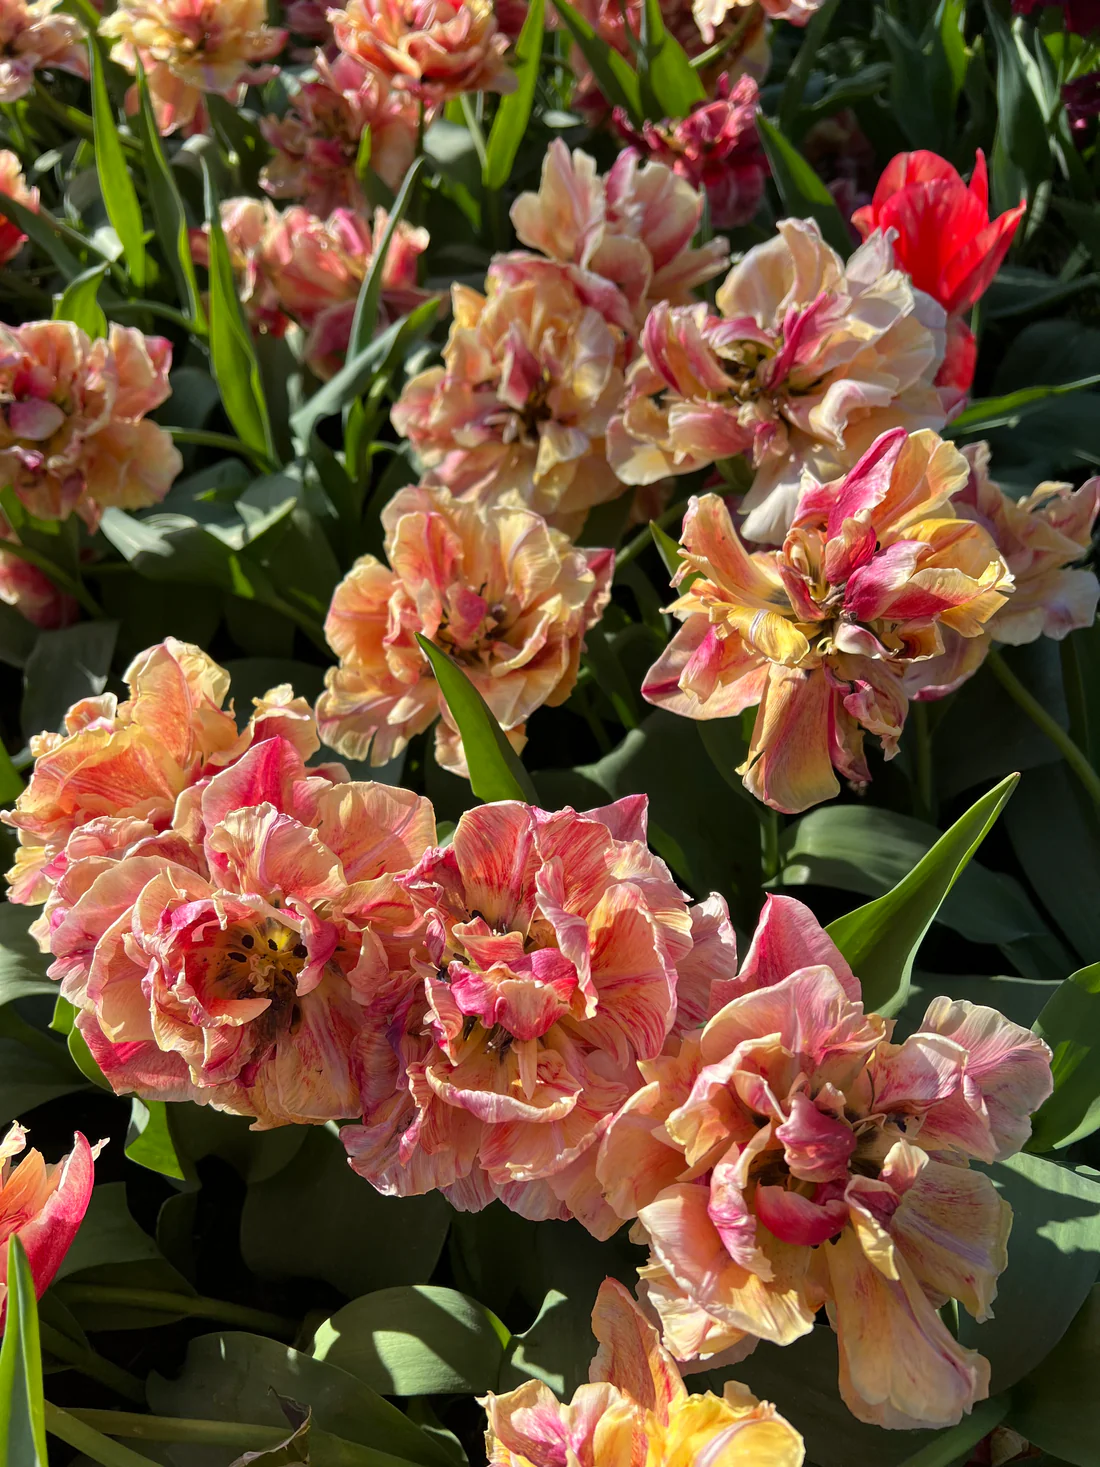
‘Foxy Foxtrot’ is a double tulip with shades of apricot and yellow and hints of rose orange. (Photo courtesy The Flowerhat)
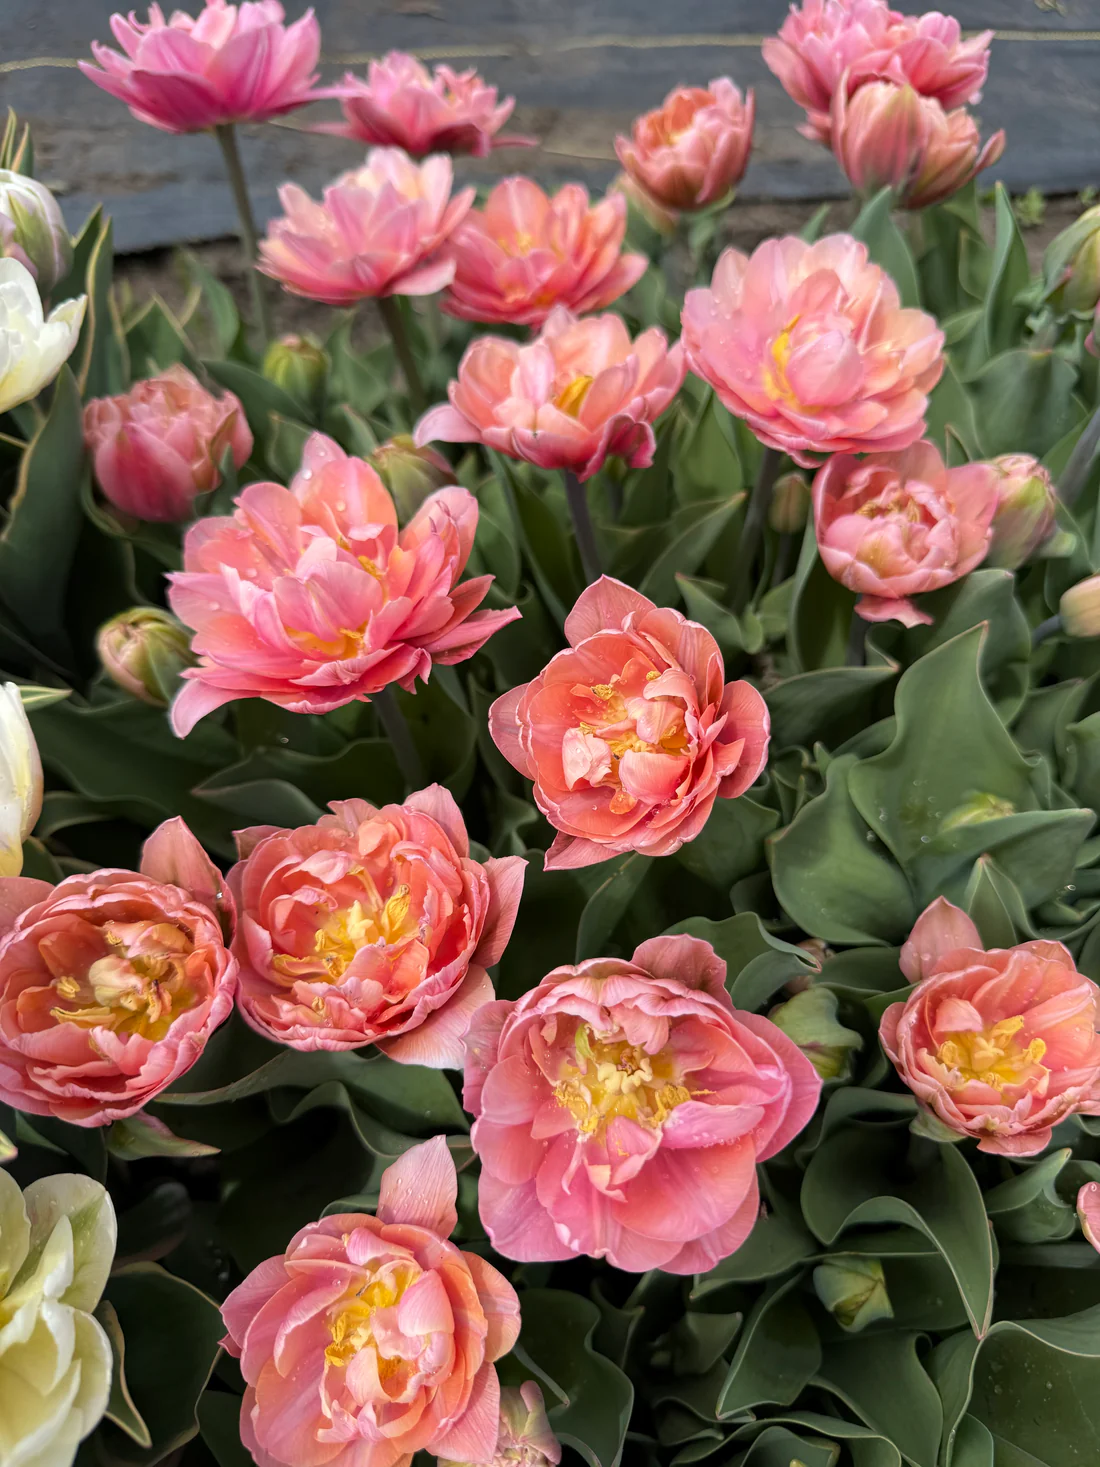
‘Pink Cameo’ produces full, double blooms in soft pink tones with warm apricot highlights. (Photo courtesy The Flowerhat)
‘Verona Sunrise’ shows off a blend of apricot, blush, and buttery yellow that deepens as the bloom matures. (Photo courtesy The Flowerhat)
And this gorgeous double tulip is ‘Sugar Crystal.’ It has huge, feathery blooms with many layers of frilly petals in shades of silvery baby pink. (Photo courtesy The Flowerhat)
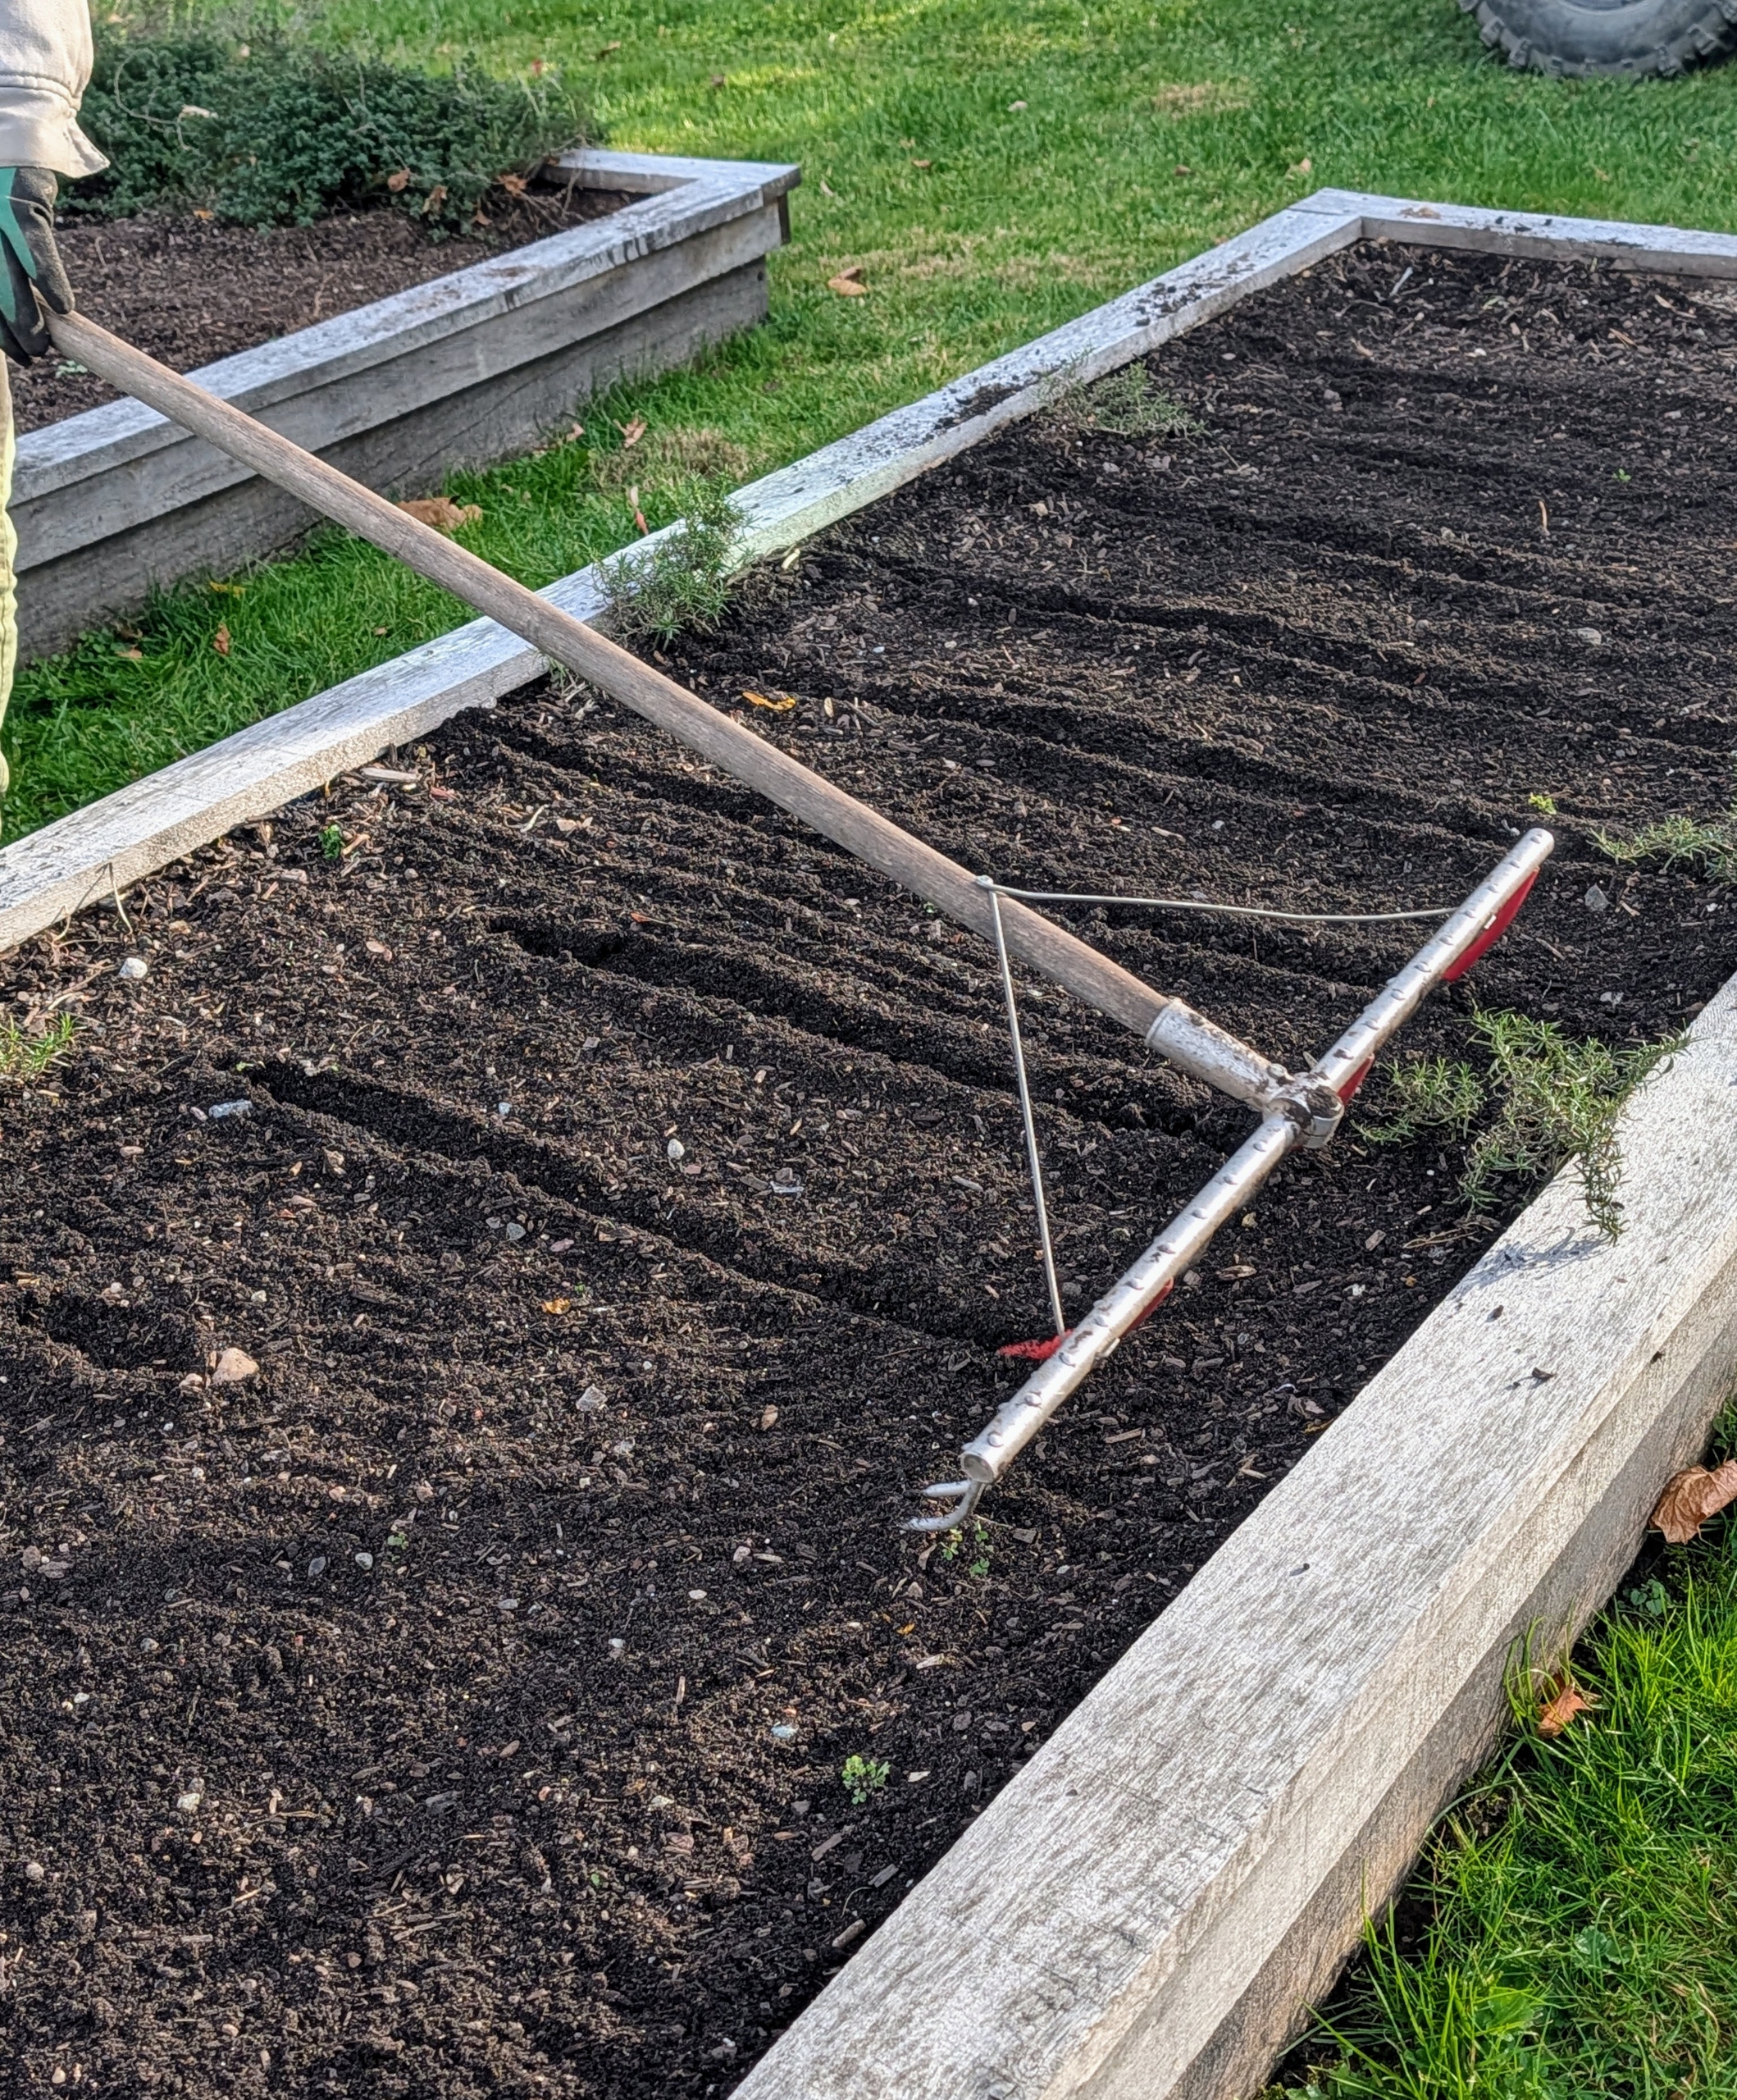
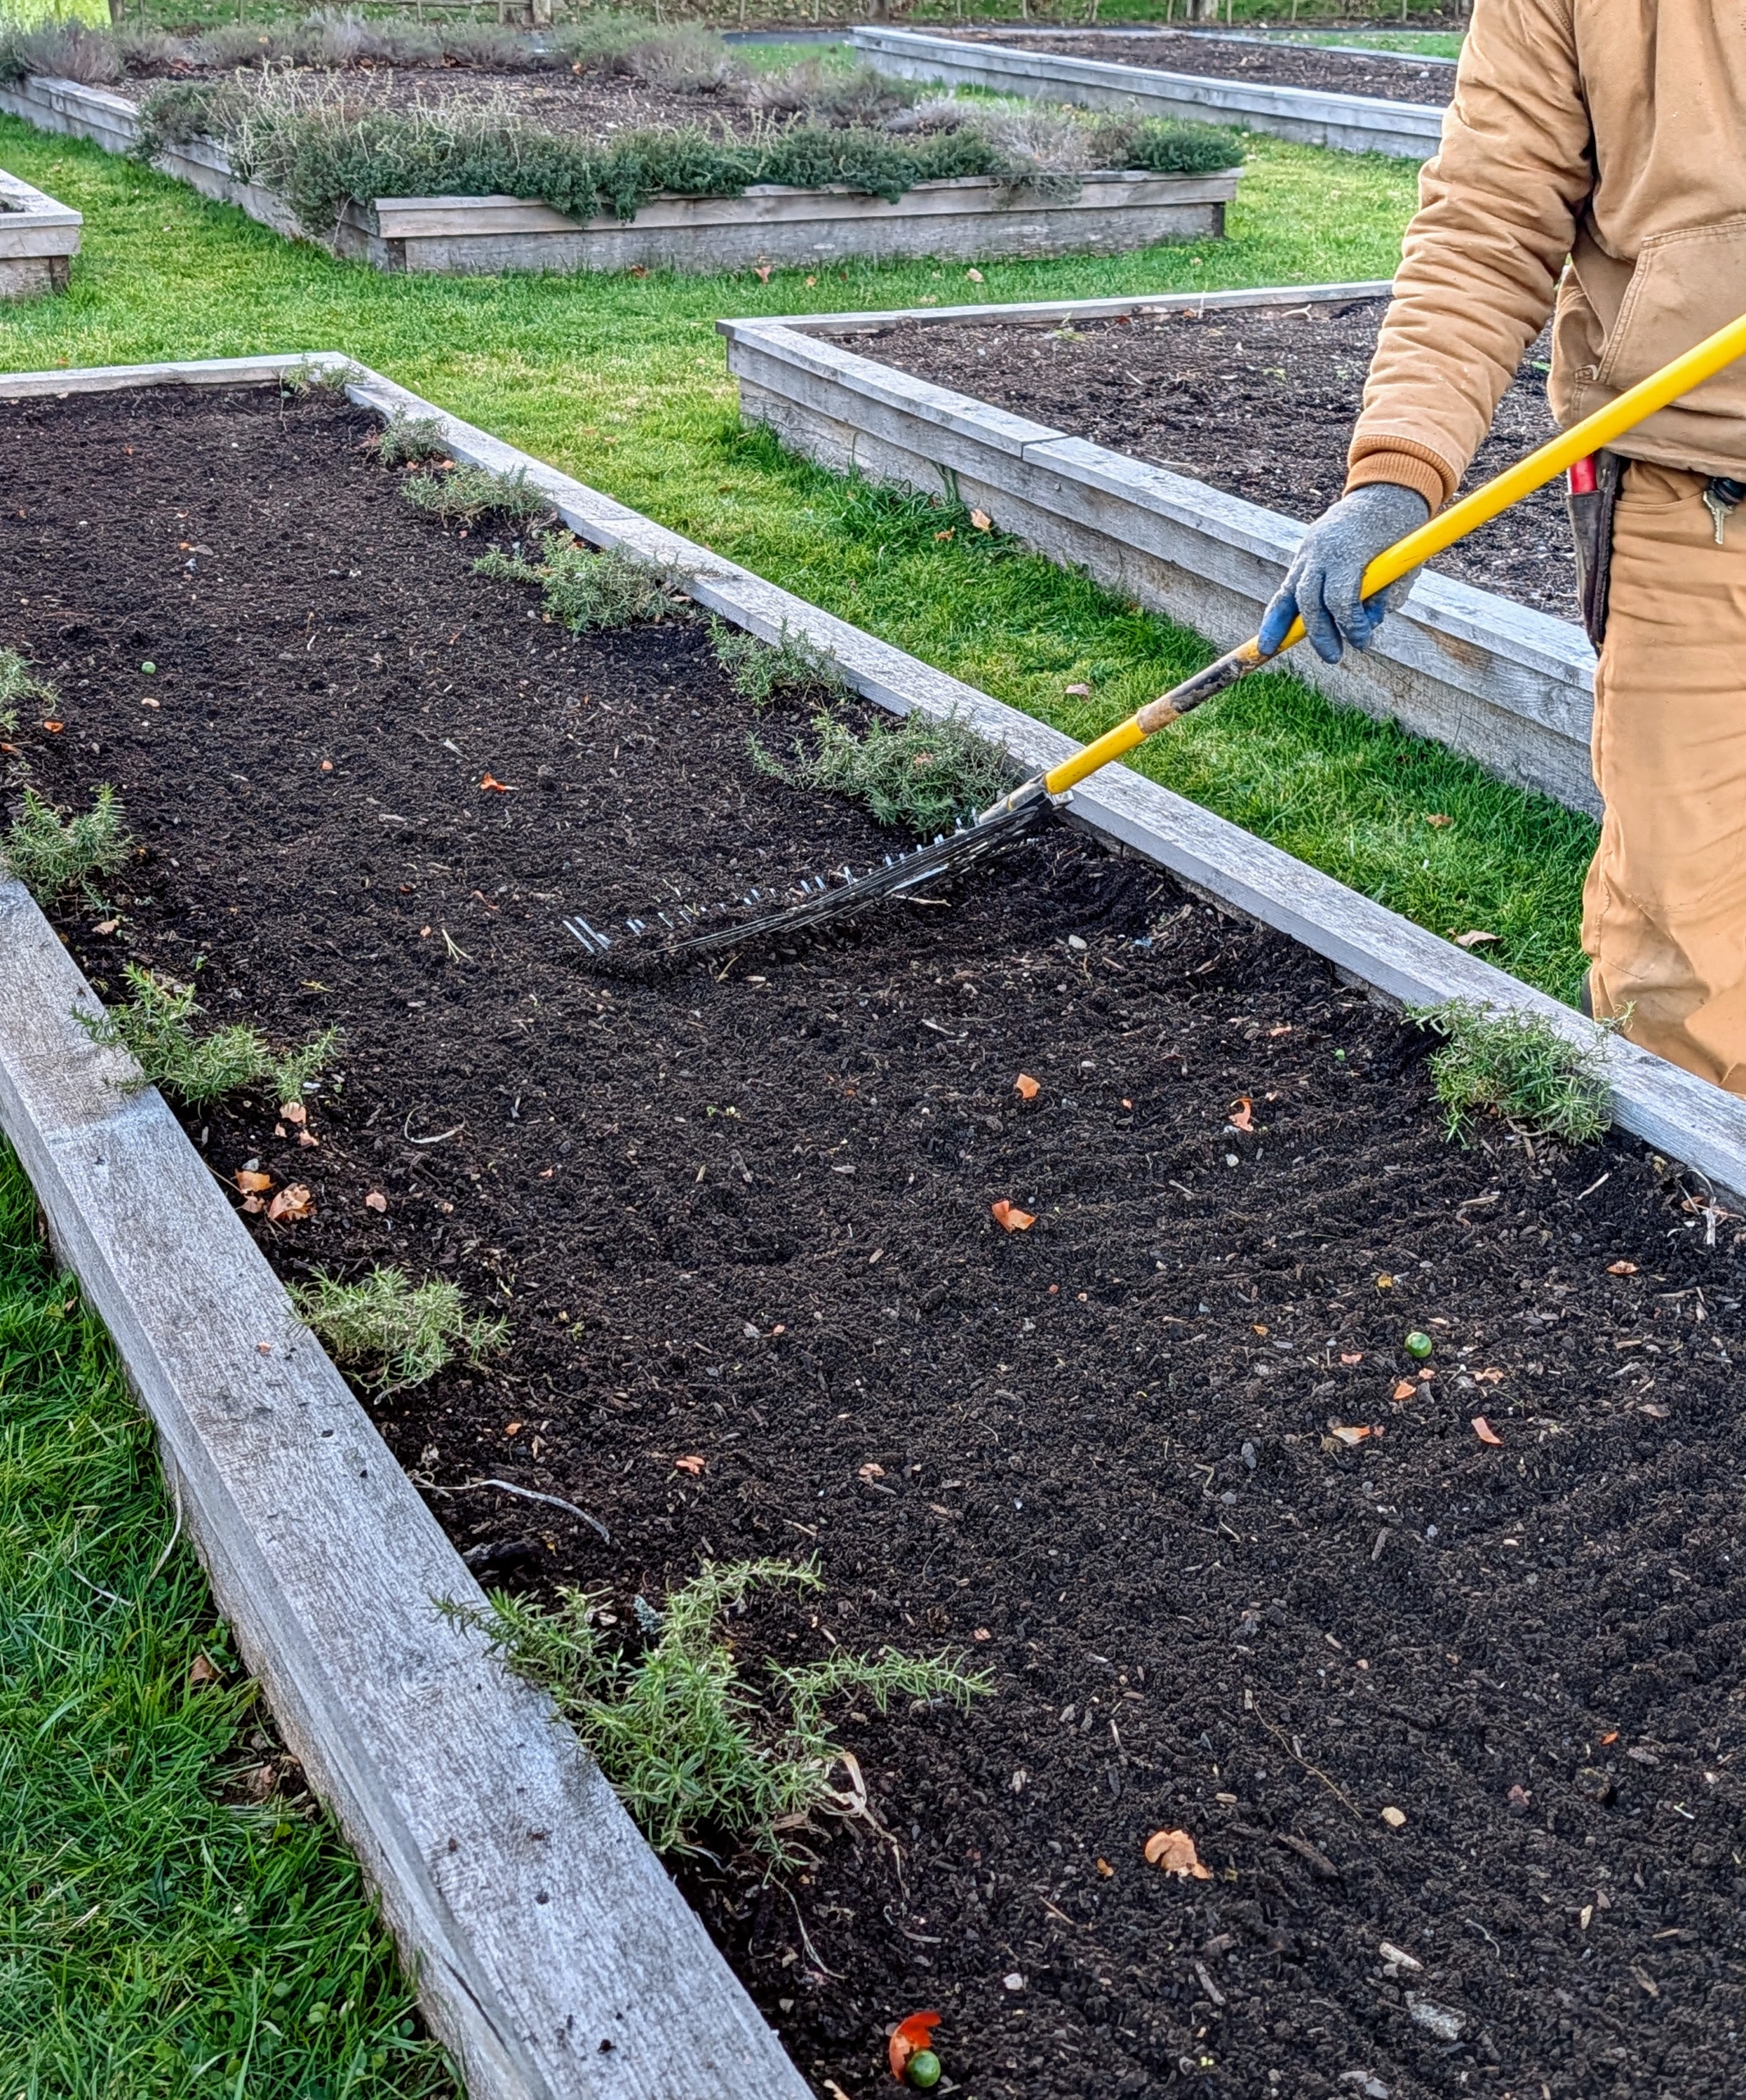
Phurba starts by raking the bed and evening the soil. These beds are great for planting tulip bulbs – they will look so pretty when in bloom. And they will be done blooming before it is time to plant my vegetables.
Ryan follows by making the rows using the bed preparation rake from Johnny’s Selected Seeds. This tool allows him to create shallow furrows in the soil. Hard plastic red tubes slide onto selected teeth of the rake to mark the rows.
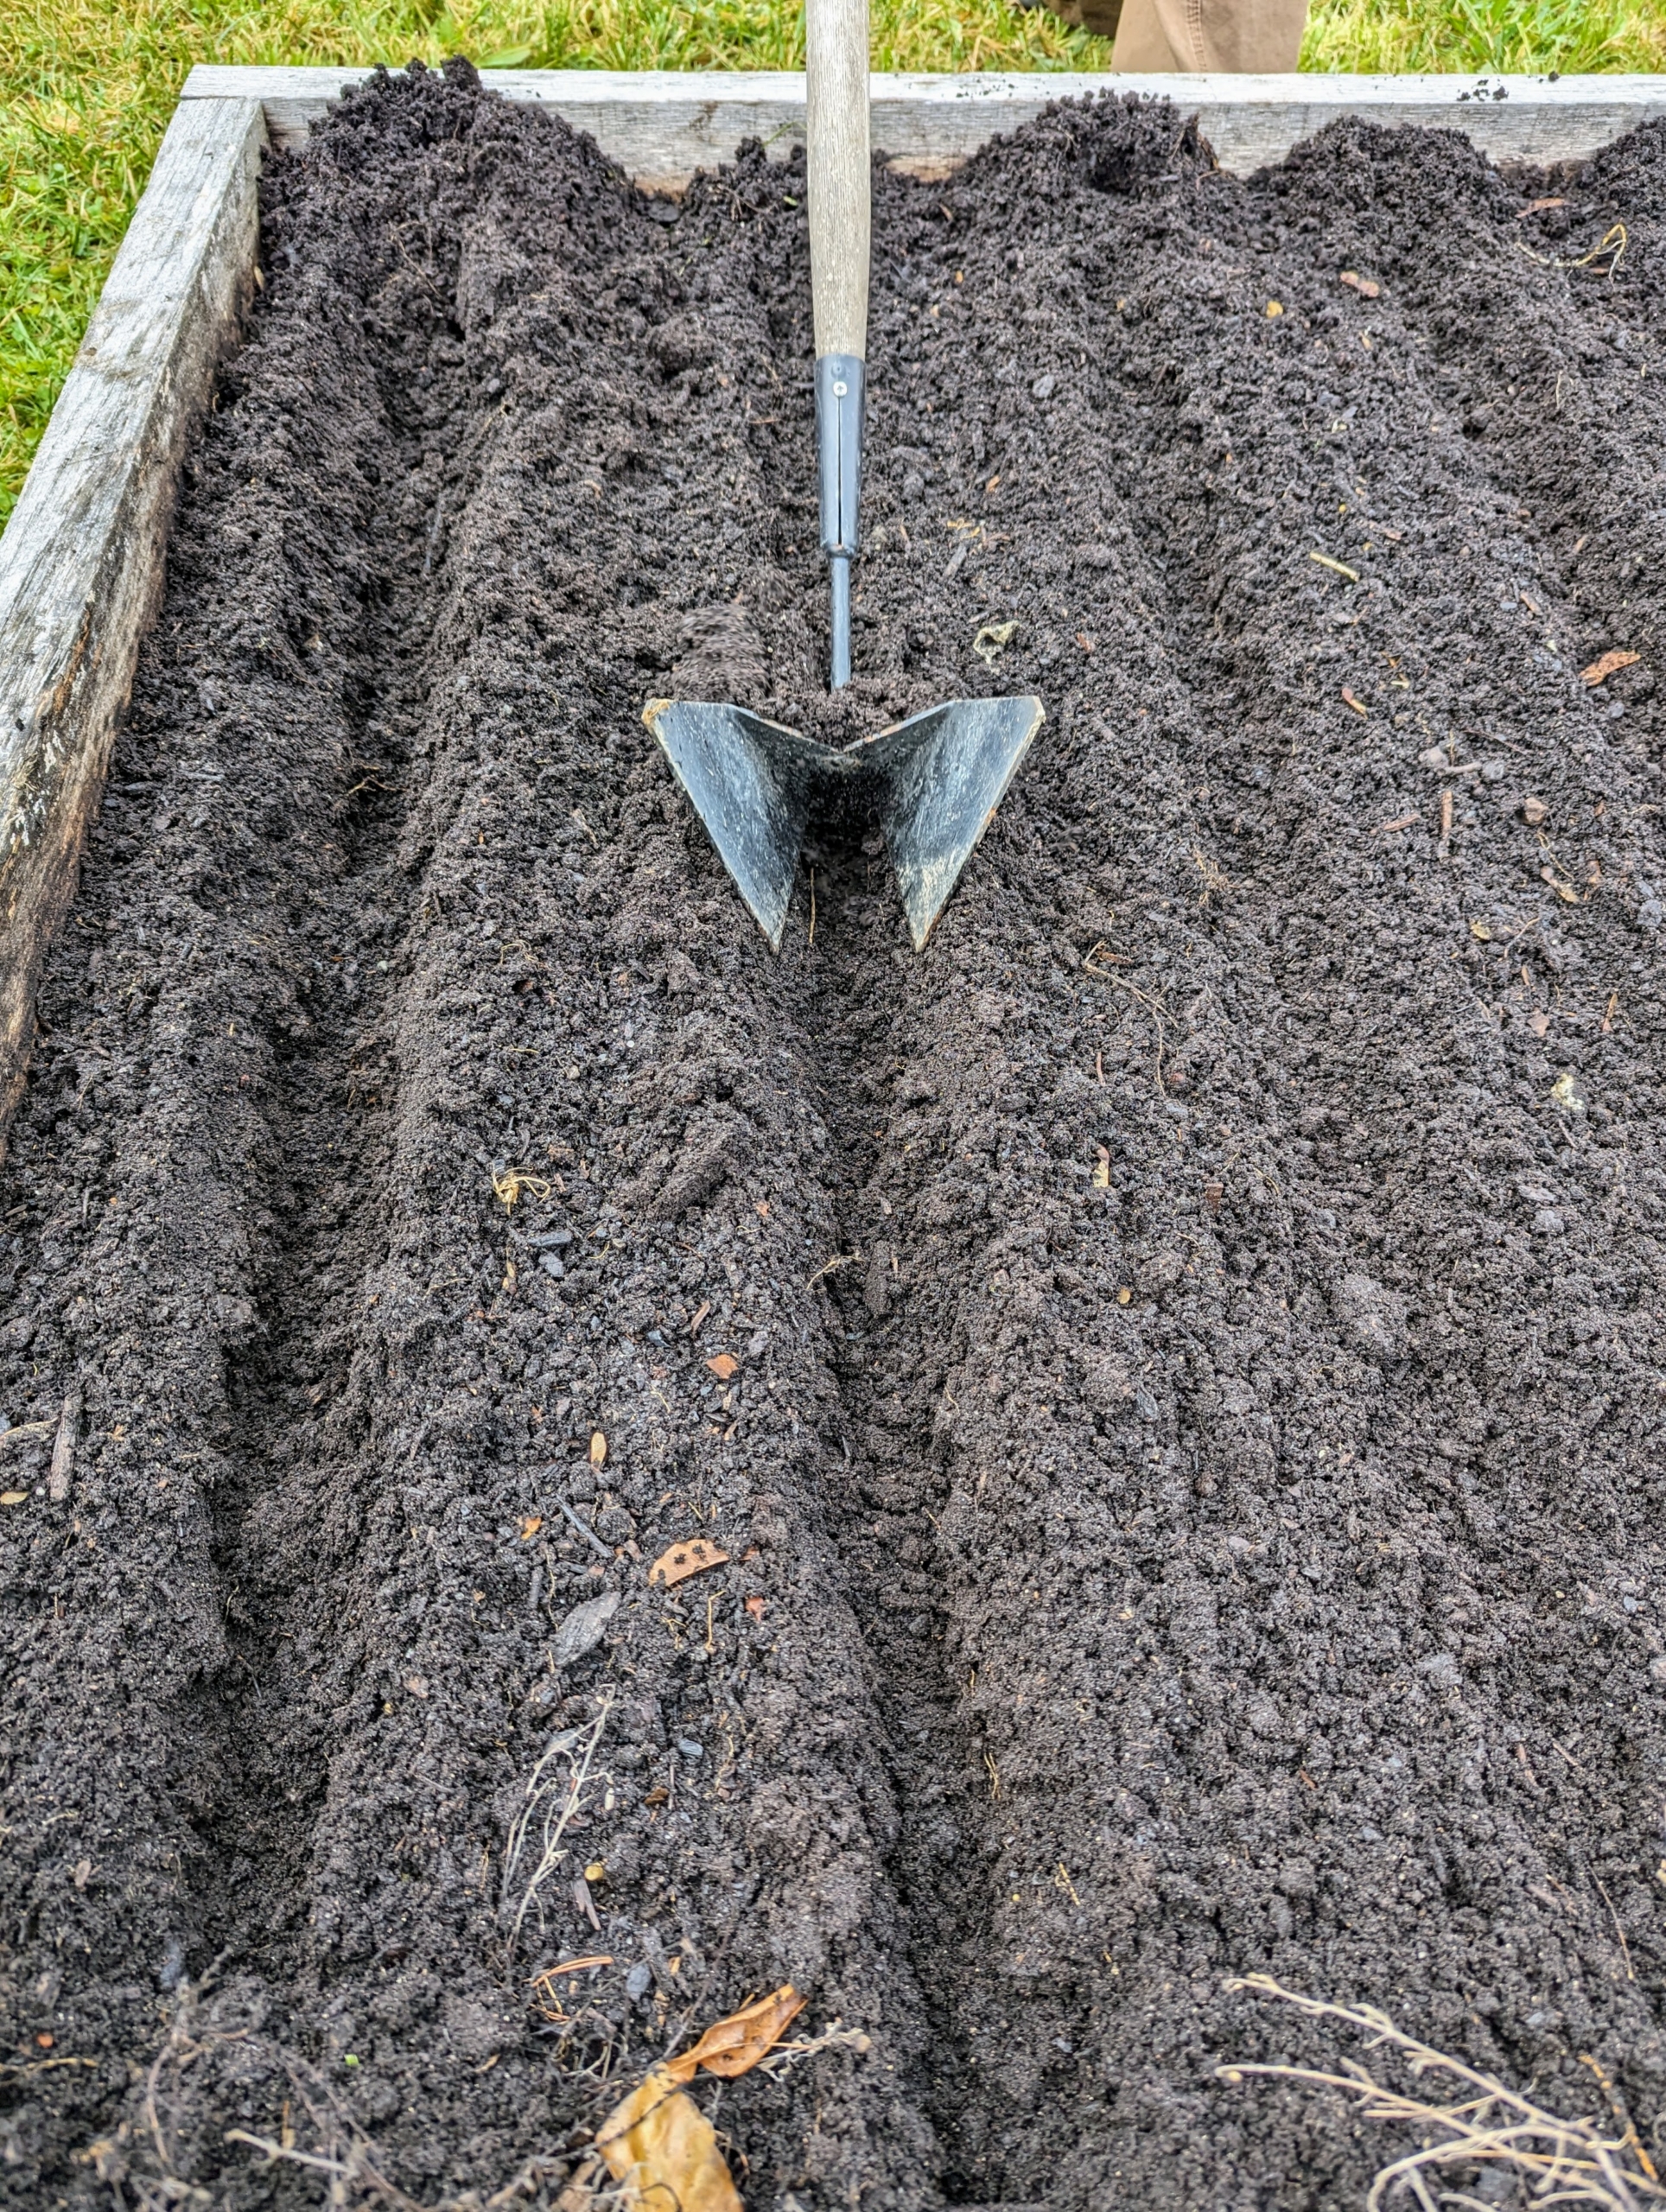
Then Matthew goes over the same furrows with the Row Pro™ from Johnny’s Selected Seeds. It’s great for making deeper trenches in the soil.
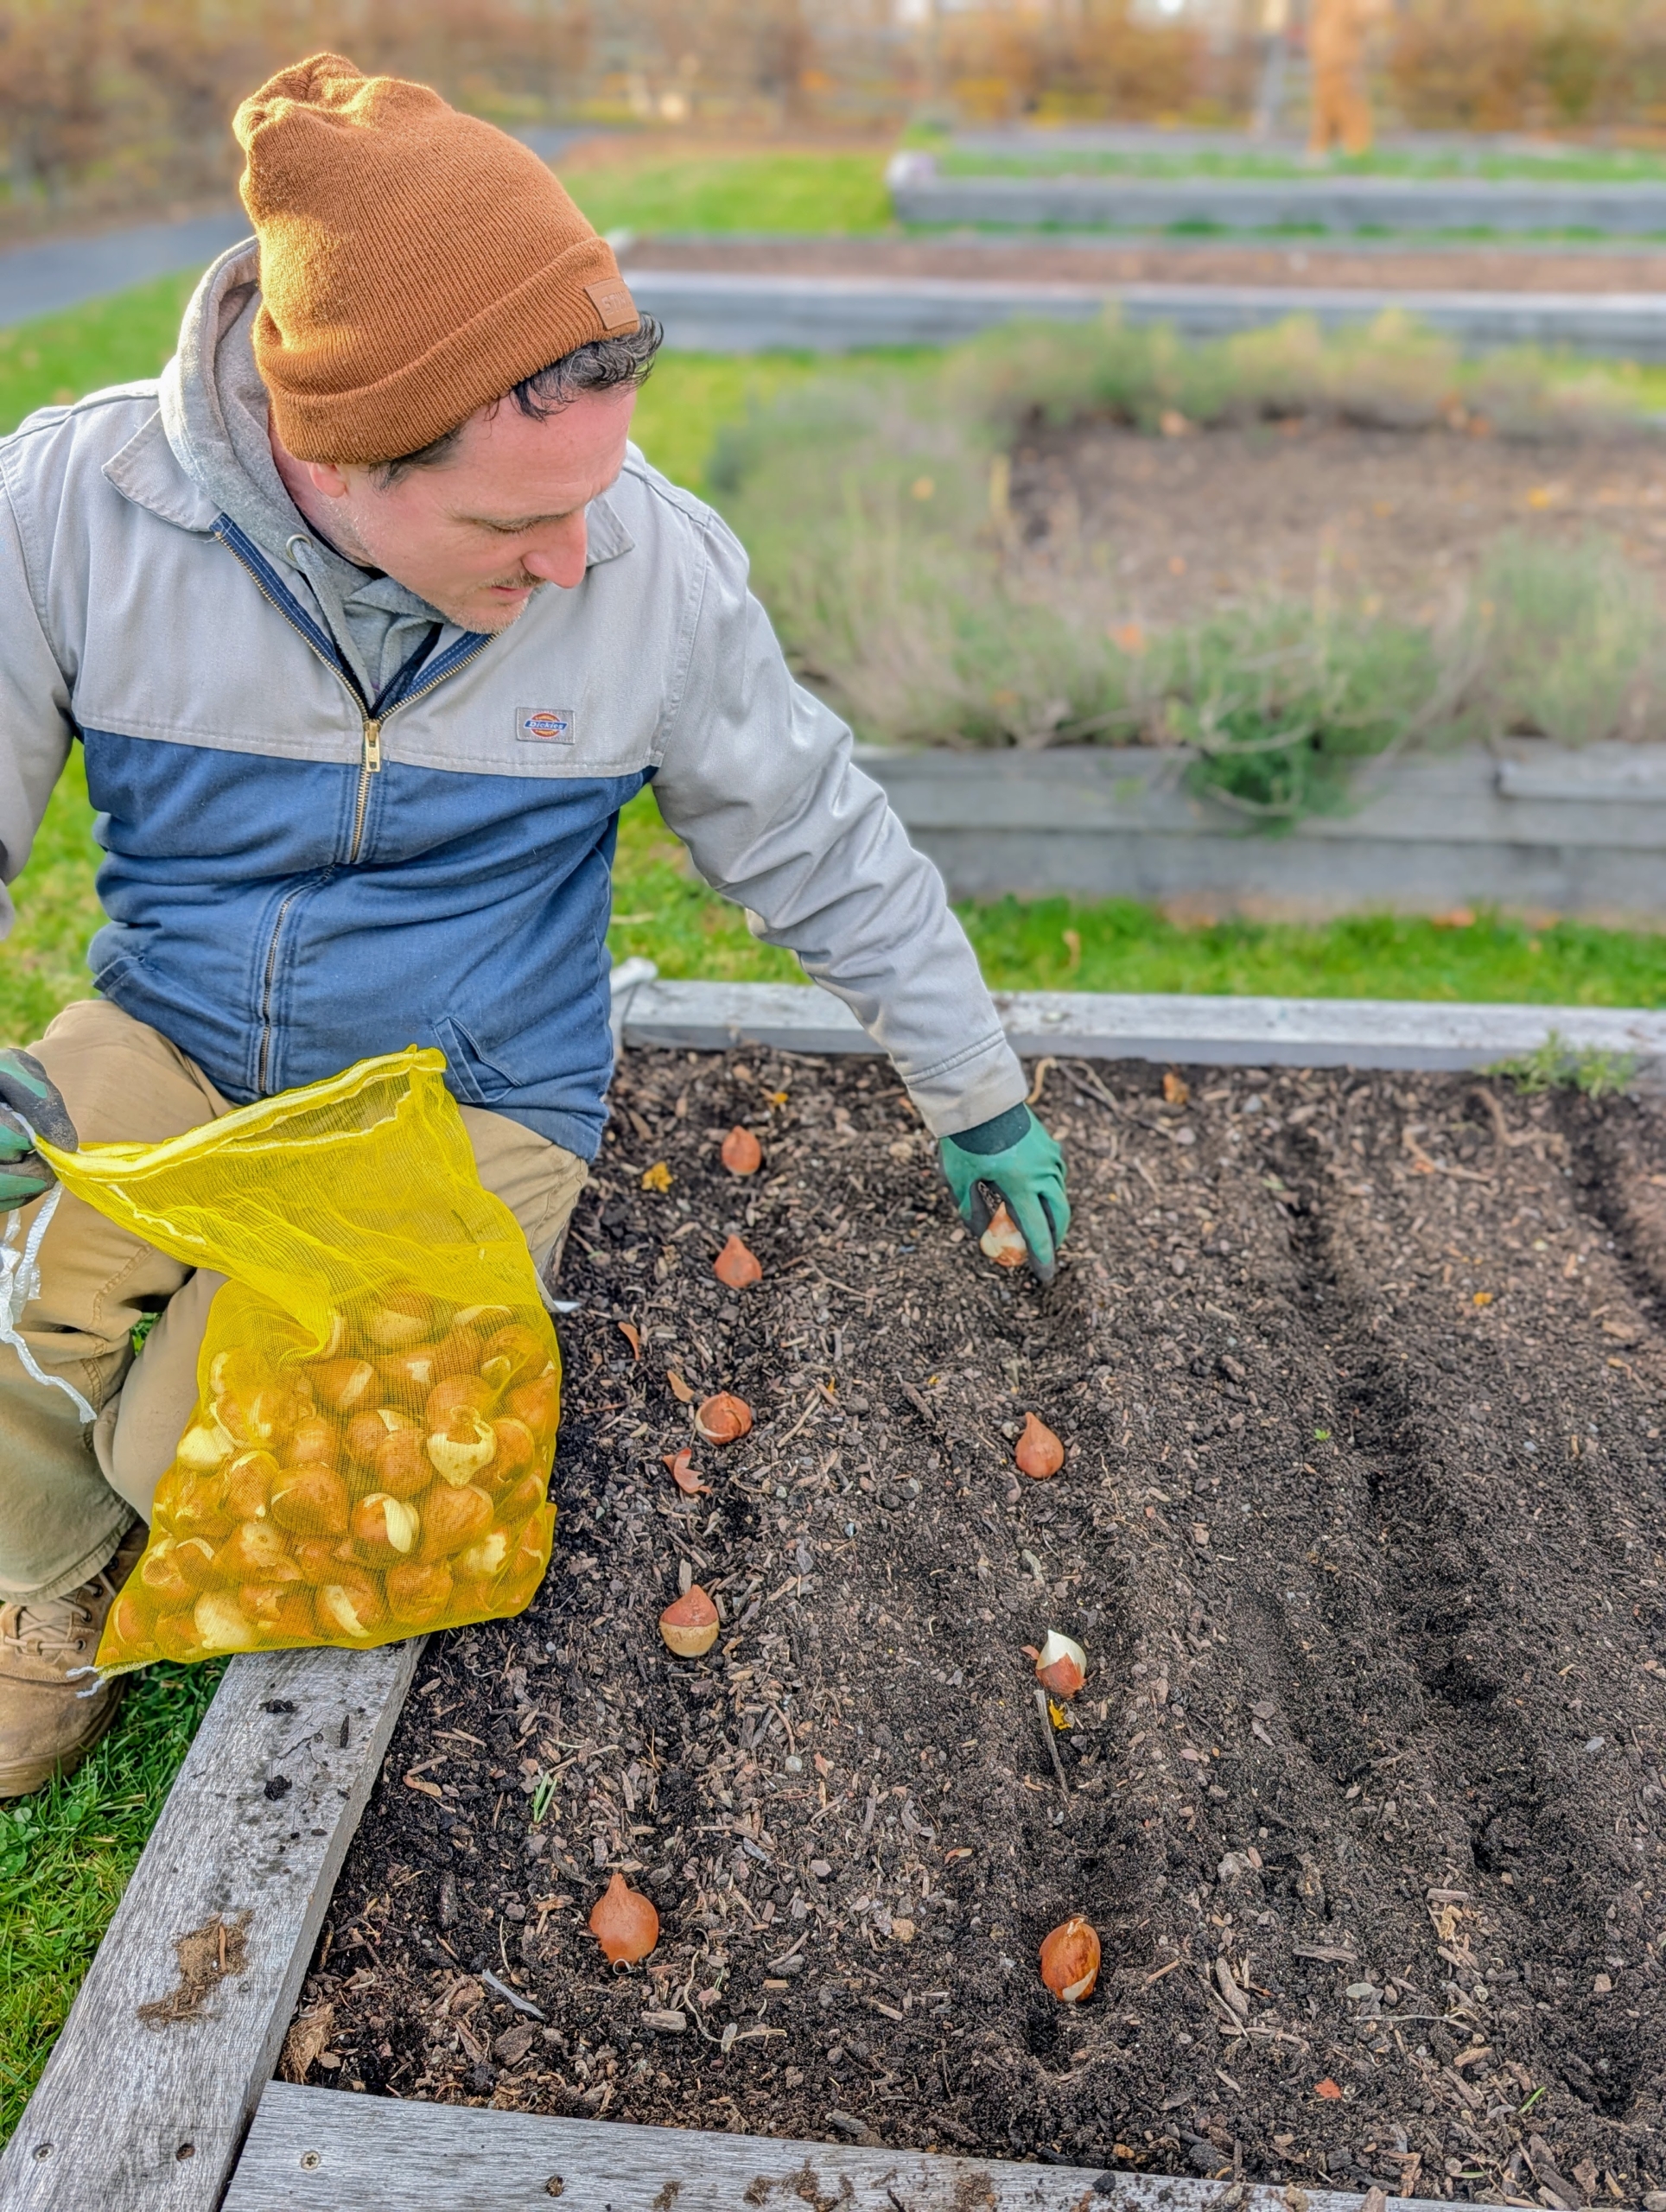
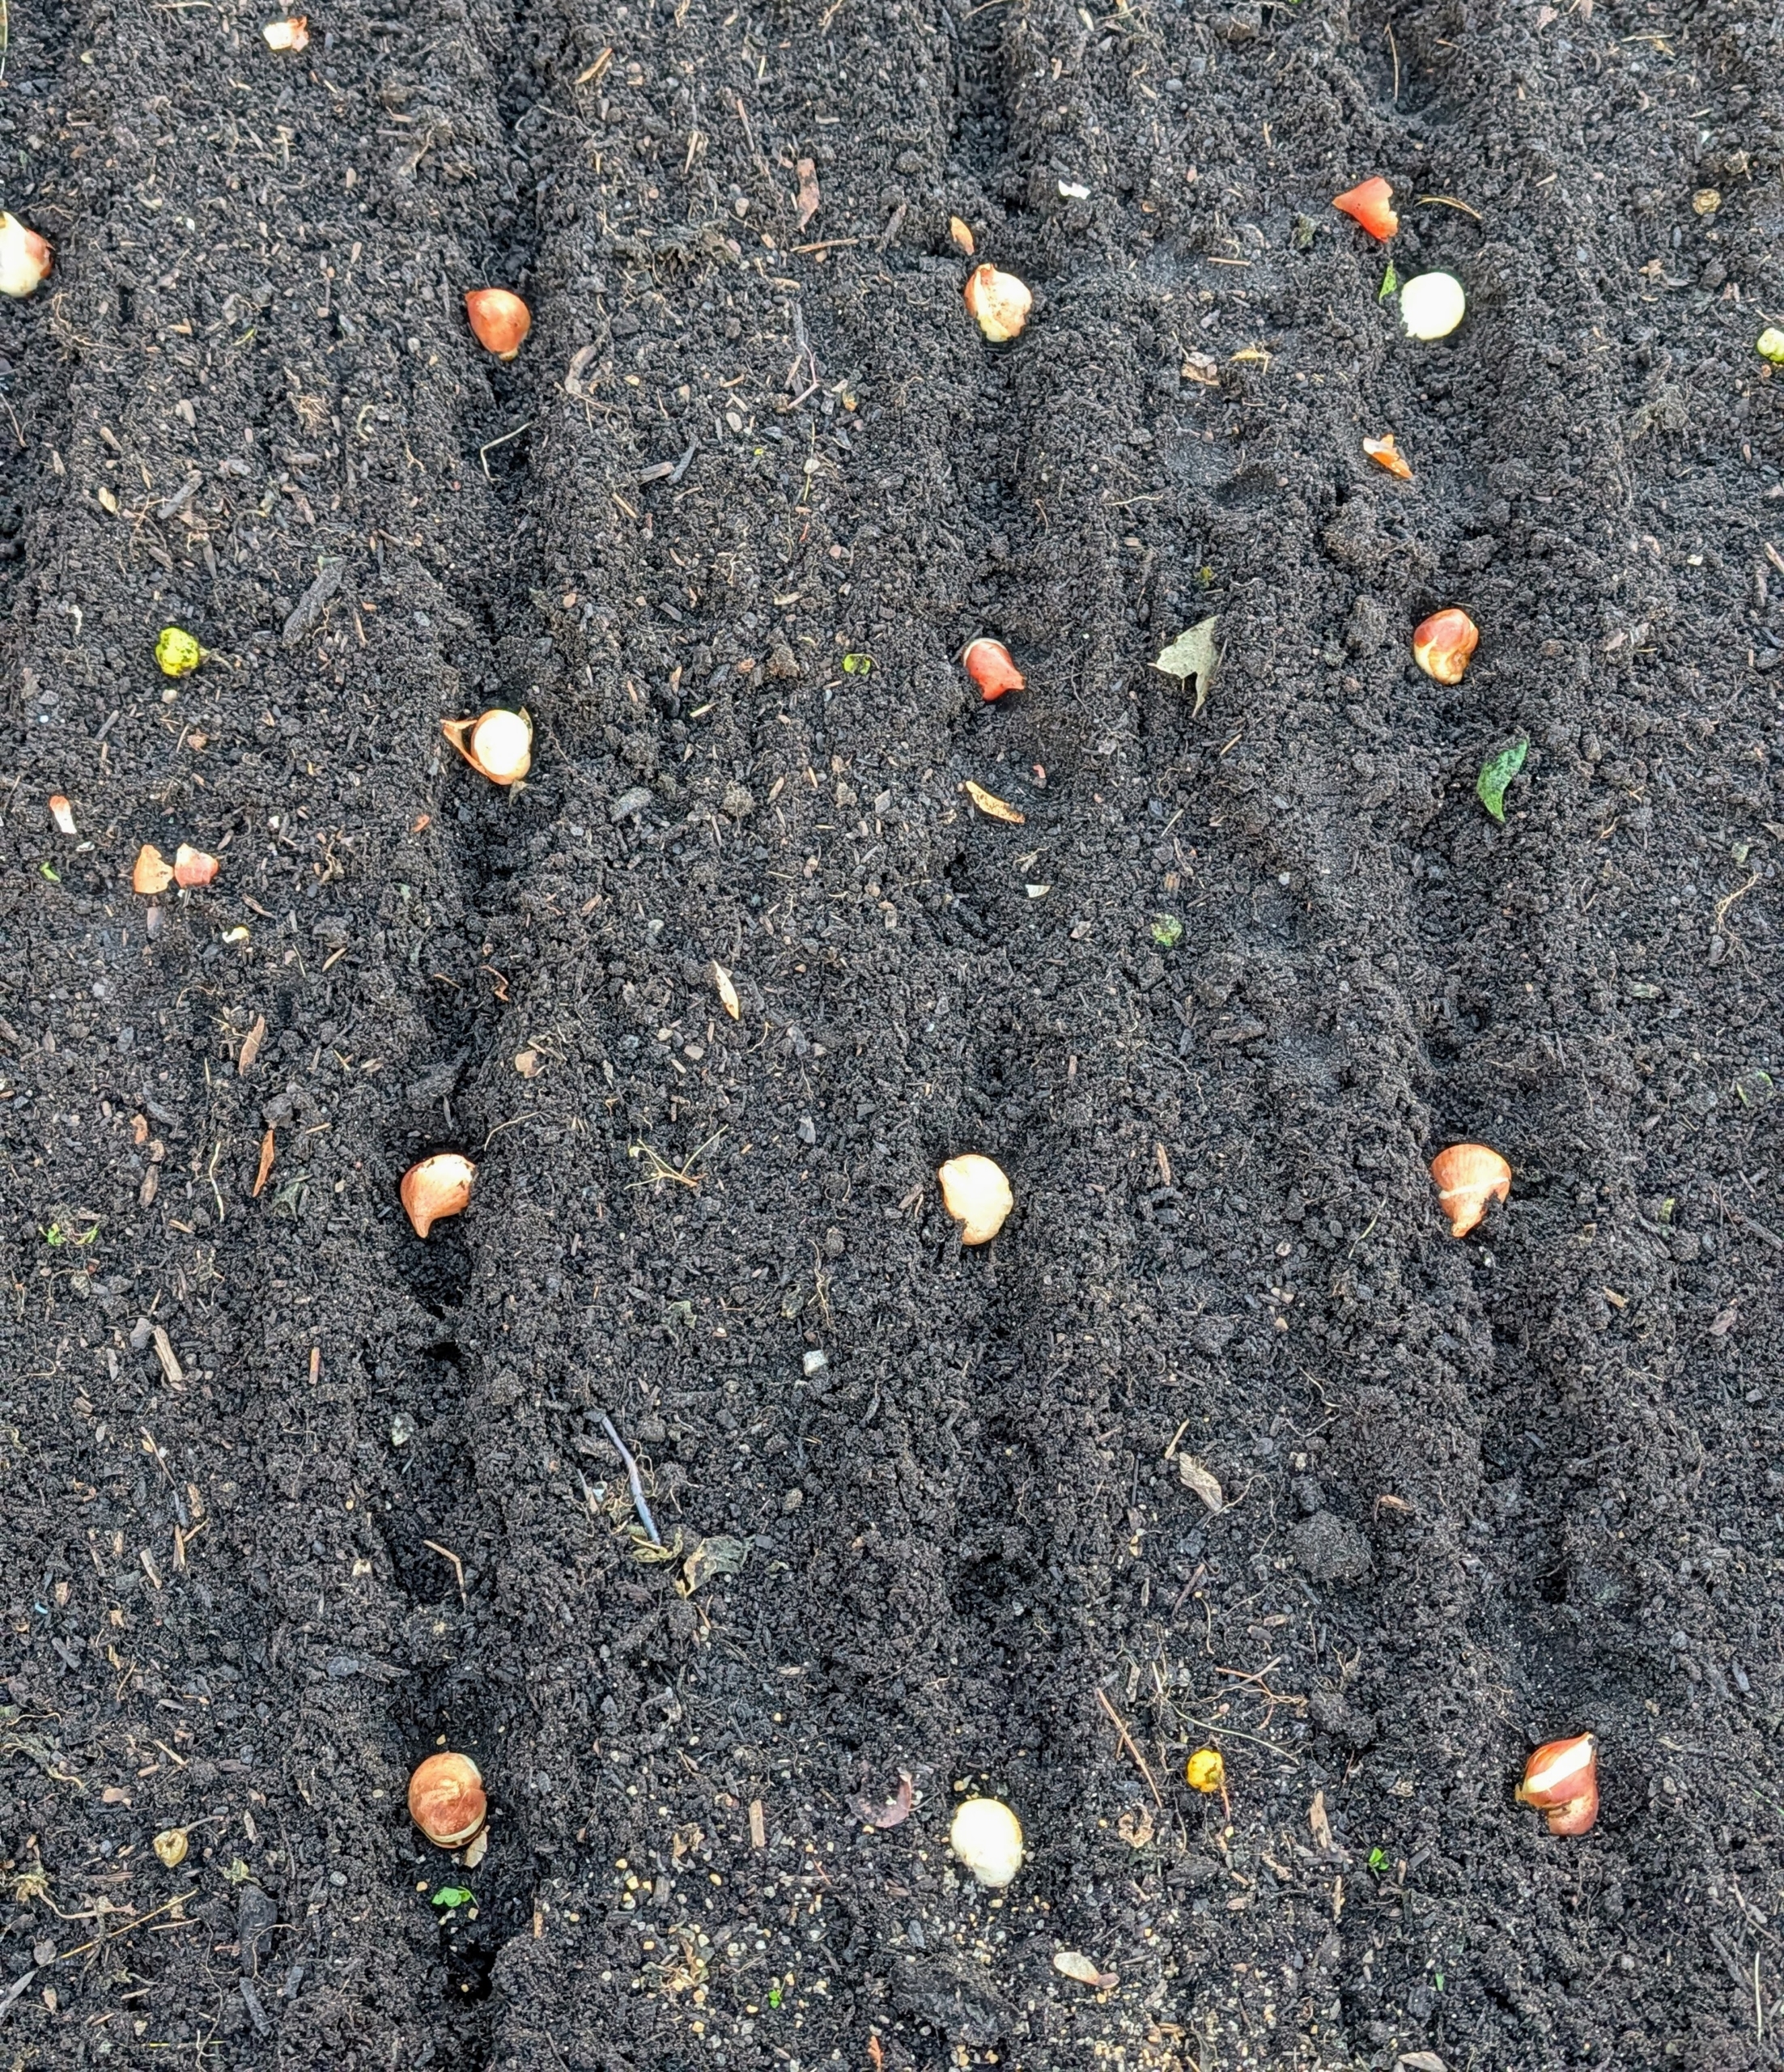
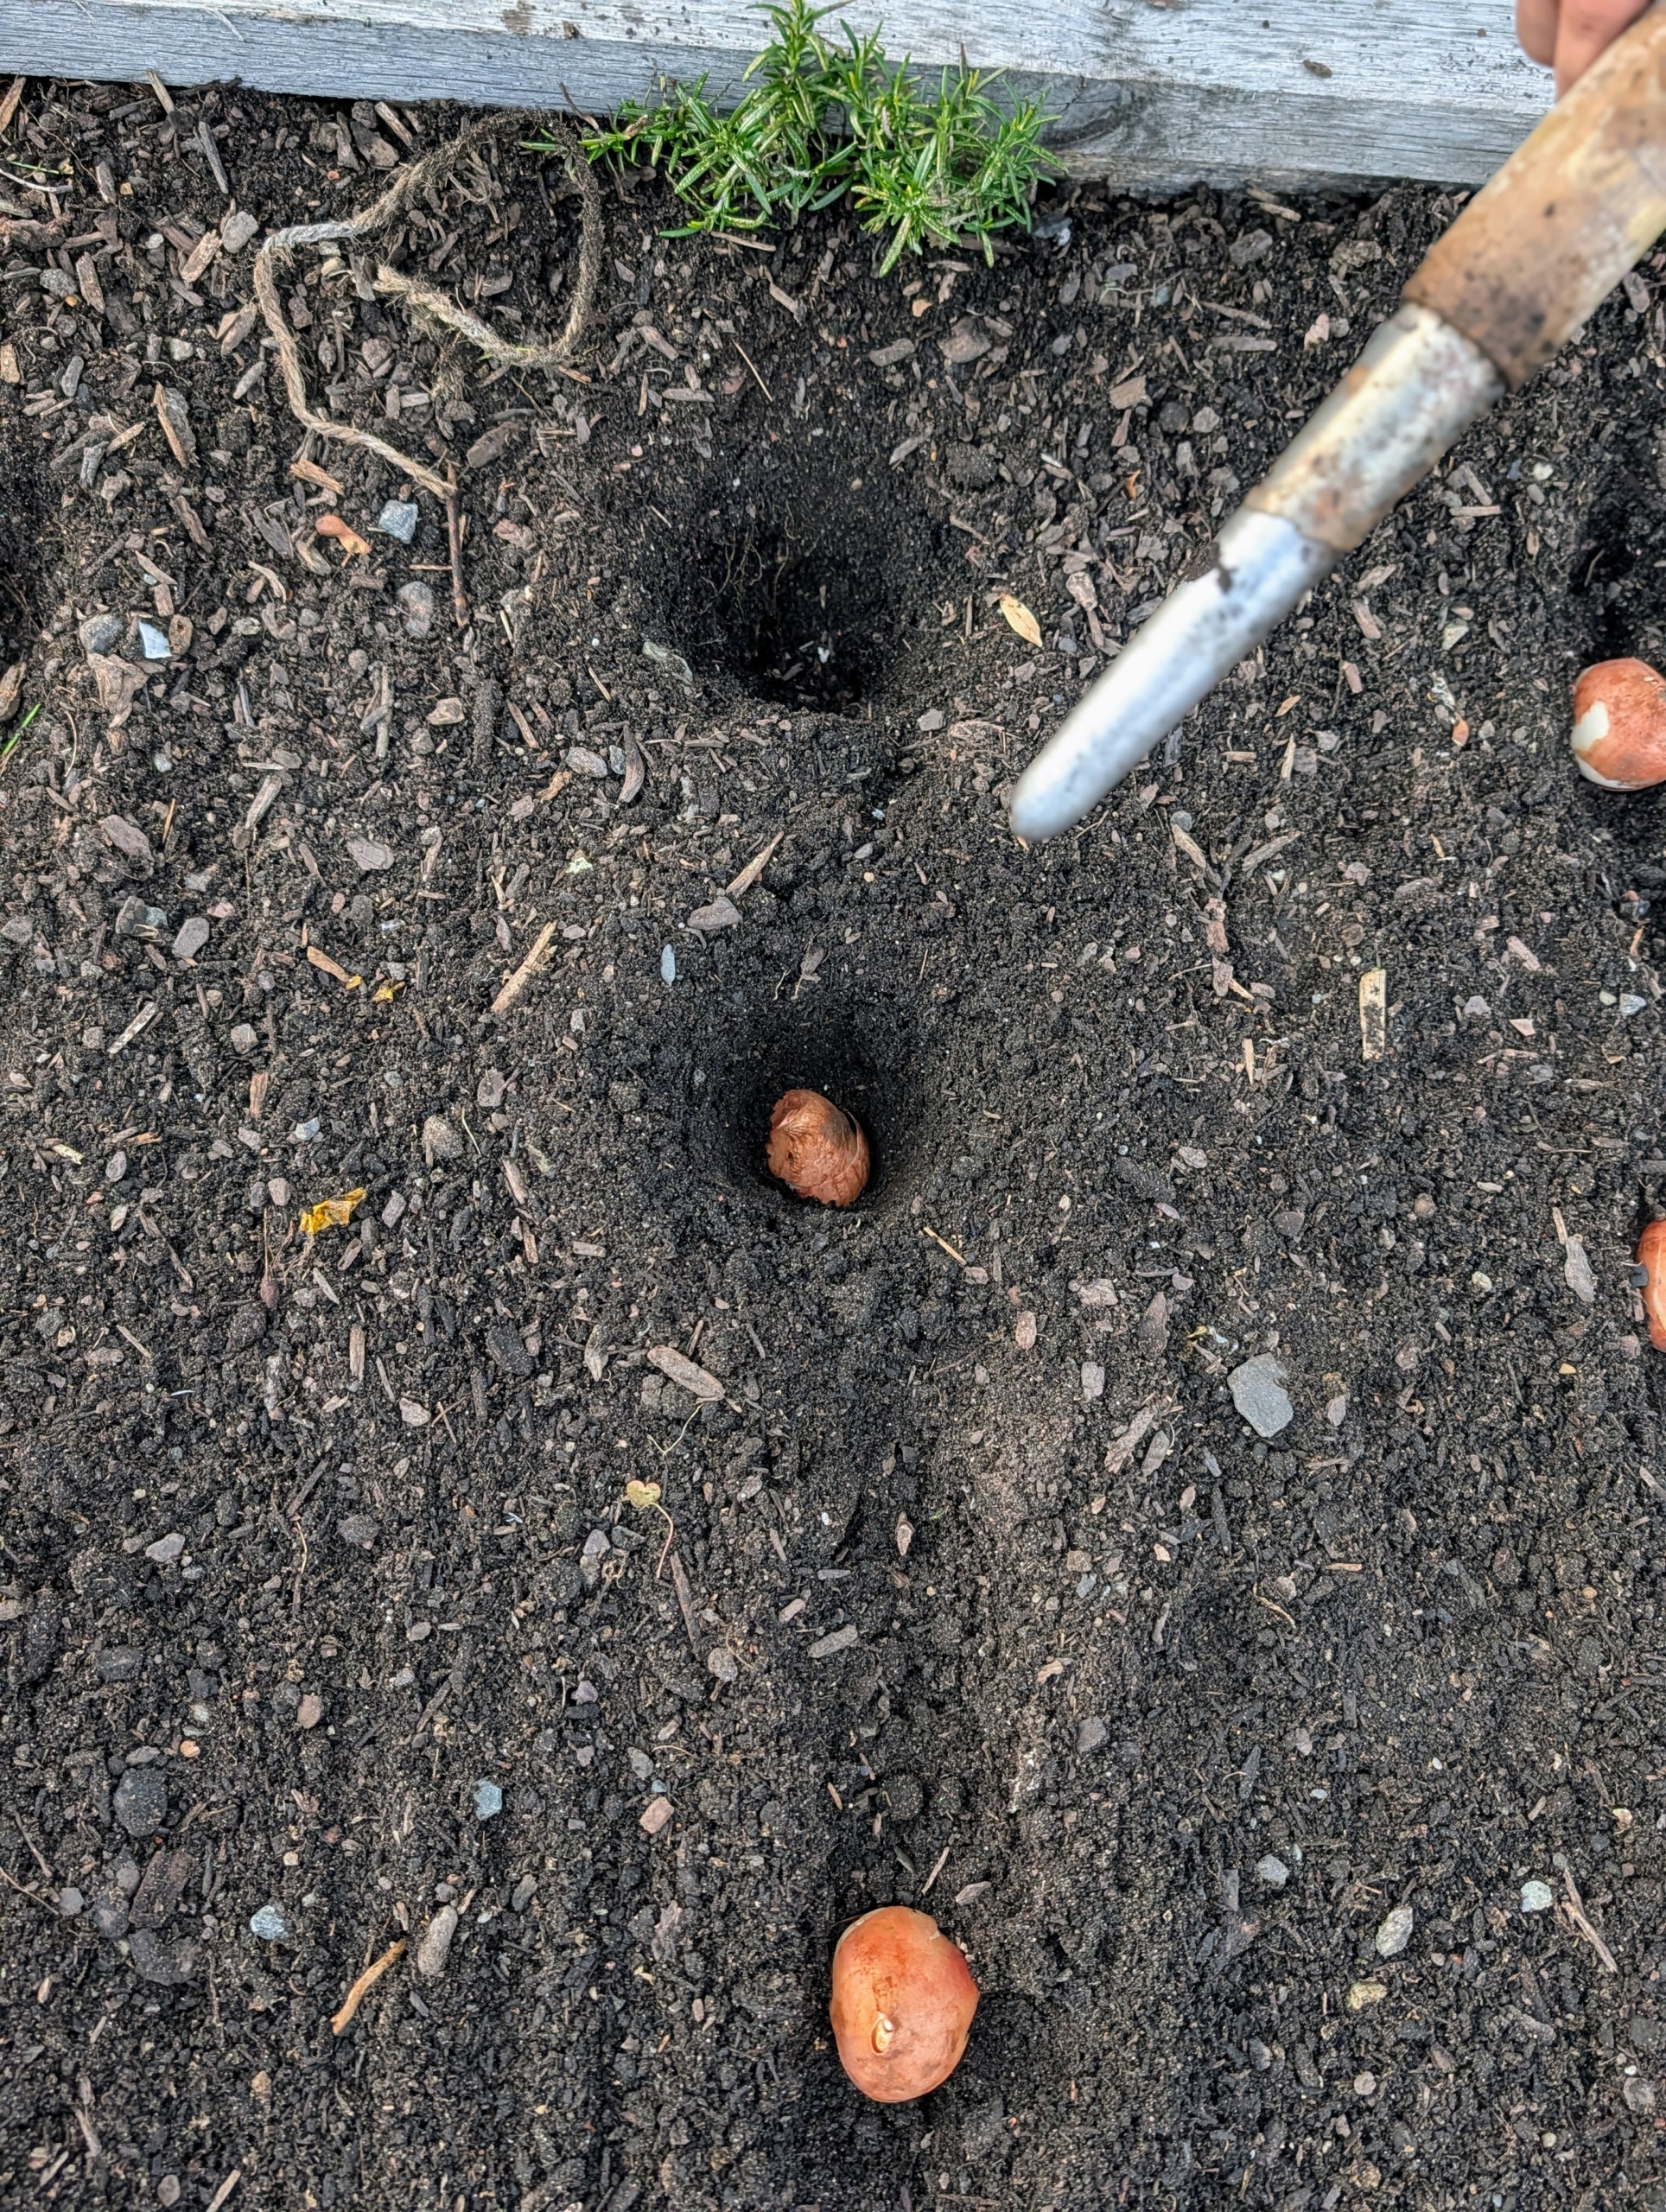
One by one, Ryan places each bulb into the trench. Tulip bulbs are medium sized, so they should be buried at least six to eight-inches deep. As a rule of thumb, bulbs should be planted about three times the height of the actual bulb.
Here is a view from above. These tulips should also have space between them to promote healthy growth and blooming. Here, they are about six inches apart.
The bulbs look so healthy. Any kind of bulb should be firm and free of soft spots or visible rot. Check for signs of disease, cracking or other damage, which may cause the bulb to rot in the ground. The brown tunic, or outer skin protects each bulb’s bottom or basil plate. One can peel it off, or plant as is.
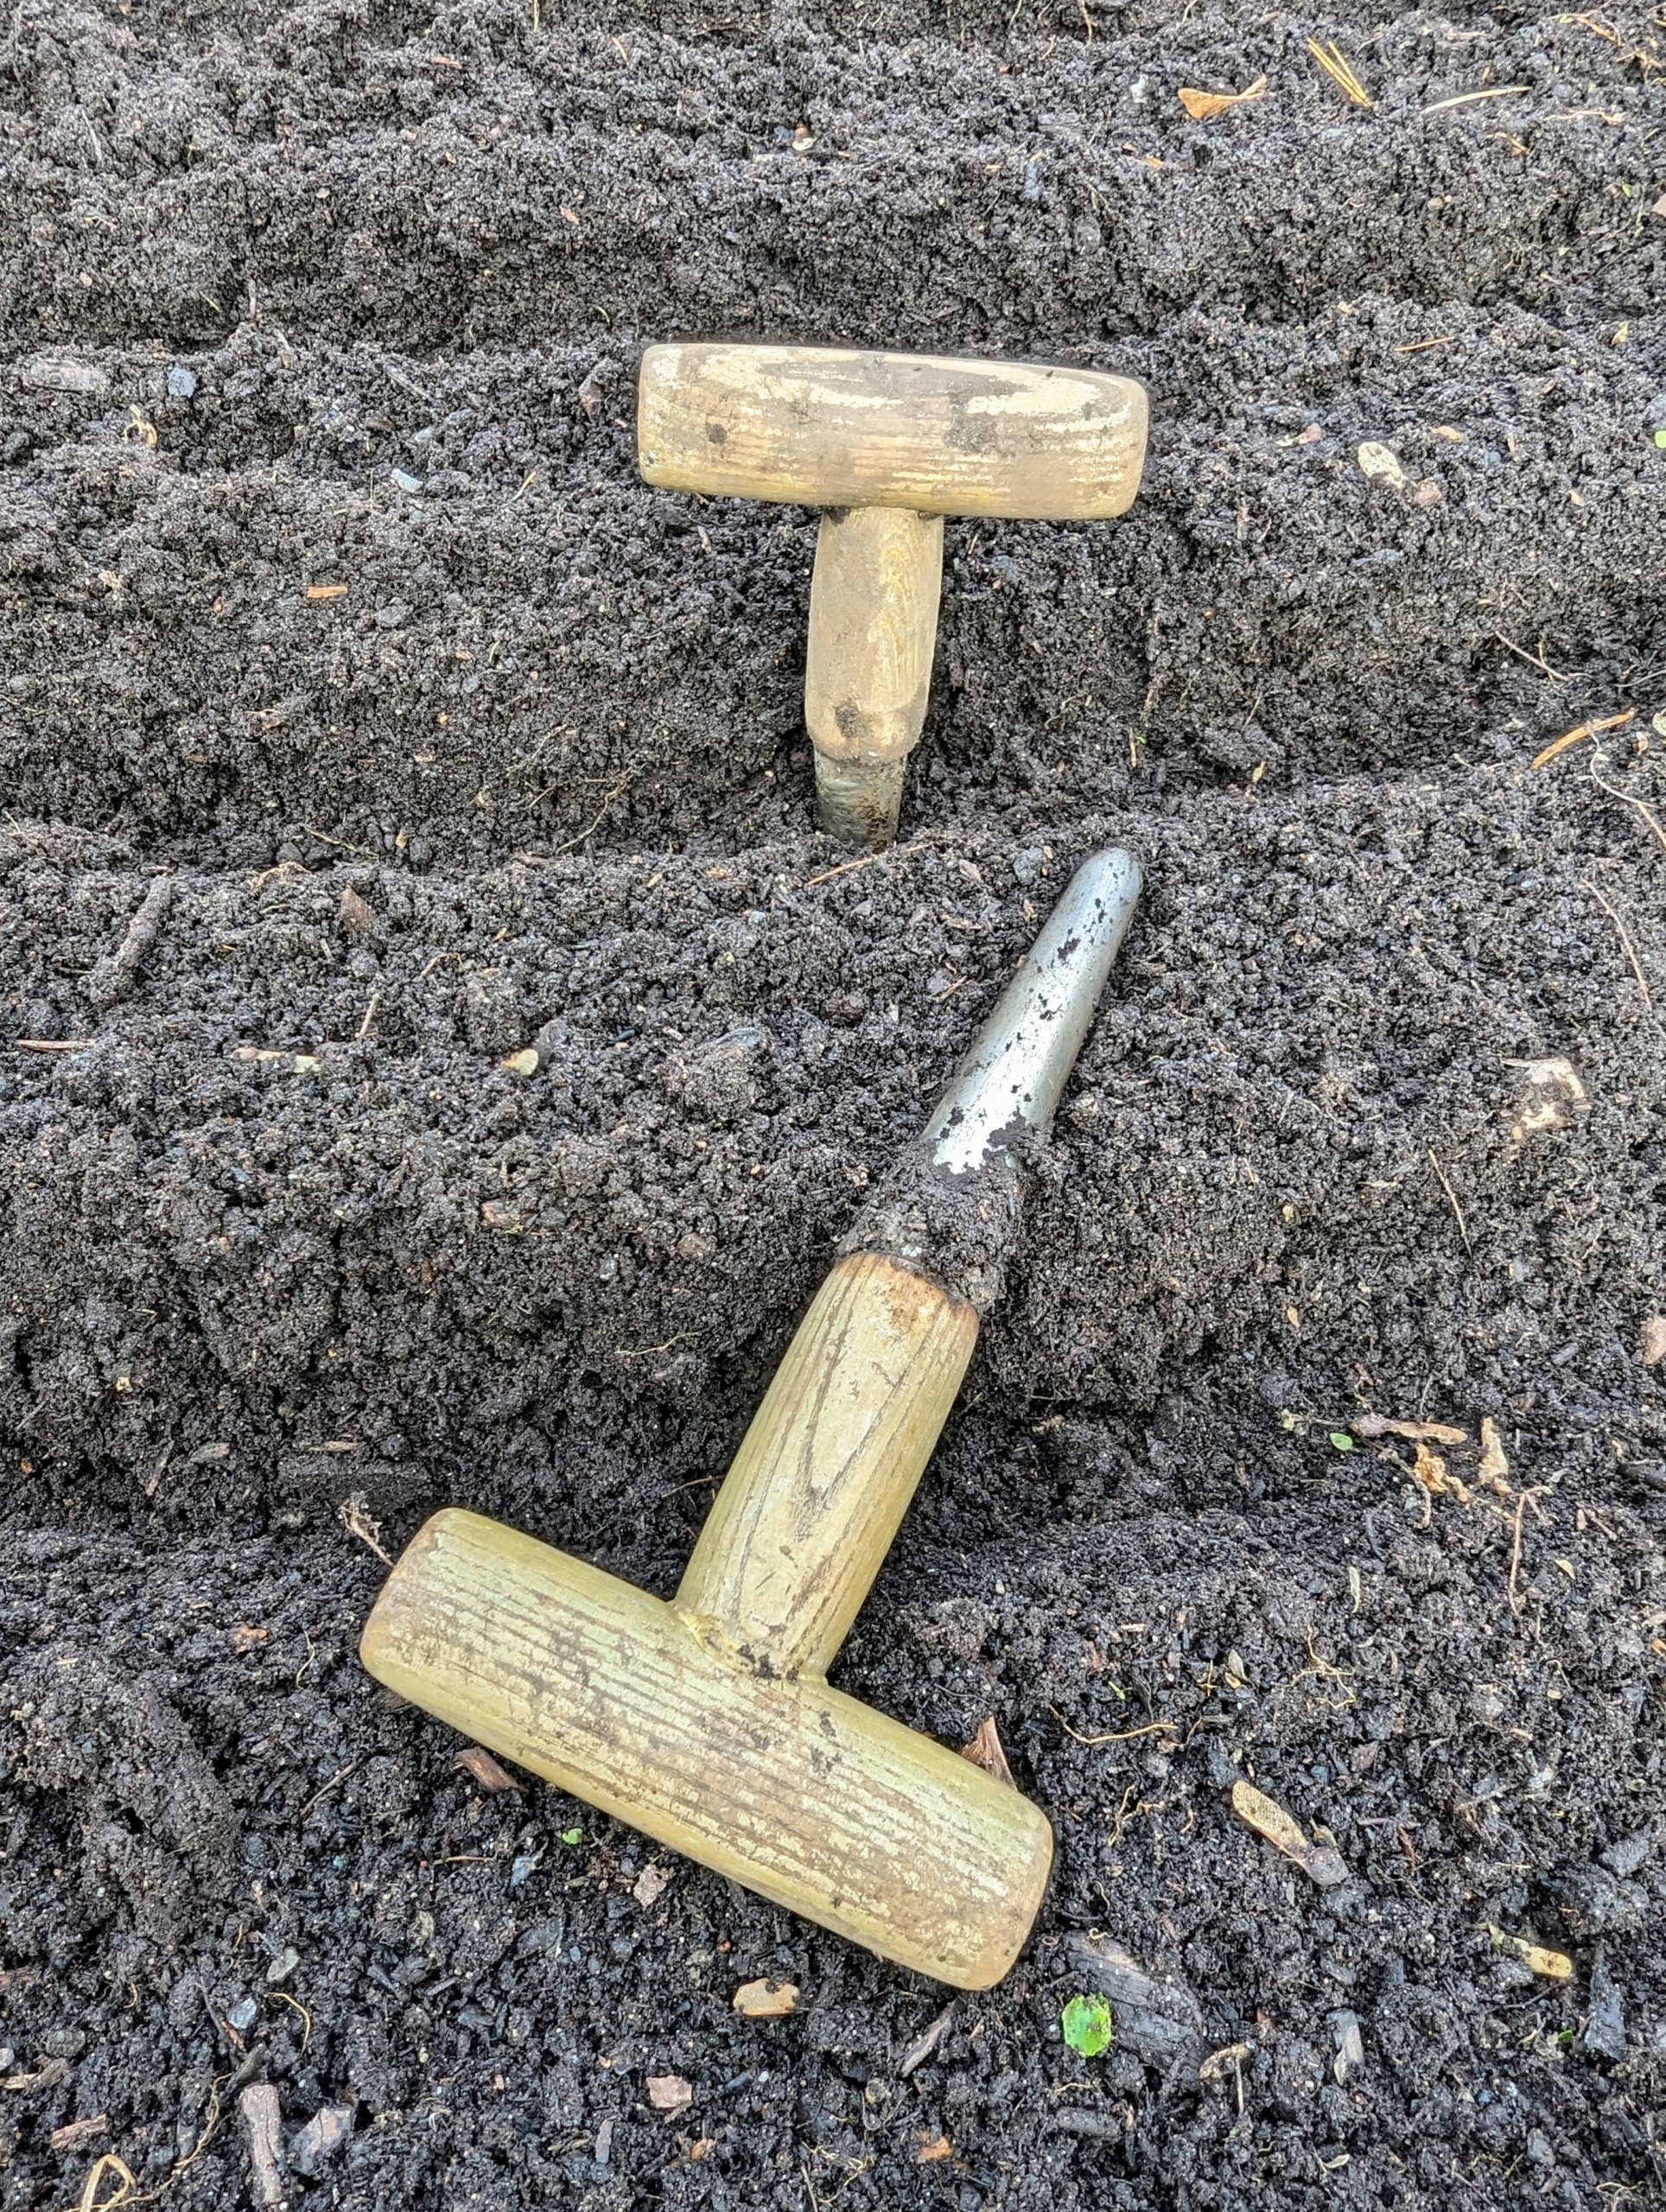
To plant these tulip bulbs, Matthew and Phurba use these dibbers. A dibber or dibble or dibbler is a pointed wooden stick for making holes in the ground so seeds, seedlings or bulbs can be planted. Dibbers come in a variety of designs including the straight dibber, T-handled dibber, trowel dibber, and an L-shaped dibber. These are T-handled dibbers. Dibbers are available at garden shops and online.
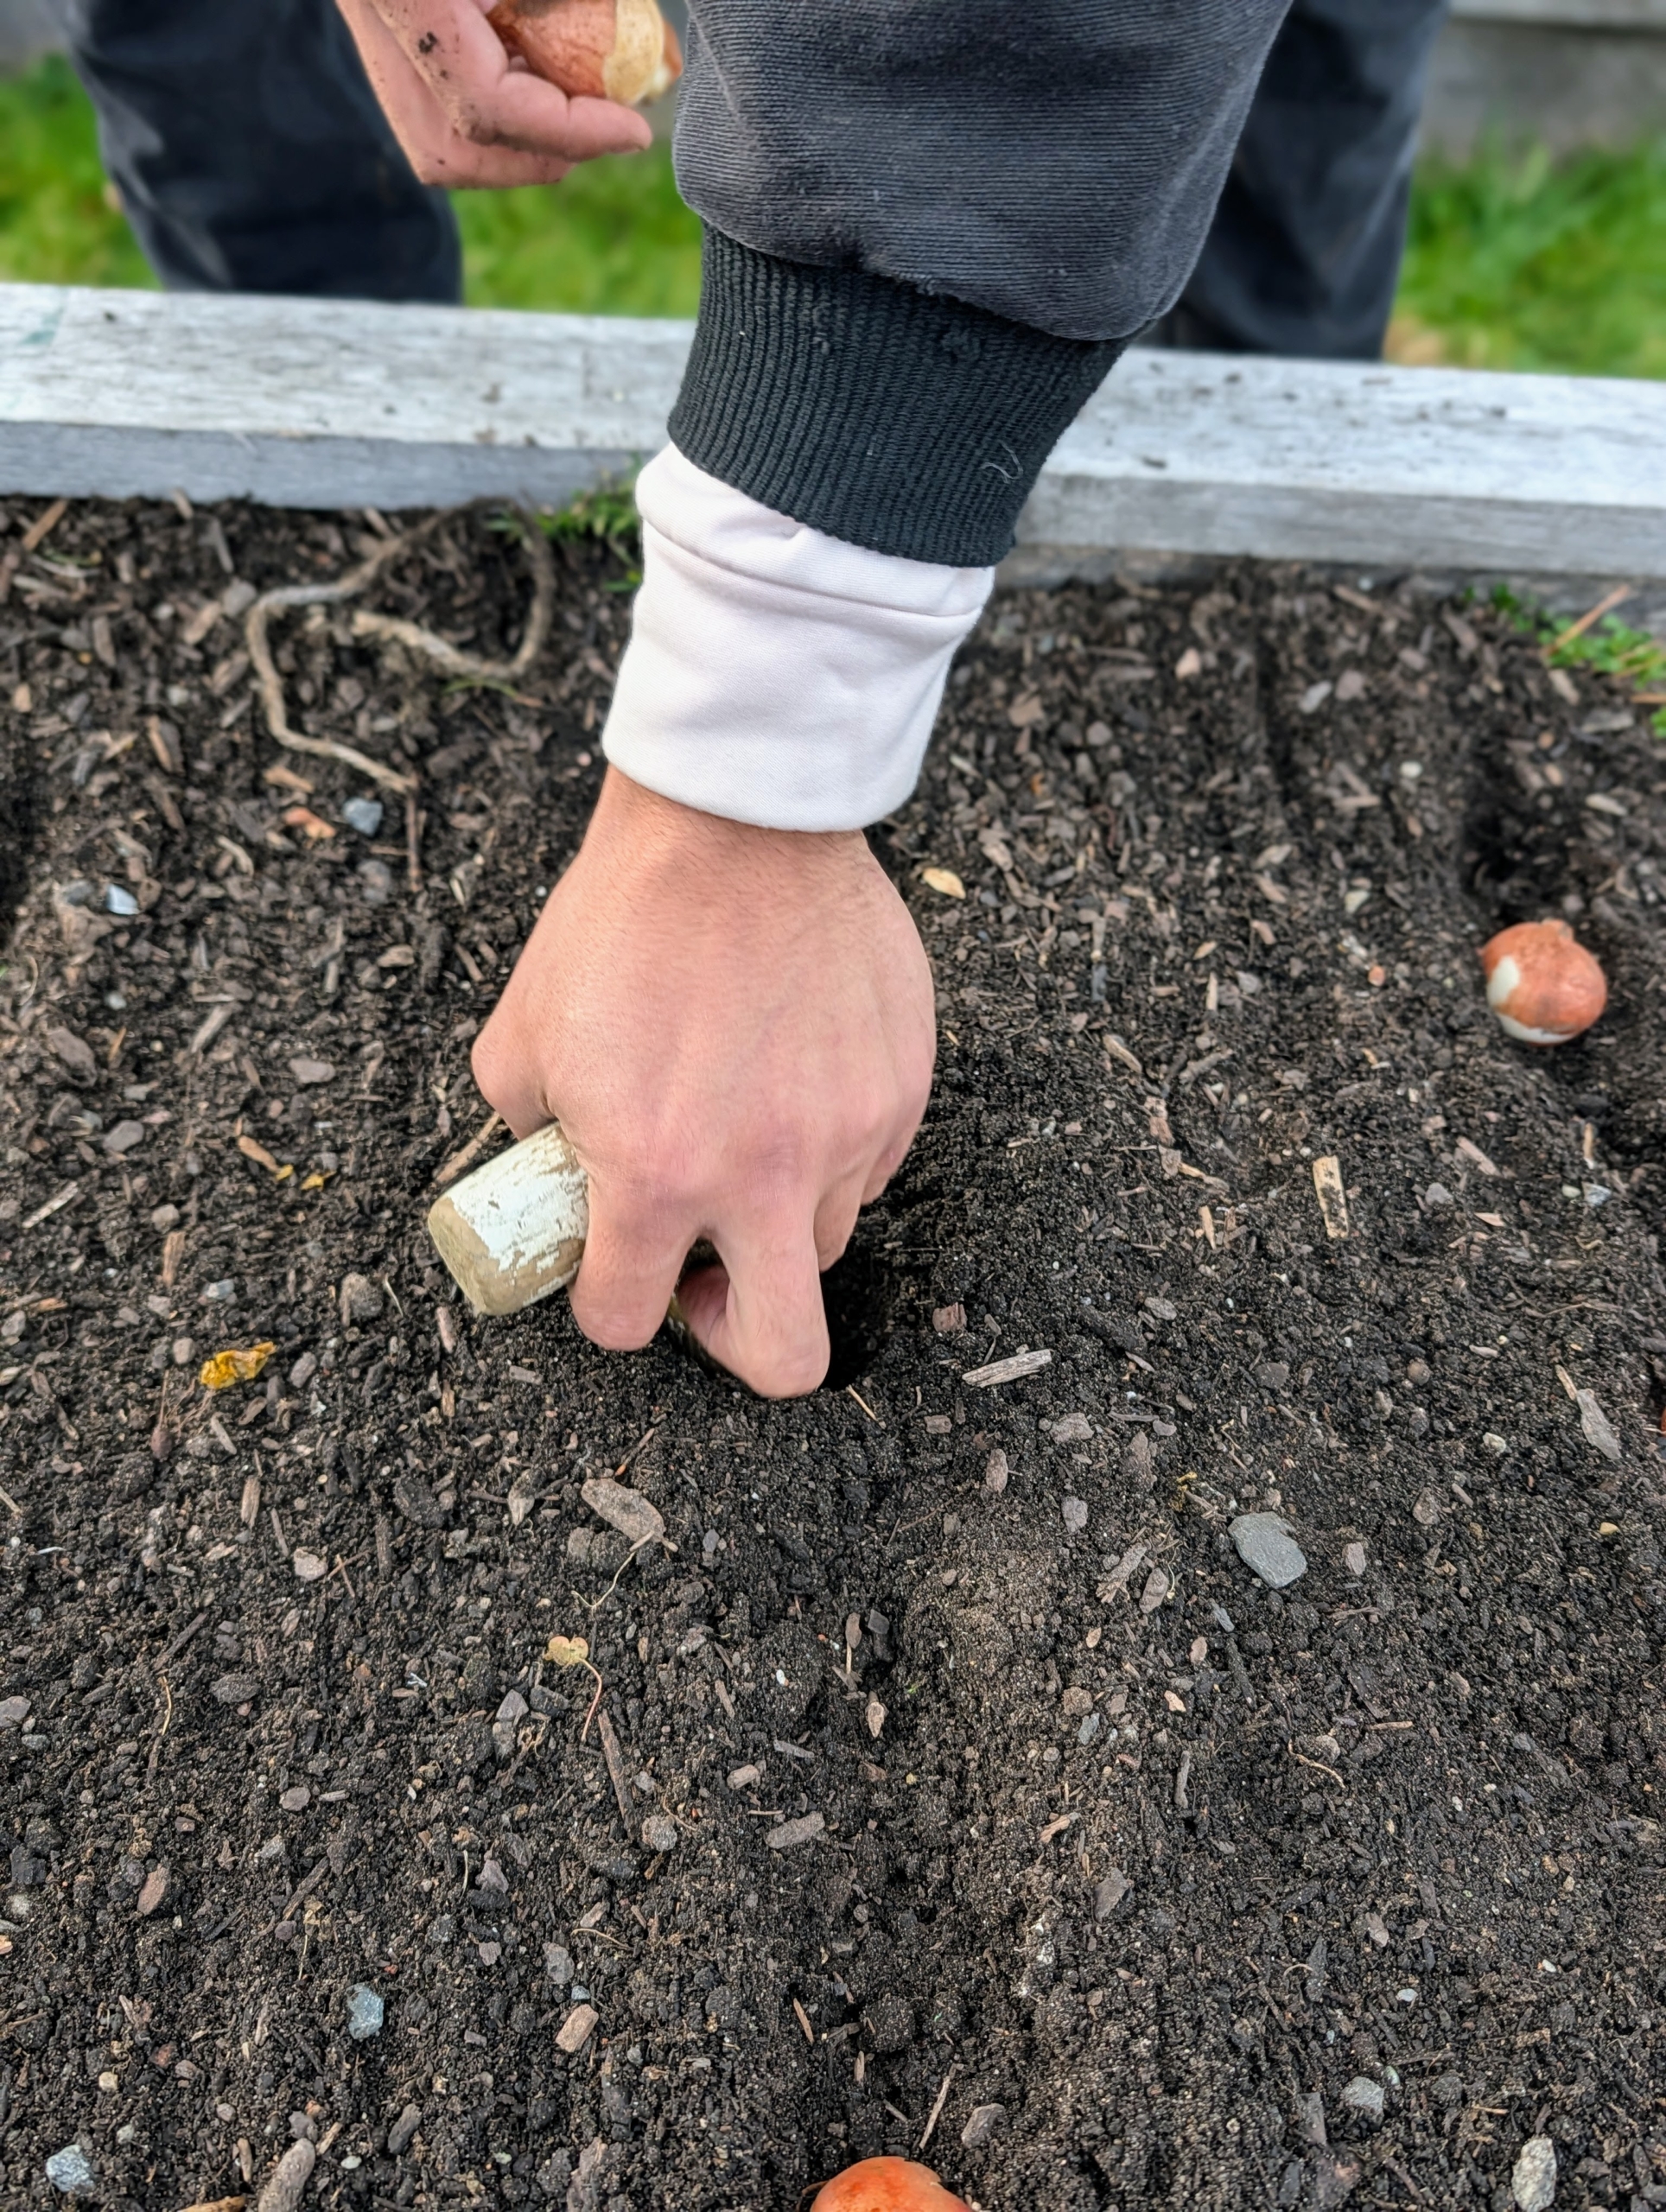
Once all the bulbs are in their designated rows, Matthew pushes the dibber into the soil making a hole where the bulb will be planted.
Matthew is careful to place each bulb with the pointed end faced up. This is important for all bulbs. If the pointed end is not obvious, look for the flat side of the bulb, which is the bottom.
Matthew pushes it down several inches into the hole.
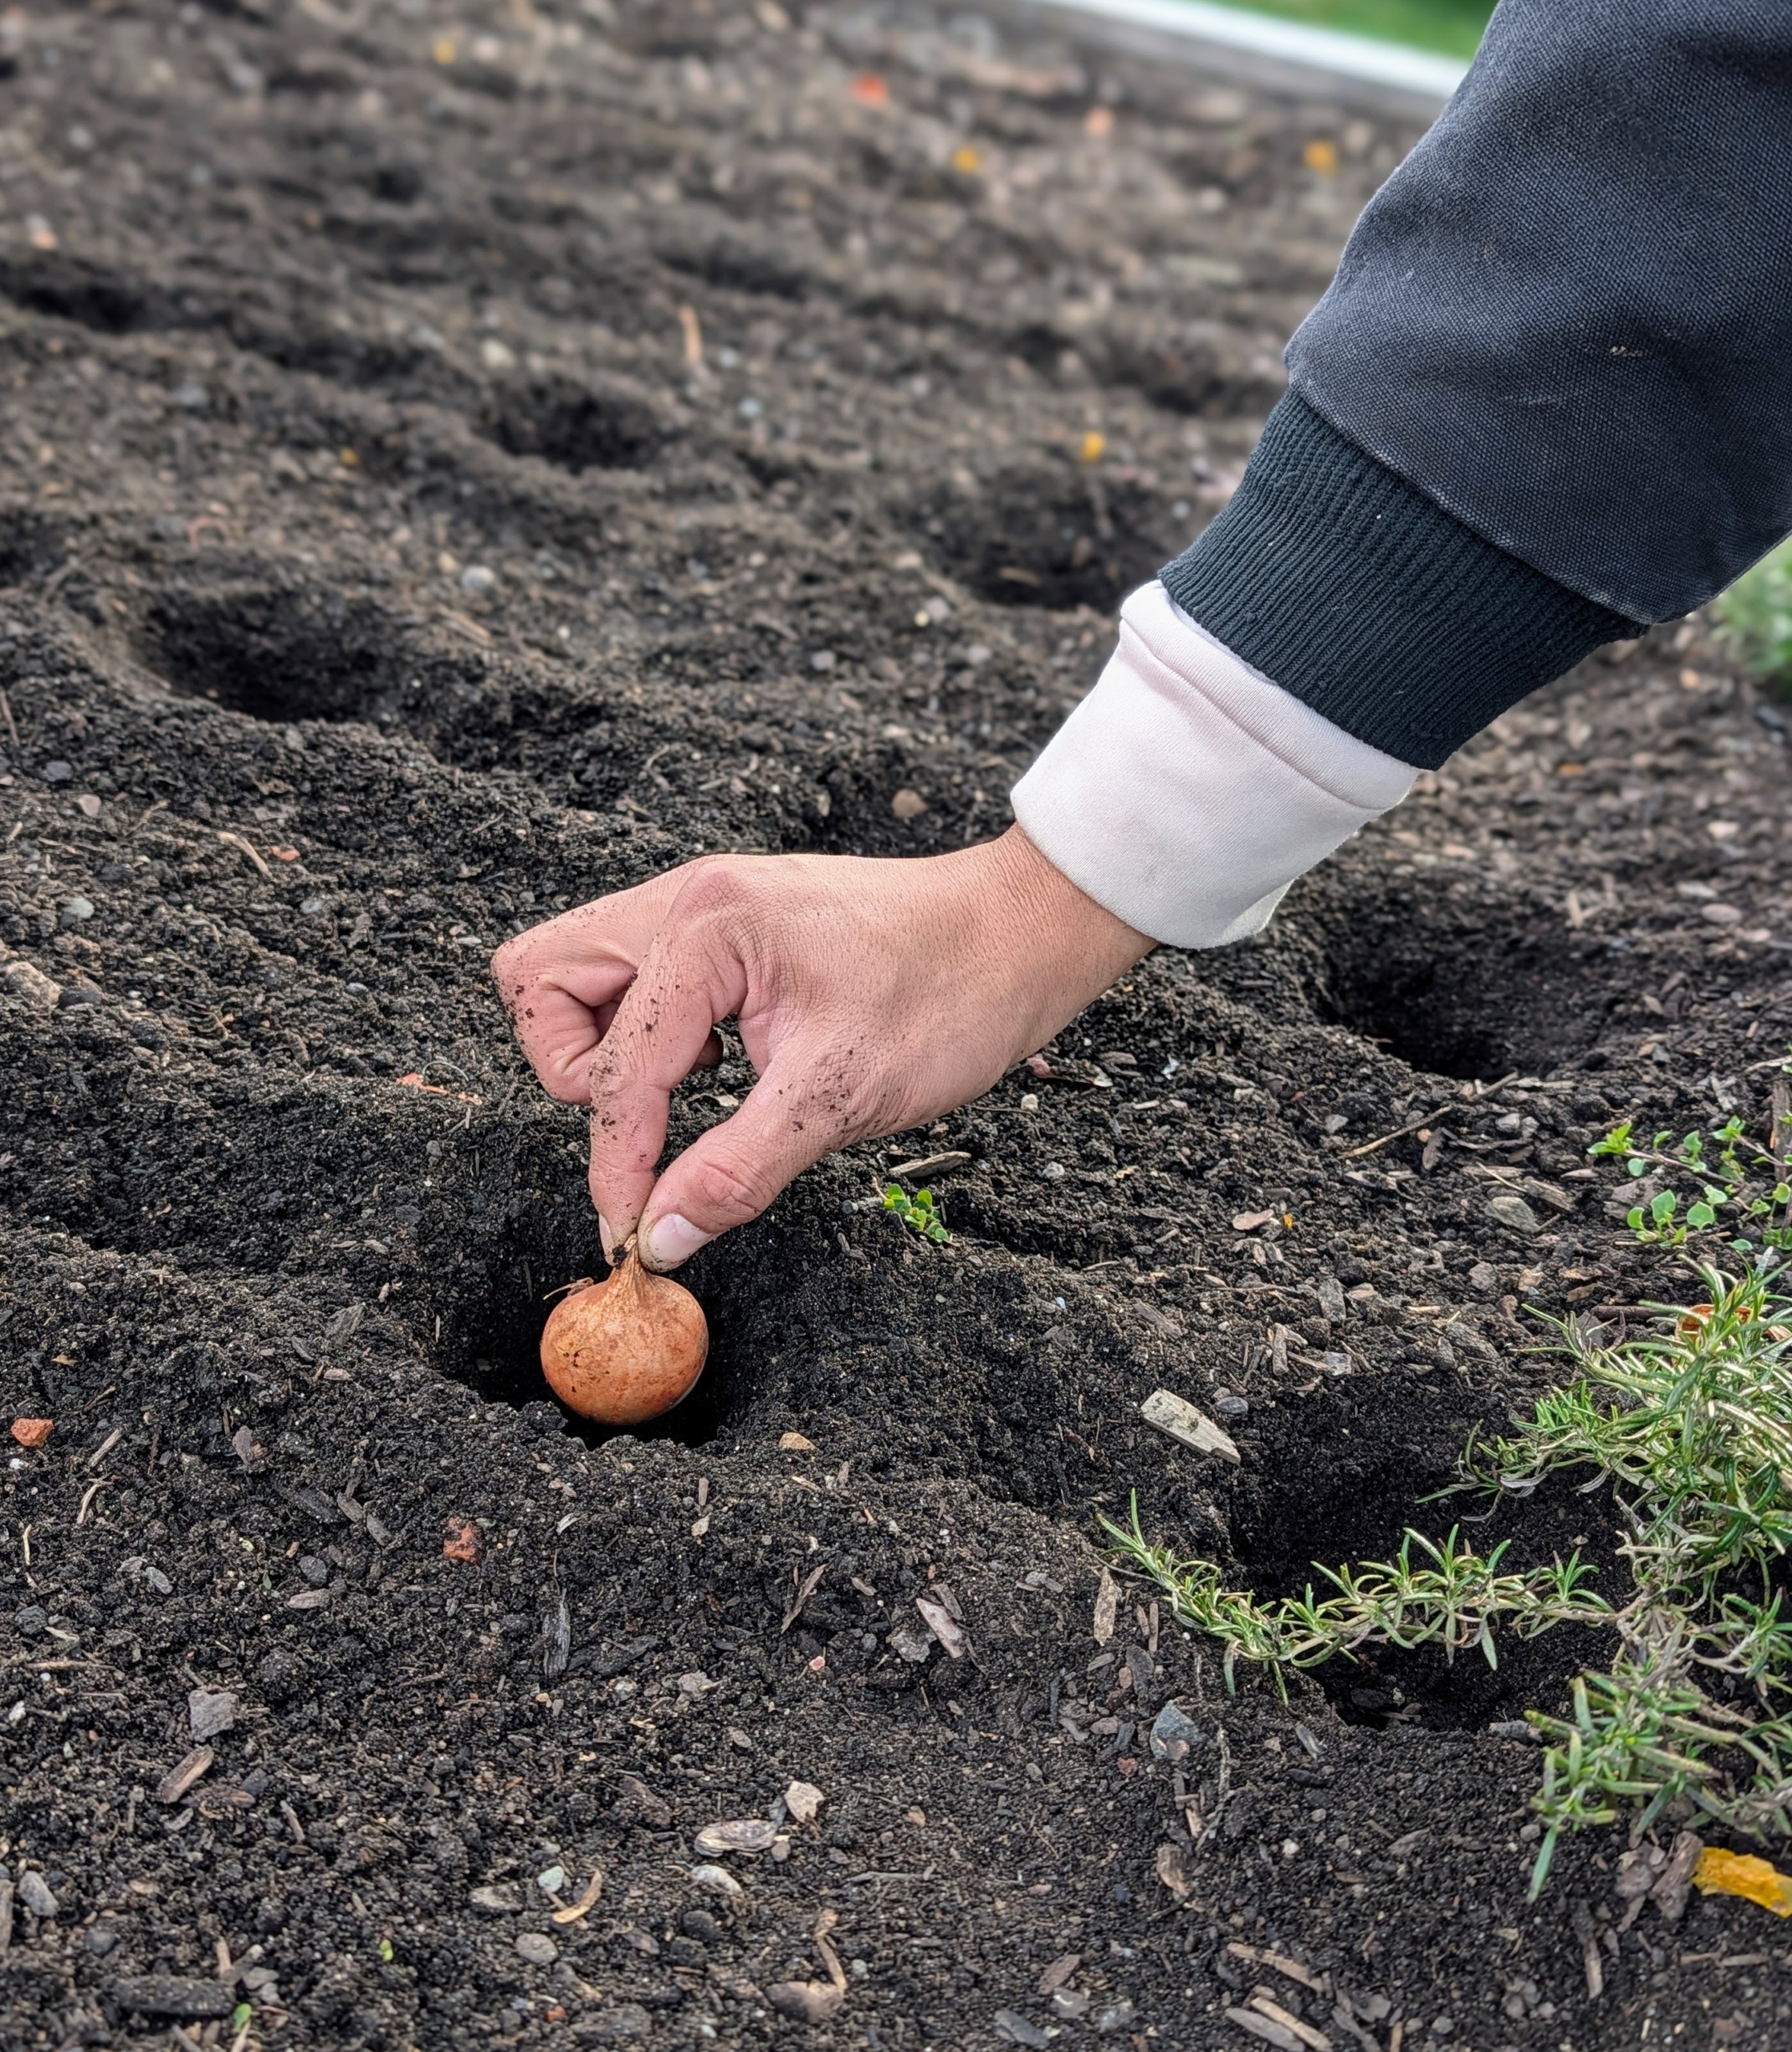
Here is the bulb in the soil. Matthew plants all the bulbs before backfilling, so he can keep track of the planted holes and rows.
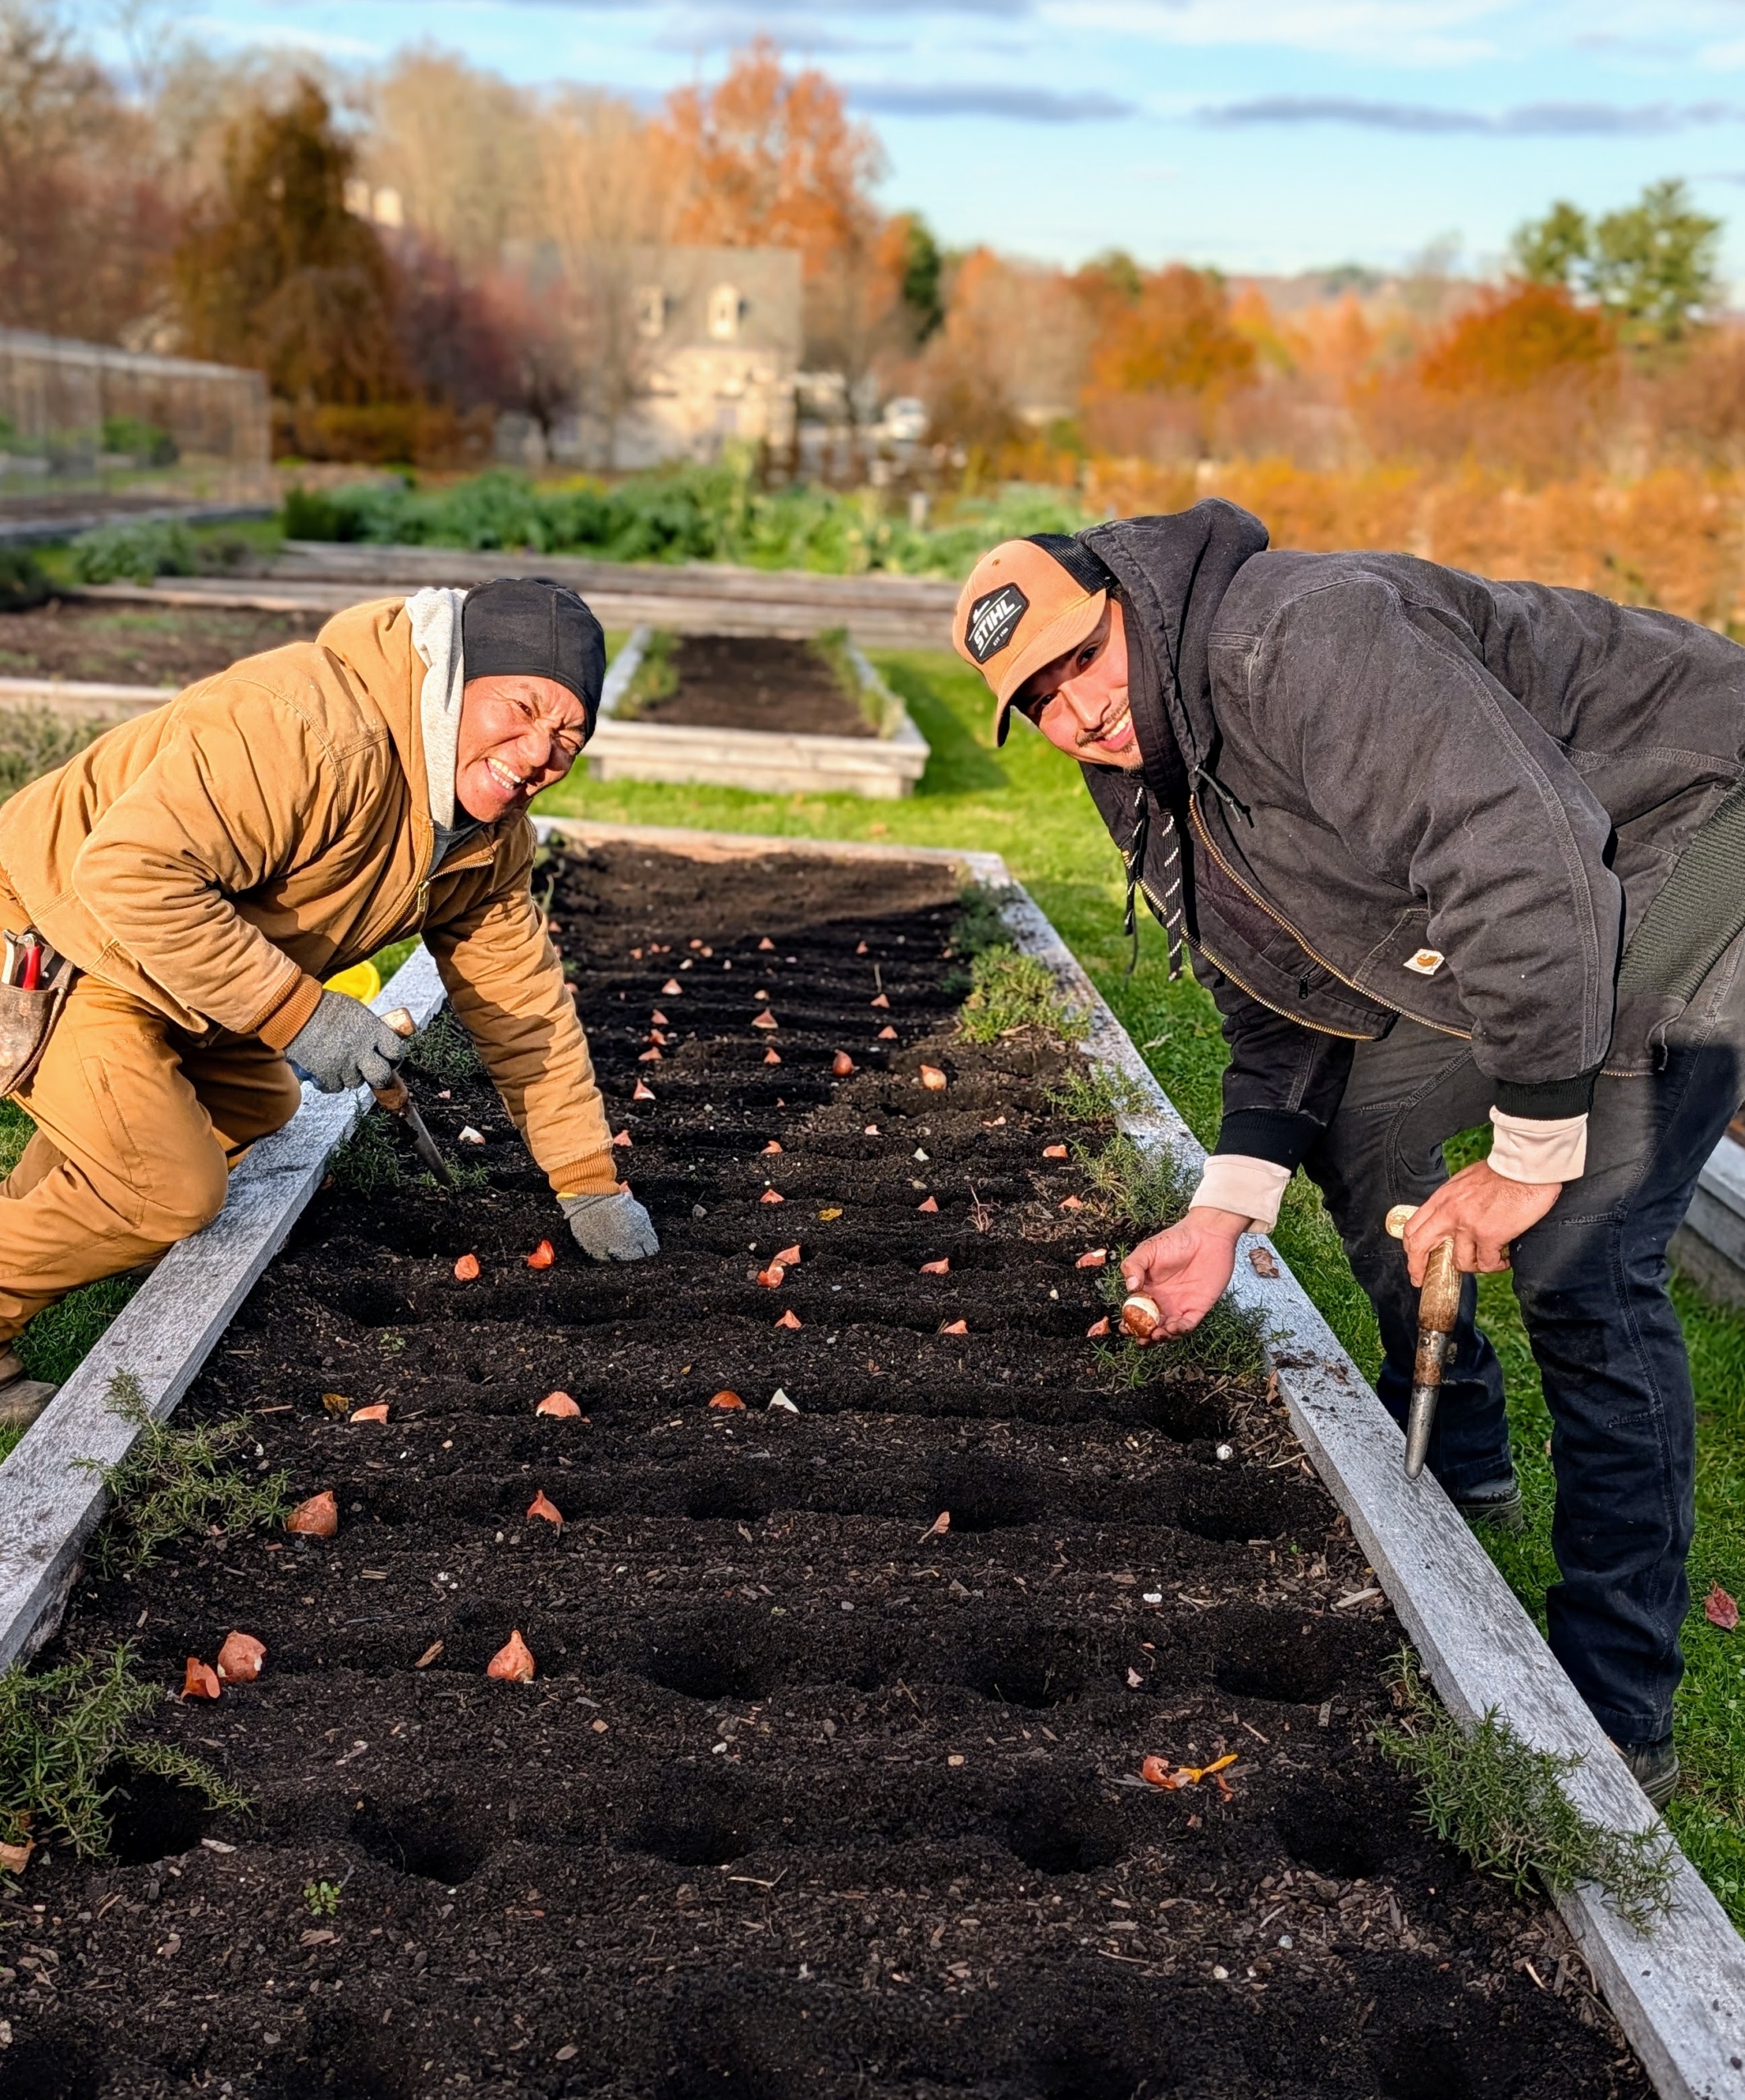
Here are Phurba and Matthew – this year’s bulb planting team. They have more than 380 tulip bulbs to get into the ground. Bulbs are alive, but dormant, so they prefer to be in the soil. If they cannot be planted promptly, store them in a dark, dry location with good air circulation and temperatures averaging about 50 to 65-degrees Fahrenheit.
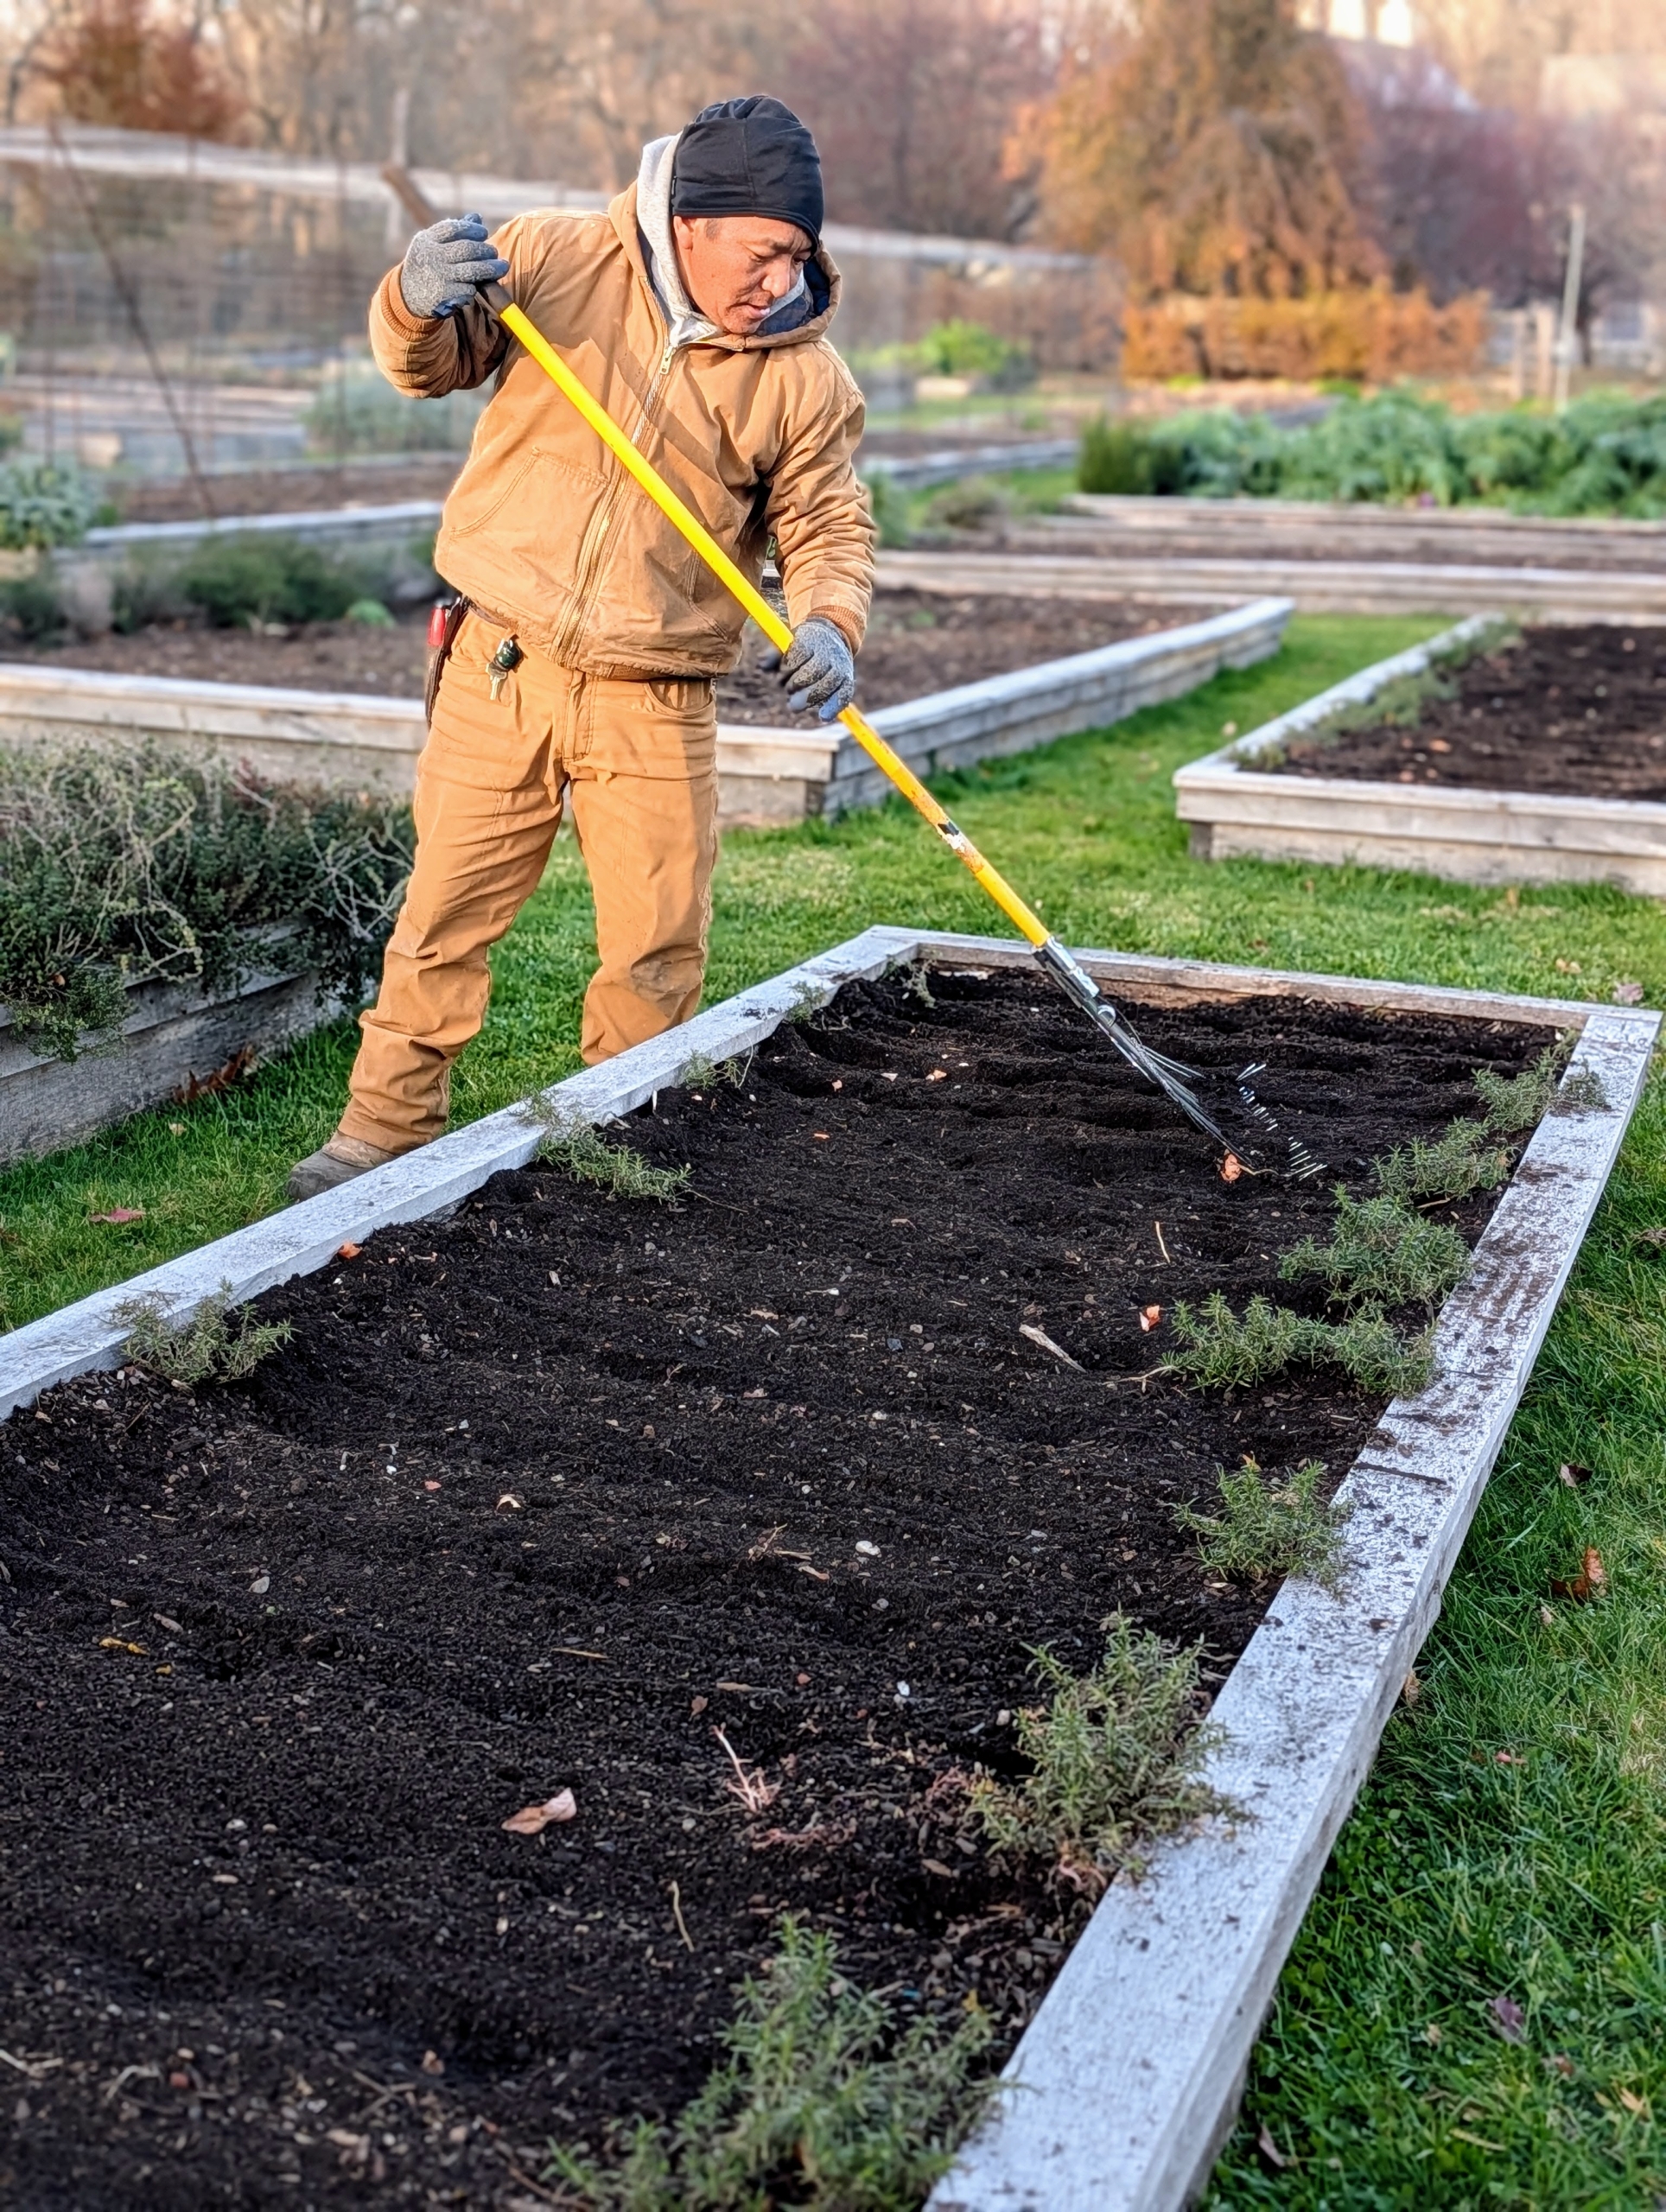
Once the bulbs are in their designated trenches, it’s time to cover and rake the bed. Phurba carefully uses the back of a soft rake so he doesn’t disturb the bulb placements.
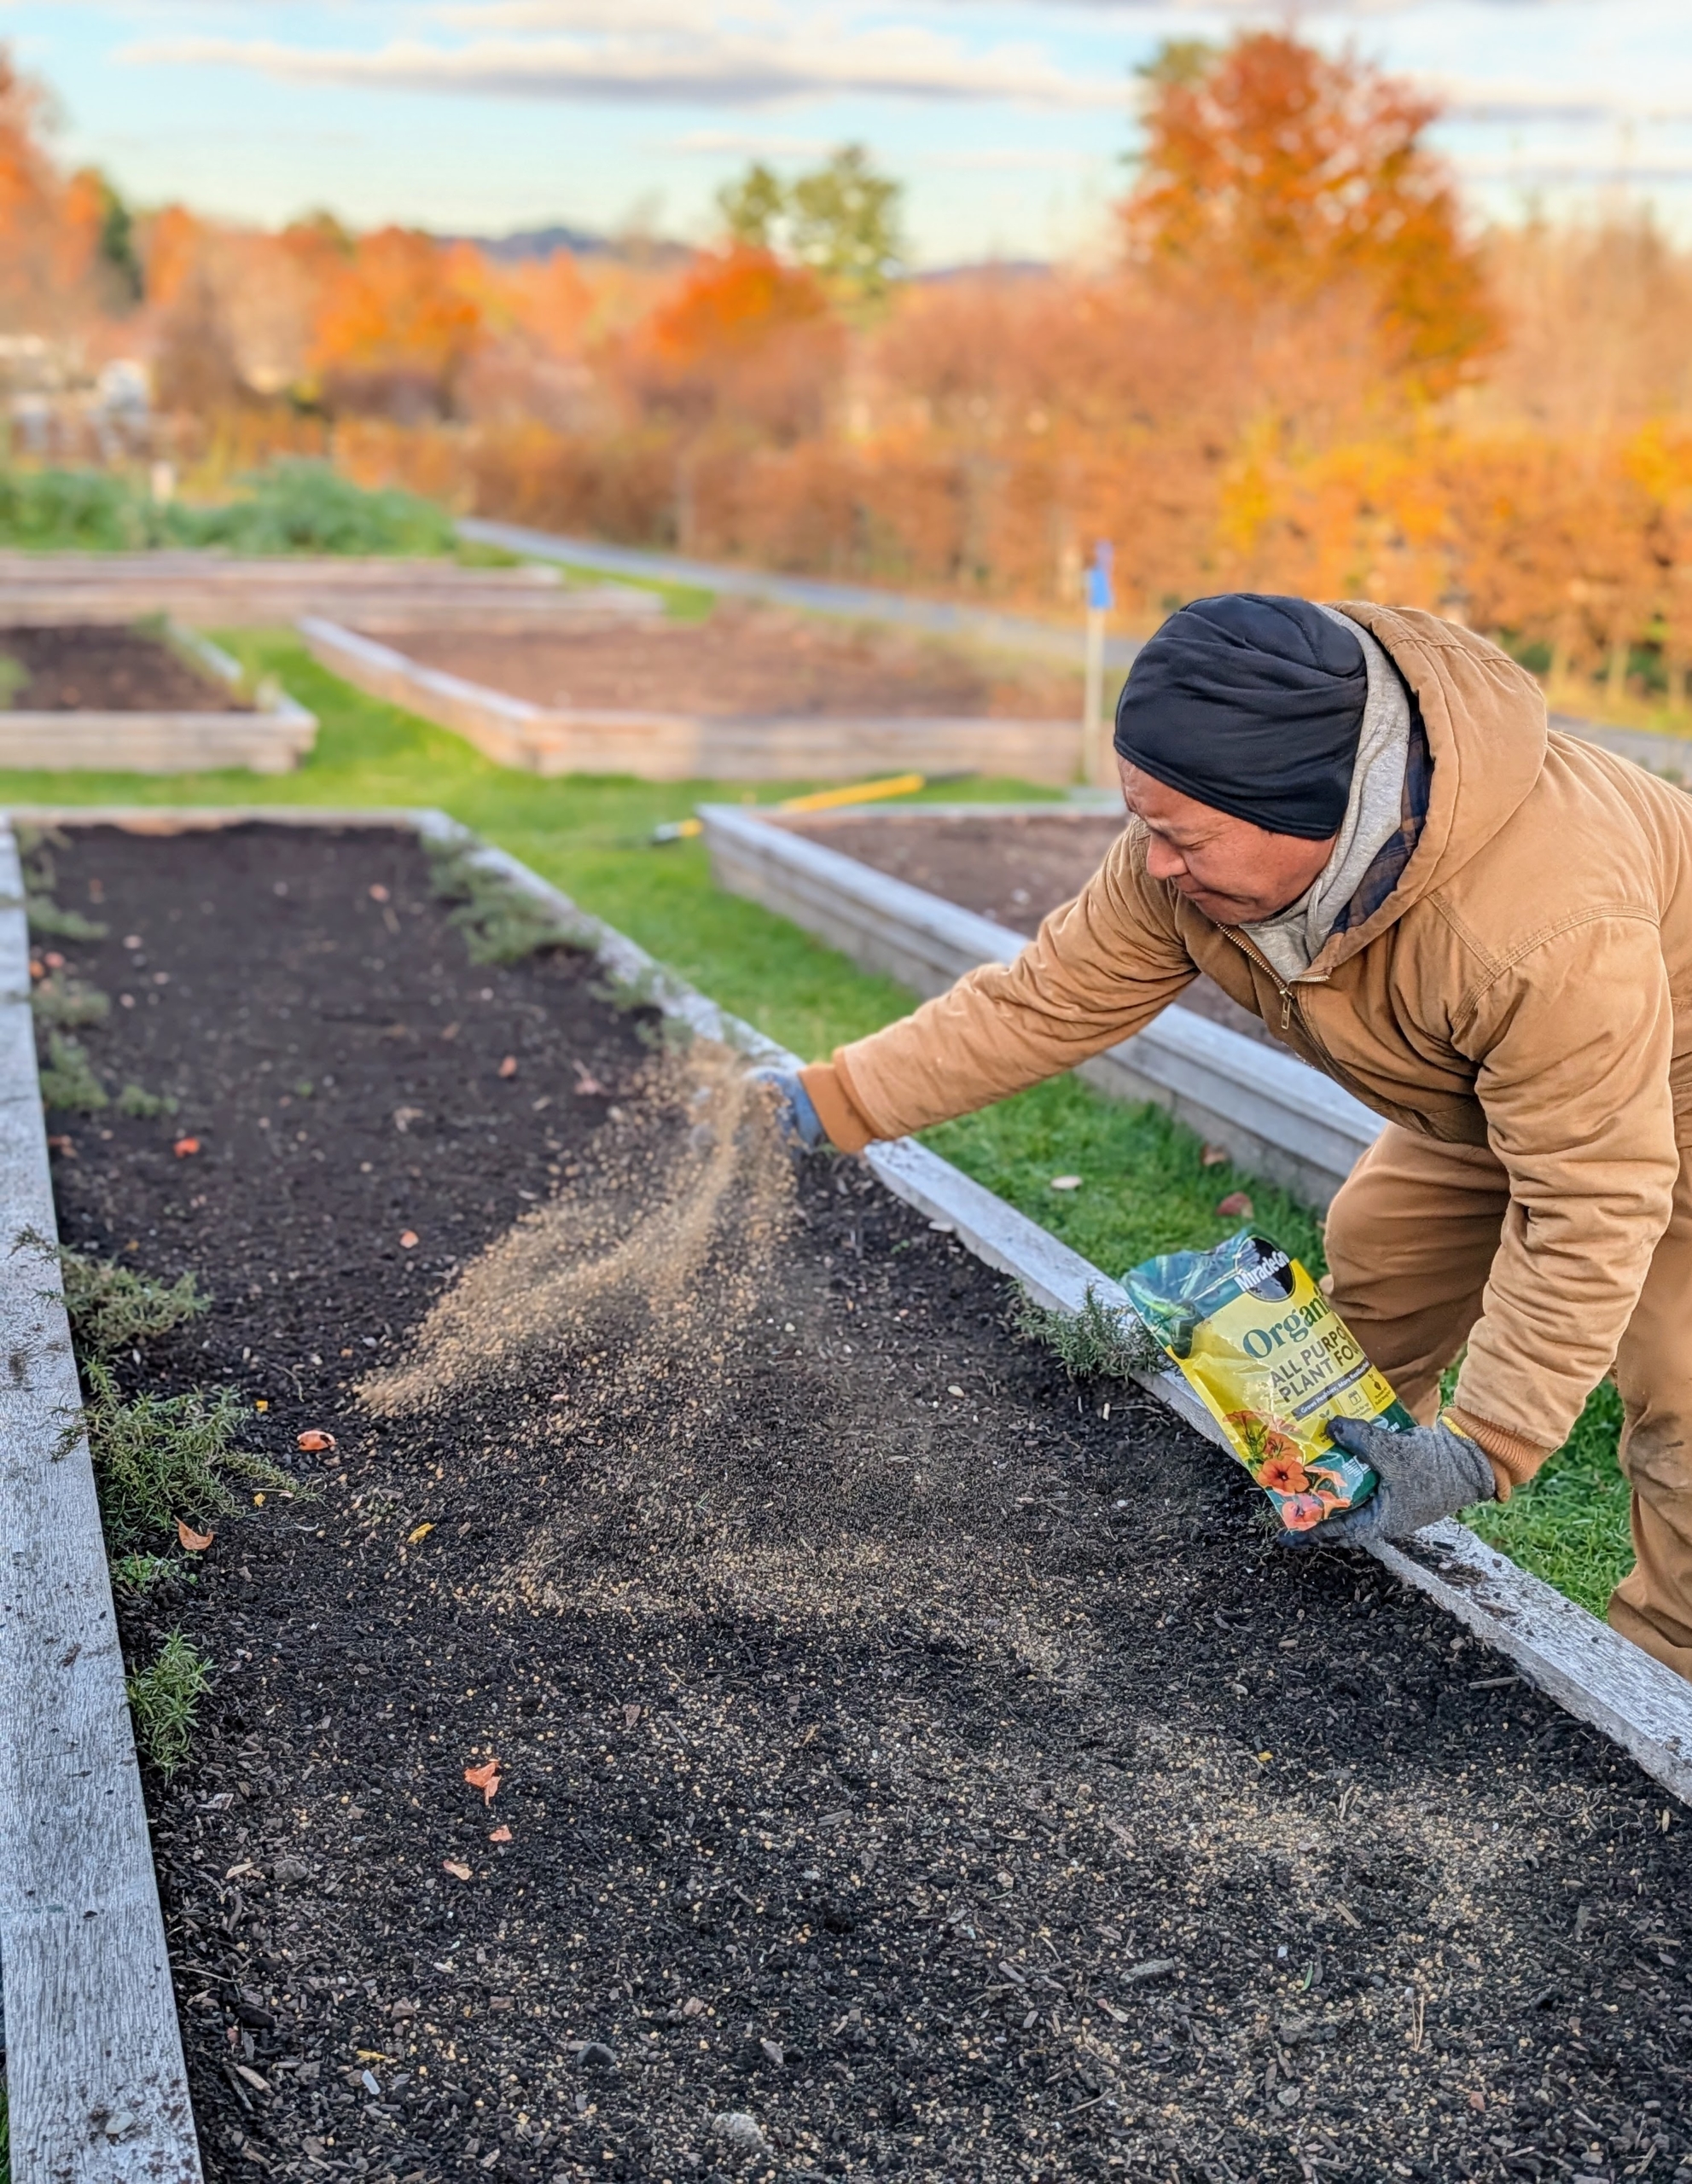
Next, a generous amount of fertilizer is sprinkled over the backfilled bed. Avoid fertilizing directly on top of the bulbs, which will cause root burn. I use Miracle-Gro Organic All Purpose Plant Food.
And lastly, Phurba rakes the bed lightly again to mix in the fertilizer. We’ll have a beautiful cutting garden of colorful tulips come April – I’ll be sure to share the photos. Are you planting your bulbs this weekend?
Visiting botanical gardens is a great way to learn about unique plants and gain inspiration for one's own plant collections.
A walk through the greenhouses and conservatories at Longwood Gardens in Kennett Square, Pennsylvania offers visitors an amazing tour of diverse plant species in dazzling displays. Longwood Gardens features more than 20 outdoor gardens and 20 indoor gardens spread across more than 1100 acres - all meticulously maintained by hundreds of employees, students, and volunteers. If you're ever in the area, stop by. As I always say, "learn something new every day."
Enjoy these photos.
Longwood Gardens is open to visitors year-round where one can walk through its vast outdoor spaces or inside one of its many greenhouses. This is a beautifully planted allée of Japanese elm trees, Ulmus davidiana var. japonica ‘Morton’ – one of the more graceful elms endemic to parts of continental northeast Asia and Japan. Its leaves have already fallen for the season.
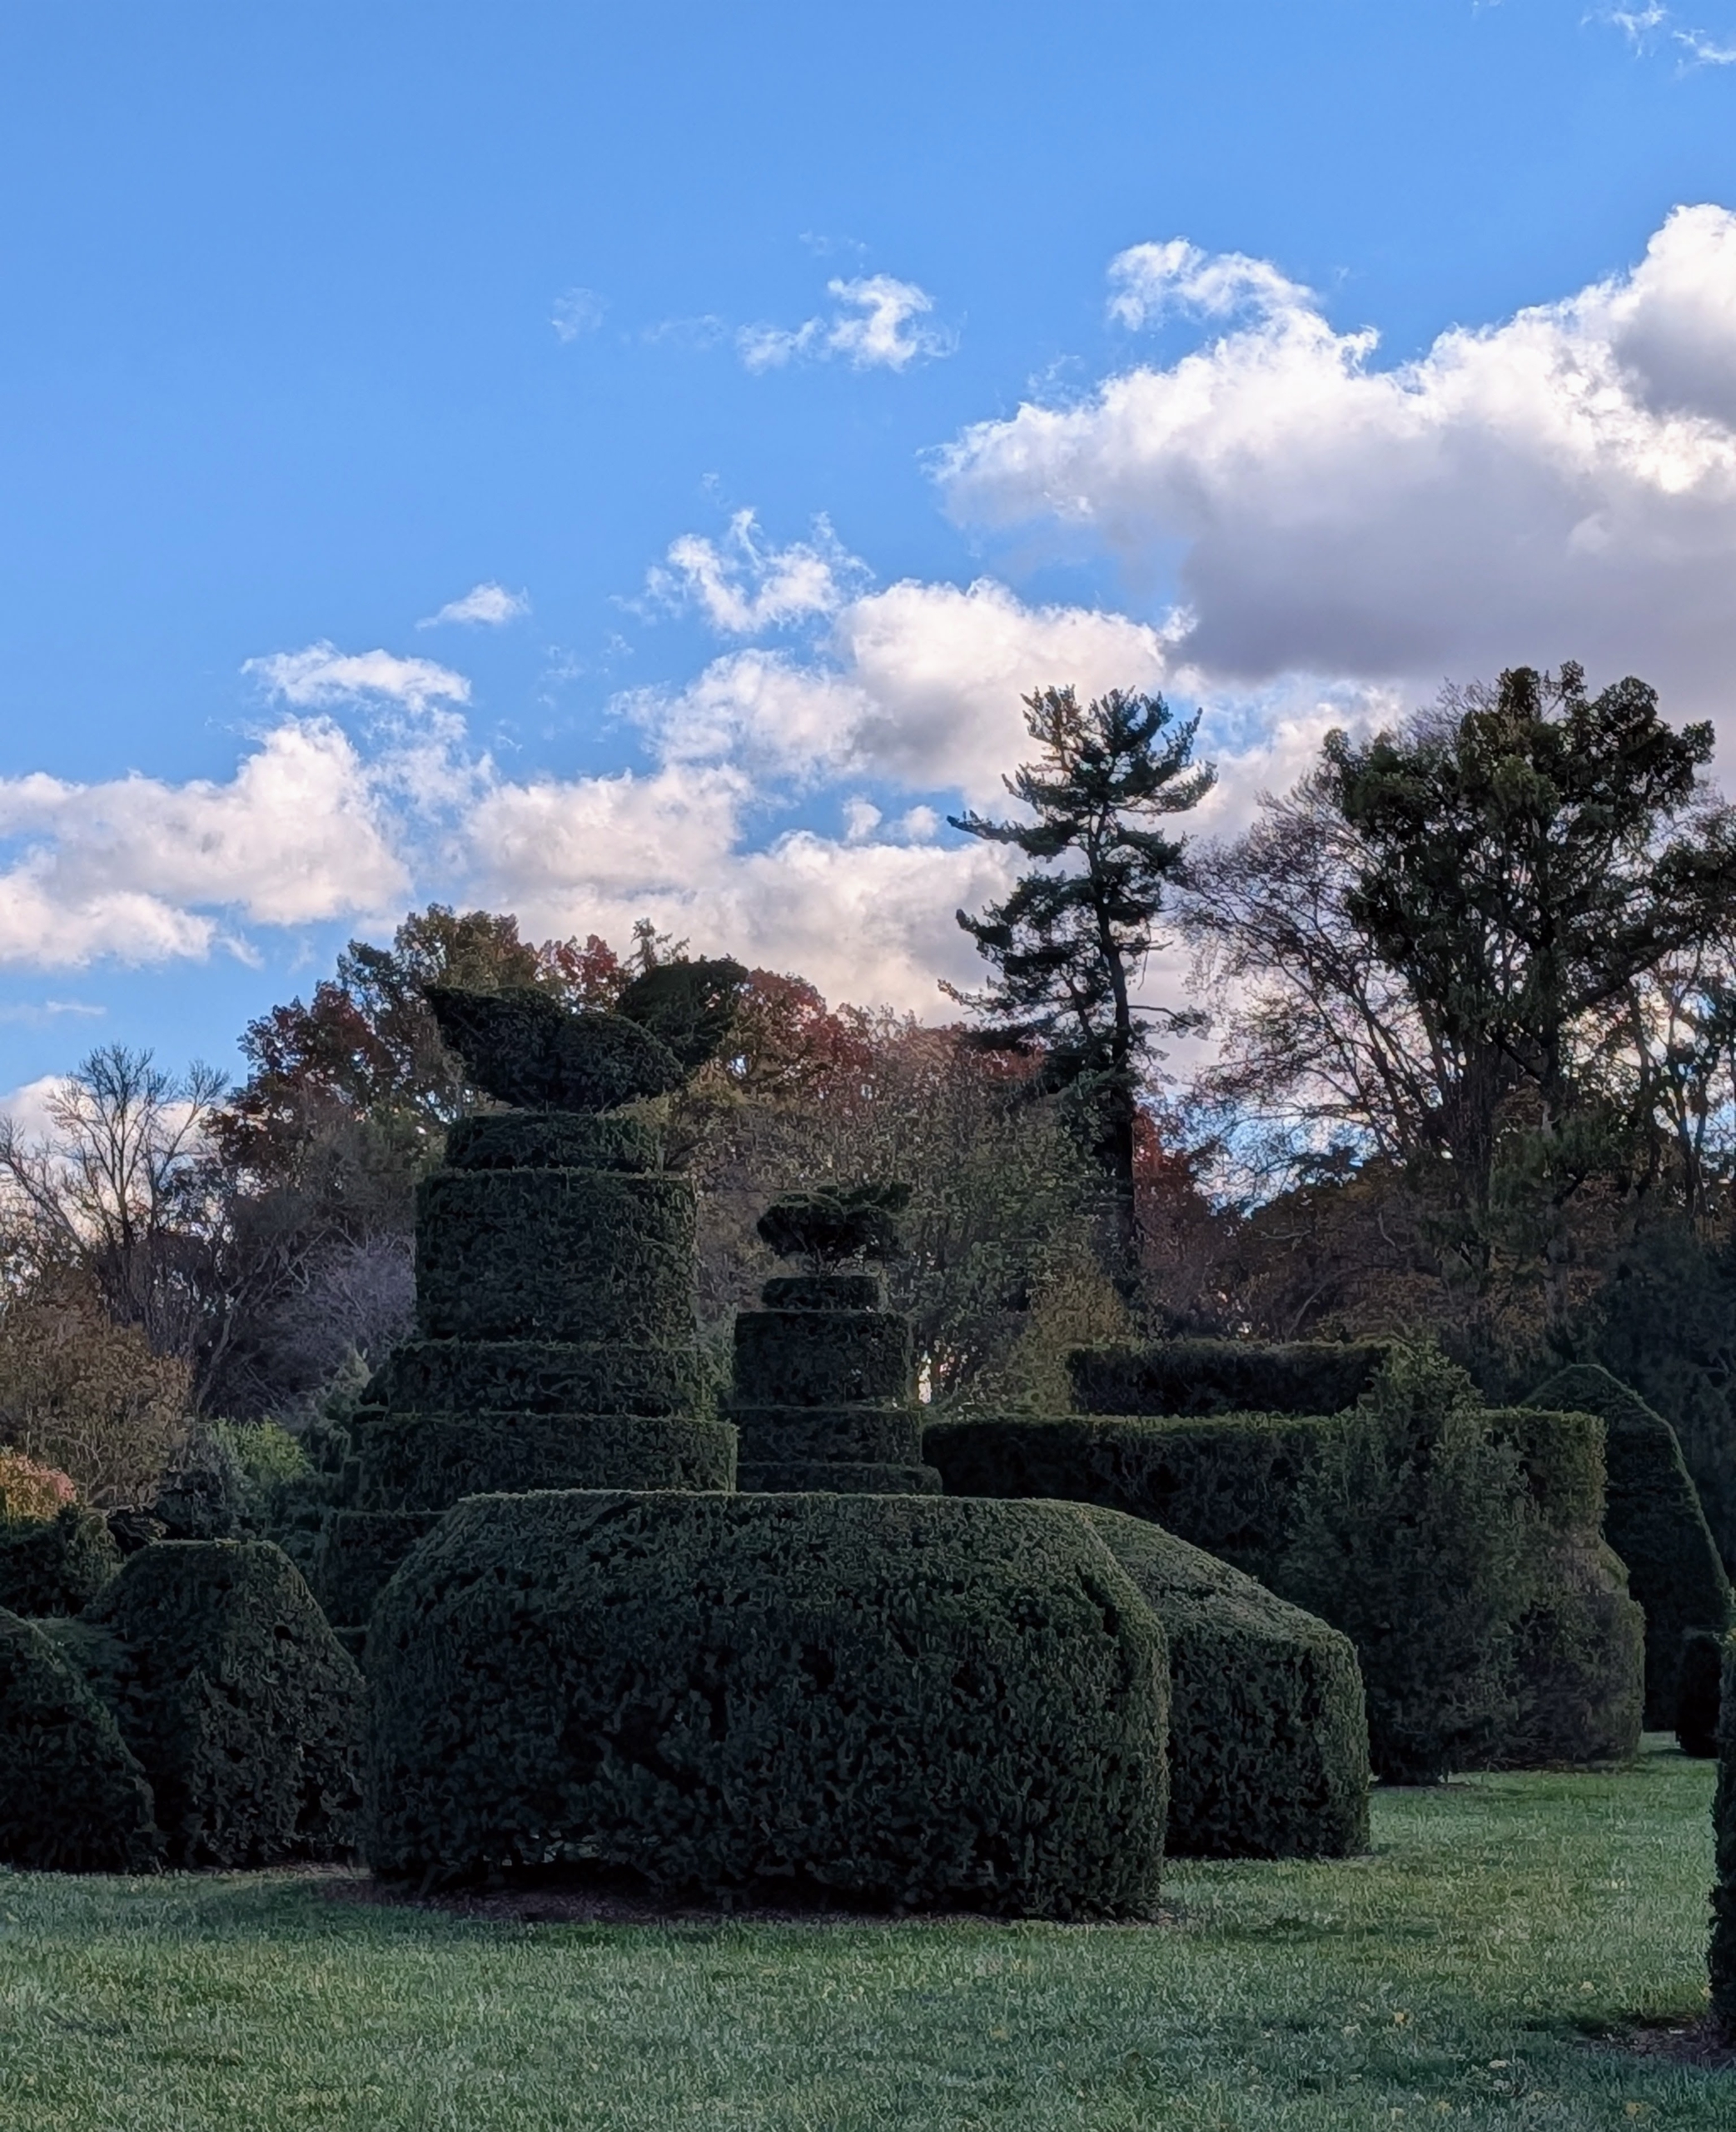
Longwood also has a mature topiary garden which includes more than 35 specimens of highly cultivated and groomed yews.
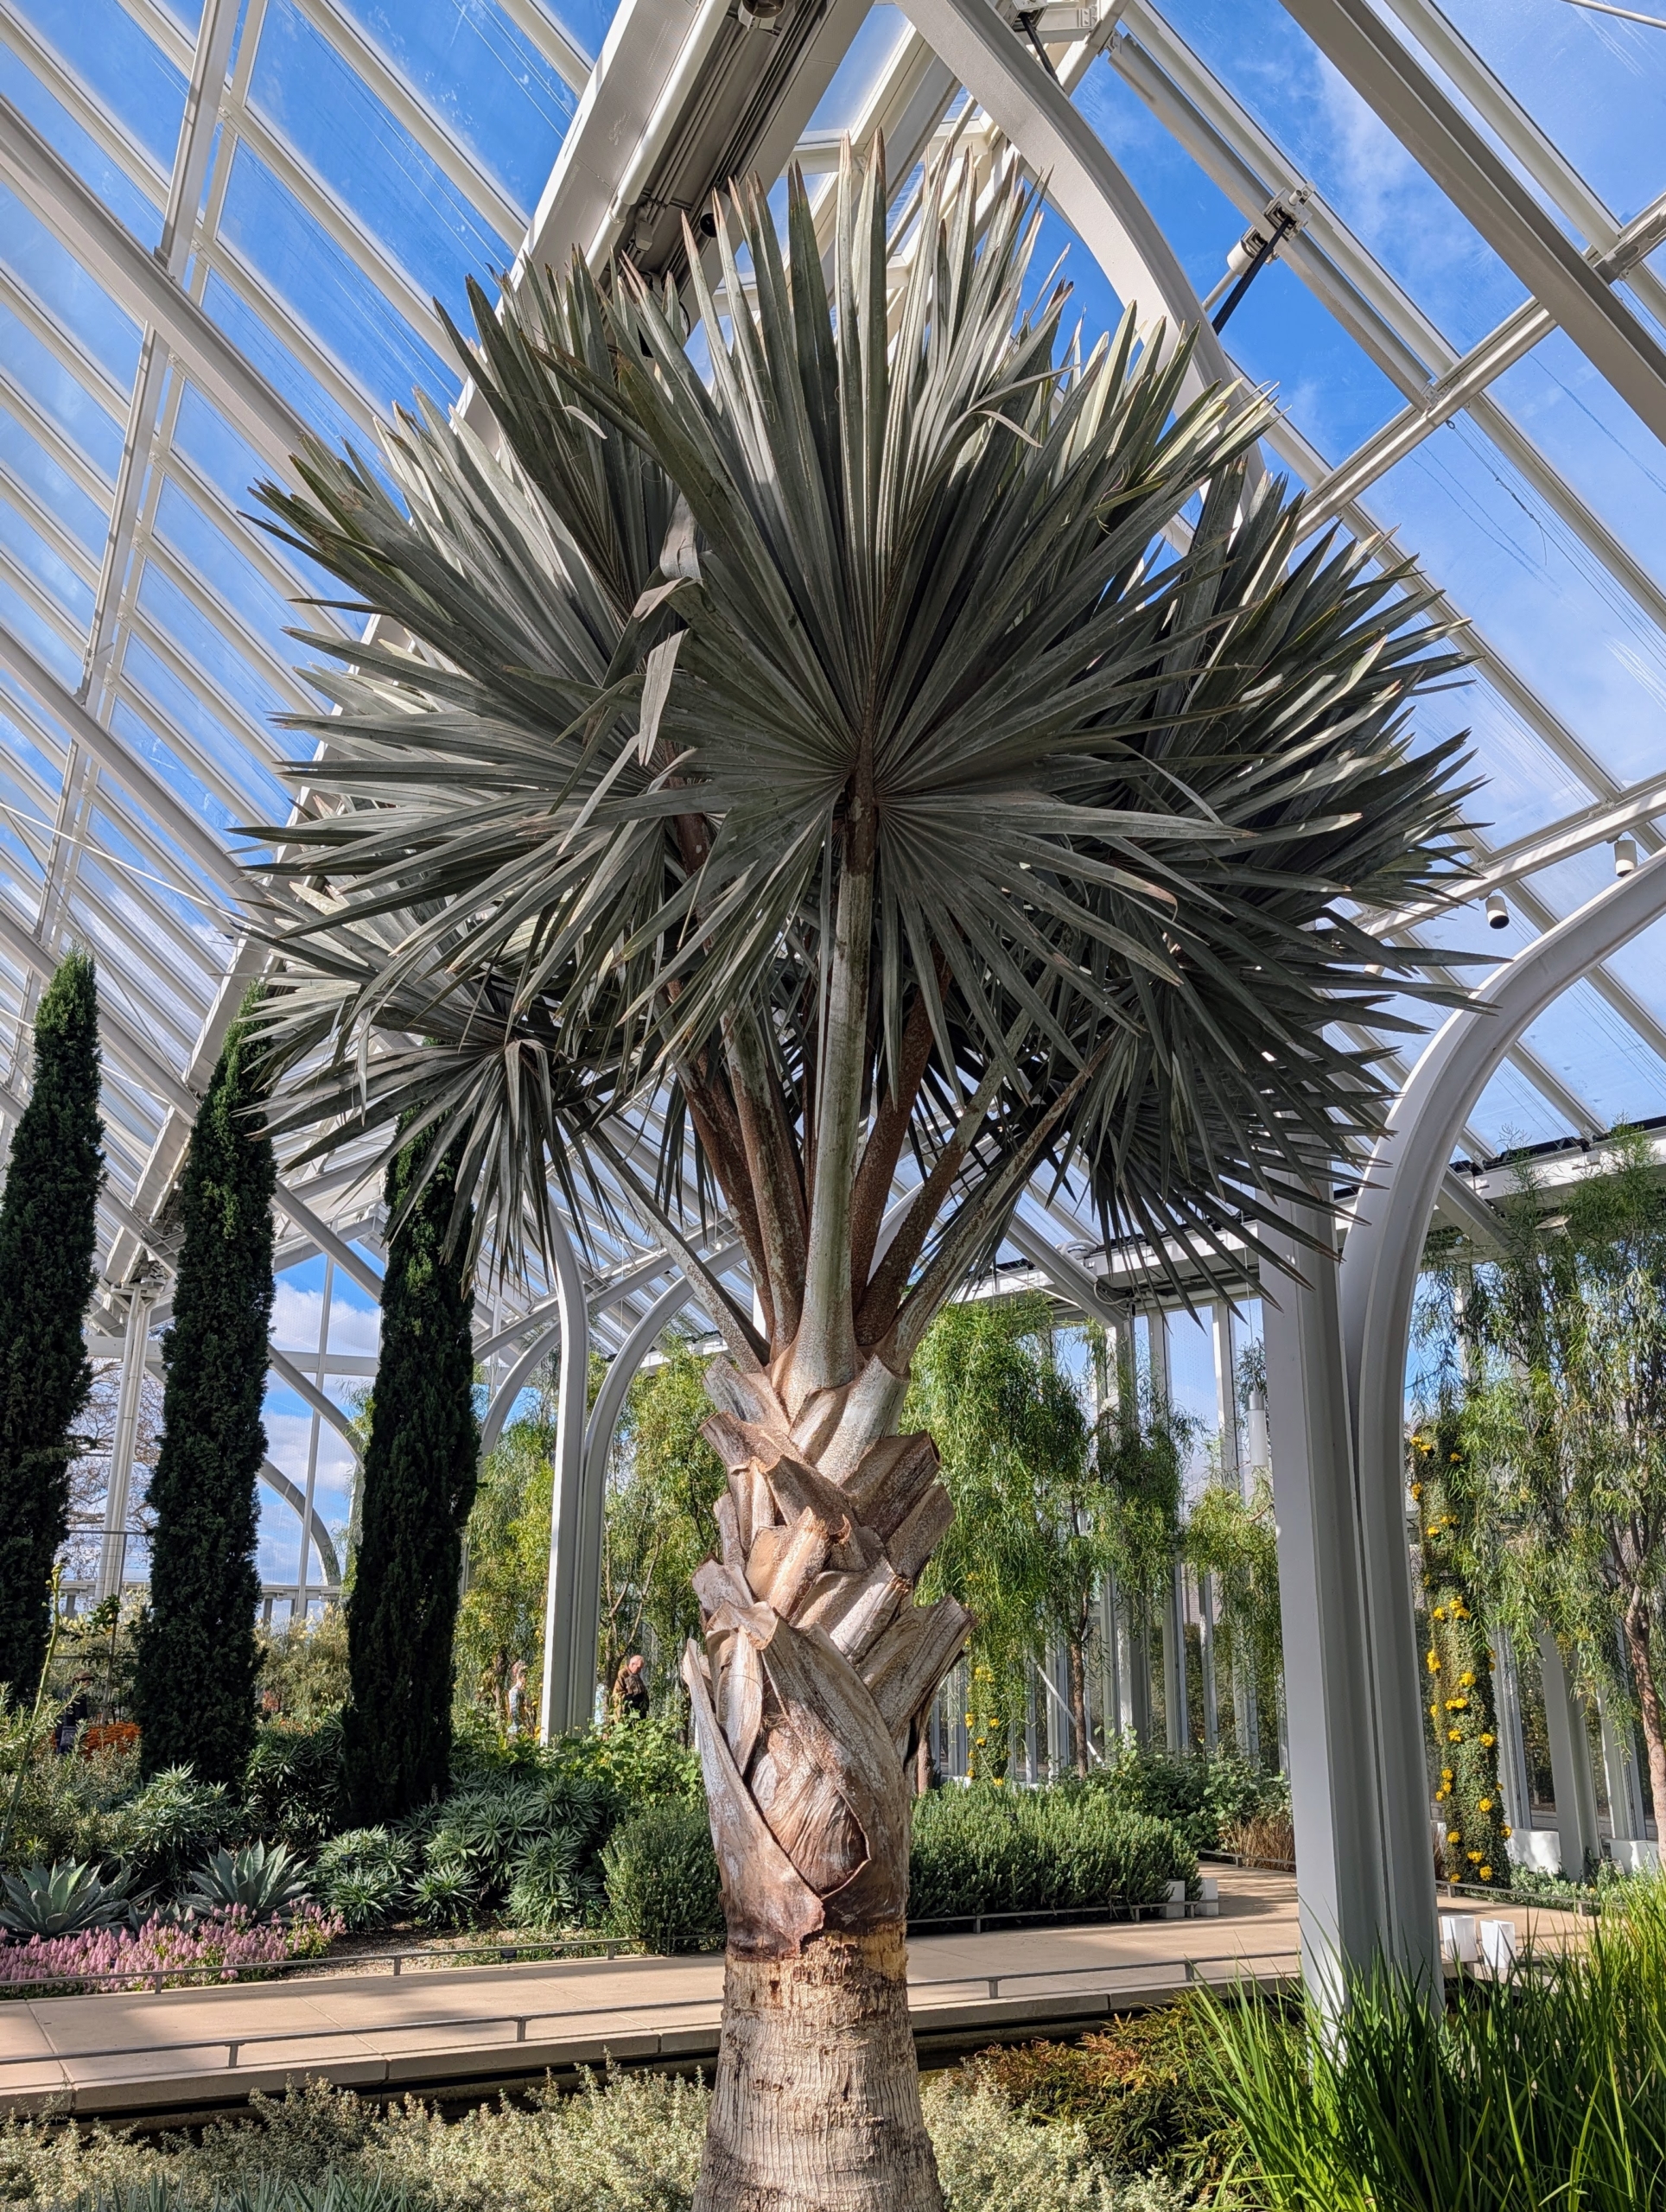
Inside this conservatory – something very familiar to me. Do you recognize this interesting specimen? This is a Bismarckia palm, Bismarckia nobilis, which grows from a solitary trunk, gray to tan in color, and slightly bulging at the base. The nearly rounded leaves are enormous and are divided to a third its length into 20 or more stiff, once-folded segments.
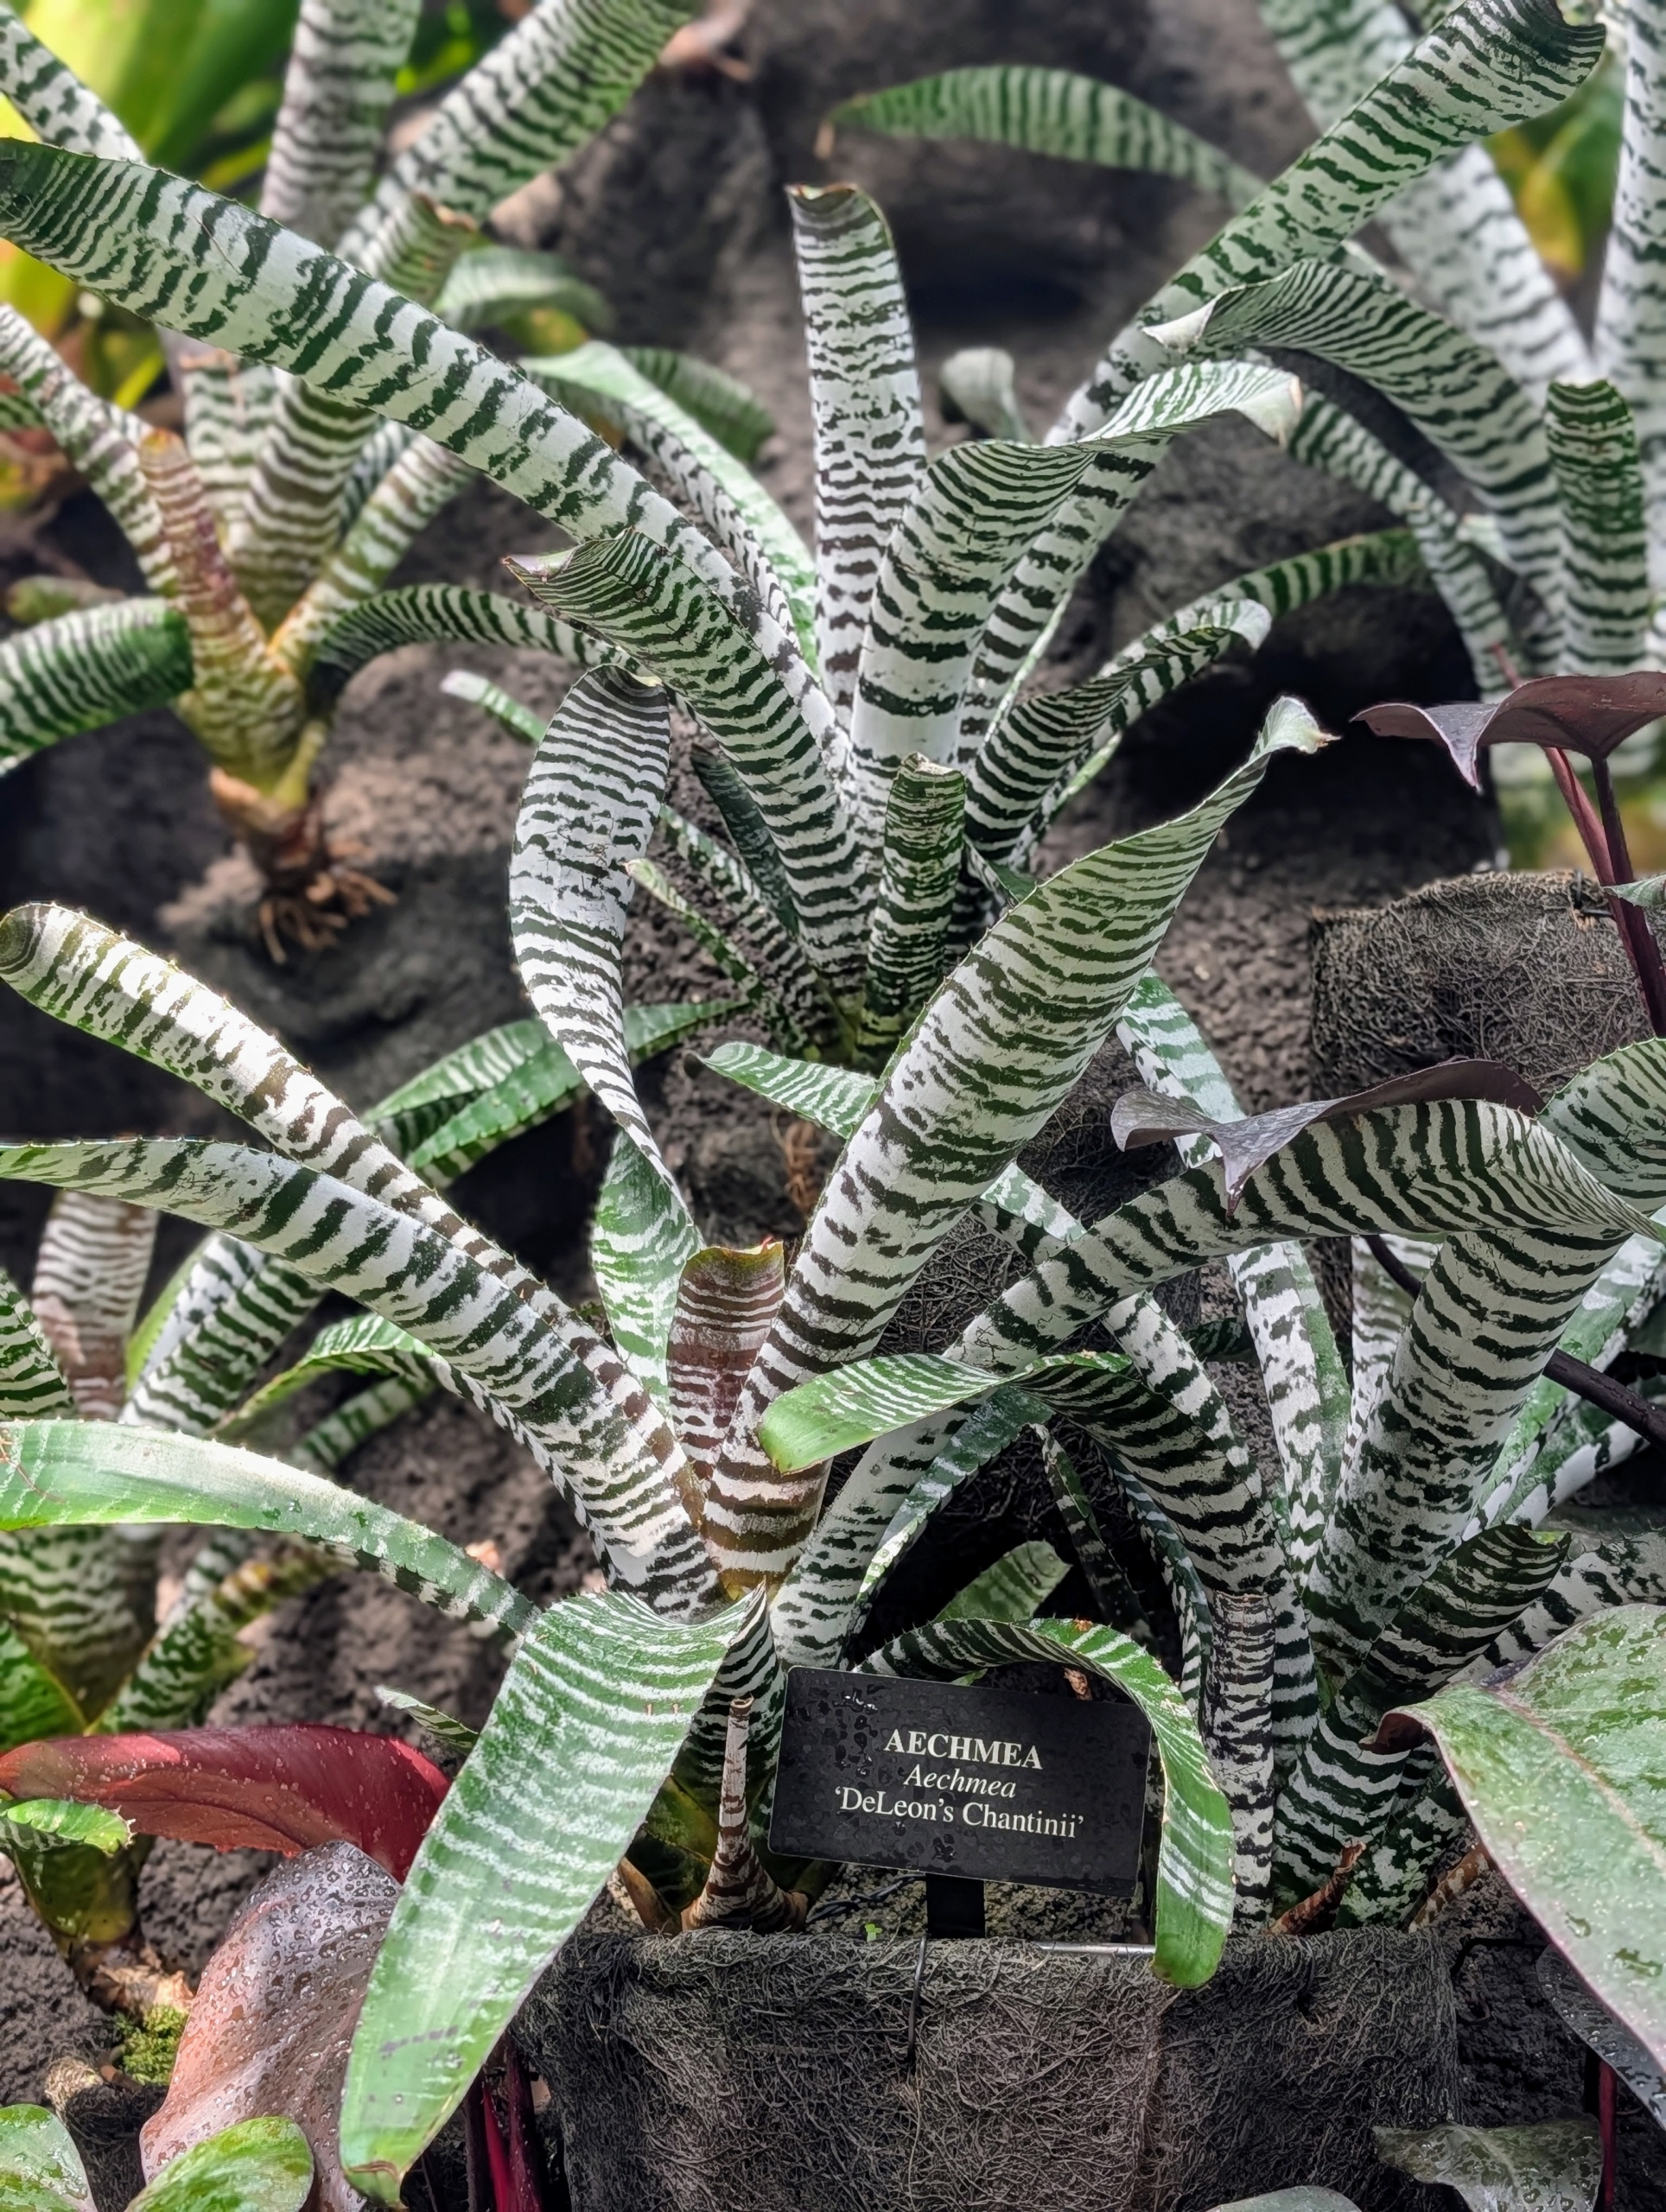
This is Aechmea ‘DeLeon’s Chantinii,’ a highly sought after bromeliad. The leaves are green with heavy white frosted banding and markings on both sides.
Earth-Star Cryptanthus bivittatus ‘Ruby’ is another evergrees bromeliad – this one with striking rosette-forming leaves that spread outward in a star pattern. The banded leaves typically range from green to pink to deep red.
Willow Leafe Spice Bush, Lindera angustifolia, is a multi-stemmed deciduous shrub native to the mountain sloes of China. It’s known for its glossy green leaves that turn vibrant shades of orange-yellow and red in fall.
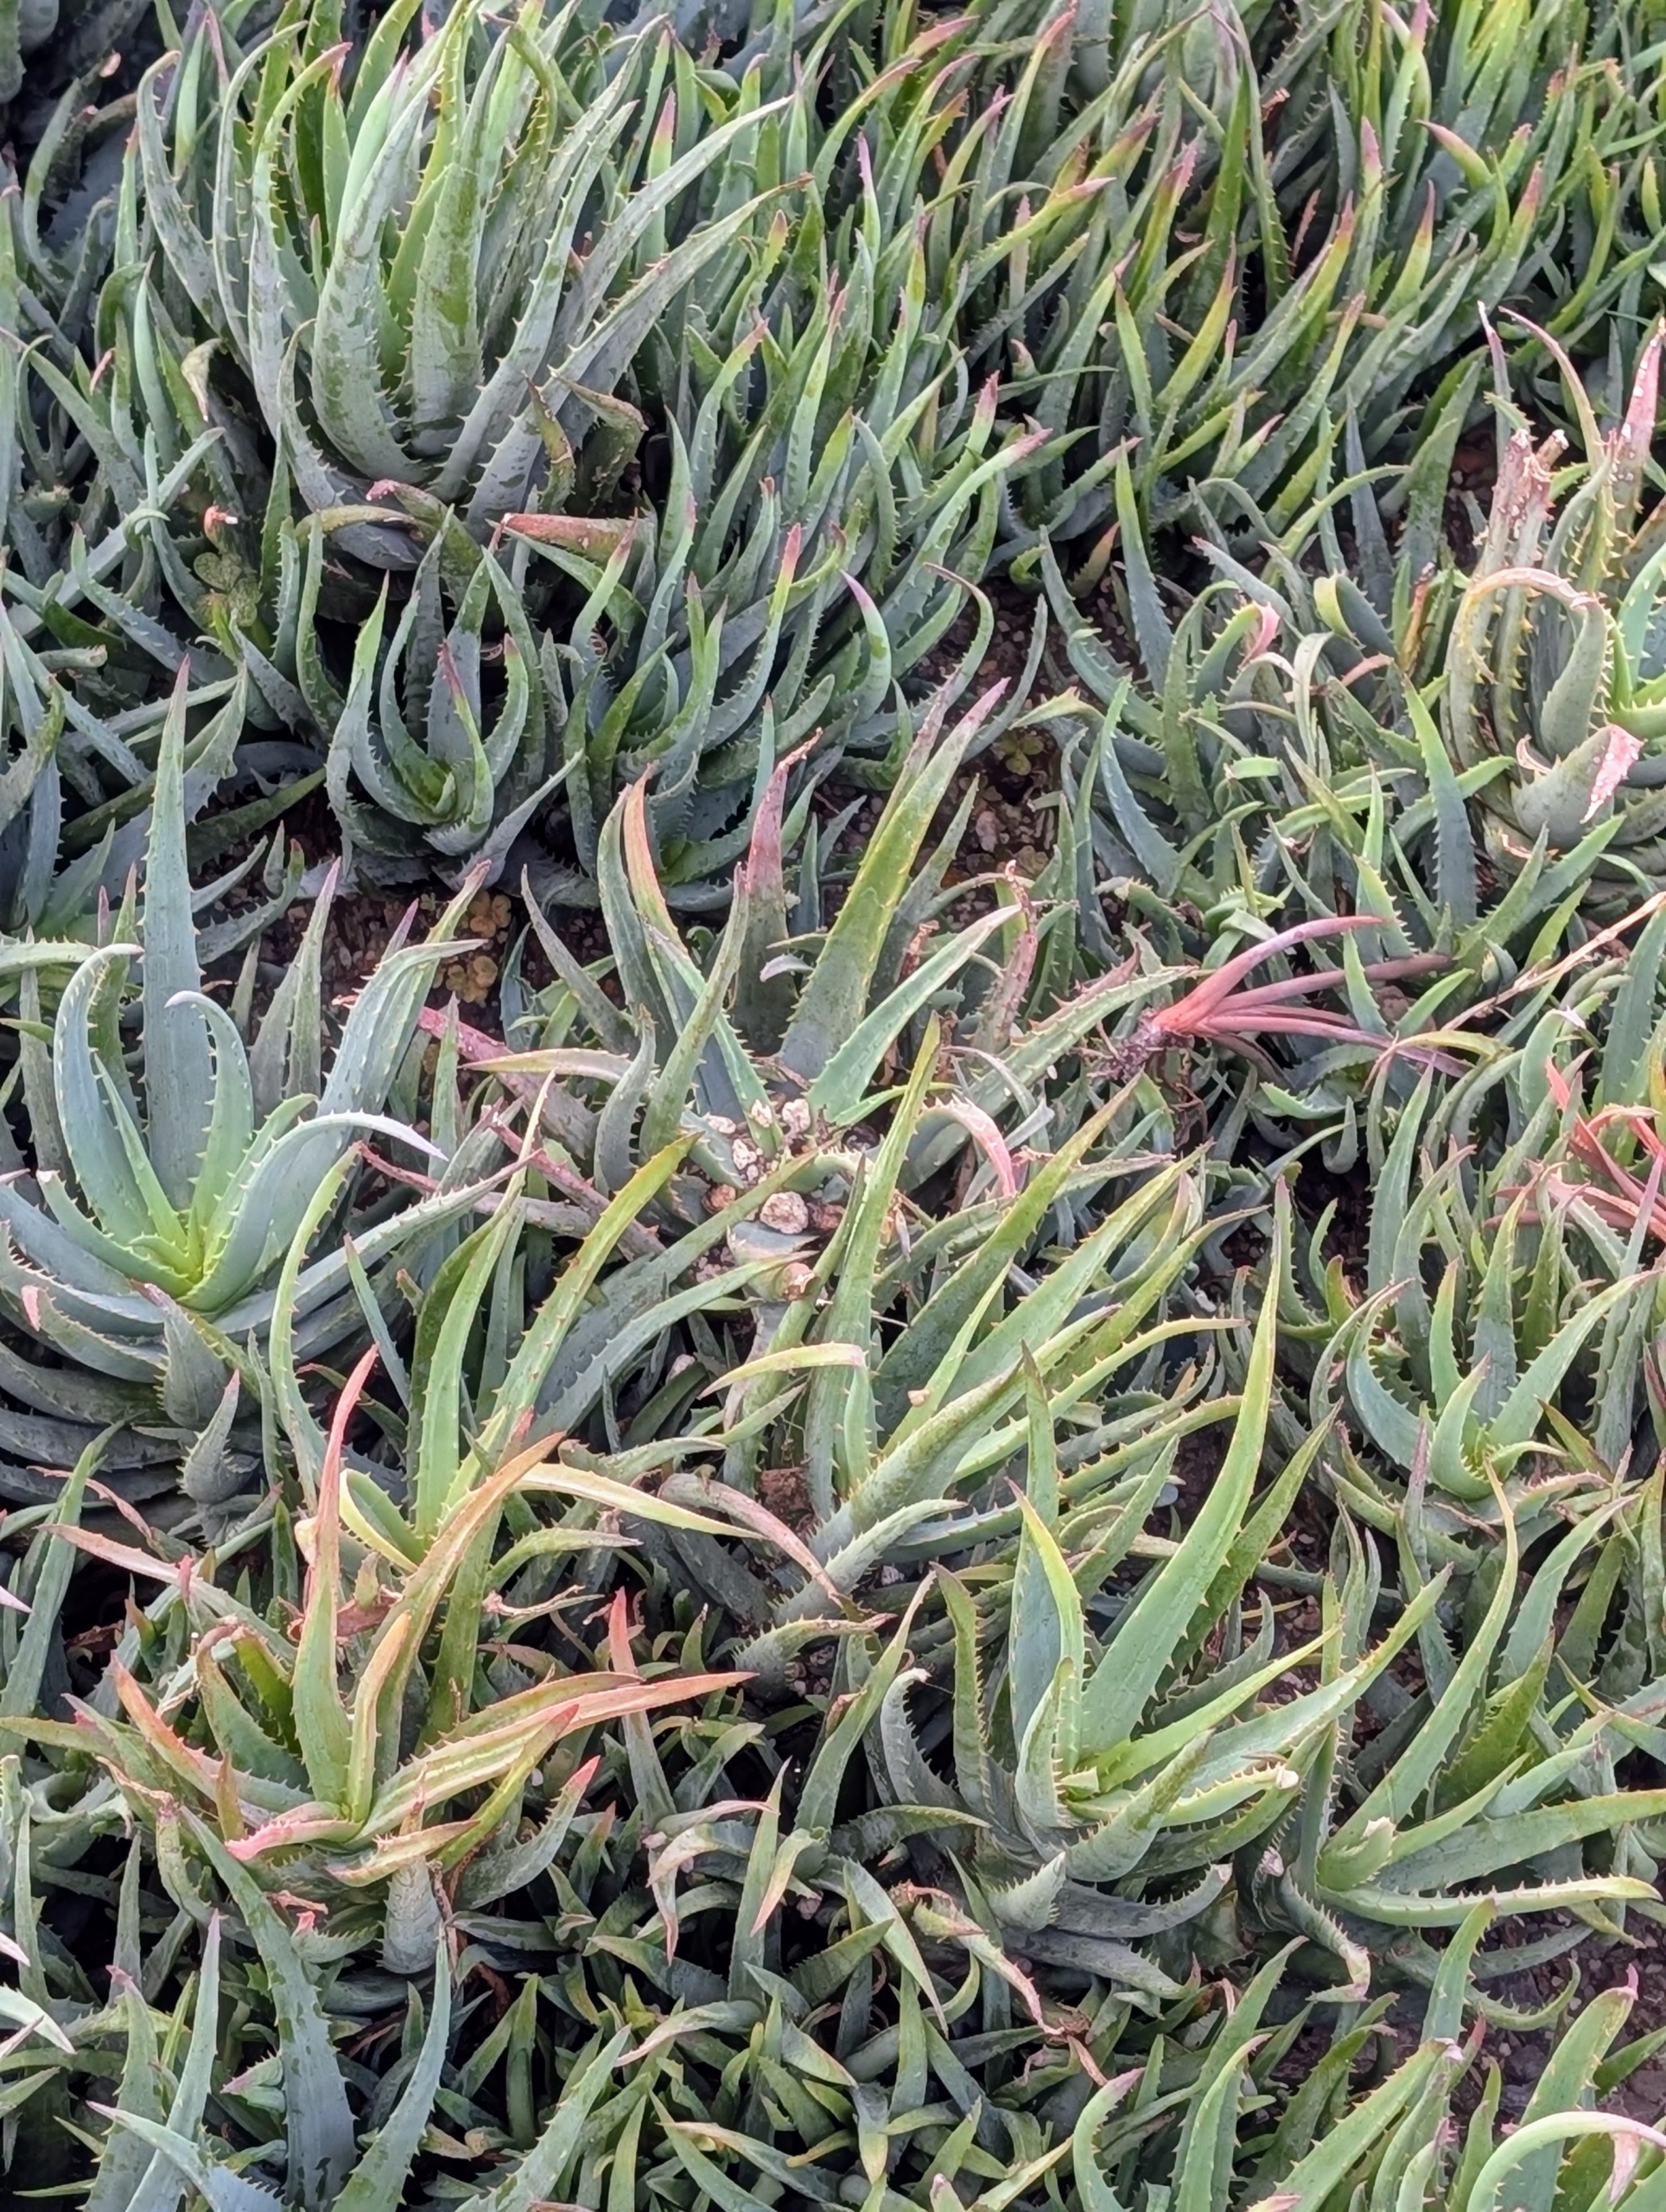
This interesting Aloe is ‘Blue Elf.’ It’s excellent for mass plantings. This Aloe is a hardy, heat loving hybrid with narrow, upright, blue-gray leaves that contrast nicely with its pale orange flower spikes.
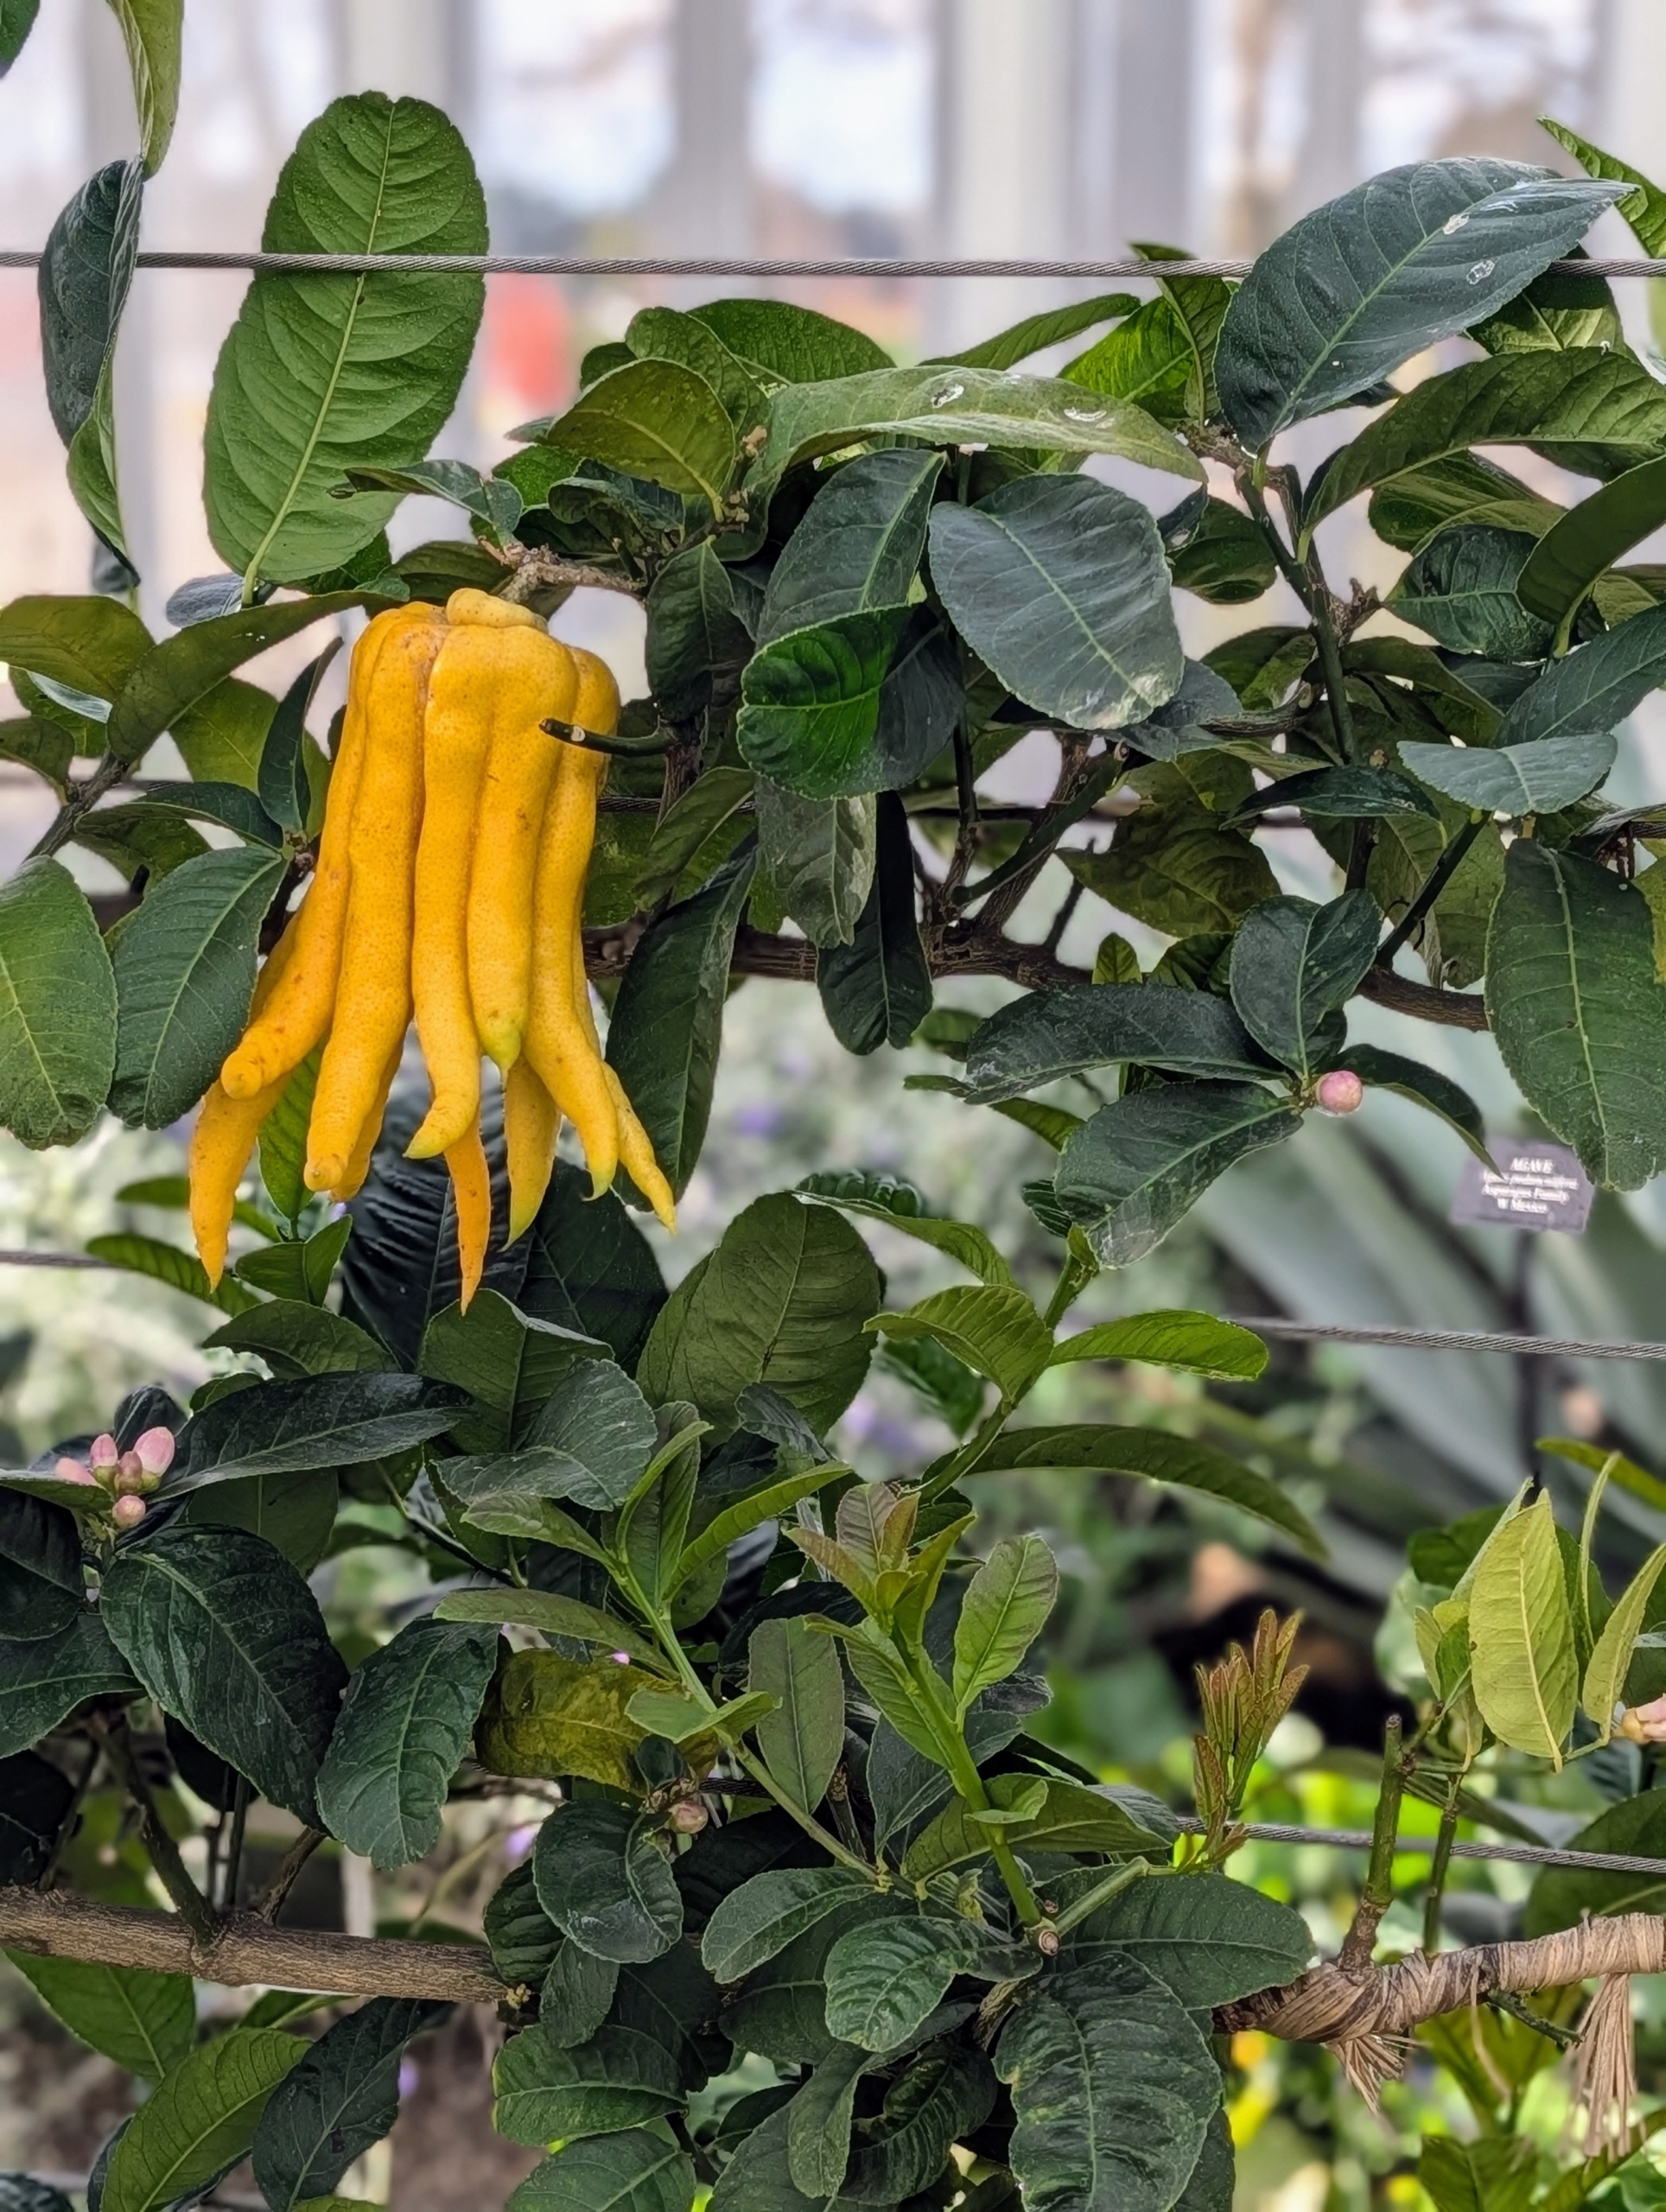
Ever see a multi-fingered citrus? I have these in my greenhouse as well. These citron trees are trained with traditional espalier methods. The ancient horticultural technique involves growing trees, shrubs, and vines flat against some kind of support structure to maximize space and create an interesting appearance.
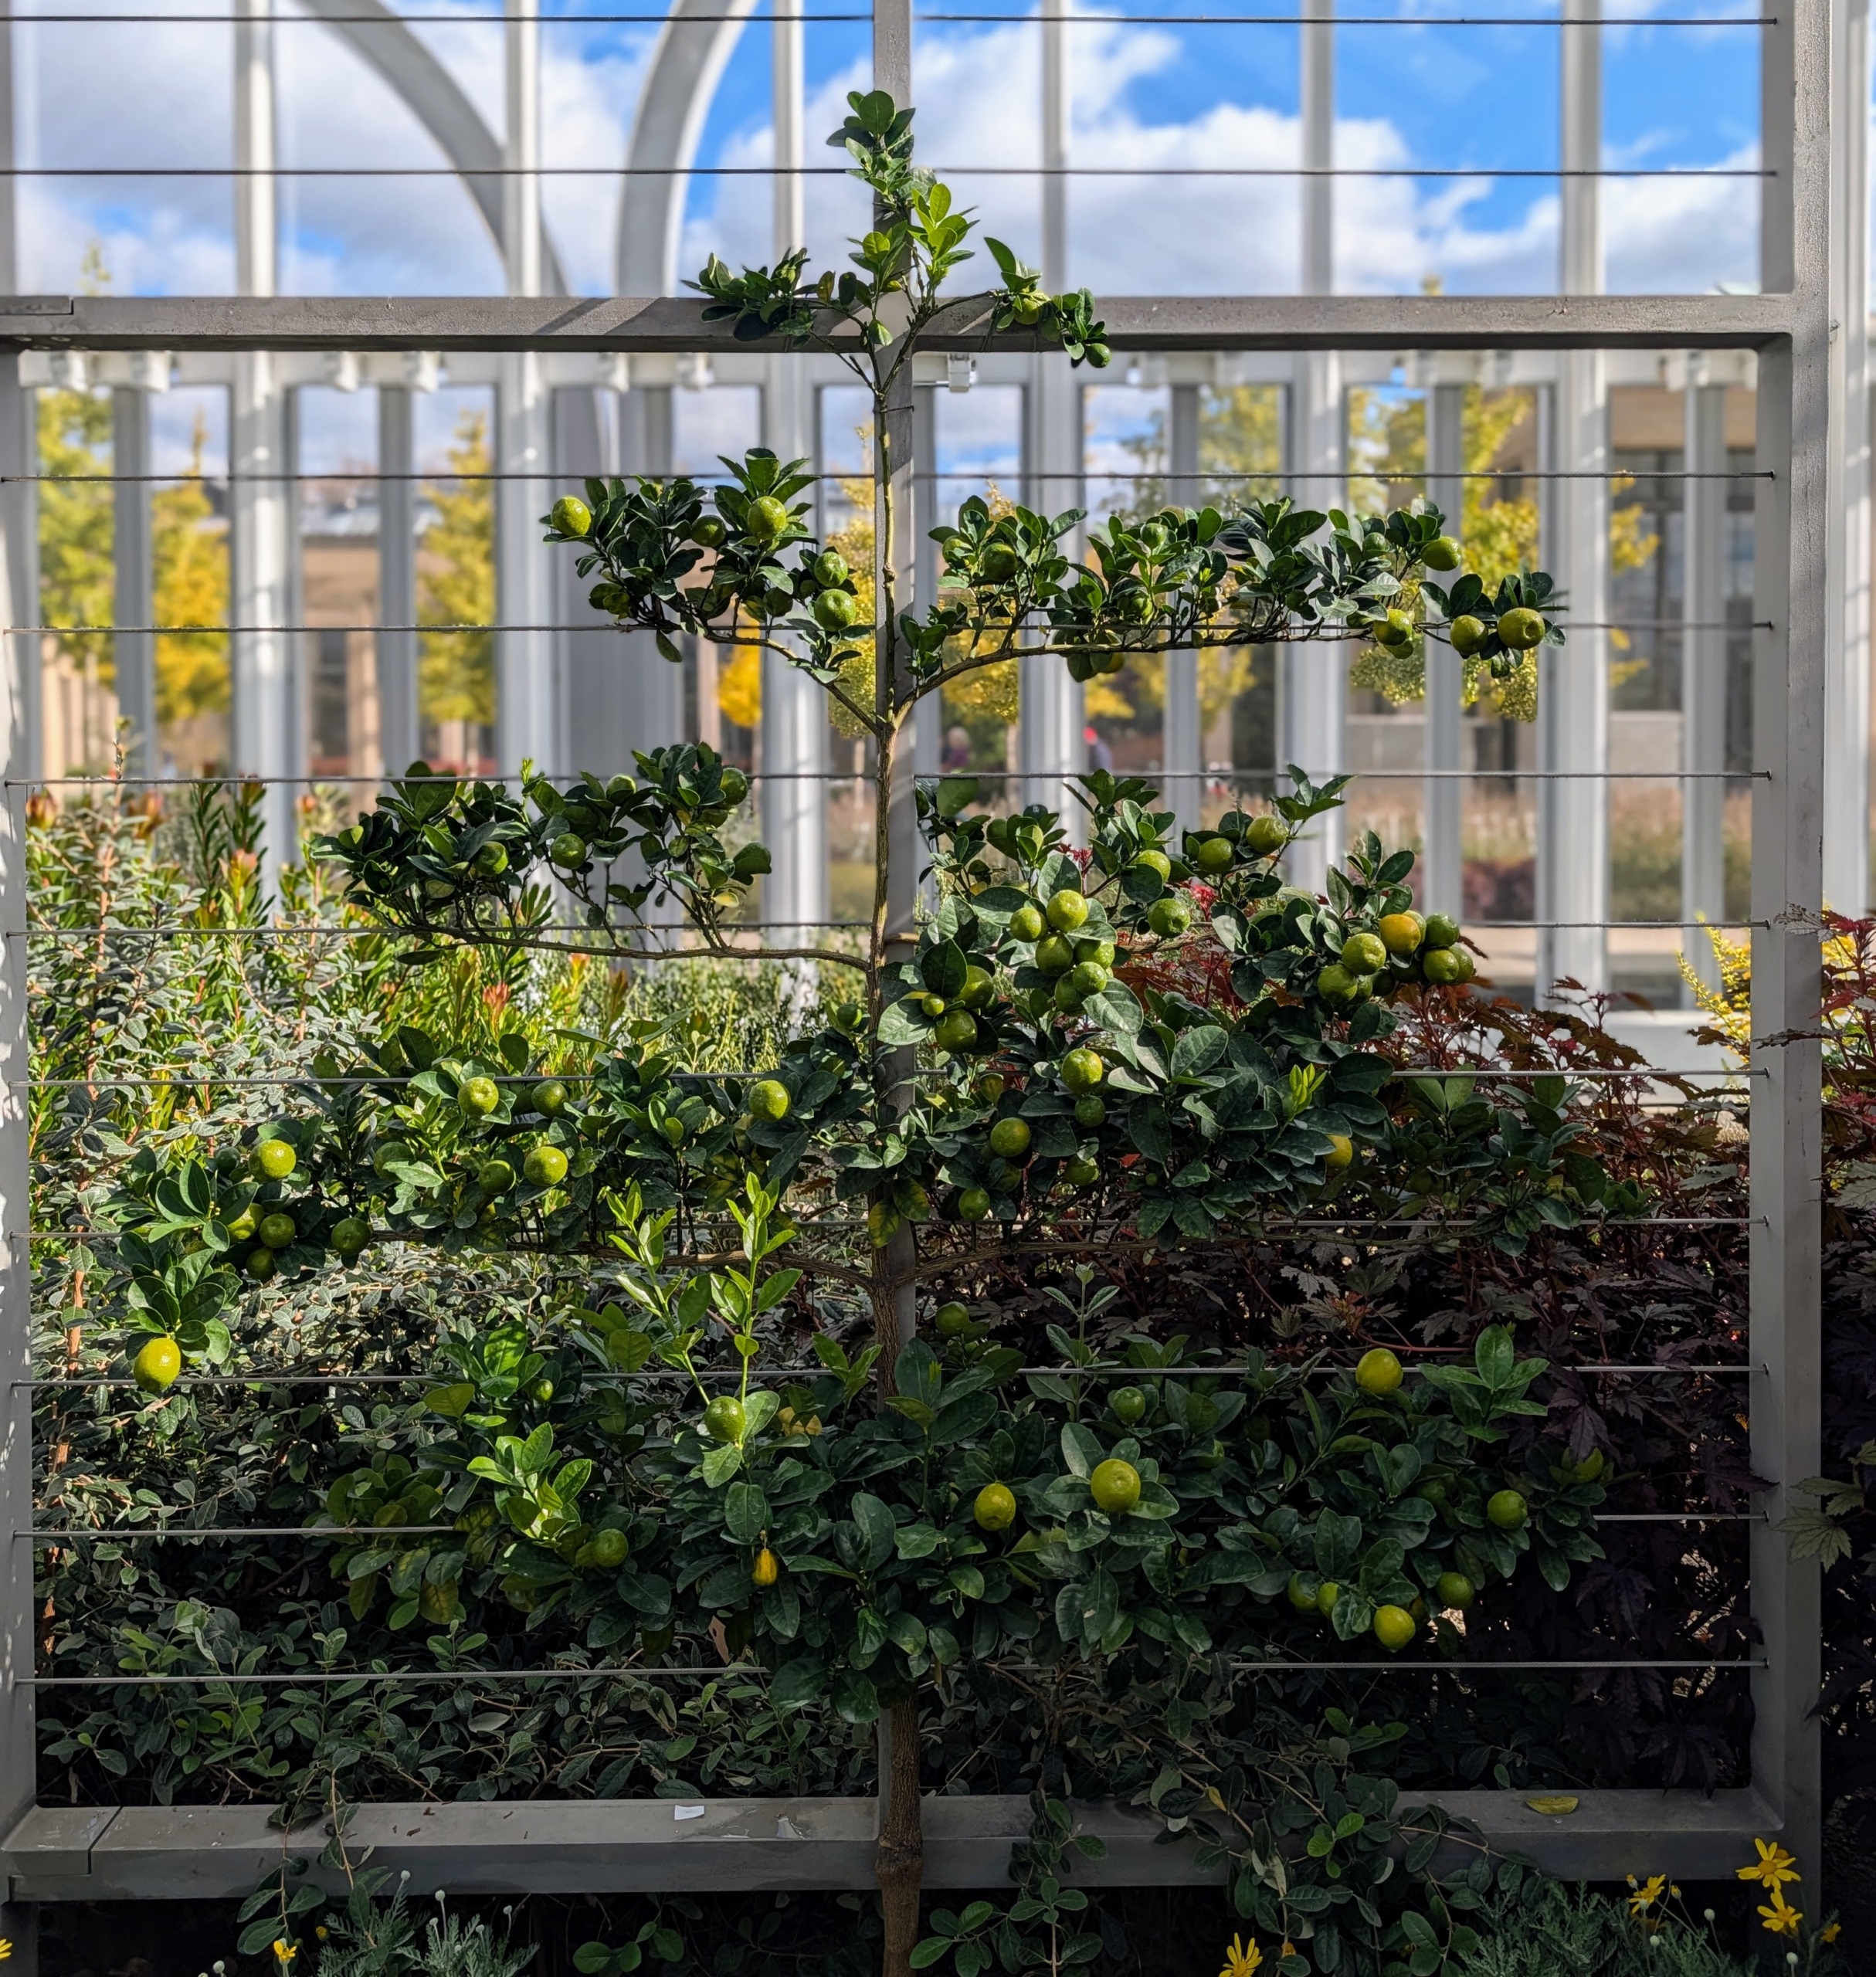
These espaliered fruits are hybrid kumquats, ‘Fukushu.’
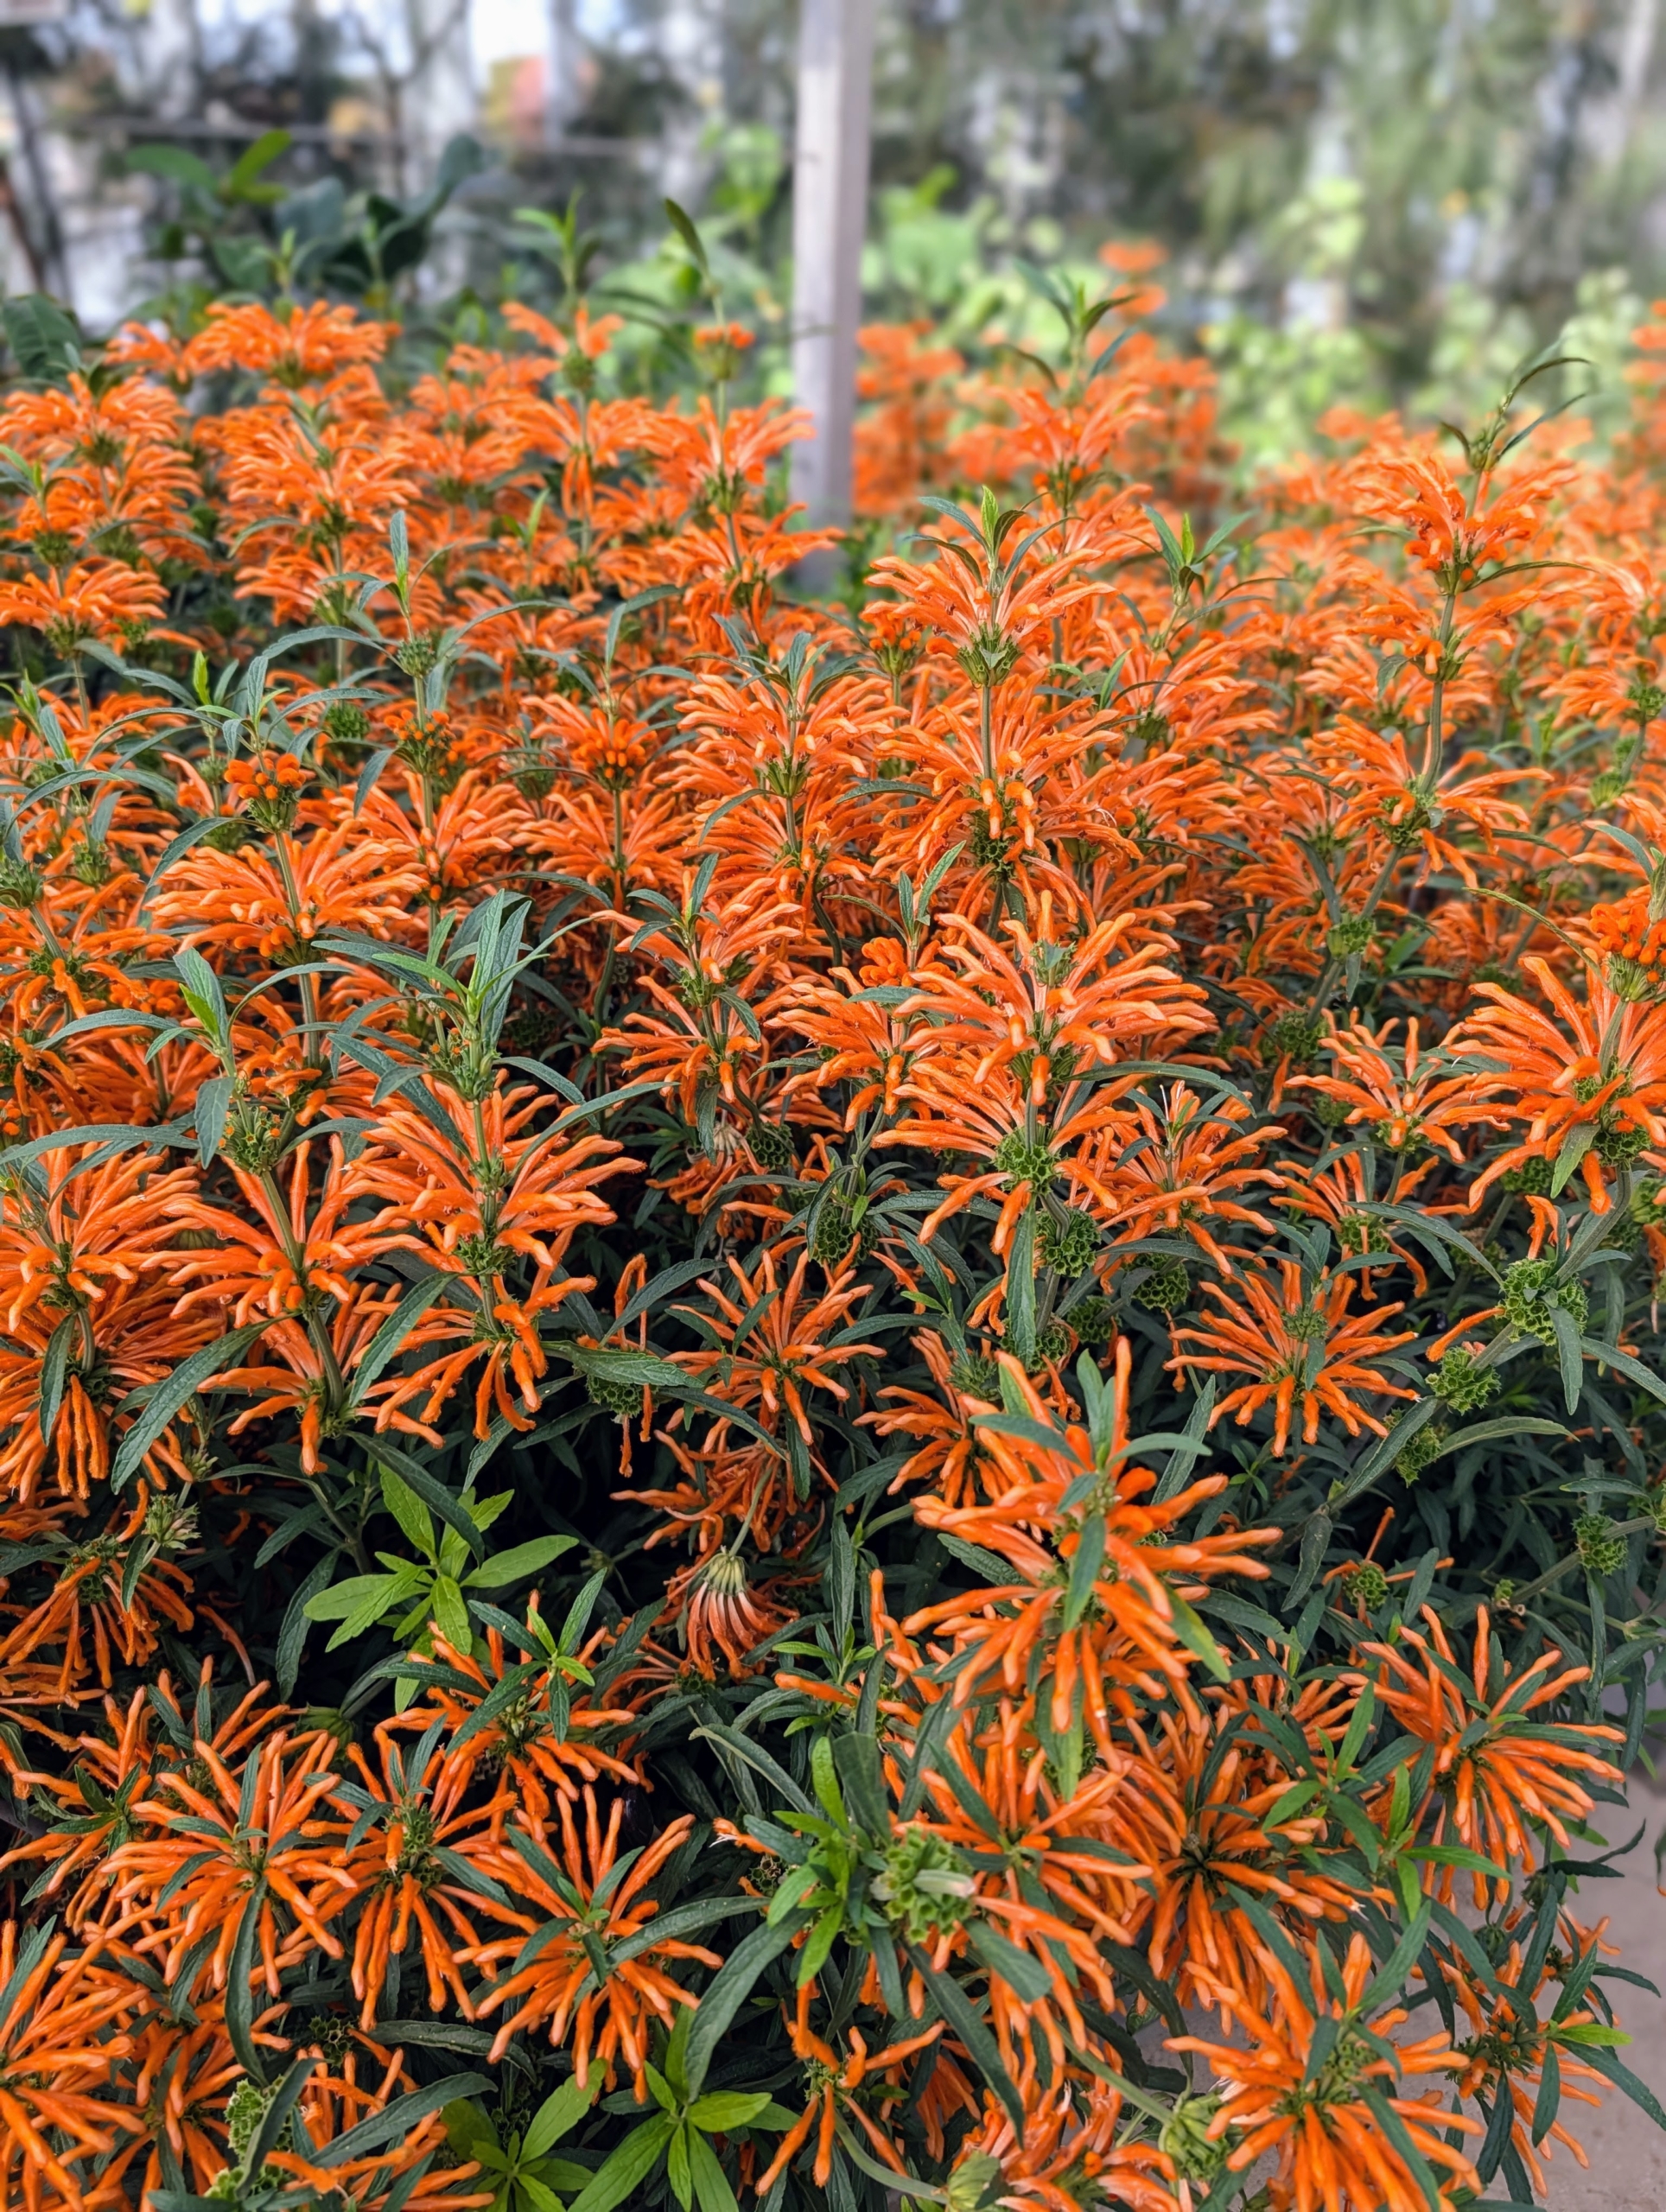
This is called Lion’s-Tail, Leonotis leonurus. It is from the mint family and is a striking flowering shrub native to South Africa, known for its vibrant orange blooms and aromatic foliage.
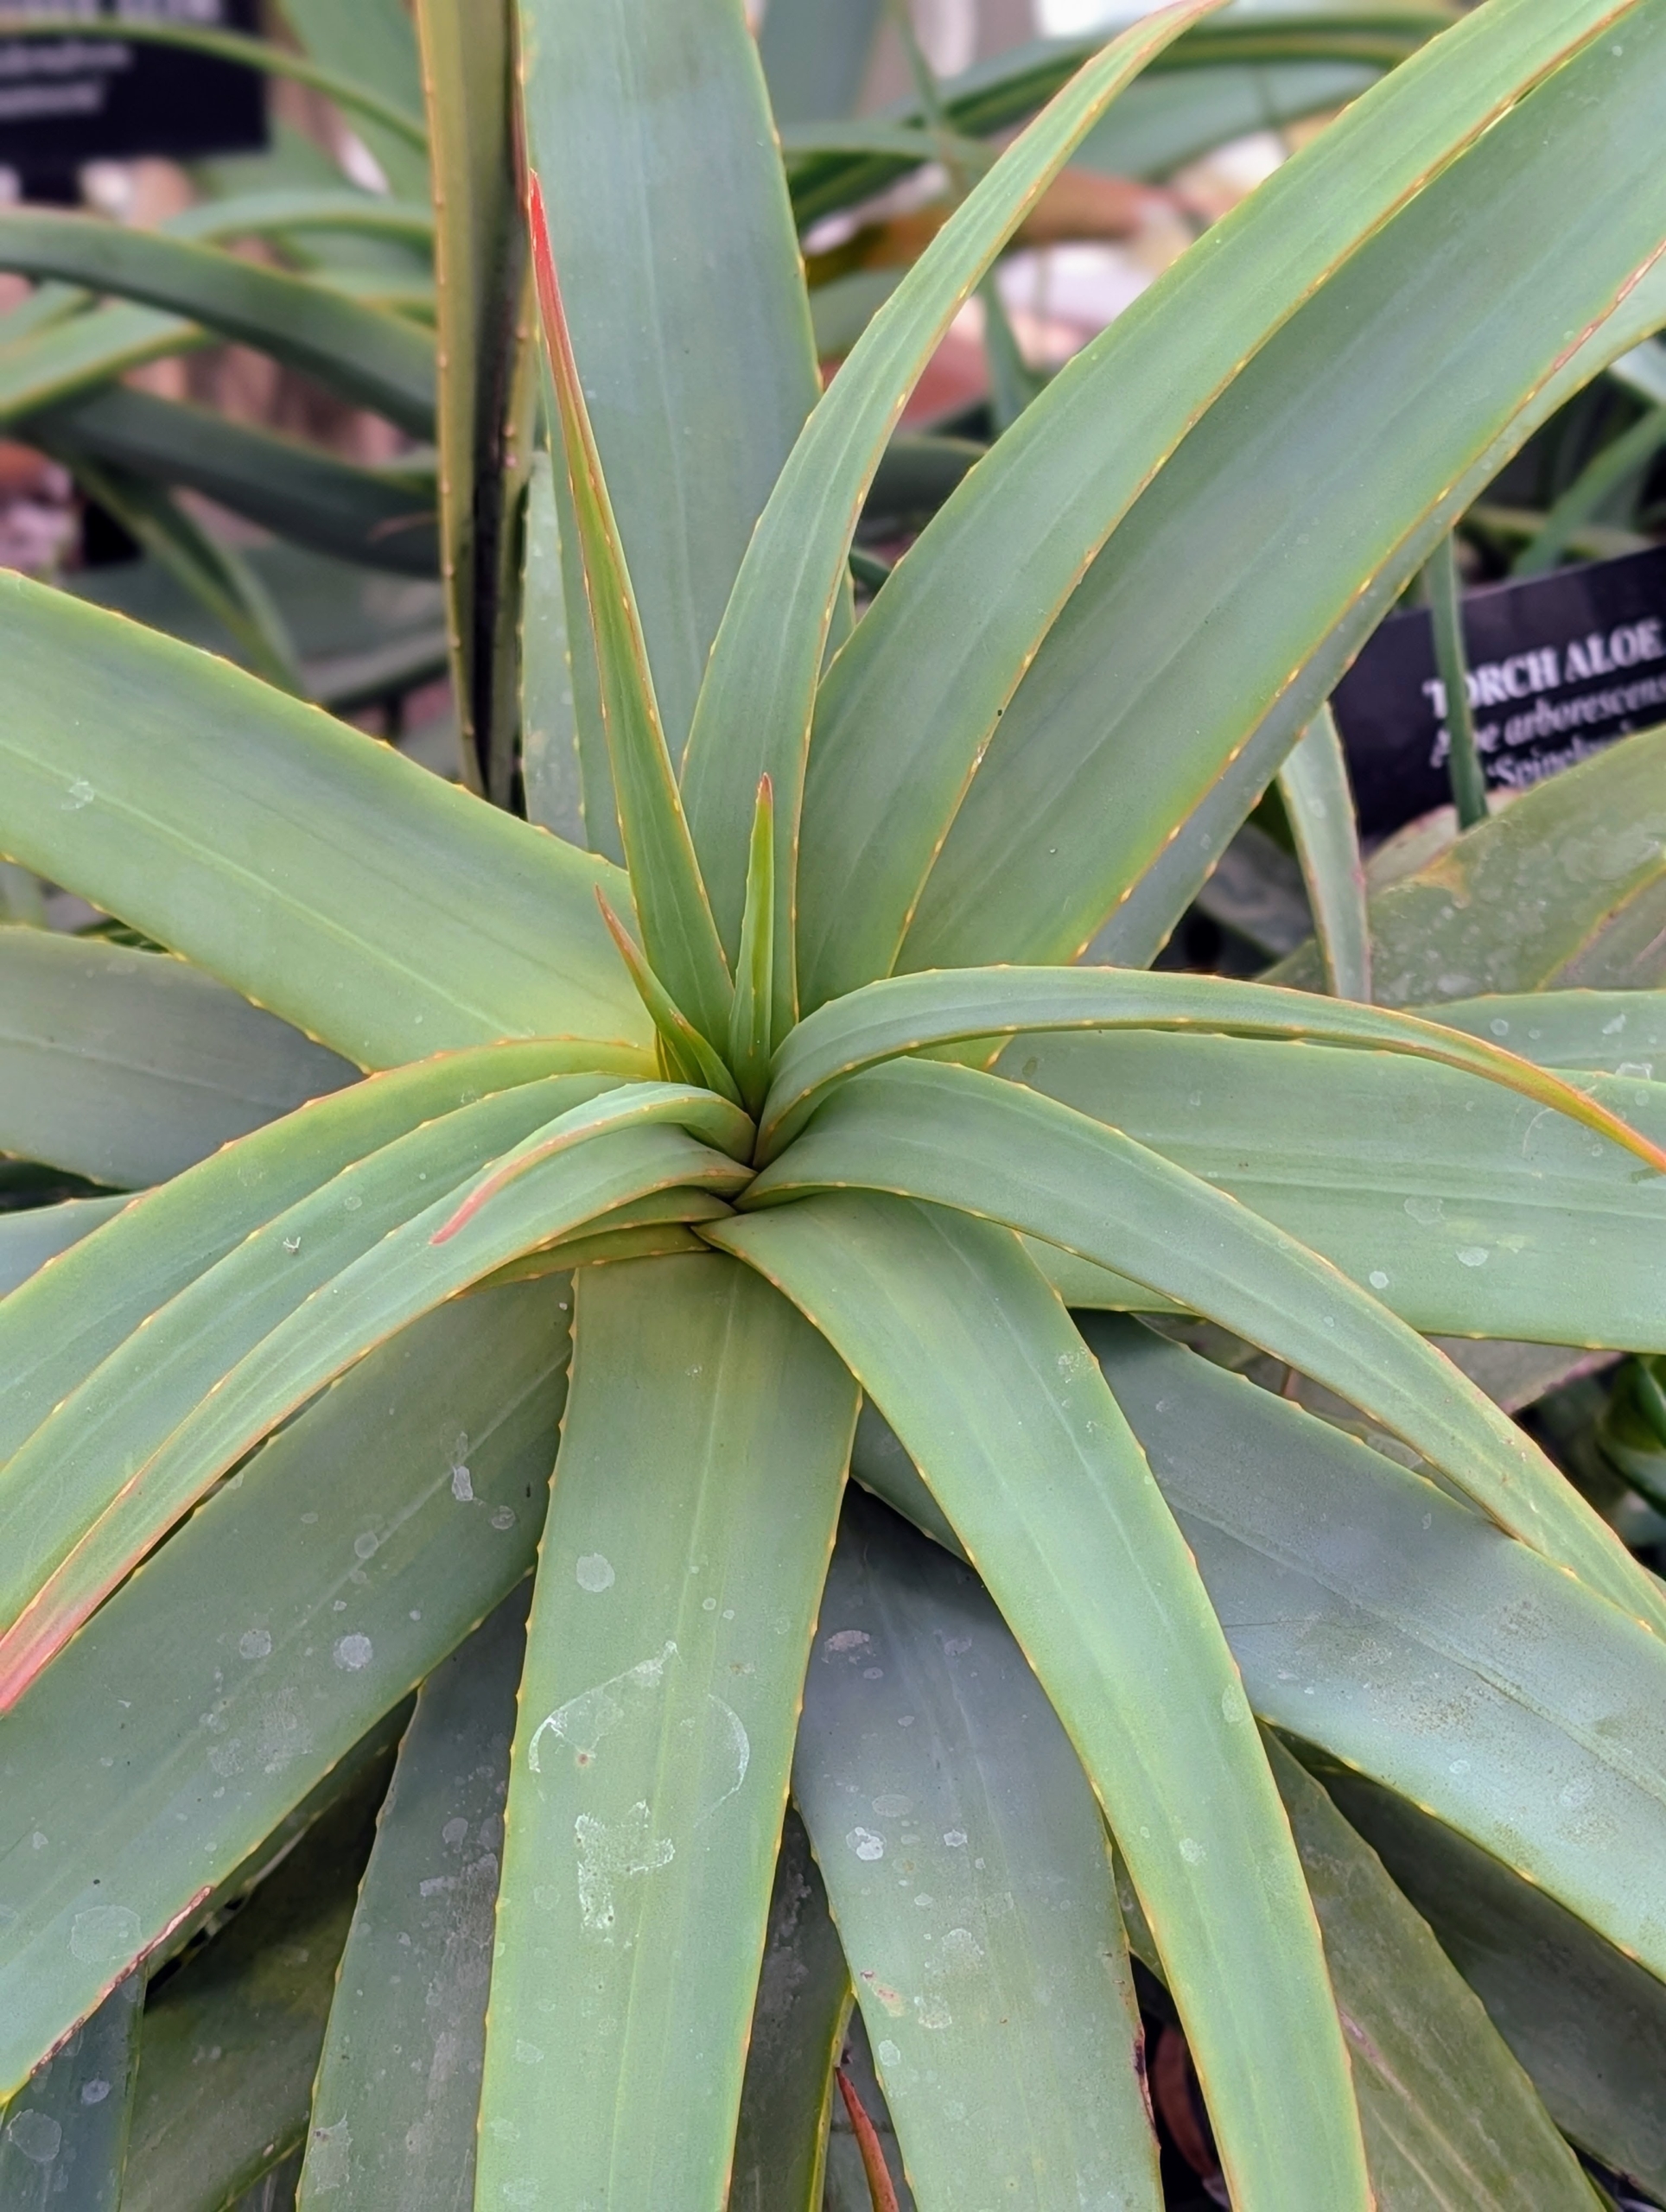
This is a Torch Aloe, Aloe arborescens, which is a large evergreen succulent shrub featuring branching stems of gray-green rosettes and sword-shaped leaves. It can grow tall and wide, making it suitable for large, outdoor spaces and natural fences in the garden.
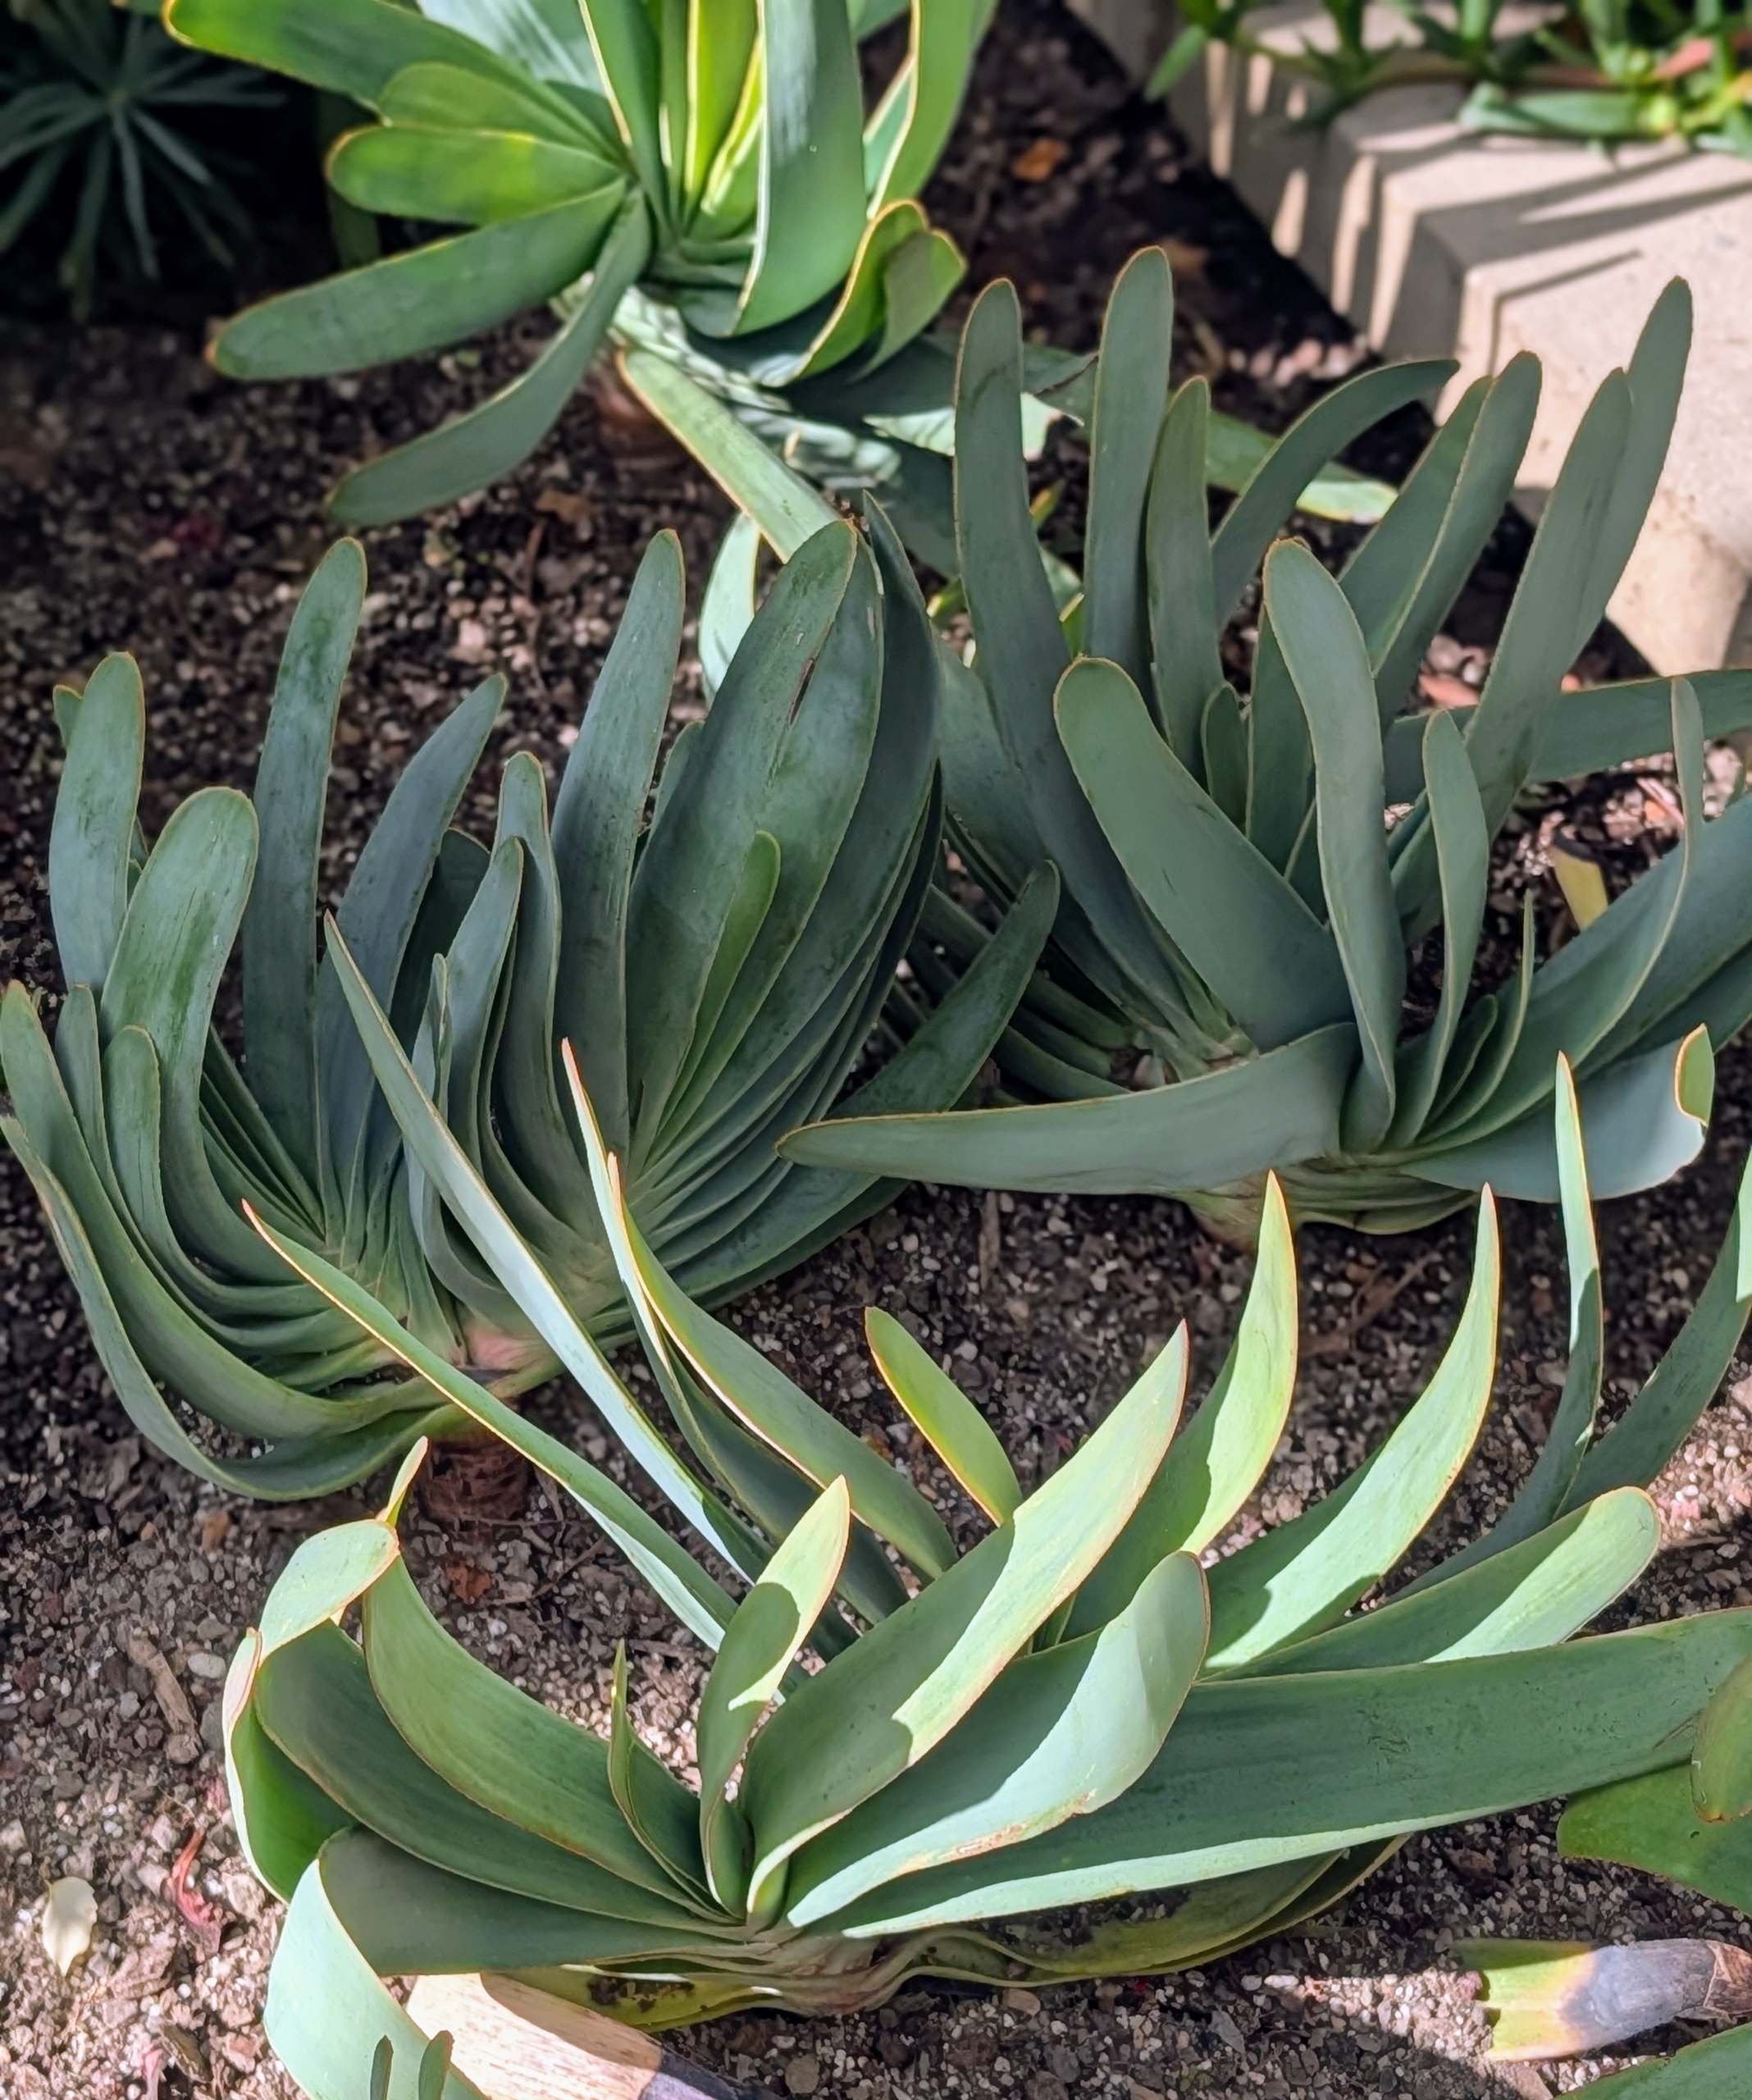
This Fan Aloe, Kumara plicatilis, has grey stems forked with clusters of round tipped leaves arranged in two opposite rows.
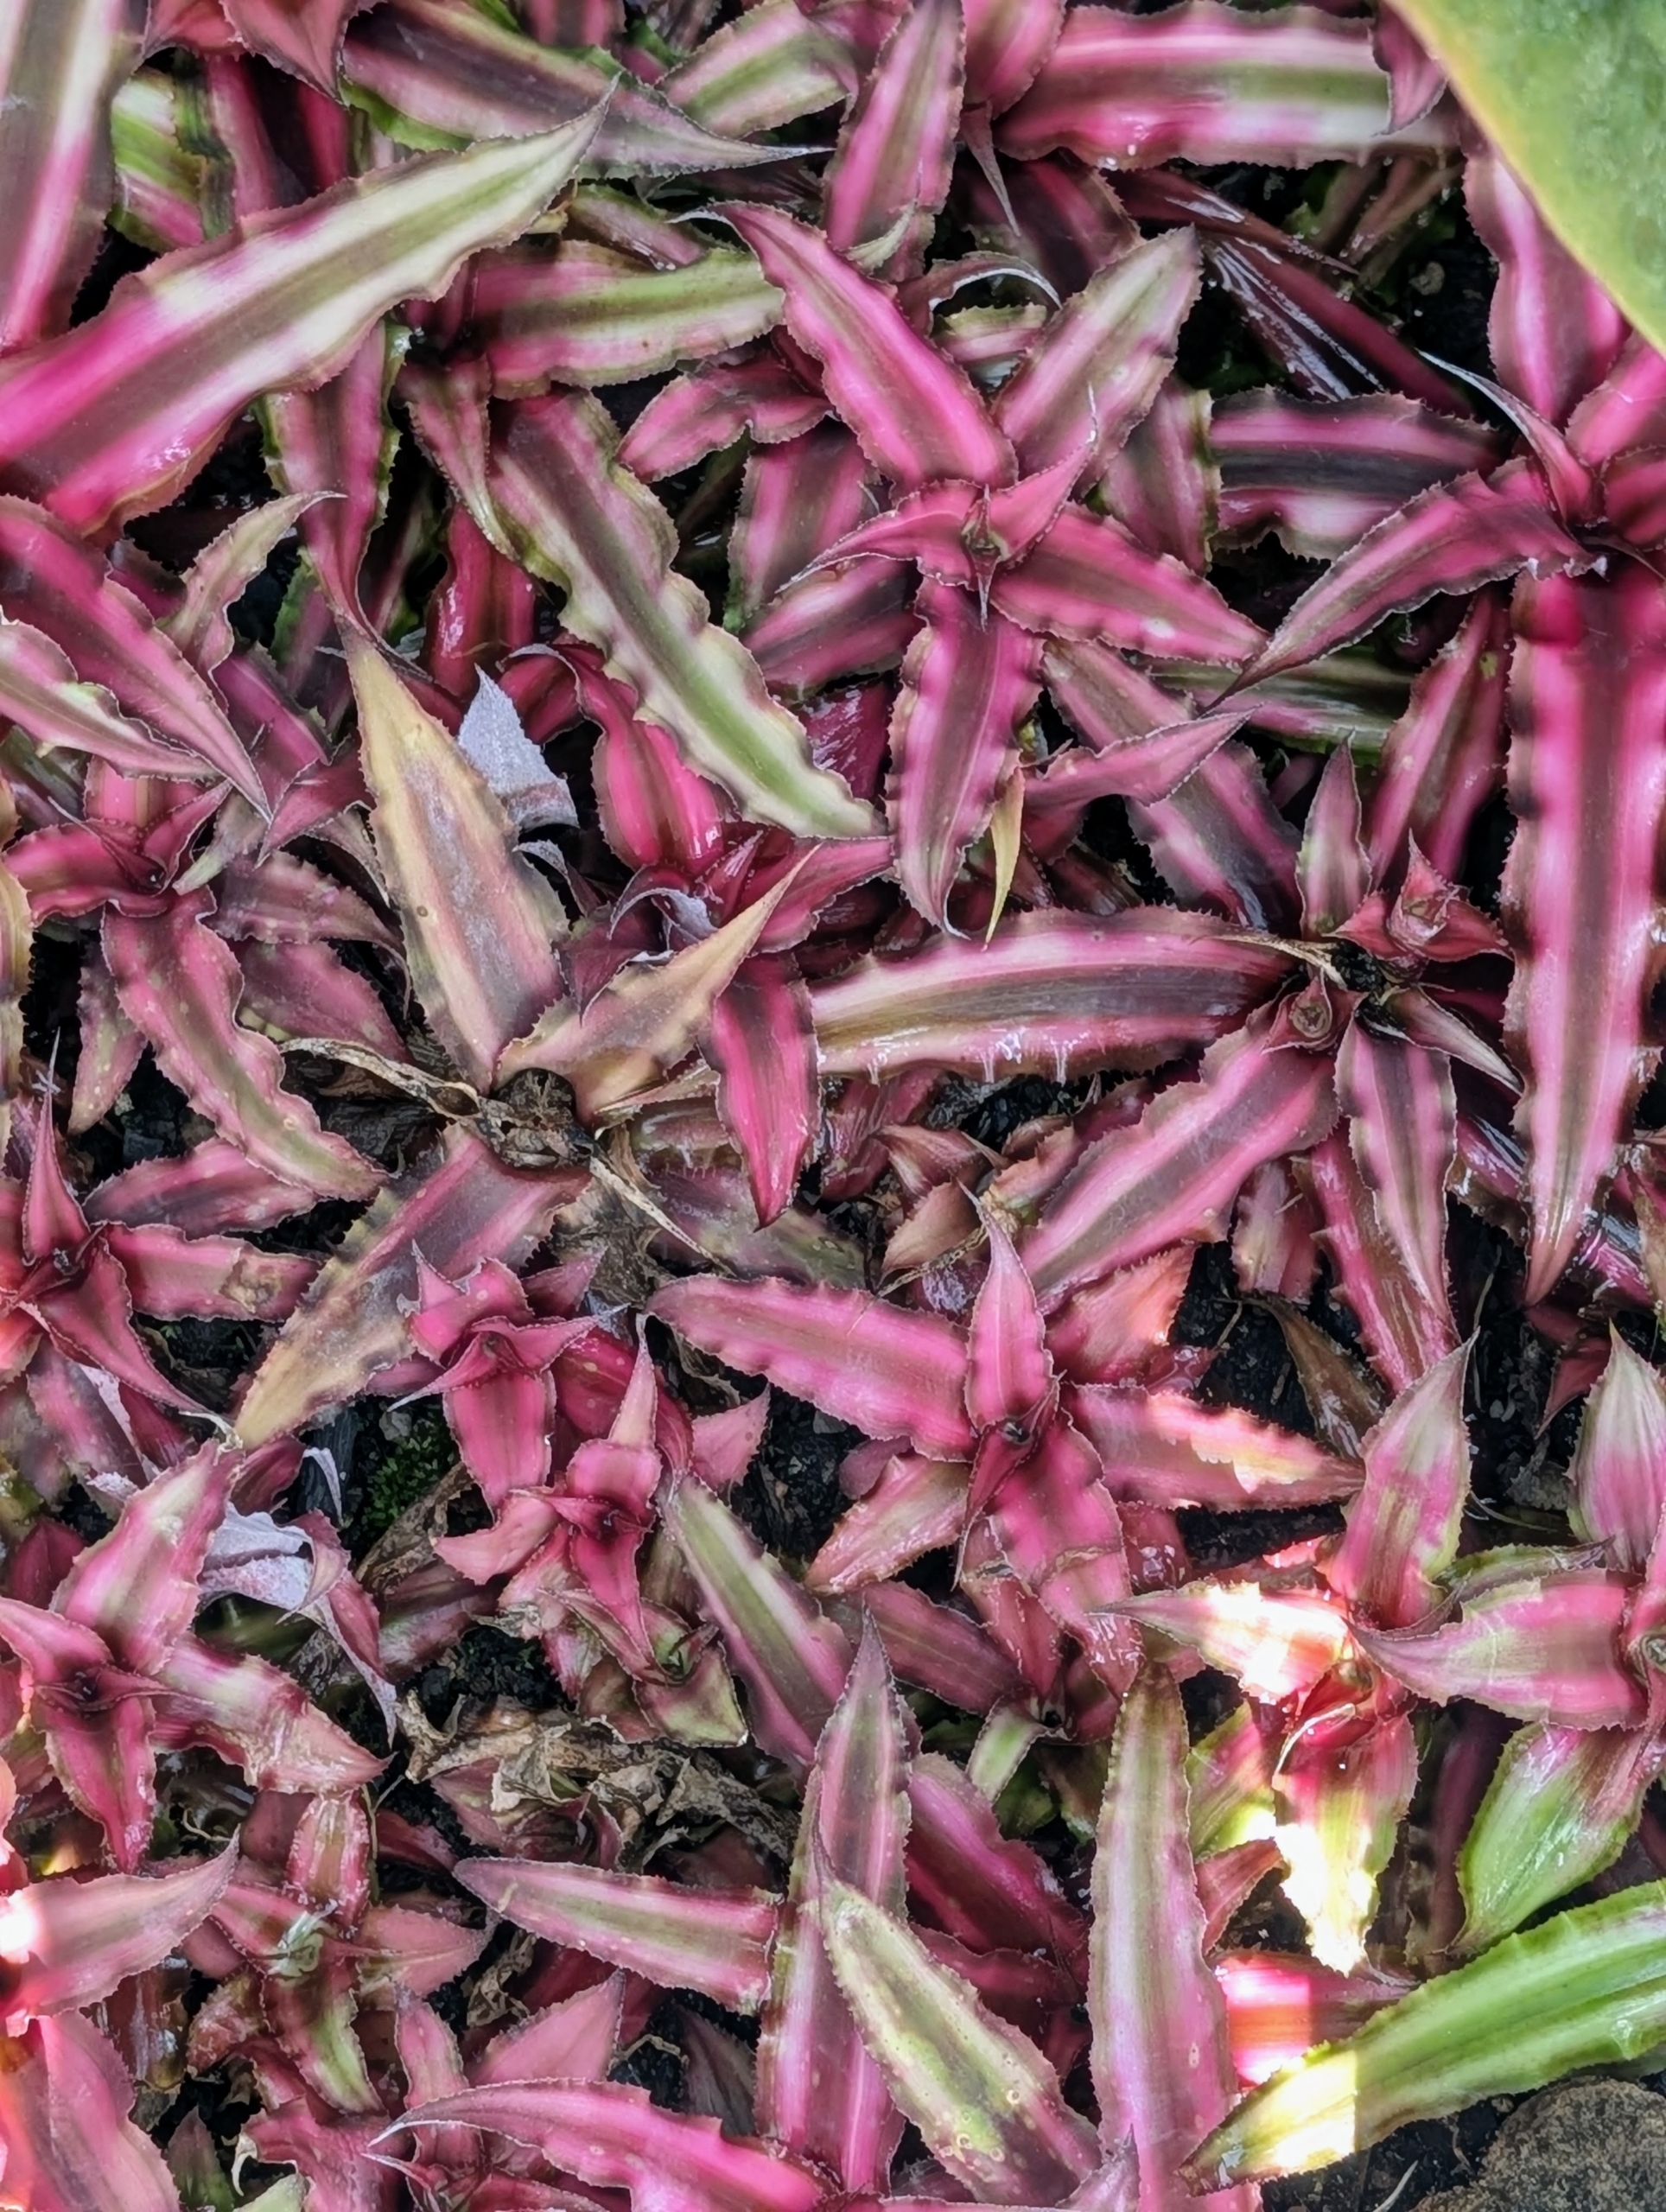
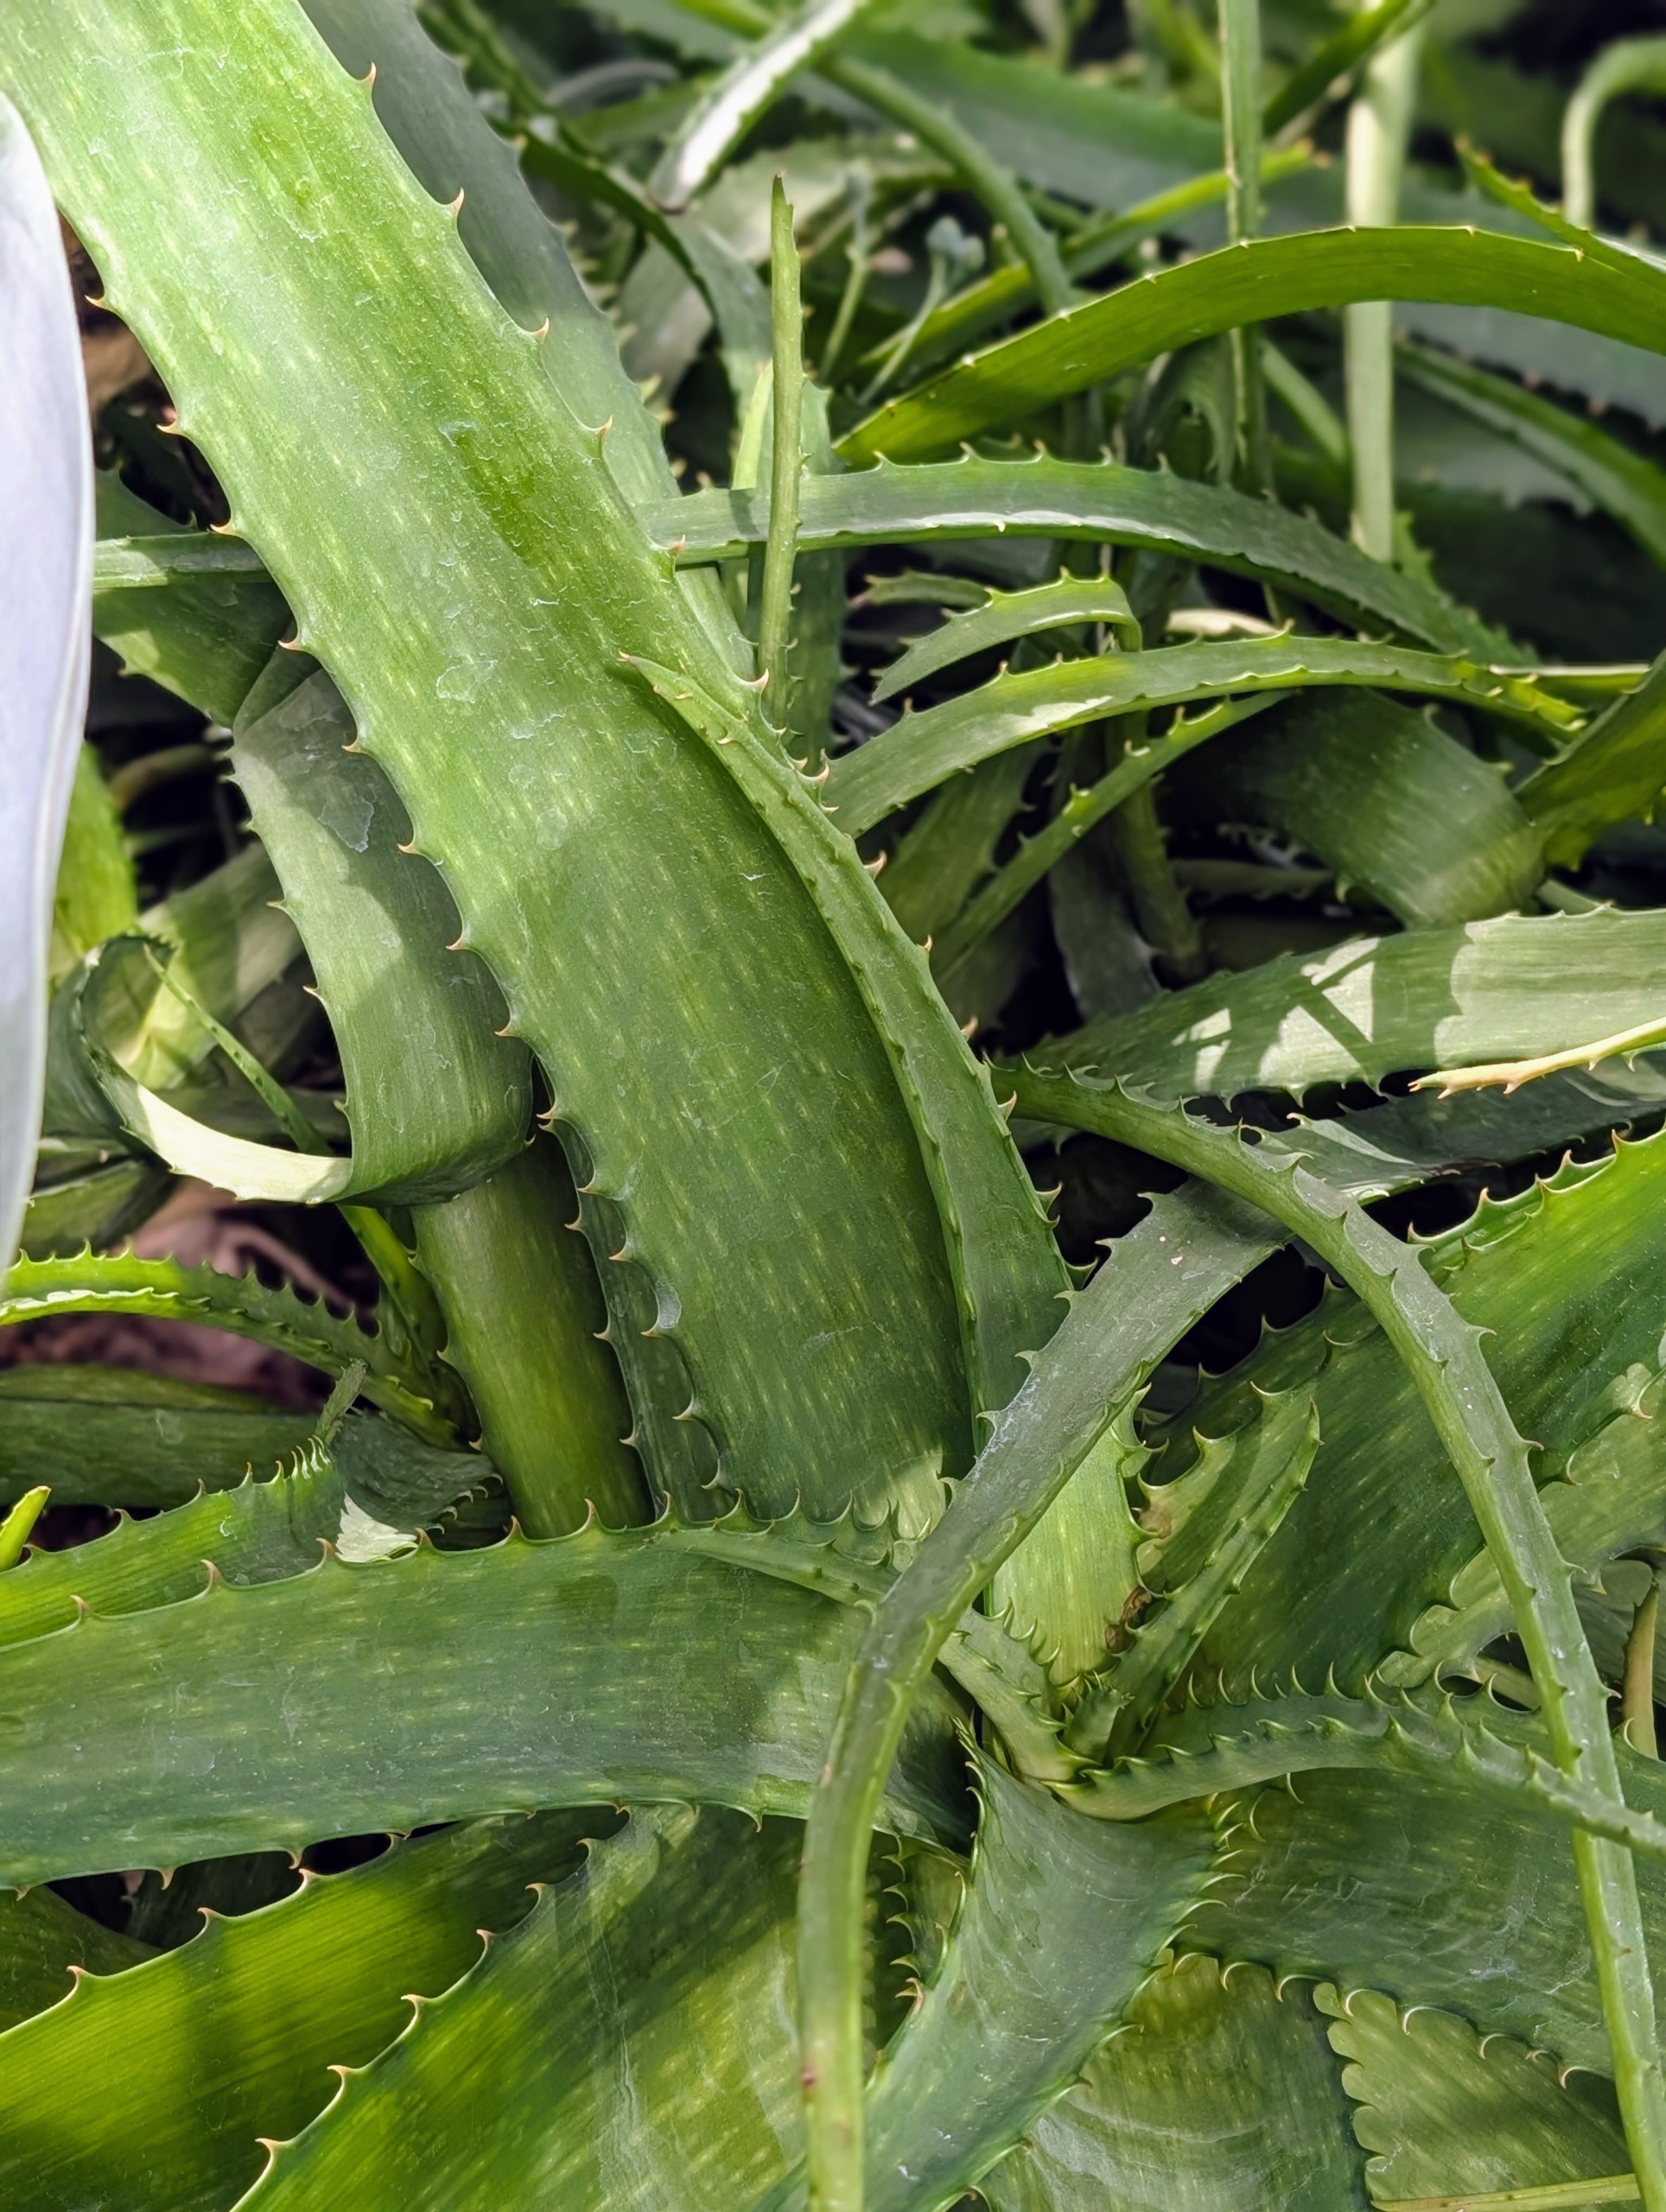
Another type of Aloe is Soap Aloe, Aloe maculata. This hardy succulent shows off rosettes of thick, lance shaped leaves that are green with white markings. The leaves have sharp eges that turn reddish in color when exposed to intense sunlight.
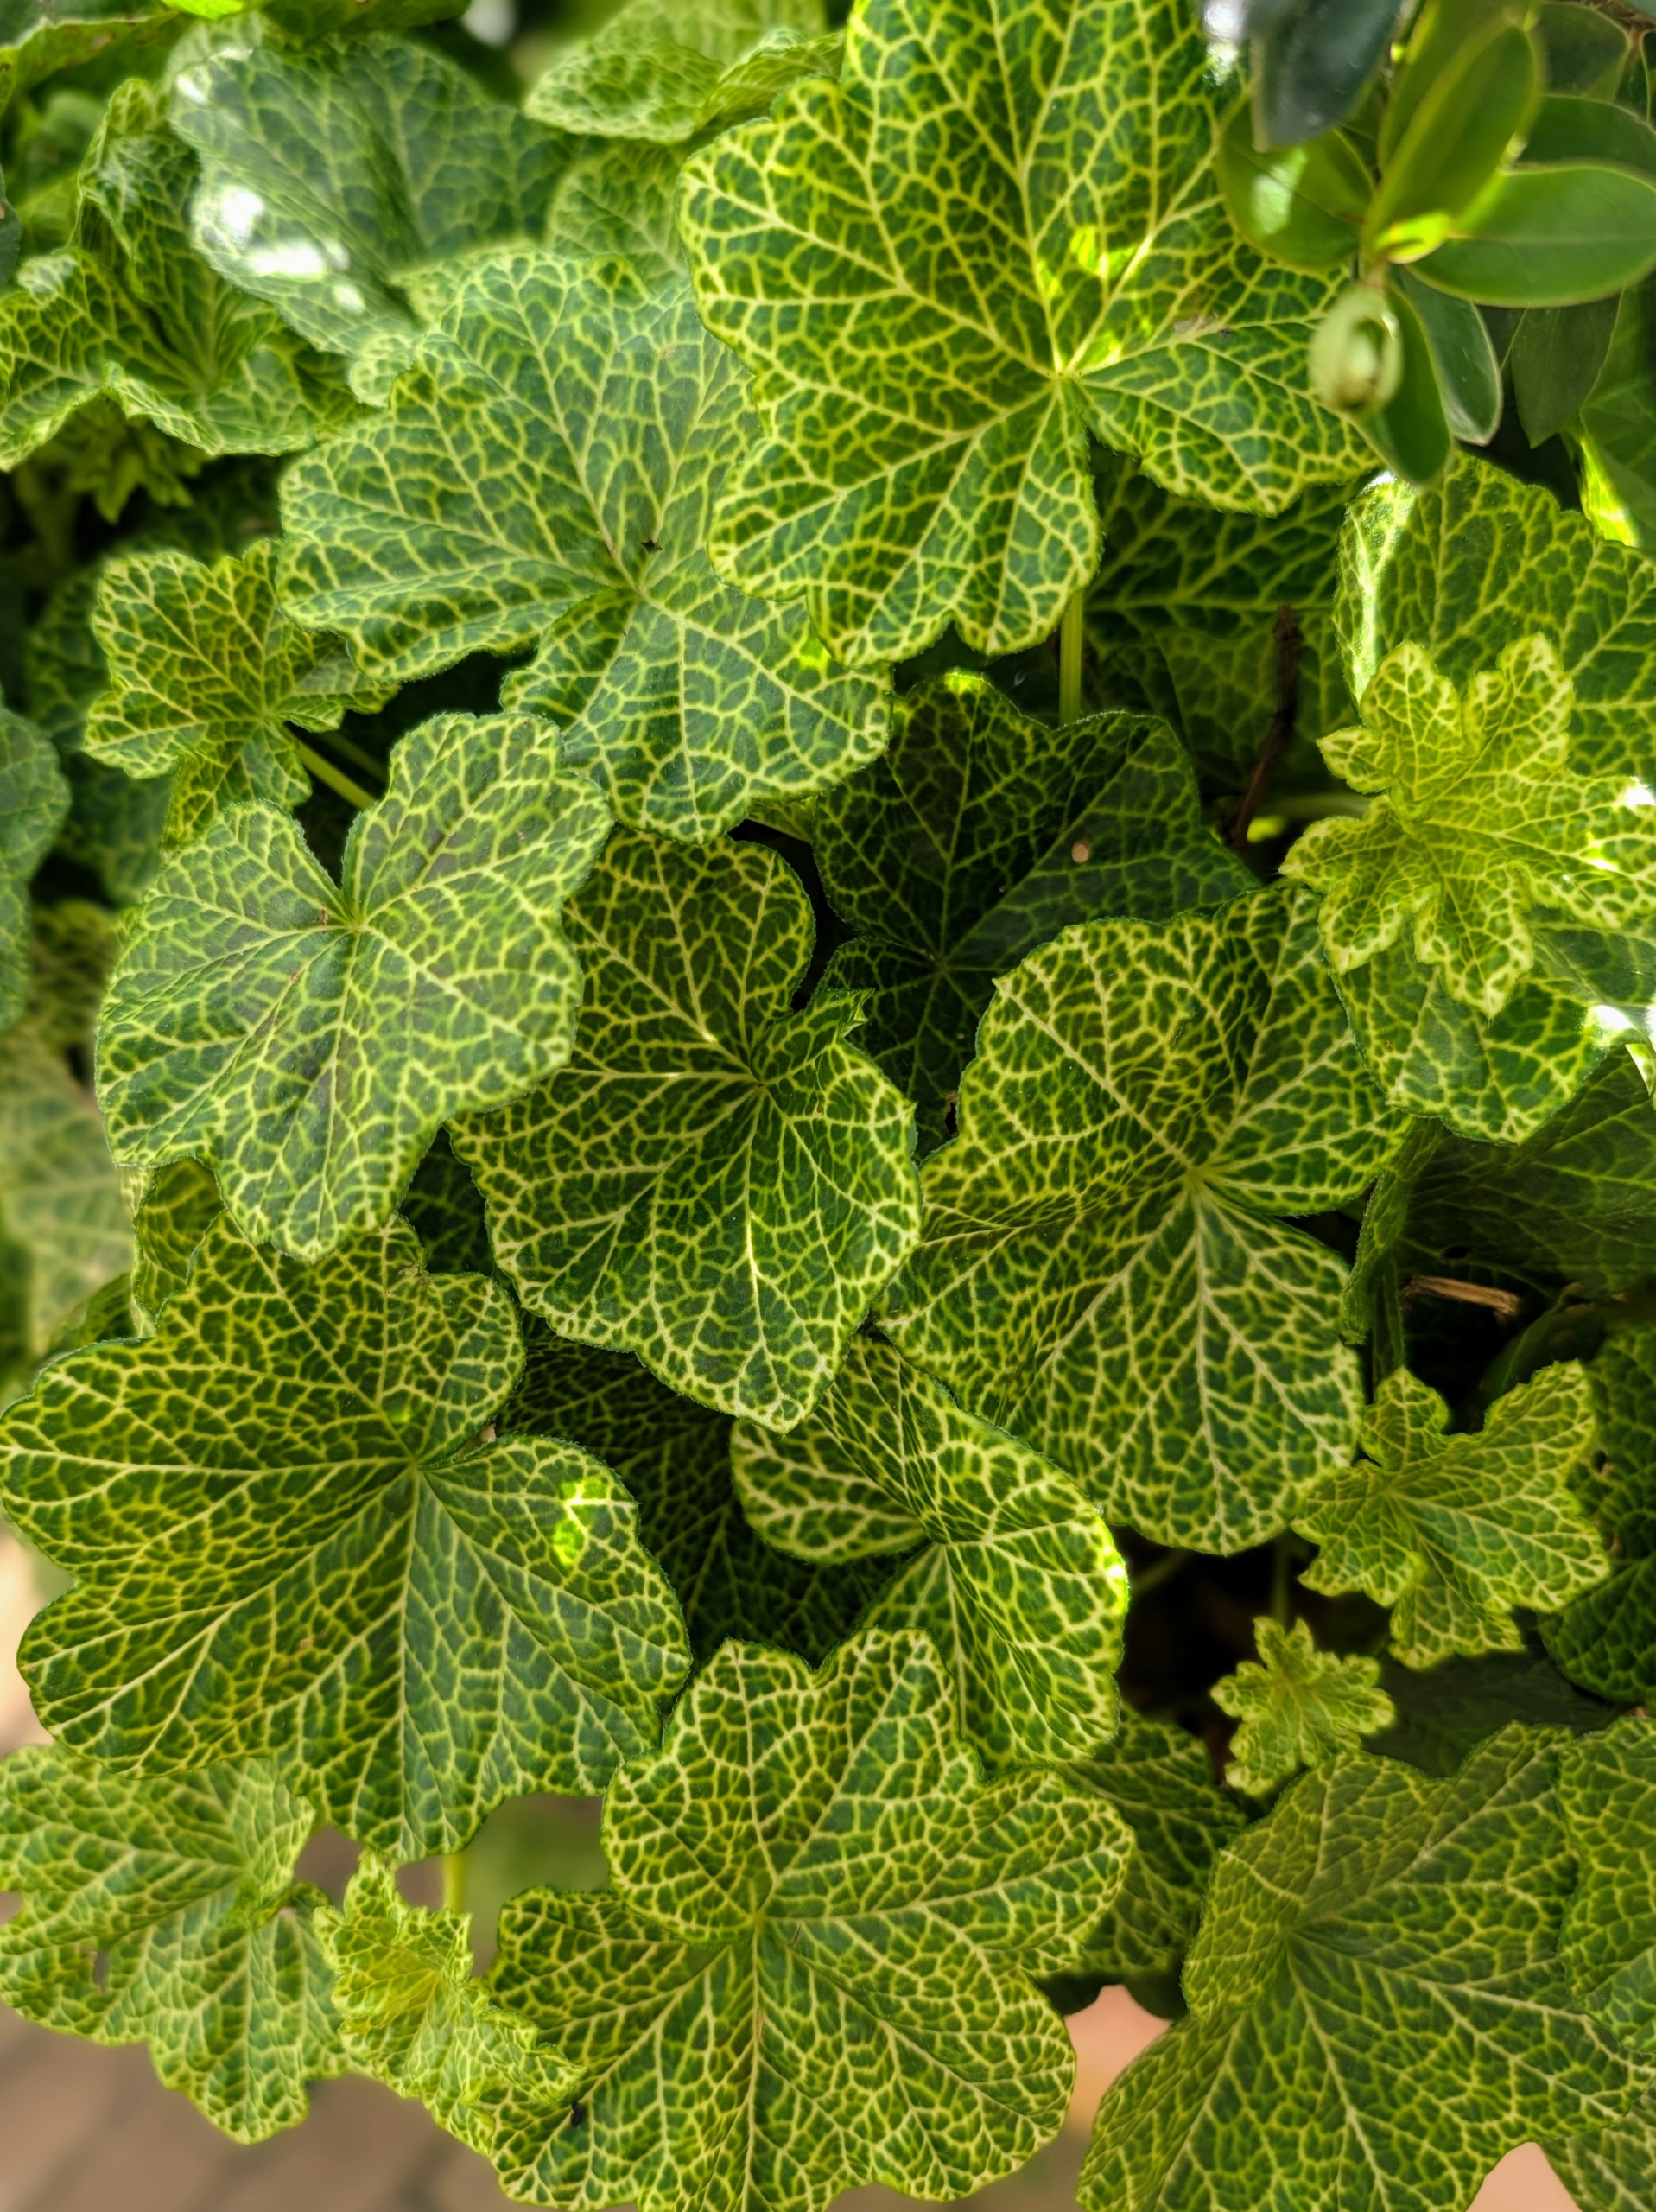
This plant is an ivy geranium, Pelargonium peltatum ‘Crocodile.’ It features rough textured green leaves with yellow white veins. Unlike some other geraniums which can handle higher heat and scorching sun, this one prefers some shade cover.
Hybrid spurge, Euphorbia ‘Miner’s Merlot’ has a lovely deep burgundy color. It is easy to care for and adds mounding texture to the garden.
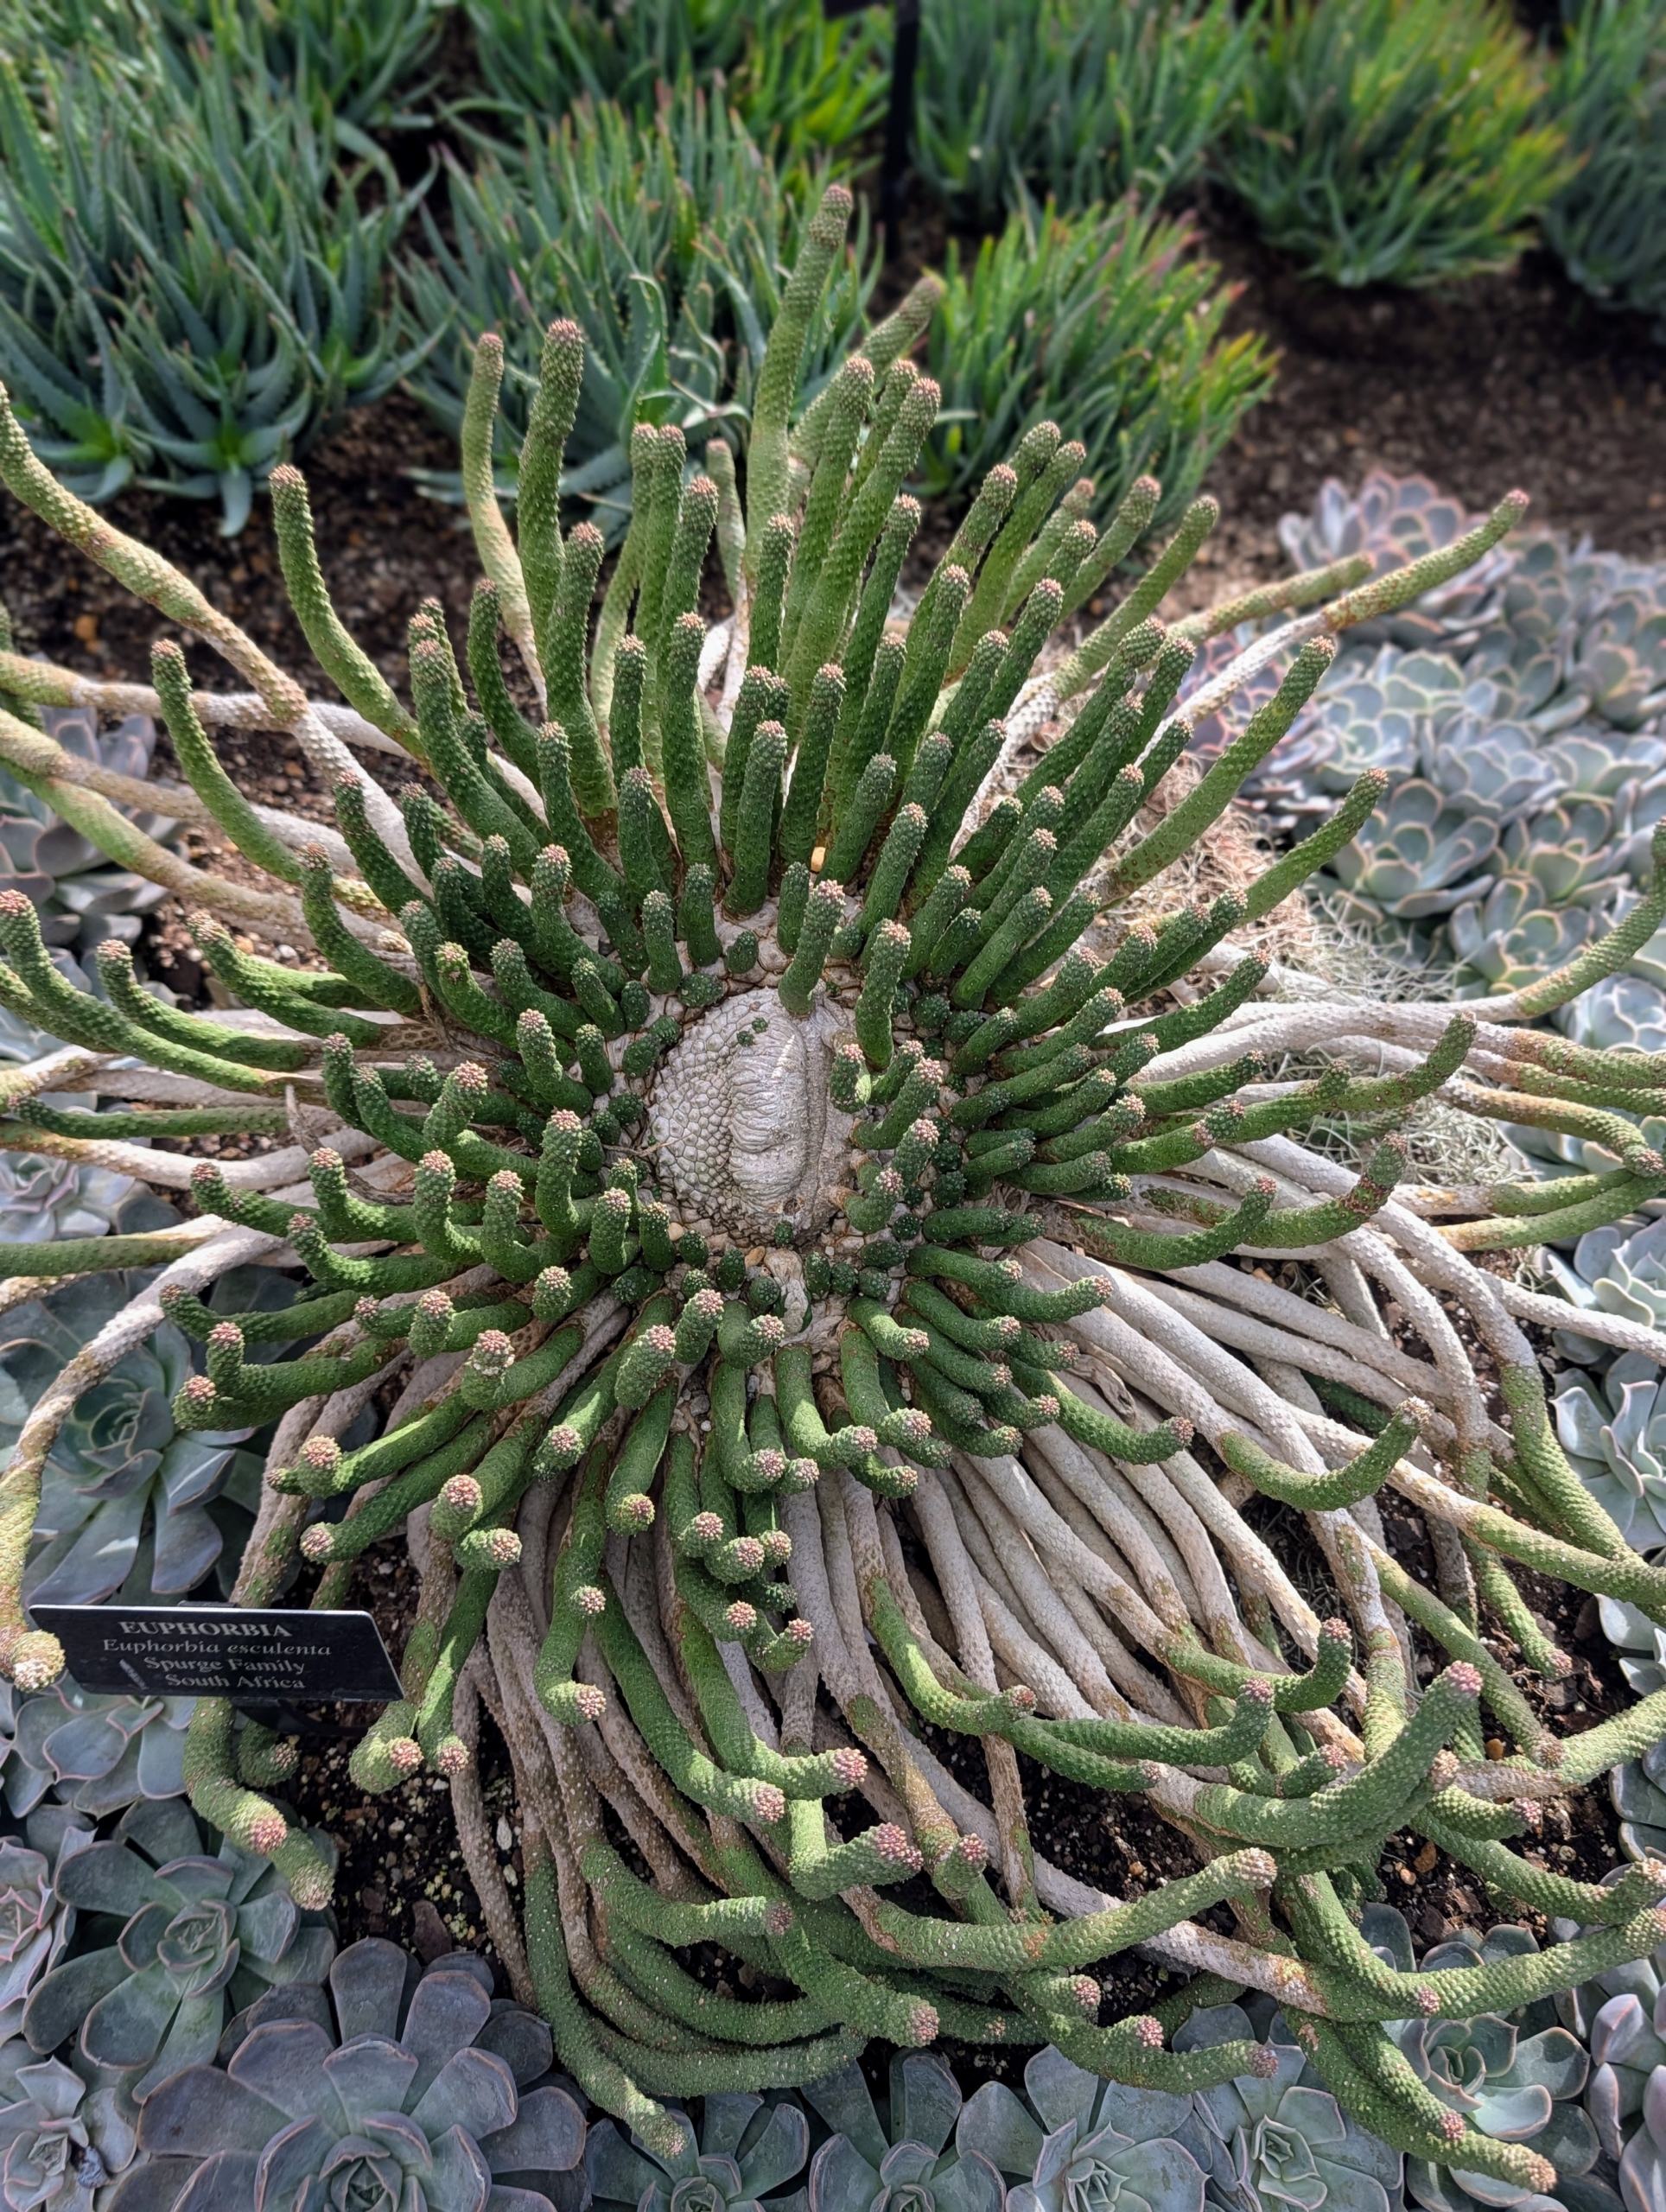
Here’s another Euphorbia, Euphorbia esculenta. It is also known as Vingerpol Milkbush, a succulent shrub native to South Africa. It features thick, fleshy water storing stems. and small cascading leaves that produce yellow-green flowers when in bloom.
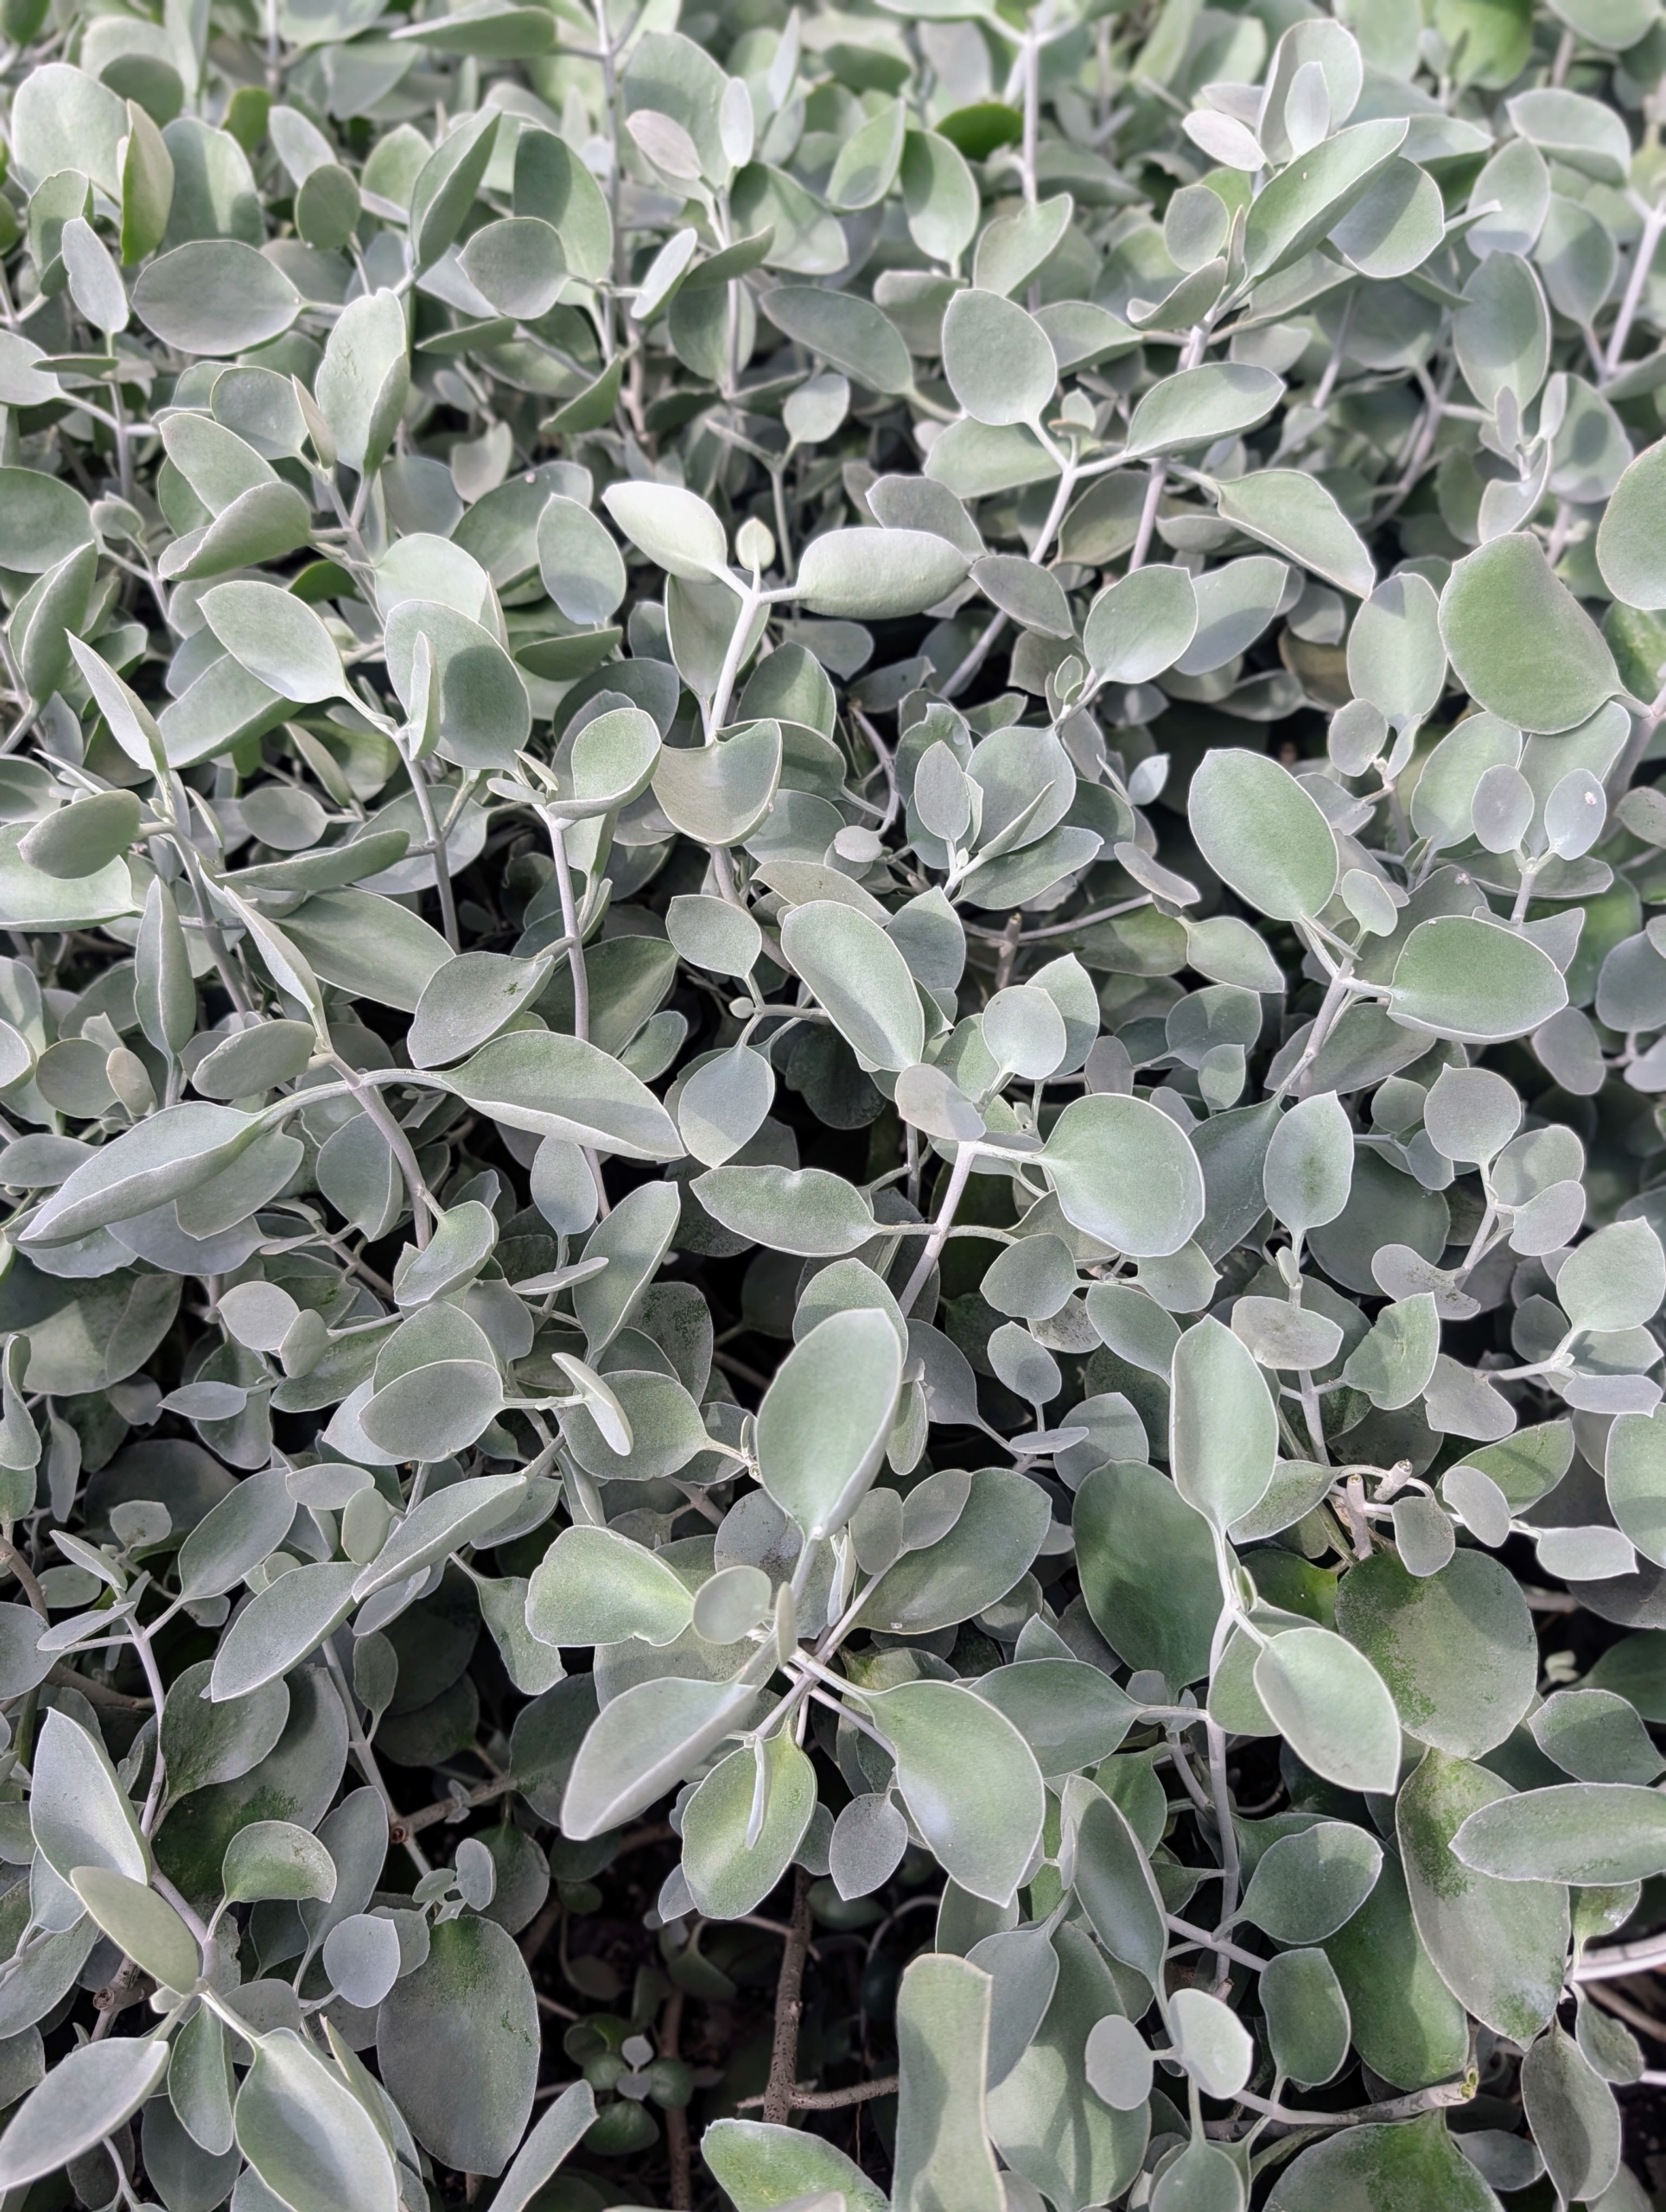
Maui wormwood, Artemisia mauiensis ‘Tnartms’ is a native Hawaiian plant loved for its silvery foliage and fine, soft texture. It is fast-growing, and heat and drought tolerant.
These are Silver Teaspoons, or Kalanchoe bracteata – aptly named because of the shape and color of its leaves. It can grow up to five feet tall.
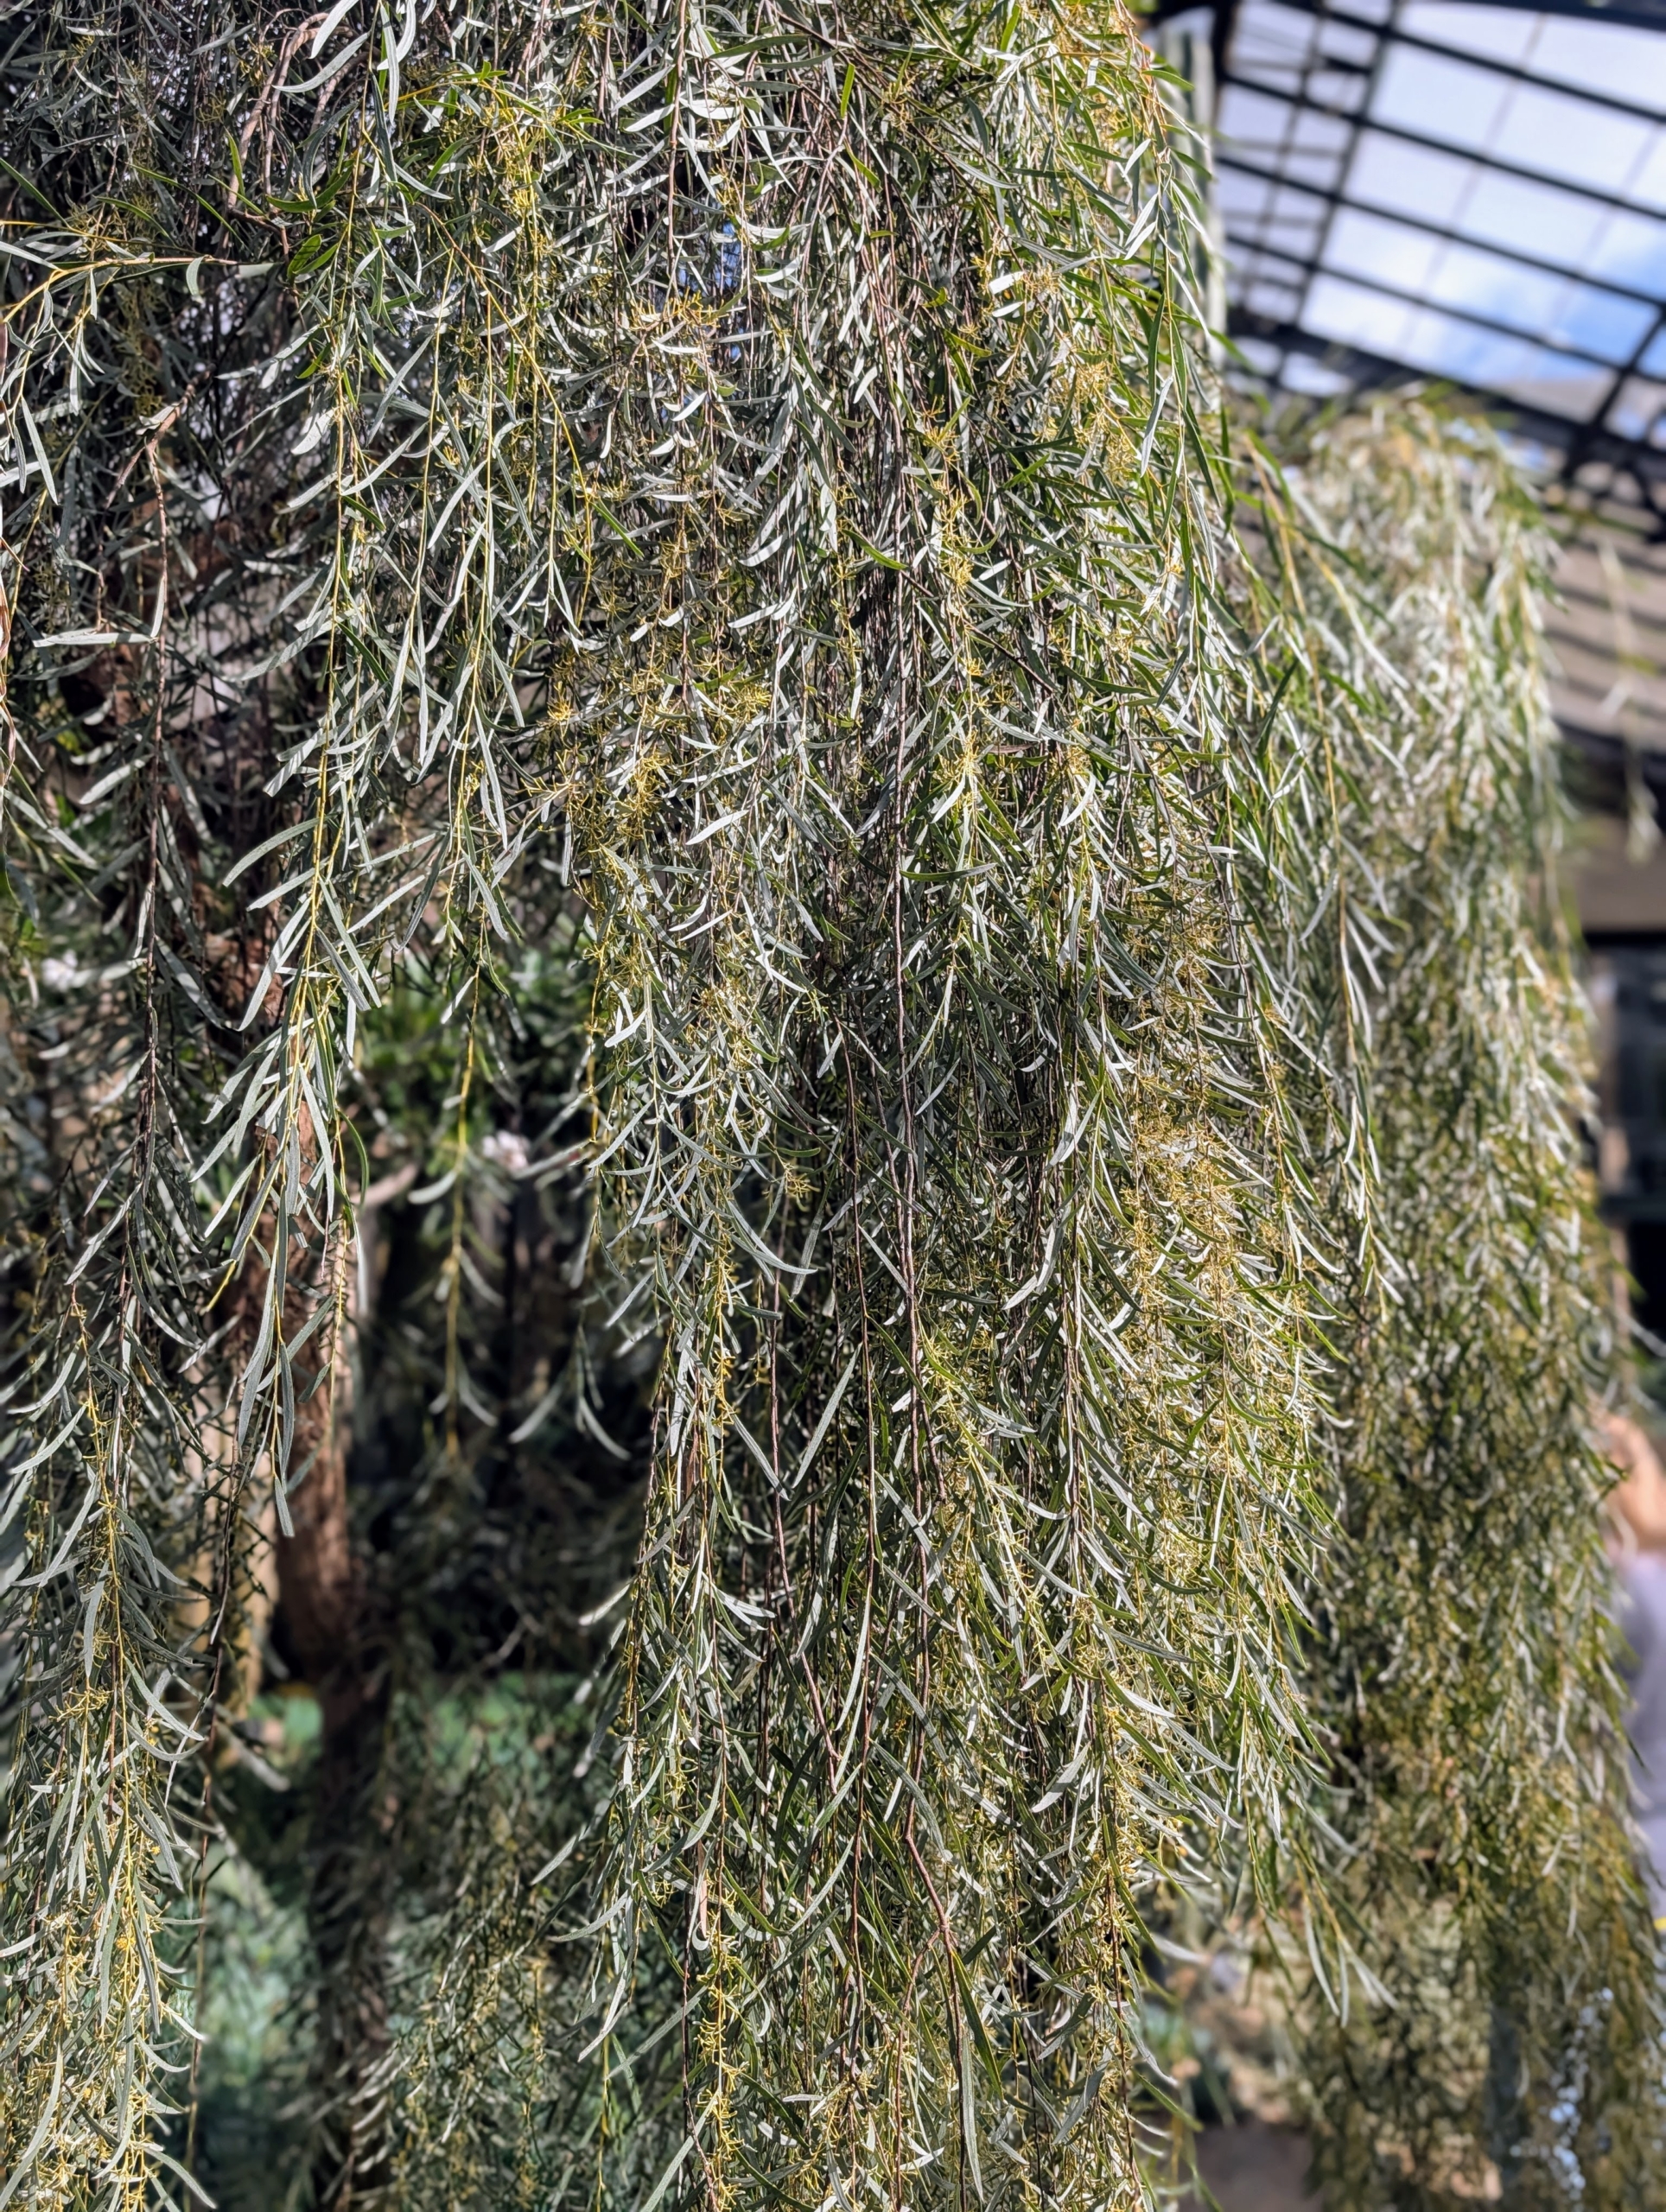
Weeping Myall, Acacia pendula, is a species of wattle, which is native to Australia. It features pendulous branches with angled branchlets that are covered in short hairs.
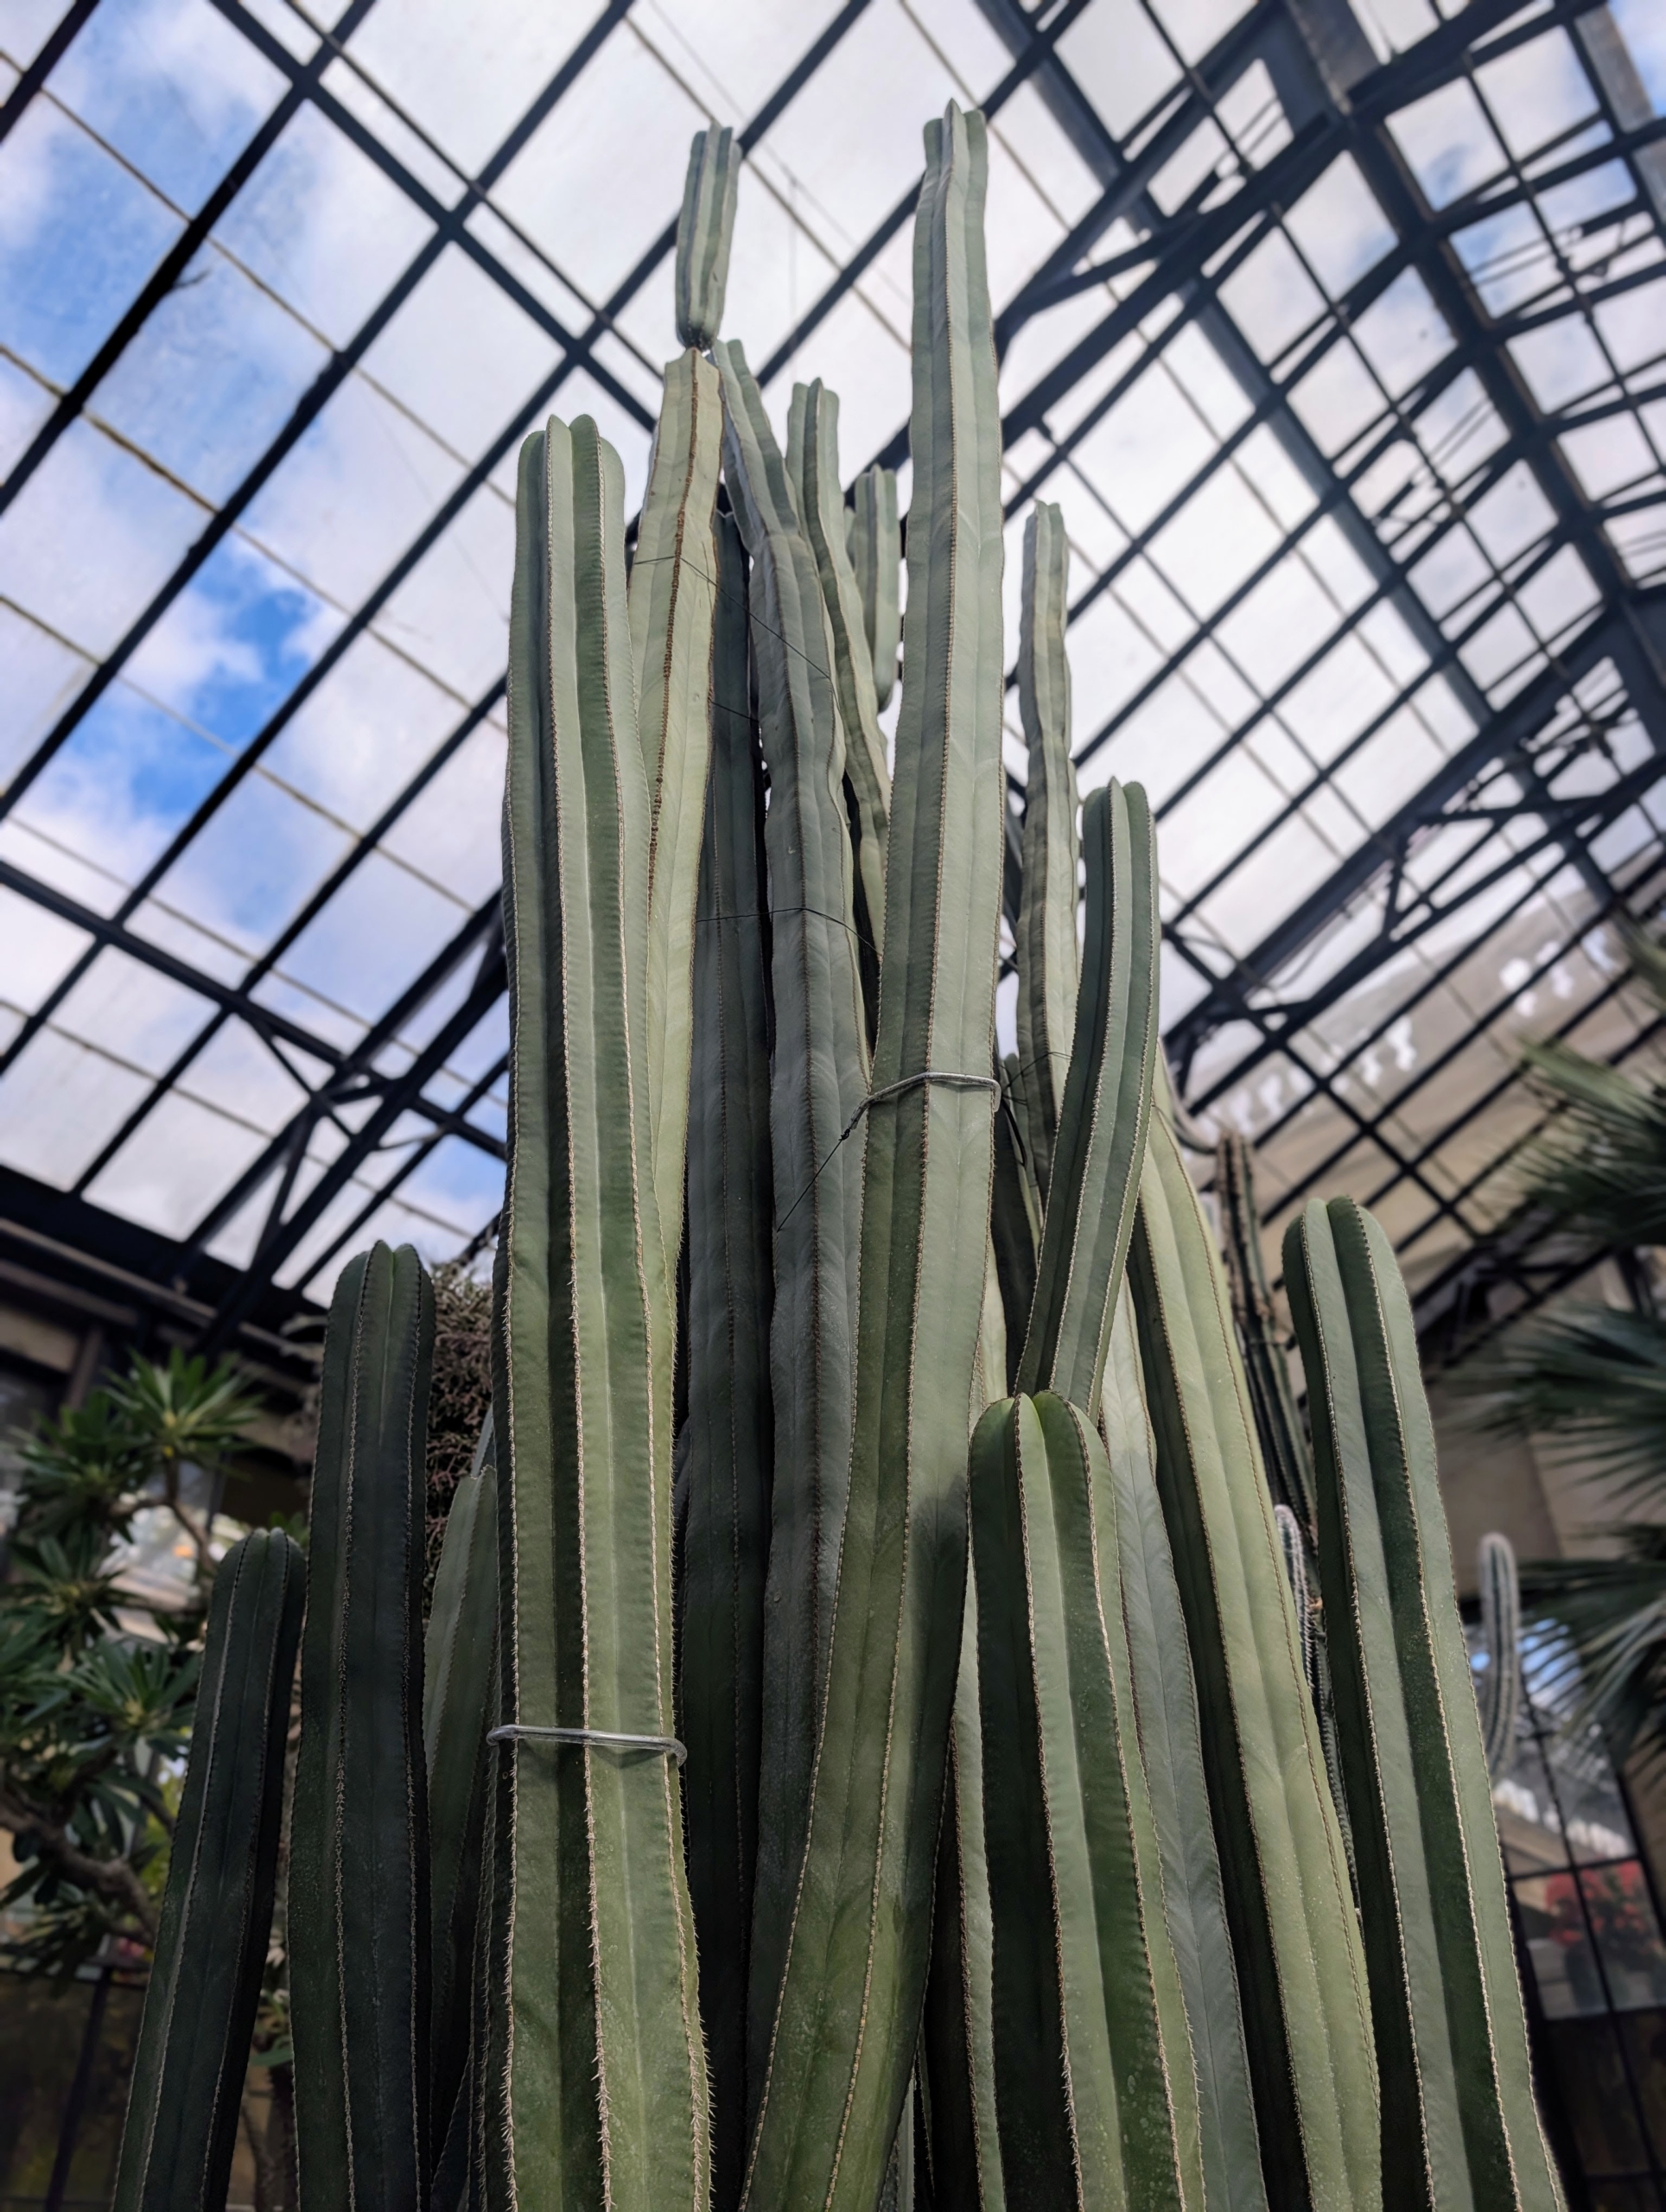
This is called Mexican Fence Post Cactus, Pachycereus marginatus. This can grow up to heights of a one story building. It forms tall columns with green-gray ribs and sharp white spikes.
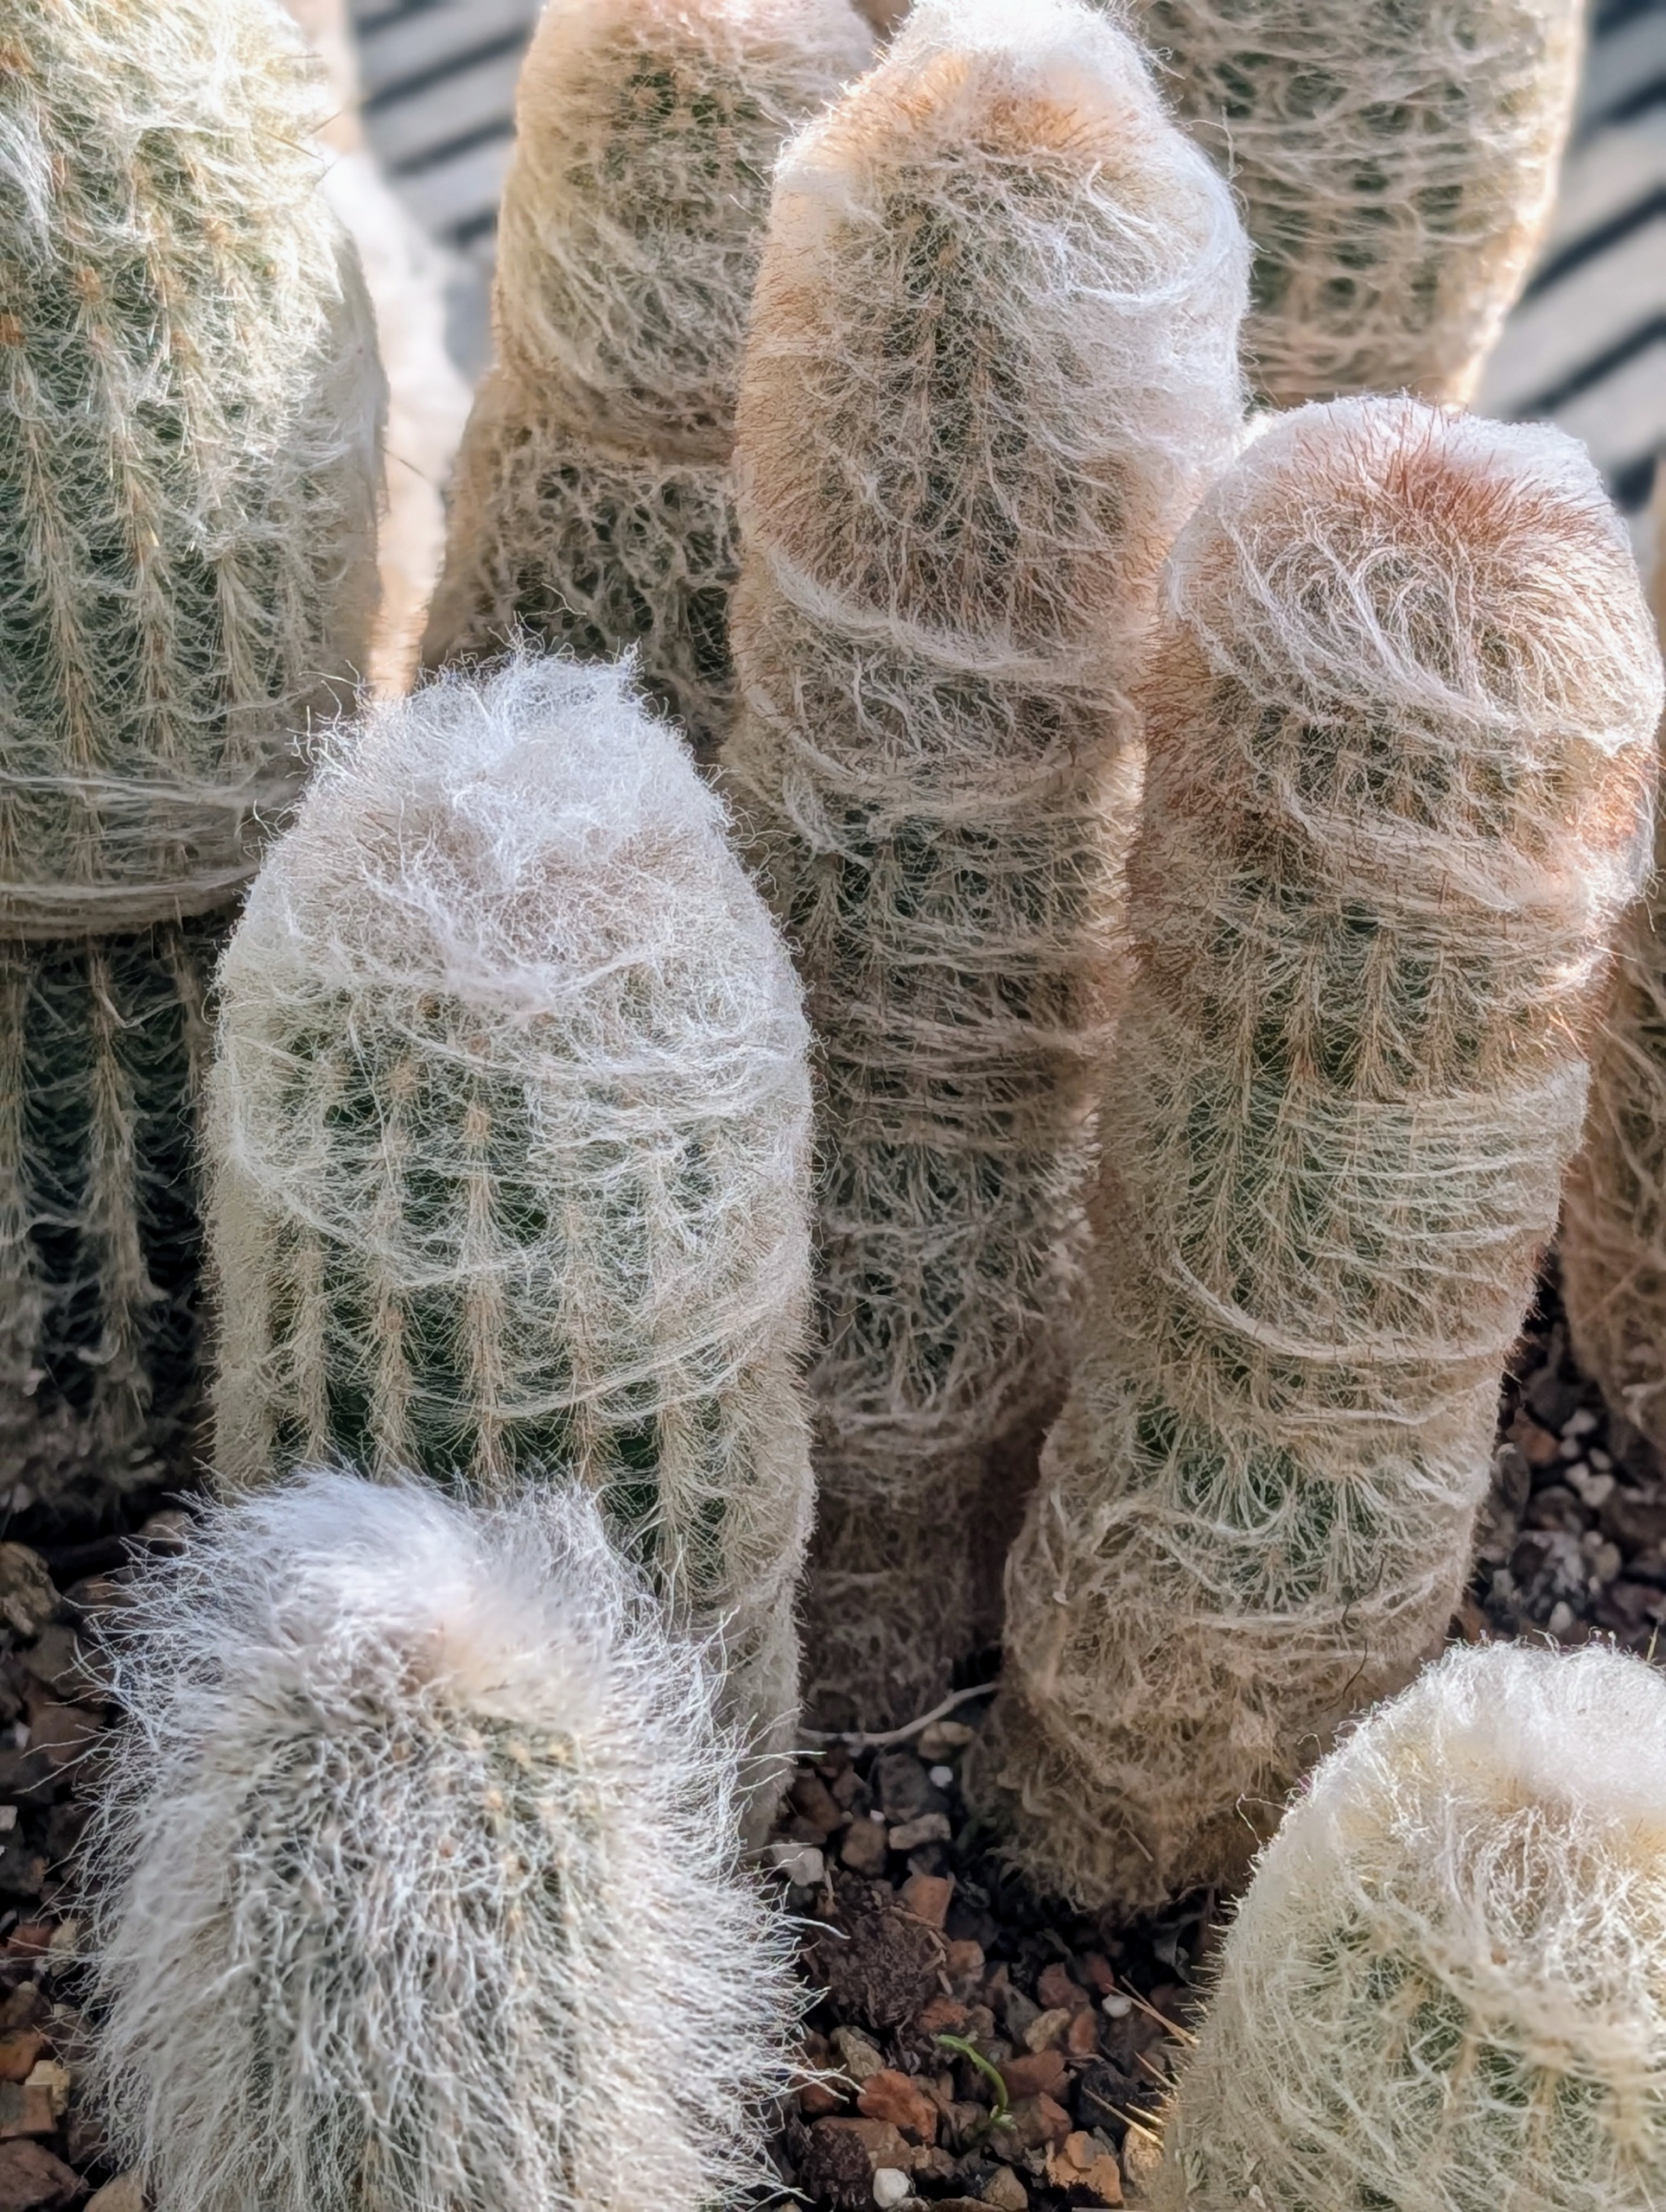
And this is Old Man of Peru Cactus, Espostoa melanostele. It is characterized by its dense cover of white, hairlike spines and very slow growth rate. If you can, stop in at a botanical garden this weekend and learn about its beautiful collections and interesting plant species.