The weather is finally warm enough to start planting outdoors.
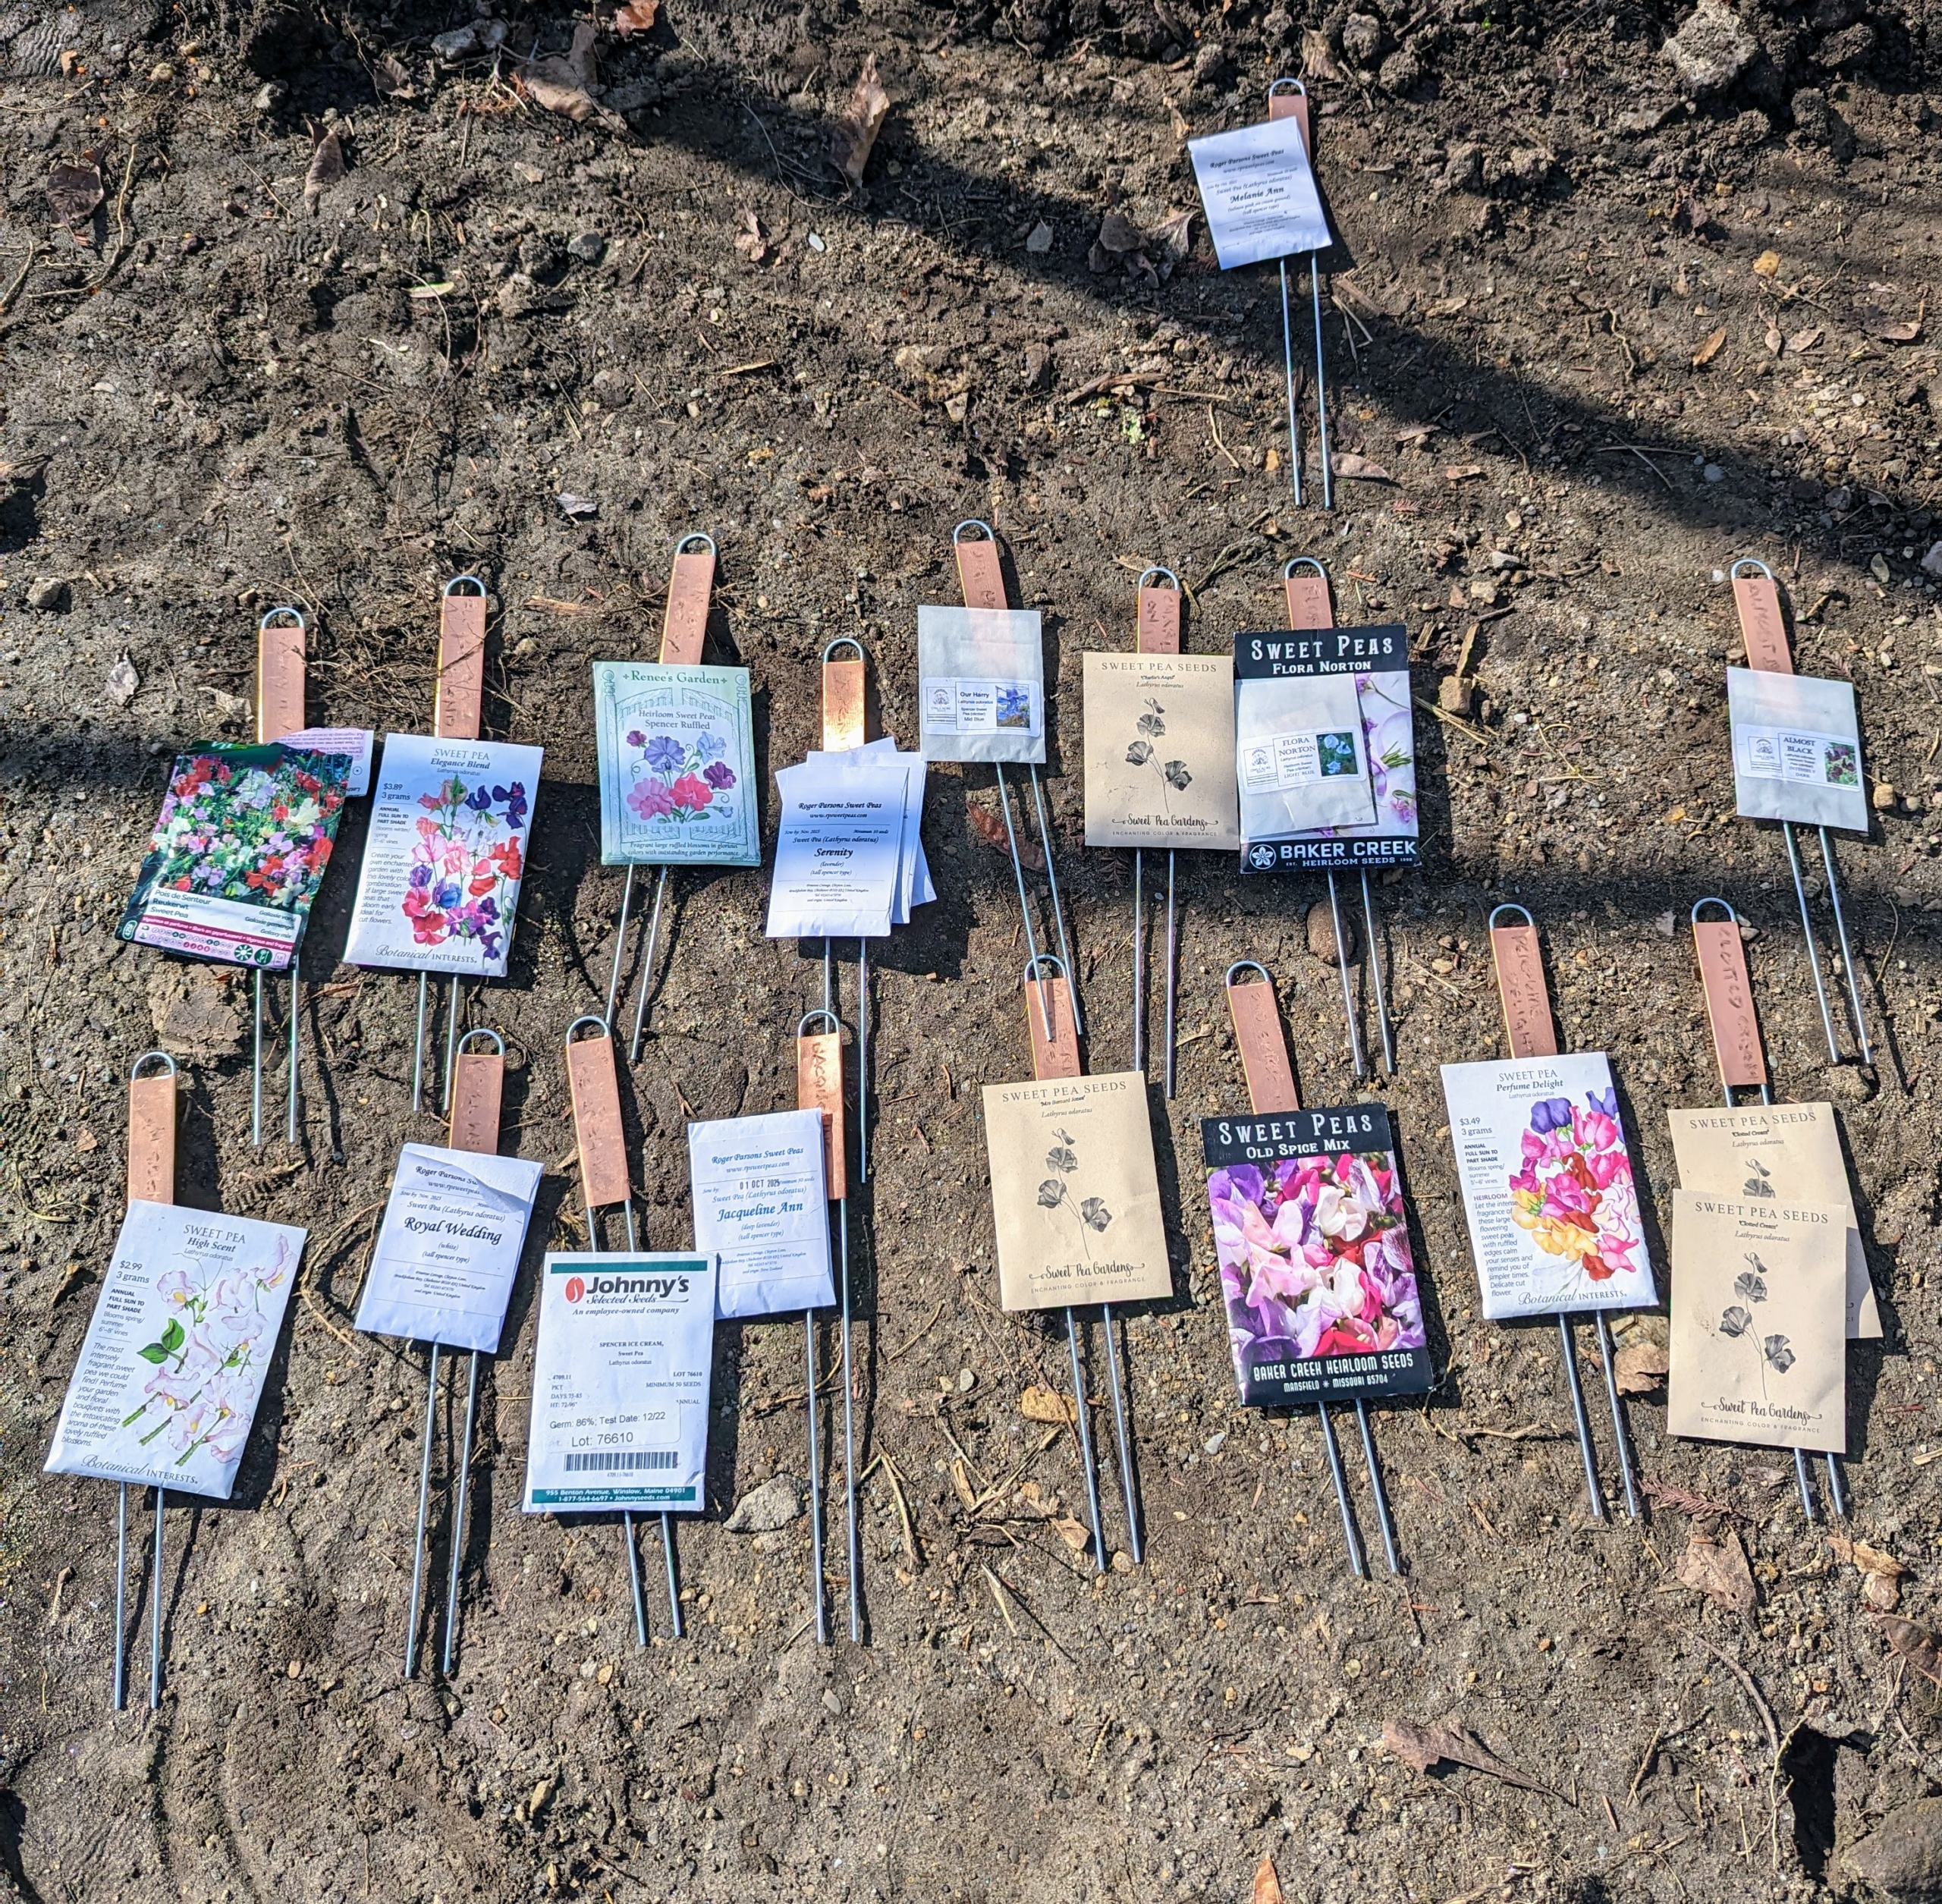
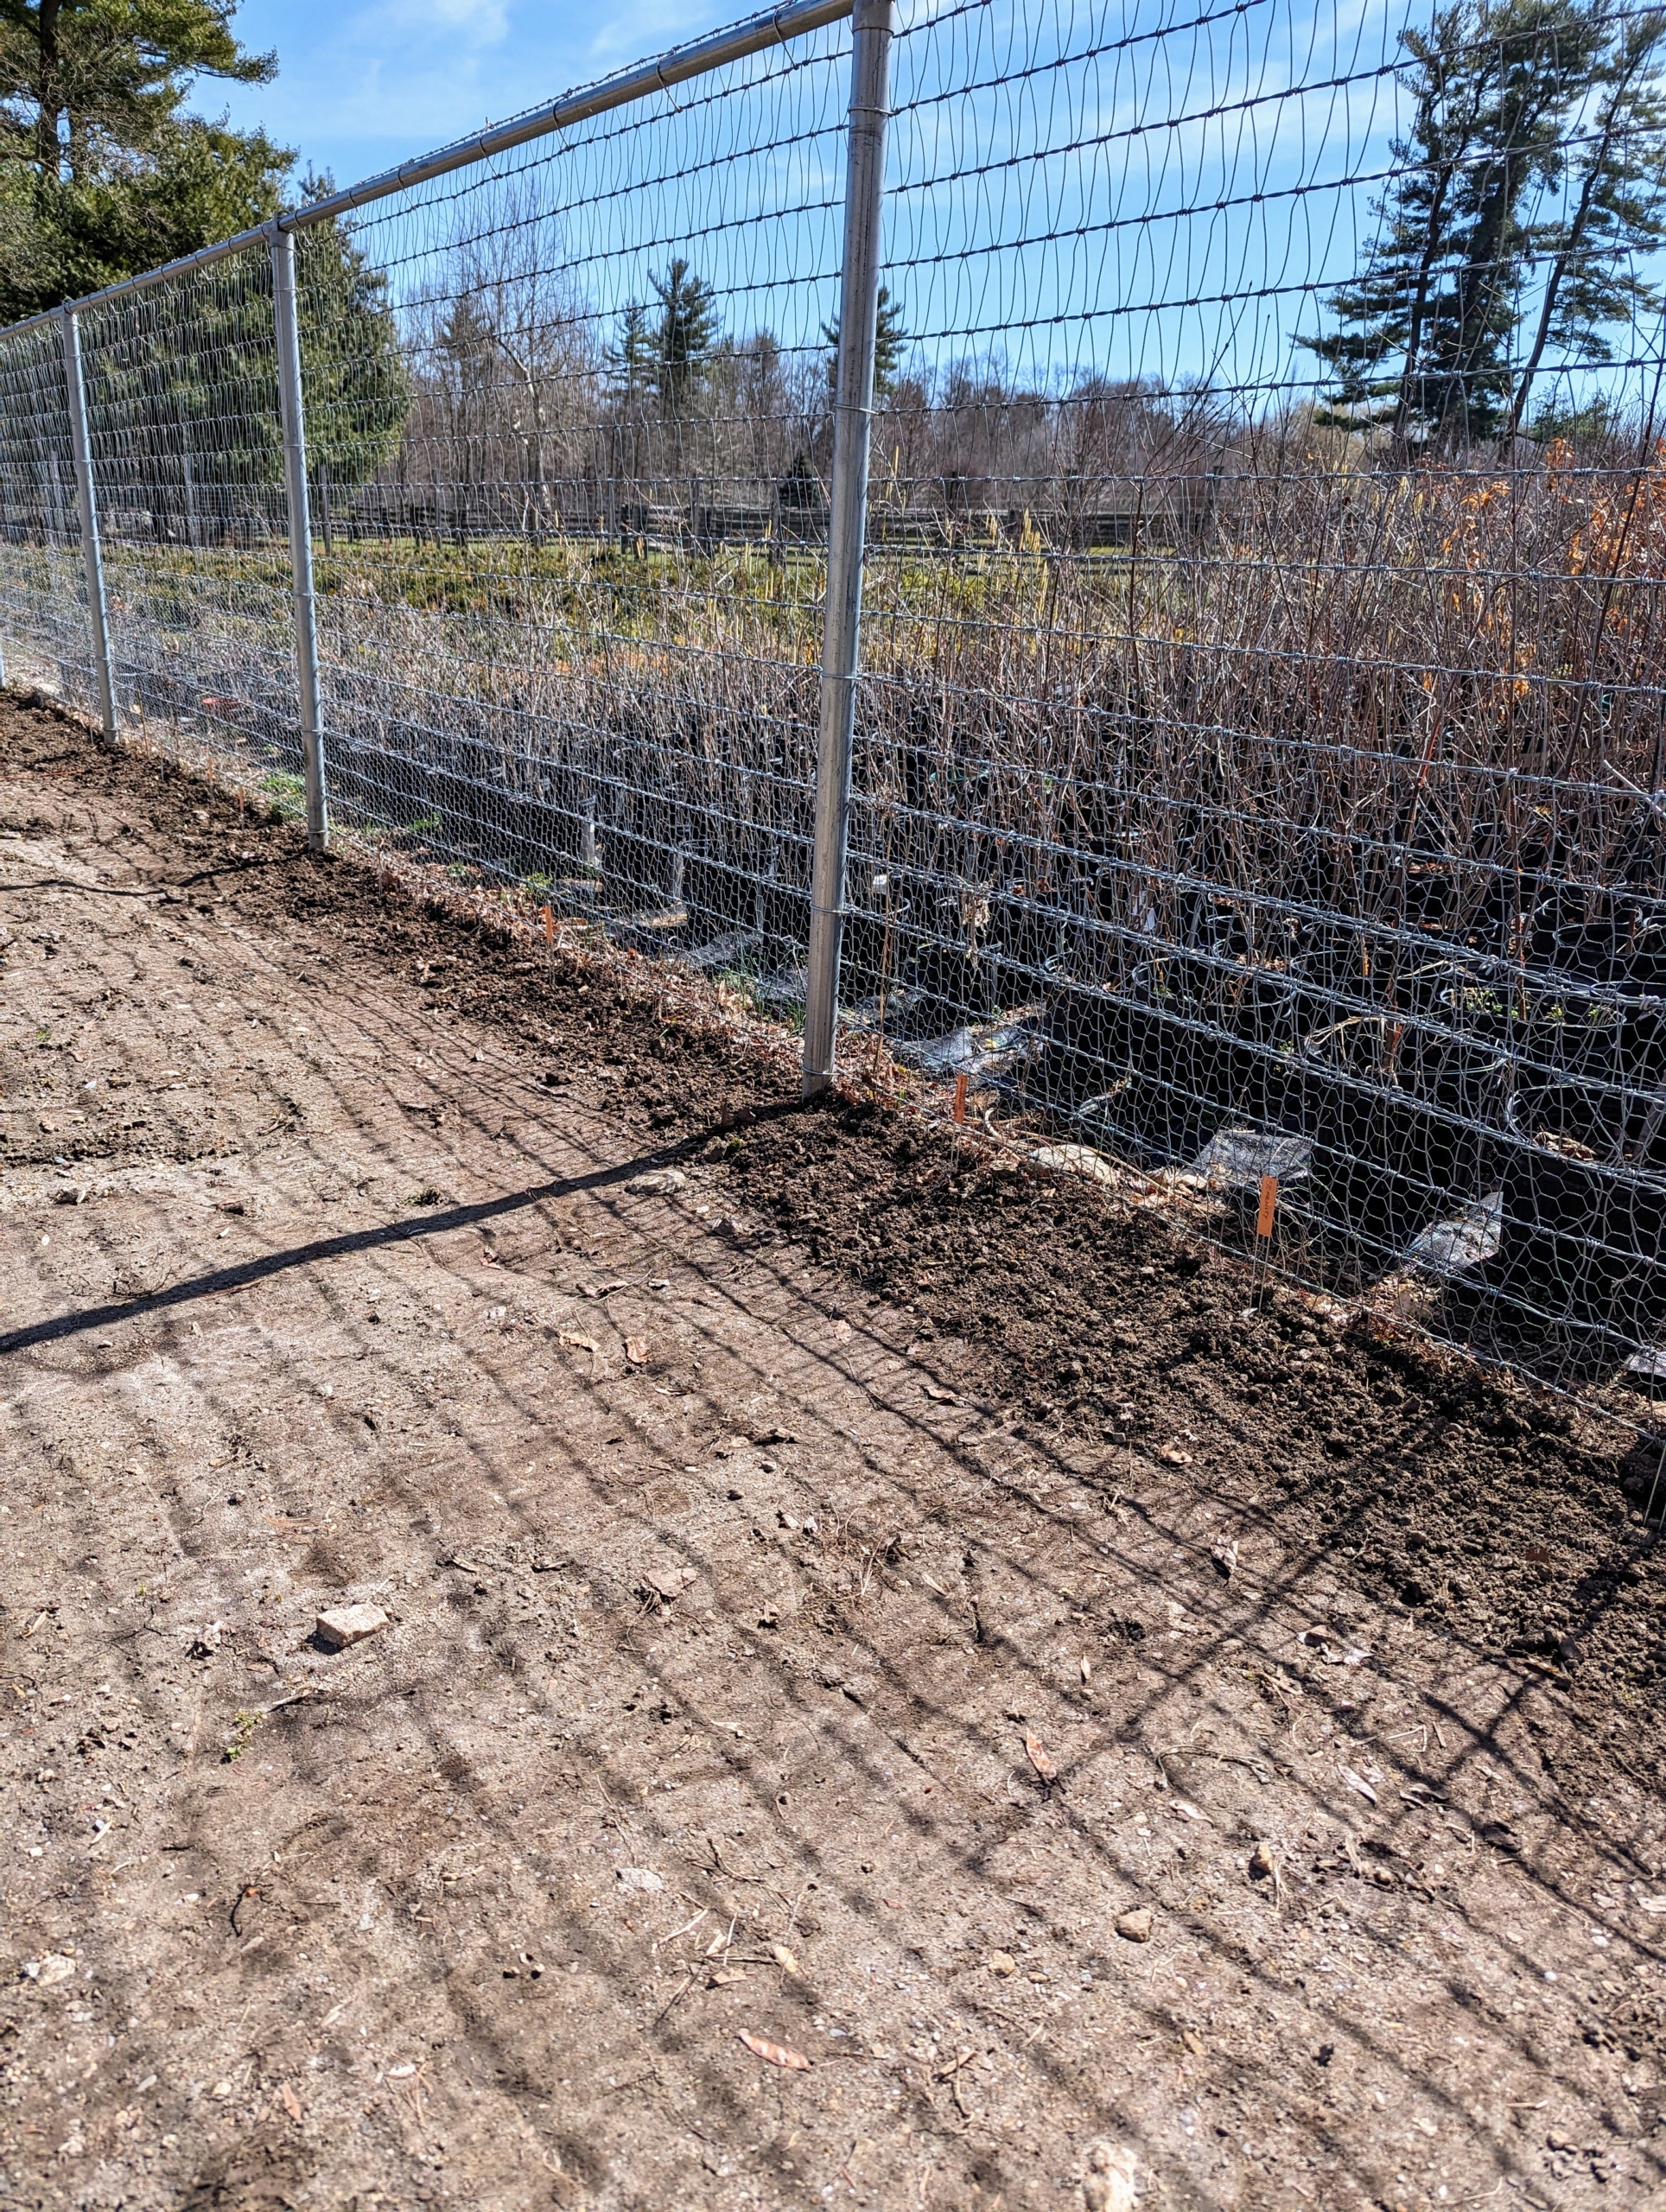
Yesterday, my gardeners planted the first of our flower seeds - sweet peas. The sweet pea, Lathyrus odoratus, is a garden classic producing beautiful blooms with the most amazing scent. Sweet pea seeds can be sown into small pots of compost in autumn and overwintered indoors, or planted directly into the ground come spring. We planted several sweet pea varieties from some of our favorite seed companies including Botanical Interests, Johnny's Selected Seeds, Sweet Pea Gardens, Baker Creek Heirloom Seeds, Renee's Garden, Roger Parsons Sweet Peas, and Owl's Acre Seed in Northern England. These flowers will give us lots of fragrant color this summer.
Here are some photos - enjoy. And be sure to follow my new Instagram page @MarthaStewartBlog.
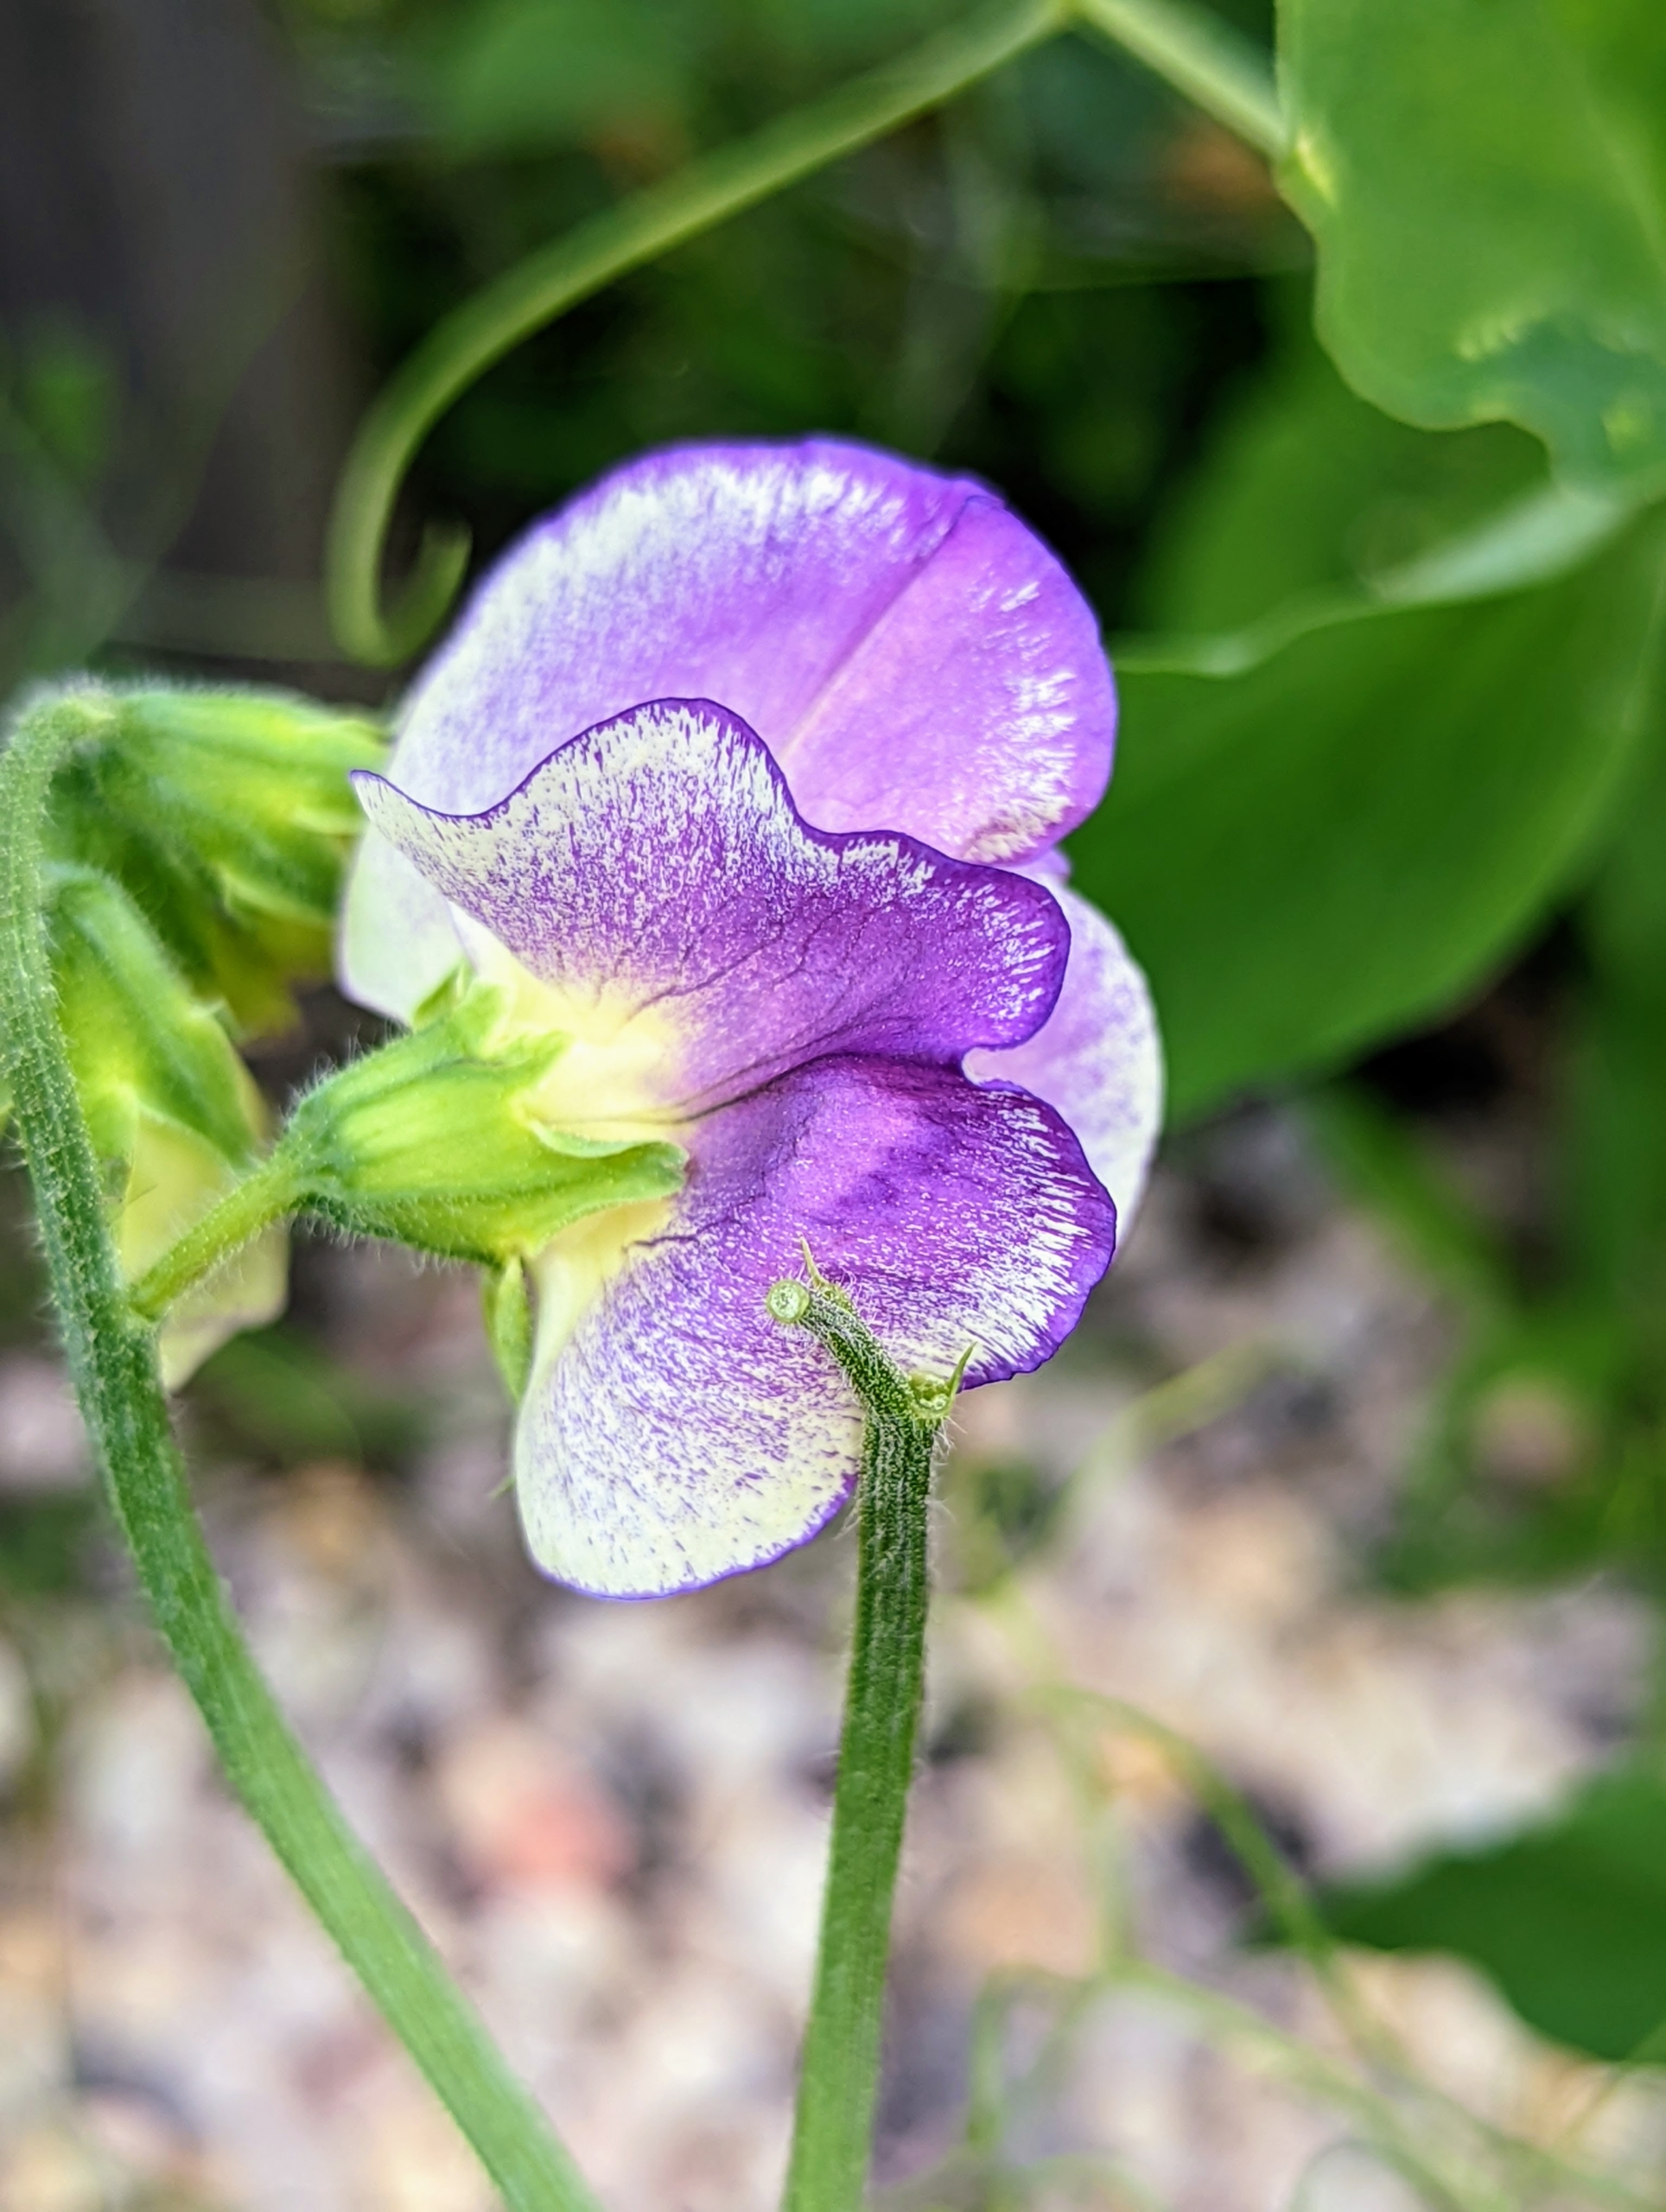
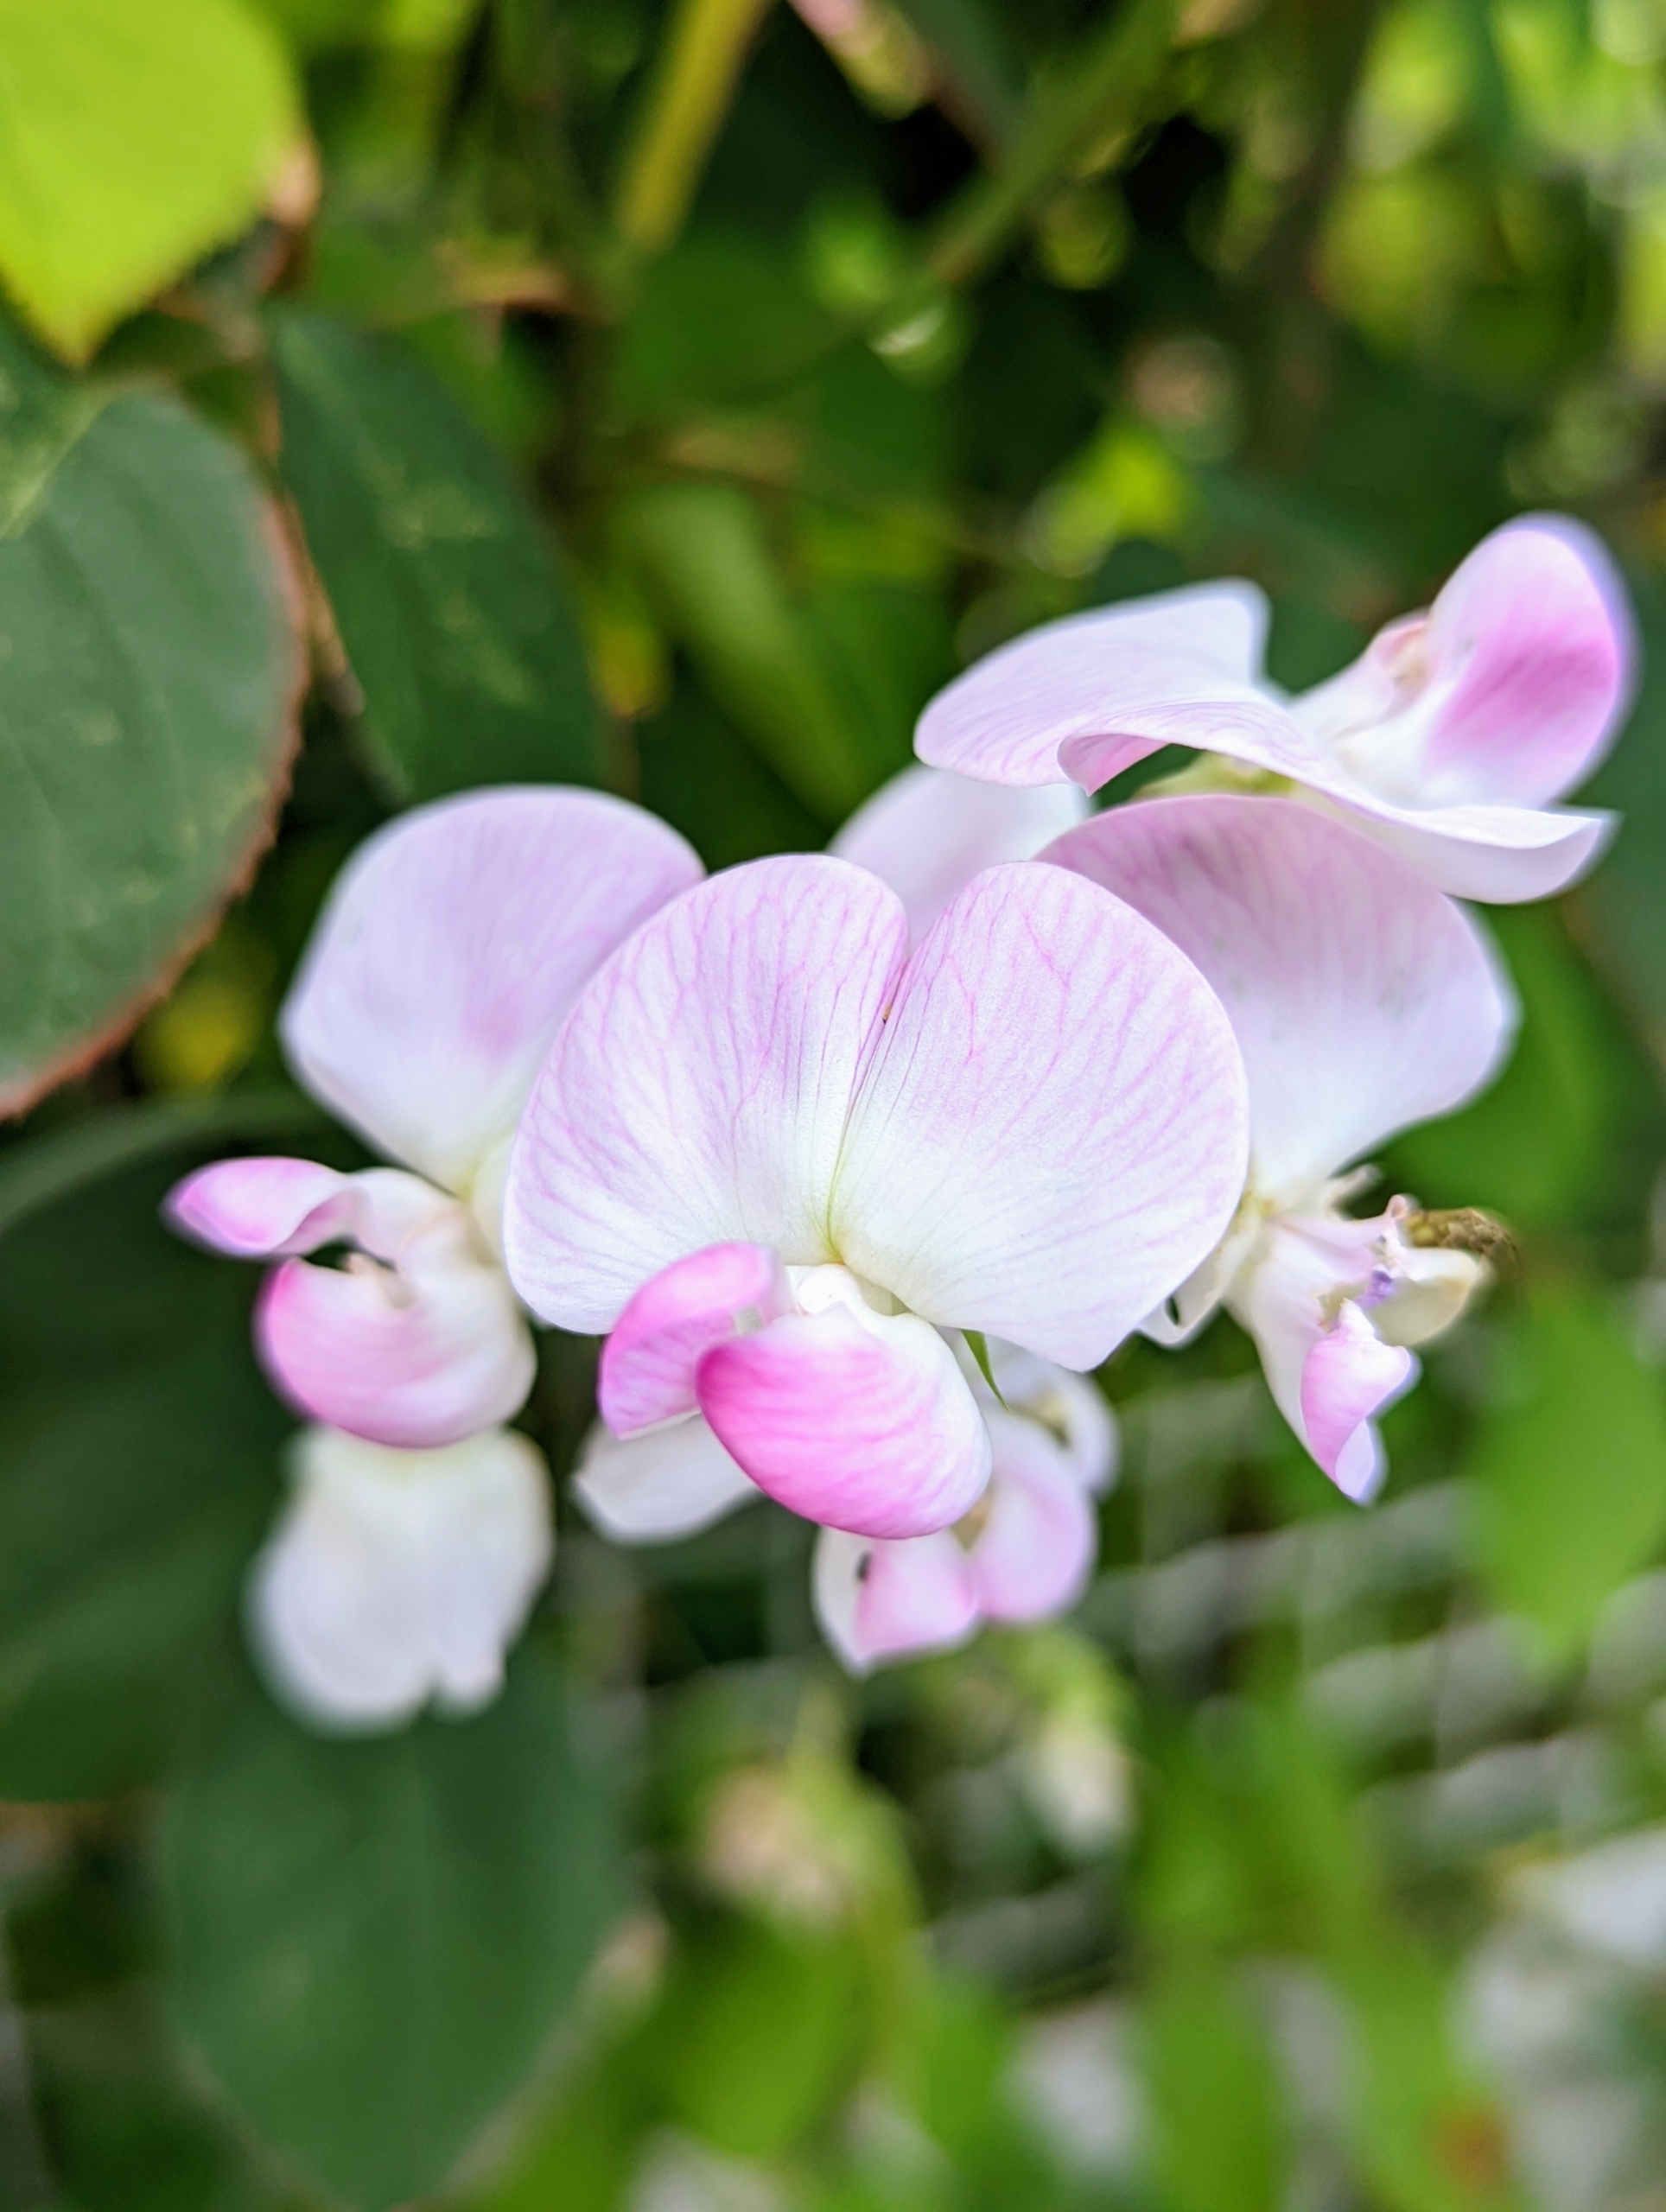
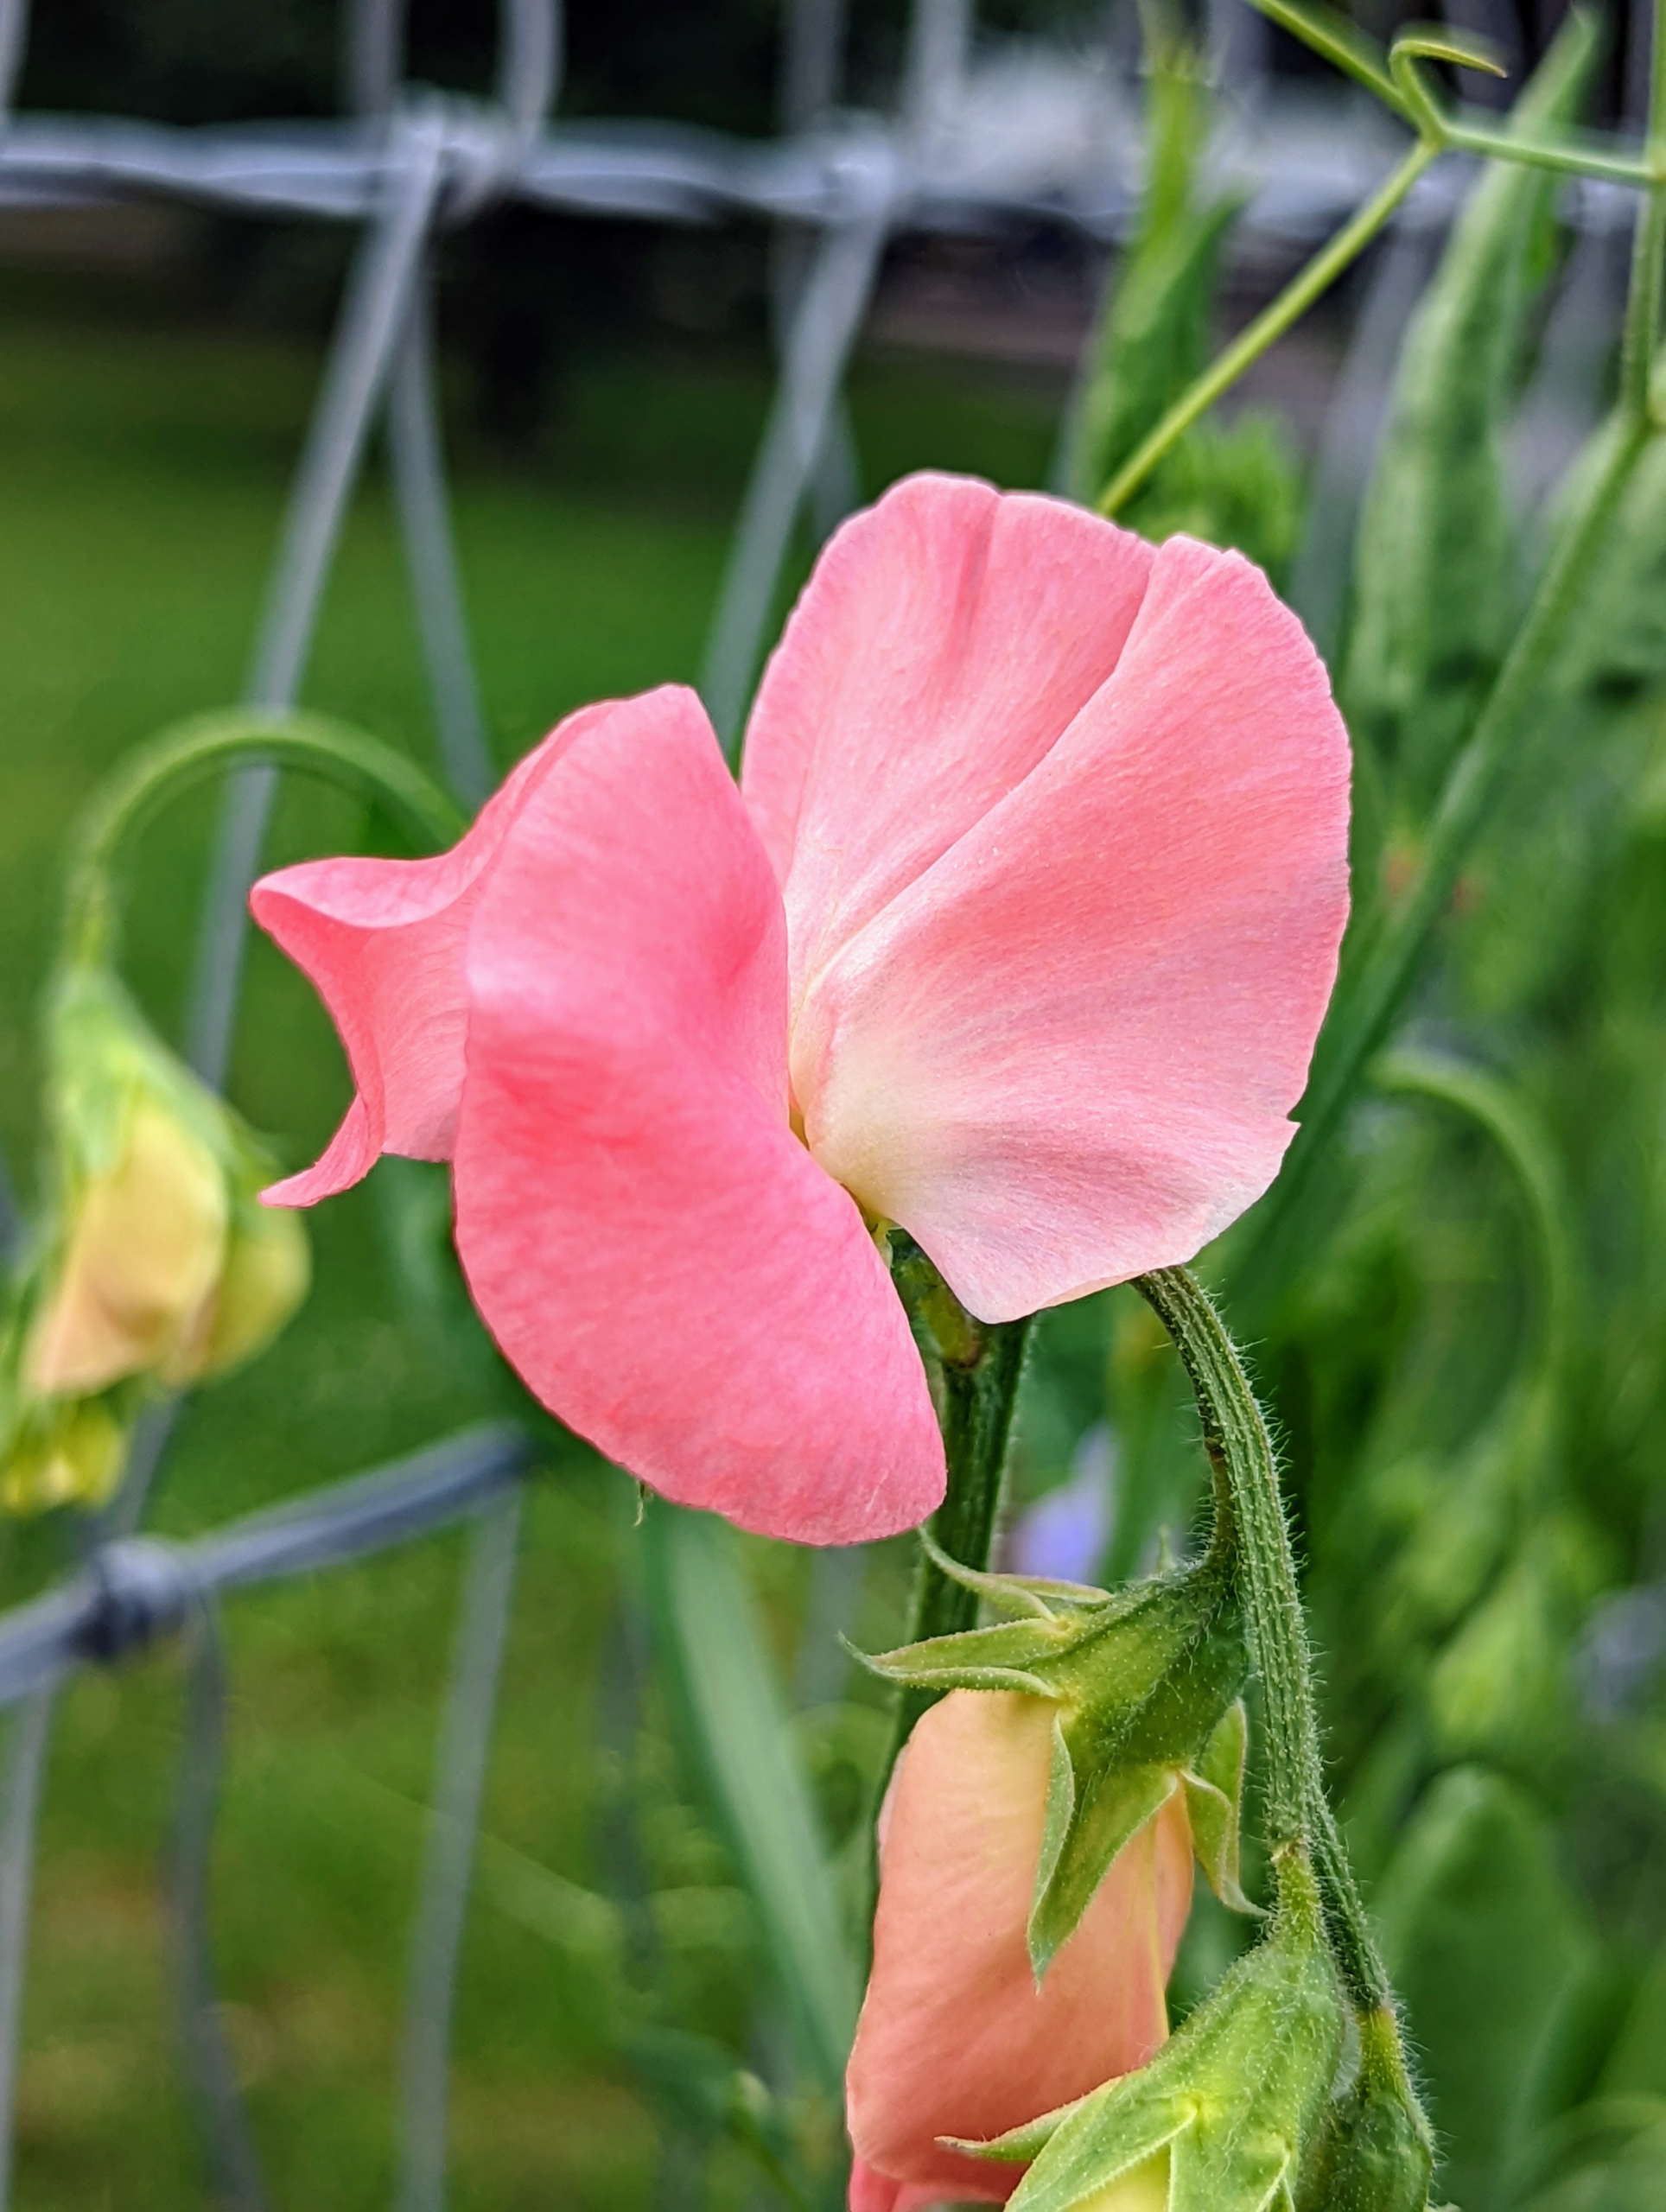
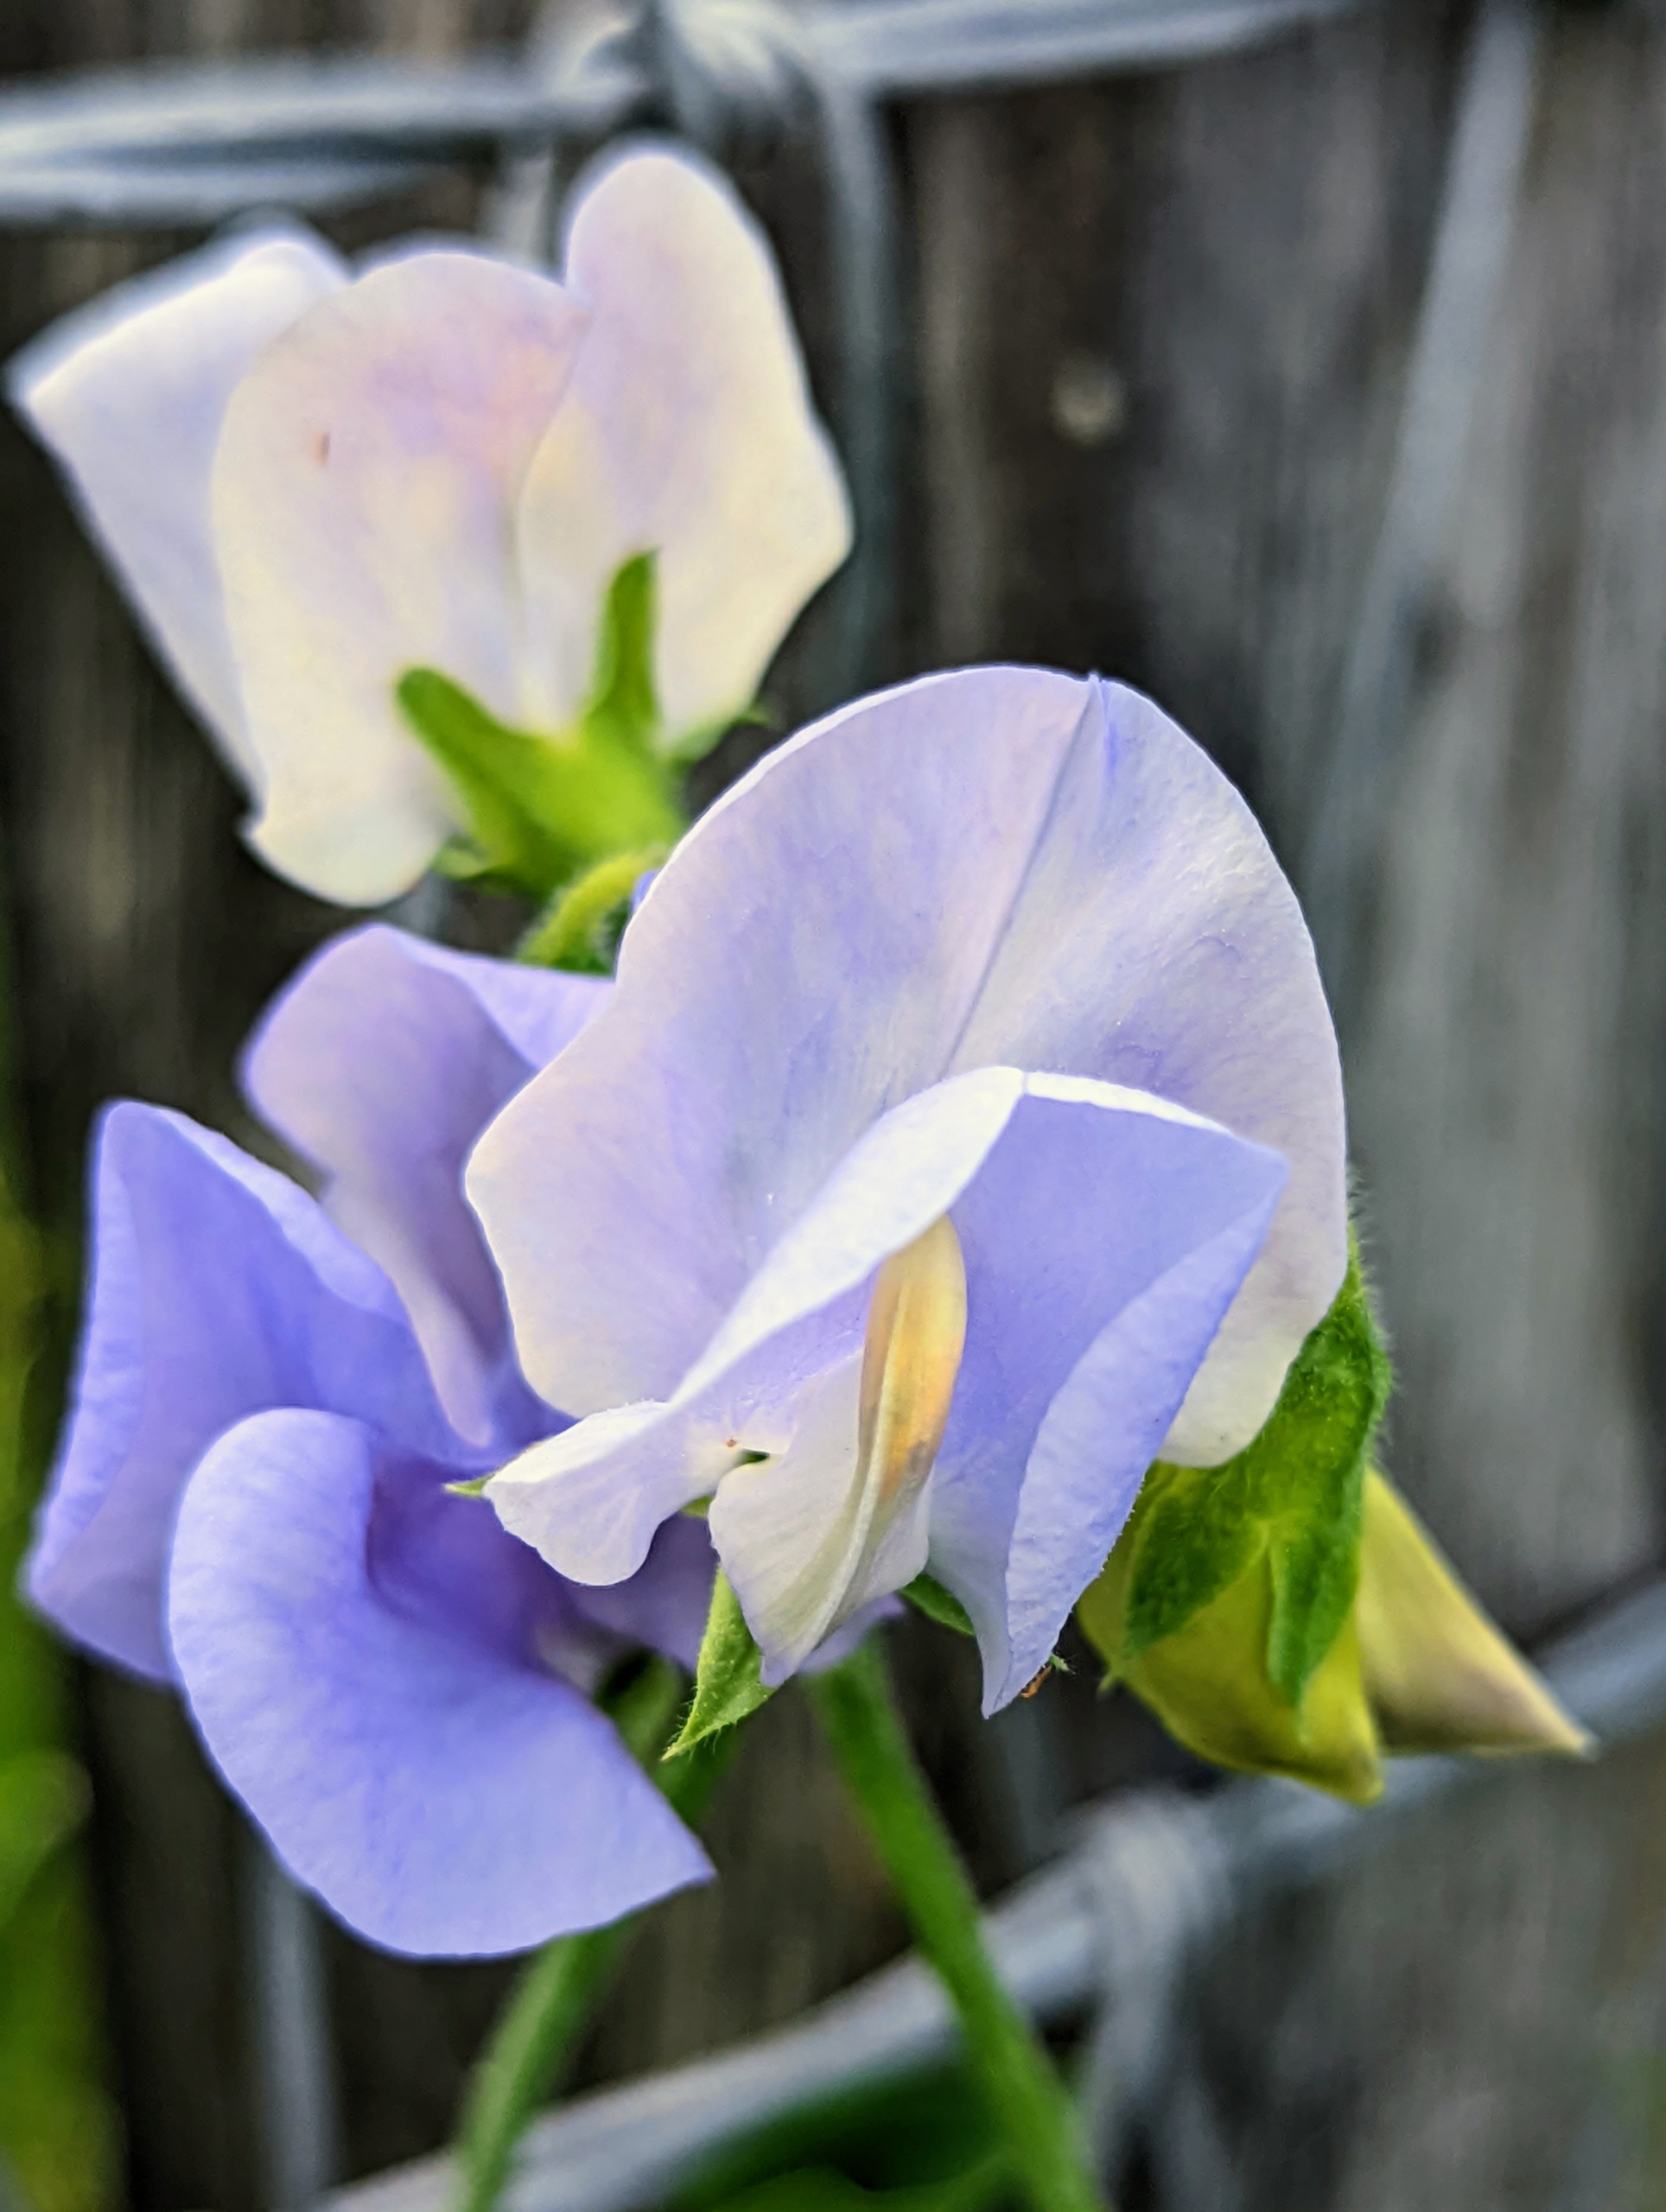
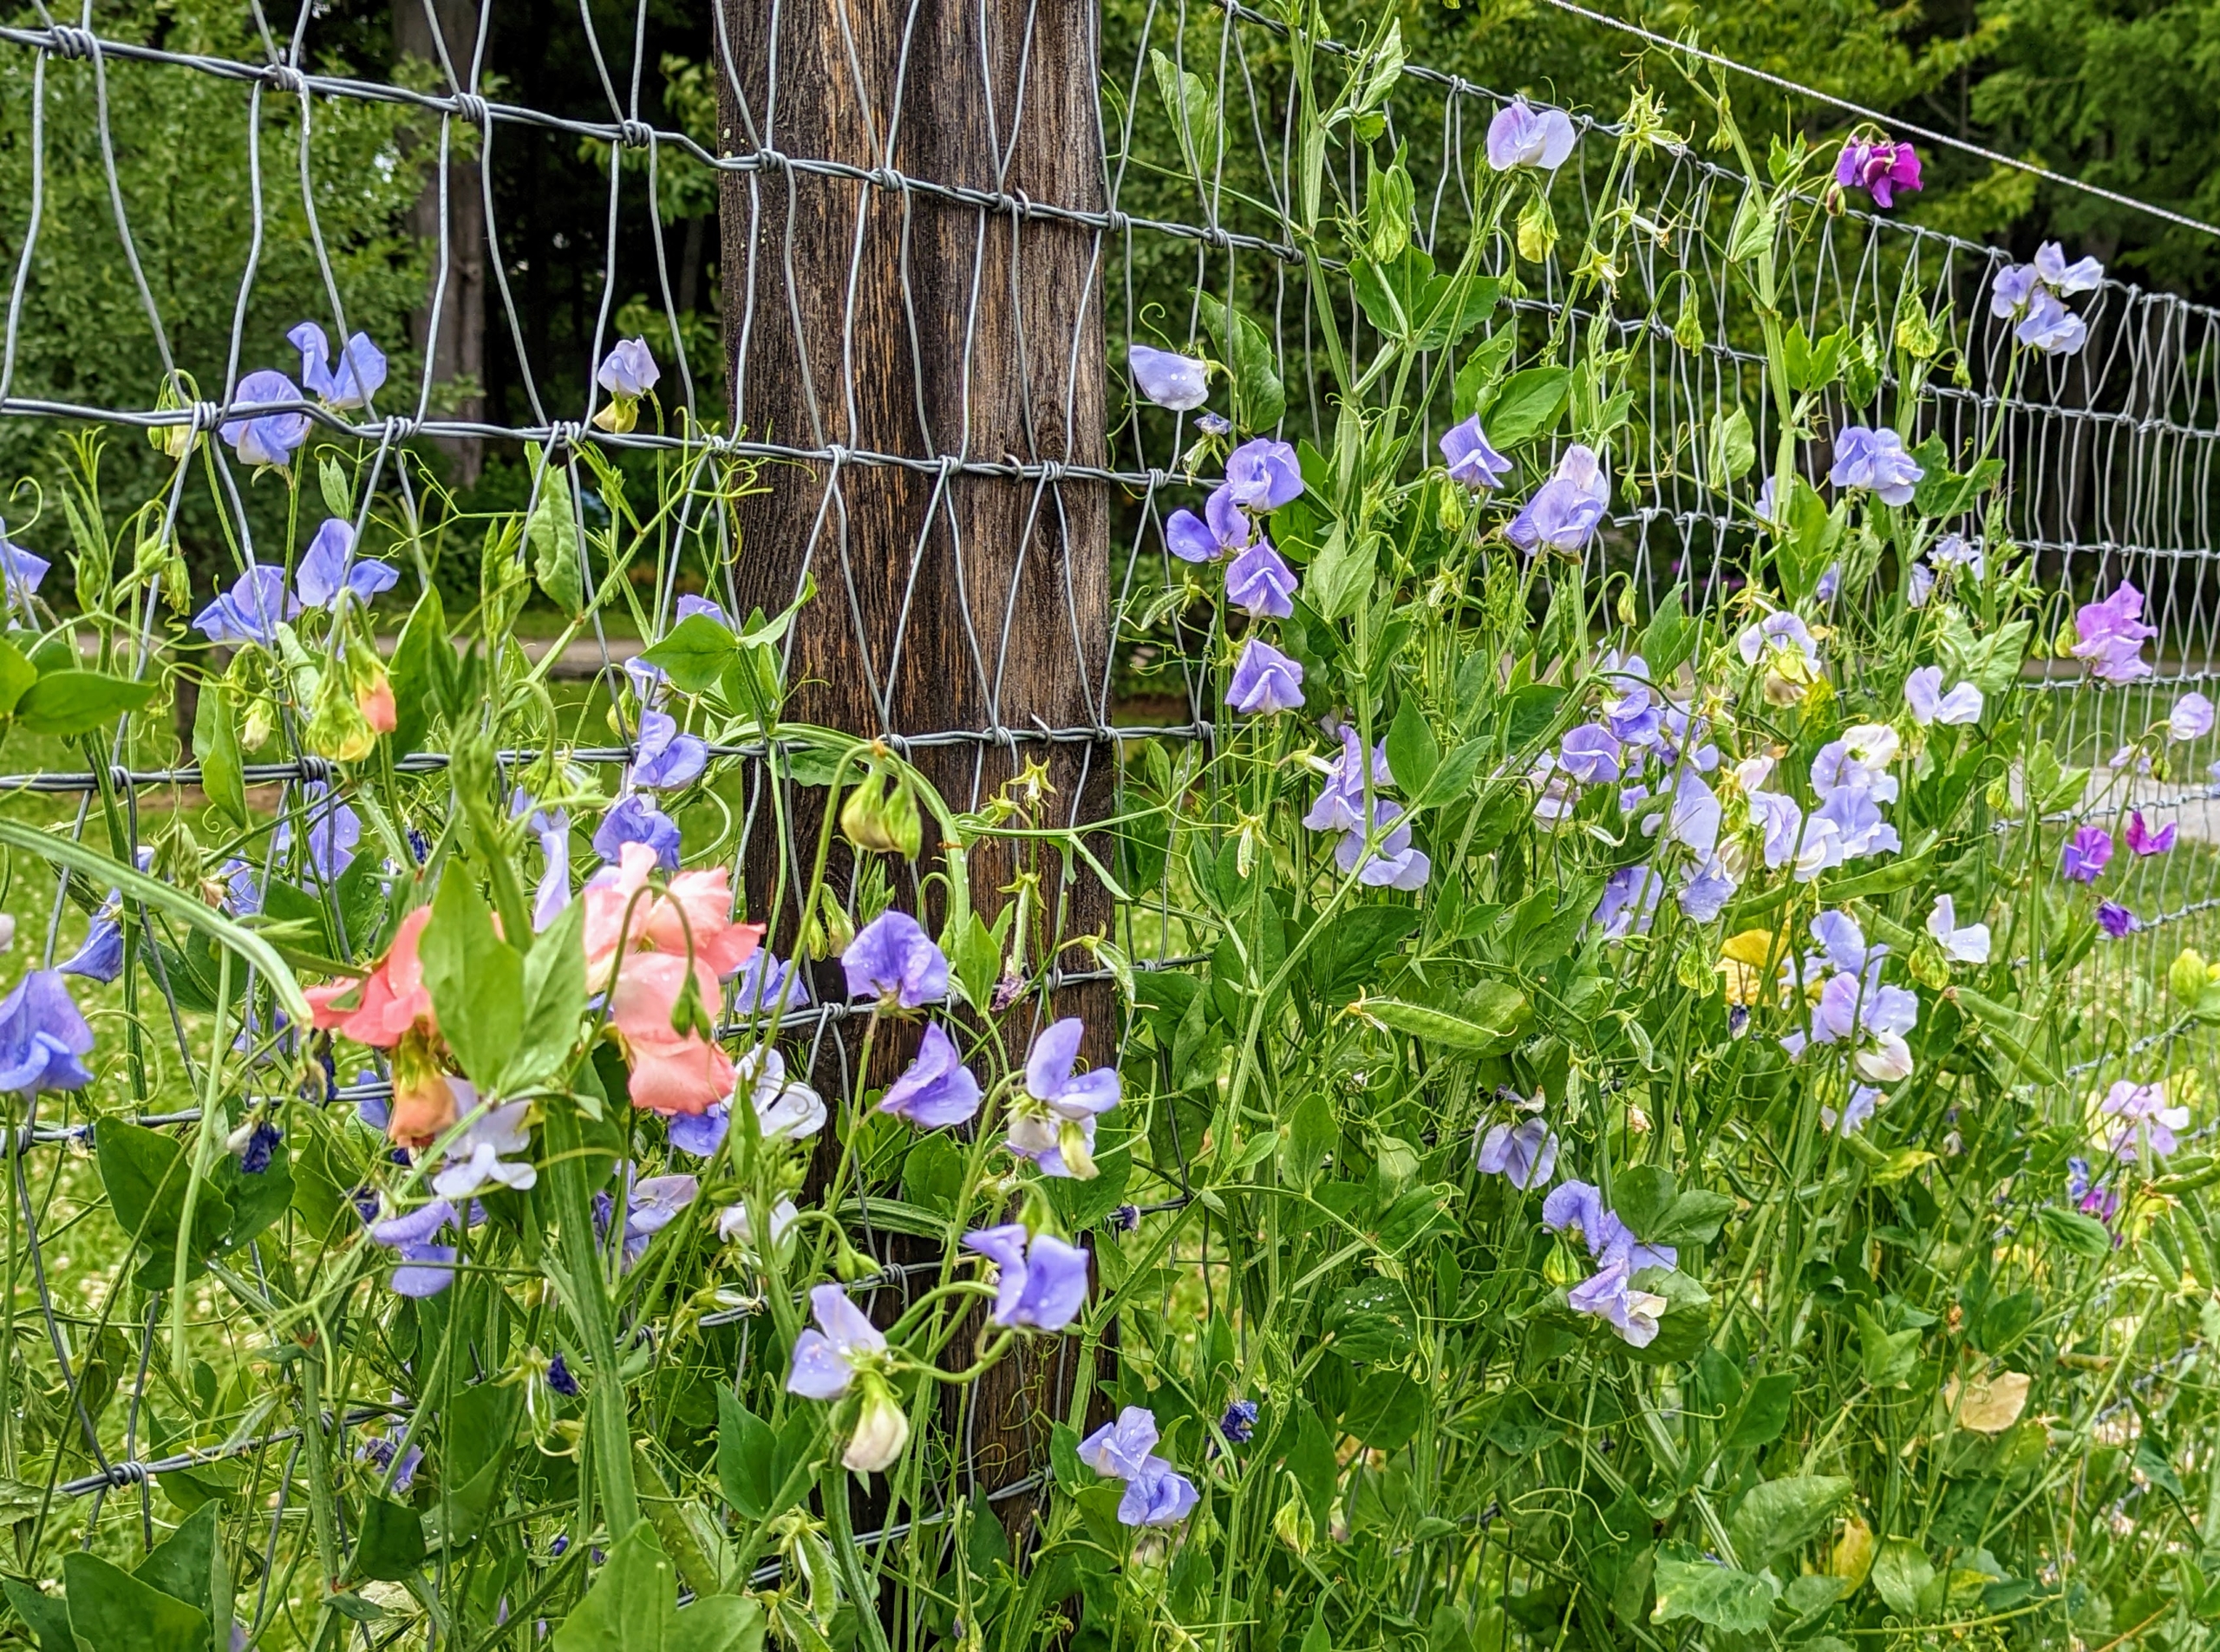
The old-fashioned varieties of sweet pea are grown for their vibrant colors and intense fragrances. Most sweet peas will begin blooming in late spring or early summer.
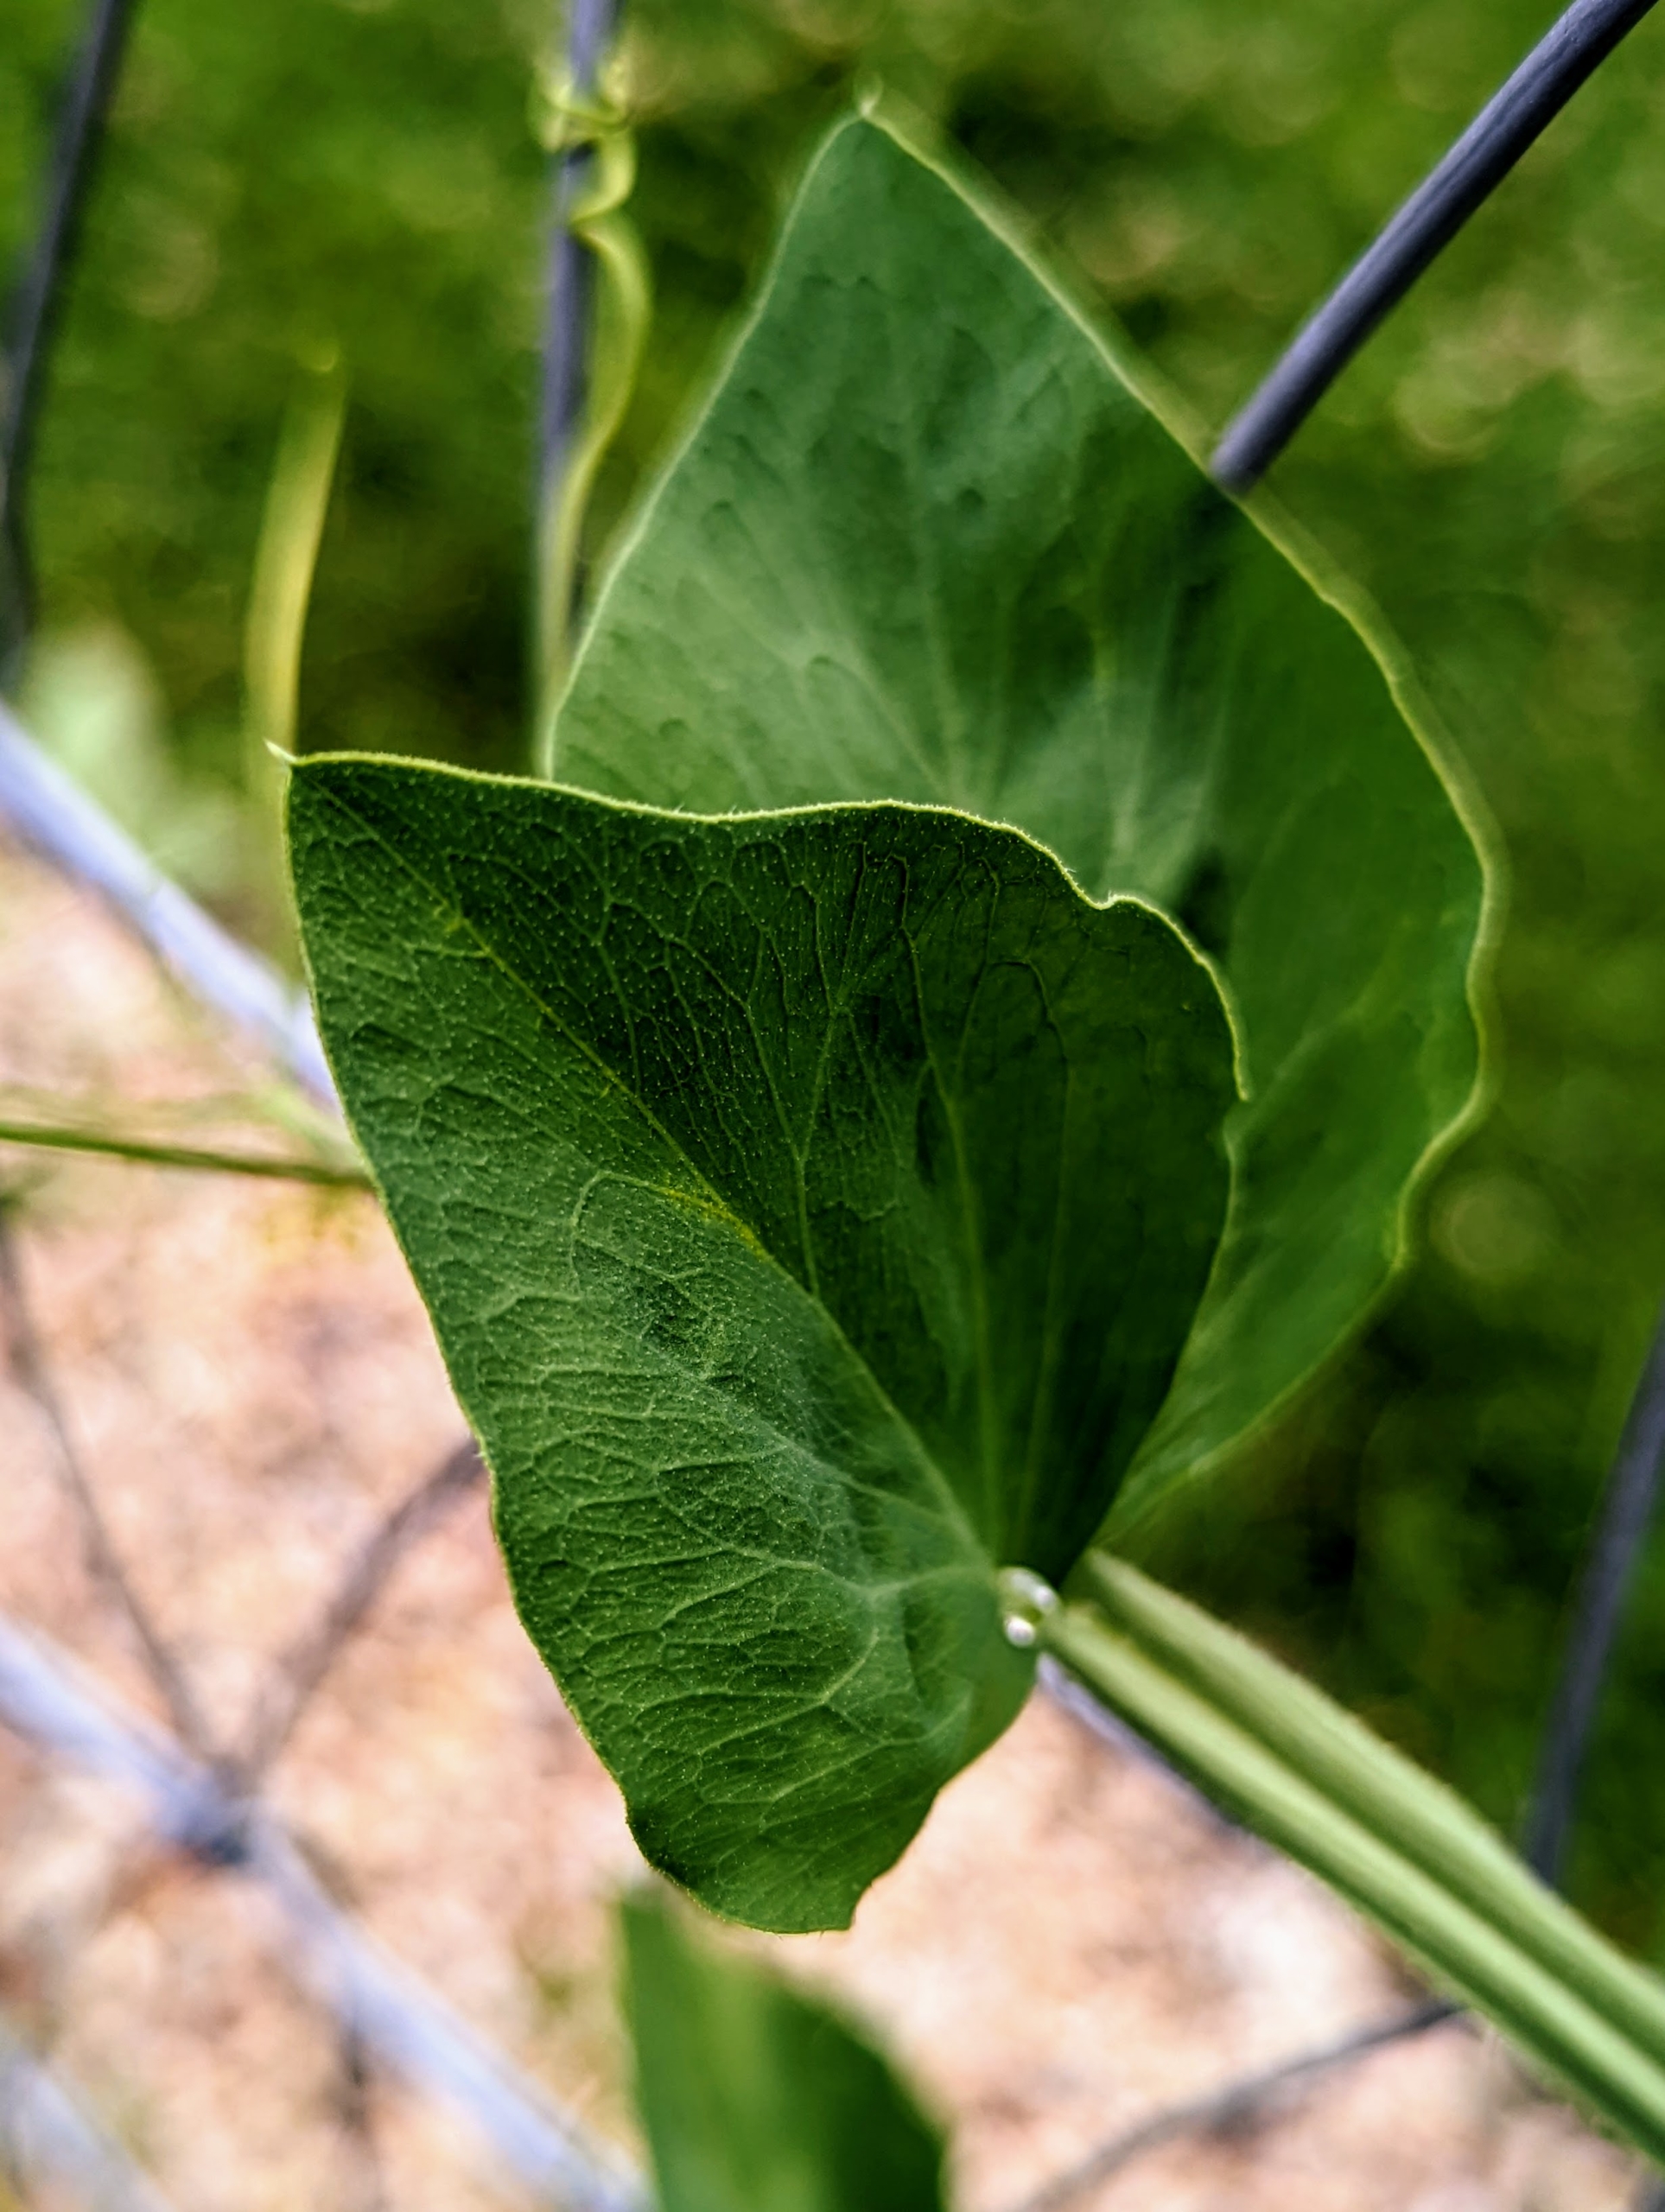
The flowers feature one large, upright rounded petal, two narrow side petals, and two lower petals. Luckily, the stems are sturdy enough to hold up their profuse flowers.
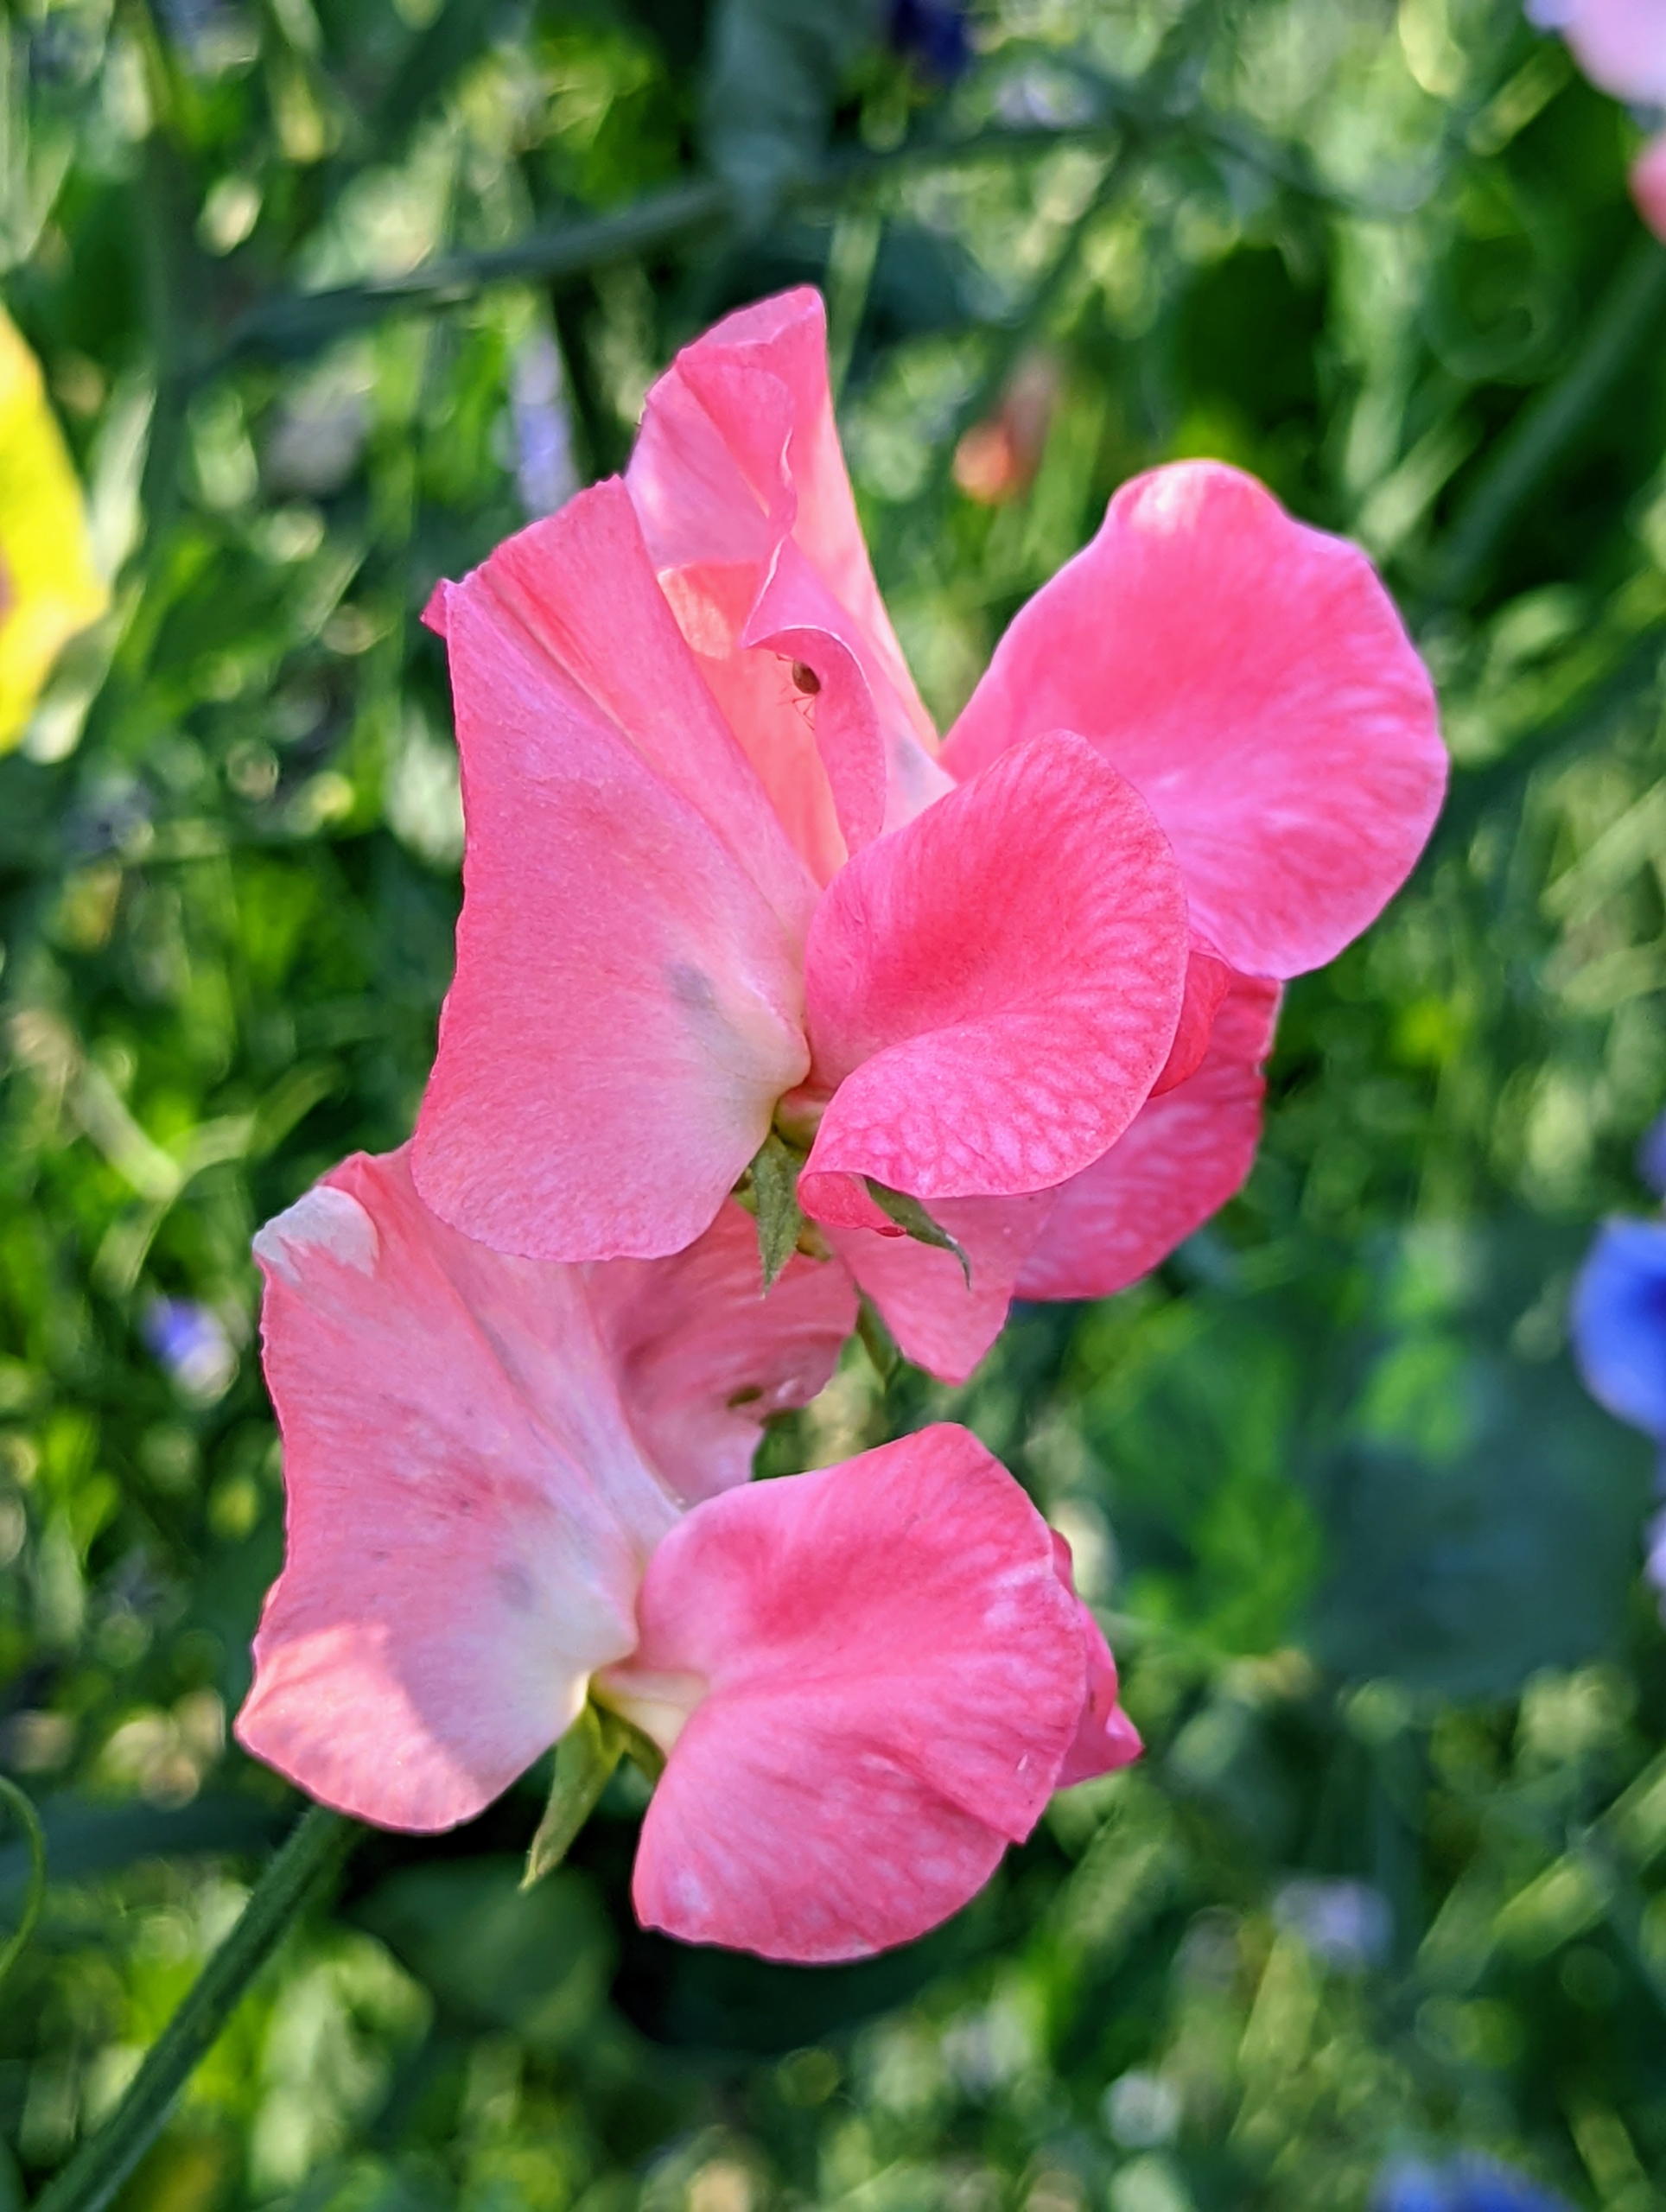
This one is a bright salmon to peach color. Originating in the southwest of Italy and the islands of the Mediterranean, sweet pea has been cultivated for use in gardens since the 17th century.
Sweet peas offer one of the widest color ranges in the plant kingdom, including crimson reds, navy blues, pastel lavenders, pinks, and the purest whites. These colors are found as solid colors, bicolors, and streaked or flaked flowers.
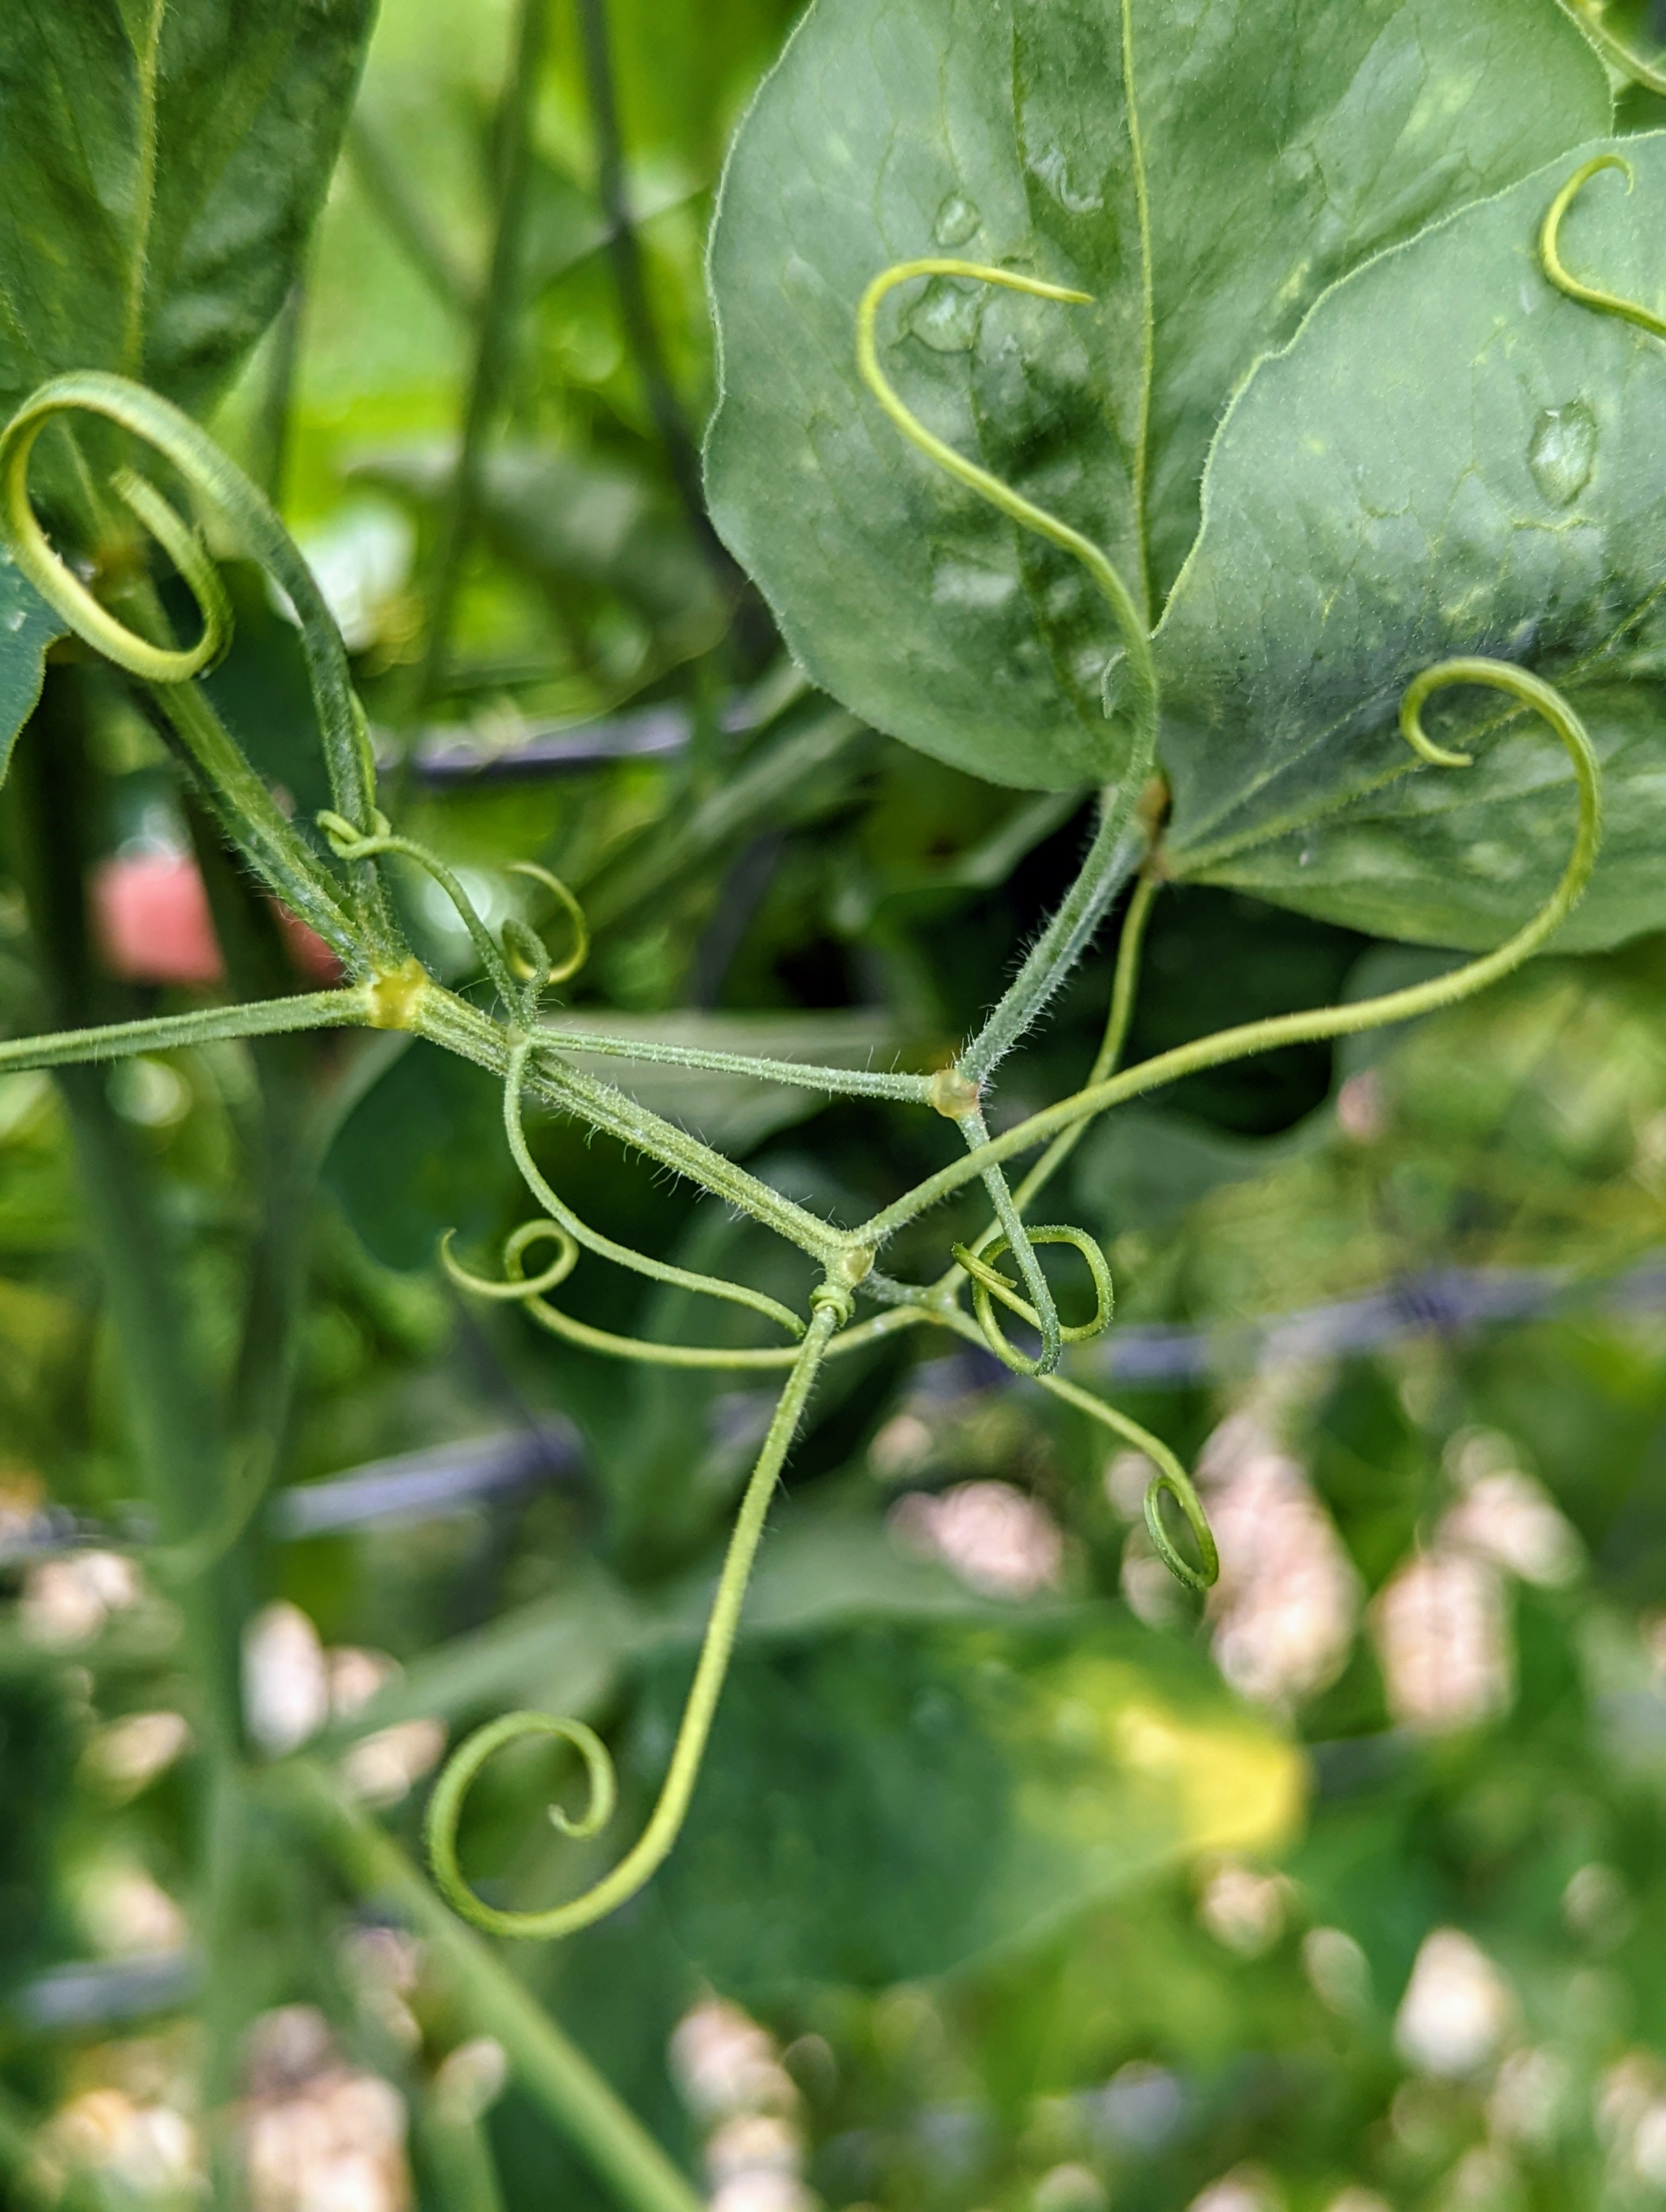
The leaves are pinnate with two leaflets and a terminal tendril, which twines around supporting plants and structures, helping the sweet pea to climb.
Here are the tendrils they use to grasp anything that’s a quarter-inch or less.
This season, we’re planting many different varieties from a number of seed companies.
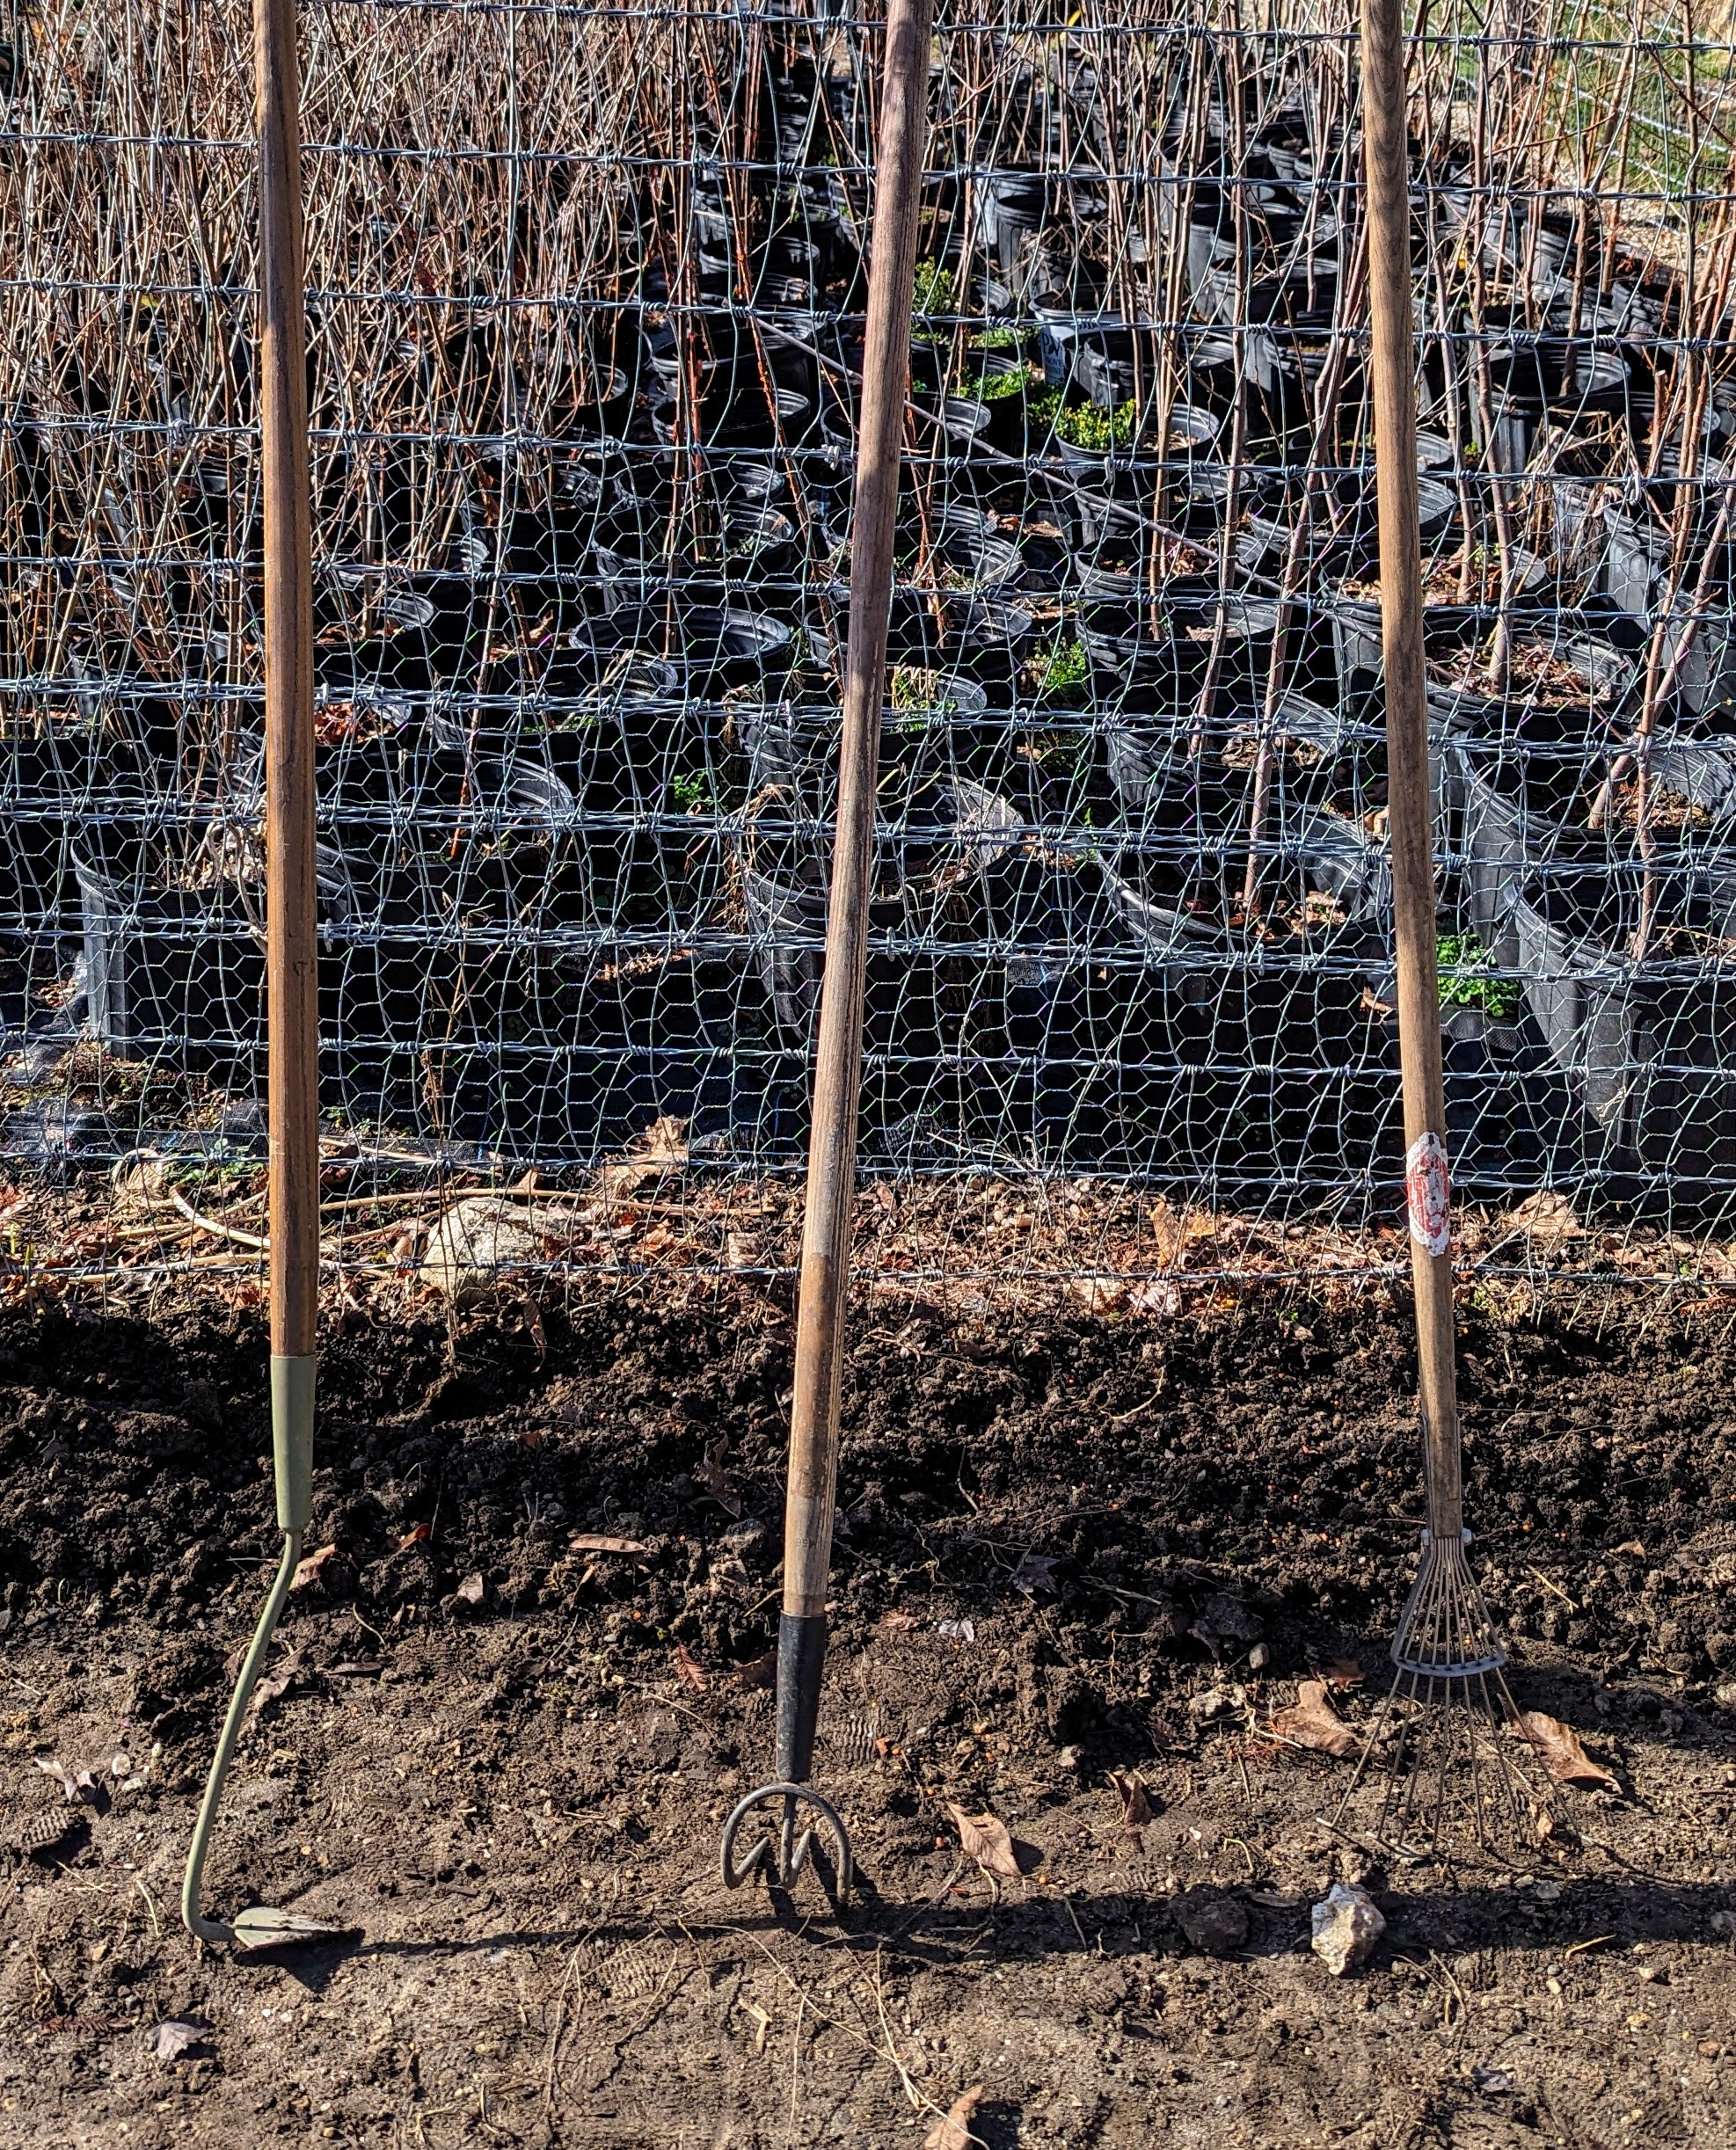
I always encourage my crew to bring “the right tools for the right job.” Here are the three tools Wendy is using for this planting project – a hoe, a cultivator, and a rake.
Once the area along the garden fence is cultivated, Wendy drops some good fertilizer. Sweet peas are heavy feeders, so it is important to ensure the soil is nutrient-rich.
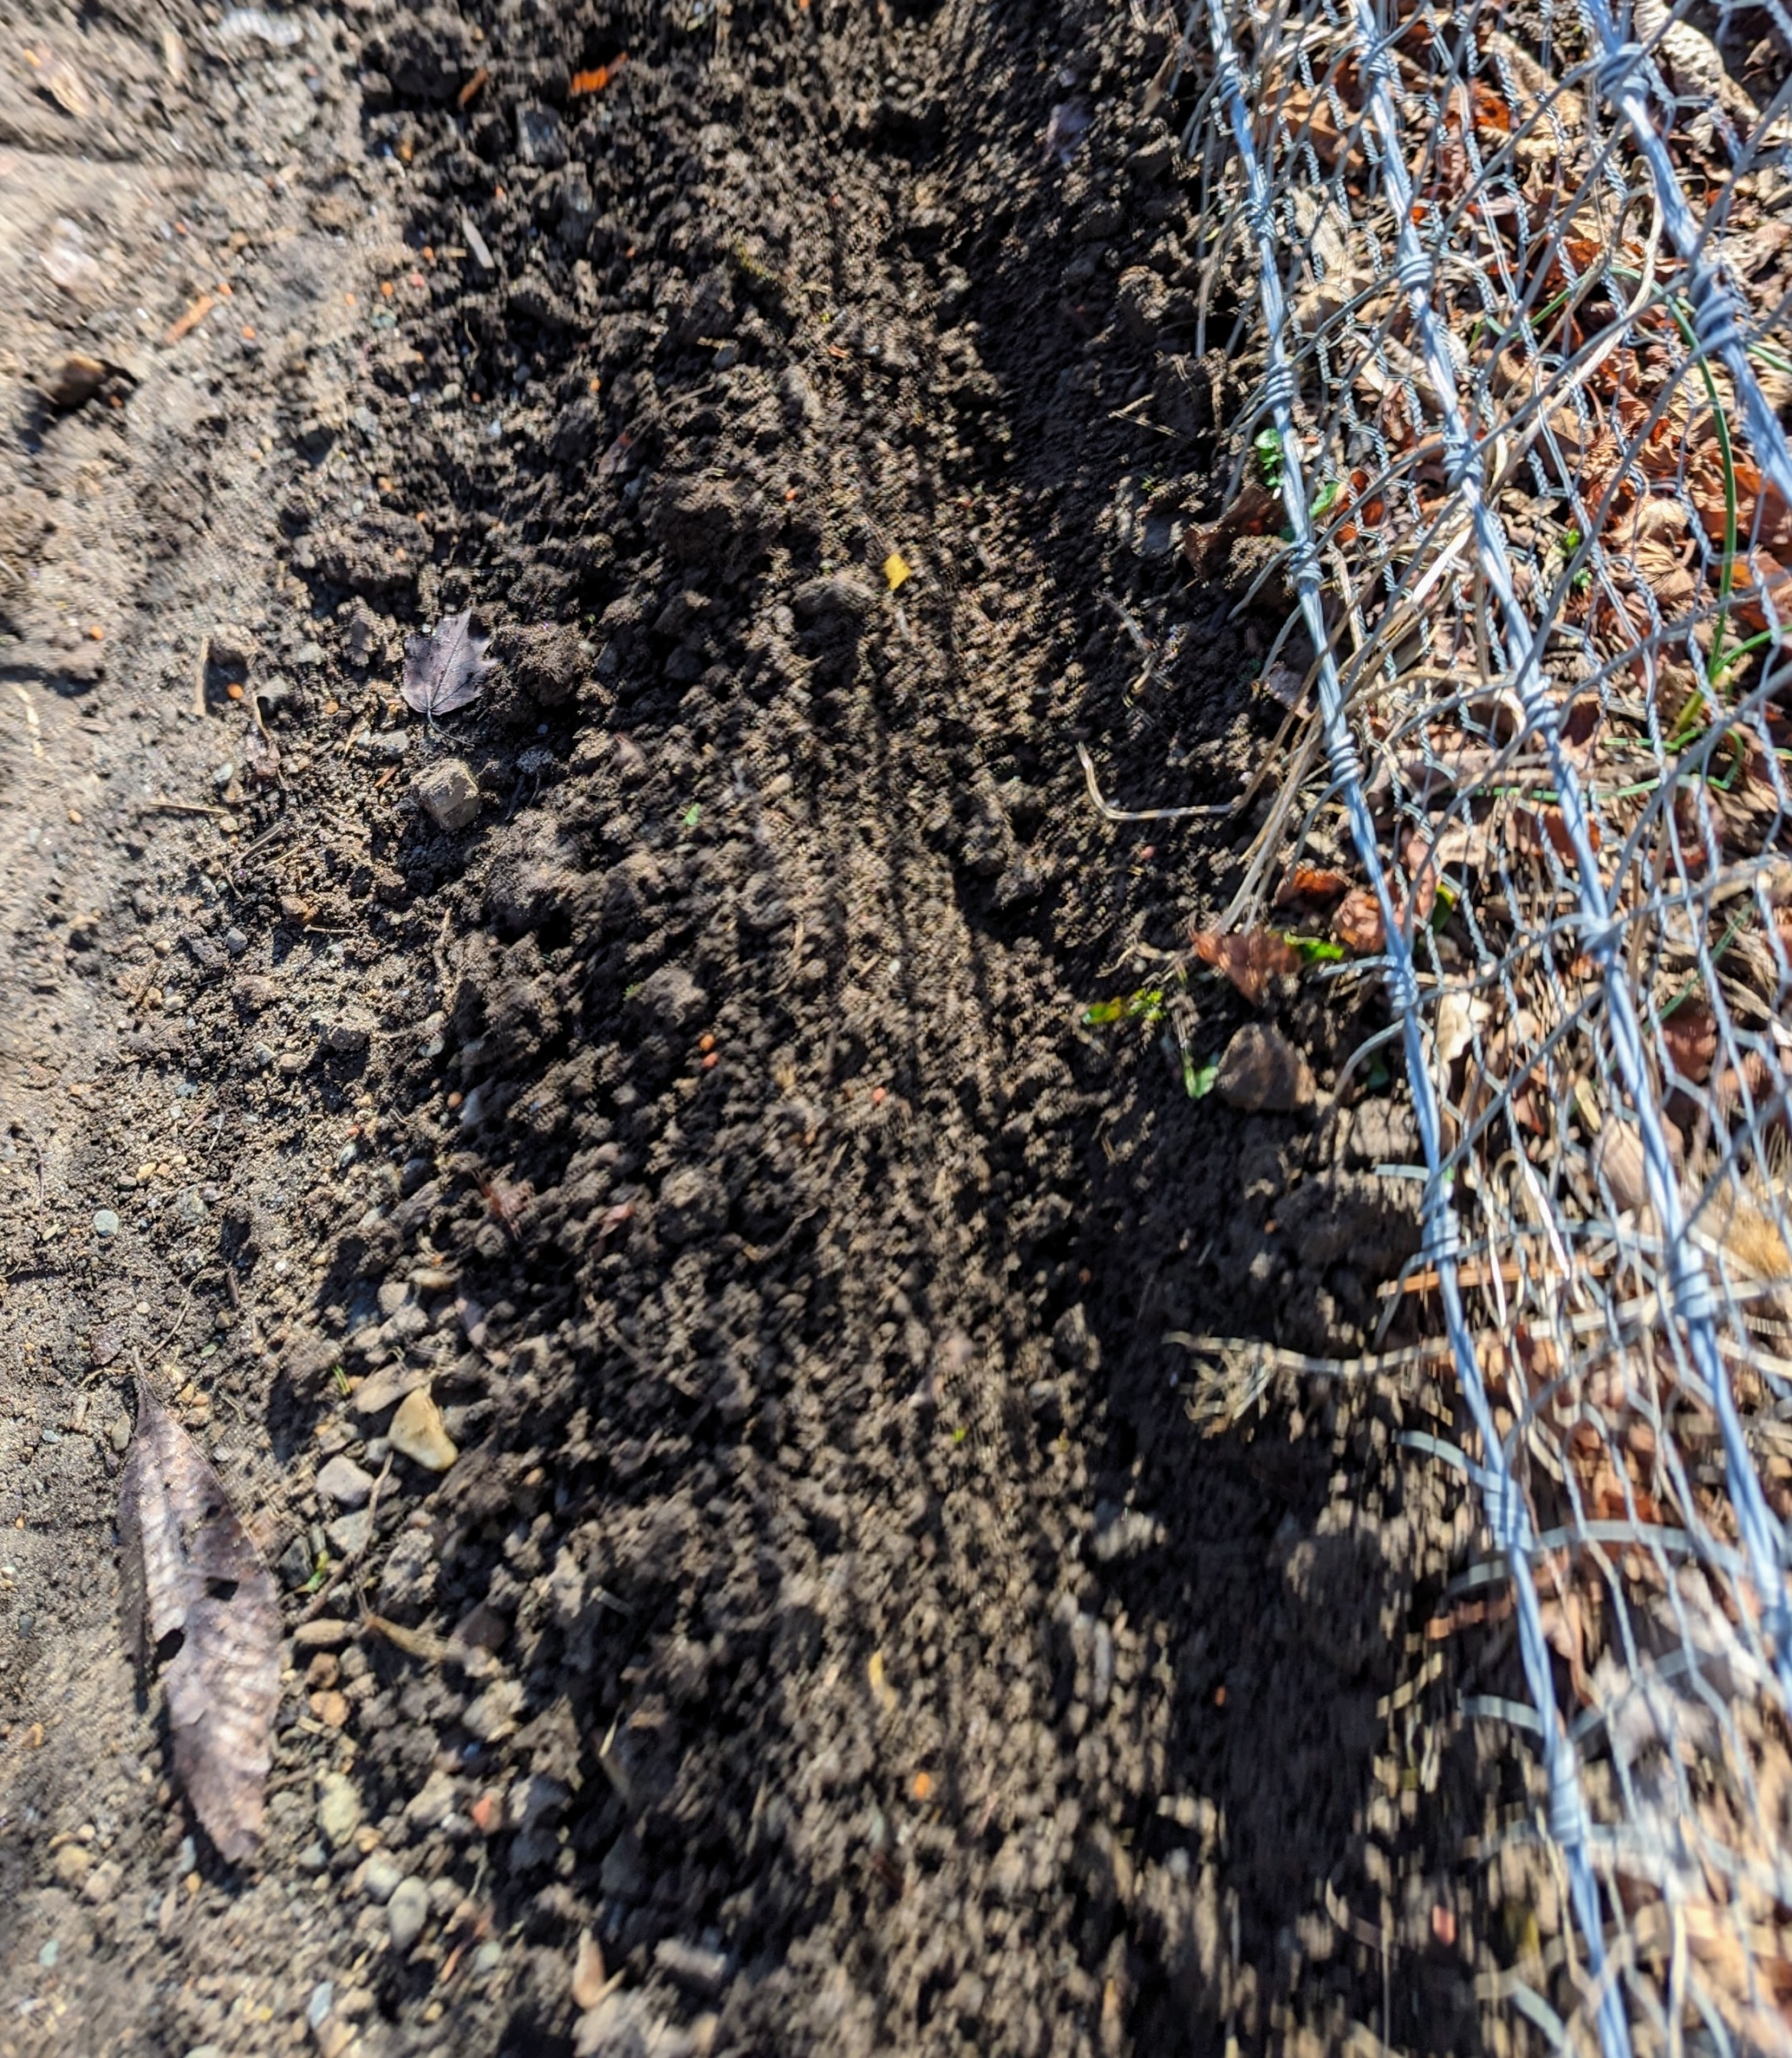
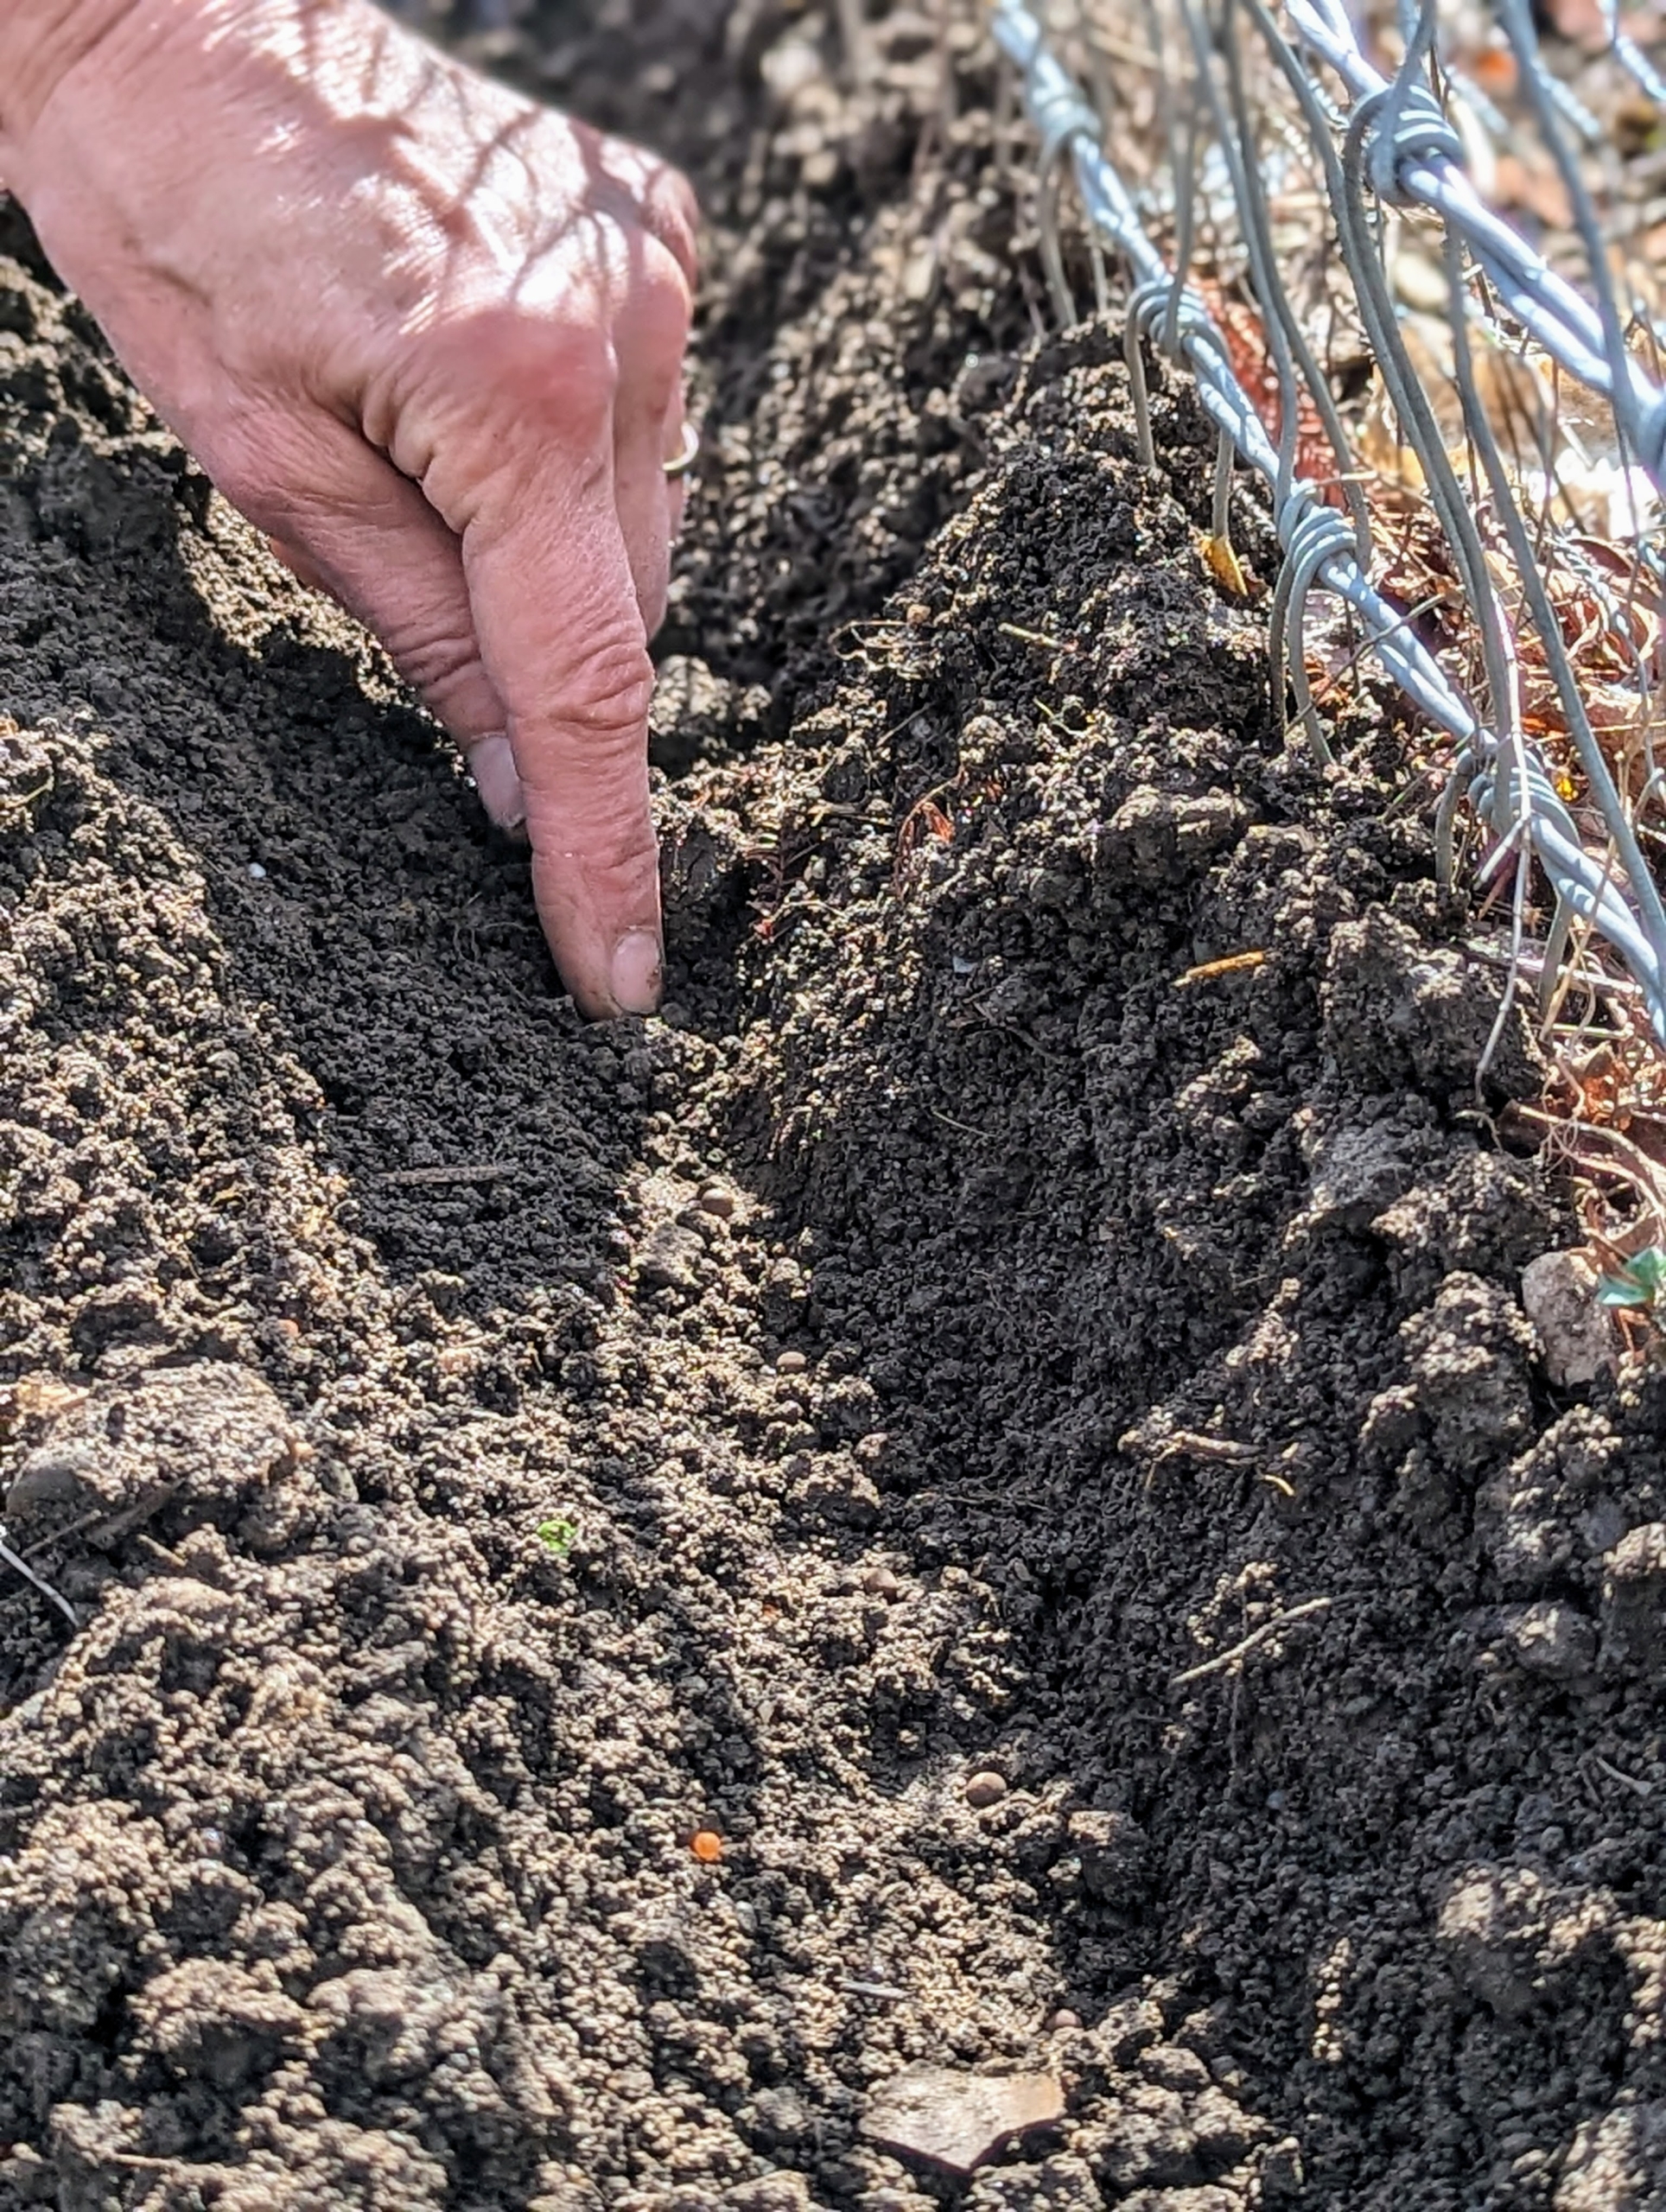
We’re planting the sweet peas along one side and the back fence of my old vegetable garden down by my chicken yard. Wendy uses a hoe to create a shallow trench – just a couple inches deep.
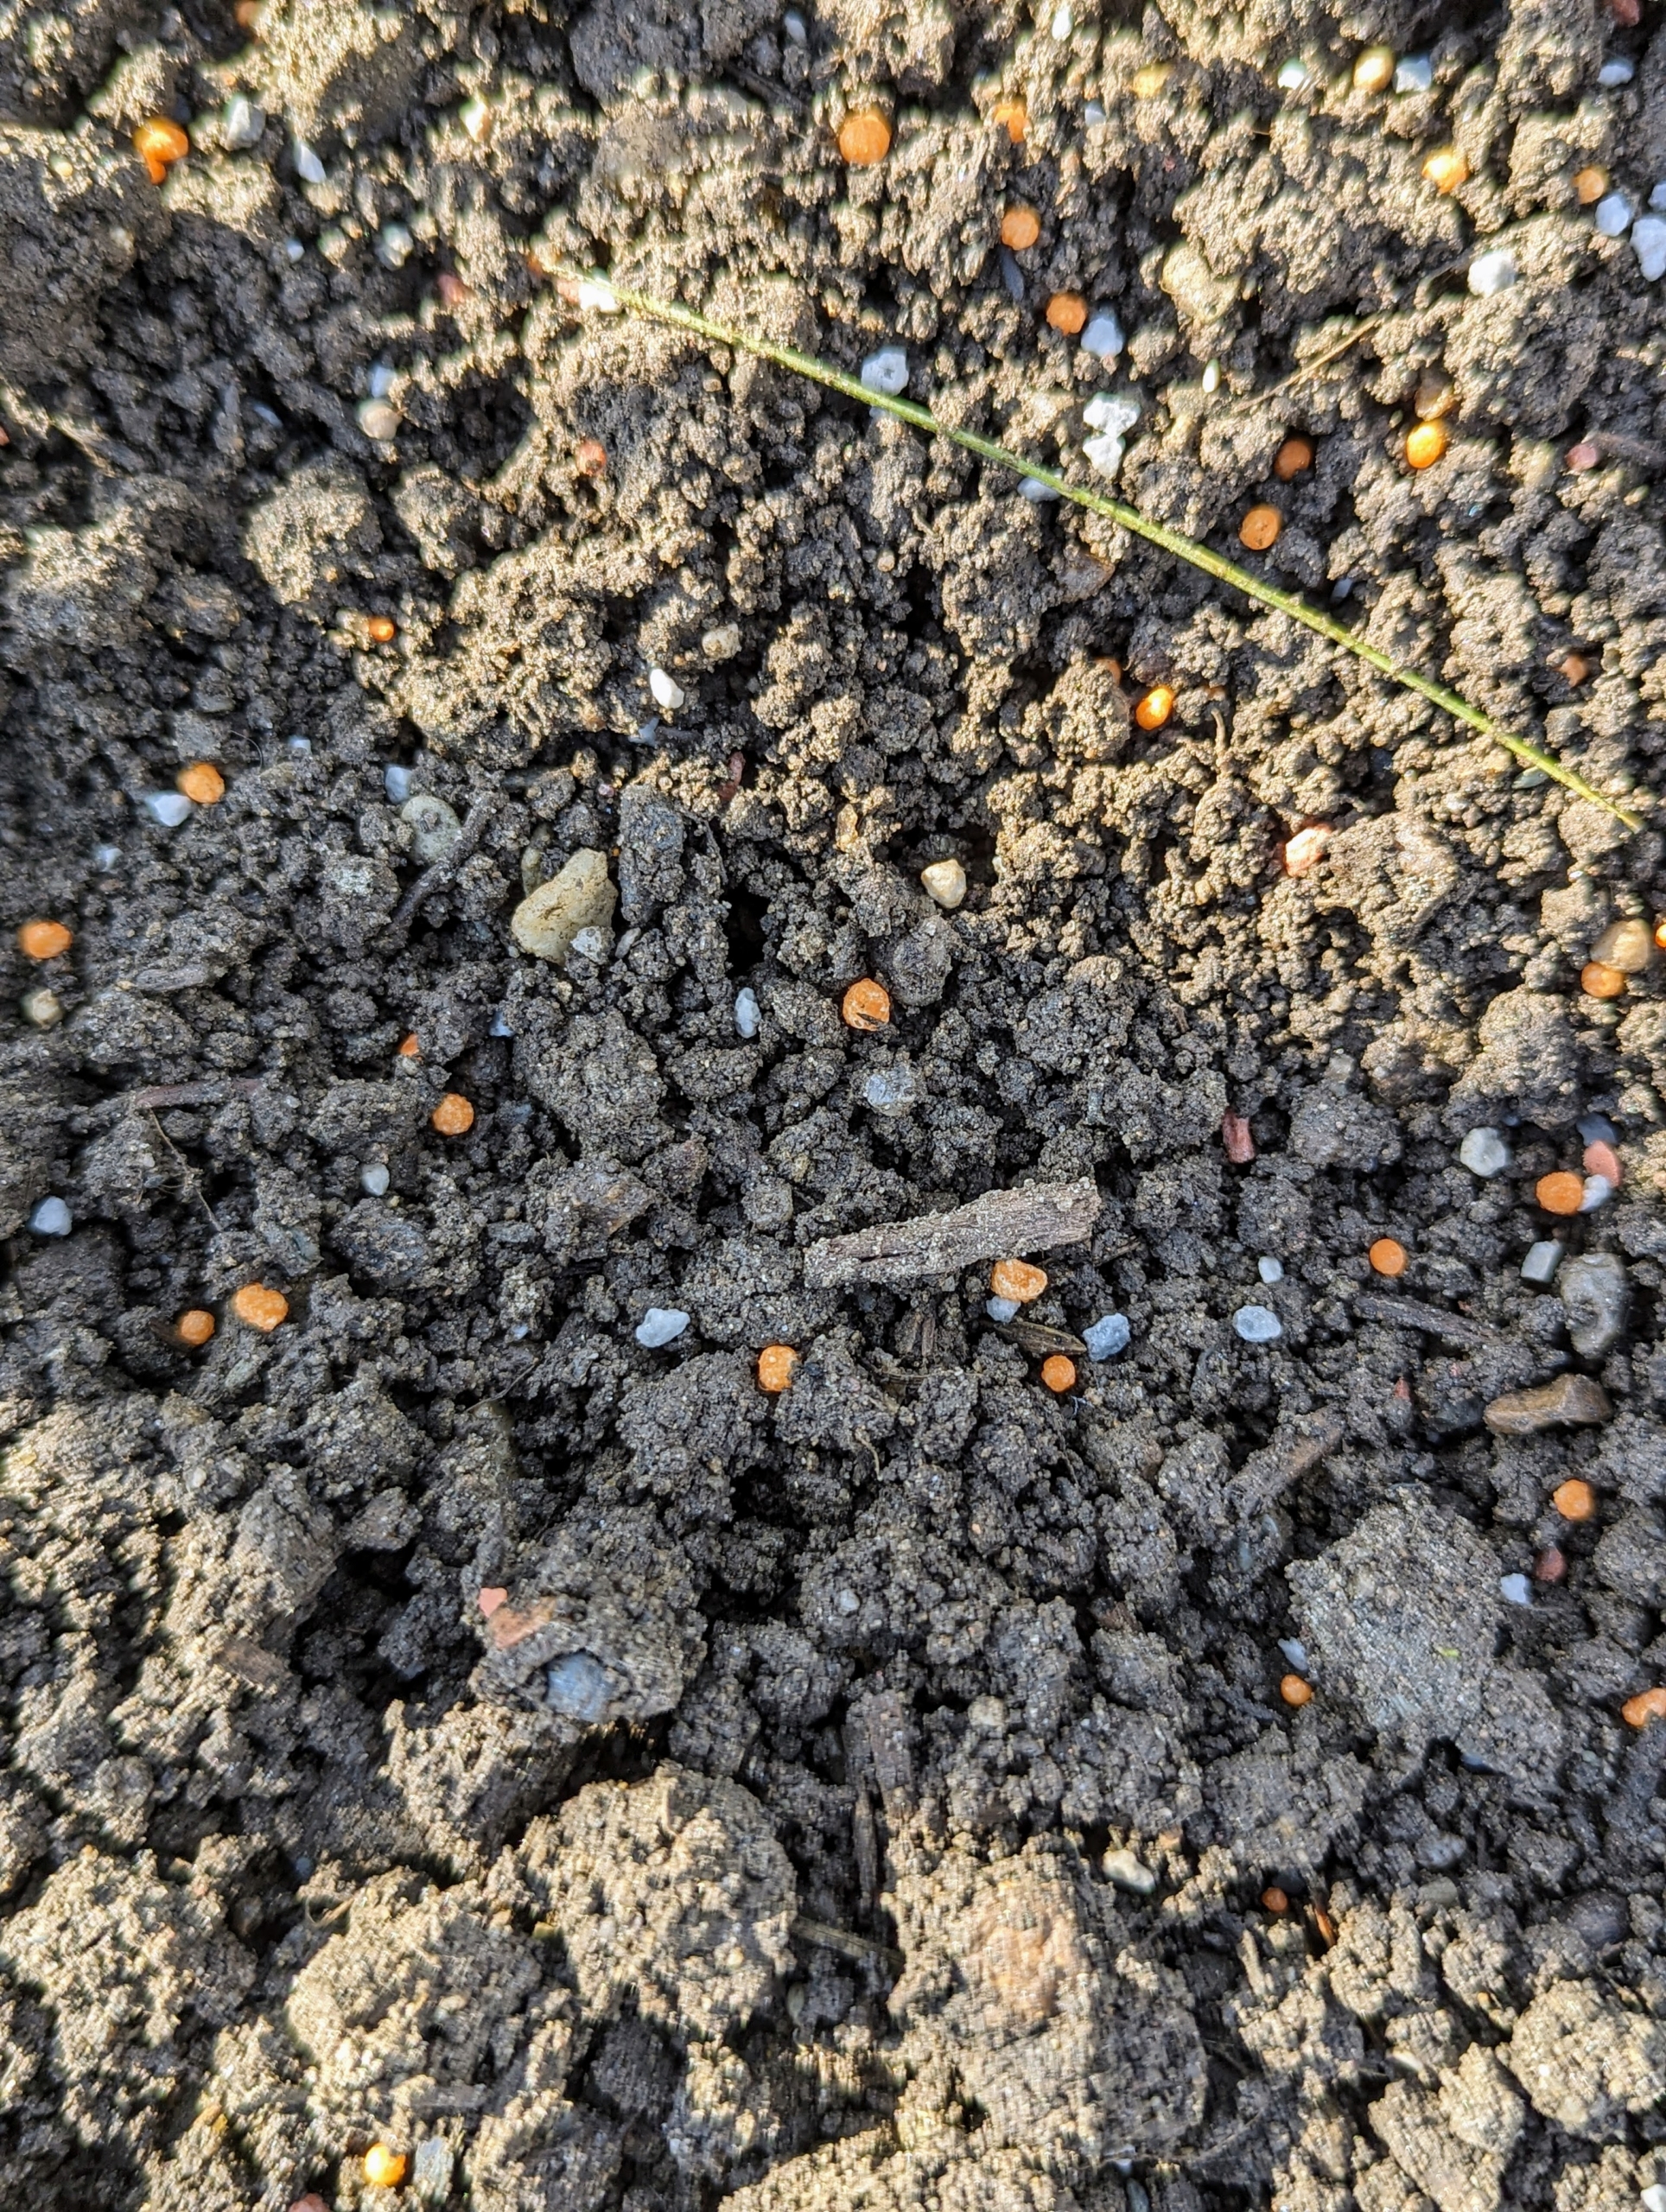
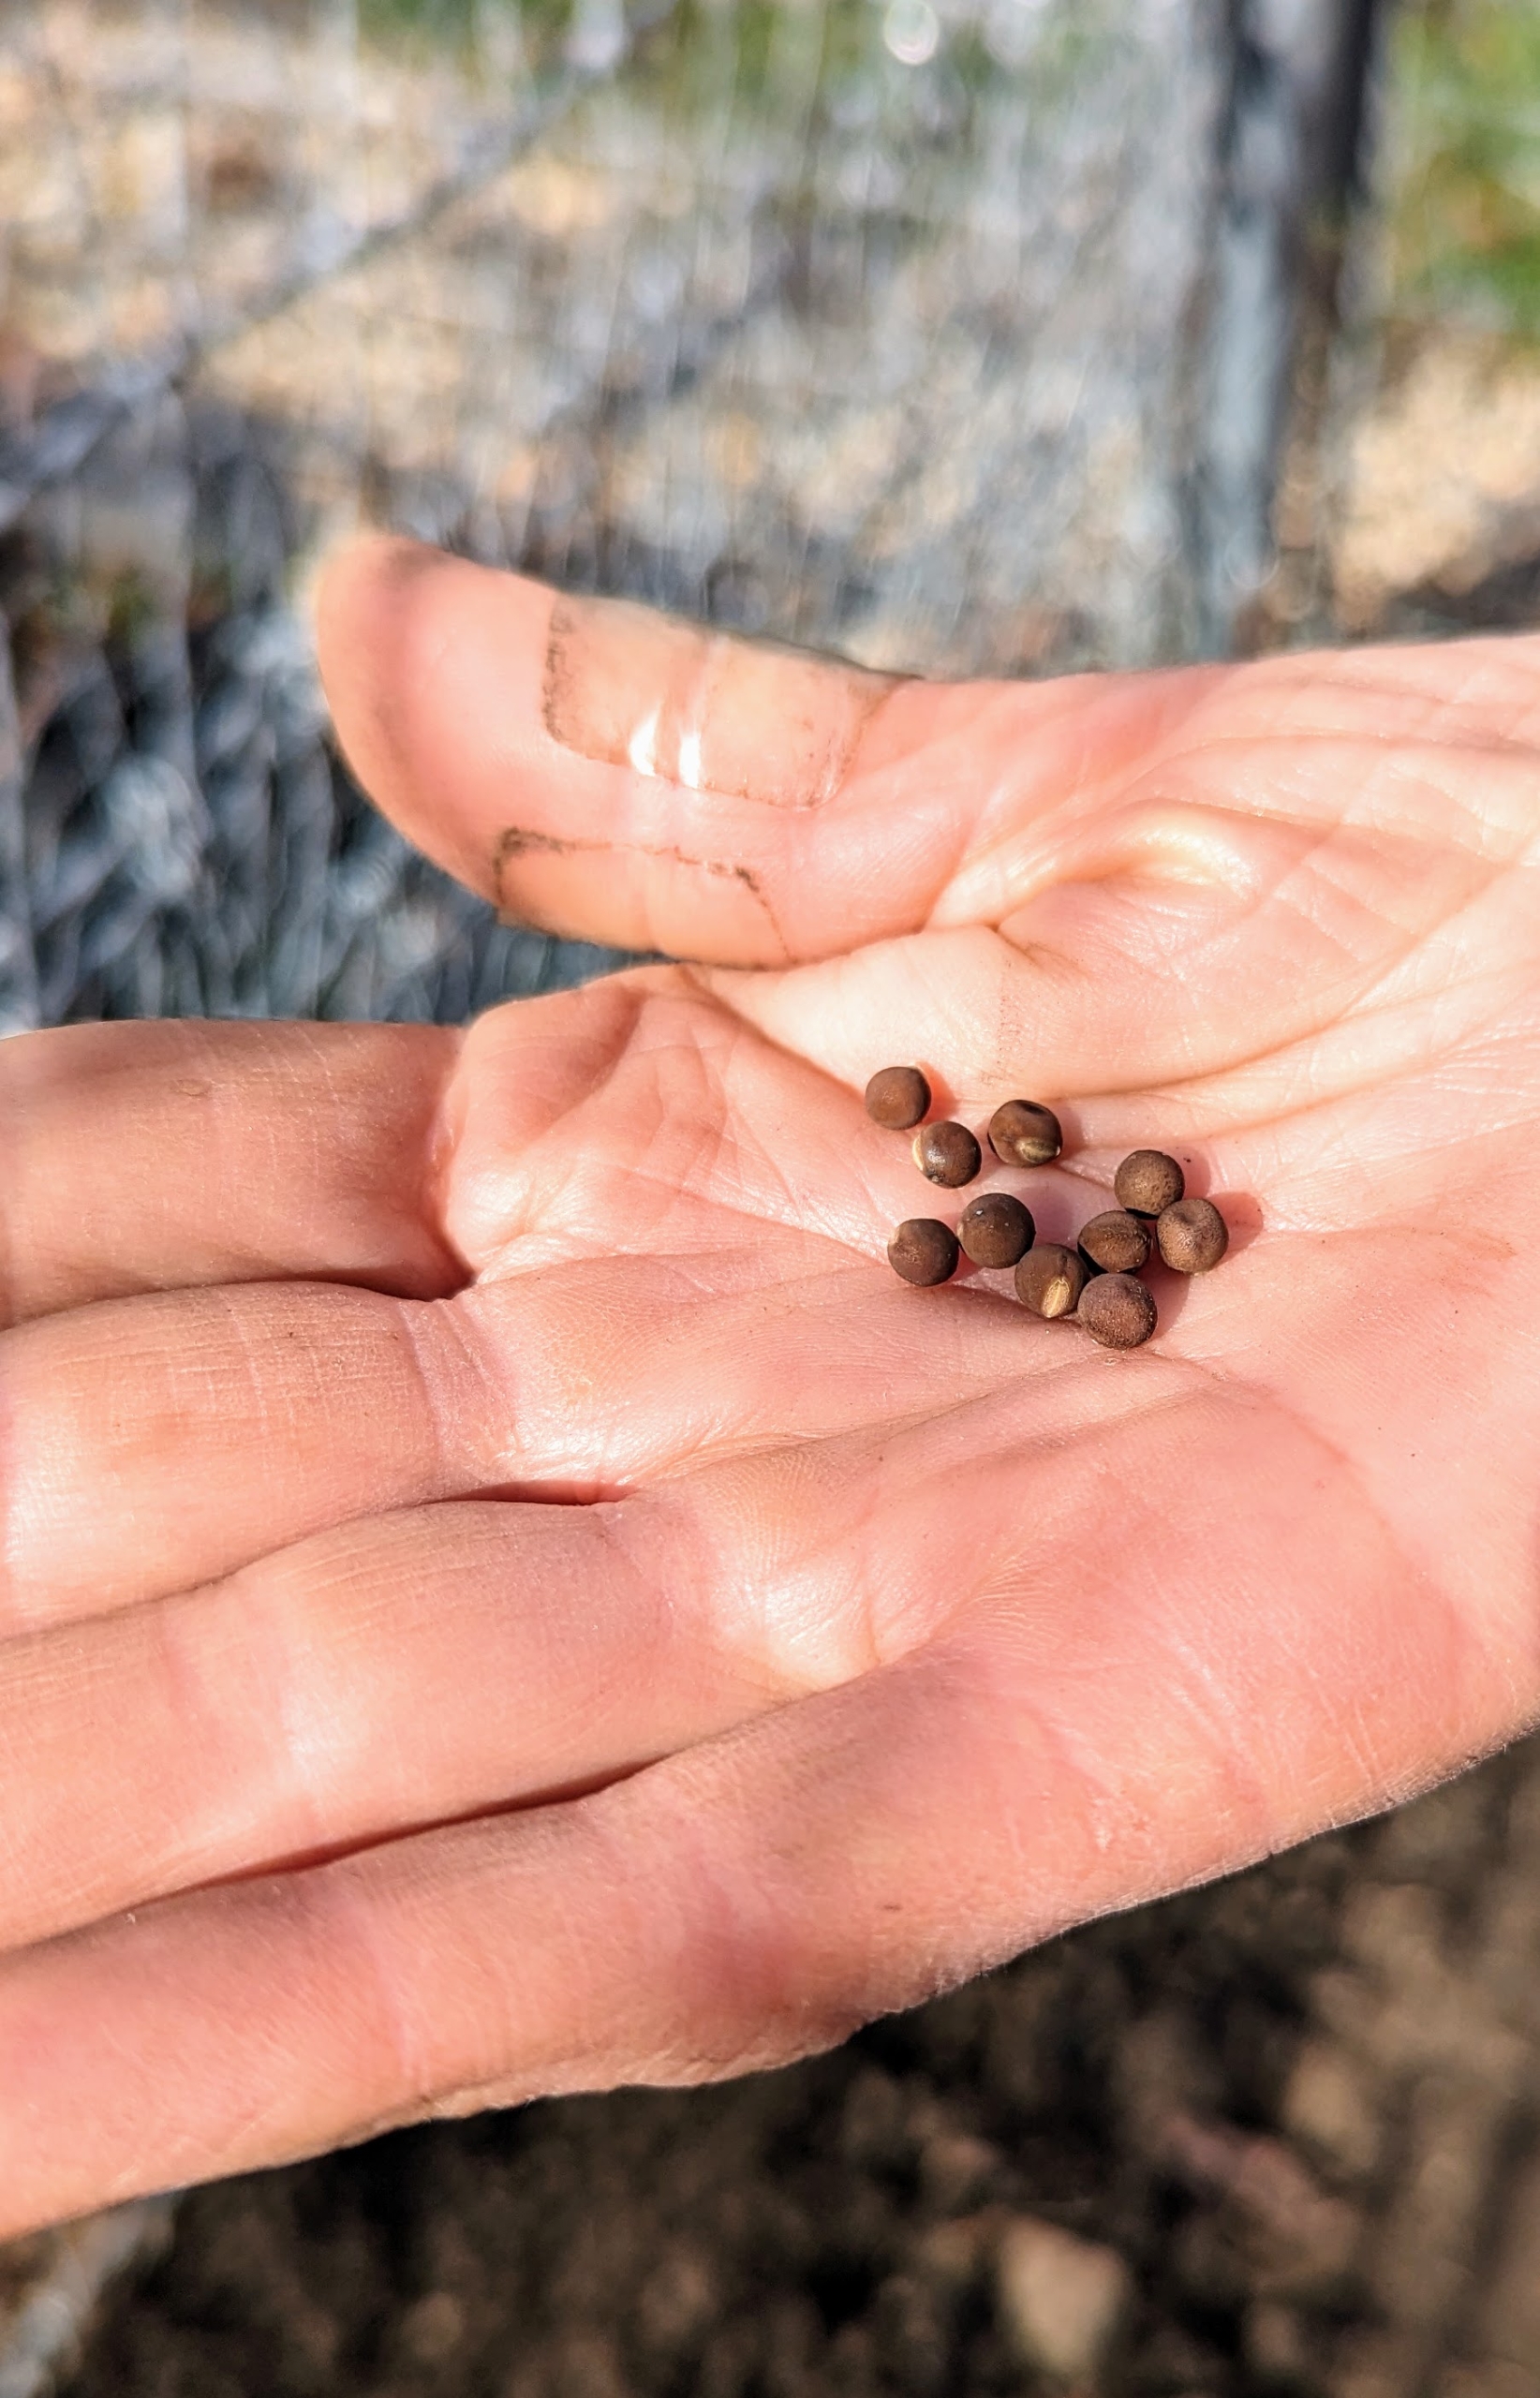
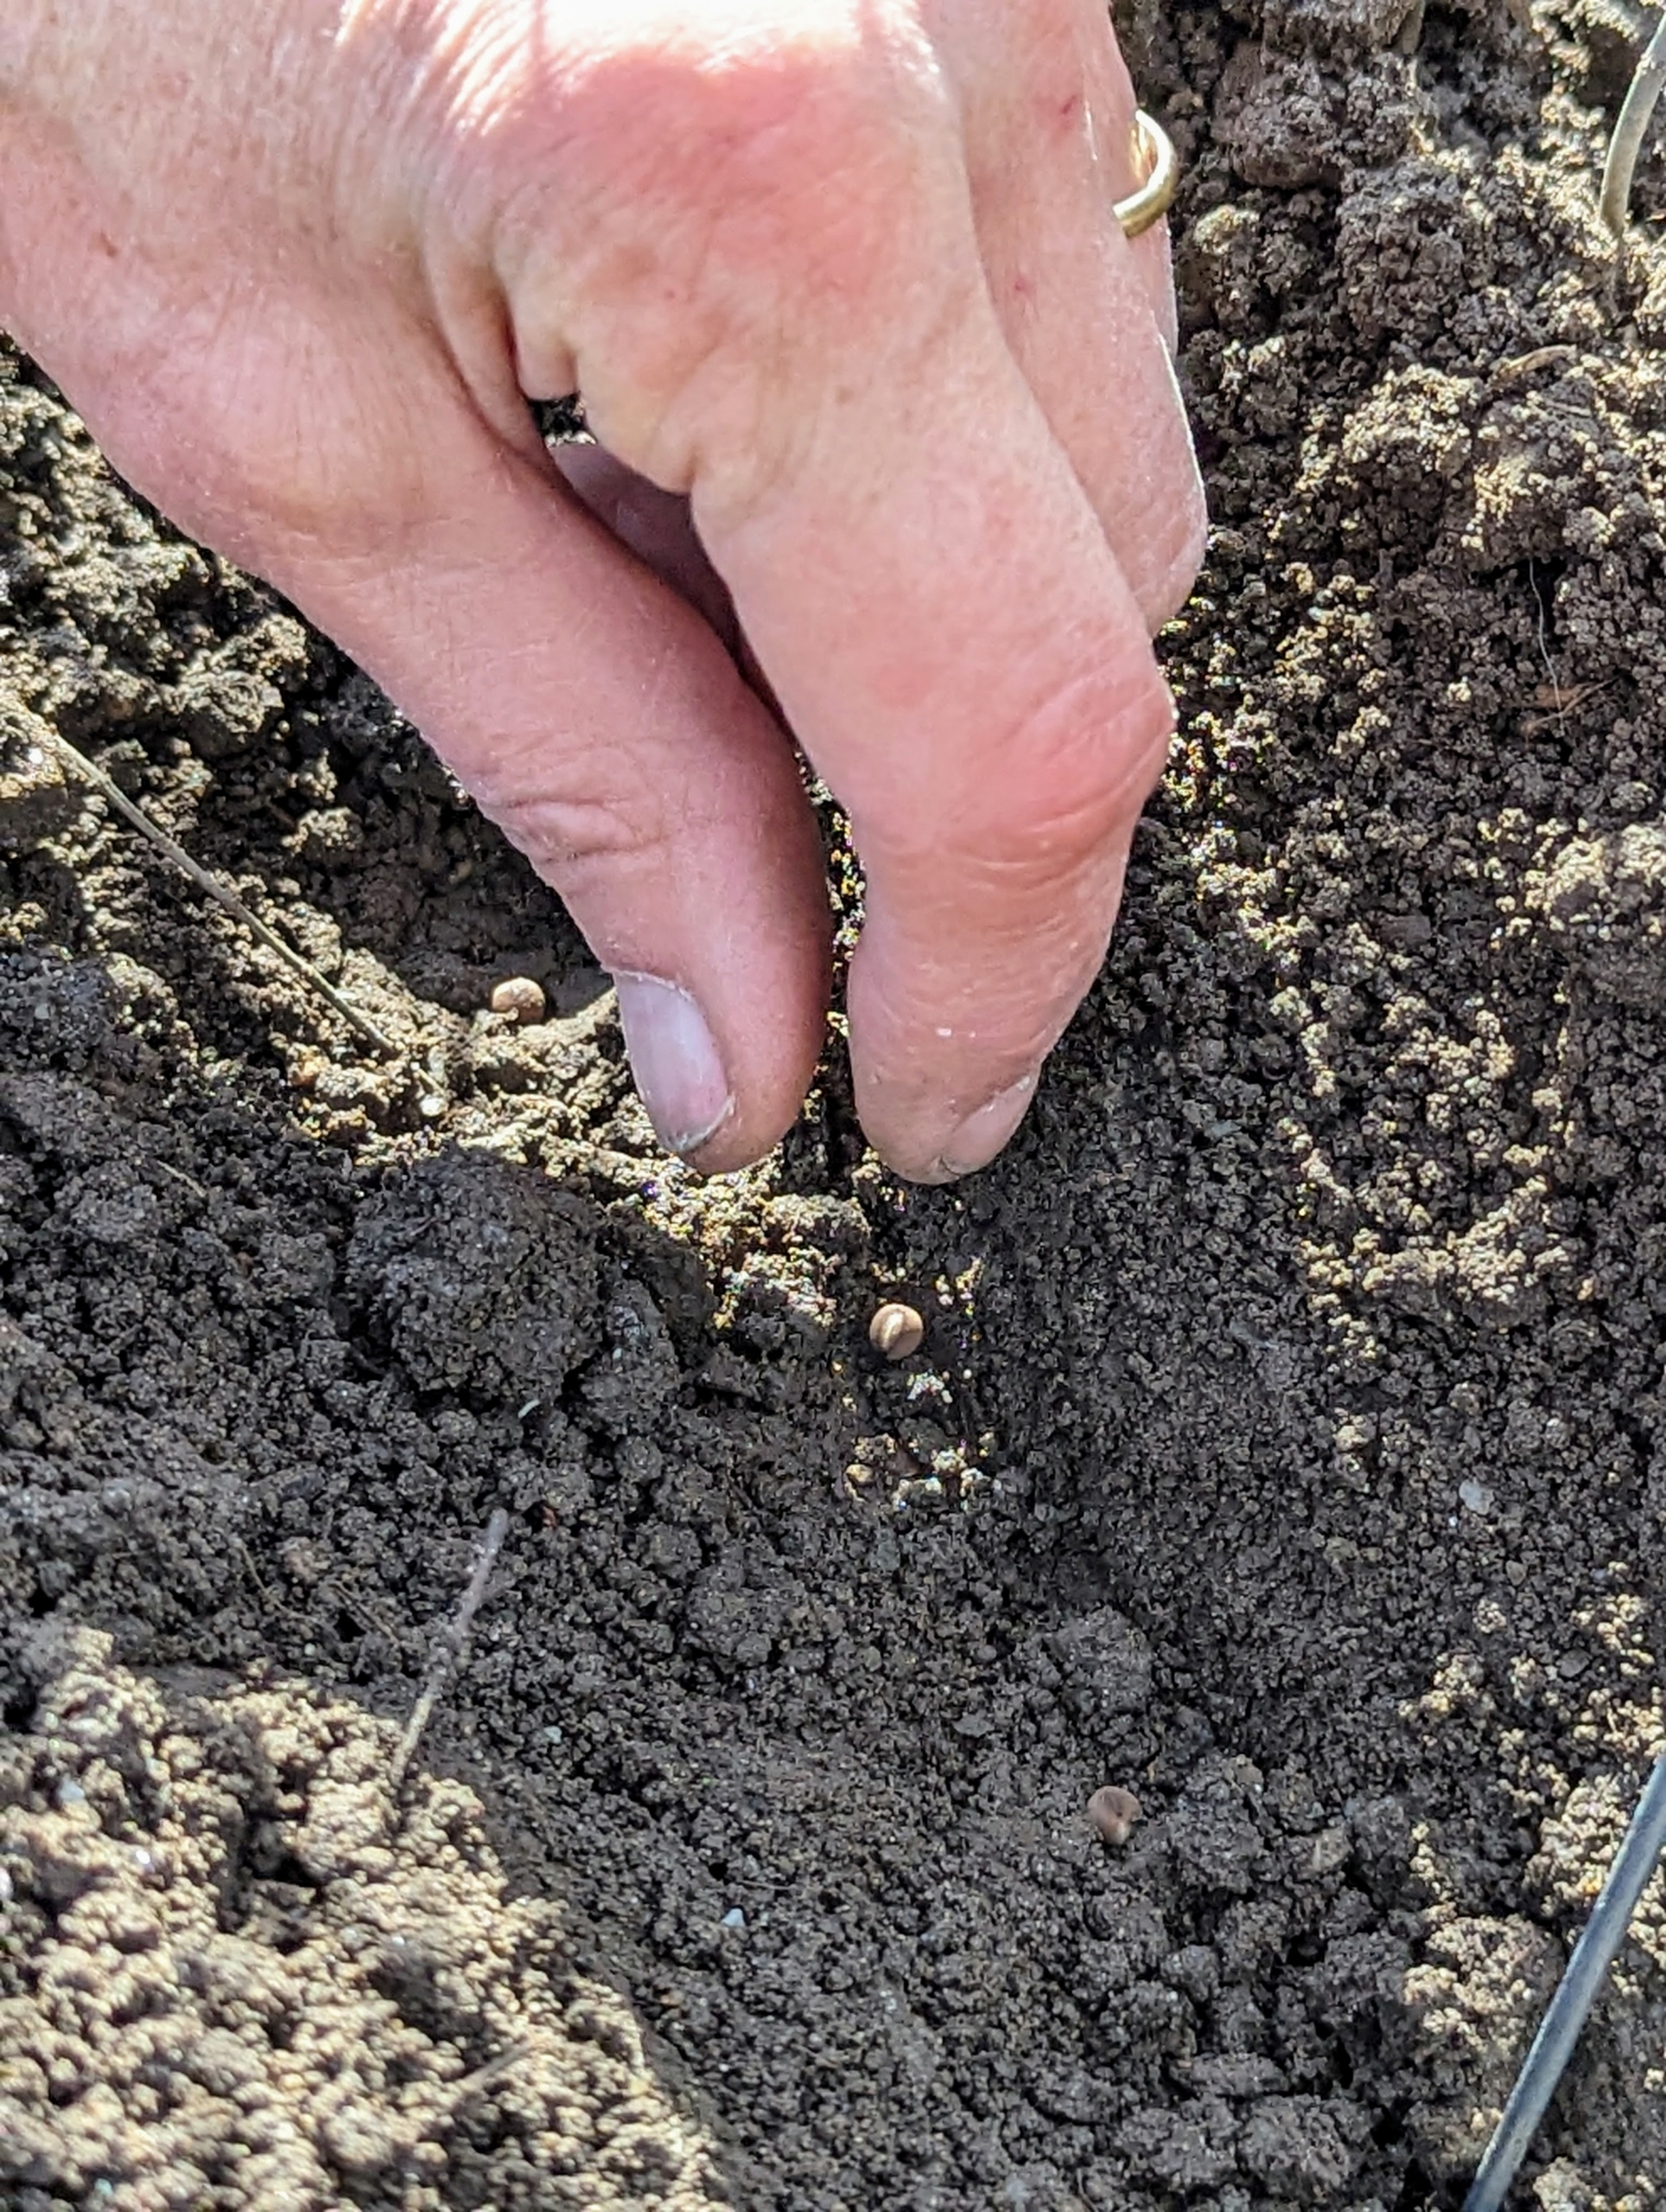
These are some of the seeds – large enough to see when dropping them into the trench.
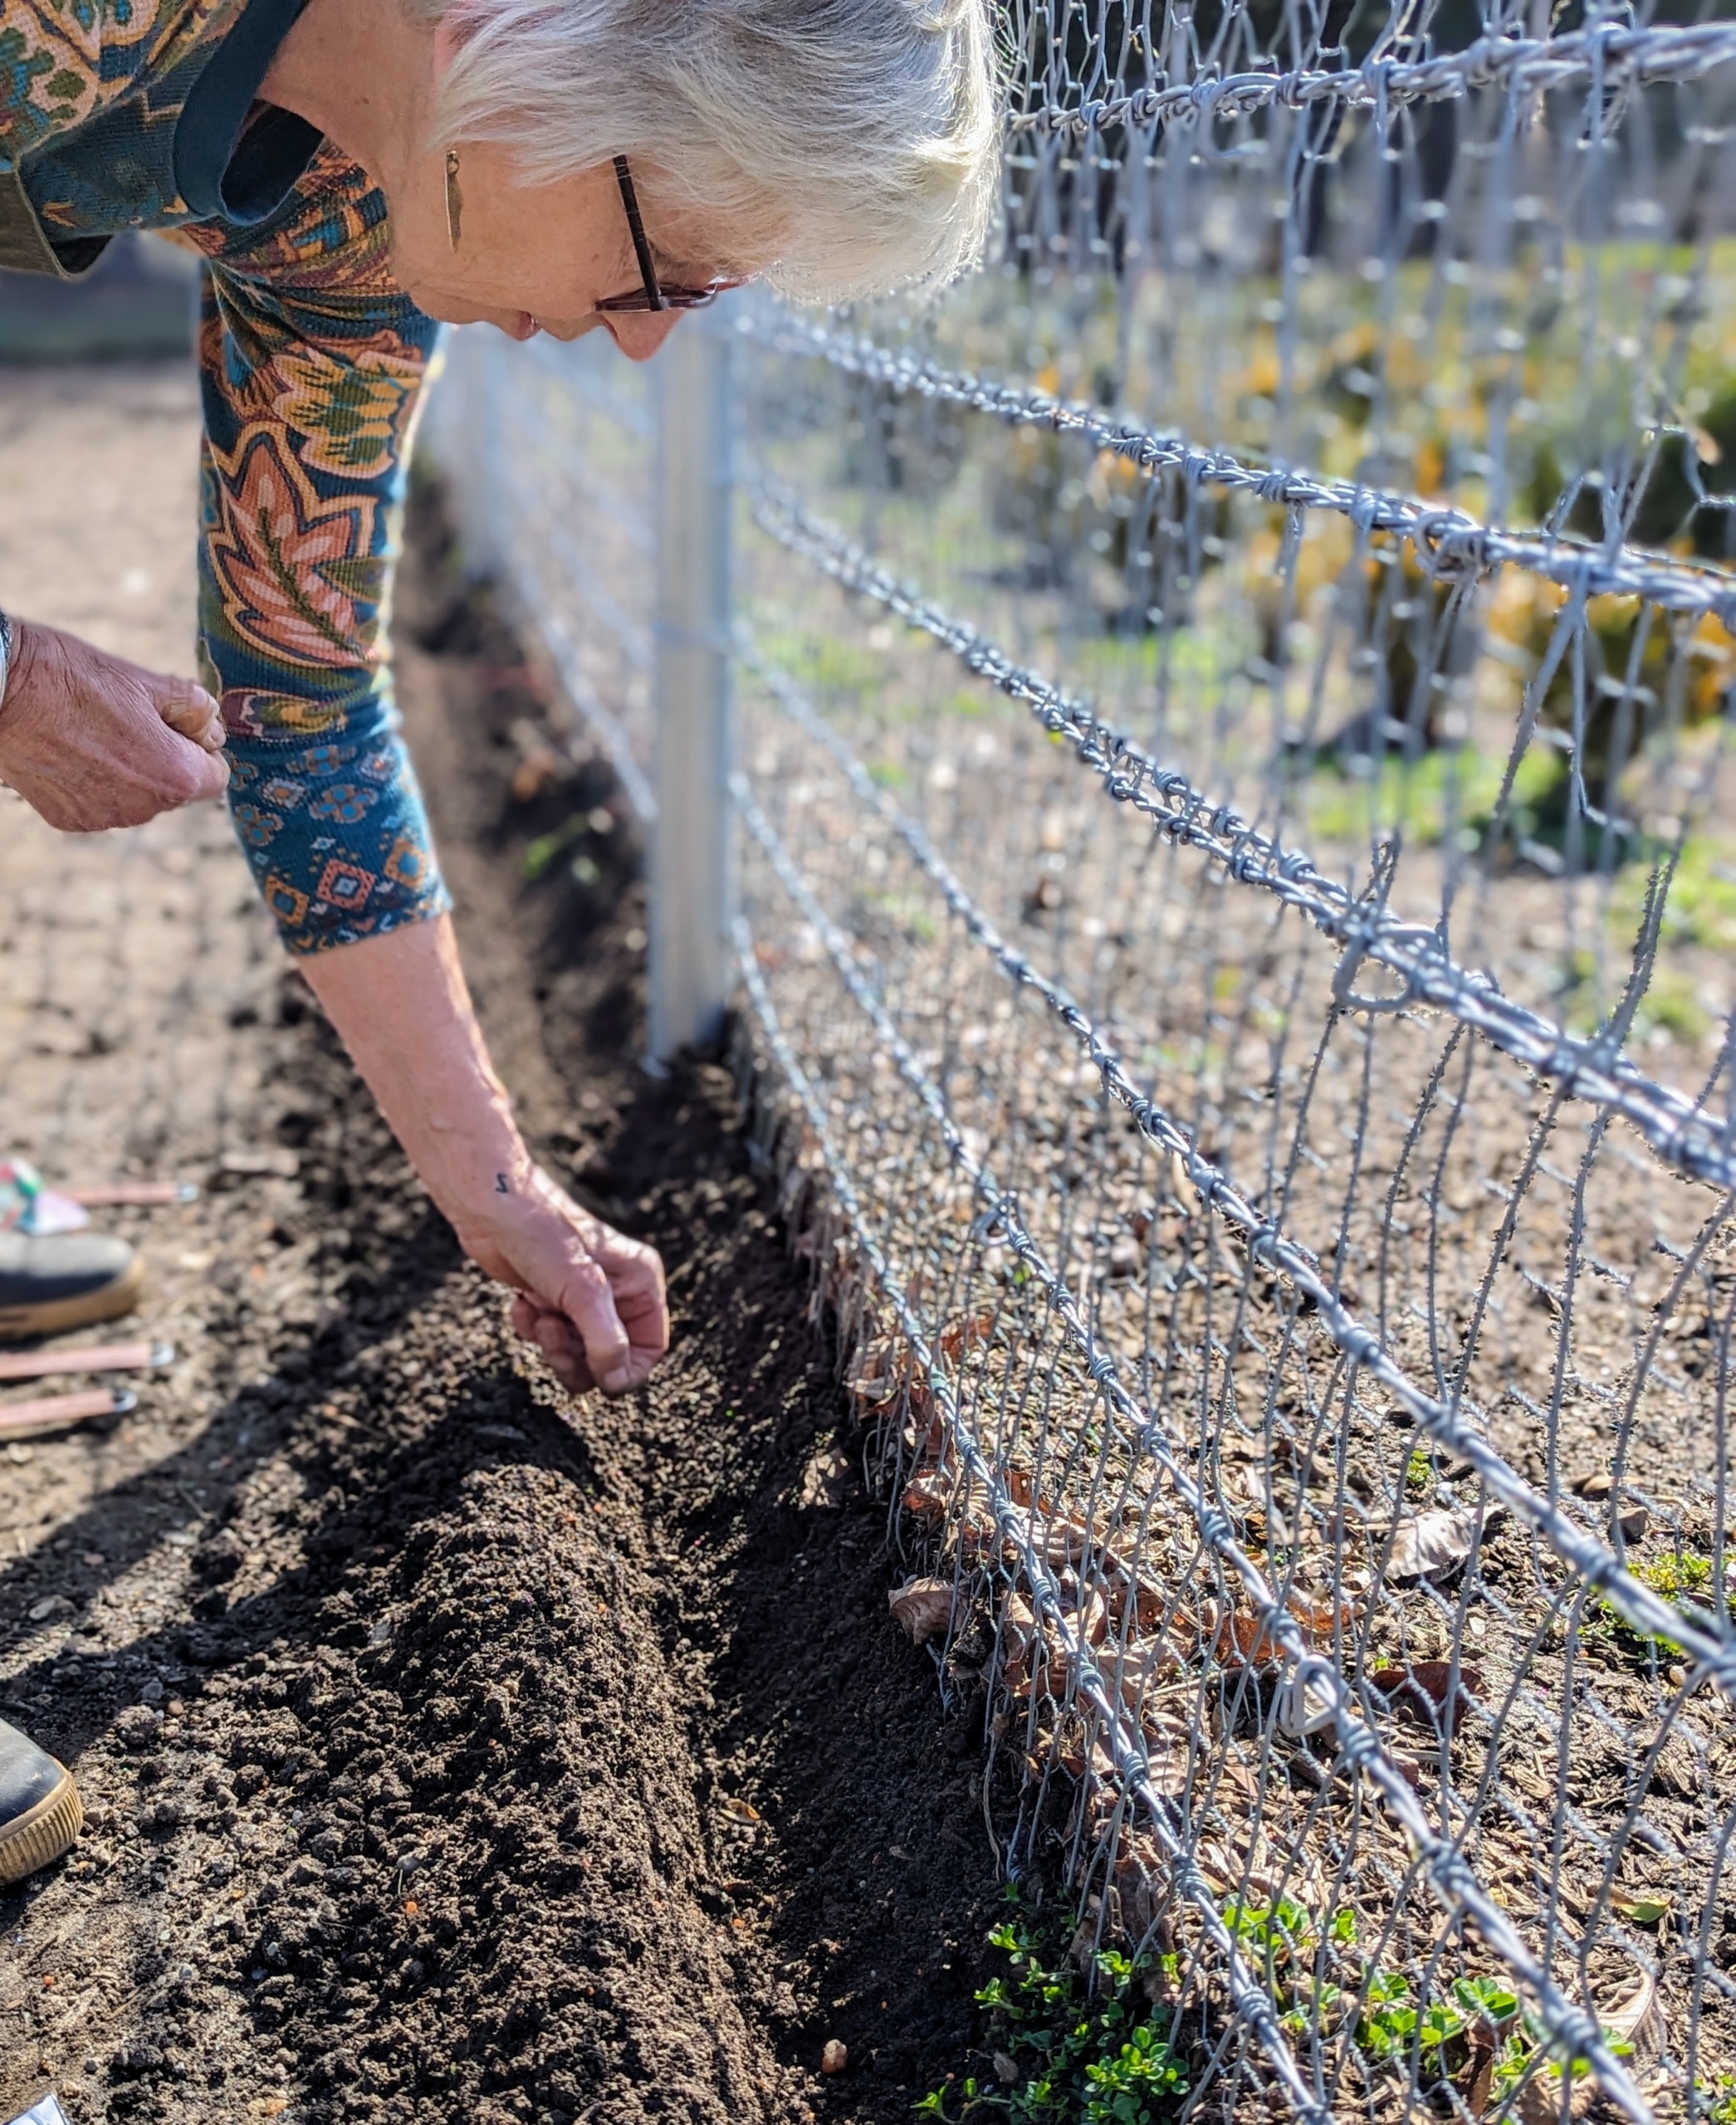
Wendy drops the seeds into the shallow furrow. Sweet peas are happiest in the sun with their roots in cool, moist soil.
These seeds are planted just a couple of inches apart. Look closely and you can see the seed.
Then the seed is pressed lightly into the soil.
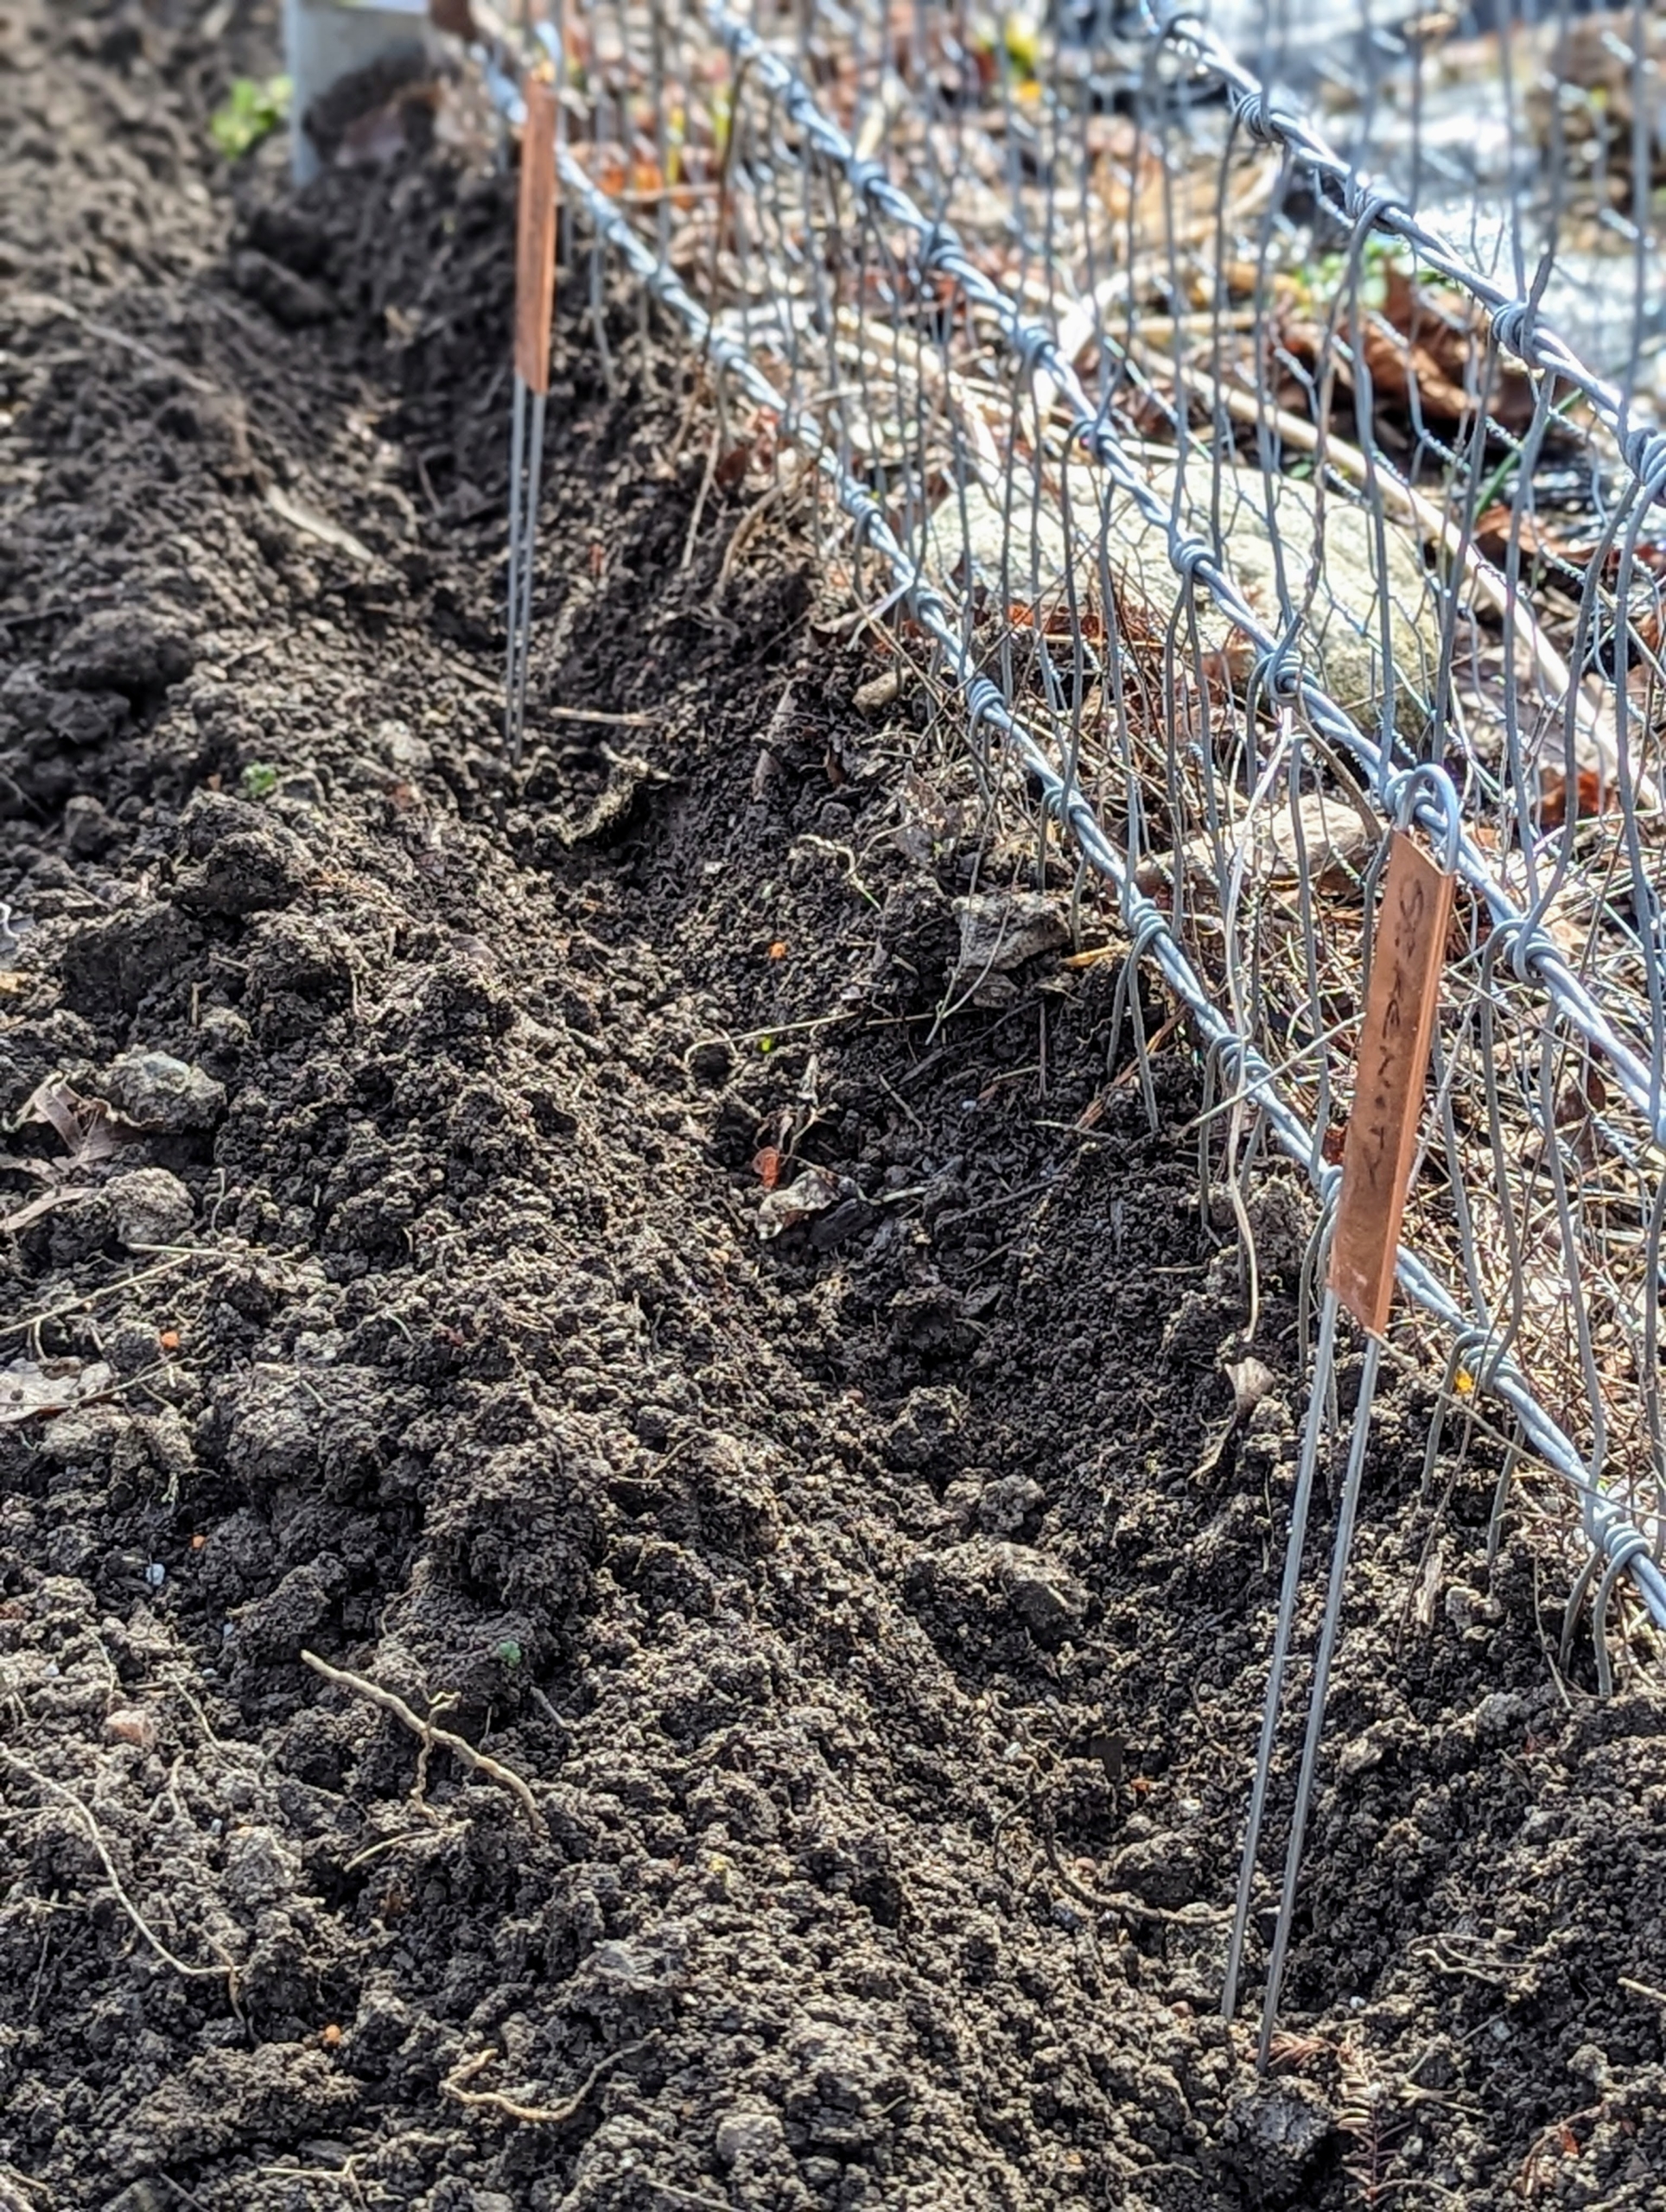
As each section of seeds is planted, a marker identifying the variety is placed accordingly.
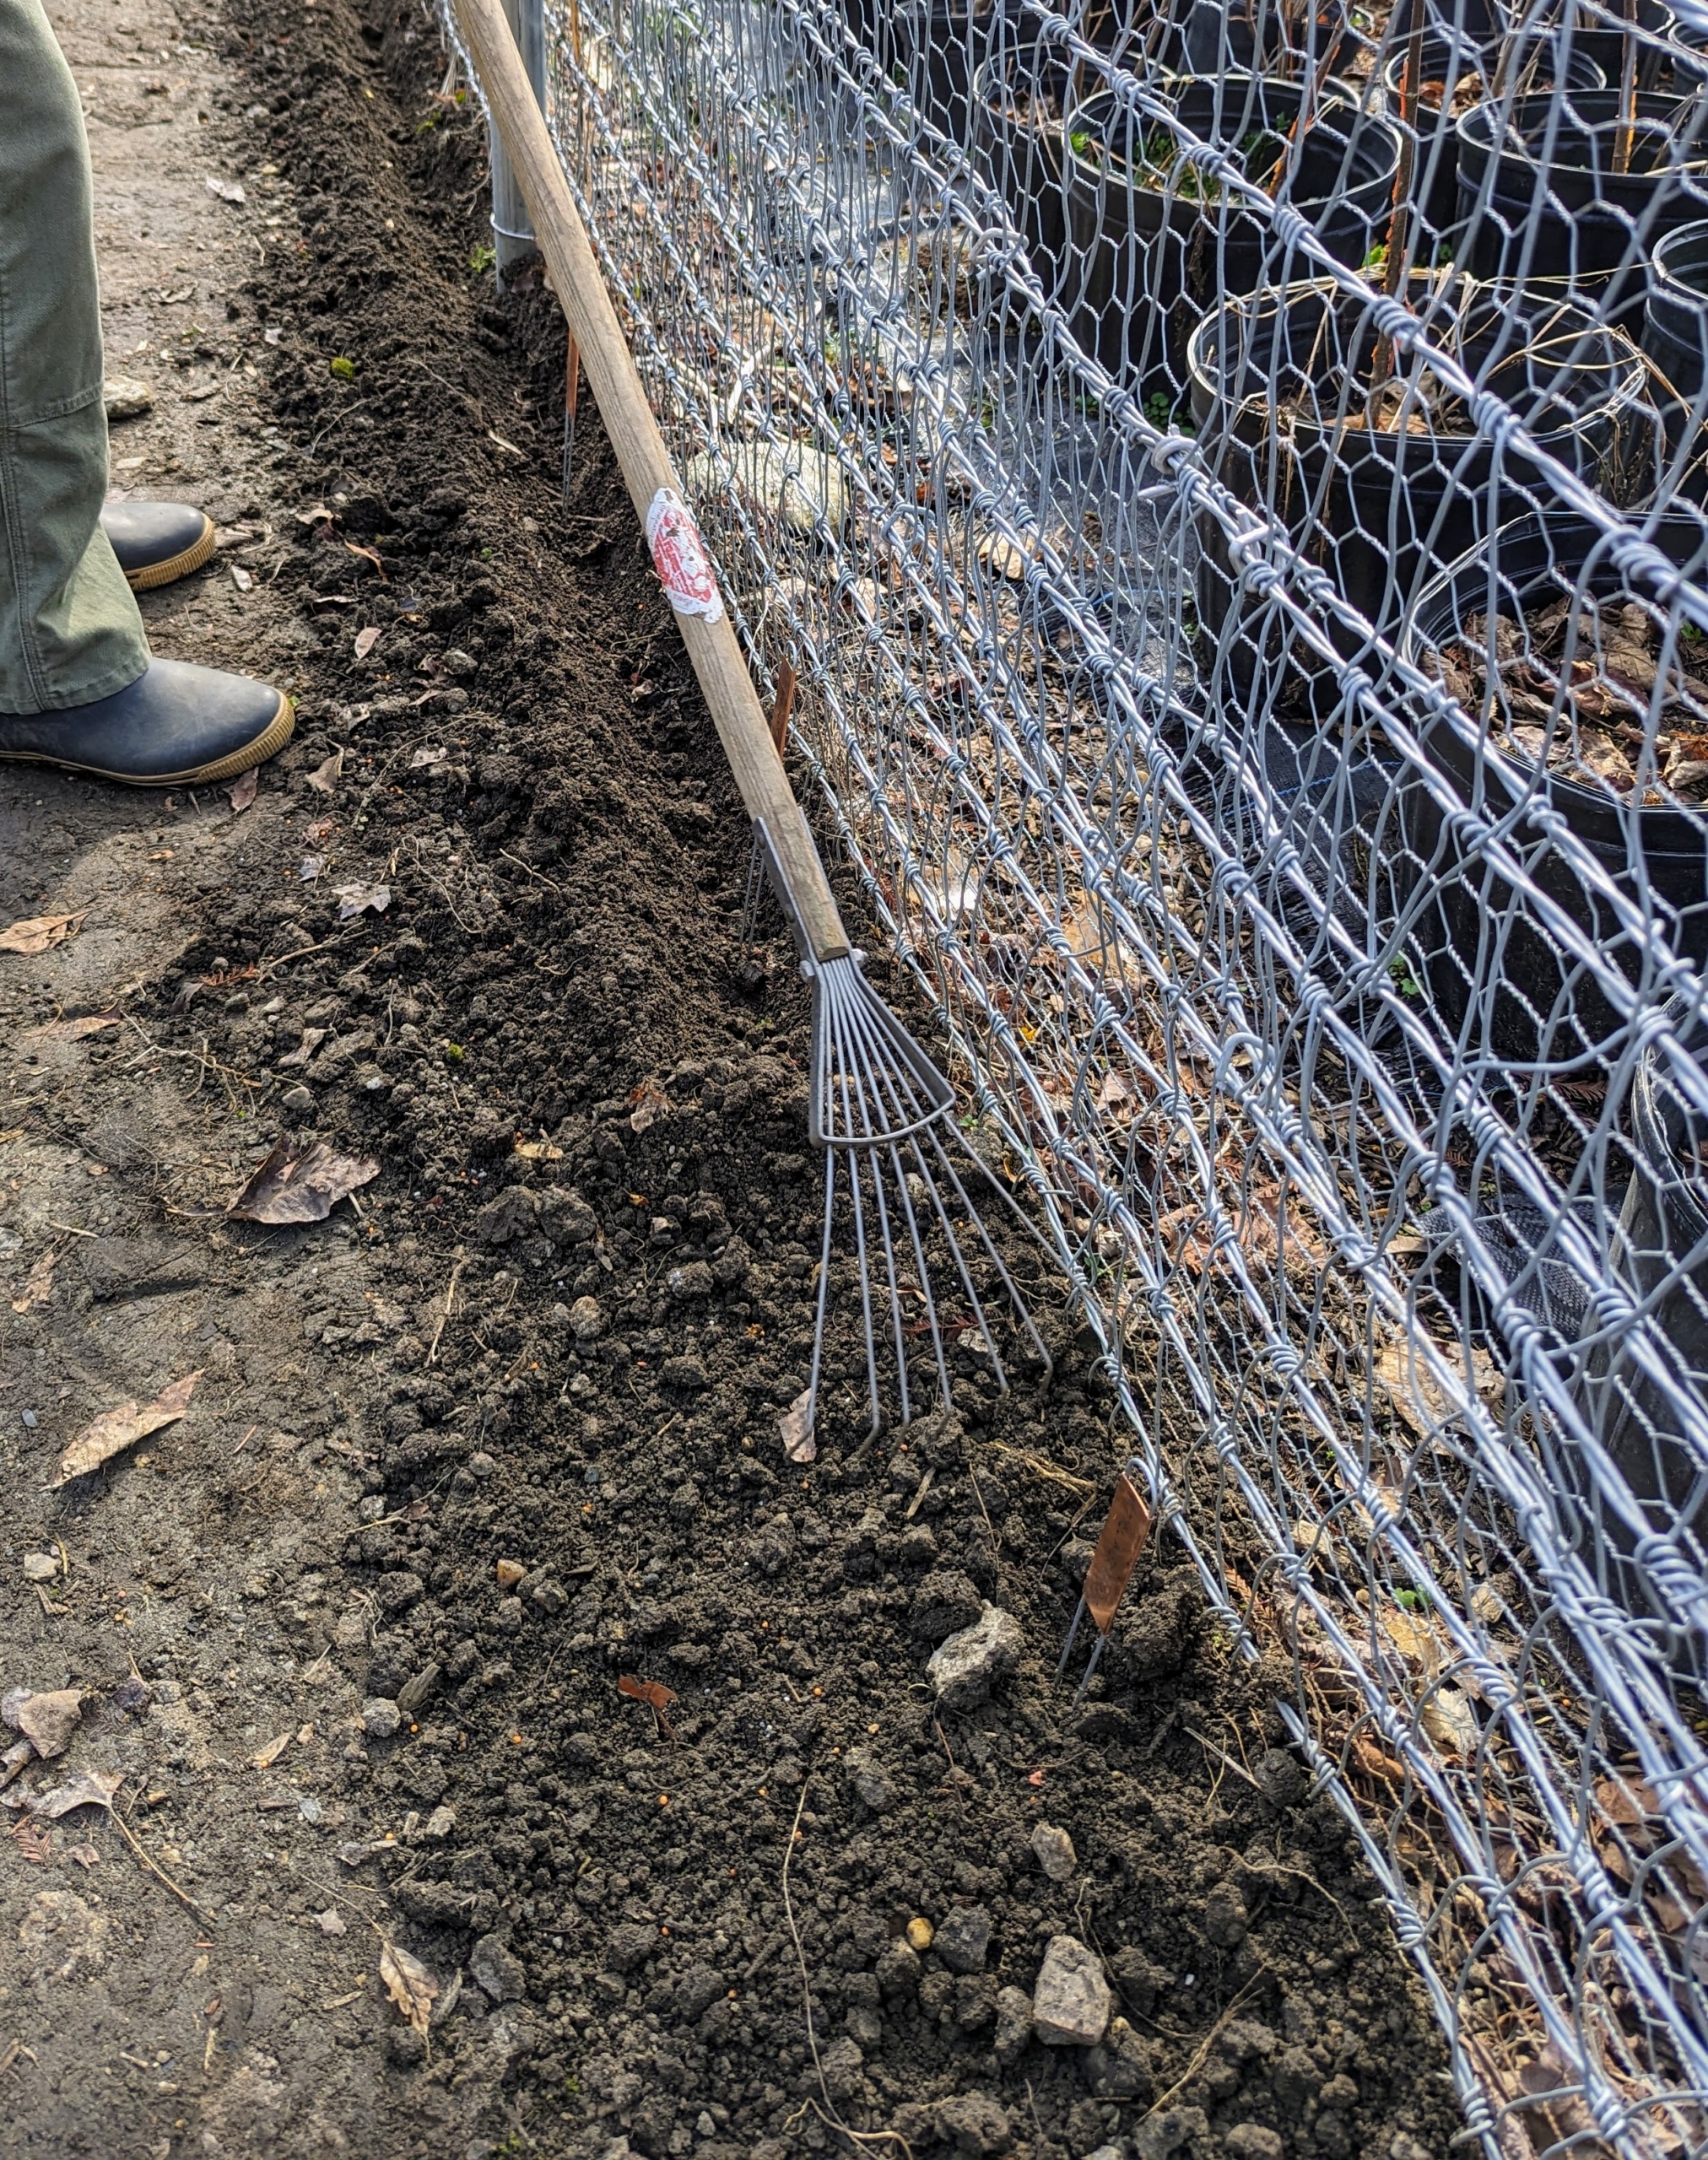
Wendy uses a small garden soft rake to cover the seeds with two inches of soil.
Using a rake also makes the area look neat and tidy.
And here is a lovely pink variety called ‘Angela Ann.’ This sweet pea has an attractive rose pink on a white background. It’s an excellent sweet pea for the garden or to use as cut flowers.
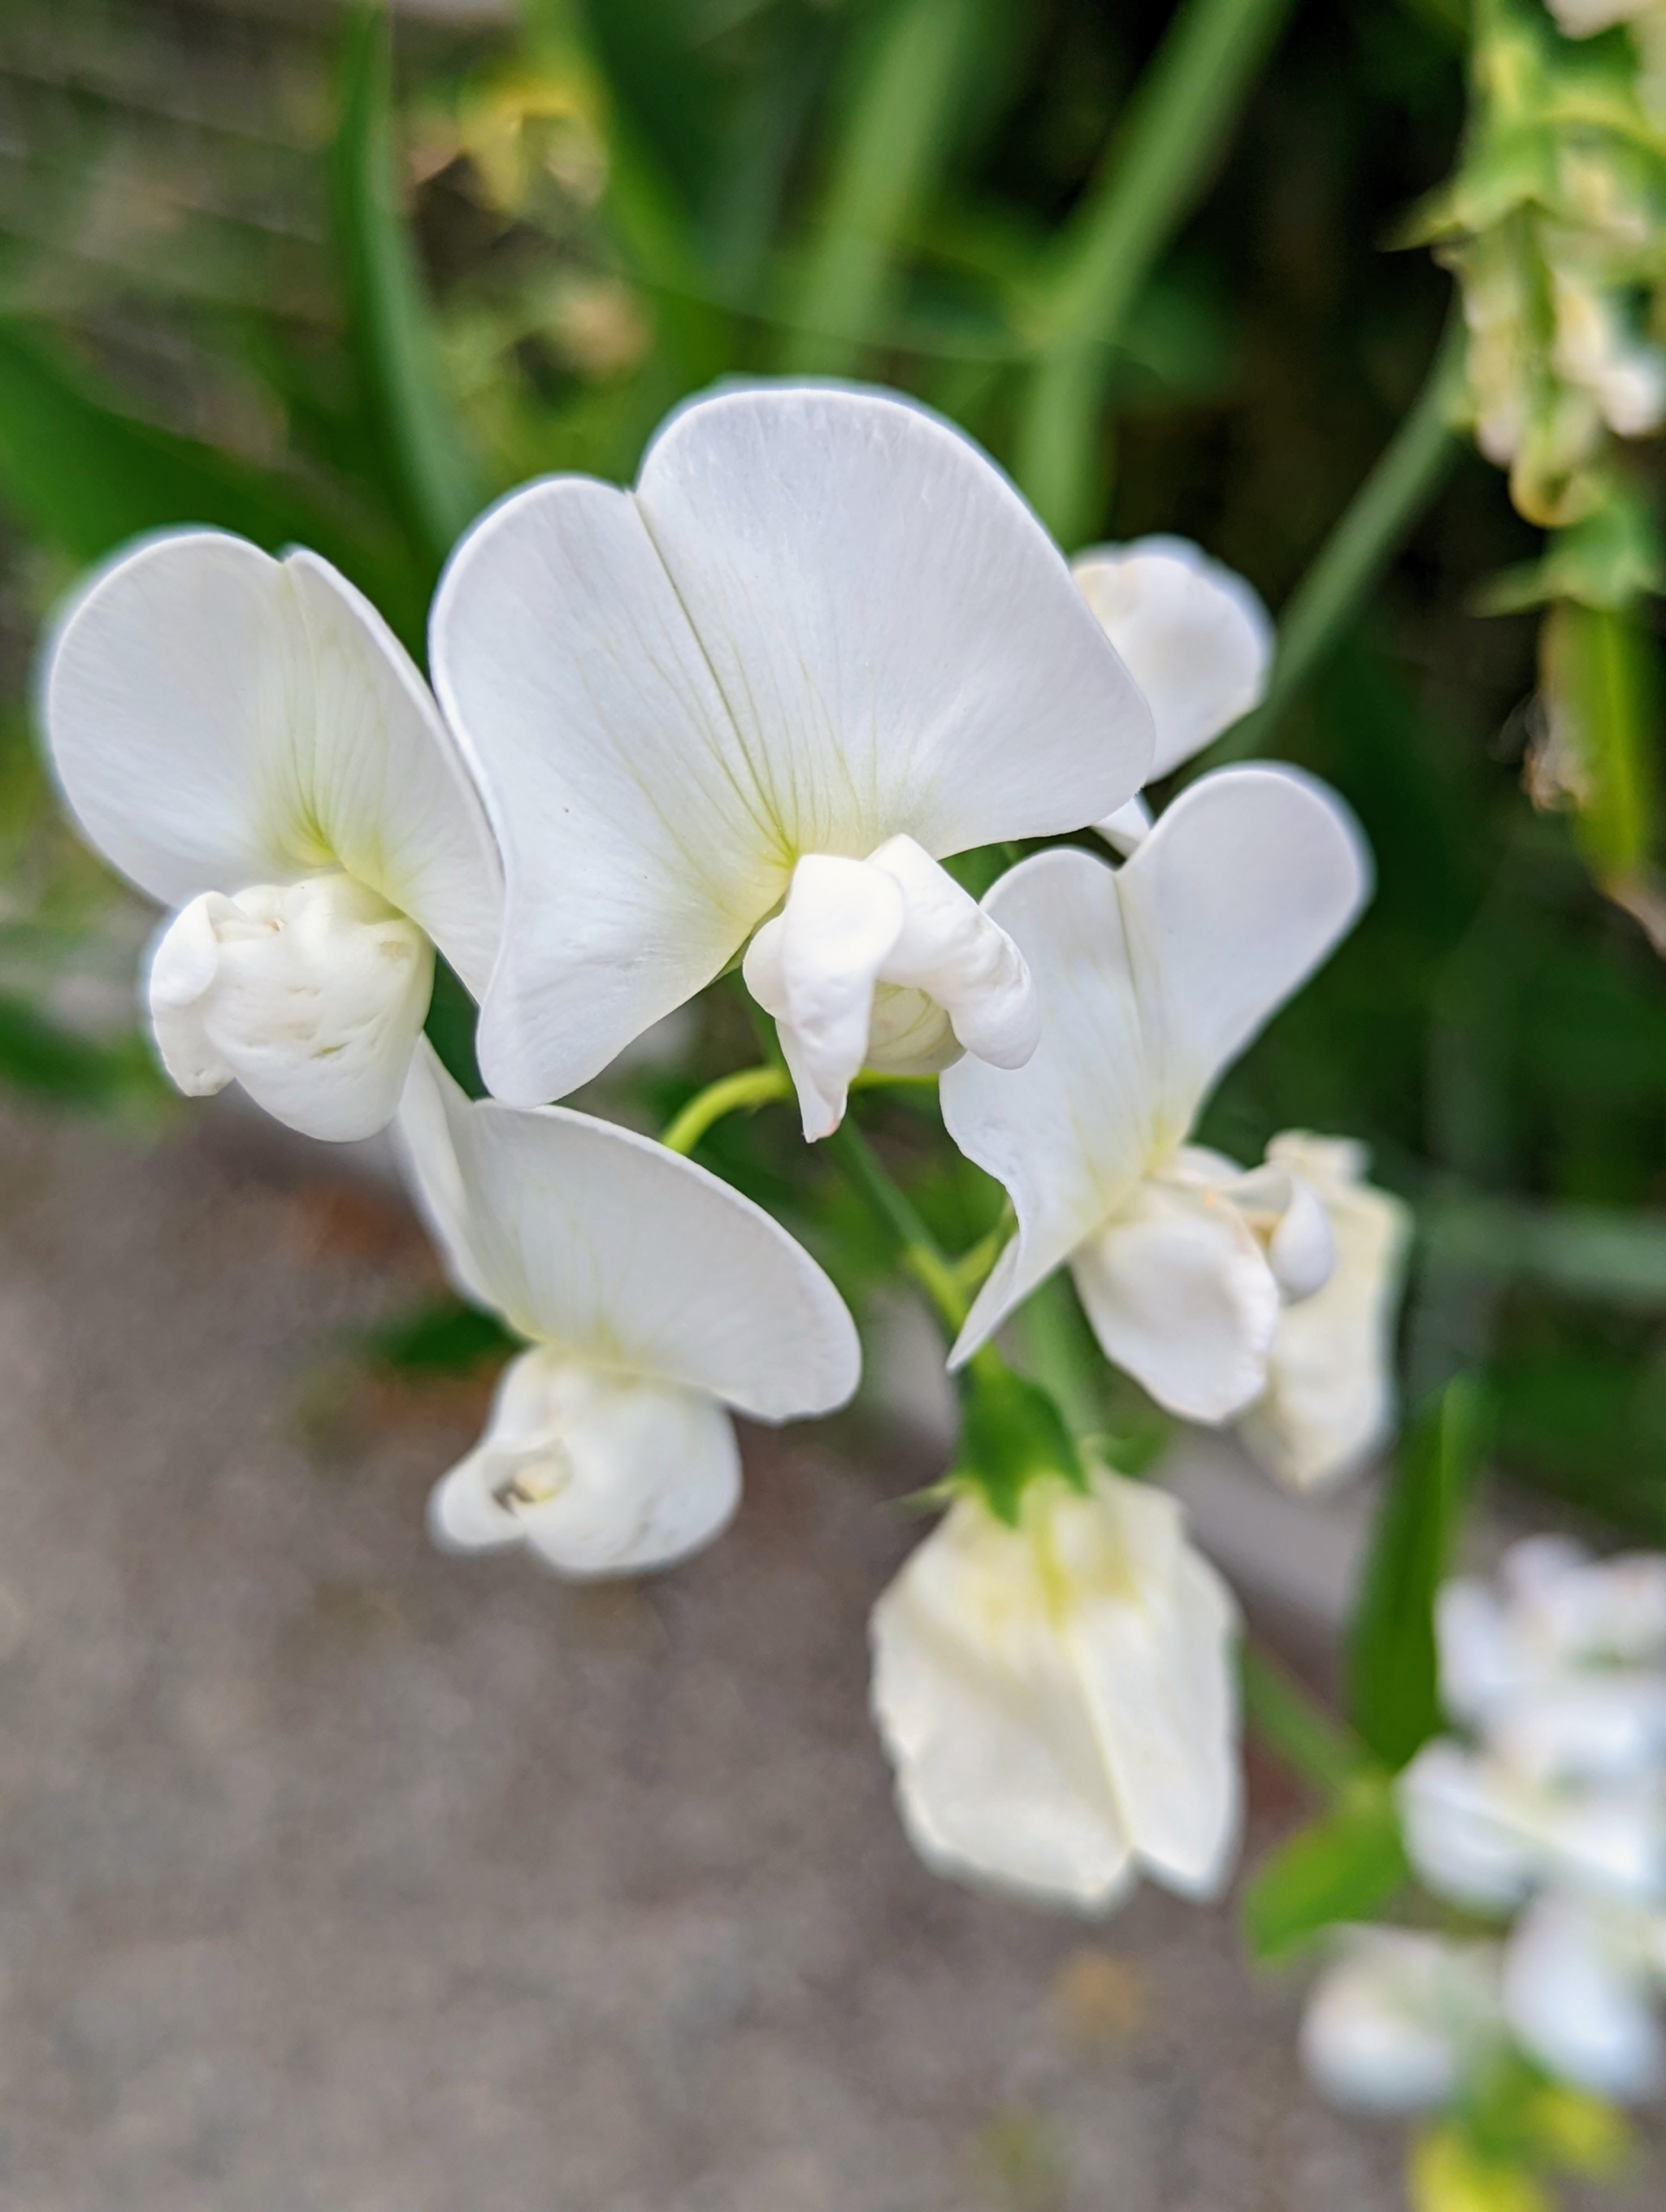
And here is a crisp white sweet pea. These flowers are rich in nectar and pollen and attract lots of bees and hummingbirds.
It takes about 50-days in cooler temperatures under 60-degrees Fahrenheit, for sweet peas to develop and bloom. I am looking forward to lots of colorful and fragrant flowers come May.
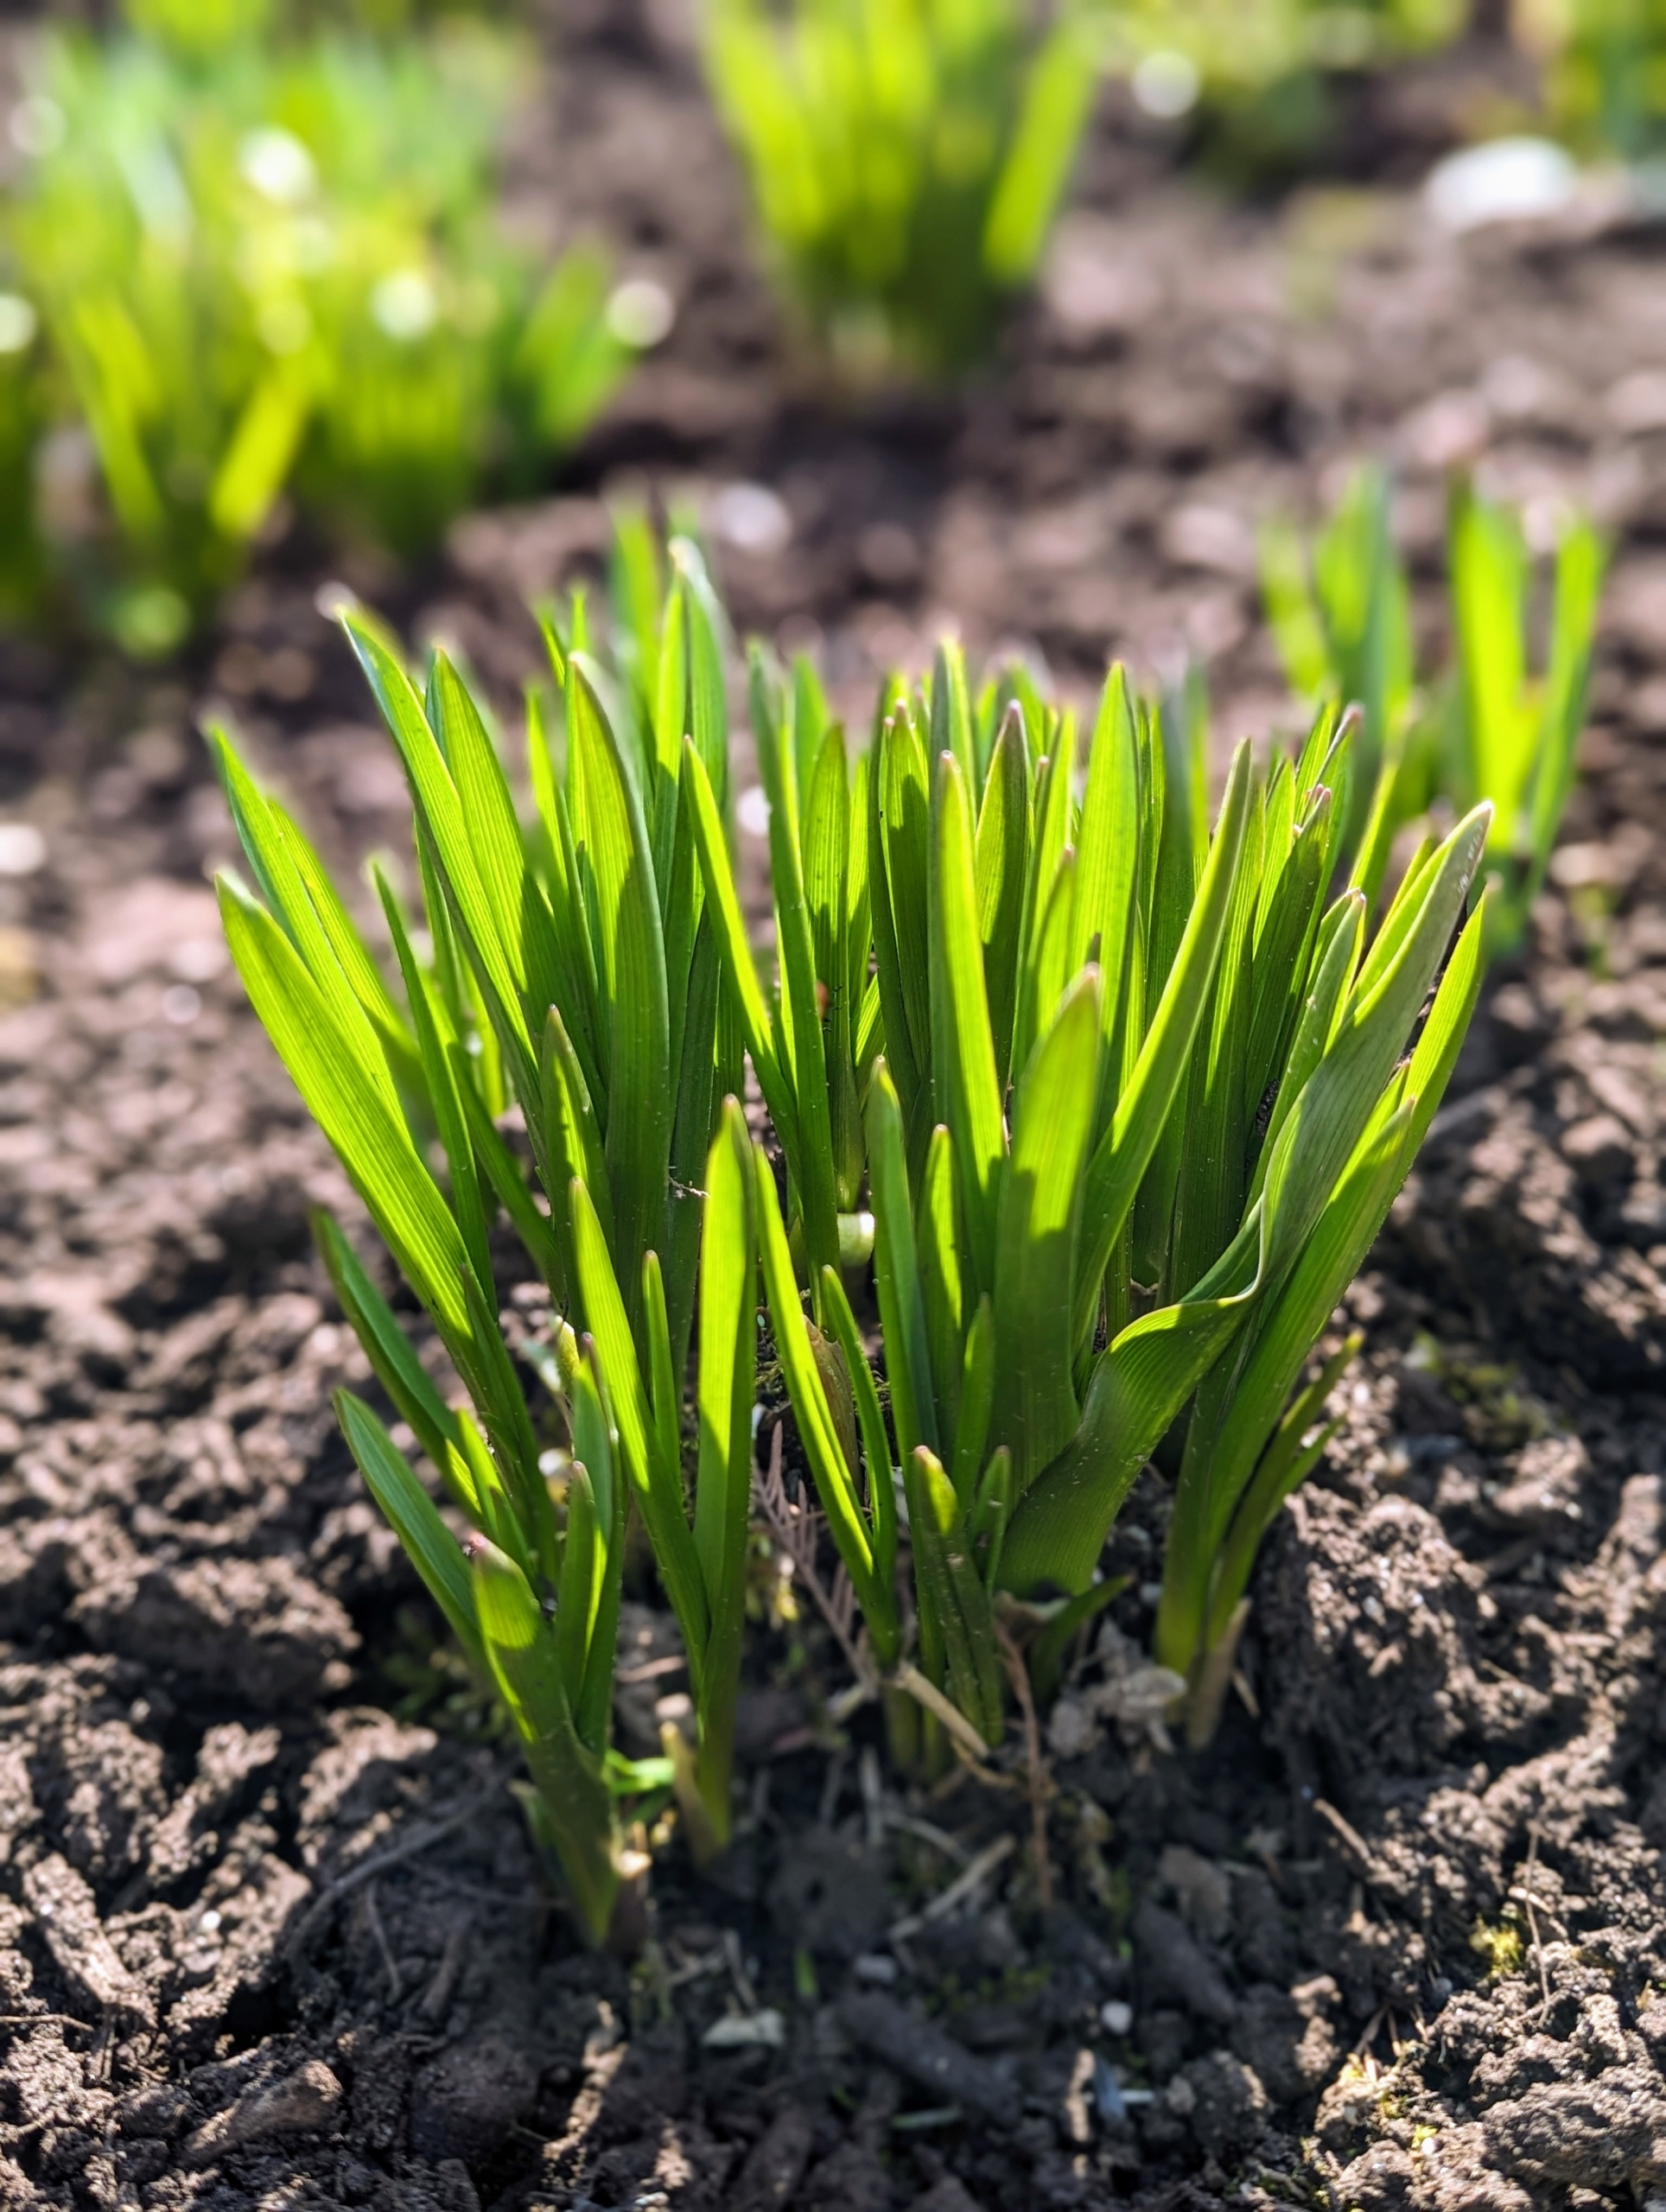
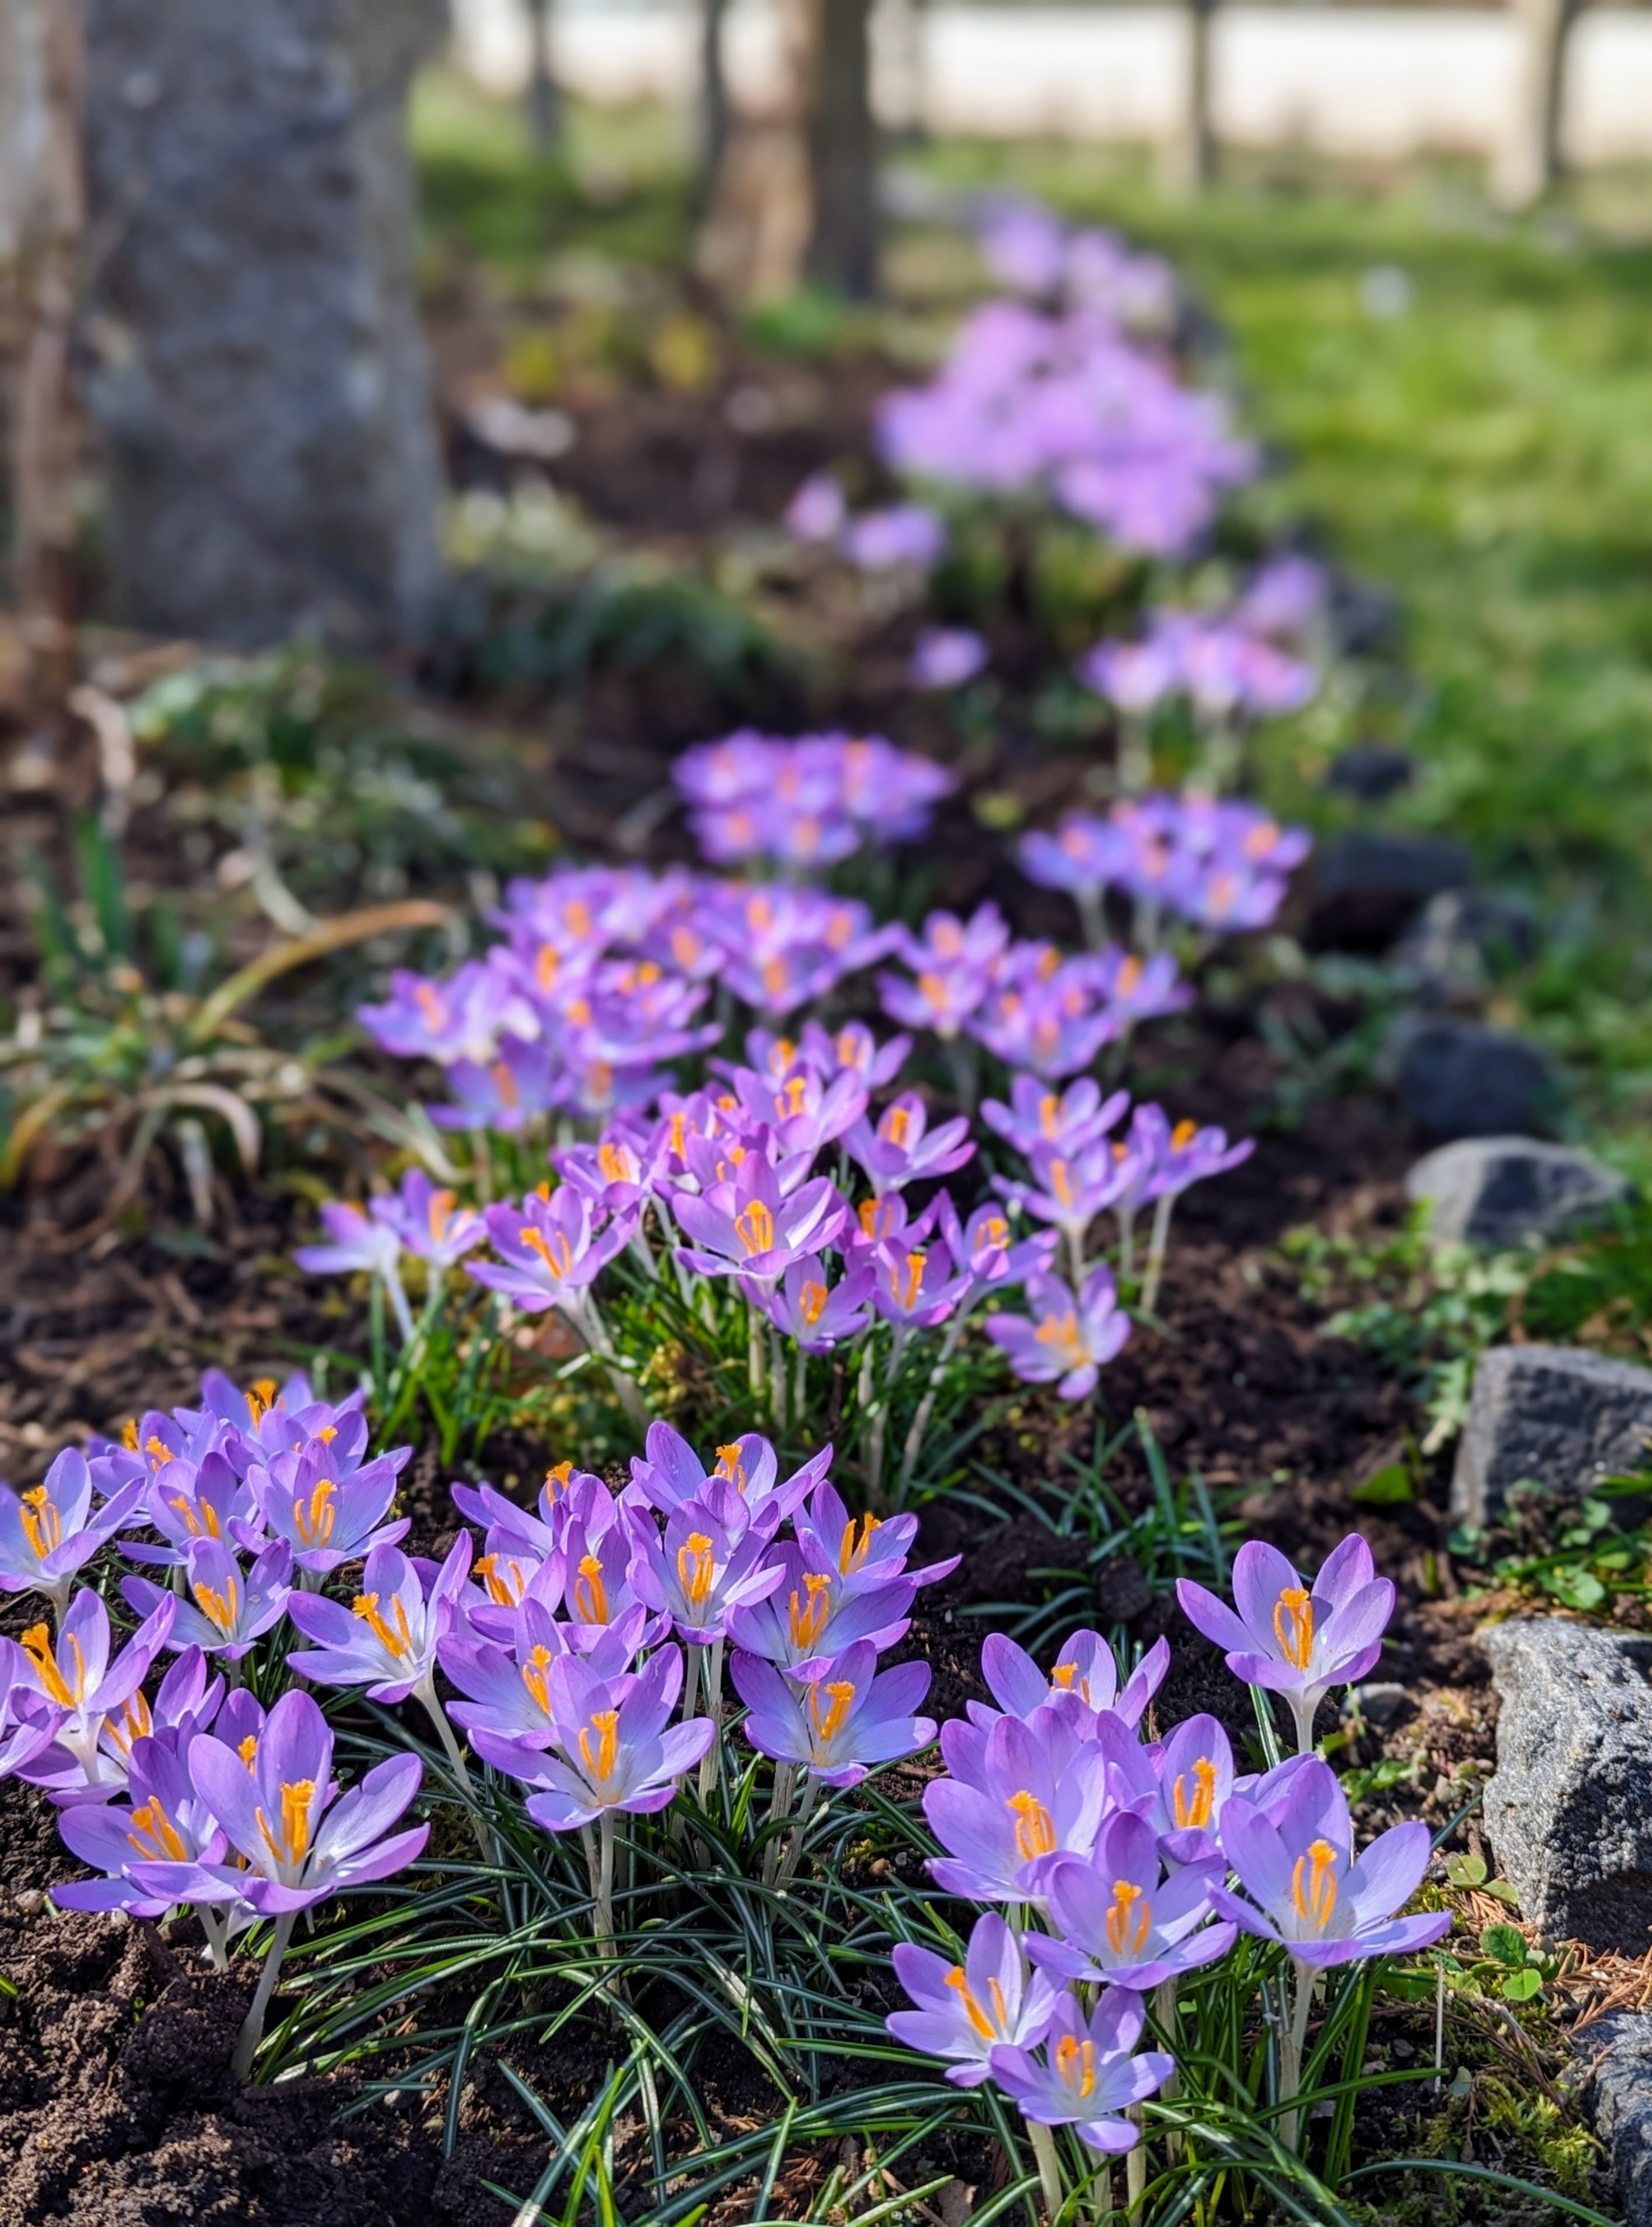
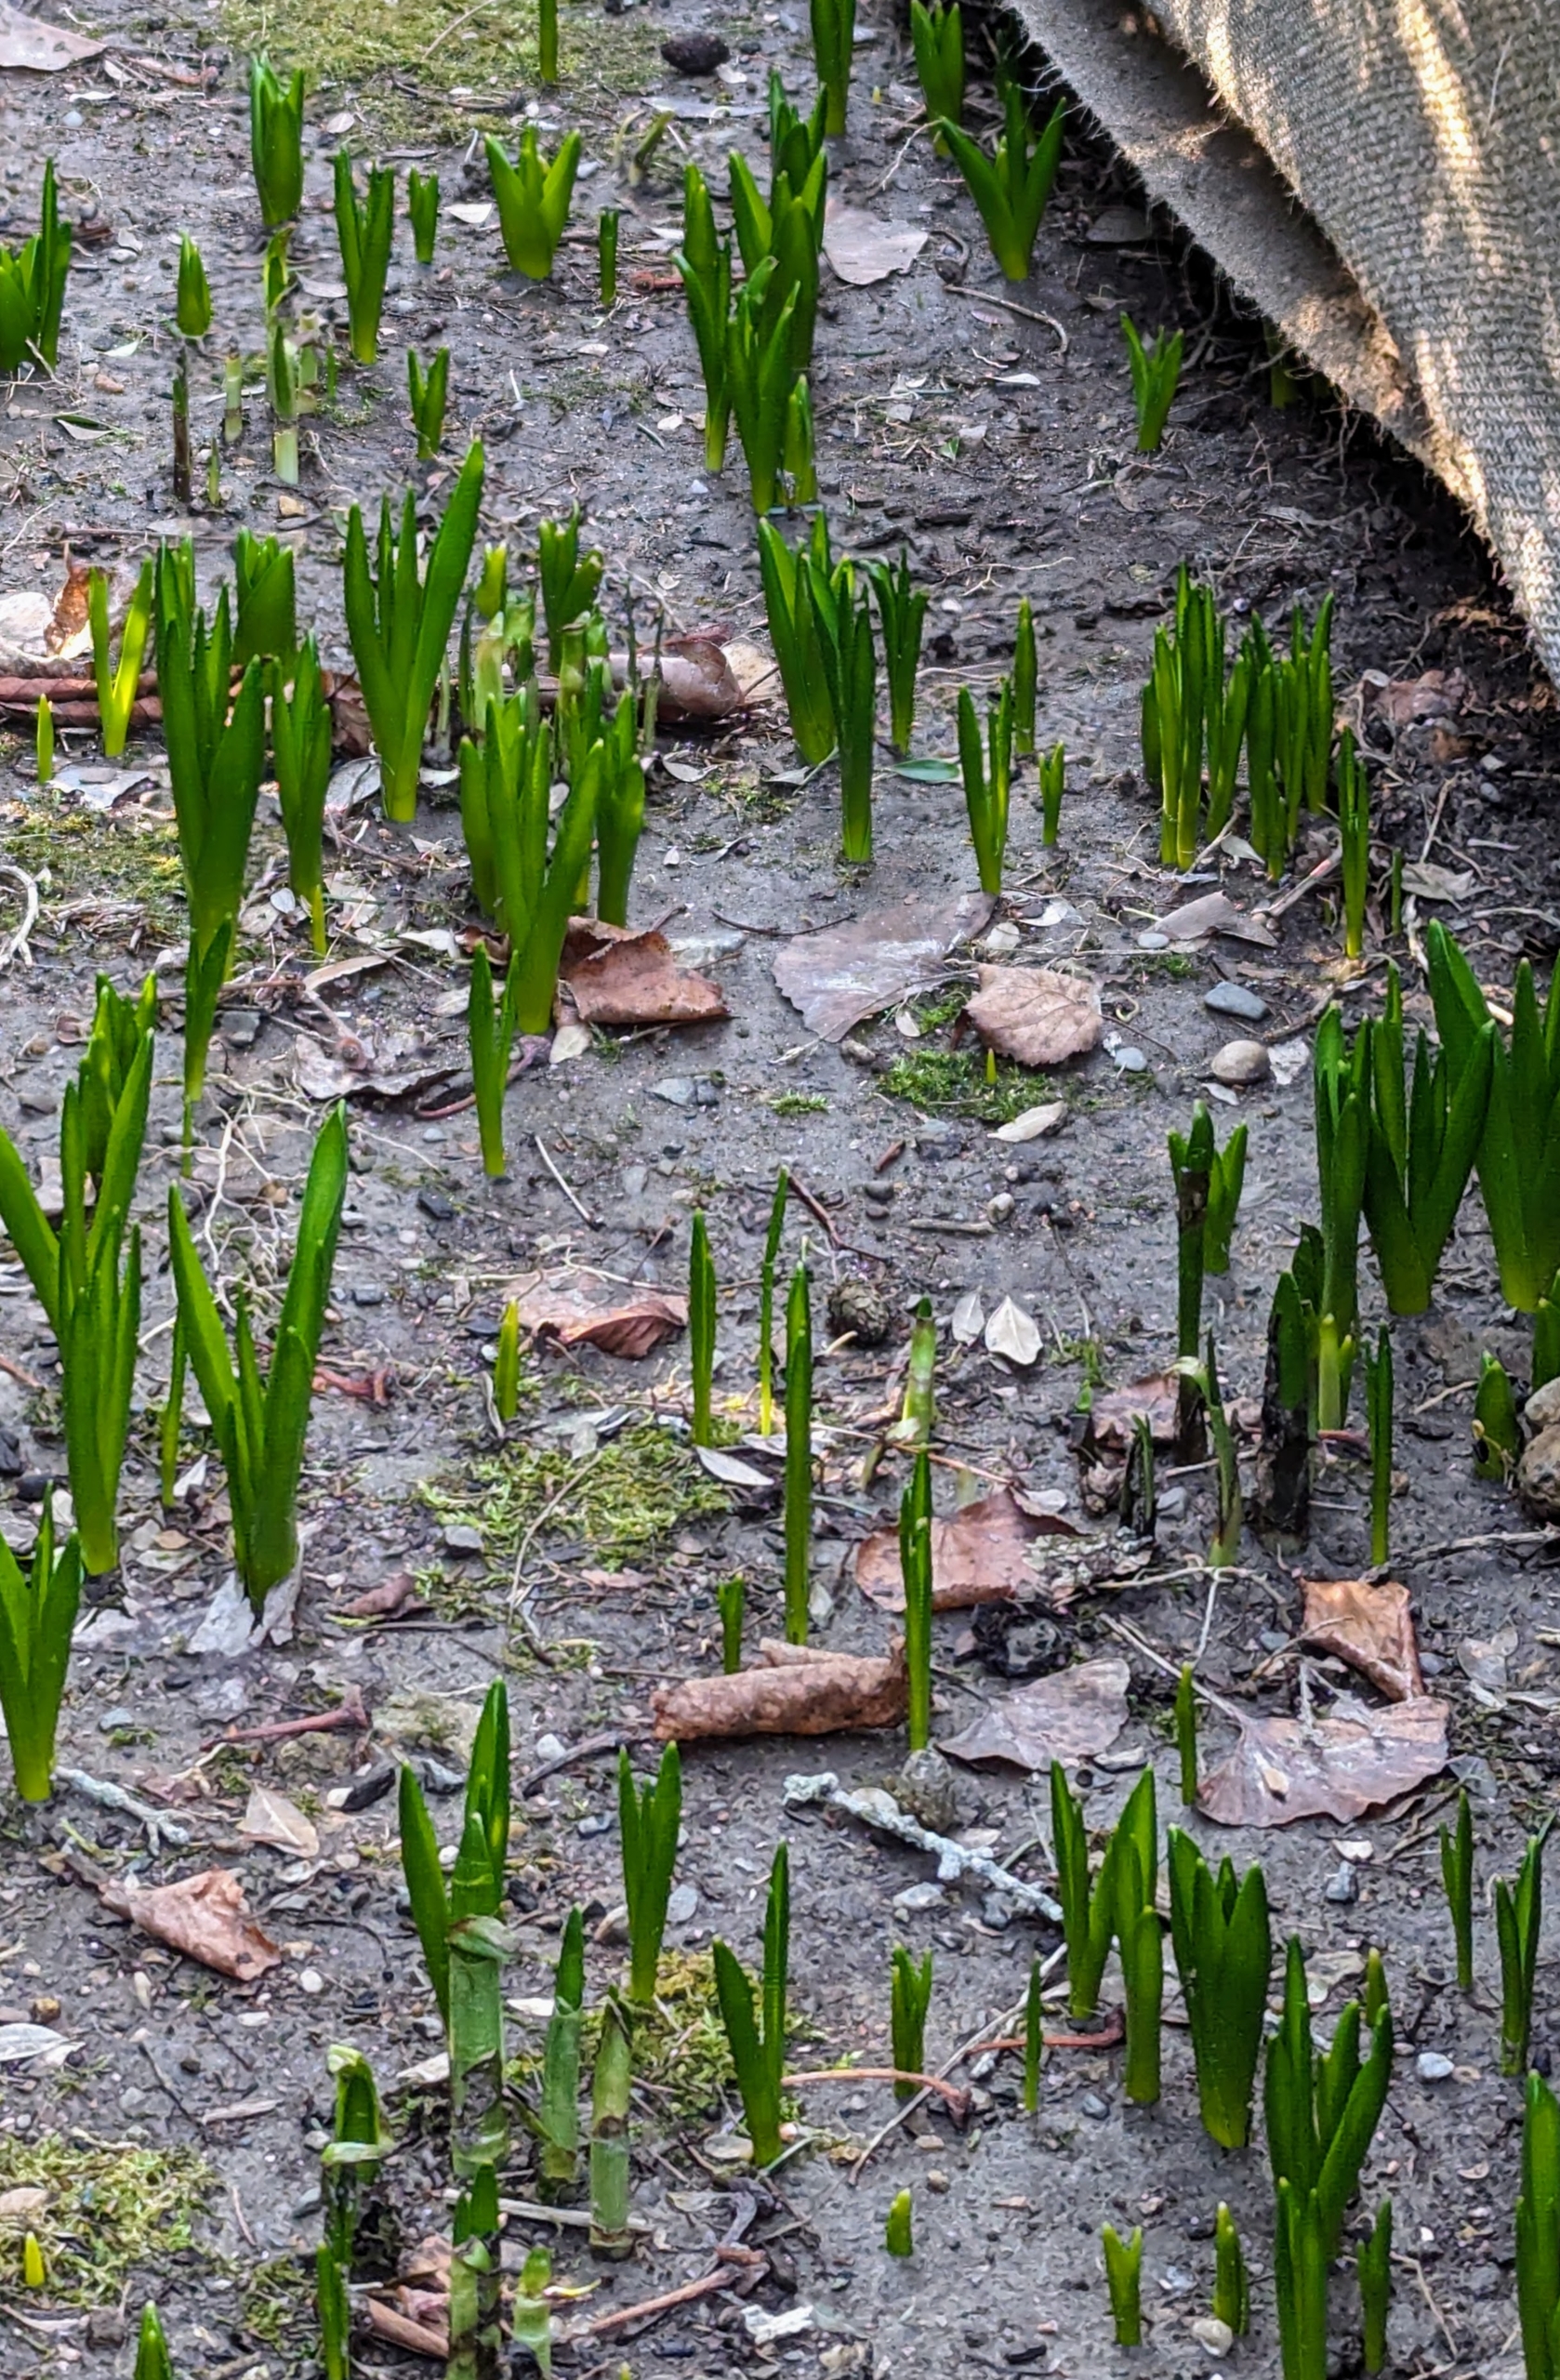
It's five days before the official start of spring. The trees are budding, the crocuses are blooming, and perennials are pushing through the soil with energy and color.
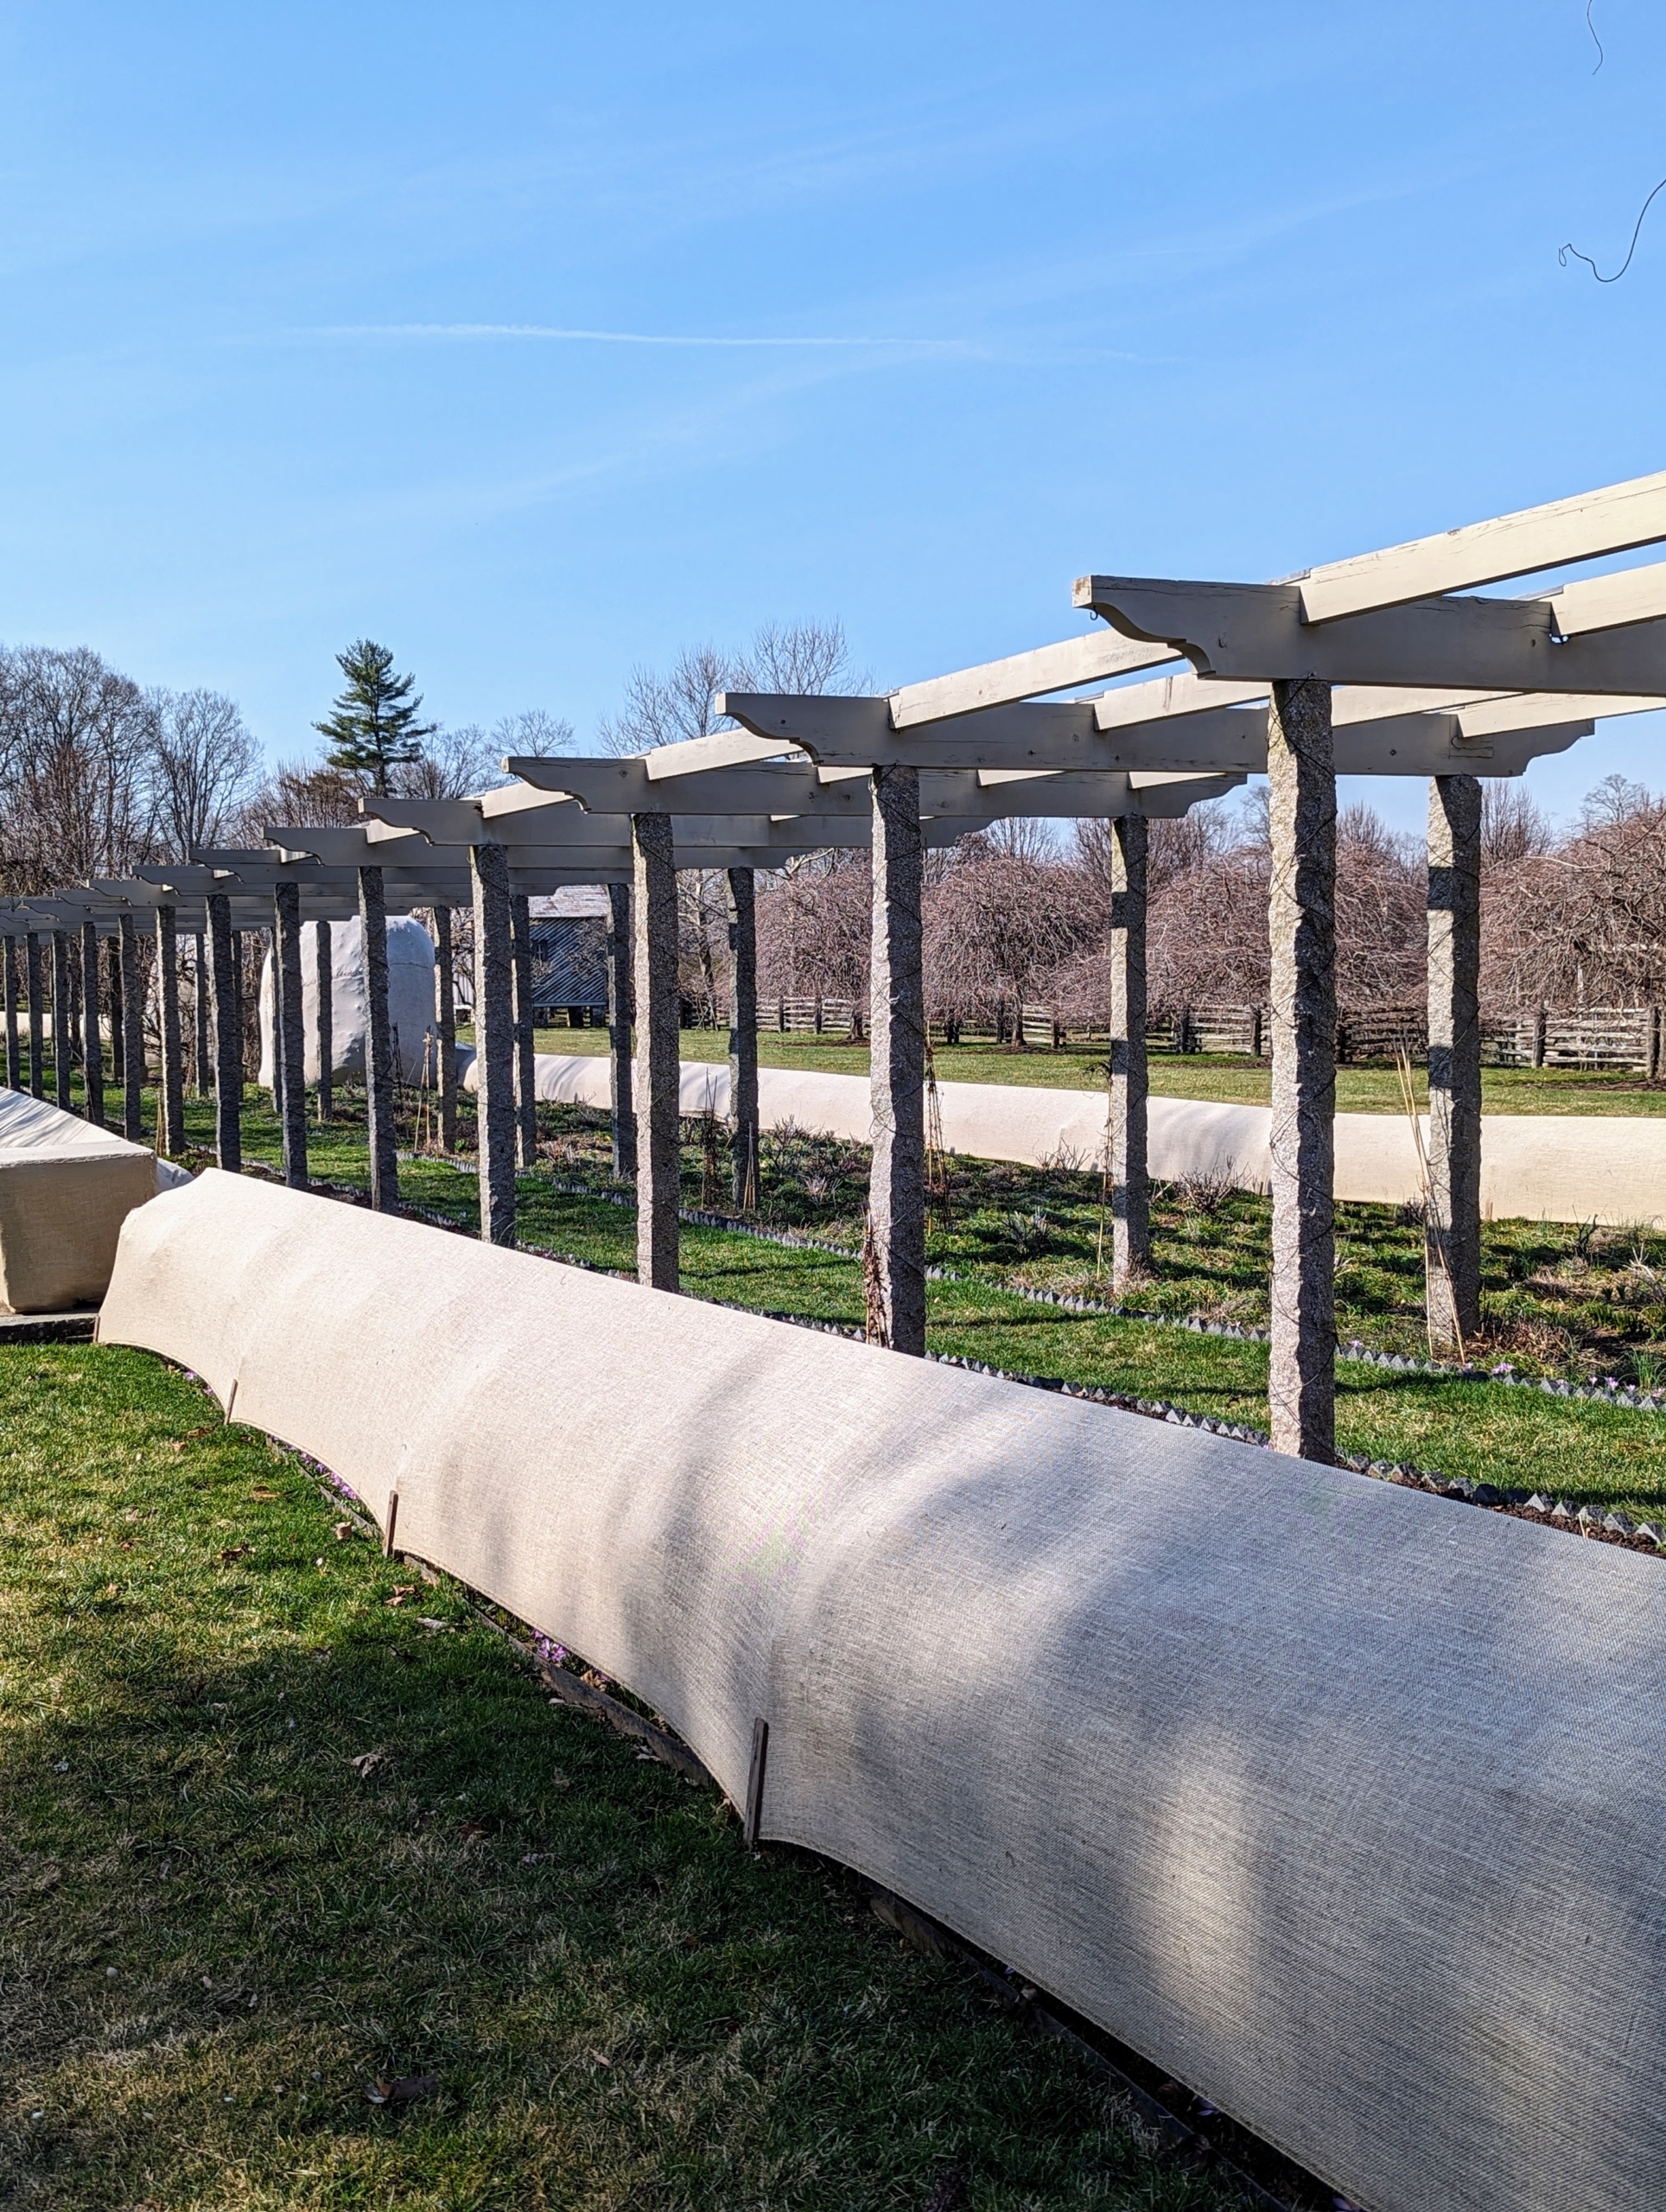
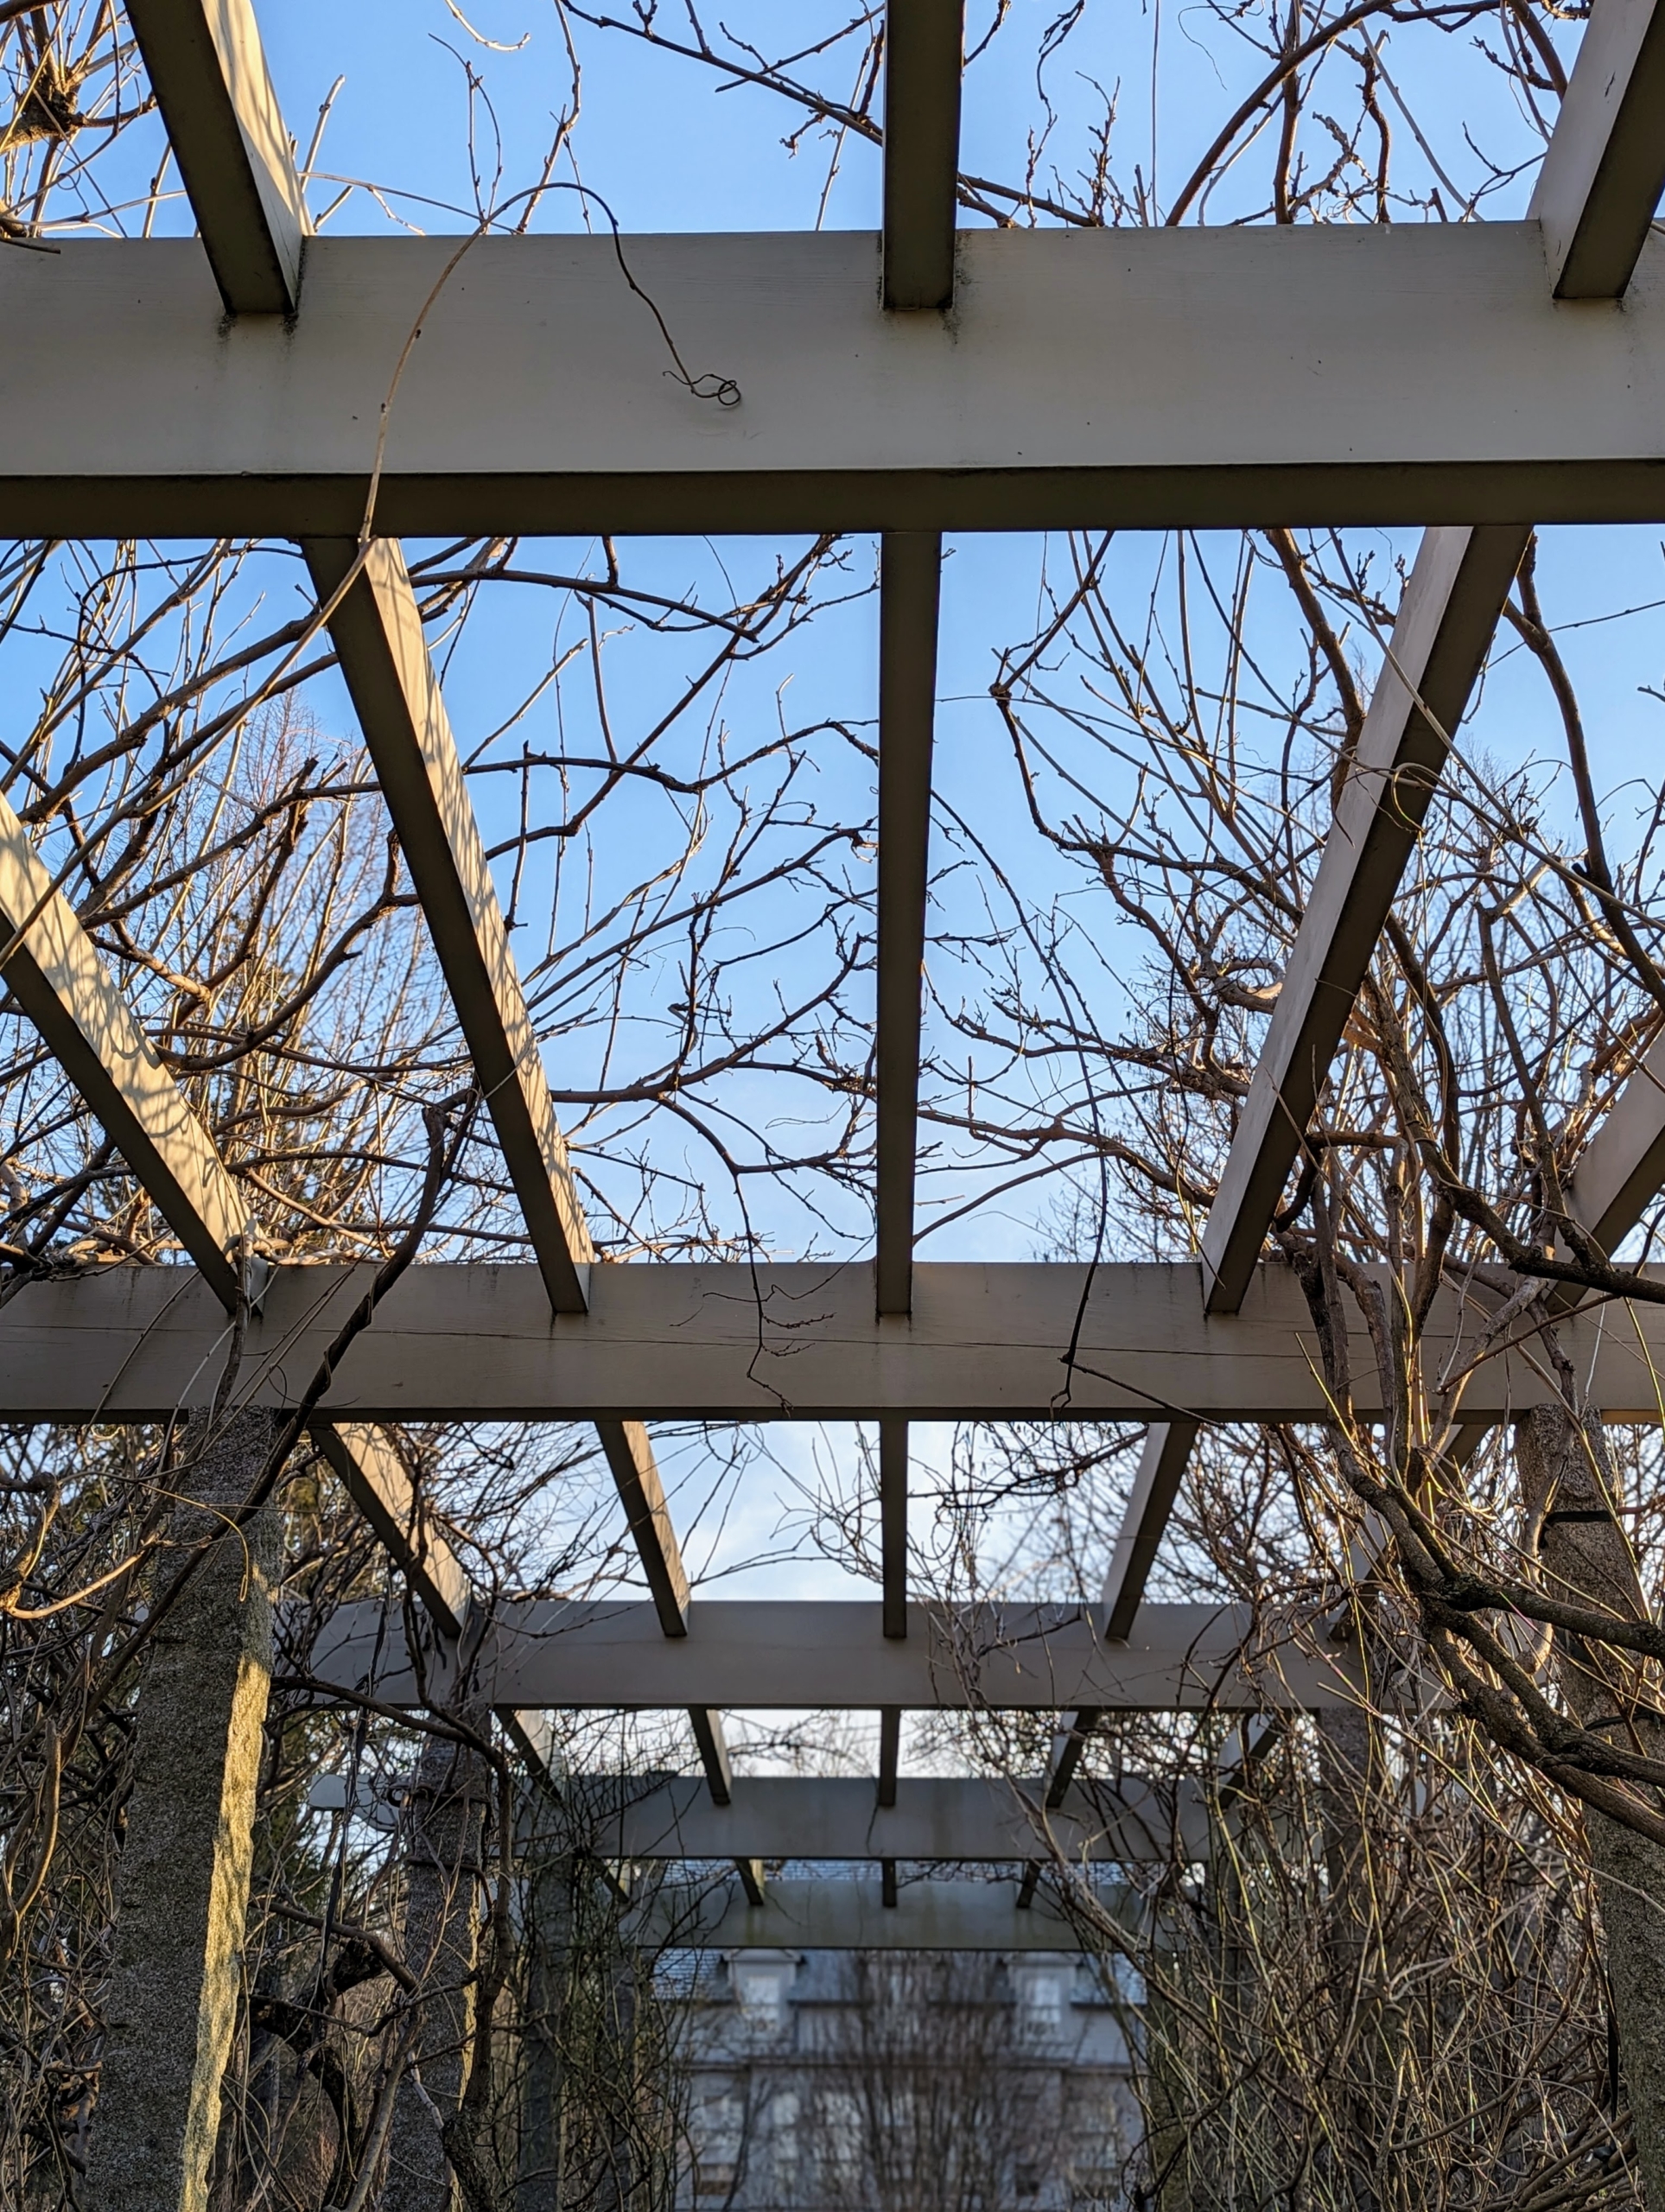
This is always a busy and exciting time at my farm. My outdoor grounds crew and gardeners are working hard to get everything ready for the season. This week, my foreman, Chhiring Sherpa, is adding nutrient-rich compost to the beds beneath my long and winding pergola. These beds are already exploding with new growth - alliums, camassia, muscari, and more. Soon, these beds will be filled with a spring palette of blue, lavender, and purple.
Here are some photos, enjoy.
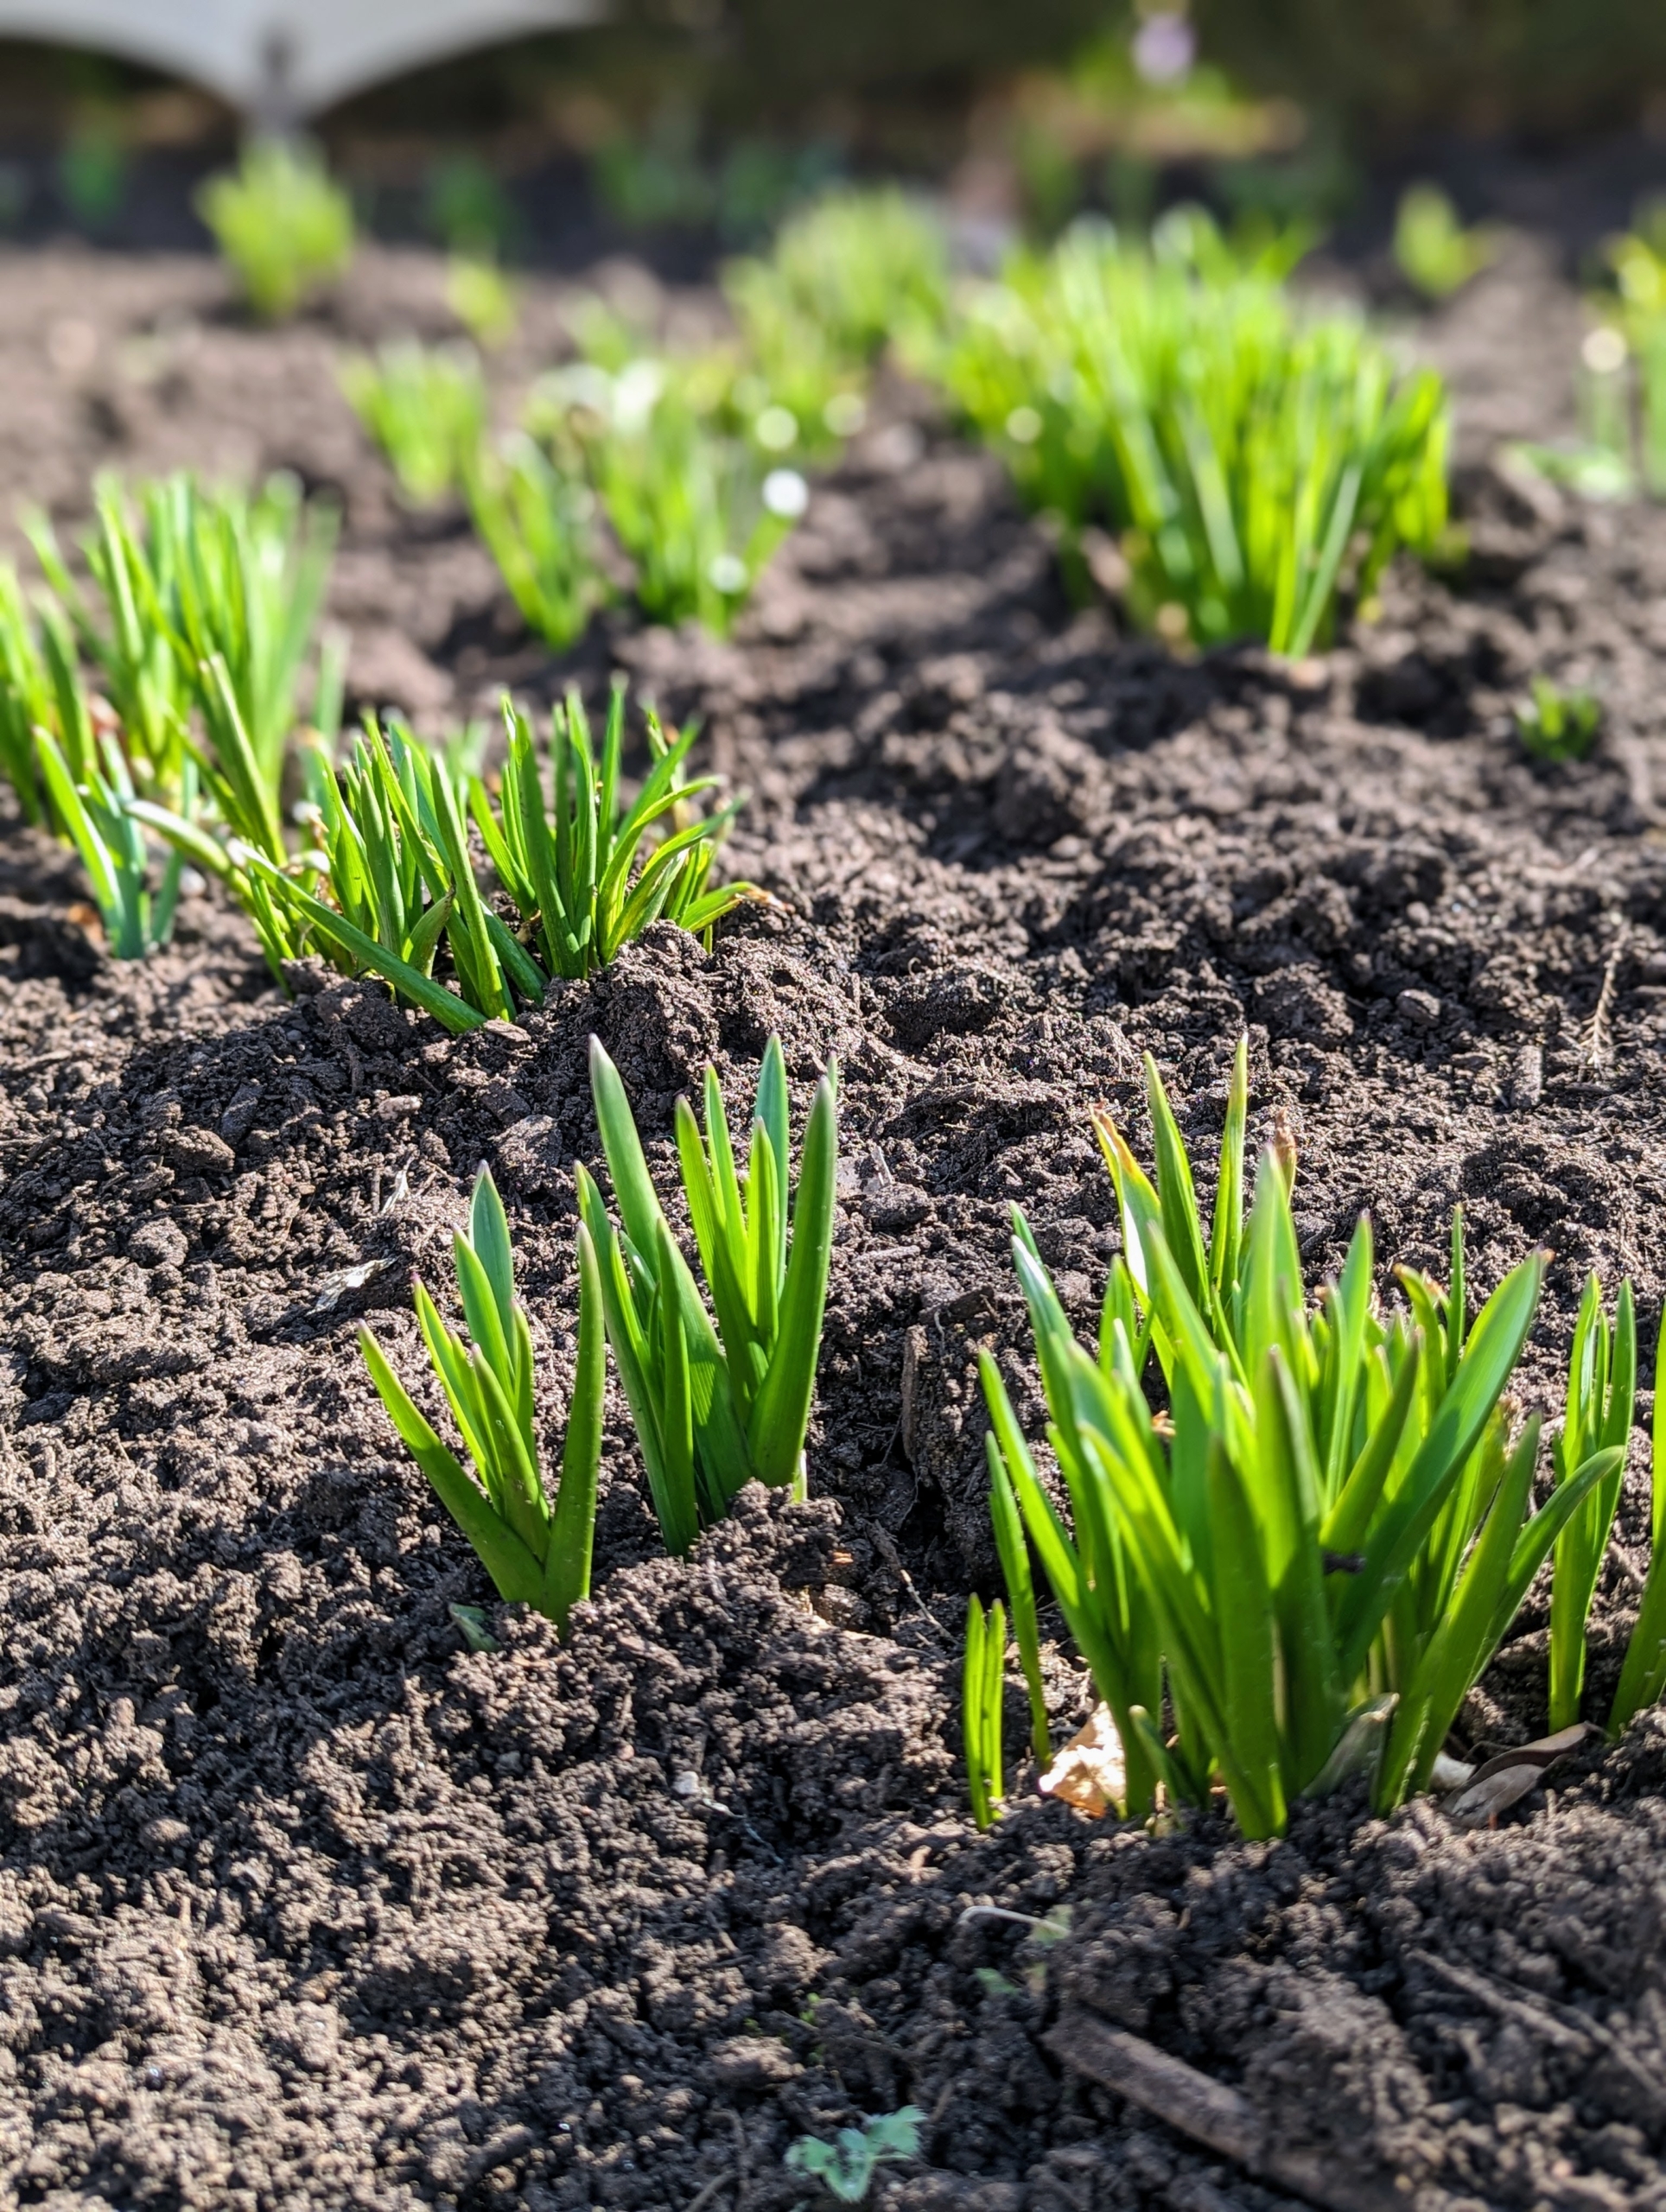
New spring growth is visible in every garden here at the farm despite nighttime temperatures still dropping into the 30s Fahrenheit.
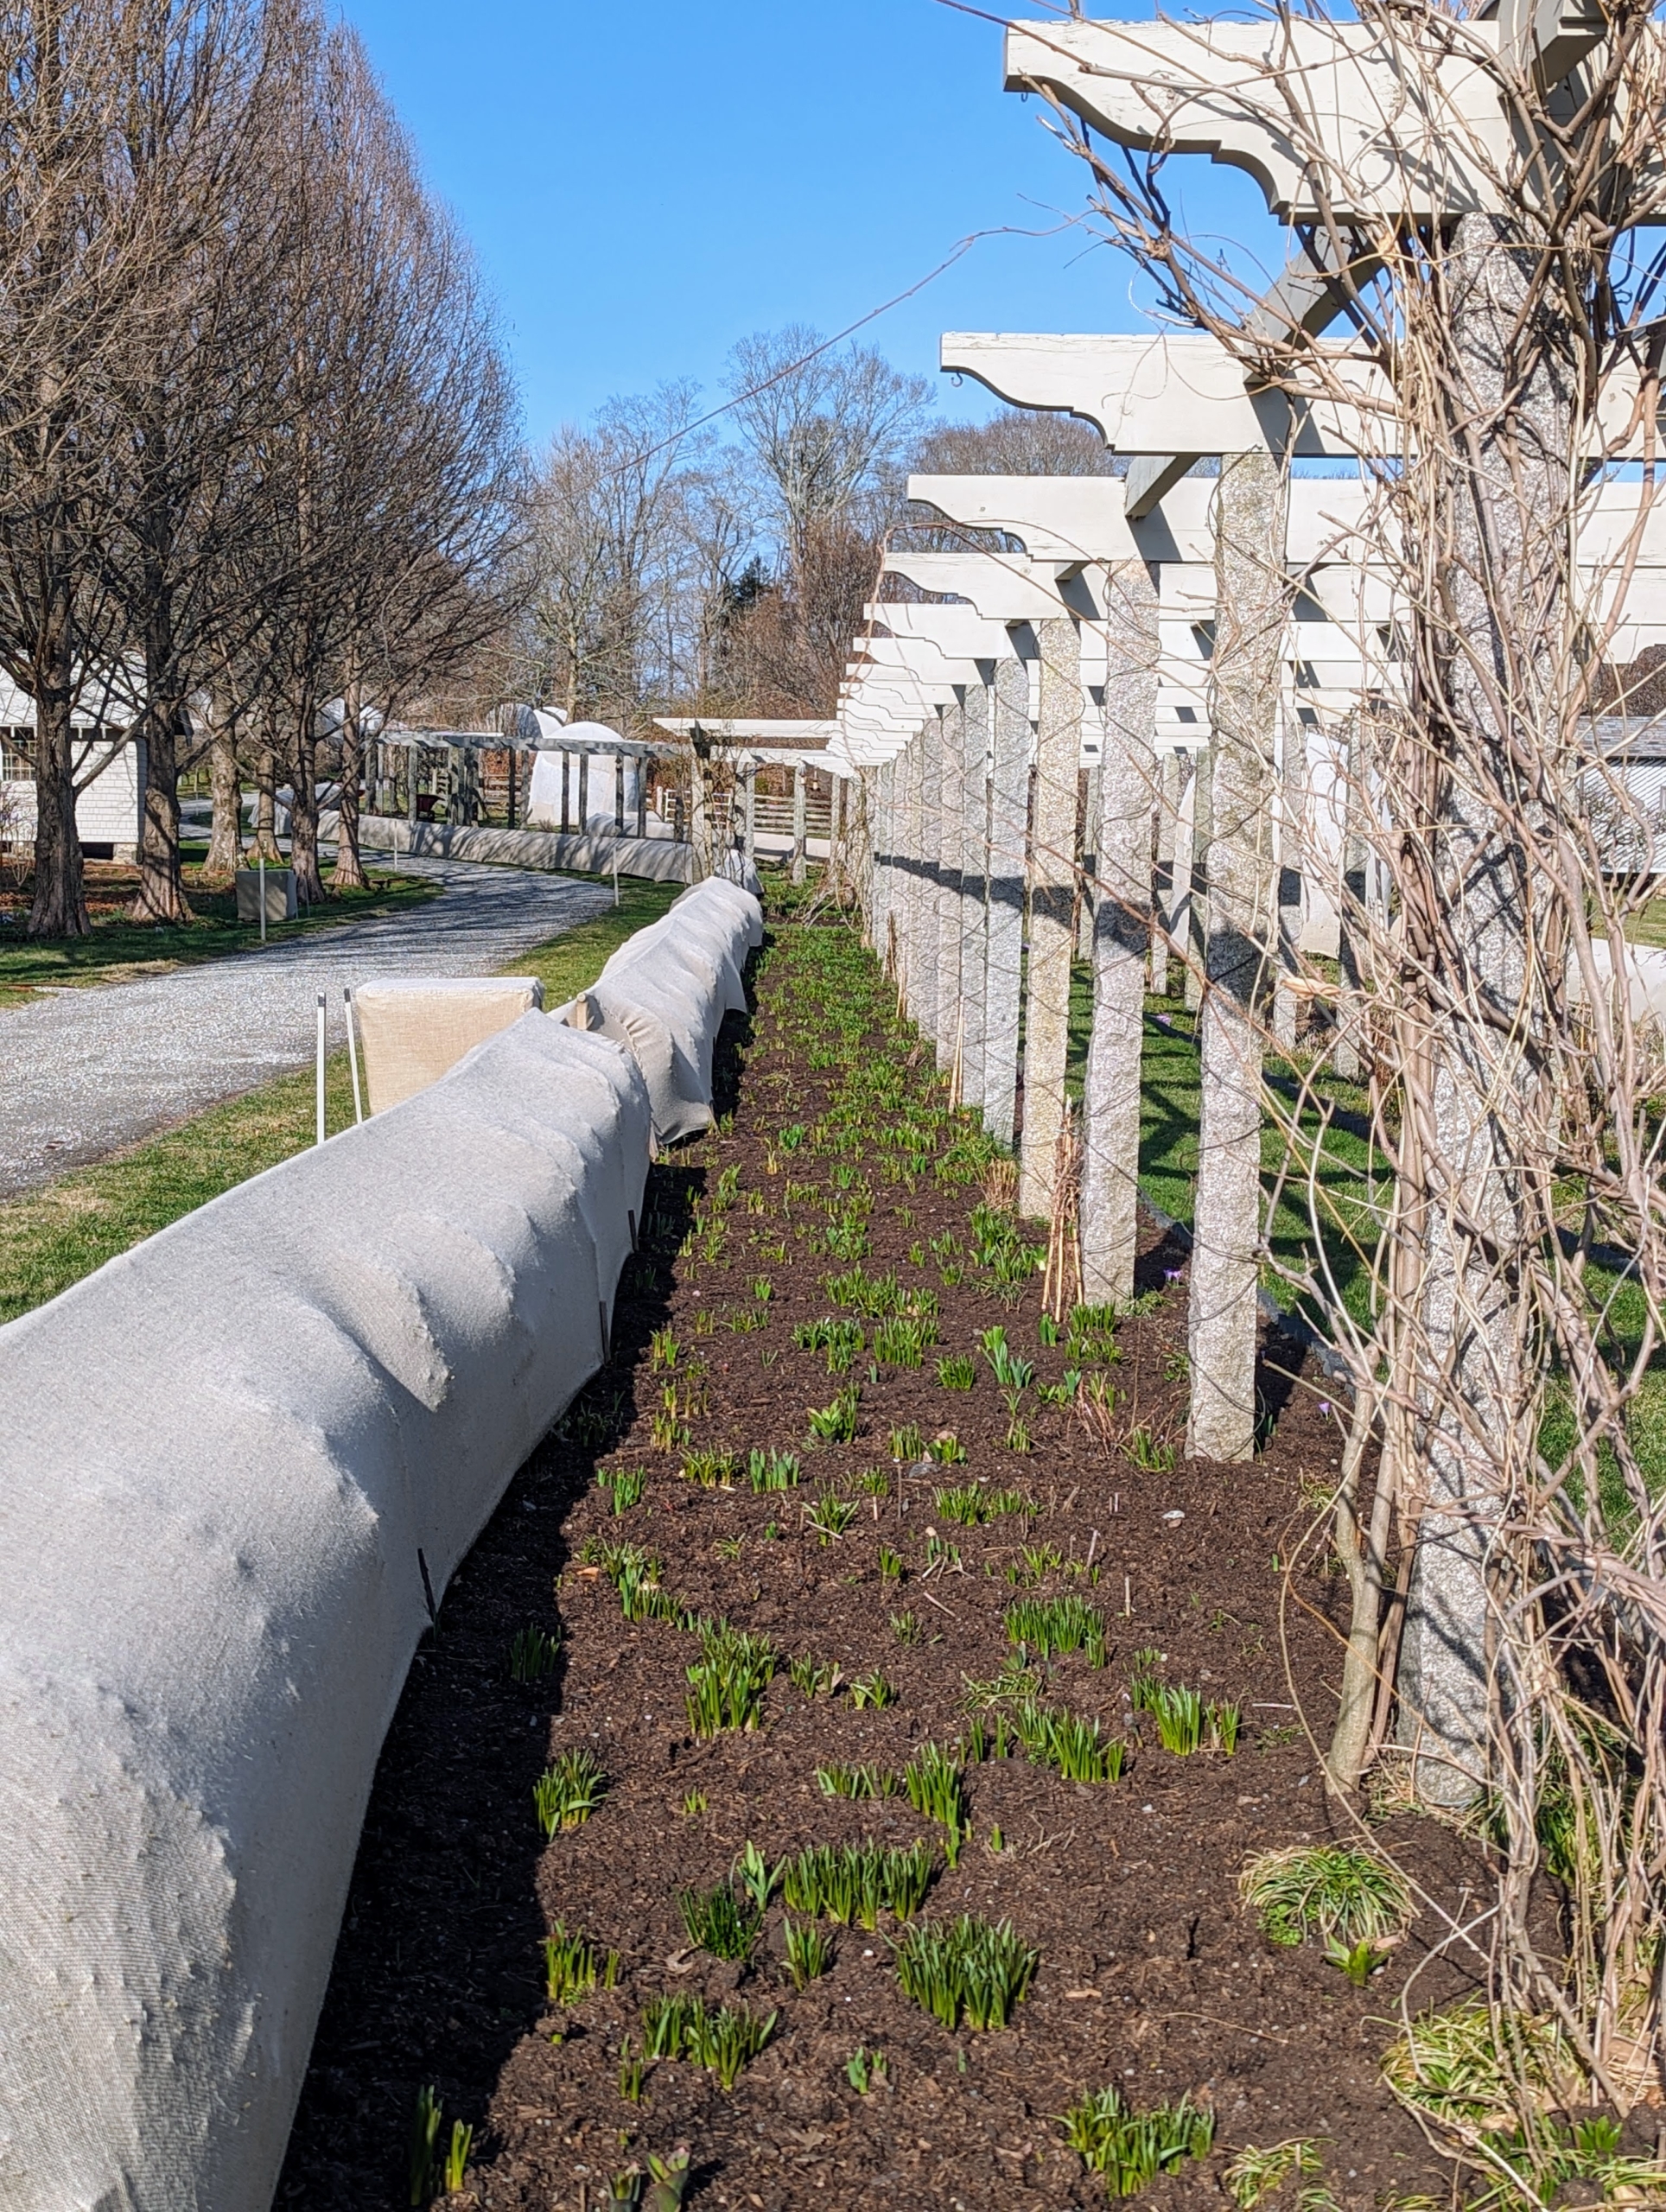
My long pergola is still surrounded by the burlap-covered boxwood, but not for long – like clockwork, we remove all the fabric in time for Easter.
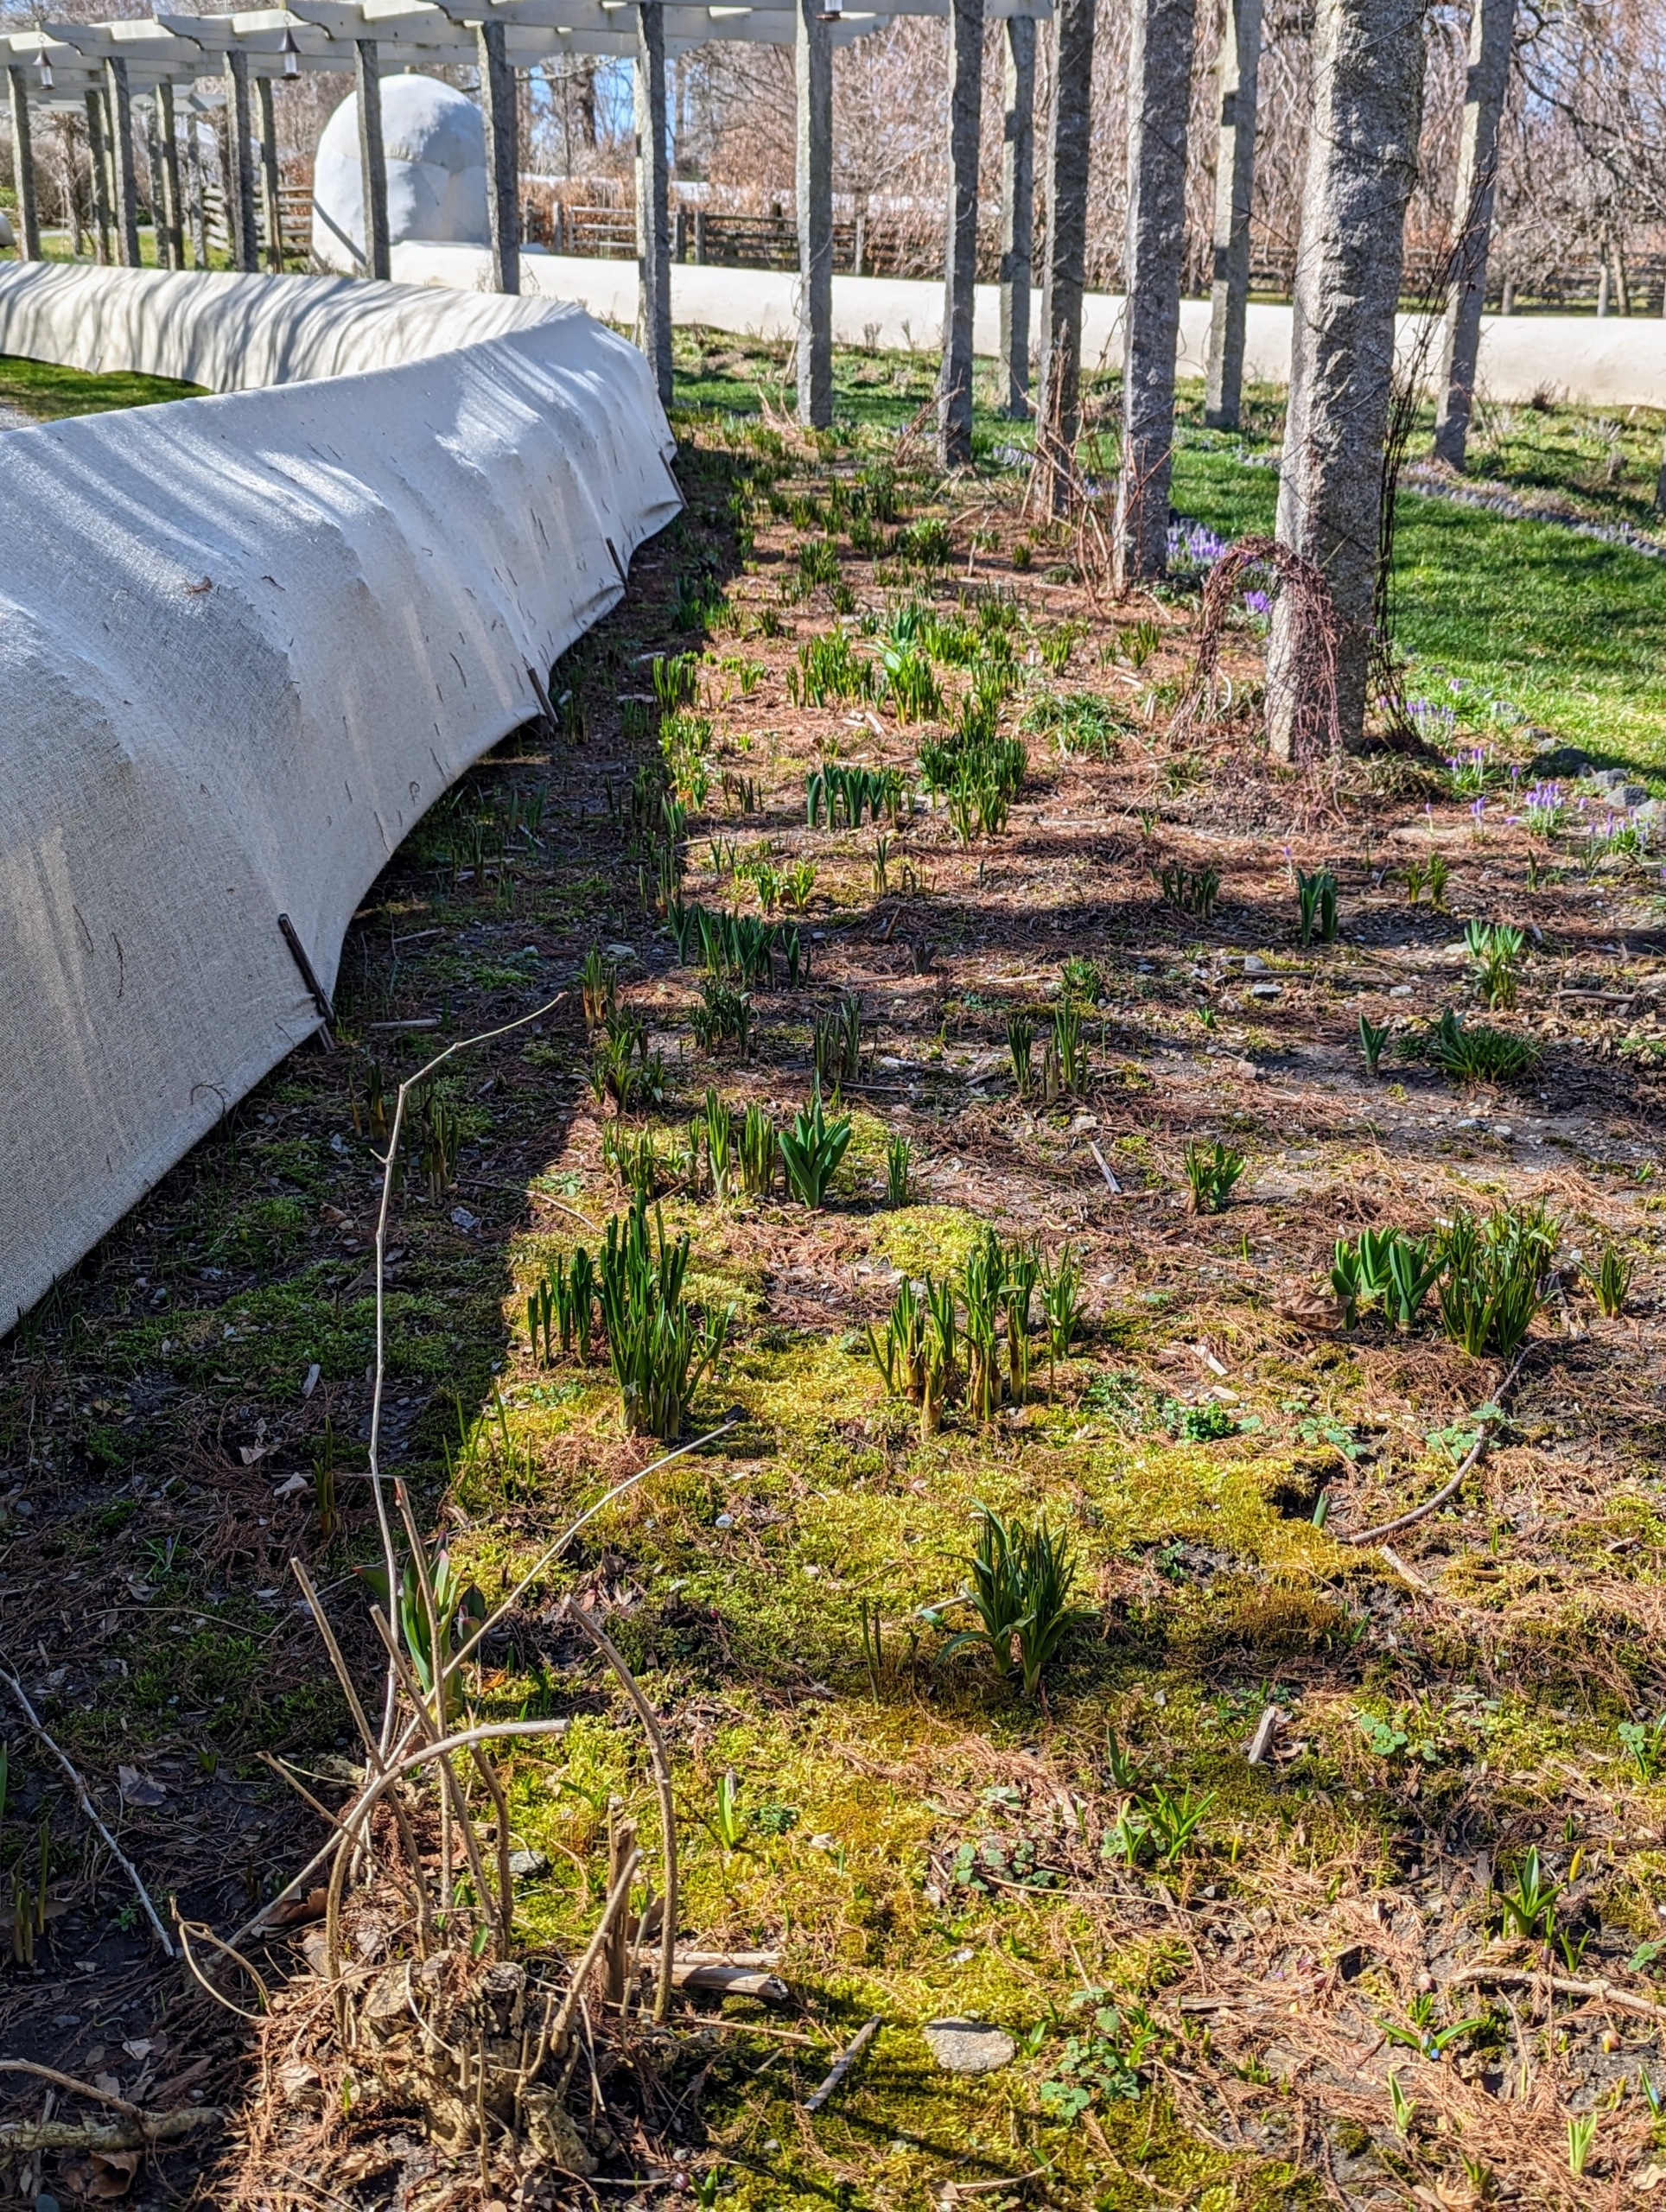
Early March is the best time to start tending the beds – weeding, and pulling last year’s growth and fallen leaves and applying a new coat of compost around the plants.
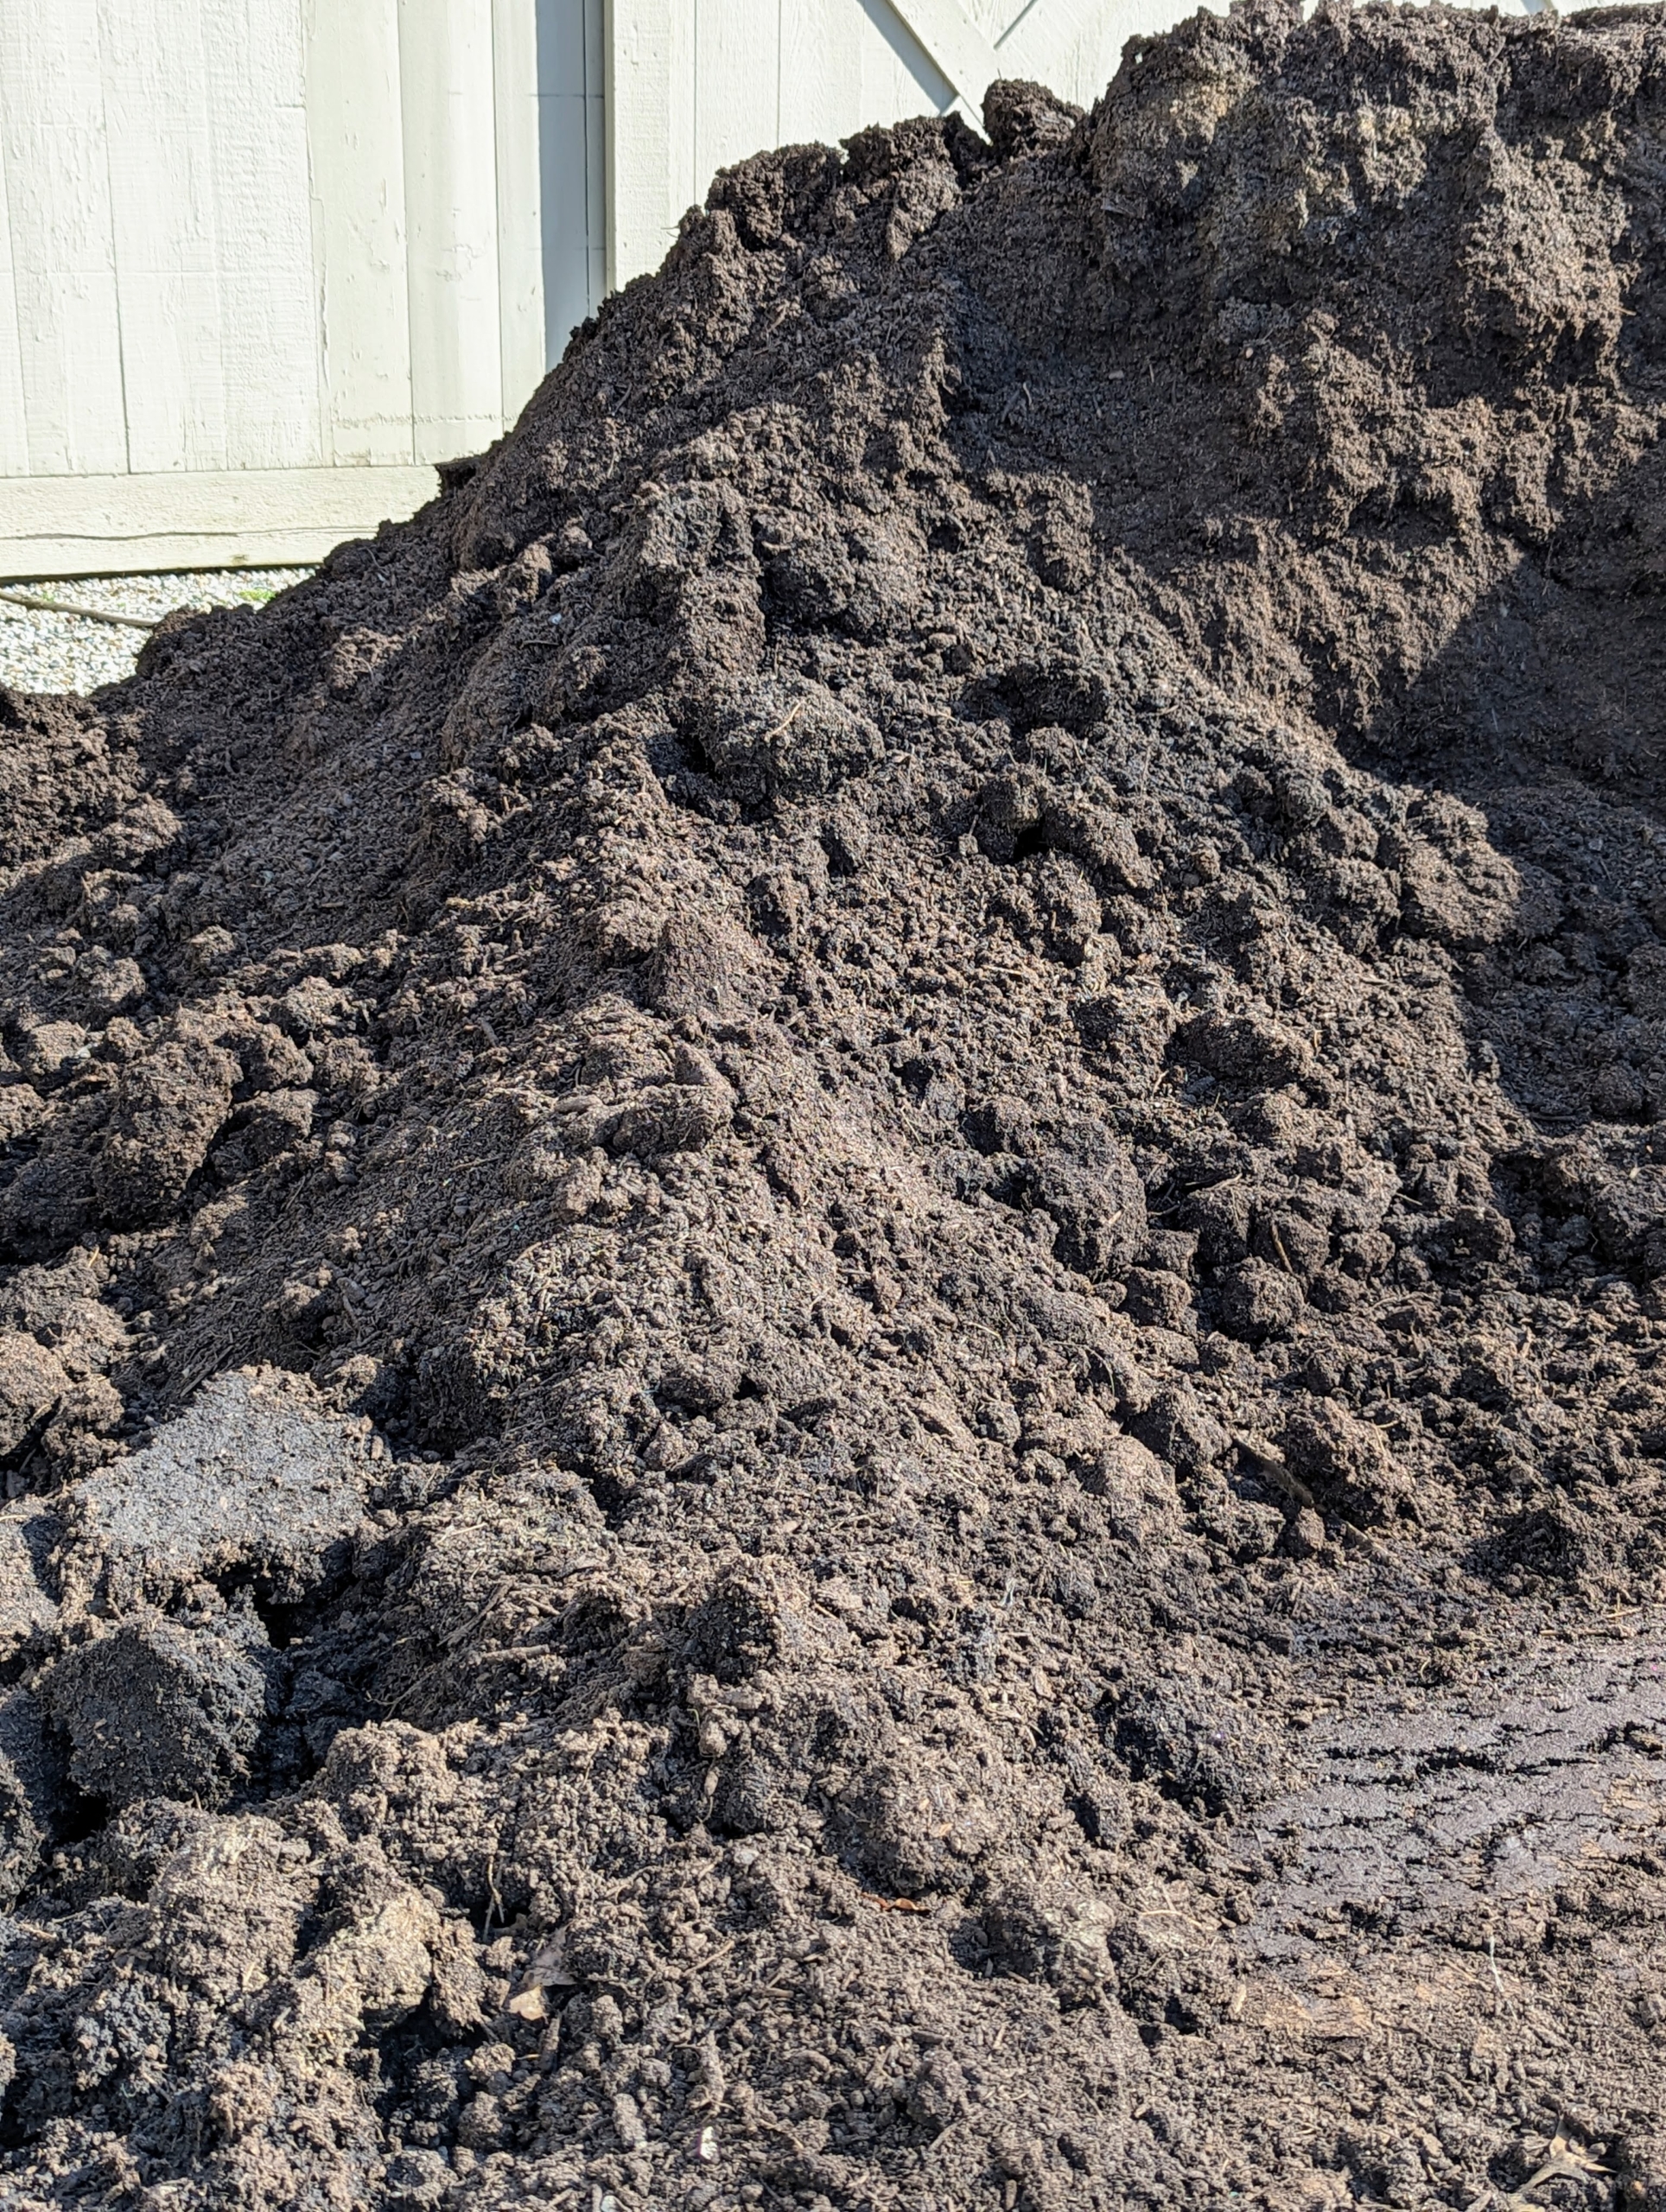
This is organic compost. I like to top dress my beds with this in the spring to add nutrients, such as nitrogen, into the soil. Compost is an efficient and practical fertilizer. Adding compost also improves the soil’s ability to absorb and store water, aerate, and increase the activity of organisms.
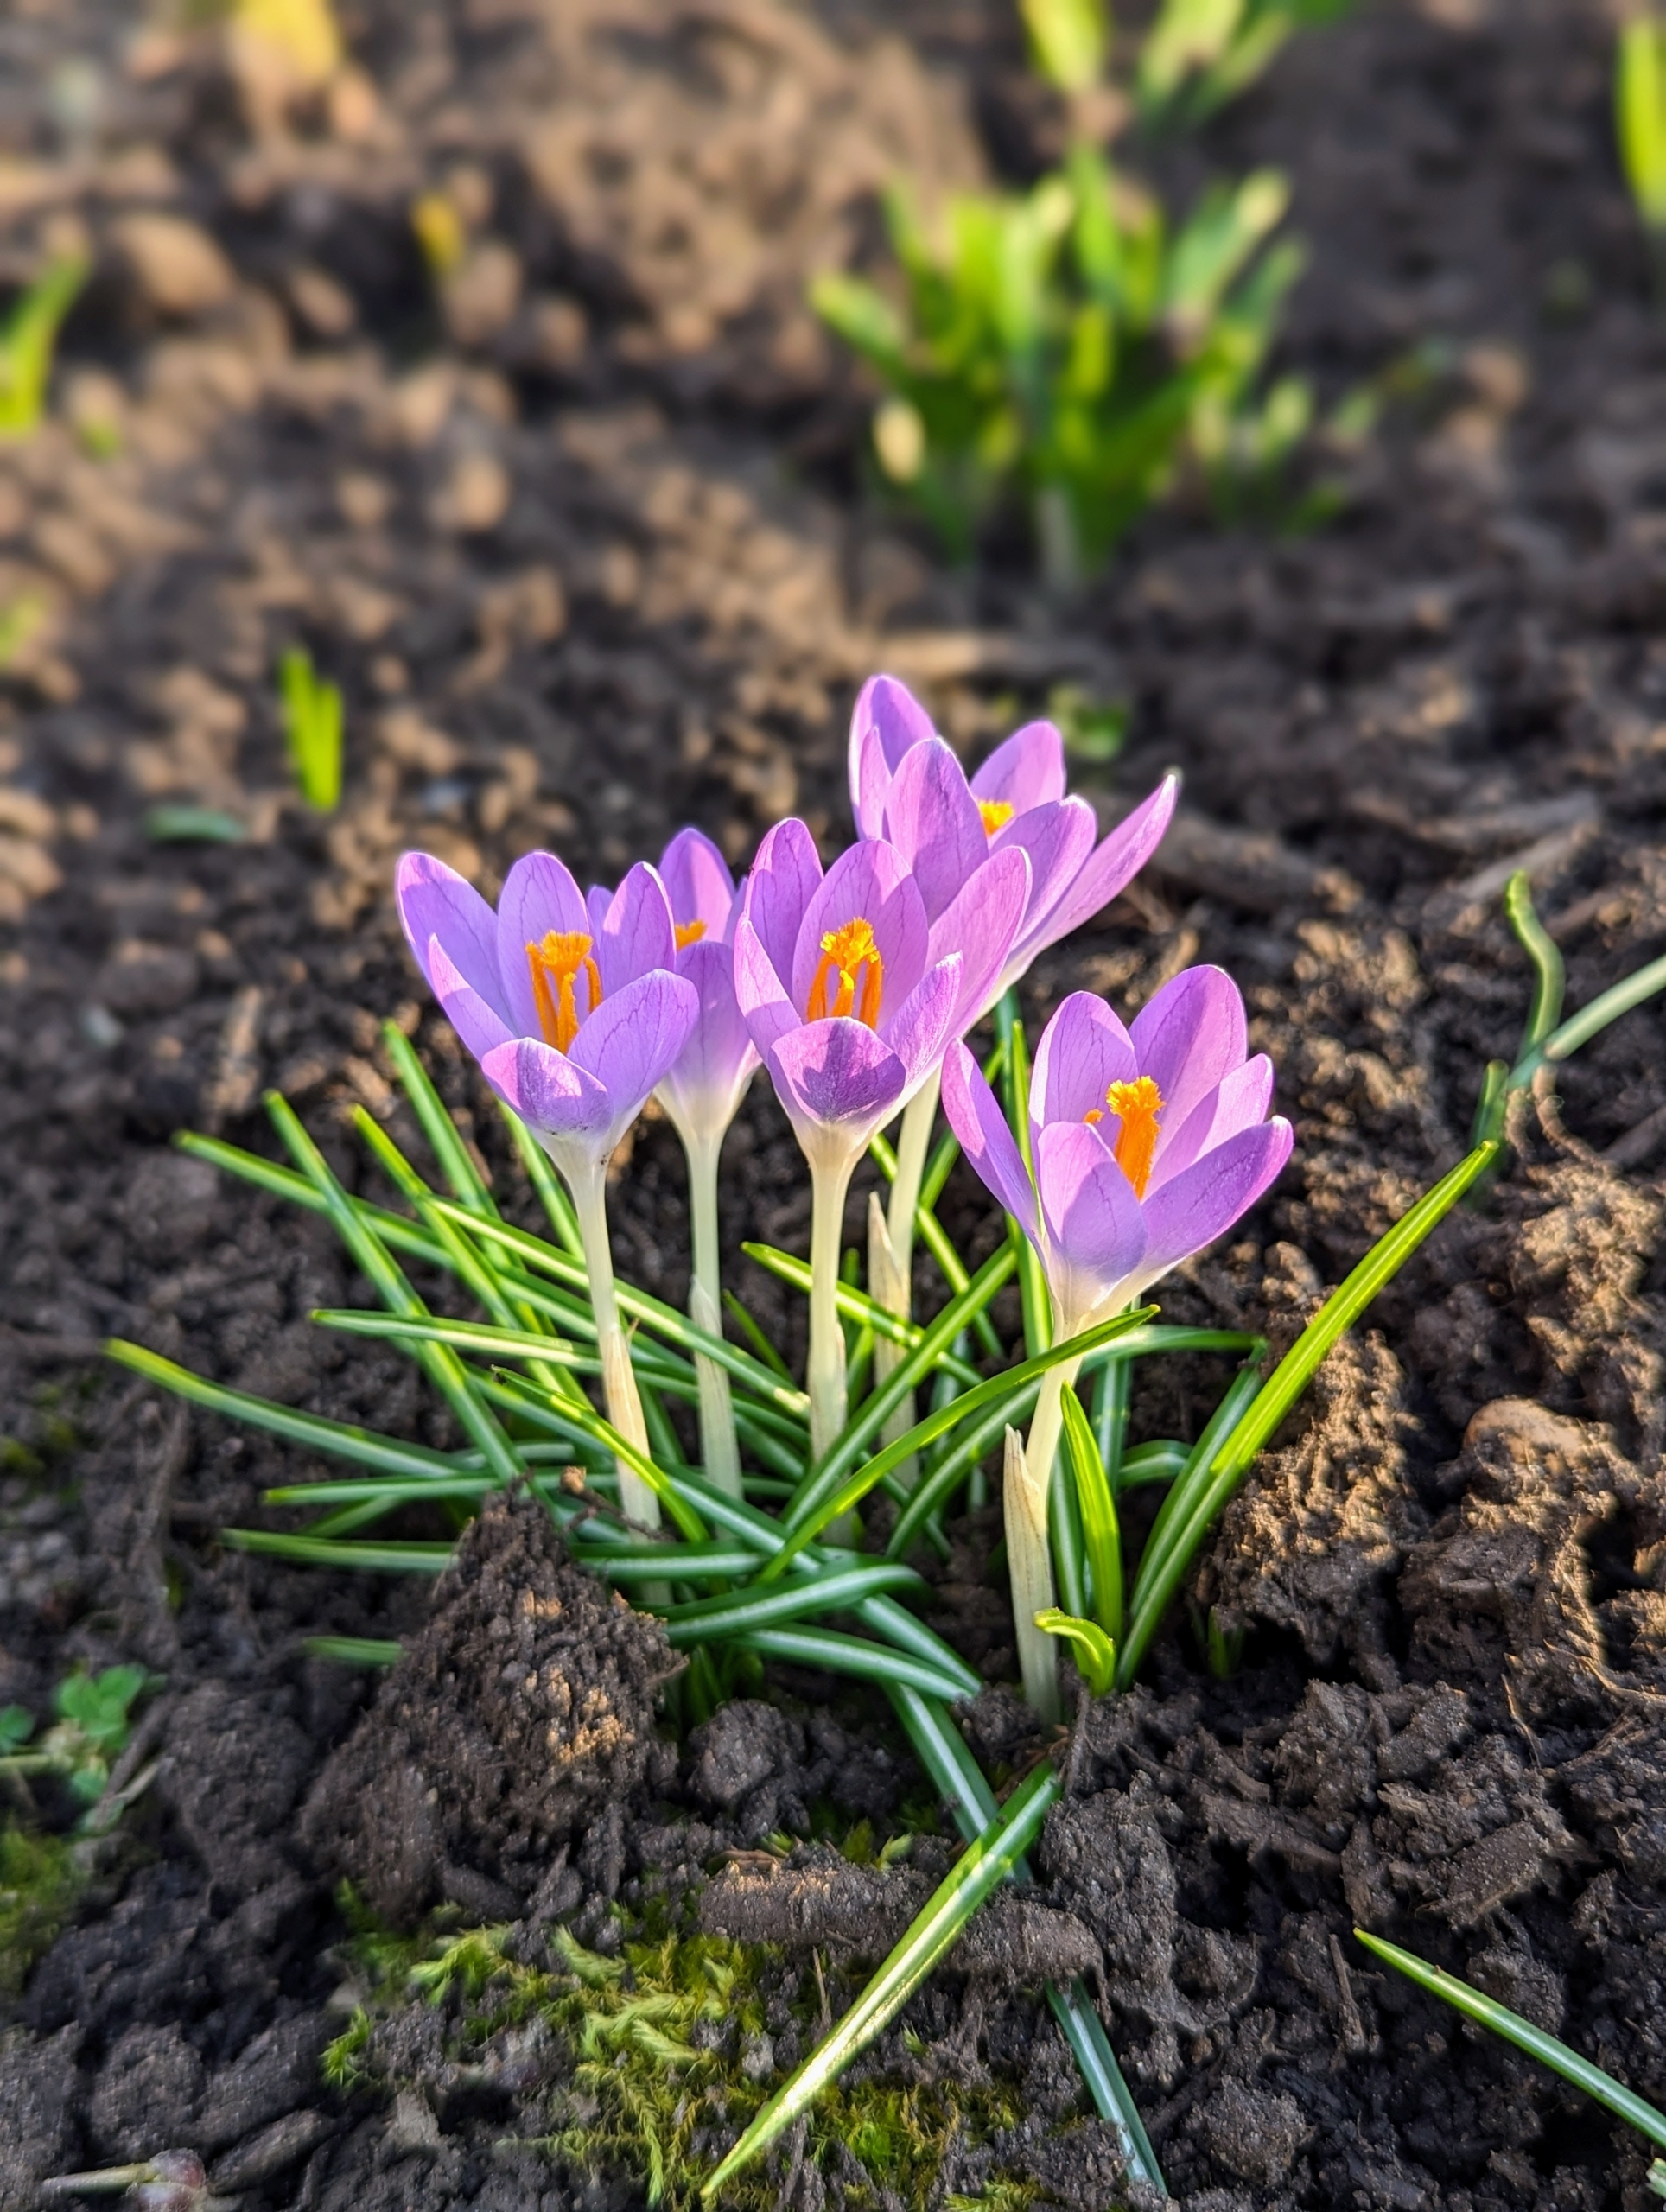
With good, consistent maintenance, look what’s already blooming so gloriously – here is a stretch of crocus.
Emerging from bulb-like structures called corms, crocuses are low-growing perennial flowering plants from the iris family. Crocus are among the first to bloom in spring and come back year after year.
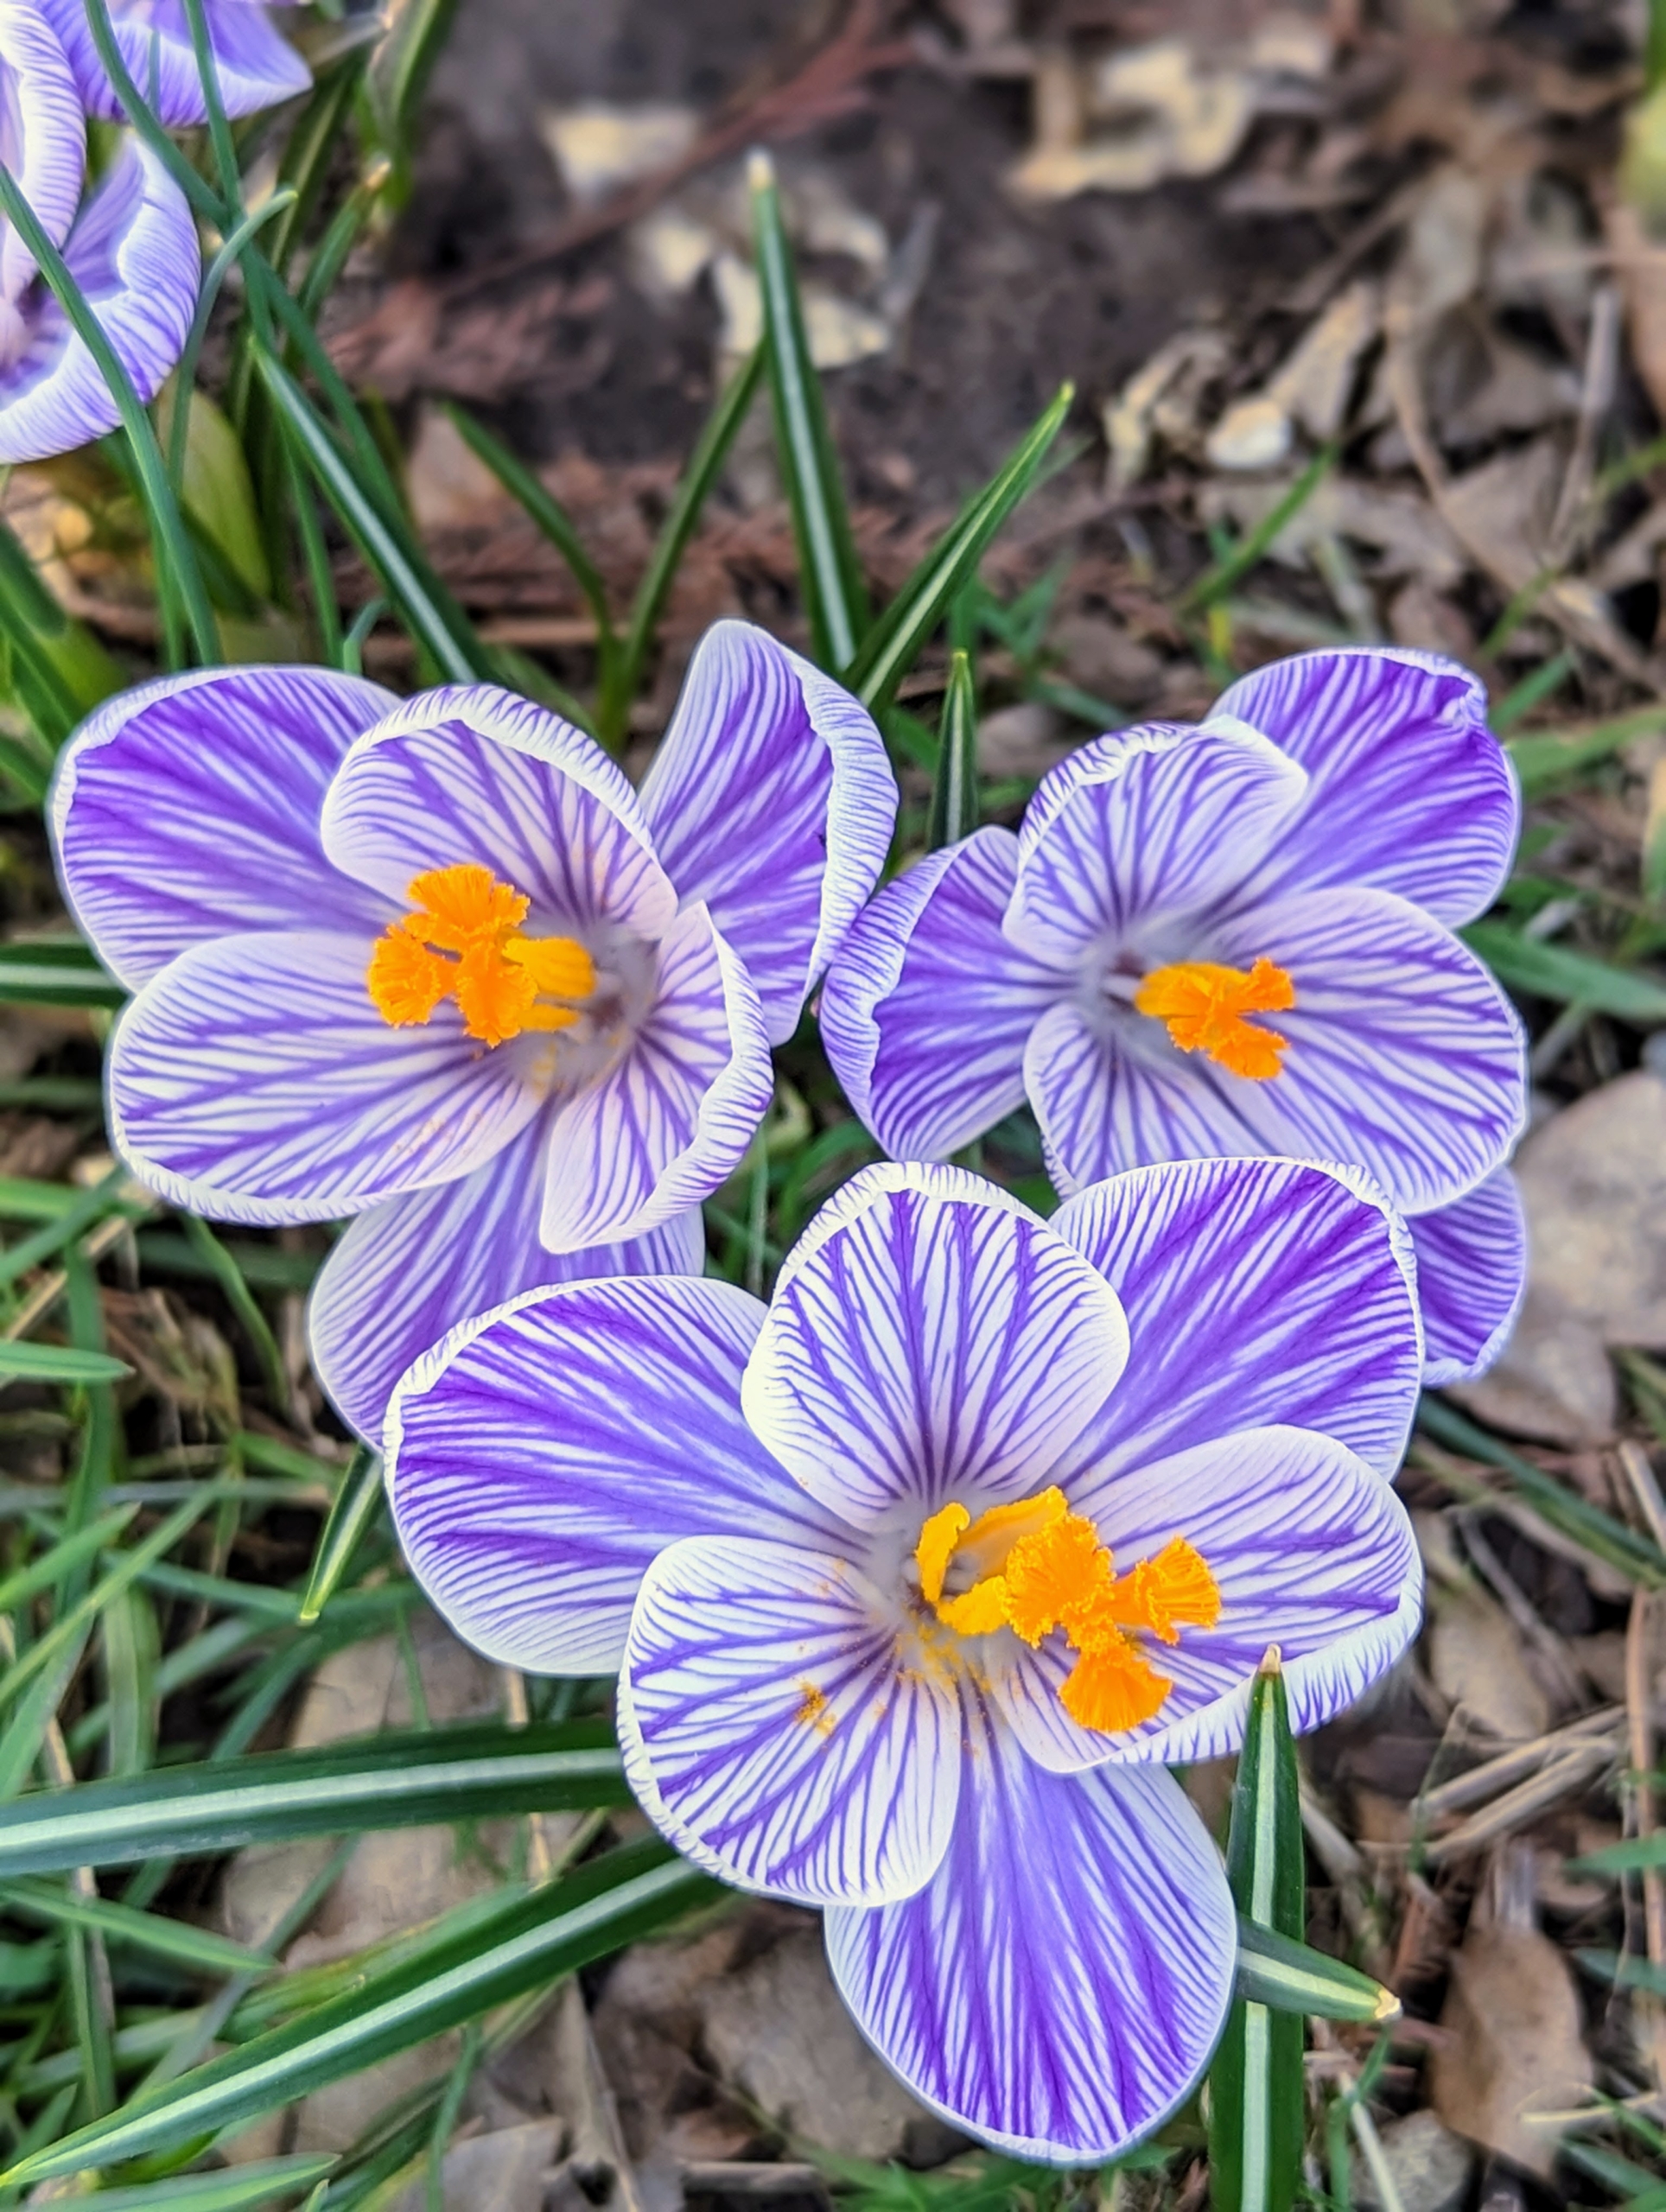
Growing along the back border are small bunches of these purple and white striped croci. This striped flower produces several upright, cup-like, purple and white striped blooms on stems rising to four to six inches above basal, grass-like leaves.
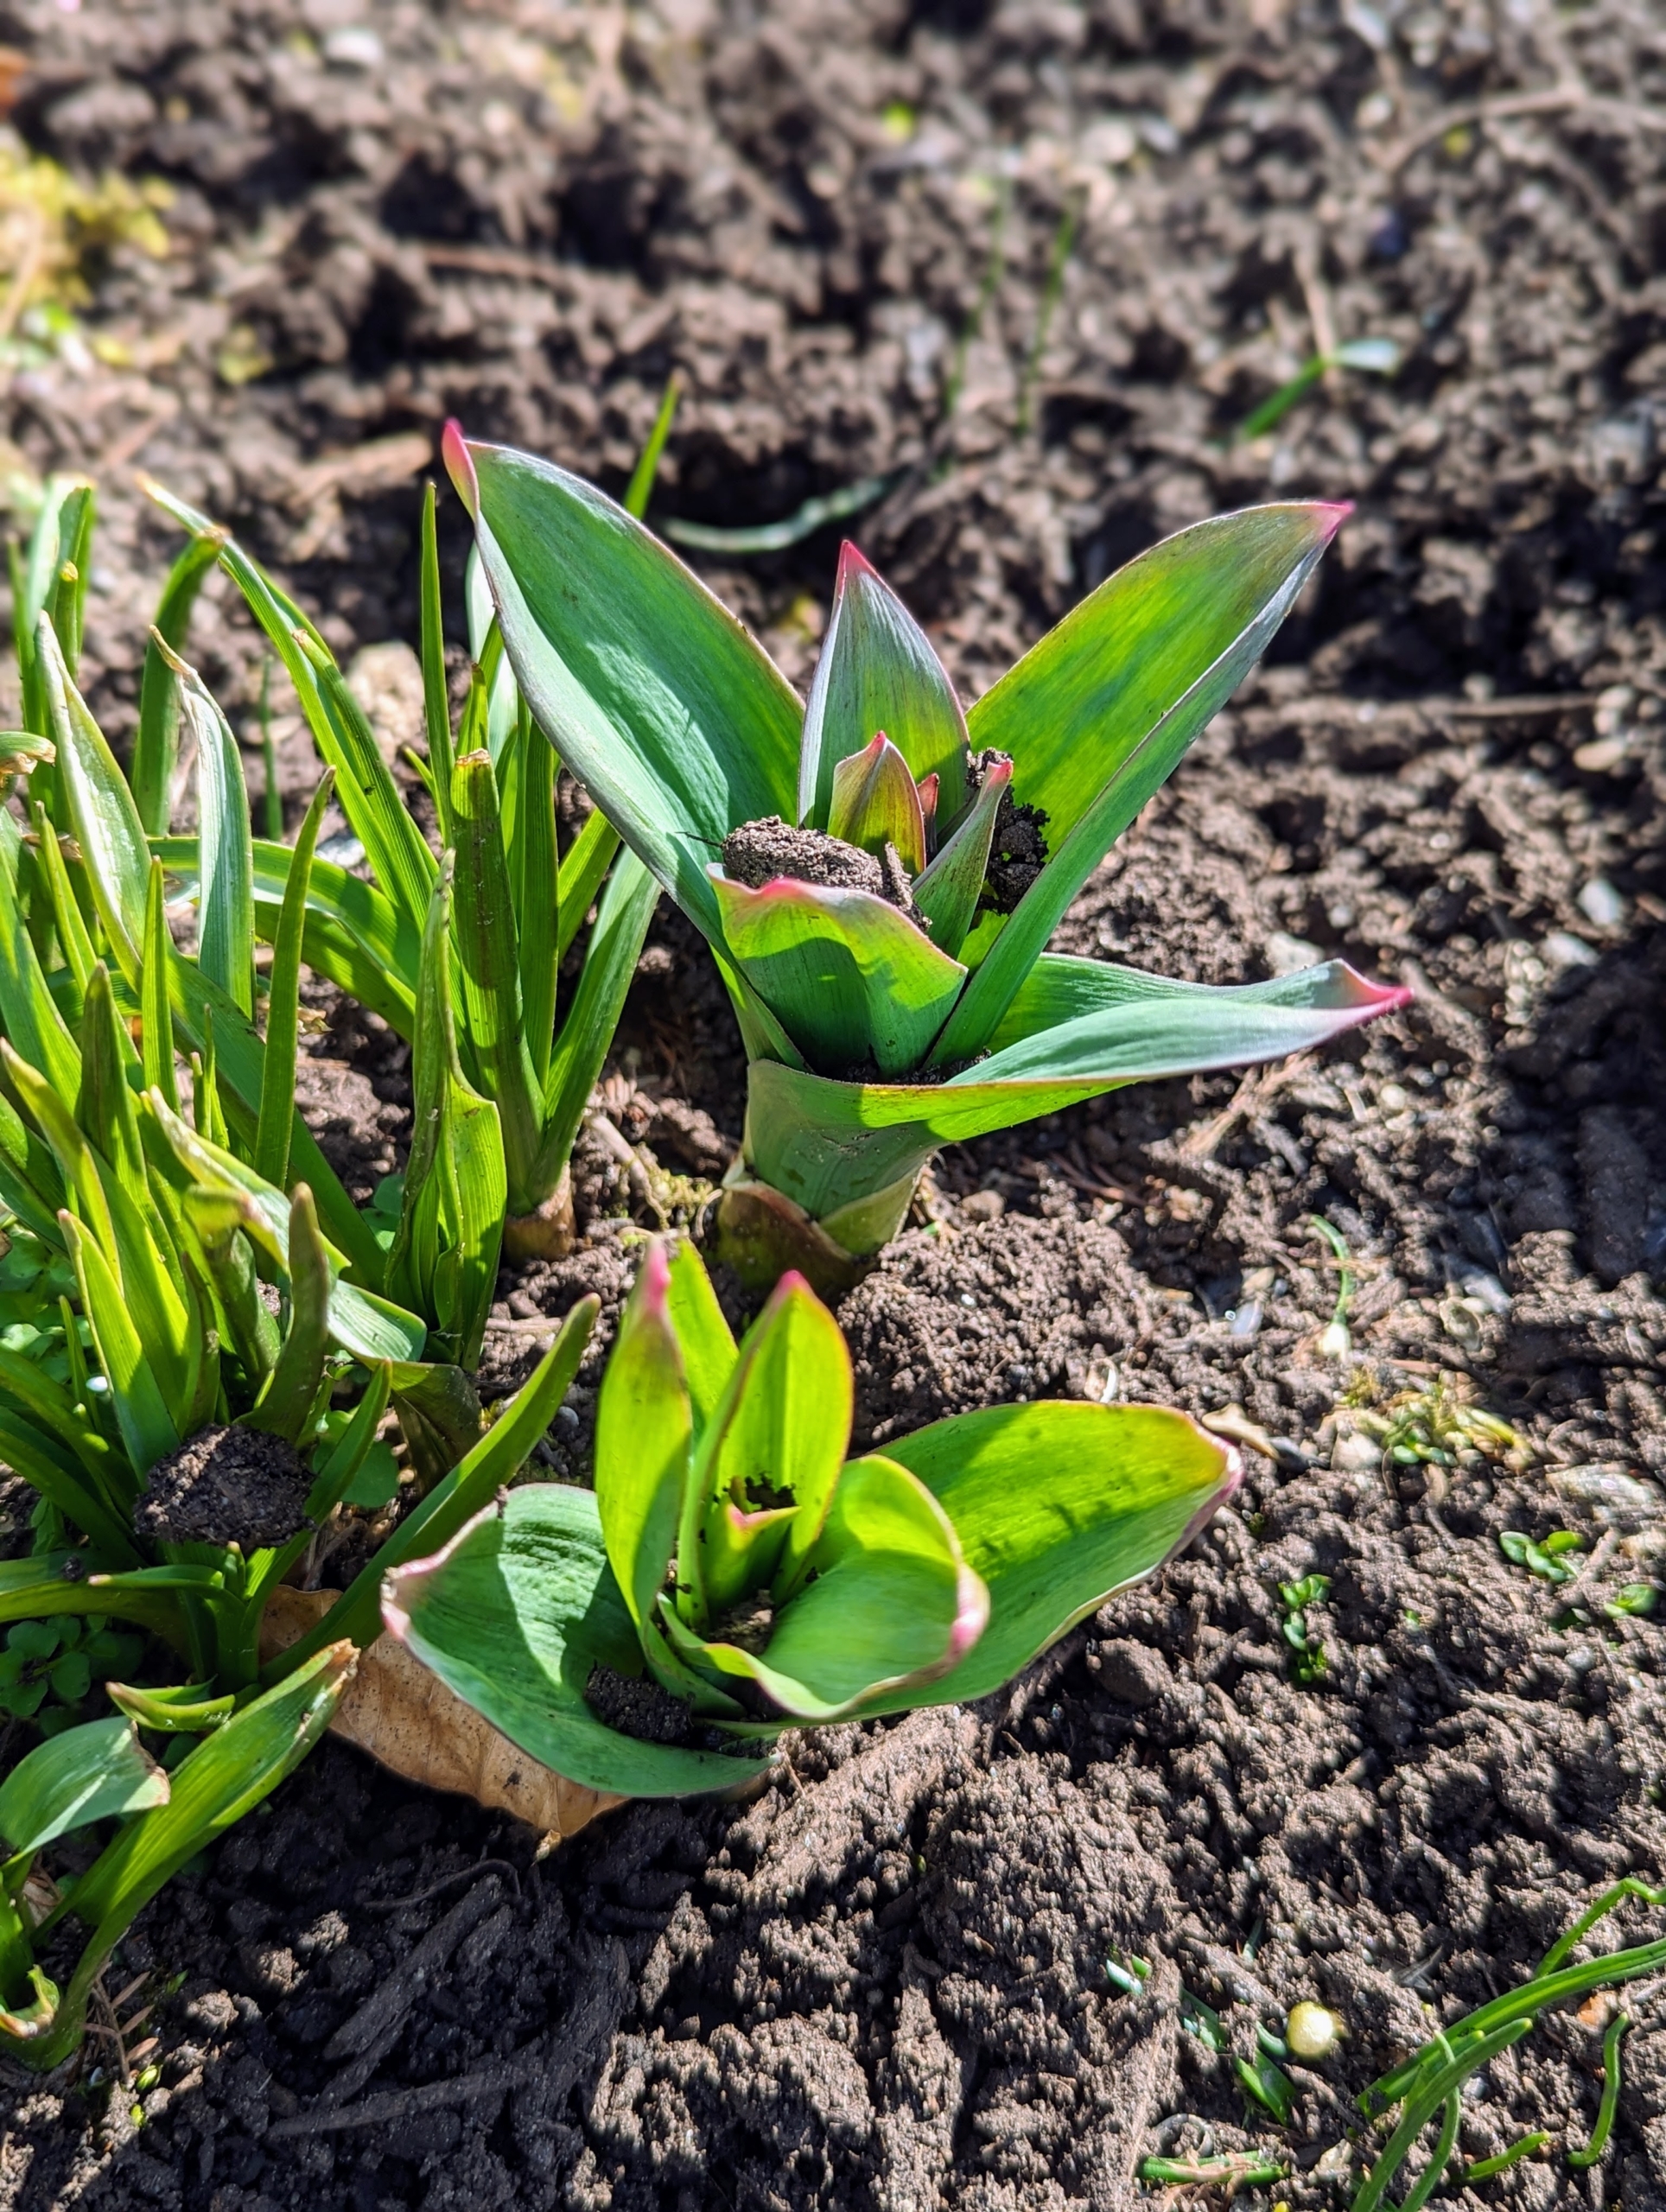
Planted at the base of every post is clematis. The uprights for this pergola are antique granite posts from China – originally used as grape supports in a valley that was going to be dammed and flooded to create a reservoir.
New growth is visible on every clematis plant. Clematis bloom times can vary, but by planting a range of cultivars, one can have flowers from early spring to late fall.
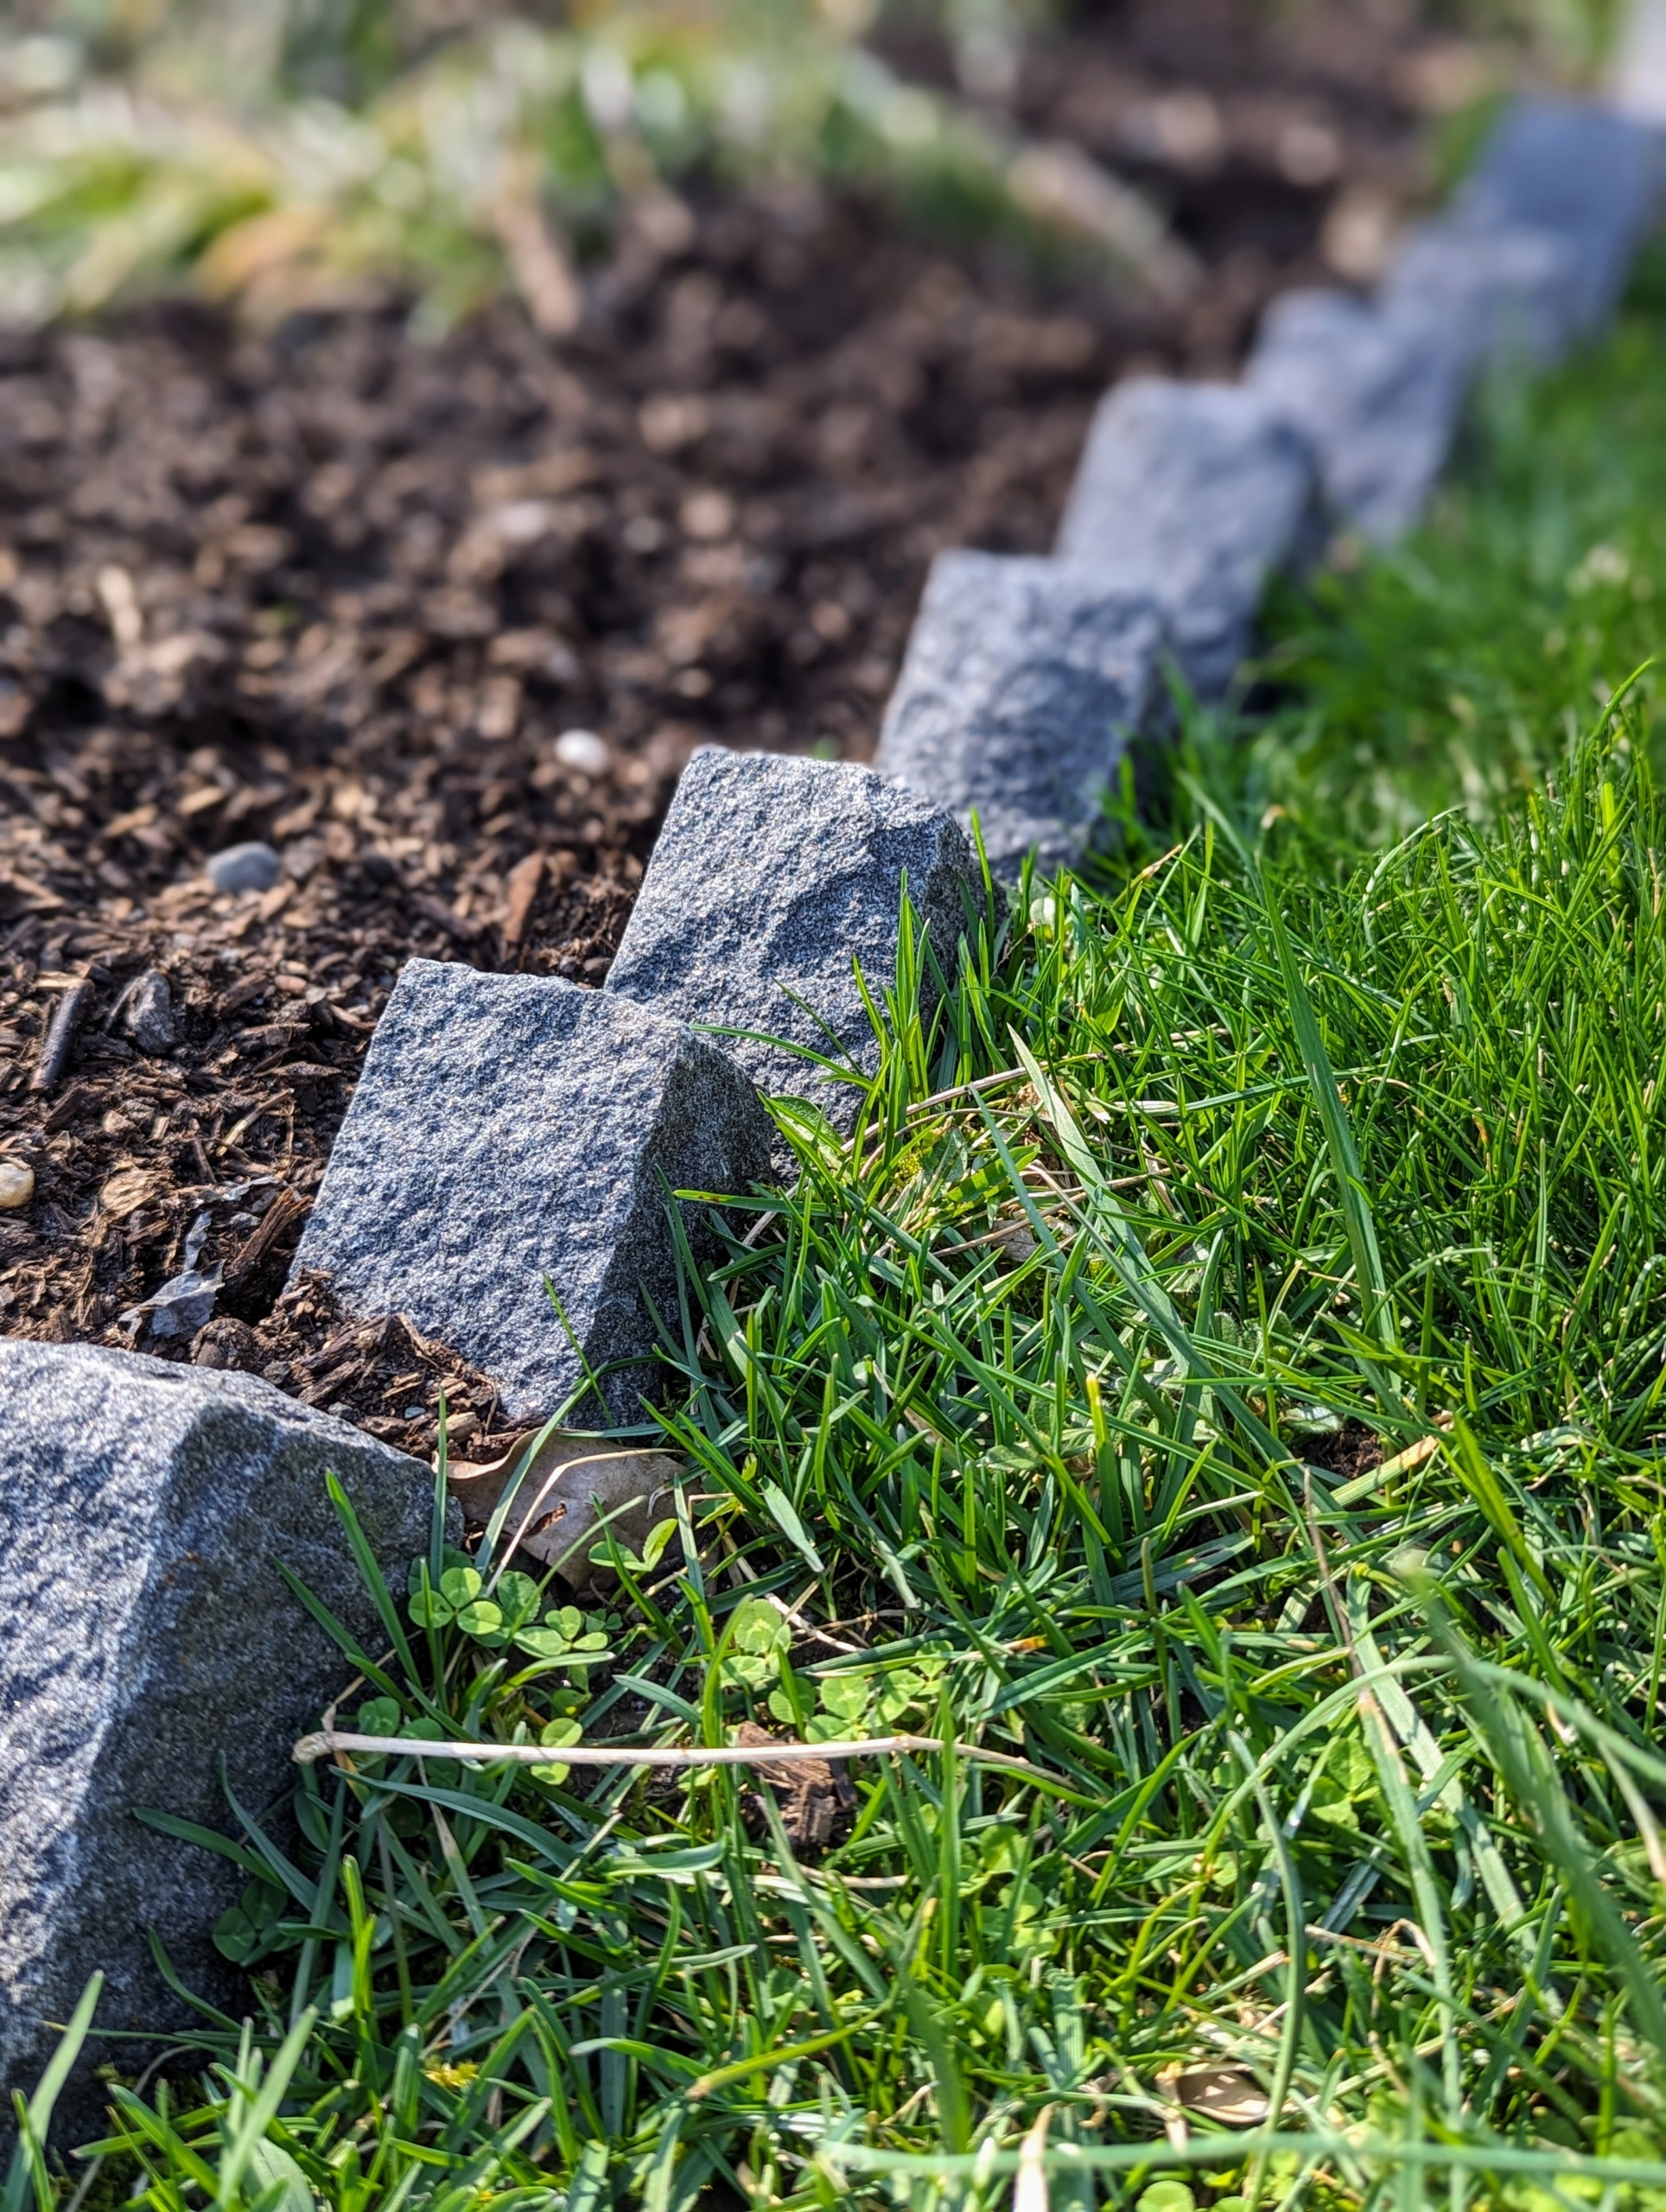
Four years ago, we lined the center footpath of the pergola with these black bricks I originally bought for a terrace project years ago and never used. Each black granite brick measures eight inches long by about two inches wide and two inches thick.
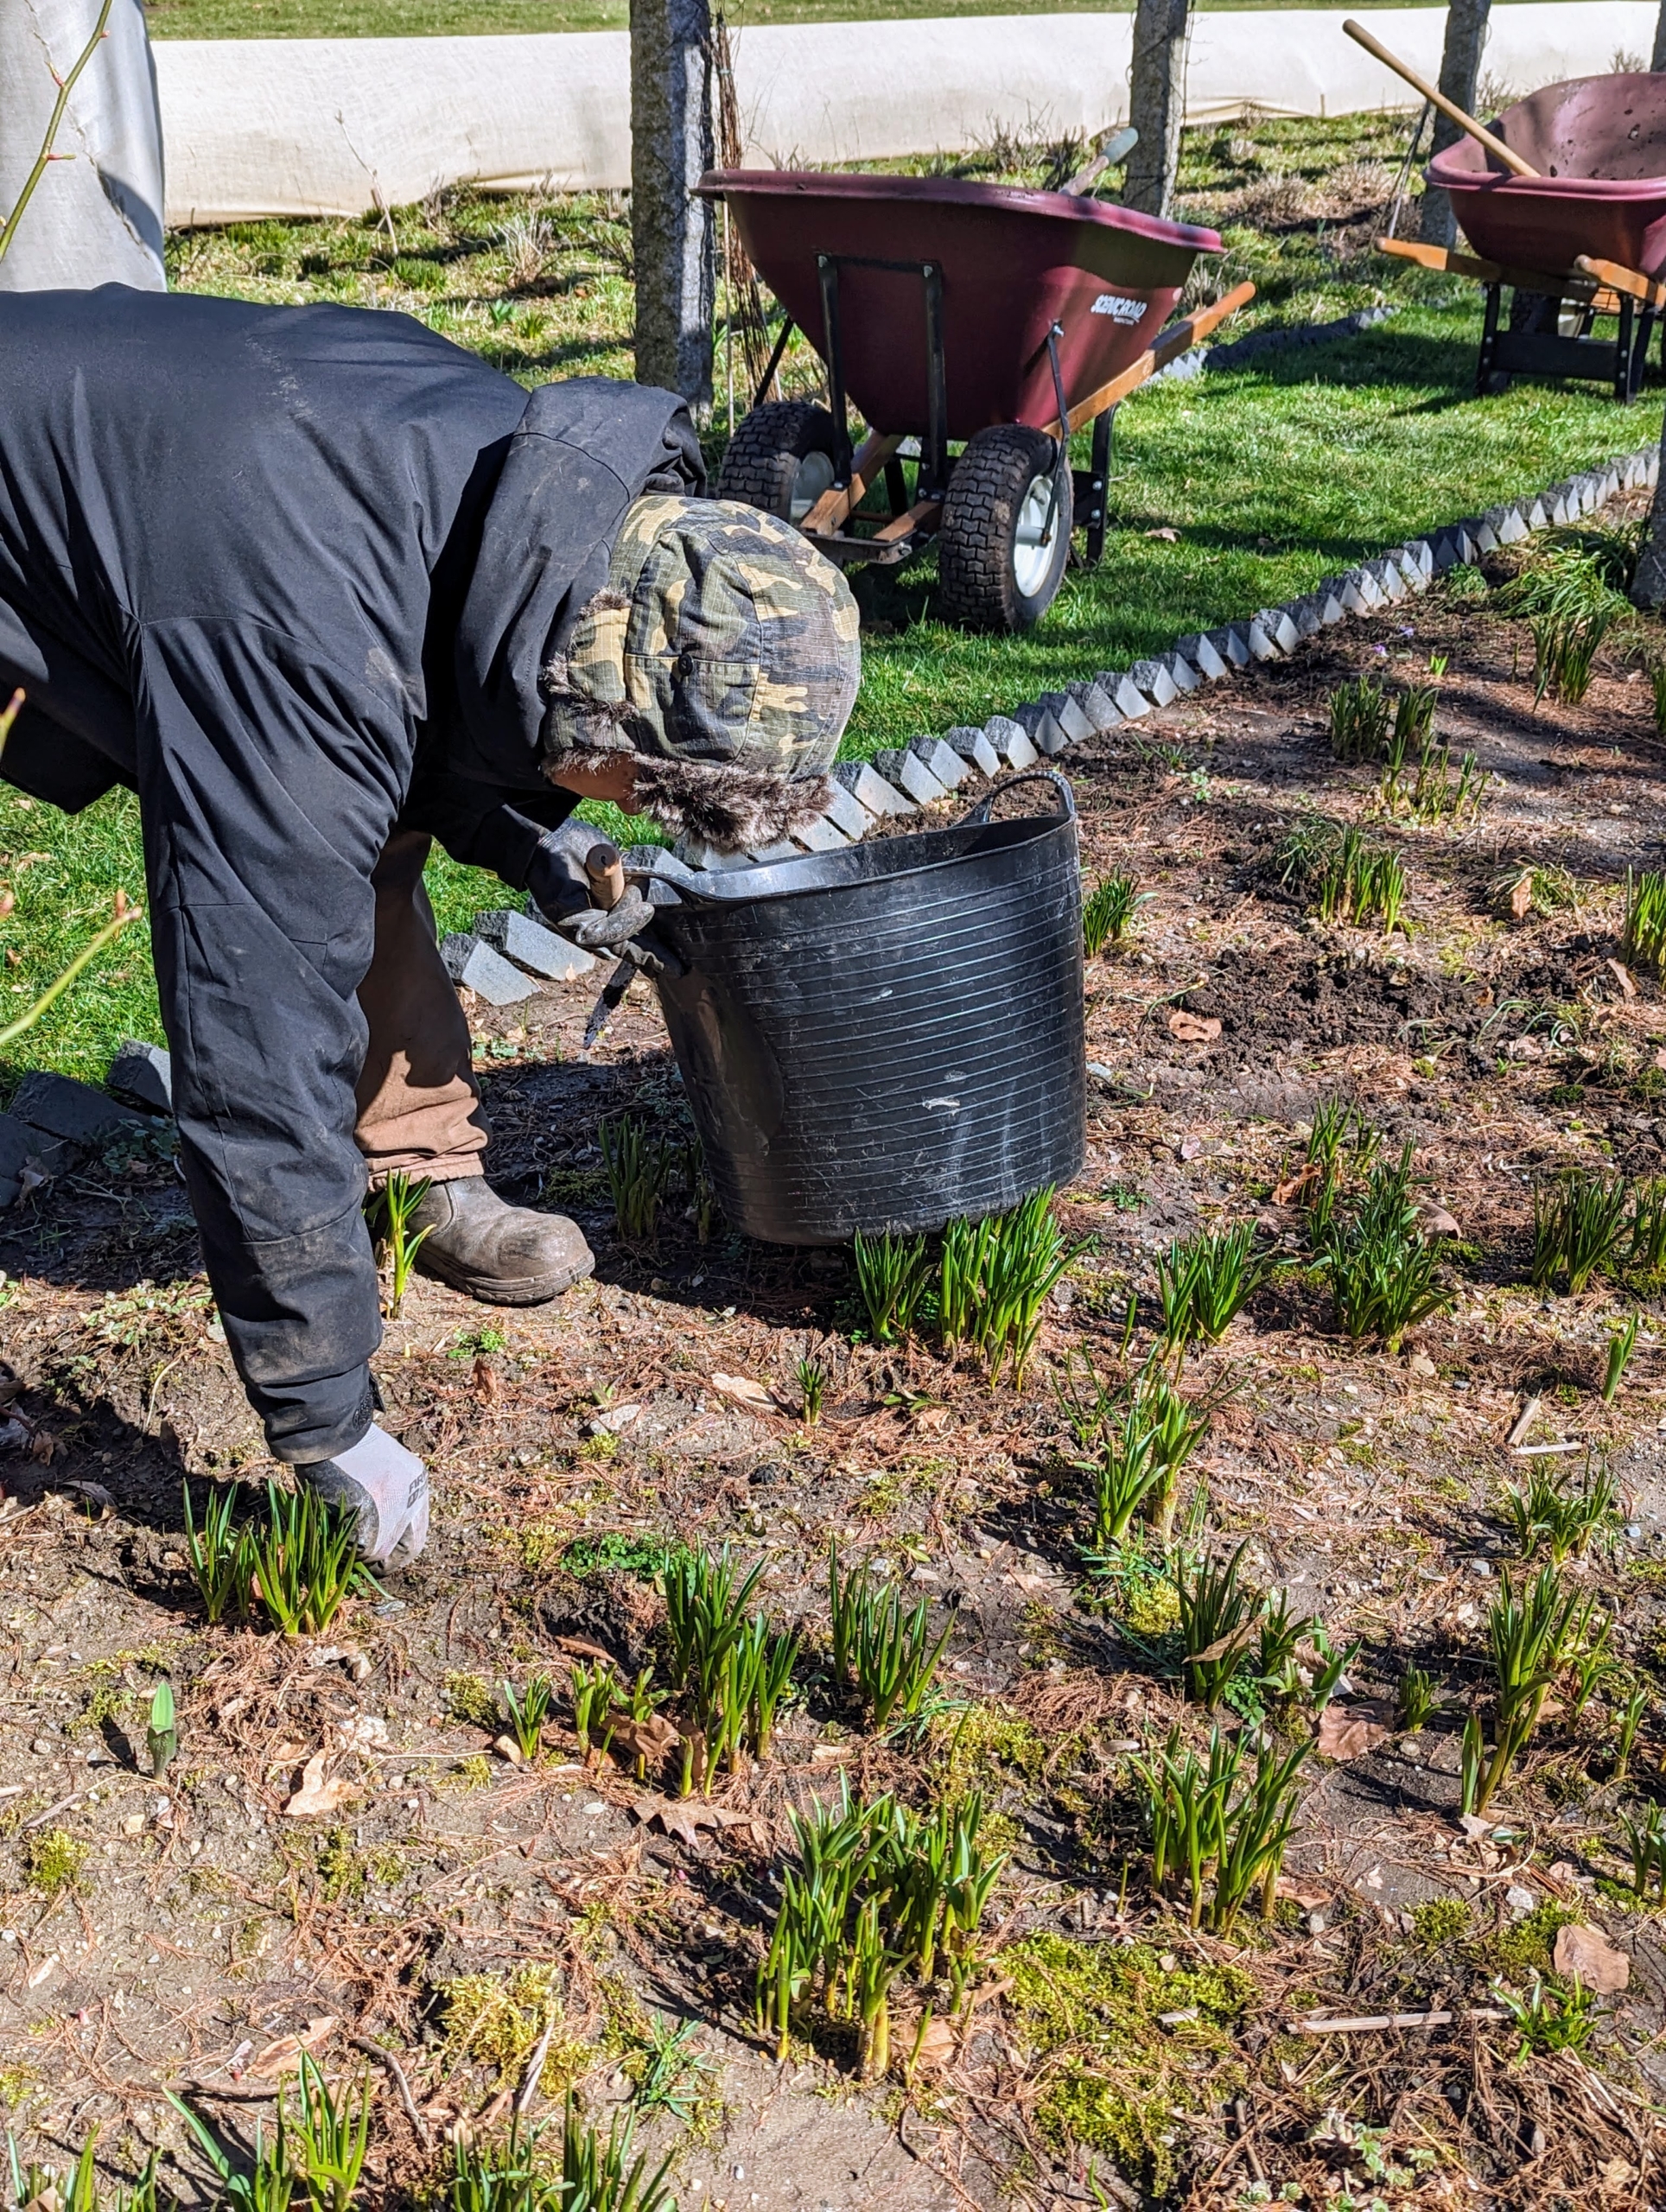
Here’s Chhiring weeding and cleaning the bed before laying down a layer of compost. It doesn’t need a lot – just an inch or two is sufficient.
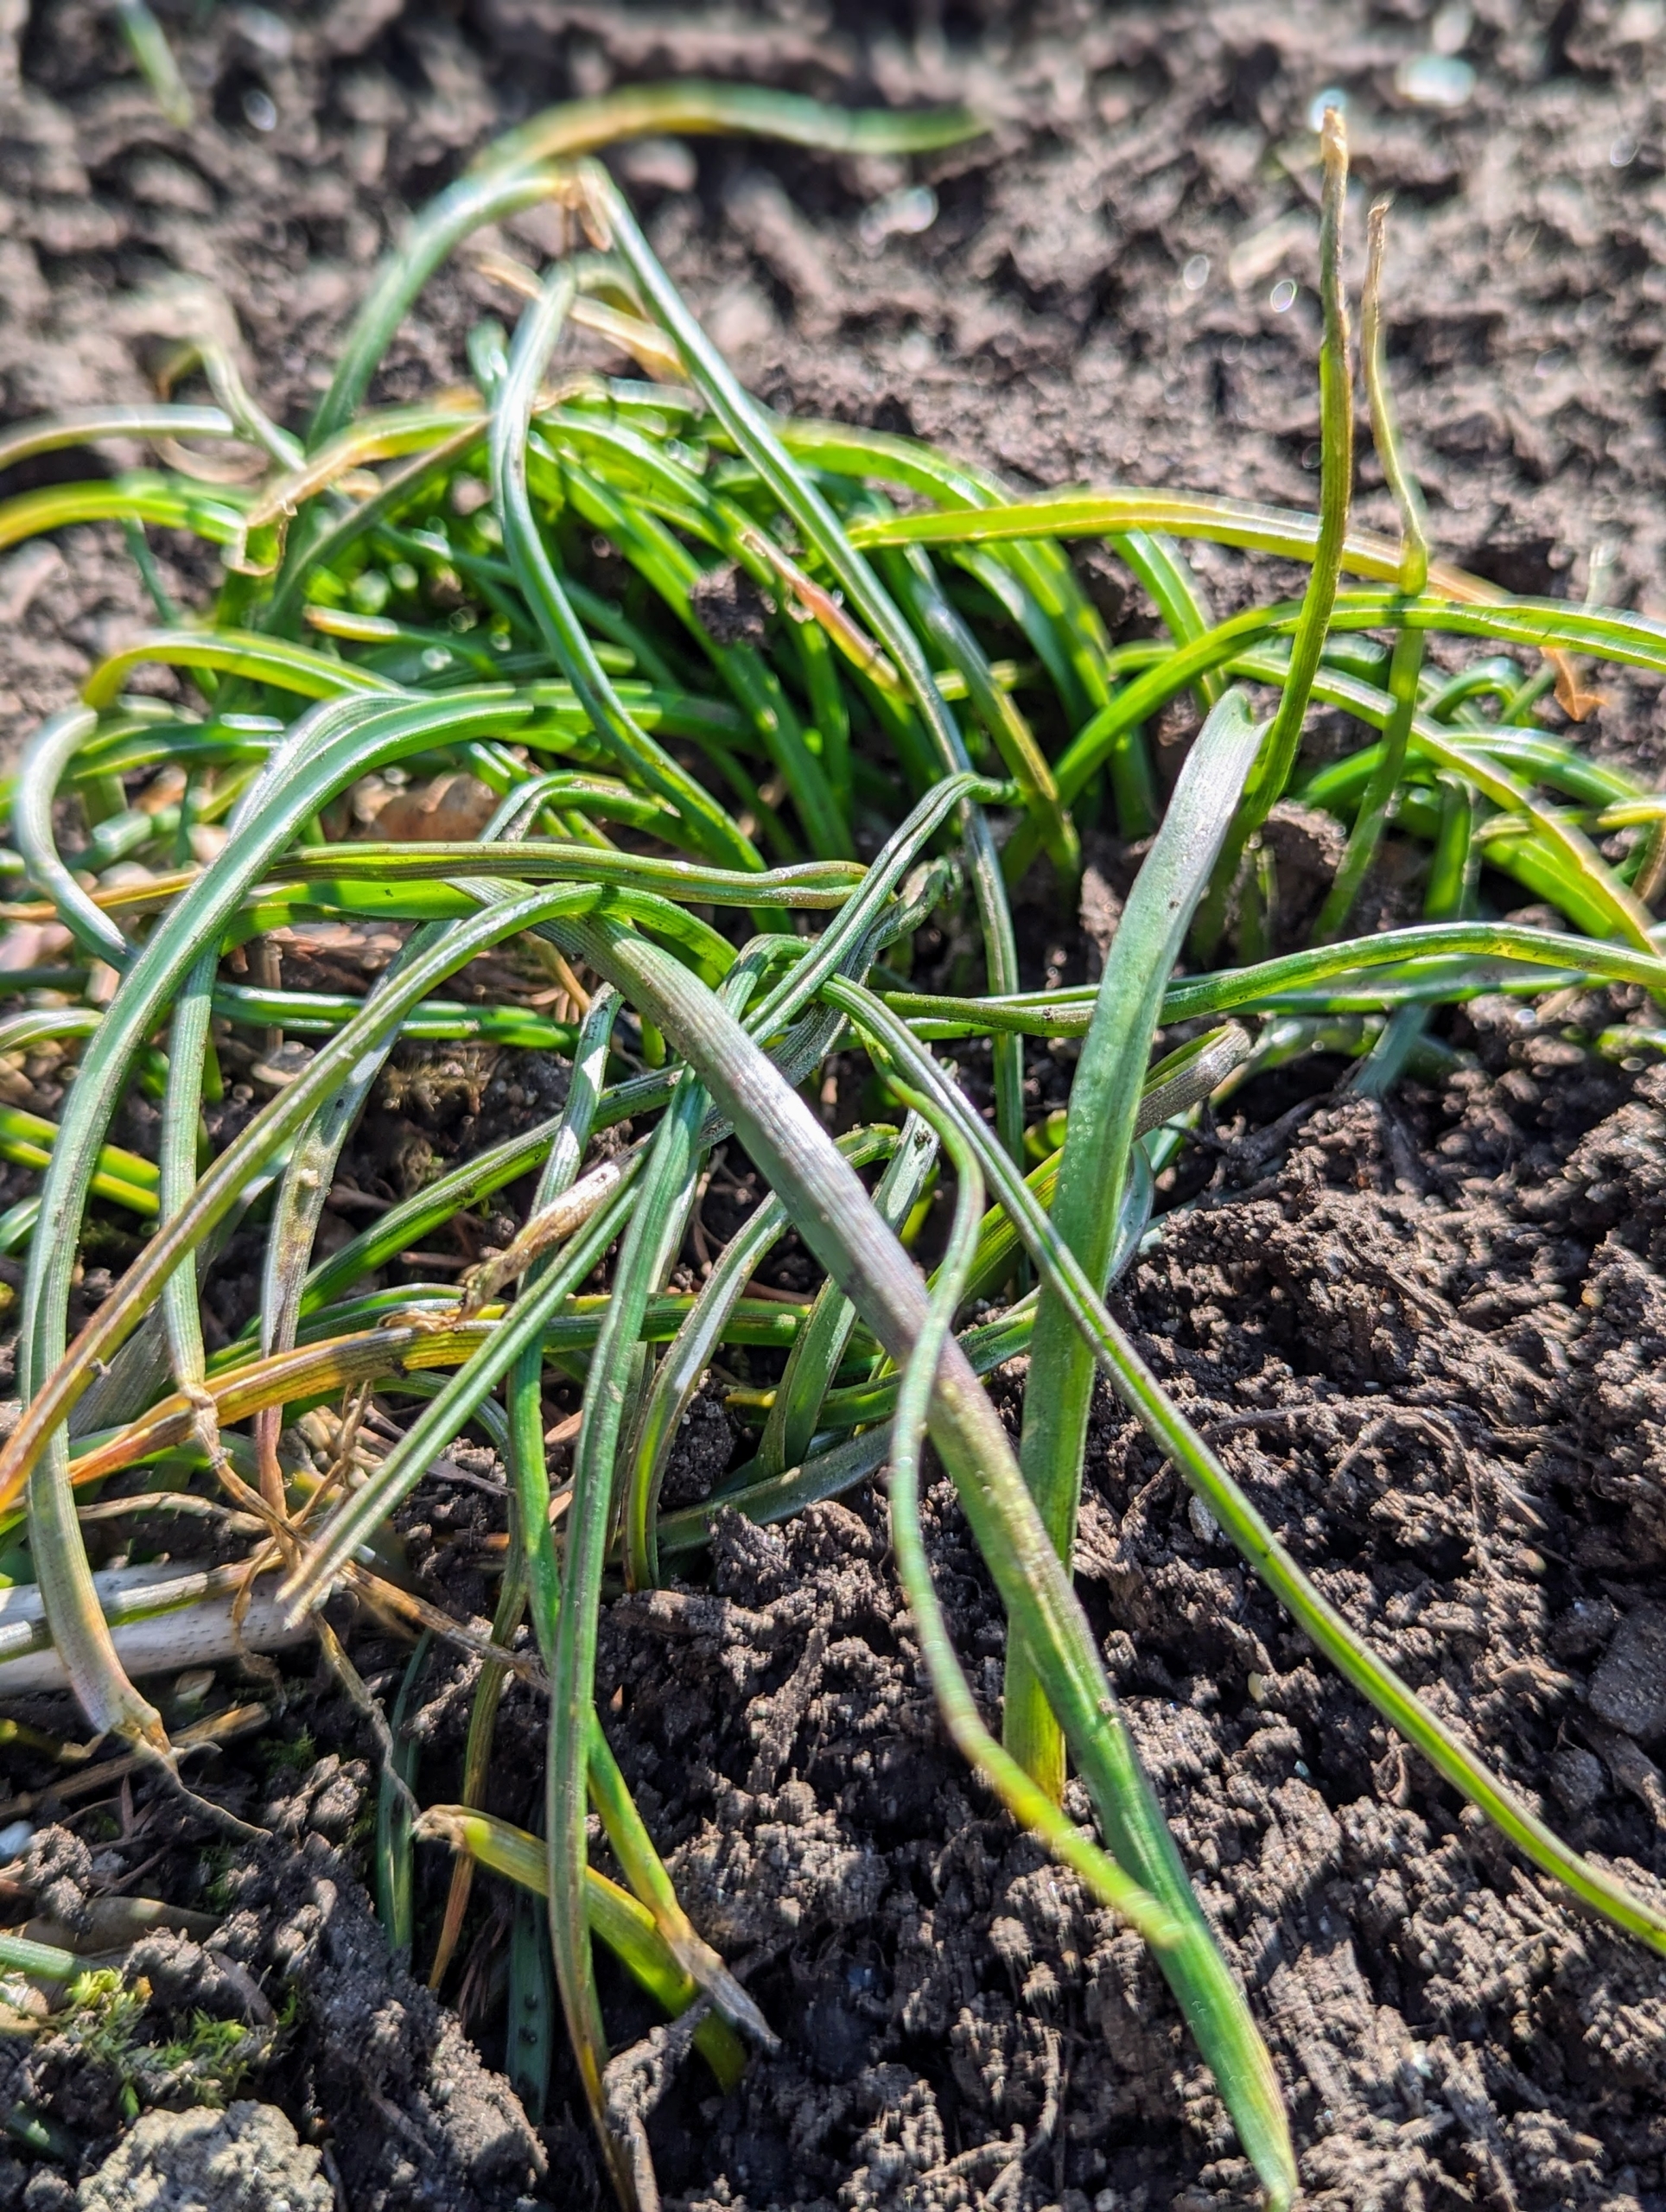
These are the leaves of Camassia. Camassia forms clusters of linear strappy foliage. By early May, these leaves will surround upright racemes. Camassia is a genus of plants in the asparagus family native to Canada and the United States. It is best grown in moist, fertile soil, and full sun.
Muscari, or grape hyacinth, has long, linear, floppy, green leaves. The foliage emerges from the ground in early spring followed by the flowers. The foliage dies back after flowering in early summer, but then starts growing actively once again in mid-autumn.
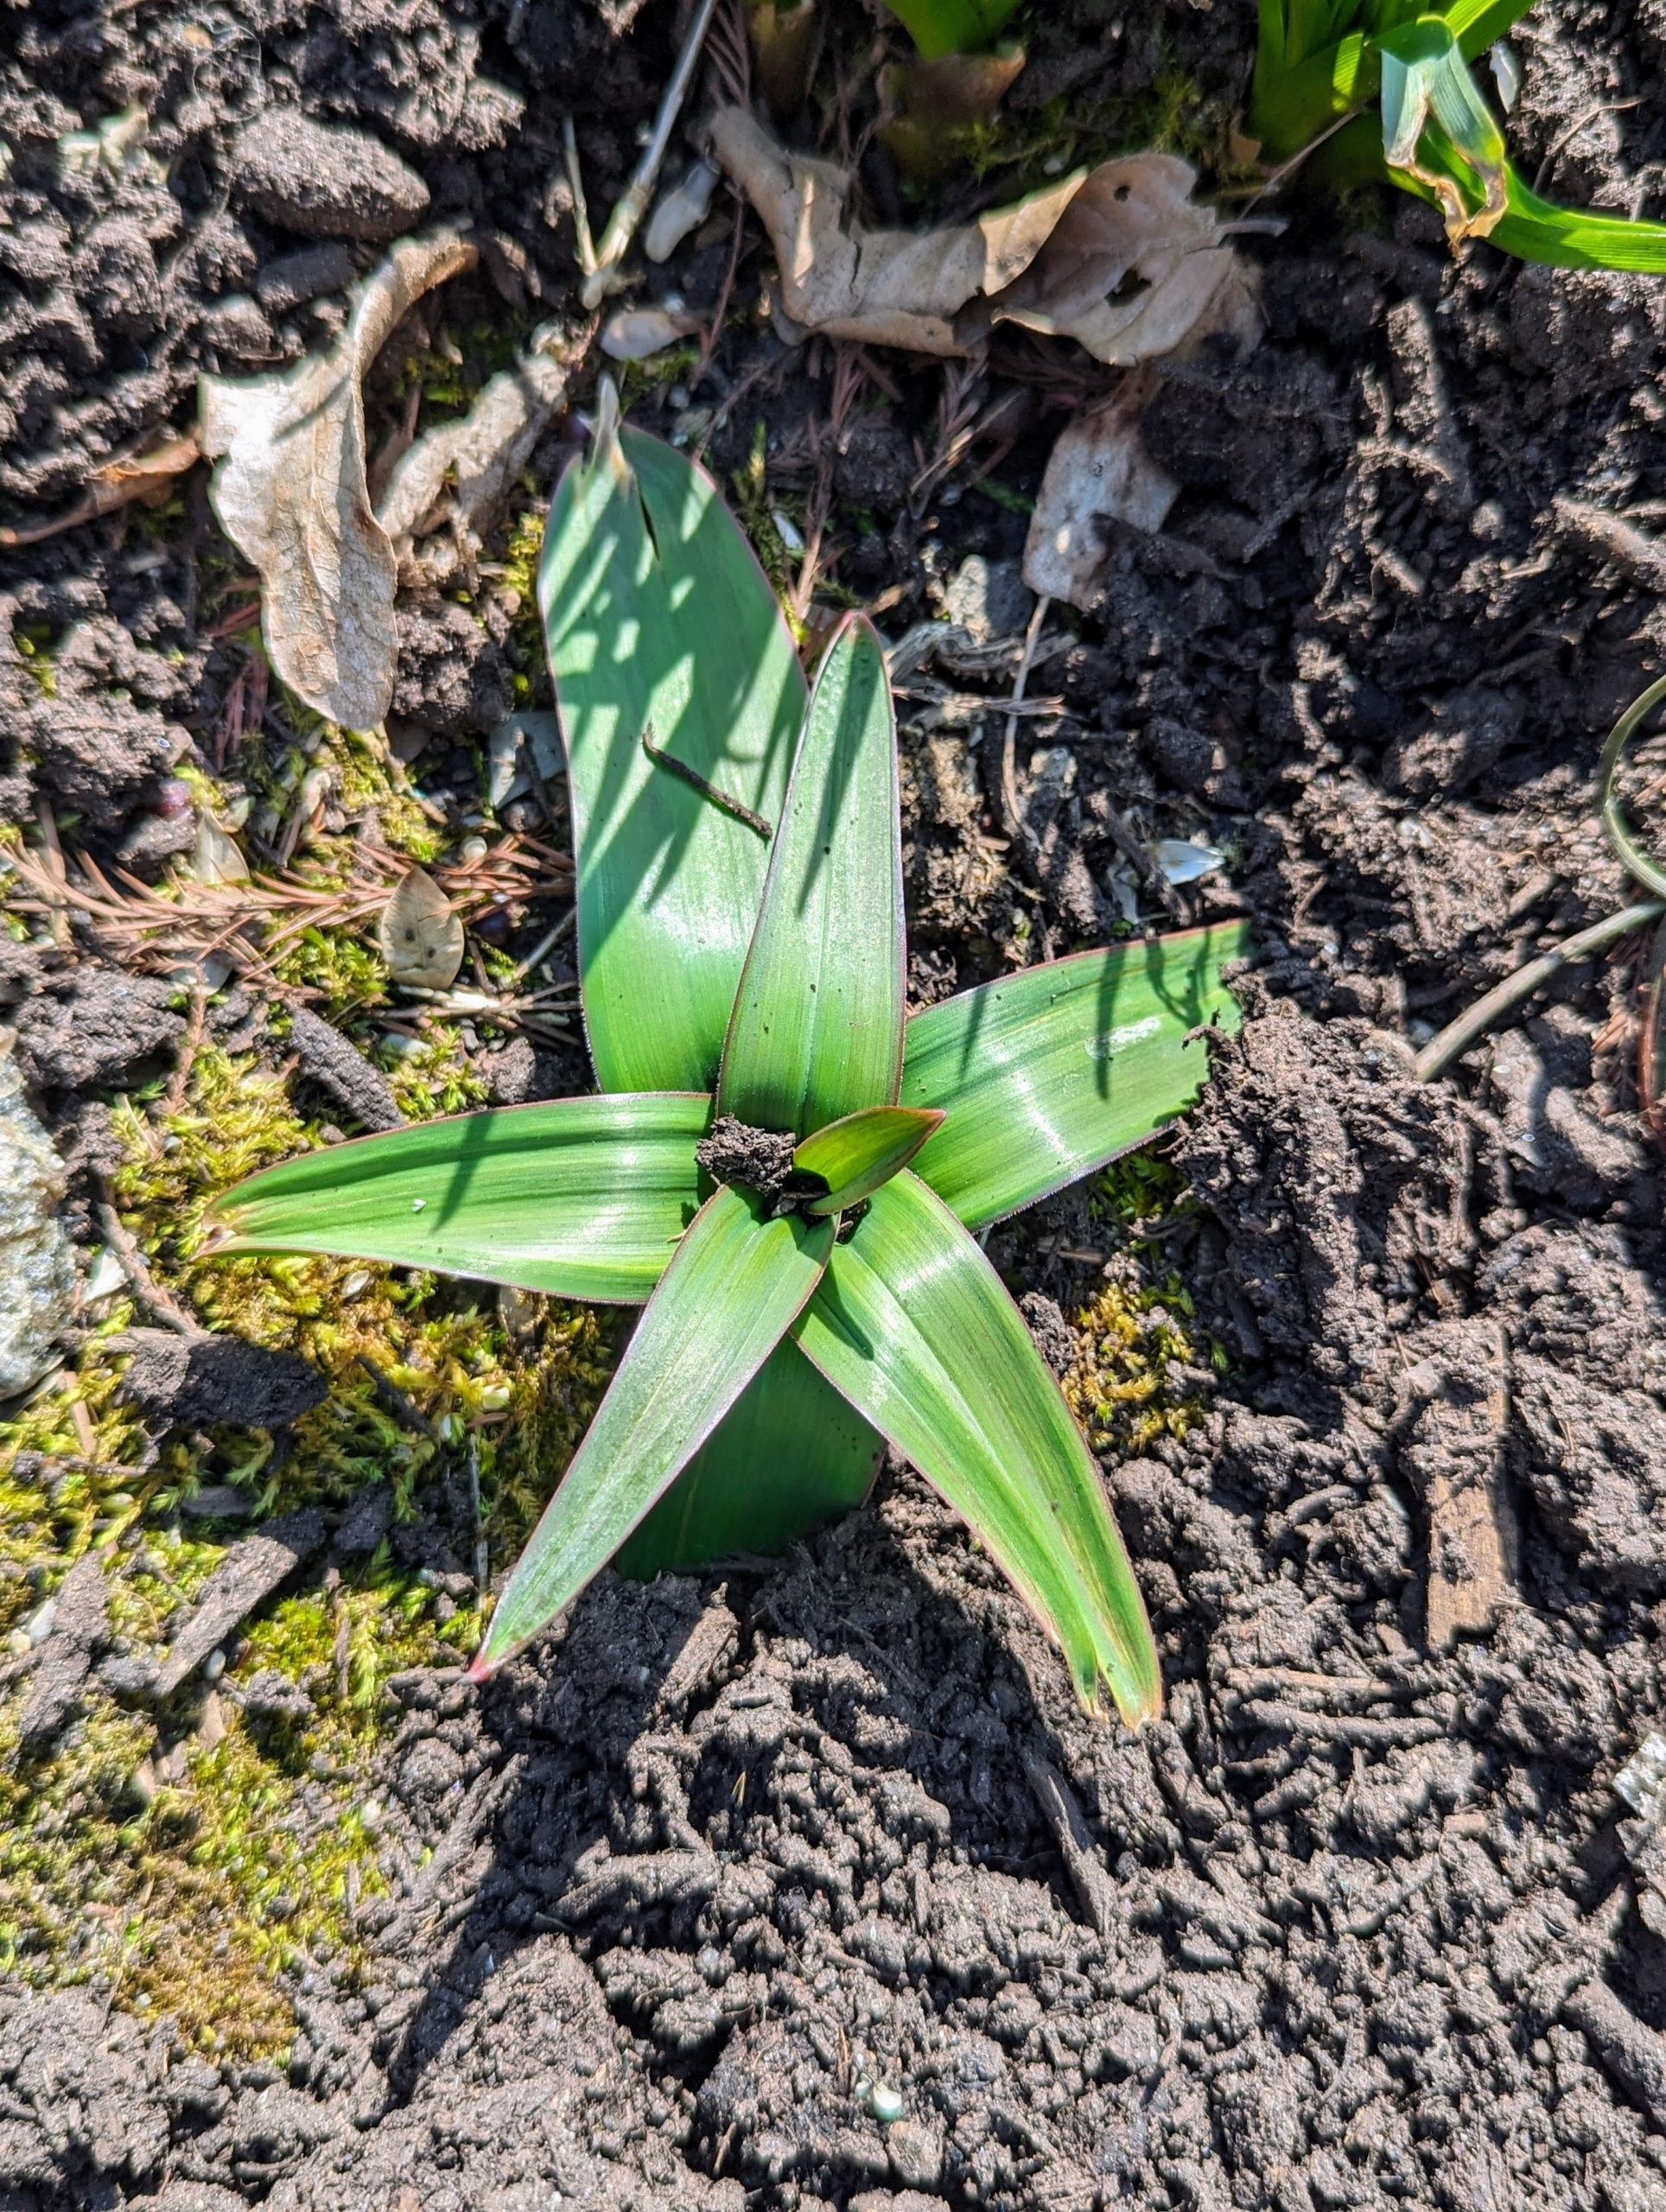
Rosettes of allium leaves also dot the garden. Alliums are often overlooked as one of the best bulbs for constant color throughout the seasons. The flowers come in oval, spherical, or globular shapes, blooming in magnificent colors atop tall stems.
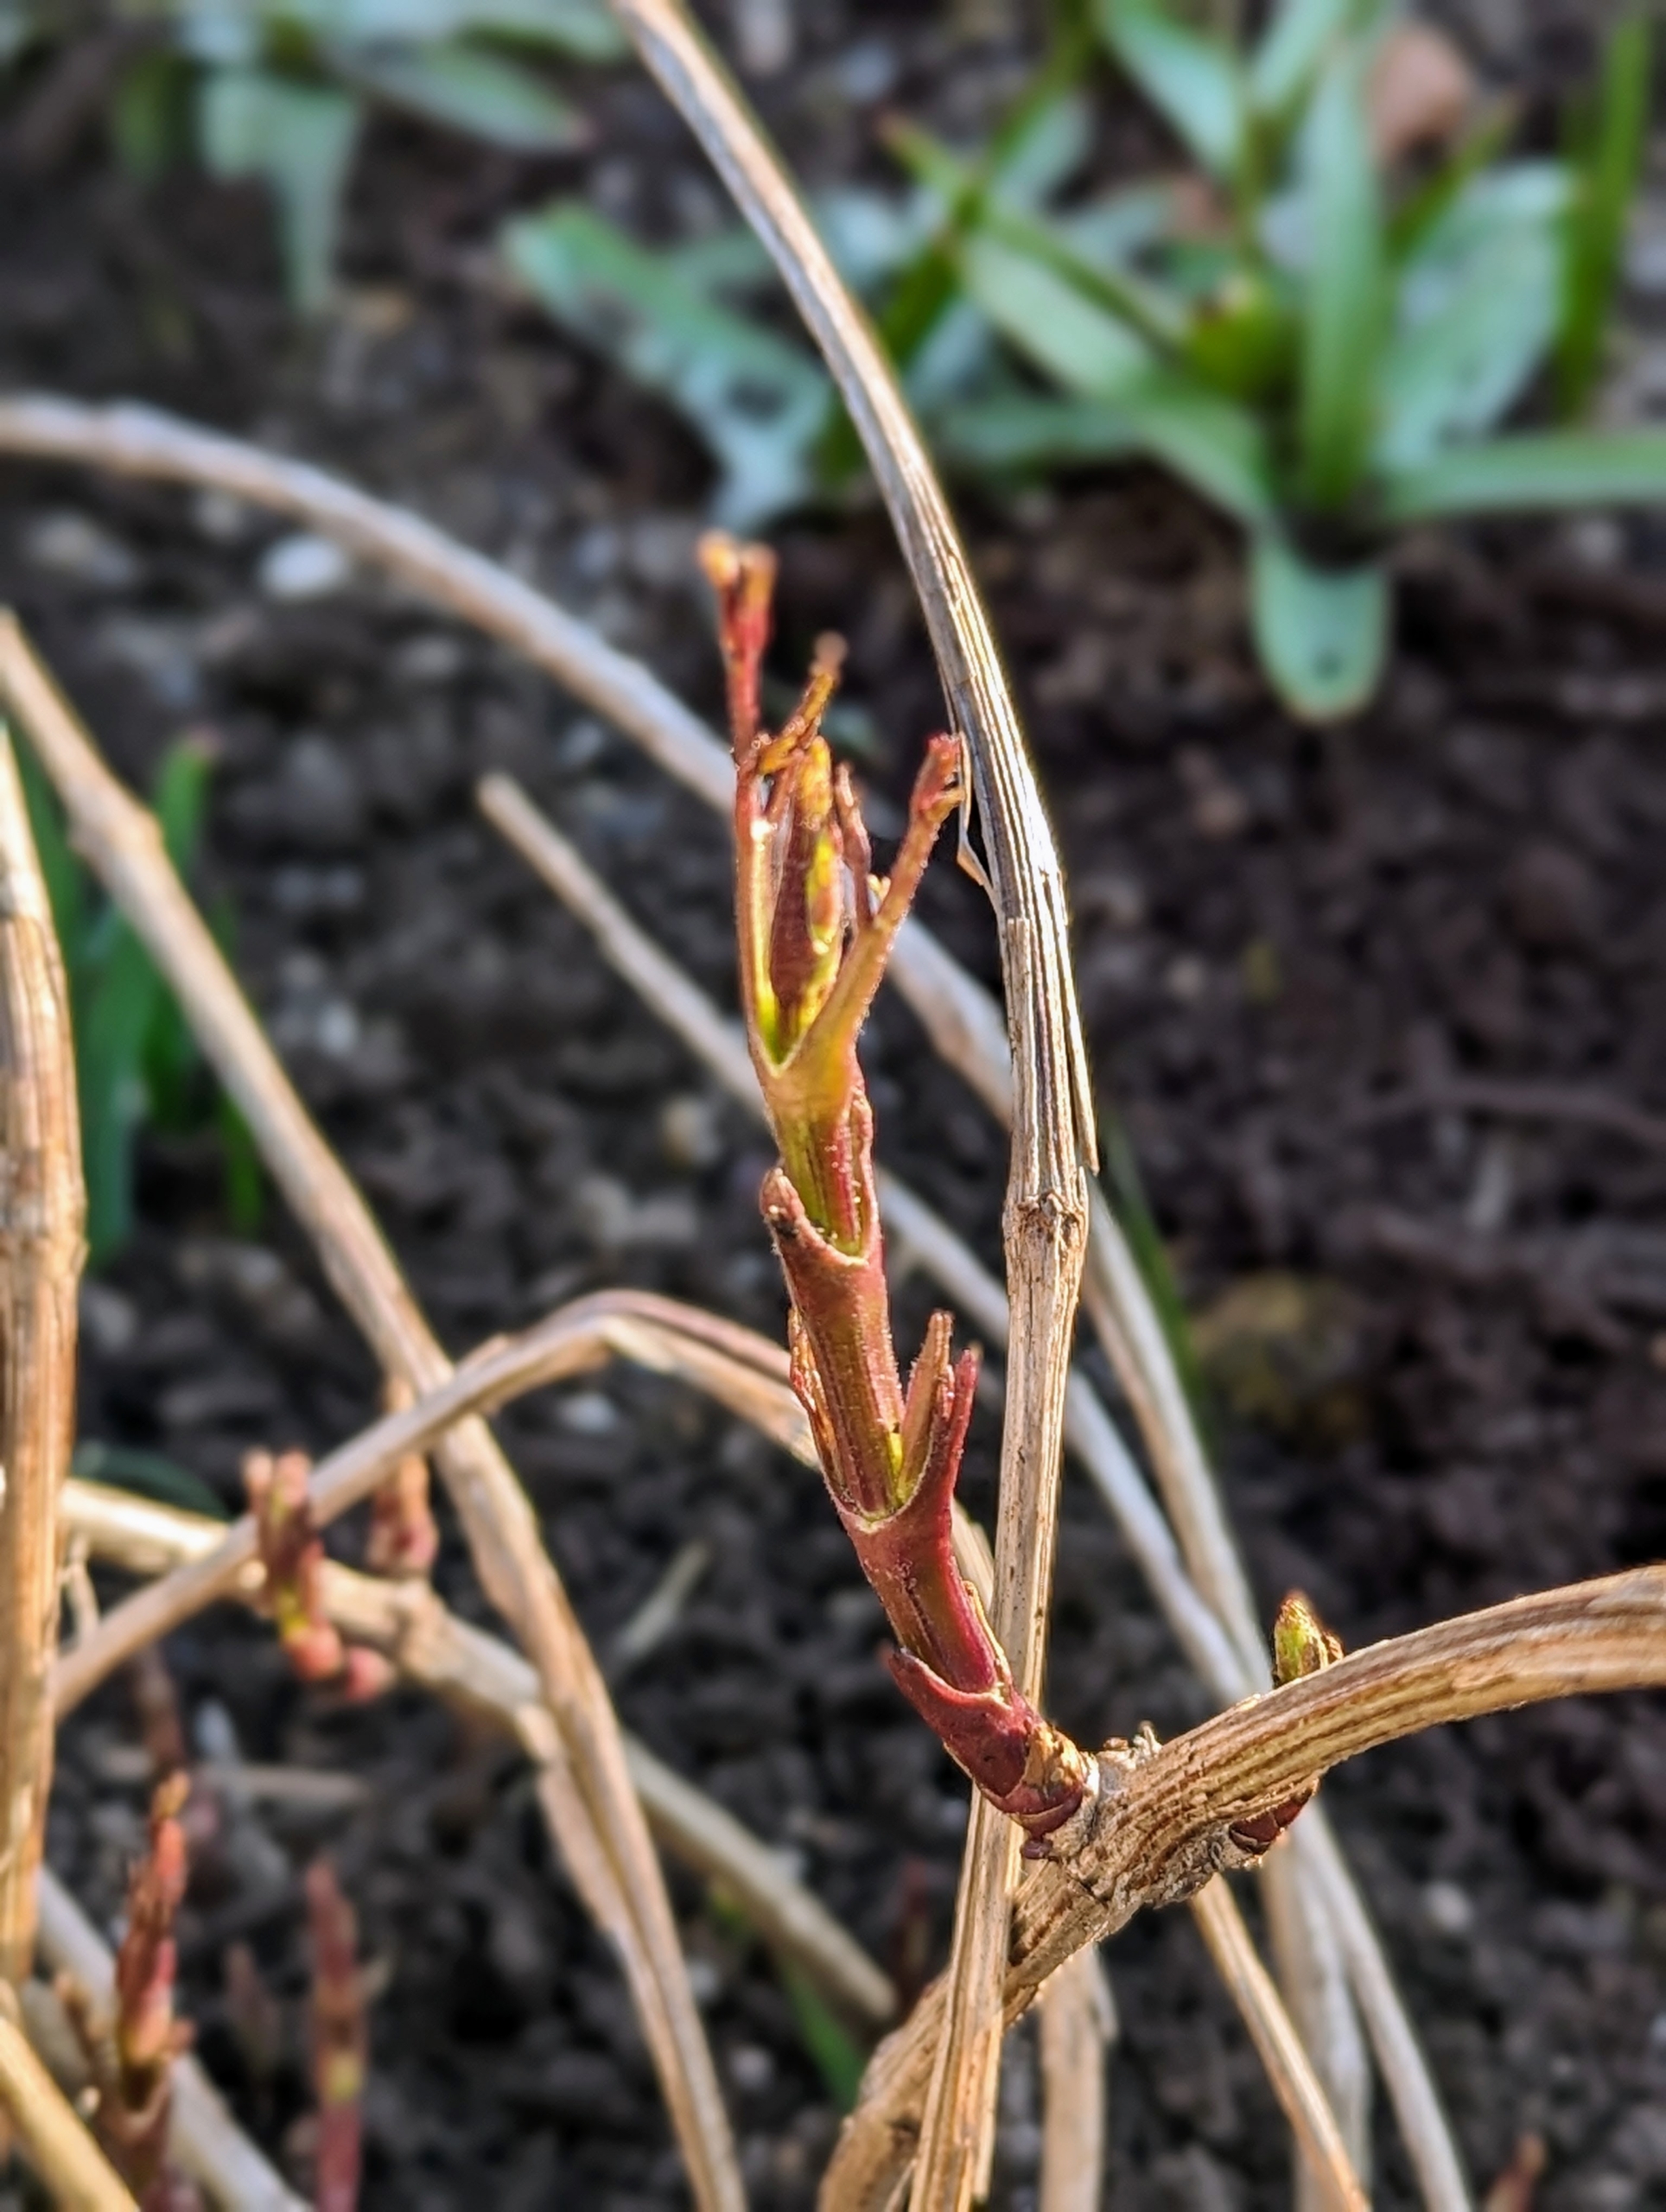
Here, one can see the red shading on the tips of the allium leaves when they first emerge. Unfortunately, by the time these alliums bloom in late May or early June, the leaves will have withered away.
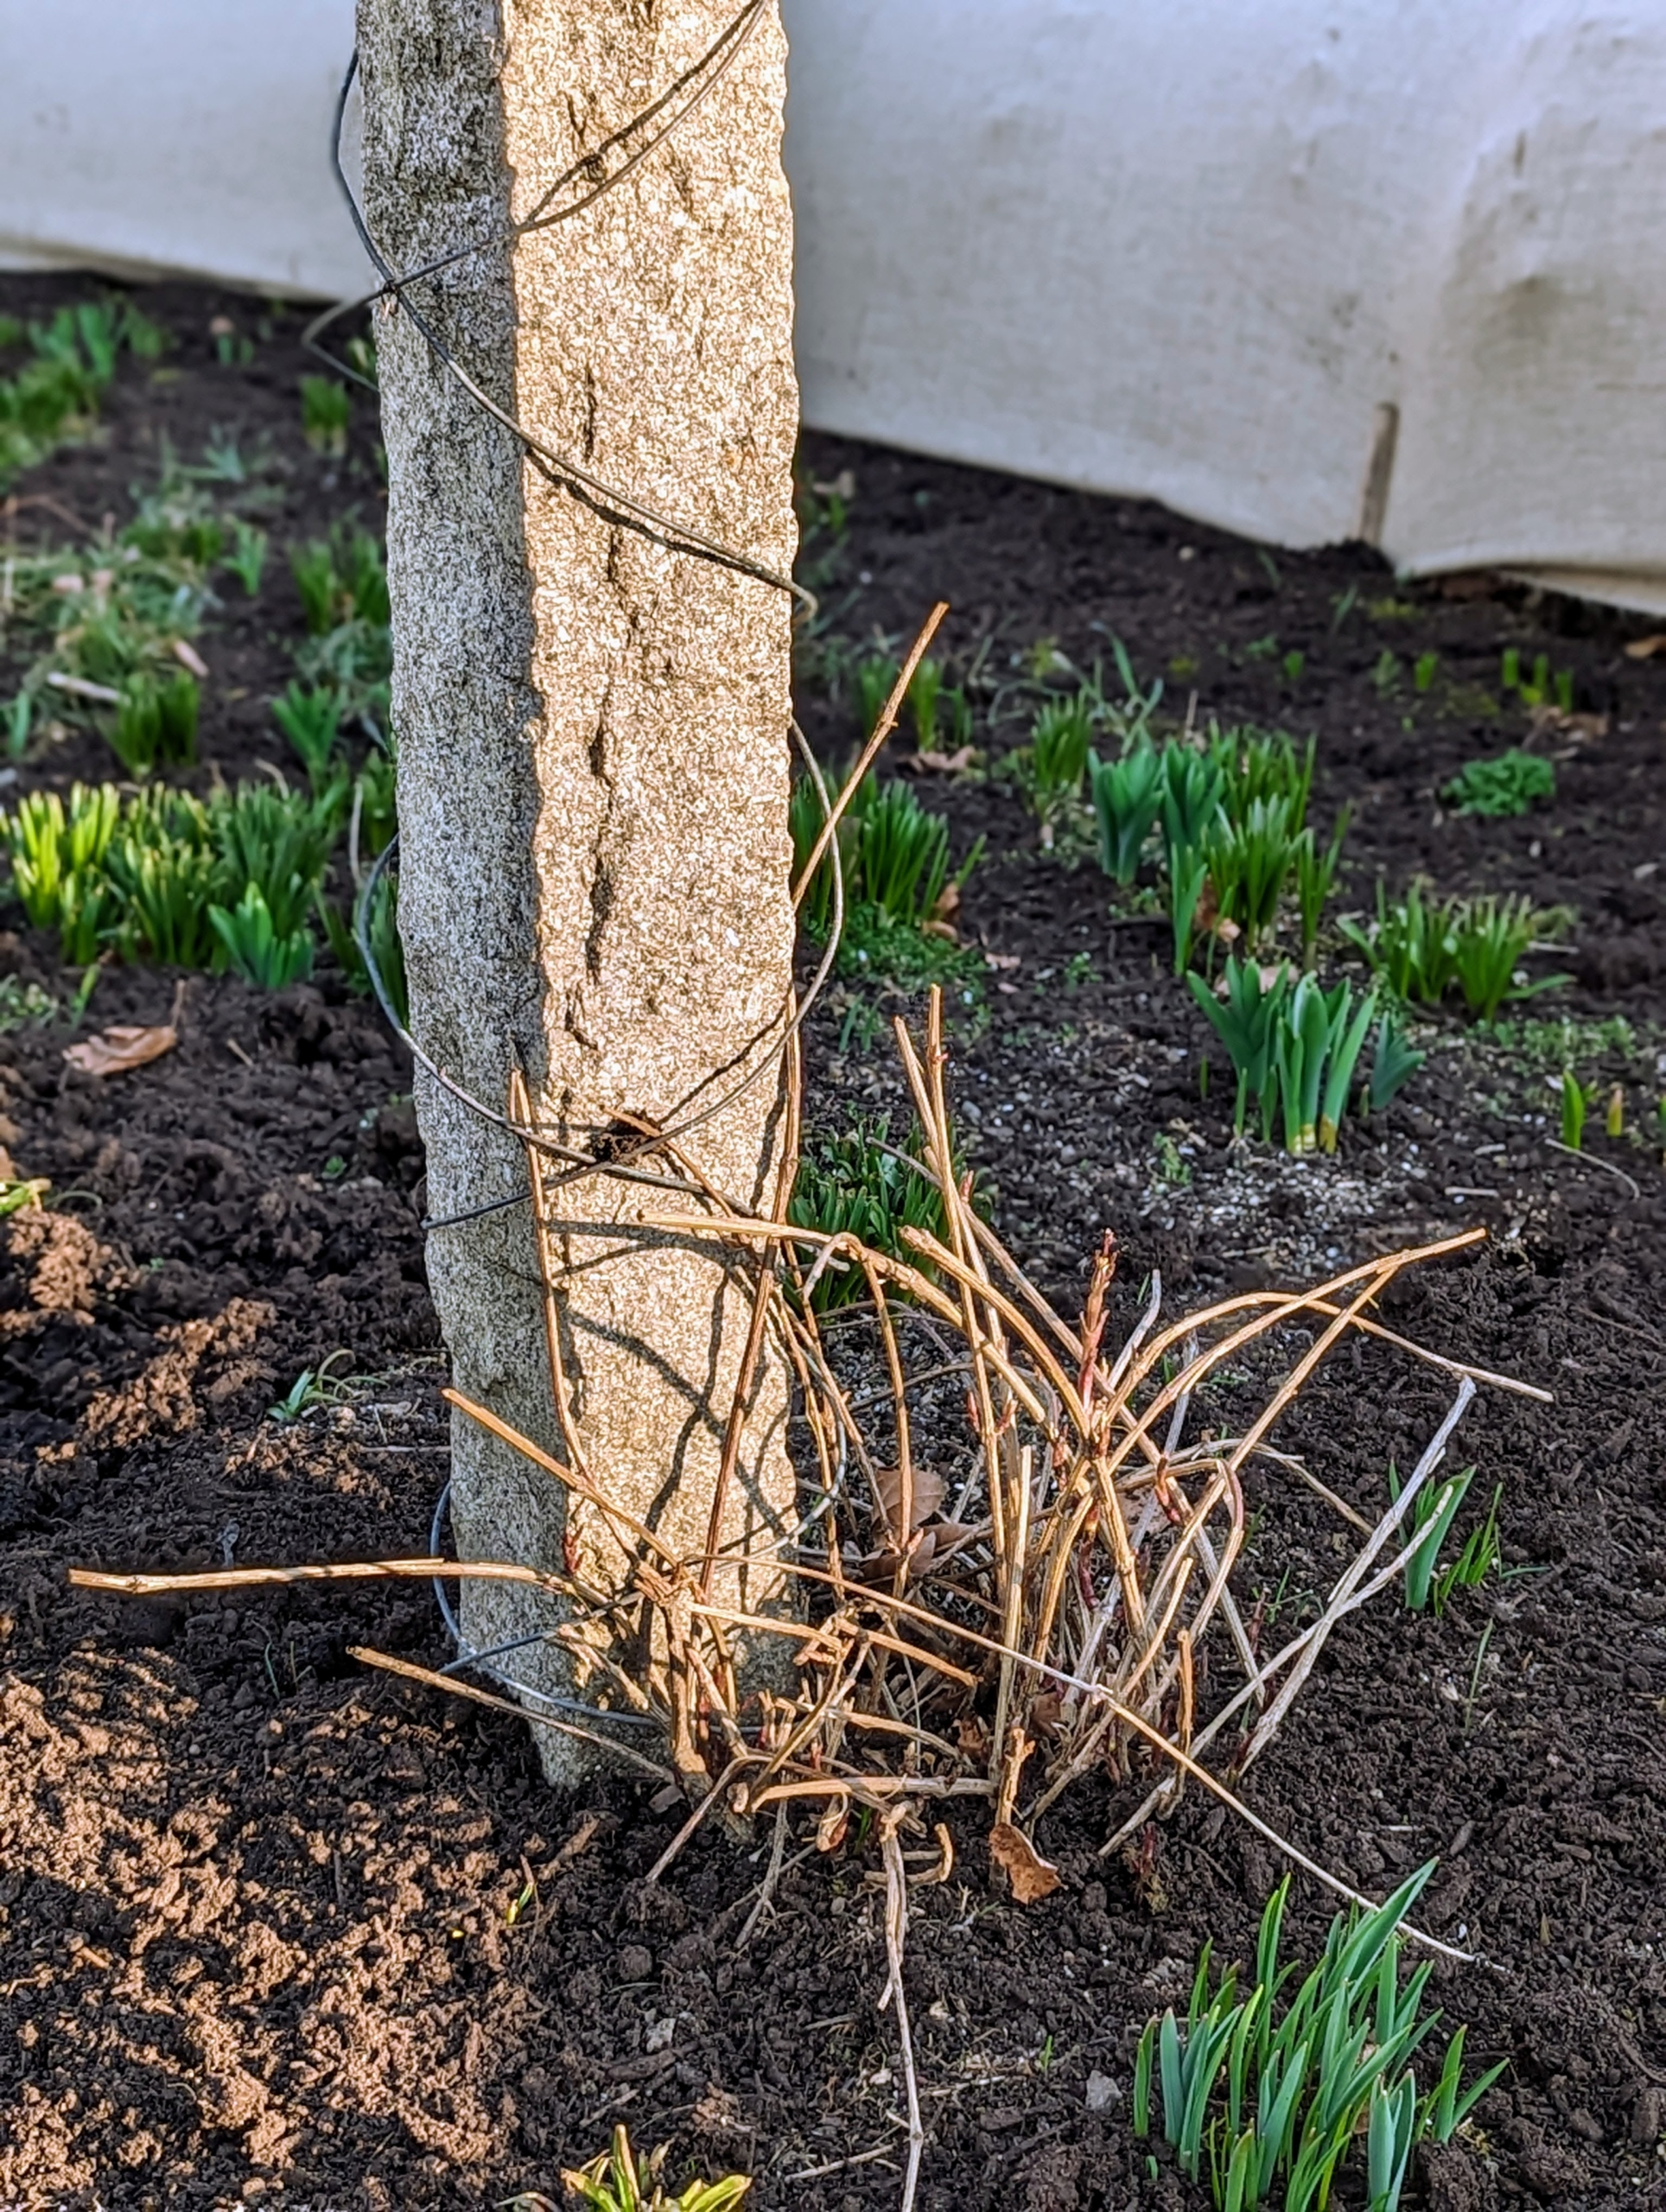
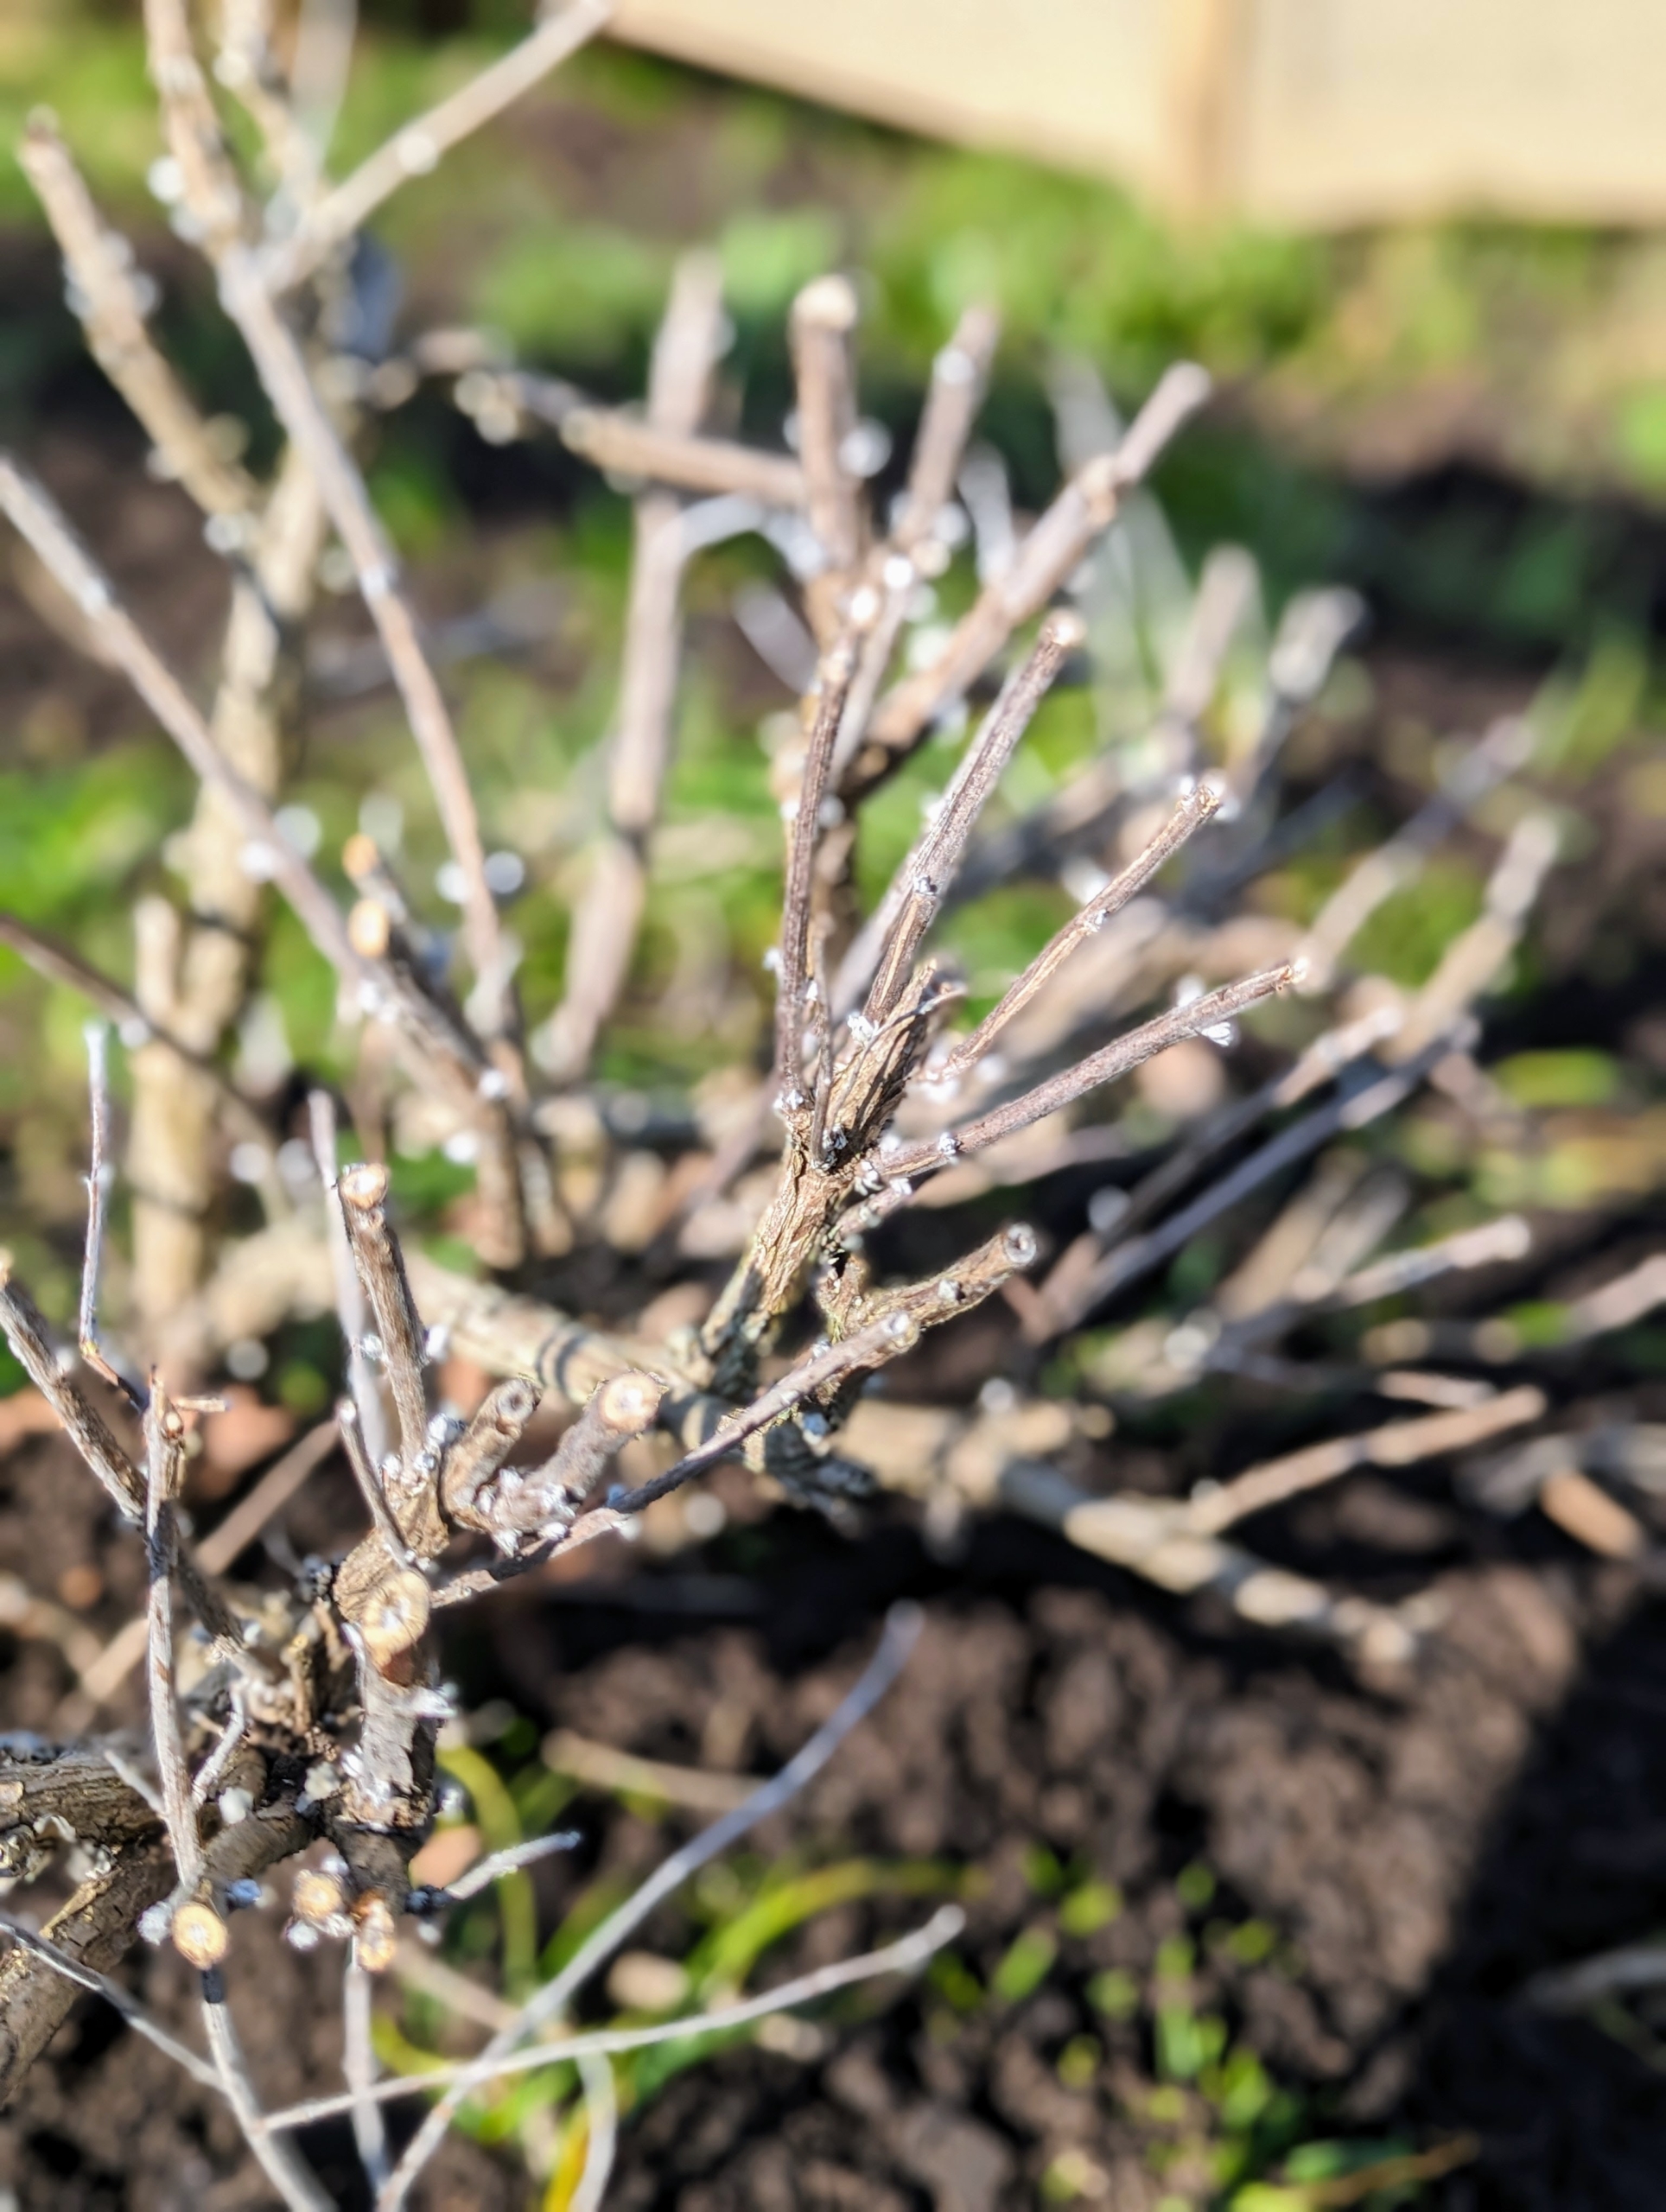
These are the woody stems of catnip. On established plants, the shoots begin to come up in early spring.
In the center and at the ends of this winding pergola are wisteria standards. Right now they are bare, but the fragrant plant blooms start to appear in mid-to-late spring, in May or June.
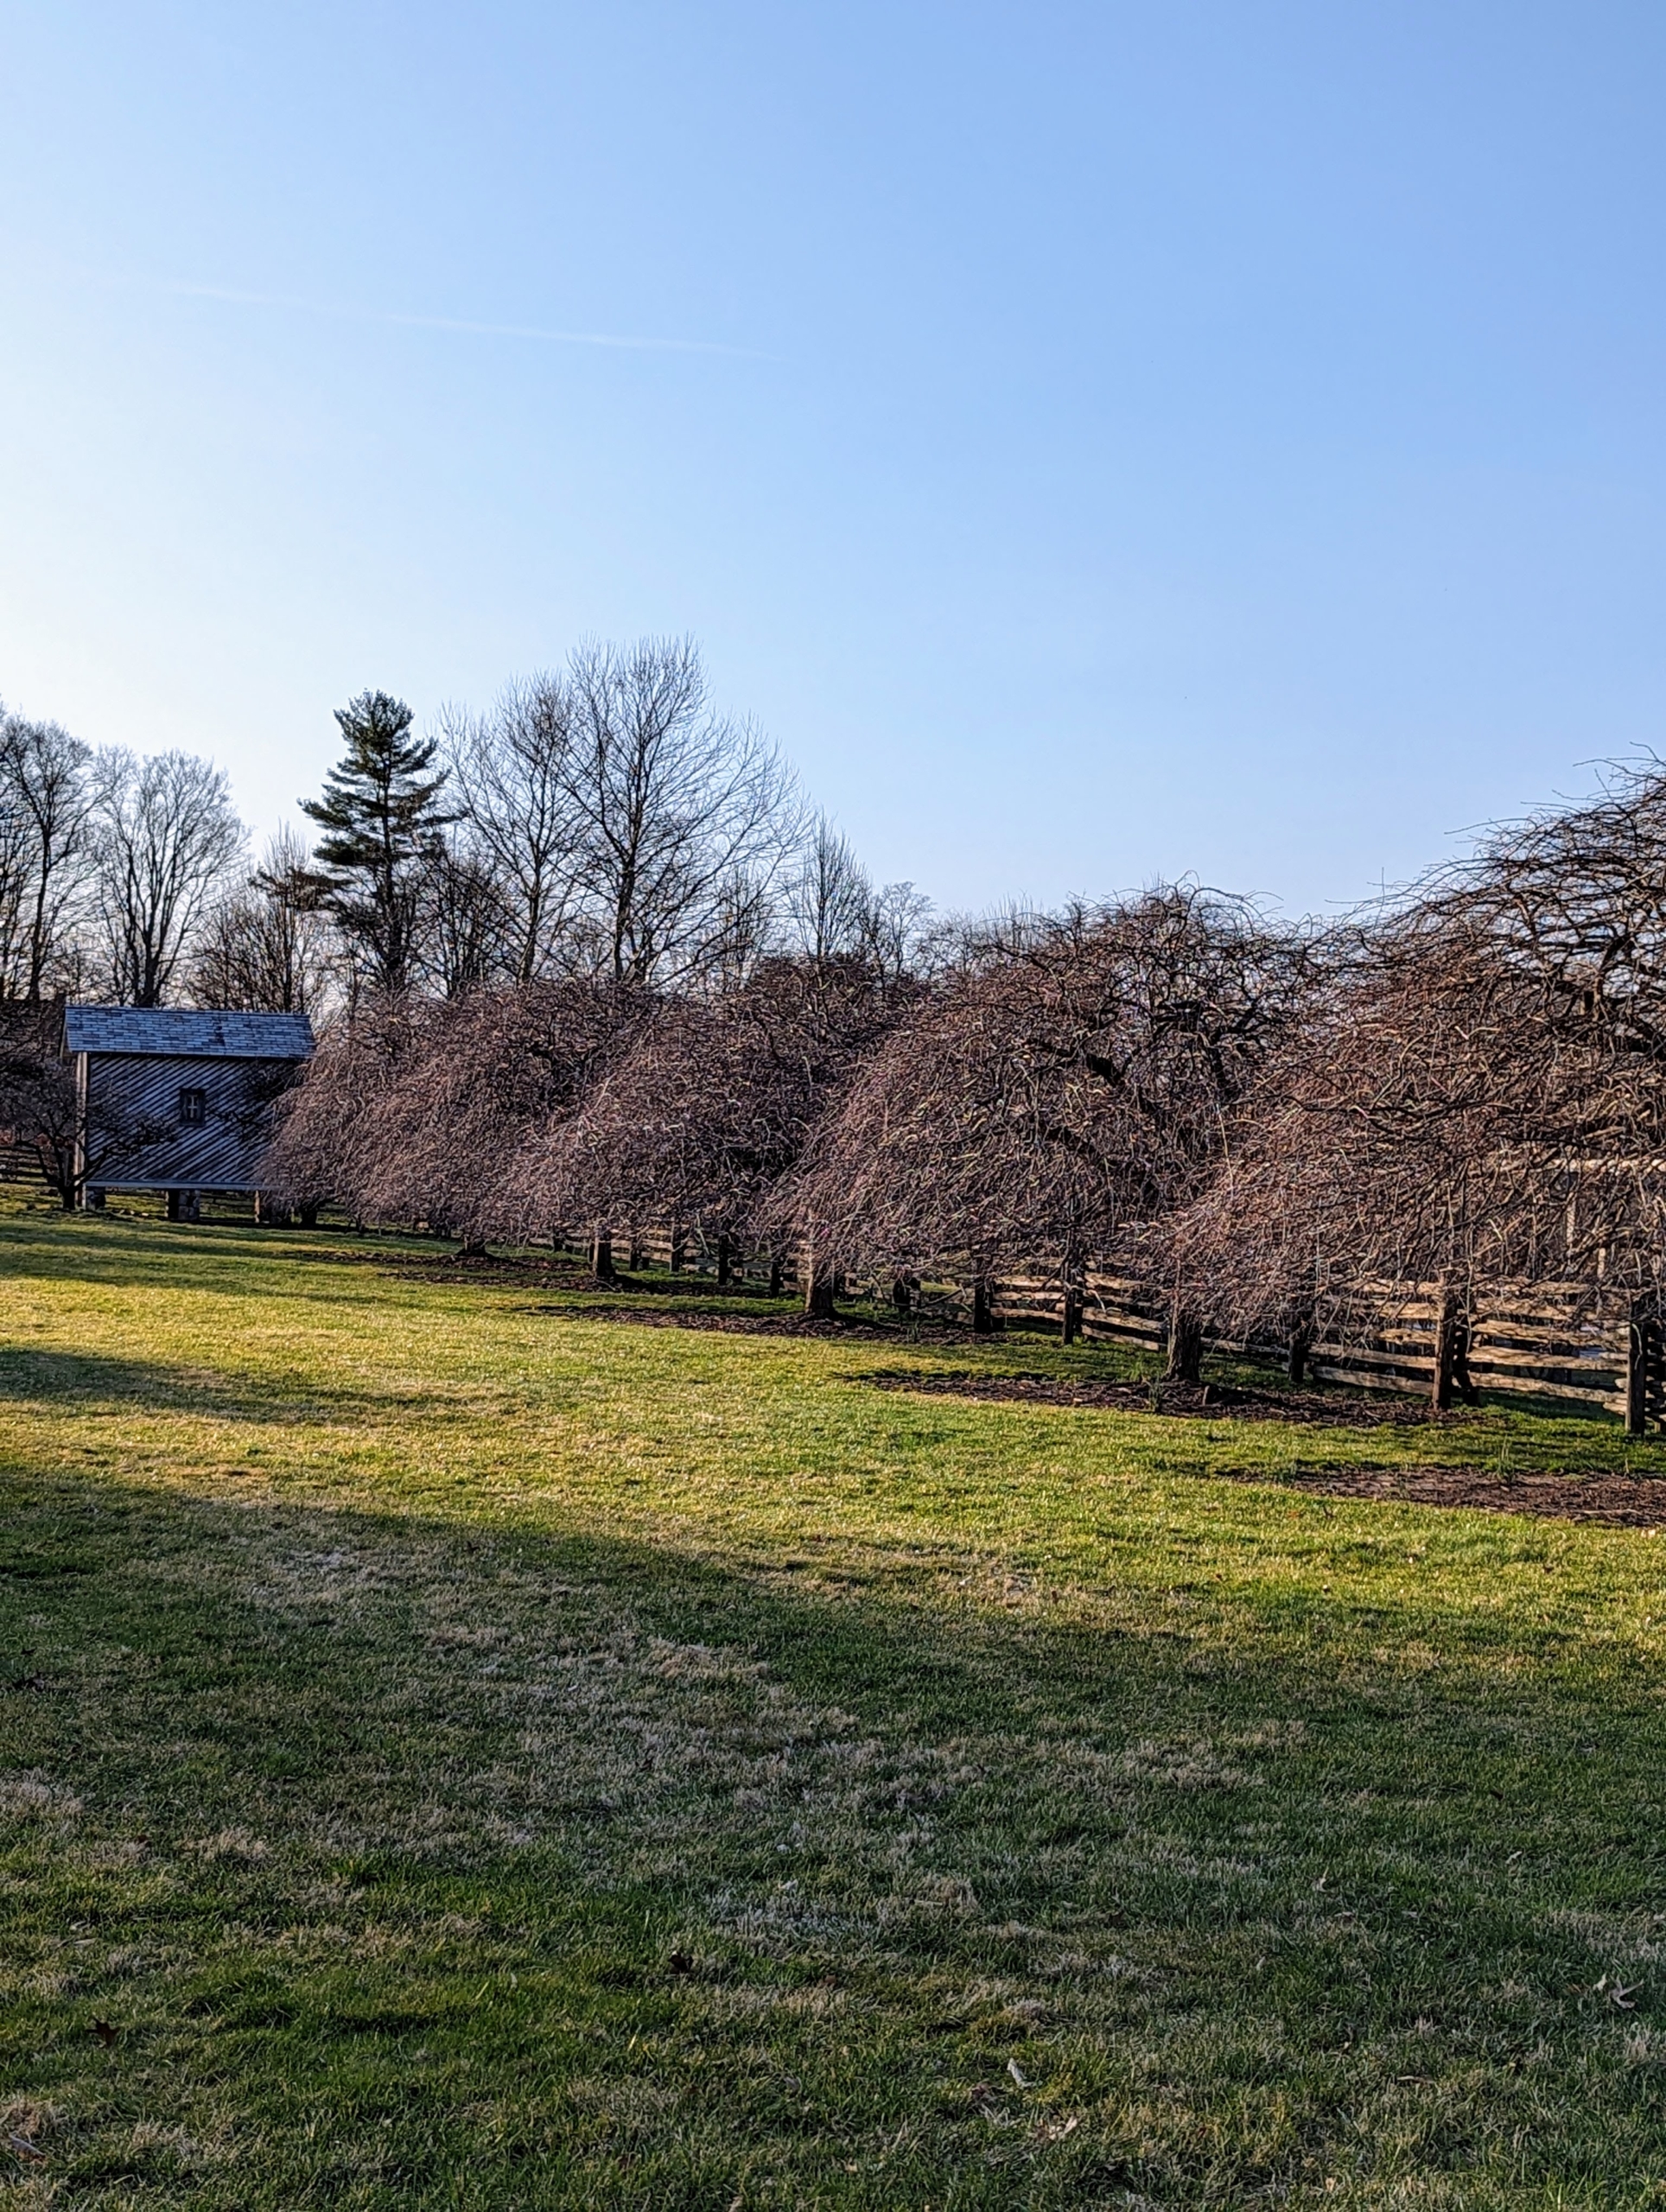
Behind the pergola and across the “soccer field,” where my grandson, Truman, loves to play whenever he visits, are six matched standard weeping hornbeams, Carpinus betulus ‘Pendula’. Weeping hornbeams can grow to be about 50-feet tall at maturity, with a spread of 40-feet. These are very rare and precious trees and I am so happy they continue to grow well here.
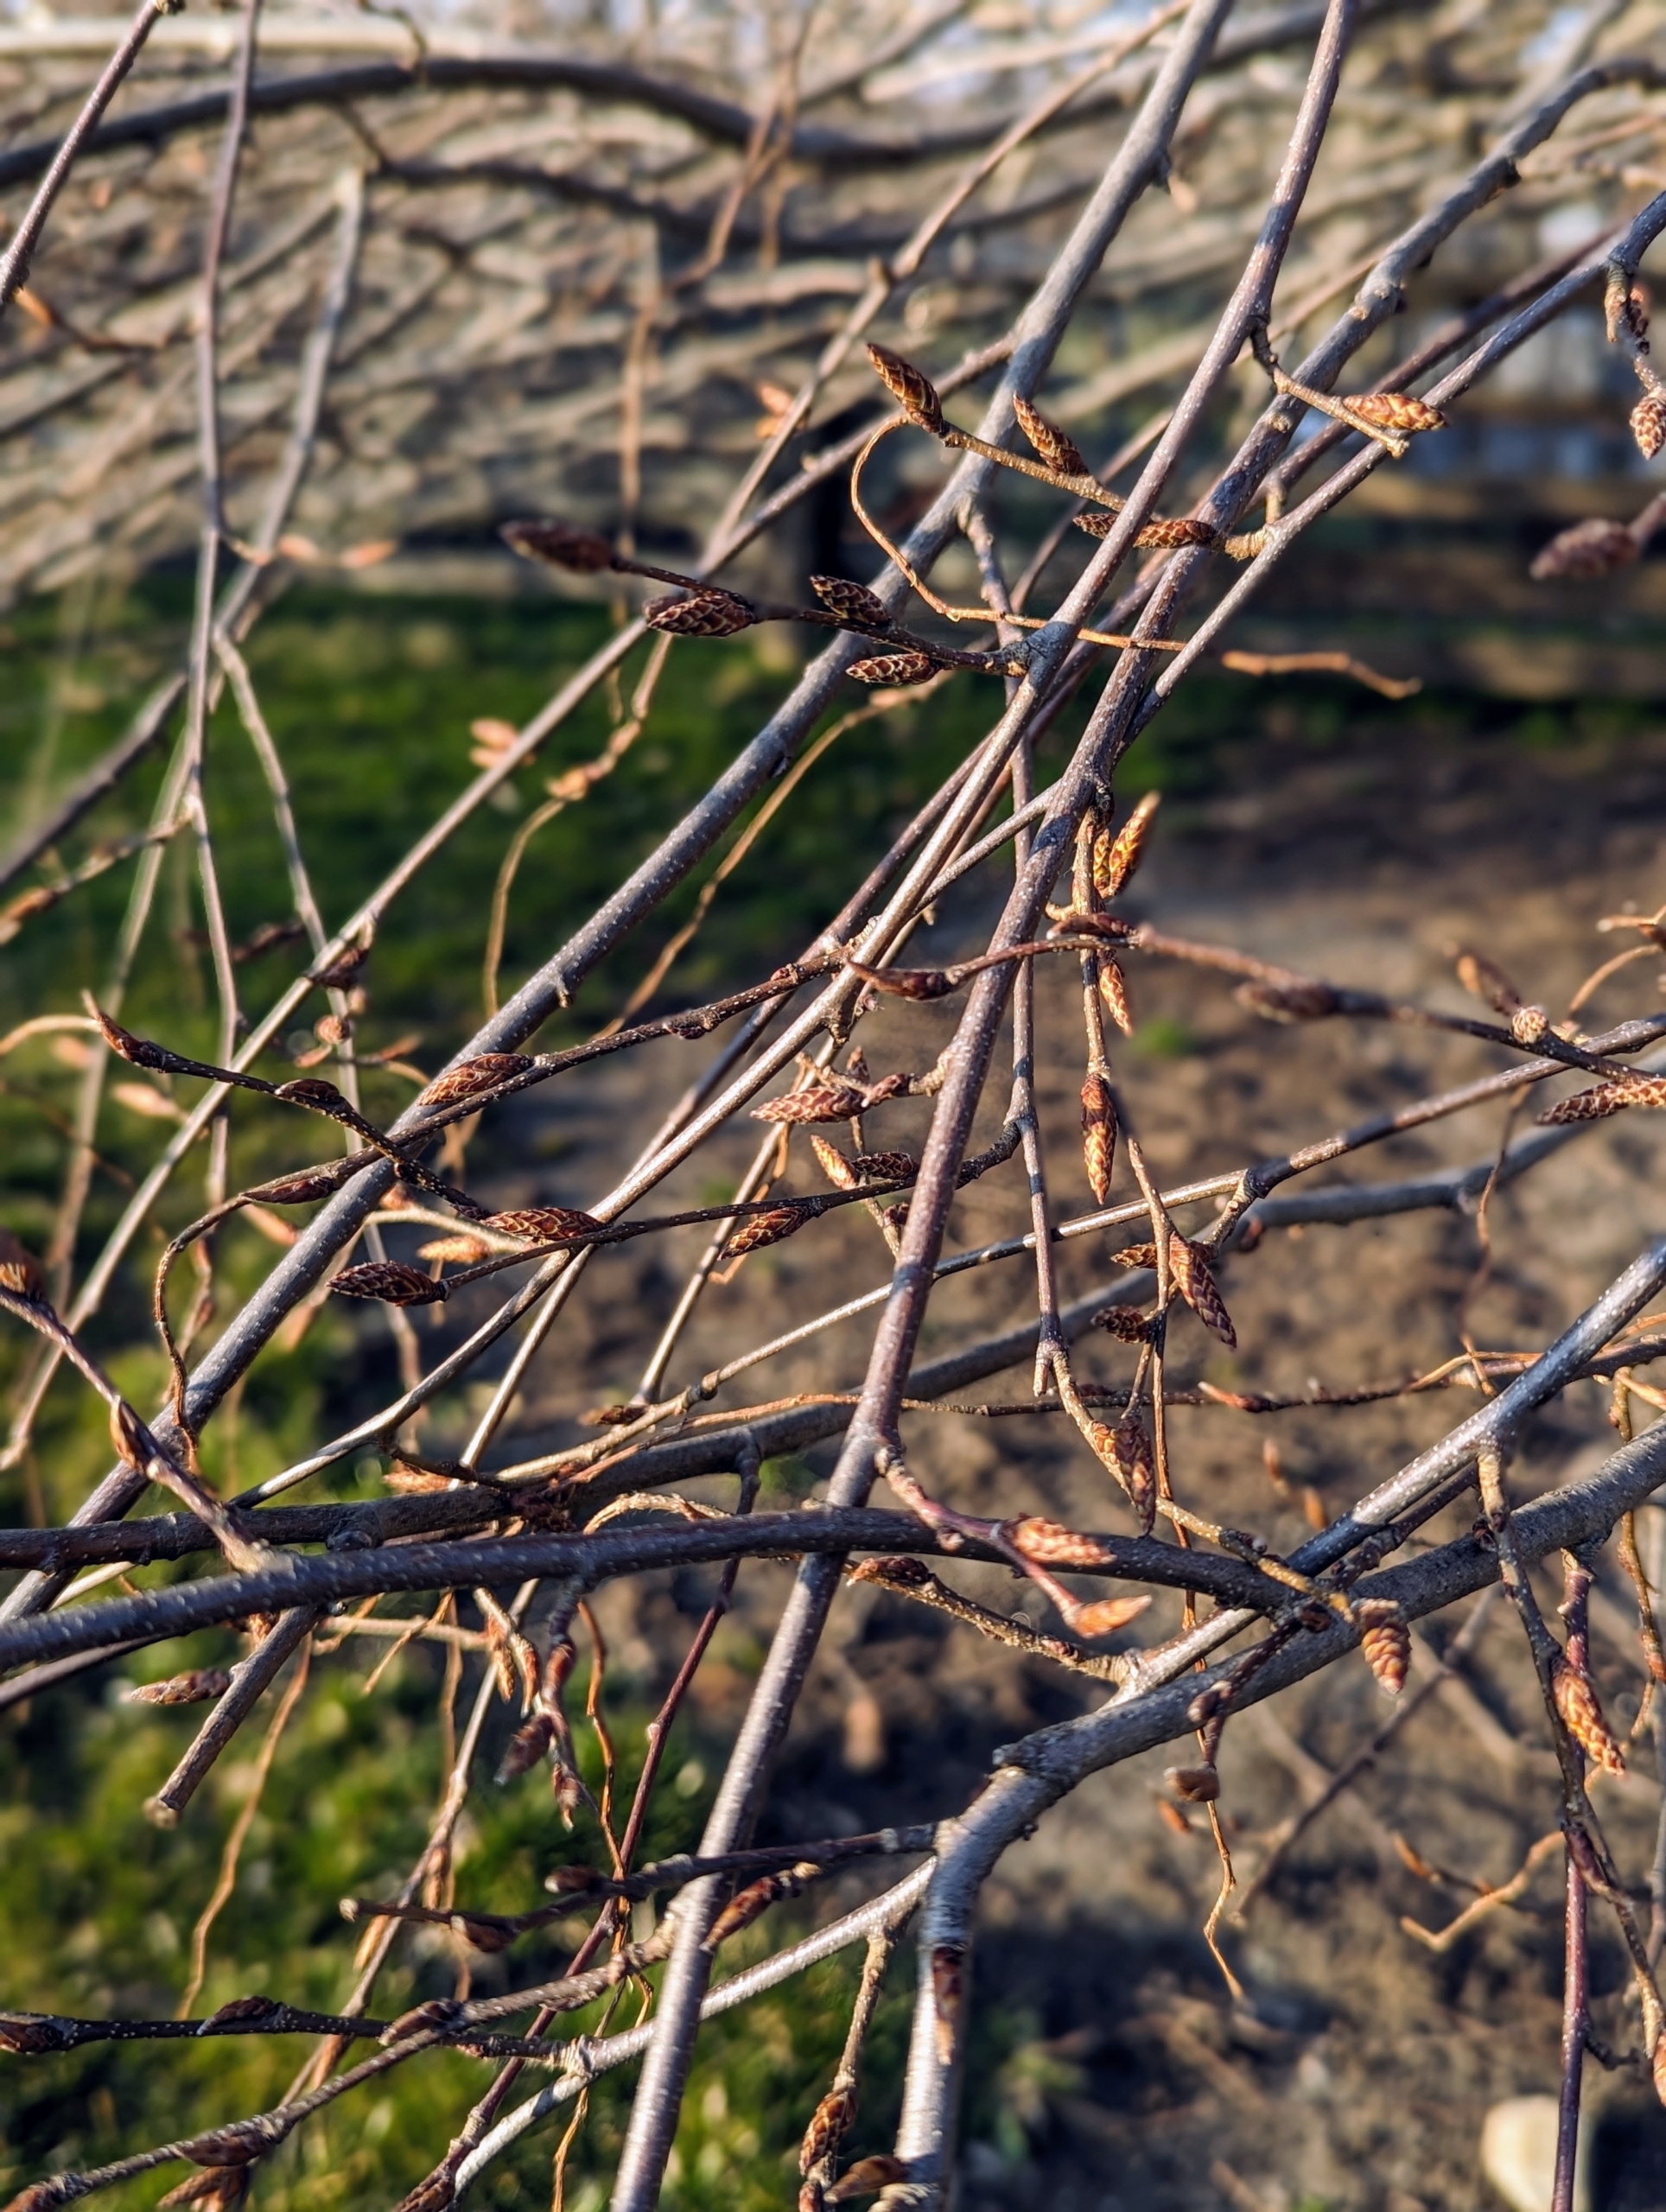
Looking closely, one can see all the buds that have formed.
Here is one side of the pergola now covered in a light layer of compost. The long beds are looking so beautiful already. I can’t wait to see this area transform into a spring garden of colorful flowers.
Here’s a view from the other side. It’s enough to inspire any gardener to get out there and start working – happy gardening.
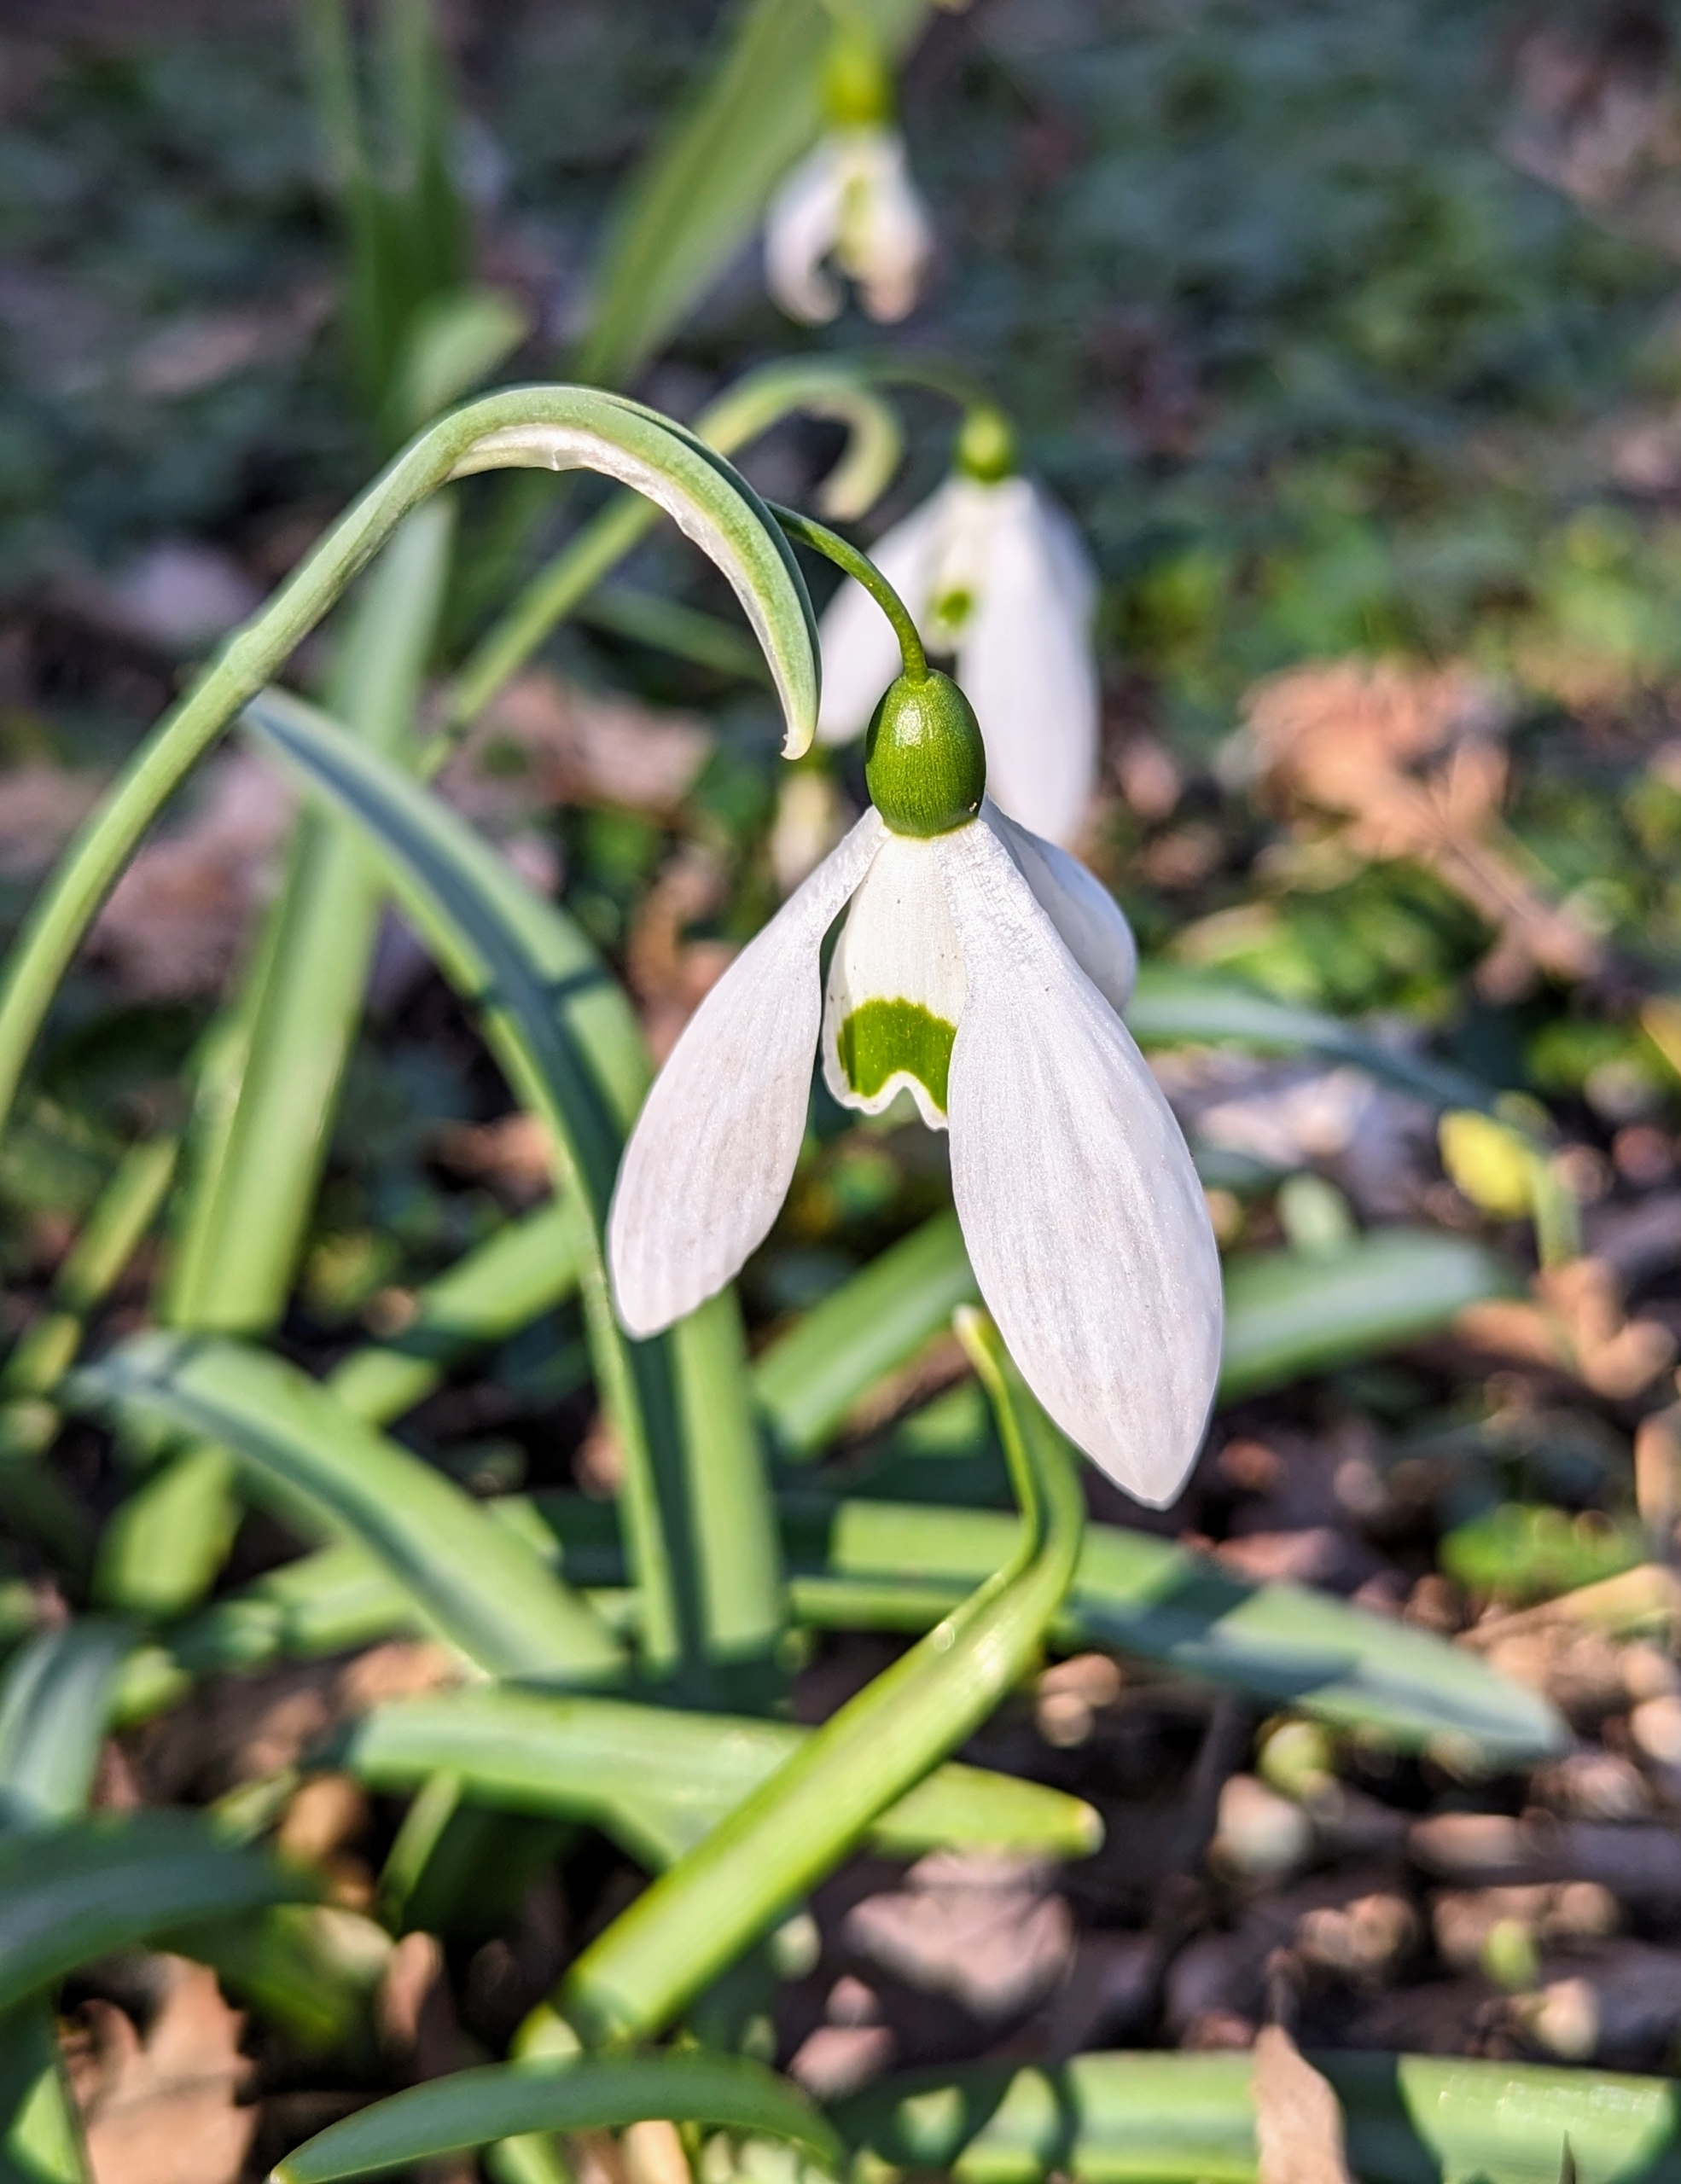
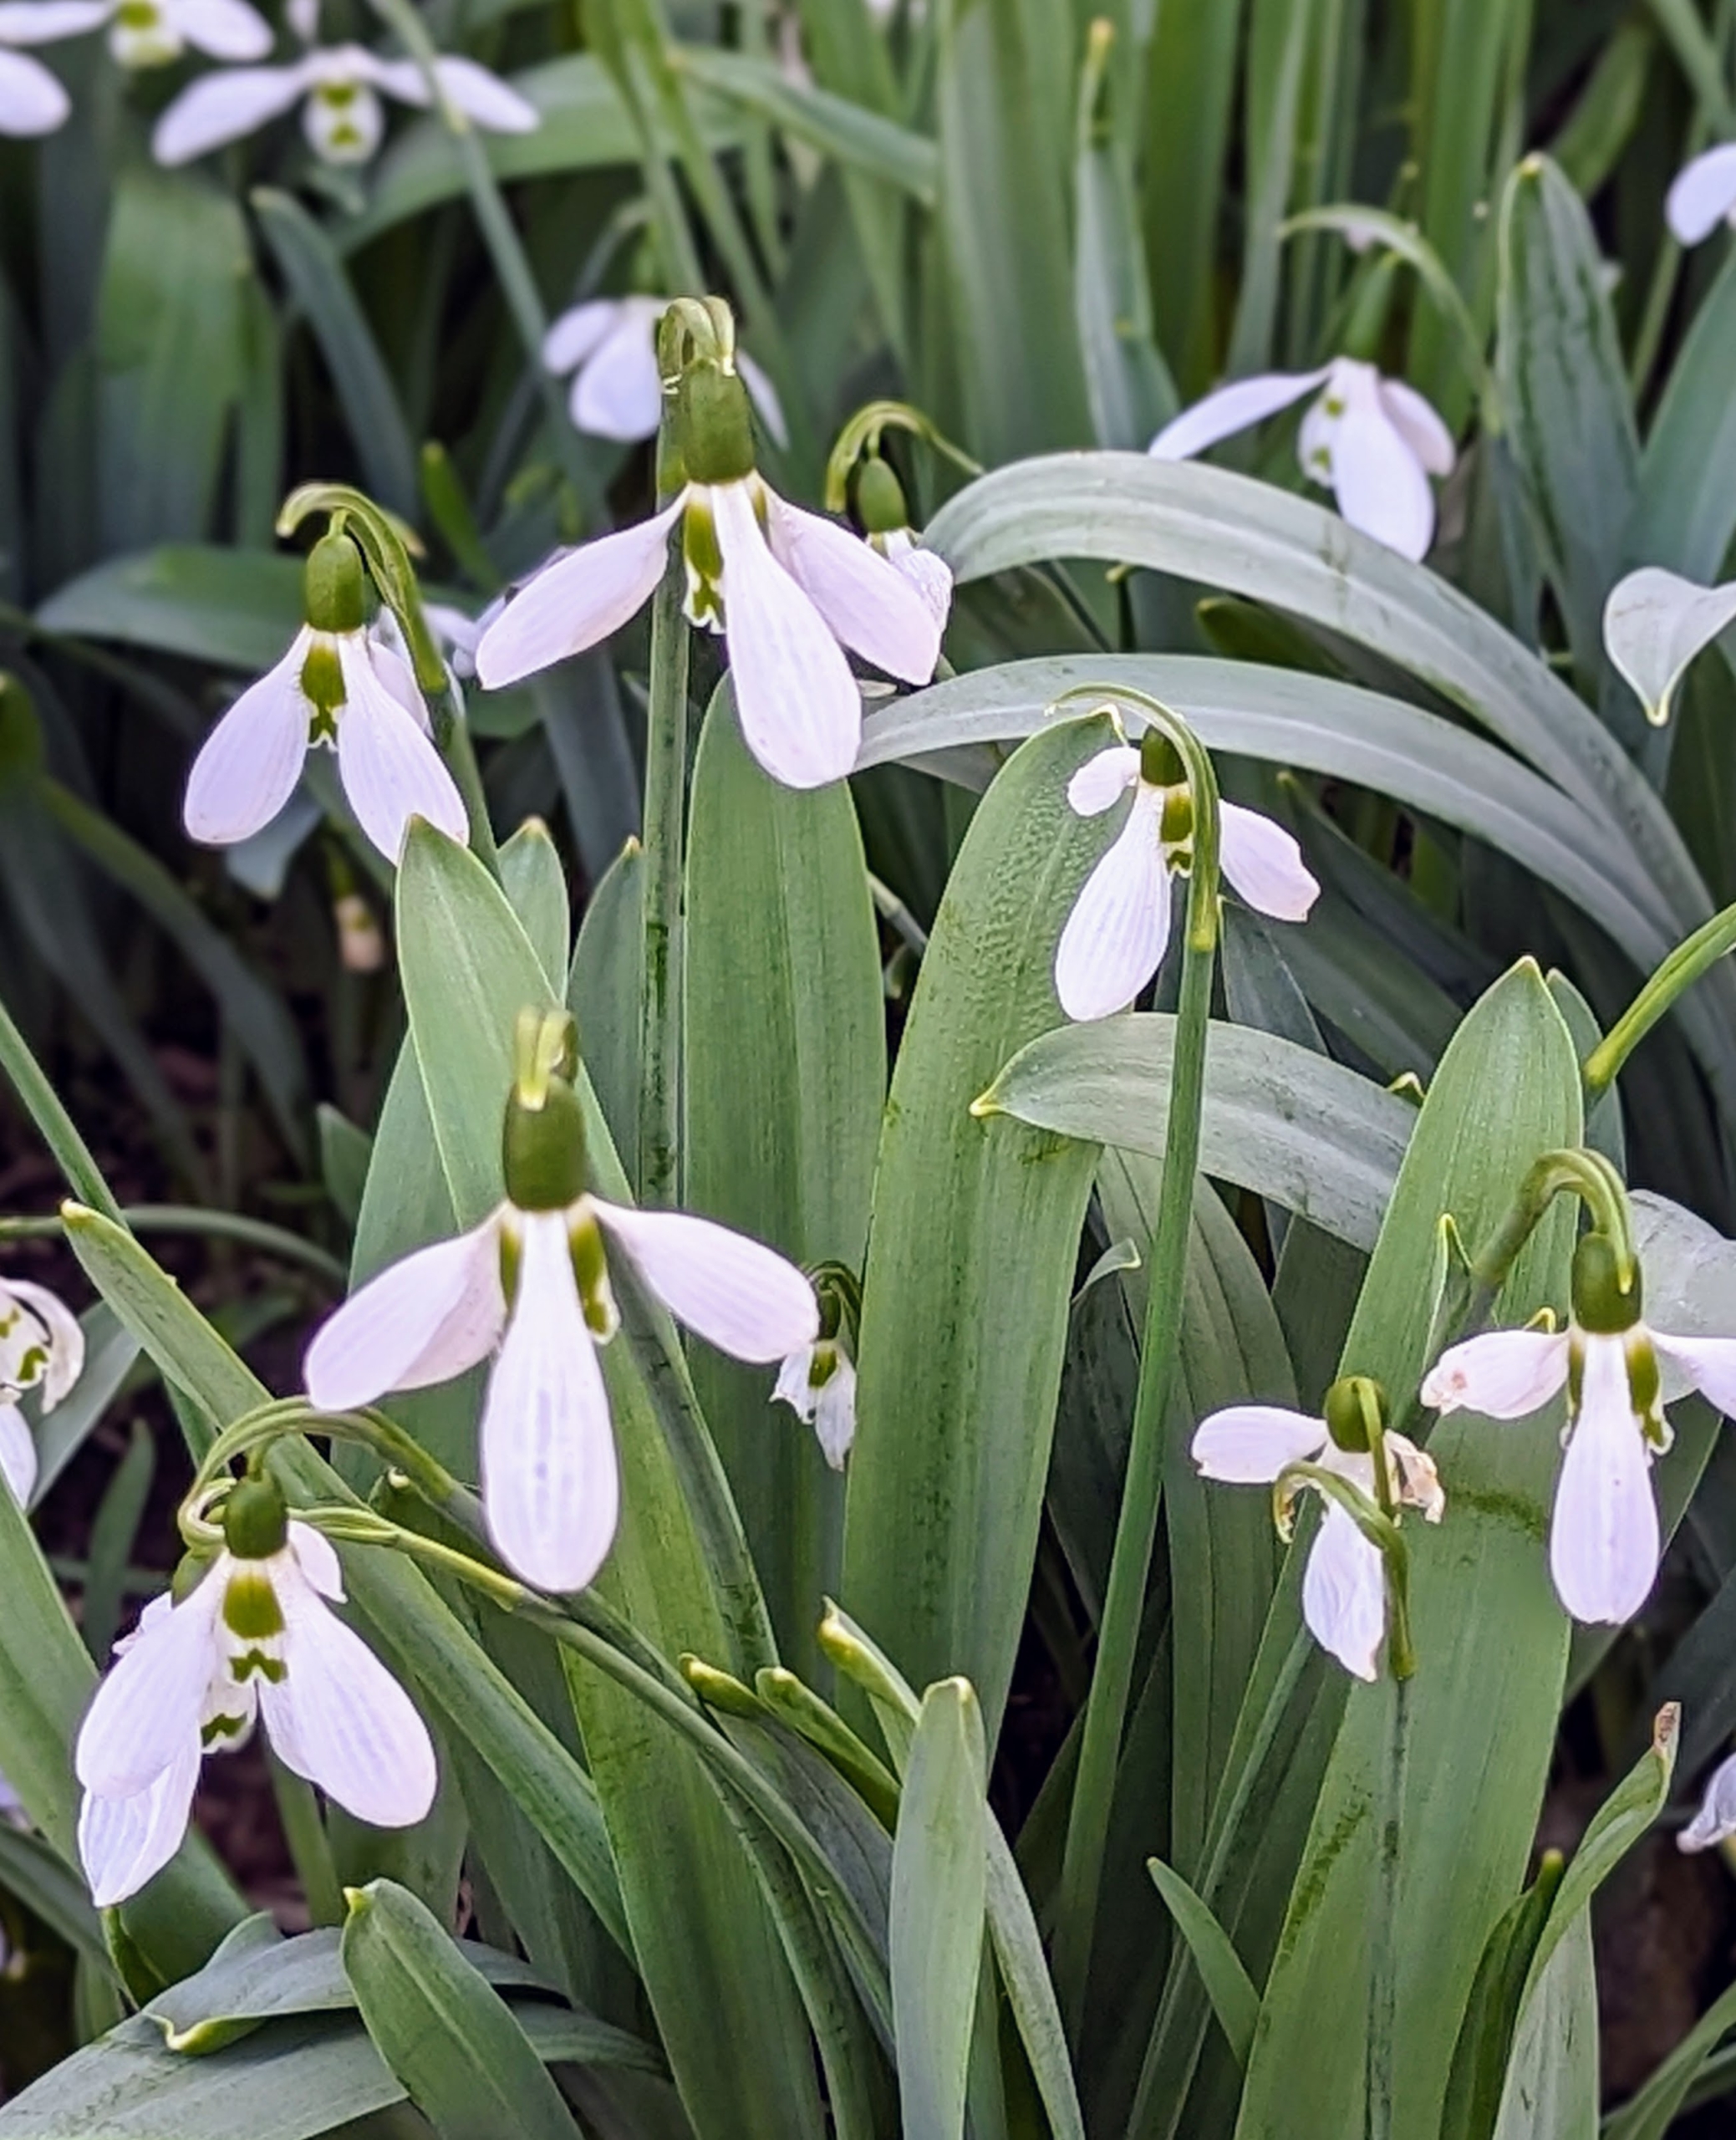
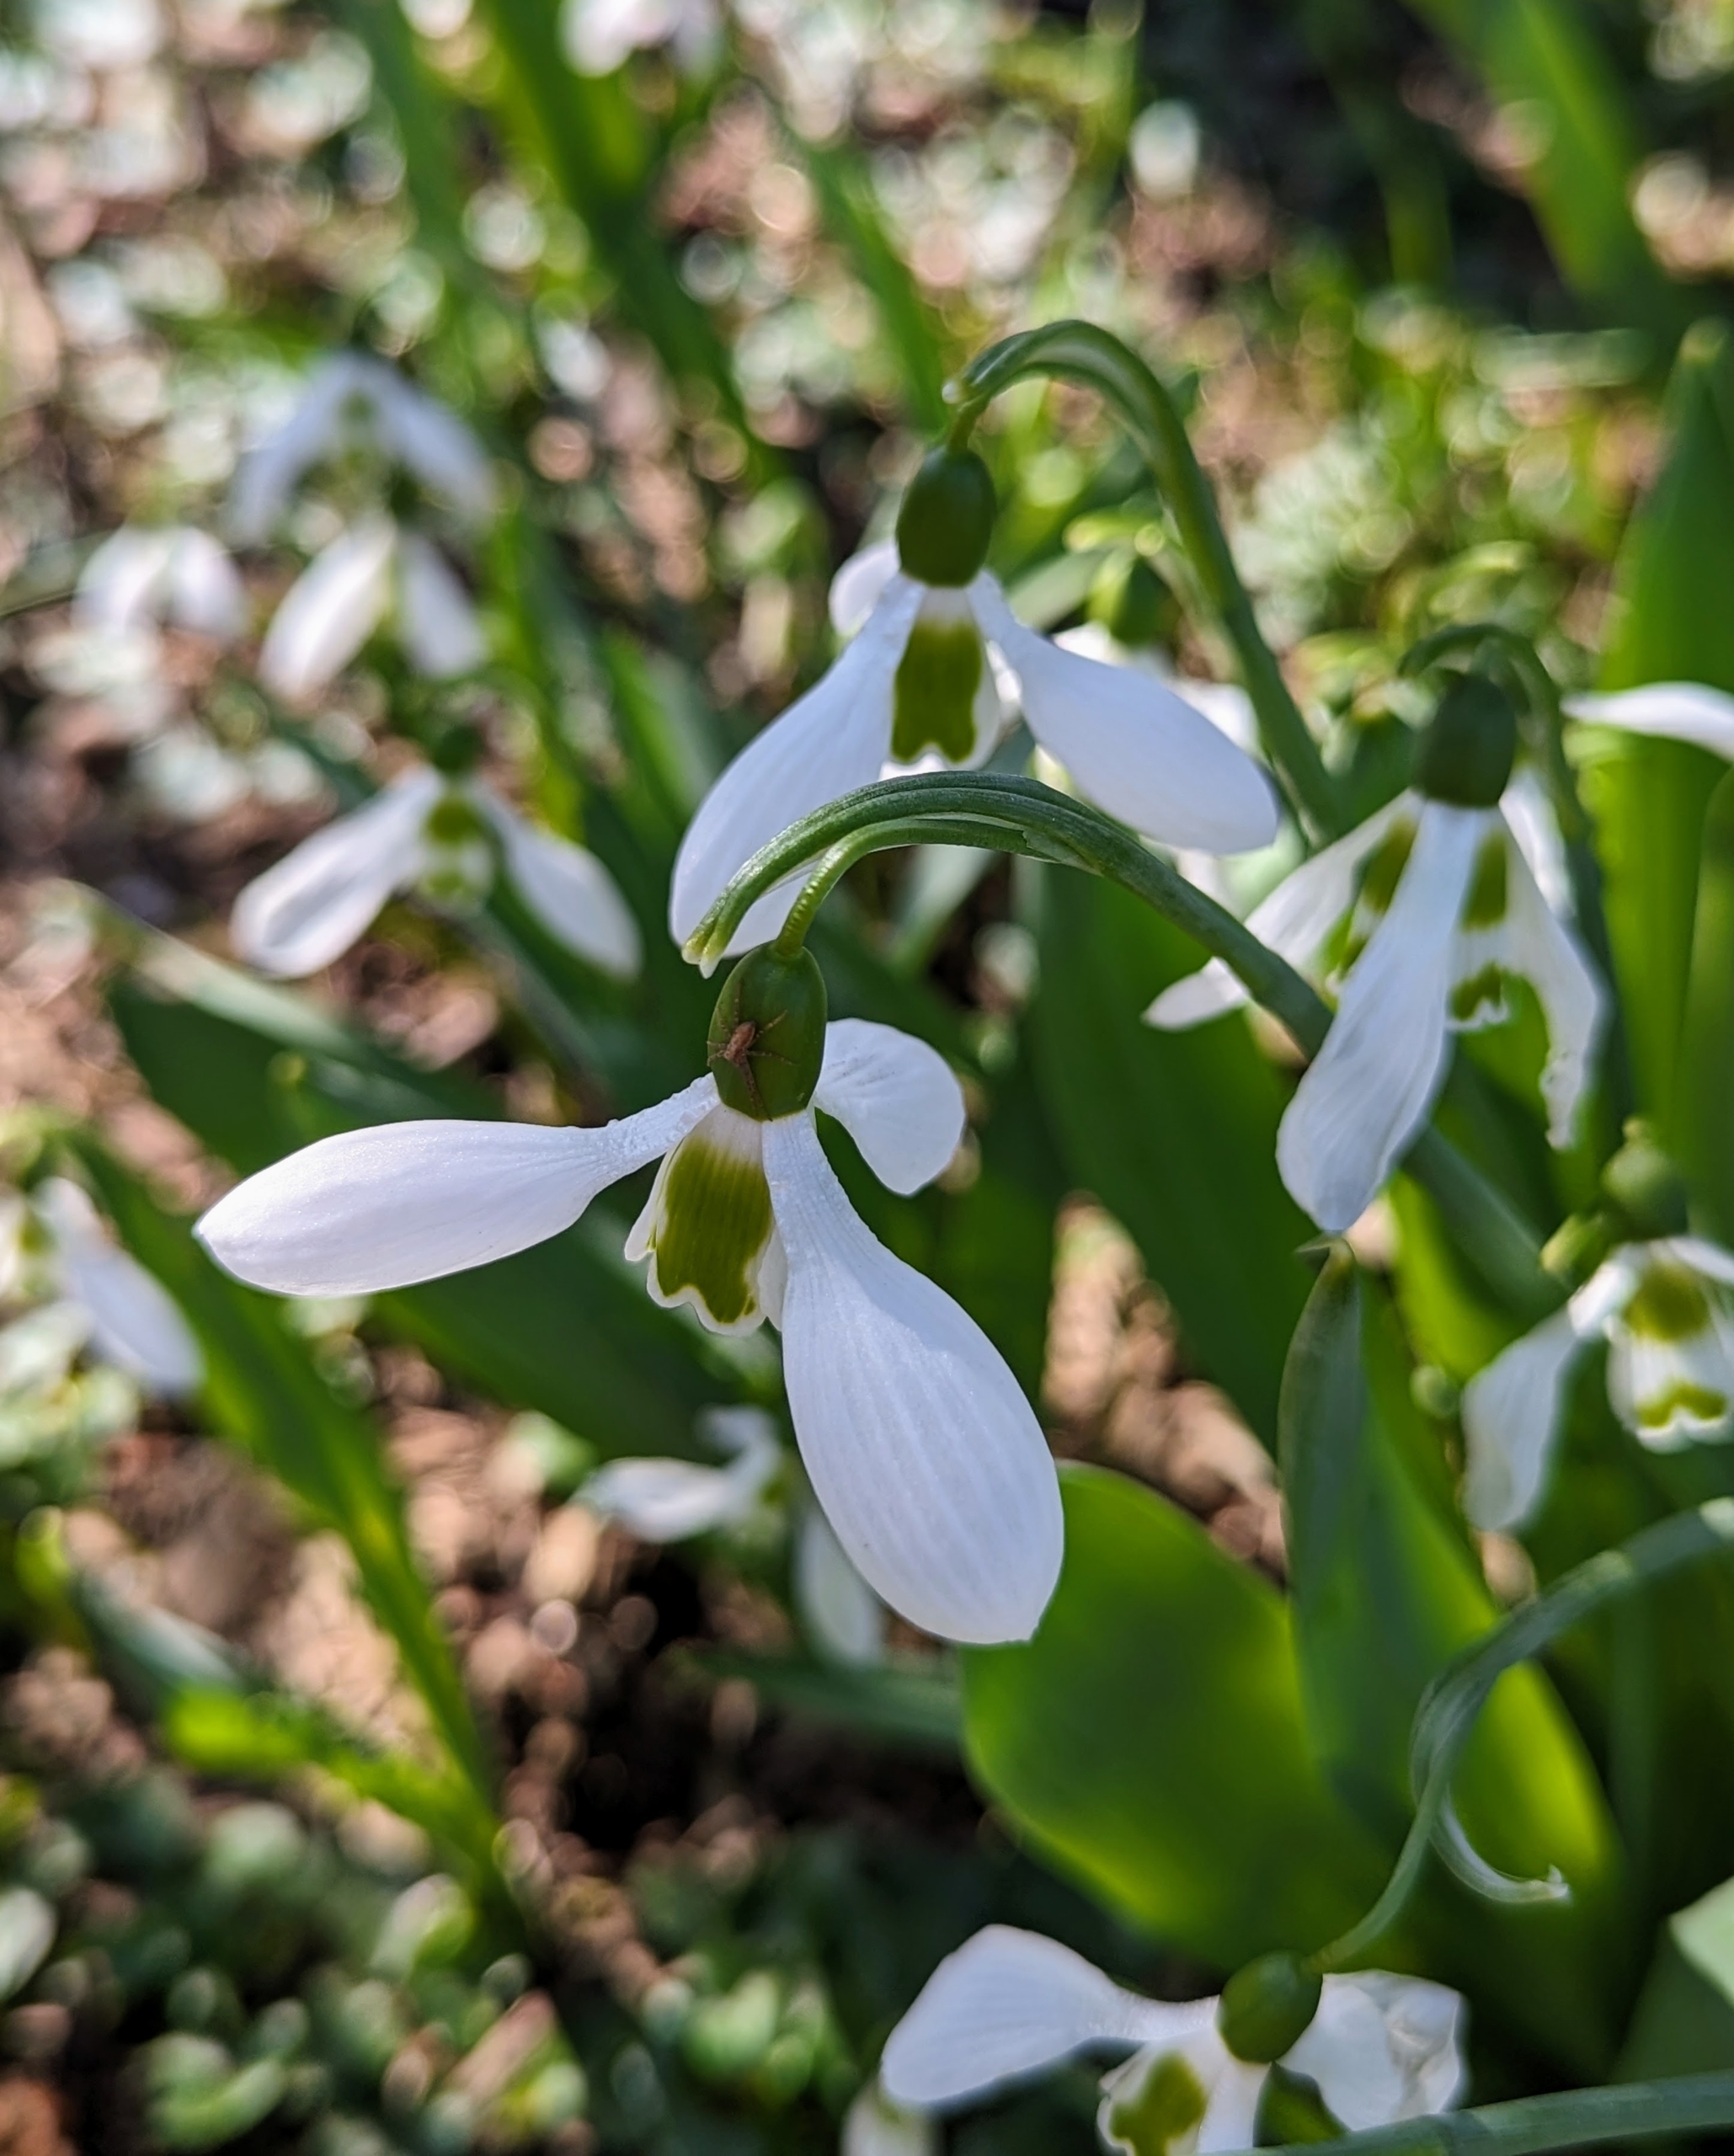
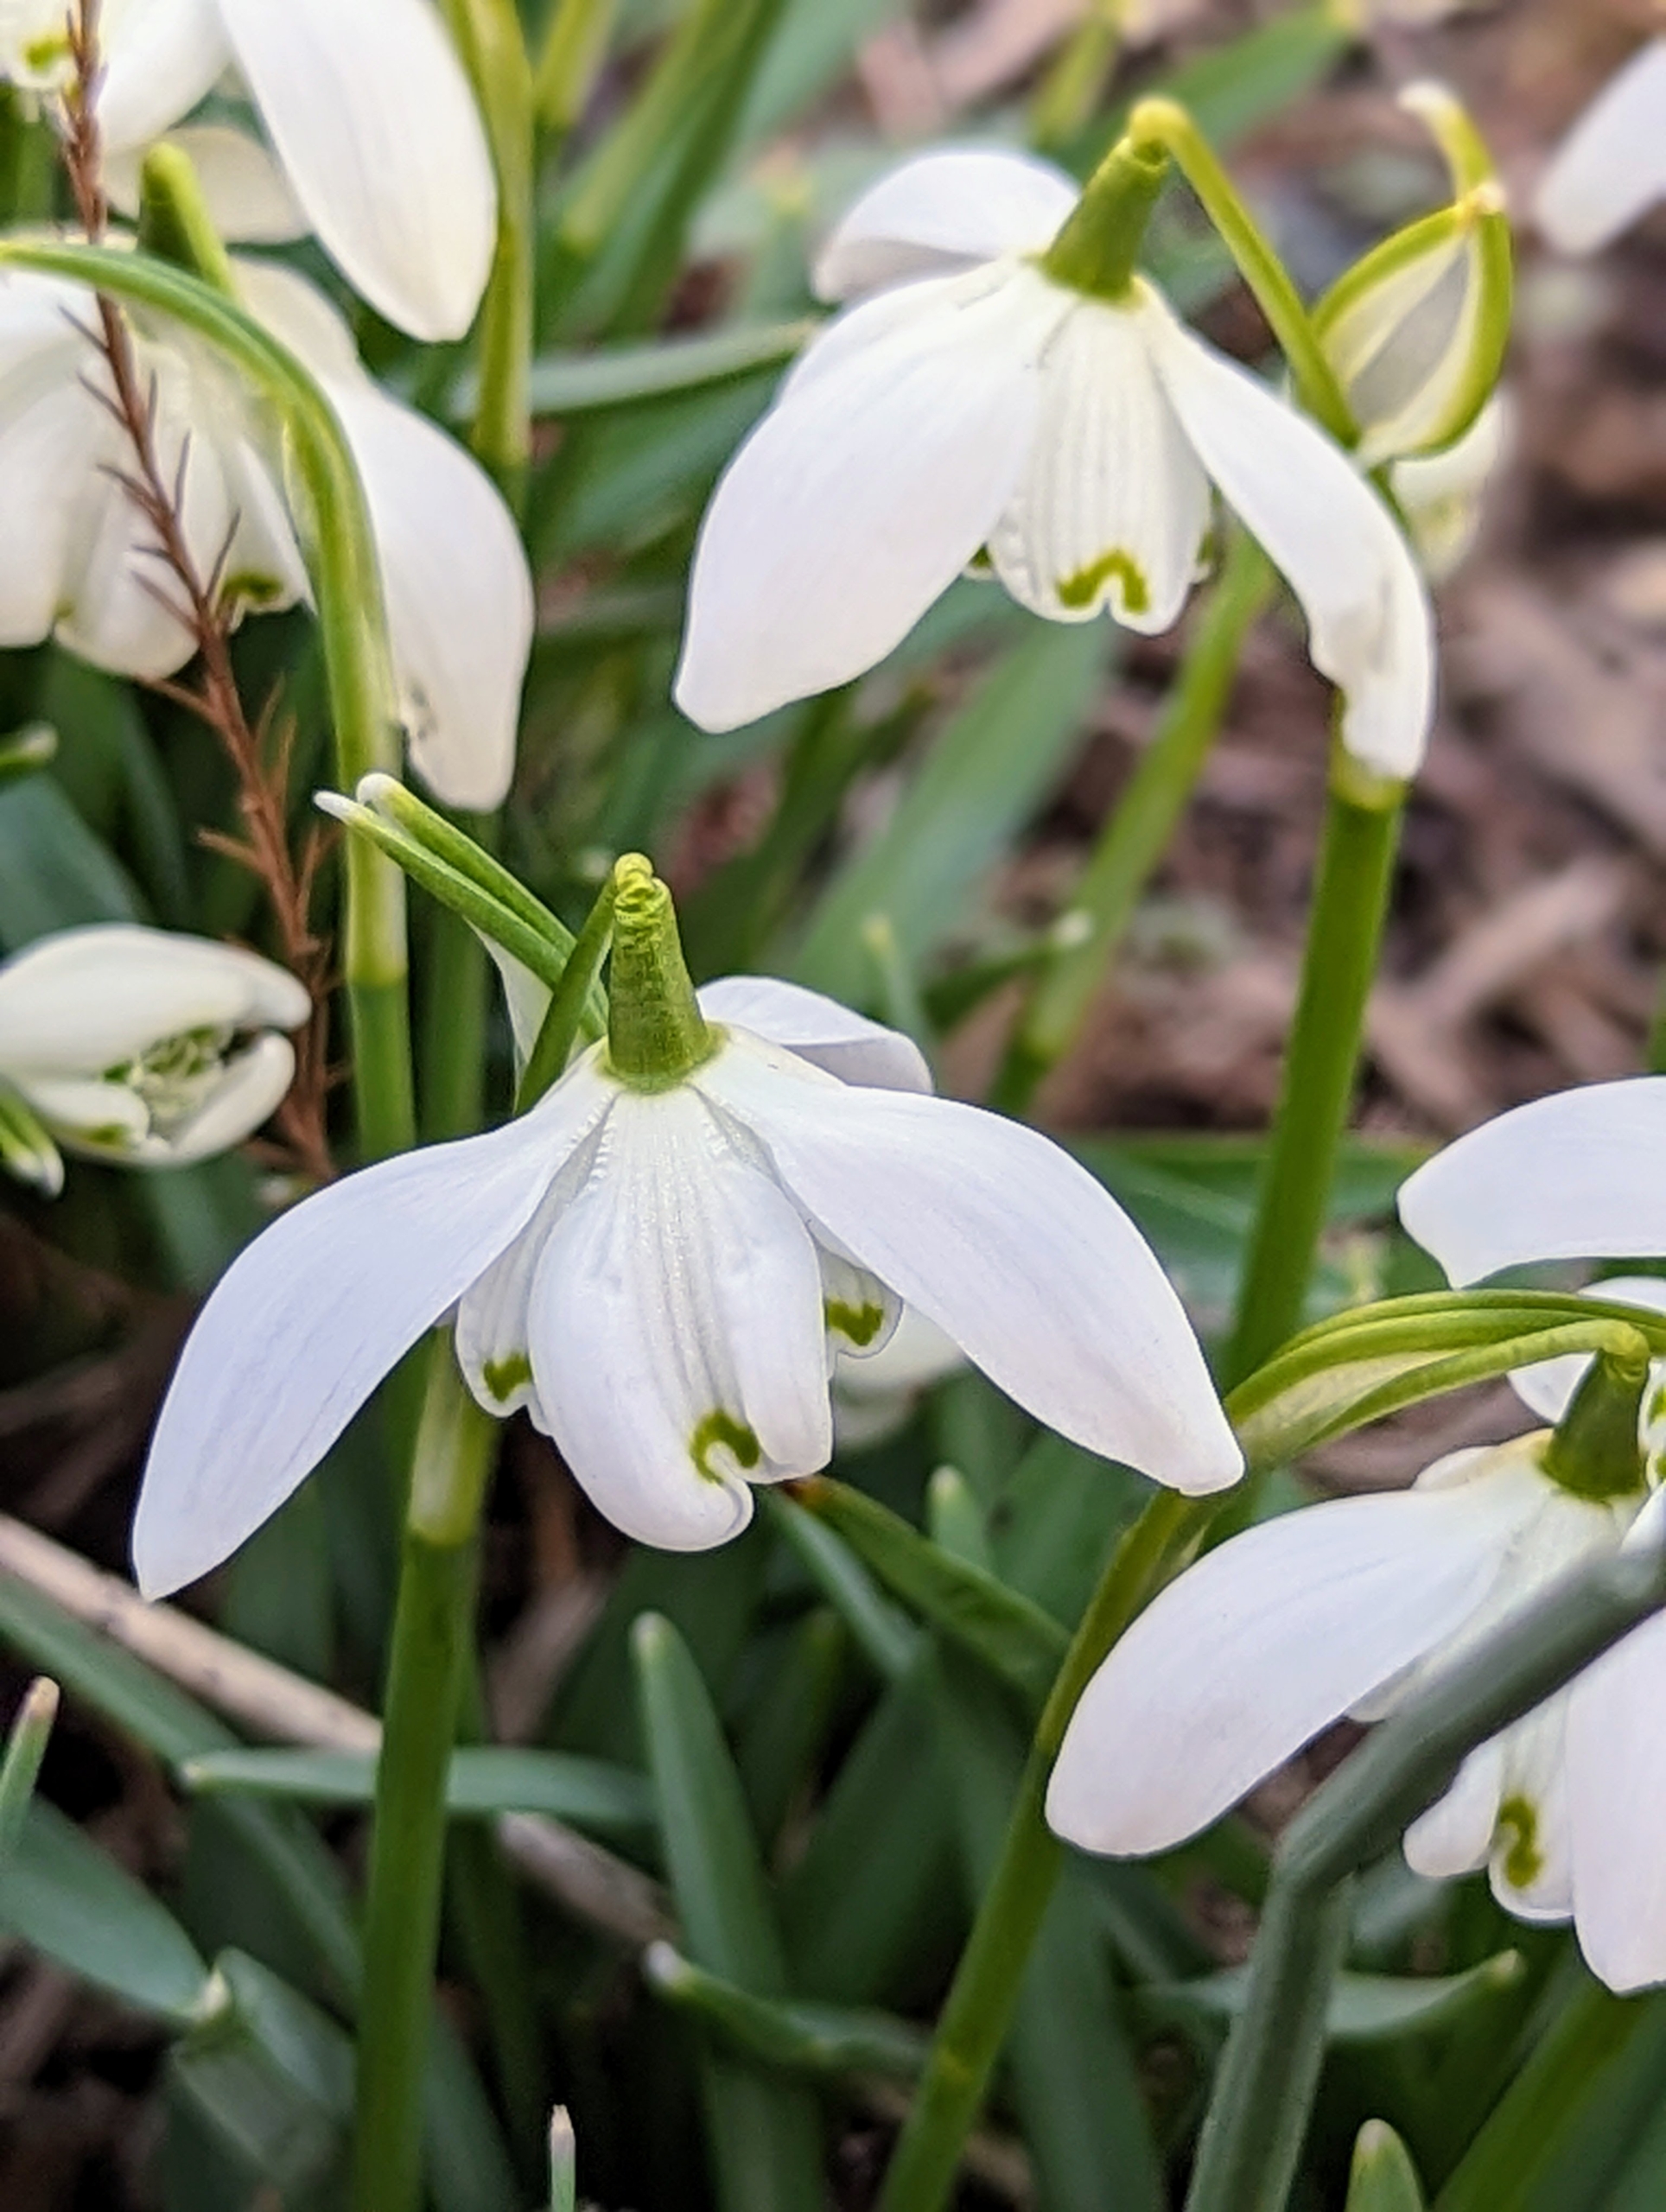
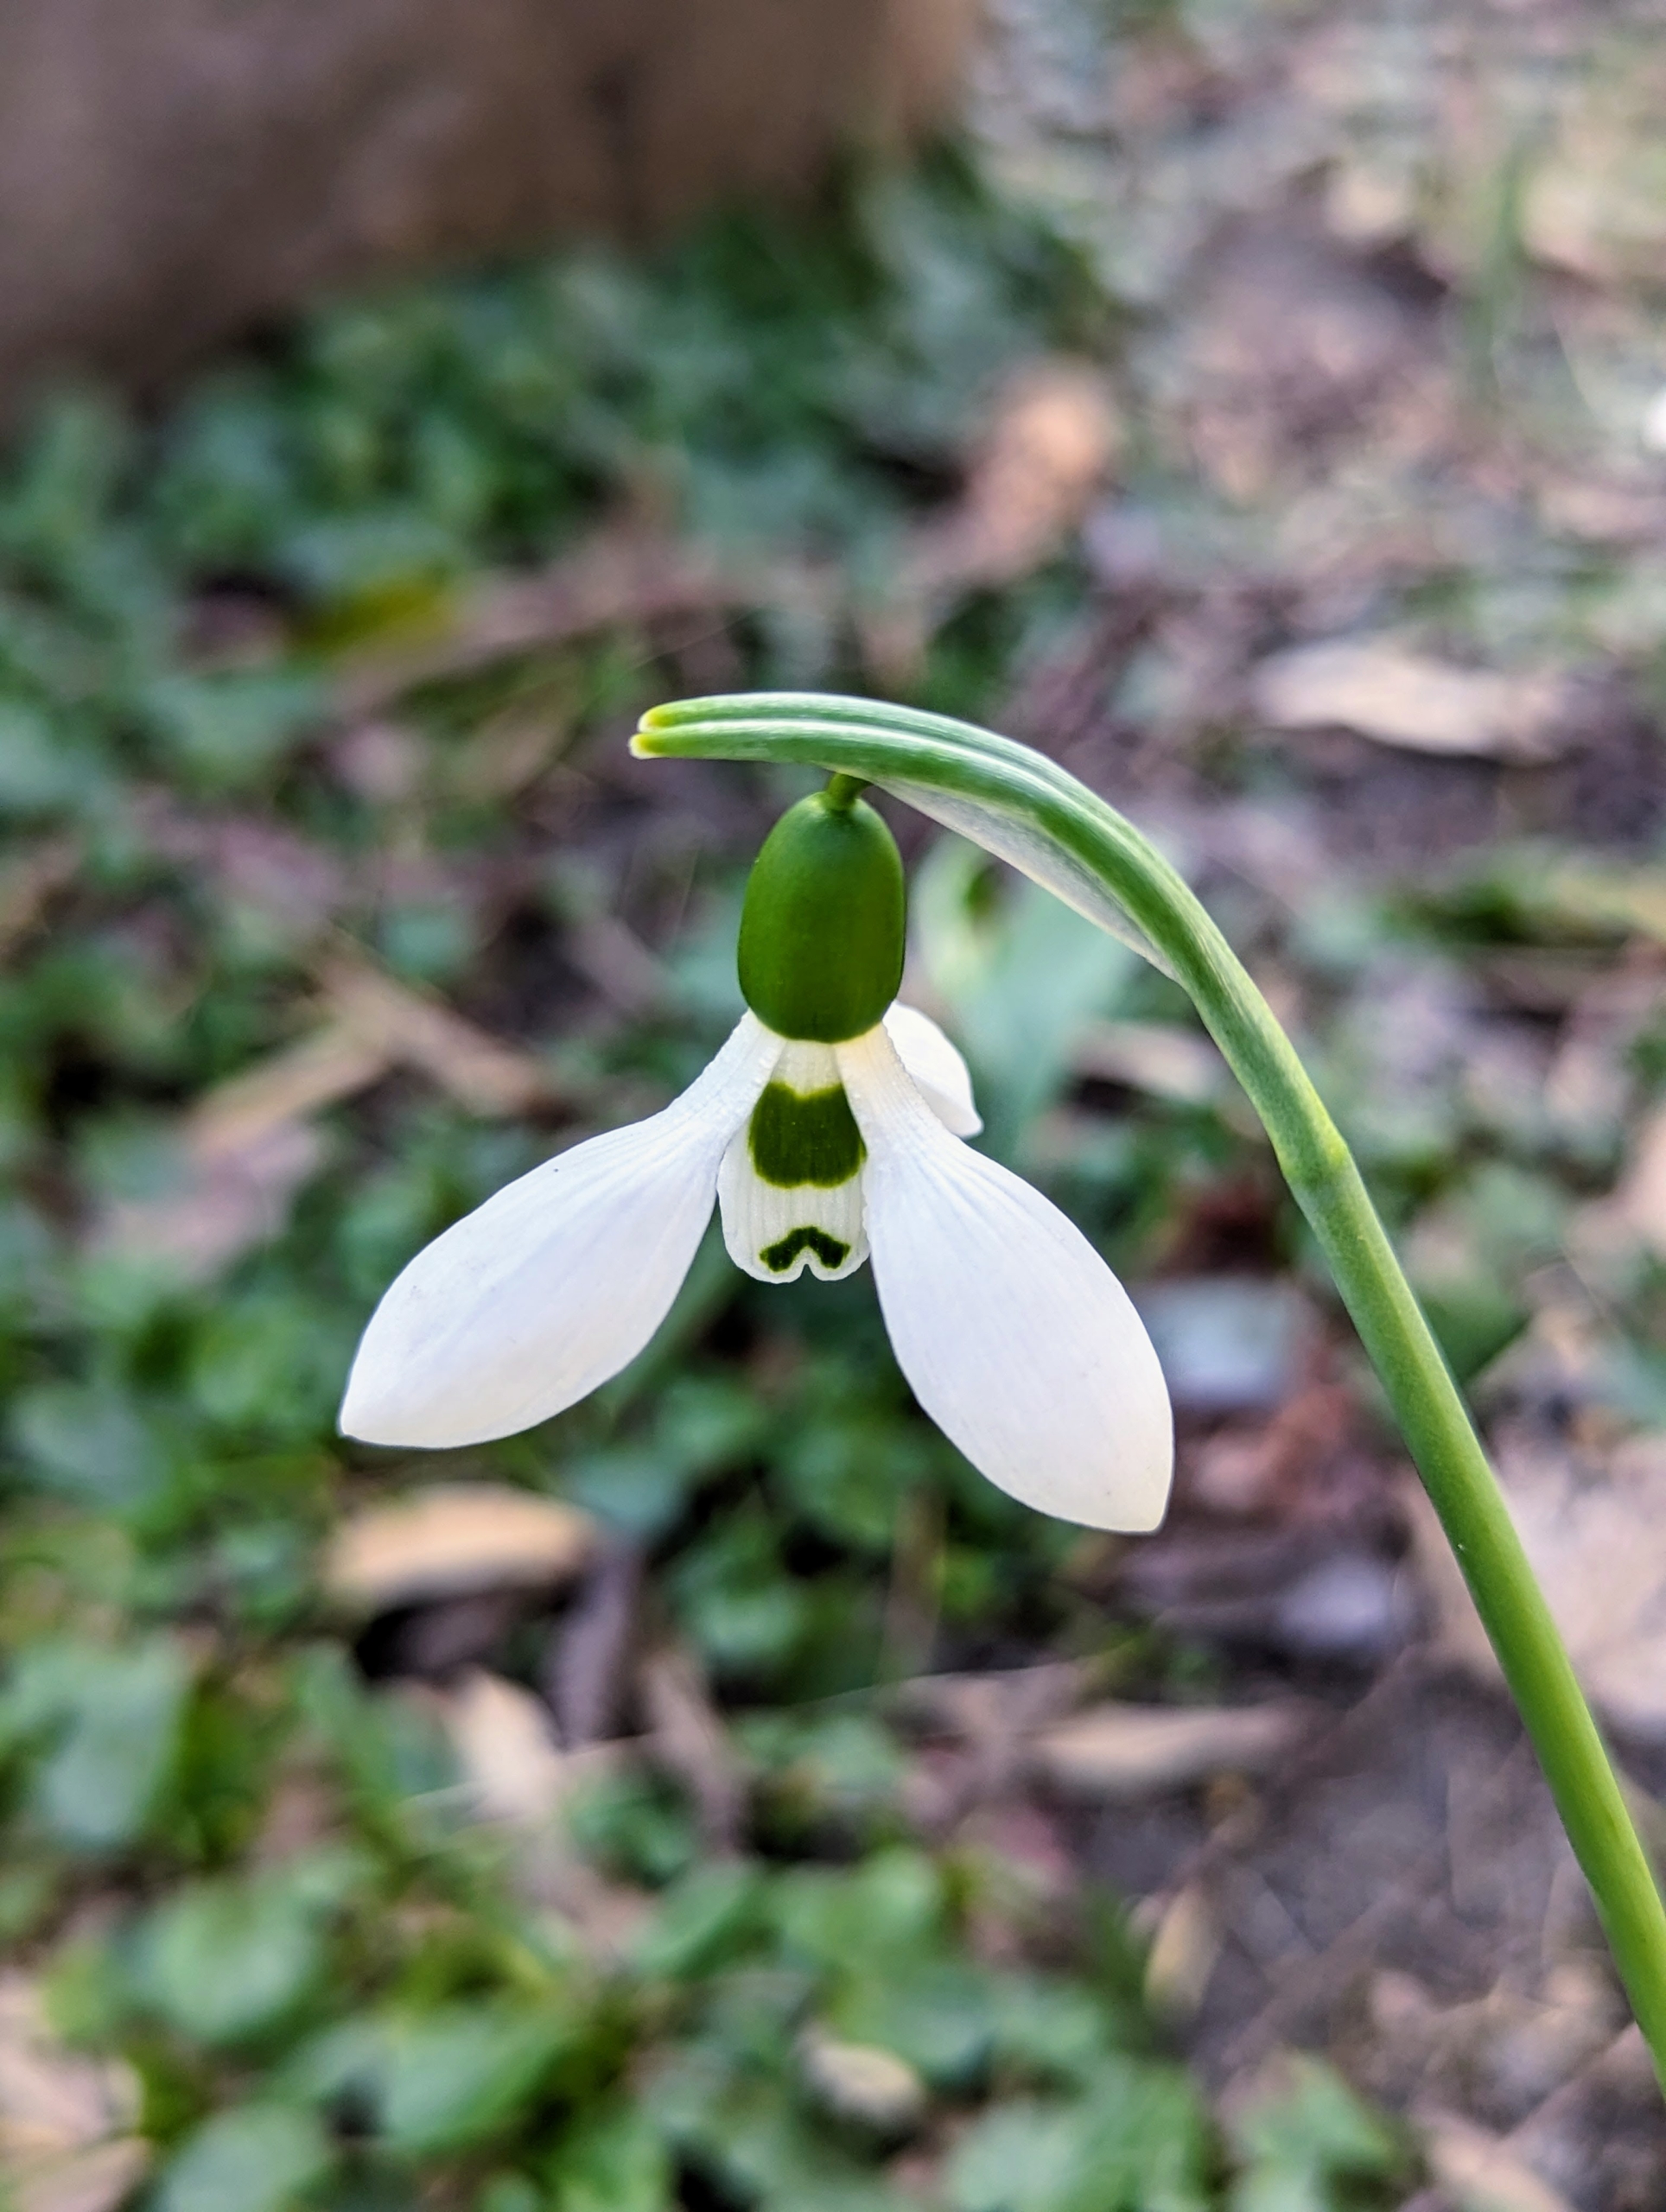
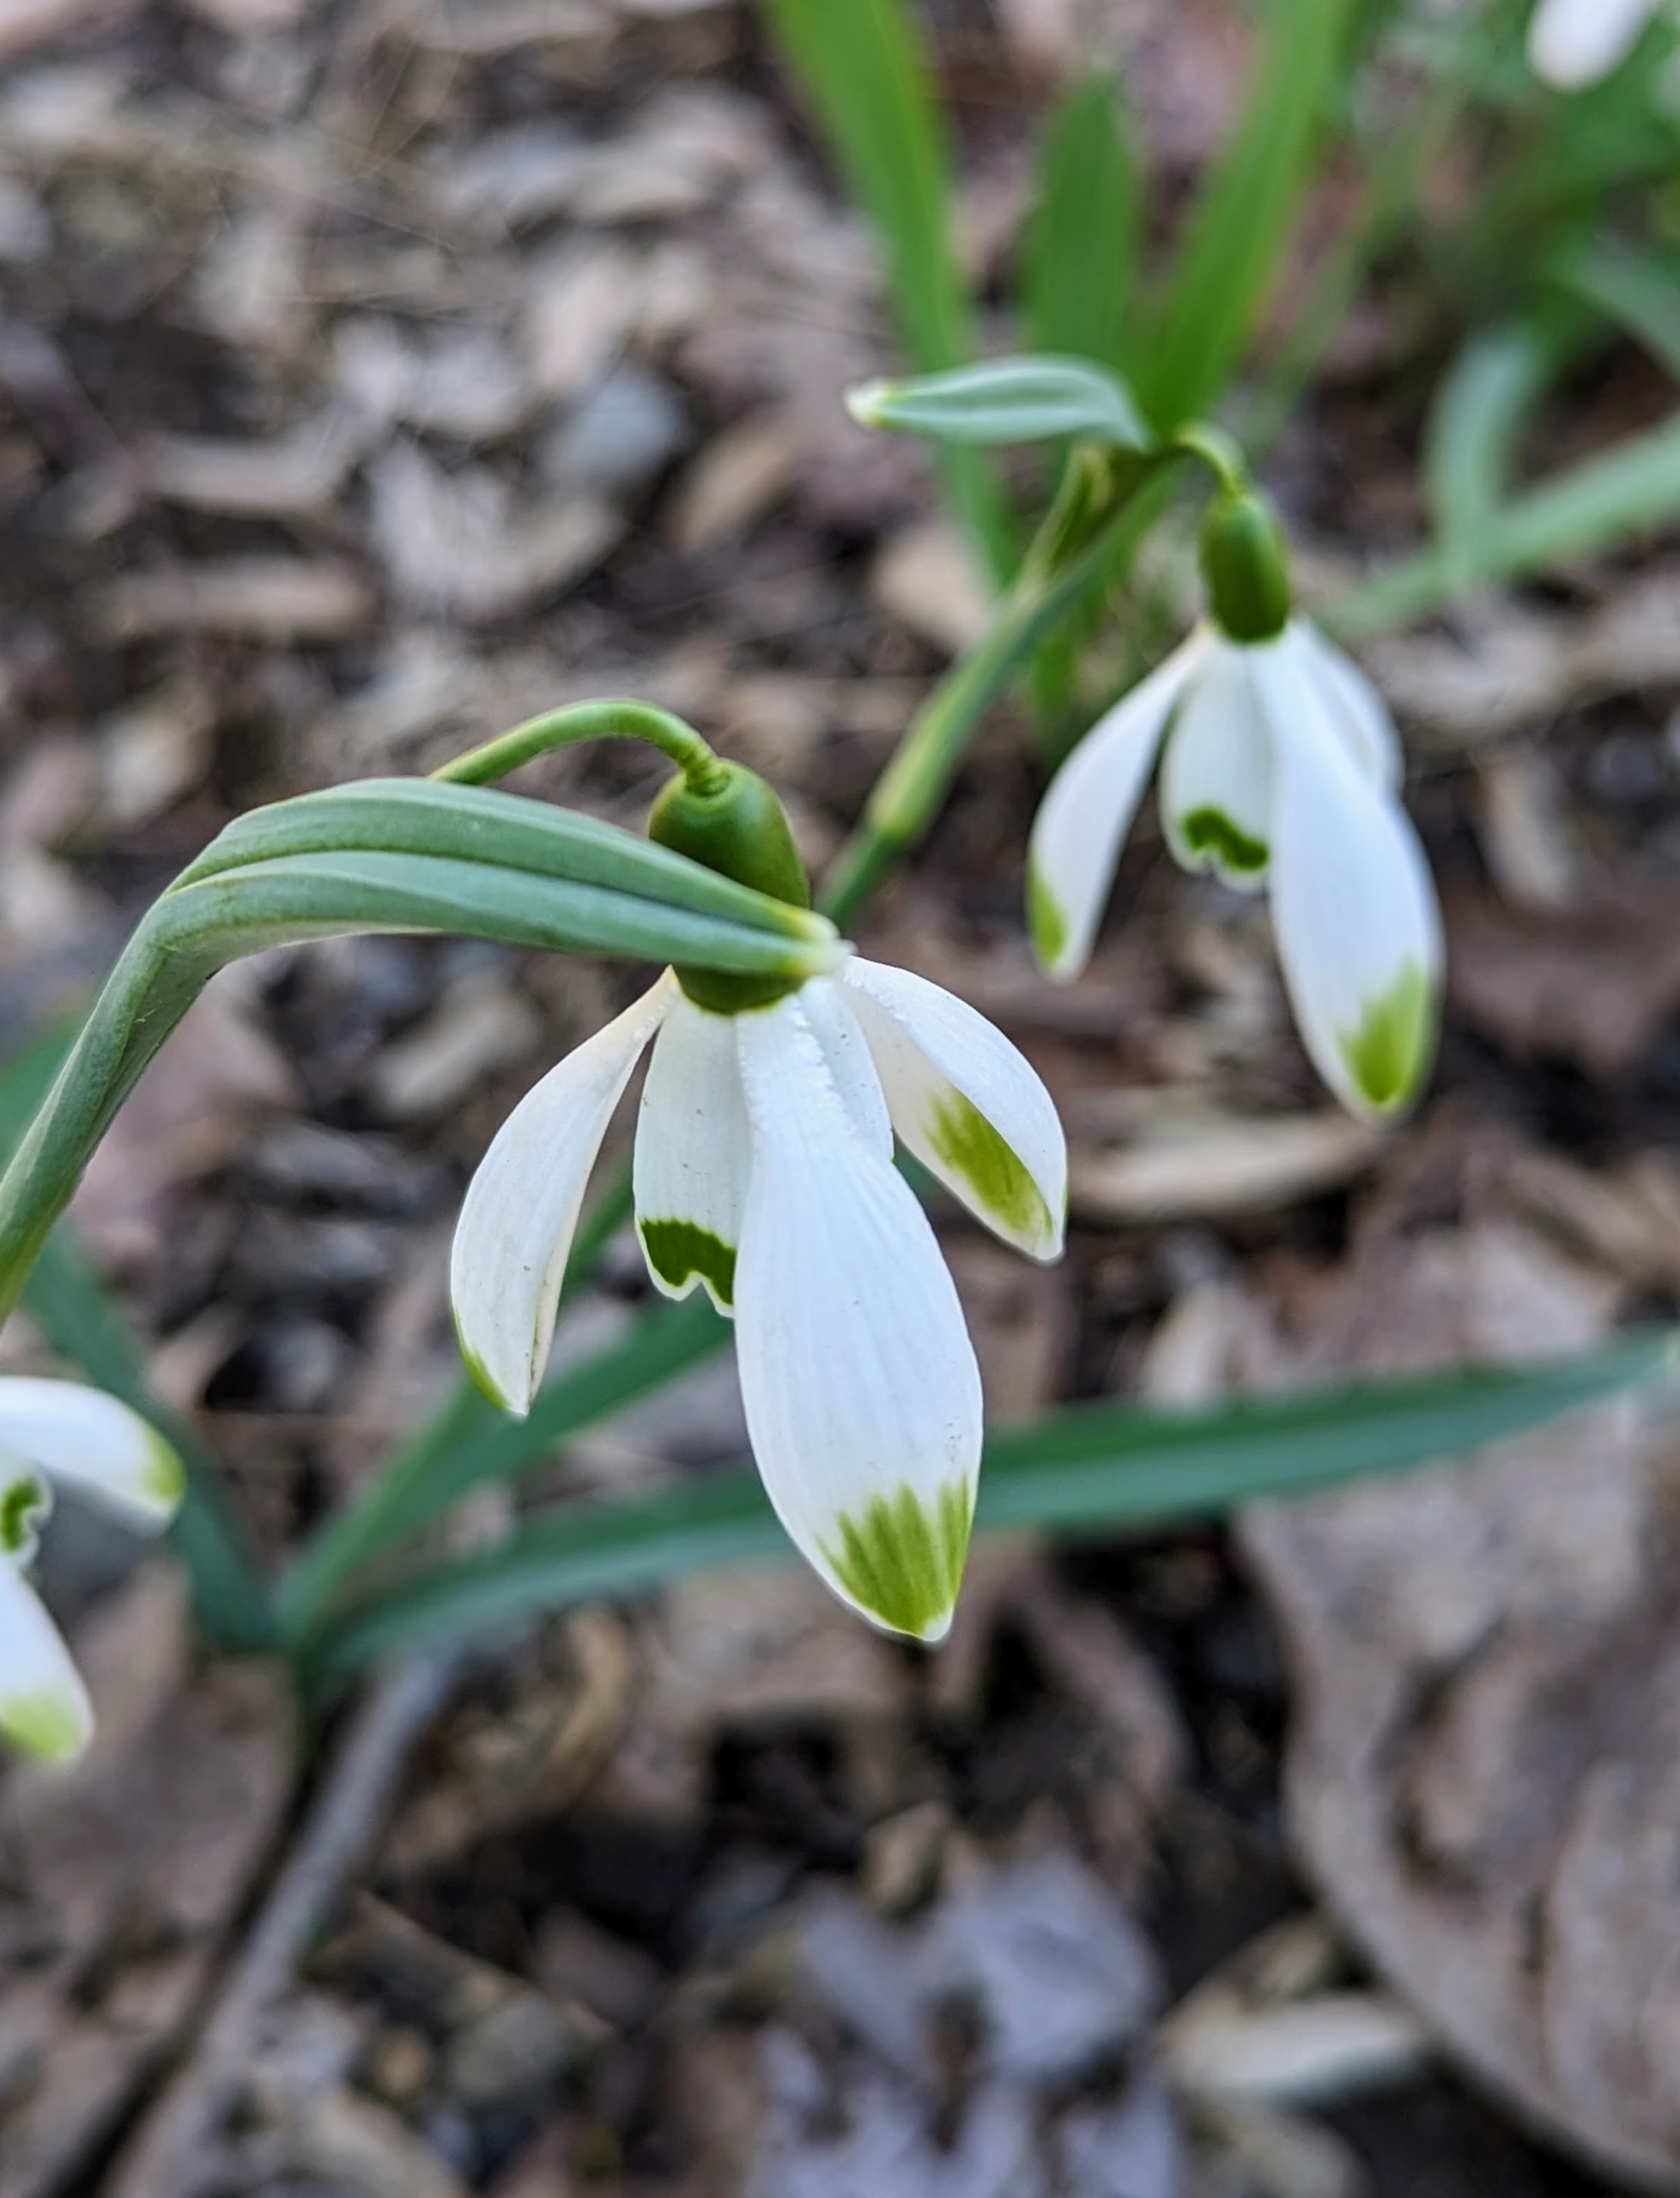
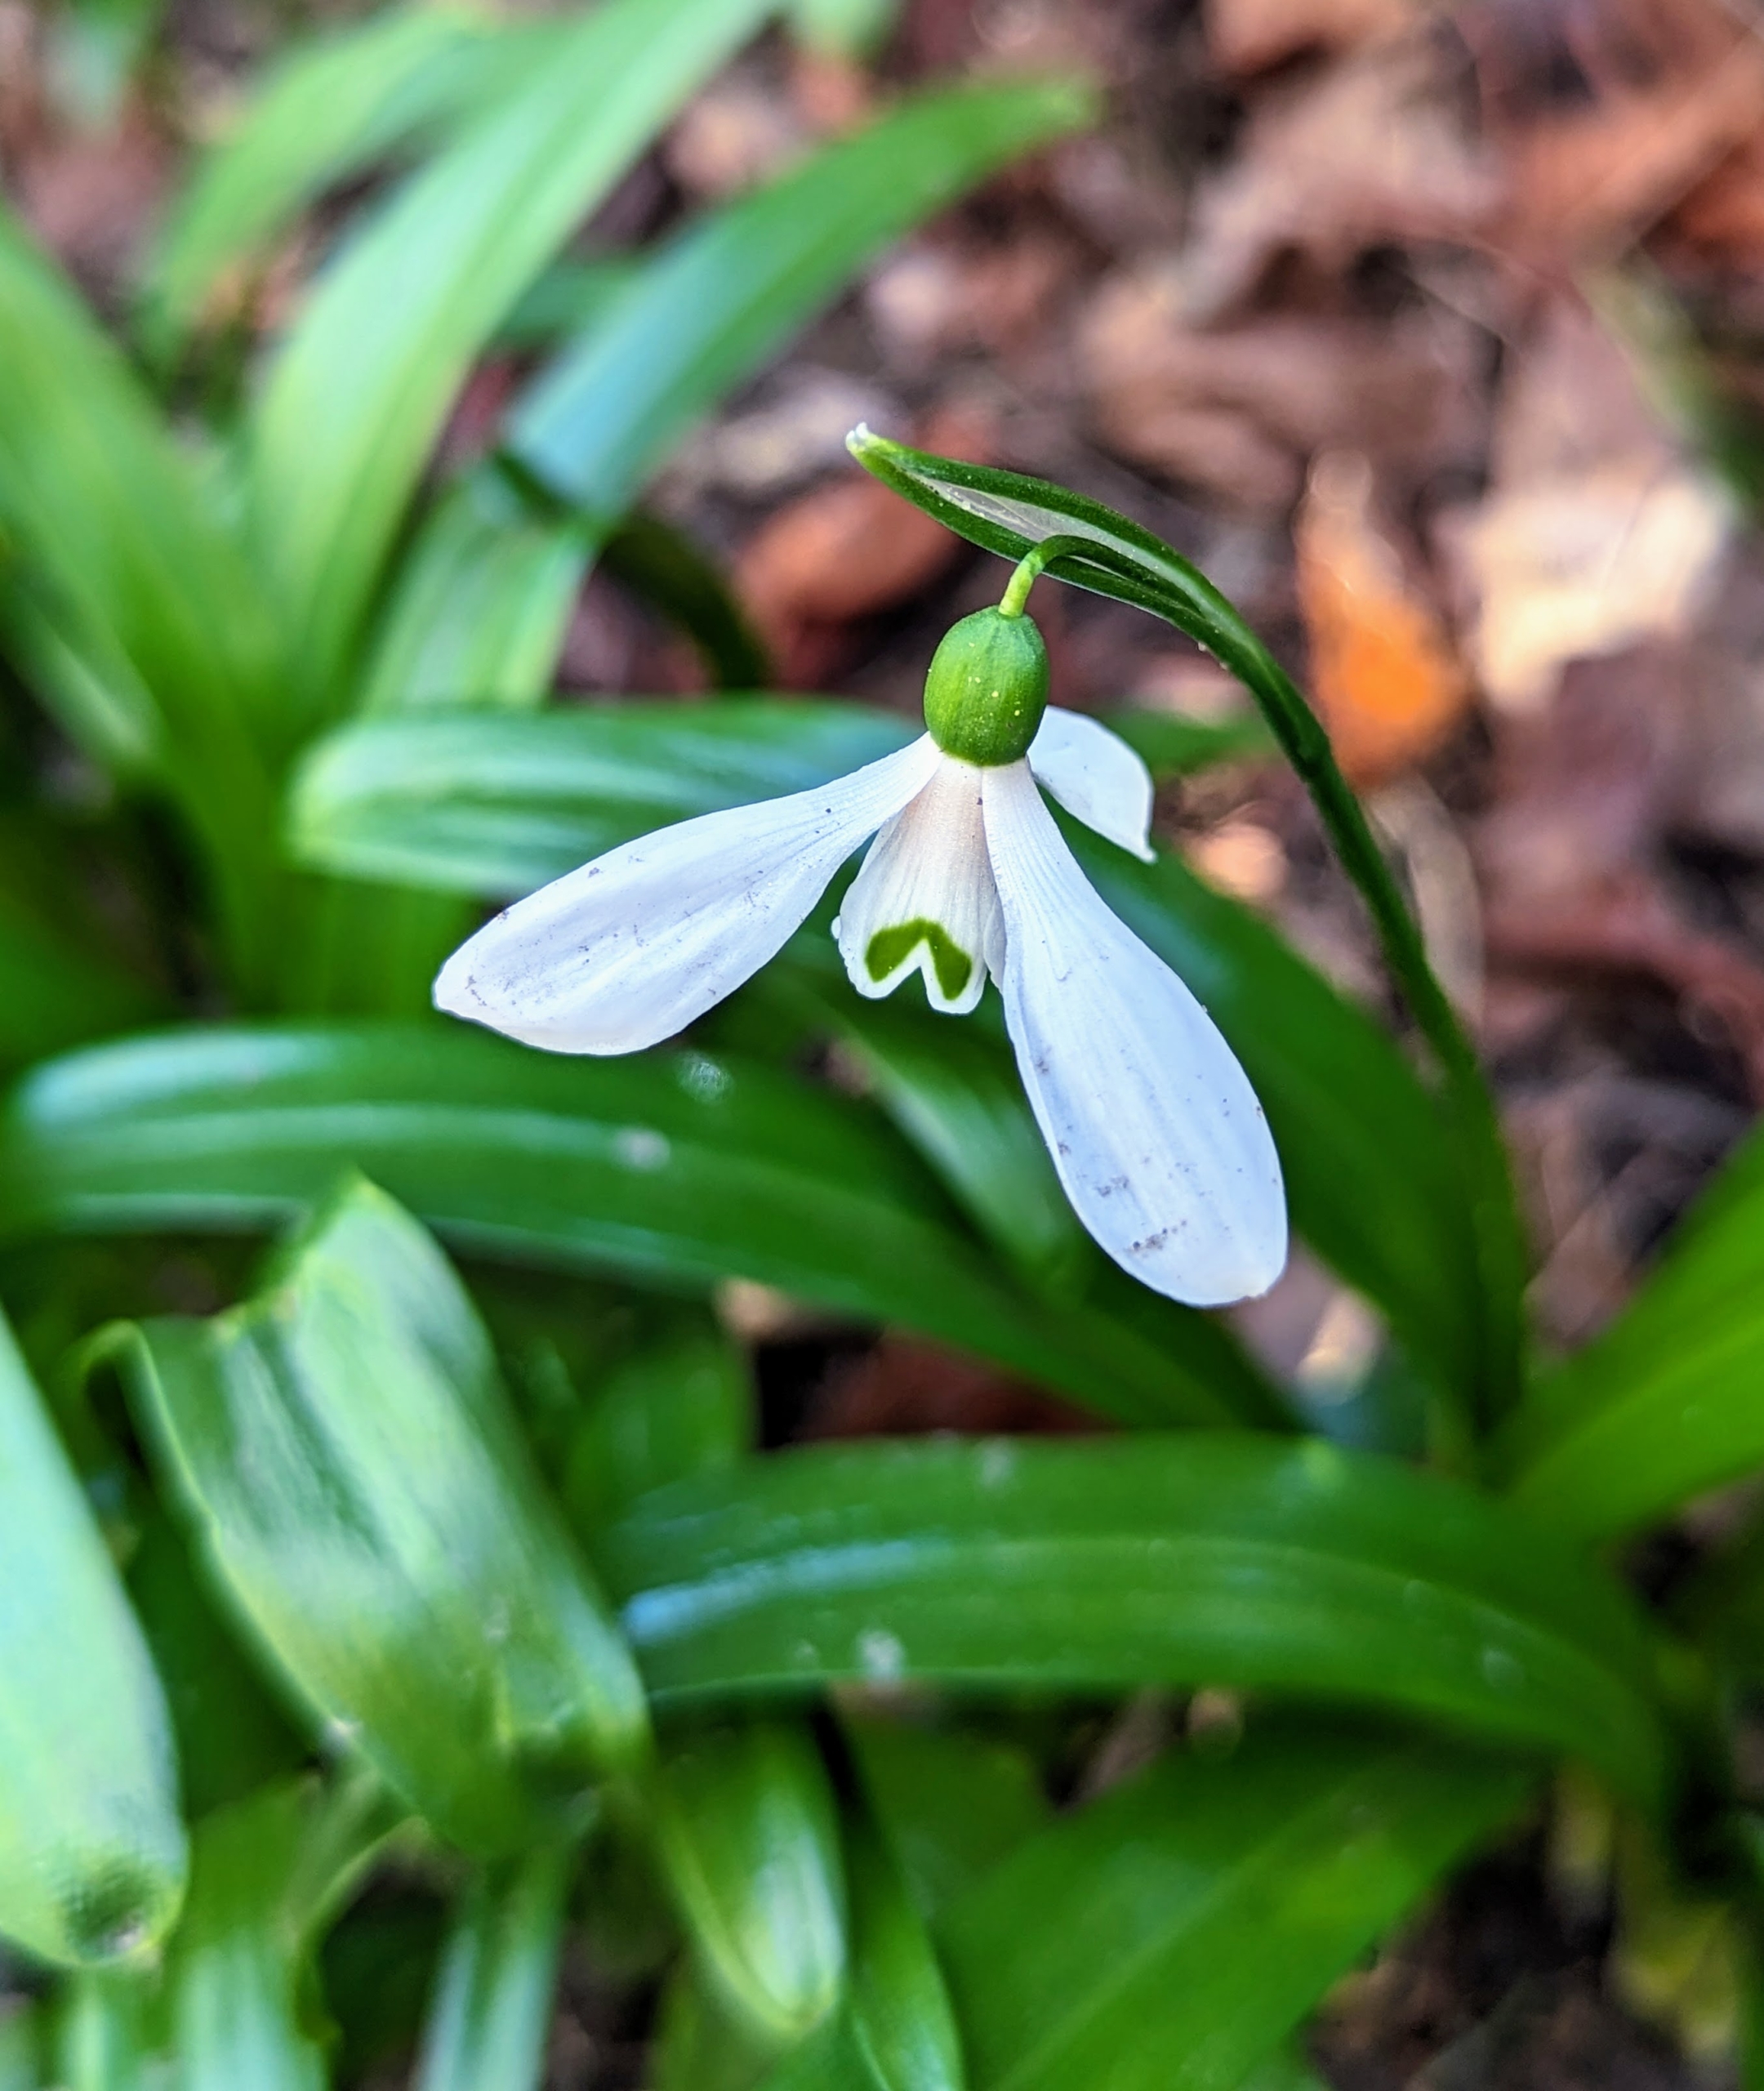
It's always exciting to see those first blooming bulbs emerge from the soil, but are those delicate white early spring flowers snowdrops or snowflakes?
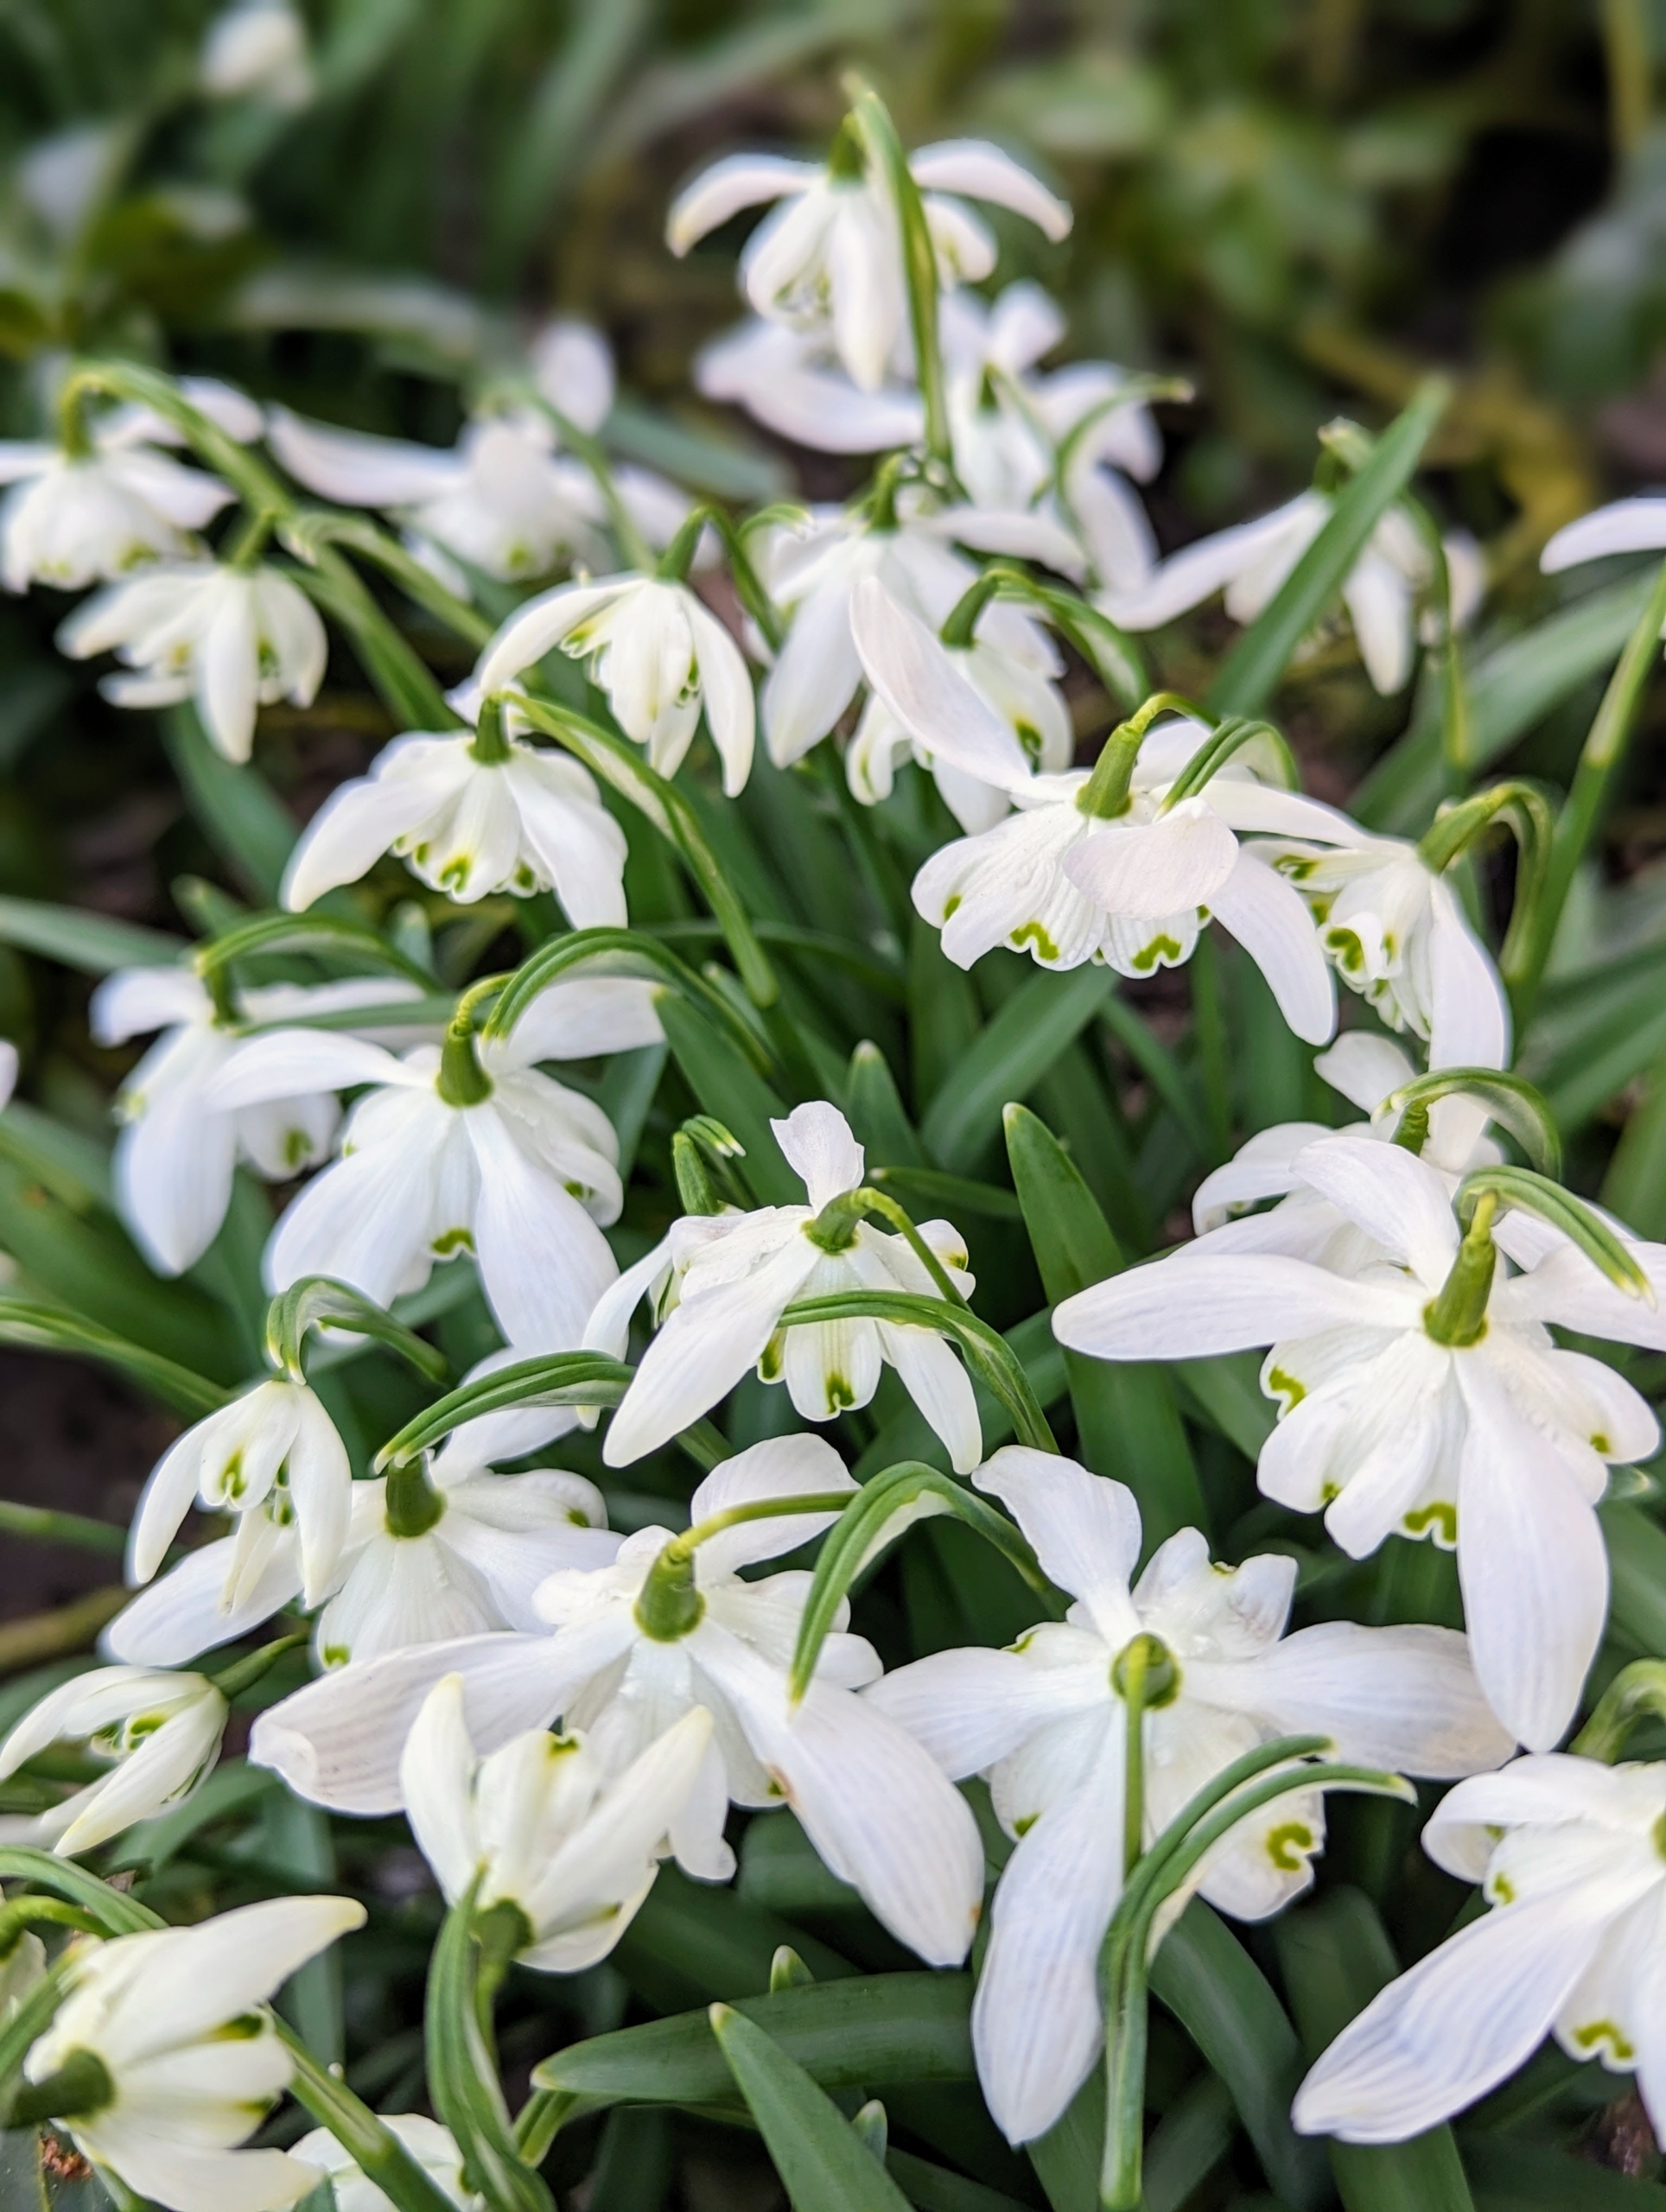
Right now, those blooms are snowdrops, Galanthus - the nodding, crisp white flowers that open above clumps of strap-shaped leaves from January through March. I love Galanthus and have many different varieties here at my farm. The hardy fall-planted bulbs are easy to grow and multiply easily providing carpets of stunning blossoms every year.
Here are some photos, enjoy.
The first white flowers of spring are the snowdrops. This is a snowdrop, Galanthus. The genus name refers to the white color of the flowers – gala is Greek for “milk,” while anthos is Greek for “flower”.
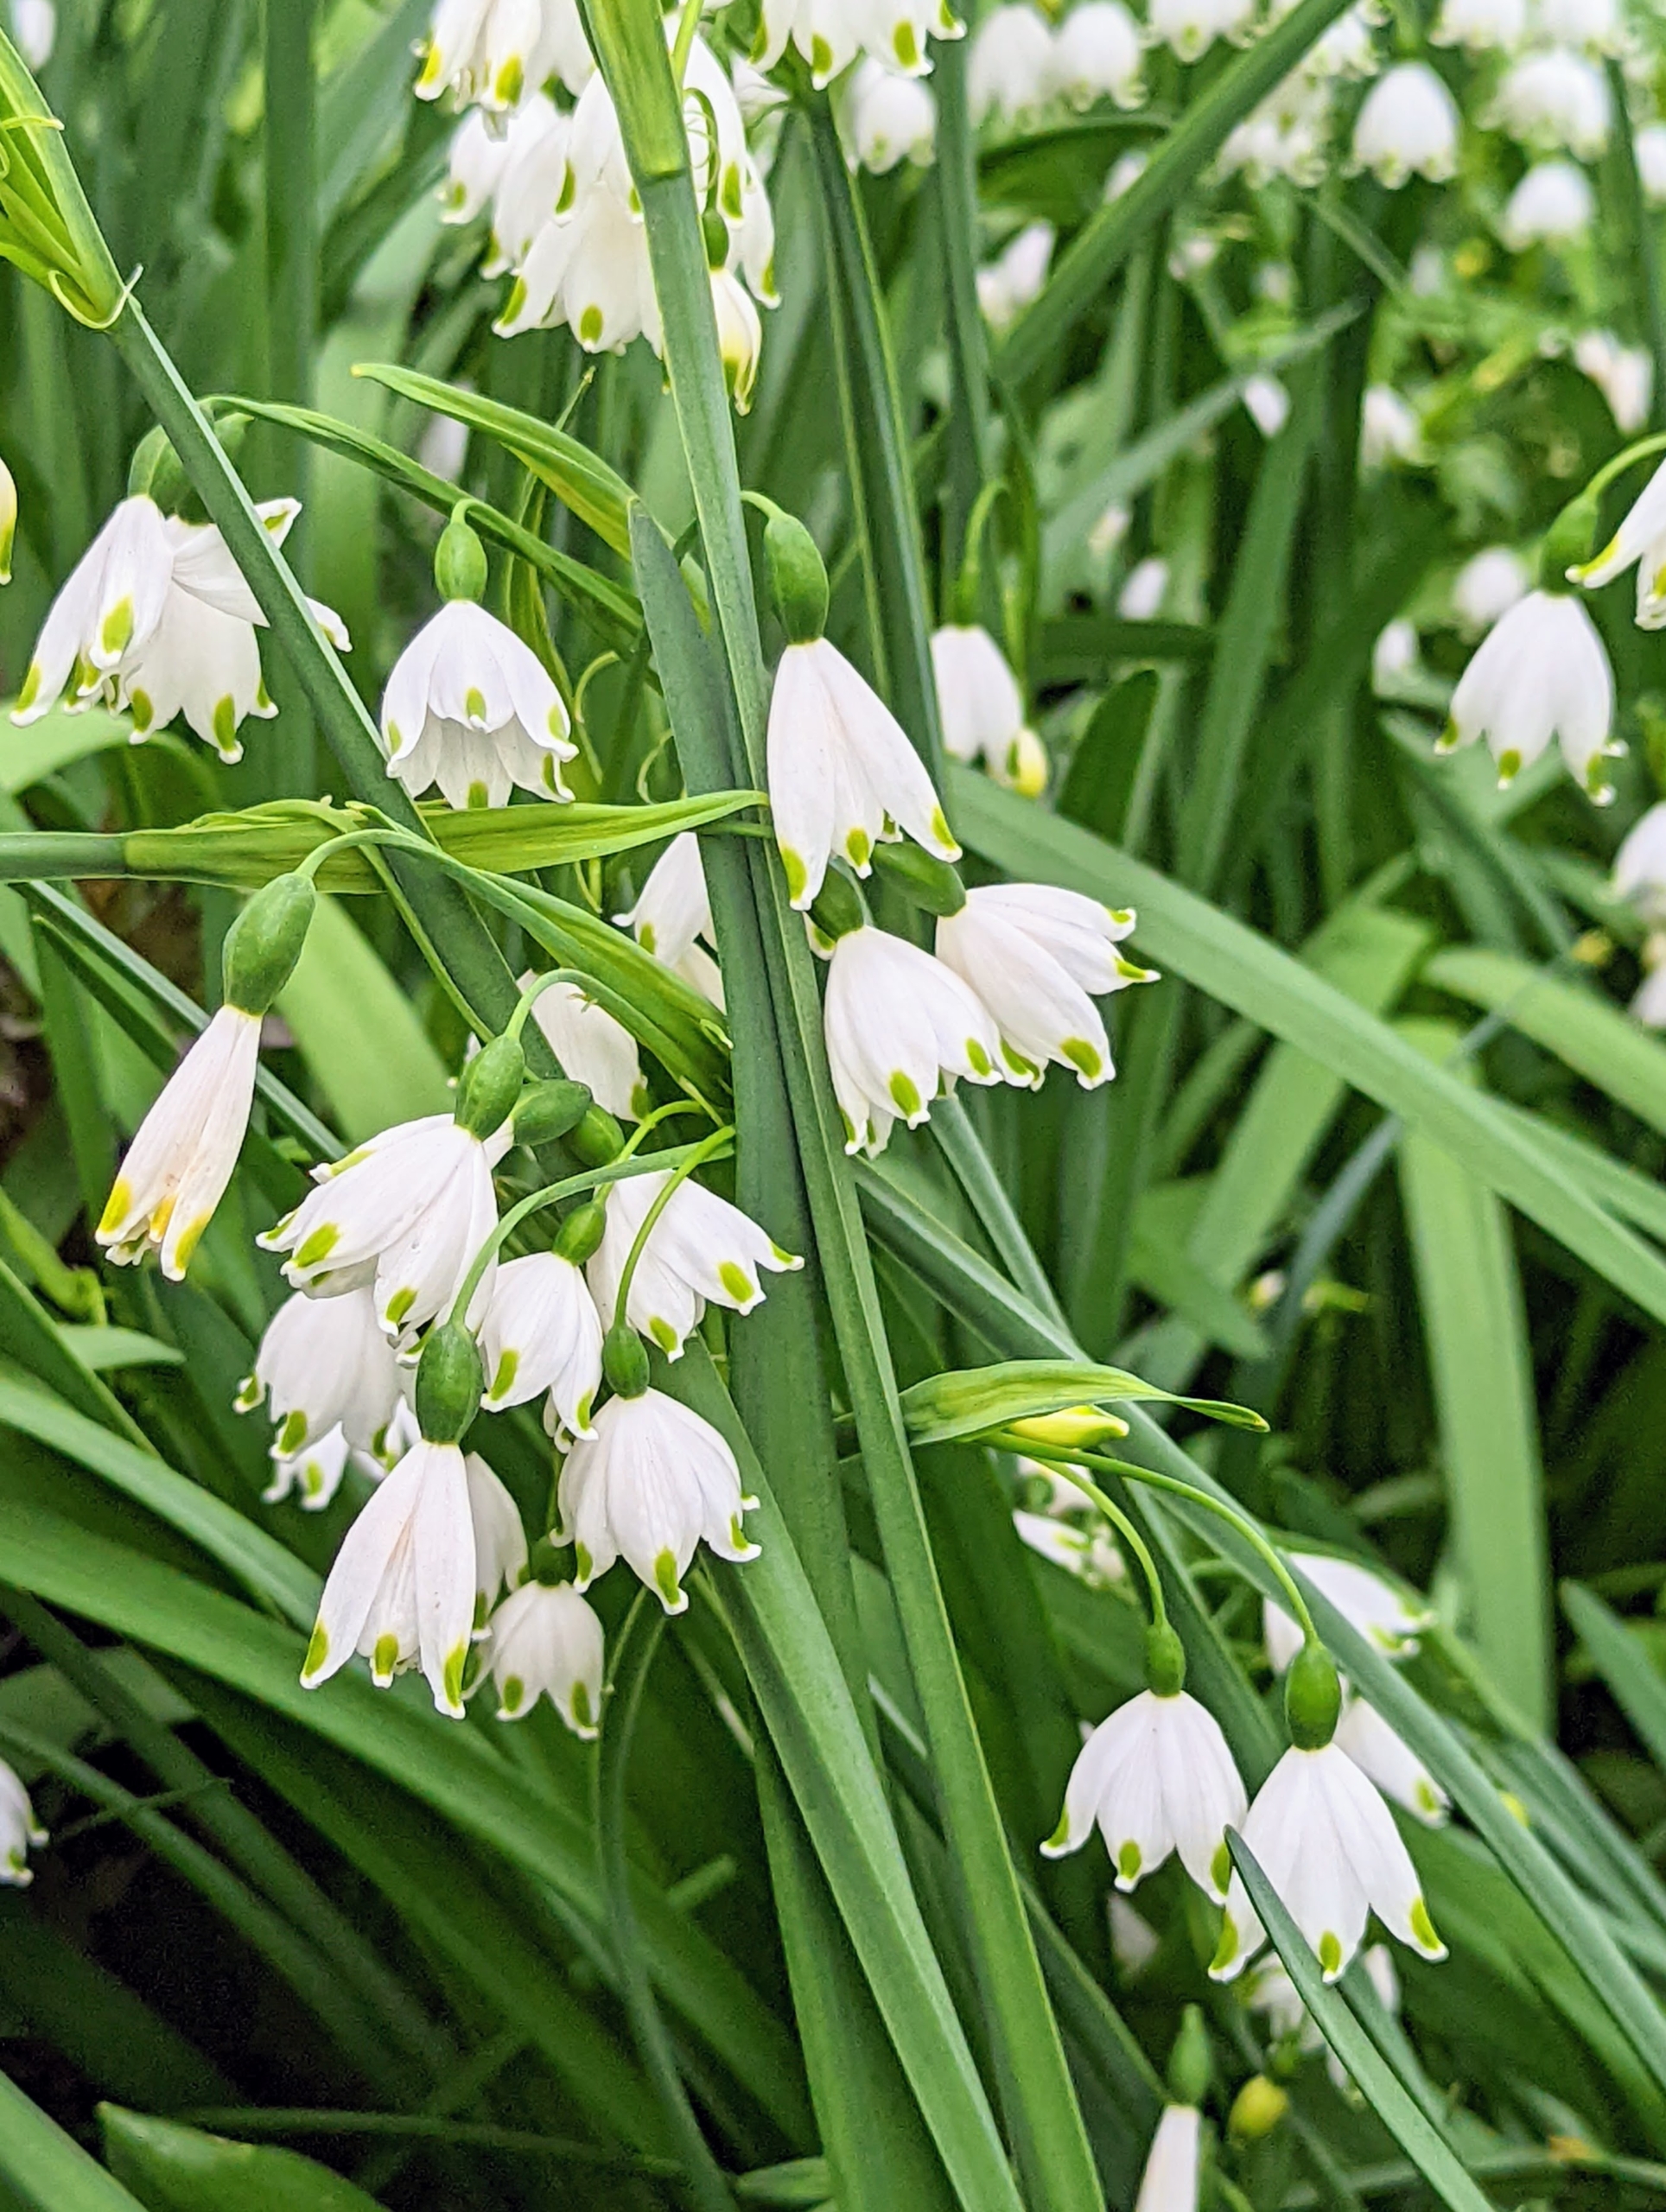
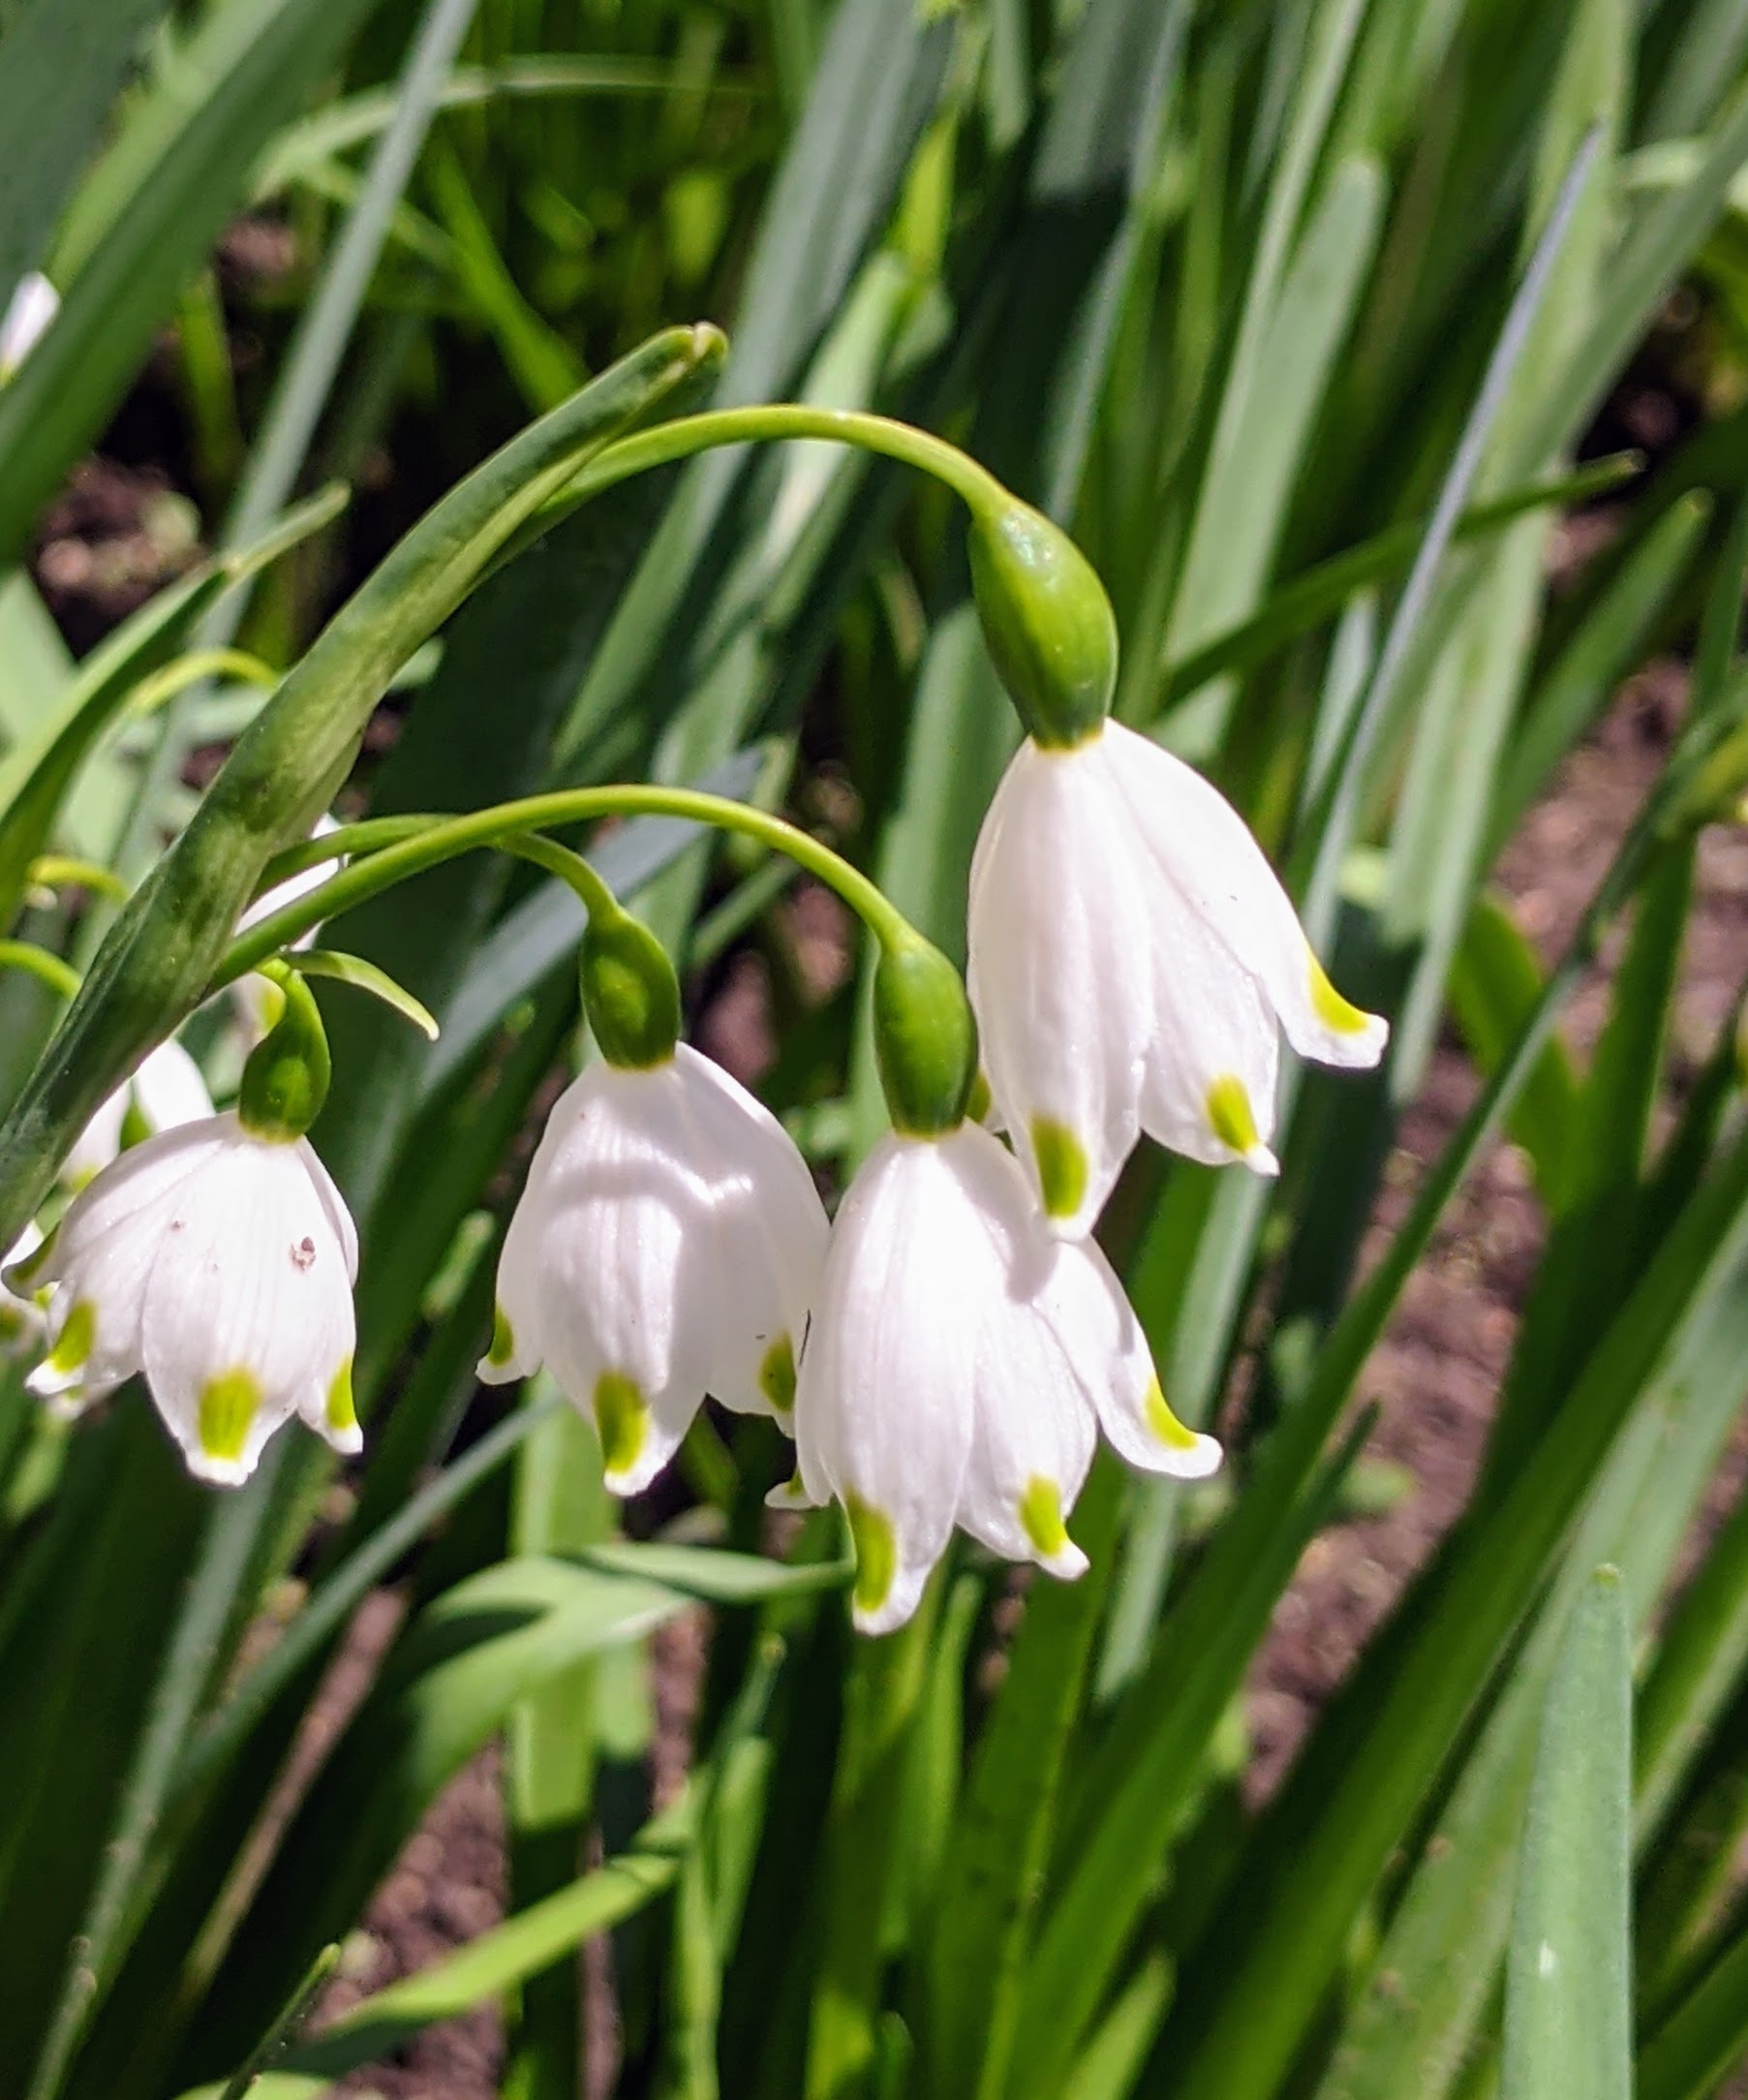
Look closely, these are snowflakes, Leucojum.
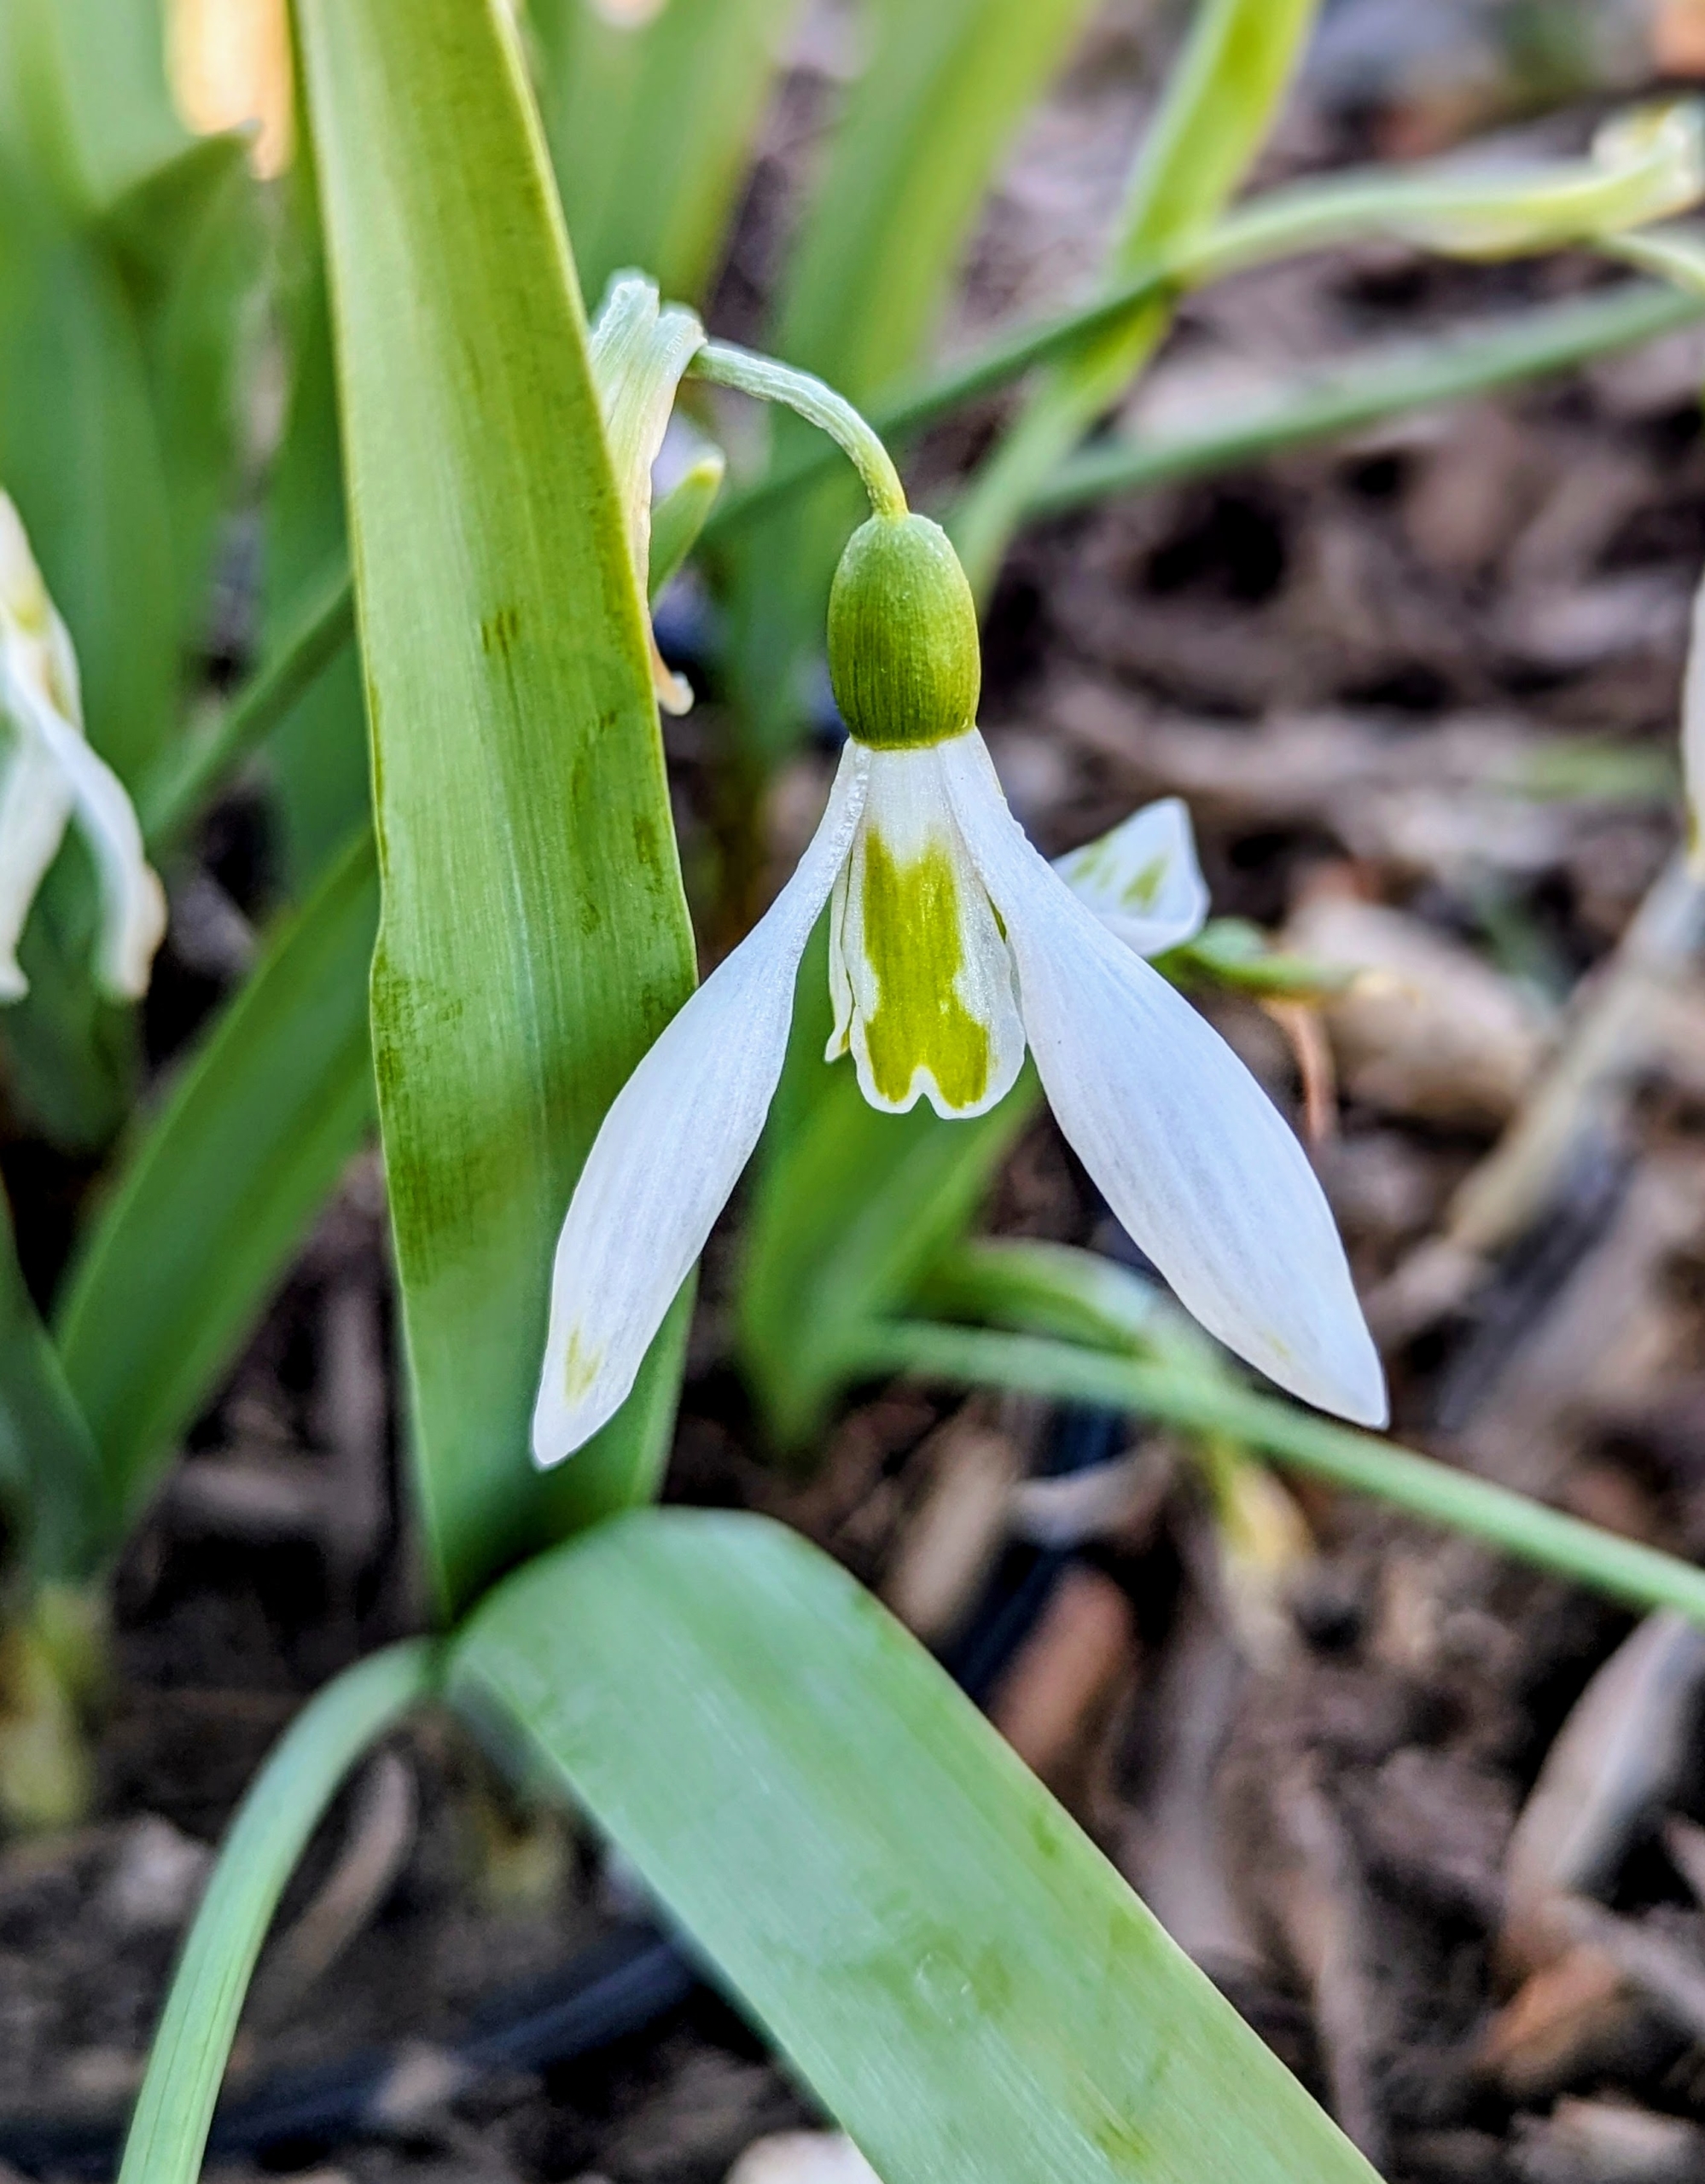
Snowdrops… characterized by three small inner petals and three outer petals, which are spoon shaped and longer than the inners.
… And snowflakes, which are typically more lantern-shaped, with pointed, out-curved, green-blotched tips and segments that are each about the same length.
It can be hard to distinguish from afar, and both flowers do share similarities, but they are different, especially in flower form.
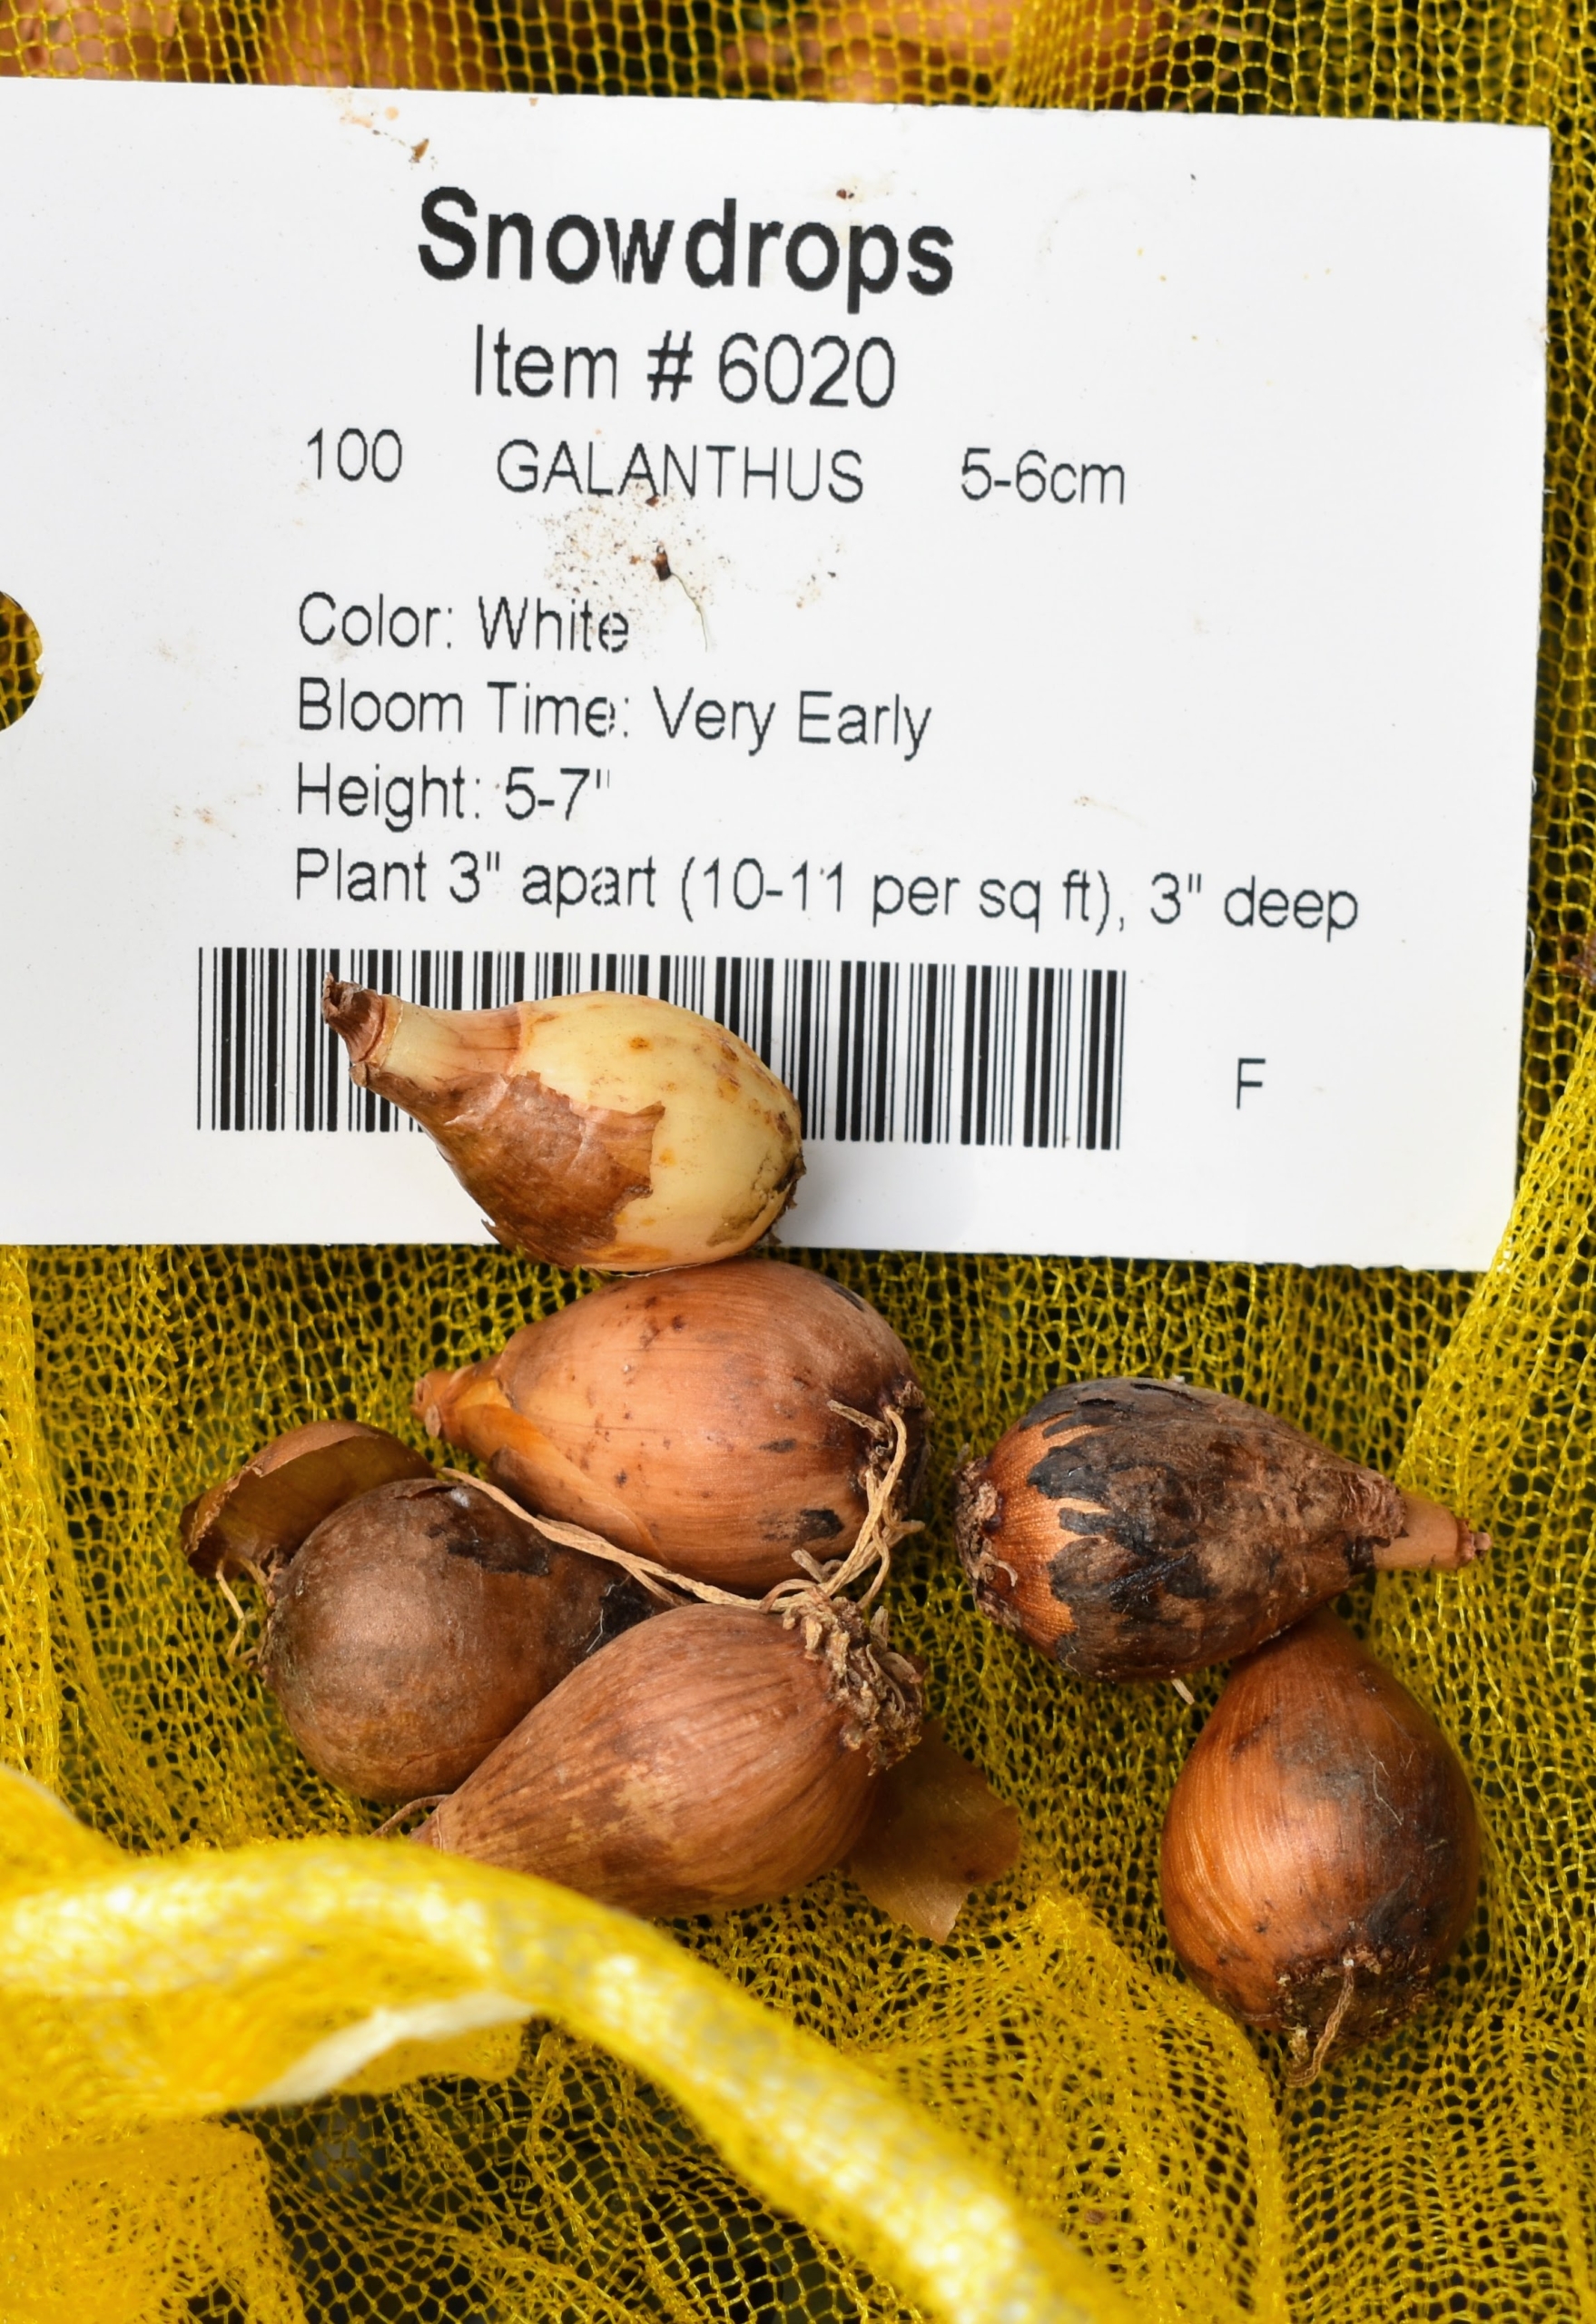
These are snowdrop bulbs. We plant them in the fall. Snowdrops should be planted in light to moderate shade and moist but well-drained soil.
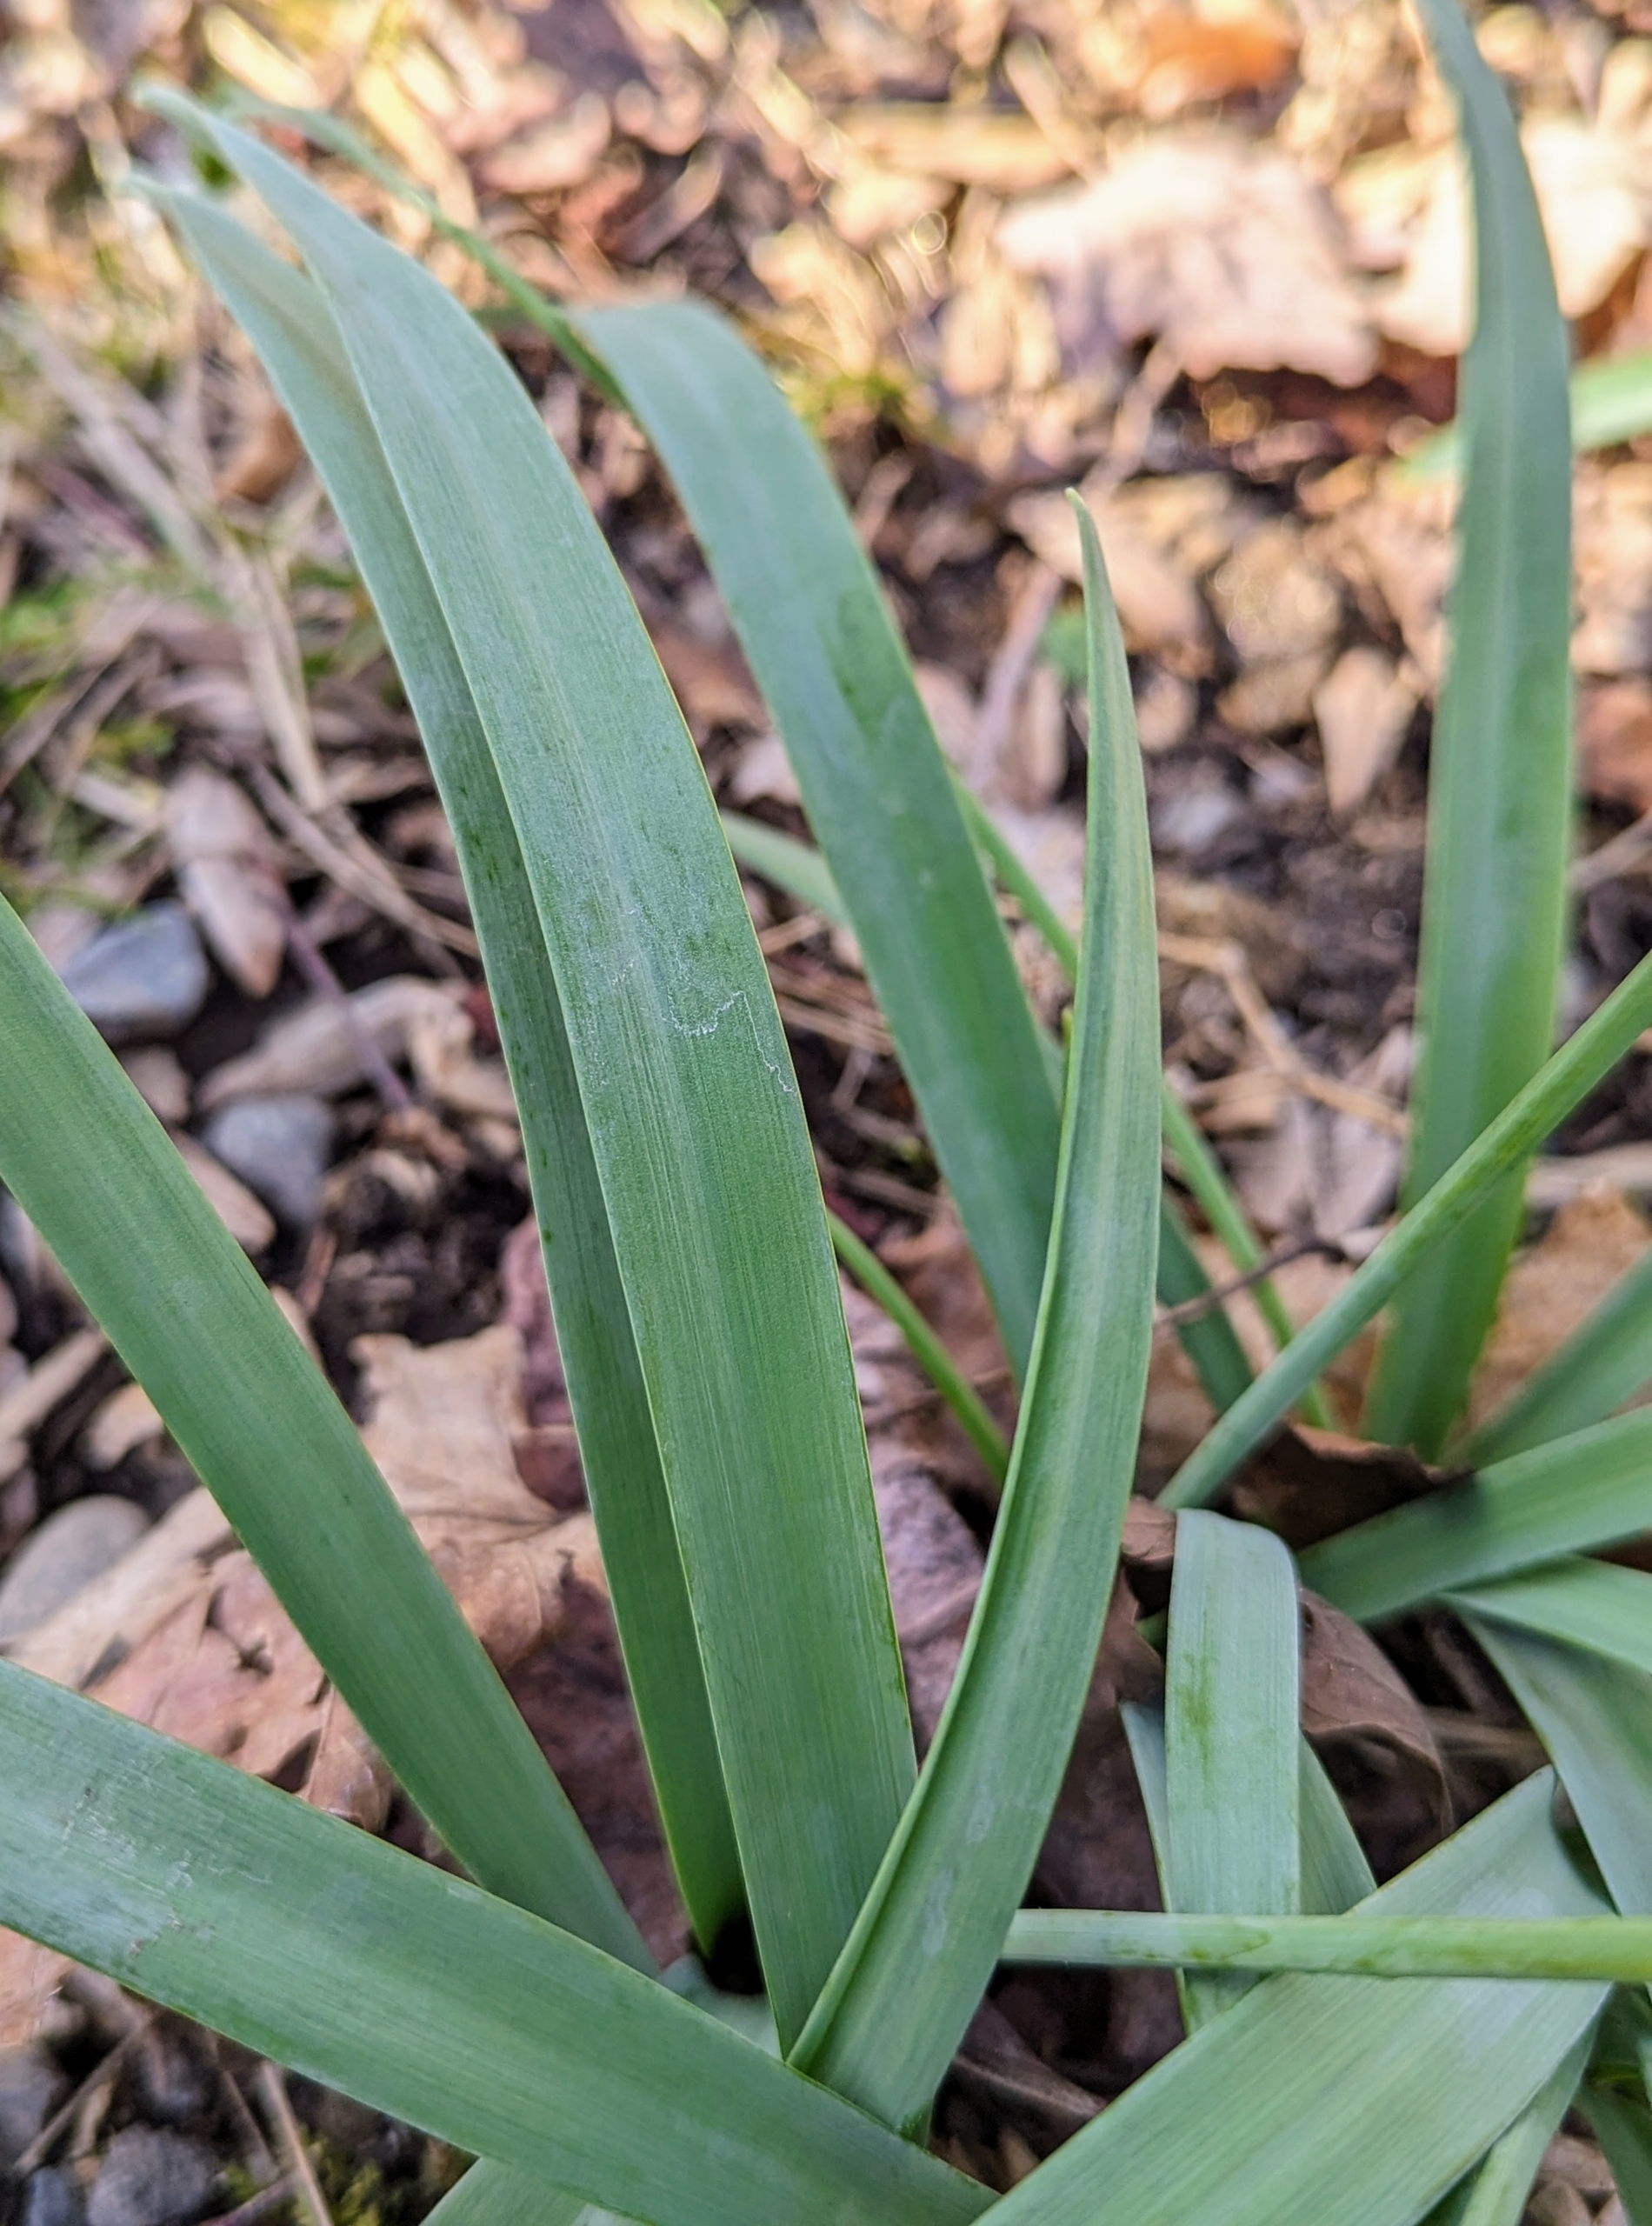
When they start to push through the soil, two or three dark green, strap-like leaves come up first and grow four to 10-inches tall.
Galanthus or snowdrop, is a small genus of approximately 20 species of bulbous perennial herbaceous plants in the family Amaryllidaceae, and native to Europe and the Middle East.
One of the most cultivated is Galanthus nivalis, usually known as the garden snowdrop.
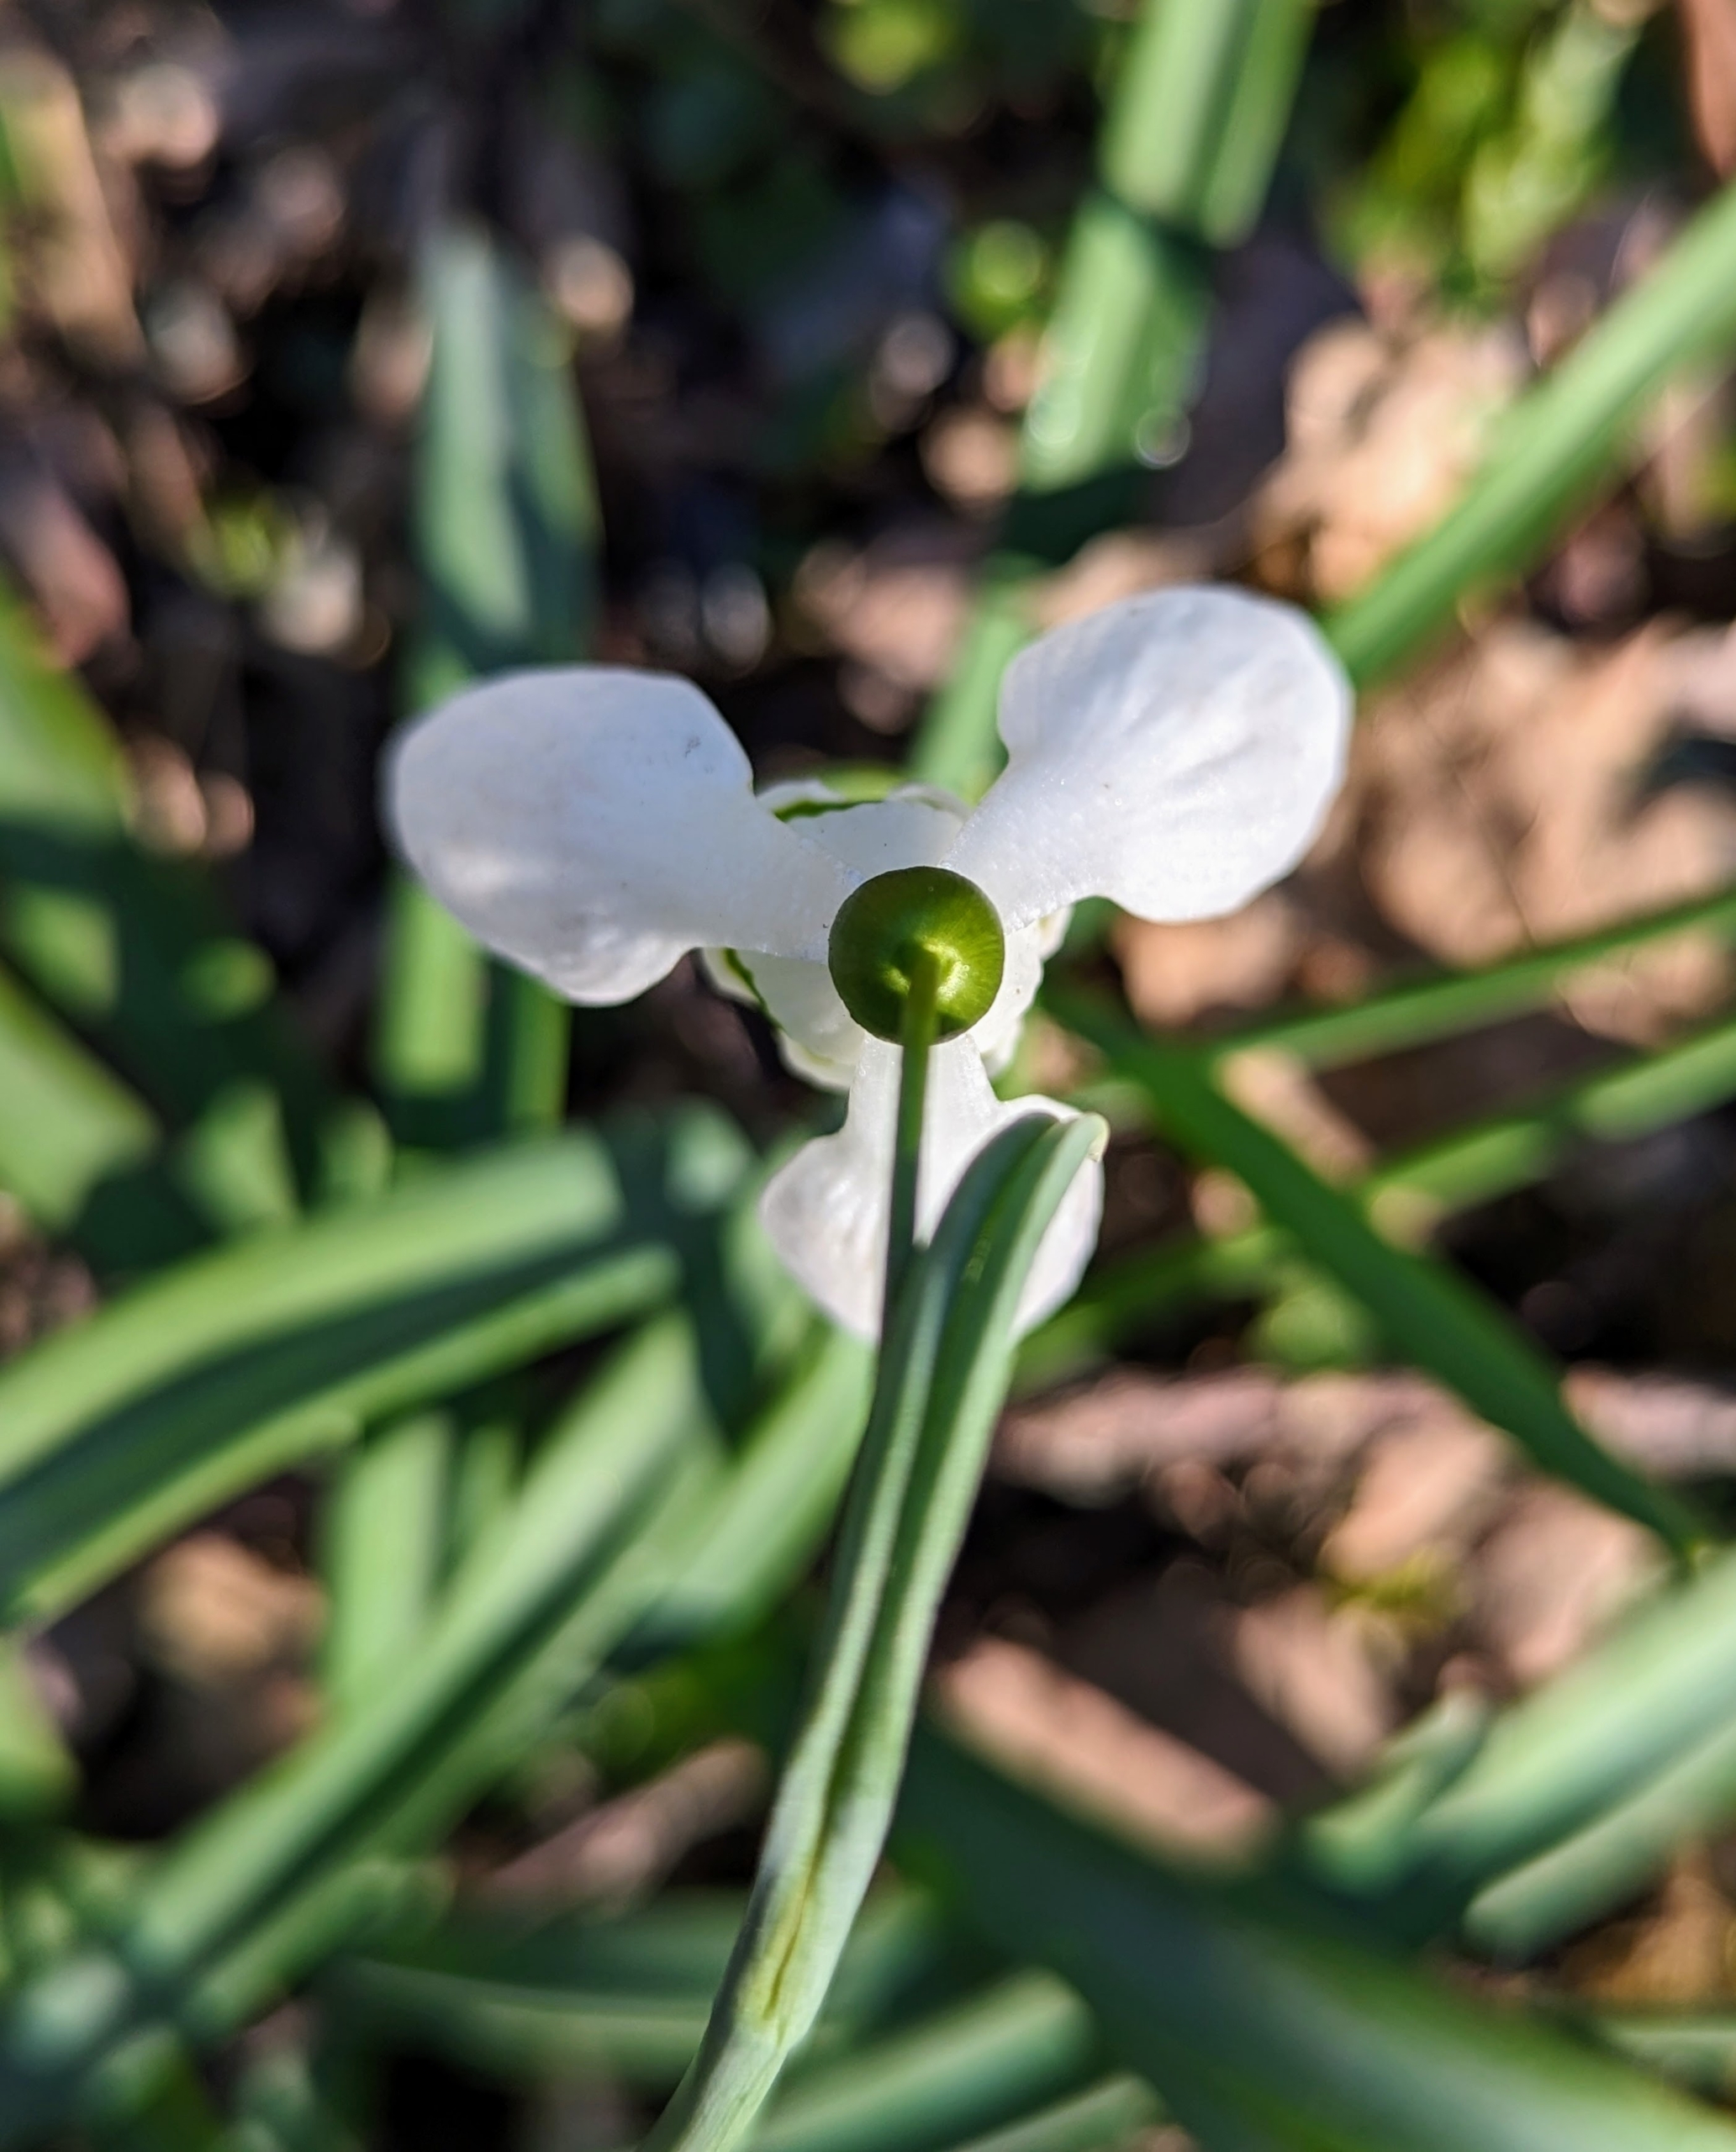
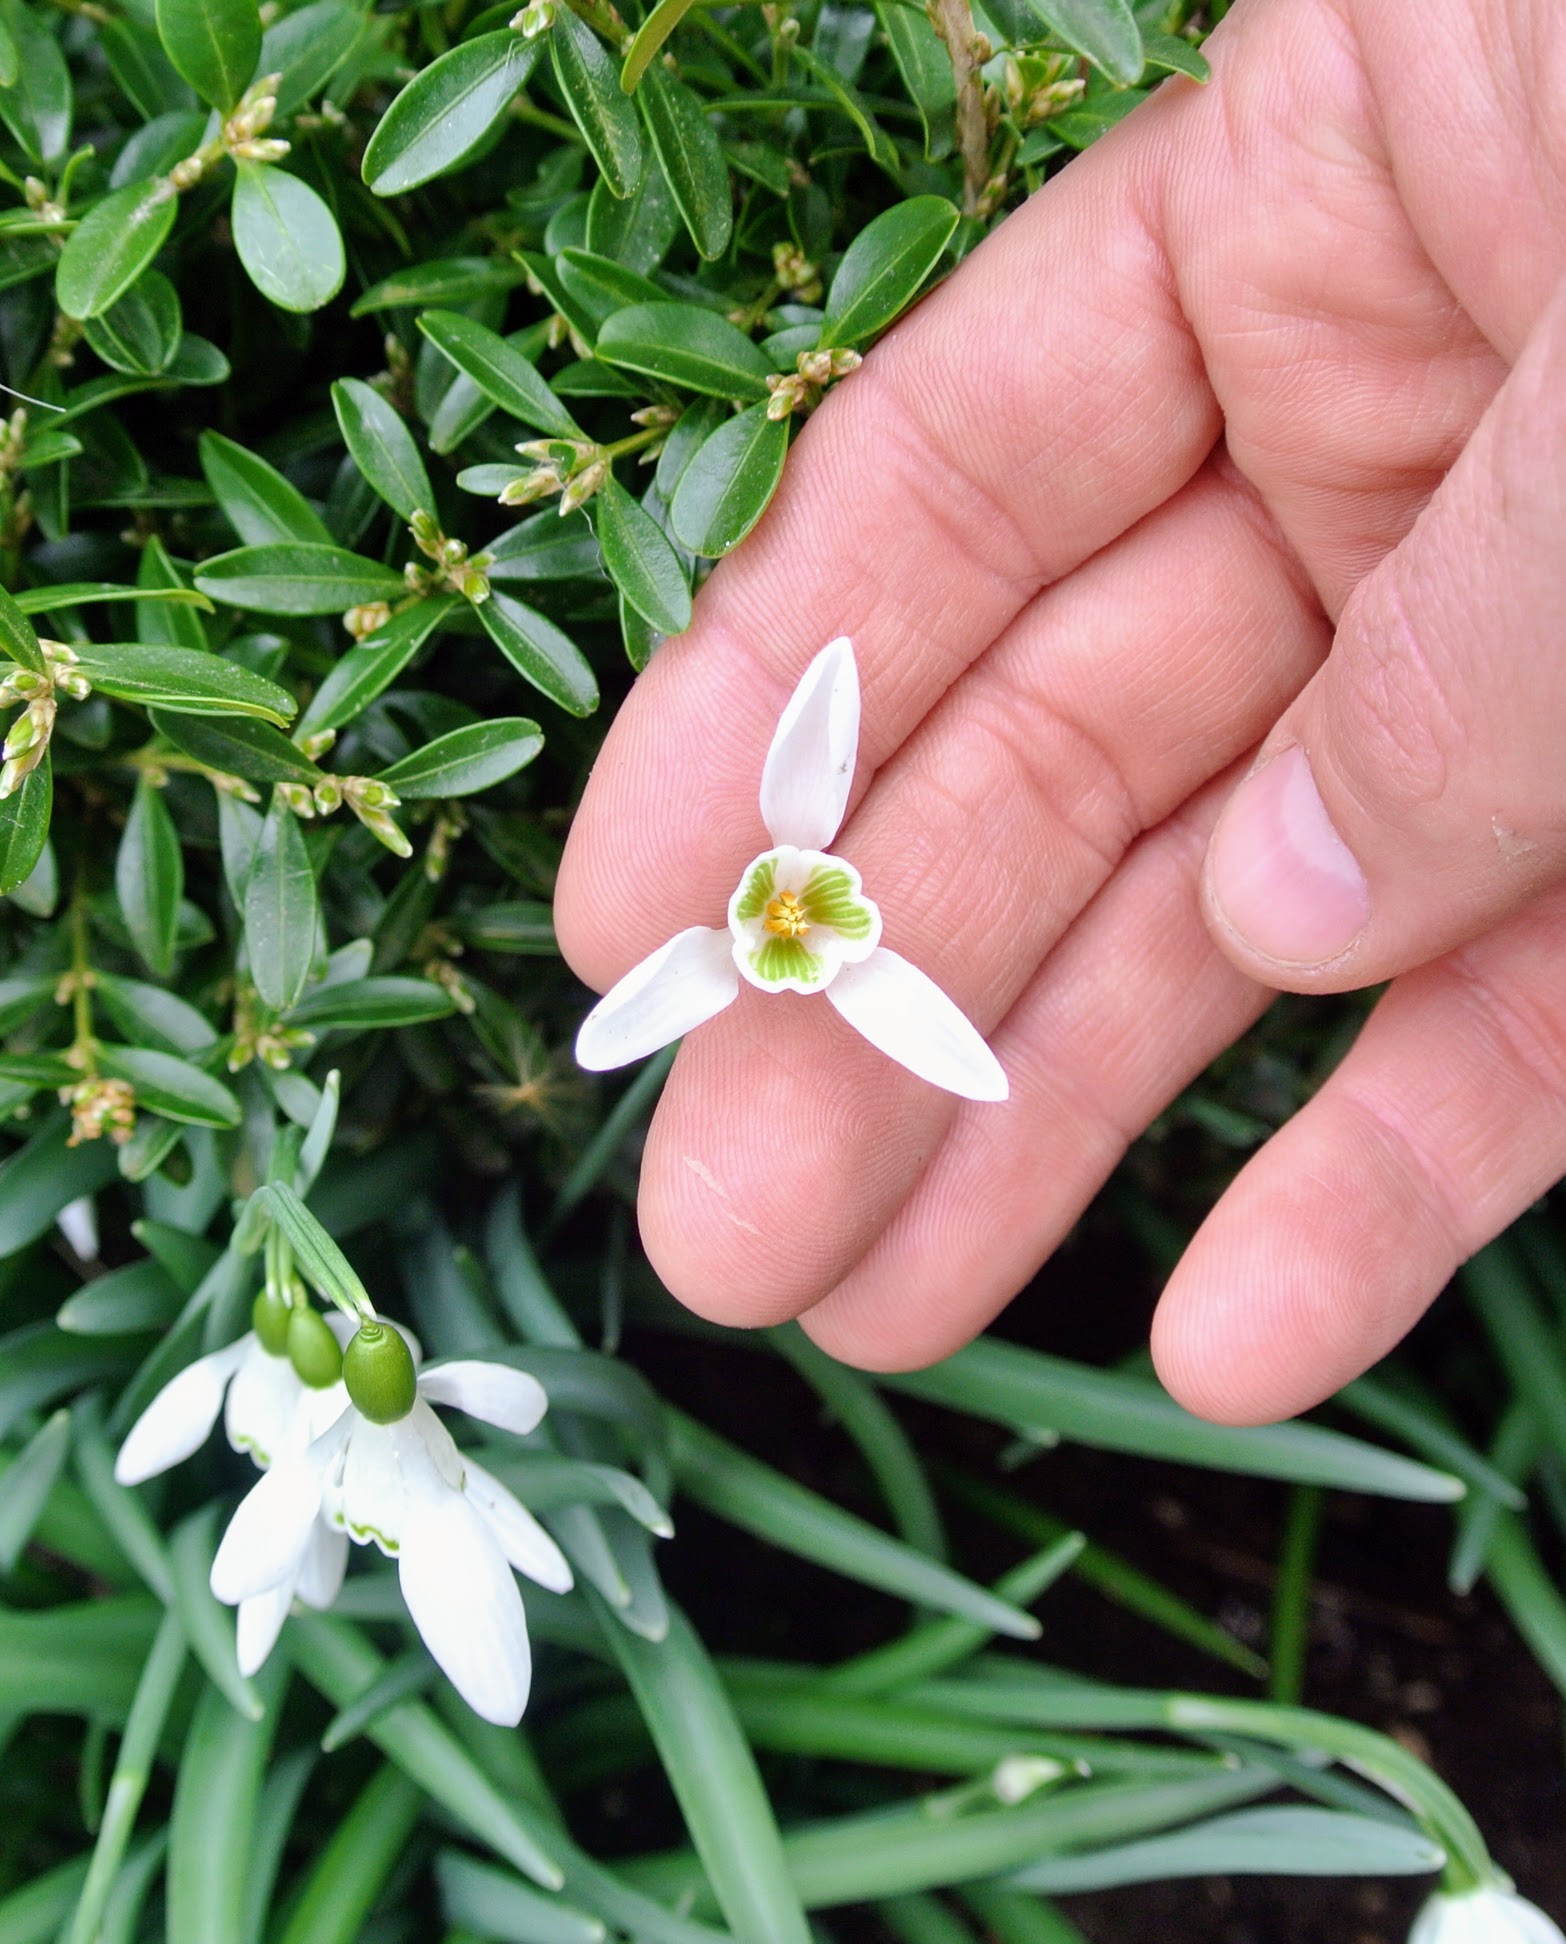
Here is a view from above of the base of the flower, where it begins to nod.
These flower heads can be ‘single’ – one layer of petals – or ‘double’ – multiple layers of petals. And notice the inner petals – they can be blotched heavily with green…
… or just tipped lightly with color.
Here is another variety with interesting markings and rounder outer petals. Some of the varieties I grow include ‘Hippolyta,’ elwesii ‘Mount Everest,’ elwesii ‘Polar Bear,’ nivalis ‘Magnet,’ ‘Sam Arnott,’ ‘ woronowii, plicatus Dionysus, nivalis ‘Viridi-apics,’ ‘Turncoat,’ ‘George Proverbs,’ and ‘Little Ben.’
On this snowdrop, both the inner and the outer petals are blotched.
And here, the inner petals are nearly all green.
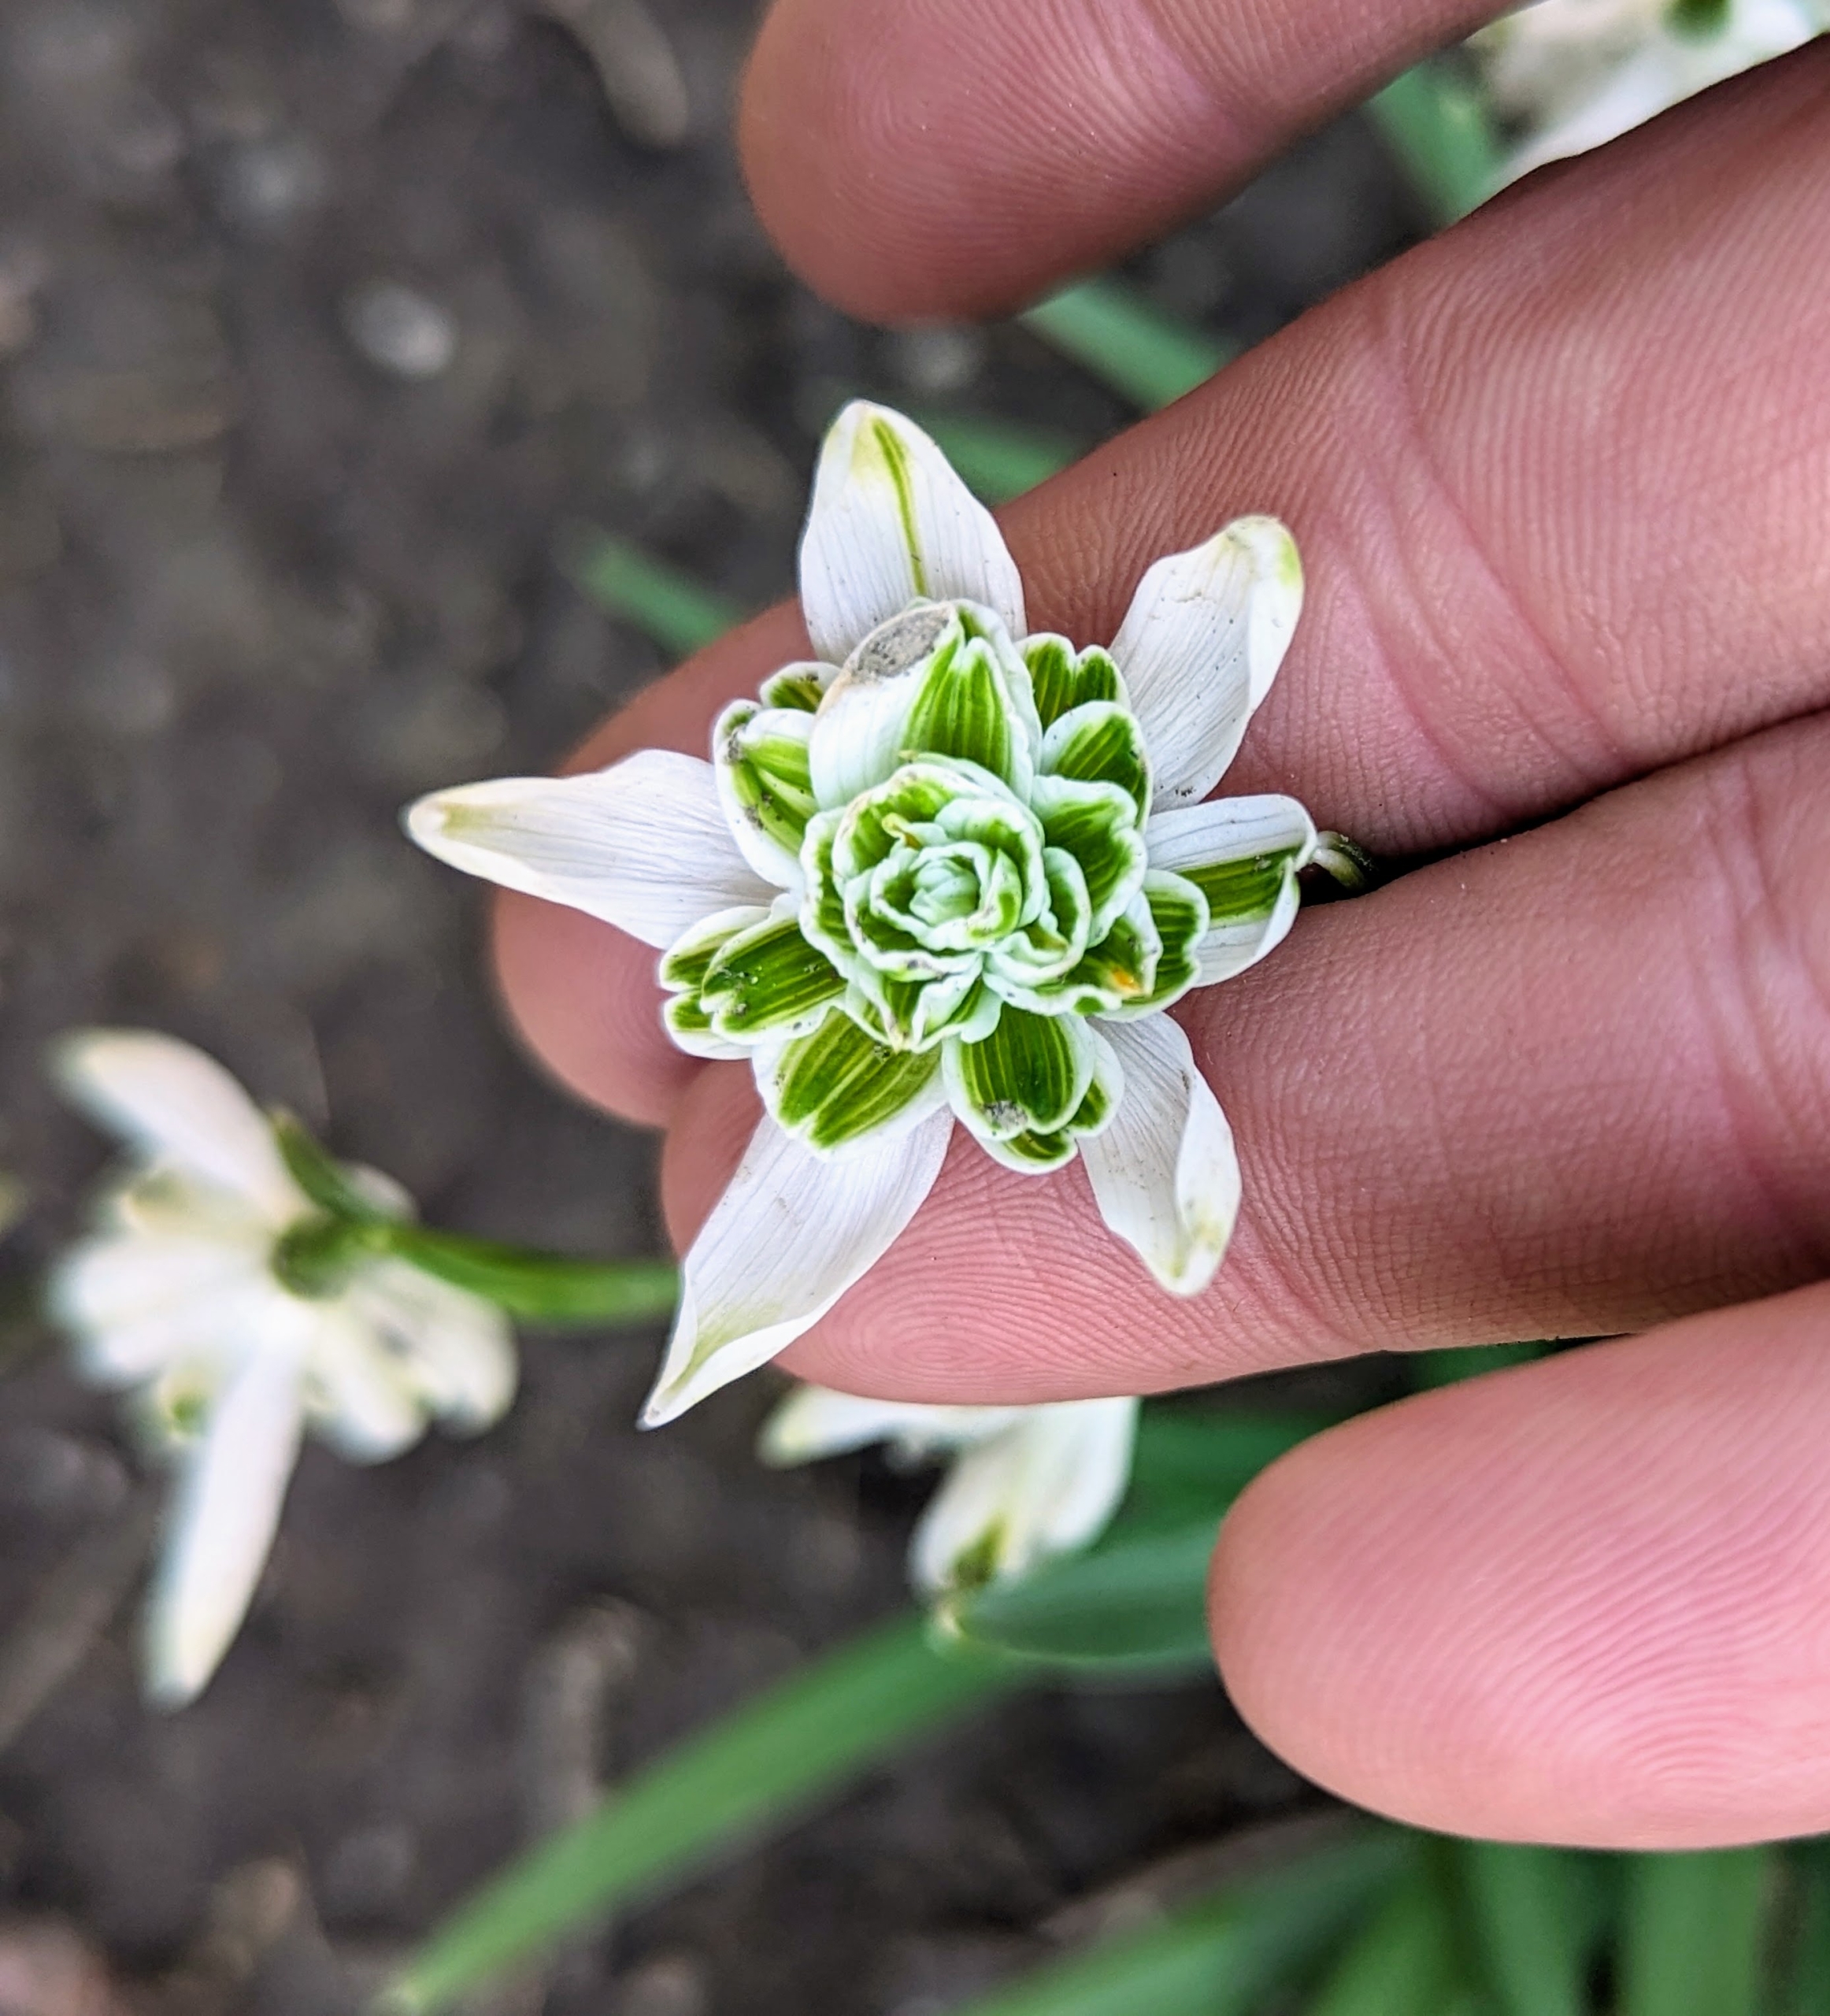
This snowdrop is double making it even more interesting.
Underneath, one can see the multiple petals tinged in emerald green.
While this one is smaller, more dainty in single form.
Snowdrops don’t often multiply from seed in a garden, but they will multiply by offsets – new bulbs that grow attached to the mother bulb. And, Because the leaves are vital to build up the bulbs’ food reserves and allow new daughter bulblets to form, never trim or tie them into bunches.
Snowdrops are a pest-free plant. Rabbits and deer won’t eat them, and most chipmunks and mice leave them alone.
And what are these? The bold green foliage of snowflakes… getting ready for their wondrous show.