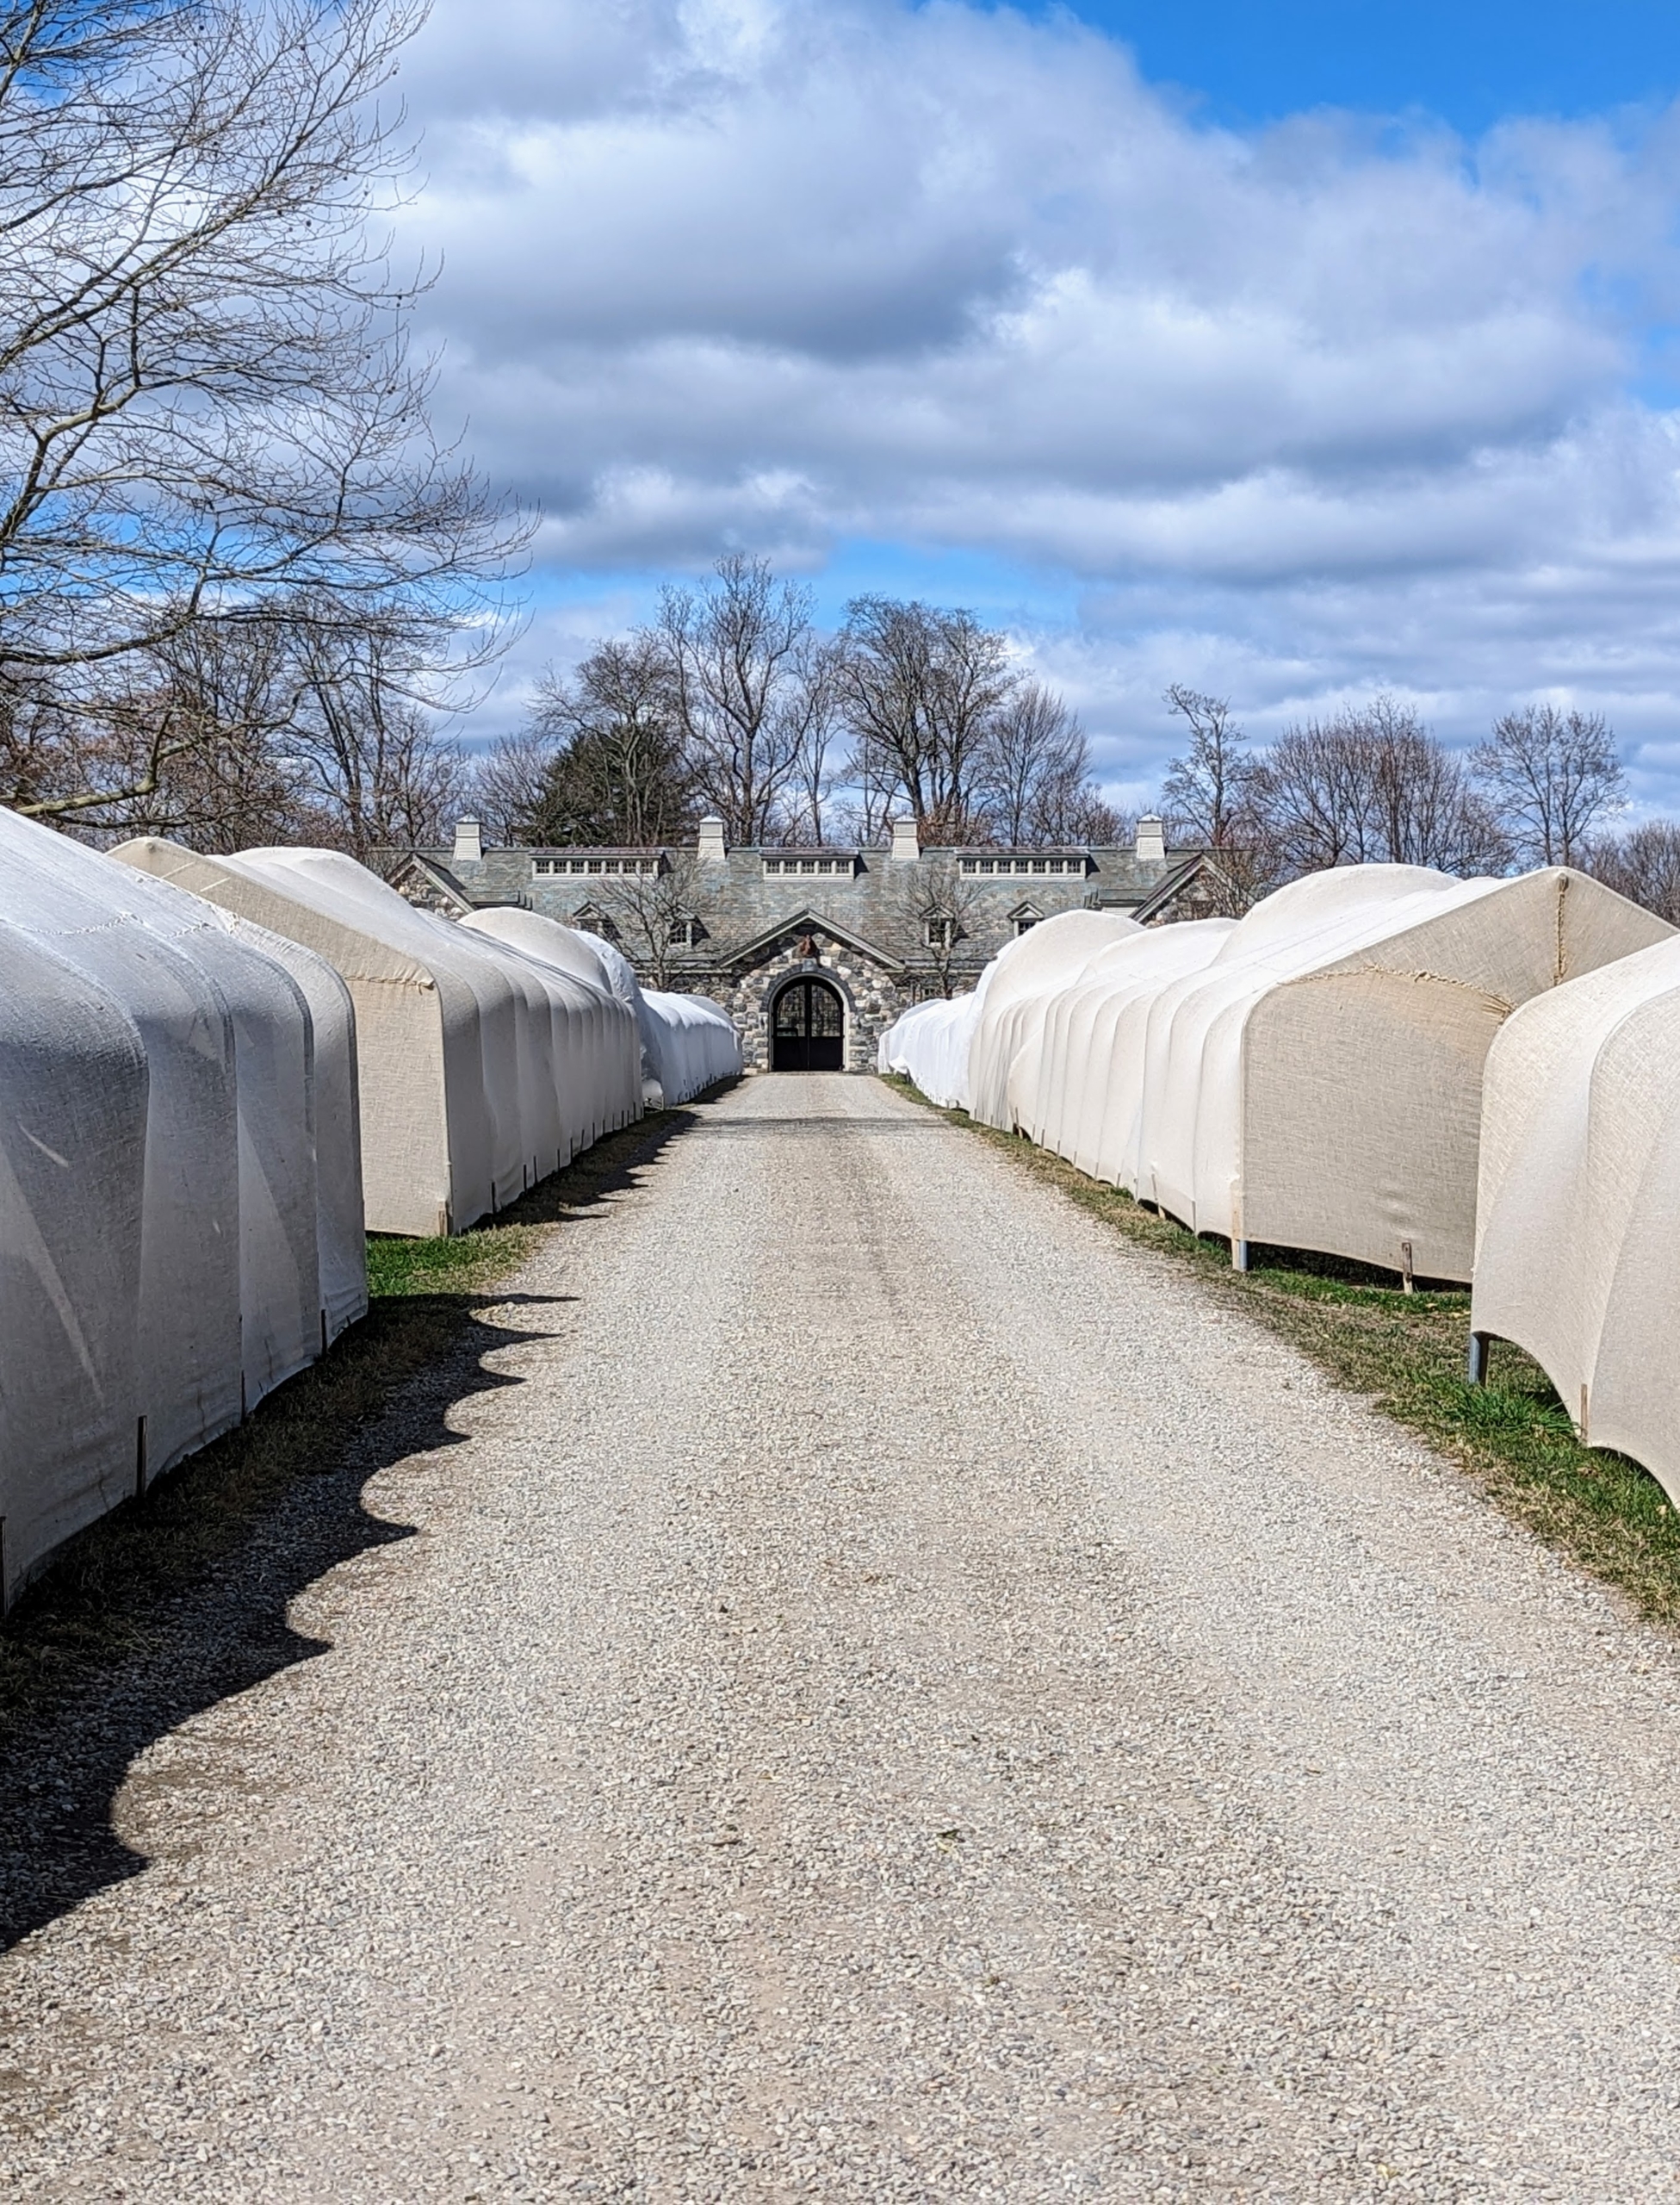
And just like clockwork, this time every year my outdoor grounds crew begins the process of removing all the burlap around the farm, exposing the lush green boxwood that has been covered all winter long.
Every autumn for as long as I’ve been gardening I’ve covered all my boxwood shrubs and outdoor ornamental urns to protect them from the season’s heavy snowfall, freezing temperatures, and damaging winds. Then, every spring when the ground begins to thaw, it’s all removed and stored away. The entire process is a big undertaking; however, knowing my plants are protected in the cold is a great comfort. And seeing all the healthy, intact shrubbery and foliage at the start of a new season is an even greater delight.
Enjoy these photos.
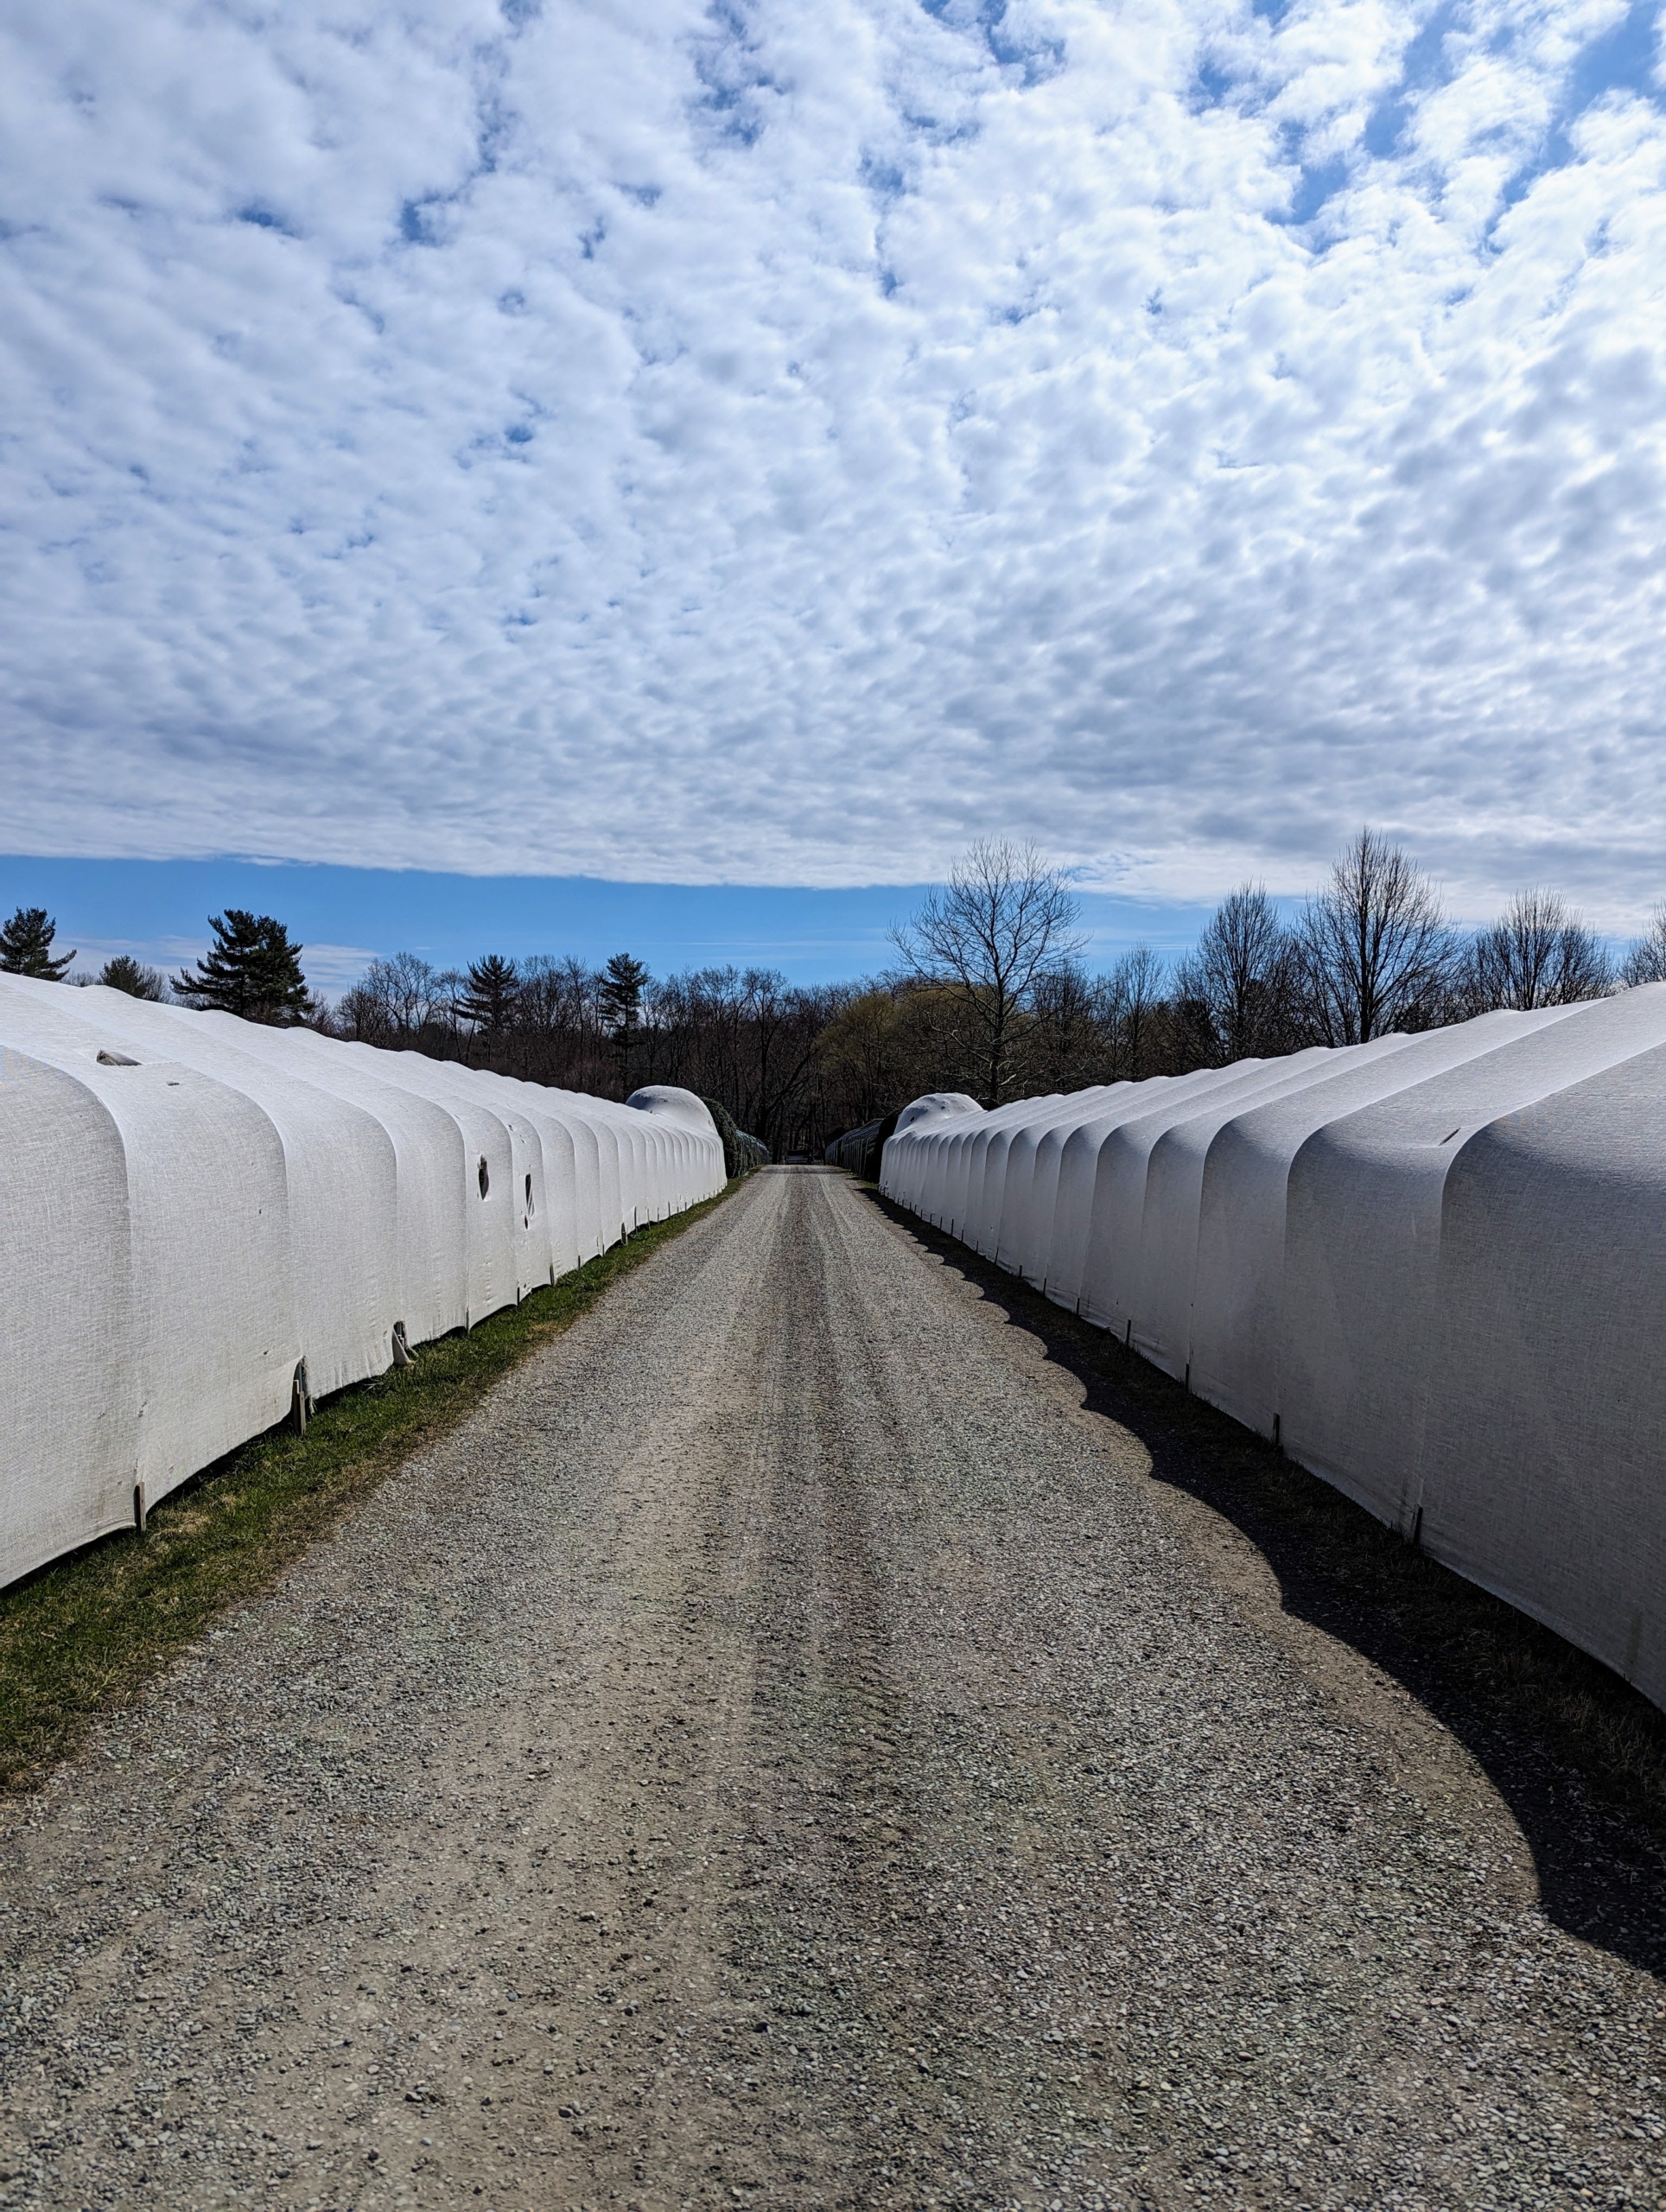
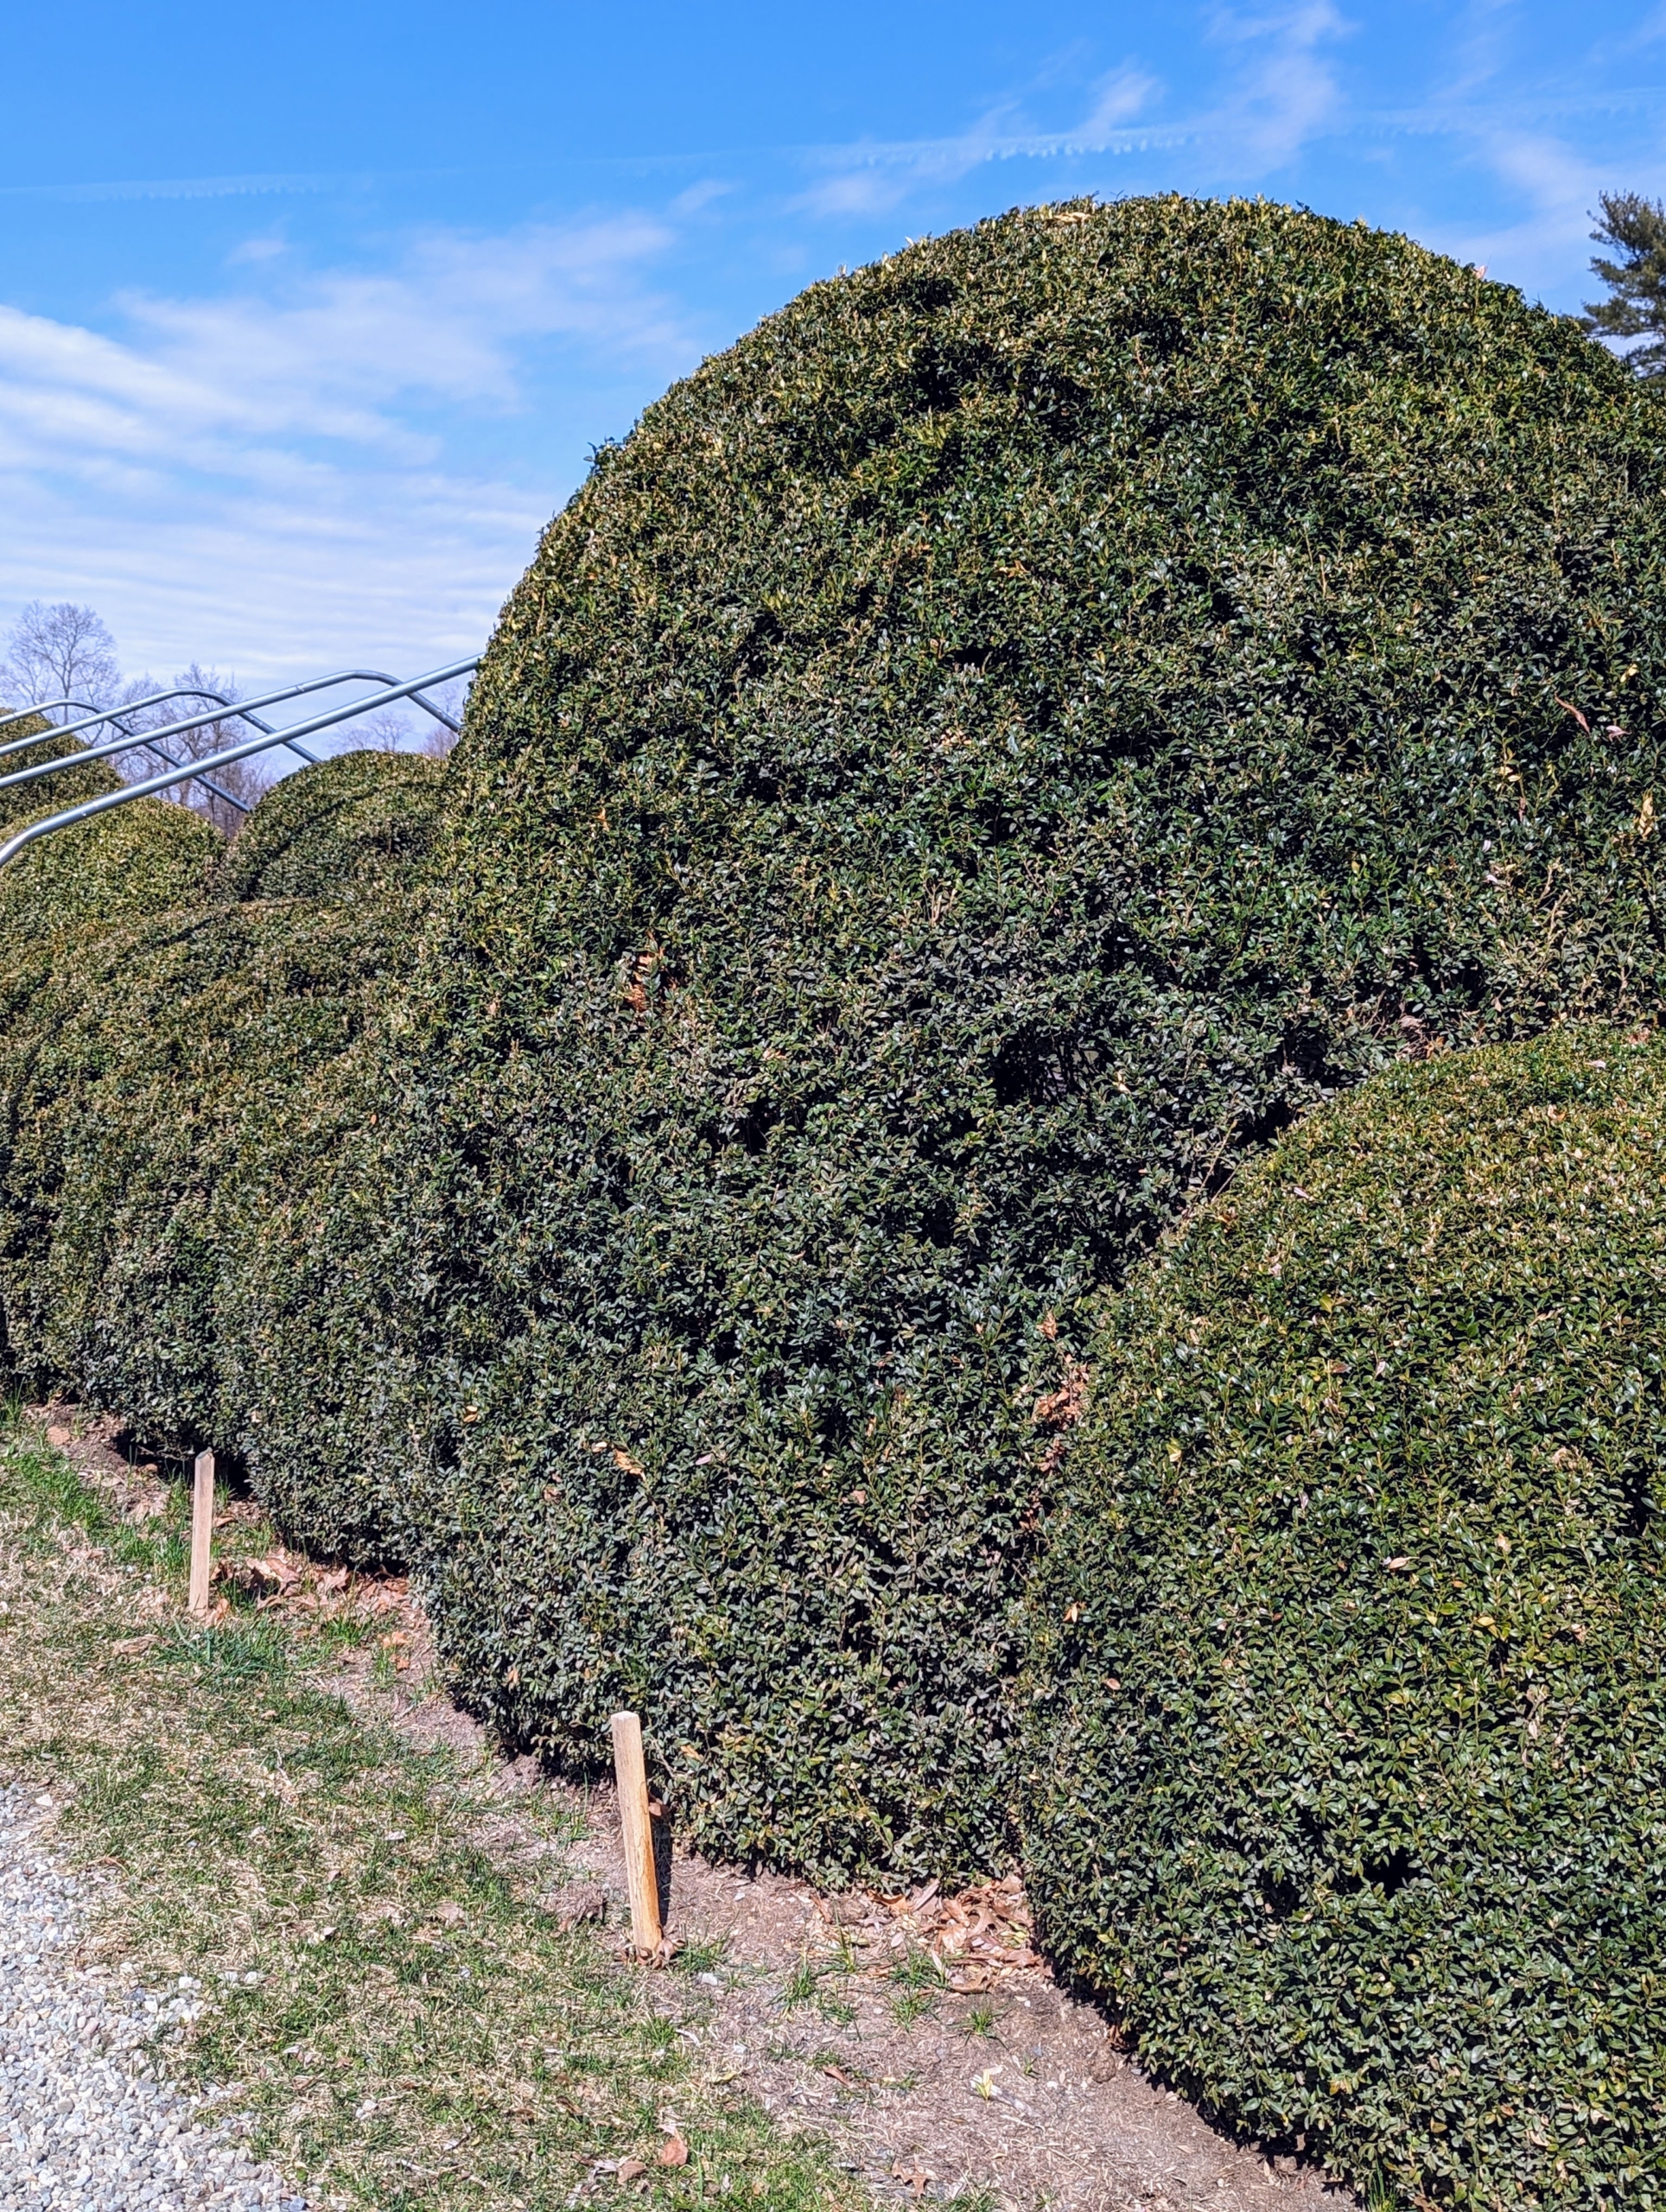
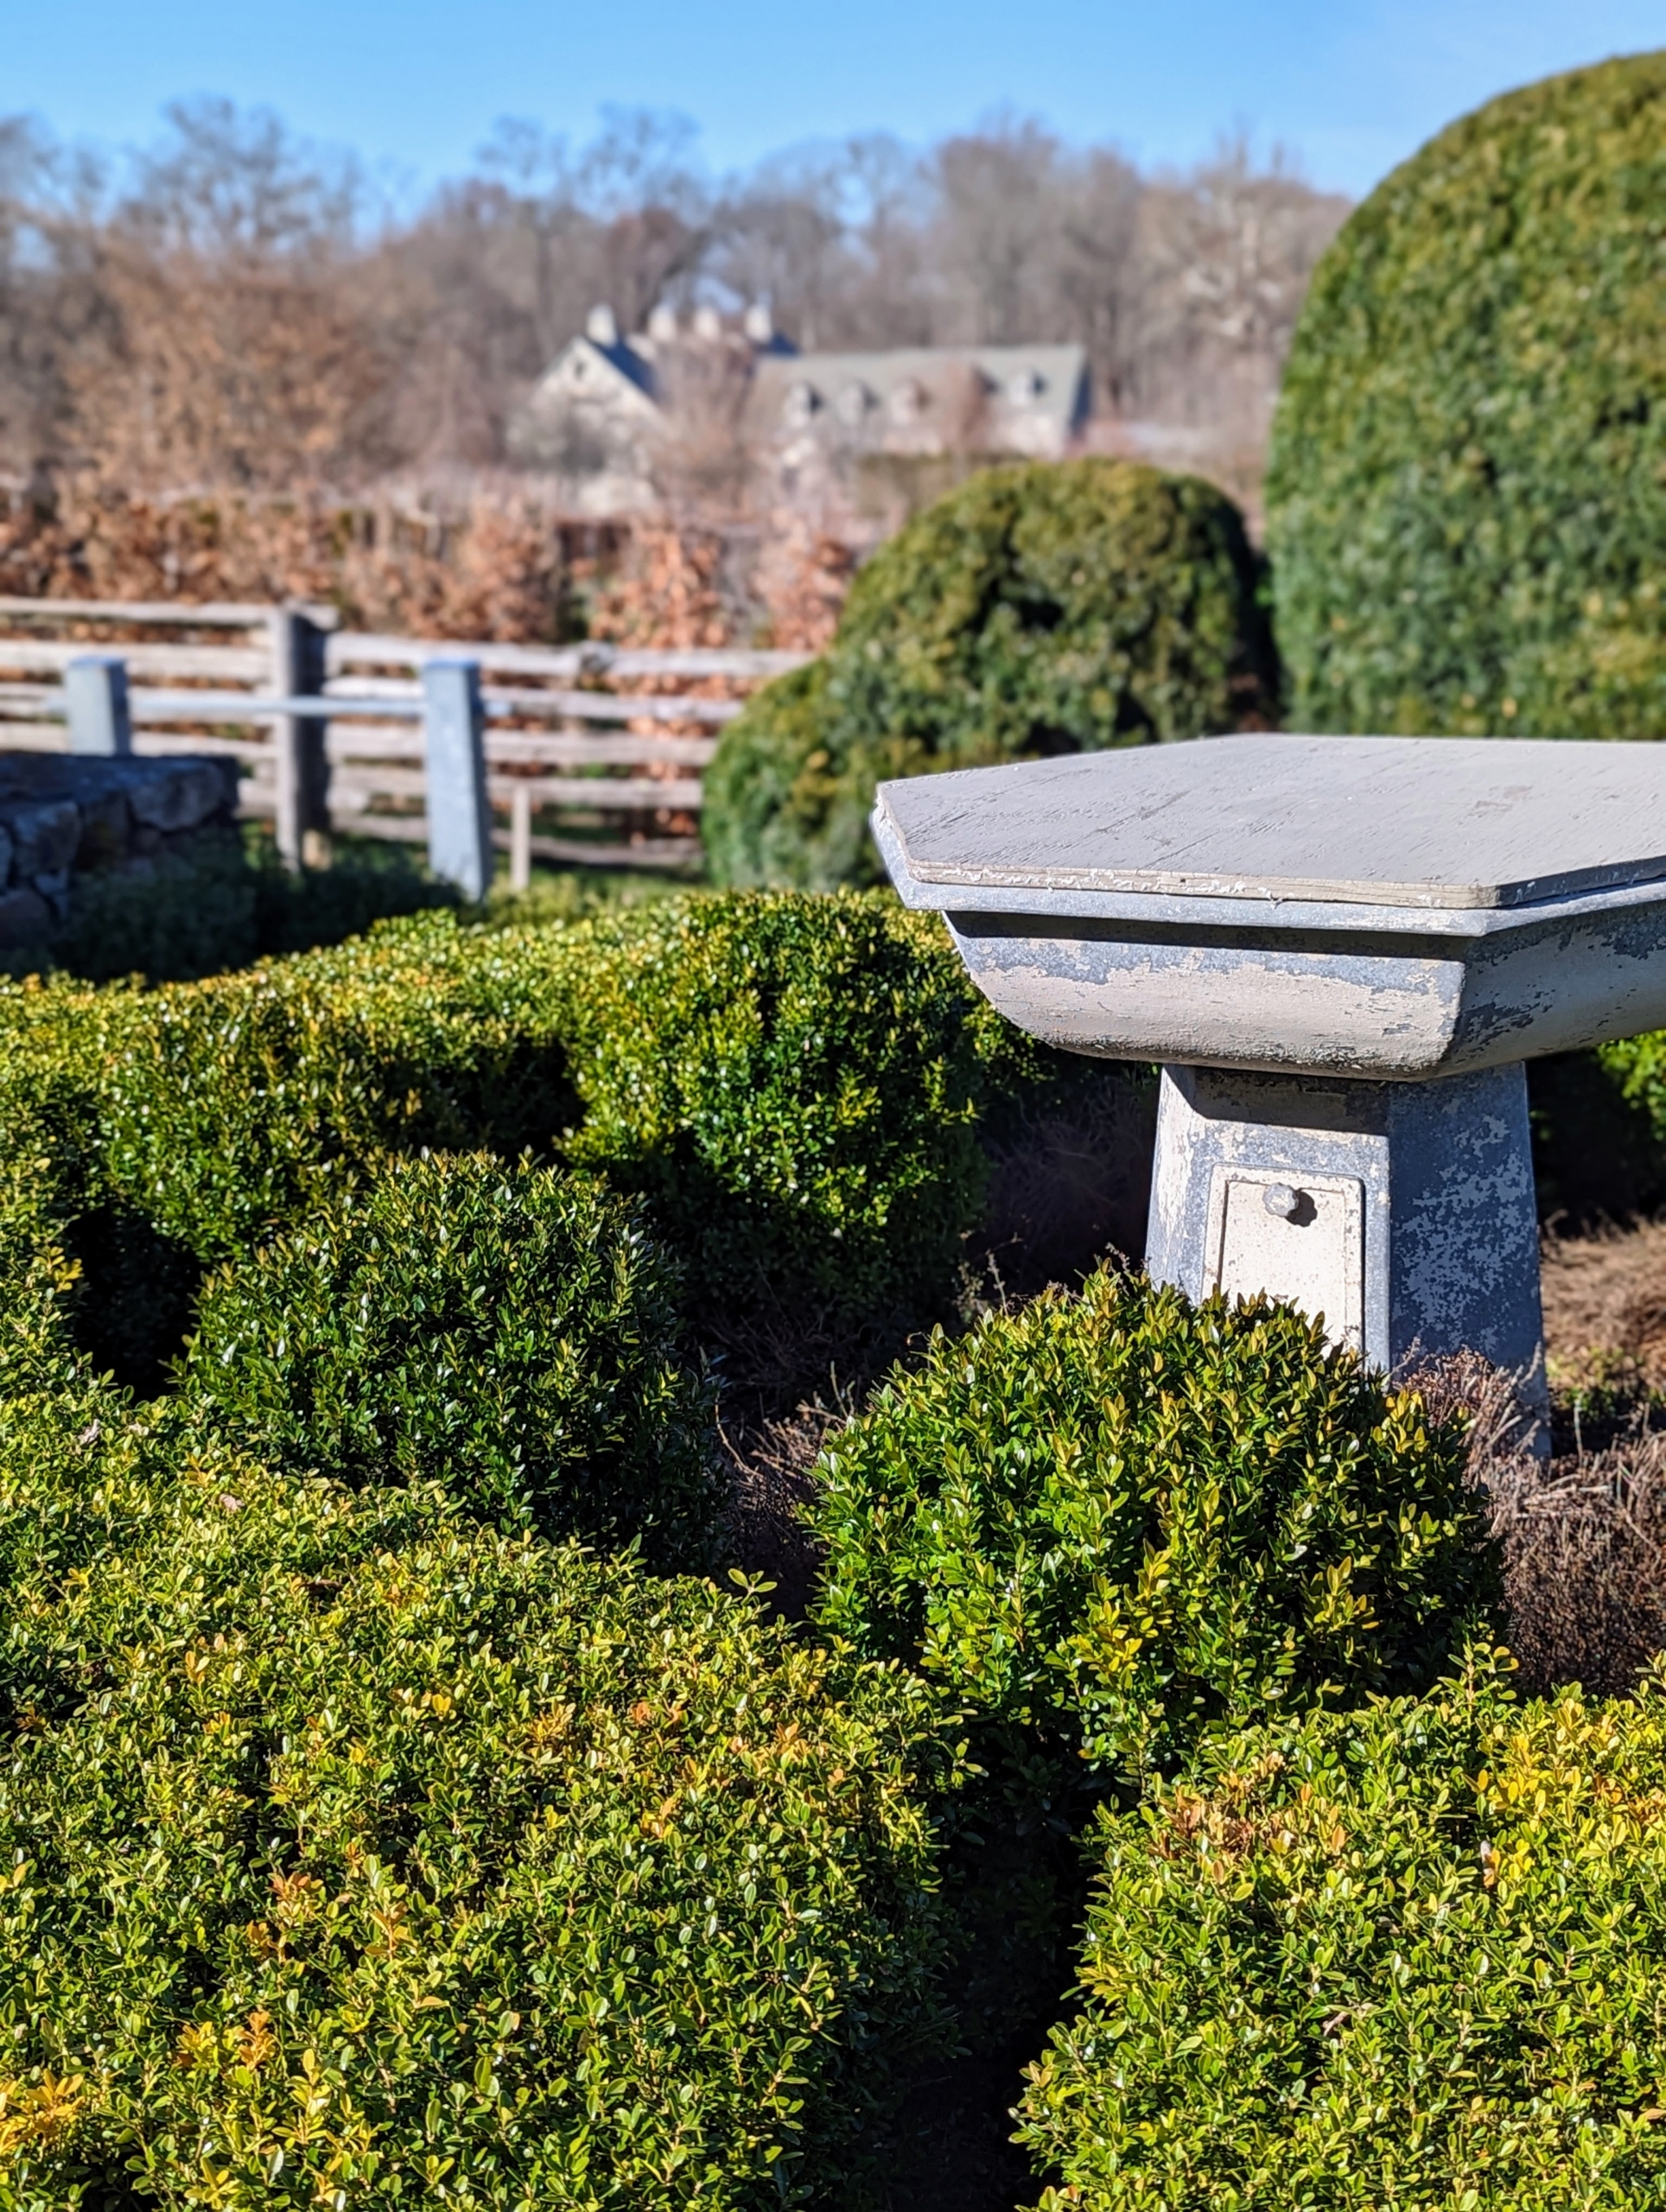
During winter, all the boxwood shrubs and hedges are covered in this natural colored fabric. Fortunately, the weather here has been pretty mild these last couple of weeks – perfect timing to start our burlap removal project.
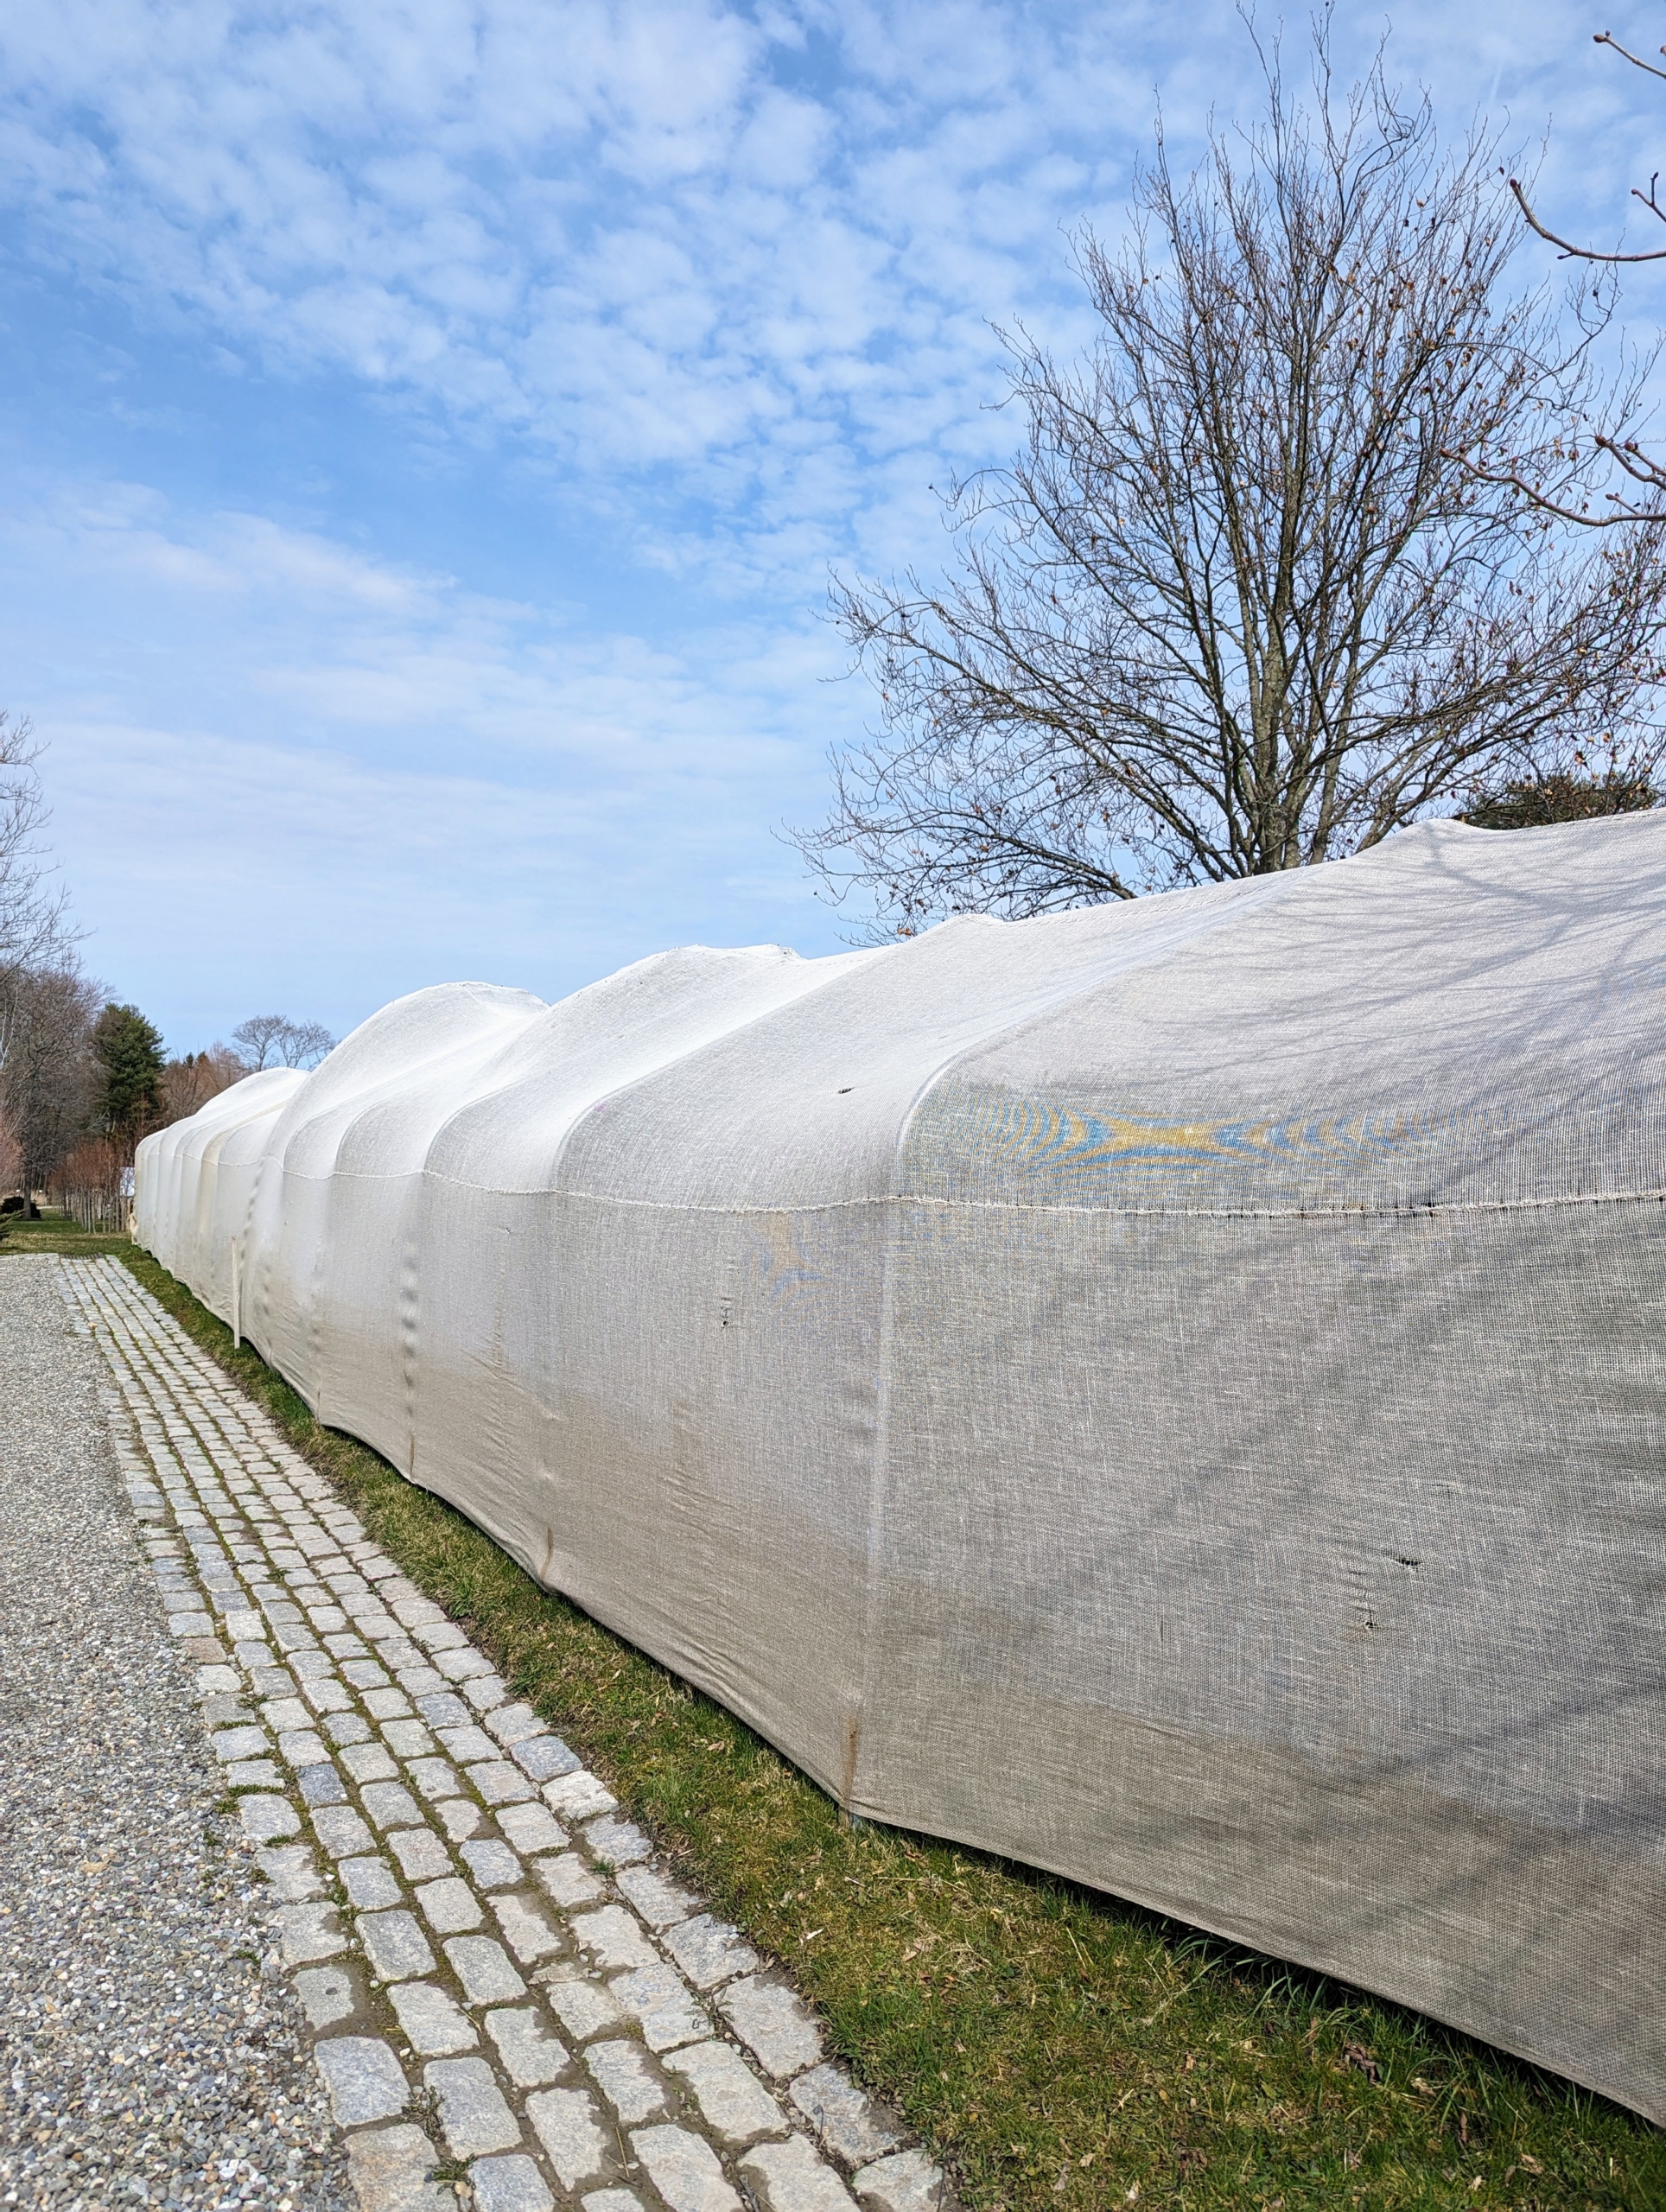
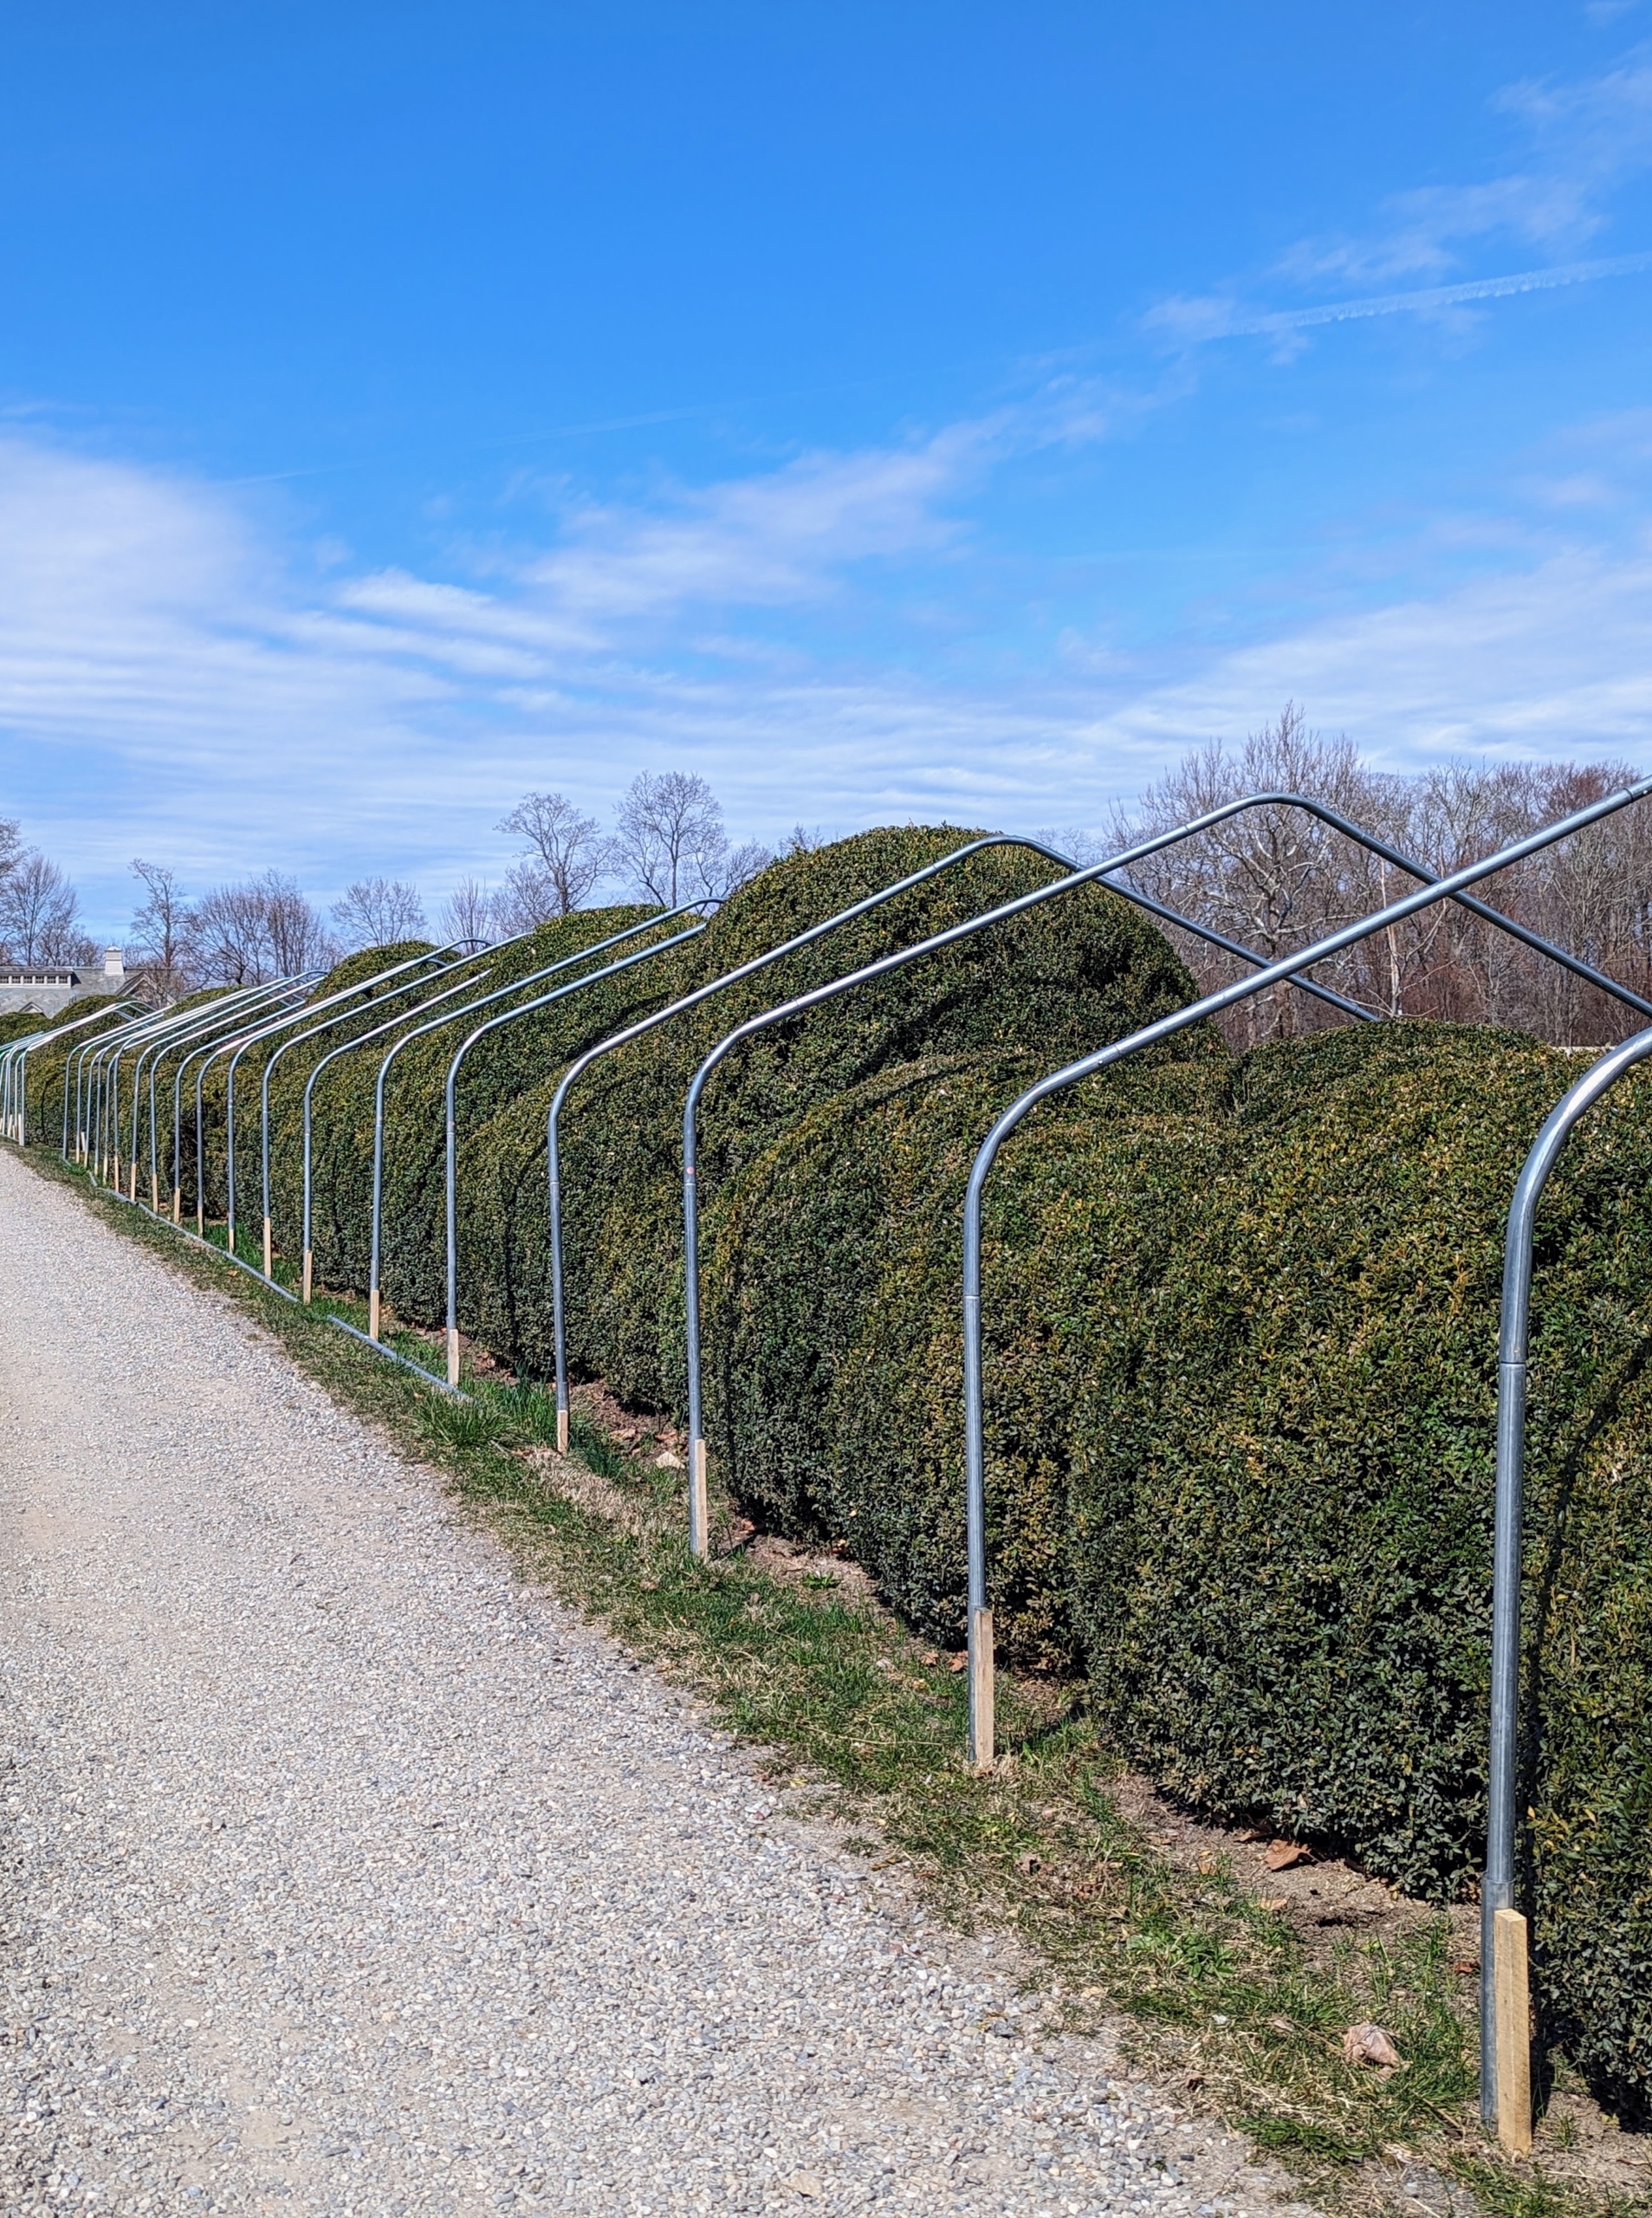
This is the biggest stretch of burlap-covered boxwood at the farm, the Boxwood Allée, which runs from outside my stable all the way down to the intersection leading into the woodland.
At one end, the boxwood also runs perpendicular to the allée carriage road – all of it is covered in burlap for the duration of the cold season.
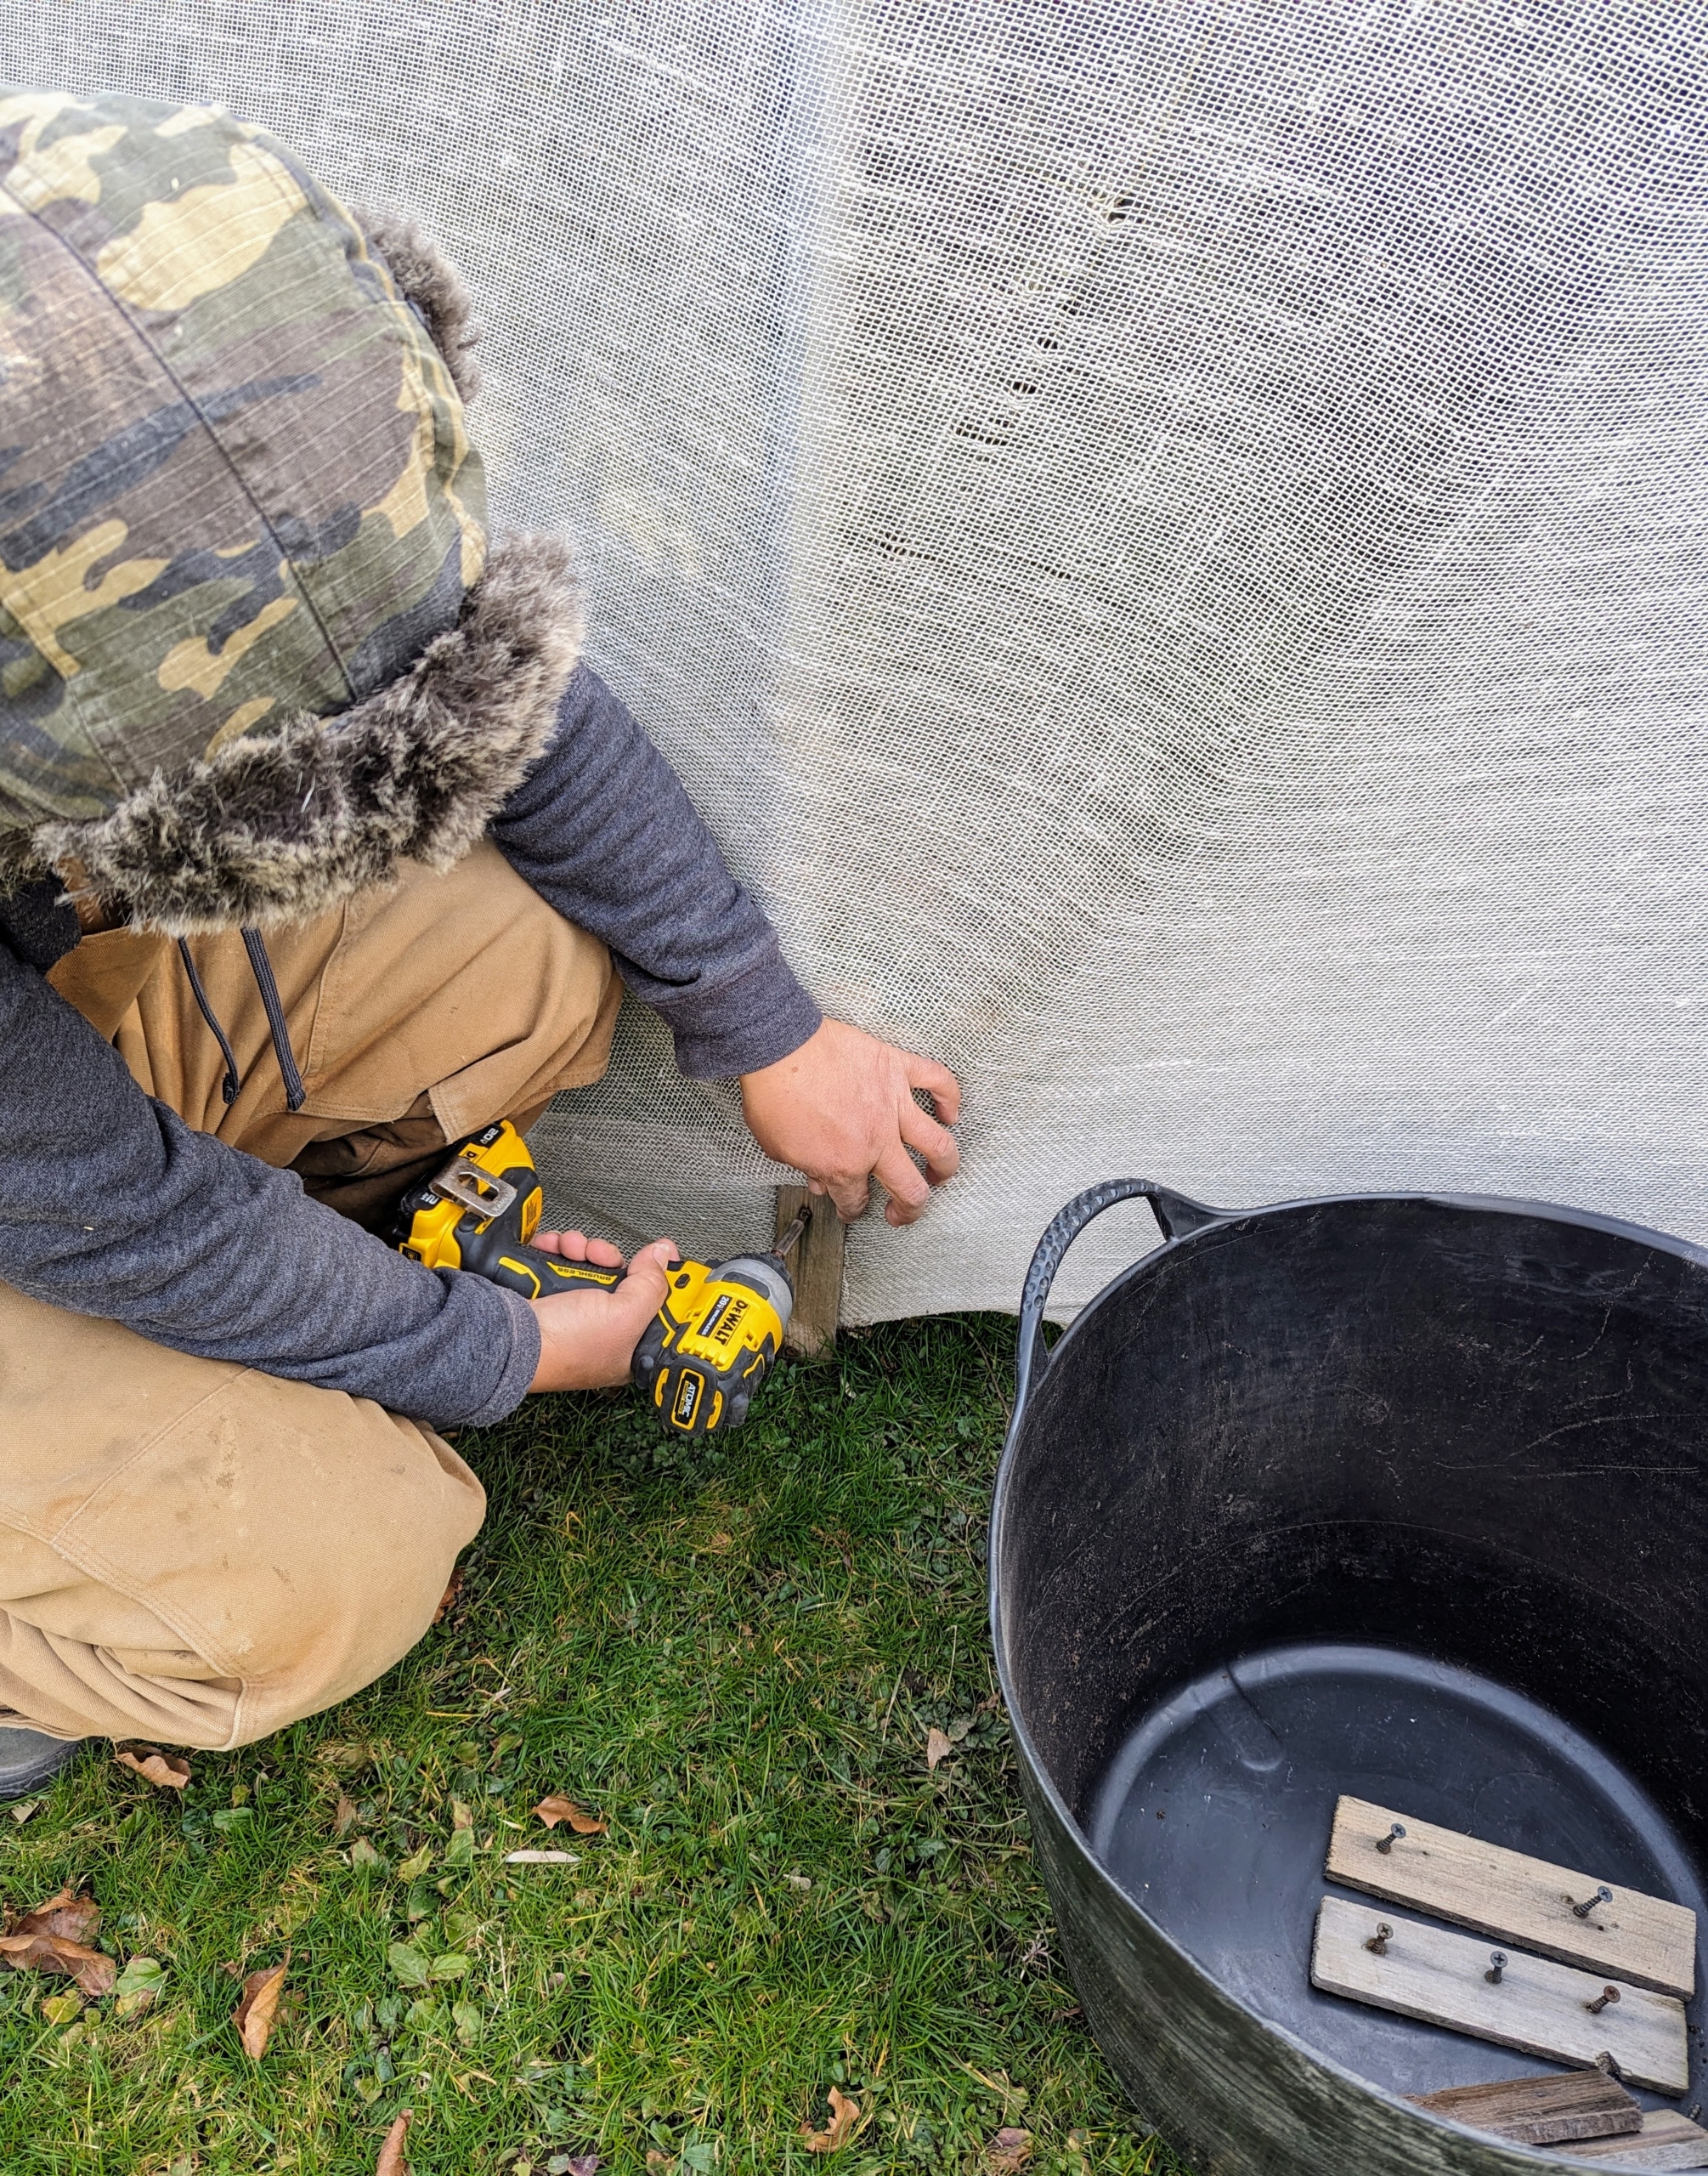
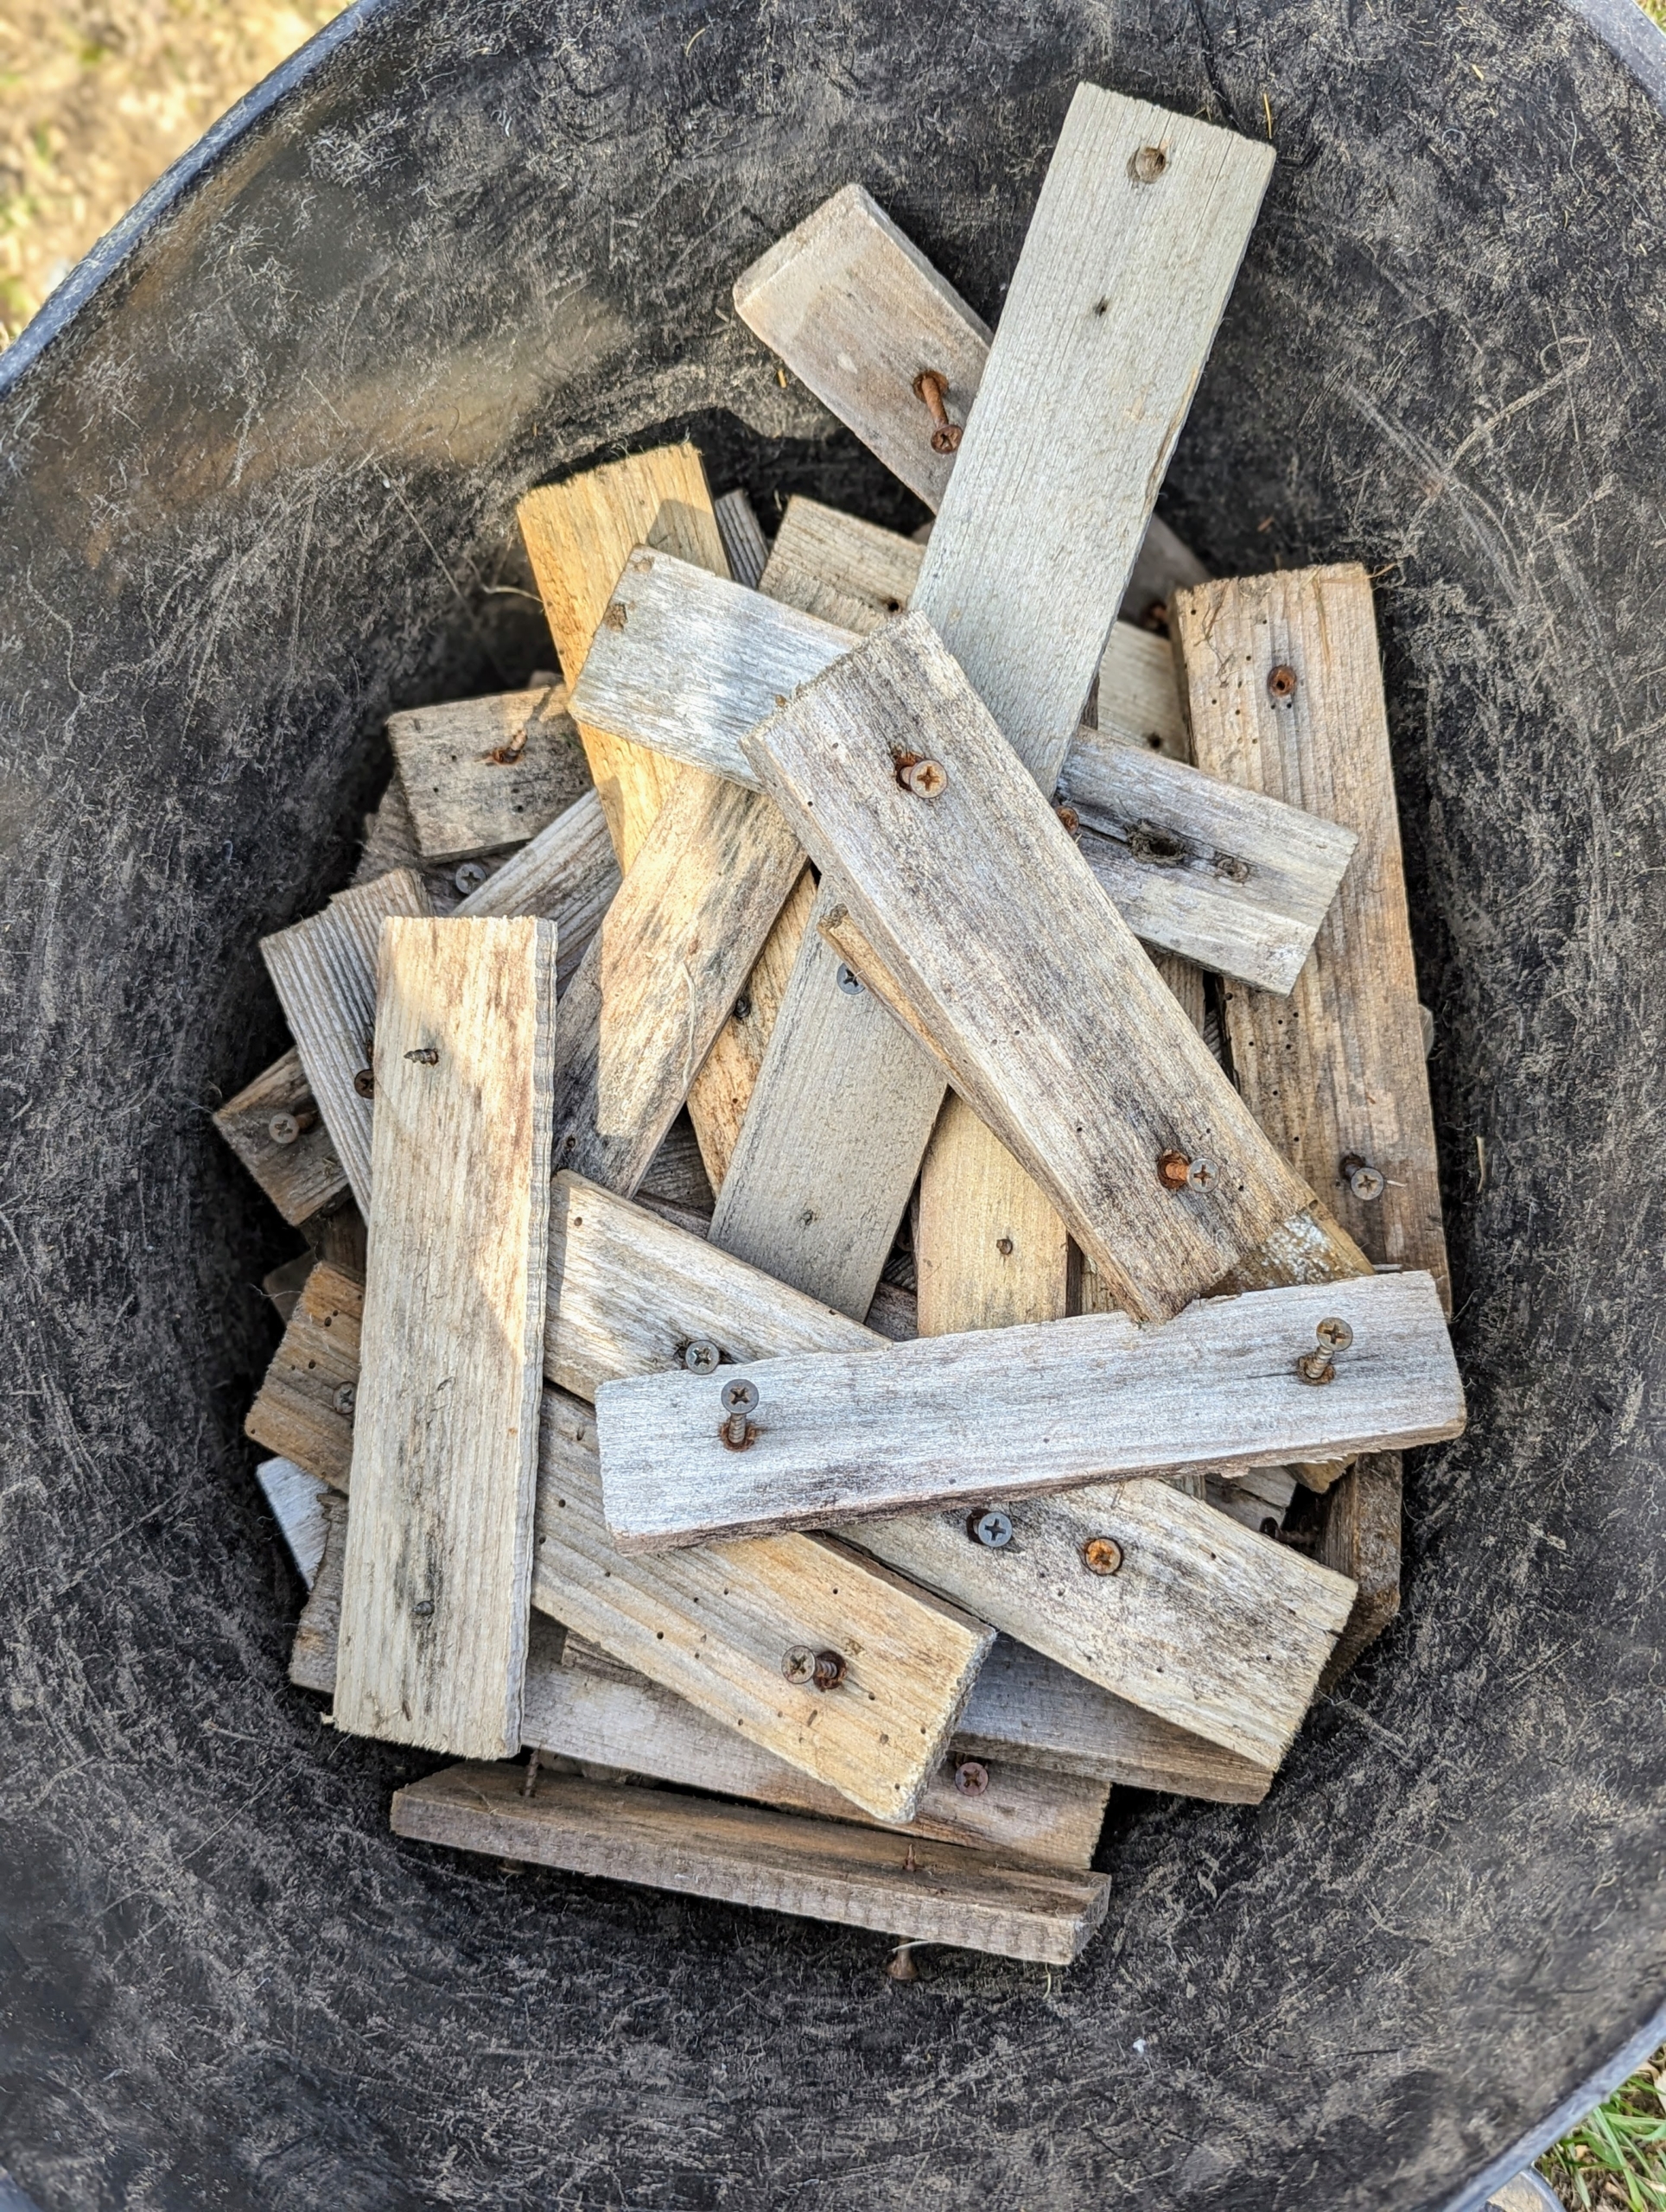
We remove the burlap once the temperatures are consistently above freezing and before Easter. All of the coverings are custom wrapped and sewn to fit each individual shrub, hedge, or bush. Chhiring starts by removing the wooden strips that help sandwich and secure the burlap at the base.
The strips are collected and stored for next year. We keep all the pieces grouped separately and neatly.
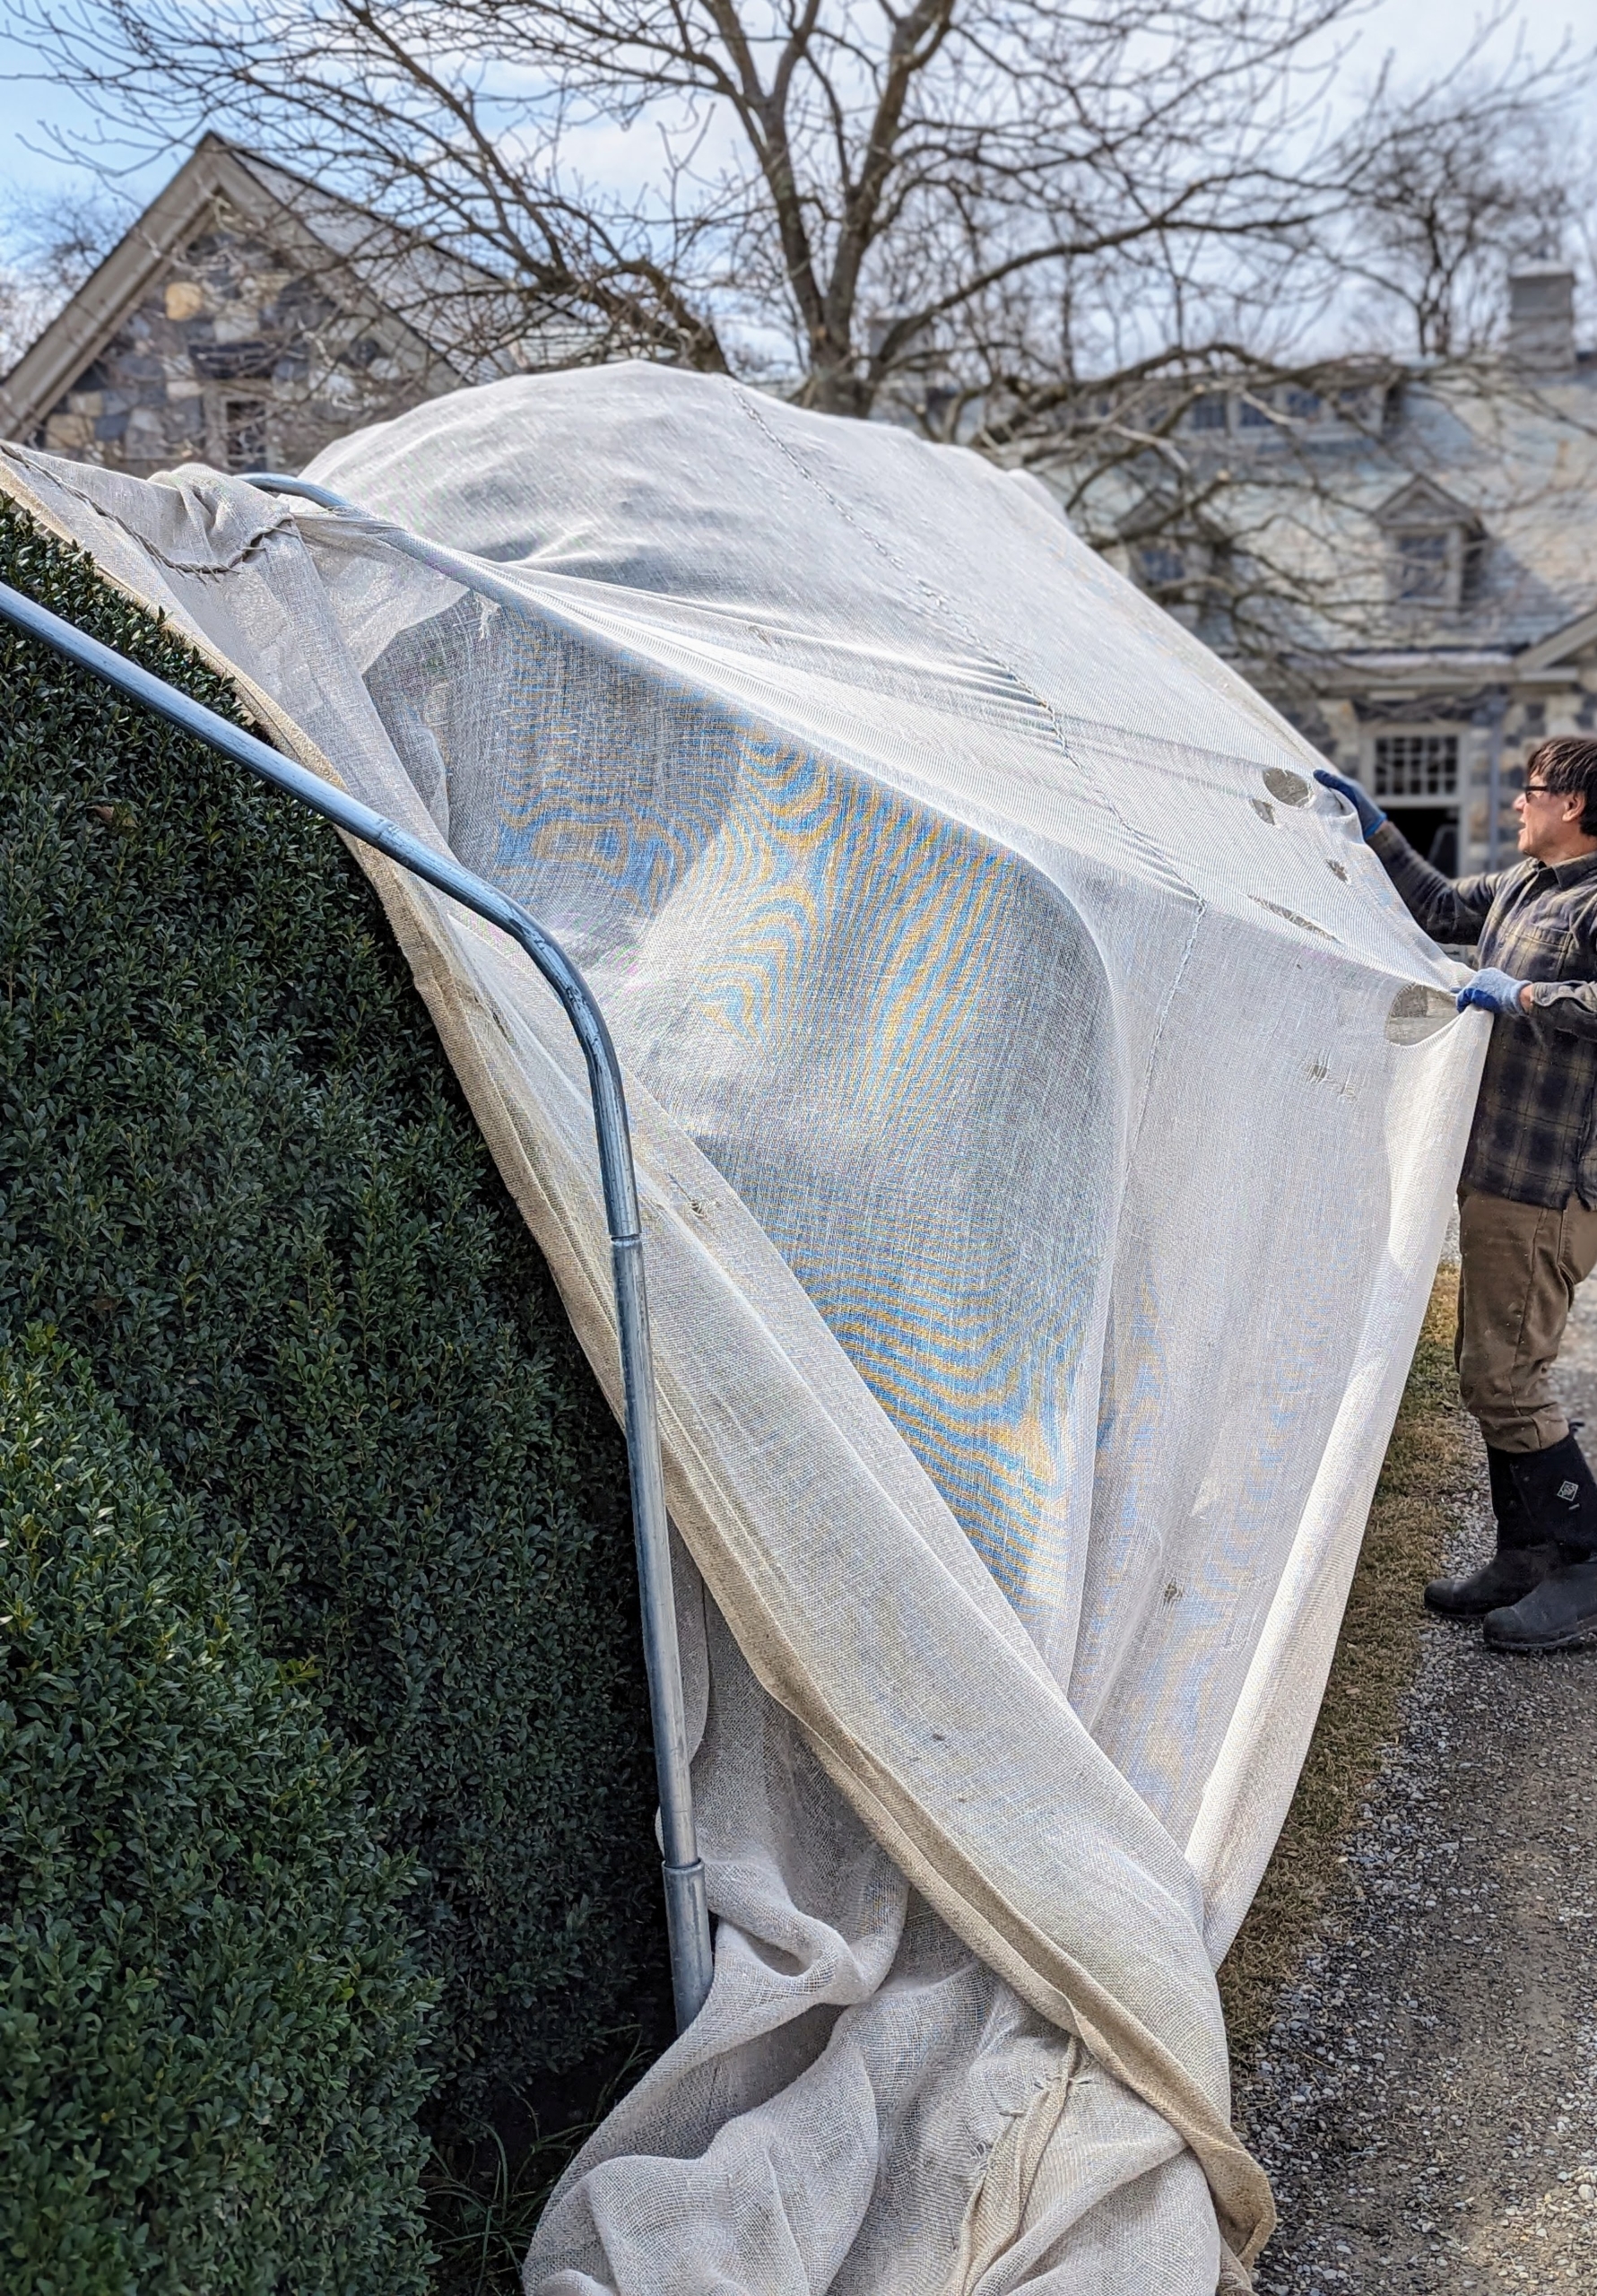
Next, the burlap is carefully pulled off the steel frames.
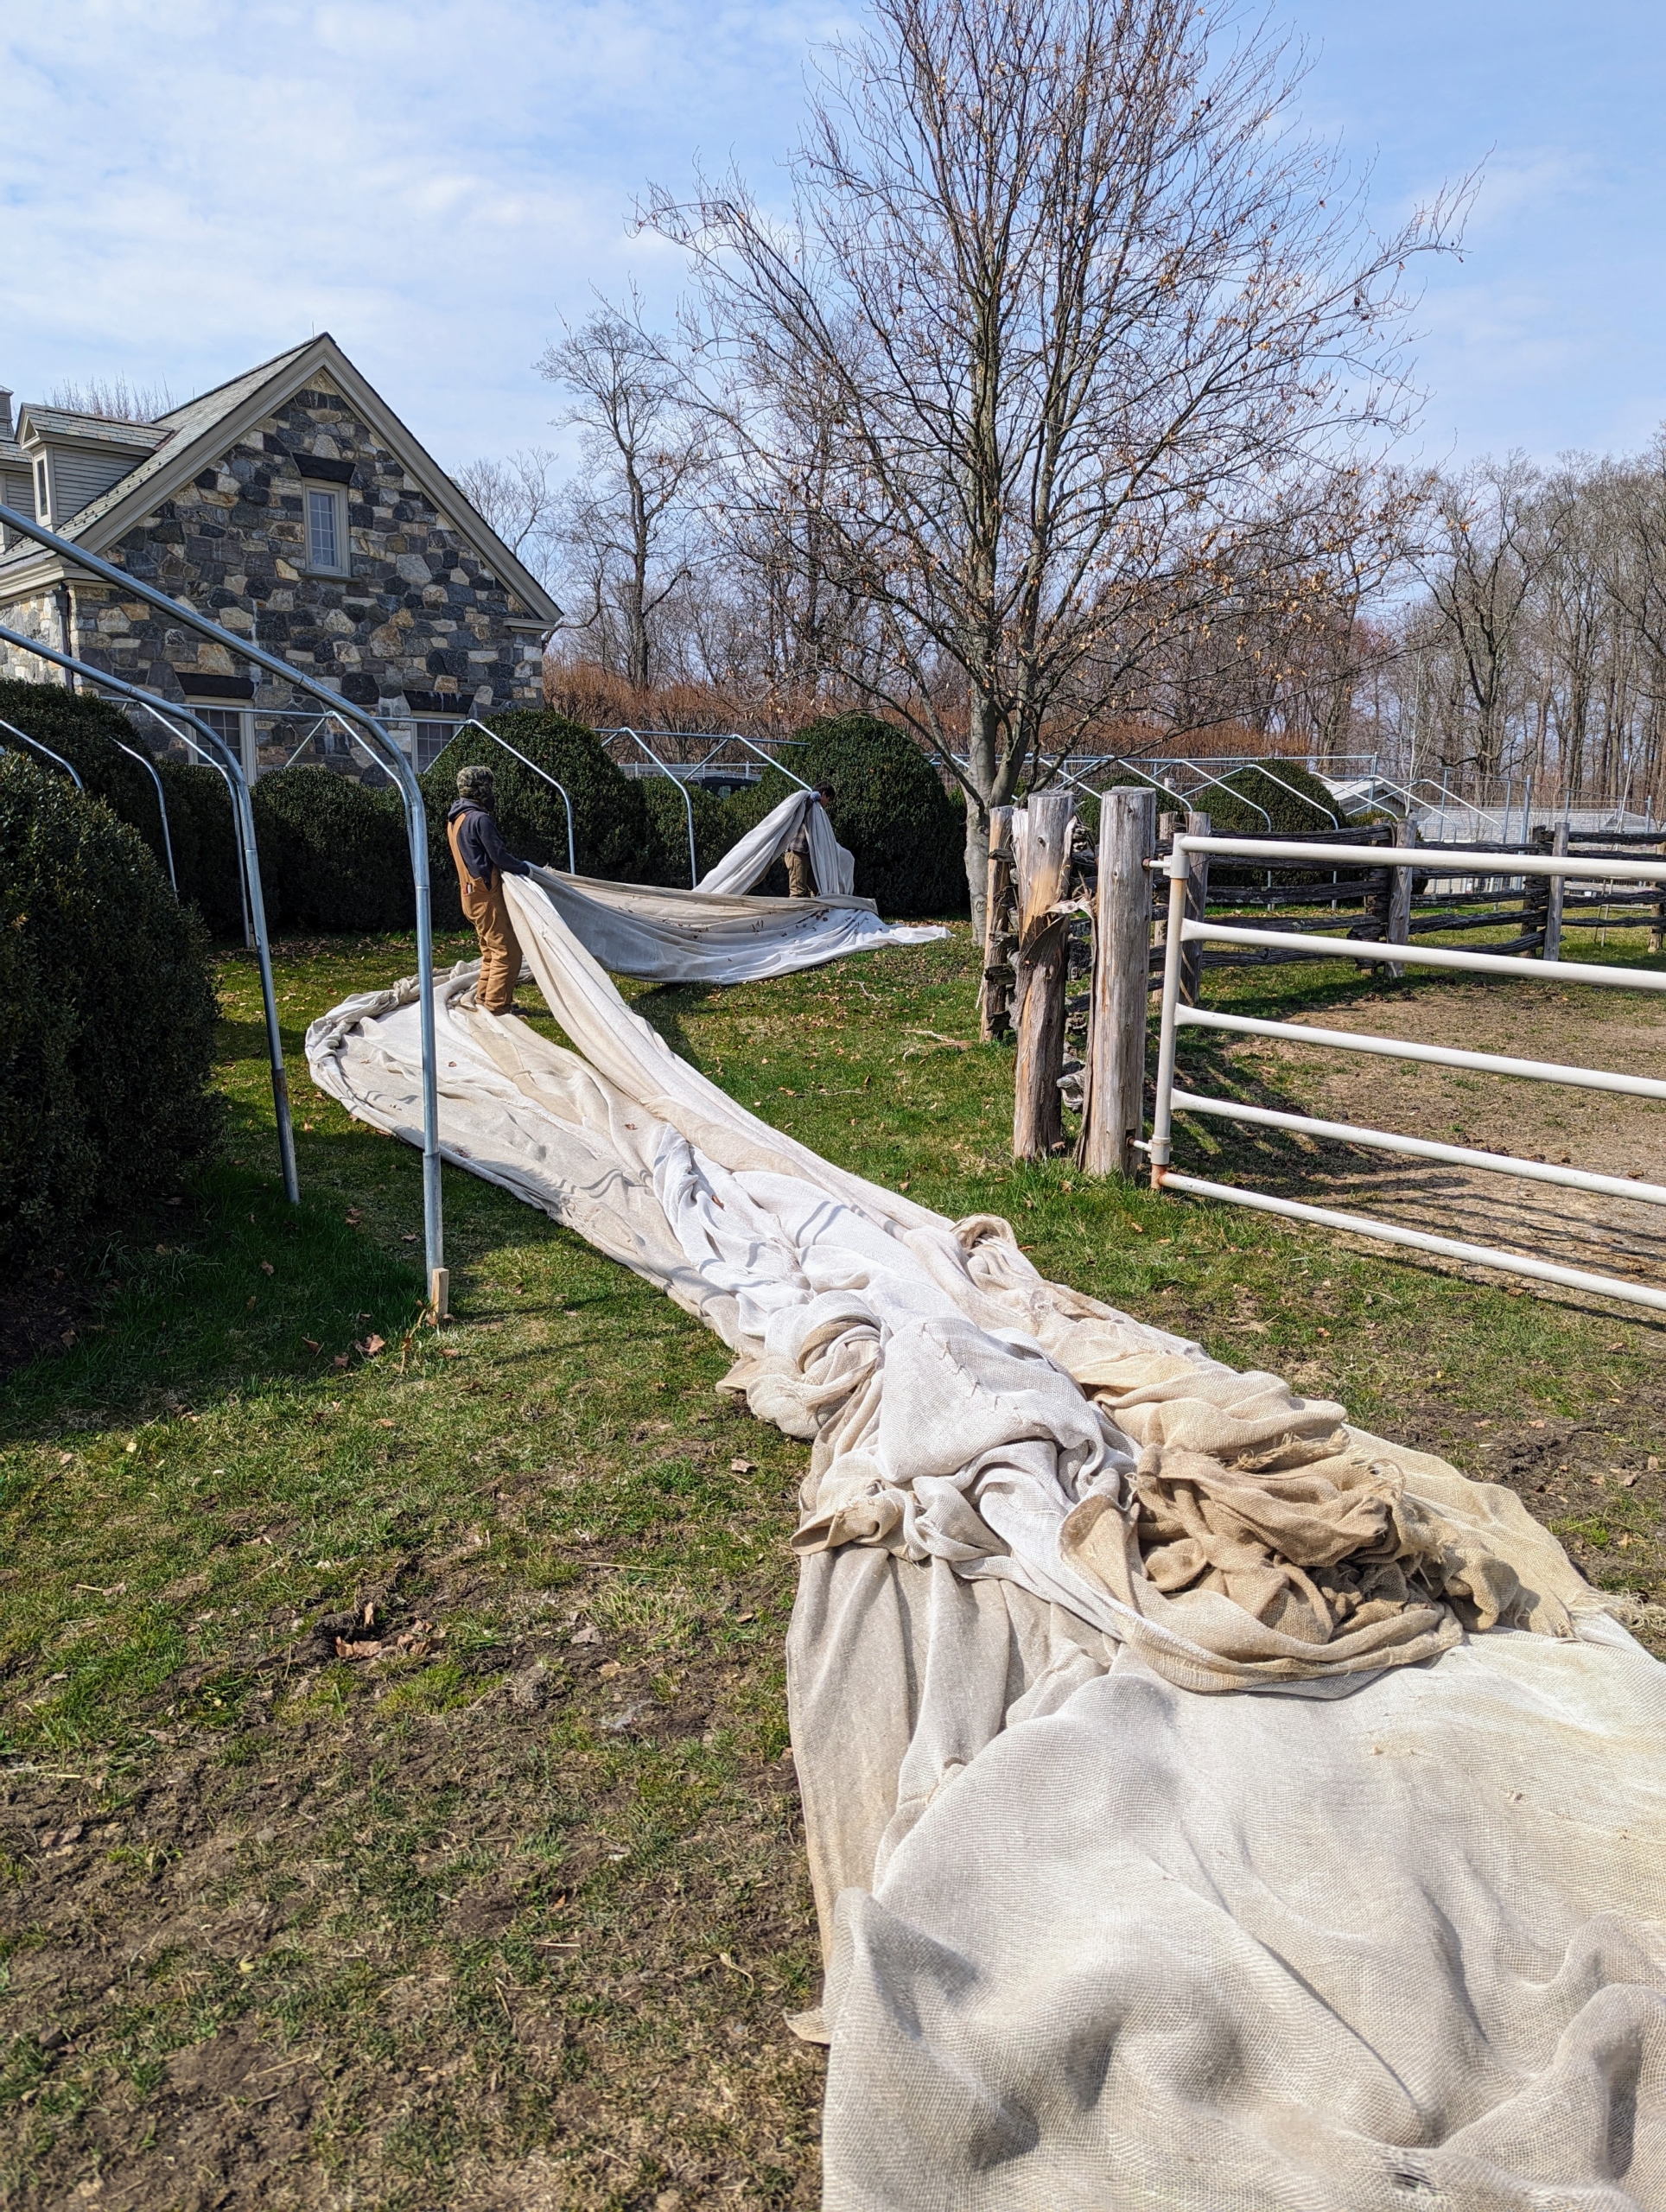
Here, Chhiring and Cesar pull a long section and begin to roll the burlap.
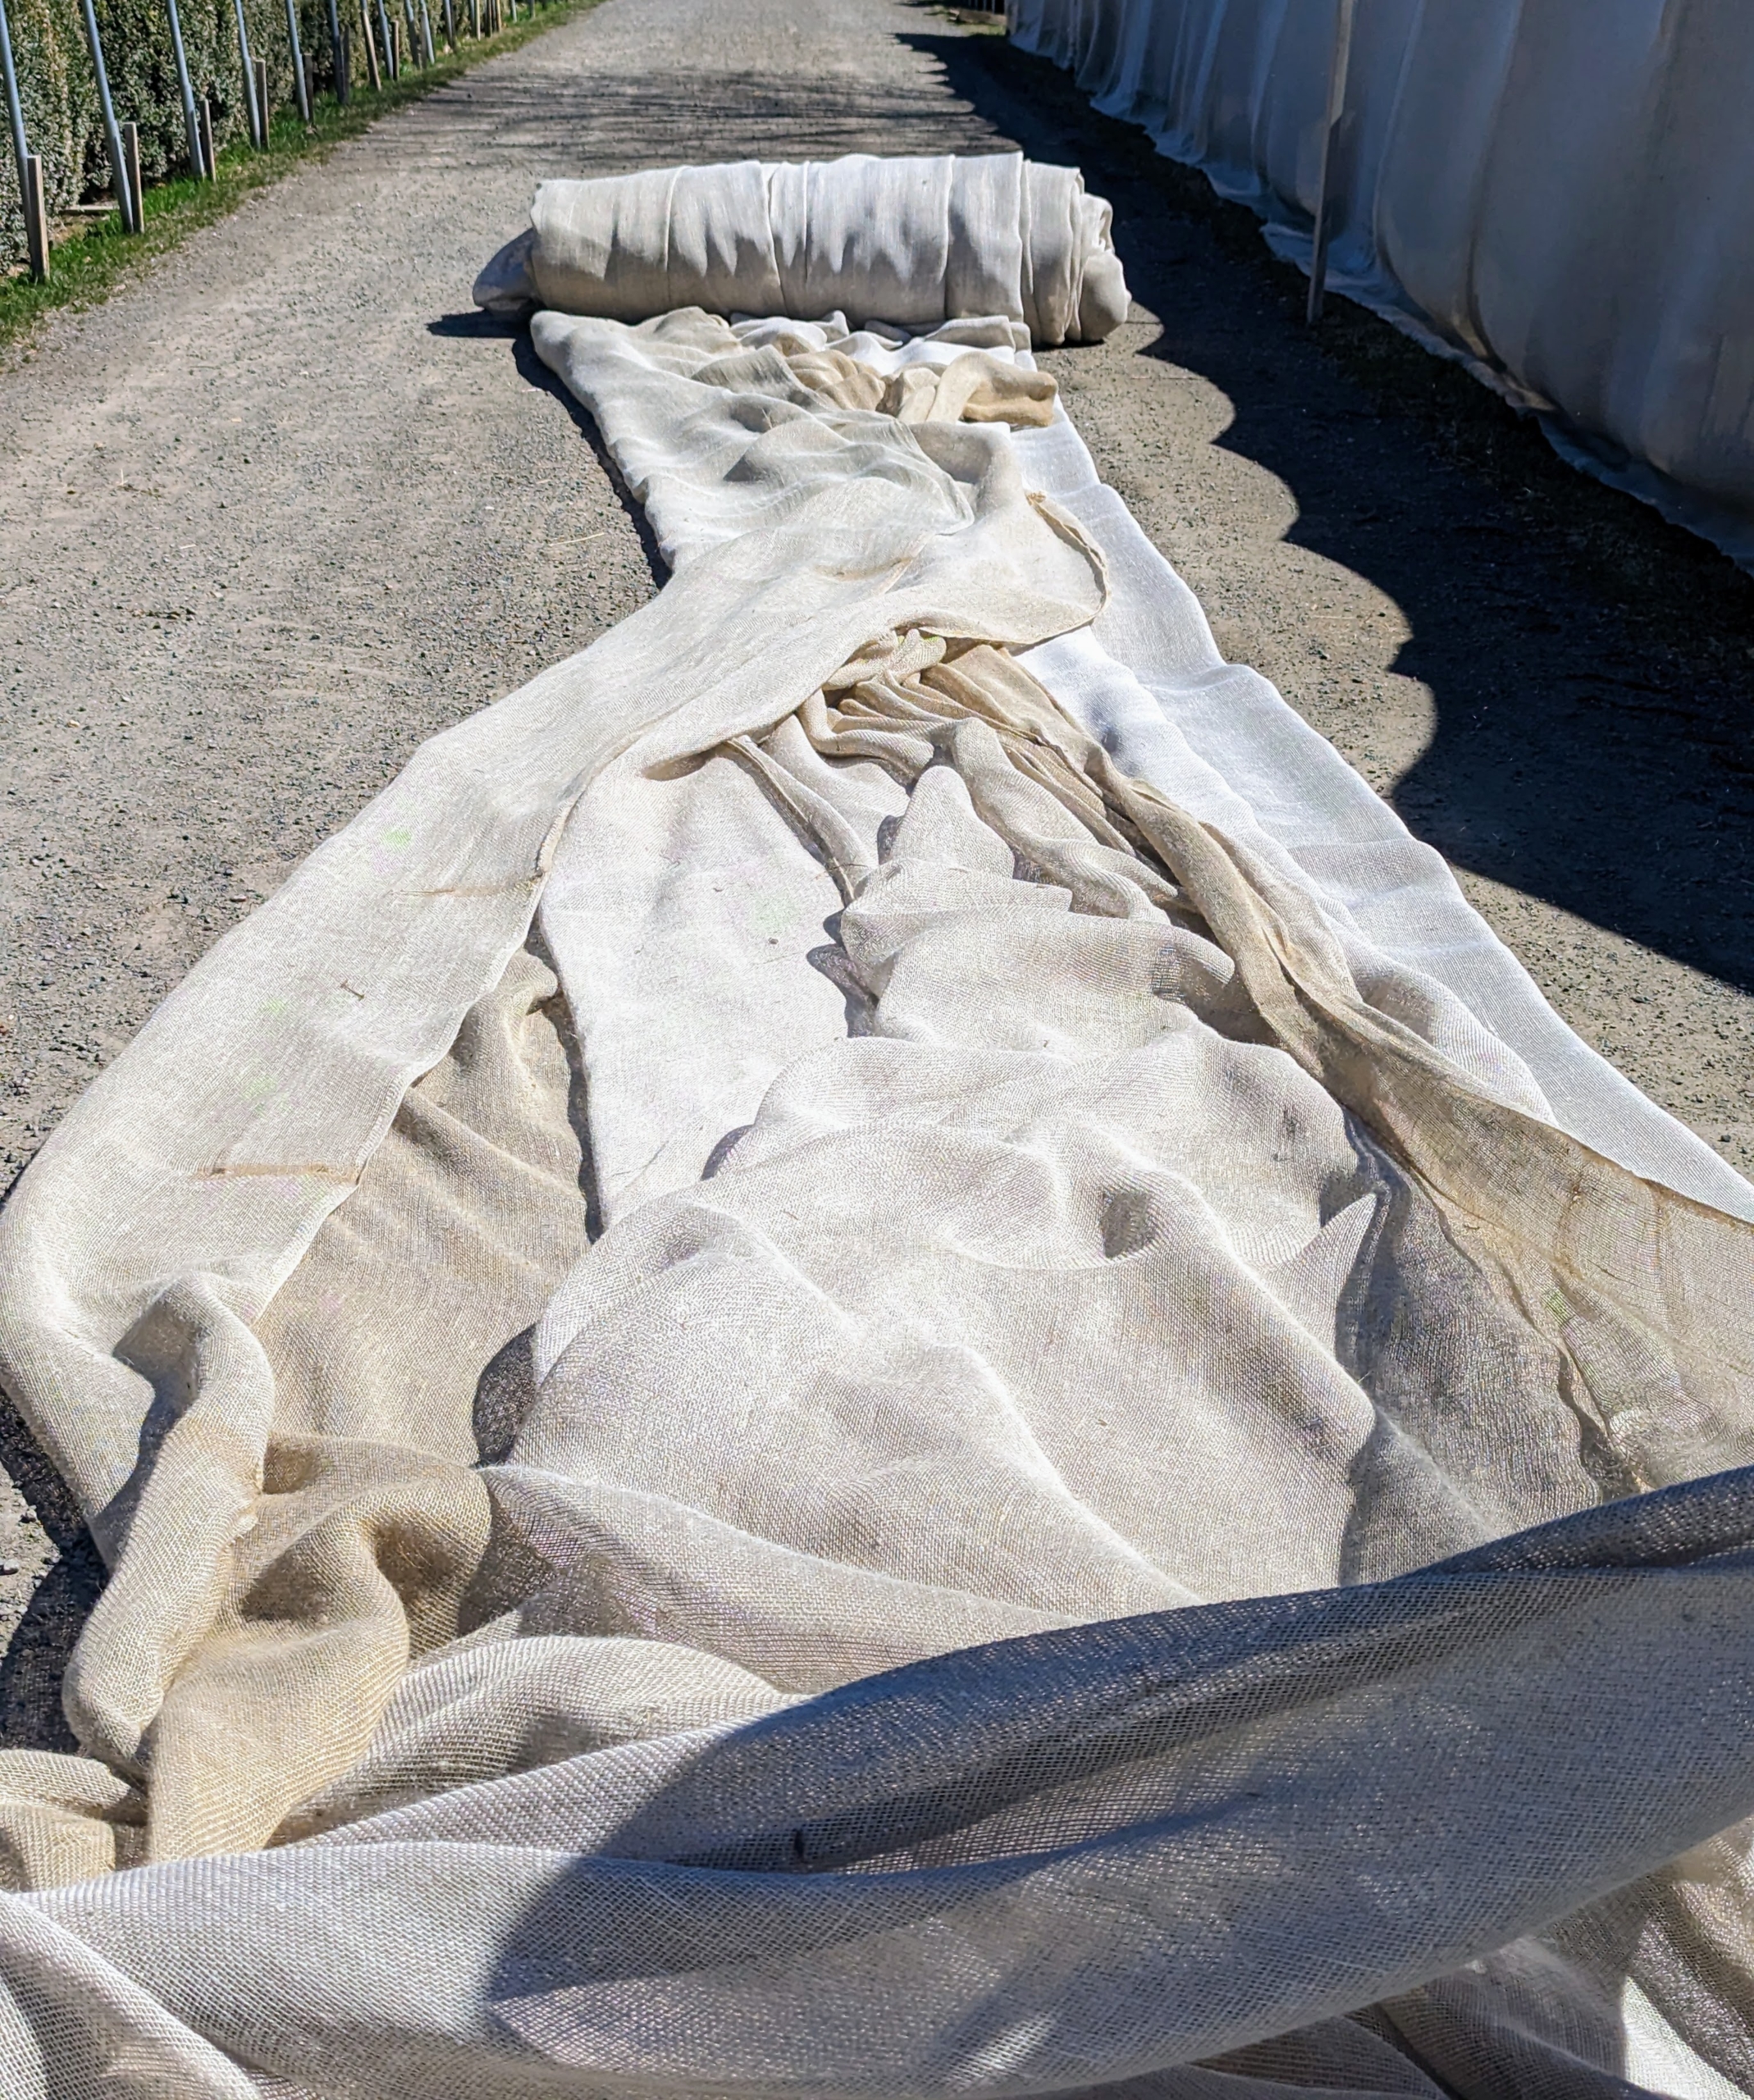
The burlap covers can be used for three seasons. Once they are no longer useable as covers, they are repurposed in the gardens to prevent weeds.
All the rolls of burlap must be kept dry when not in use. One of the few downsides to this fabric is that it will start to fray and disintegrate after time, especially if exposed to moisture. Here is one roll of fabric. It may not look it, but this roll is quite heavy.
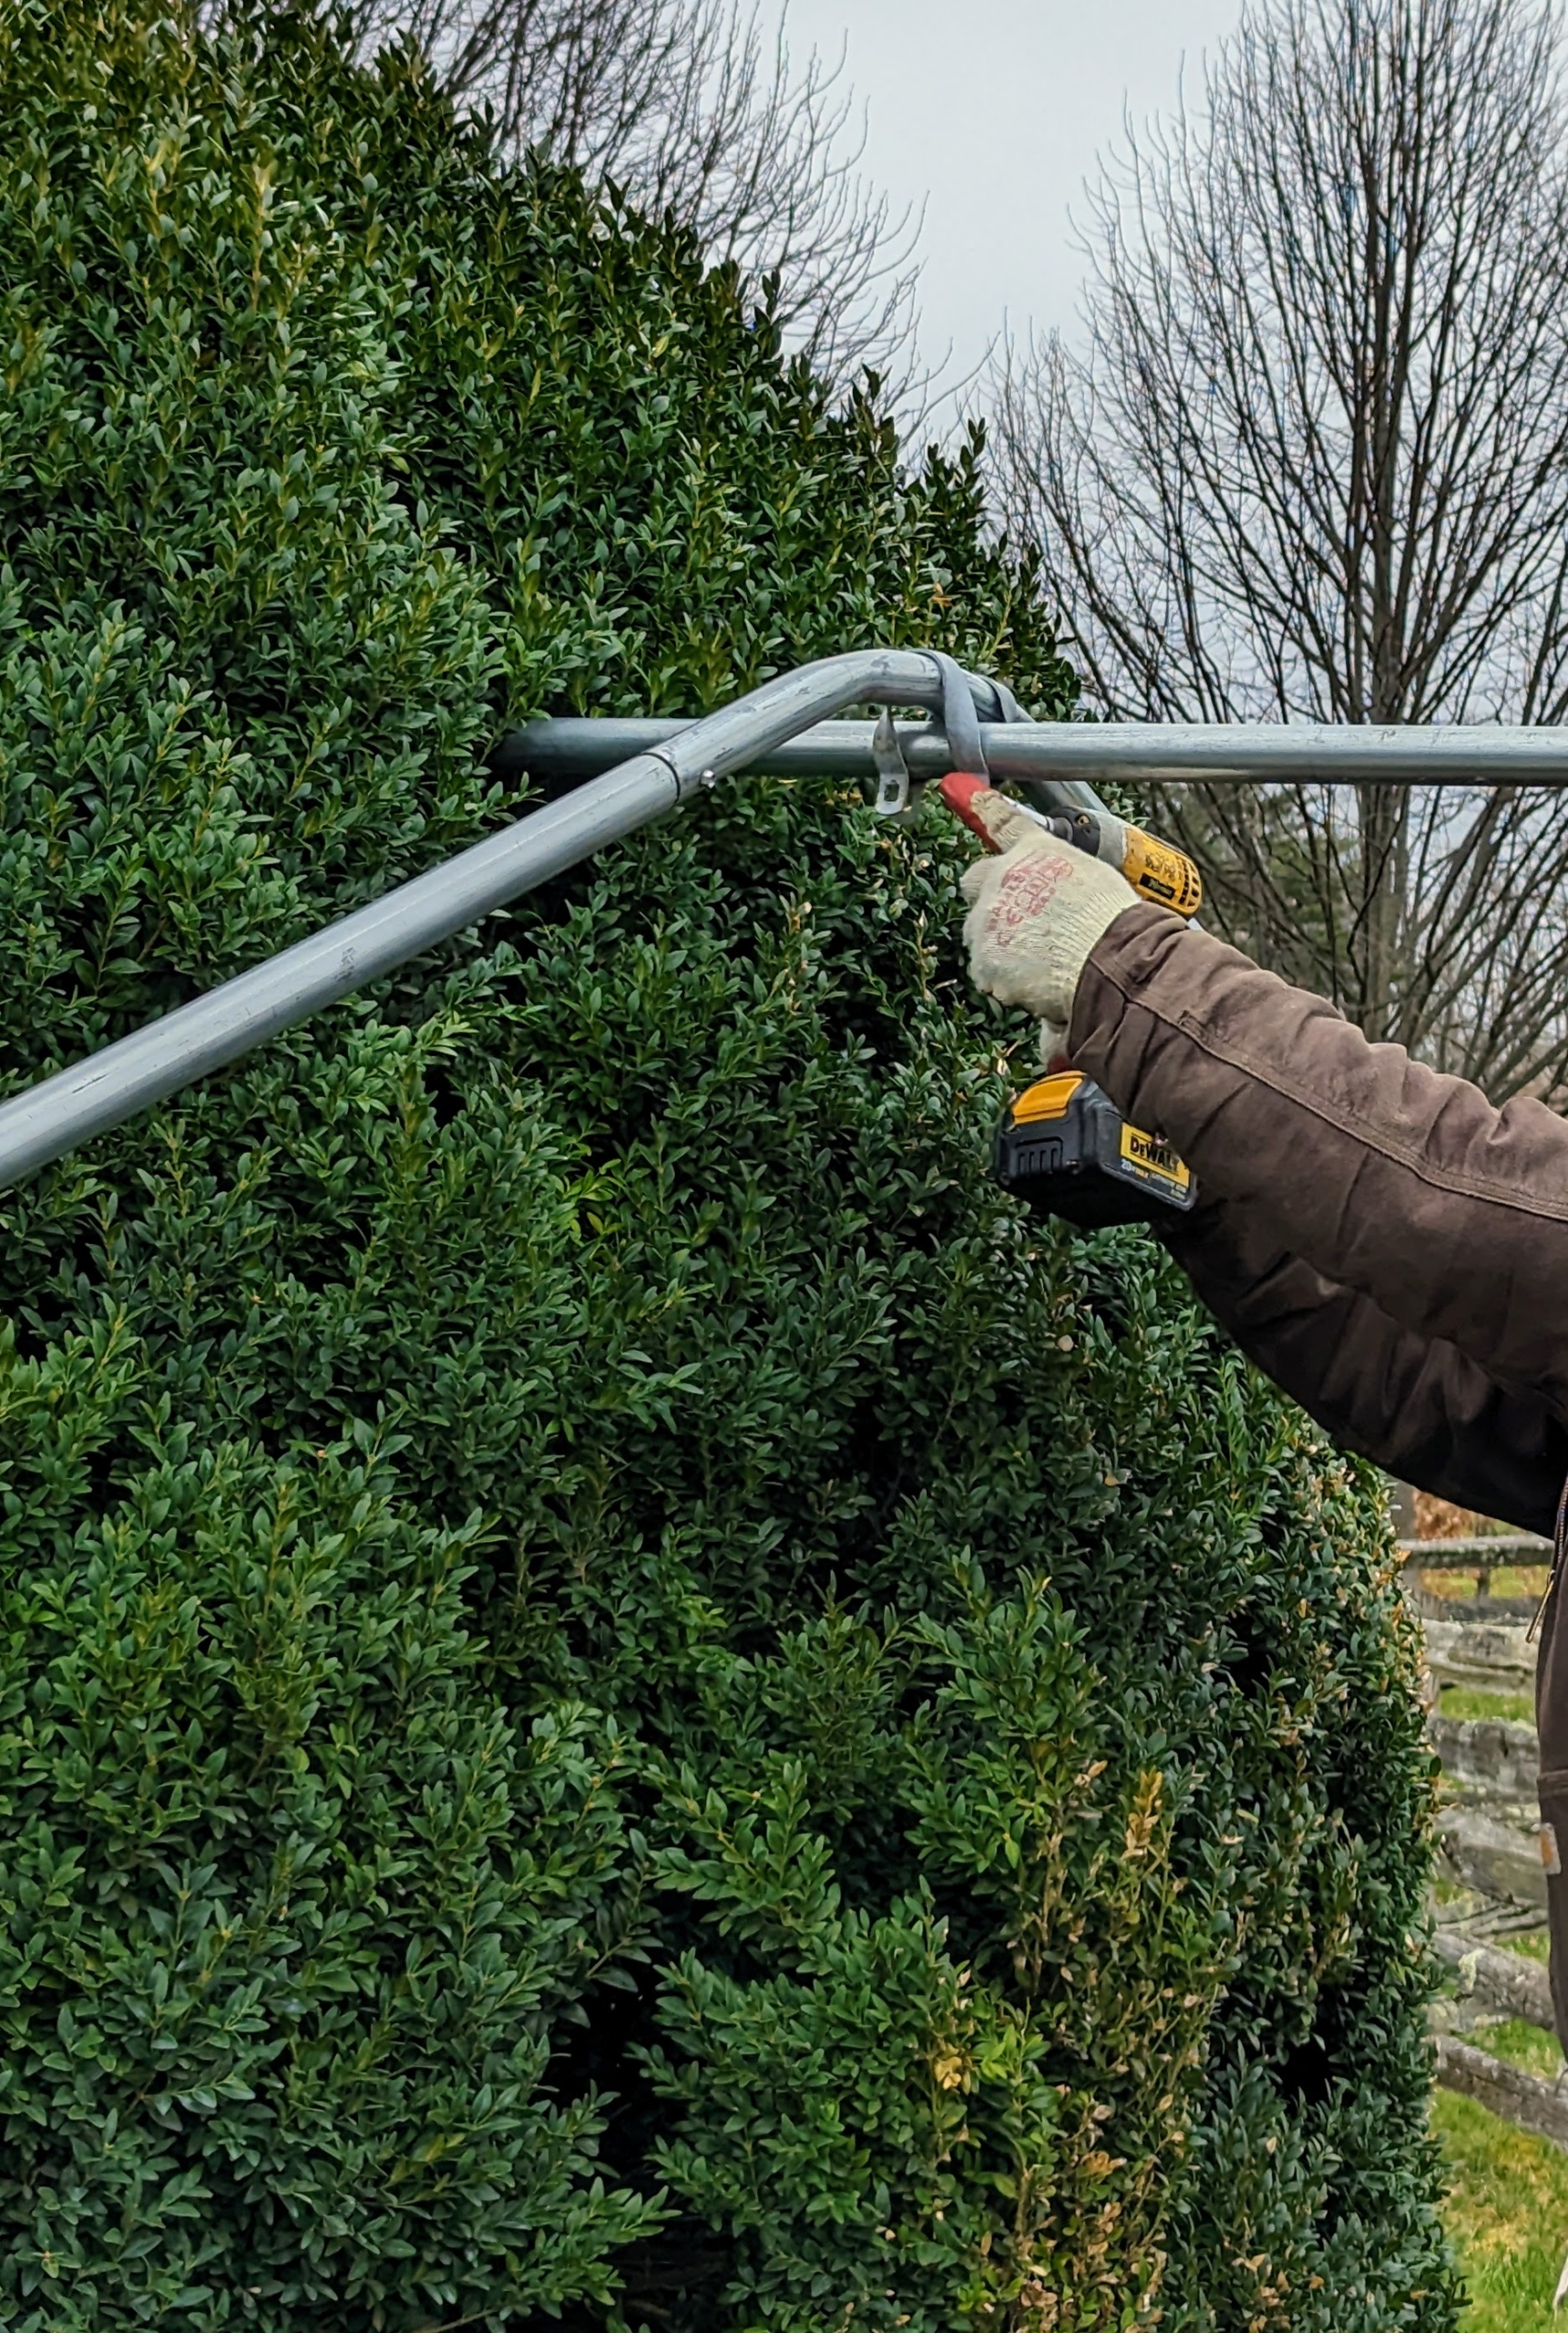
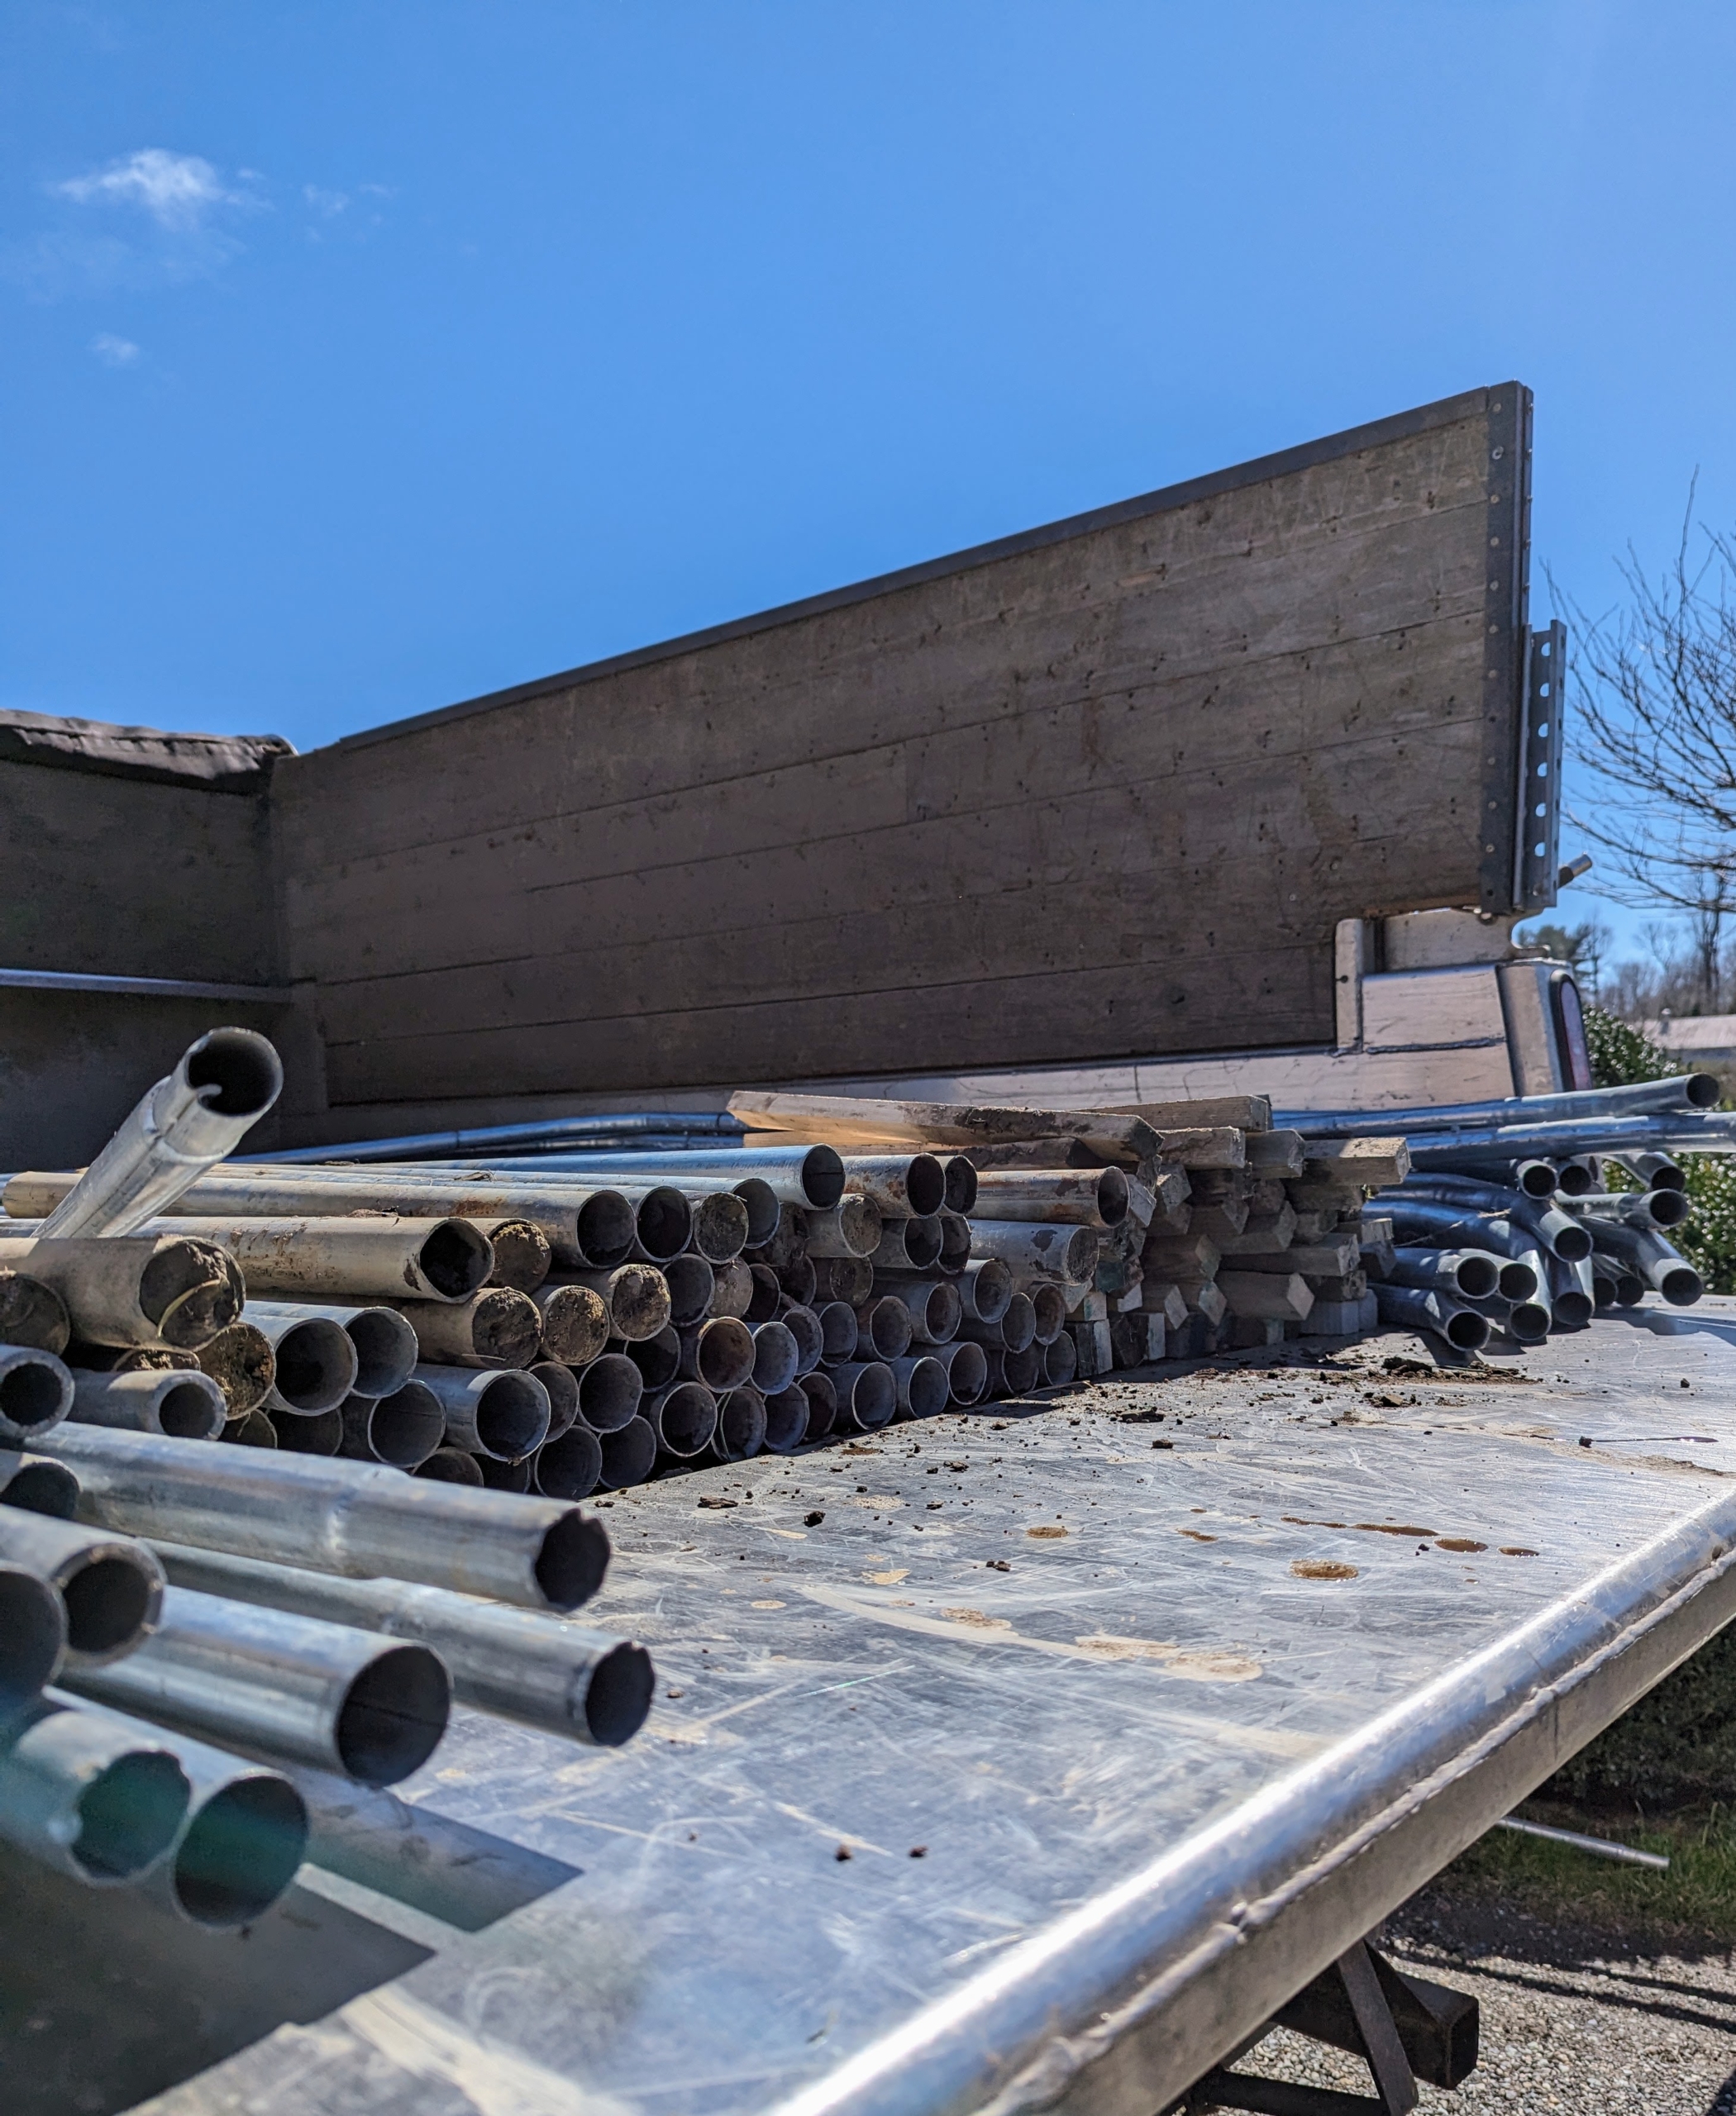
It’s always so nice to see the boxwood once the burlap is removed. For the frames we use the same metal used to make hoop houses – strong industrial steel ground uprights and purlin pipes. These materials not only provide the necessary support frames for the burlap but also accommodate any plant growth.
Chhiring removes the fasteners called tension purlin brackets. They connect the center piping to the bow sections of the frame.
All the purlin brackets and pipes are saved from year to year.
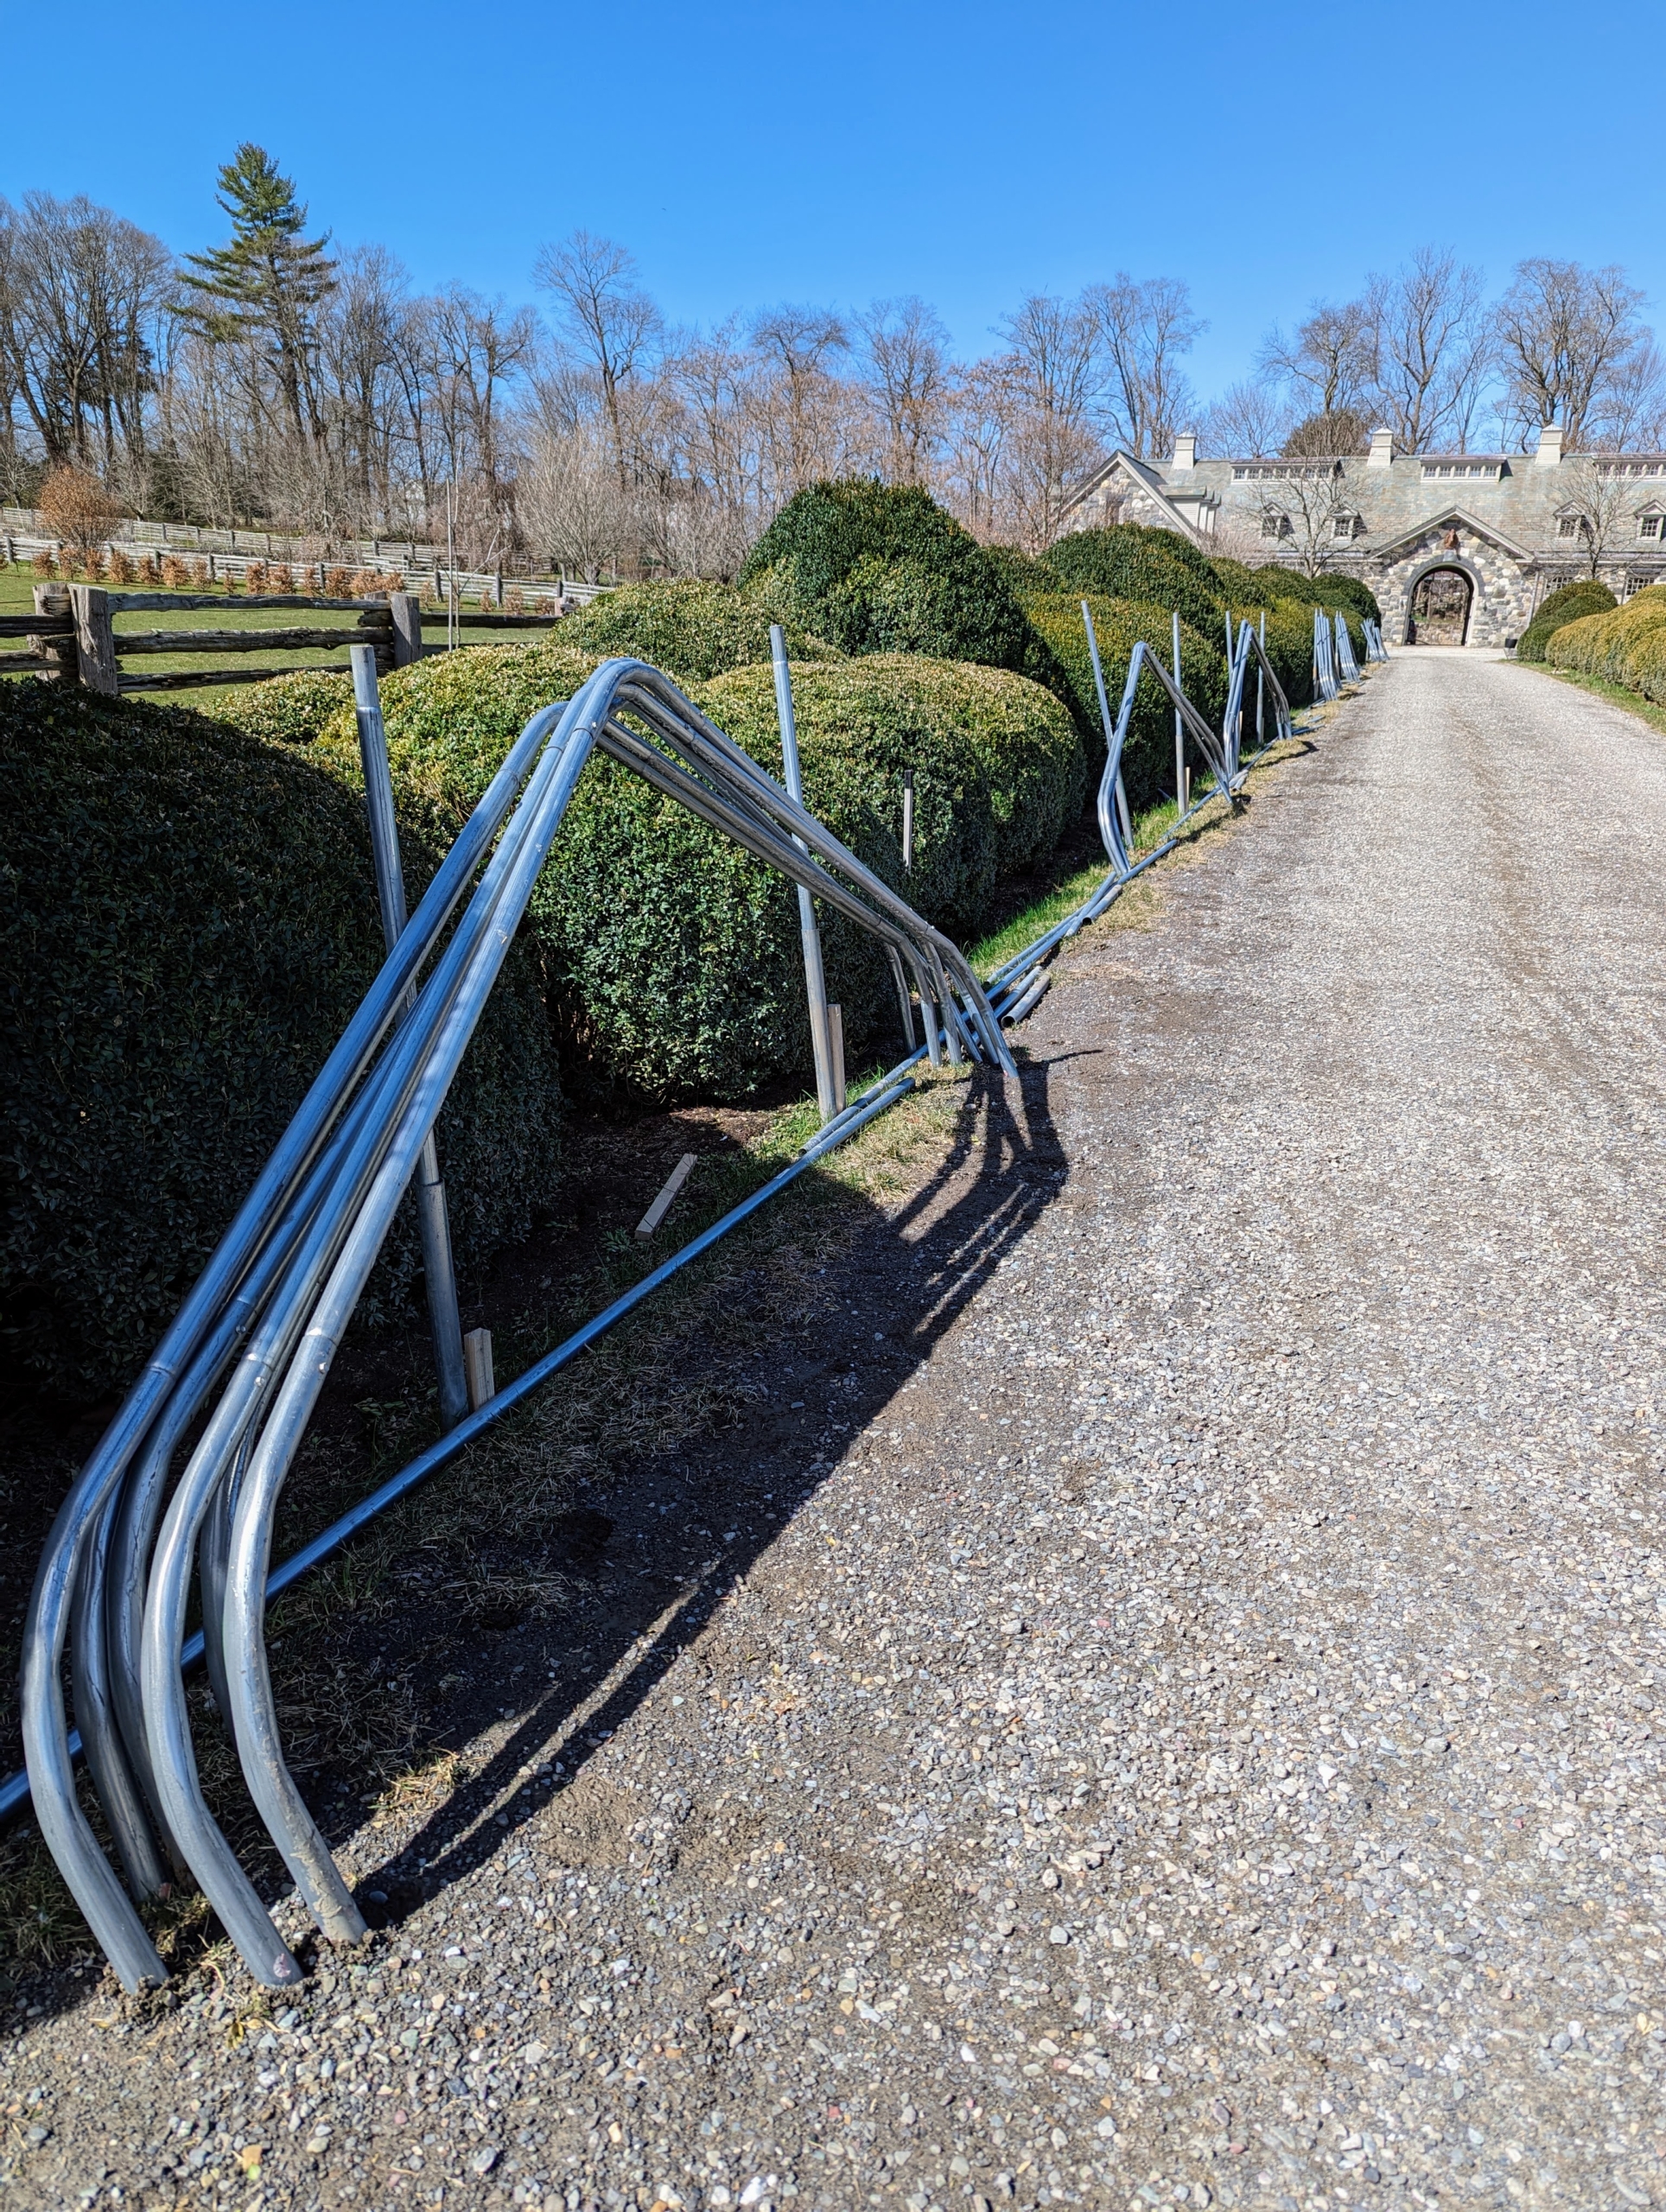
After they are properly dismantled, each piece of framing is neatly stacked, so it can be picked up quickly and hauled away to storage. These pipes are made from rolled galvanized 16 gauge industrial tubing. The top pieces are 10-foot wide bow sections – these frames will last quite a while, I hope.
The next step is to remove the metal legs that hold up the hoop structures along the allée. There are many steps – taking down the burlap is a much faster process than putting the burlap up, but it’s still very time-consuming.
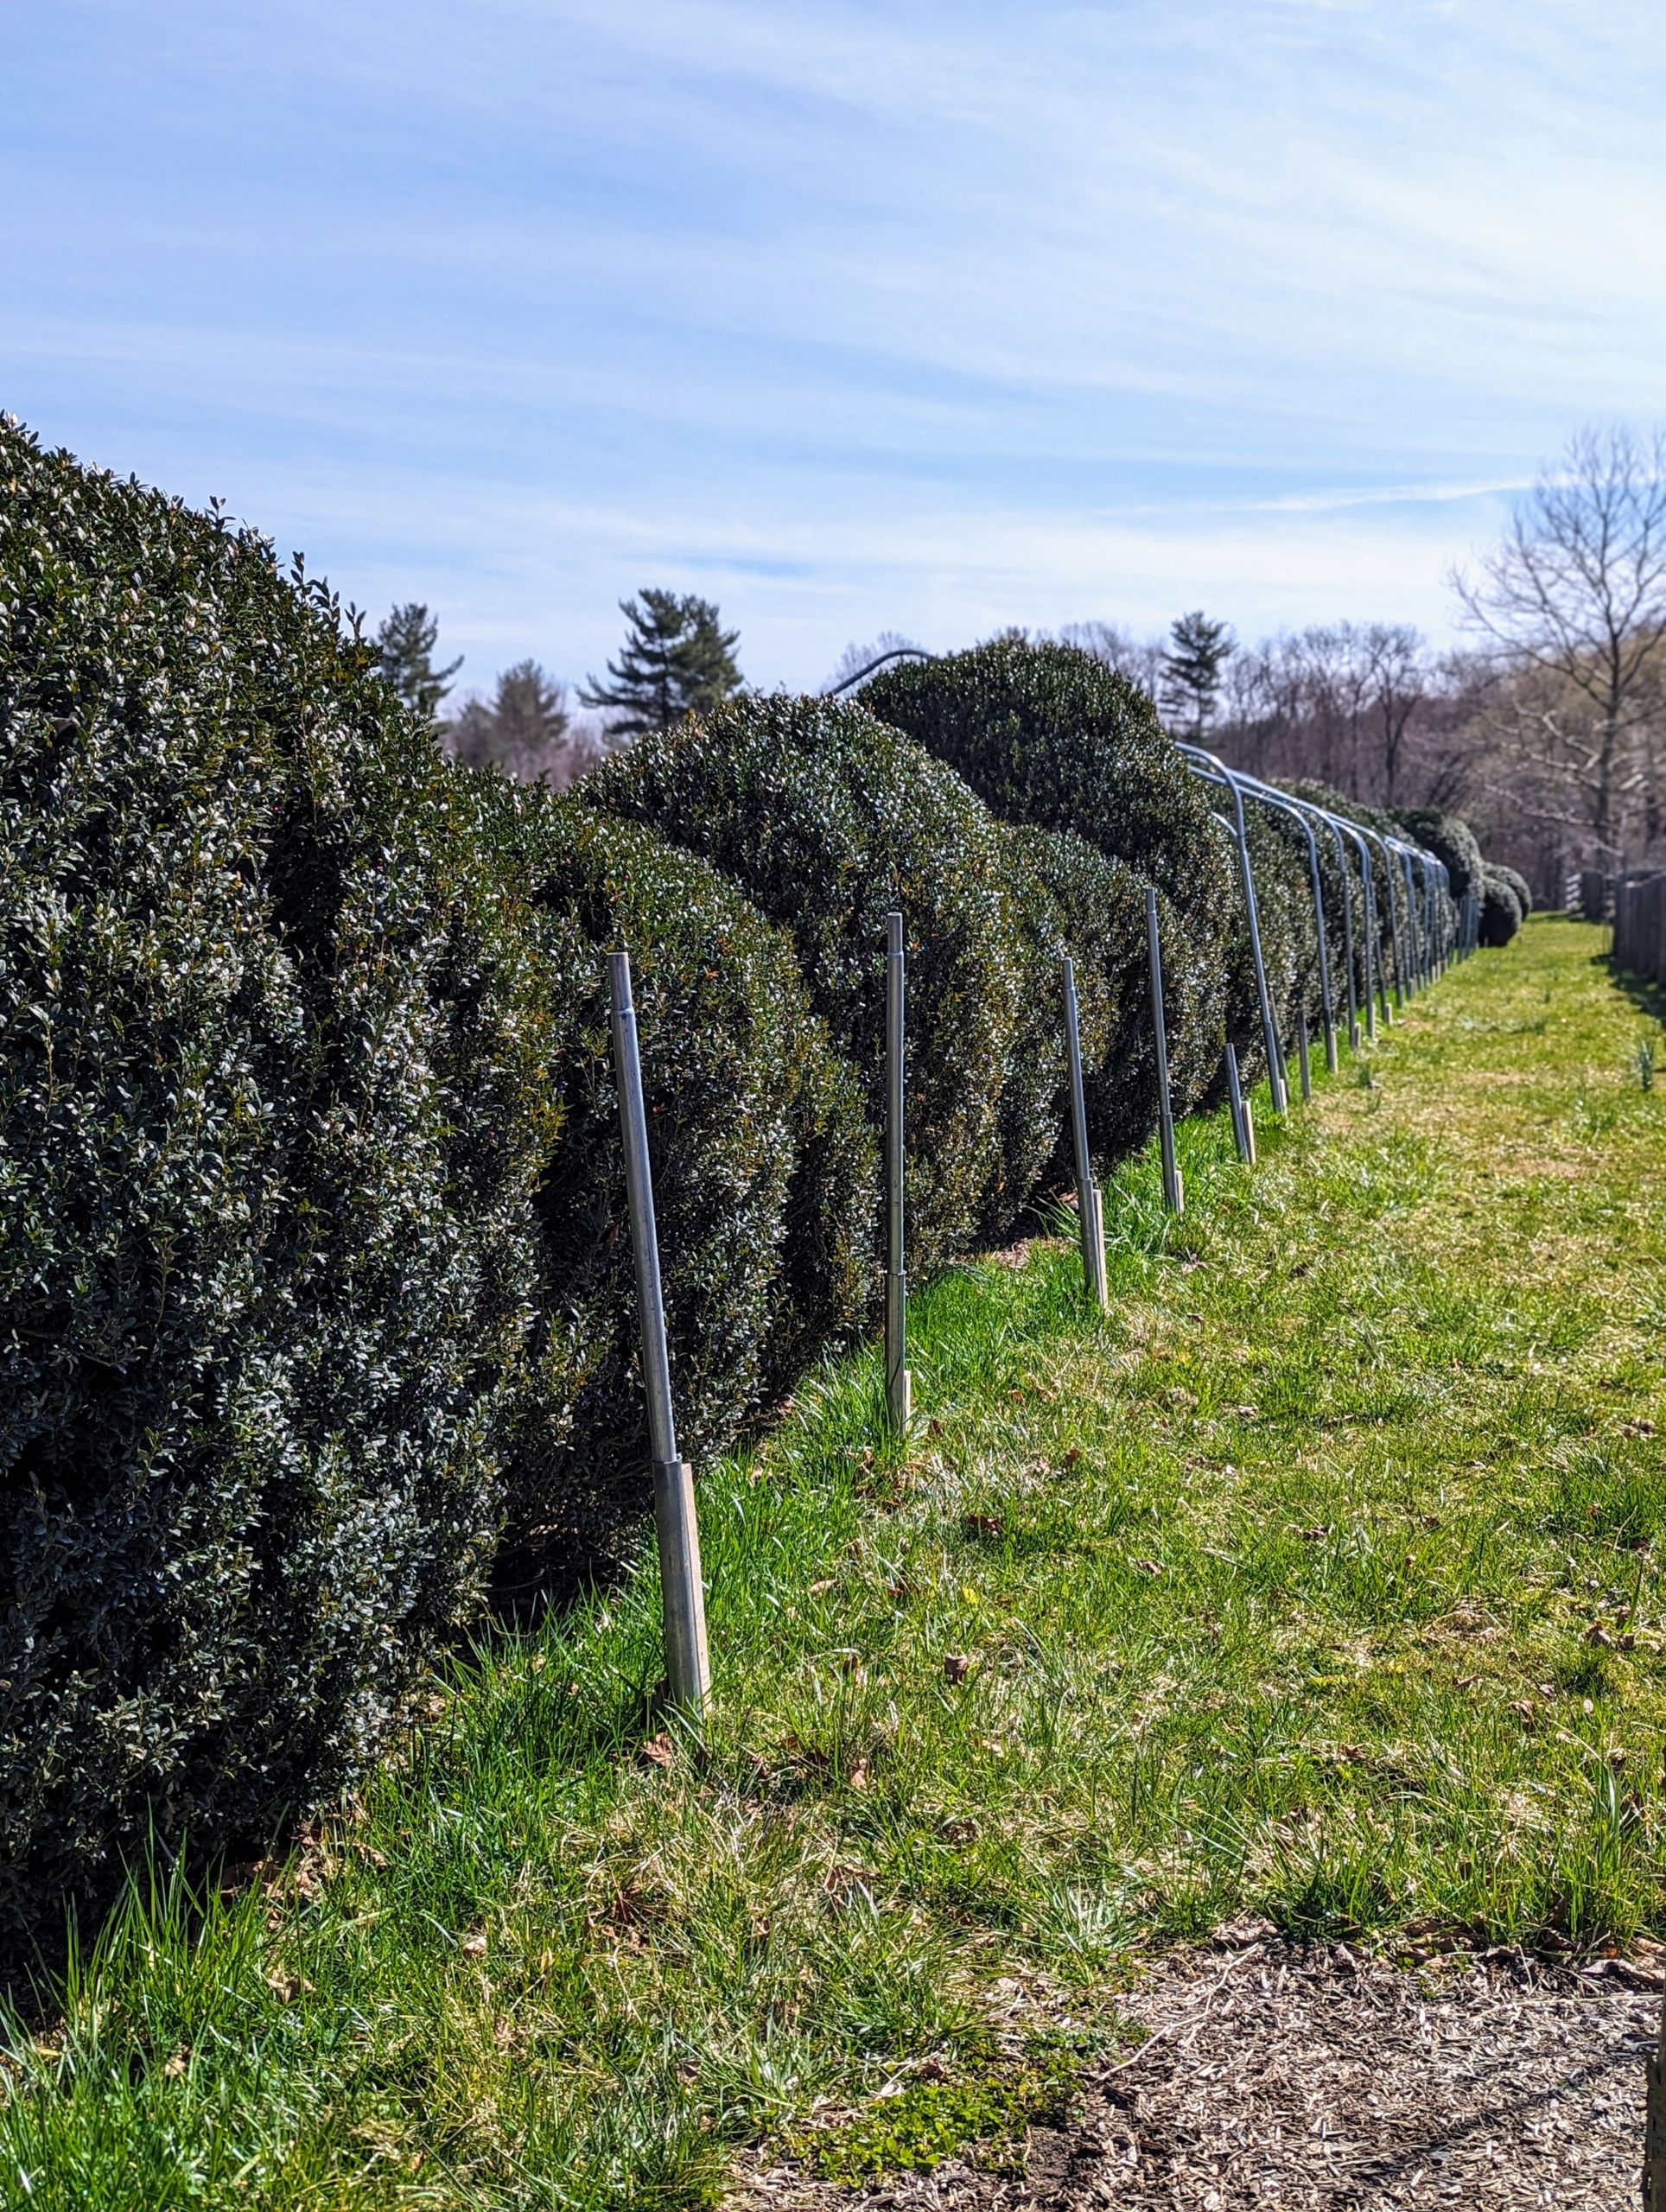
Here, the frames and legs are removed and all that’s left are the small wooden stakes that hold the legs in place.
The metal framing and pipes are all carefully loaded onto our dump truck and taken to a back storage area.
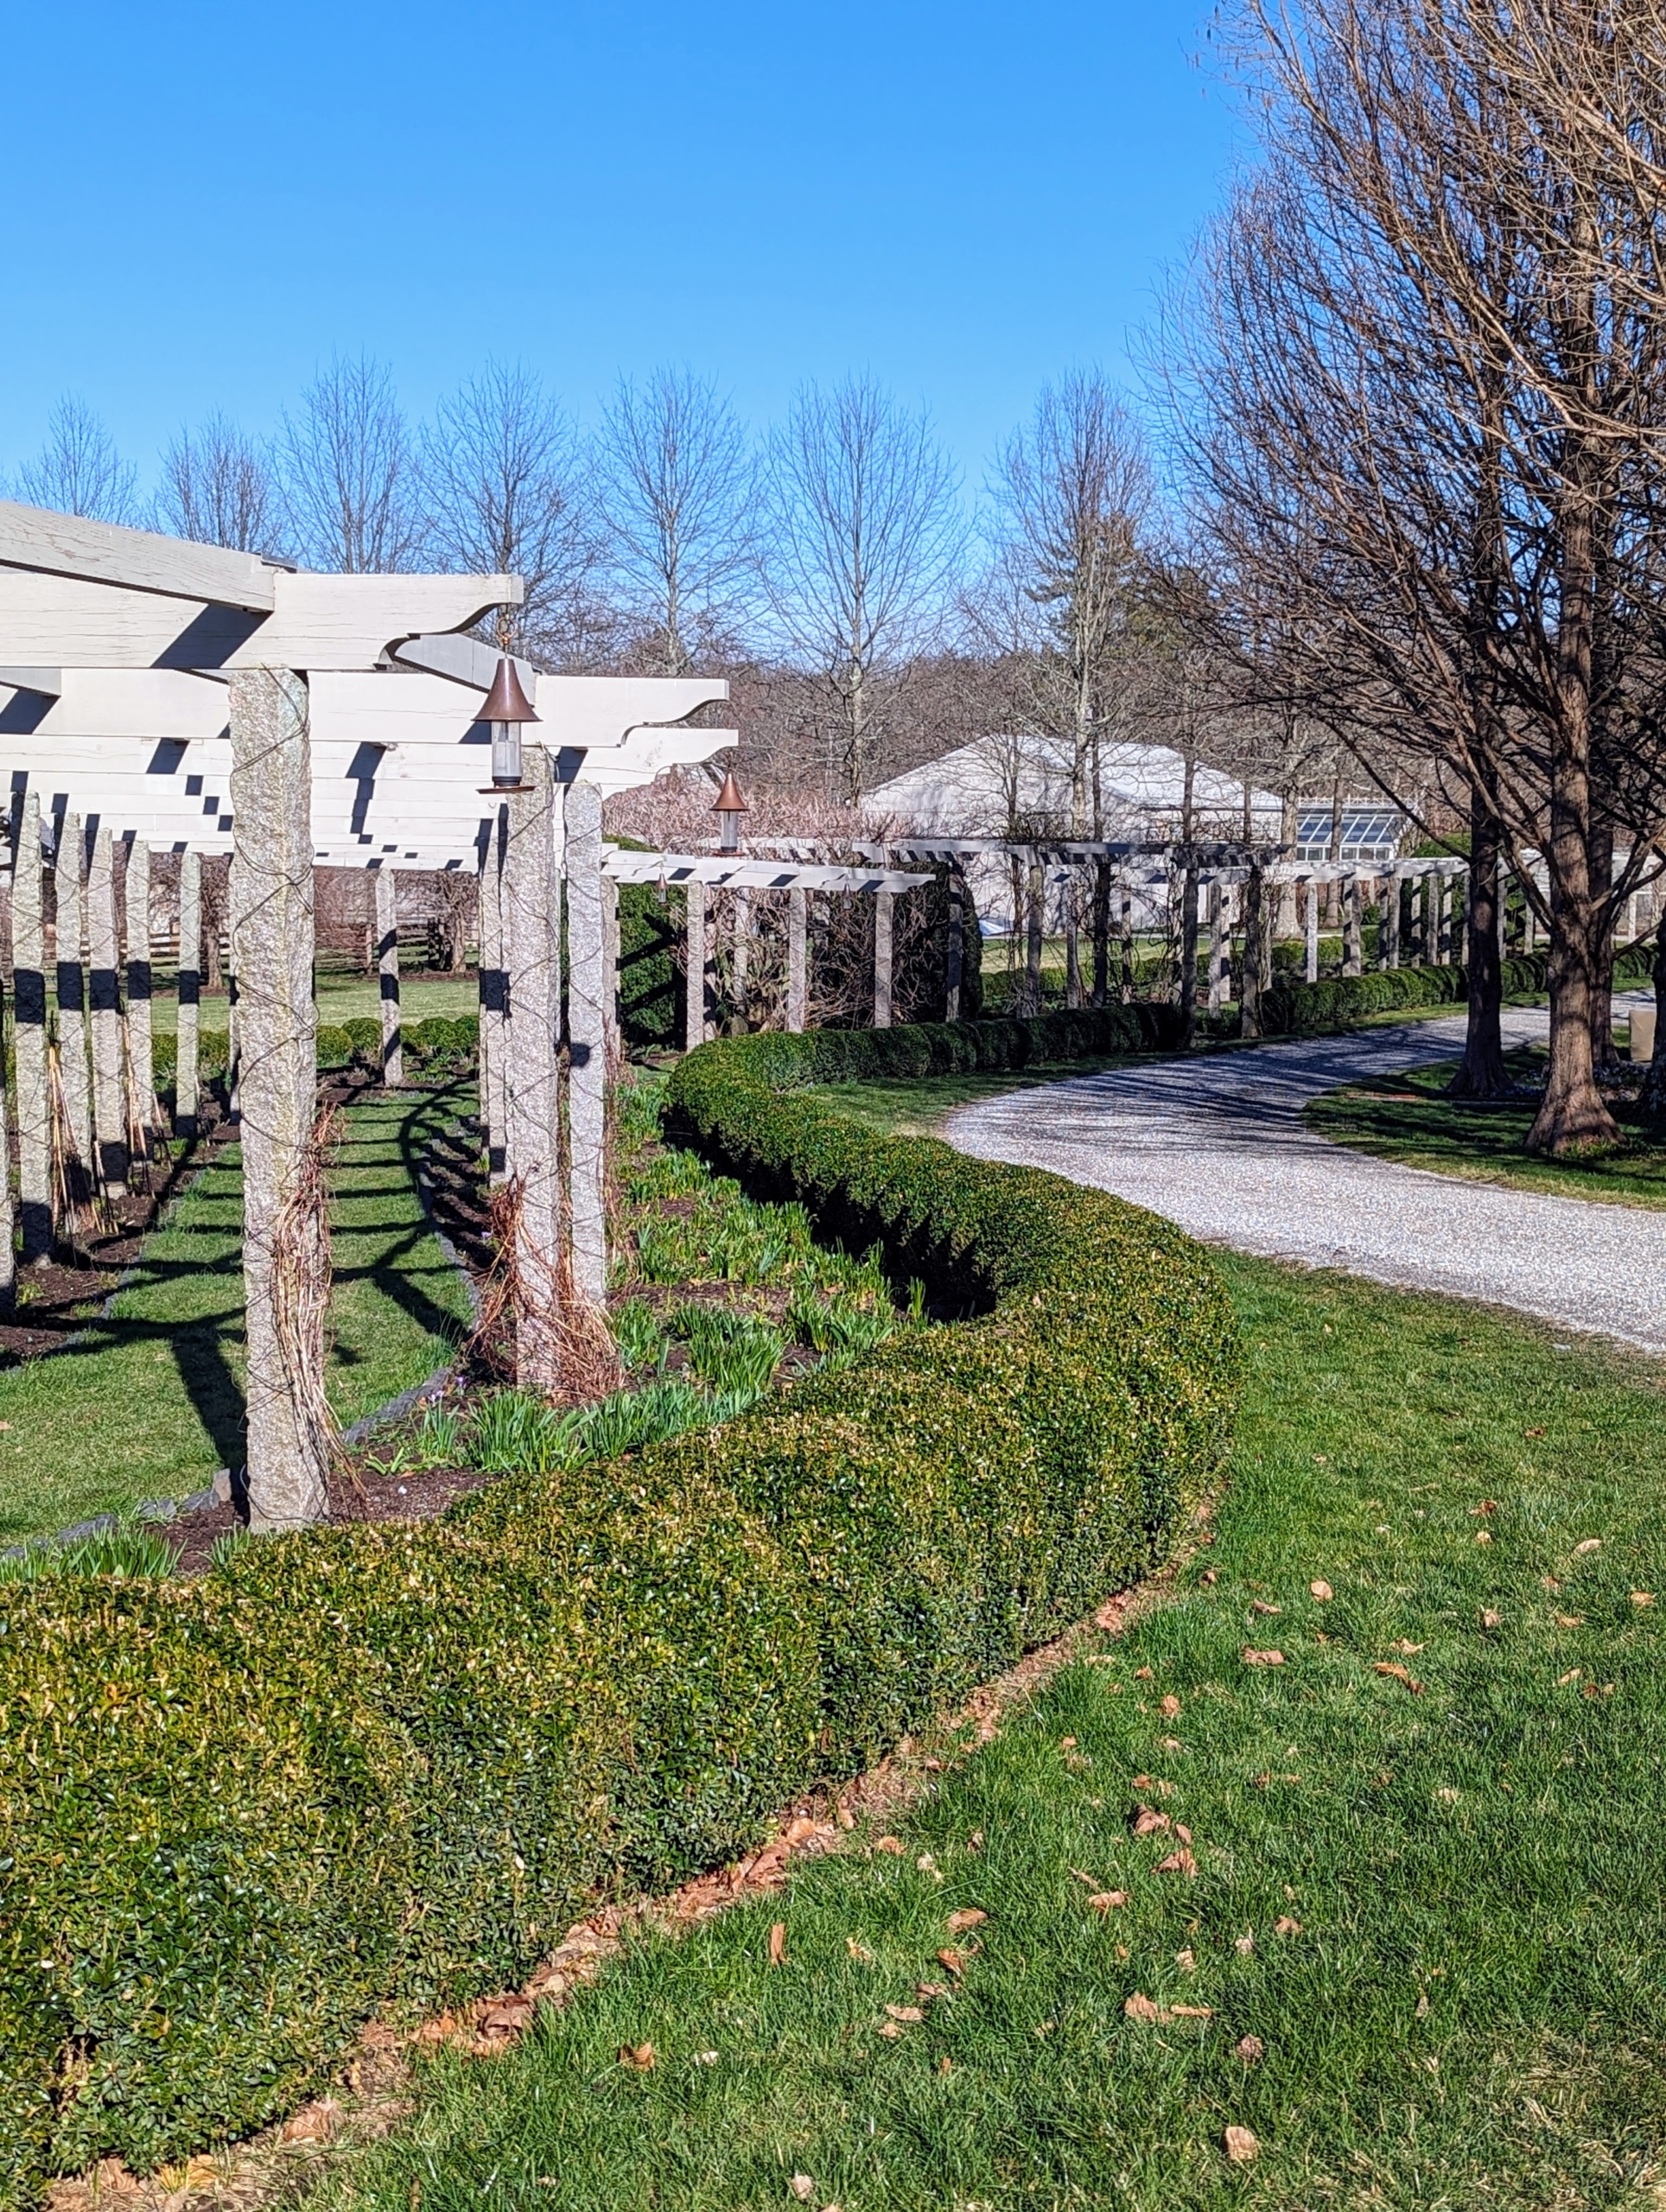
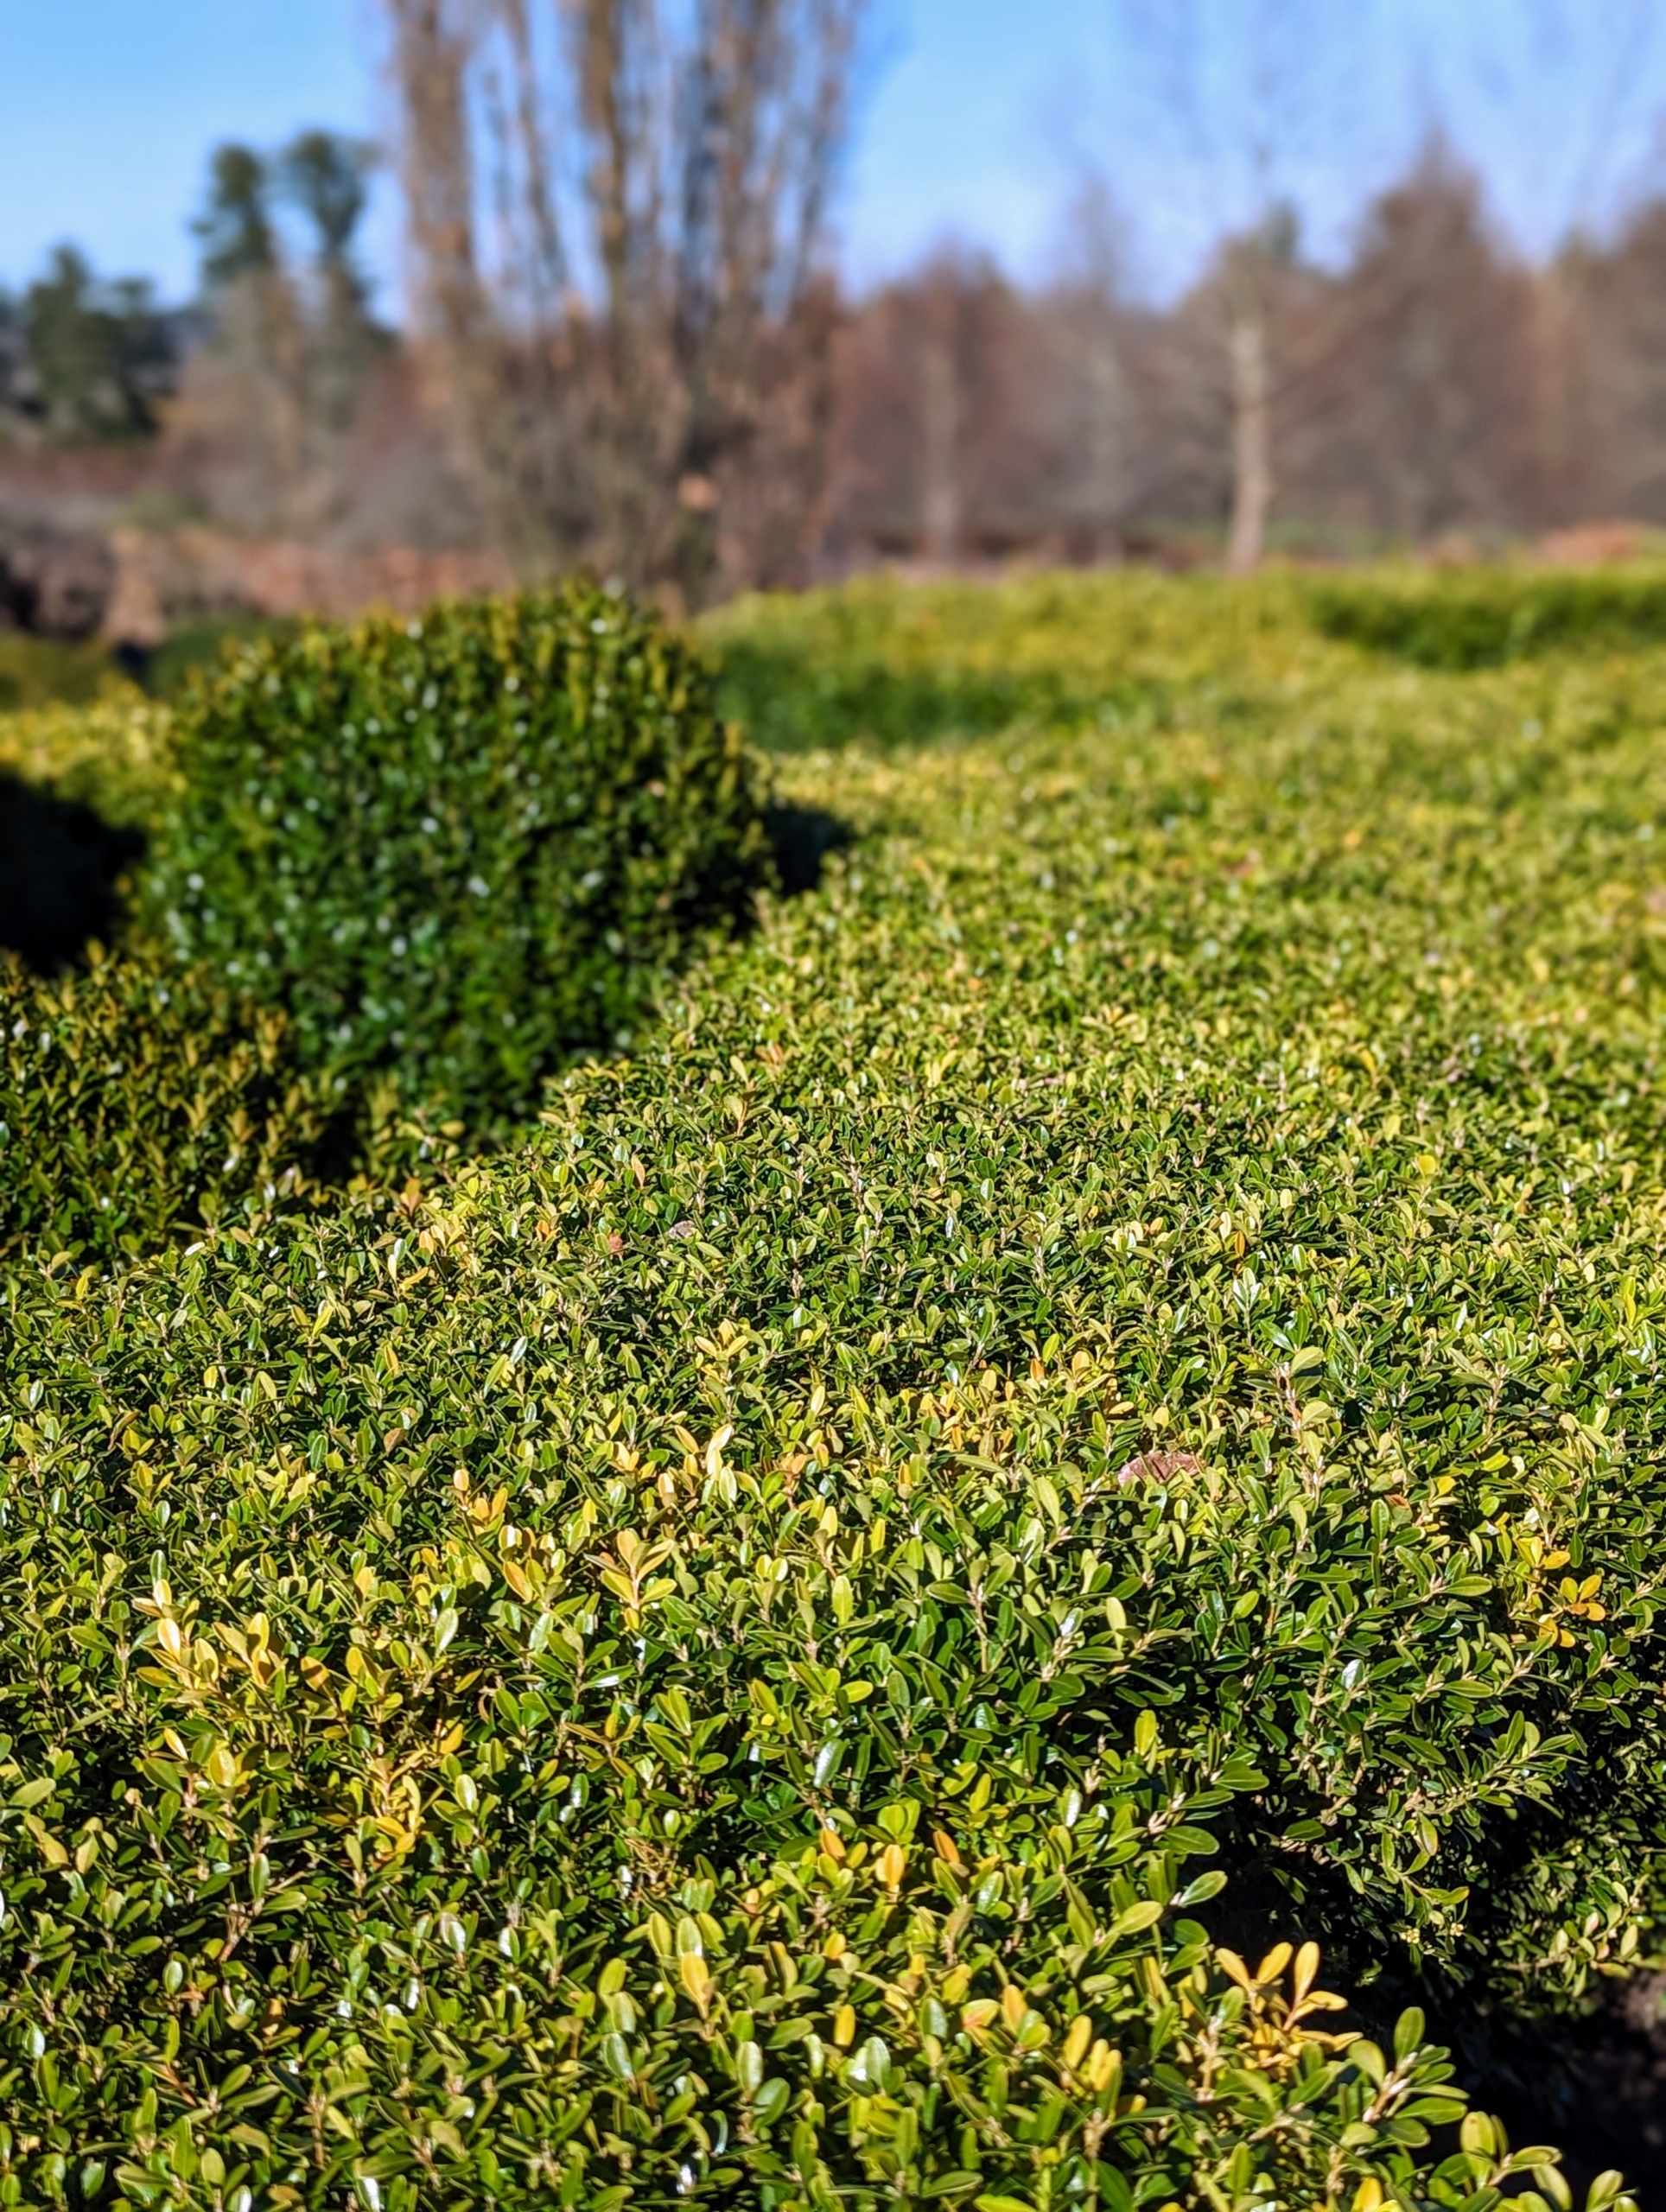
The boxwood hedges on both sides of my long and winding pergola have also been uncovered. The burlap removal reveals what we hope for every year – green, healthy boxwood. Soon, these beds will be filled with colorful alliums, lilies, camassia, and fritillaria.
This is the other side. All these boxwood shrubs were nurtured and grown here at the farm from small bare-root plants. I am so proud of how well they have developed.
This hedge is outside my Winter House. My outdoor grounds crew is moving quickly to get all the burlap off.
Some question whether covering the boxwood each winter really helps, but look how lush and intact the plantings are when exposed – I definitely feel it is worth the time and effort.
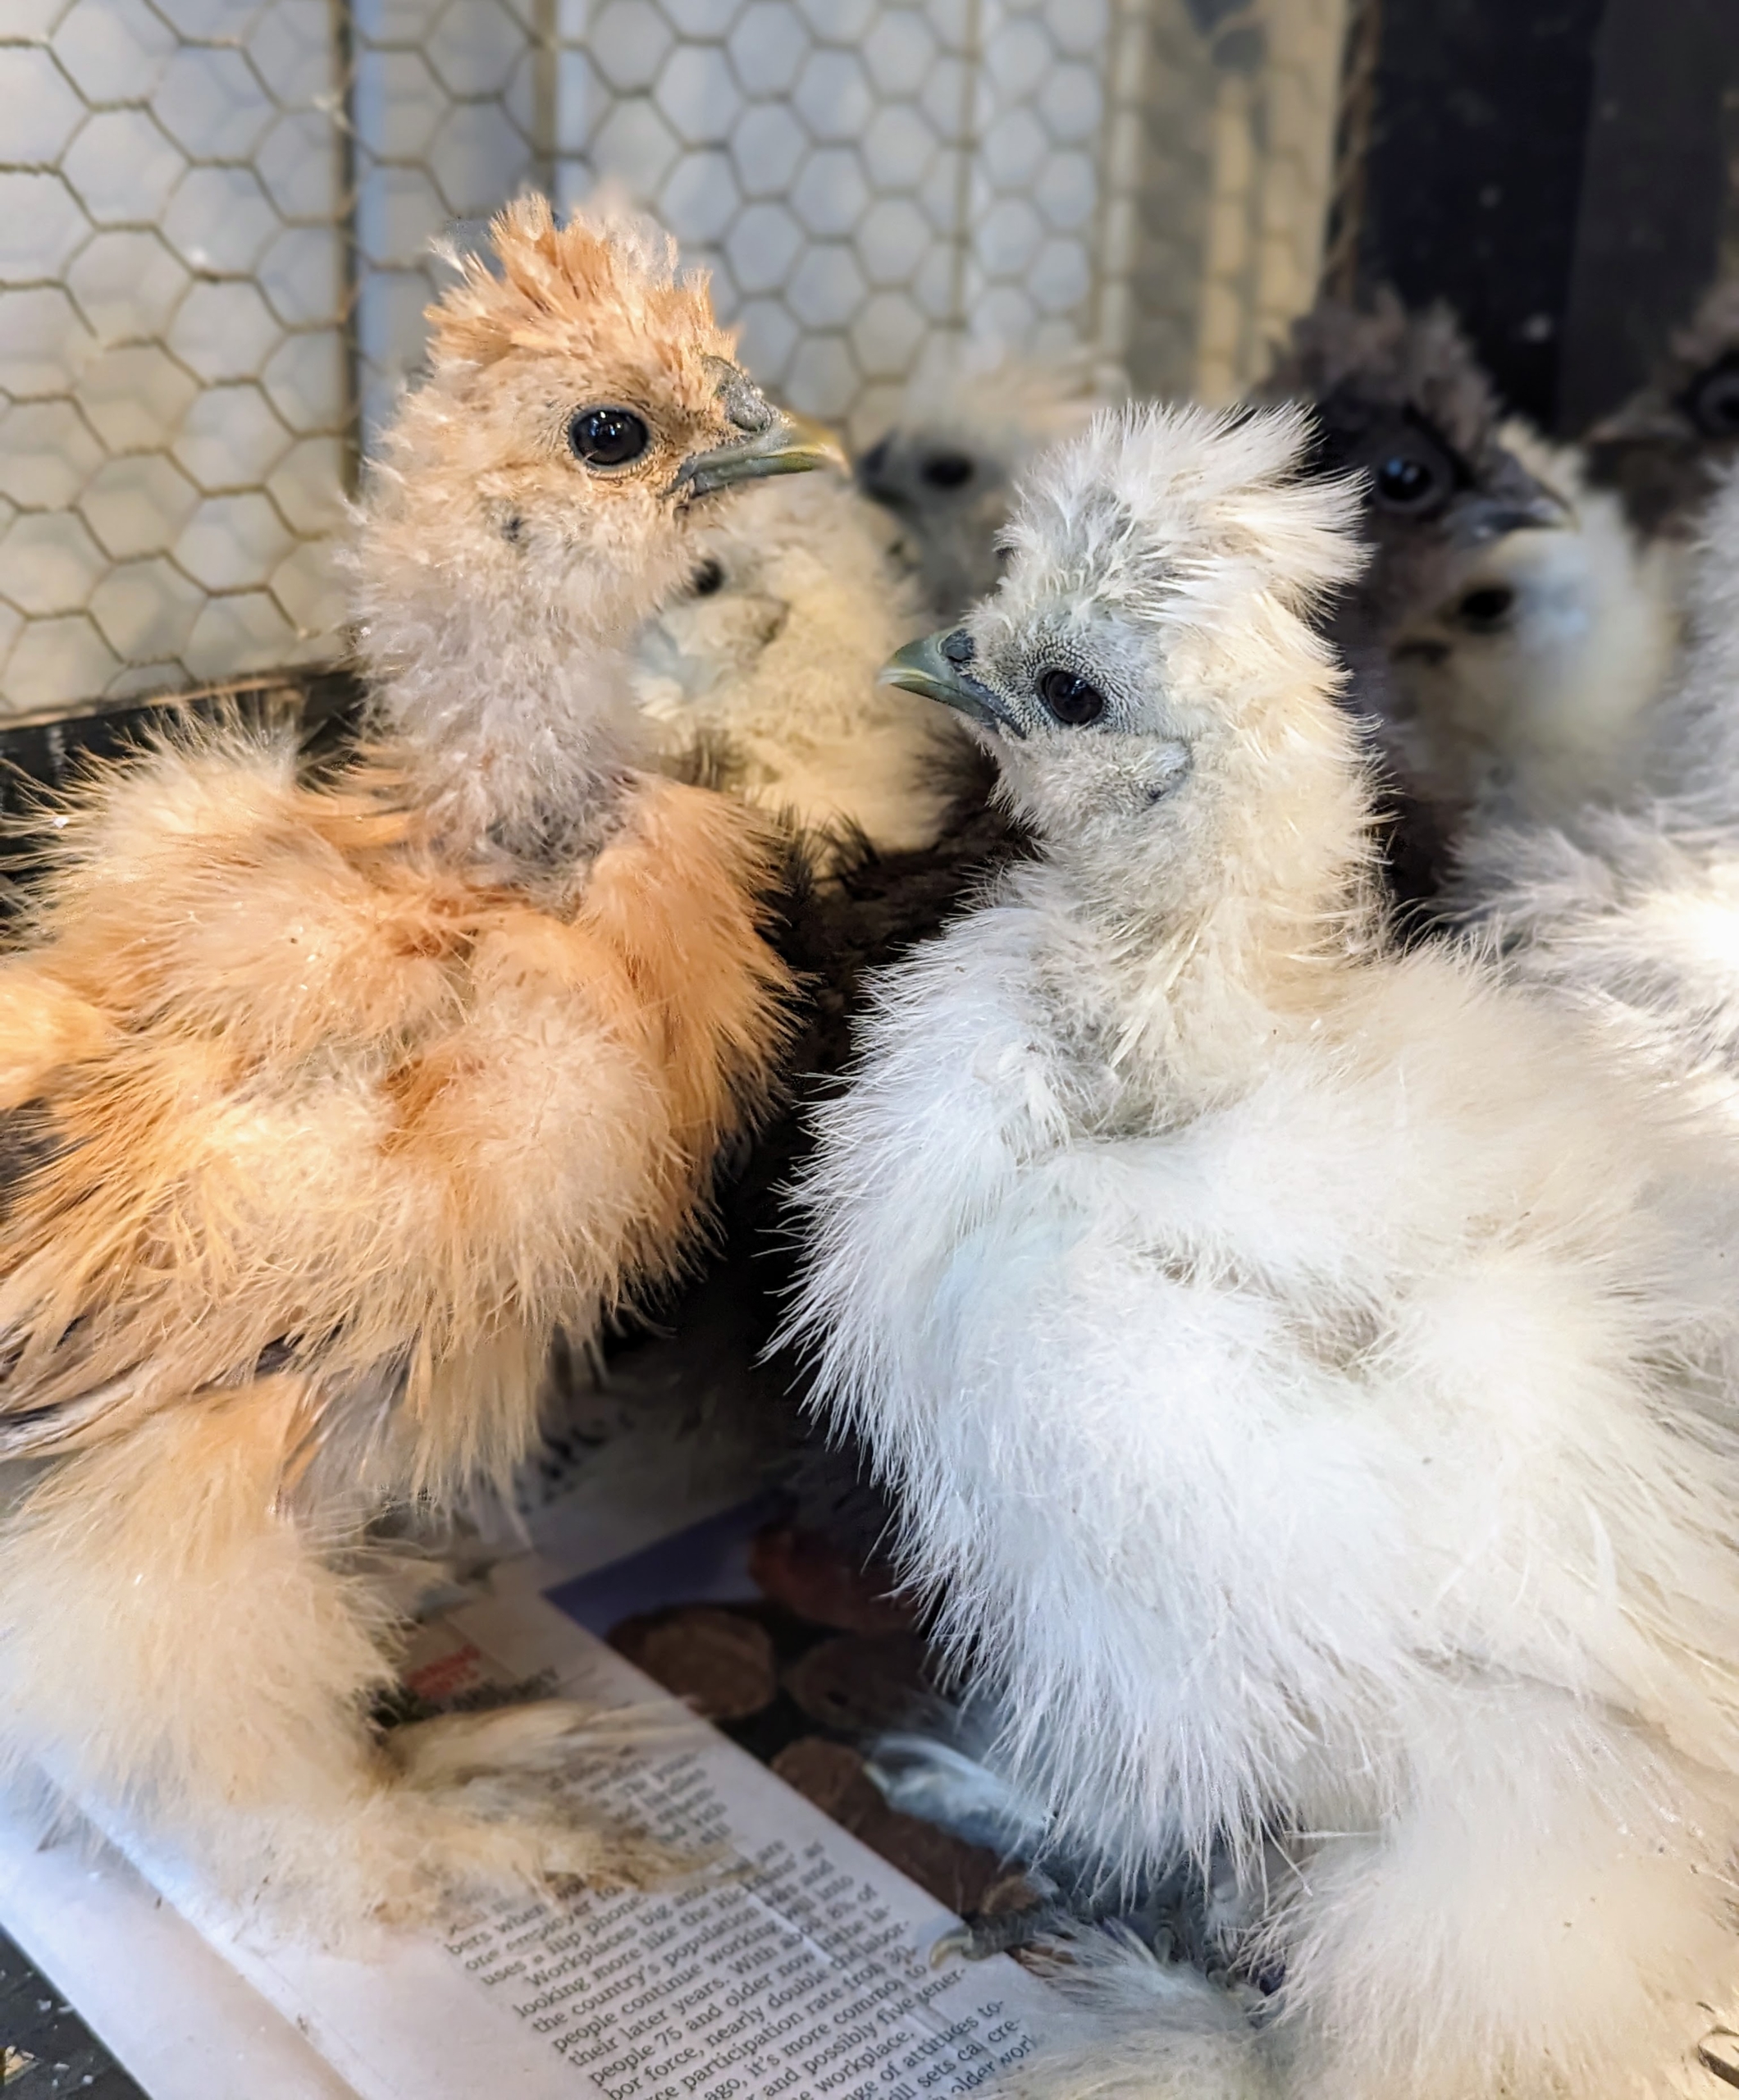
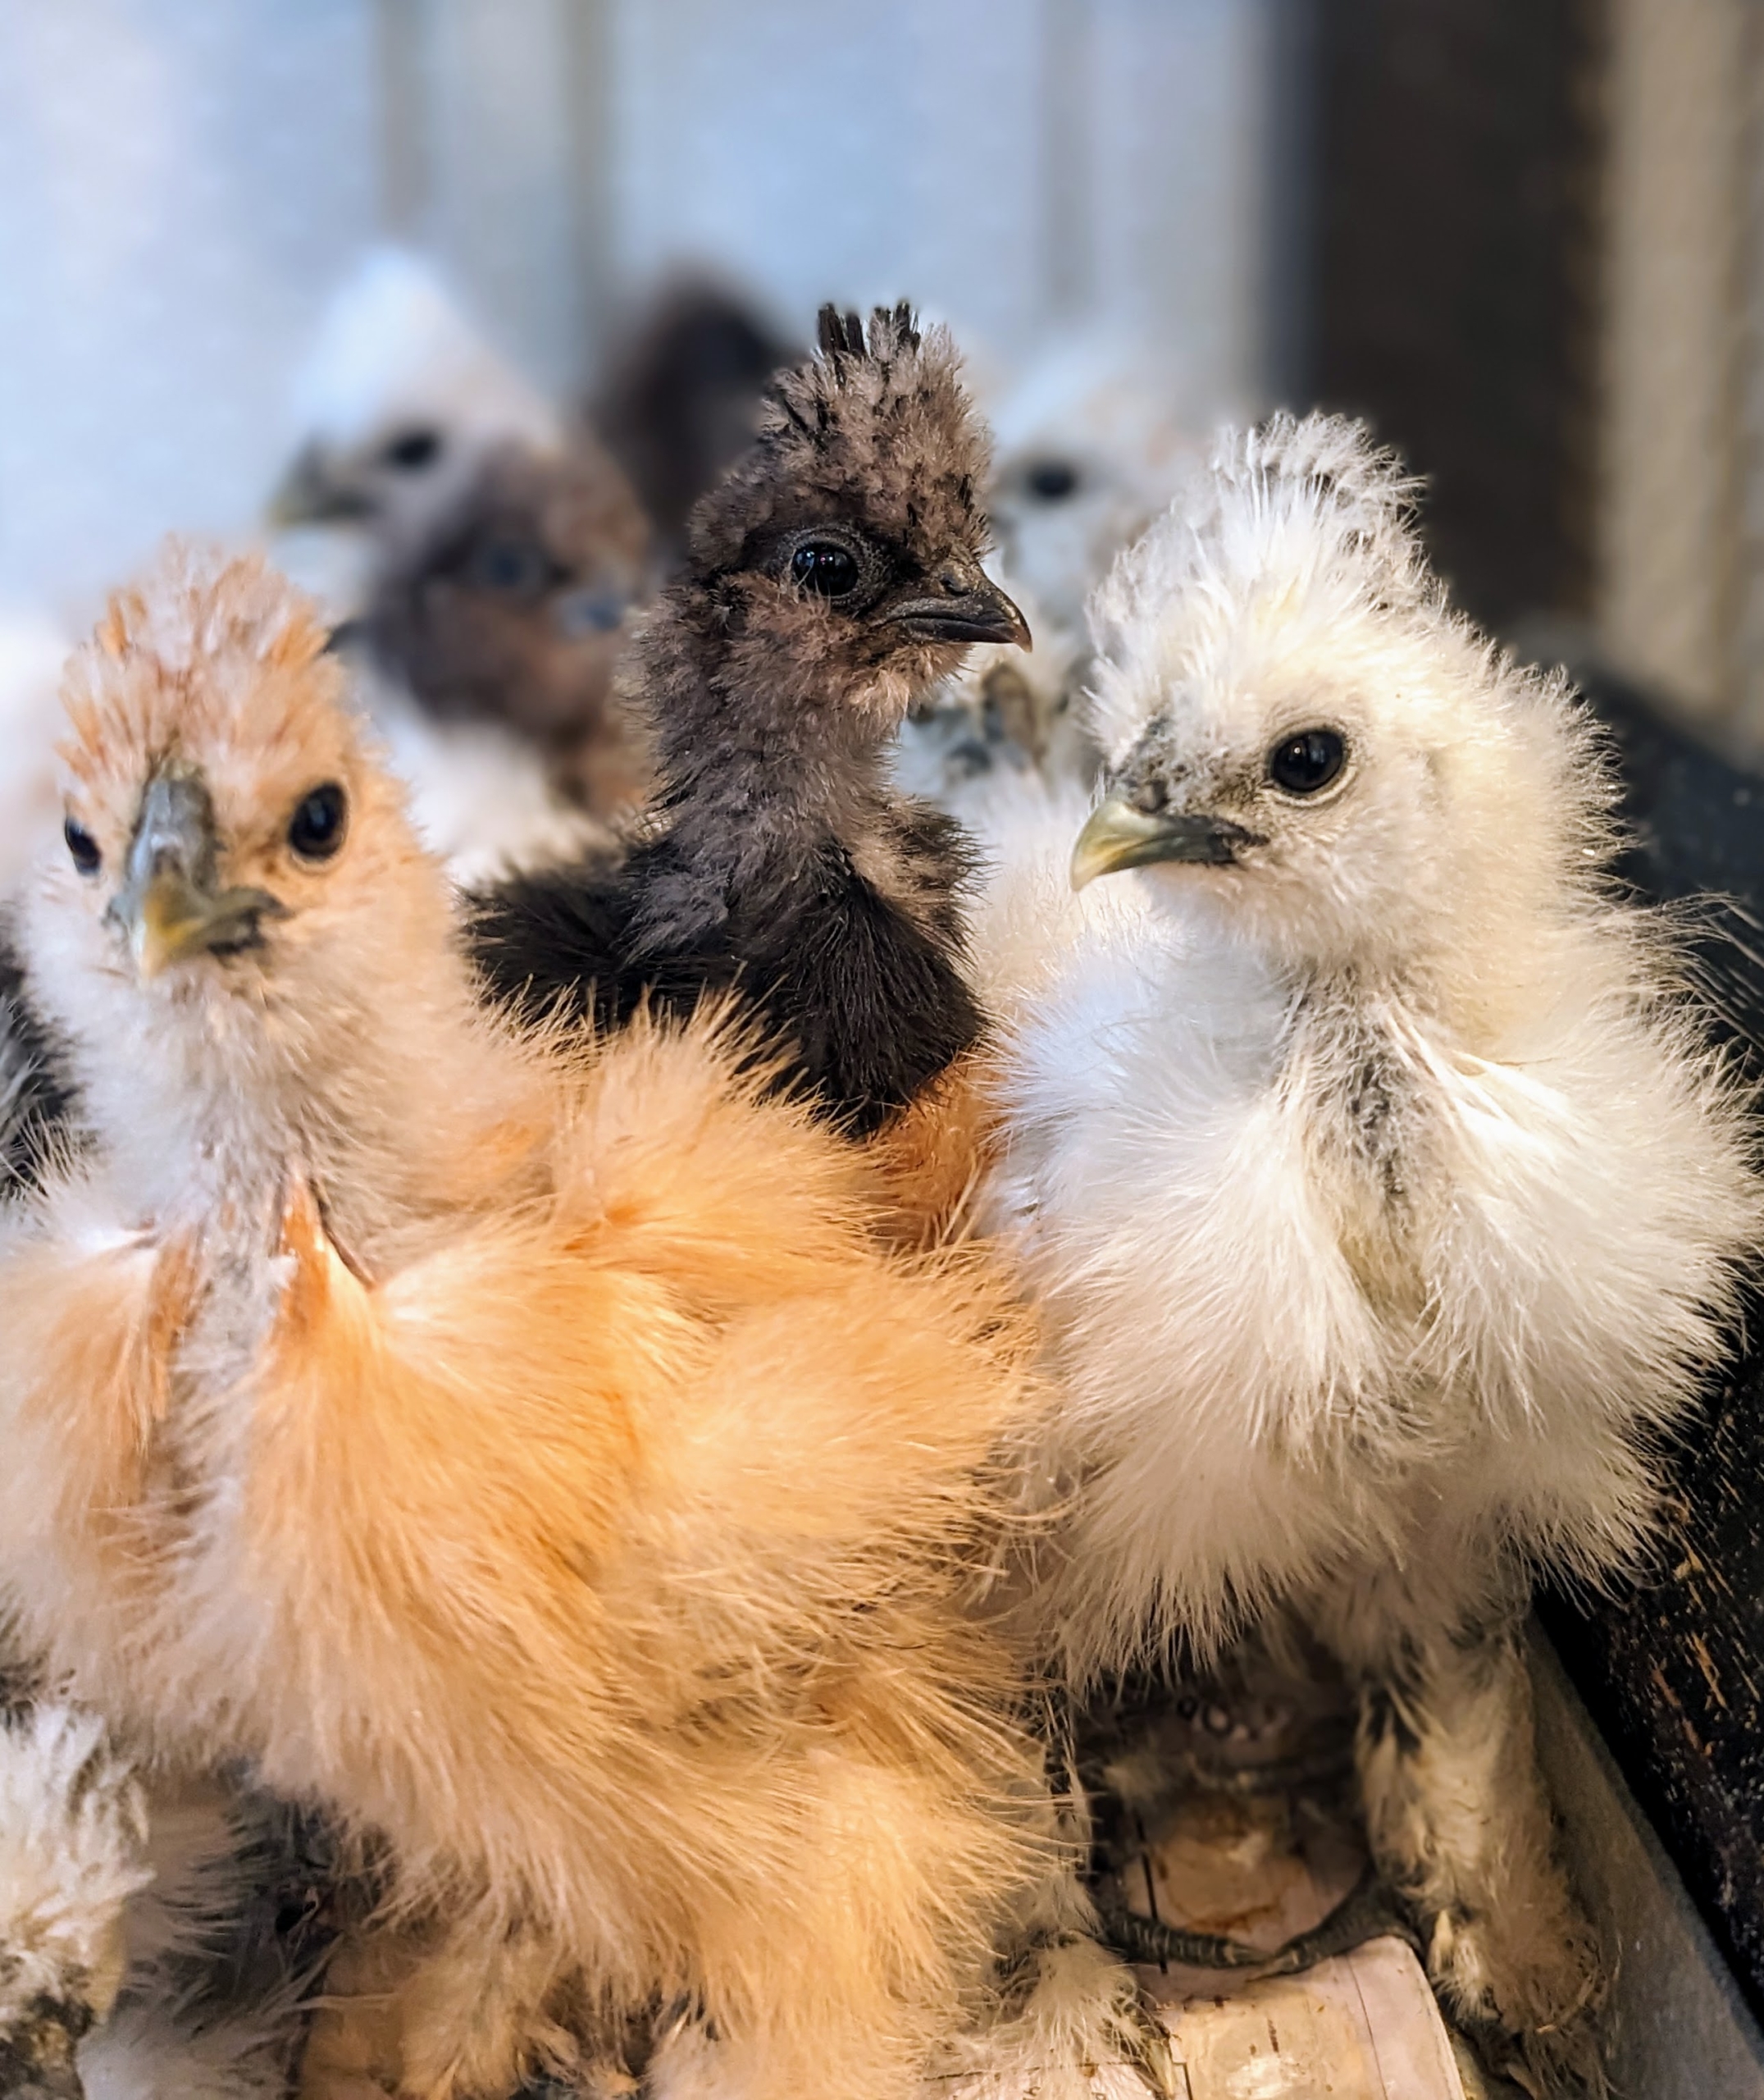
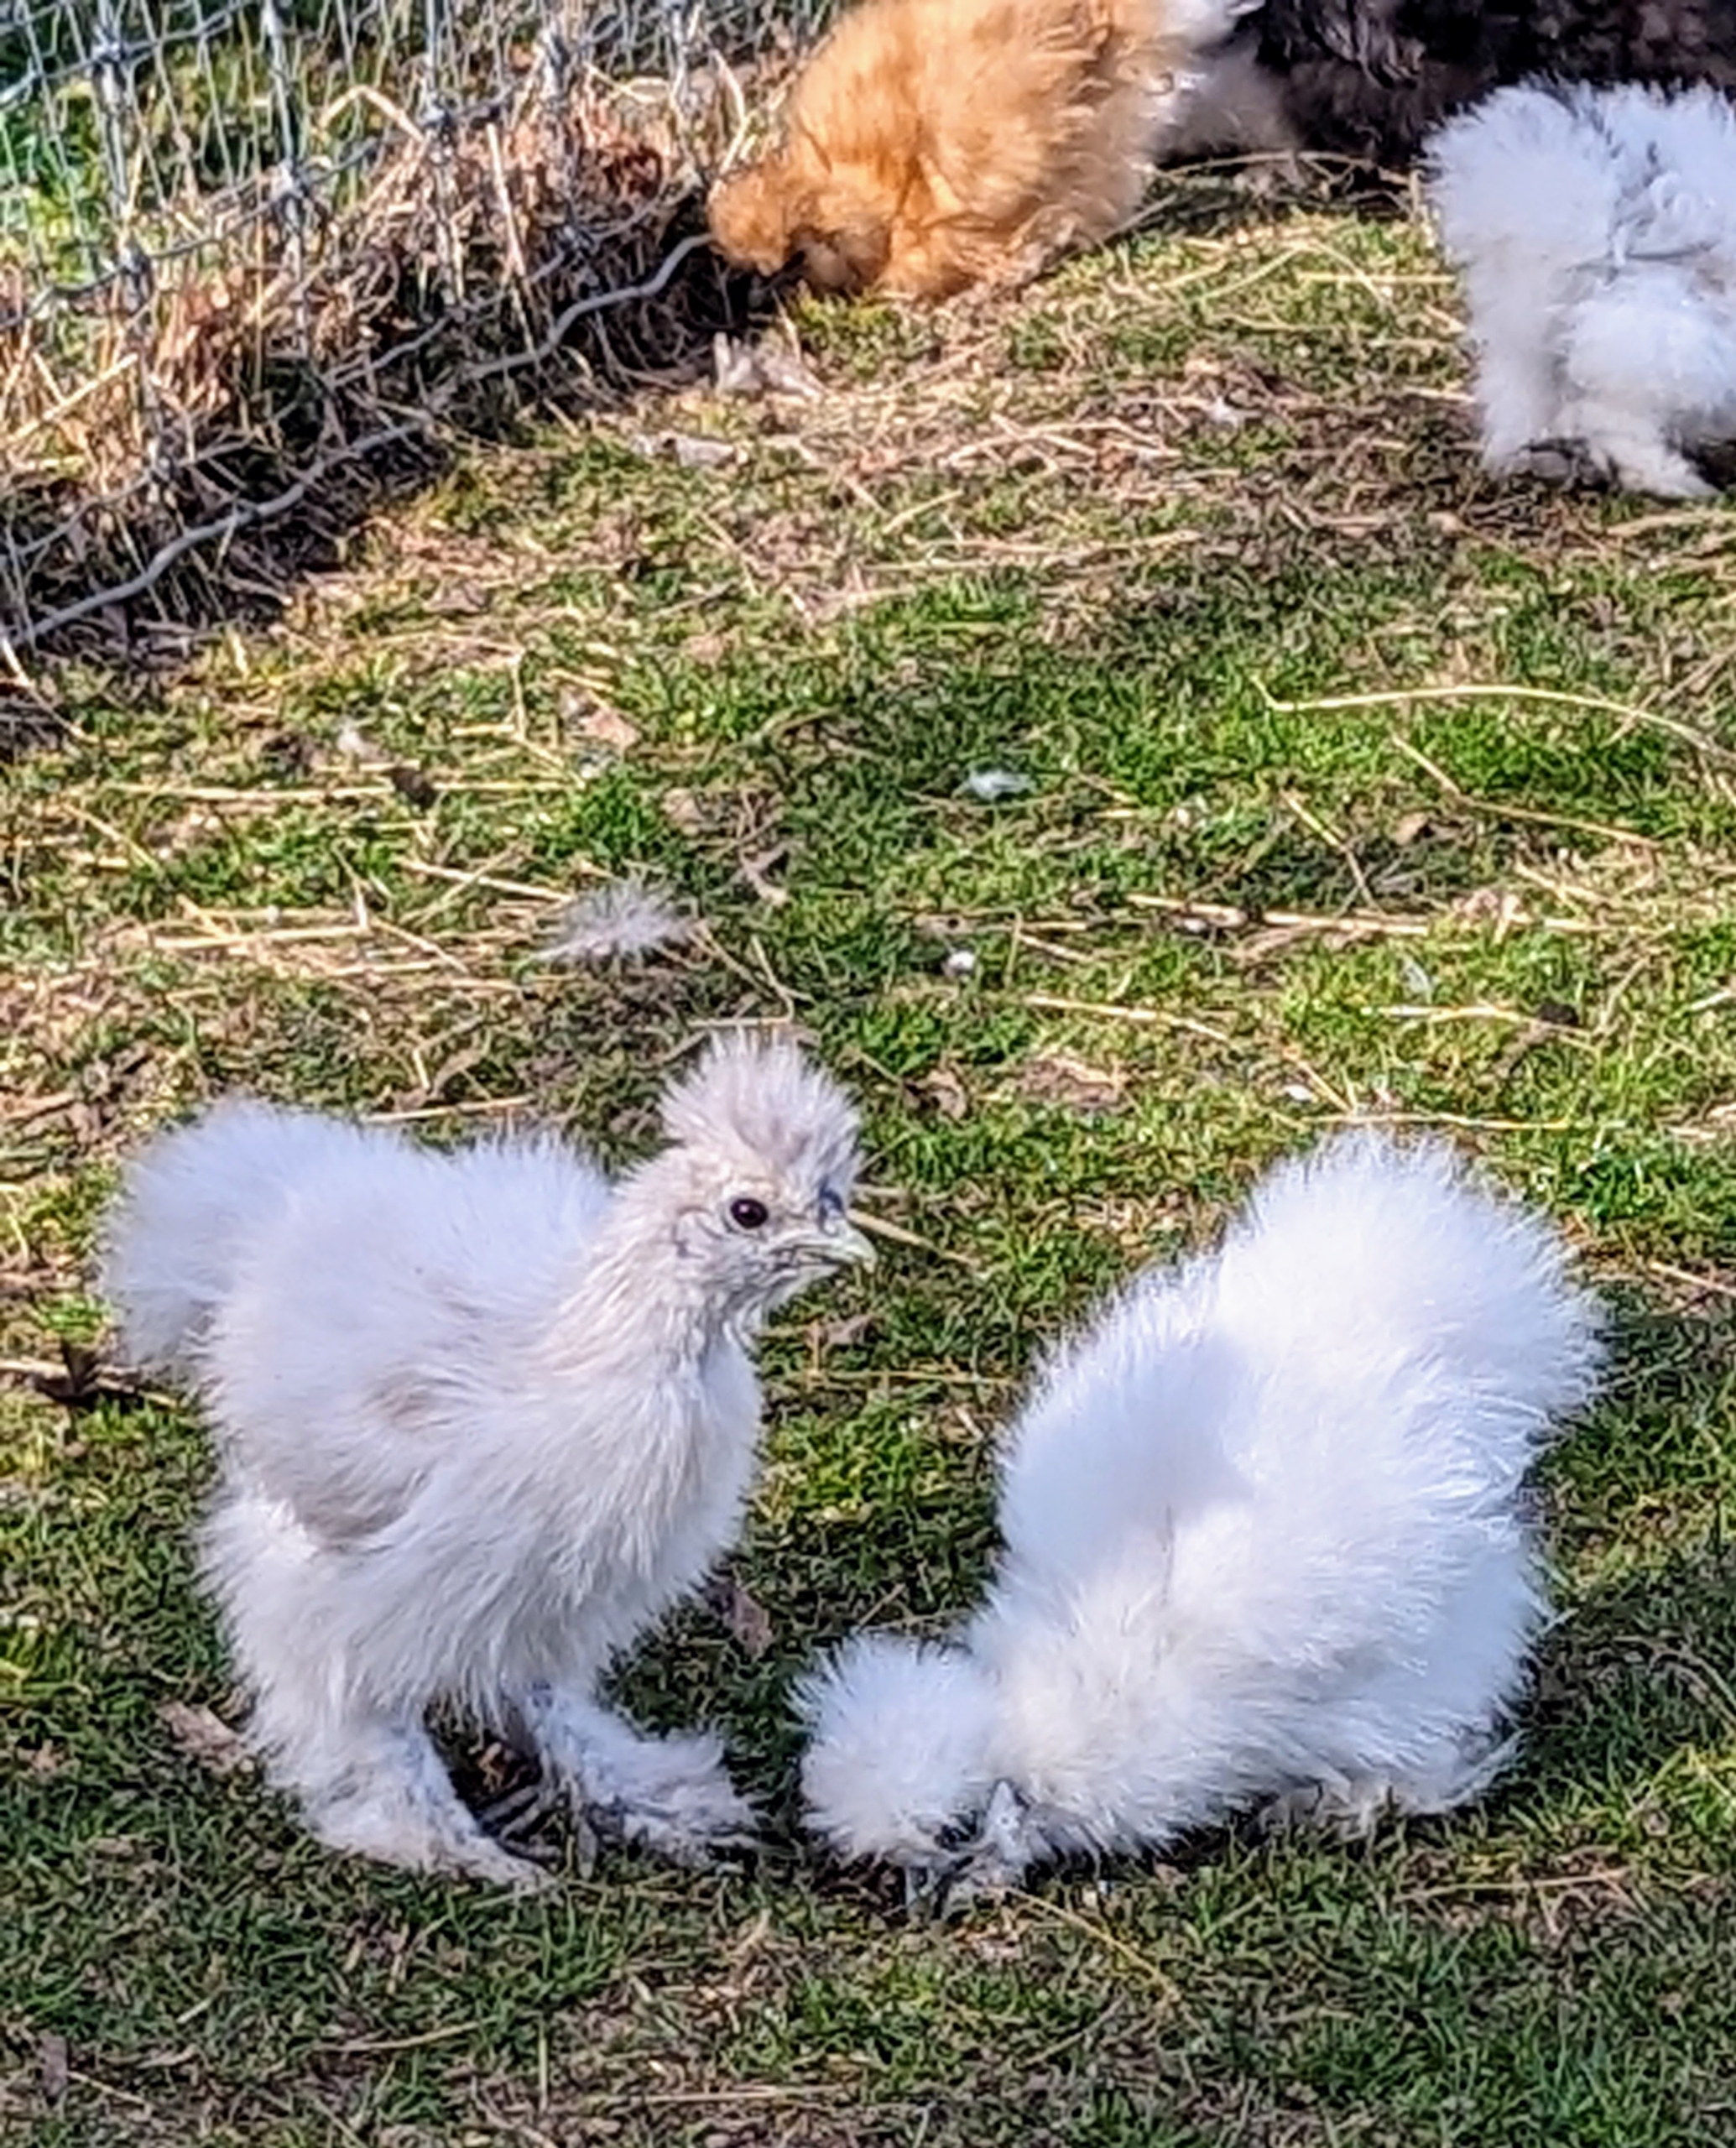
Earlier this year I incubated and hatched more than two dozen baby Silkie and Ayam Cemani chicks. Since then, the peeps have grown and moved into their new "nursery" coop where they can have access to the outdoors. All of them are alert, healthy, and very curious. They will remain in this enclosure until they are old enough to join the adult chickens.
Enjoy these photos.
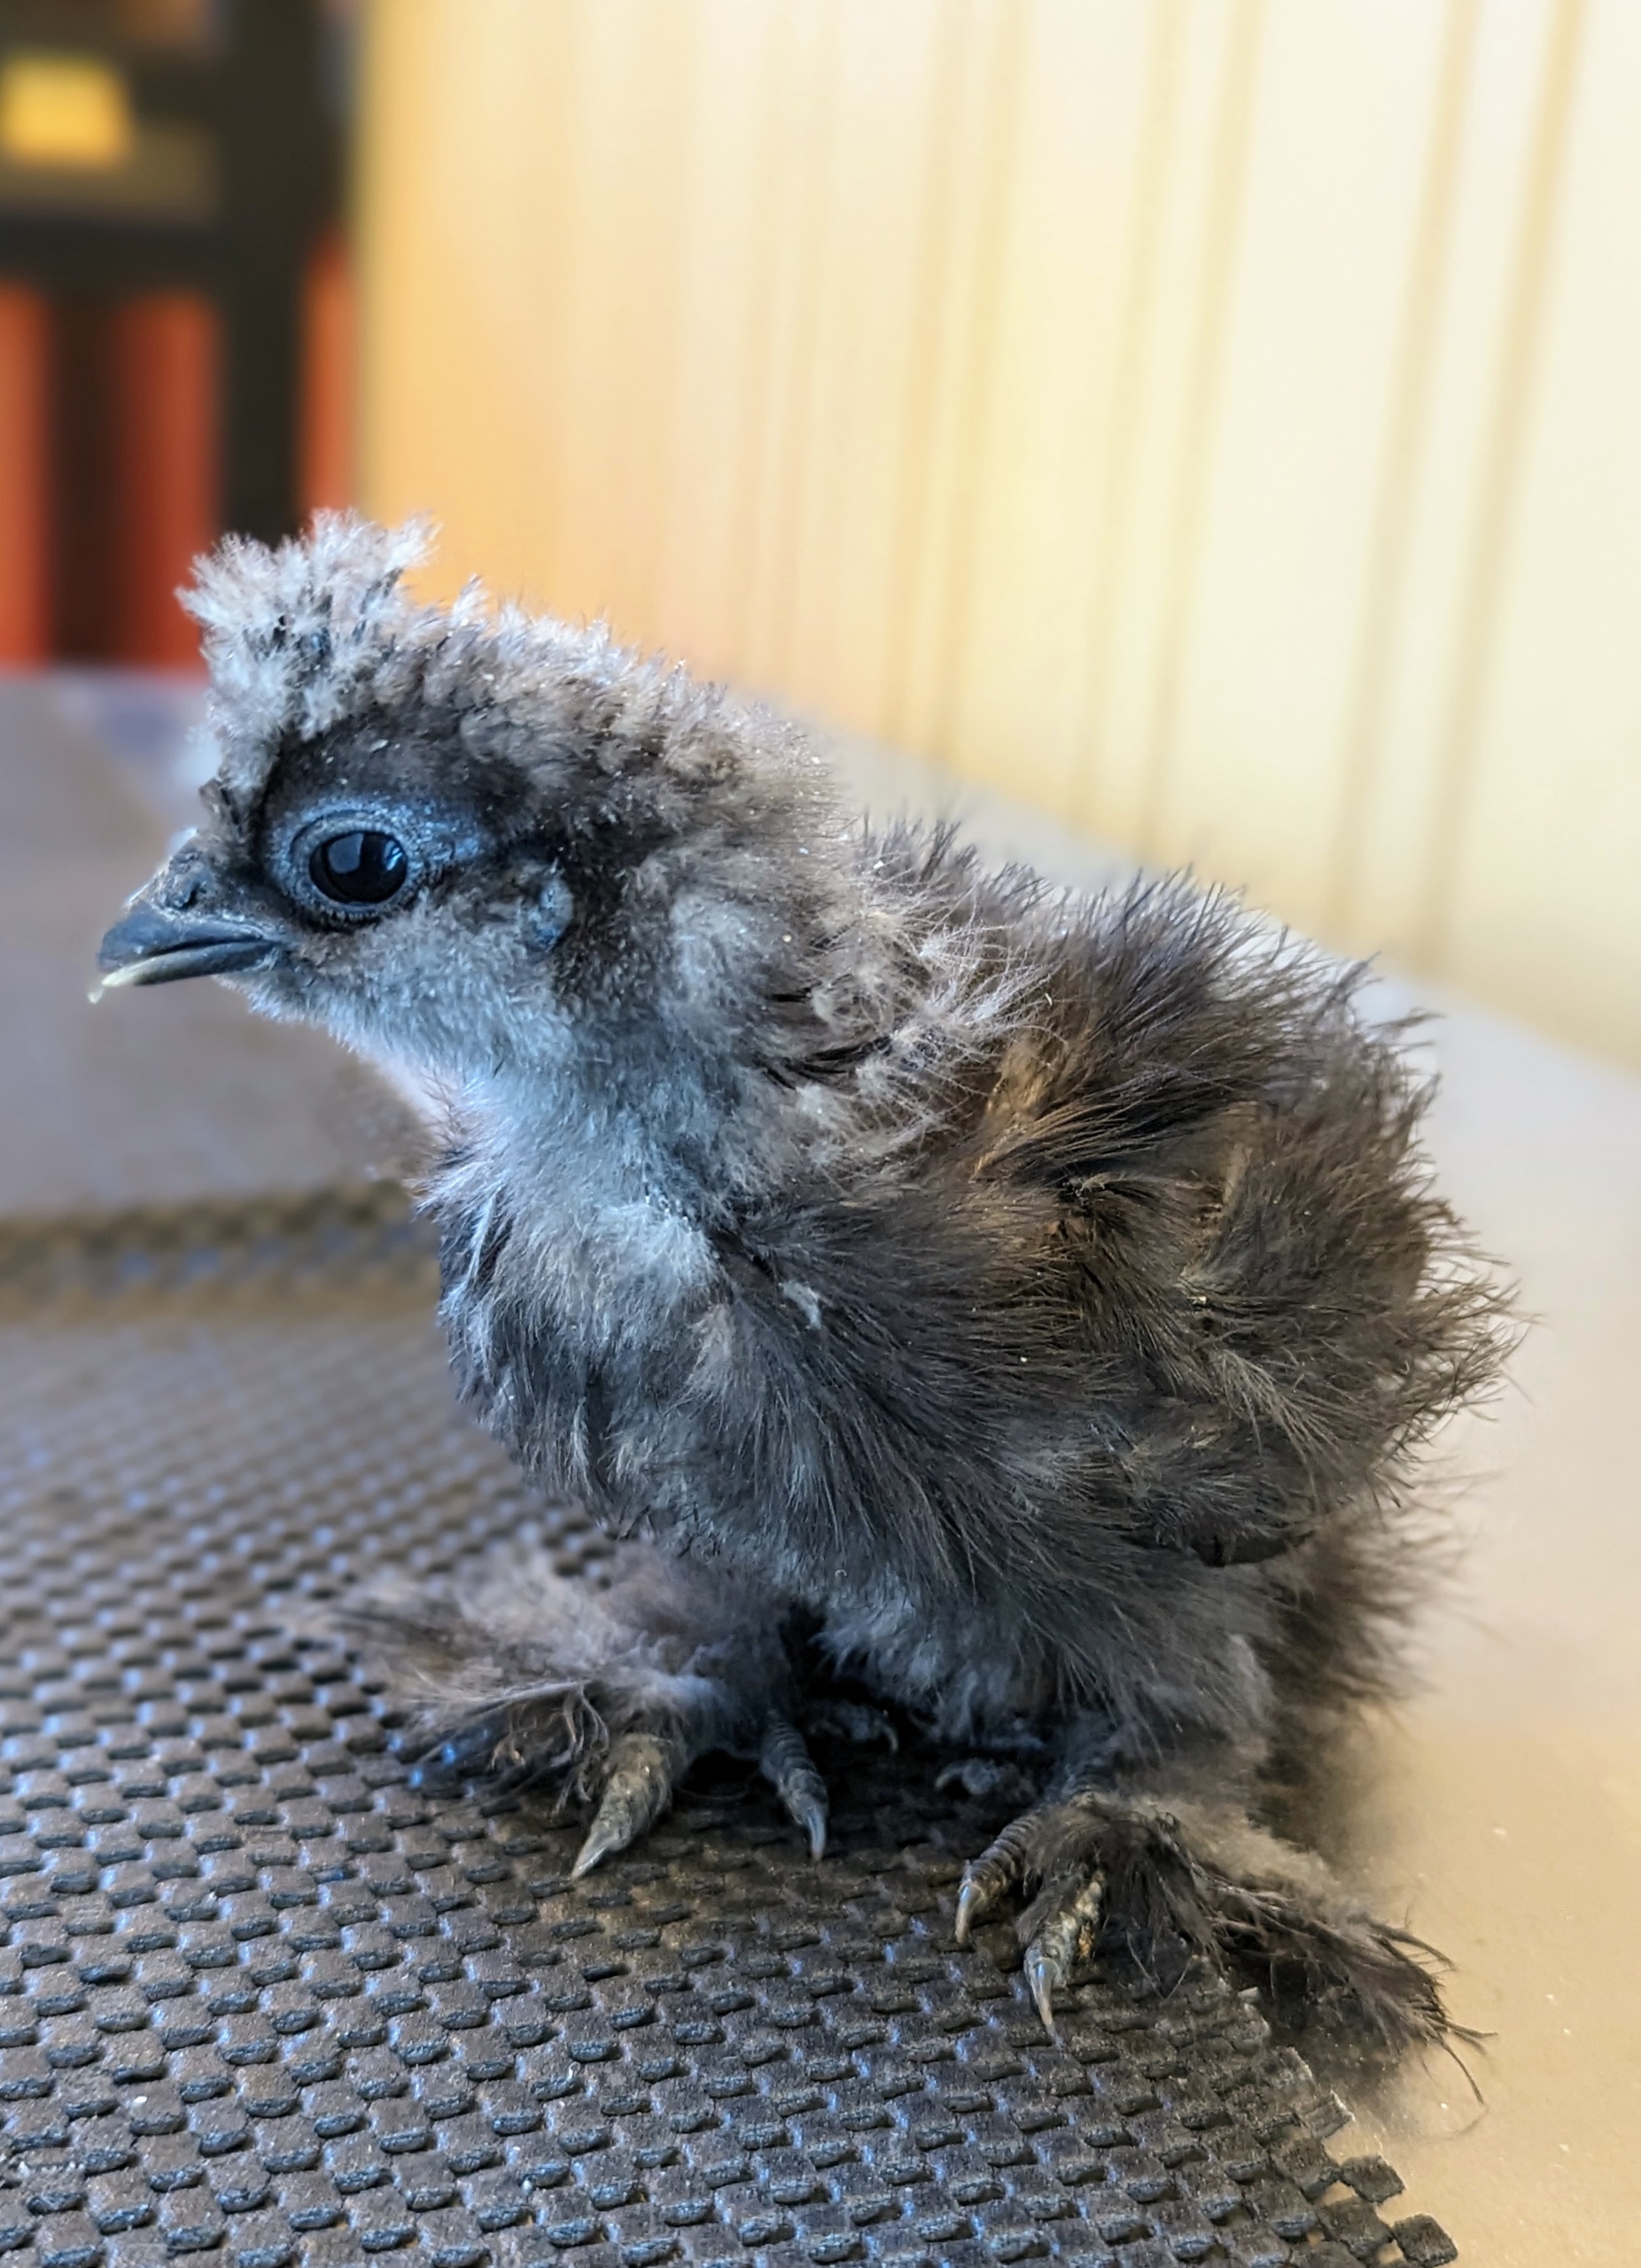
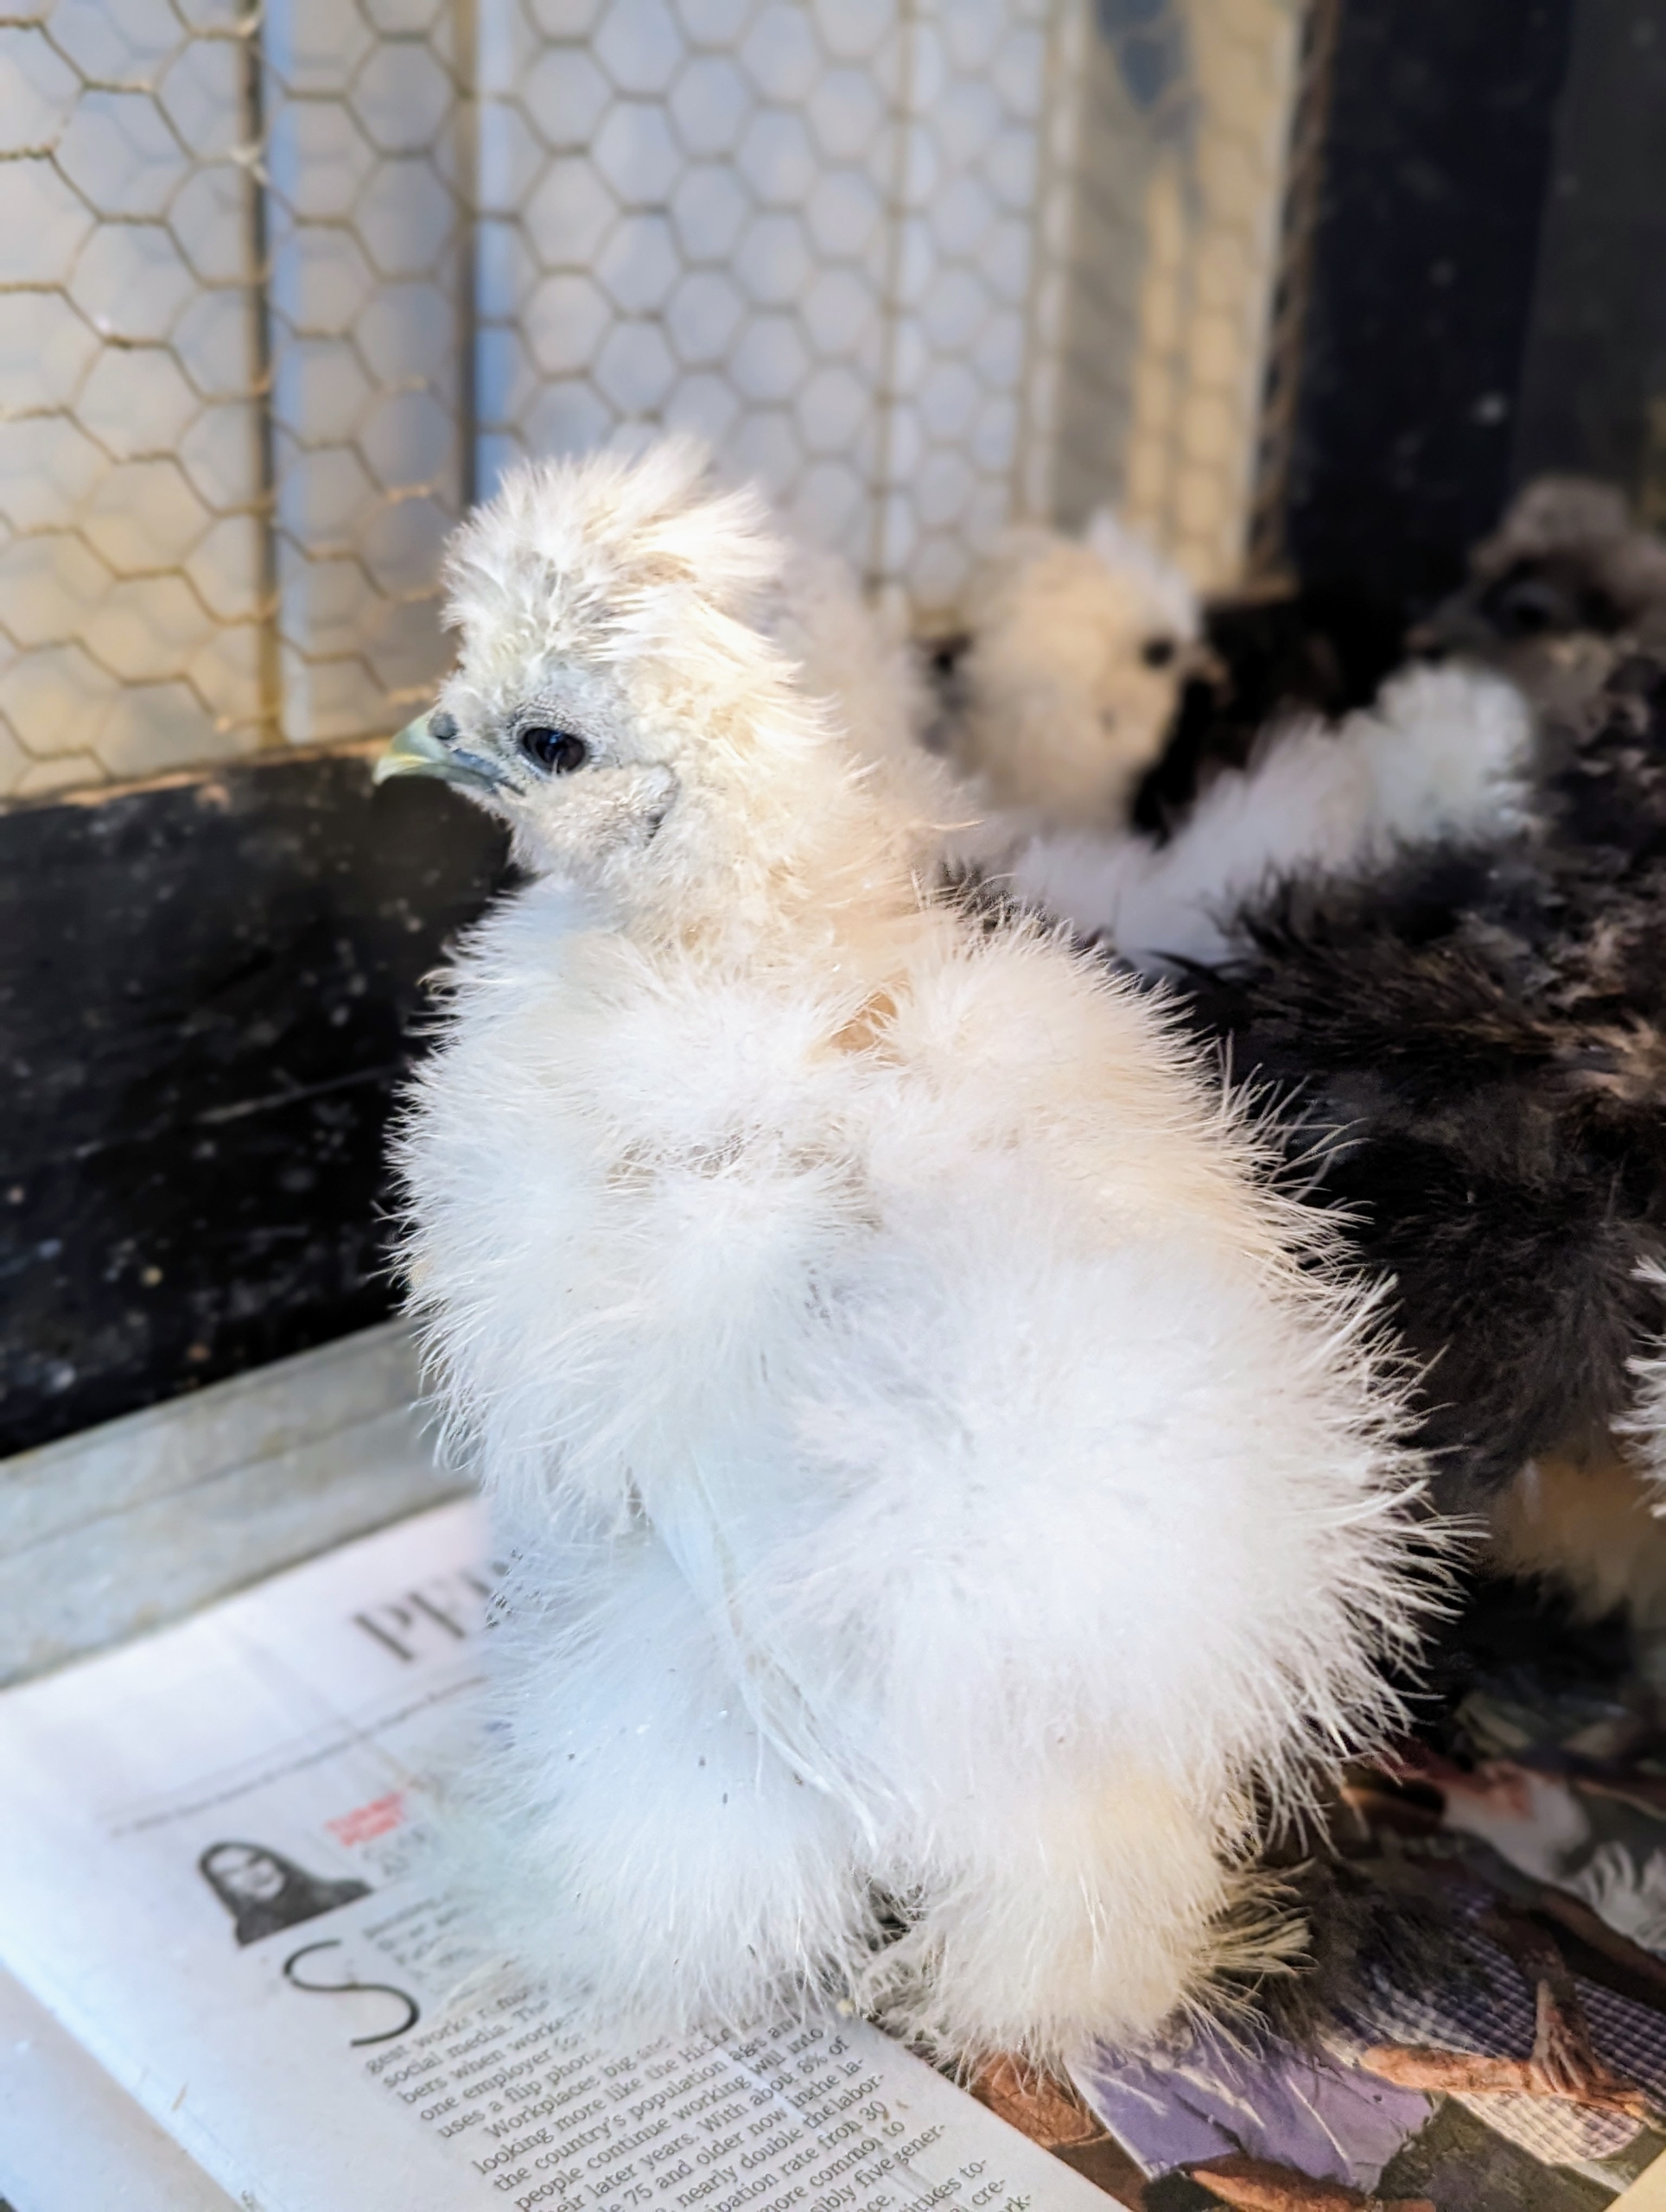
I love raising all kinds of chickens. This Silkie peep hatched early last month right here in my stable feed room.
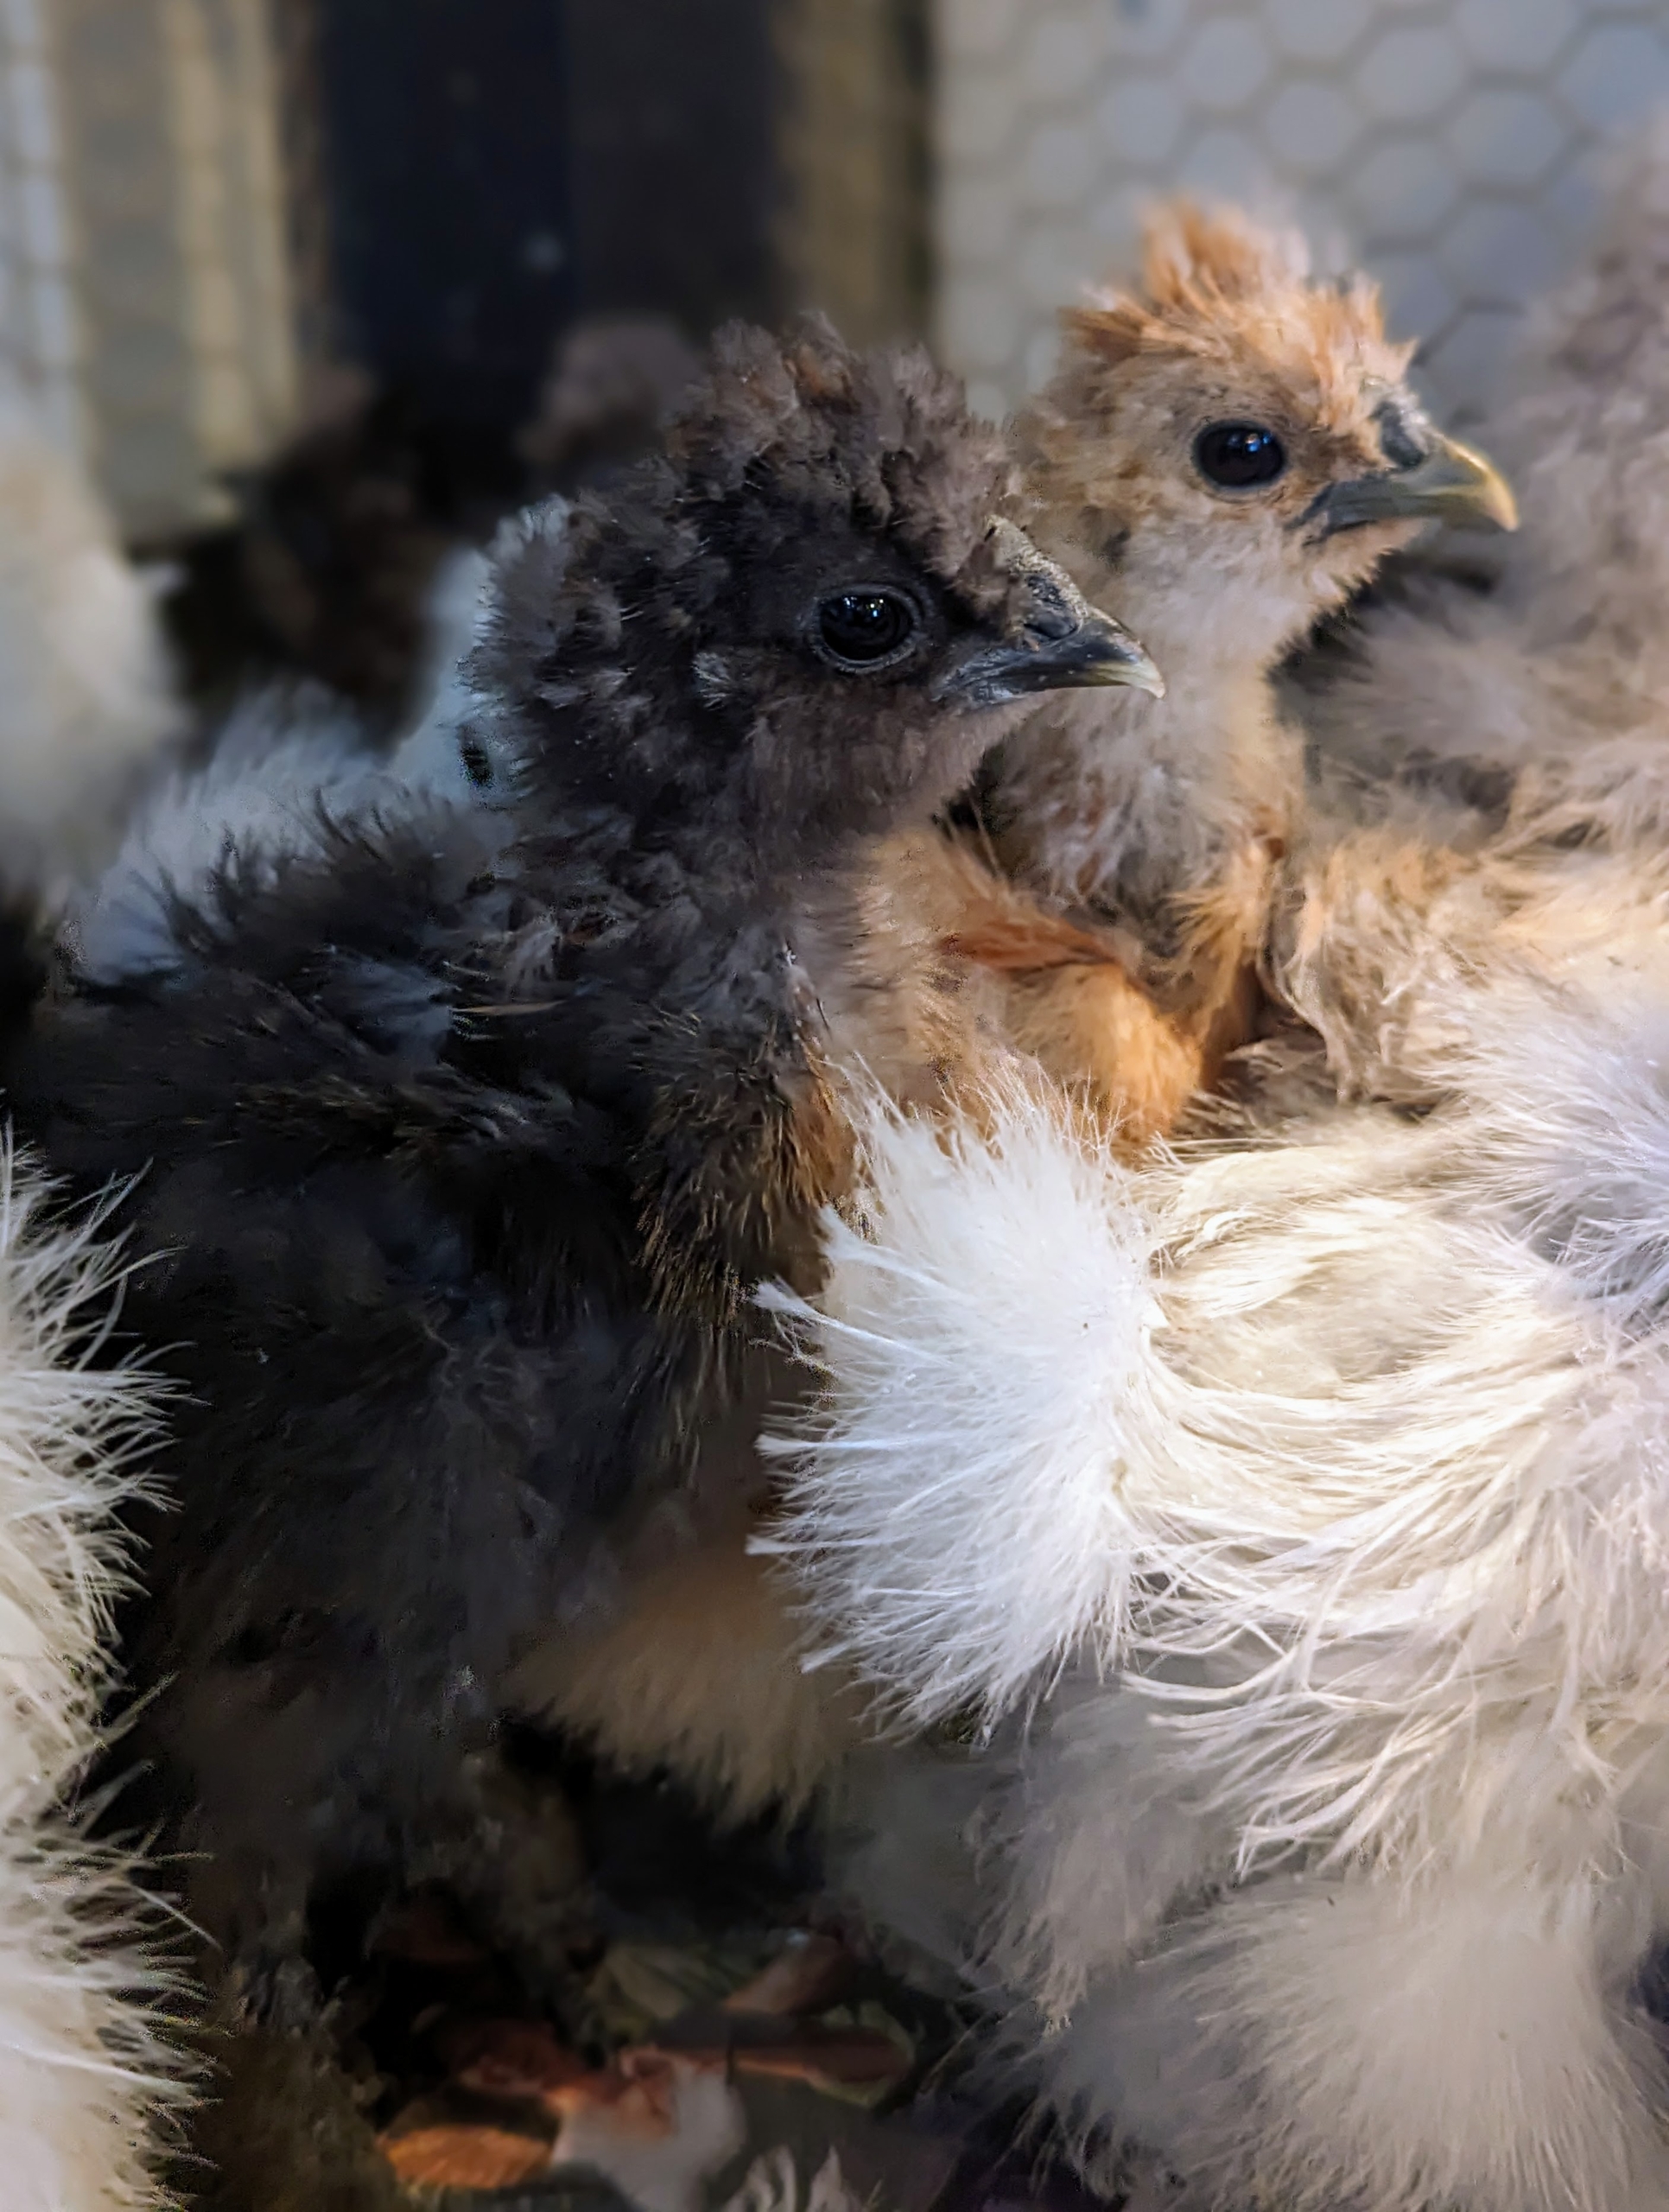
They grow quickly. Here, these chicks are about three weeks old.
The Silkie, also known as the Silky or Chinese silk chicken, is a breed of chicken named for its atypically fluffy, satin-like plumage.
This breed is very calm and friendly.
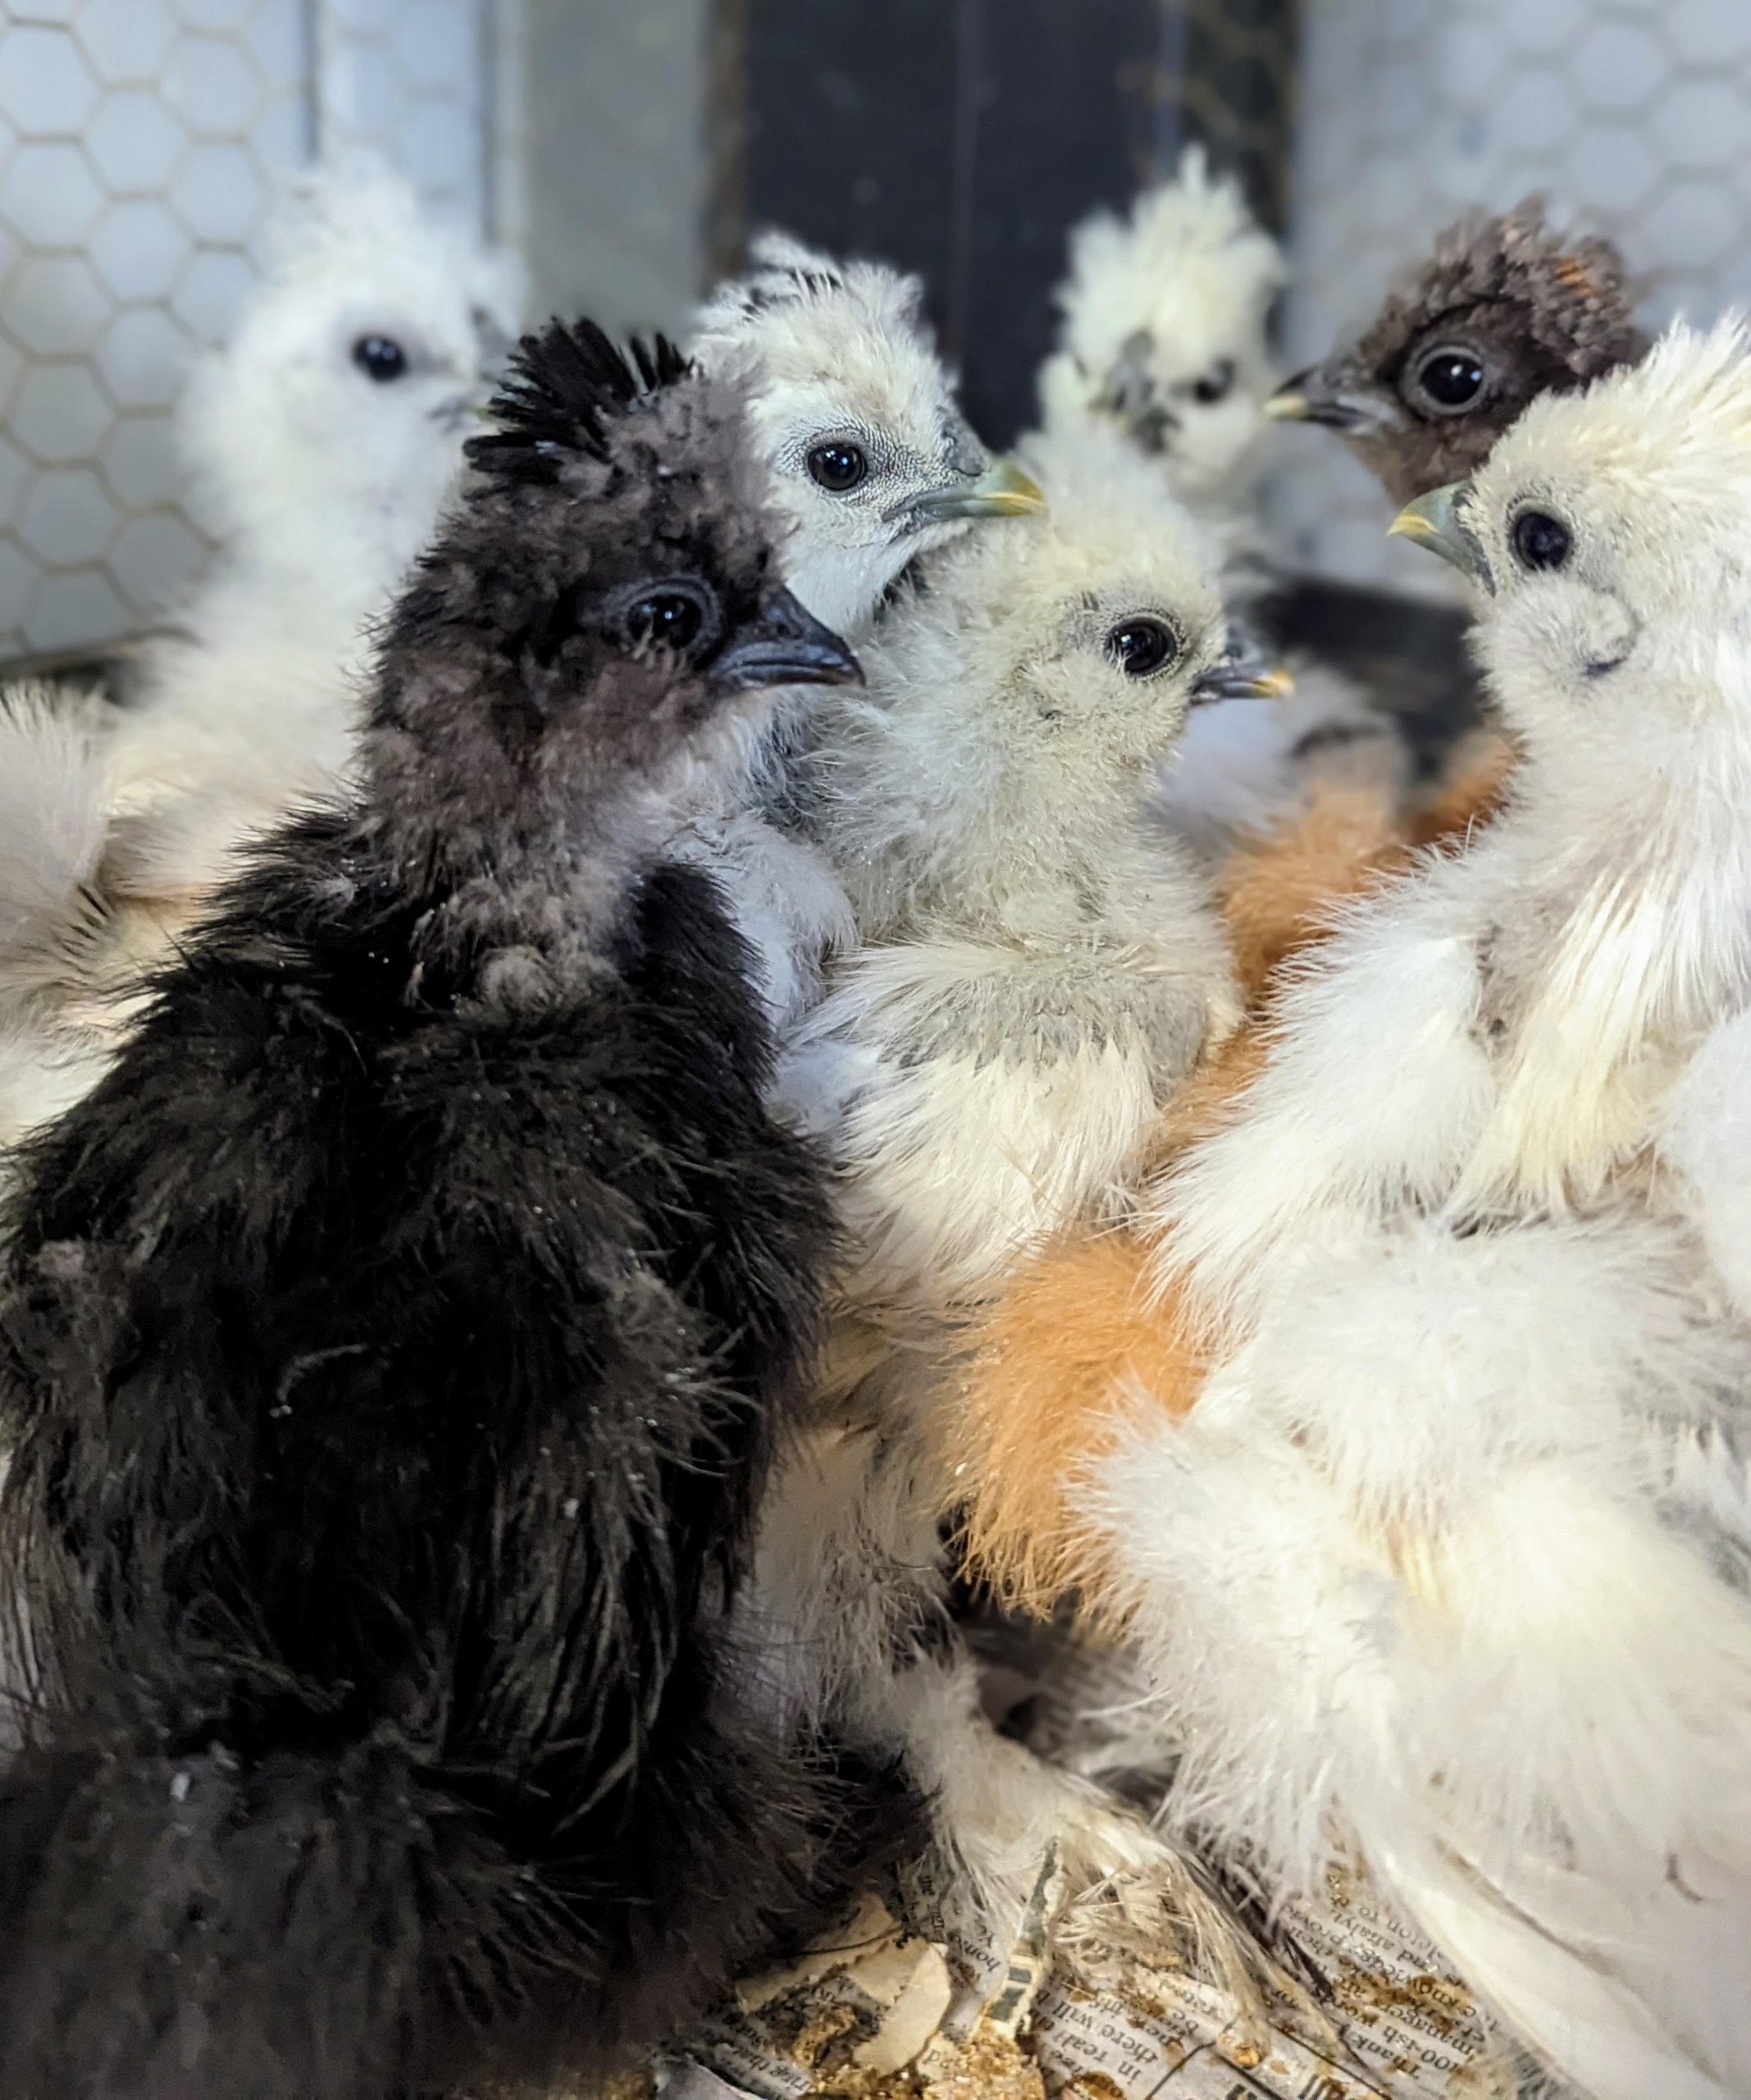
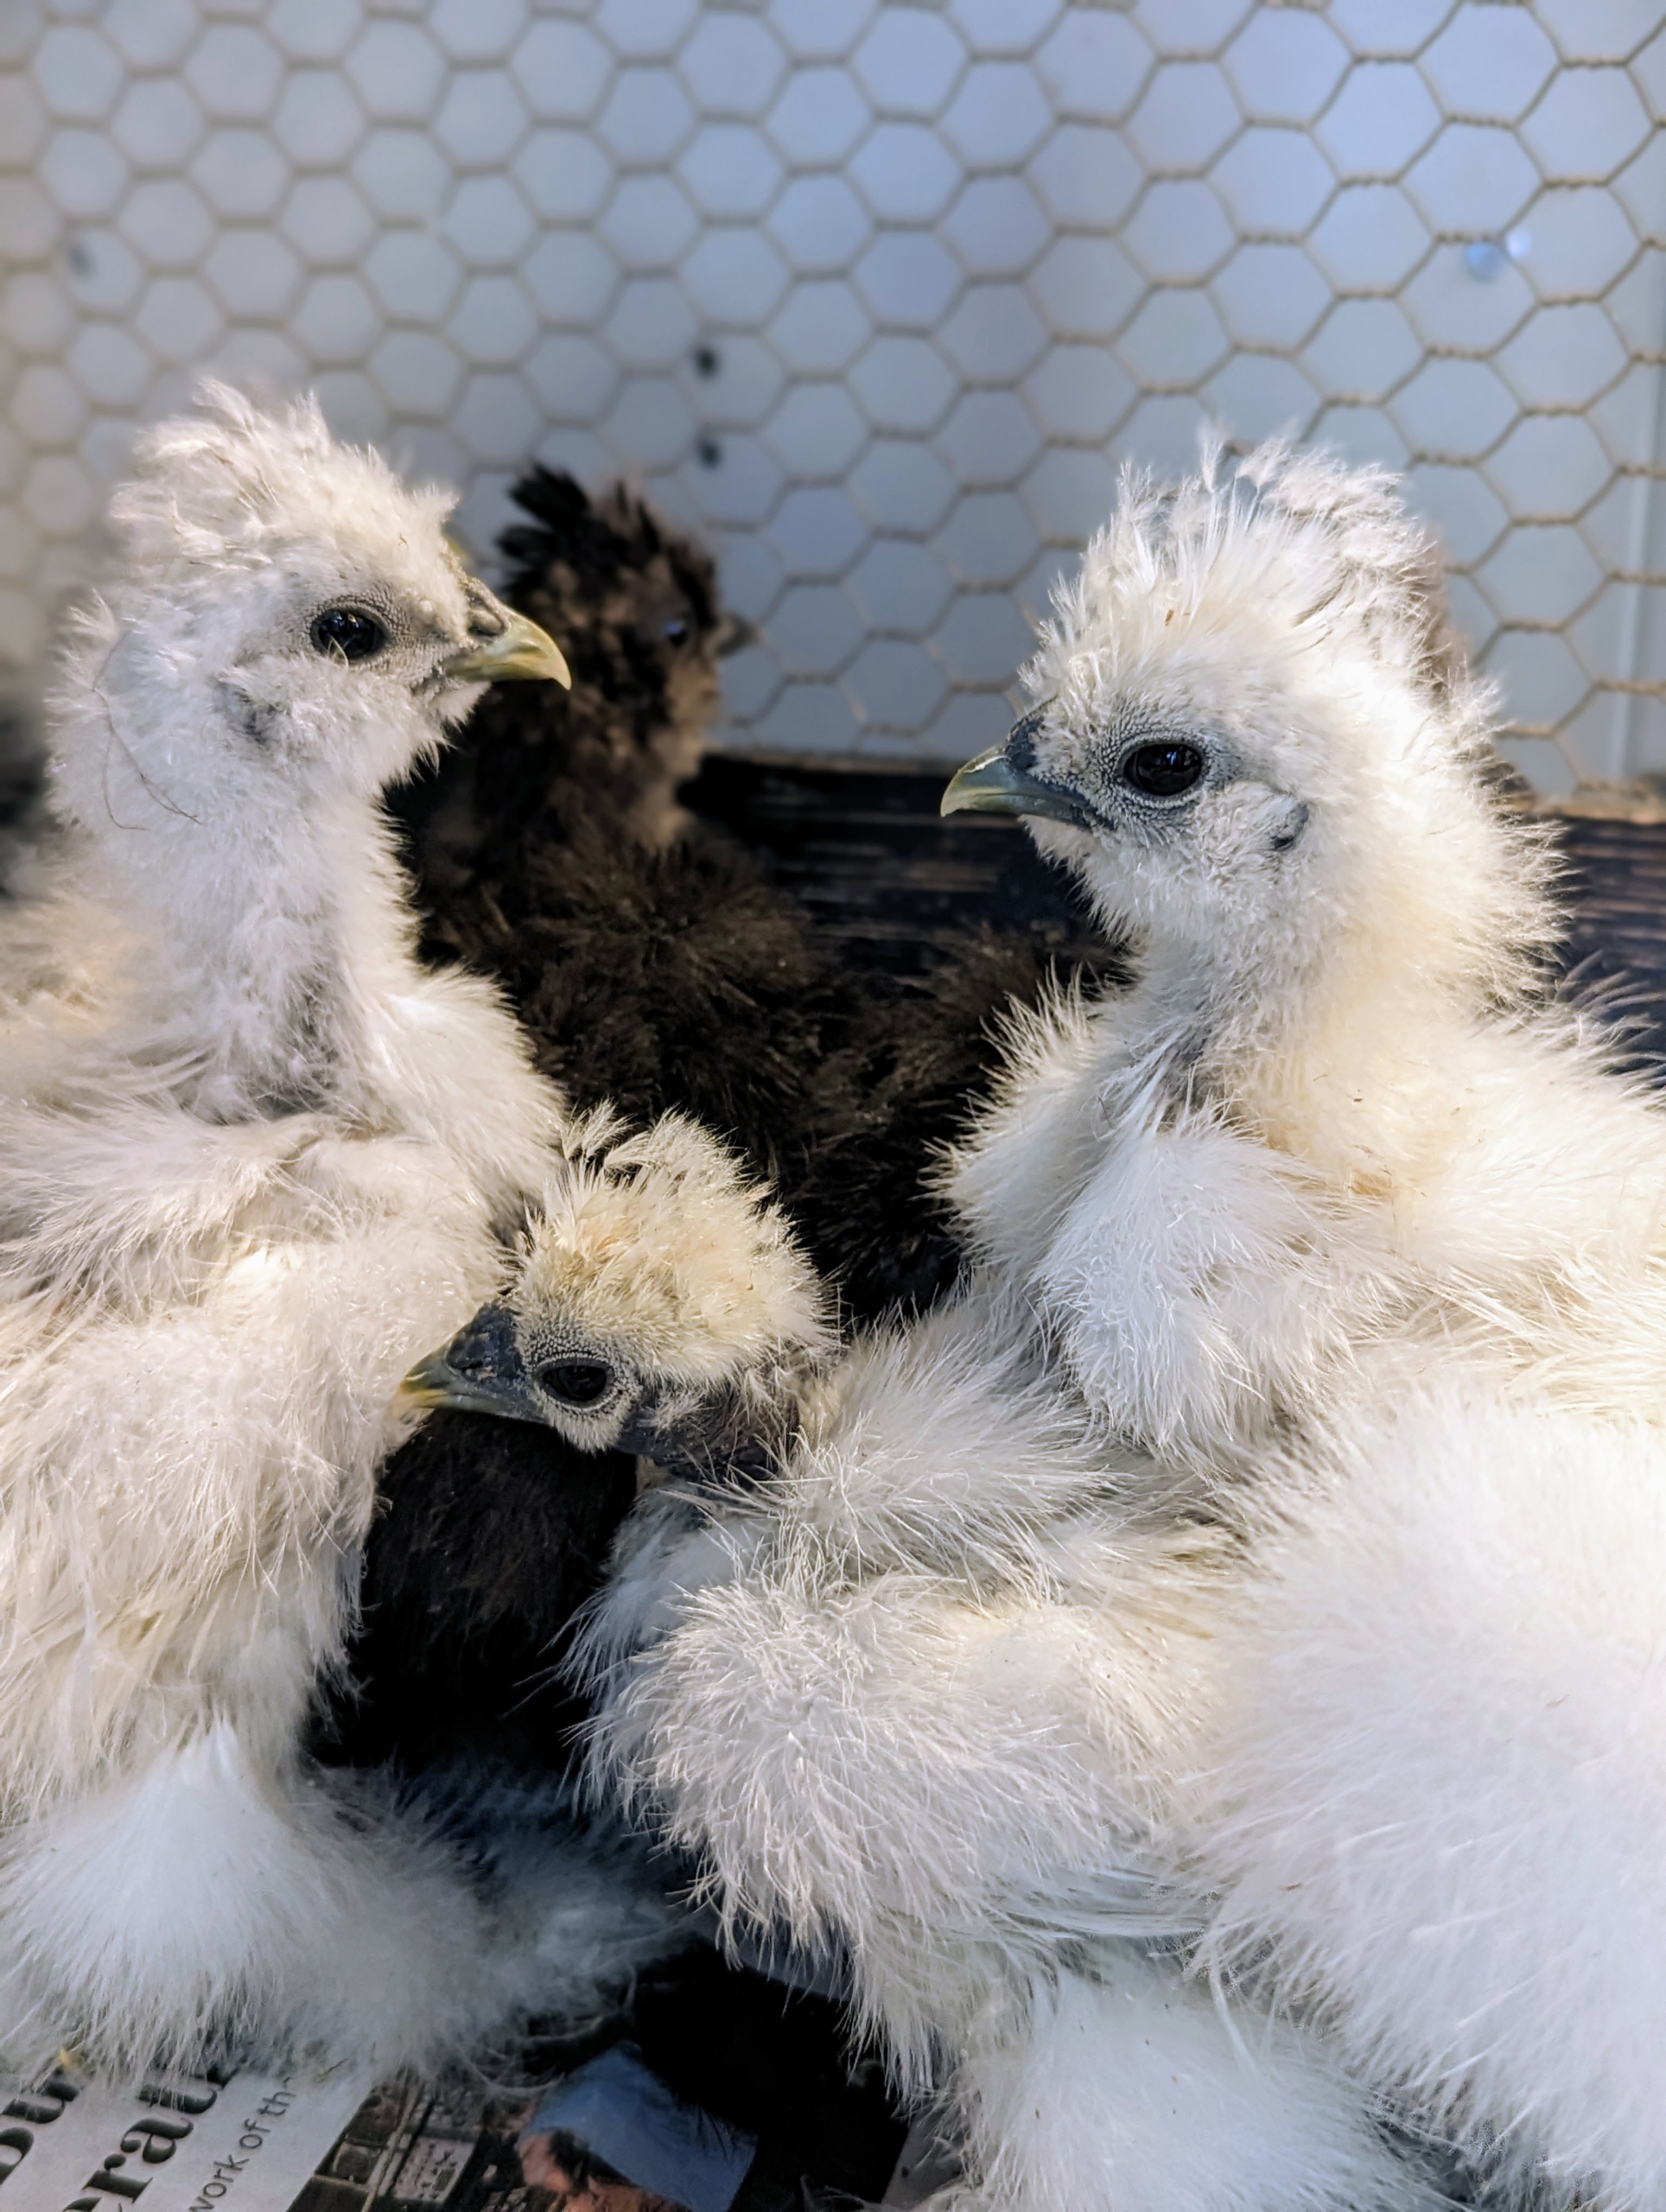
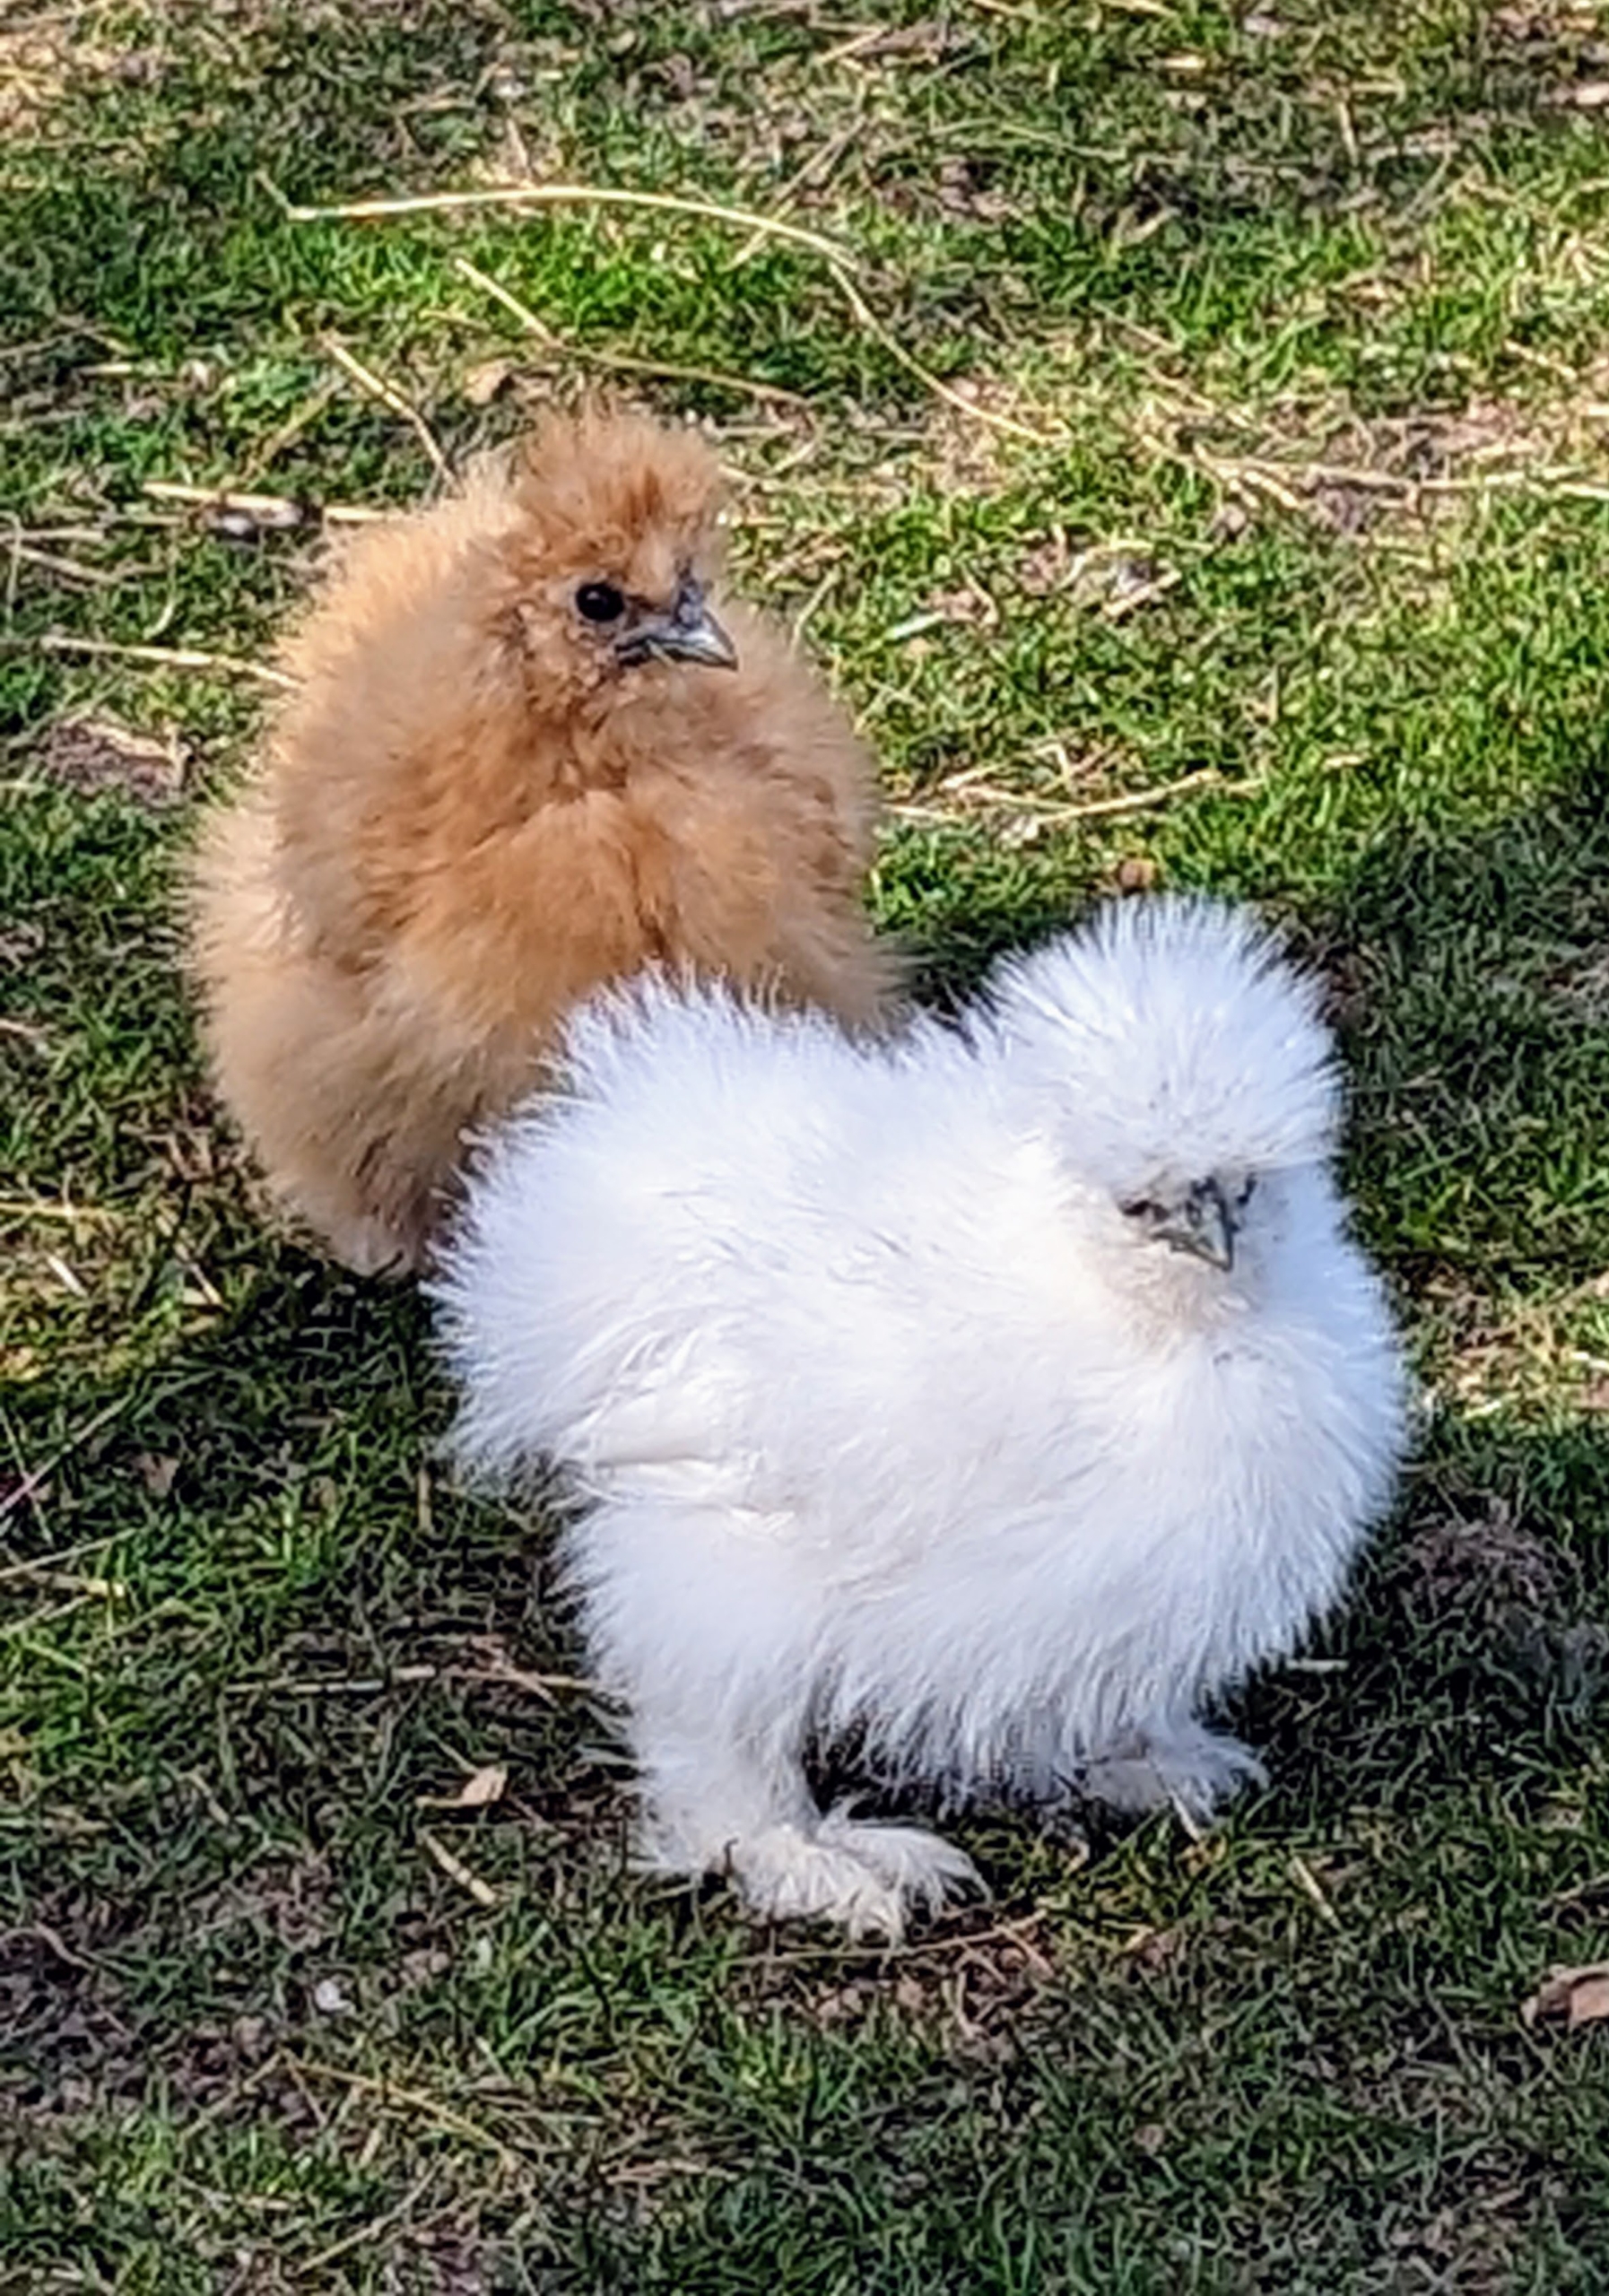
There are eight Silkie color varieties accepted by the American Poultry Association. They include black, blue, buff, gray, partridge, splash, and white.
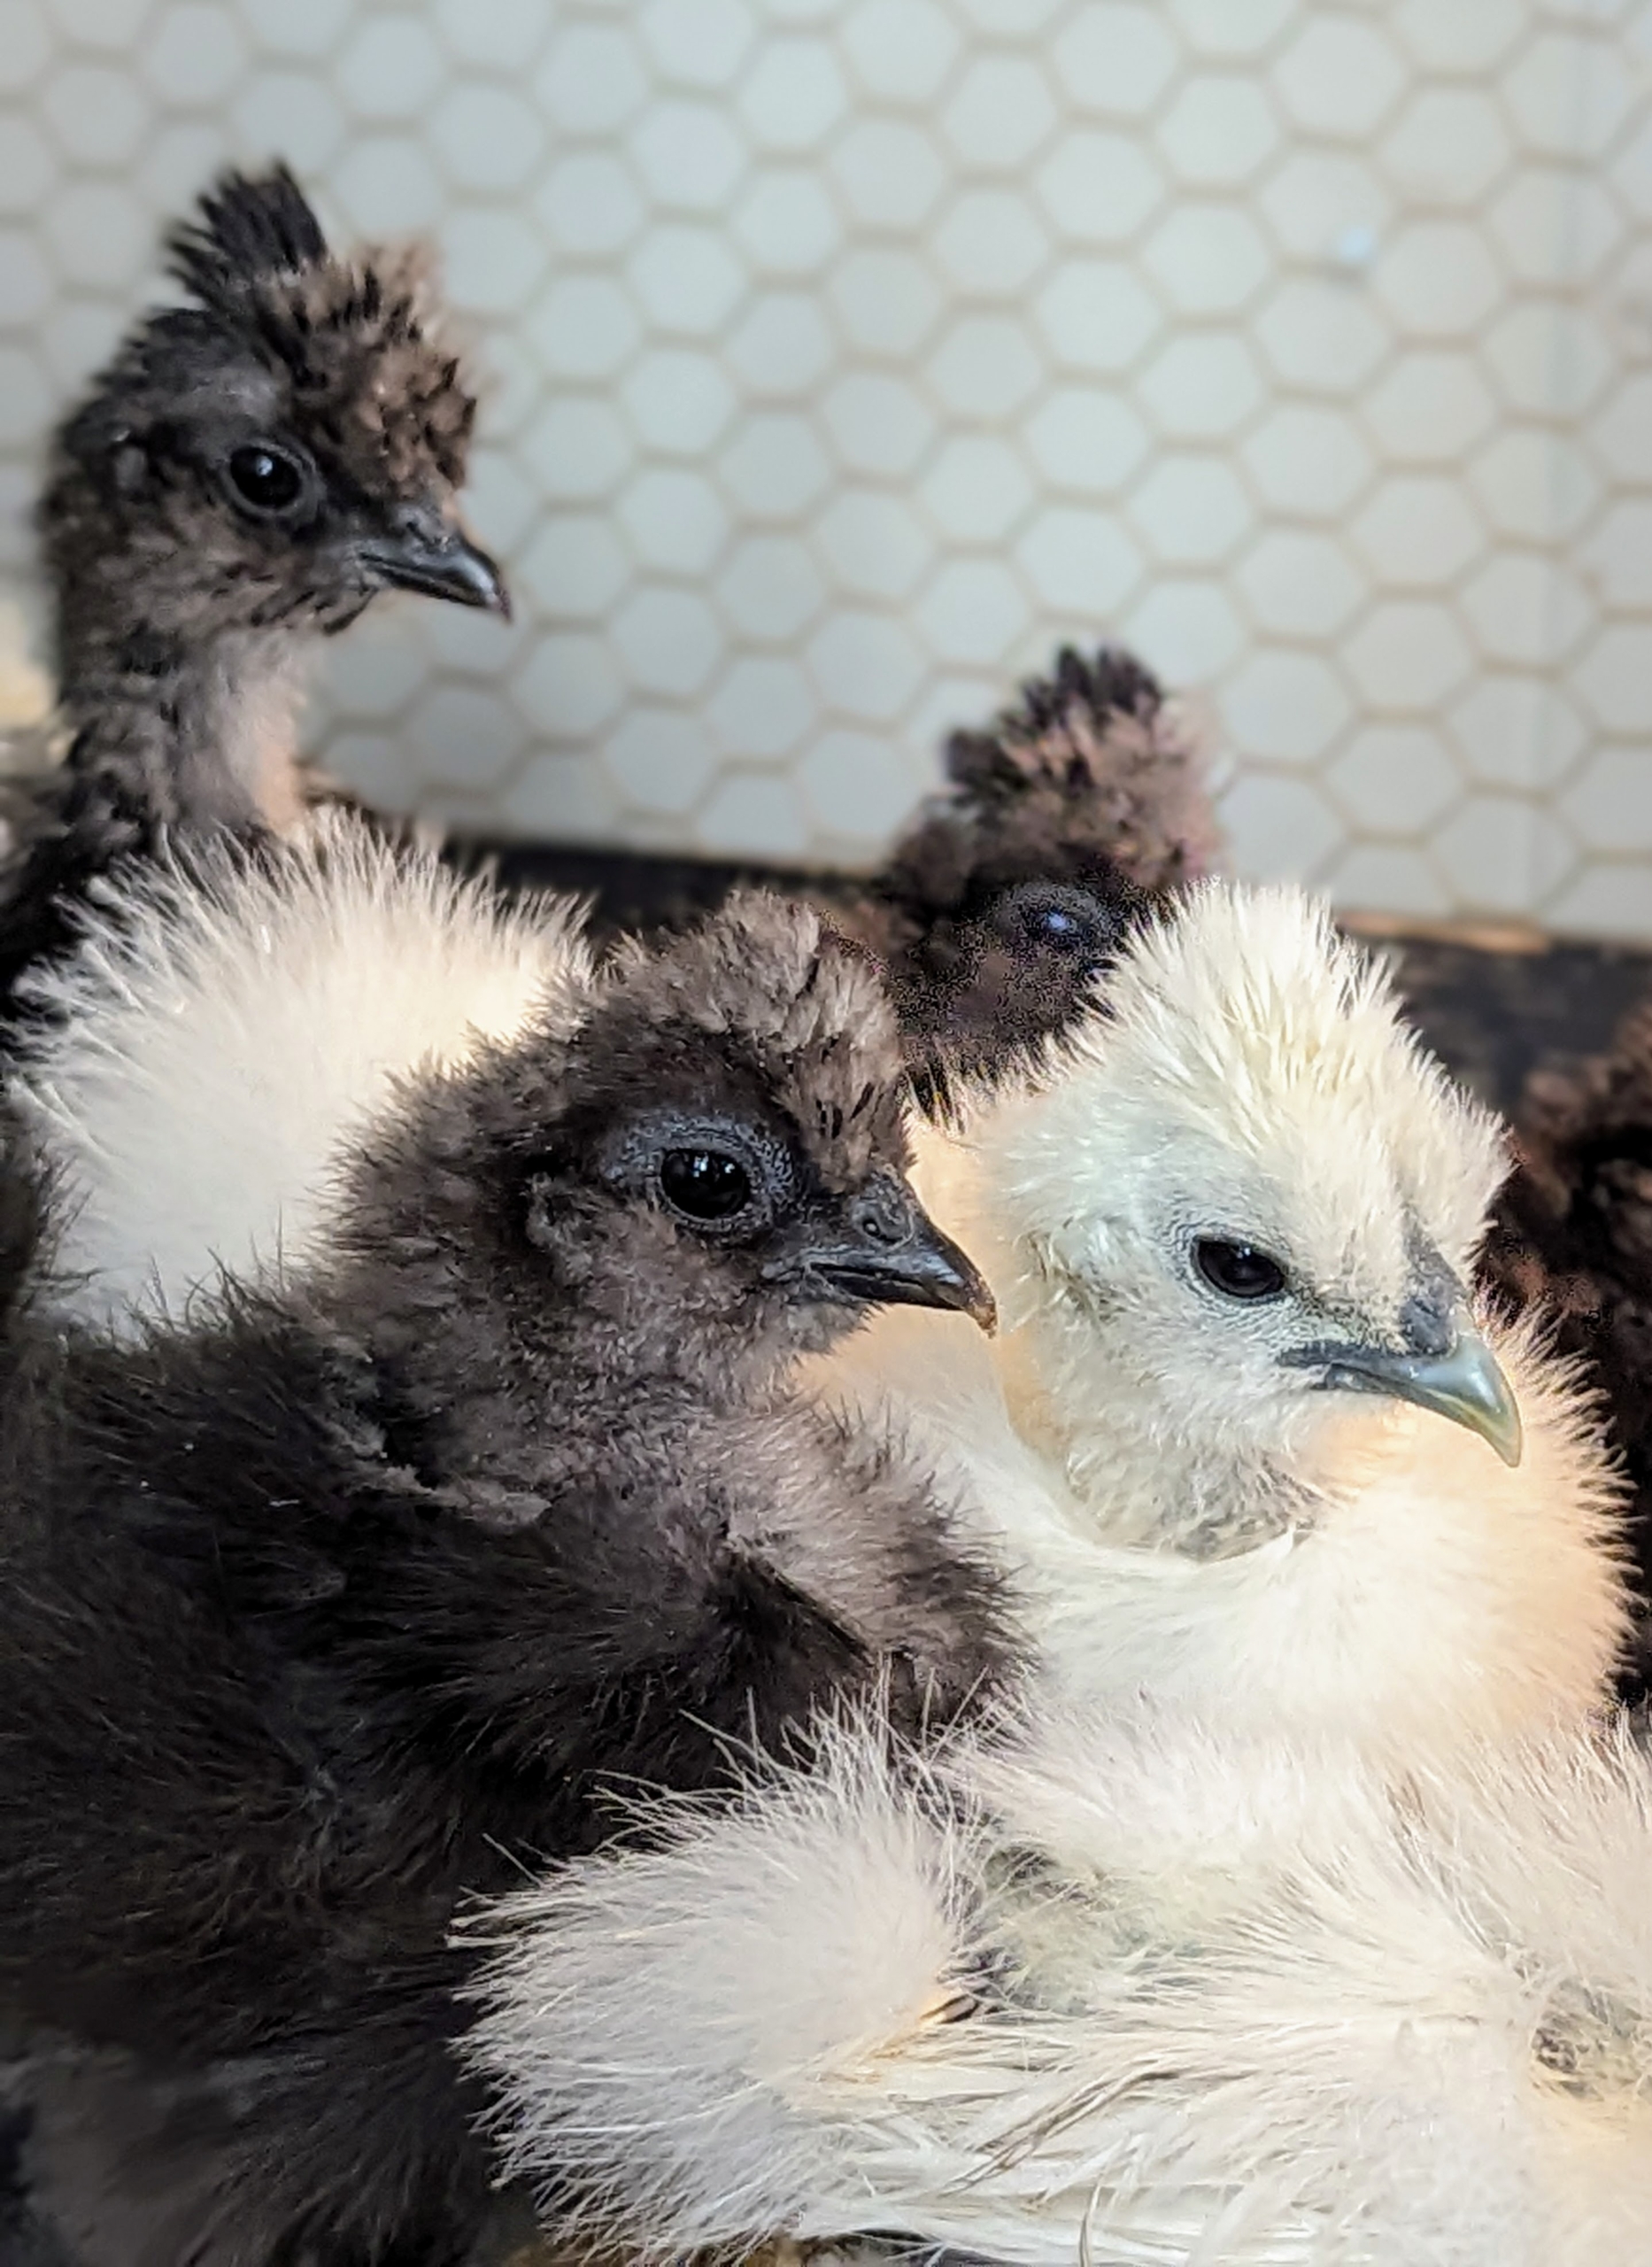
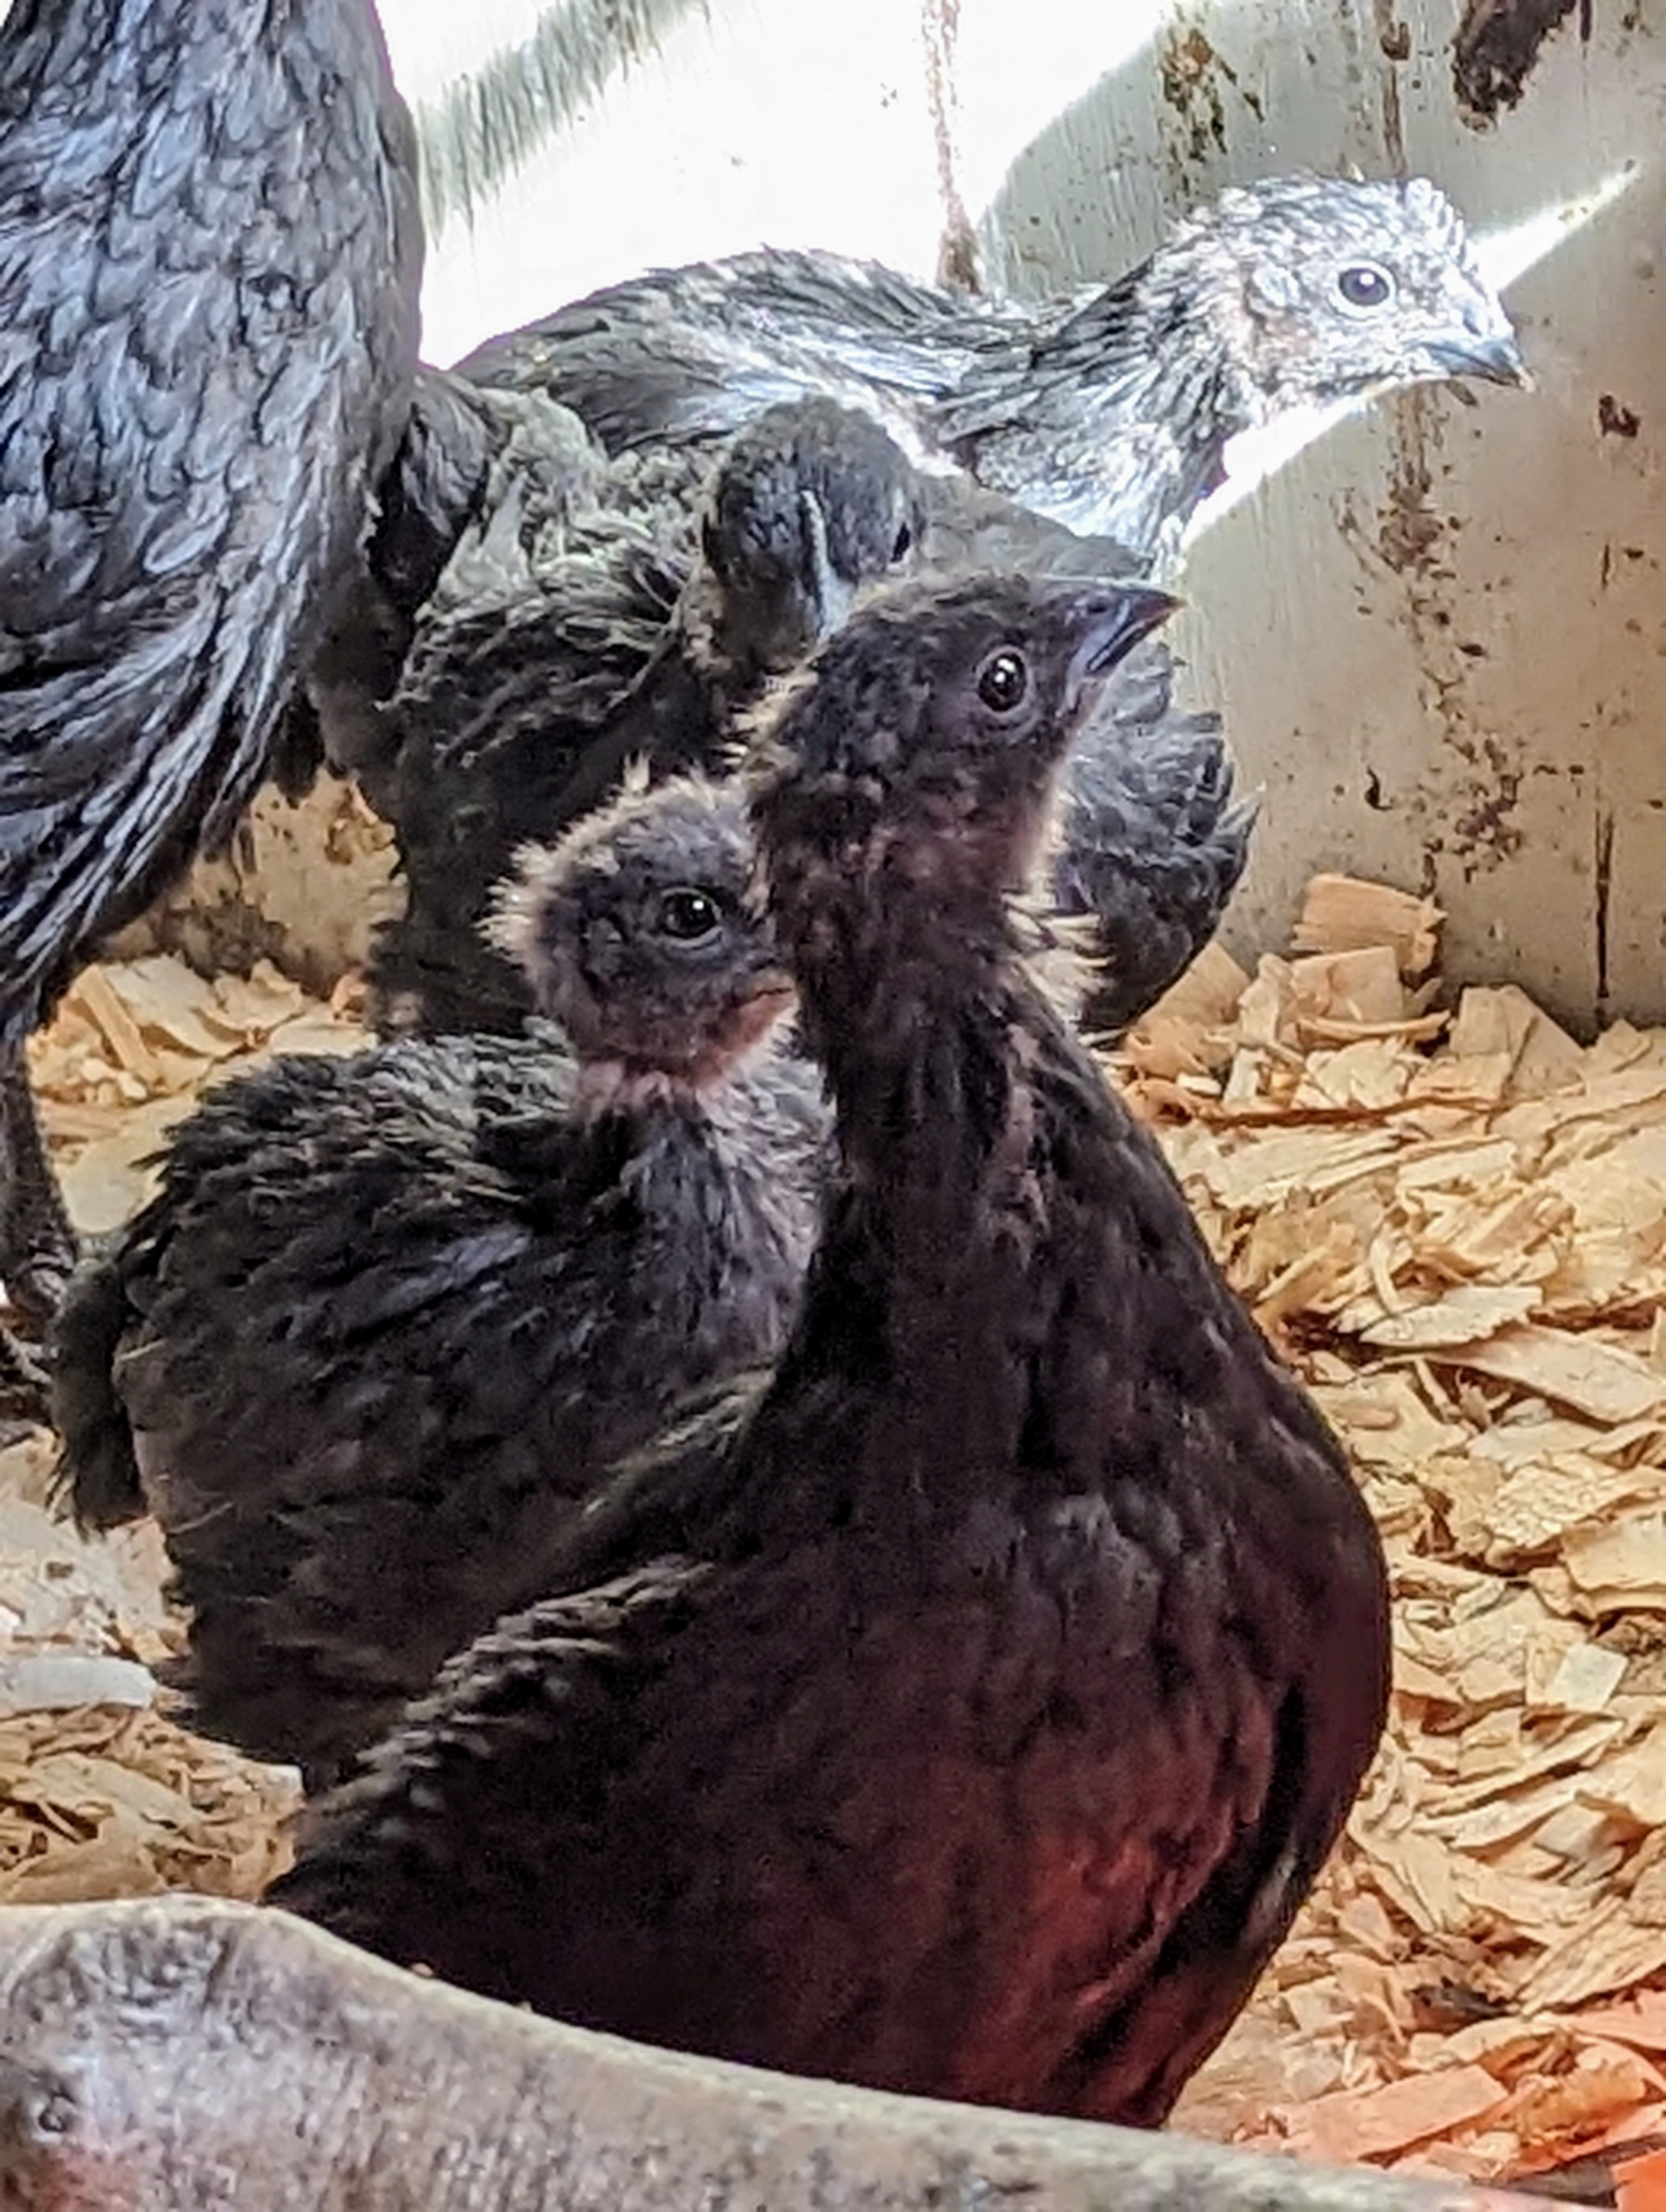
All these chicks have clear eyes and are very alert – signs of good health.
Silkies have black eyes, dark beaks, combs, and wattles.
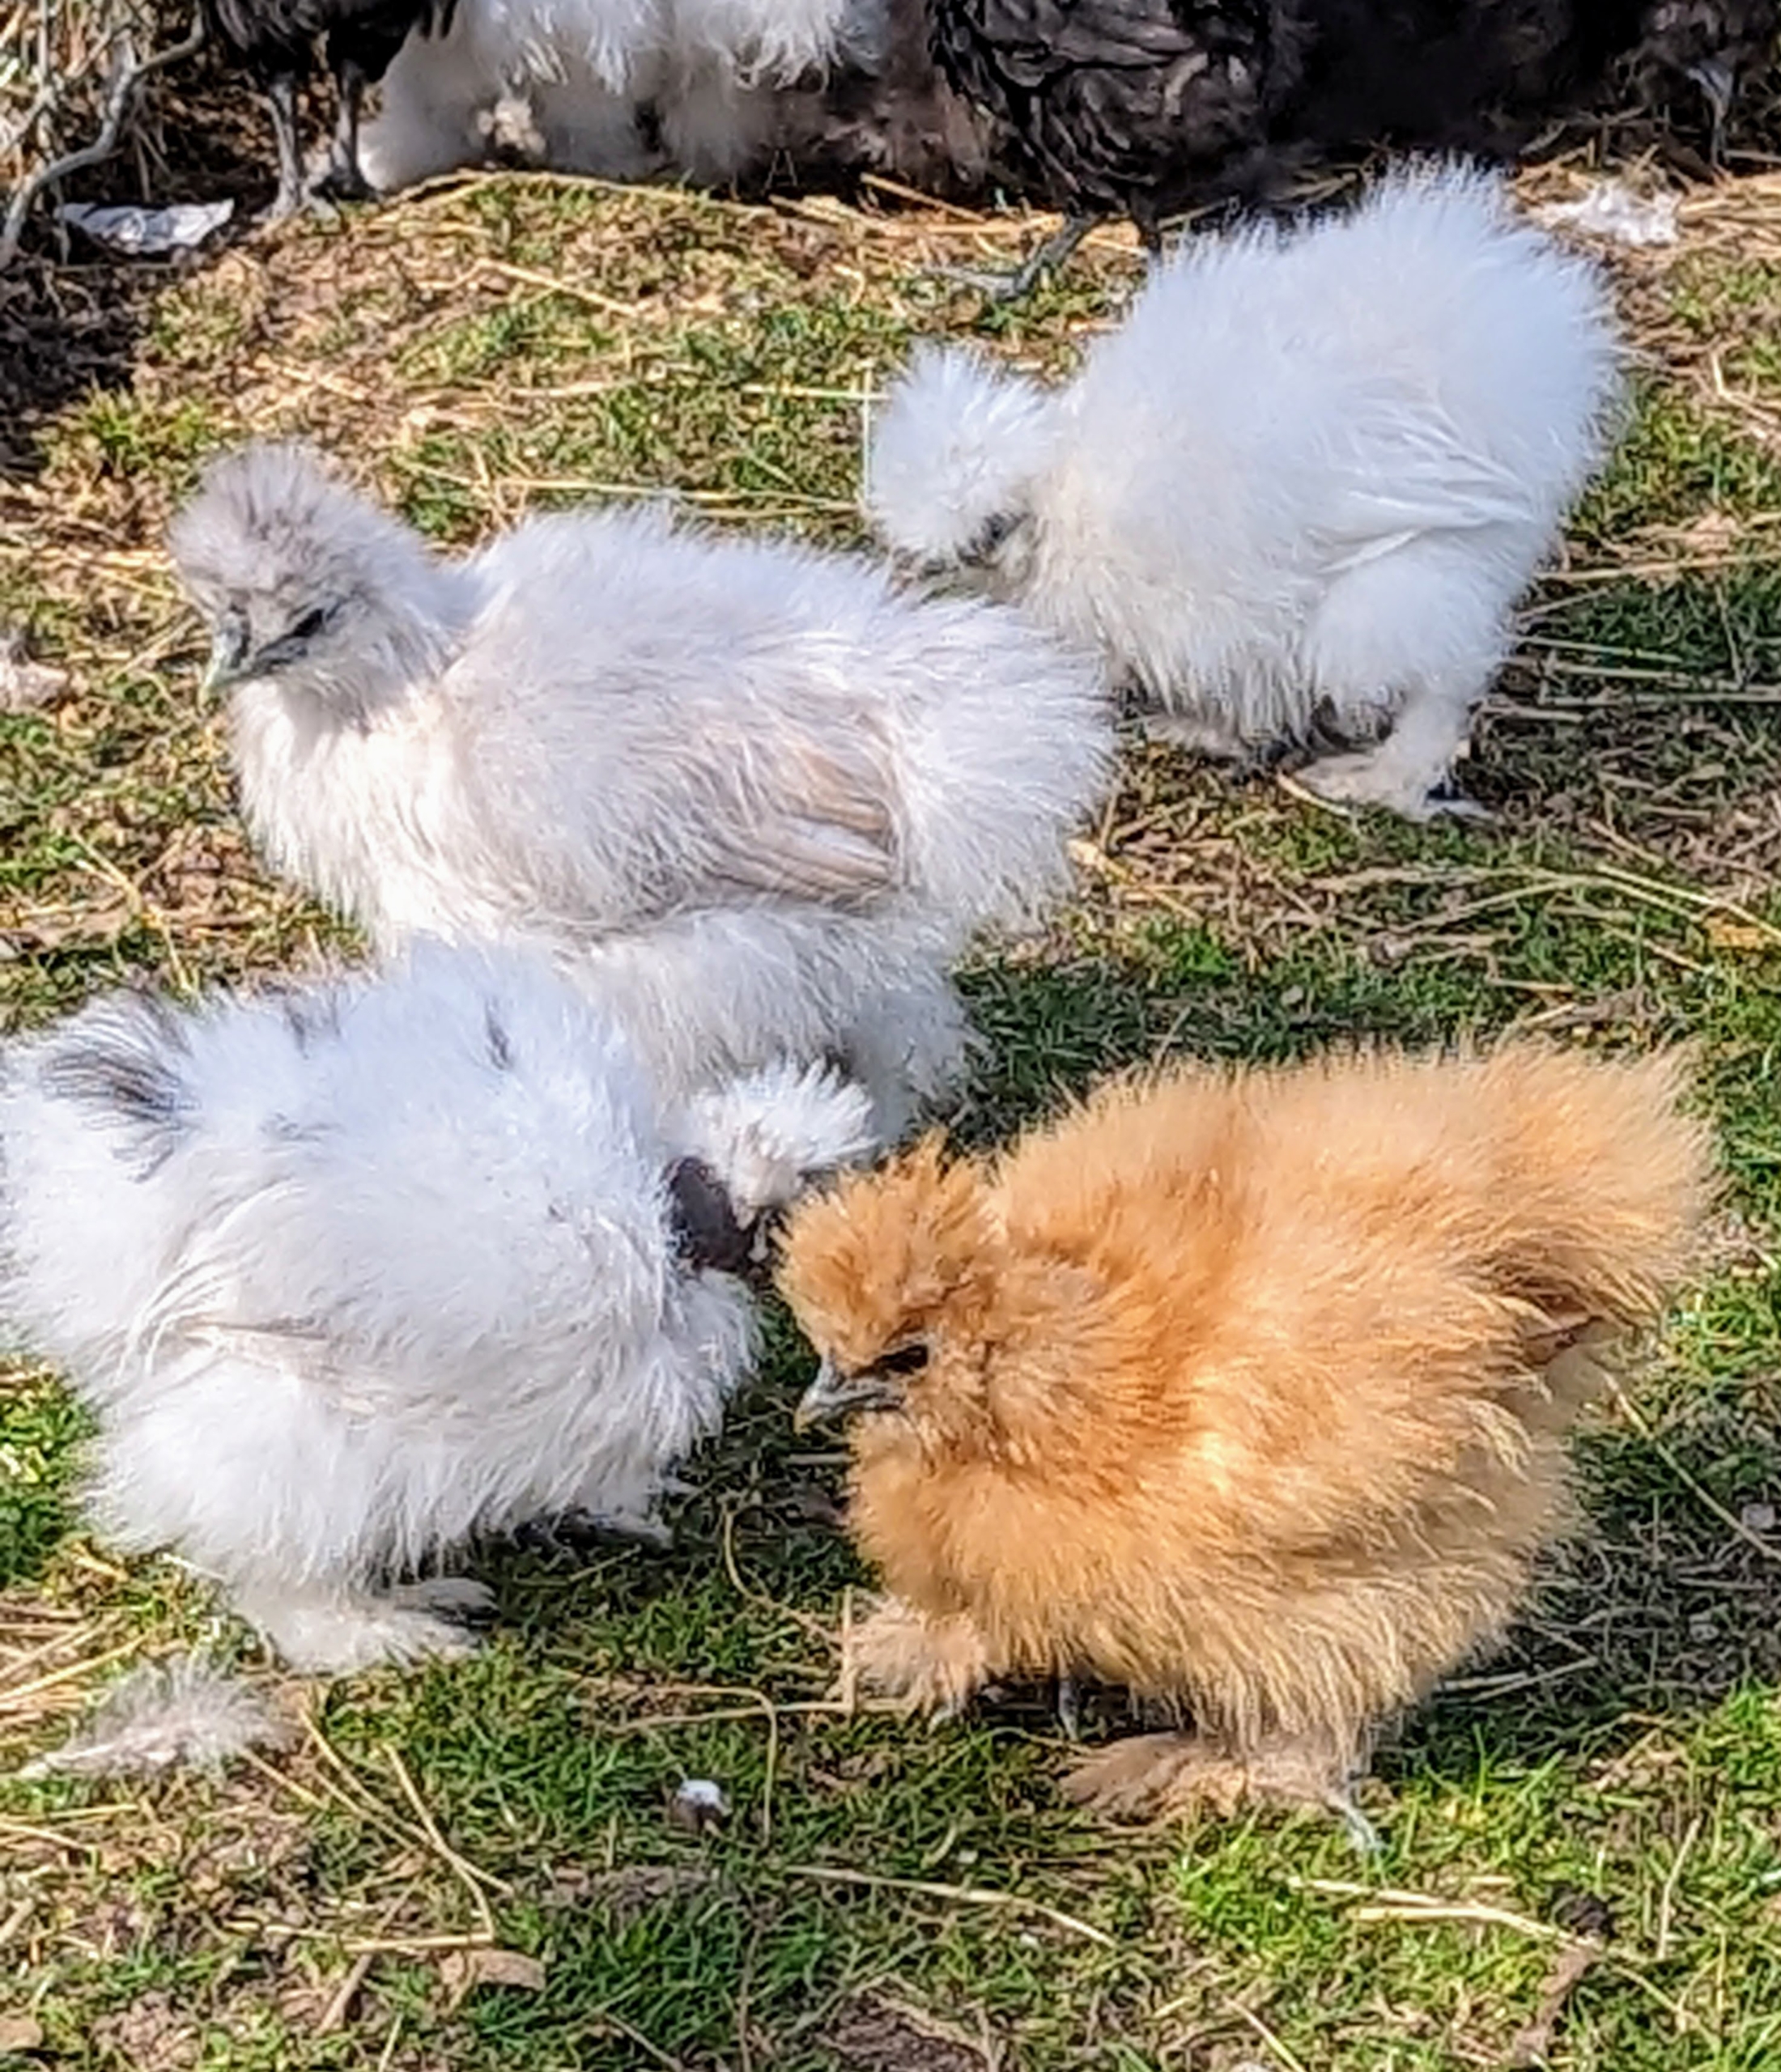
Underneath all that feathering, they also have black skin and bones and five toes instead of the typical four on each foot.
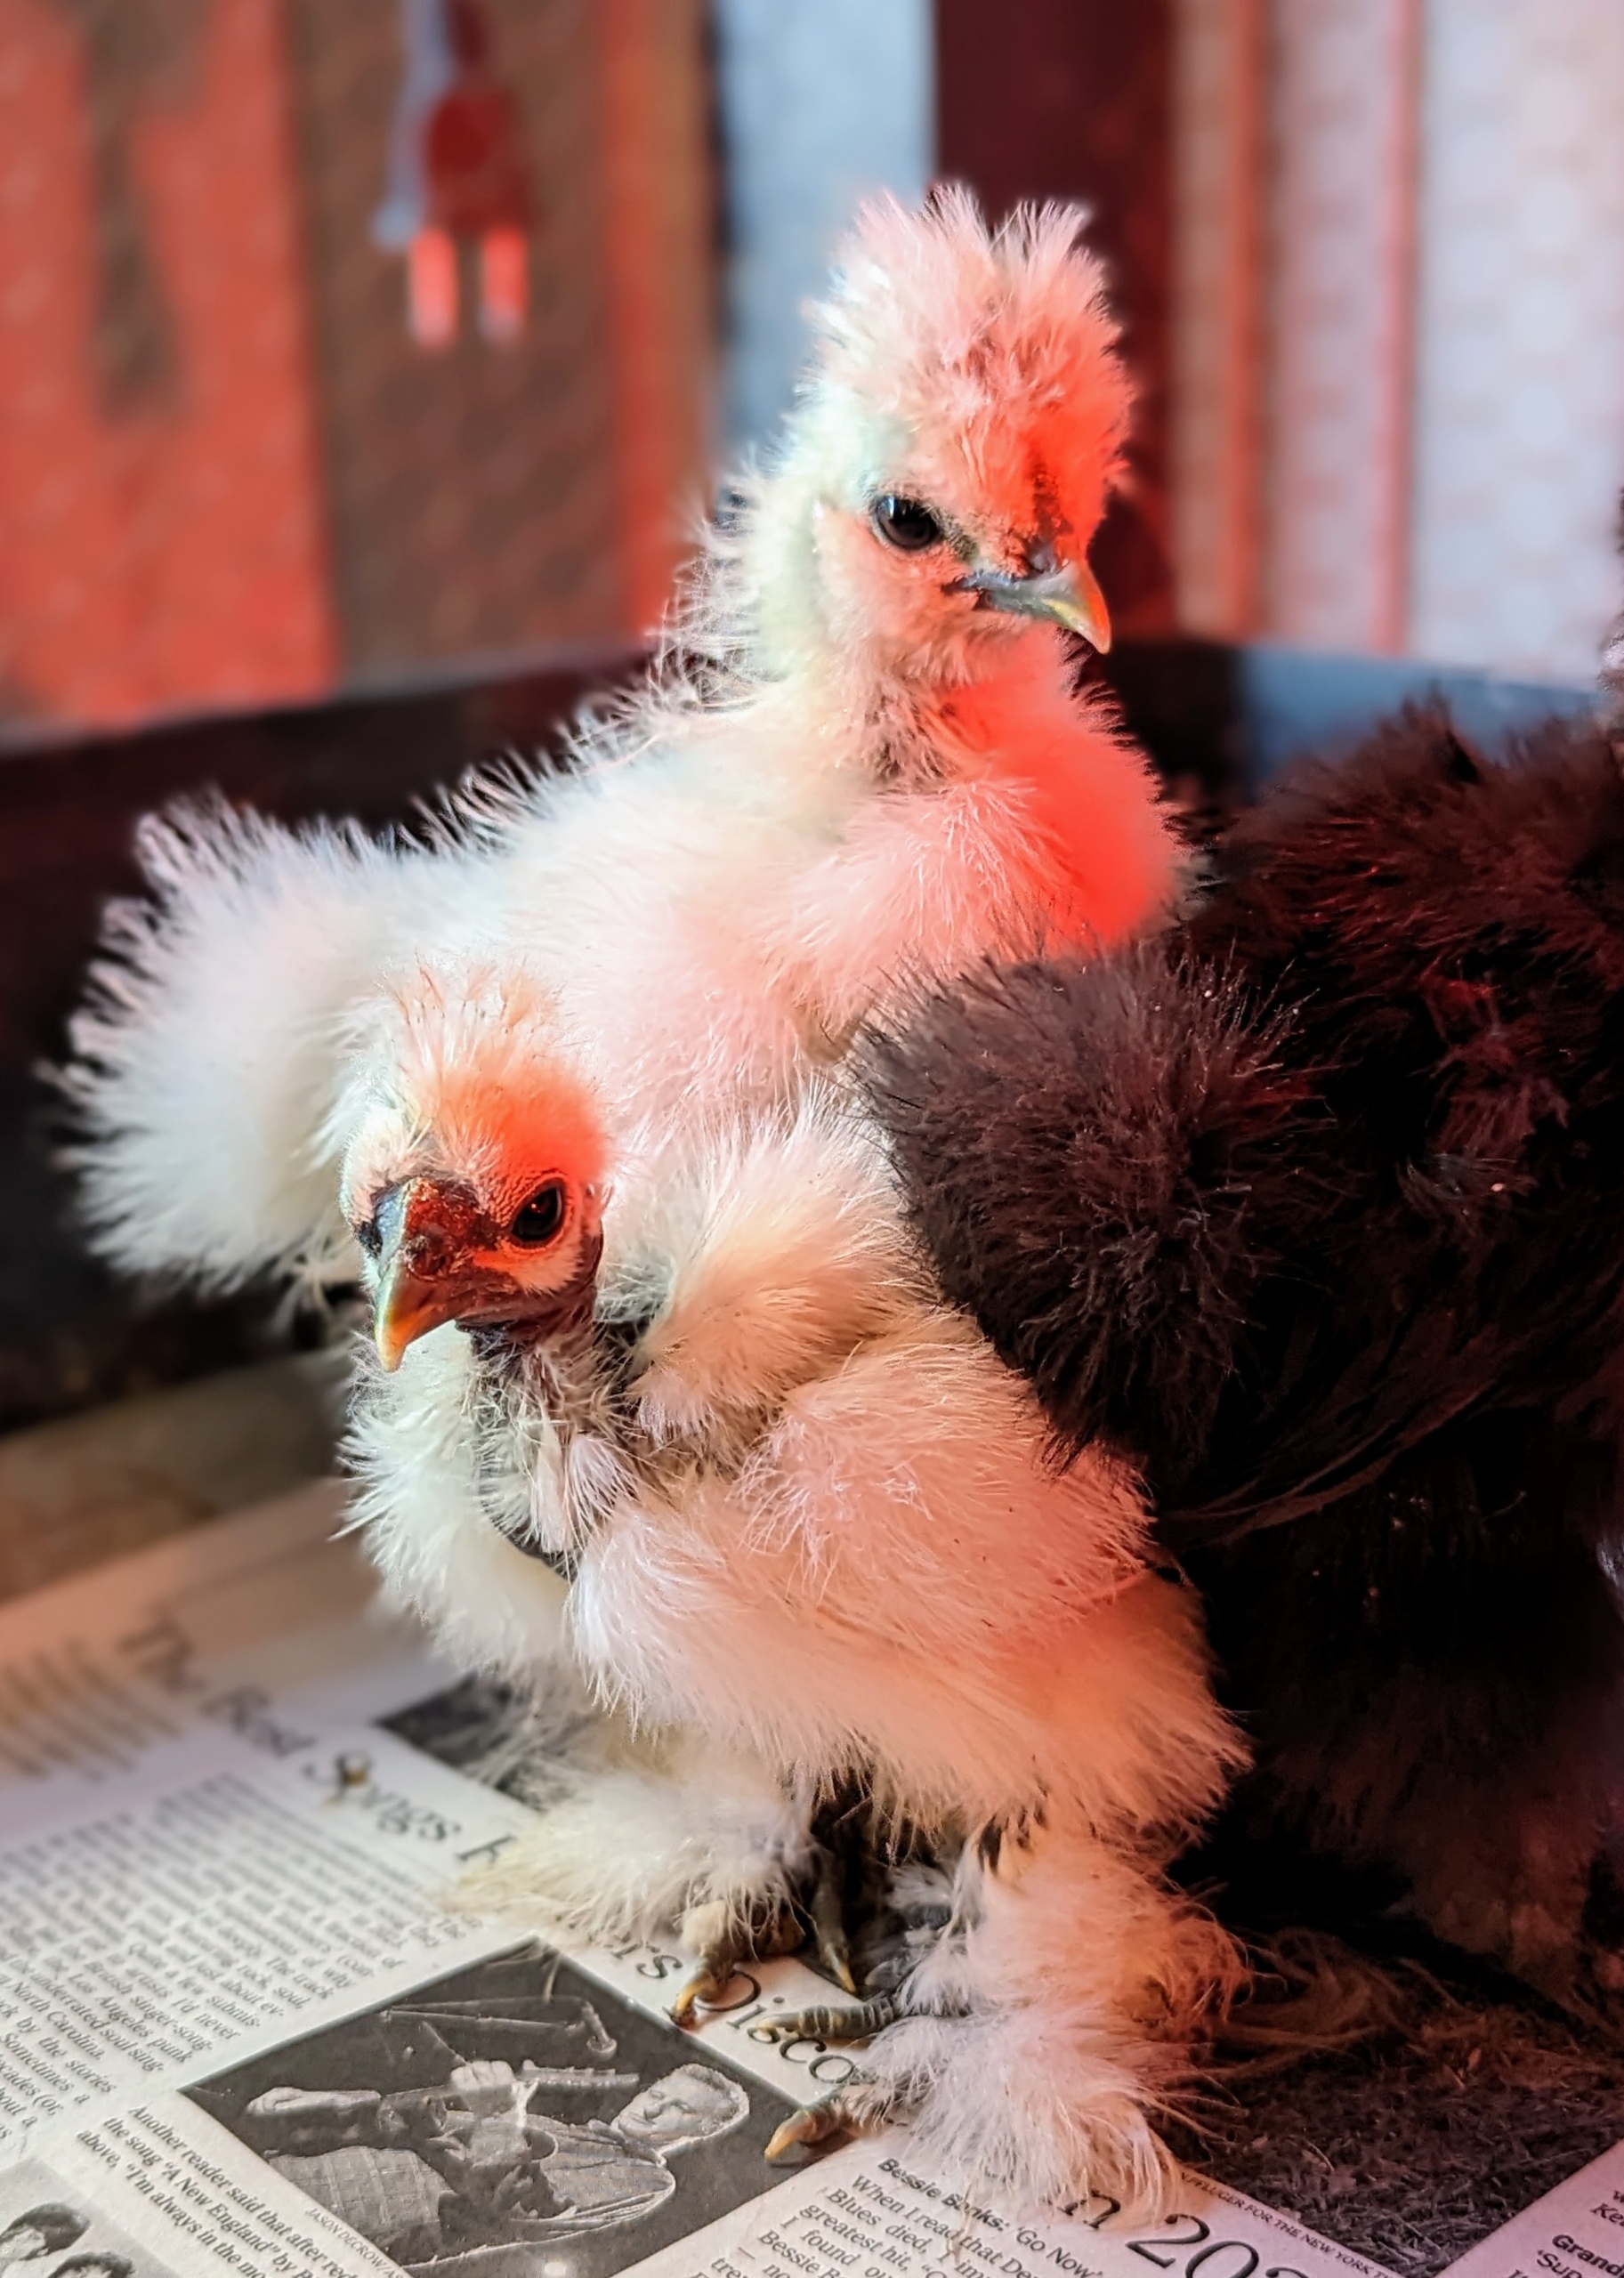
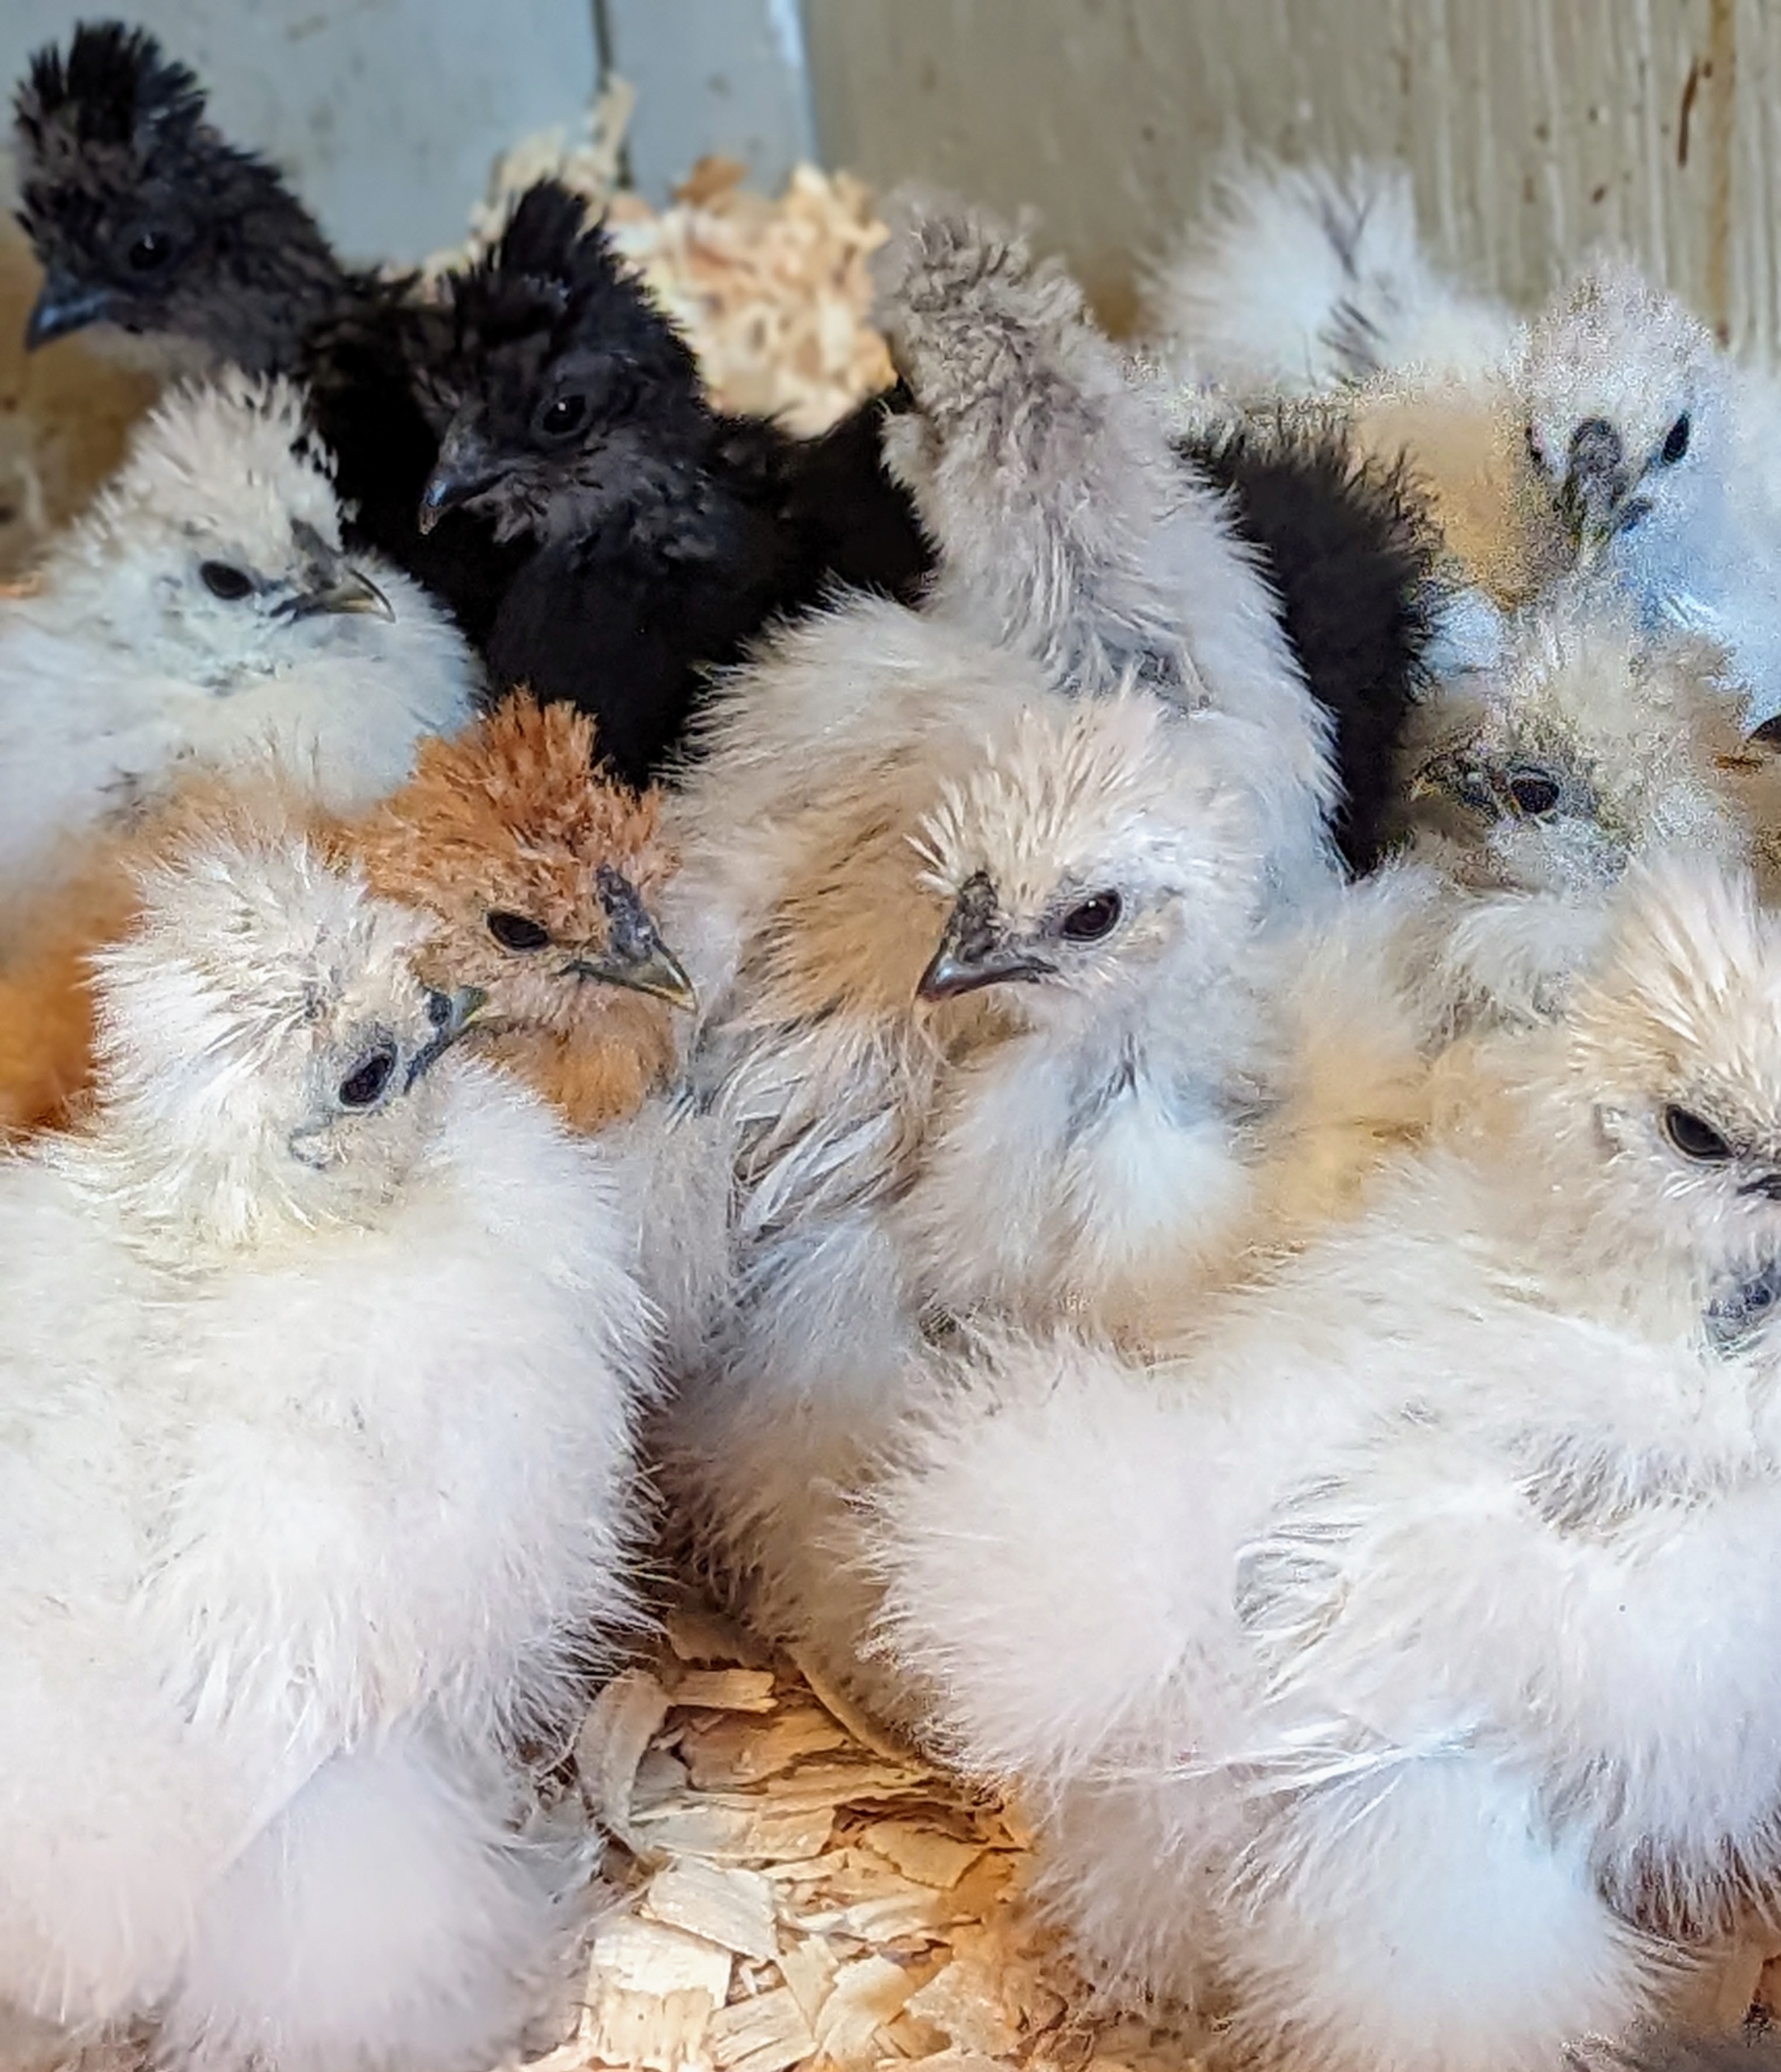
At this stage, the chicks are already communicating with each other. In general, chickens are quite vocal. They make around 30 different calls, expressing everything from “I am hungry” to “there’s a predator nearby.”
Chicks remain in my stable for a few weeks until they are big enough to go to the “nursery” coop. This was “move-in day.”
At first, they all stay together in one big flock.
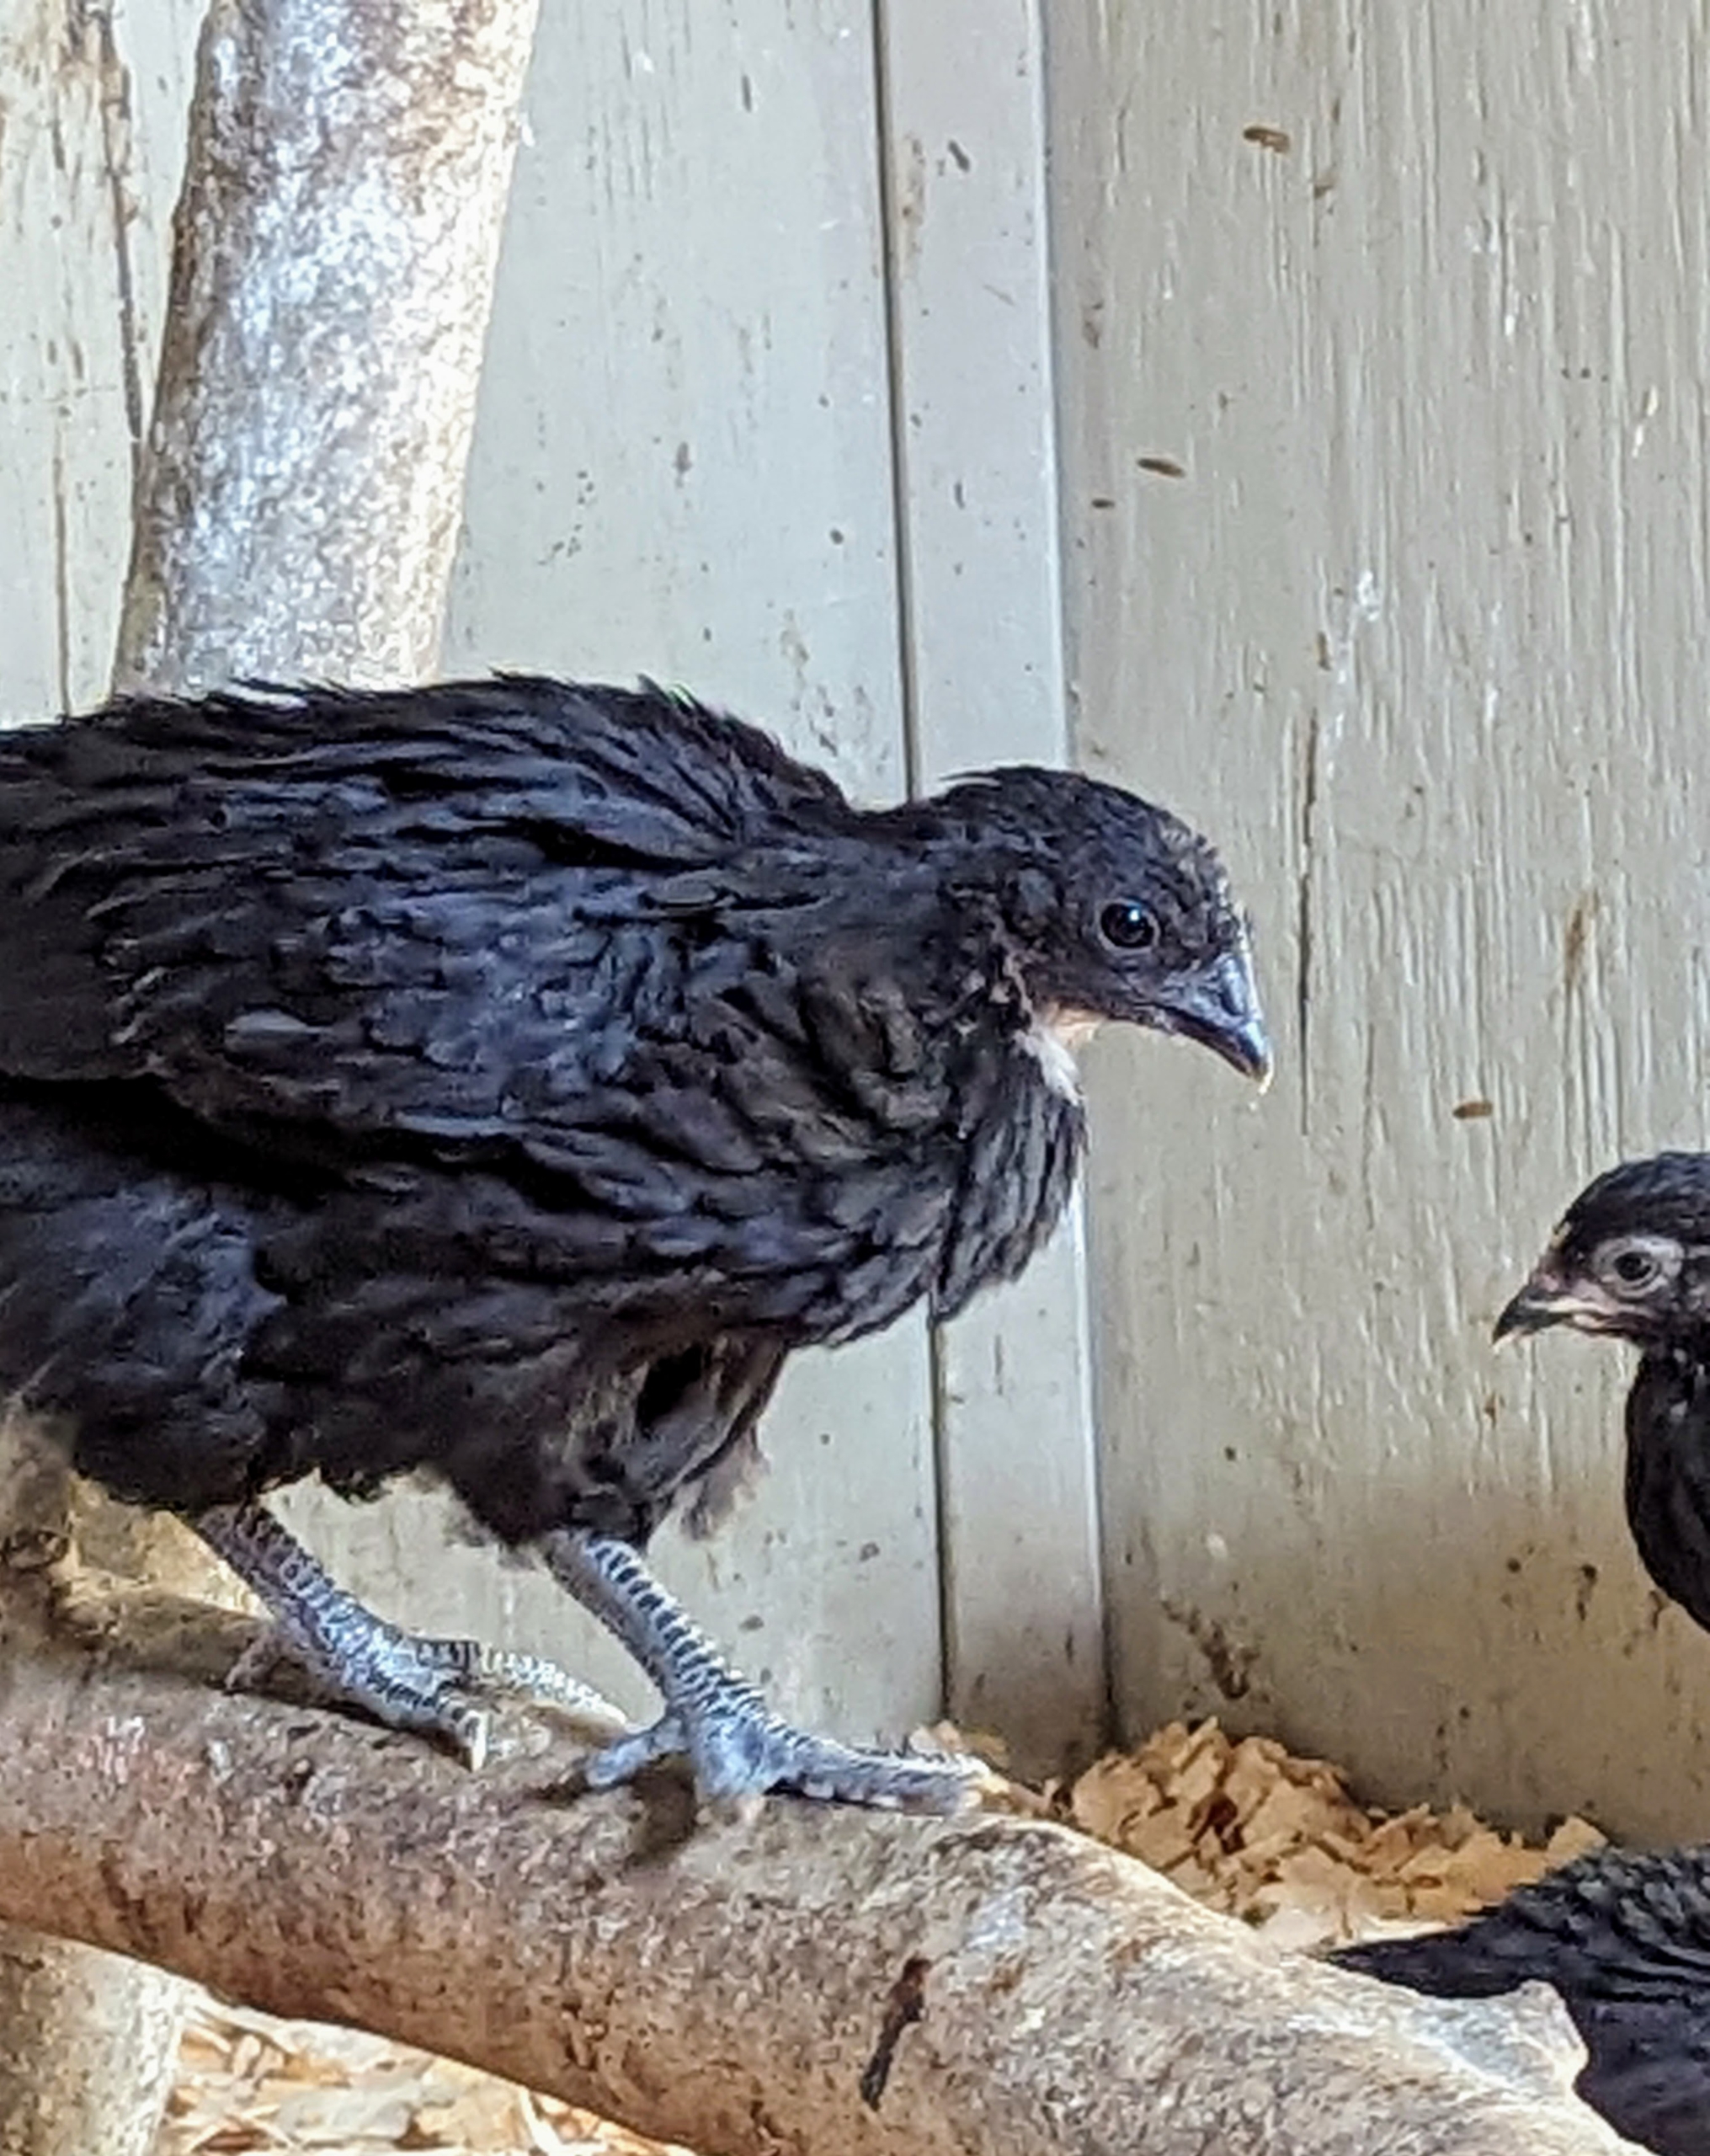
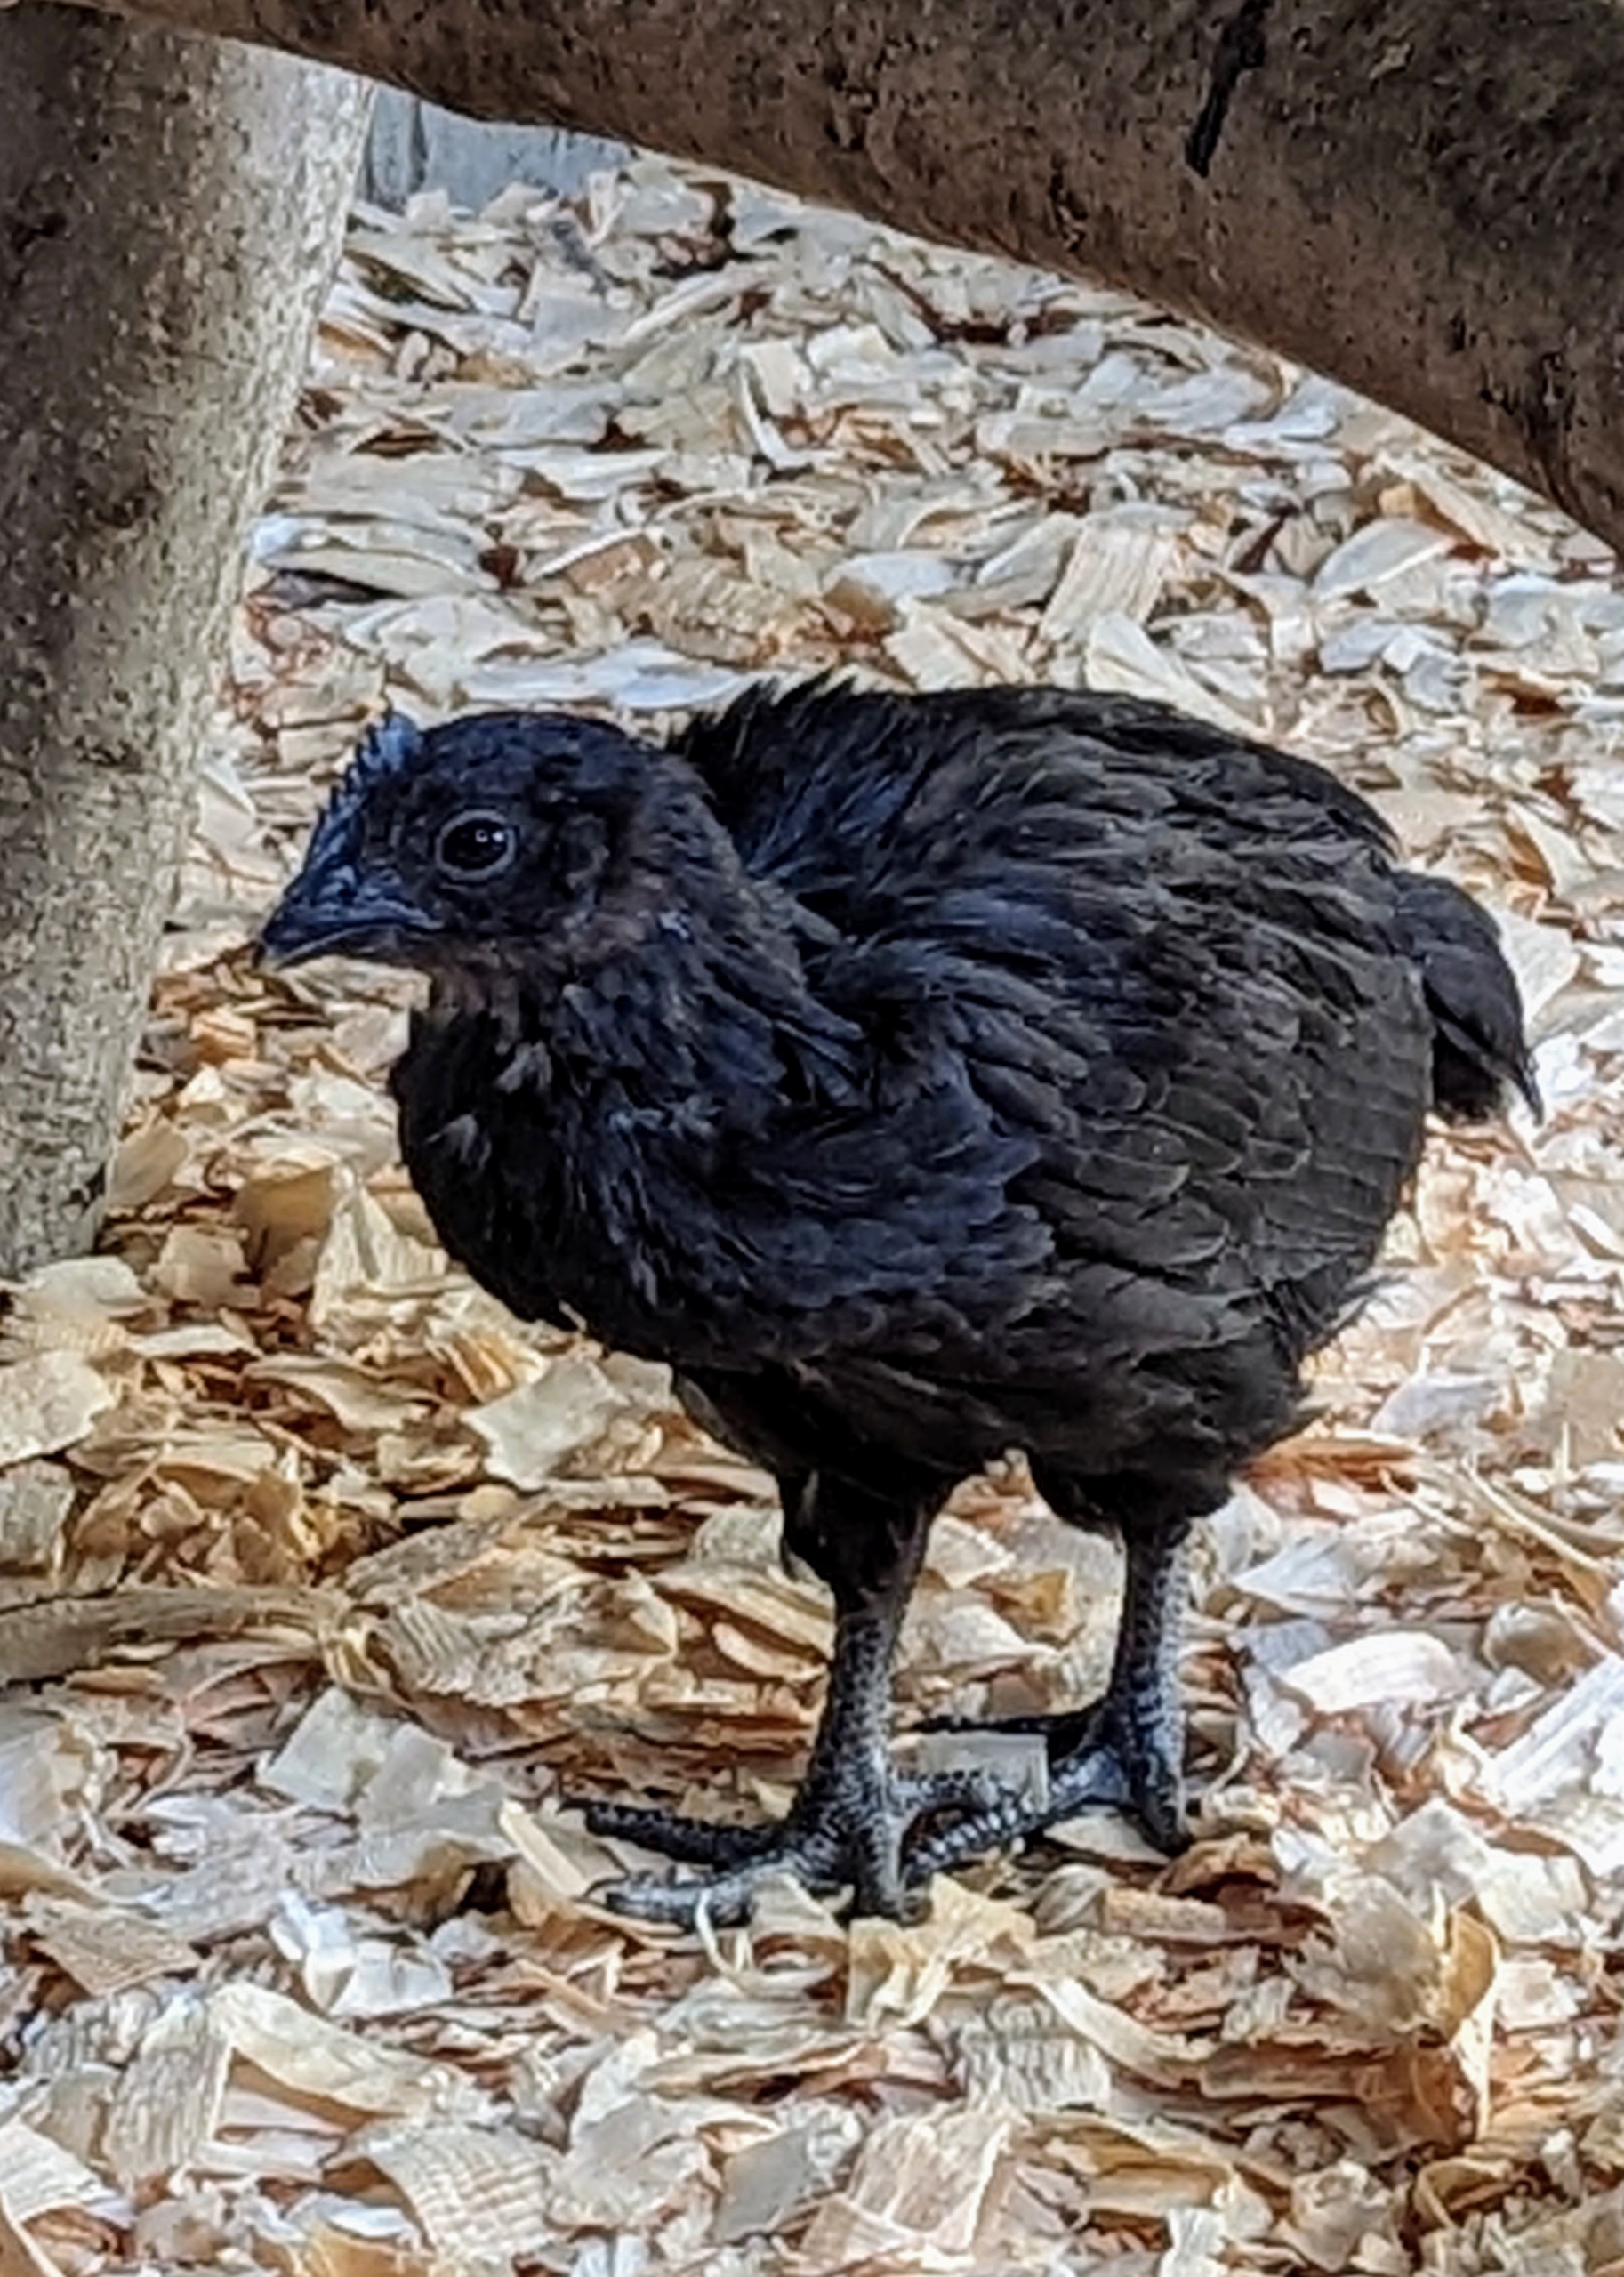
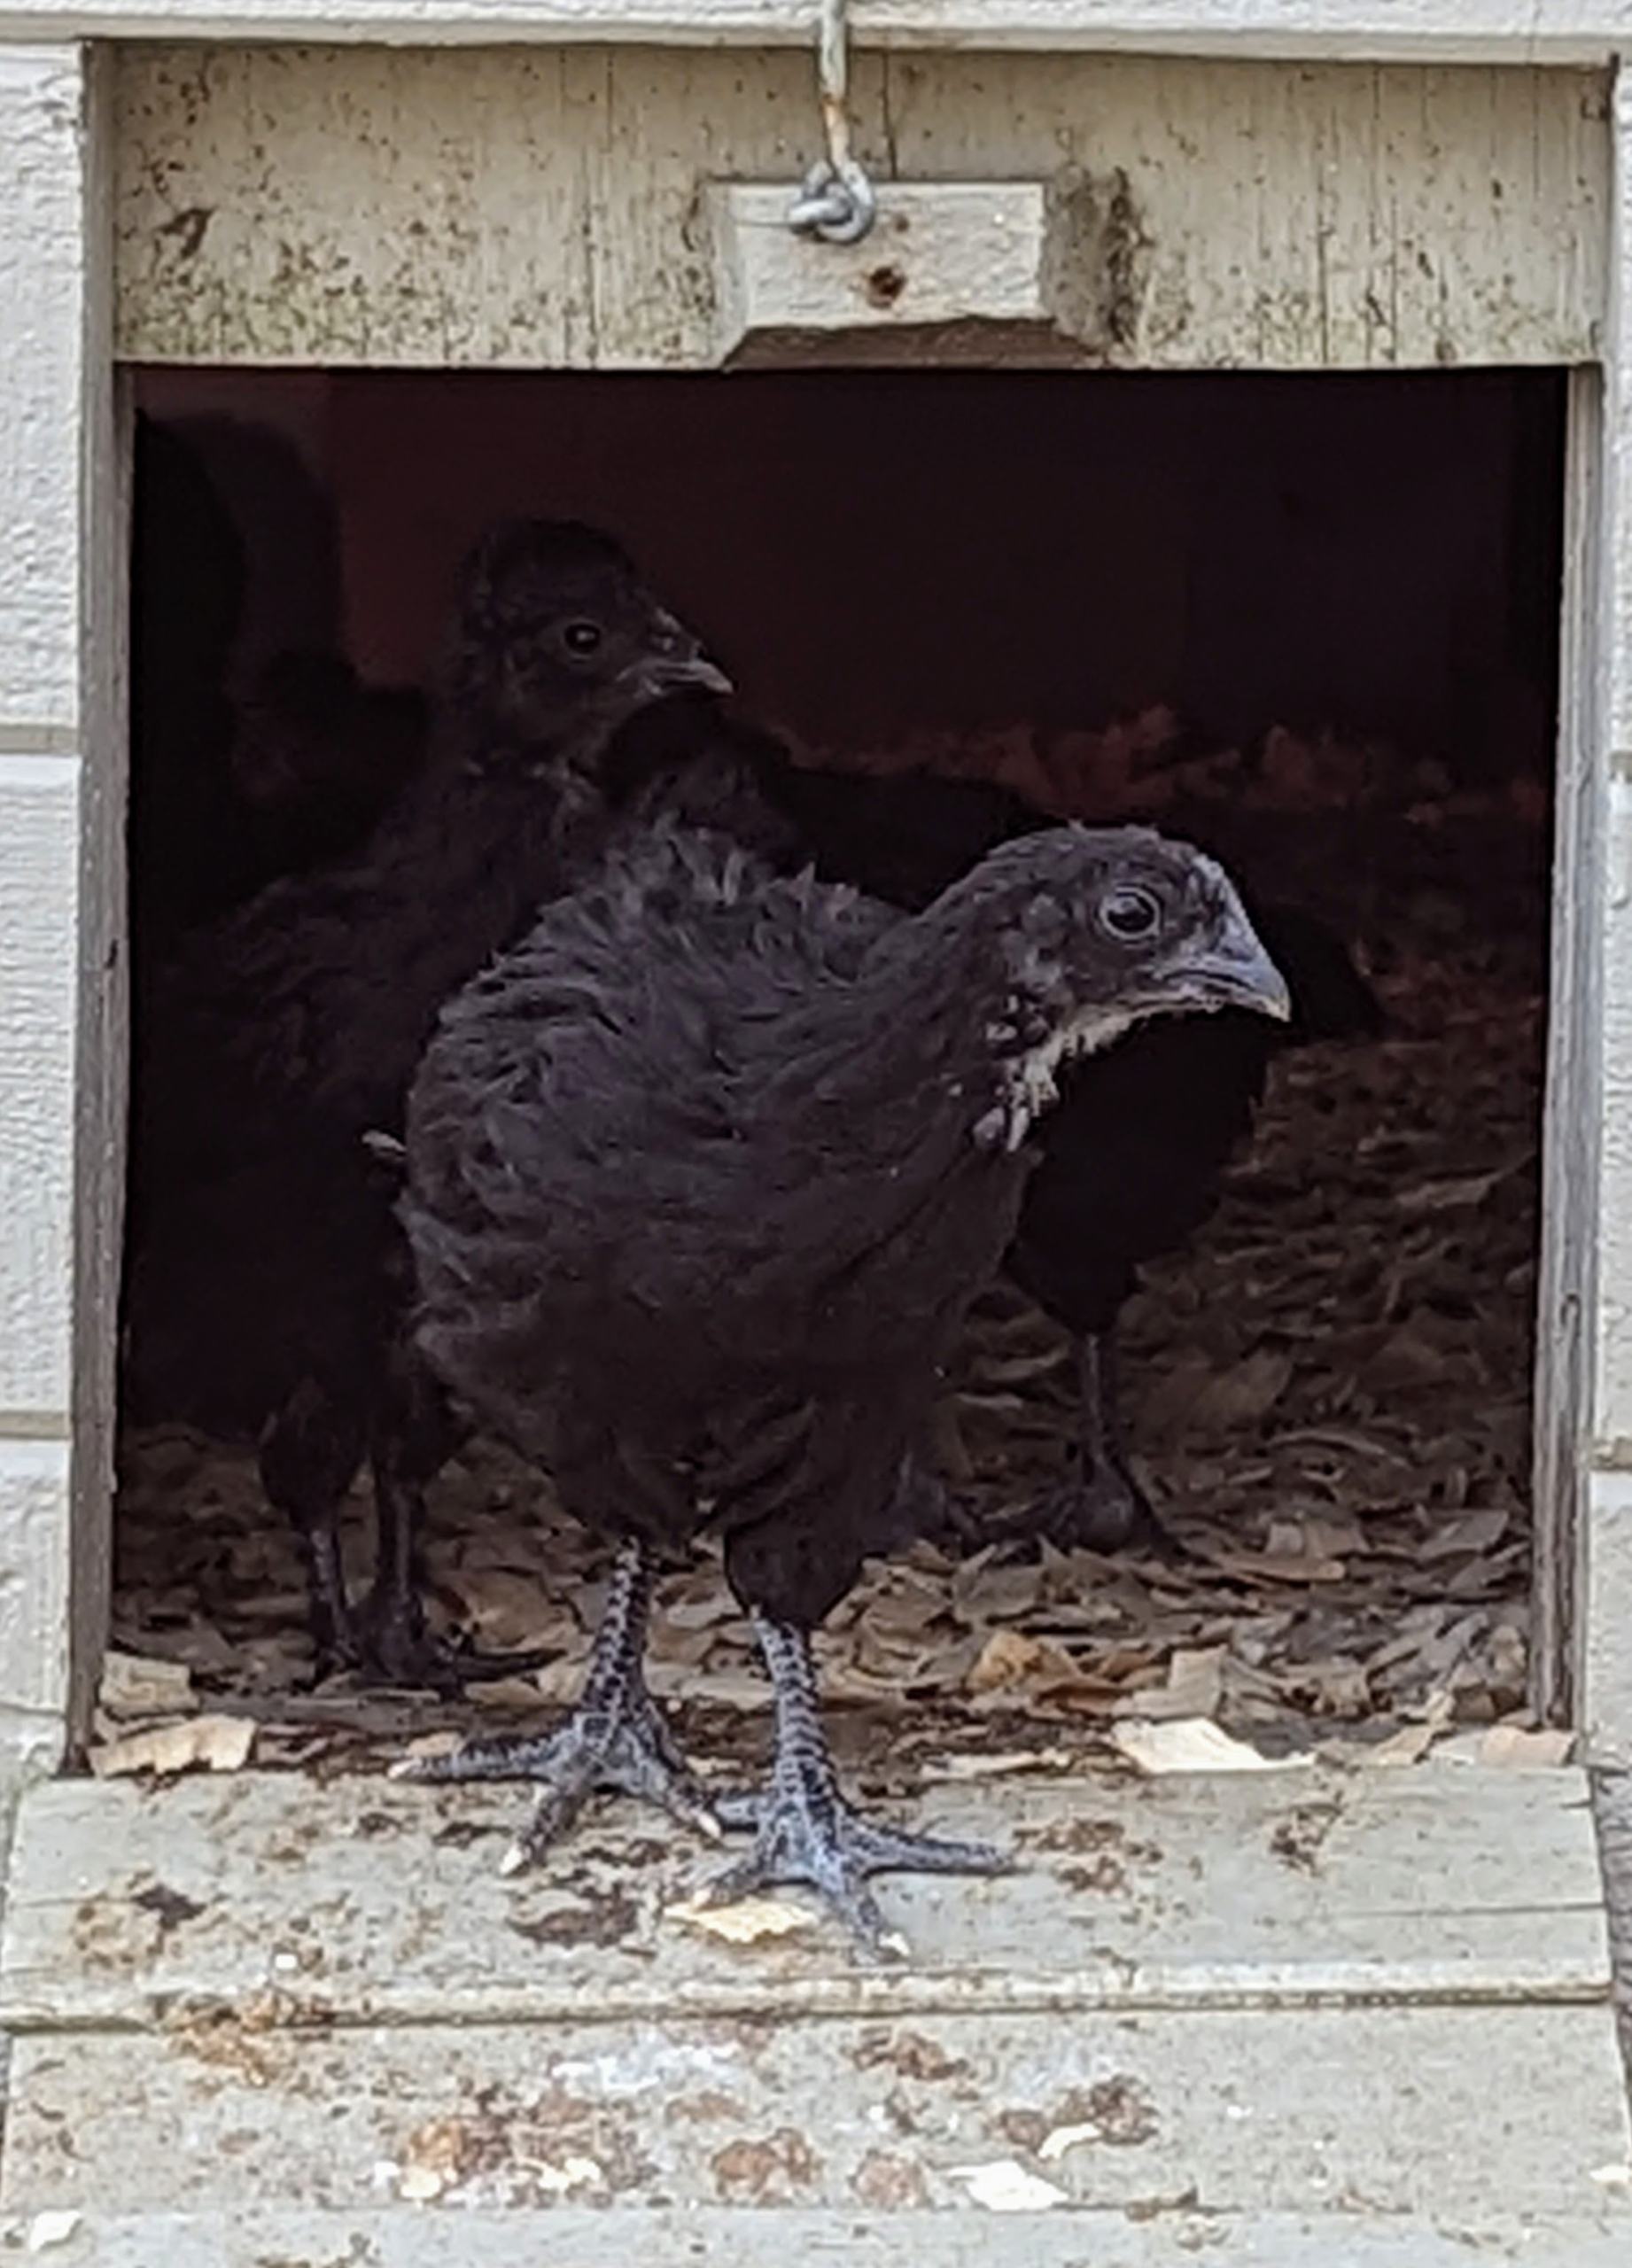
This is a young Ayam Cemani already perching on the big ladder in the “nursery” coop. It is an uncommon and relatively modern breed of chicken from Indonesia. This breed has a dominant gene that causes hyperpigmentation, making it entirely black, including feathers, beak, and internal organs.
Ayam Cemani chickens are cold and hot weather hardy, low maintenance, tame and easy to handle.
Once the hens are old enough to lay eggs, they lay a surprisingly abundant amount of eggs – and, the eggs are bright cream in color.
In the back of the coop is a small ramp. The chicks are able to go in and out as they please during the day. At night the doors are all closed to keep them safe from predators.
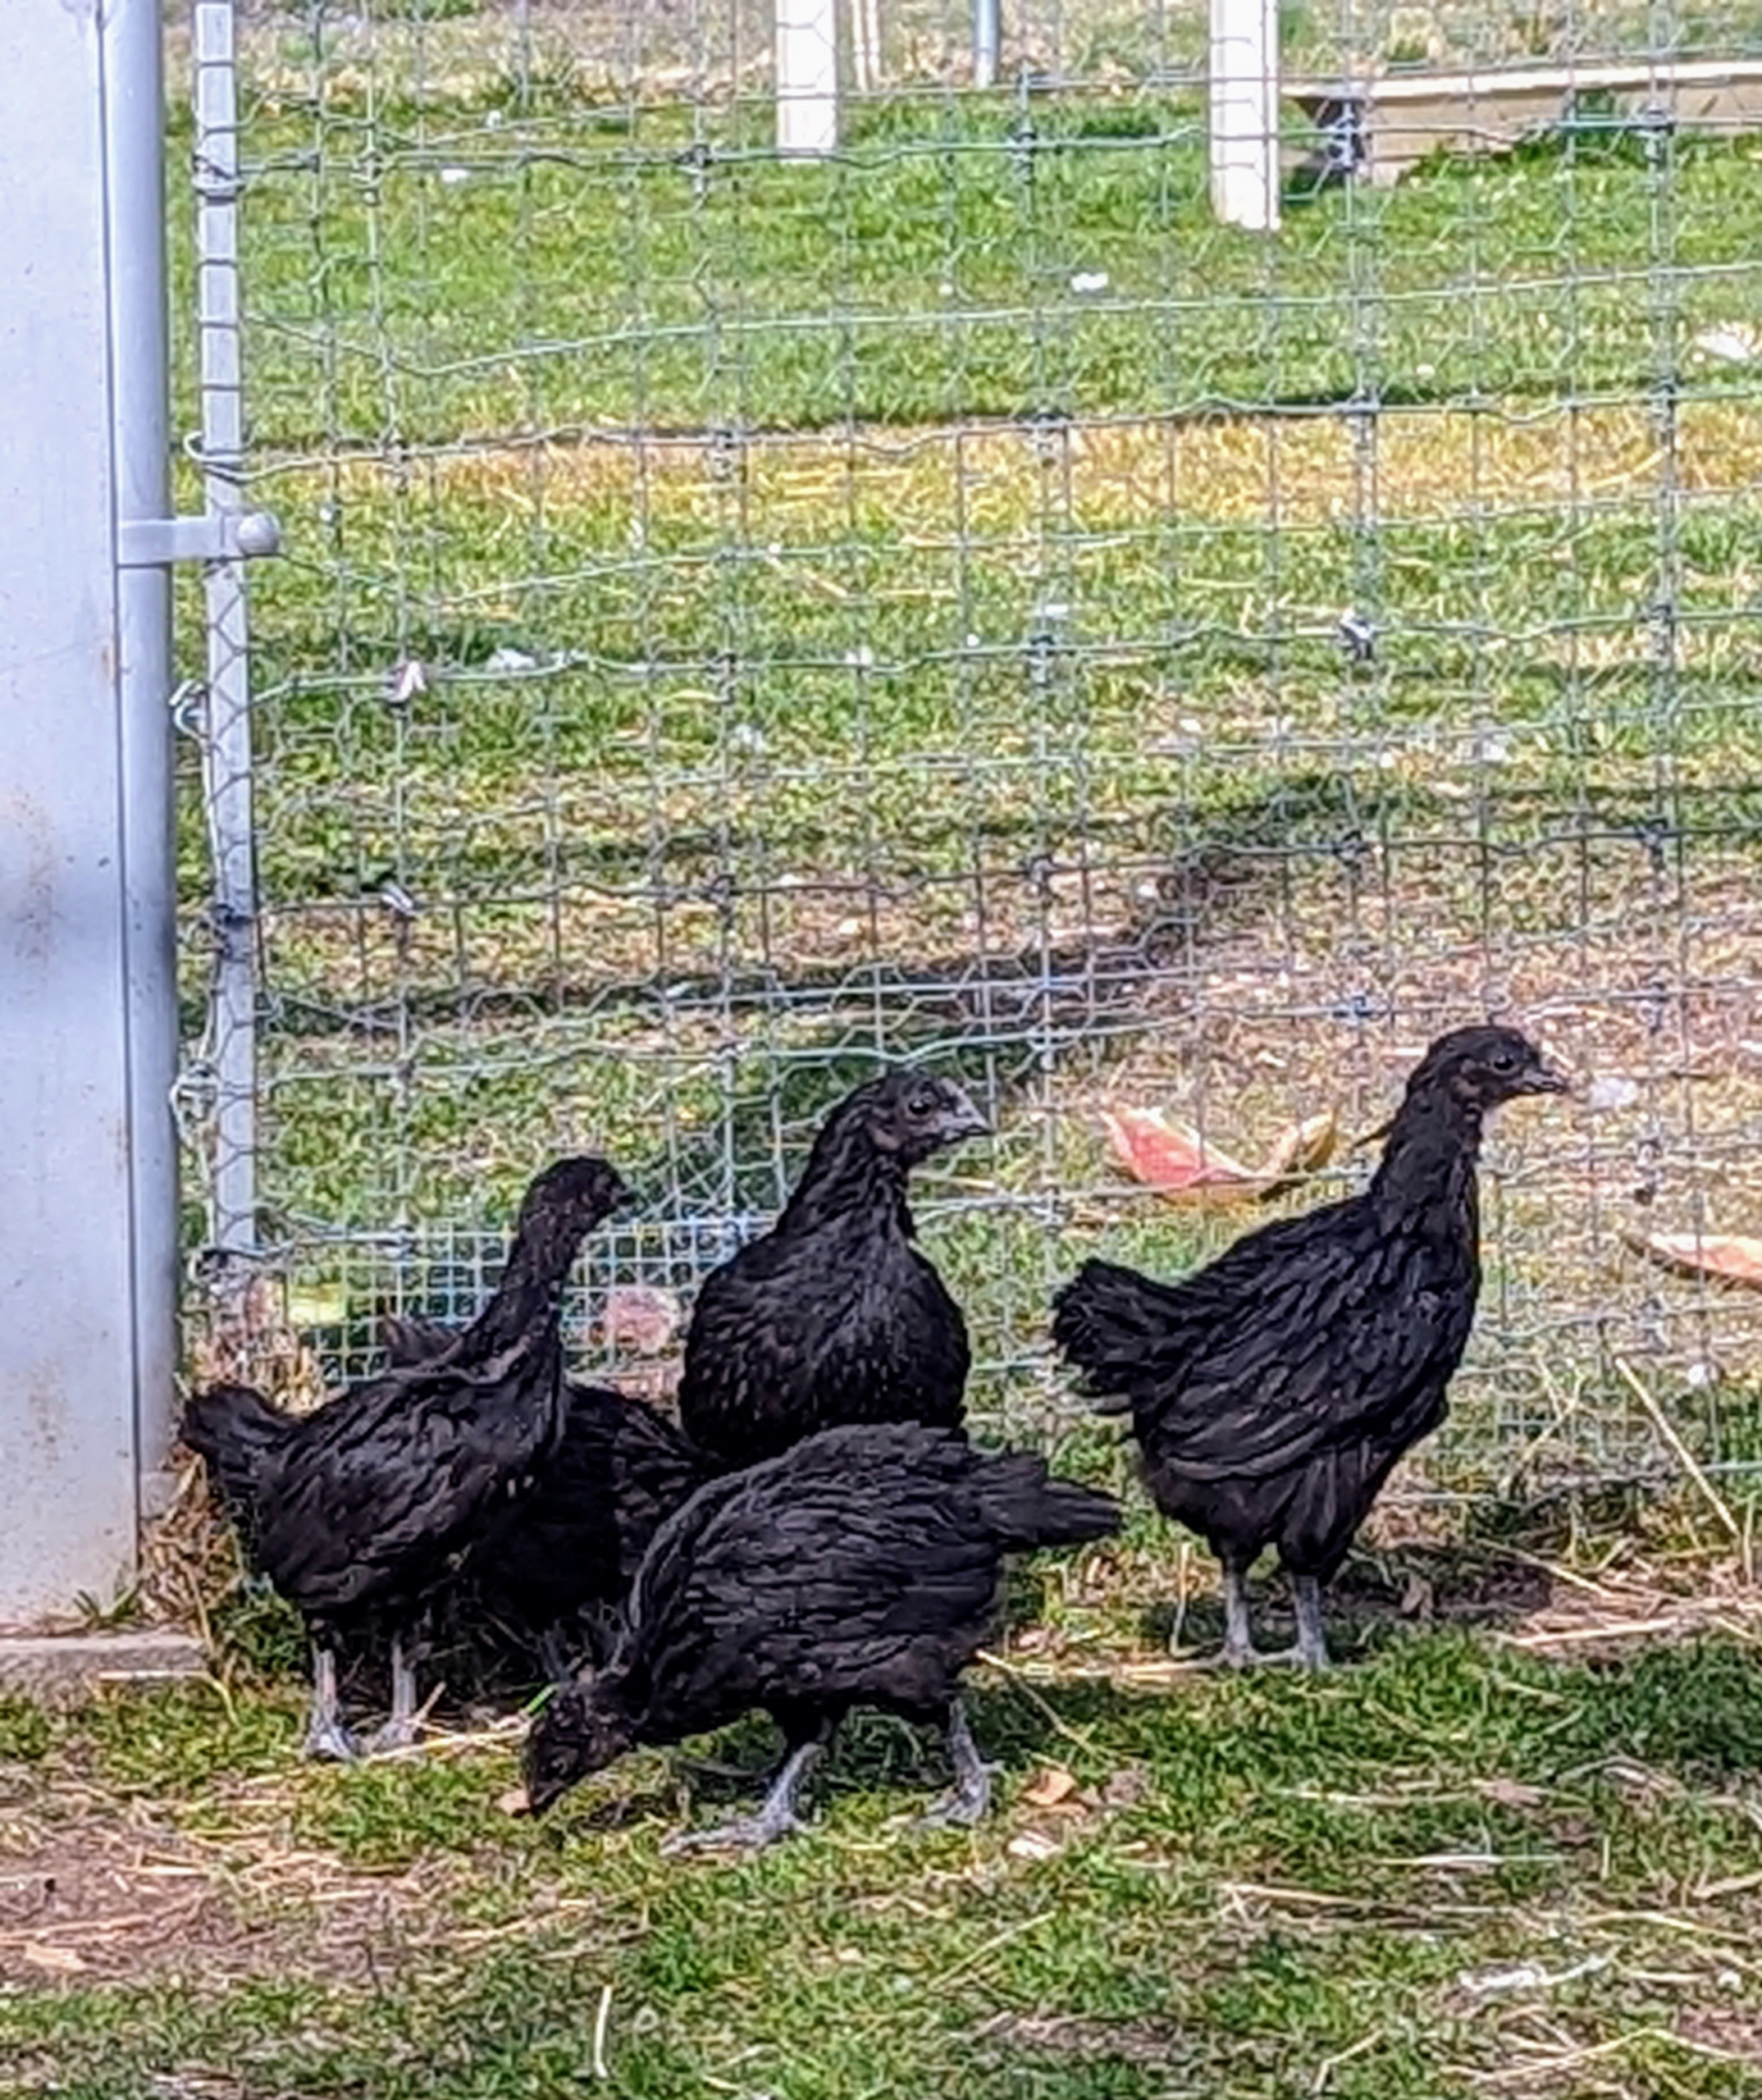
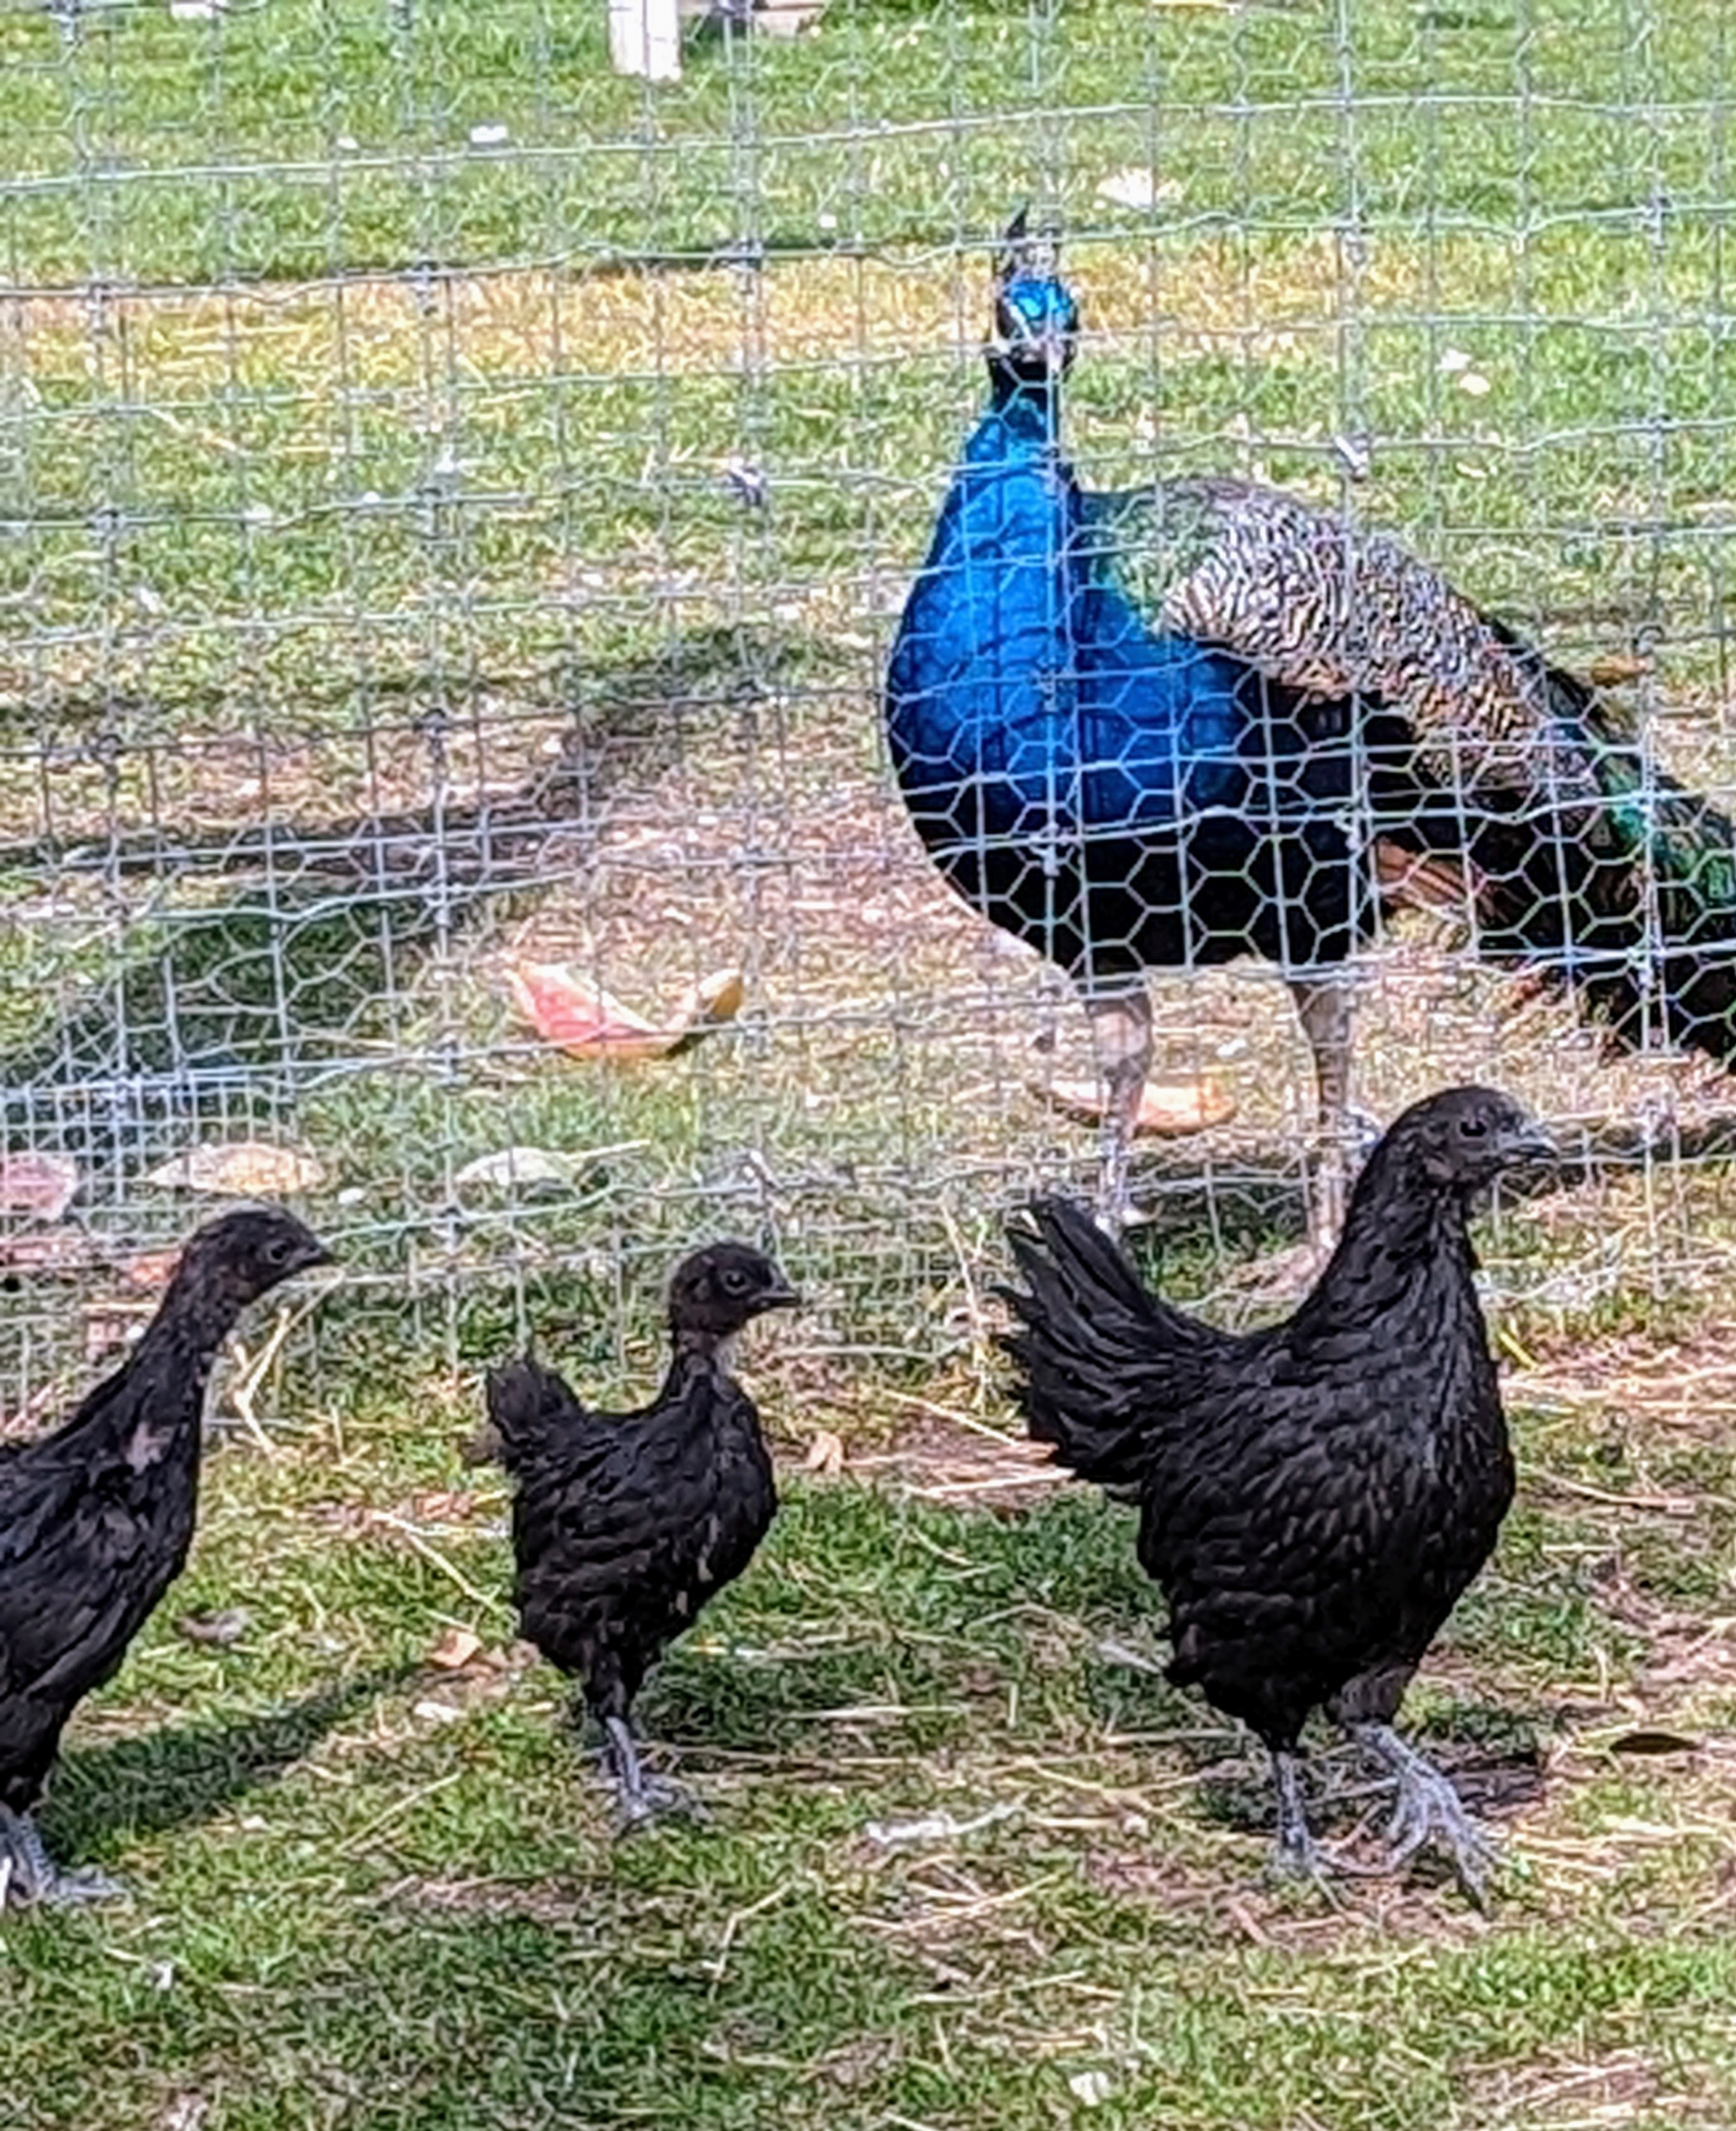
Here is a group of Ayam Cemanis. While all the birds get along fine, “birds of a feather flock together.” Ayam means “chicken” in Indonesian. Cemani refers to the village on the island of Java where this breed originated. The breed was first described by Dutch colonial settlers and imported to Europe in 1998 by poultry breeder Jan Steverink. The roosters weigh about five pounds full grown, while the hens are about a pound less.
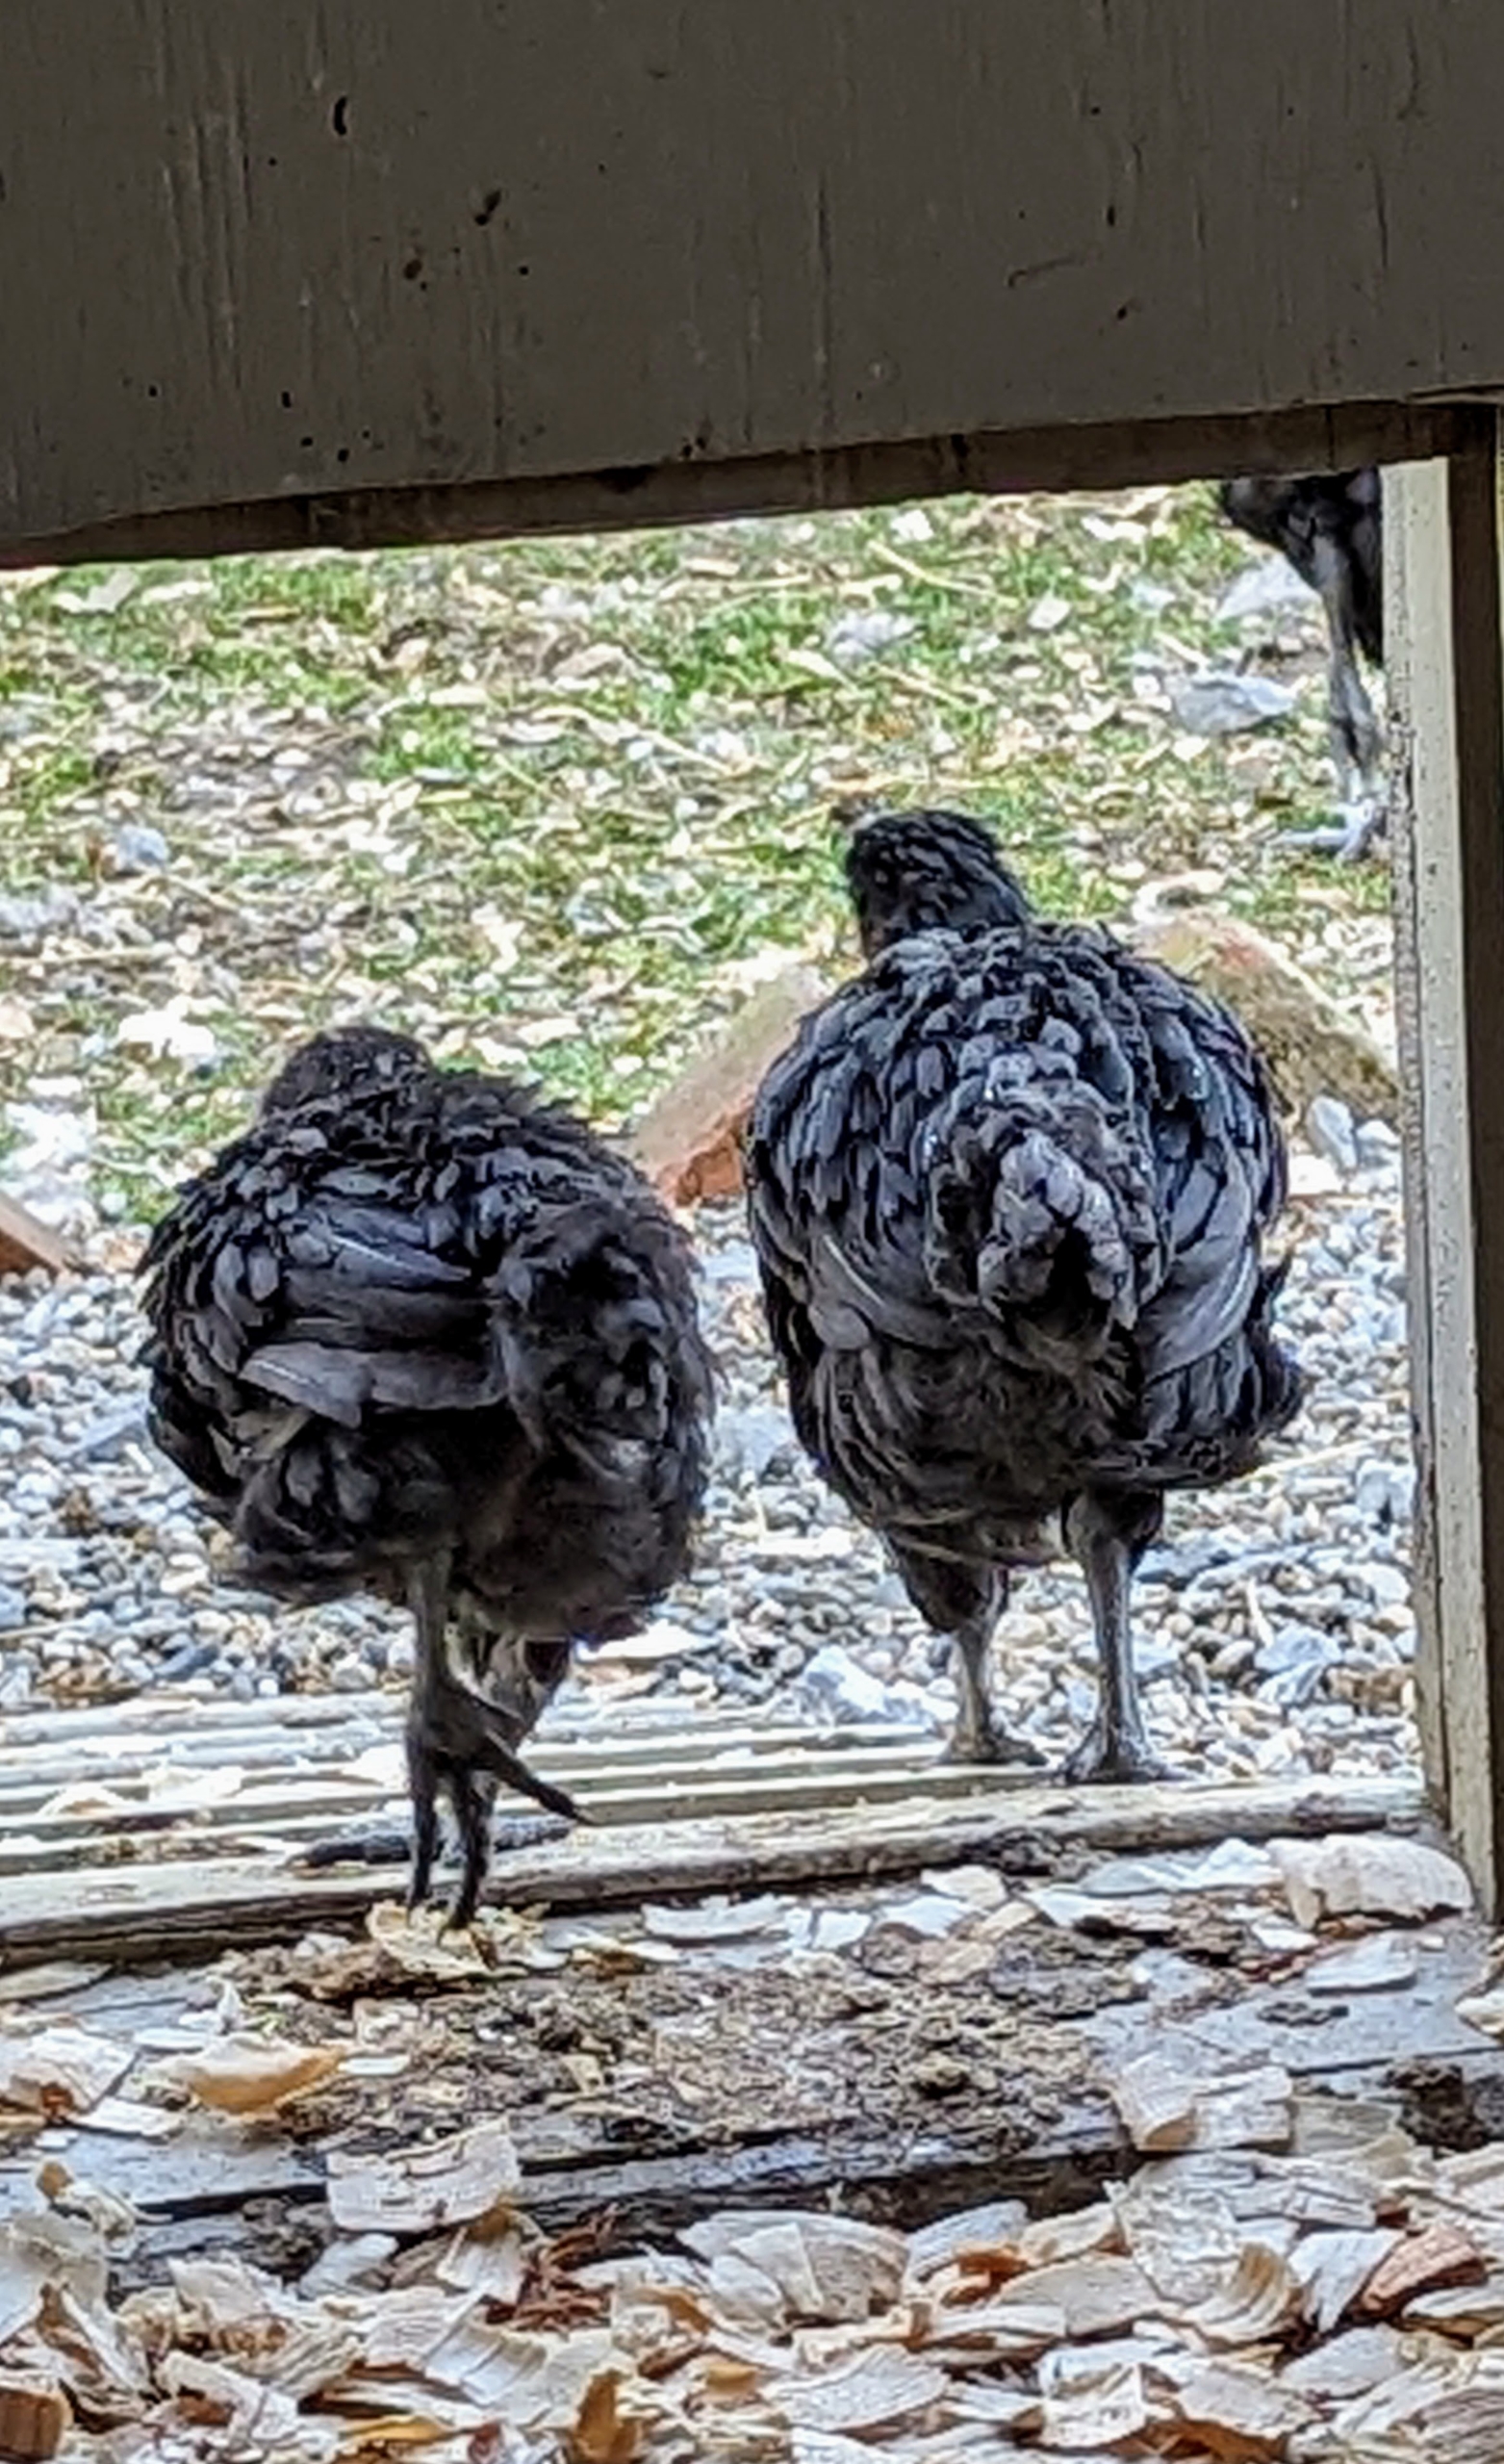
All the young chickens love being outside. They are now almost eight weeks old. Here are two white Silkies foraging. When determining their sex, female Silkies will keep their bodies more horizontally positioned, while males will stand more upright, keeping their chests forward and their necks elongated. Males will also hold their tail more upright, where females will keep it horizontal or slightly dipped toward the ground.
Because the Silkie’s feathers lack functioning barbicels, similar to down on other birds, they are unable to fly, but they can stretch and flap their wings.
Silkies are quite adaptable and playful, and even peck each other lightly to encourage playful interaction.
This pen is next to the peafowl enclosure. This “blue boy” loves saying hello to its young neighbors.
Chickens are not difficult to keep, but it does take time, commitment and a good understanding of animal husbandry to do it well.
If you want to add some houseplants to your collection, consider aloe vera - it's low maintenance and a wonderful air-purifying specimen.
Aloe vera is a succulent plant species of the genus Aloe. Known for its lance-shaped leaves with jagged edges, aloe vera is an evergreen perennial that originates from the Arabian Peninsula, but also grows wild in tropical, semi-tropical, and arid climates around the world. I have many different varieties of aloe vera. This week, my head gardener, Ryan McCallister, potted up a selection of small succulents for my greenhouse including Aloe 'Marmalade.'
Enjoy these photos.
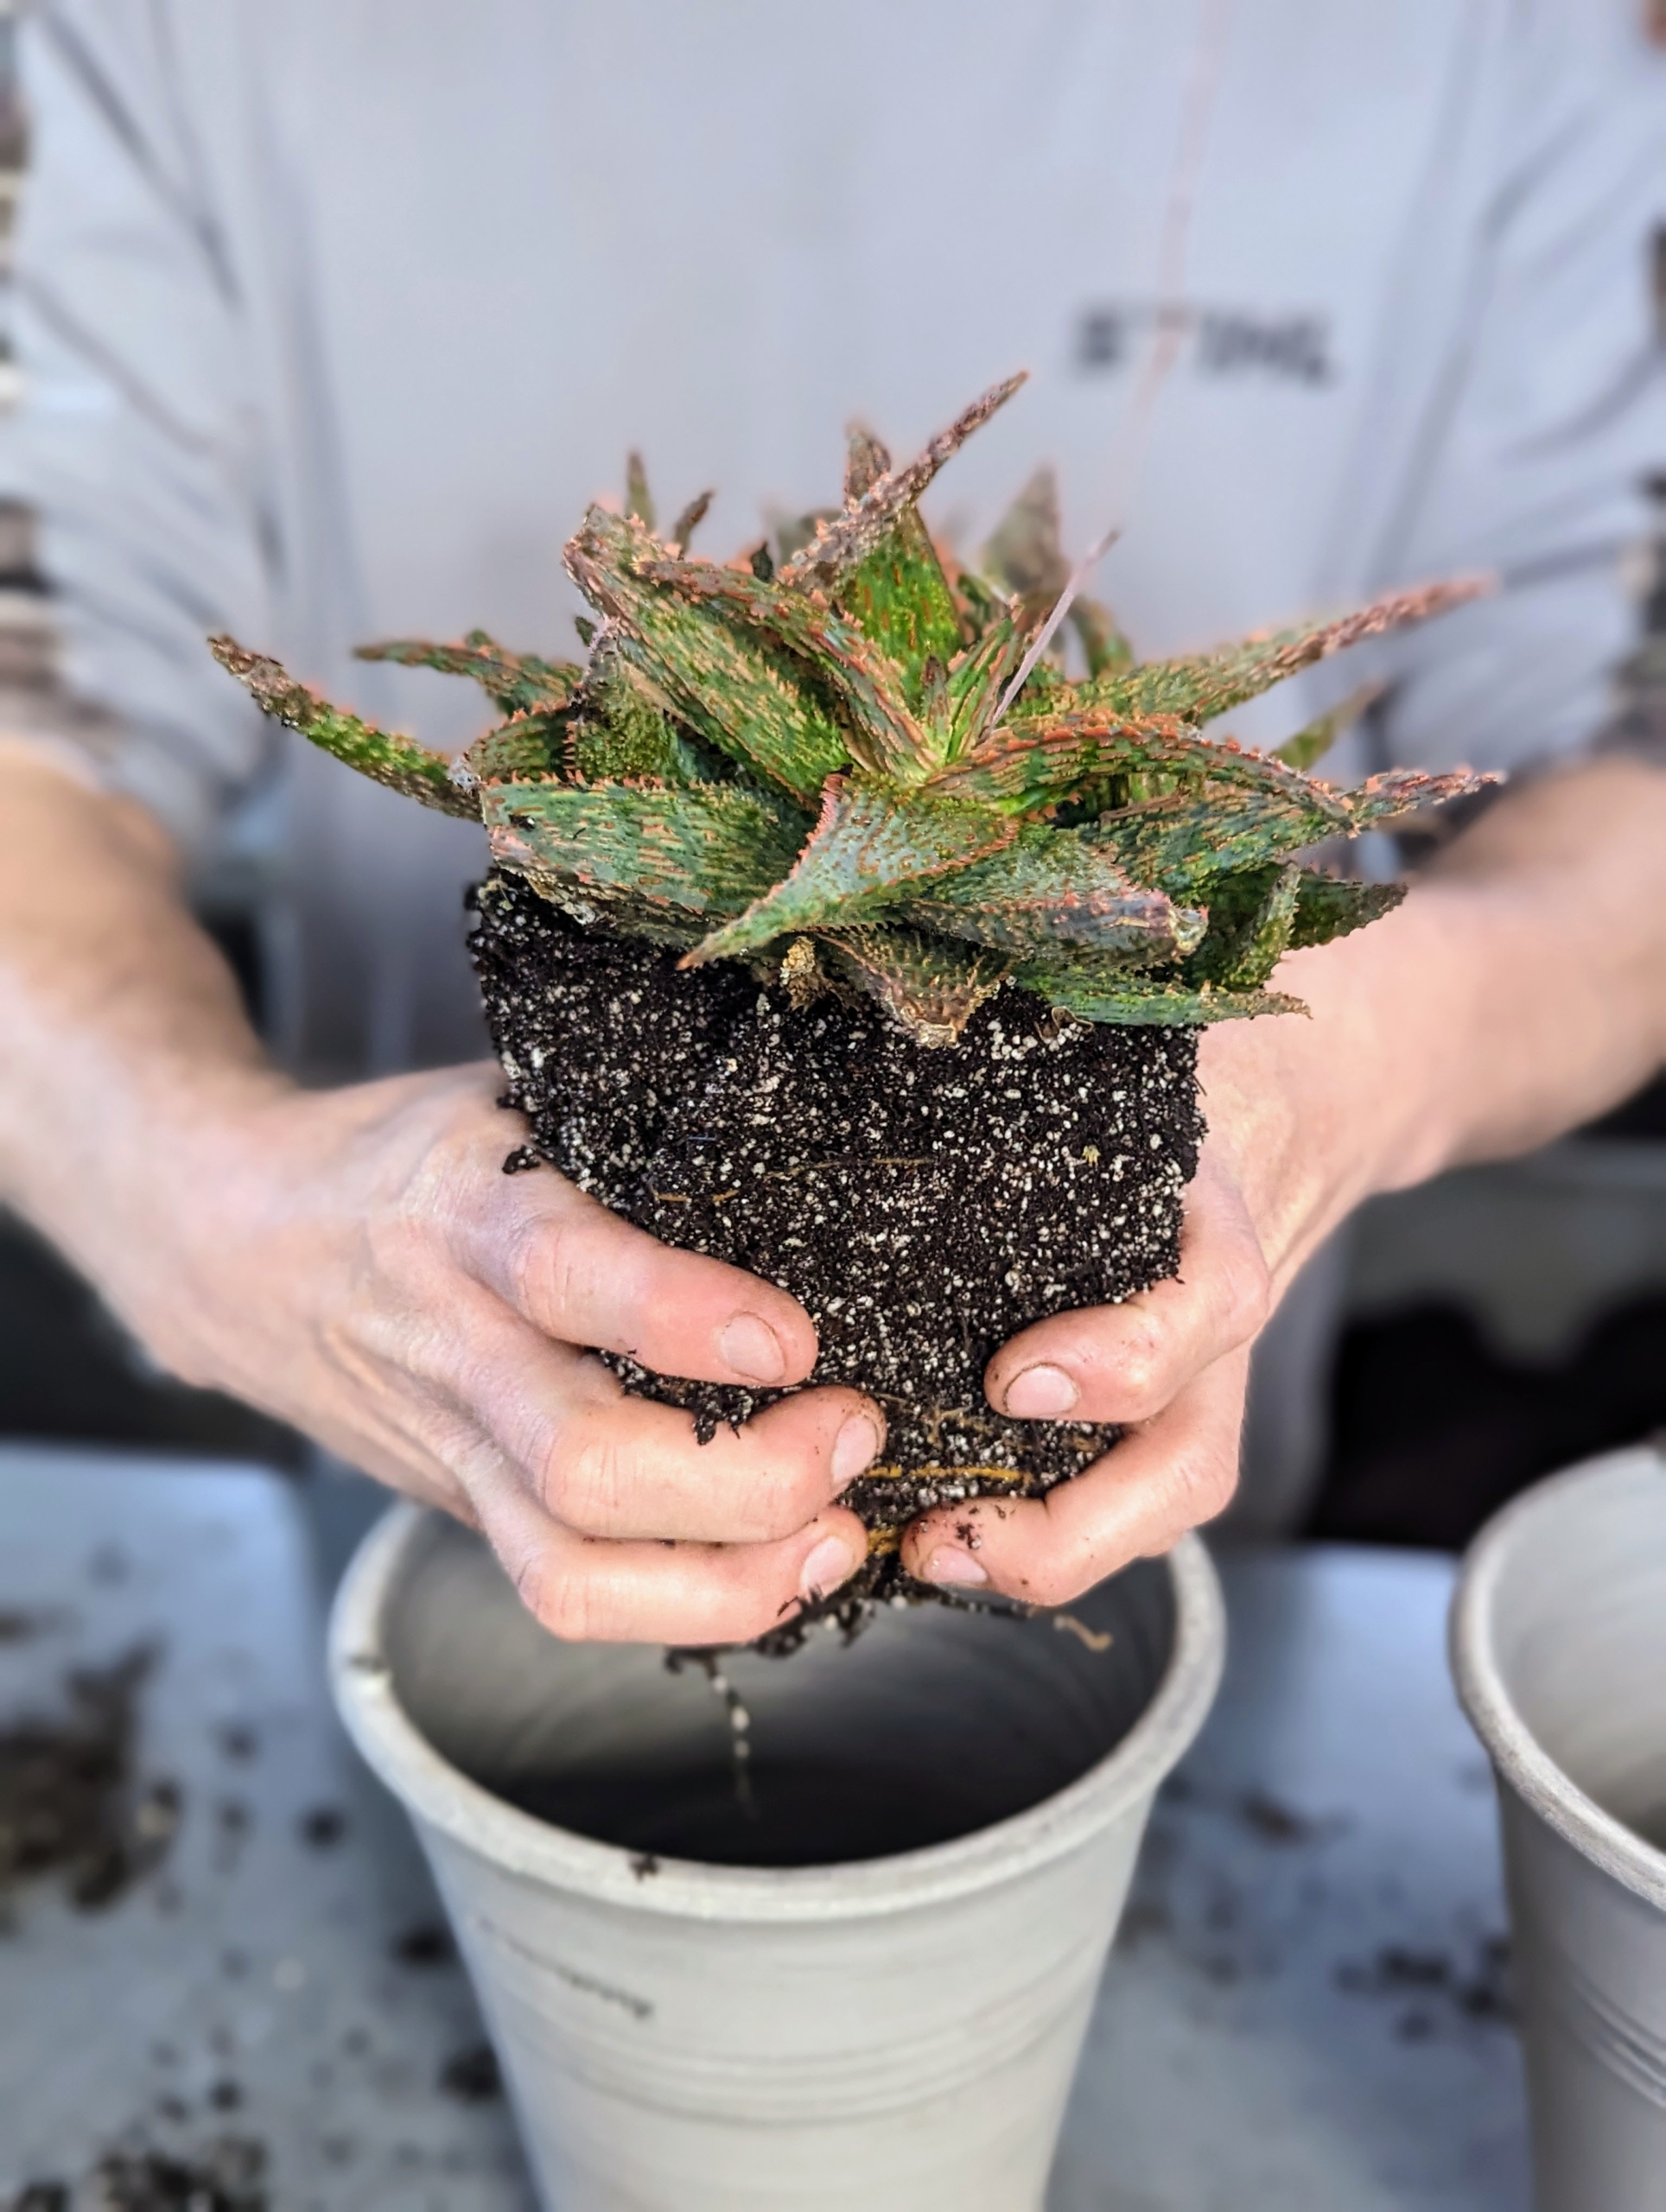
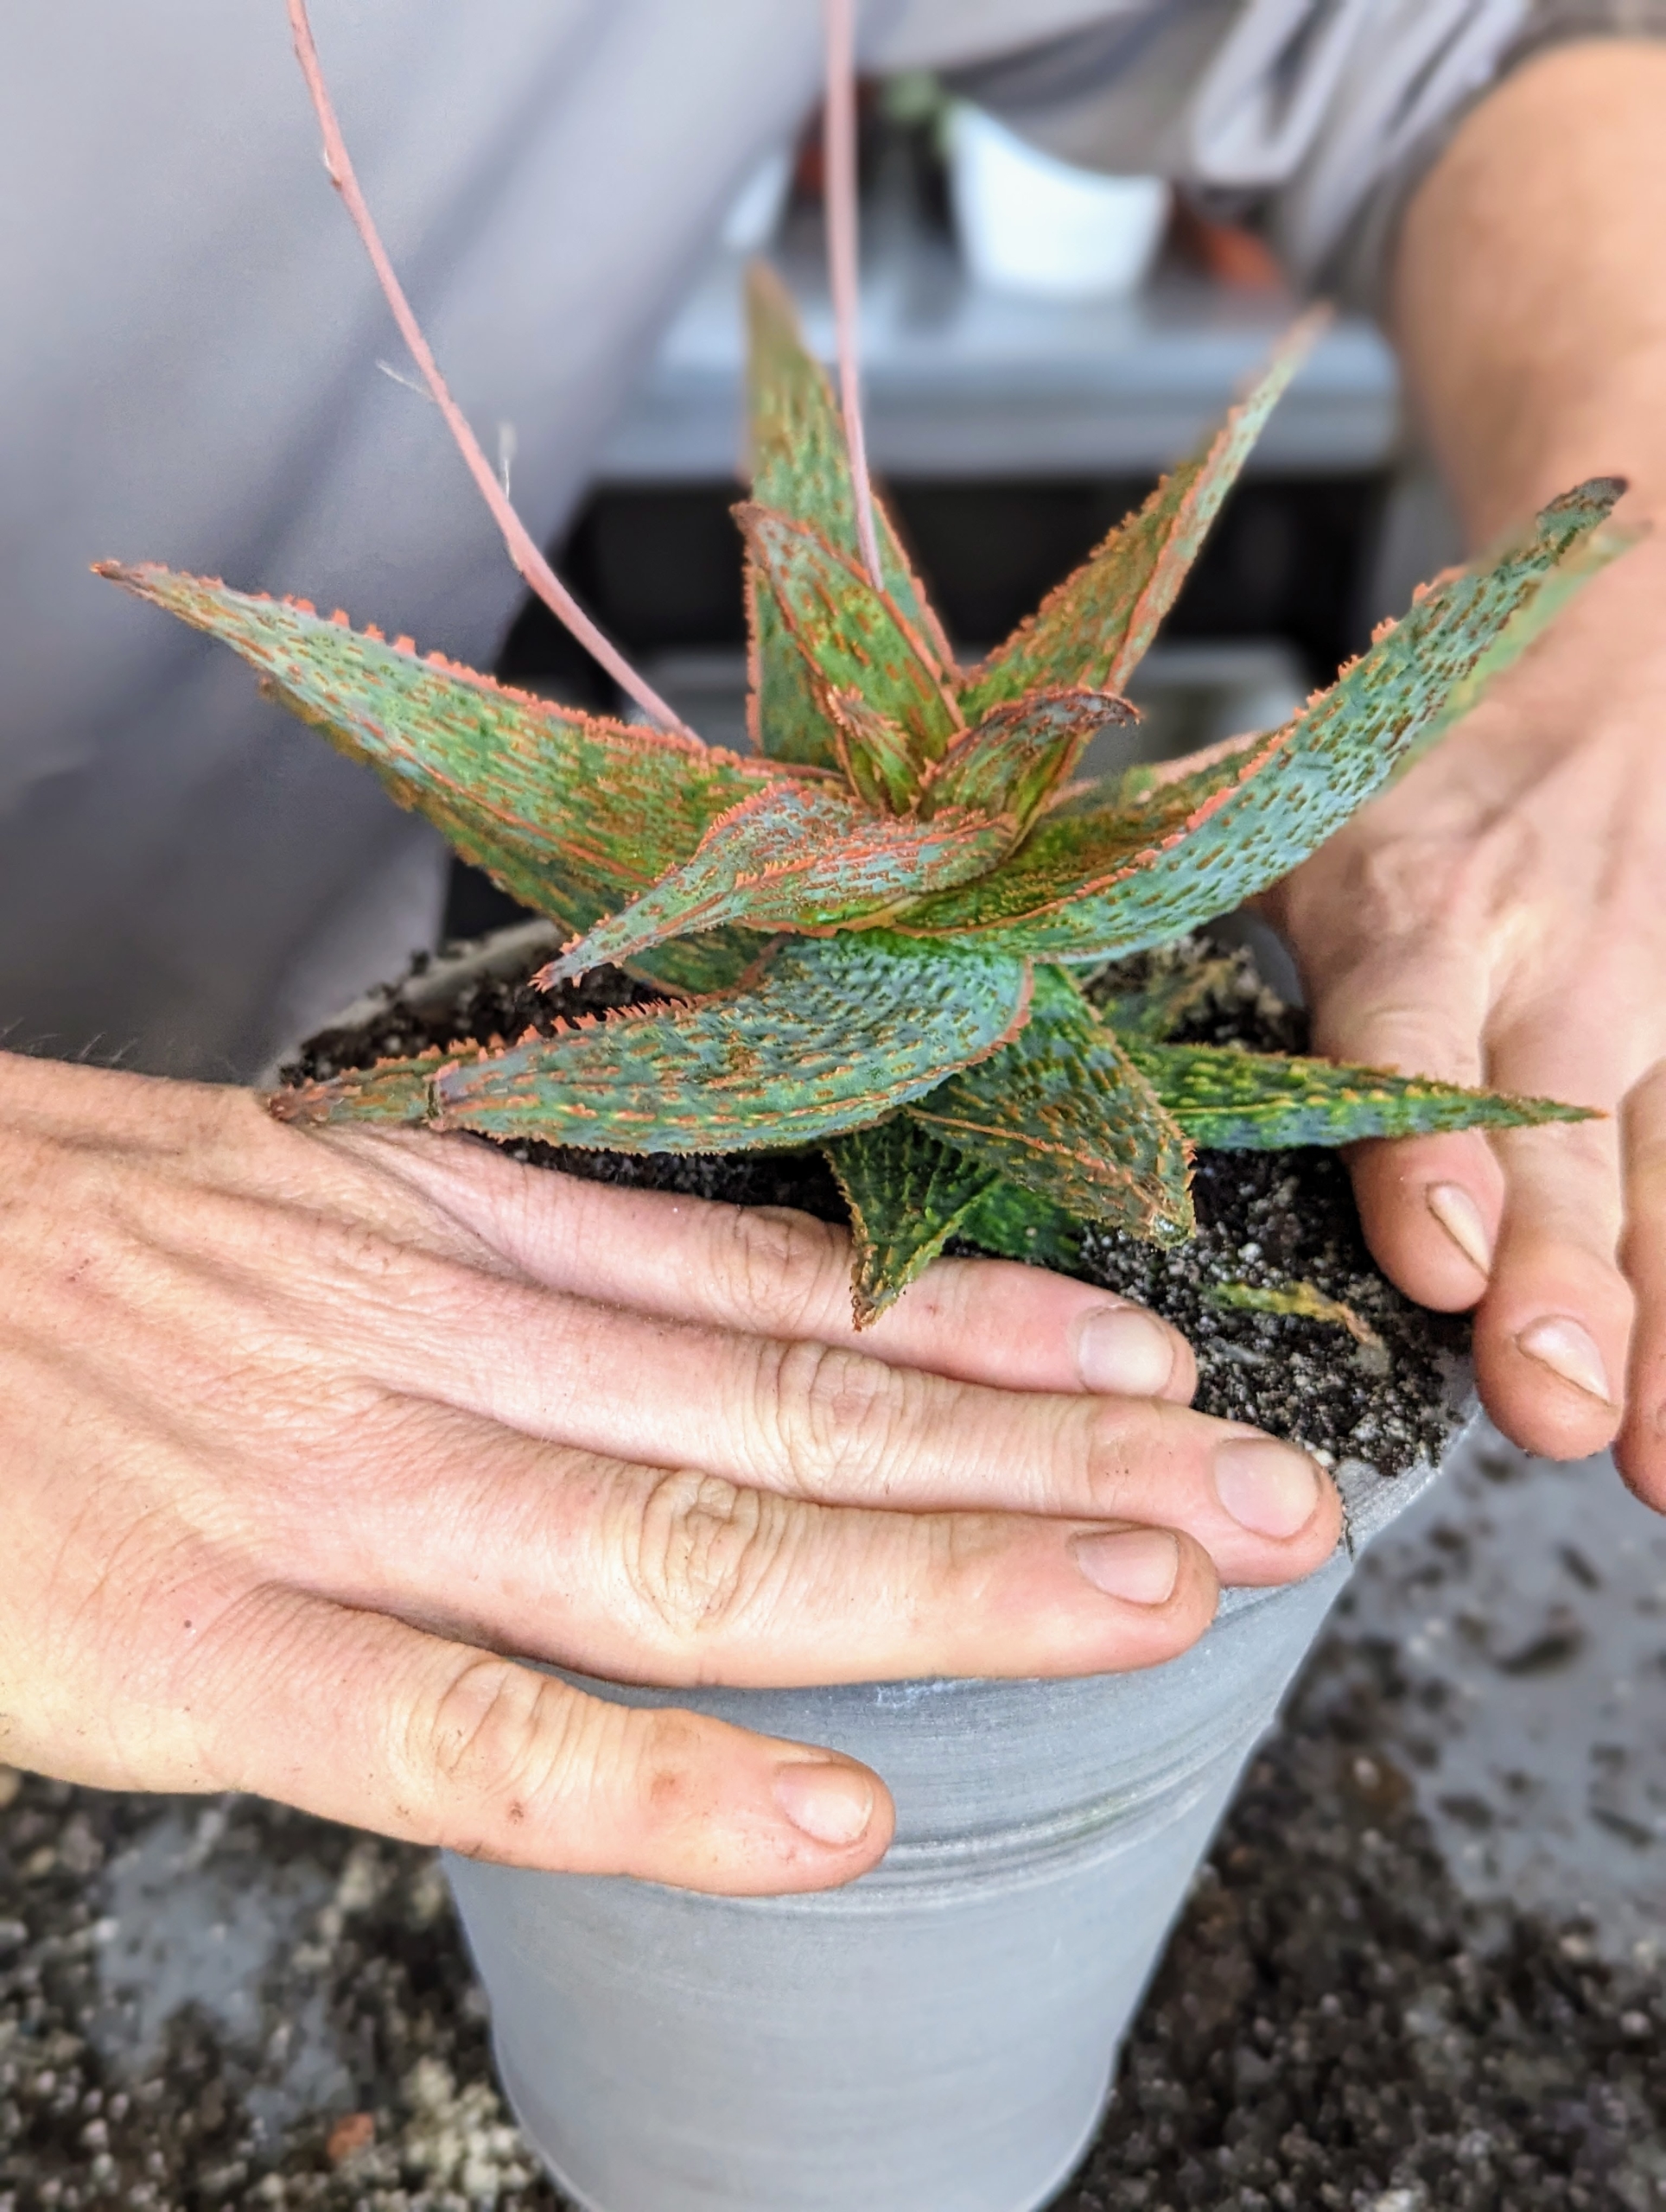
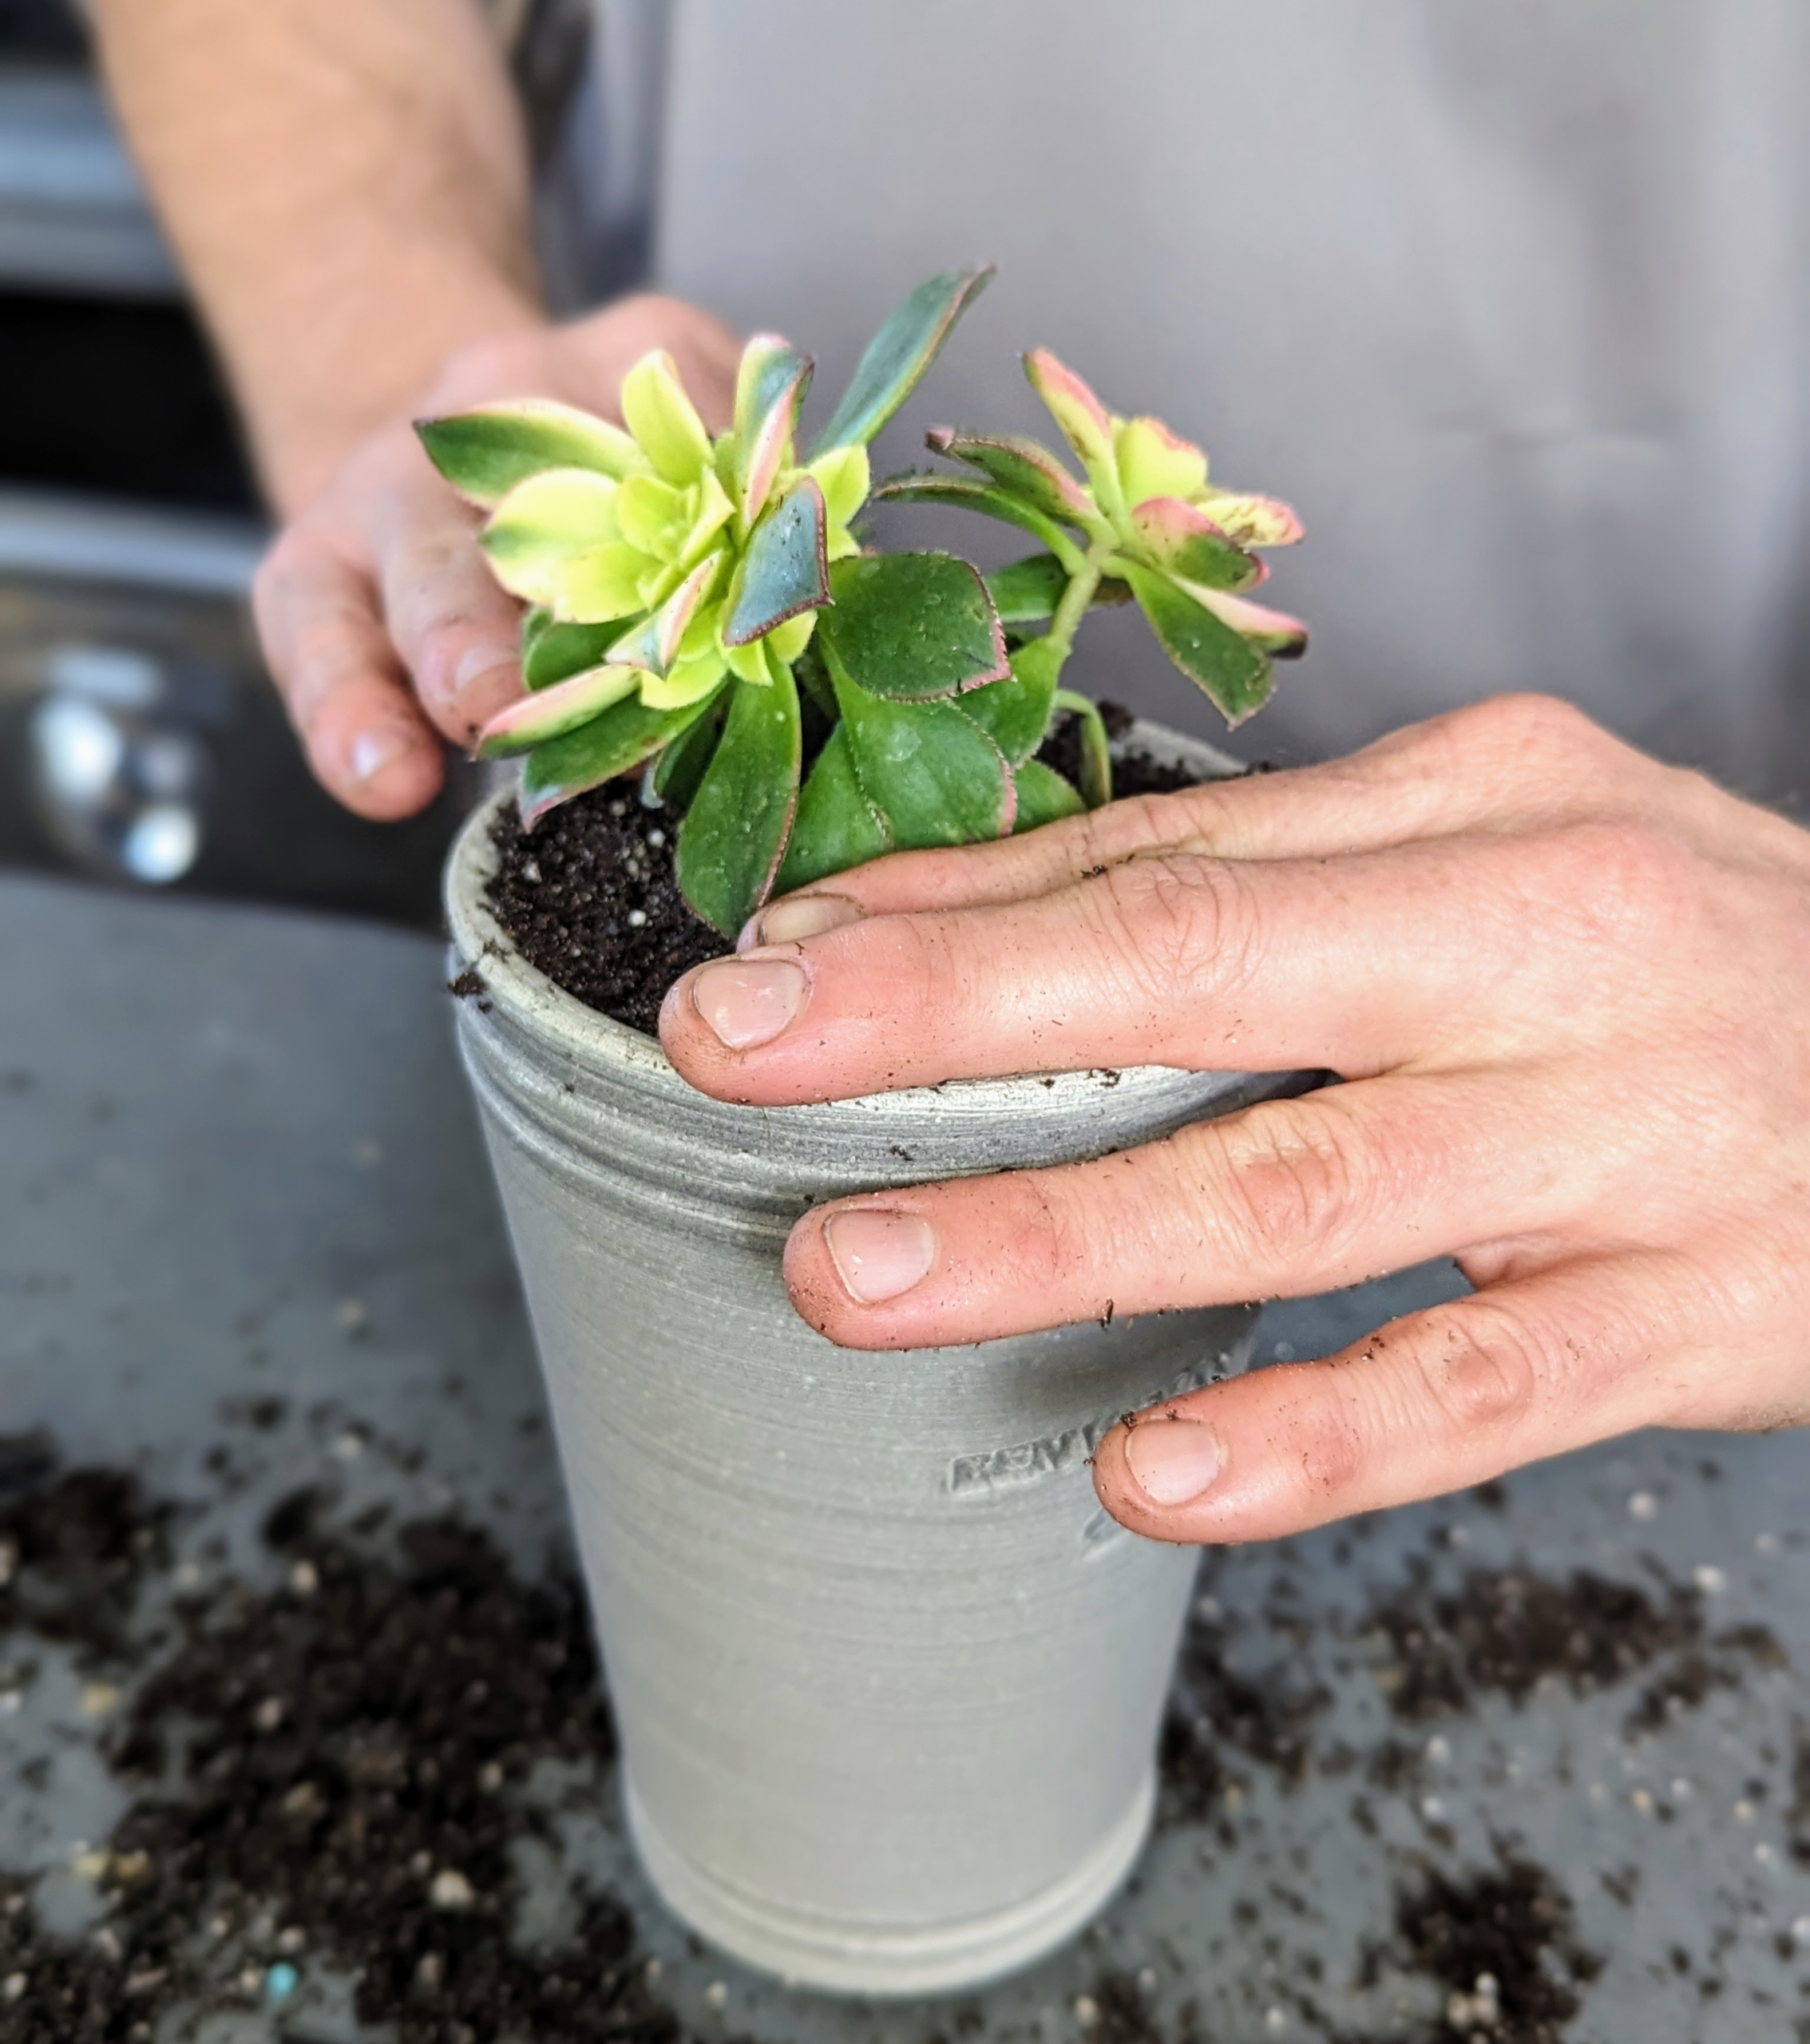
This is Aloe ‘Marmalade’, also known as Aloe ‘Orange Marmalade.’ Before placing it into its new container, Ryan loosens the root ball with his hands just a bit to stimulate new root growth.
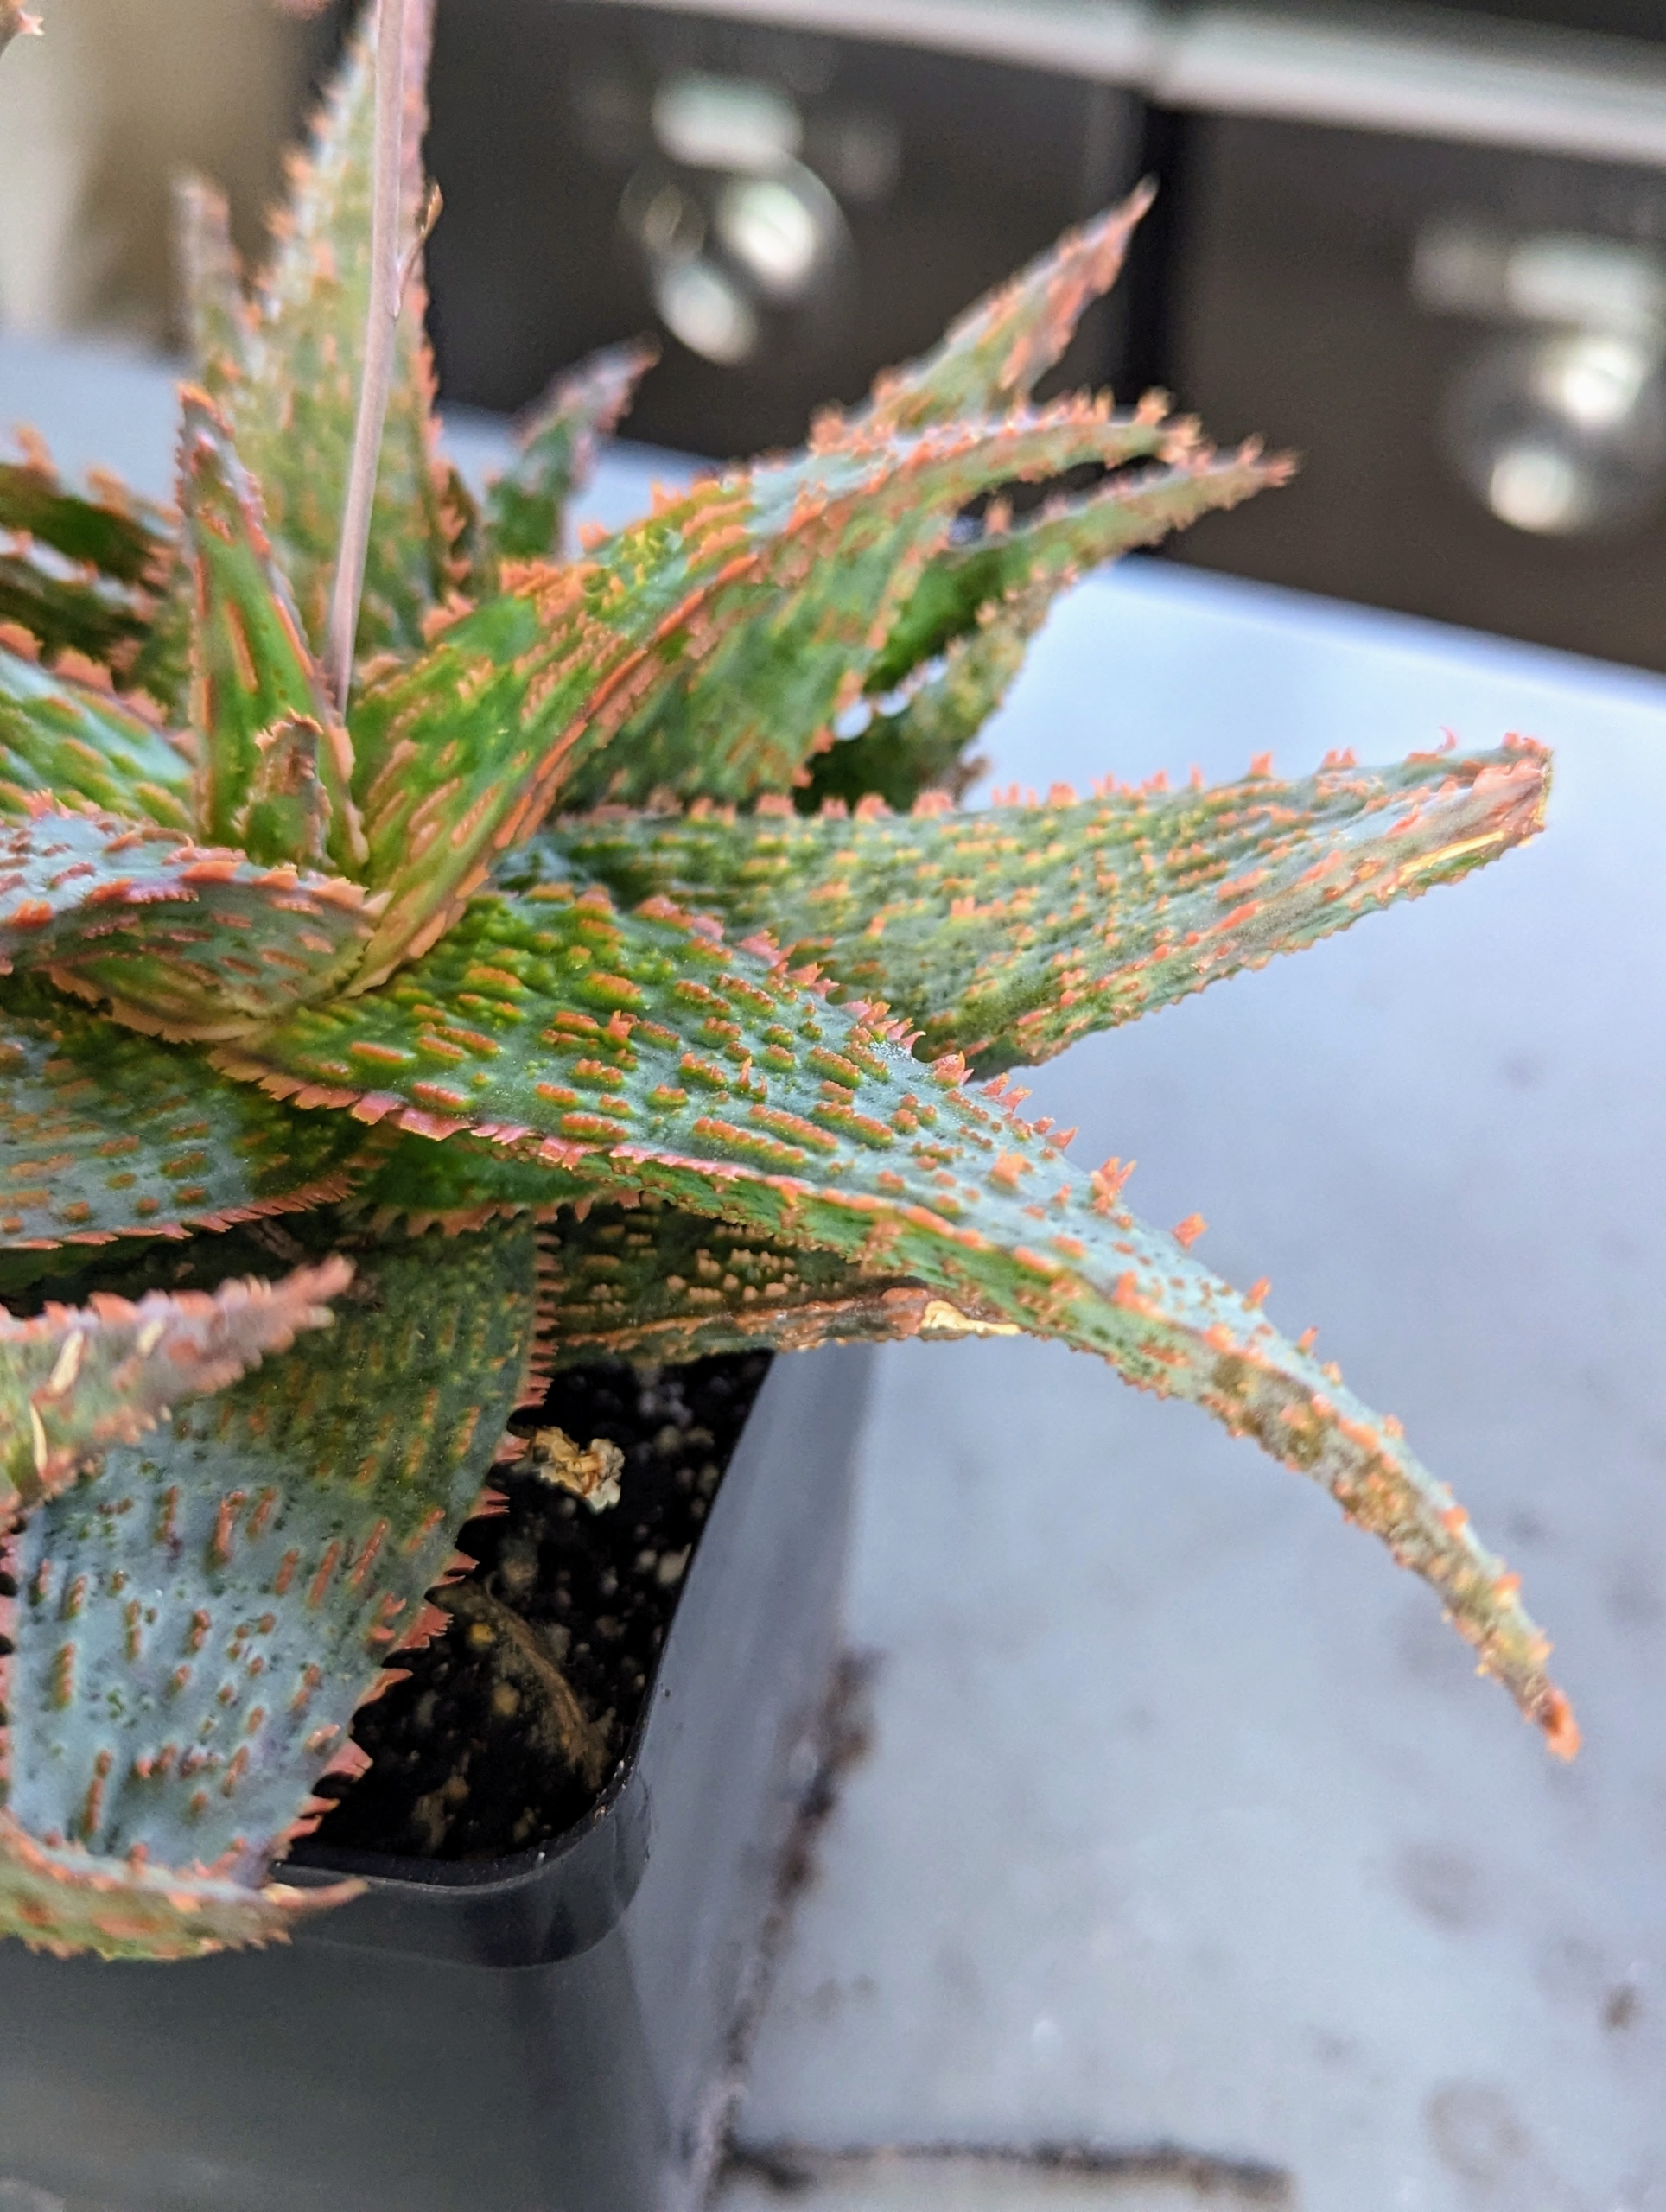
Aloe ‘Marmalade’ is a striking aloe with star-shaped blue-green rosettes. The leaves are covered in orange bumps and lined with small jagged teeth that tend to be flat with a slight downward arch.
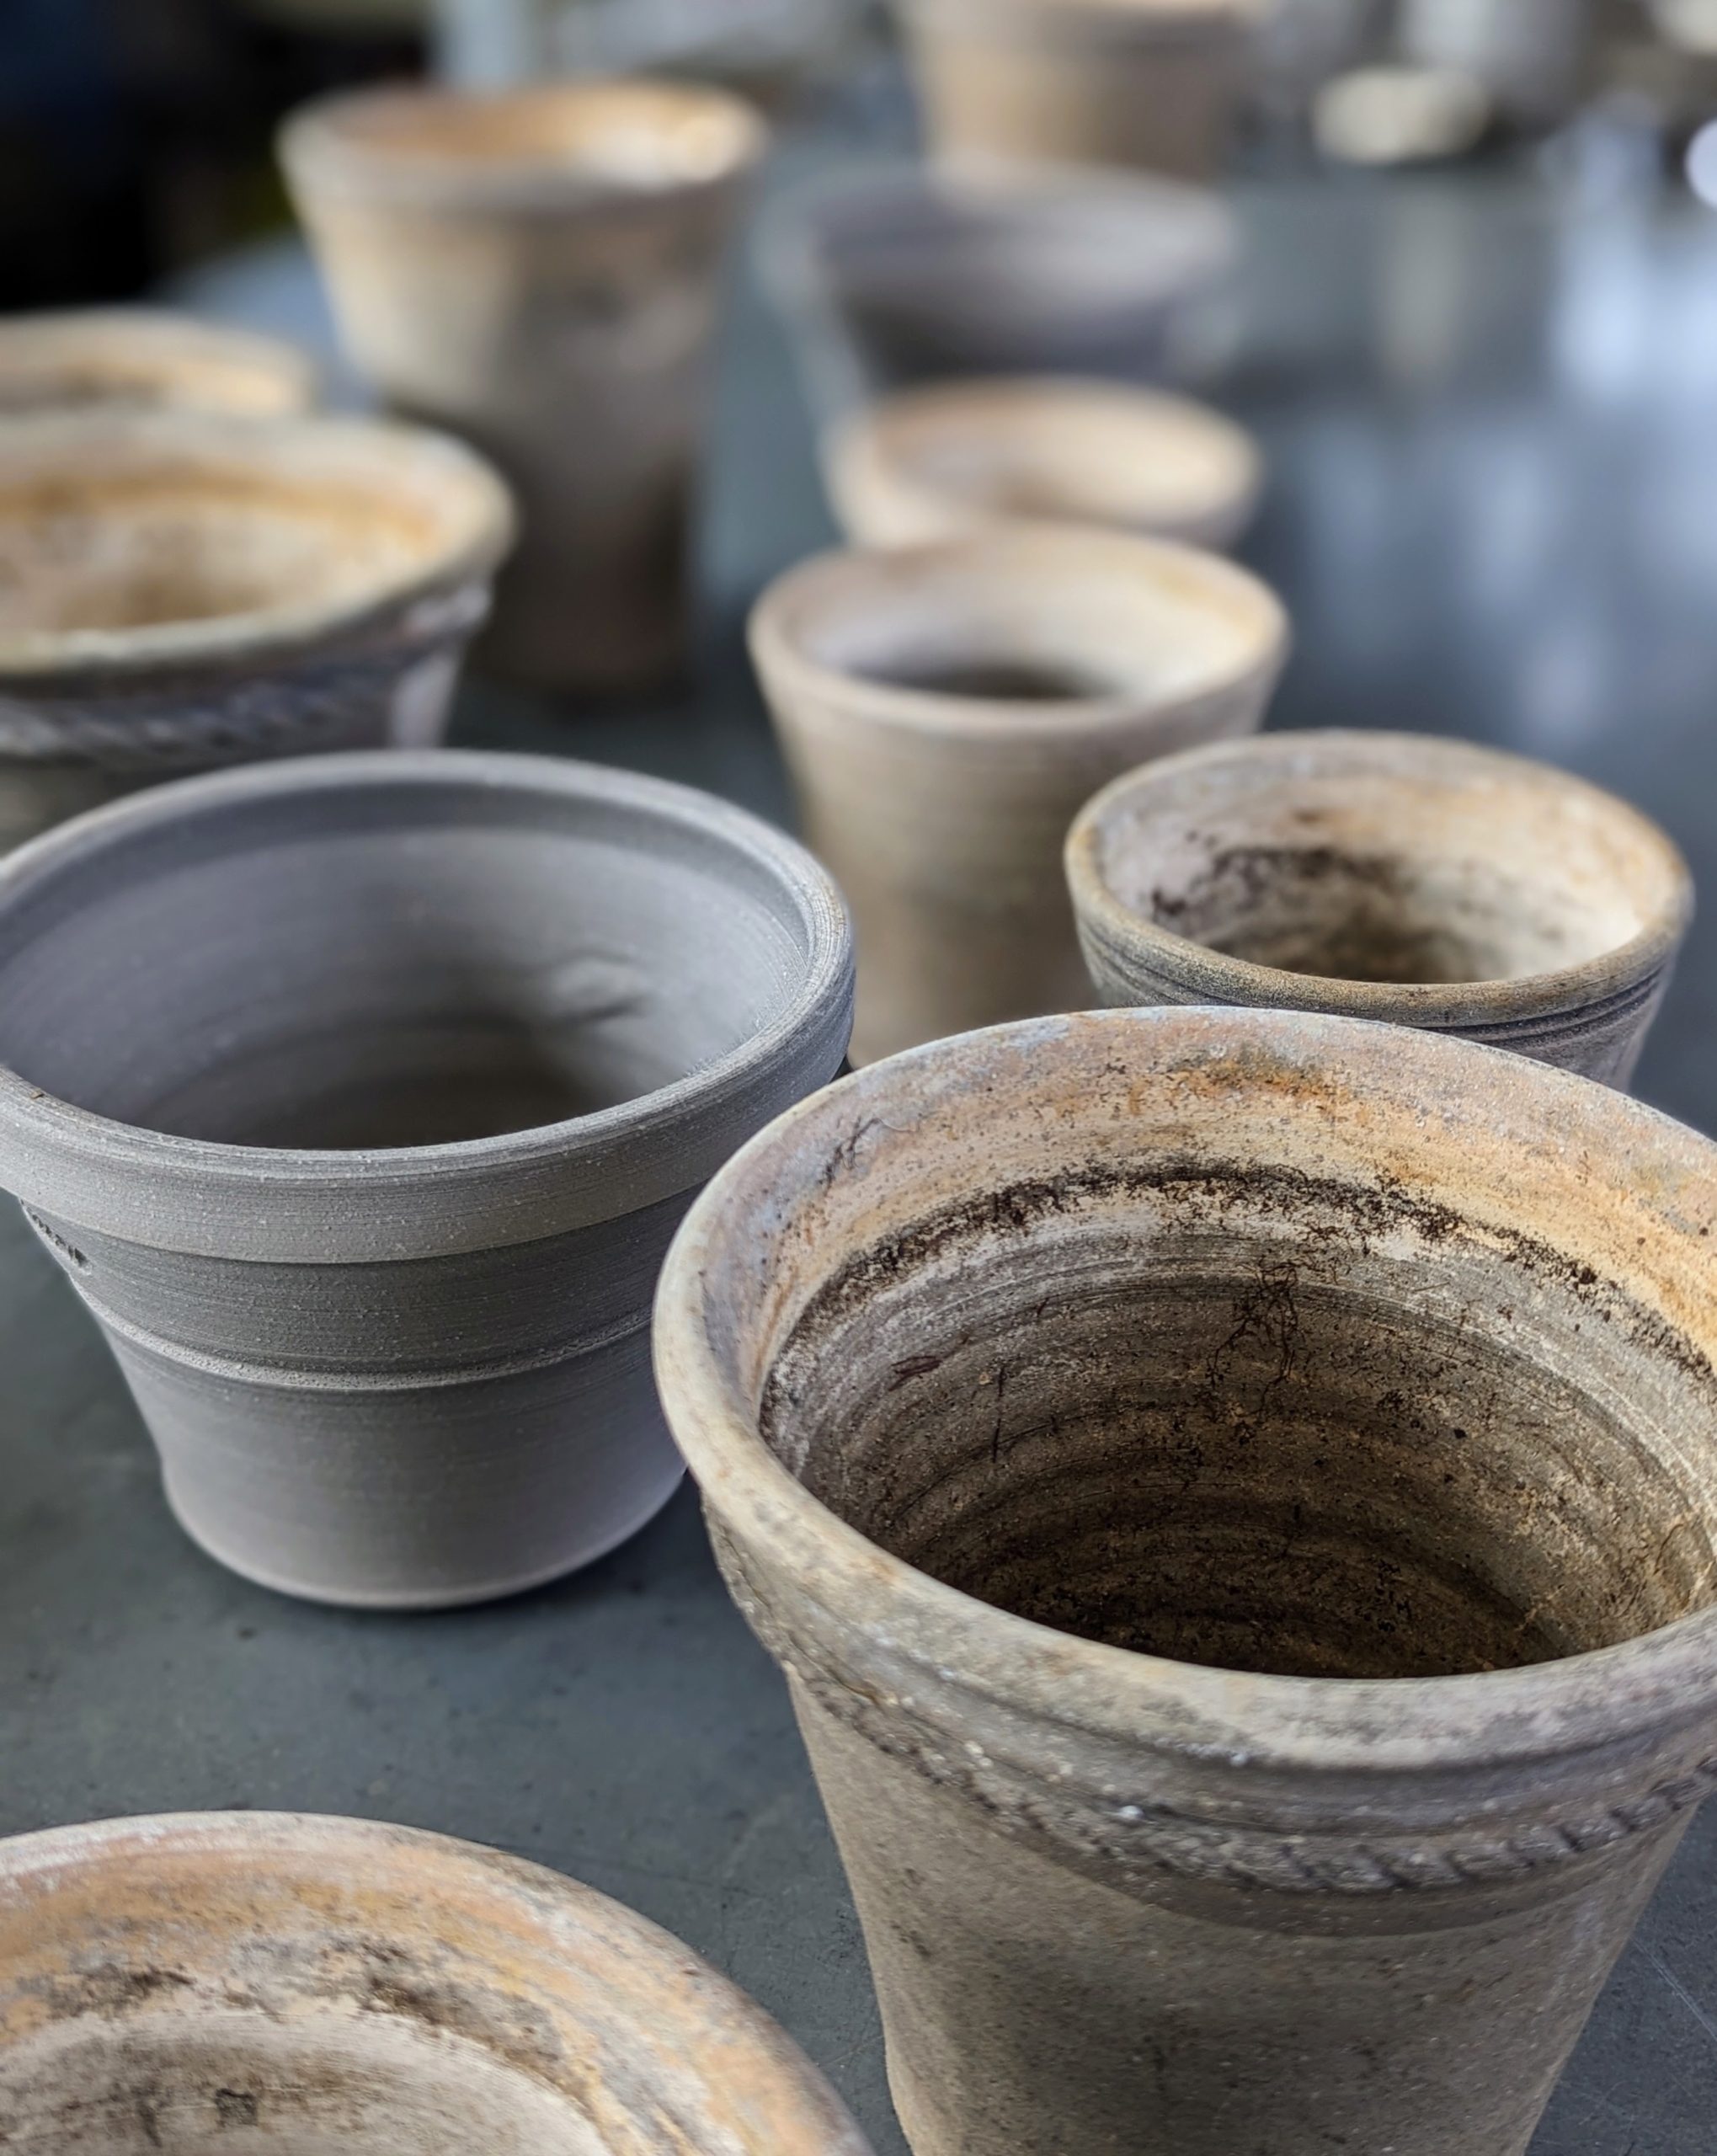
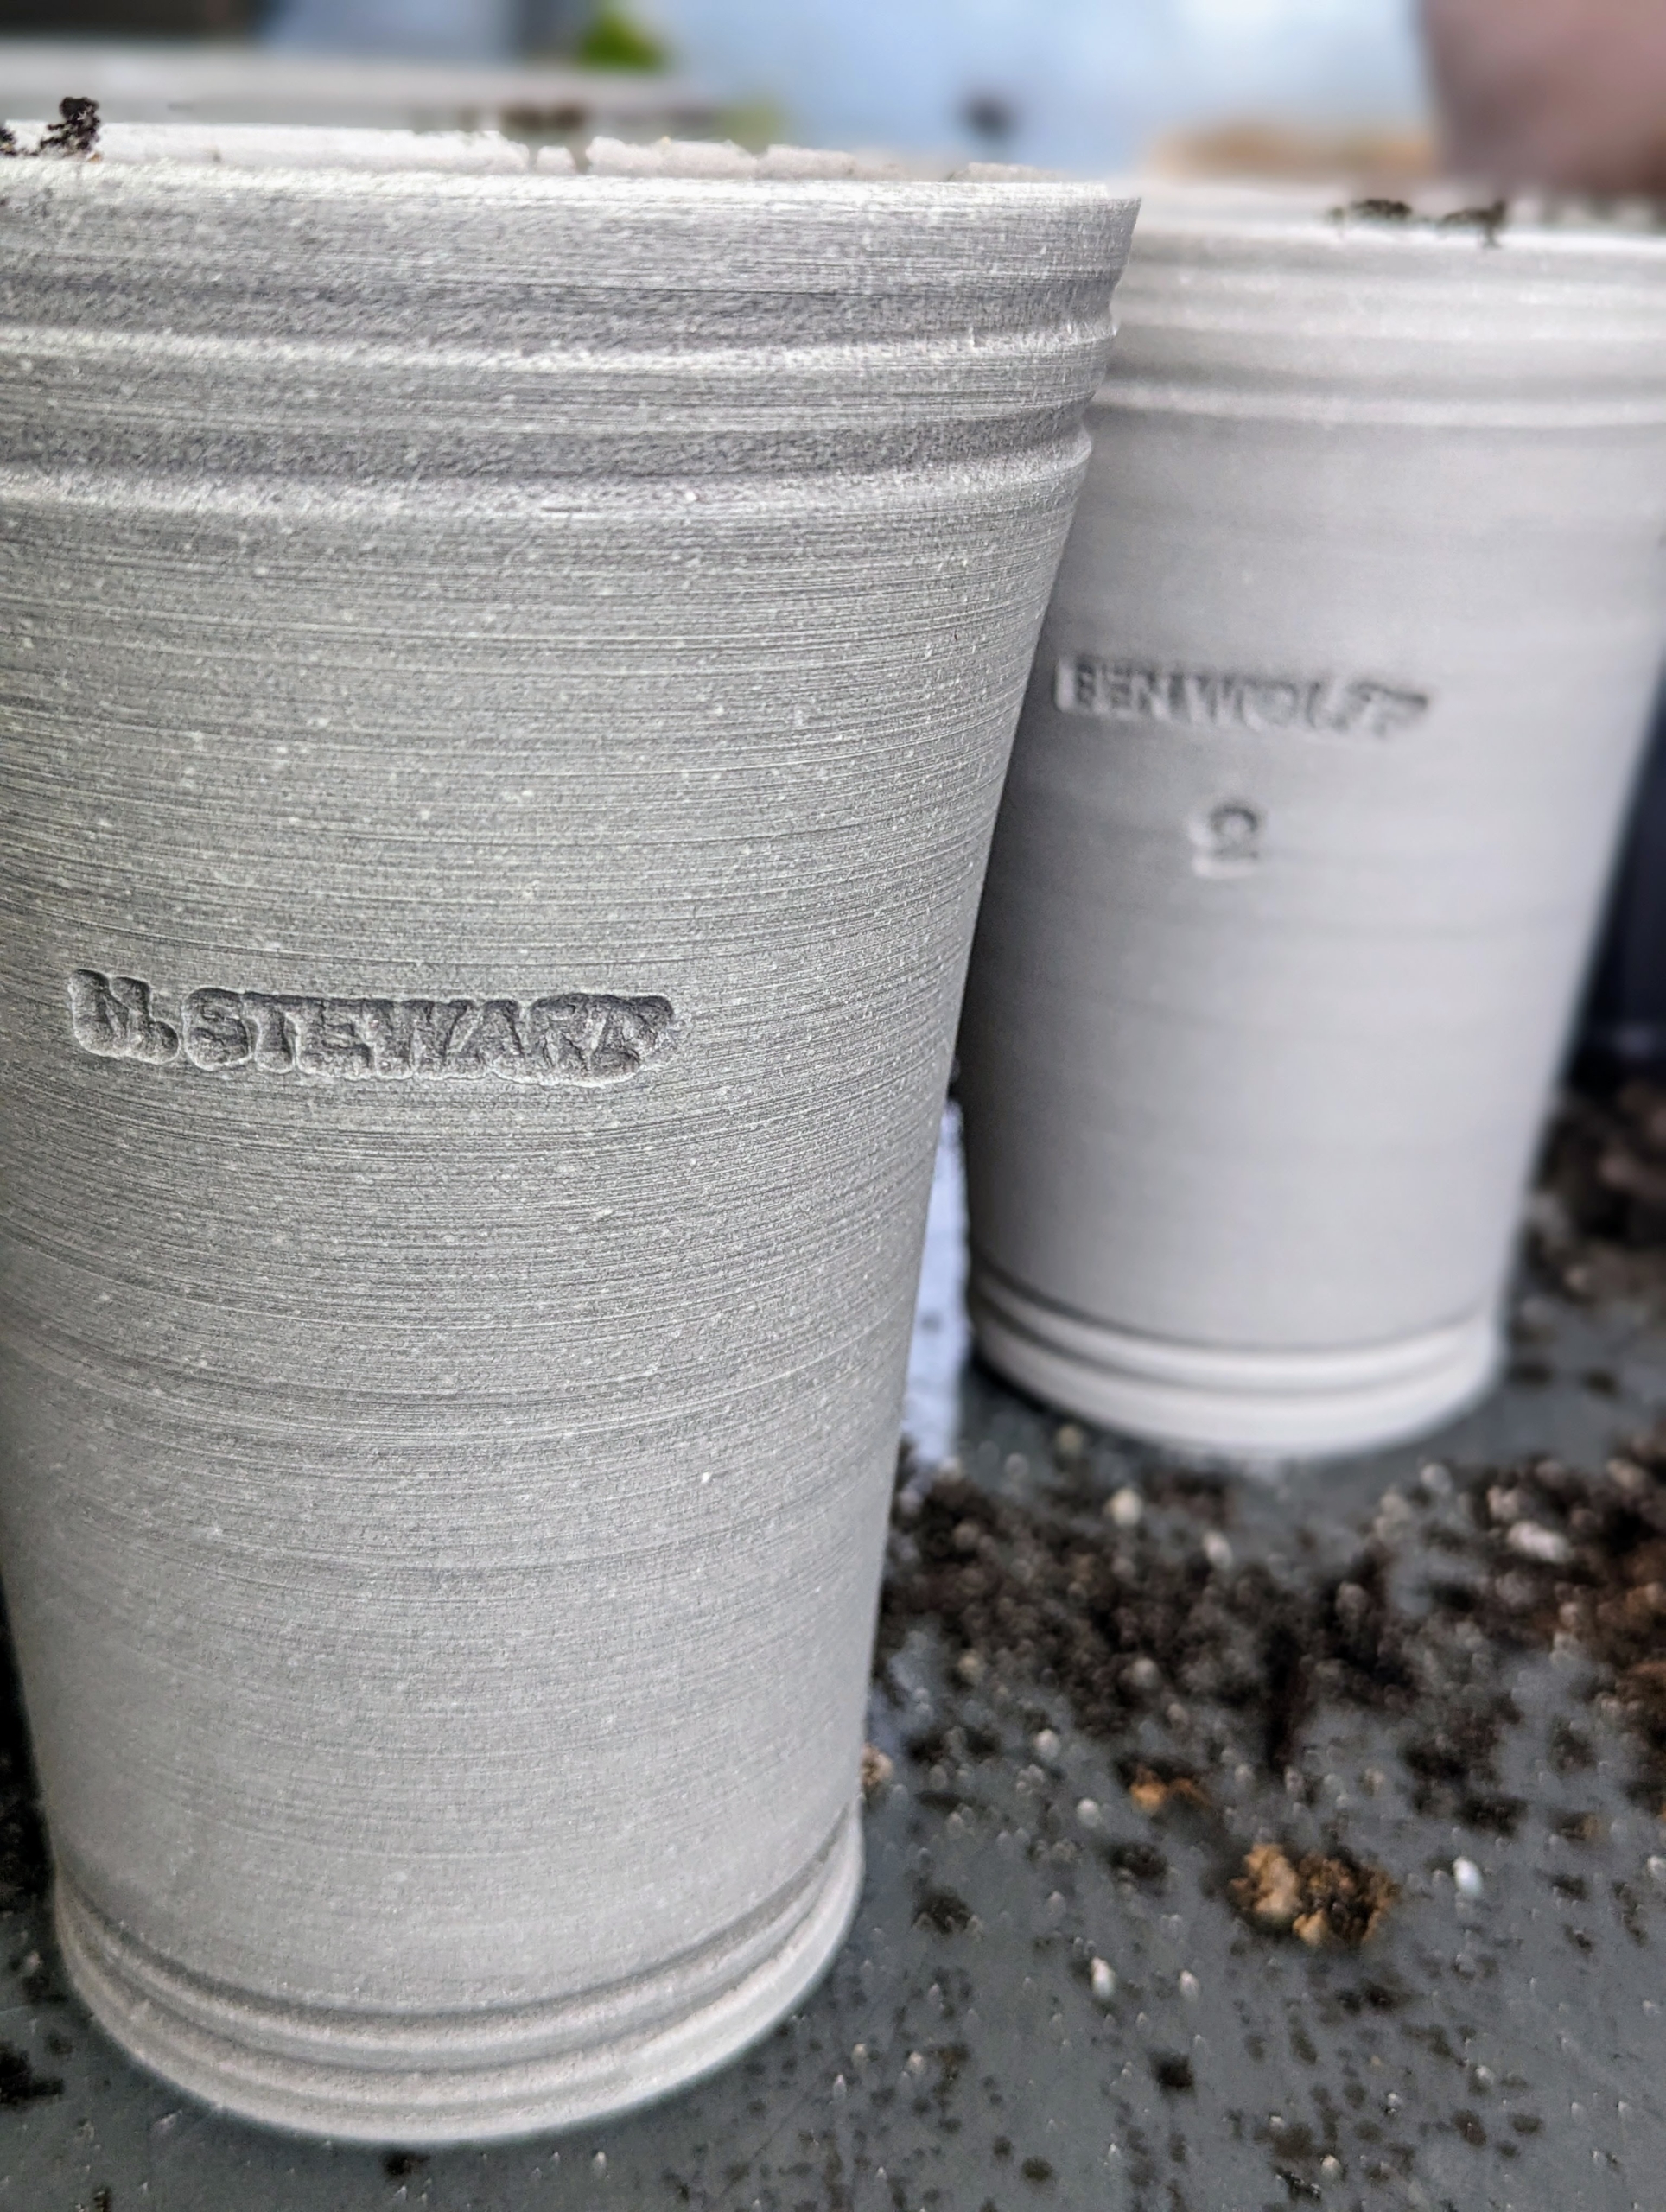
Succulents are best planted in clay or terra cotta pots with proper drainage holes because the vessels dry quickly, and prevent water from building up. I favor clay pots and have a large collection, especially from master potters, Guy Wolff and his son Ben Wolff. Ryan pulled a group of different pots to see which ones work best. Select a planter that is at least two-inches wider than the plant’s diameter and tall enough to accommodate the roots.
Every few years, I add to my stock of planting pots. These are new vessels from Ben Wolff. He and his father make every one of them by hand. On the side of each one, he stamps my name. On another side is Ben’s name and the wet-weight of the clay used.
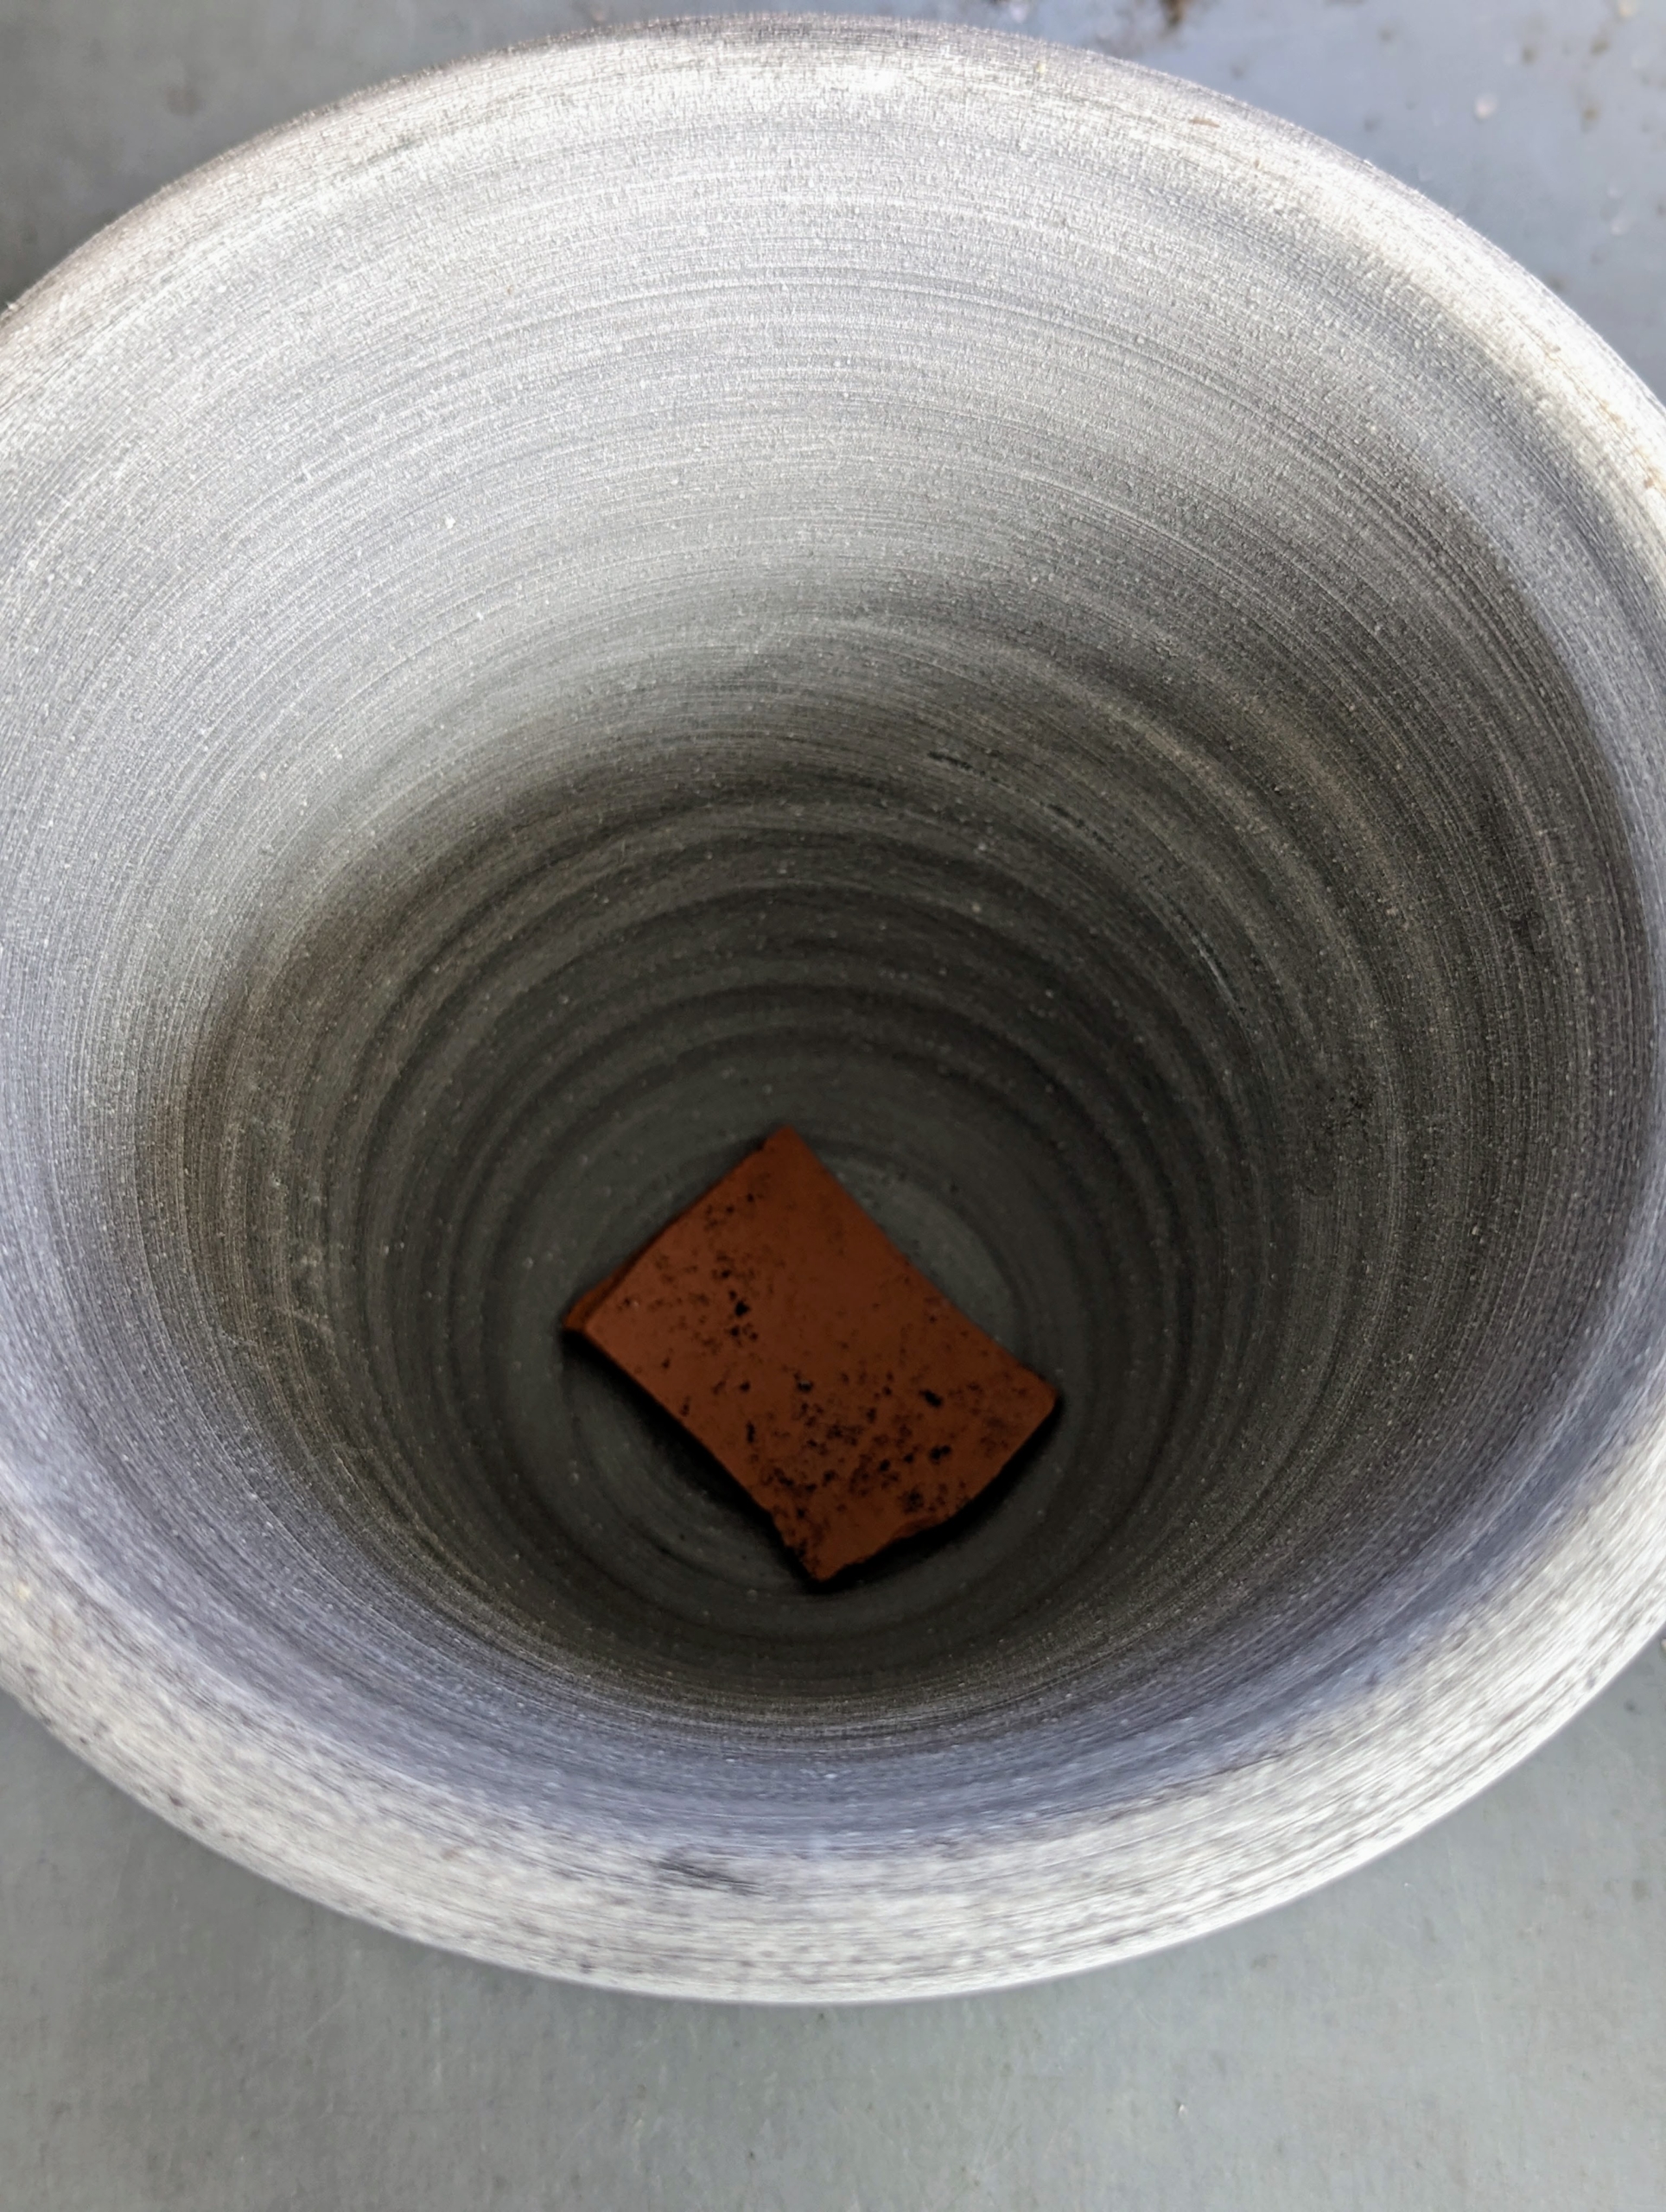
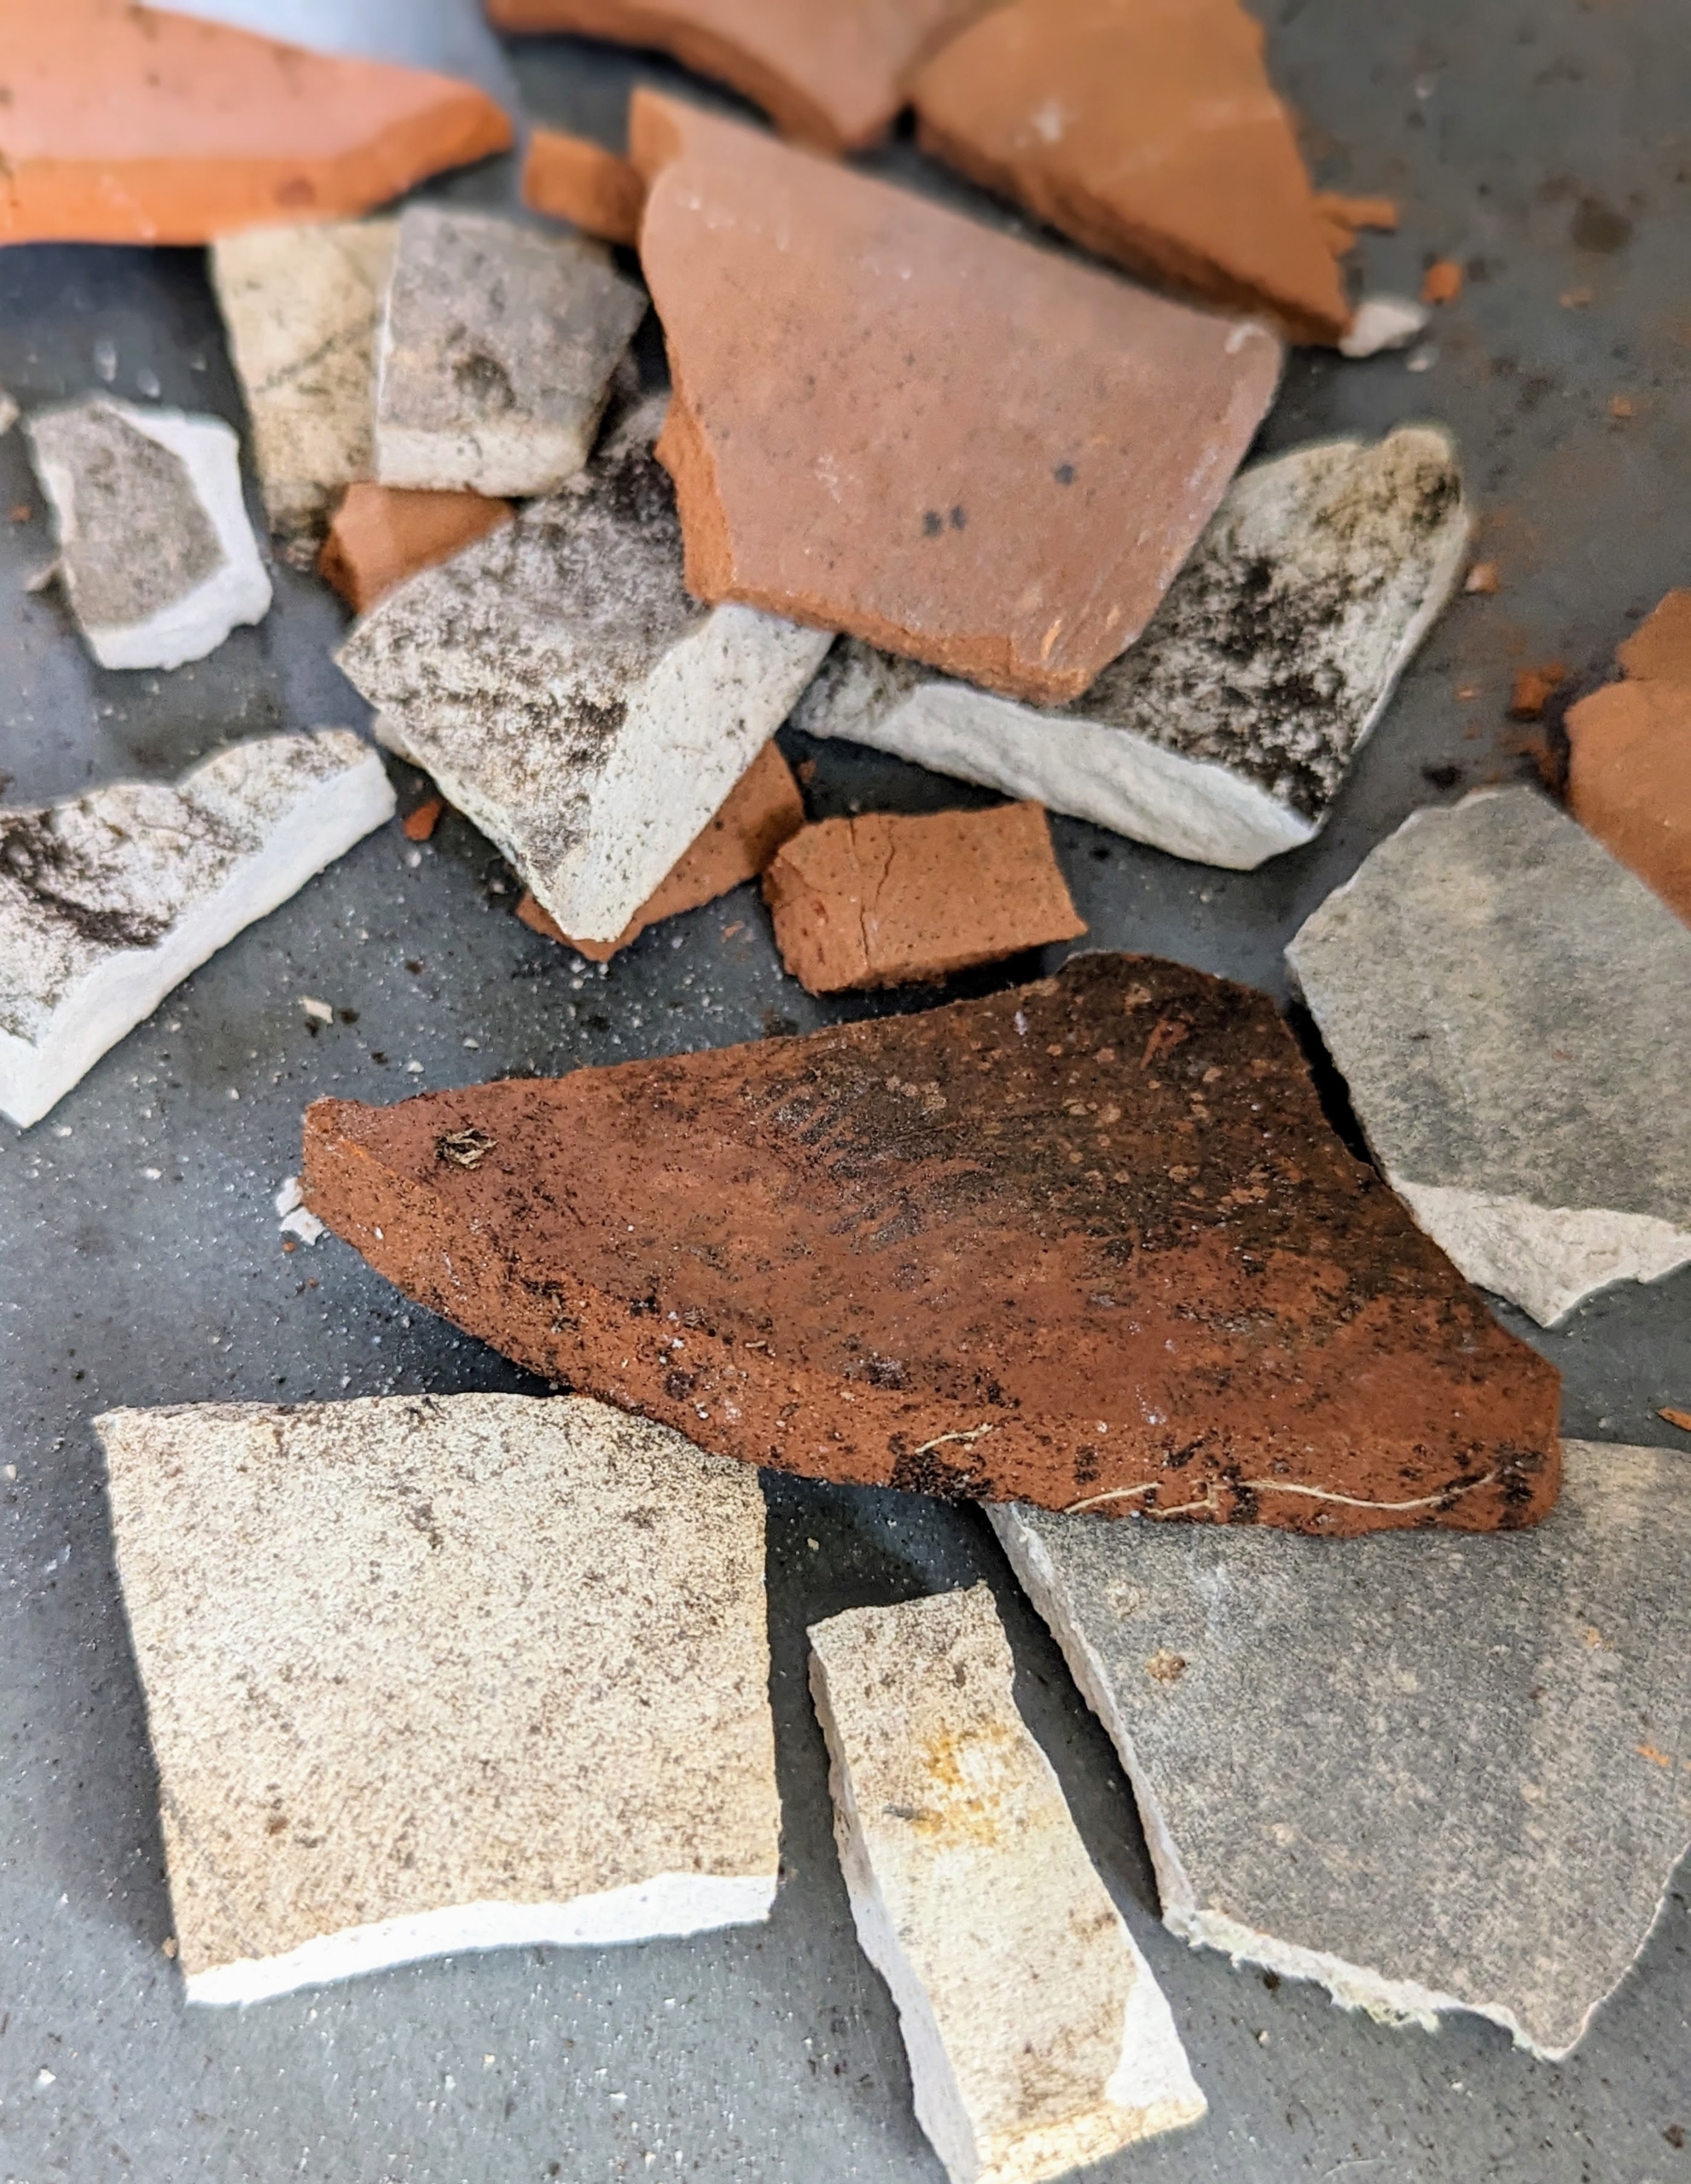
Each pot has a drainage hole. A clay shard is placed over the hole to help prevent any soil from falling out and to aid with drainage.
We always save any broken shards so they can be repurposed in the pots.
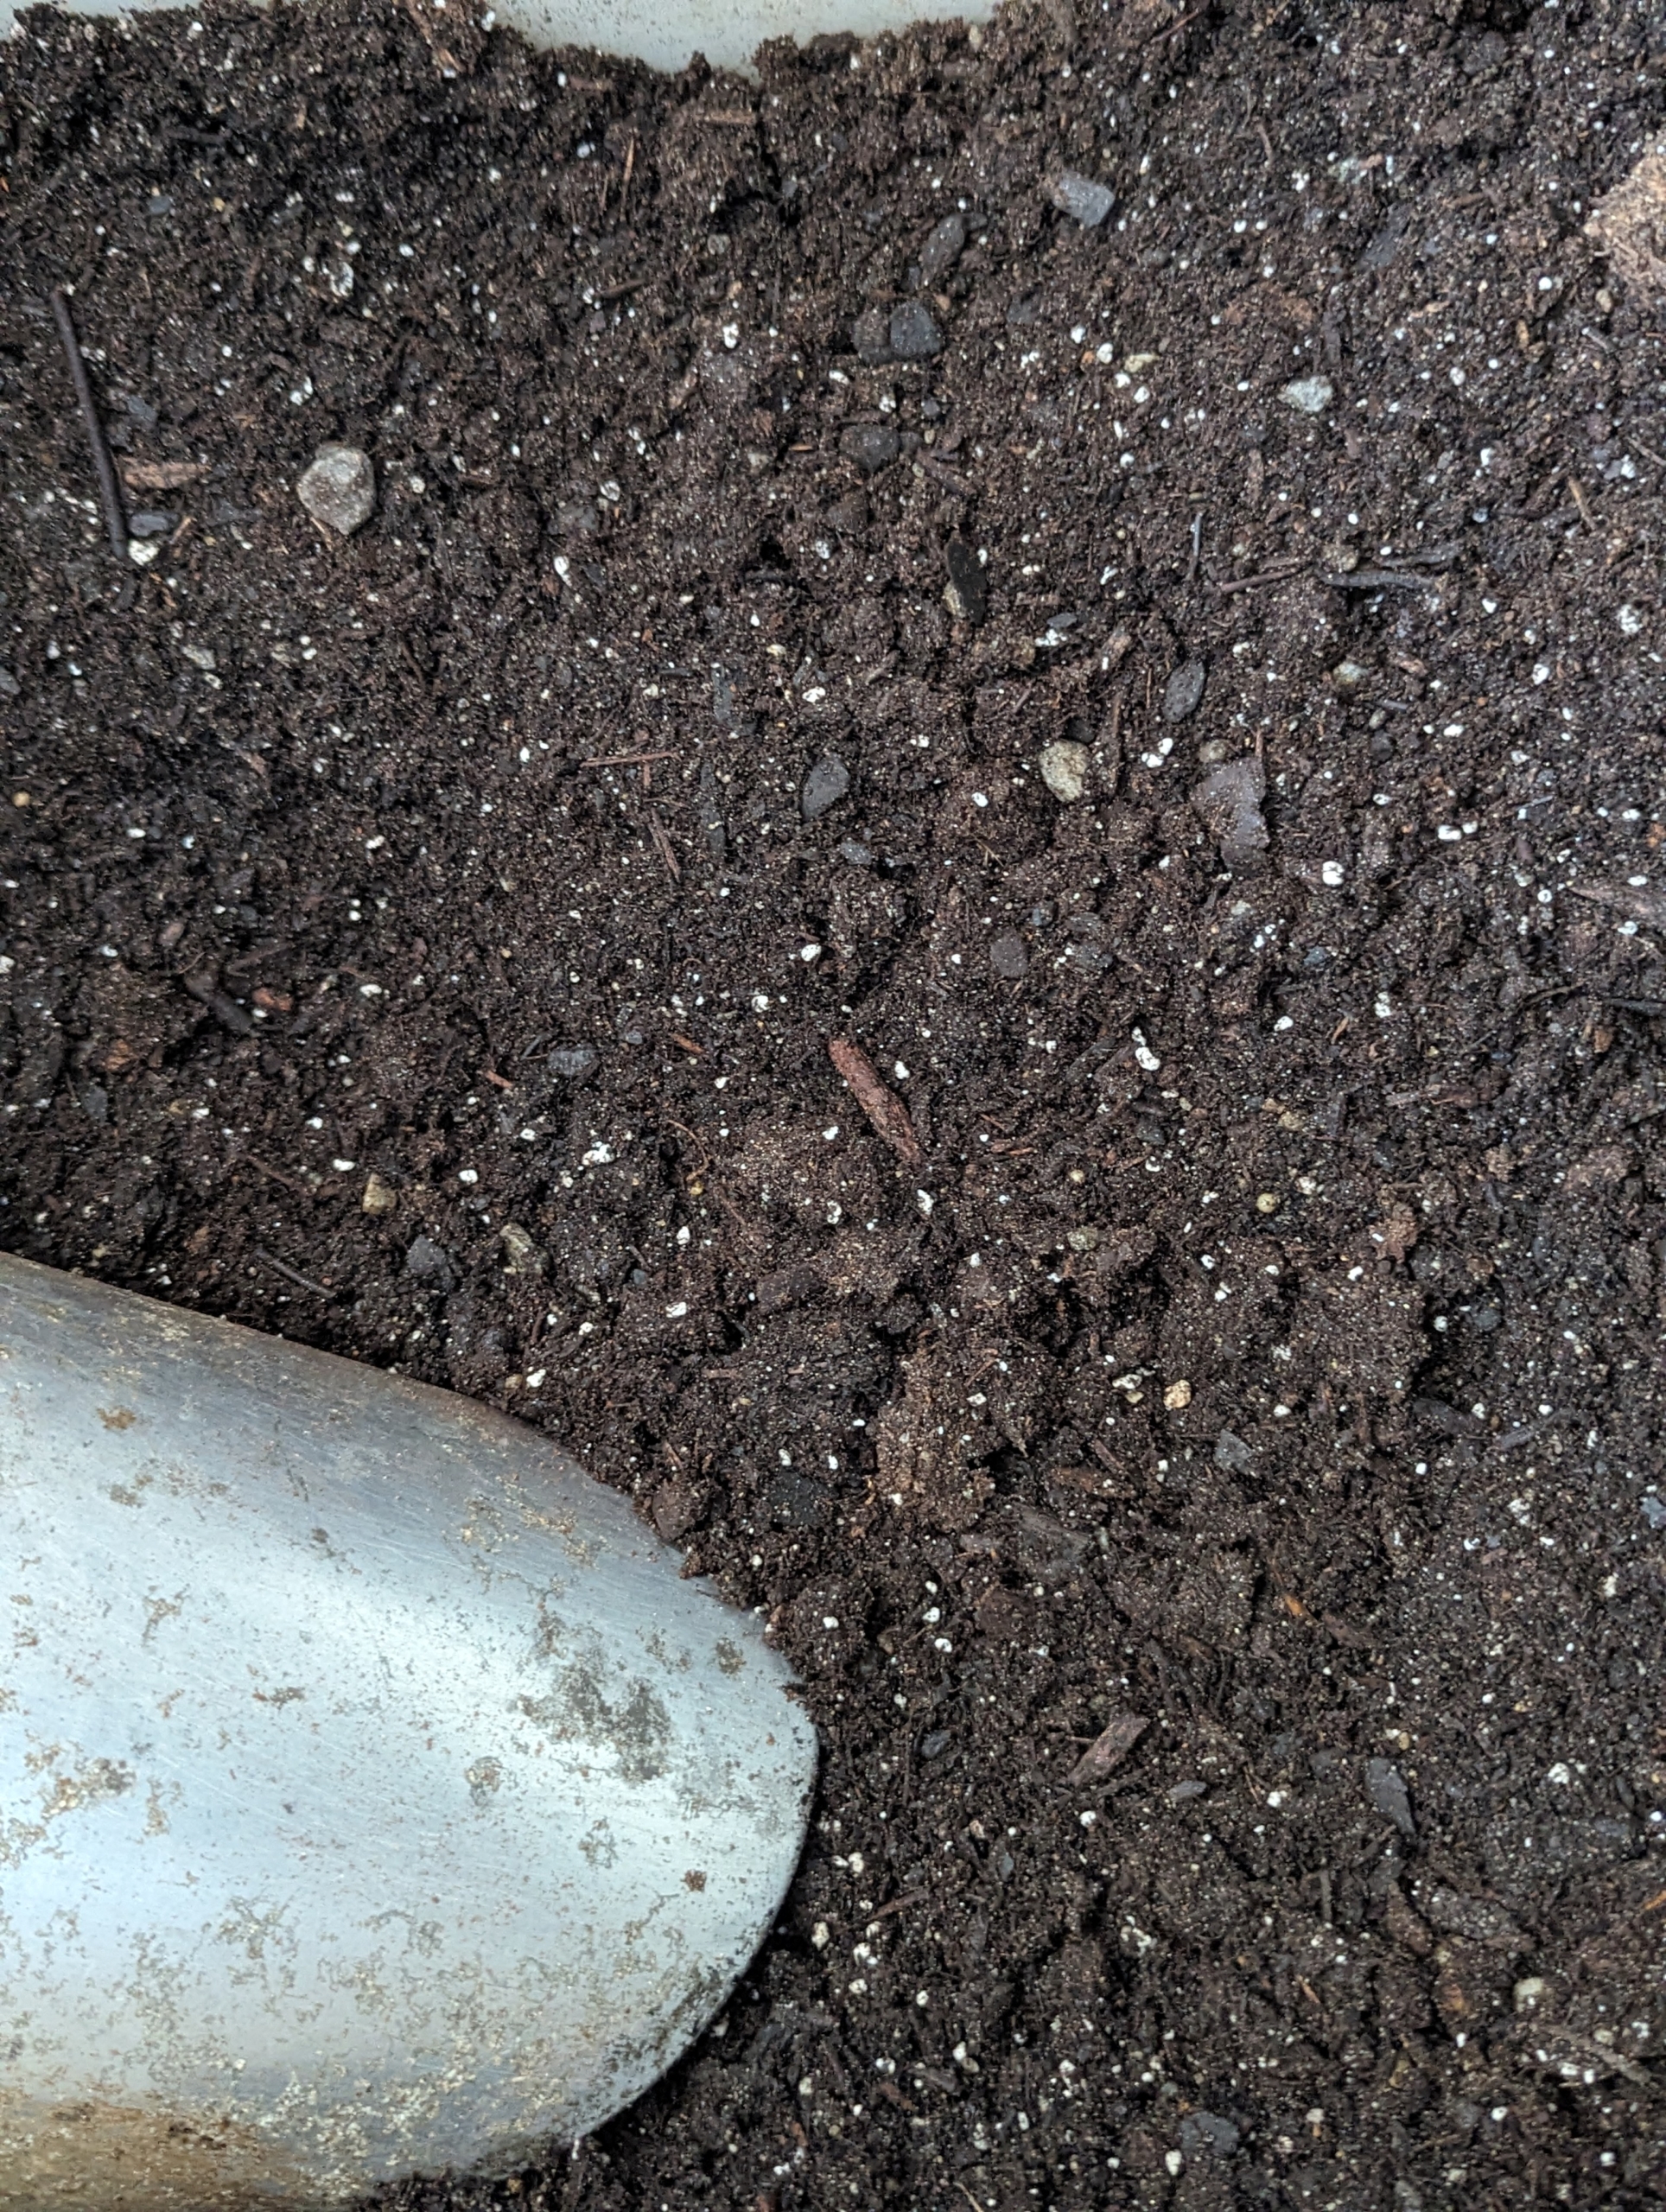
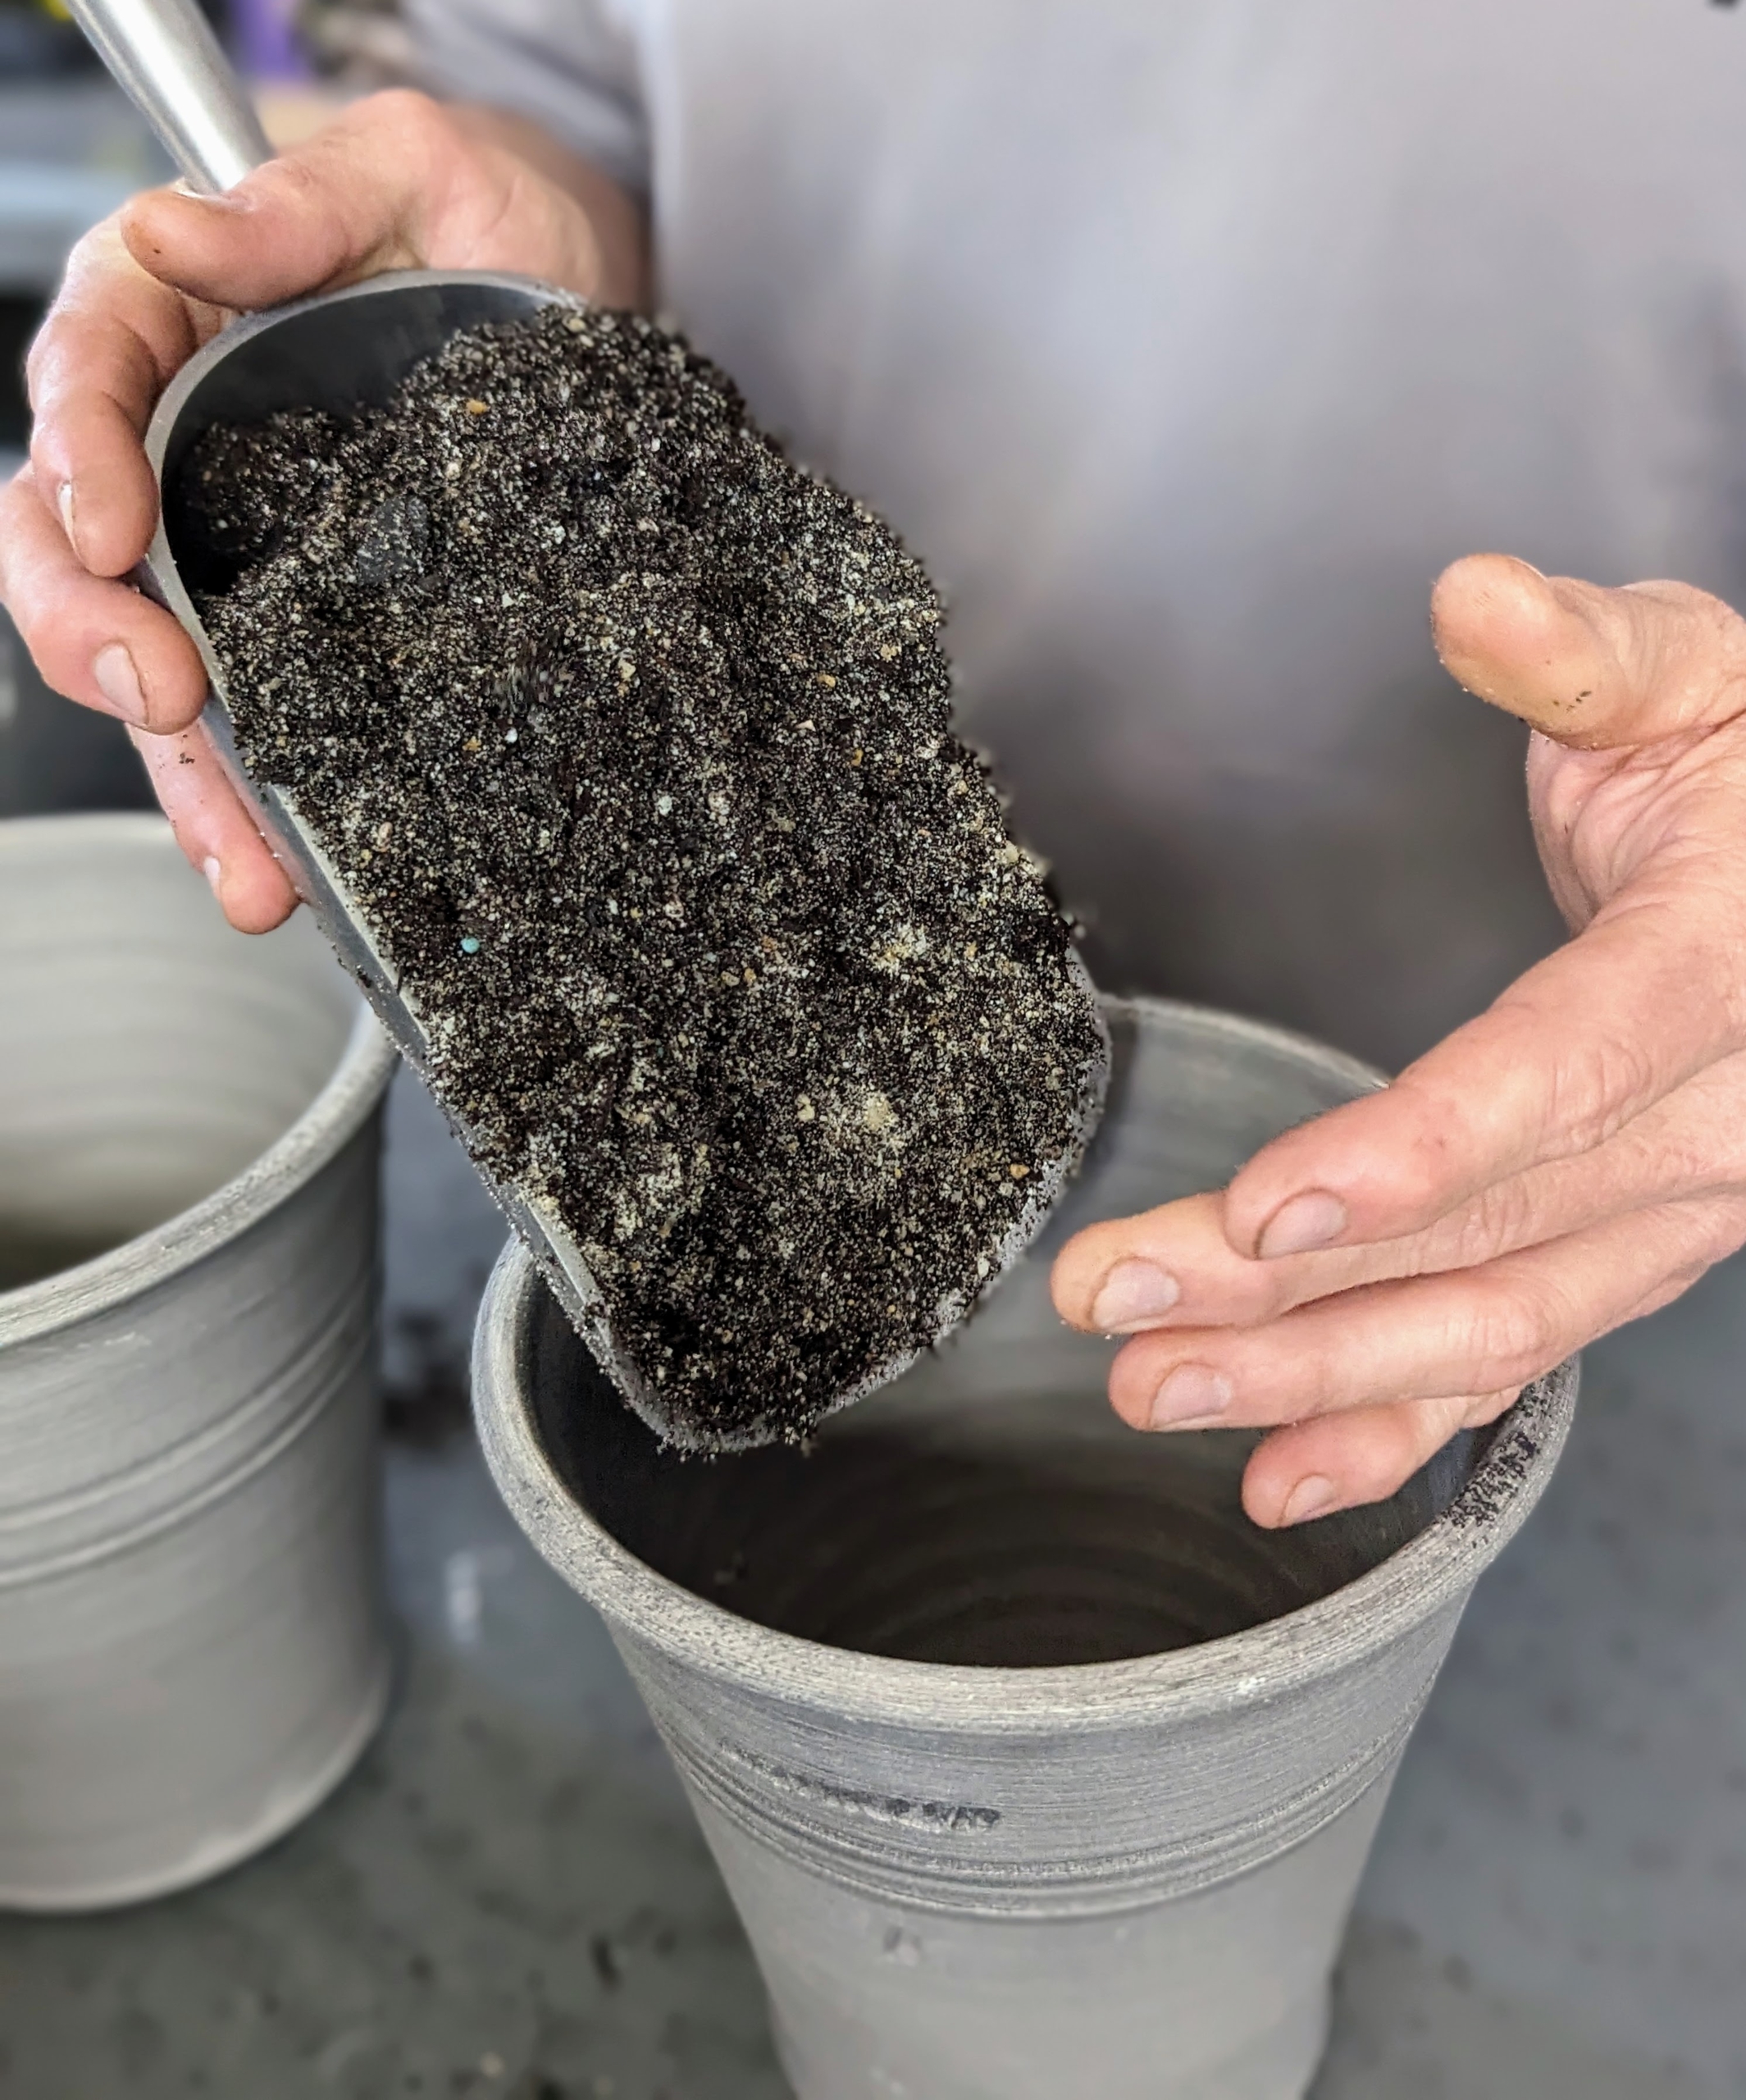
Ryan fills the pots with the appropriate medium. Because succulents such as aloe don’t like wet roots, it is important to use a soil mixture that will drain well.
We use a mix of sand, perlite and vermiculite for best drainage. The right soil mix will help to promote faster root growth, and gives quick anchorage to young roots. Ryan also mixes in some all-purpose plant food.
Once it is completely mixed together, Ryan fills about half the pot with the soil mix.
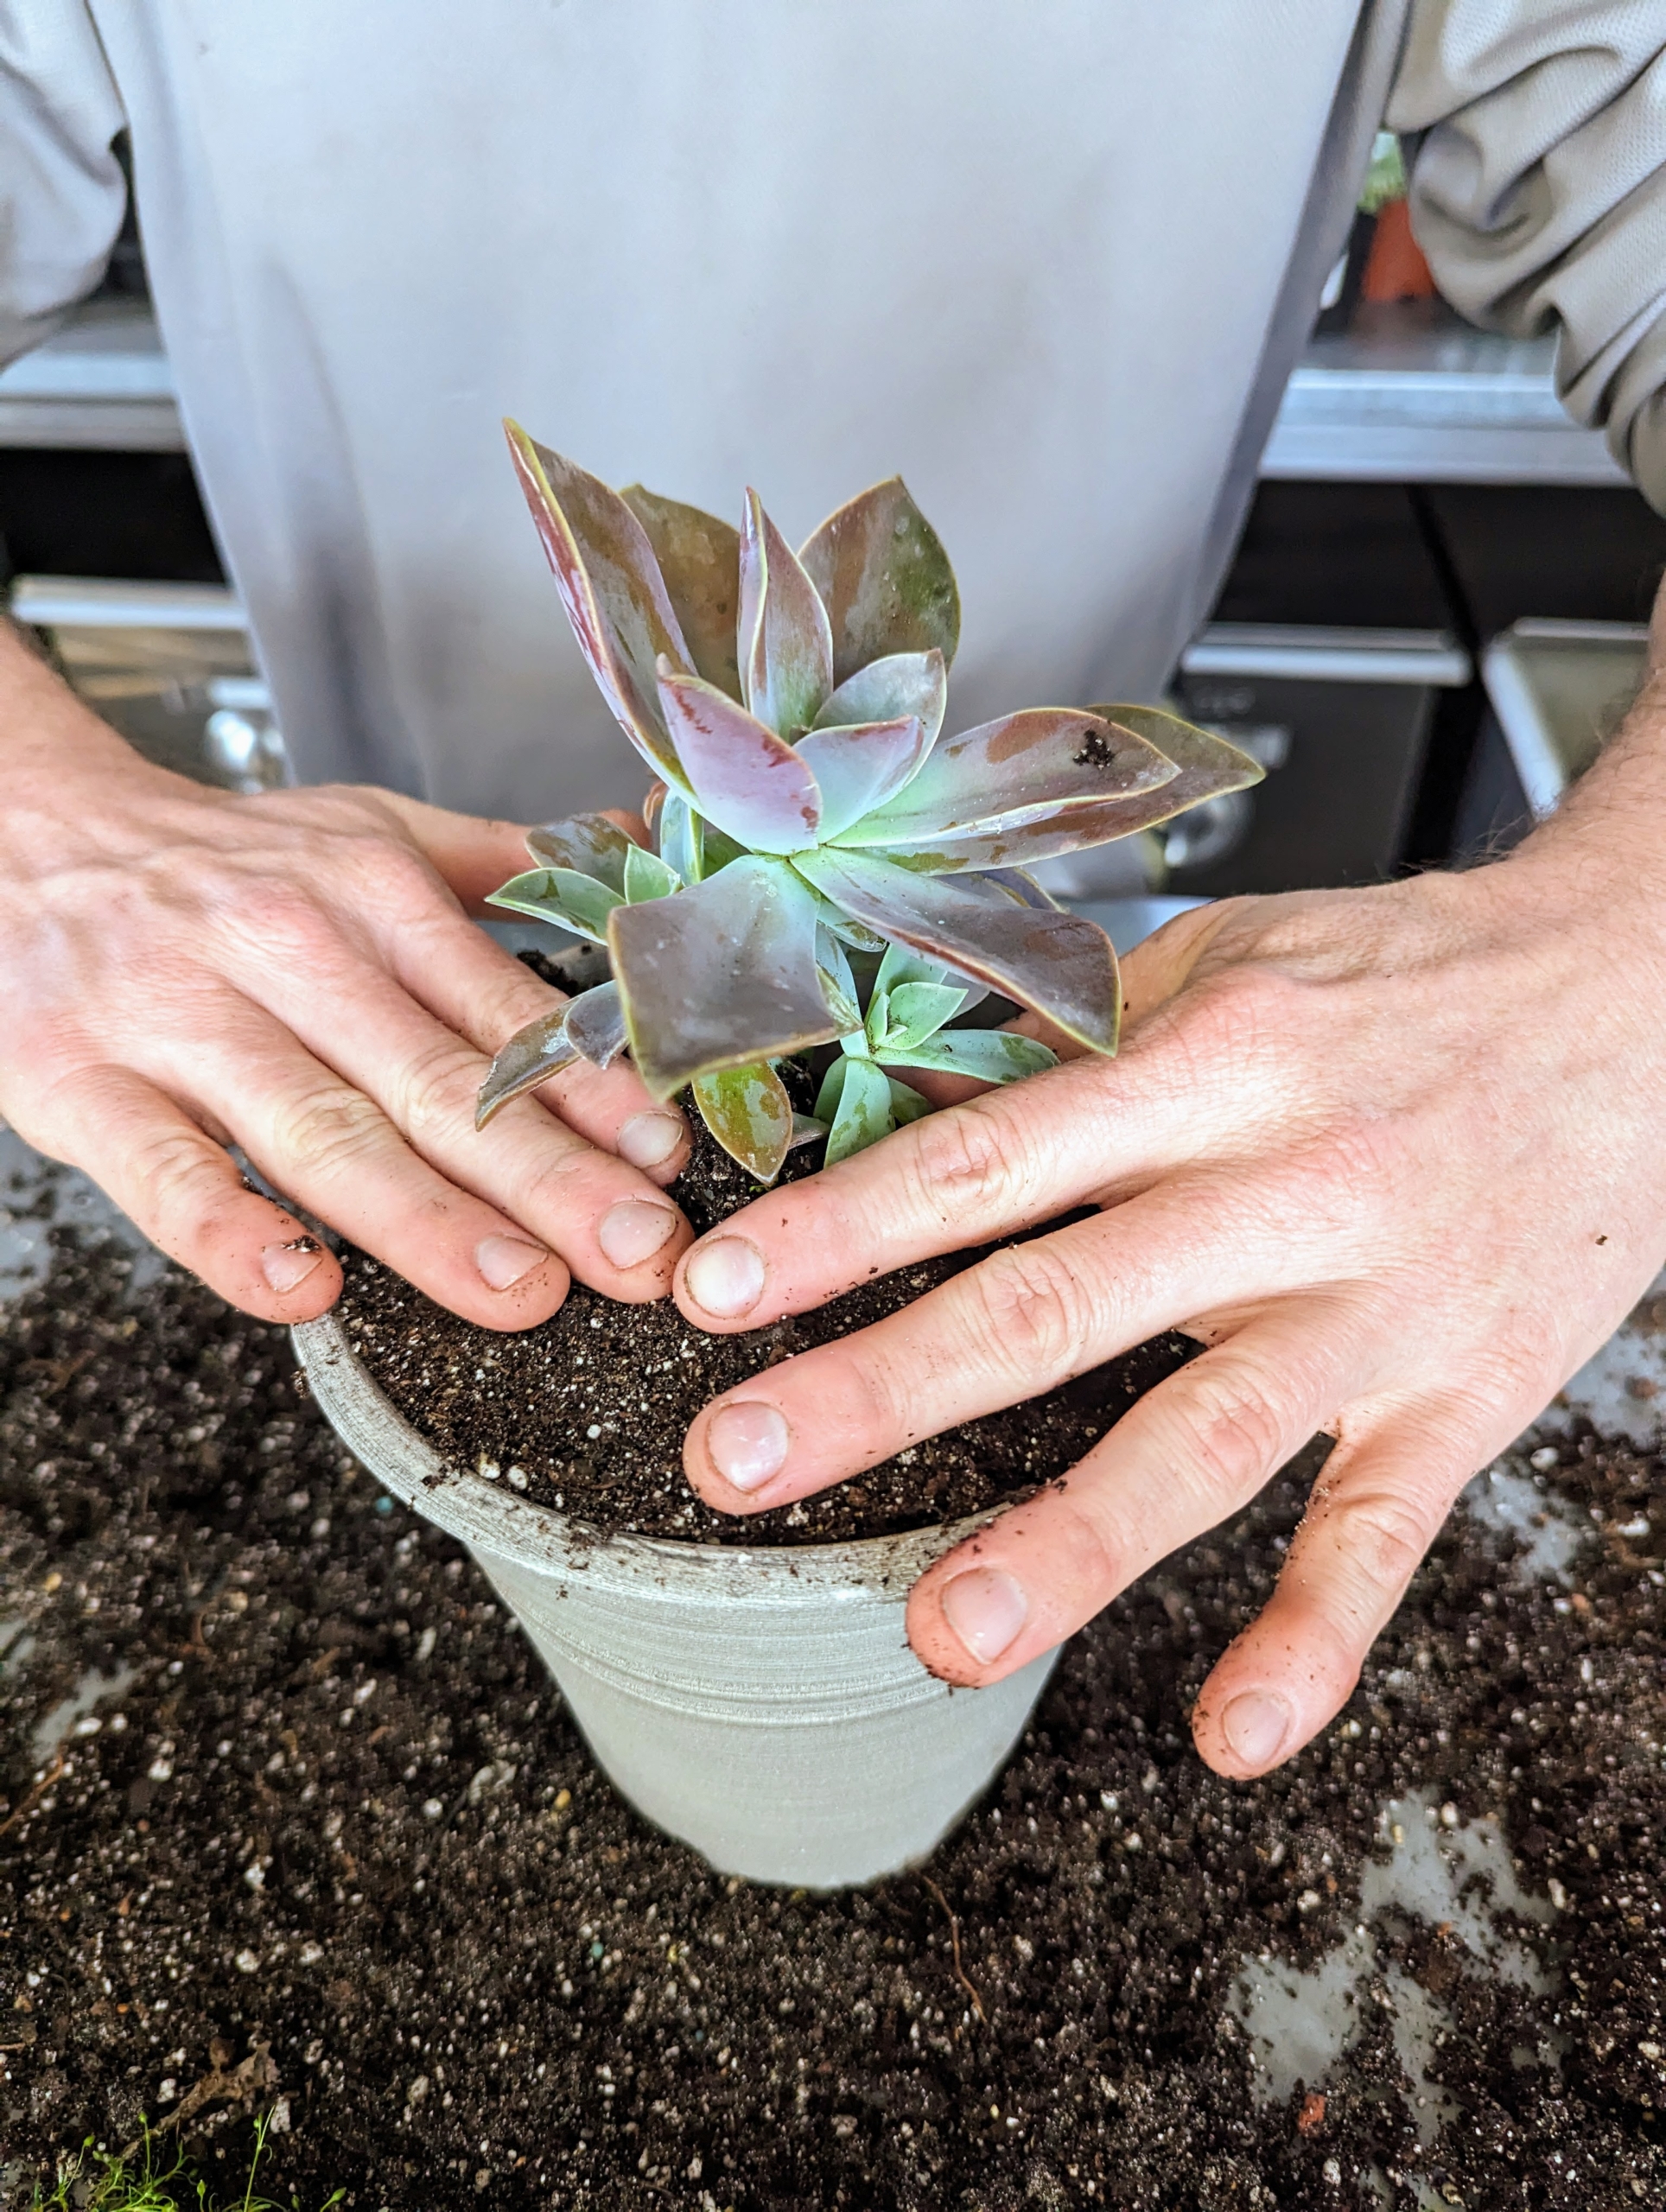
And then places the plant in and adds any additional soil needed. Don’t worry about giving aloe a lot of space – this plant thrives in snug conditions.
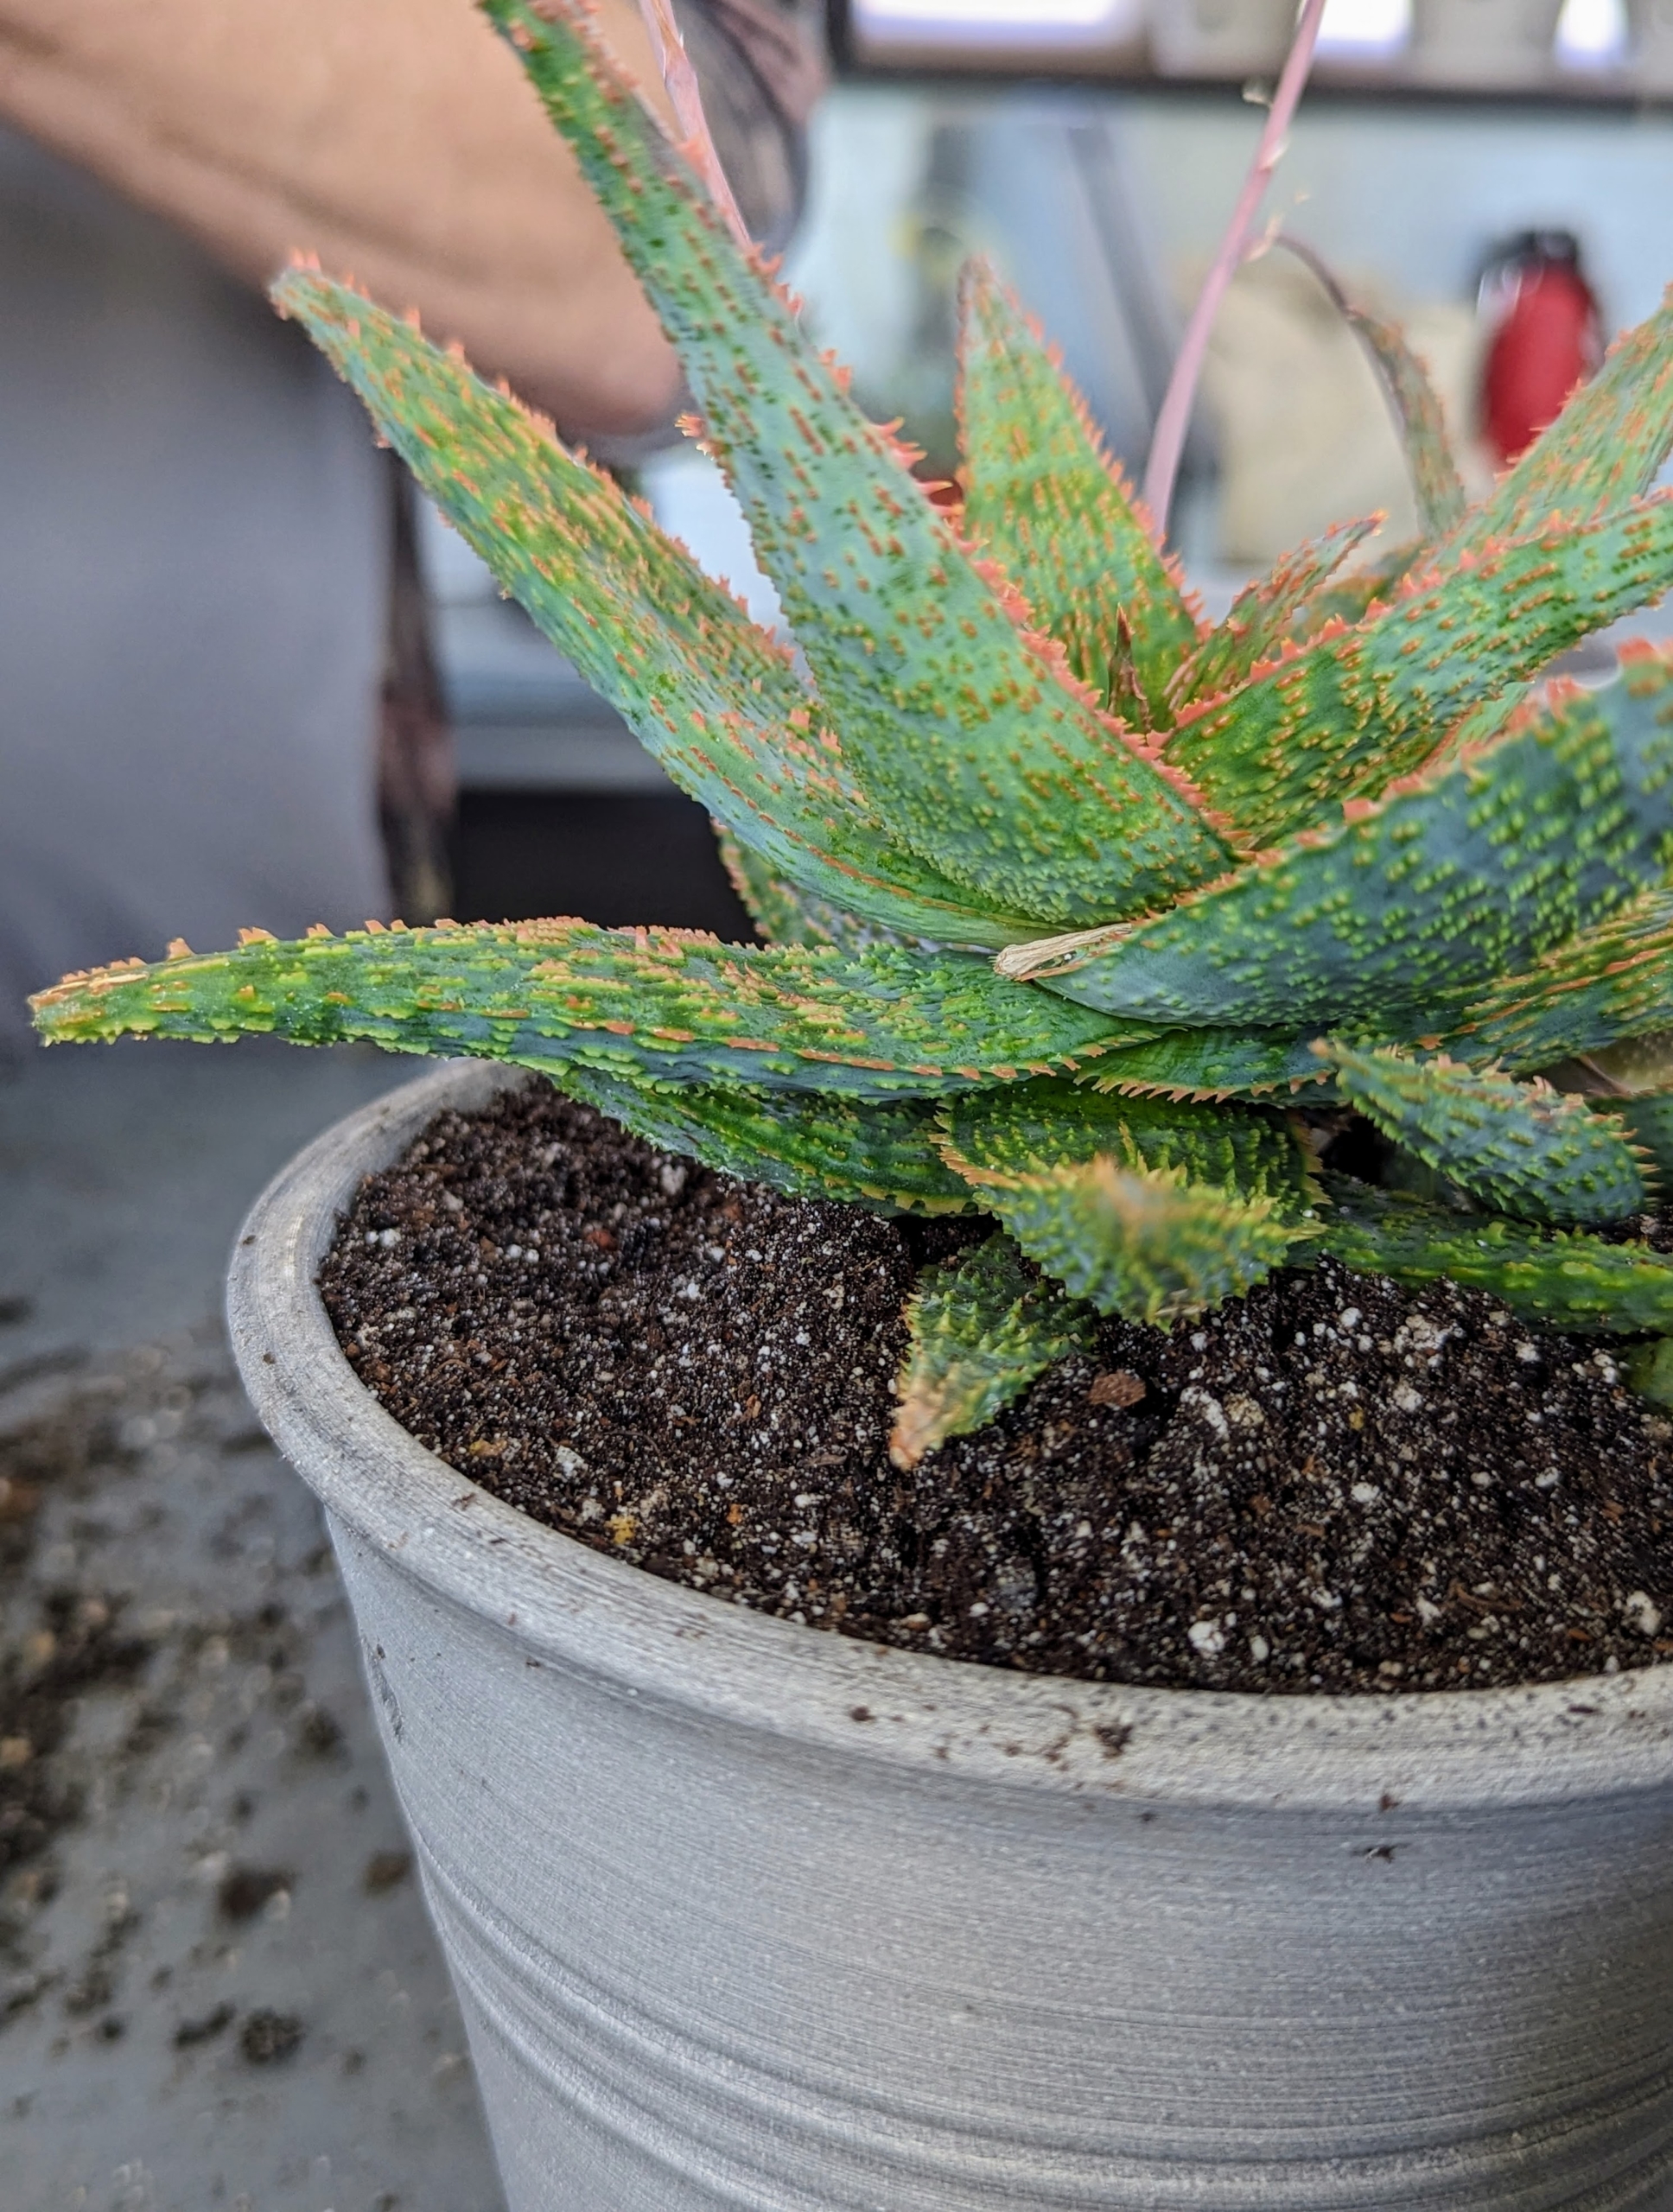
Next, Ryan tamps the soil down to prevent any air holes.
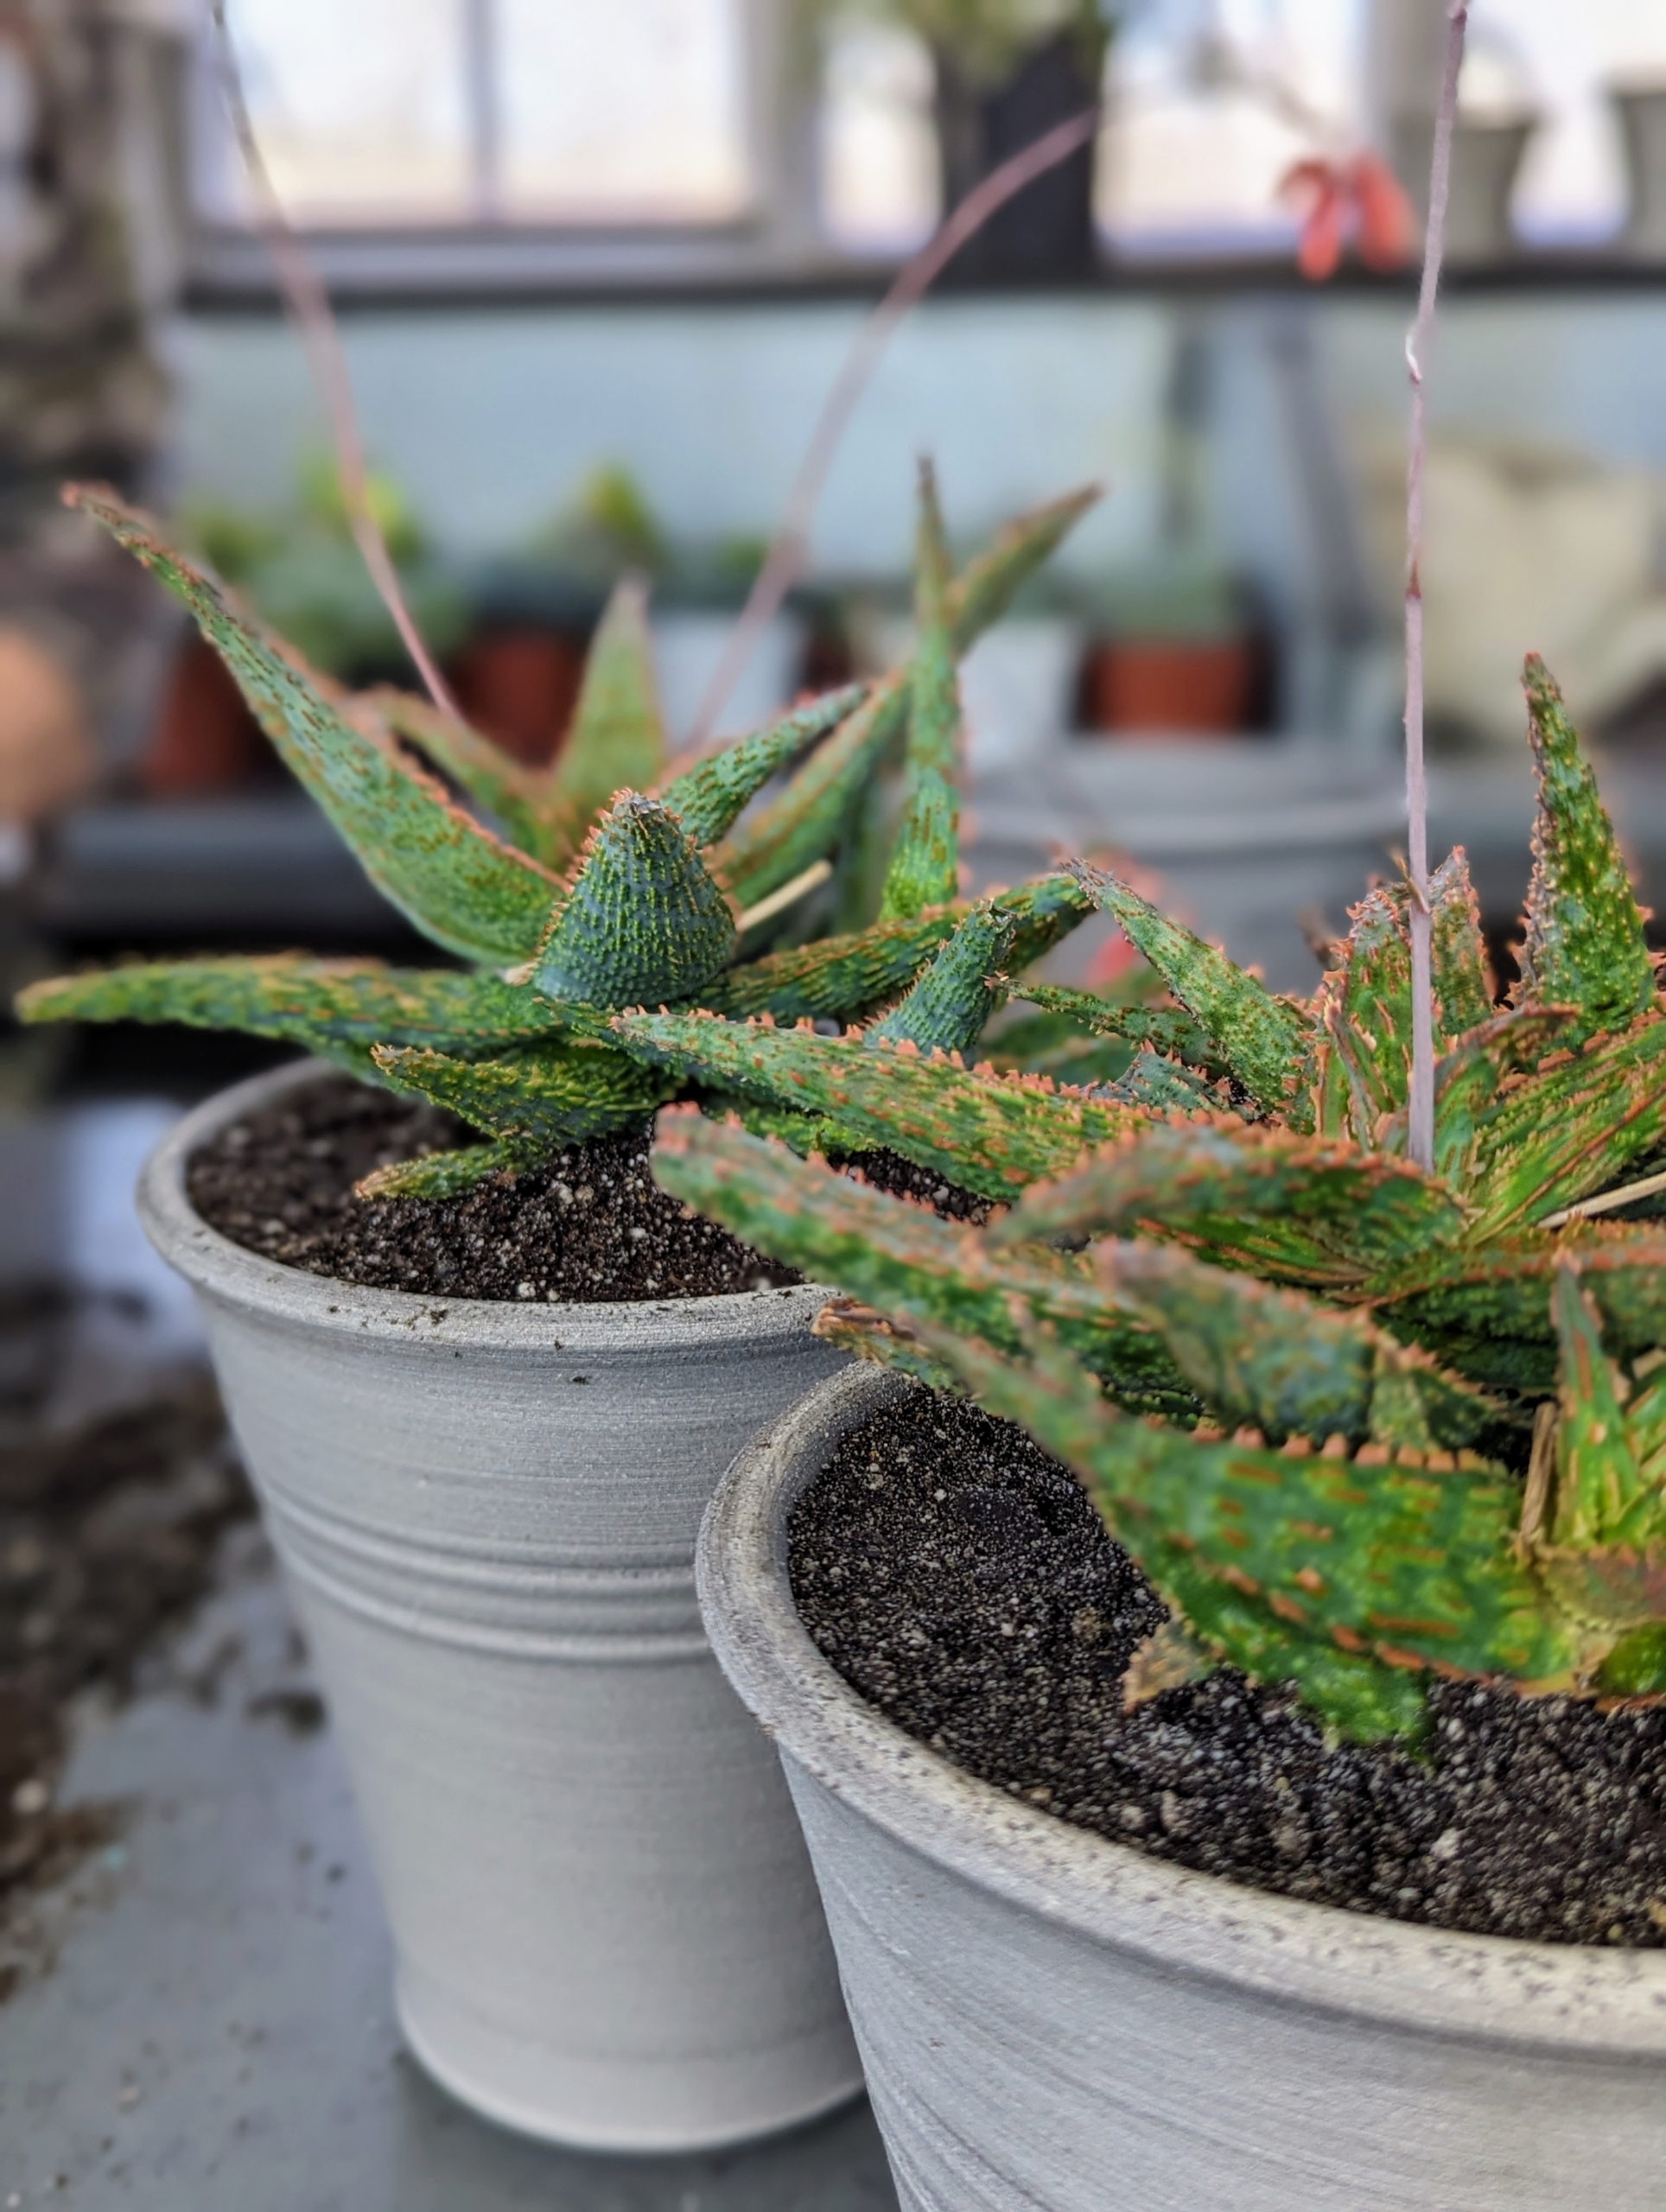
This is a well-potted plant. Aloe vera can grow indoors and outdoors. Outside, this plant thrives best in USDA plant hardiness zones 9, 10, or 11.
When kept indoors, select a spot where it will get plenty of sunlight. South- or west-facing windows are ideal.
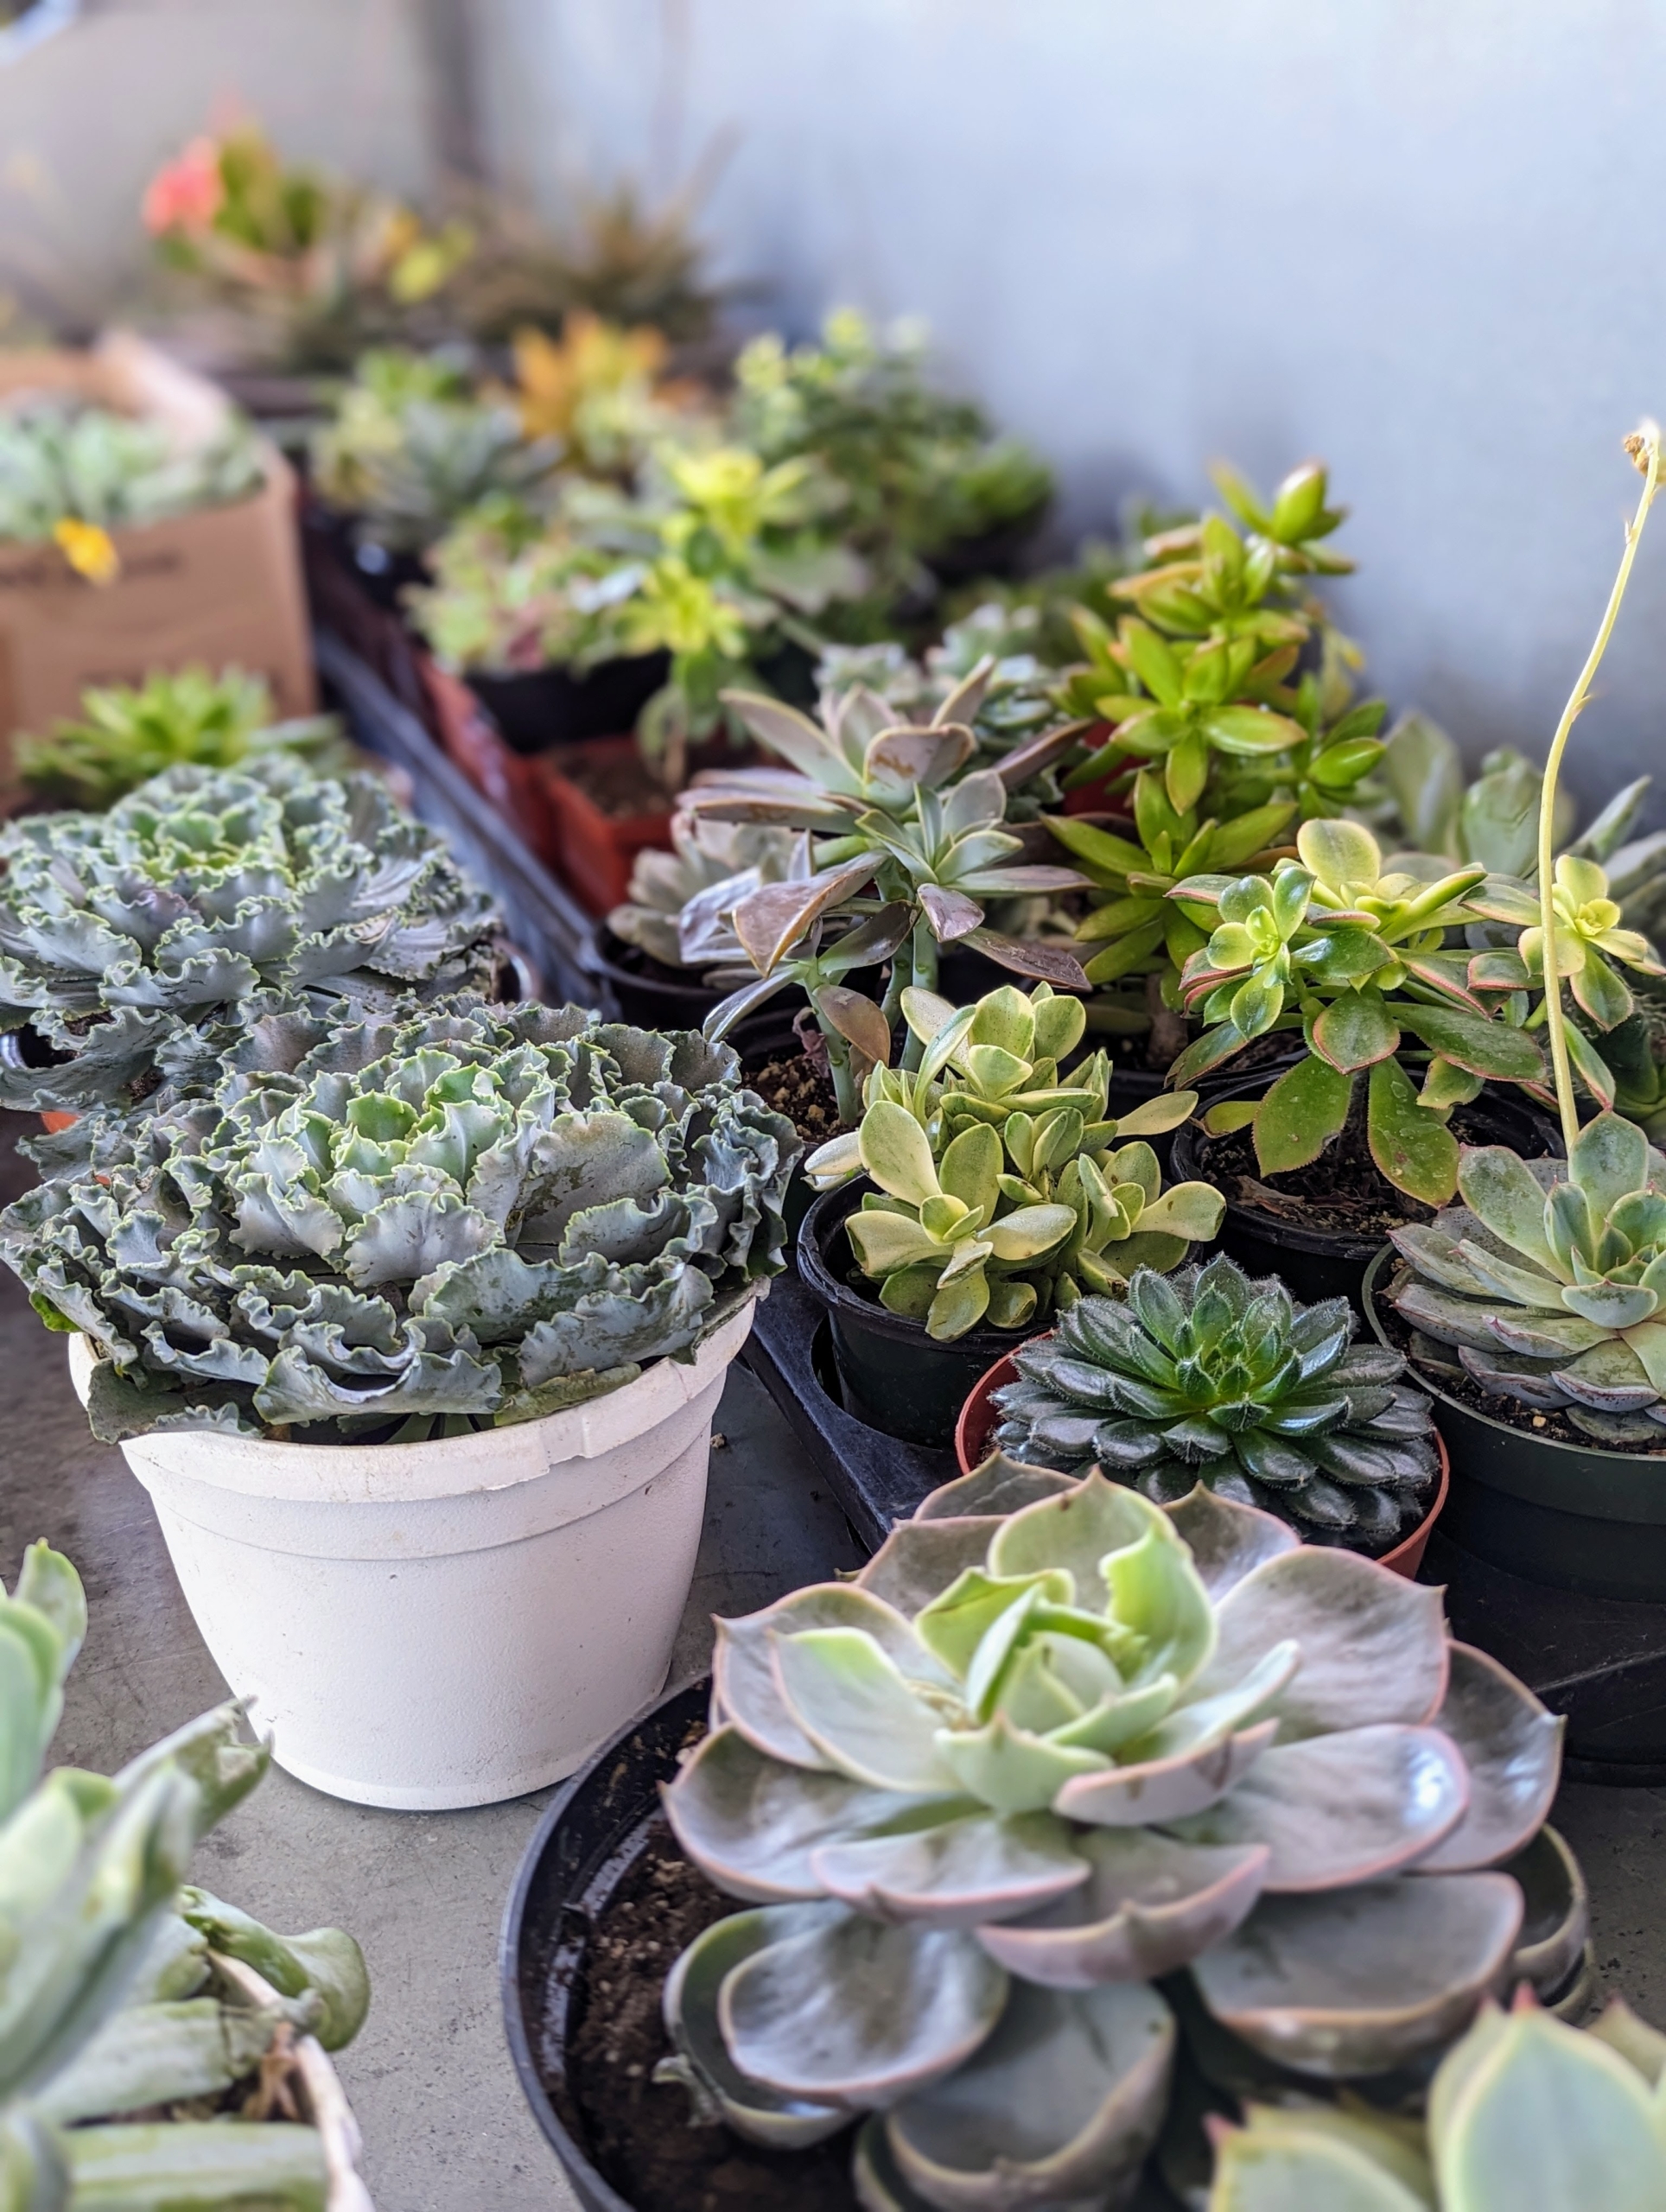
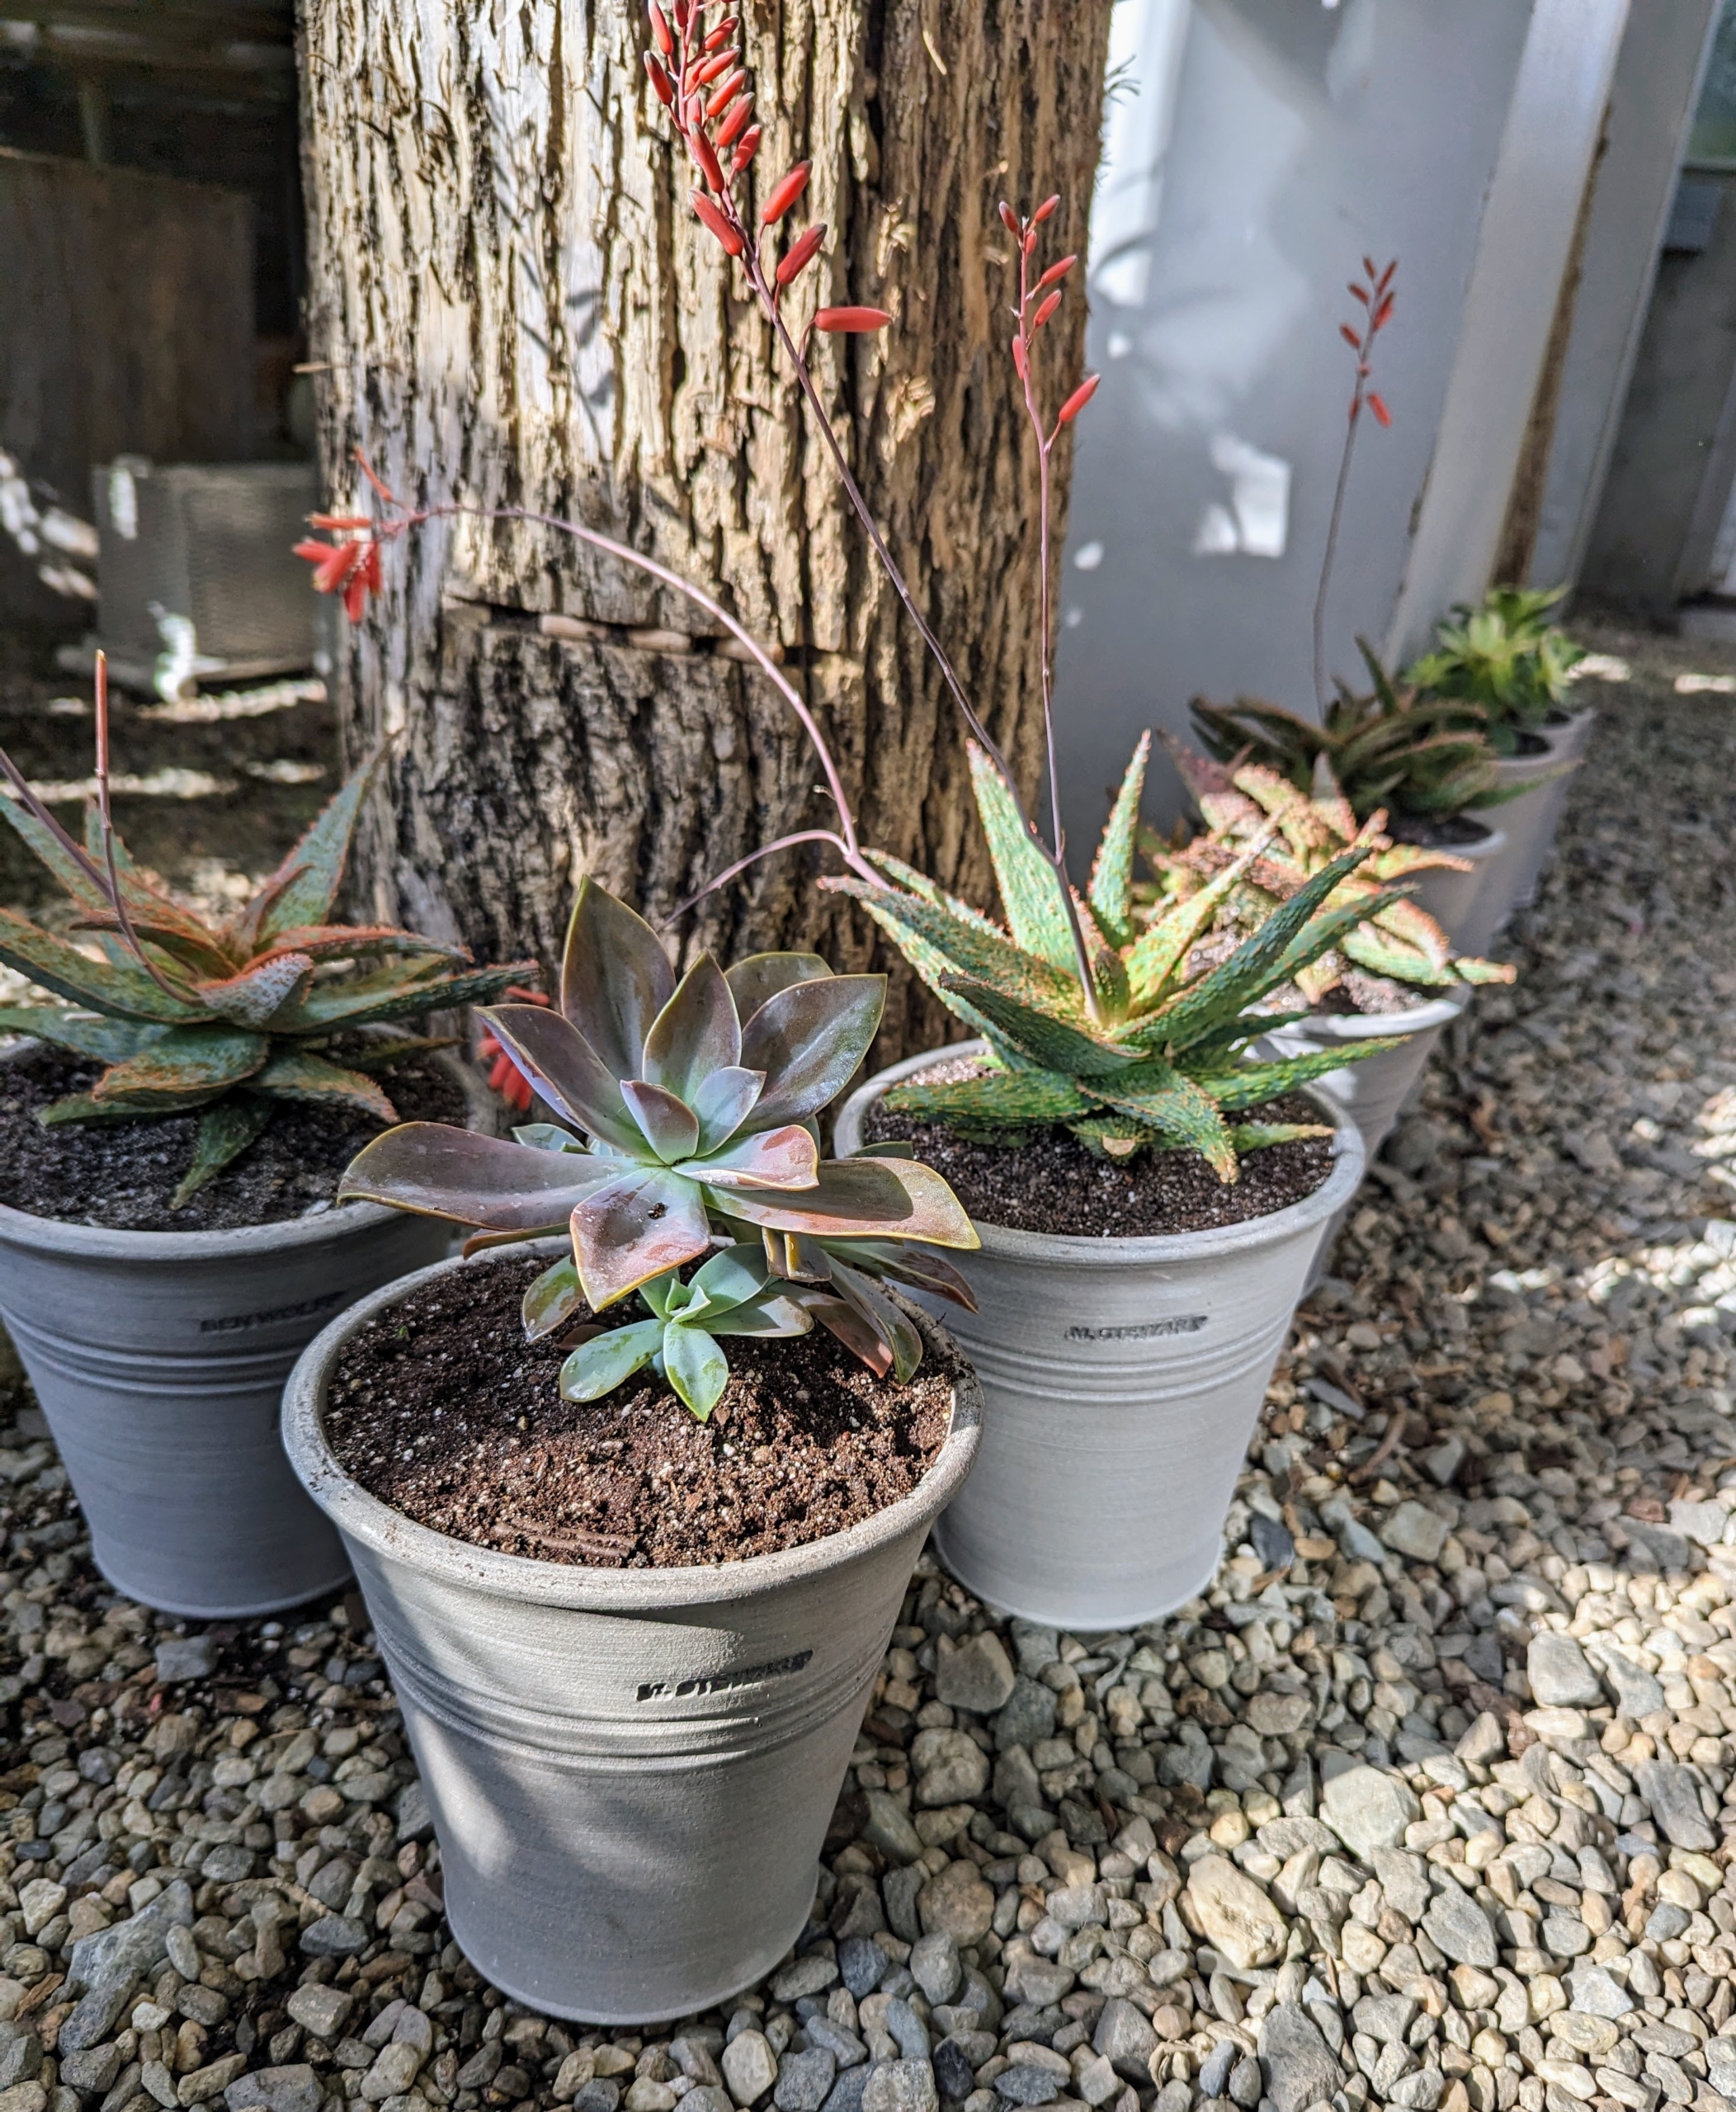
The aloe plants are among this group of specimens I am adding to the greenhouse. Succulents grow in so many different and interesting formations. I often bring succulents into my home when I entertain – guests love seeing and learning about the different varieties.
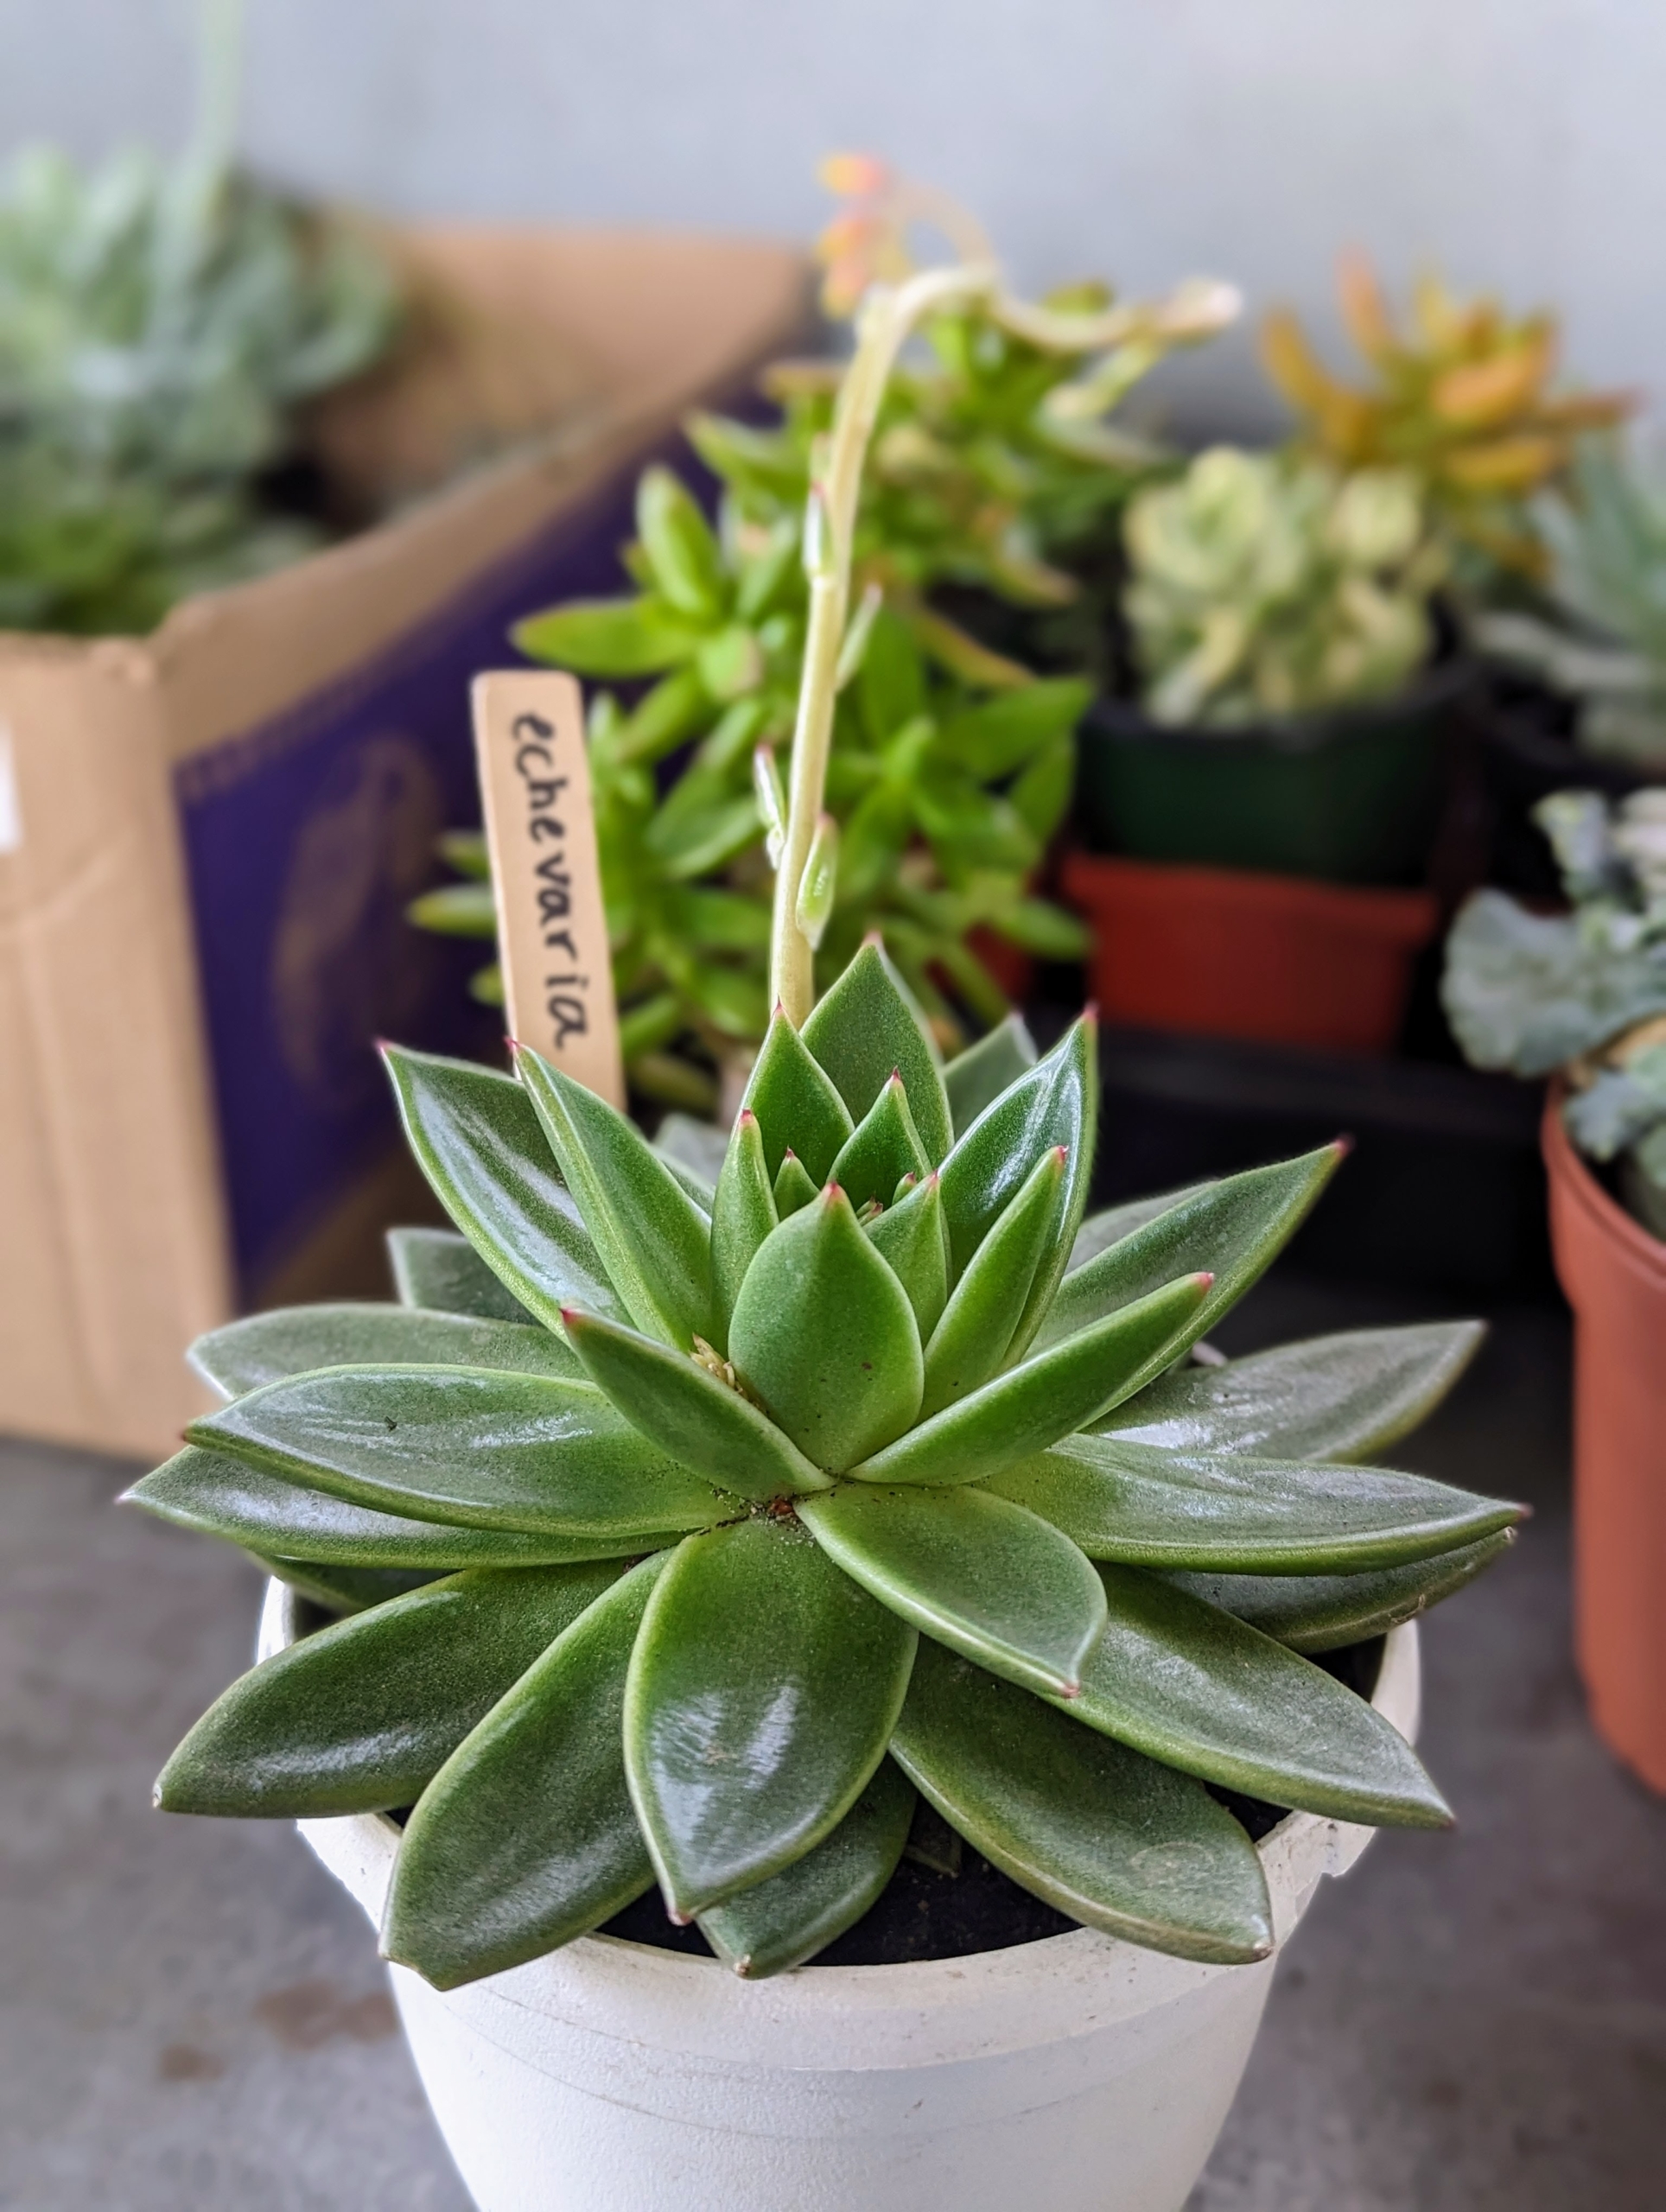
Echeveria is a large genus of flowering plants in the stonecrop family Crassulaceae, native to semi-desert areas of Central America, Mexico and northwestern South America. They are among the most popular succulents because of their delightful rosettes and interesting water-storing leaves.
Most Echeverias are non-hardy succulents and can’t survive cold temperatures. They prefer temperatures between 65 and 70 degrees Fahrenheit and can decline when it drops below 50 degrees Fahrenheit.
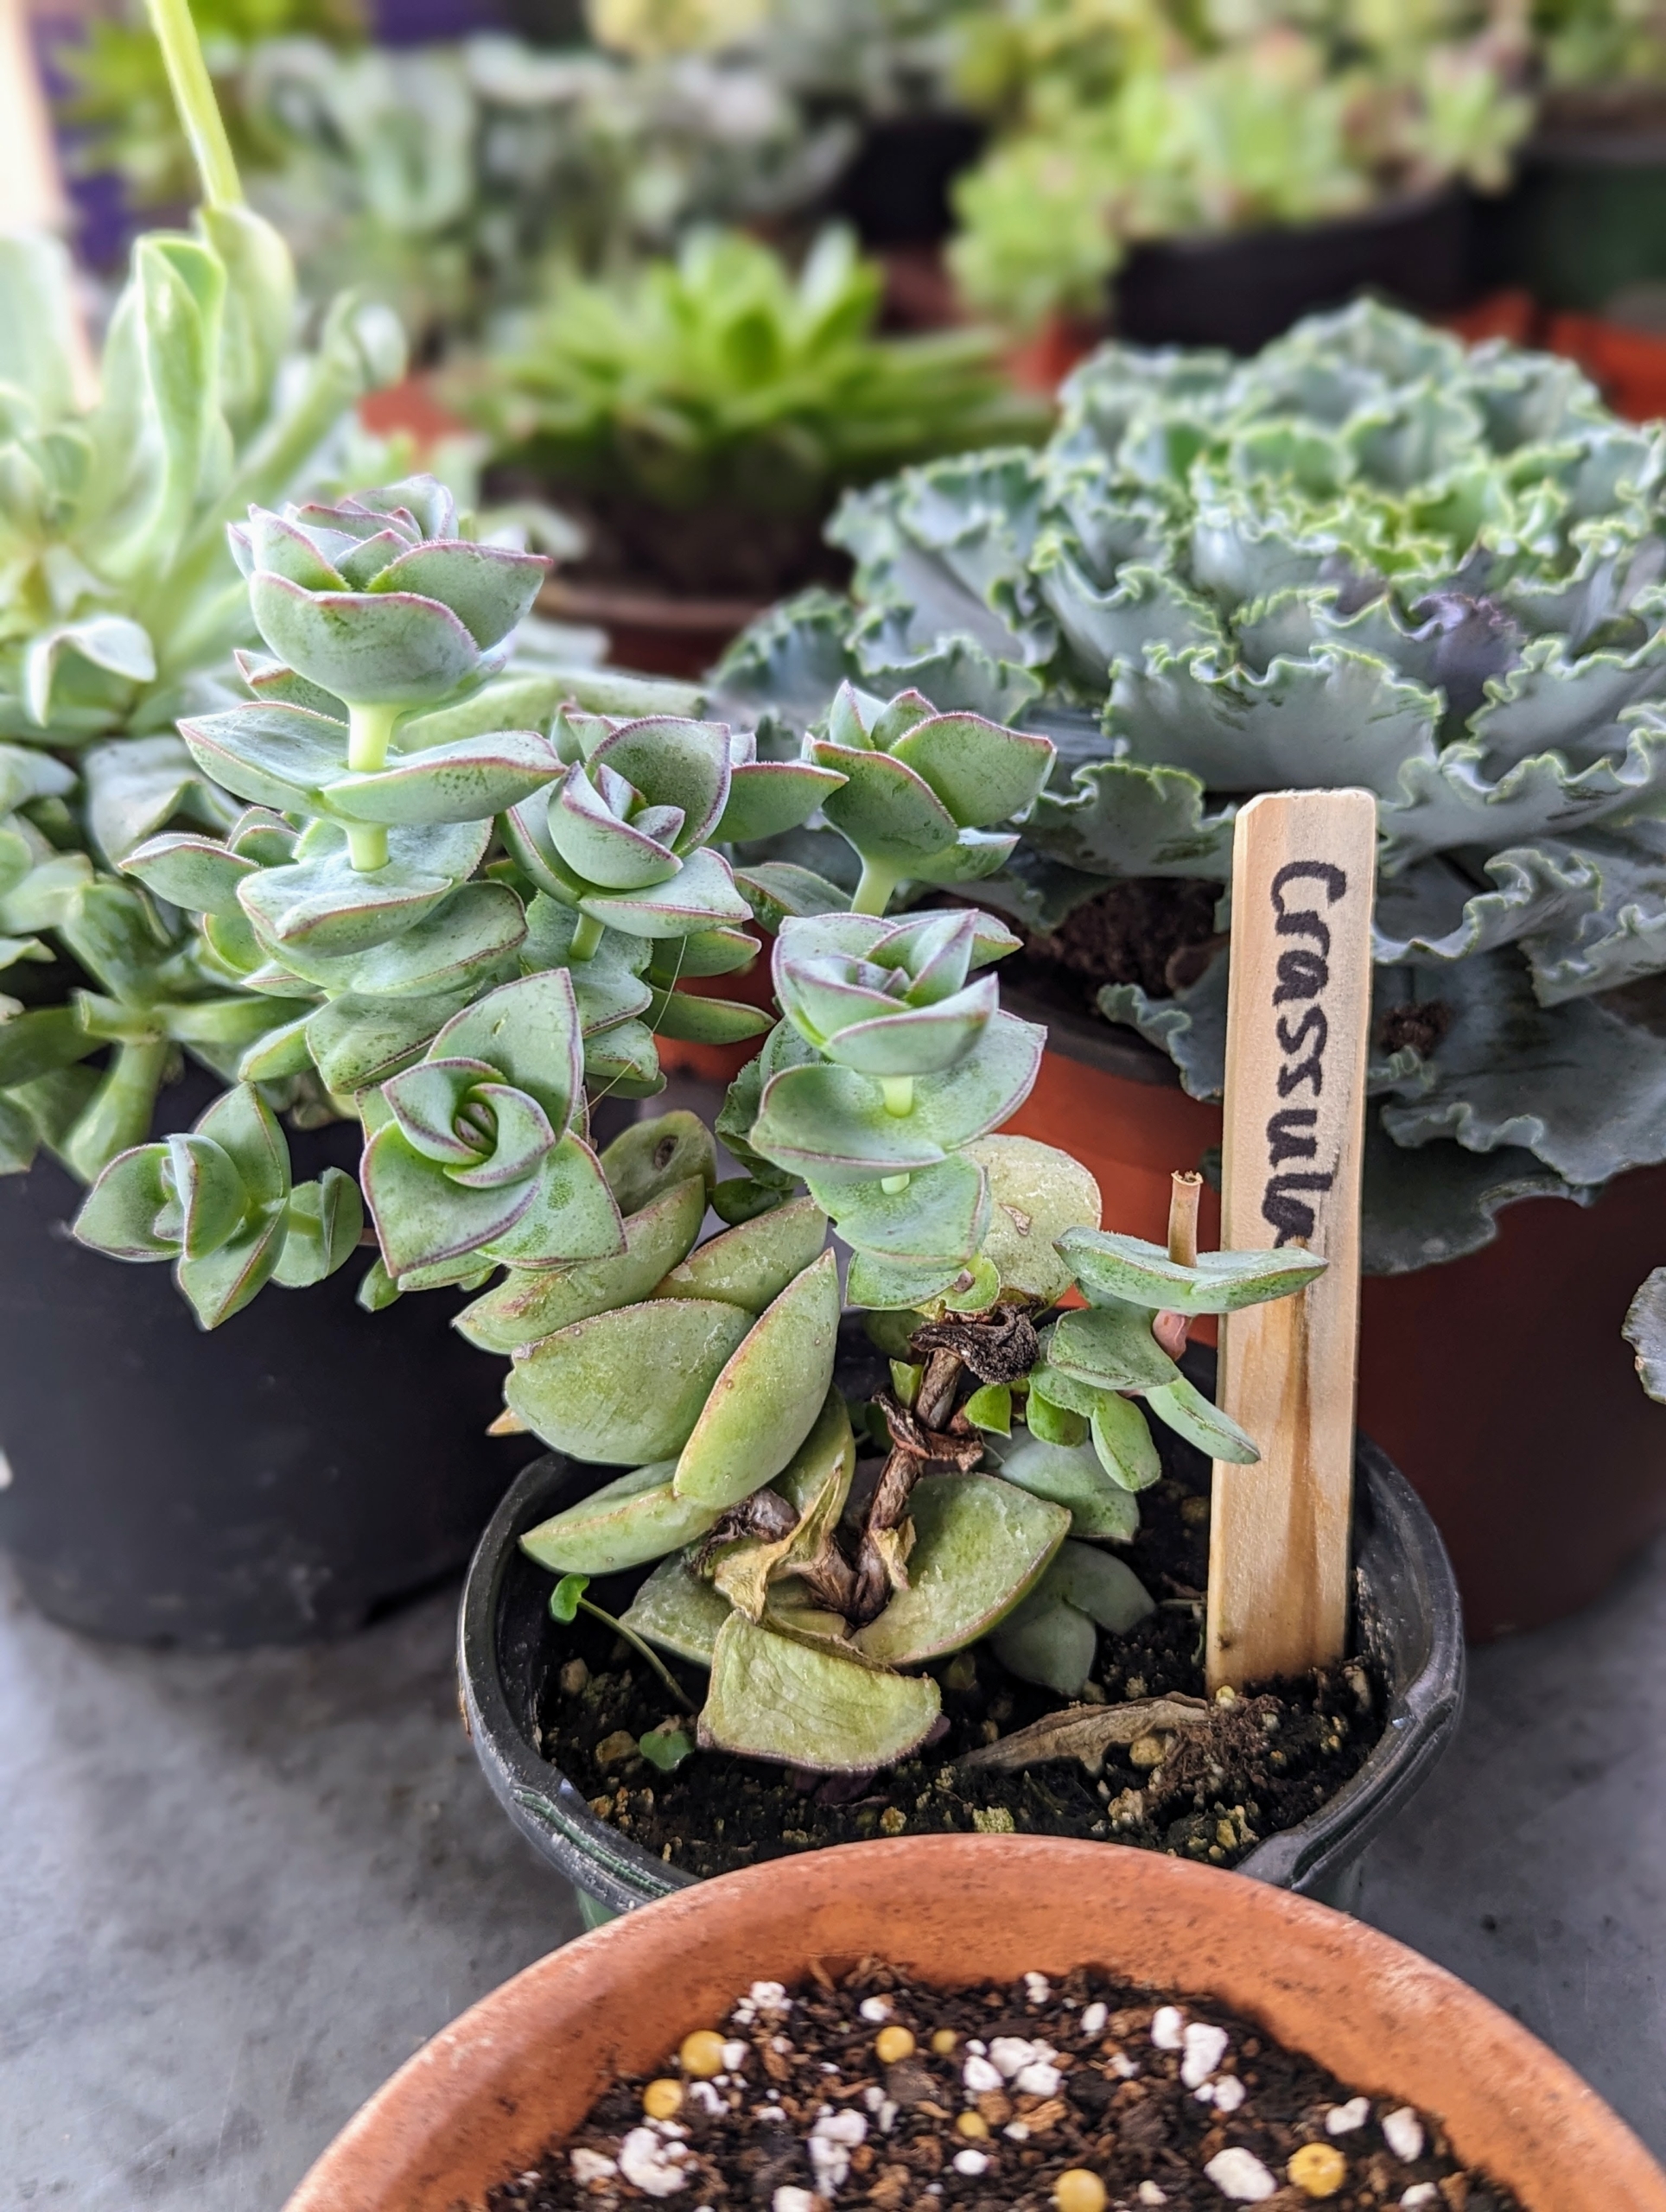
Crassula is a diverse genus of succulent plants, with about 300 small and large species, including the well-known jade plant. These plants do best in bright, southern-facing windows, providing at least six hours of direct sunlight.
In general, succulents require little water to survive – these potted plants will be watered about once a week. They need time to store the water in their leaves and for the soil to dry out between waterings.
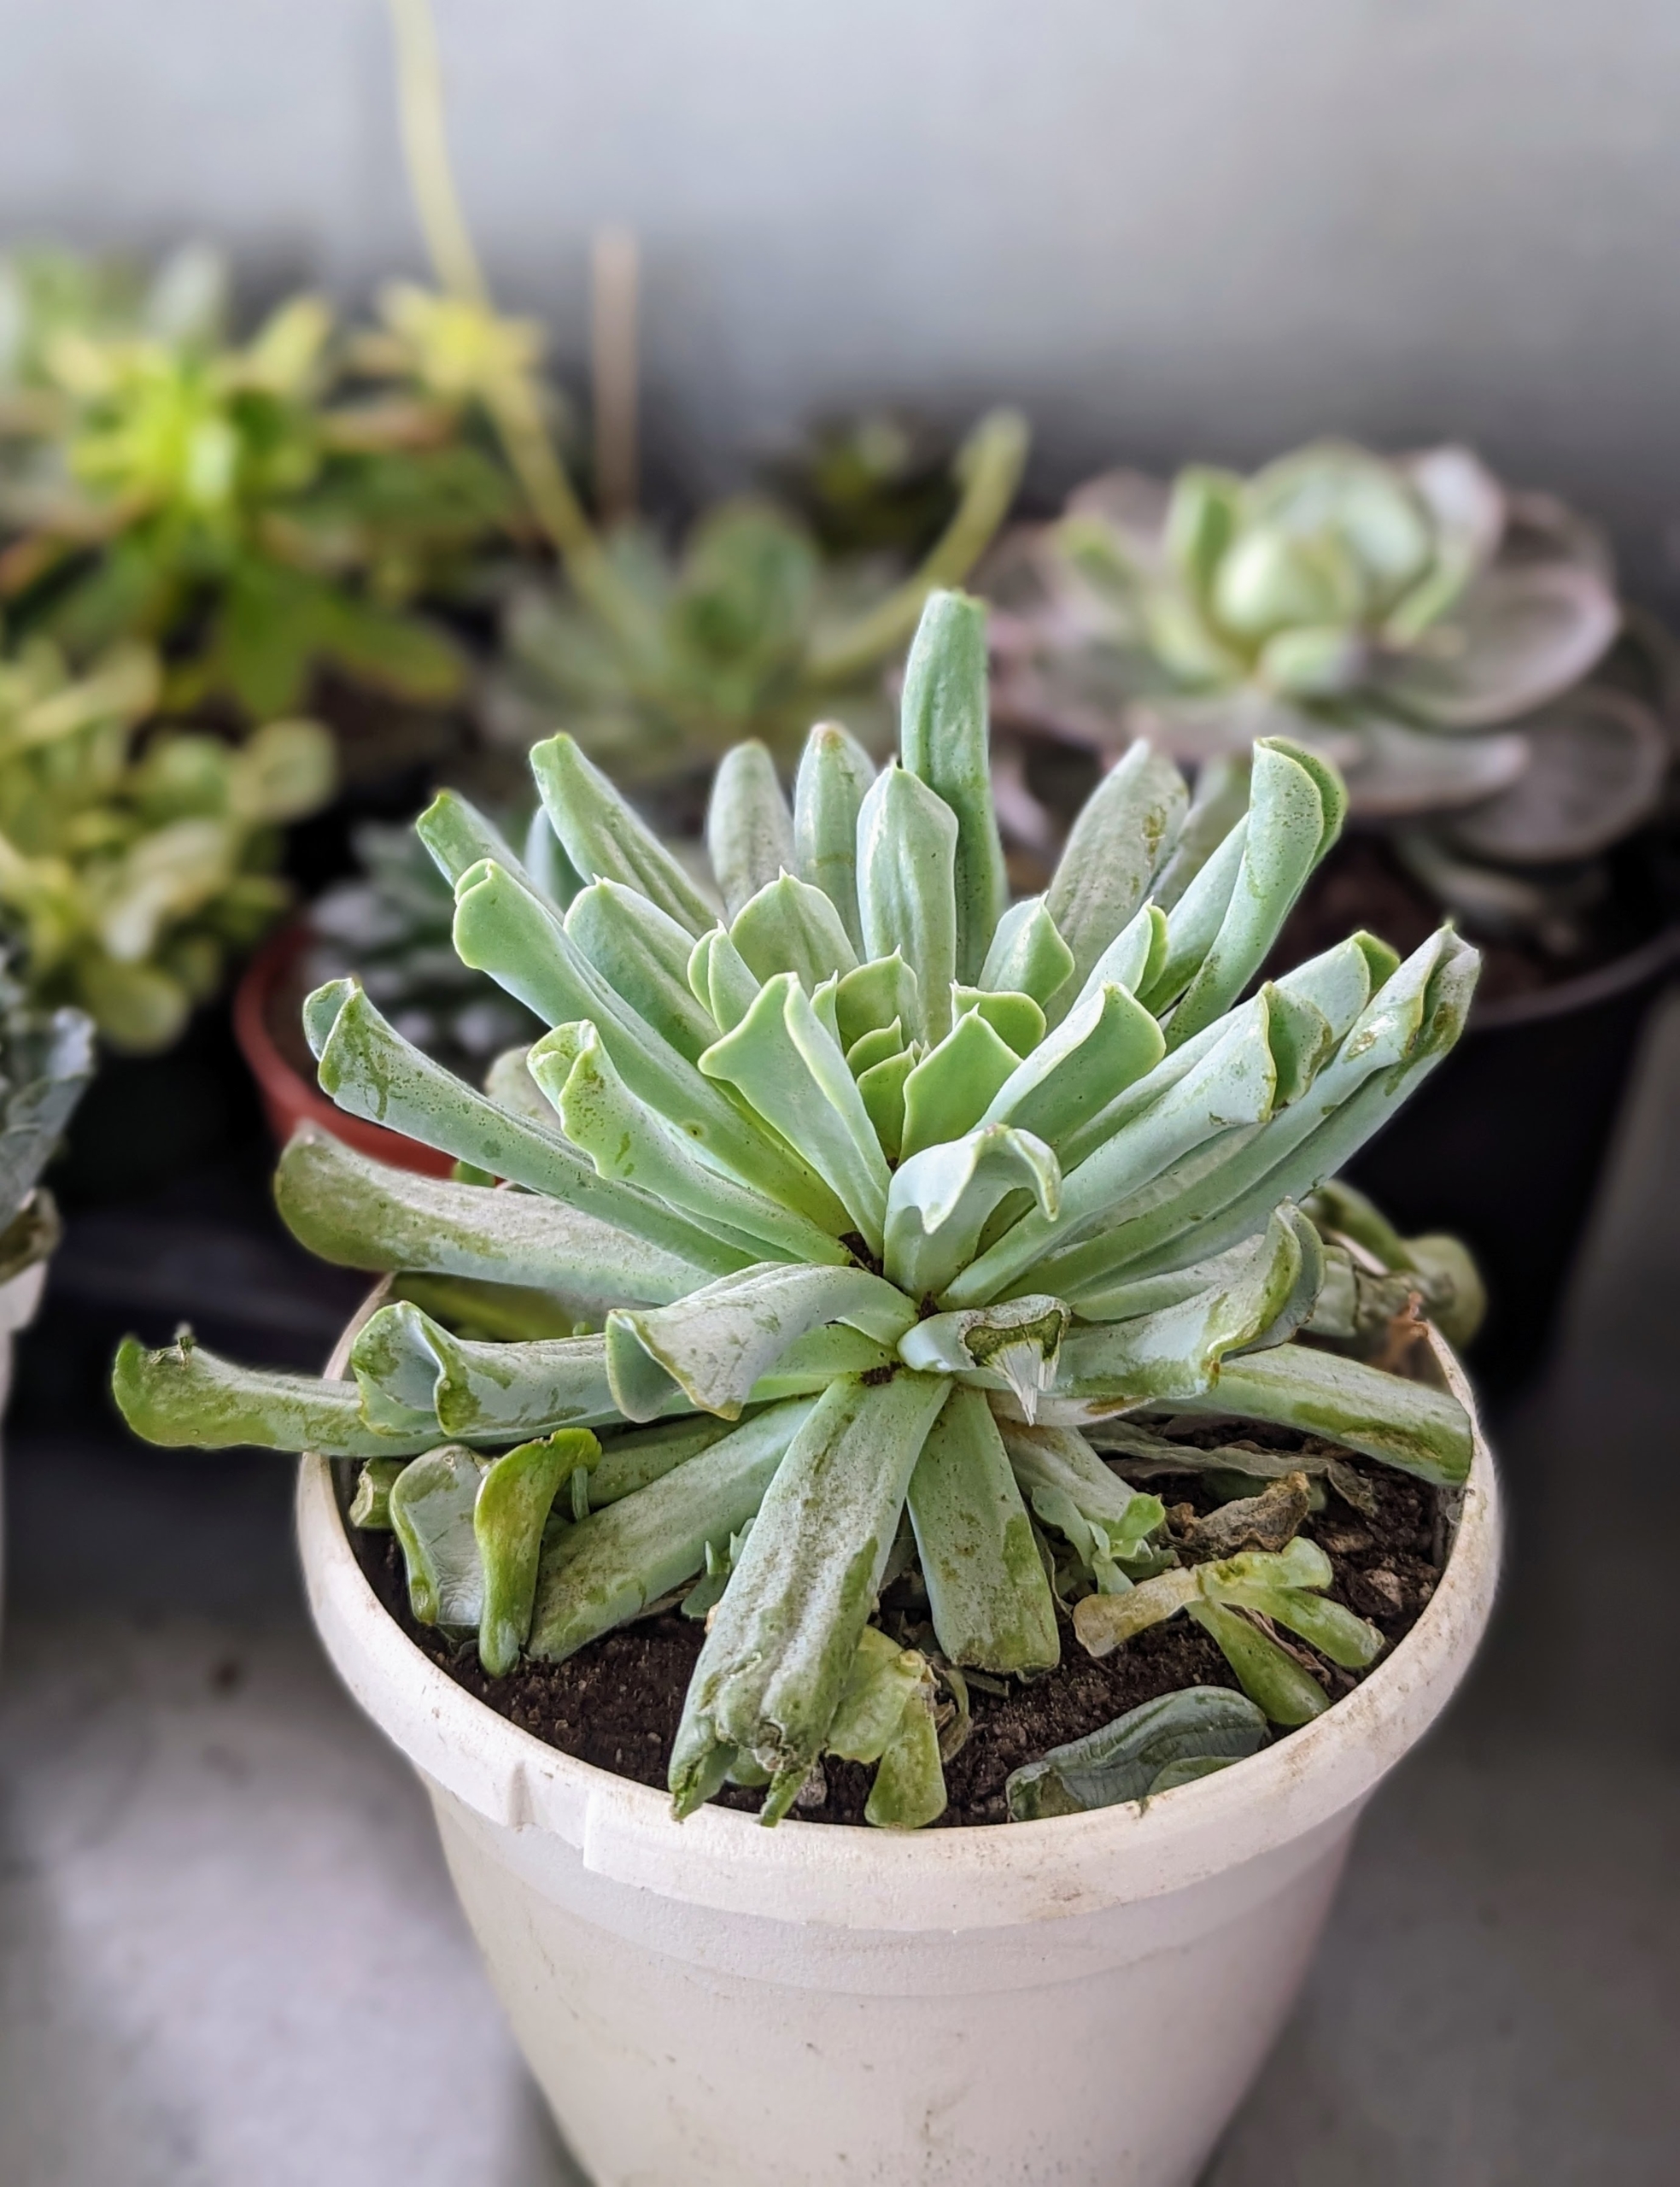
Succulents look great potted by themselves, or in groups. Shades of green are a given, but one can also find succulents that are blue, purple, pink, orange, and even red.
These succulents will do excellently in my greenhouse where they can drink in lots of natural sunshine even when the sun isn’t directly over their pots. Happy gardening.