Here in the Northeast, today's weather is expected to be very hot and humid with temperatures in the 90s. Last week, while the temperatures were still warm, but much more pleasant, my outdoor grounds crew worked hard to get all the hay at my Bedford, New York farm cut and baled before the heat wave.
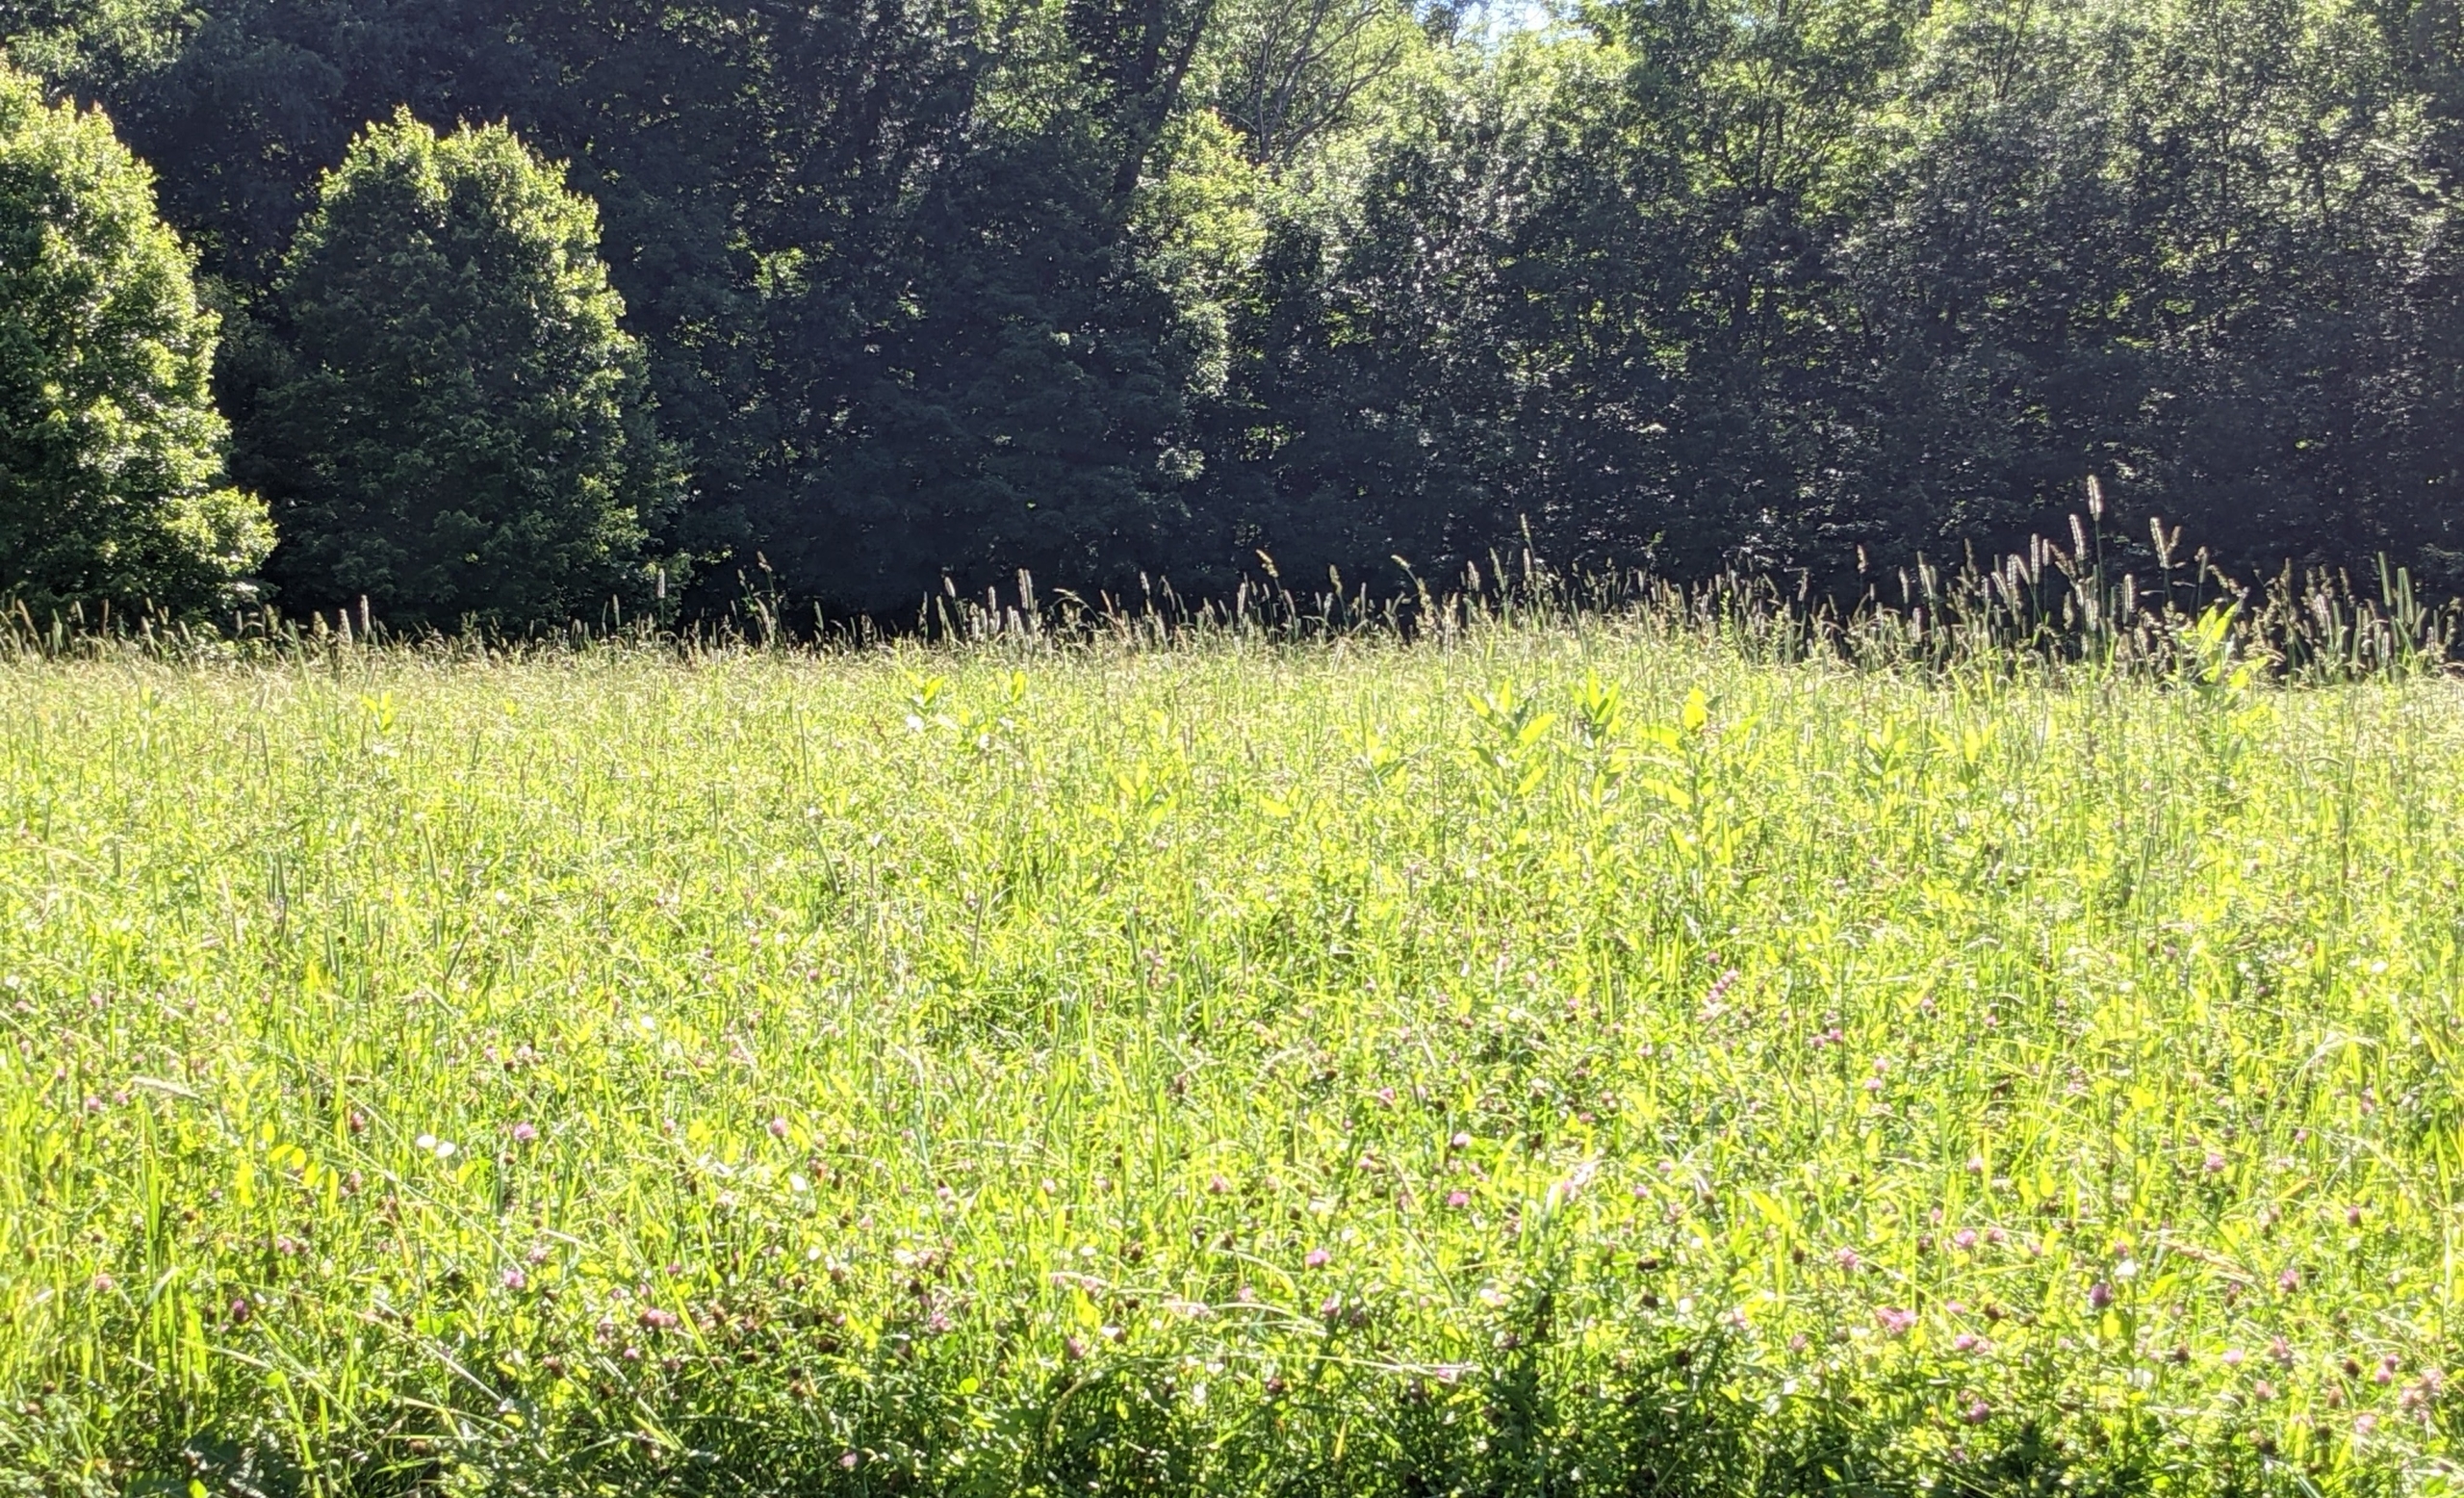
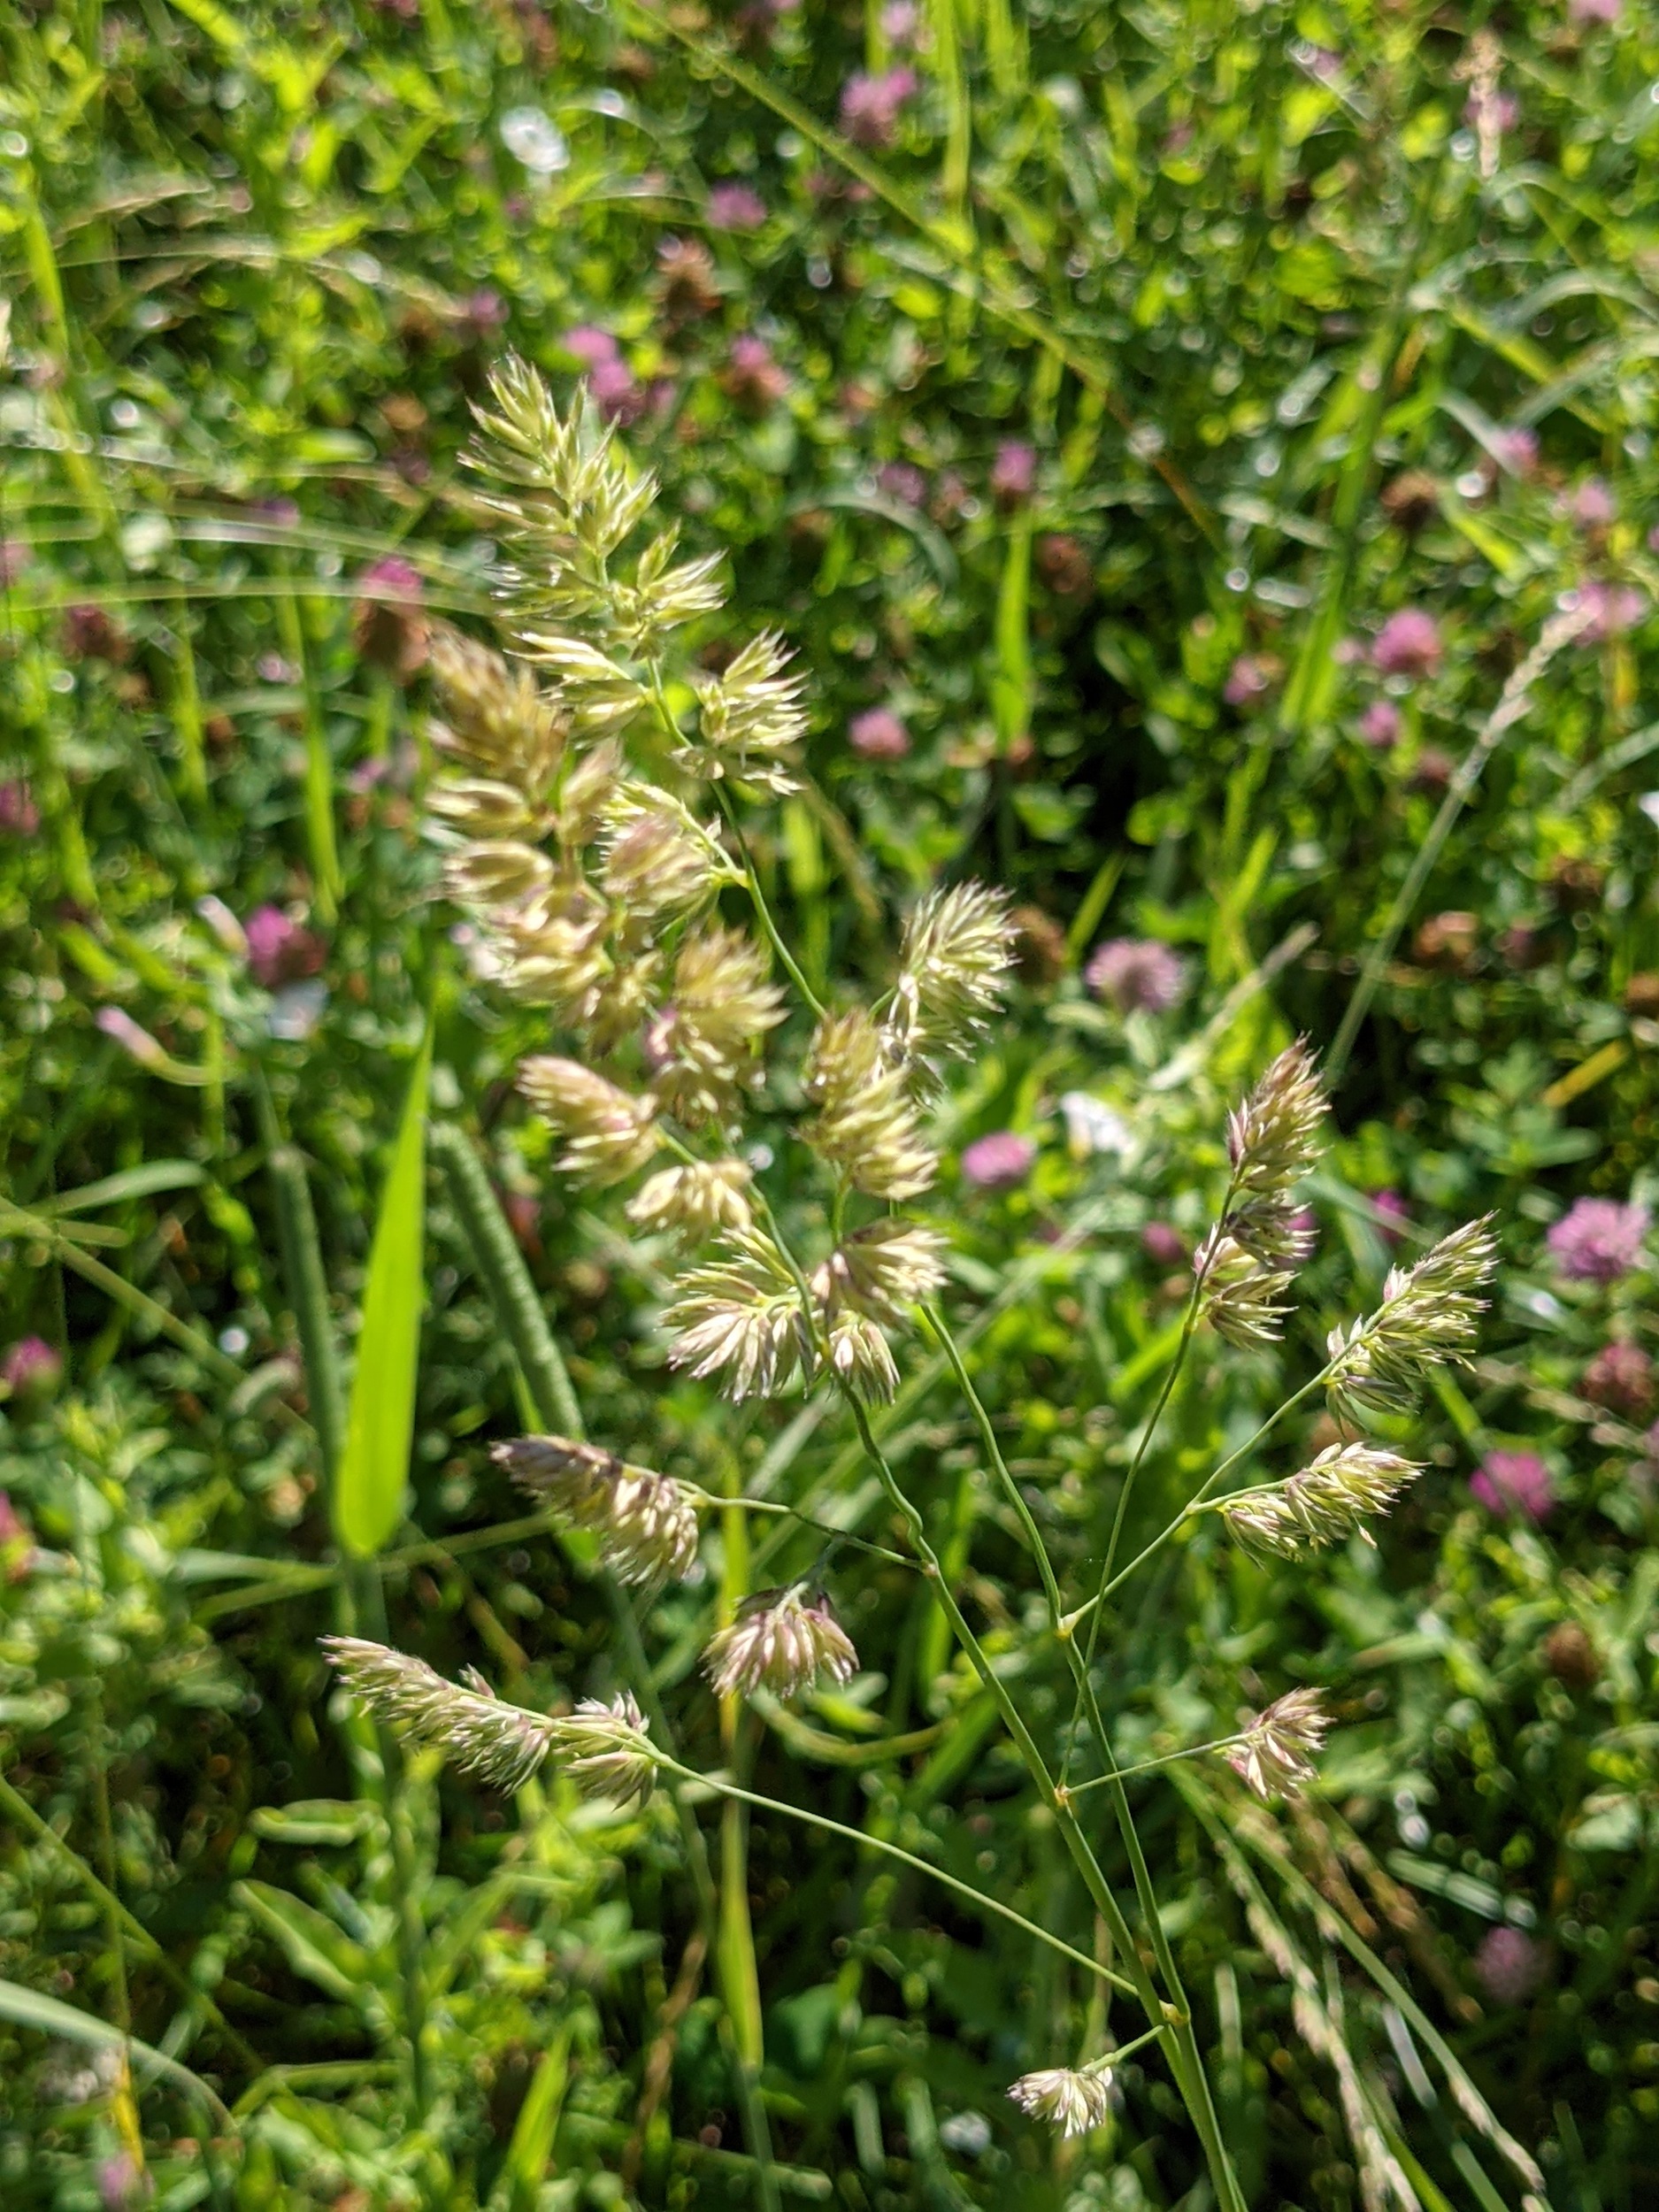
When I moved here, I designated three separate areas as hayfields and planted them with a mixture of timothy, orchard grass, Kentucky bluegrass, ryegrass, and clovers - all great for producing good quality hay. The hay is also treated with agricultural lime, a soil additive made from pulverized limestone or chalk that works to correct the acidity of the soil, eradicate any noxious weeds, and raise the overall health of the land. To make hay, we cut the hayfields, tossed the grass for the crucial drying process, raked it all into tidy windrows for collection, and then baled the hay.
Enjoy these photos.
Time to make hay for my horses! This time every year, we hope for at least a week of good, dry weather, so we can get the first cut of hay from the fields. Timing is everything when cutting the hay crop. The first cutting should be when grass has greened up and reached 12 to 16 inches tall.
Here is a closer look. Next, it’s important to consider the time of day that’s best for mowing. The plants’ sugar content is highest at dusk but because of moisture, it’s not ideal to cut hay at night. The best time is to start as soon as dew is off in the morning, which will maximize drying time.
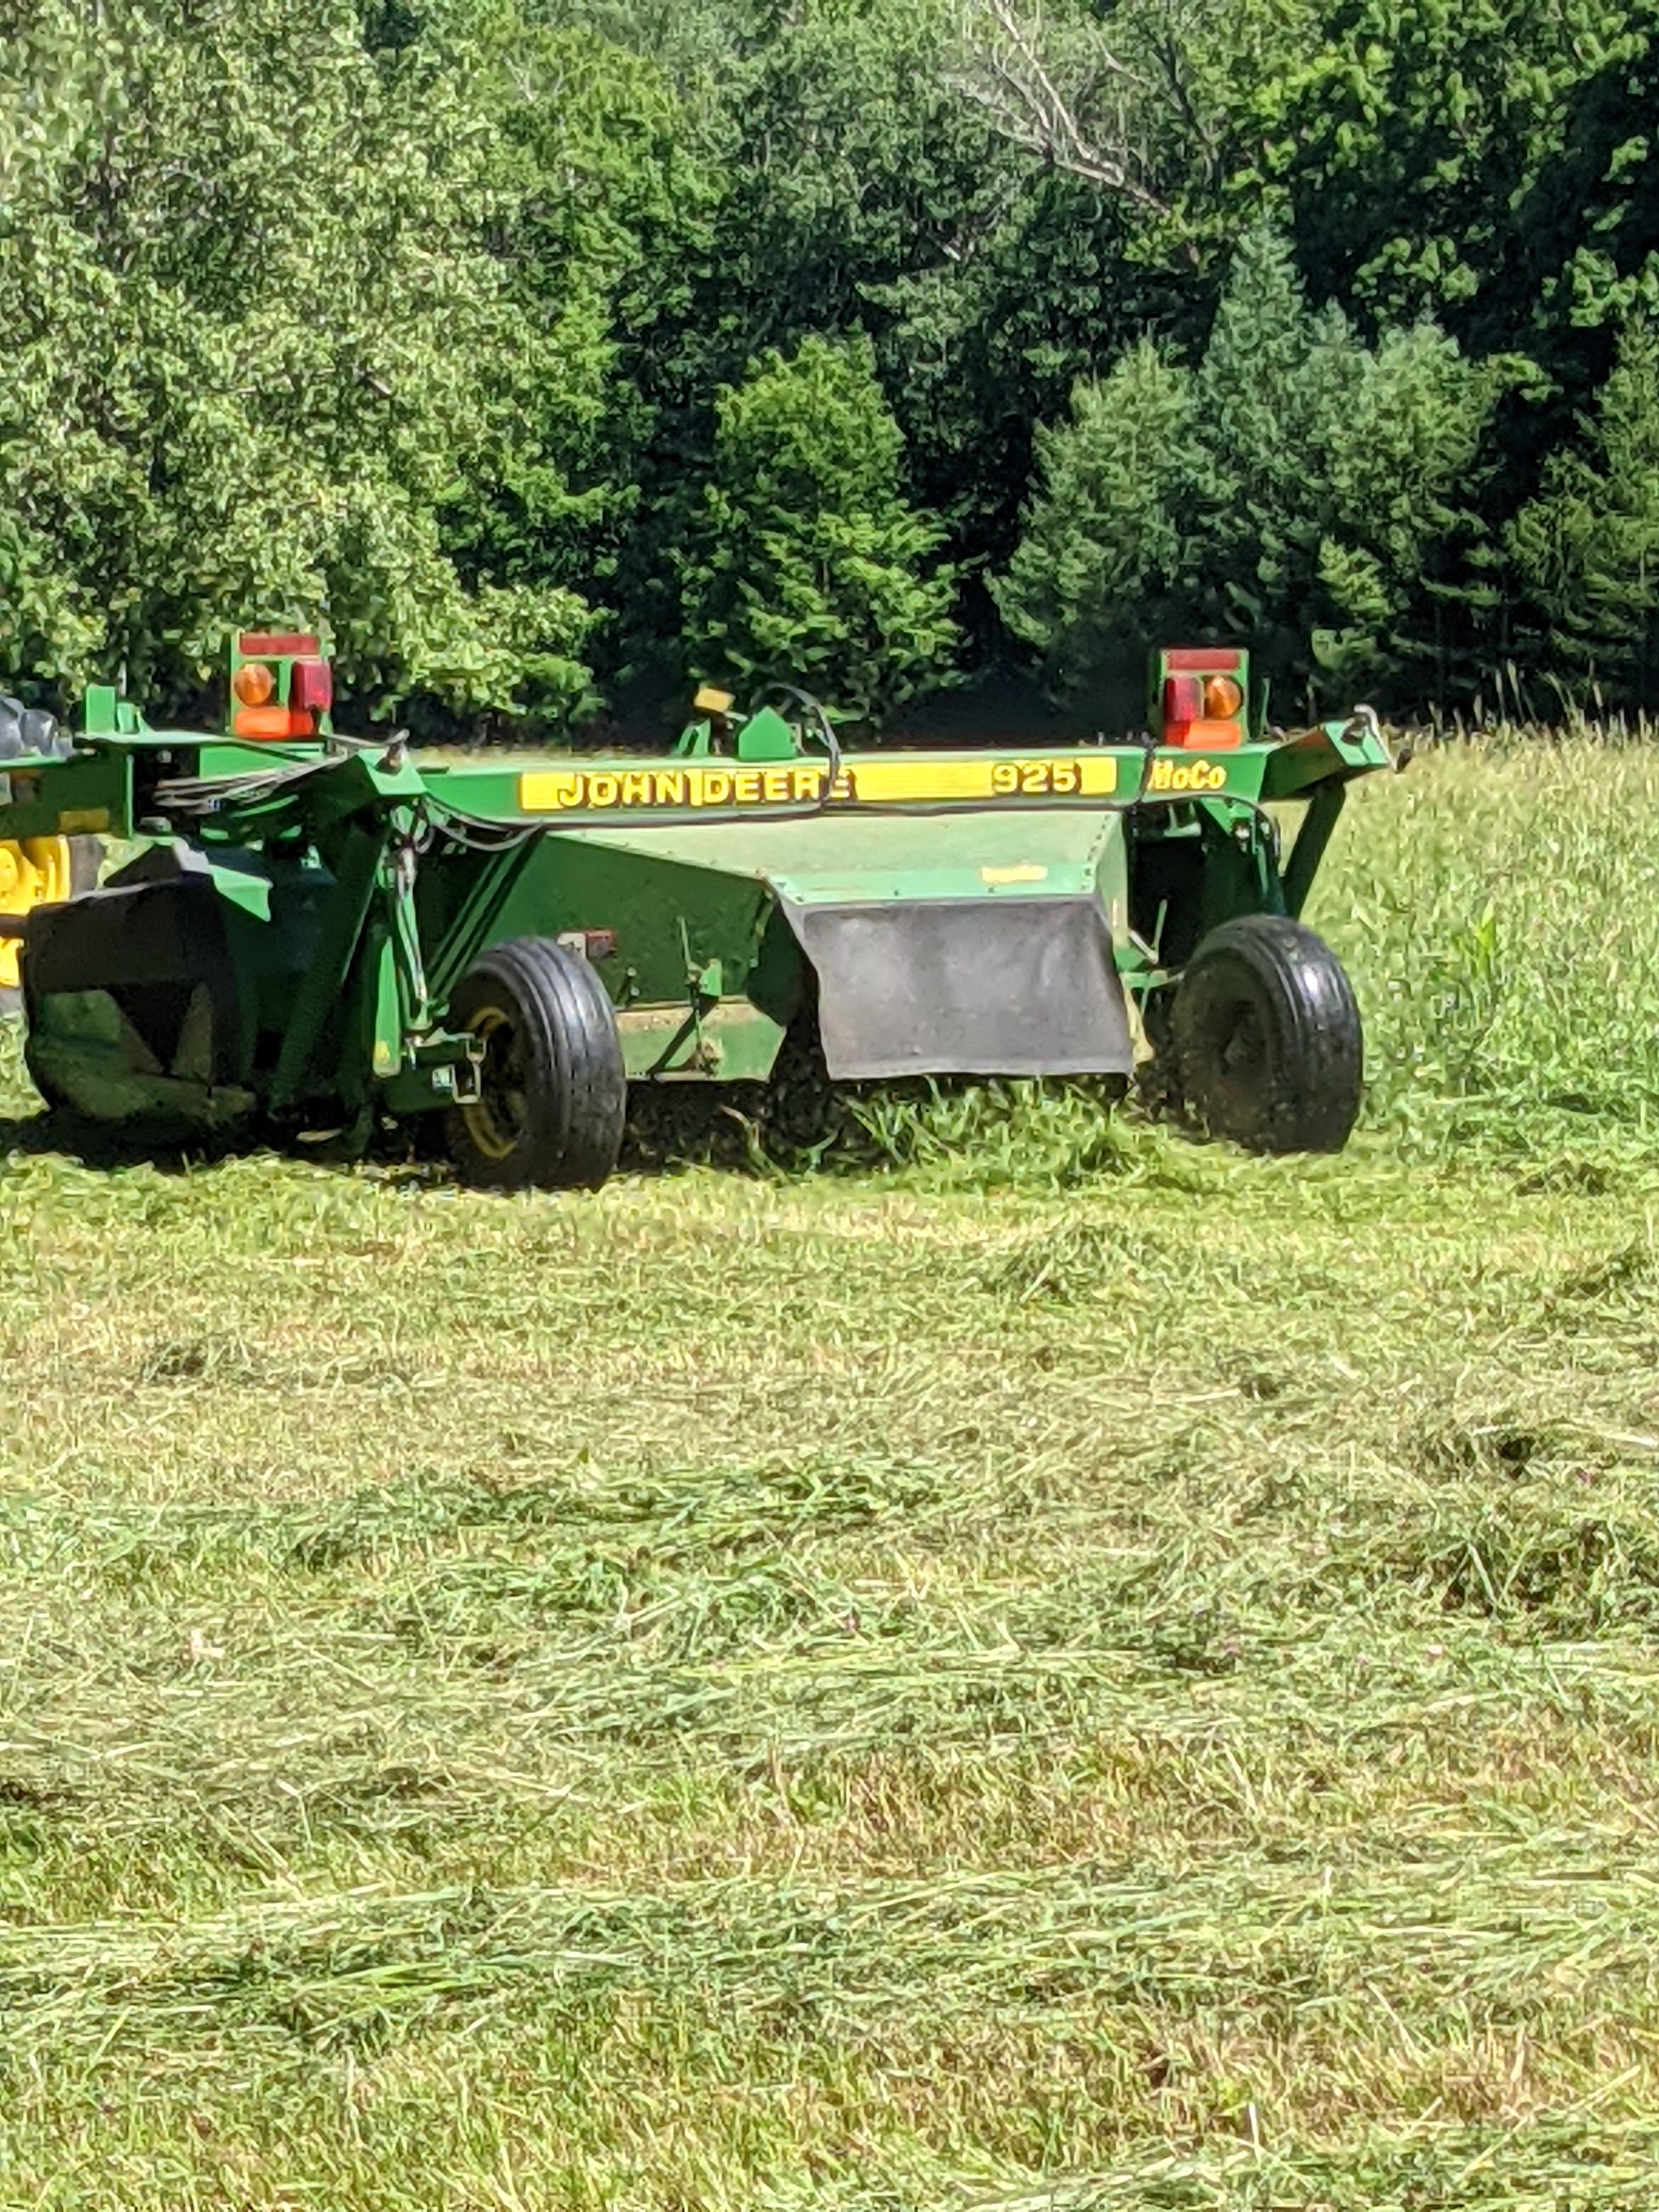
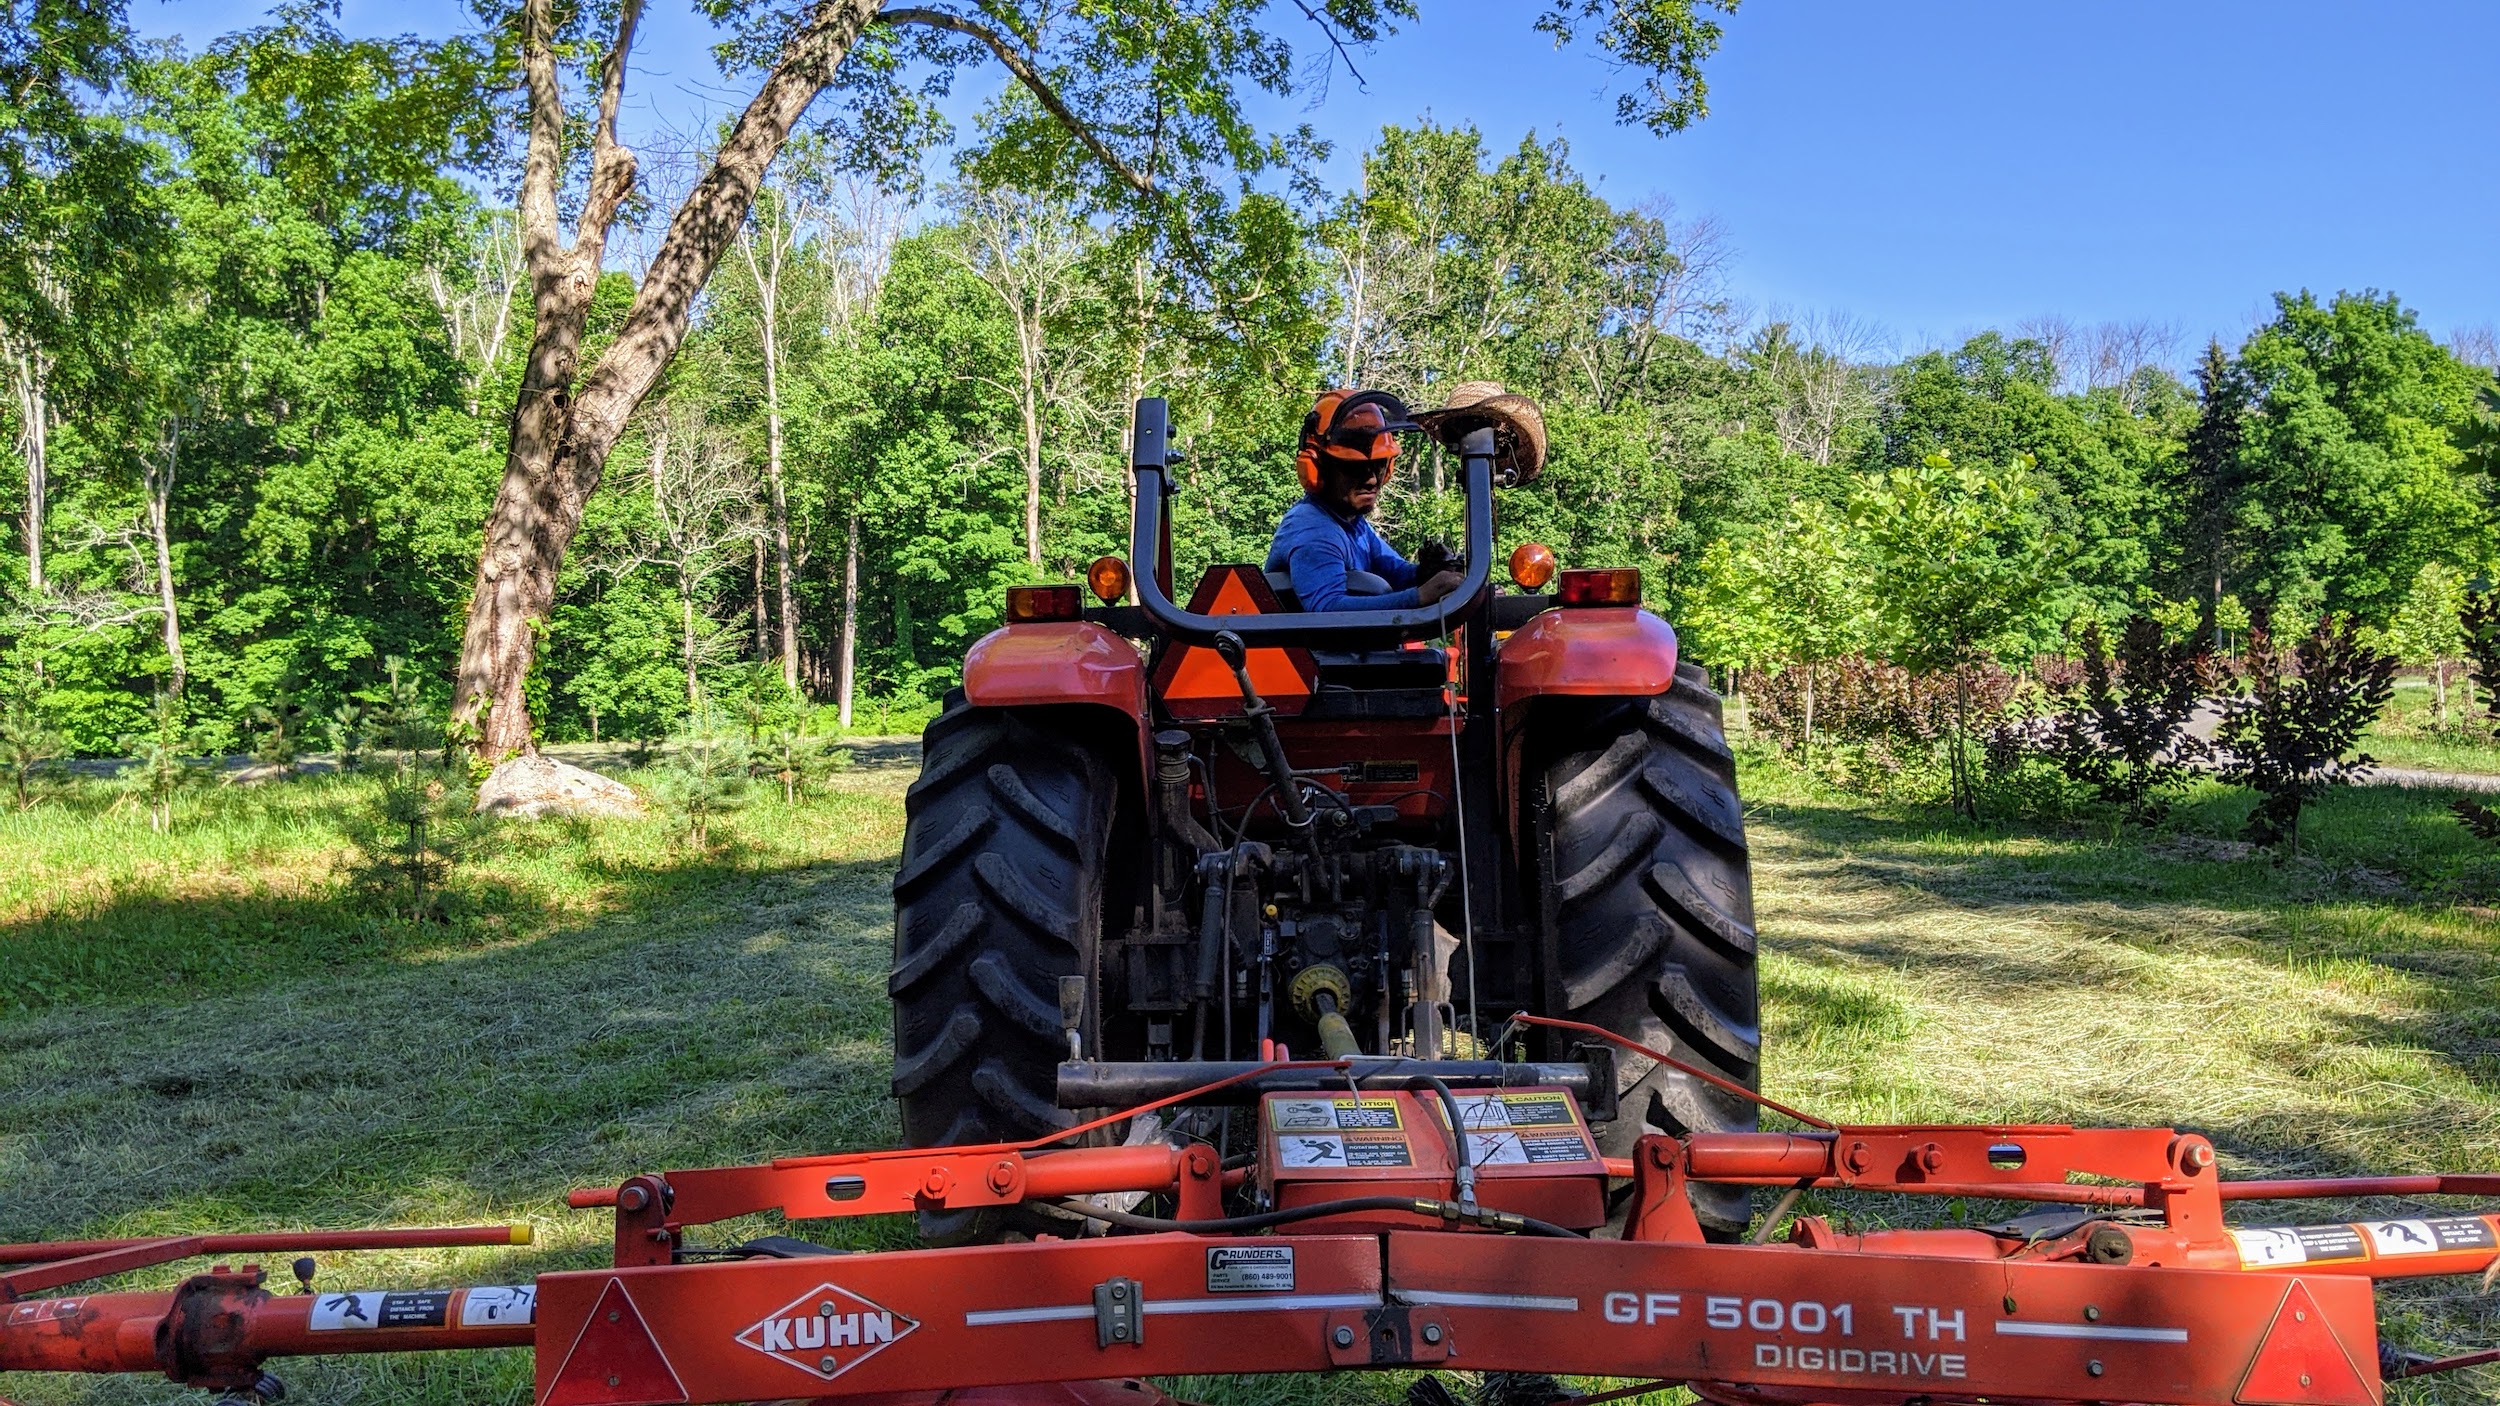
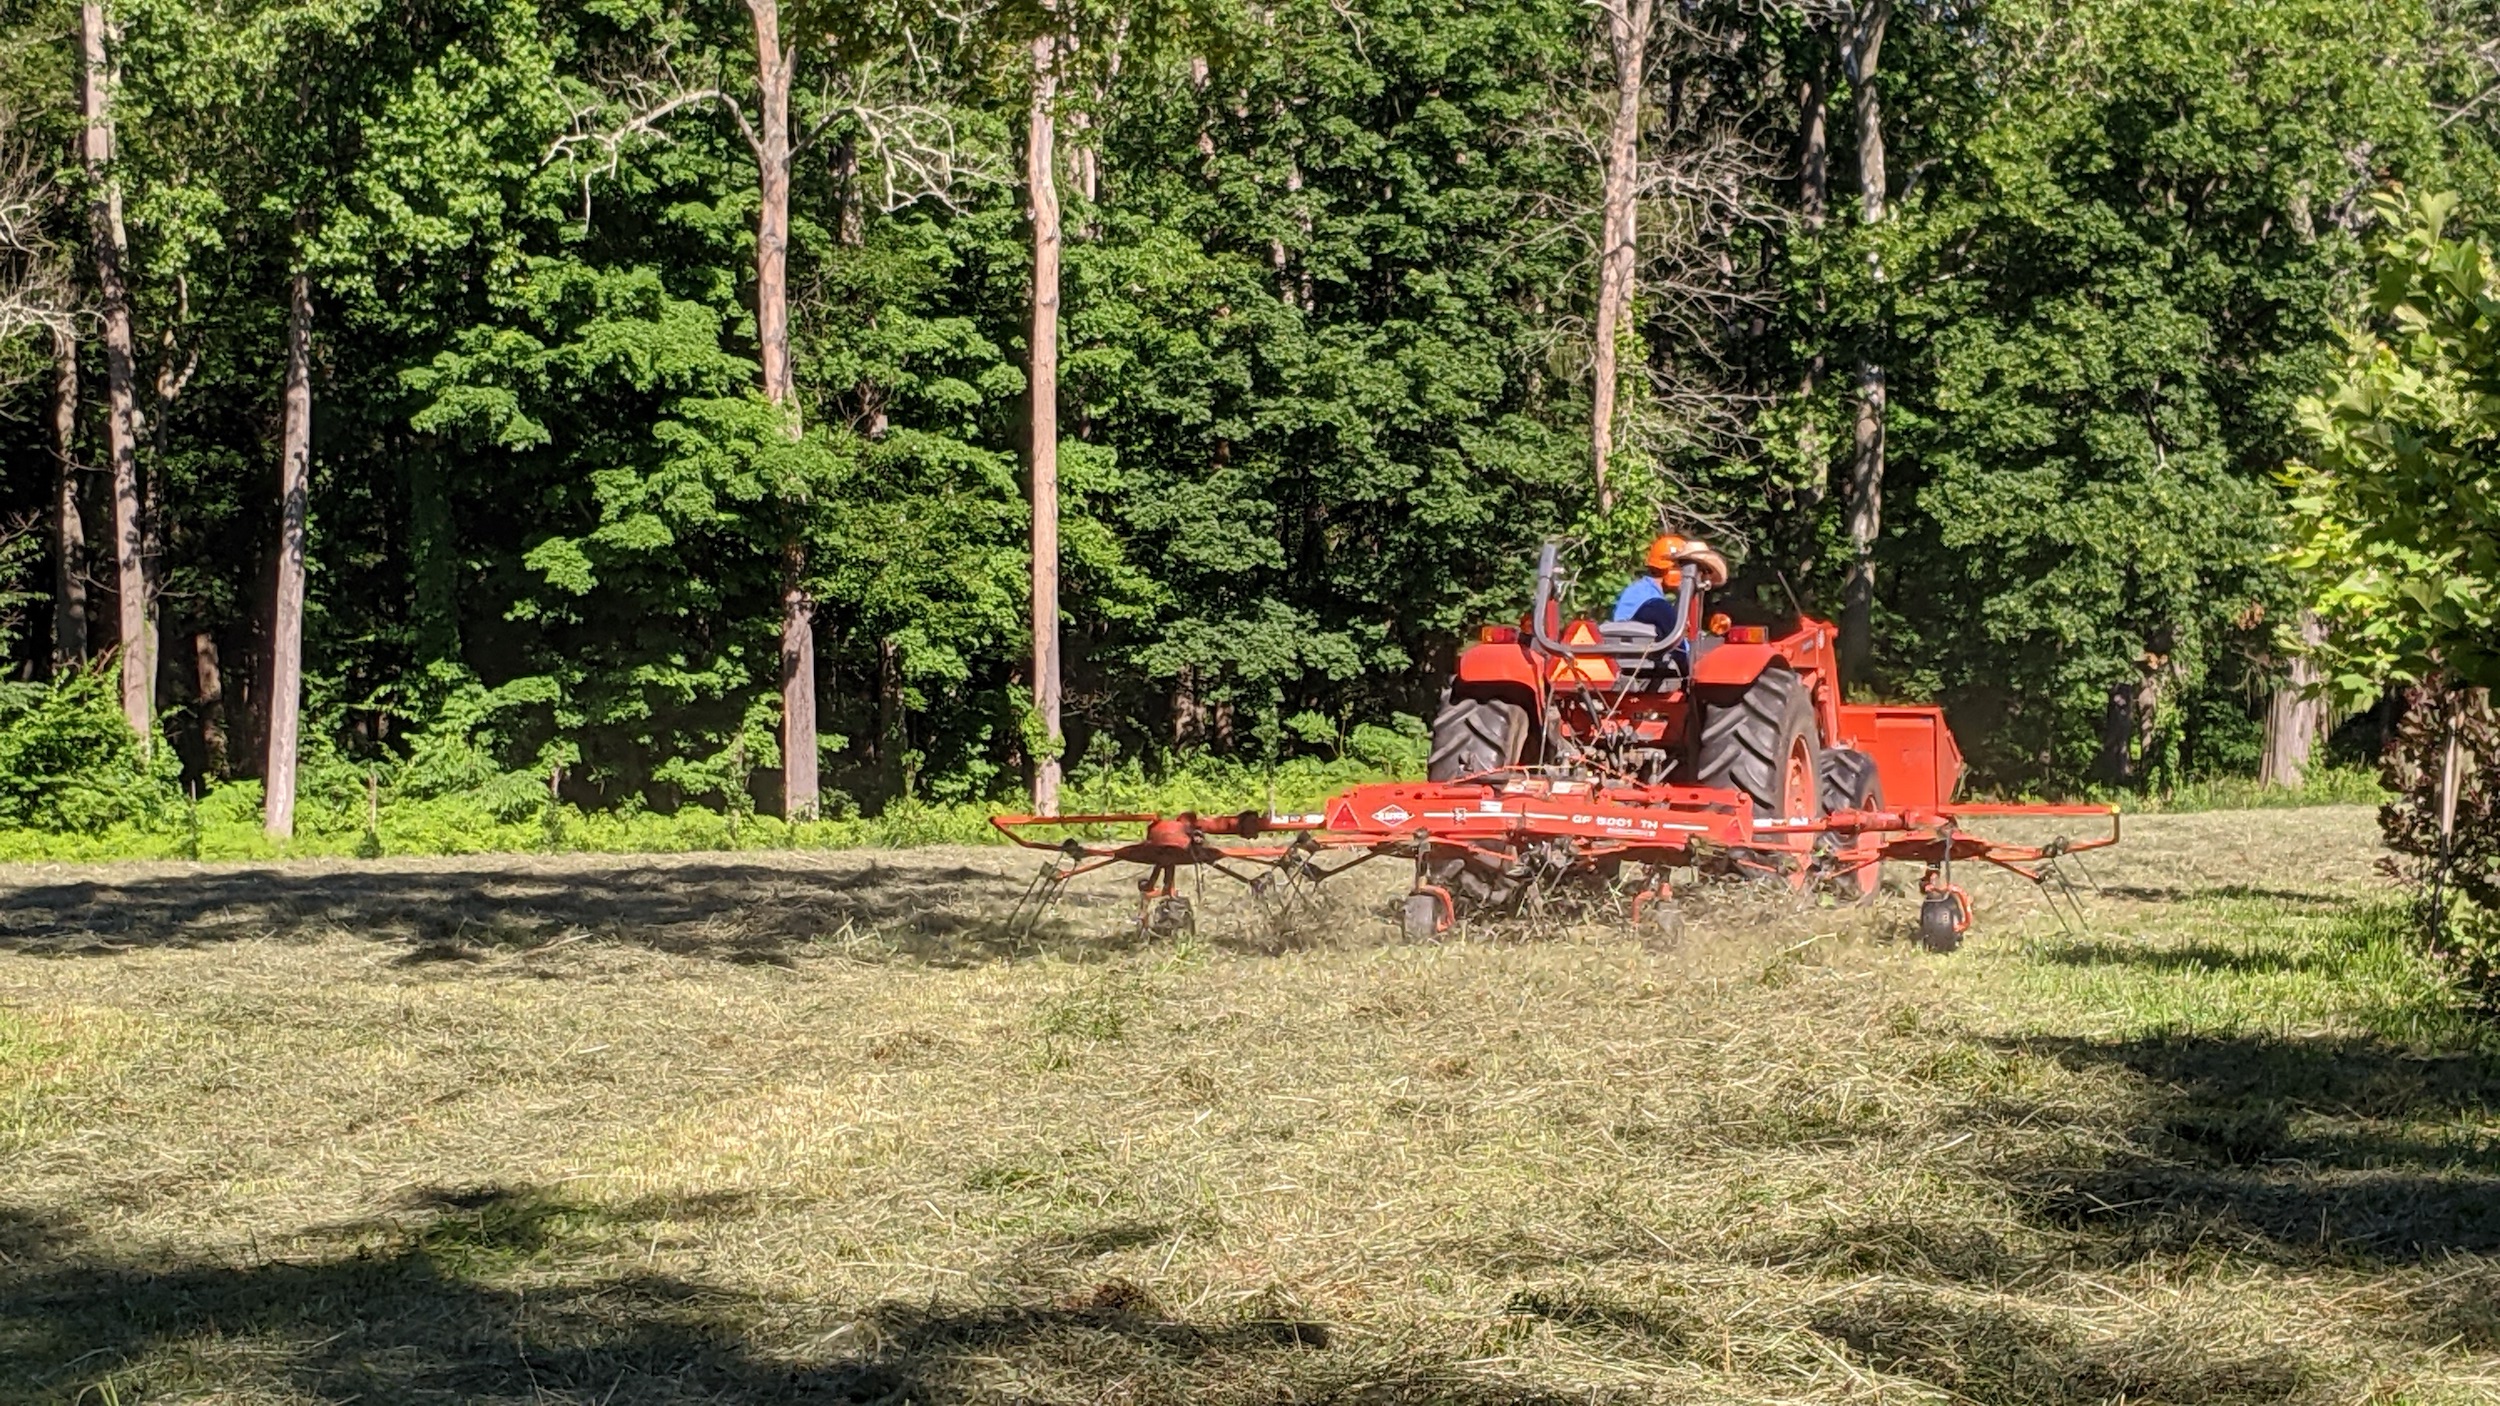
I am fortunate to have all the necessary equipment here at the farm. This is our mower-conditioner. A hay conditioner crimps and crushes the hay after it is cut to promote faster and more even drying.
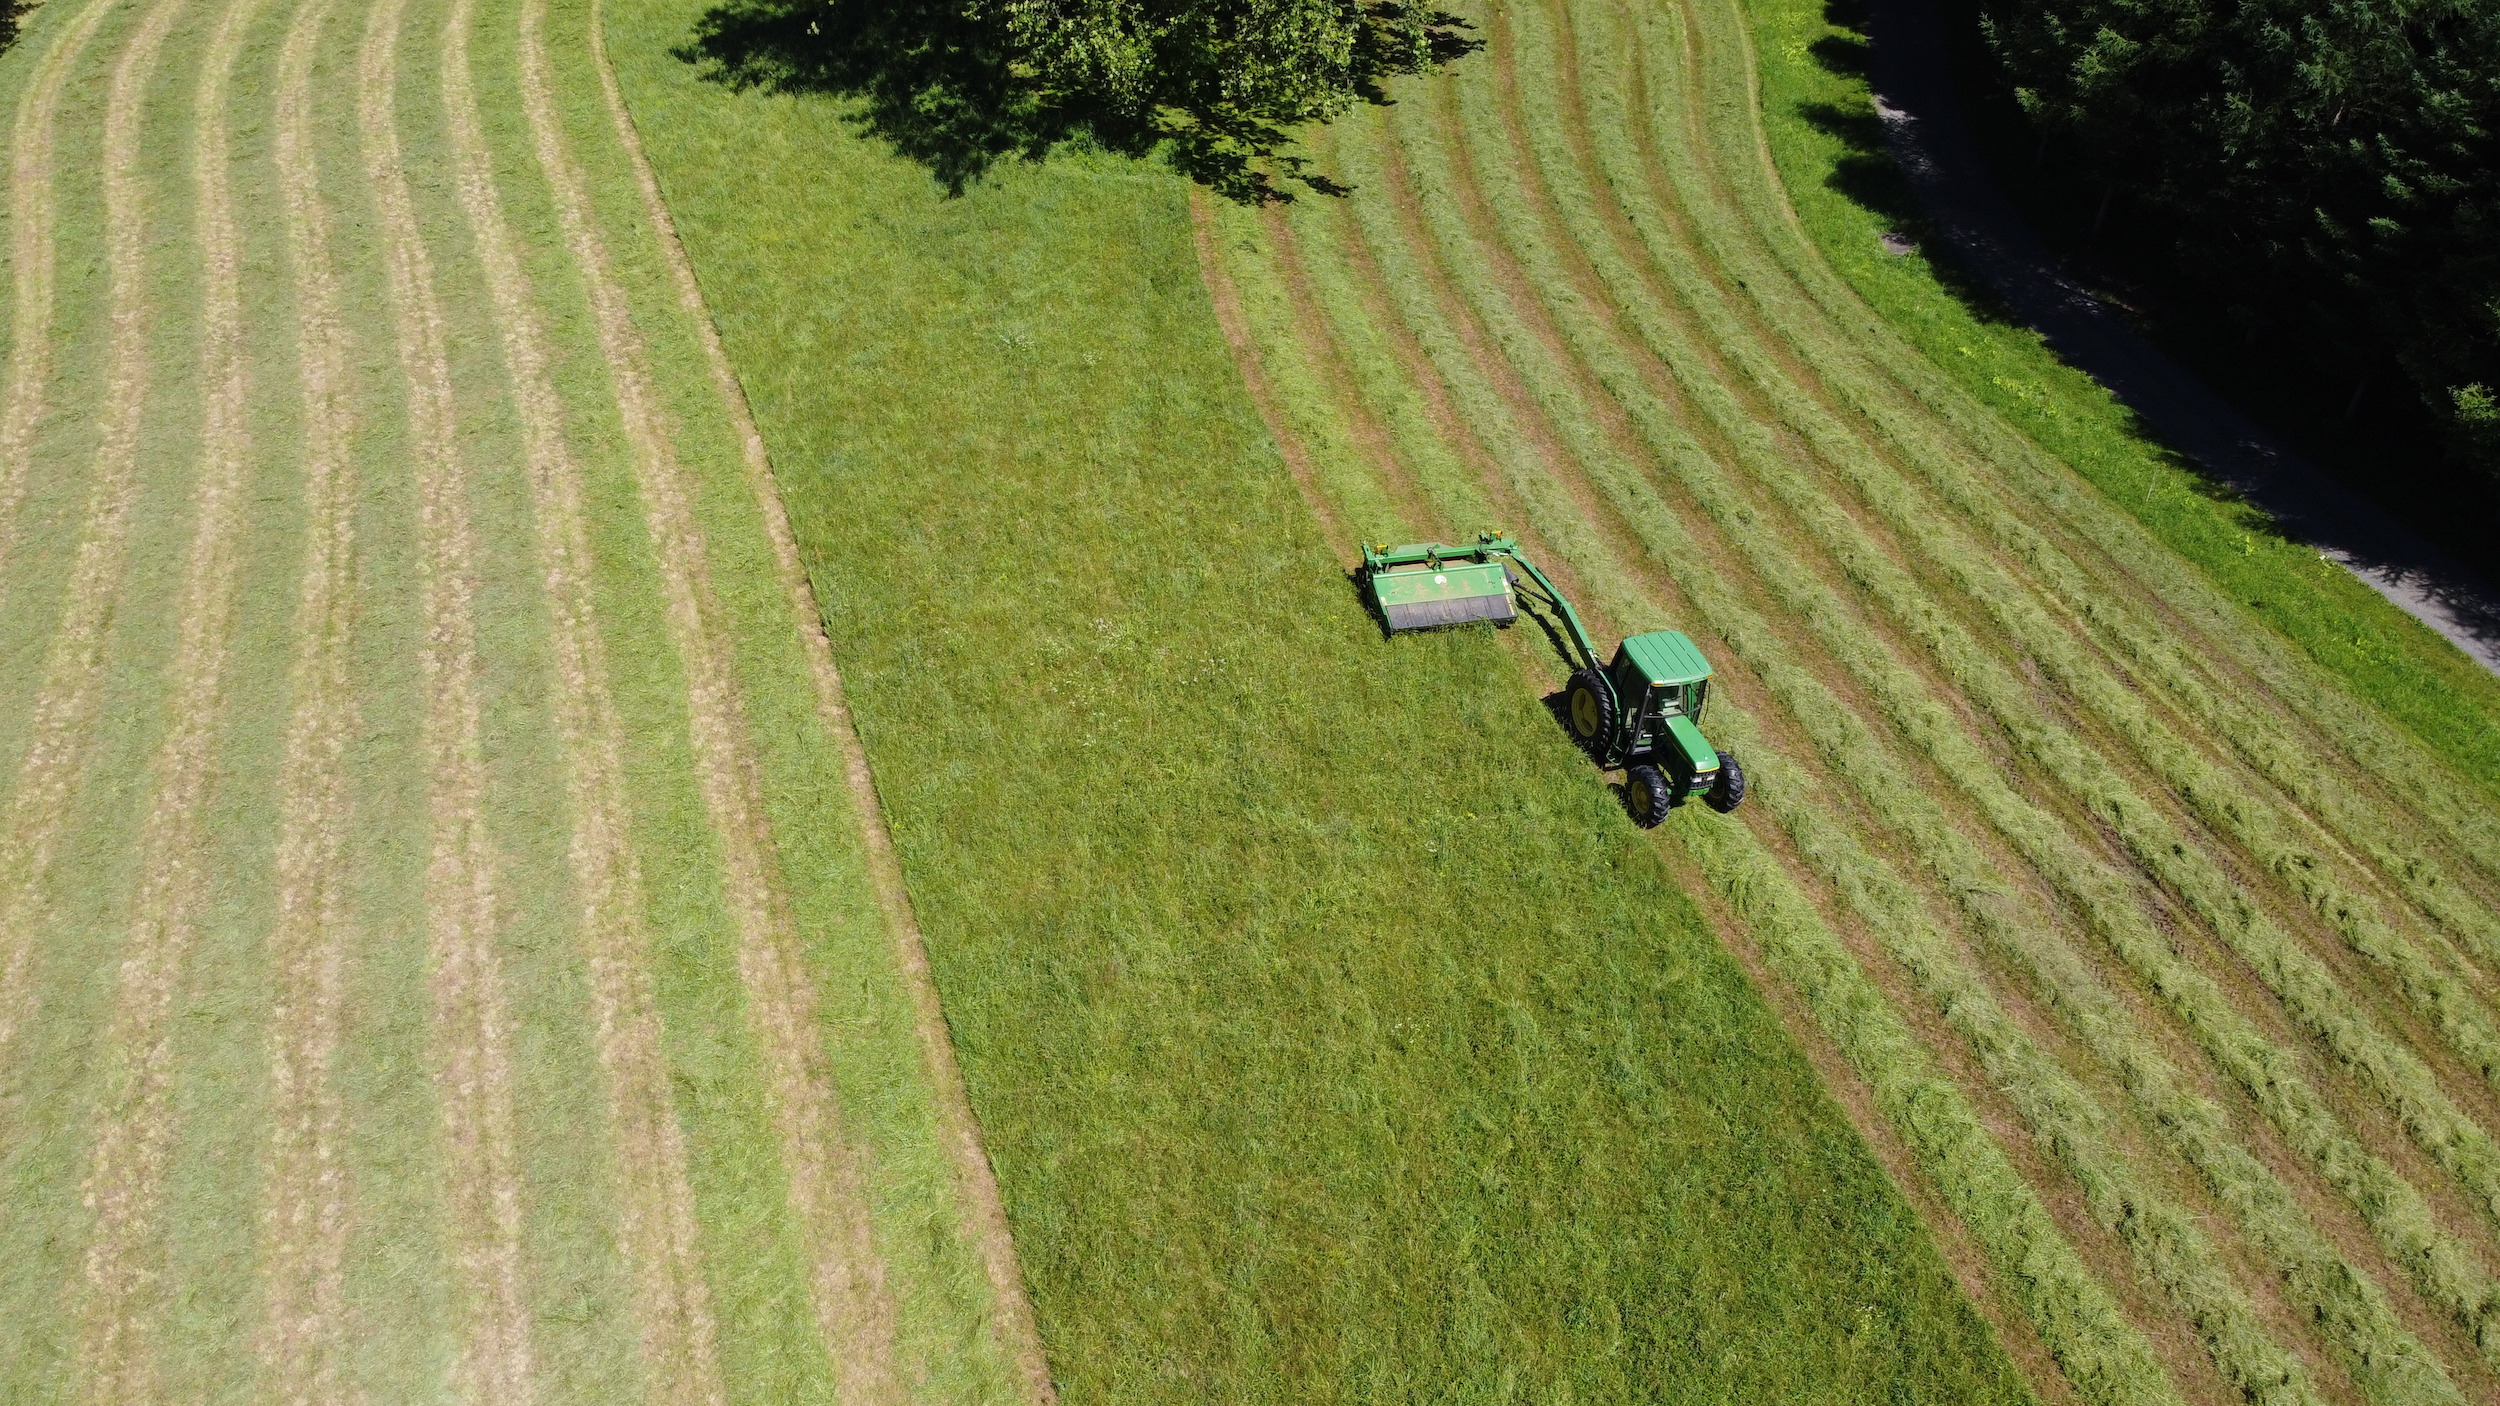
When weather conditions are ideal, these machines allow farmers to cut wide and fast – the best formula for quality field productivity. My outdoor grounds crew foreman, Chhiring, goes over all the fields slowly and evenly with the mower-conditioner.
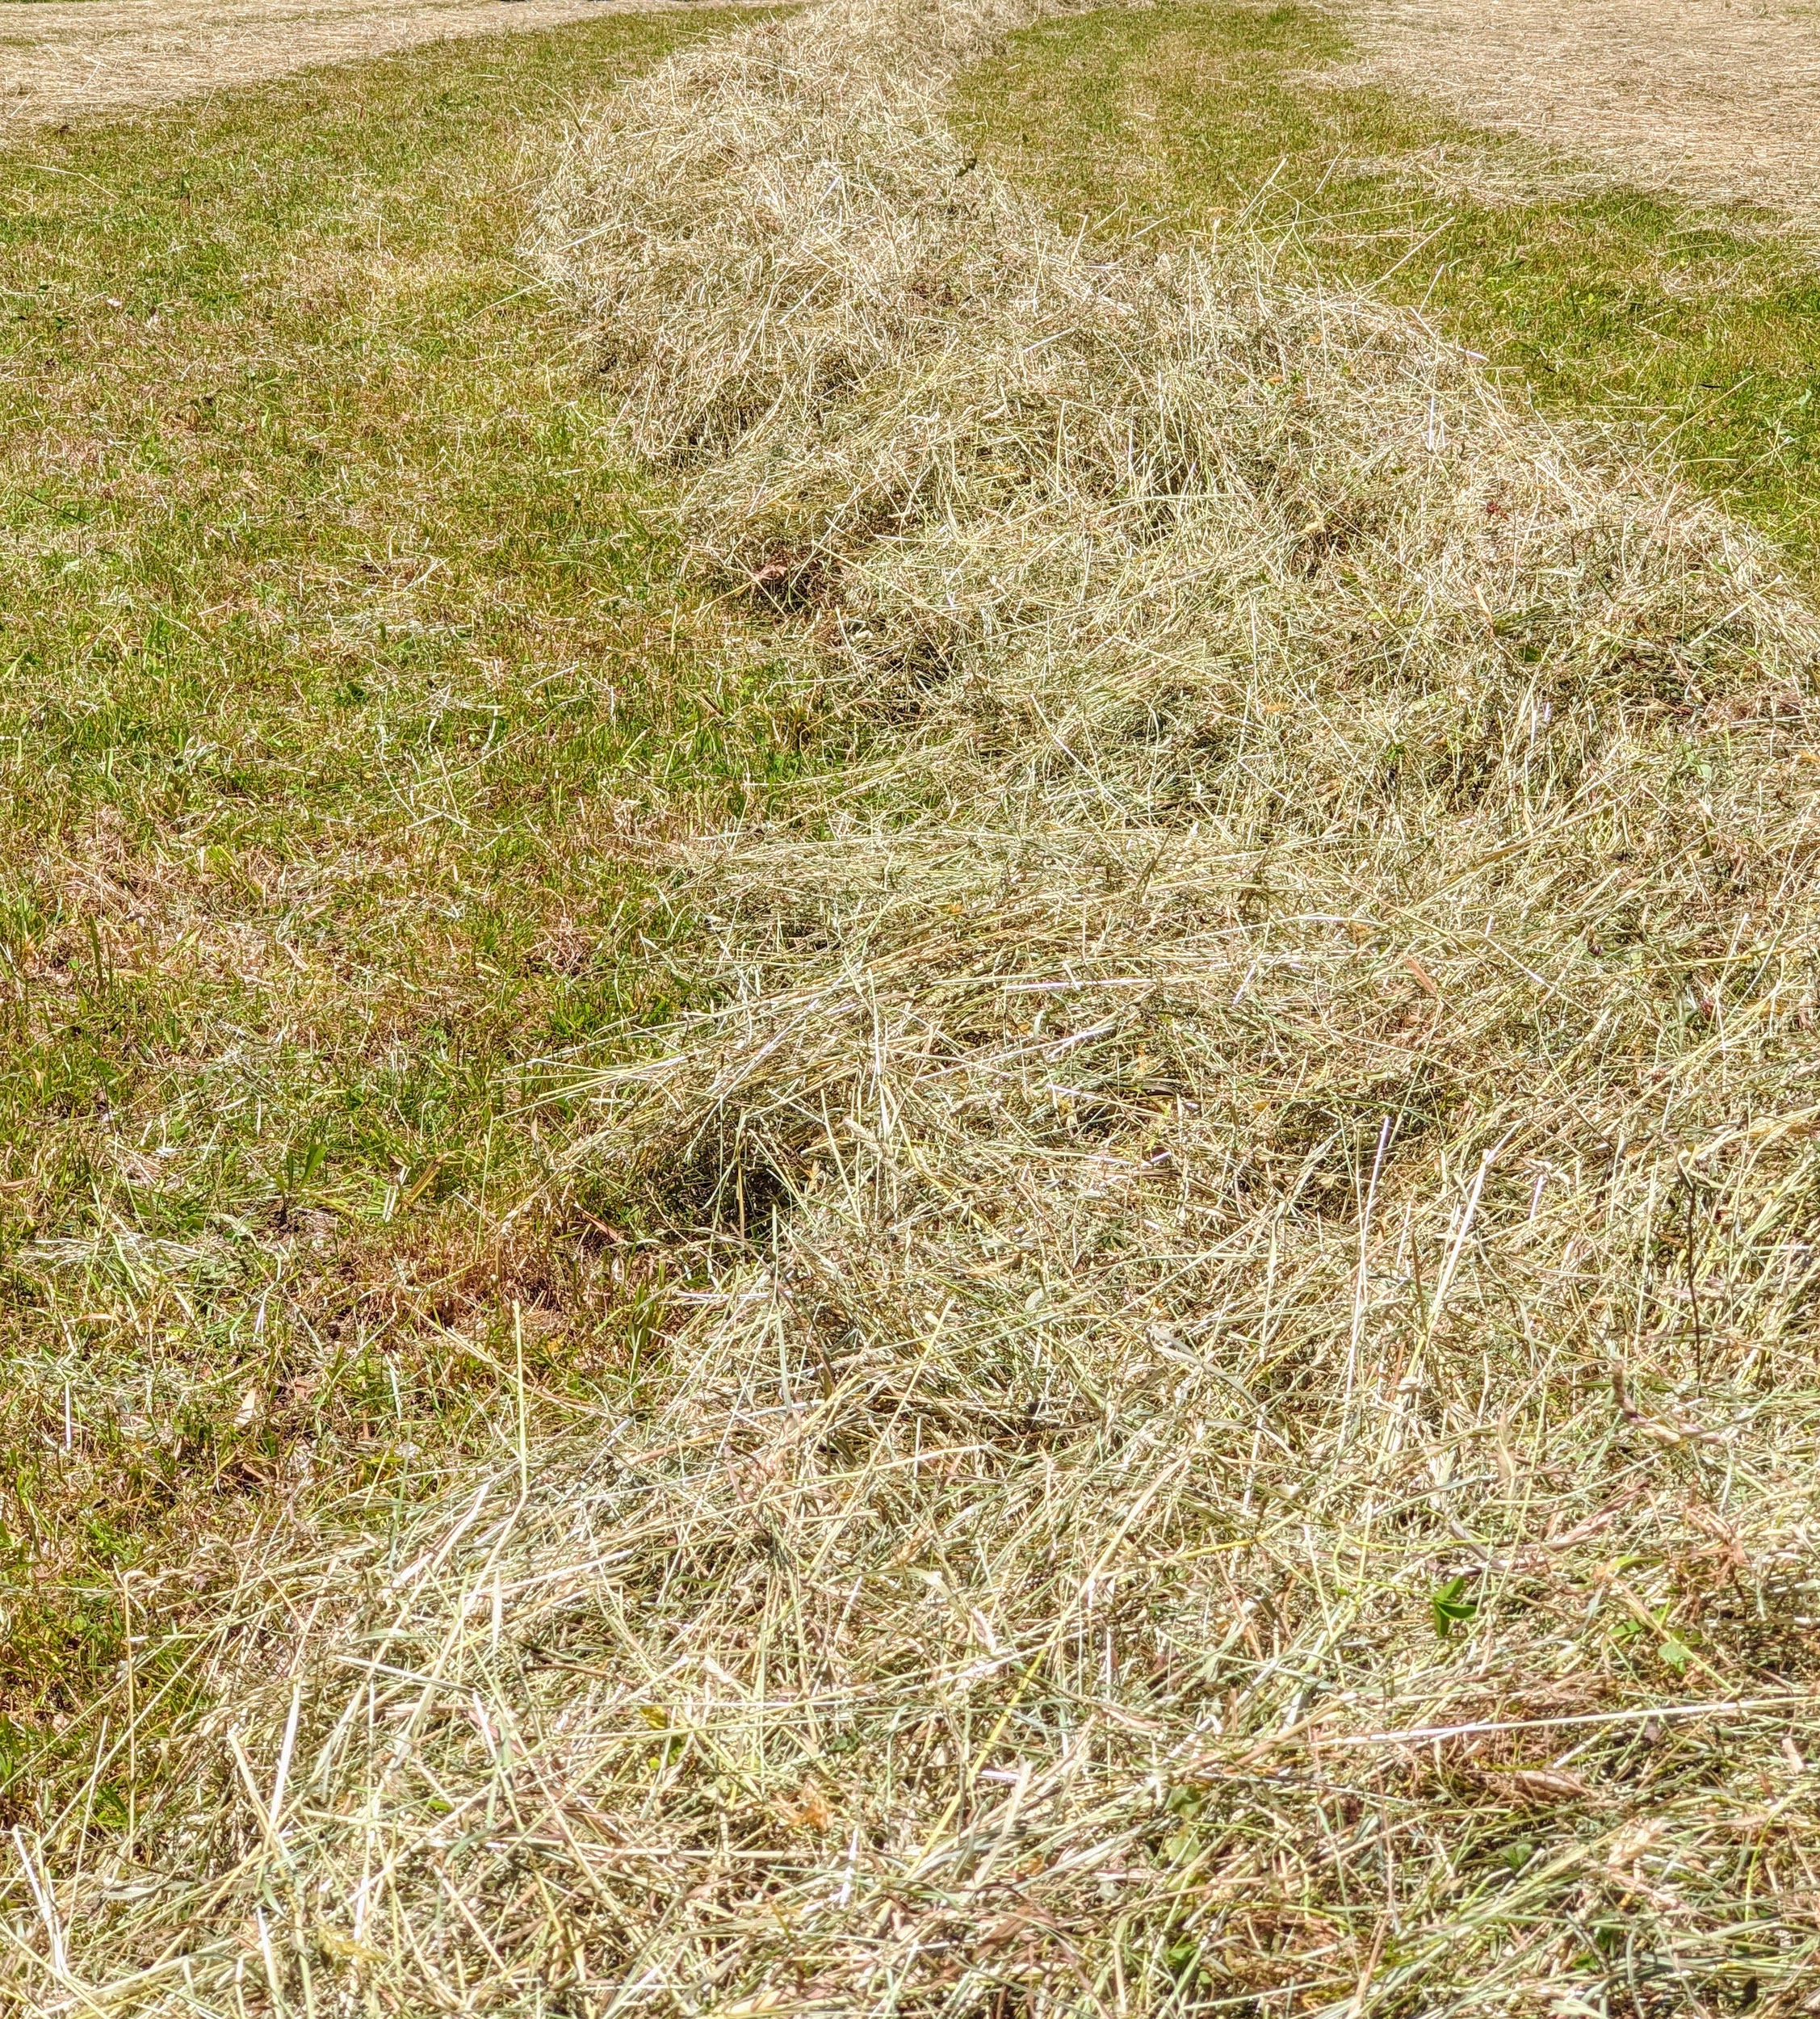
Here, one can see the mounded rows of cut and crimped grass.
Here is another view after the mower-conditioner goes back and forth over the field. On the left – cut hay, and on the right, the hay that is still waiting to be mowed.
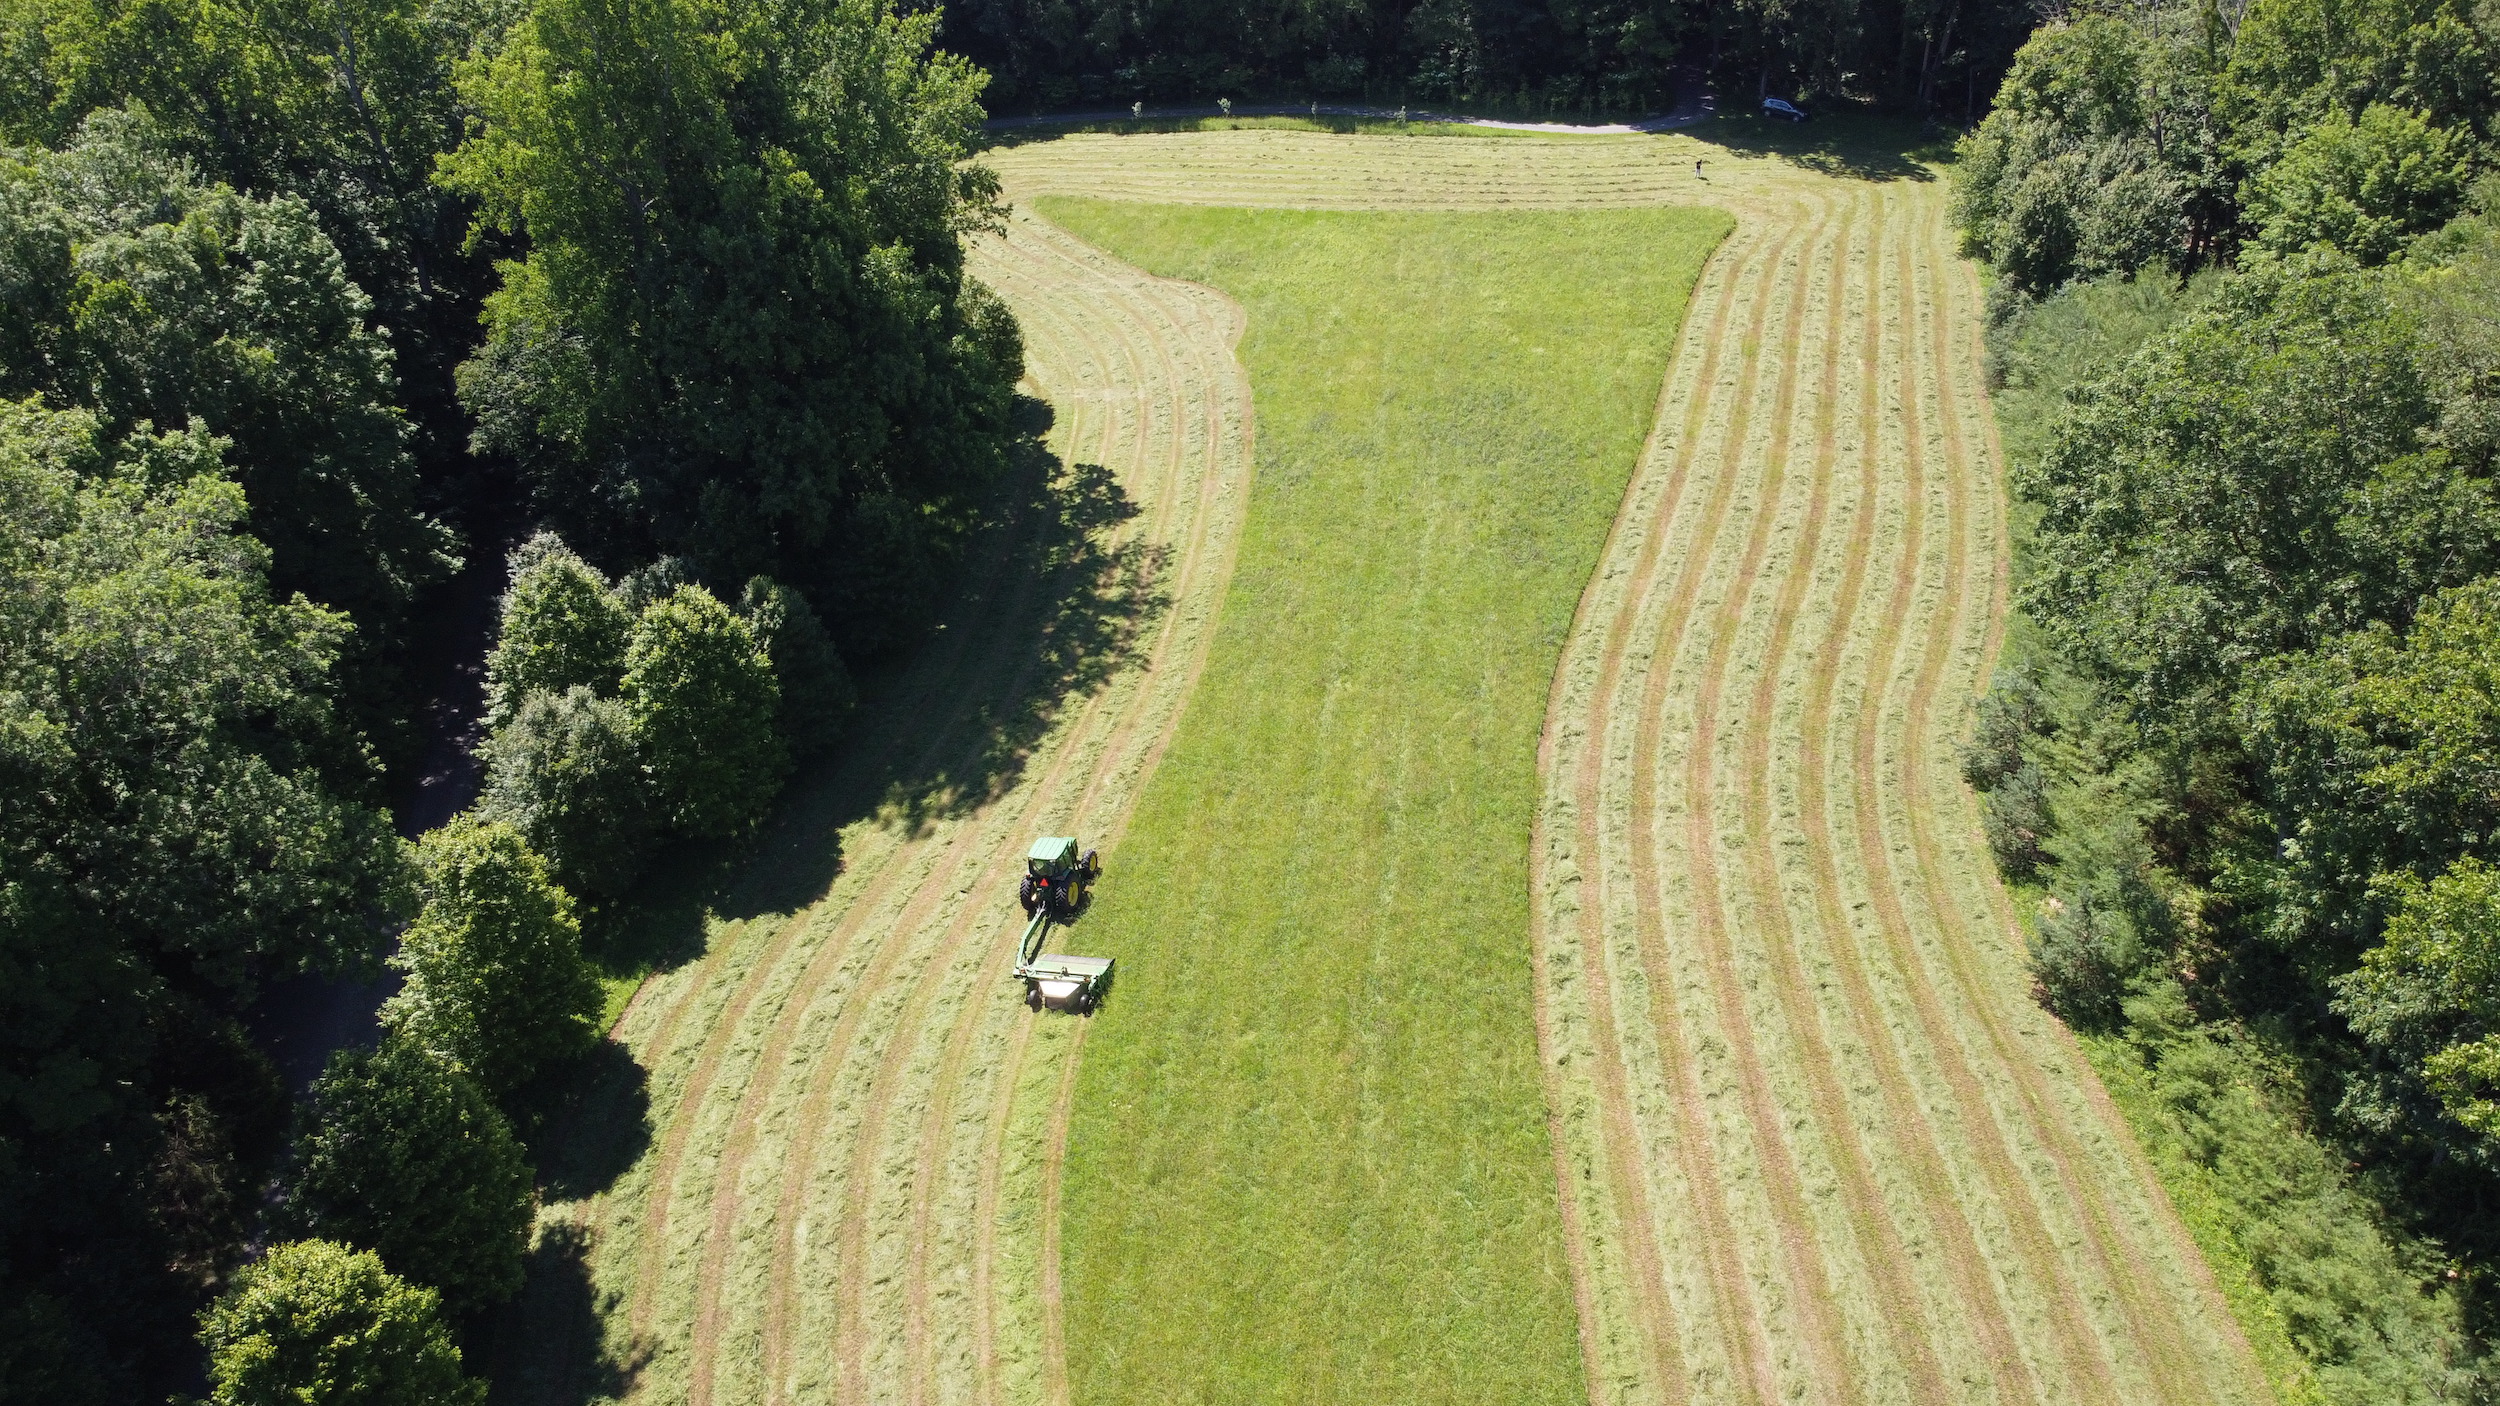
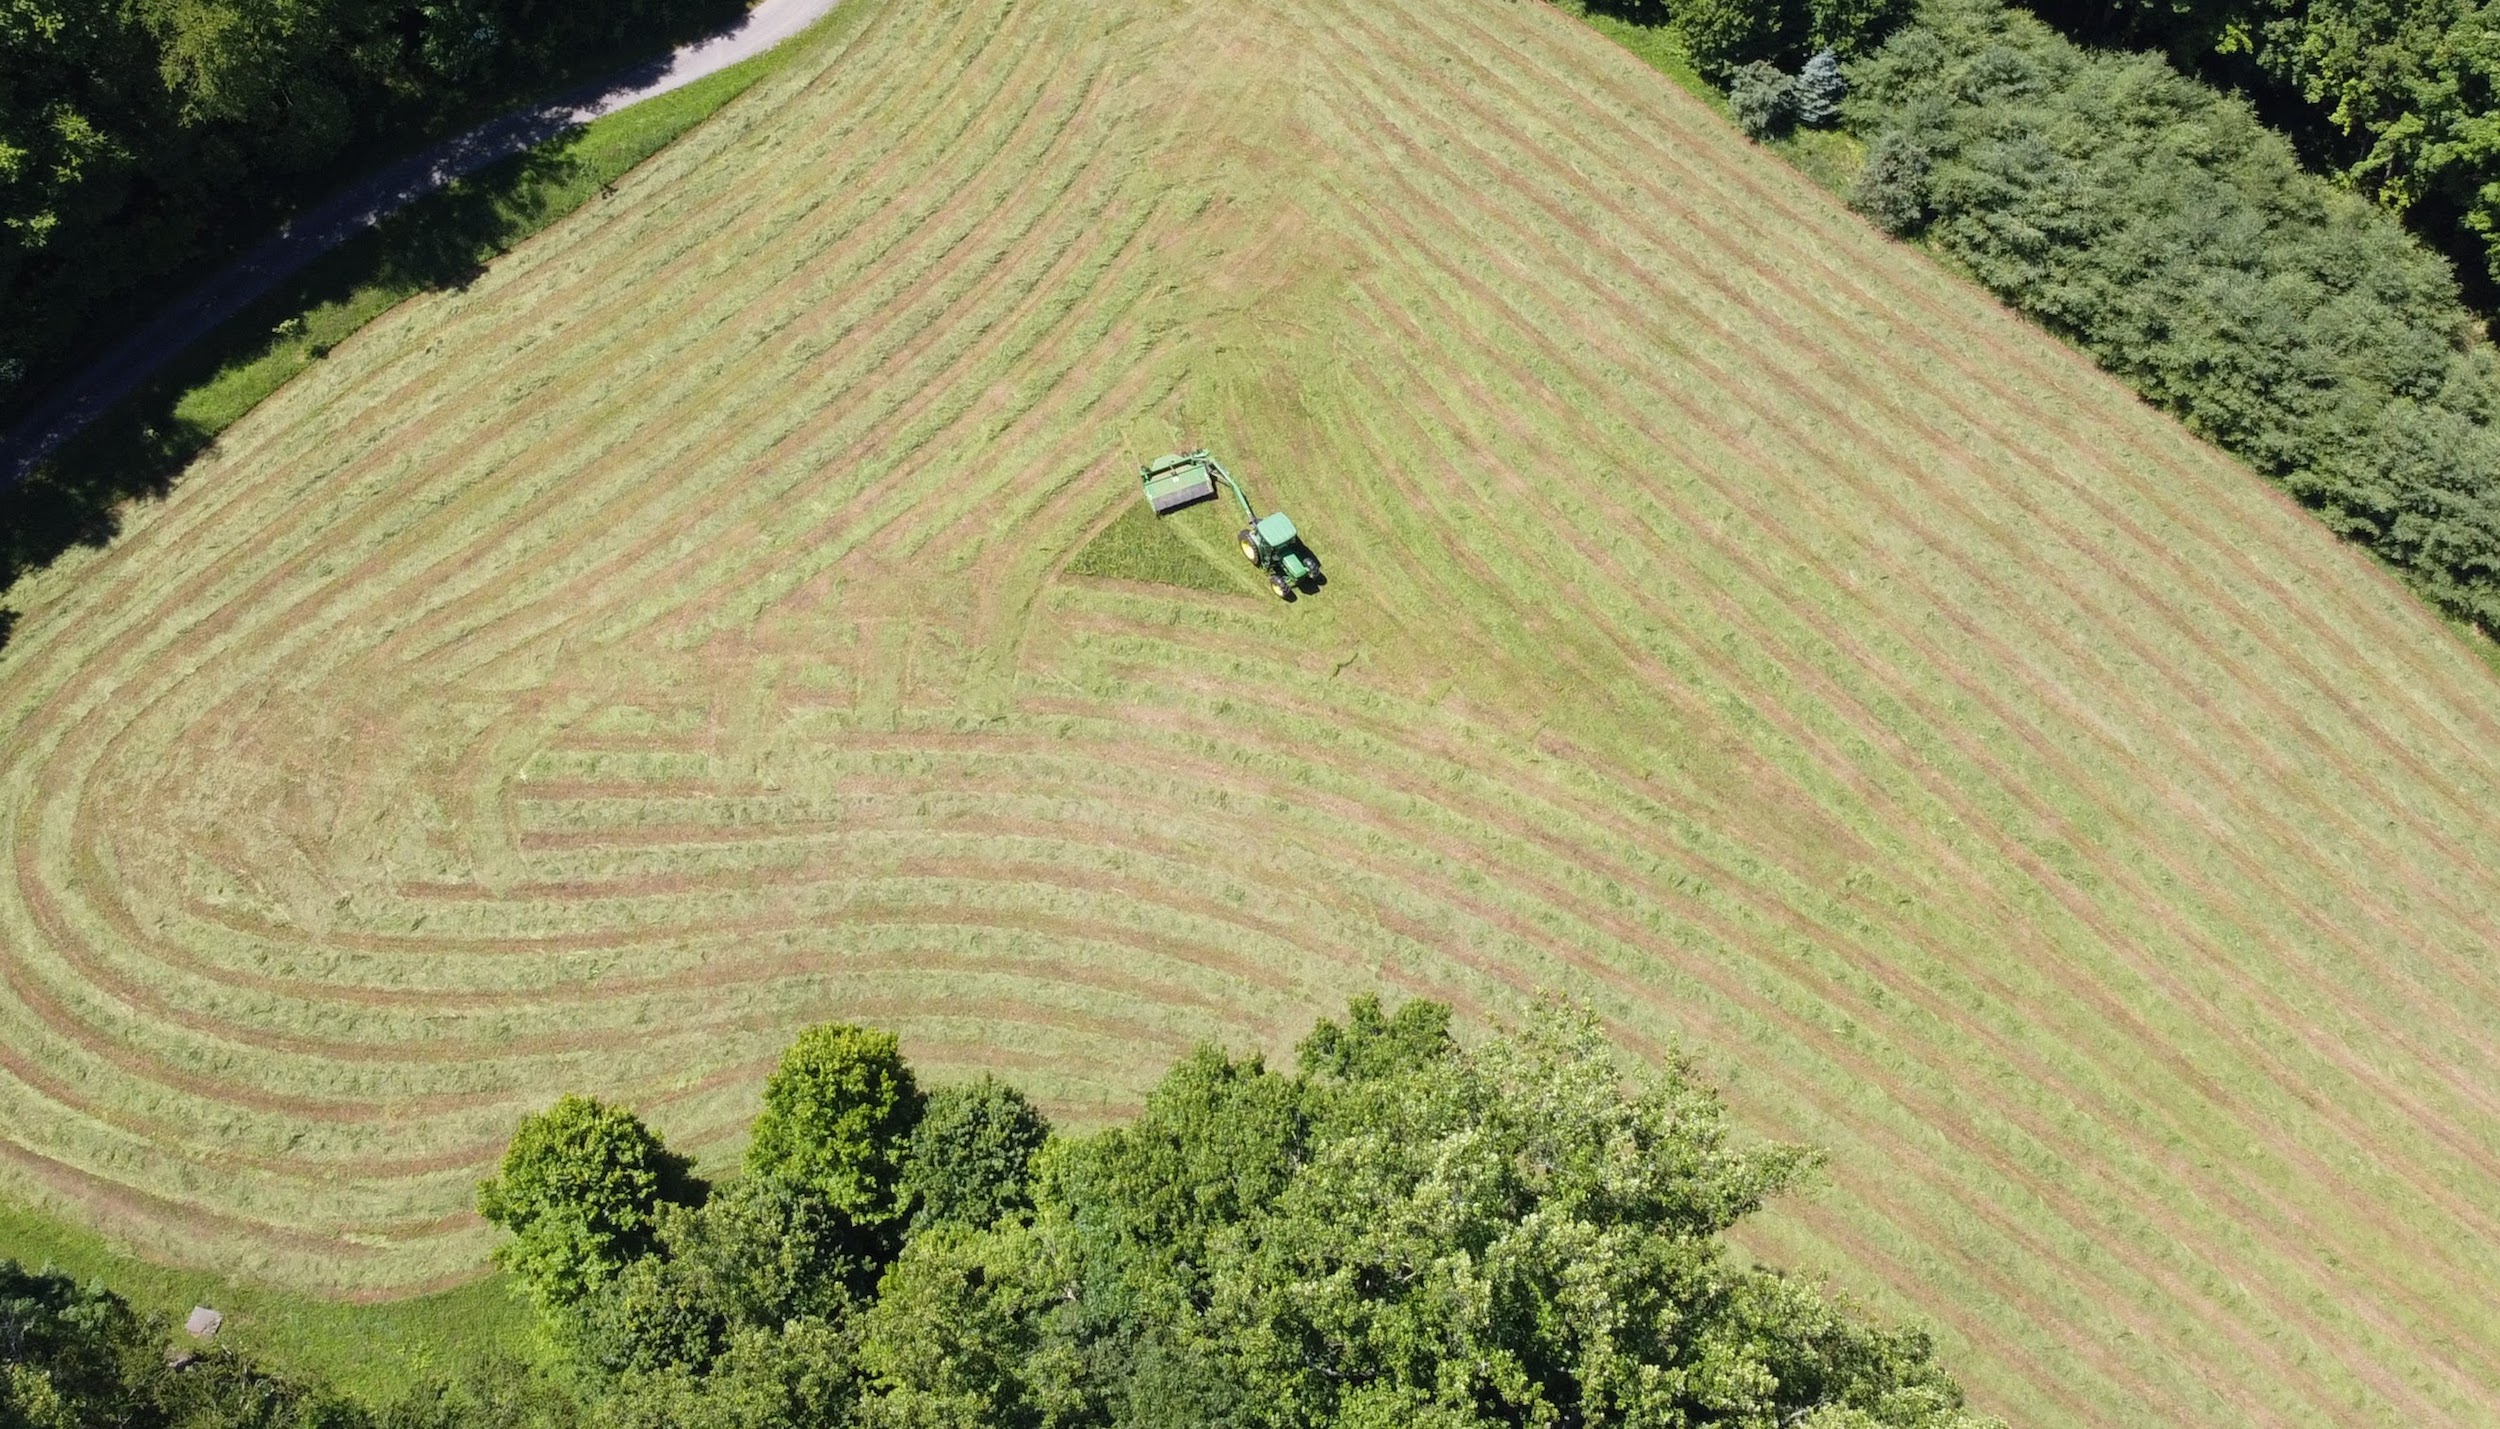
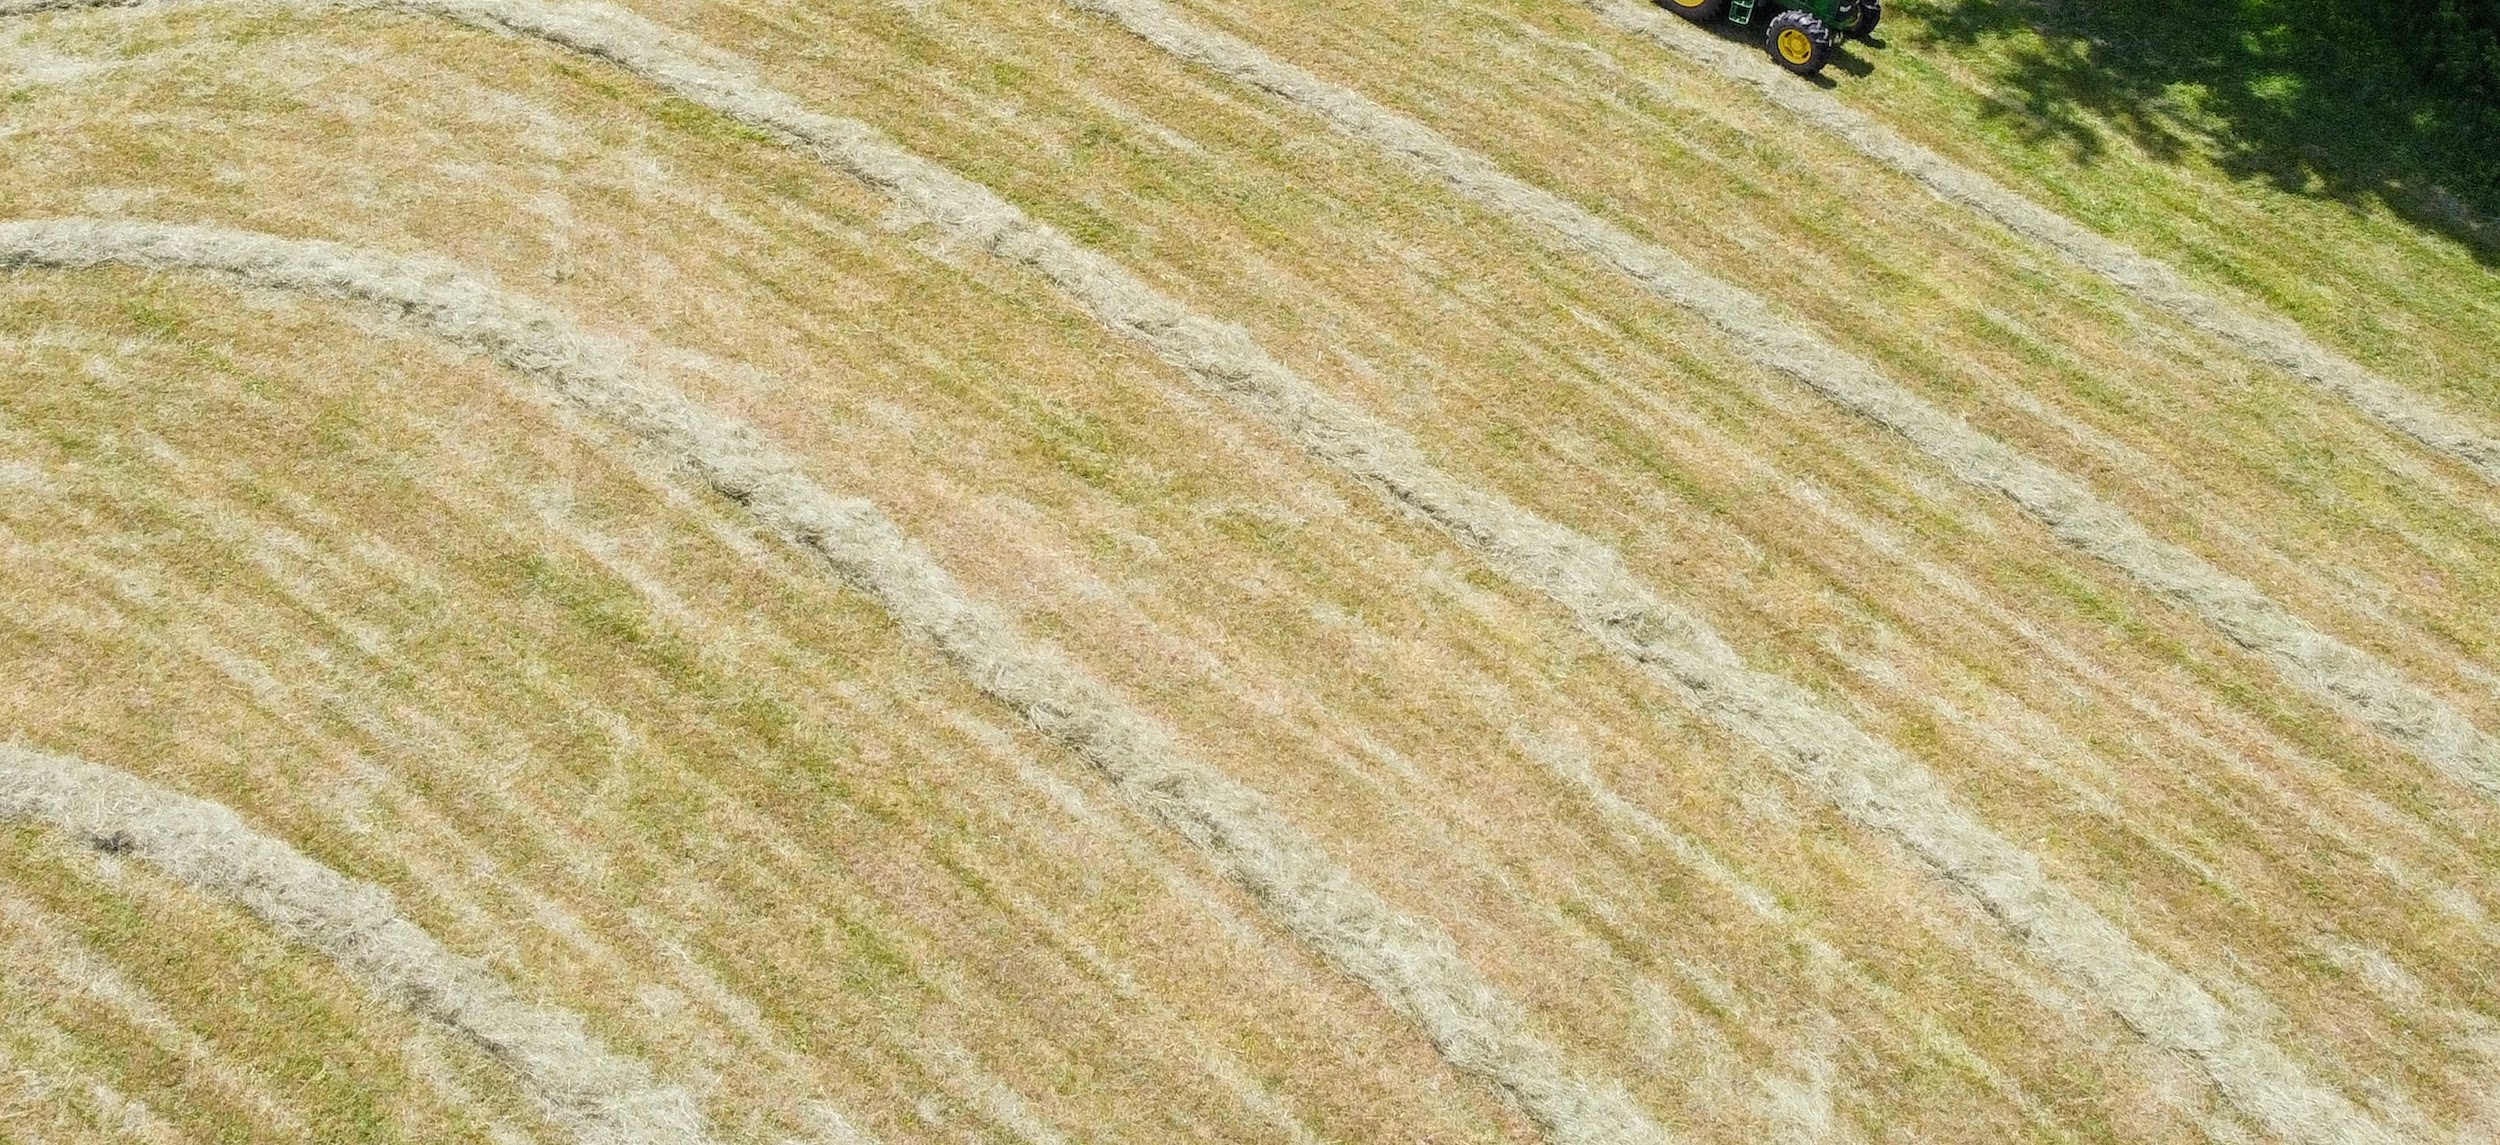
Here is a view from above. Chhiring’s son, MingMar, took the next few photos with a drone. The mounded rows are called windrows – rows of cut hay or small grain crops. They are so beautiful and all perfectly straight.
Chhiring follows the shape of the field and works from the outside in – until every bit of hay is cut.
Here is the last section to be done.
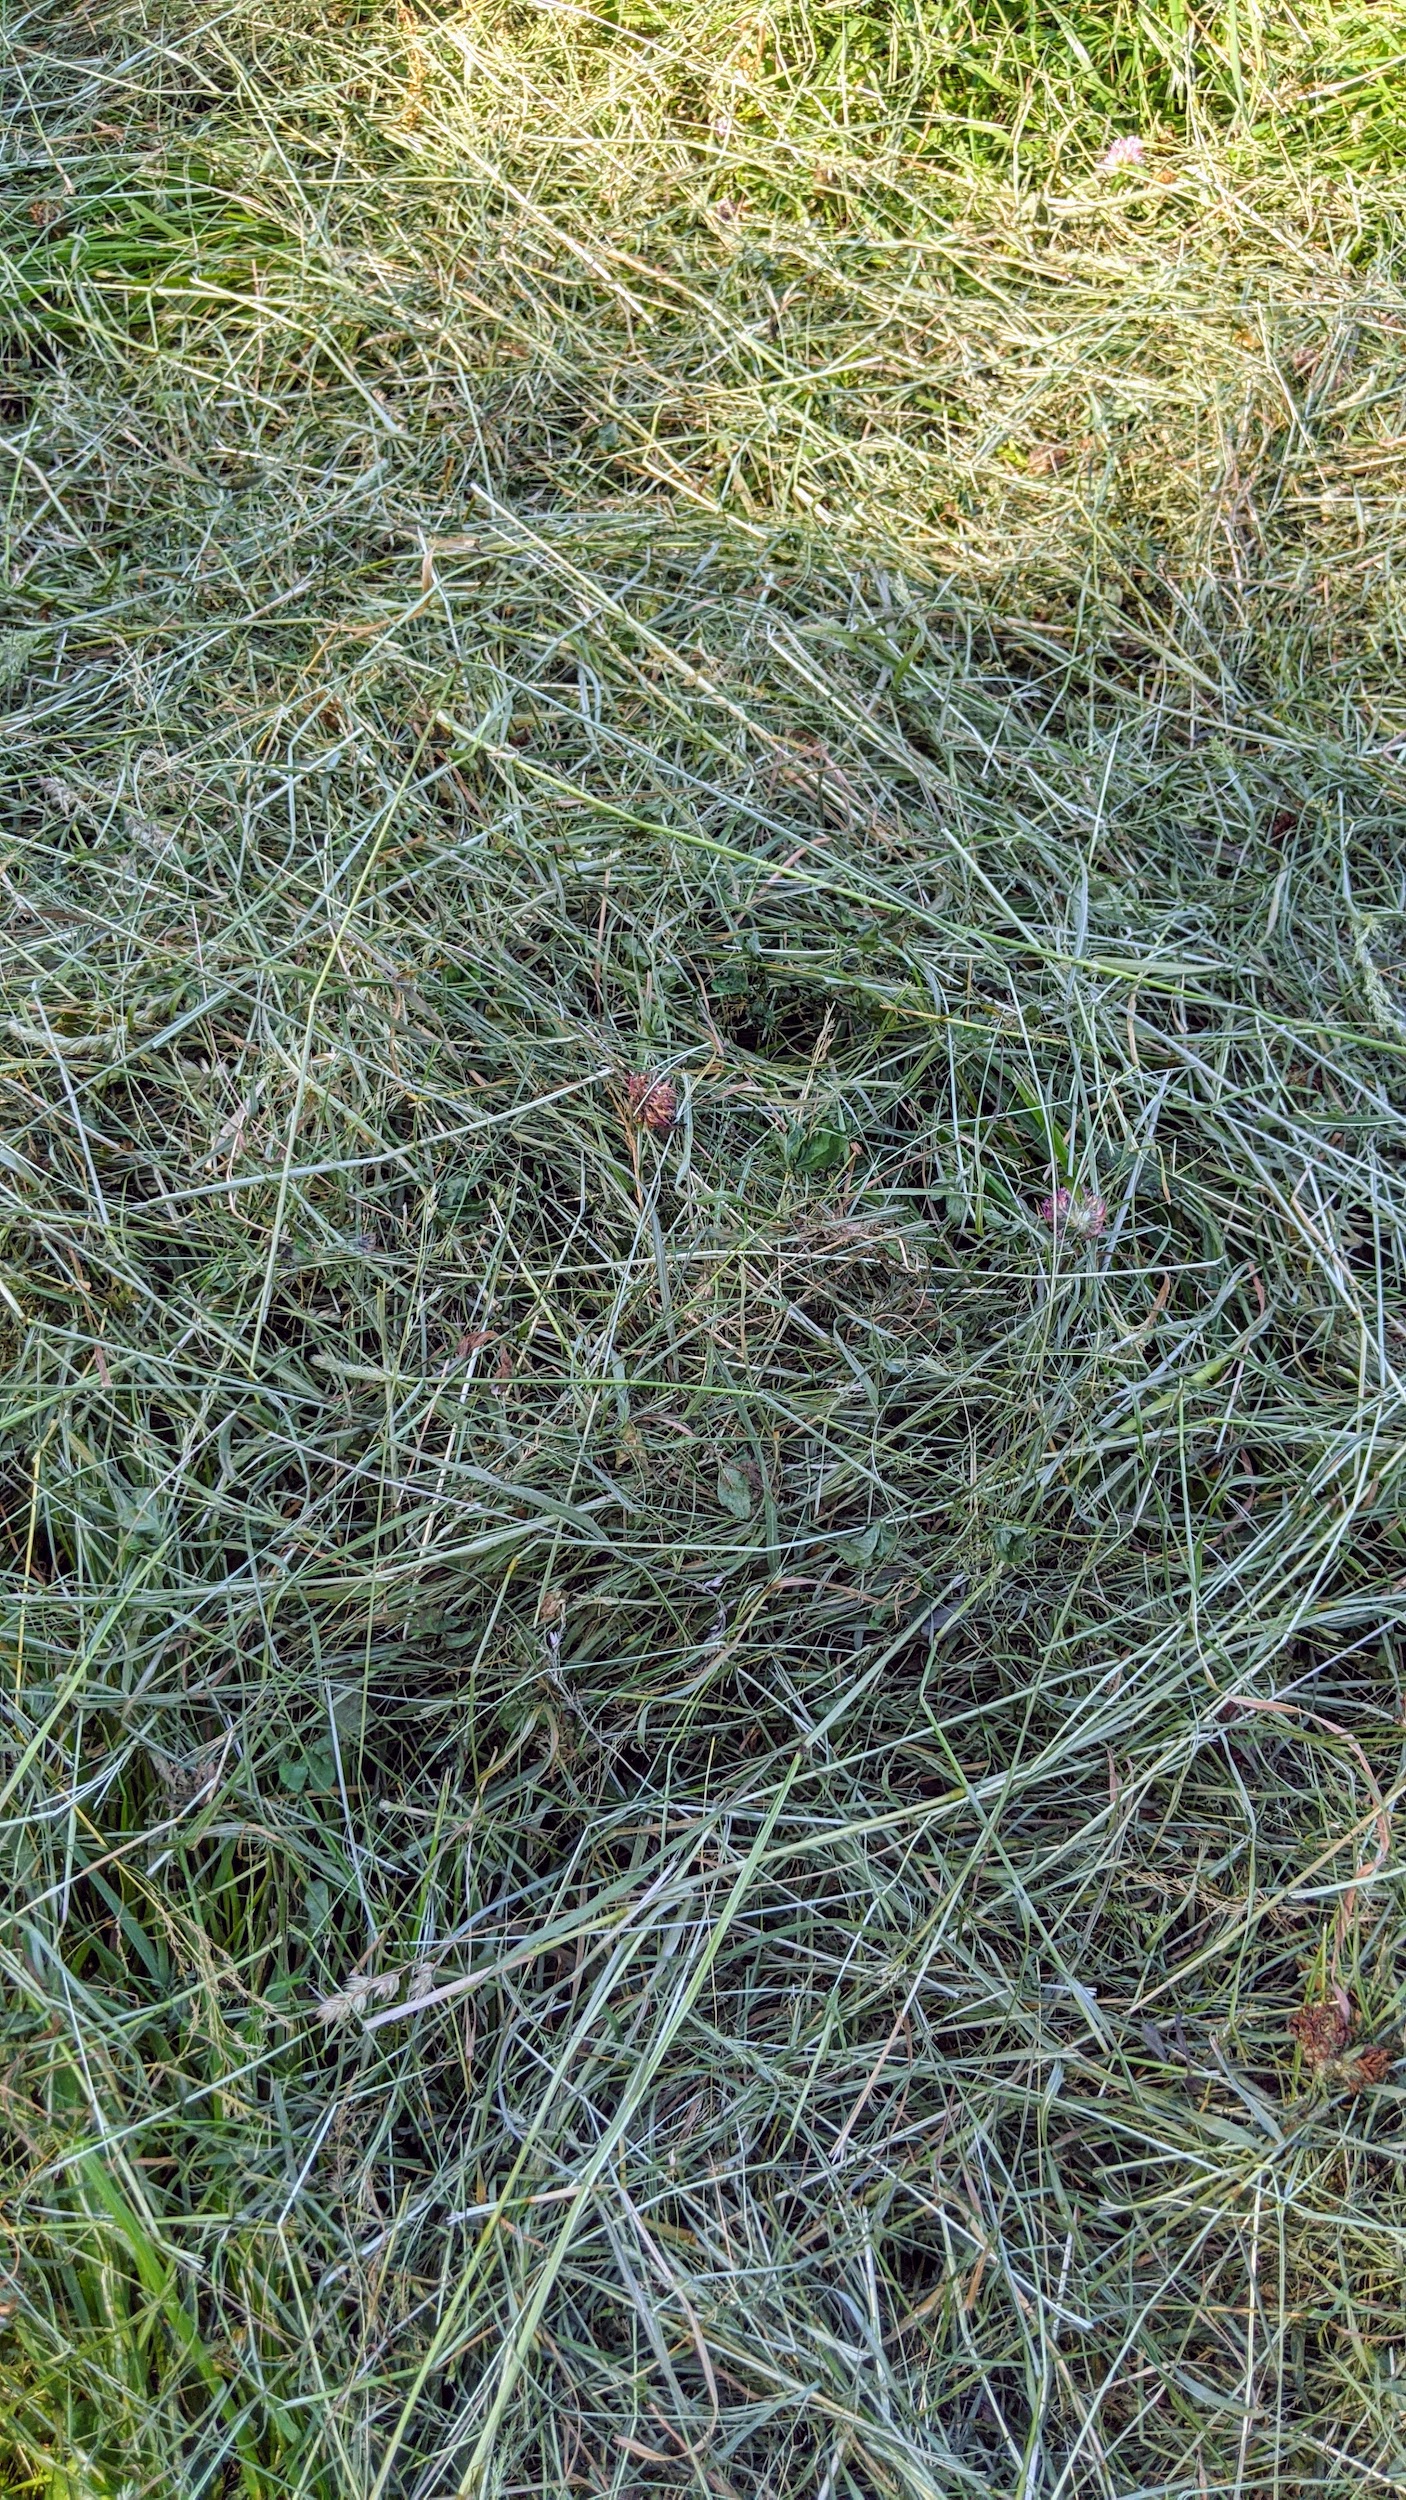
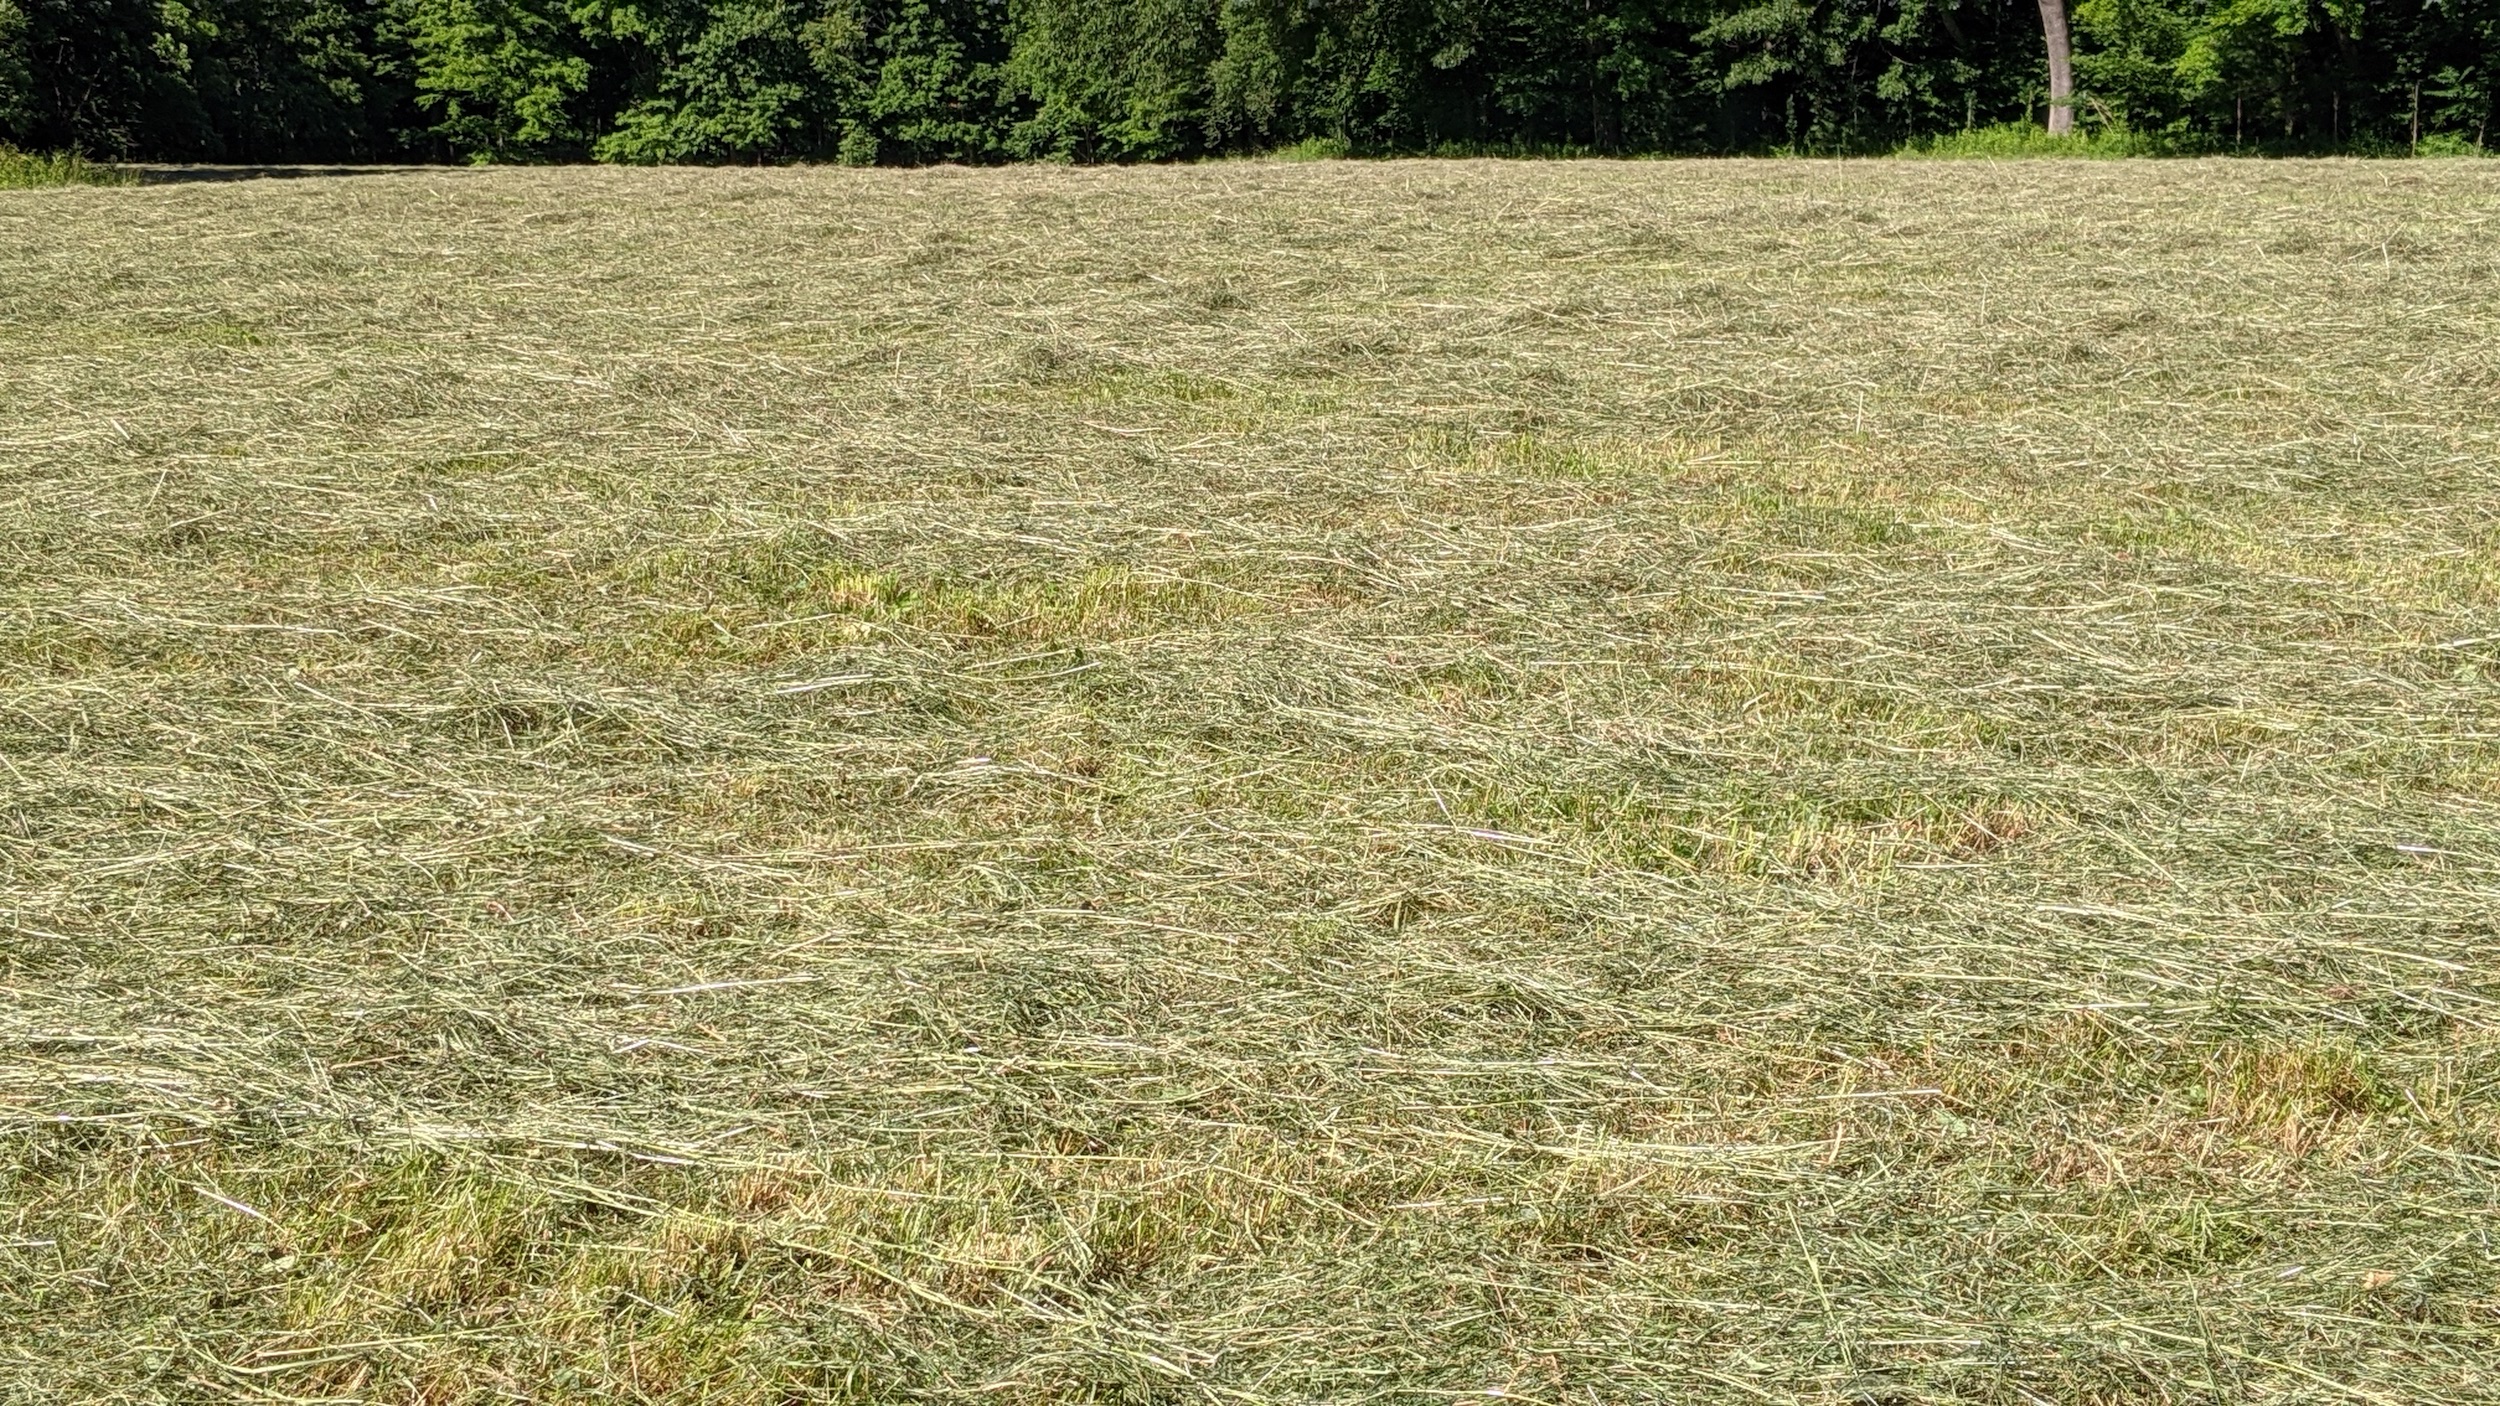
This freshly cut hay will need to dry before it is baled. The hay is ready when hay pulled from the bottom of the windrow makes a crunching sound when snapped.
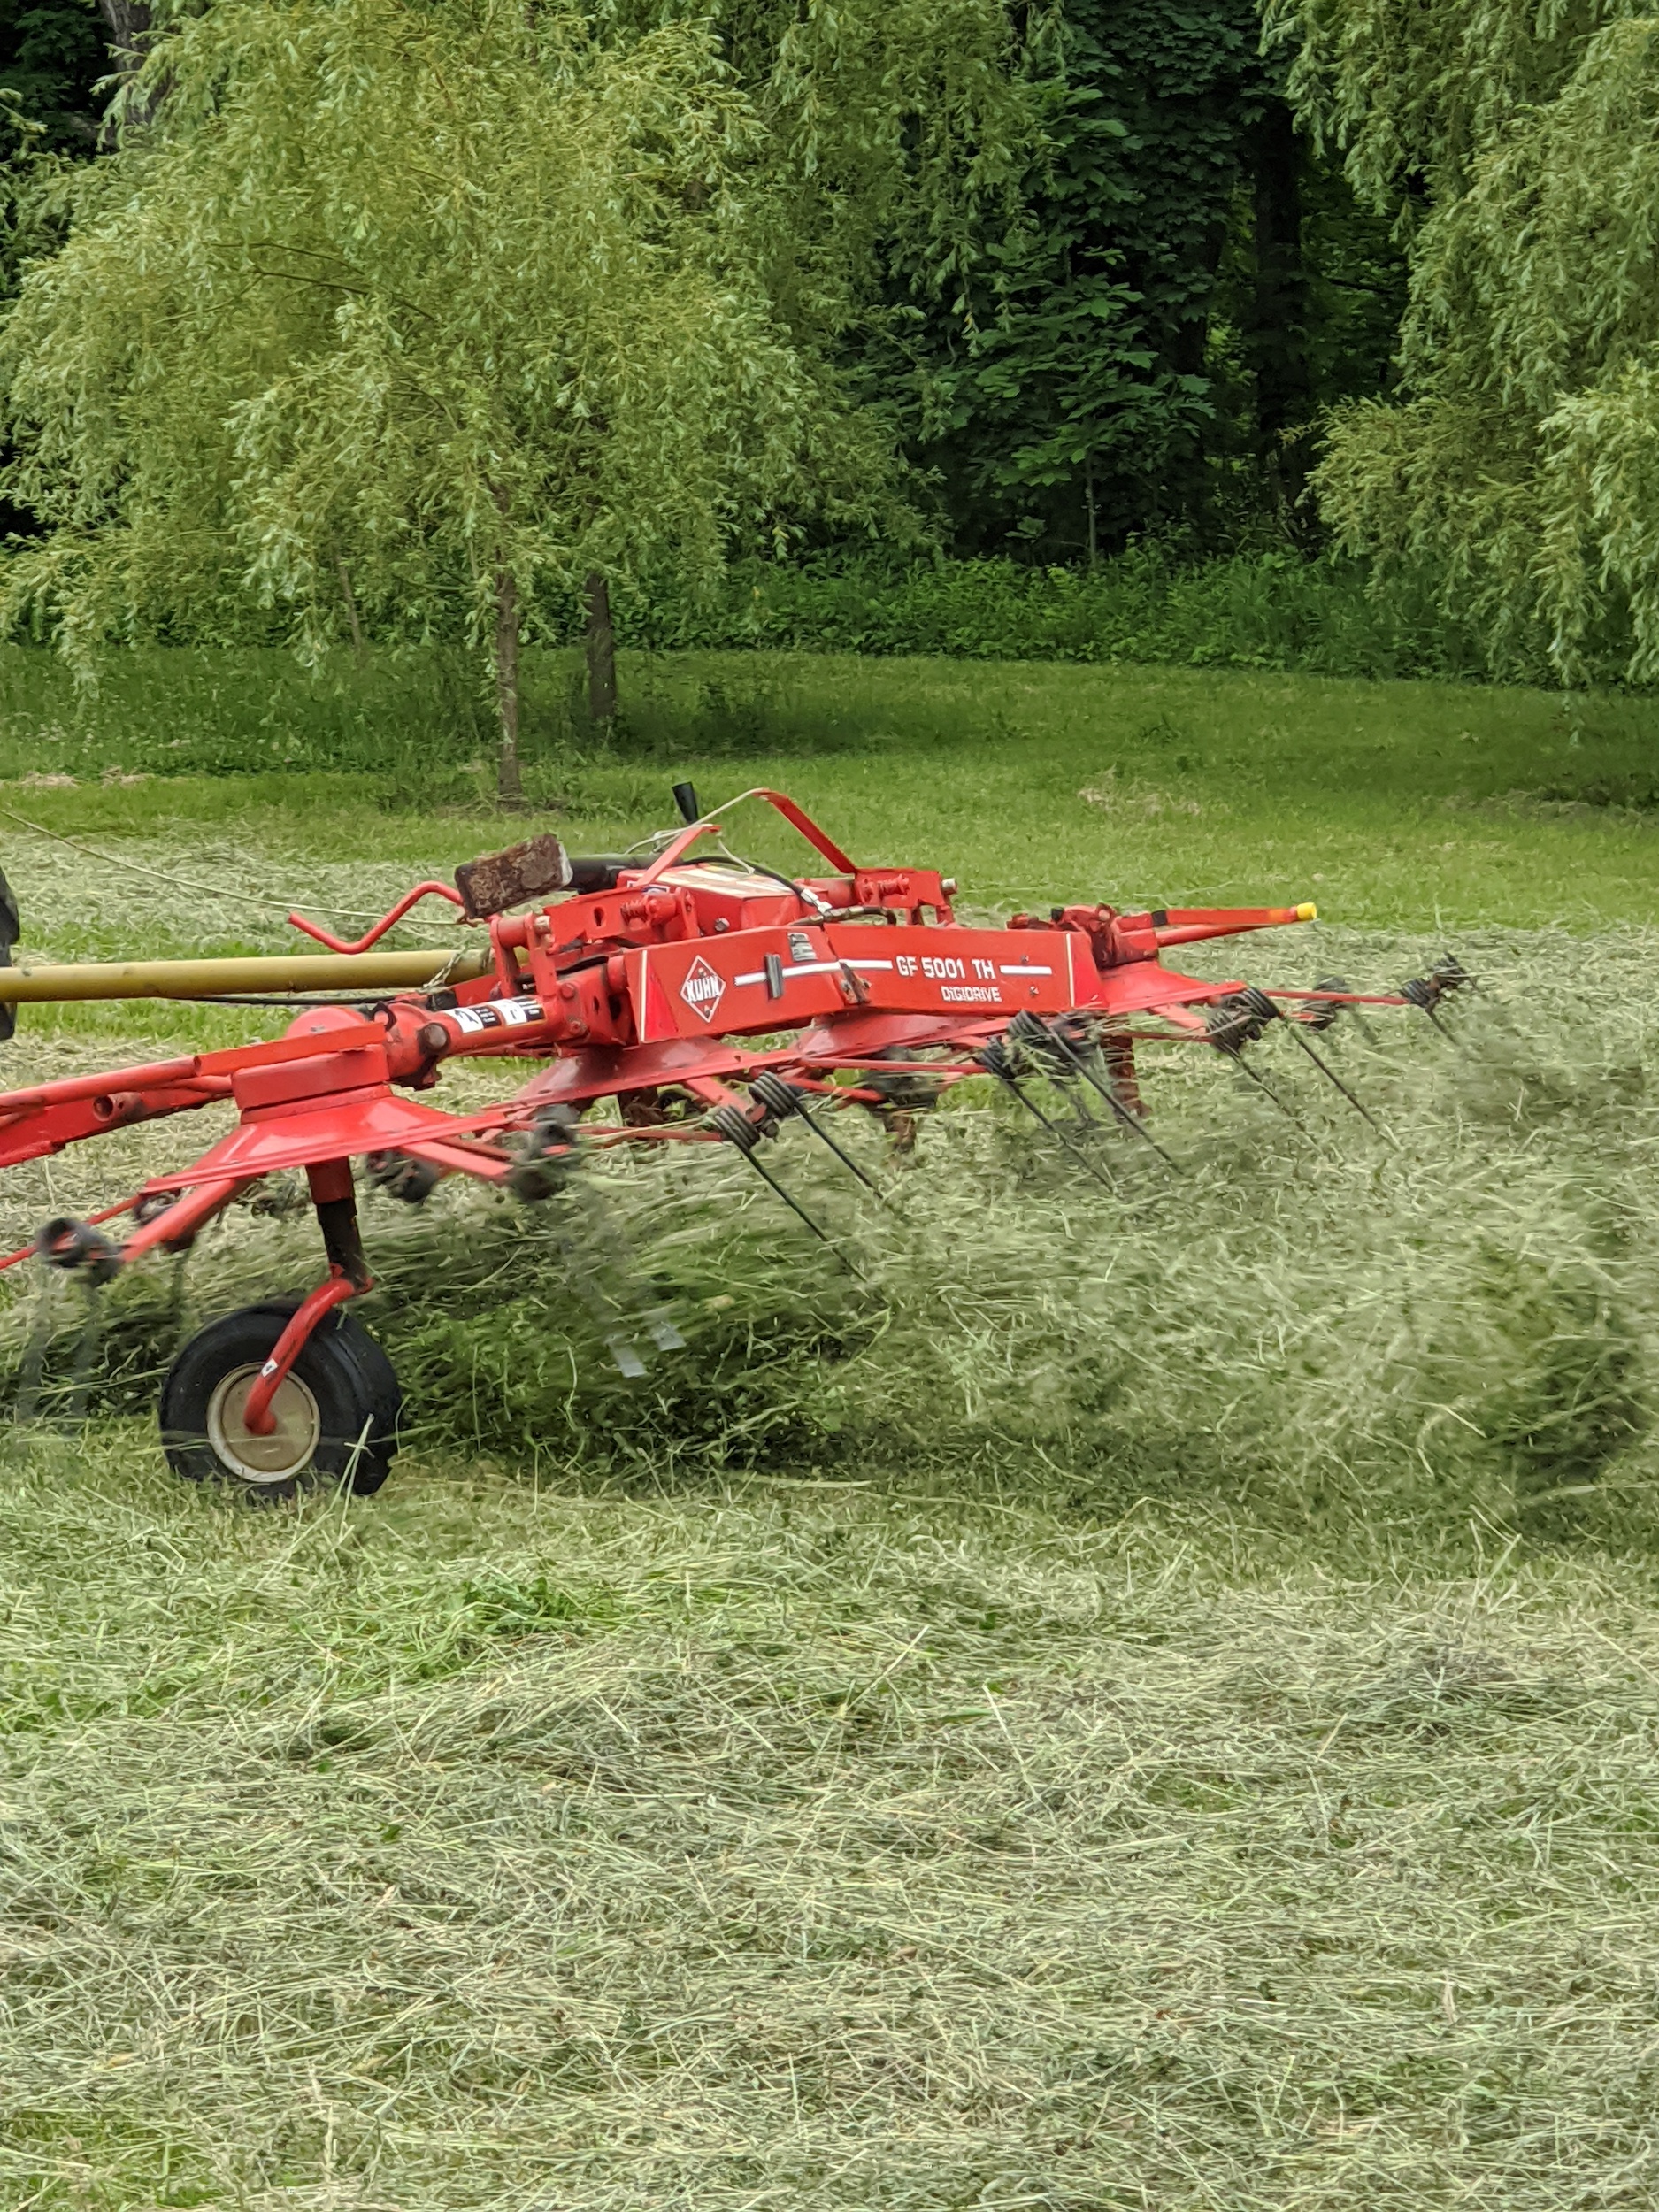
On the next day, Chhiring goes over the fields with the hay tedder. A tedder spreads and fluffs the hay in a uniform swath after the mower-conditioner has made the windrows.
It uses a rotary motion to grab the hay with spinning tines and then cast it out the back of the machine.
Here is a closer look at the tines, or moving forks, which aerate or “wuffle” the hay and speed up the drying process.
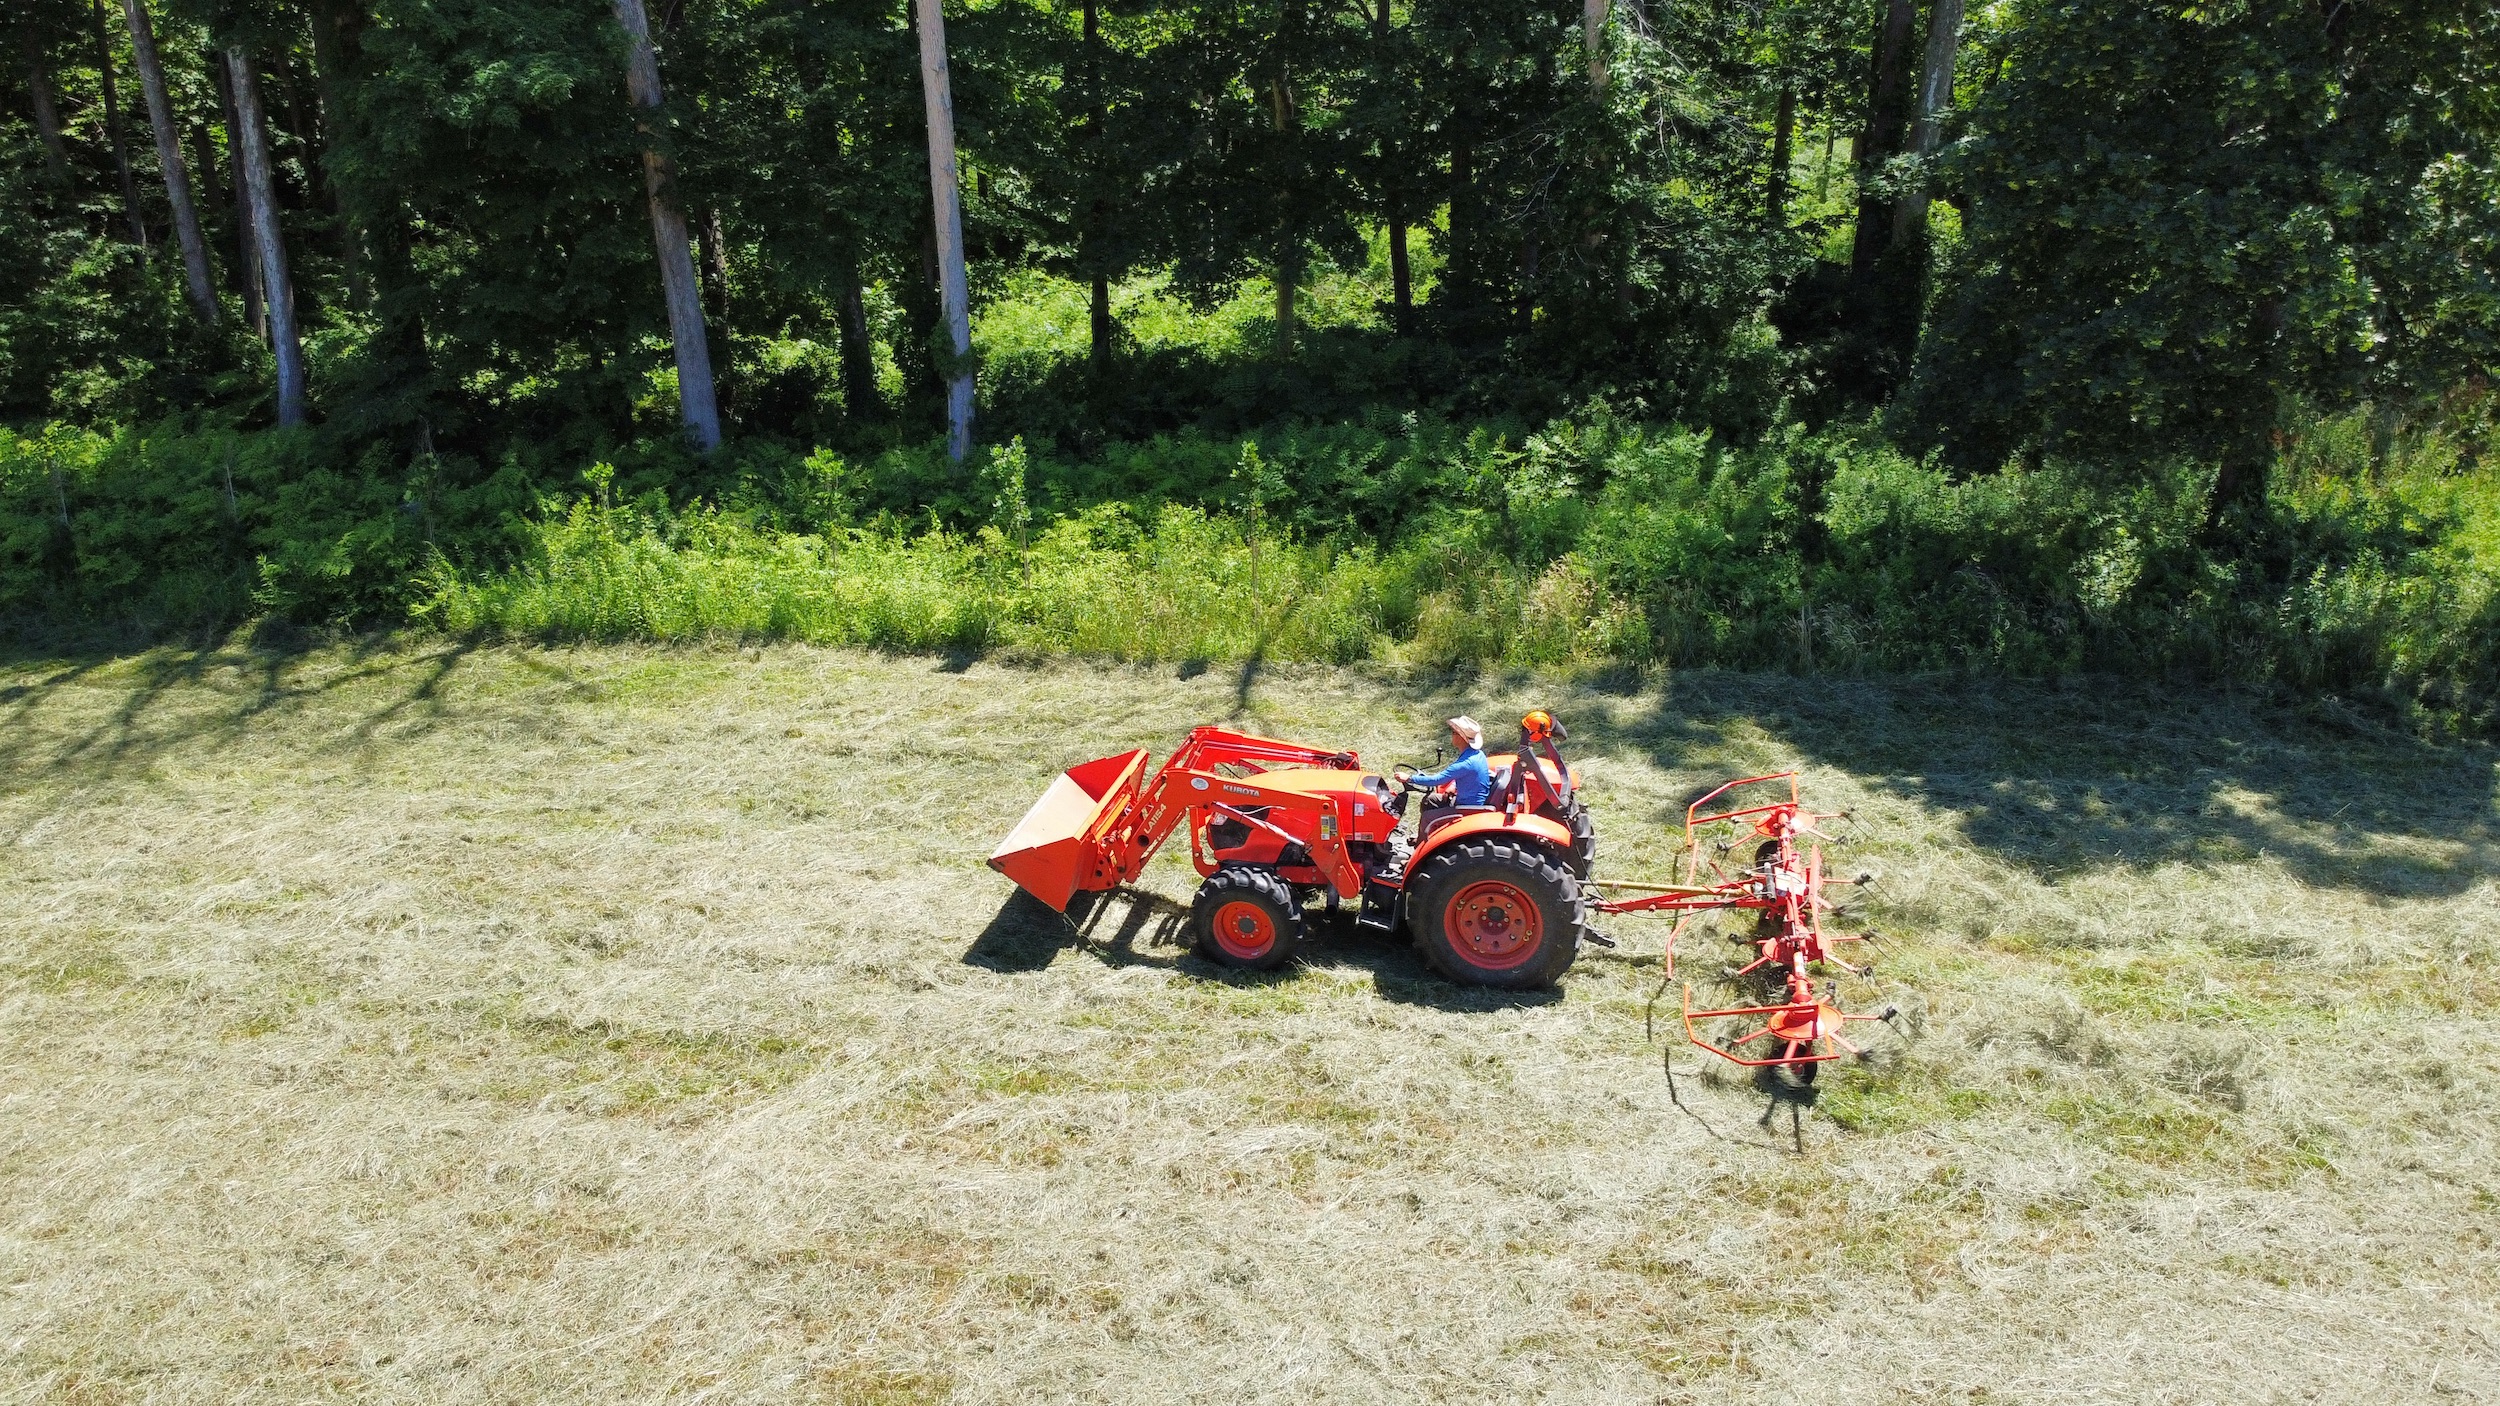
Here is Chhiring with the tedder attached to our trusted Kubota M7060HD12 tractor – a vehicle that is used every day here at the farm.
Here is the tedder moving up and down the field taking all the greener hay from the bottom and turning it over to dry.
Here is another view – look how the tedder picks up and fluffs the hay with its forks.
Here is some of the fluffed up hay, which will continue to dry for the next day. On average, it takes about three days per field, depending on the size of the field and the weather, to complete the entire process of mowing, raking, and baling hay.
From above, one can see how the tedder works to turn the hay around and around.
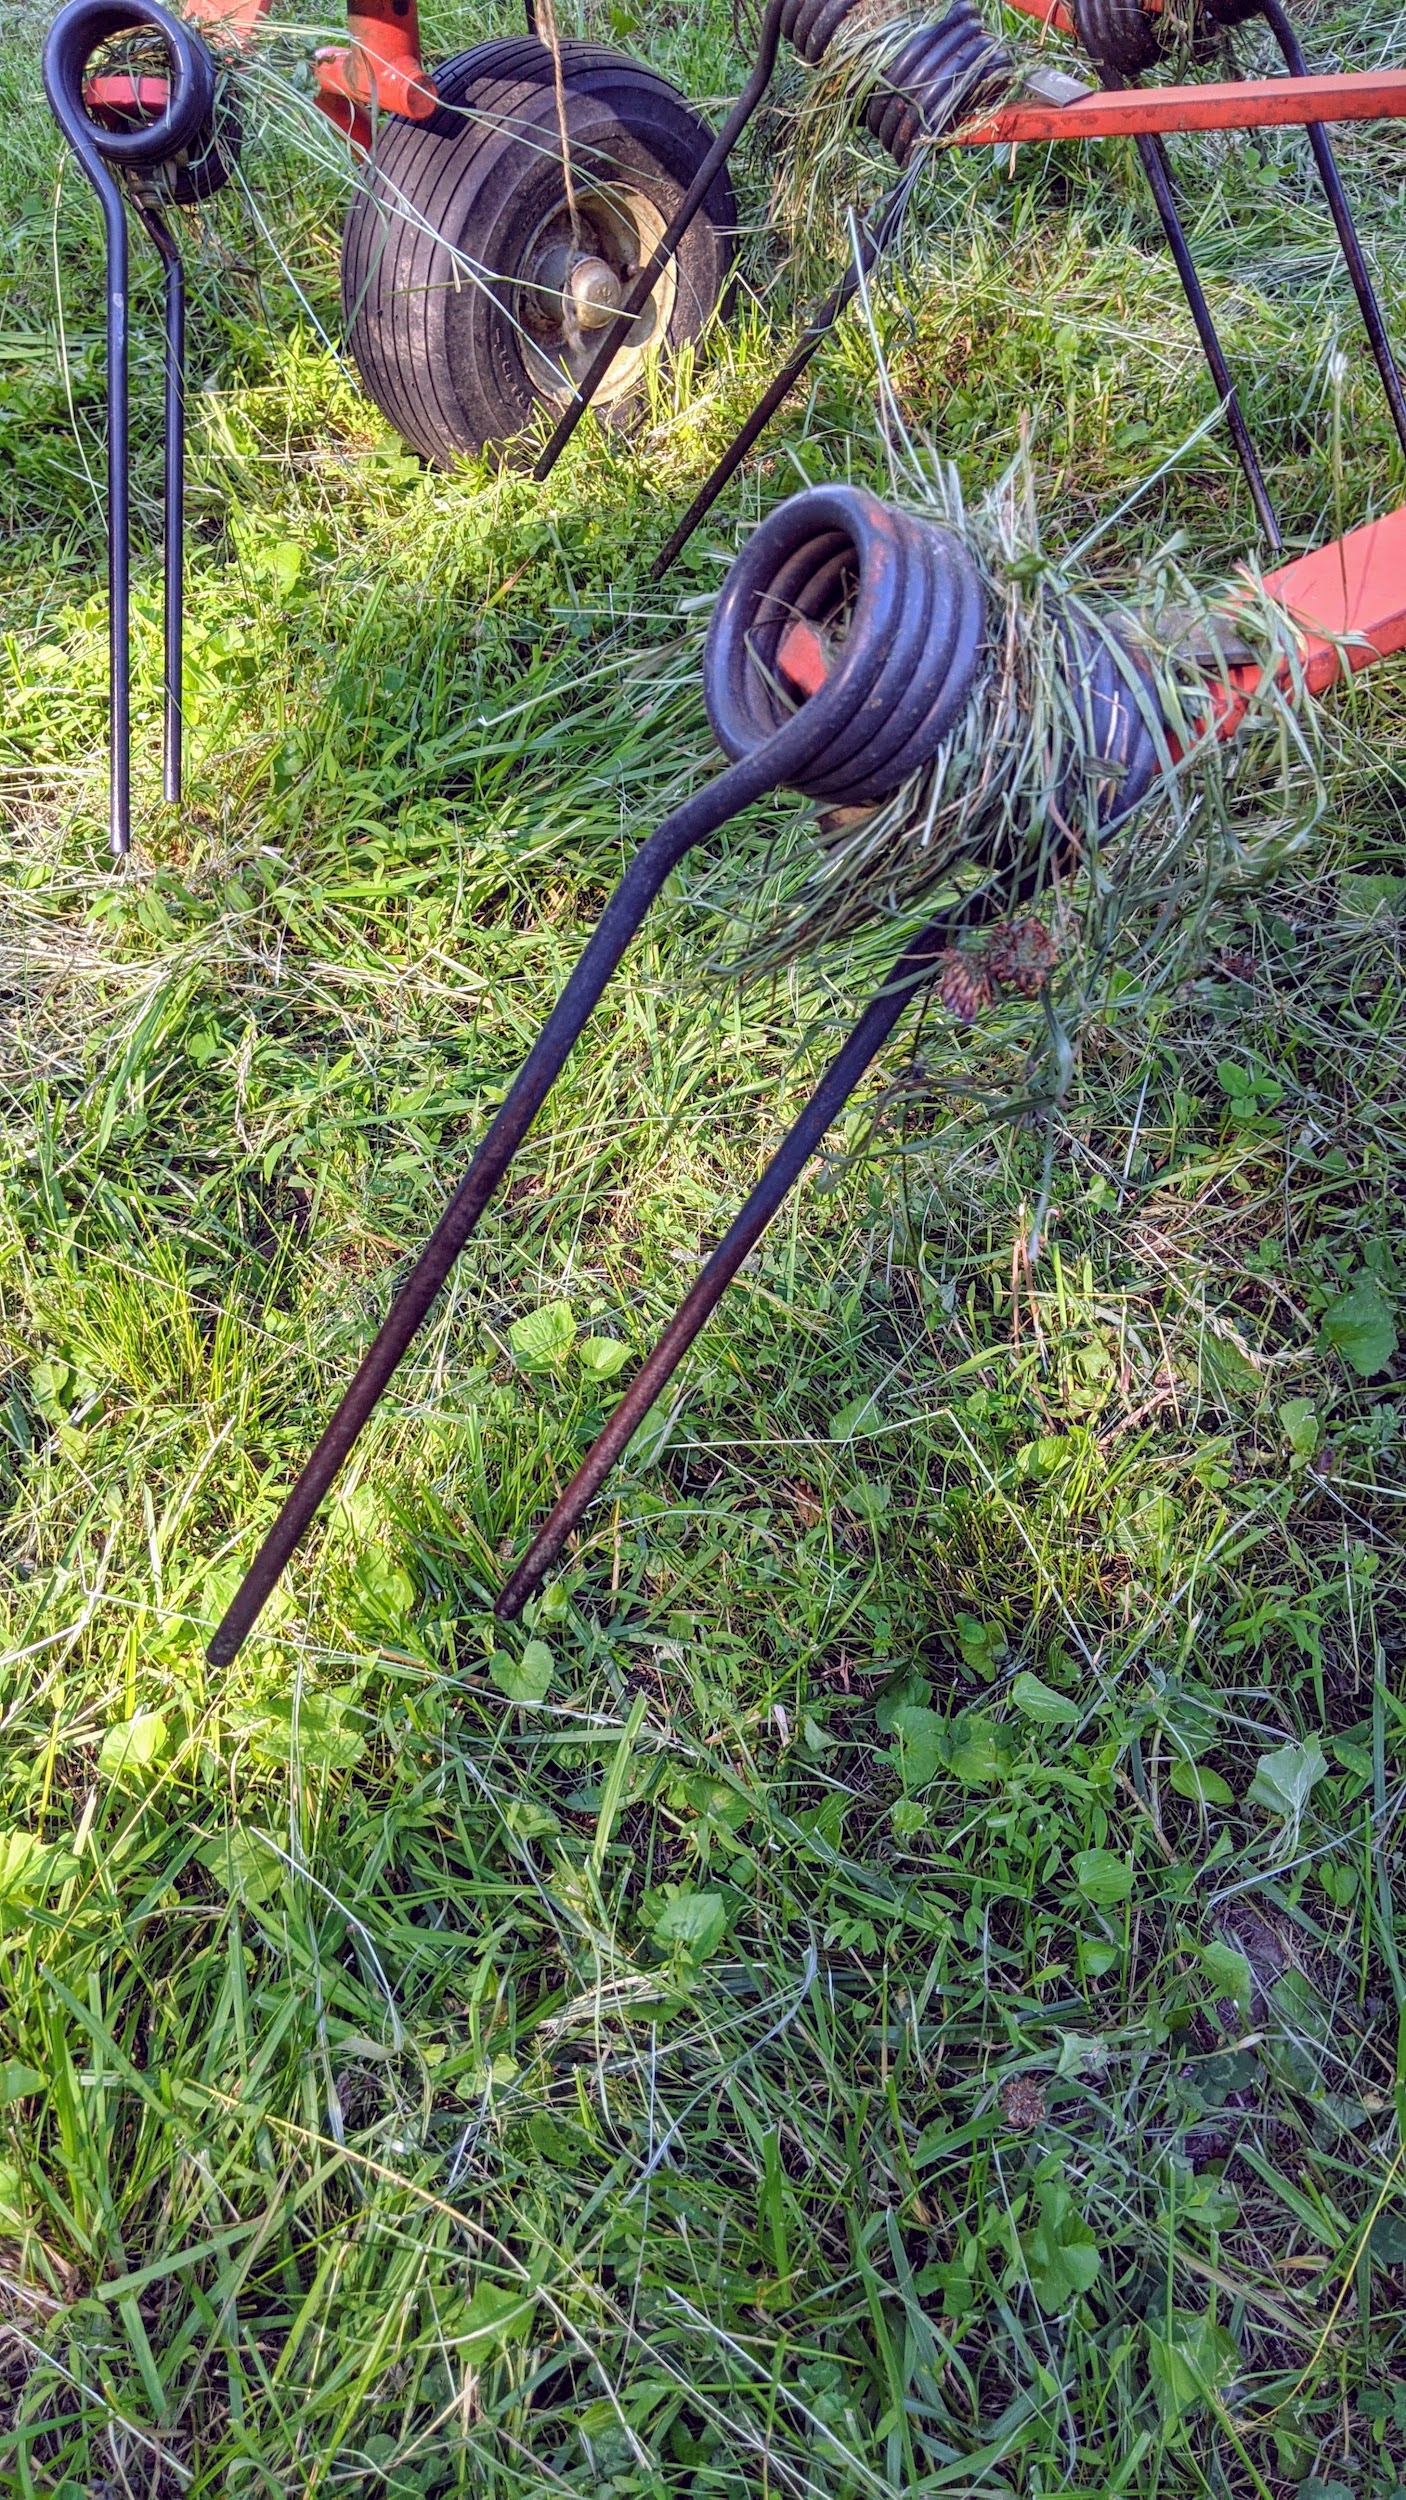
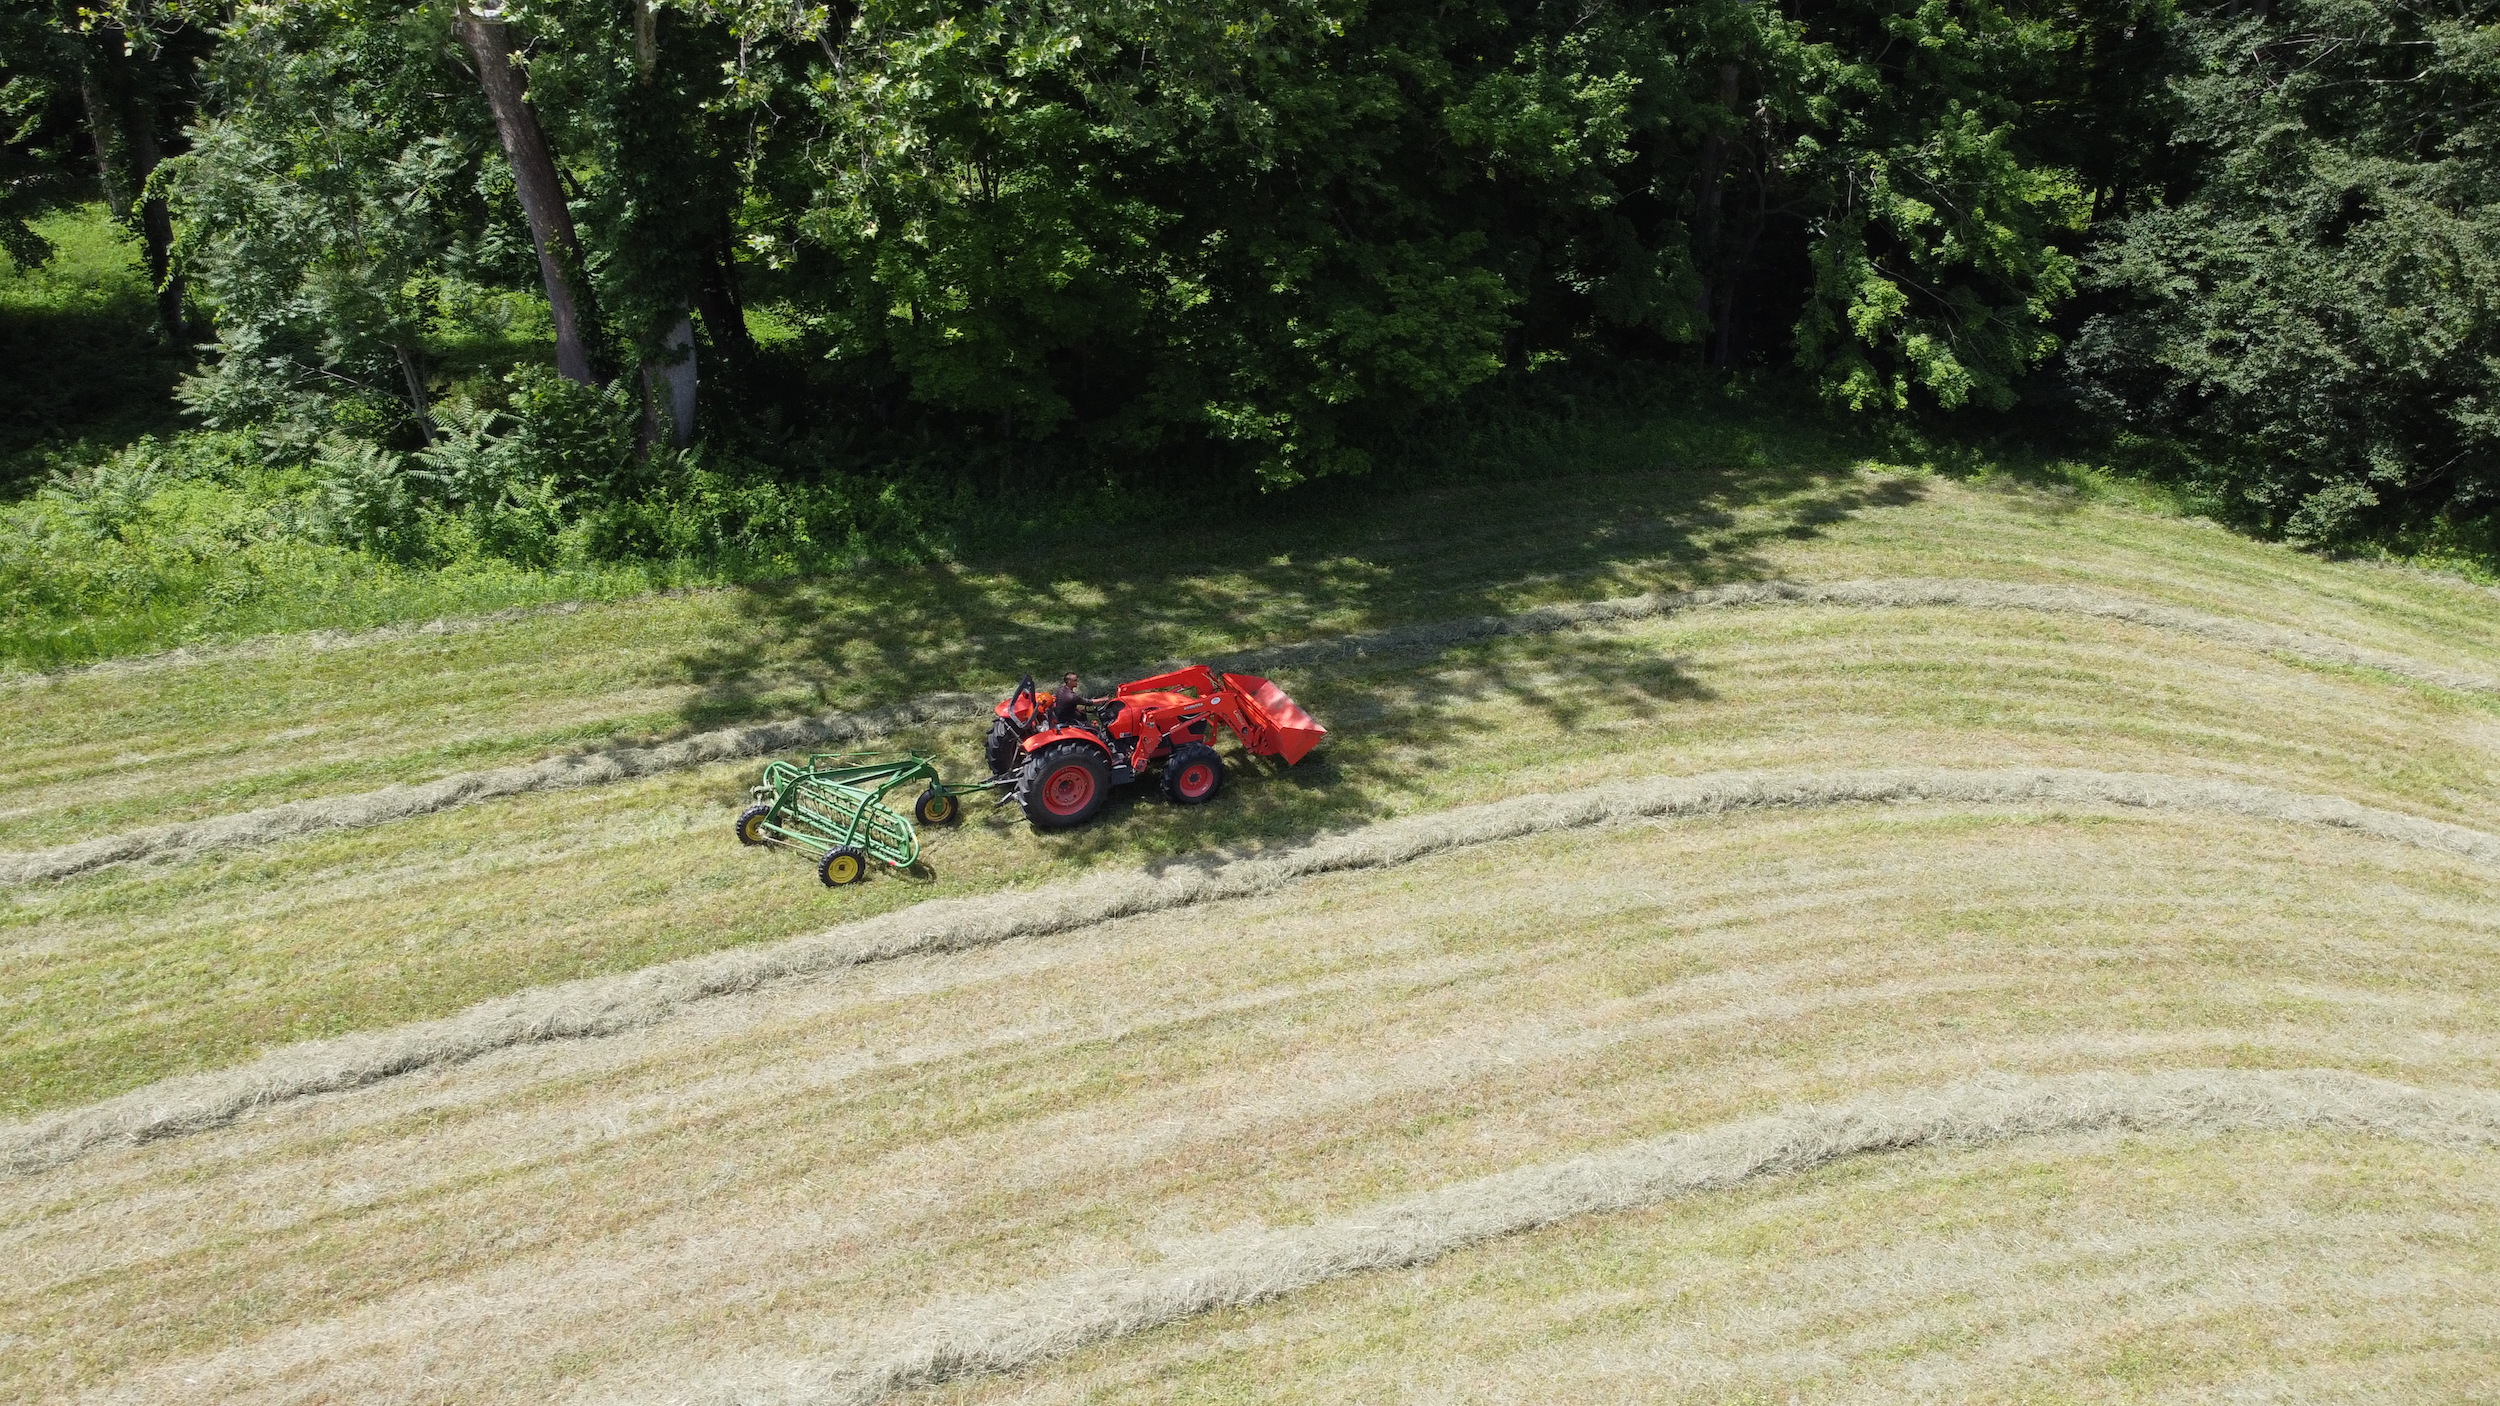
After the hay is tedded, it is then raked. Raking the hay is the fastest part of the process. There are different kinds of rakes – they include wheel rakes, rotary rakes and parallel bar or basket rakes. This is a parallel bar rake. This type uses a gentle raking action with a lower chance of soil contamination than the wheel rake.
The parallel bar rake picks up the cut and drying hay and rakes it into more windrows that can be baled.
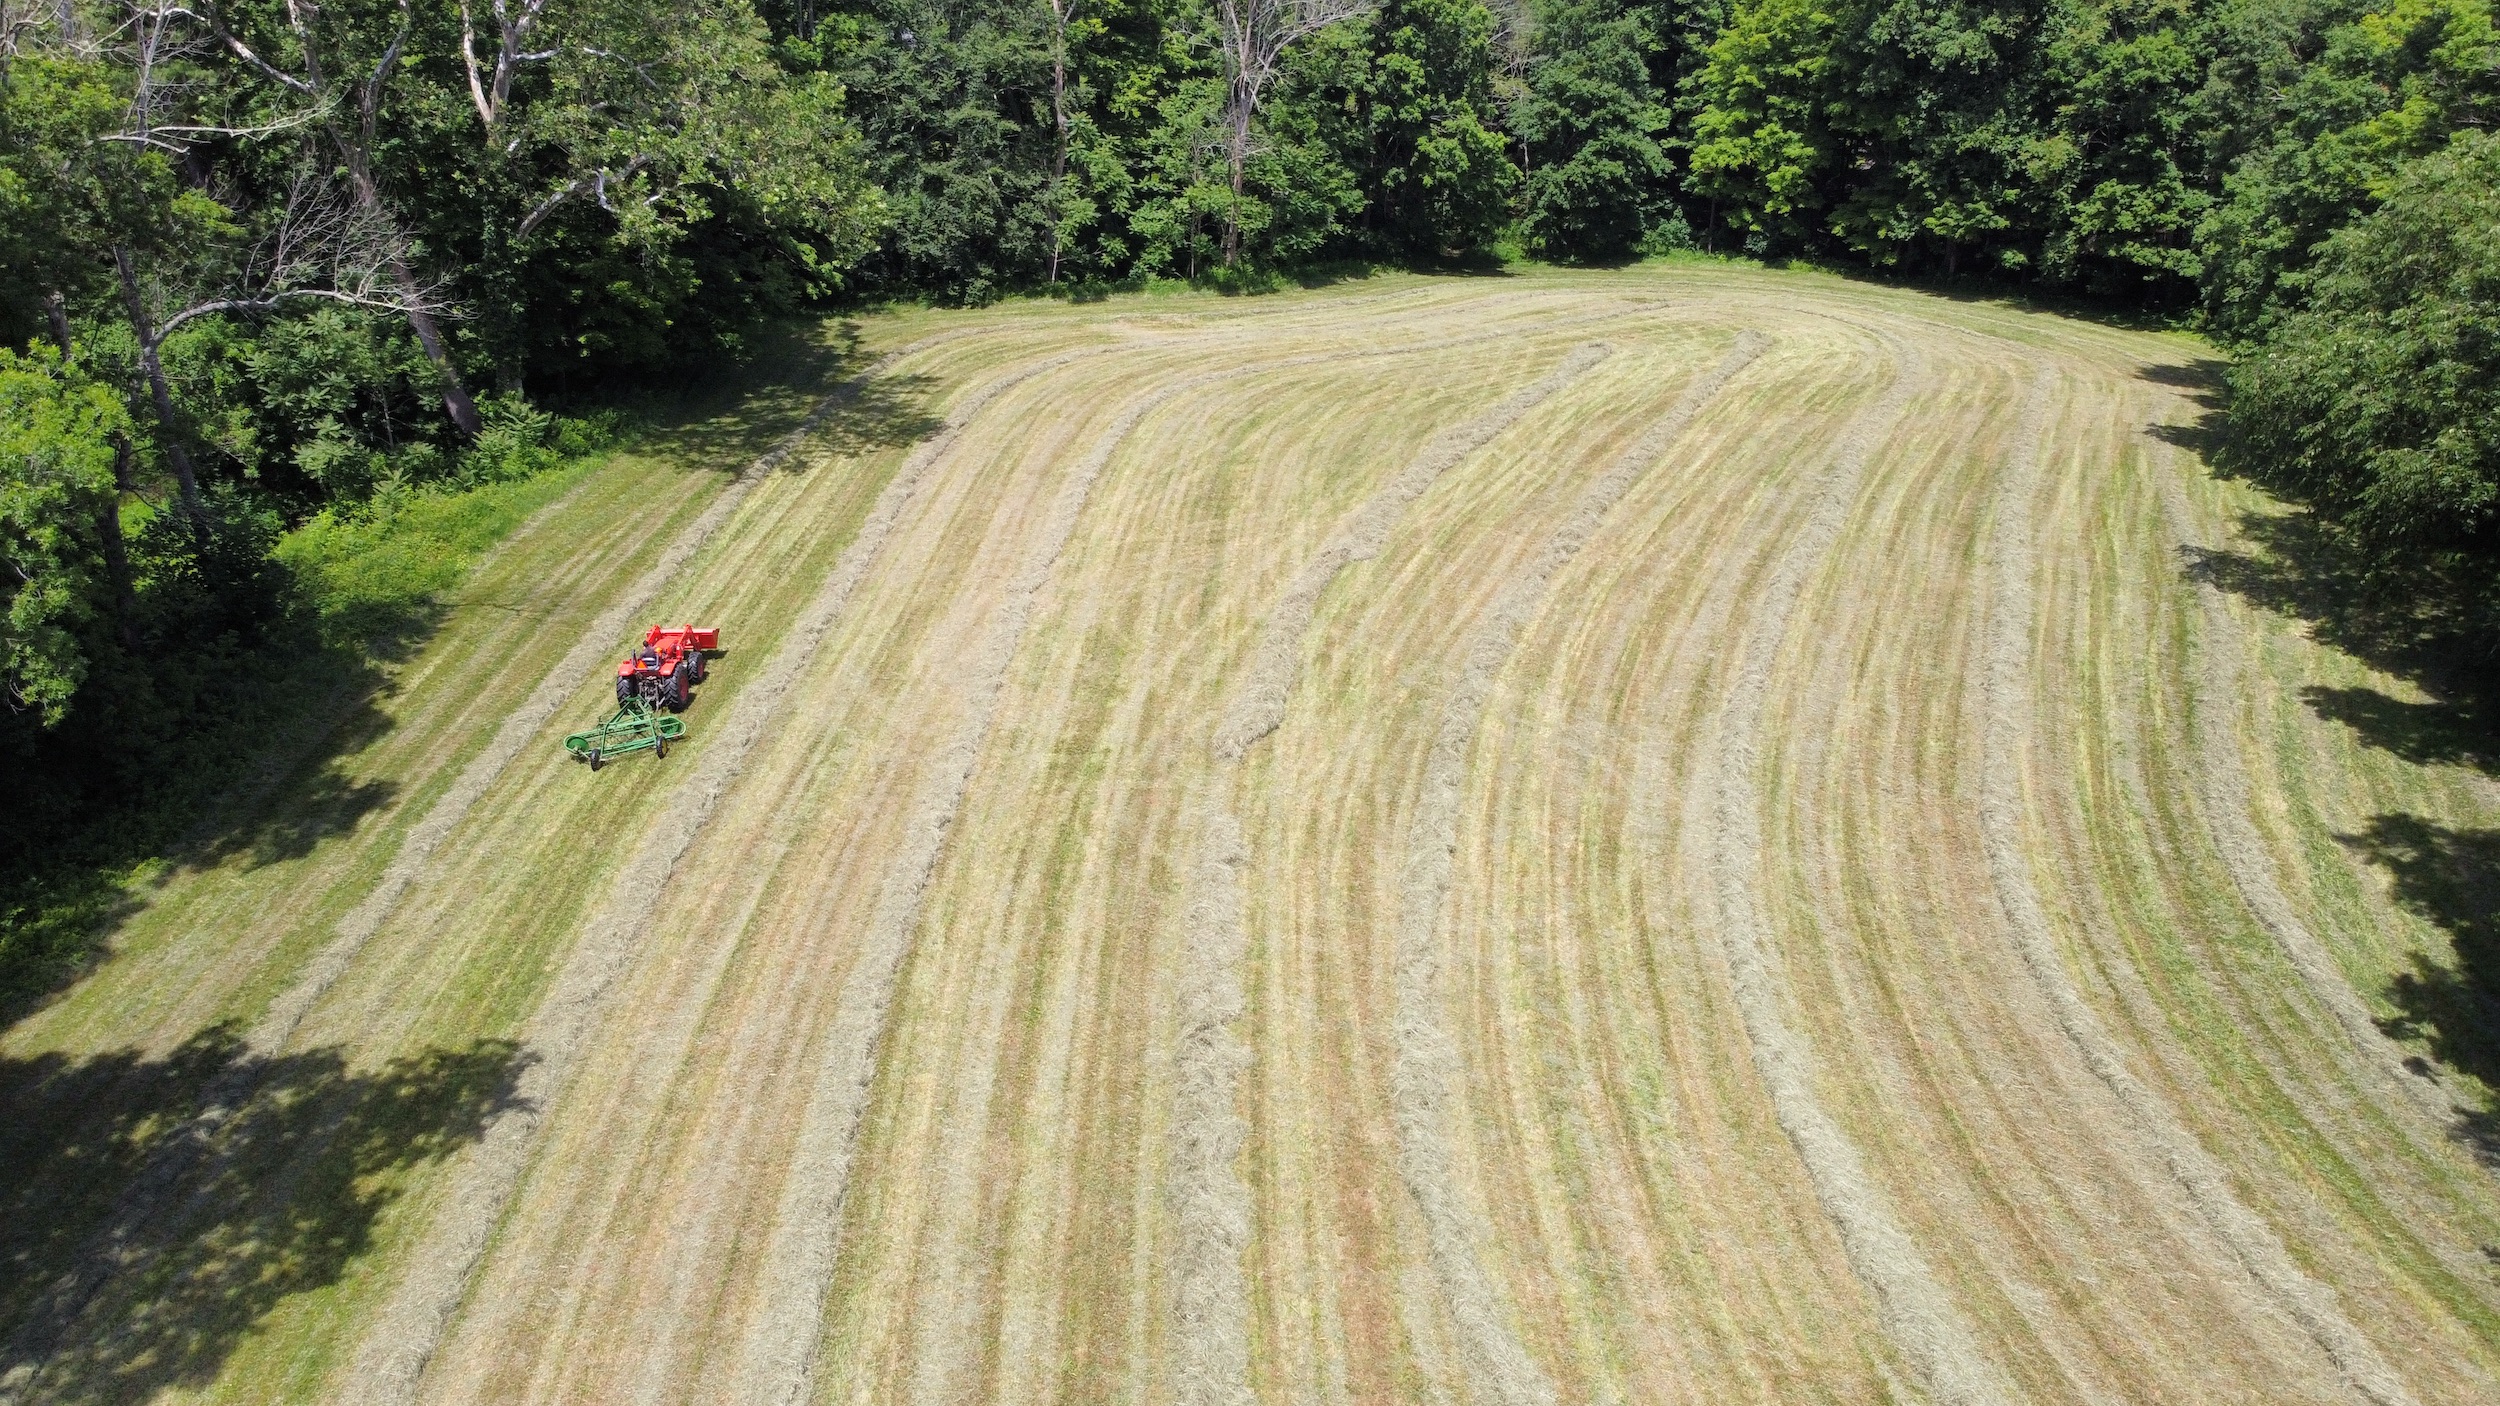
And here is a row completely raked and ready for the last stage – baling.
All the rows are perfectly straight. They will continue to dry out until they are made into bales. I am excited to see how many bales of hay we get from this cutting. I’ll share the very interesting process of baling hay in my next blog. Stay tuned.
My flower garden continues to produce many colorful and beautiful blooms.
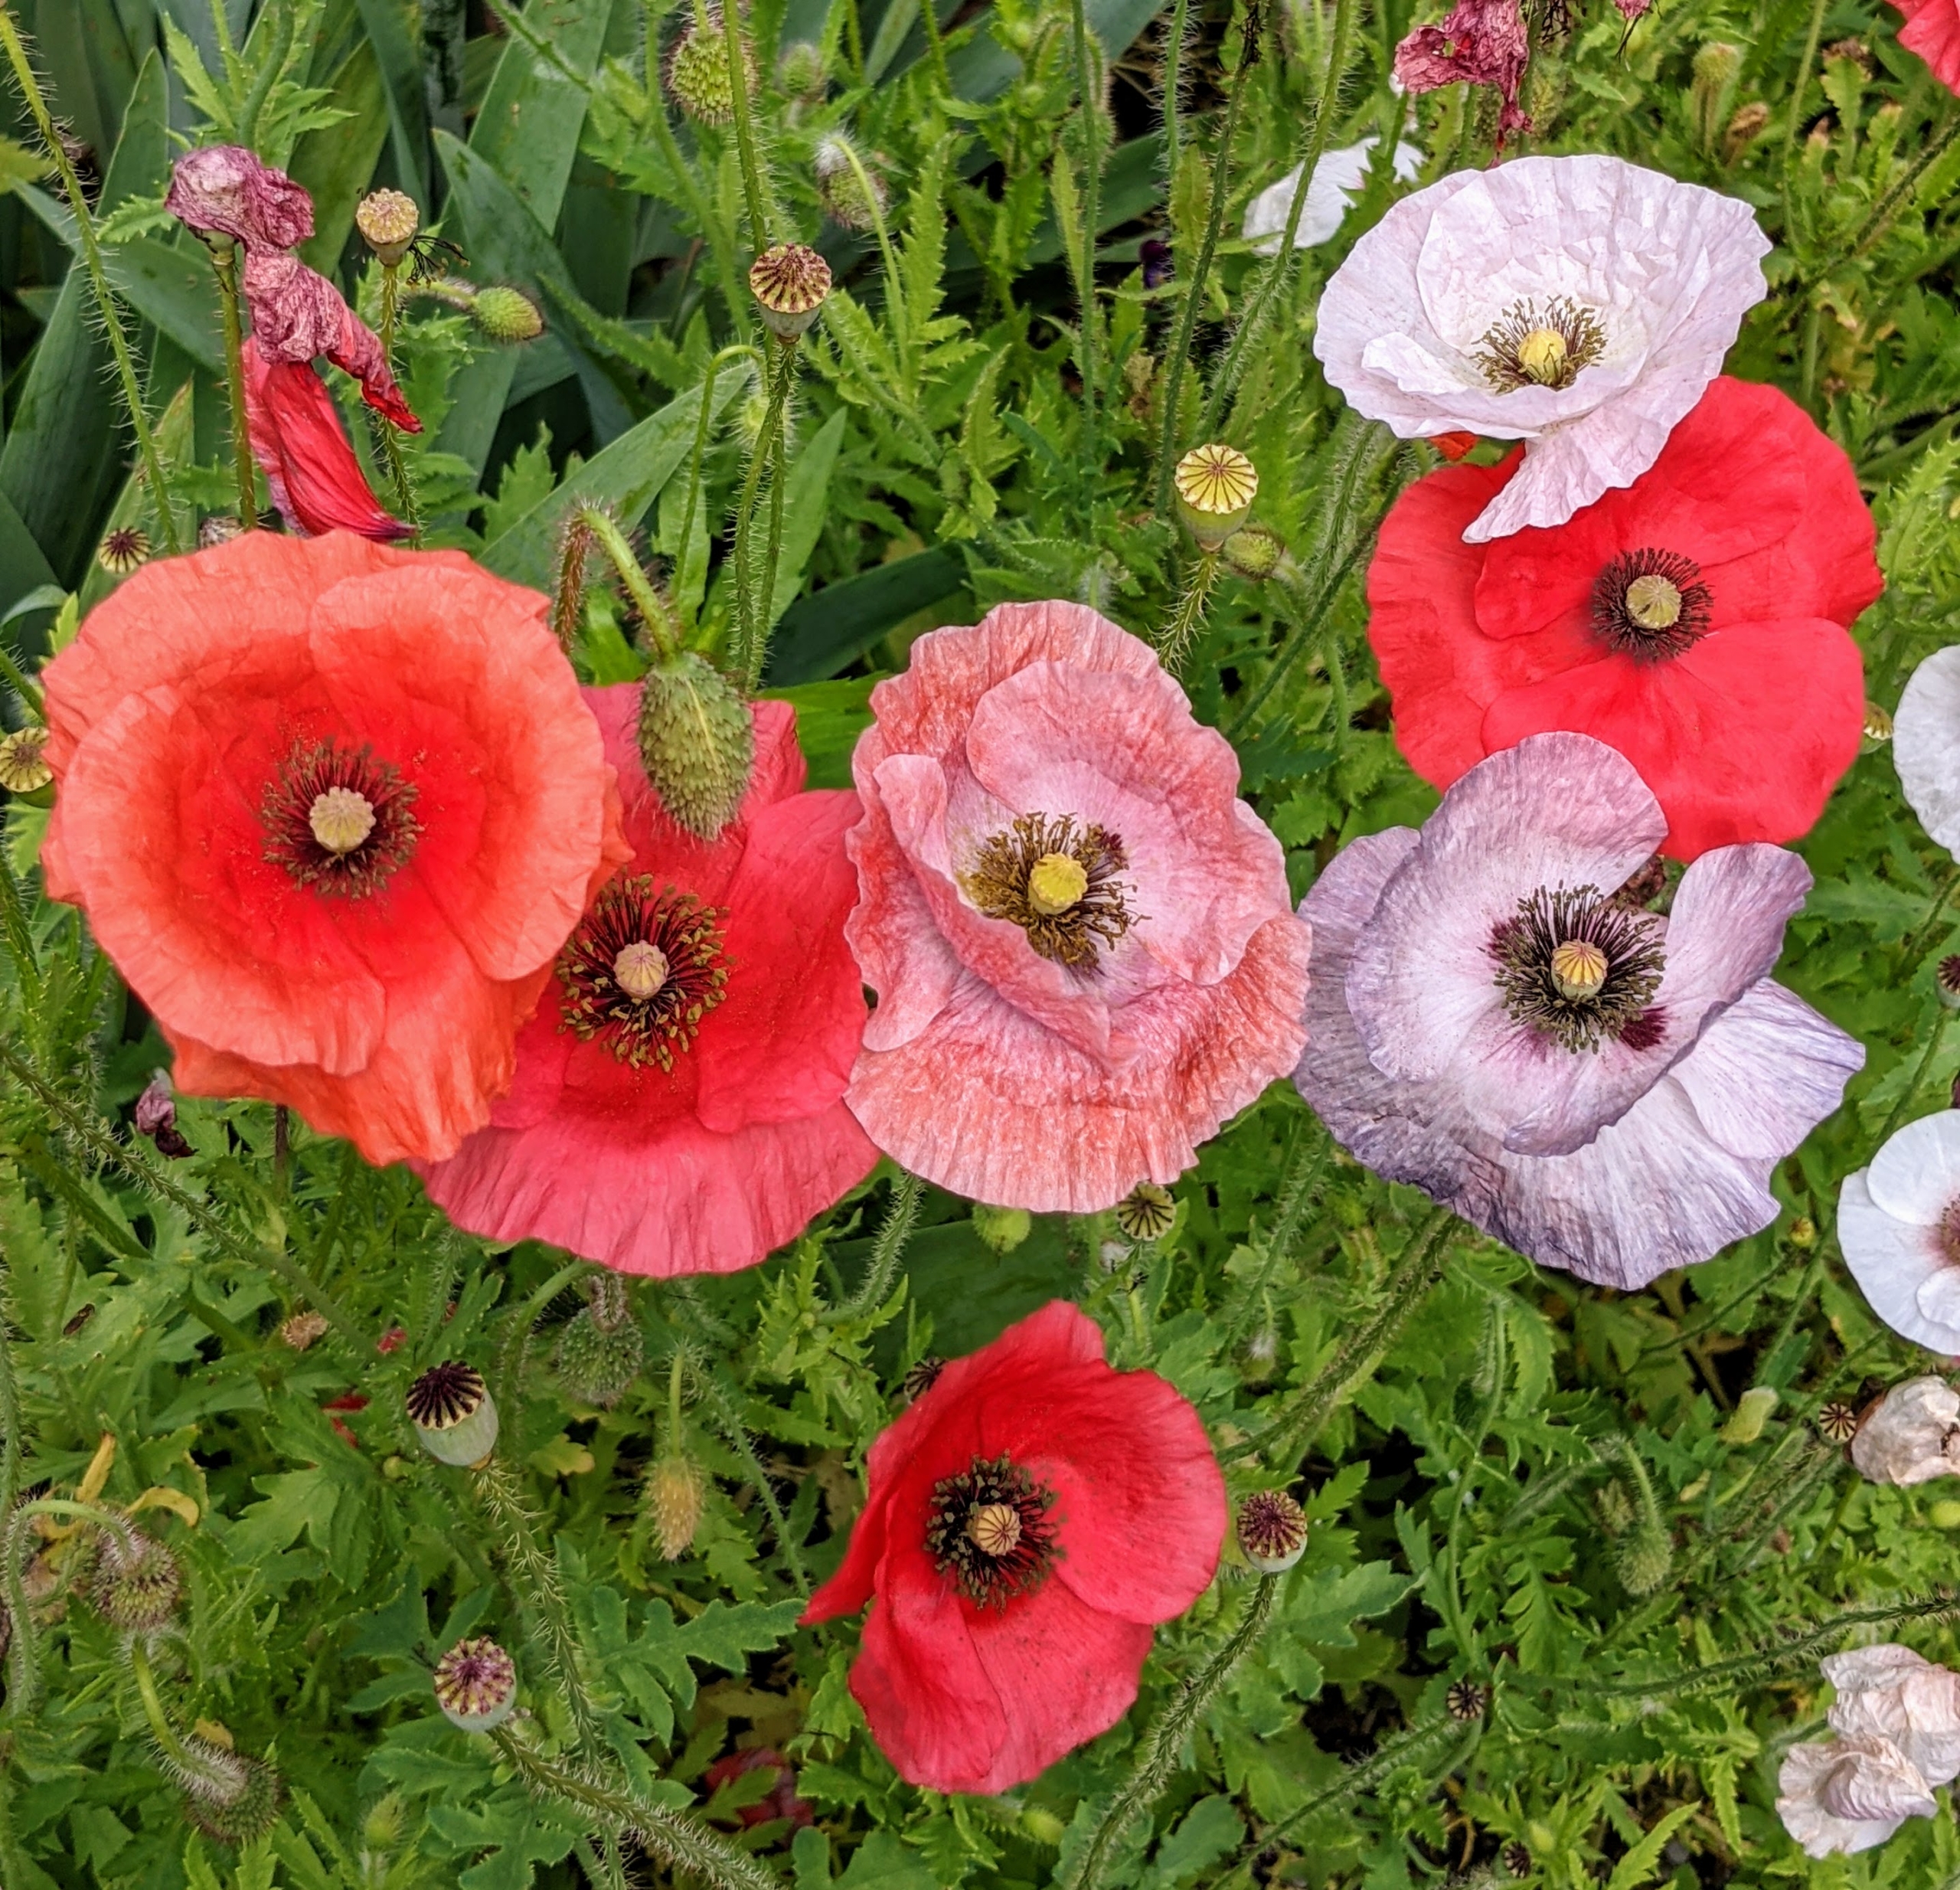
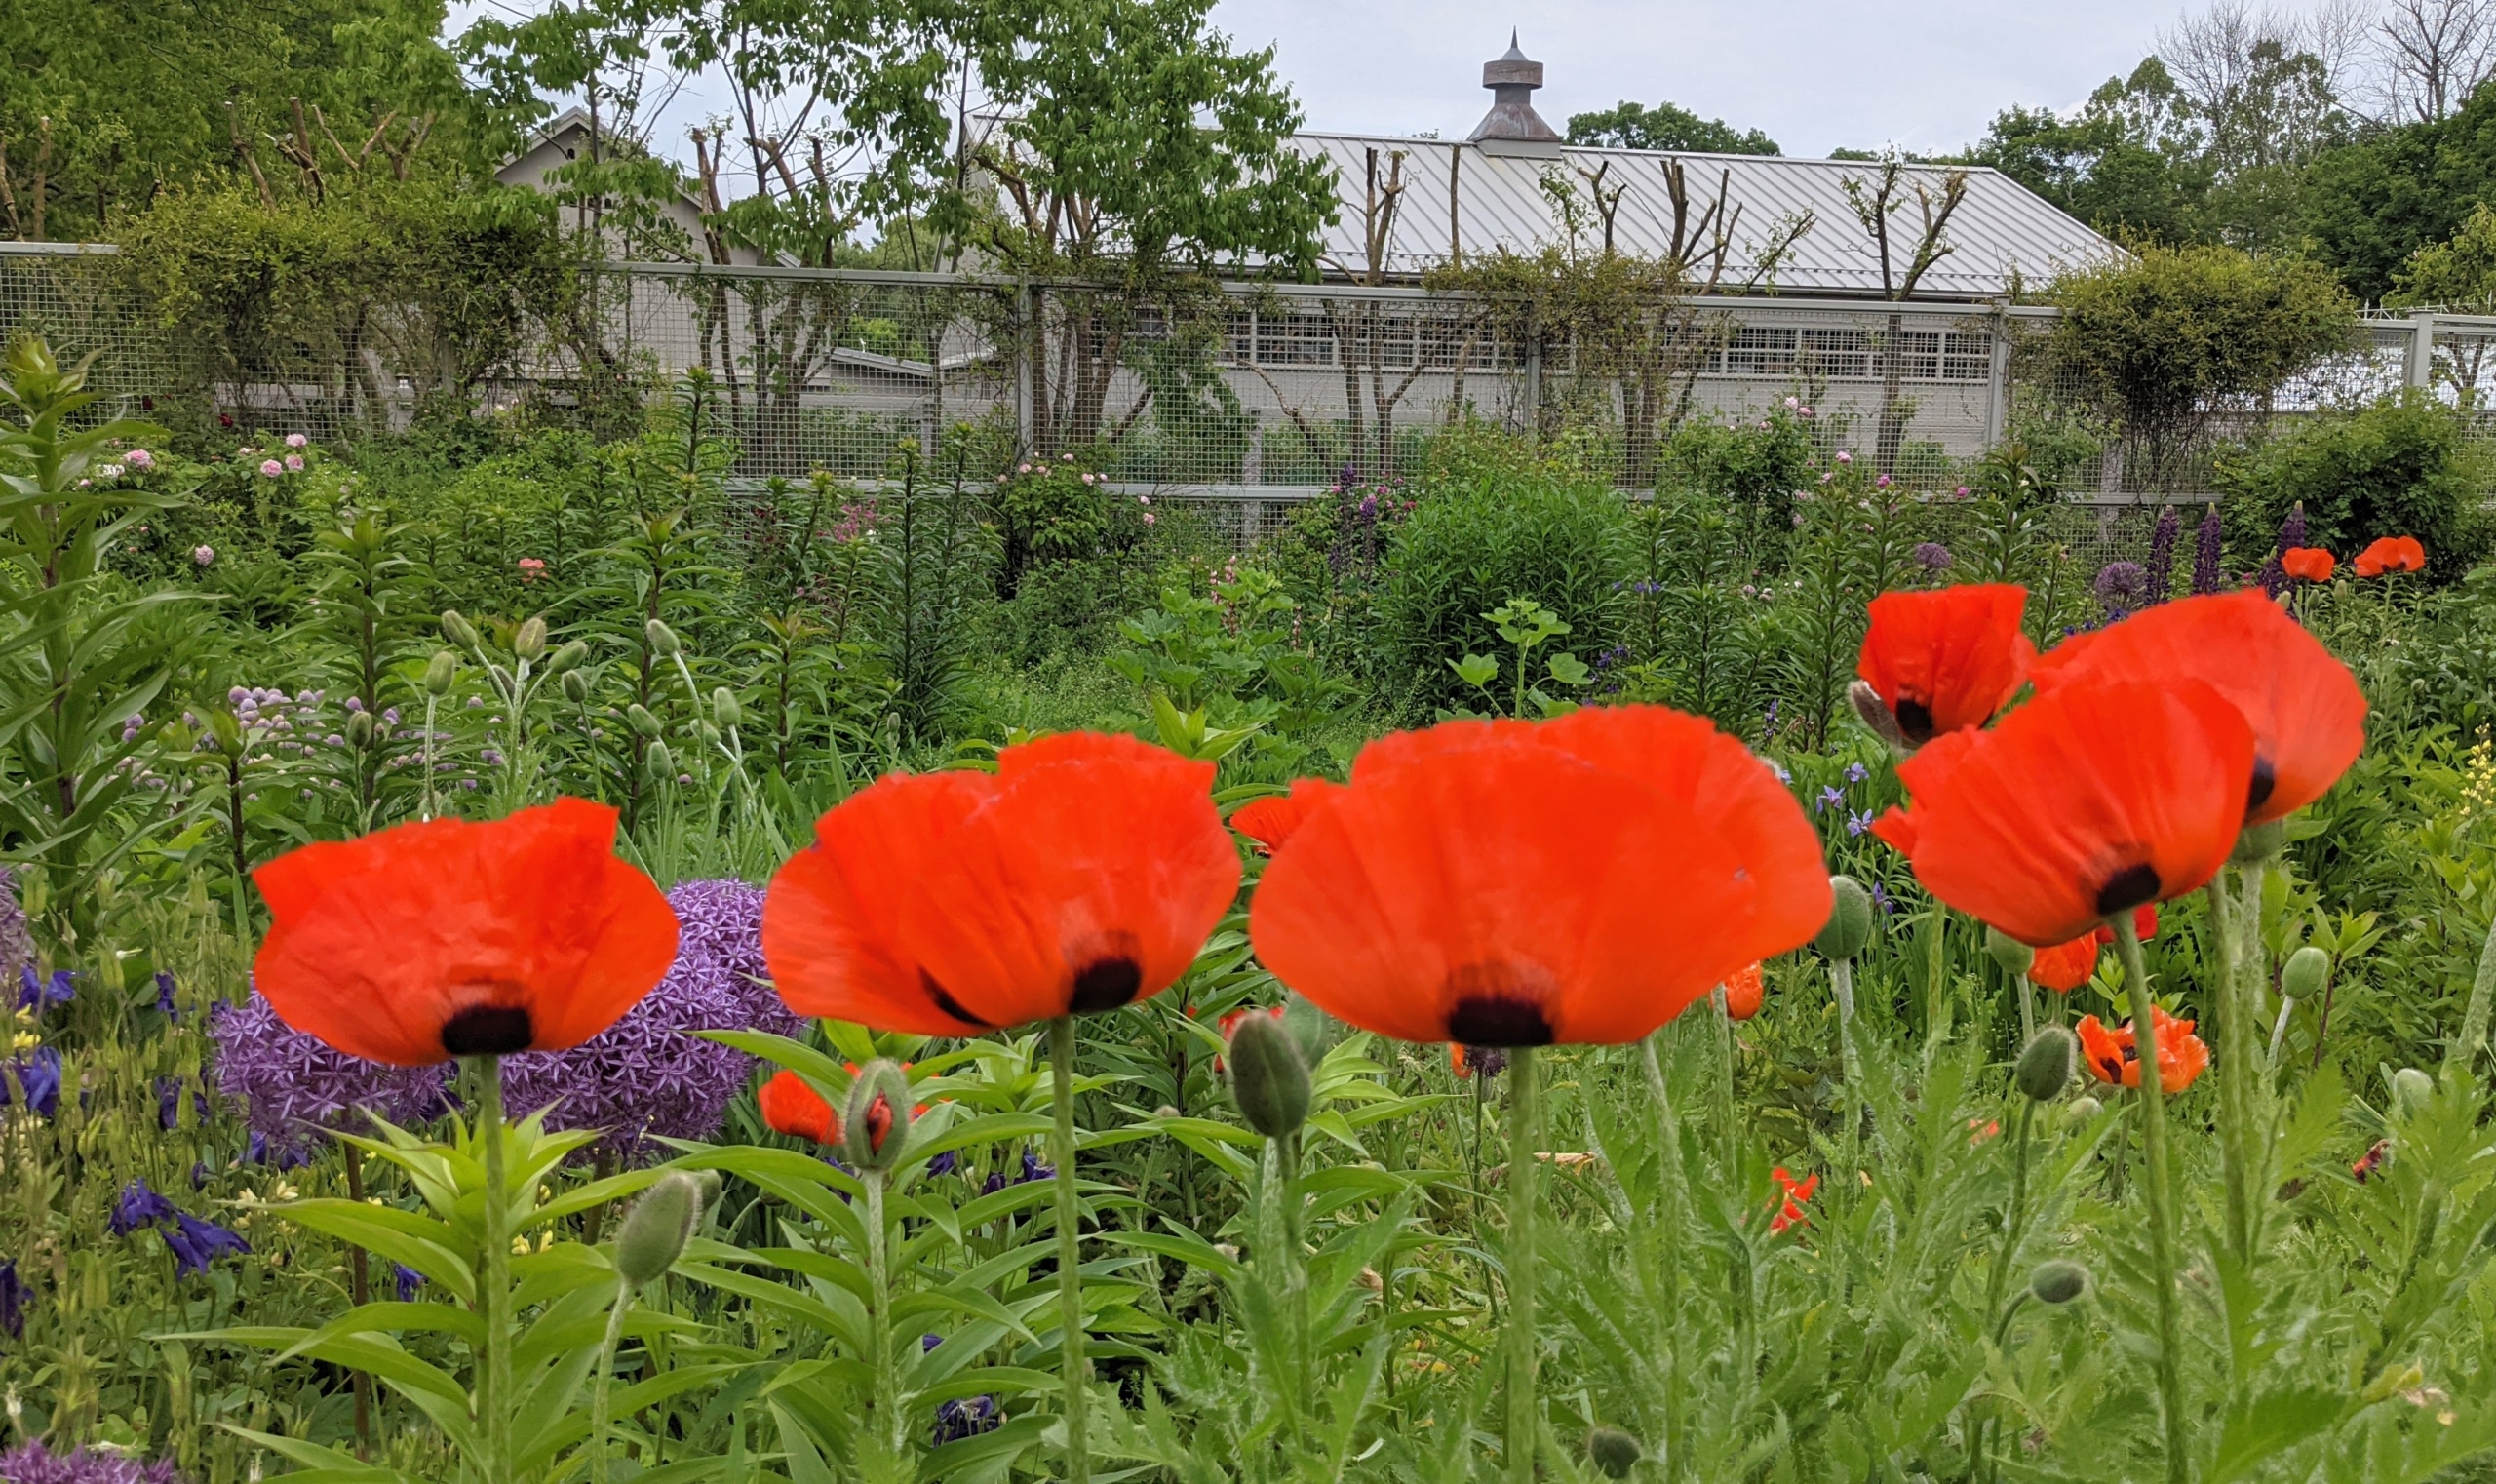
This cutting garden has developed so well over the last few seasons. I really enjoy comparing its progress from year to year, and seeing where I need to add more plants to improve the display. Right now, there are gorgeous poppies blooming everywhere - those colorful tissue paper-like flowers that look stunning both in the garden and in the vase.
The name “poppy” refers to a large number of species in at least 12 different genera in the subfamily Papaveroideae, which is within the plant family Papaveraceae. They produce open single flowers gracefully located on long thin stems, sometimes fluffy with many petals and sometimes smooth.
My flower garden is brimming with poppies in a variety of colors and forms. Papaver grows mainly in the northern hemisphere, including within the Arctic Circle, with one species found in southern Africa.
Poppies are attractive, easy-to-grow herbaceous annual, biennial or short-lived perennial plants. This poppy has a long stem and a delicate, crisp white bloom.
The plants typically grow to about two feet in height forming colorful flowers during spring and into summer.
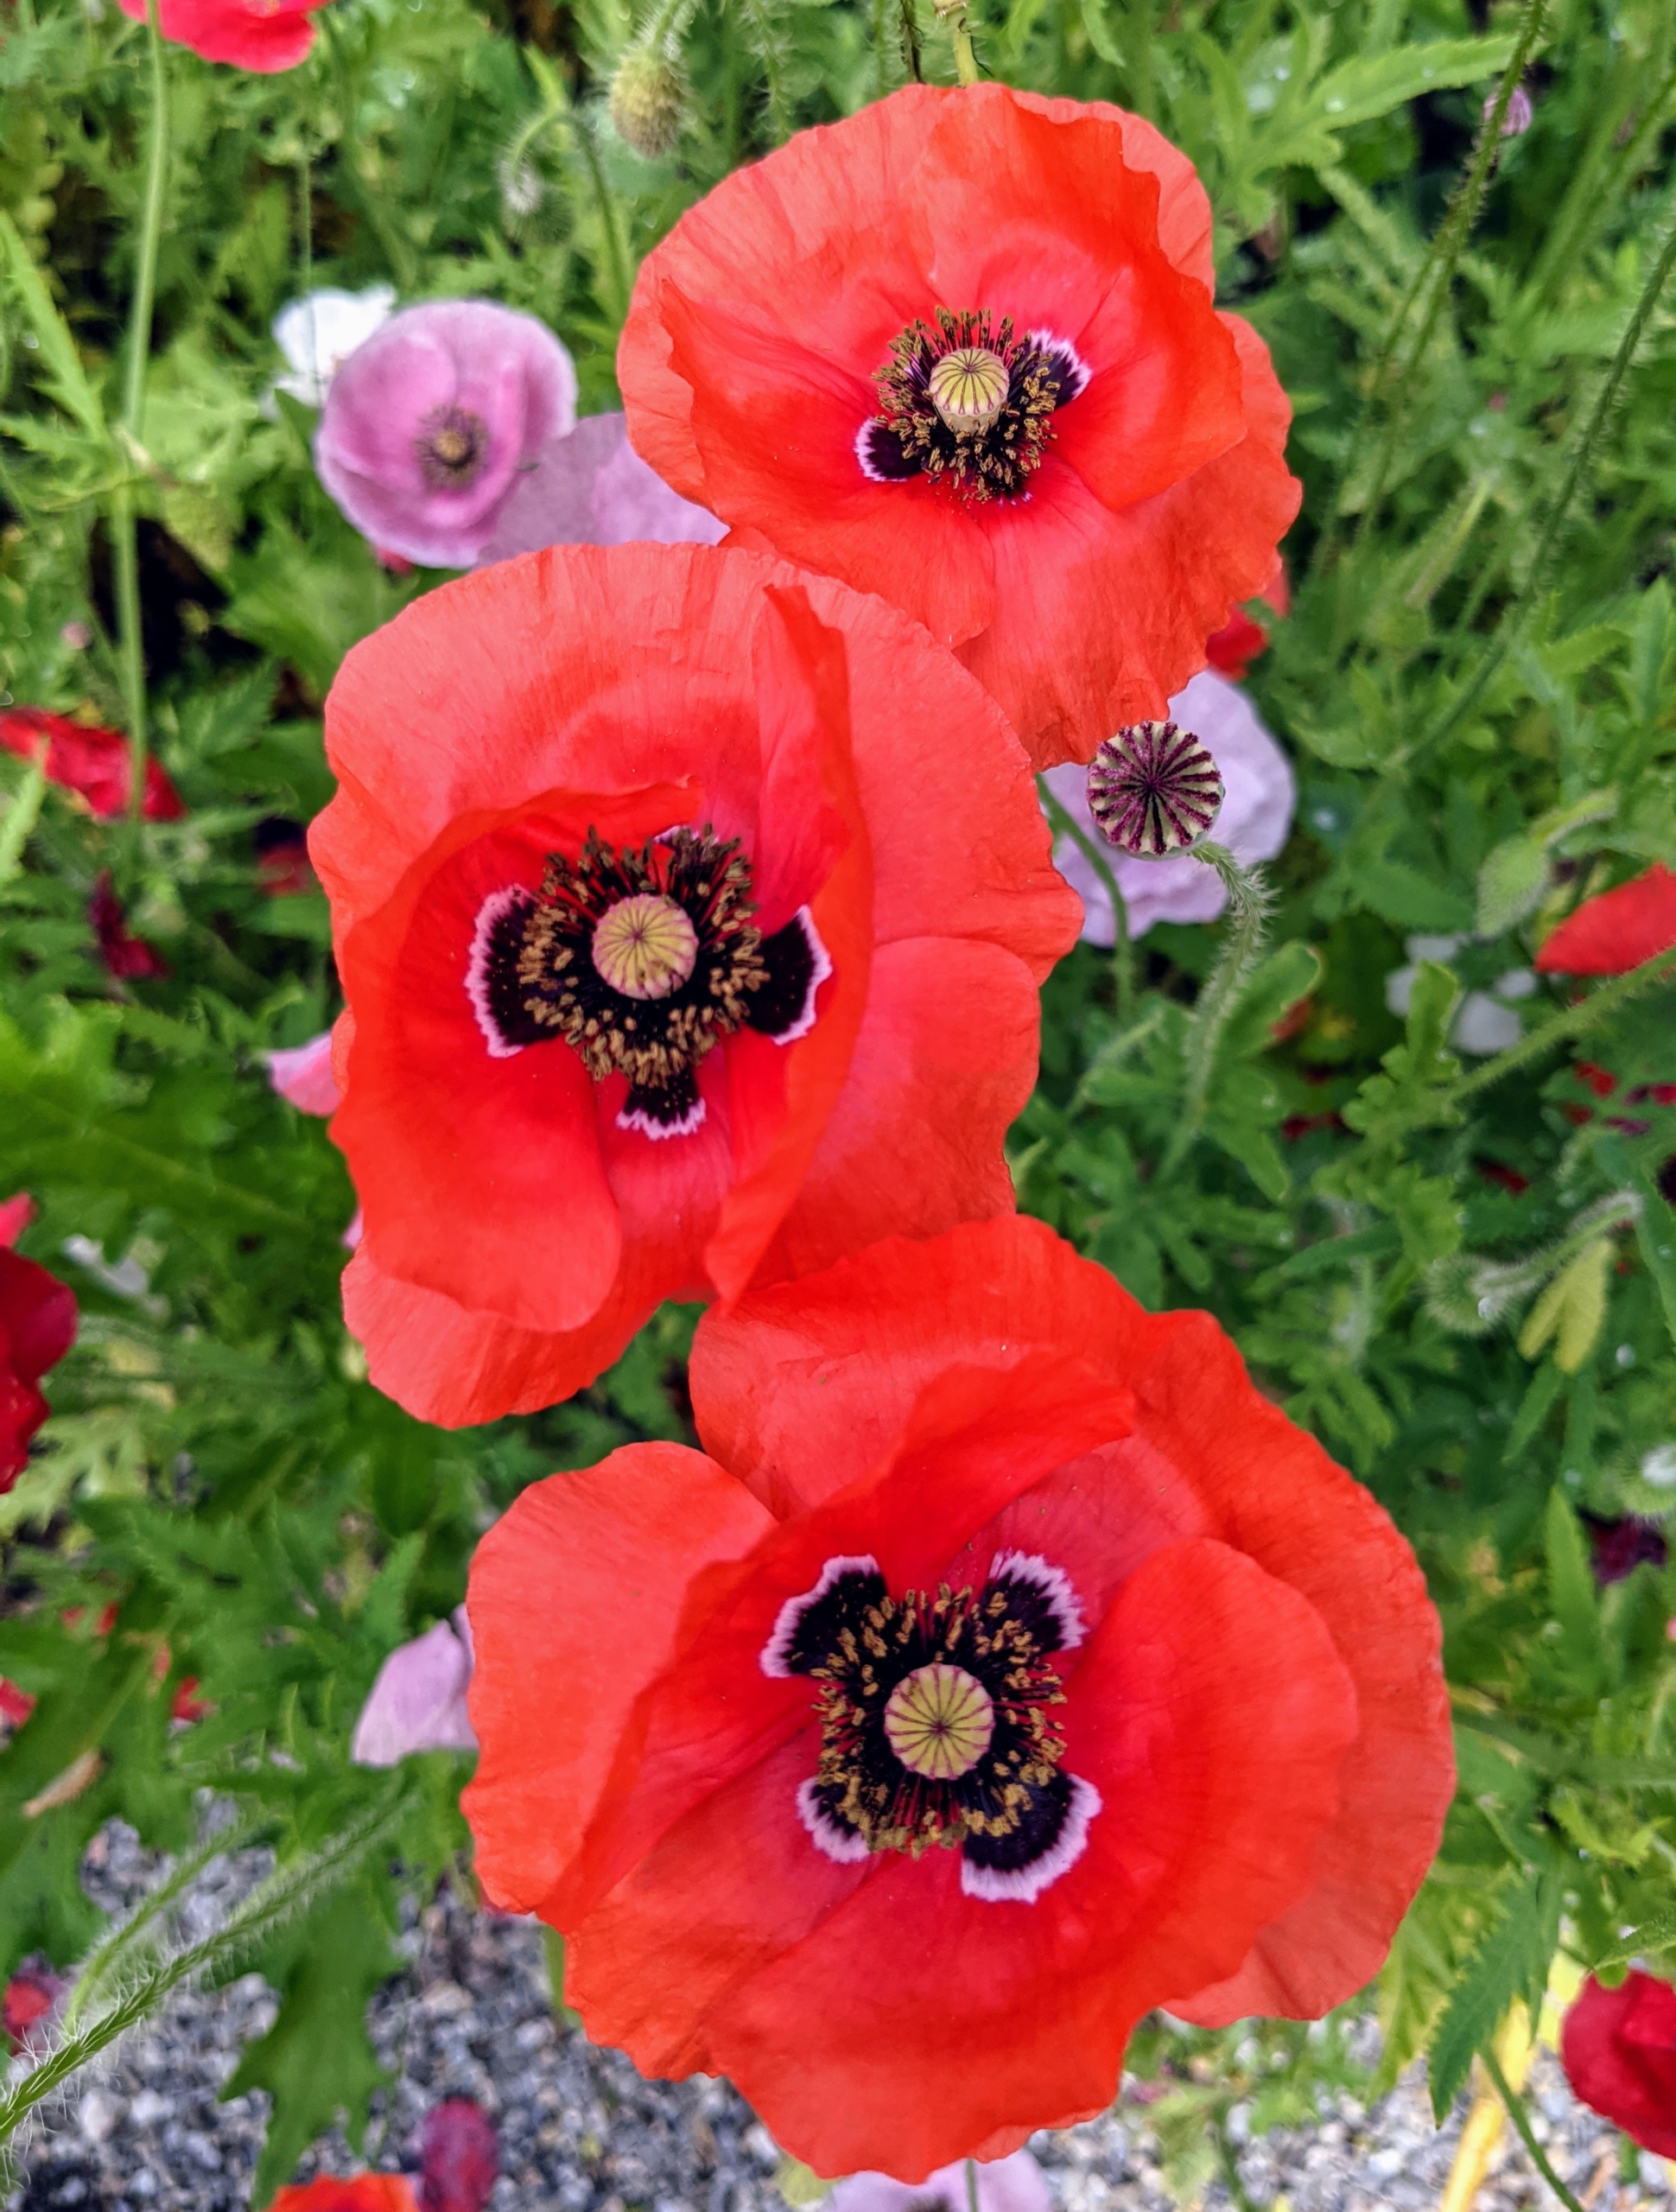
Flowers have four to six petals, many stamens forming a conspicuous whorl in the center of the flower and an ovary of two to many fused carpels.
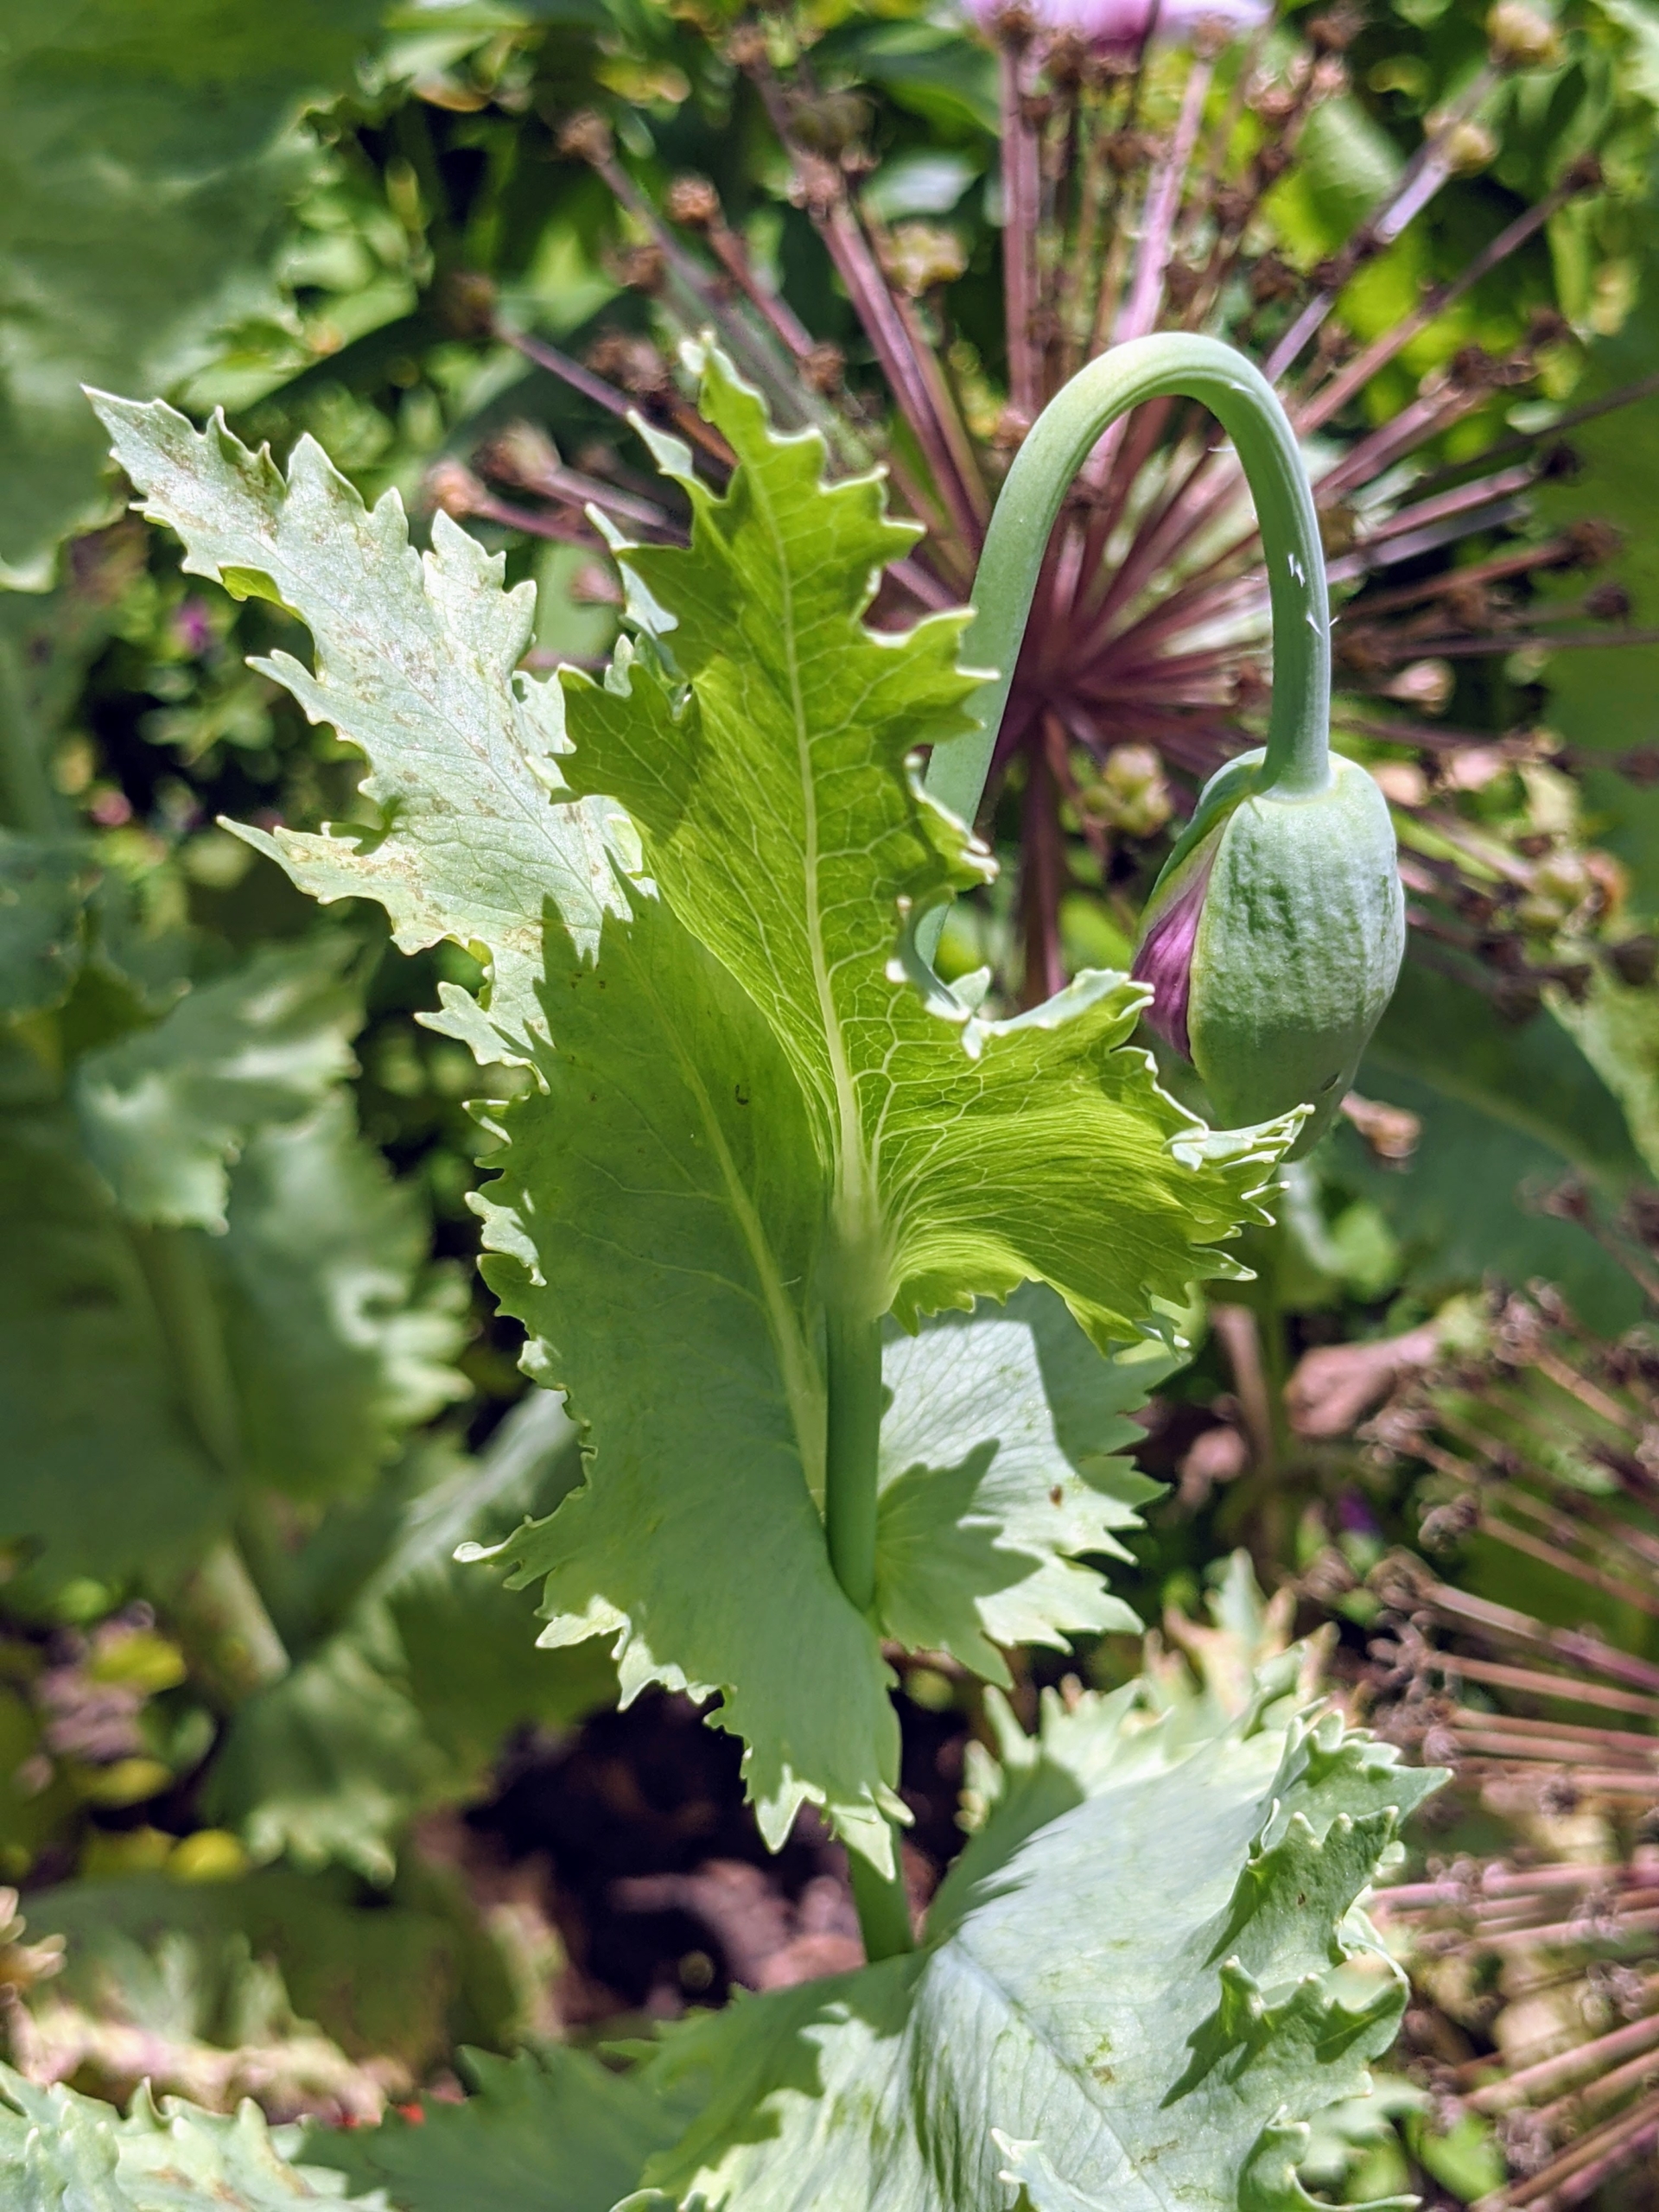
The leaves almost look like weeds when first emerging from the soil. They are lobed or dissected, appearing lacy, frilly or fern-like.
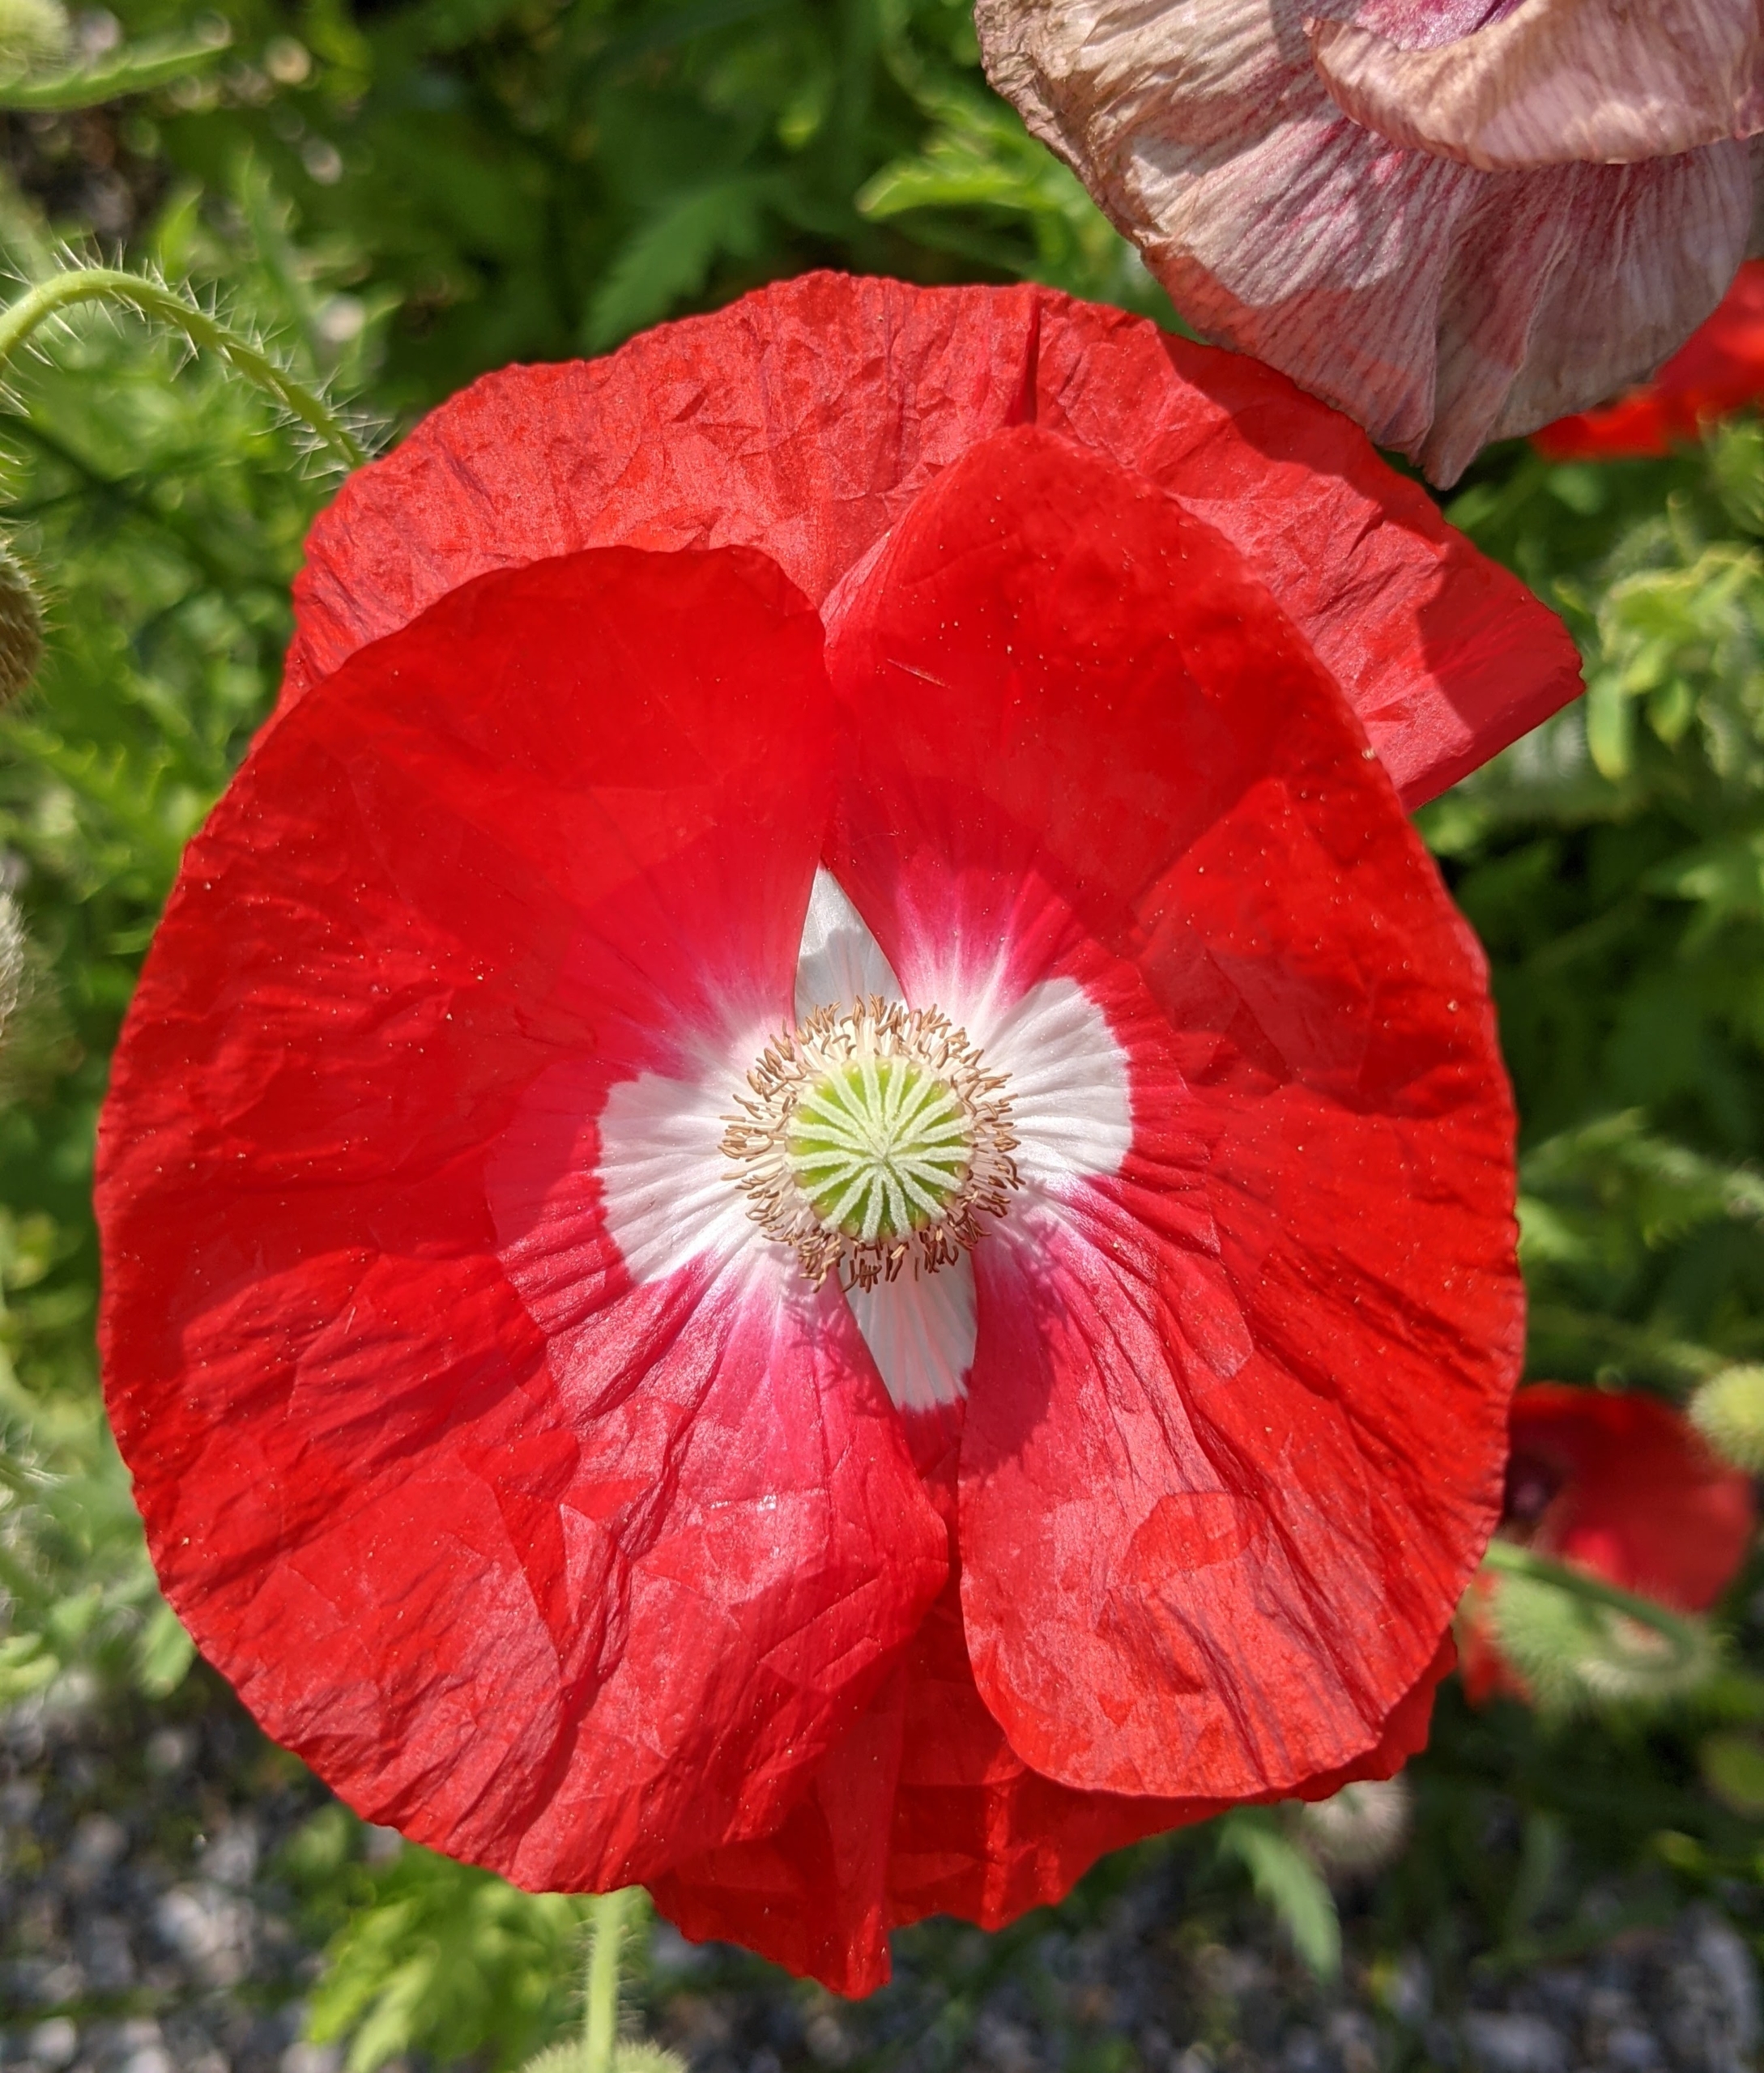
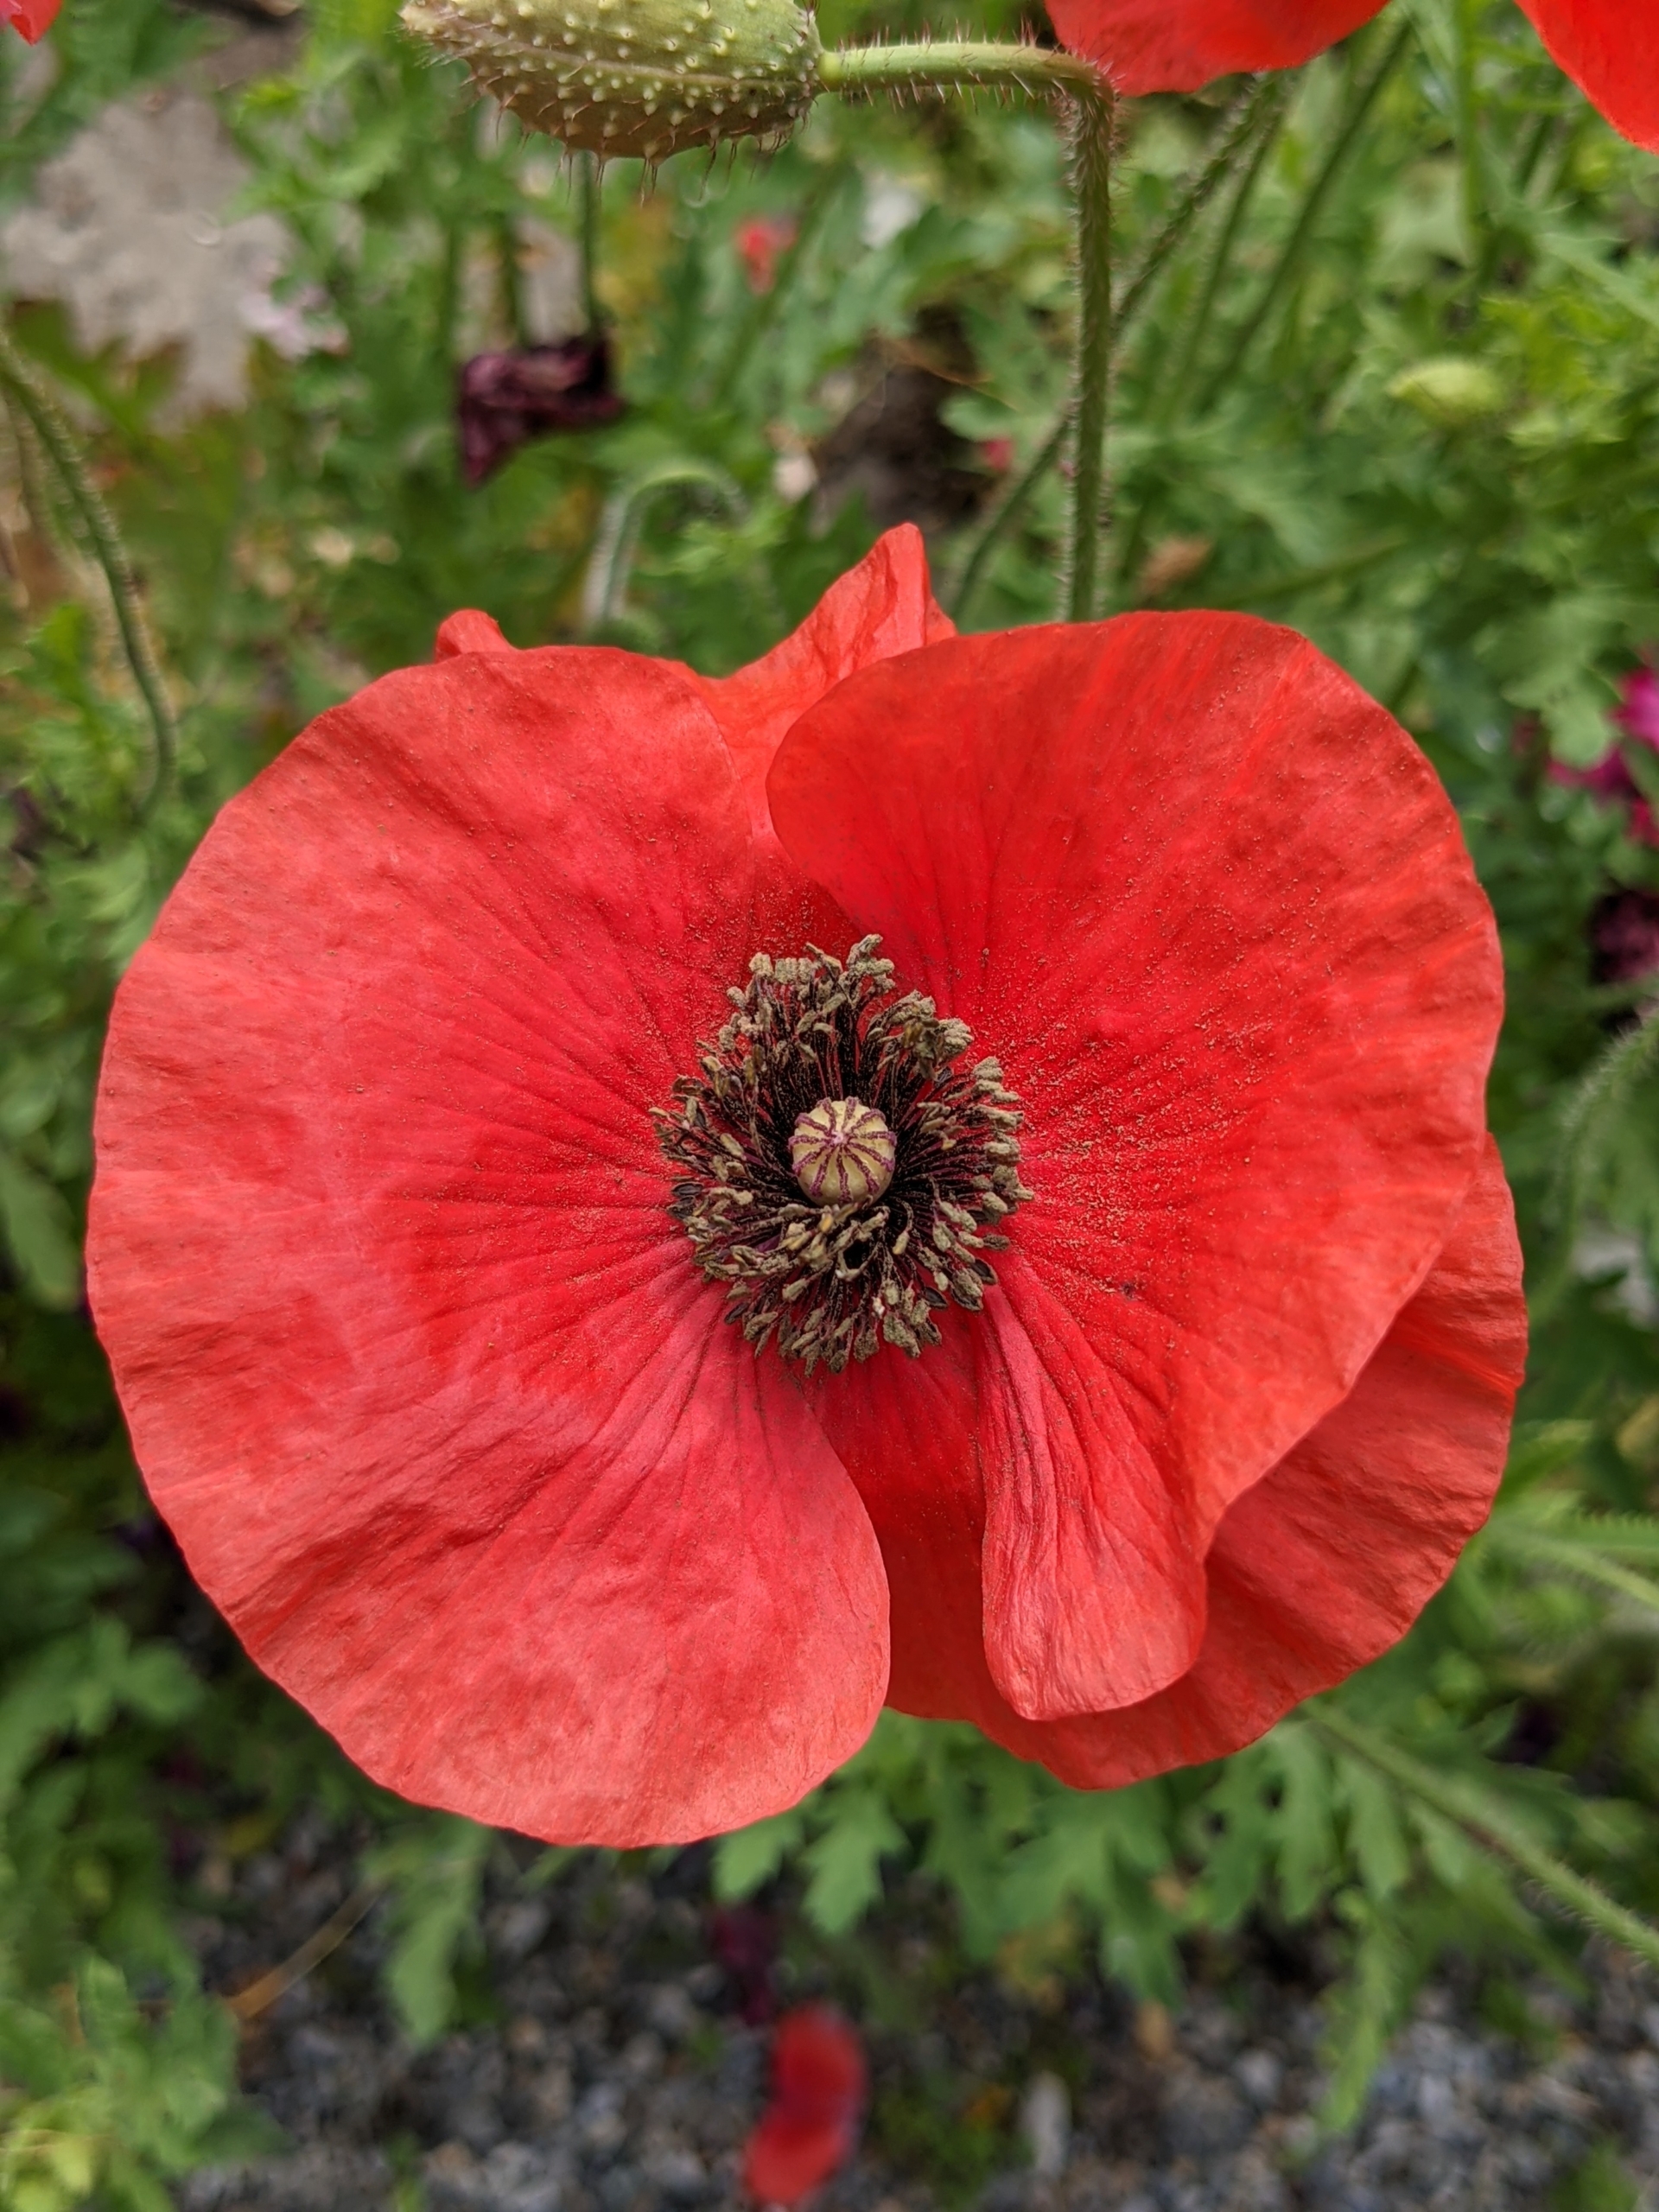
One of the most familiar of all poppies is the Oriental poppy. This perennial garden plant is a common feature of northern gardens, with its feathery foliage and orange, red, or salmon flowers that bloom in June and July. The leaves disappear in summer as the plant goes dormant, but a new set of basal leaves emerges in the fall.
Poppies grow naturally in conditions of disturbed earth throughout Western Europe. The destruction brought by the Napoleonic wars of the early 19th Century transformed bare land into fields of red poppies, growing around the bodies of the fallen soldiers. In 1914, the fields of Northern France and Flanders were hit again as World War I raged through Europe. Once over, the poppy was one of the only plants to grow on the otherwise barren battlefields. Today, it remains a popular bloom and an enduring symbol of remembrance.
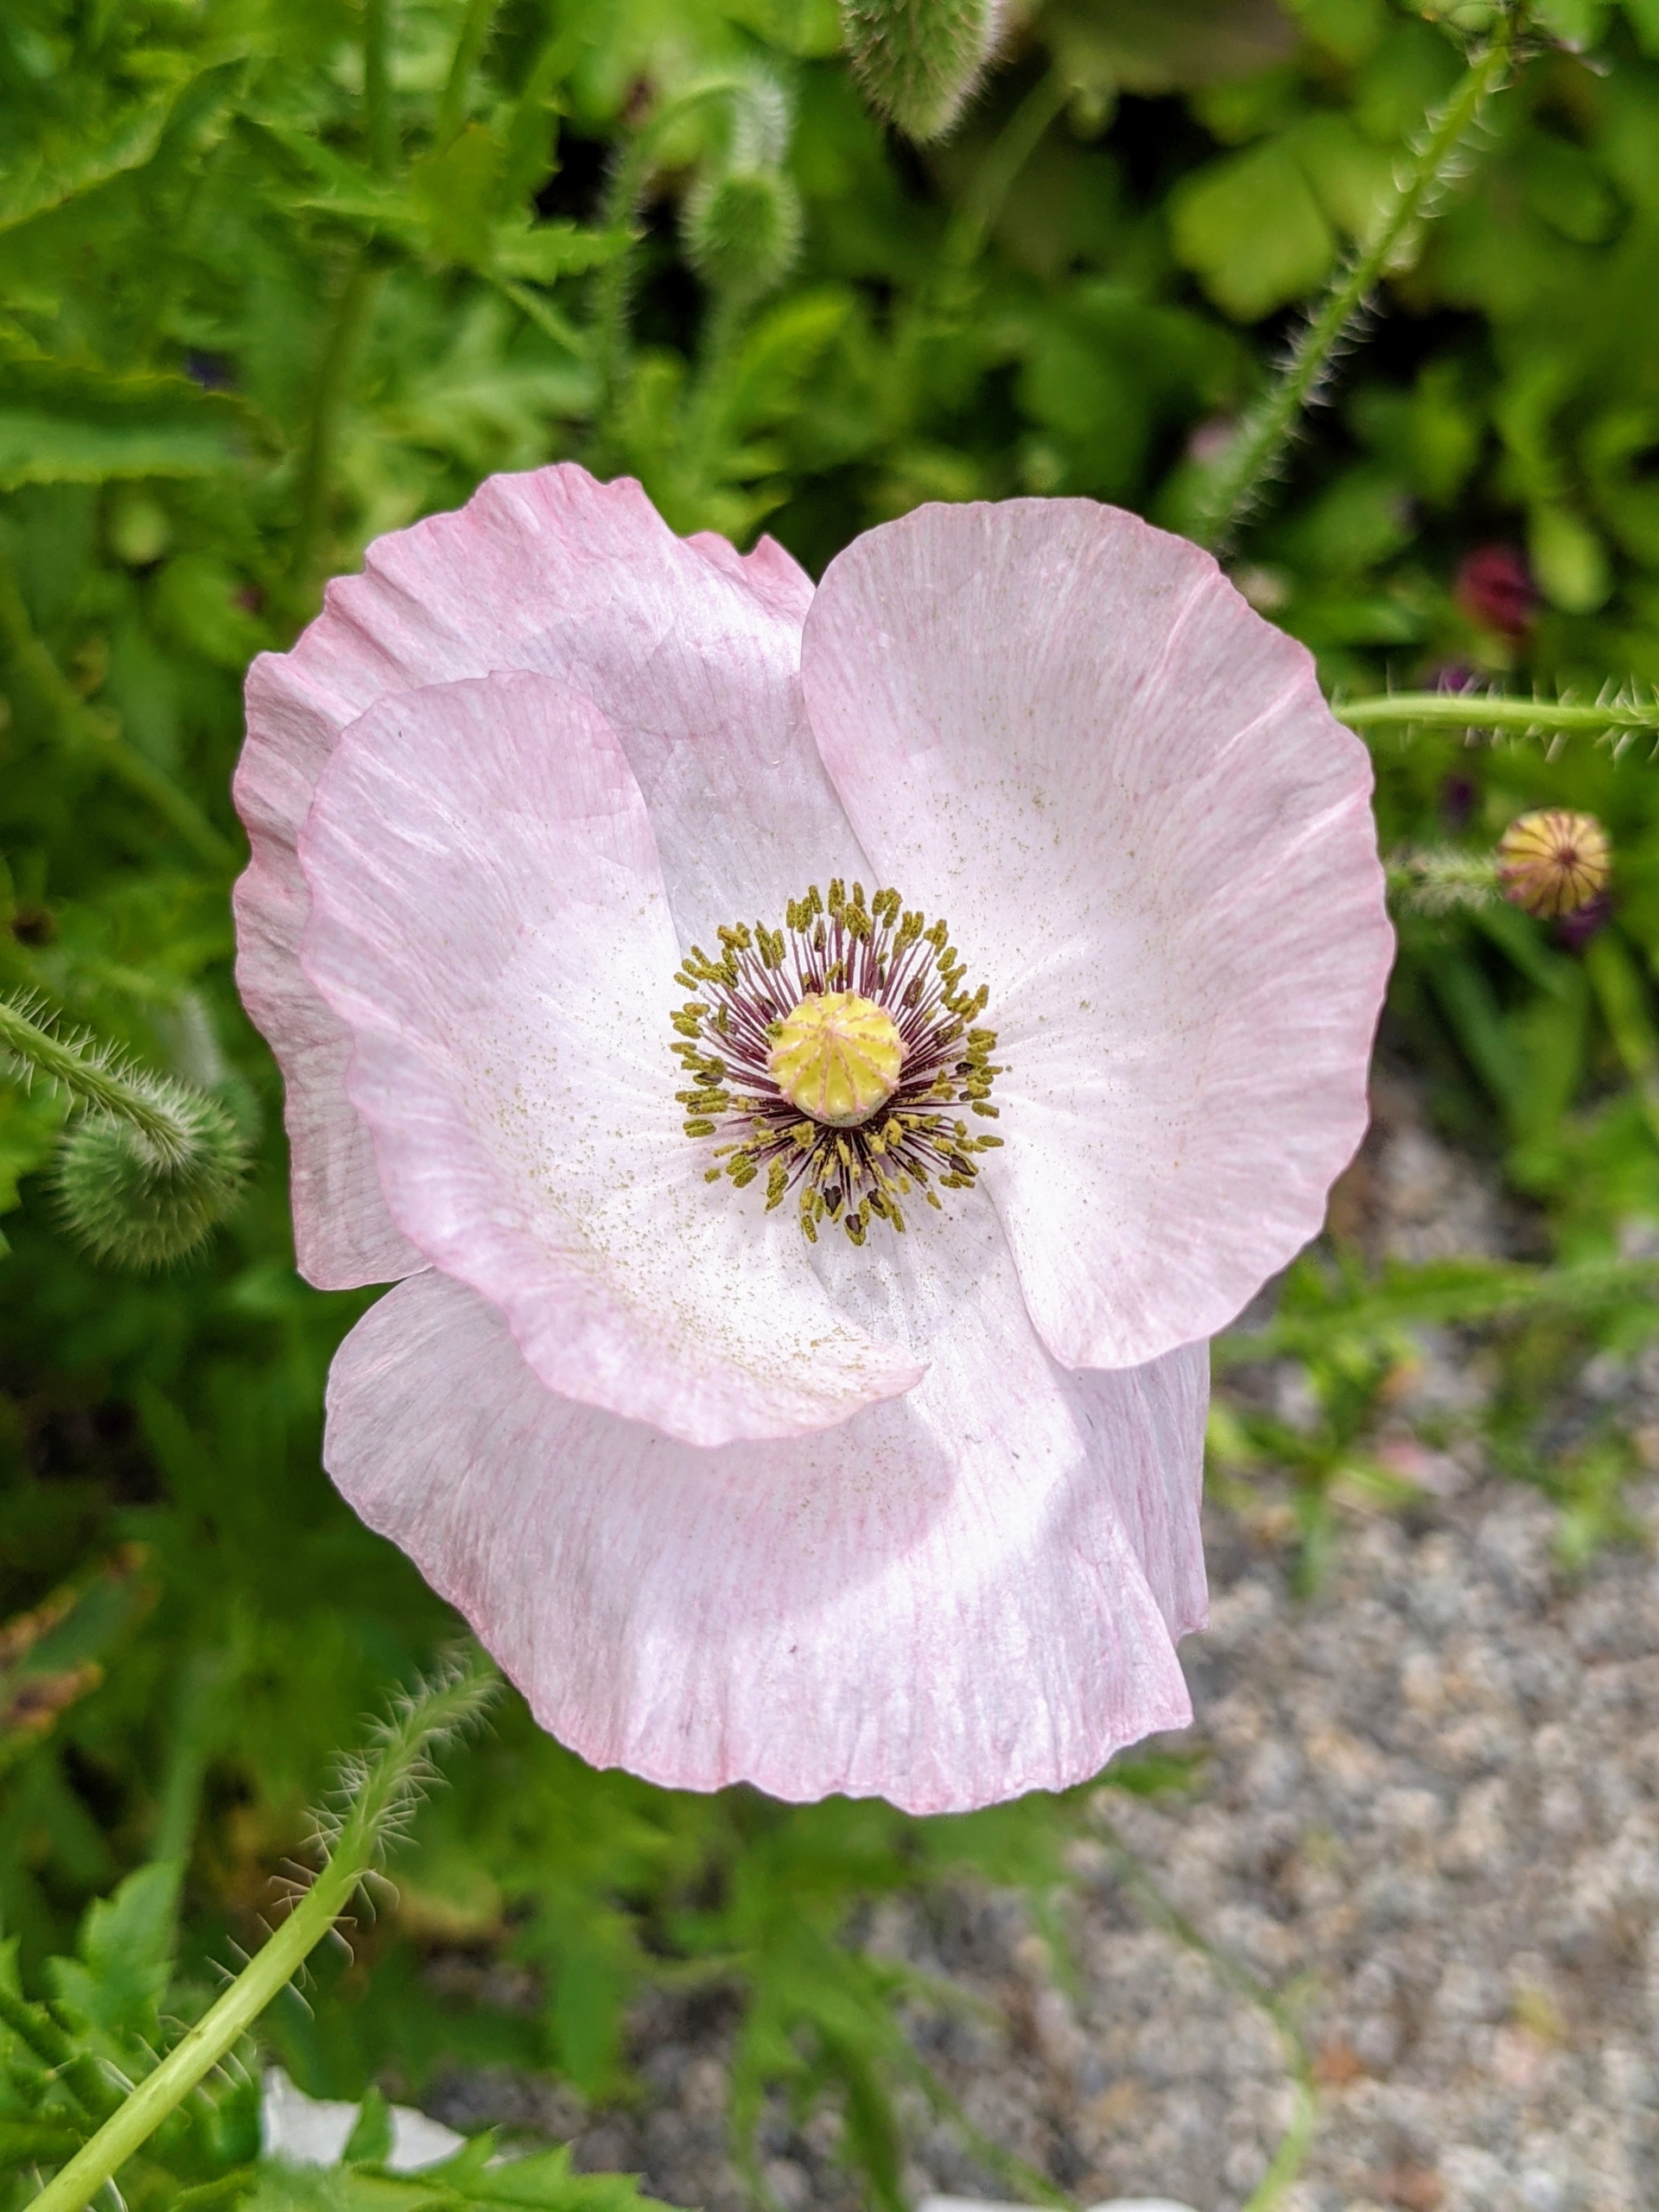
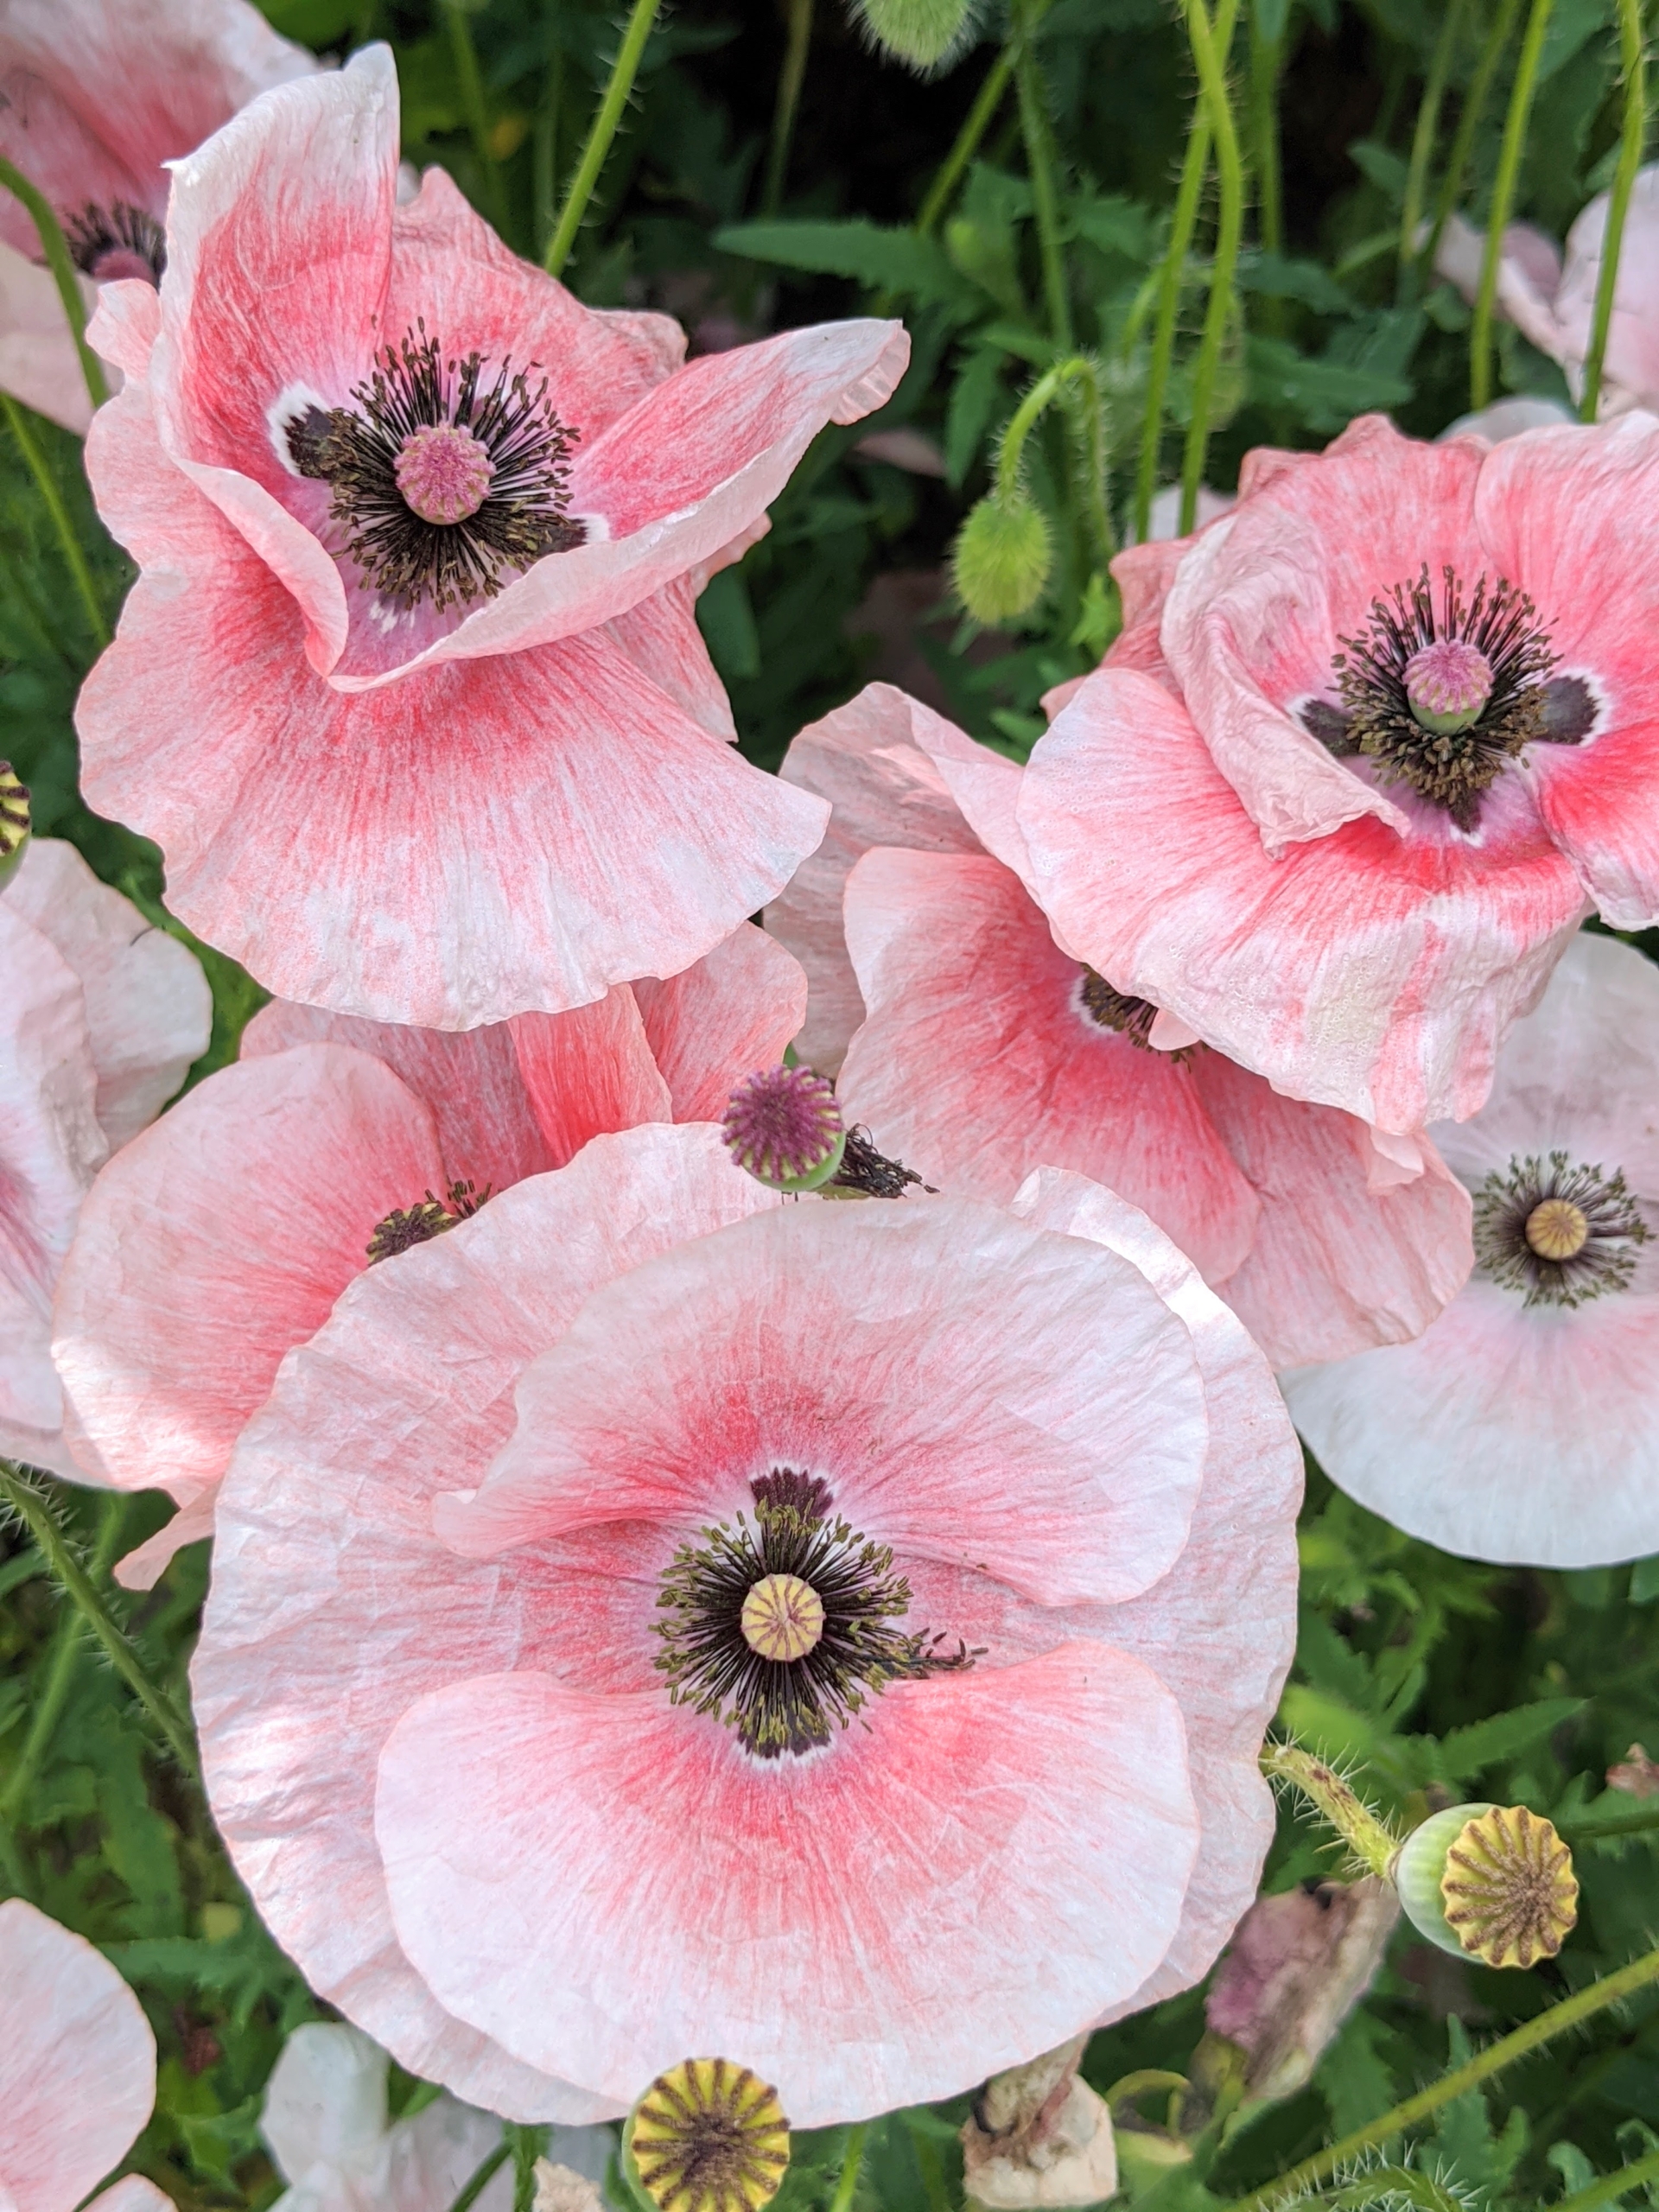
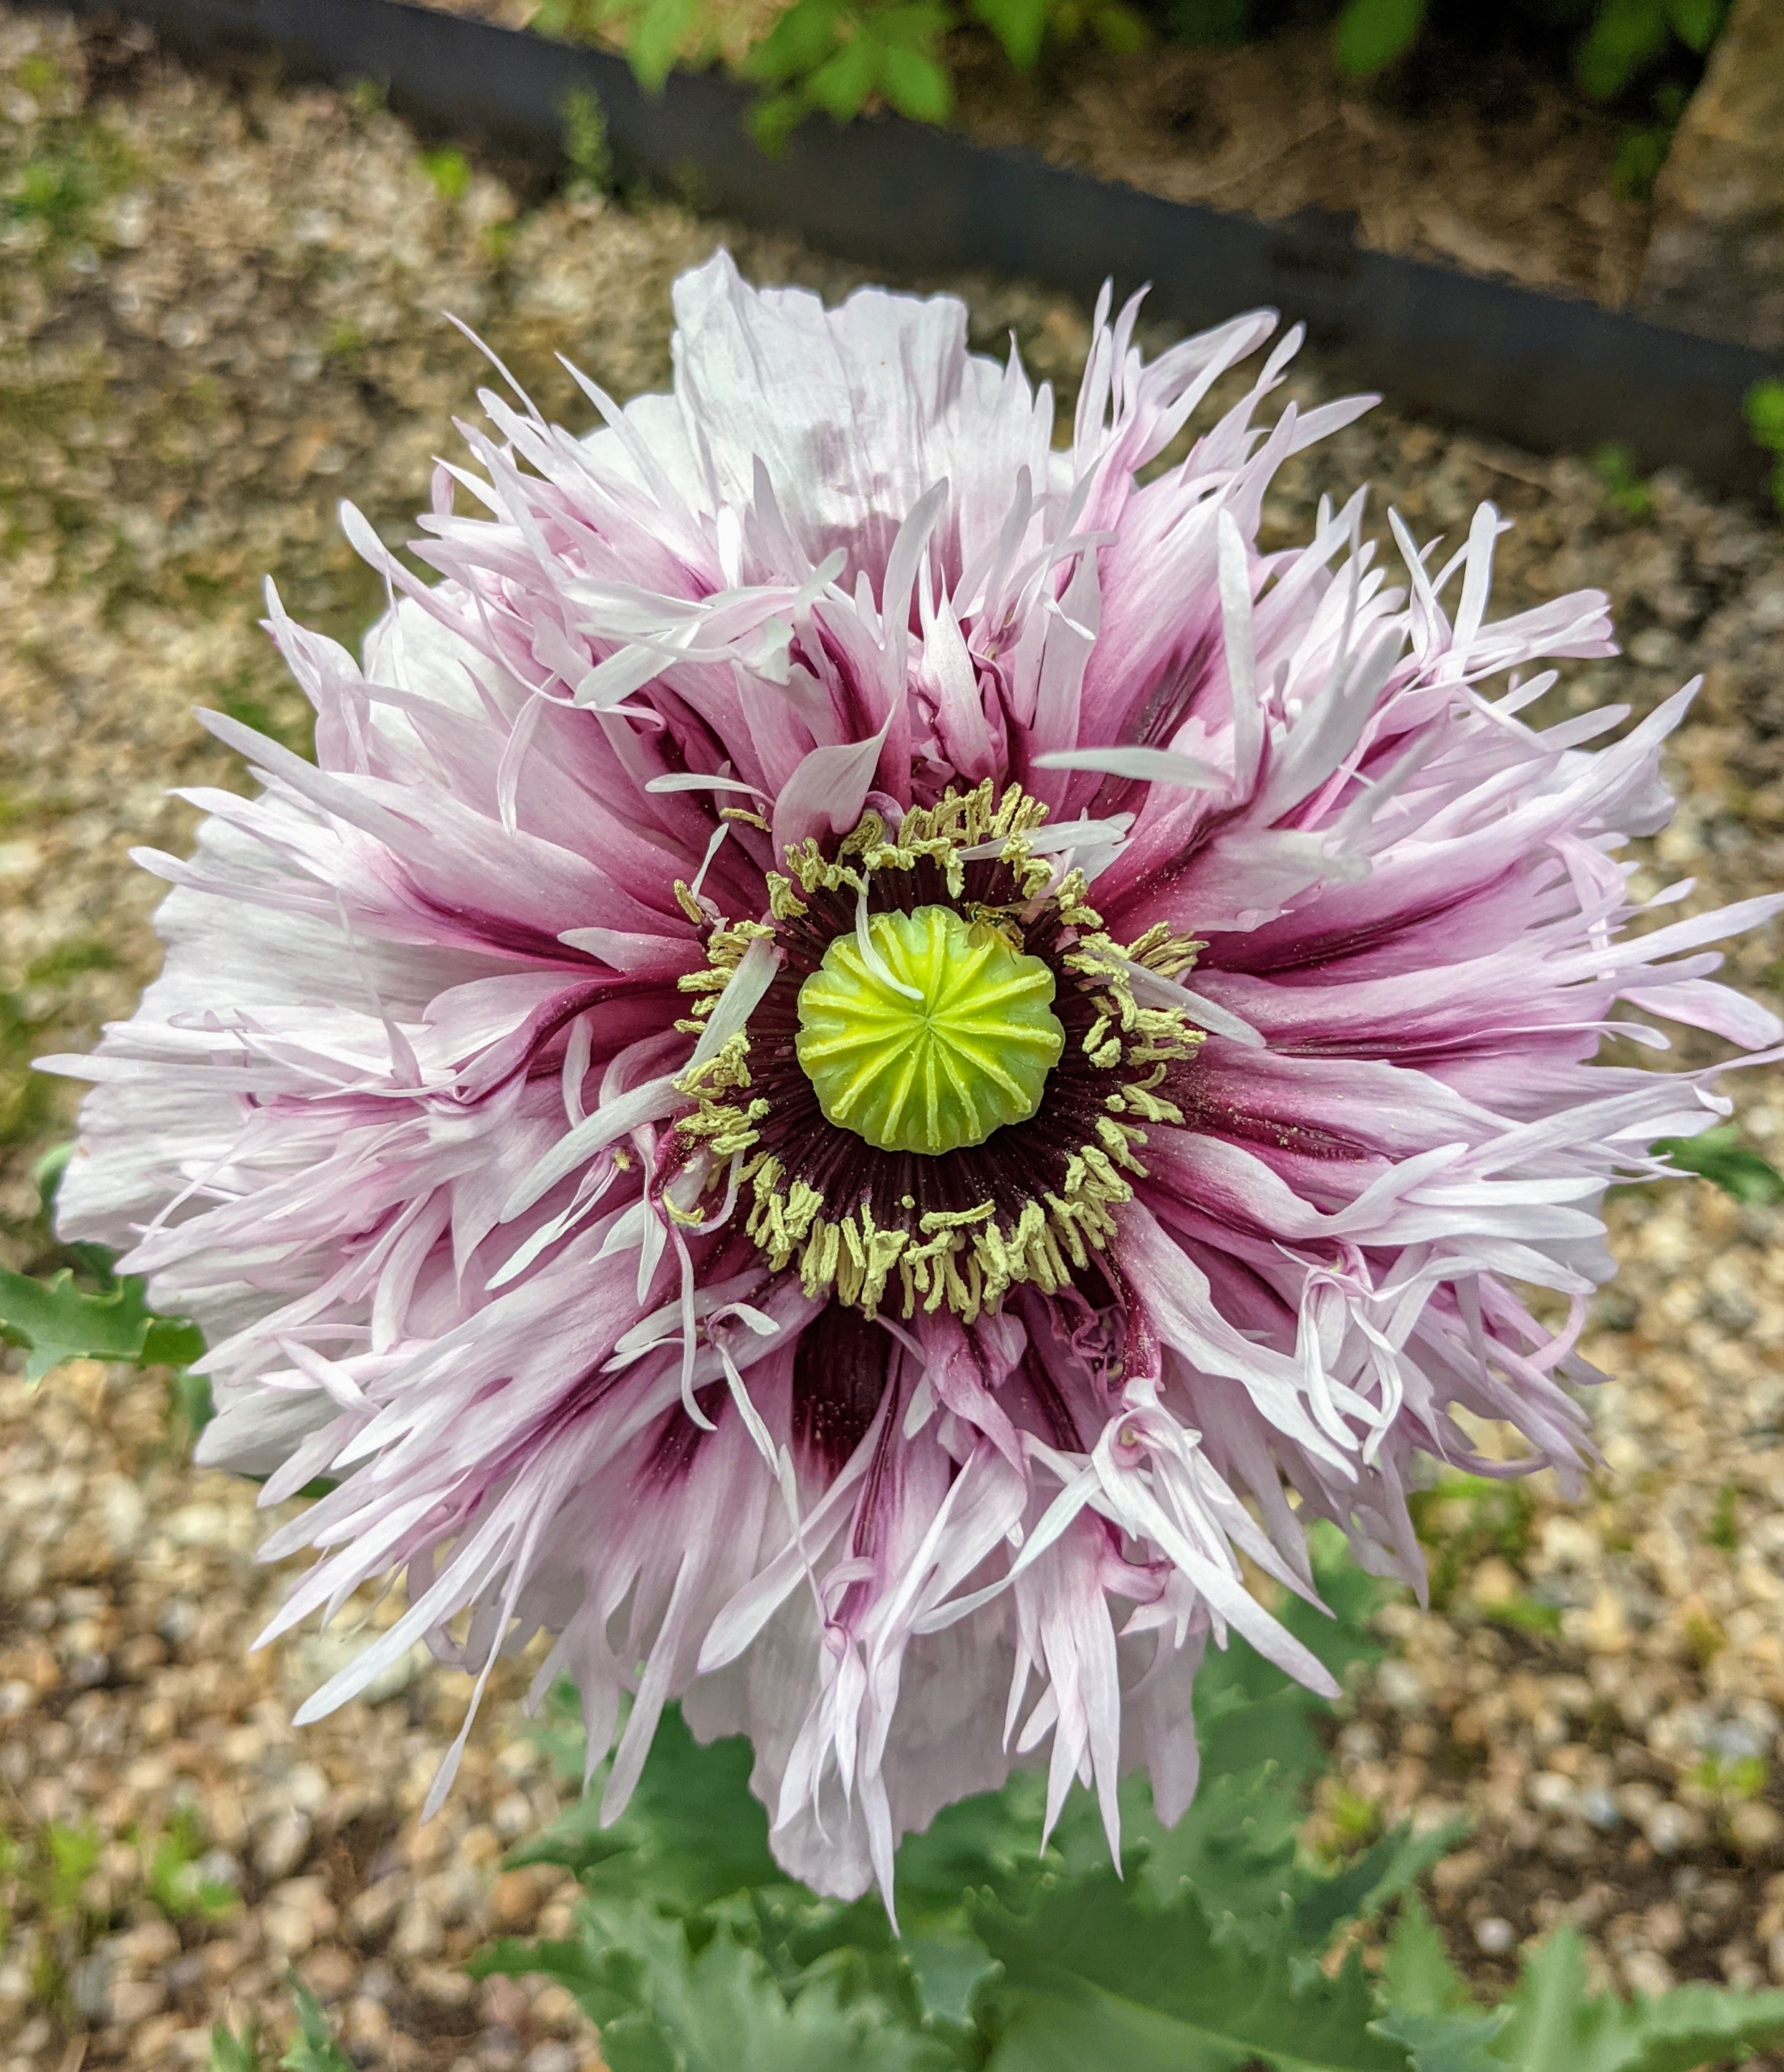
These poppies have delicate light pink petals with darker pink centers.
Poppies require very little care, whether they are sown from seed or planted when young – they just need full sun and well-drained soil. Though it varies from one type to the next, most poppies fare best in U.S. Department of Agriculture plant hardiness zones 3 through 9.
Poppies can be planted as soon the ground becomes warm and soft in spring. If there’s a frost, poppies will survive and are also able to germinate in chilly weather. Poppies should receive at least six hours of sunshine a day, but in very warm locales, a little shade in the middle of the afternoon, when the sun is most intense, is ideal.
One tip – only water once per week during weeks that receive less than two inches of natural rainfall. And don’t splash any water on the foliage; moist leaves are more susceptible to pests and diseases.
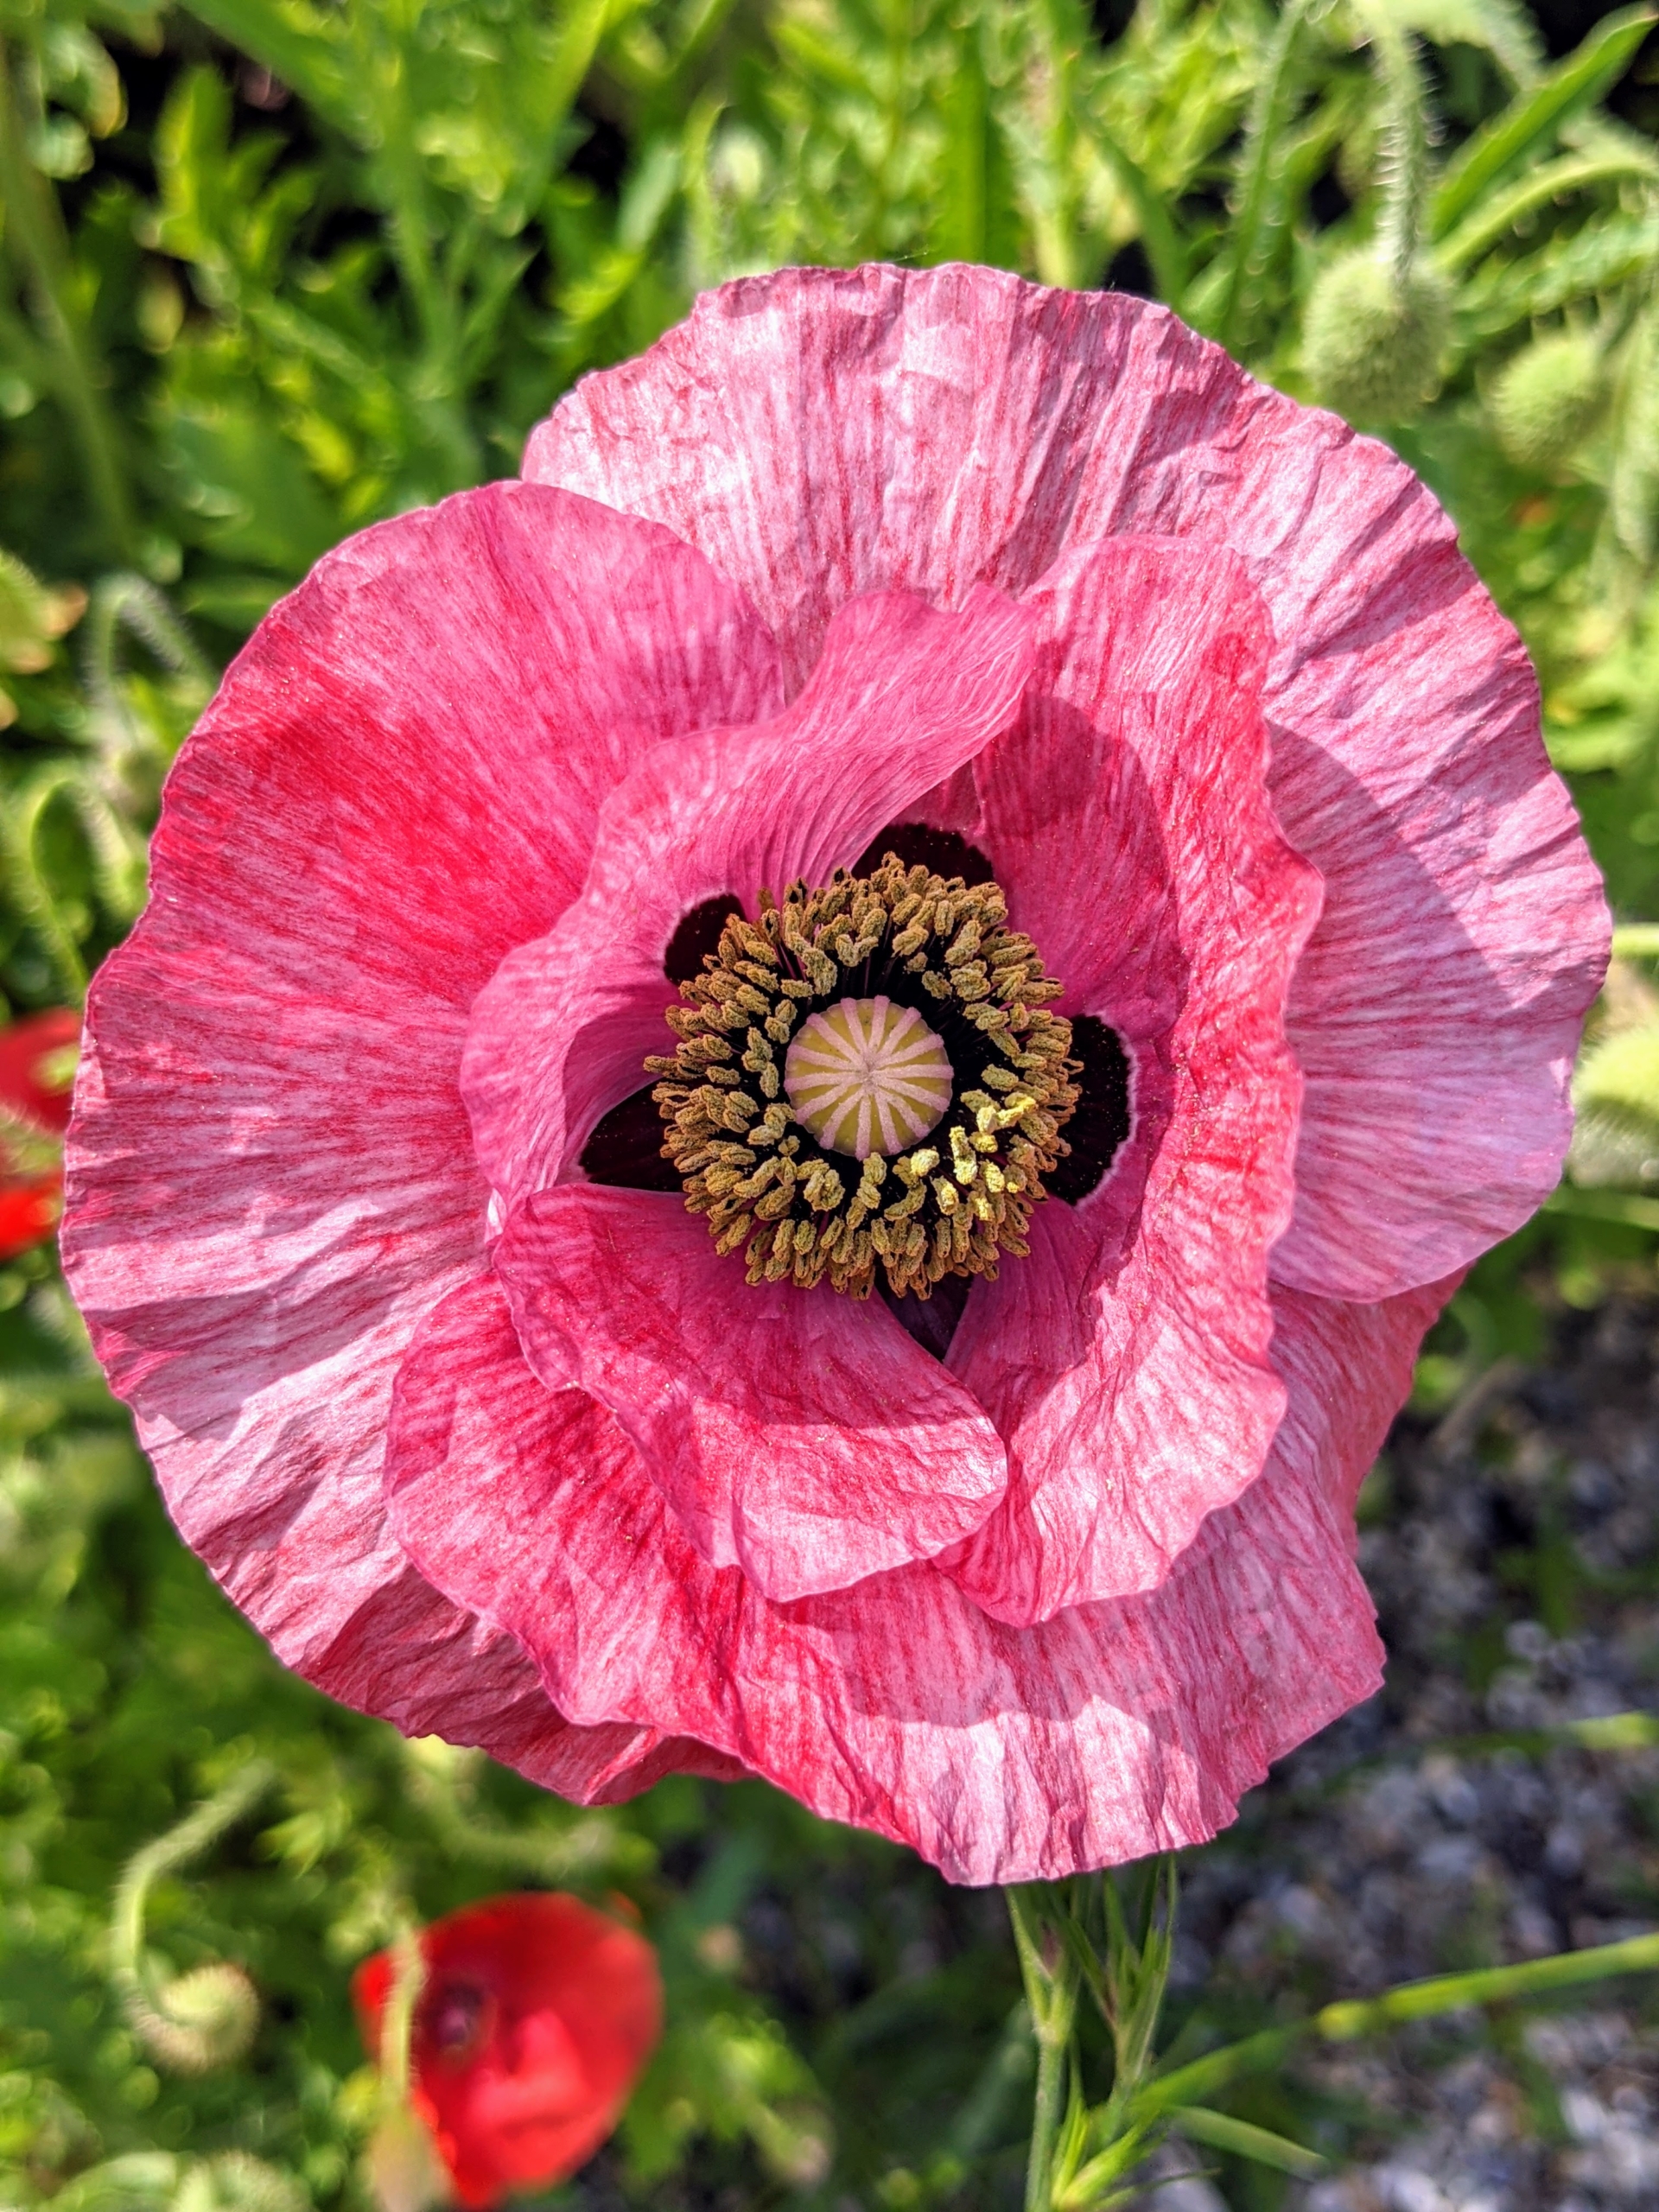
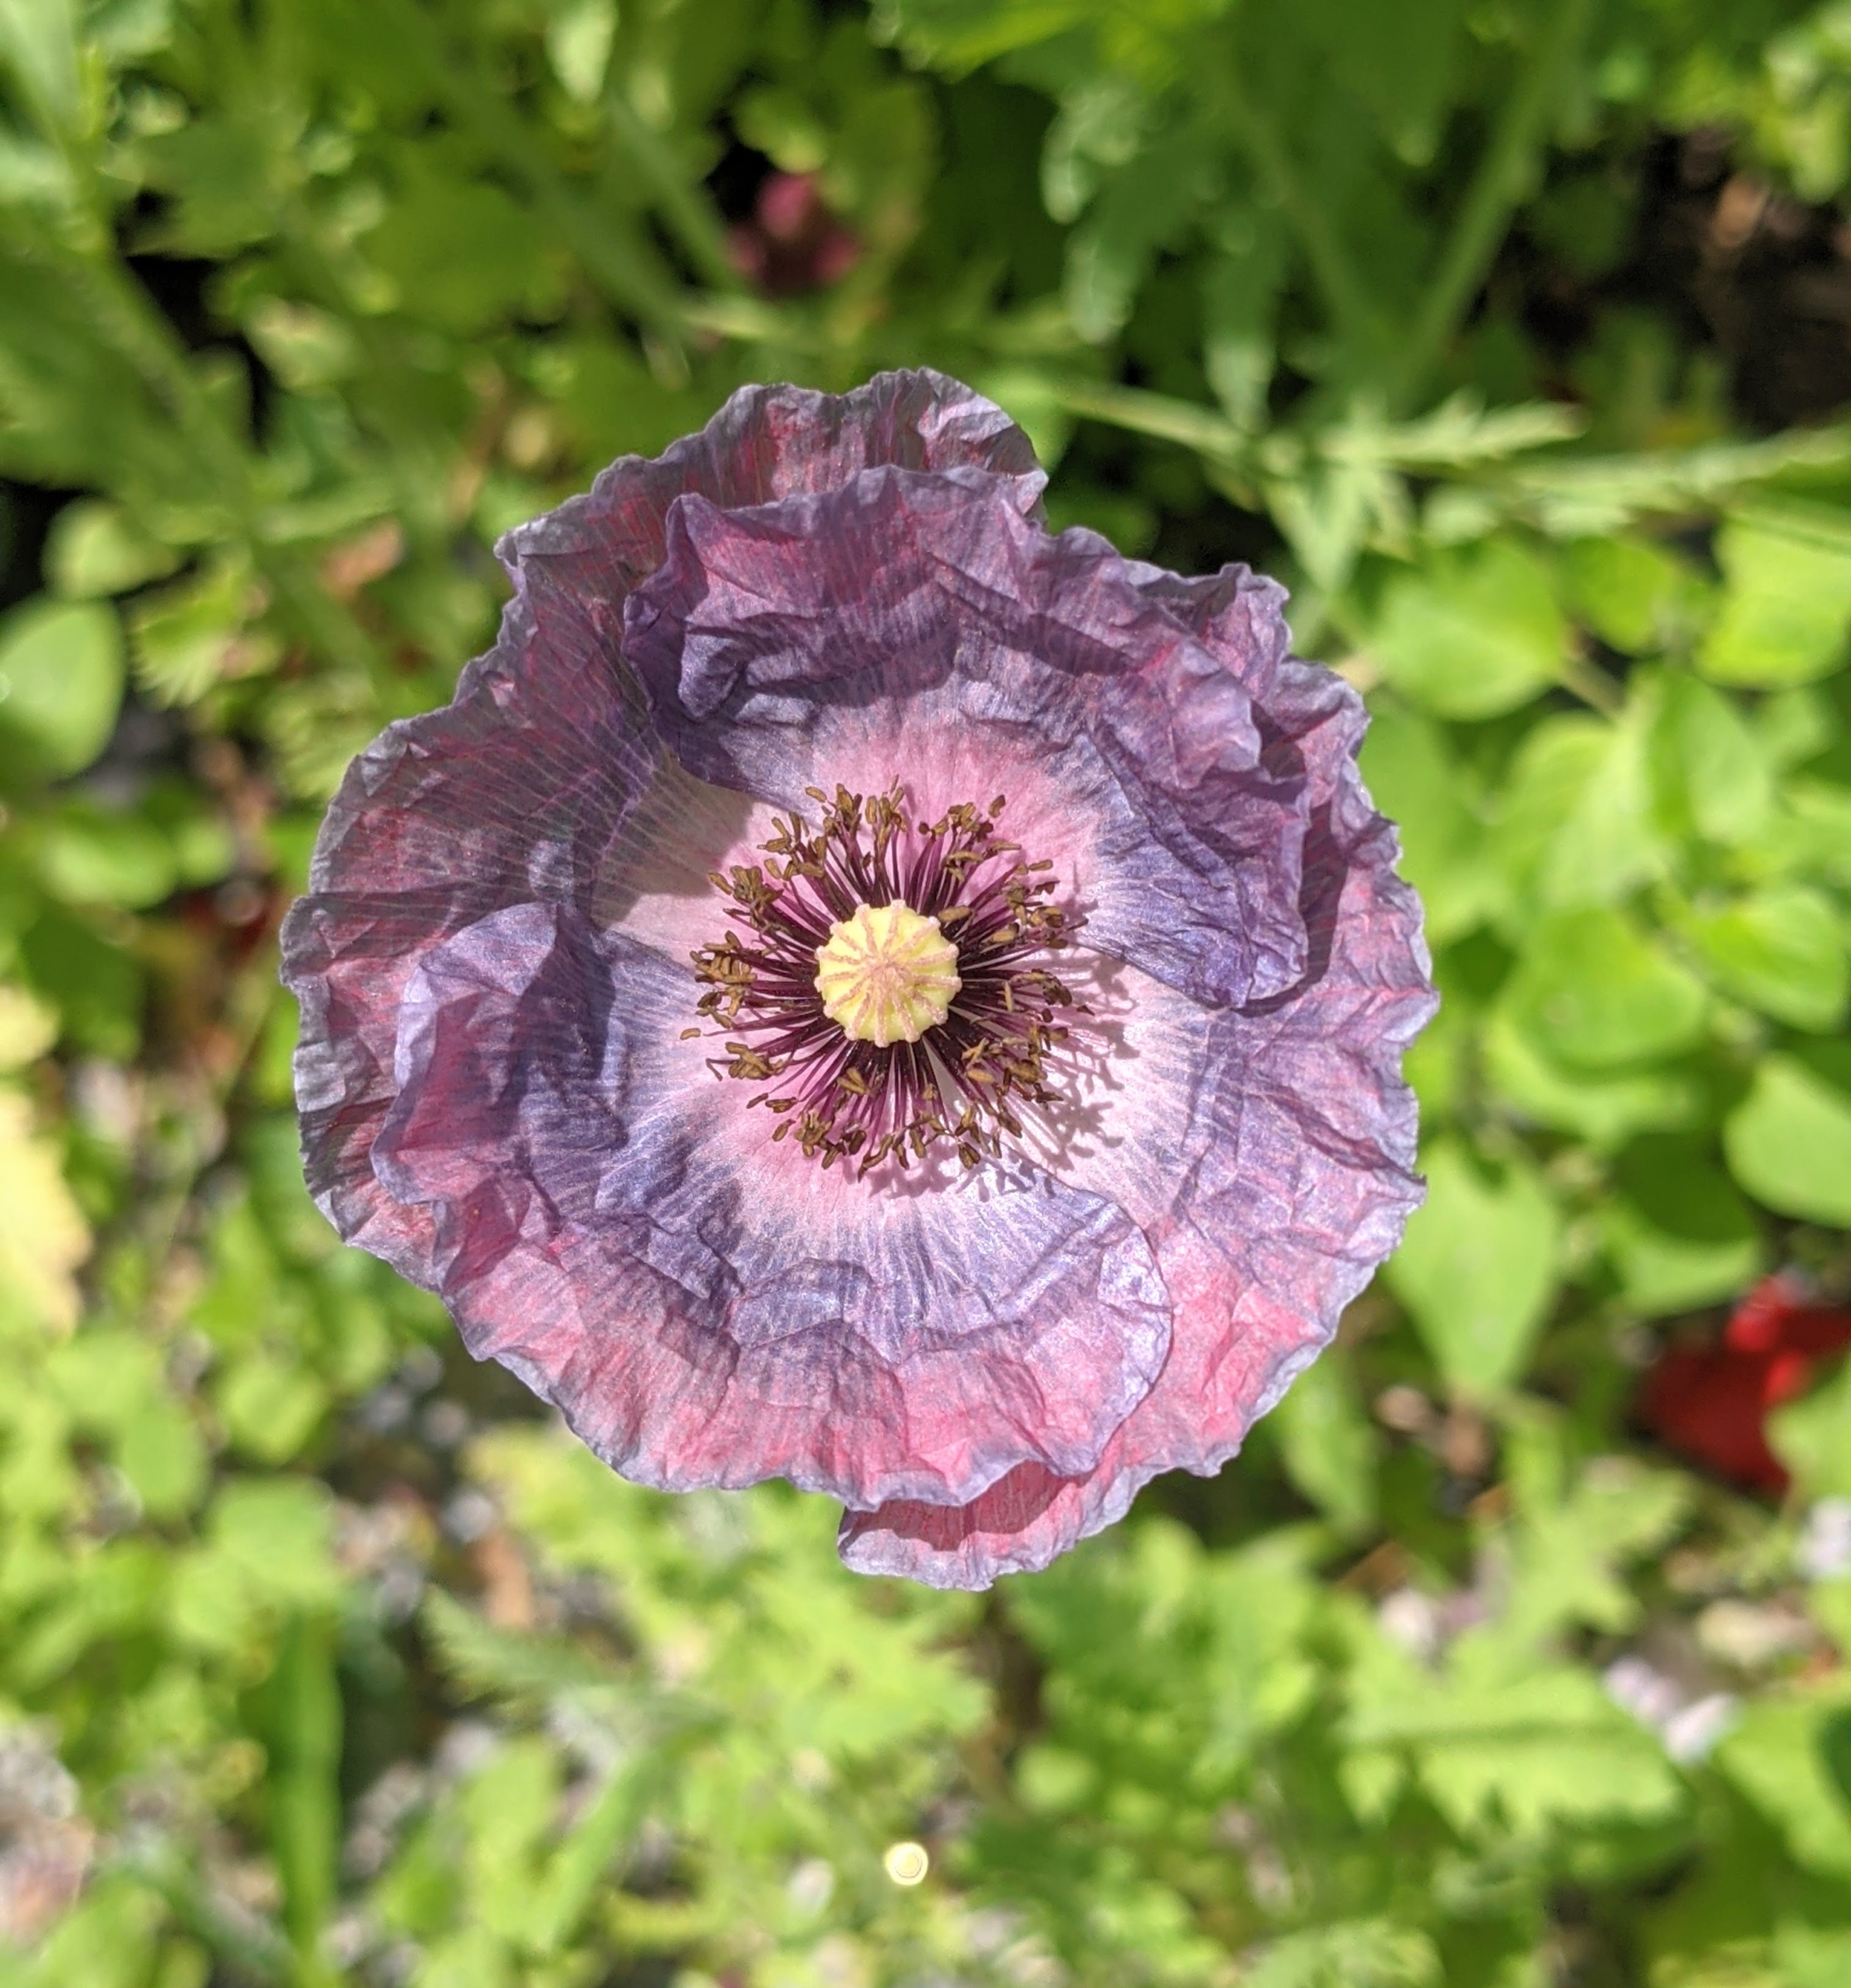
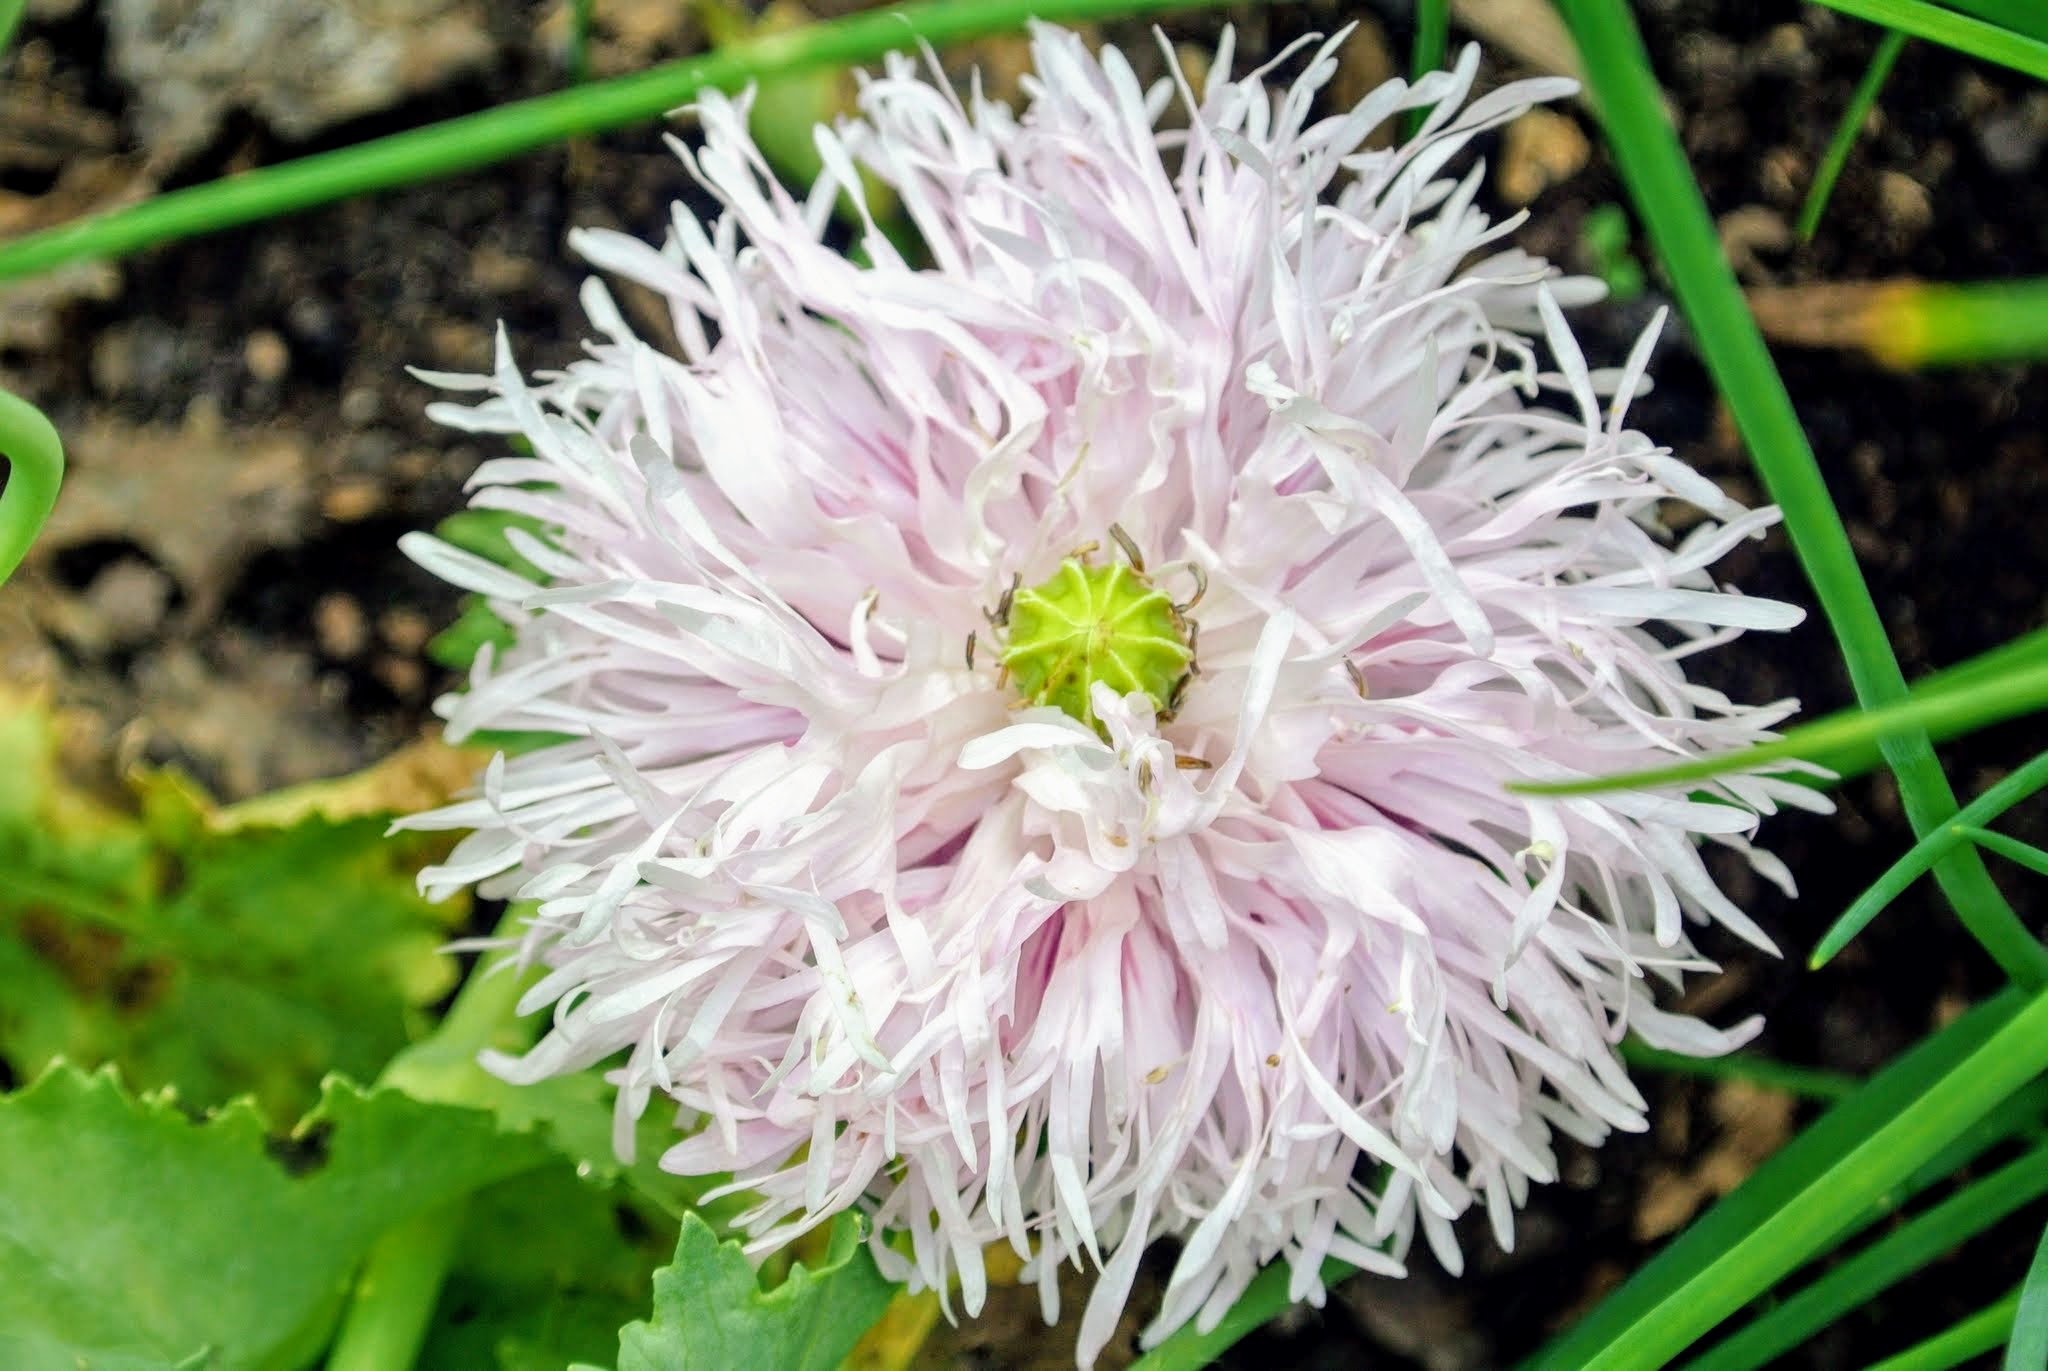
This lavender bloom has both frilly and shaggy petals adding lots of texture to the garden.
This poppy is smaller, more dainty, and more tissue paper-like in appearance. The gray tones are a favorite.
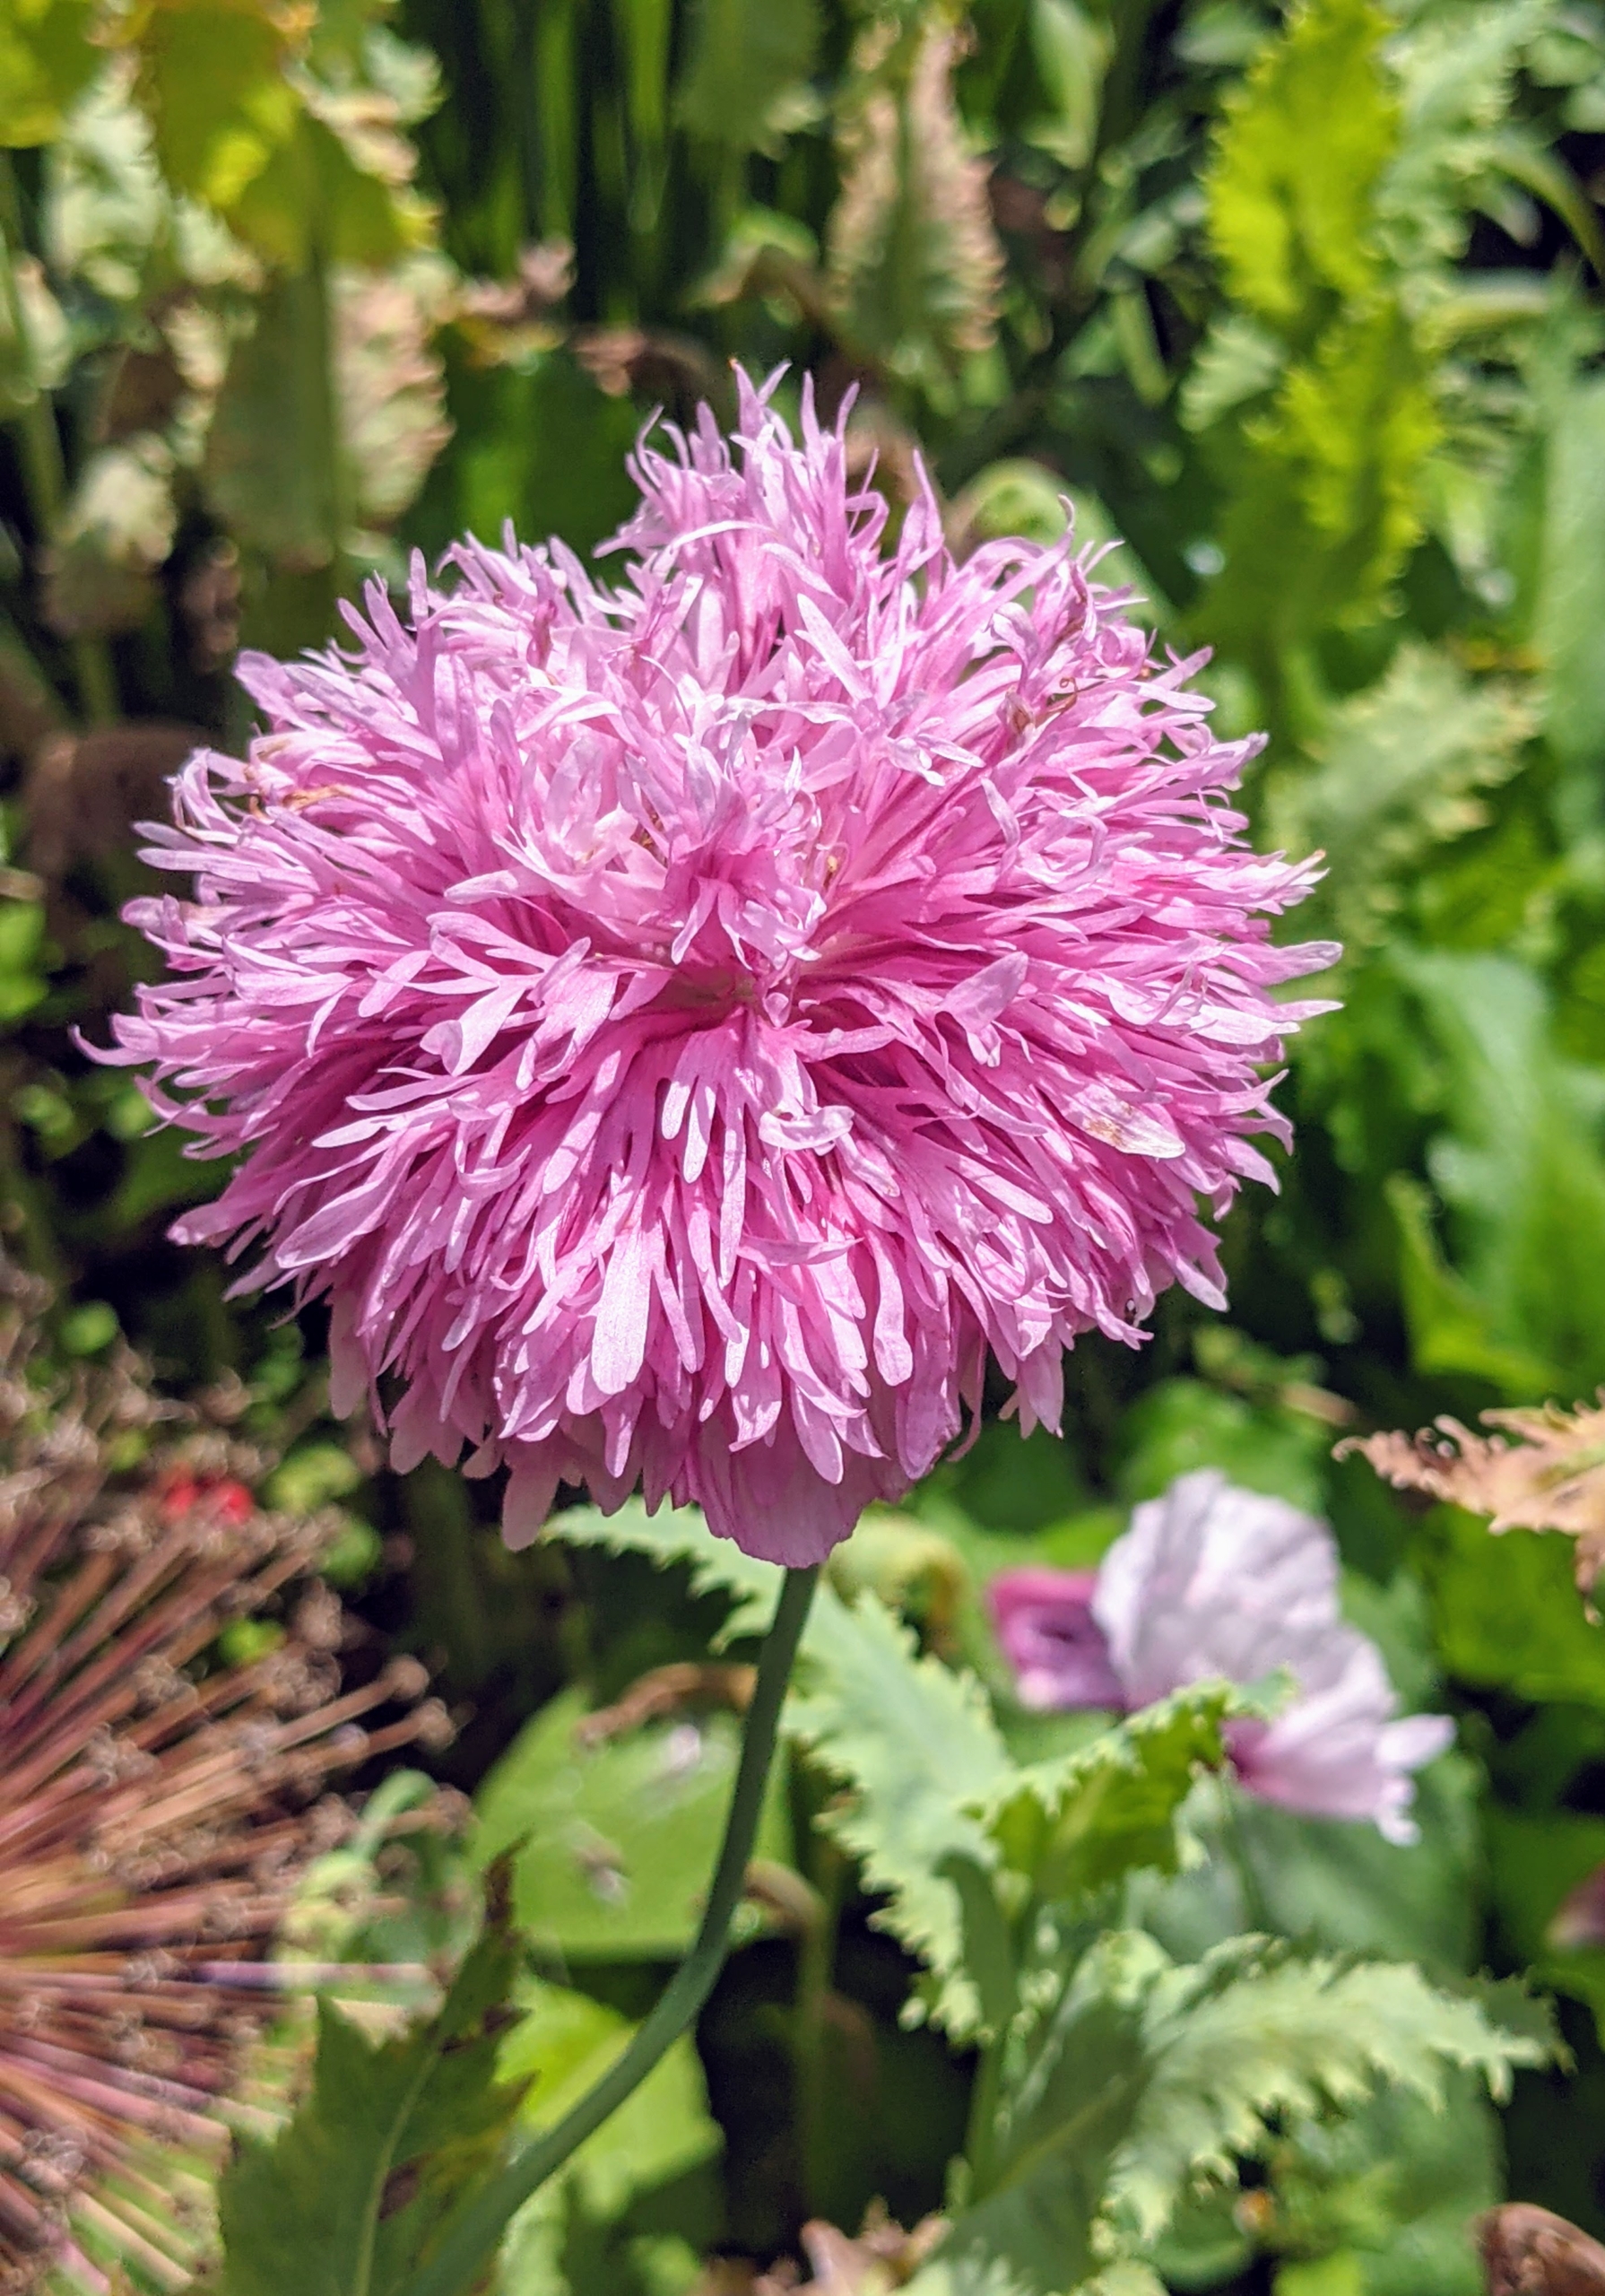
One of the more unique poppies is this pompom variety with amazing double and semi-double flowers in a delicate lilac color. The large, frilly blooms are truly eye-catching.
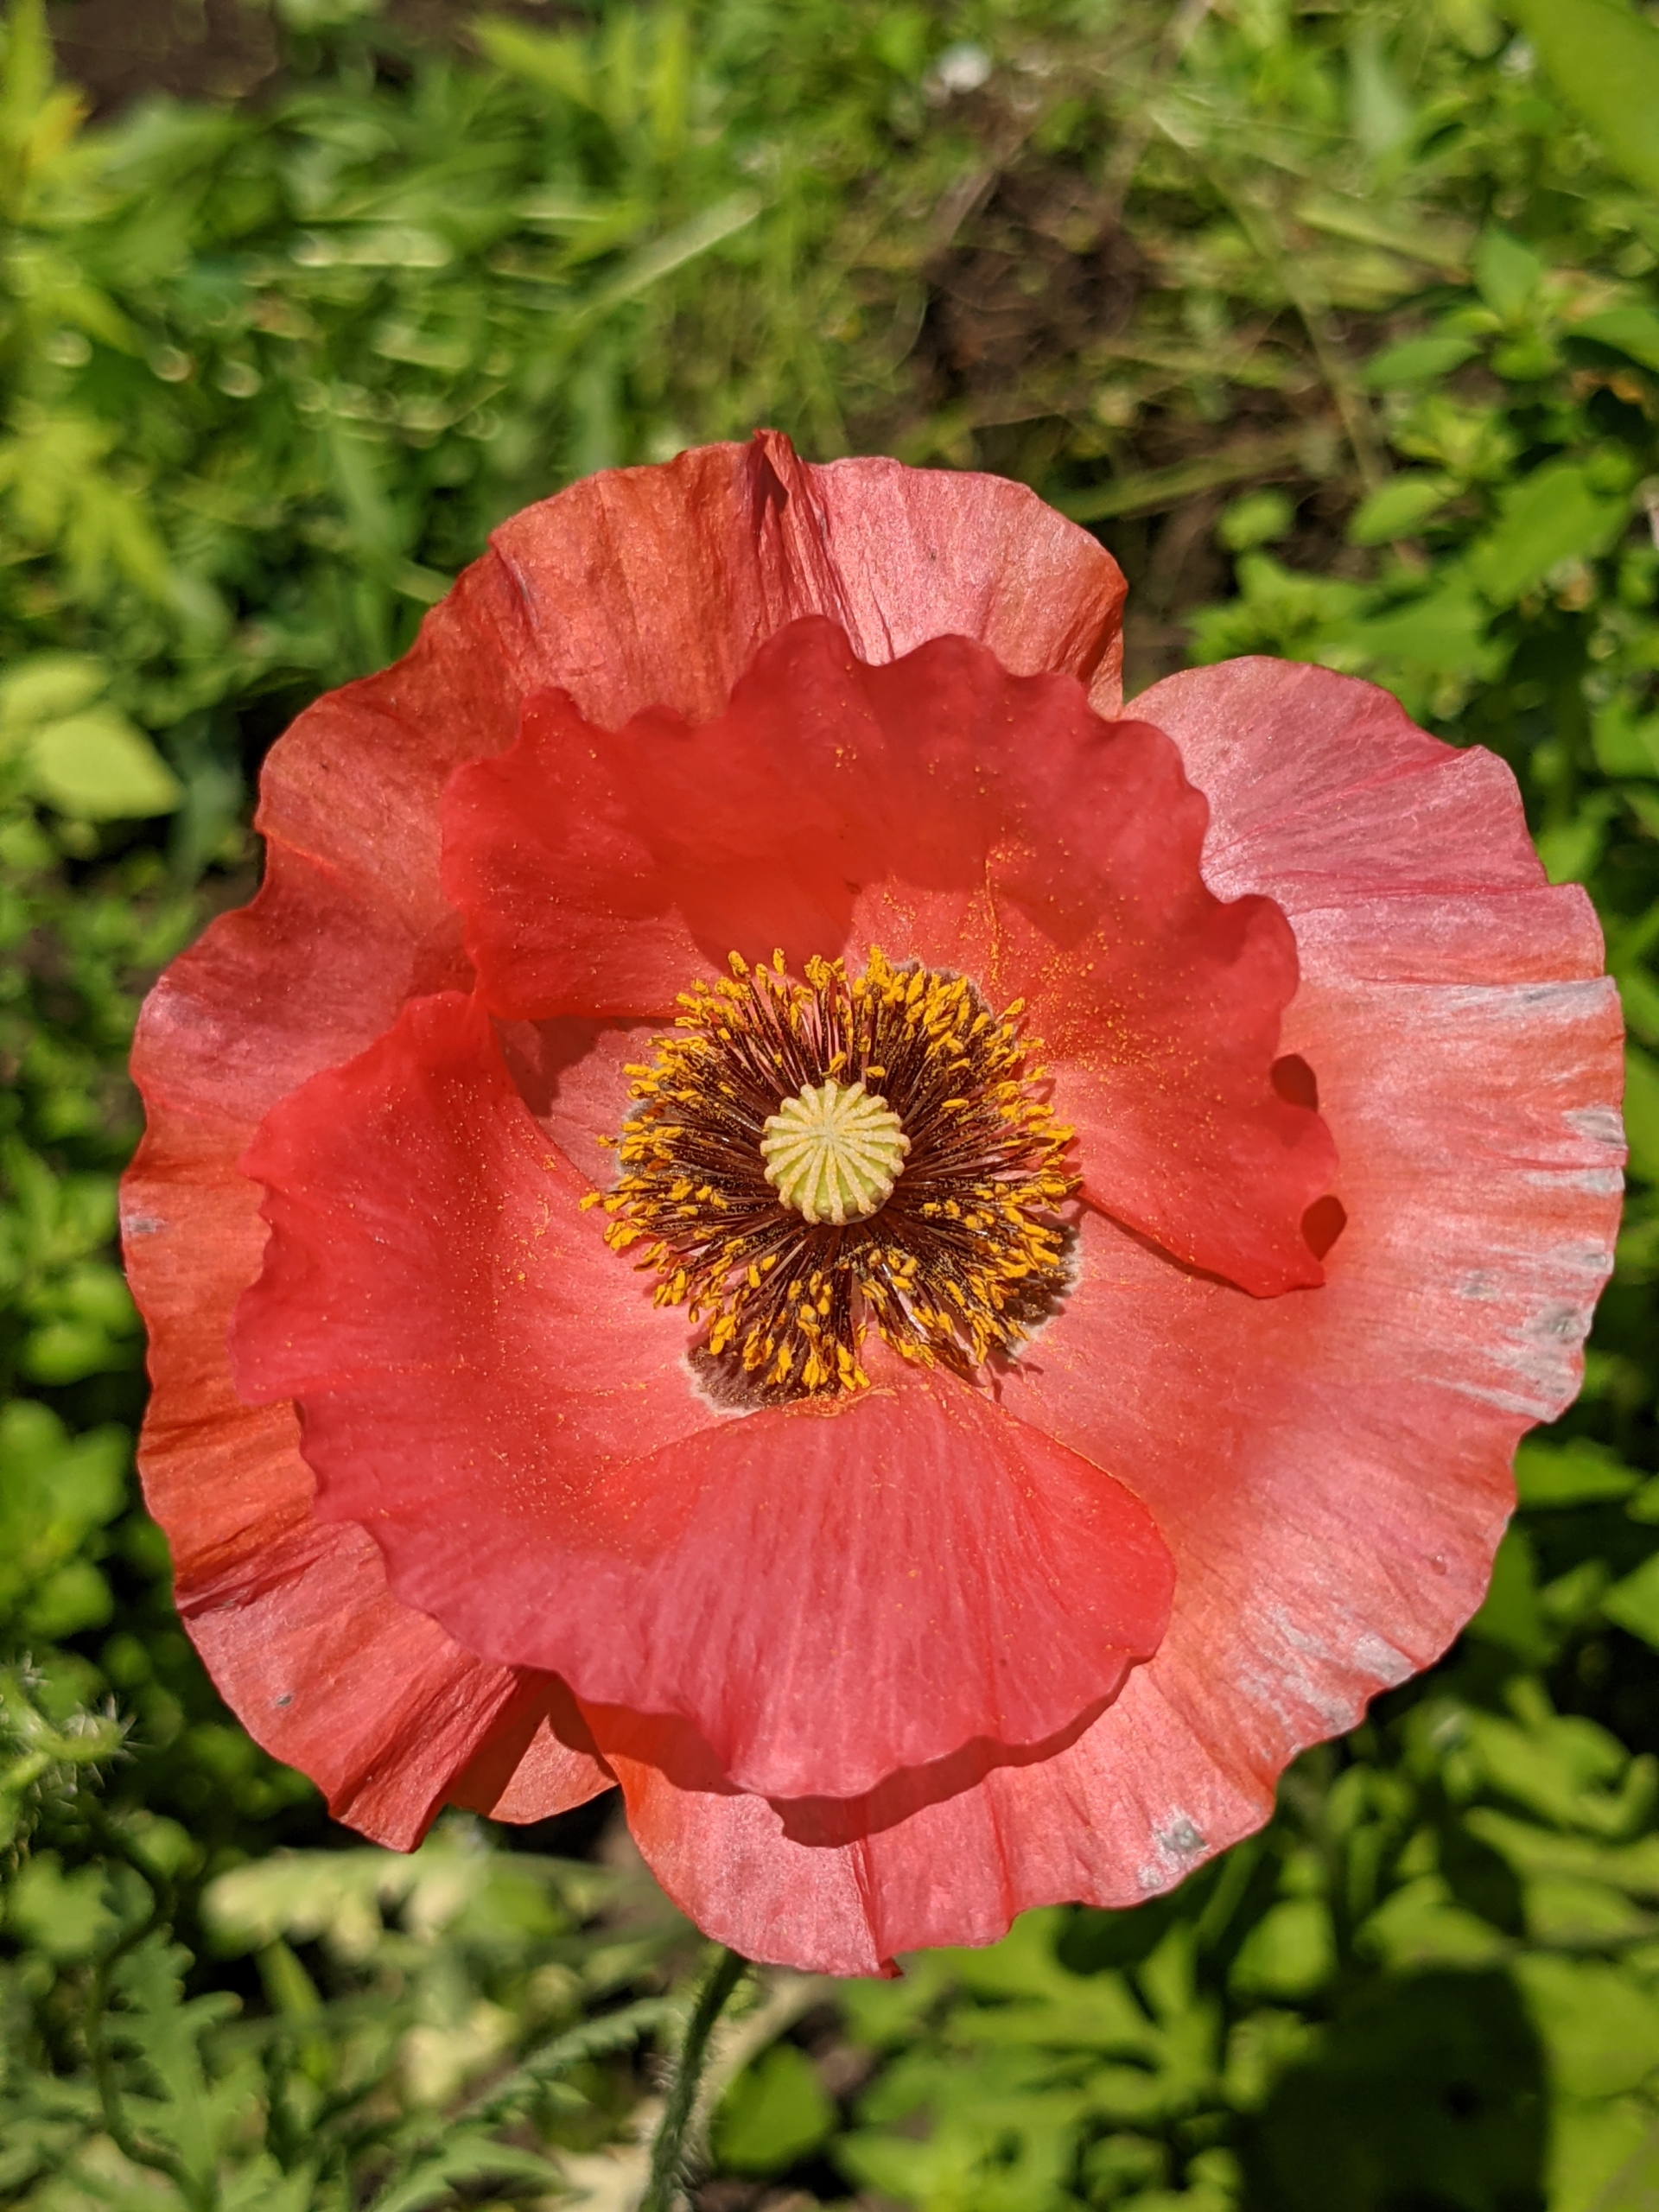
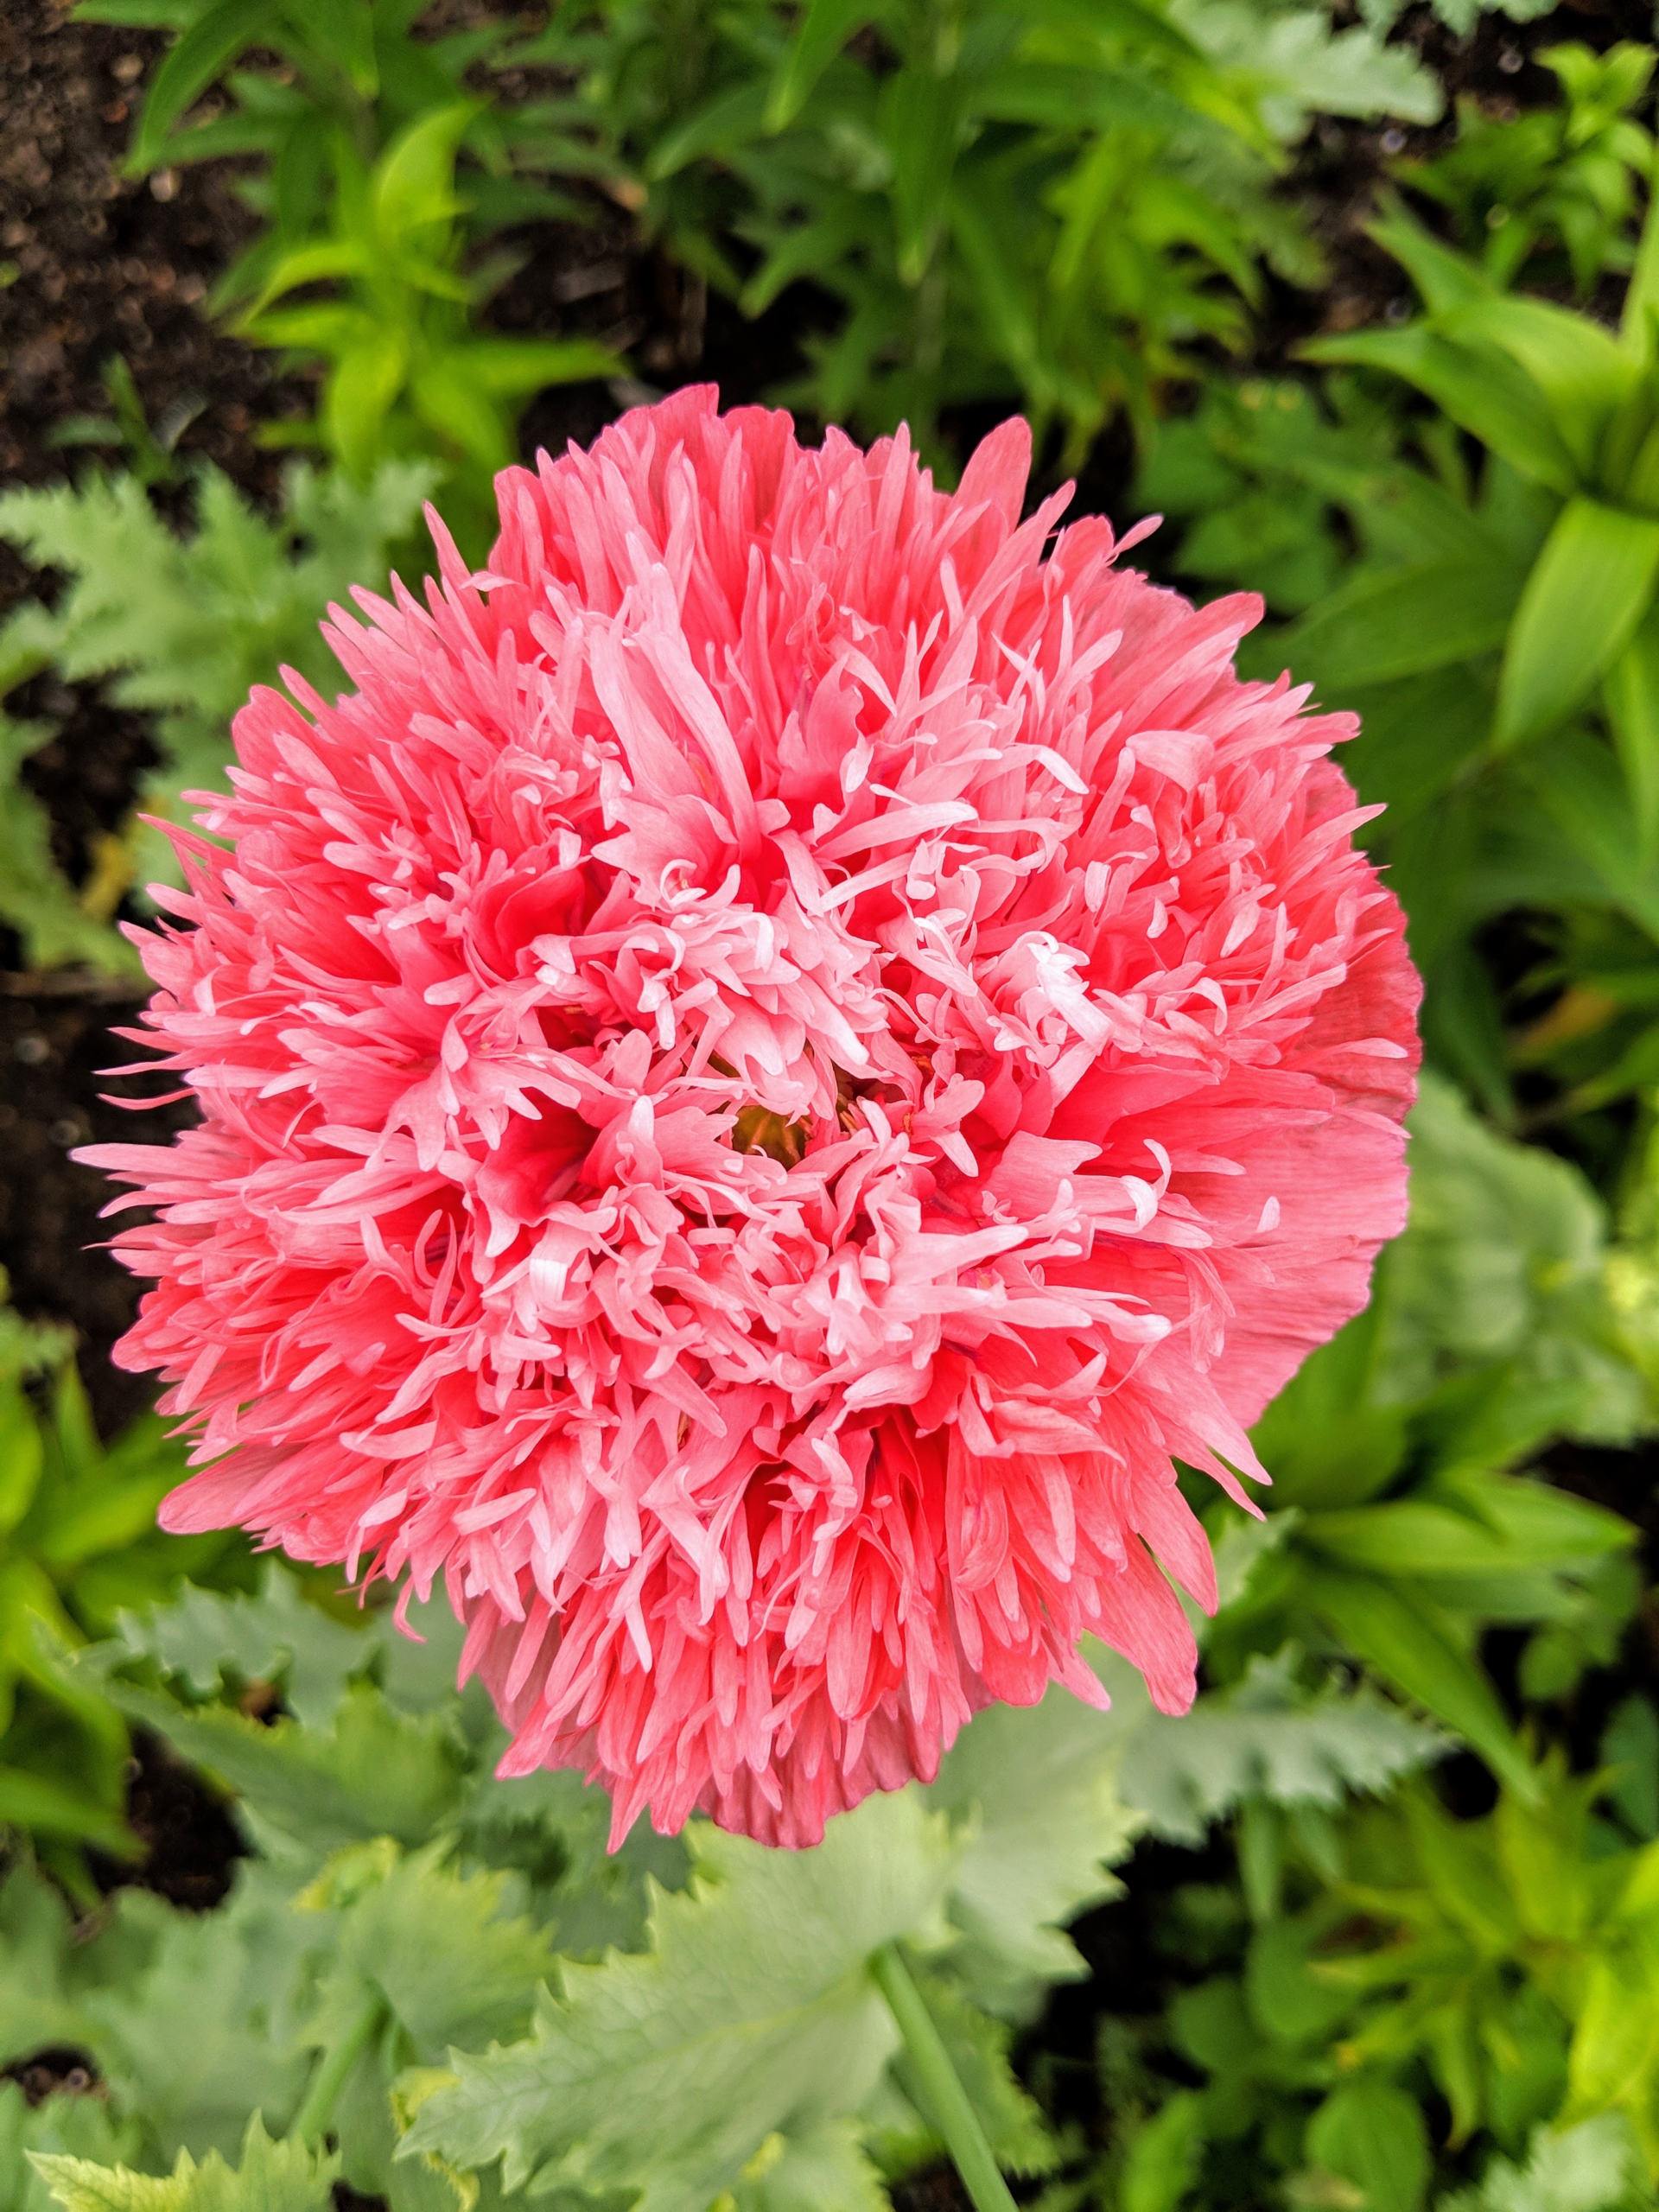
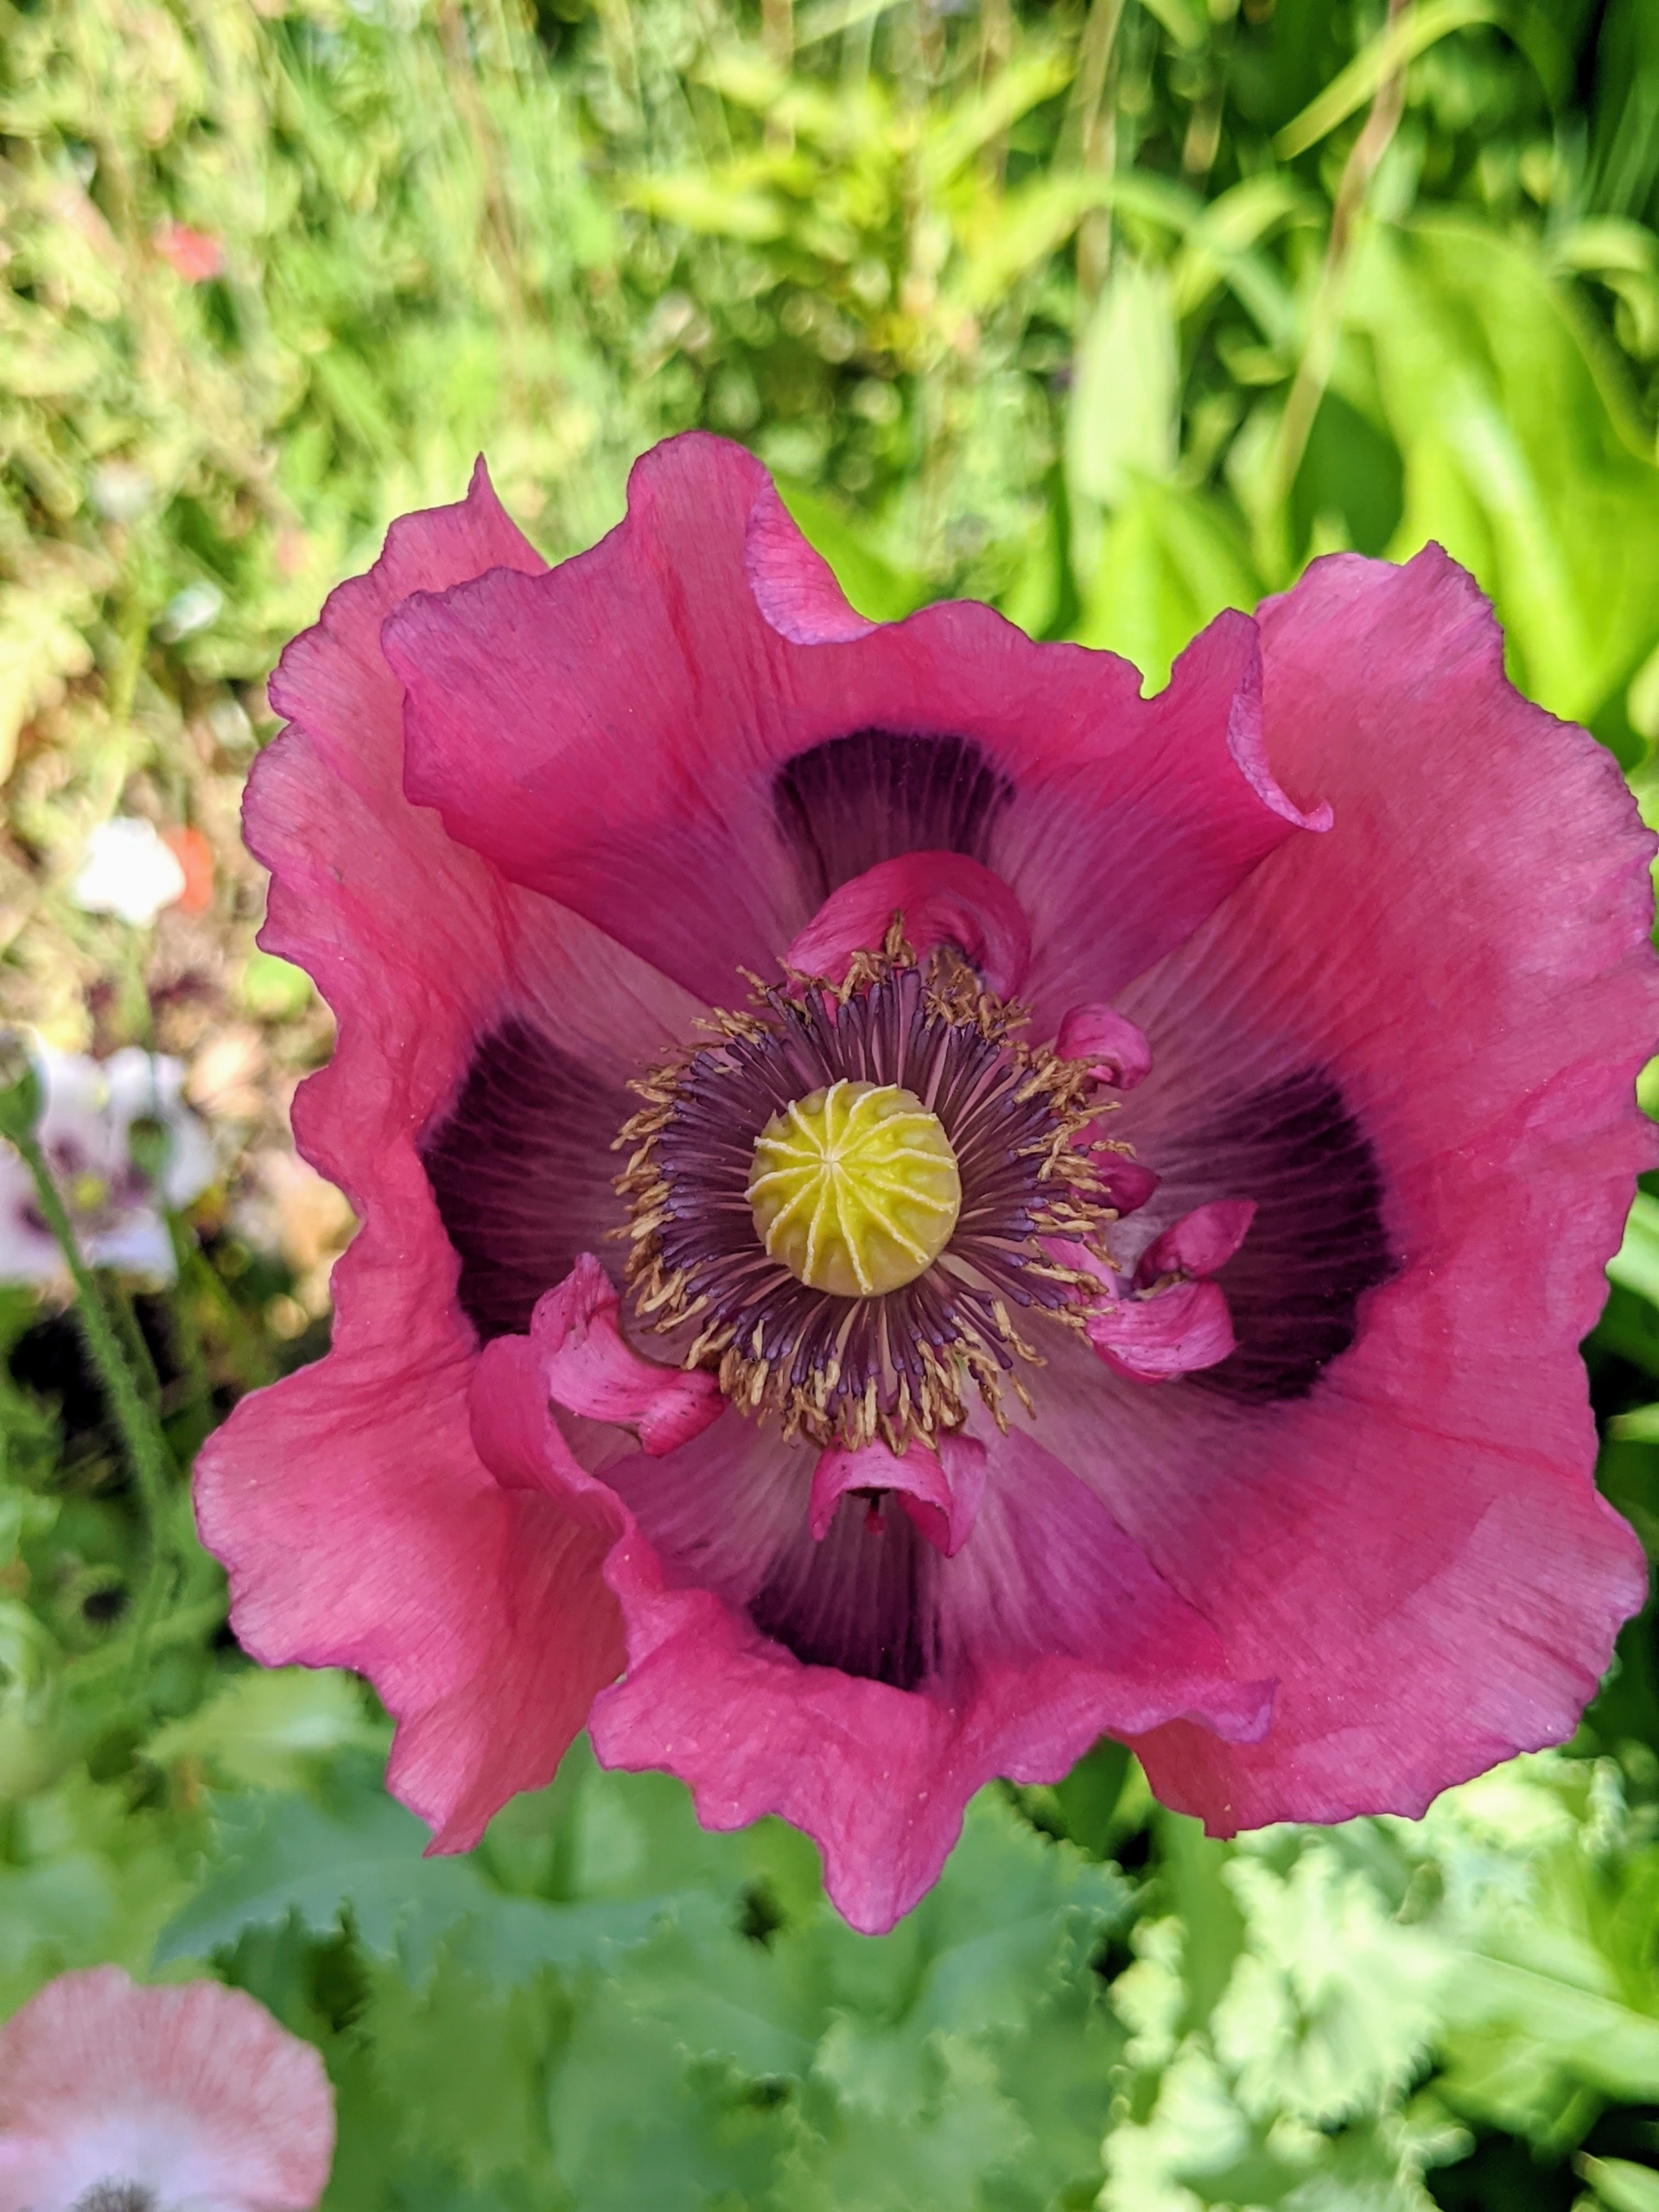
Here’s another in a more salmon color. Though flowers are packed full of petals, their stems are strong enough to support the weight.
And here is another poppy in light pink with a bright green center.
Poppy flowers are attractive to pollinators such as bees, butterflies, and hummingbirds.
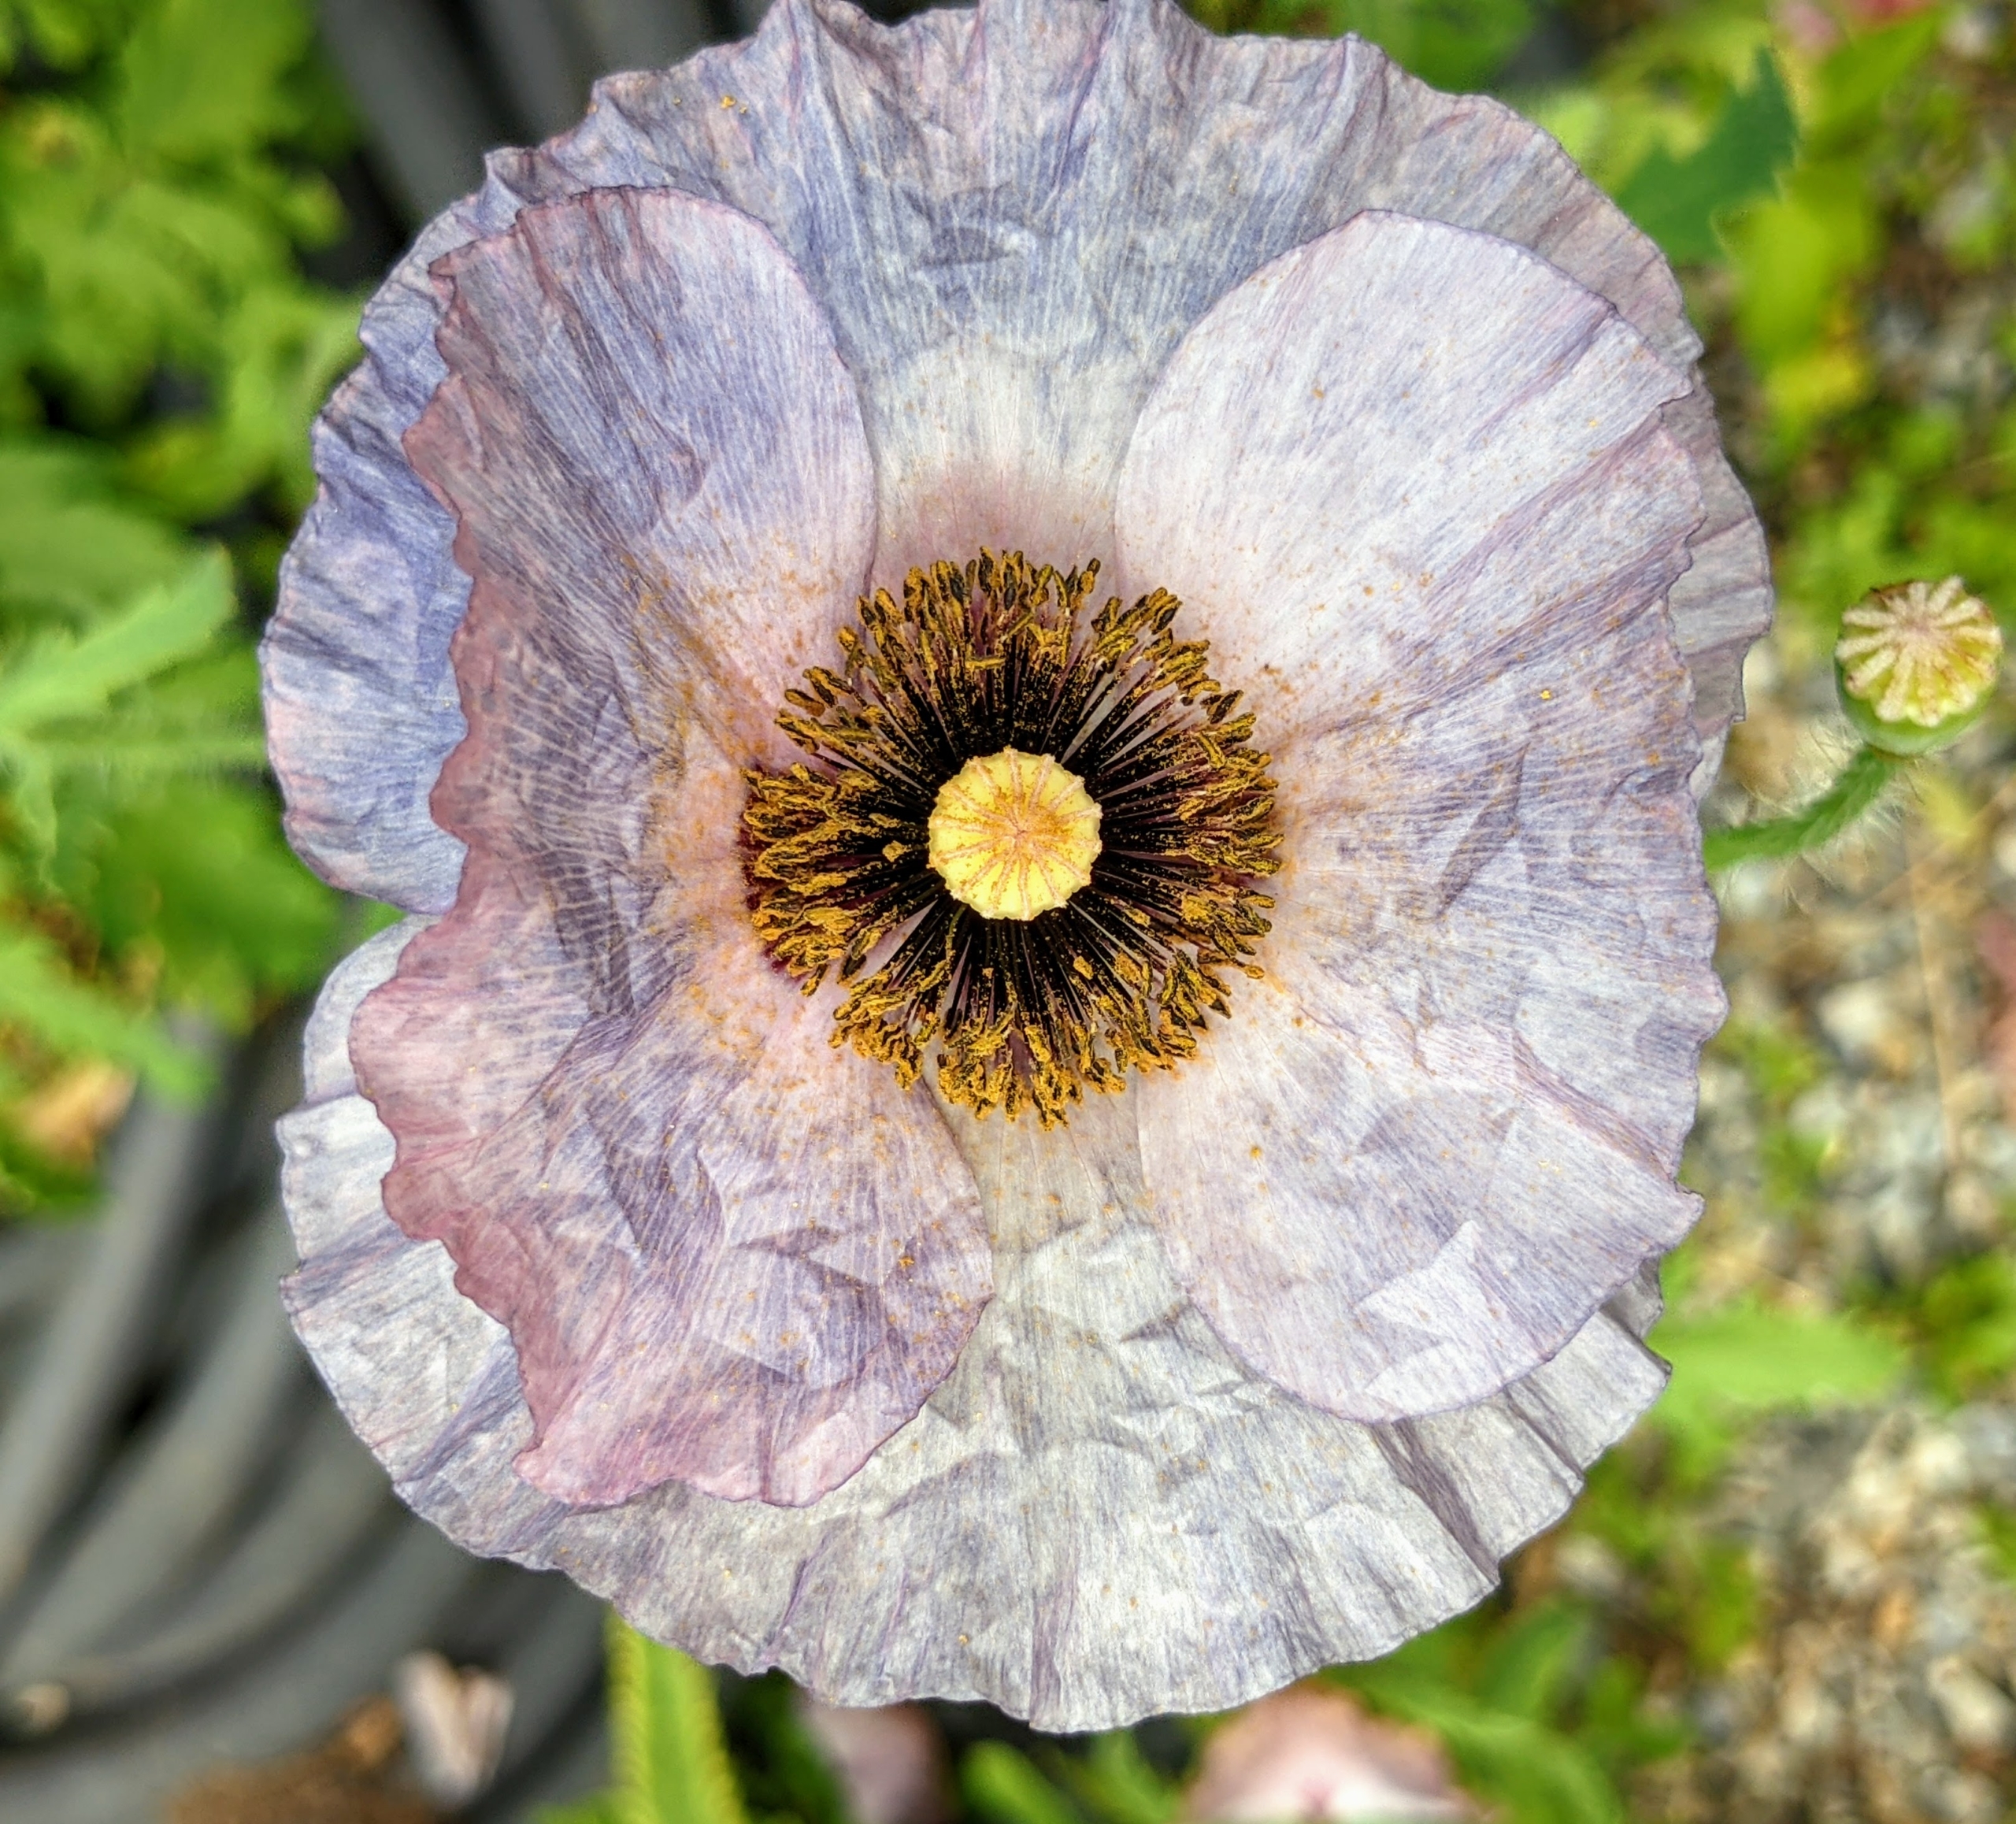
Poppies come in a variety colors including purple, white, lilac, pink, yellow, orange, red, blue, and gray.
Never eat poppies. Most poppies are toxic to varying degrees. Virtually all species contain alkaloid compounds that are poisonous and can cause terrible side effects in both humans and pets.
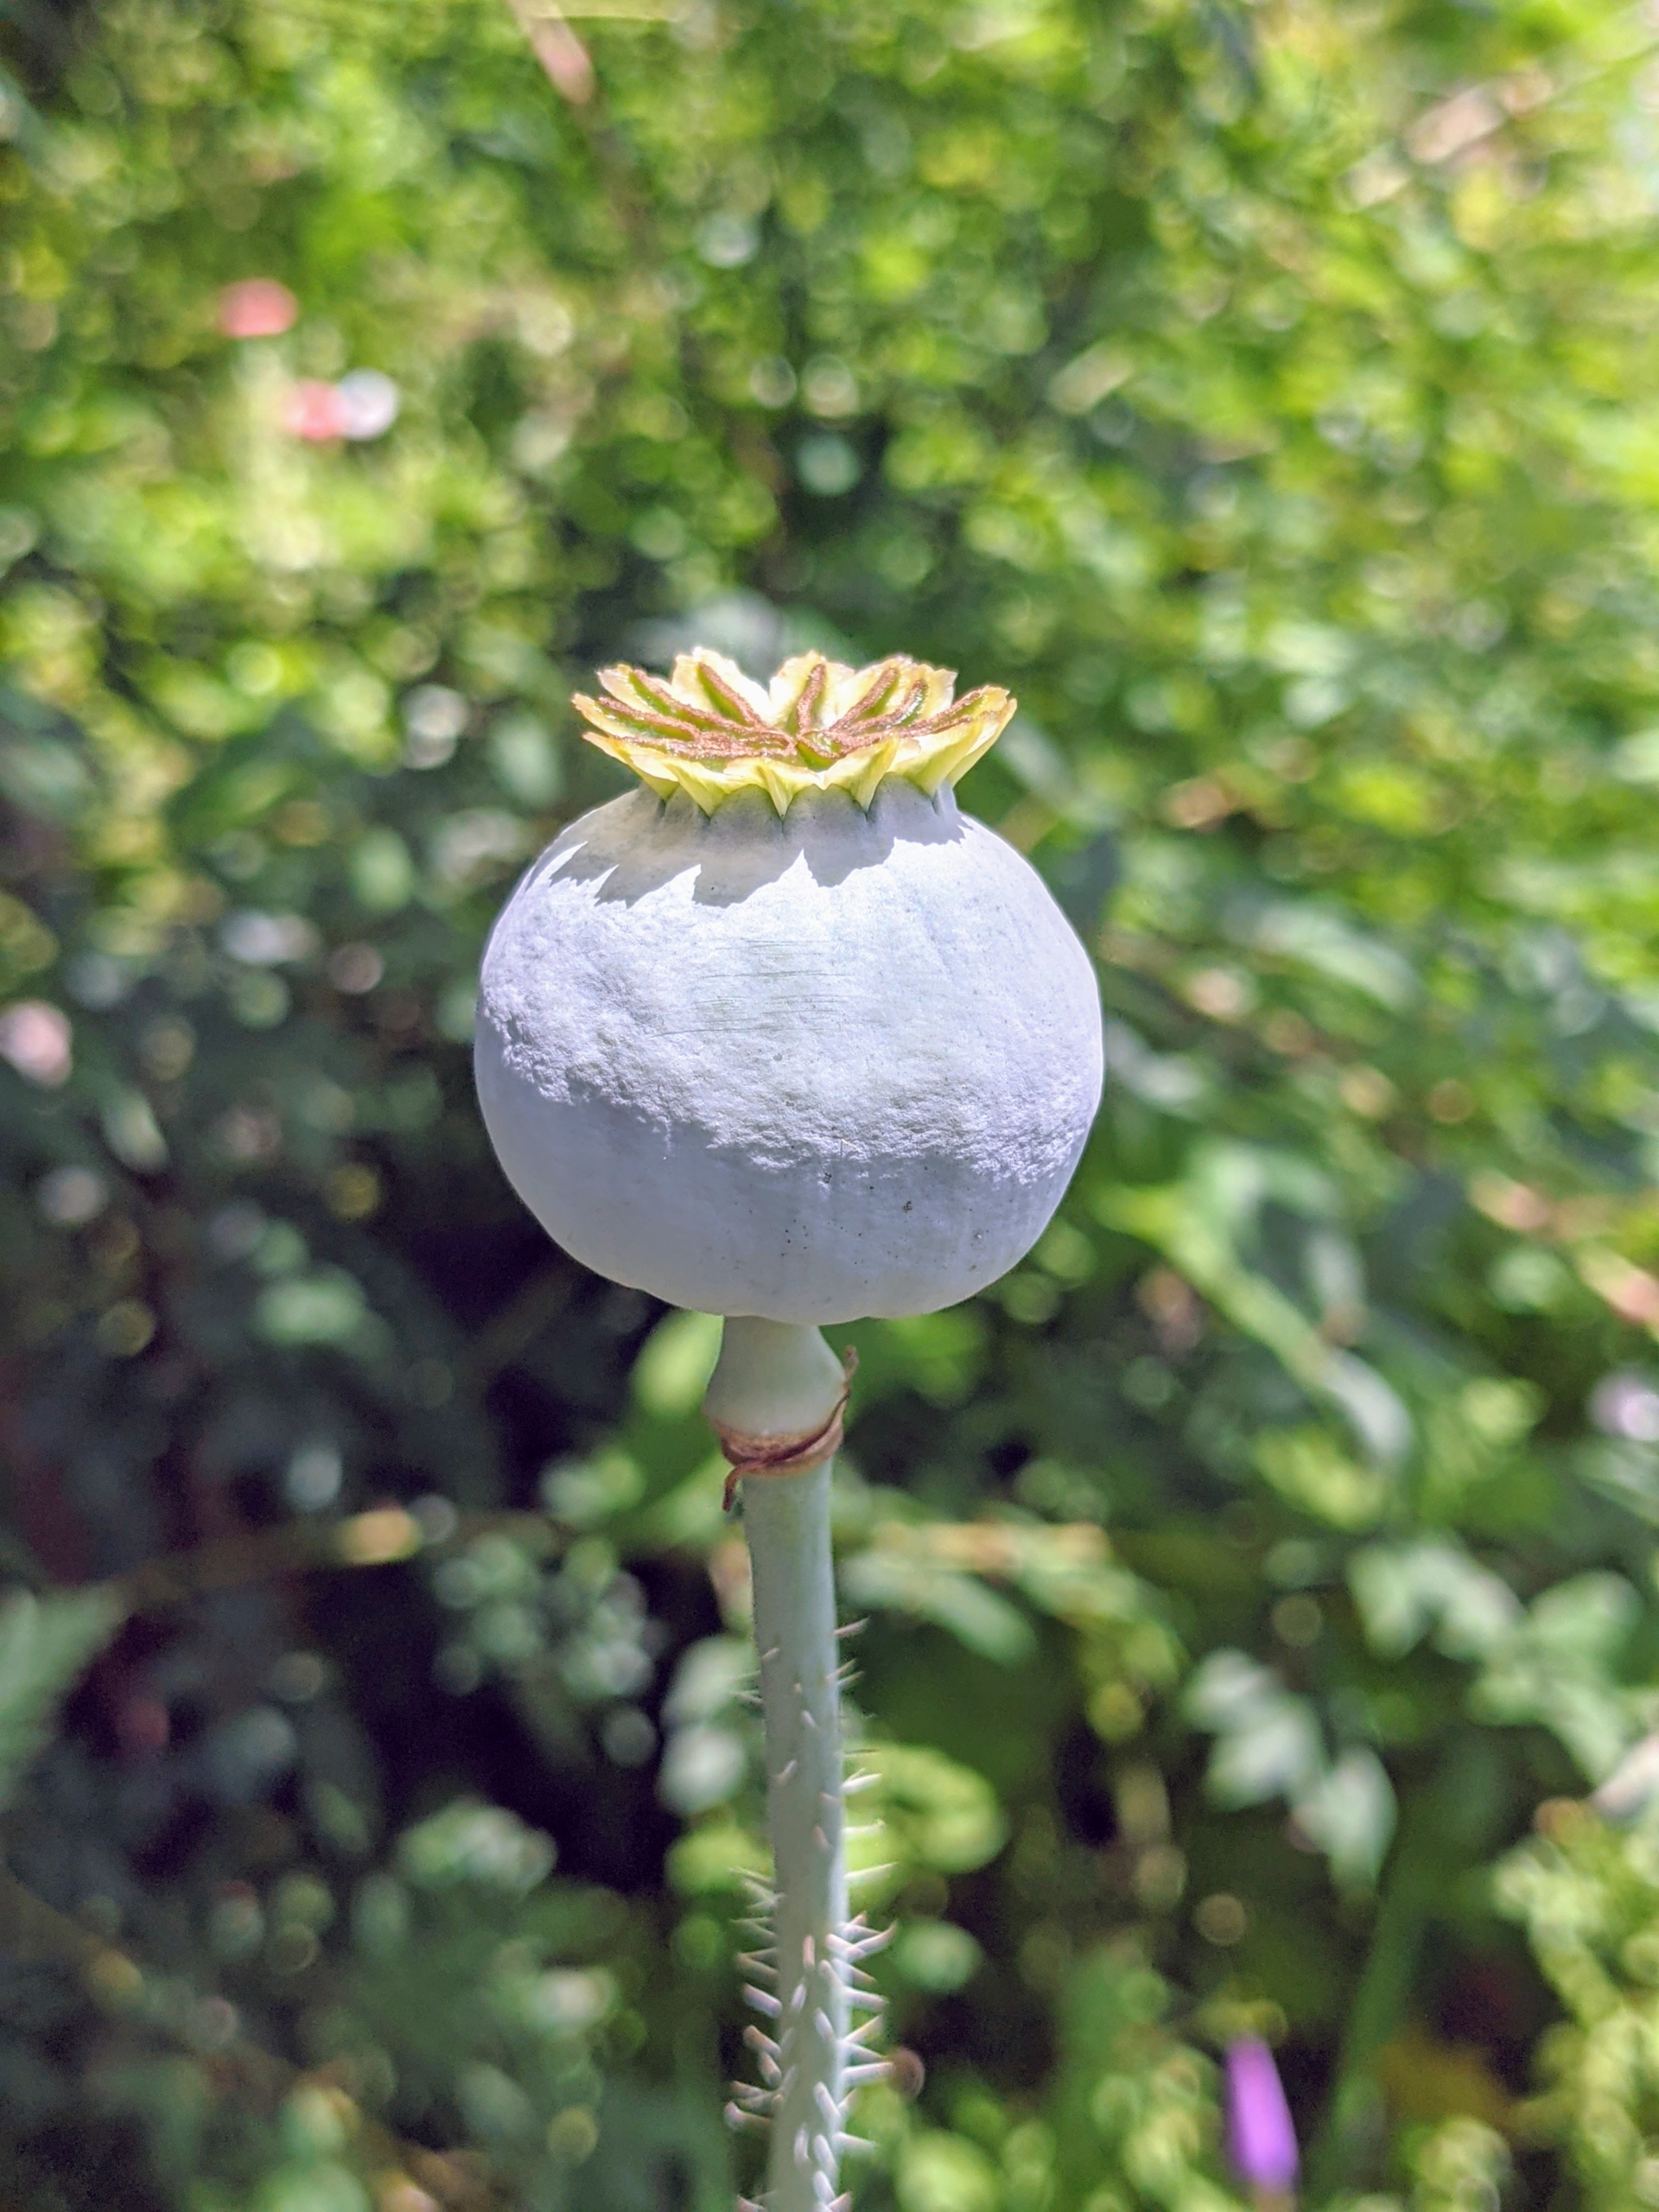
The sepals usually drop off as the petals unfold. The ovary develops into a spherical capsule topped by a disk formed by the stigmas.
Here is the poppy seed pod capsule, which is what’s left on the stem once the flower blooms. When the seed heads turn brown, they are cut and the seeds inside are harvested and saved until they can be planted in the garden the following year. What are your favorite poppies?
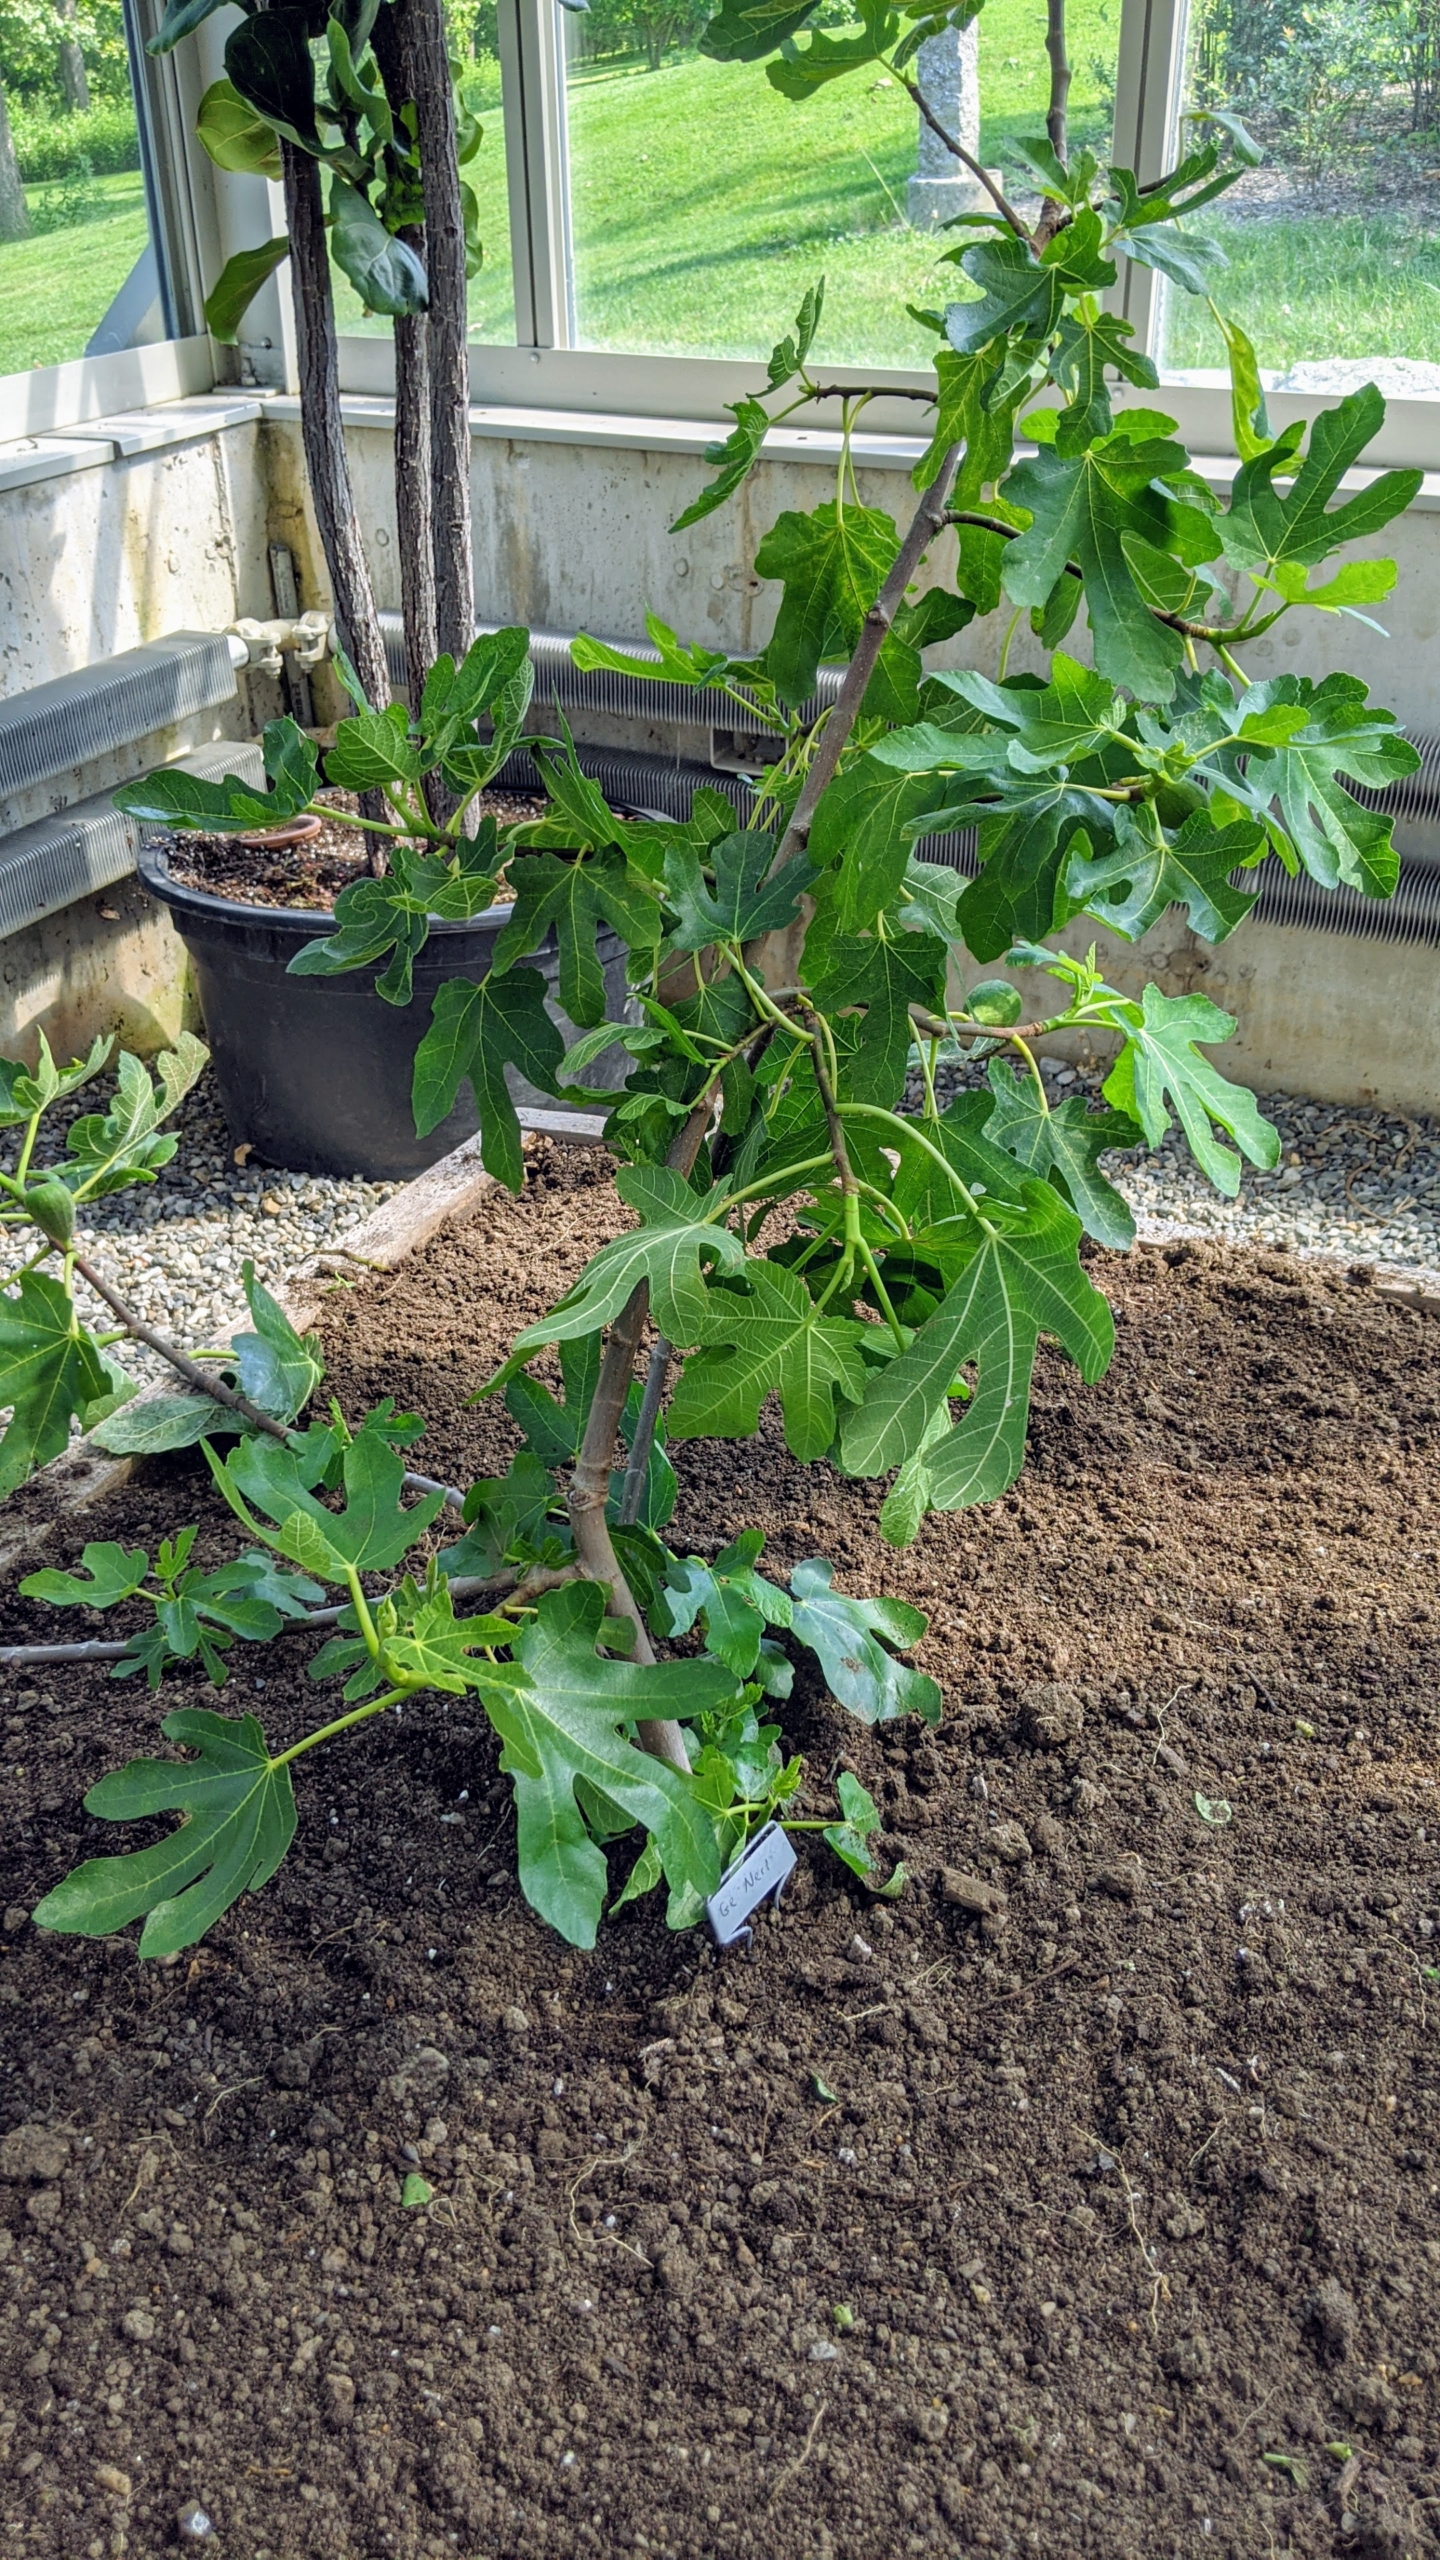
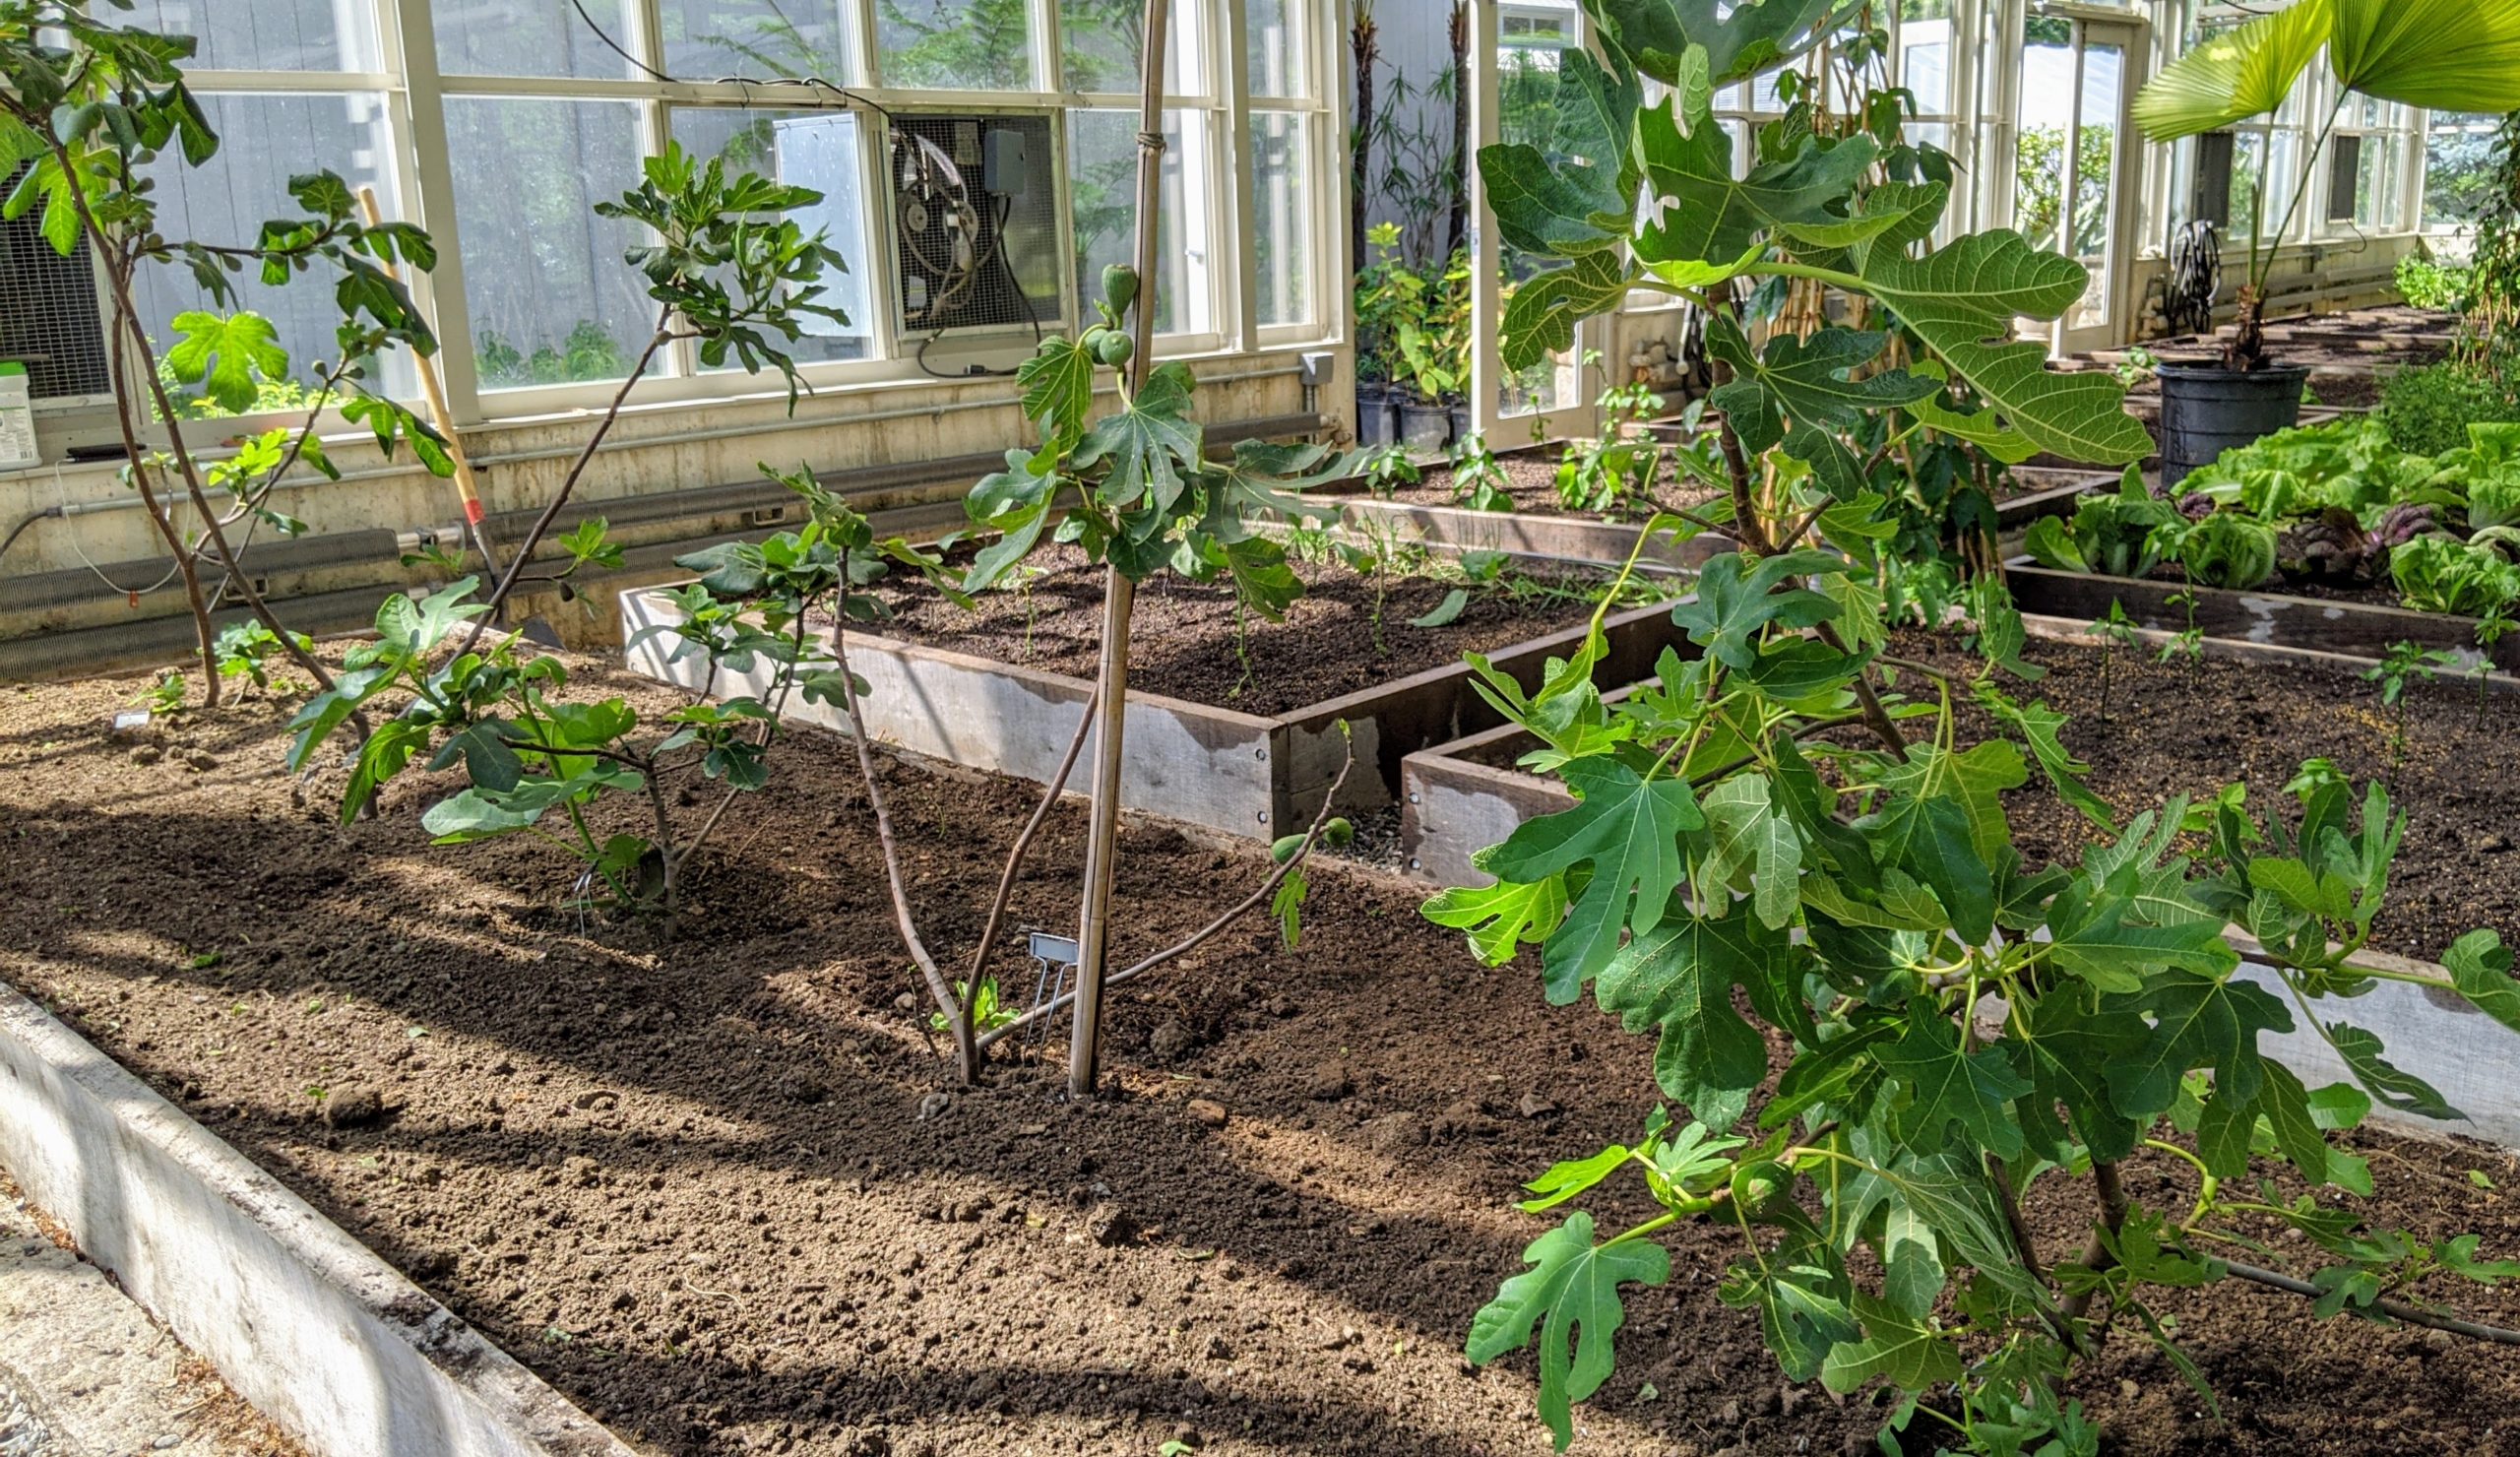
Fresh, organic, sweet figs will soon be ripening in my vegetable greenhouse.
Figs, Ficus carica, are members of the mulberry family and are indigenous to Asiatic Turkey, northern India, and warm Mediterranean climates, where they thrive in full sun. Yesterday, my gardeners planted five of my fig trees in the vegetable greenhouse where they can live all year long in a controlled setting. If you enjoy growing an unusual fruit crop that’s delicious and nearly trouble free, consider figs. Figs will grow well unprotected in zones 8 to 10, and also in colder areas if given good care and proper winter protection.
Enjoy these photos.
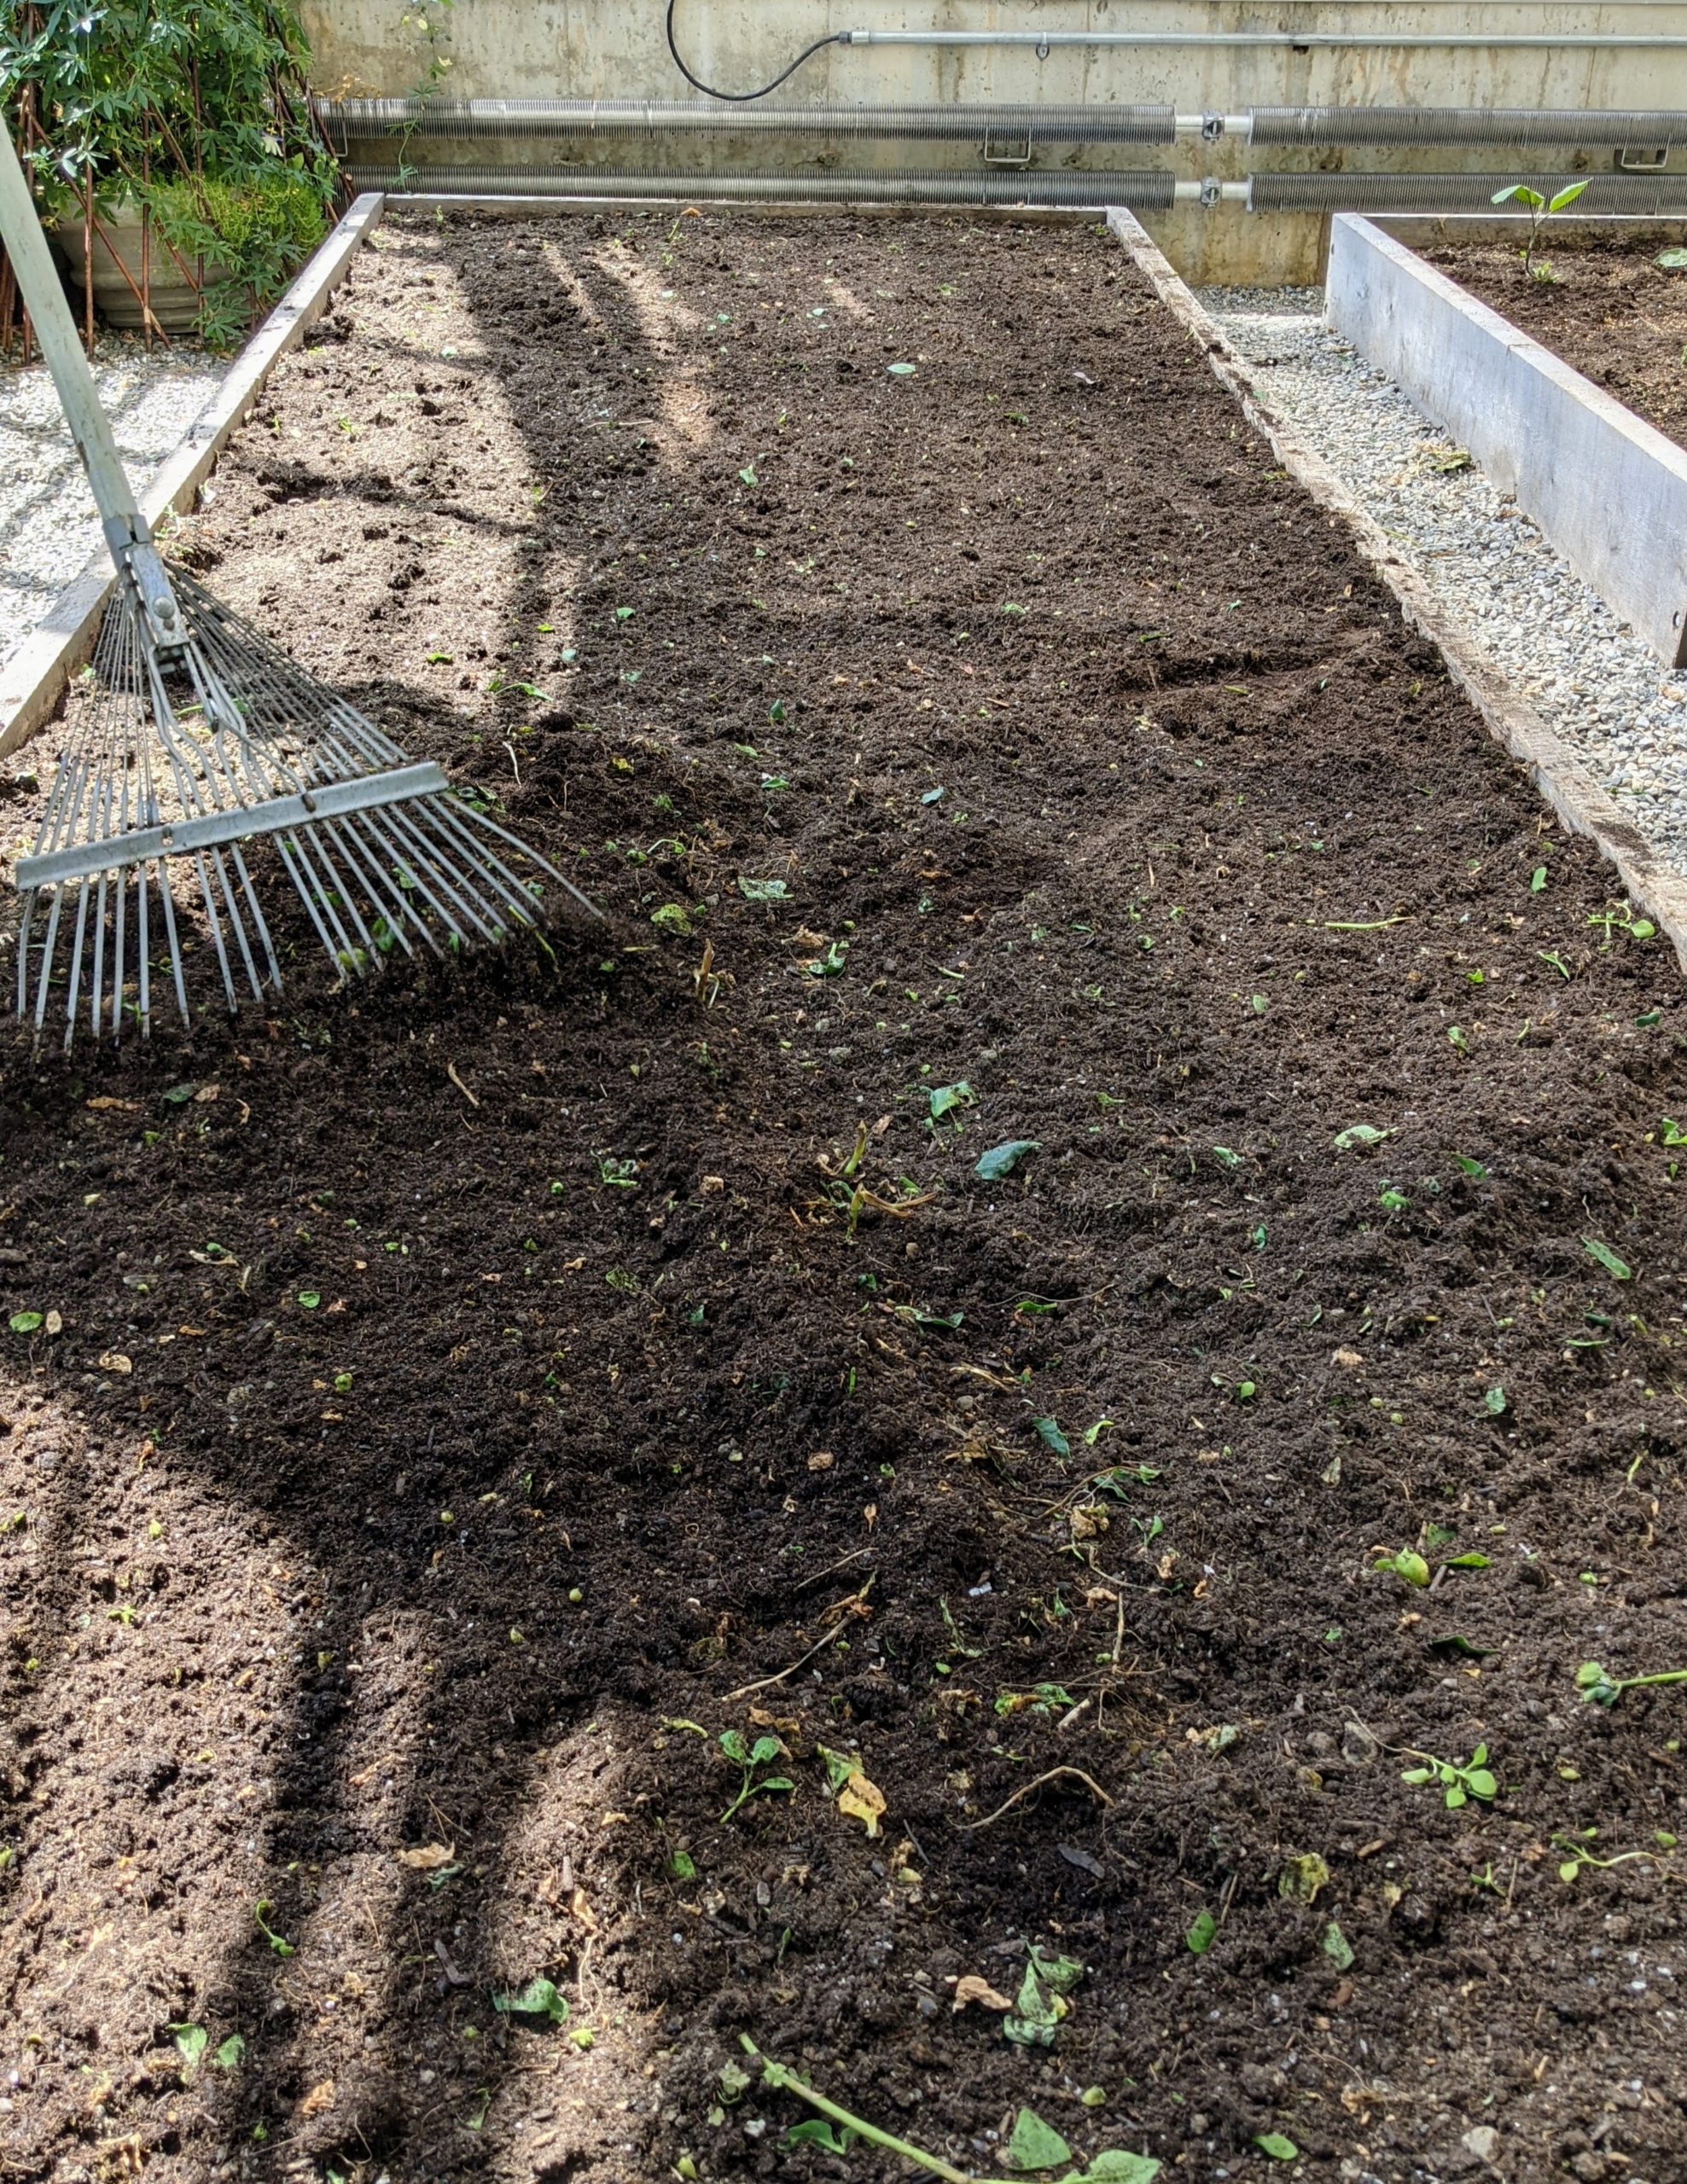
Before the figs are planted, Brian cleans the bed and pulls out any last remaining crops and and weeds. This vegetable greenhouse is a special greenhouse I had constructed several years ago that was inspired by Eliot Coleman, an expert in four-season farming. I constructed 16 wooden garden boxes to fit the entire length and width of the space. Raised bed gardening allows good drainage, prevents soil compaction, and provides protection for those plants that may otherwise get trampled.
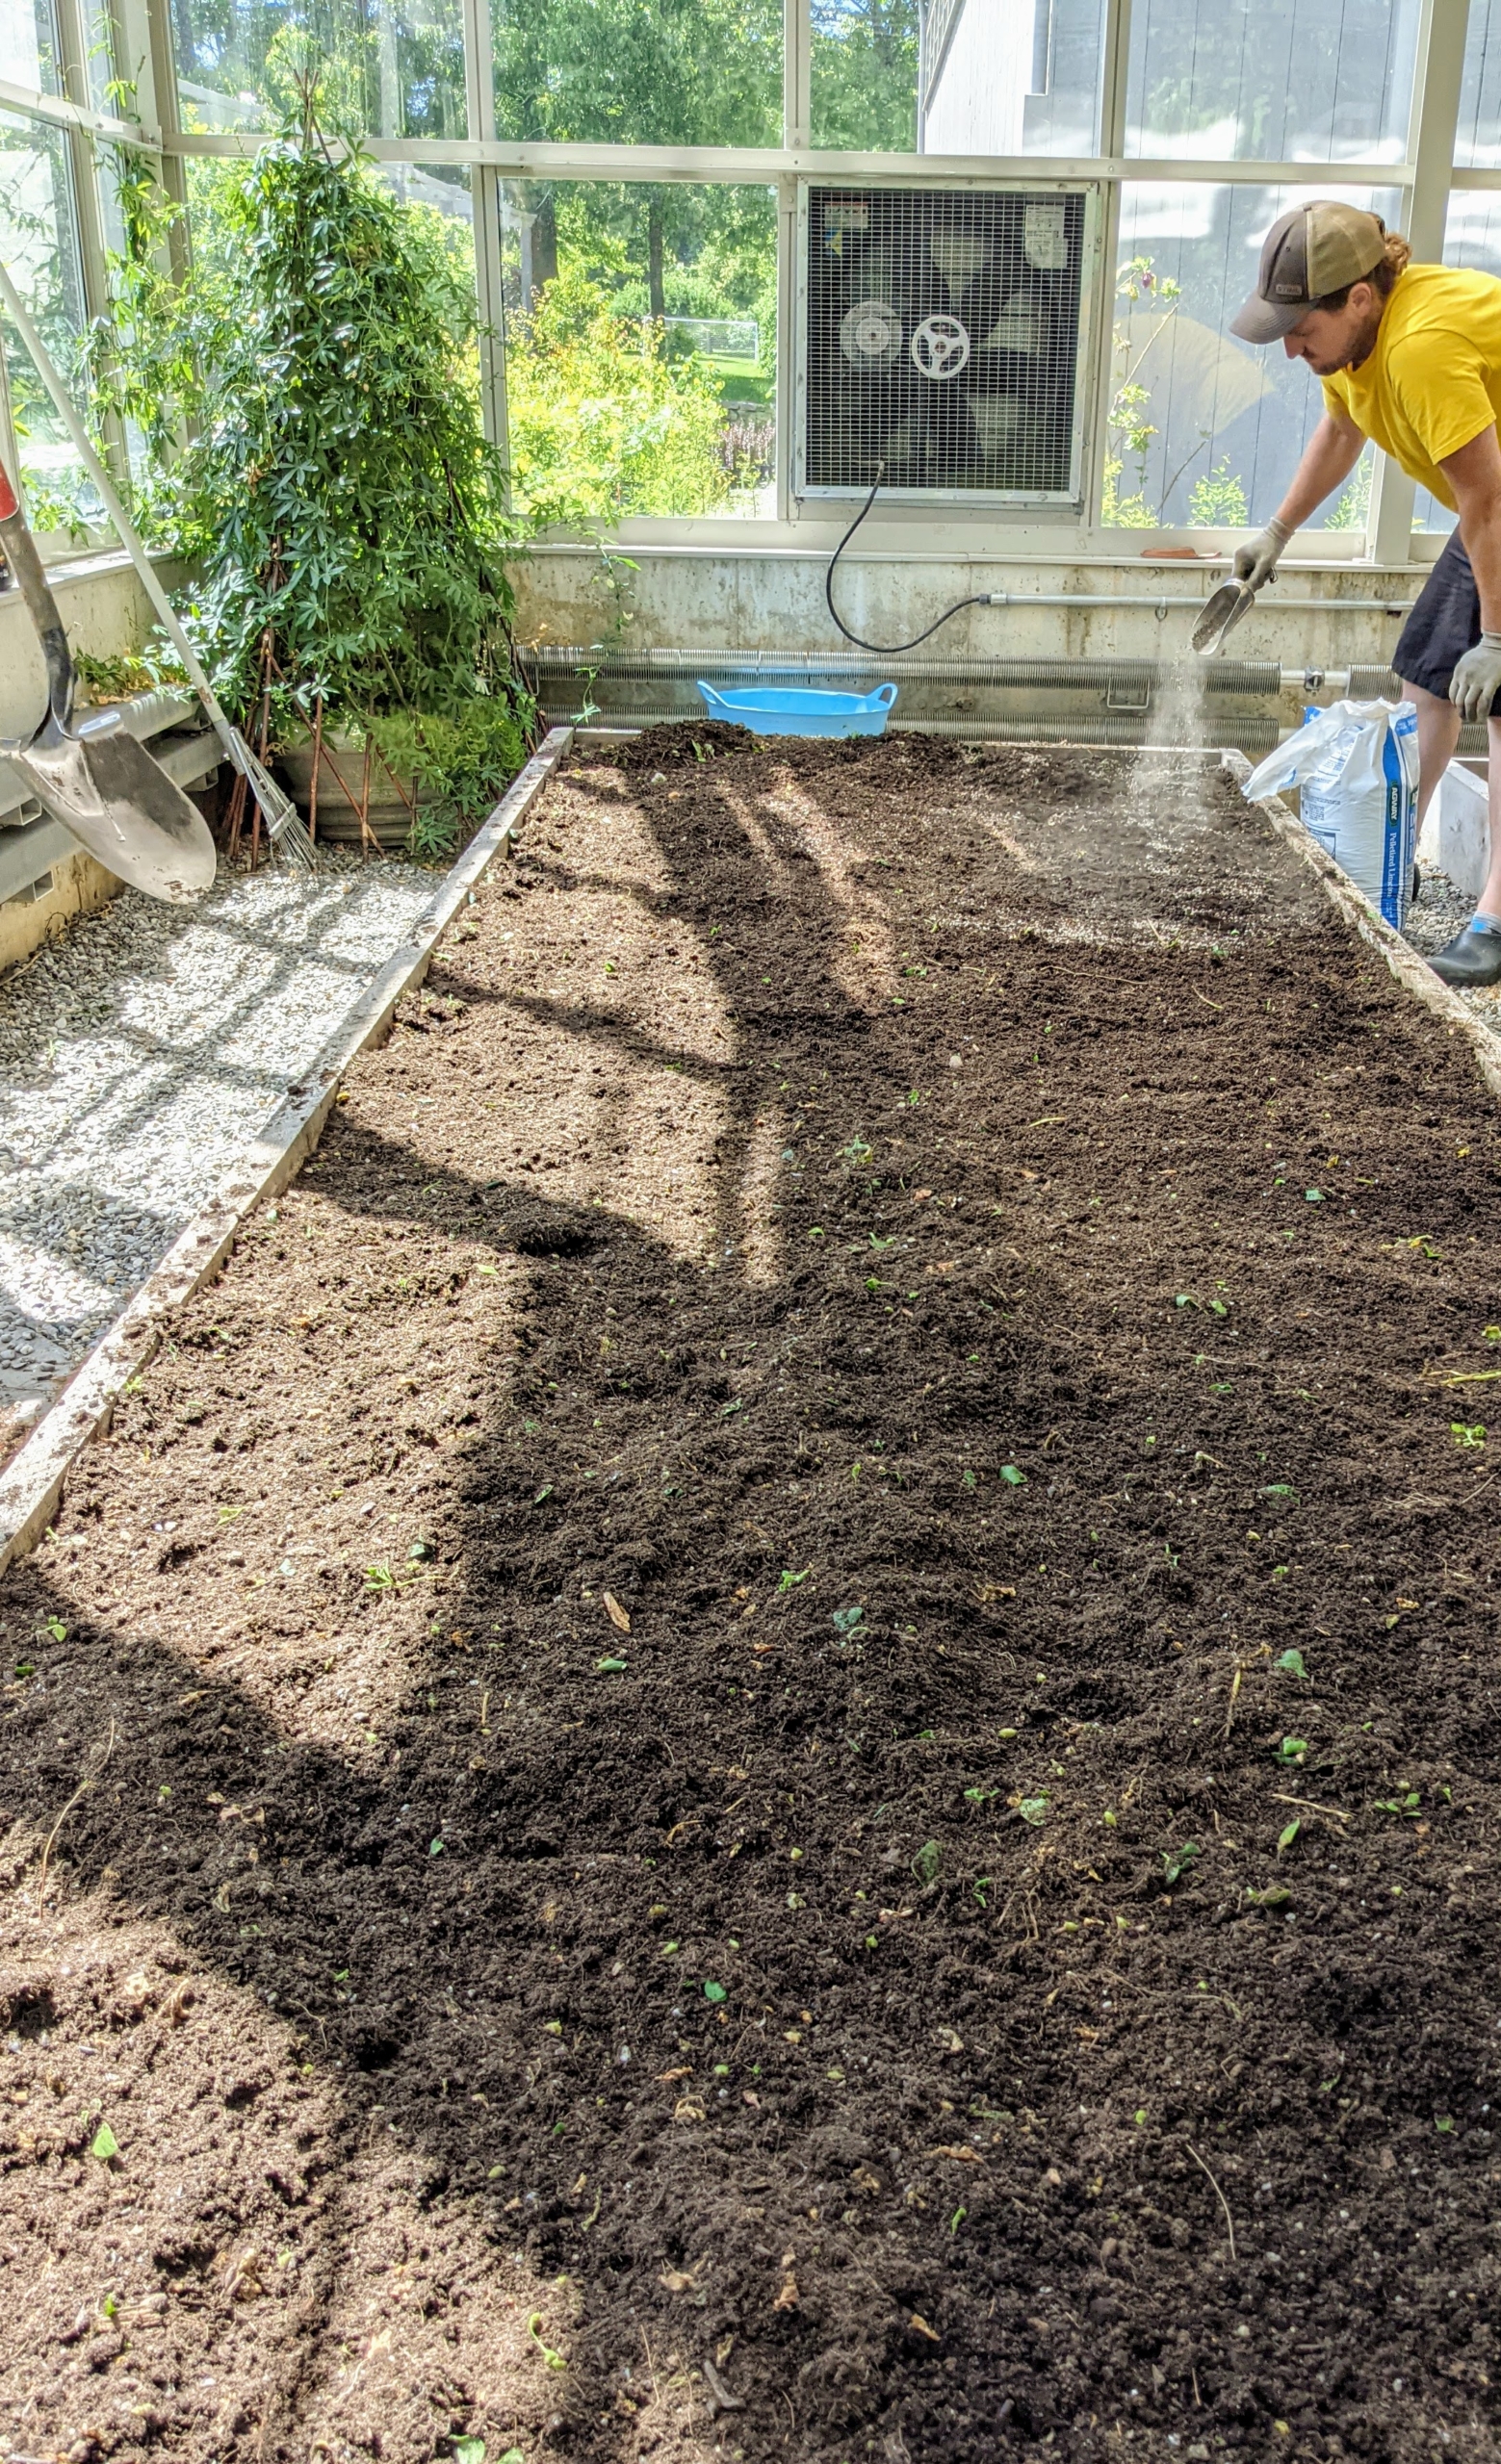
The beds are already filled with good, nutrient-rich soil and compost, but to keep it at its best, Ryan also amends the soil in this box with a treatment of dolomitic pelletized limestone – a natural mineral which neutralizes acid and toxic elements, improves soil structure, promotes healthy bacteria, and enhances nutrient availability and disease resistance.
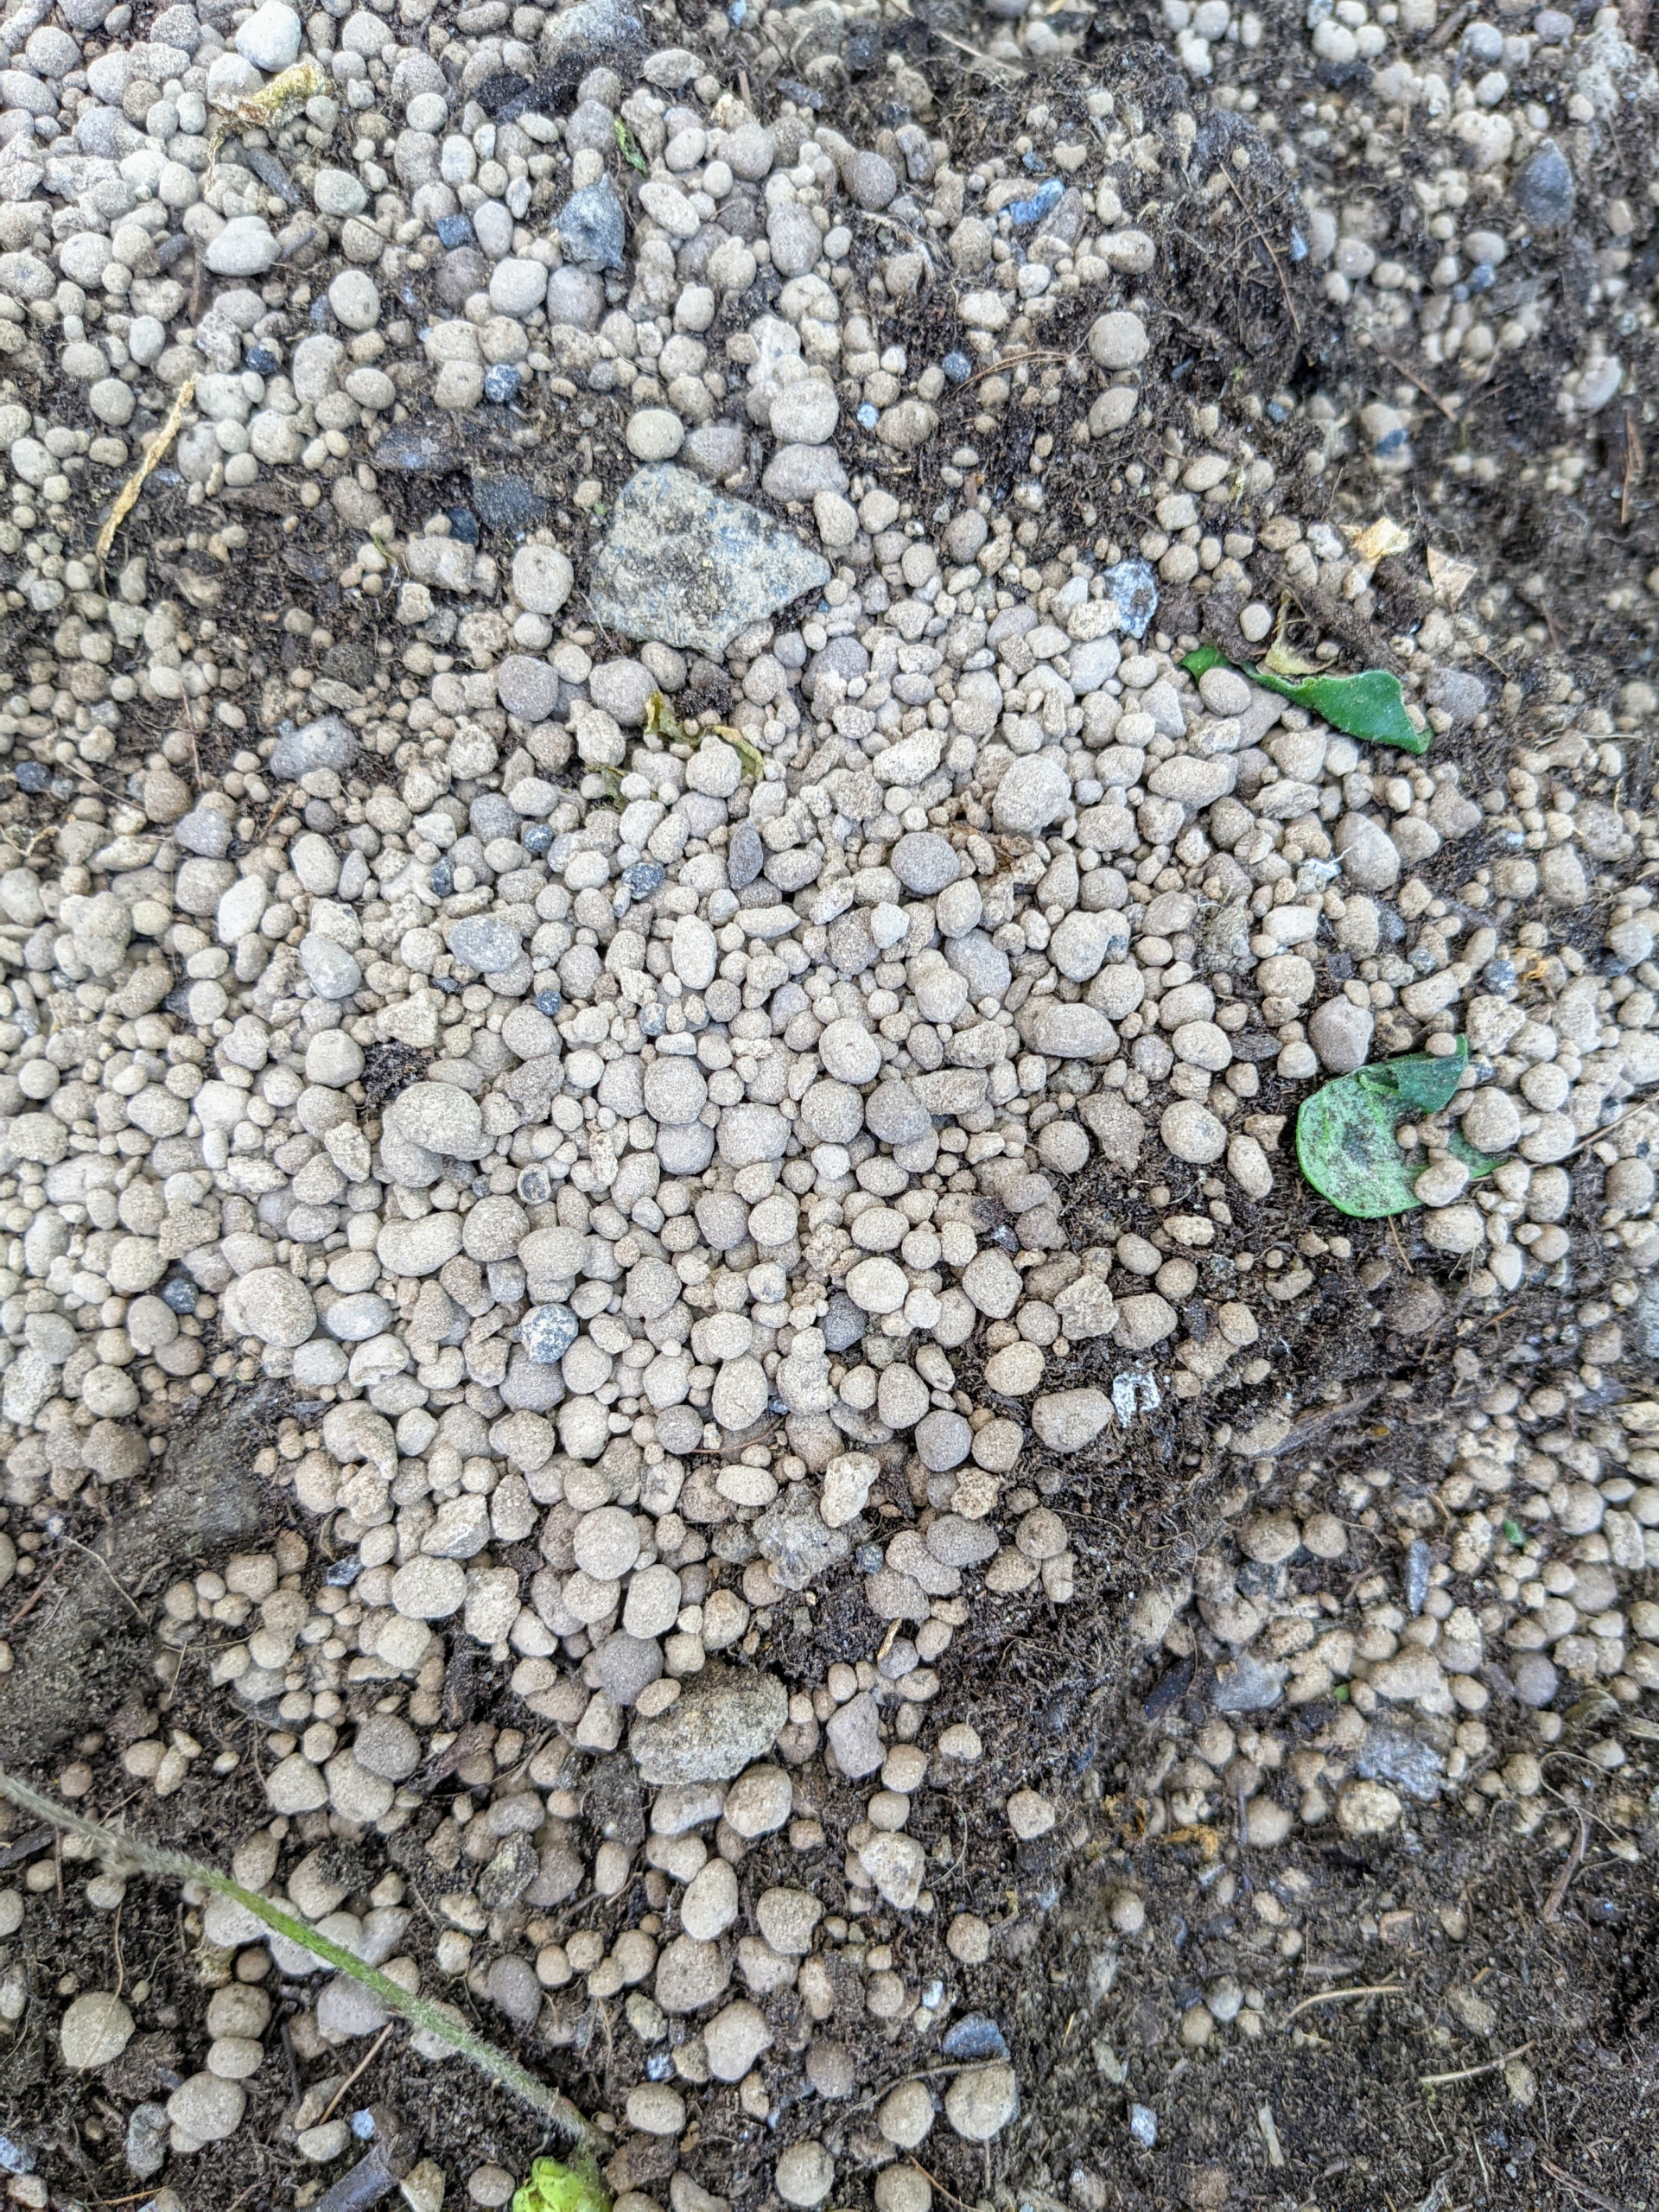
Dolomitic pelletized limestone comes in a finely ground pulverized form inside an organic binder pellet.
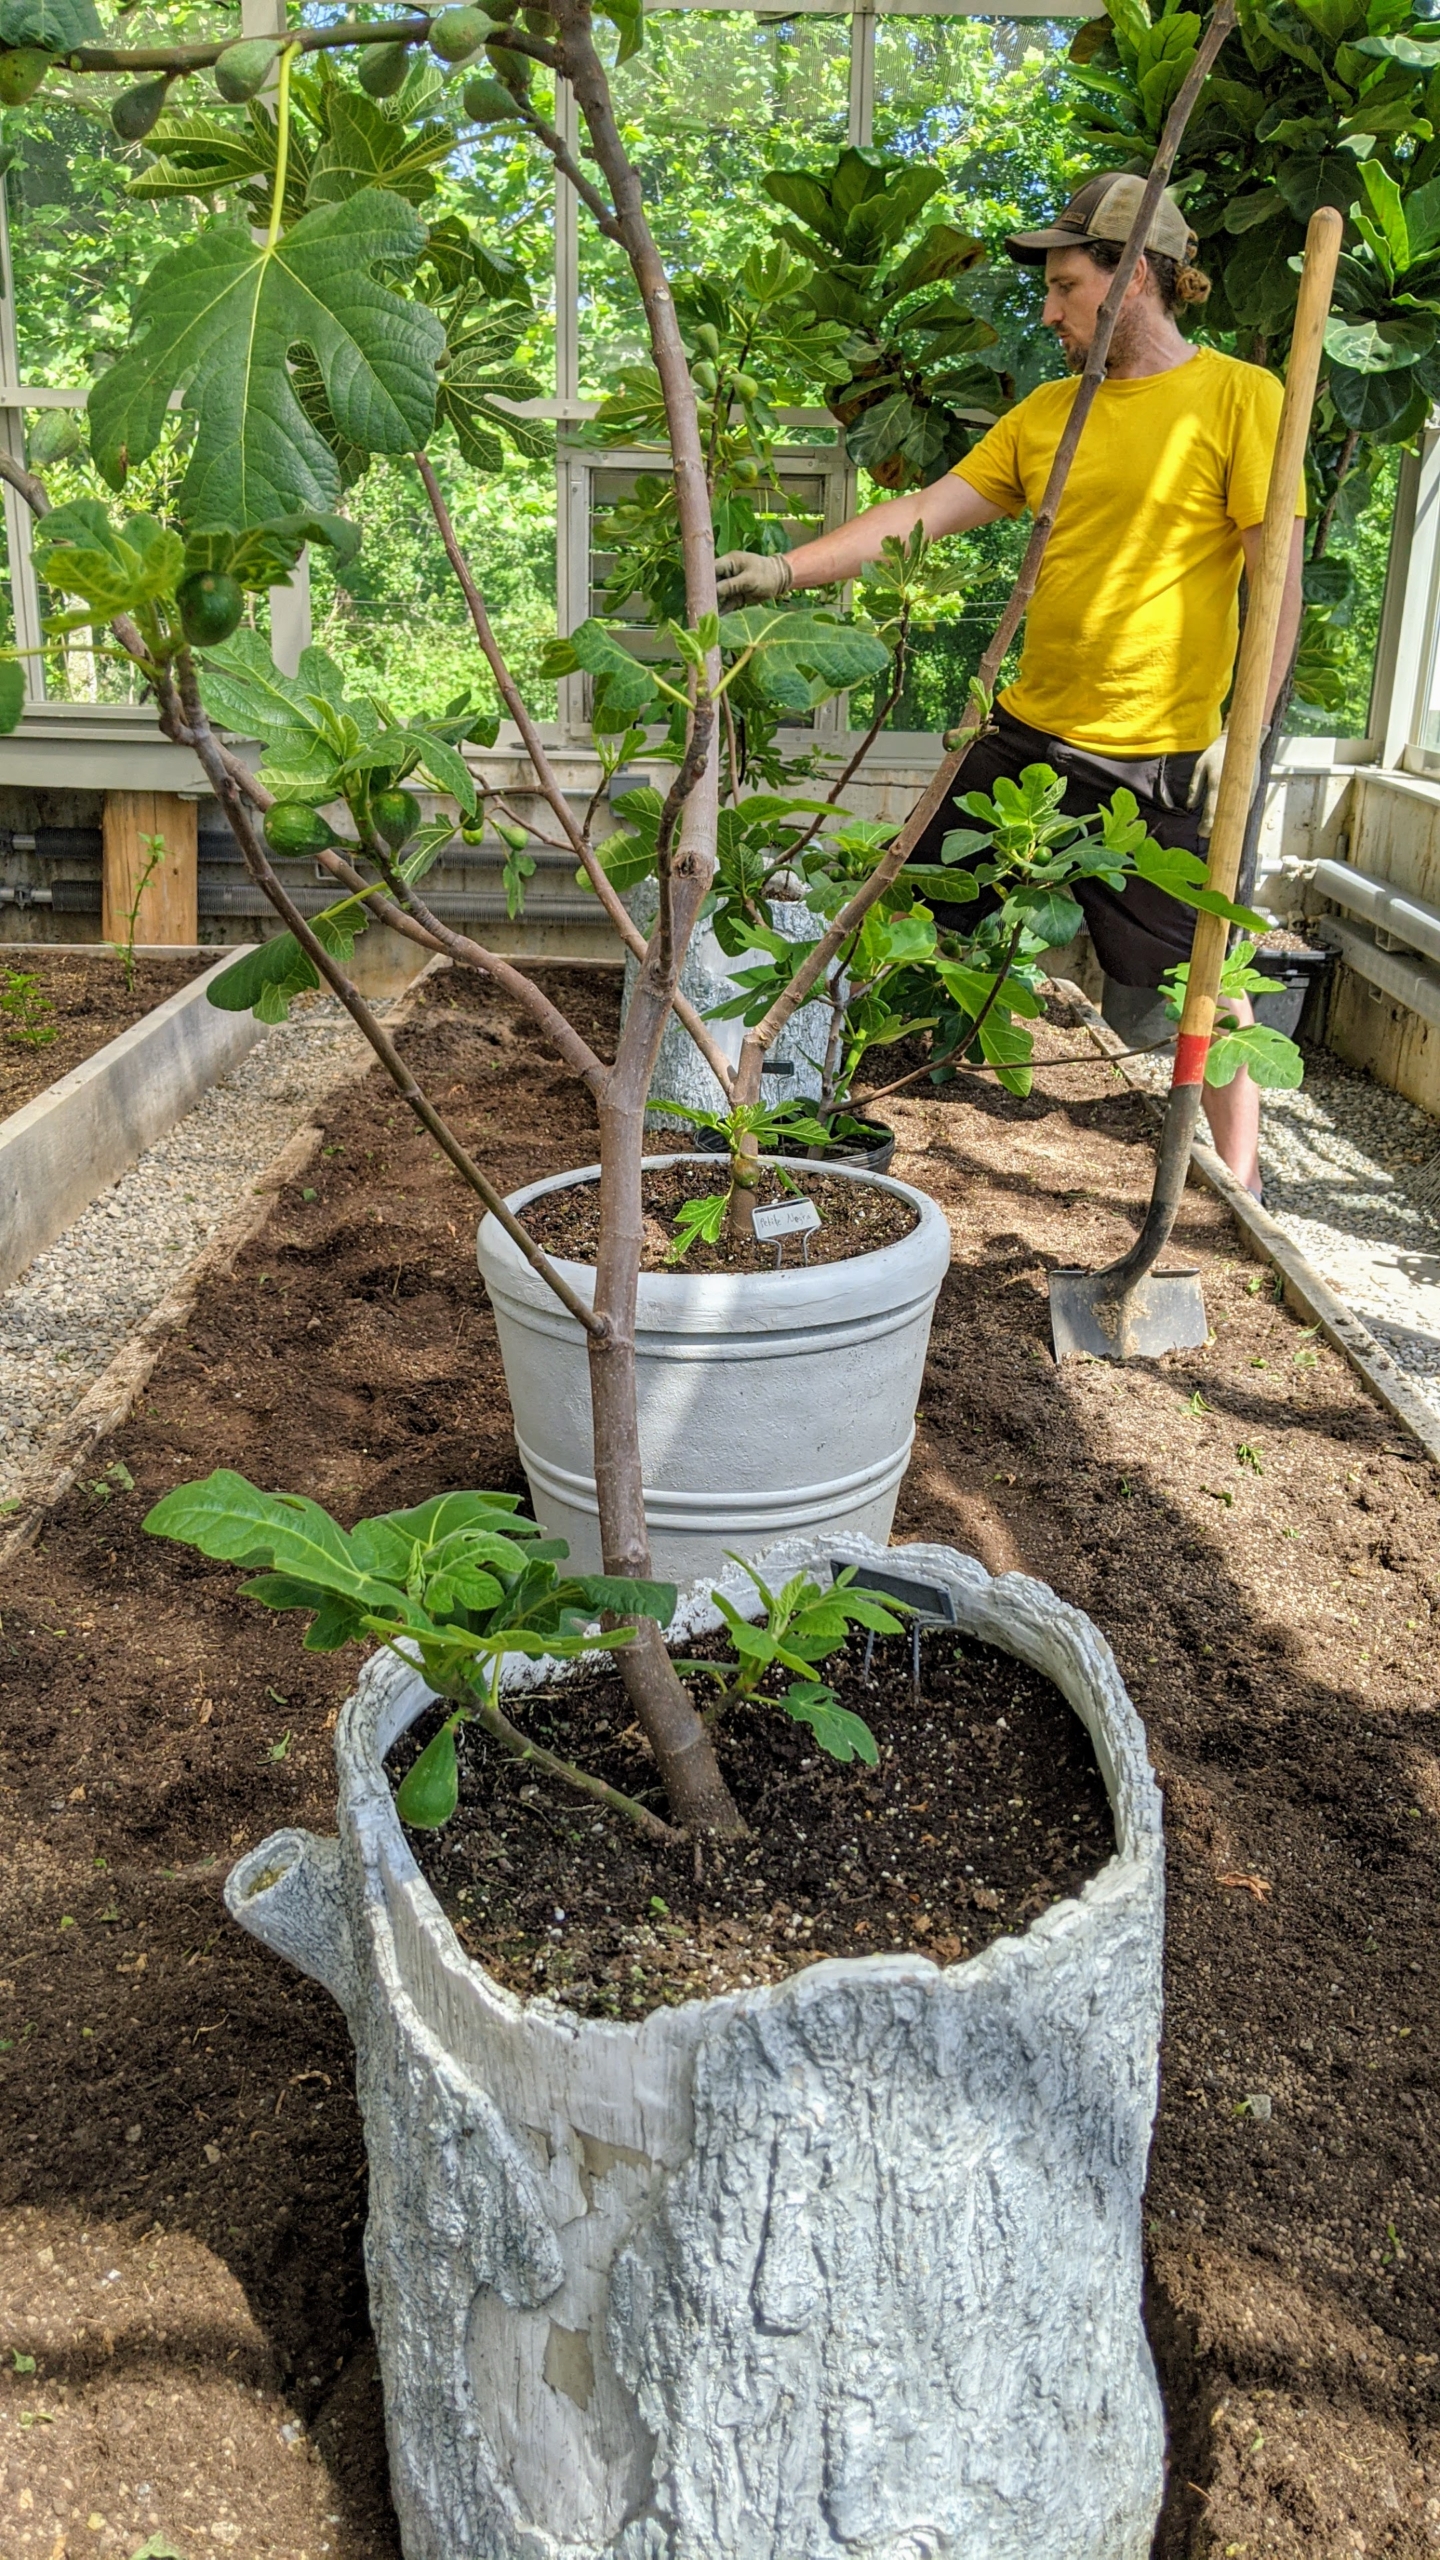
Here, Brian and Ryan move five fig trees into the greenhouse. This fig tree is planted in one of my Martha Stewart Round False Bottom Planters. Find two sizes – 12-inch round and 17-inch round – available through my new web site Martha.com. Be sure to check it out.
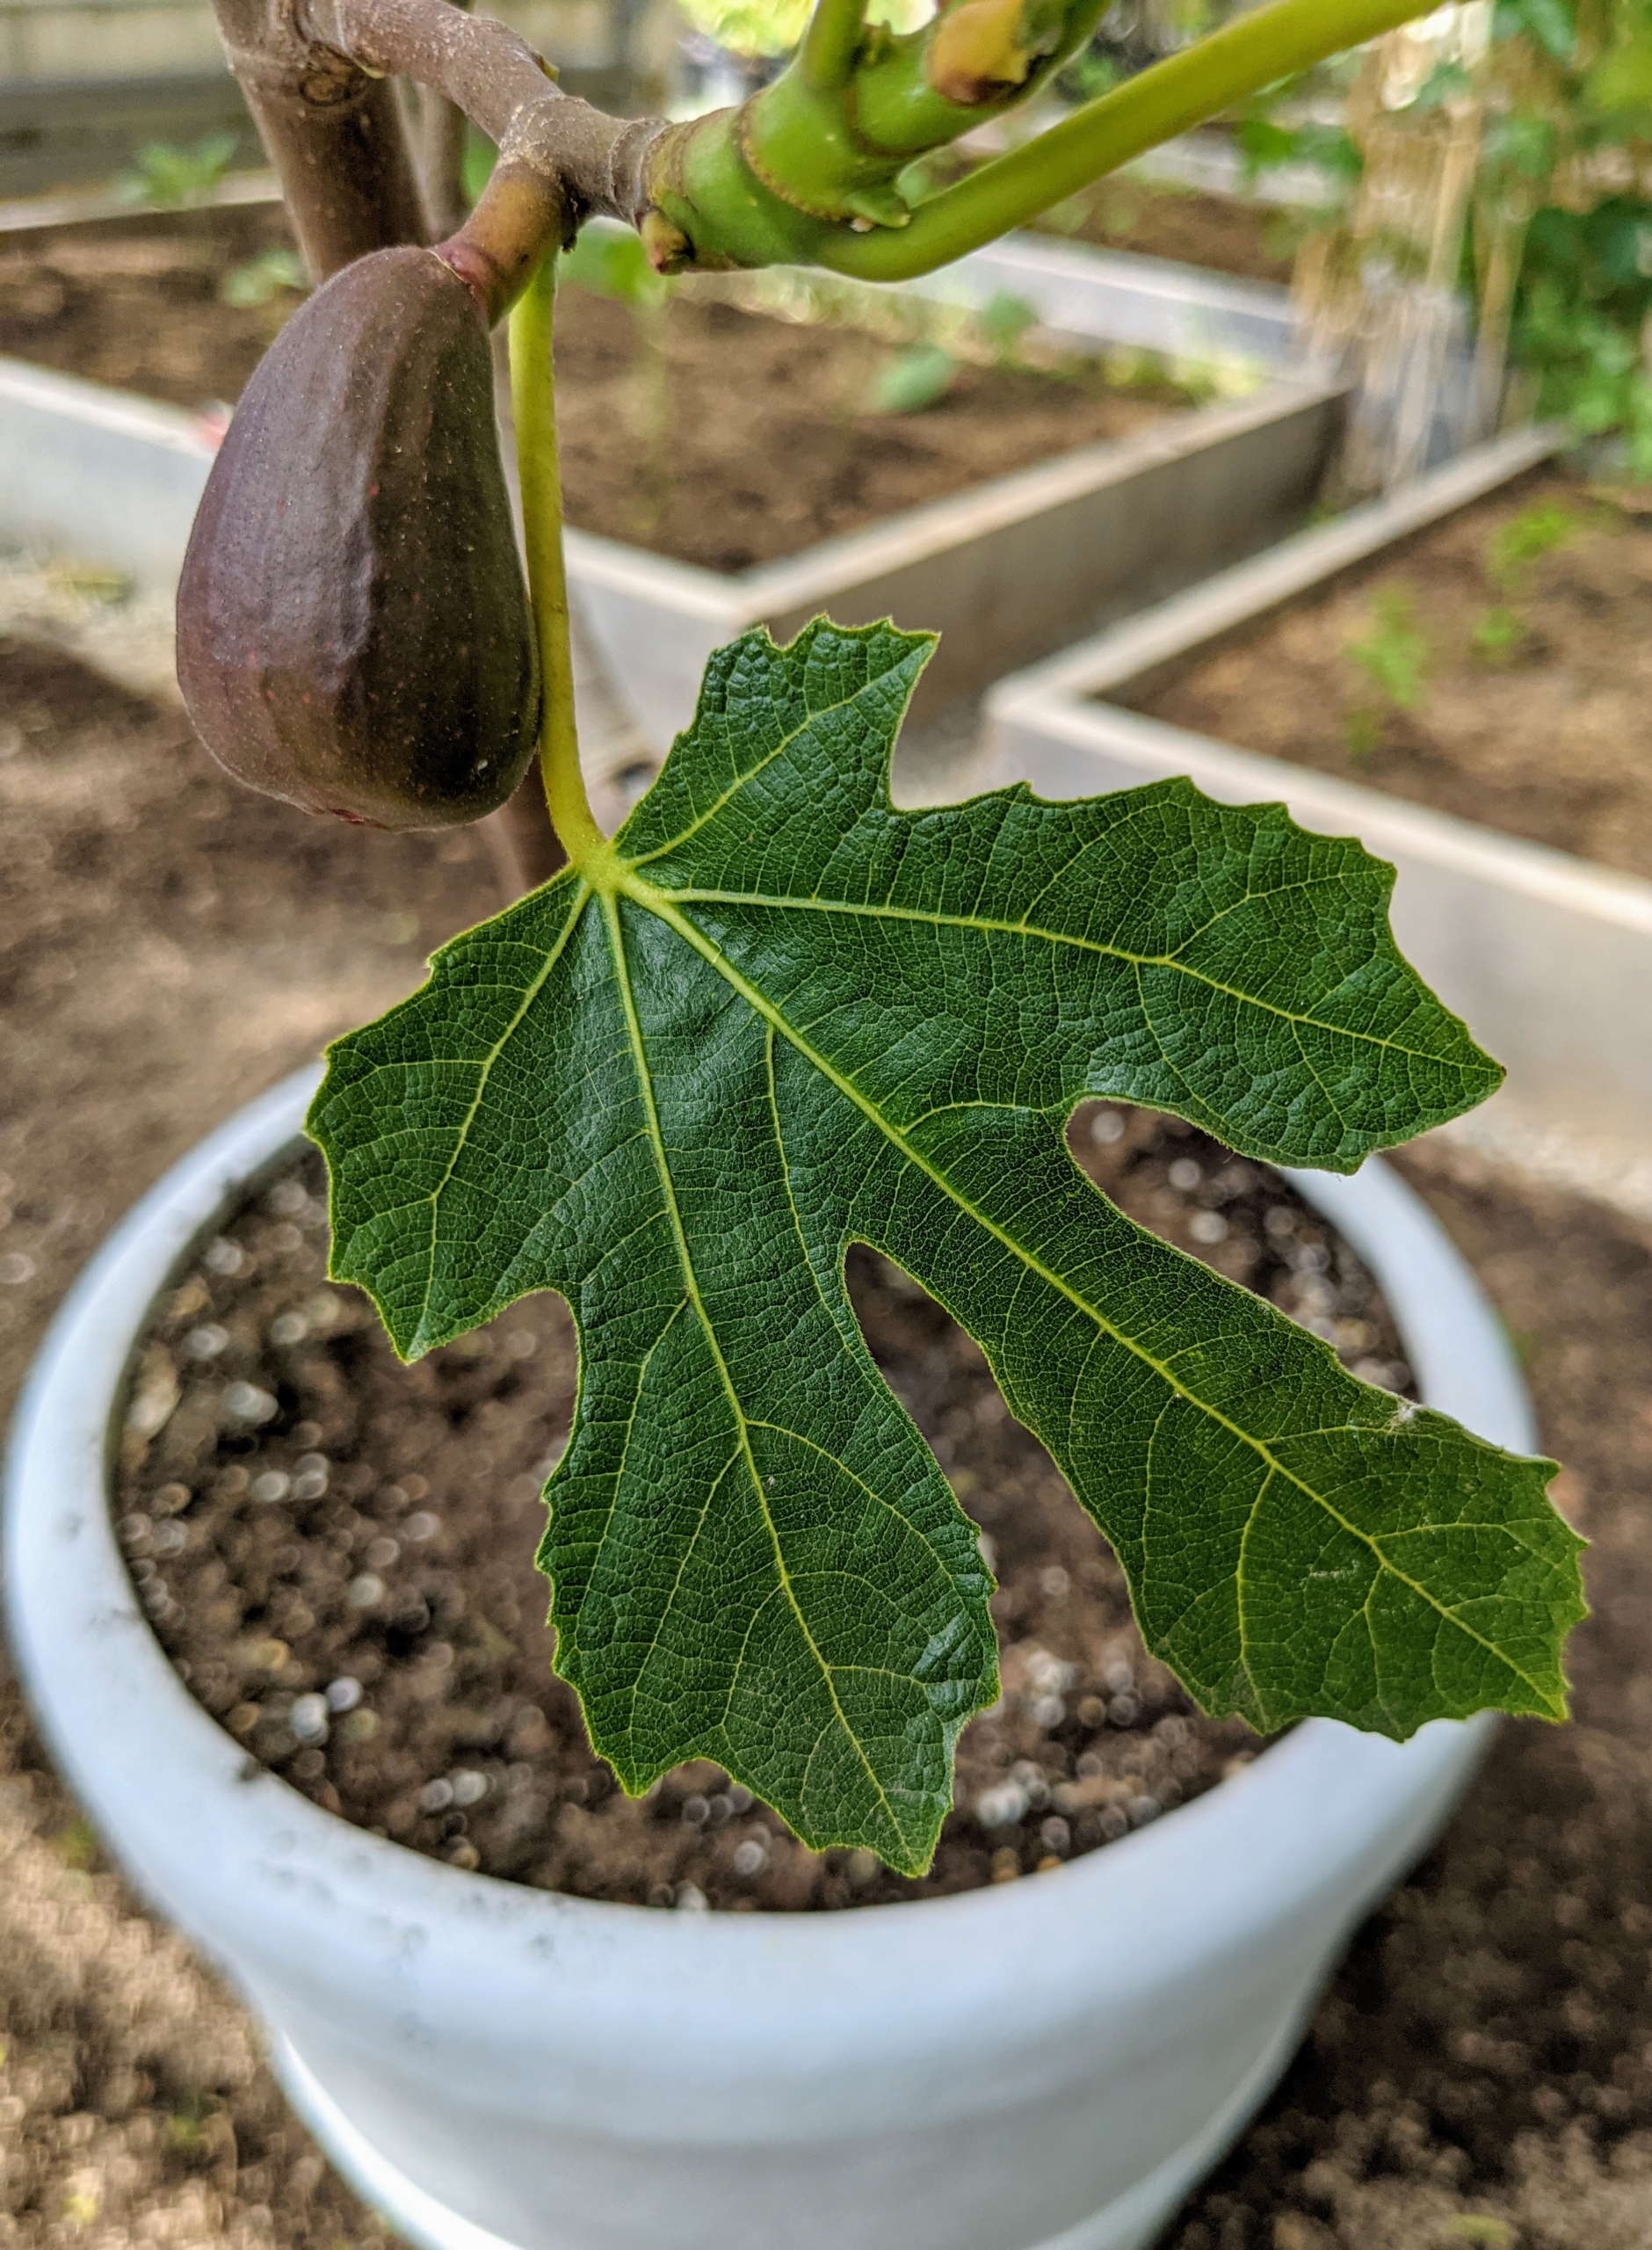
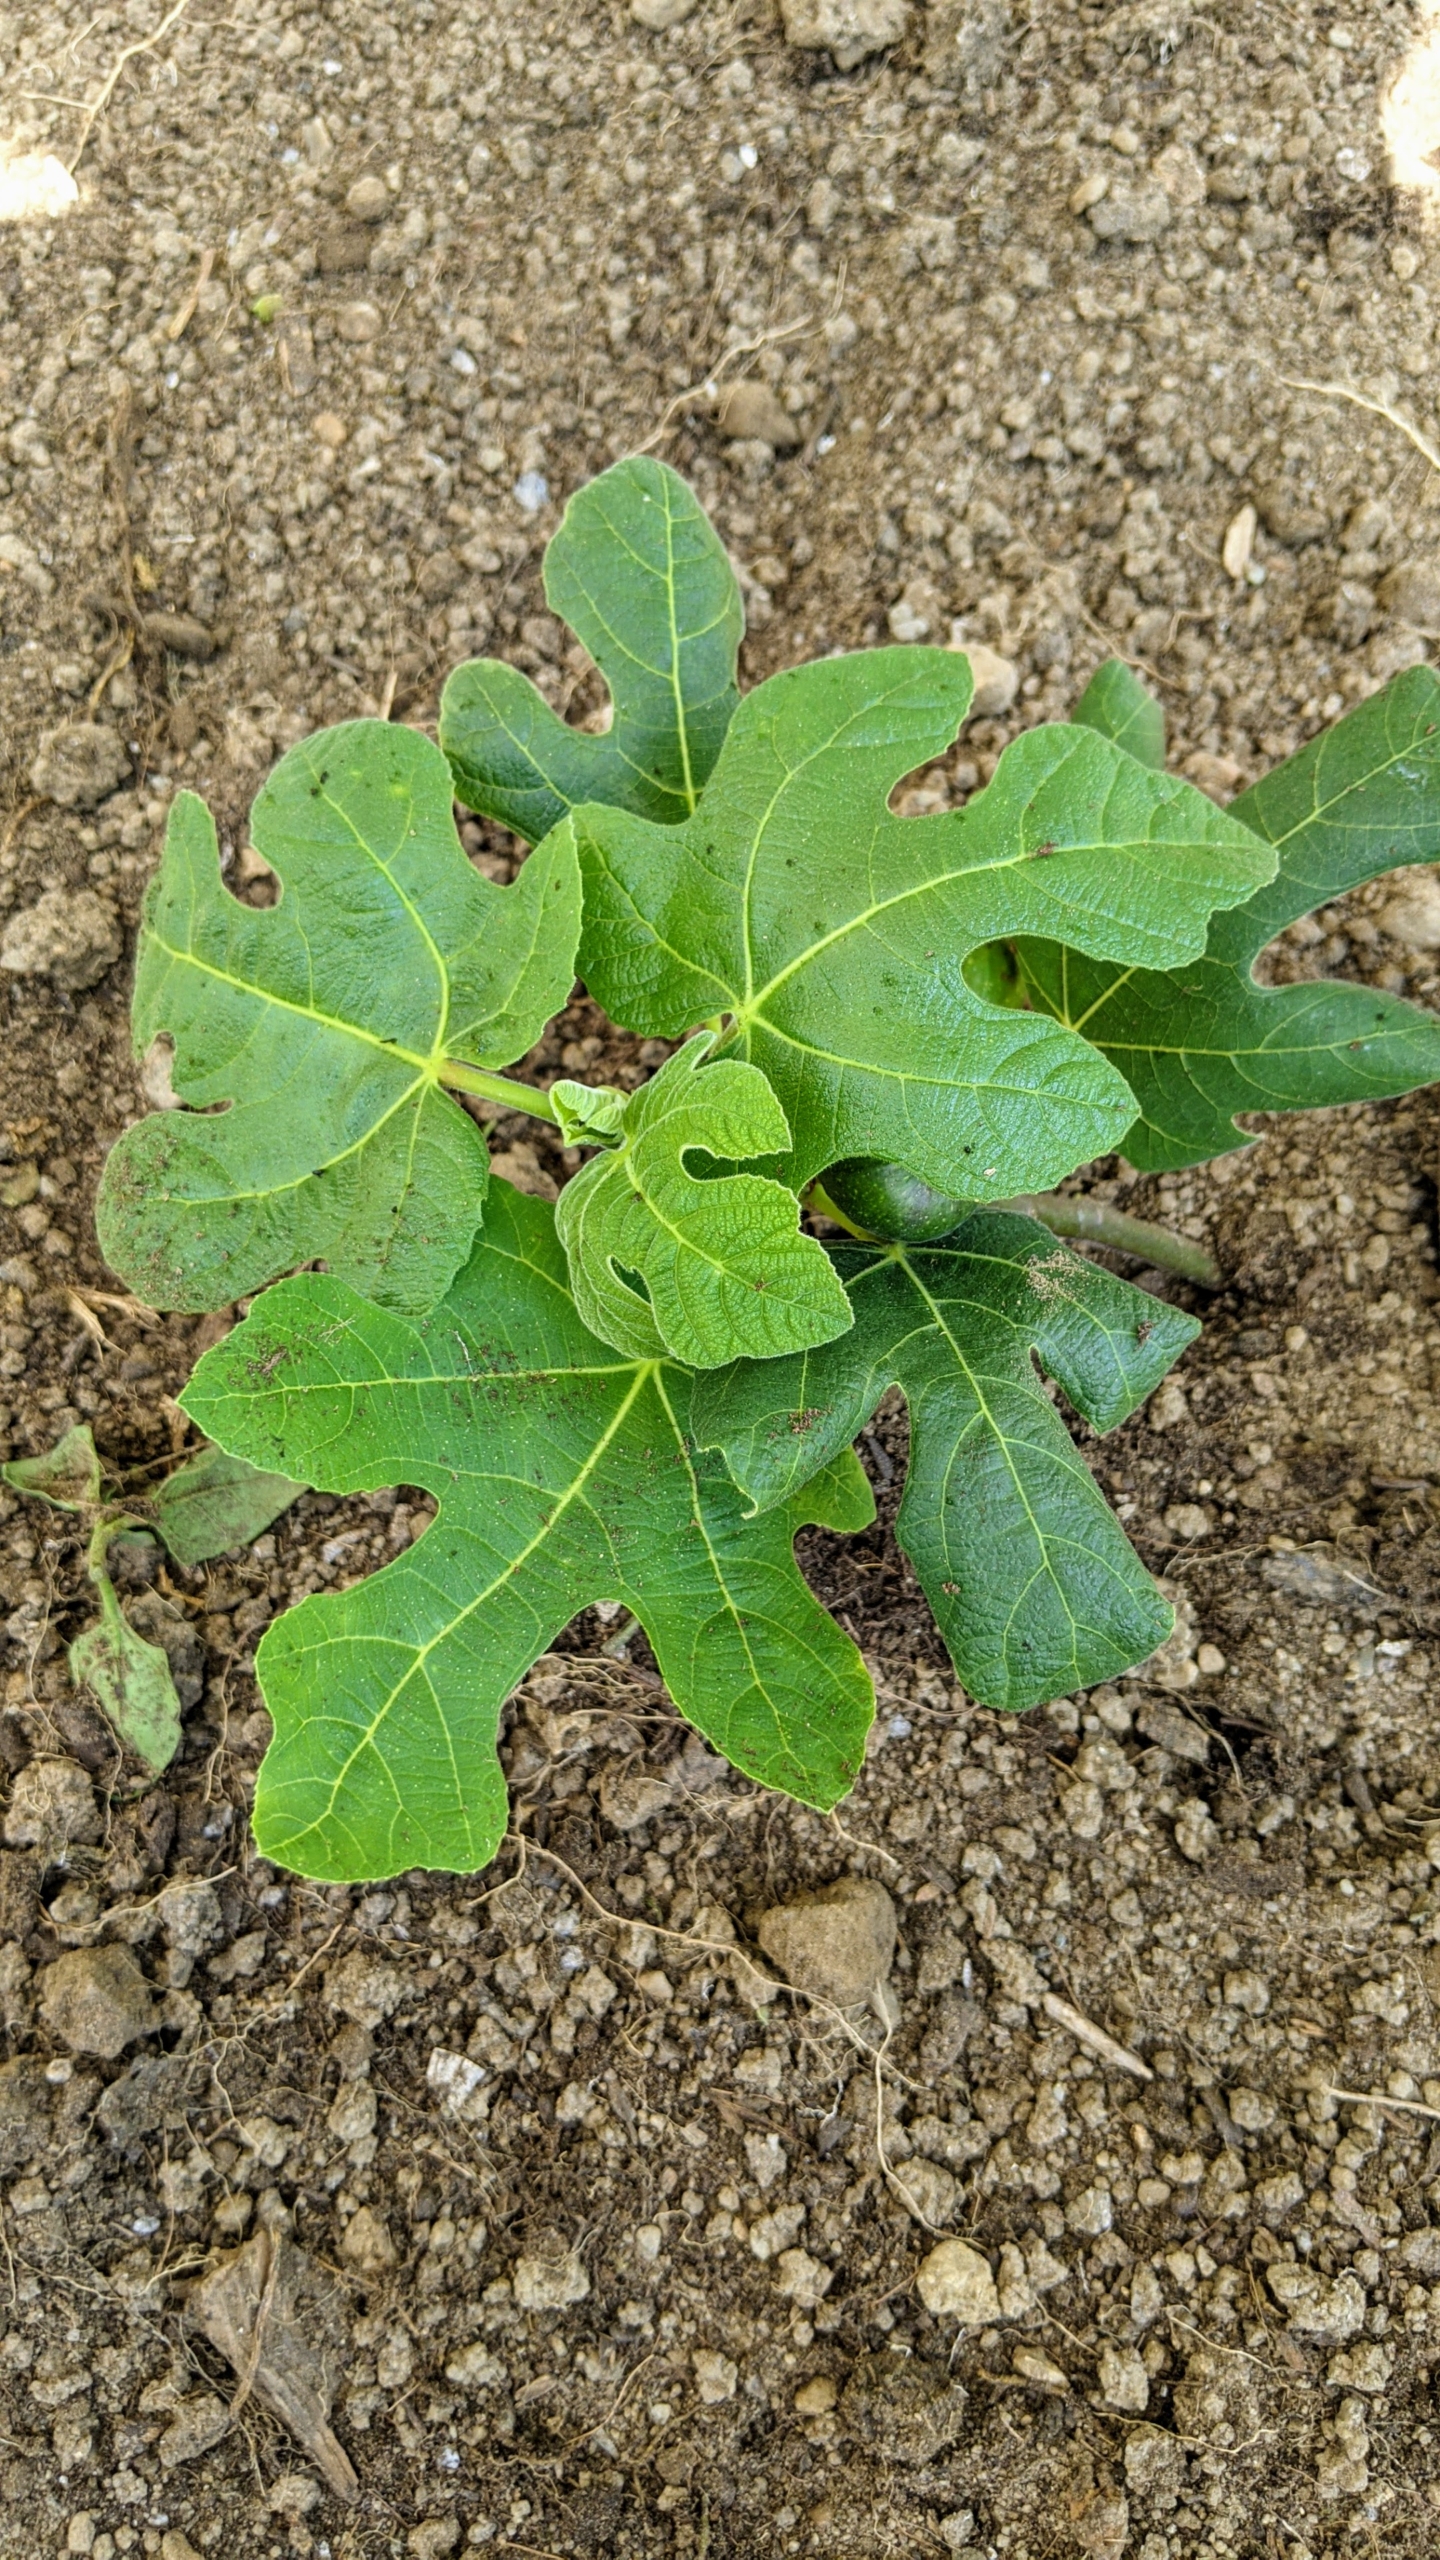
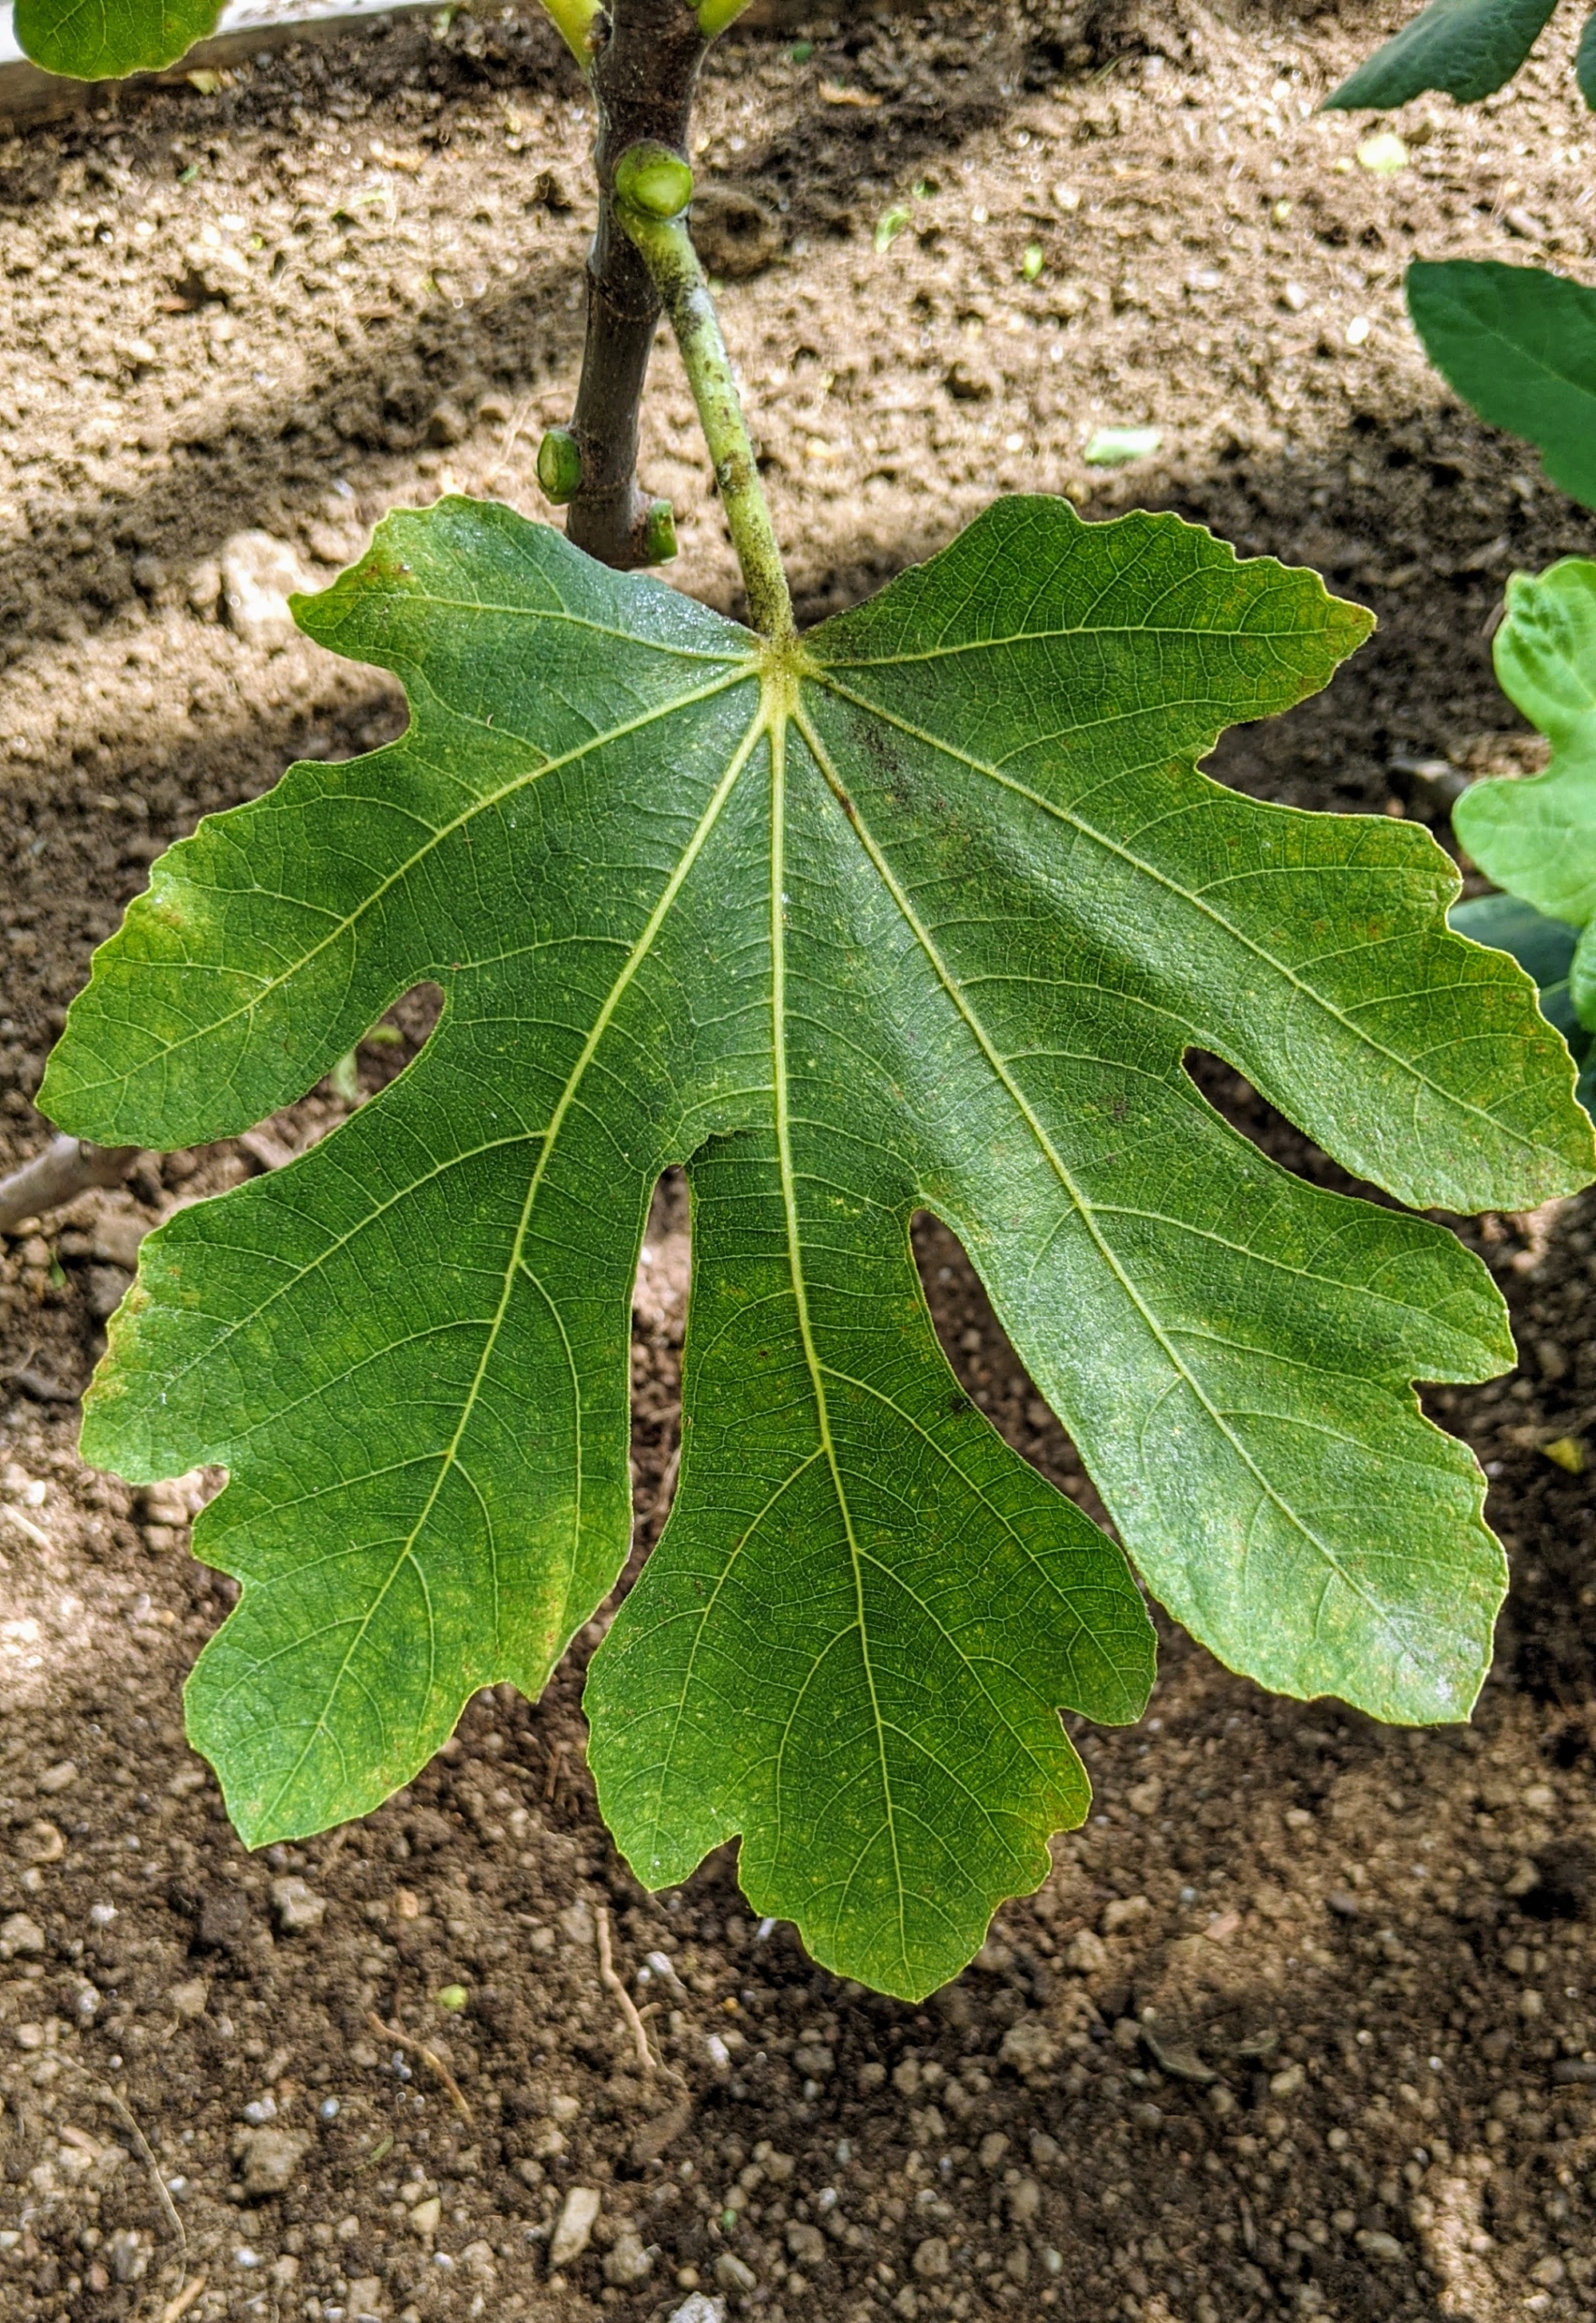
The fig tree has been sought out and cultivated since ancient times and is now widely grown throughout the world, both for its fruit and as an ornamental plant. Most fig tree leaves are bright green, large, singular, and well-lobed.
Ryan lines up the five fig trees in the bed and makes sure they are all evenly spaced. Fig trees need full sun to partial shade – a minimum of seven to eight hours of sun exposure is best. They also like soil with good drainage – this greenhouse will be just perfect.
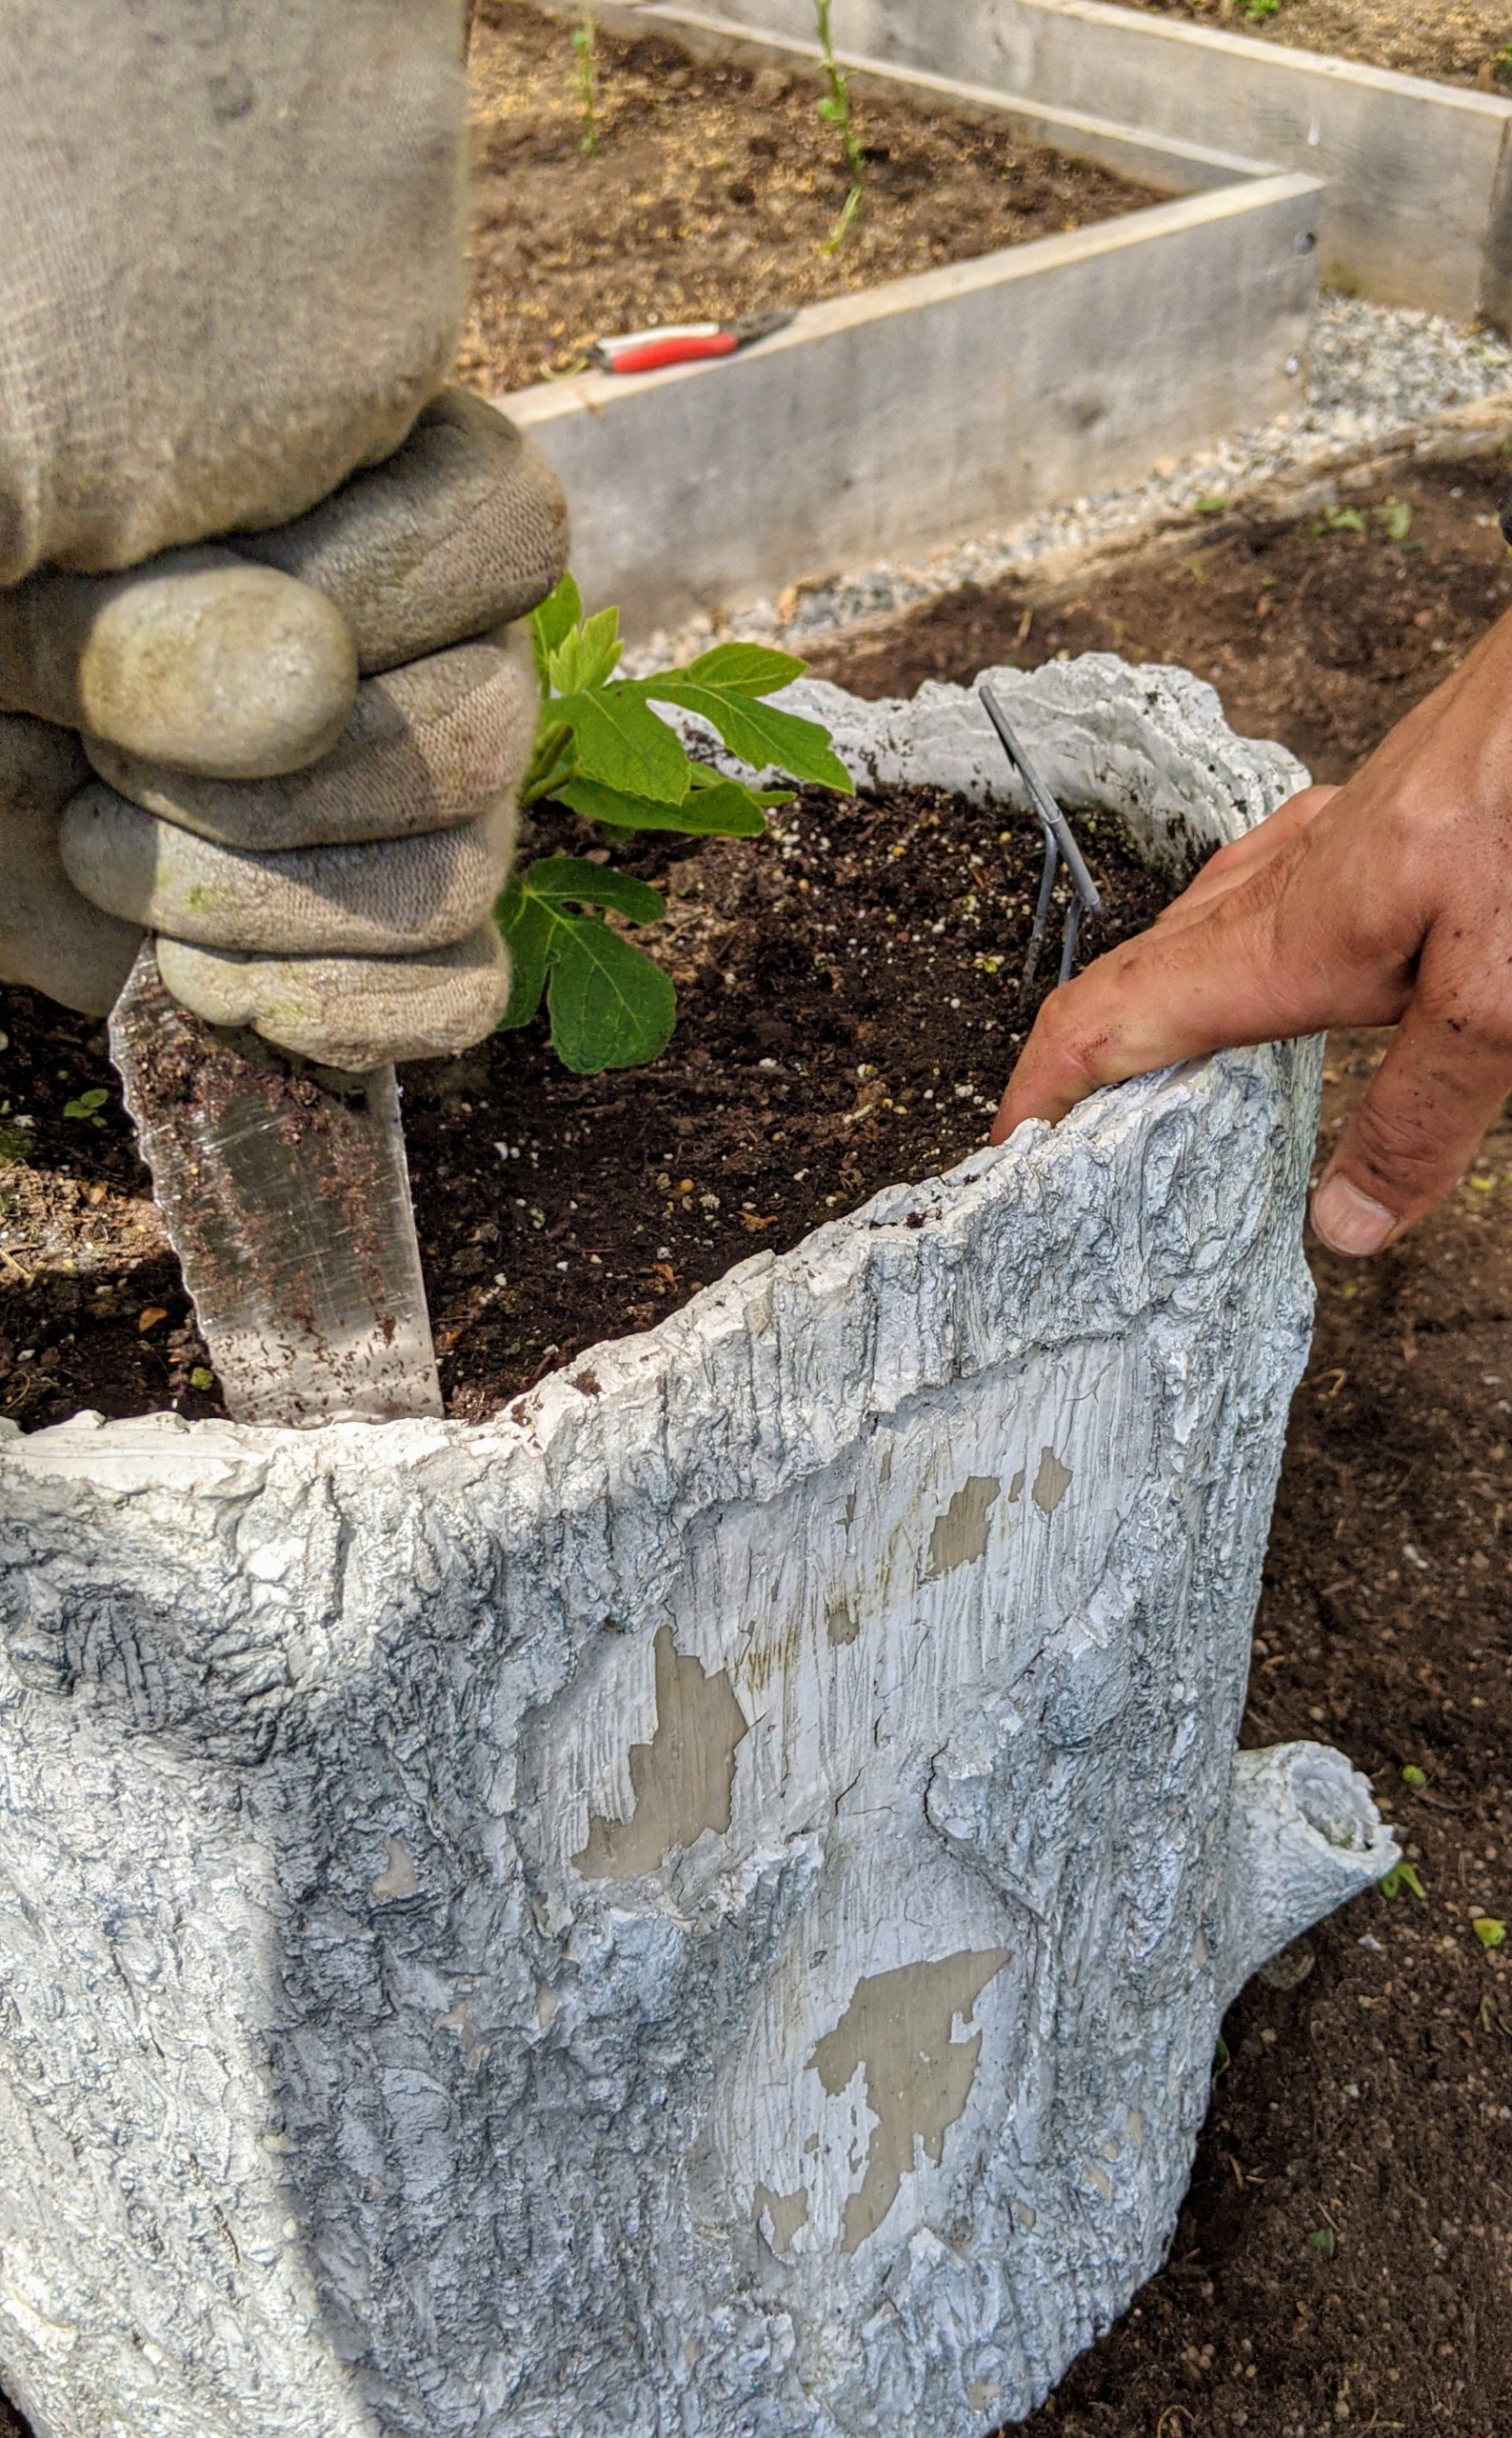
Next, using a serrated edged knife, Brian carefully loosens the root ball from its pot. This is one of my Faux Bois planters, also available in different sizes through Martha.com.
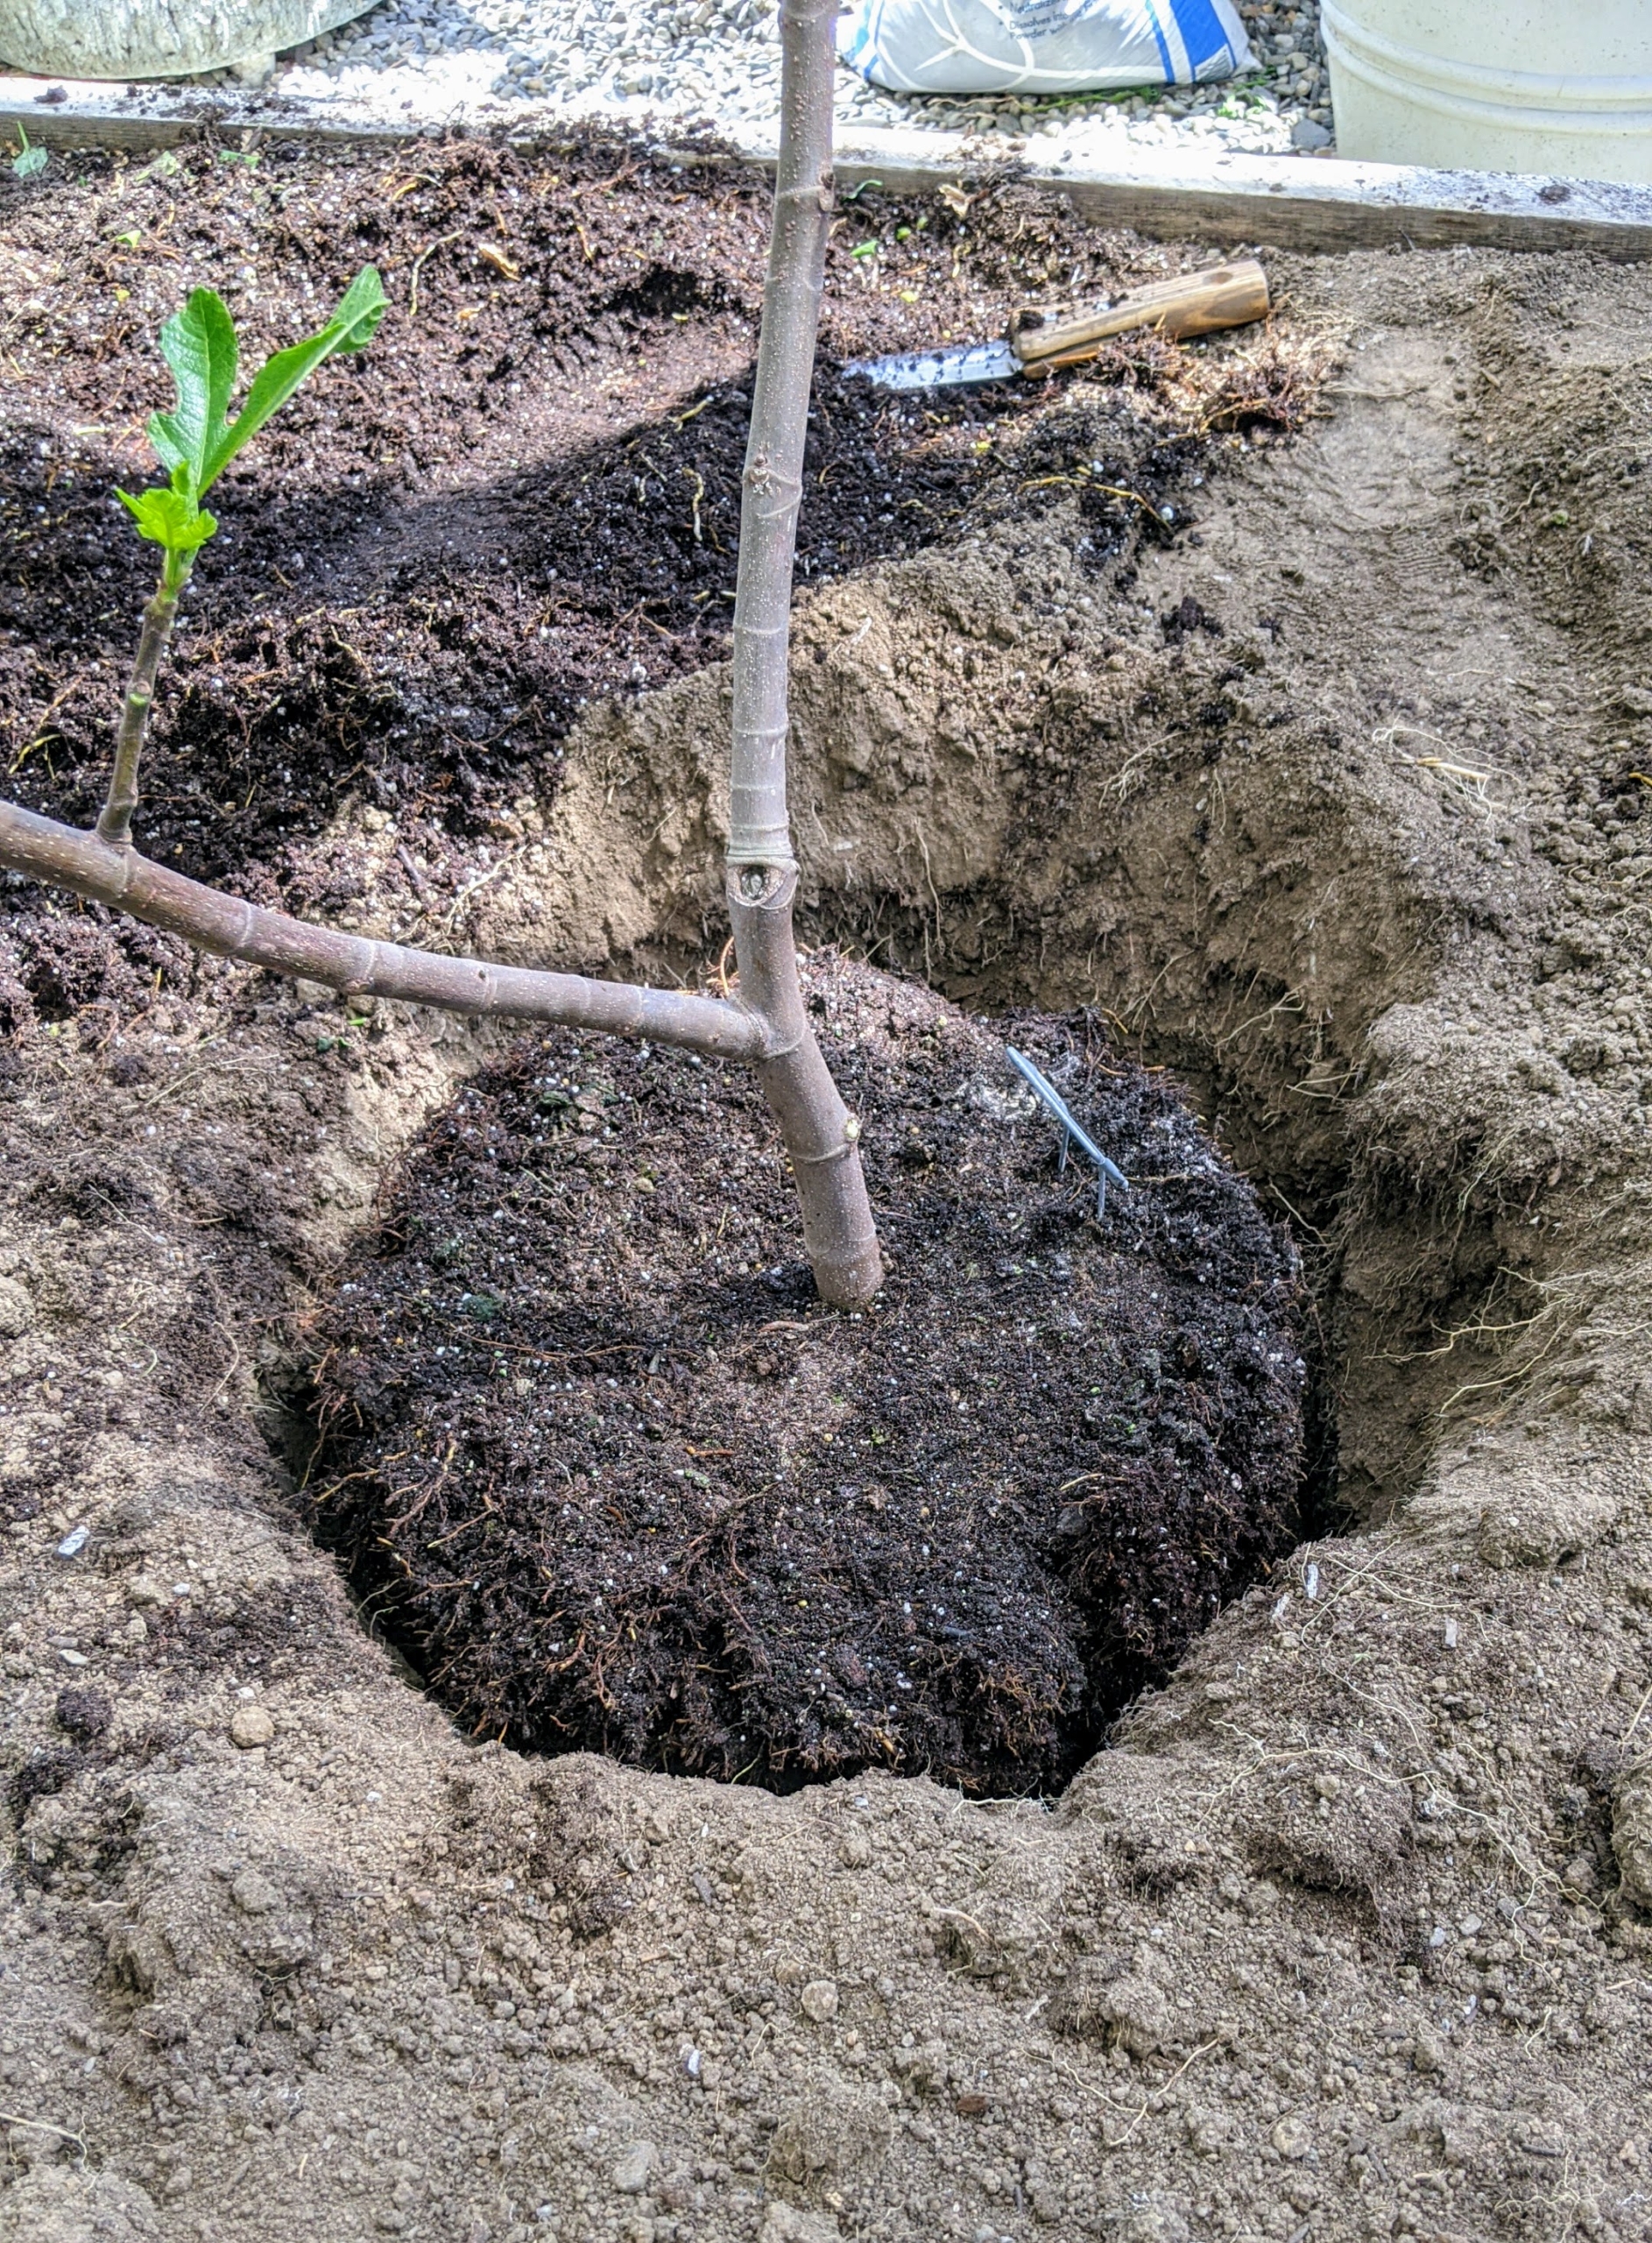
Here is the fig tree root ball completely freed from its pot and ready for planting.
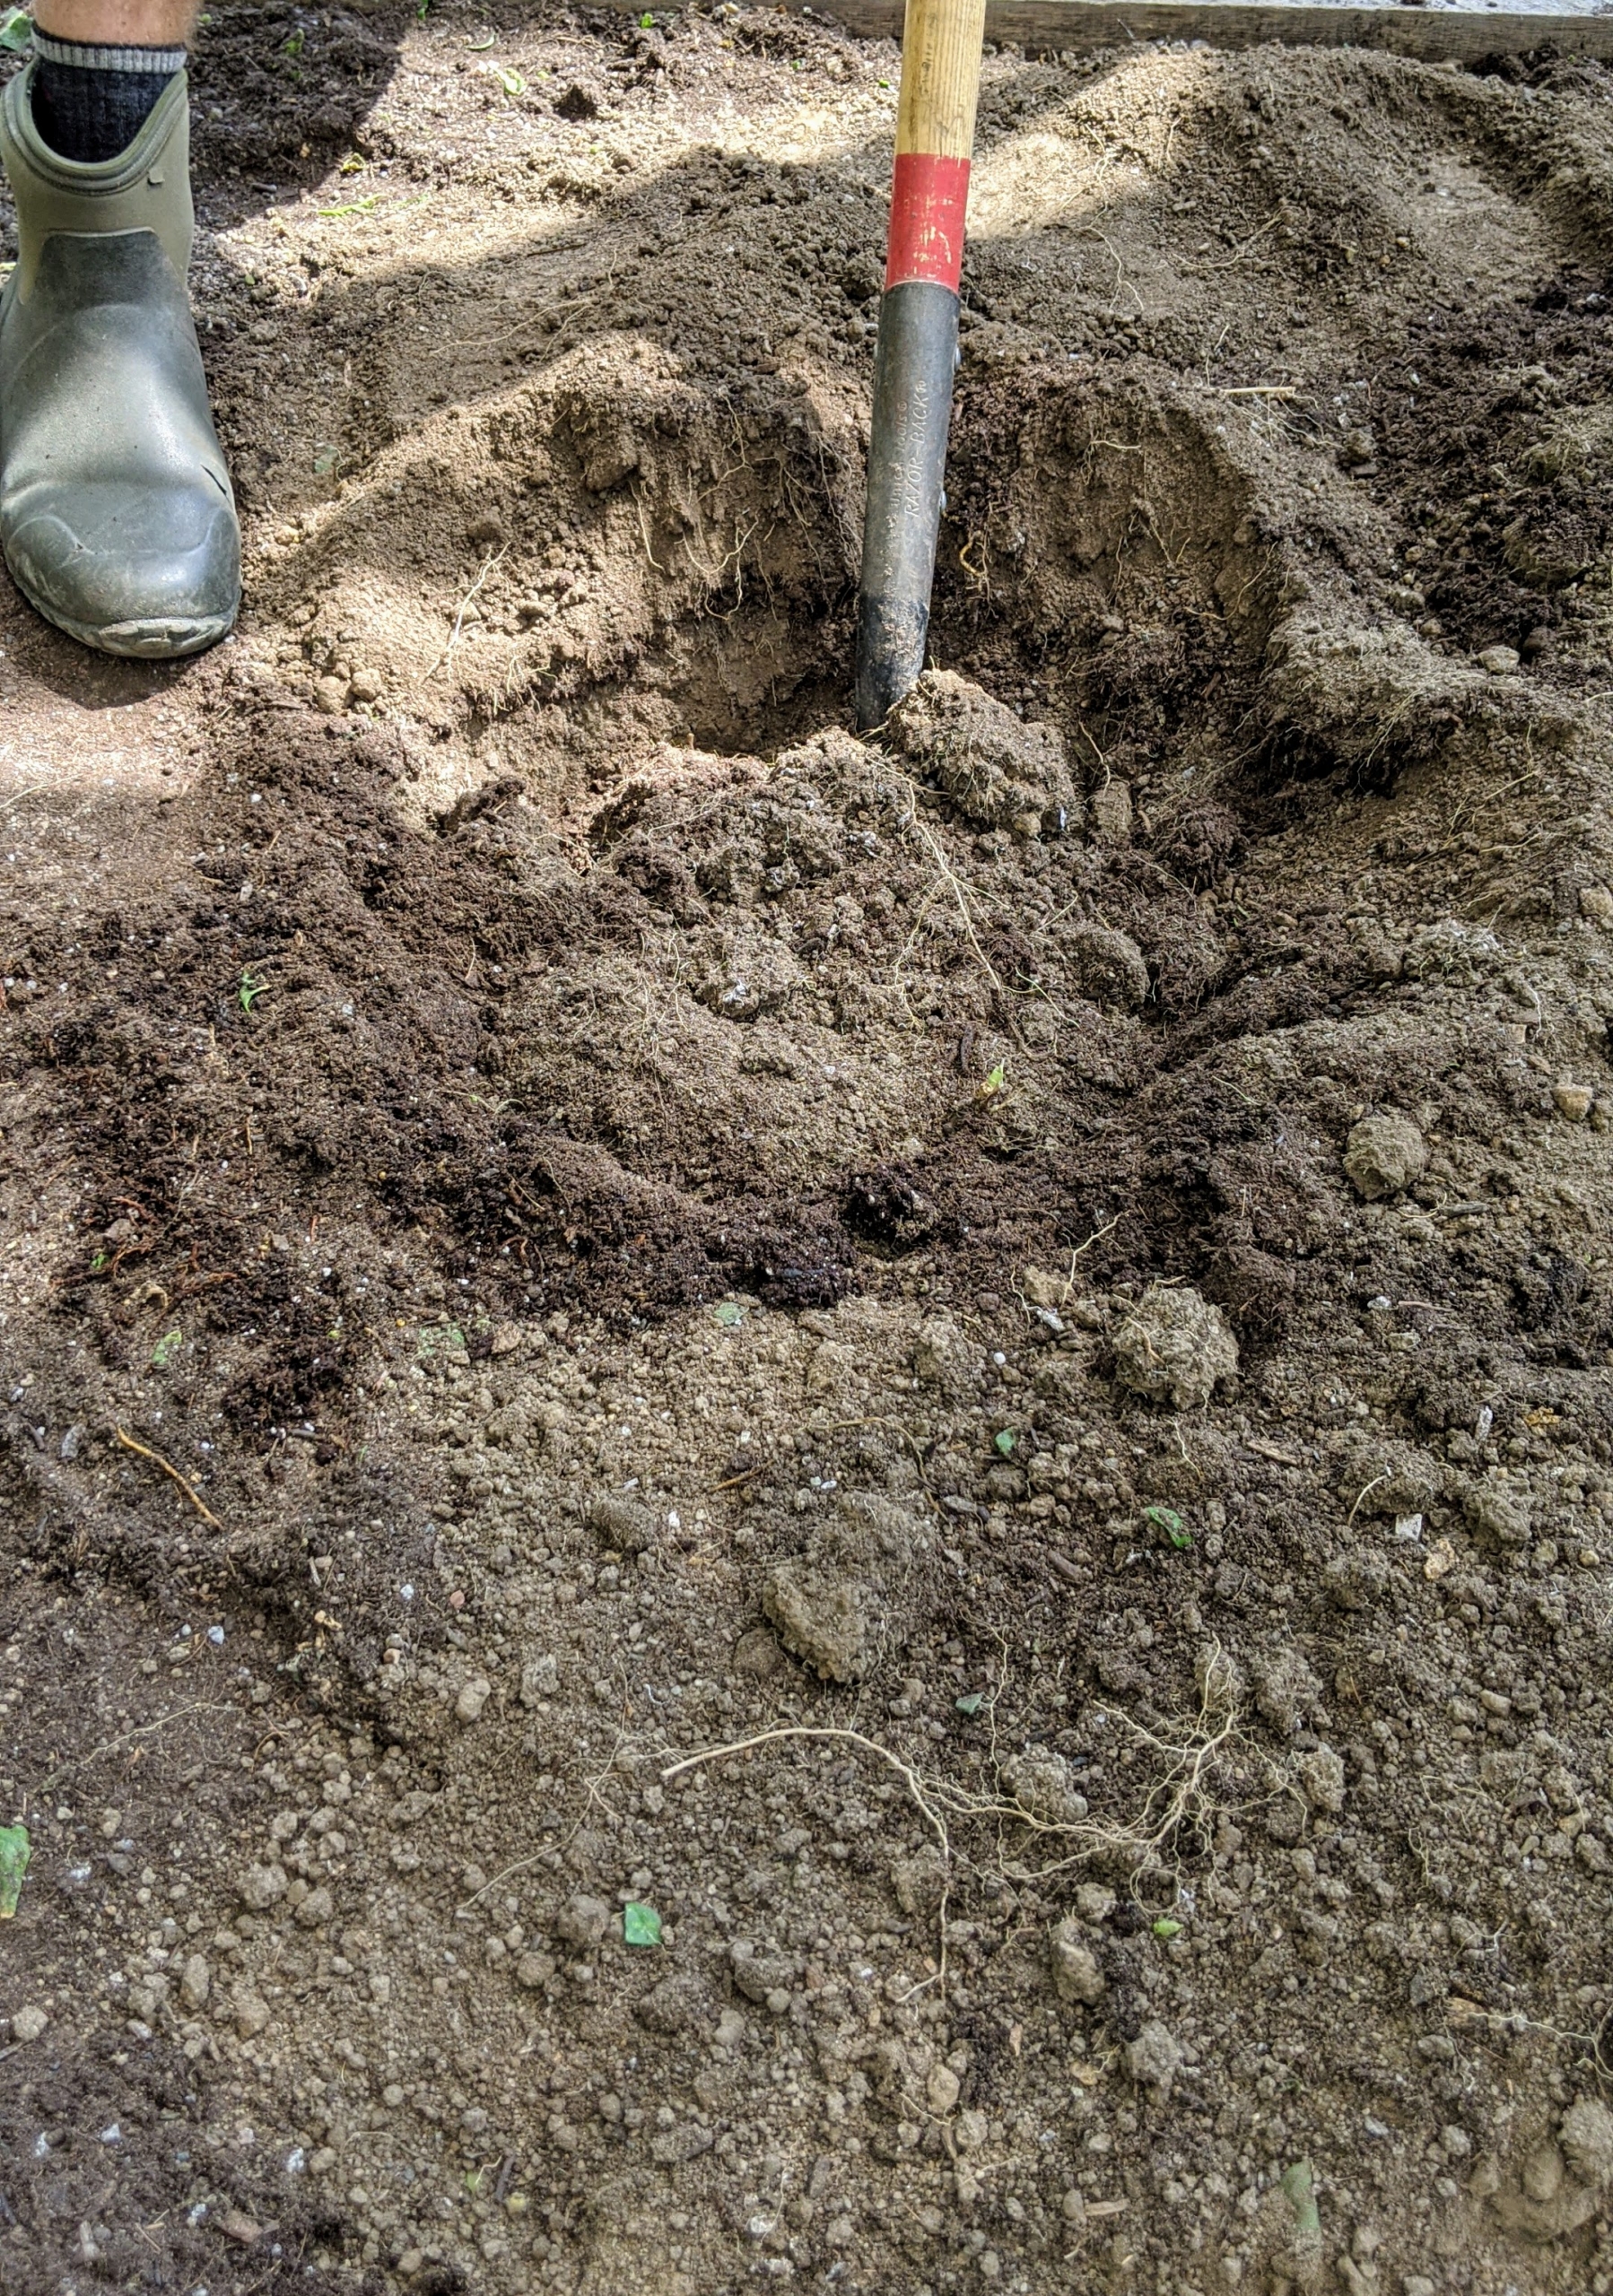
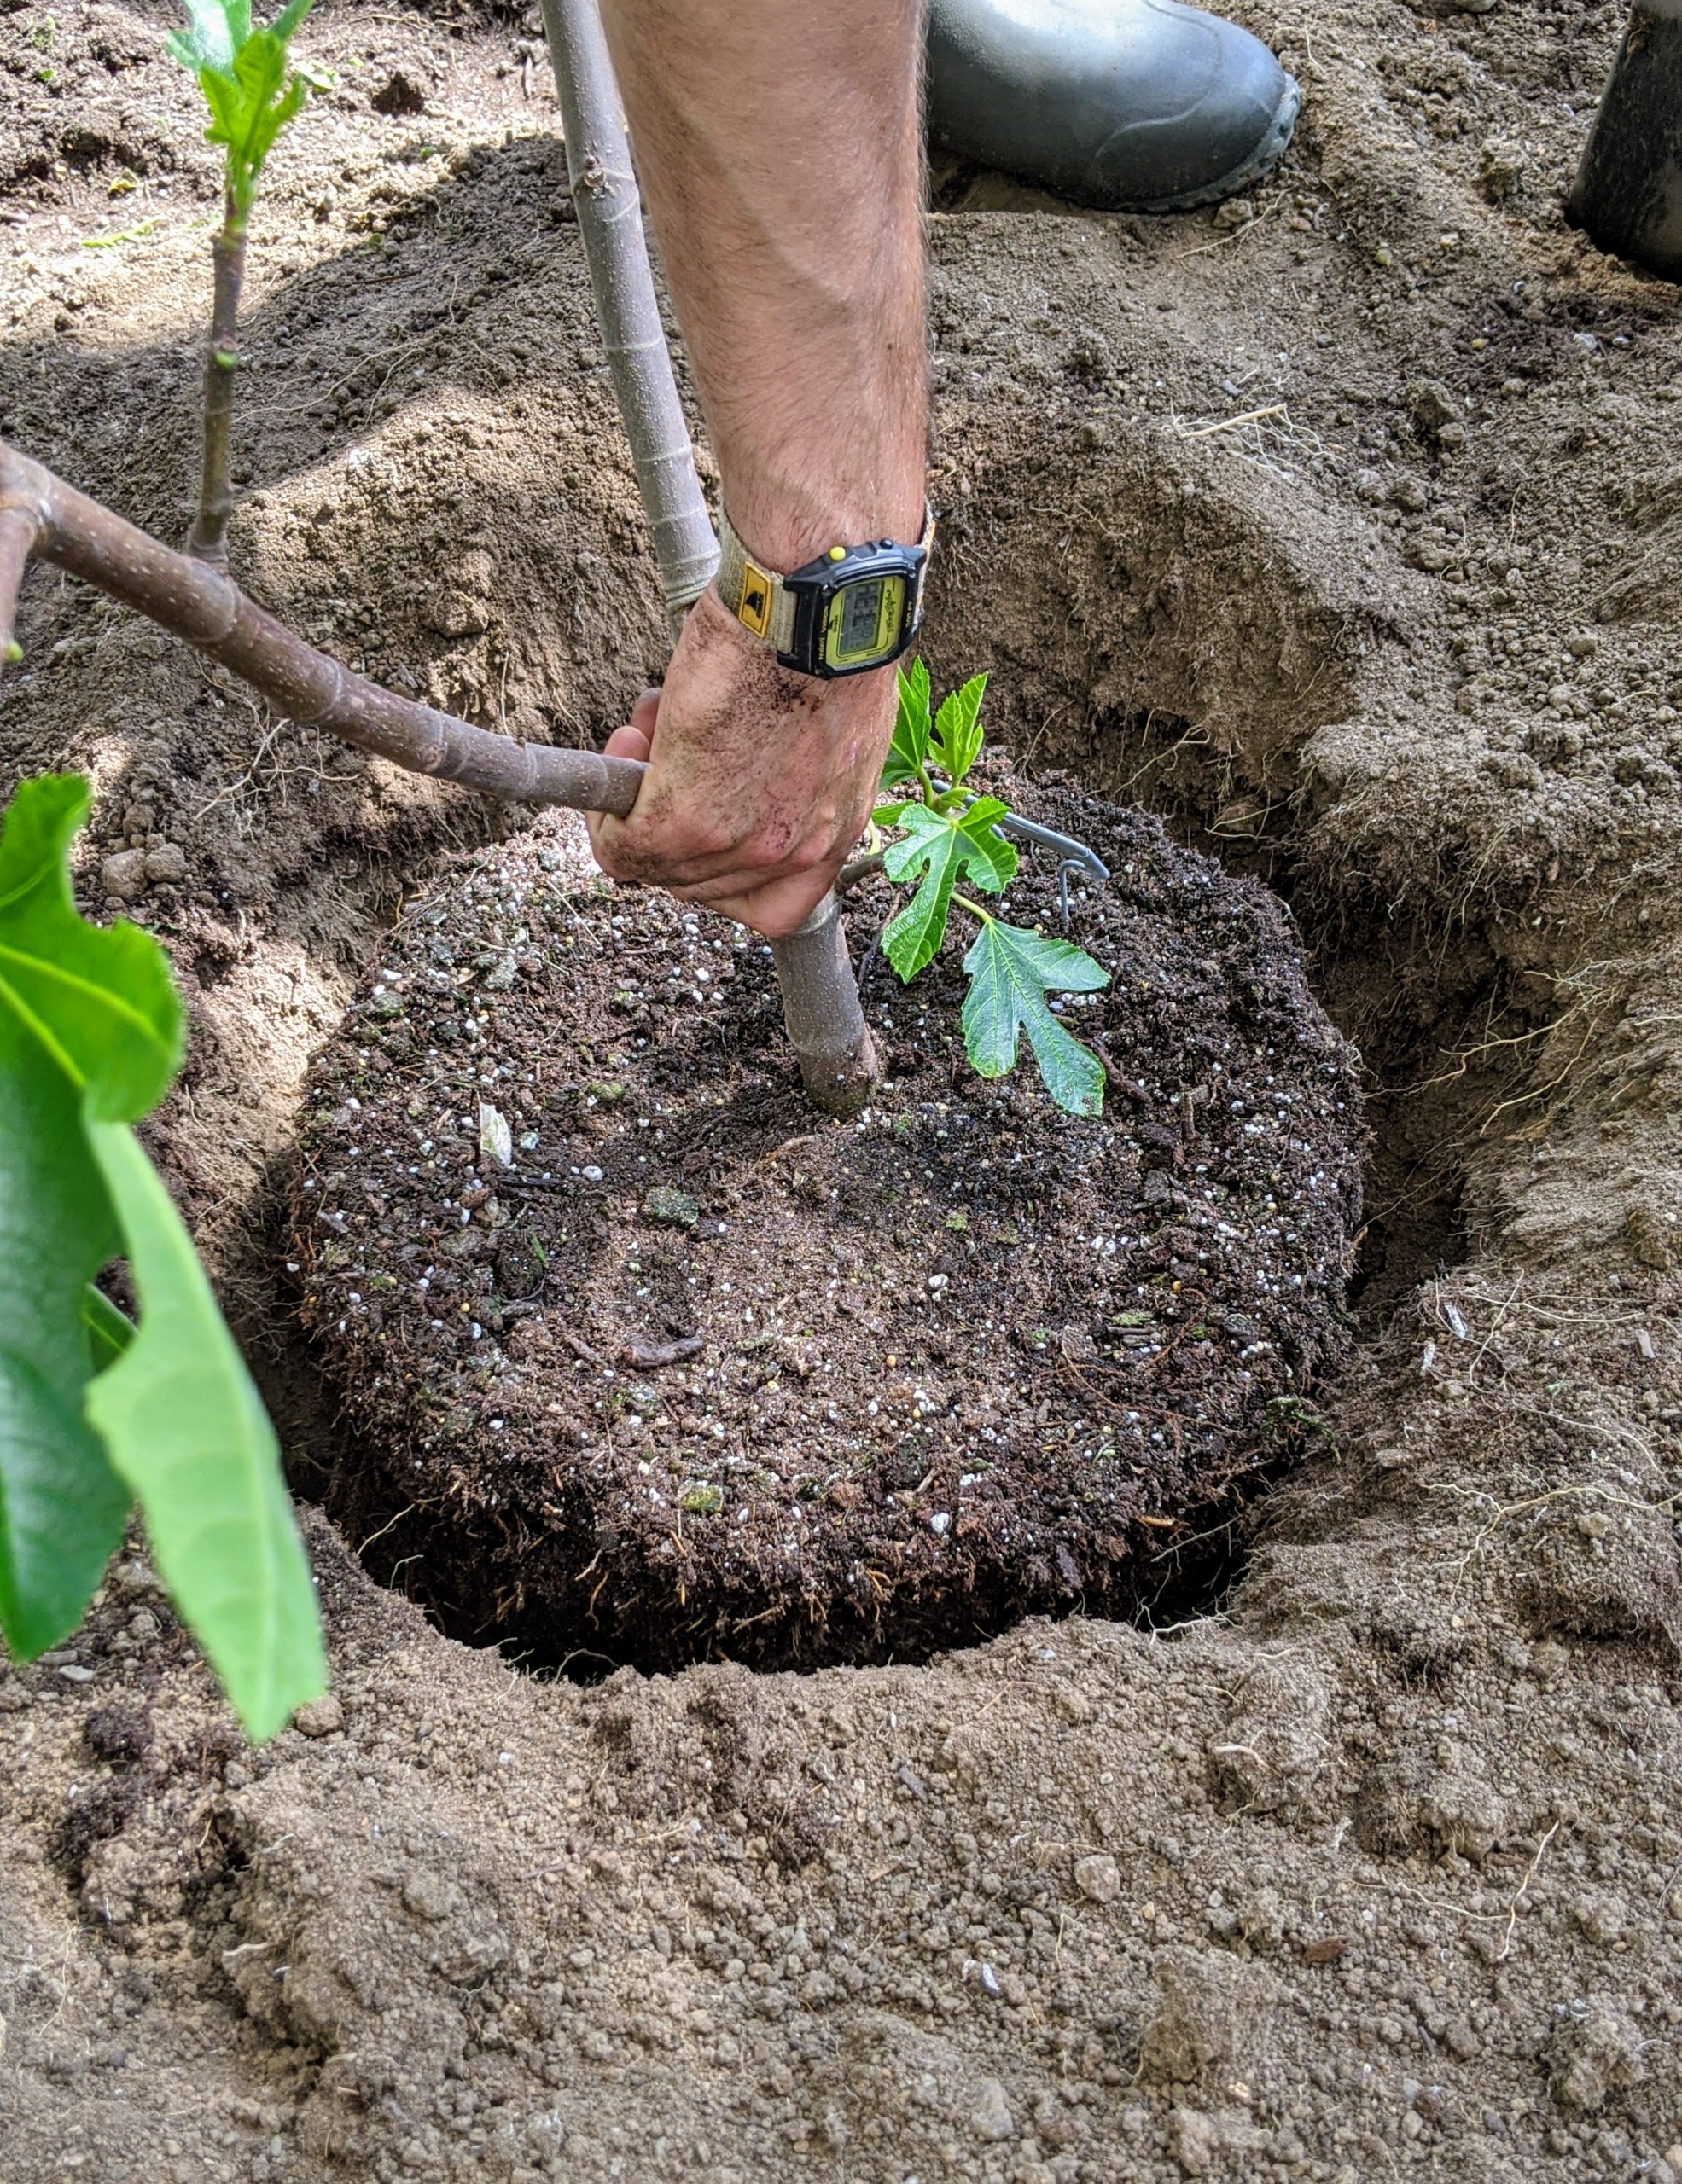
Brian digs a proper hole for the fig tree that is two to three times the size of the root ball.
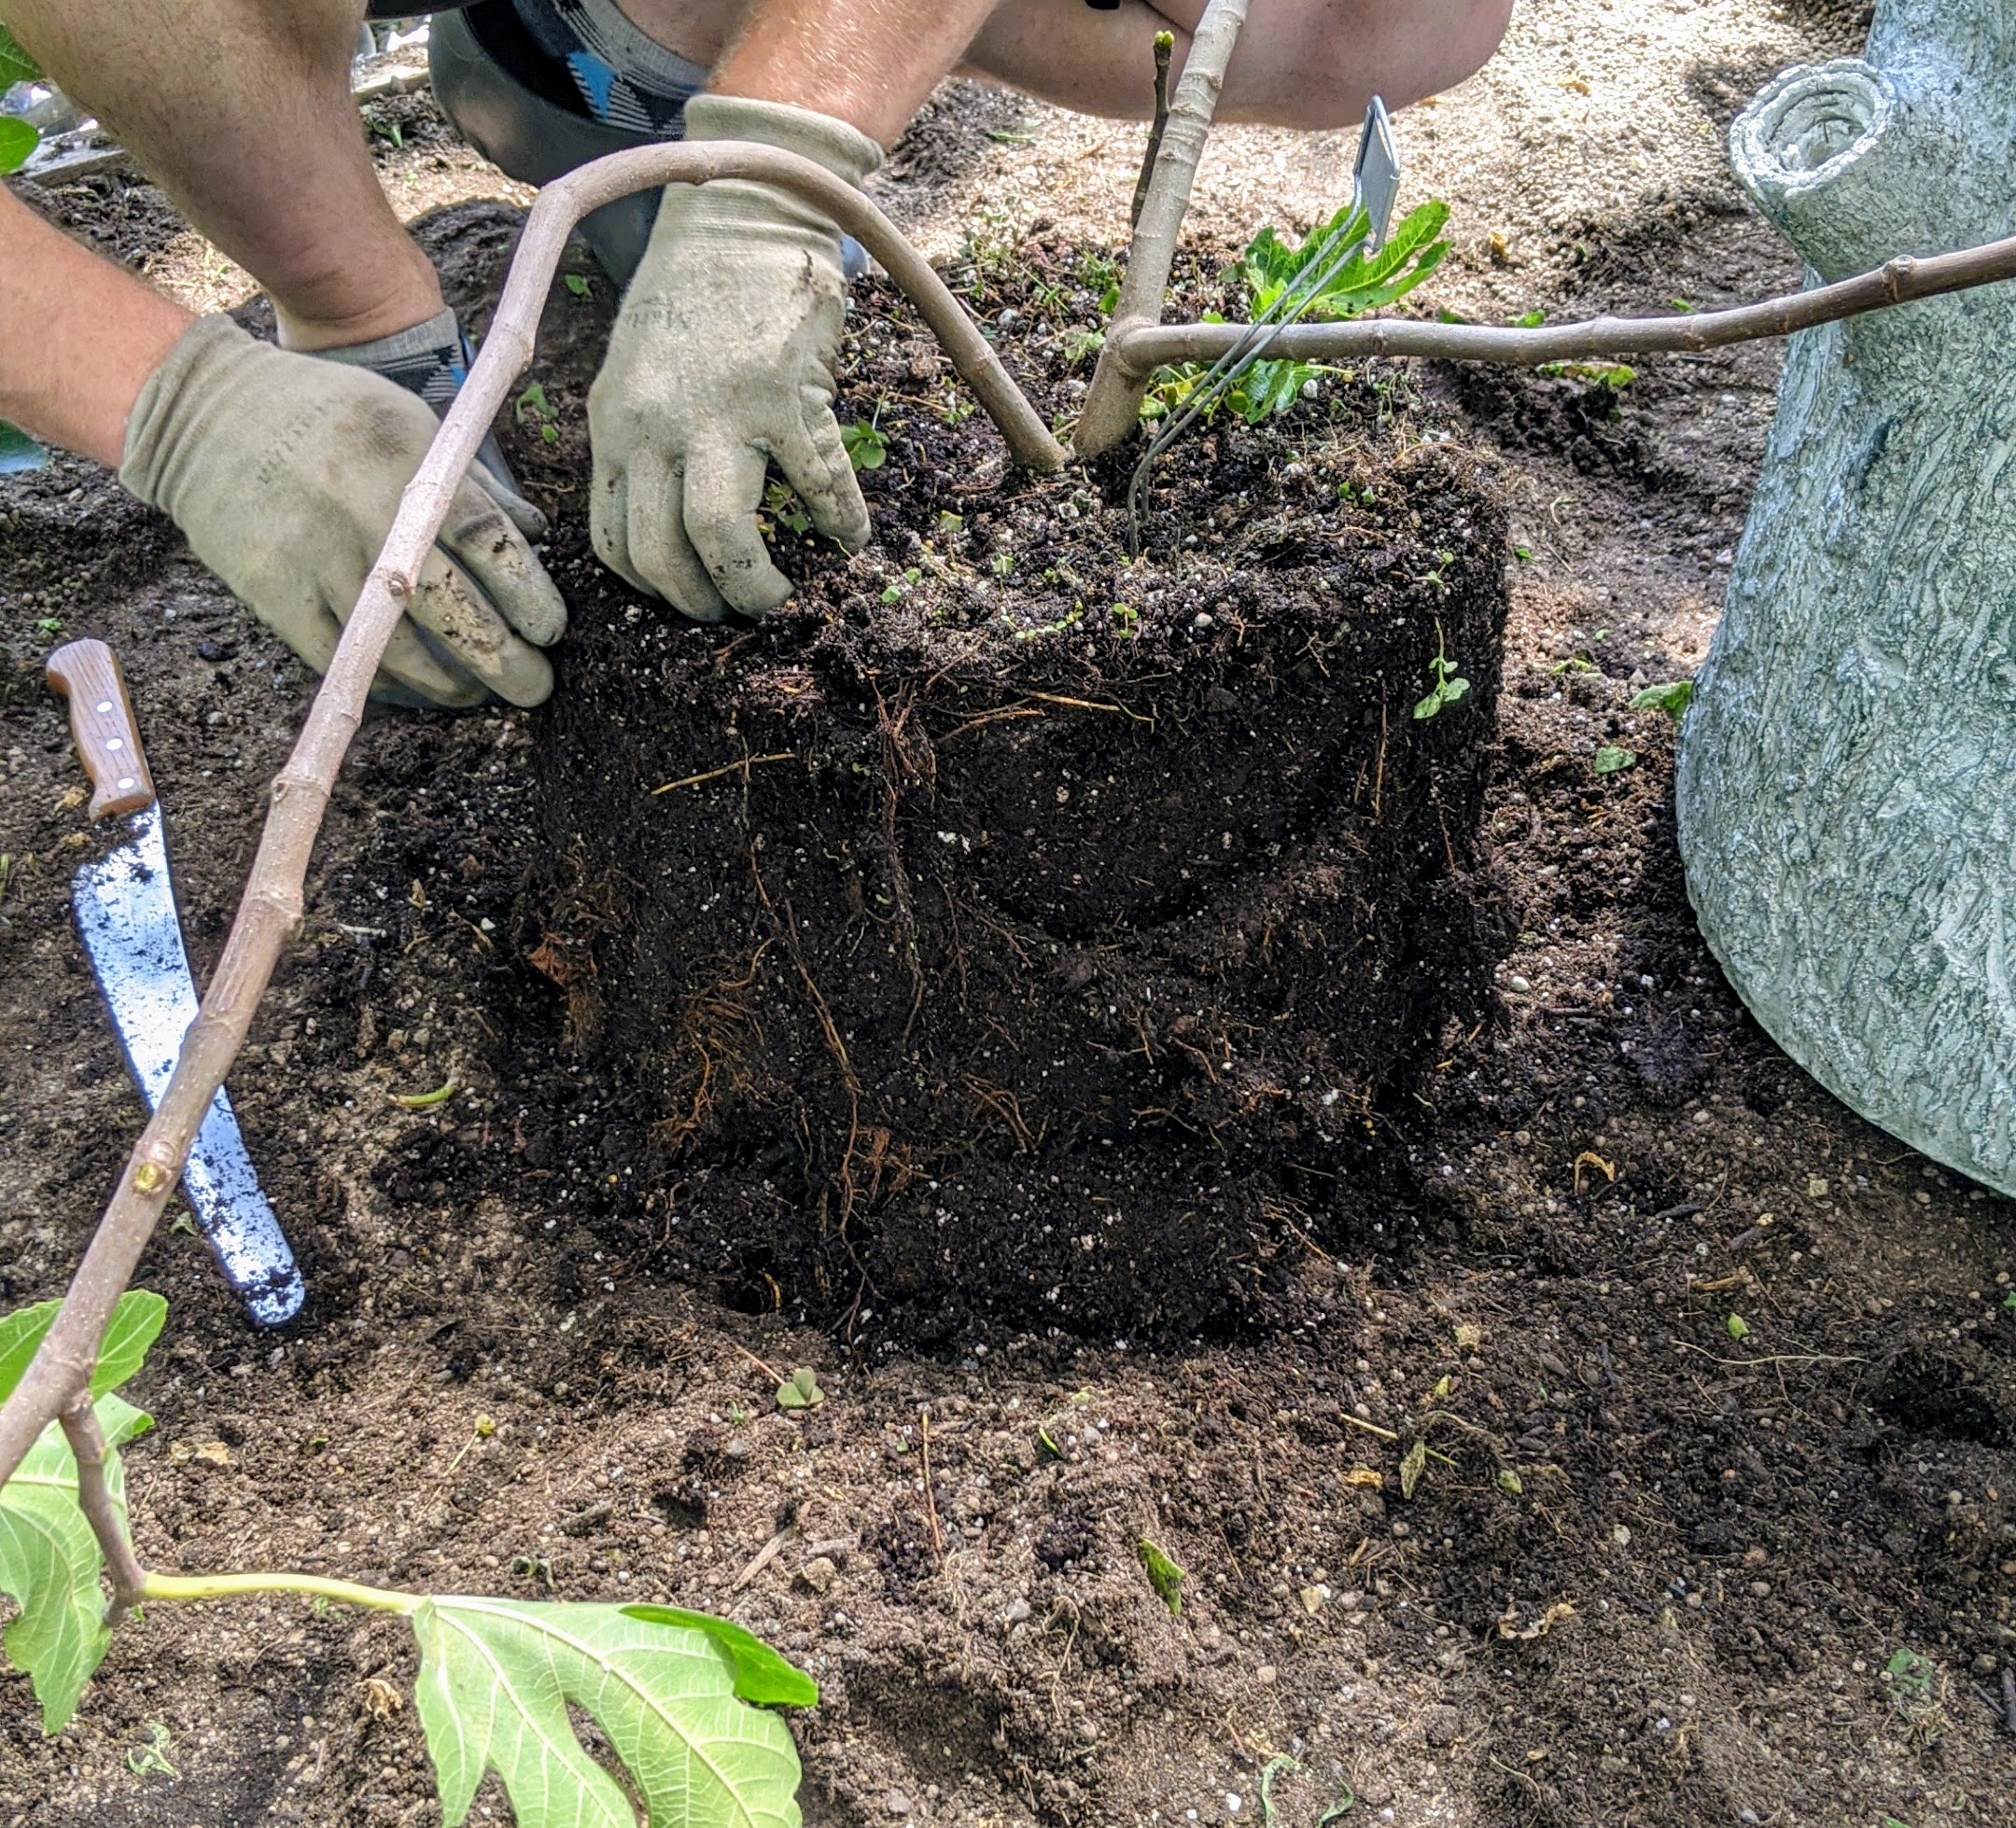
Next, he places the tree into the hole to see if it is the right size. It must be as deep as it was in the original pot – planting a tree too deep can kill it.
To help the roots get established, Brian scarifies them. Scarifying stimulates root growth. Essentially, he breaks up small portions of the root ball to loosen the roots a bit and create some beneficial injuries. This helps the plant become established more quickly in its new environment.
Brian places the tree back into the hole – now it is just right. He makes sure it is straight and turned with its best side facing toward the center of the greenhouse.
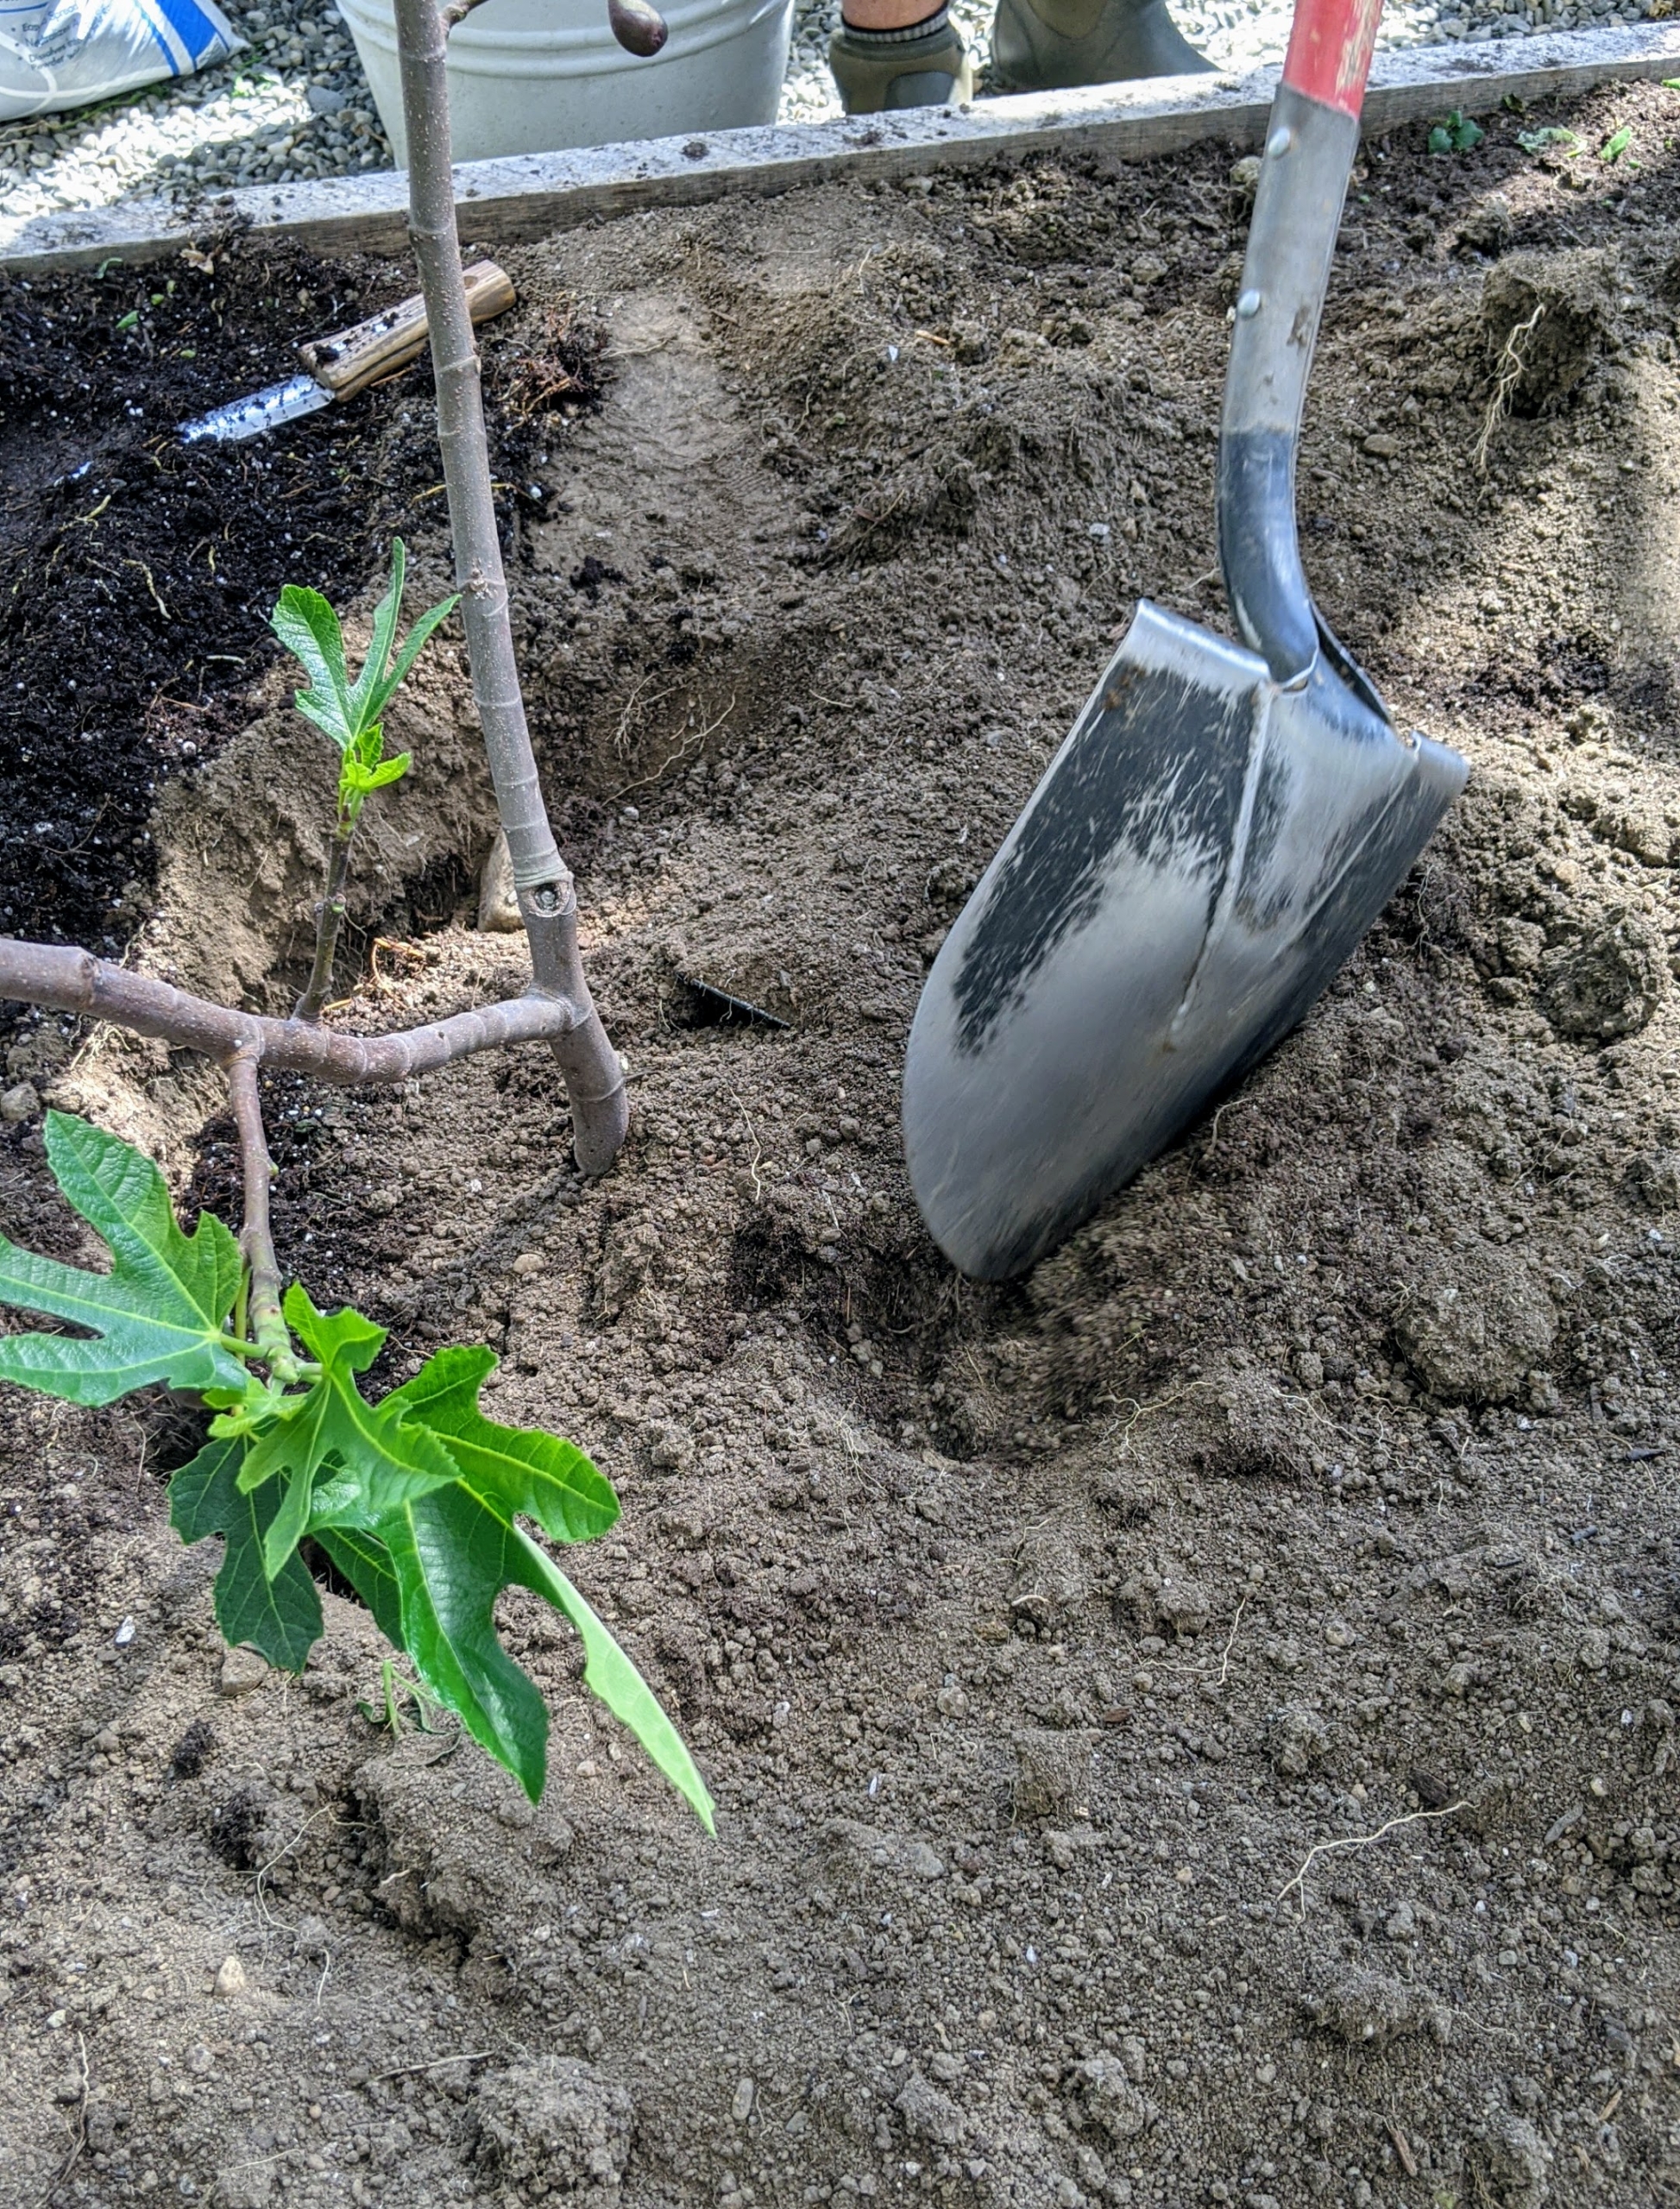
And then finally, Brian backfills the hole and tamps the soil down lightly to ensure there are no air pockets.
Here he is backfilling another hole and stopping for a quick photo.
Once all five specimens are planted, Brian rakes the bed so the soil is level and tidy.
Fig ‘GE Neri’ is known as one of the largest fruiting figs, with fruit the size of a tennis ball. This rare Italian fig tree variety has one crop of fruit a year that starts ripening in late summer and continues through early fall. The figs are crimson on the outside with reddish inner flesh that’s very sweet.
Fig ‘Letezia’ is family heirloom fig, named after plantsman Steve Castorani’s mother, Letizia. It is a rare Italian fig that’s hardy to zone 6. It makes a nice ornamental shrub since it’s well branched with large leaves when mature. The medium-sized fruit has light brown skin and delicious, honey-colored inner flesh.
Ficus carica ‘Brunswick’ is an attractive, self-fertile and heavy cropping fig. It is very hardy, and quite popular for growing.
‘Brunswick’ produces pear-shaped skinned fruits with a sweet flavor and yellow-red flesh. These need more time to ripen.
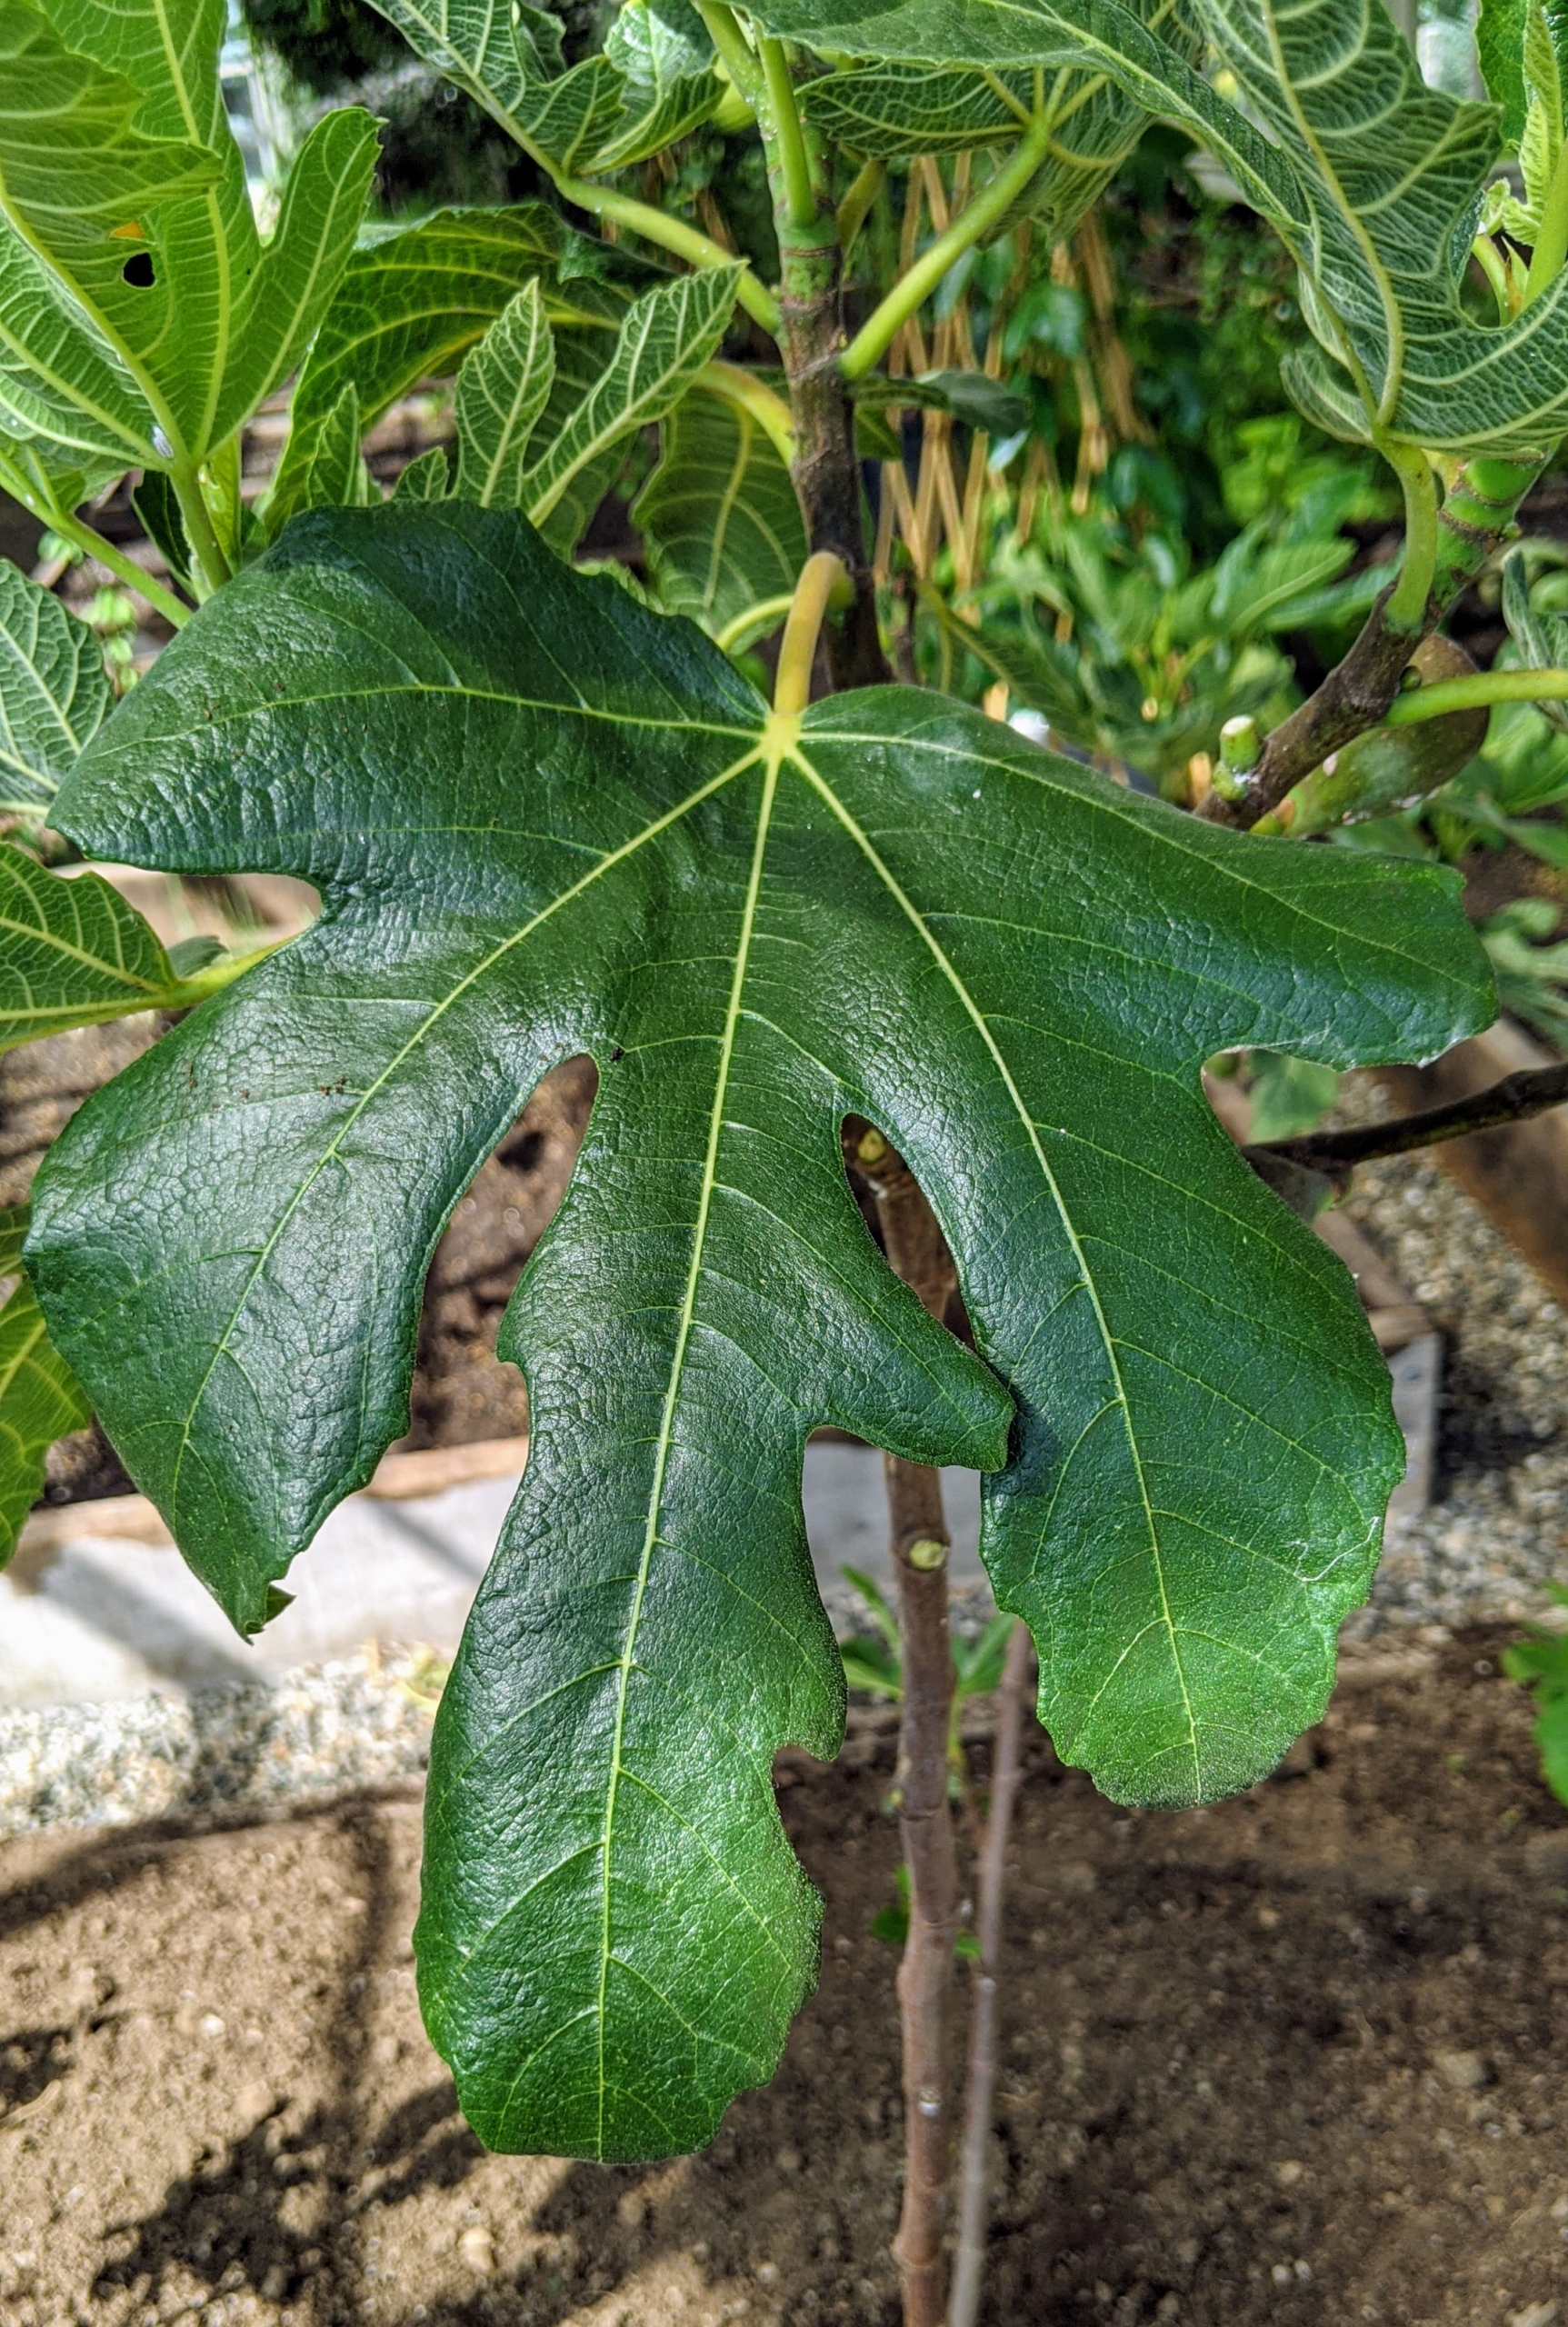
This leaf is from a ‘Chicago Hardy’ fig. A healthy “Chicago Hardy’ can produce bushels of plump, delicious figs that are perfect for peeling and eating right off the tree in late summer to early fall. It has large dark green leaves that are four to 10 inches long.
Fig ‘Petite Negra’ is another amazing fruiting variety with large, dark green leaves.
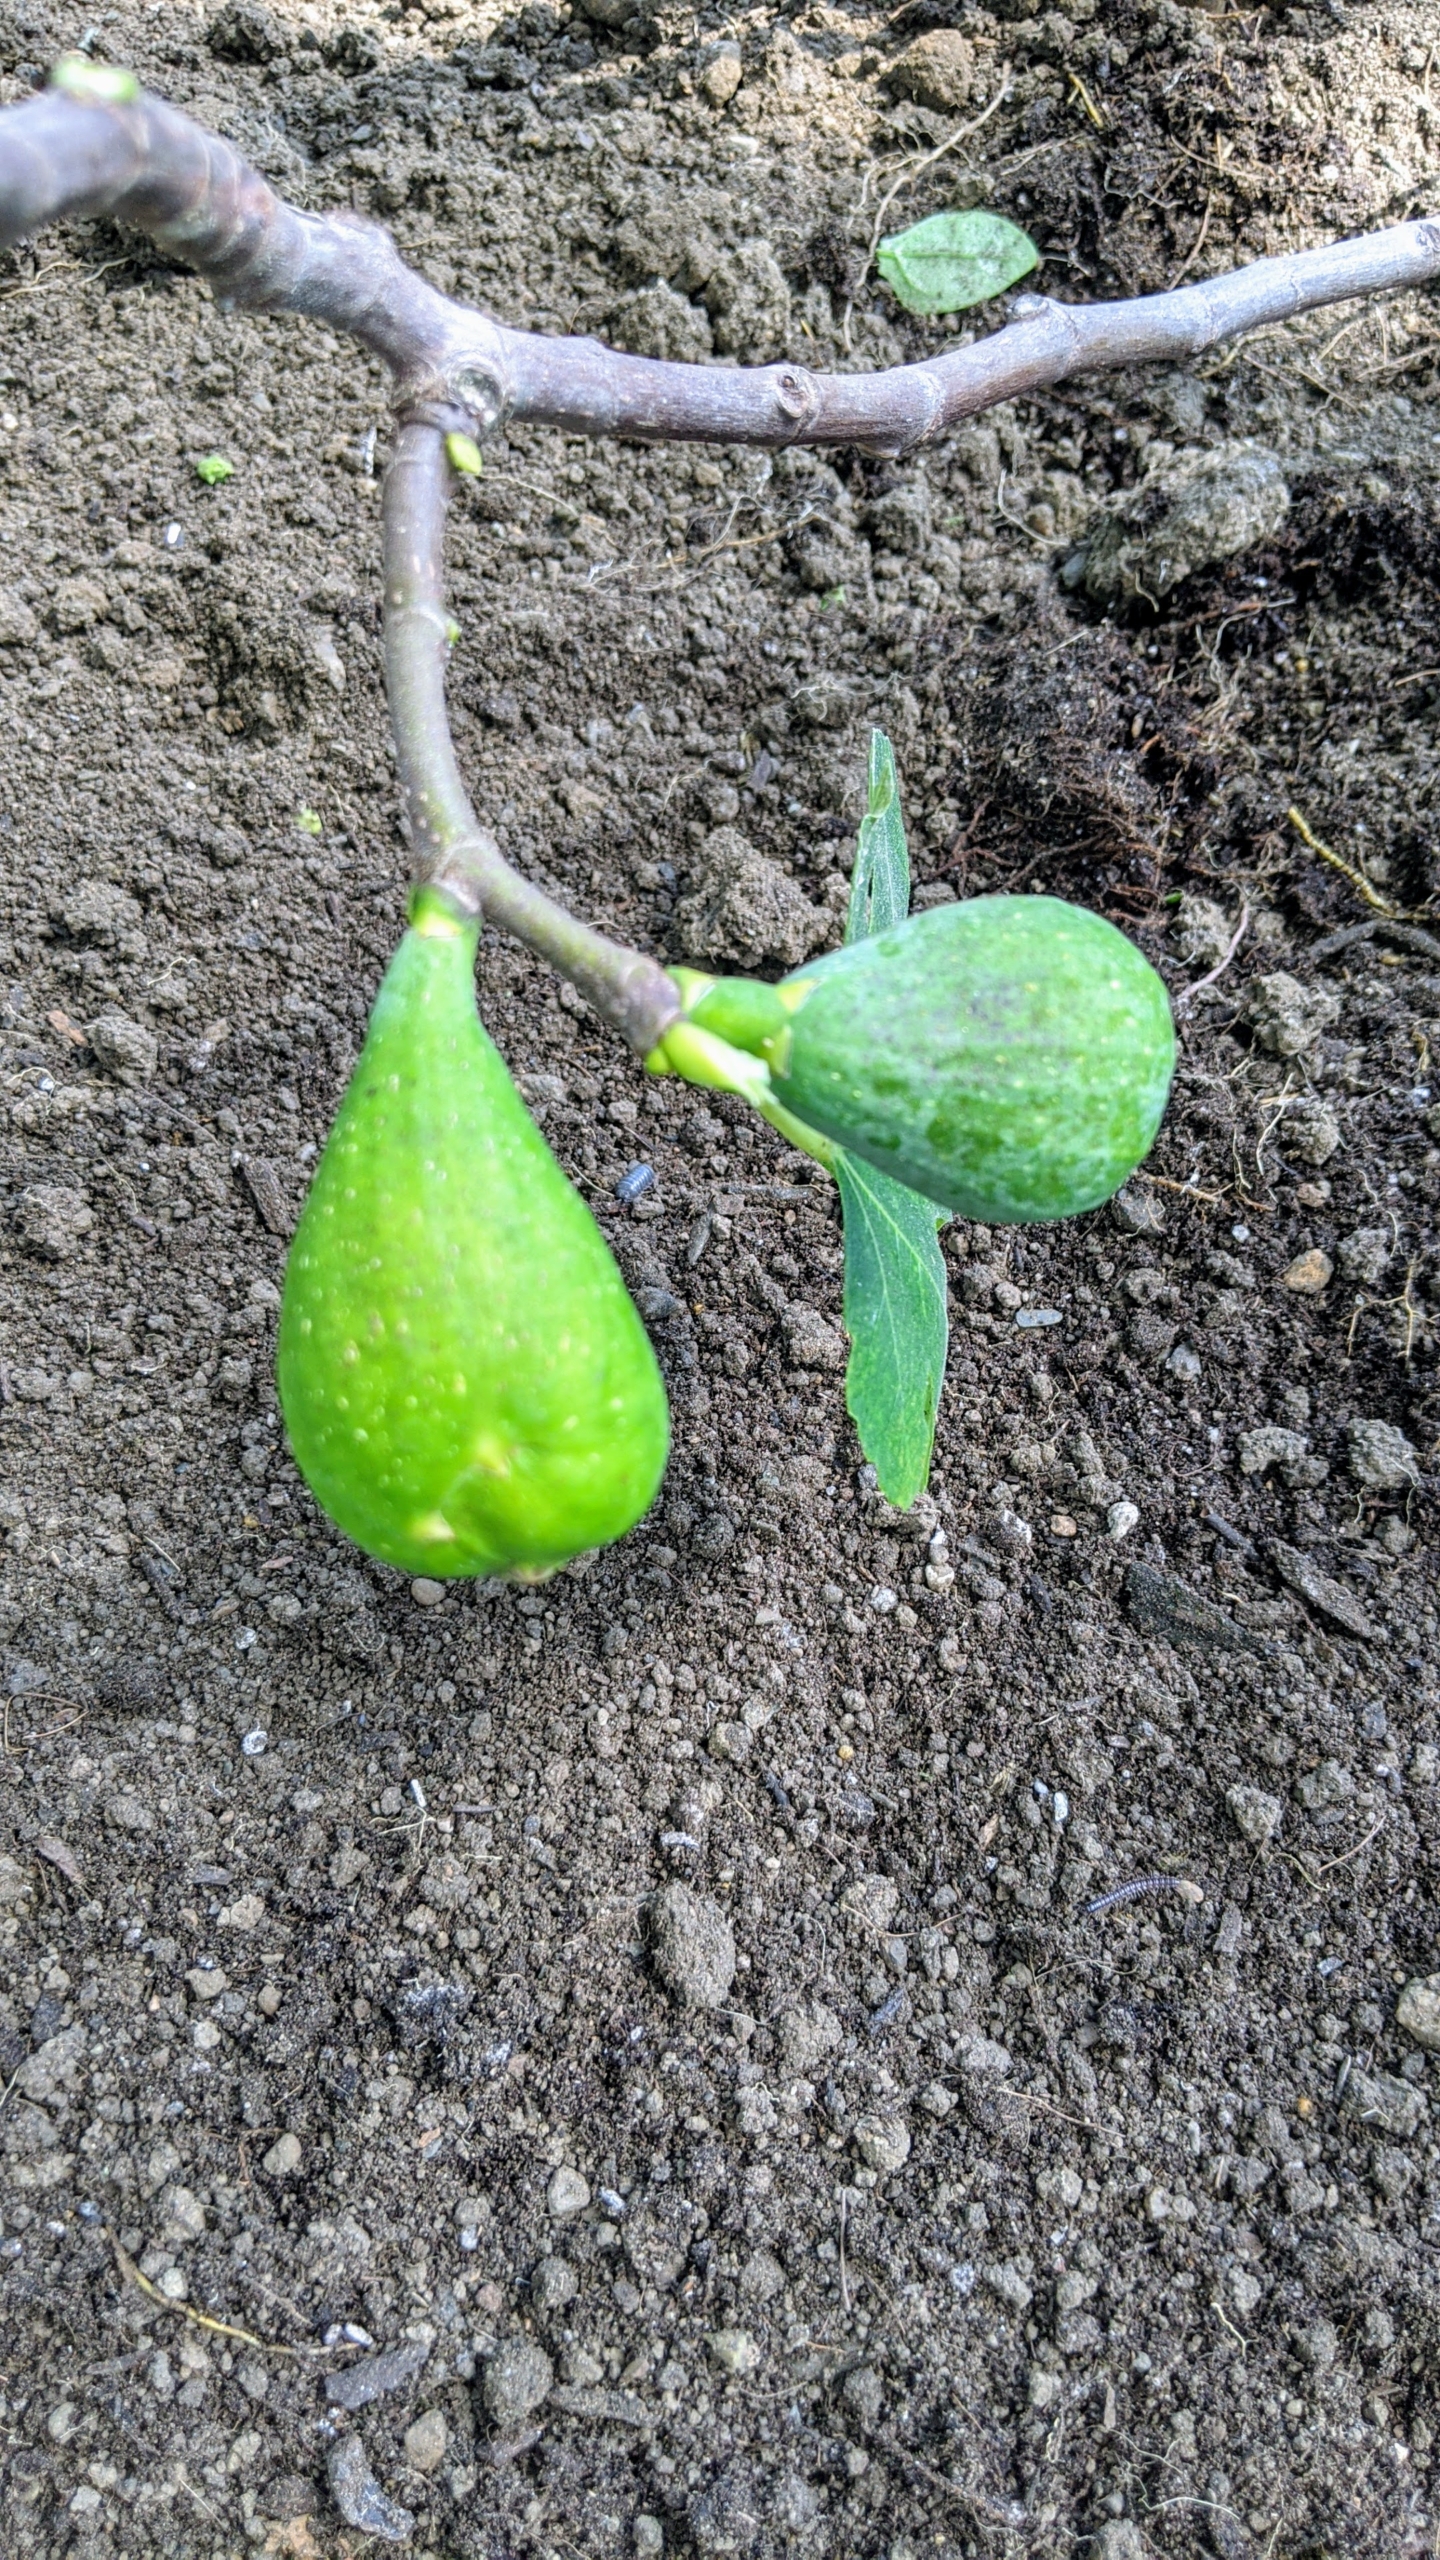
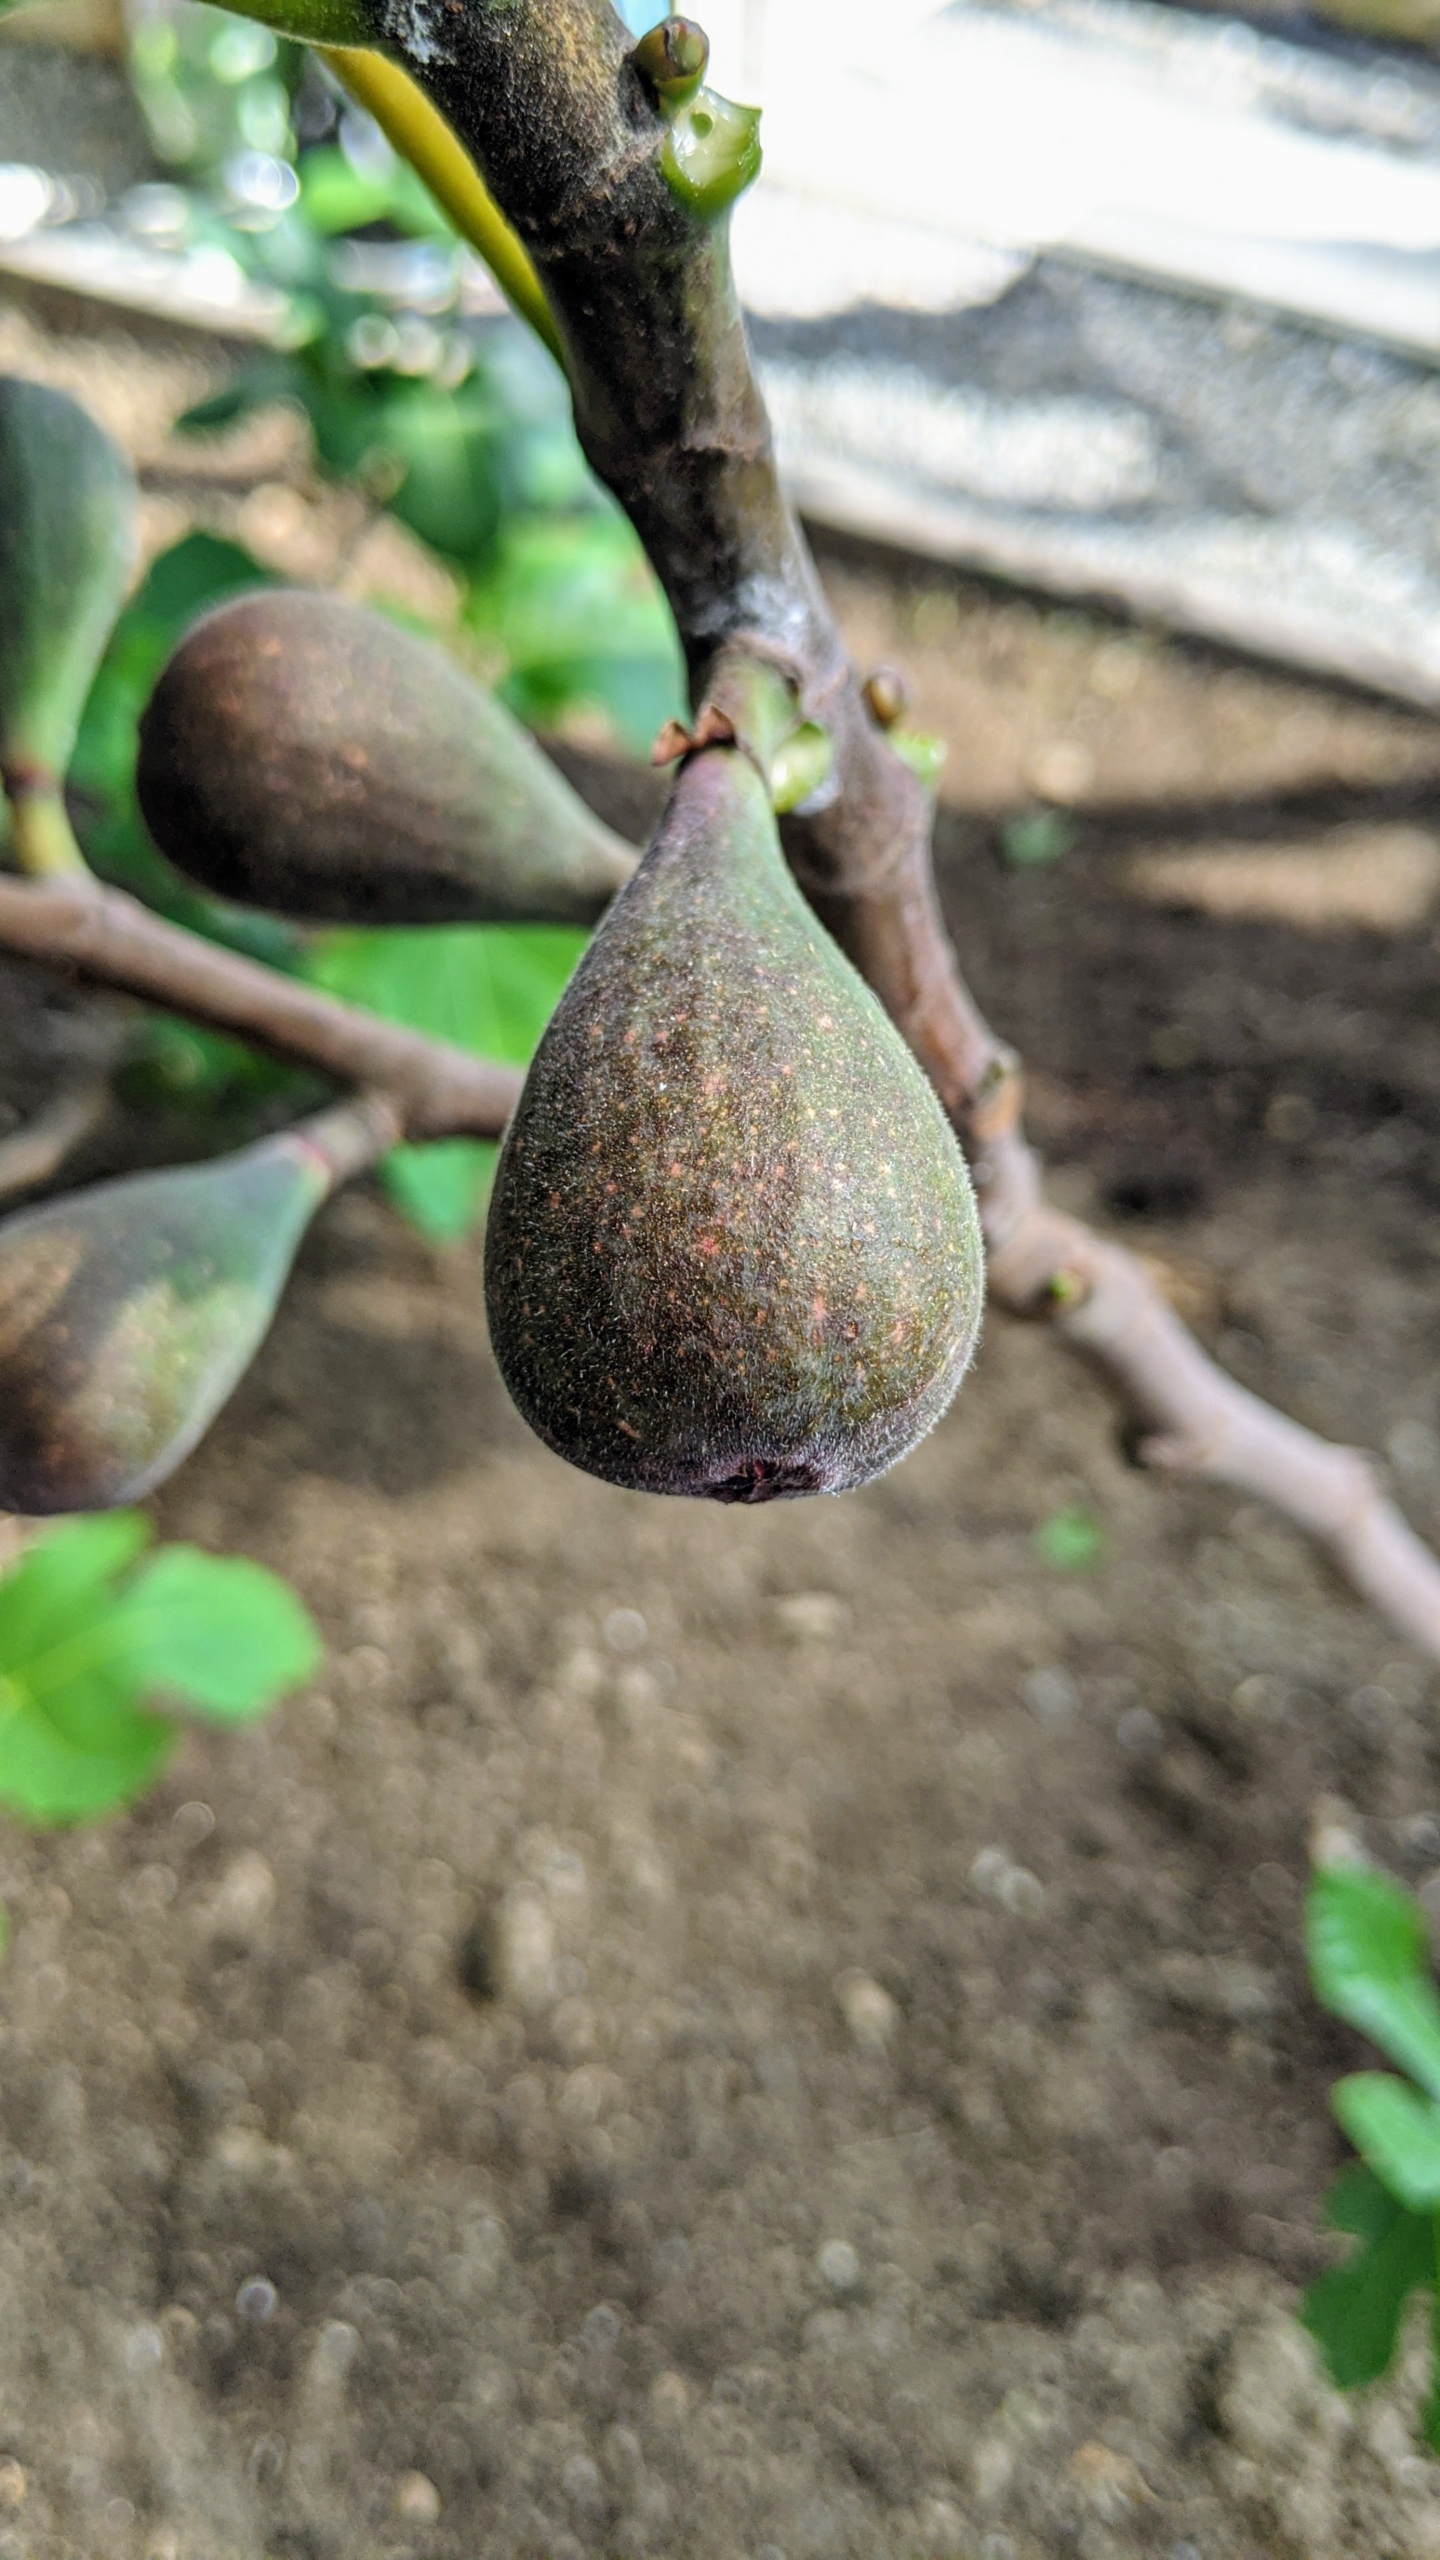
It produces medium-sized plump black juicy figs at a young age. An important tip – never pick figs that are still green; always let them ripen fully on the tree before picking as they do not ripen any more once harvested.
These trees will do so well here in my vegetable greenhouse. And with good care and a bit of time, these trees will produce lots and lots of delicious sweet fruits. I can’t wait. What are your favorite fig varieties? Share your comments with me below.