Today we're expecting partly cloudy skies in the area with temperatures rising to the mid-50s - good conditions for melting the snow from this week's nor'easter.
The day after a snow storm, I always enjoy touring the farm early in the morning to take photos and to see the picturesque winter scenes across the landscape. I did just that yesterday as the sun was rising. Here in Bedford, New York, we got a good amount of snow that stuck to everything. I hope you saw some of my images on my Instagram page @MarthaStewart48.
Here are more, enjoy.
Early in the morning – around 5:30 – I ventured out to see how the farm was doing after the storm. I like to do this before anyone arrives. It was so peaceful and pristine, and there was snow everywhere.
We all know “the sun rises in the east and sets in the west.” But actually, it is only a generalization. The sun only rises due east and sets due west on two days of the year — the spring and fall equinoxes! Here I am looking east toward the gardens behind my Tenant House as I drive down the carriage road. The farm is covered with a new layer of glistening snow.
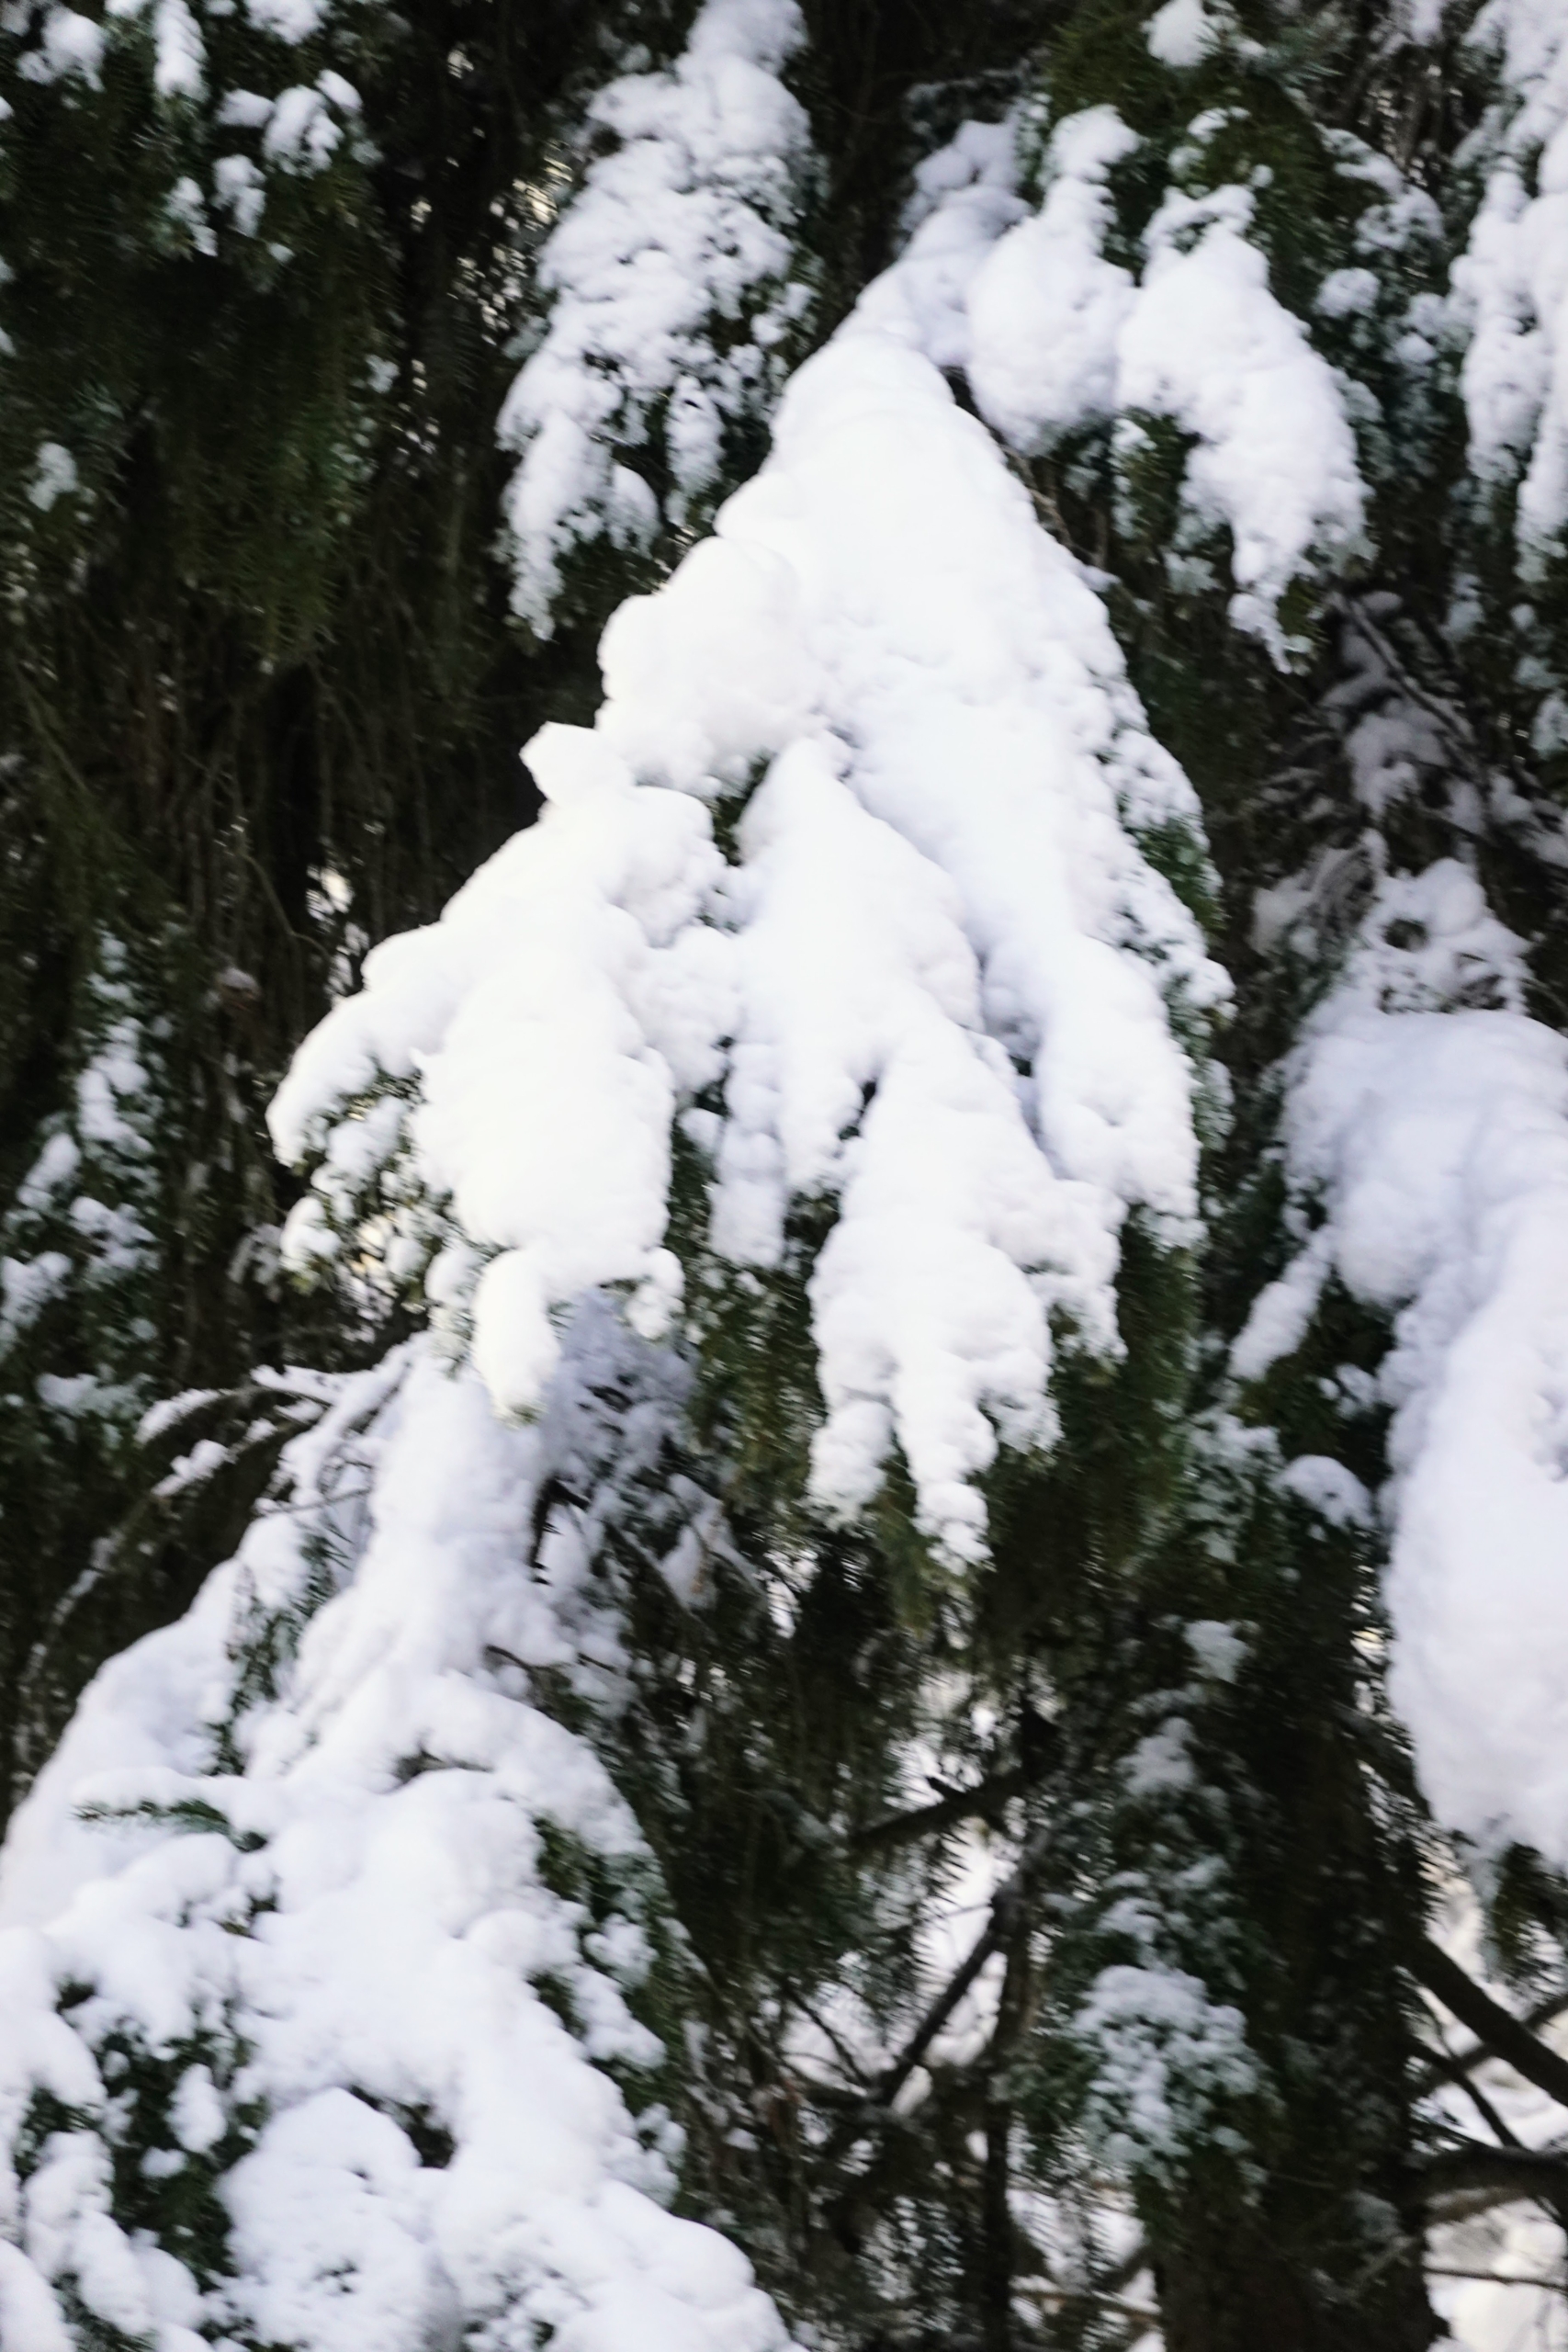
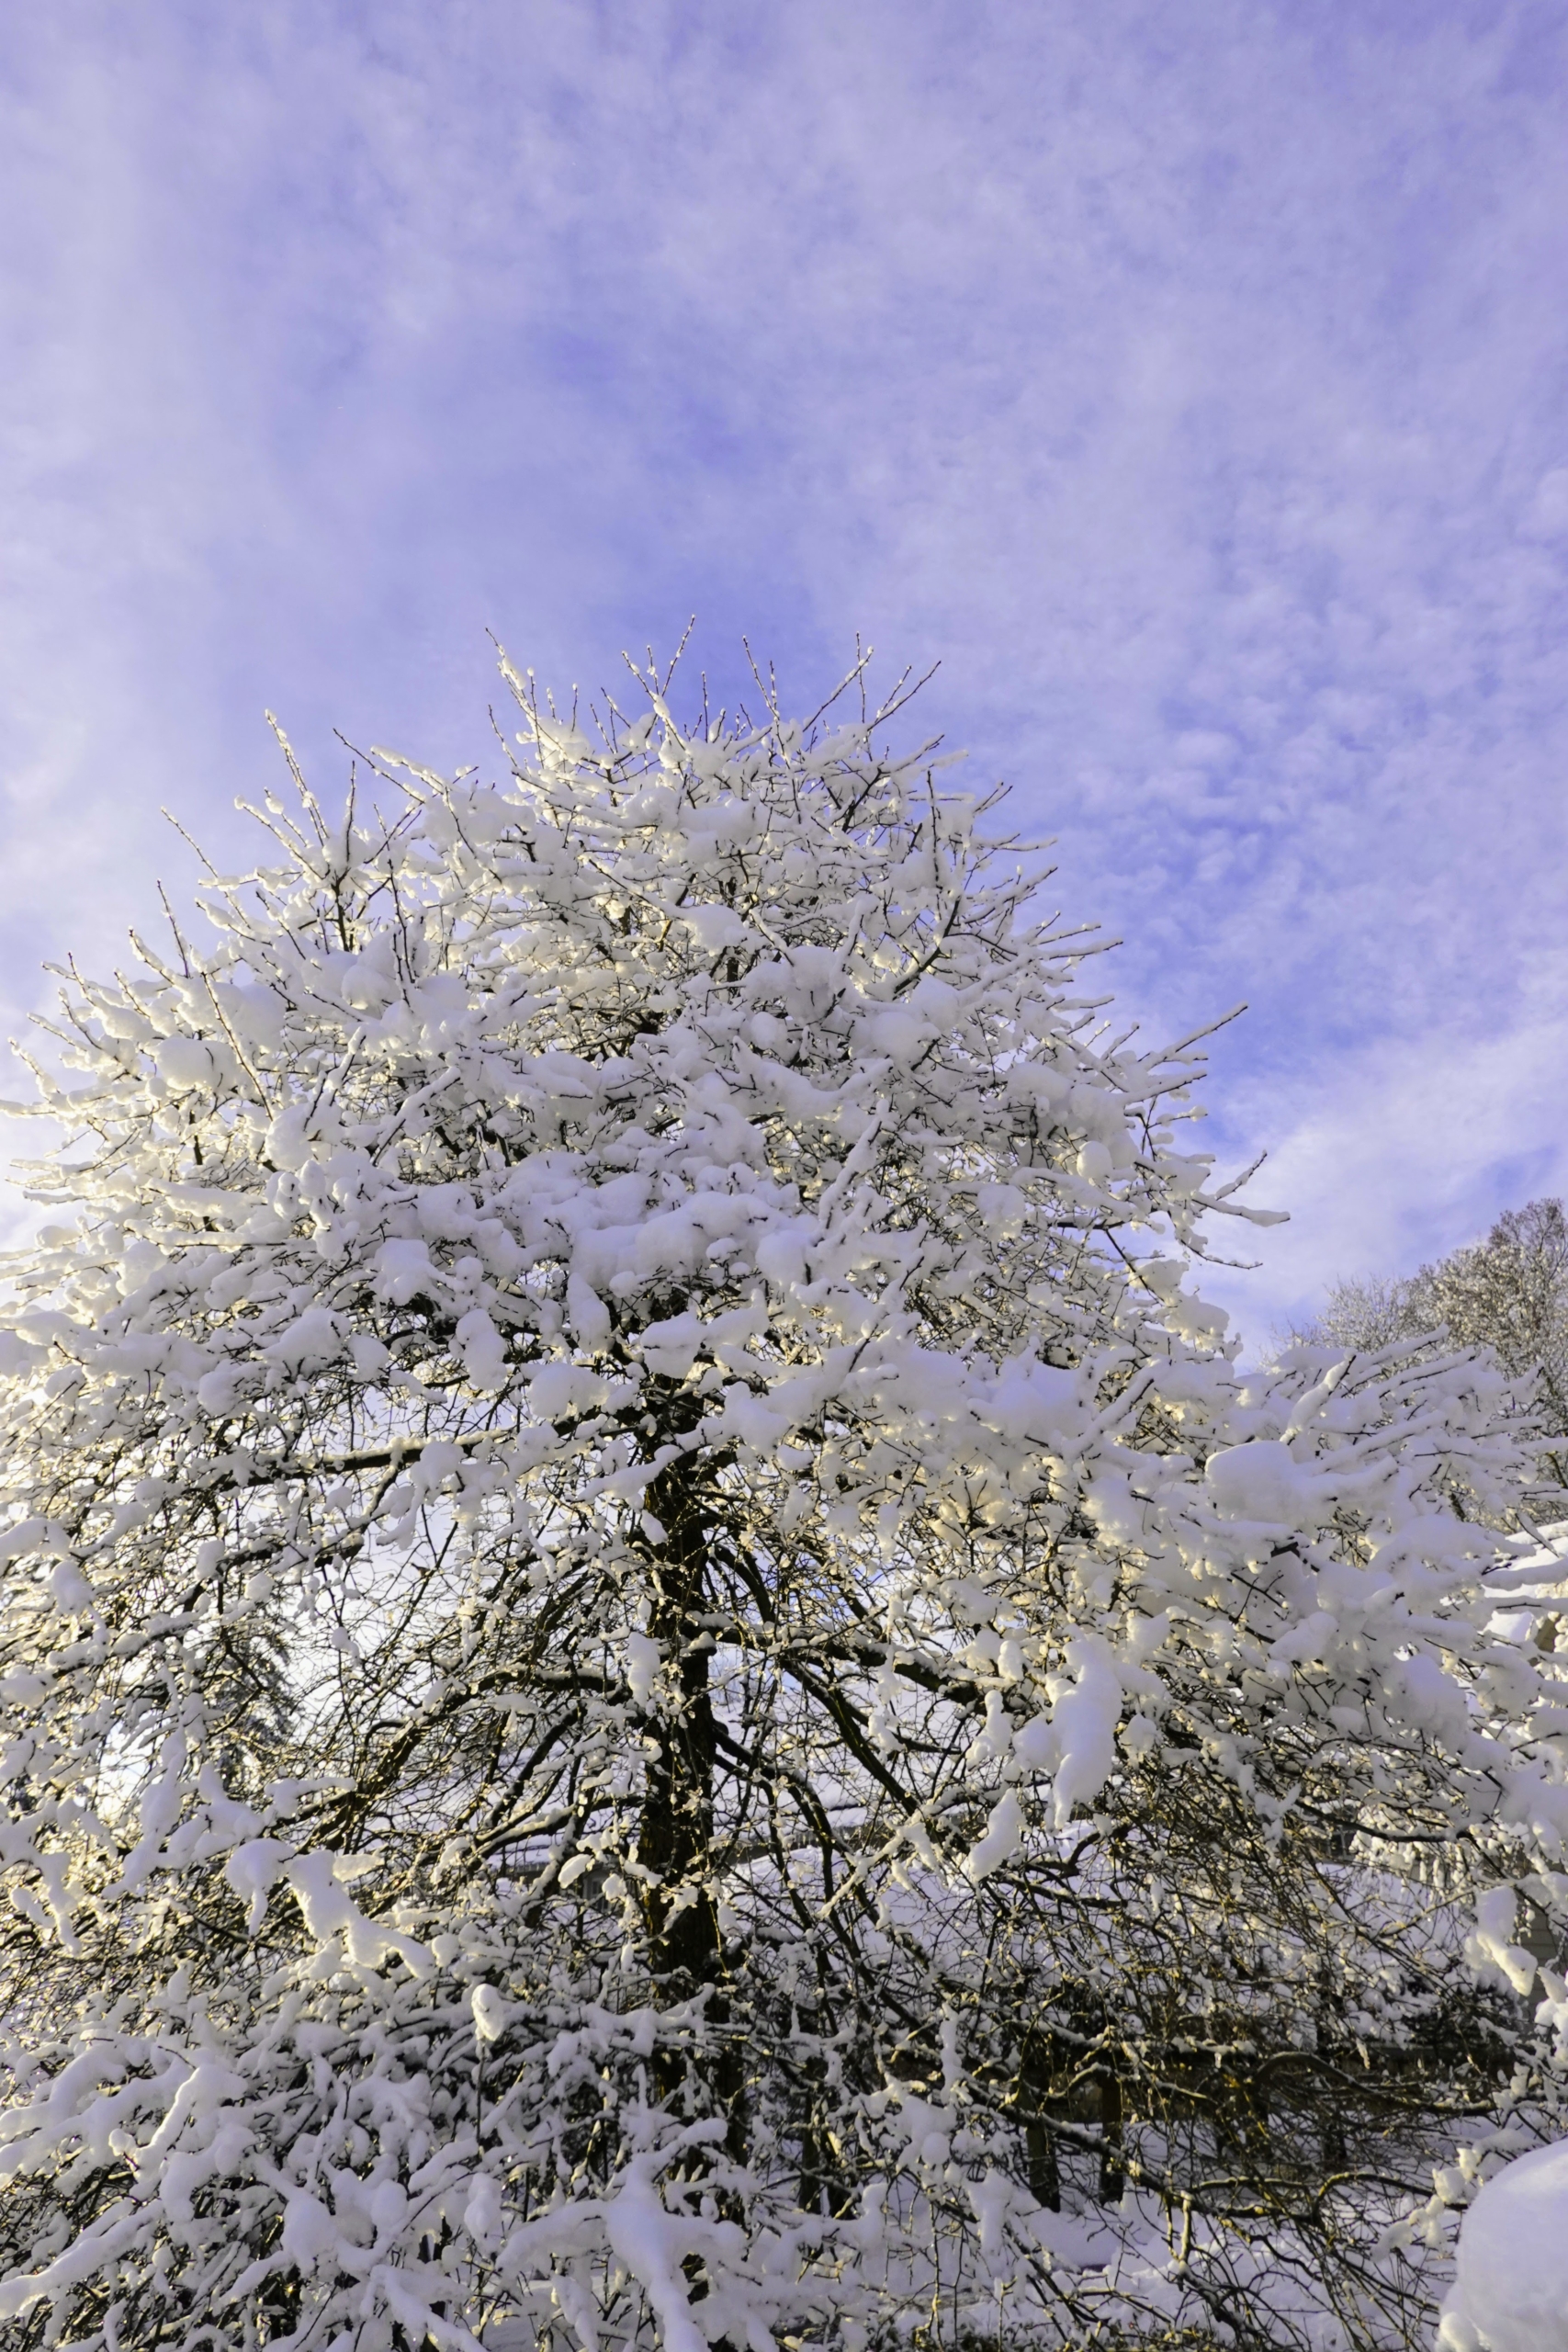
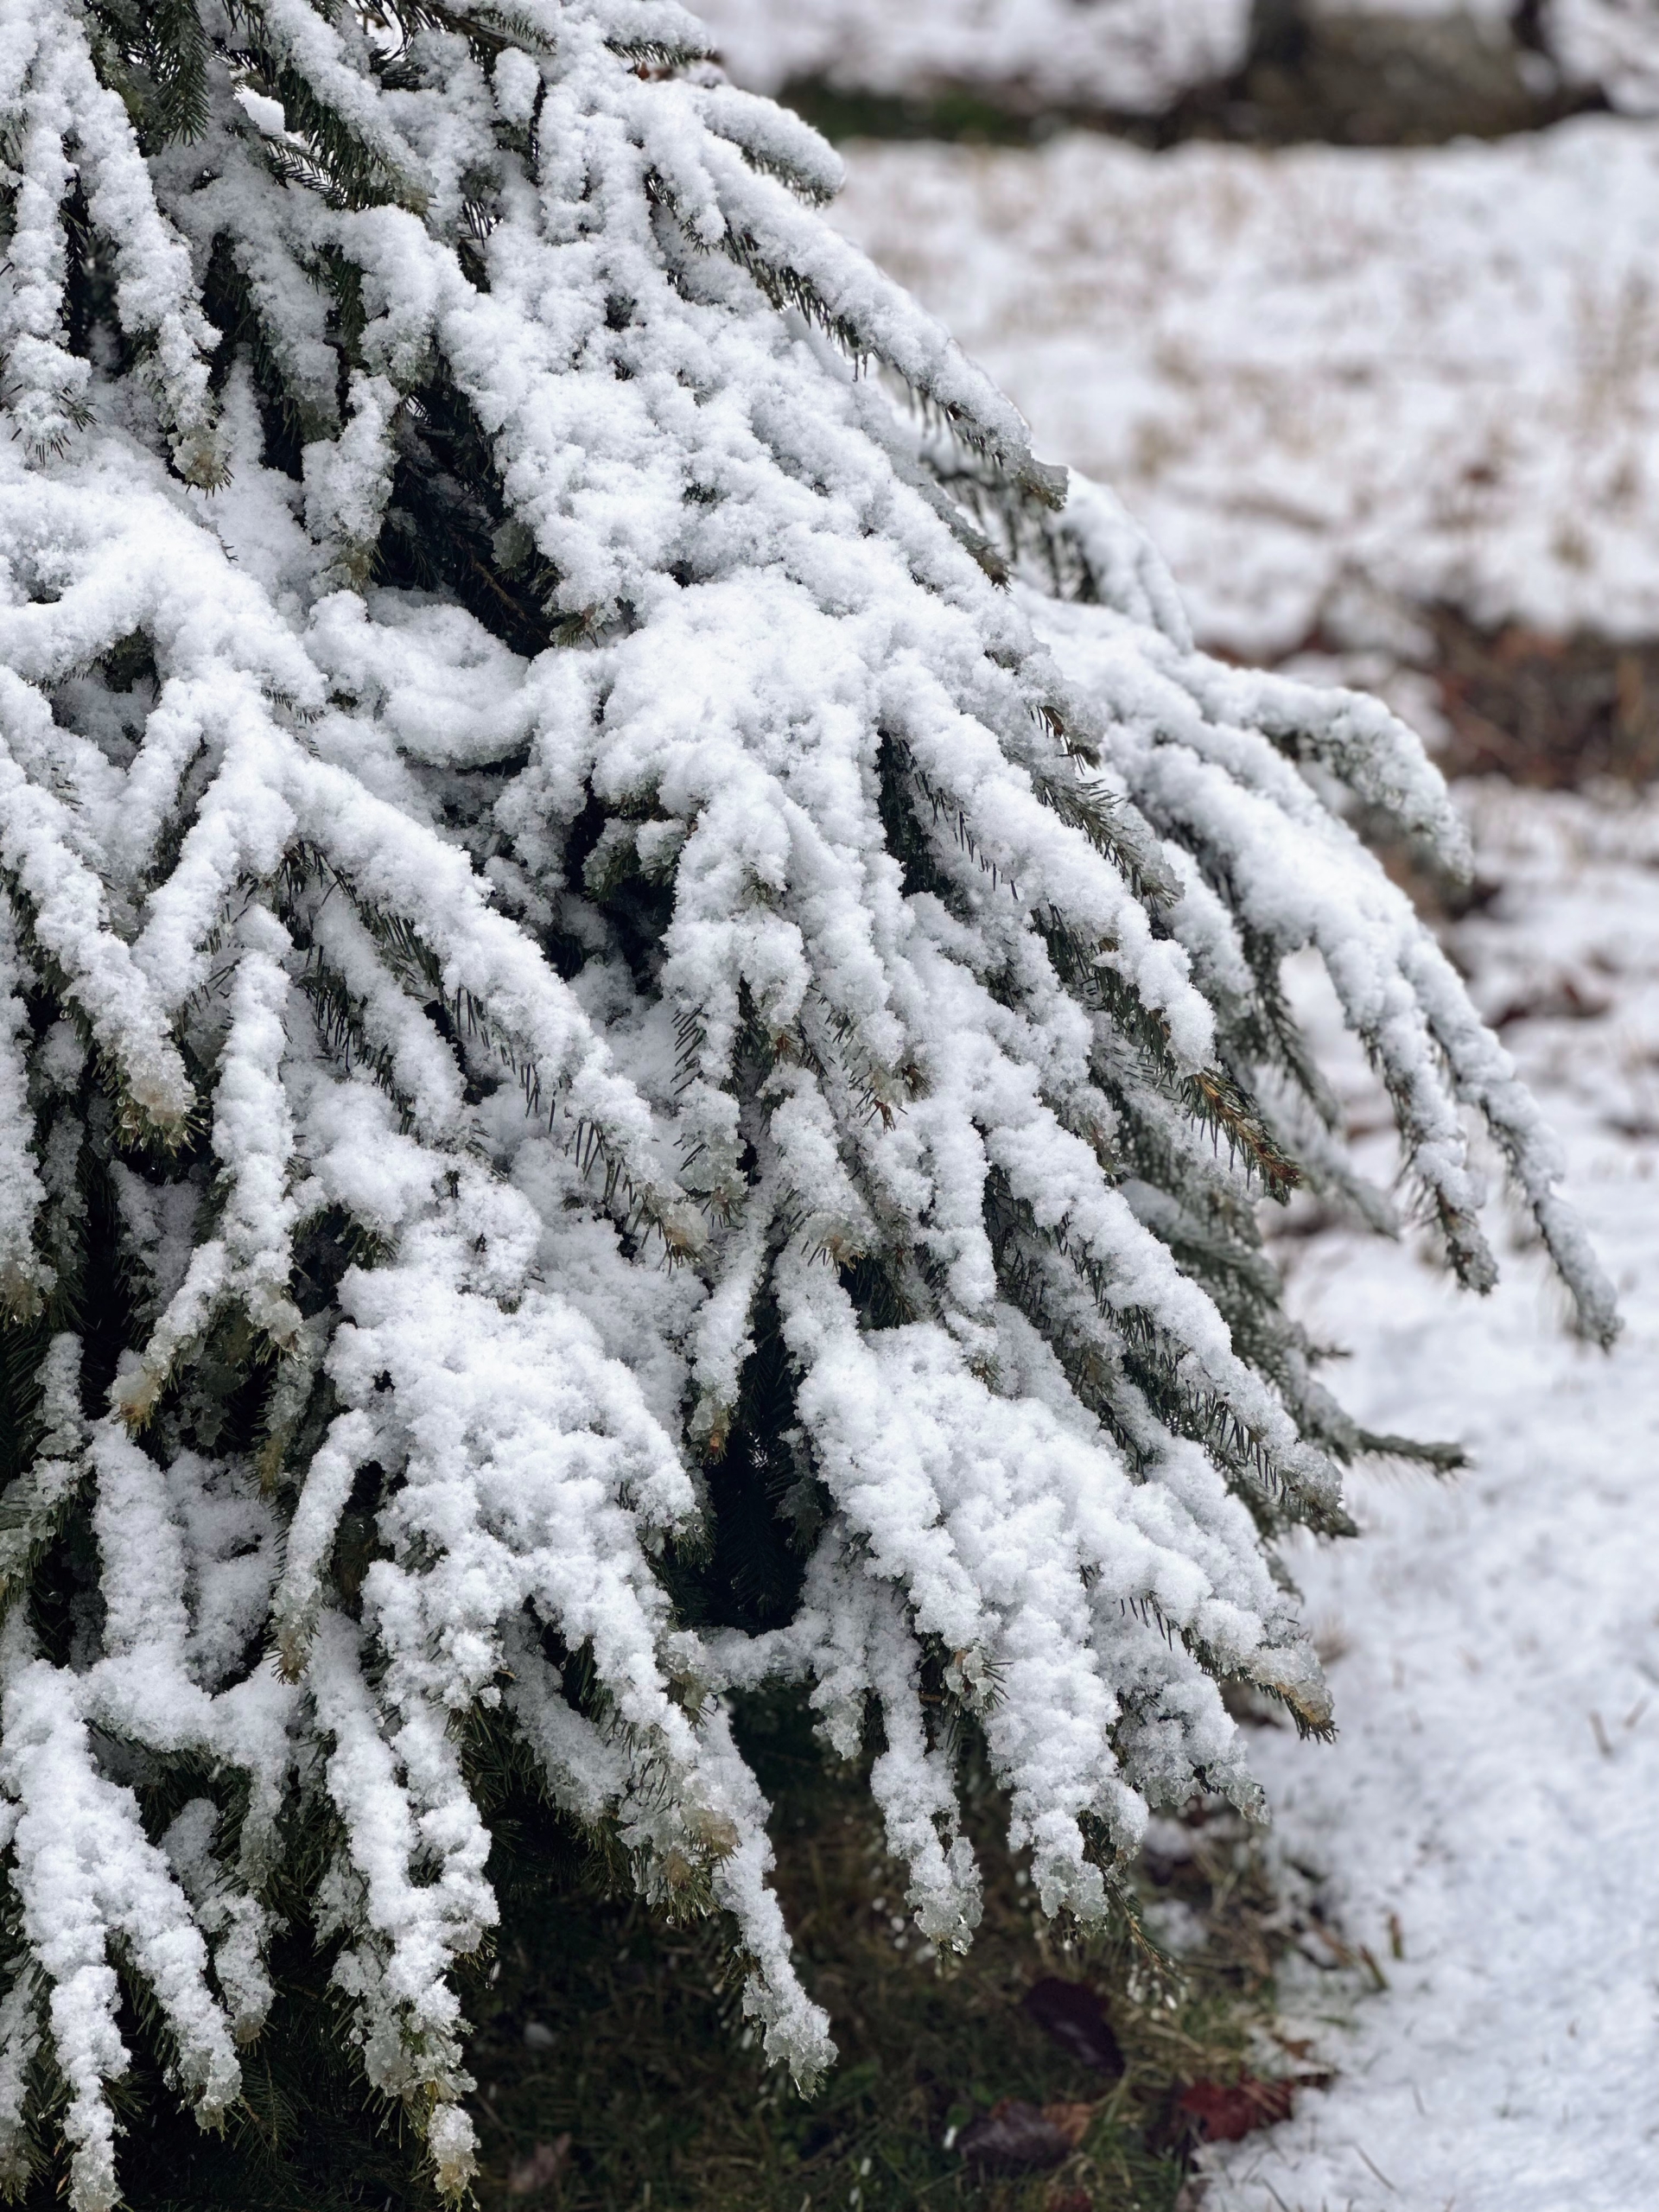
This weather system left all the tree branches heavily dusted with snow. Thankfully, none broke.
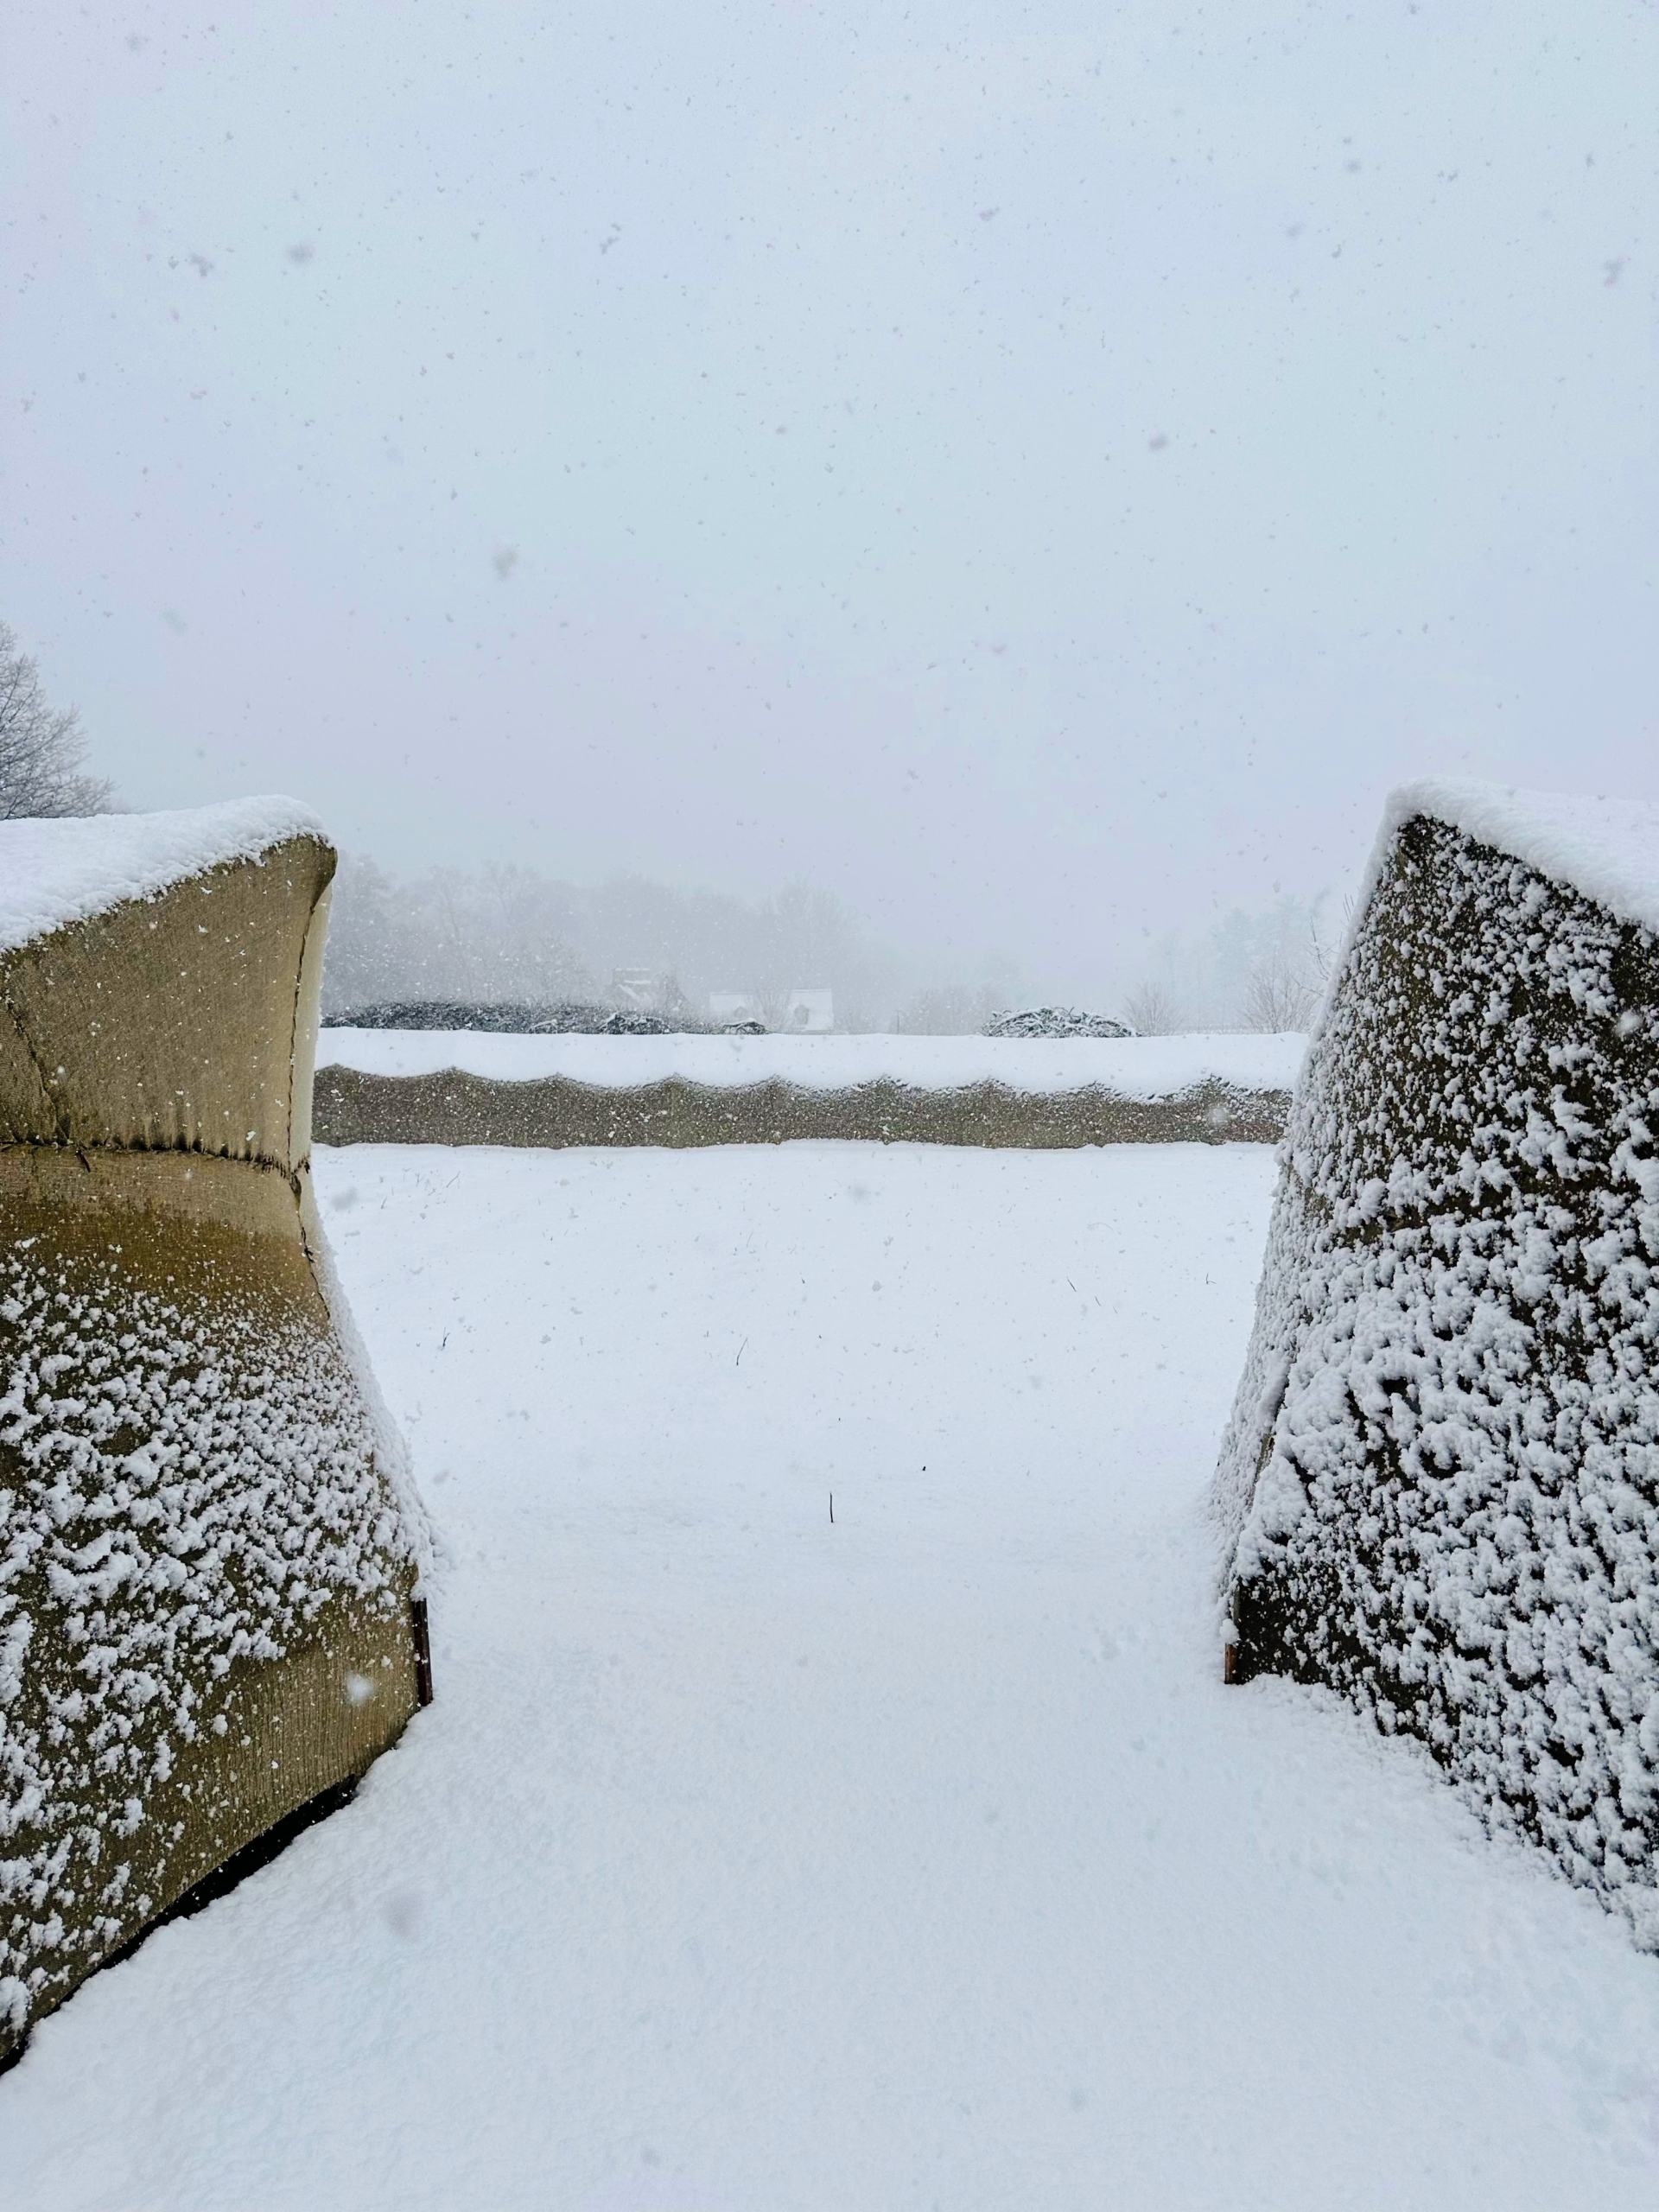
Here’s the entrance to my living maze. All the young trees are intact. All my garden trees are always well-mulched to protect the roots from winter damage.
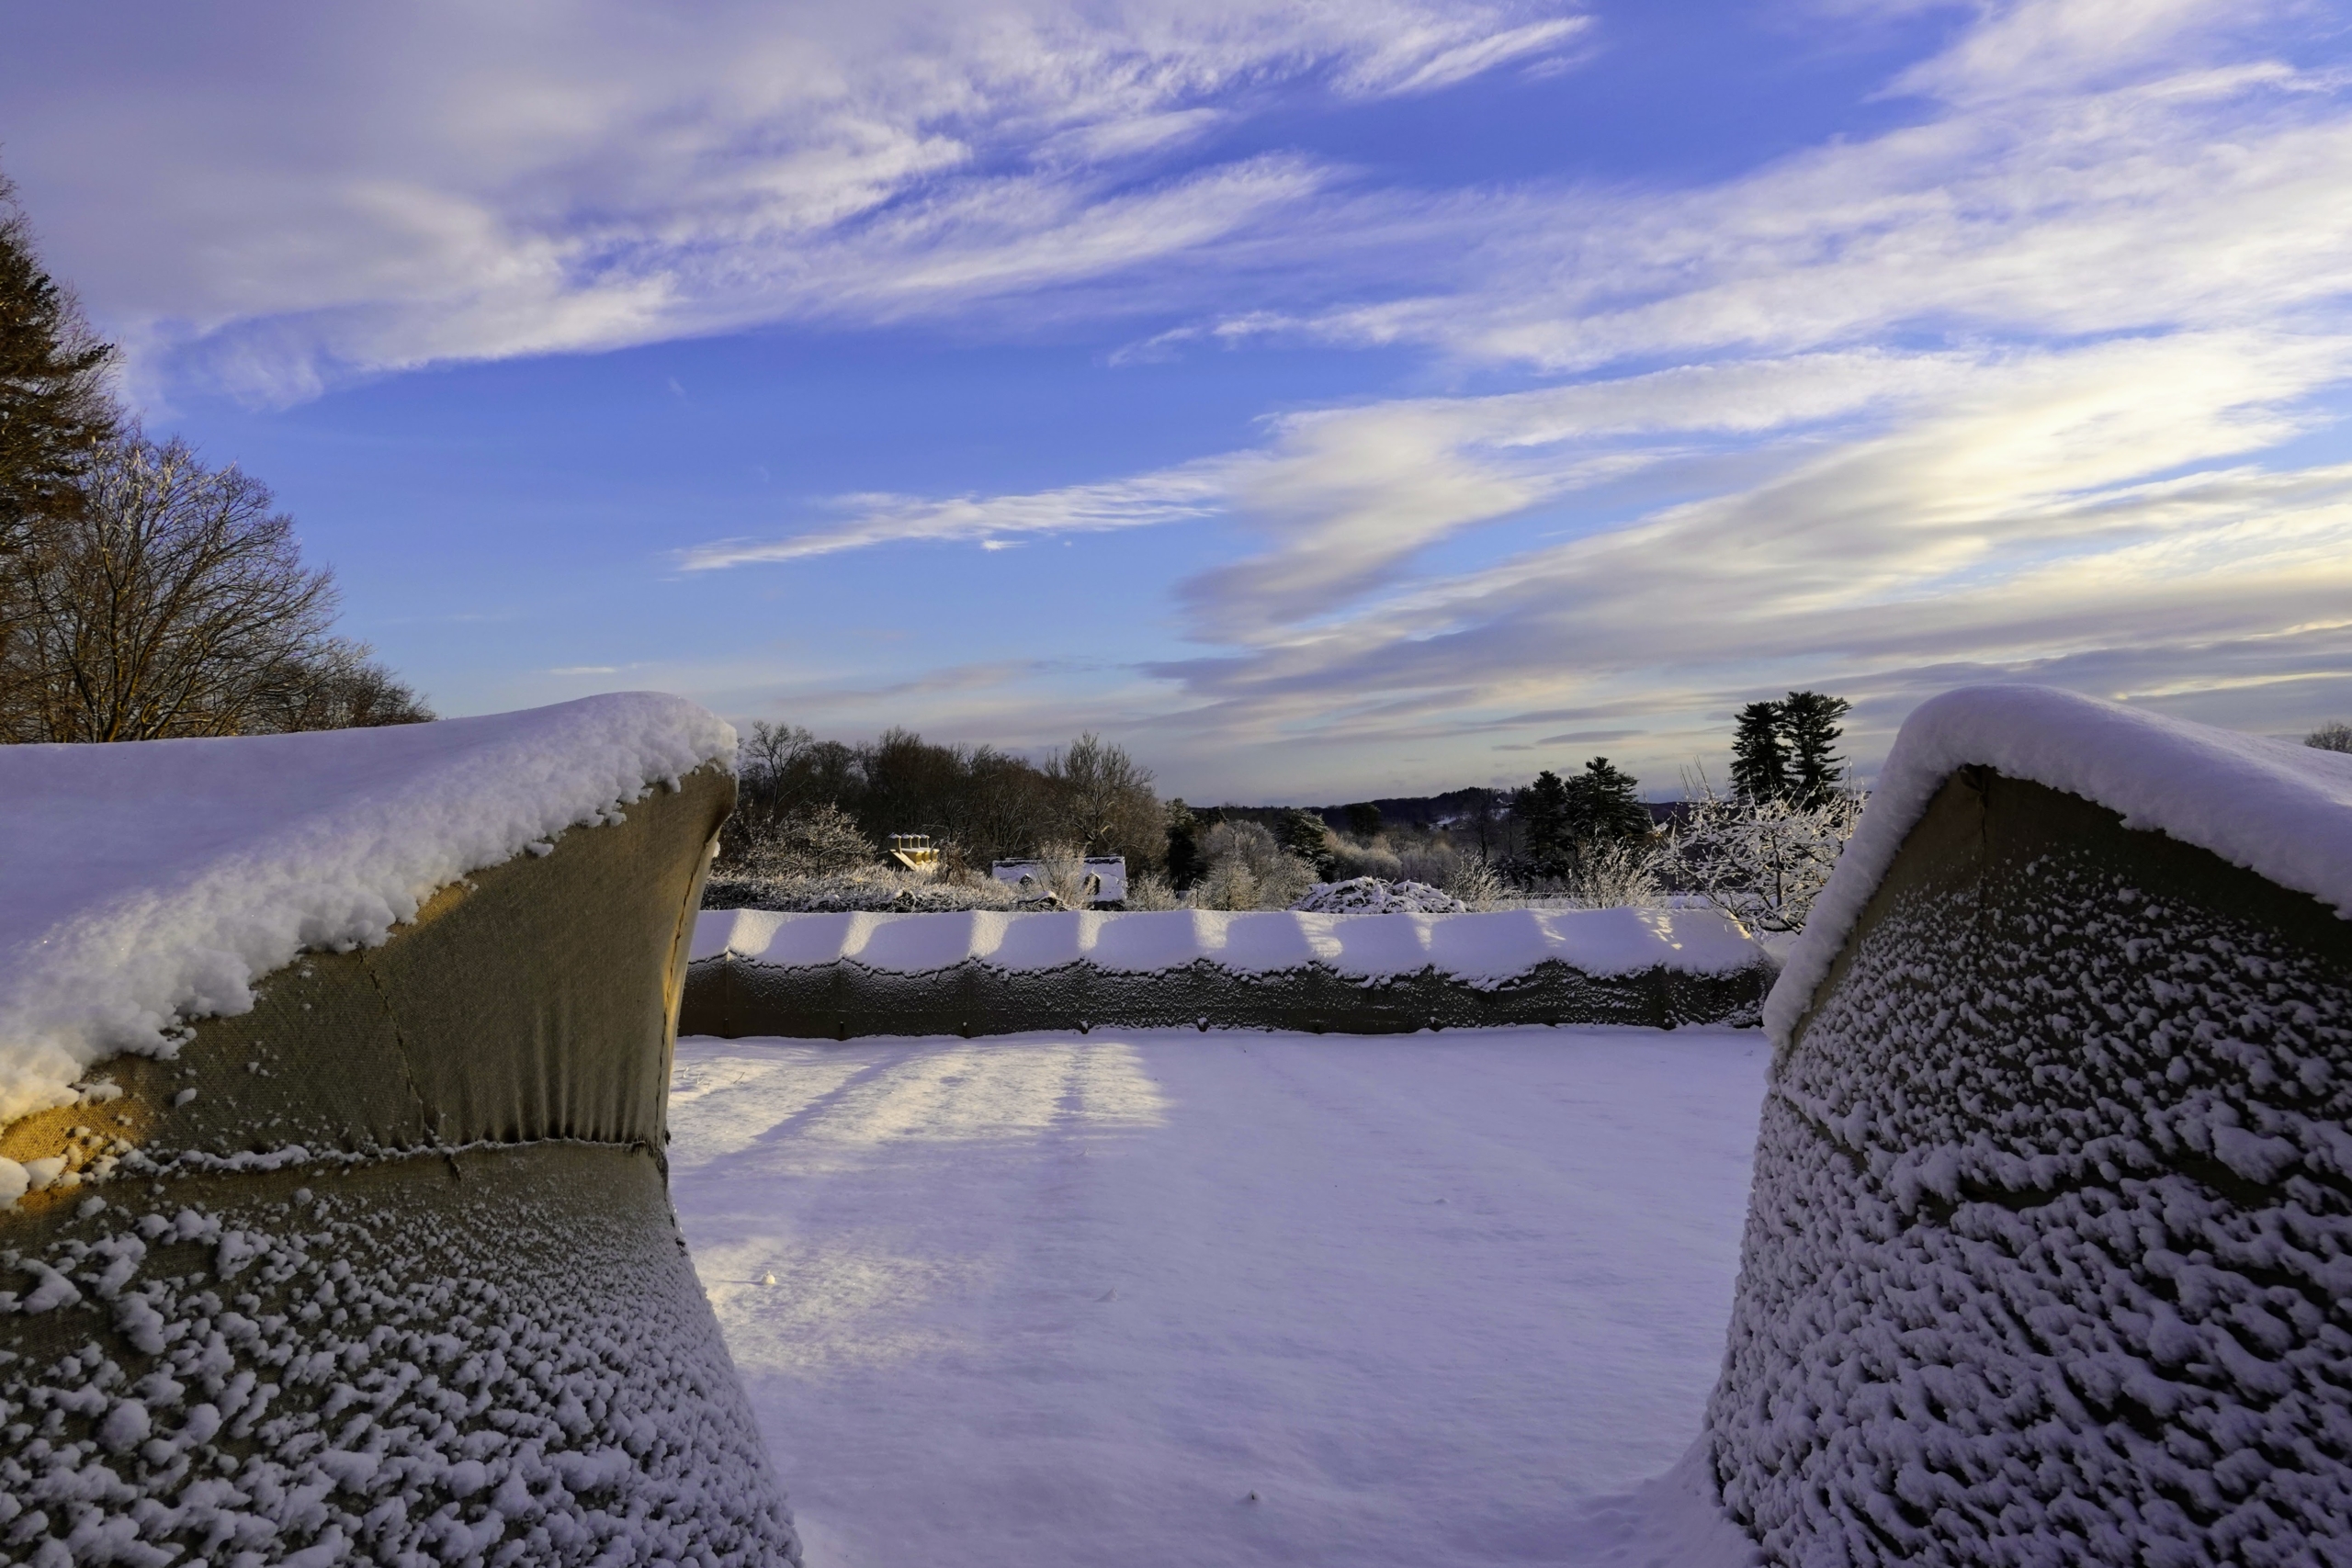
This is one side of my peony bed – a small pathway leads to my stable in the distance.
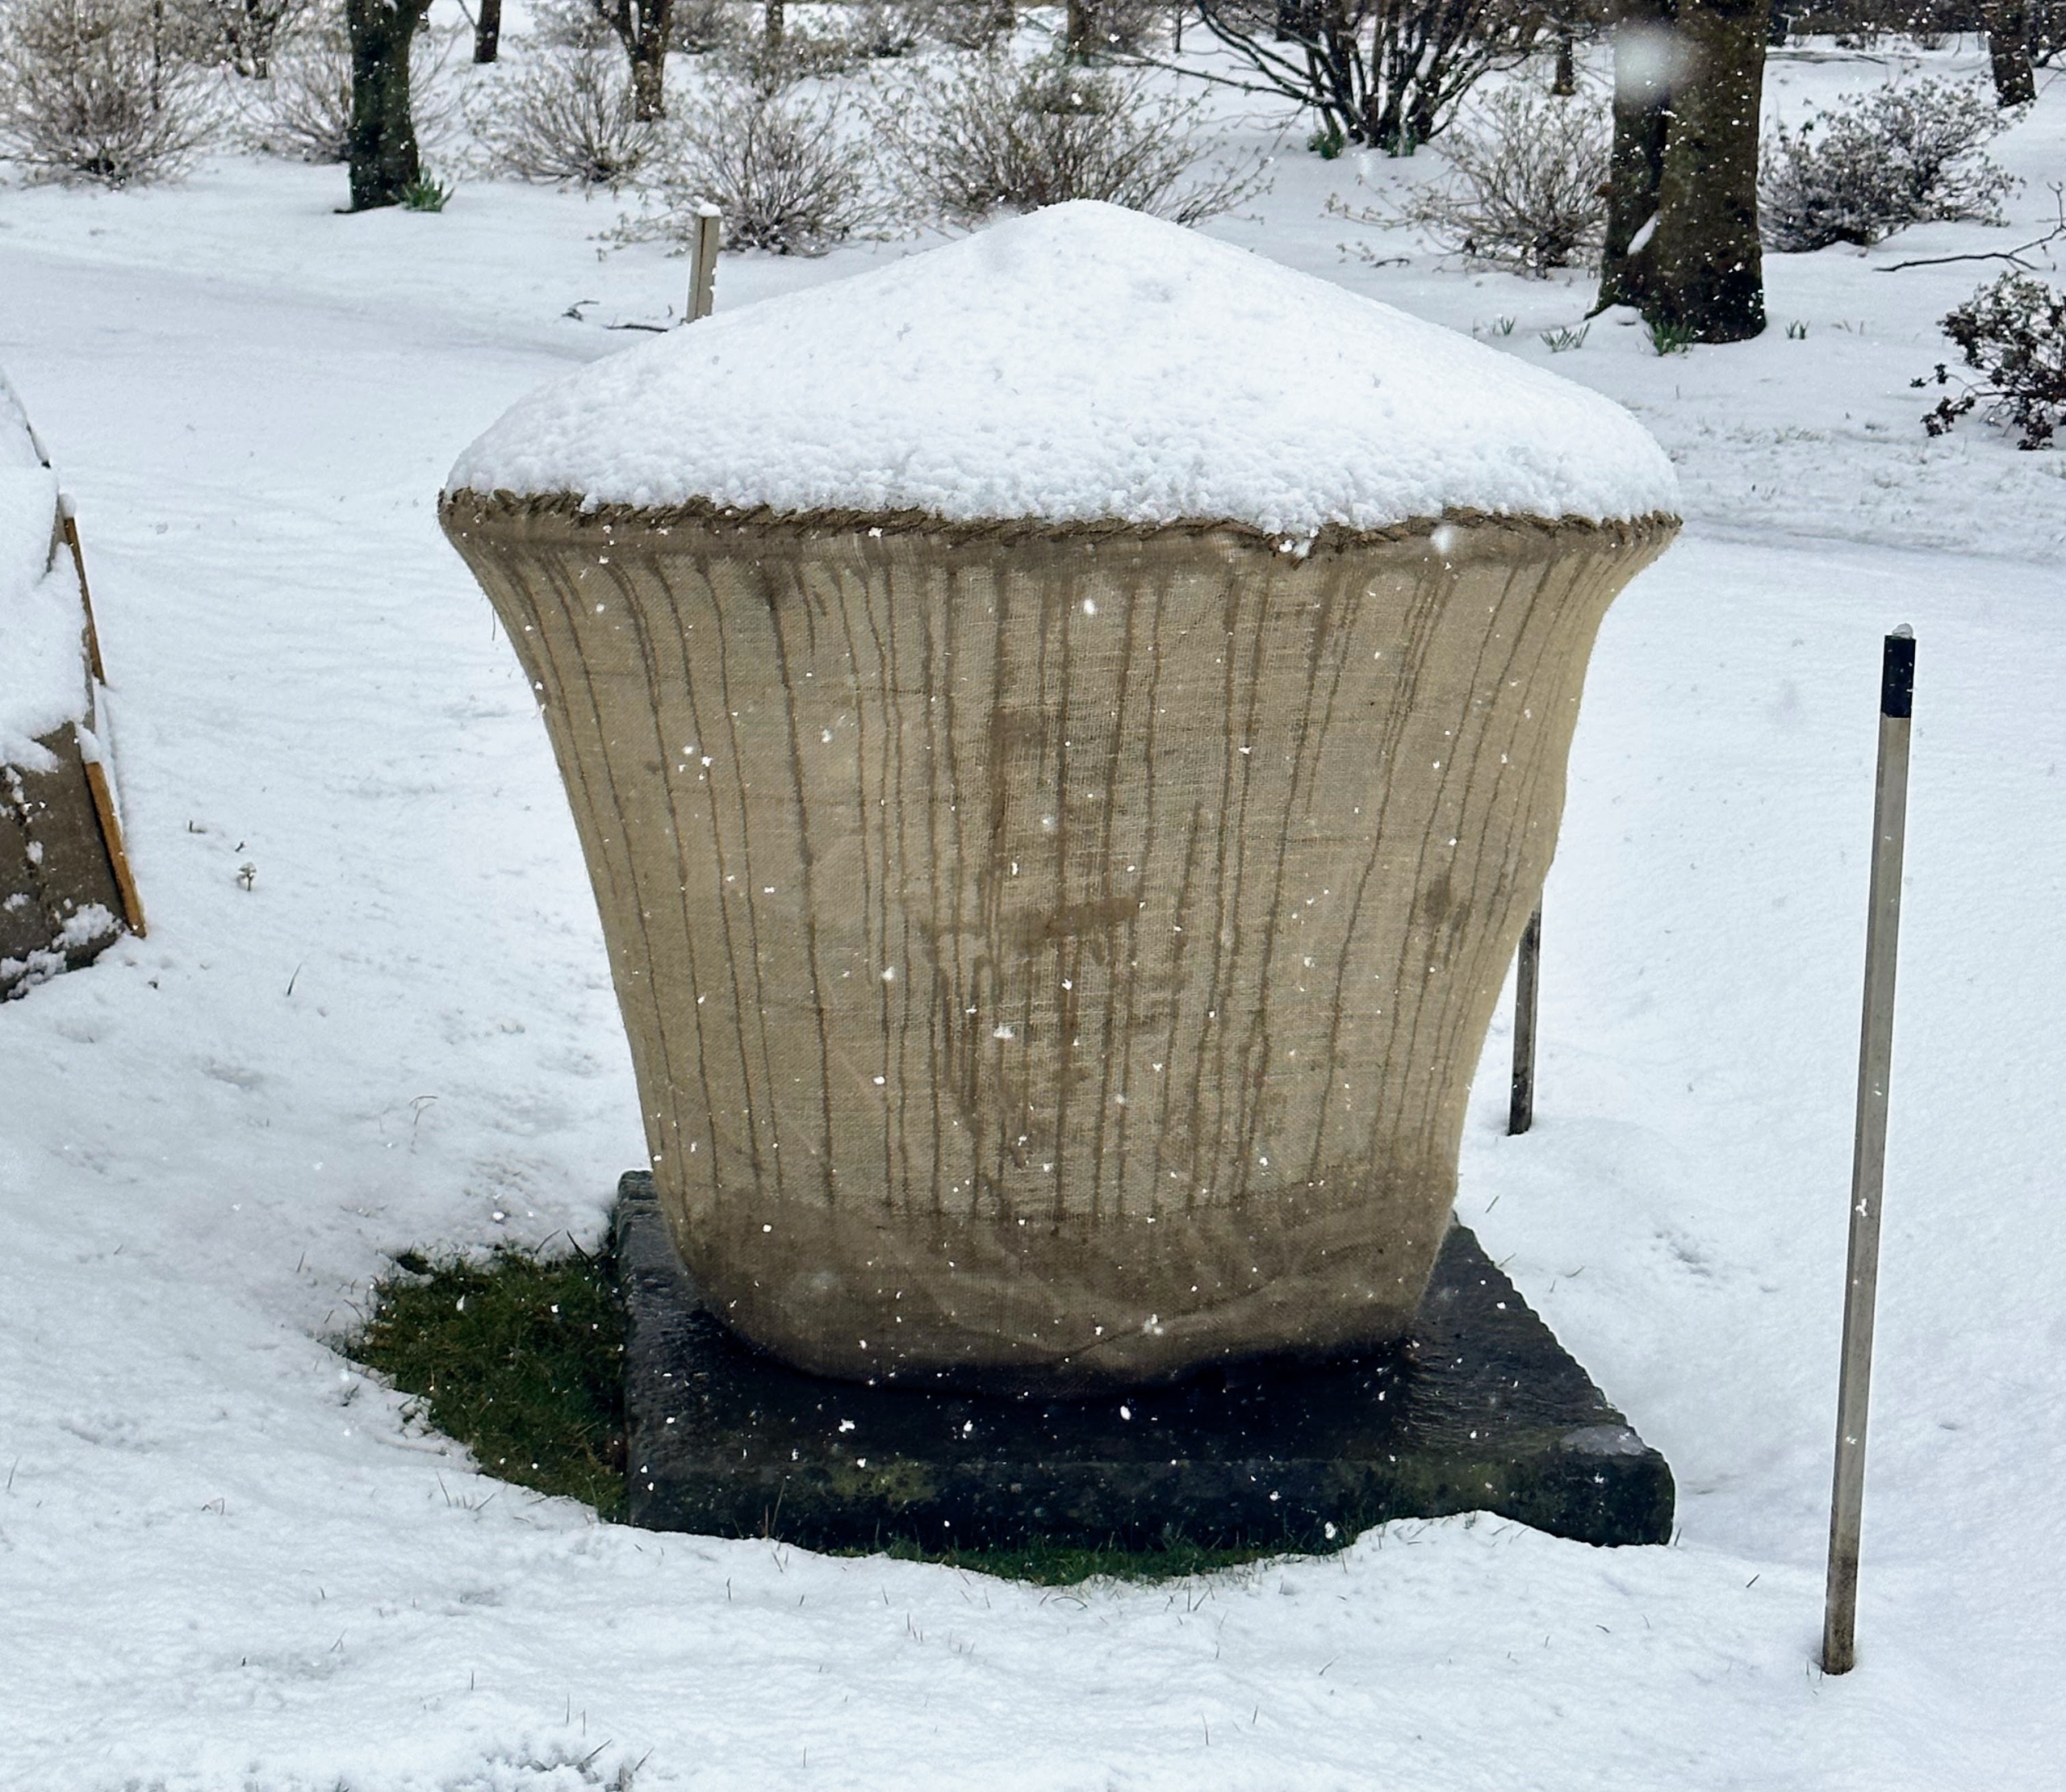
The fresh layer of untouched snow looks so pretty atop my herbaceous peony beds. The pattern left on the burlap shows the strong metal frames we used to cover the boxwood. They are the frames of a hoop house. They work perfectly to accommodate the growing plantings.
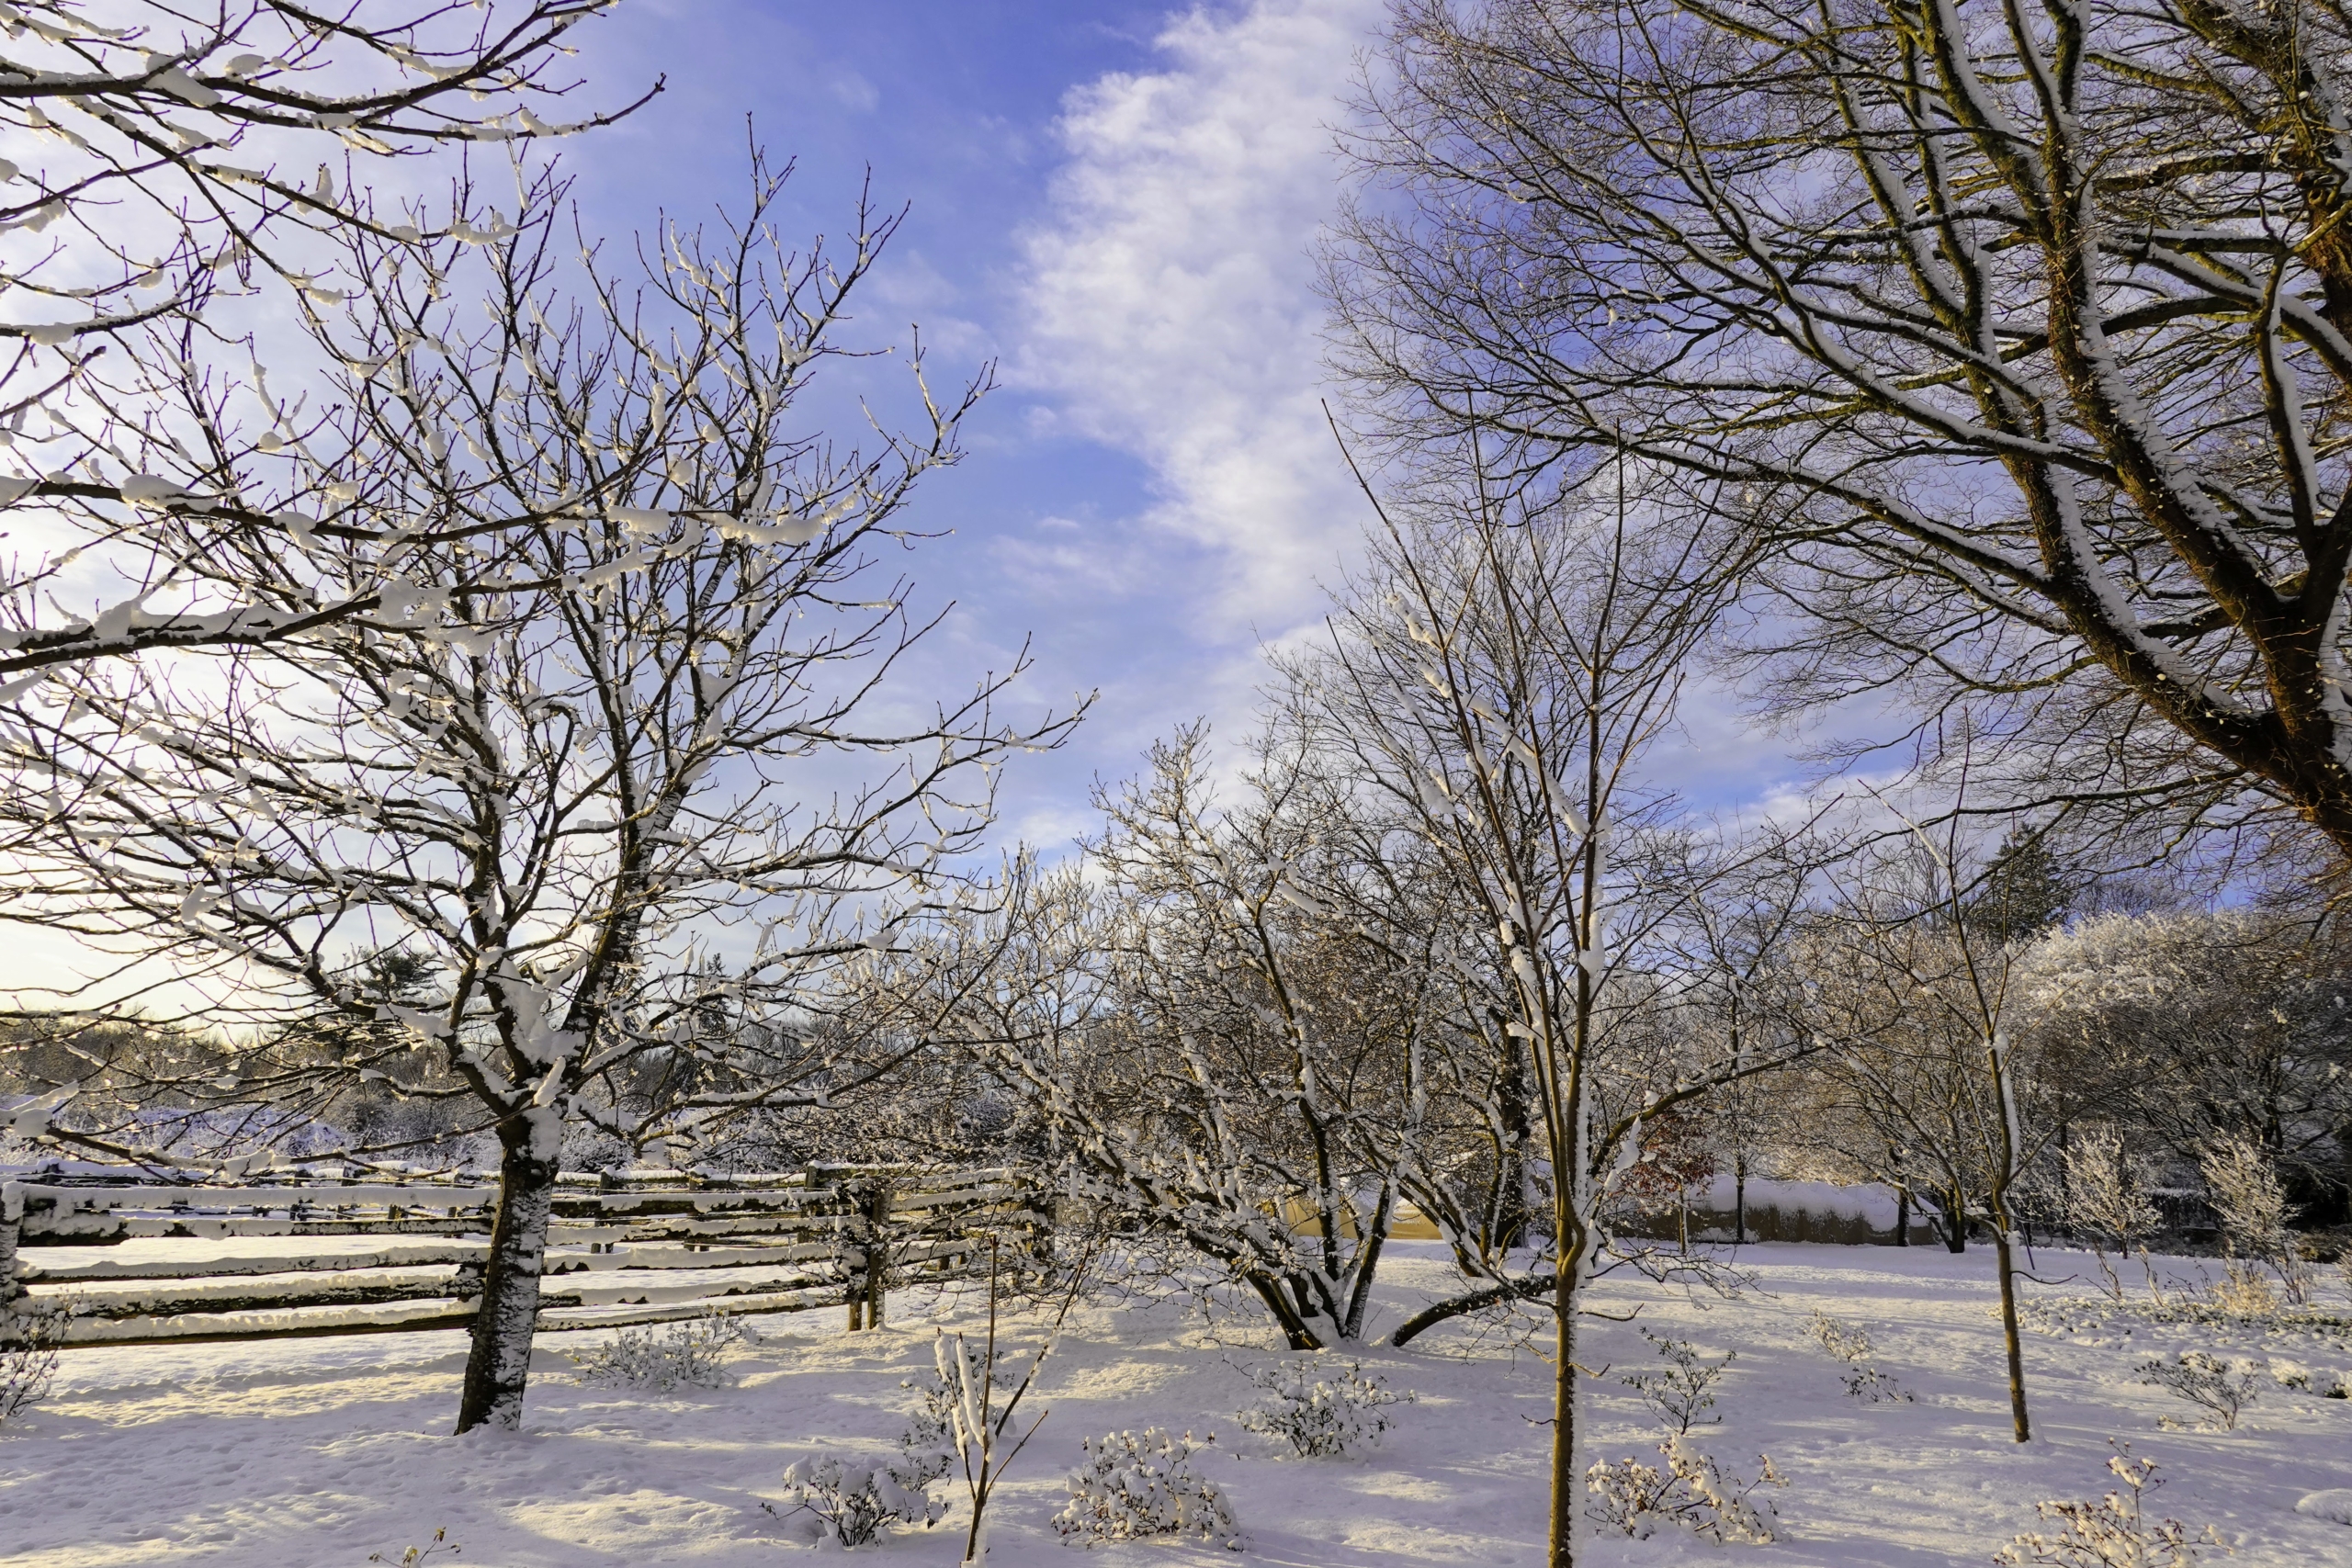
This area is where I planted my azalea grove – hundreds of colorful azaleas on both sides of this carriage road. One can see the outlines of the still small deciduous shrubs covered in snow.
Snow stuck to nearly every surface. This is the fence of the coop outside my stable.
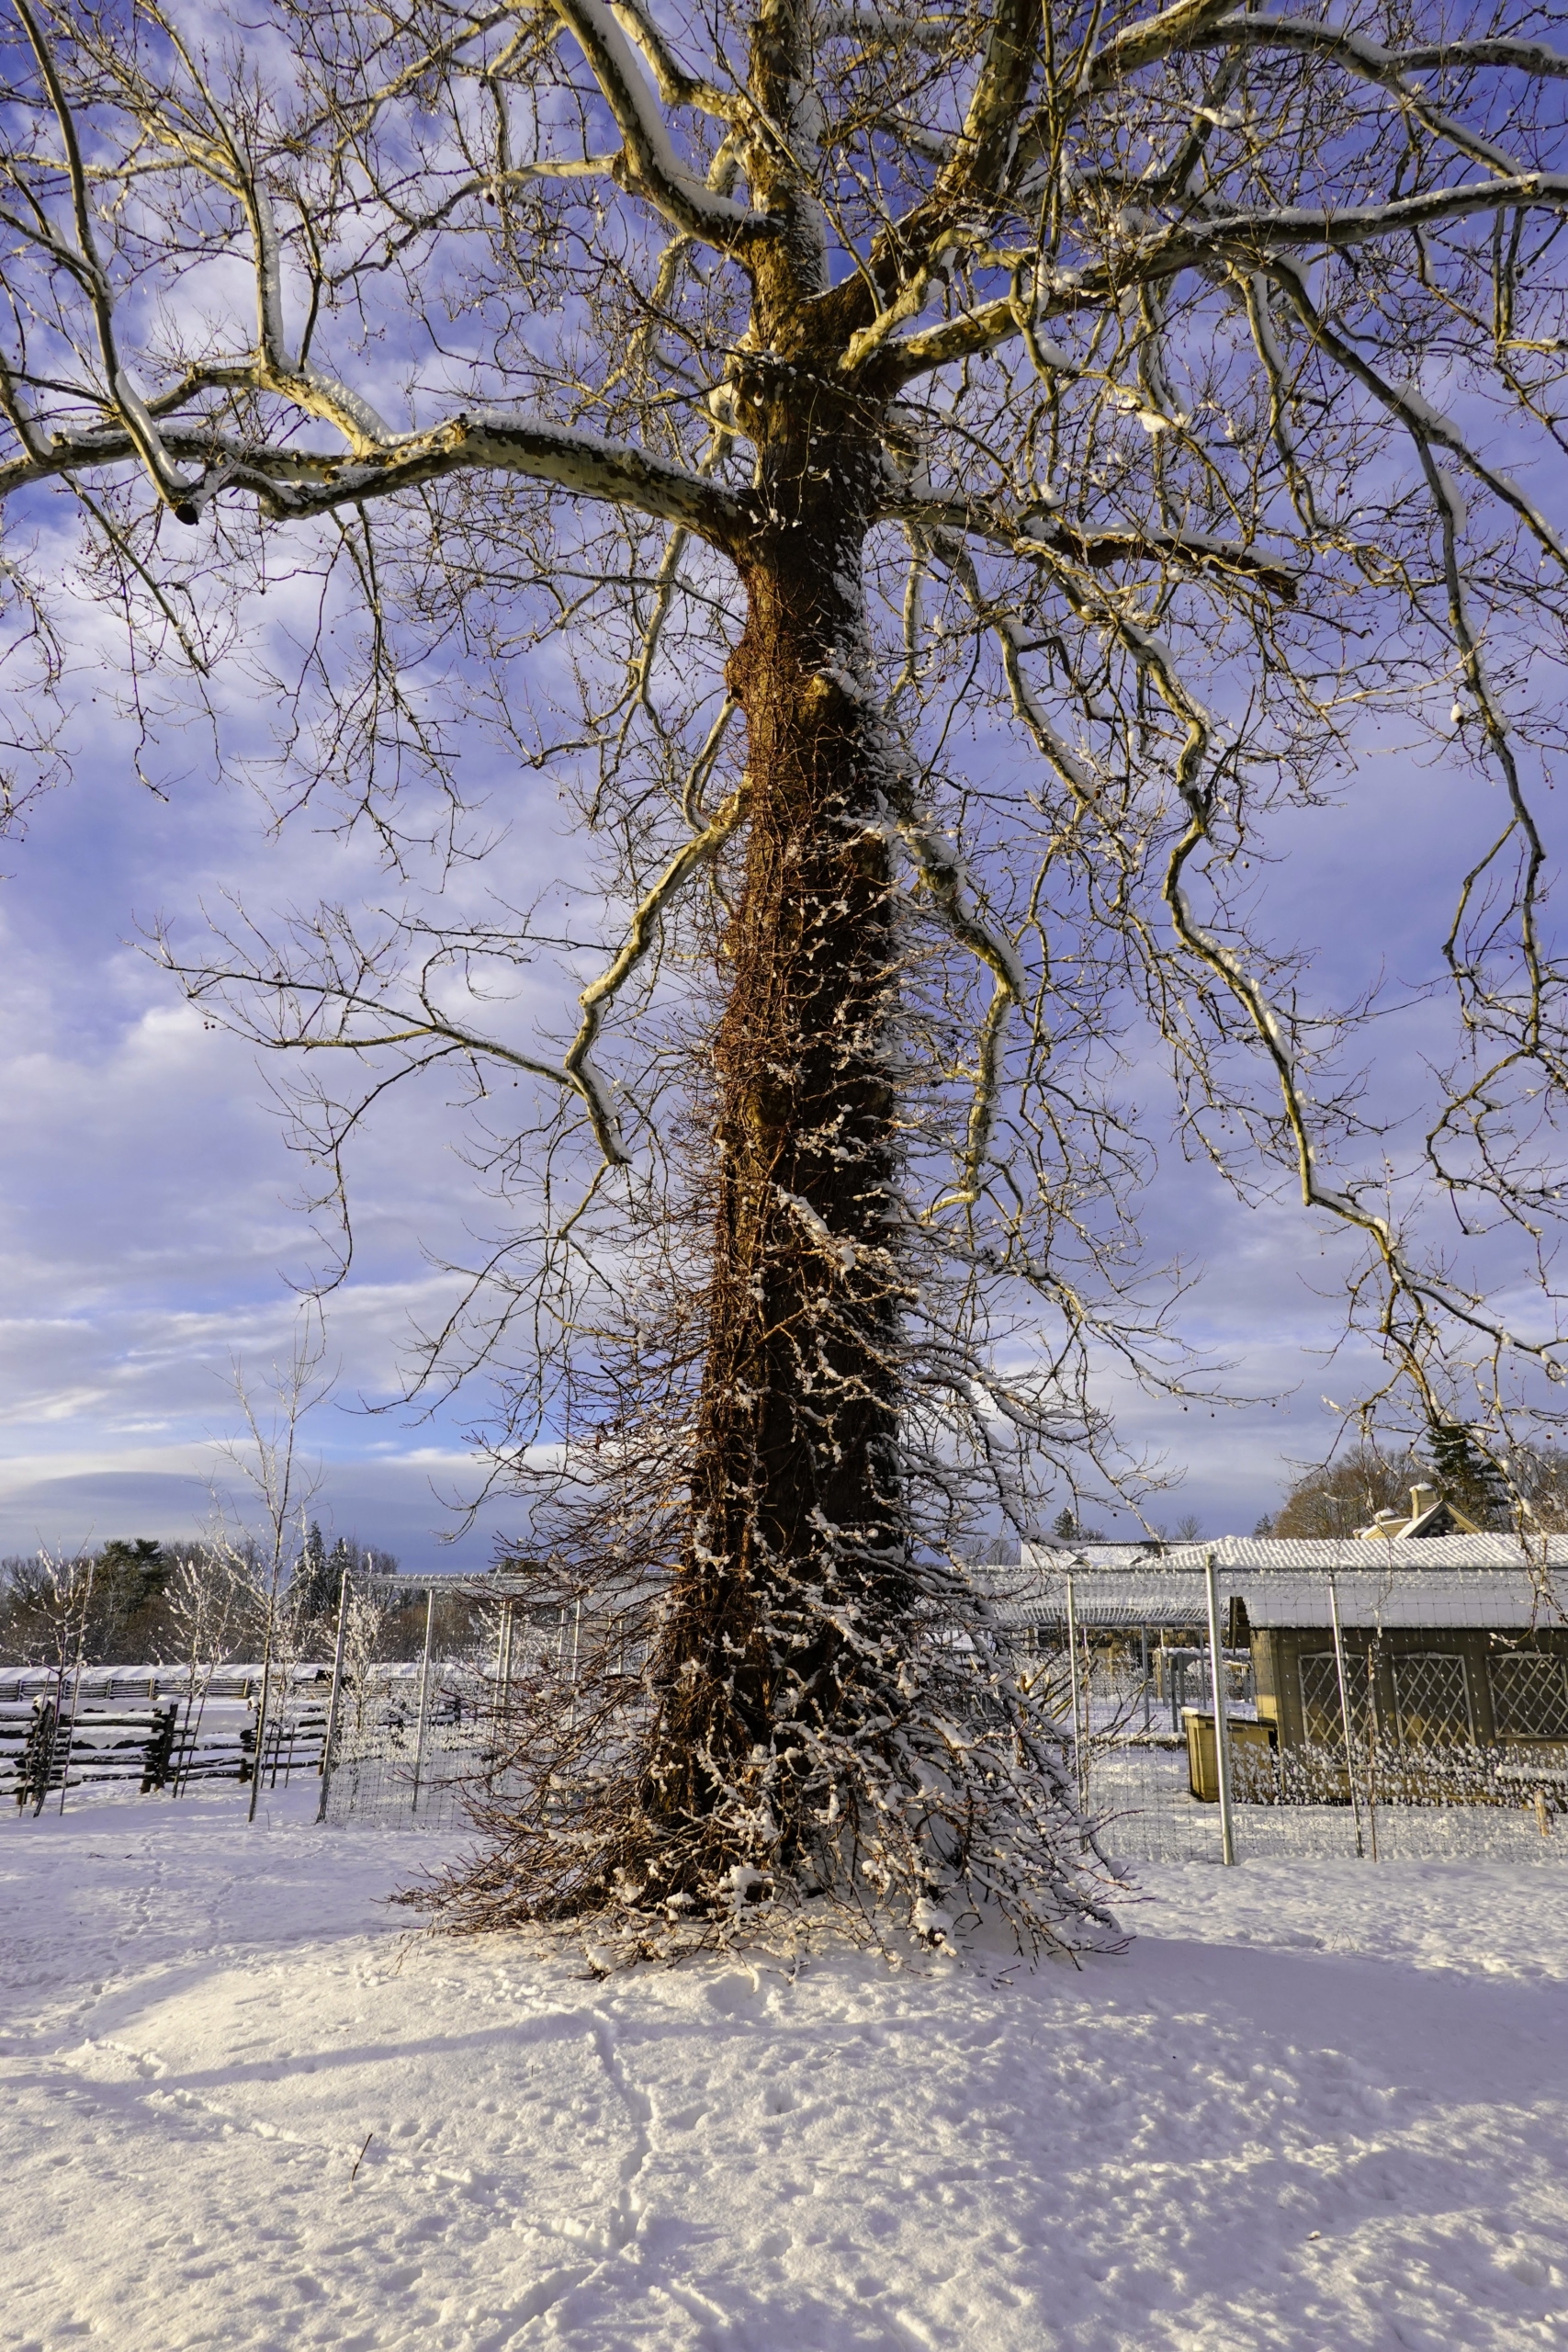
The snow even stuck to the branches of the climbing hydrangea on this tree trunk.
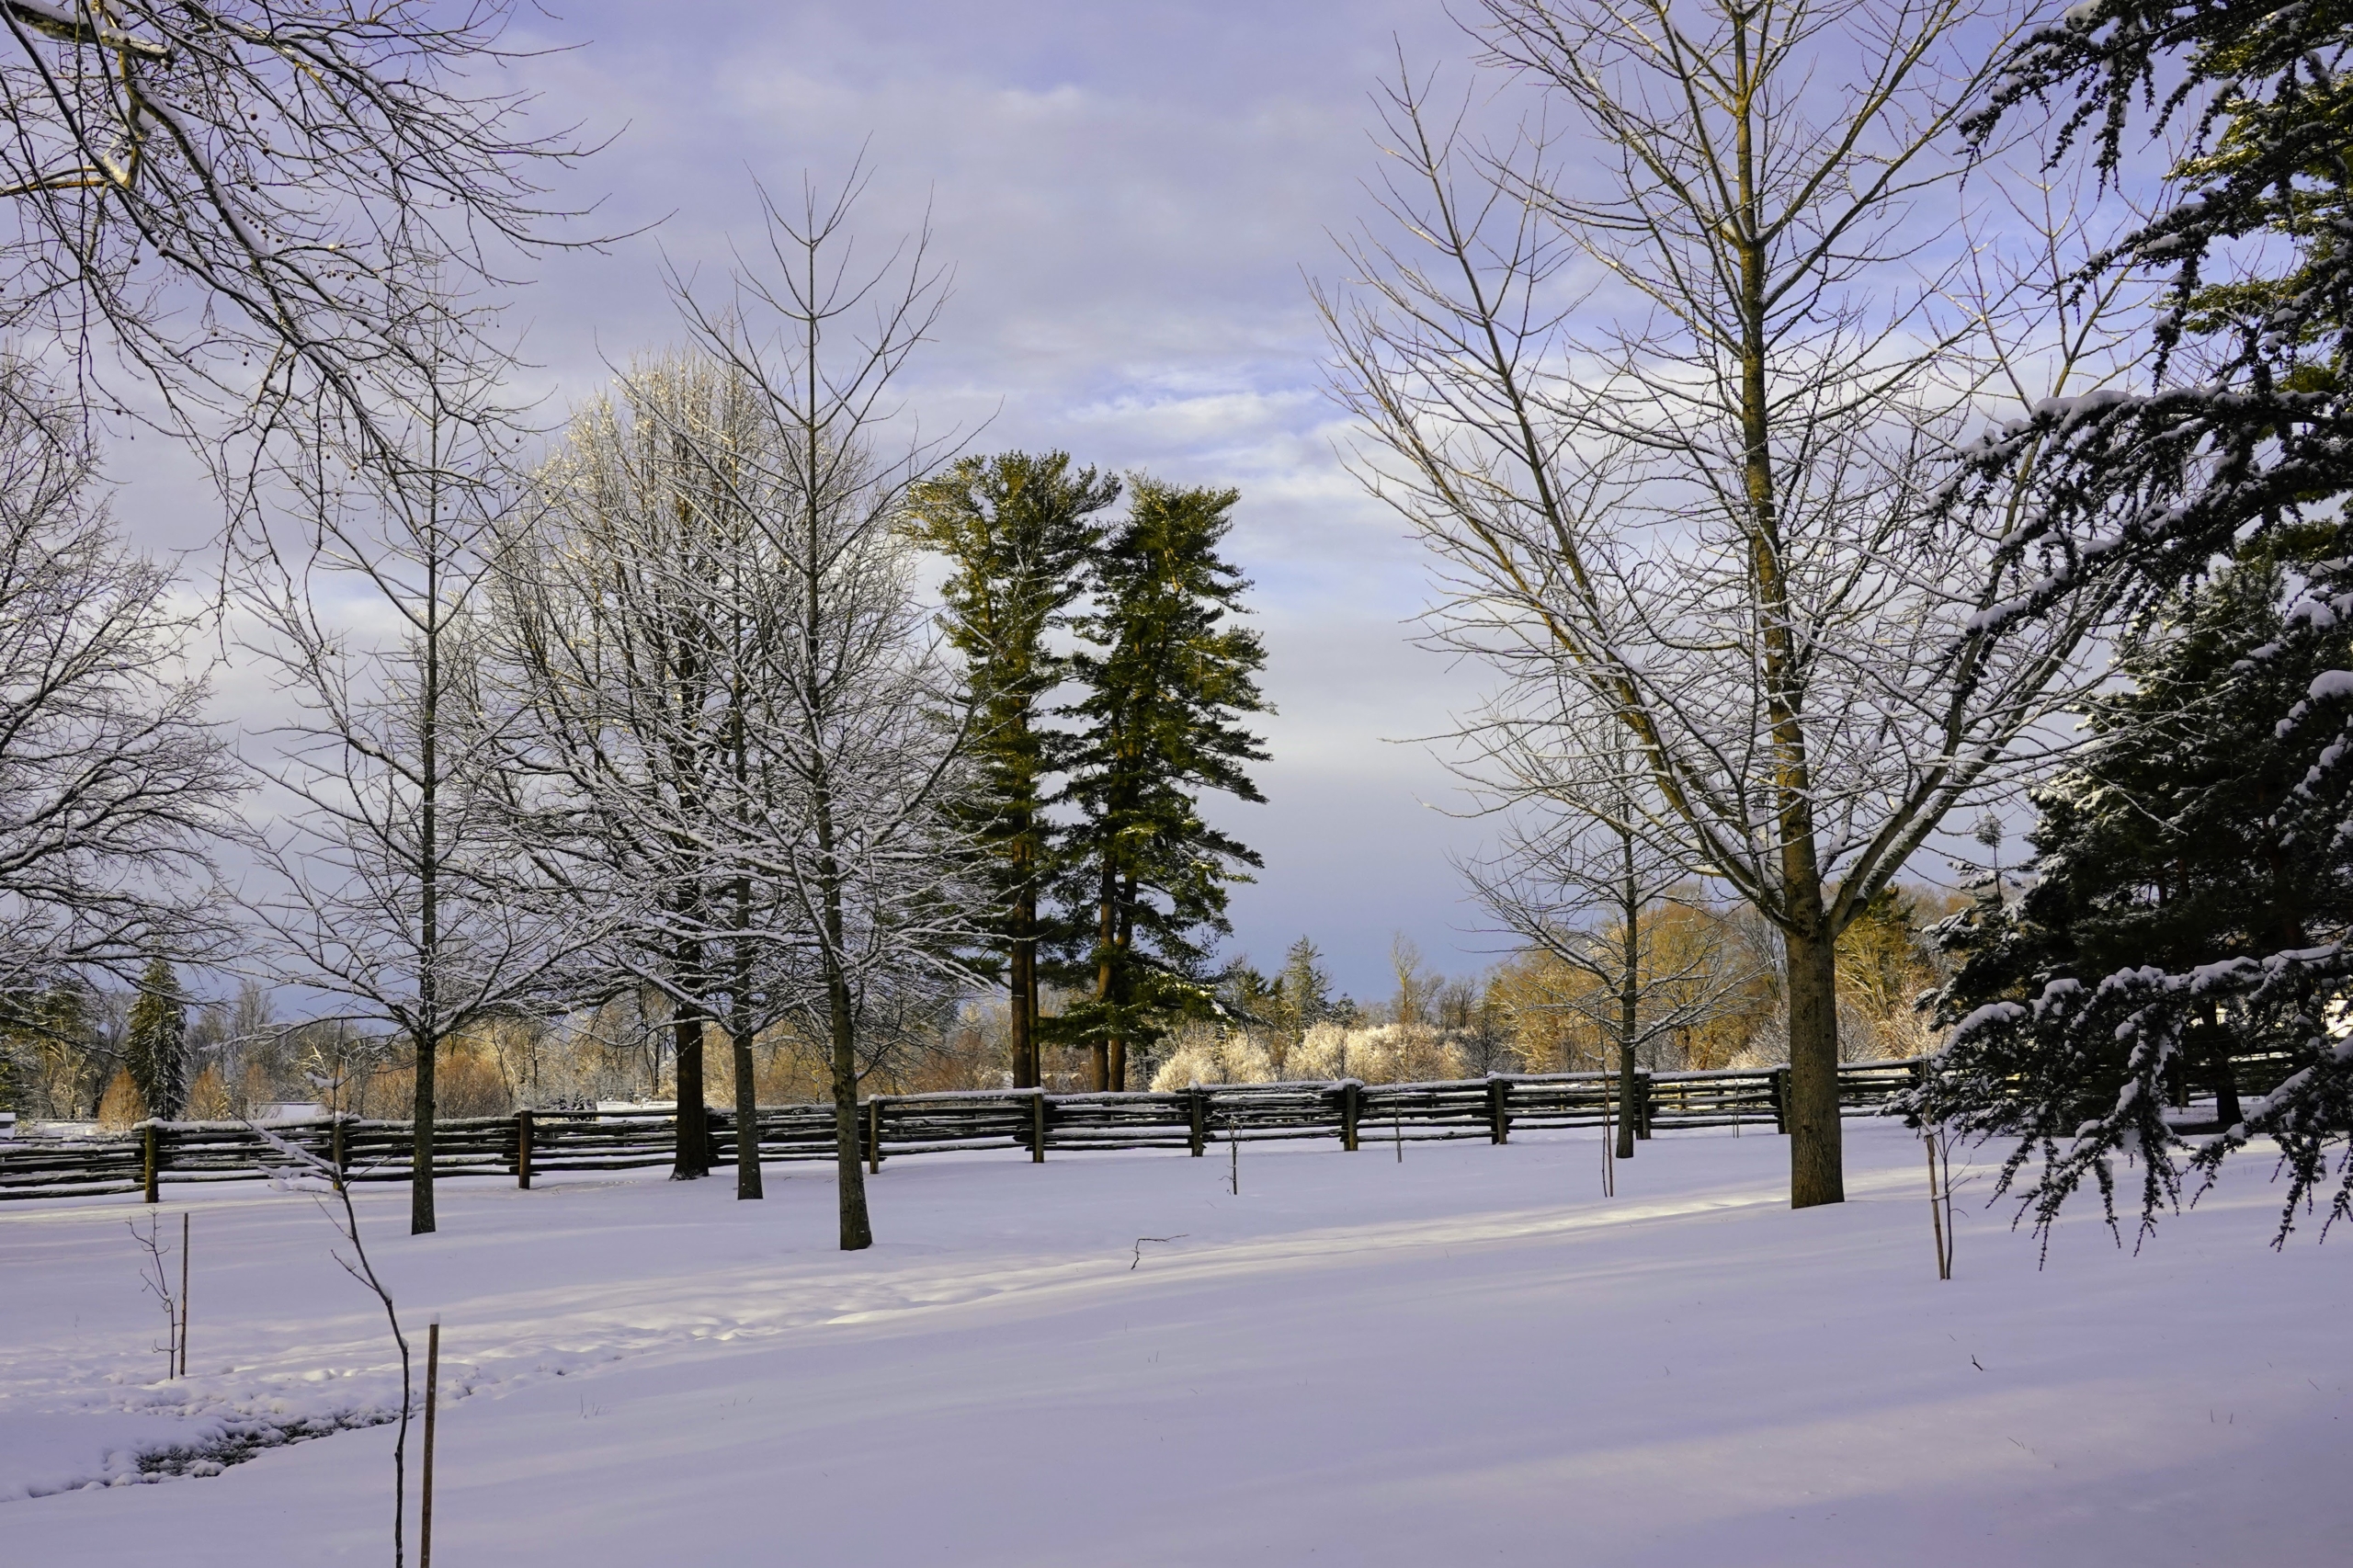
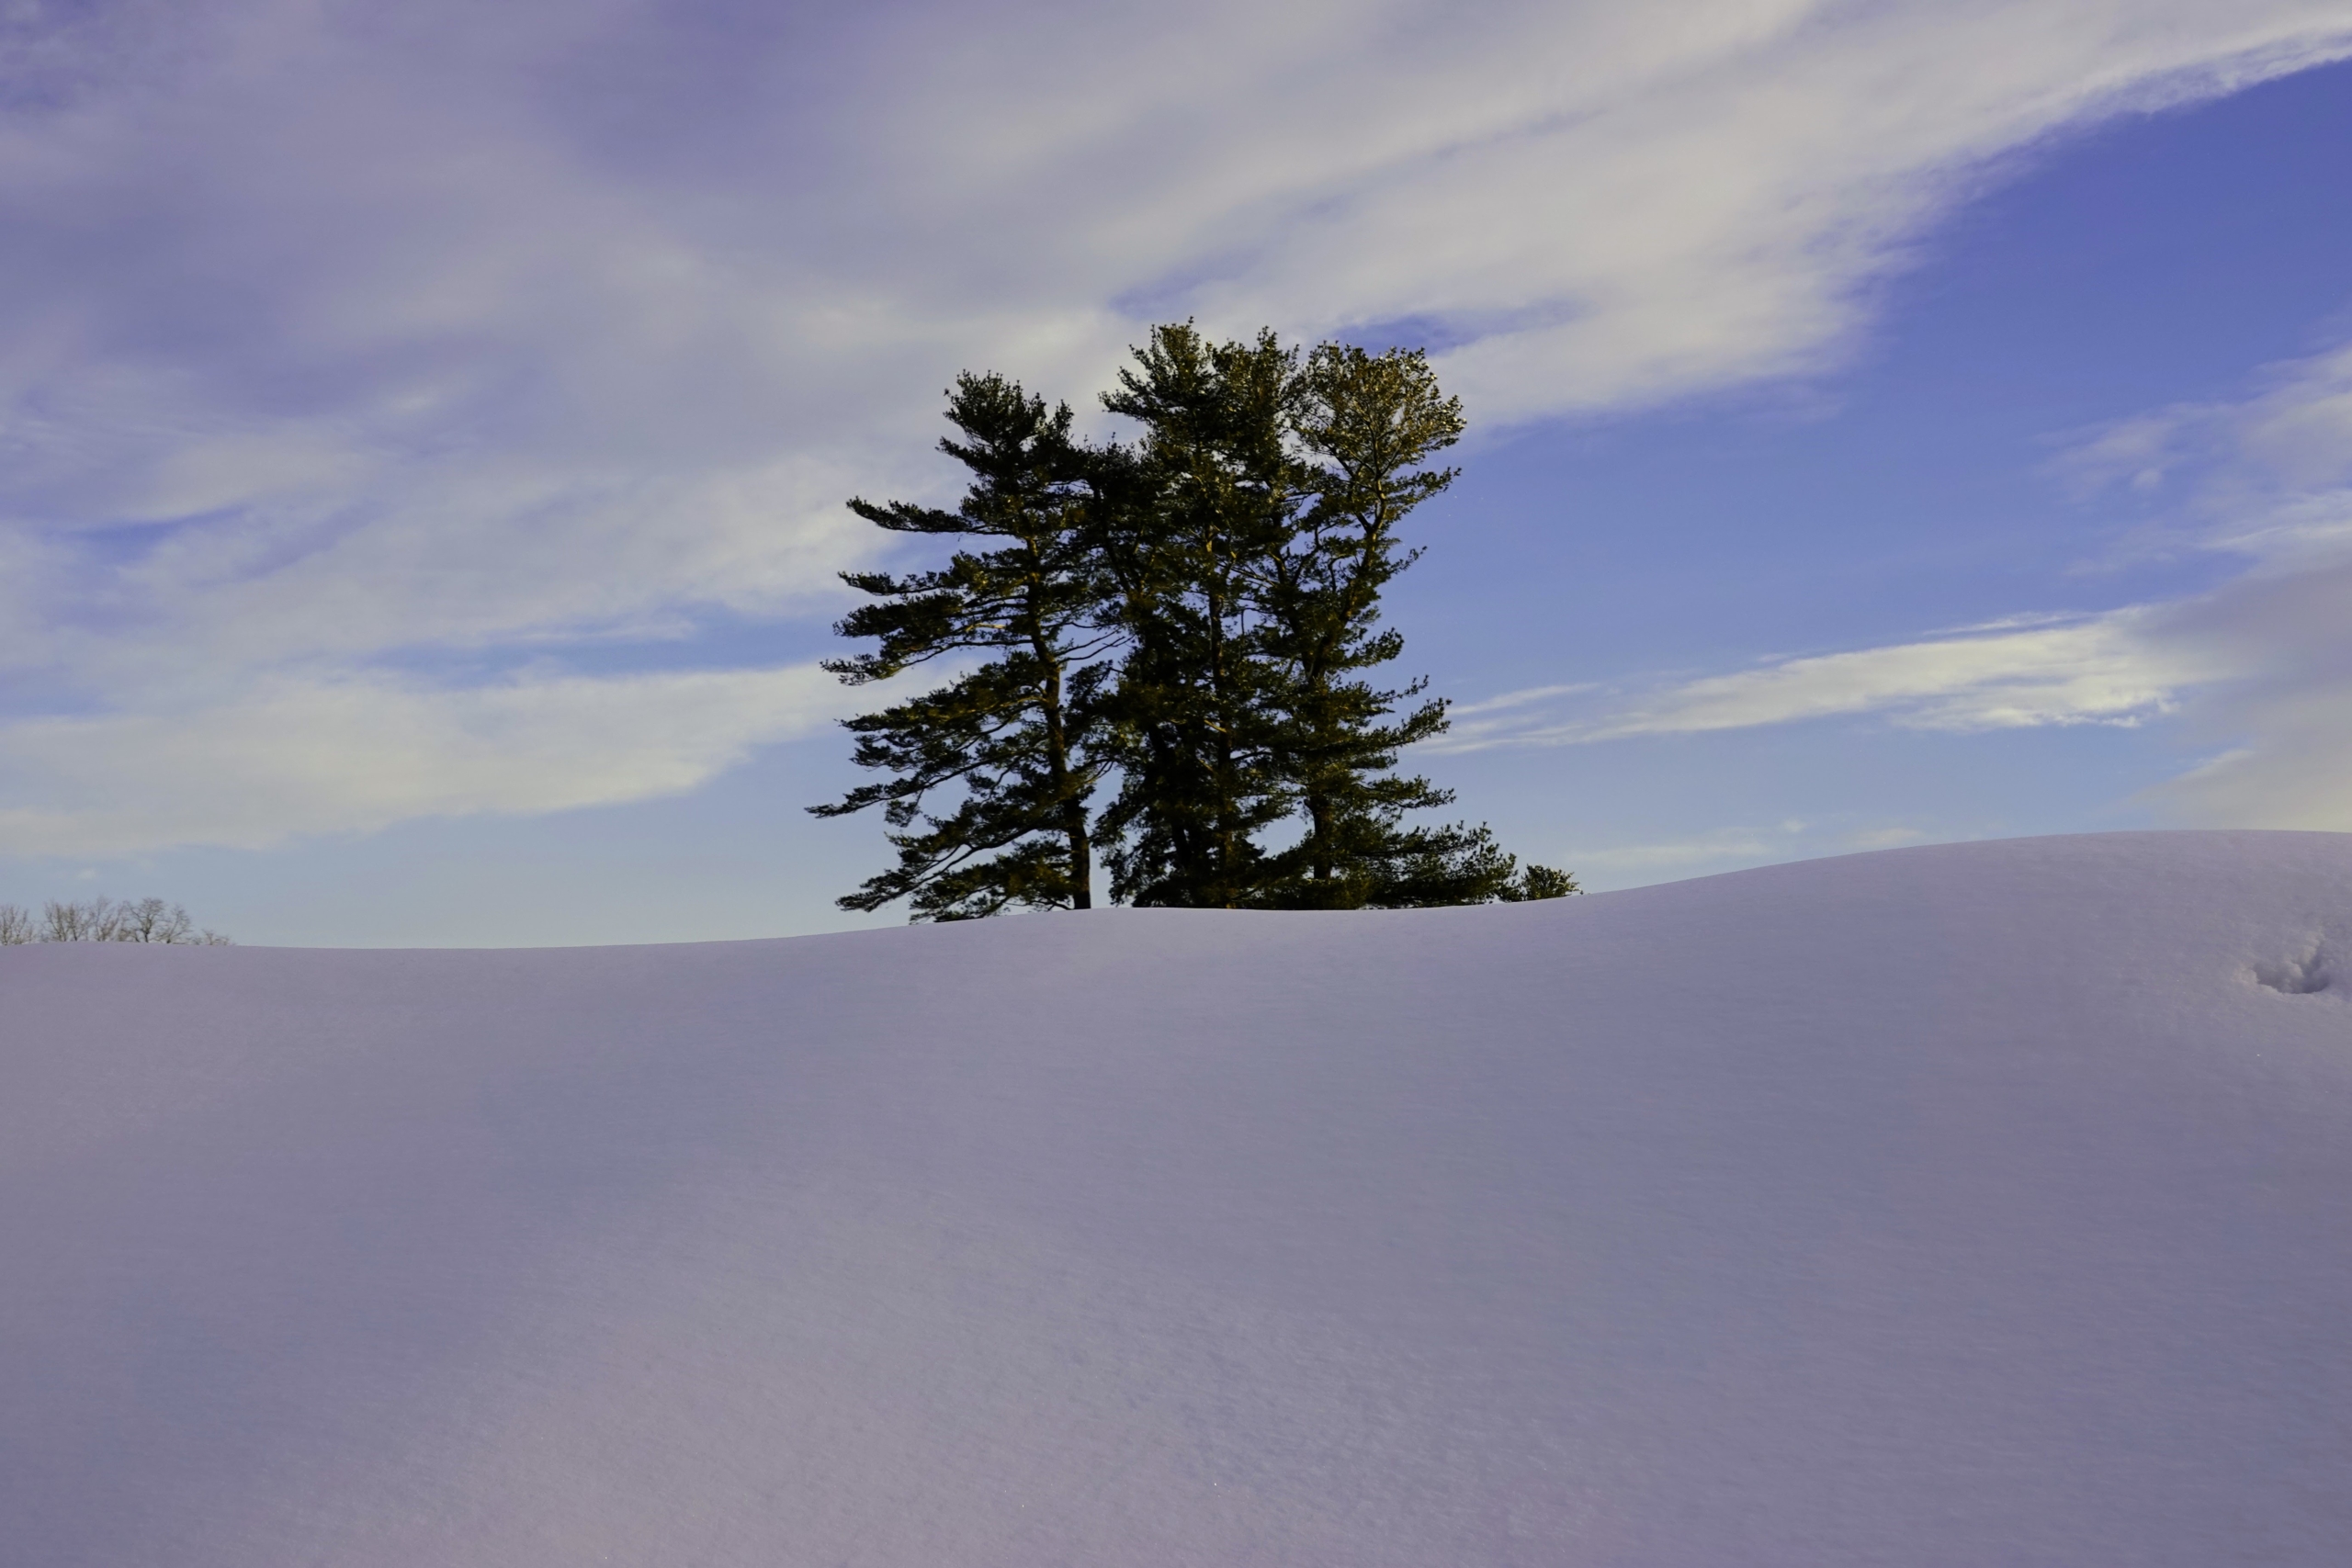
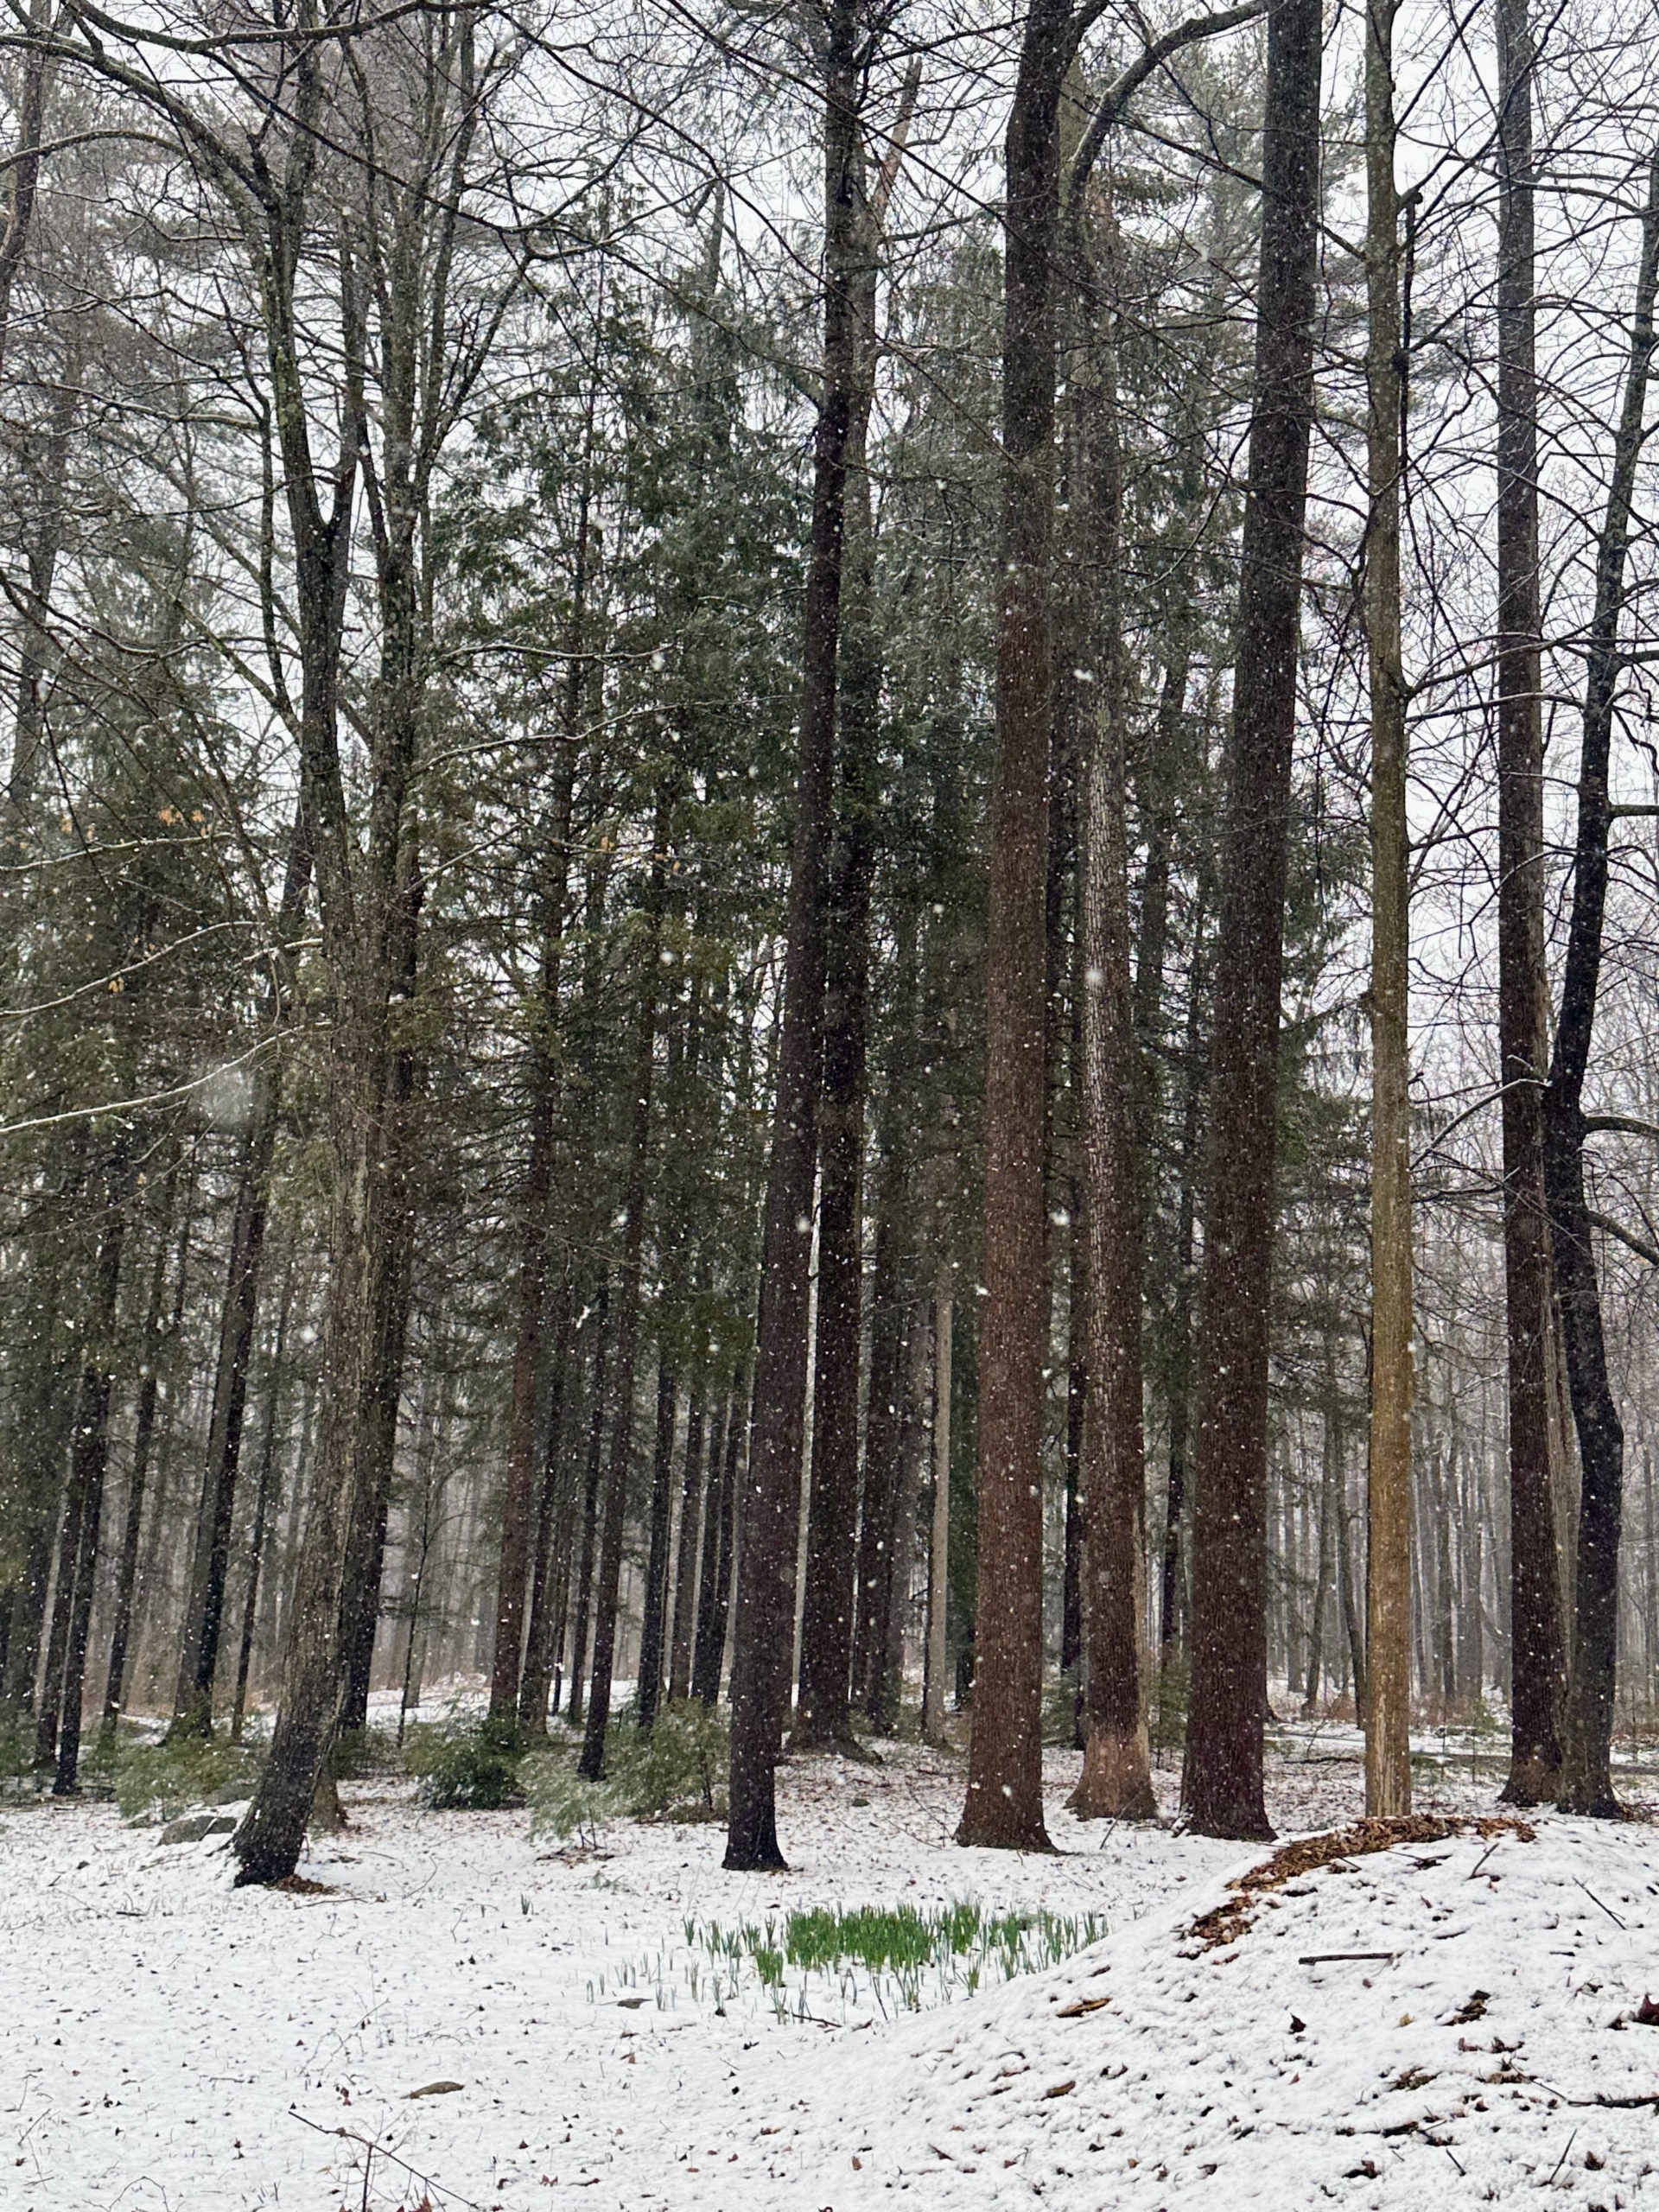
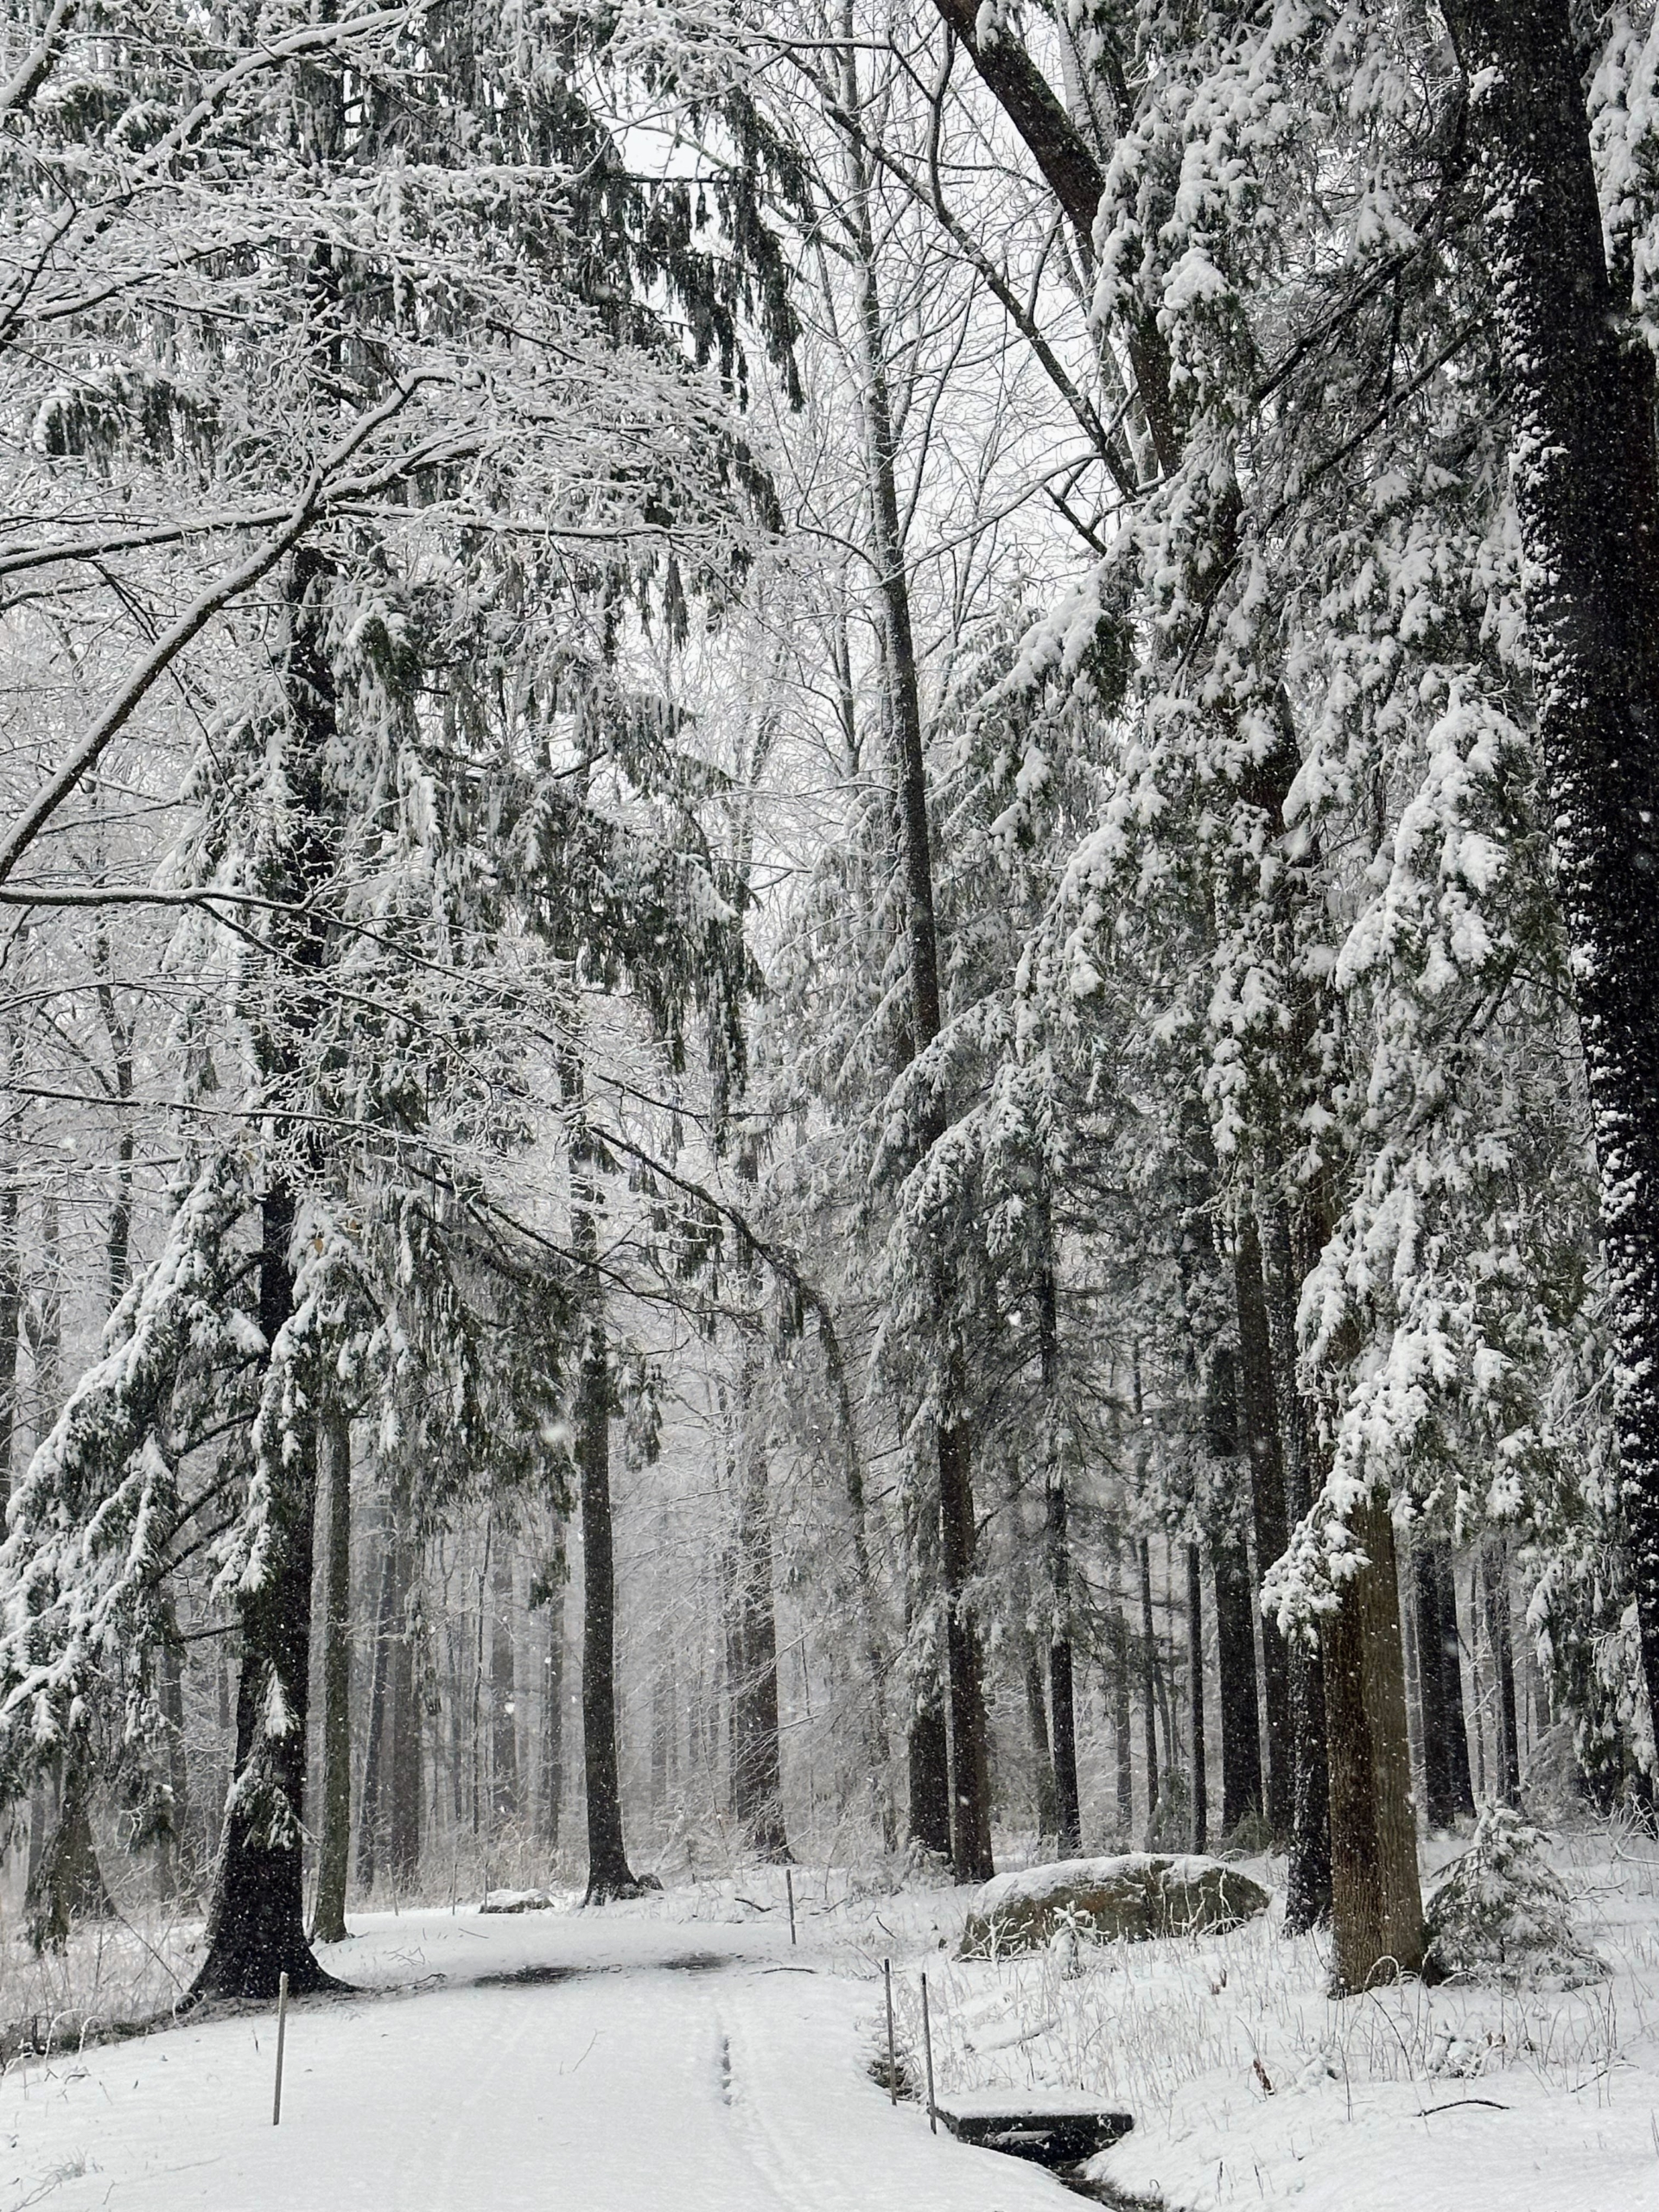
And yet the majestic eastern white pines still stand tall and bold green in the distance. These trees can be seen towering from nearly every vantage point on this side of the farm.
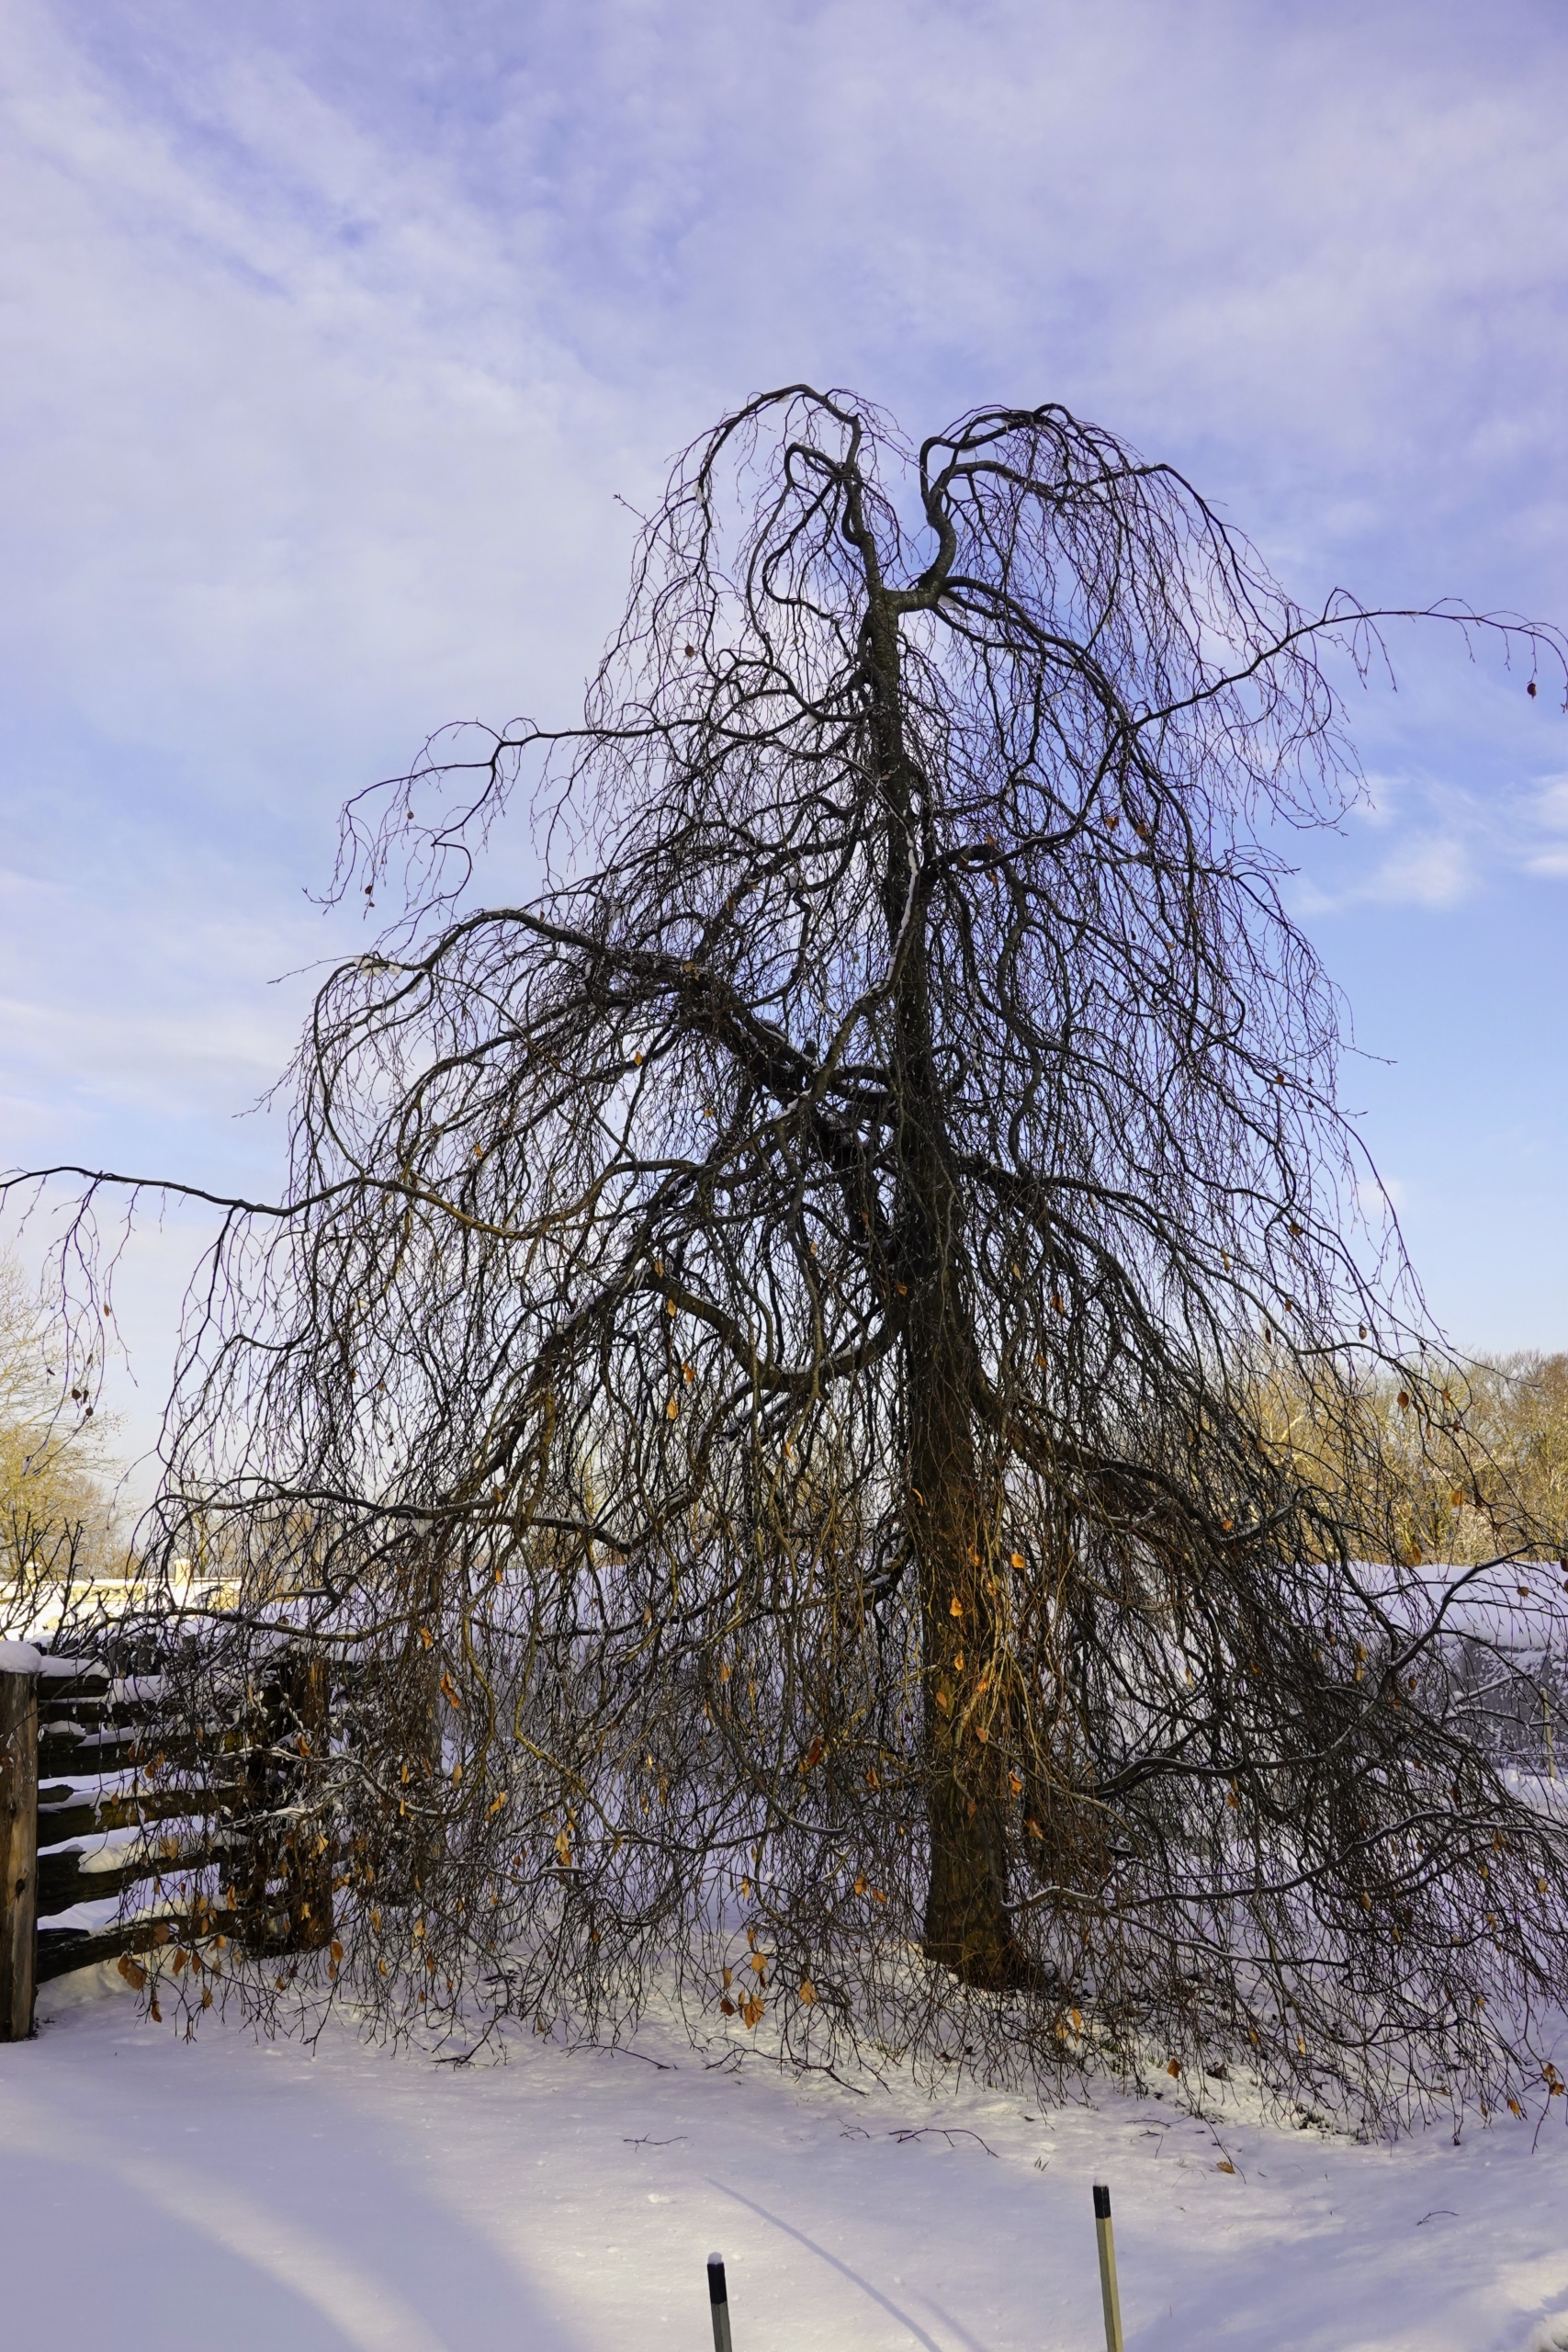
At one end of the Boxwood Allée is this beautiful weeping copper beech, Fagus sylvatica ‘Purpurea Pendular’, an irregular spreading tree with long, weeping branches that reach the ground.
Here is my expansive soccer lawn, where my grandson Truman loves to practice when he visits. He is a very avid and skilled soccer player who just celebrated his 11th birthday.
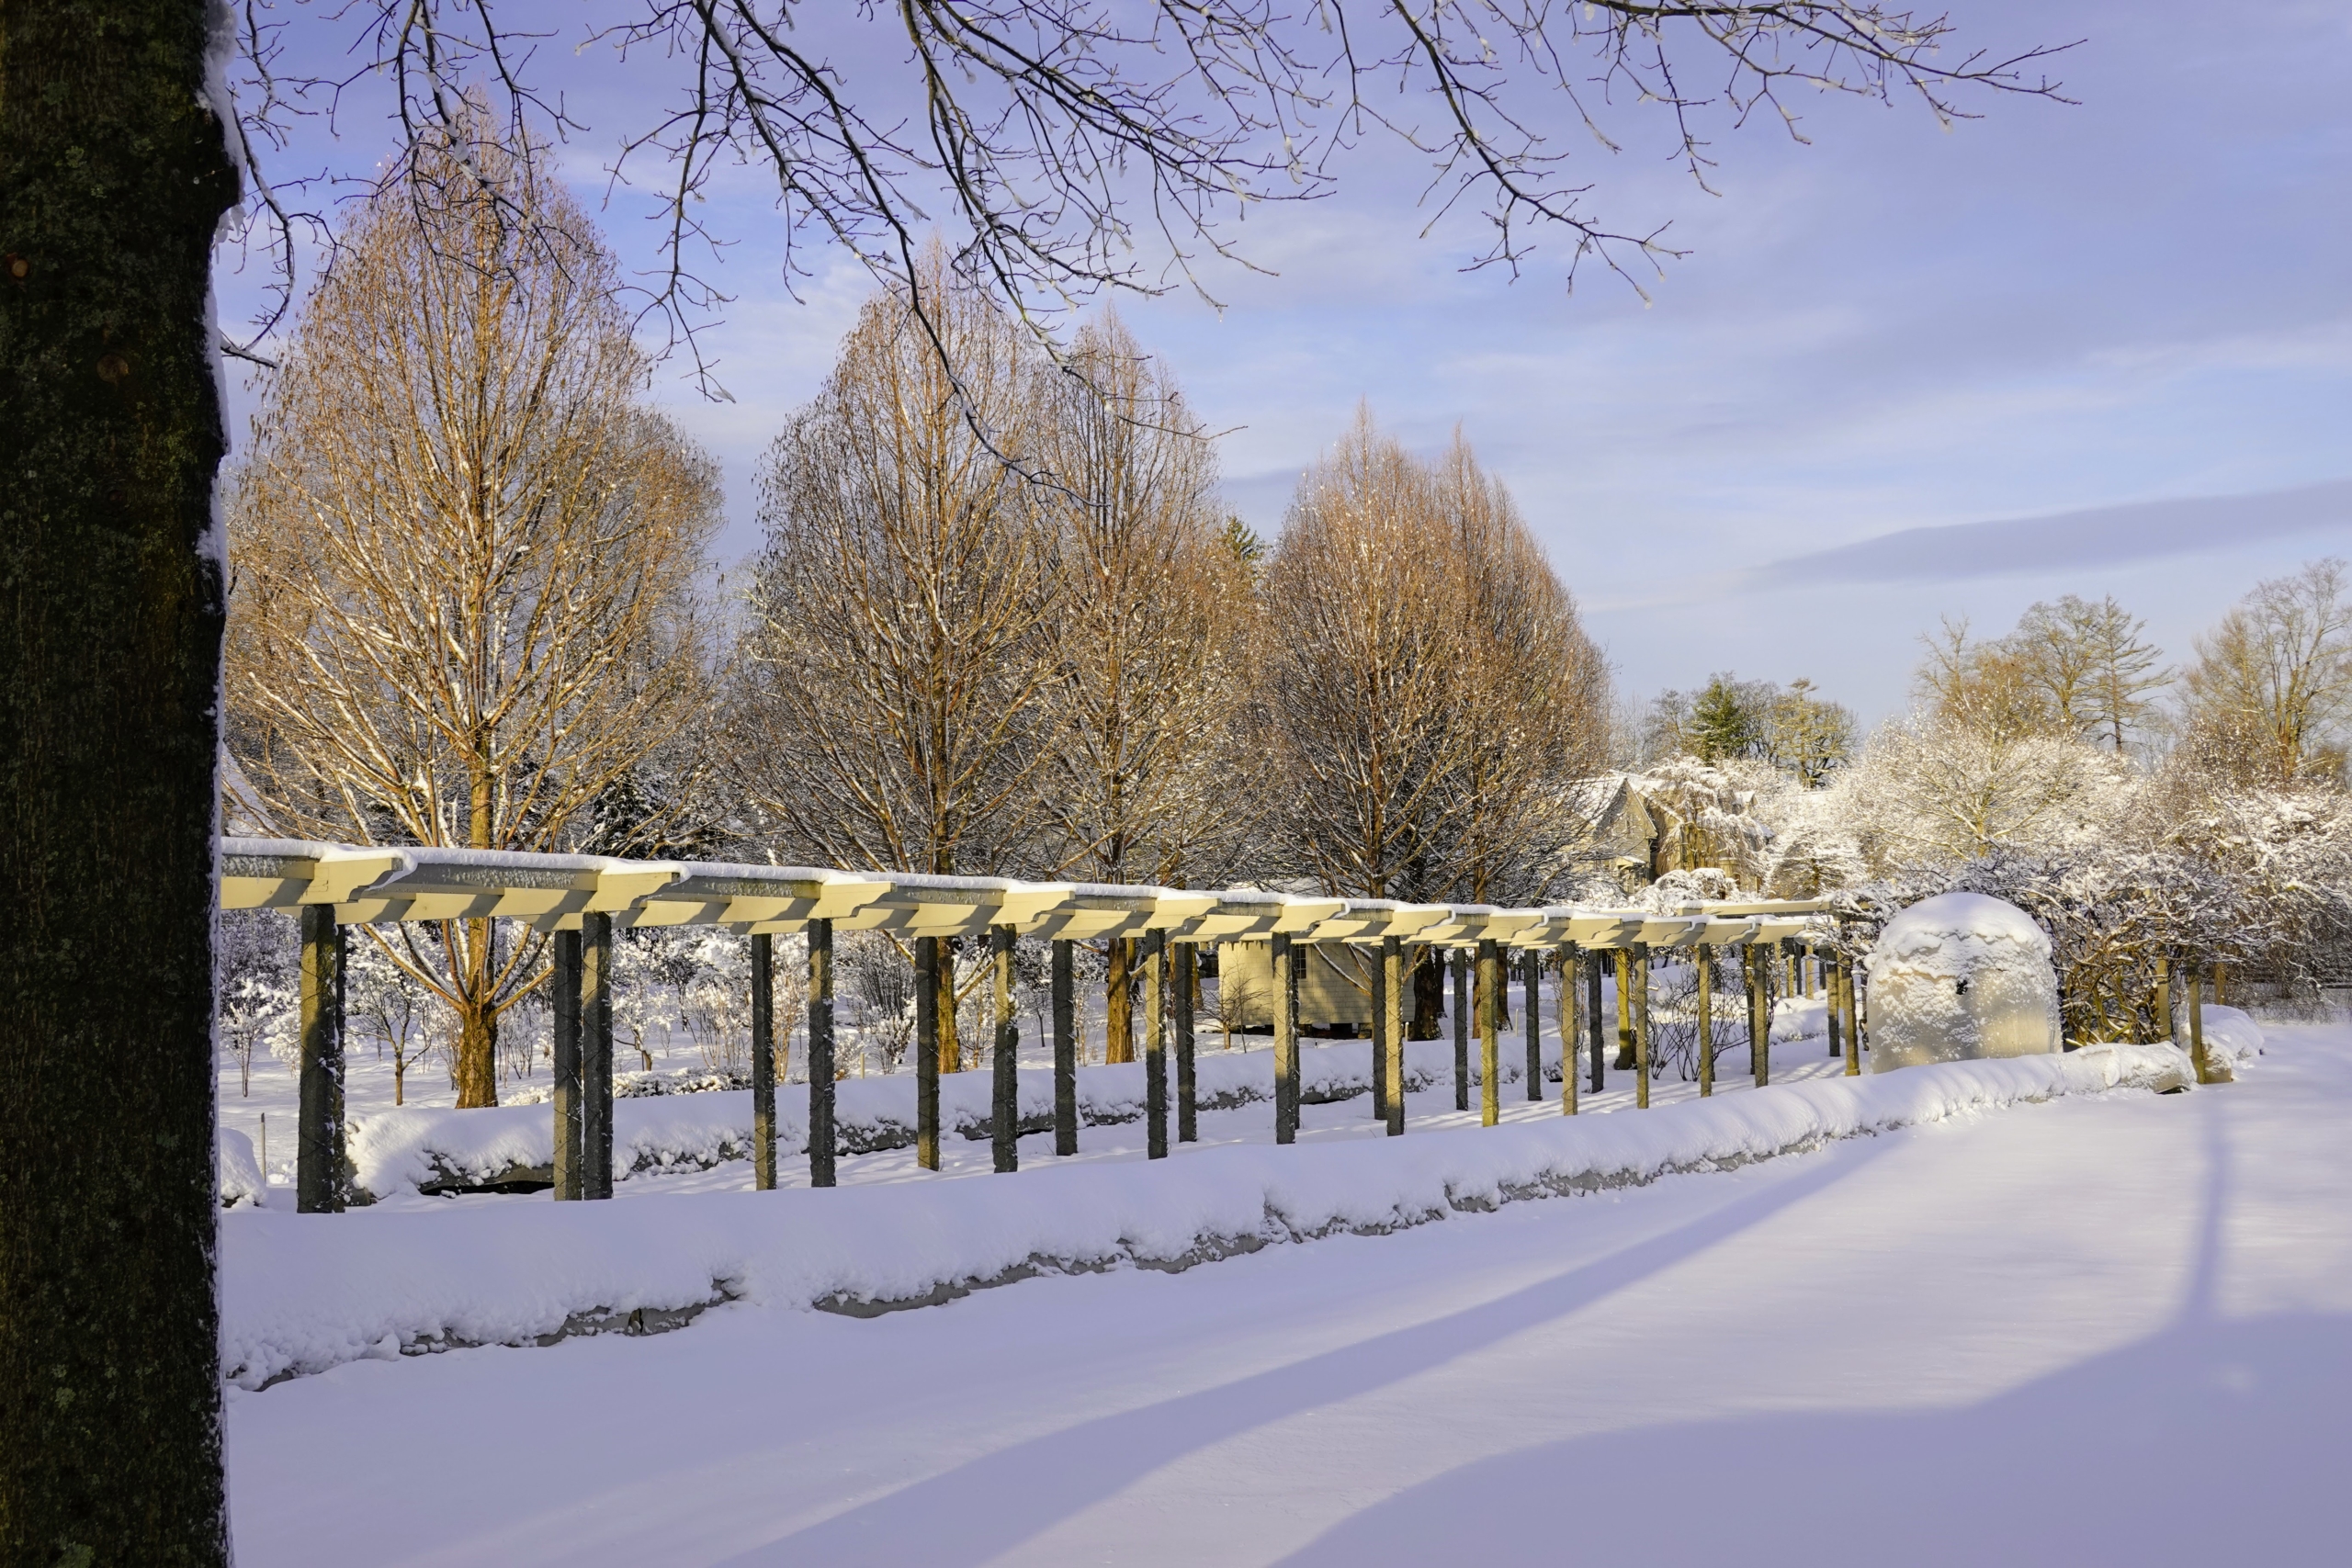
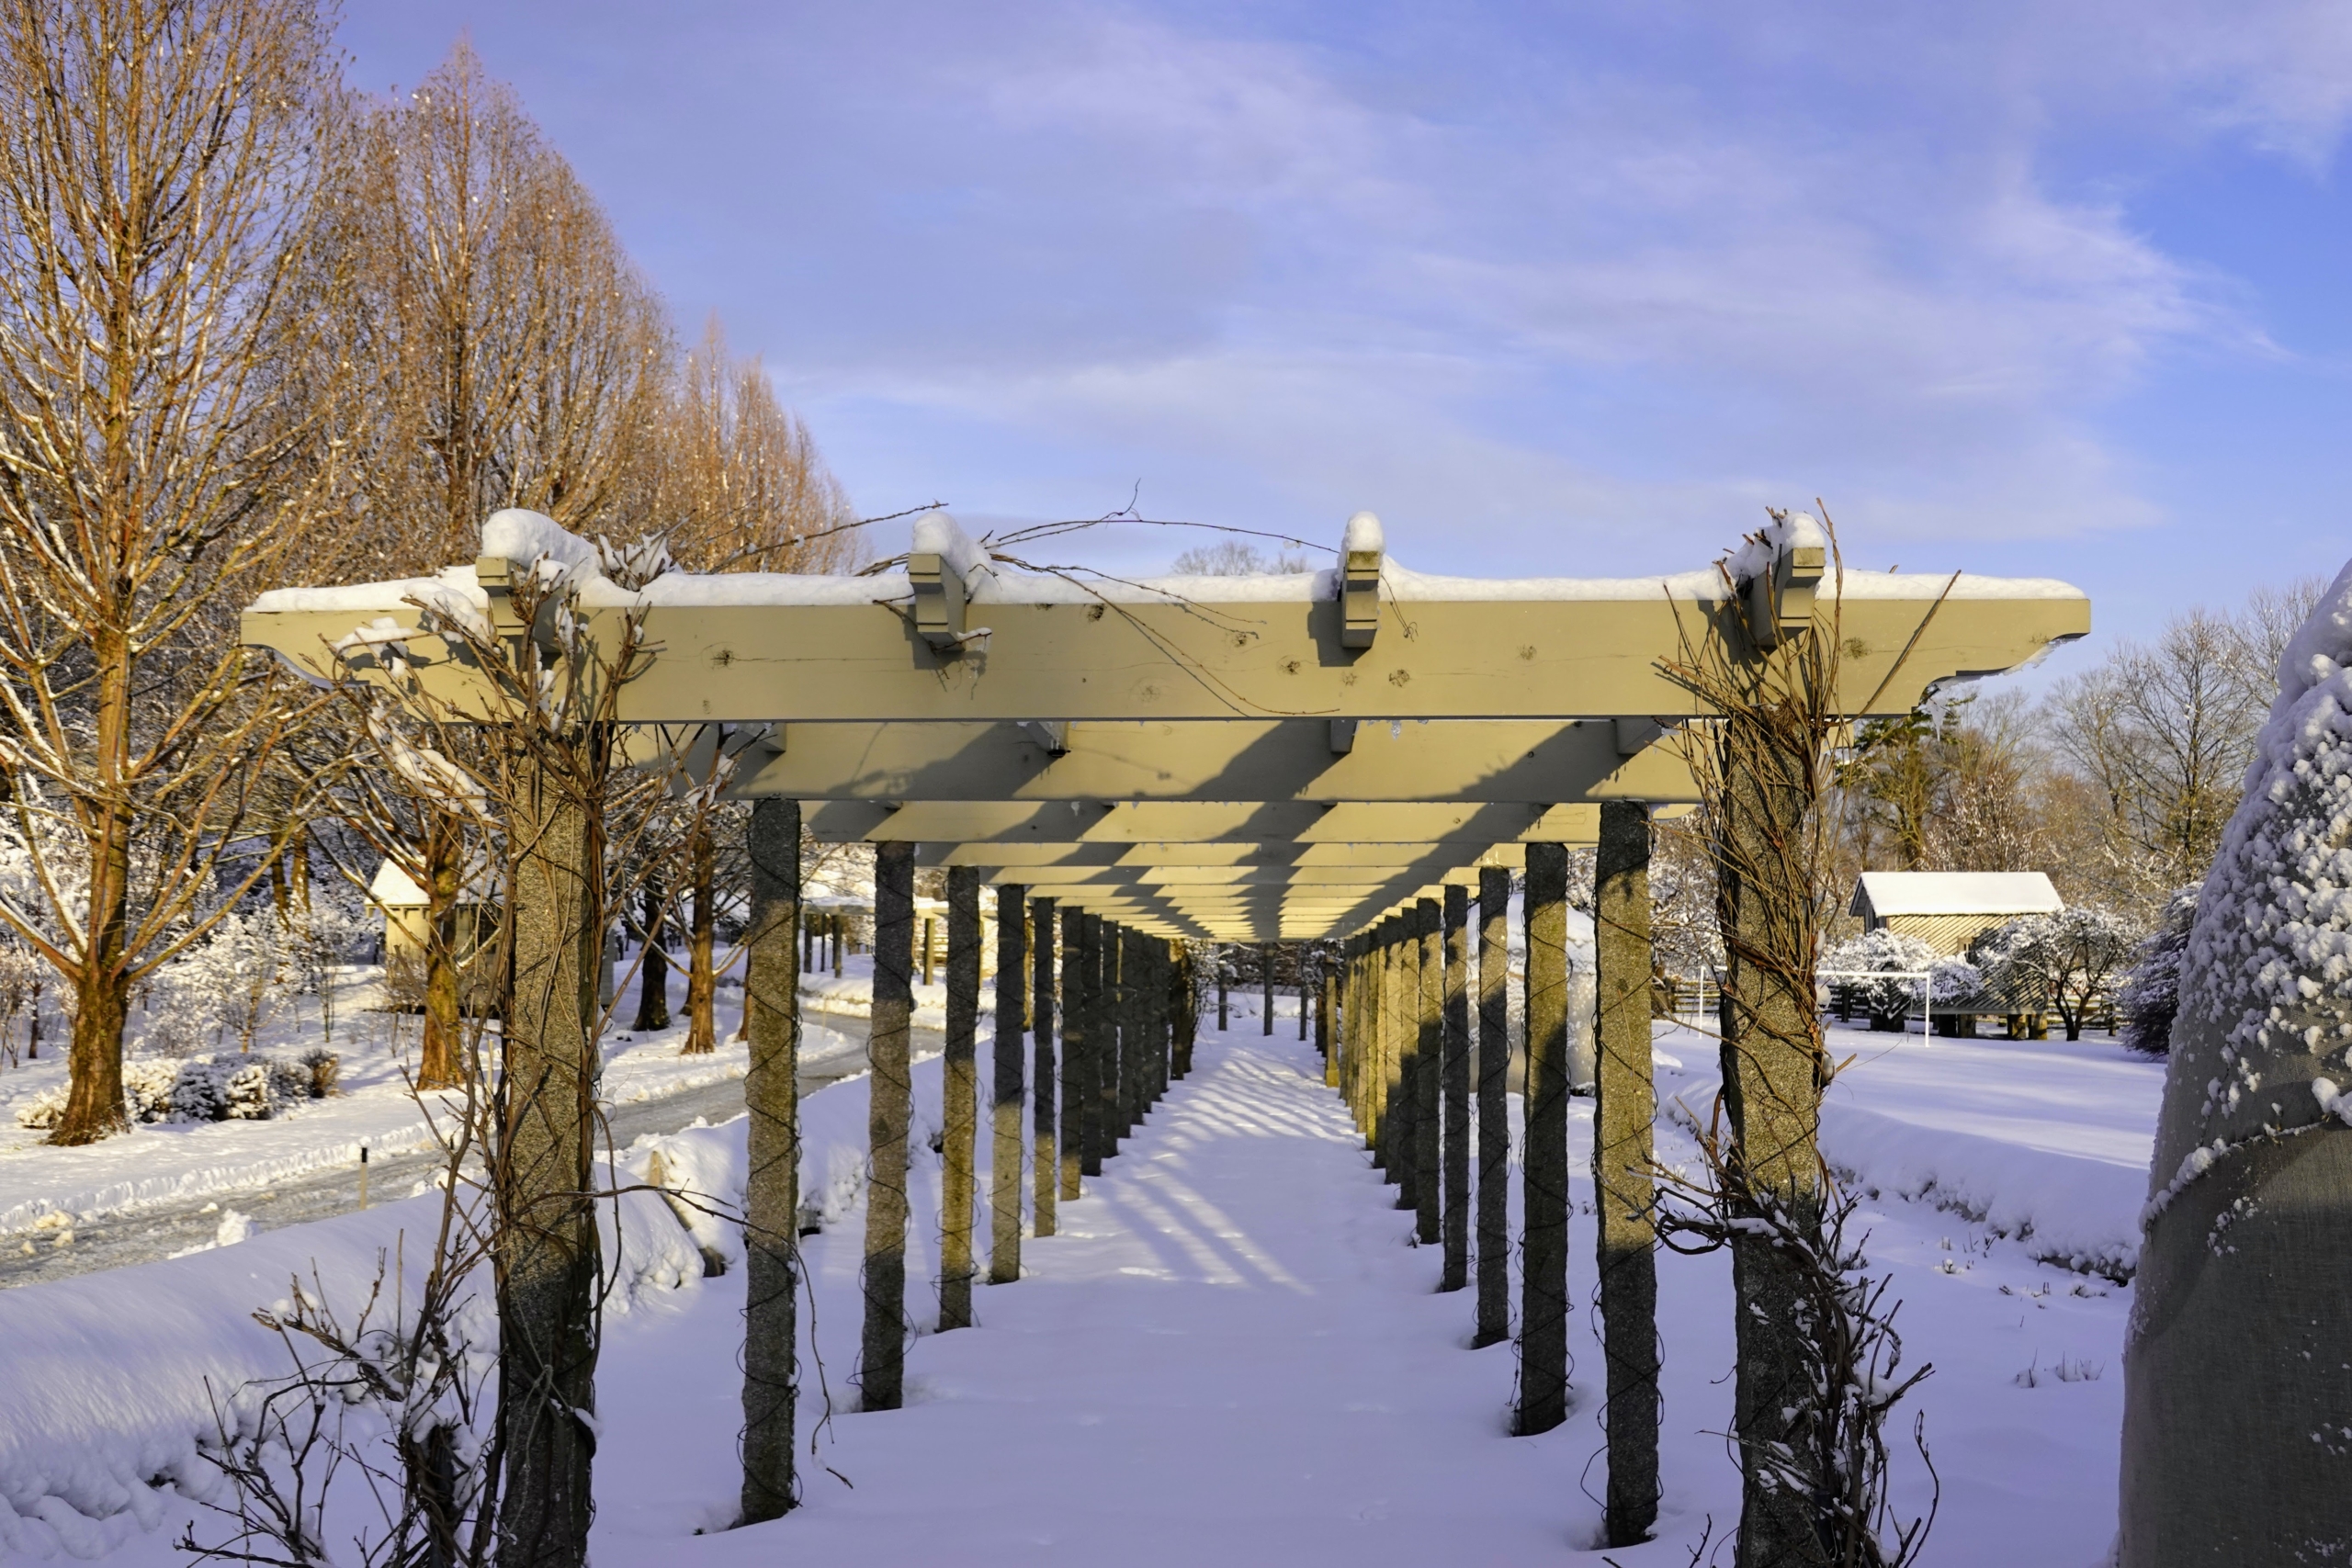
Nearby, my boxwood border along the winding pergola is well-protected under burlap. The snow almost covers the entire row.
And here is a view through the pergola – such a different look from what it will be like in just a couple of months when the garden is filled with colorful spring blooms.
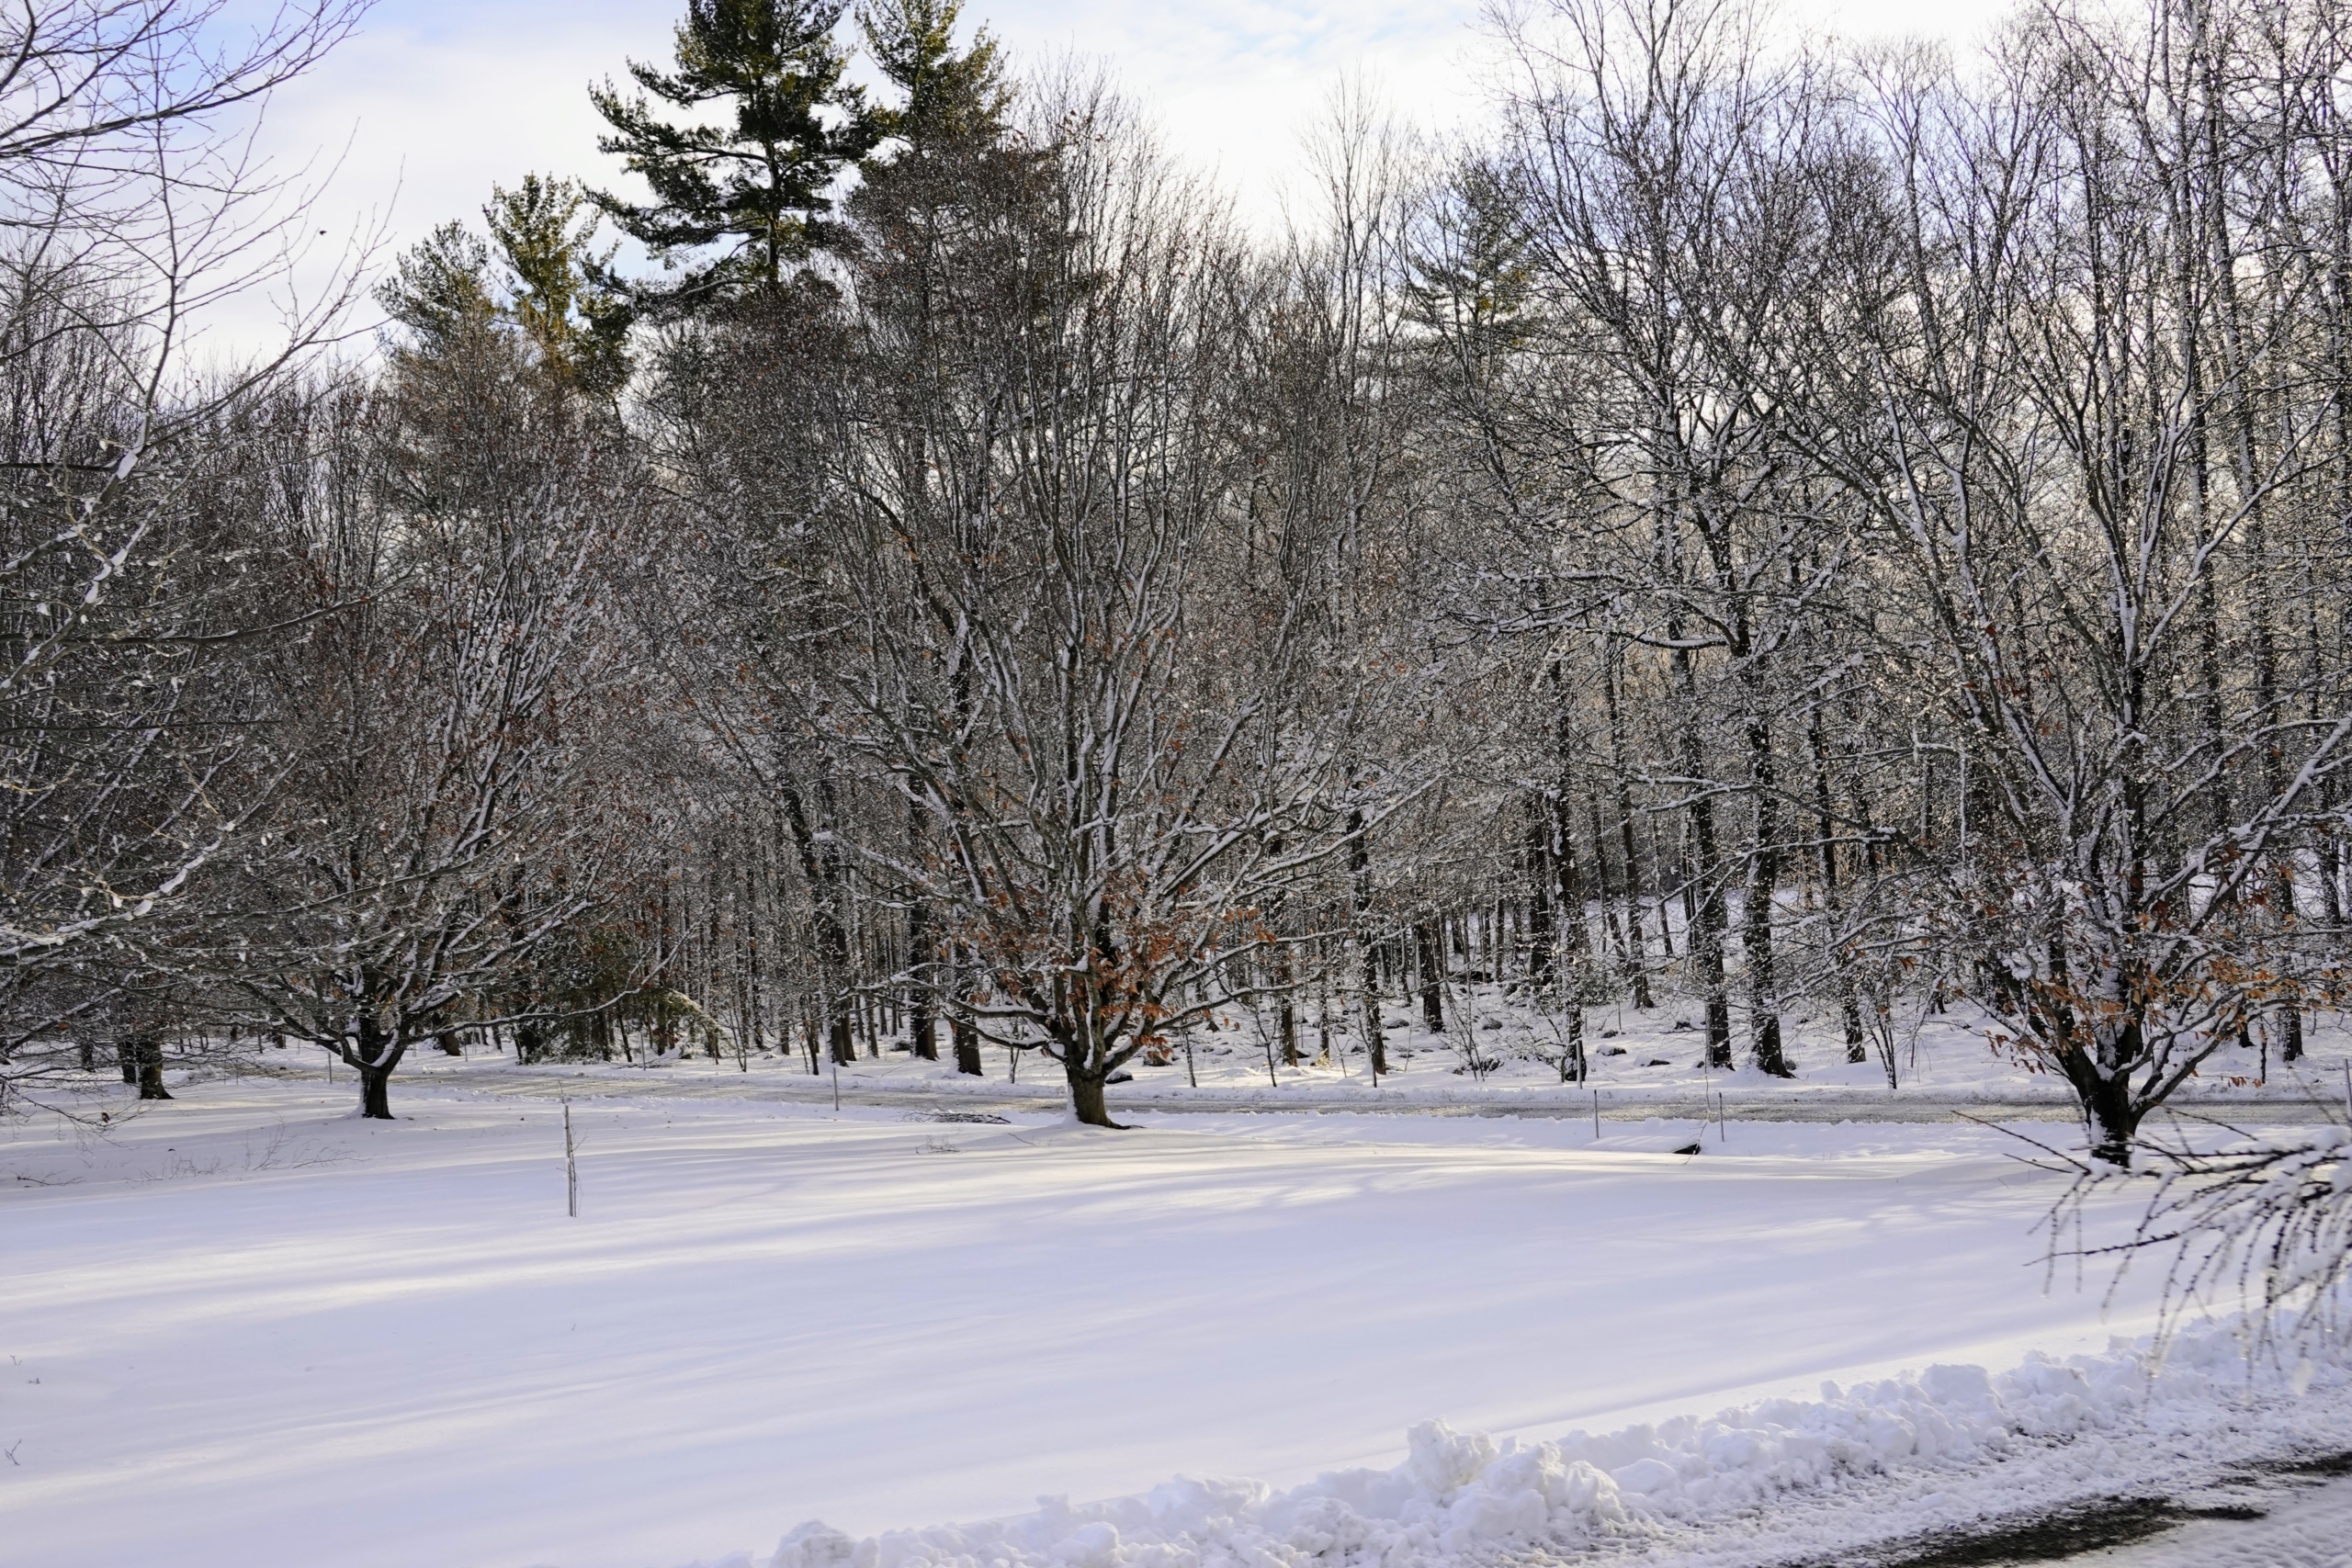
Hard to tell when the trees are so bare, but this is my grove of American beech trees, Fagus grandifolia. American beech trees are slow to grow, but can live up to 300-years.
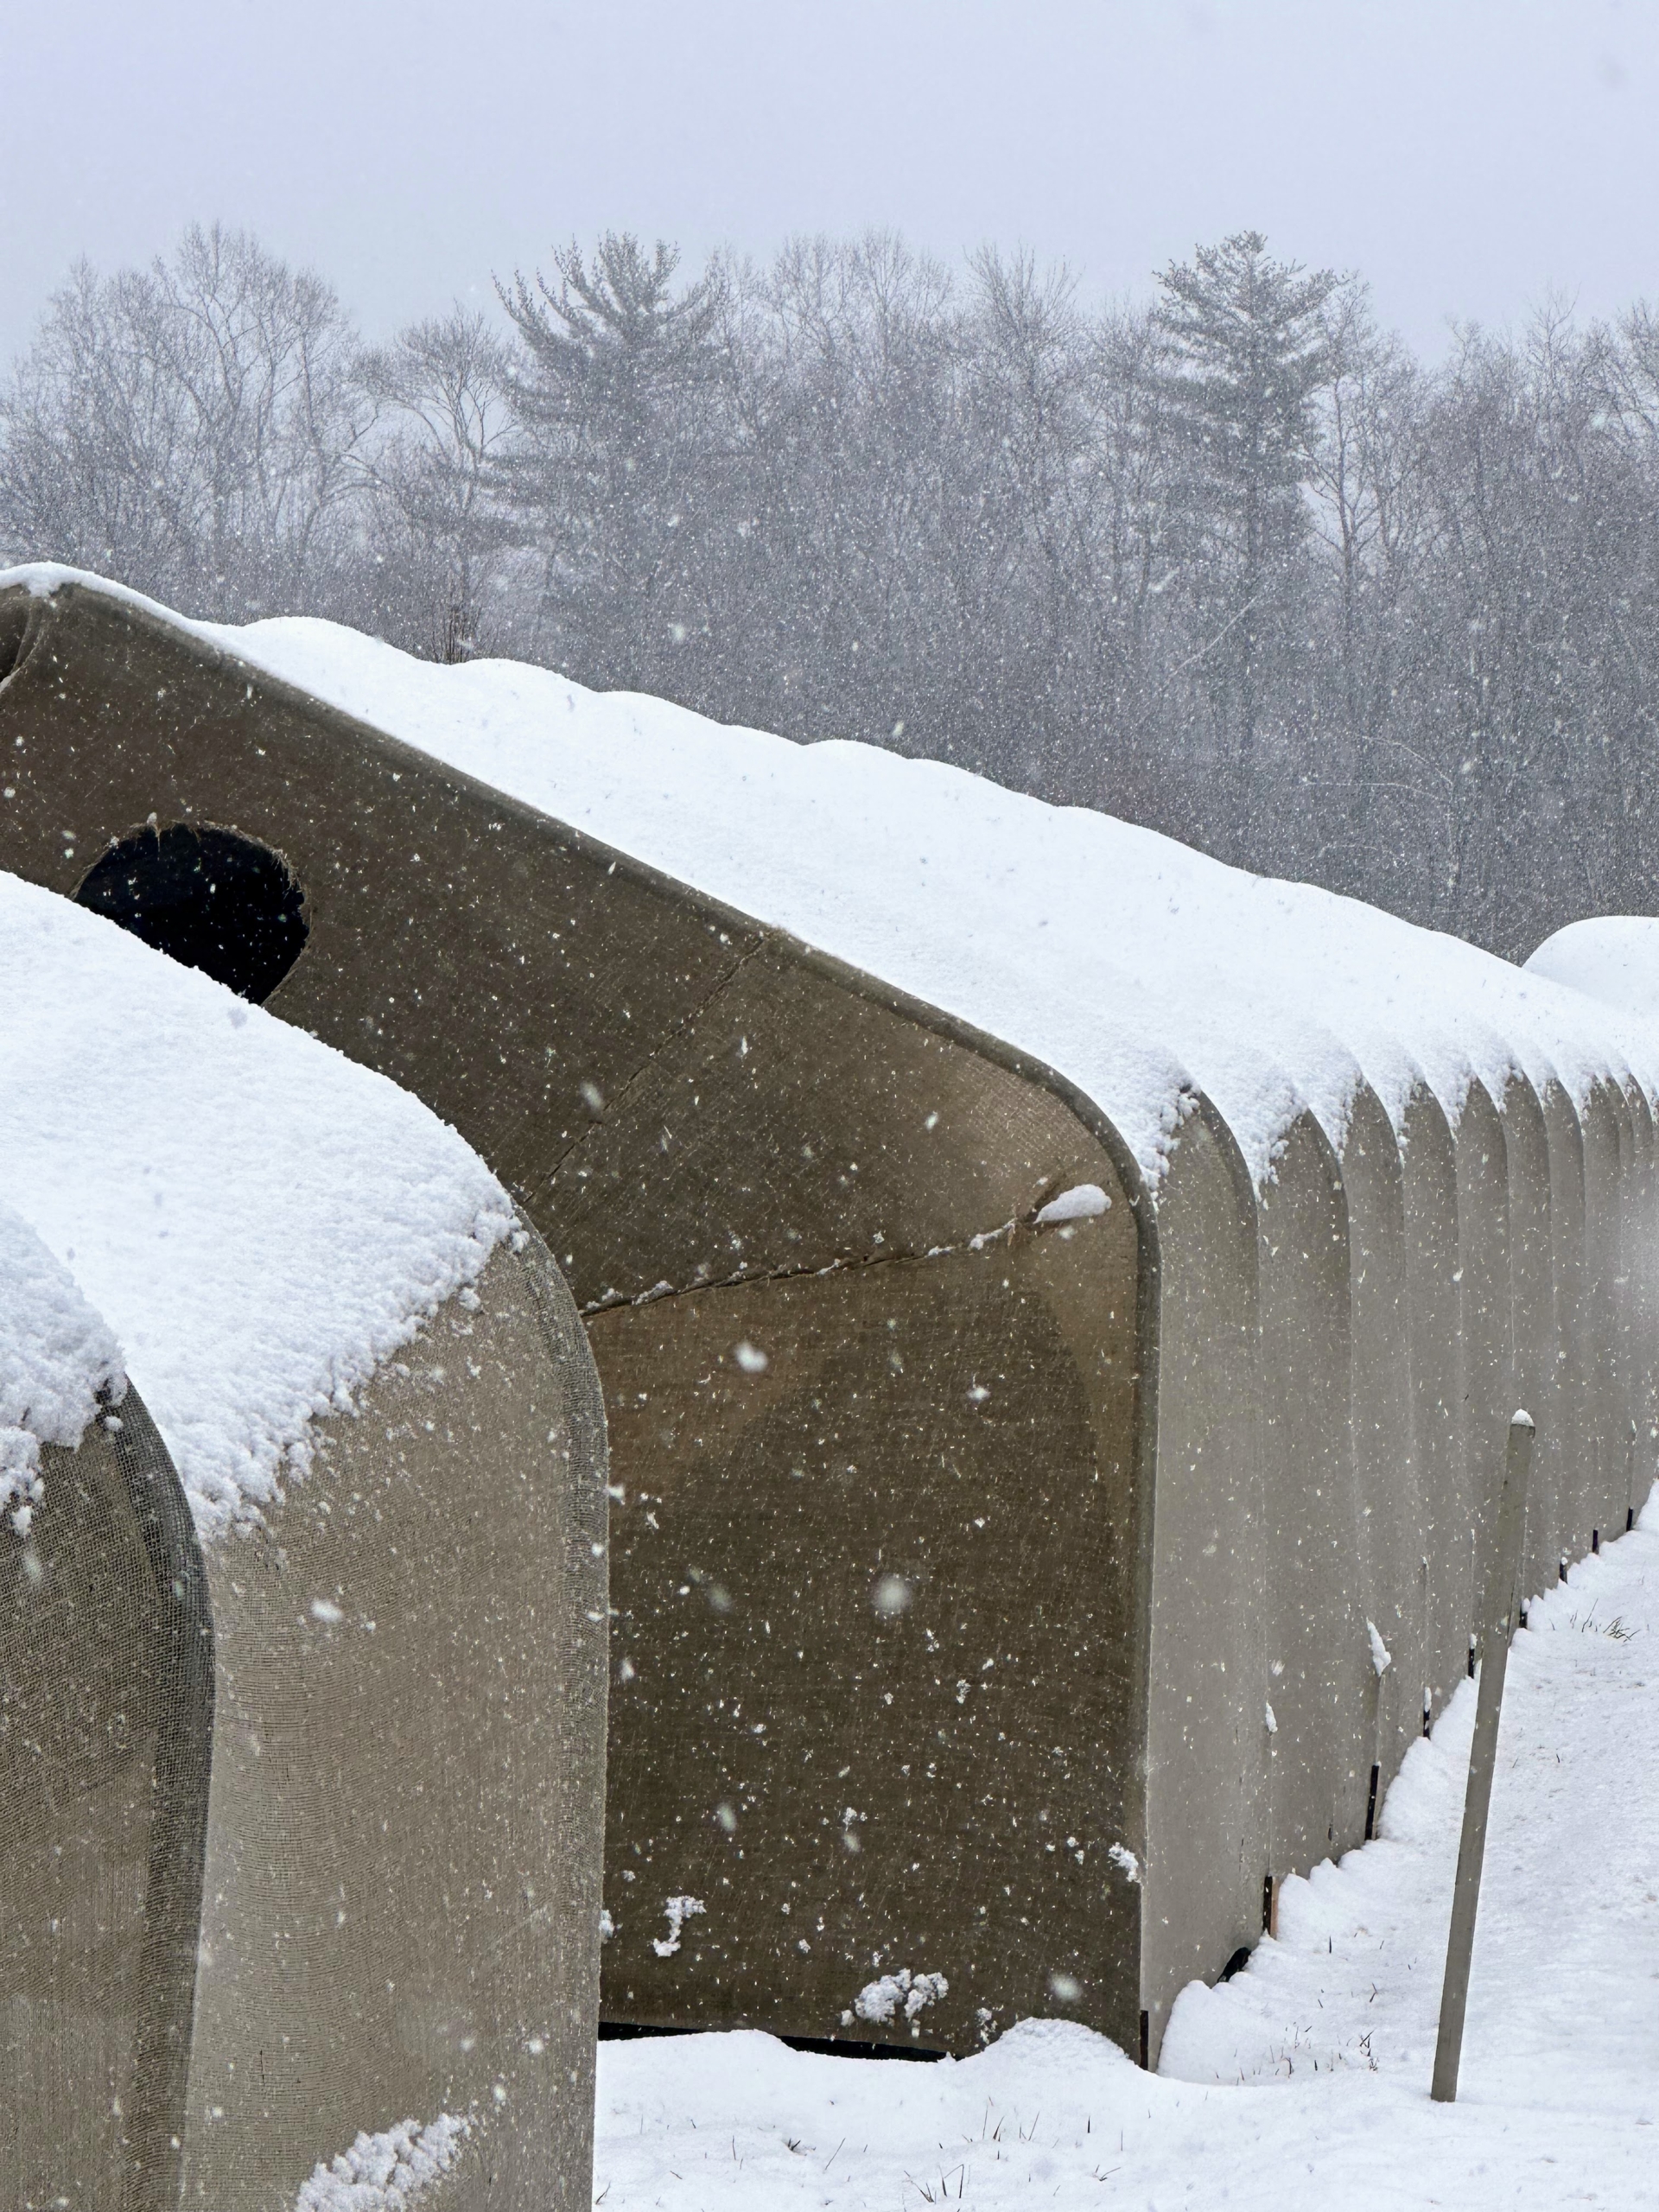
Snow and snow drifts piled on top of the burlap-covered boxwood shrubs in the long allée – and the great pines can still be seen.
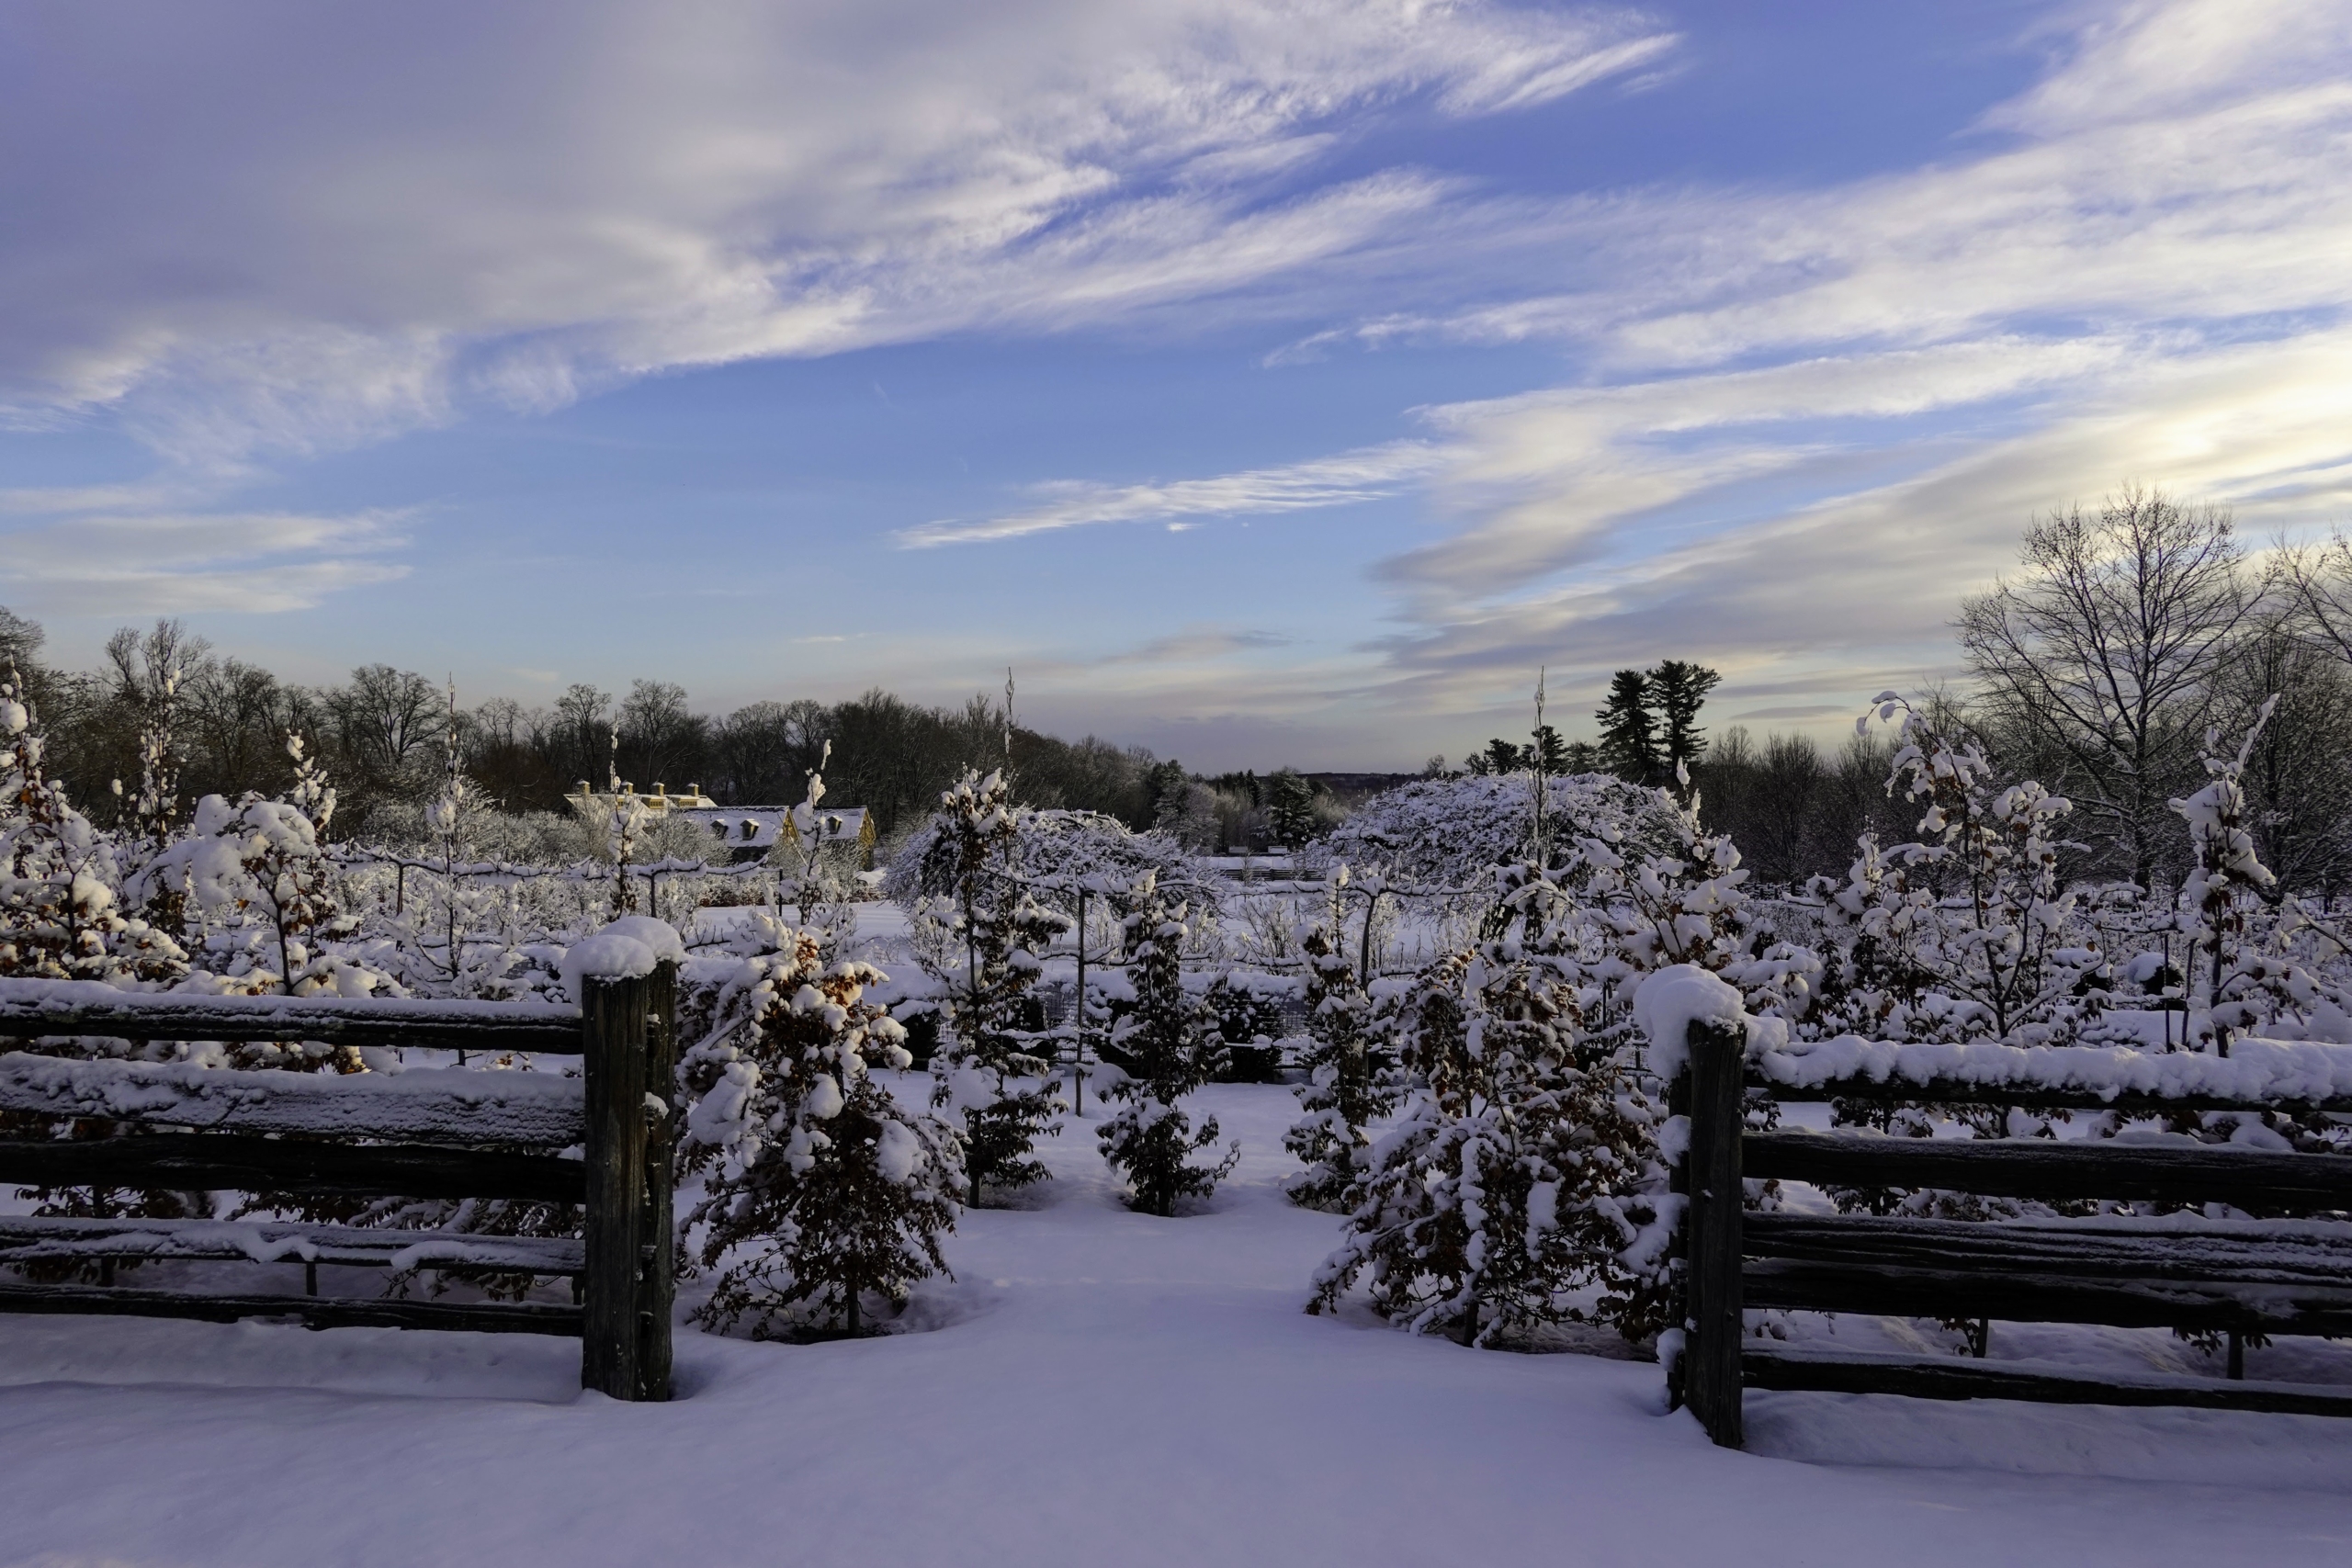
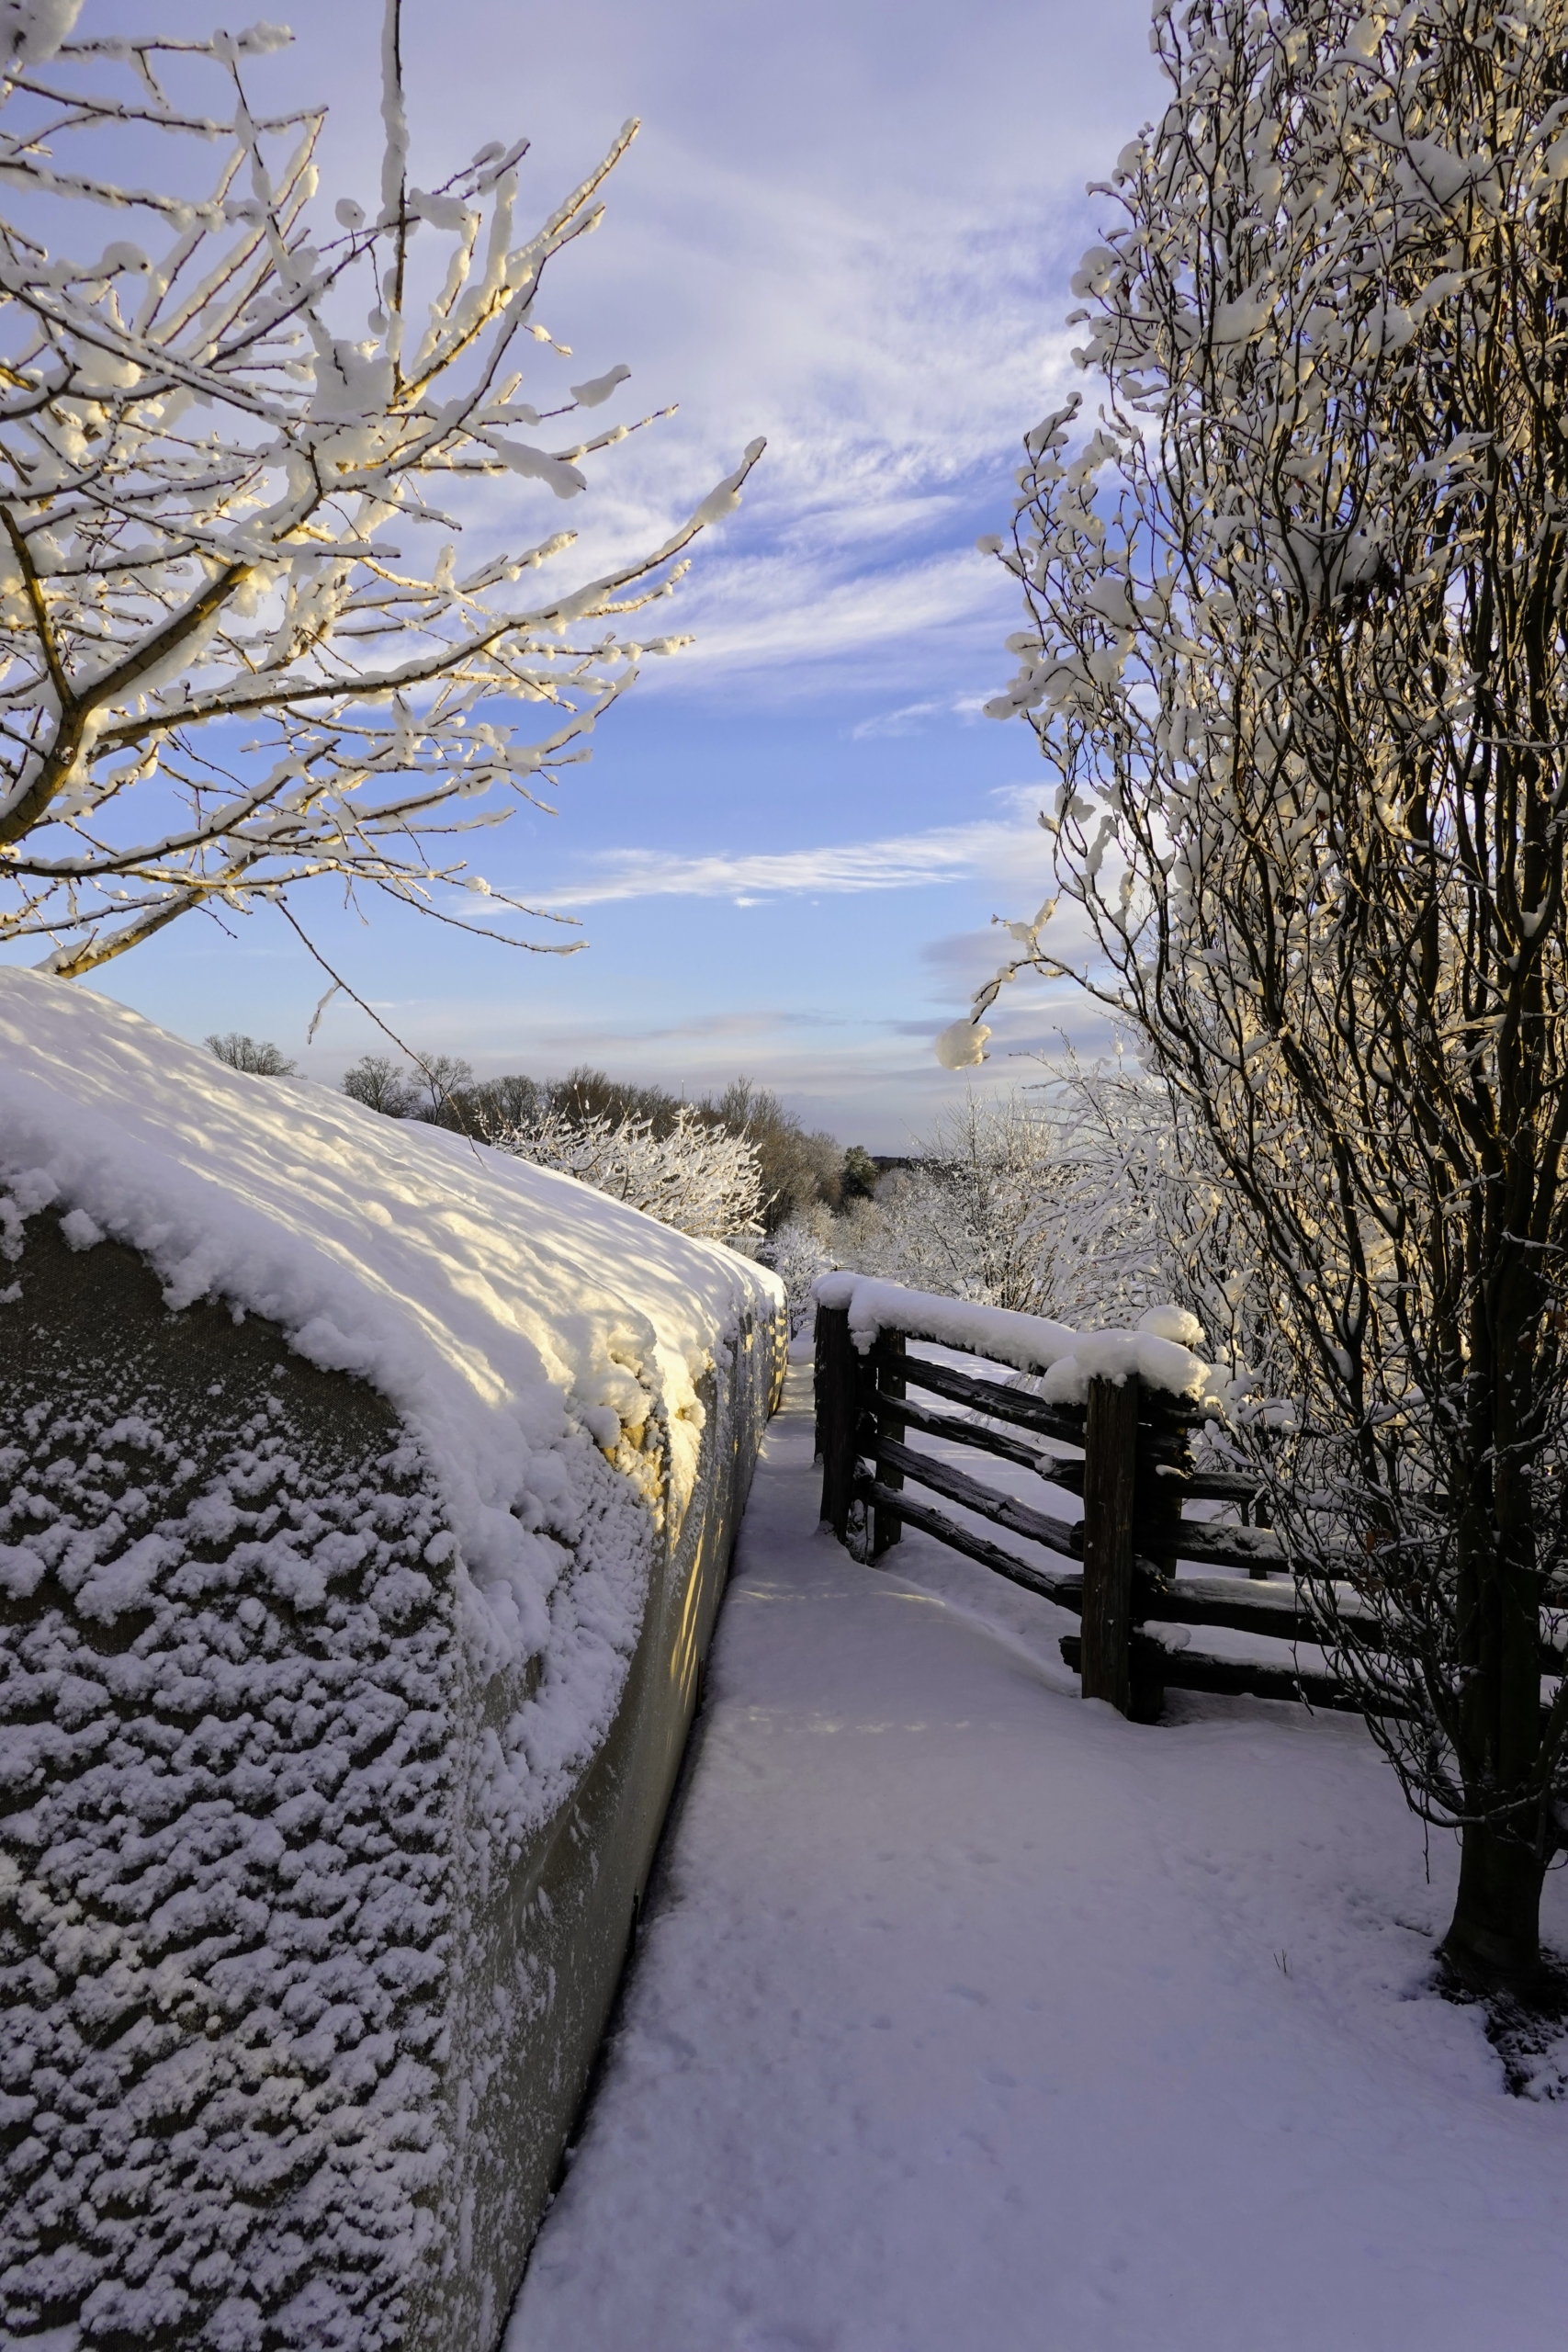
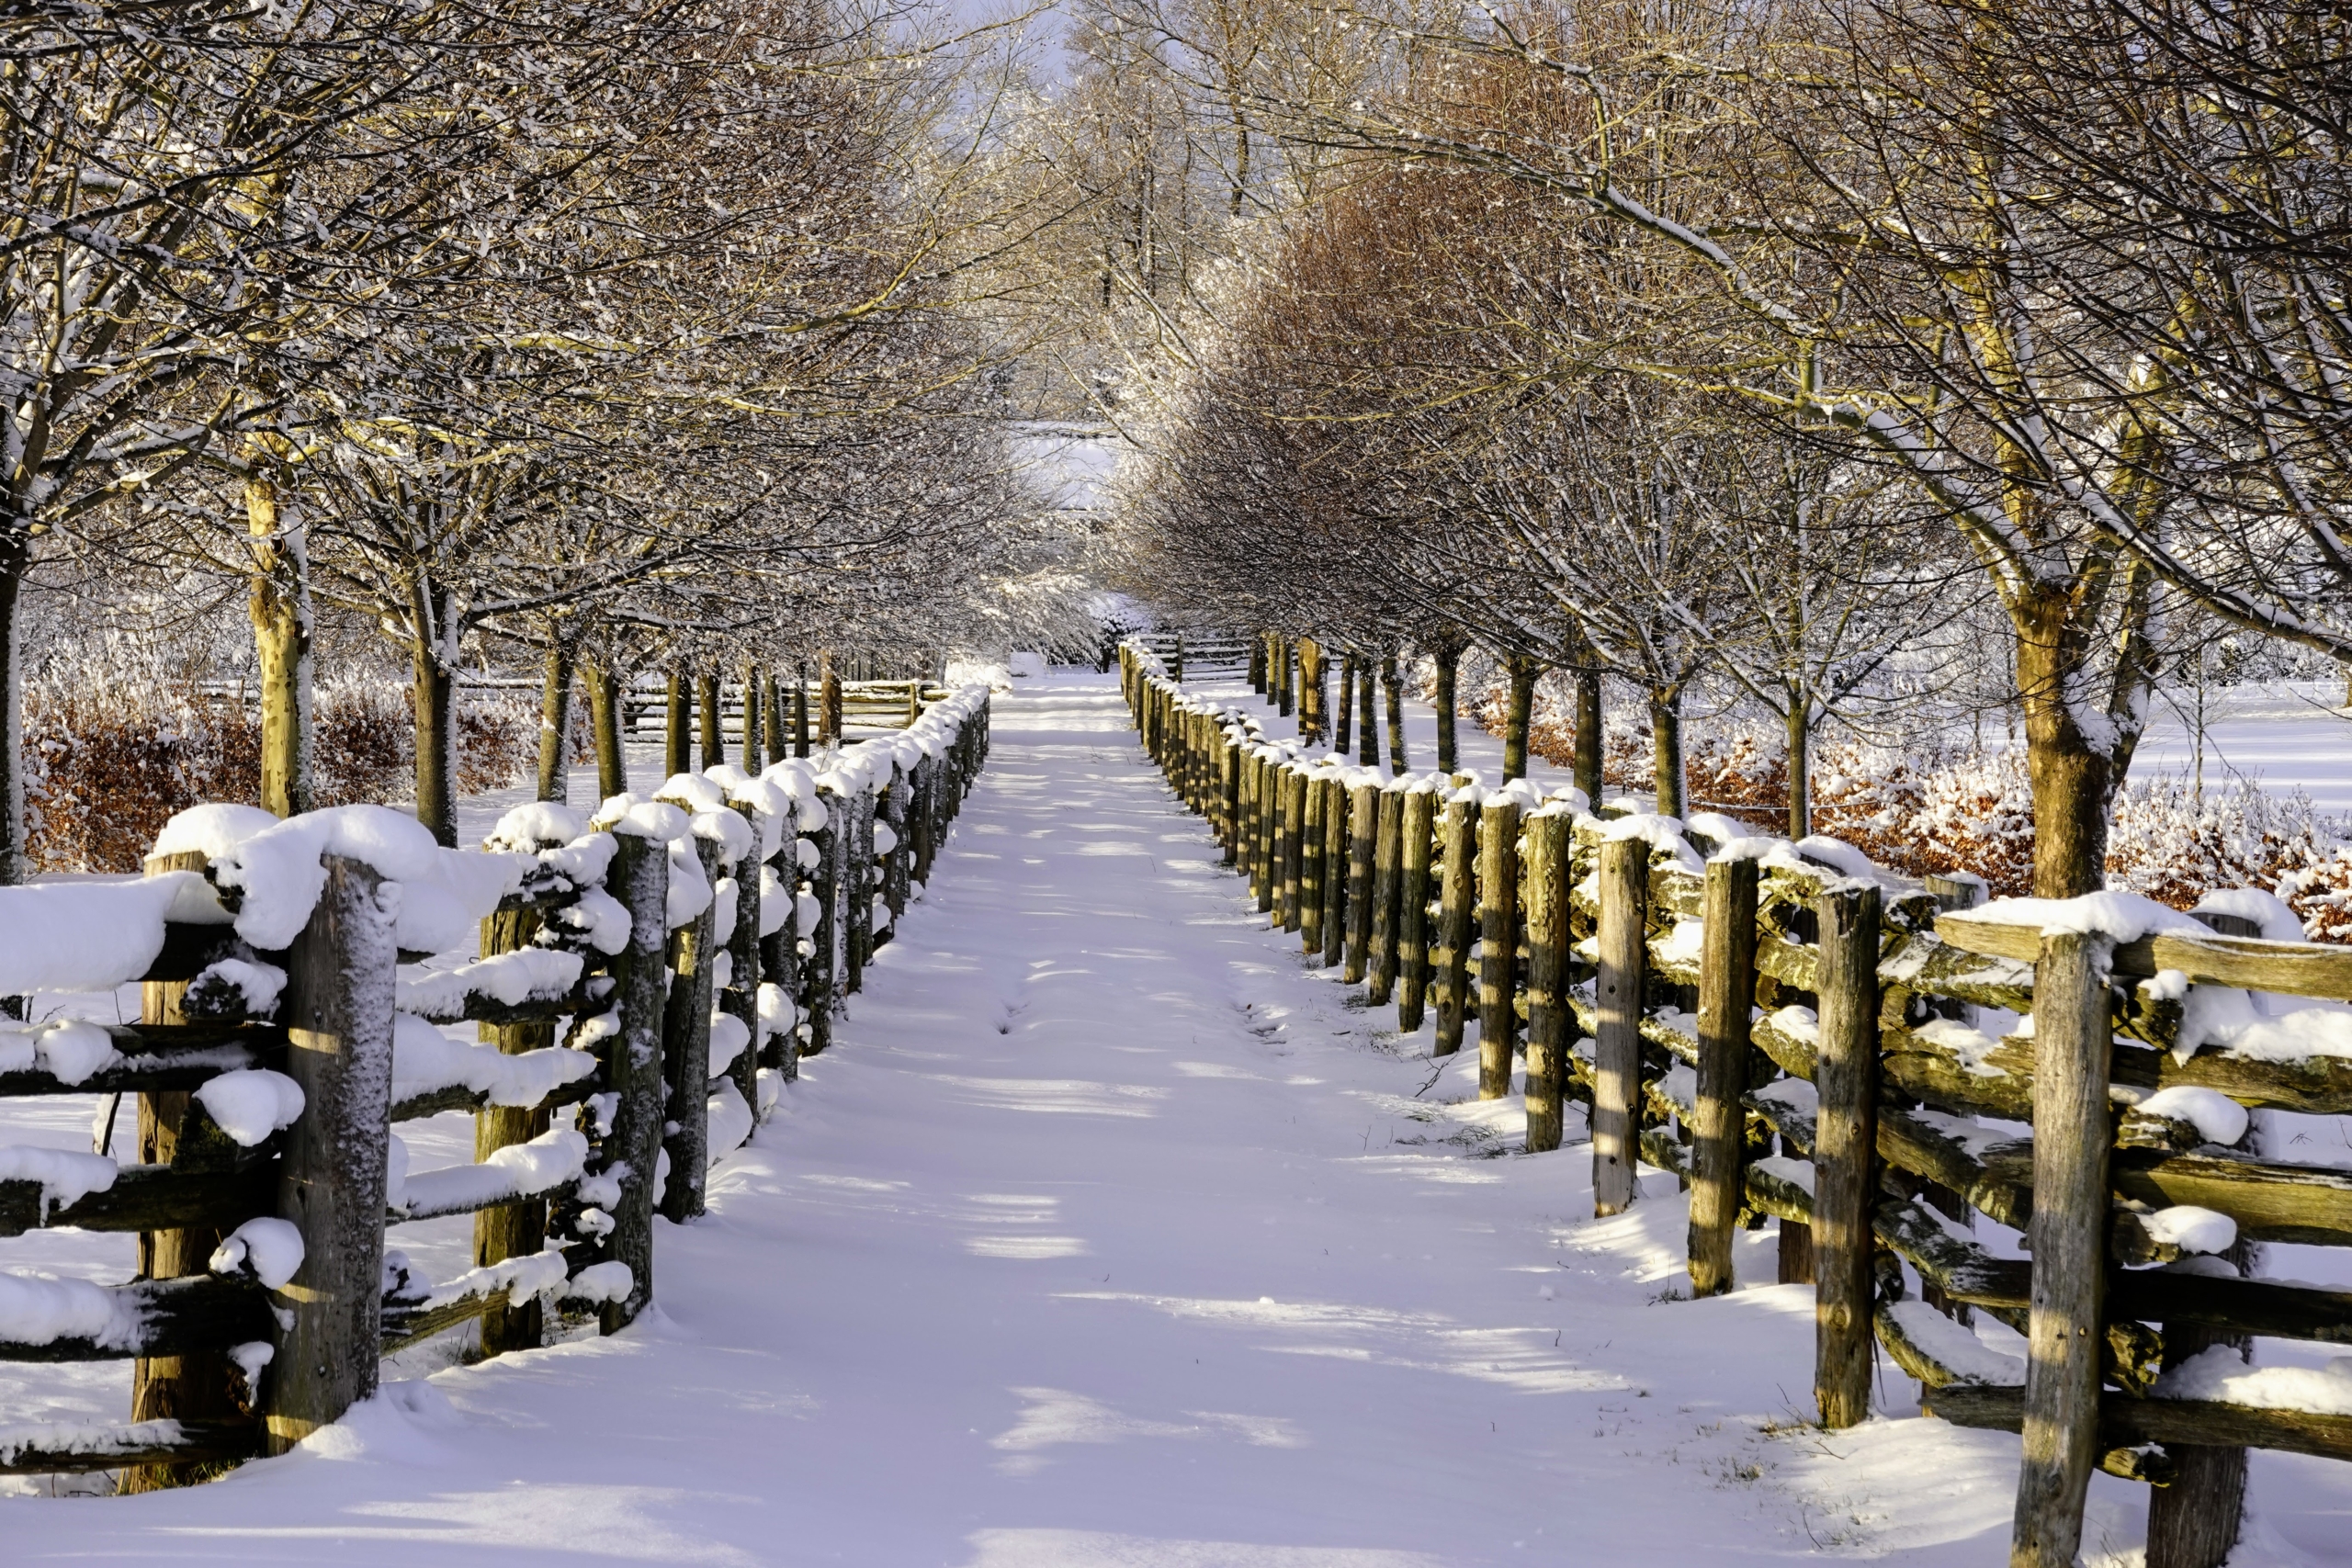
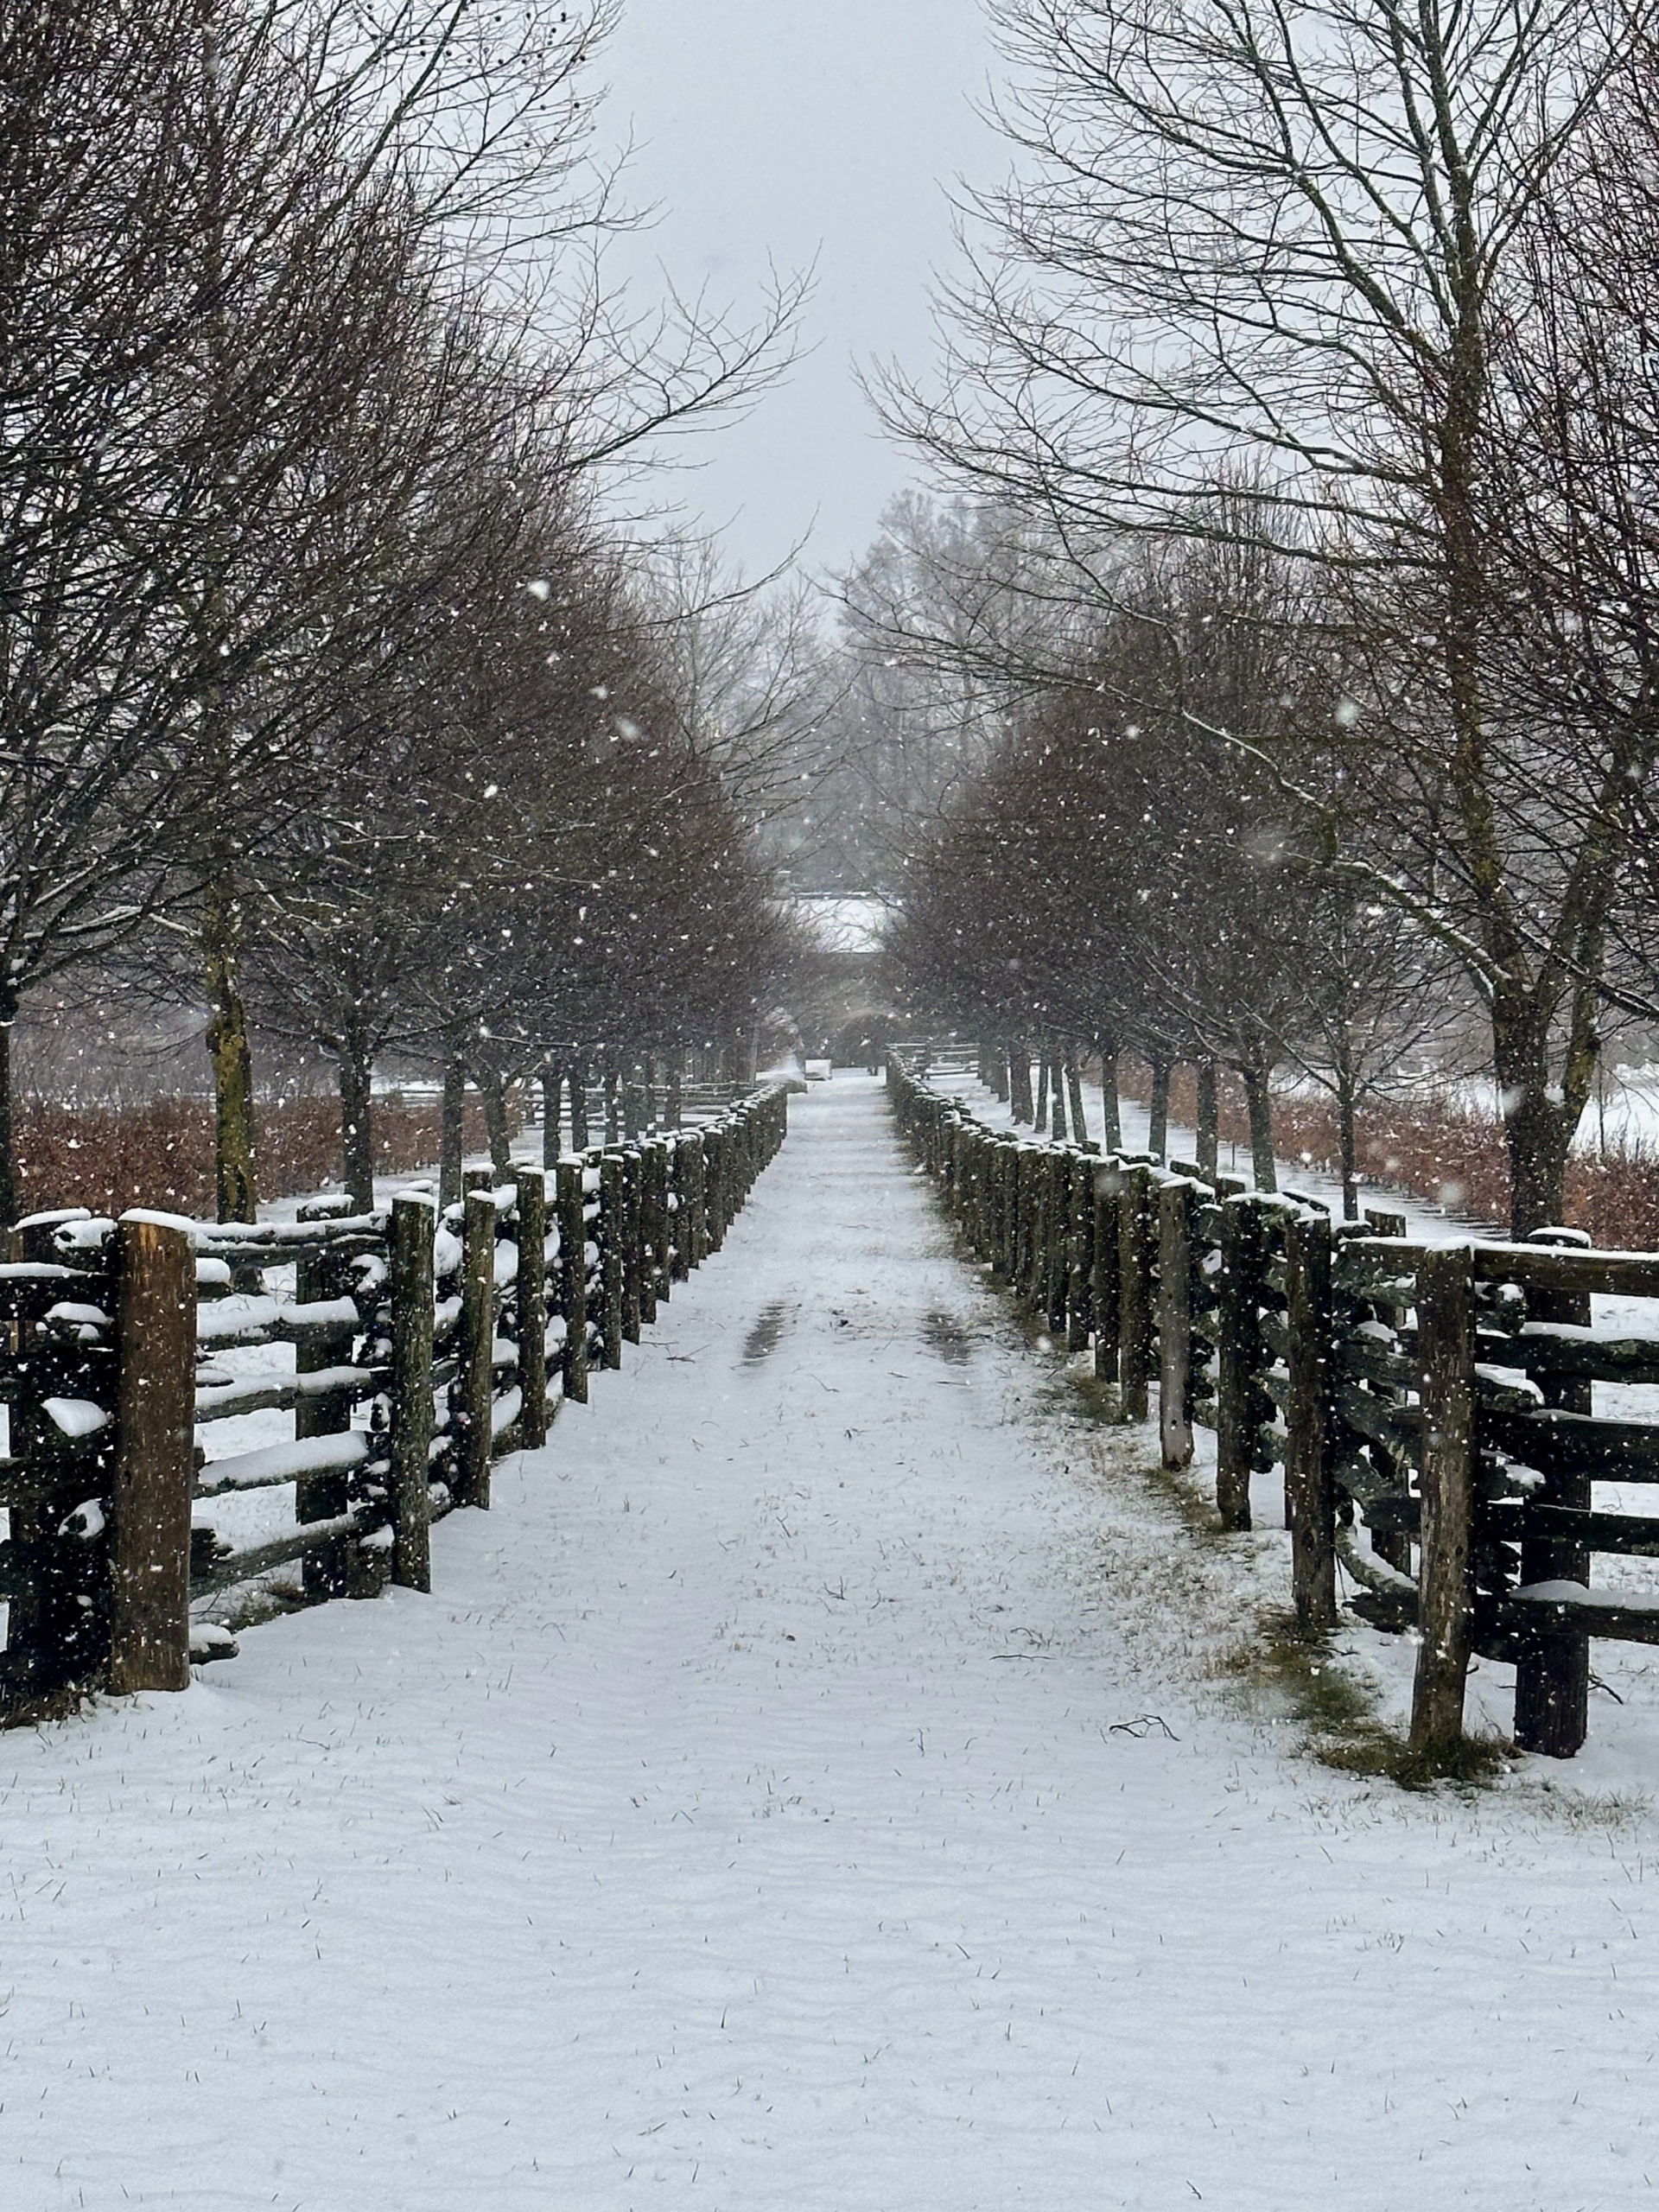
As many of you know, I planted a few different allées at the farm. This is the south section of my allée of linden trees leading to my carport. An allée is a walk or passage, especially one between two rows of evenly planted trees.
And looking north, here is the other section just across the carriage road. This allée extends all the way to the chicken coops. The fencing casts wonderful shadows.
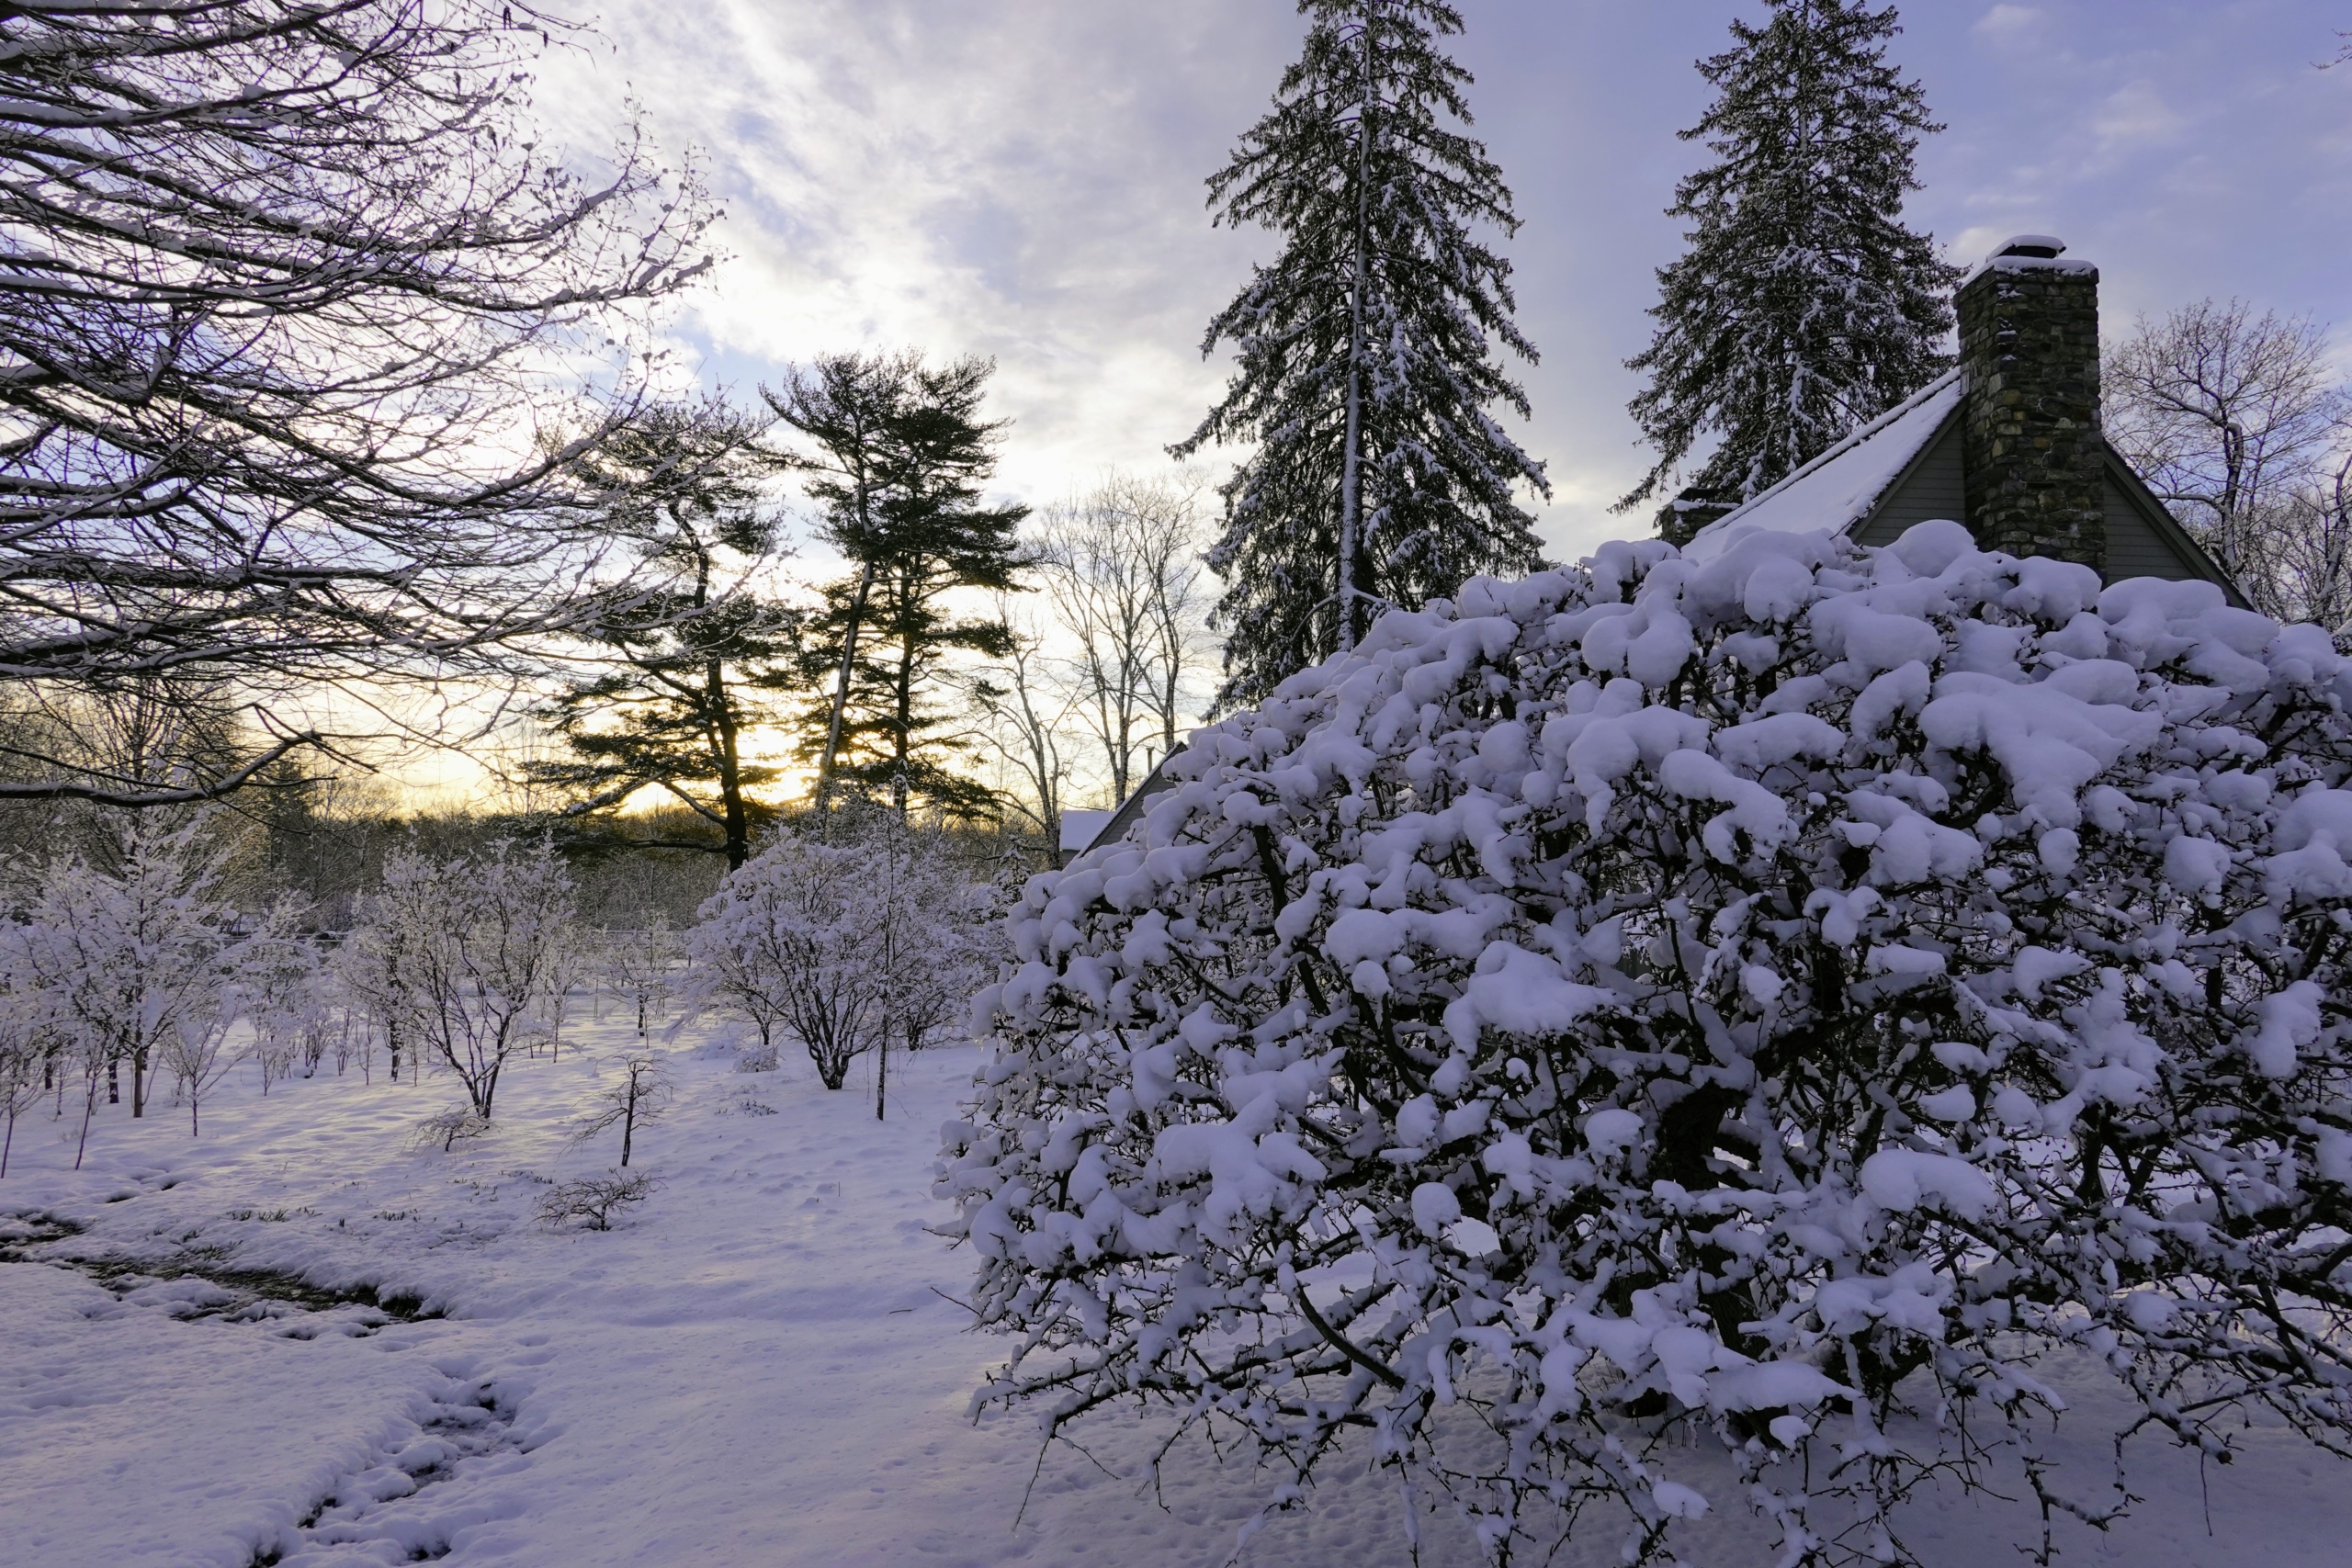
These trees are in front of my Winter House – covered in crisp, clean white.
The upper terrace parterre outside my Winter House is also buried under the snow. I am thankful the snow weighed down on the burlap and not on the precious plantings underneath.
And here is the nyssa tree in front of my lower terrace parterre outside my Winter House kitchen – disguised in white. Birds love to perch on the top and watch all the activity around the farm. Nyssa sylvatica is a small, slow-growing, stately, deciduous tree with a dense, pyramidal habit. Were you affected by Winter Storm Sage? How much snow did you get? Share your comments in the section below.
Here at my Bedford, New York farm, today is clean up day after Winter Storm Sage came through the region dropping several inches of heavy, wet snow.
Yesterday's nor'easter began as rain during the early morning hours and then continued through the day and into the night covering everything in white. Fortunately, we were not among the hardest hit areas, but by afternoon, roads were slick and visibility was low - winter is definitely not over yet.
Here are some photos, enjoy. I hope all of you who were affected are doing okay.
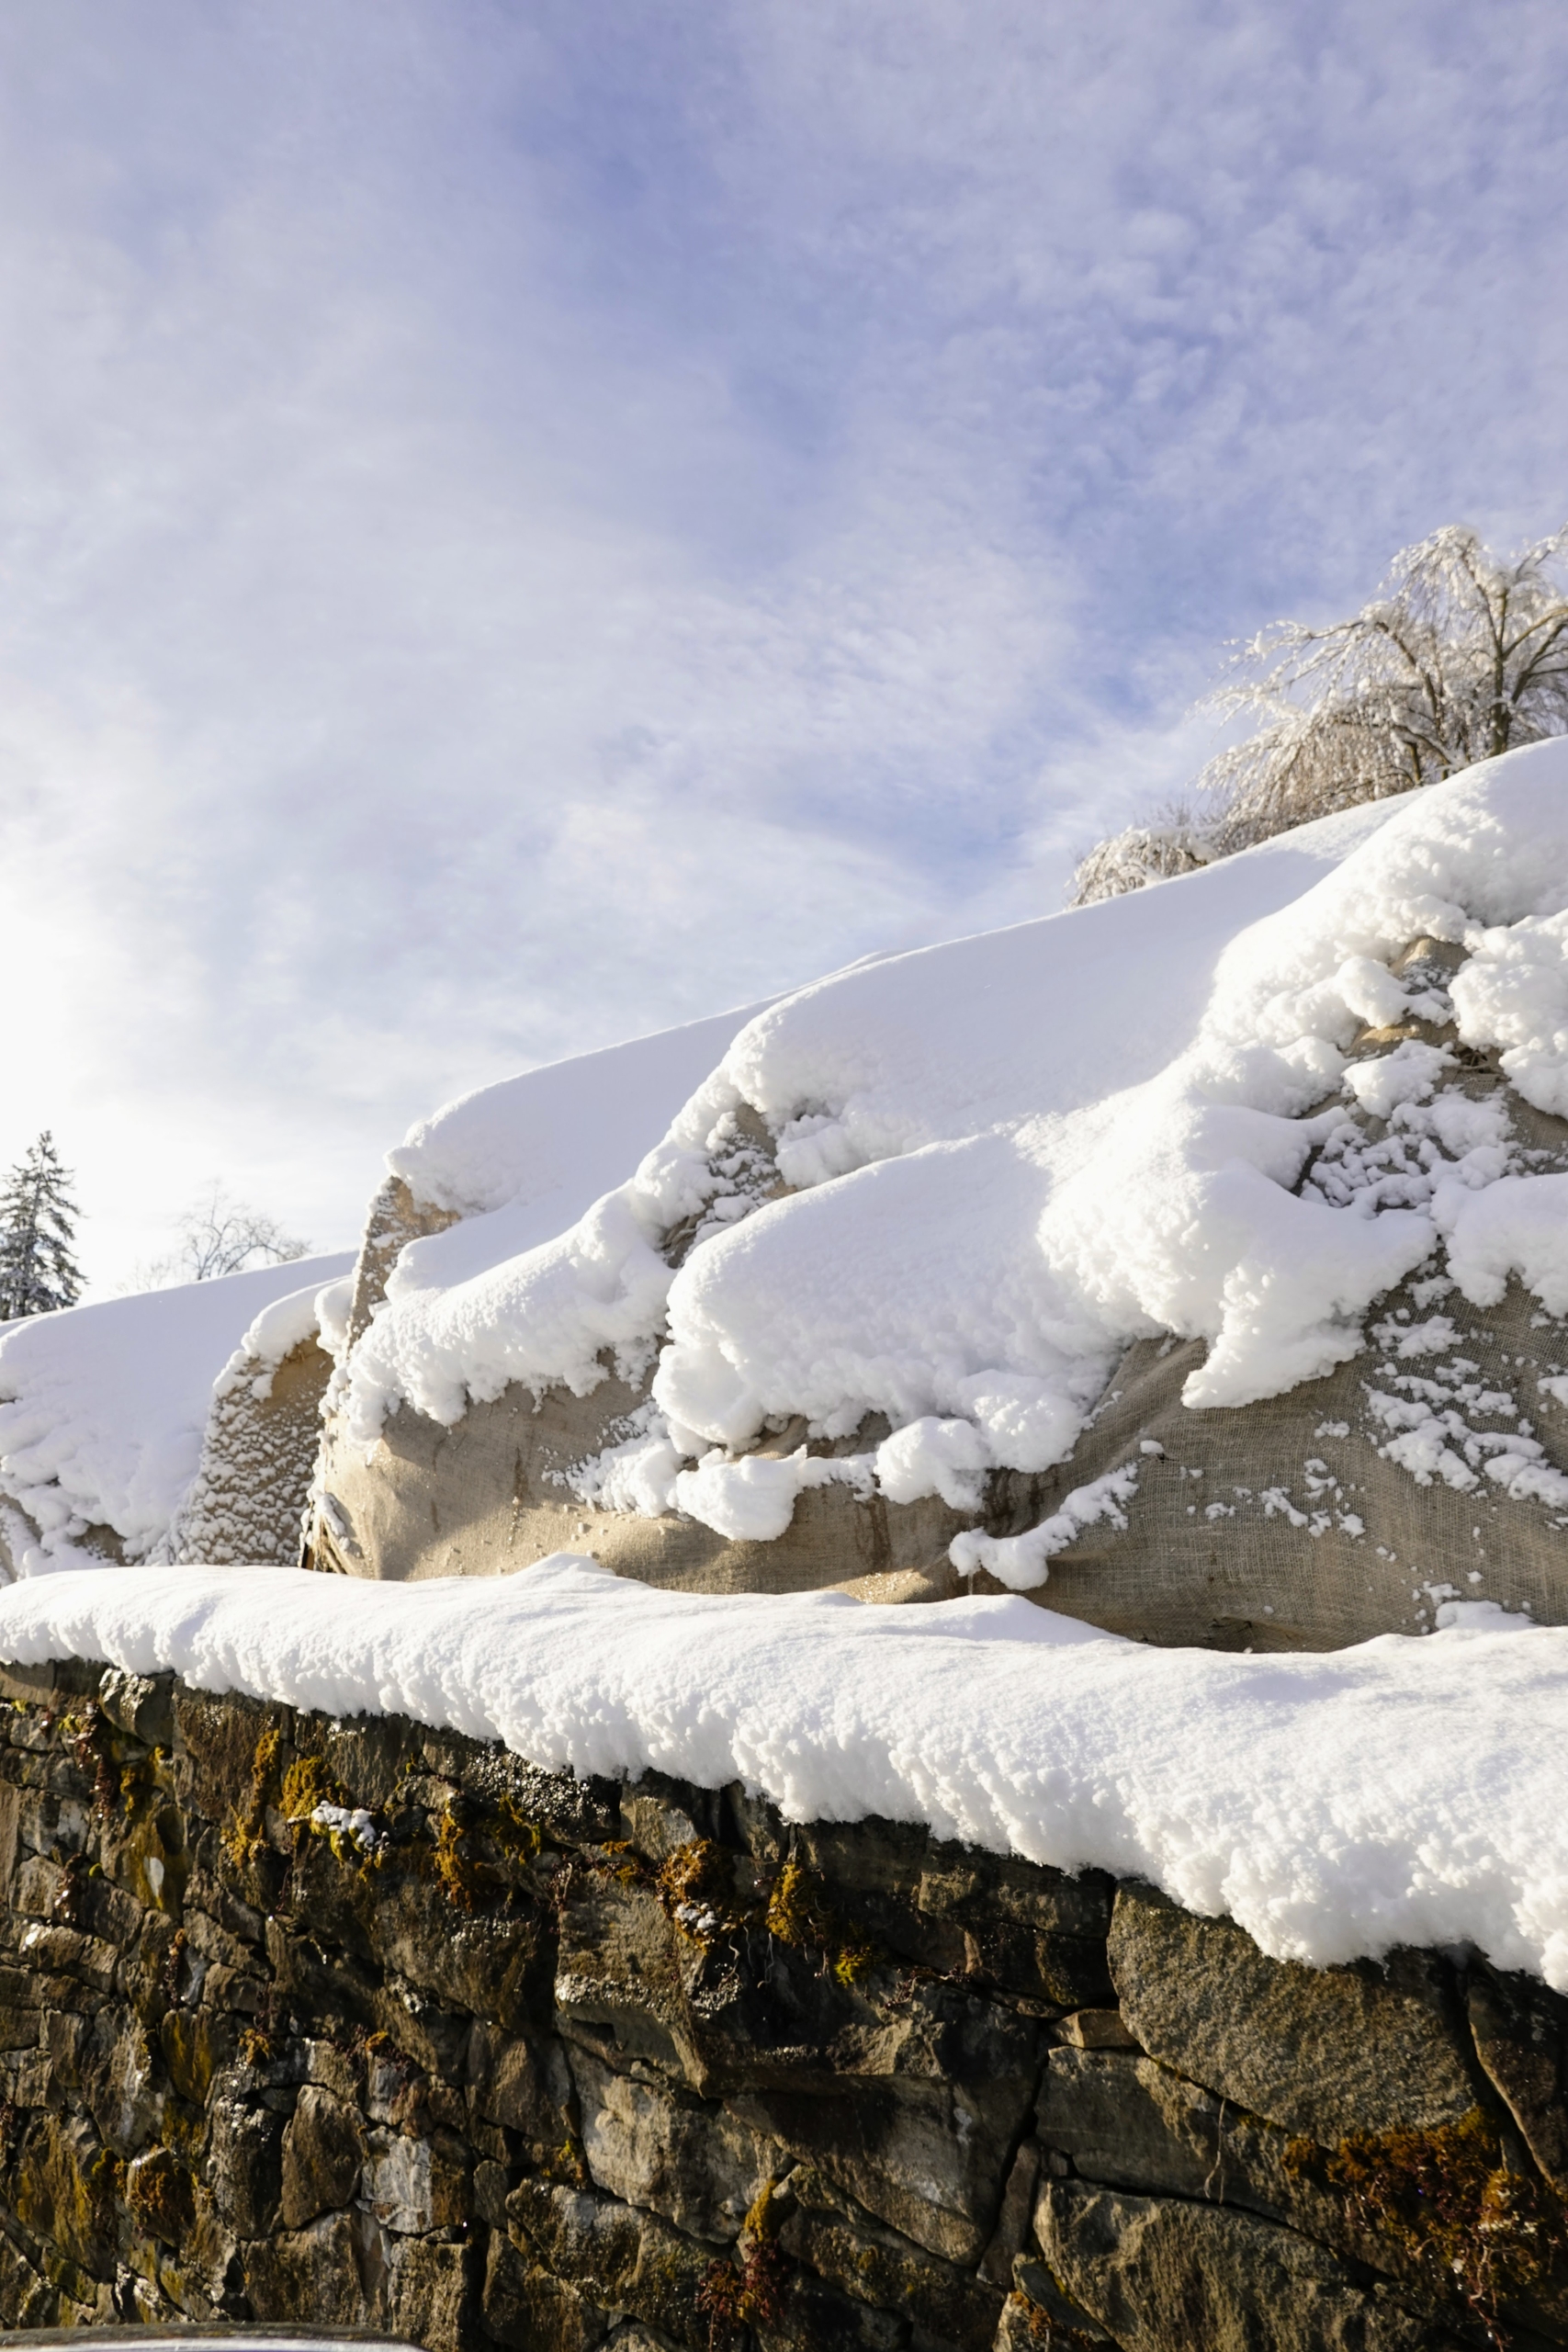
Here at the farm, temperatures hovered in the low to mid-30s much of the day. The storm started as rain and slush. By late morning, snow started to stick on every surface, including the moss and sedum growing on this stone wall outside my Winter House kitchen.
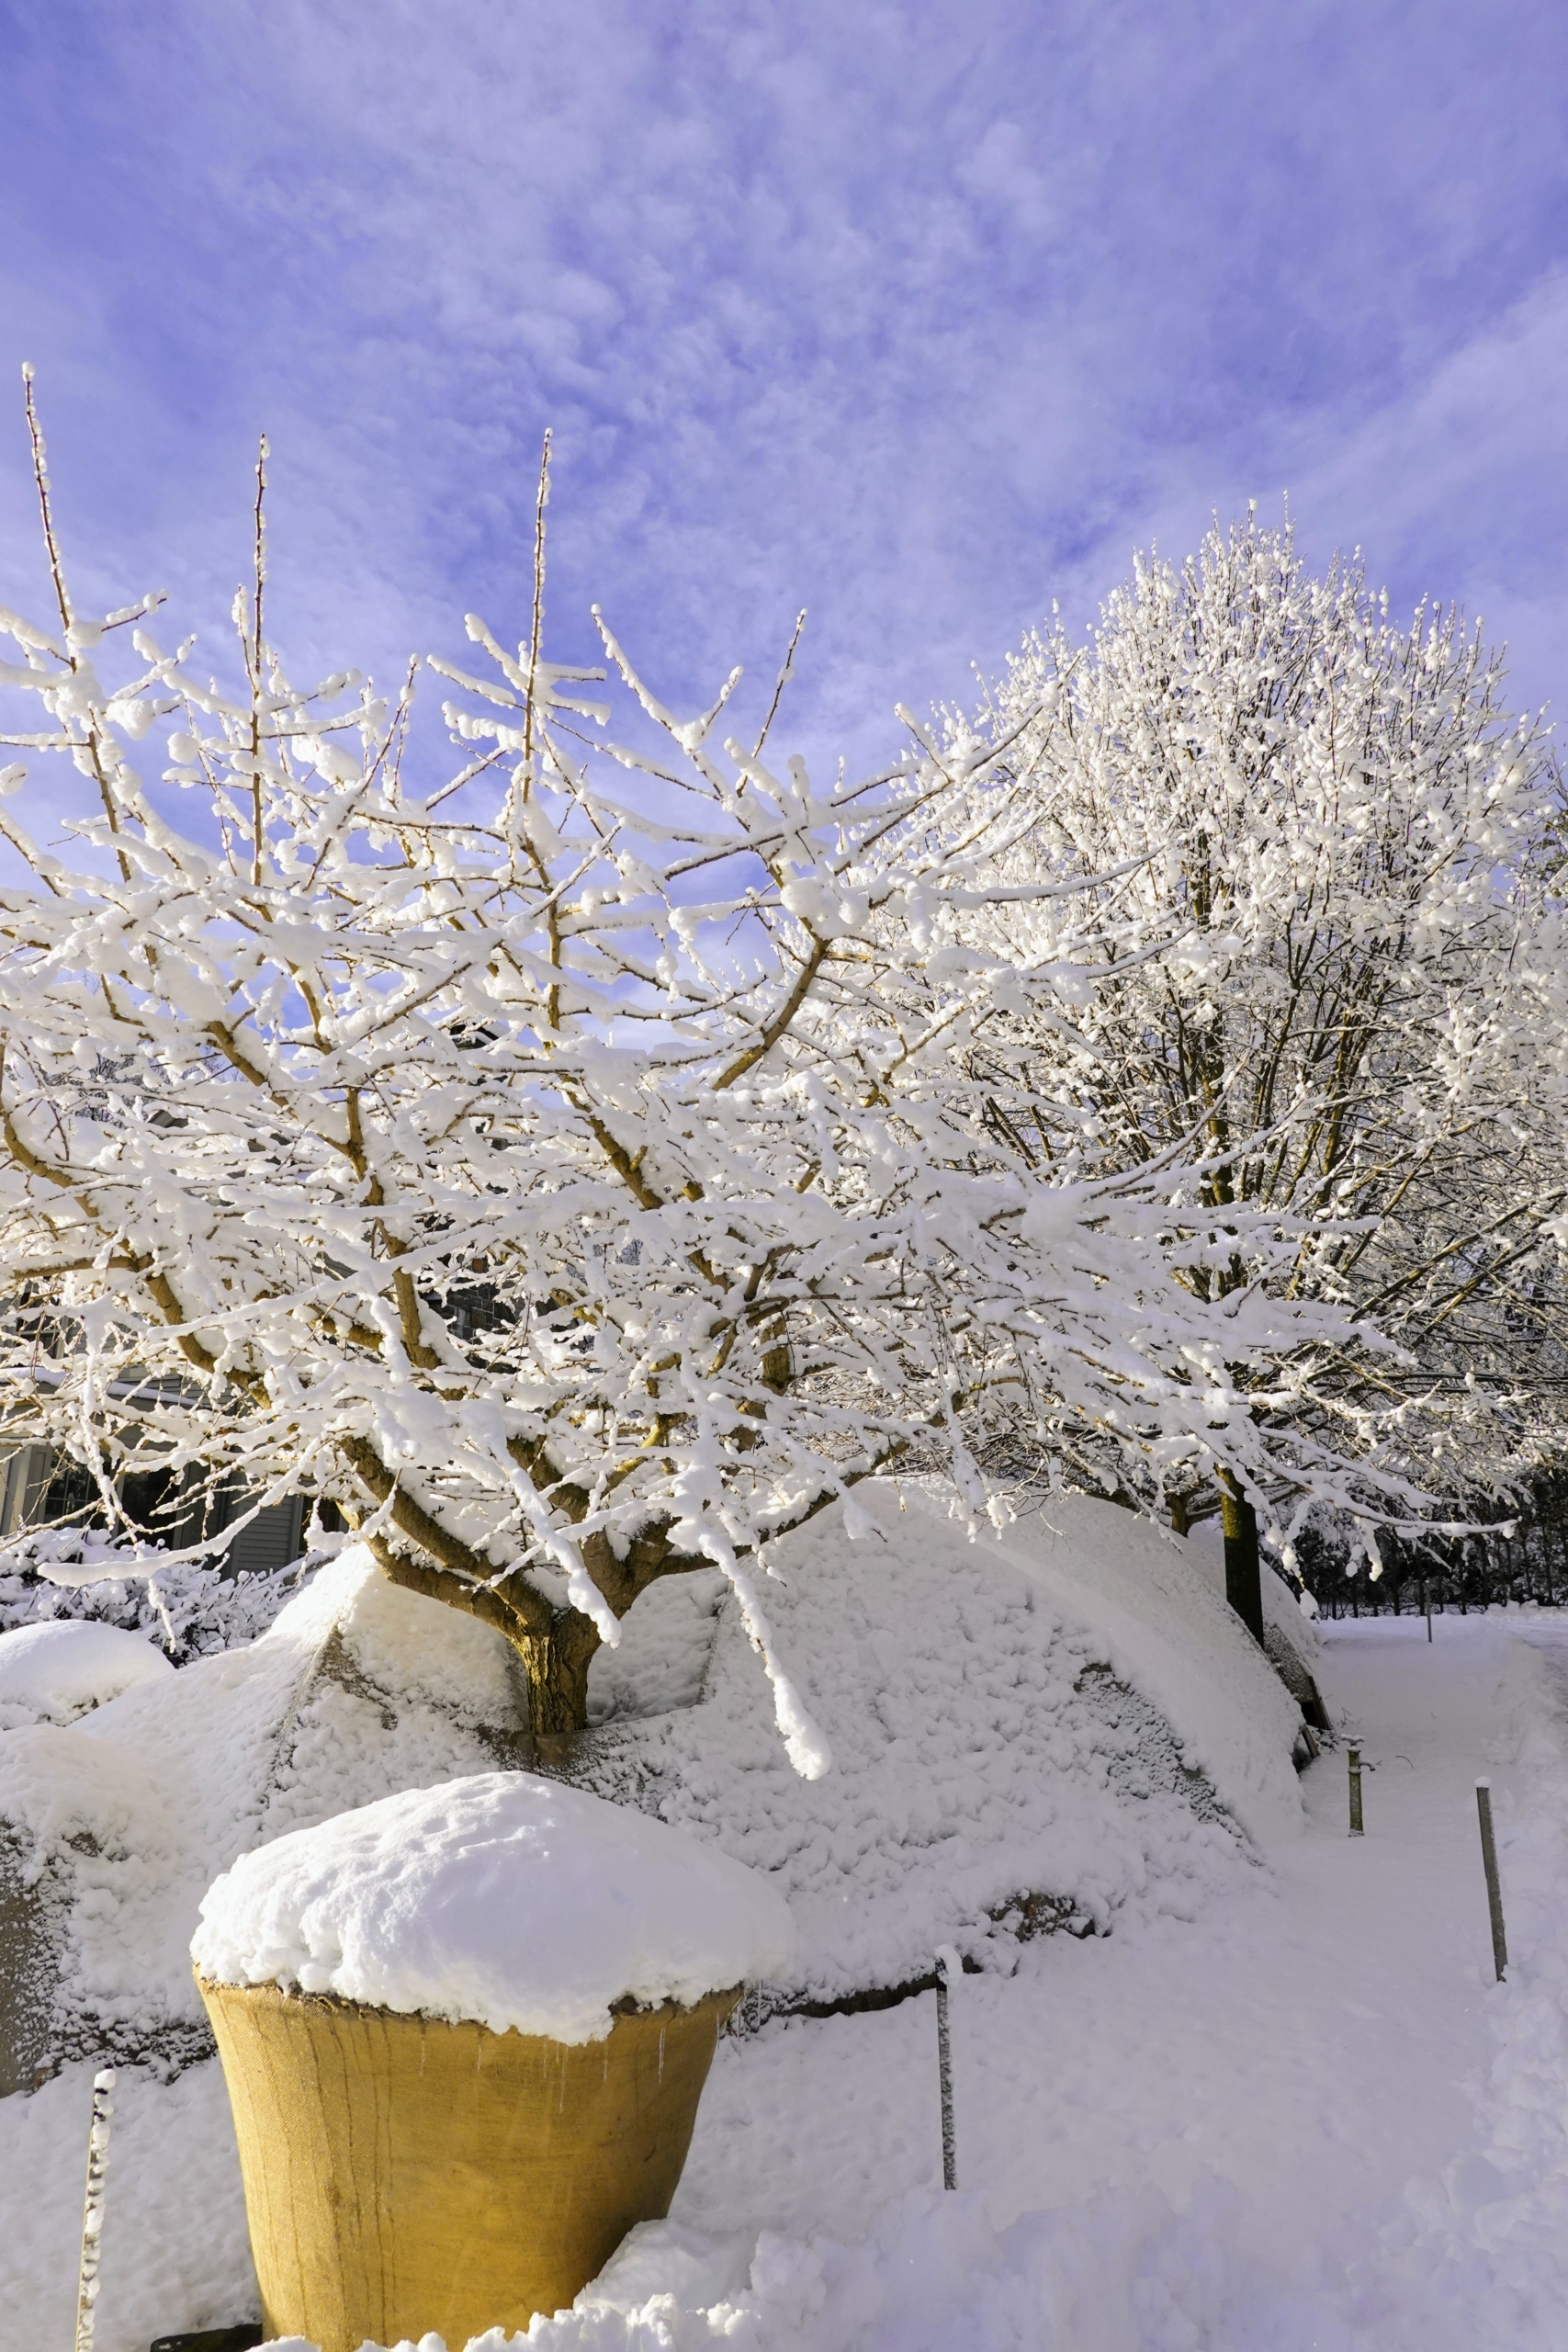
Thankfully, all the ornamental urns and precious boxwood are all still covered with protective burlap.
Here, a burst of early spring color – the witch hazel in bloom.
Snow accumulated on the tops of the burlap-covered frames in my long Boxwood Allée. Here, one could see how large the snowflakes were. These larger flakes occur when temperatures are near freezing at 32-degrees Fahrenheit, which melts some of the snow crystals and causes them to become sticky. As they fall, they collide with other snow crystals, causing them to grow in size and appear as larger snowflakes once they get closer to the ground.
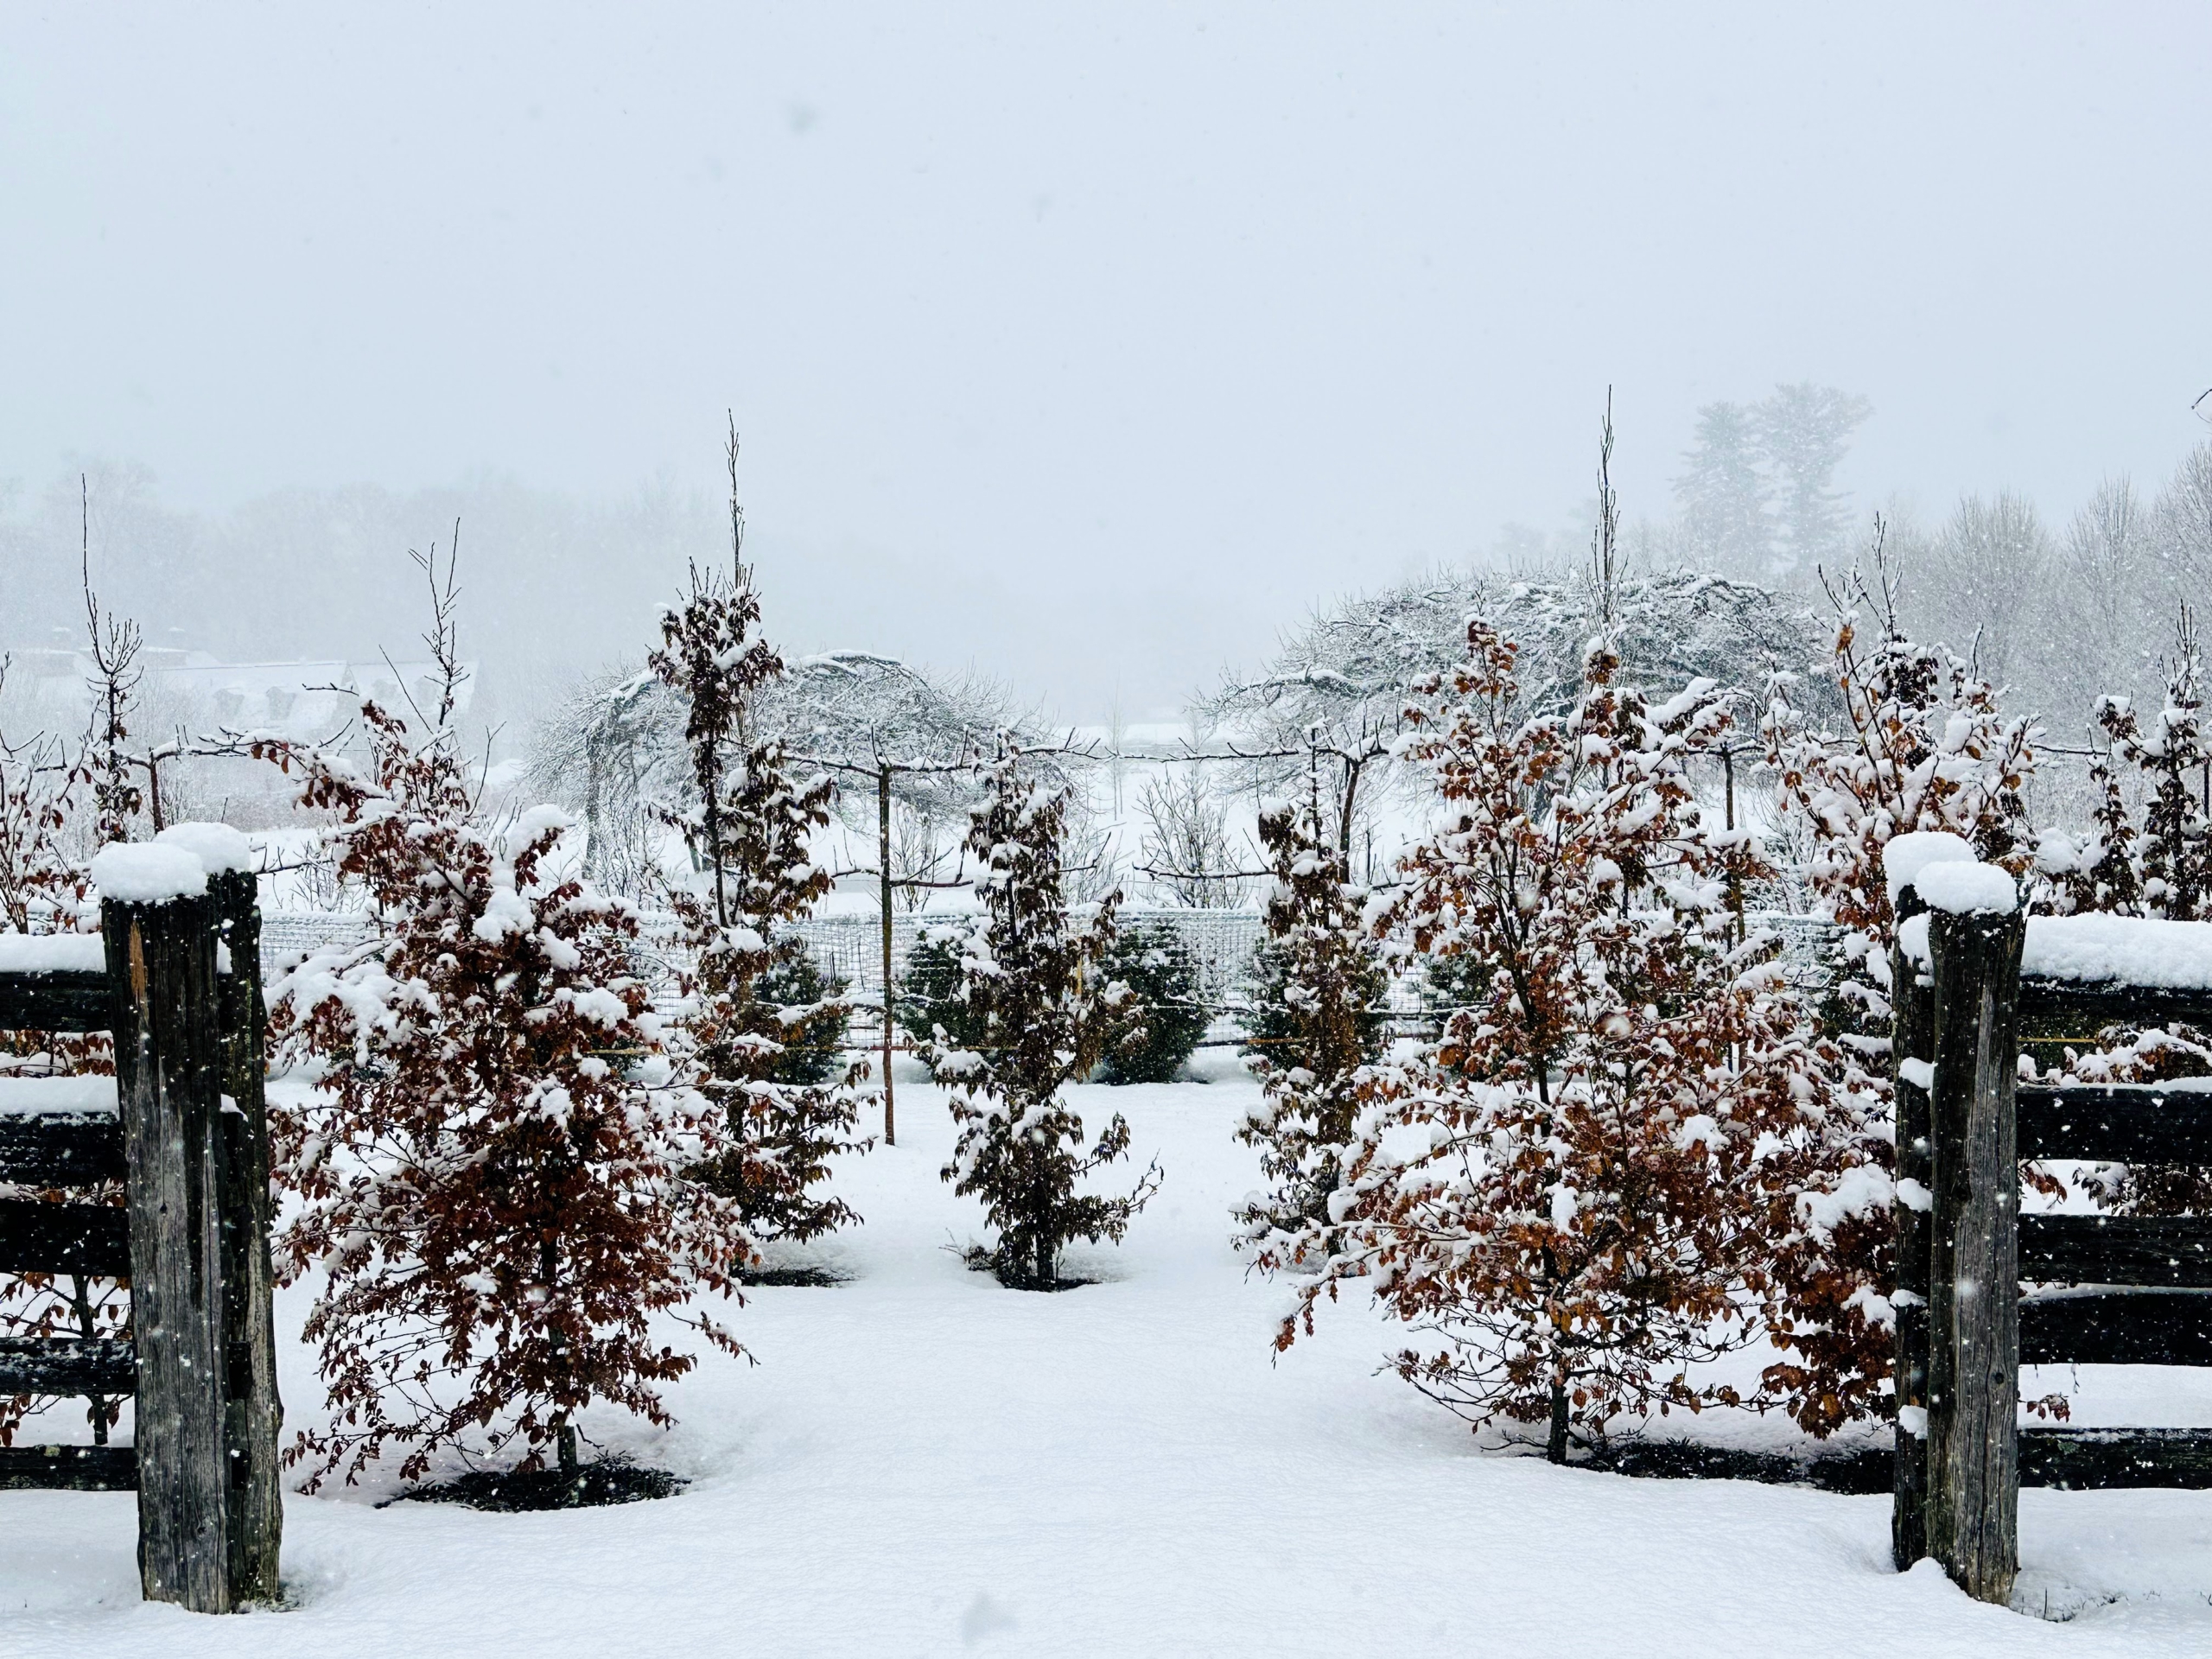
Here is another allée – the south section of linden trees, which lead to the espaliered apple trees behind my long carport.
Venturing into the woods is this stand of beautiful and upright trees. During winter, my outdoor grounds crew works hard to “clean the woods” of any fallen branches, invasive barberry, and dead trees – leaving clear views of the woodland.
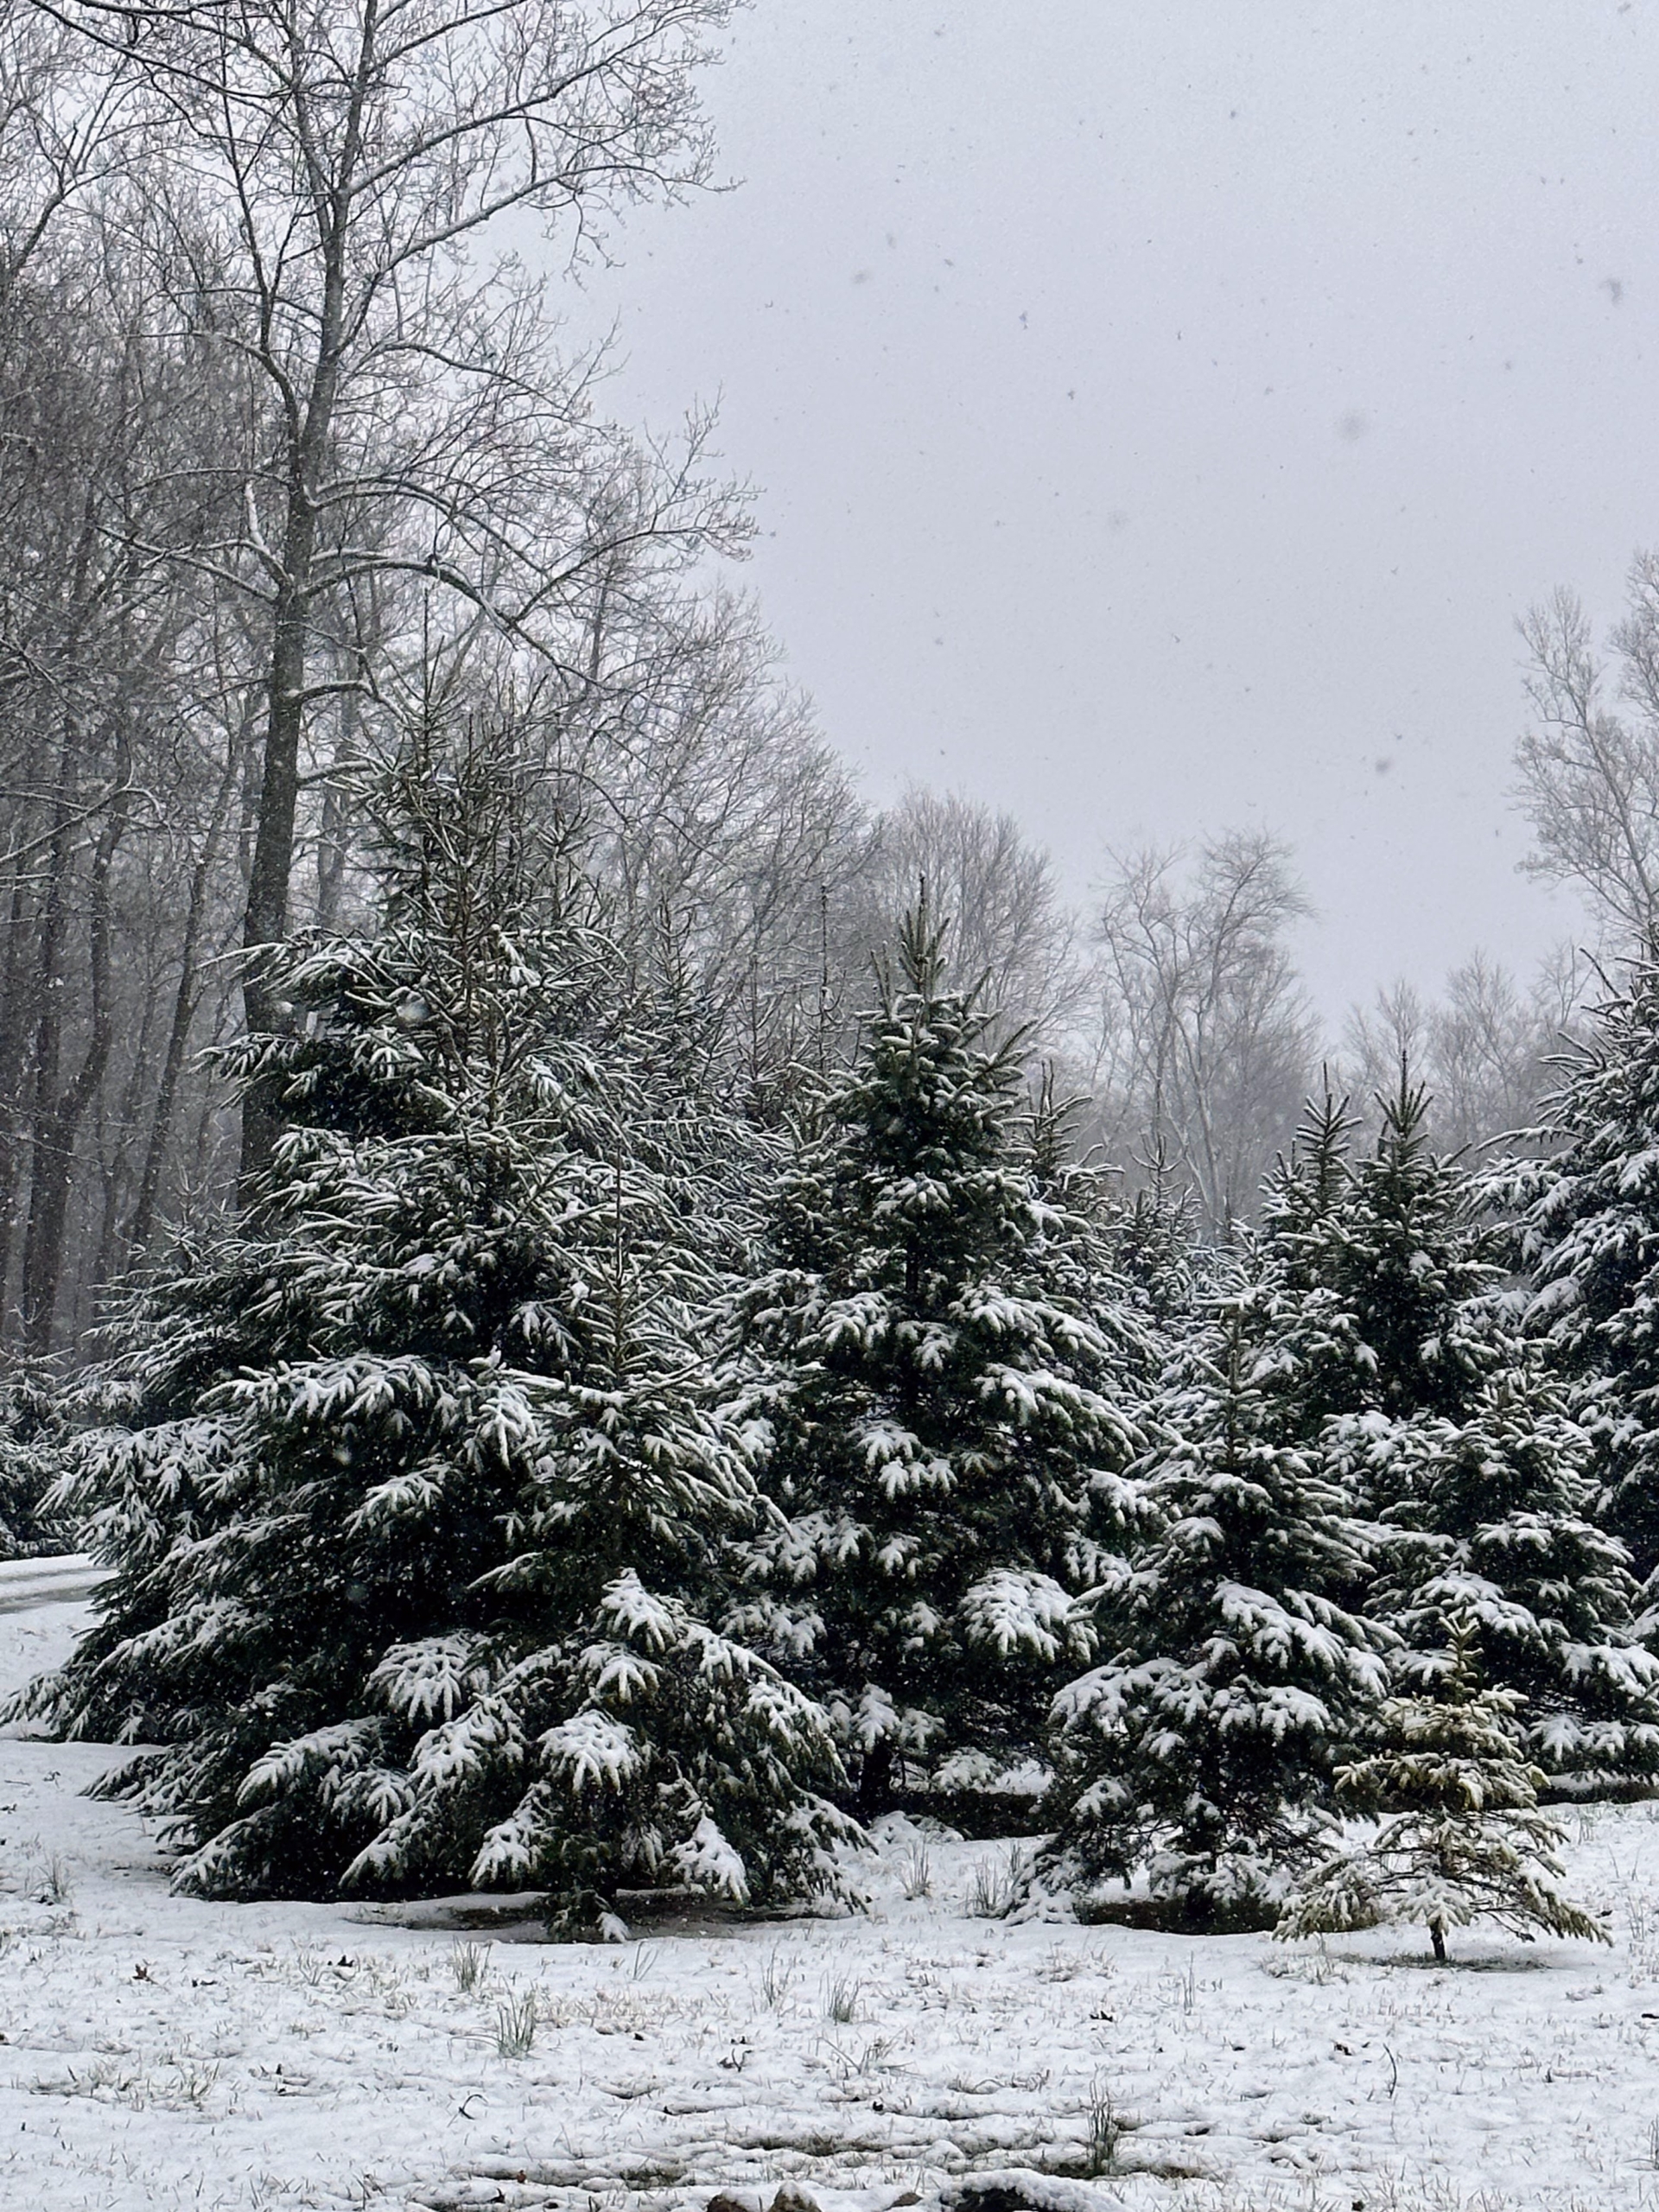
These are some of the evergreen trees at the edge of my “Christmas tree garden.” The snow is beginning to weigh down on the branches, but fortunately no damage was done. I planted hundreds of evergreens here more than 10-years ago and they’ve grown immensely.
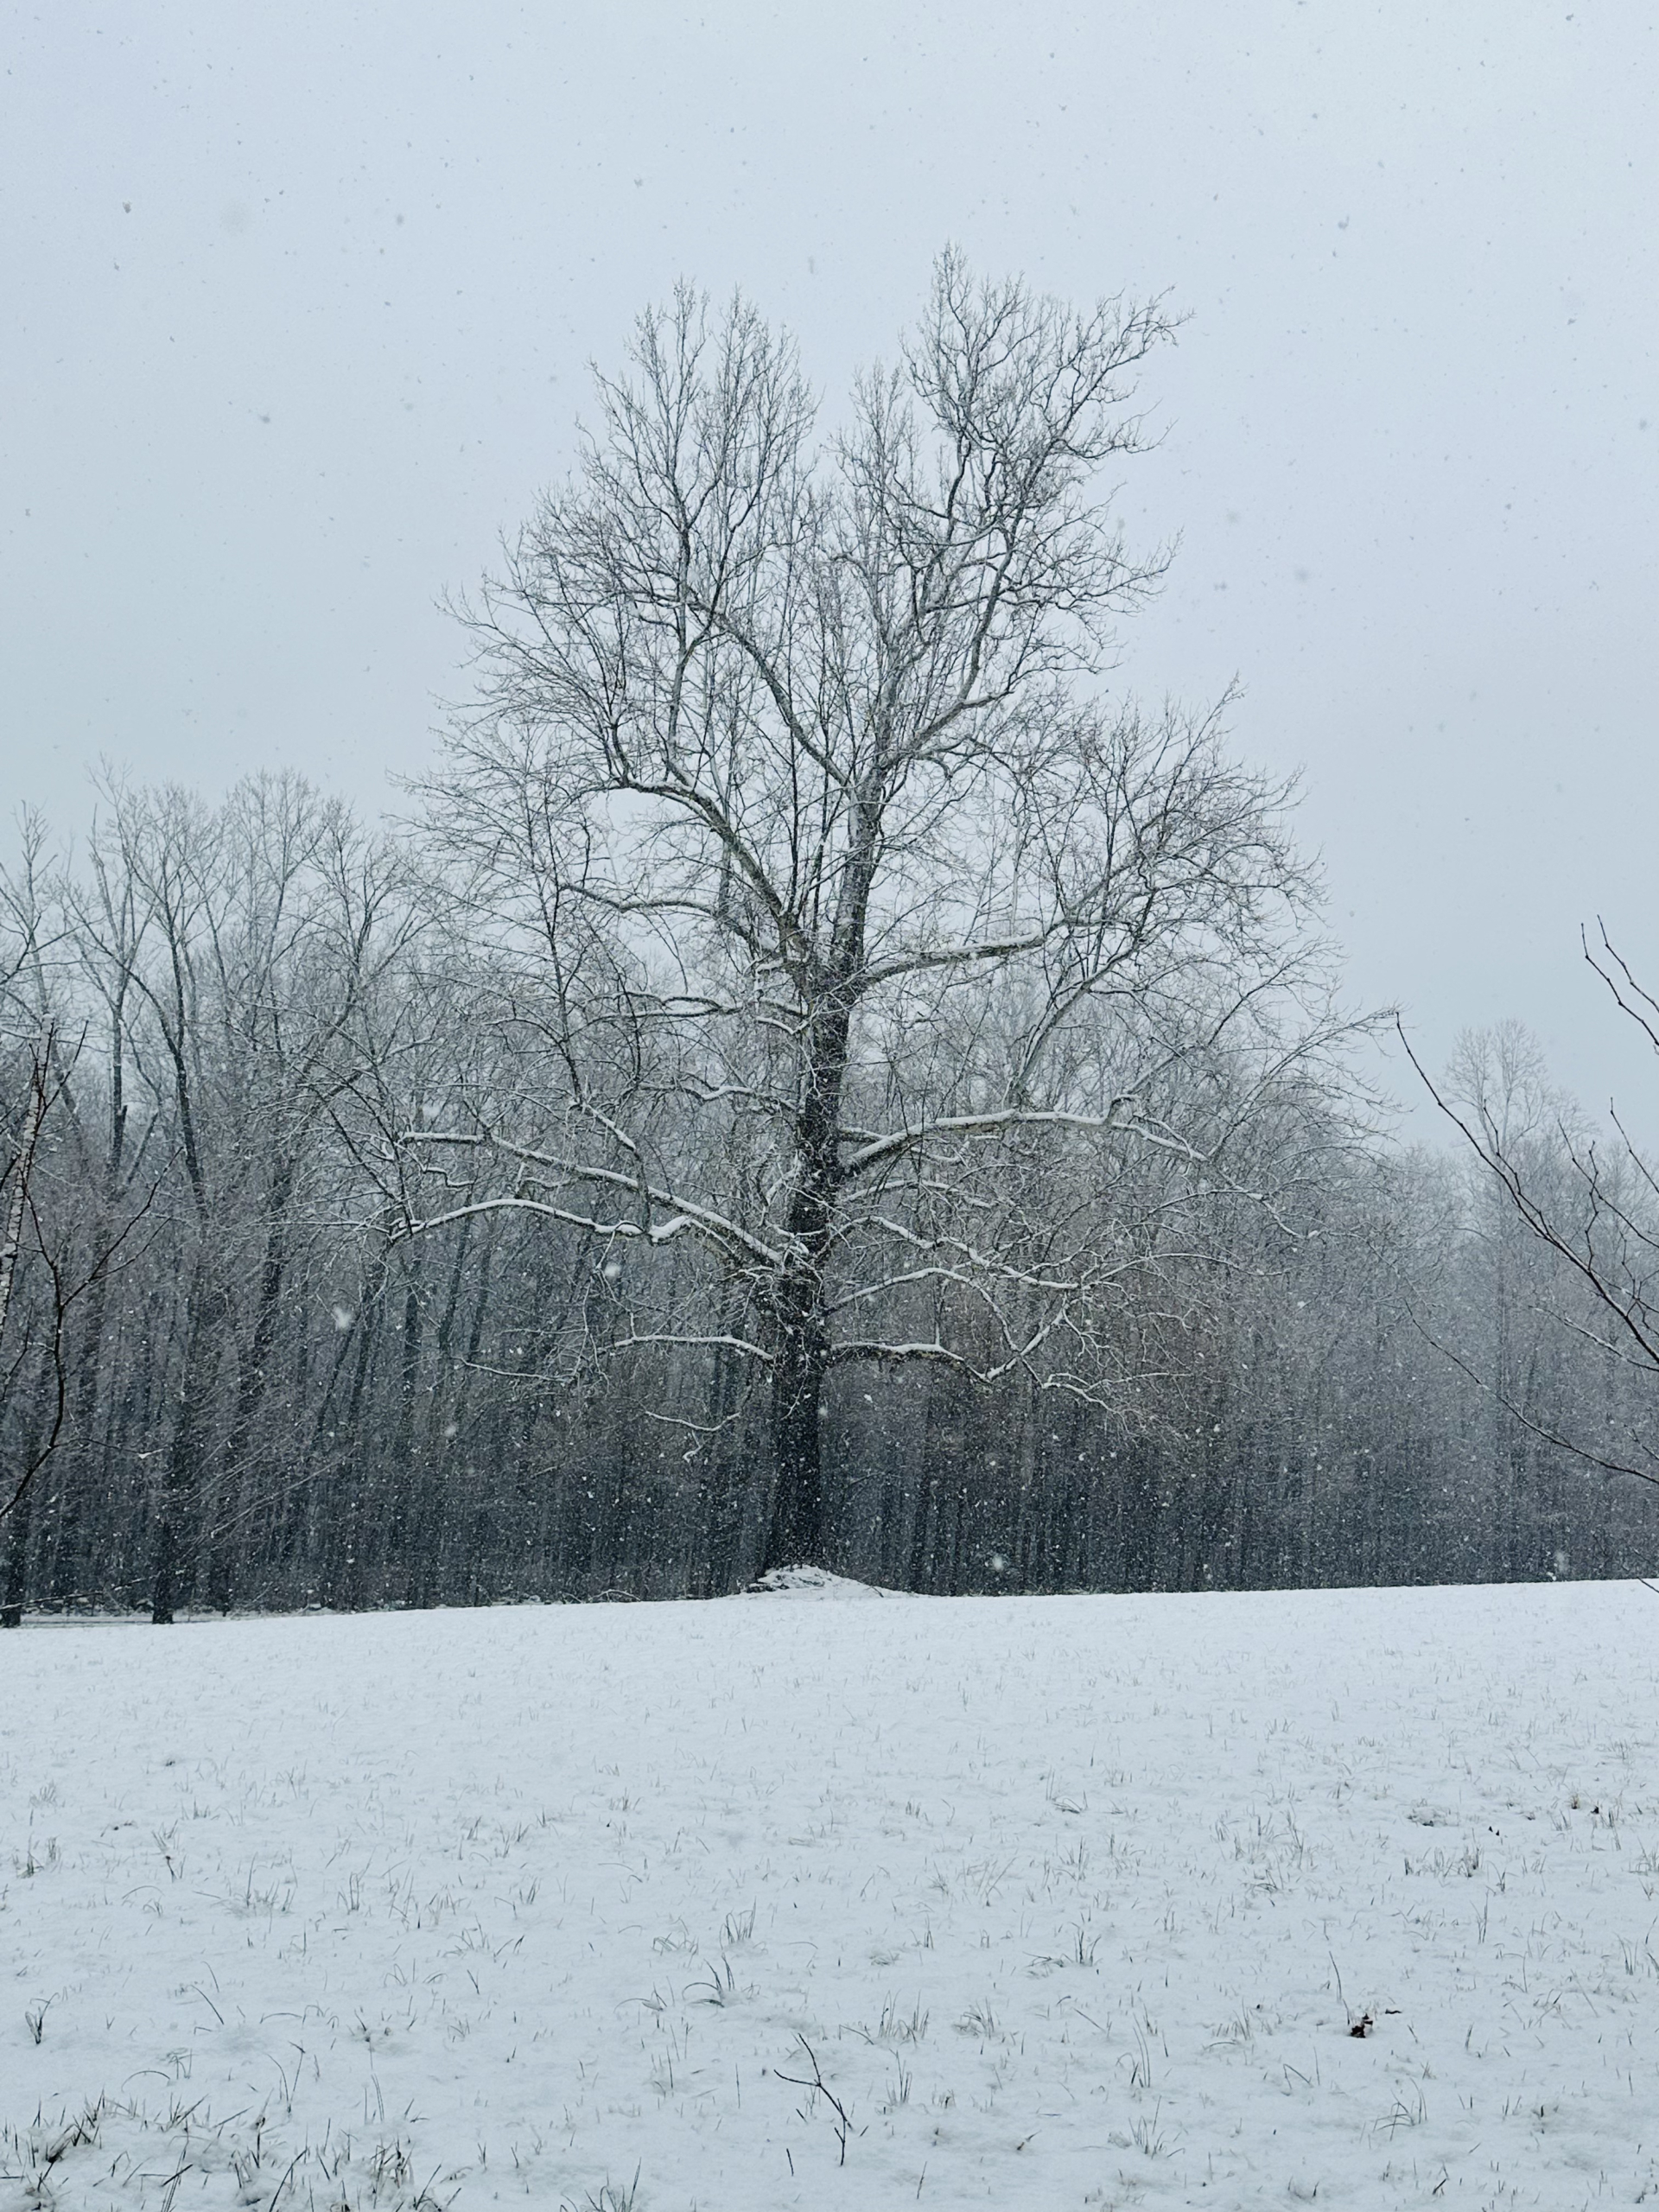
Here is a tree almost completely disguised by the snow.
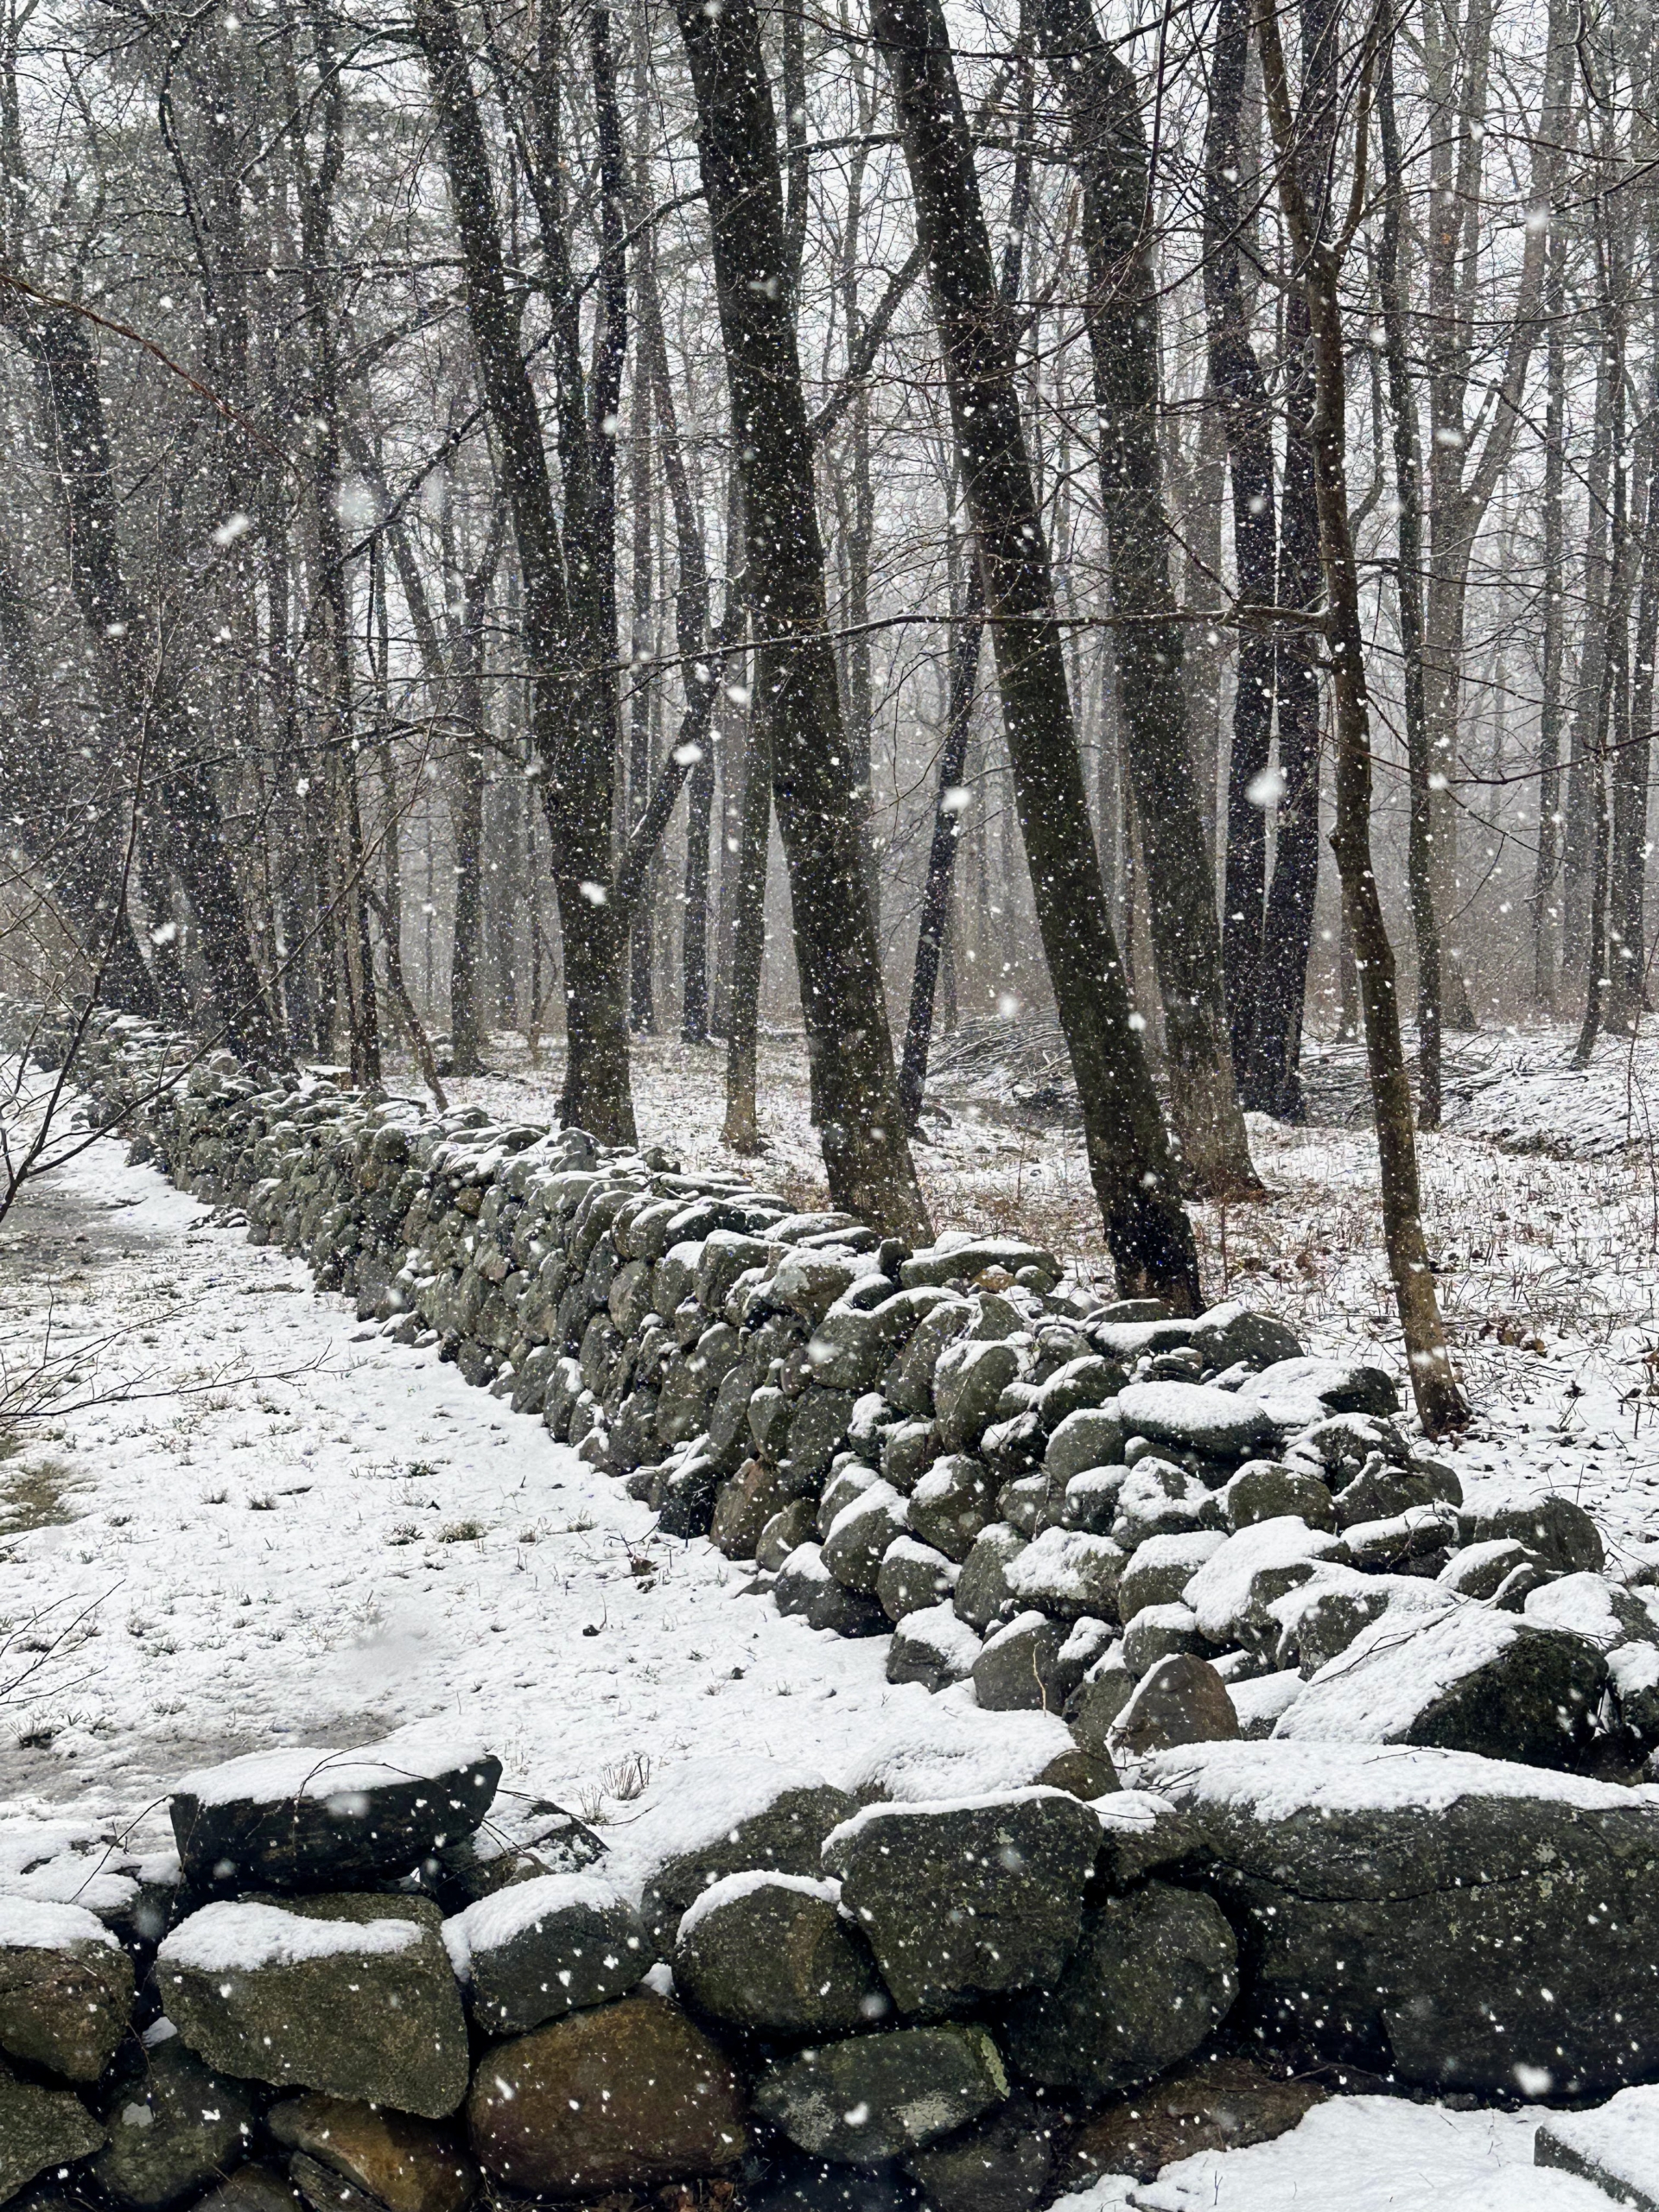
This is an old stone wall on my farm. Stone walls are very common here in New England. They originally served as a boundary for property lines and as a way to keep animals away from crops. They still mark properties today, but are also used decoratively.
In this area of the woods, it is so quiet, one can just hear the snow falling in clumps from the trees.
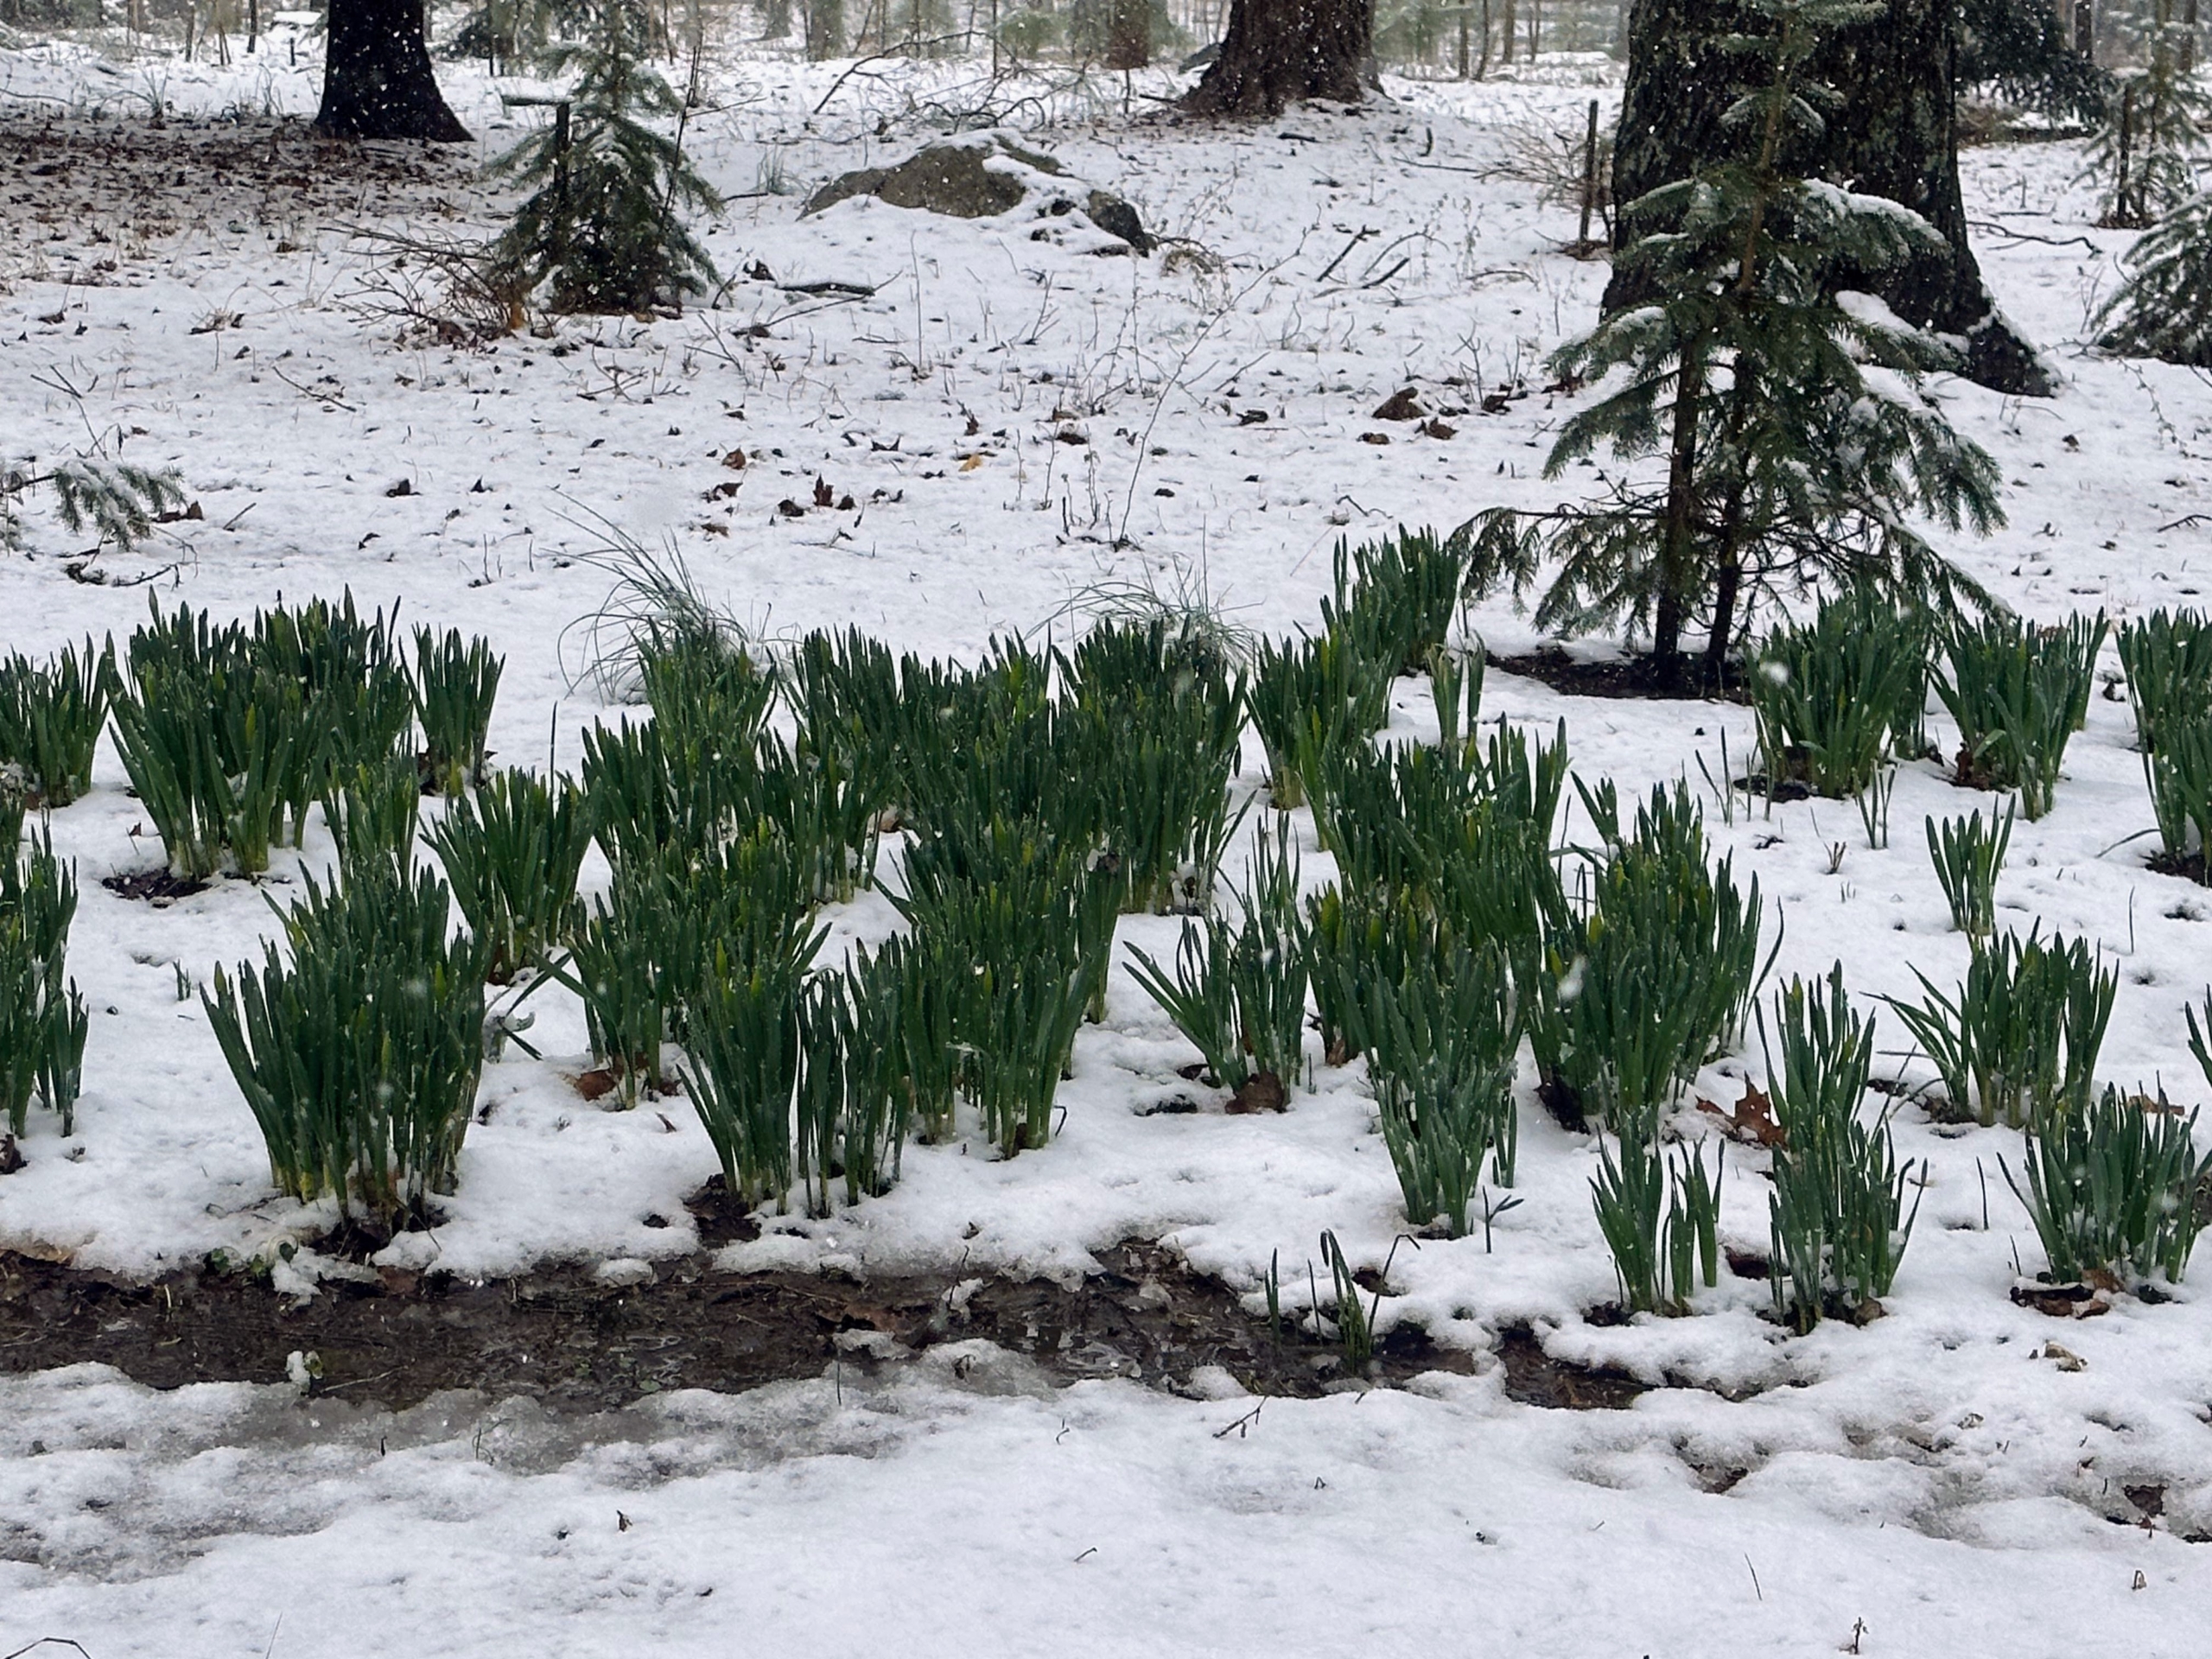
Another sign that spring is on the way – the growing daffodils. There are patches of daffodil greenery bursting through the soil all over the farm. I can’t wait to see them in their full splendor.
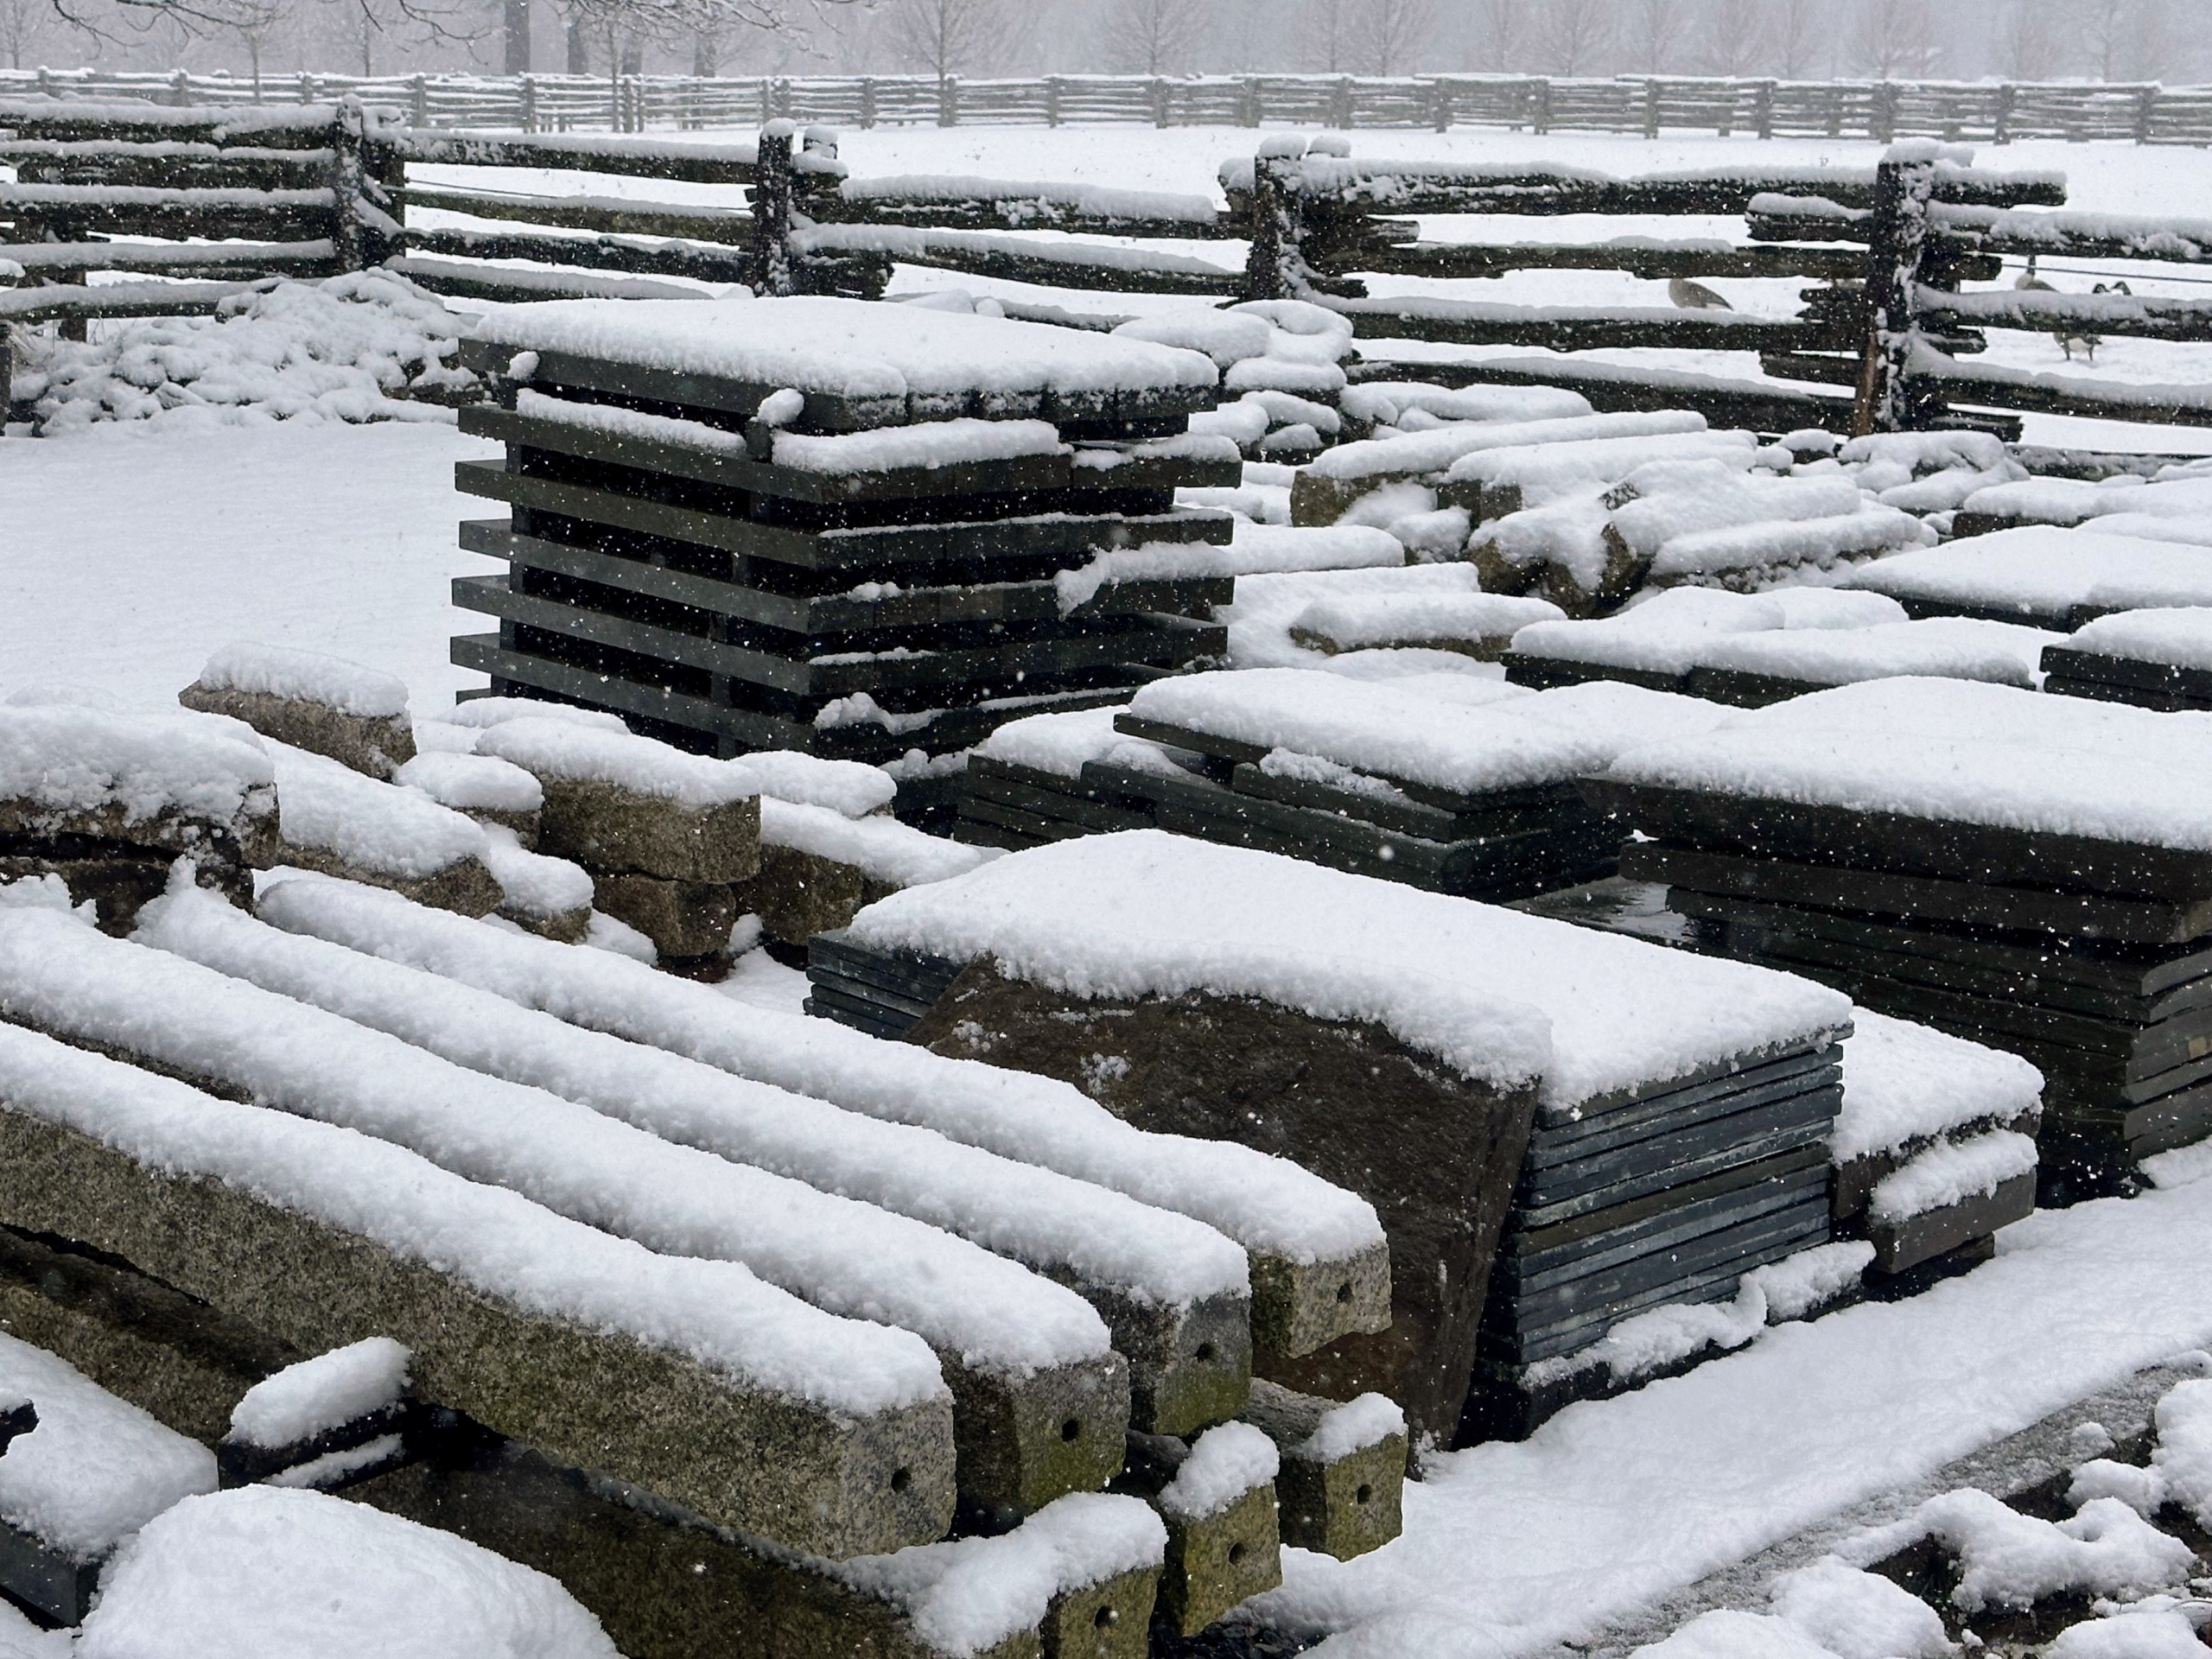
This is our nicely organized stone yard, where I keep stone, granite, bricks, pavers and posts for future projects. These piles of stone are also covered in soft white snow.
Last fall, we planted a group of large Chamaecyparis obtusa ‘Filicoides’ or Fernspray Hinoki cypress bushes along the carriage road just past my allée of lindens near the entrance to my Japanese Maple Woodland. I thought the space would look even prettier planted with these upright, bushy conifers – and it does, even with the snow cover.
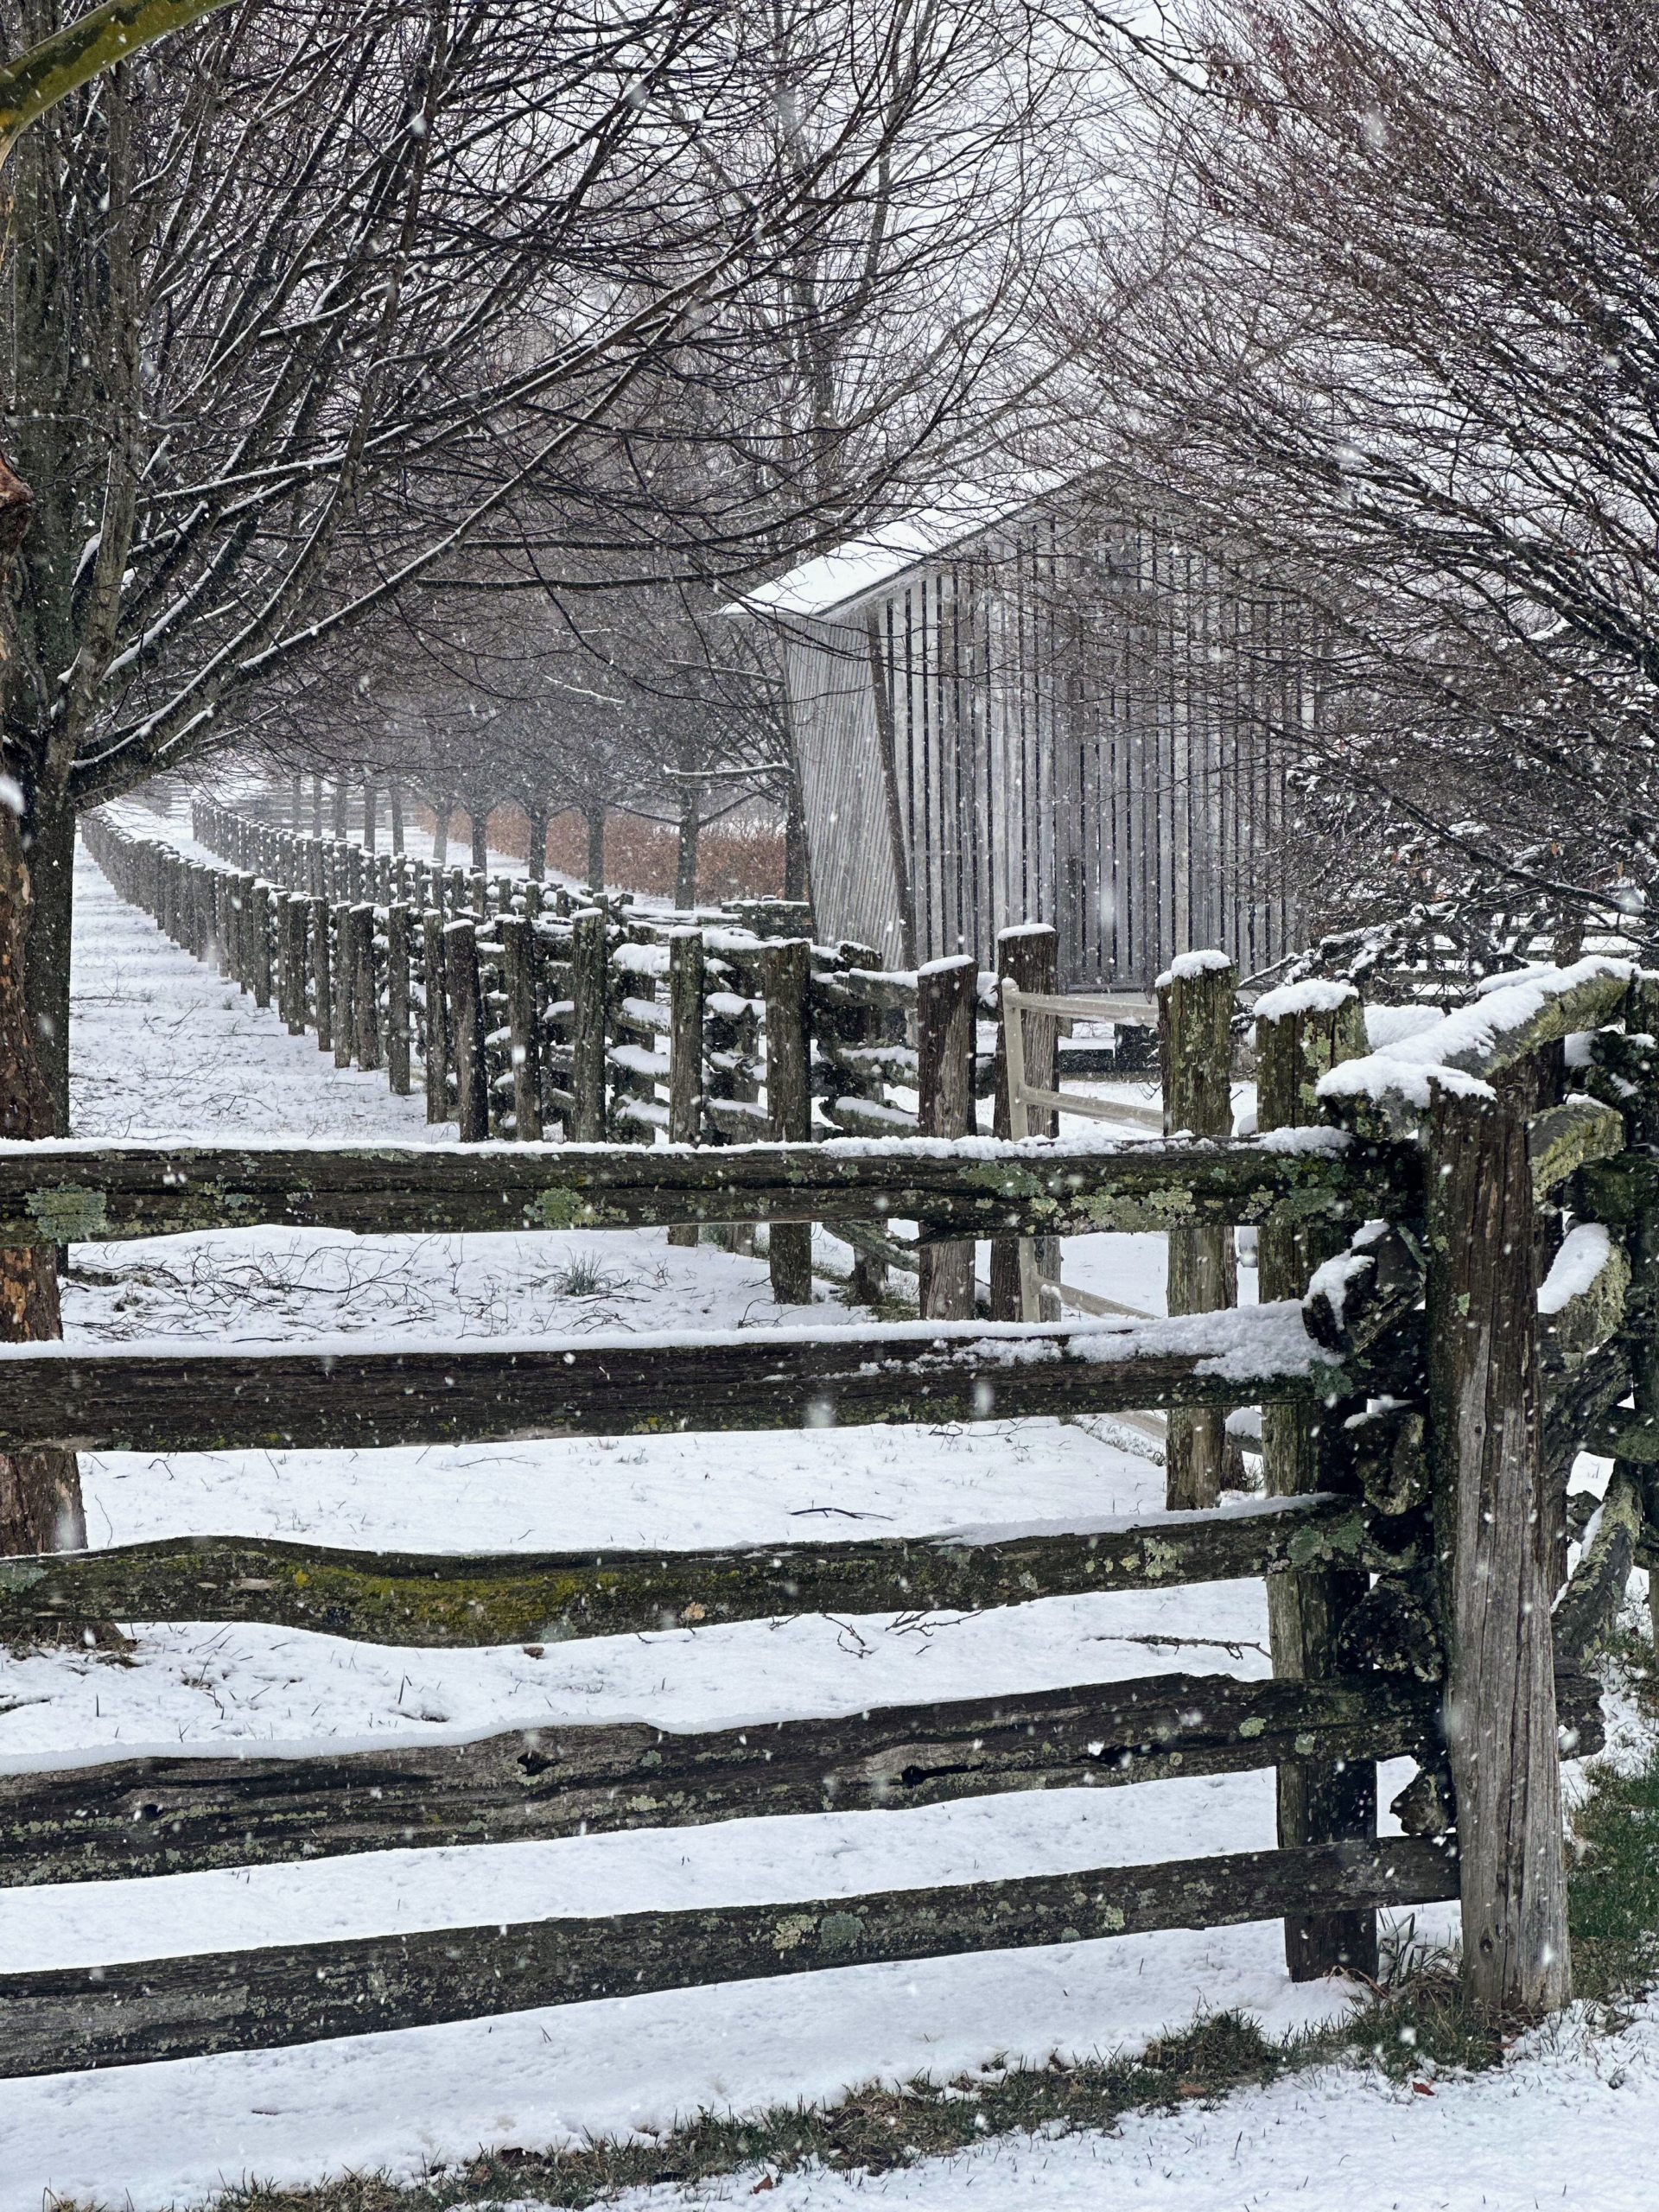
By afternoon, the snow fell more furiously. This is the old corn crib, original to the farm, at the edge of a horse paddock surrounded with antique fencing.
The wild geese often visit my farm and gather in one of the pastures. Geese are very hardy and adaptable to cold climates – they don’t mind the snow at all.
Do you recognize this? It is the entrance to my herbaceous peony garden. The boxwood hedge surrounding it is protected in burlap, while the beds are completely covered in this blanket of white.
And here is the entrance to my living maze. I started planting it last year. I am looking forward to adding more turns and beautiful plants this spring.
These are some of the evergreens in my pinetum, an area I developed behind my Equipment Barn and near one of my weeping willow groves. The pinetum collection has grown so well over the years. It includes pines, spruces and firs, as well as other evergreens.
Here is one of the ancient apple trees in front of my studio building just below my carport. This apple tree is original to the farm and still provides multitudes of delicious fruits every year.
These are six weeping hornbeams. We prune these rare hornbeams regularly to keep the beautiful shape.
And here is the symbol of my farm – the great sycamore tree in the back hayfield. This tree is stands tall and majestic in every season. I love how the snow outlines its branches. Today is expected to be windy with possible snow flurries here in Bedford, but rest assured spring officially begins in less than a week.
My calendar is always filled with business meetings, events, and speaking engagements.
Last week, I made a quick visit to Utah for the Qualtrics X4™: The Experience Management Summit in Salt Lake City. After a three-year hiatus due to the pandemic, more than 10-thousand experience management professionals representing 52-countries gathered at the Salt Palace Convention Center for the three-day conference. I was honored to be one of several headline speakers. I shared my thoughts on social media and technology, brand partnerships and collaborations, and the importance of learning in an ever-evolving environment. Afterwards, my team and I also enjoyed a visit to Rawtopia Living Cuisine and Beyond, where they serve Mediterranean-inspired raw, organic, and vegetarian fare.
Here are some photos, enjoy.
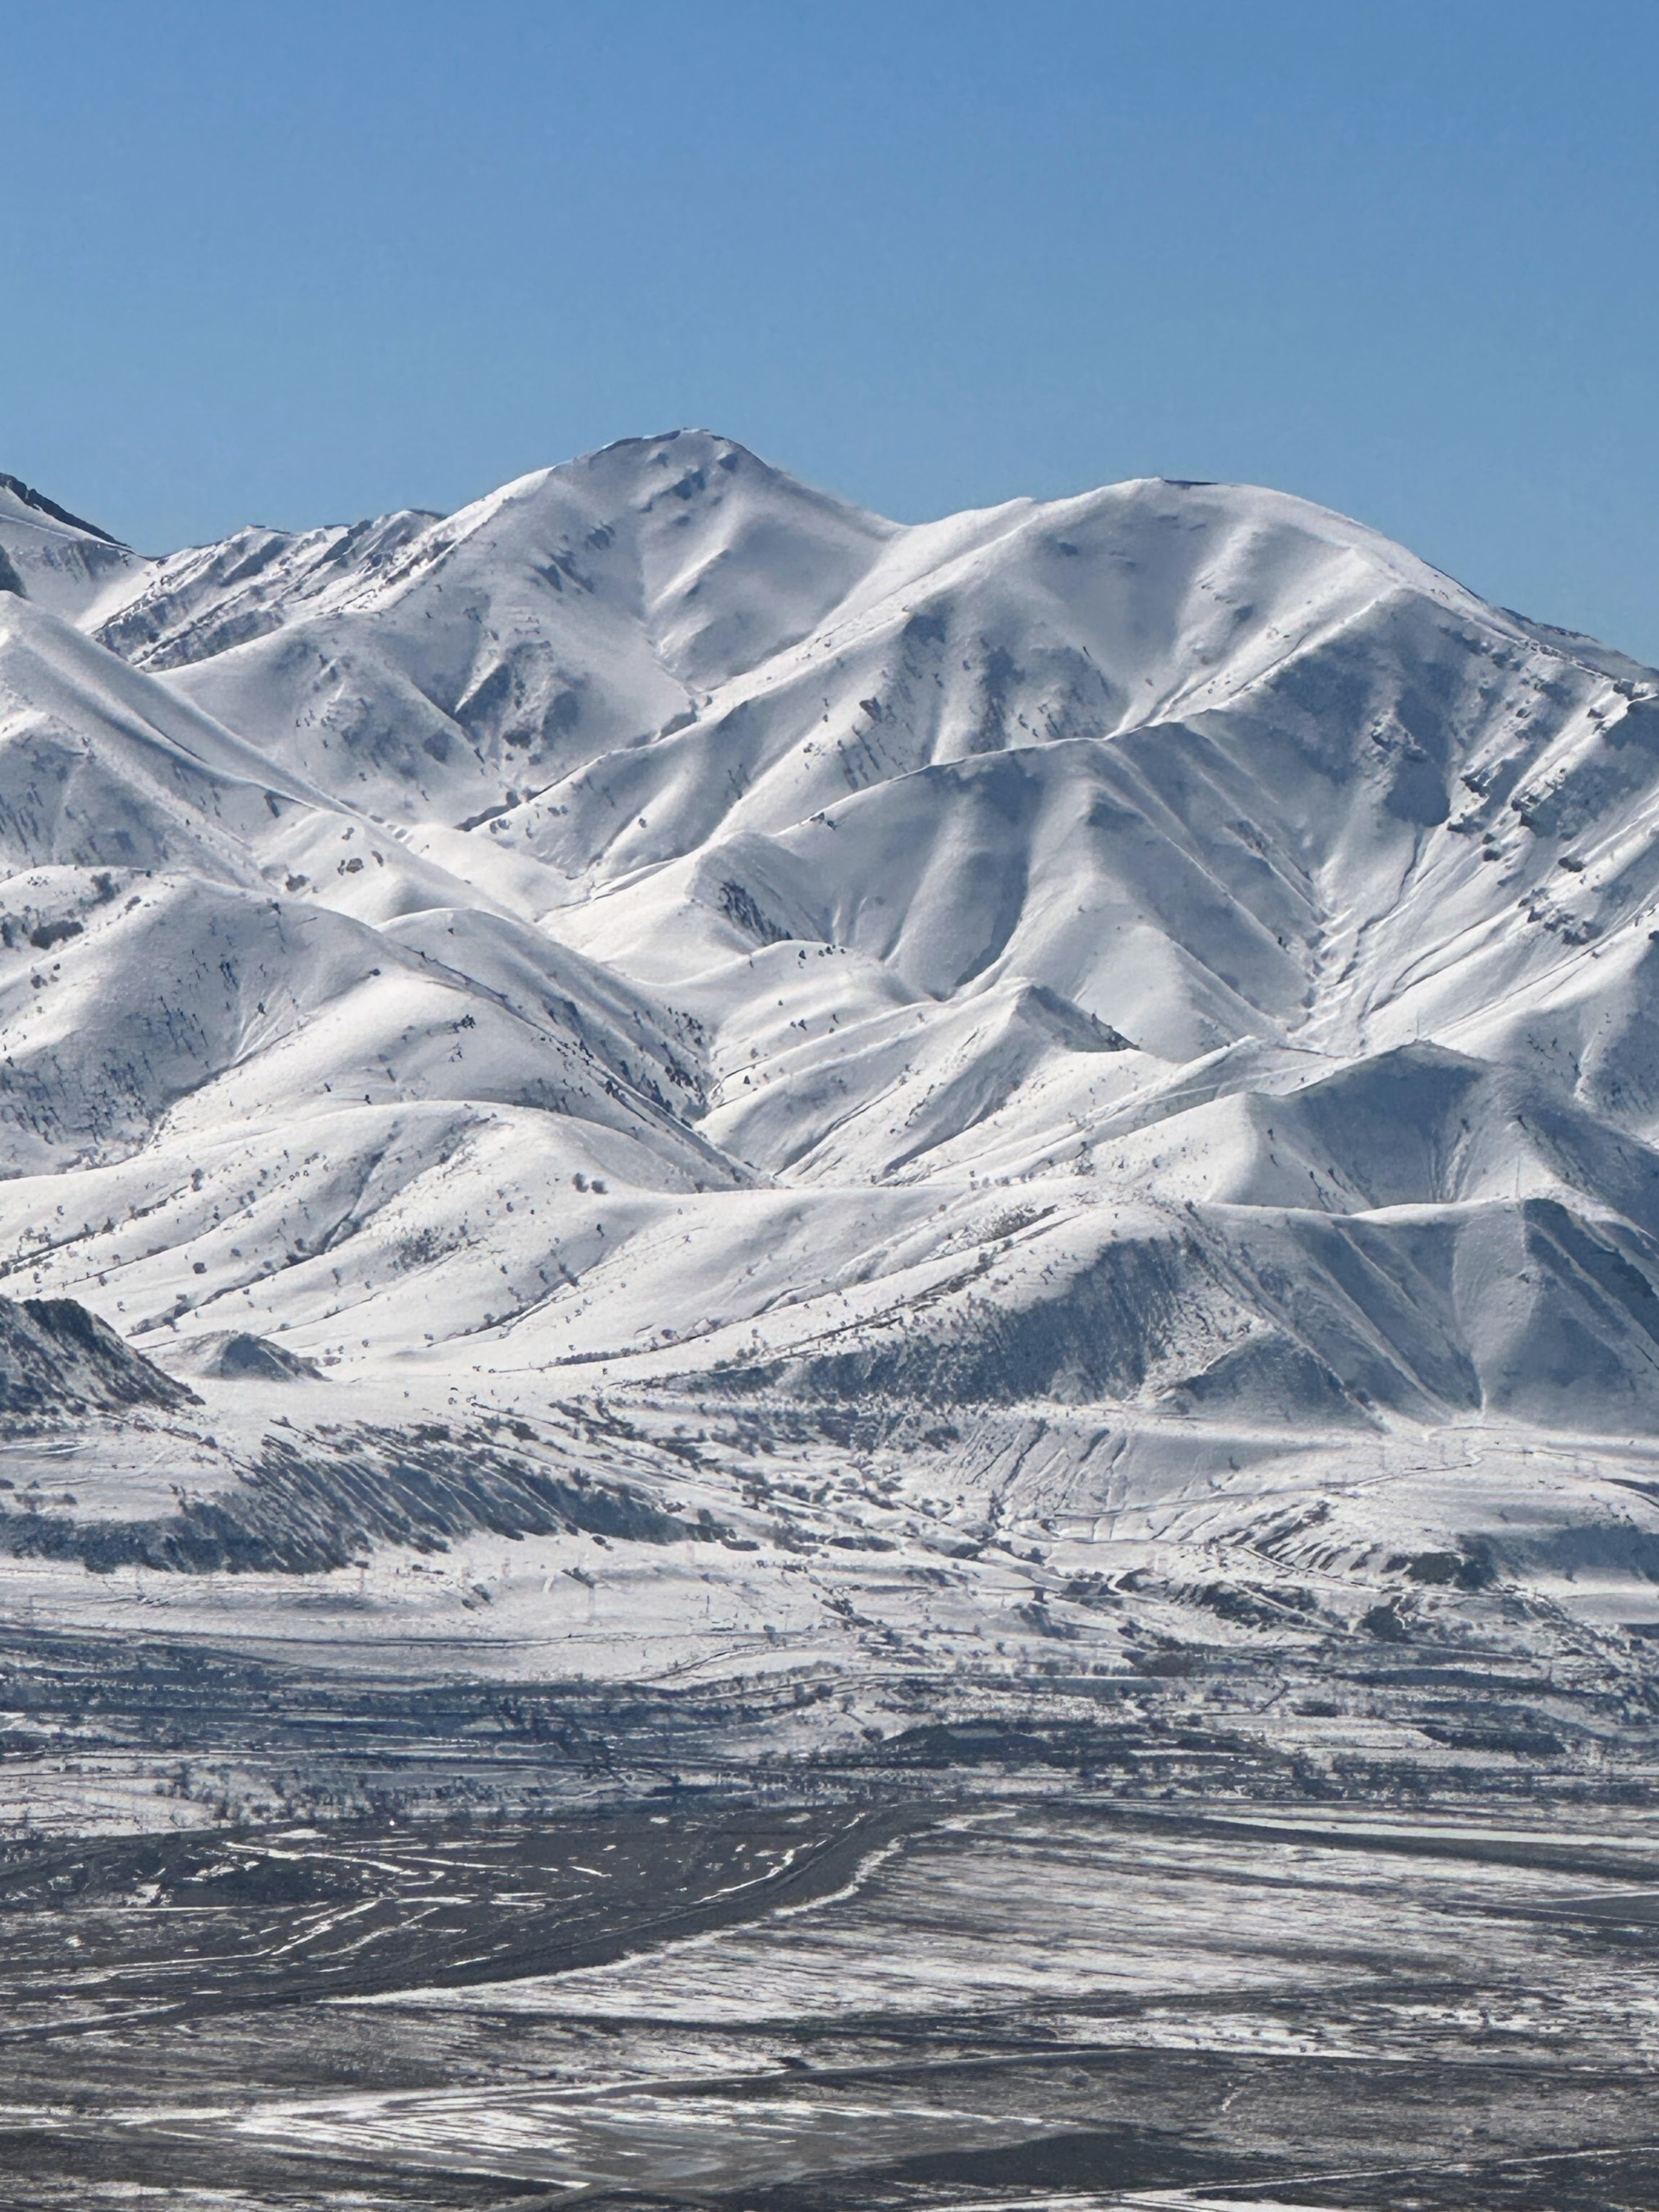
Salt Lake City lies in a mountain valley with the Wasatch Mountains to the east and north, and the Oquirrh Mountains to the west. On this day, the skies were so clear, we had stunning views from the plane.
There was lots of snow – a very different winter scene than what we’ve had on the east coast this season. In general, Salt Lake and the surrounding mountain ranges receive at least 500-inches of snow every year.
Snow-capped mountains could be seen for miles. Among the many mountains in the region, the tallest mountain found within the Salt Lake City boundaries is Grandview Peak, which rises 9,410 feet above sea level. In comparison, Salt Lake City sits at an altitude of around 4,200 feet above sea level.
The Qualtrics X4: Experience Management Summit was held at the Calvin L. Rampton Salt Palace Convention Center, named after Utah’s 11th governor. For those unfamiliar with its history, the first Salt Palace in Utah was built in 1899, but was destroyed by fire in 1910. An indoor arena was completed in 1969 for area concerts and other large events. And then this convention center opened its doors in 1996. Over the years, expansions increased the building’s size to nearly one-million square-feet. (Photo by Qualtrics)
The X4 event featured hundreds of sessions covering topics such as customer care, customer research and insights, digital experience and employee experience for several key industries including professionals in education, government, healthcare, and financial services. (Photo by Qualtrics)
The host company Qualtrics started in 2002 and grew from a basement startup to a multi-billion-dollar business focused on helping organizations in more than 100 countries manage the four core experiences of business: customer, employee, product, and brand experience. Qualtrics has 25 offices around the world with nearly 17,000 customers and more than 5,000 employees. (Photo by Qualtrics)
More than 10-thousand were in attendance at the conference. It was nice to see such an enthusiastic crowd. (Photo by Qualtrics)
The event was well-organized and well-managed by the Qualtrics team – so important in a venue this large. (Photo by Qualtrics)
I was interviewed by Gina Sheibley, Chief Communications Officer at Qualtrics. Gina leads global communications for the company, including analyst relations, public relations, executive communications, internal communications and the customer office. (Photo by Qualtrics)
During my interview, I talked about one of my biggest mantras – to learn something new every day. I need to always learn new things in order to teach others. I also feel it is important to take risks – in business and in everyday life. In business, one must expect that there will always be bad partnerships and good partnerships… and great partnerships. (Photo by Qualtrics)
While at the Summit, I met up with another speaker, Olympian Shaun White. He recently started a new brand of snow boarding products called Whitespace. Here I am with Shaun and his business partner, Miles Nathan.
After the event, we had just enough time to eat lunch at Rawtopia Living Cuisine and Beyond. This is tabouli with no bulgur wheat. It’s an authentic Lebanese mix of parsley, tomato, hemp seeds, red onion, scallion, mint, lemon, olive oil, Celtic sea salt – served with cabbage and lettuce. It was fresh and delicious.
We also had miso soup, along with their signature homemade veggie seed crackers.
These are deep leafy greens topped with avocado, tomato, bell pepper, cucumber, celery, red onion, olive, parsley, crunchy falafel crust, served with a side of tahini dressing.
This taco was served on an organic corn tortilla filled with sautéed wild-caught cod, topped with bell pepper, tomato, onion, avocado, cilantro, and cashew-lime cilantro sauce.
We also enjoyed coconut water straight from the coconut.
My team and I headed back to New York that afternoon. It was definitely a quick trip, but I always enjoy visiting Salt Lake City. See you soon, Utah!