If you enjoy water sports and are looking for something new to try this summer, consider getting an inflatable paddle board - it's lightweight, portable, durable, and built for adventure.
This past spring, the son of my longtime massage therapist, Rod Kaufmann, graduated from college. Knowing that he was already an avid and experienced surfer, I decided to gift him with a Navigator Plus SUP paddle board from our business partner, Body Glove - the well-known water sports apparel and accessories company founded in 1953. Stand up paddle boarding, or stand up paddle surfing, is a water sport where participants use paddles to propel themselves through the water - it's a great way to exercise and enjoy the outdoors.
Here are some photos, enjoy.
It’s hot and sultry in the Northeast, but at Kent Lake in Southeast Michigan, the weather this week has been perfect – sunny with temperatures in the 70s. Kent Lake offers plenty of fun activities such as fishing, boating, kayaking, paddle boarding, or picnicking along the water. 80 to 90 percent of the lake is less then 10 feet deep and the entire lake has a 10 mile-per-hour speed limit.
Kent Lake is a 1200-acre reservoir lake formed by the damming of Huron River near its headwaters in 1946. For decades, Kent Lake has attracted visitors of all ages to its shores.
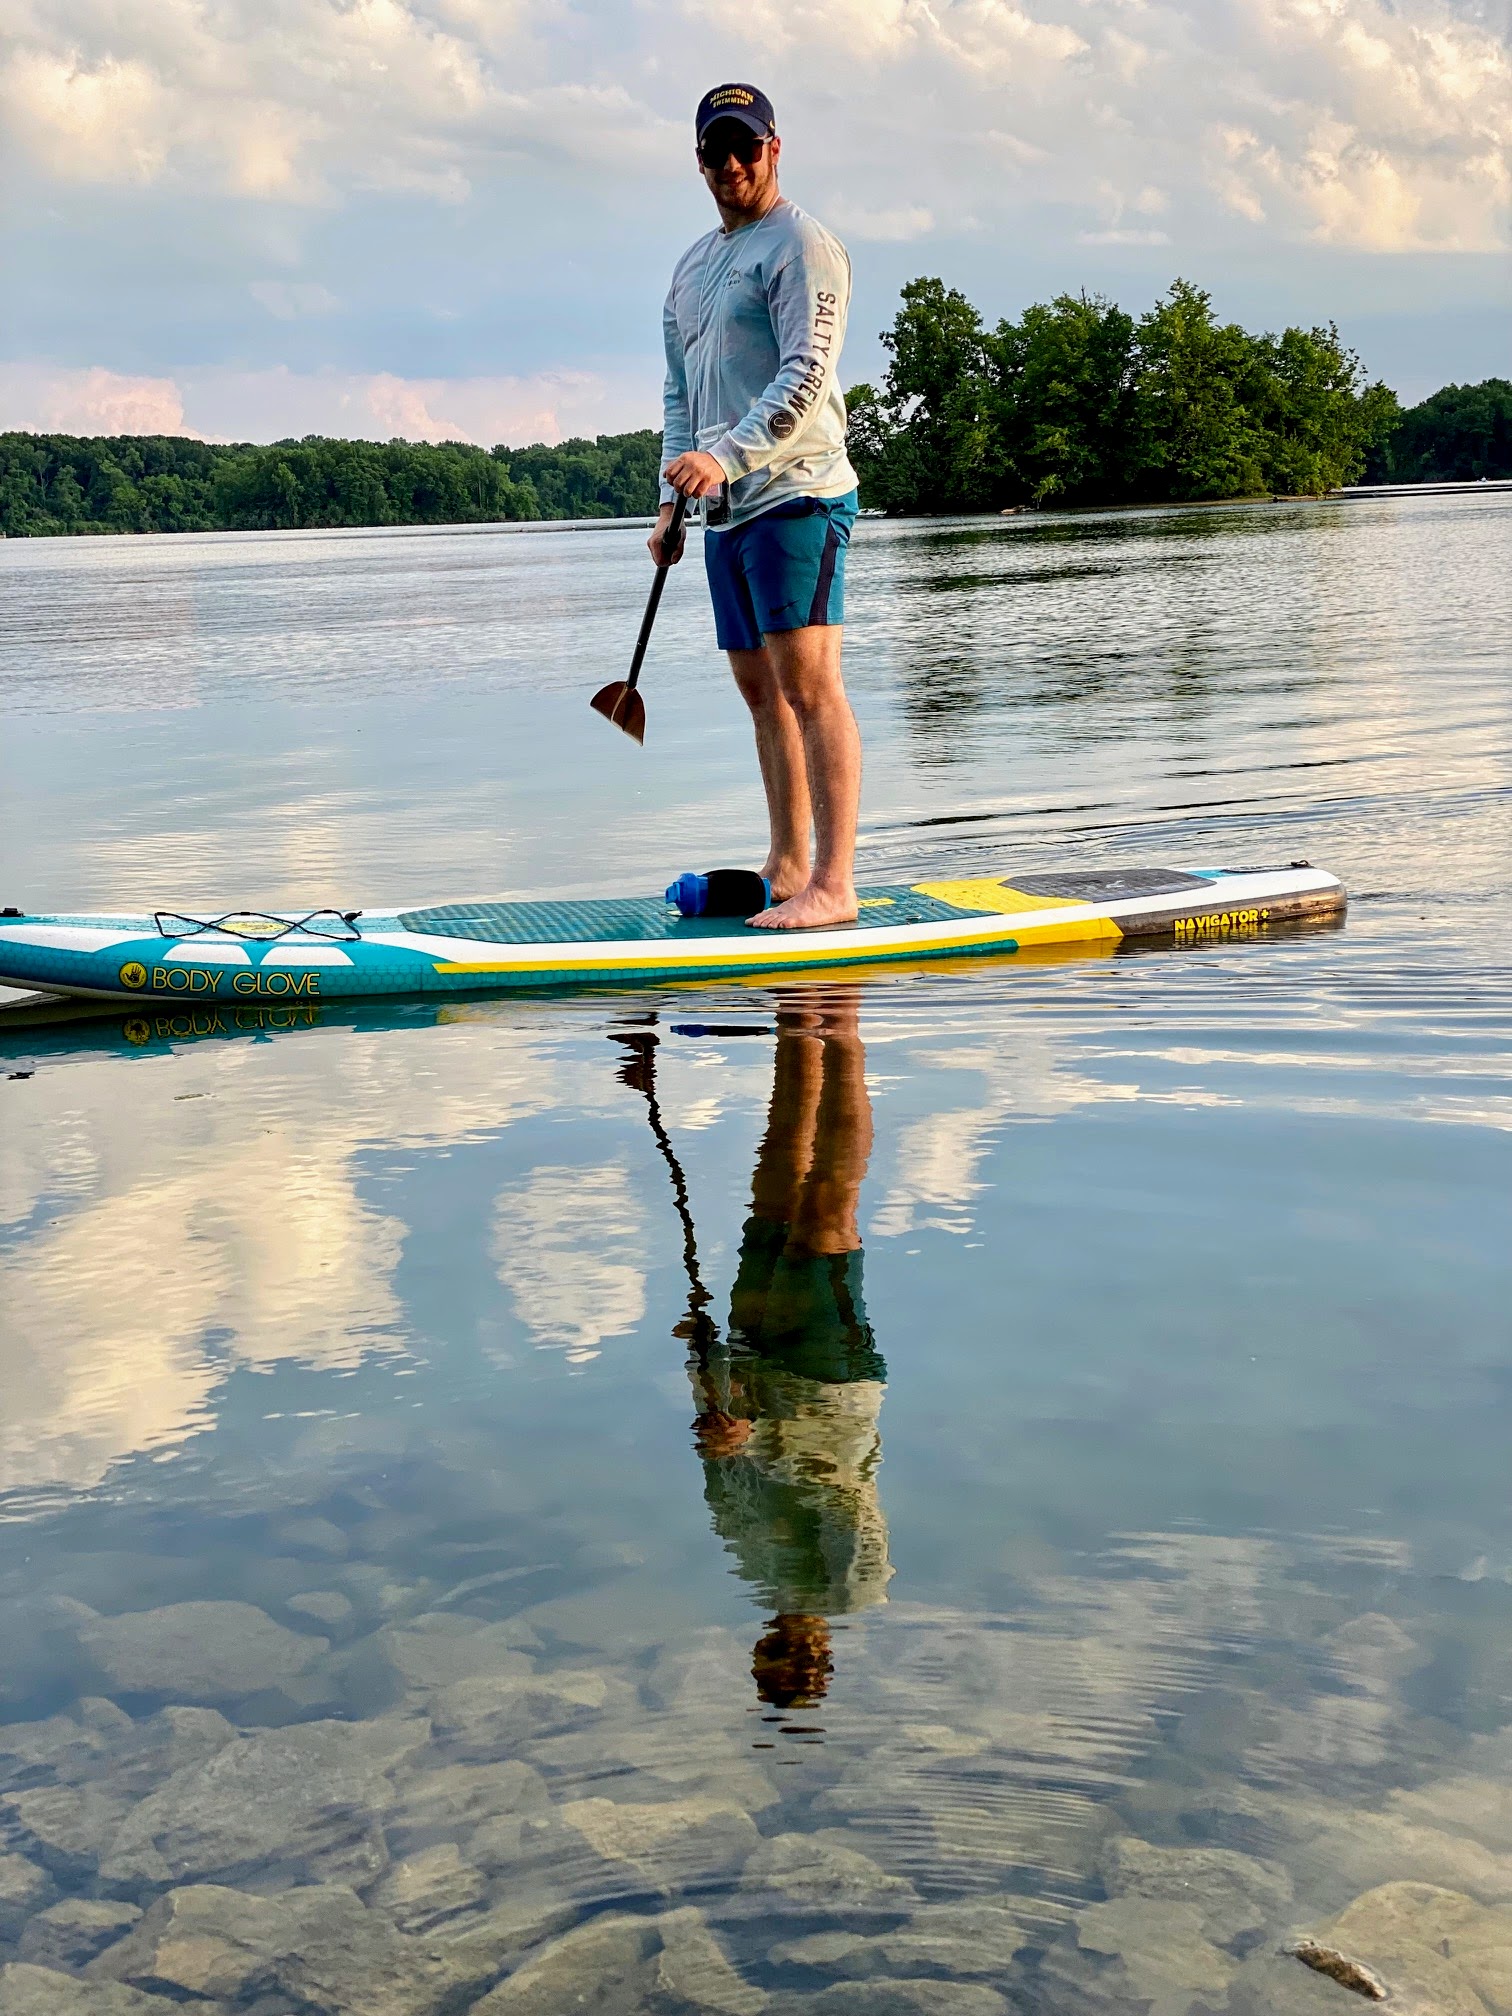
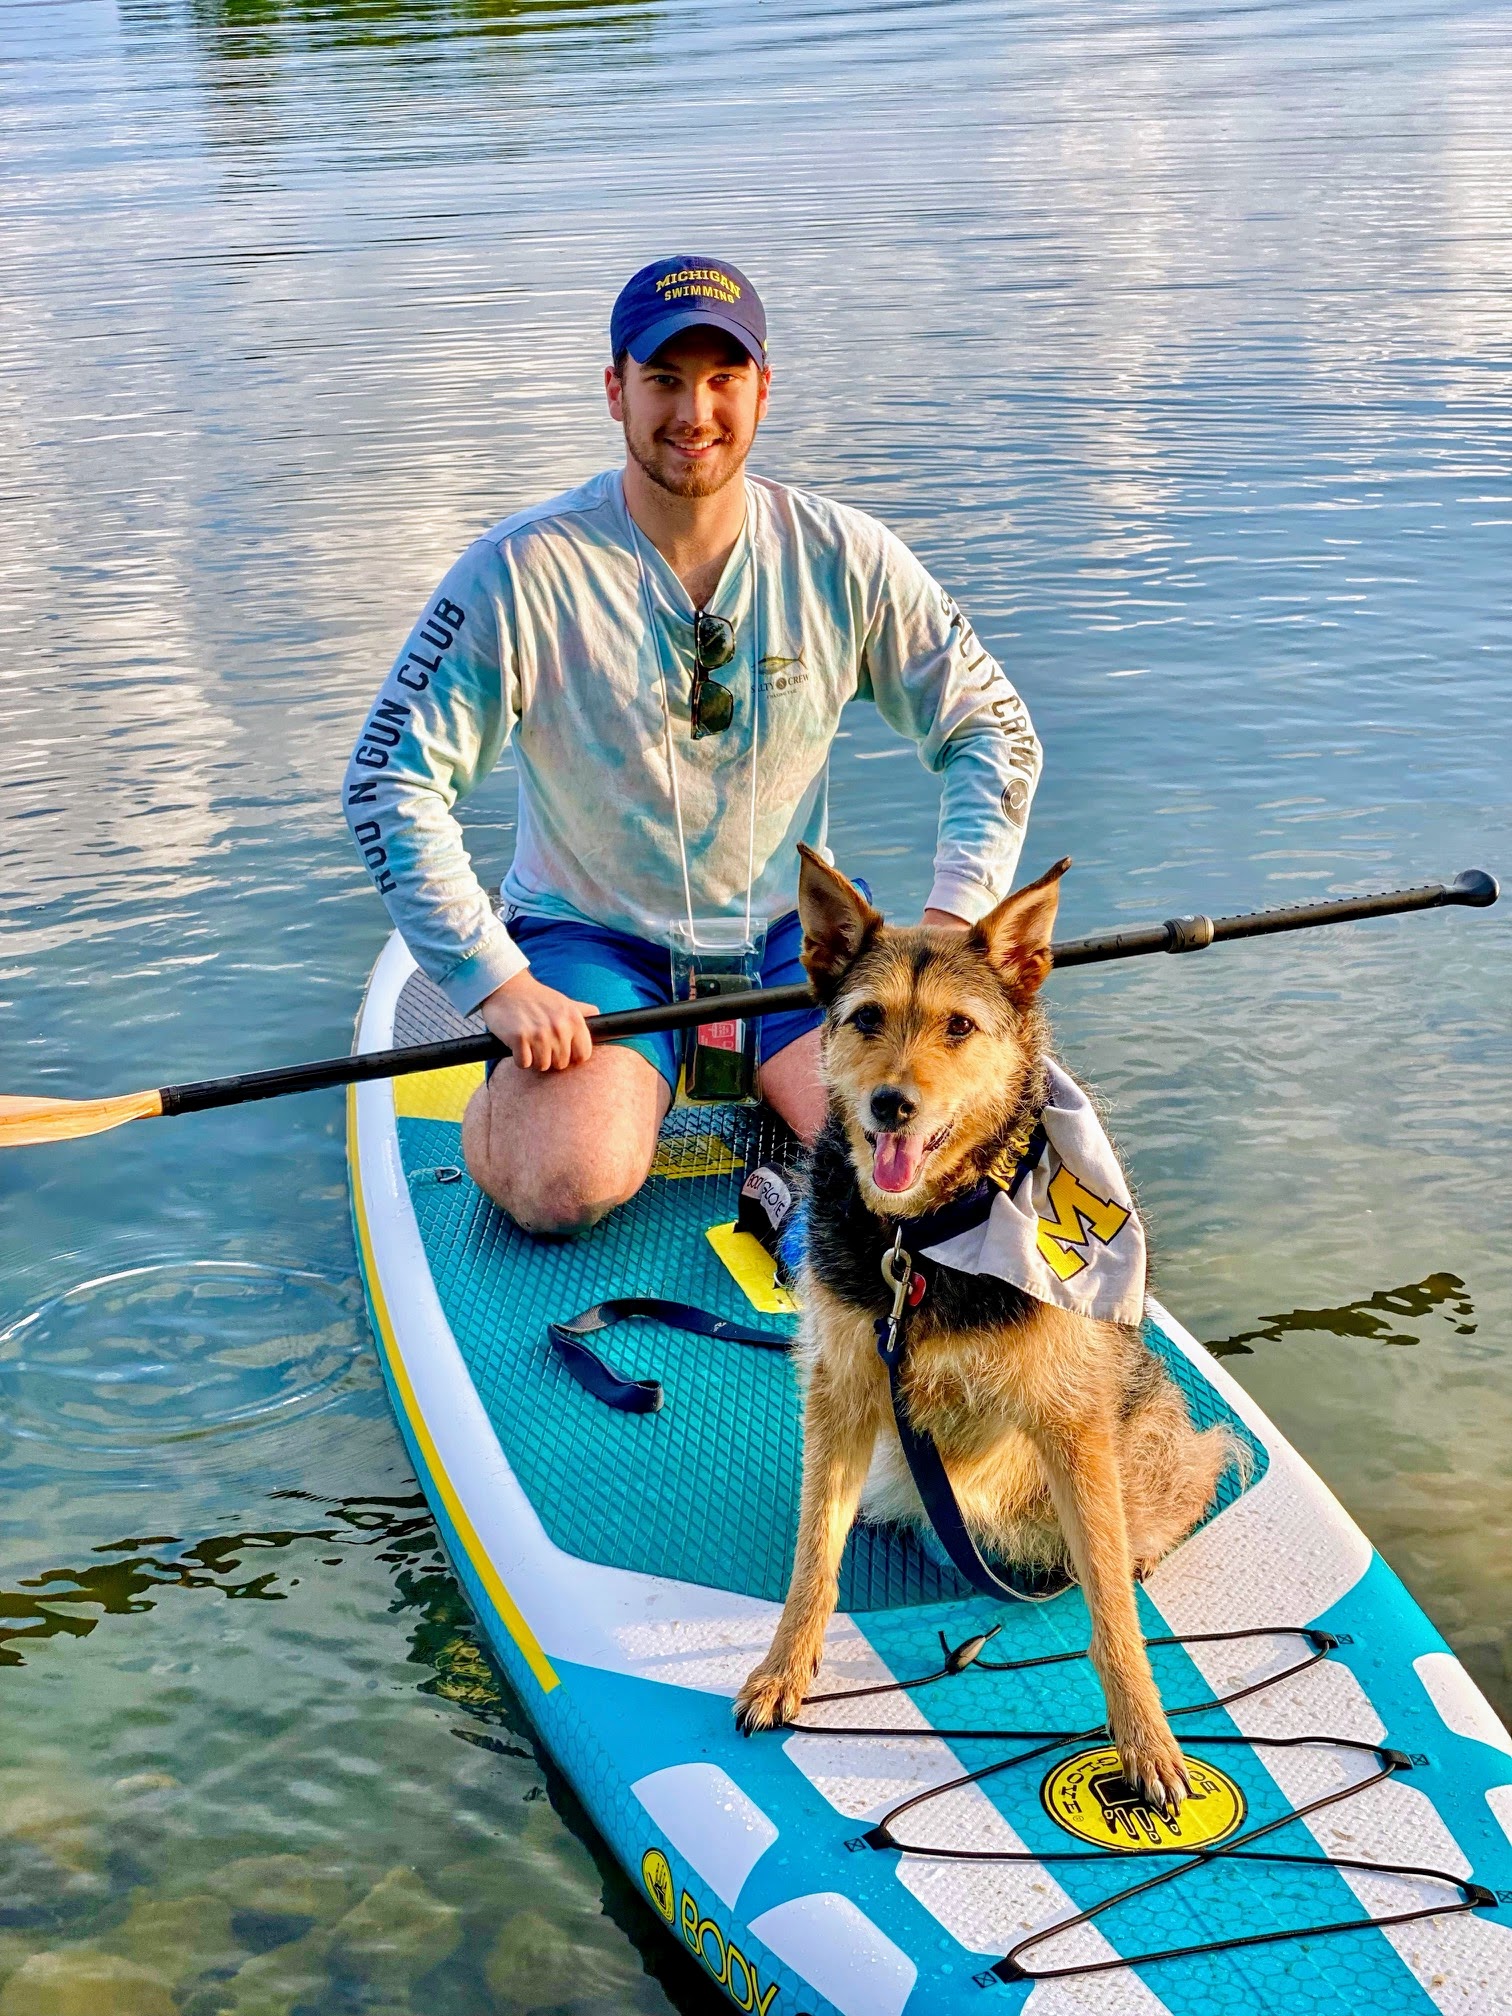
Garrett Kauffman loves to surf, so I knew a paddle board would be a nice graduation gift. Here he is with the Body Glove Navigator Plus Inflatable SUP, a highly stable and rigid board loaded with features. The Navigator Plus model is great for both beginners and advanced paddlers, and comes with a cell phone dry bag, pump, ankle leash, and a comfortable, durable backpack.
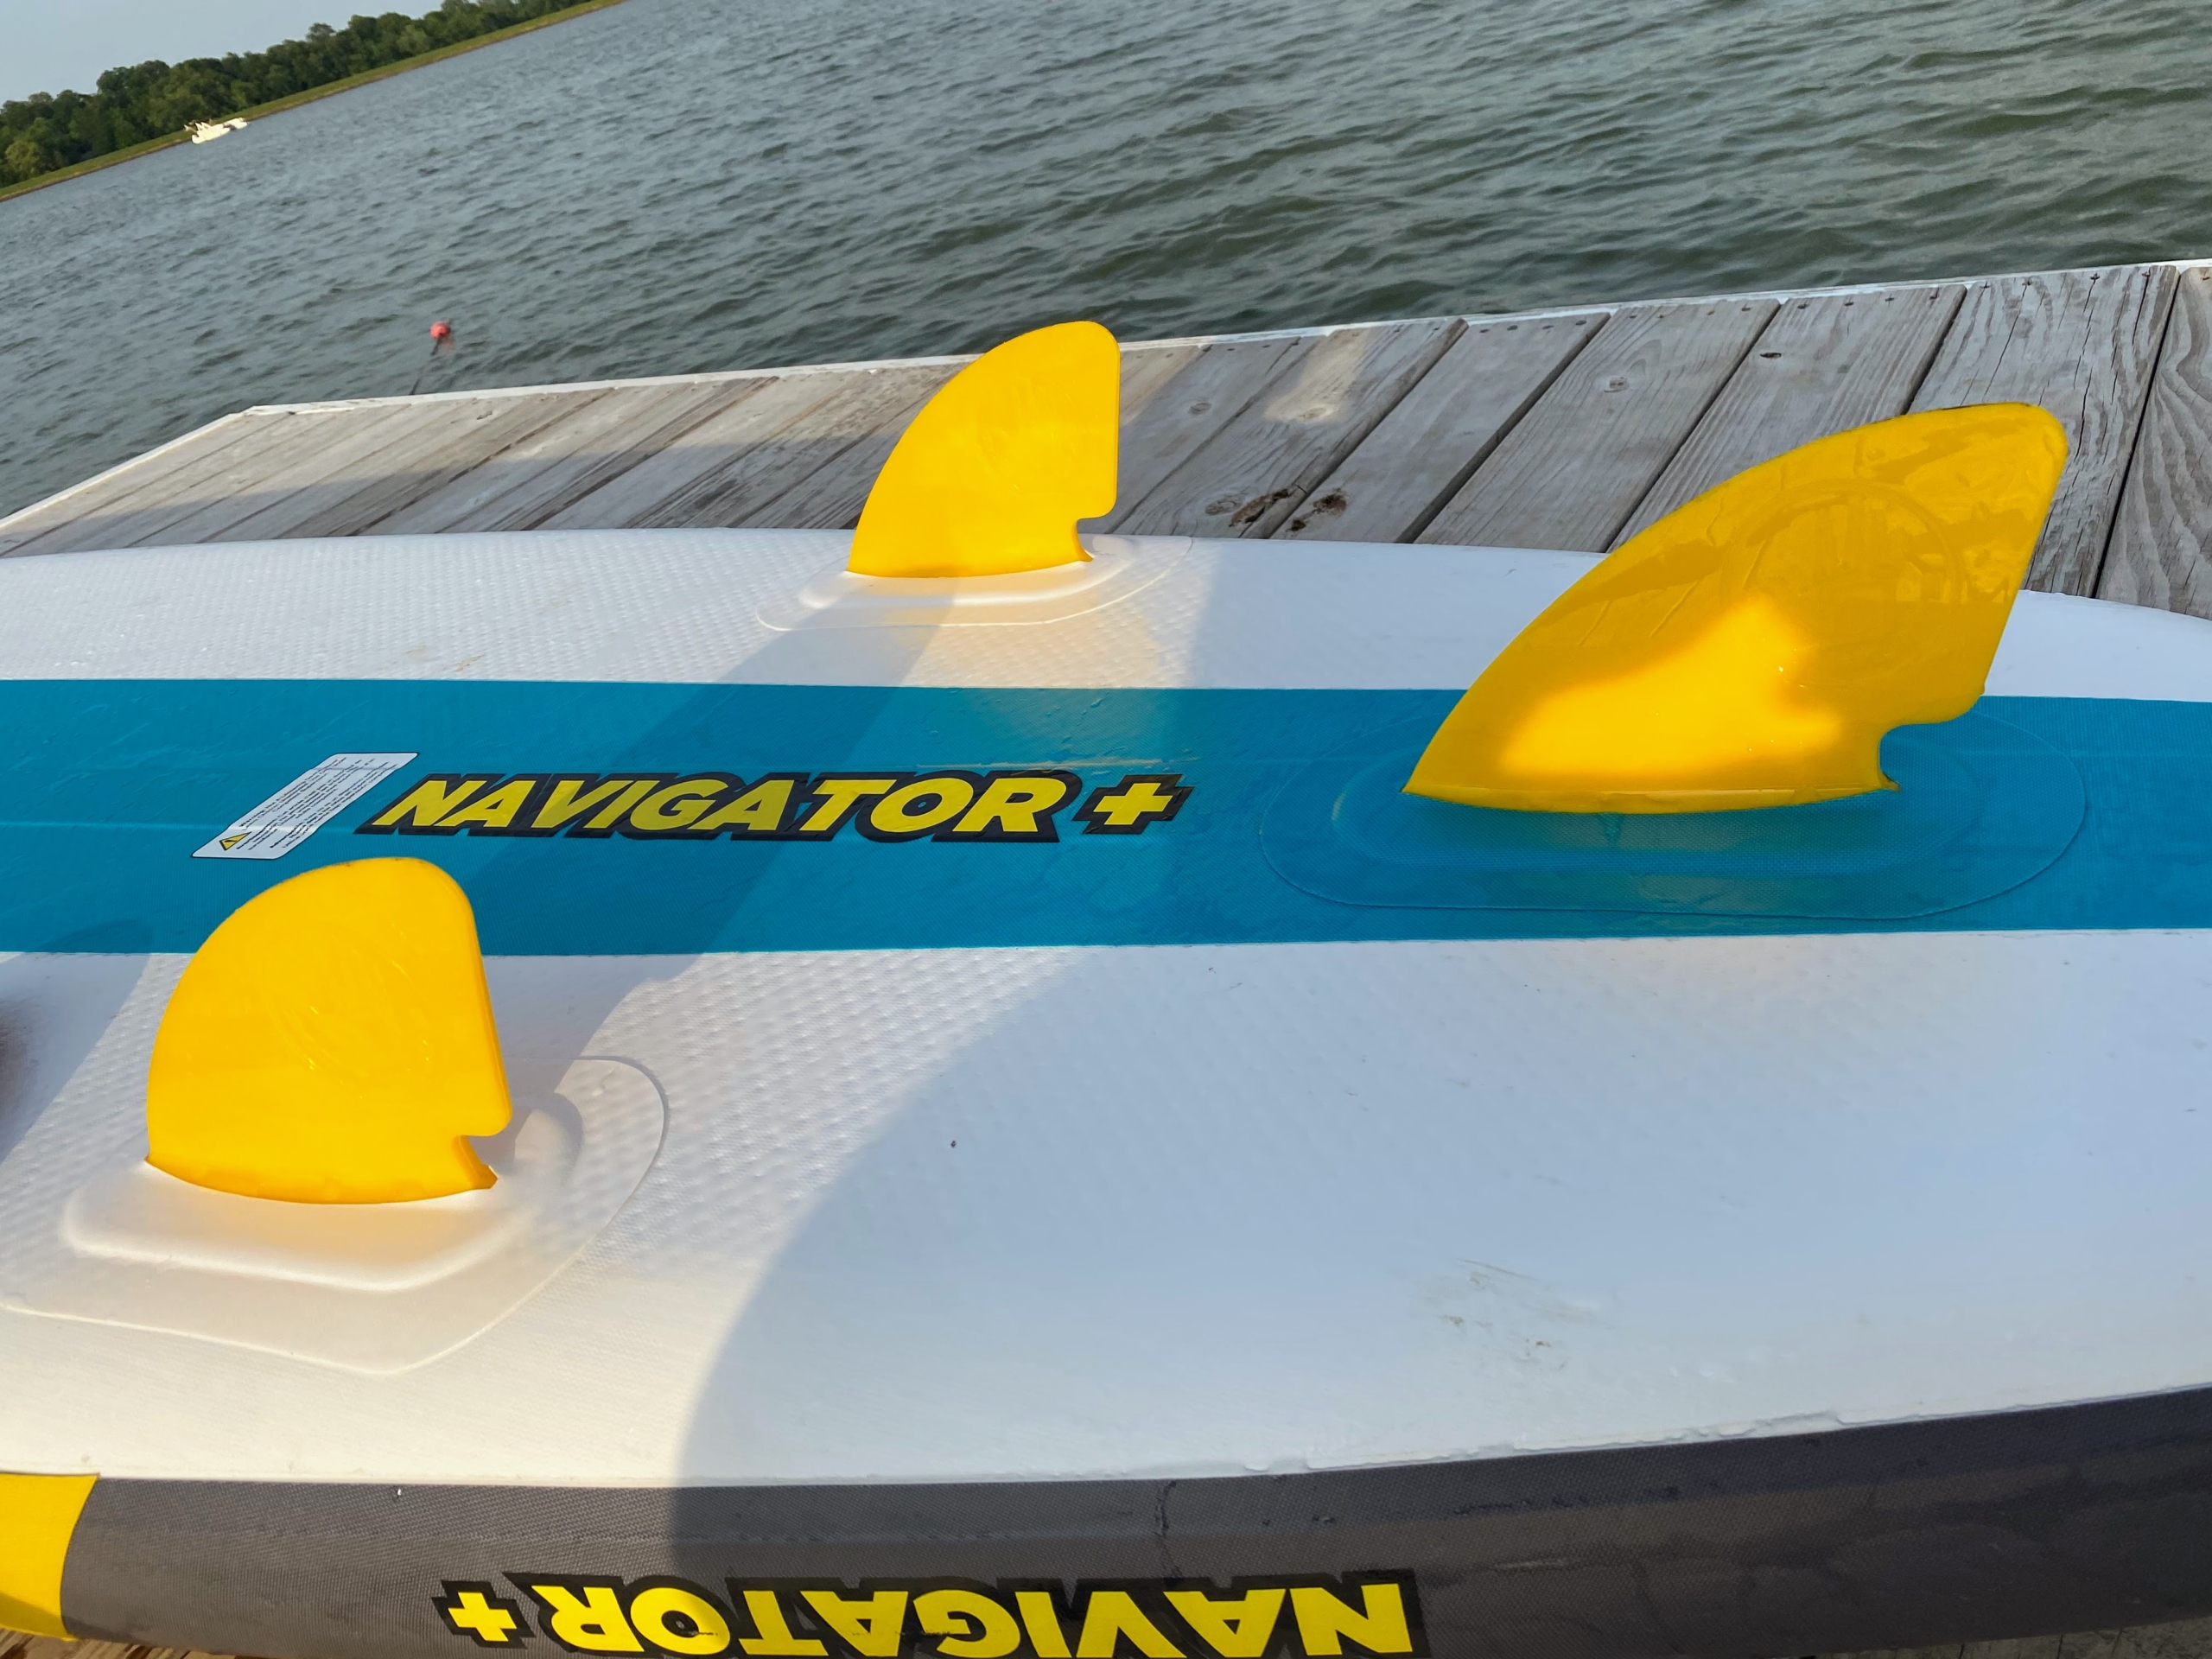
In paddle boarding, surfing, windsurfing, and kitesurfing, skegs, usually known as “fins”, are attached toward the tail of the board to improve directional stability and control throughout the ride.
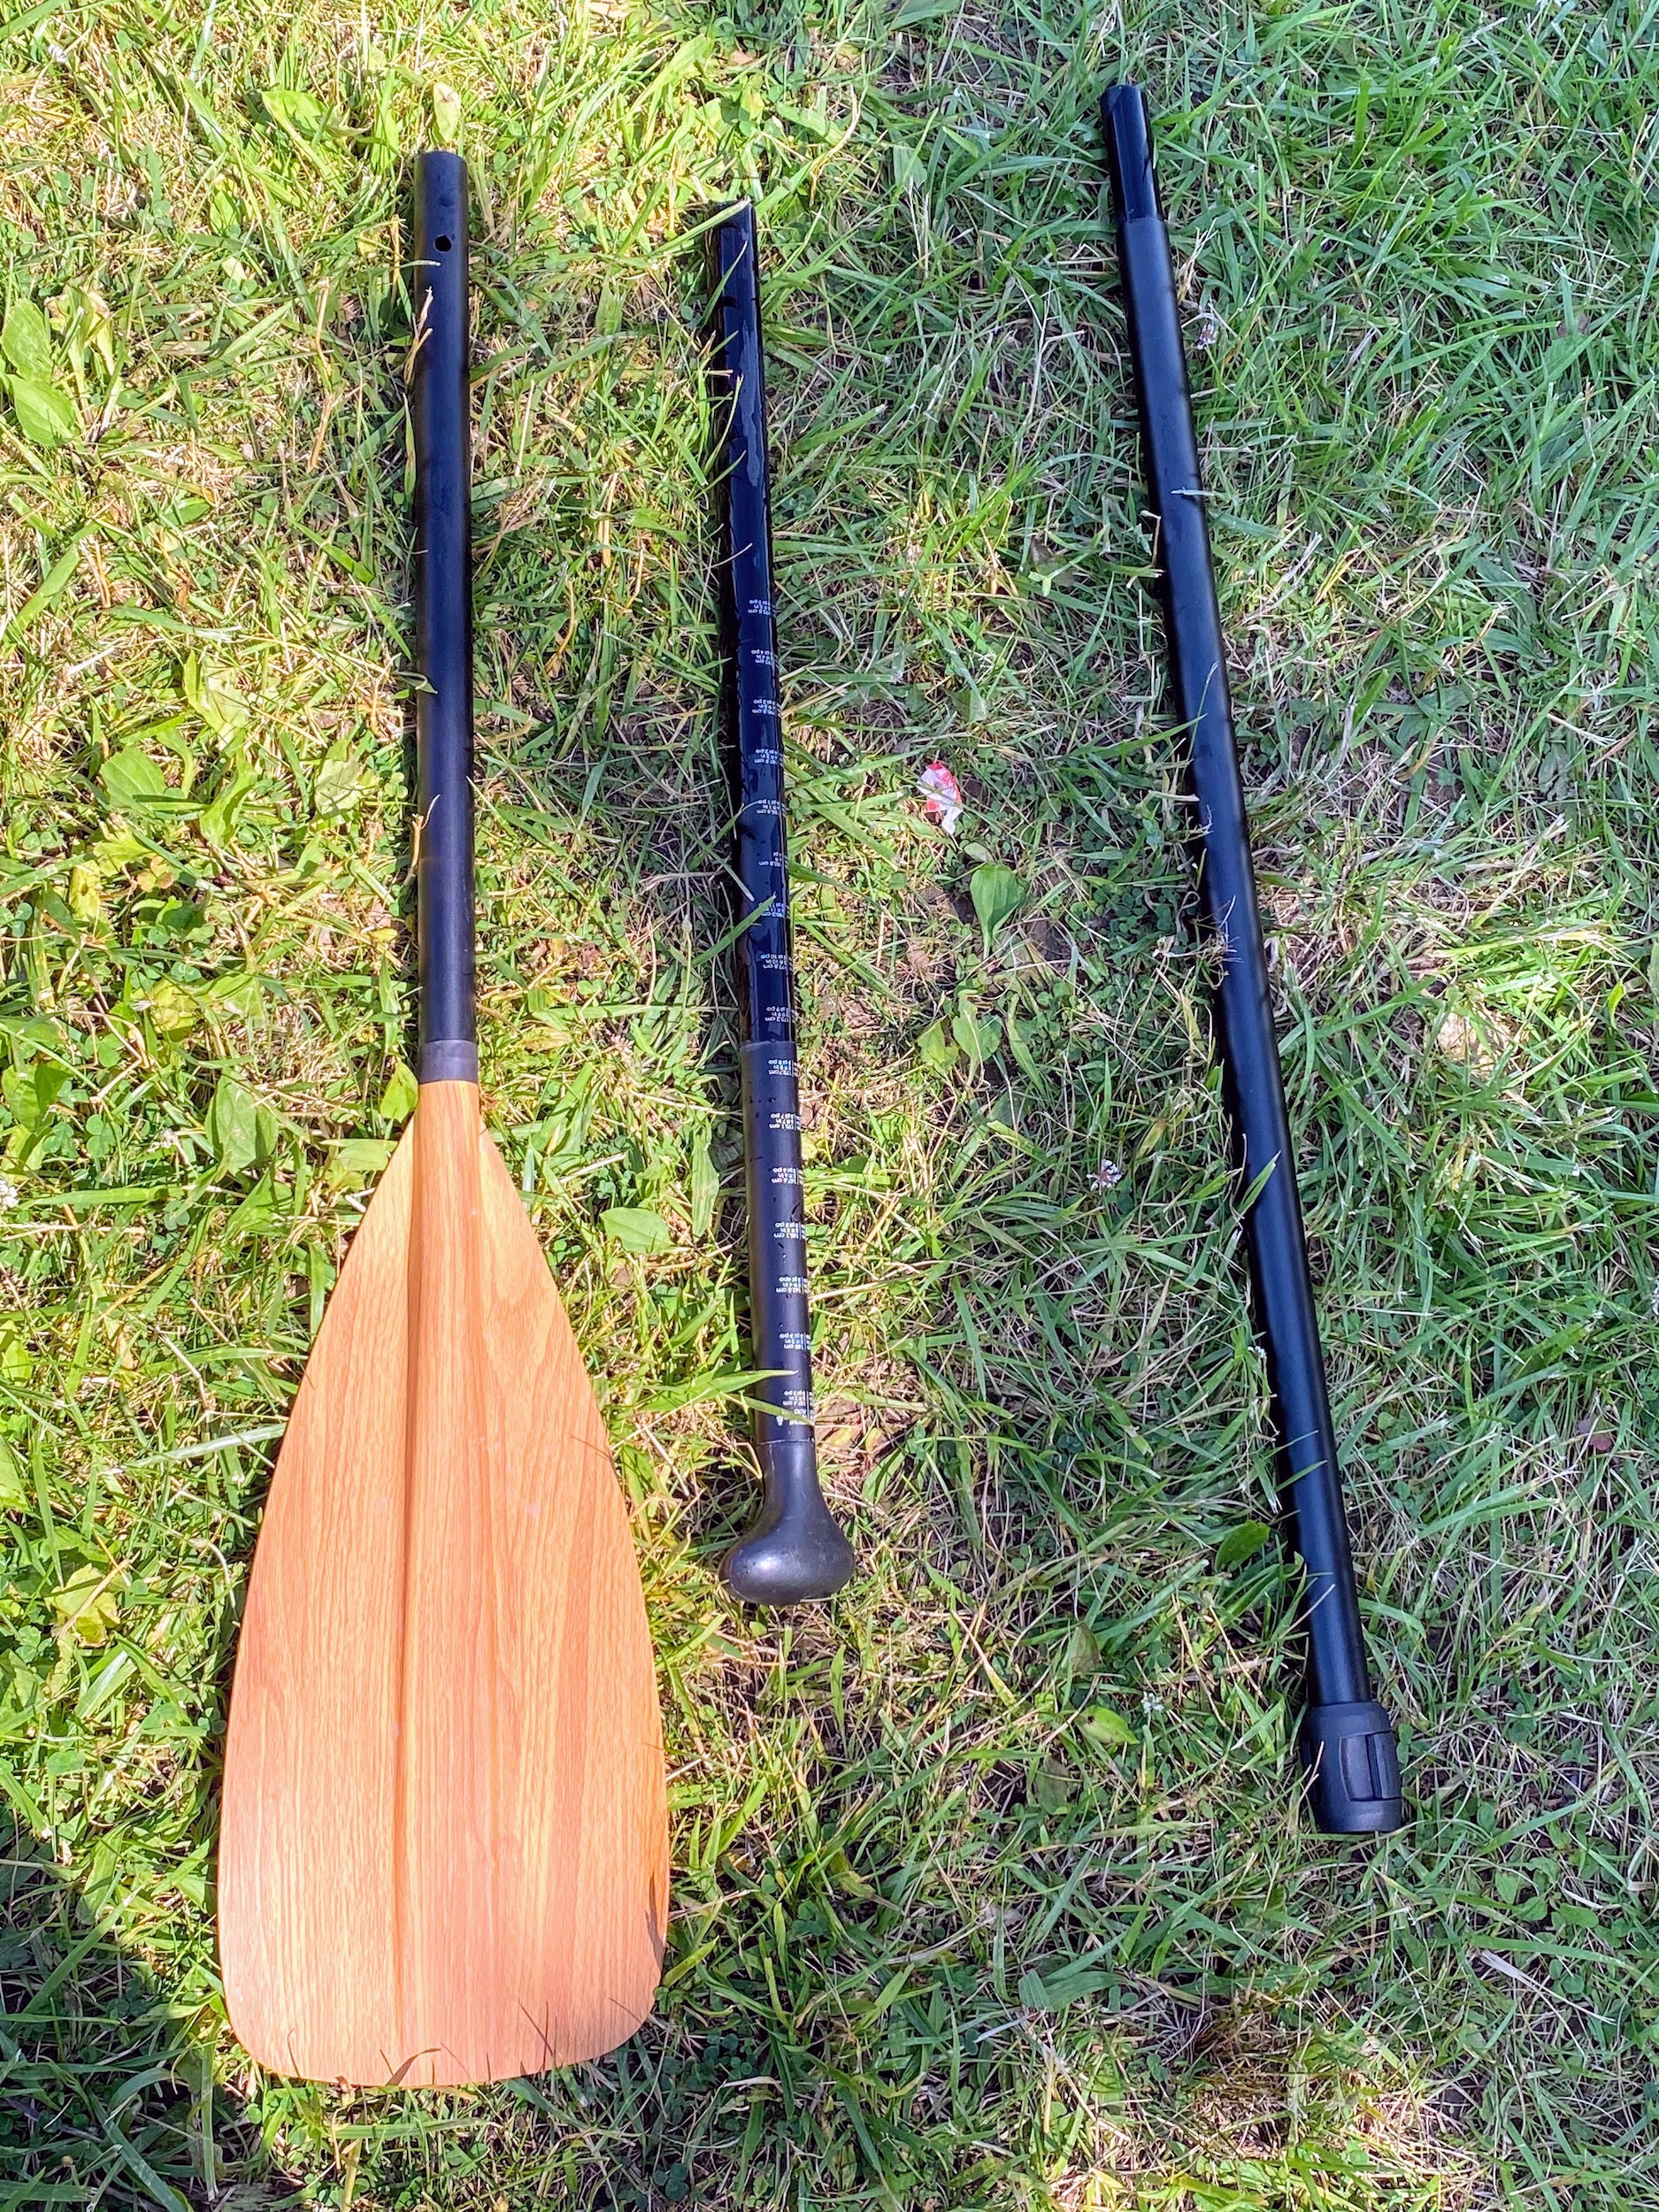
Here’s the adjustable paddle. The general rule is that the paddle should be six to 10 inches above the height of the paddler – a little longer for flat water use and shorter for use in the surf. The blade is typically bent at a slight angle to the shaft to allow for more forward reach when taking a stroke.
Body Glove’s Navigator Plus Inflatable SUP, or stand up paddle board, offers a patented multi-purpose handle to carry a water bottle and the paddle. It also has superior welded drop-stitch construction, heavy-duty poly vinyl fabric material, and a weight capacity of 320-pounds. In all, this board is 11 feet long, 34 inches wide, and six inches thick.
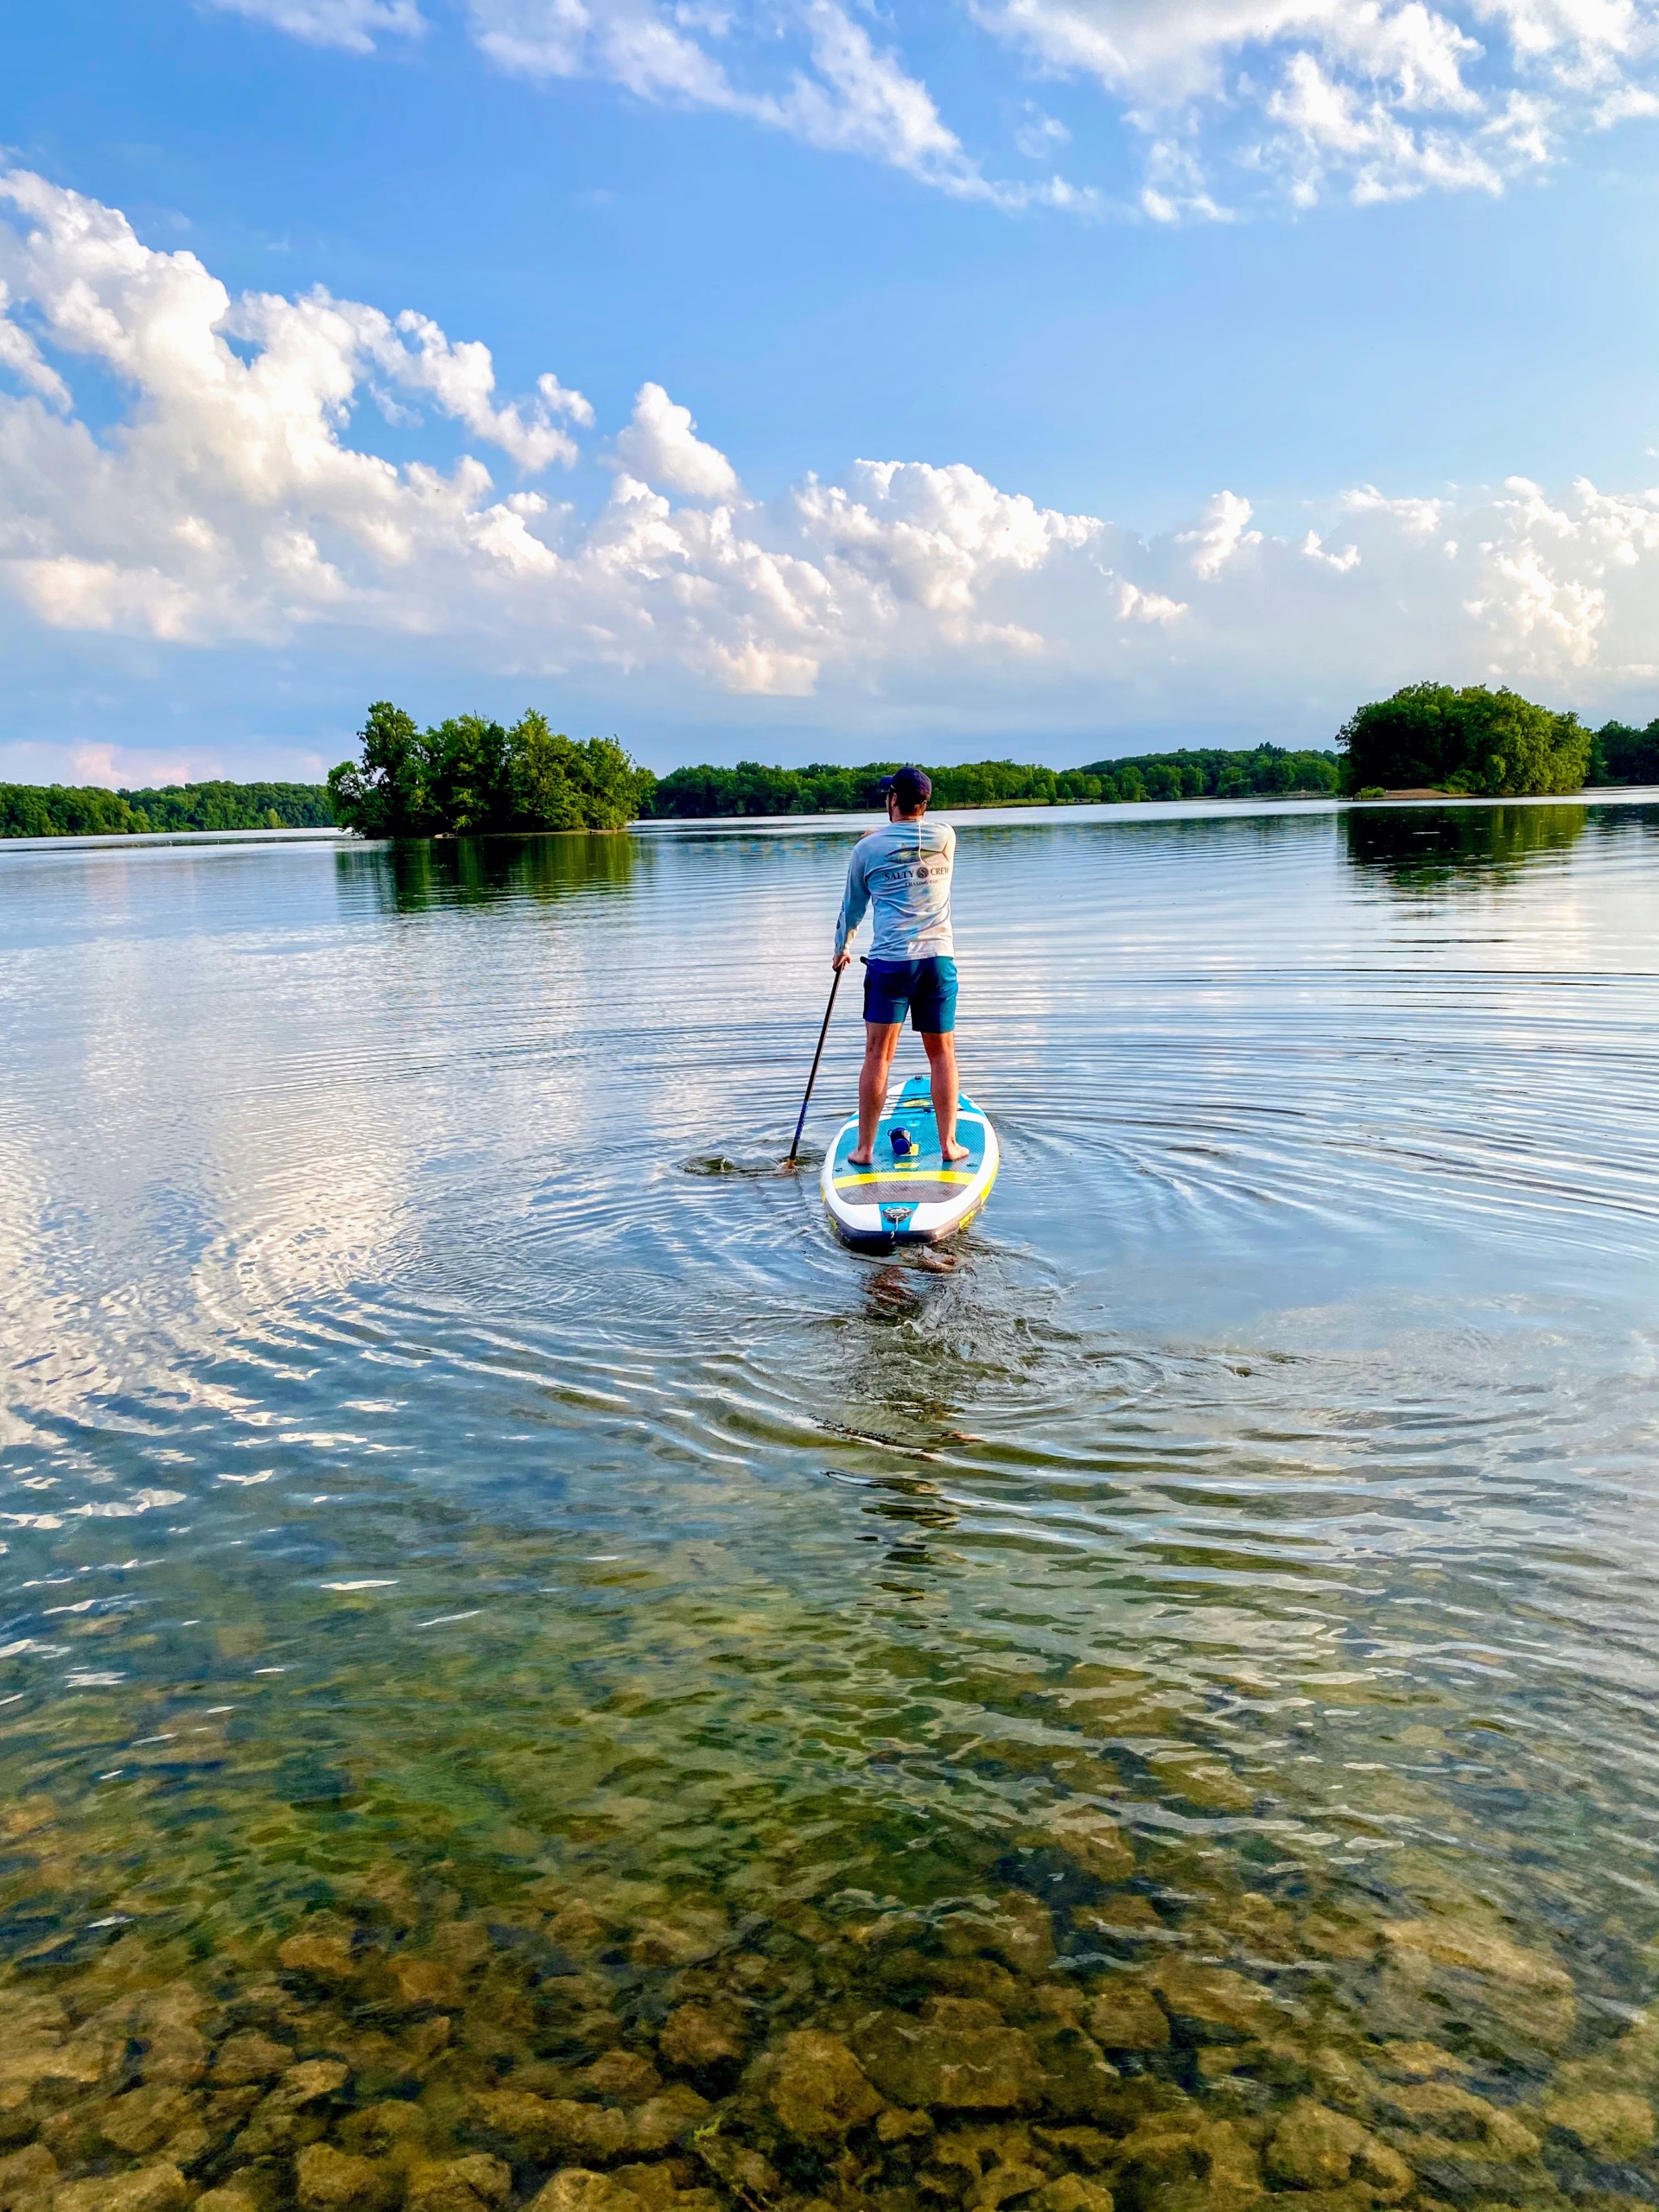
To use a paddle board, it is important to first get out into in water so the fins are free from hitting the bottom. Garrett takes a few strokes on each side of the board while maintaining a steady stance in the middle. His feet are parallel to the stringer – about shoulder width apart. And he keeps a slight bend in the knees and his core centered over the board.
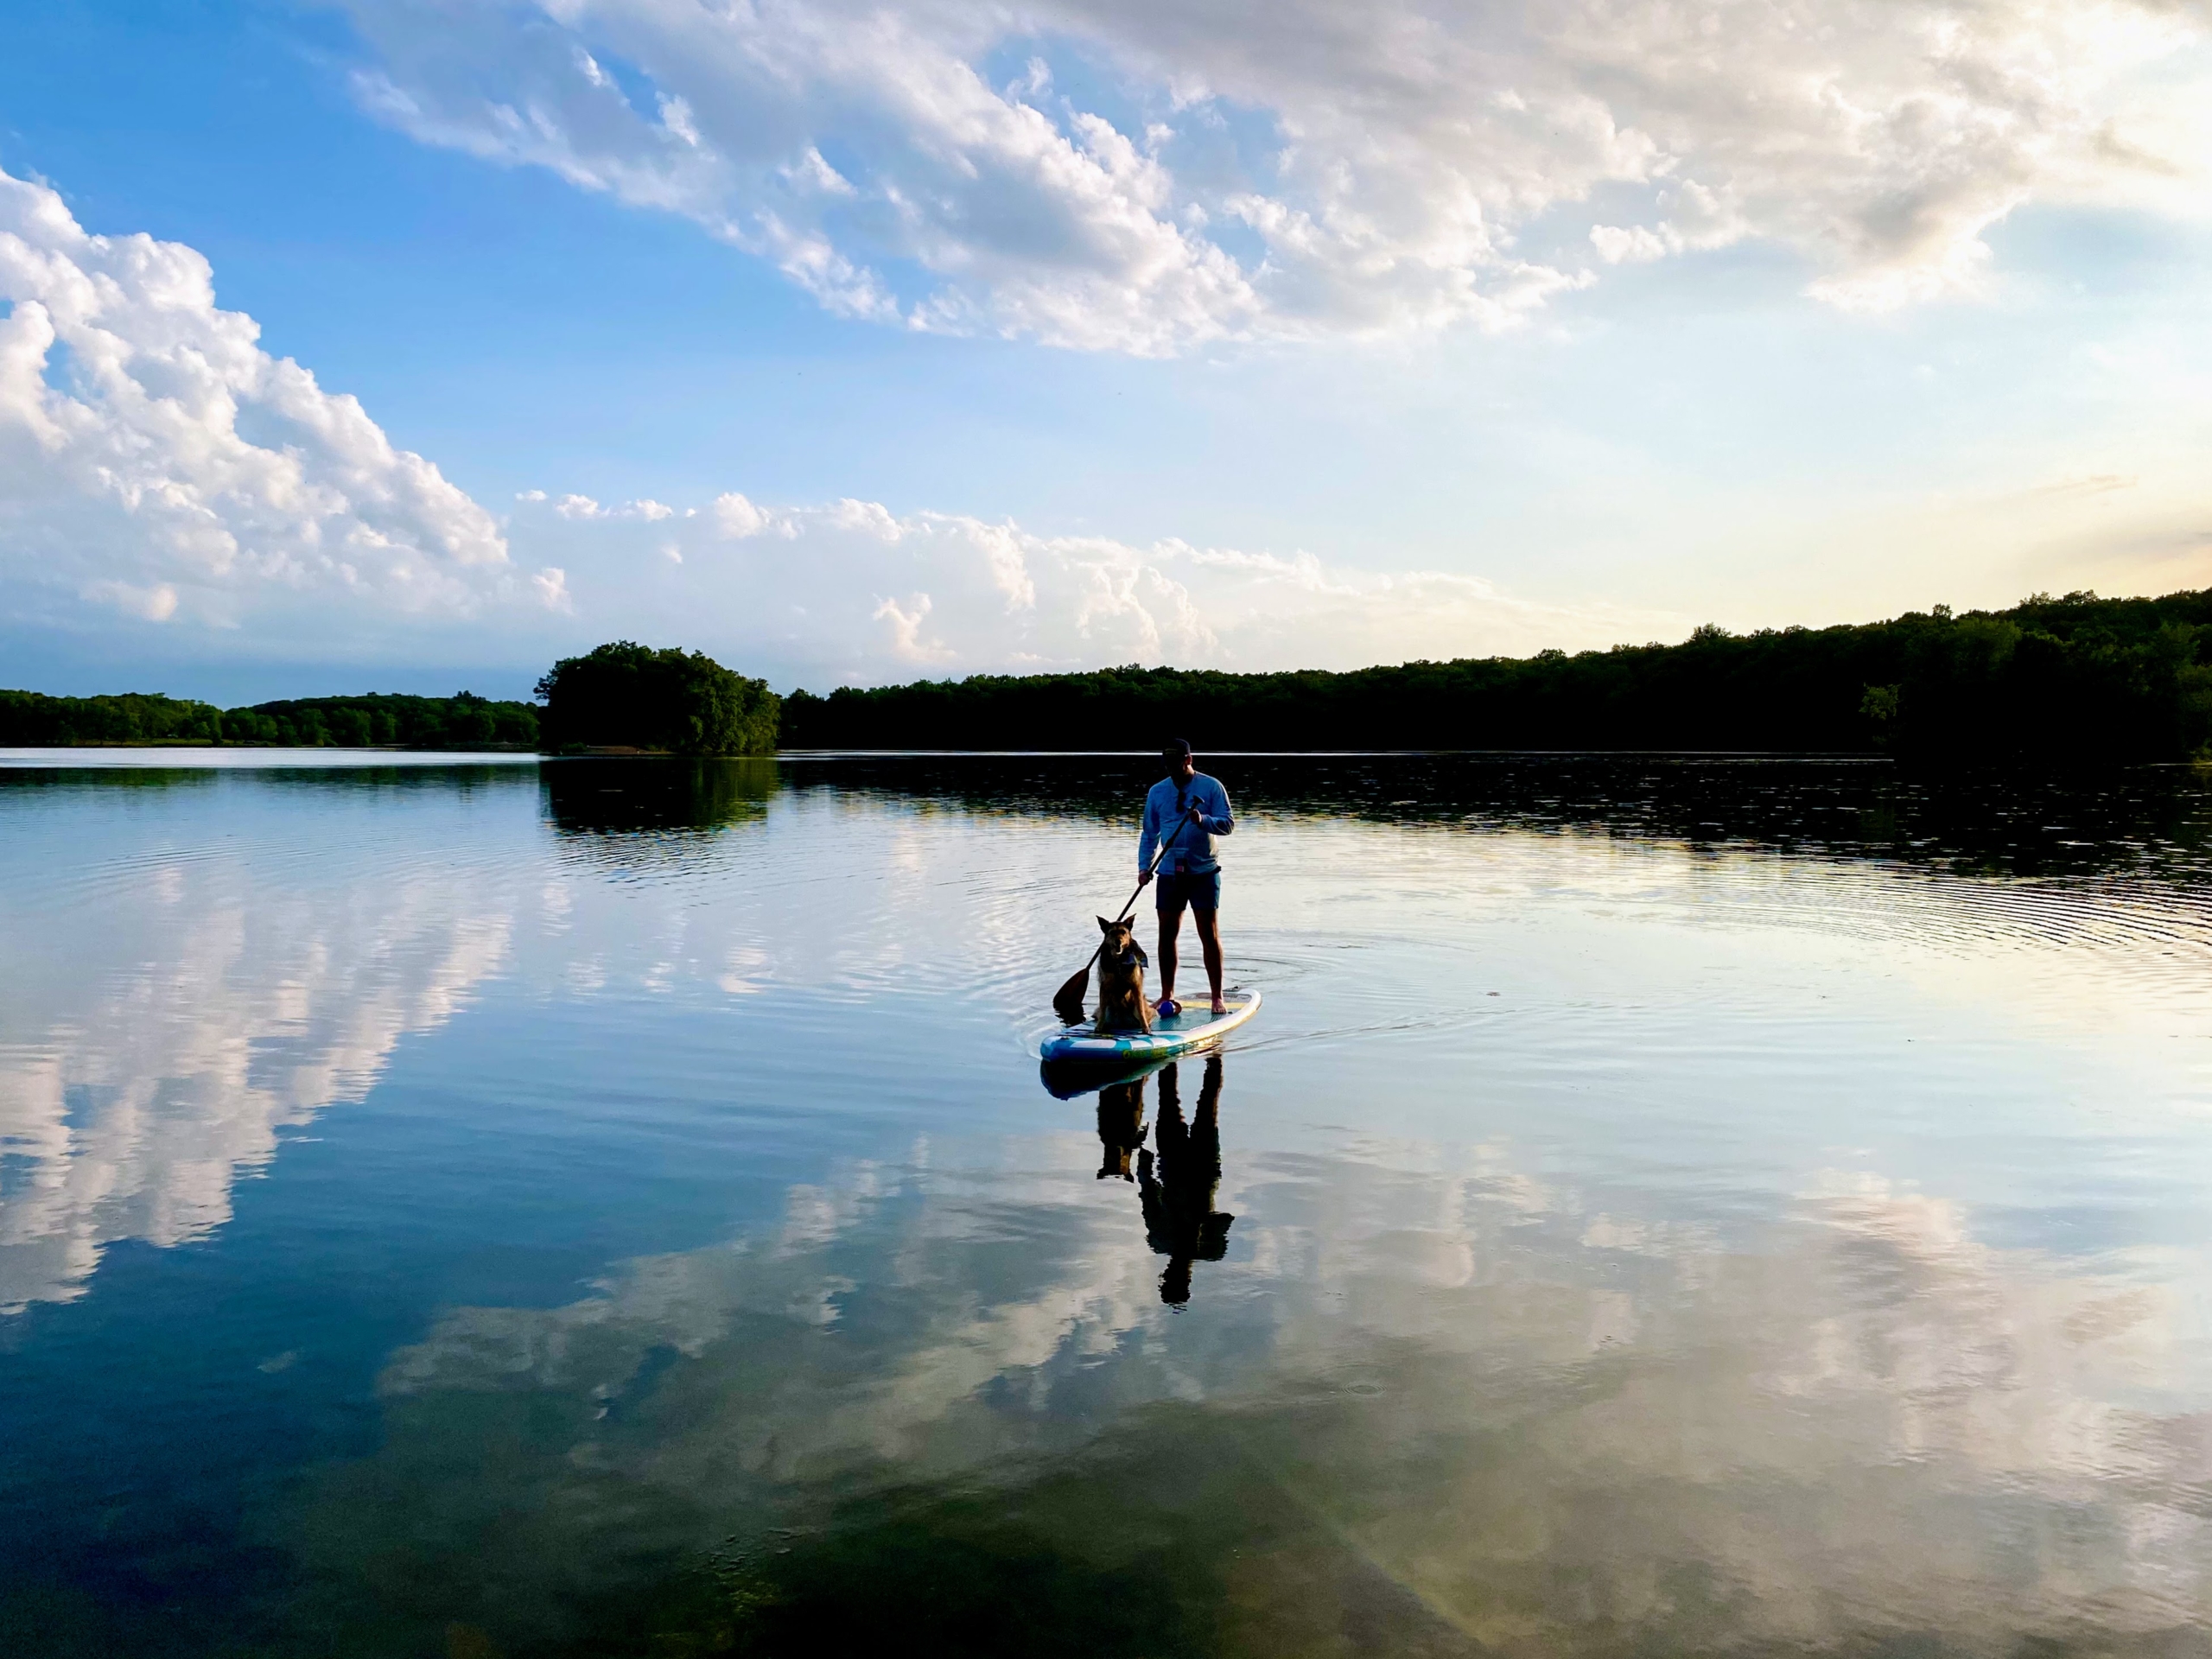
Garrett heads out into the very calm lake waters, but paddle boards can also be enjoyed in oceans, rivers, and bays.
Here is a closer look at Garrett on the paddle board. A stand up paddle board is much thicker than an average surfboard.
Garrett keeps his balance throughout. Beginners who are unaccustomed to paddle boarding and surfing should use a wider, longer board, which offers the greatest stability to learn the paddle board basics. As one gains experience, one can progress to smaller paddle boards.
To make turns, the paddle is placed in the water on the opposite side of the board as the turn that is desired. If going left, the paddle goes in on the right side. At the same time, the paddler turns his or her torso to the left side and pulls to the right, towards the tail with the paddle. Turns are very easy on this Navigator Plus model because of its design and durability.
On this short paddle board ride, Garrett takes his Shepherd-Terrier mix, Bella. Because Garrett is already an experienced surfer, this was easy for him to do. Another tip – always hold the paddle with one hand on the top of the handle and the other on the shaft. Keep shoulders width apart, and toes pointed toward the nose. A coil ankle leash is also part of this board package. In fact, this board won a Connect Gear of the Year award in 2019.
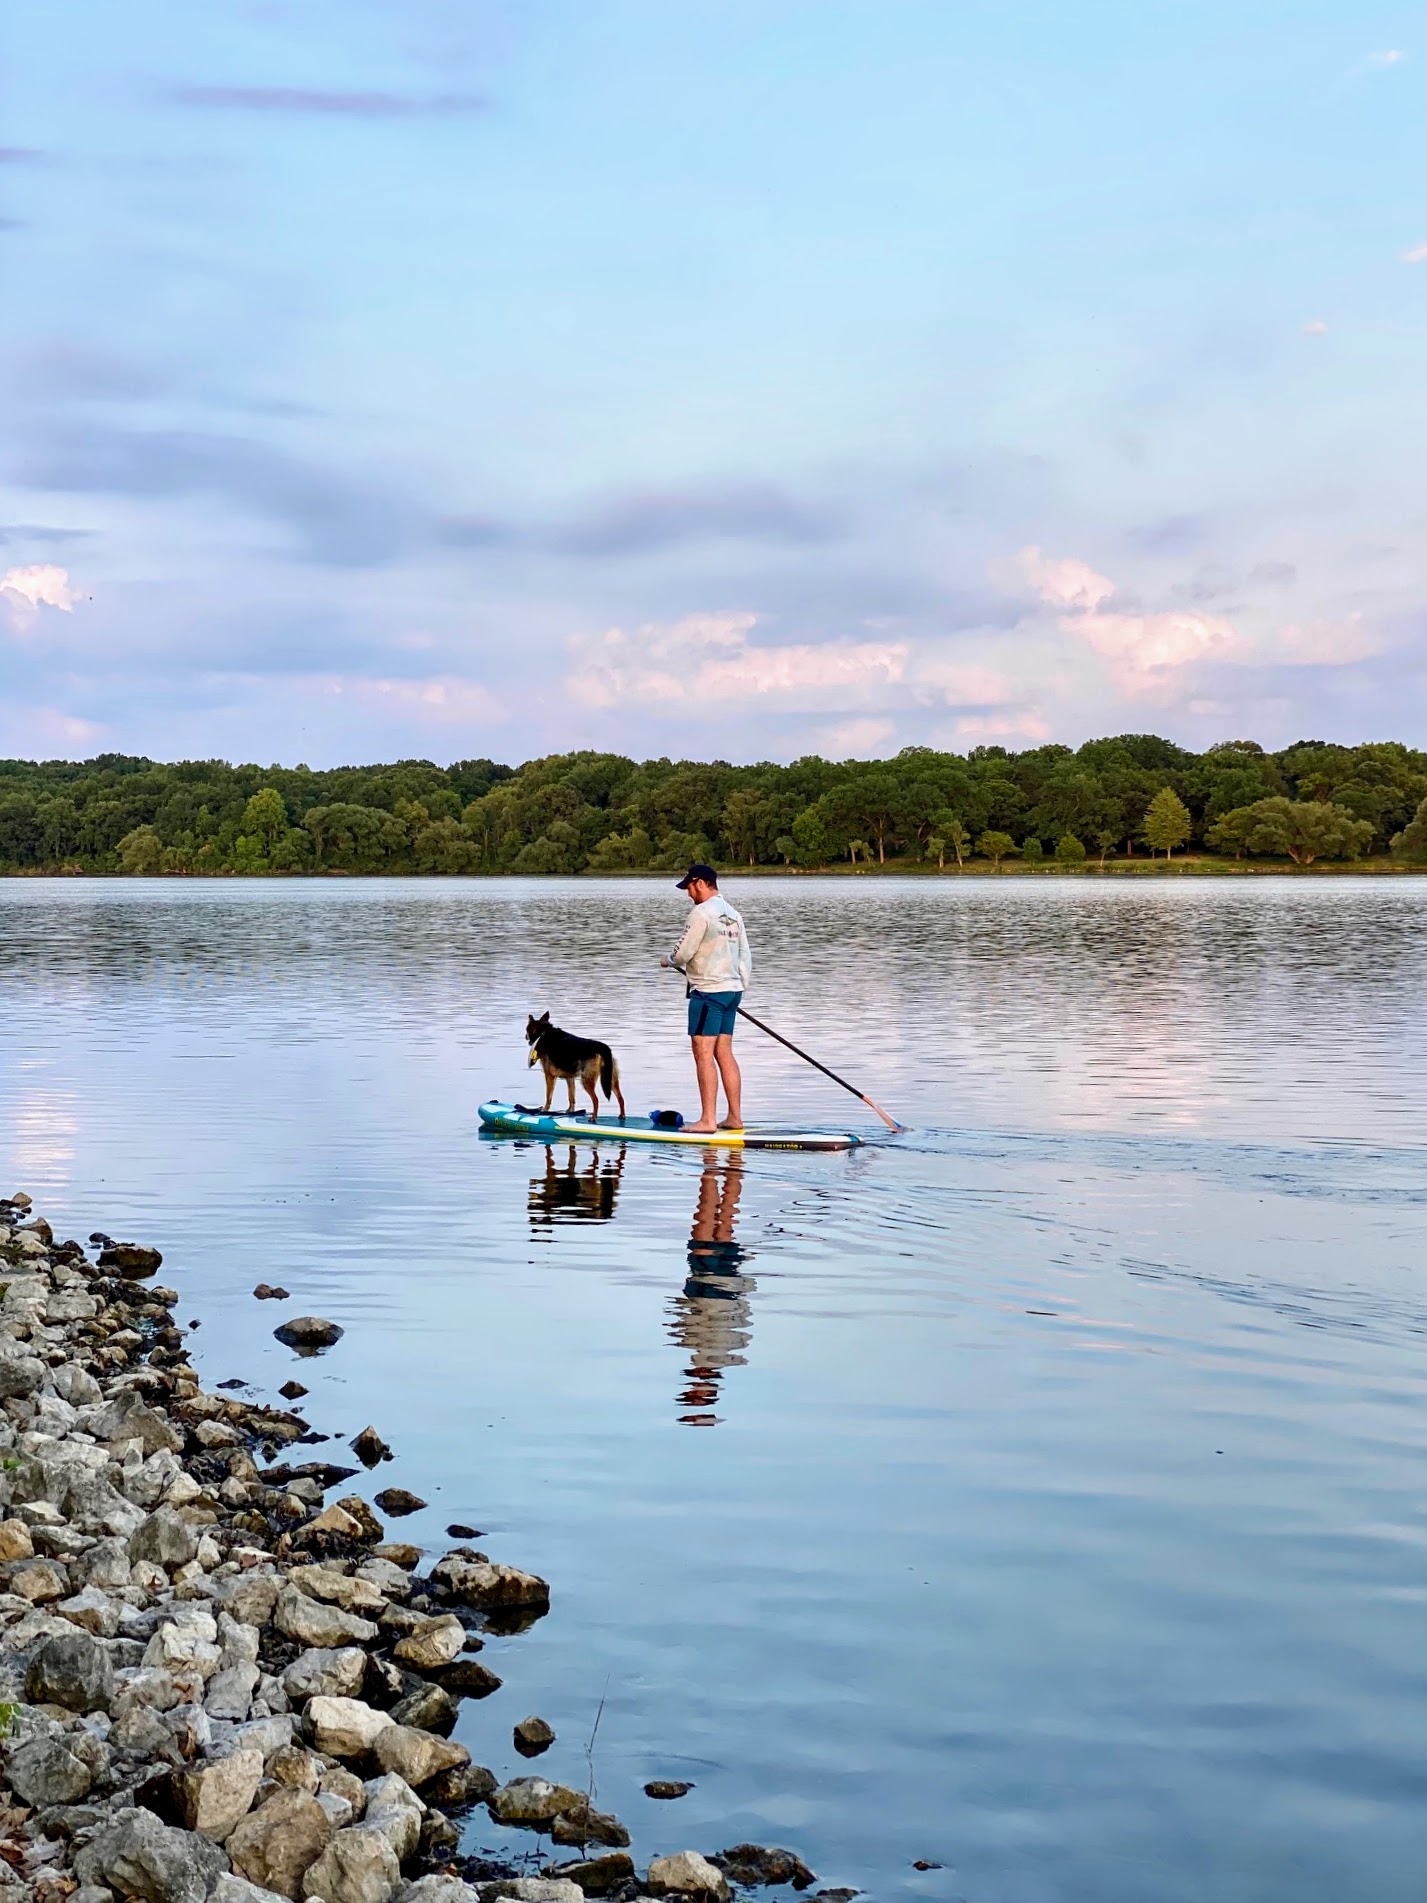
Bella seems to enjoy the slow and easy paddle ride with Garrett – both maintained good balance on the board.
Paddle boarding is also a very good workout. Garrett is able to dip the blade fully into the water and take long strokes, using his strong back muscles to do the work.
Here they are coming back to shore and smiling for this quick snapshot.
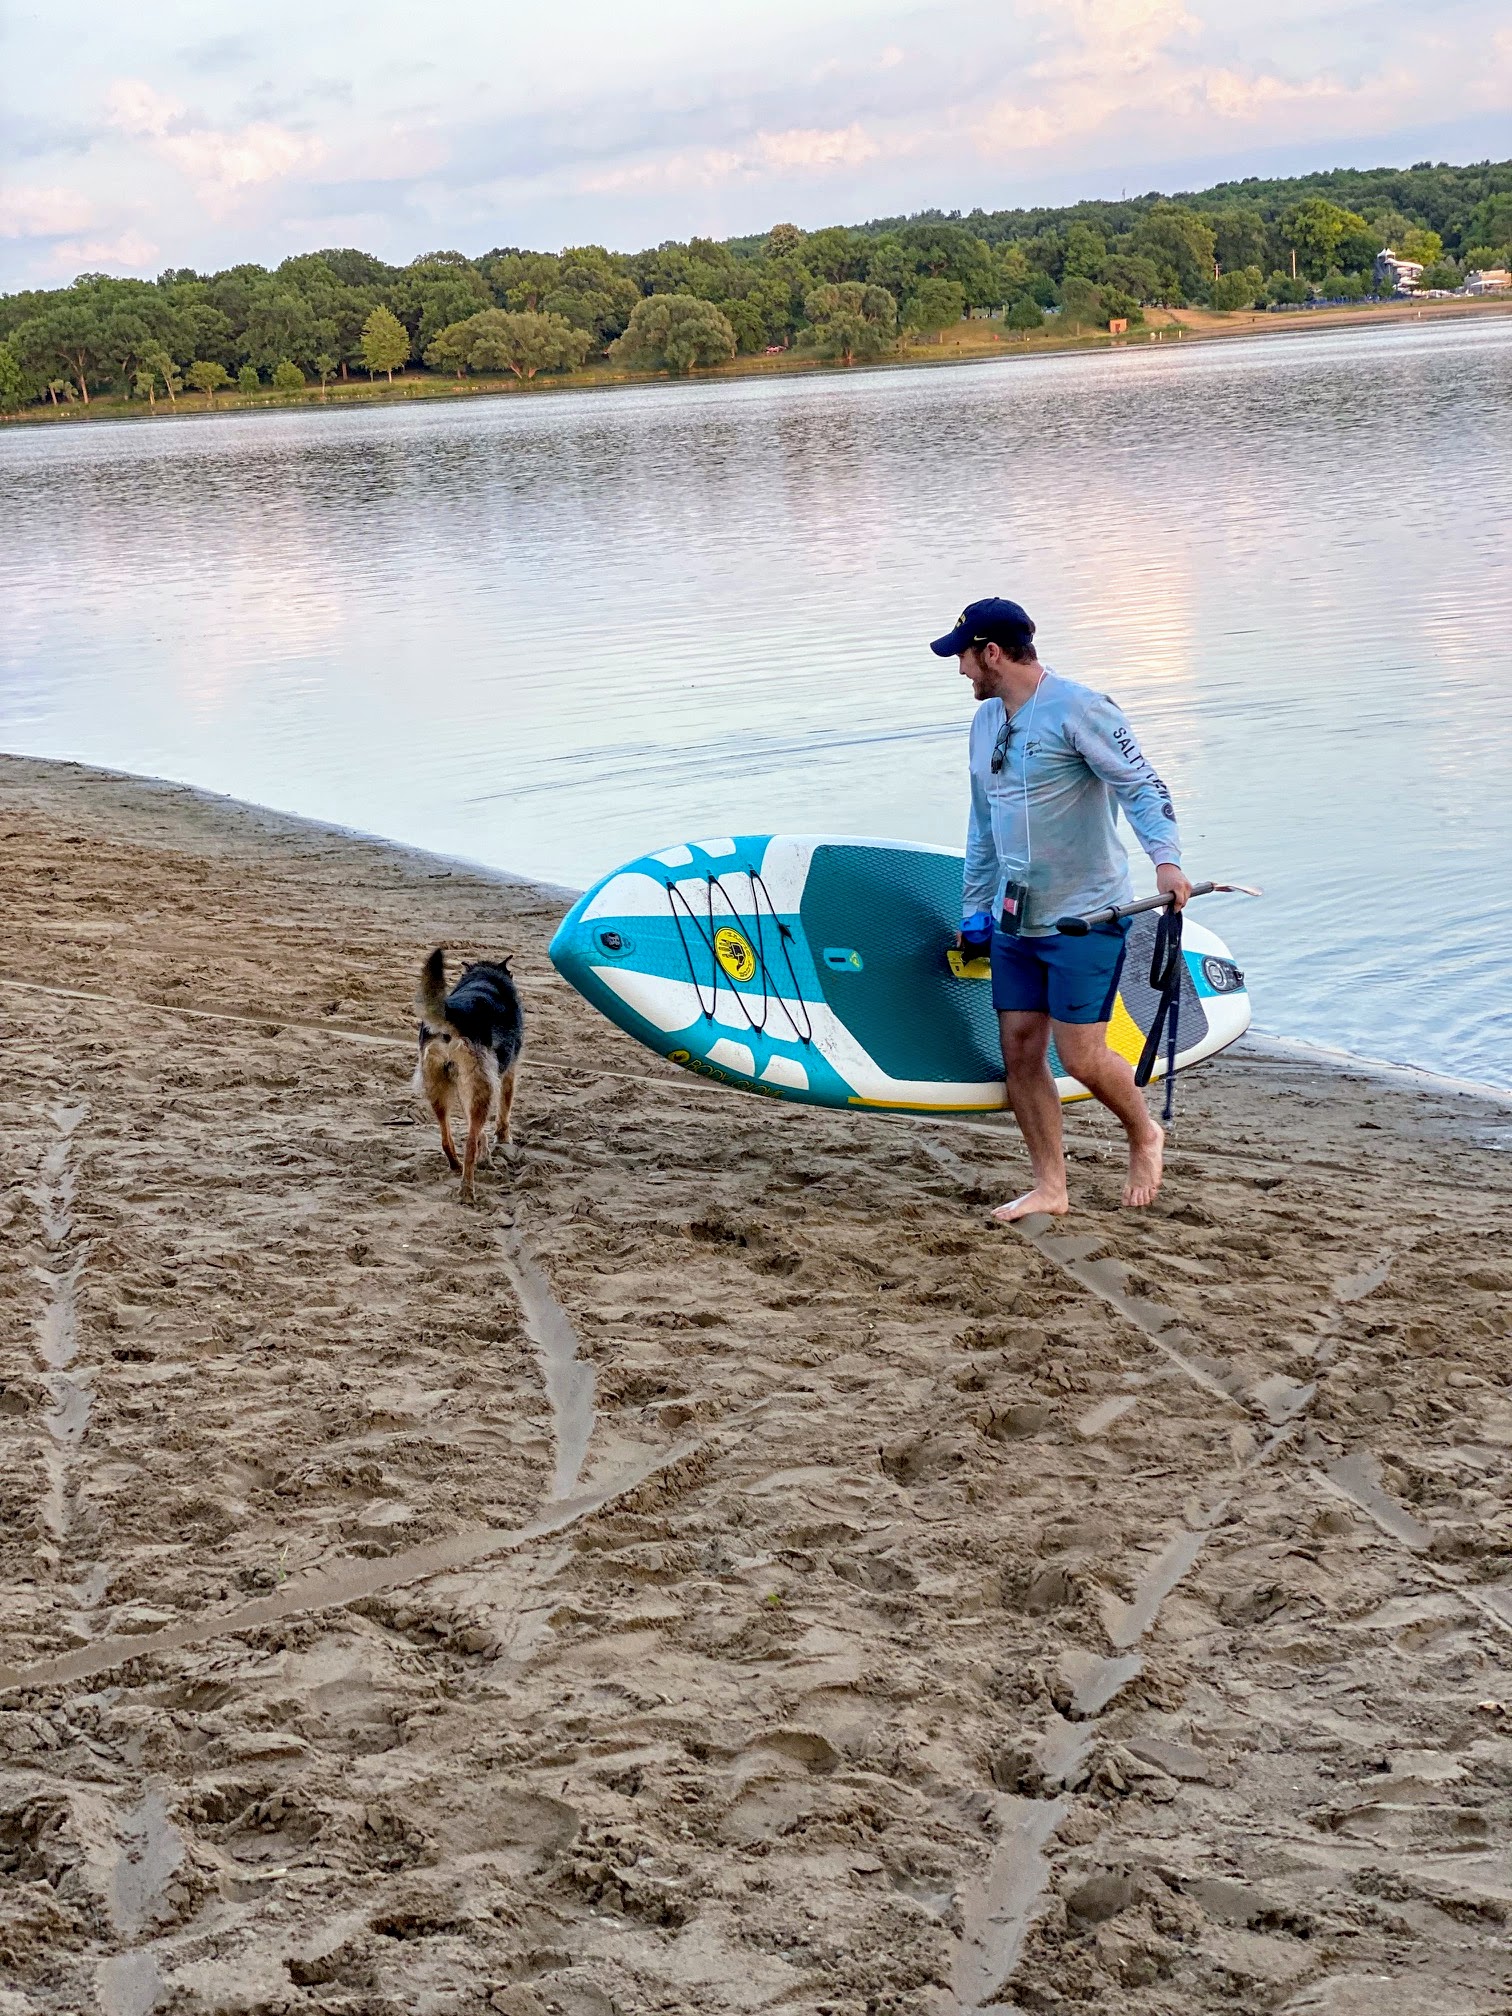
Once the two are on shore, it is very easy to carry the Navigator Plus Inflatable SUP out of the water. The entire board weighs 24-pounds.
Garret has already used the board more than a handful of times – I am so pleased he likes it.
And it is so easy to store because it can roll up to the size of a sleeping bag. Here’s Garrett rolling the board as it deflates. Inflating it back up is also very easy. The high-quality dual-action pump with gauge inflates it in less than 10-minutes.
The packed bag dimensions are 37-inches by 19-inches by 10-inches. The board and all its accessories weigh under 40-pounds.
Garrett says he always looks forward to getting the board back out into the water. Enjoy it, Garrett. And congratulations on your college graduation!! And please go to the Body Glove web site to learn more.
Summer is a great time to get those home organizing projects checked off your list.
If you're thinking about redoing an area in your home or want to tidy up a disorganized space, I encourage you to consider California Closets to help. If you follow this blog regularly, you may have seen the projects I've done with California Closets here at my Bedford, New York farm. I transformed a spare bedroom into a large walk-in closet. I converted an under-used dining room in my guest house into a cookbook library. And last year, I used The Everyday System™ from California Closets - the high-quality modular components I designed with the company - to create a beautiful home office in the apartment above my Carriage House. Using California Closets is a fantastic way to create a functional and elegant modular space for any room. Plus, once a configuration is selected, California Closets schedules a professional installation - it's that easy.
The closet spaces and dressers were custom designed for my wardrobe needs, and ample lighting was incorporated into every hanging space and cubby.
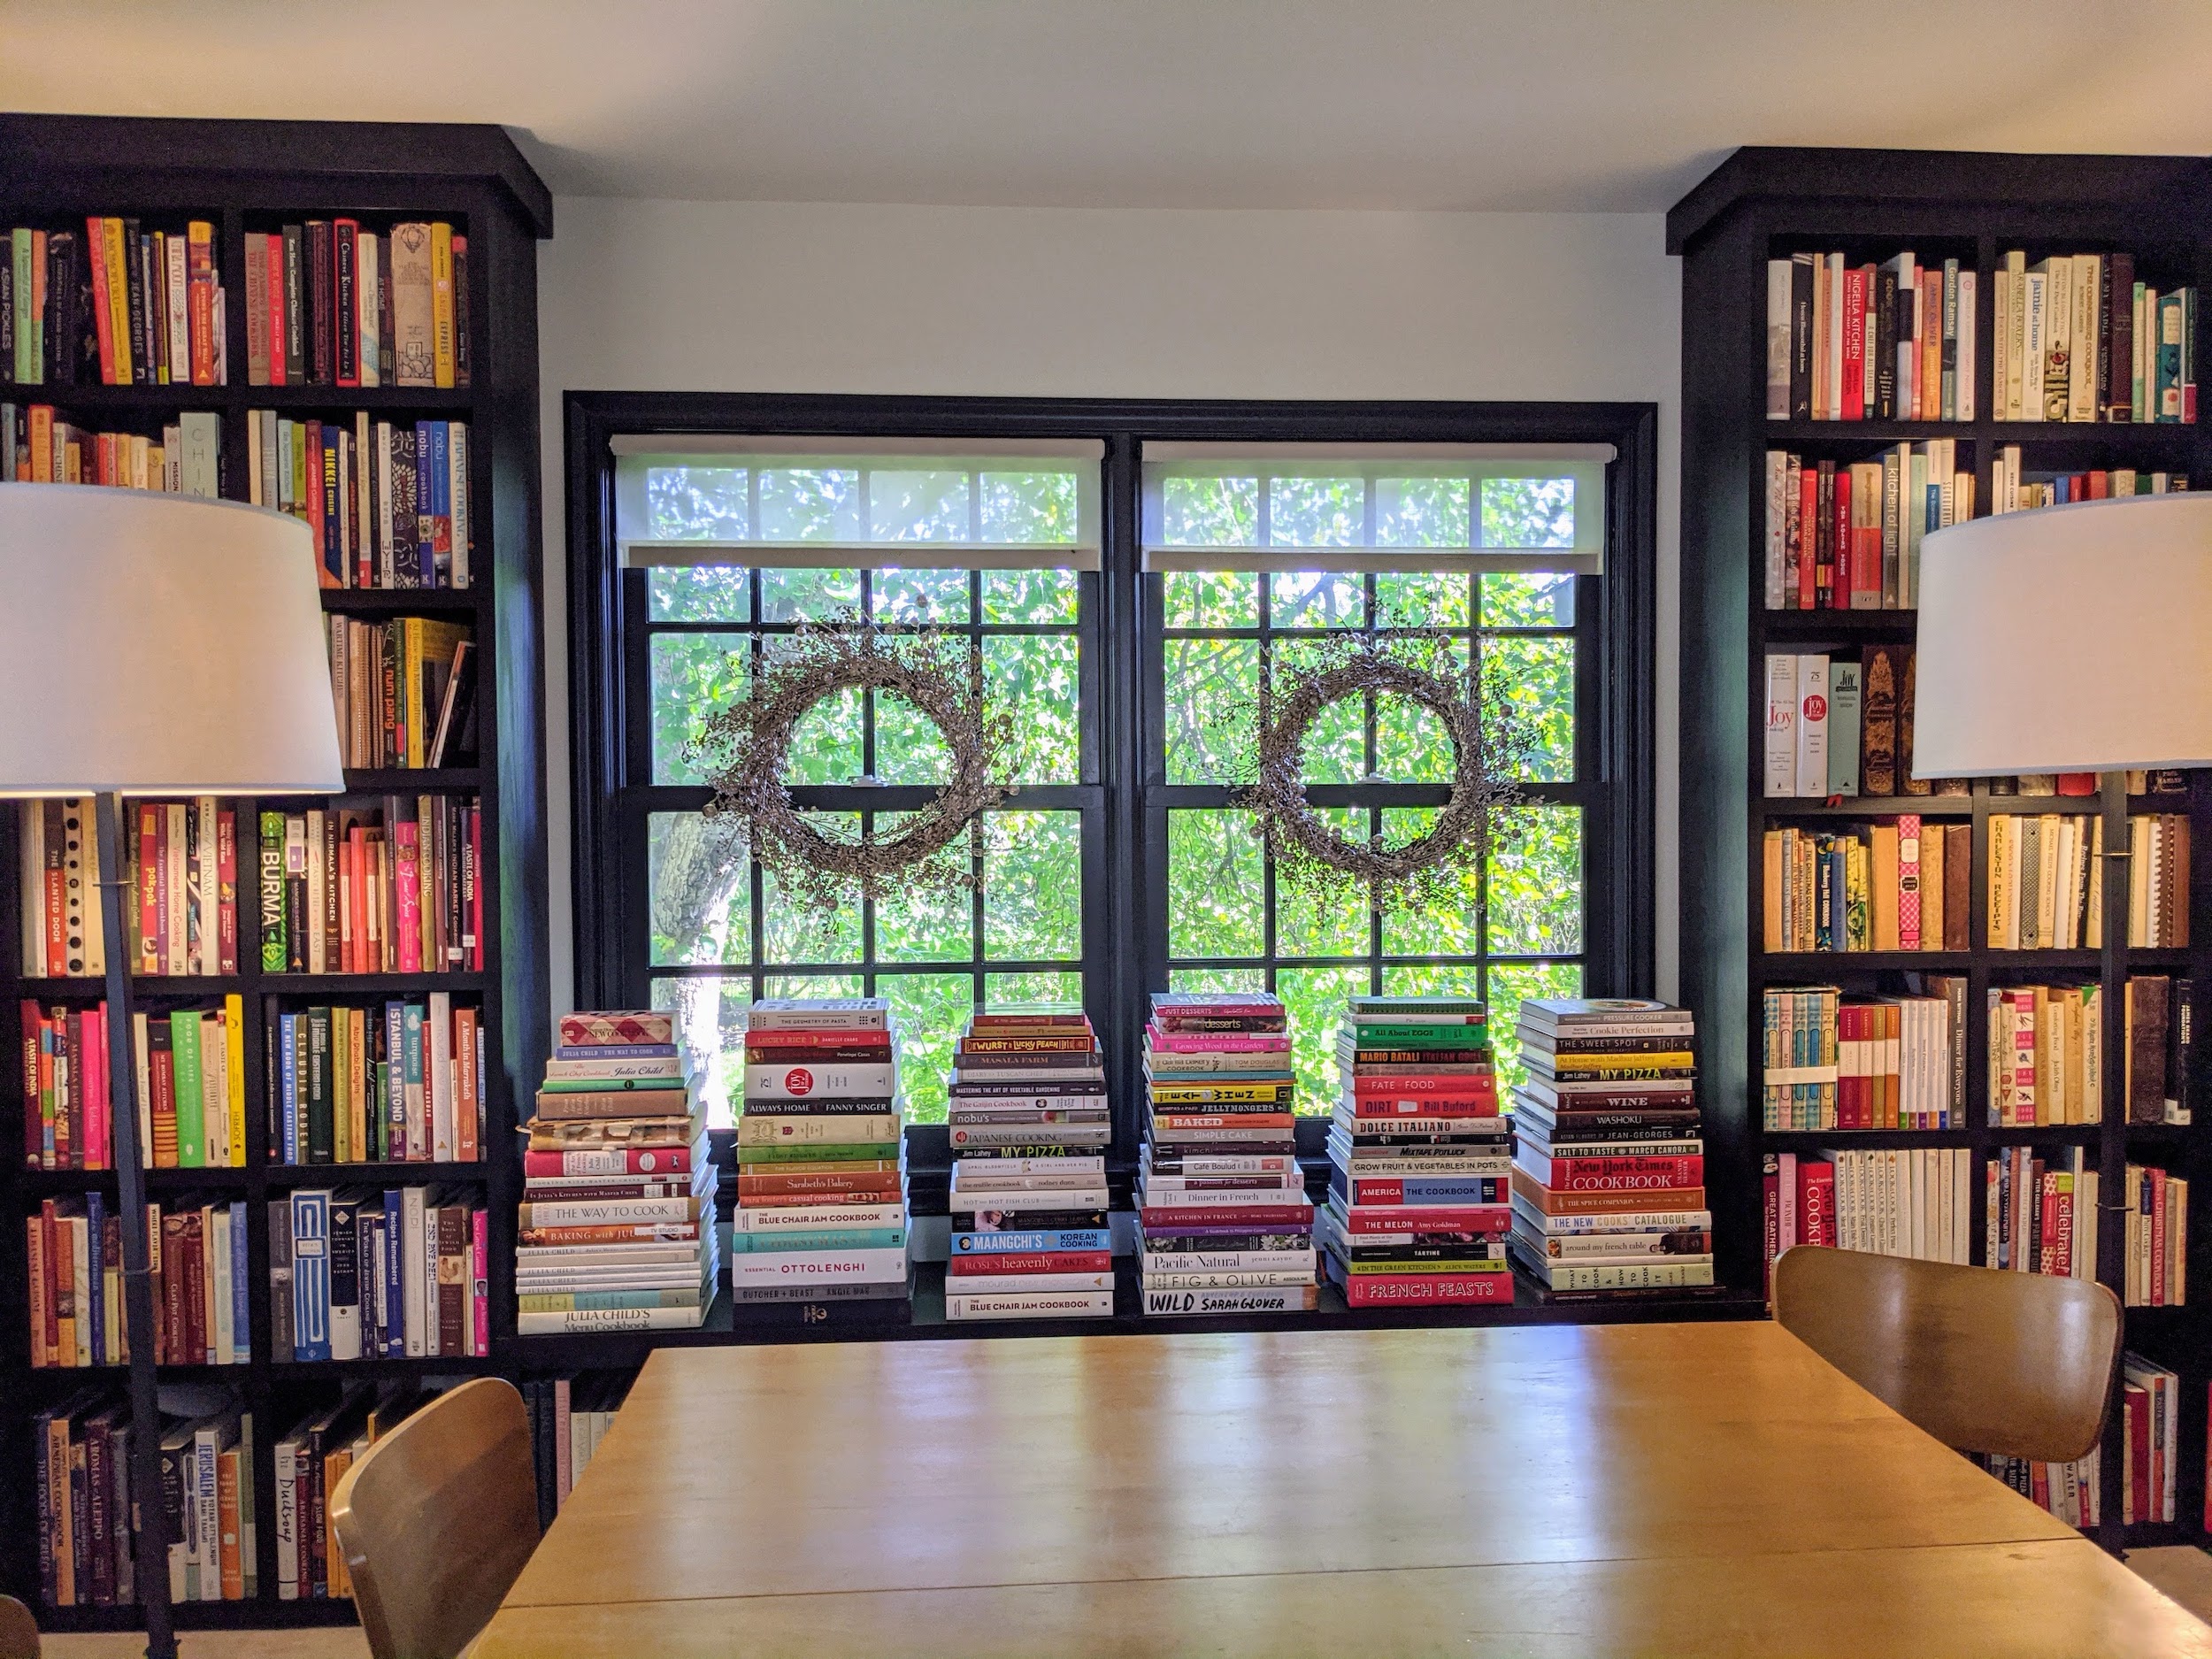
This room was an under-used dining space in my guest house. I also decided it needed a transformation. This room is near my new studio kitchen, so it was the perfect space to store all my cookbooks. Over the years, my collection of cookbooks has grown tremendously – I have hundreds and hundreds from all over the world. Read this story from our October 2019 “Living” issue.
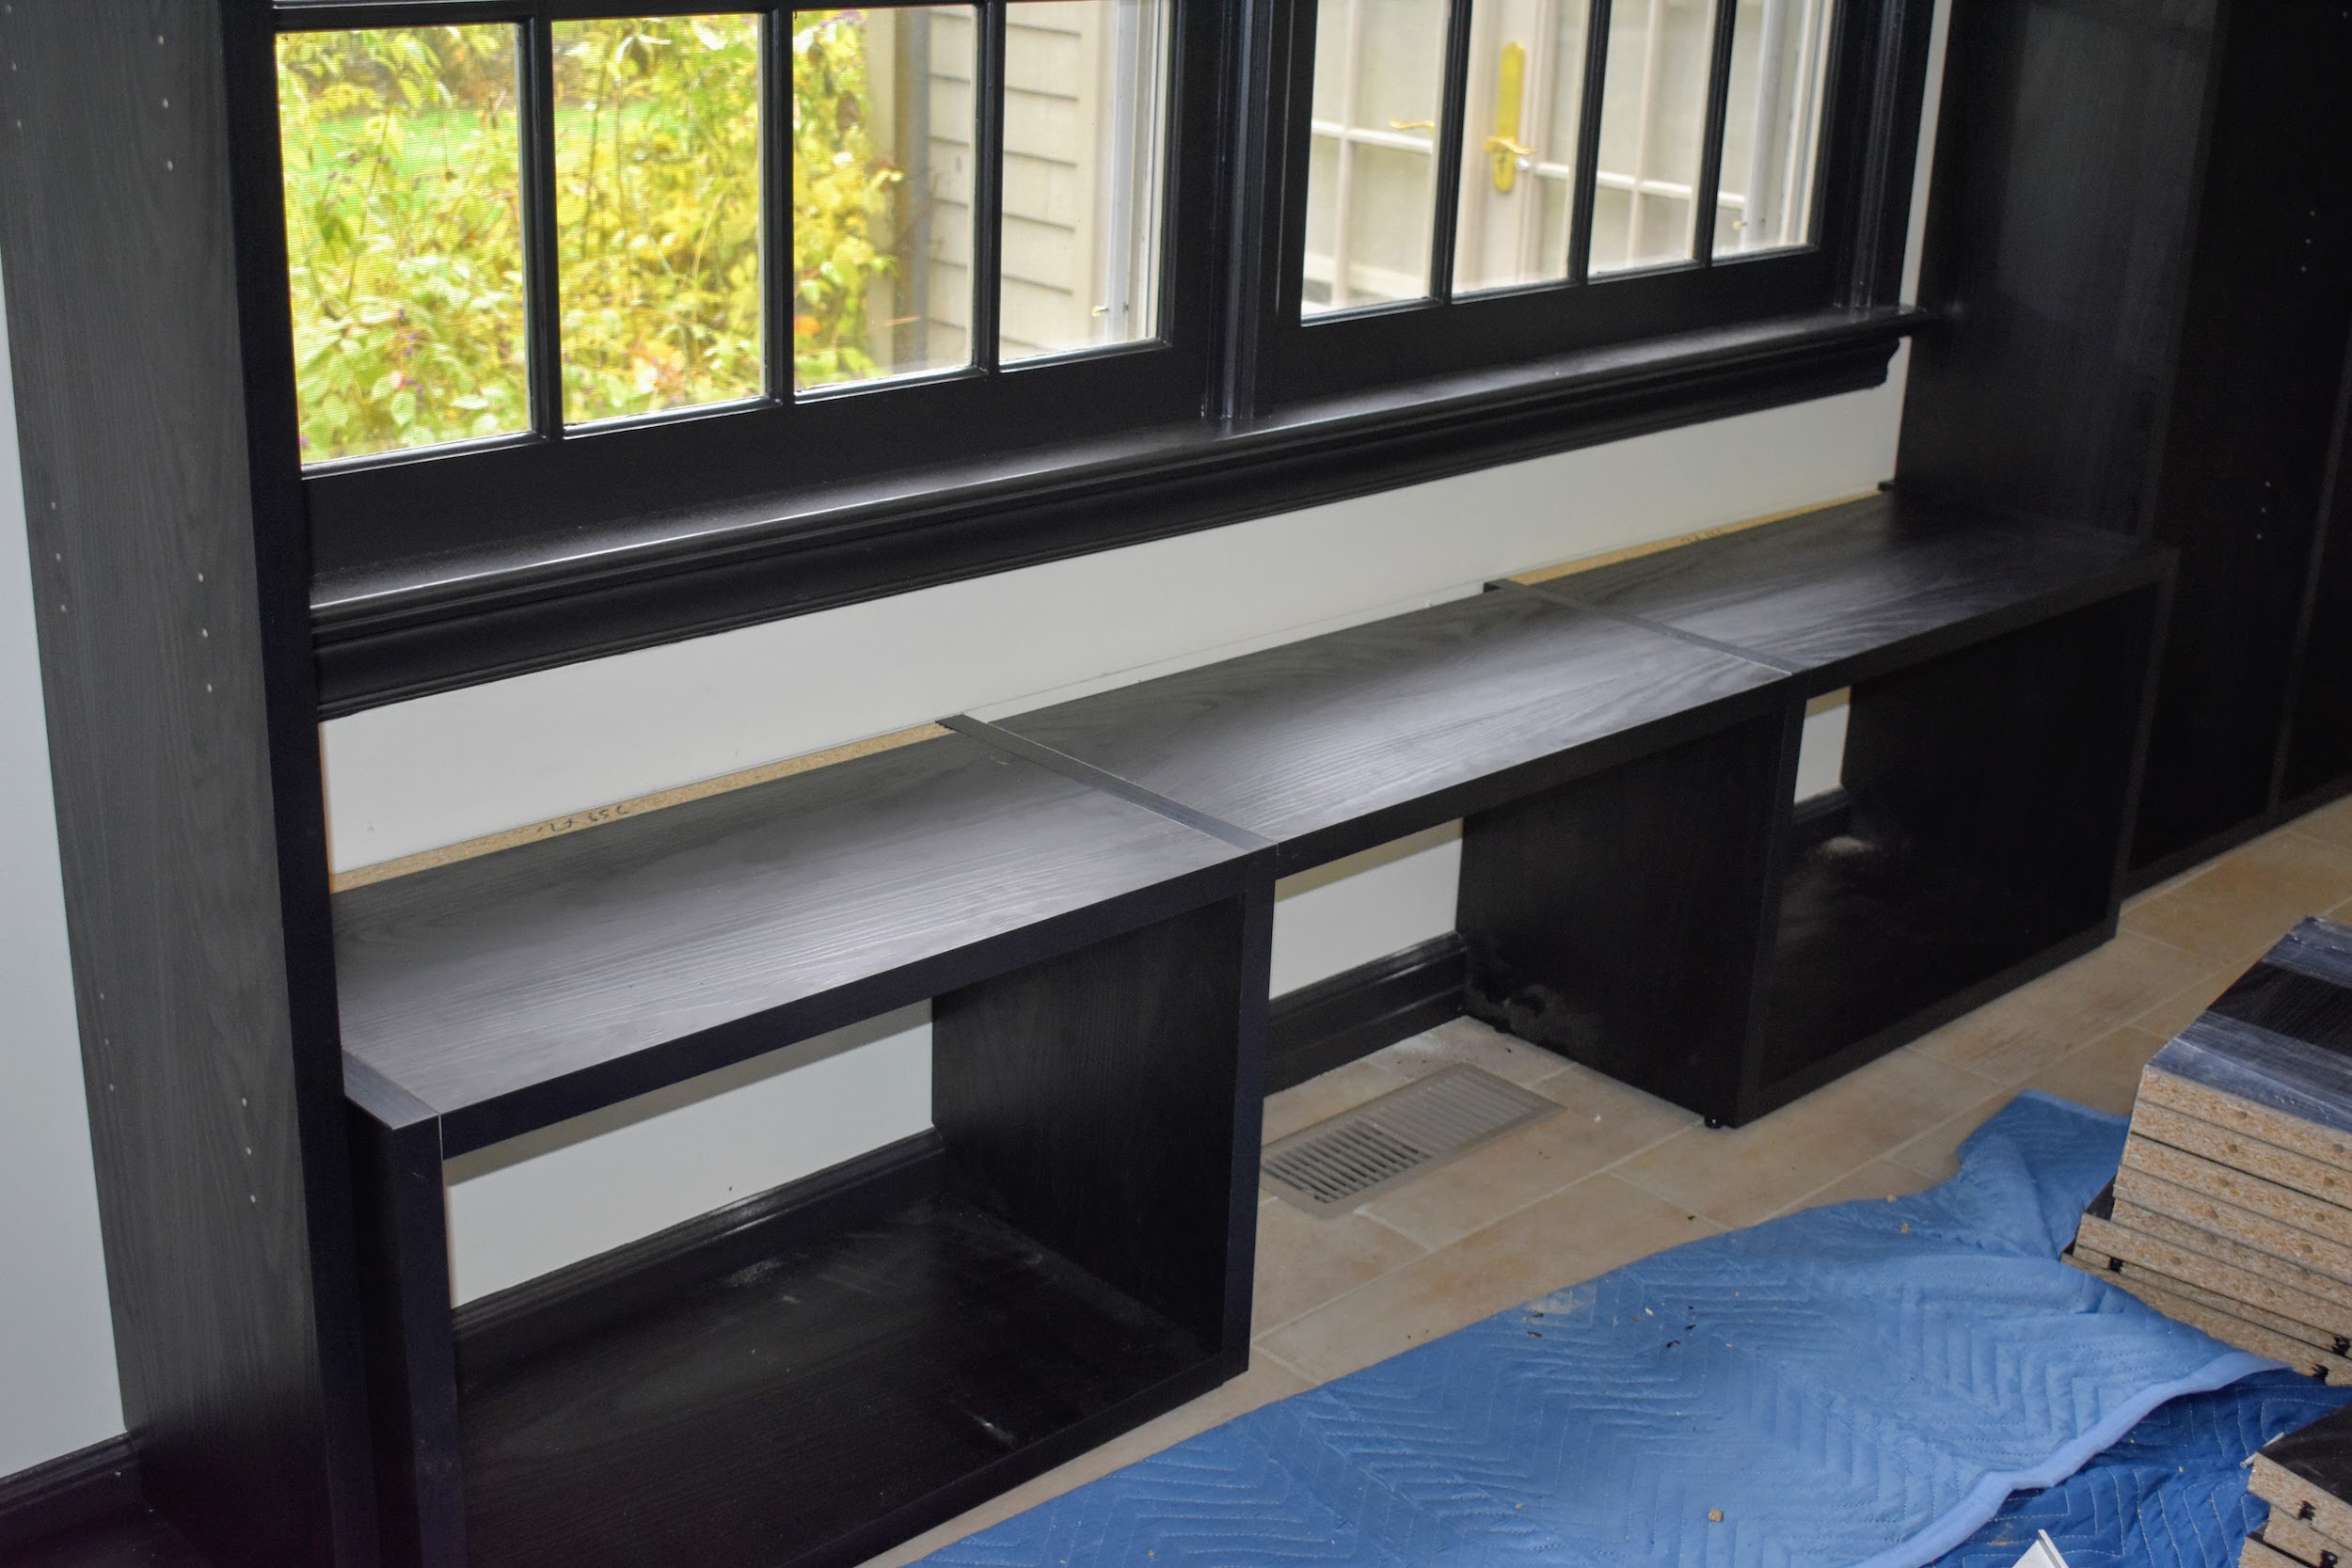
A long window seat with underneath storage was also built to maximize every inch of space.
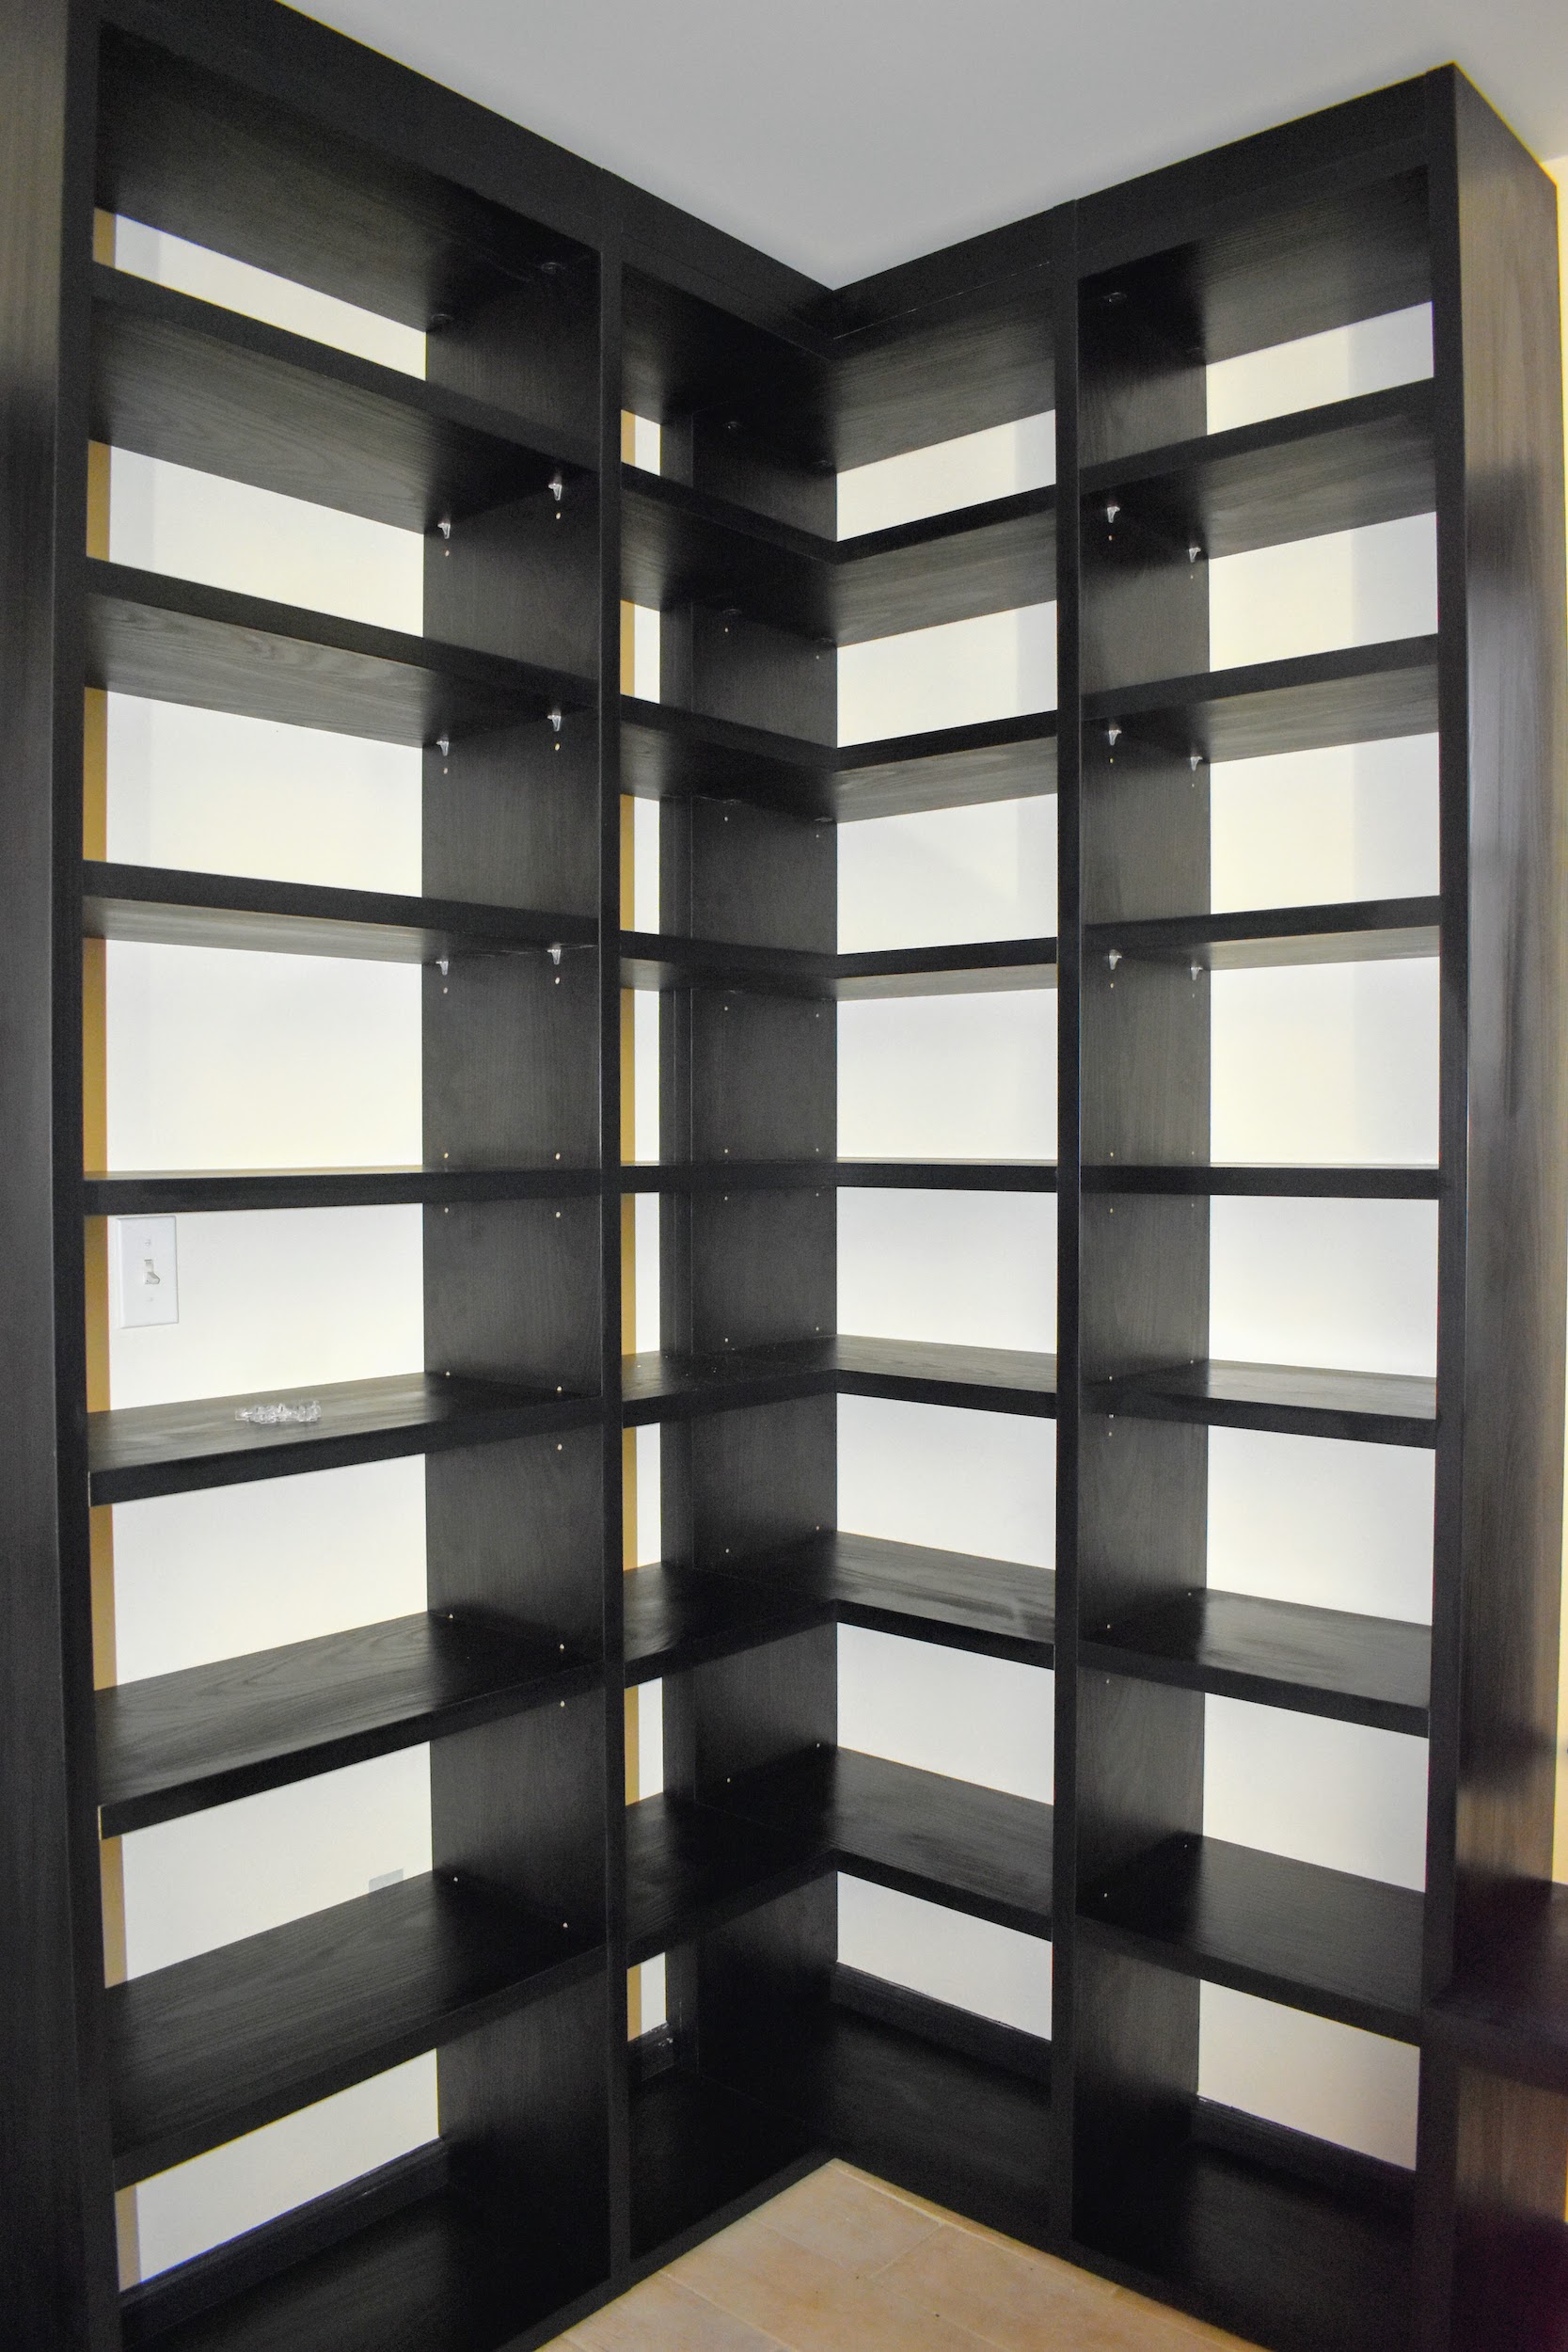
Every wall was outfitted with sturdy bookshelves. Here is one side completely done. When building a home library, consider the room’s size, and environment. It should have no more than about 35-percent relative humidity. Also, be sure the room is not in direct sunlight. This room will also have proper shades to protect the books.
Here is the new cookbook library after all the books were organized on the shelves by cuisine and then alphabetically by author.
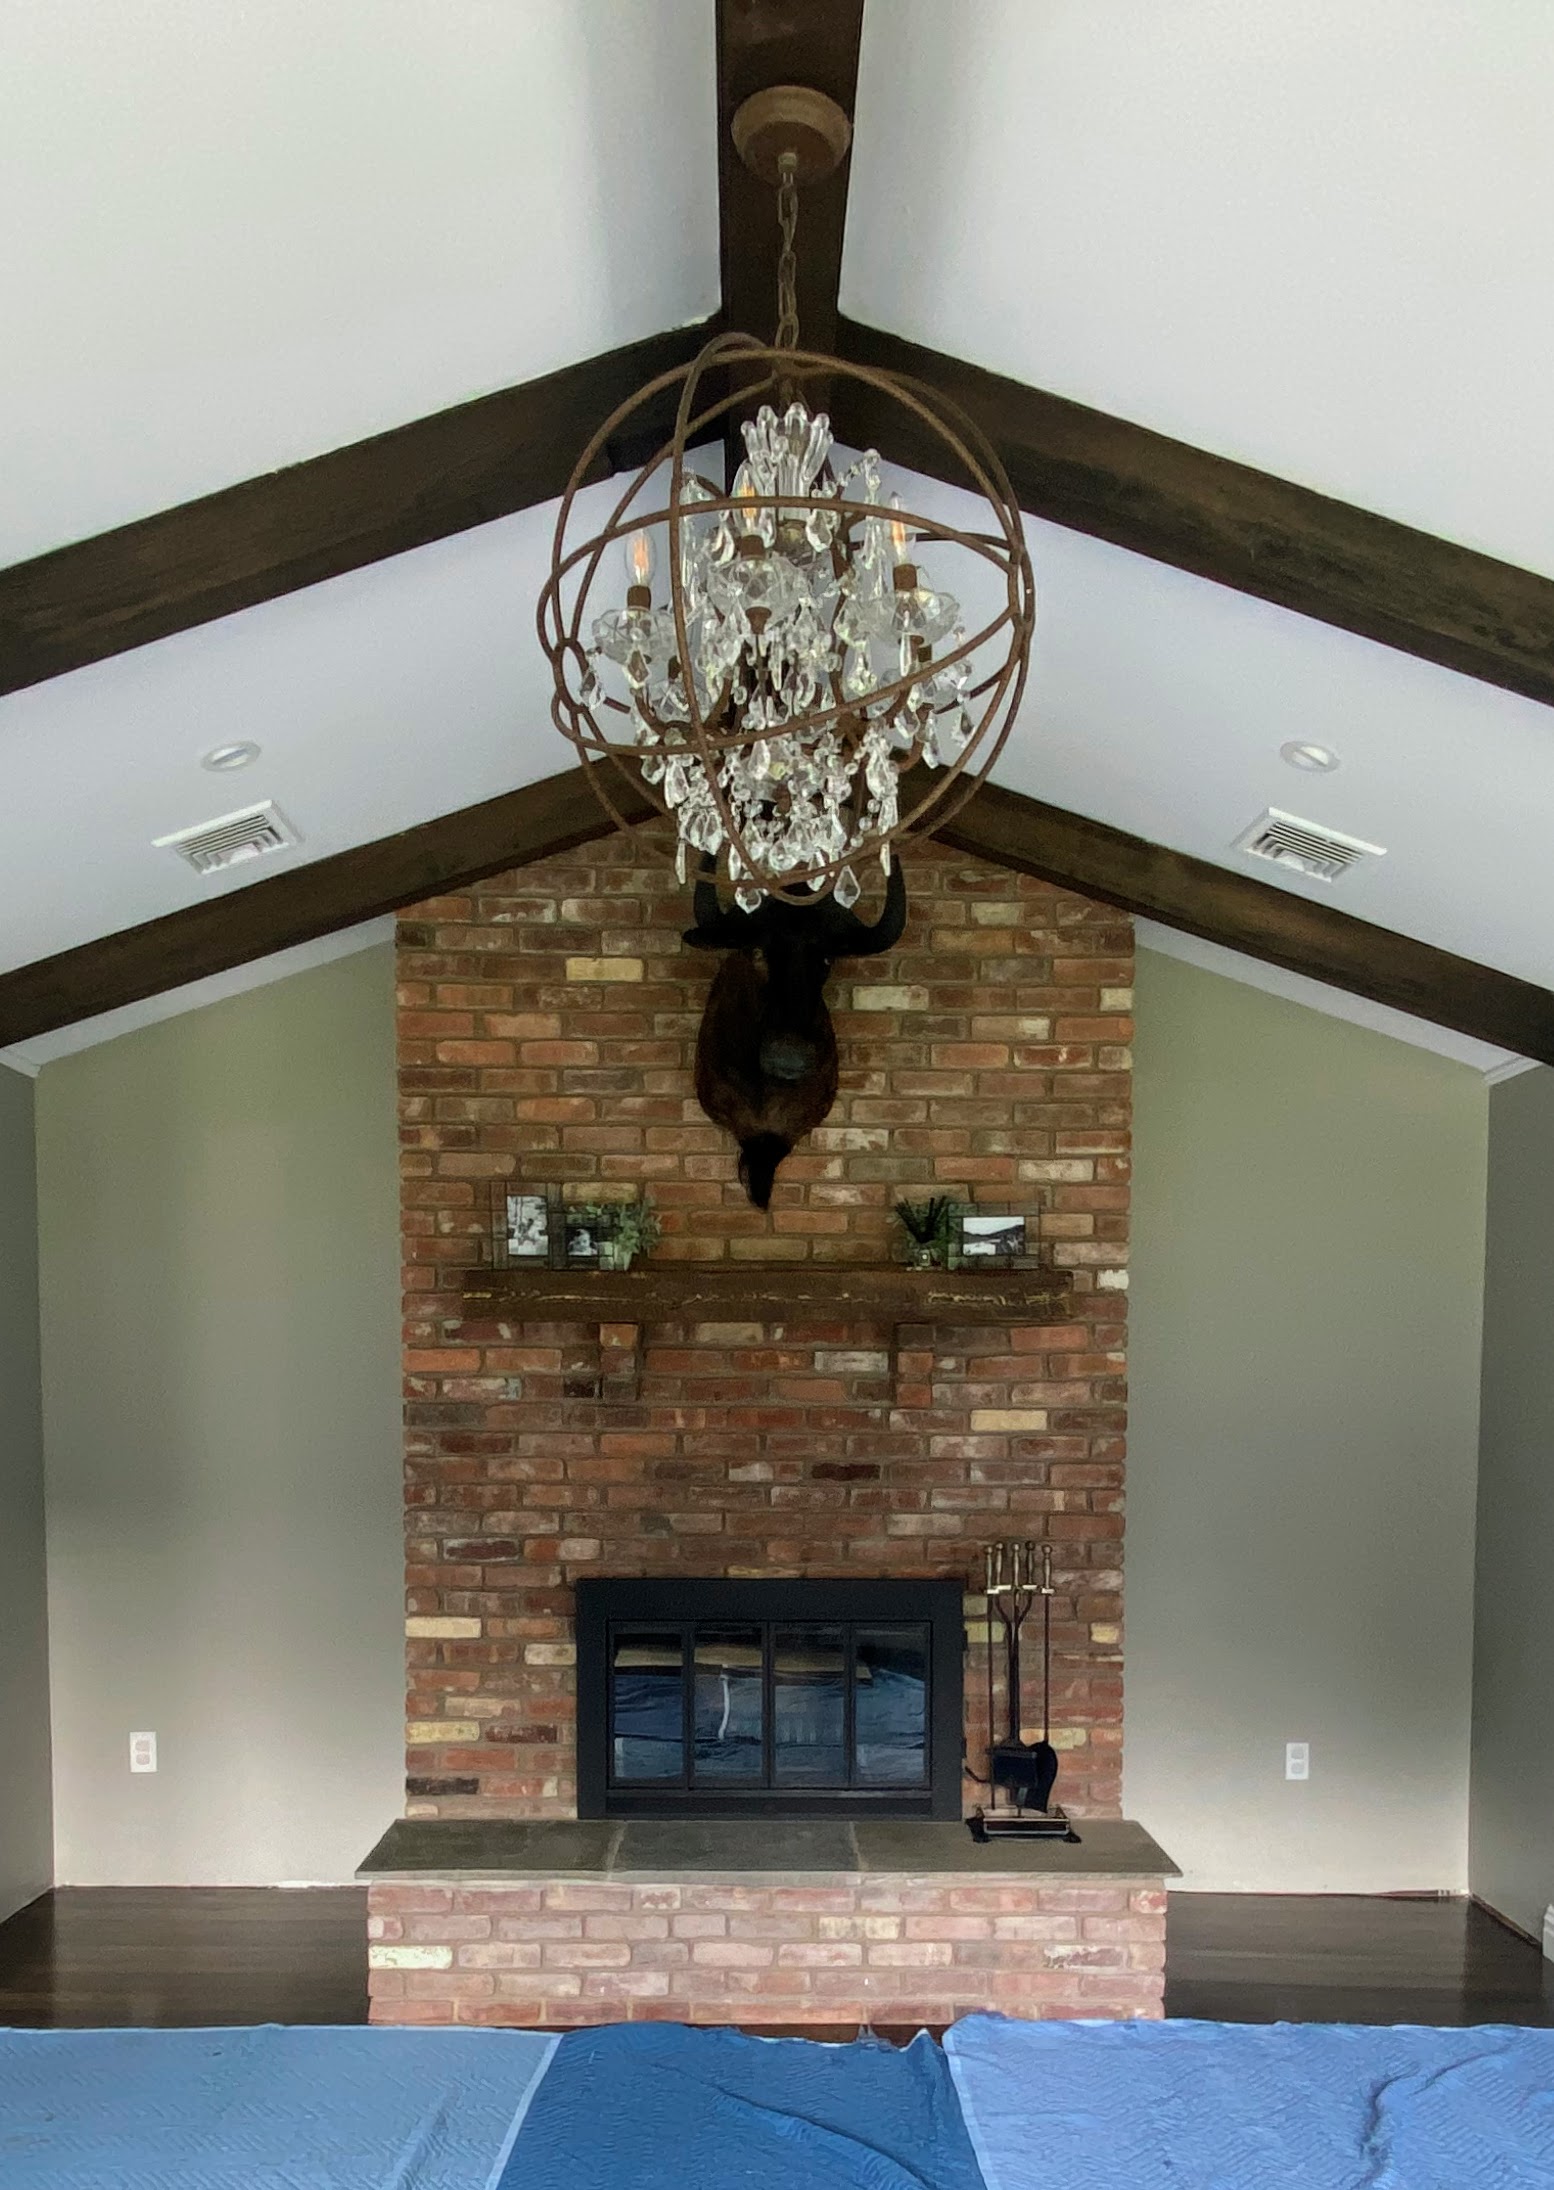
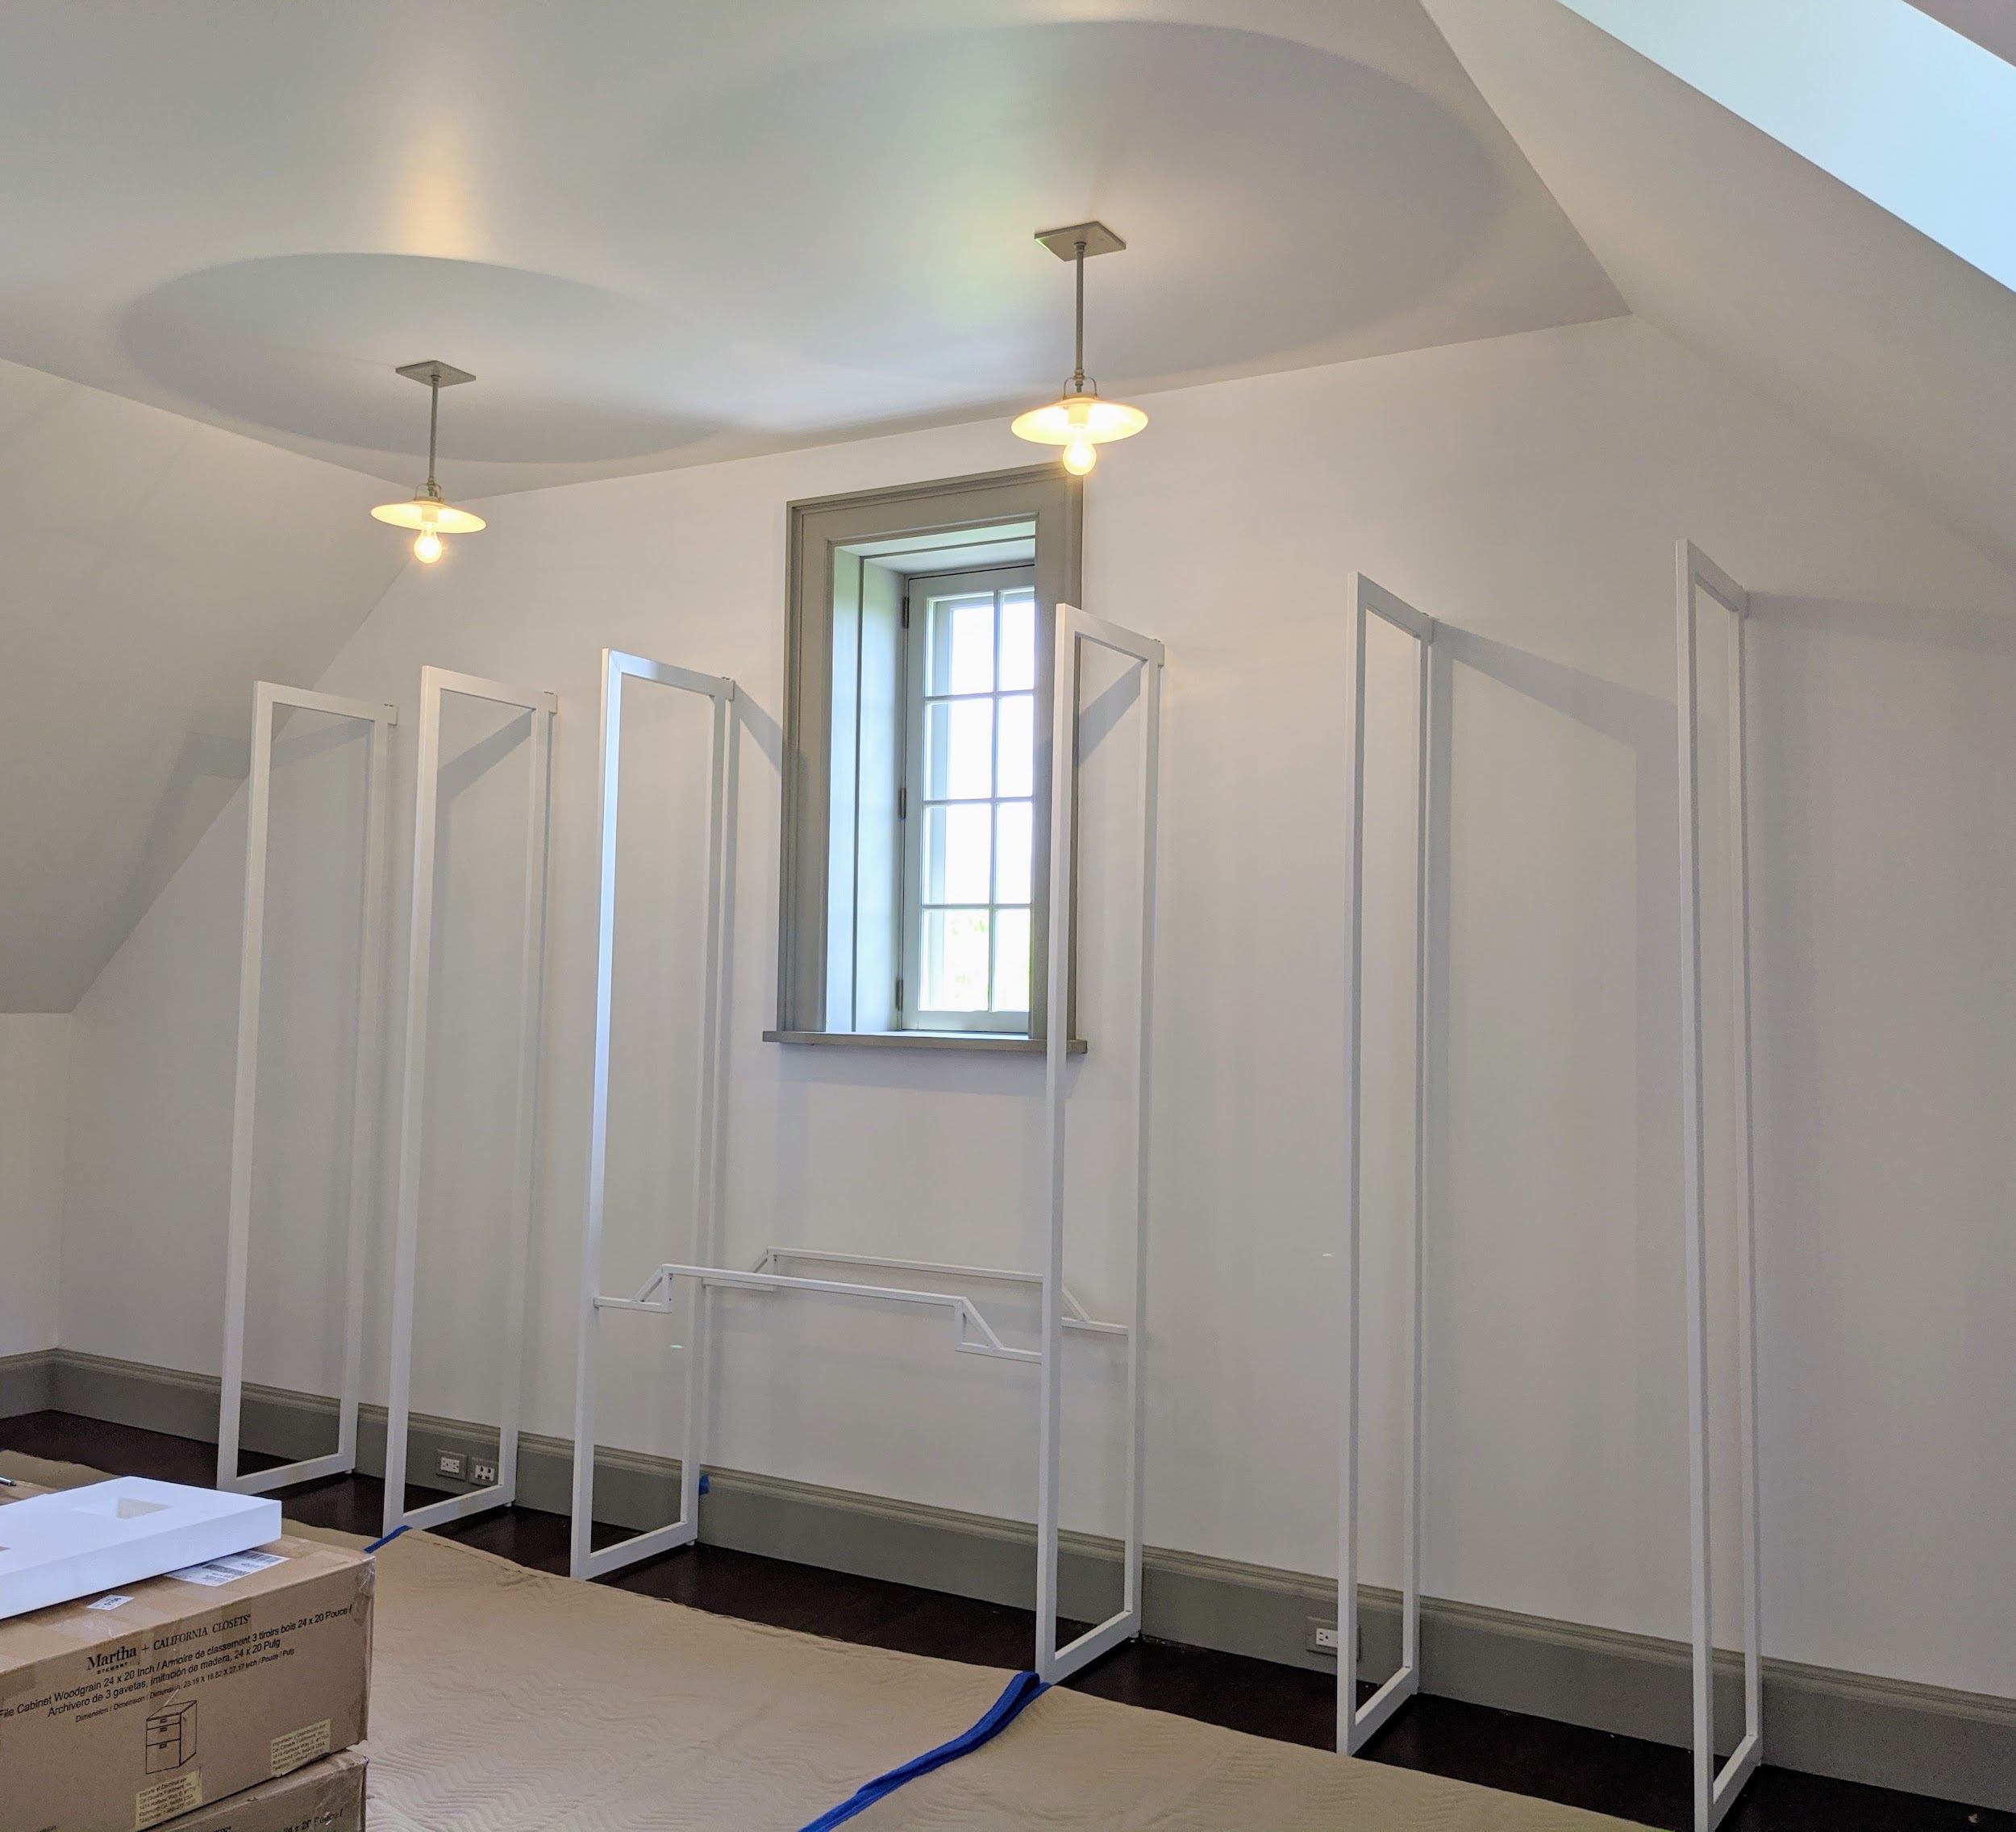
My room transformations have even inspired others. A colleague wanted to install shelves in the living room of her new home. She enlisted the help of California Closets to do the job. The team at California Closets helped design a plan that fit perfectly with the space.
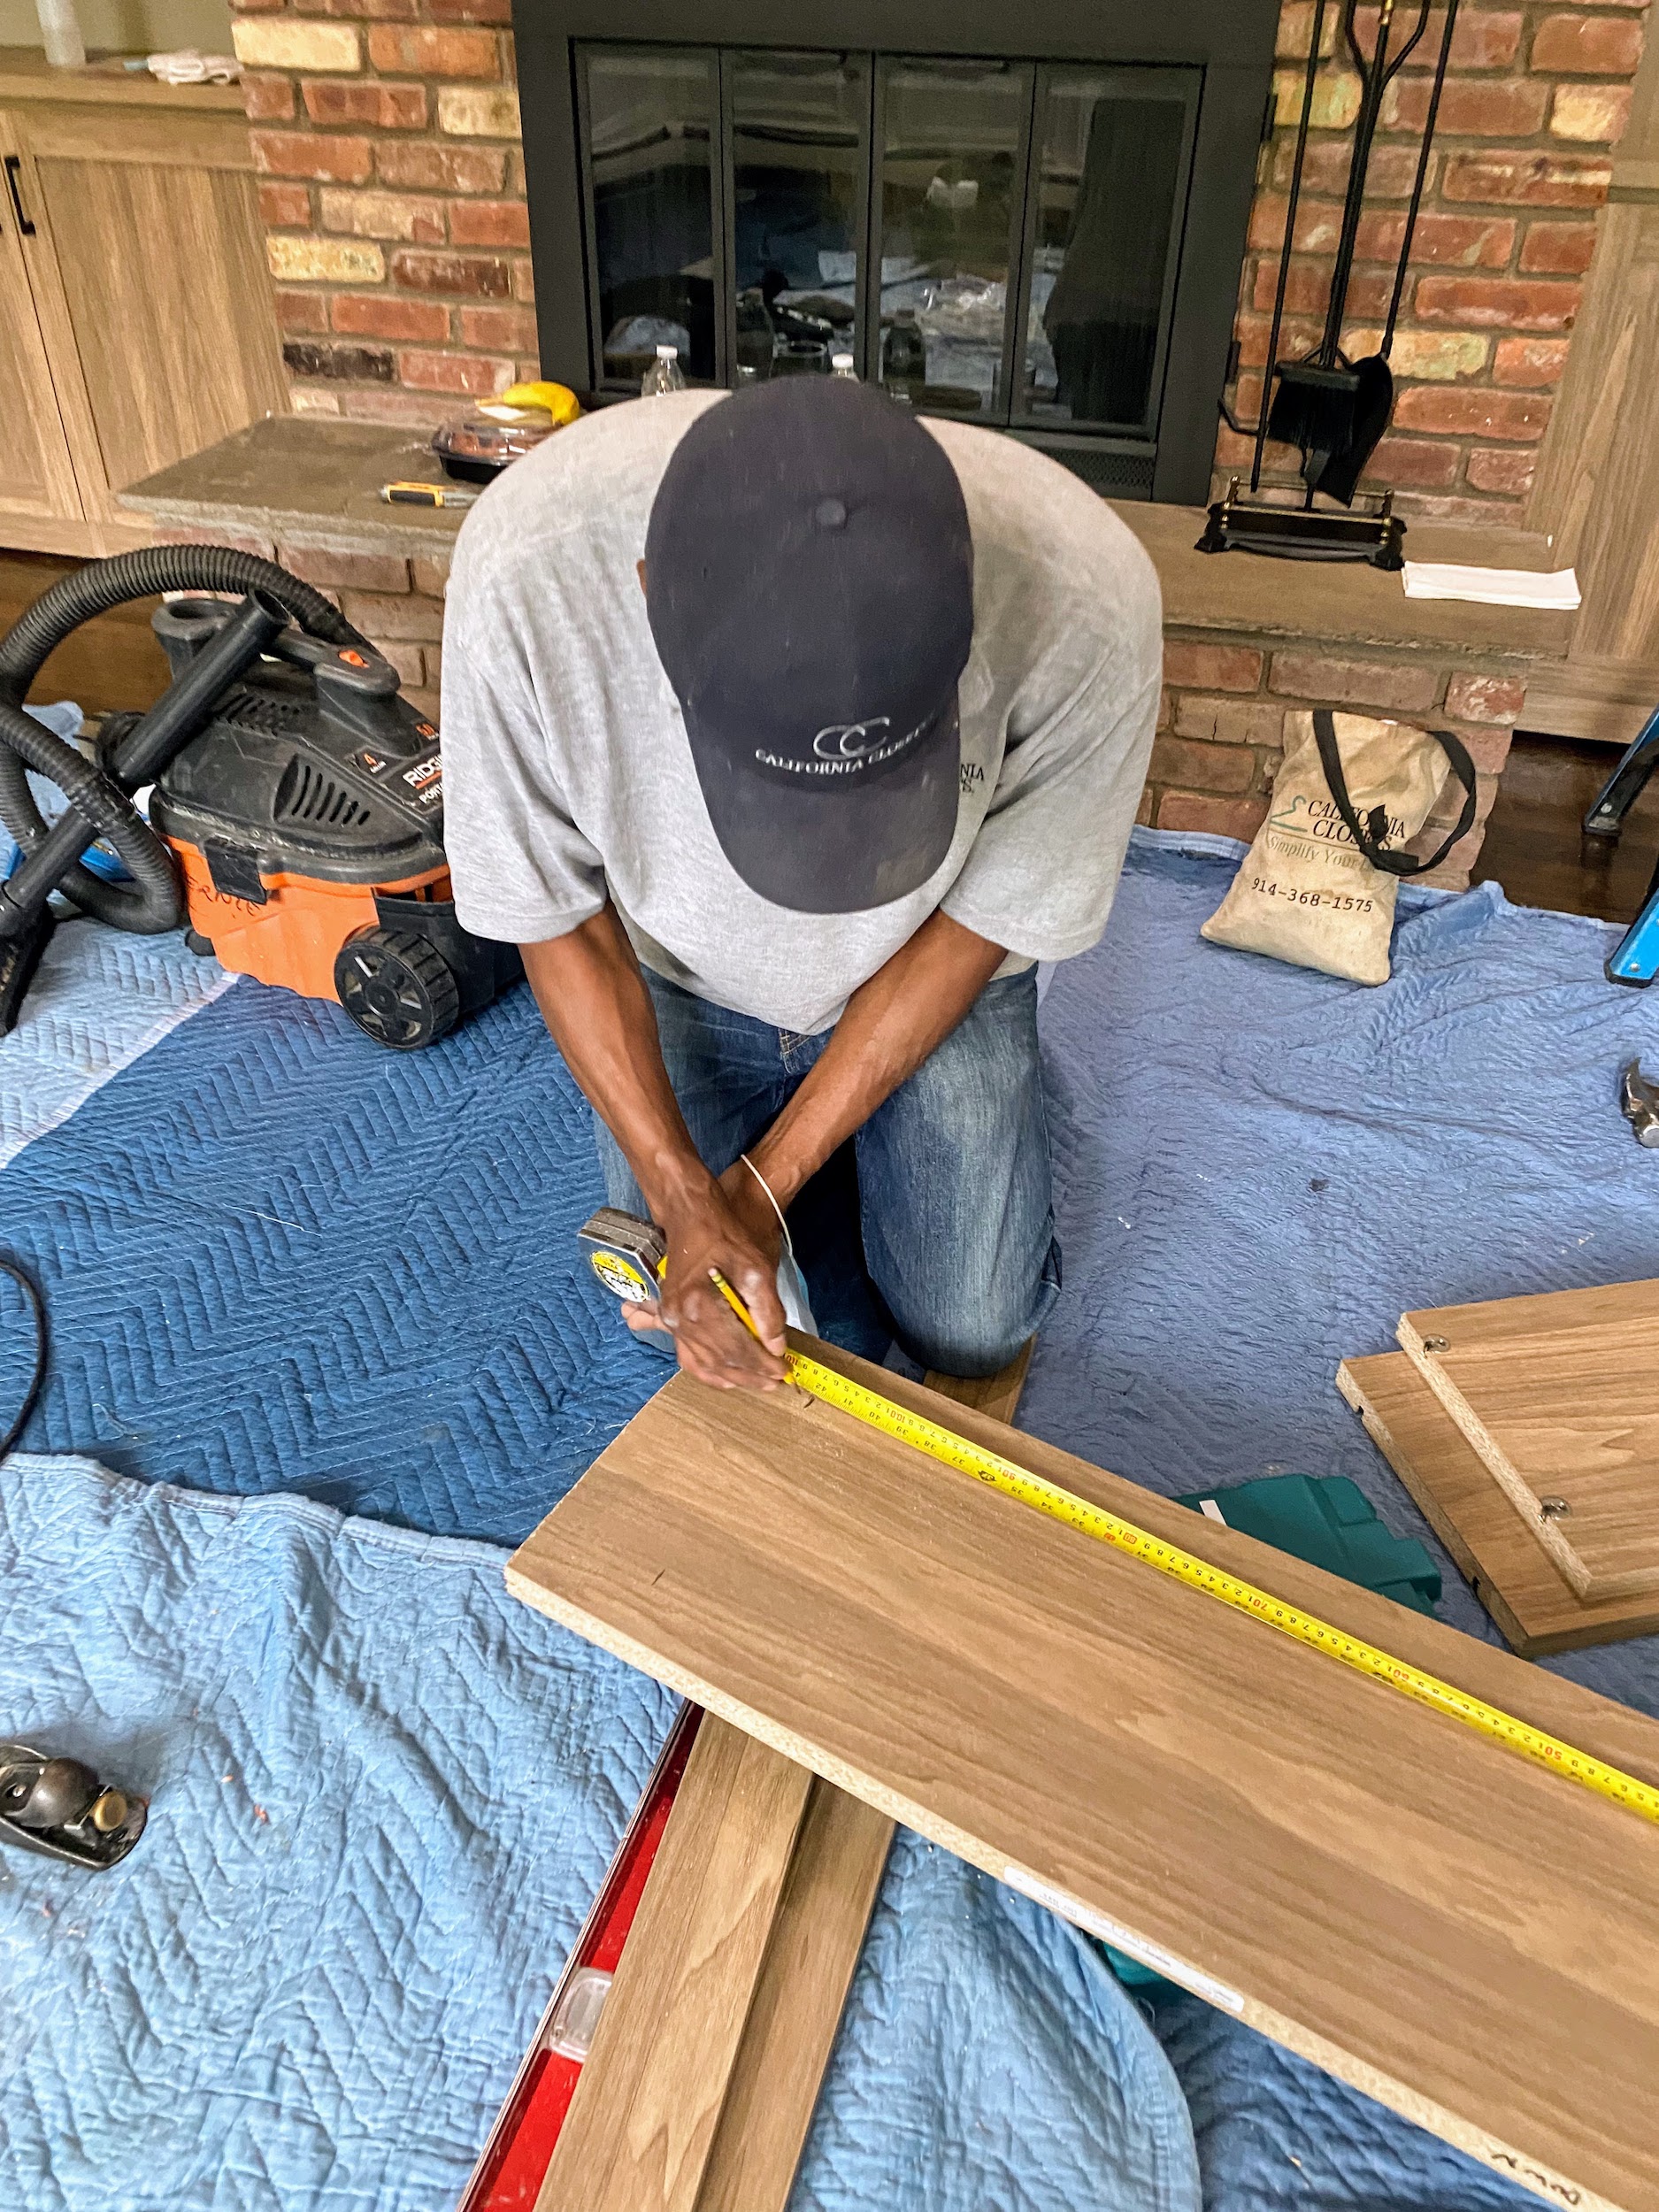
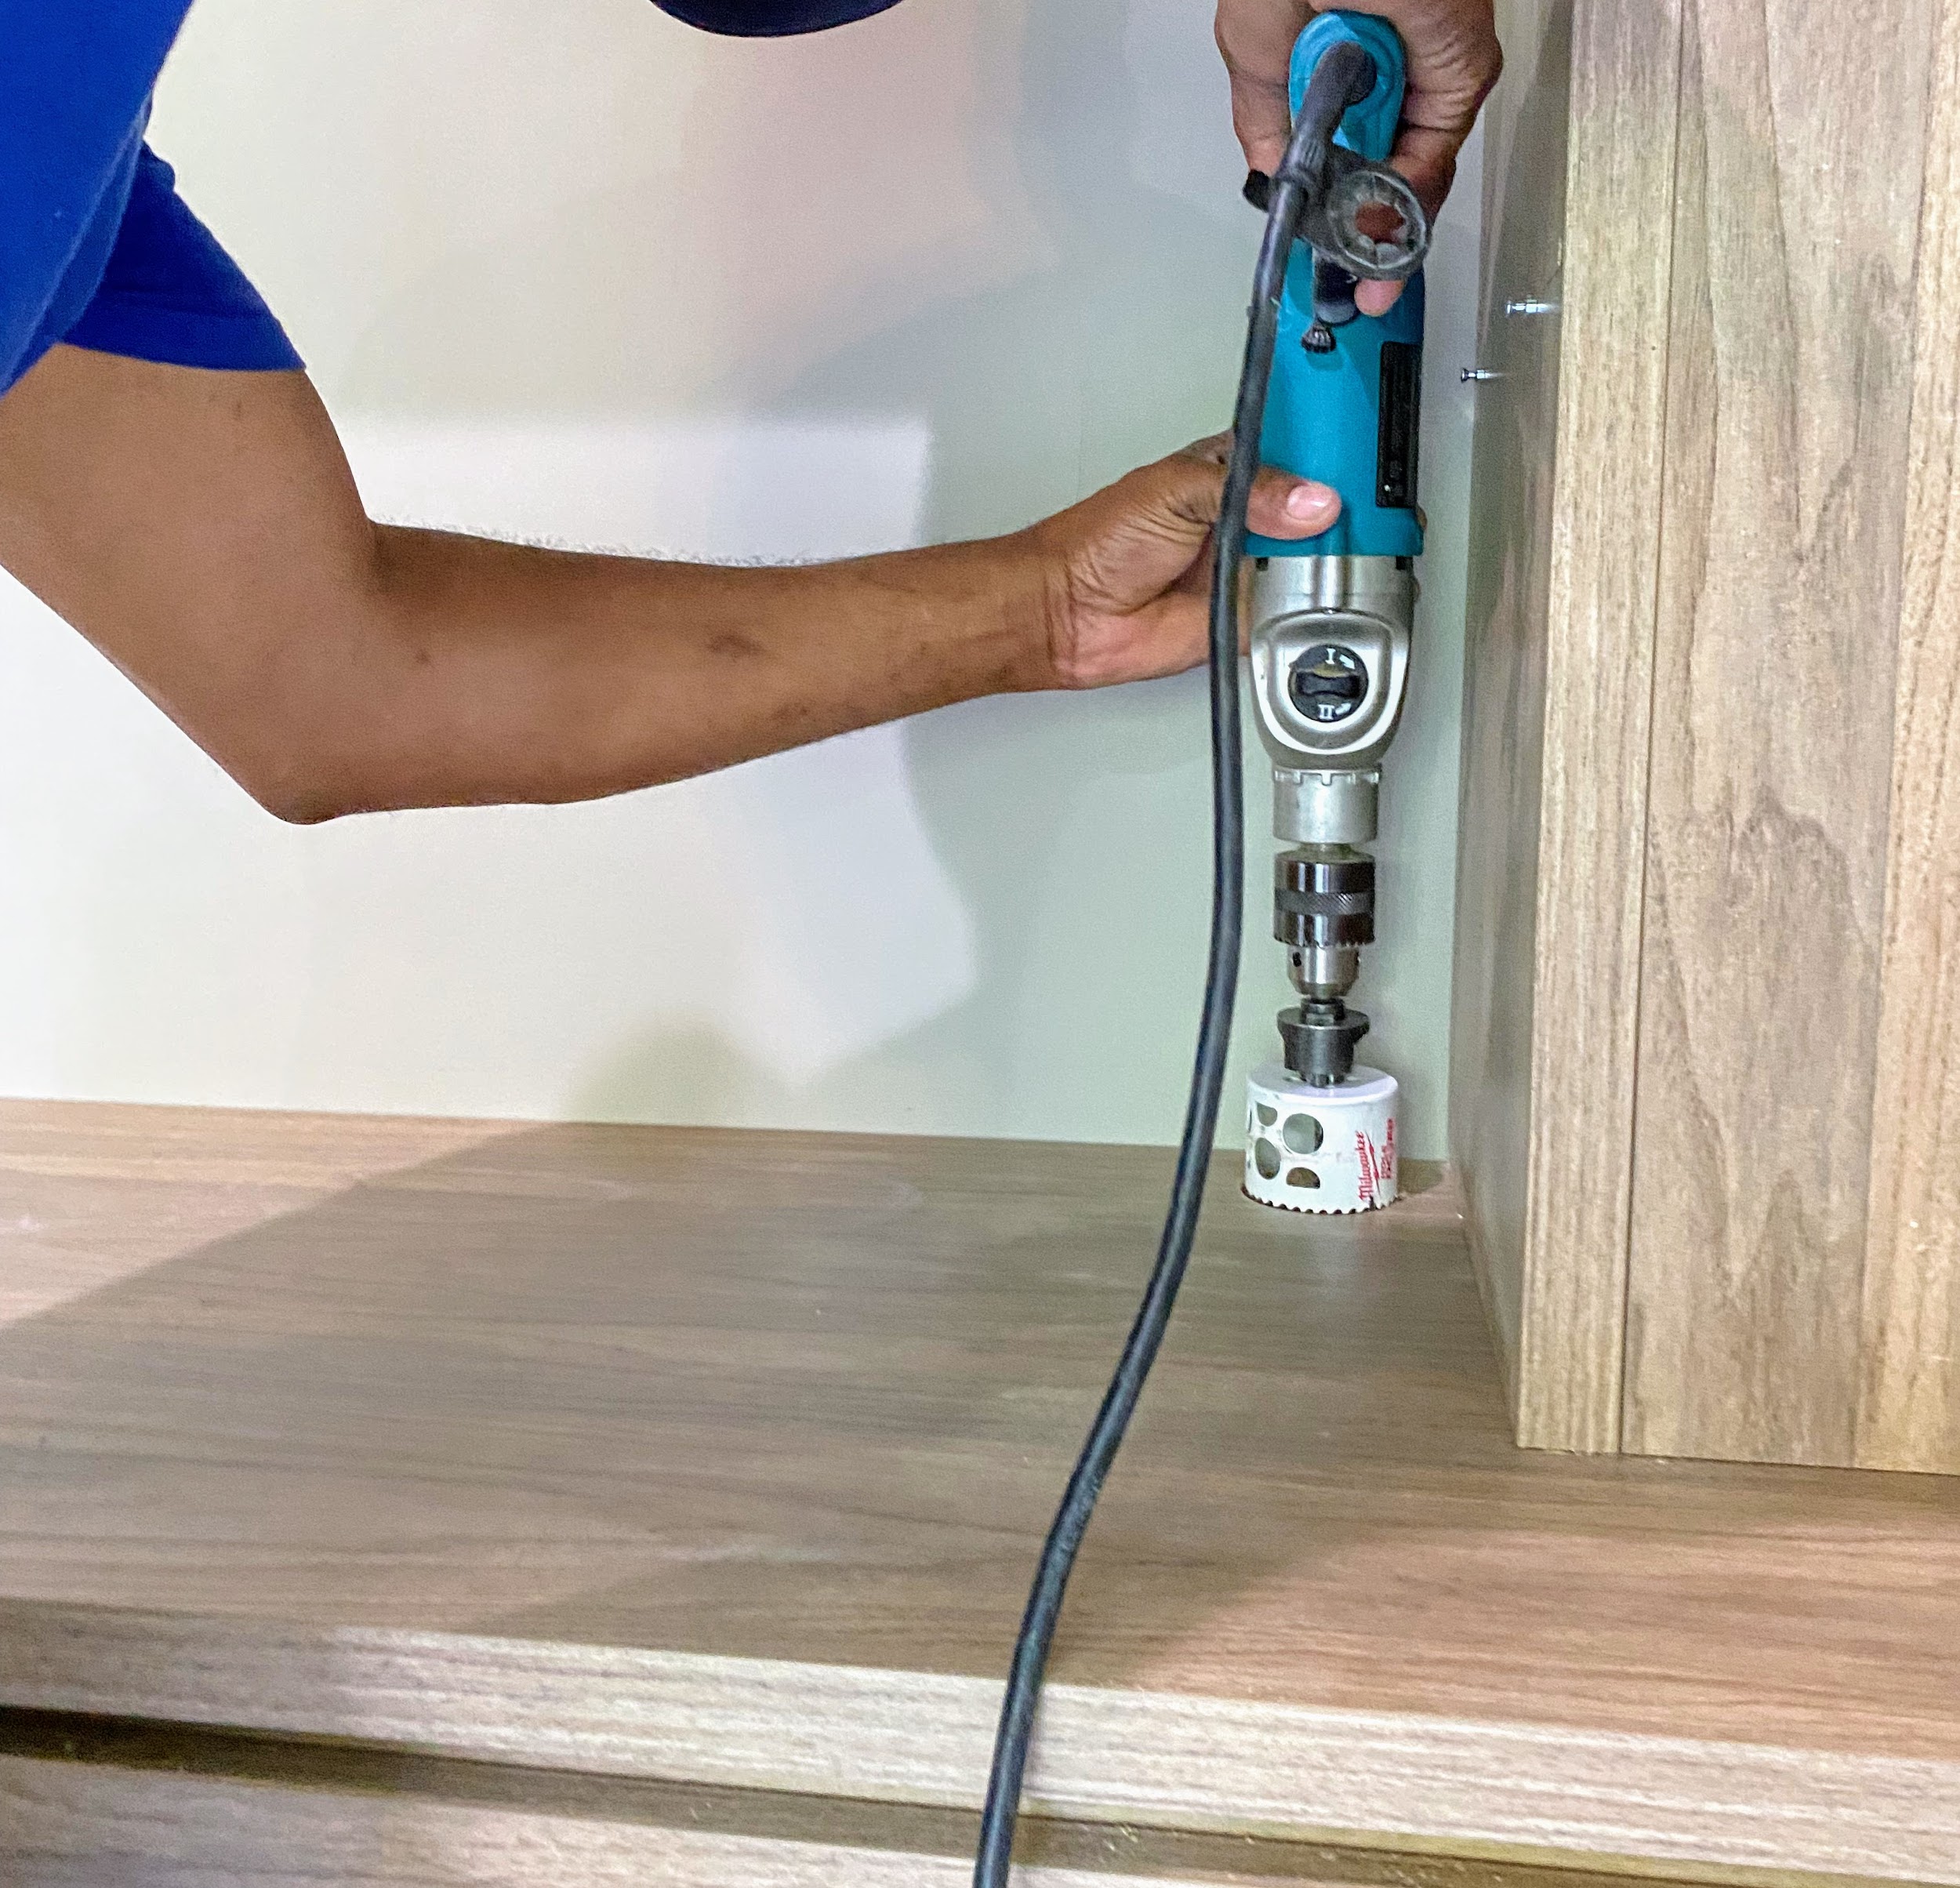
The installation takes several hours to complete. All the necessary pieces are brought into the space and neatly piled. Any adjustments are made right in the room, so everything fits perfectly.
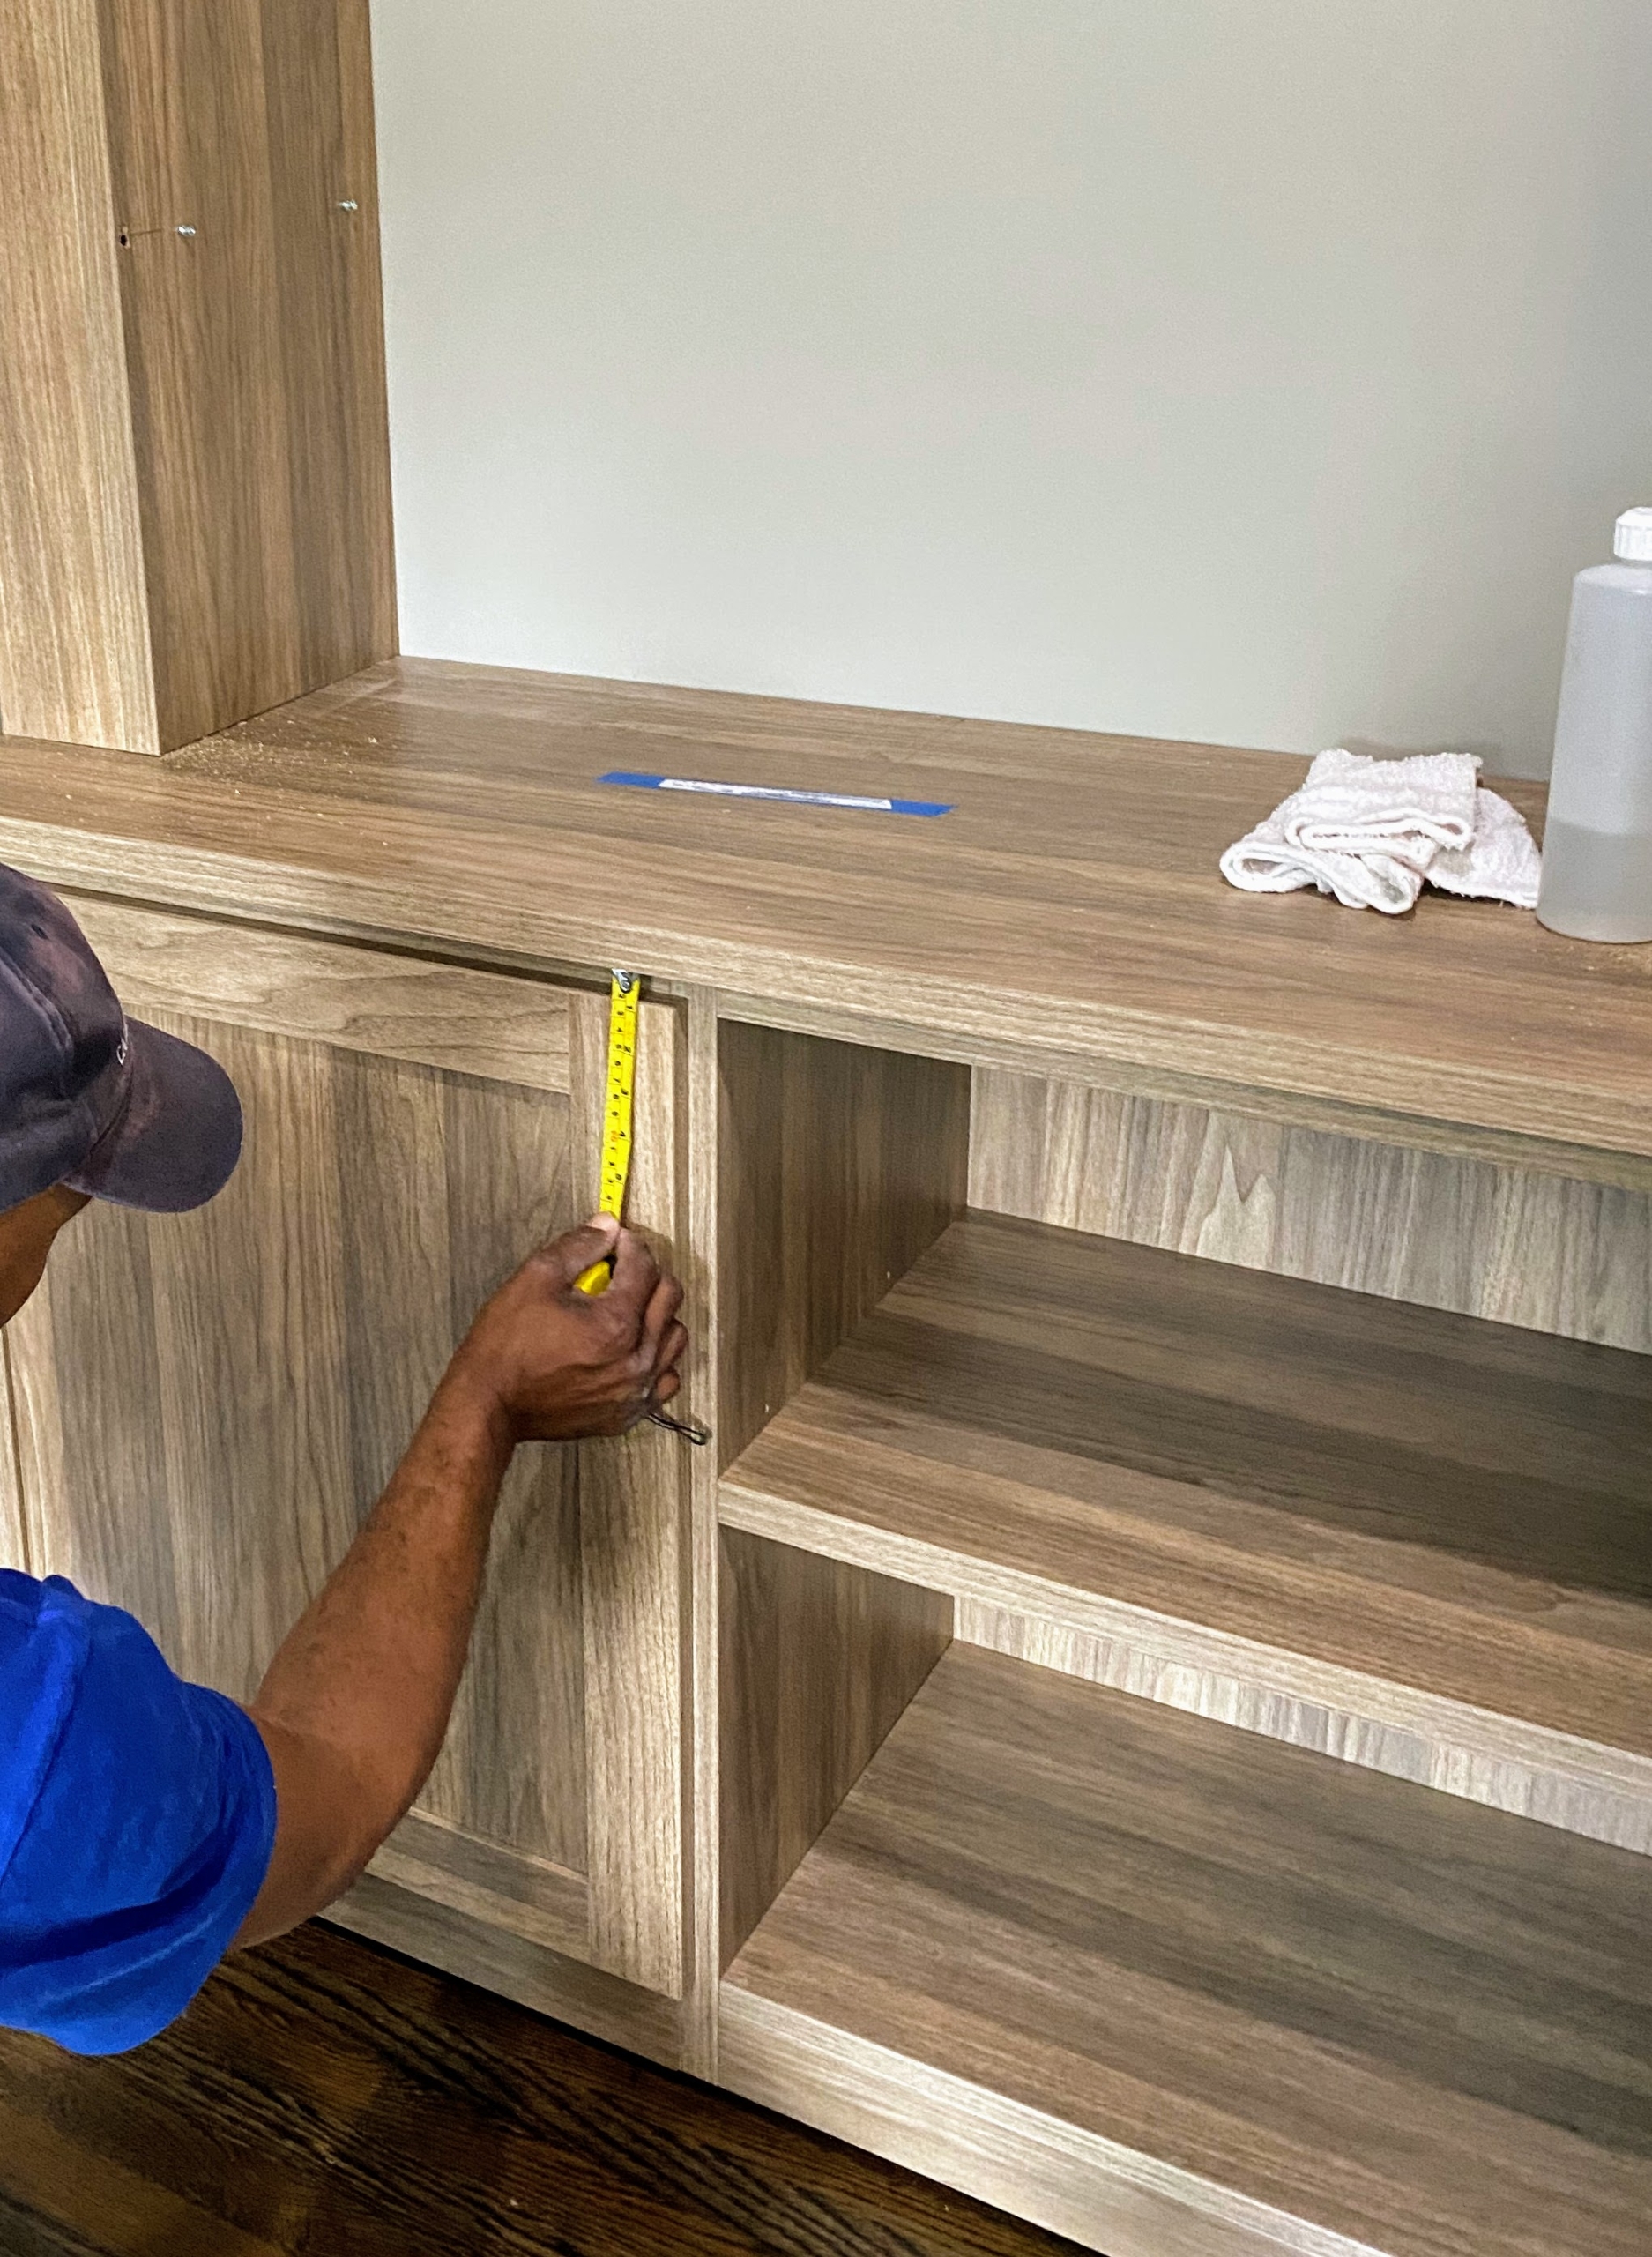
Shelving and cabinets are always measured and remeasured.
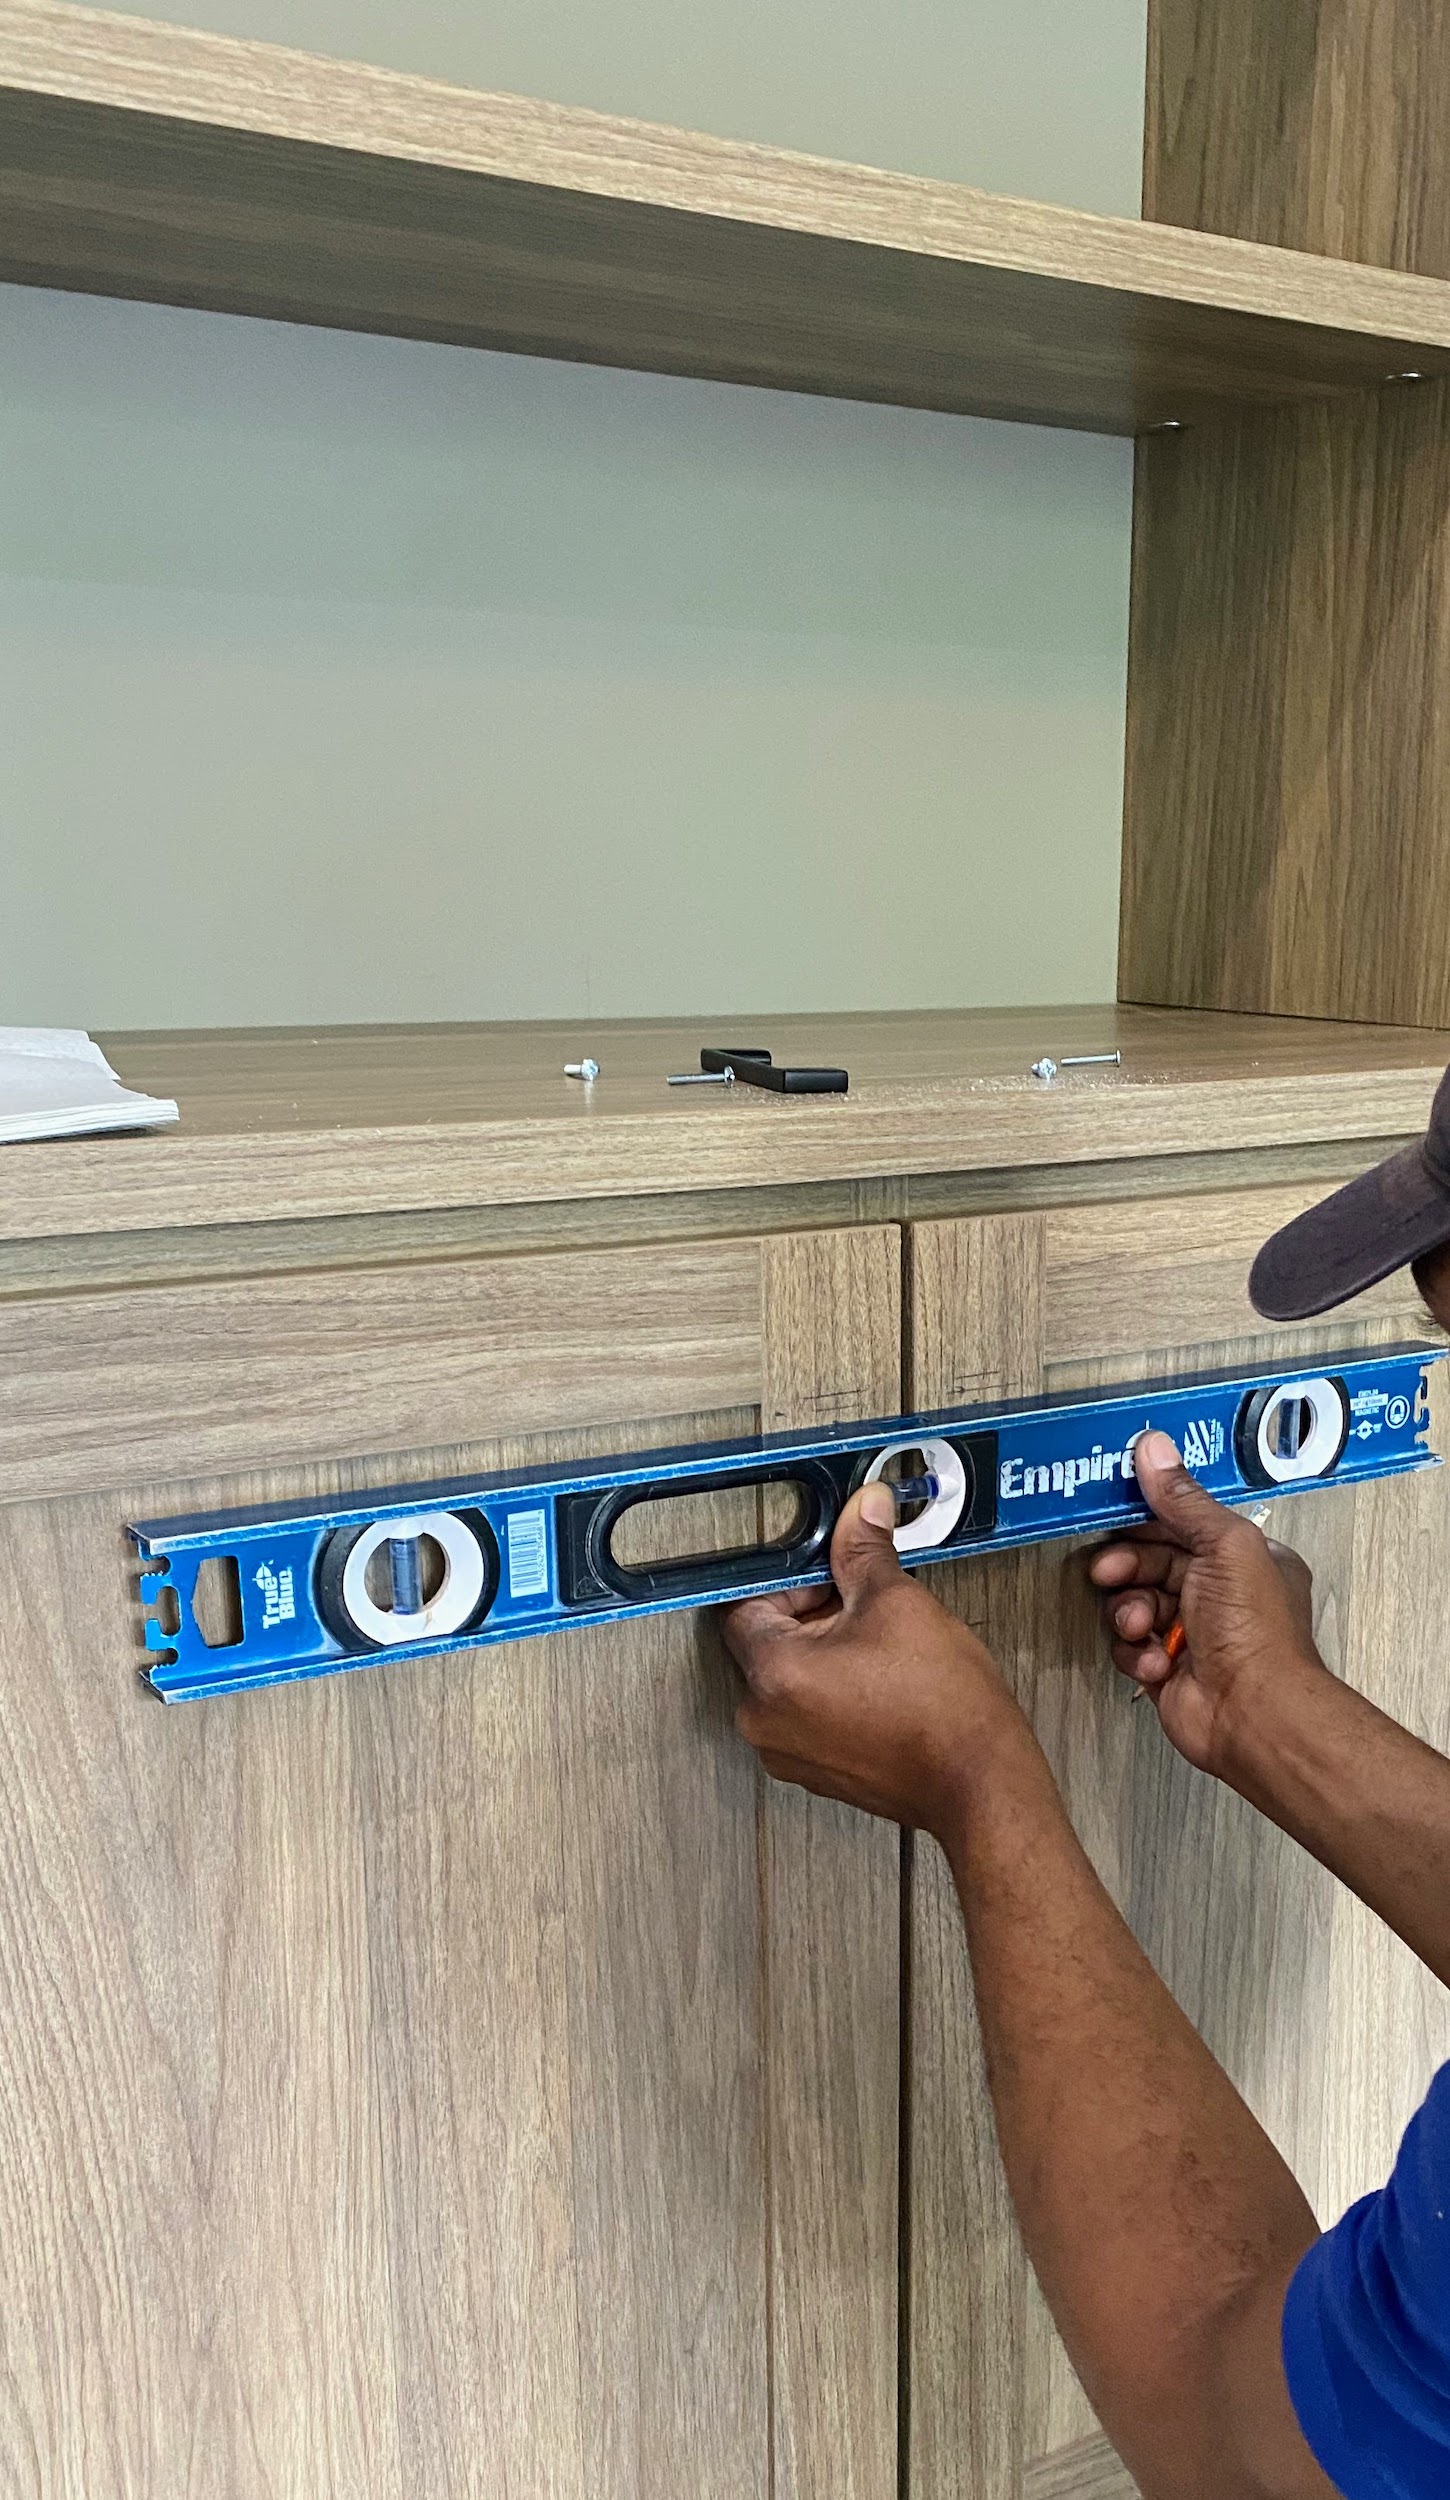
And then every surface is checked for level and plumb. The team works quickly and efficiently throughout the entire process.
Holes are made to hide any wiring.
And here are the finished units. The pieces focus on open shelving and closed cabinetry below, so it looks clean and has an easily-accessible design for visibility as well as function.
This transformation was in my Carriage House using “The Everyday System” I designed with California Closets. Considering the symmetrical lines of the wall and the measurements of the space, the design team and I came up with this great arrangement using their special CAD technology. California Closets offers virtual design consultations to design just the right configuration. One can also shop their pre-configured systems online. There are so many variations.
And look at how it turned out. It is just perfect for this room. I selected the “Perry St. White Woodgrain with White Metal” finishes combination.
These components can change, and improve everyday living. They feature a modern palette of wood and metal finishes that can fit in every home. The shelves are also outfitted with supplies from my Office Collection at Staples. I love “The Everyday System” – it’s modern, modular, and moveable.
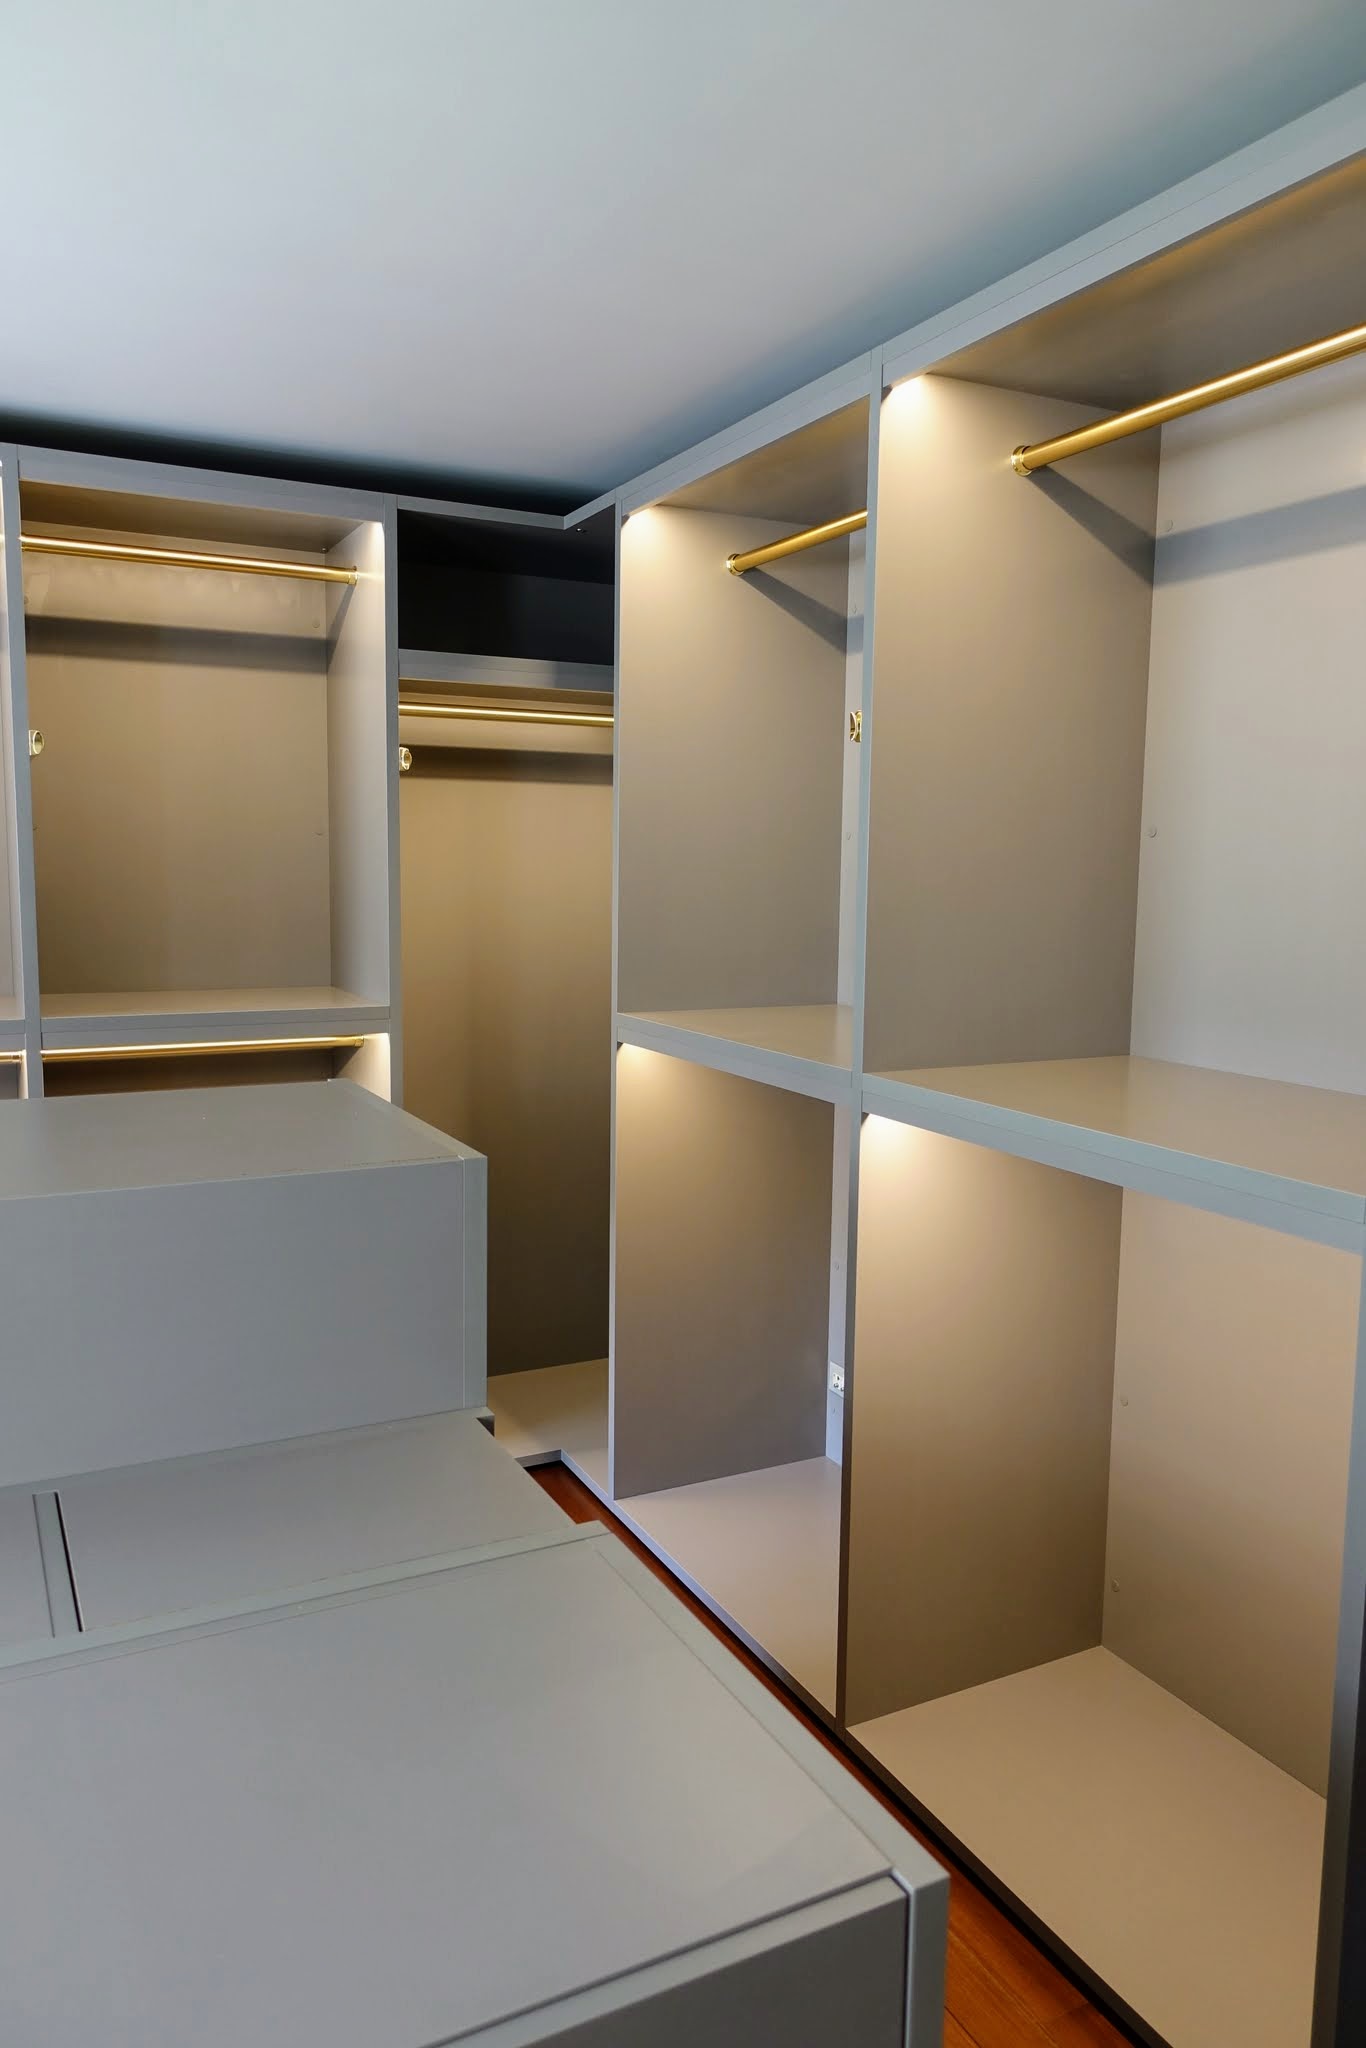
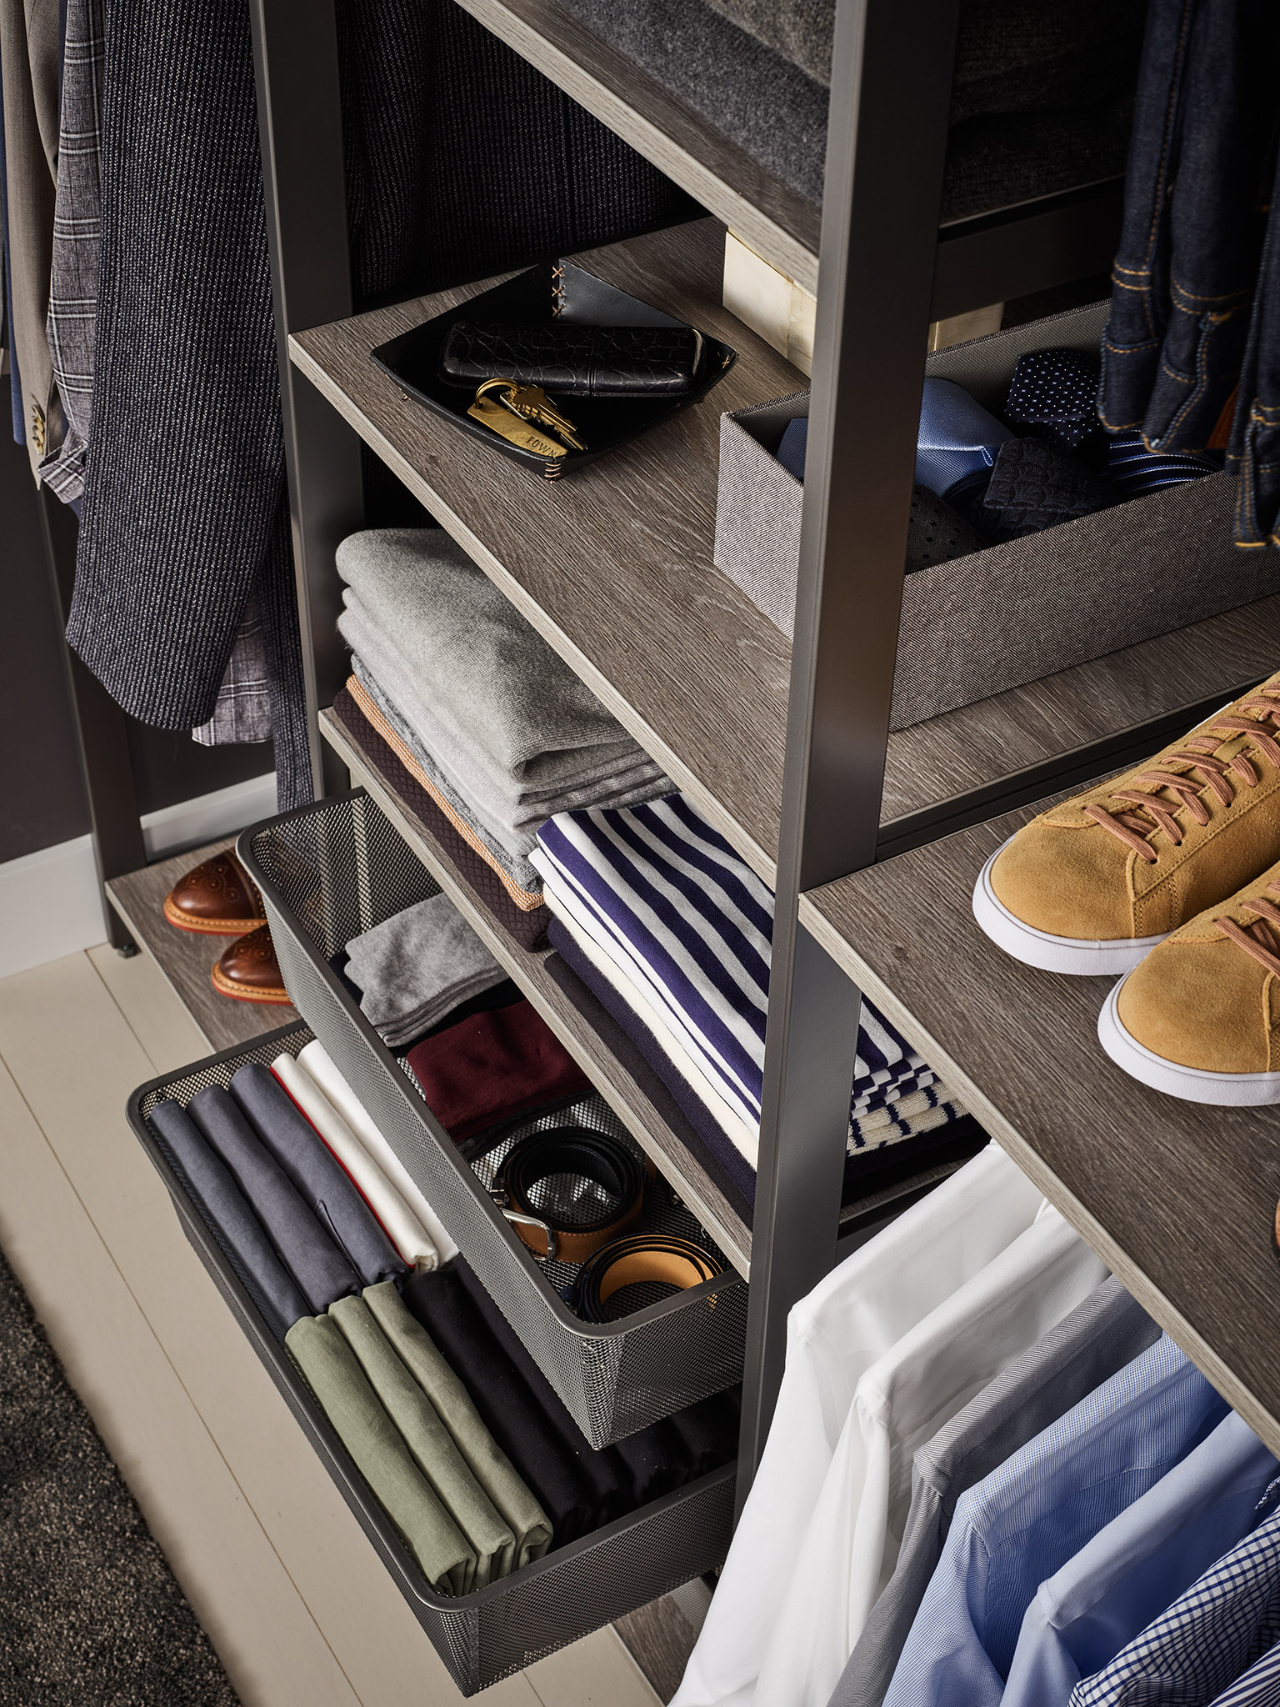
Other examples of “The Everyday System” include this closet configuration. It is my signature “Bedford Gray Woodgrain with Graphite Metal” finishes. (Photo by Douglas Friedman)
Durable hanging rods allow for several heavy suits. And premium hangers organize all the sports coats while protecting their shape and quality. (Photo by Douglas Friedman)
Plus, one can also choose from a variety of shelf placements. (Photo by Douglas Friedman)
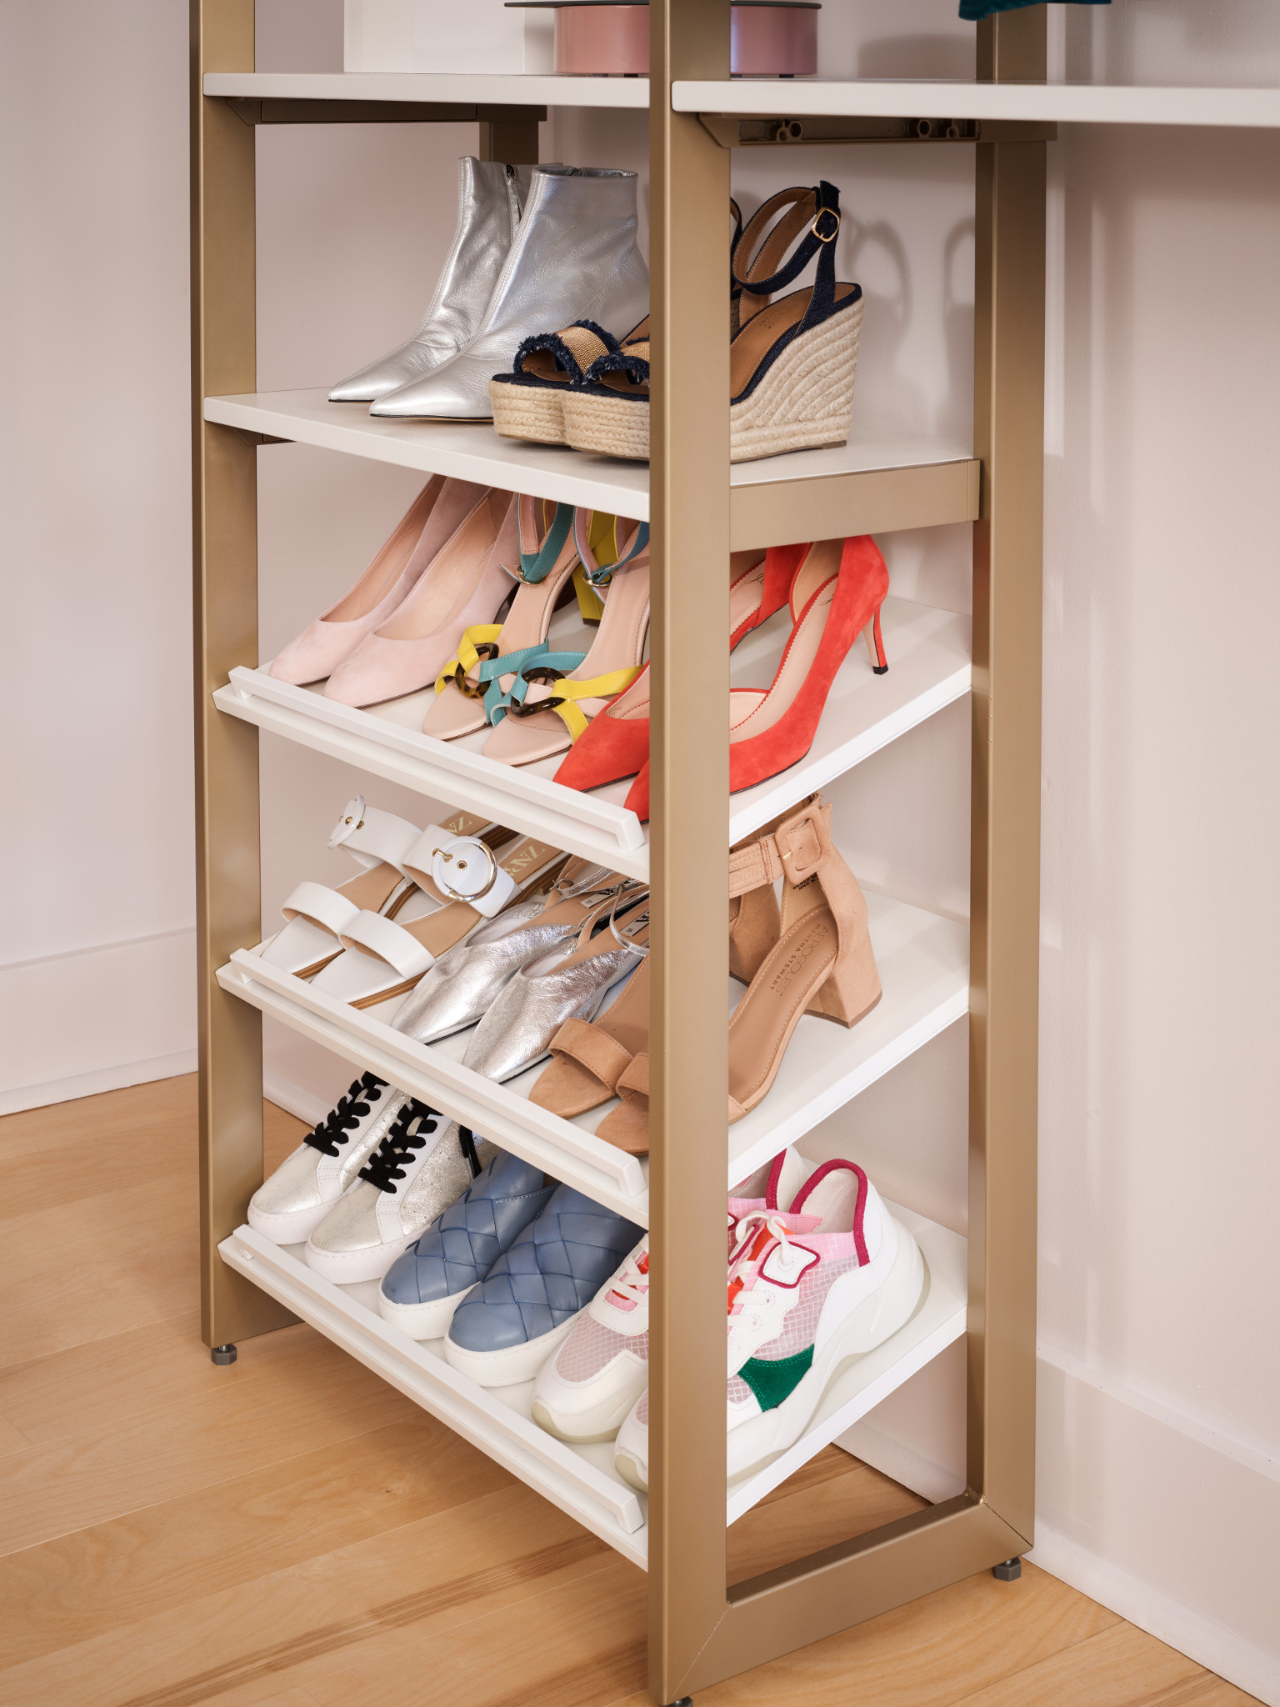
This closet is the “Perry St. White Woodgrain with Gold Metal” finishes modular set. This sophisticated system doubles the storage without compromising style. There’s more than 11-feet of hanging space for all those dresses, blouses, and work outfits. (Photo by Douglas Friedman)
And look at all the room for shoes on these slanted open shoe shelves – every pair is visible and easy to access. (Photo by Douglas Friedman)
Sturdy hangers organize a full wardrobe while protecting the shape and quality of the clothing. Special hanger indents keep those delicates from falling to the floor. (Photo by Douglas Friedman)
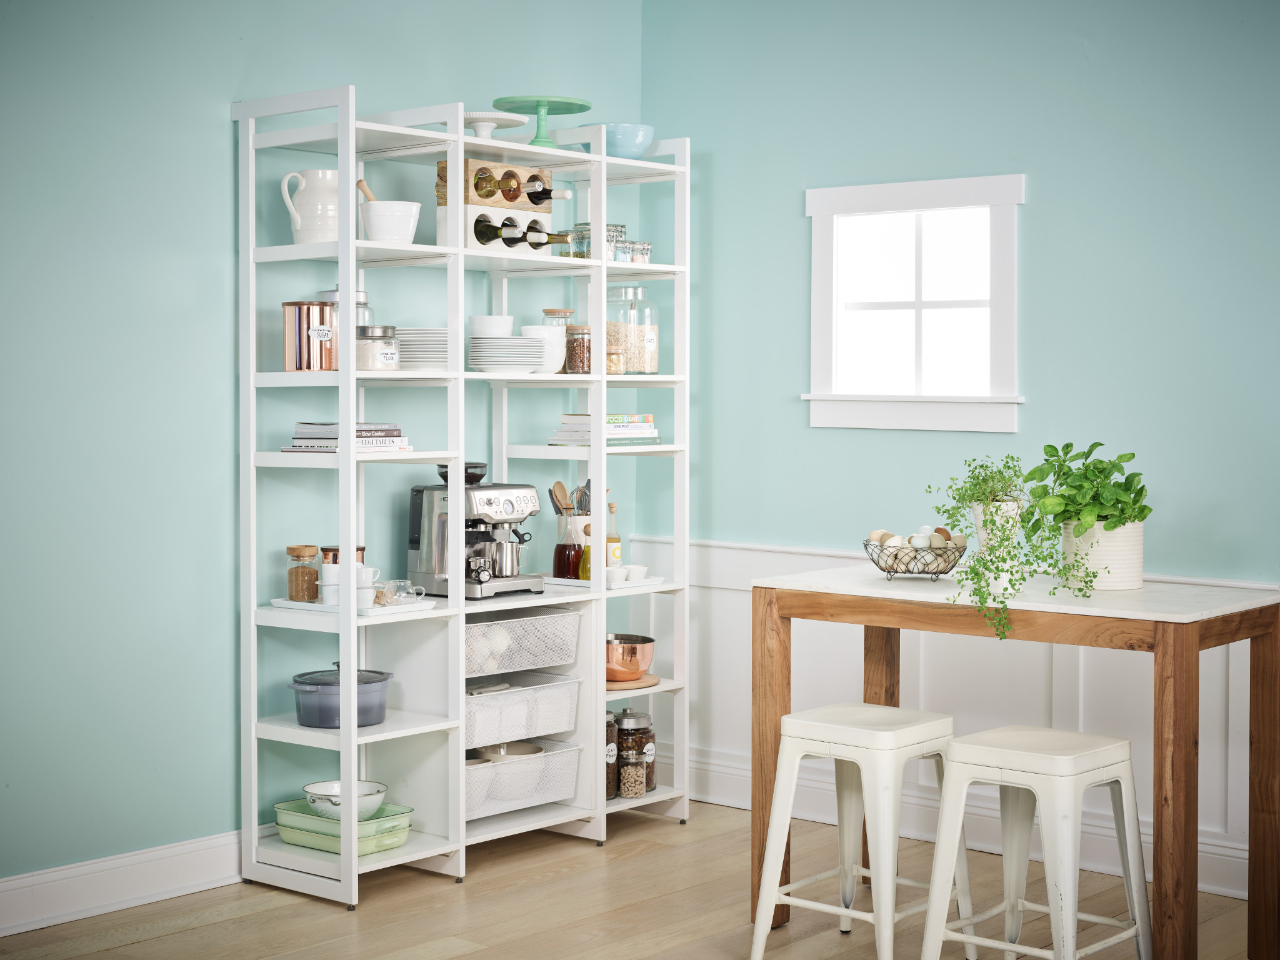
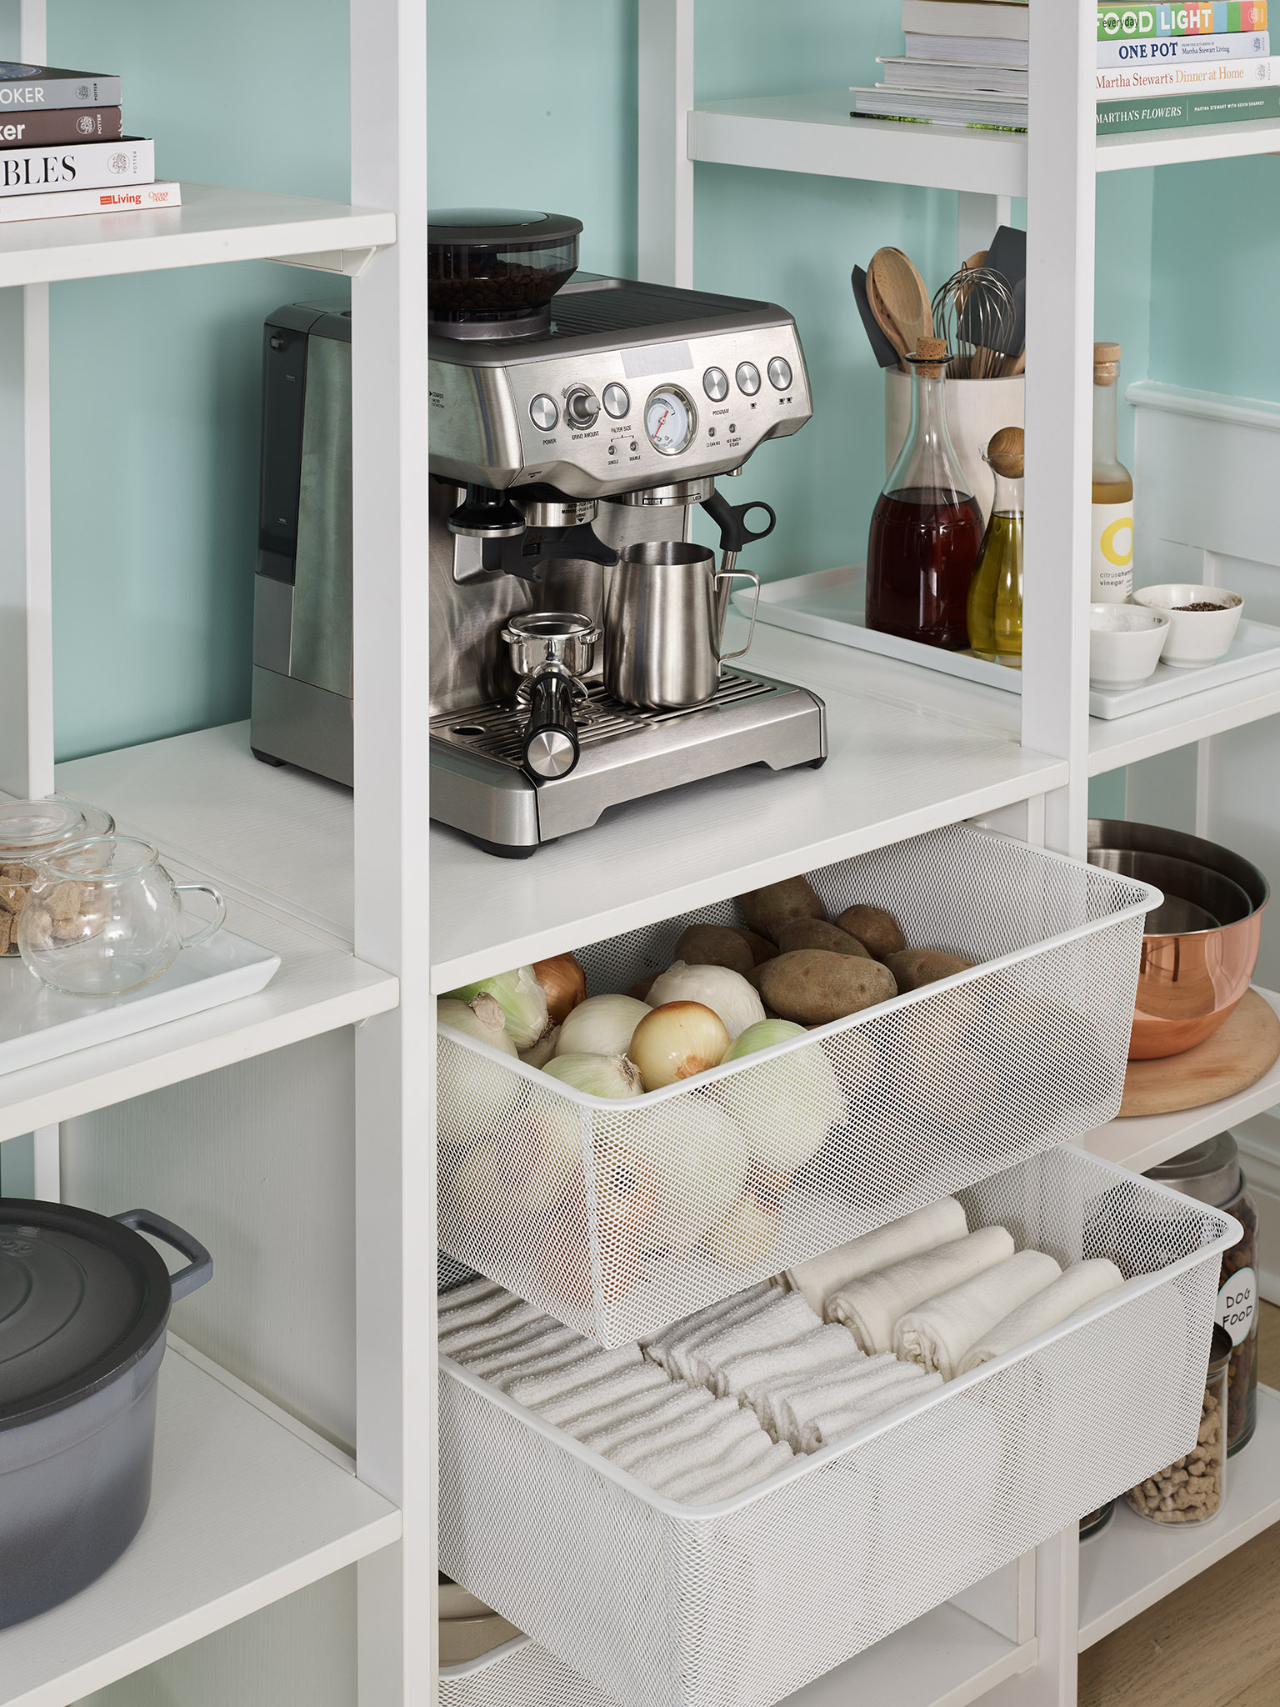
This clean and easily-accessible design caters to visibility and function for kitchen pantry storage. Each 14-inch or 20-inch shelf can fit various appliances including food processors and microwaves. (Photo by Douglas Friedman)
And mesh basket drawers on gliders provide a practical solution for vegetables or kitchen towels. (Photo by Douglas Friedman)
And here I am with this modular media center also in my “Bedford Grey Woodgrain with Graphite Metal” finishes. This unit’s well-designed cabinets and shelves keep everything accessible, but out of sight if needed. California Closets has so many units to fit your needs. Visit their web site to see “The Everyday System” and all their other great pieces. (Photo by Douglas Friedman)
Our big hay baling project continues at my Bedford, New York farm.
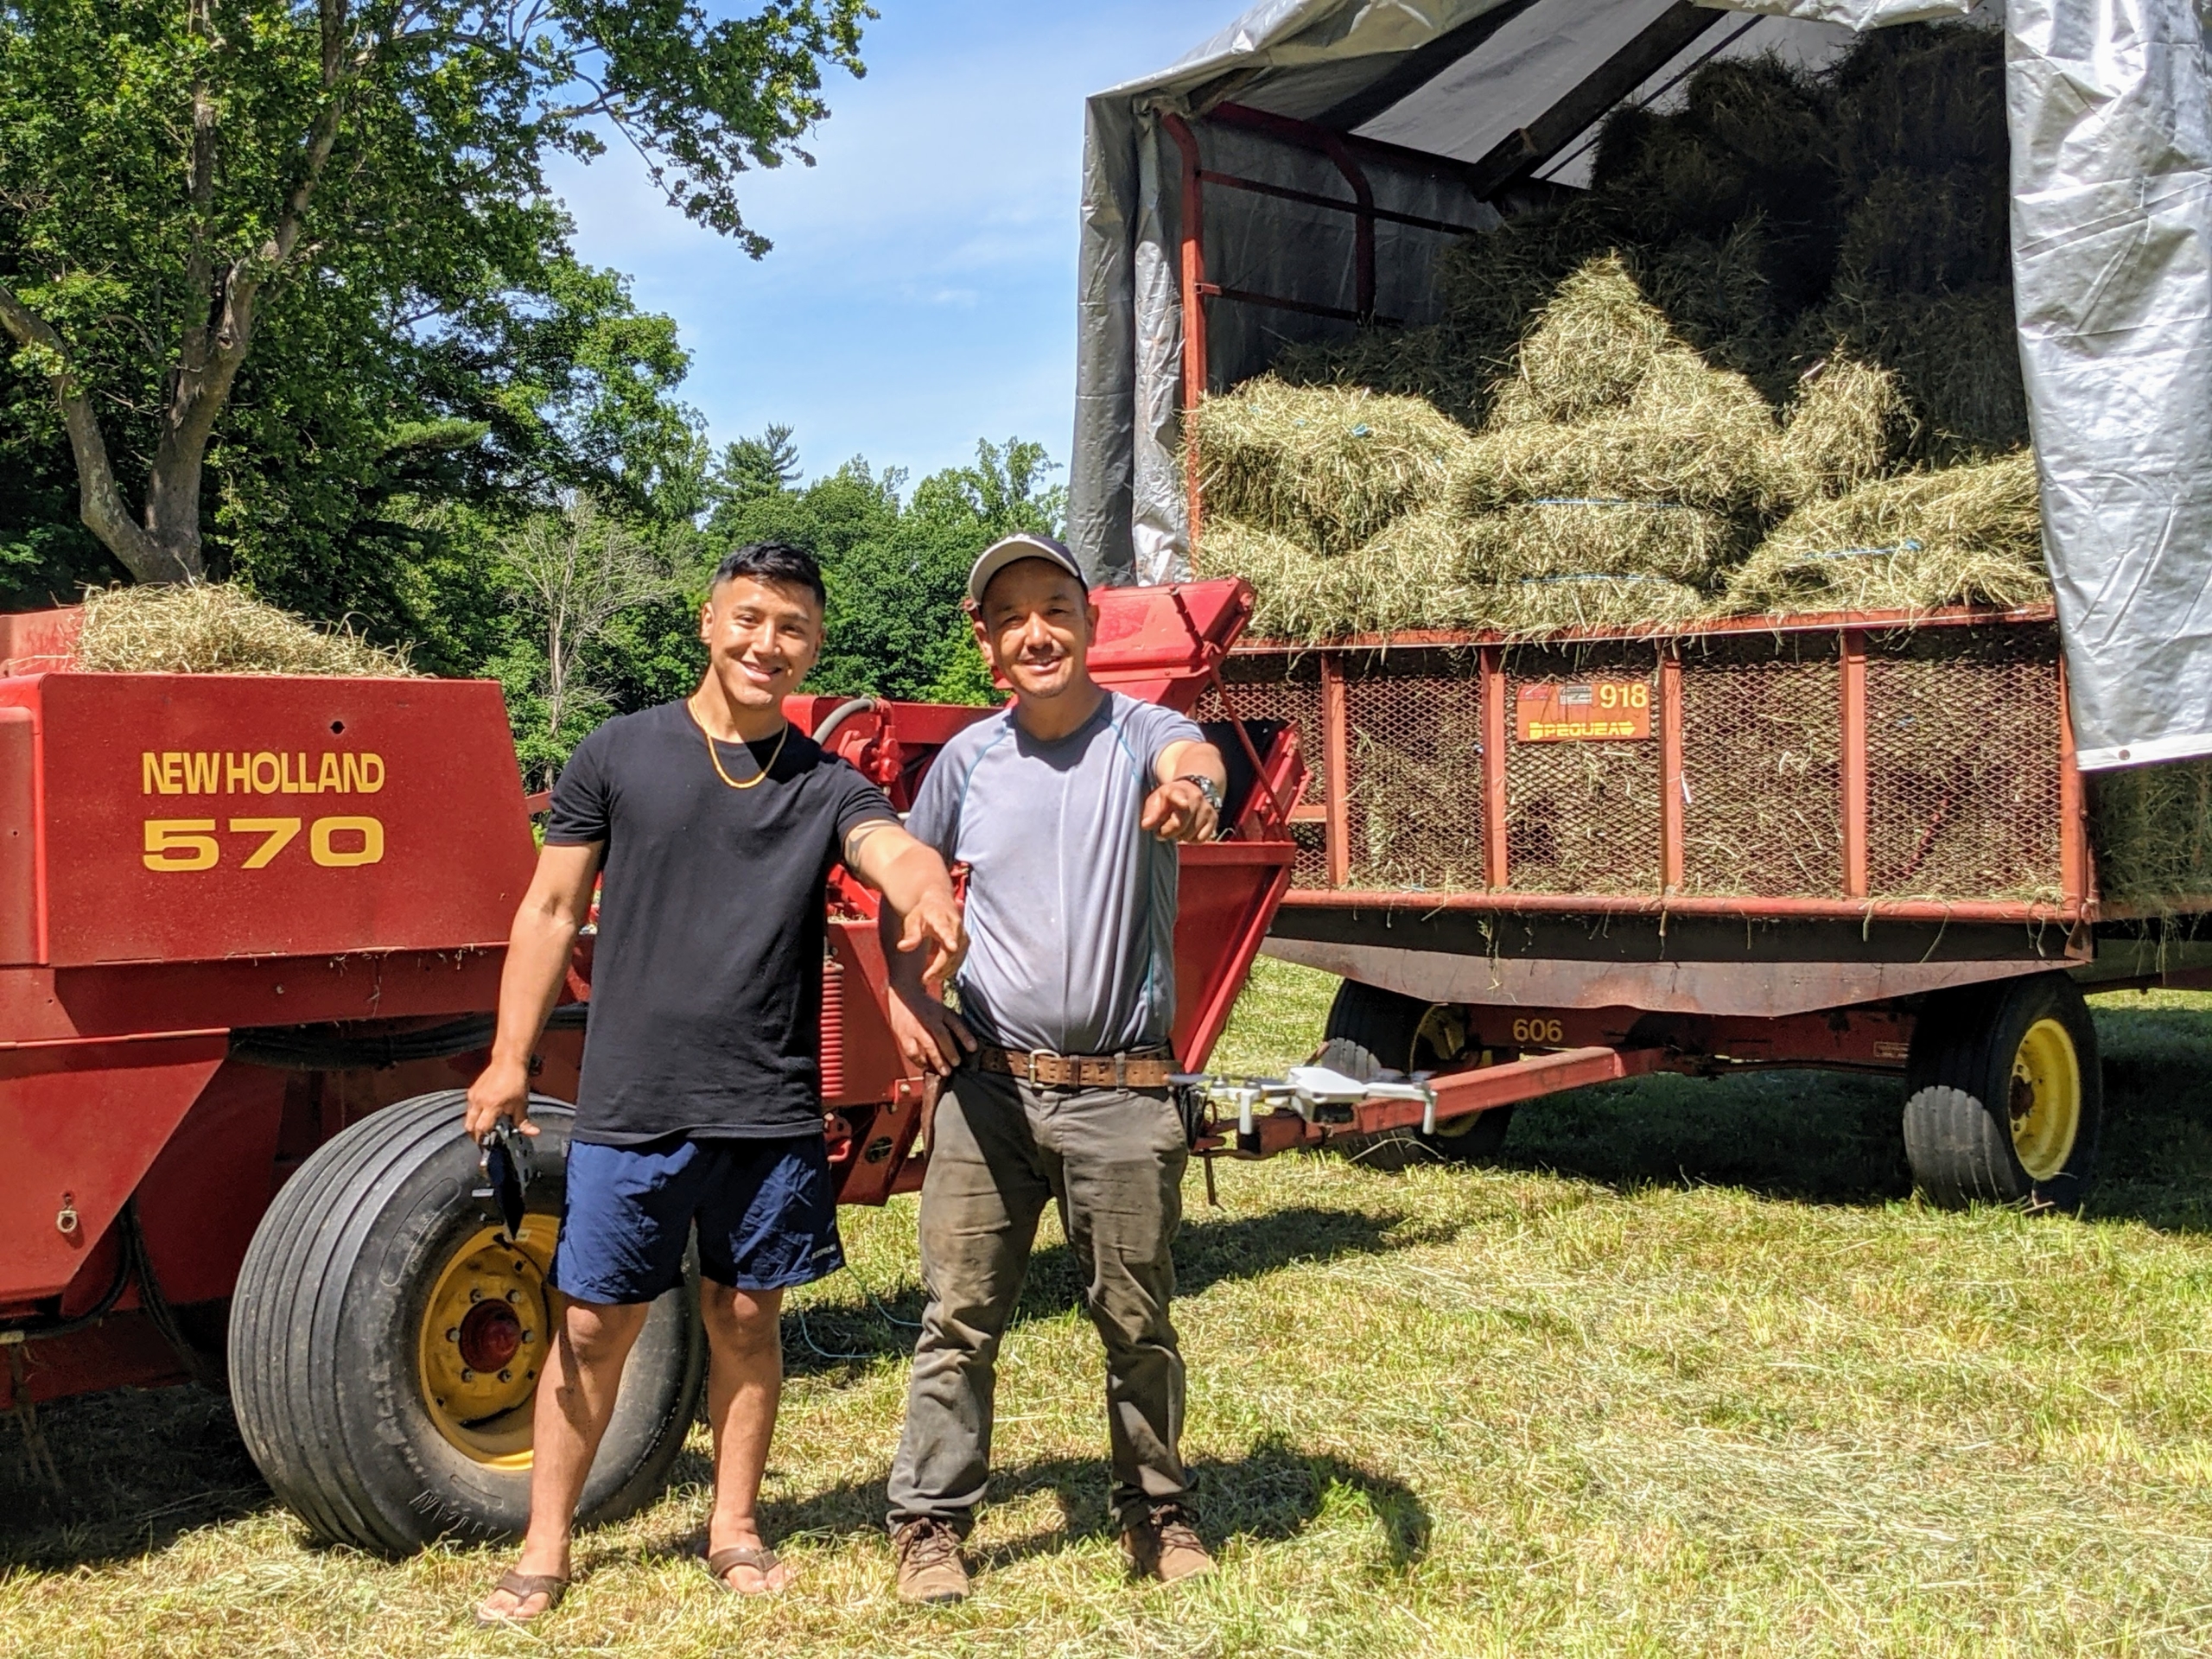
Hay is a harvested plant that’s dried and cured after being cut in the field. In most cases, hay is cut during the late bud or early bloom stage to maximize its nutritional value. This week, my outdoor grounds crew foreman, Chhiring, along with crew member, Domi, worked hard to cut, toss, rake and then bale the hay in my fields. Chhiring's son, MingMar, took photos with a drone to capture the arduous process. We're all so excited about this first cut. The first cut of the season is higher in fiber content and lower in protein and fat - my horses will love it.
Enjoy these photos.
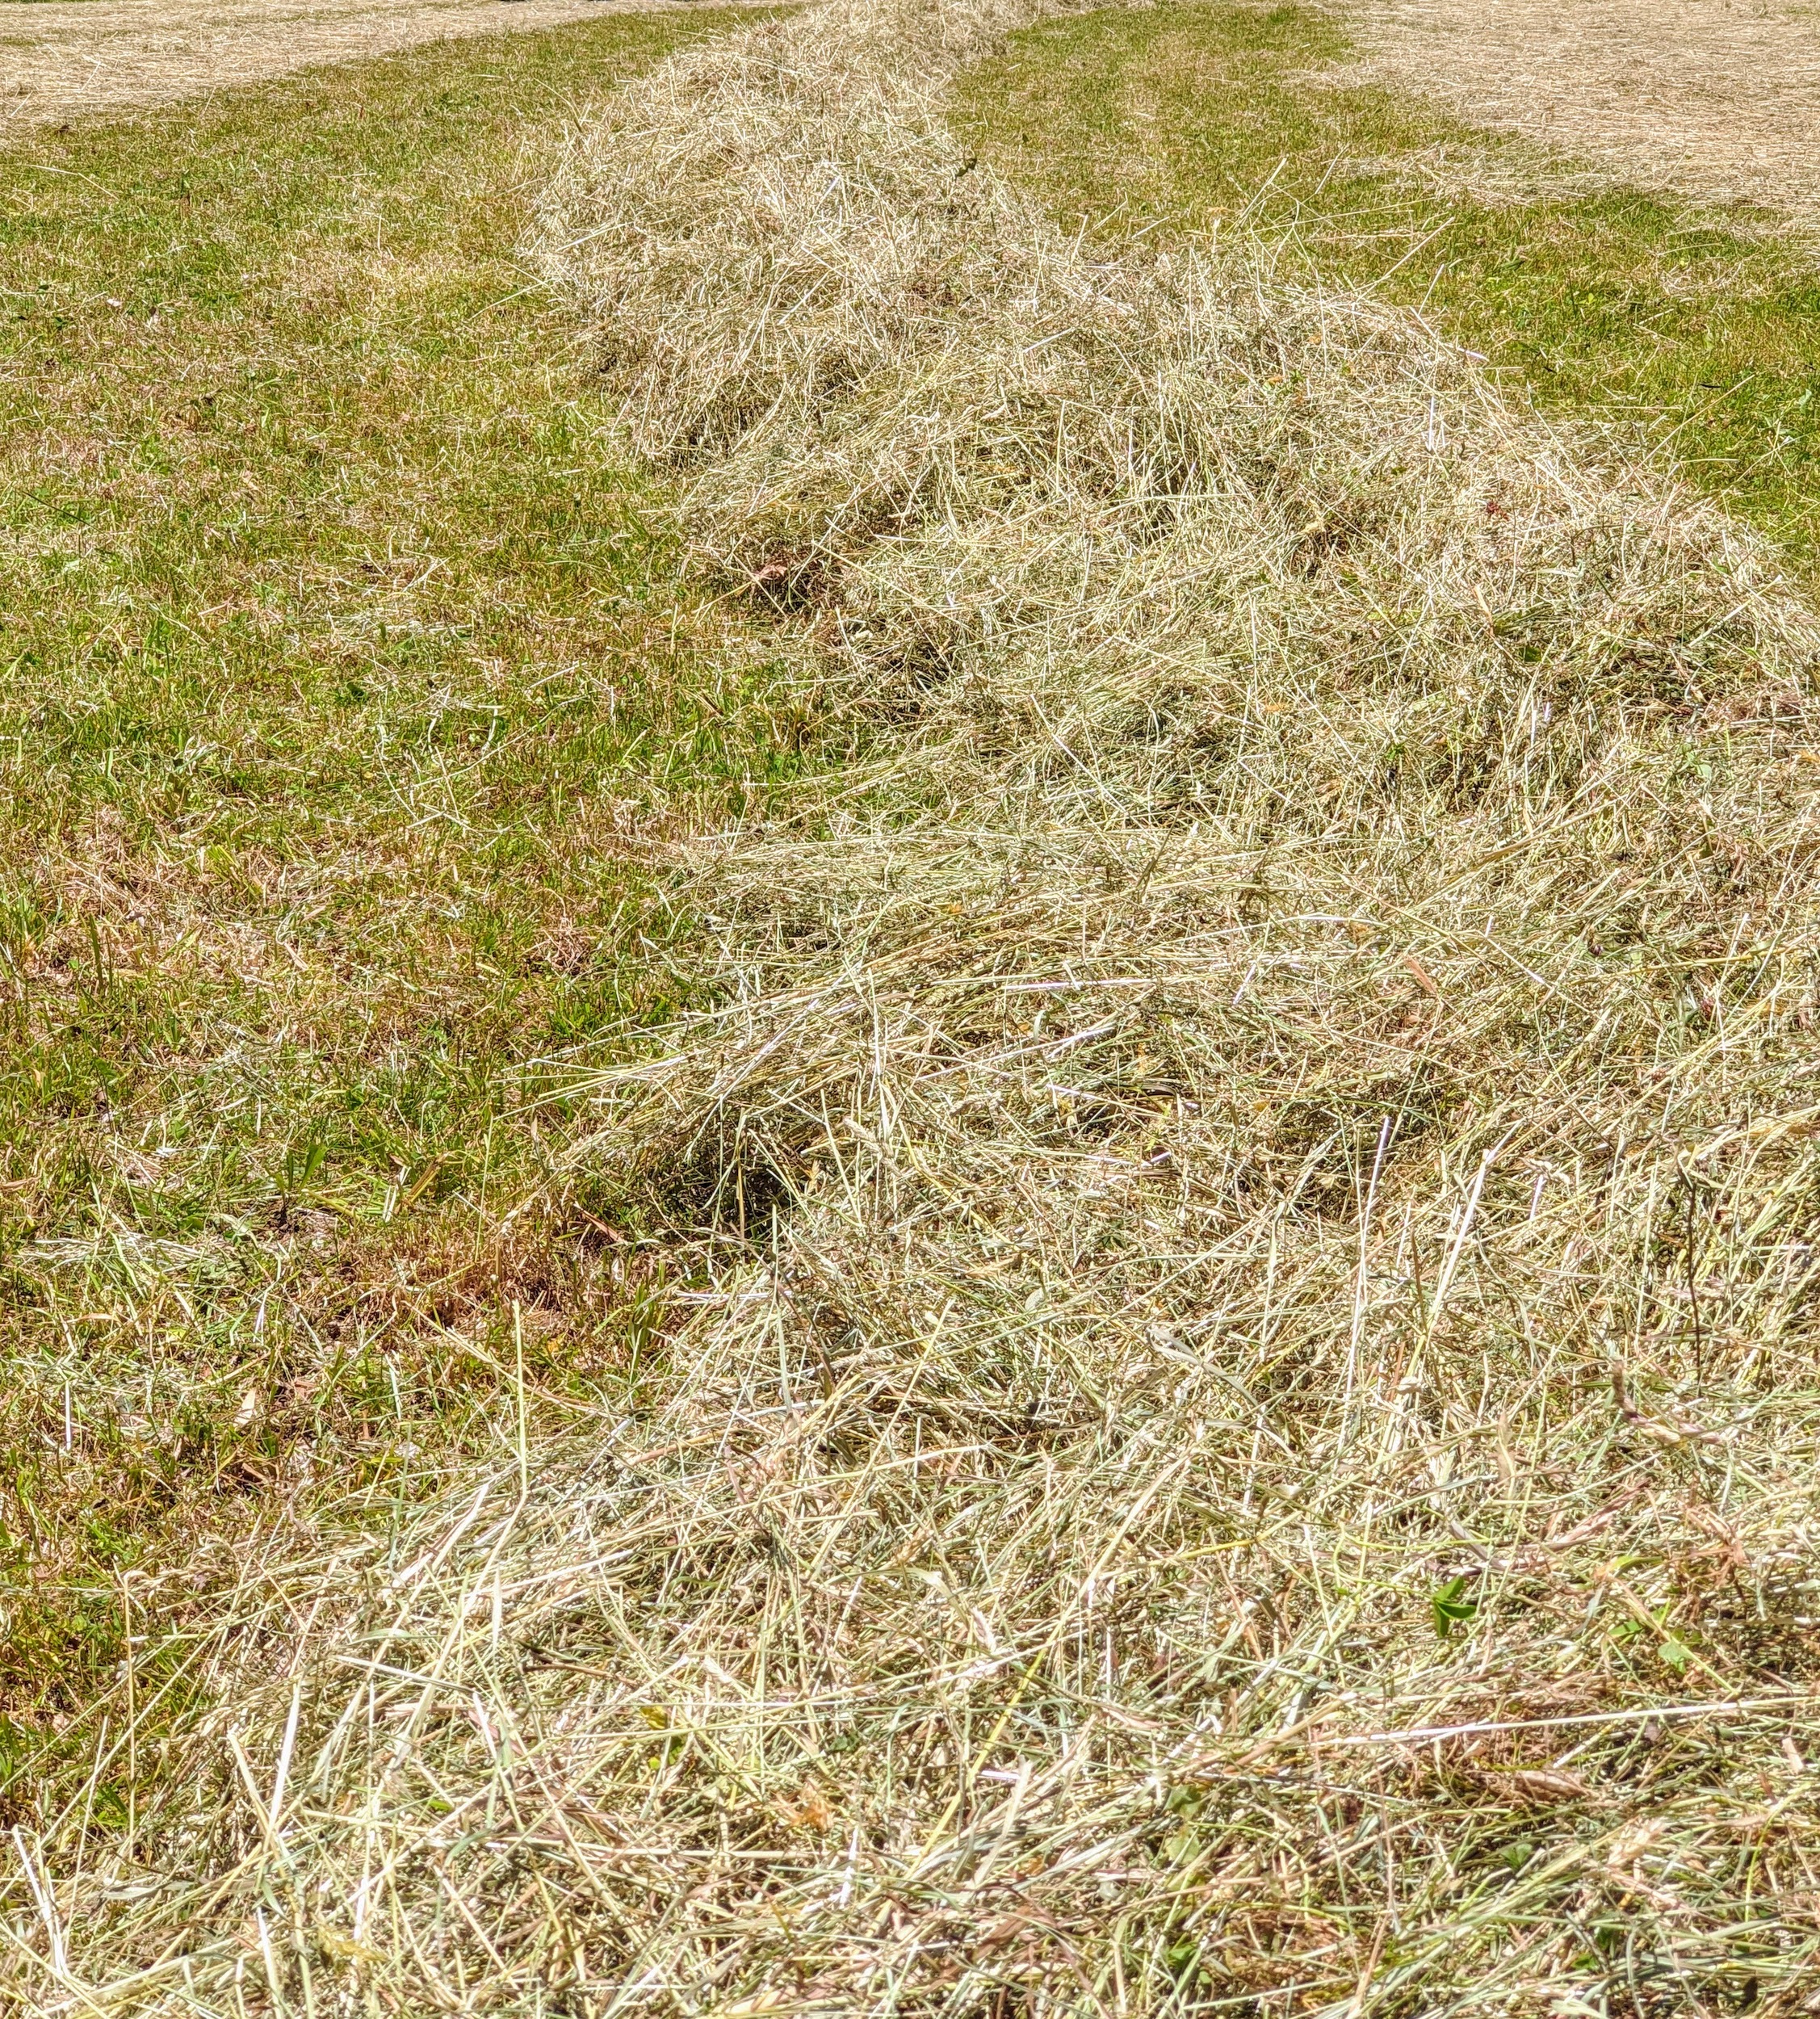
Earlier this week, I shared a blog explaining how my hay was cut and tedded. A tedder spreads and fluffs the hay in a uniform swath after the mower-conditioner has made the windrows.
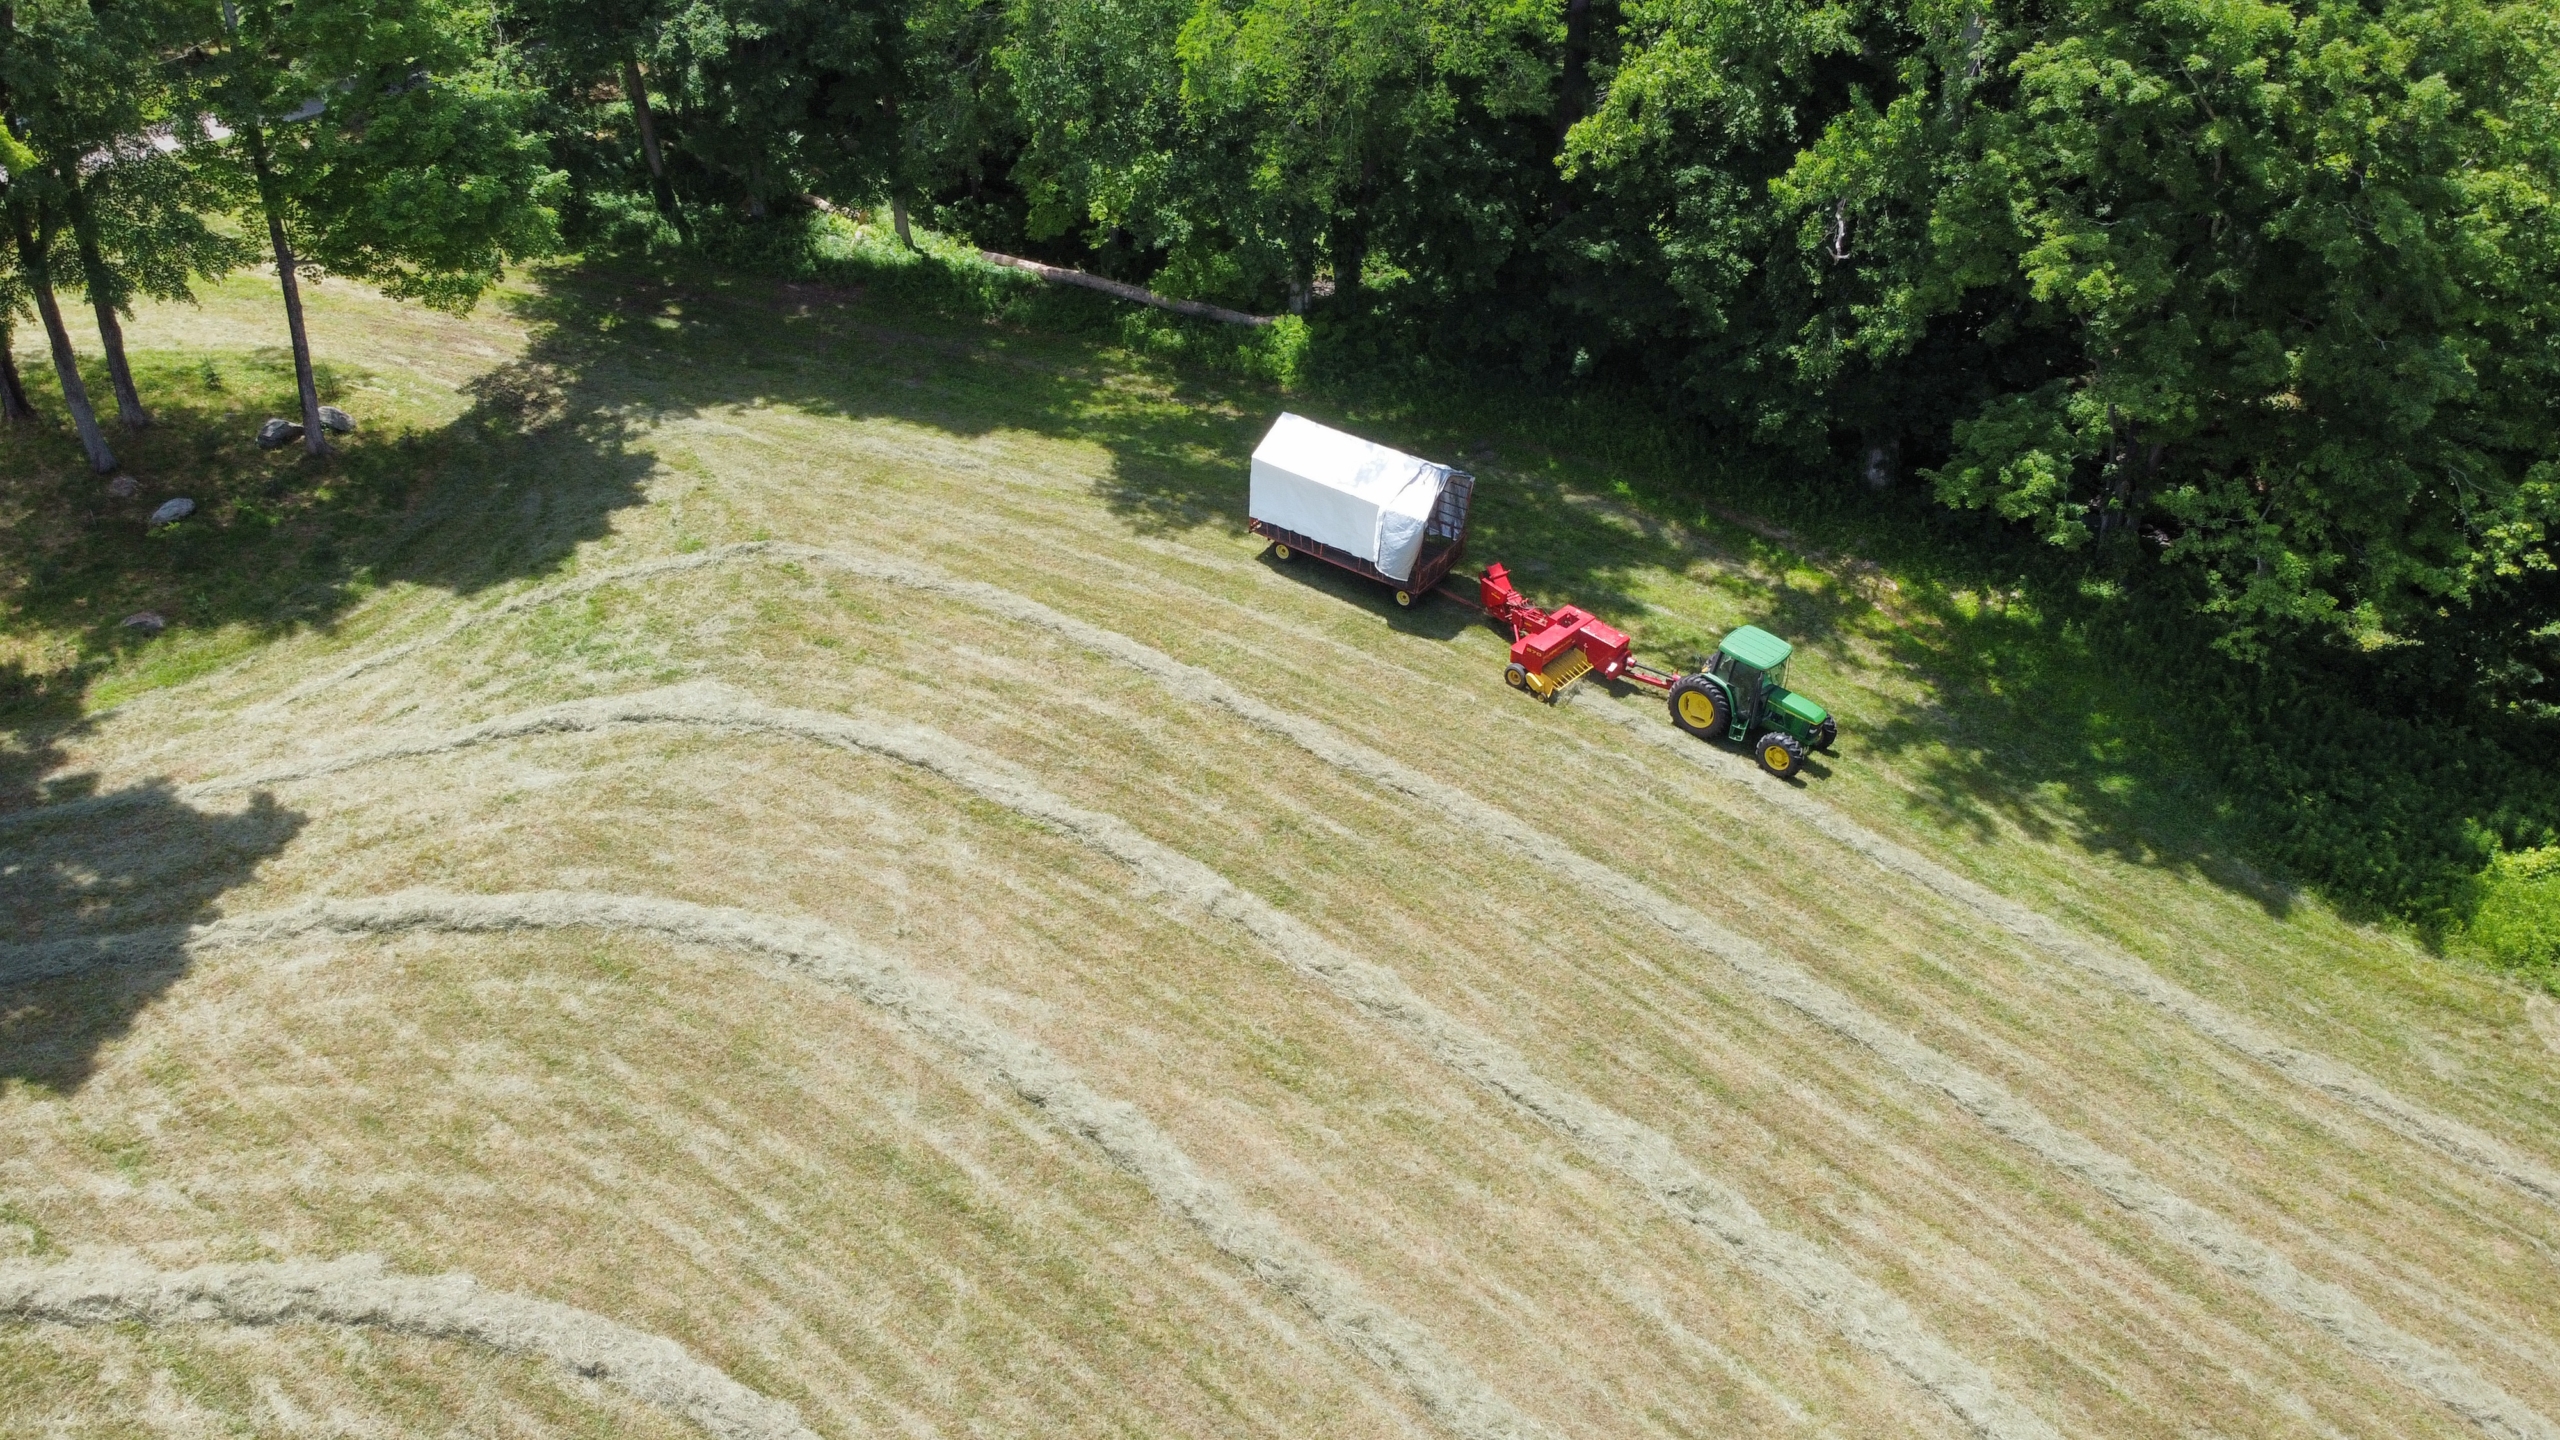
Here is a drone shot showing some of the windrows ready for baling. Thankfully, this was another beautiful dry day at the farm.
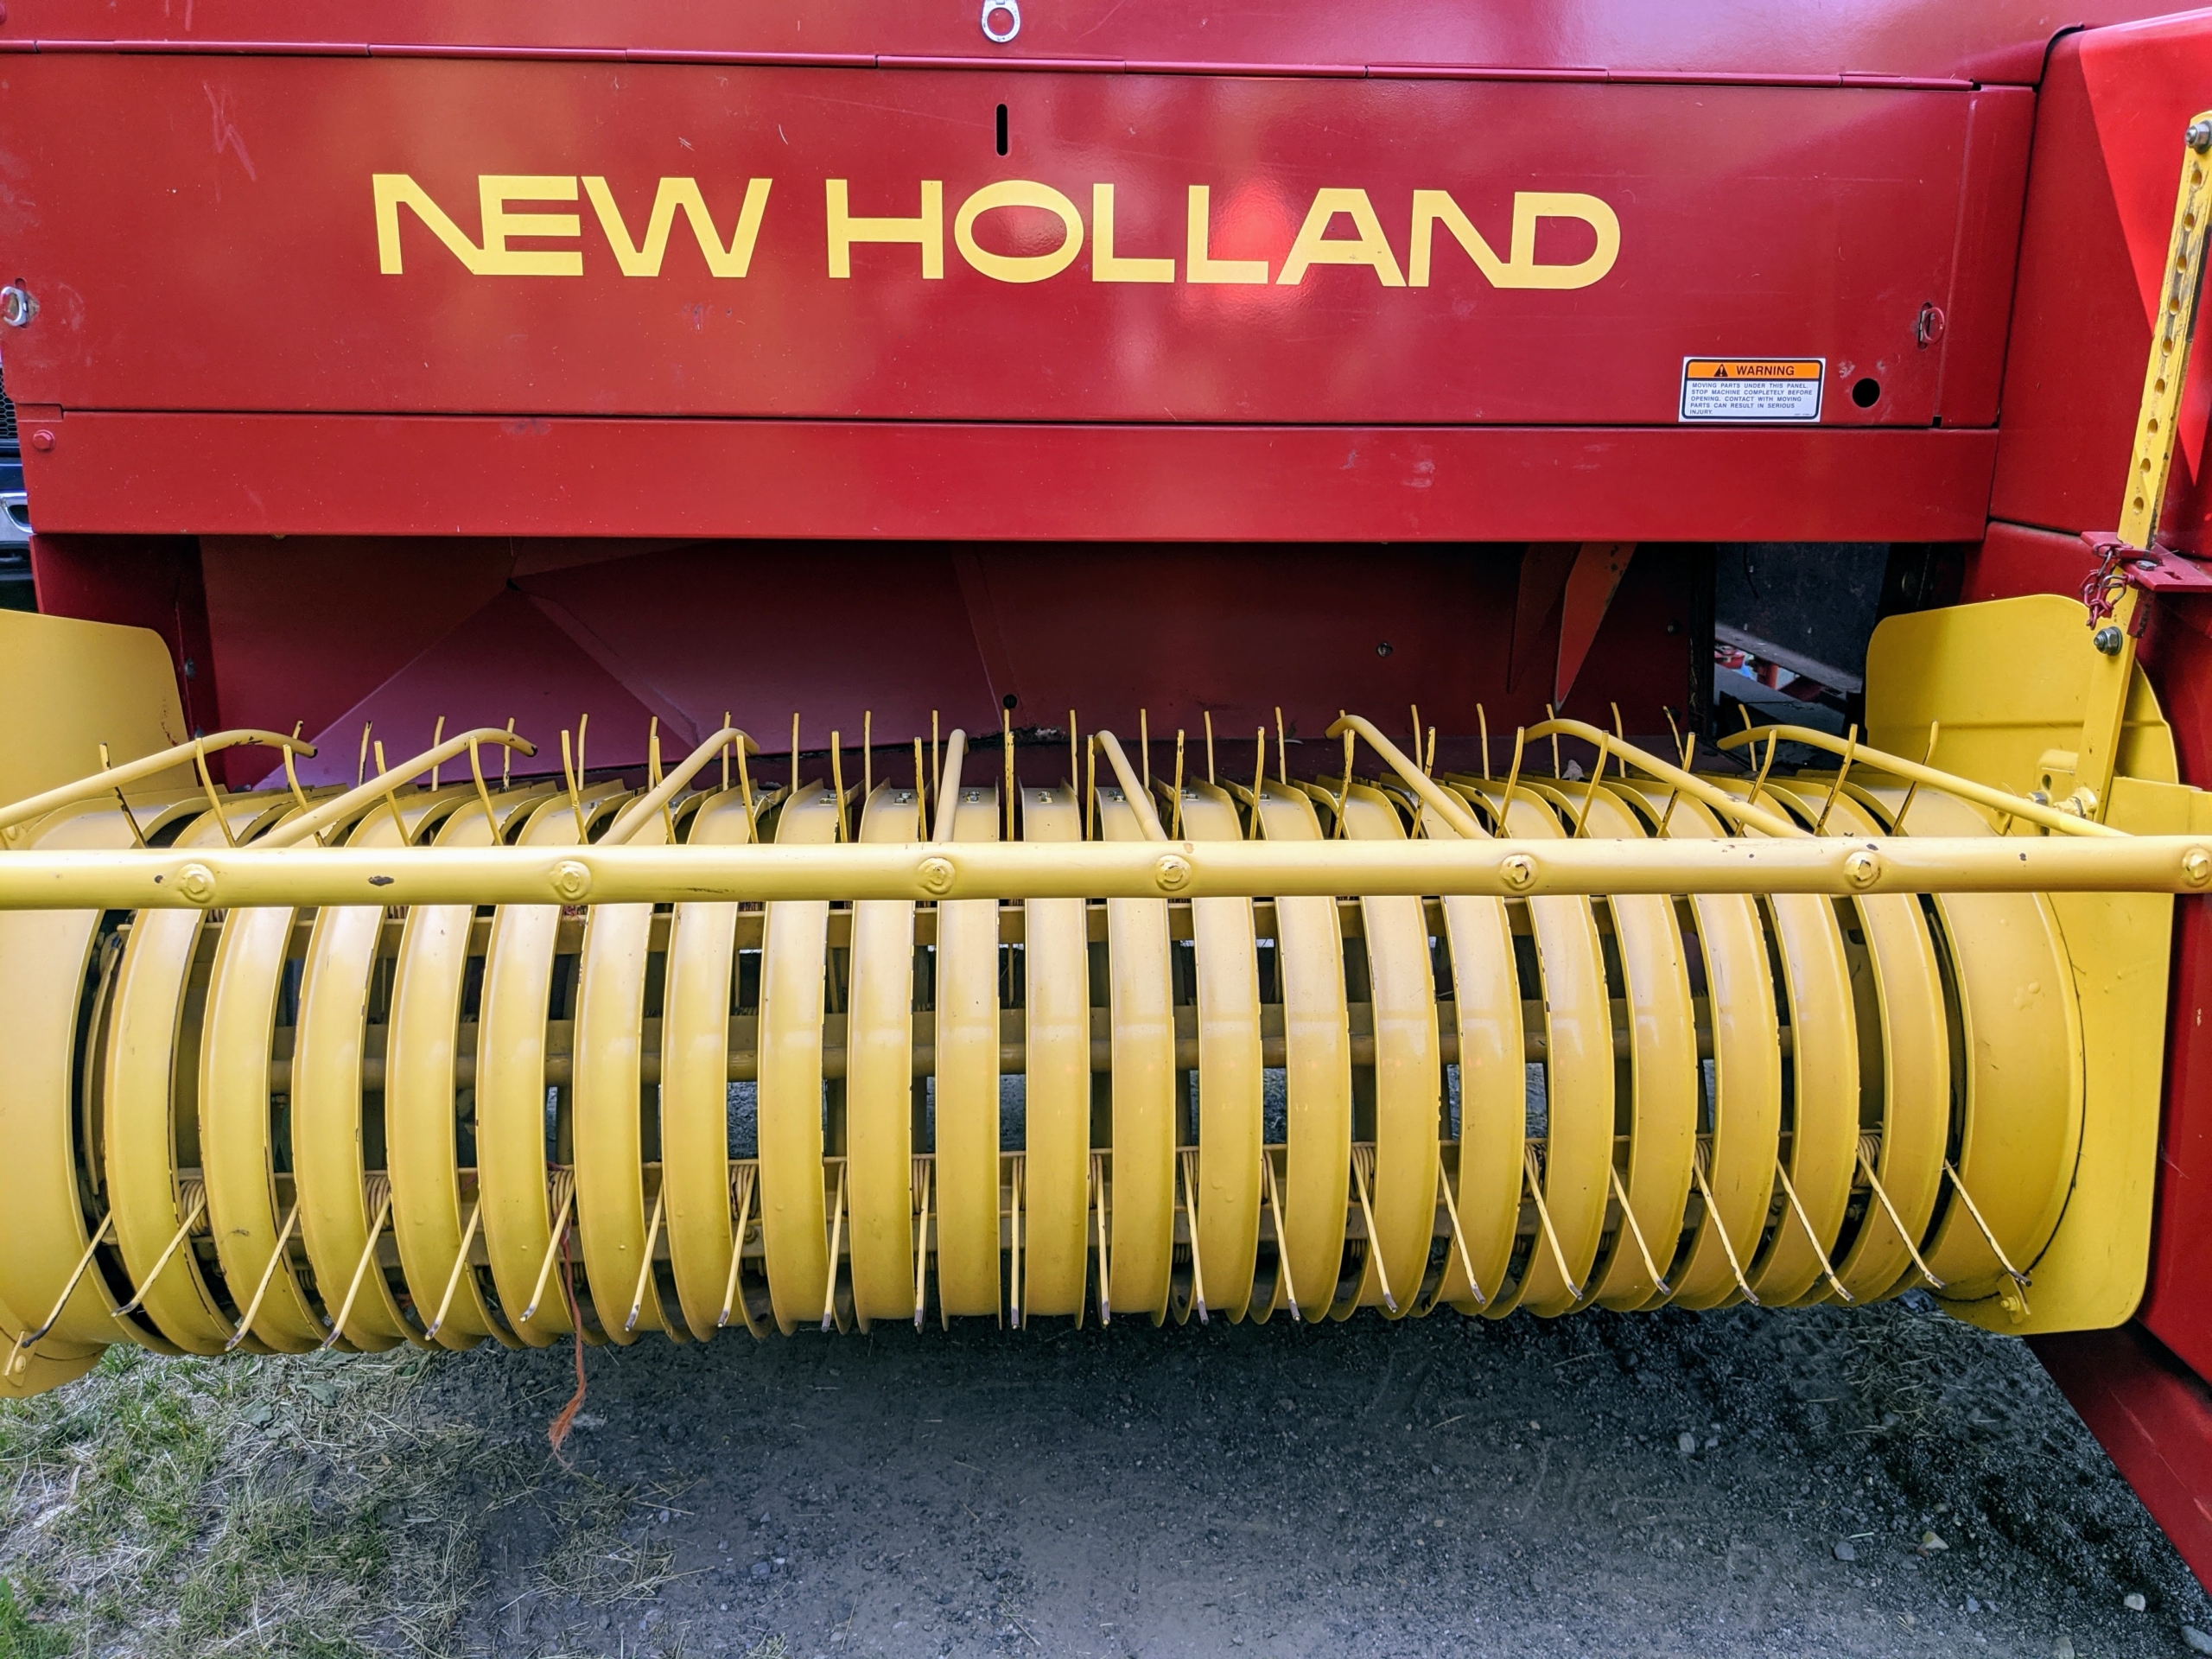
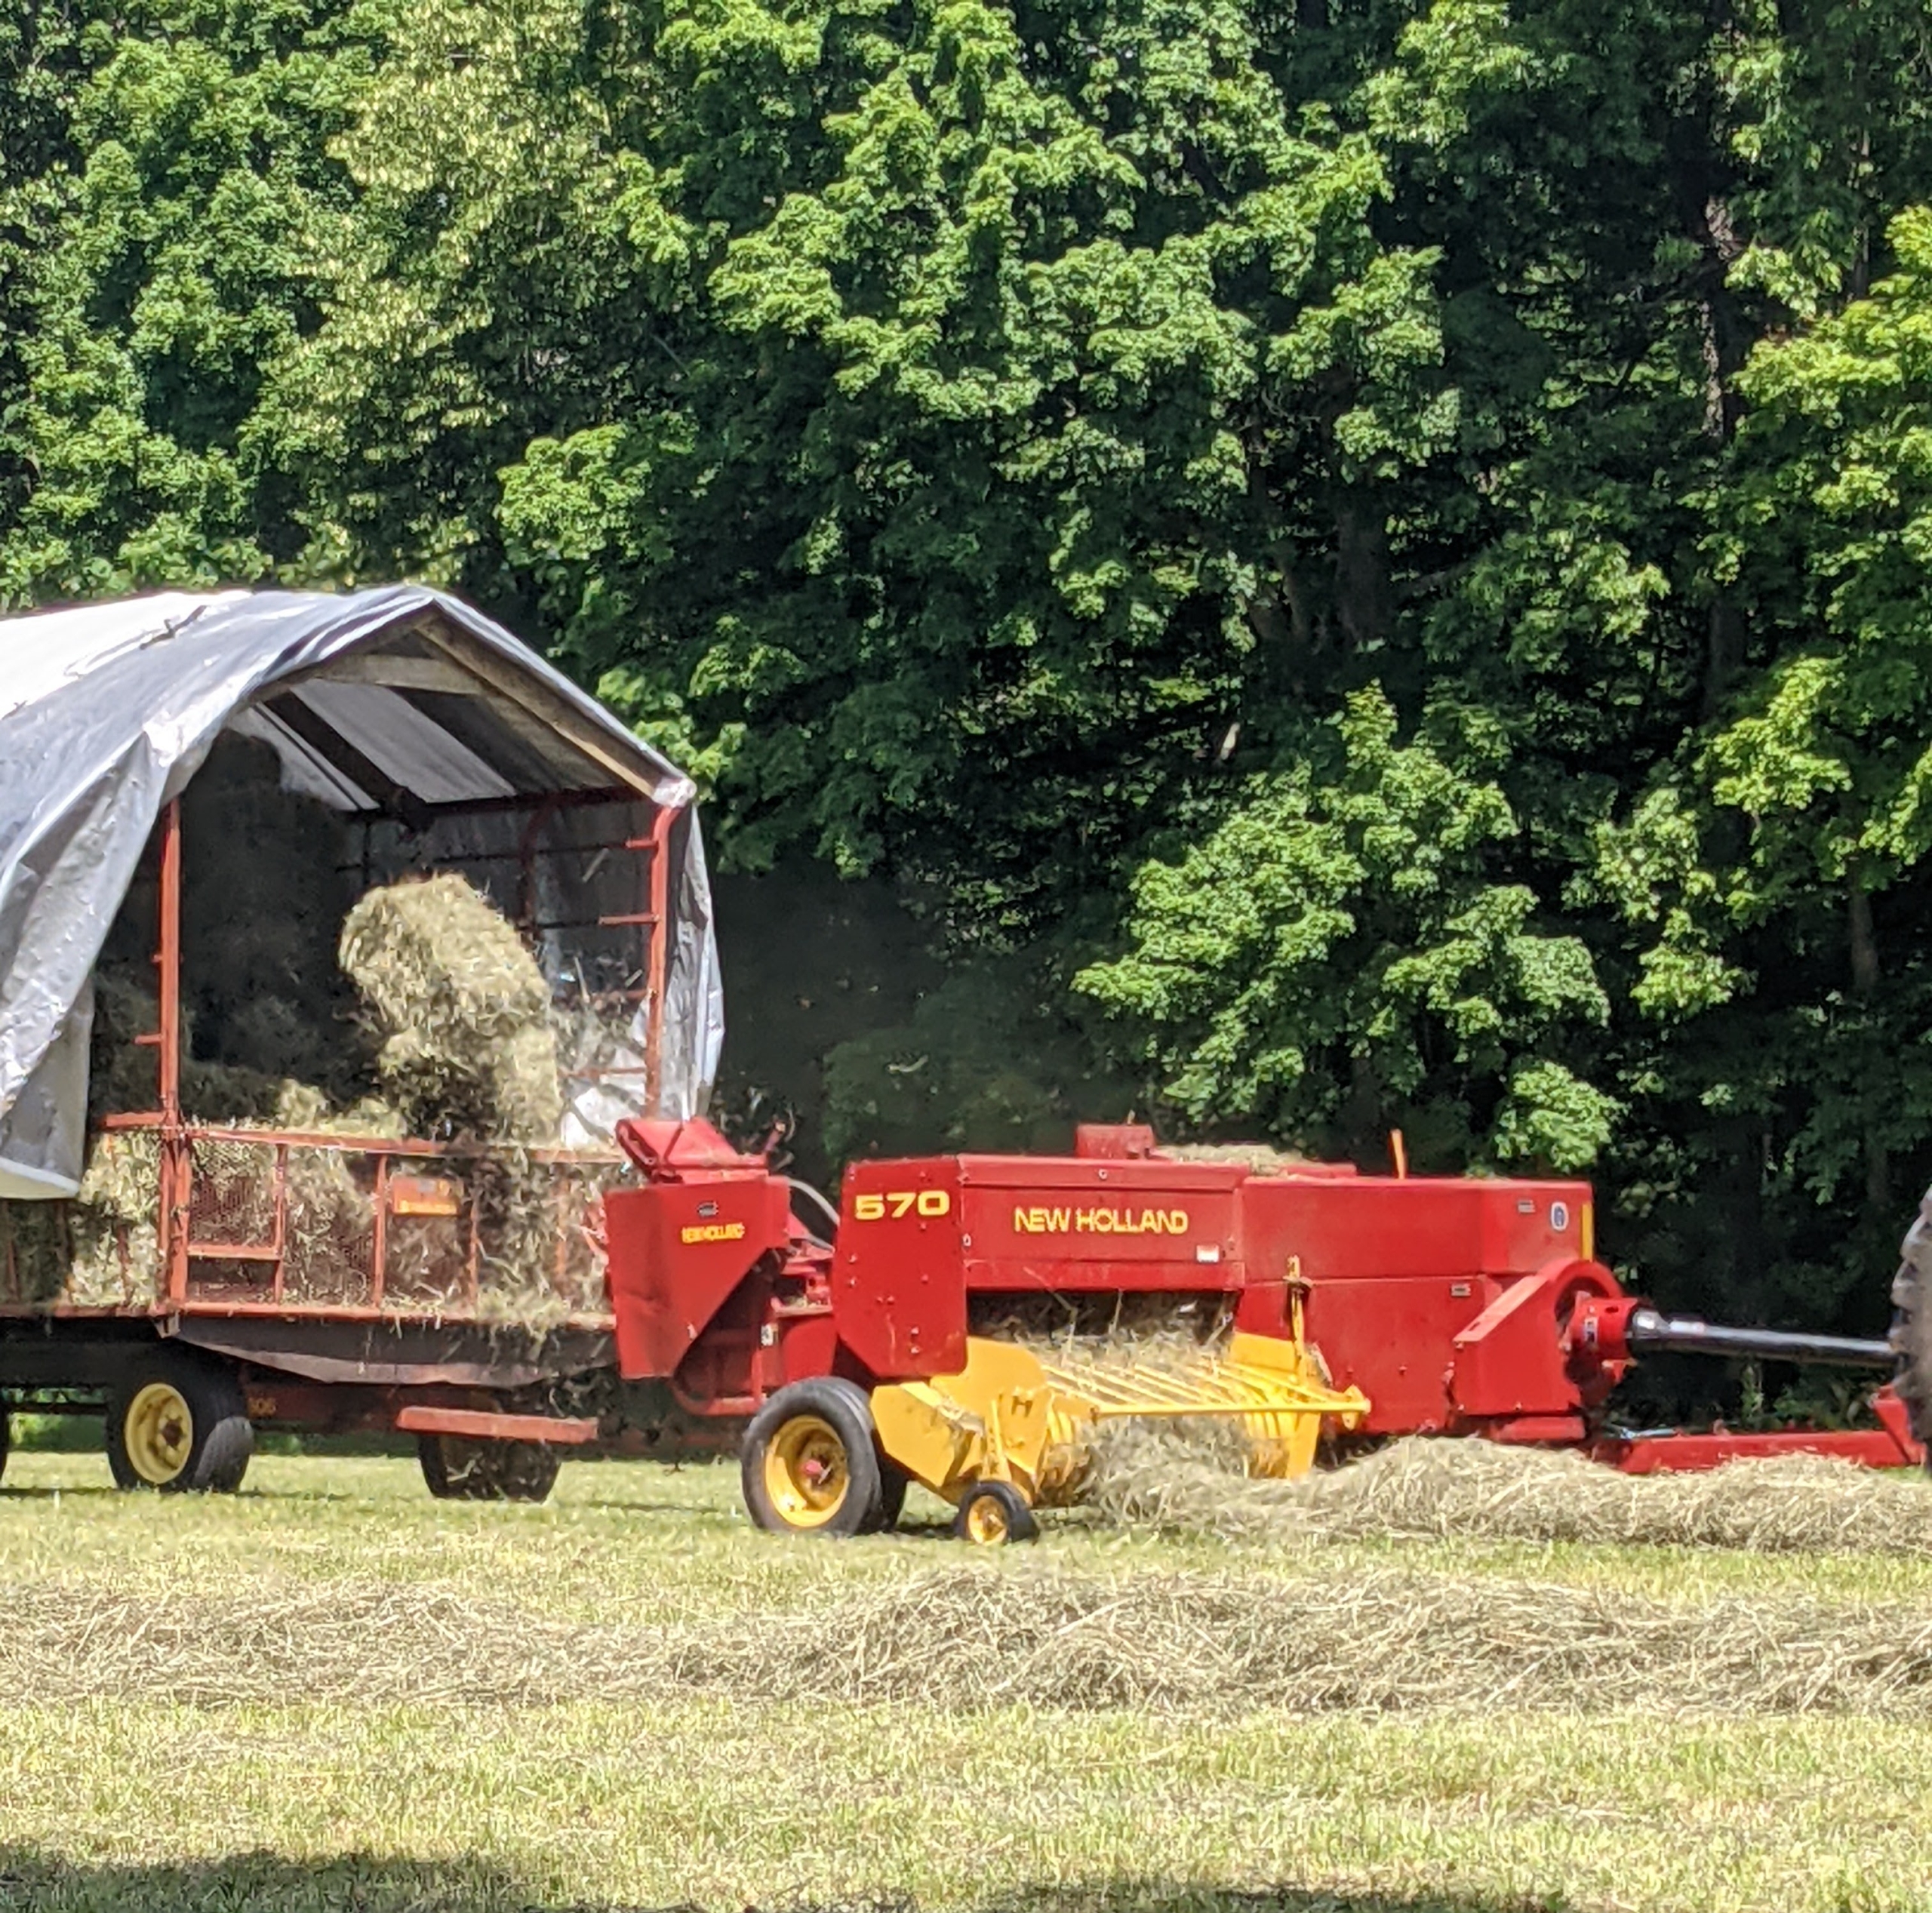
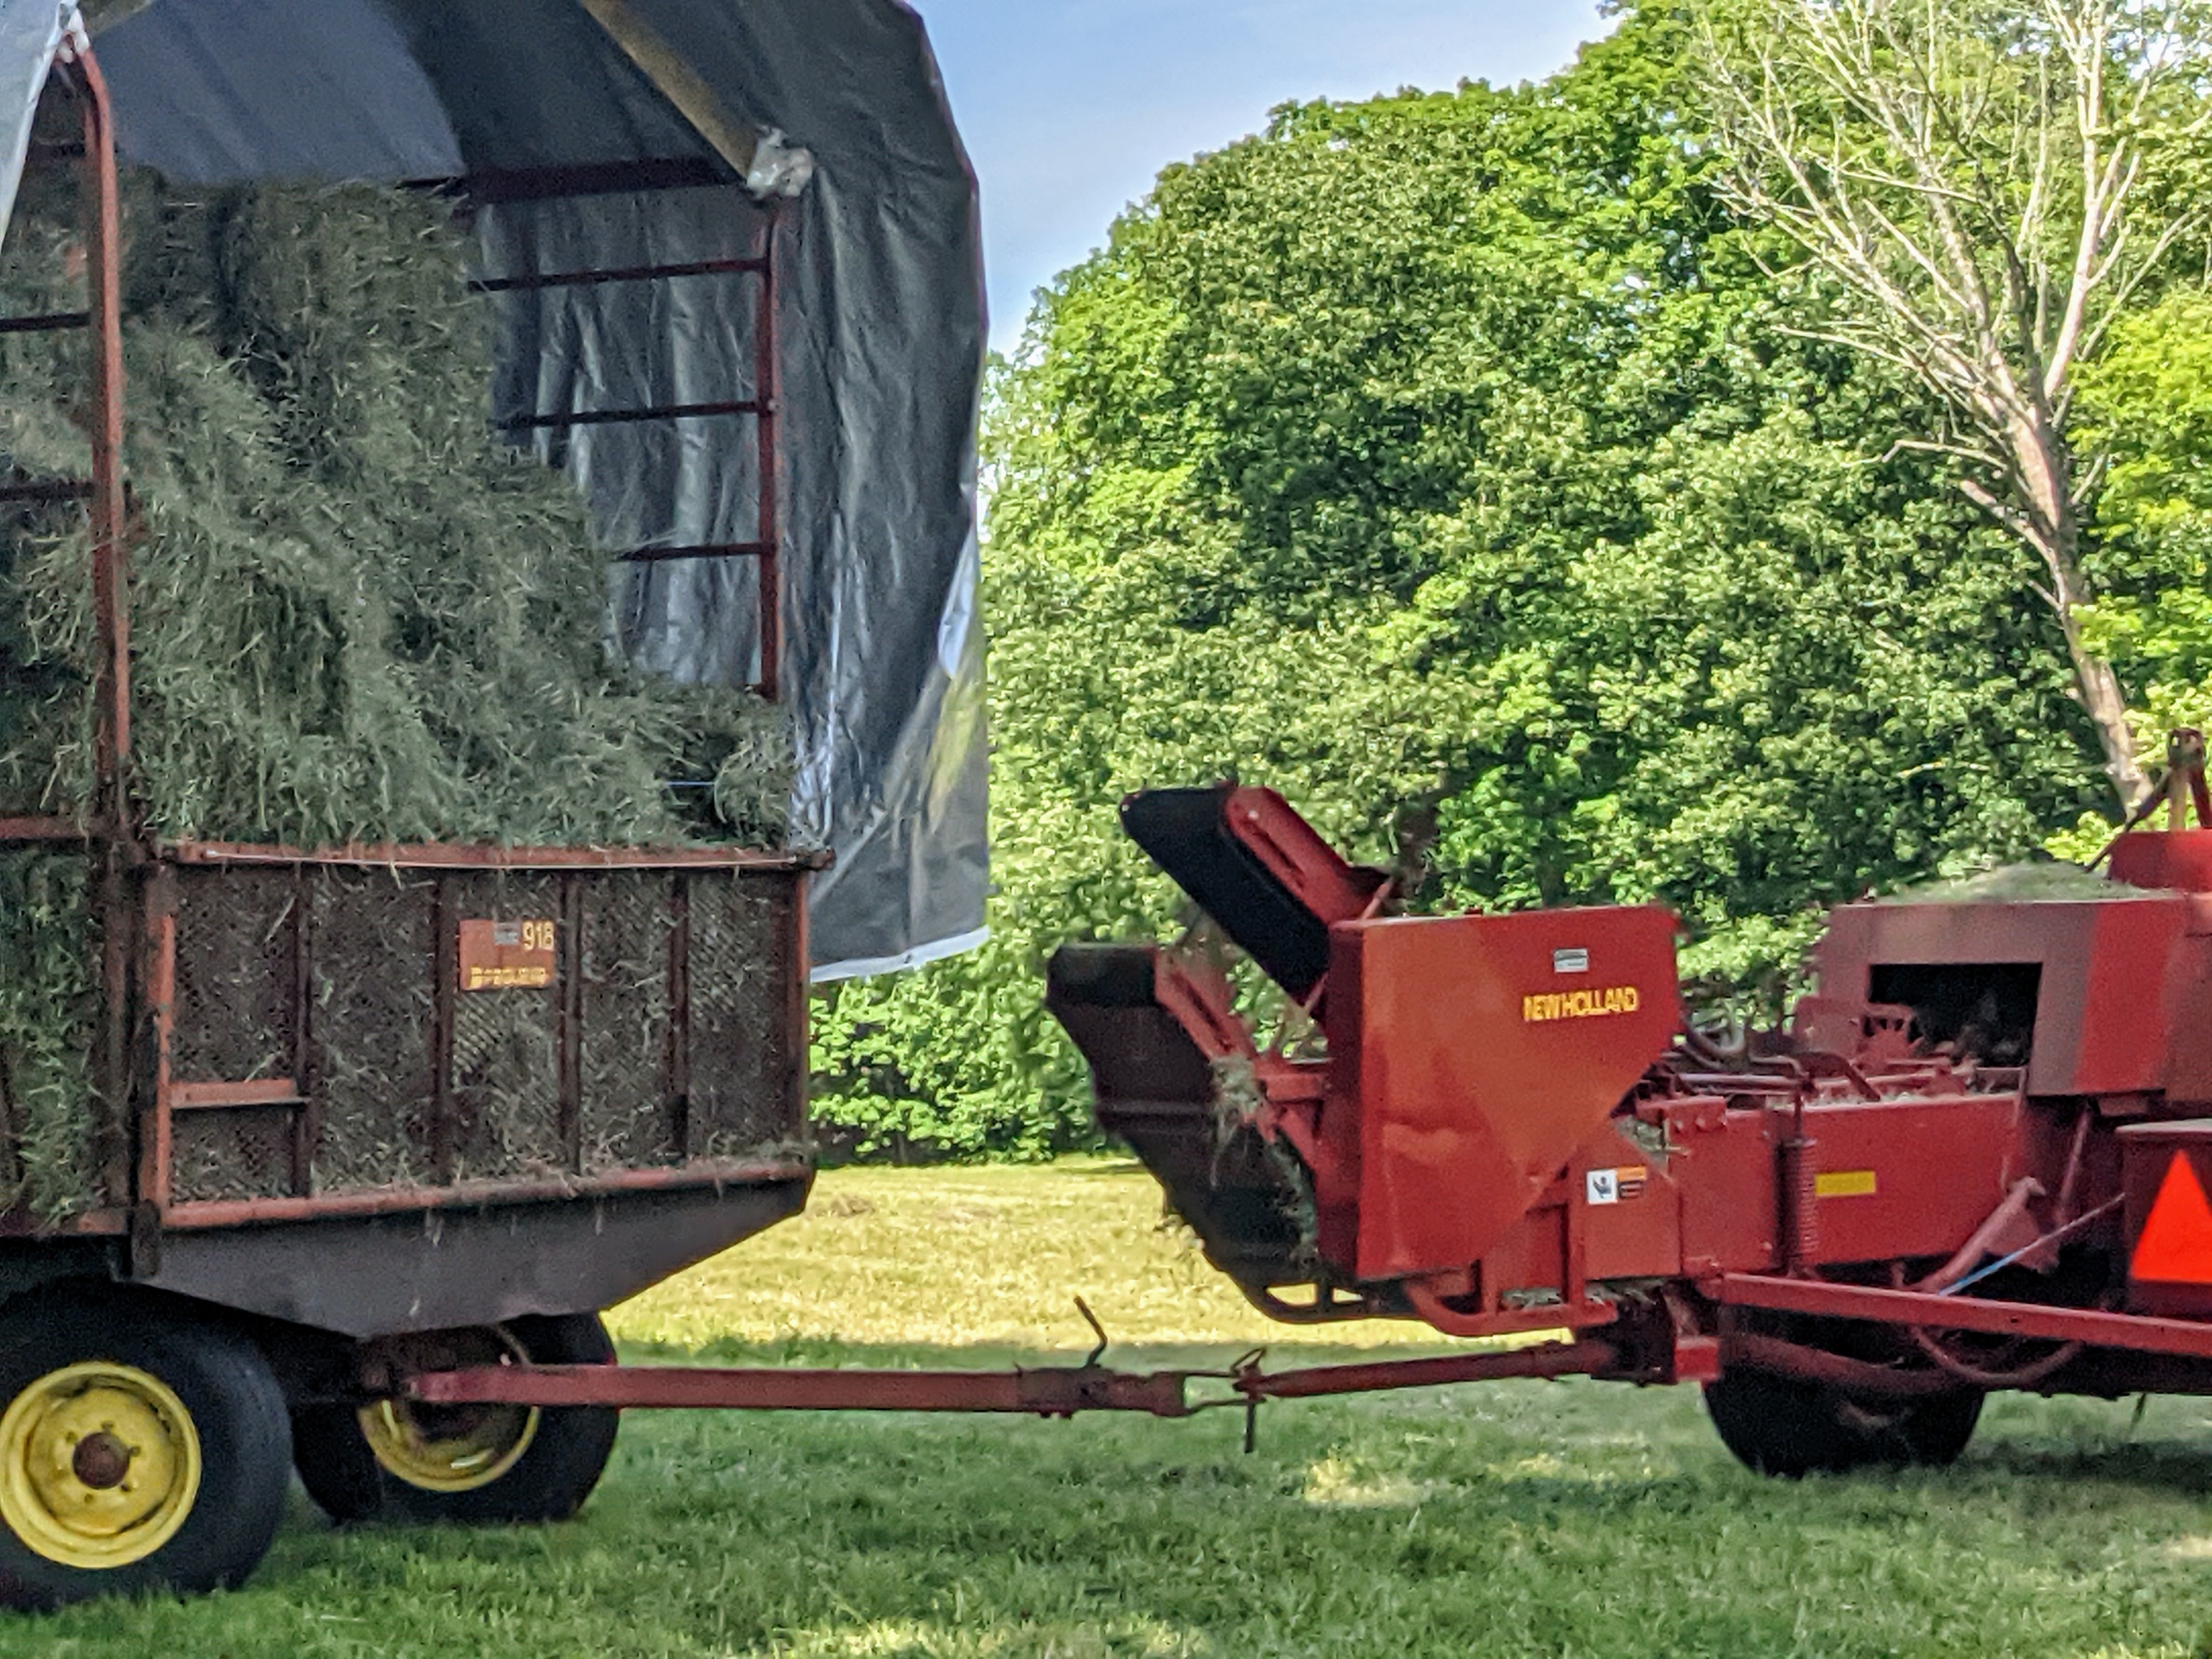
A baler is a piece of farm machinery used to compress a cut and raked crop into compact bales that are easy to handle, transport, and store.
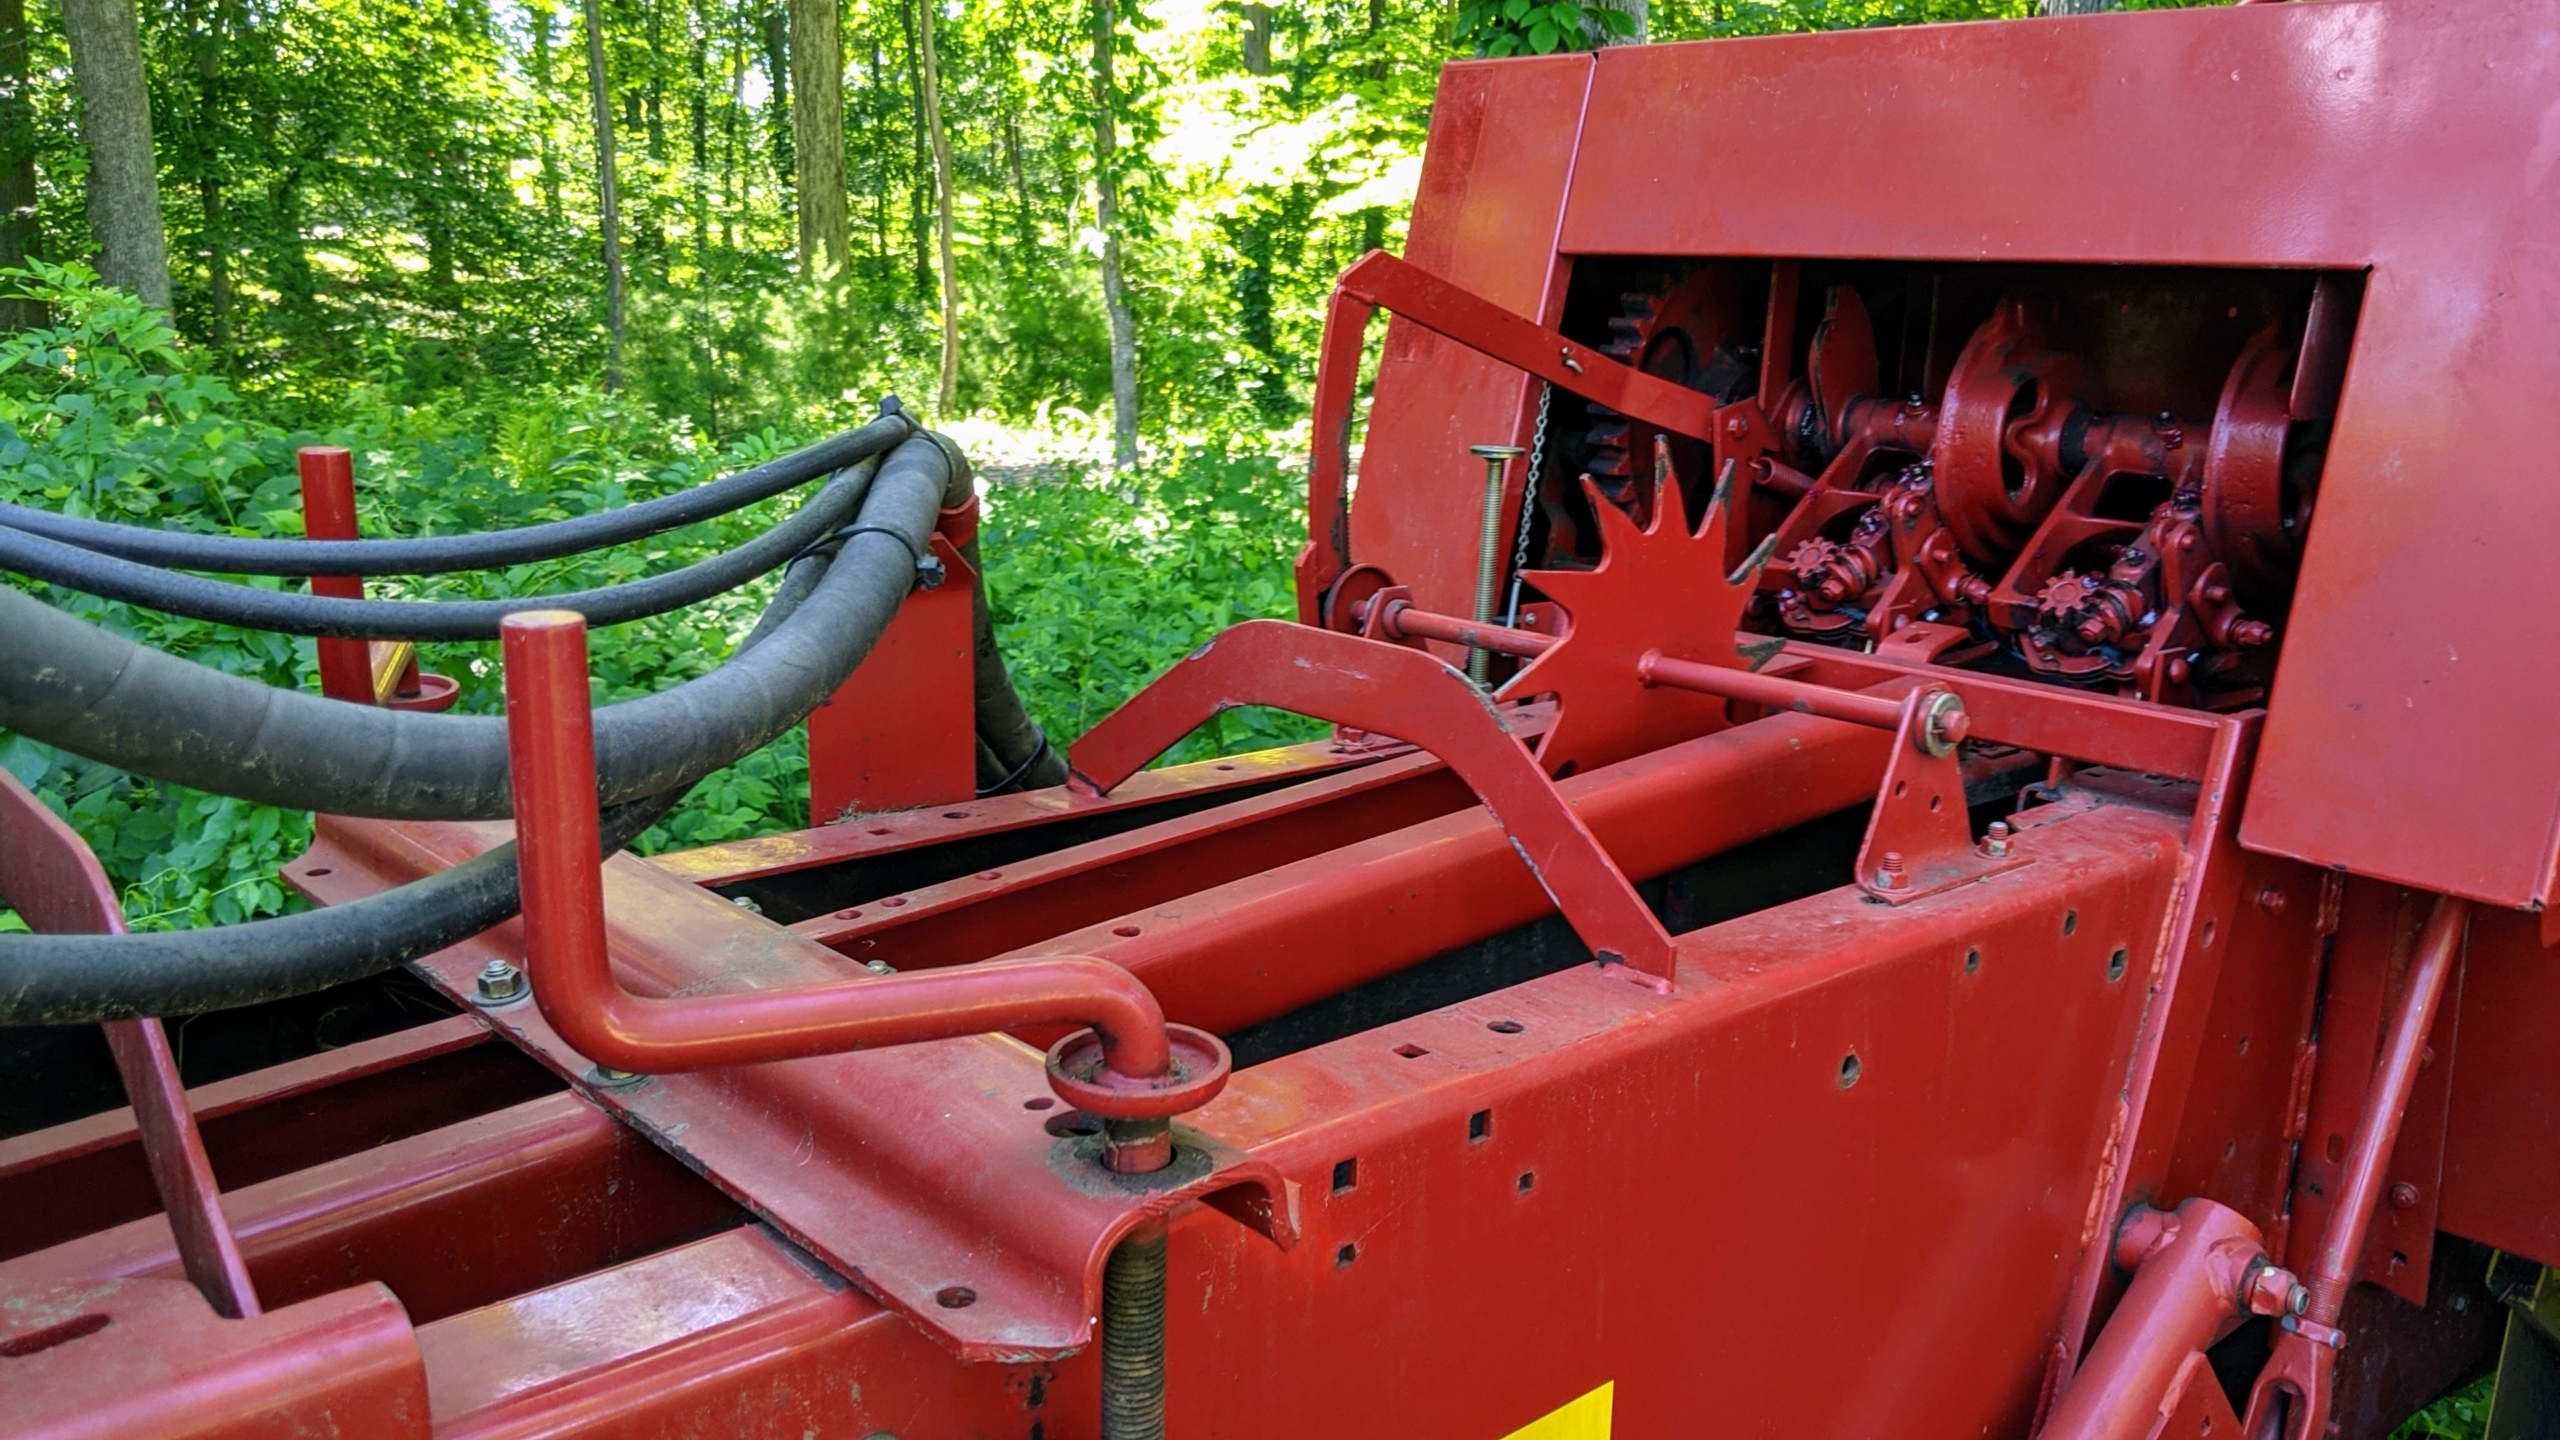
Here is the motor that helps to move and propel the bales into the wagon.
Chhiring hitches the baler to my tractor. I am so glad I have all the necessary equipment here at the farm. Having the “right tool for the right job” is very important.
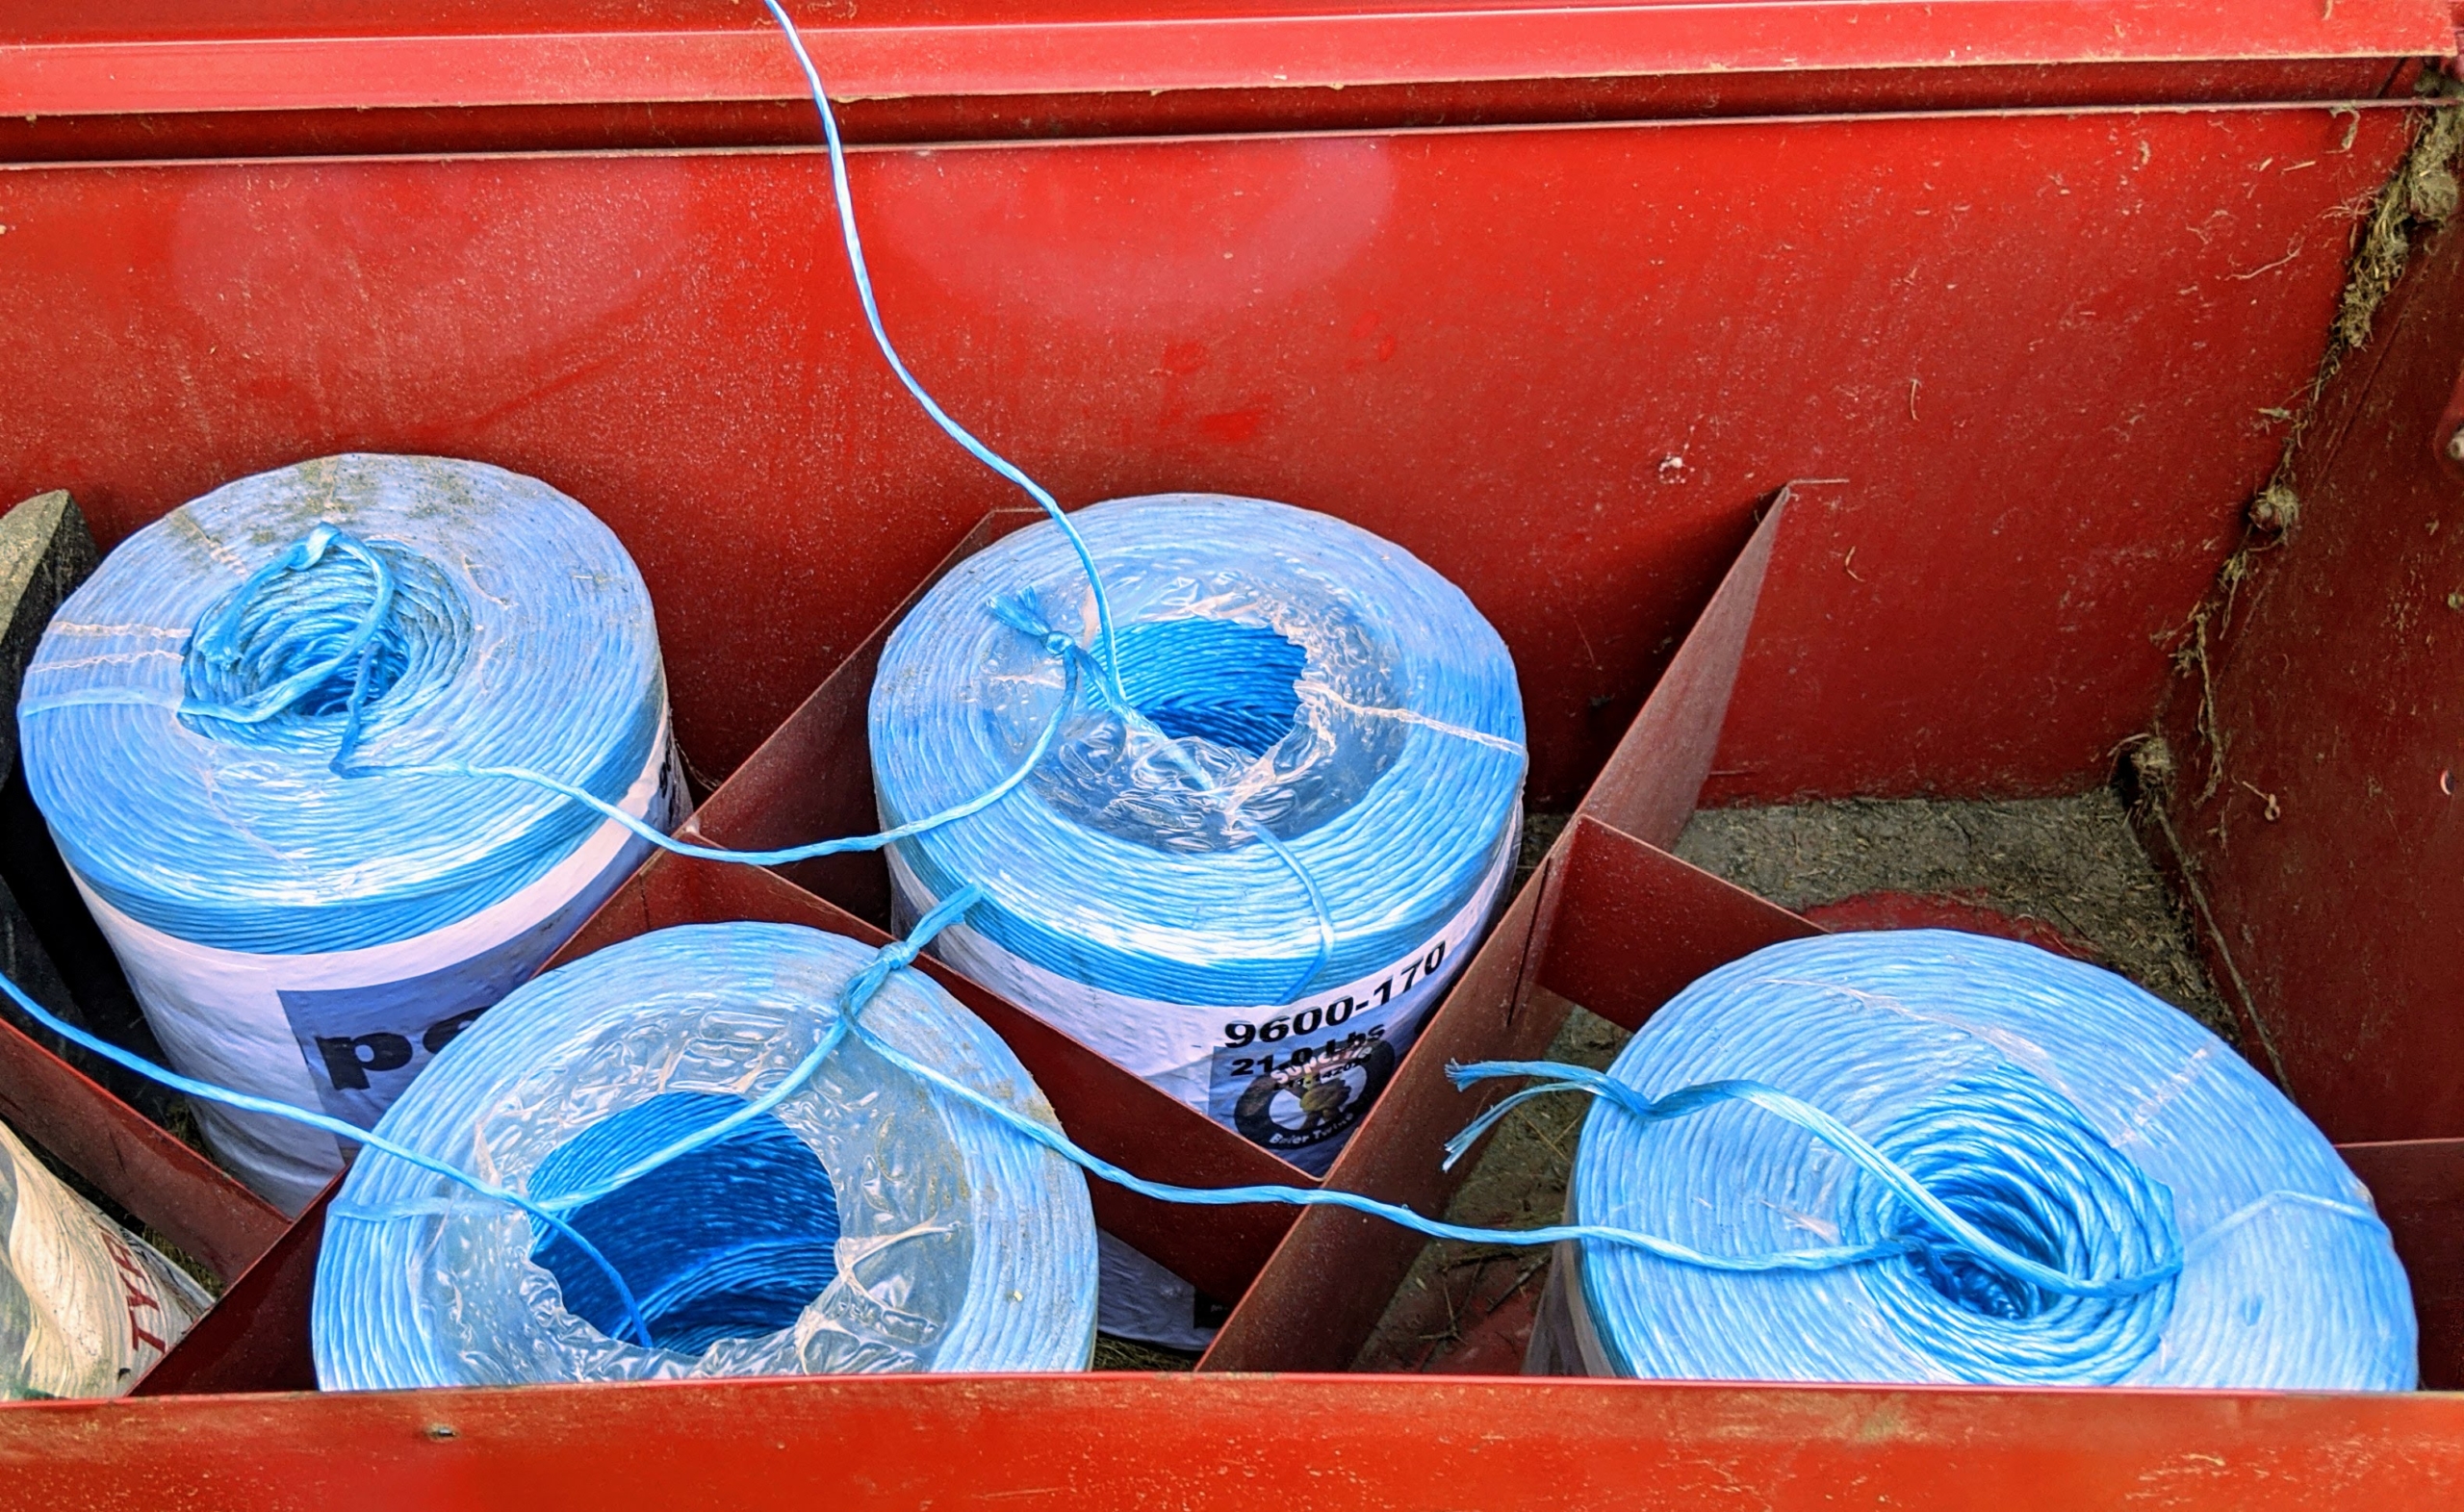
Large rolls of twine are positioned and tied to each other, so they can feed into the baler and secure the hay just before it shoots out into the trailer.
Here is a closer look at a row of hay ready to bale. I have three separate areas for growing hay. They are all planted with a mixture of timothy, orchard grass, Kentucky bluegrass, ryegrass, and clovers – all great for producing good quality hay.
Chhiring starts this process midday when there is the least amount of moisture.
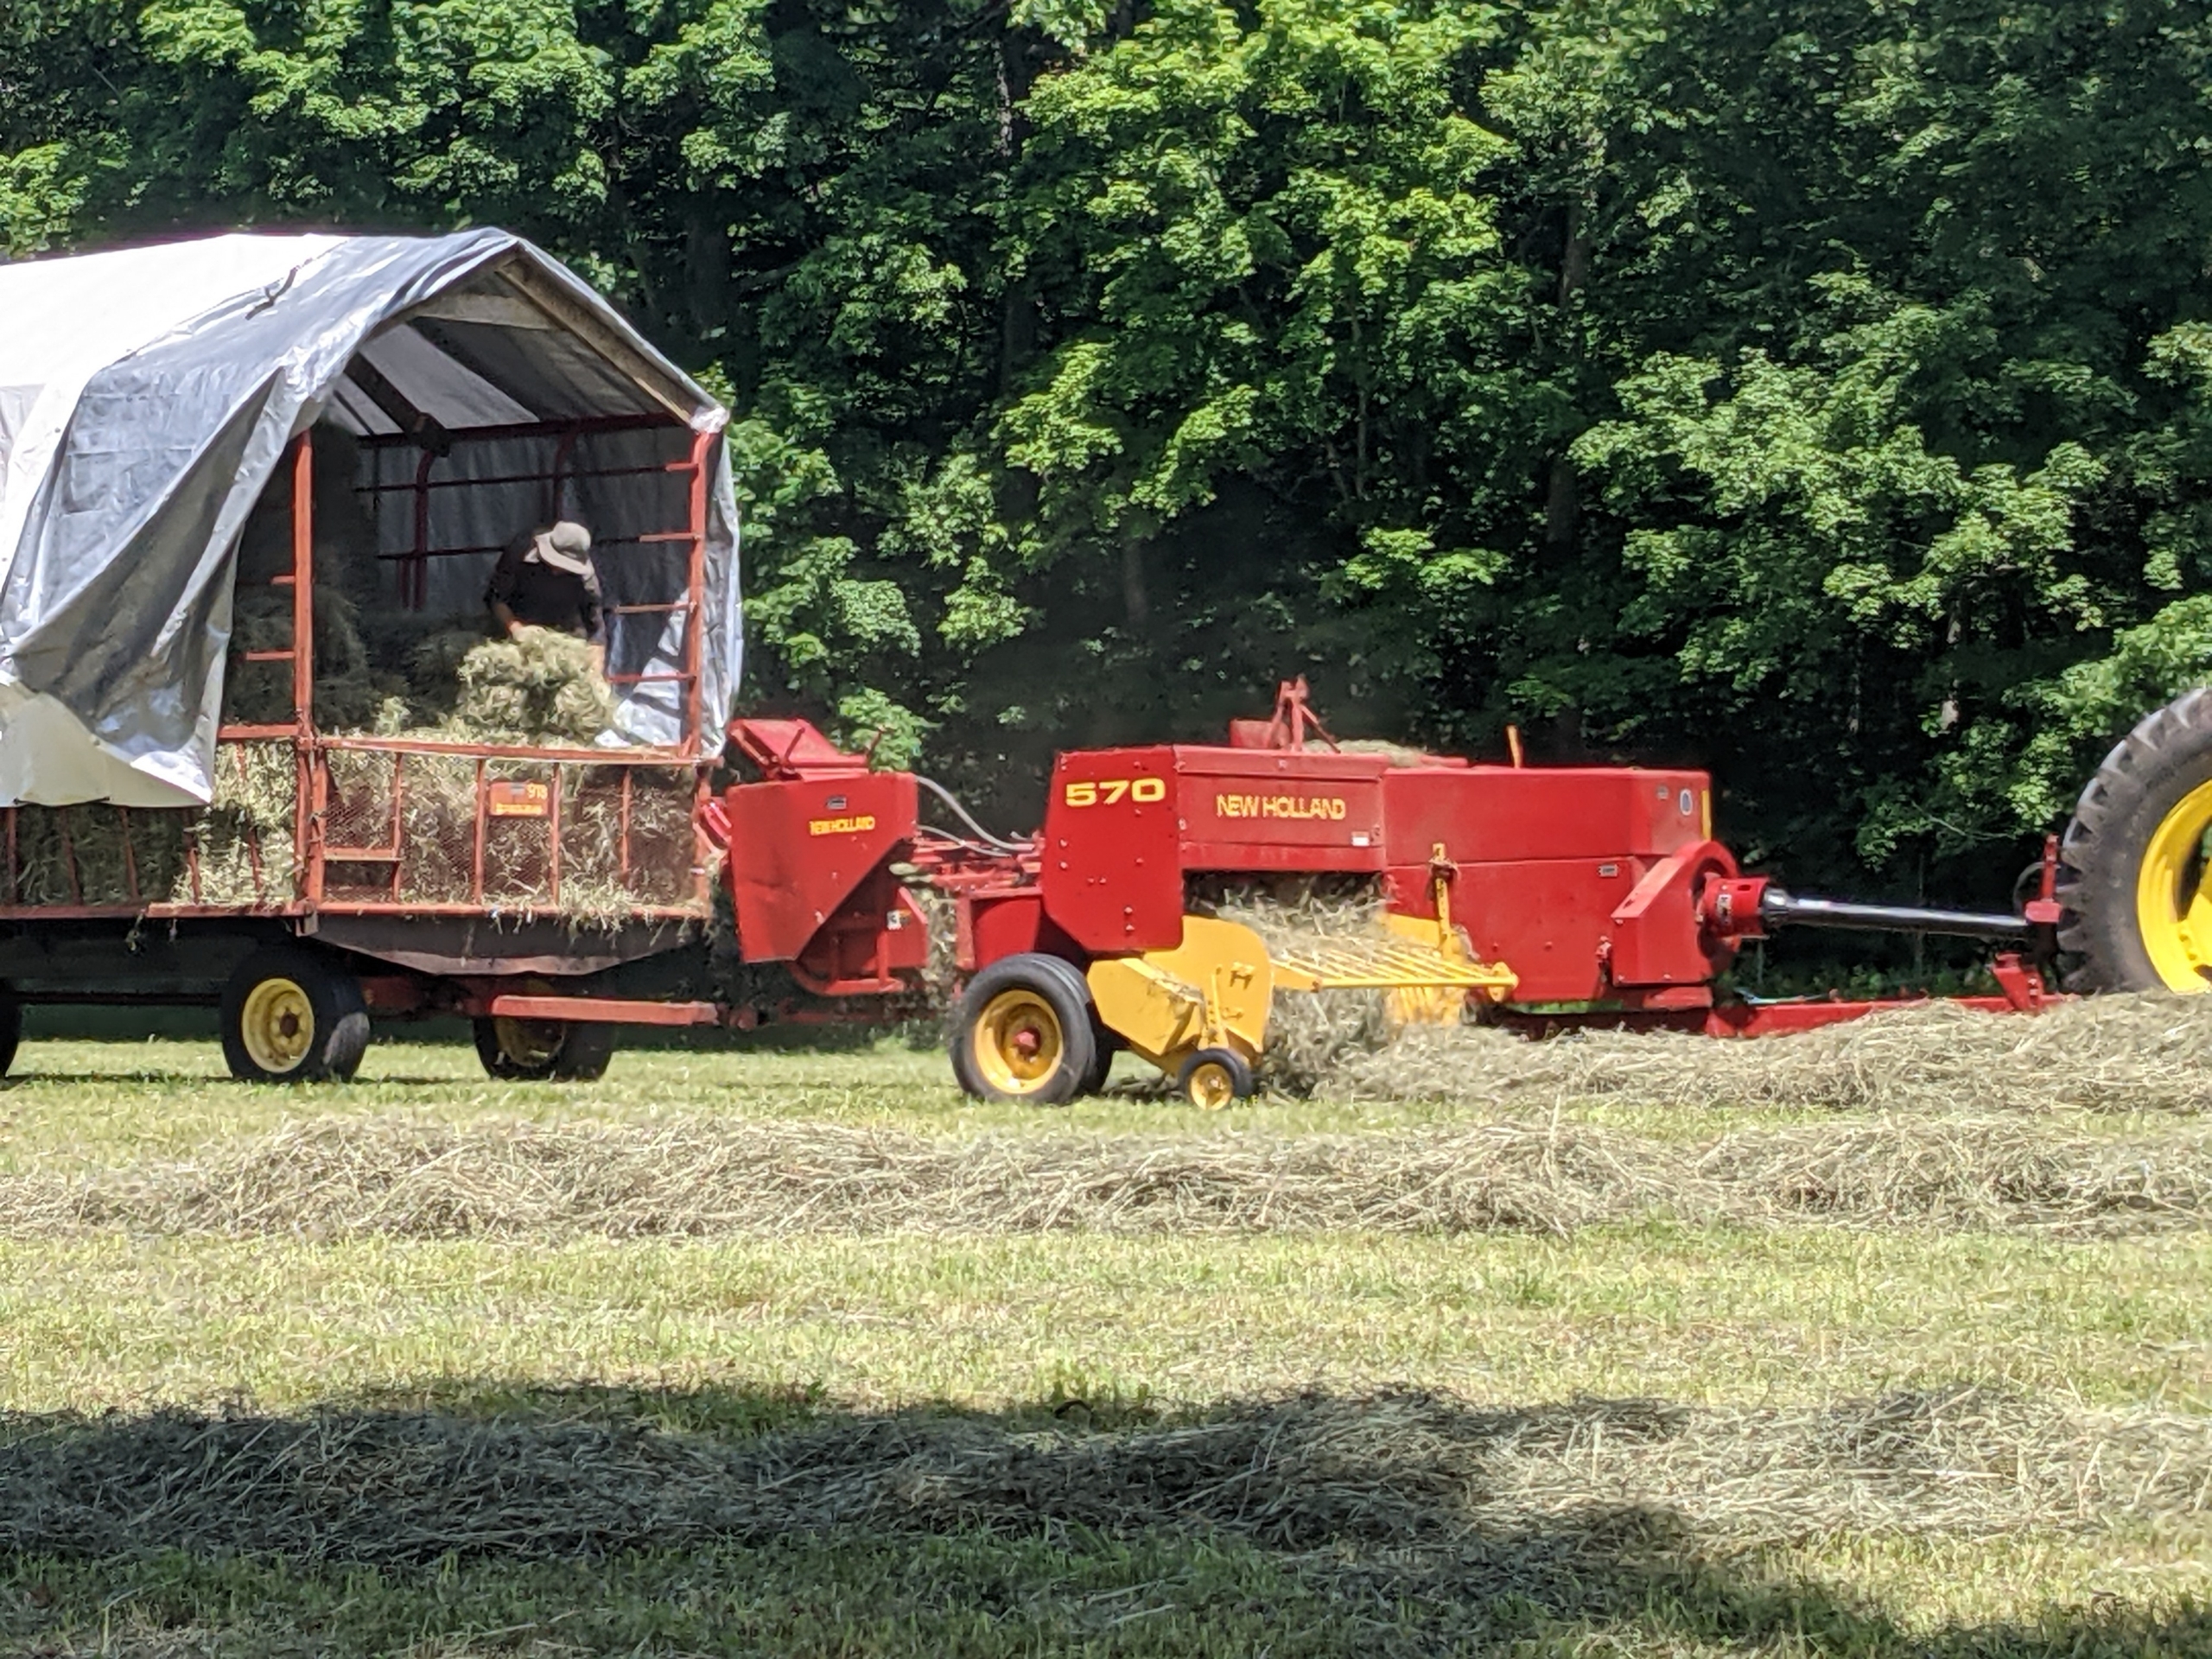
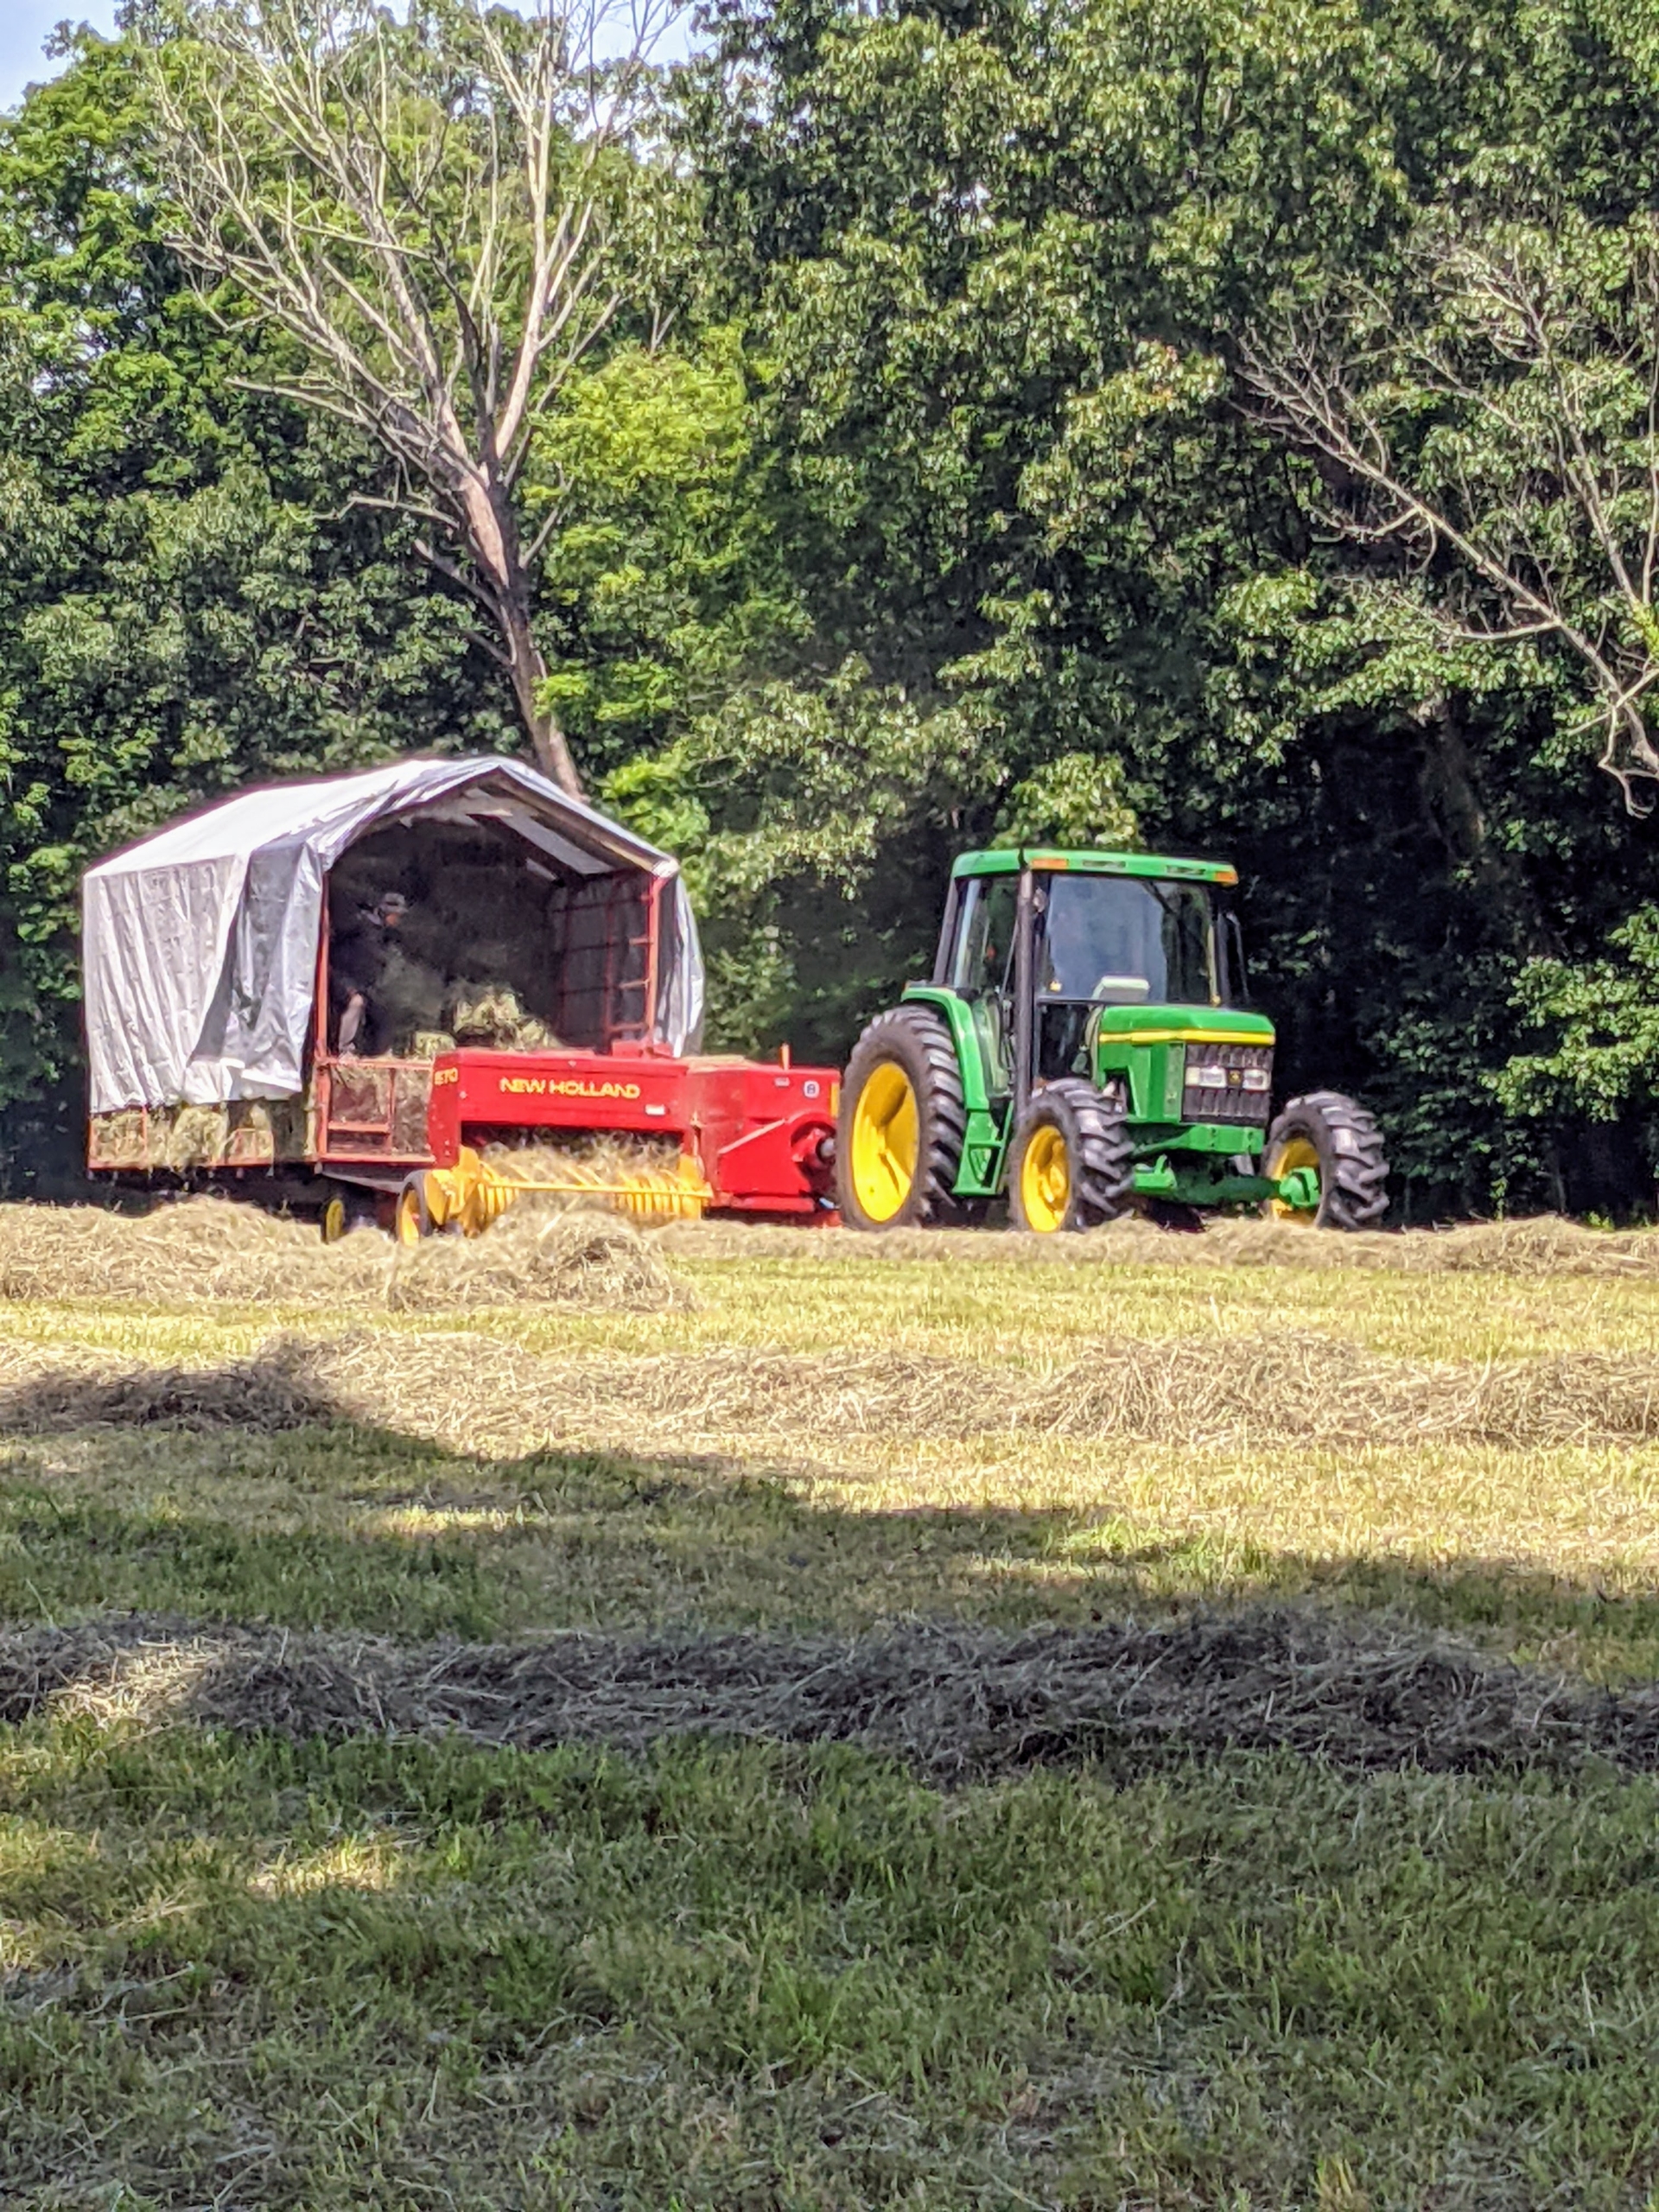
The tractor rides to one side of the windrow while the baler passes directly over it to collect the hay.
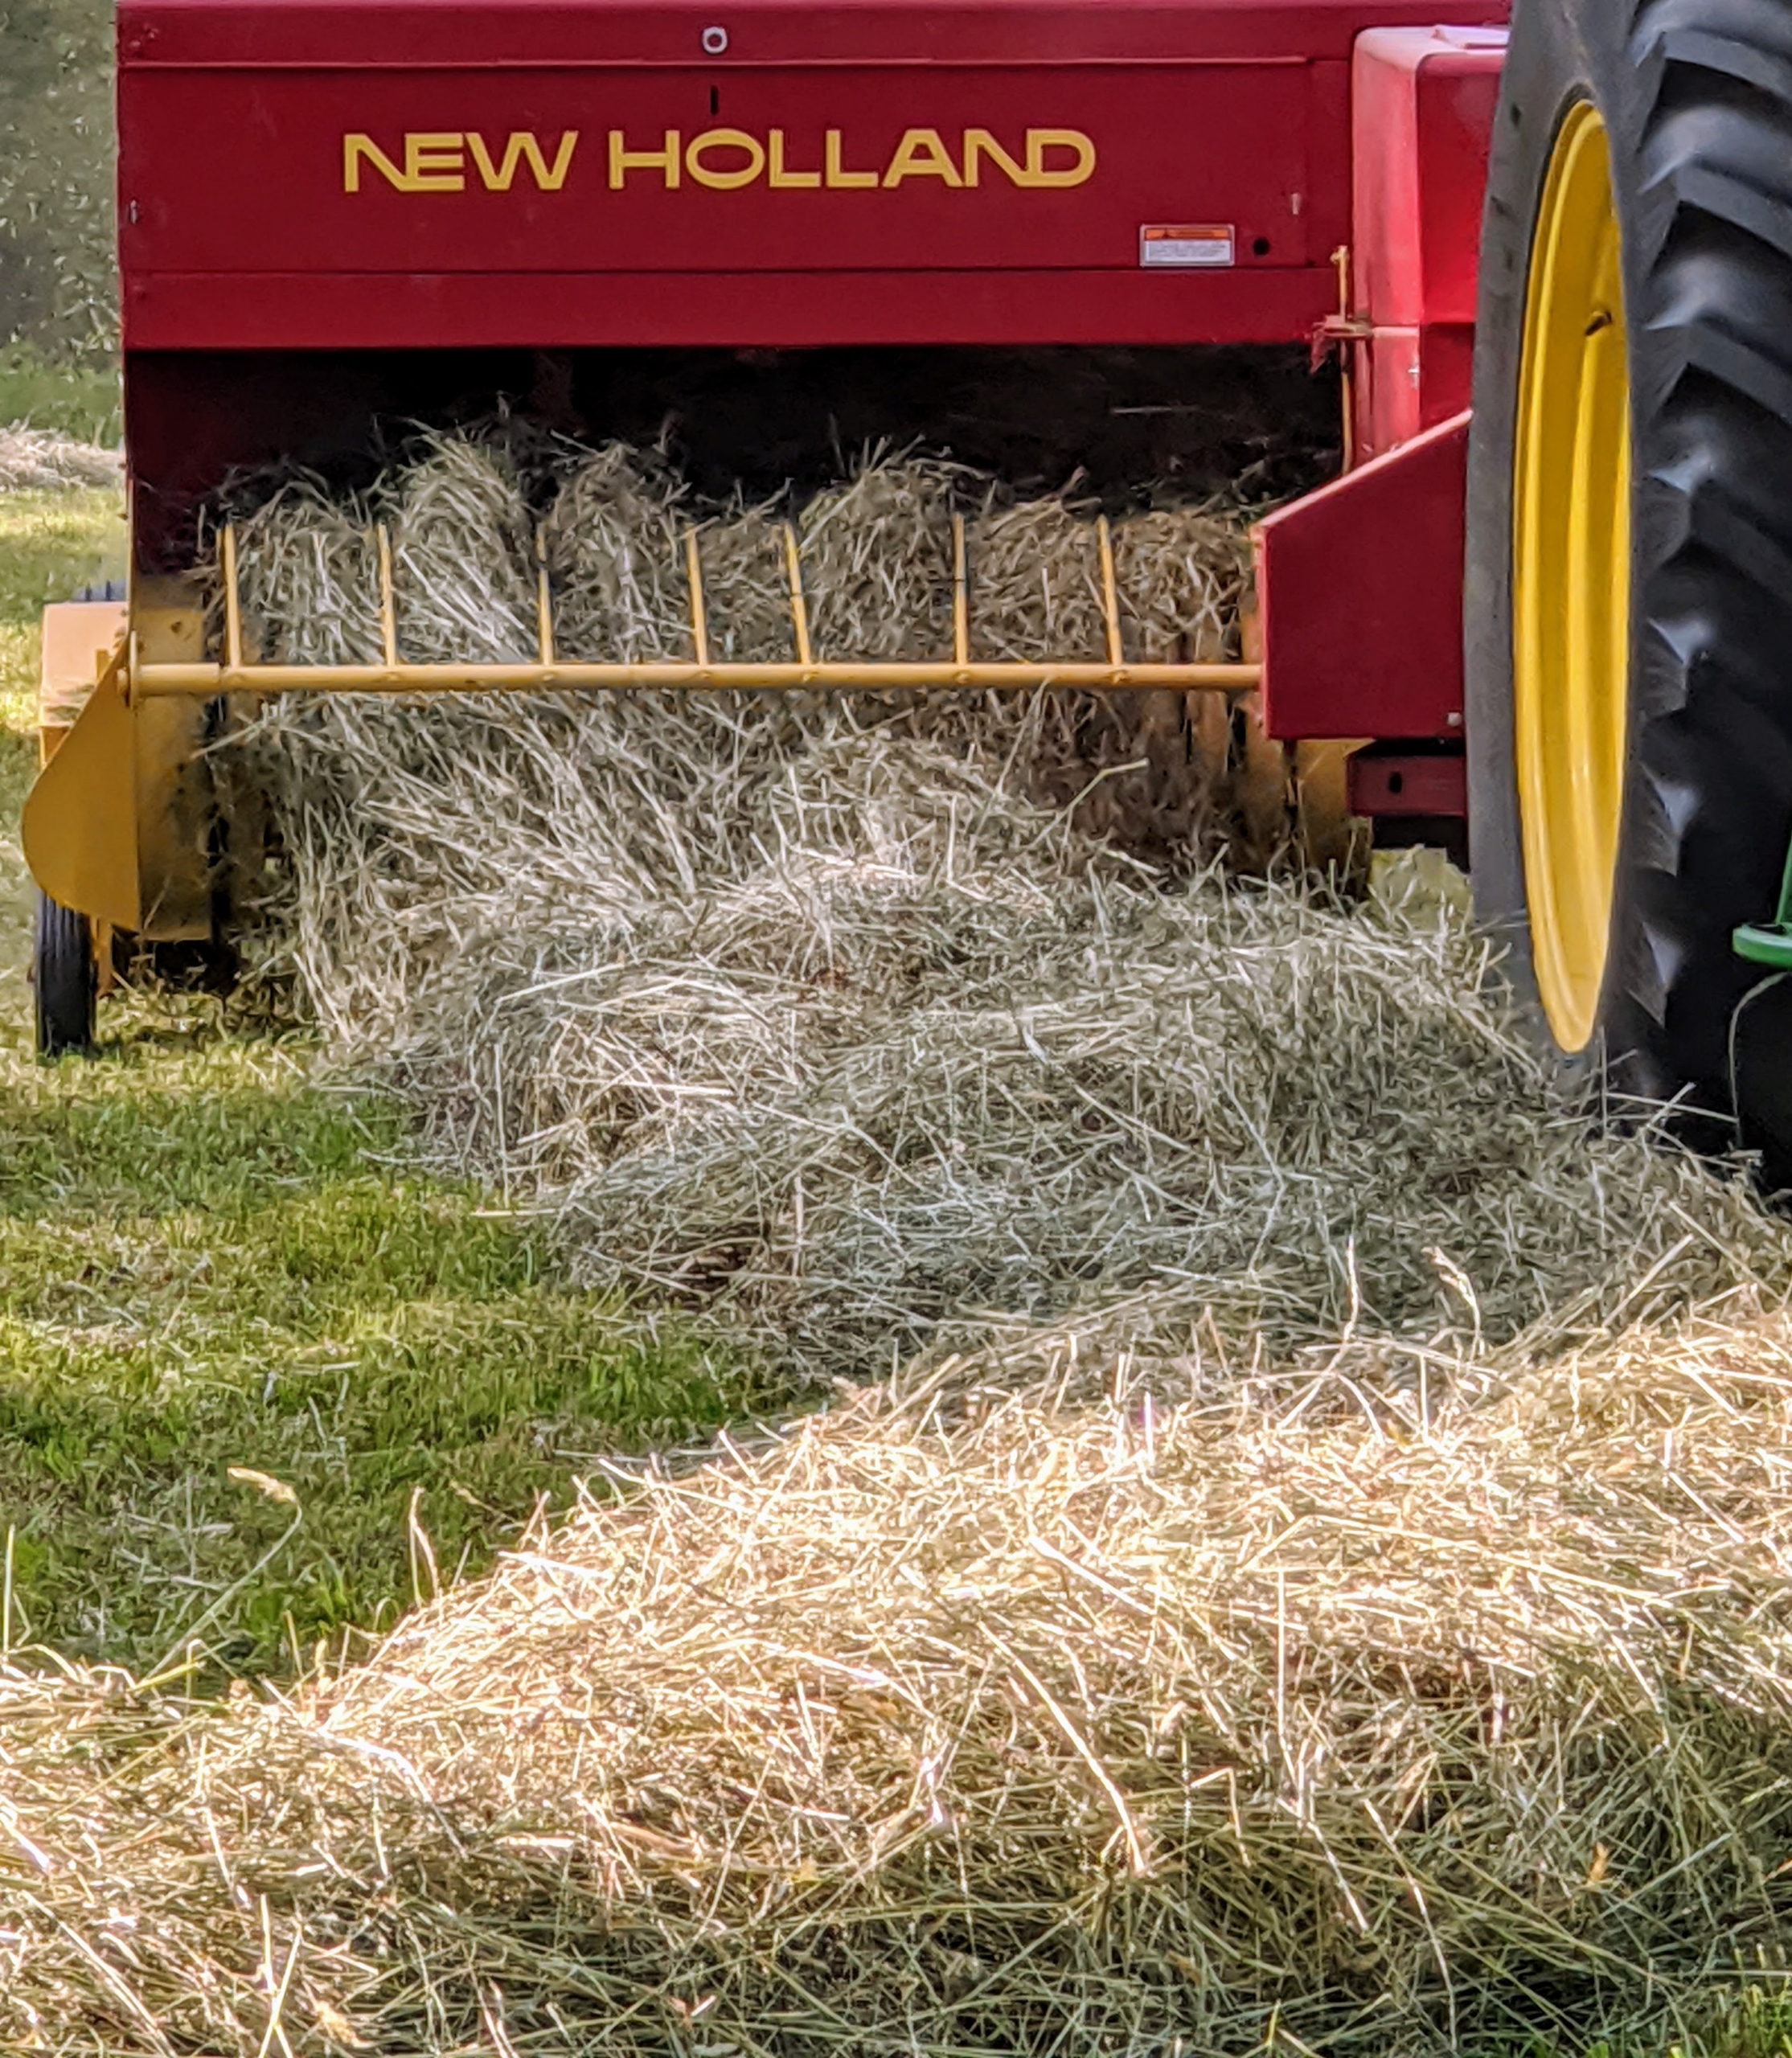
The hay is lifted by tines in the baler’s reel and then propelled into the wagon by a mechanical arm called a thrower or a kicker. The bales are manageable for one person to handle, about 45 to 60 pounds each.
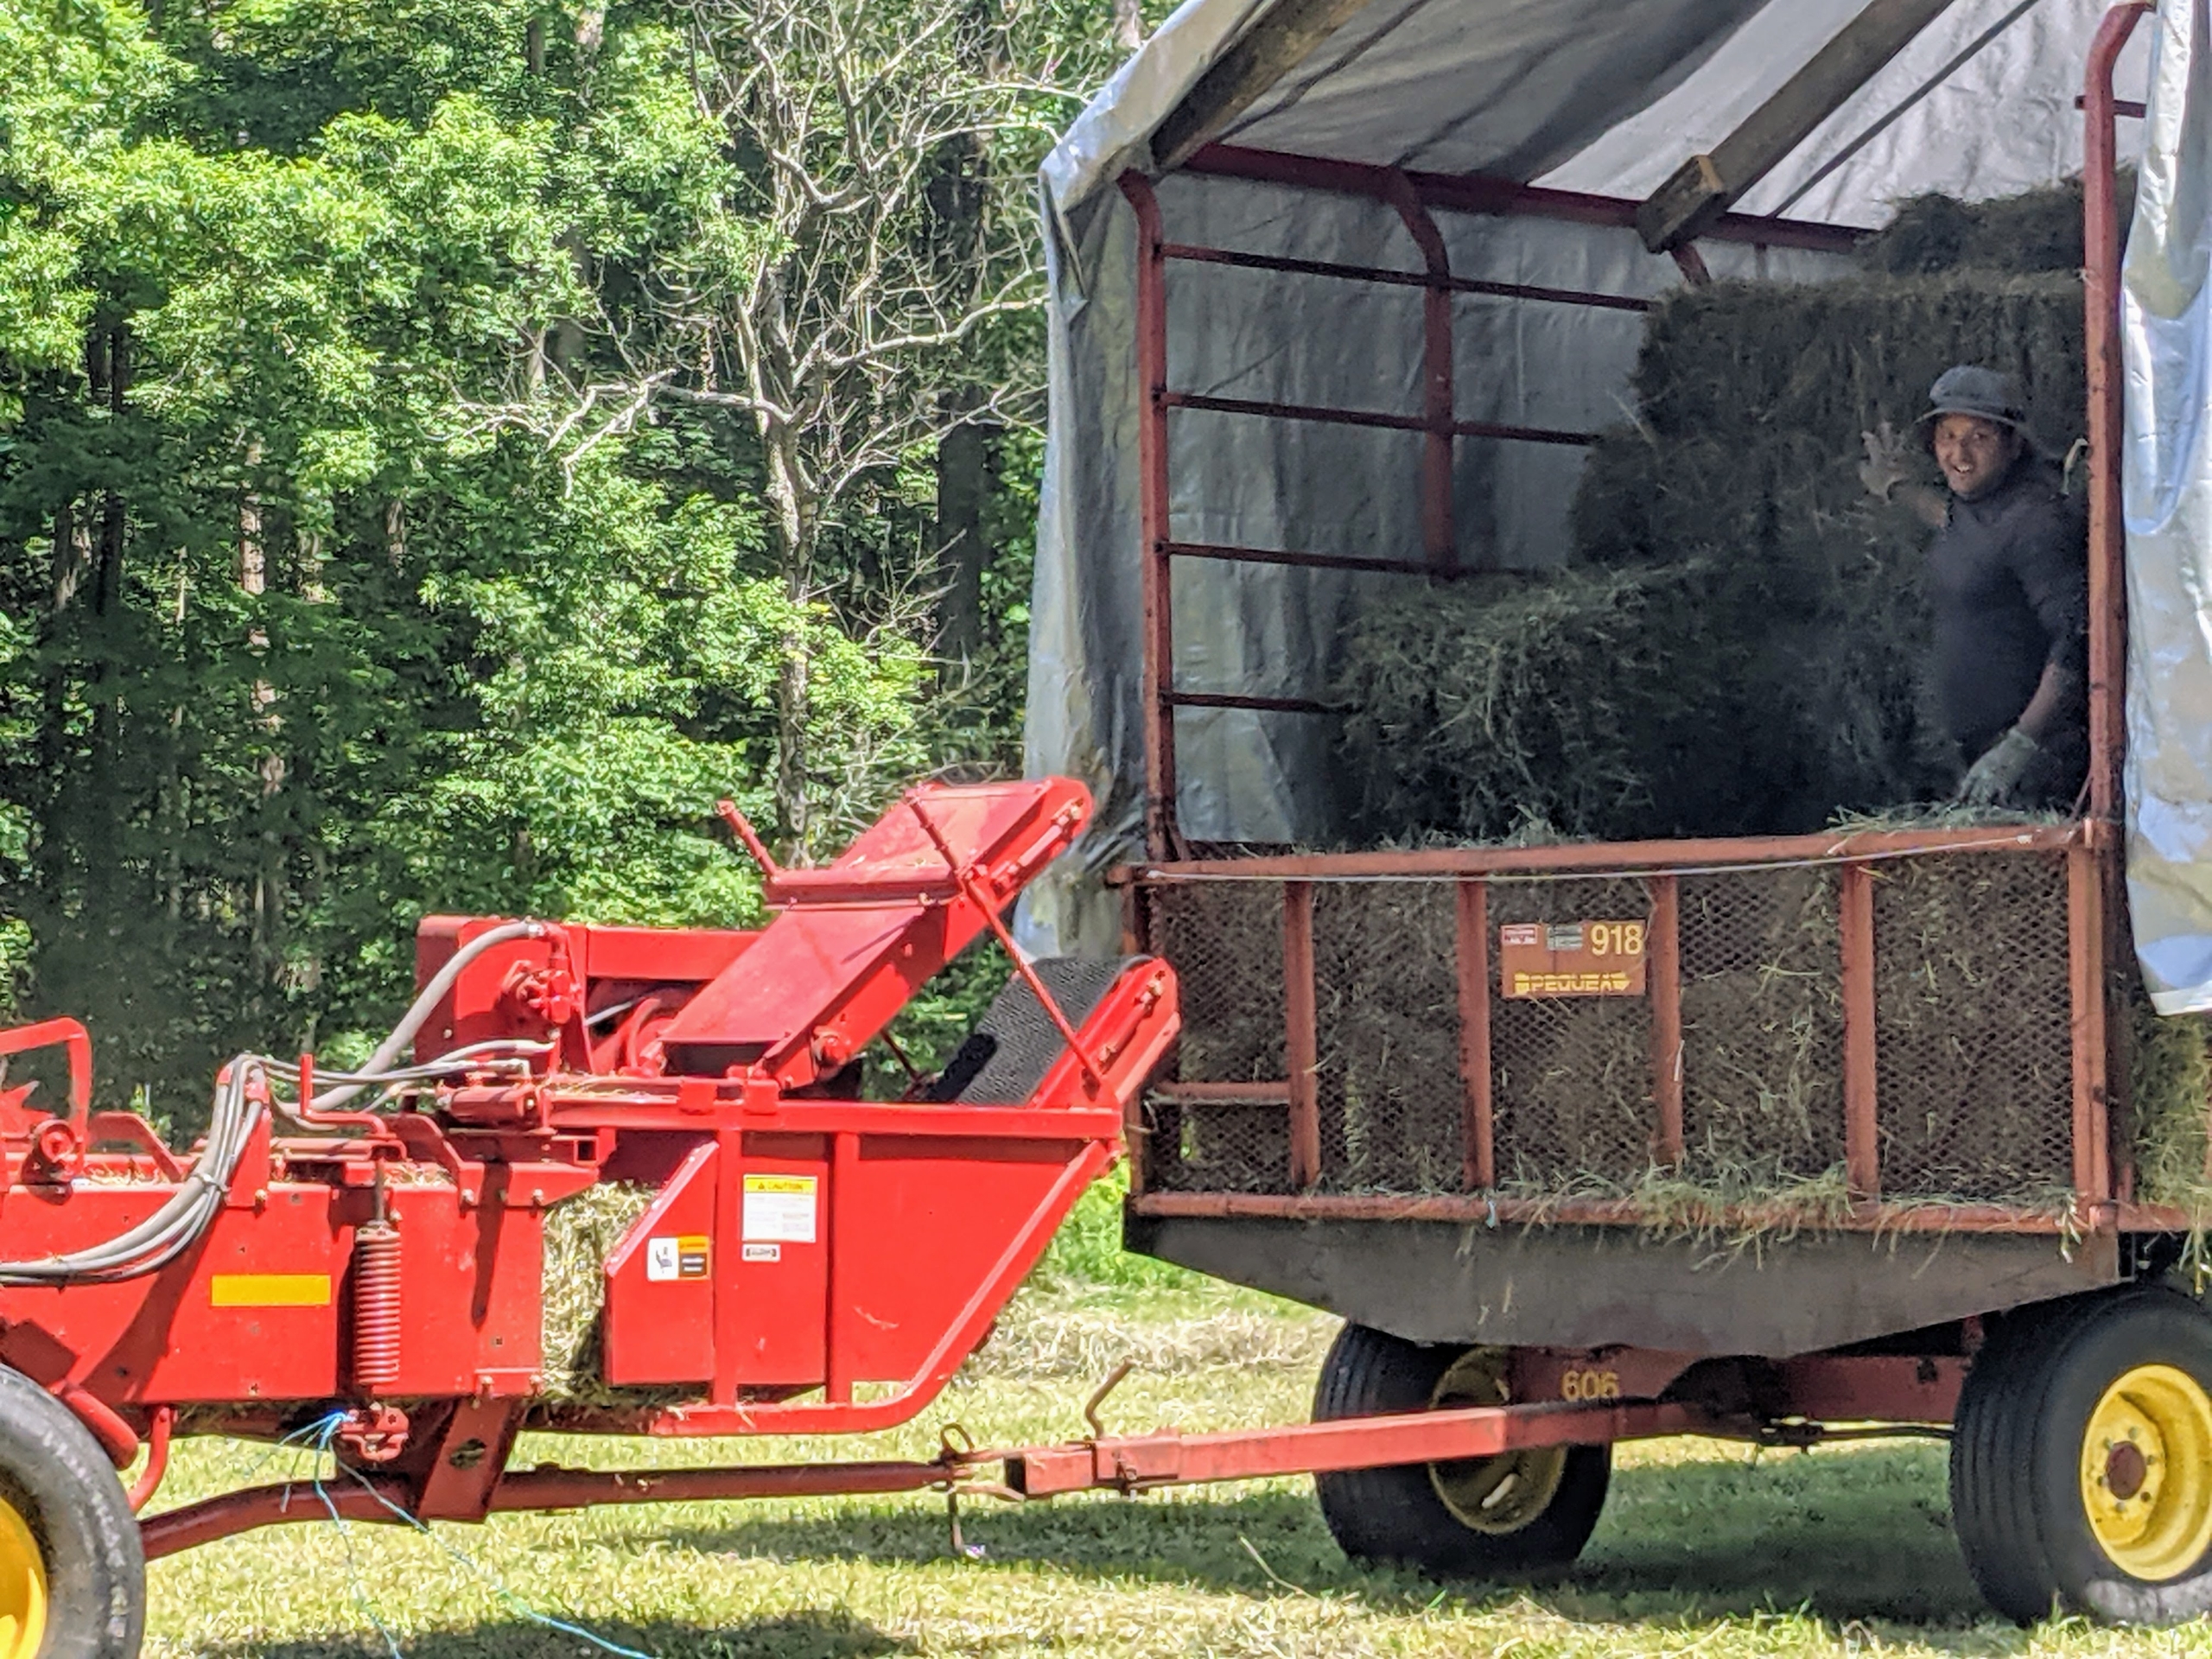
Behind the baler is the hay trailer or wagon, which is used to catch the bales once they are formed and tied. It’s covered to protect the bales from any unexpected rain and to offer shade to Domi who is stacking the bales as they are thrown.
Here is Domi ready to catch each bale as it shoots out of the machine.
All the hay is dry and passing through the machine smoothly. If the hay is properly dried, the baler will work continuously down each row. Hay that is too damp tends to clog up the baler.
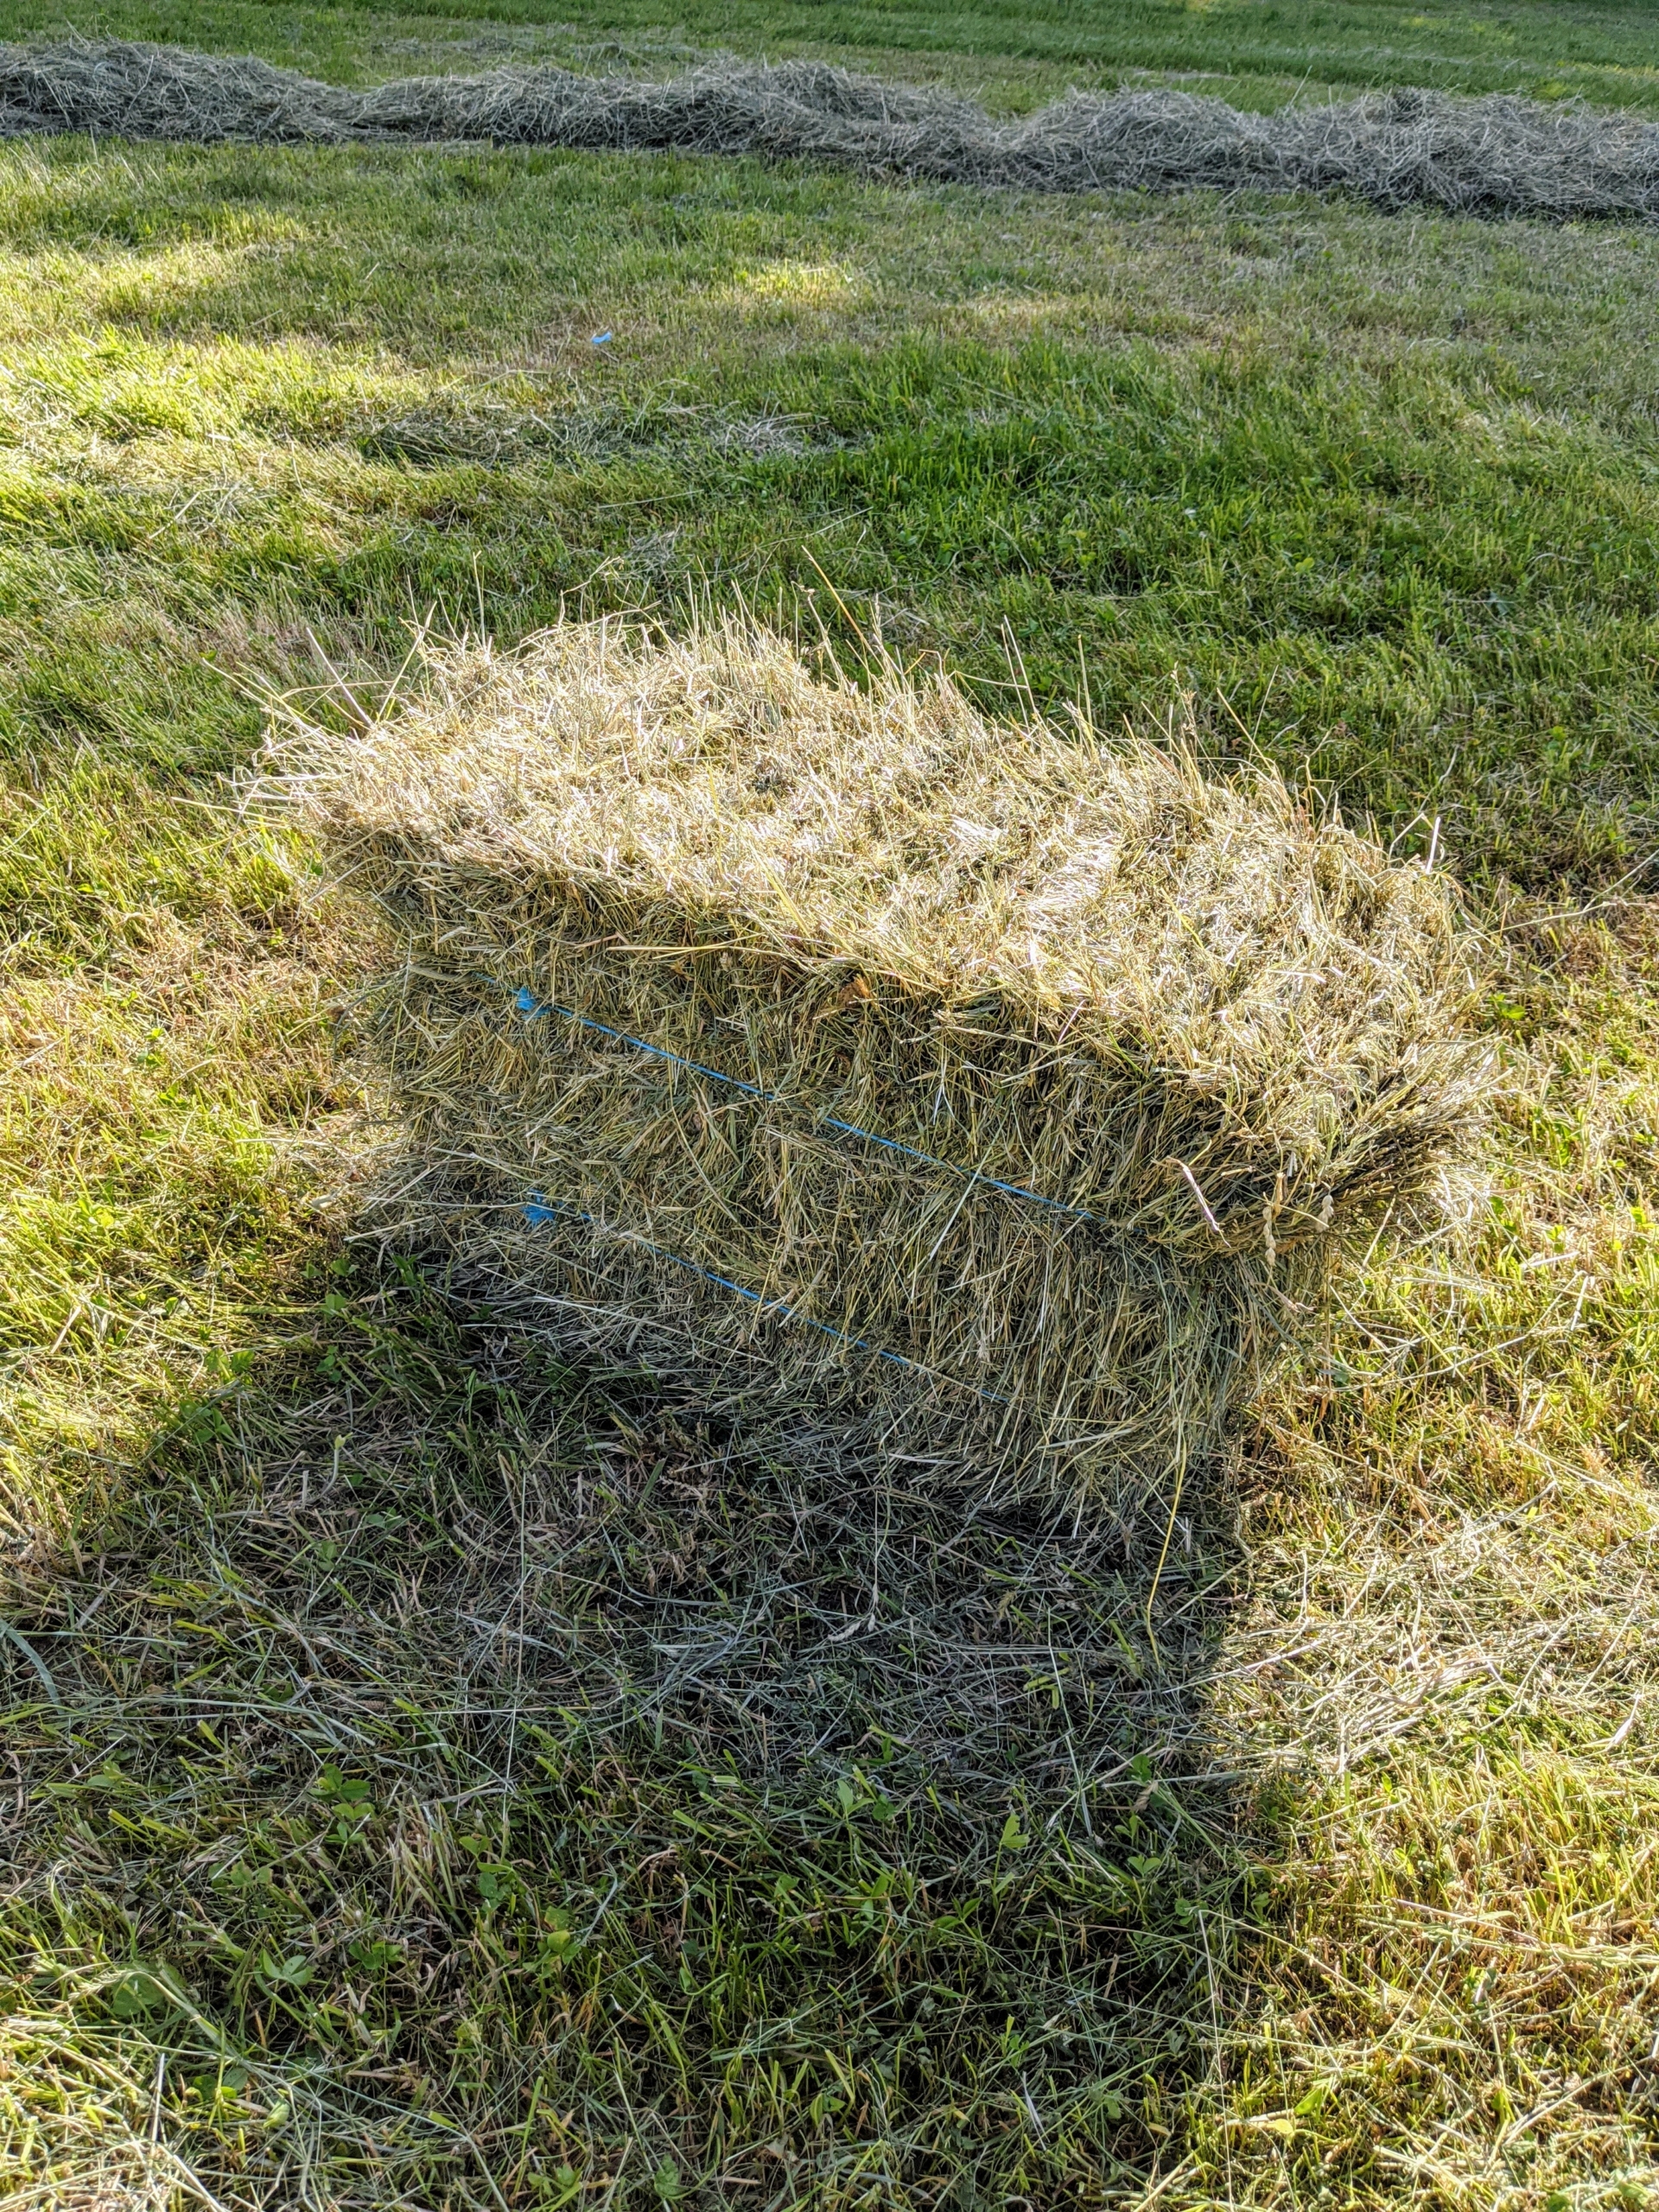
A baled “square” is seen traveling through the shoot. A measuring device—normally a spiked wheel that is turned by the emerging bales—measures the amount of material that is being compressed and then knotters wrap the twine around the bale and tie it off.
This bale accidentally fell out of the trailer and will be picked up on a later pass. Each bale is about 15 by 18 by 40 inches large. The number of flakes in the bale is determined by a setting in the baler. Many balers are set for 10 to 12 flakes per bale.
Chhiring goes evenly and slowly over every row of cut, tedded hay.
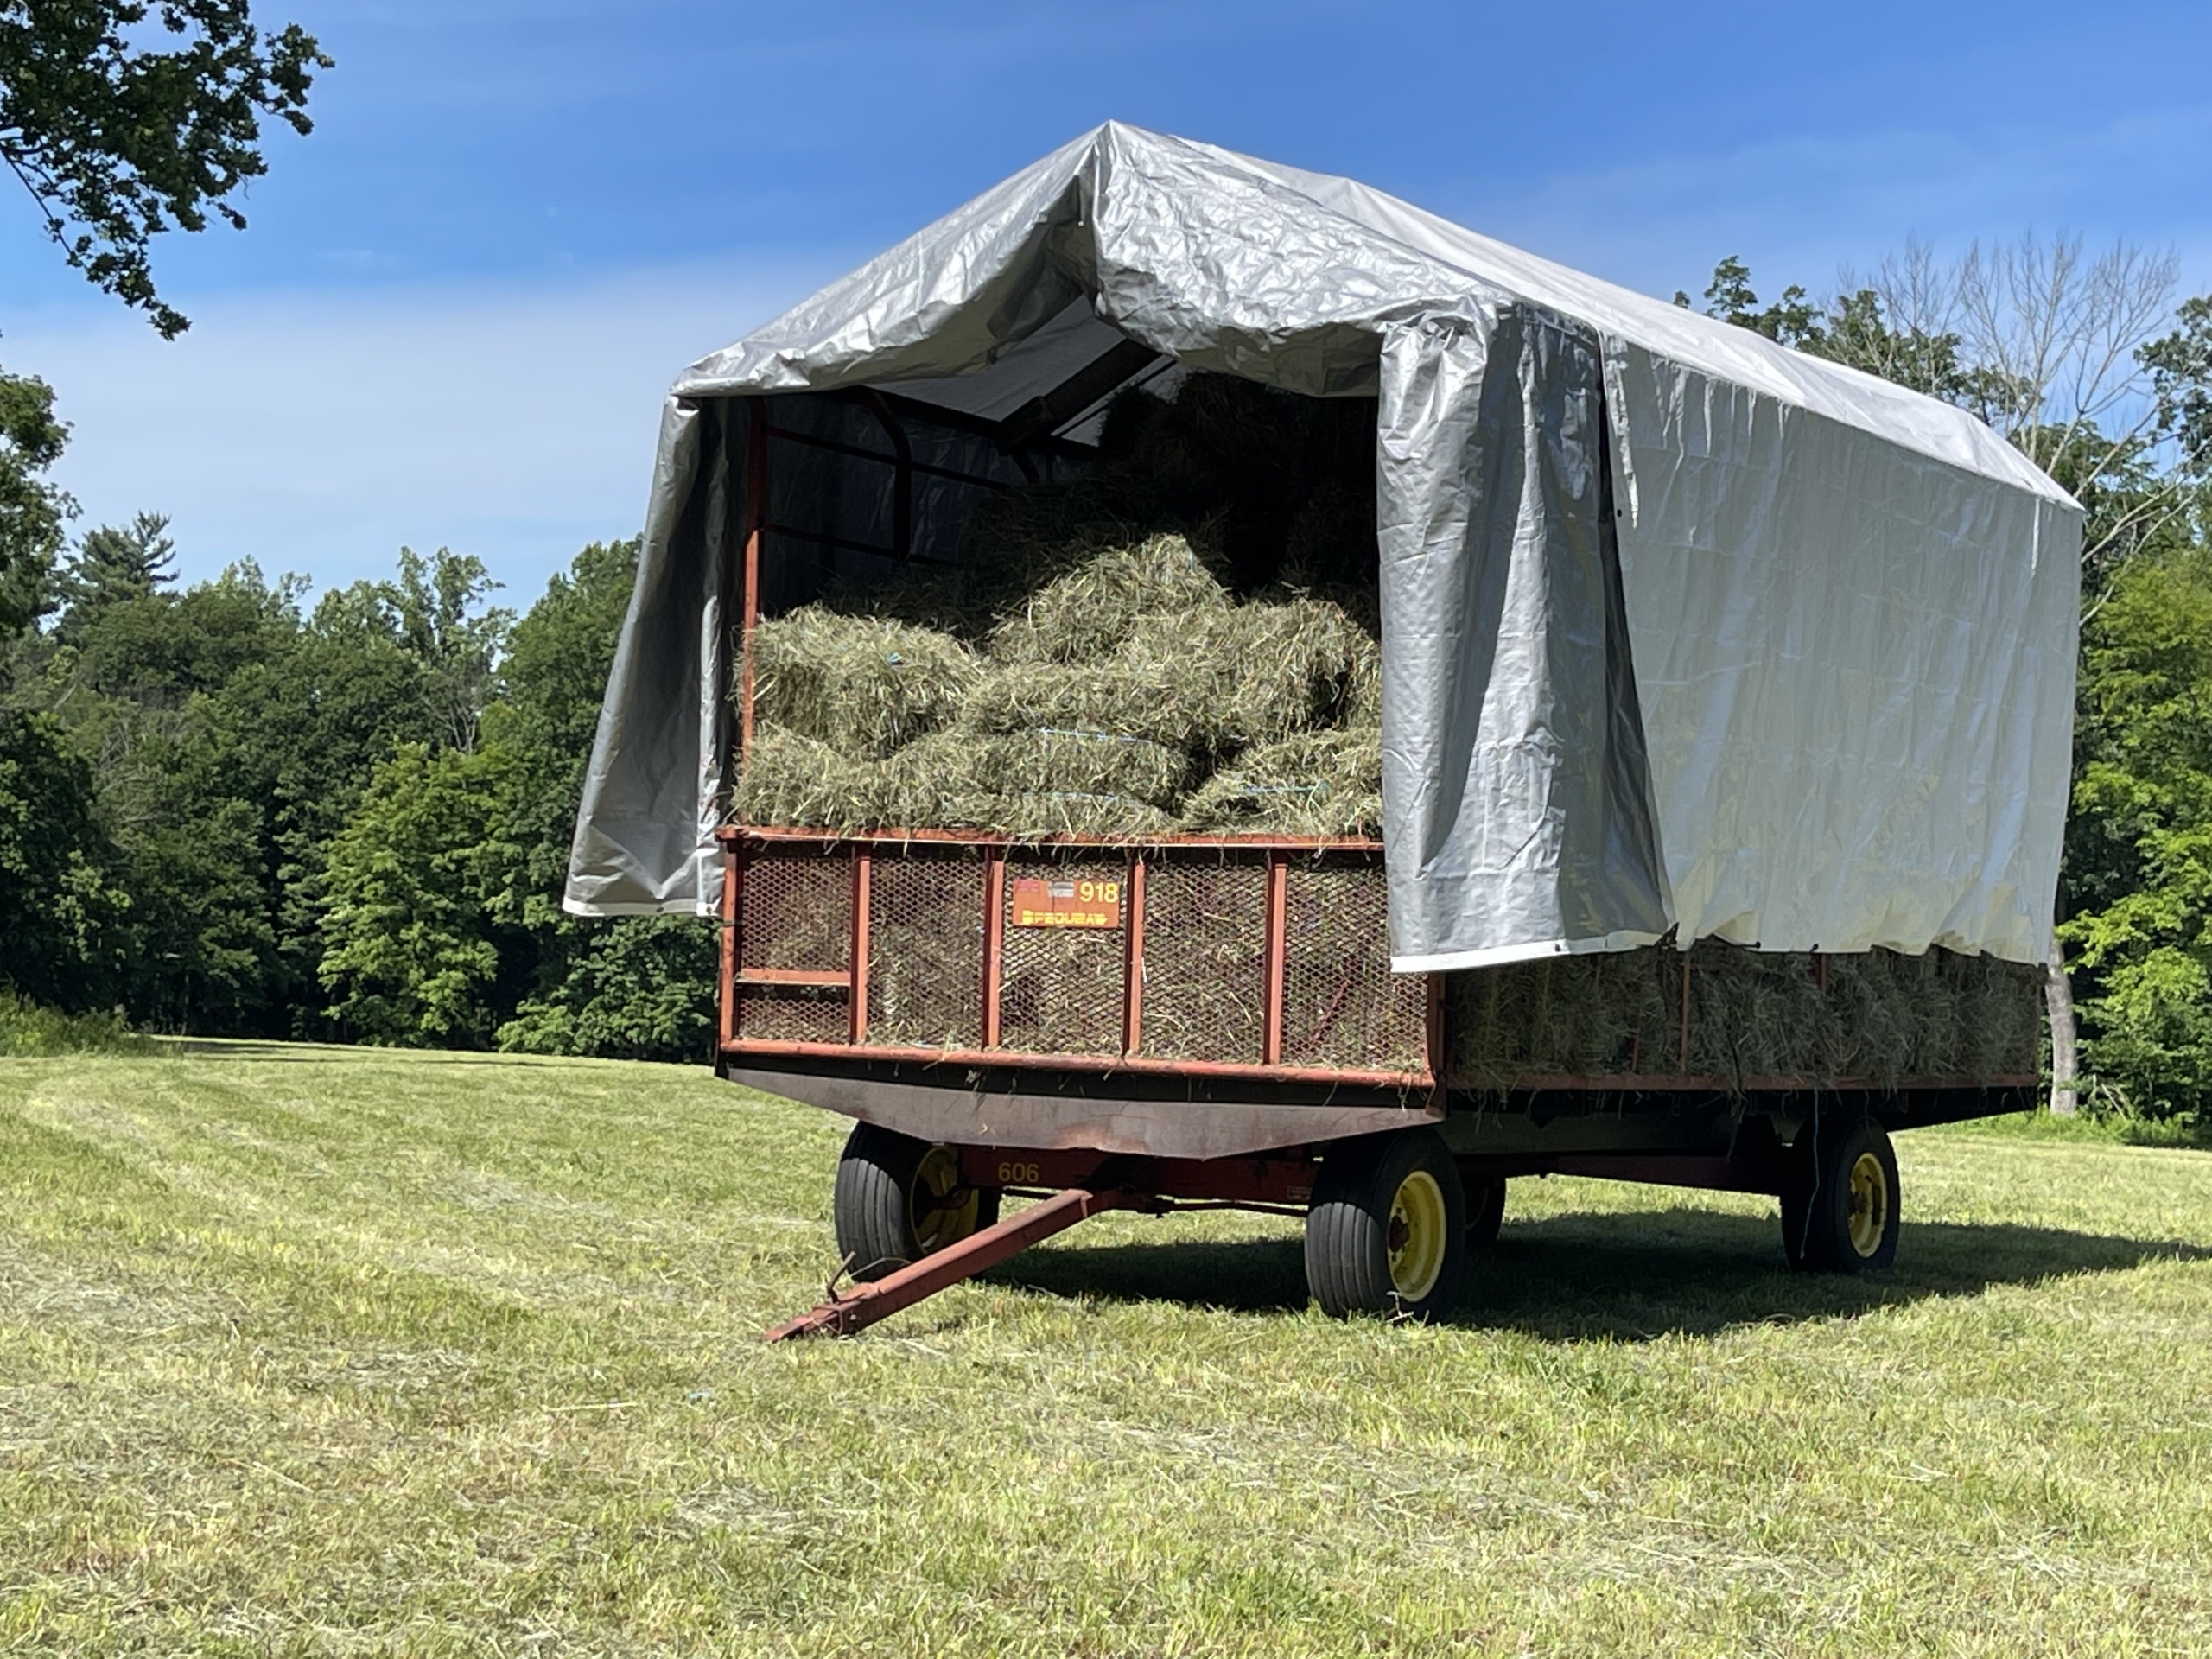
The hay trailer has high walls on the left, right, and back sides, and a short wall on the front side to contain the bales which are stacked neatly from front to back.
The trailer fills up pretty quickly. Luckily, I have two hay trailers. Each one can hold about 150-bales. Chhiring drives up and down the windrows of all the hayfields which takes about two hours. This hay will be more palatable for the horses. Feeding early-cut hay greatly reduces the amount of grain a horse needs. In all, we collected 400 bales of hay!
Chhiring, MingMar, and the drone stopped for a quick photo. Once the trailer is full, it is brought to the stable, where the hay is unloaded and stored. I am so excited to see all these bales of hay made right here at my farm. Below is a short video of the bales shooting into the trailer.