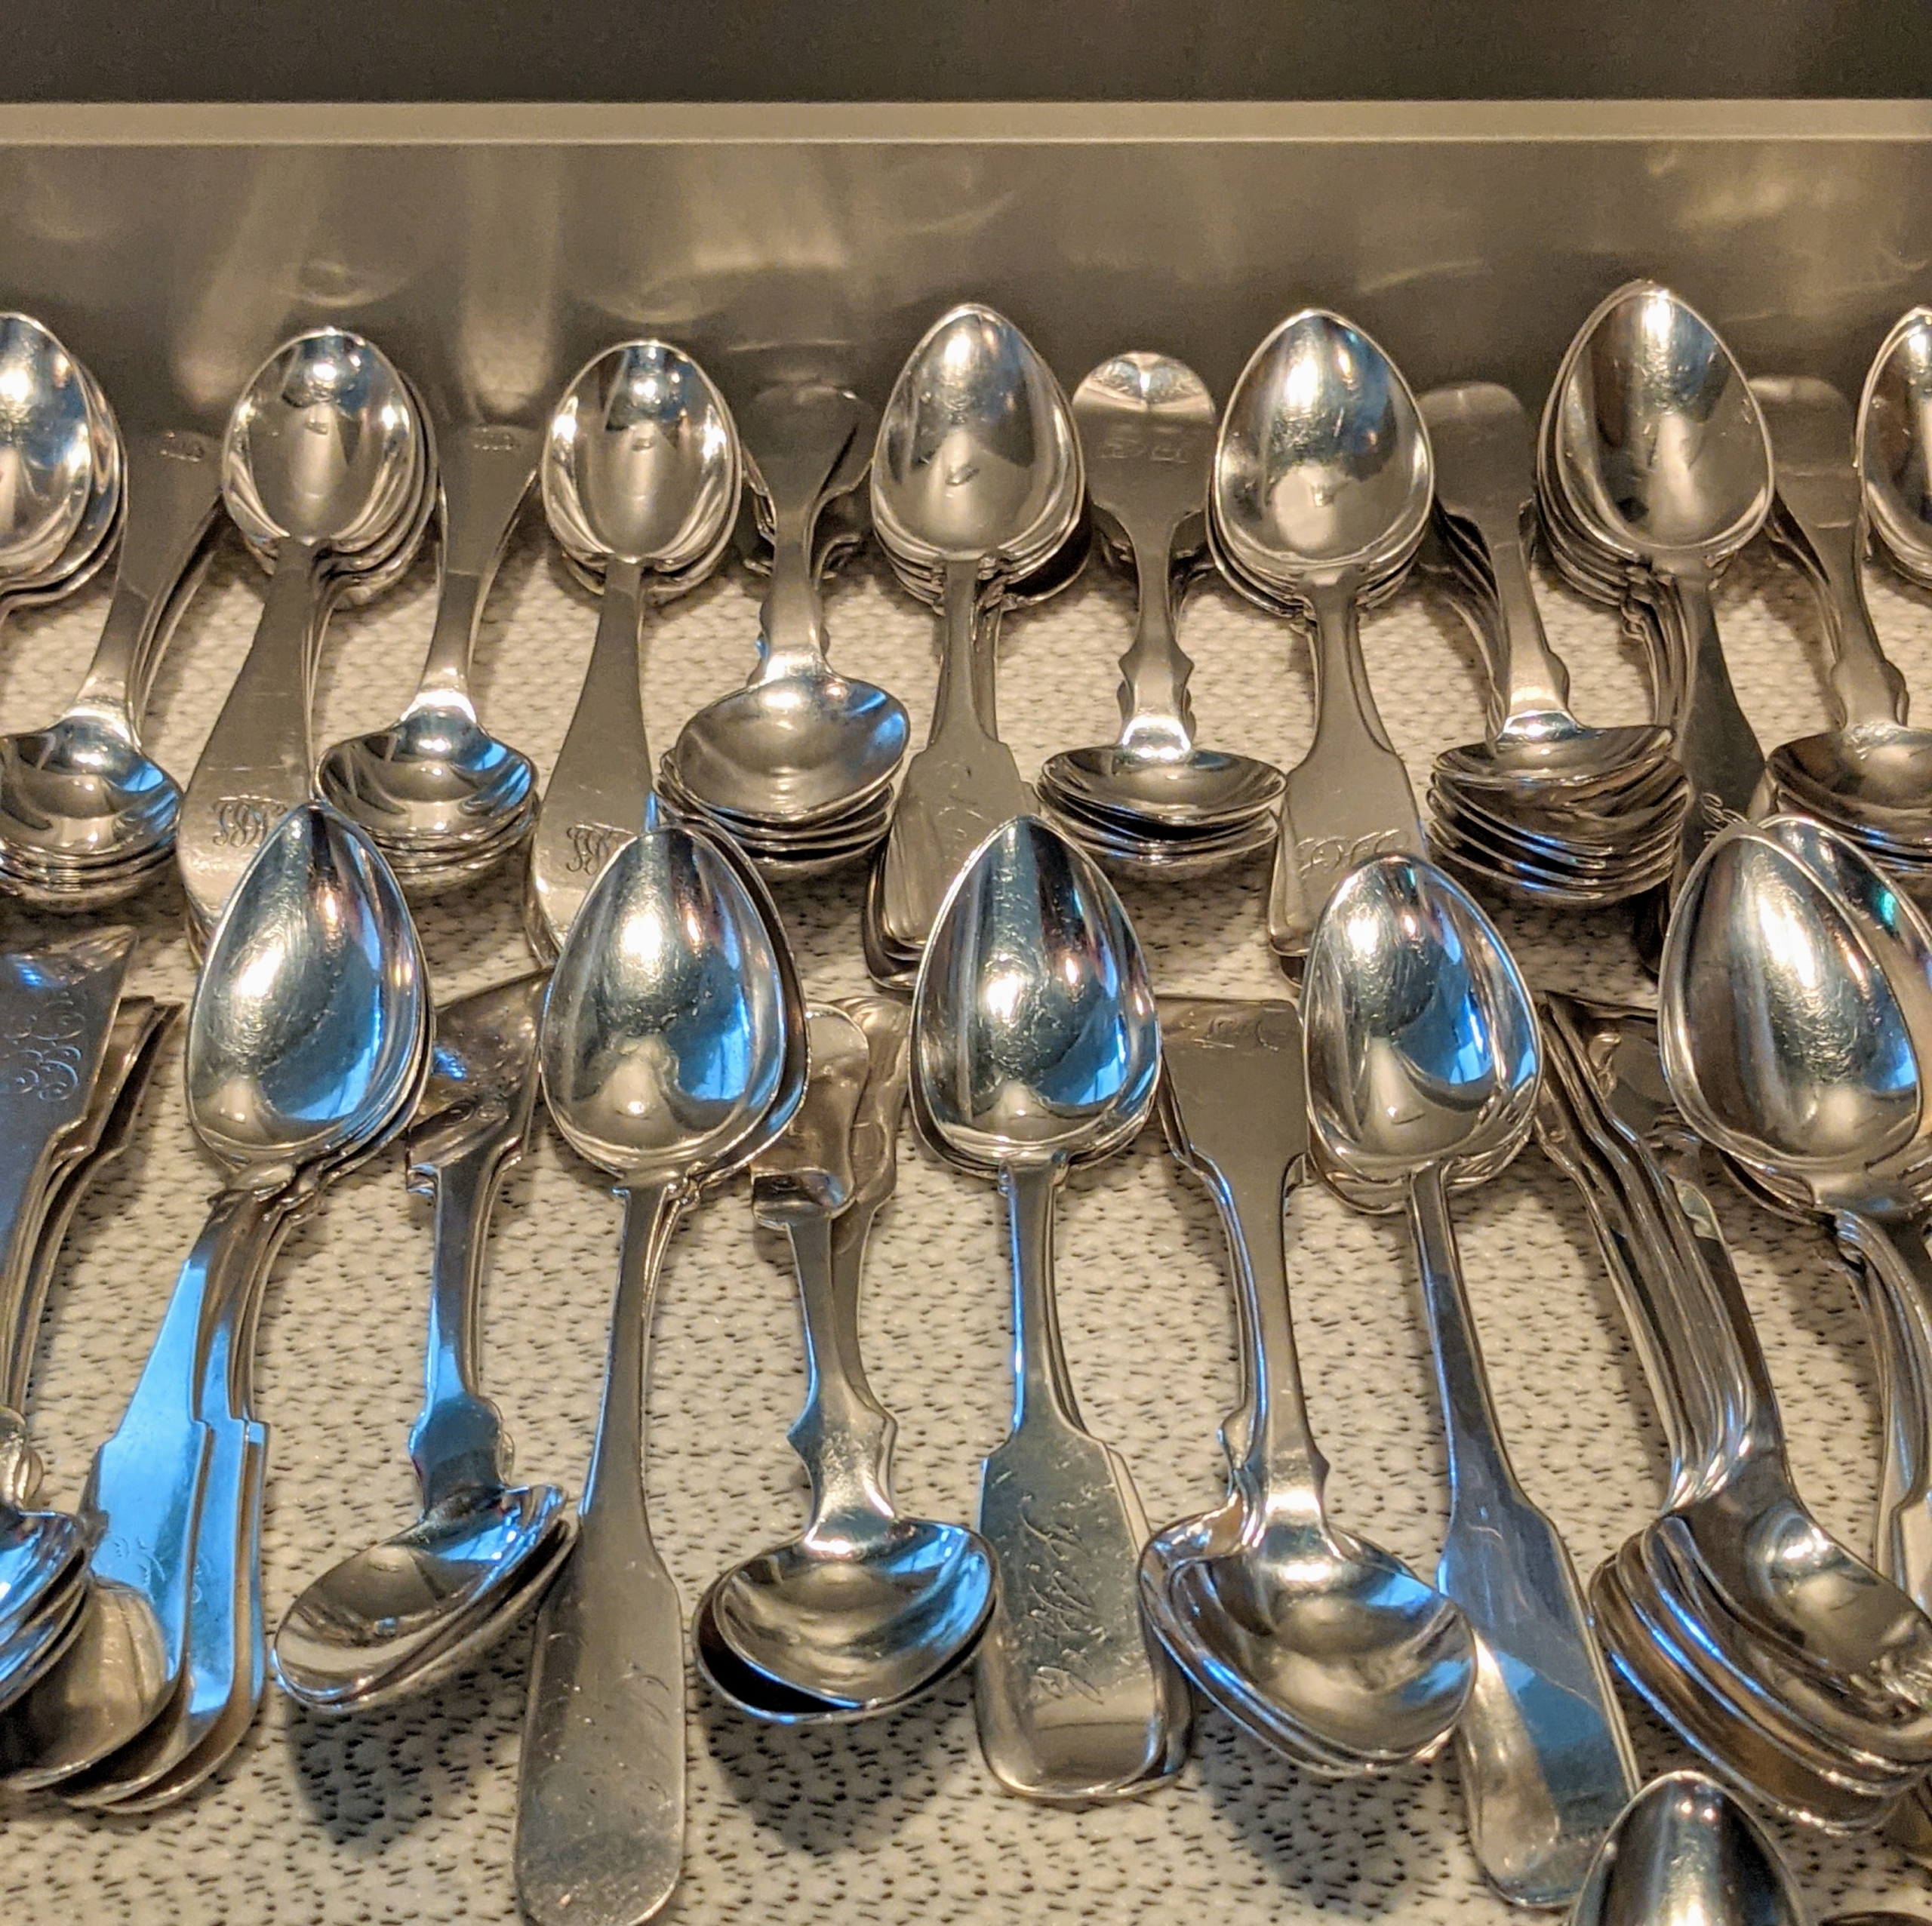
Our summer polishing project continues with my large collection of silver flatware. After several cleaning and polishing sessions, all the silver forks, spoons, and knives are shimmering once again.
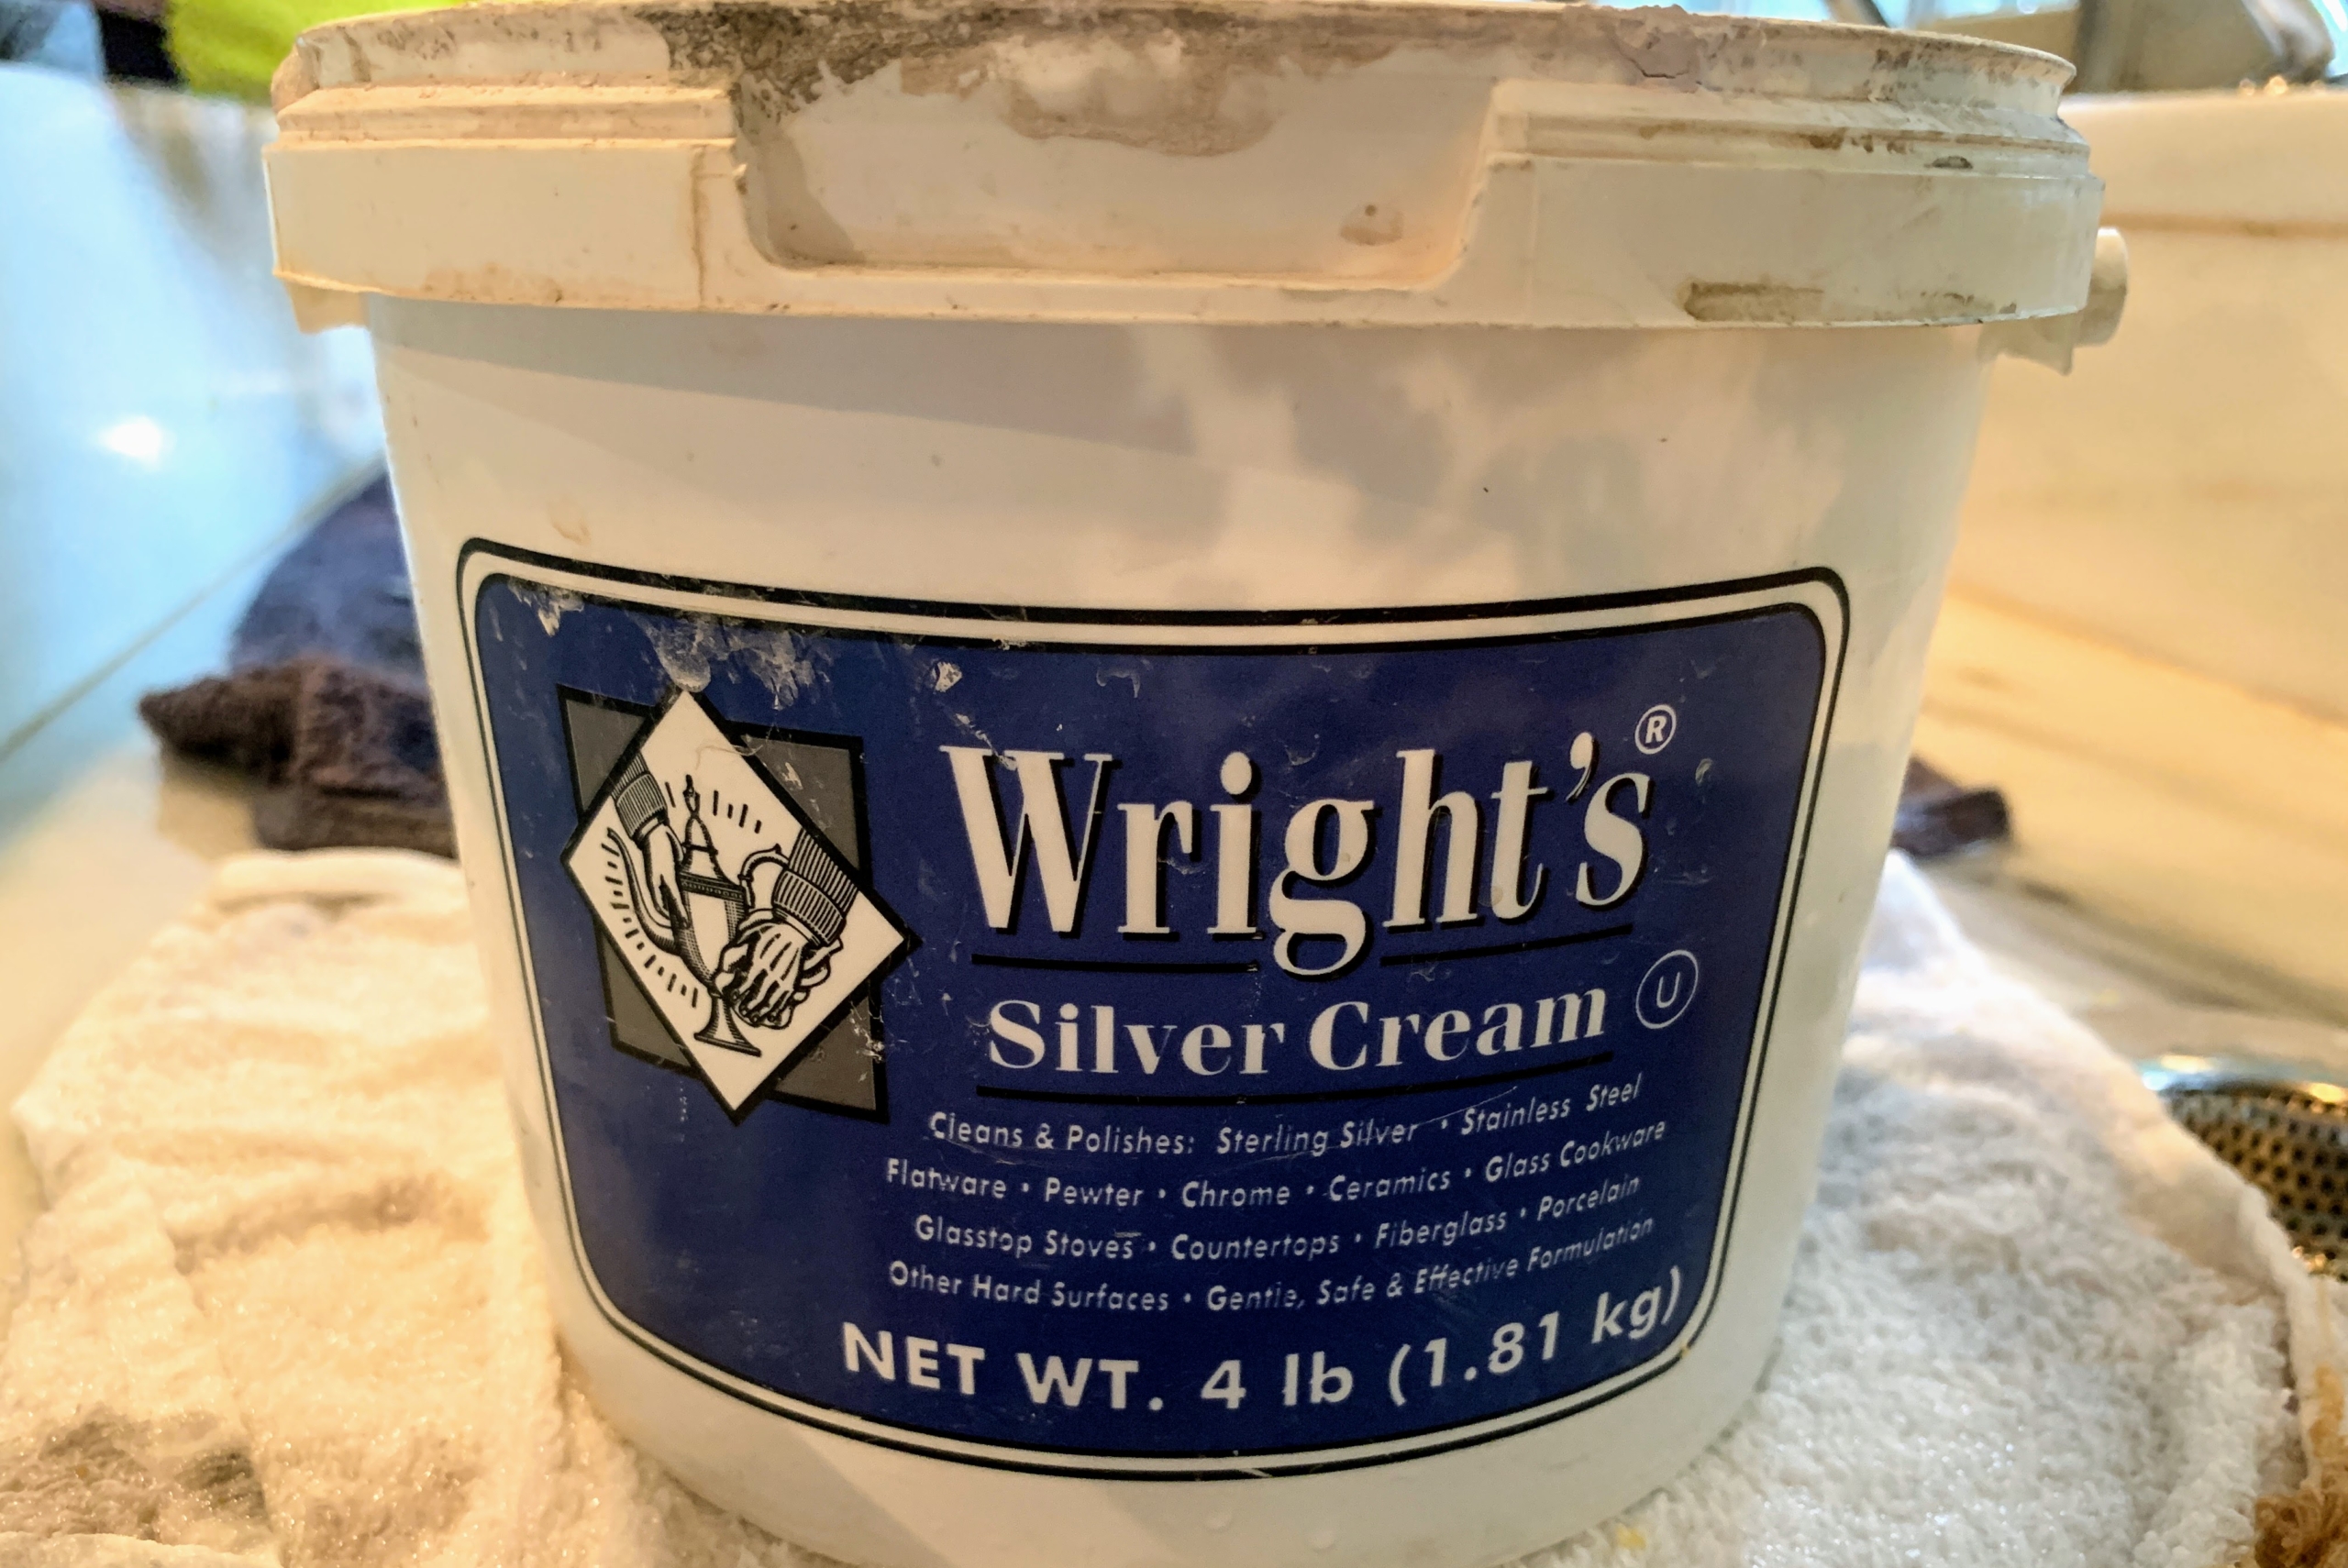
There are a few ways to clean silver. One nontoxic method is to fill an aluminum pan with hot water, salt and baking soda, stir until it is all dissolved, and then soak the pieces until a chemical reaction occurs that removes the tarnish. This technique is faster than hand cleaning but may cause pitting and remove the more desirable tarnish called patina. Silver cleaning cloths made especially for removing tarnish from precious metals are also available. Many experts recommend using a good-quality, non-abrasive commercial silver polish. I've been using Wright’s Silver Cream for years and love how it works.
Enjoy these photos.
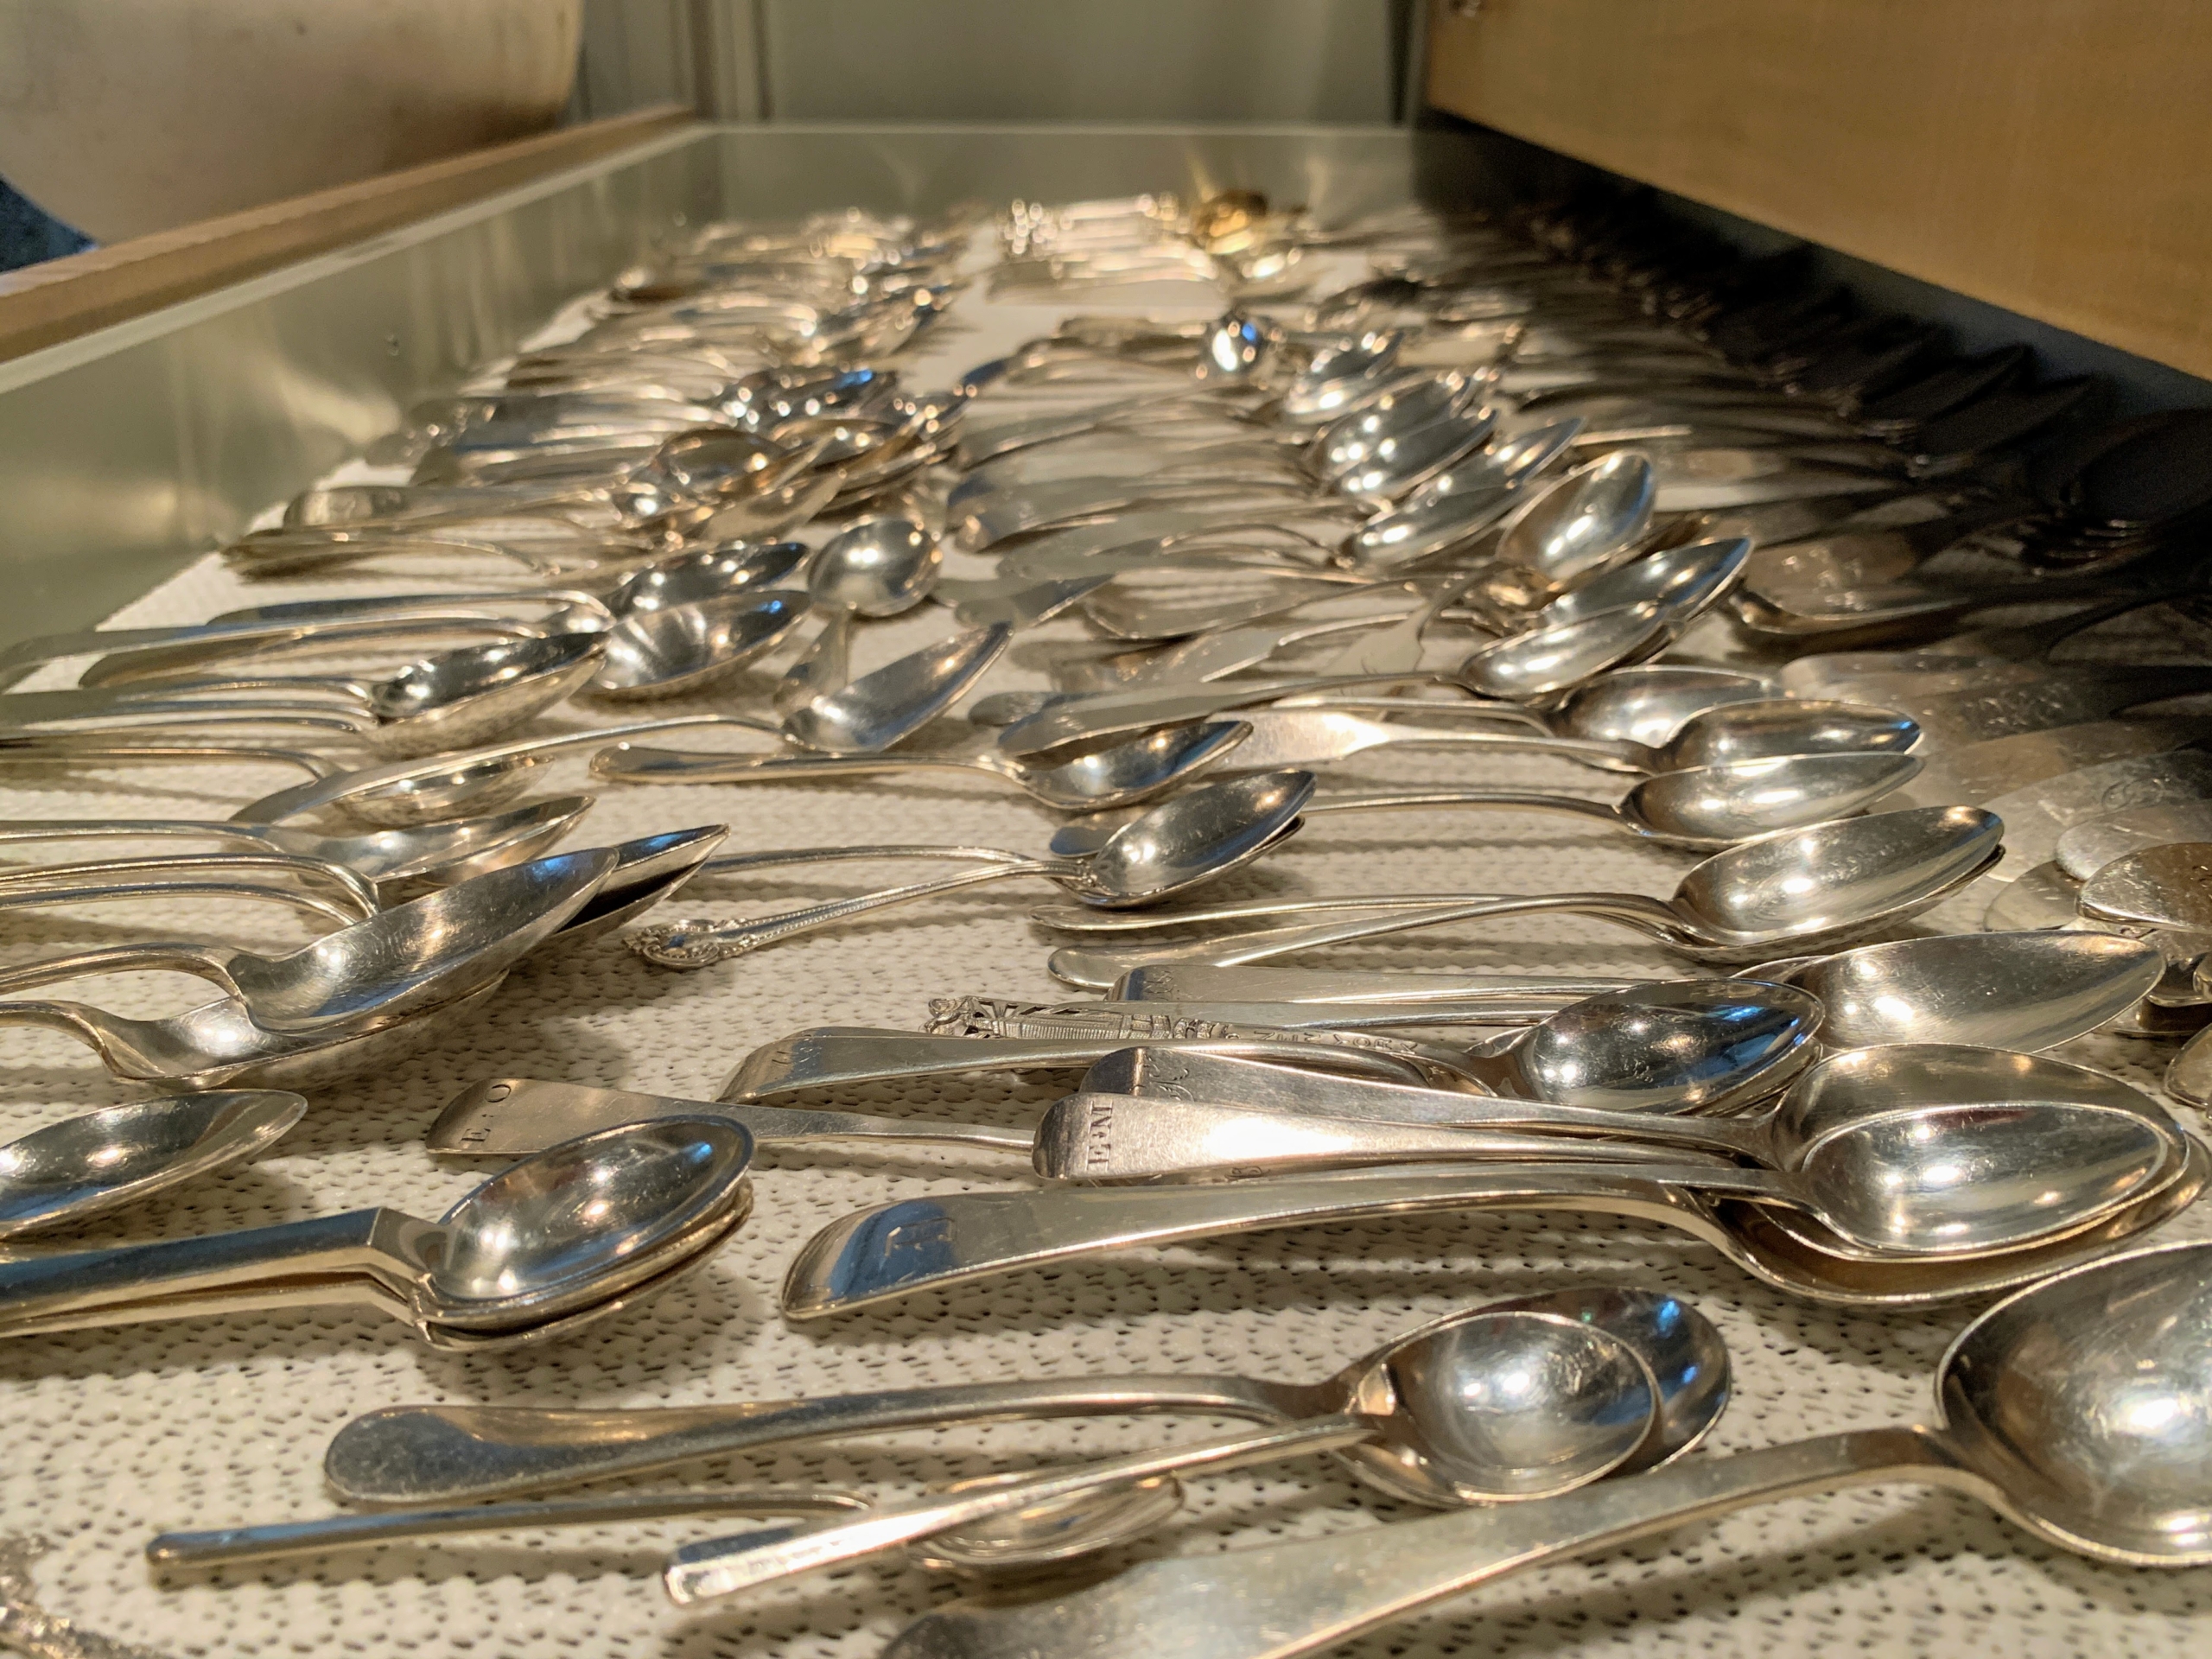
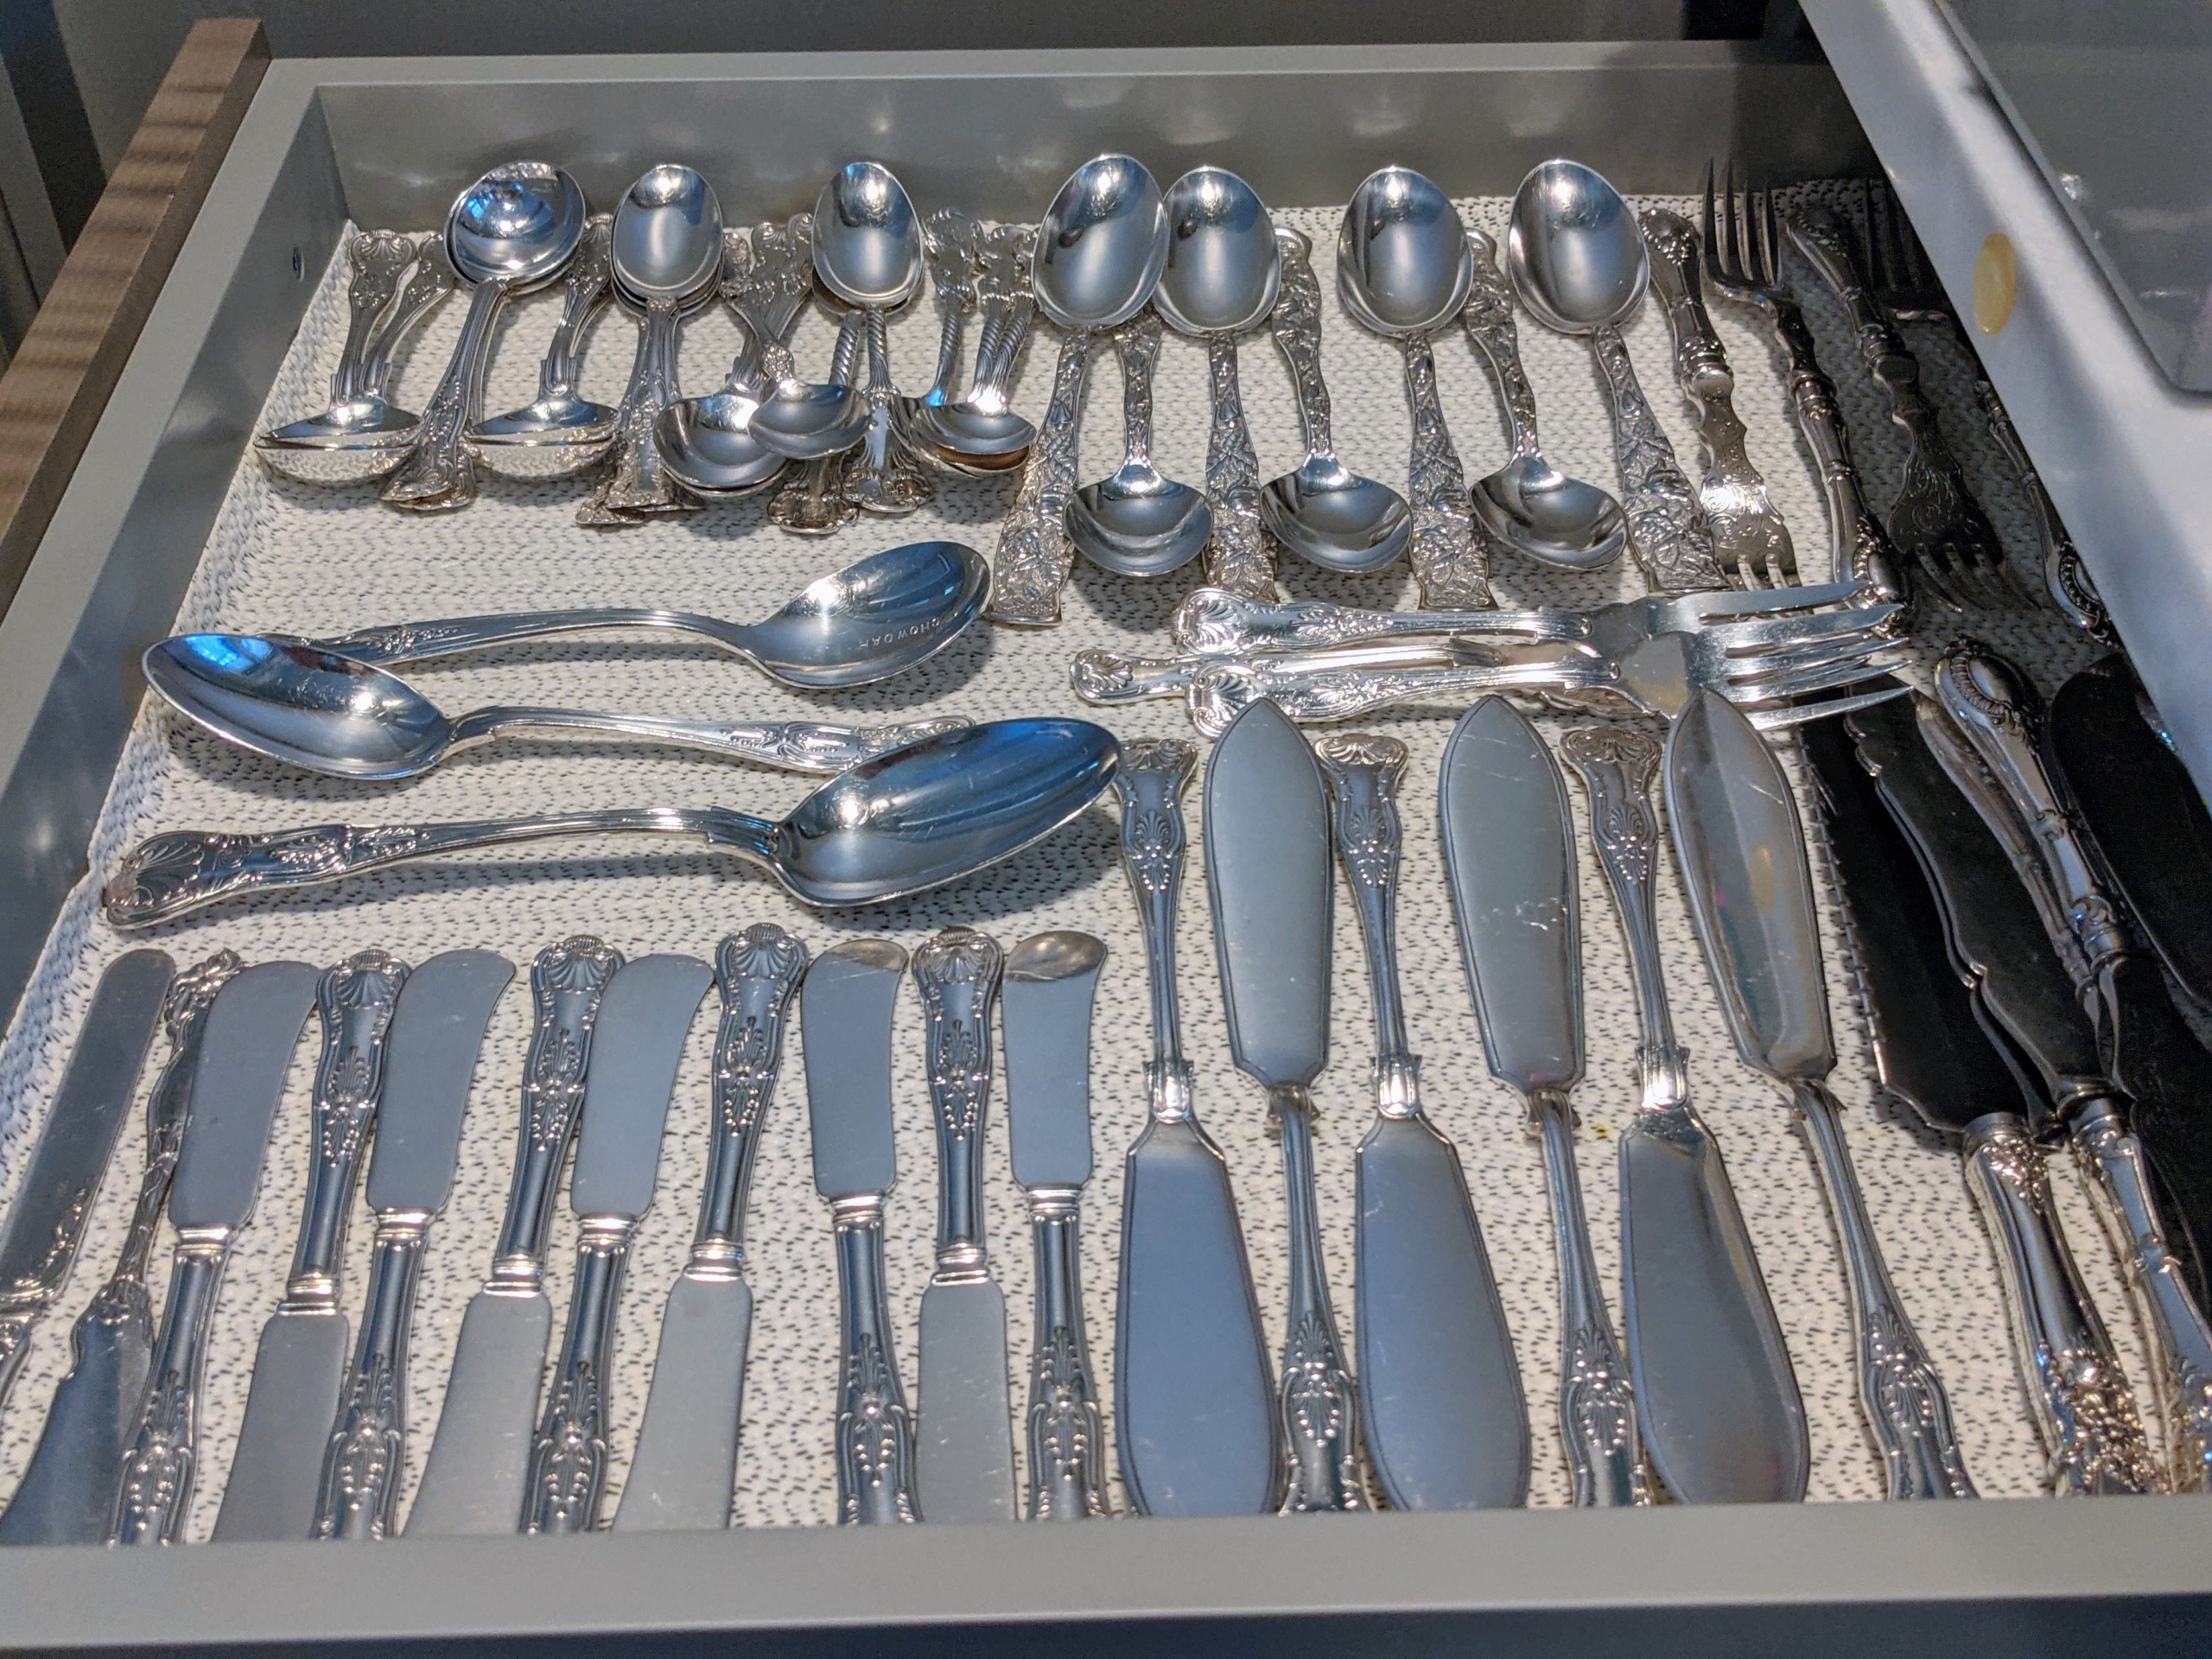
In my Winter House servery, I have several shallow drawers specifically designated for storing silver spoons, forks, and knives. I use these pieces often for entertaining, so they are very lightly tarnished – some pieces don’t even look tarnished at all, but it is always a good idea to clean silver regularly, so it doesn’t develop a thick coat of tarnish that is harder to remove. Polishing them a couple times a year is generally sufficient to keep everything in good condition.
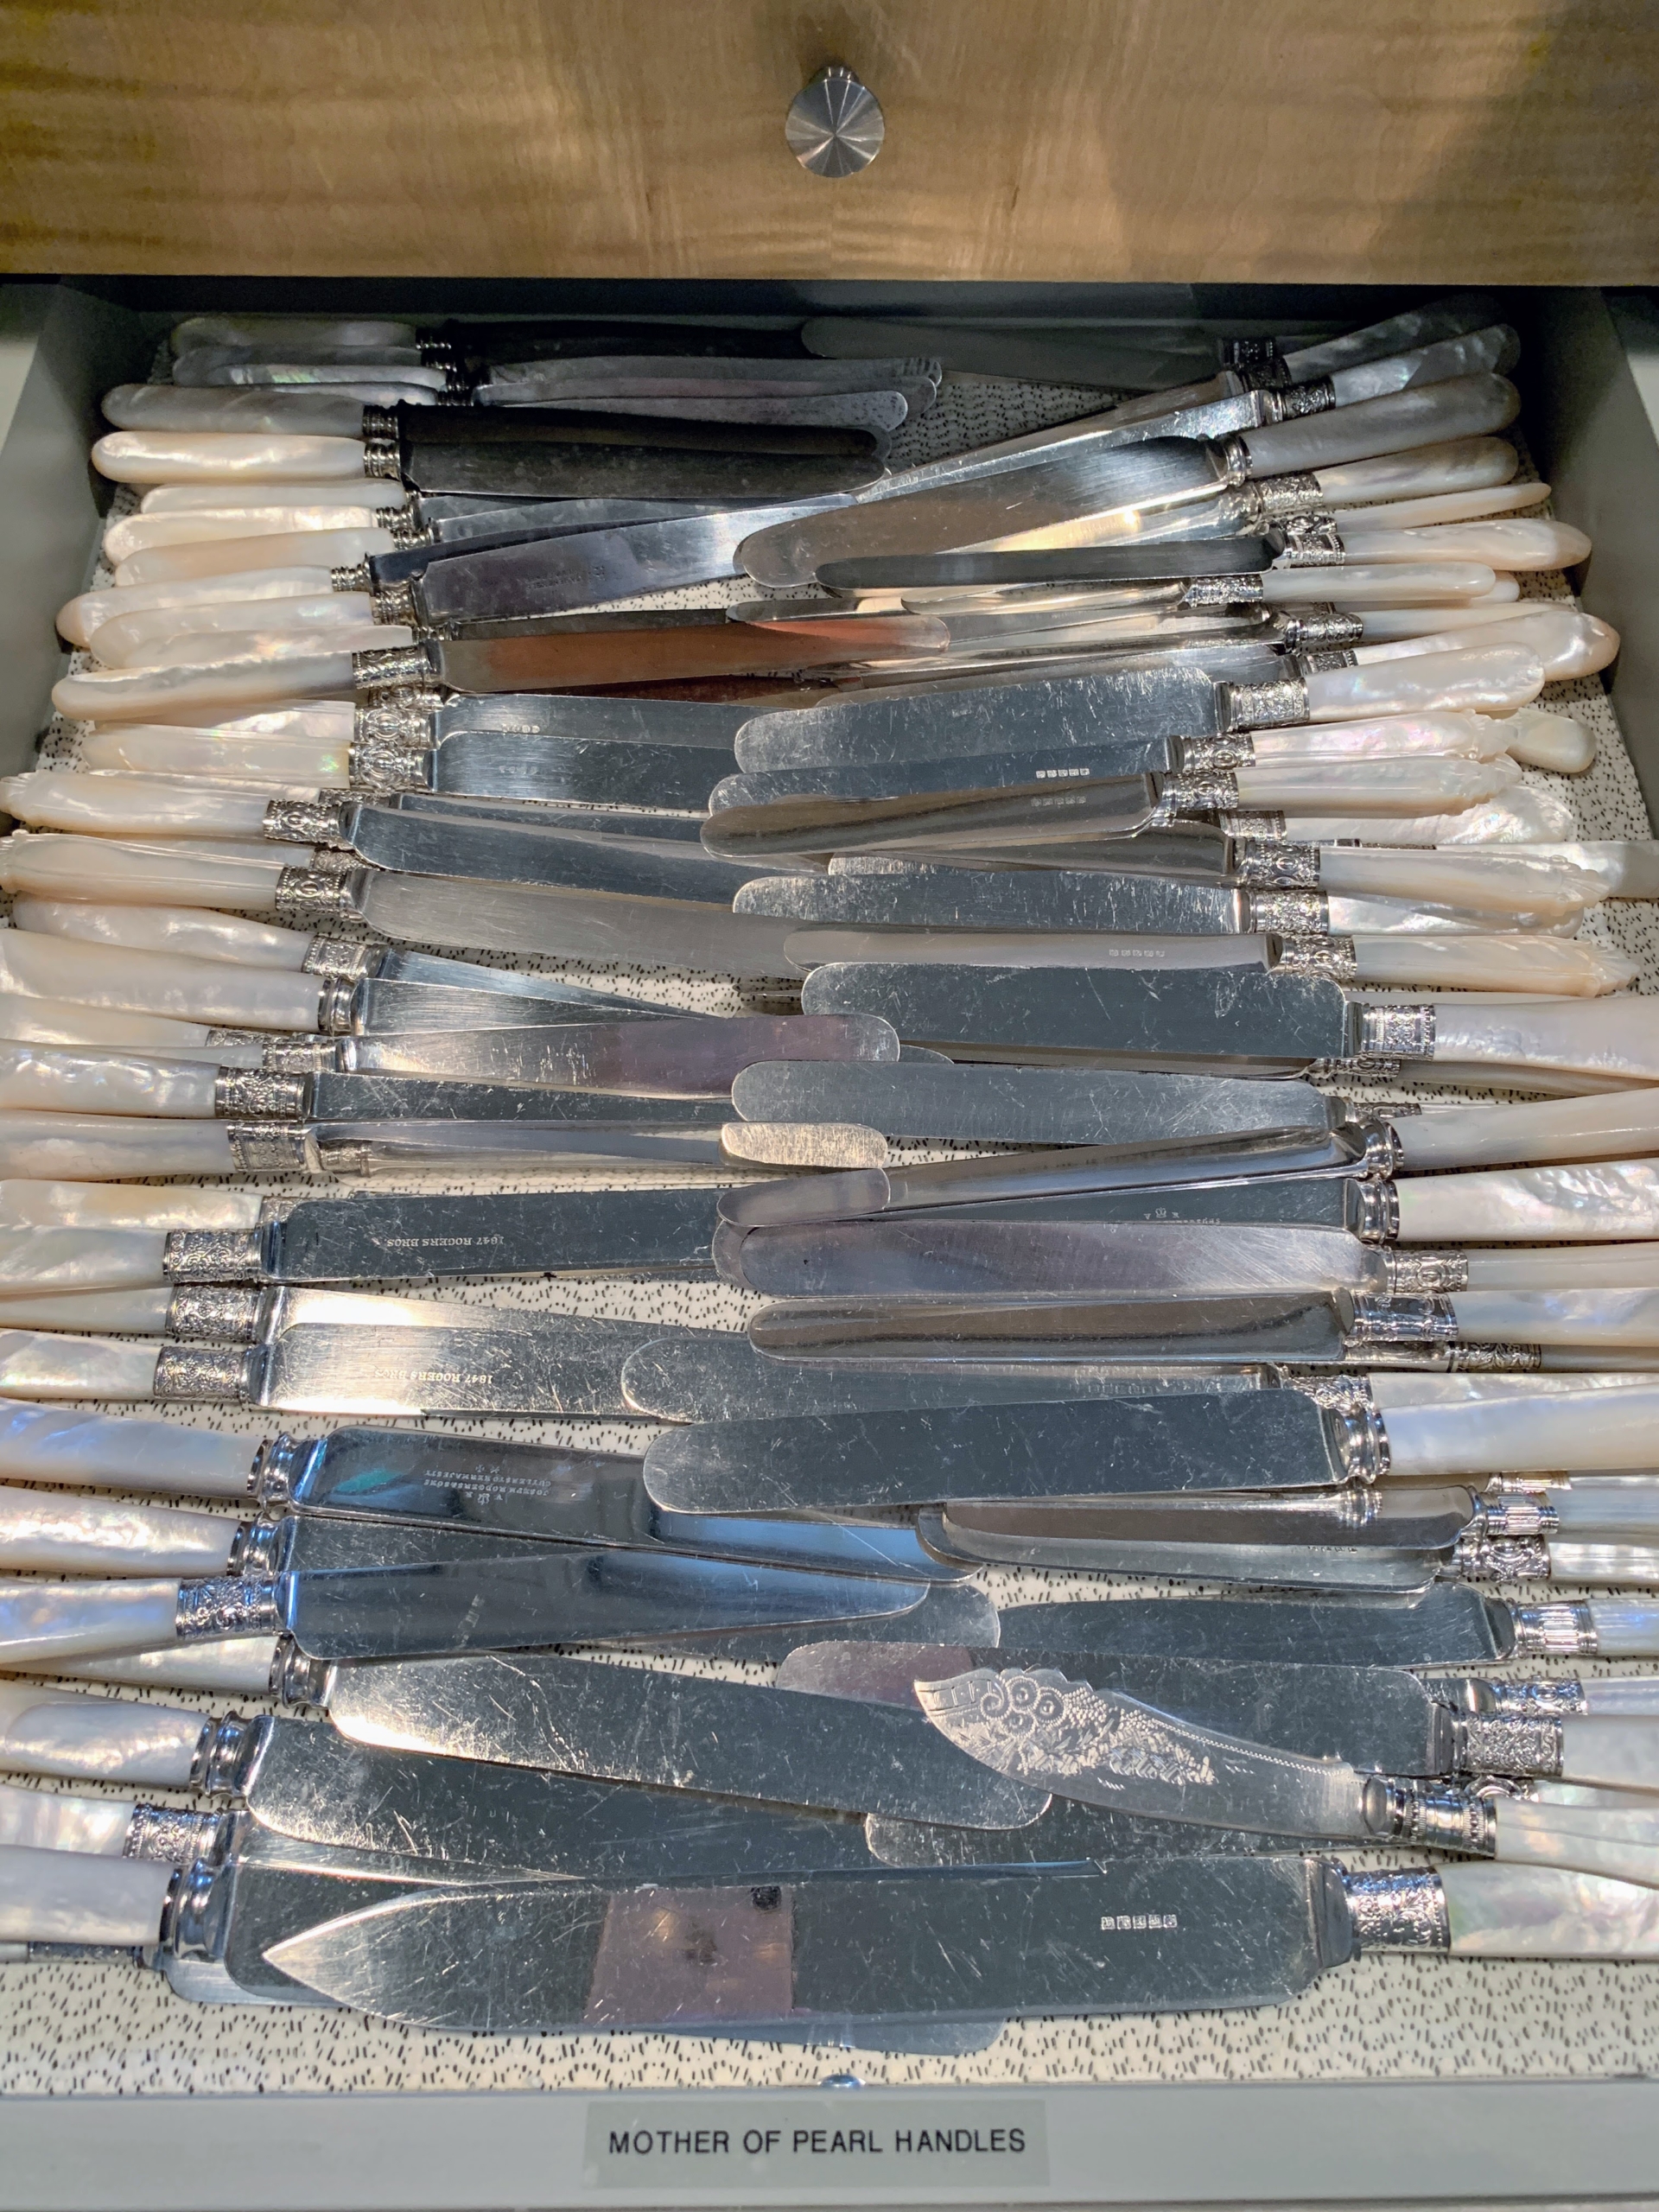
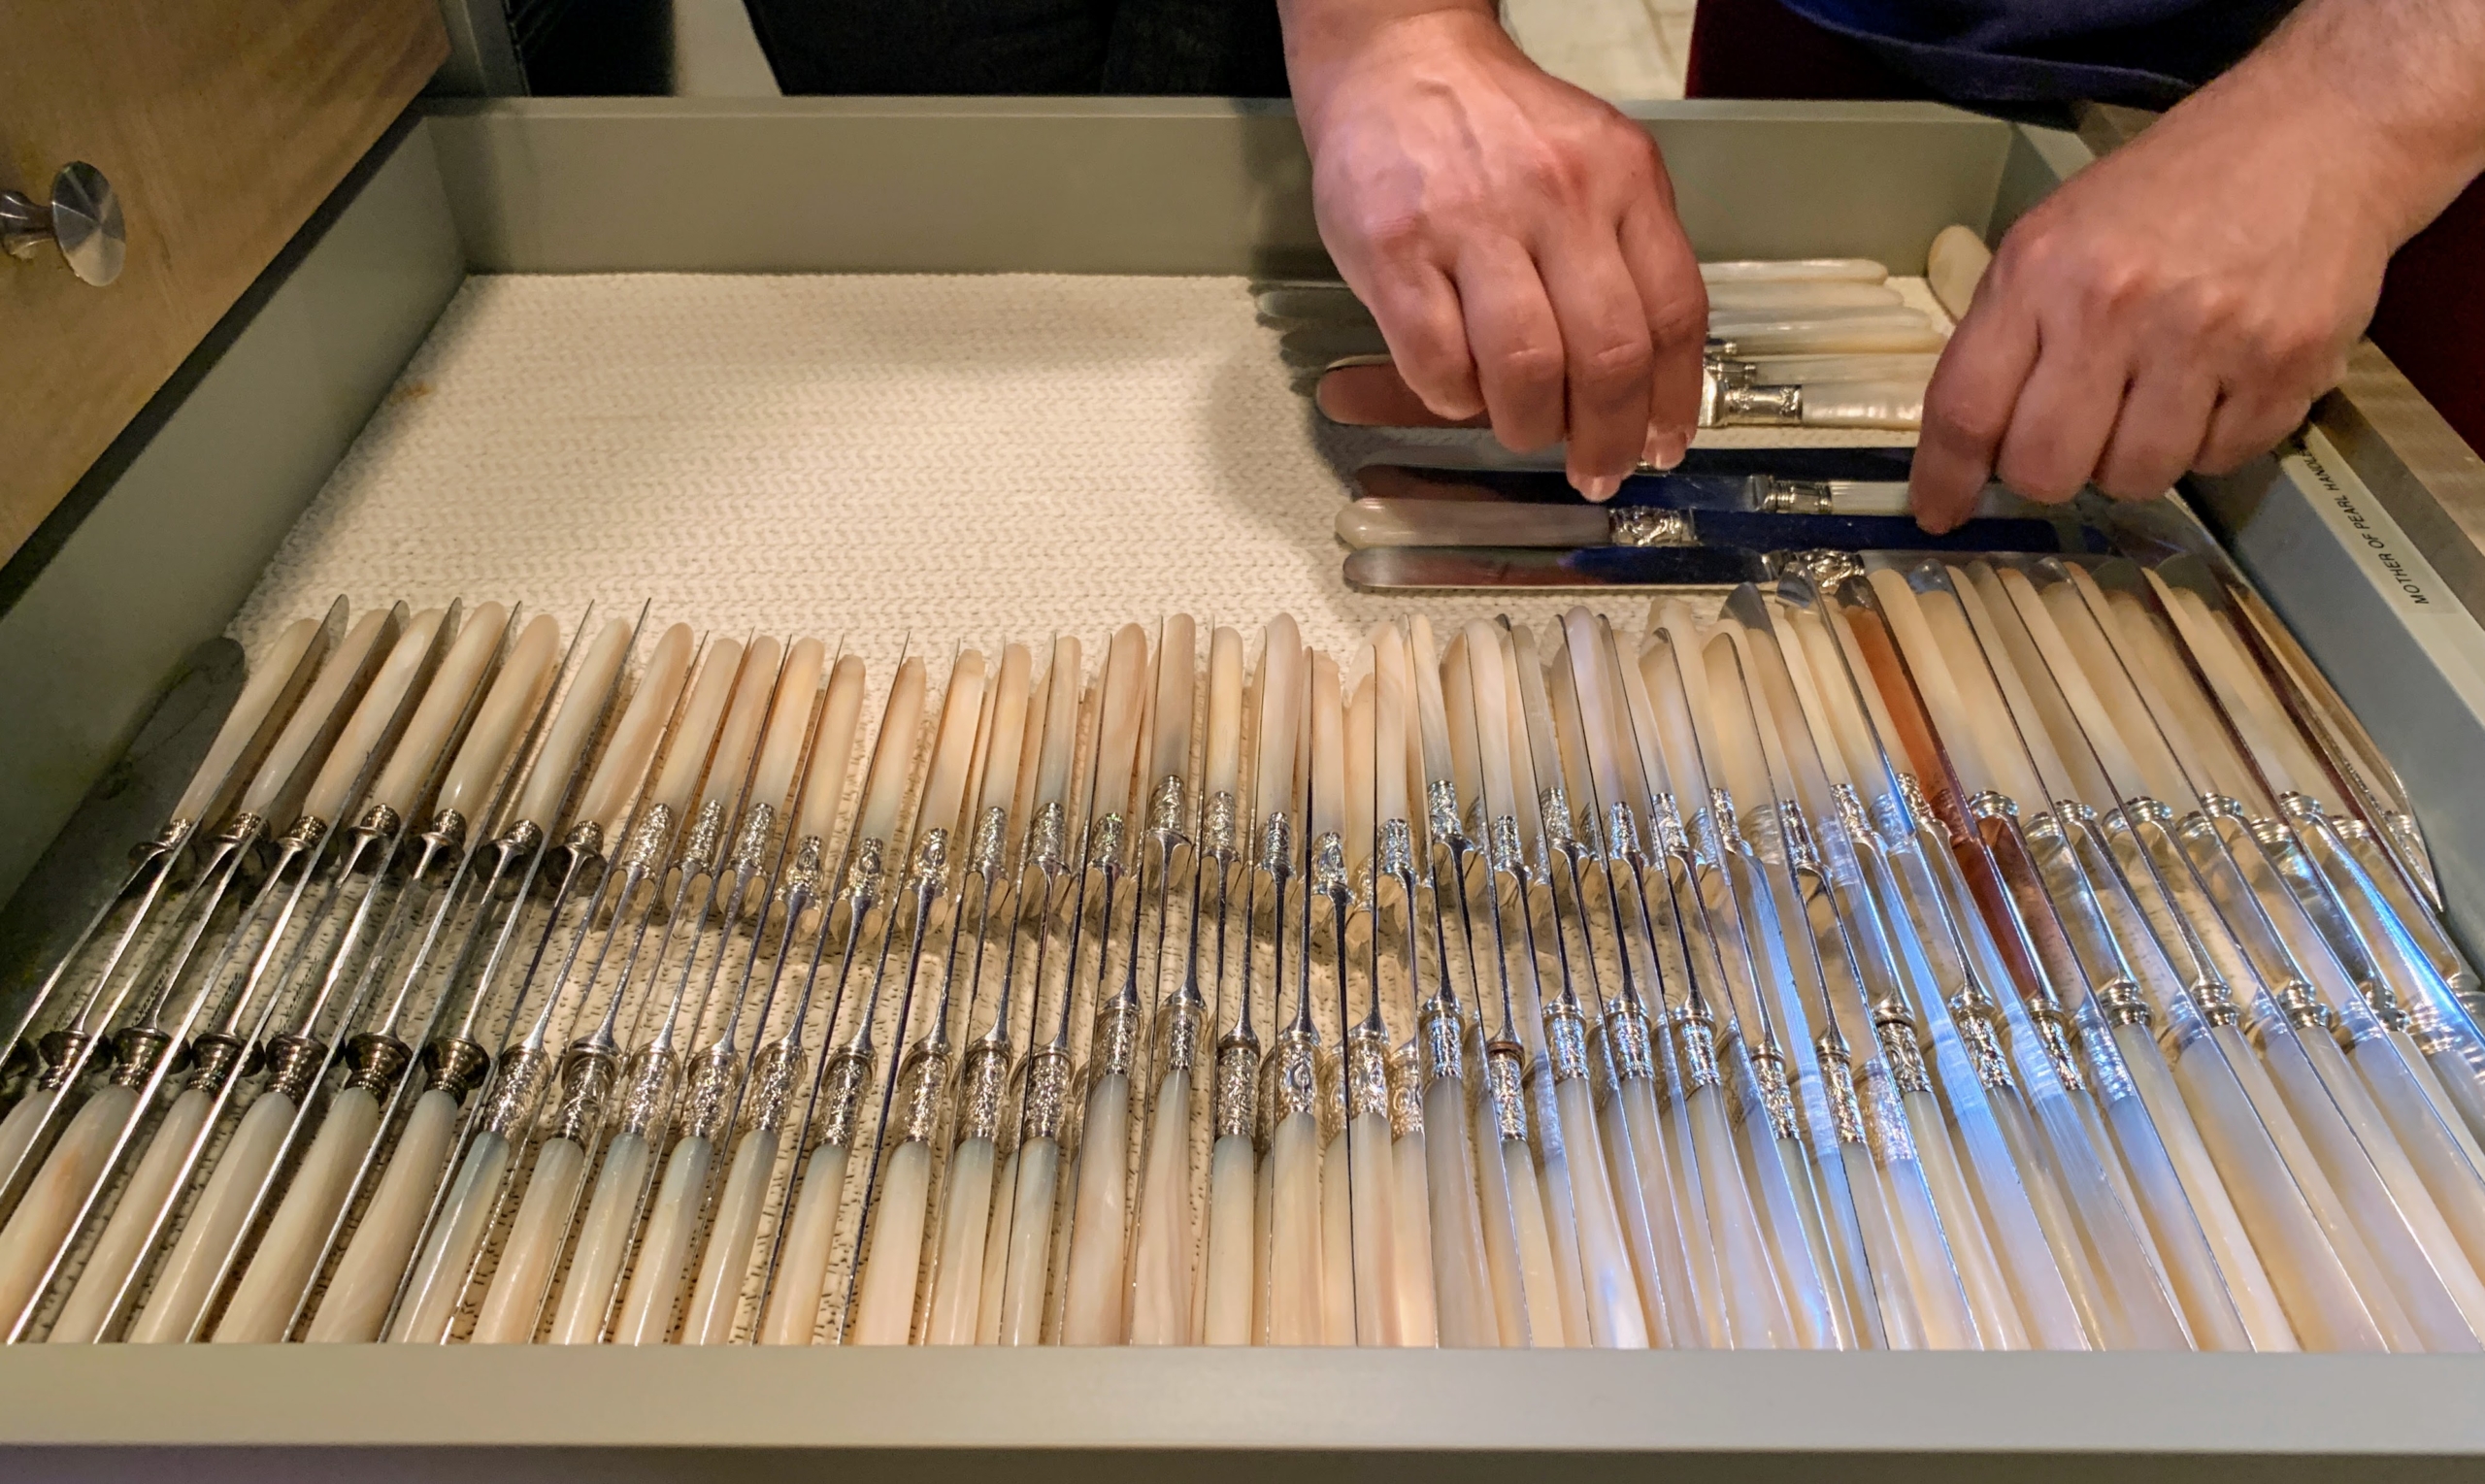
This drawer is specifically used to store my mother of pearl flatware. Both silver and those with special handles should never be placed in the dishwasher. The detergents’ aggressive chemicals, combined with the washer’s high cleaning temperature, will eventually turn the silver grey or white, with a dull, non-reflective surface.
I’ve purchased many of my pieces from antiques fairs and shops over the years. I try to buy sets whenever I can. When buying antique or vintage silver flatware, always check the lengths of the prongs on the forks and the ends of the bowls on the spoons. These are the two areas which get the most wear. And check to make sure any decoration is also intact.
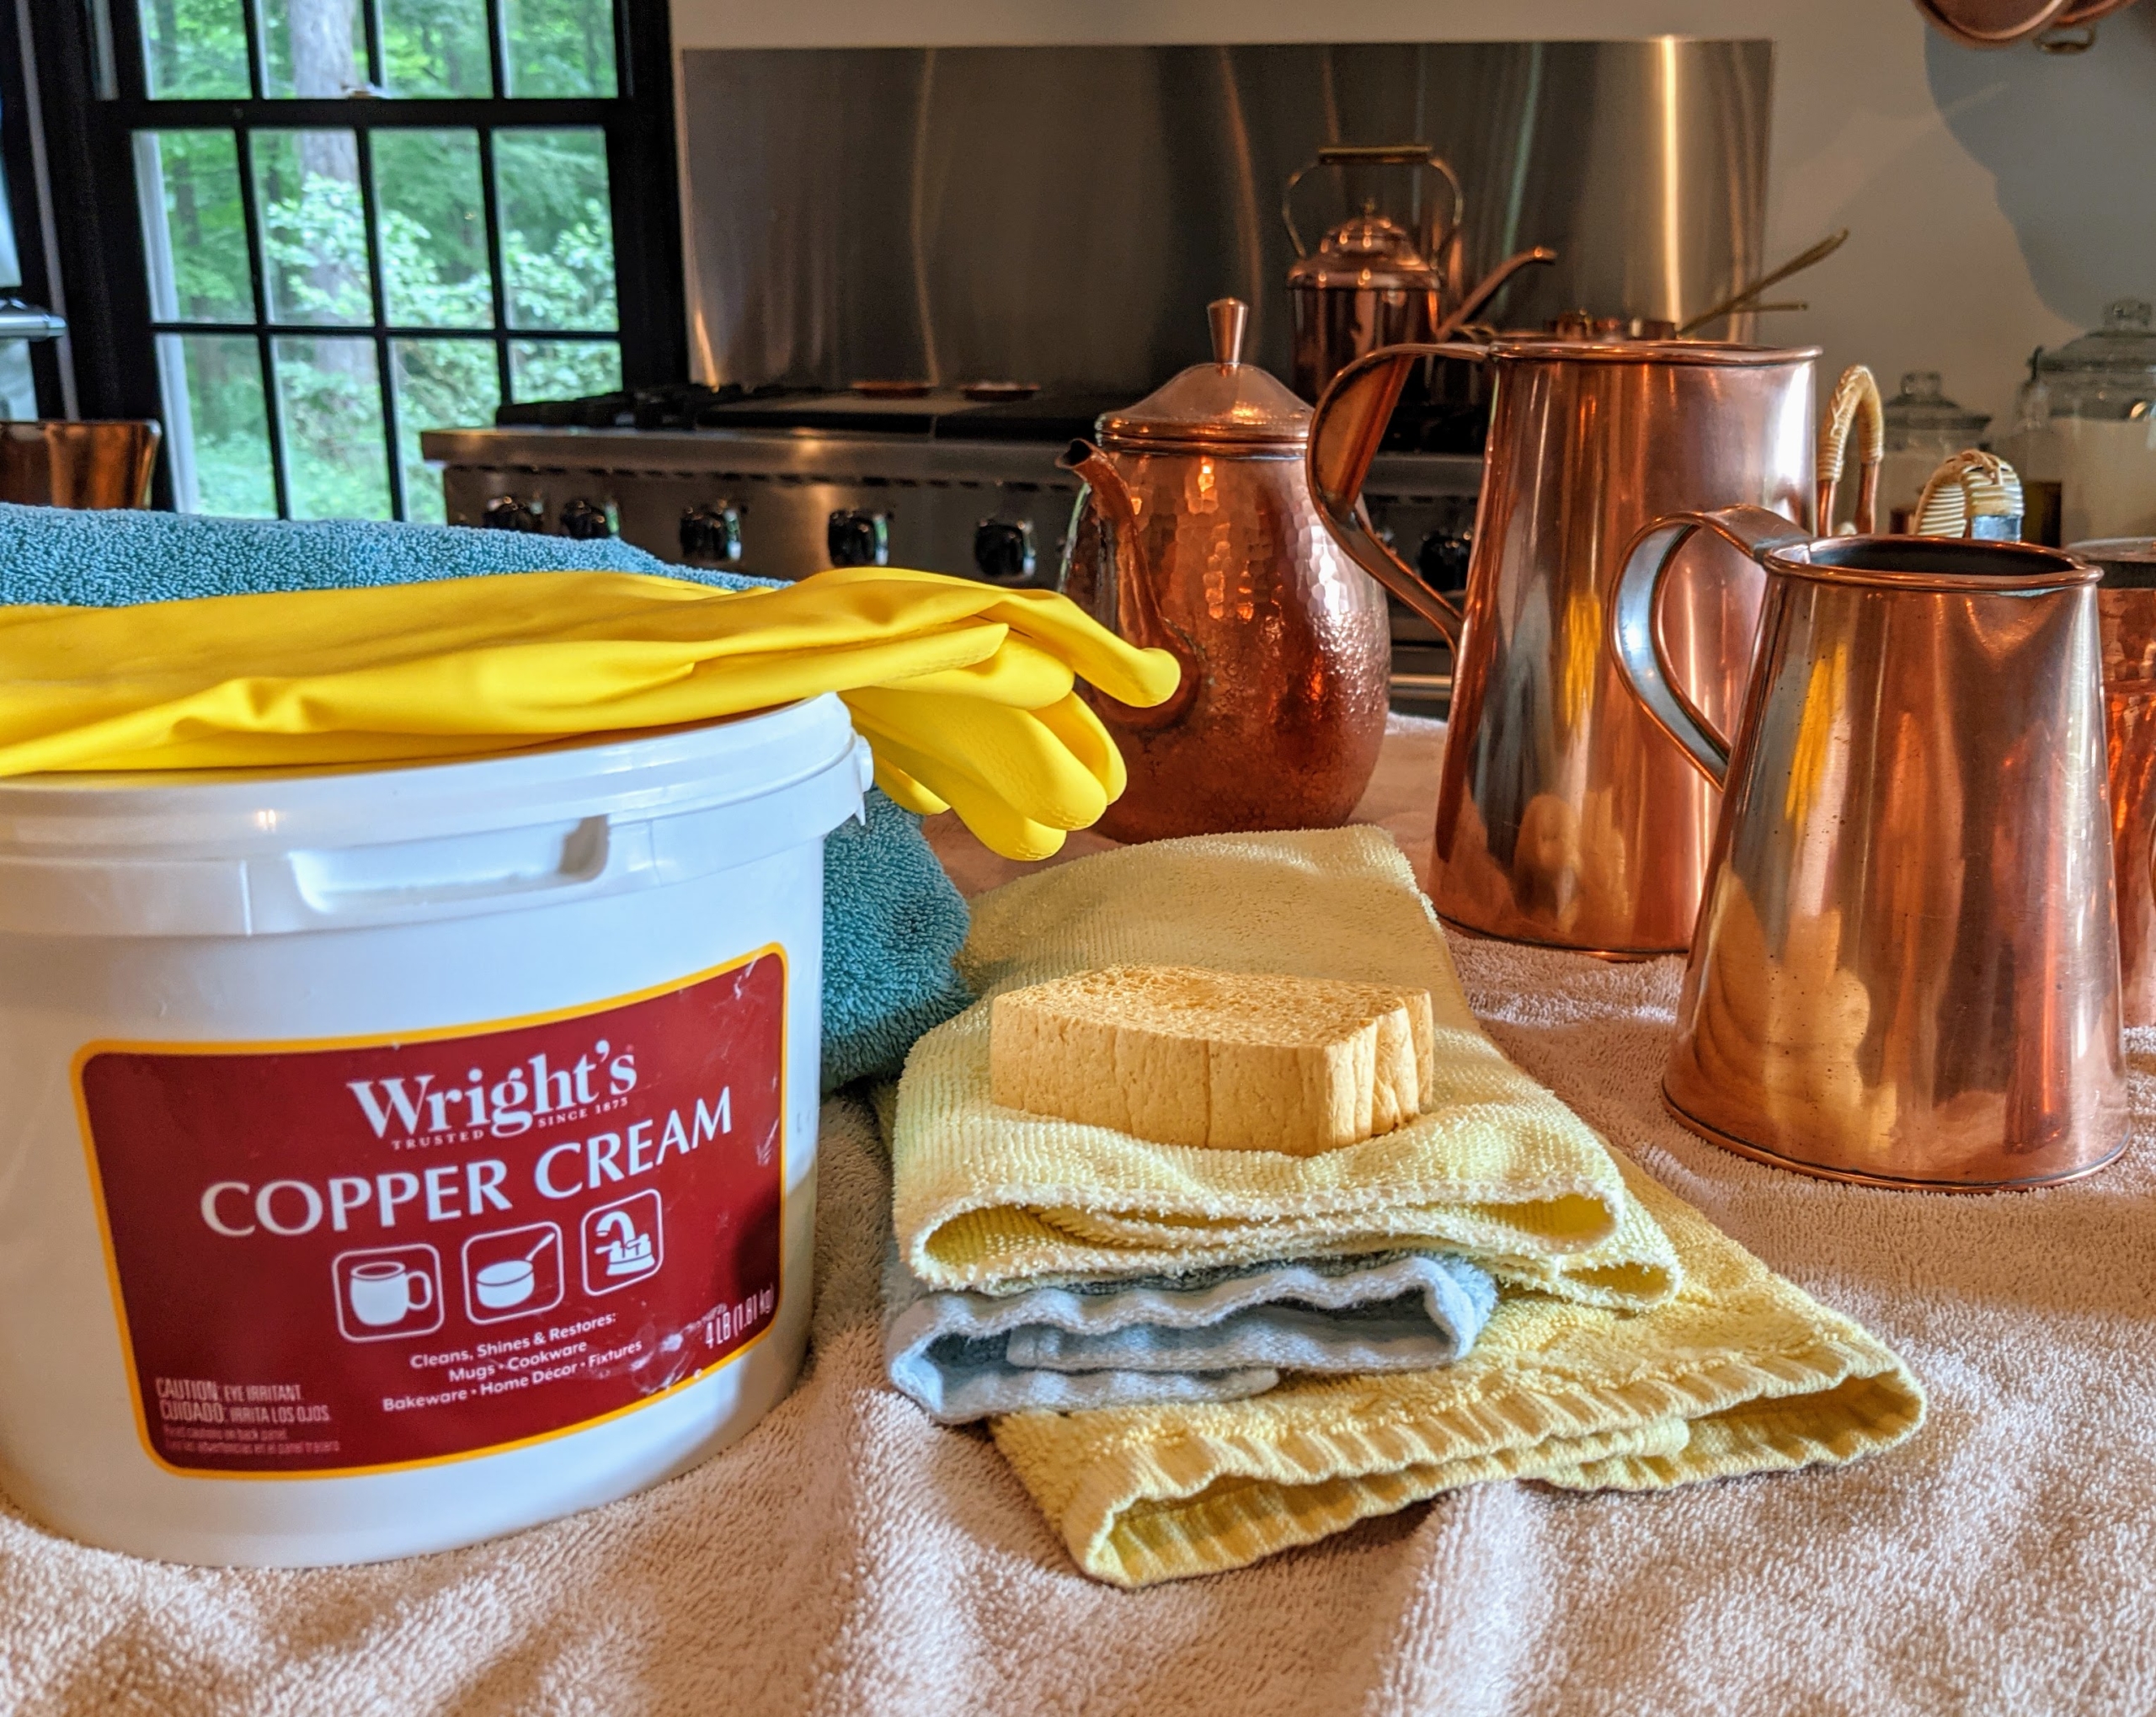
Wright’s Silver Cream is a gentle all-purpose polish that works on all types of silver. It also works nicely on stainless steel and chrome and comes in a big tub.
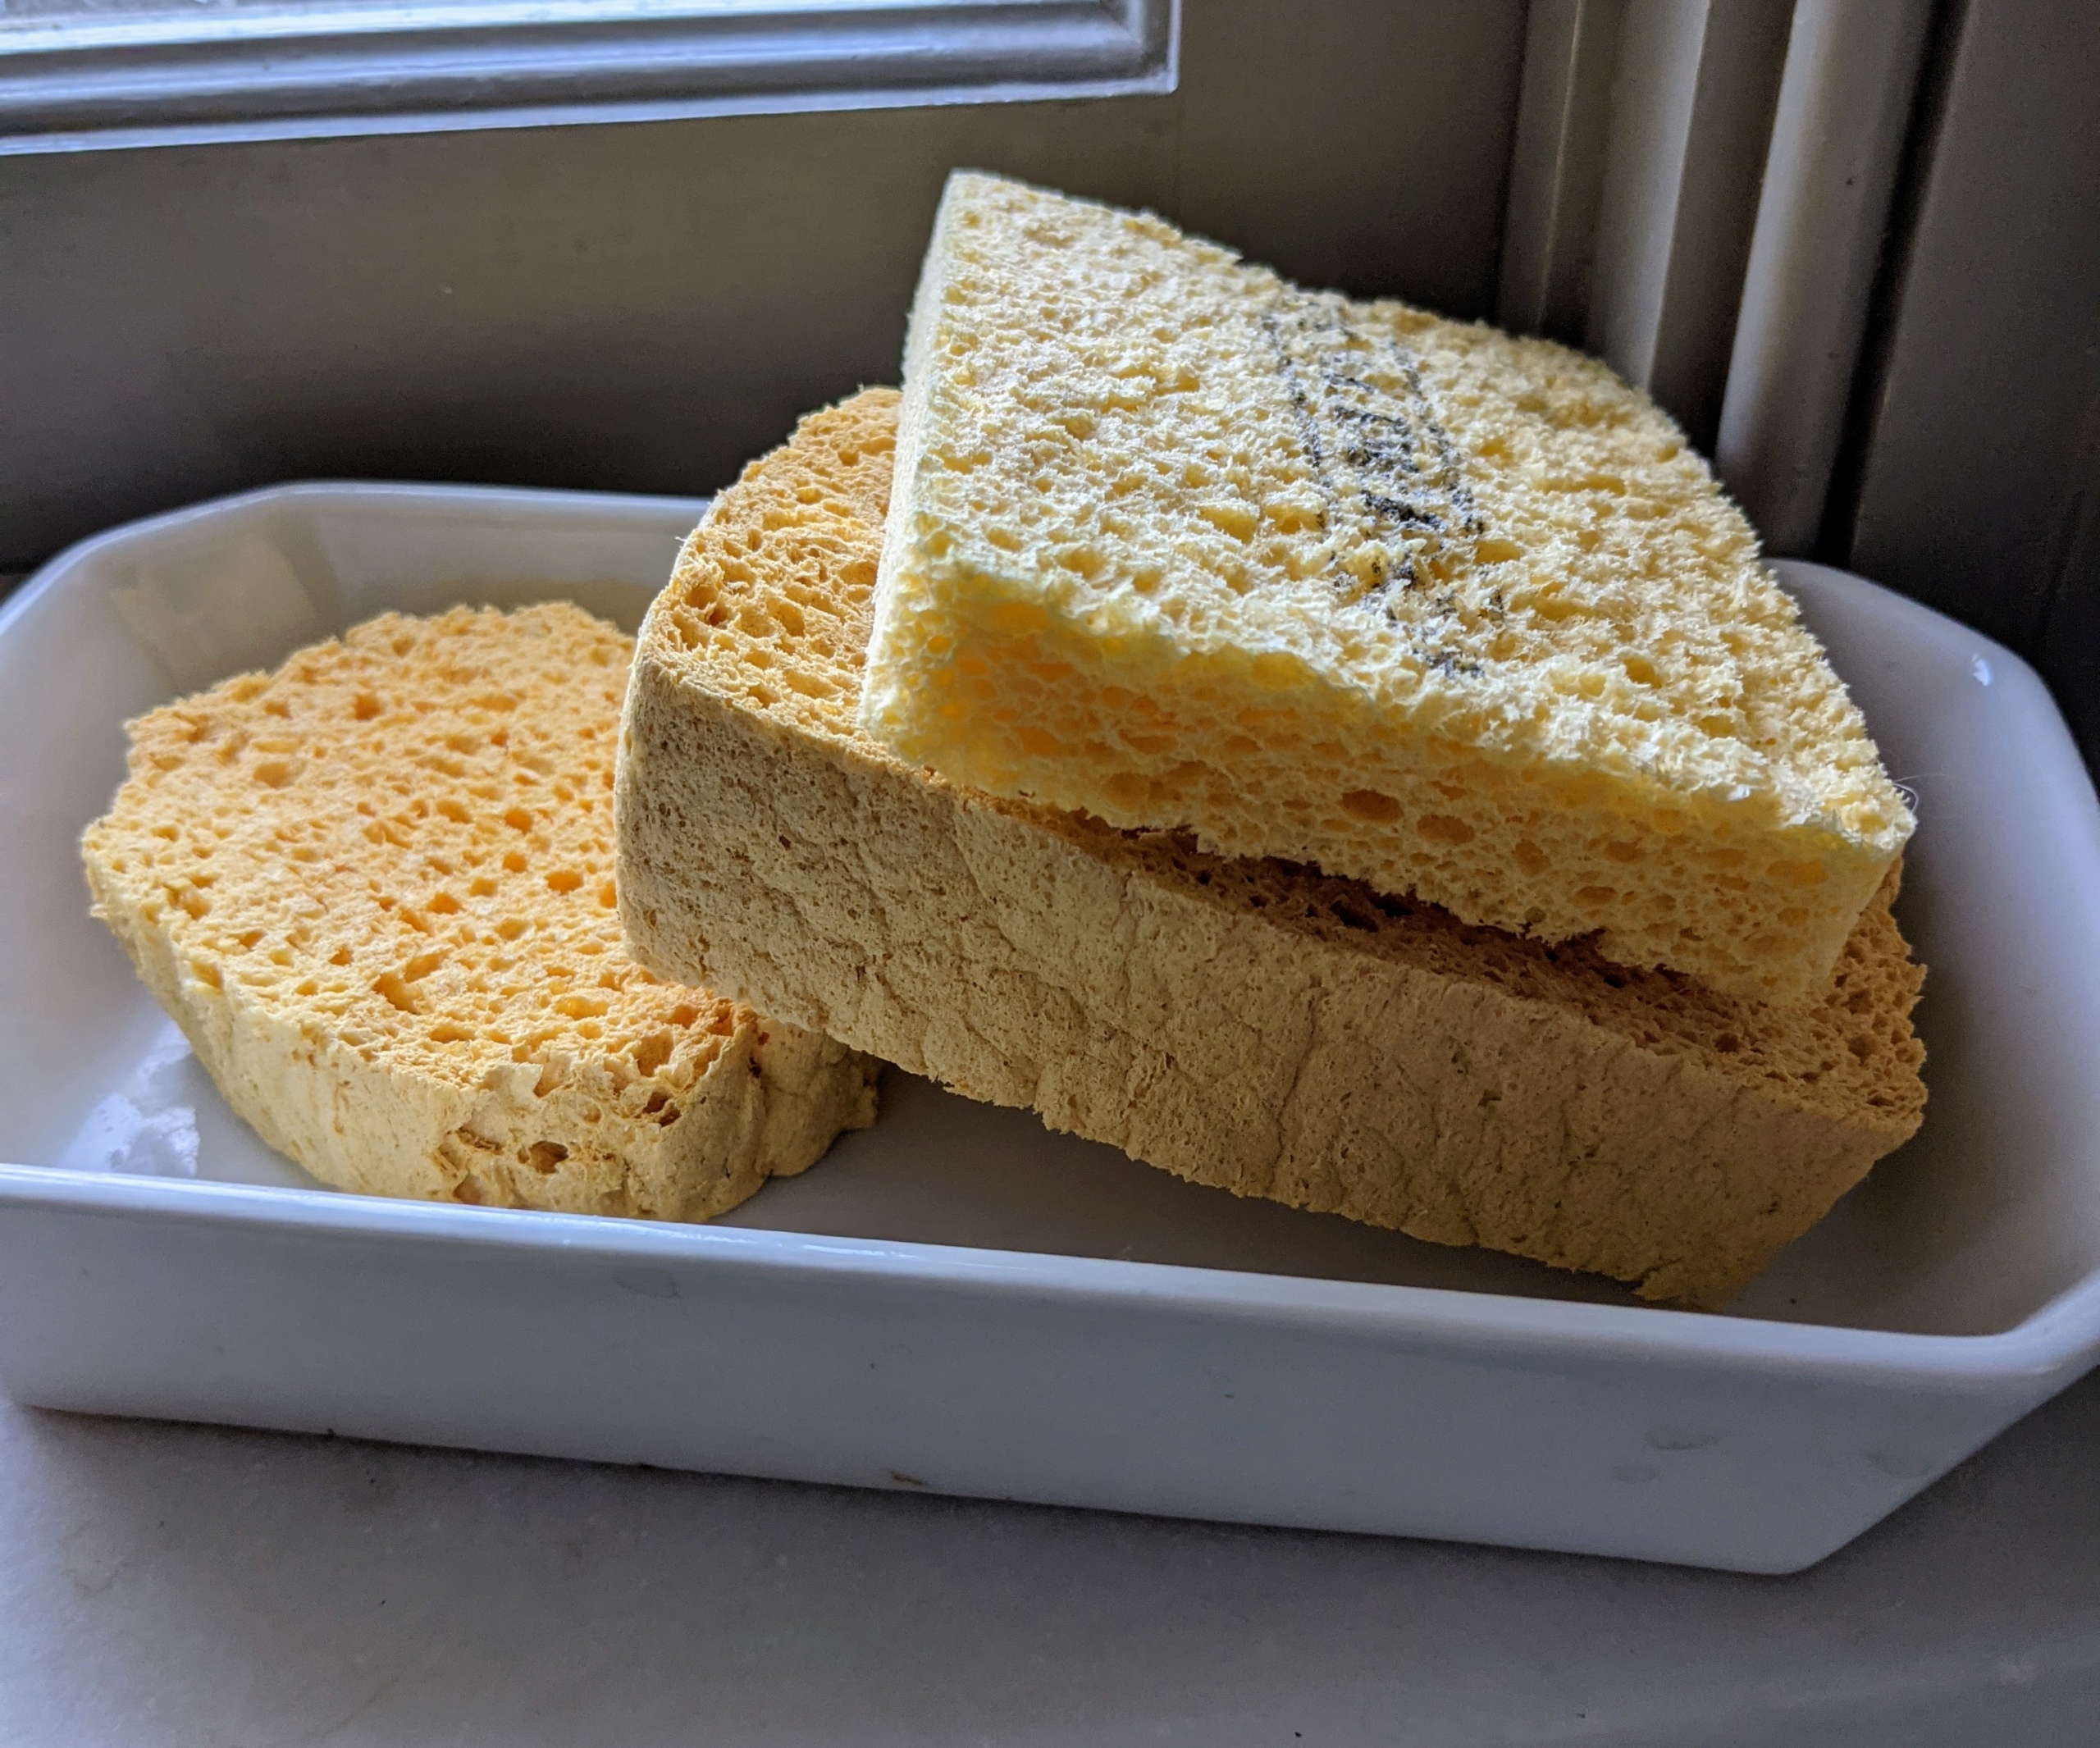
Whenever cleaning precious silver, we use soft moistened sponges. Made of all-natural material, these sponges are compressed to a thin rectangle for easy storage and then pop-up when wet. A soft cloth can also work well.
Wright’s Silver Cream anti-tarnish agents leave a protective invisible wax-like surface that actually slows the formation of tarnish. It’s also ammonia-free.
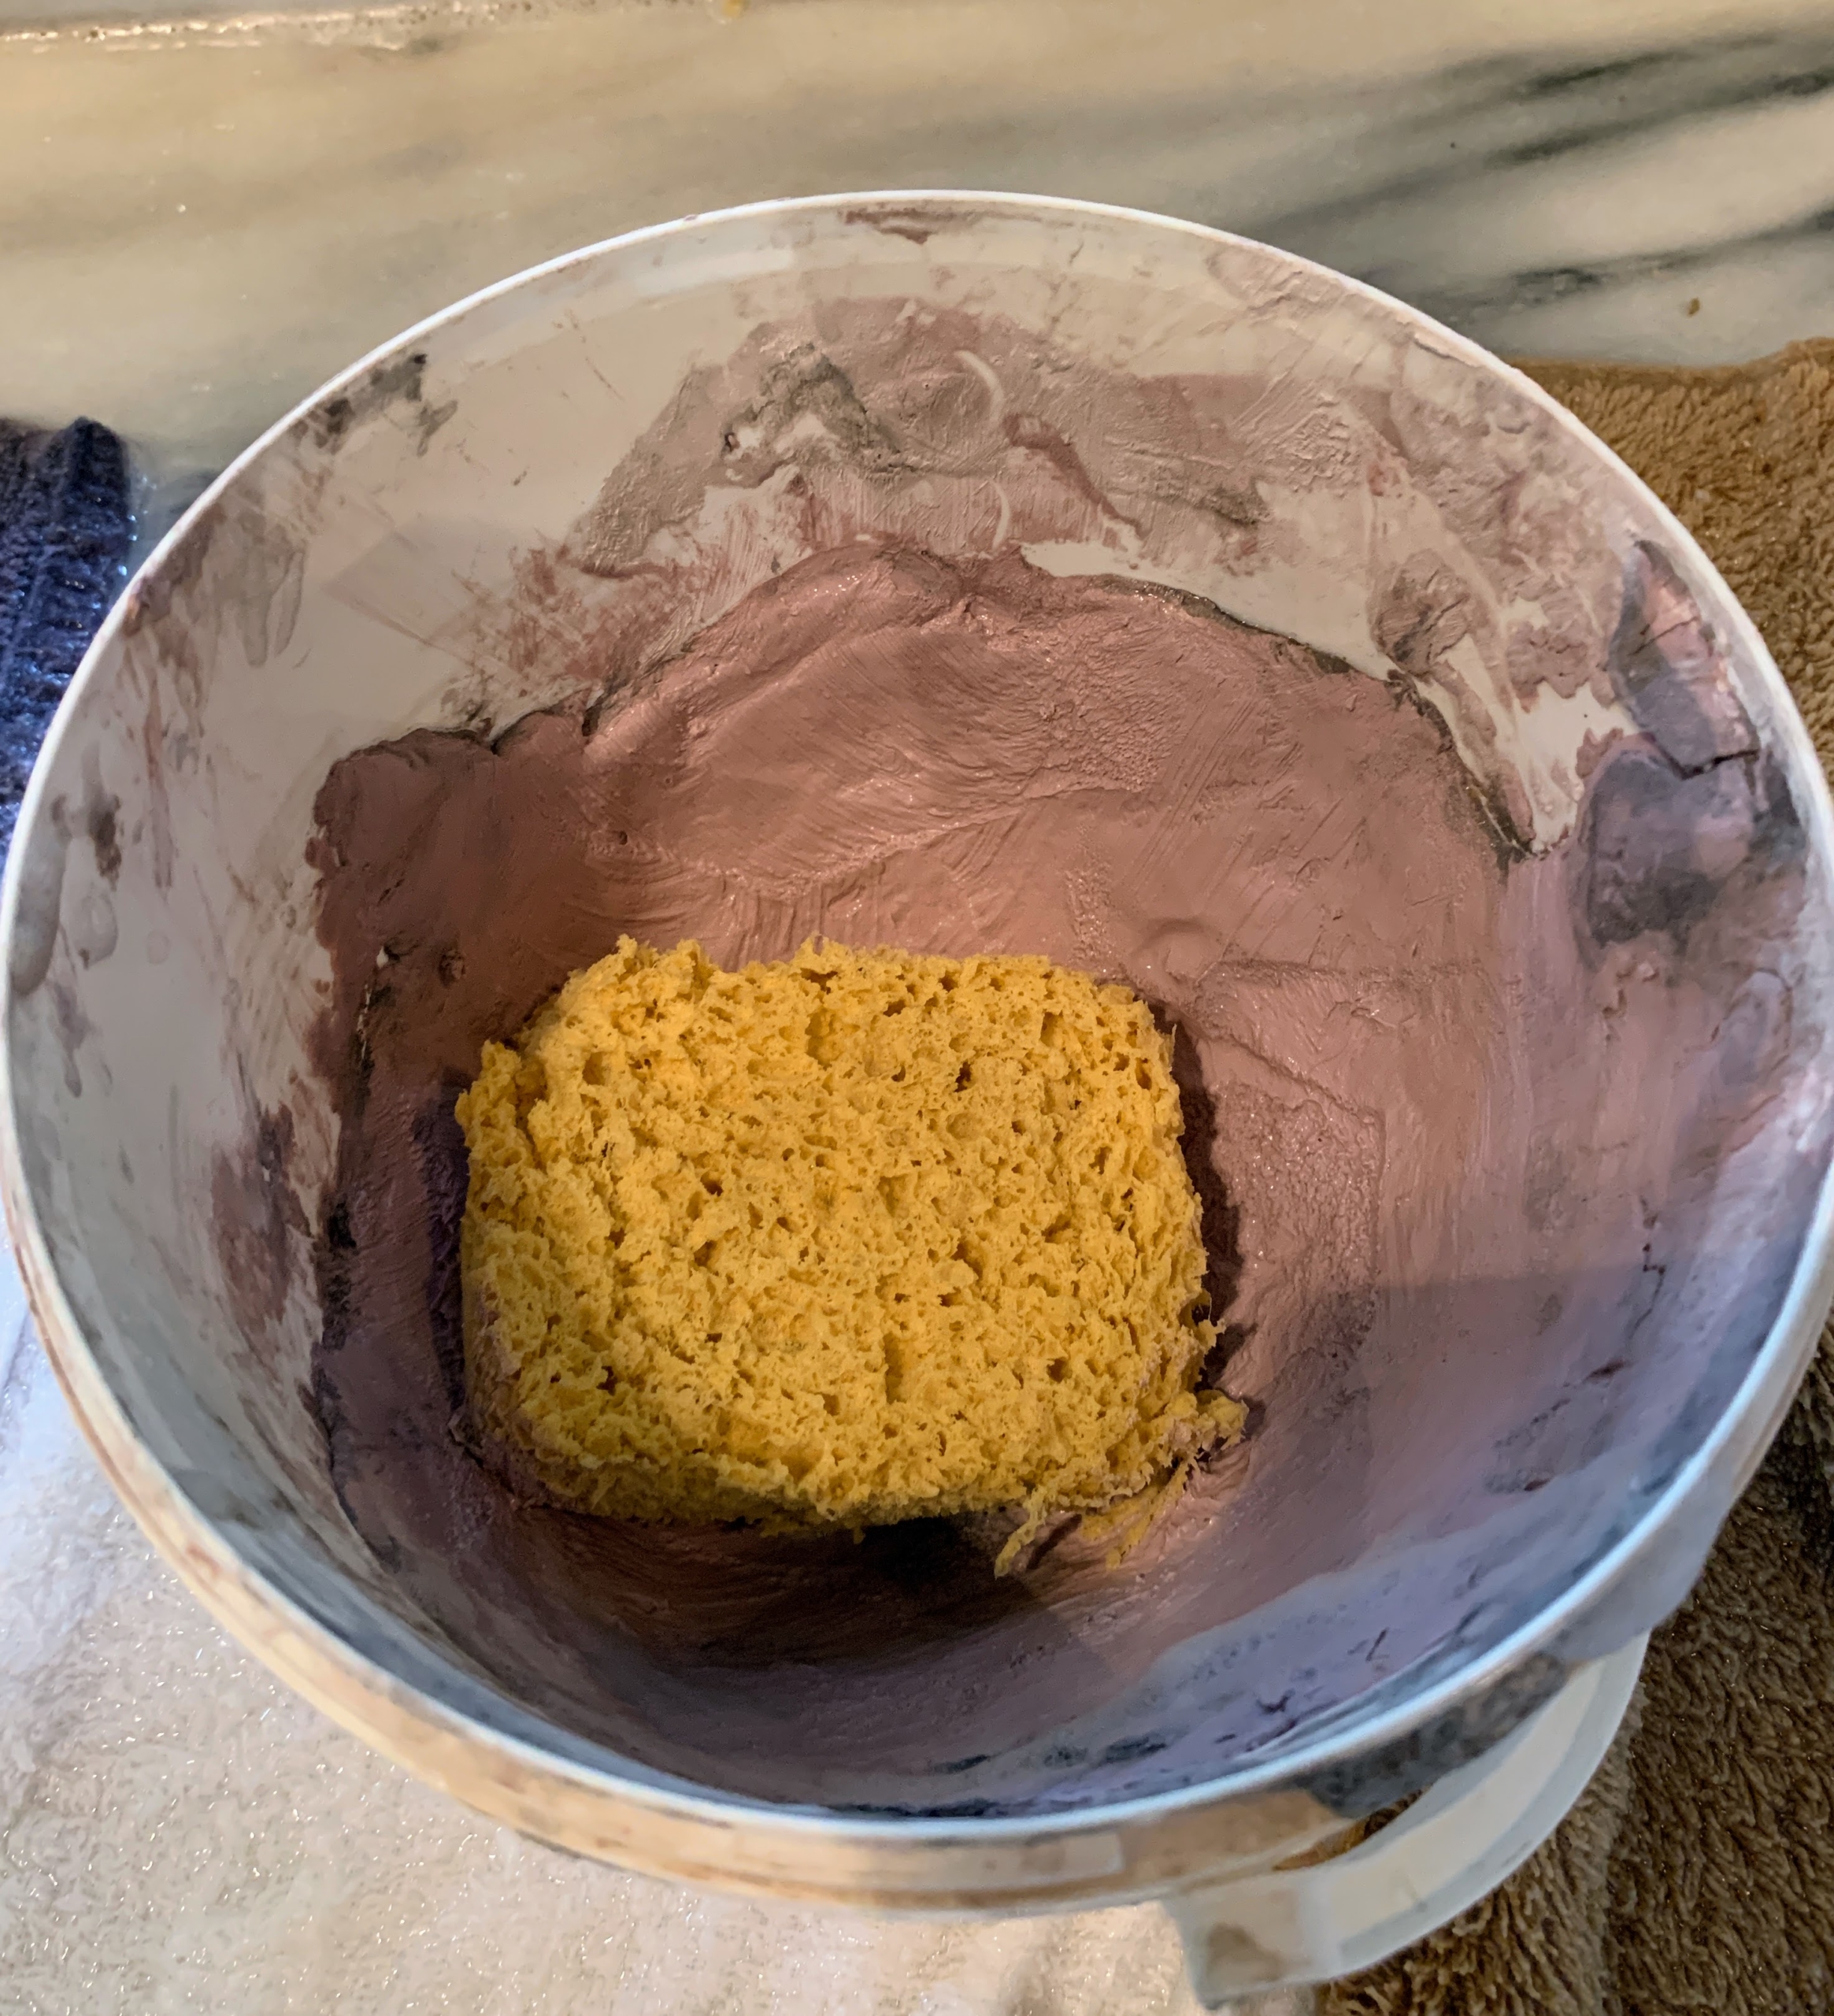
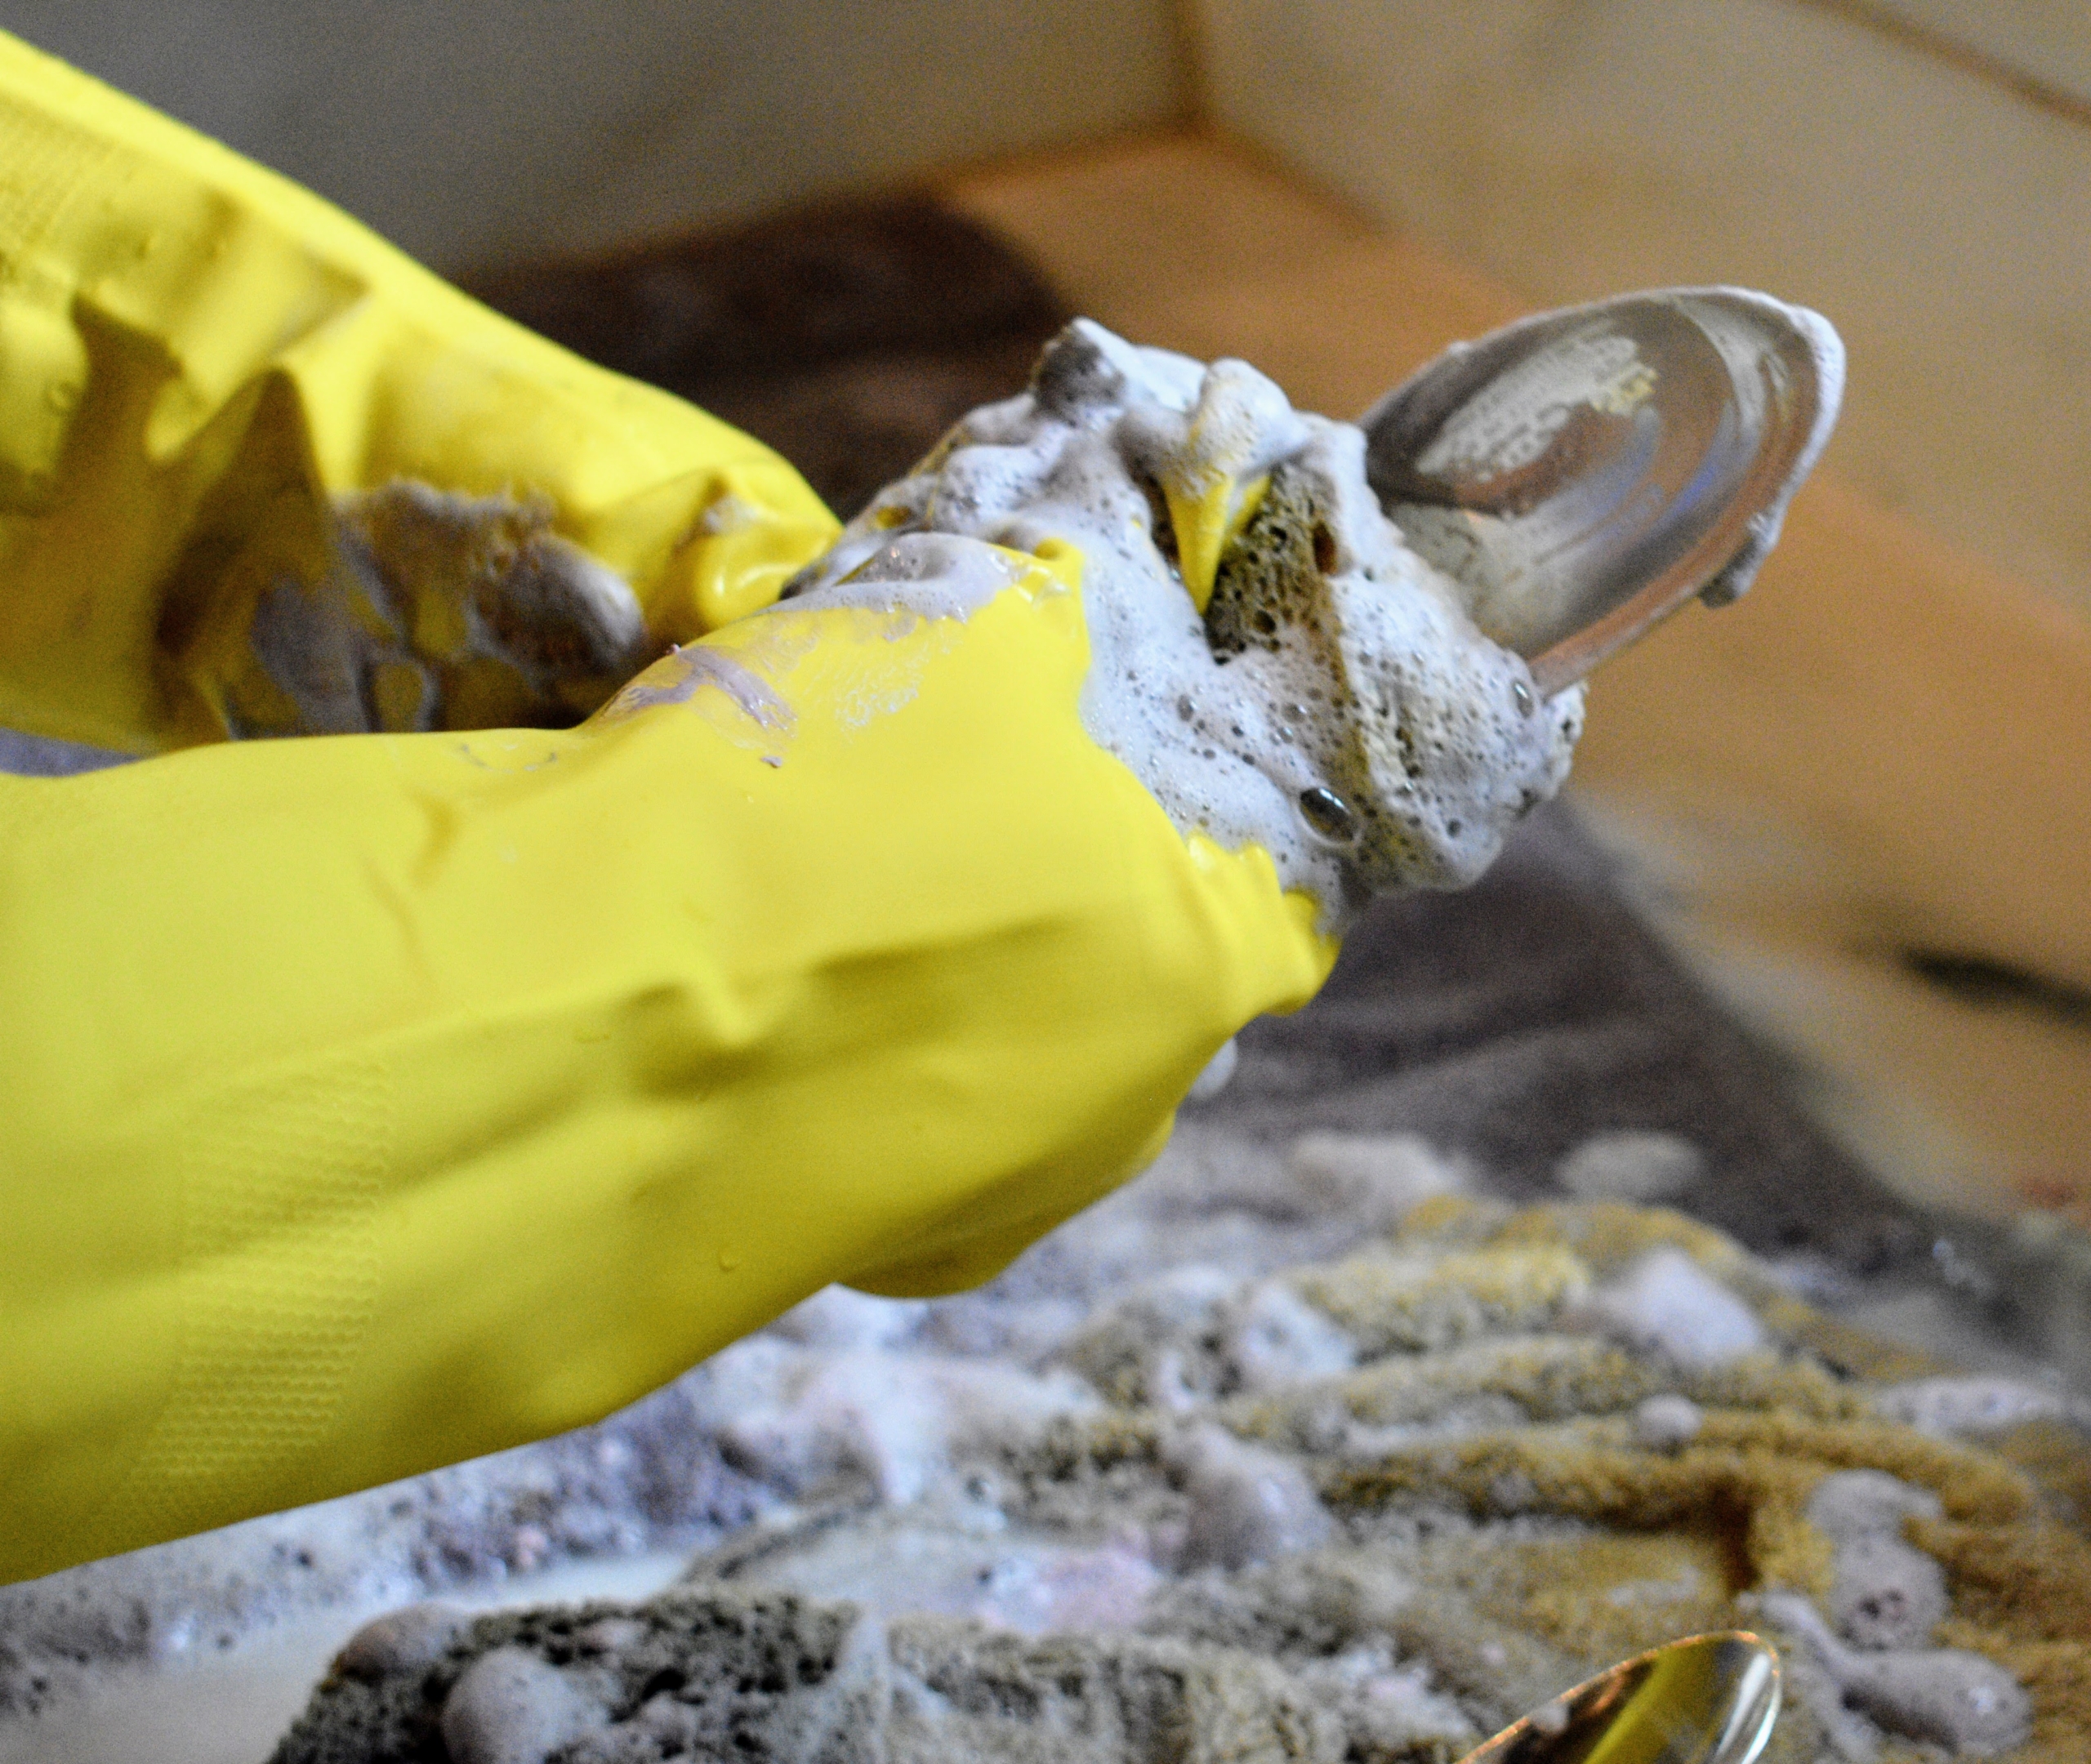
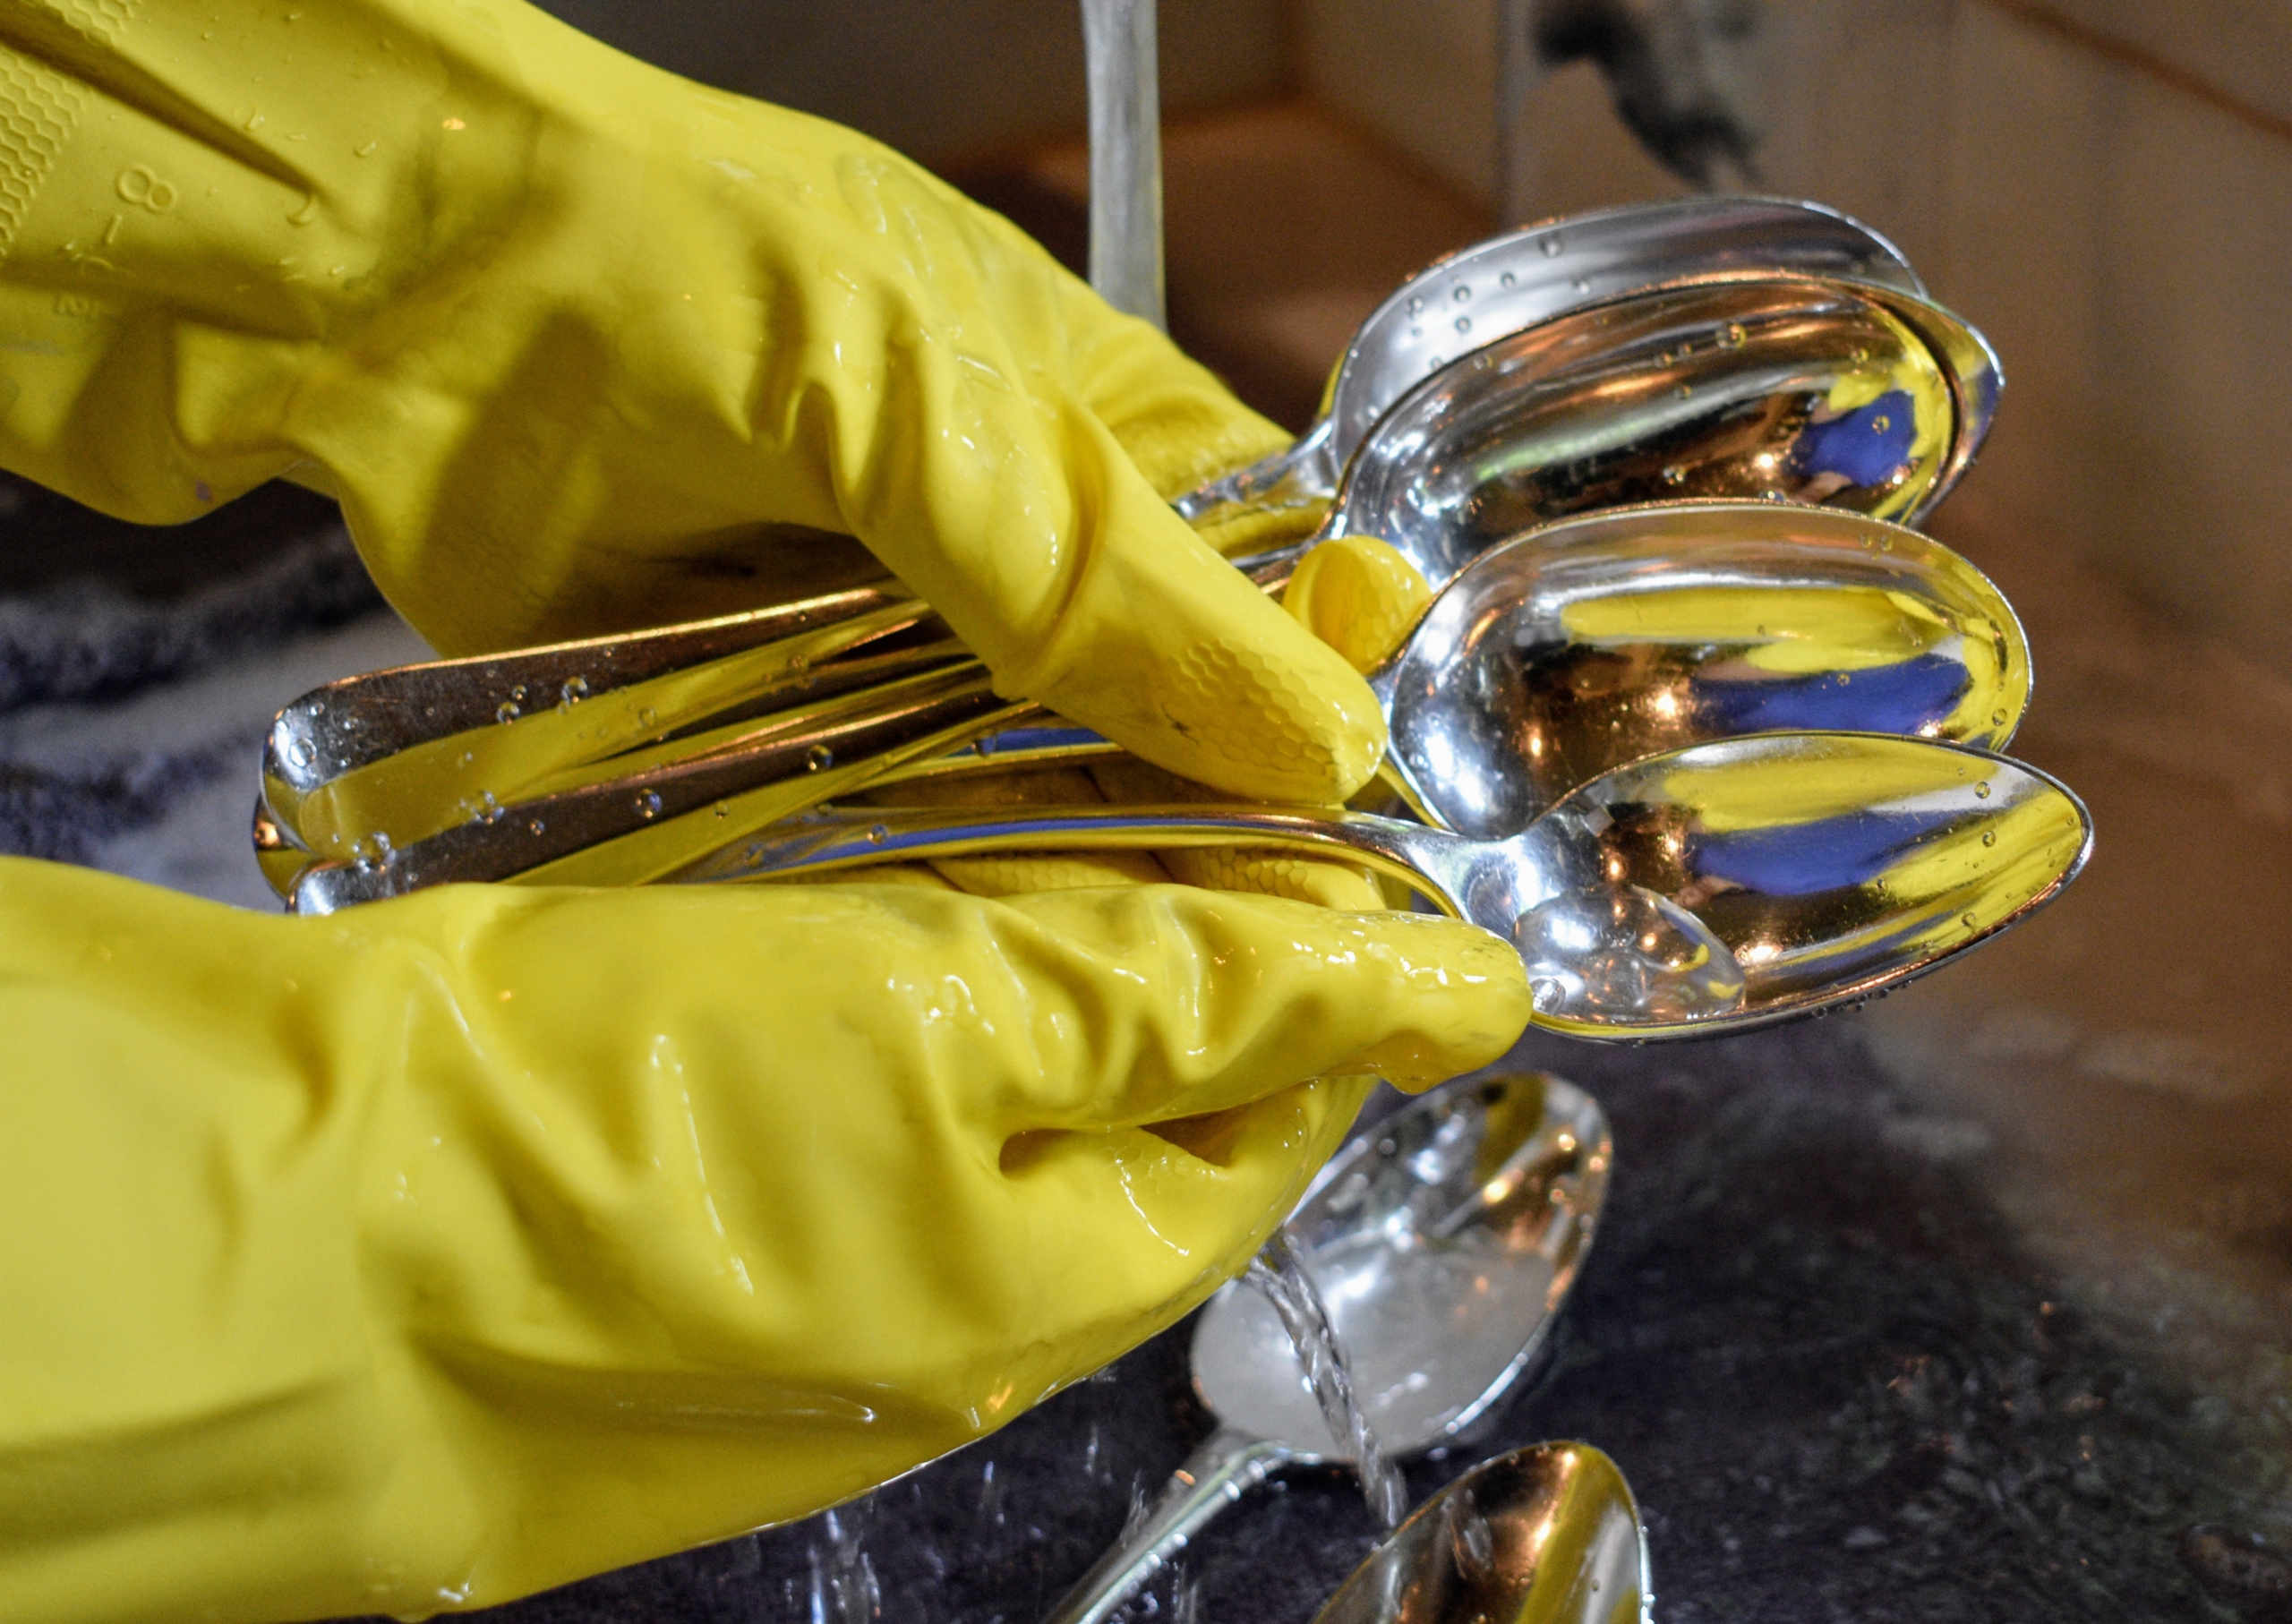
Each piece is washed separately – first, it is coated completely with the silver cream. The silver will start to brighten as it is rubbed. Always use silver polishes that are non-abrasive, and opt for formulas, such as creams and gels instead of sprays. It’s also a good idea to use gloves when taking on this task, so the cleaning cream does not come into contact with the skin.
We also place terry cloth towels on the bottom of the sink, so the metal doesn’t bang against any surfaces. I also do this whenever washing delicate china pieces – just in case something slips through the hands.
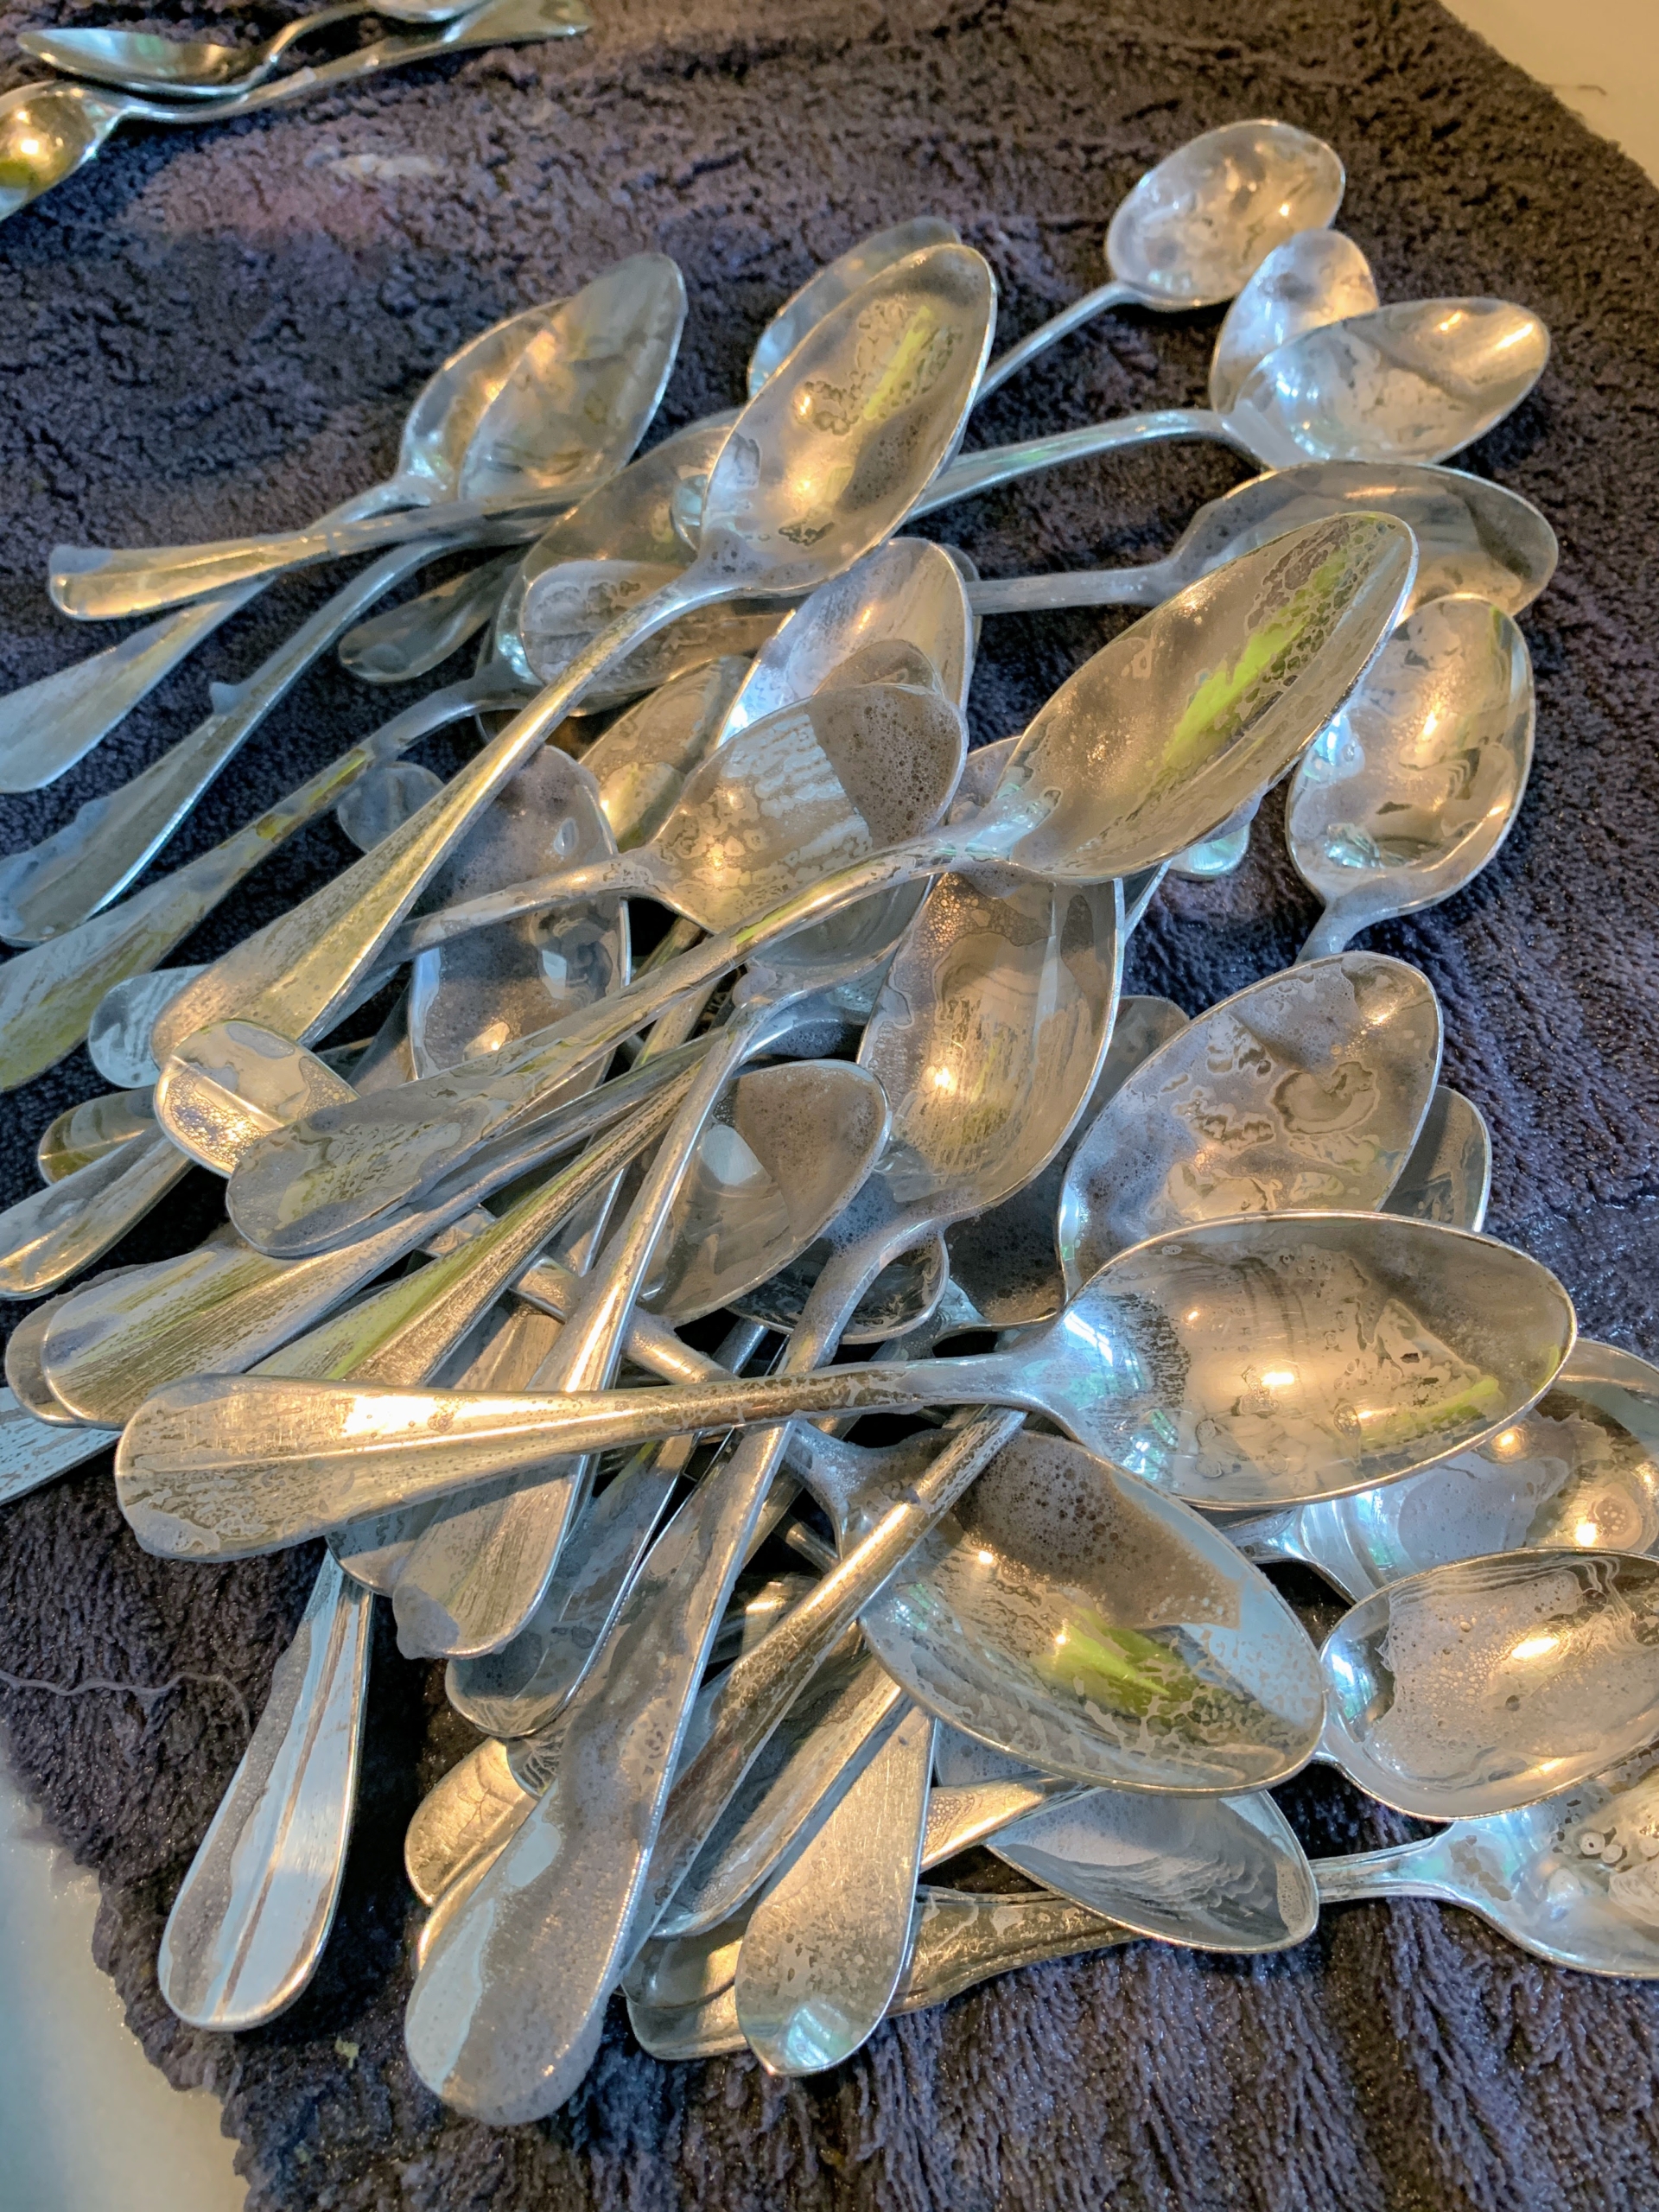
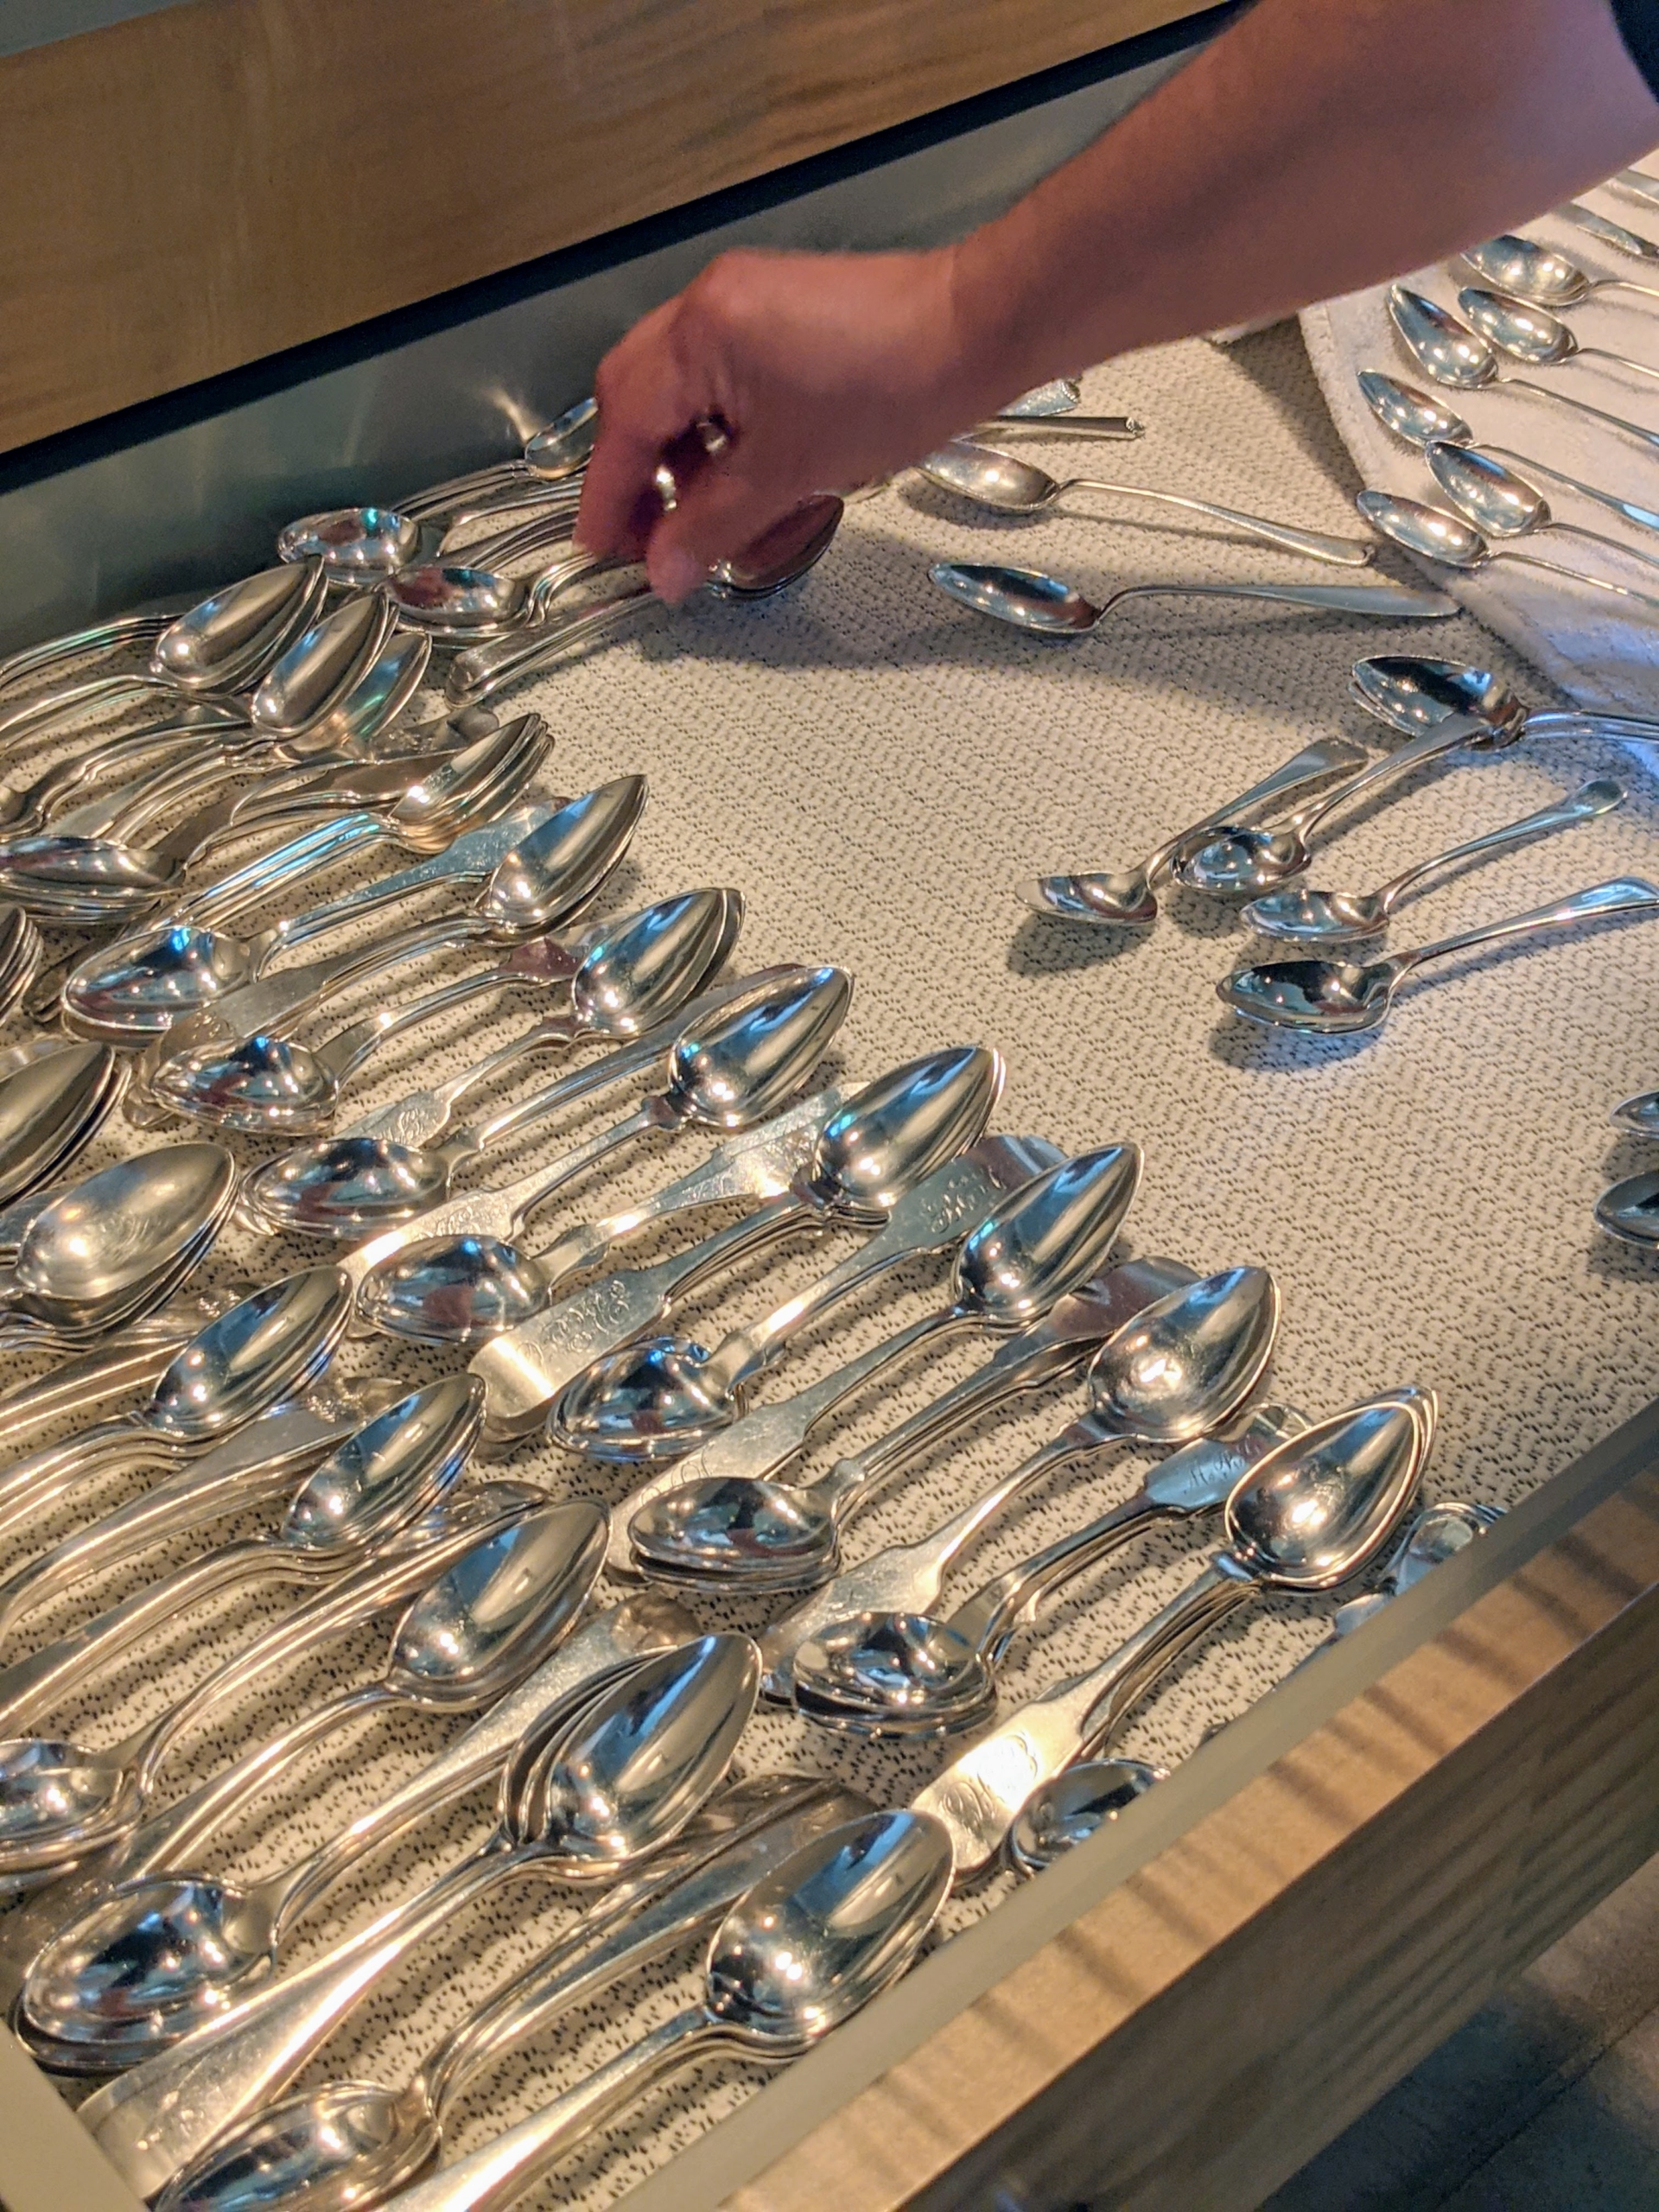
After cleaning with the silver cream, these spoons are washed with water and dish soap to ensure all the cream is removed. These spoons look very shiny.
The finished pieces are dried and placed on another towel, so they can be sorted before being put away. Do not let silver air dry, because water left standing can cause spotting.
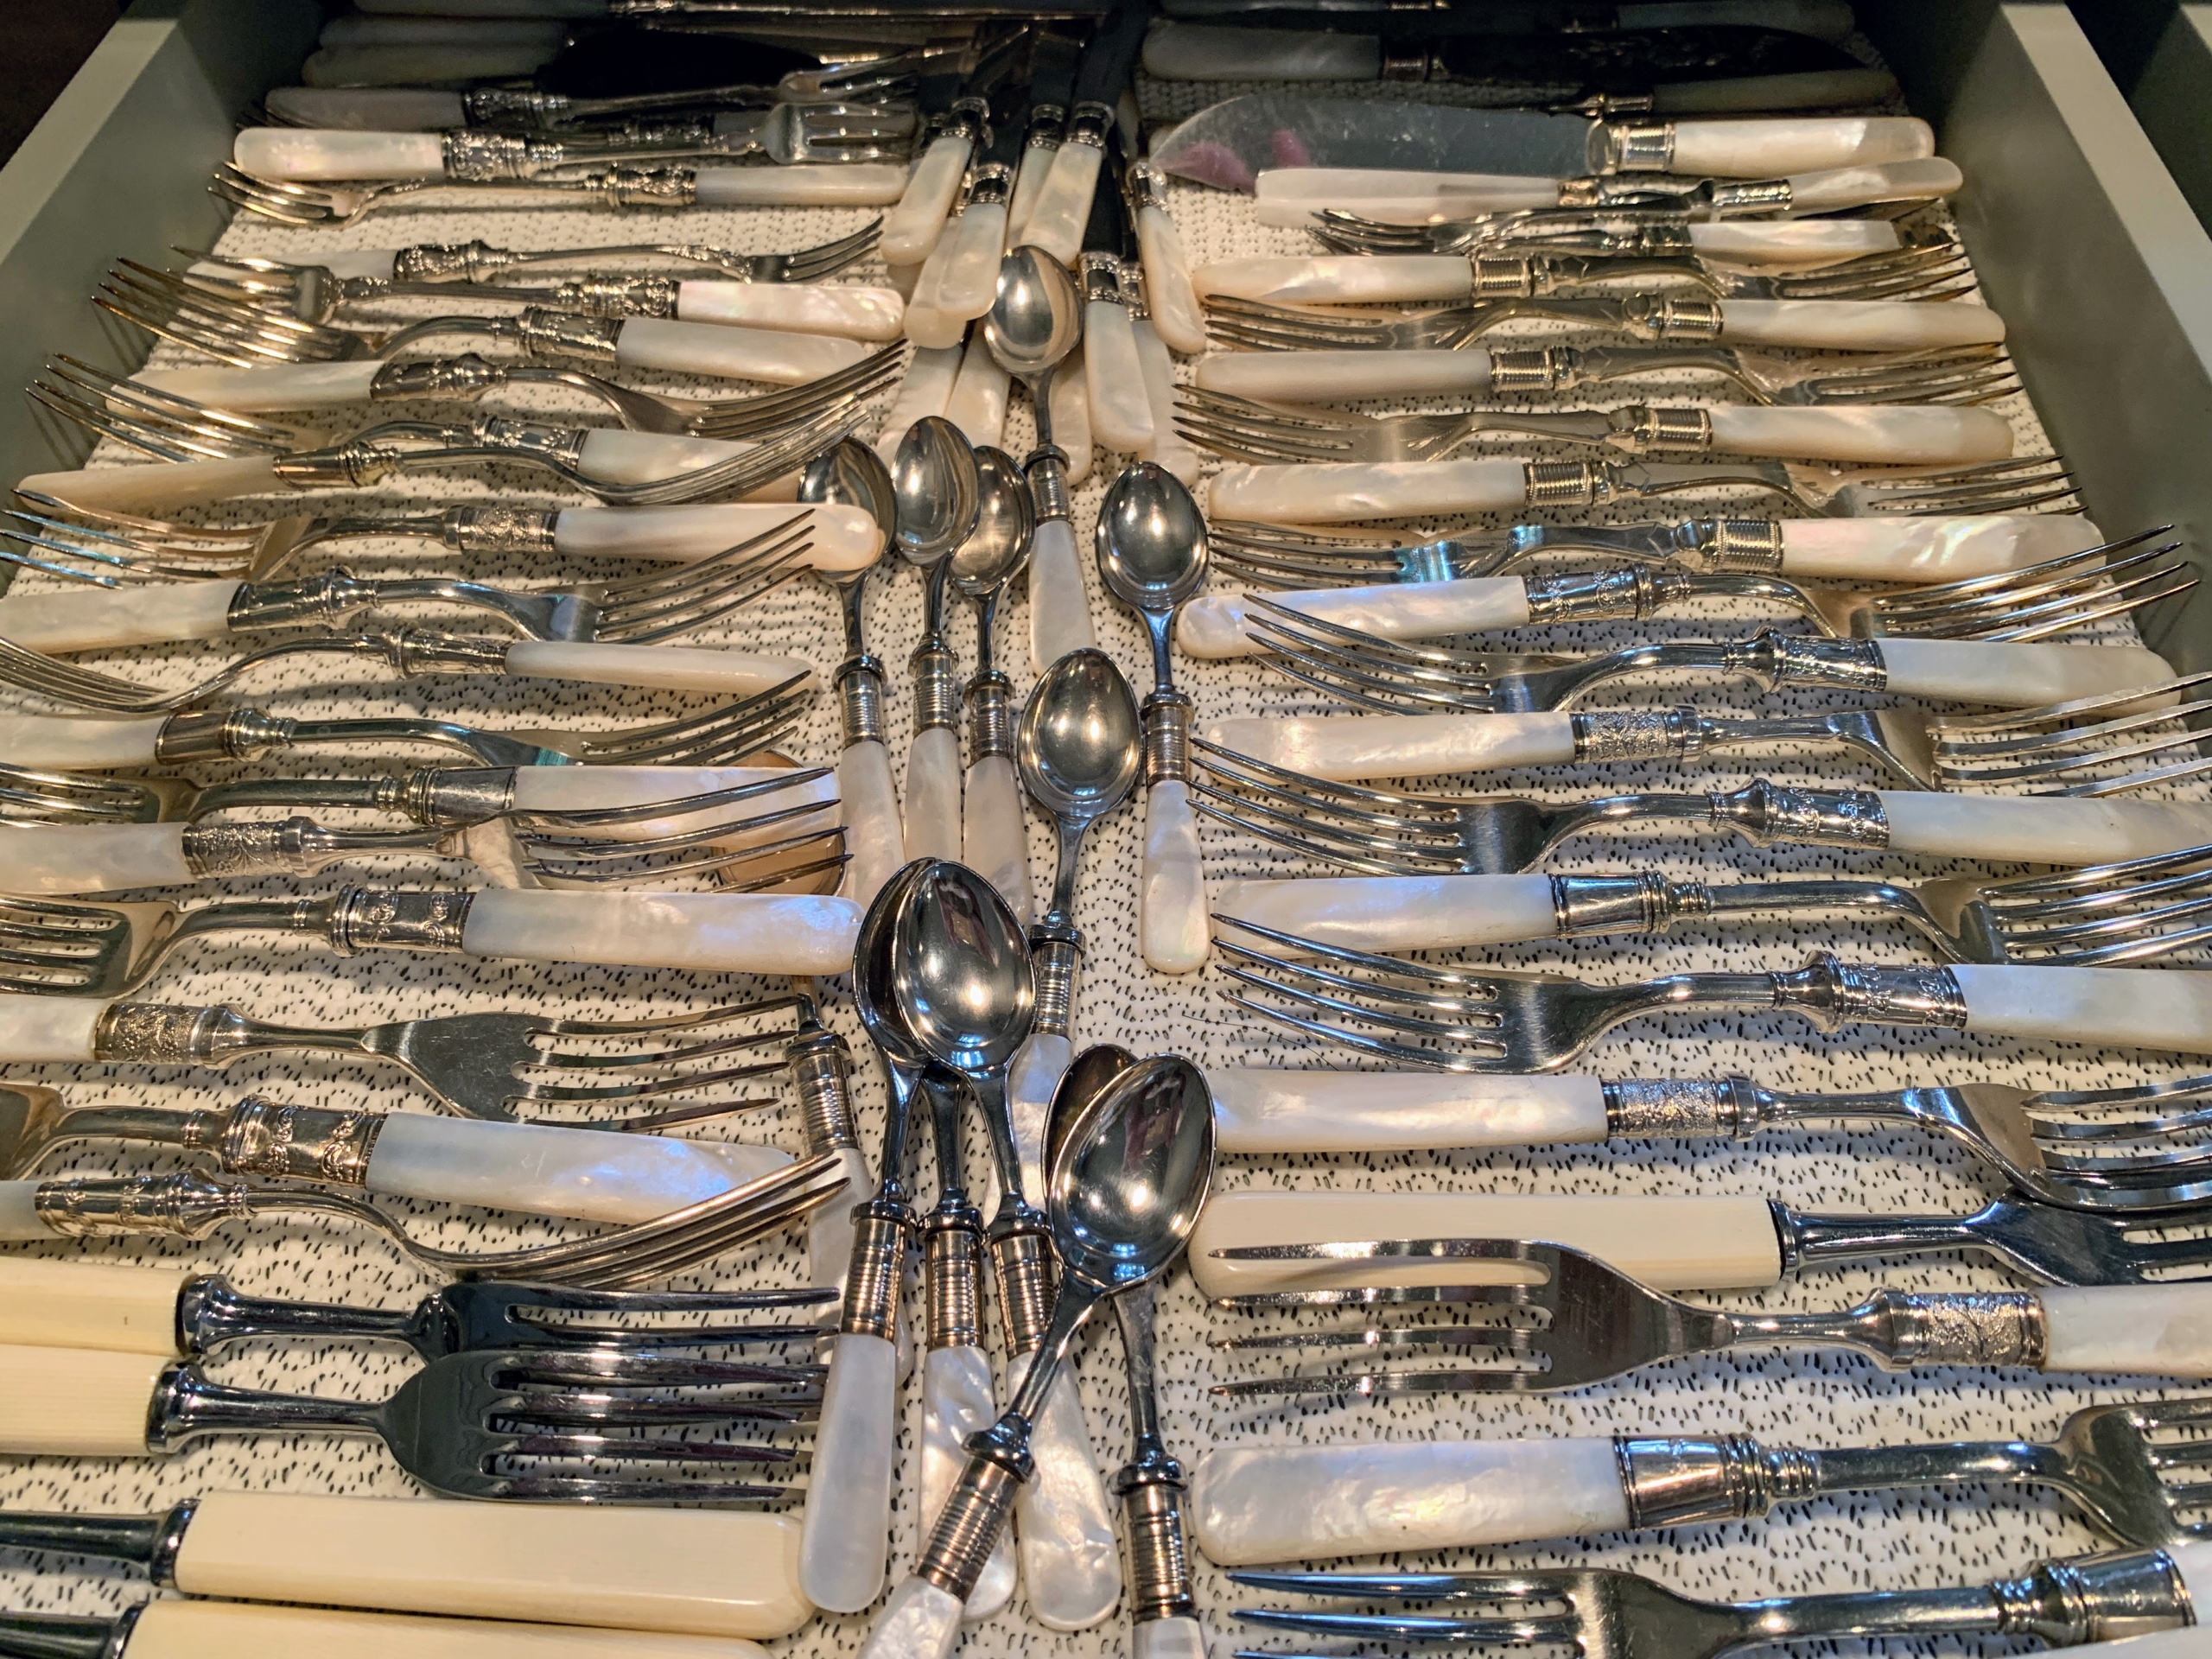
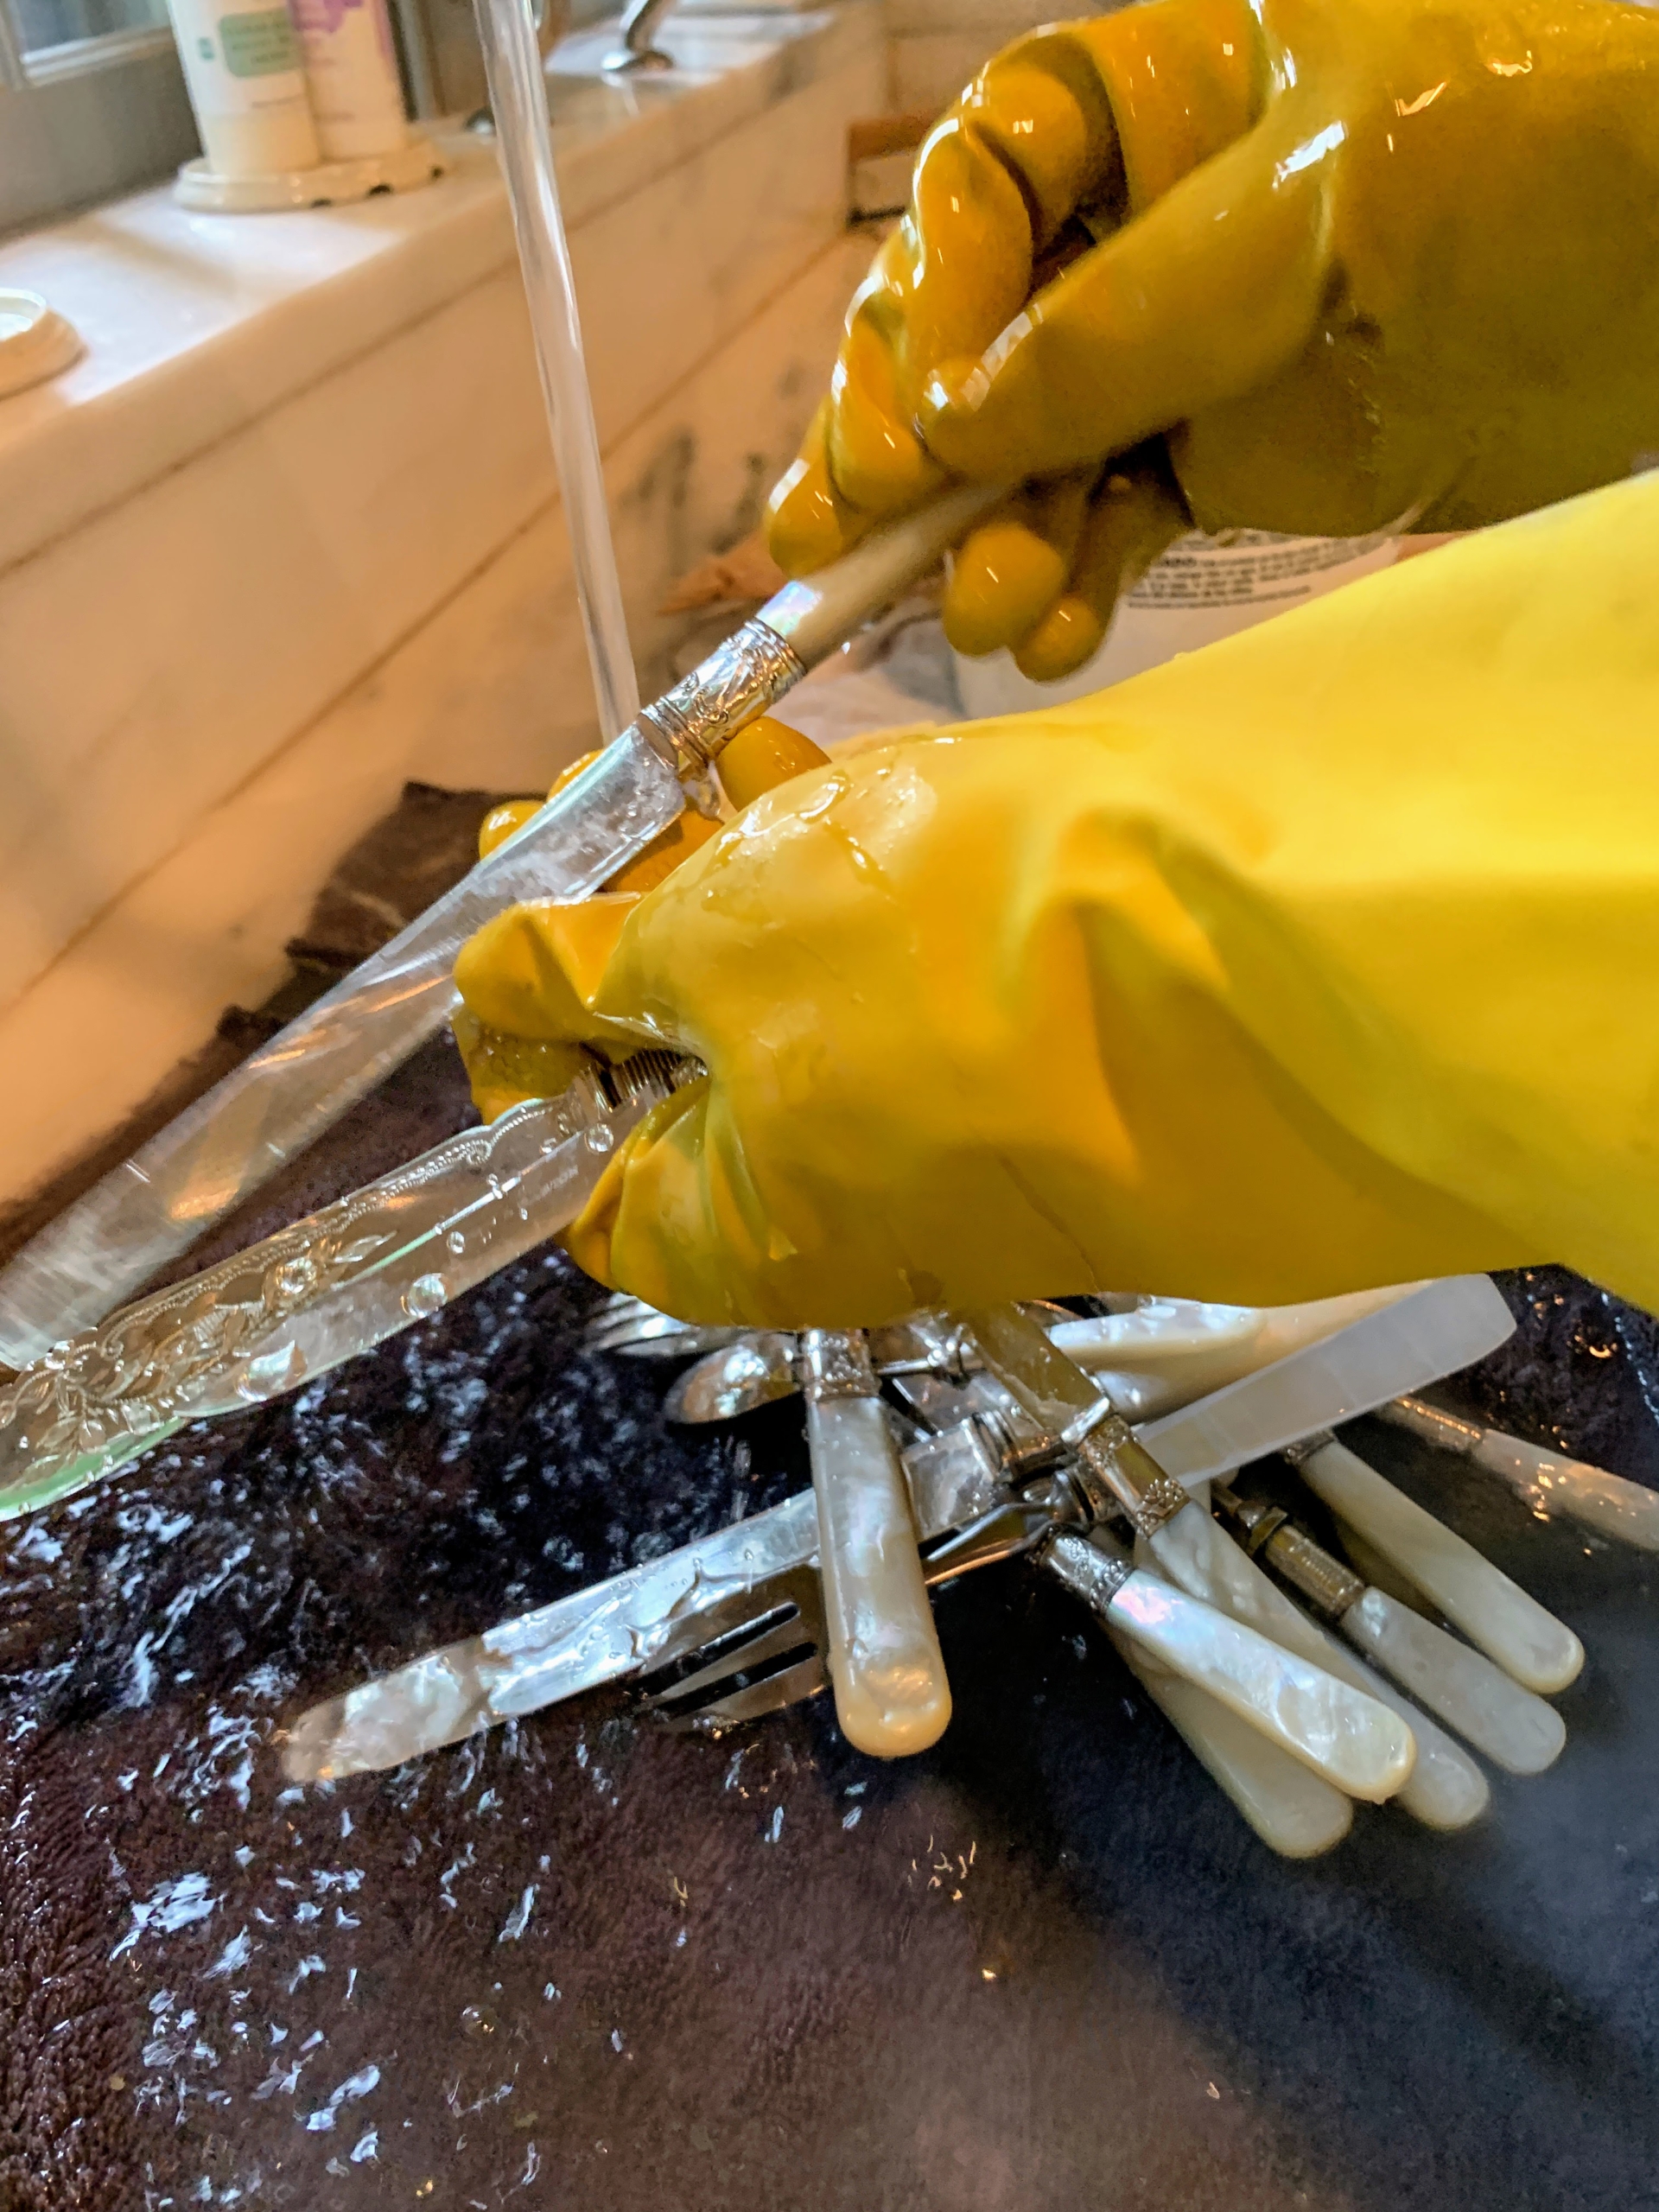
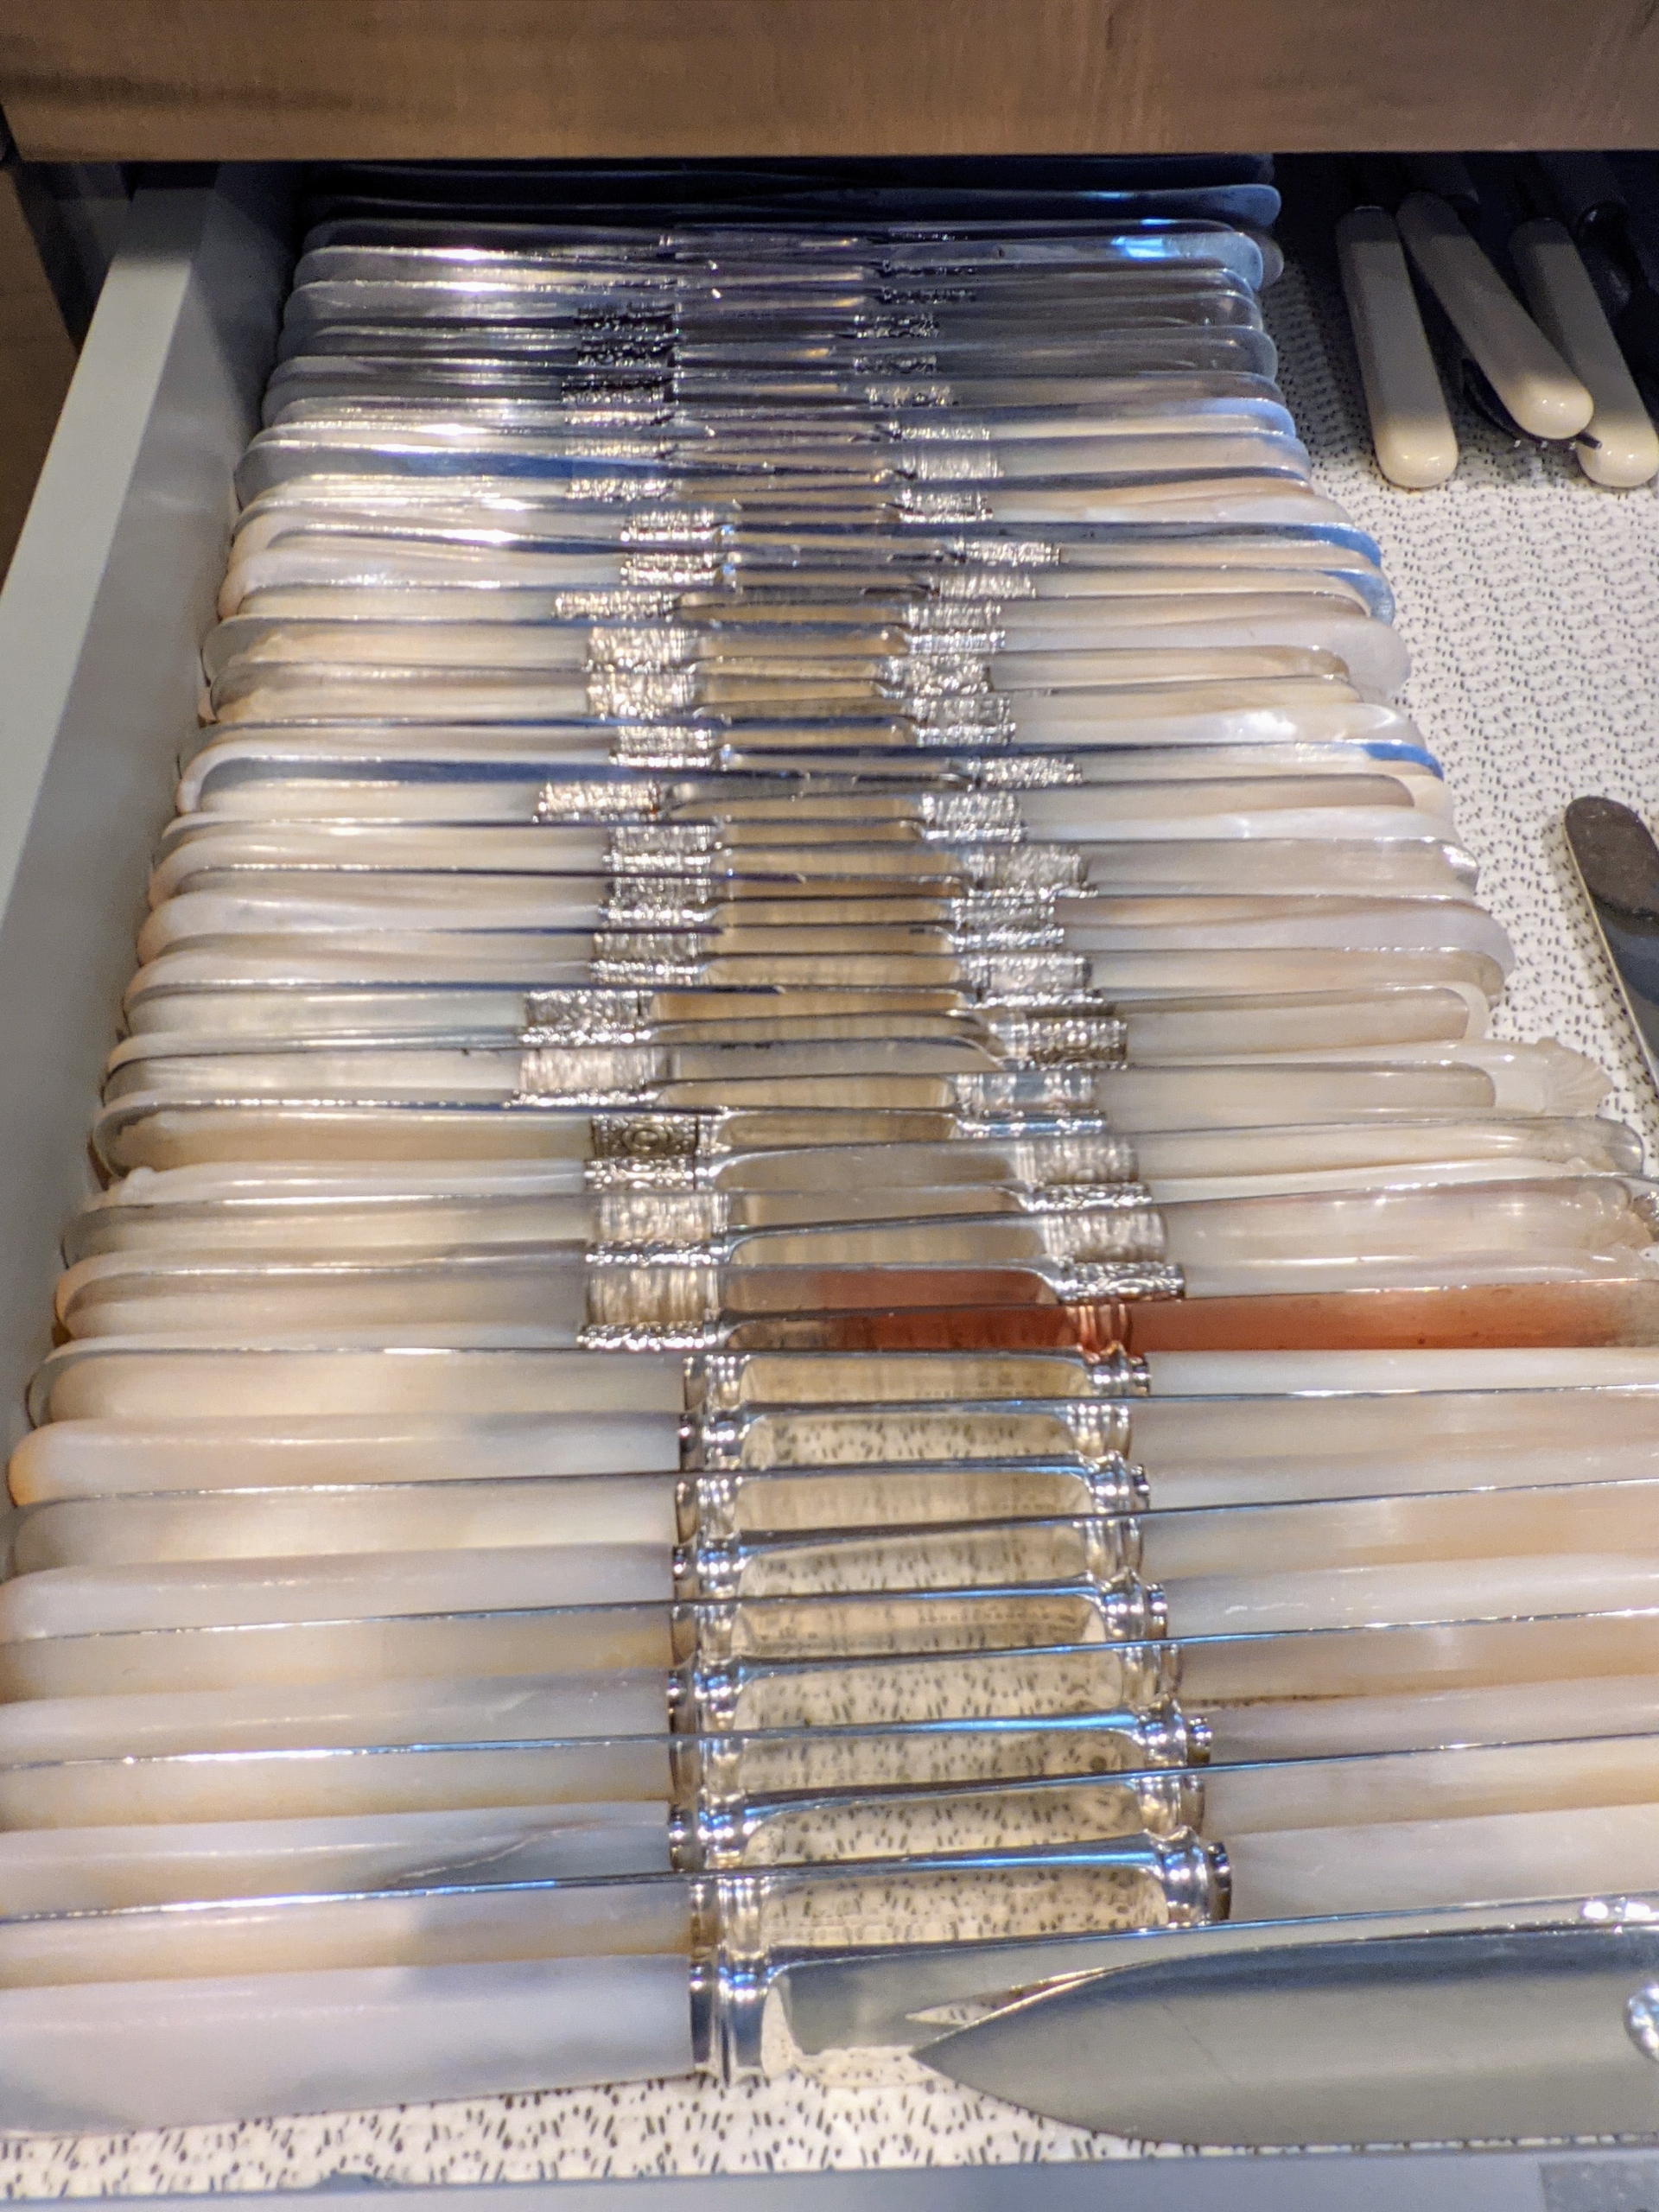
The same is done for these silver knives with mother of earl handles. Mother-of-pearl, nacre, is a glowing, pearlescent material that’s used to make flatware handles, jewelry and ornaments. Mother-of-pearl comes from the inside of oyster and abalone shells.
Once cleaned, these too are washed thoroughly with regular dish soap and water.
As Elvira cleans, Enma dries – it is a serious process to get hundreds of these utensils polished.
They look so beautiful and shiny after they are done. Mother of pearl is delicate and will scratch if mishandled.
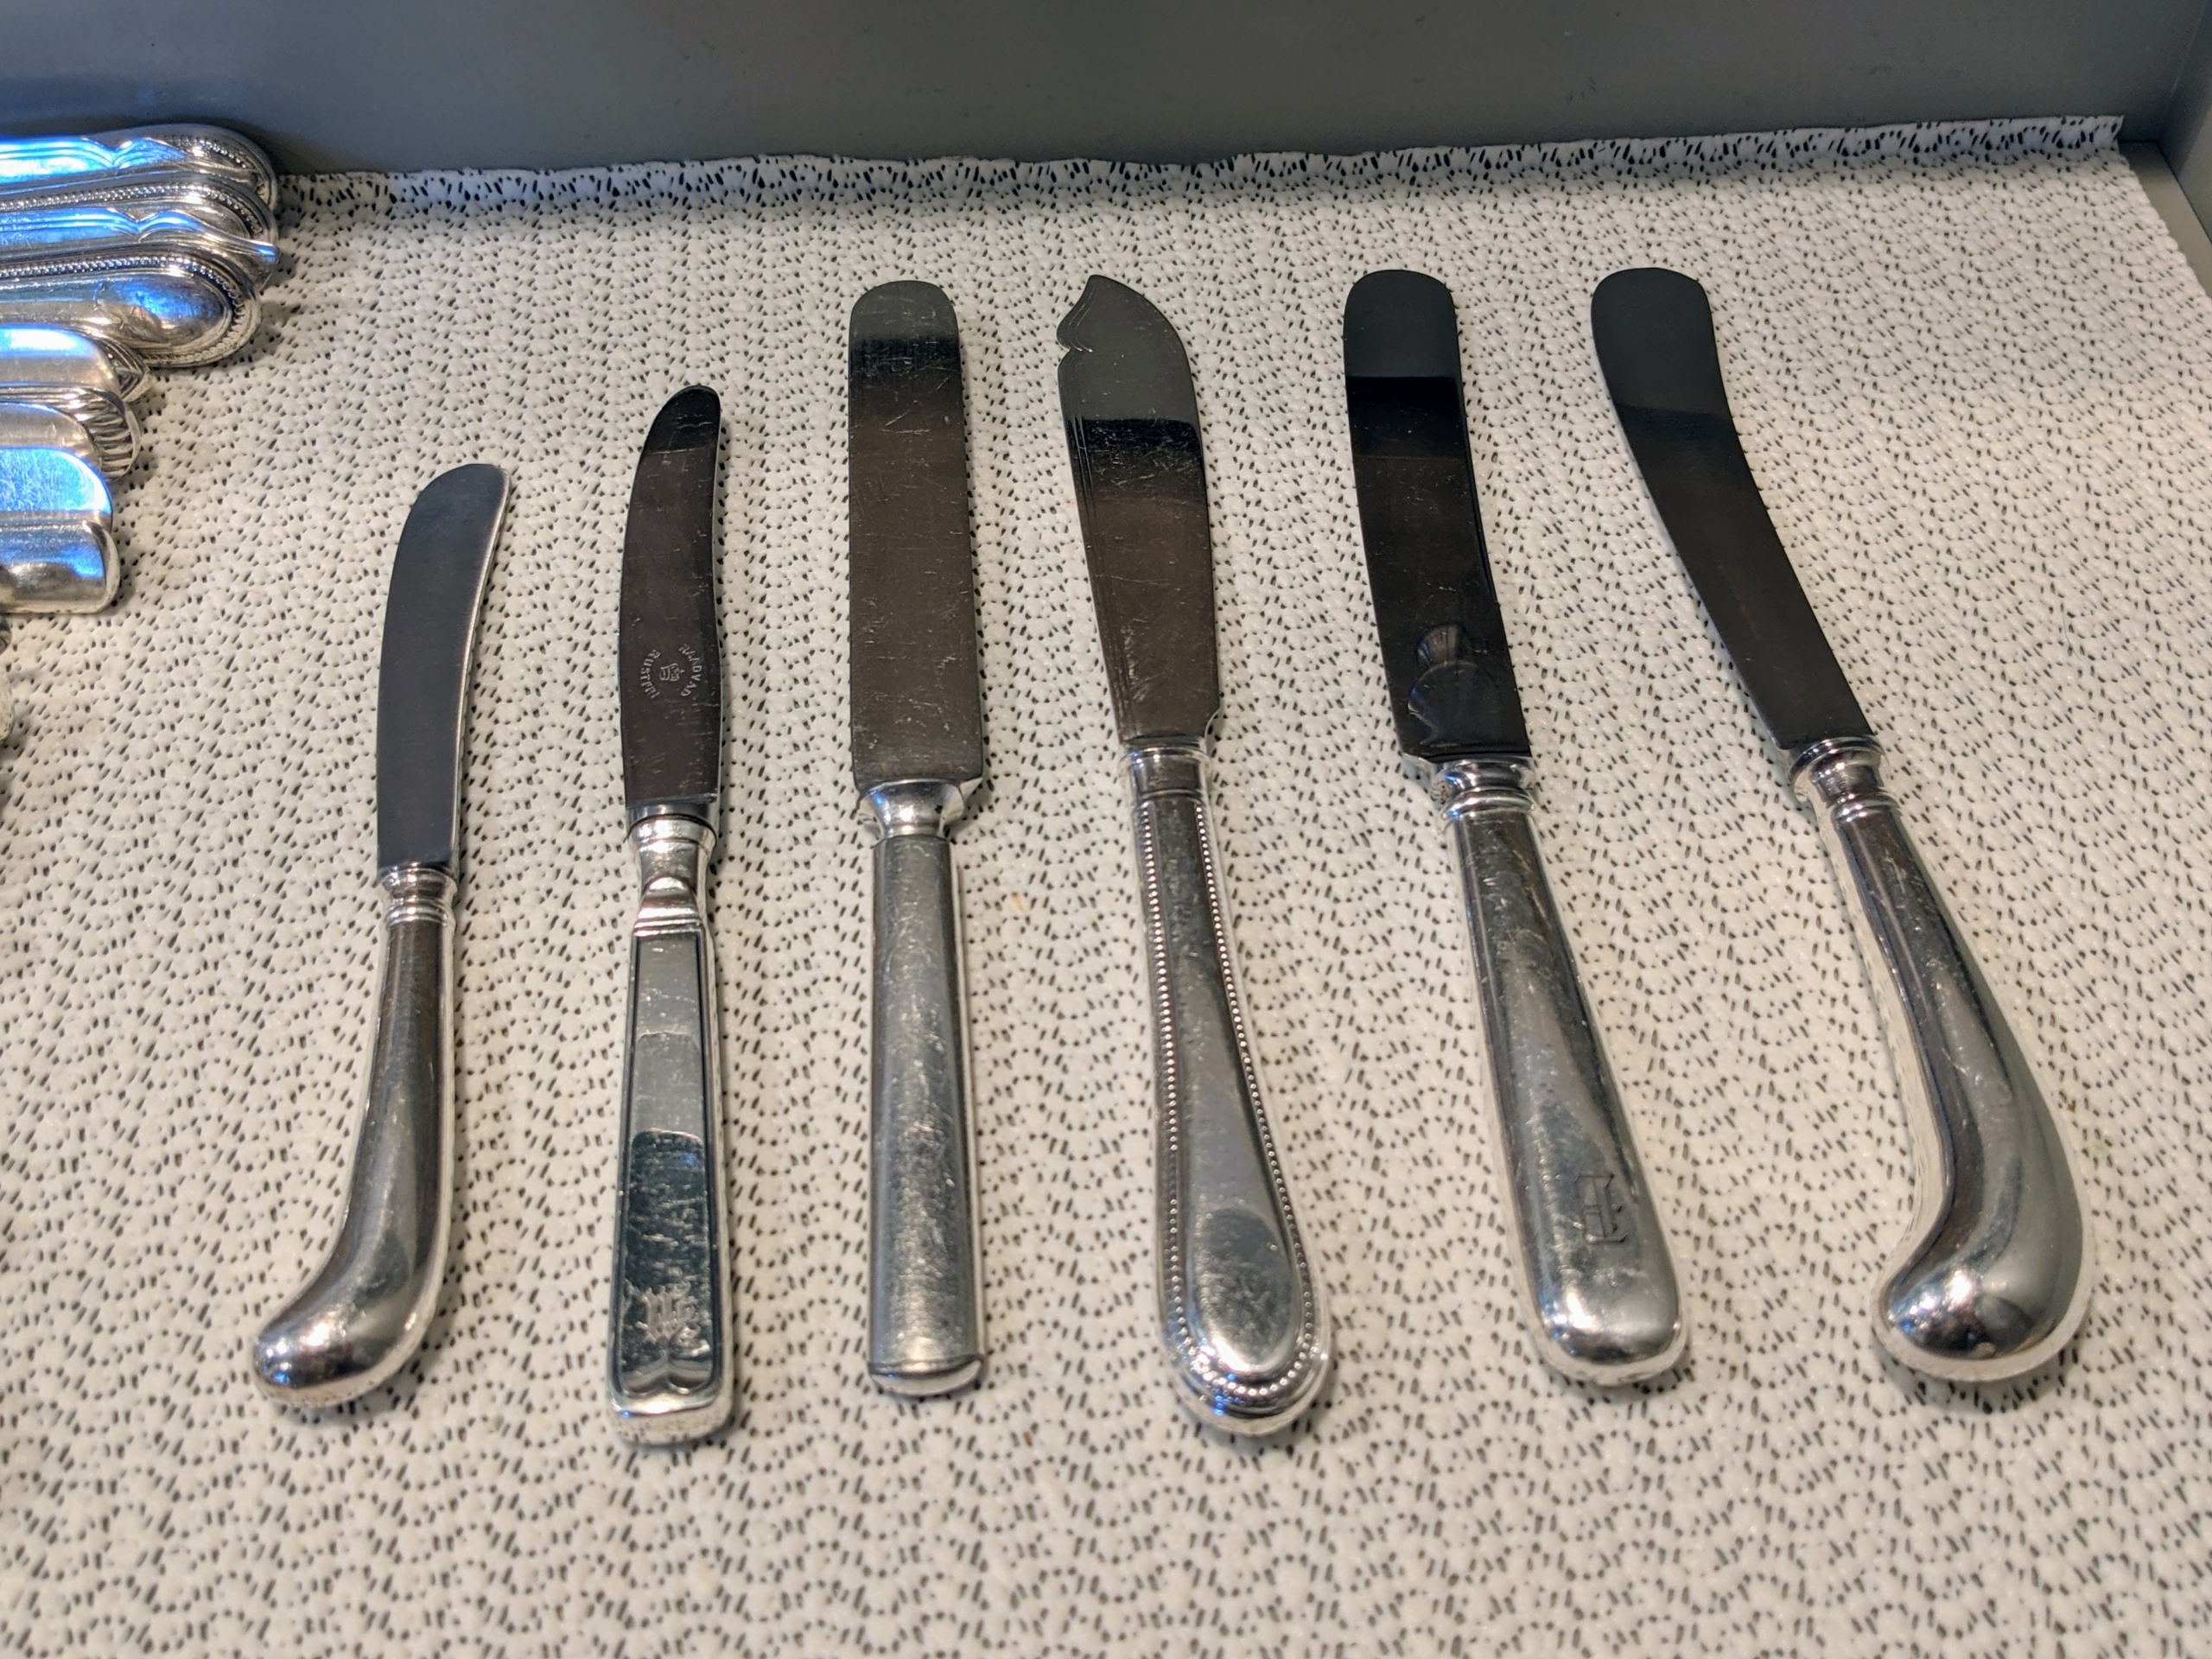
There are so many different types of knives. Look at this sampling – all the handles are different and can be flat, hollow, or solid. The blades are also very different – sometimes beautifully engraved. And the size may vary by as much as an inch or two between patterns. Do you know… knives were the first pieces of flatware used at the table? In fact, knives, or pointed personal “weapons,” sometimes became the source of many dangerous and violent meal gatherings. In 1669, King Louis XIV of France banned pointed knives at the table in an effort to curtail violence. In the 1700s, the blunt-ended table knife became much more popular. Knives and various spades were made for cutting and spreading – for cutting fish, poultry, fruits, desserts, and butter. And there were special knives for using only at lunch, and some only at dinner.
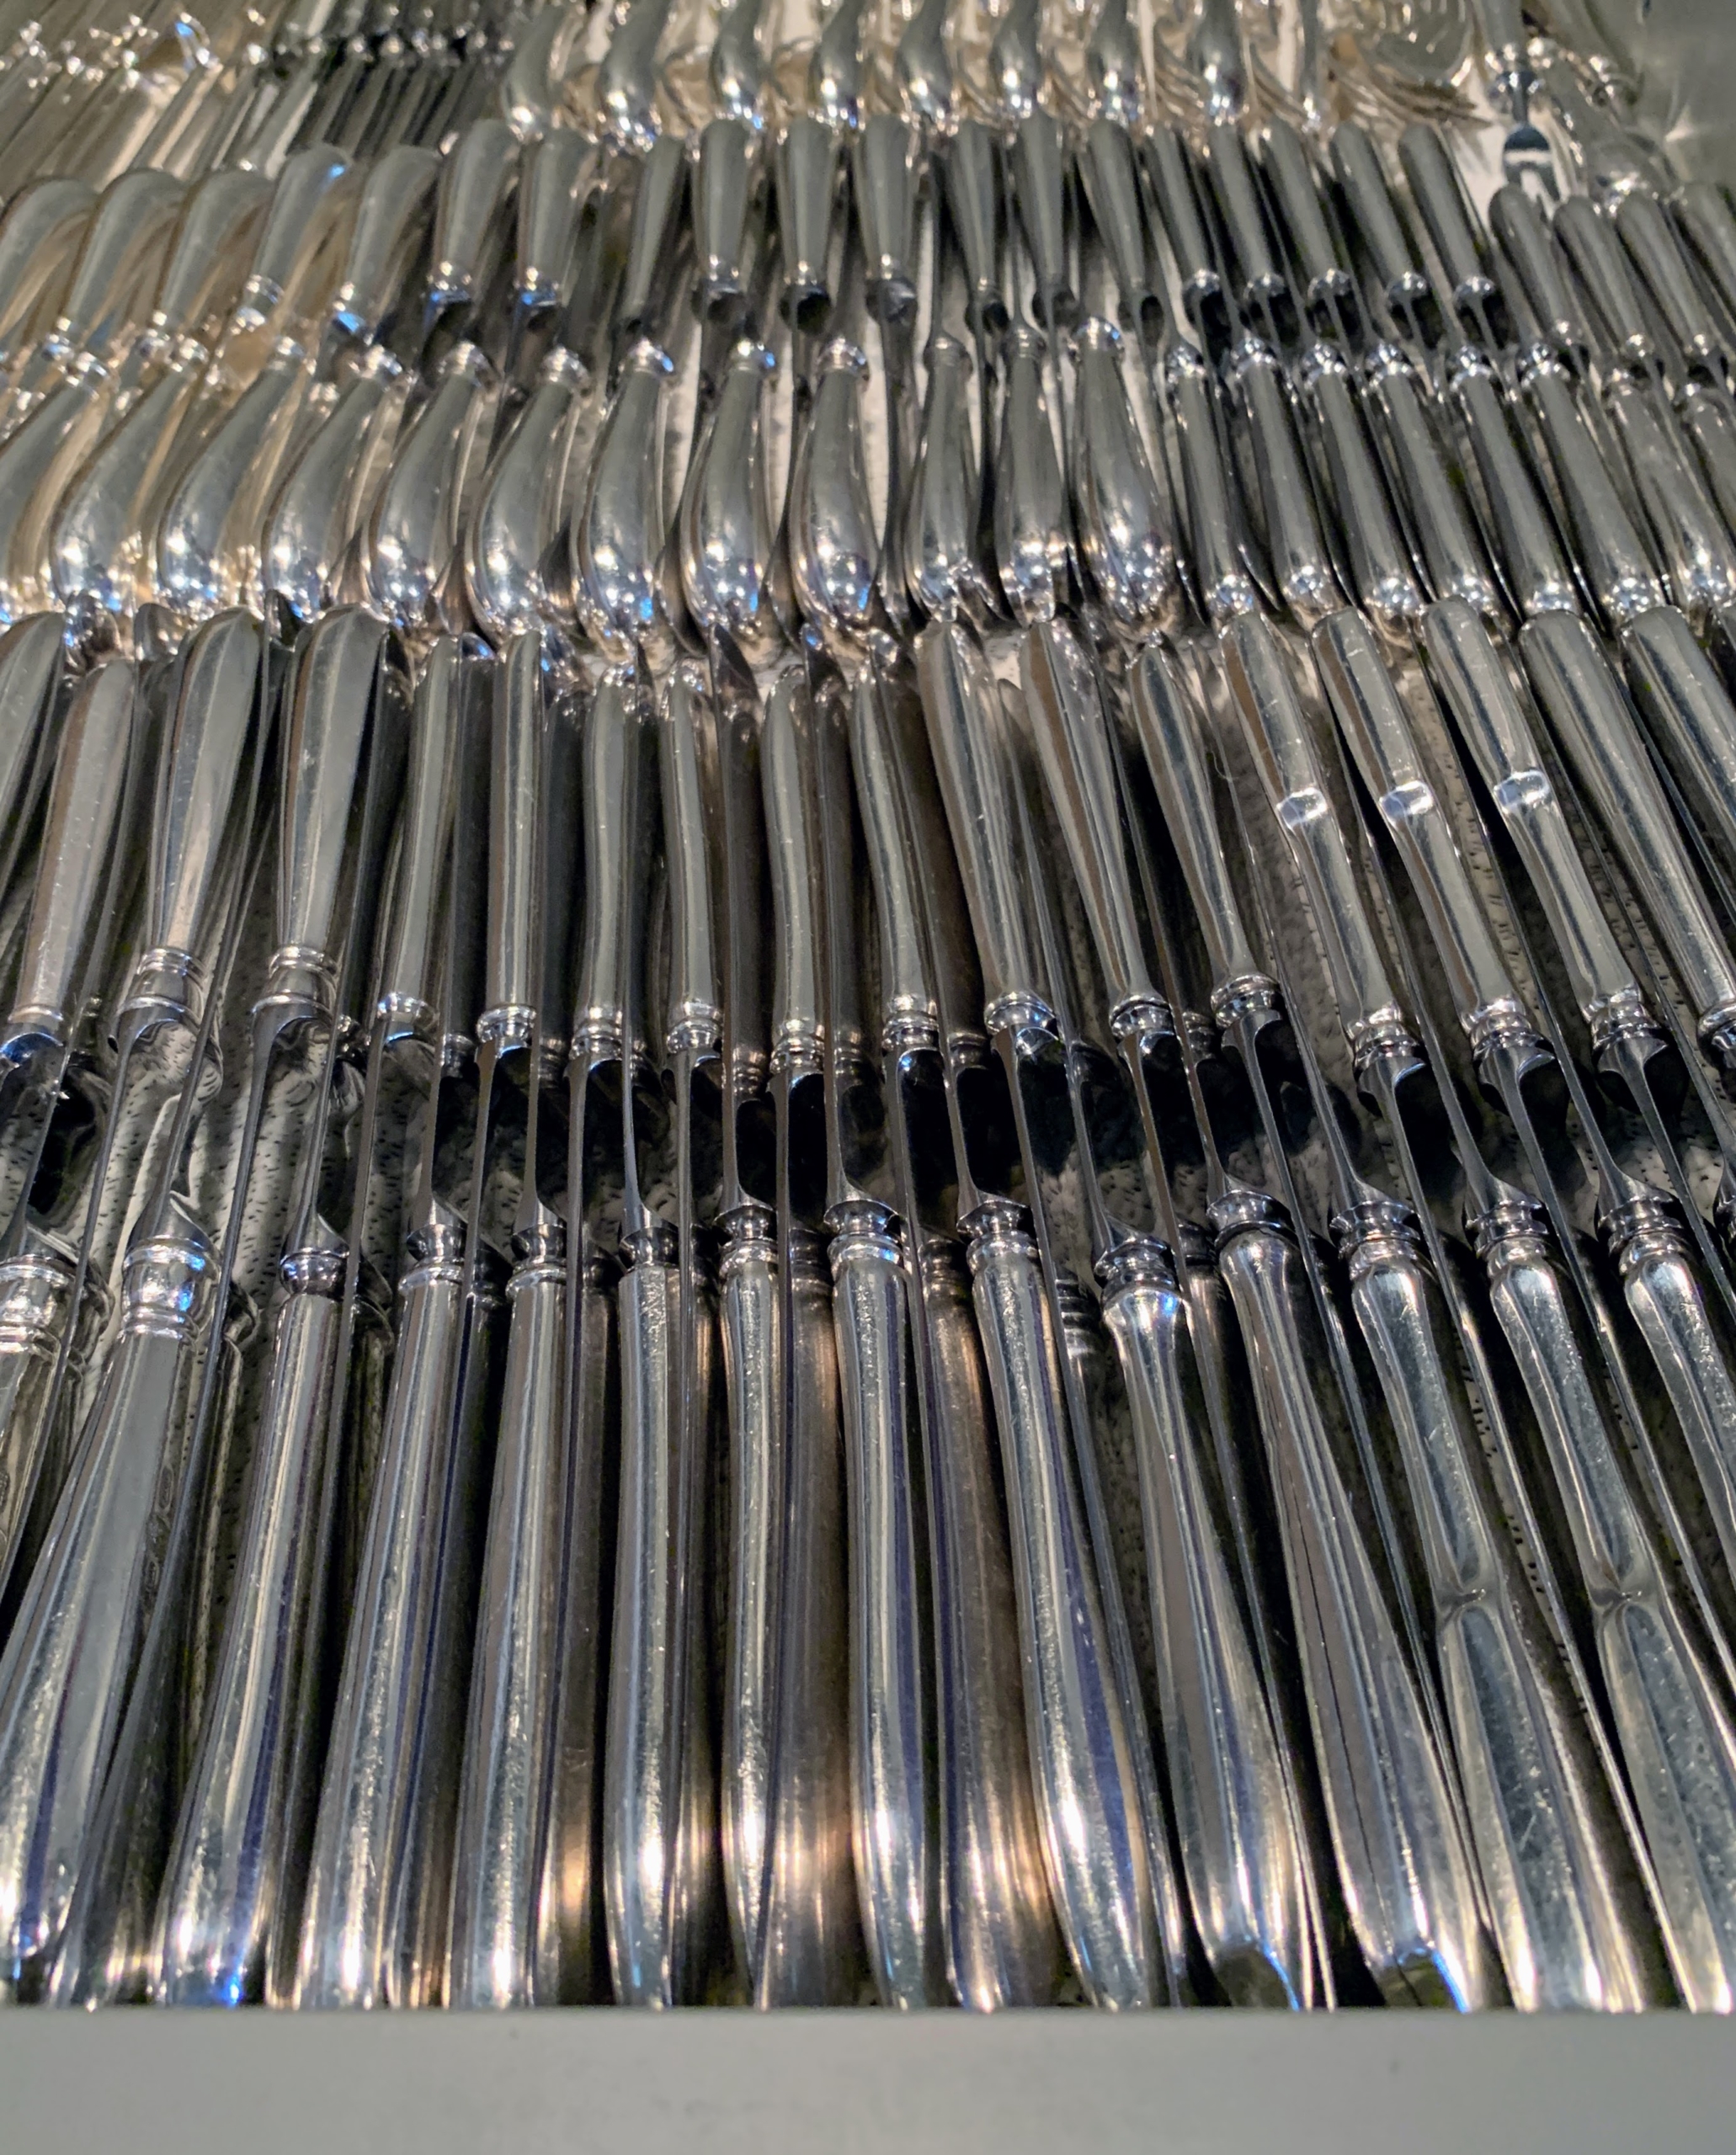
Once cleaned, the knives are returned to the drawer – all organized by type and design.
The spoons are also organized by size, function, and style – notice how similar these are, but none are exactly the same. Spoons also come in many interesting forms – teaspoon, dessert spoon, table spoon, sugar spoon, spoons for basting, spoons for scooping, and even spoons for sifting.
All the drawers are outfitted with shelf liner at the bottom. These shelf liners are available at any kitchen supply store. I like to use non-adhesive grip liners. They stay firmly in place and provide a bit of cushioning for the silver.
Enma carefully returns the spoons back inside the drawer, lining them up with other like pieces.
Here is the drawer of mother of pearl knives – easy to see, access and count when preparing for a dinner party. Another tip for storing silver – keep it away from high humidity and high heat.
Try to make time to use precious silver when entertaining – regular use is the best way to prevent tarnish from forming. If you have a large collection, try to rotate the pieces, so everything gets some use during the course of the year.
And, since silver can easily get scratched or dented you have to handle it with care. That includes storing it so that items don’t bang into one another. Always wash silver soon after using, since any salt and acidic foods can cause damage and pitting. The joy of owning beautiful silver flatware does require some work to keep it looking beautiful, but it is all well worth the effort. Happy summer-entertaining!
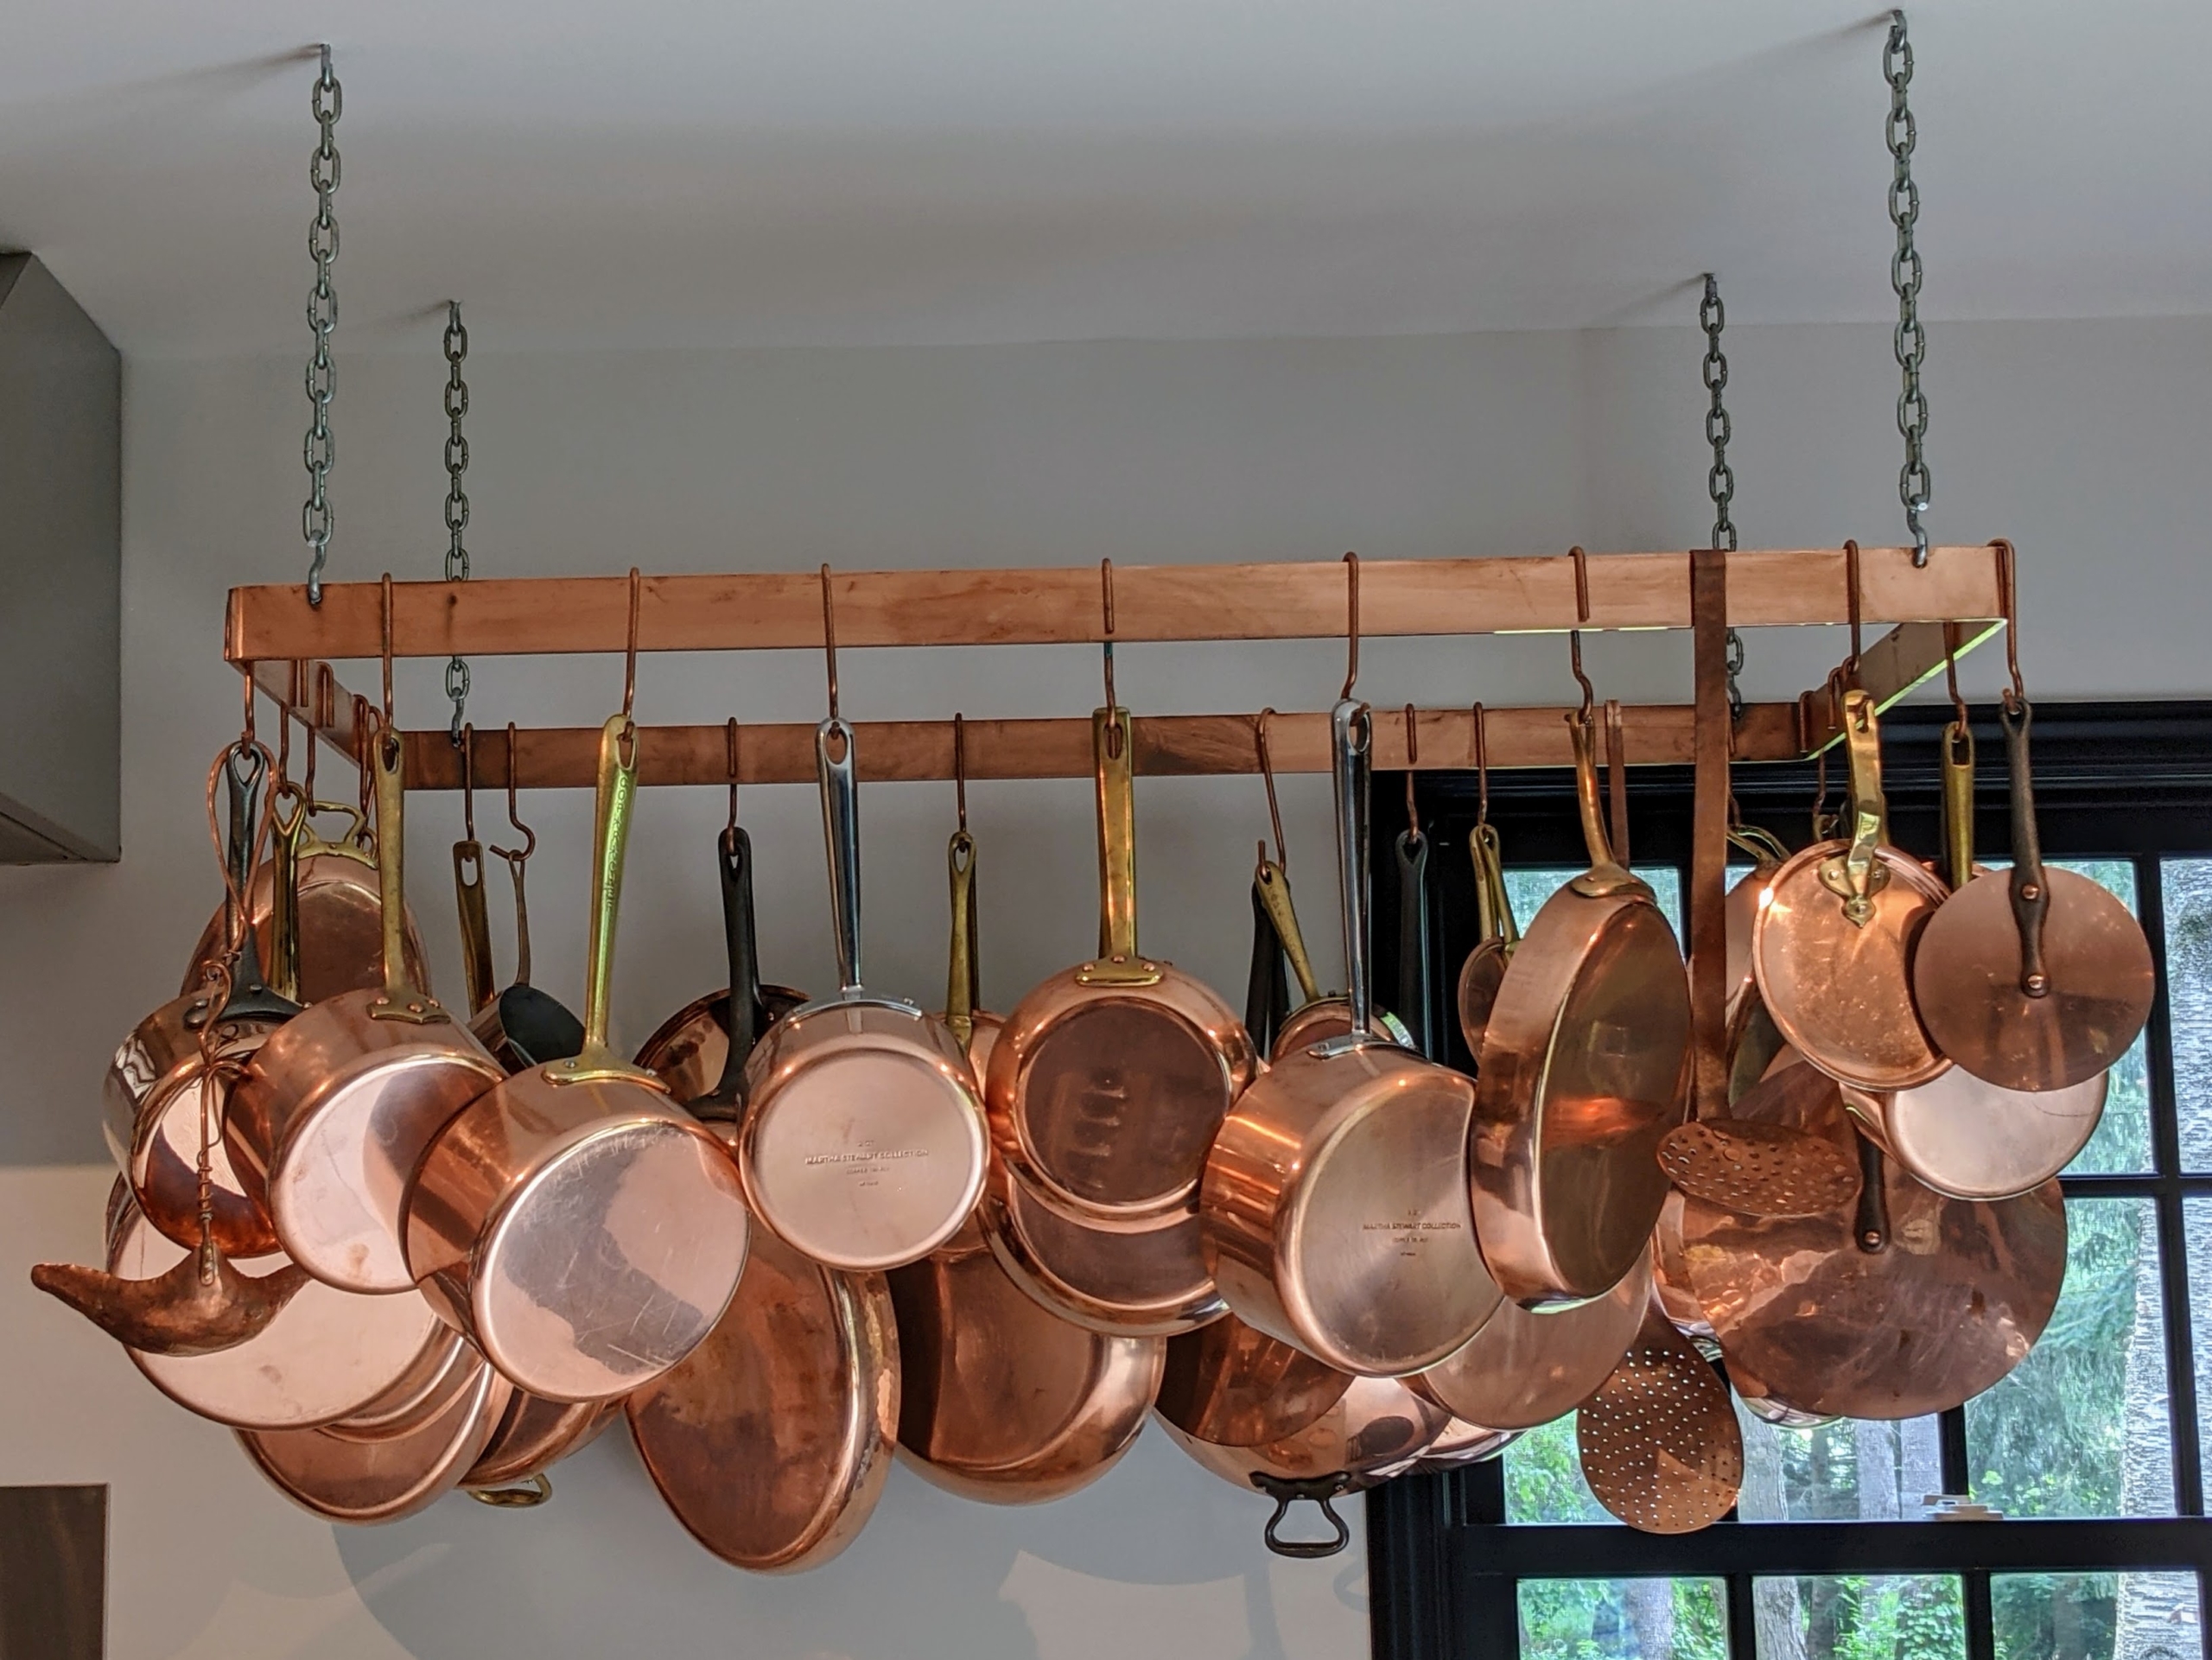
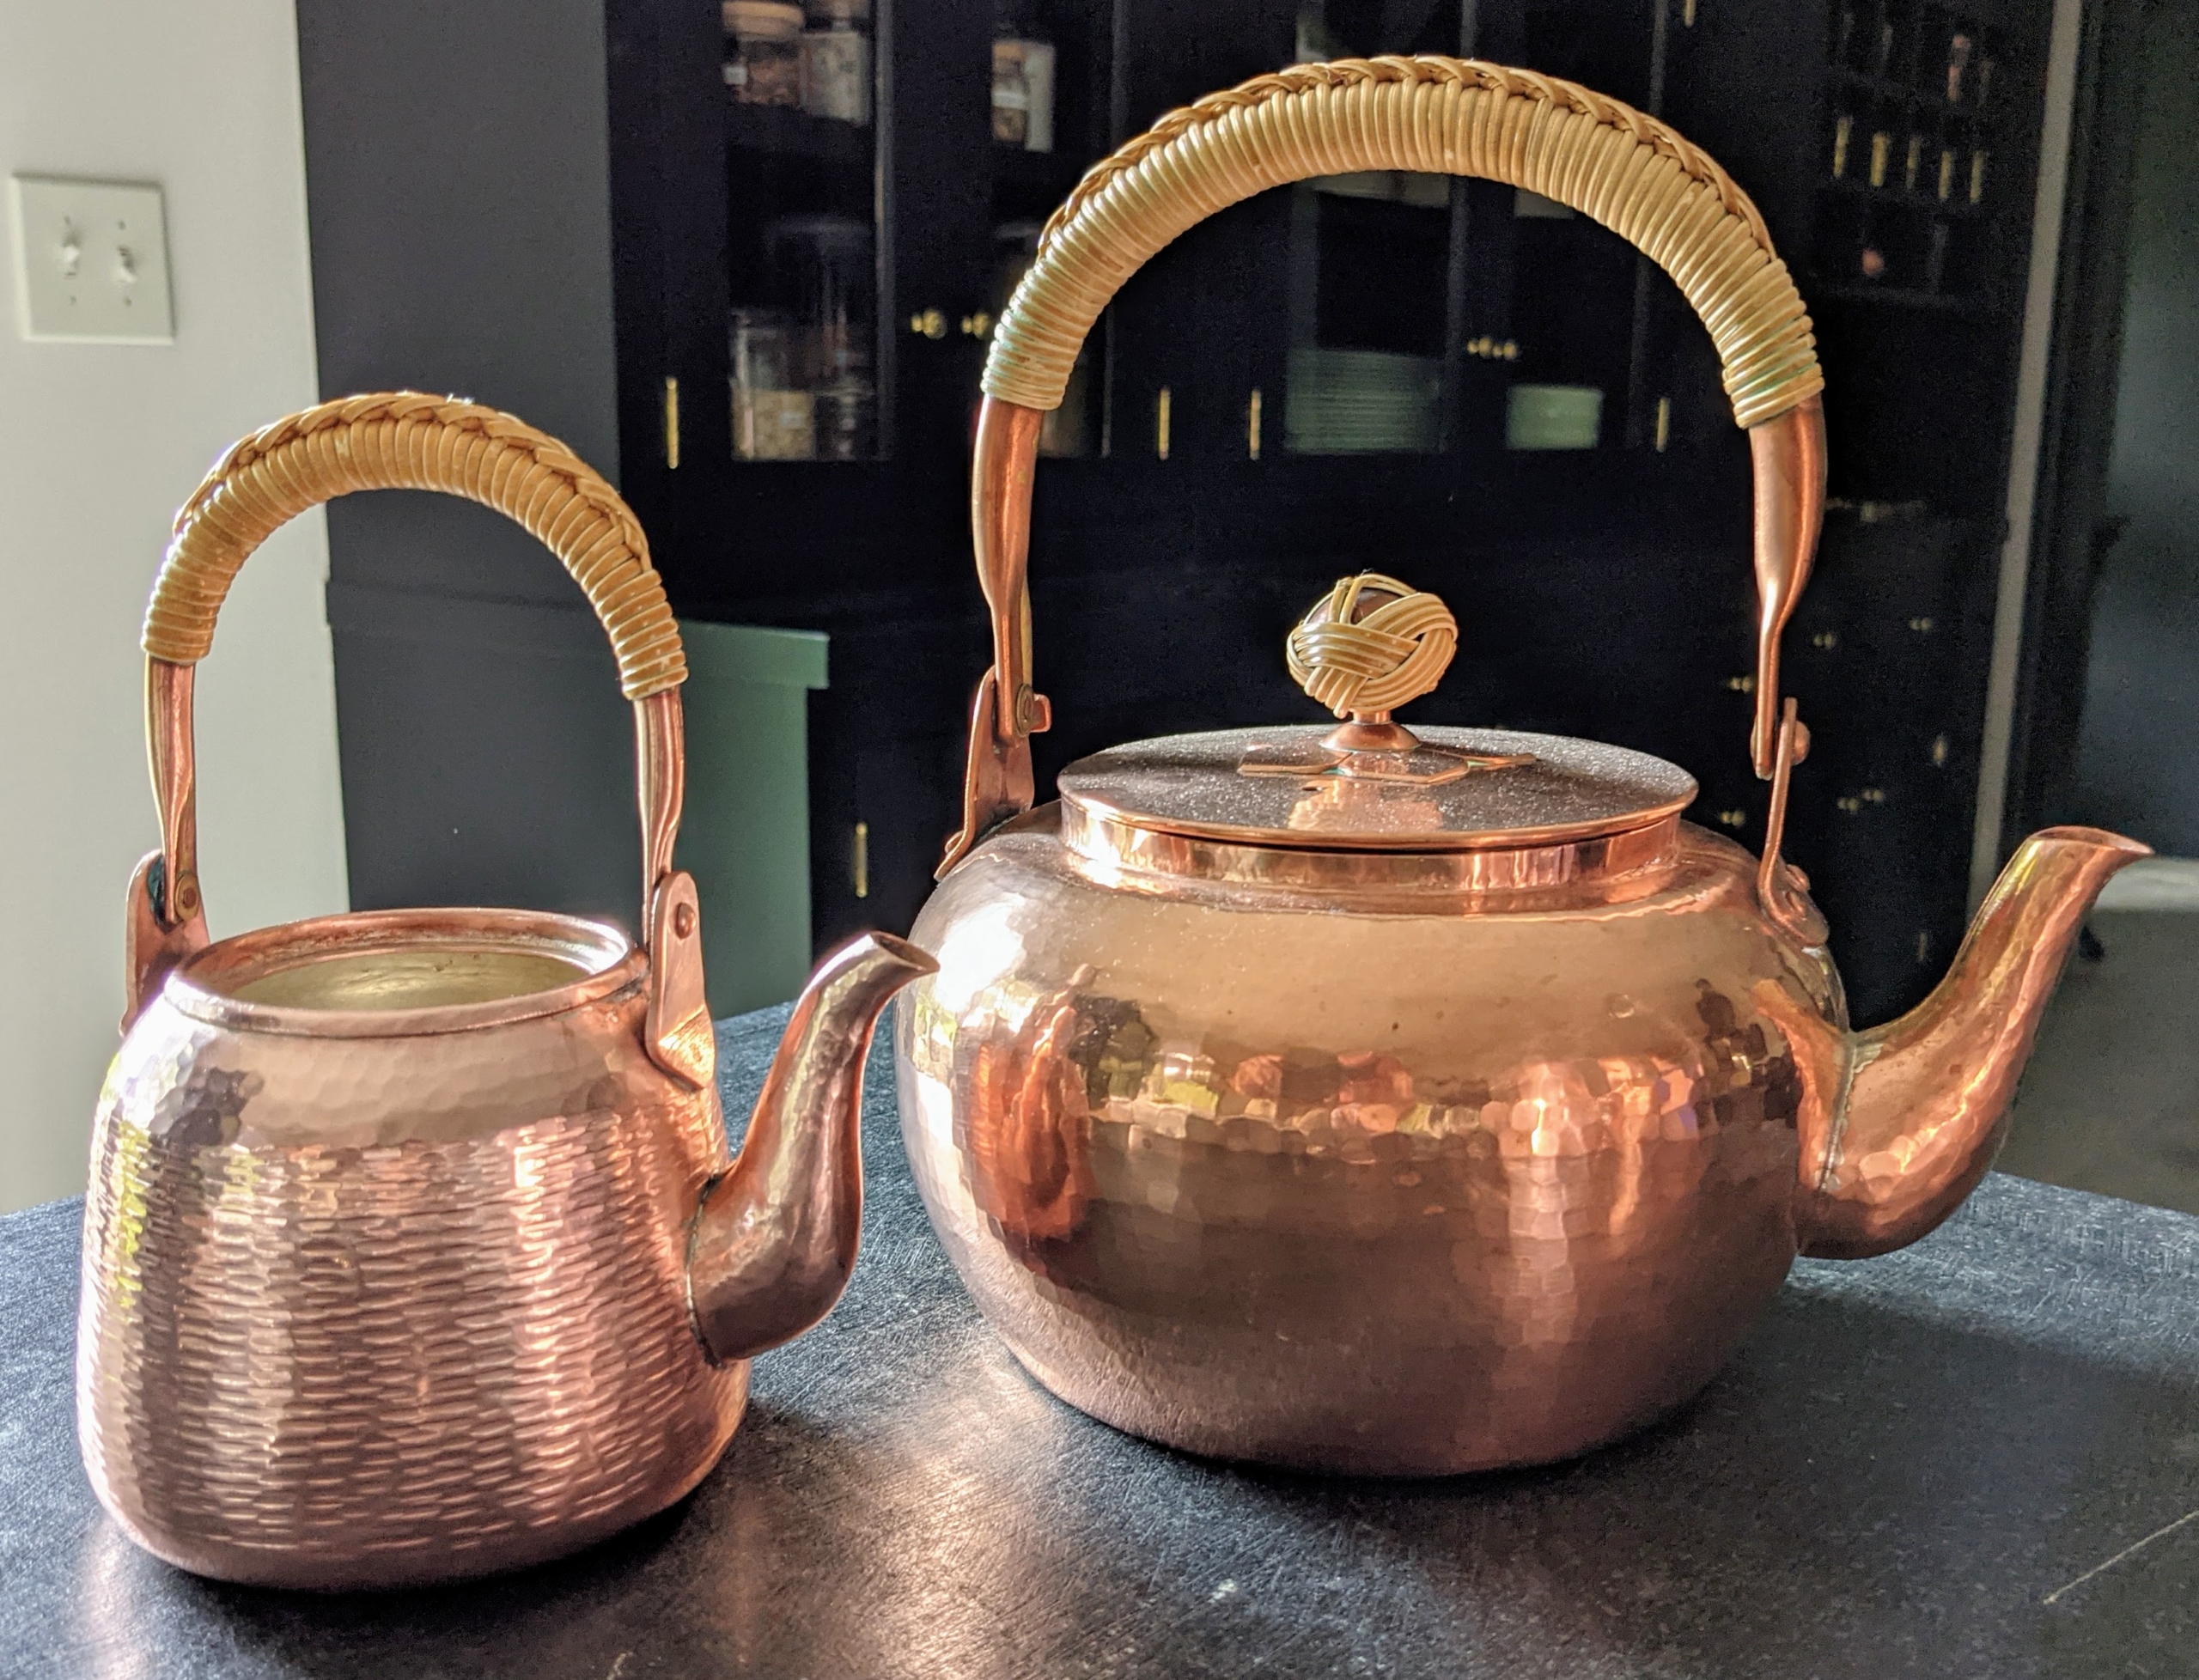
My collection of copper pots and pans, with its shiny rose-gold hue, always looks so beautiful after a good cleaning.
Last week, my housekeepers took on the task of cleaning and polishing many of the copper pieces that are now displayed in my newly renovated studio kitchen located in the guest house of my Bedford, New York farm. Copper is a soft, malleable, and ductile metal with a distinct pinkish-orange color. It's used as a conductor of heat and electricity, as a building material, and as a popular metal for cookware and other home decorating items. Over time, copper loses its luster and acquires a tarnish when exposed to air, so it is important to clean it regularly.
Enjoy these photos and tips, and please read my story on the renovation of this kitchen in the September issue of our flagship magazine, "Living" - it's on newsstands today!
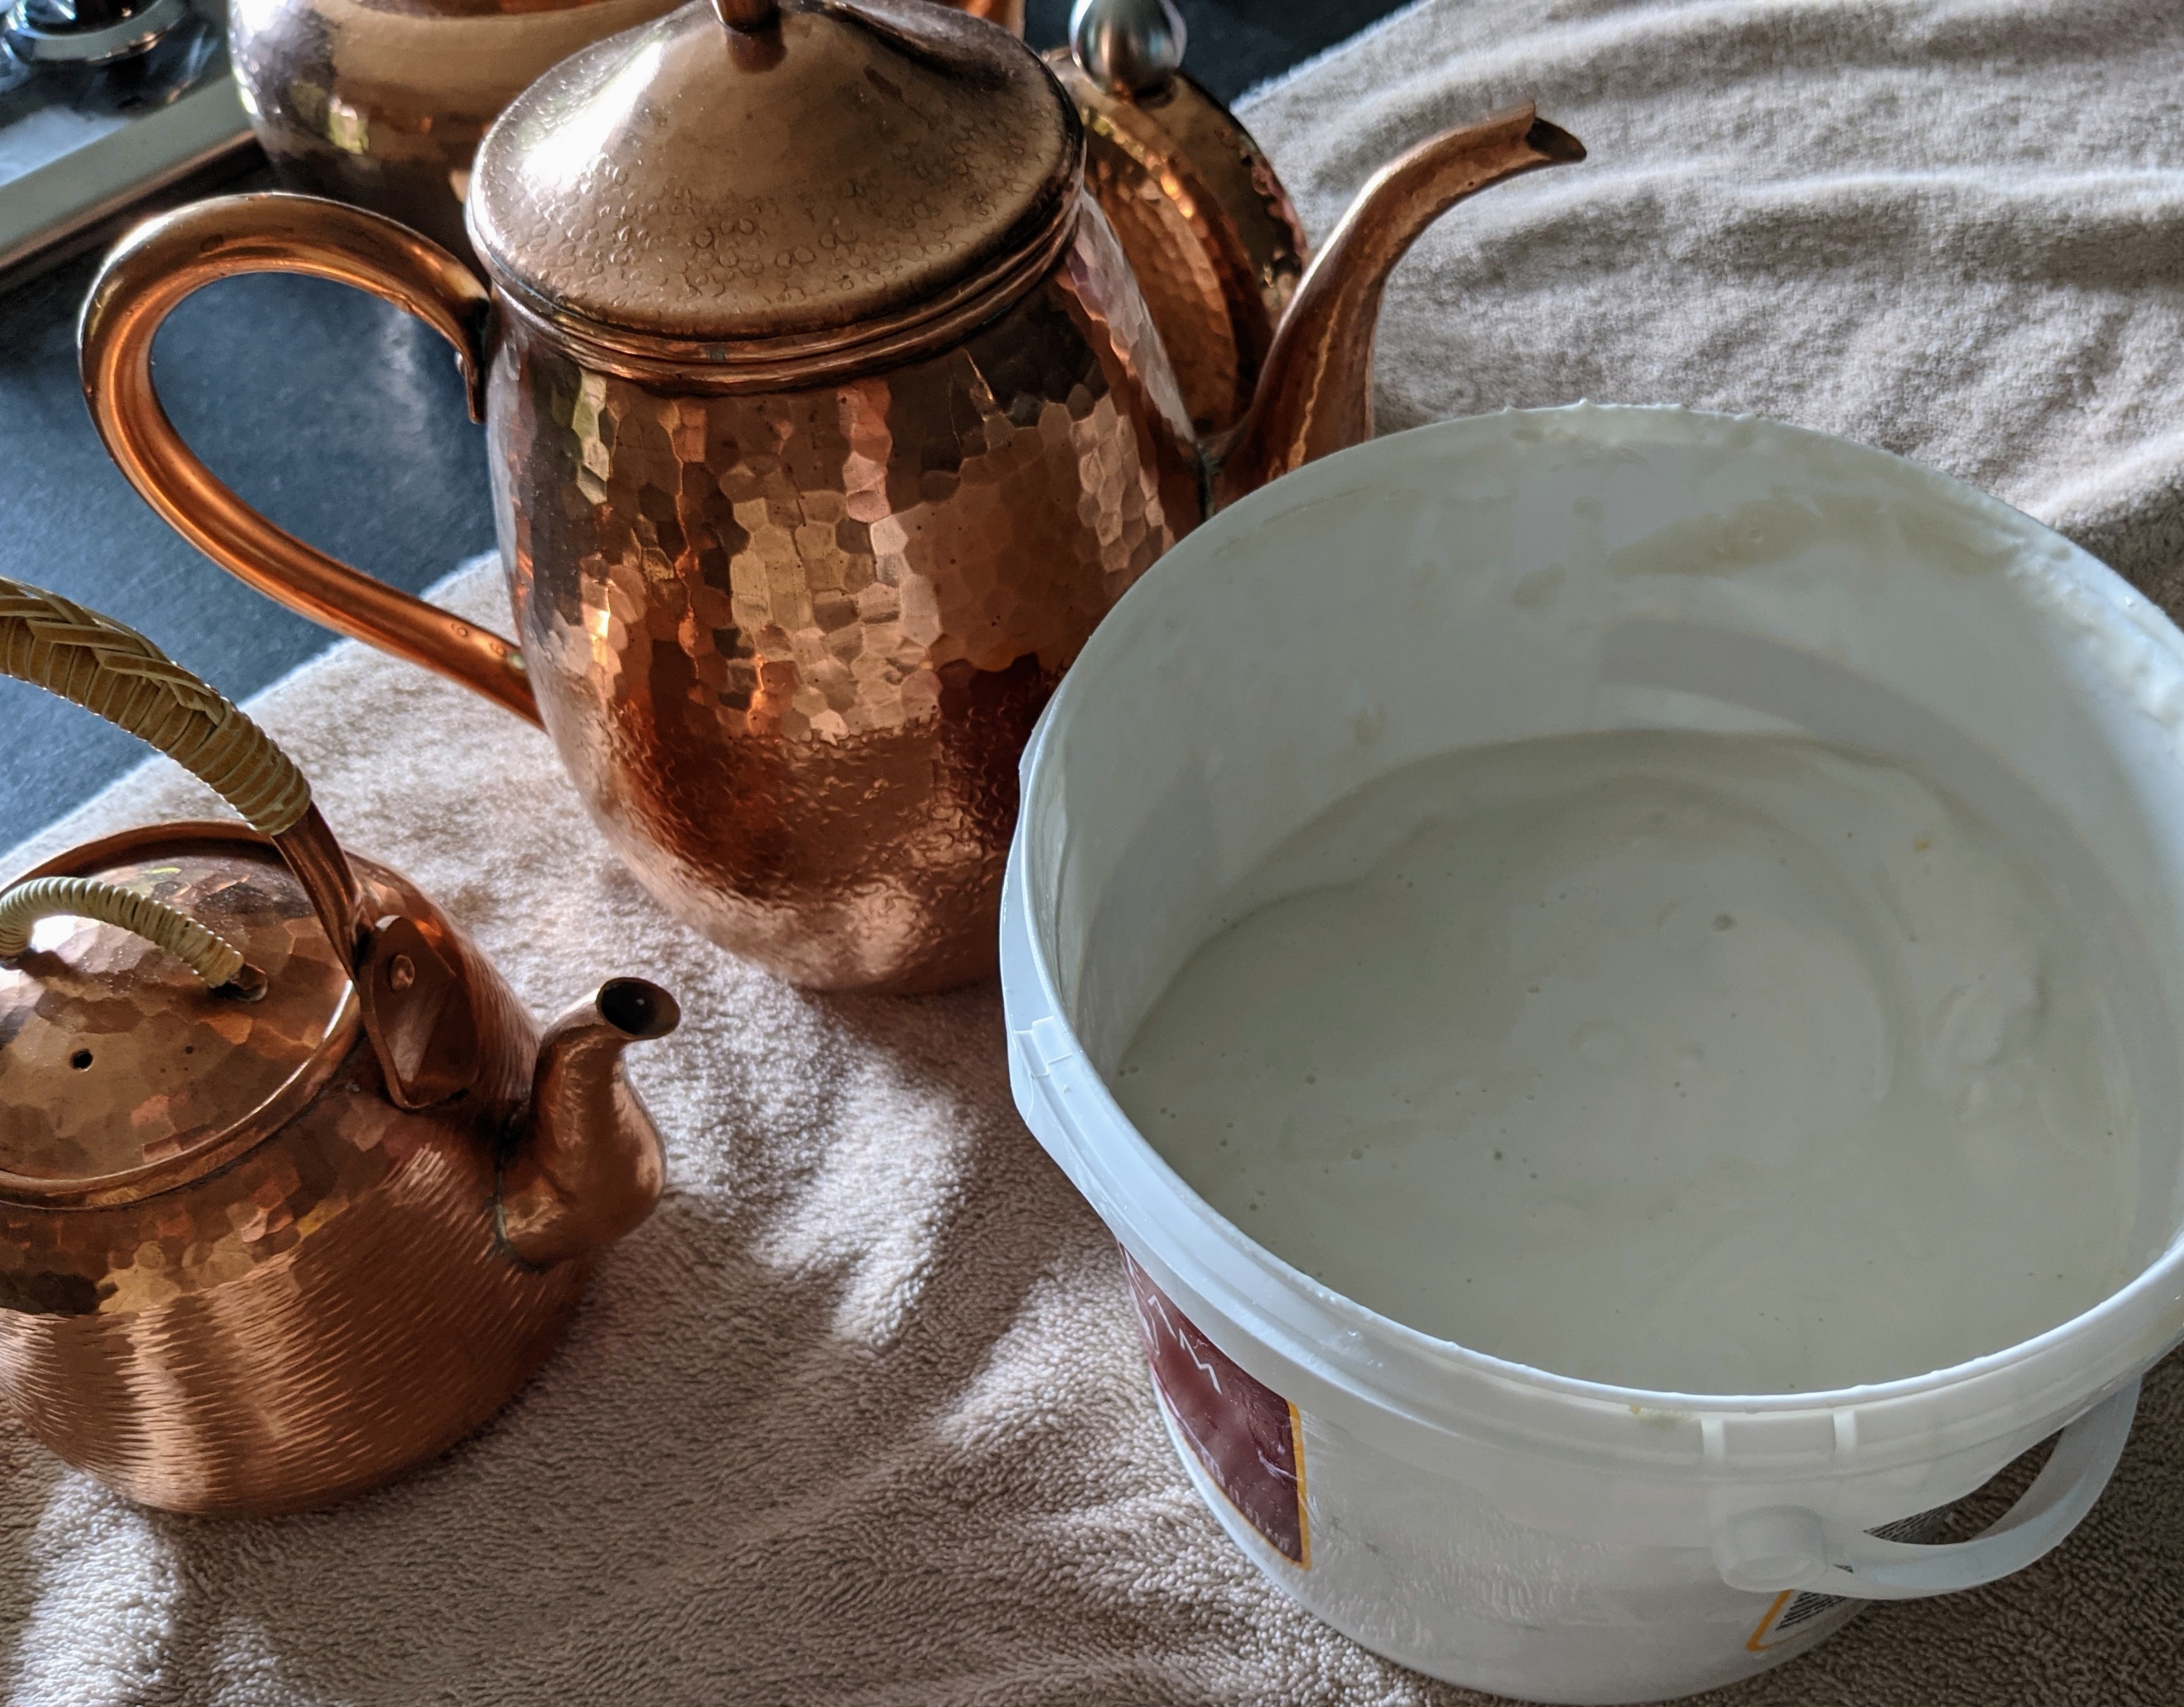
Before starting any chore, always get all the supplies ready to use. There are several ways to clean copper. Experts recommend using a good-quality, non-abrasive commercial copper polish. I’ve been using Wright’s metal creams for years. Wright’s Copper Cream is a gentle formula that cleans and shines – it’s also great for brass. We also get out our gloves, sponges, brushes, and drying towels.
Wright’s Cream is also an anti-tarnish formula that leaves behind a protective coating to delay any tarnish from reforming. It is easy to use and comes in a creamy paste form.
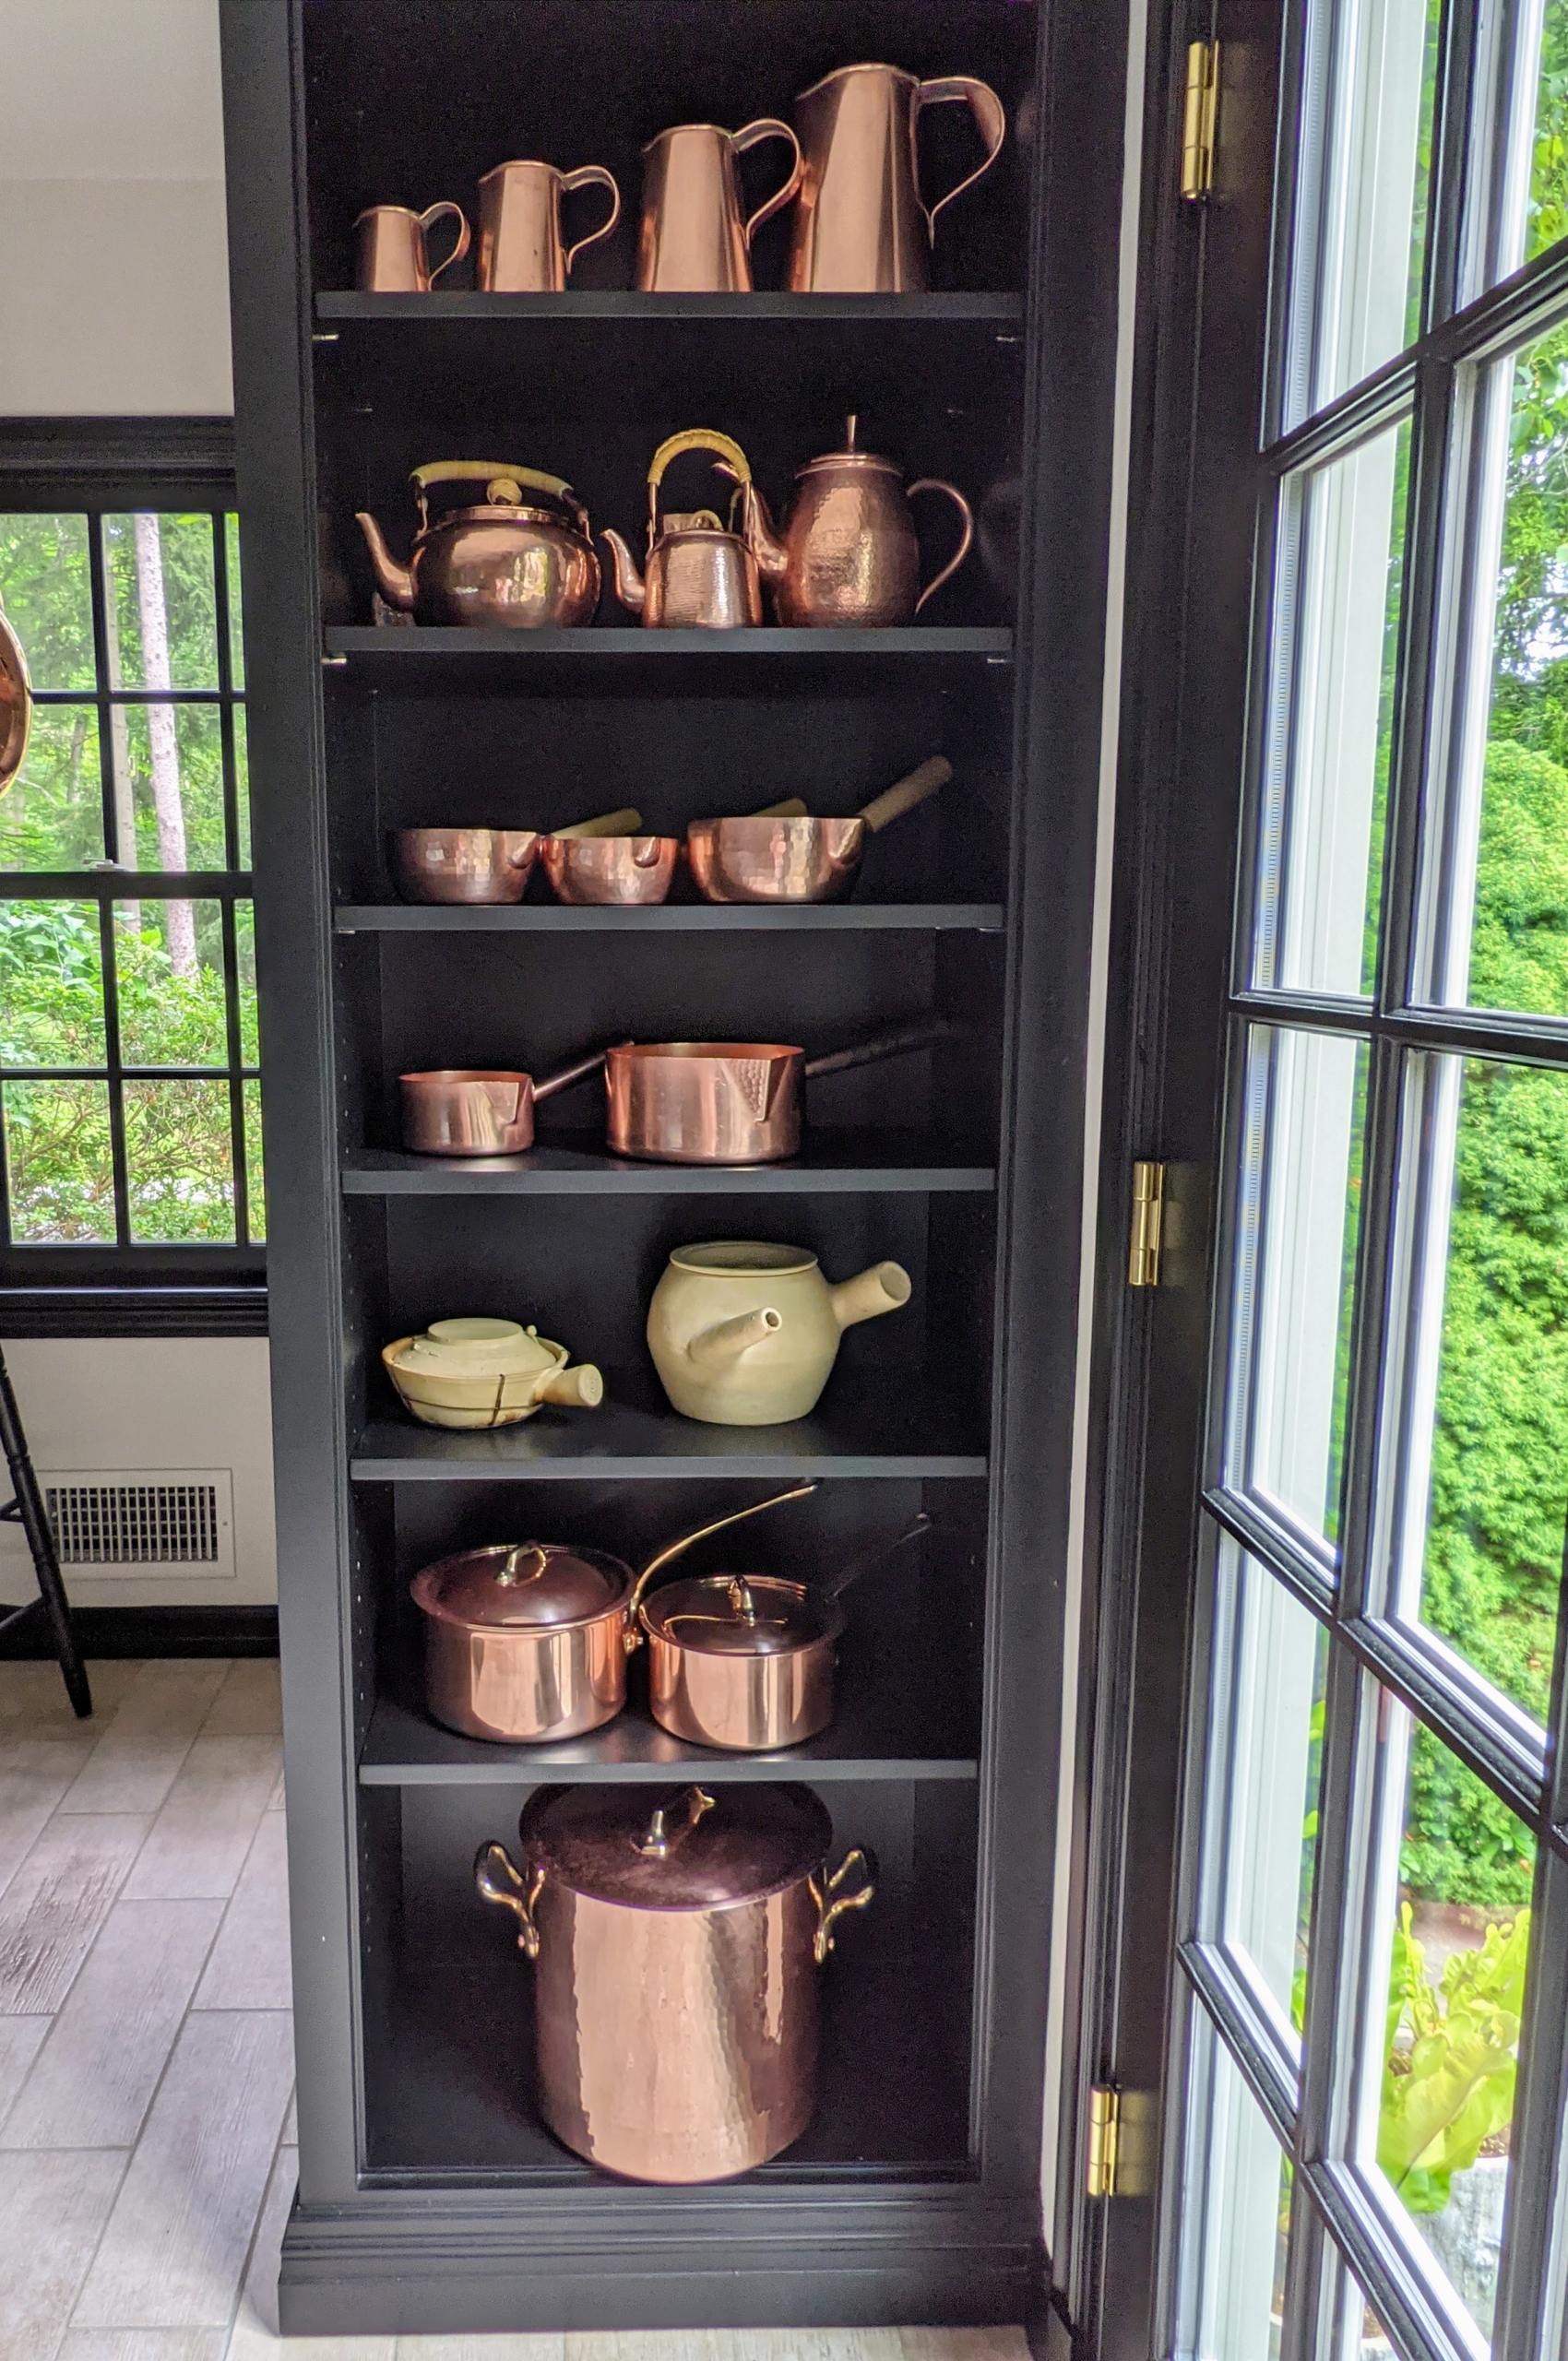
I have a lot of copper pots and pans and other kitchen pieces. I like to keep a lot of my pots hanging on a rack where they are easy to reach. Copper was actually one of the first metals used by humans more than 10-thousand years ago, and it remains a common household material today. Polishing copper, silver, brass or any other metal three or four times a year is generally sufficient to keep it in good condition.
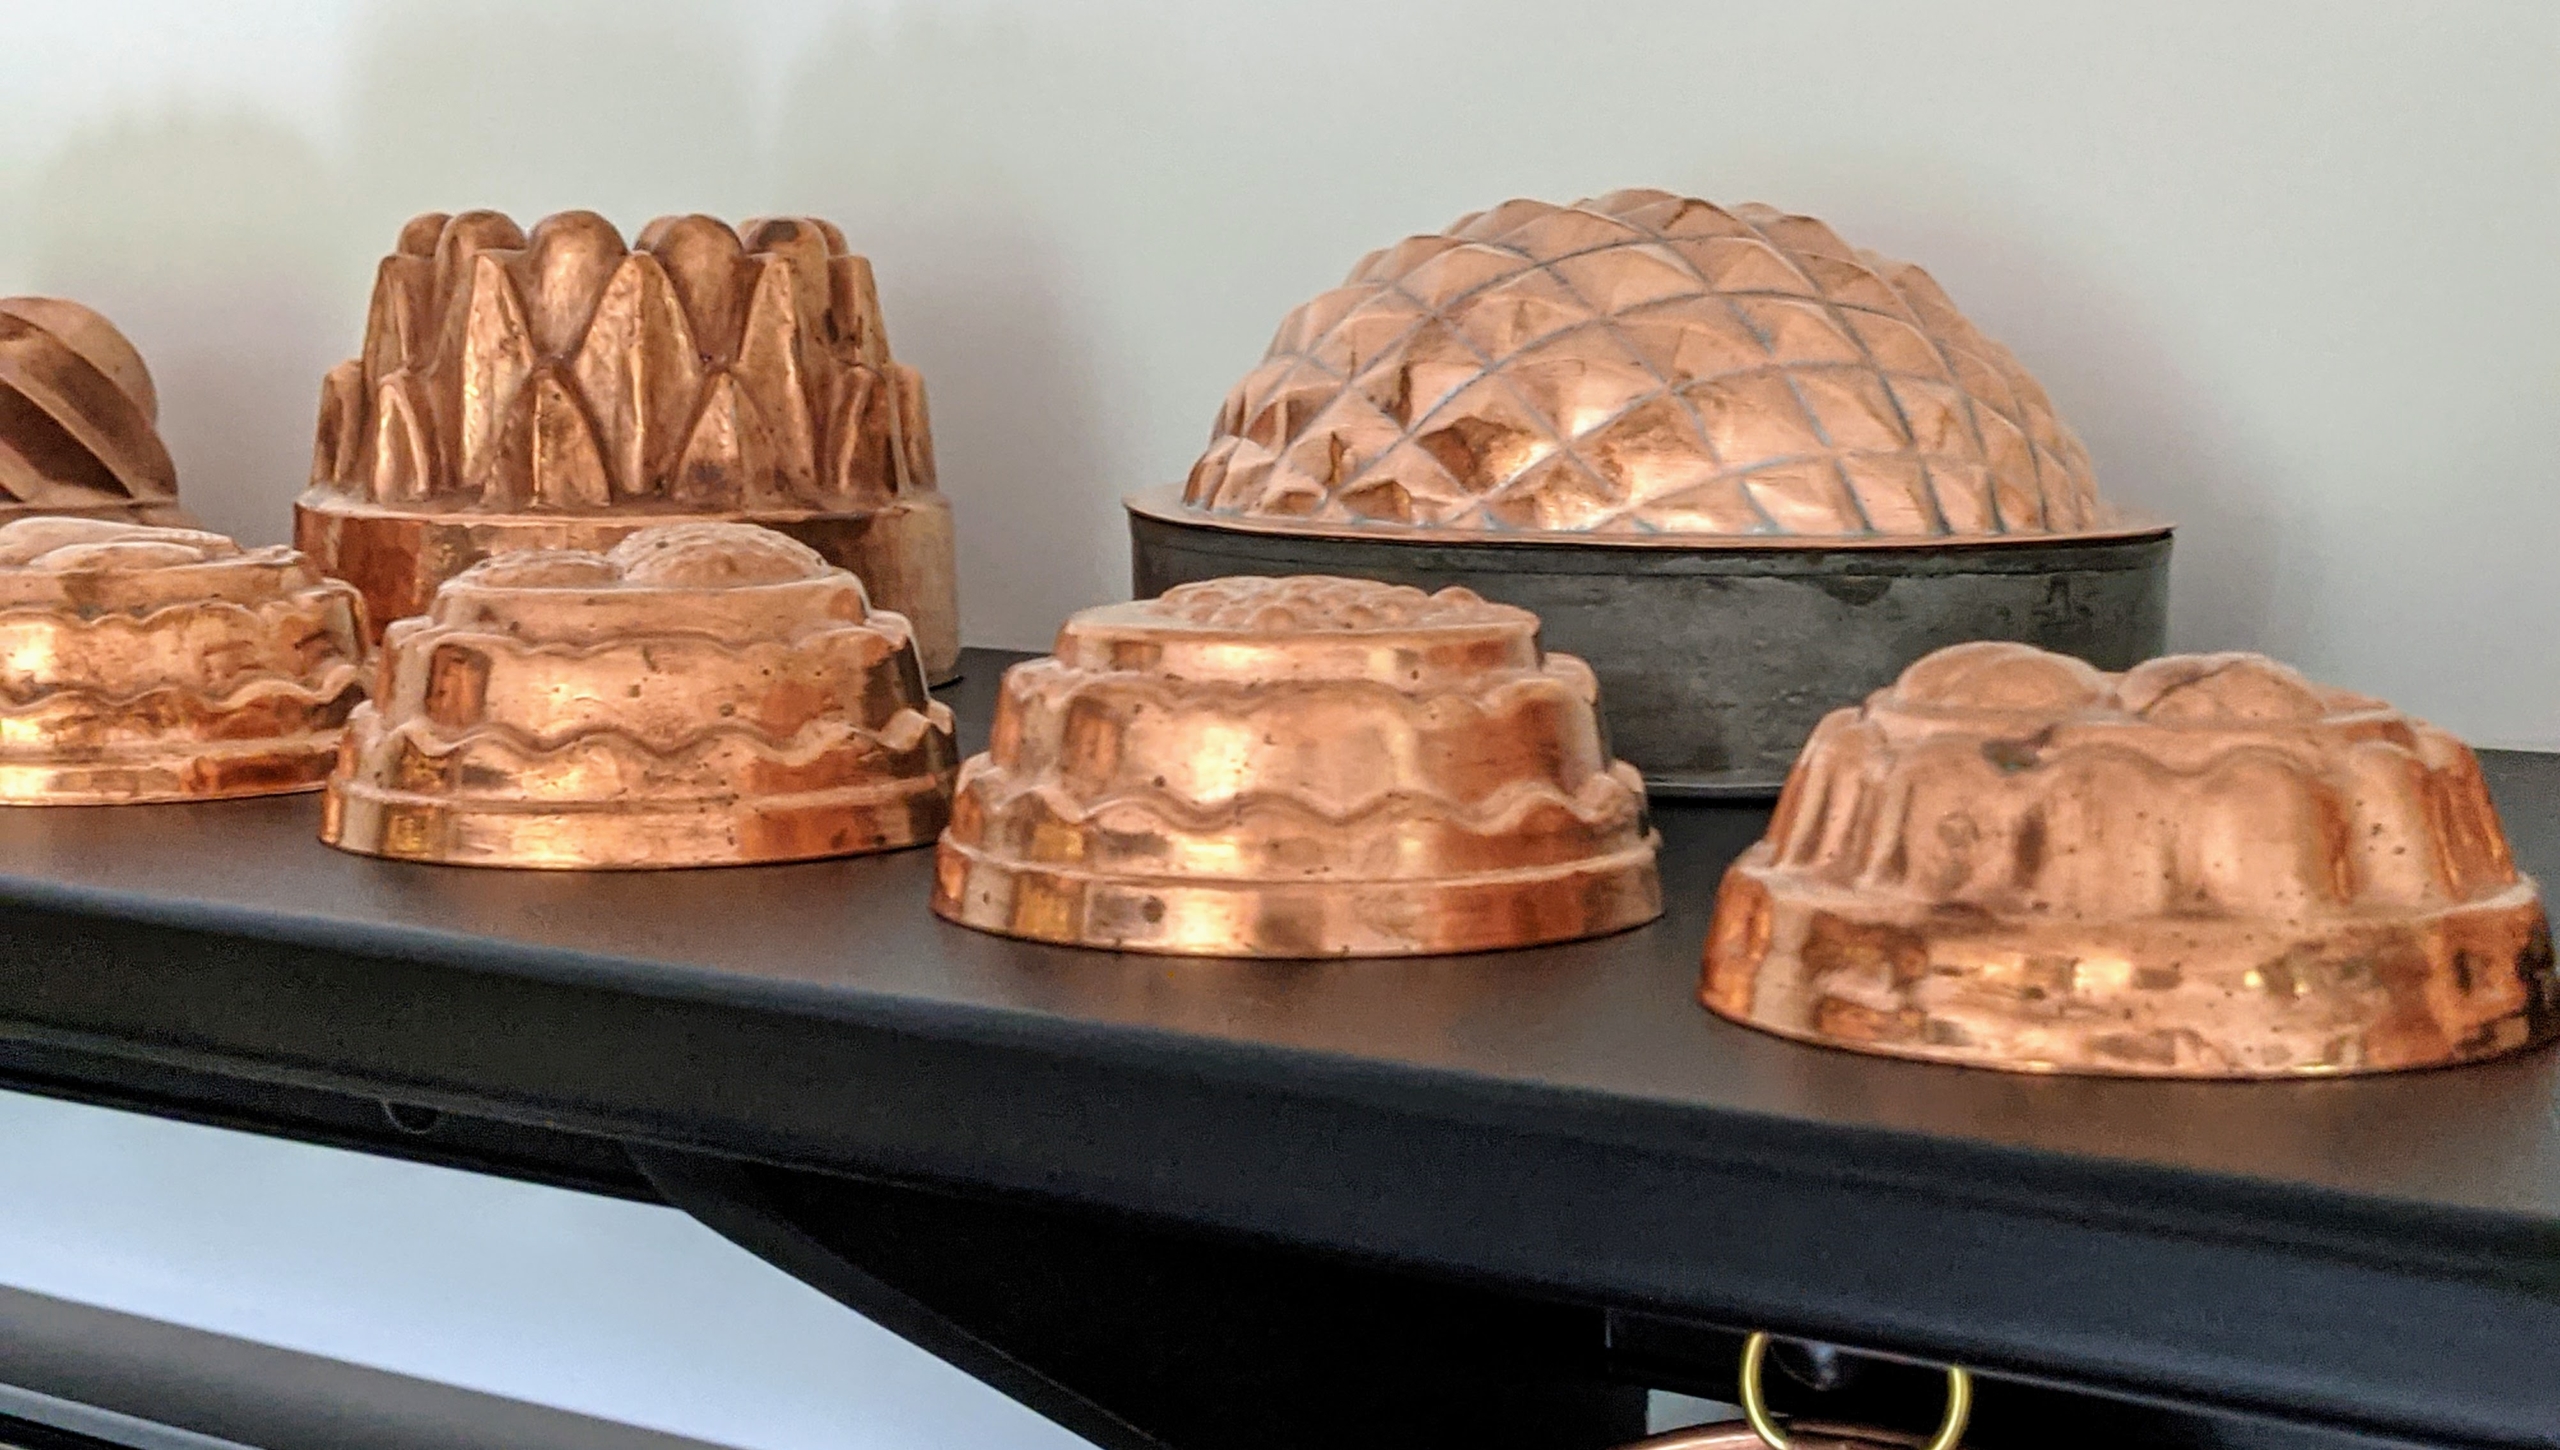
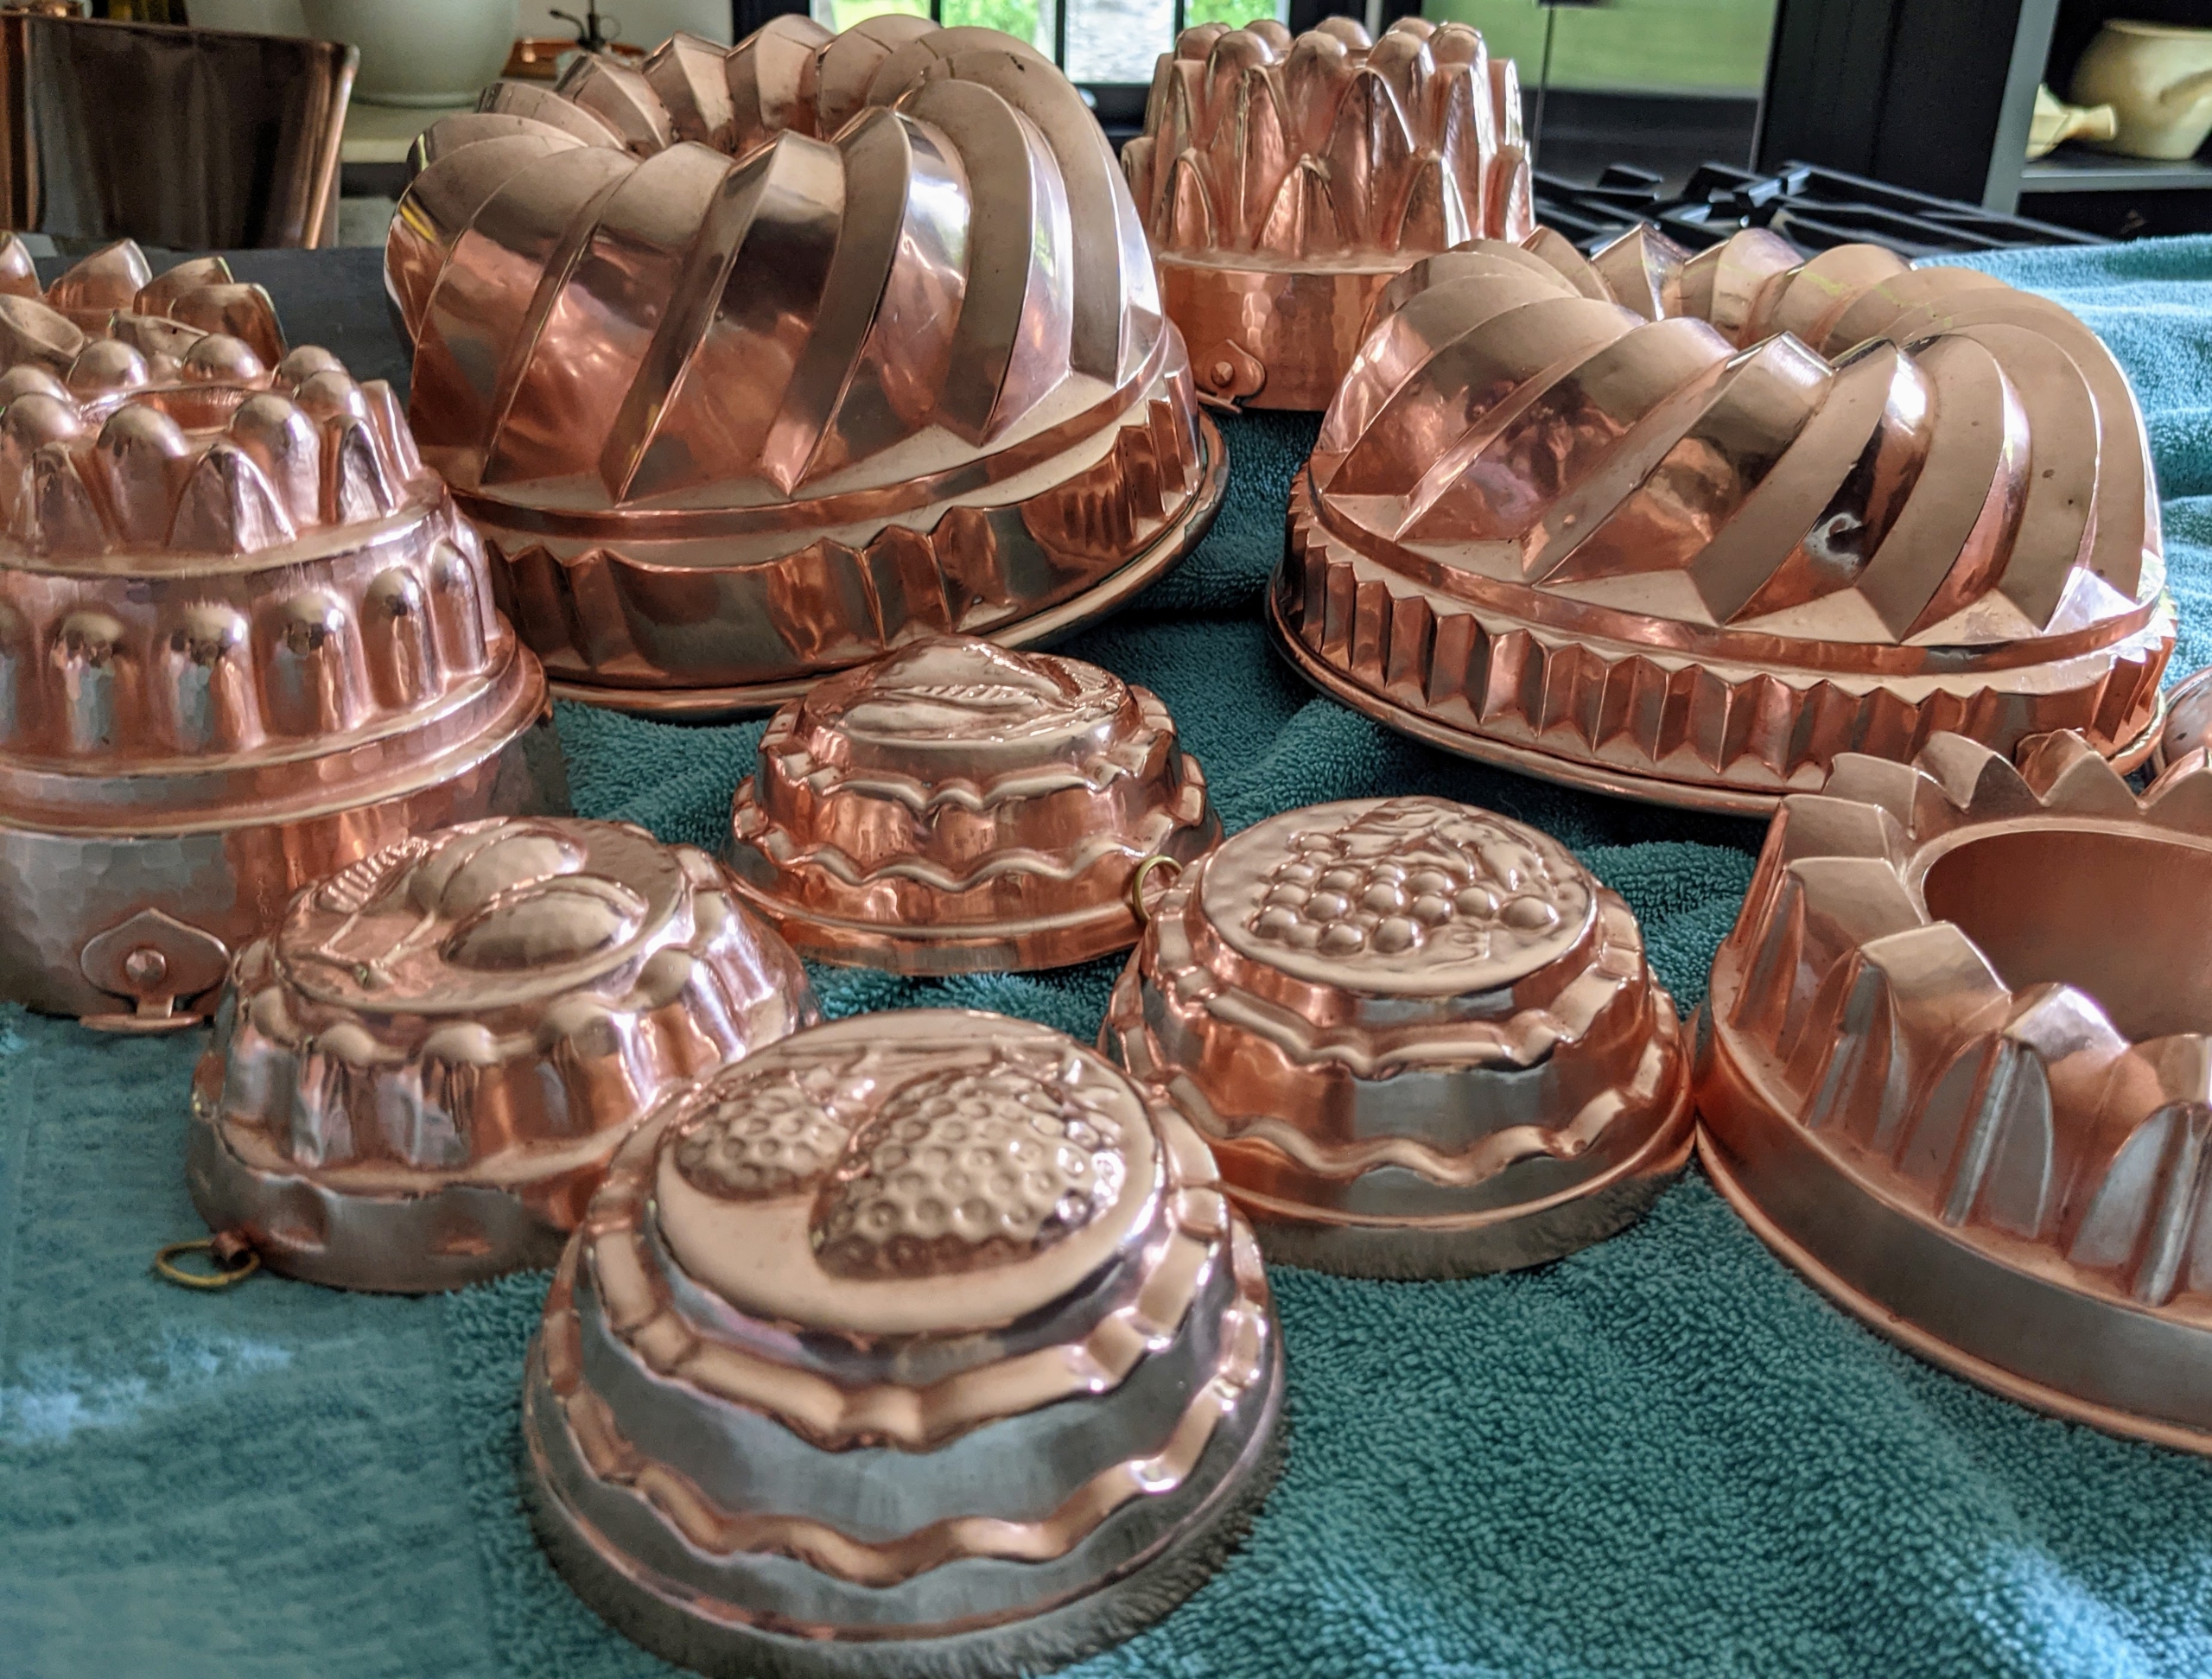
Many of my molds are on display on this shelf. Jello, or jelly, molds became popular during the Victorian era when cooks experimented with recipes such as meat-based aspic. Copper molds, as opposed to the more affordable tin alternatives, were a sign of wealth. And by the 1950s and 1960s, these pieces were used for other recipes, especially those well-loved jelly creations.
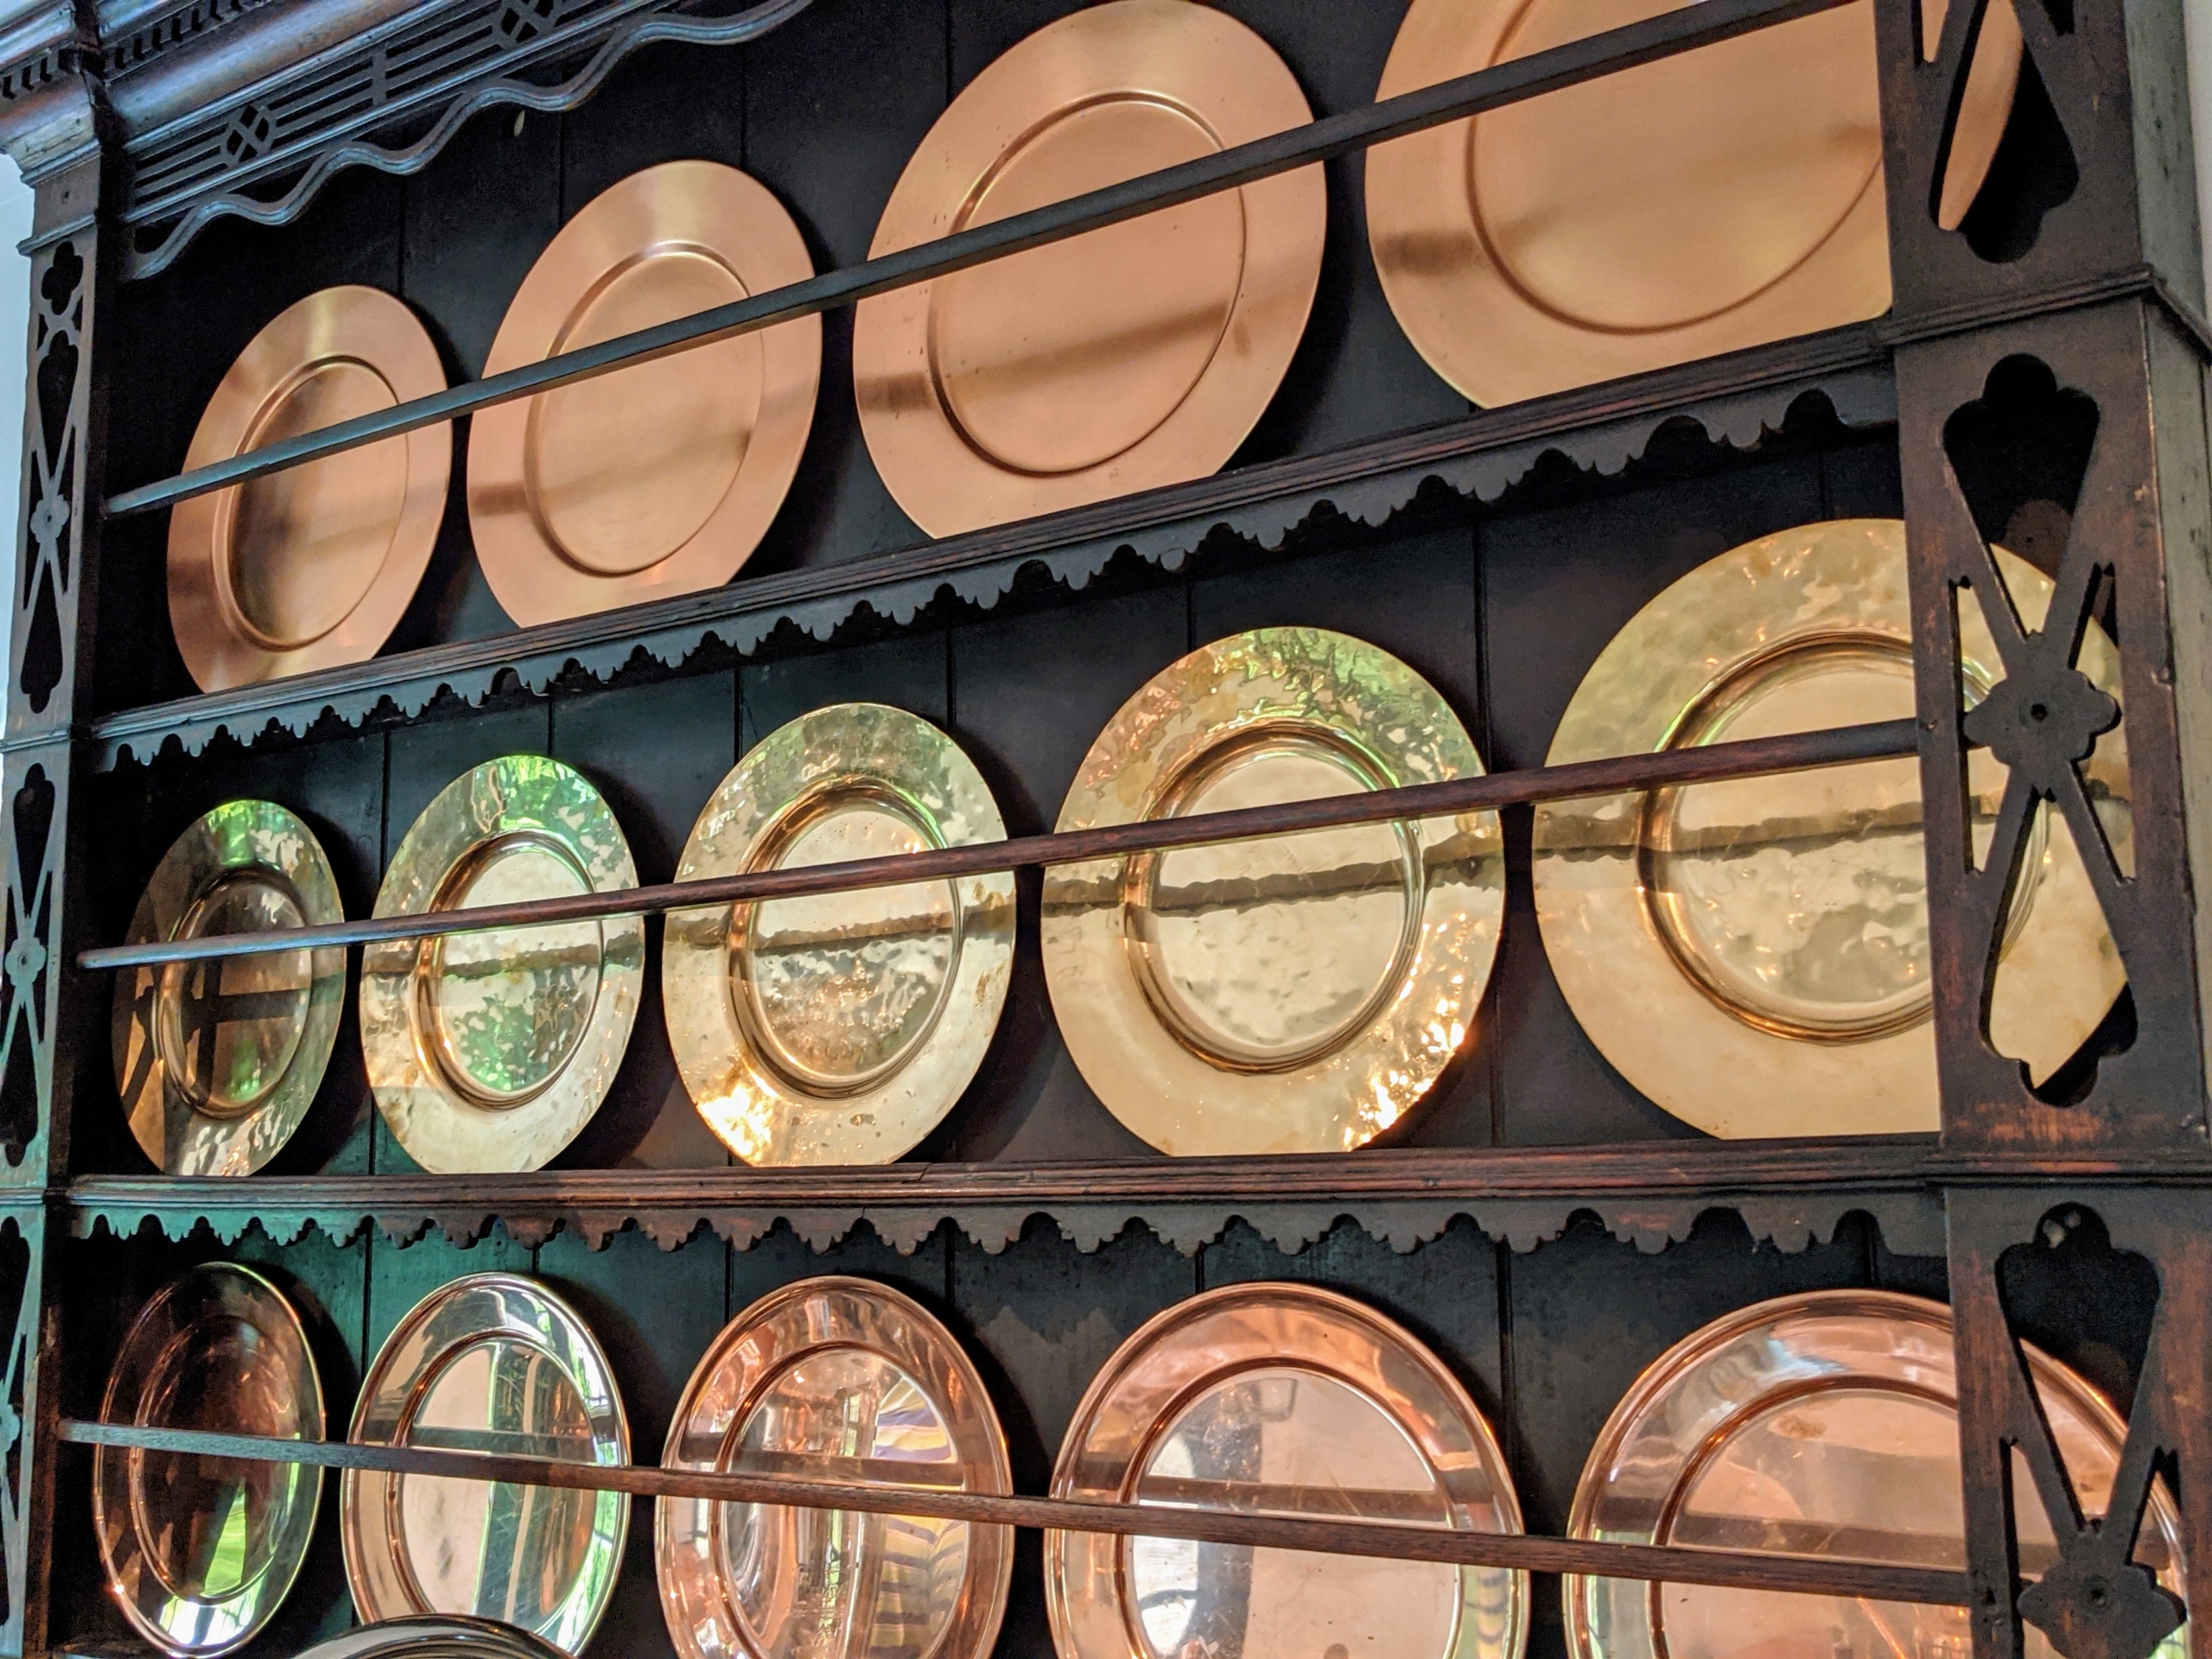
Antique copper and brass charger plates hang above one of my sinks. These also need cleaning to look their best. Look for these on the cover of our latest issue of “Living.”
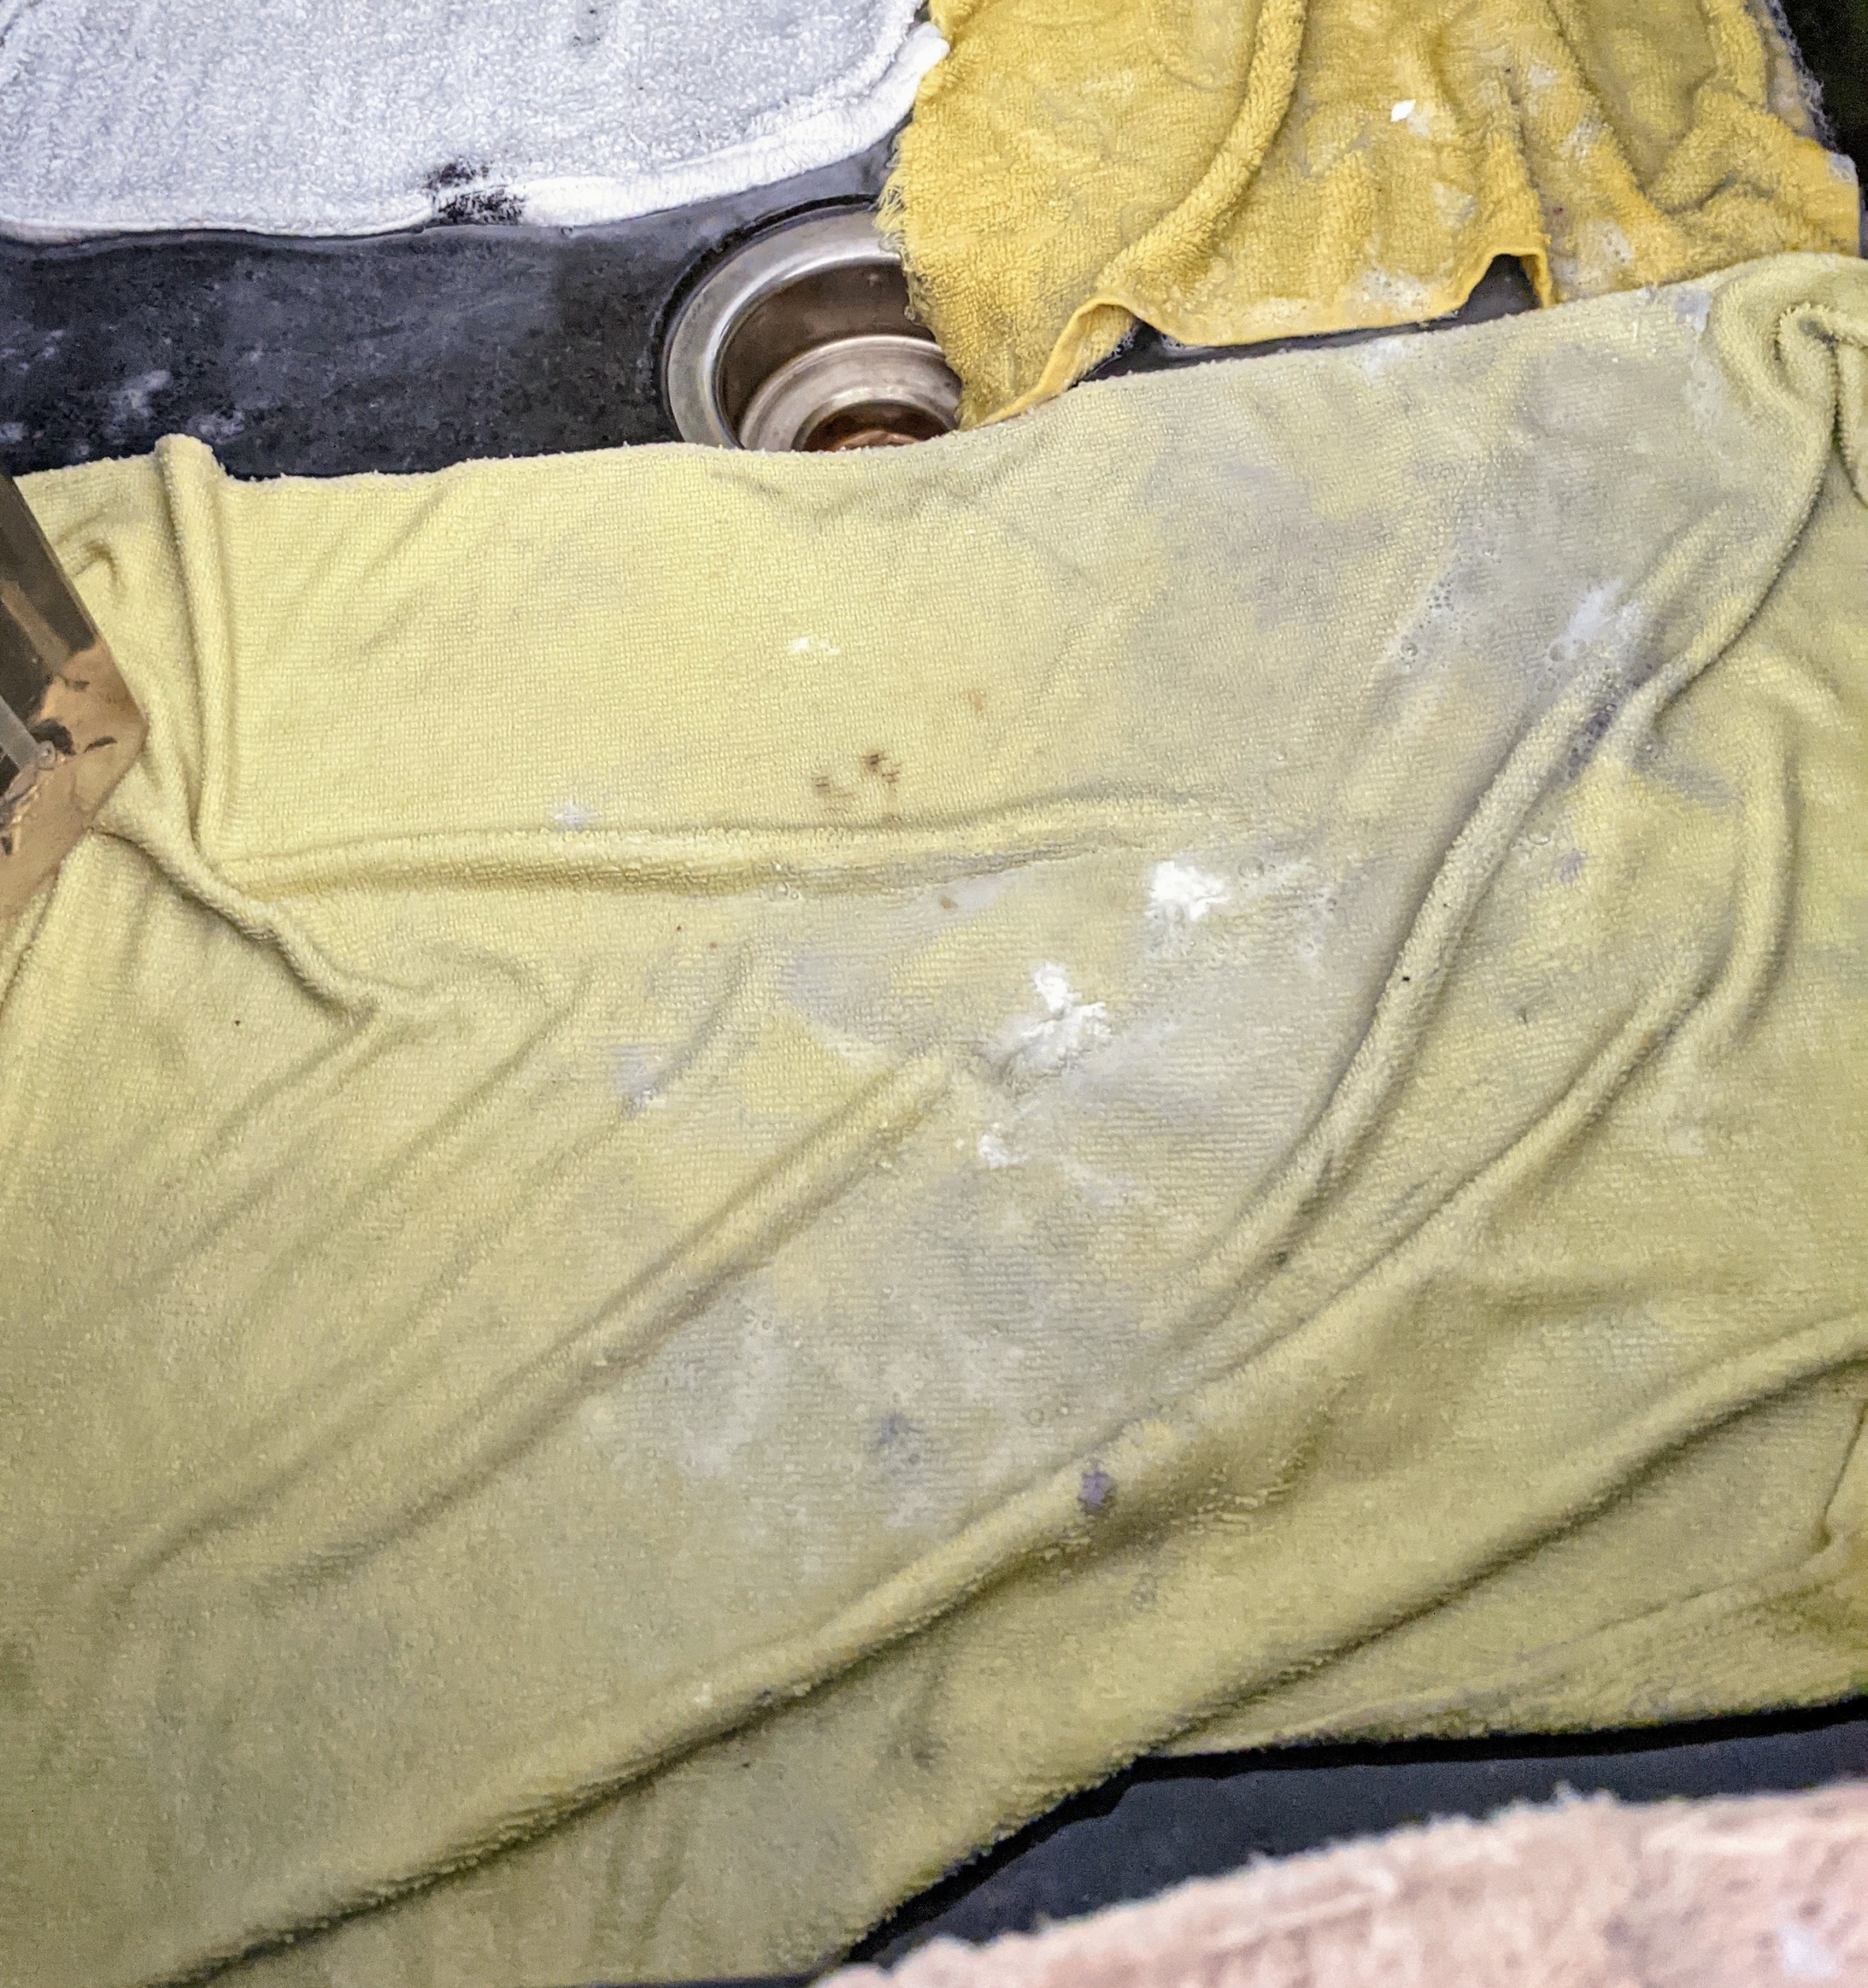
We always place terry cloth towels on the bottom of the sink, so the metal doesn’t bang against any surfaces. This also protects them in the event a piece accidentally slips from one’s grip.
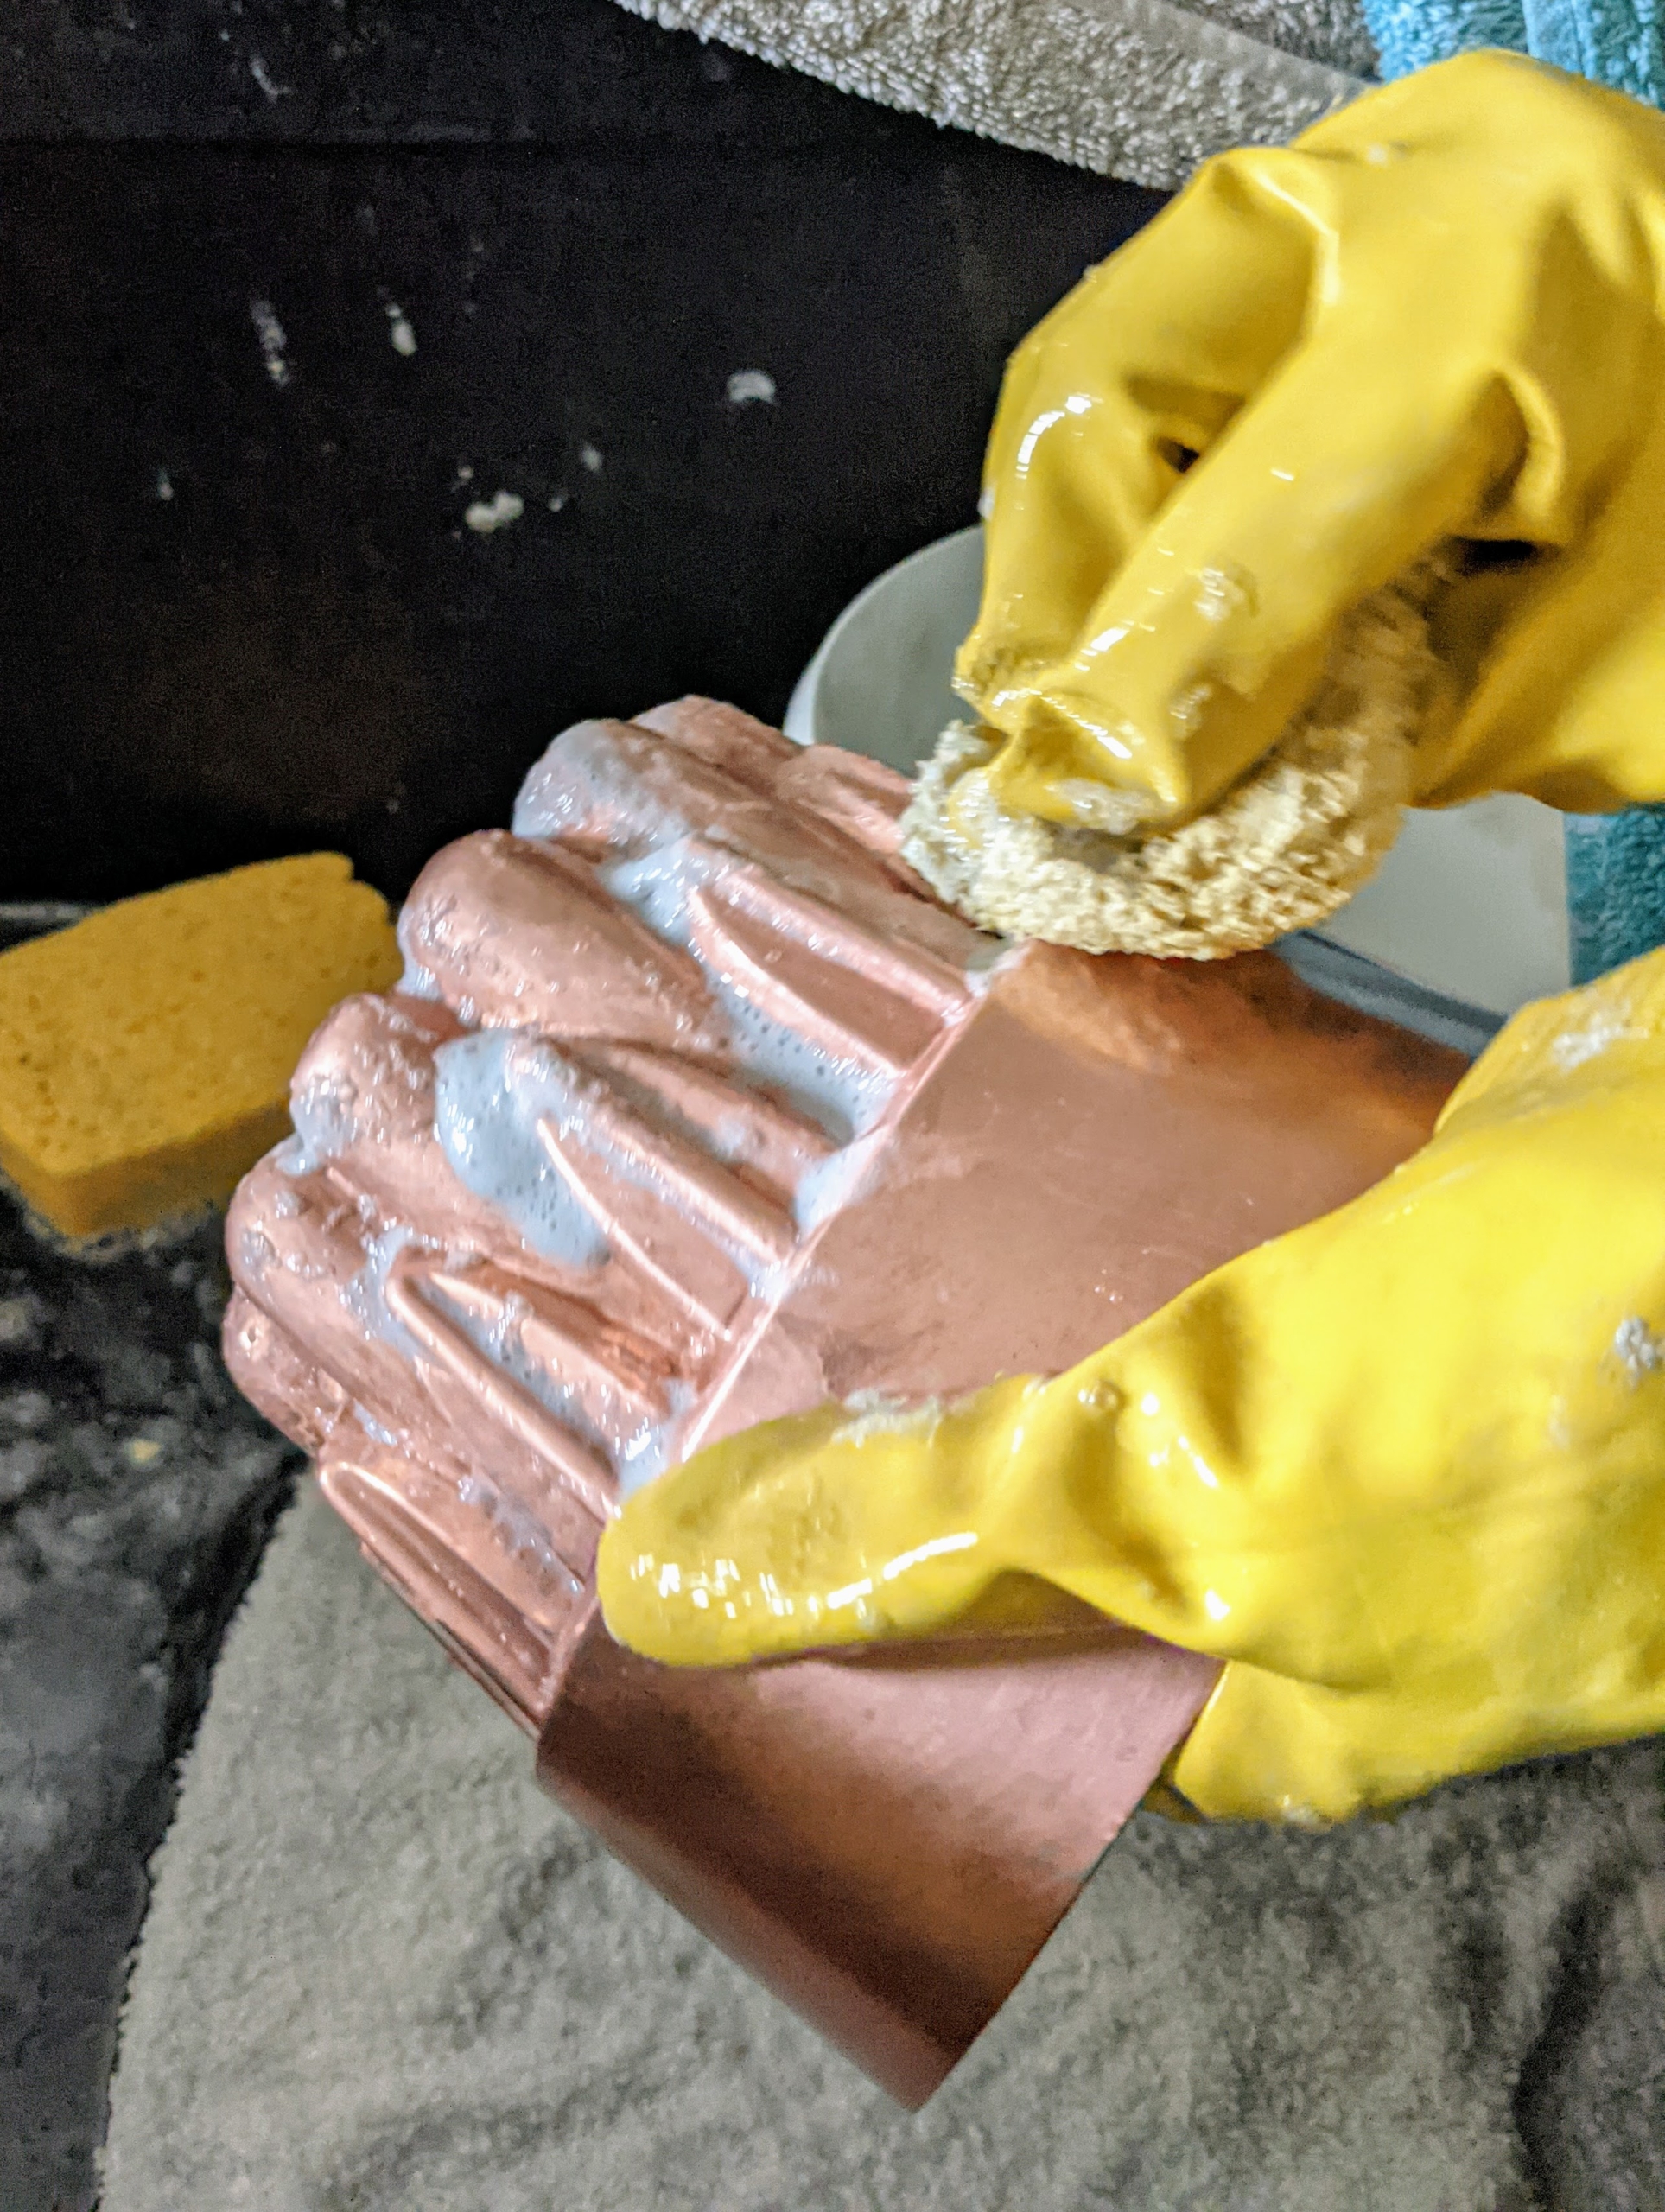
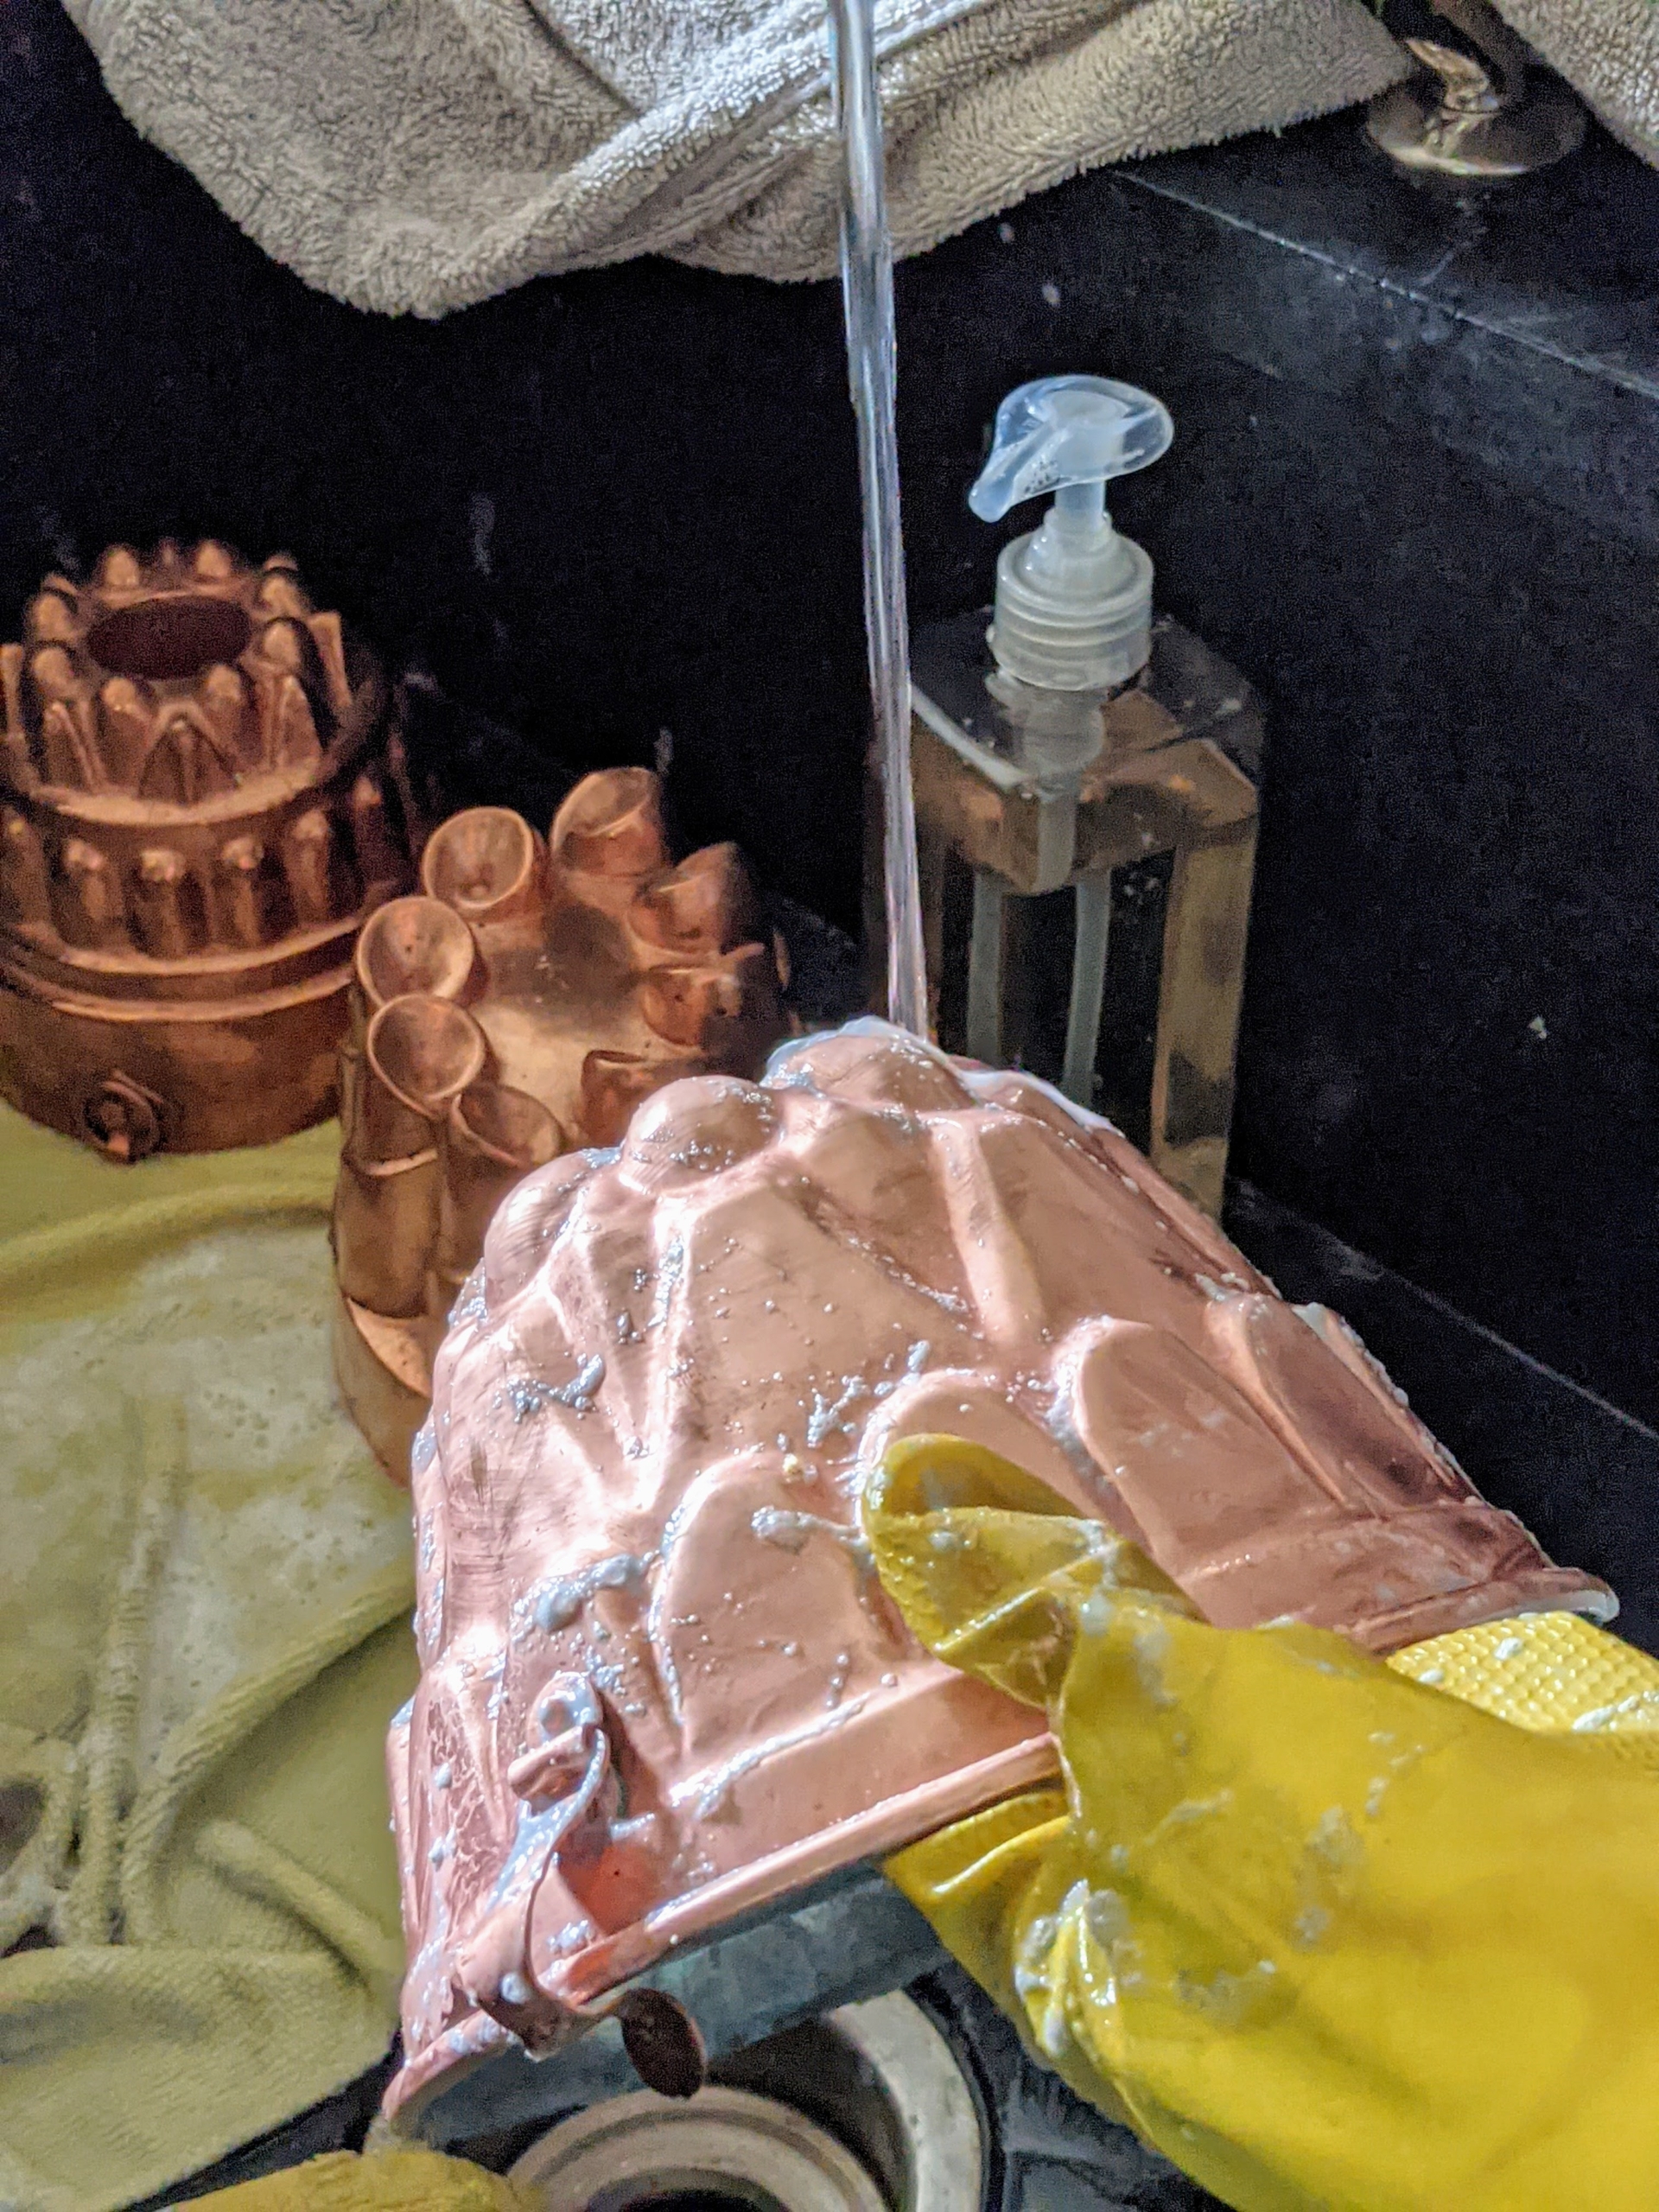
Whenever cleaning any precious metal, always use a soft moistened sponge. A soft cloth can also work well. And, for tight areas – a soft-bristled brush is good to have on hand. And always use polishes that are non-abrasive, and opt for formulas, such as creams and gels instead of sprays. Plus, it’s also a good idea to use gloves when taking on this task, so the cleaning cream does not come into contact with the skin.
Completely coat the piece with cream. The copper will start to brighten as it is rubbed. This task is time-consuming, but it is well-worth all the work and elbow grease. And remember to get into the cracks and crevices.
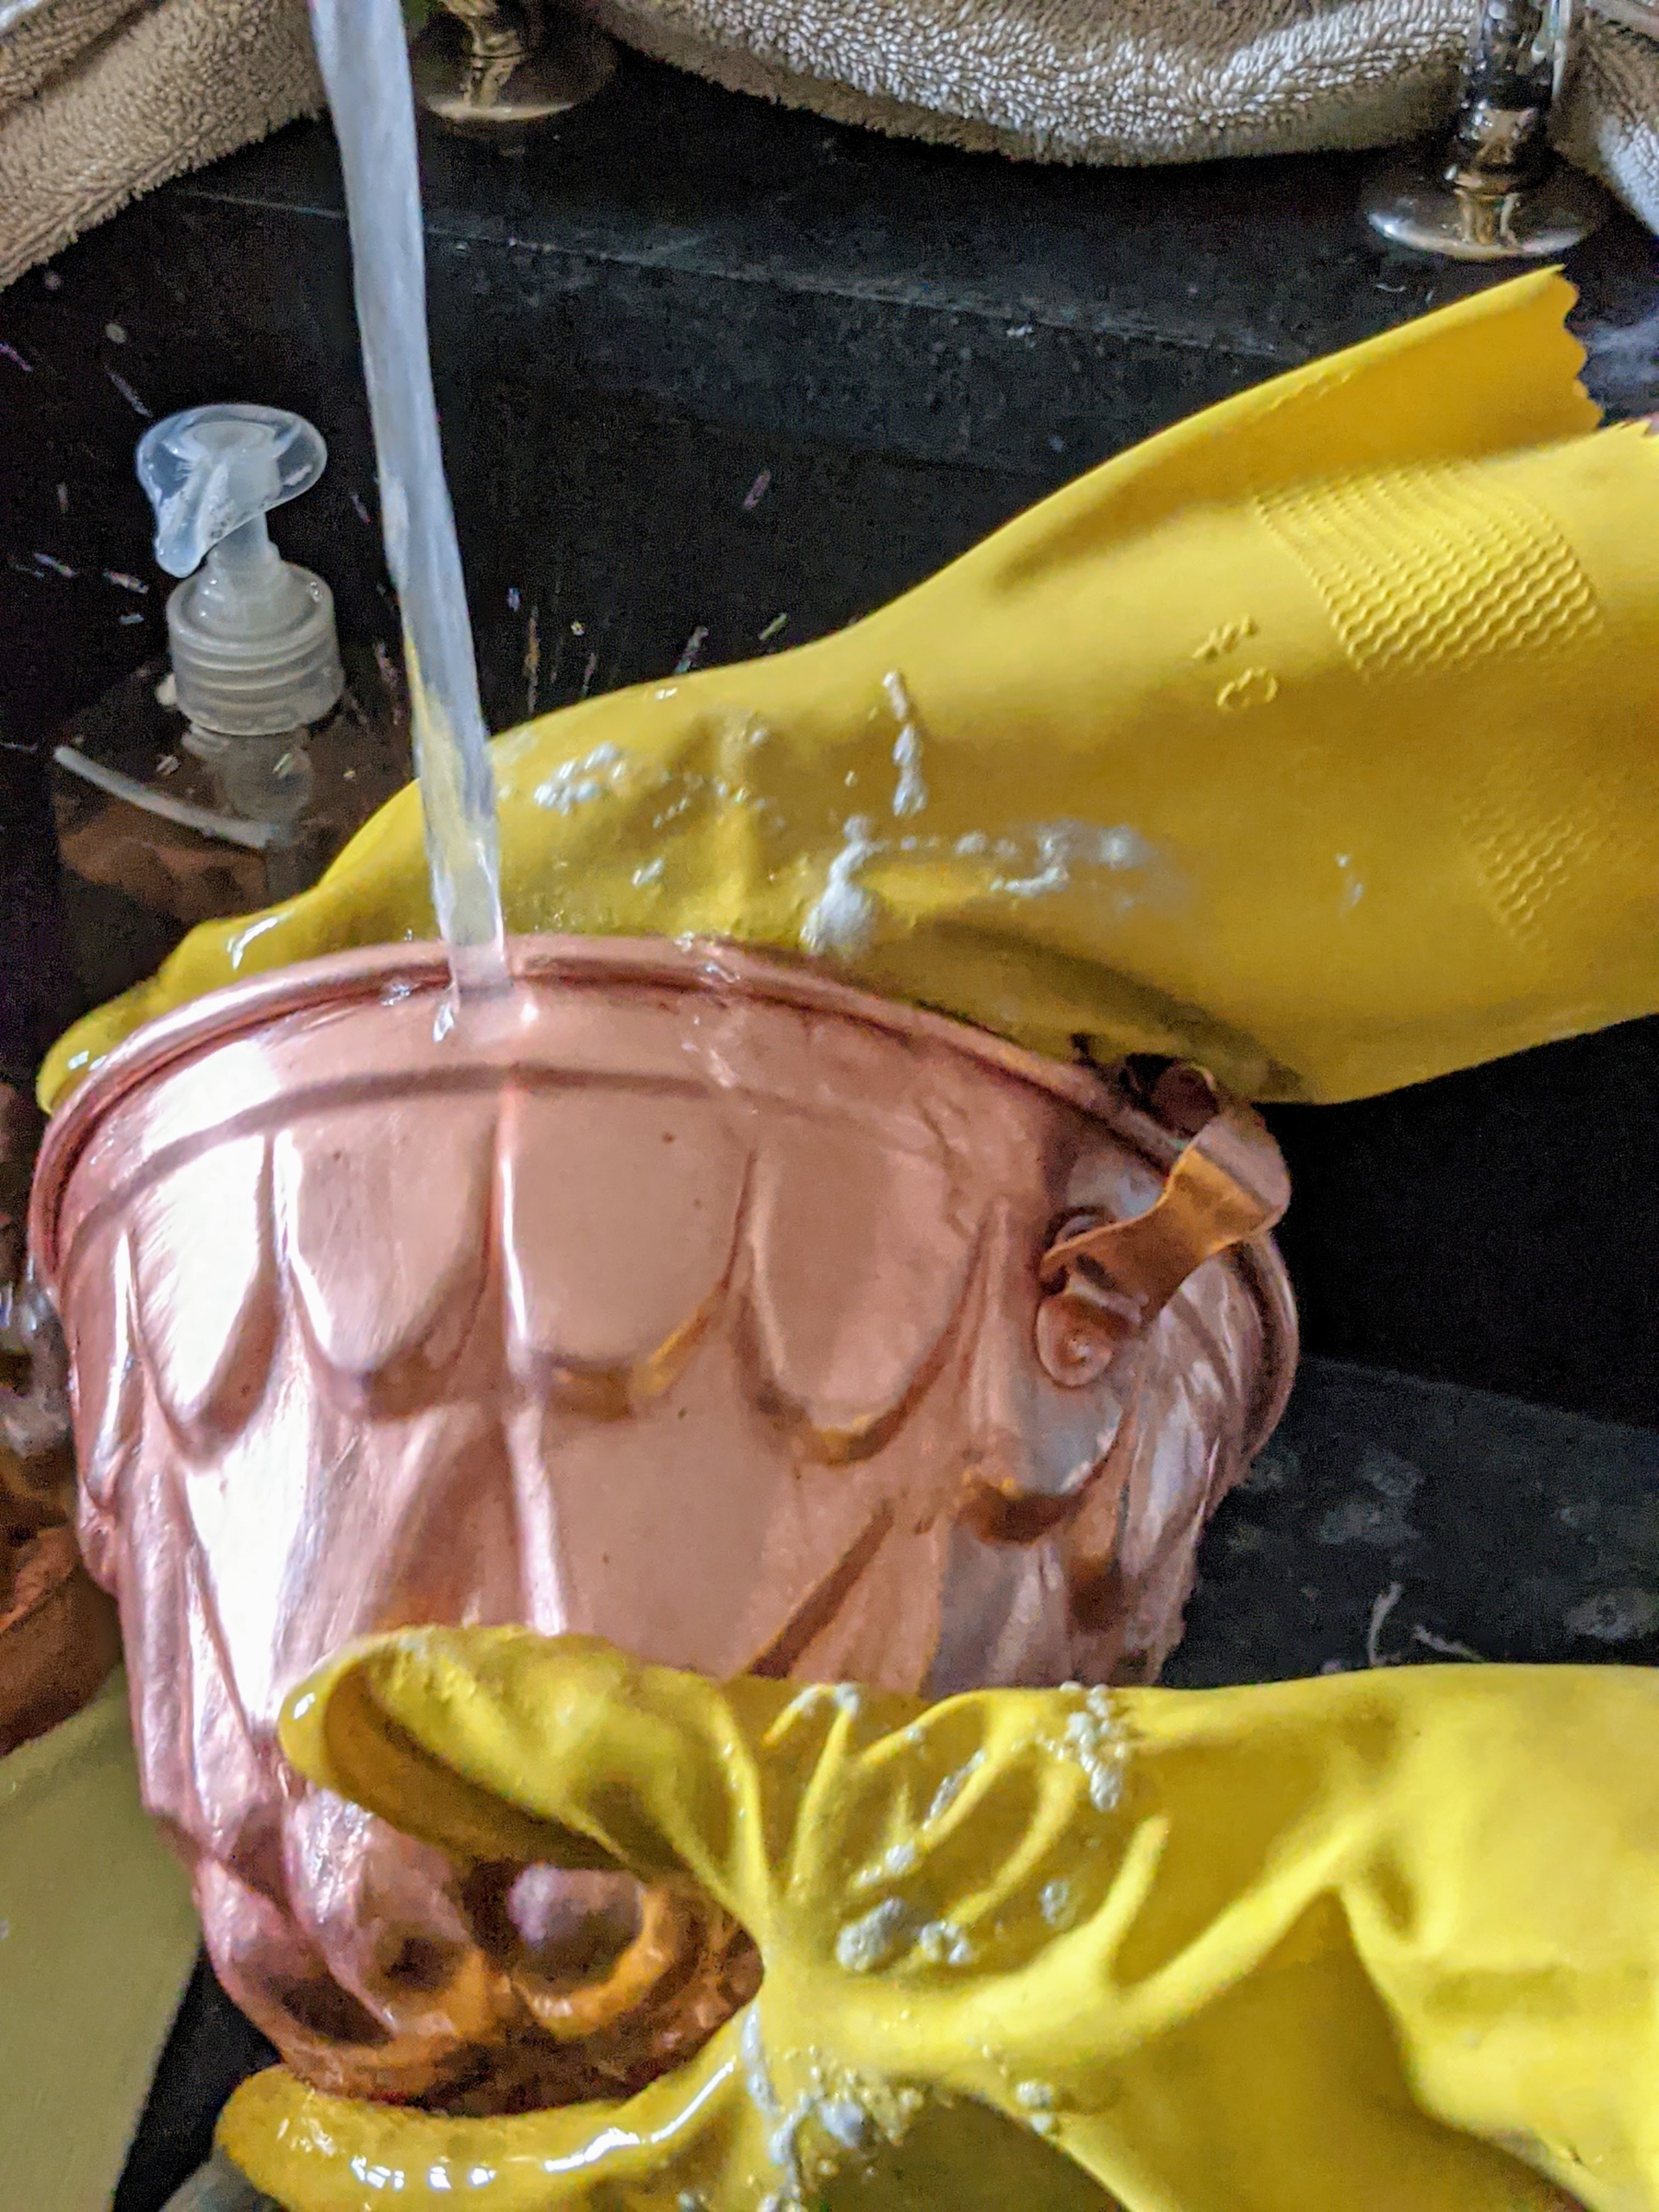
It may take a little longer when cleaning a piece with more intricate designs, crevices, or indentations. After rubbing the piece with cream, wash it with dish soap and water to ensure all the cream is removed.
And then give it a thorough rinse with tepid water.
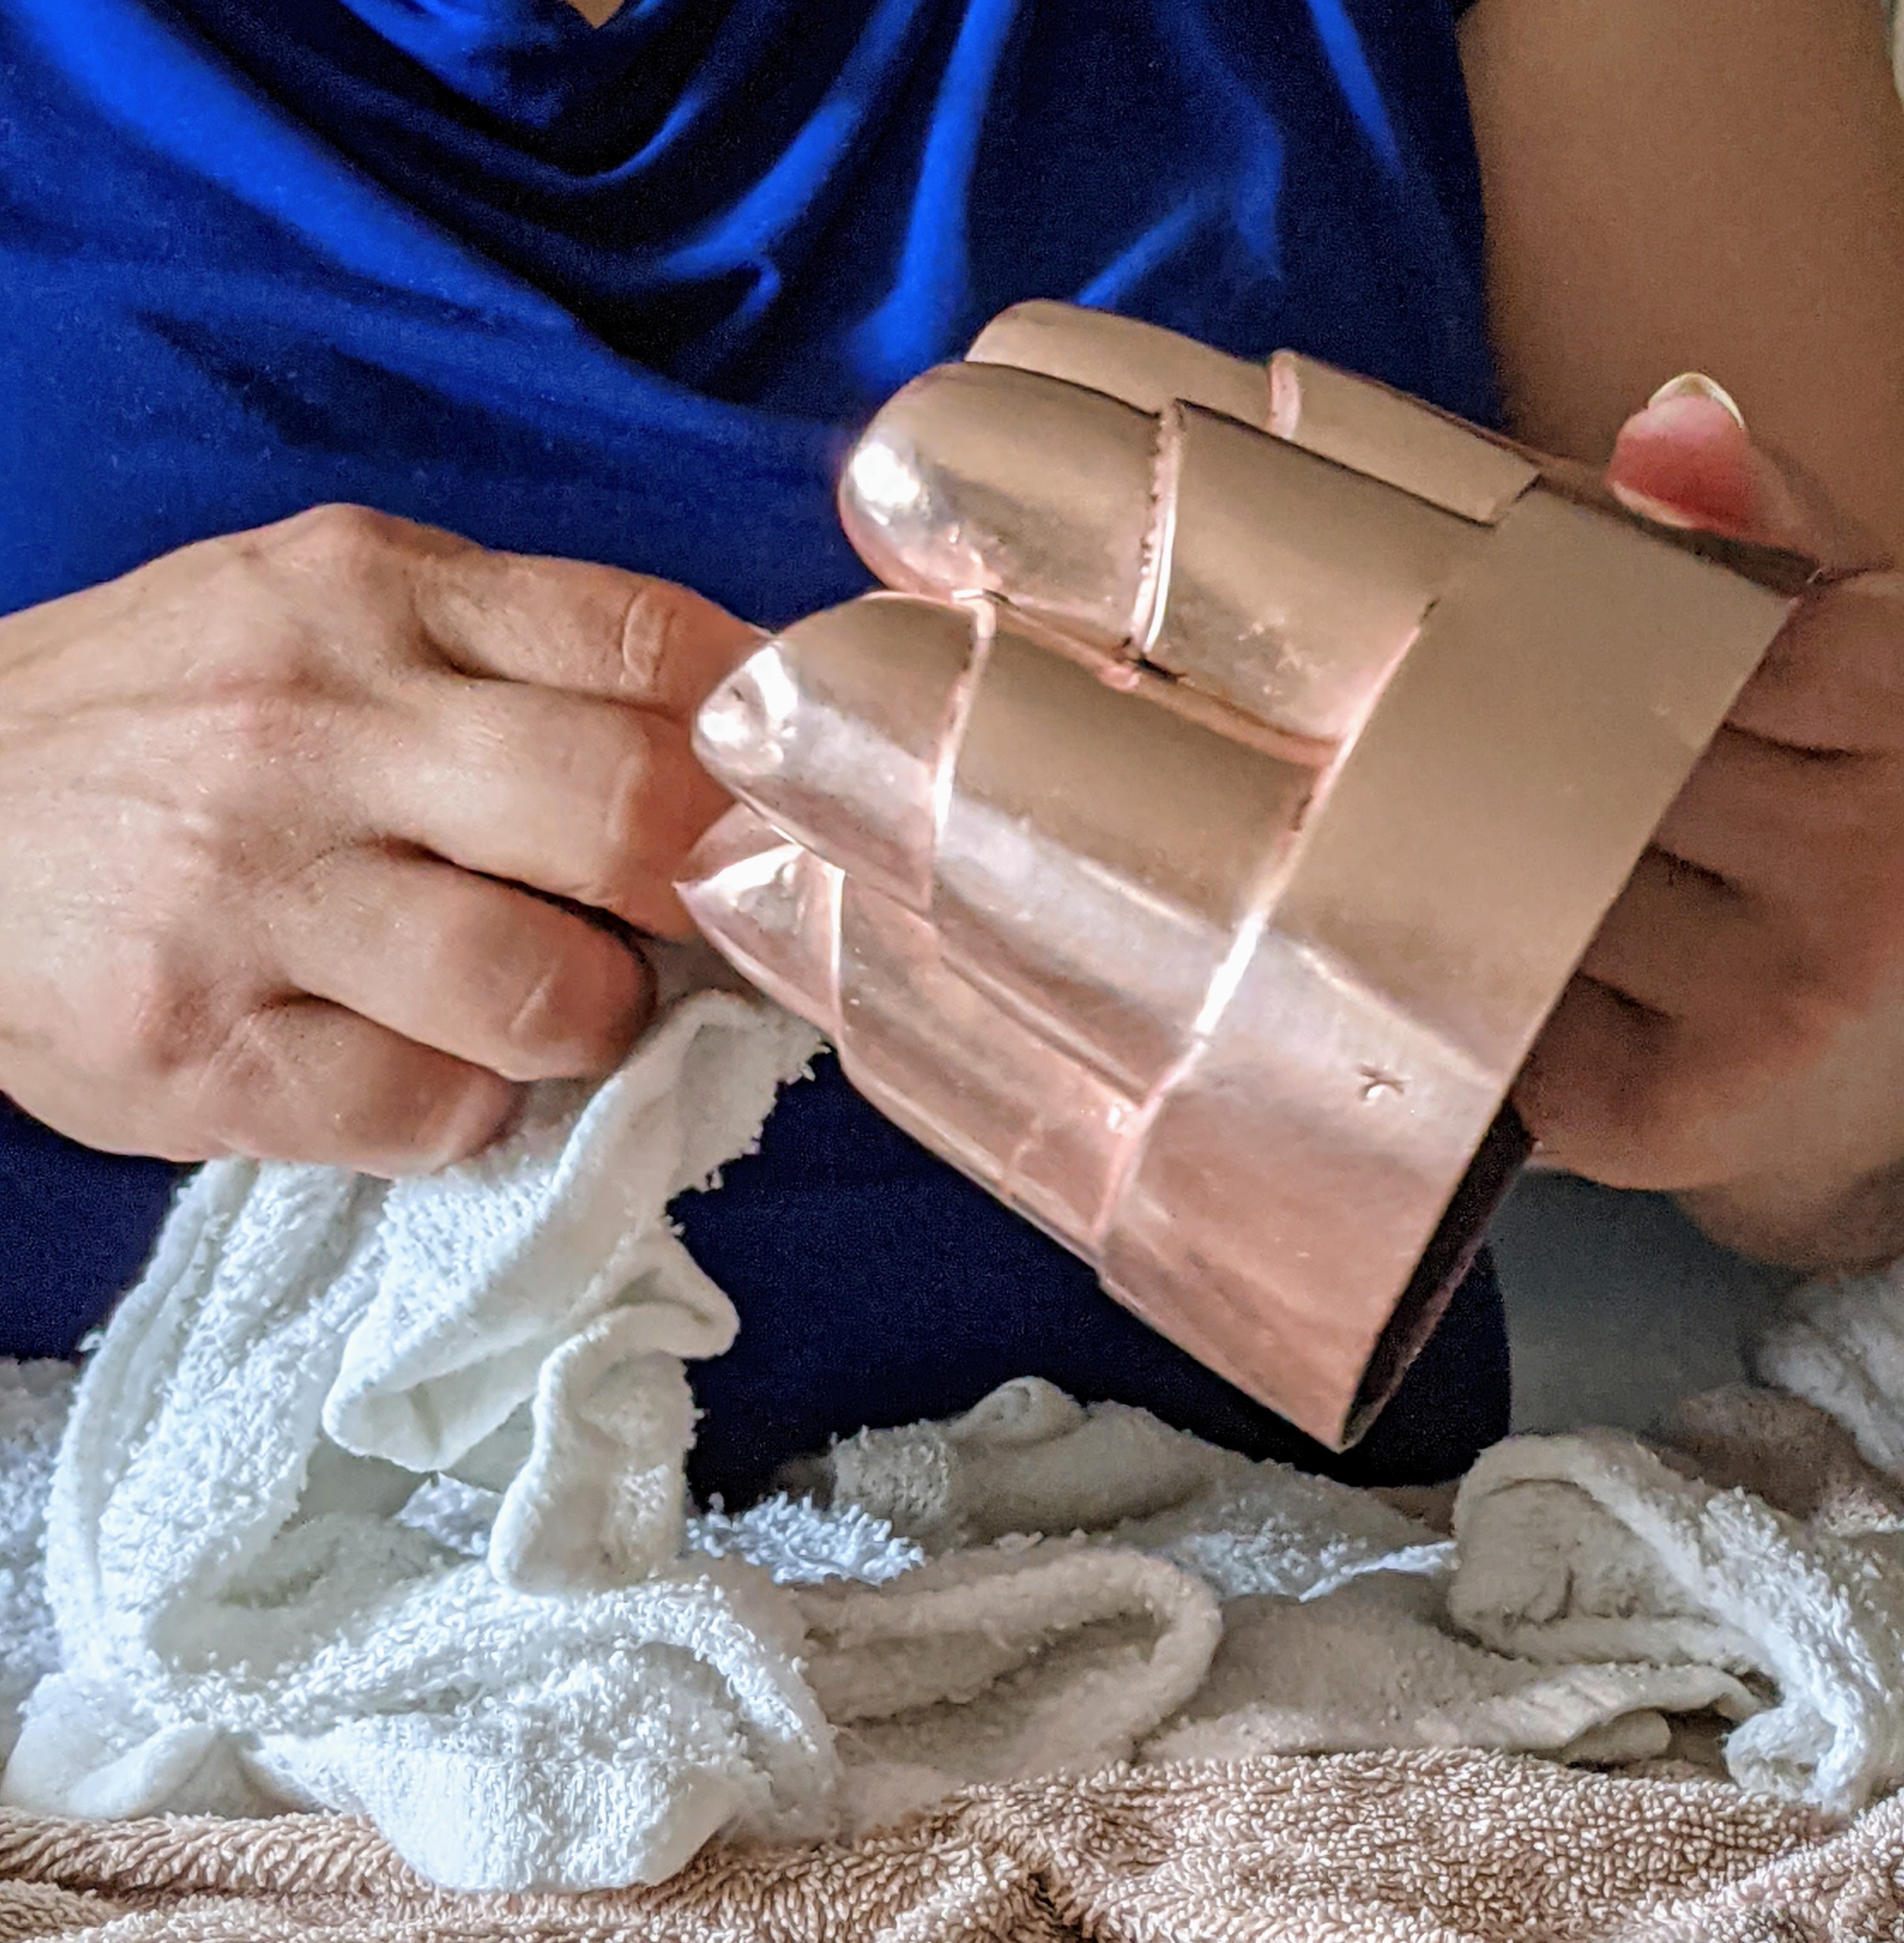
Here’s Enma ready to dry the pieces as soon as they are done getting washed. Working in a production line fashion helps to get the job done quickly and efficiently.
Enma dries this giant mold next. Drying copper as soon as it is washed also helps prevent watermarks. And never place any copper in the dishwasher. The detergents’ aggressive chemicals, combined with the washer’s high cleaning temperature, will eventually cause any copper surfaces to dull, so hand-wash all copper mugs, pots, and pans instead.
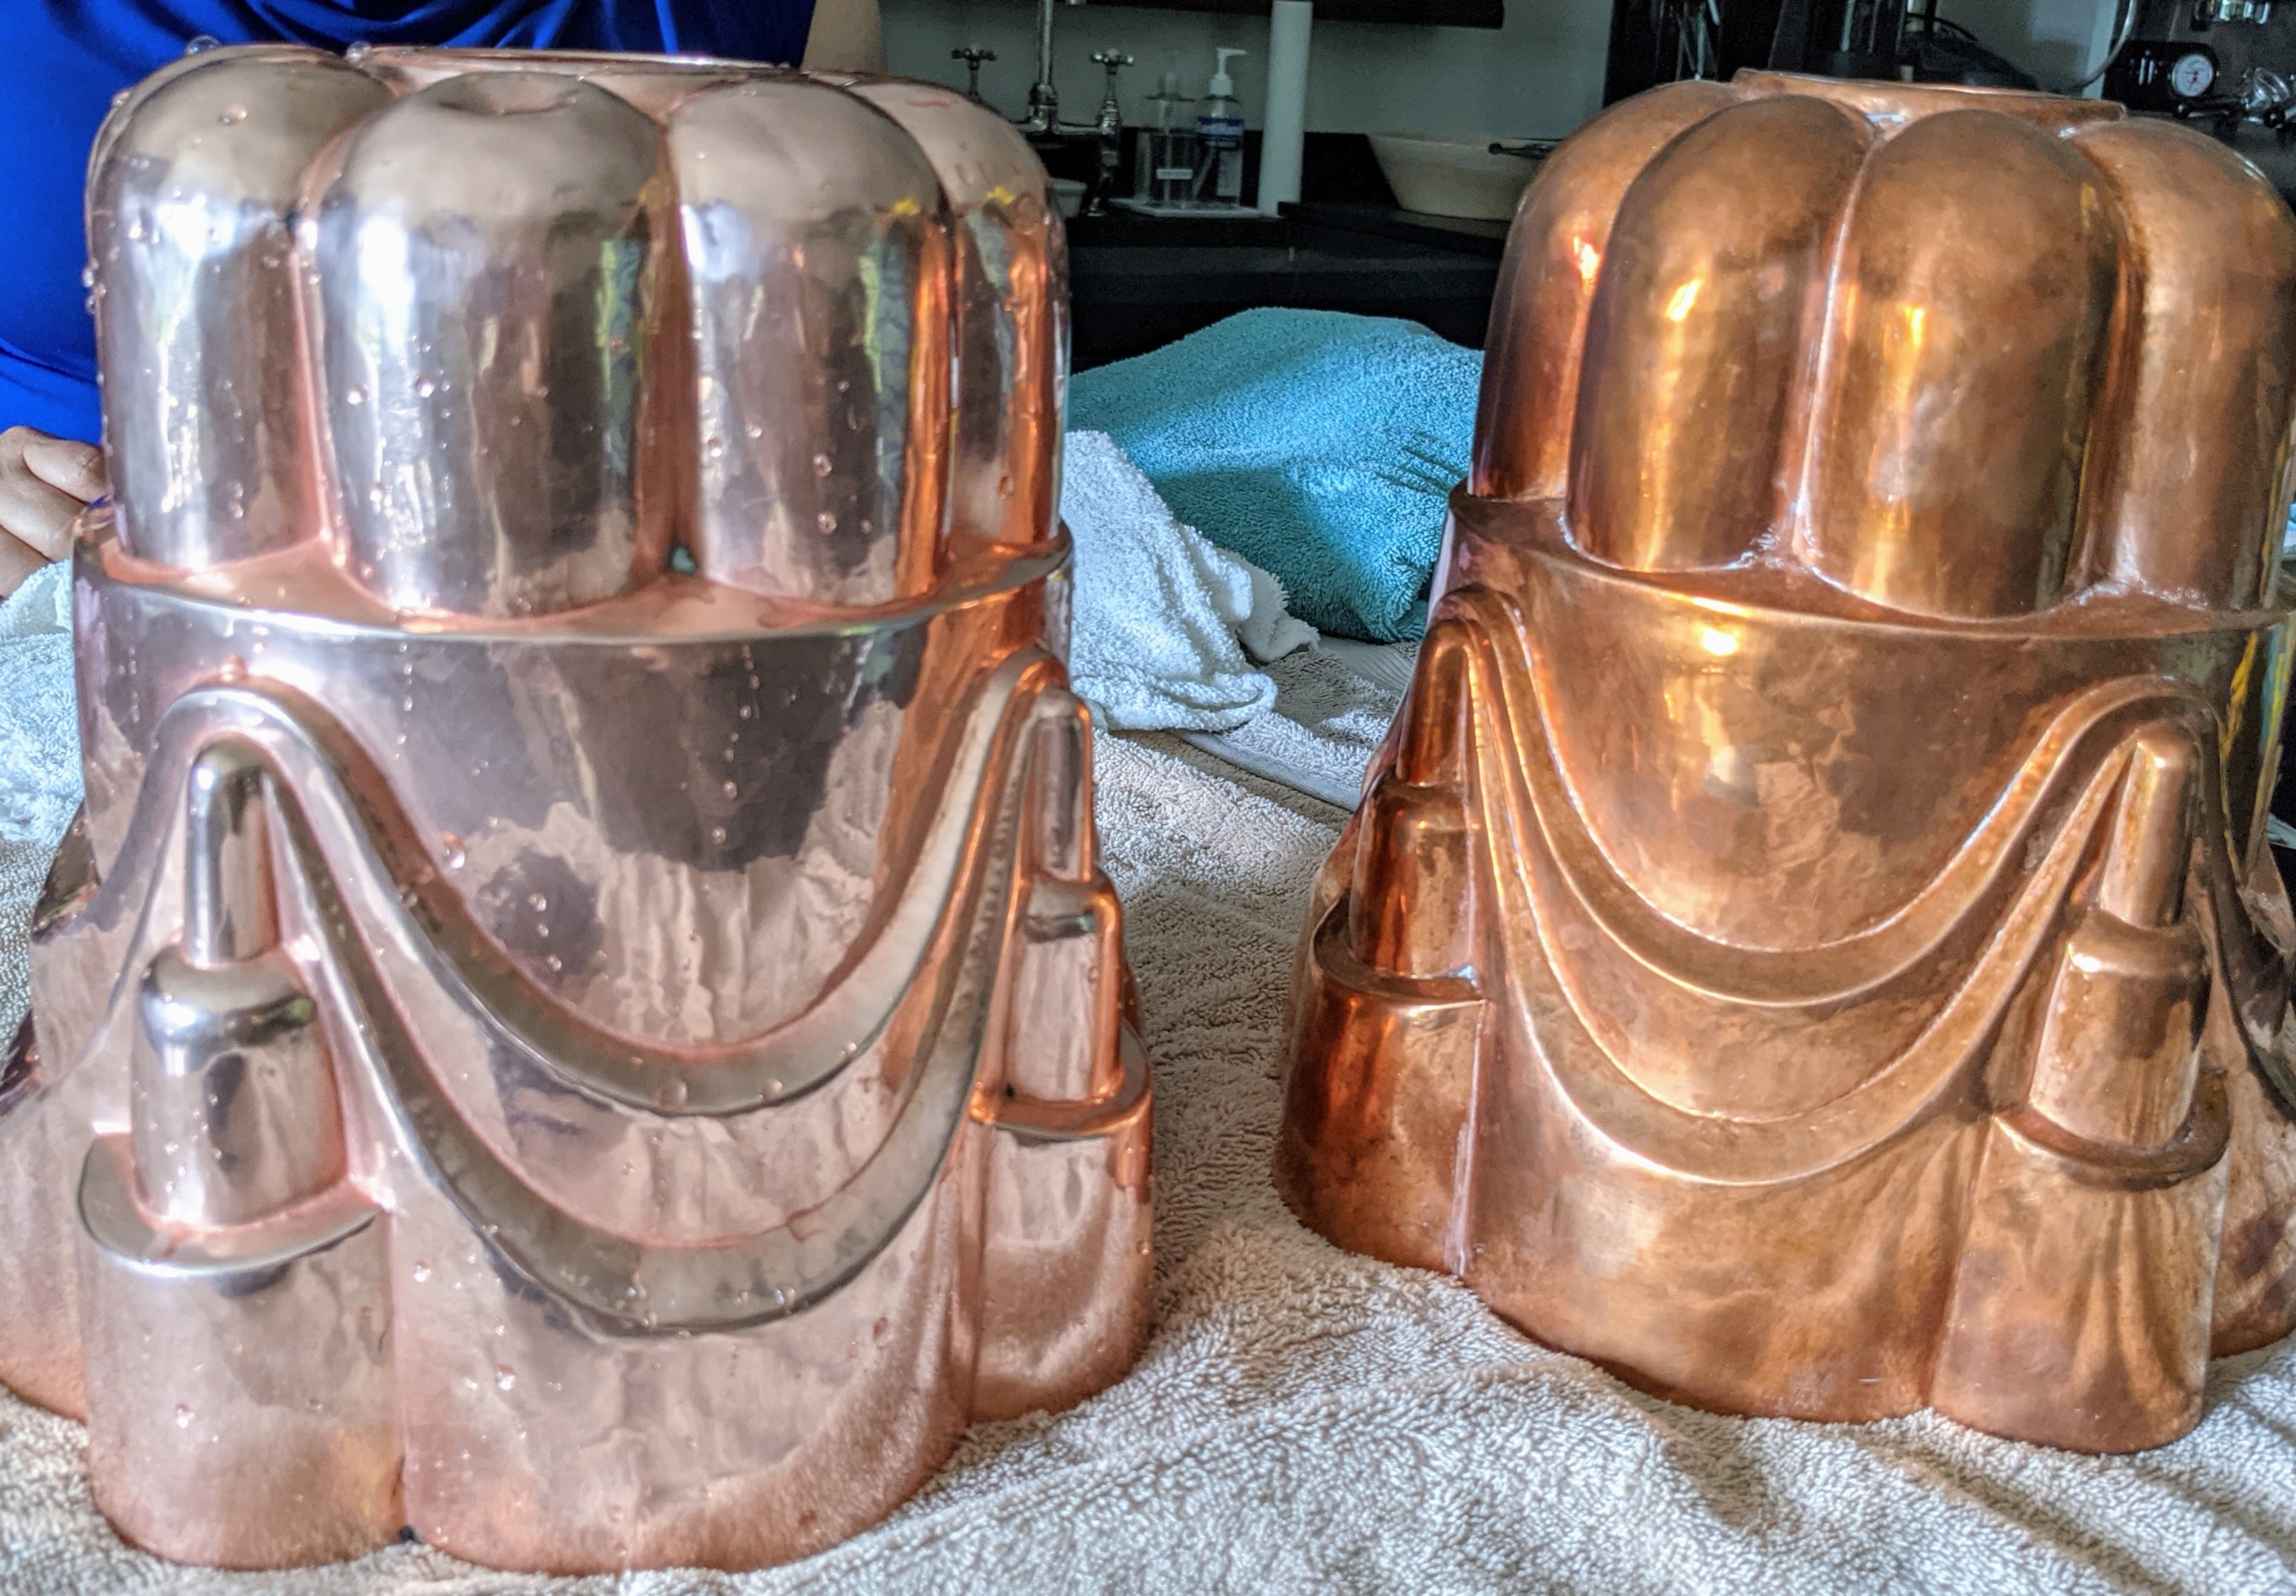
And look at the difference. The one on the left is cleaned and polished dry. The one of the right still has to be done.
Here are two copper kettles – also newly cleaned and polished.
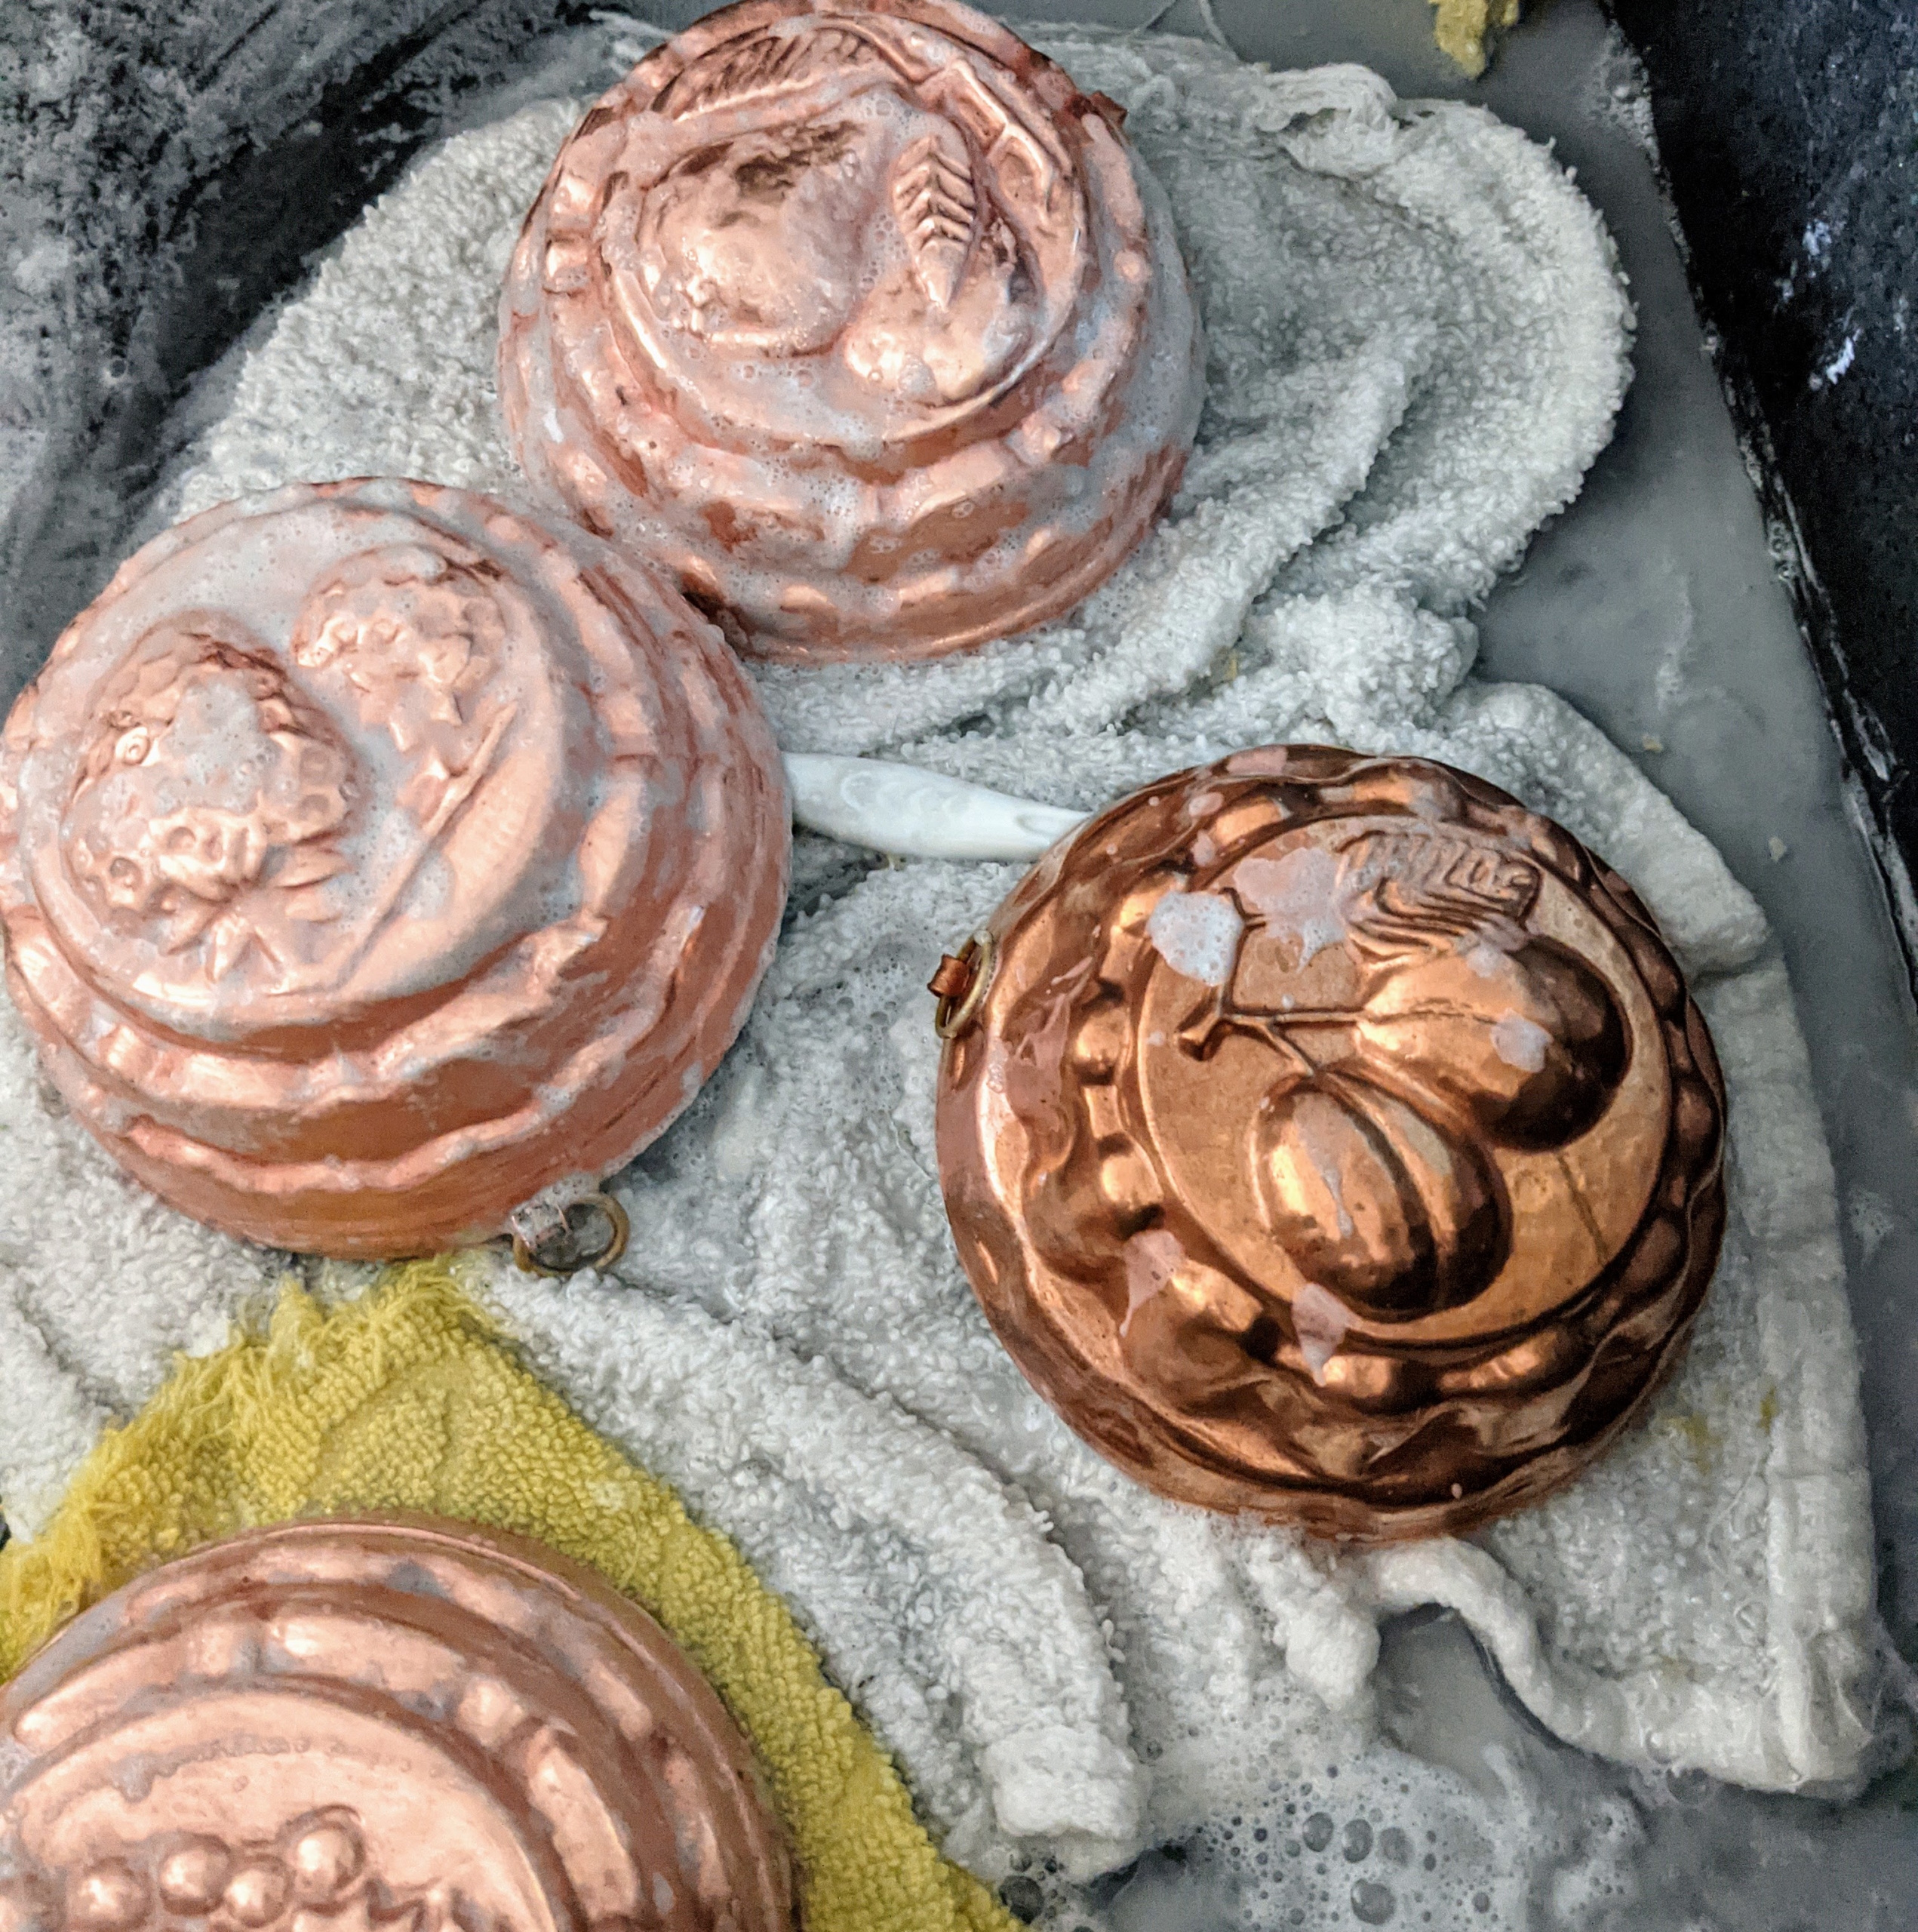
And here are four more smaller molds that are removed from the shelves so they could be cleaned. Notice the ones on the left are in the final soap and rinse stage while the darker piece on the right is waiting its turn.
A few minutes later, all these pieces are shimmering. The copper returns to its original luster very quickly.
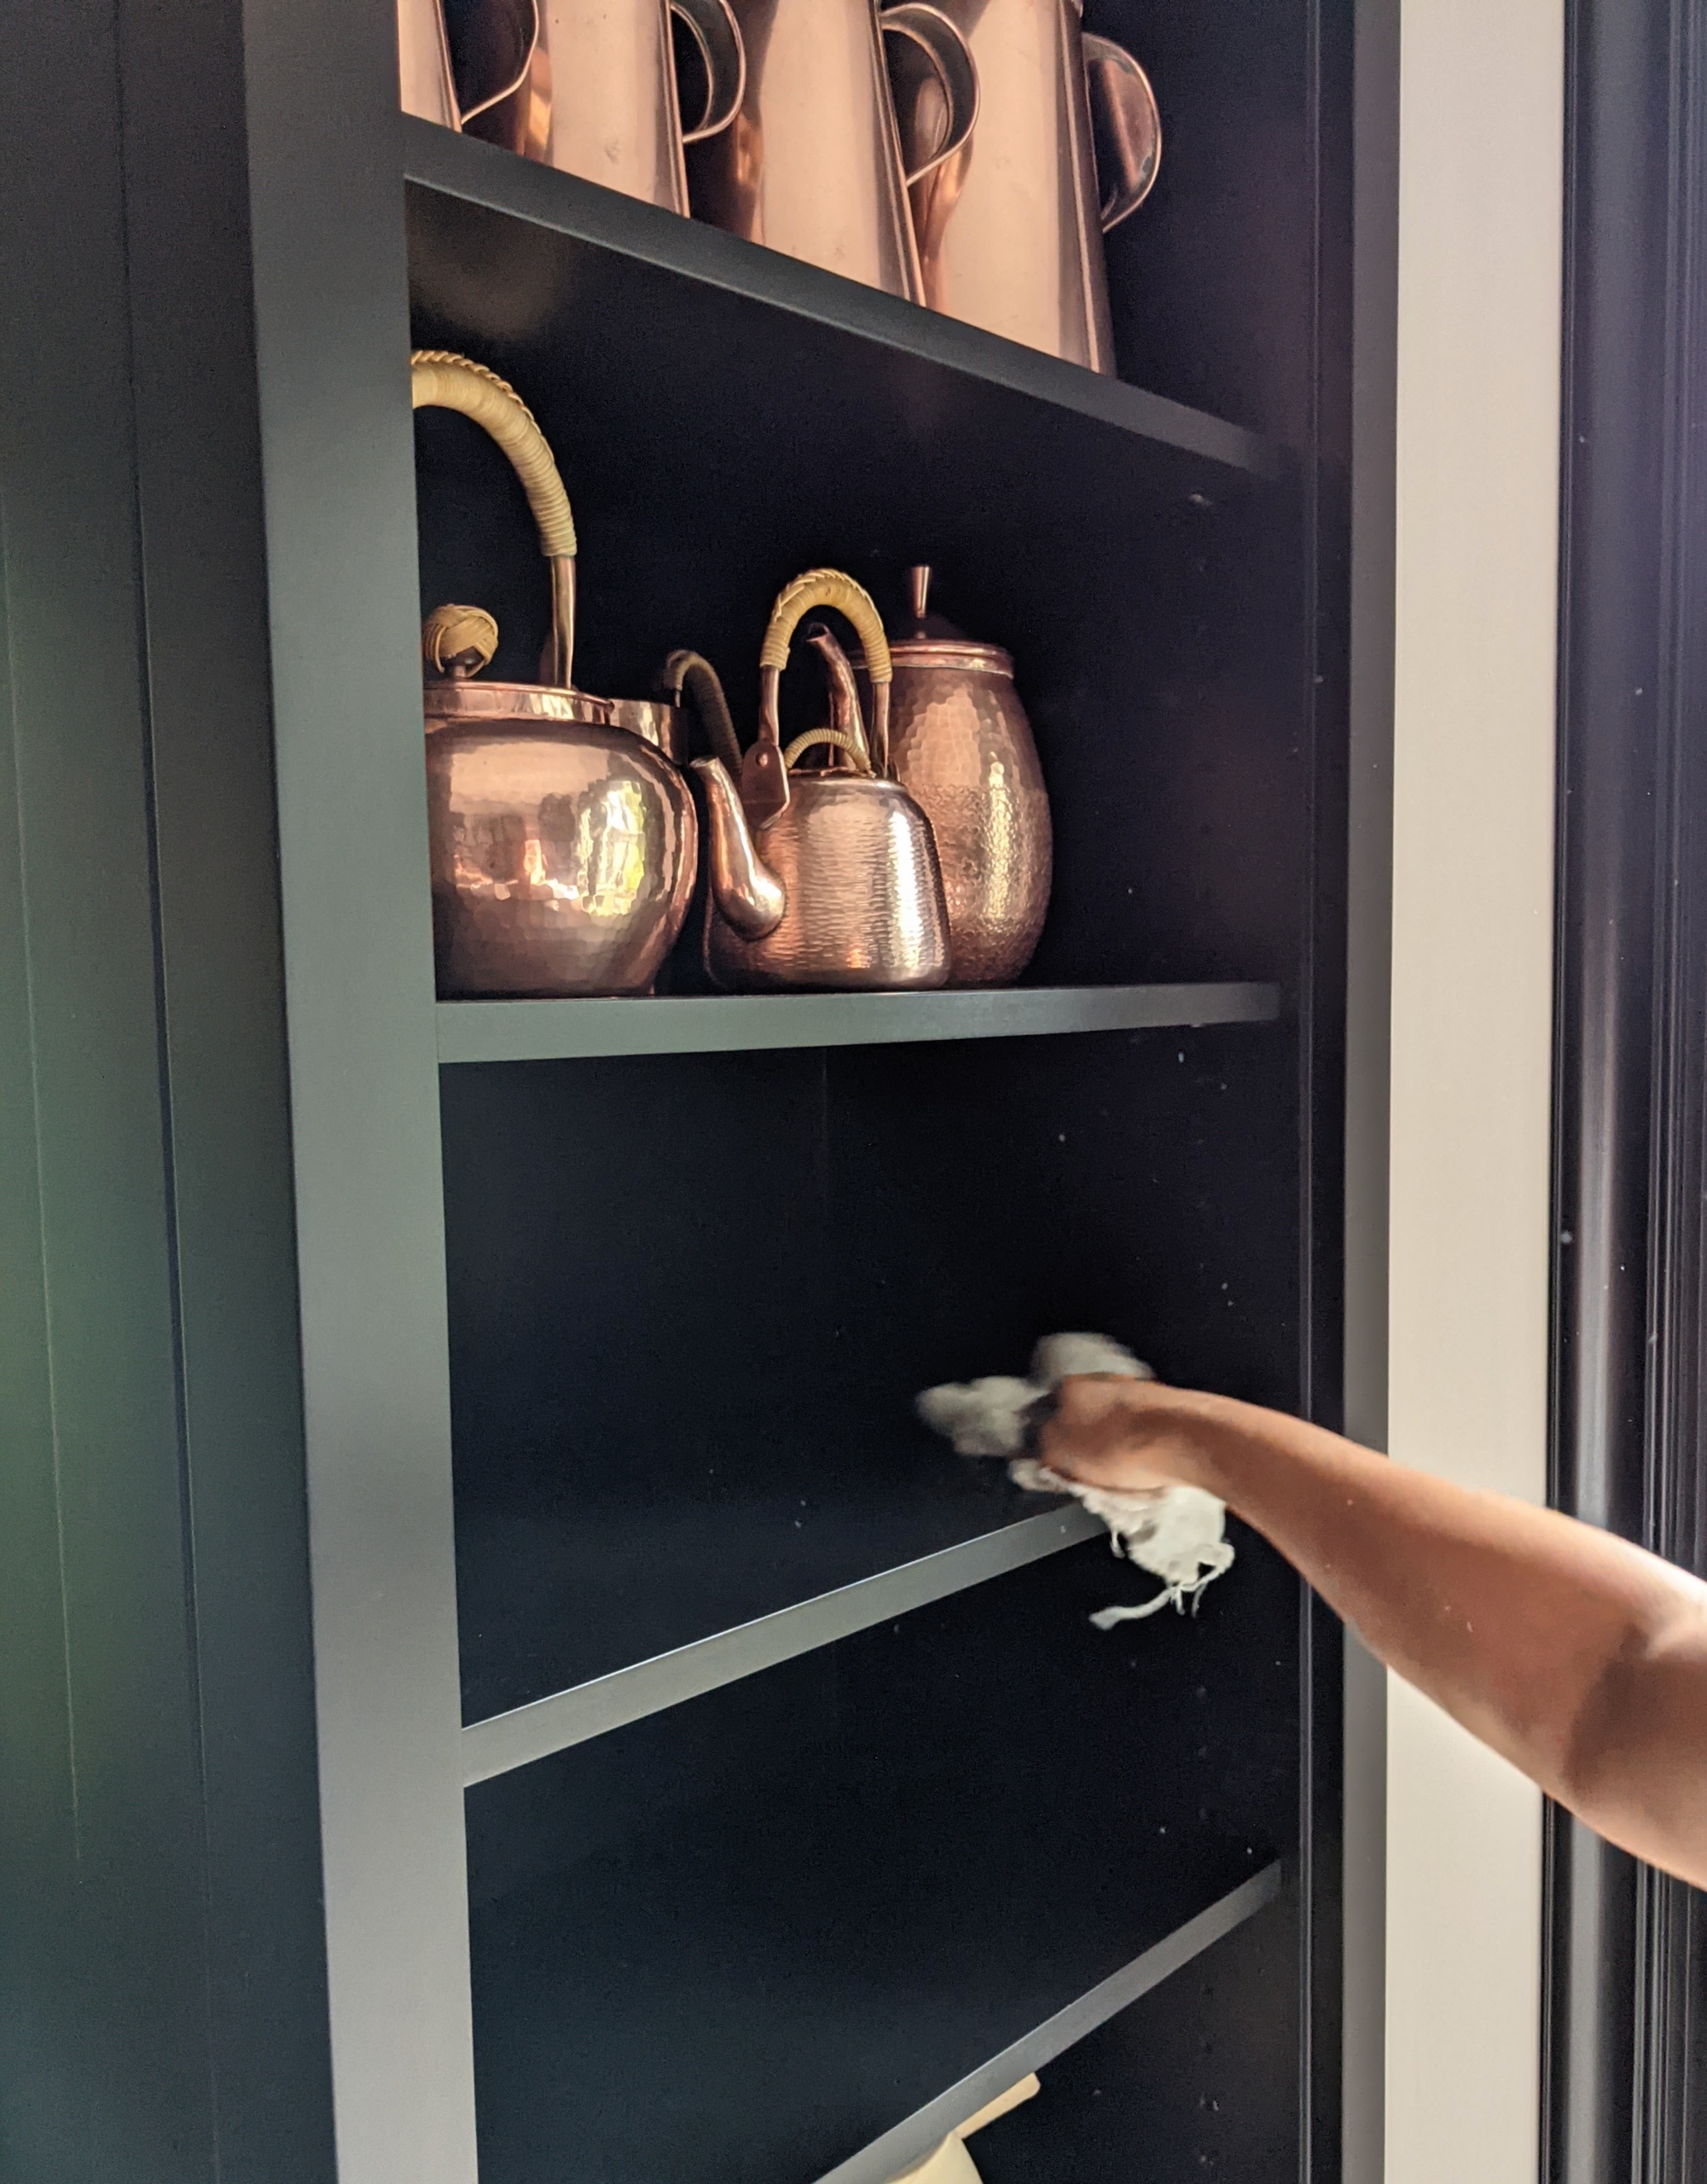
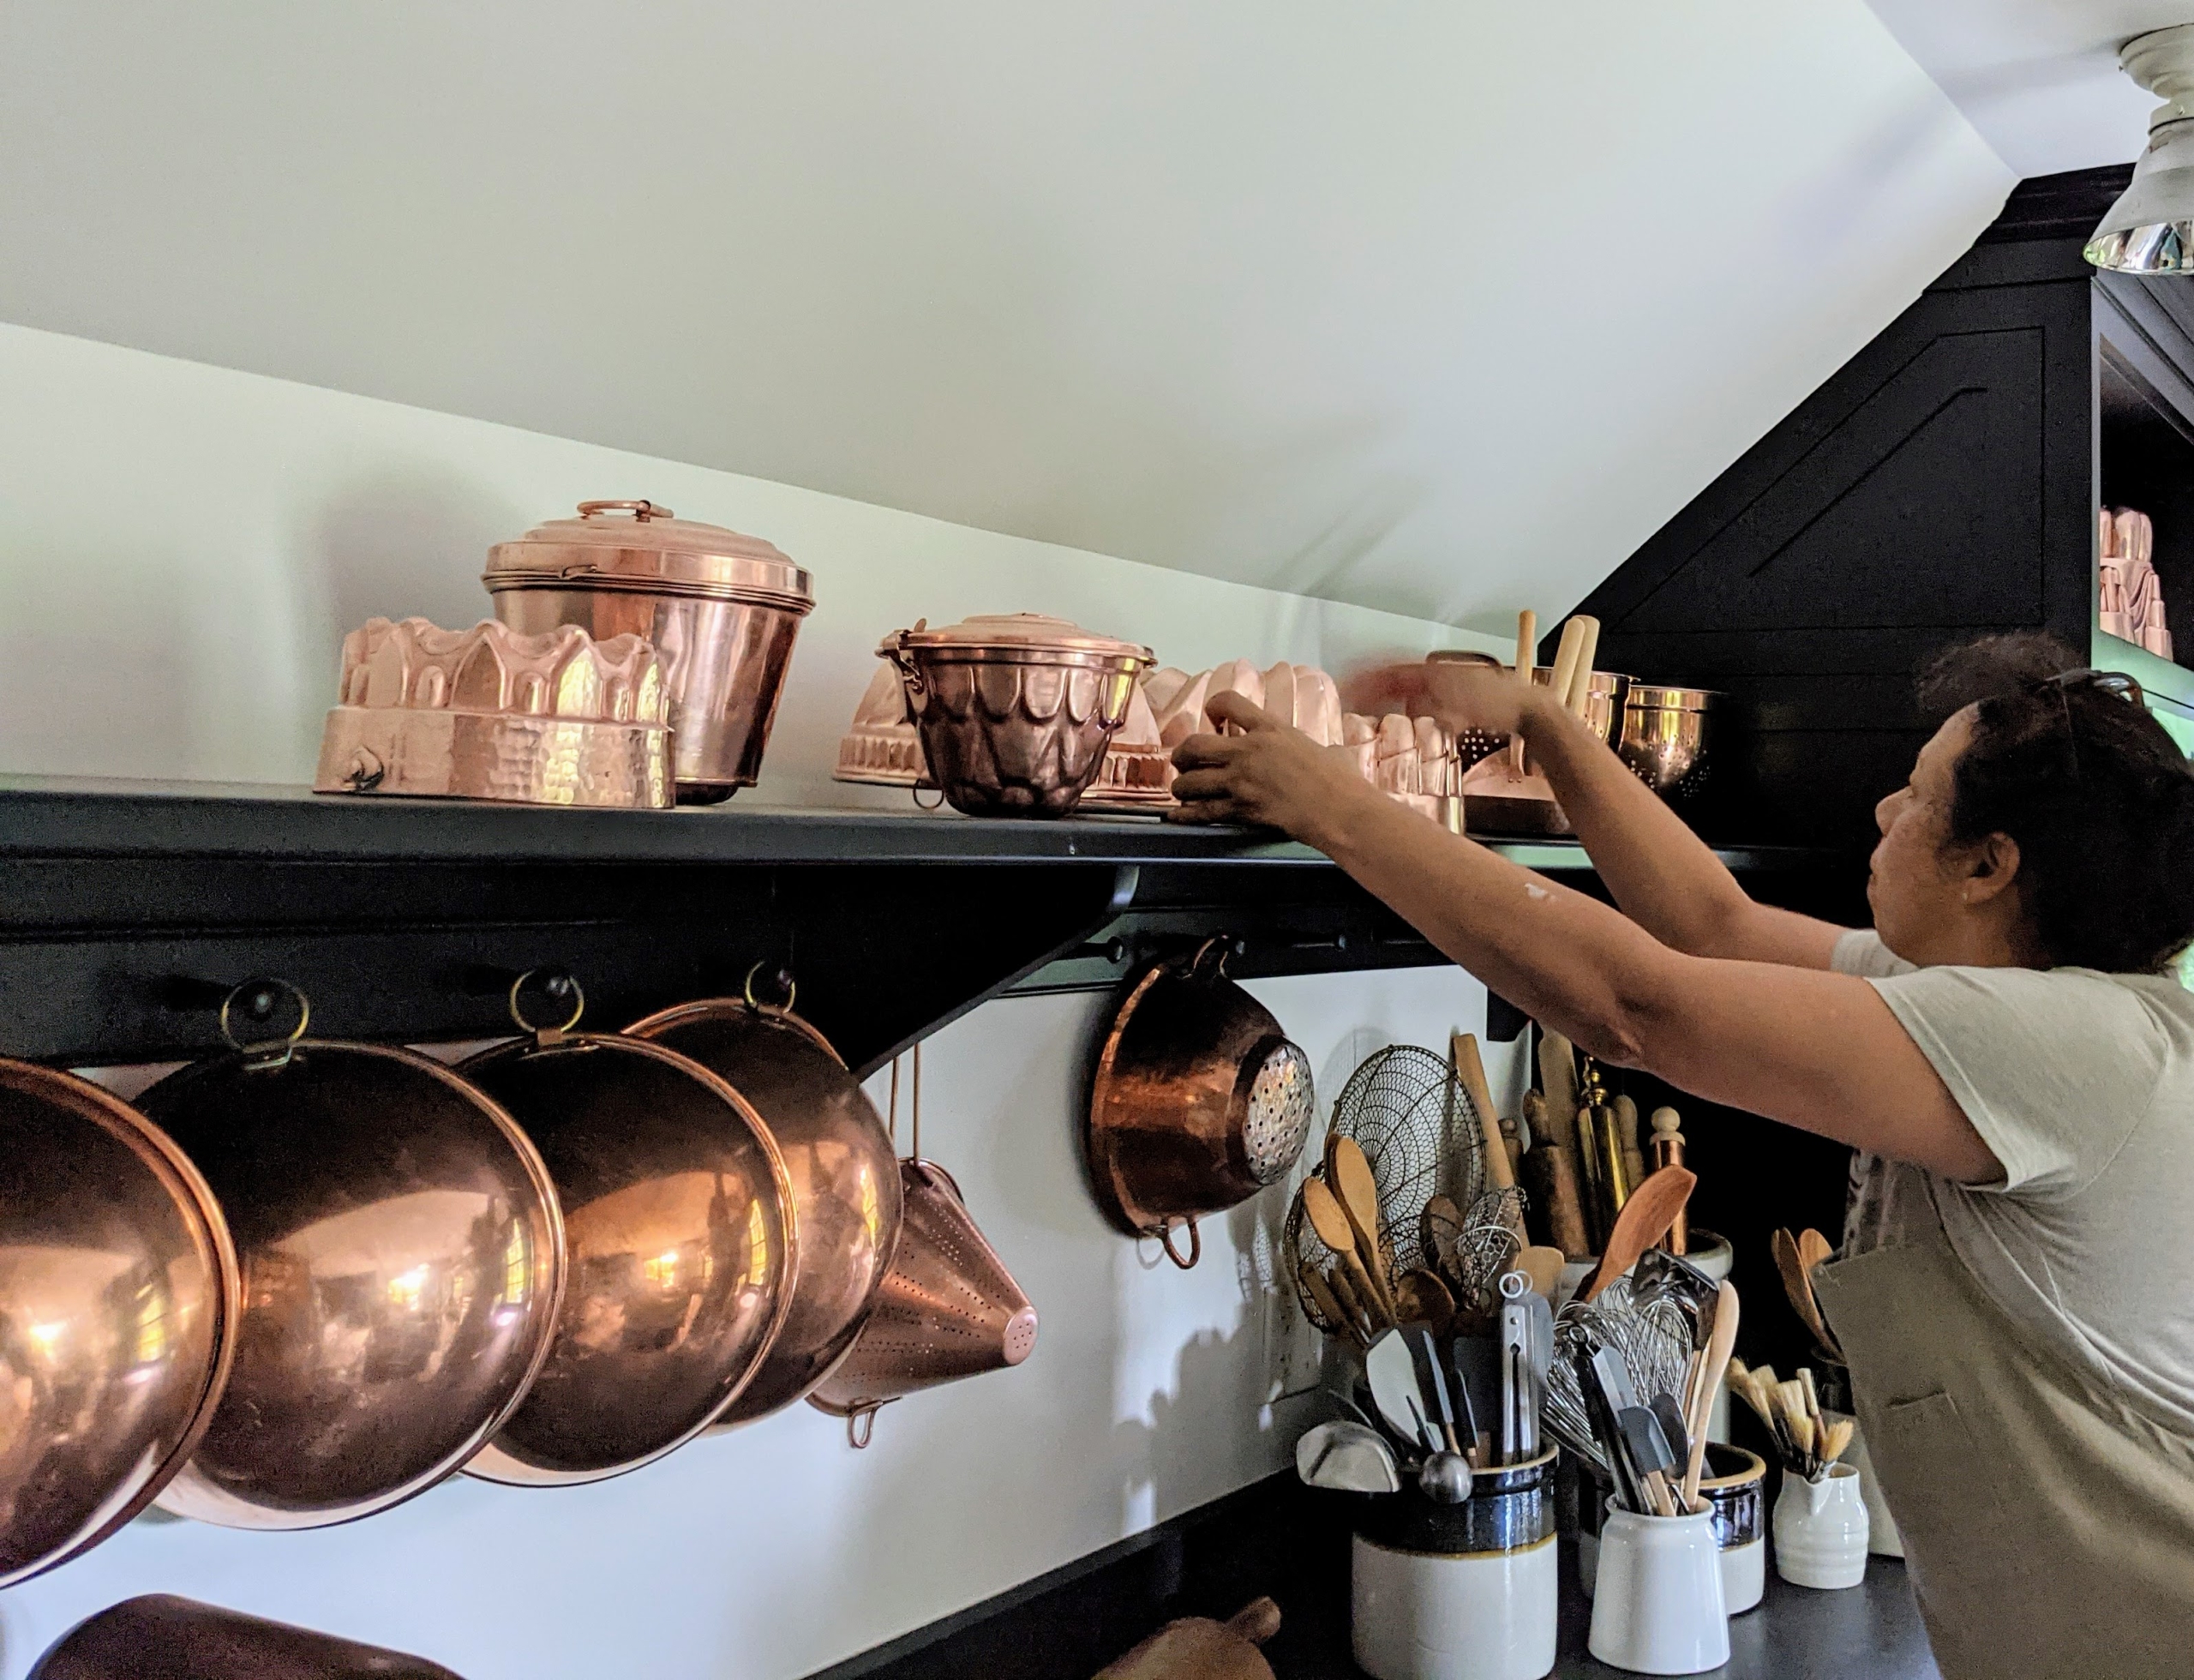
Elvira wipes down the shelves with a dry cloth before returning the pieces for storage and display.
Another tip: if you like the way your displays are arranged, take a quick snapshot before you remove them, so you know exactly how they should be returned.
Elvira places the molds carefully on this shelf. I will be using this kitchen a lot going forward – for television and magazine shoots and for other media appearances. It’s important that it is always clean and “camera-ready.”
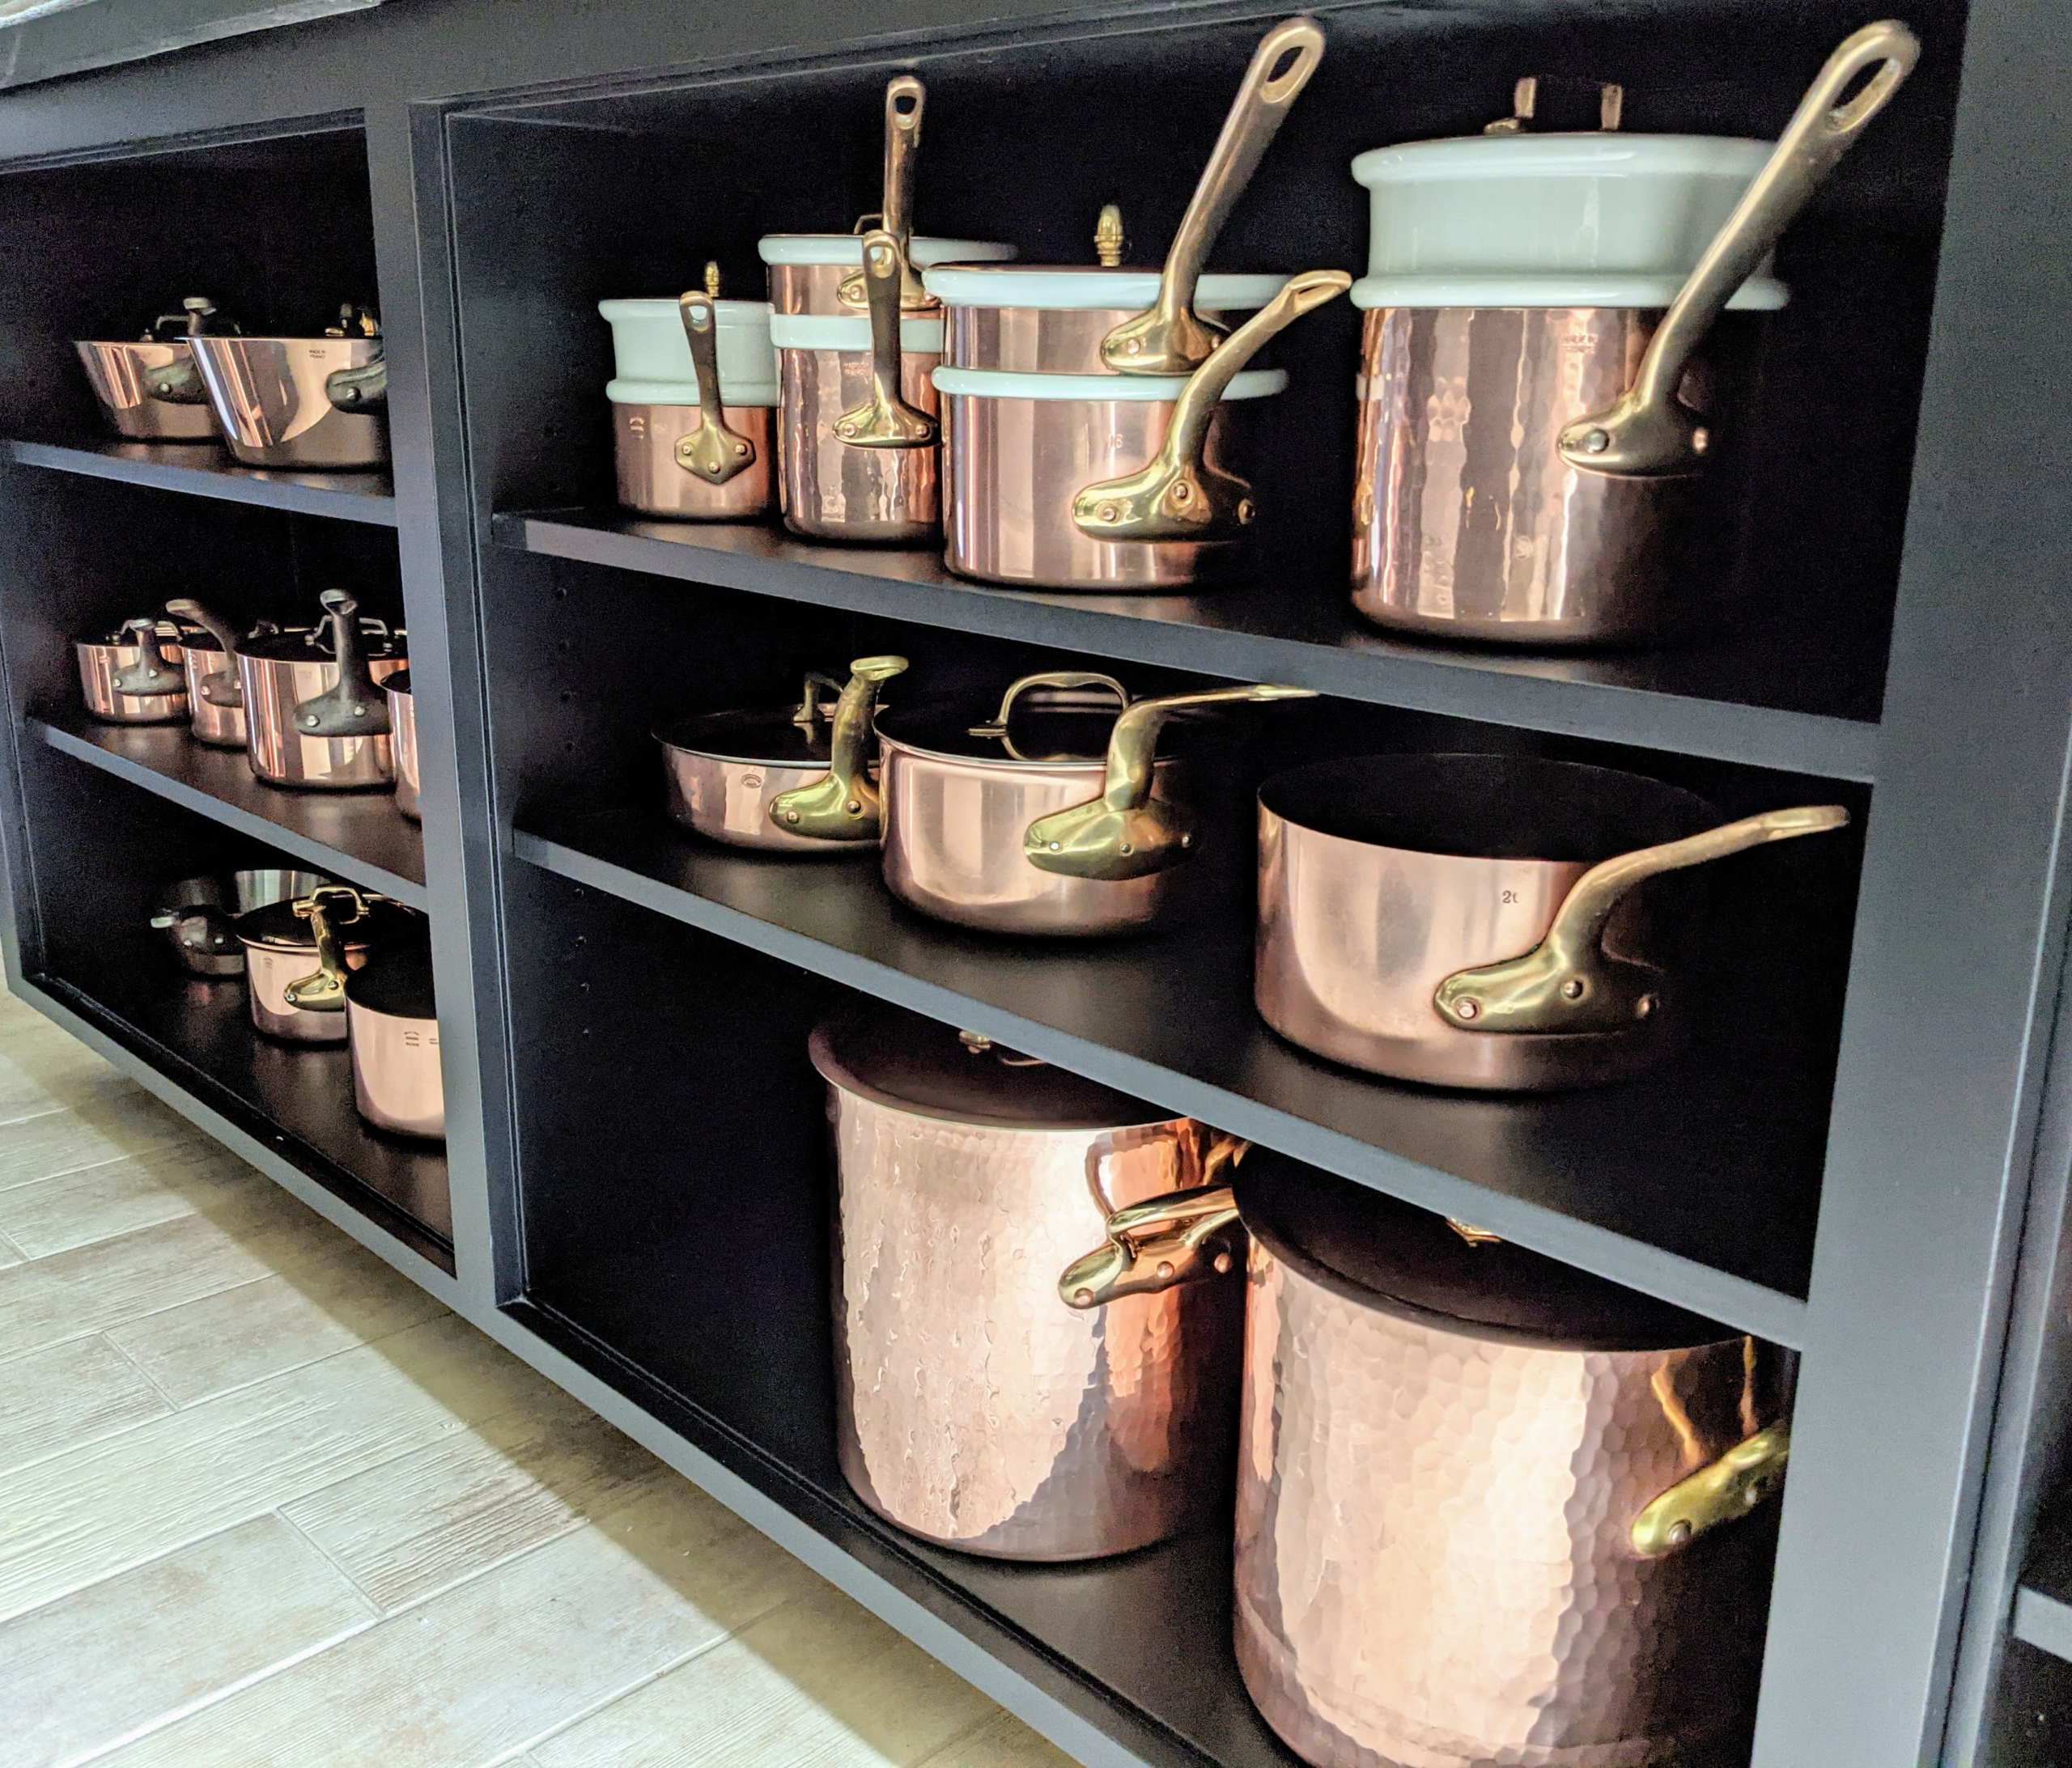
These pots are placed with other like pieces on the black shelving underneath my large soapstone island. It’s always so satisfying to check off time-consuming cleaning chores. Enma, Elvira, and Carlos got the task done in one day. The copper is now ready for my next cooking shoot in this kitchen!
Our September issue of “Living” is on newsstands starting today. Pick up a copy and see more of this renovated kitchen. Plus, read about my bittersweet farewell to Lily Pond, my beloved cottage in East Hampton, New York.
The dahlias are growing excellently this season, and some are already beginning to show off those colorful, spiky flowers that bloom from midsummer right through the first frost.
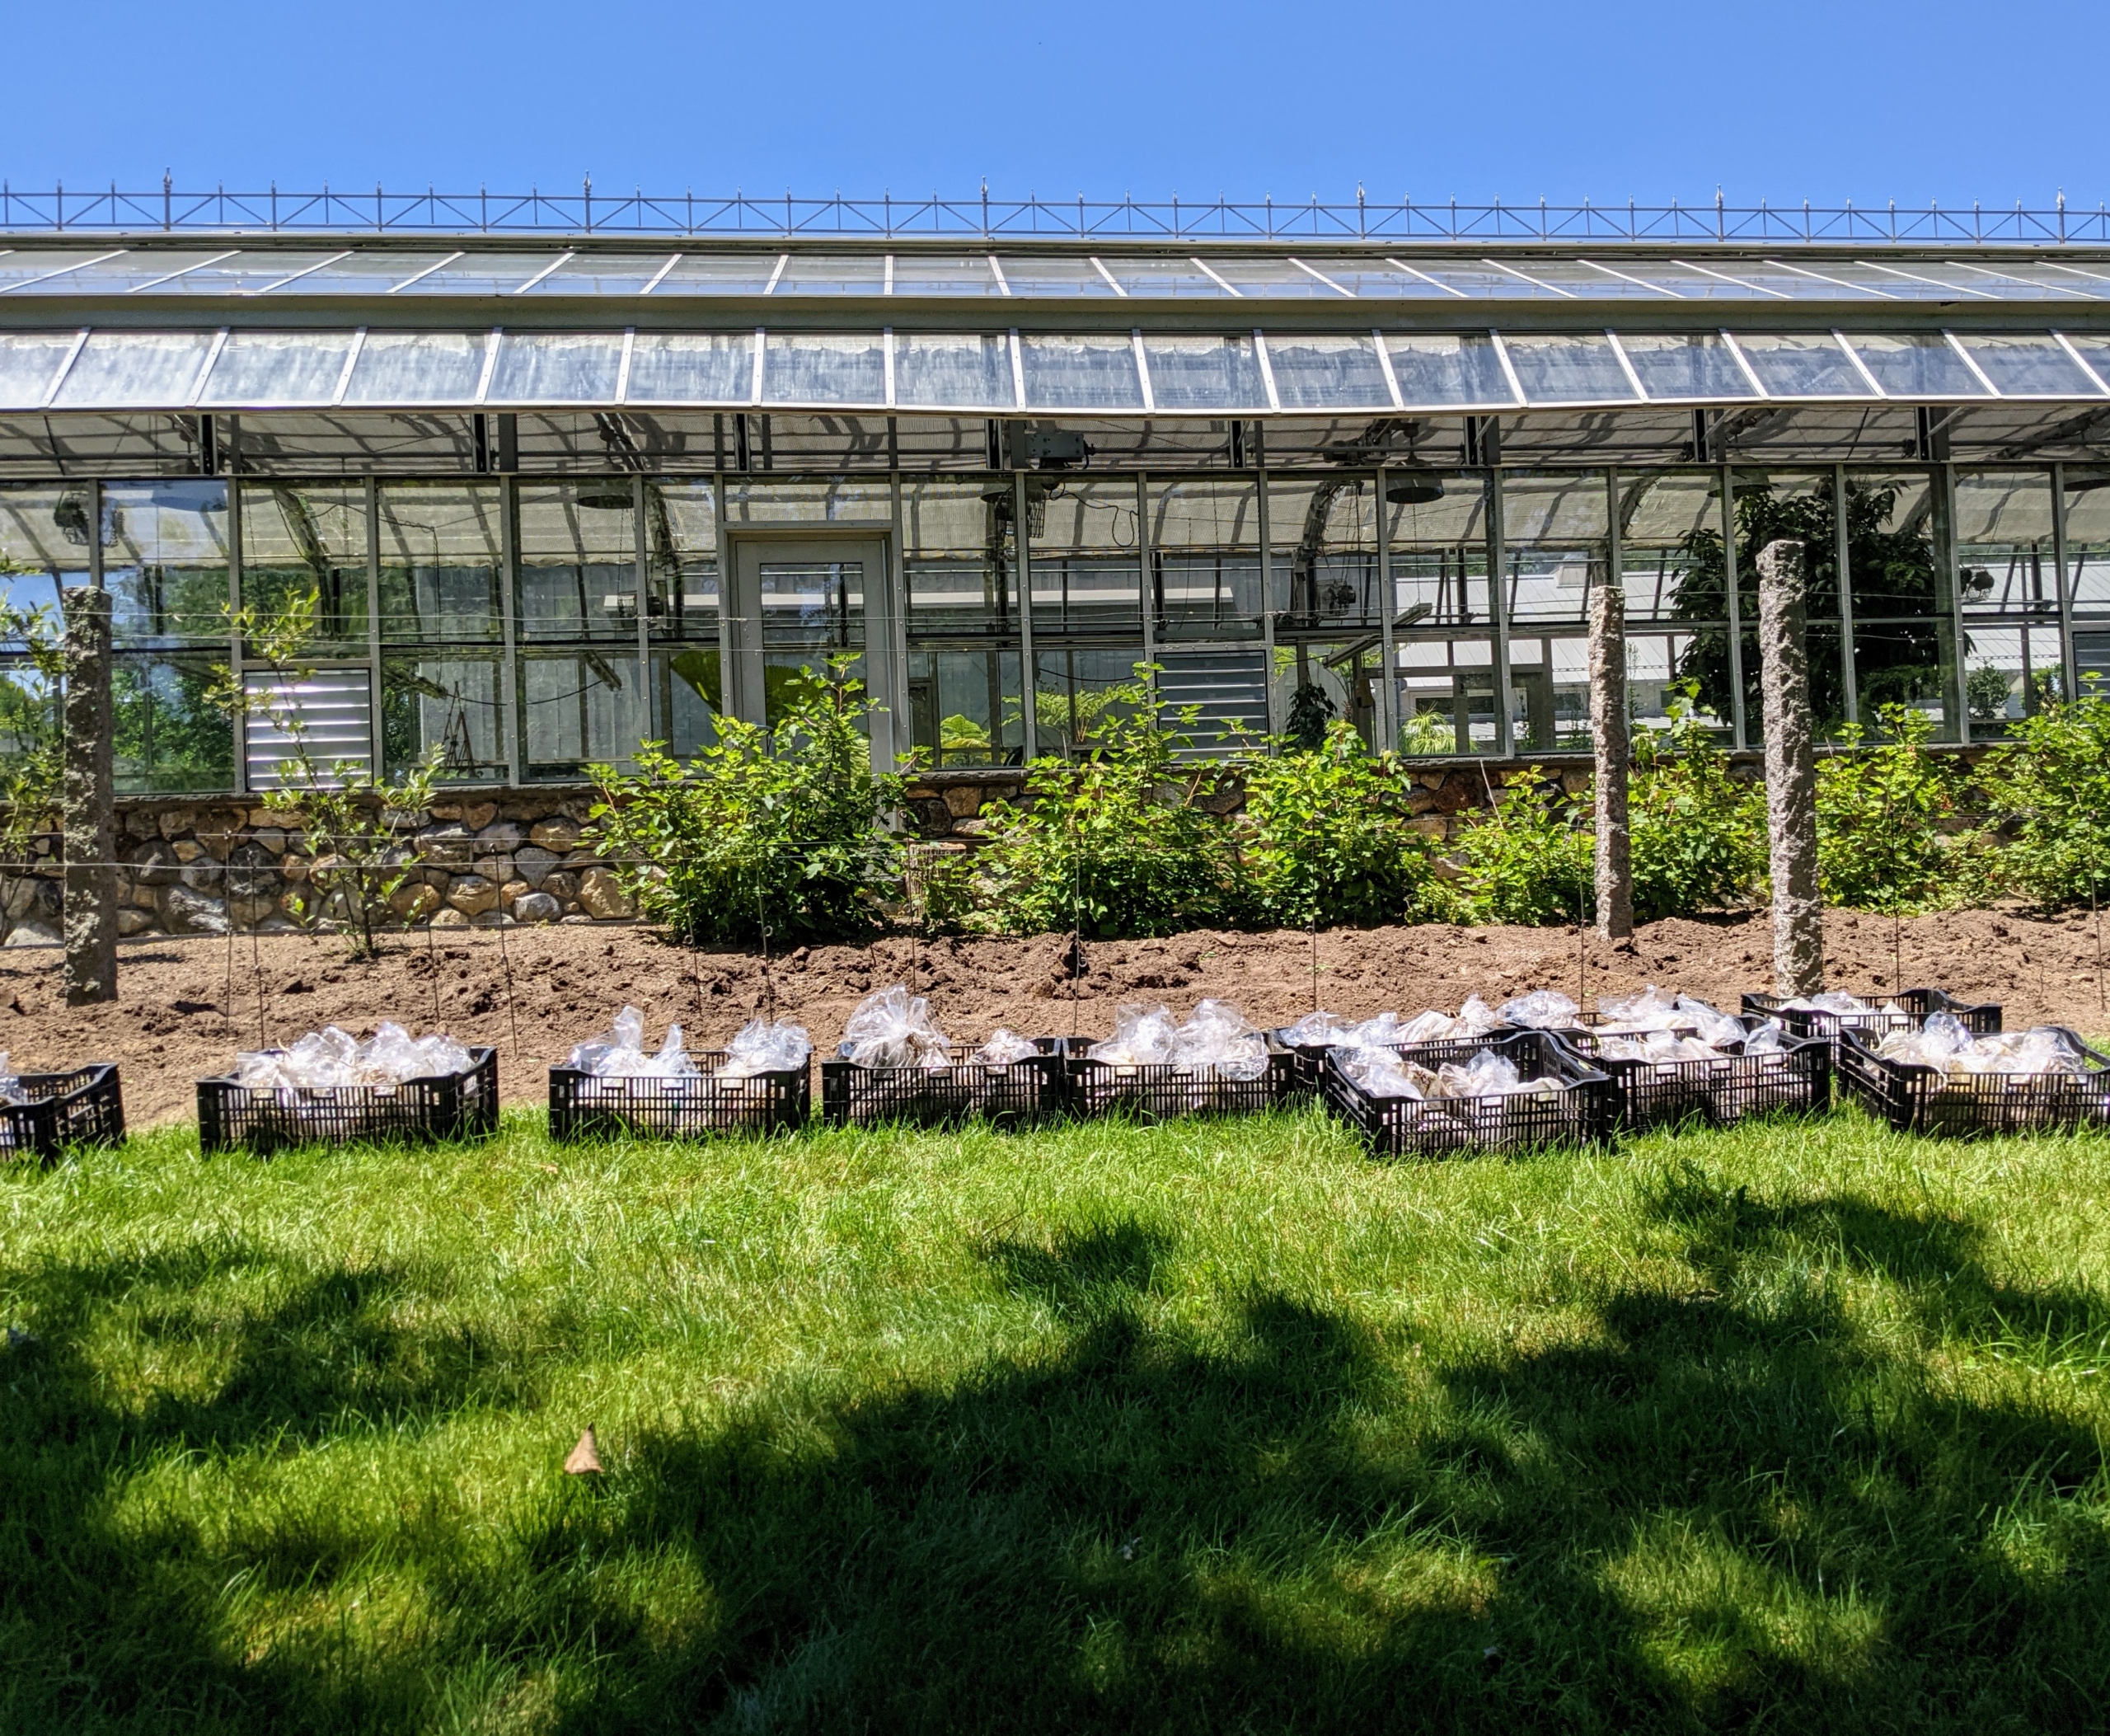
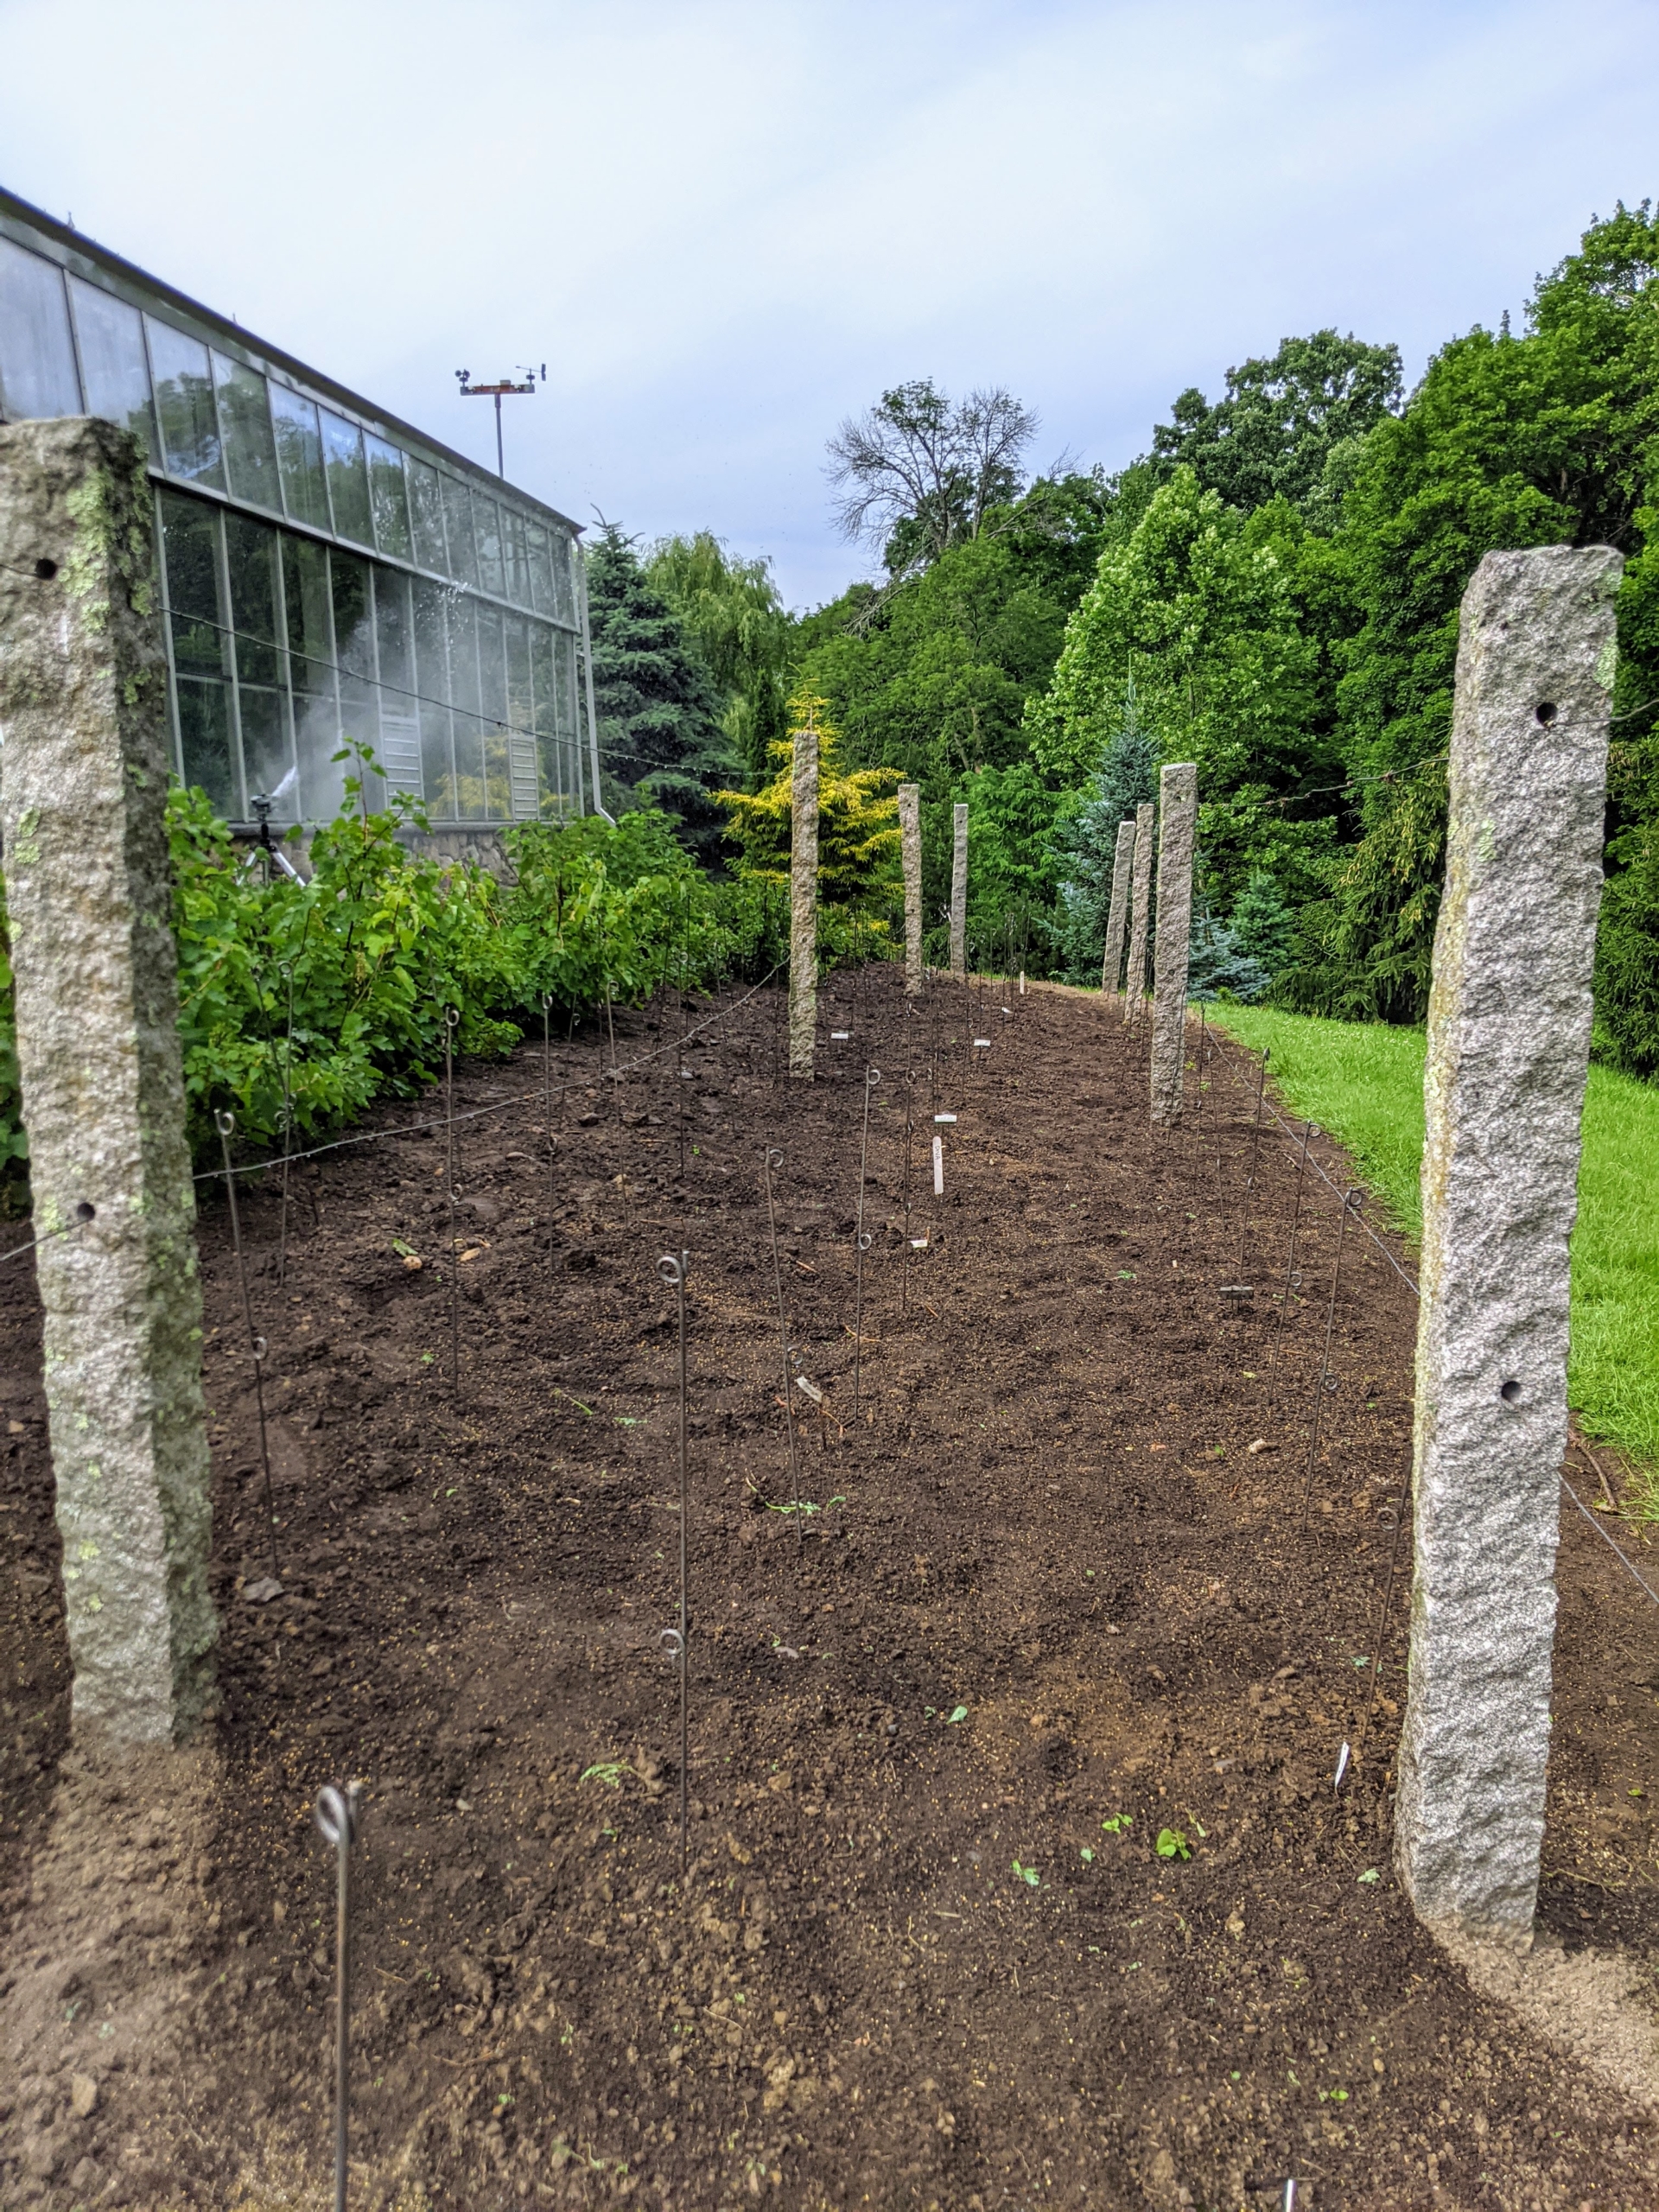
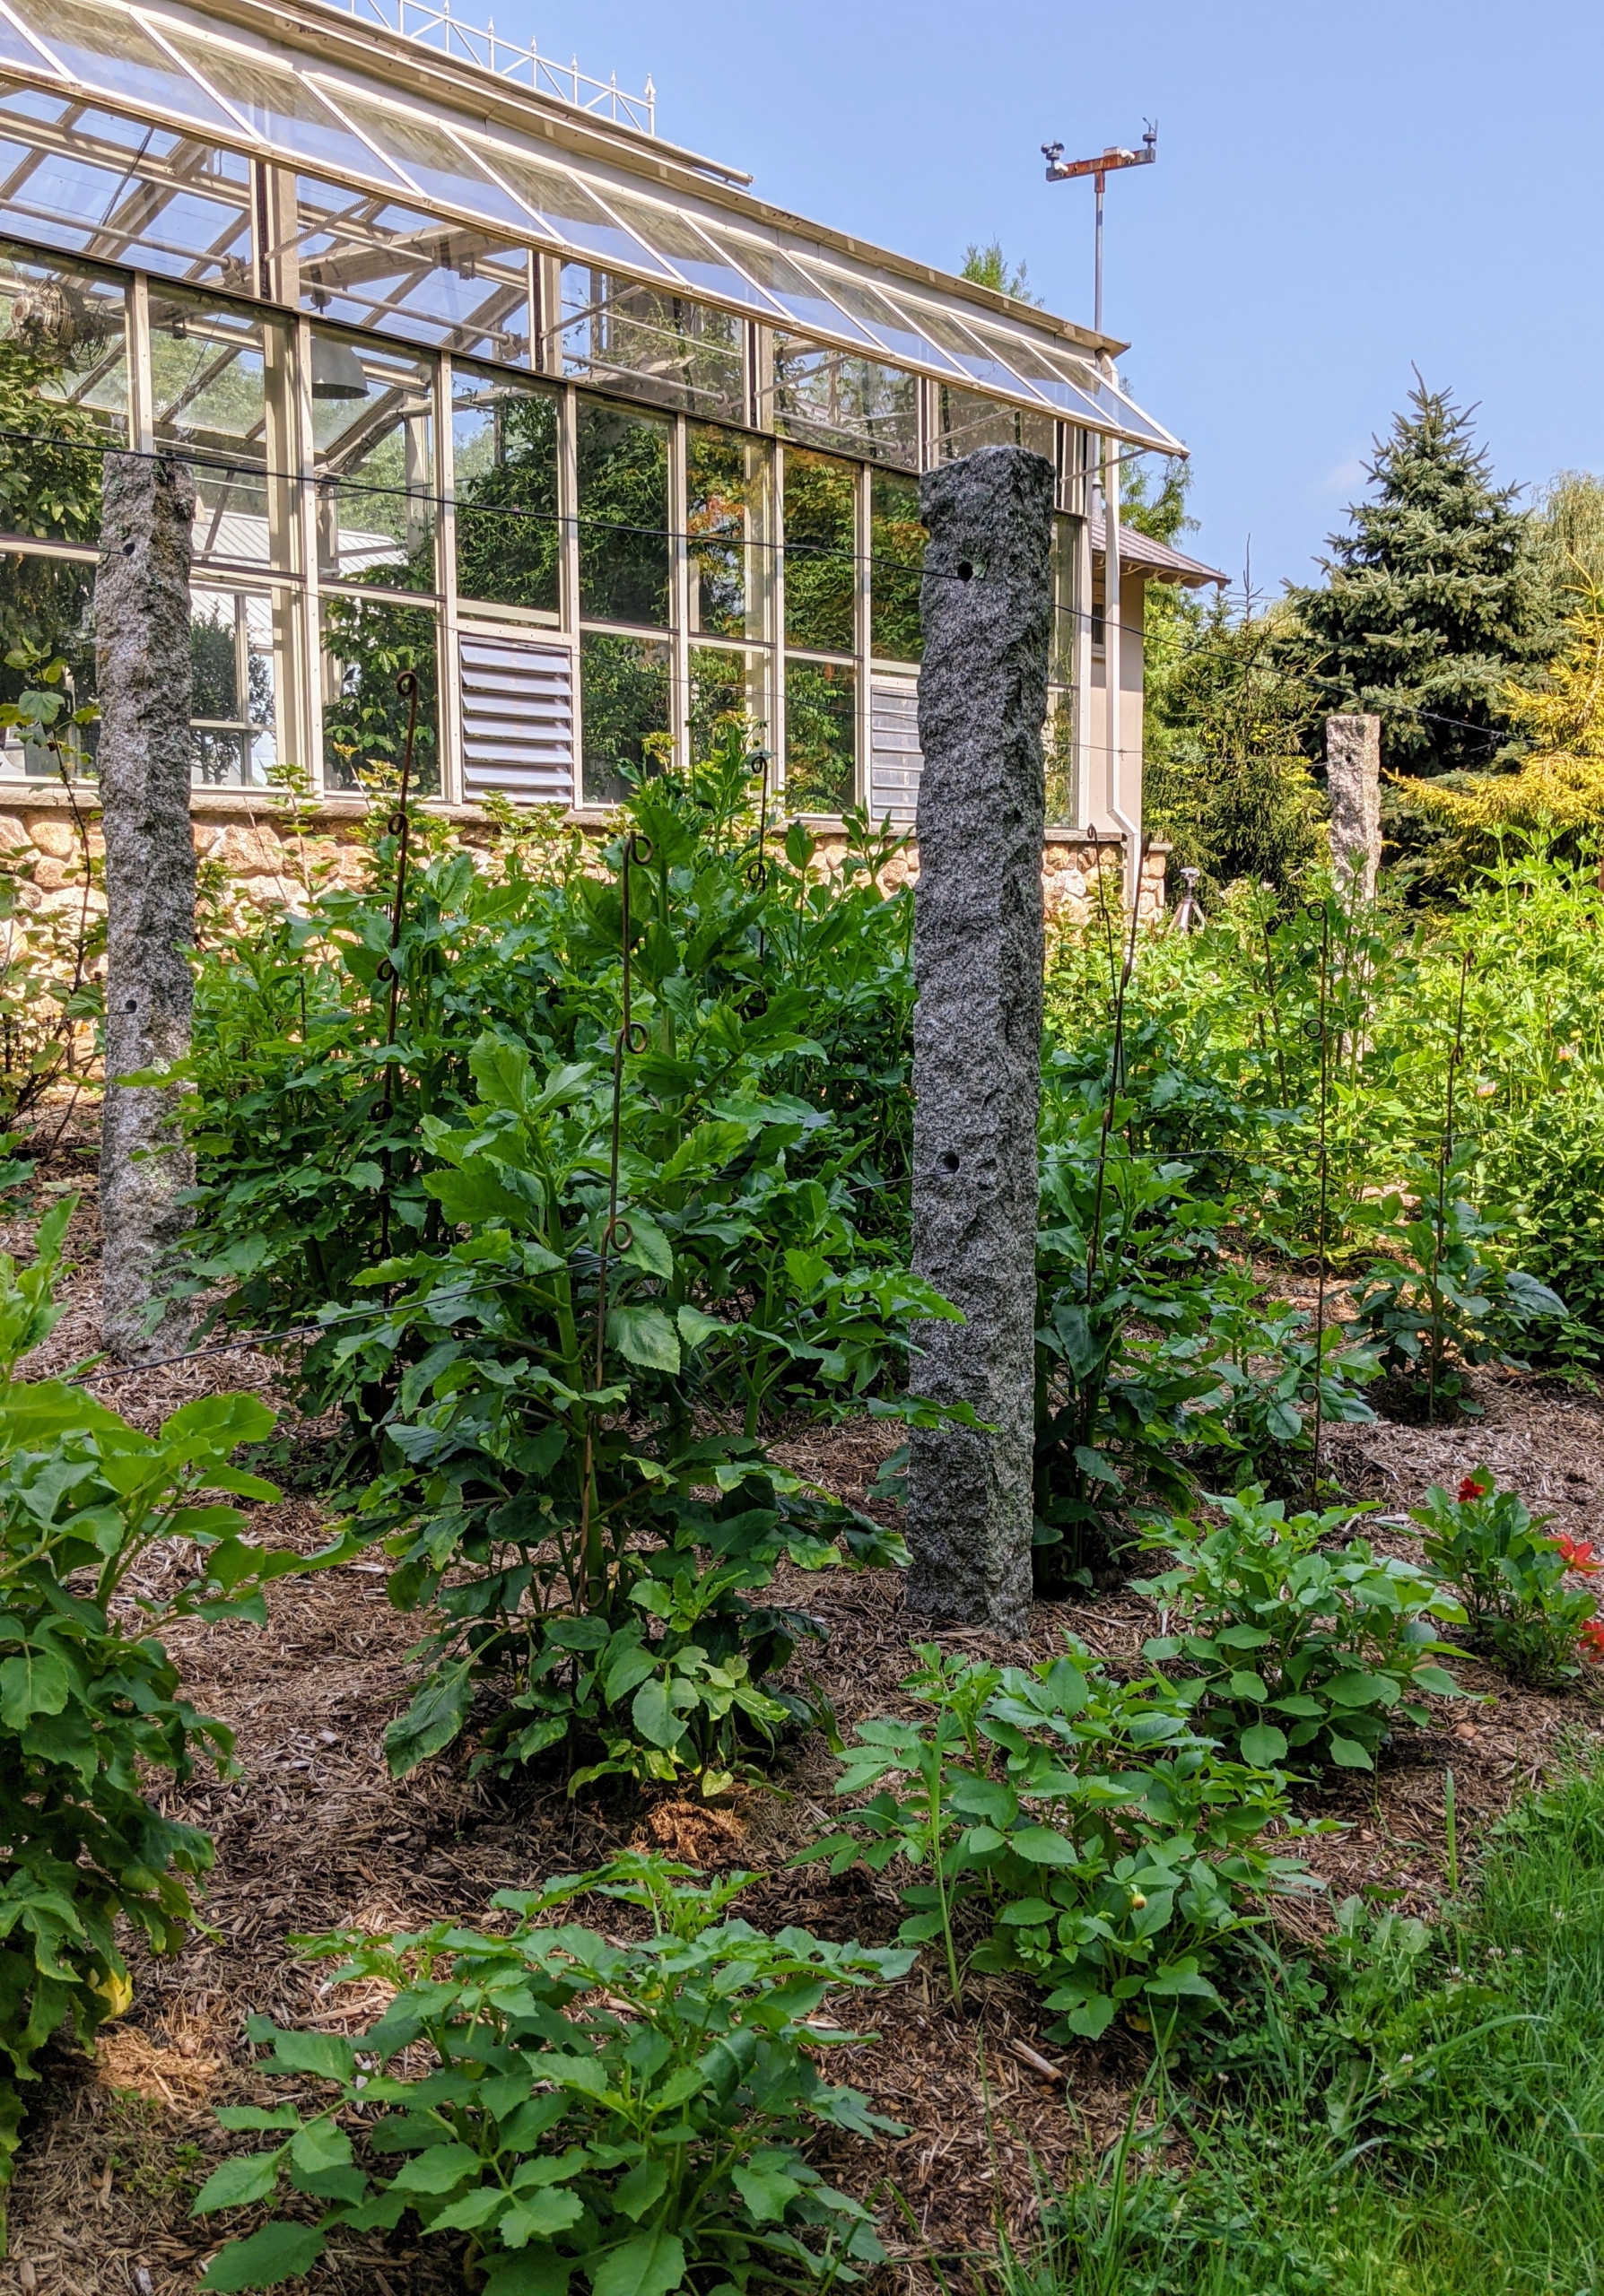
This year, I designated a new location for our all-dahlia garden - it's behind my vegetable greenhouse in a bed previously used for growing grapes. The garden was planted in June. Yesterday, my gardeners, Ryan McCallister and Brian O'Kelly, staked the plants, so they're well-supported as the heavy flowers develop. Dahlia is a genus of bushy, tuberous, herbaceous perennial plants native to Mexico and Central America. Our dahlias are from Floret, a family farm and floral design studio in the State of Washington. We also have some from Swan Island Dahlias in Oregon, a family owned business and the largest and leading dahlia grower in the United States. And, a selection from The Flower Hat, based in Bozeman, Montana.
Here are some photos, enjoy.
I knew this area would be perfect for planting our dahlias. This location gets great sun. Dahlias grow more blooms when they get at least six to eight hours of direct sunlight per day. And because this spot is behind this large structure, it is also protected from strong winds.
All our dahlias are frost-tender tuberous plants. Dahlias can overwinter outdoors where the weather is mild; however, here in the Northeast, severe winter conditions can cause them to split and rot, so they are pulled from the ground and stored away every fall and replanted in spring. Here is the garden bed all planted in June.
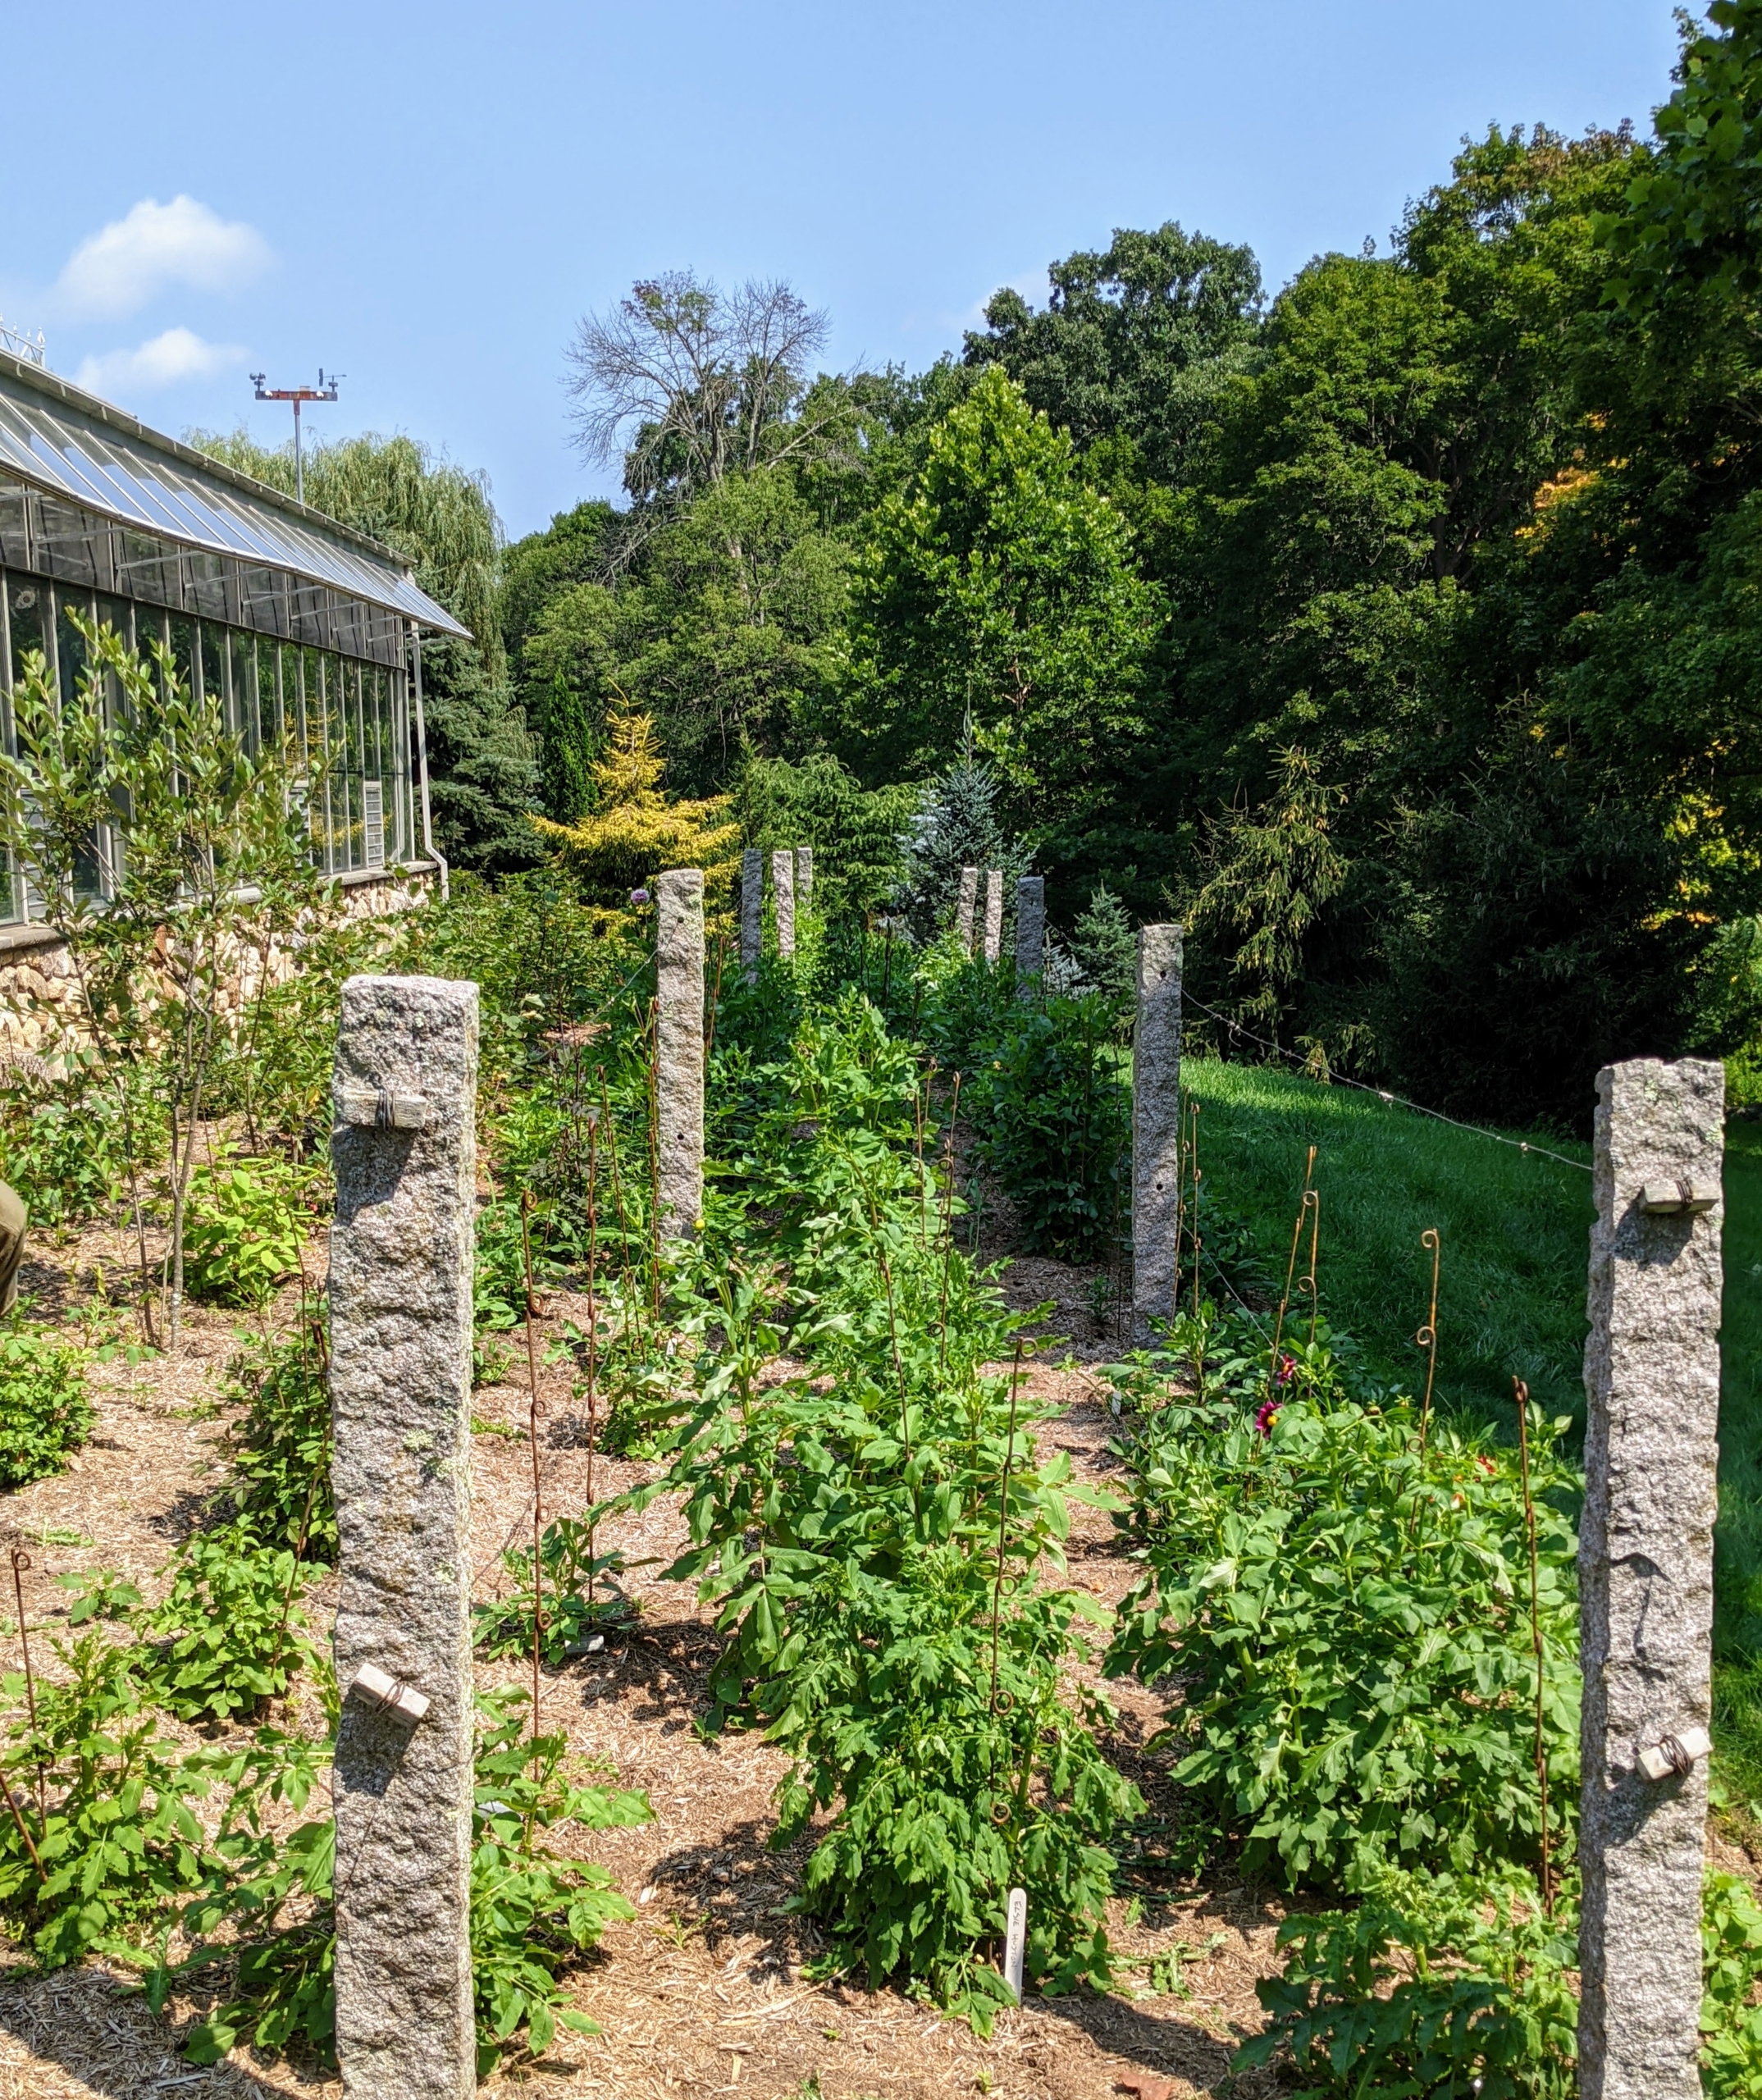
And here is the same view of the garden now – the plants have developed so well and are growing lush and green.
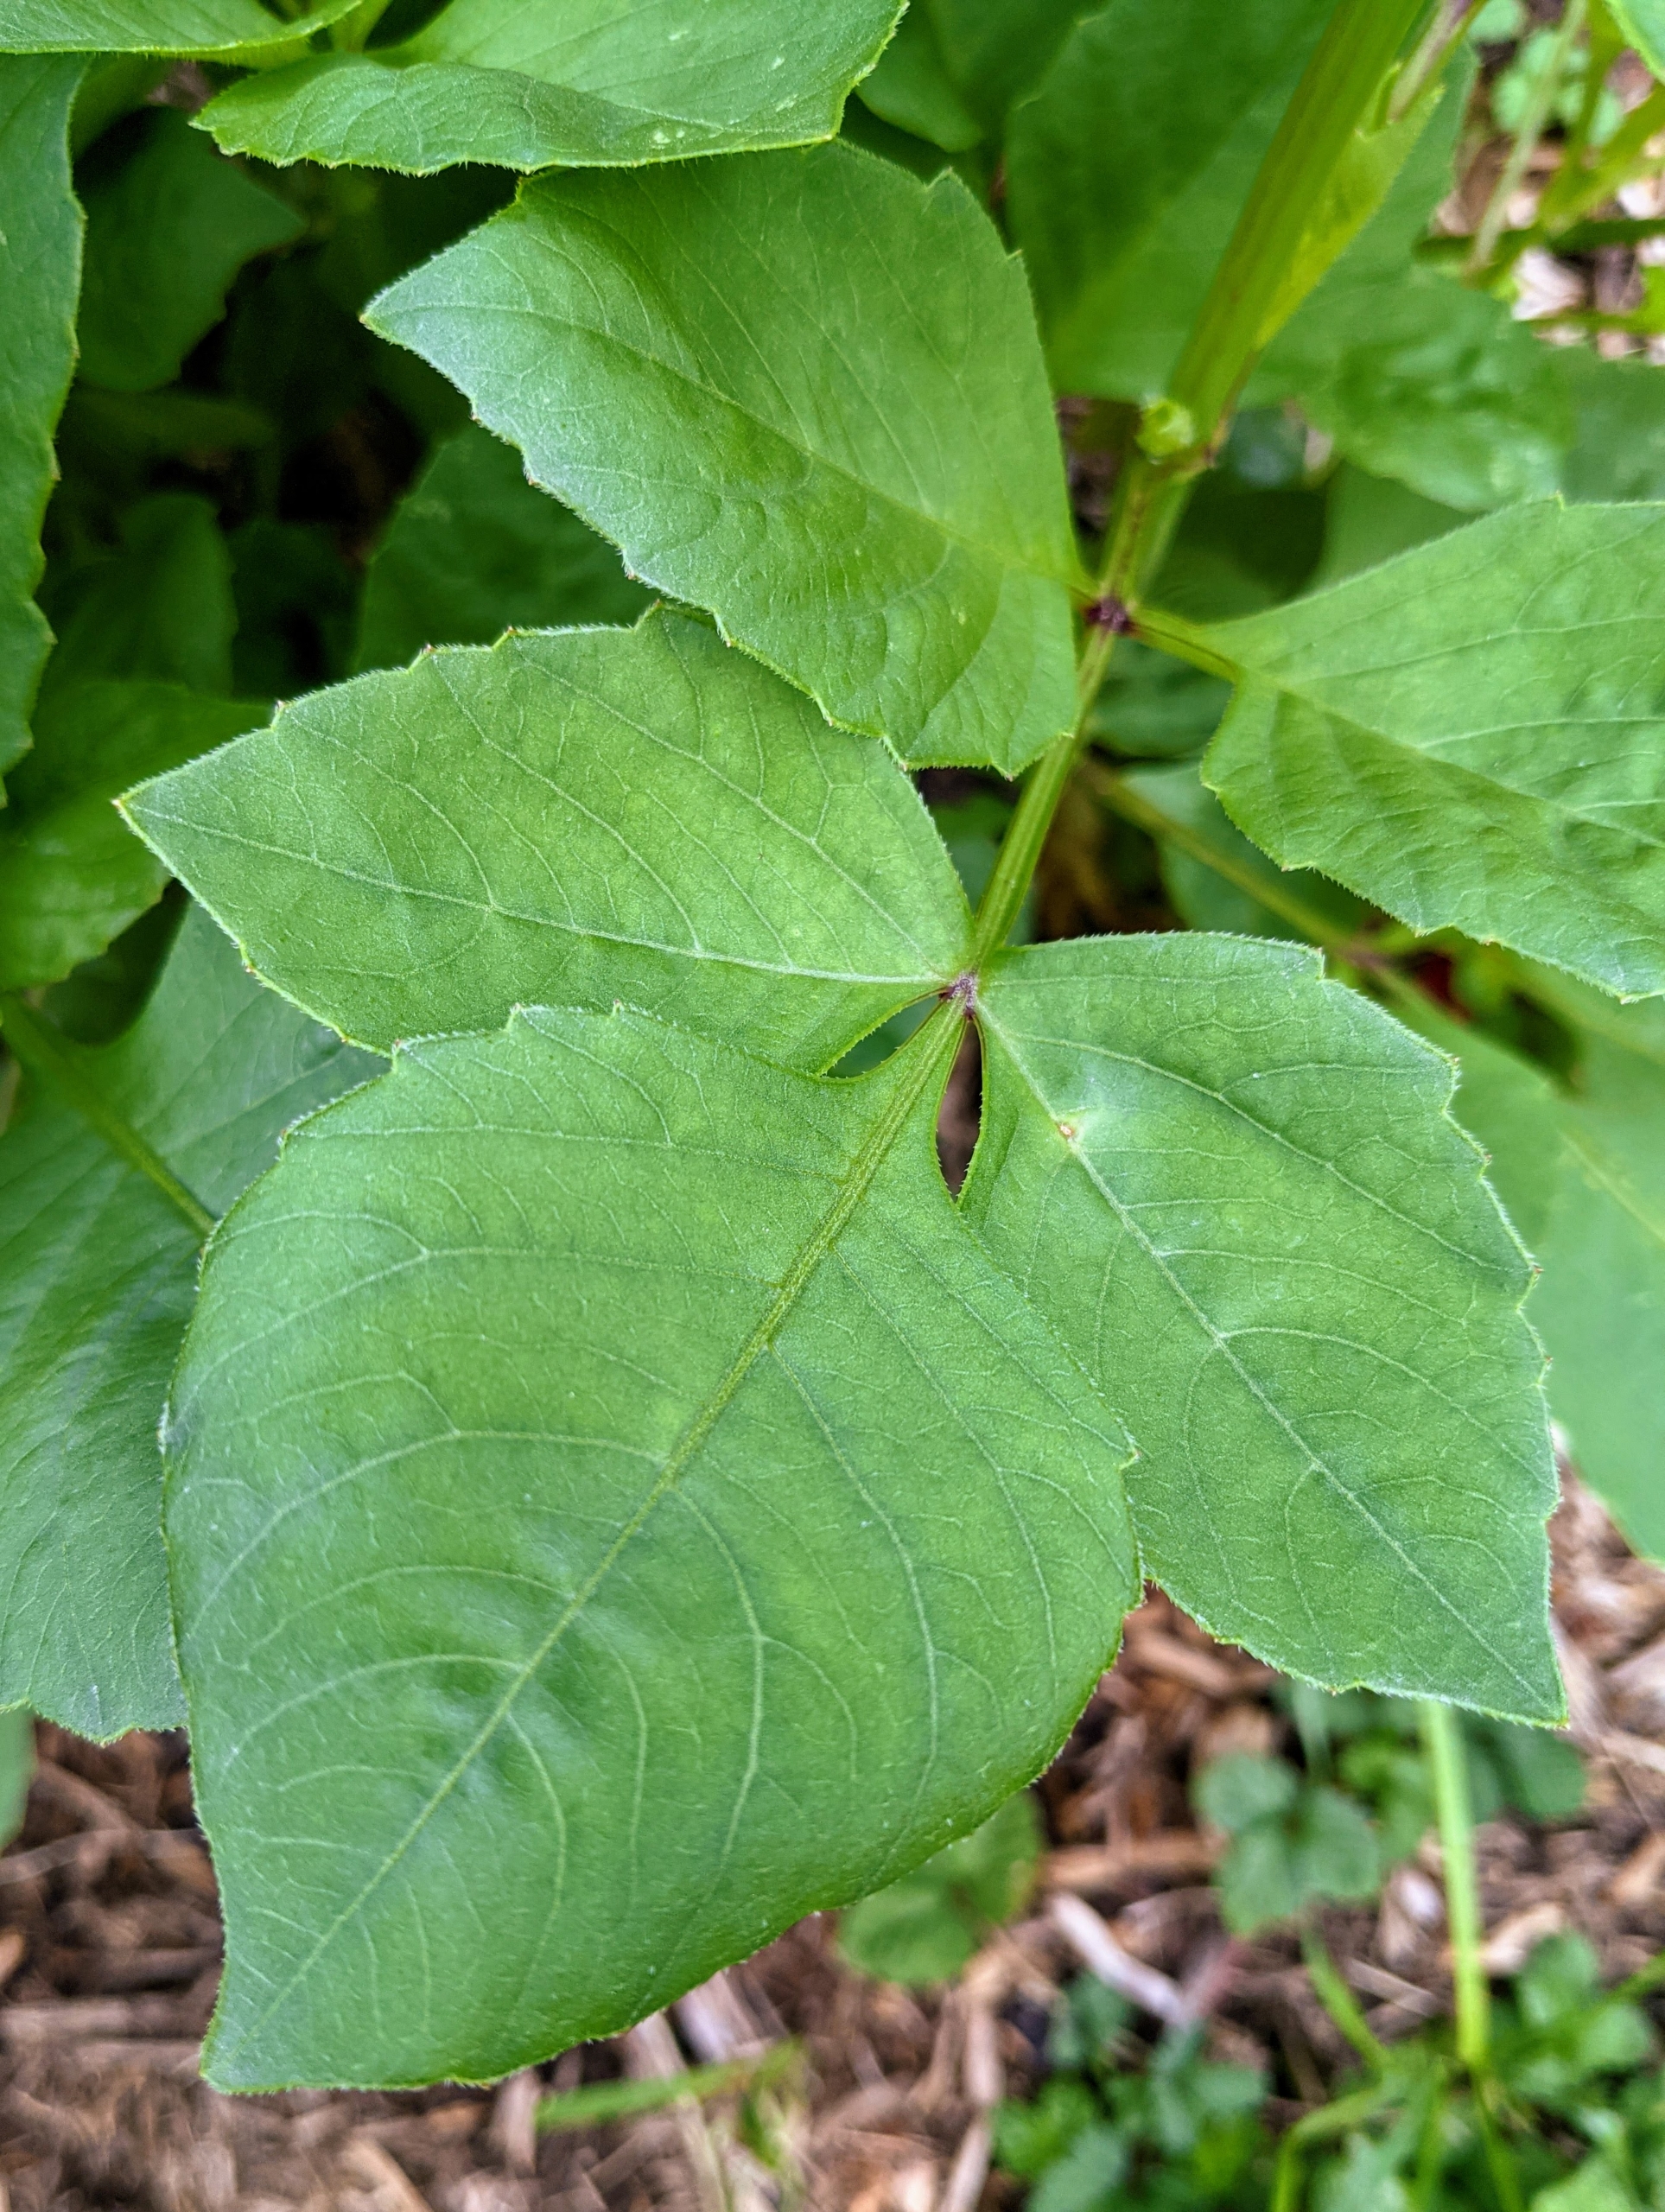
Dahlia plant leaves grow opposite each other and are simple to pinnately compound with segments that are ovate to oblong to lanceolate in shape. The leaf margins may be lobed or dentate. Leaves may be green, reddish-purple, or purple-black depending on the variety.
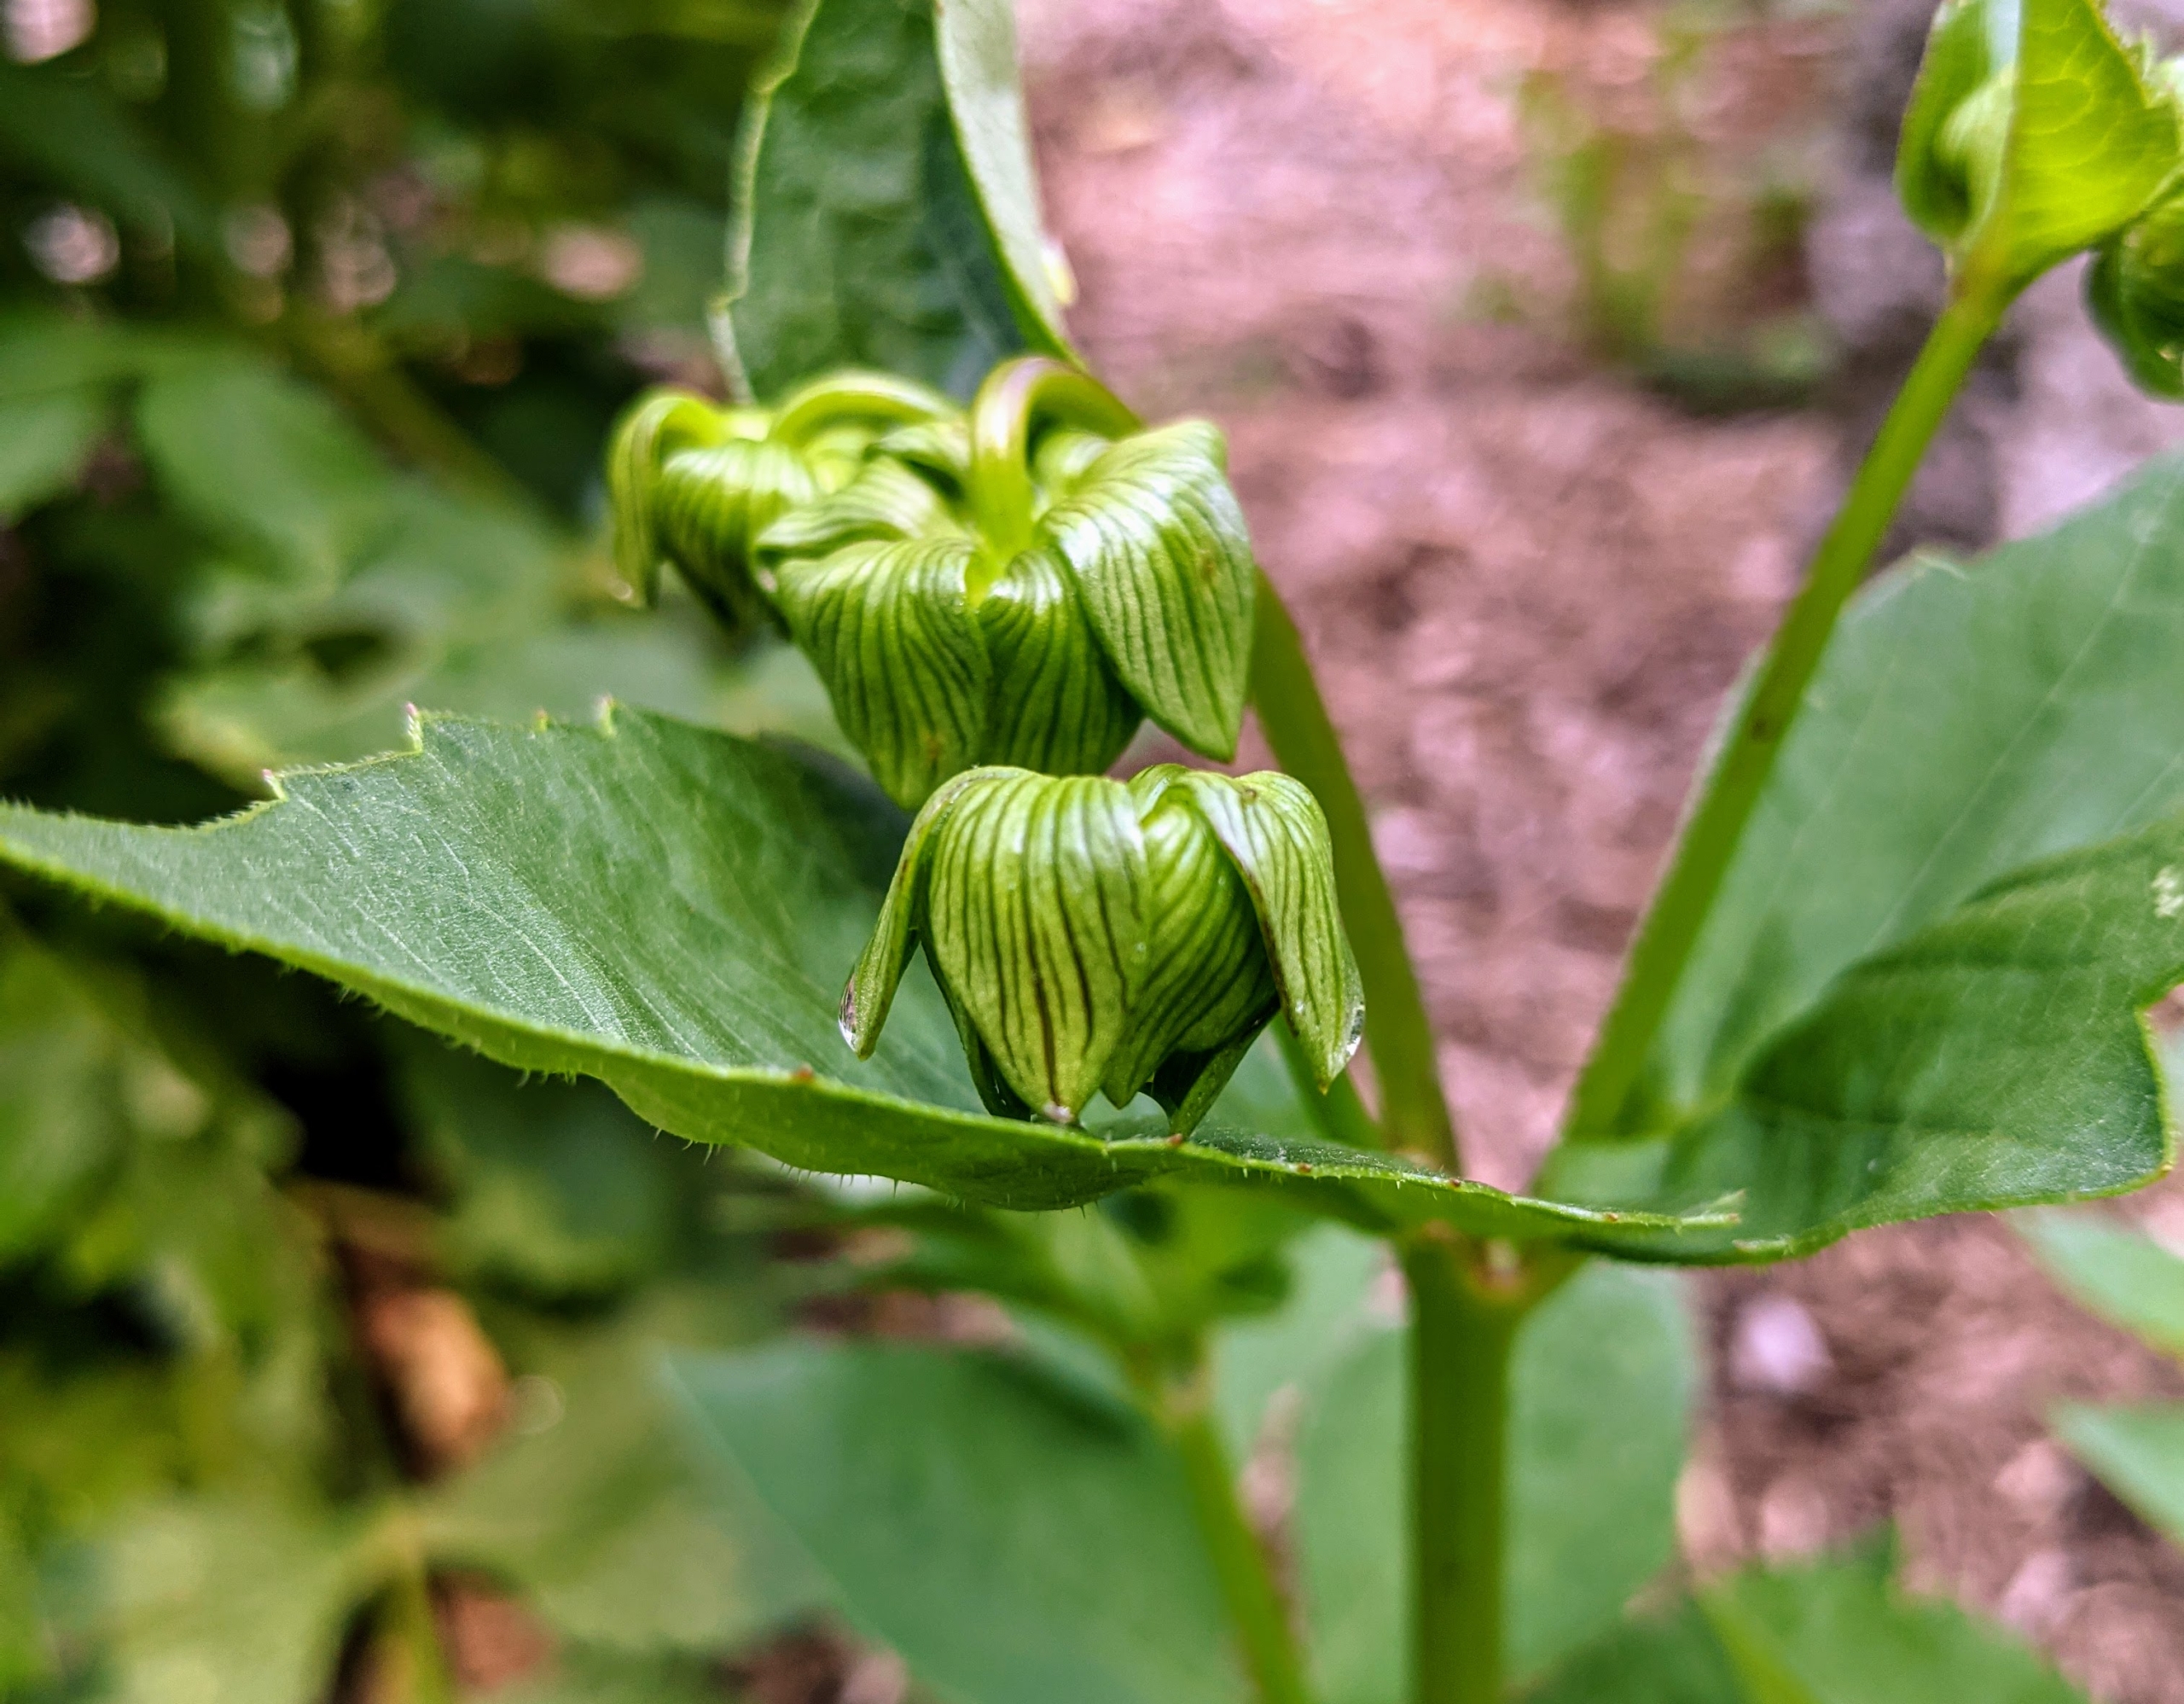
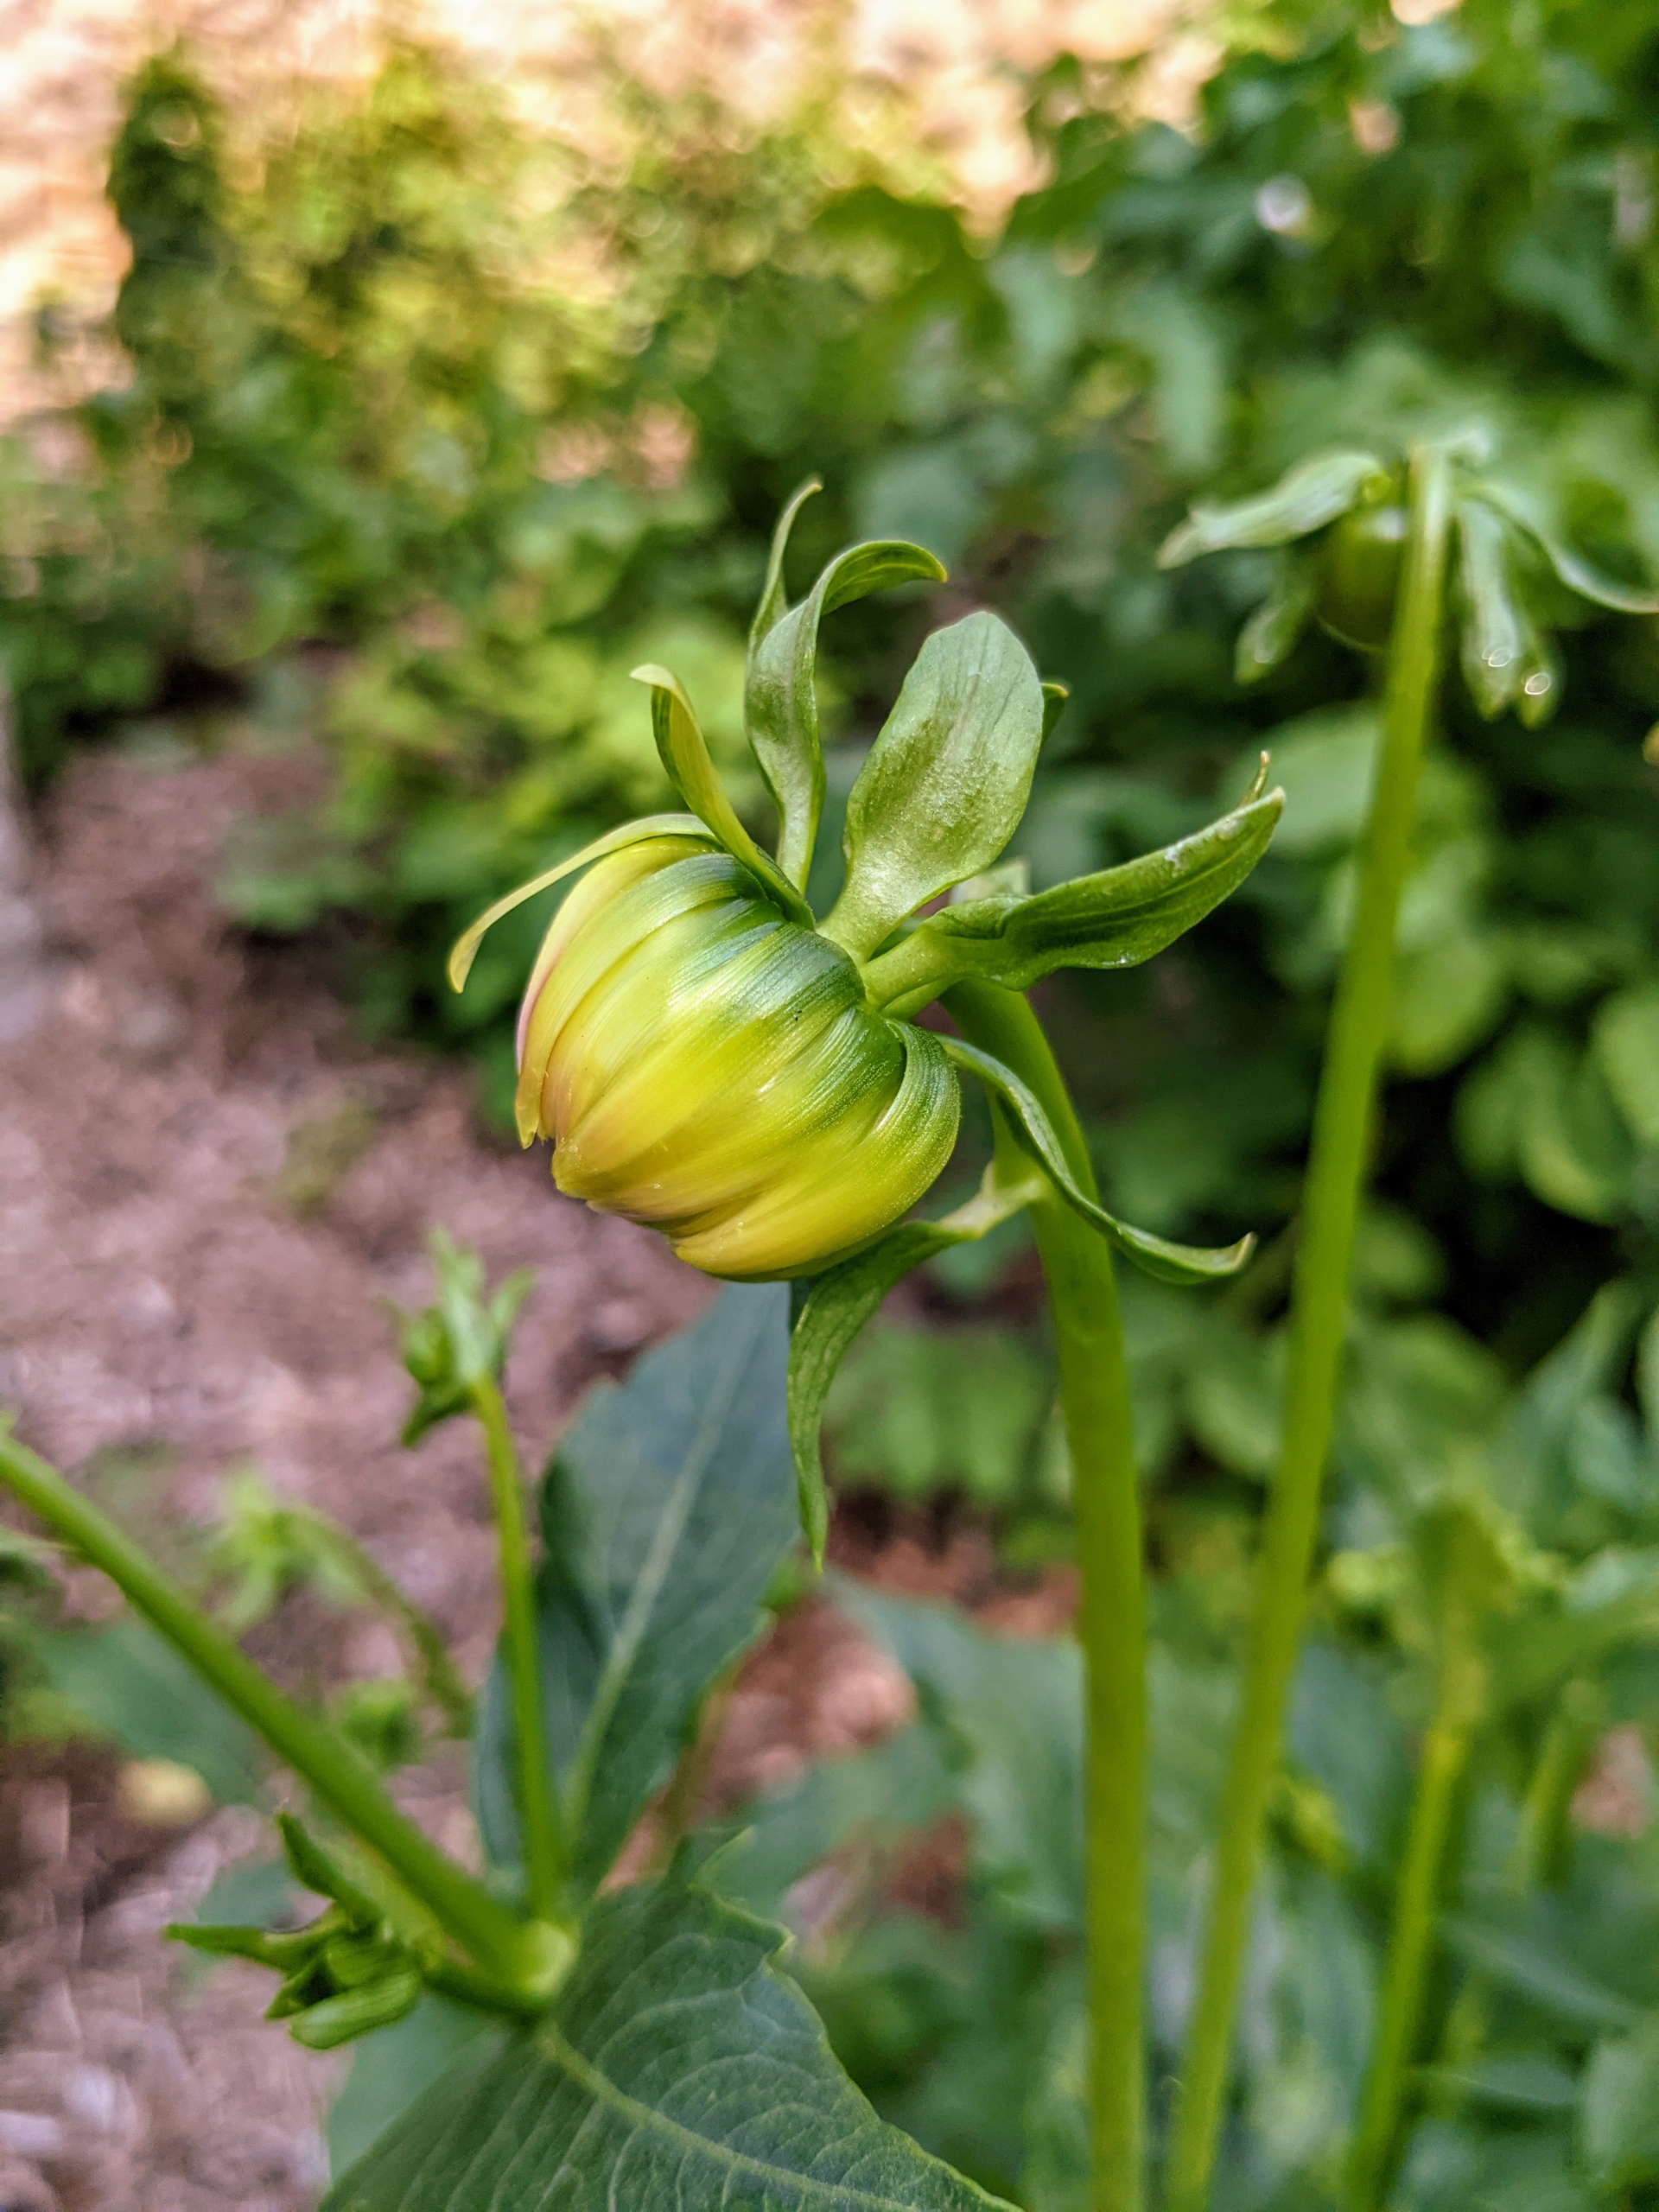
When the flowers grow, they emerge small and pale green at first.
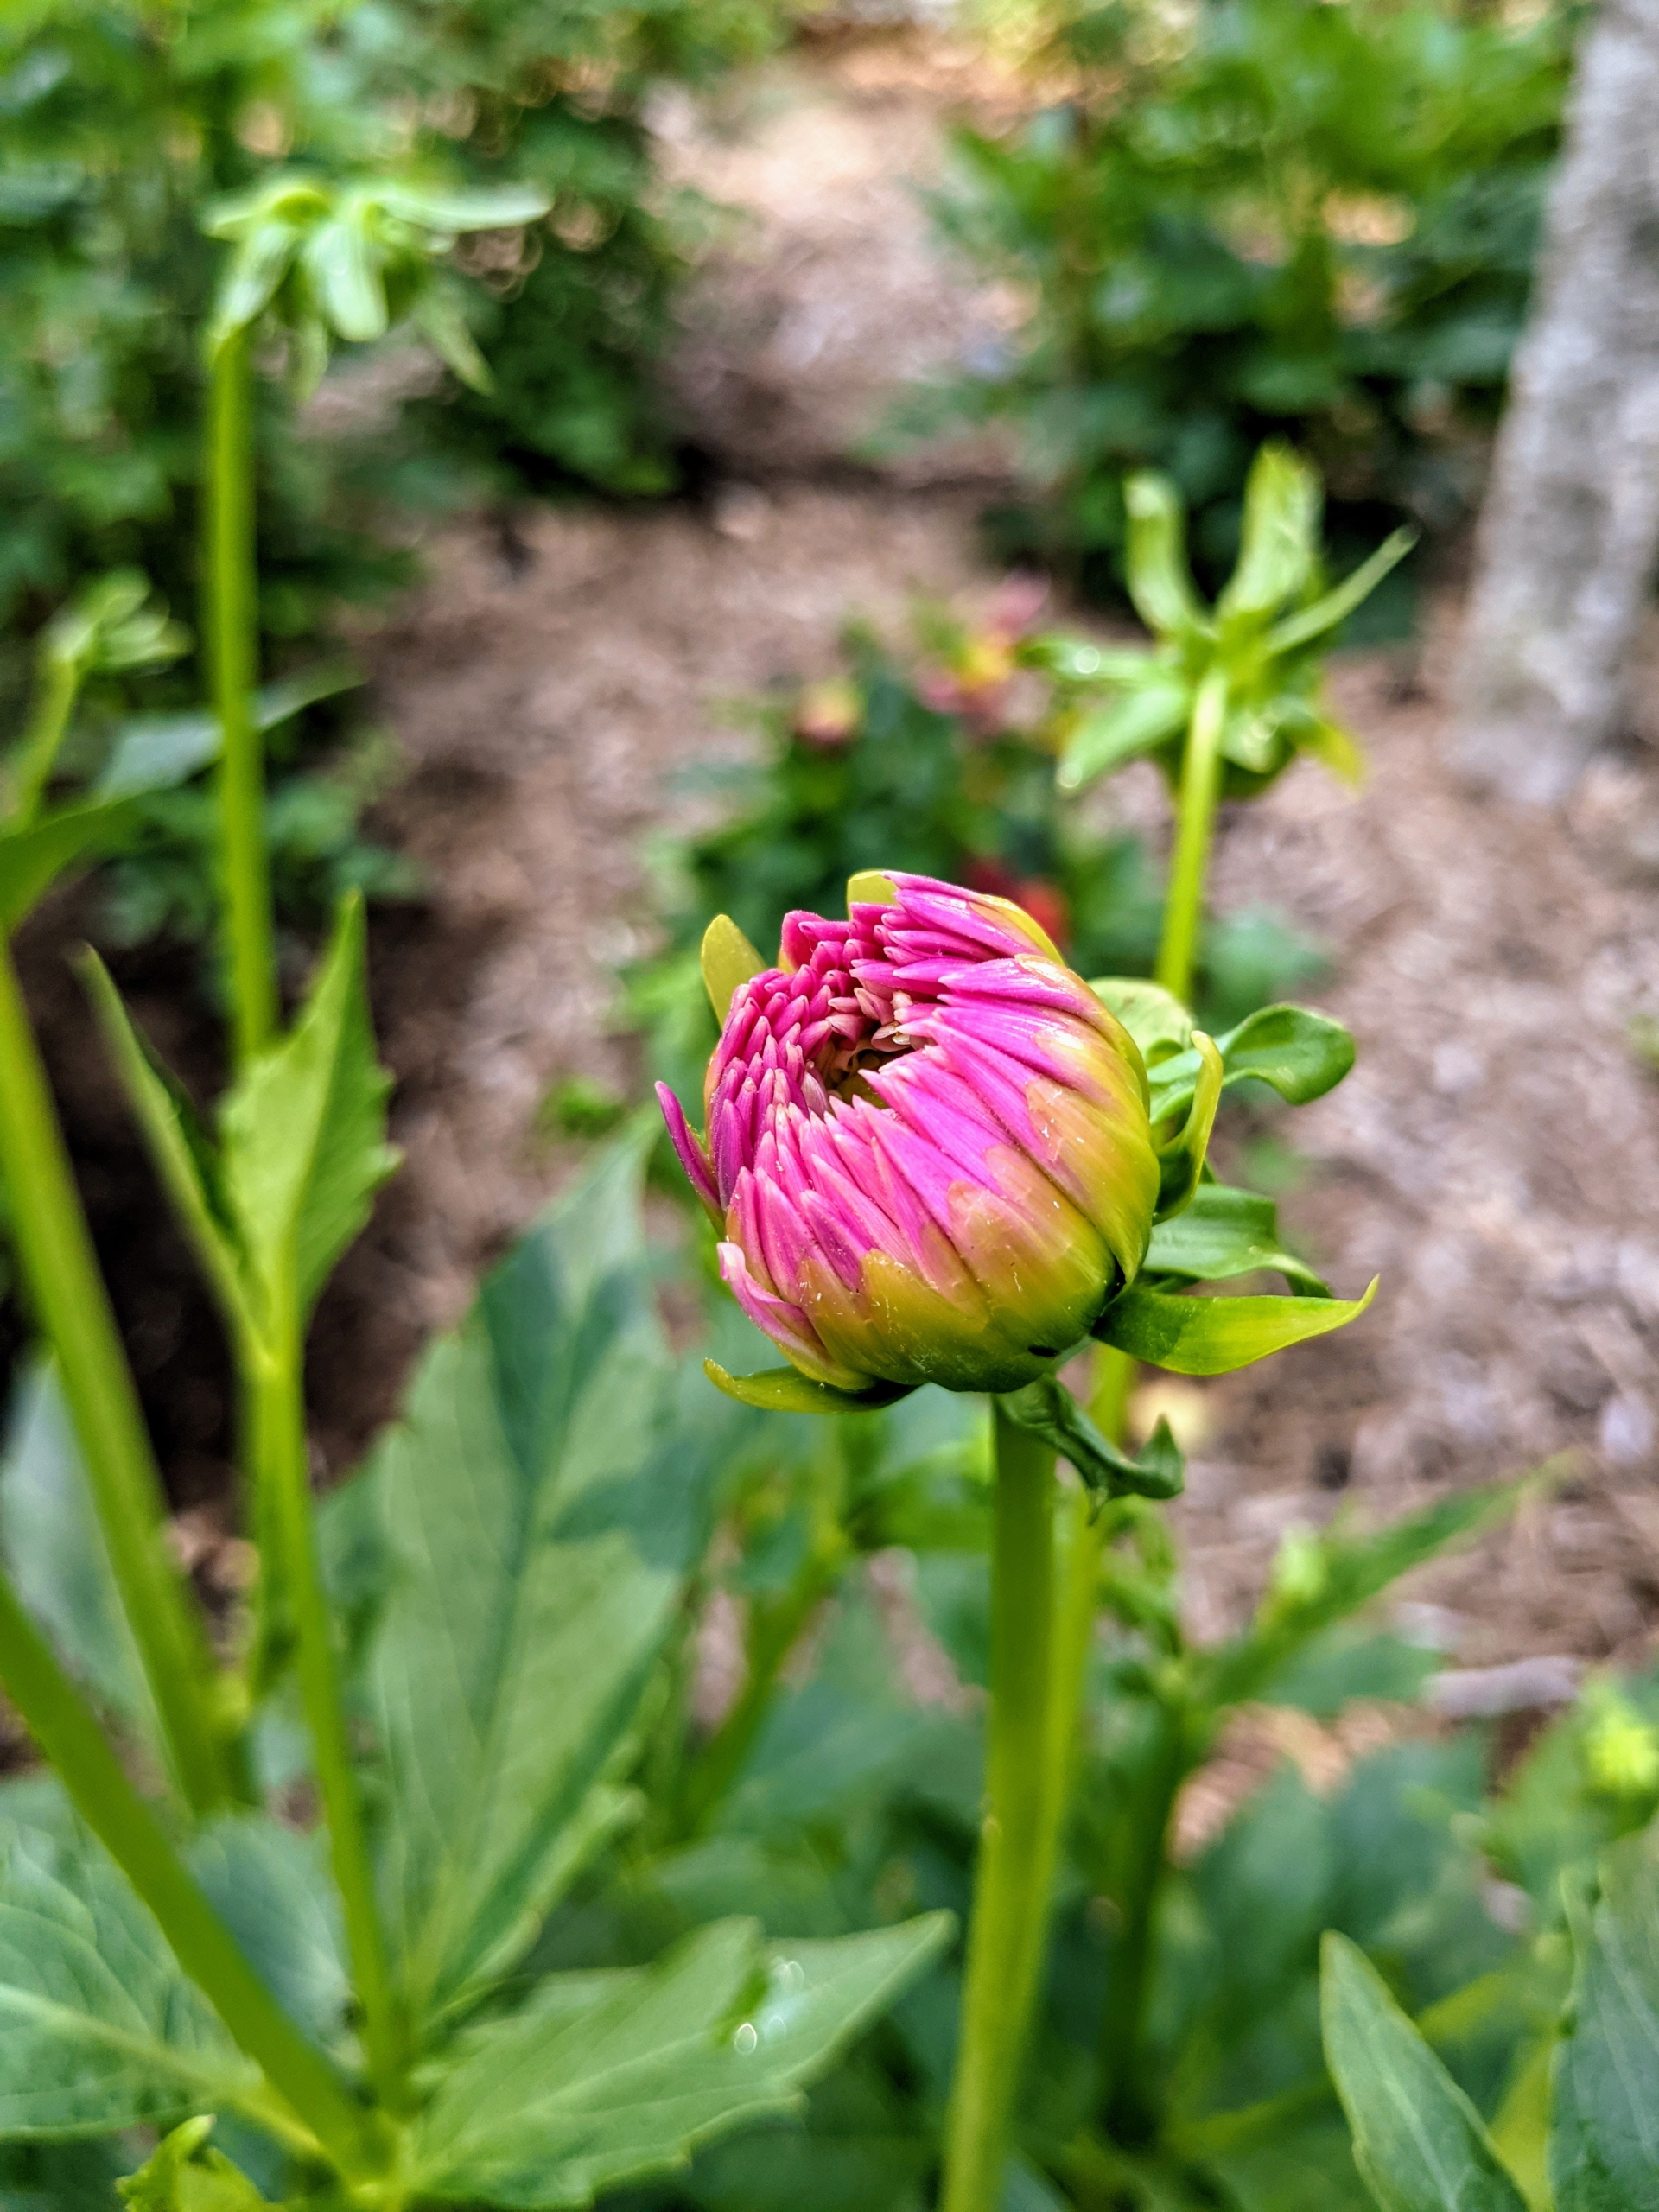
And gradually they get larger and more detailed. Dahlias start blooming about eight weeks after planting.
And here is one just starting to show off its color.
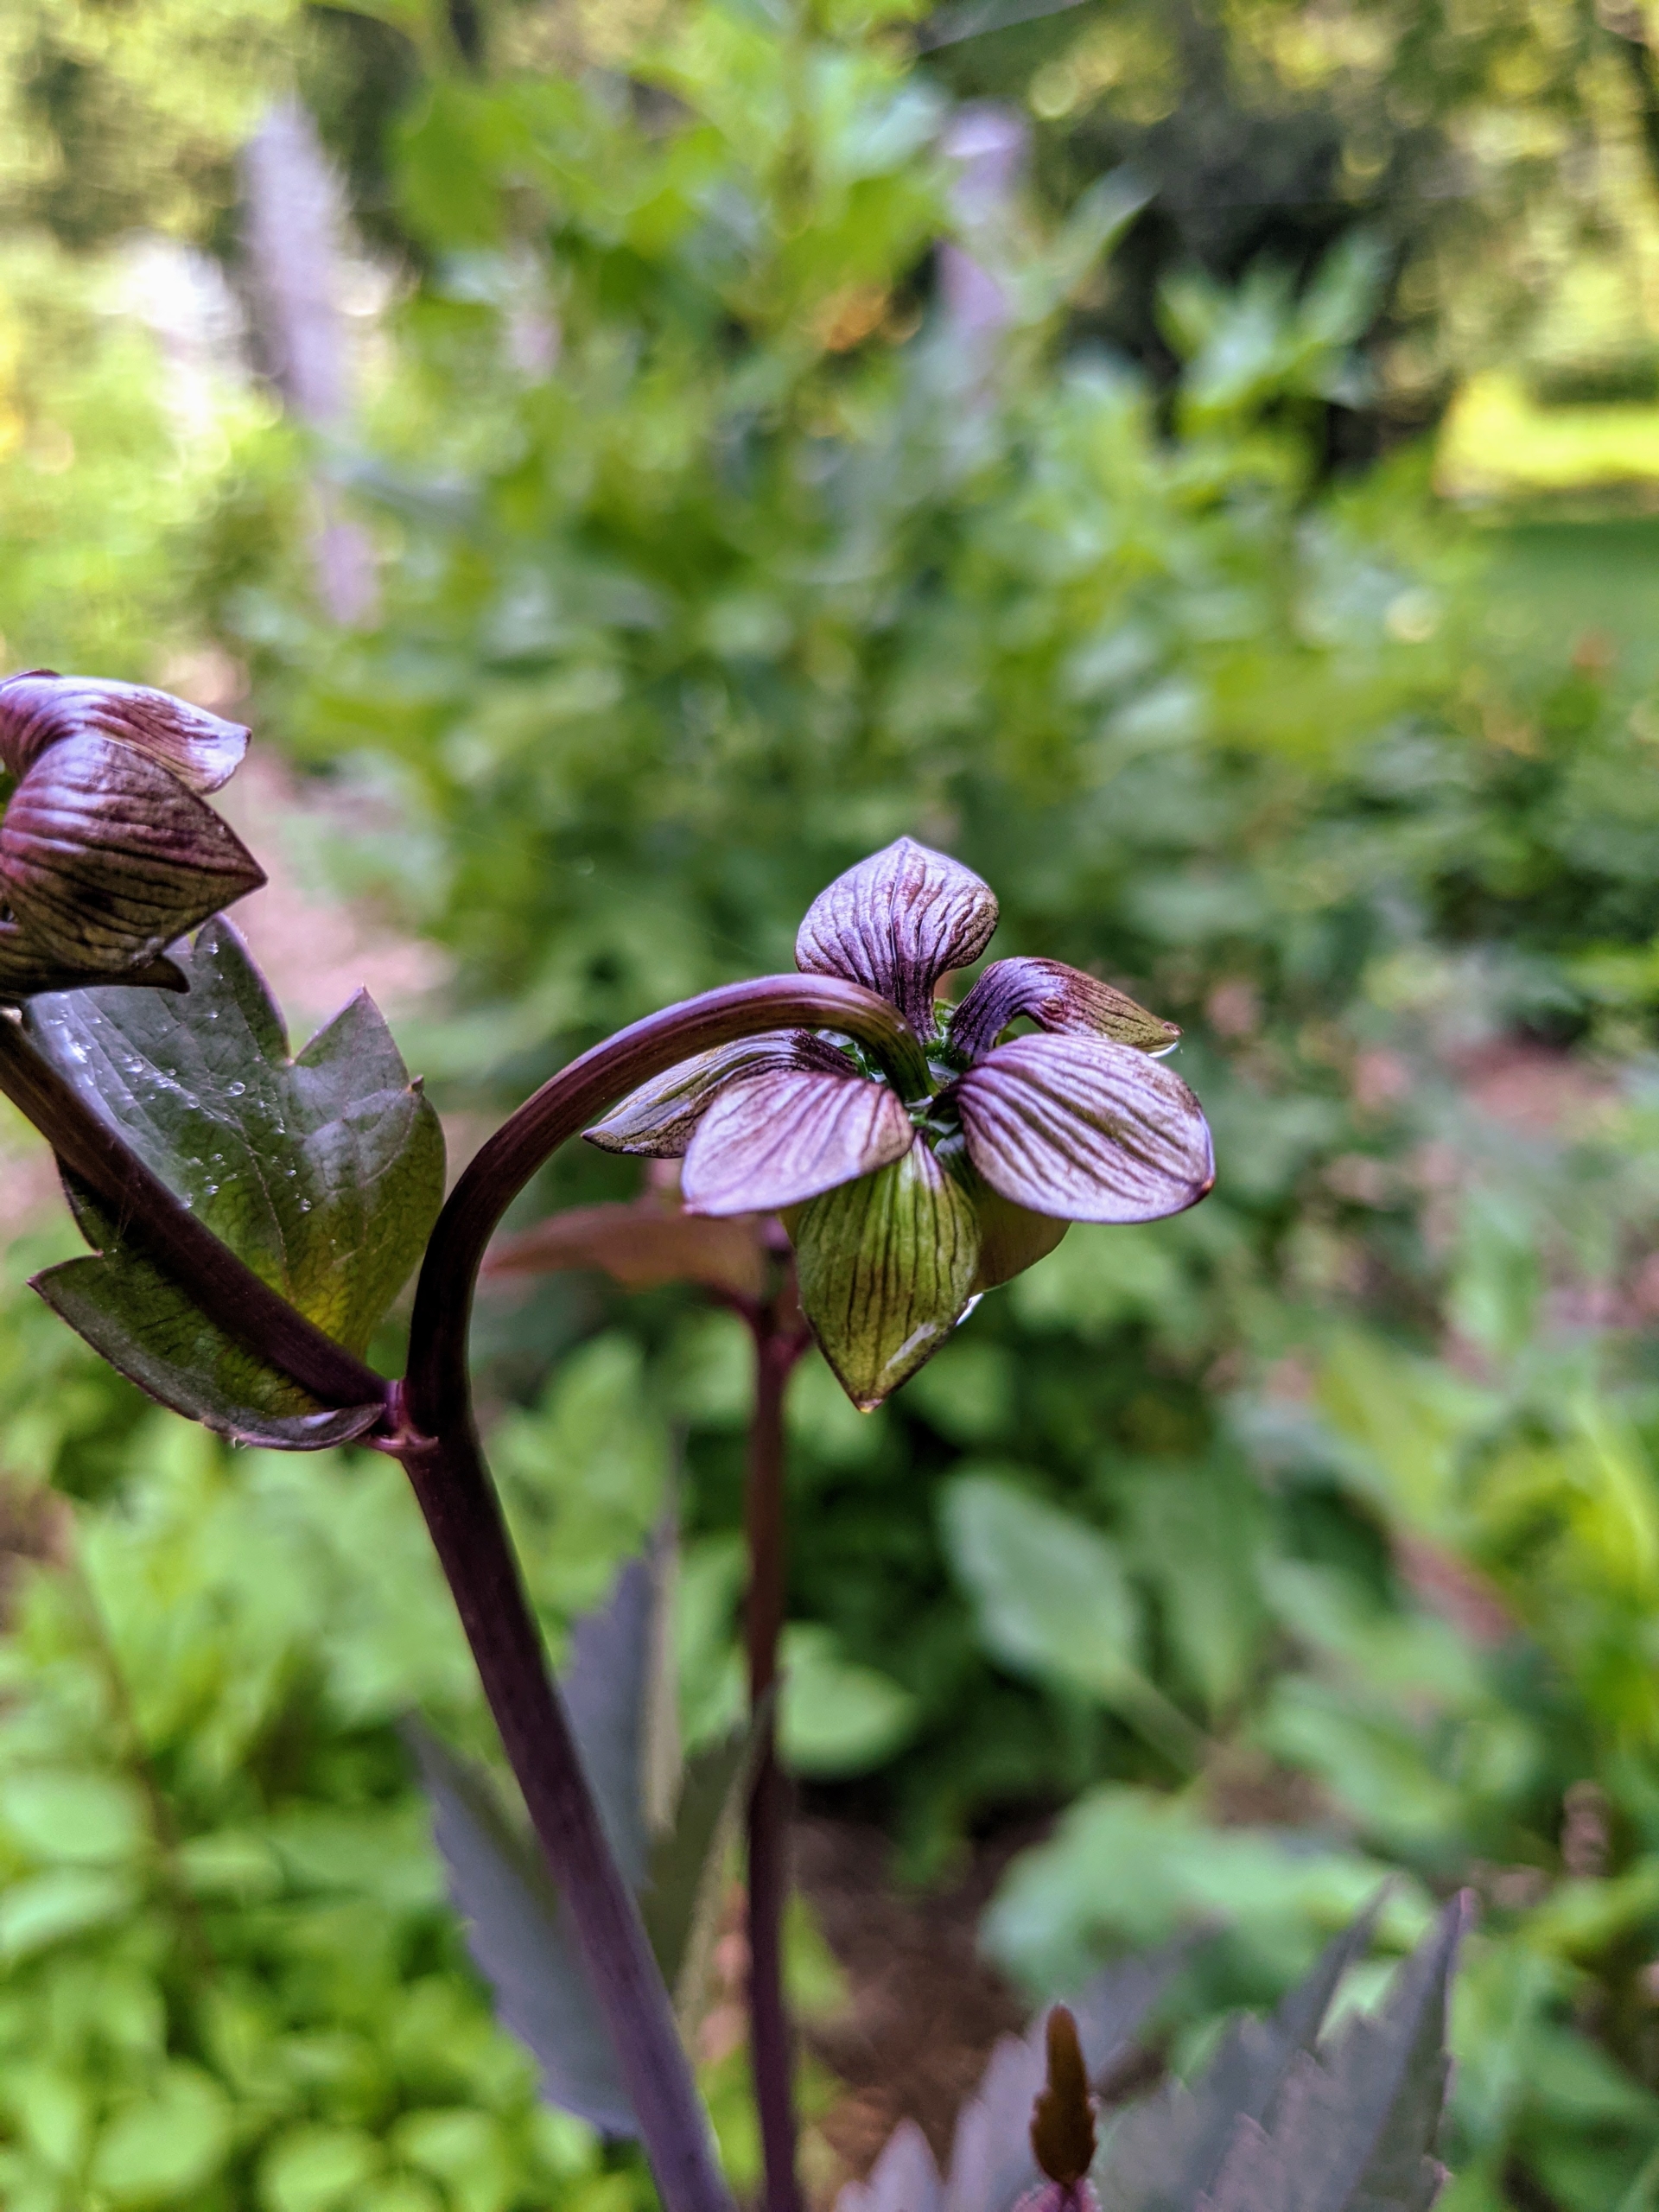
Here is one with dark purple leaves and stems.
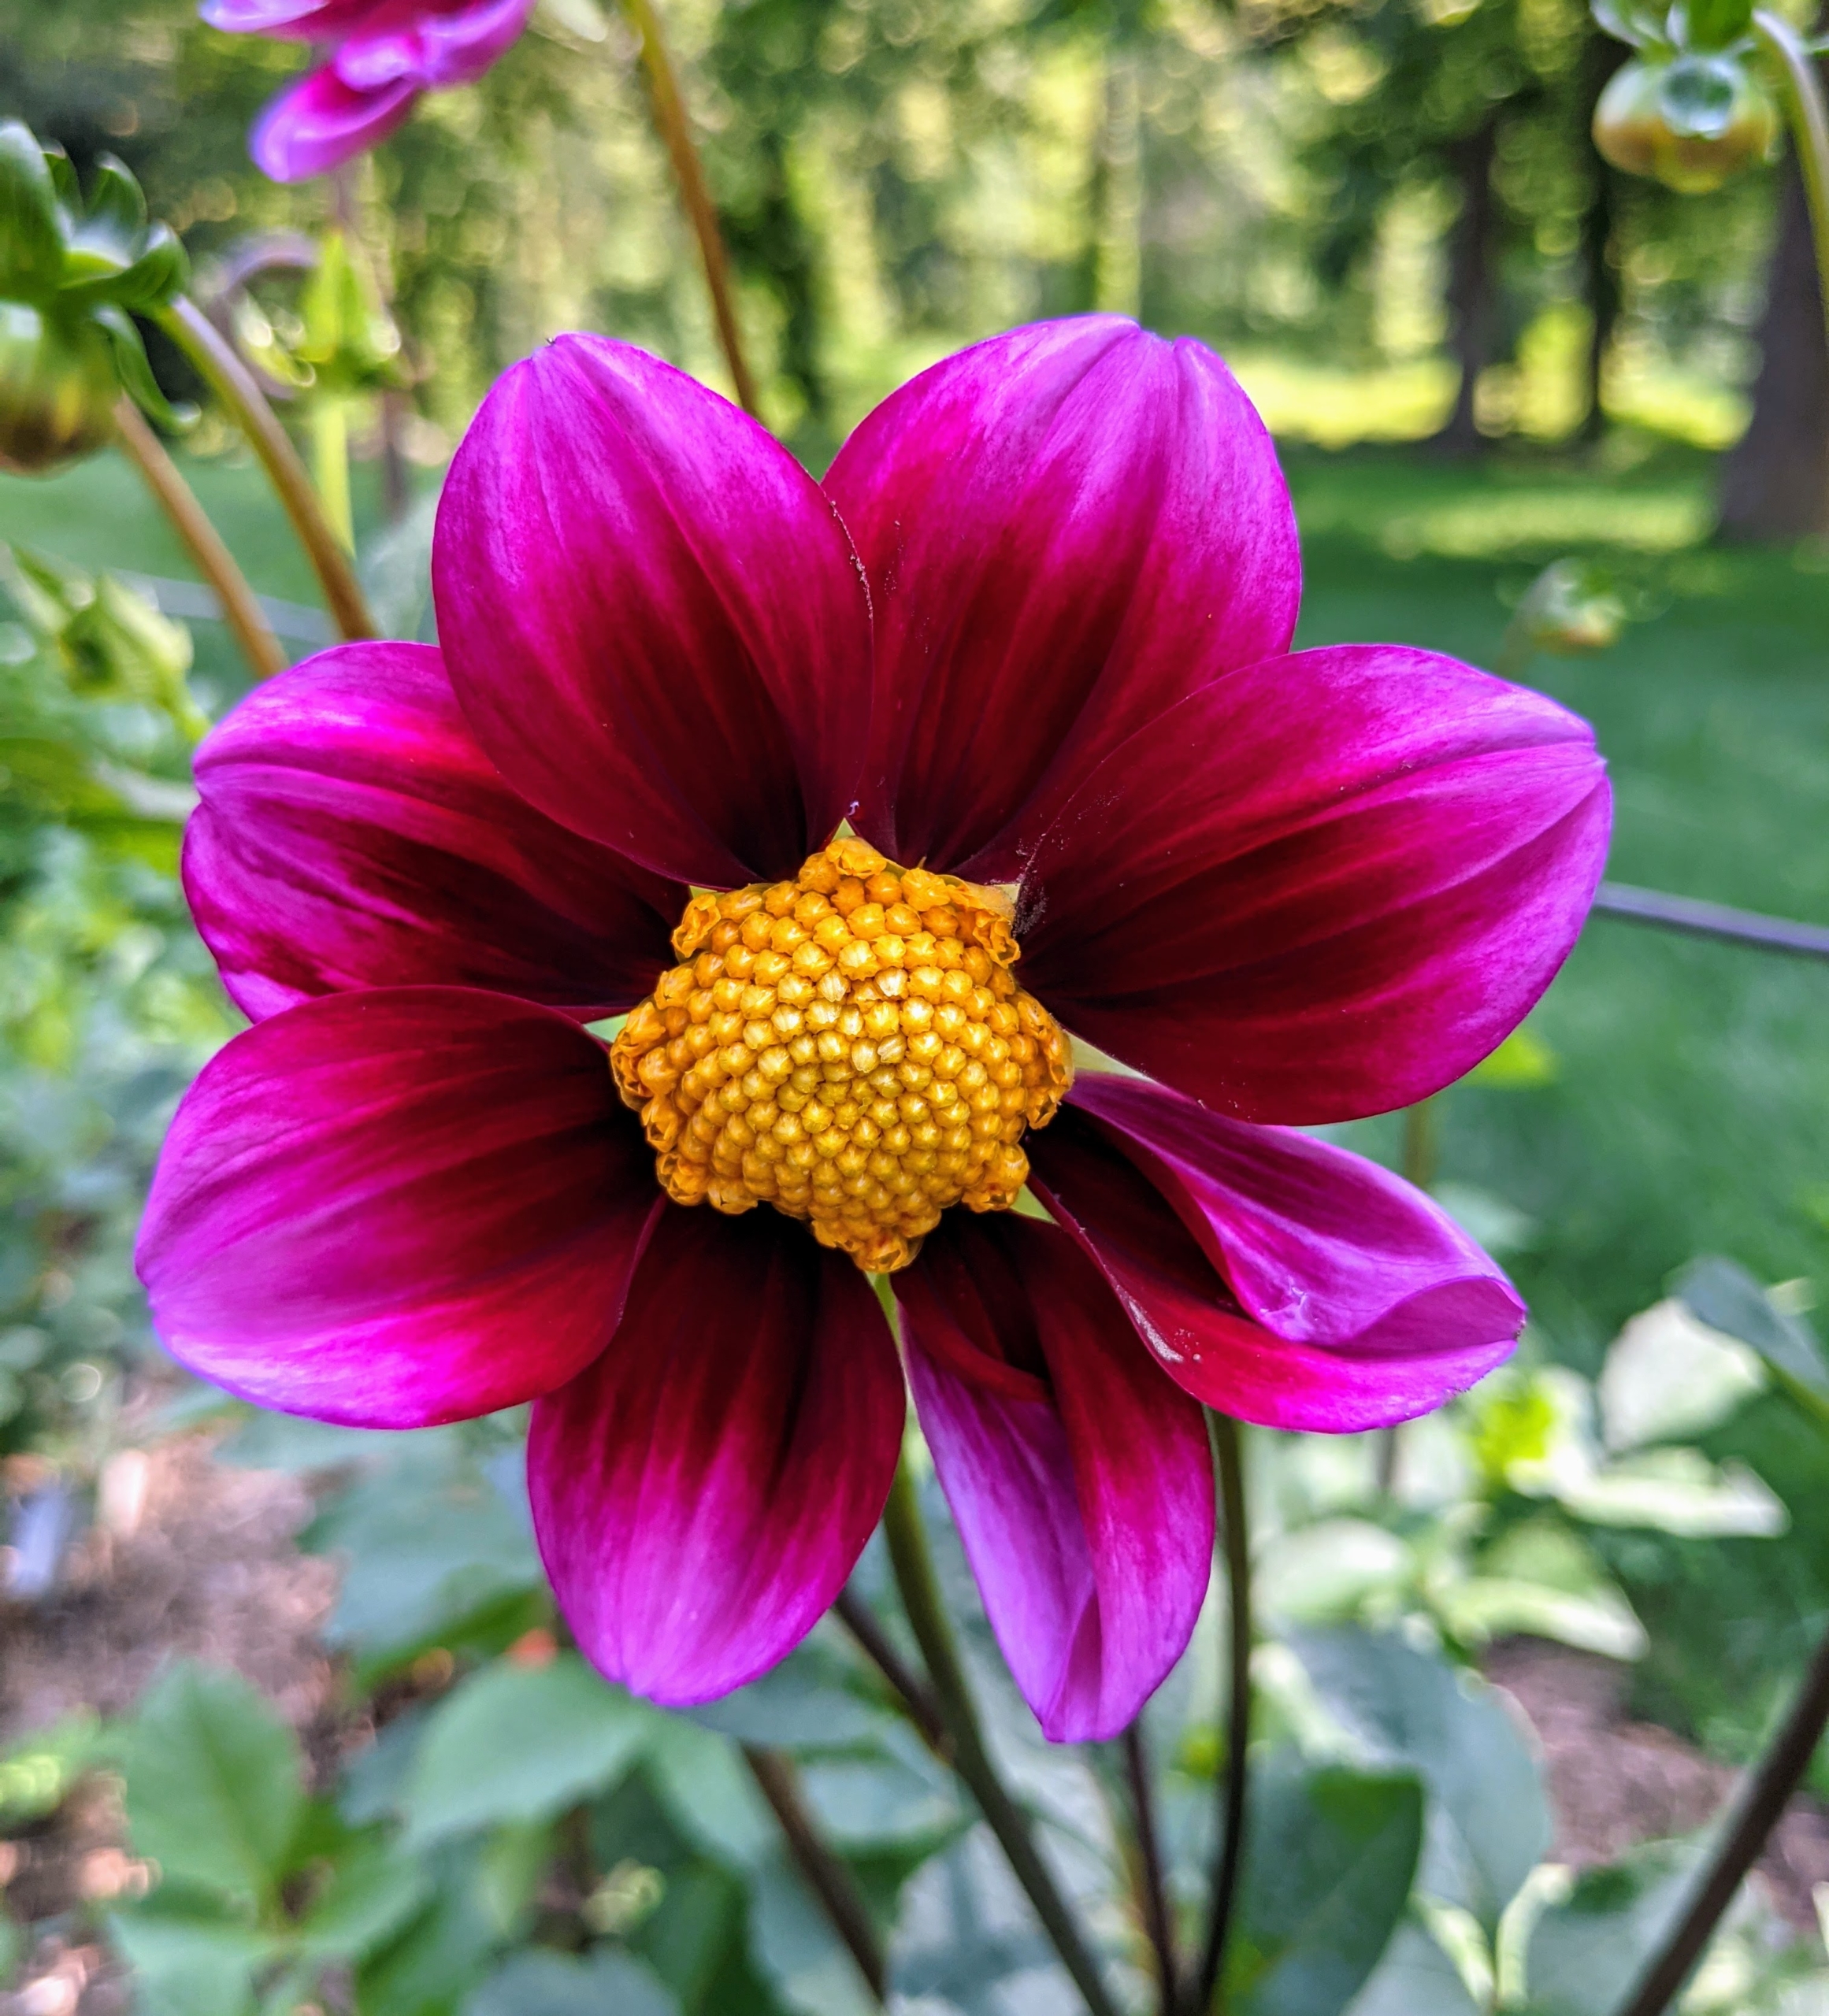
And here is one of the first blooms – bright red with a yellow center. The array of flower colors, sizes, and shapes is astounding. Dahlias come in white, shades of pink, red, yellow, orange, shades of purple, and various combinations of these colors – every color but blue. In the 19th century, a London newspaper offered a pound, or a little more than a dollar, to the first breeder to create a blue dahlia—the reward was never claimed, but there have been many attempts that are near-blue, but not true blue. Like many flower varieties, there is also no pure black variety—only dark red and dark purple.
Dahlias are named after 18th-century Swedish botanist Anders Dahl. He actually categorized dahlias as a vegetable because of their edible tubers. The tubers are said to taste like a mix between potatoes and radishes.
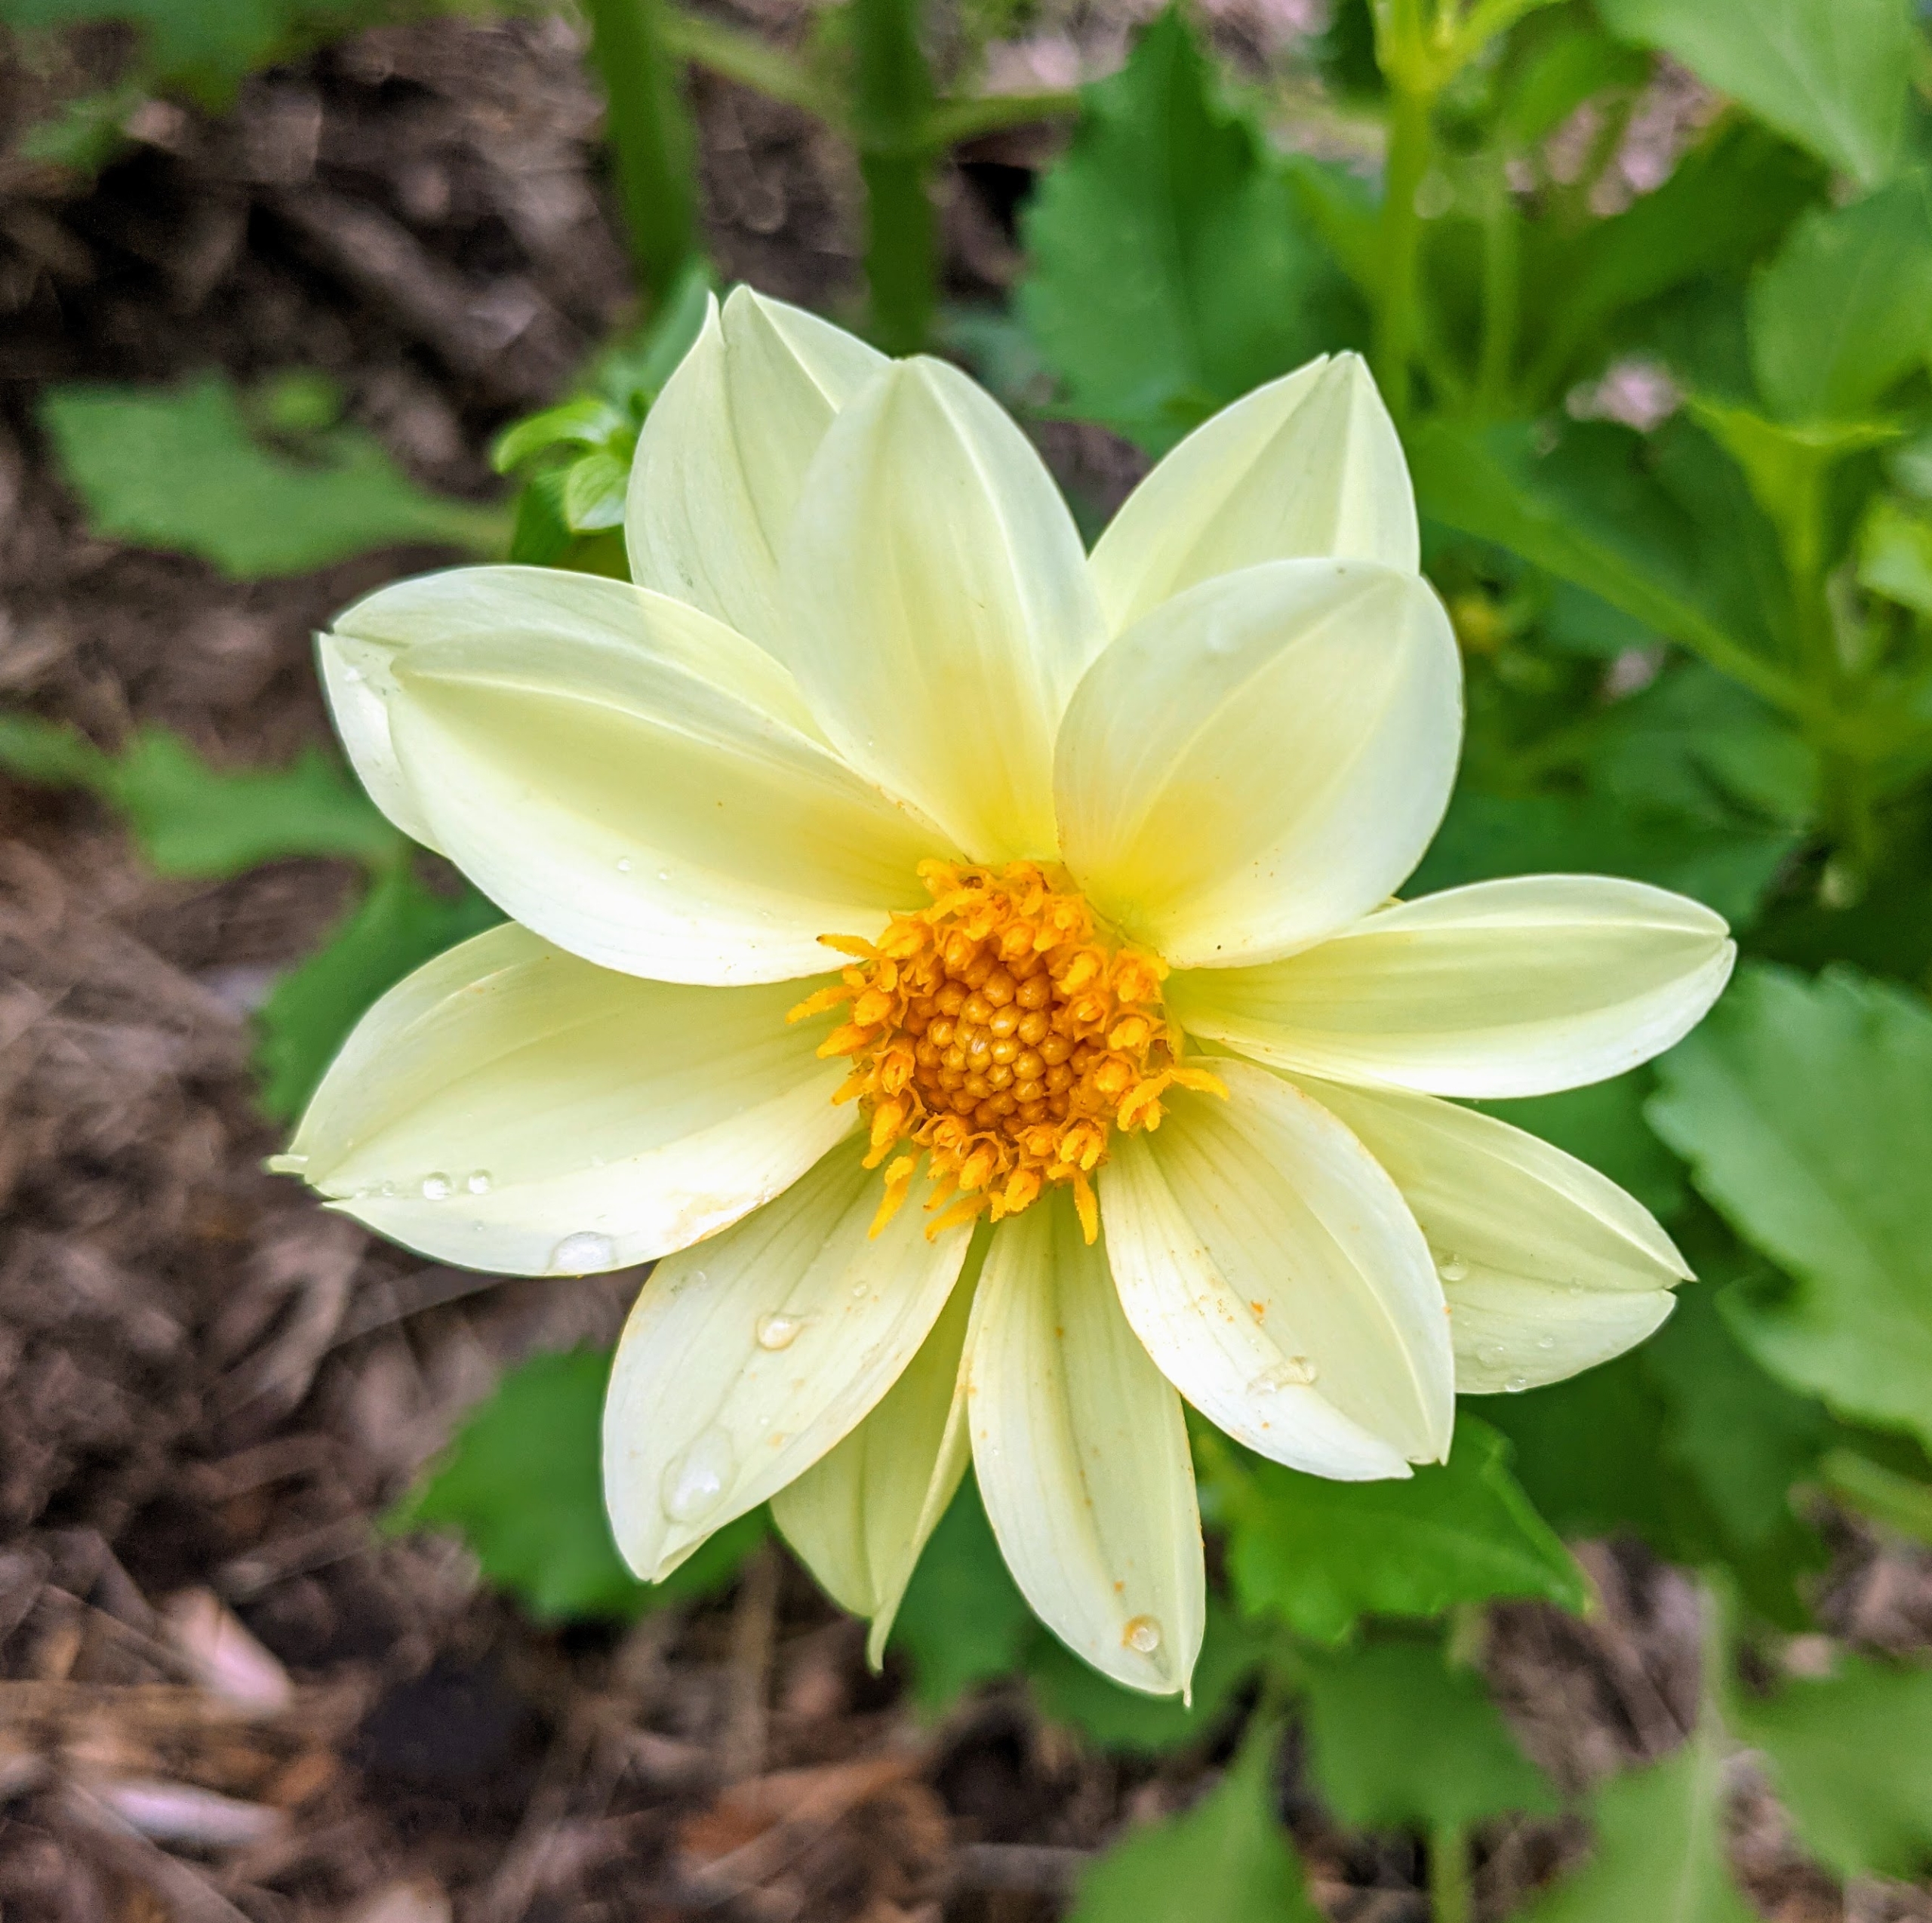
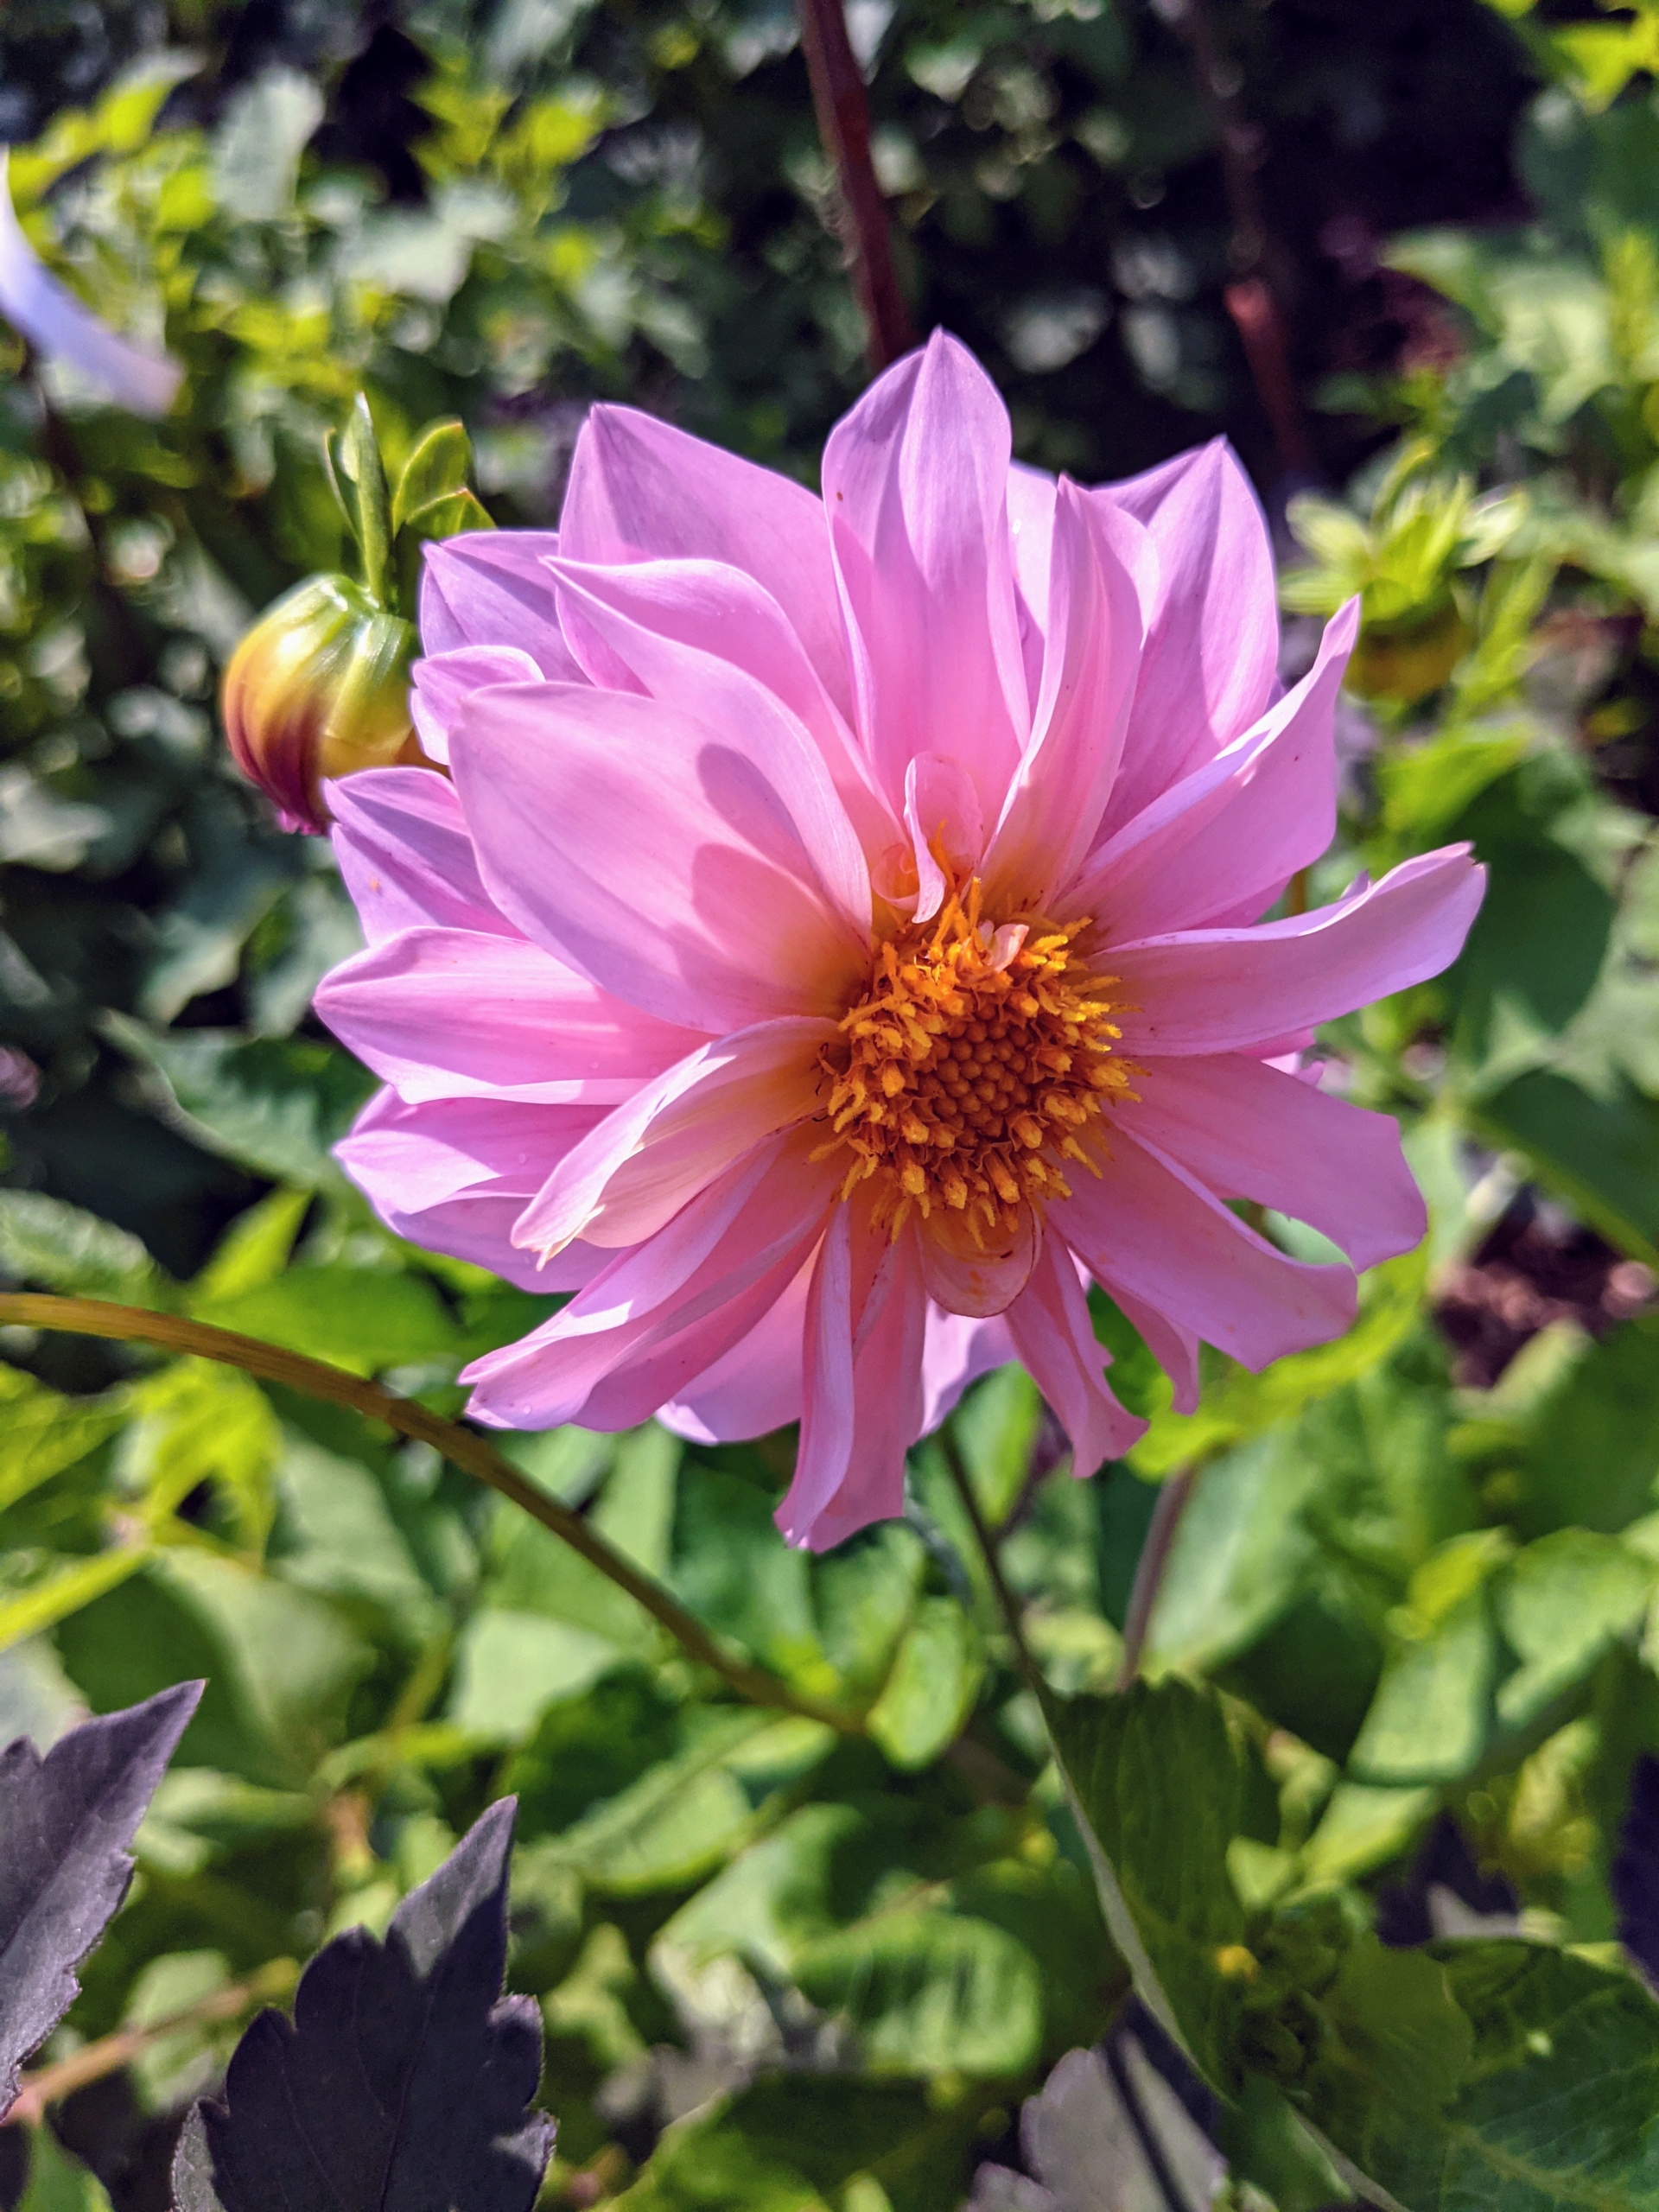
Dahlias belong to the Asteraceae family along with daisies and sunflowers. This dahlia is a soft, creamy yellow with a dark yellow center.
The genus Dahlia is native to the high plains of Mexico. Some species can be found in Guatemala, Honduras, Nicaragua, El Salvador & Costa Rica as well as parts of South America where it was introduced. At present there are at least 35 recognized species in existence.
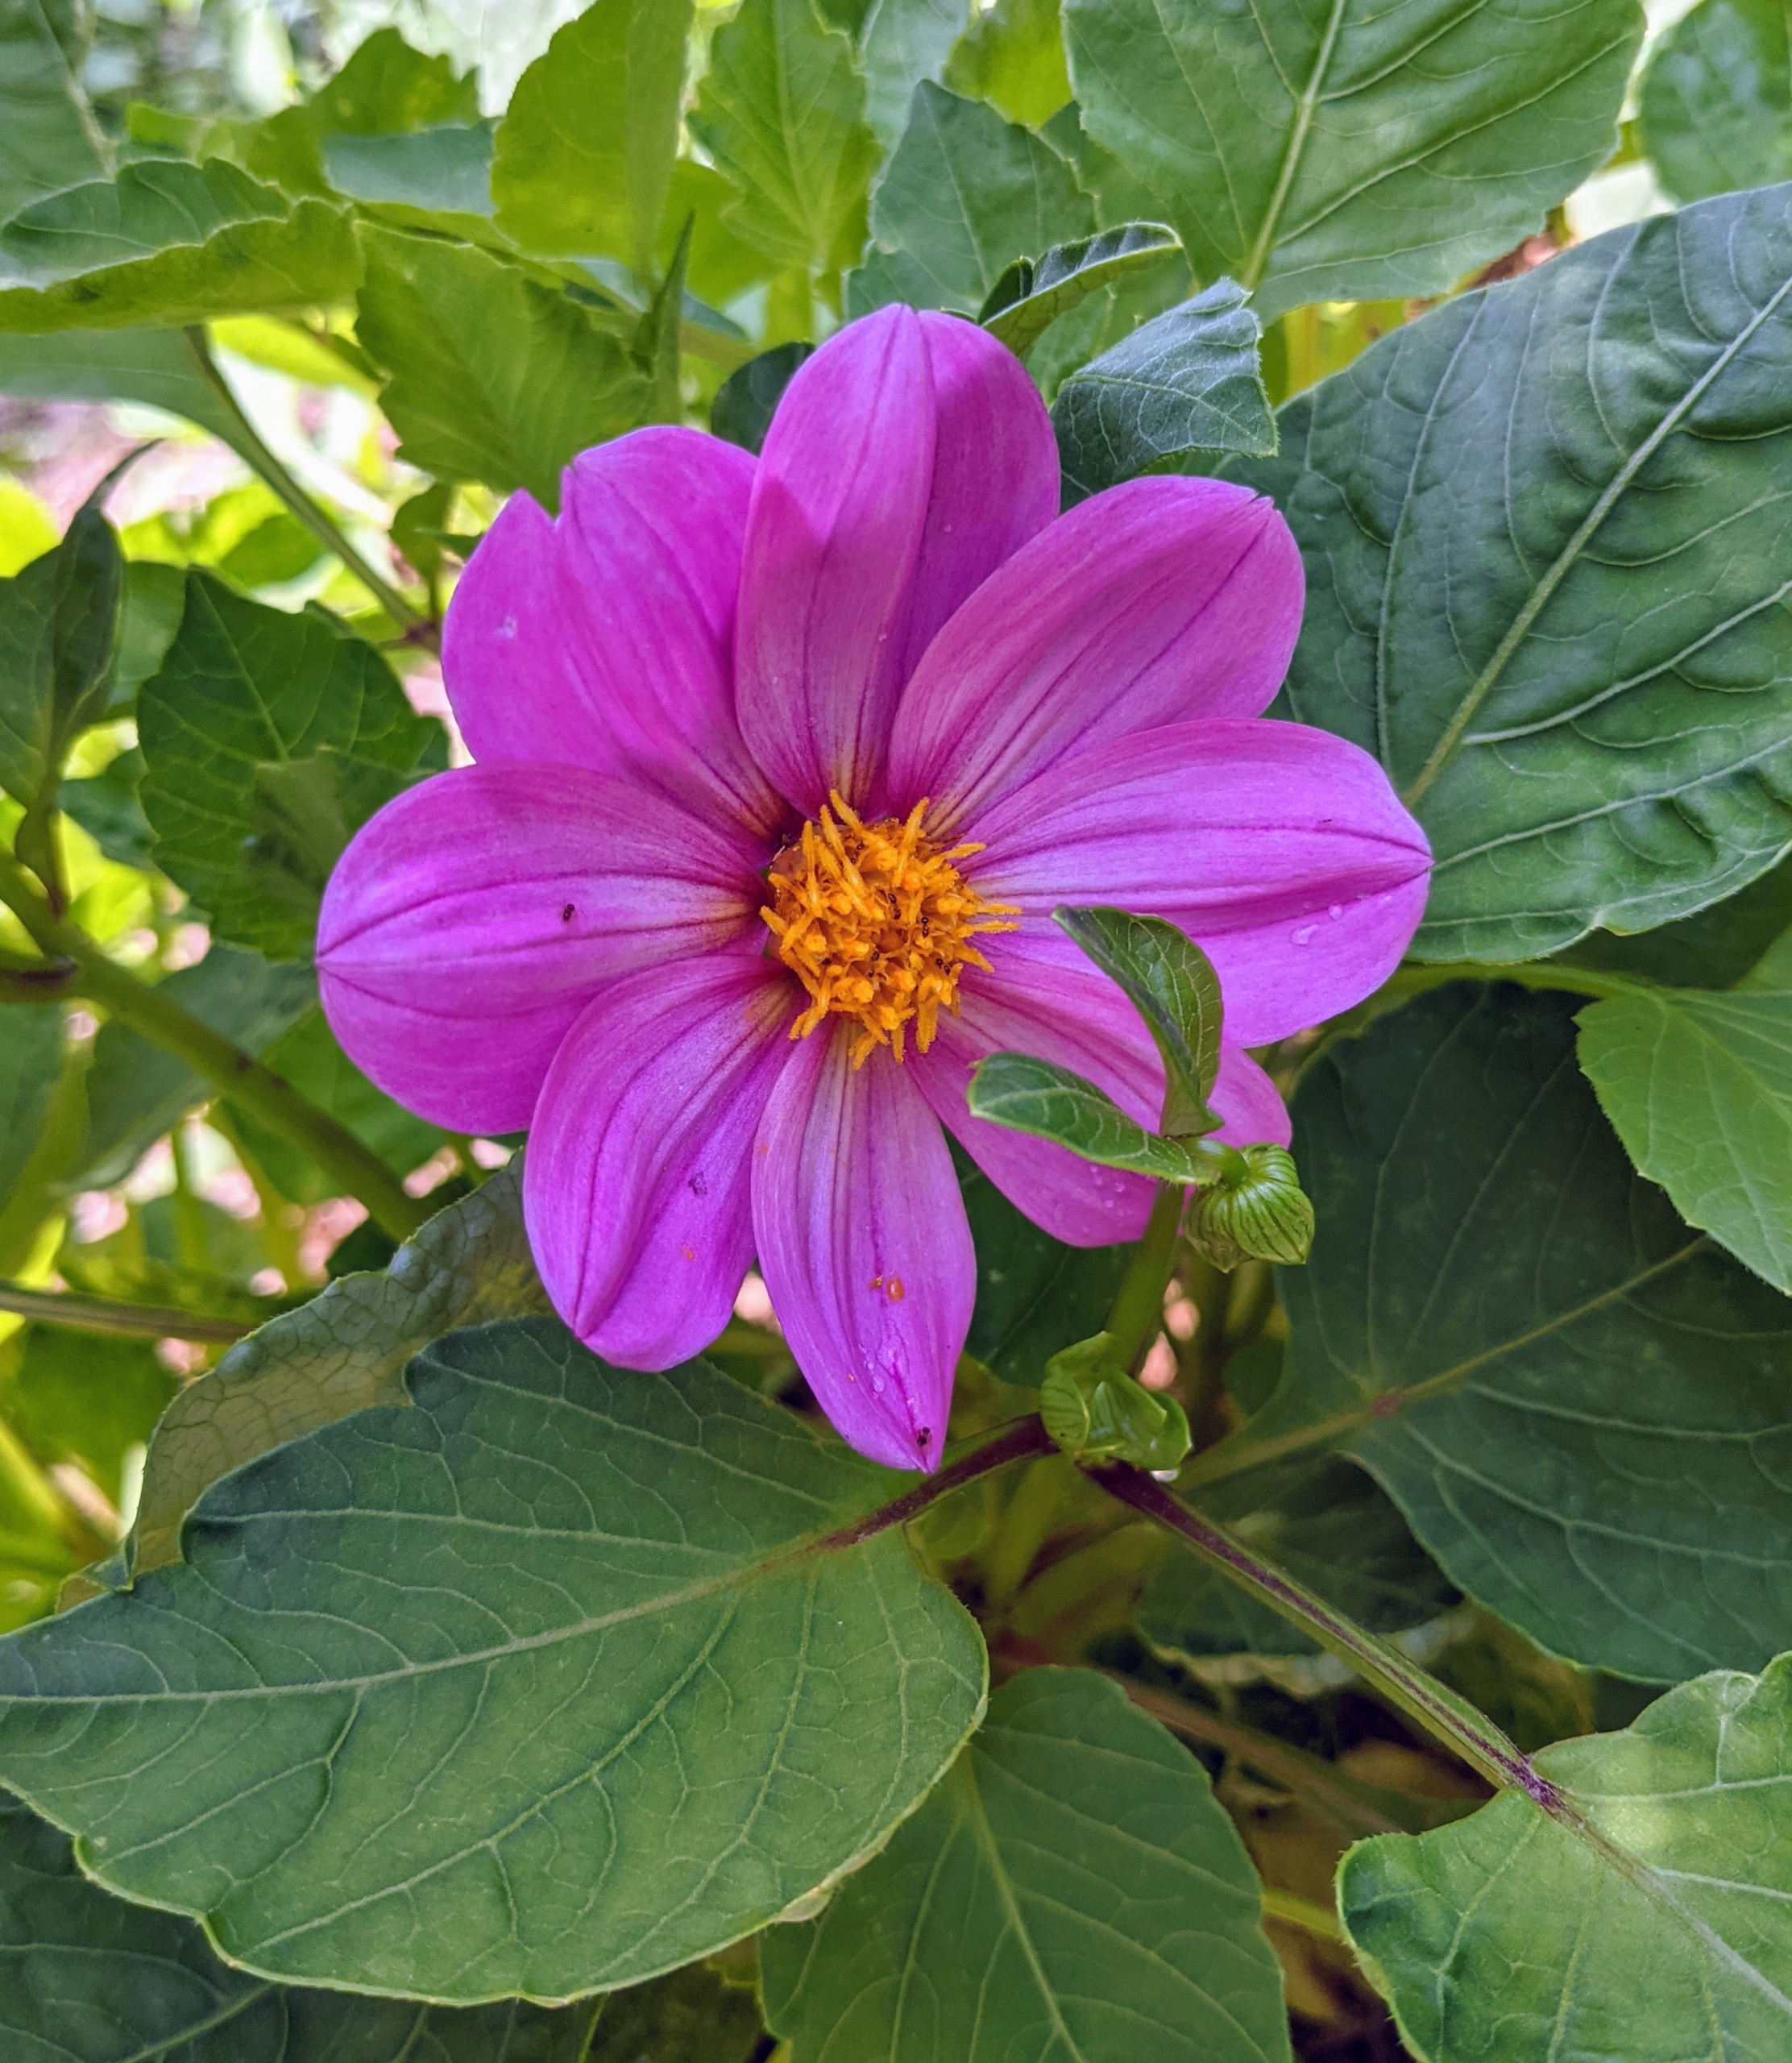
This dahlia is lavender with a bold yellow center. Dahlias are herbaceous perennials, but typically grown as an annual.
Some of the Dahlia flower forms are also amazing. They range from a charming single, daisy-like flower to the popular double varieties which can range from the two-inch-pompons to 12-inch dinner plate size. They are divided into 10 groups: single, anemone, collarette, waterlily, decorative, fall, pompon, cactus, semi-cactus, and miscellaneous.
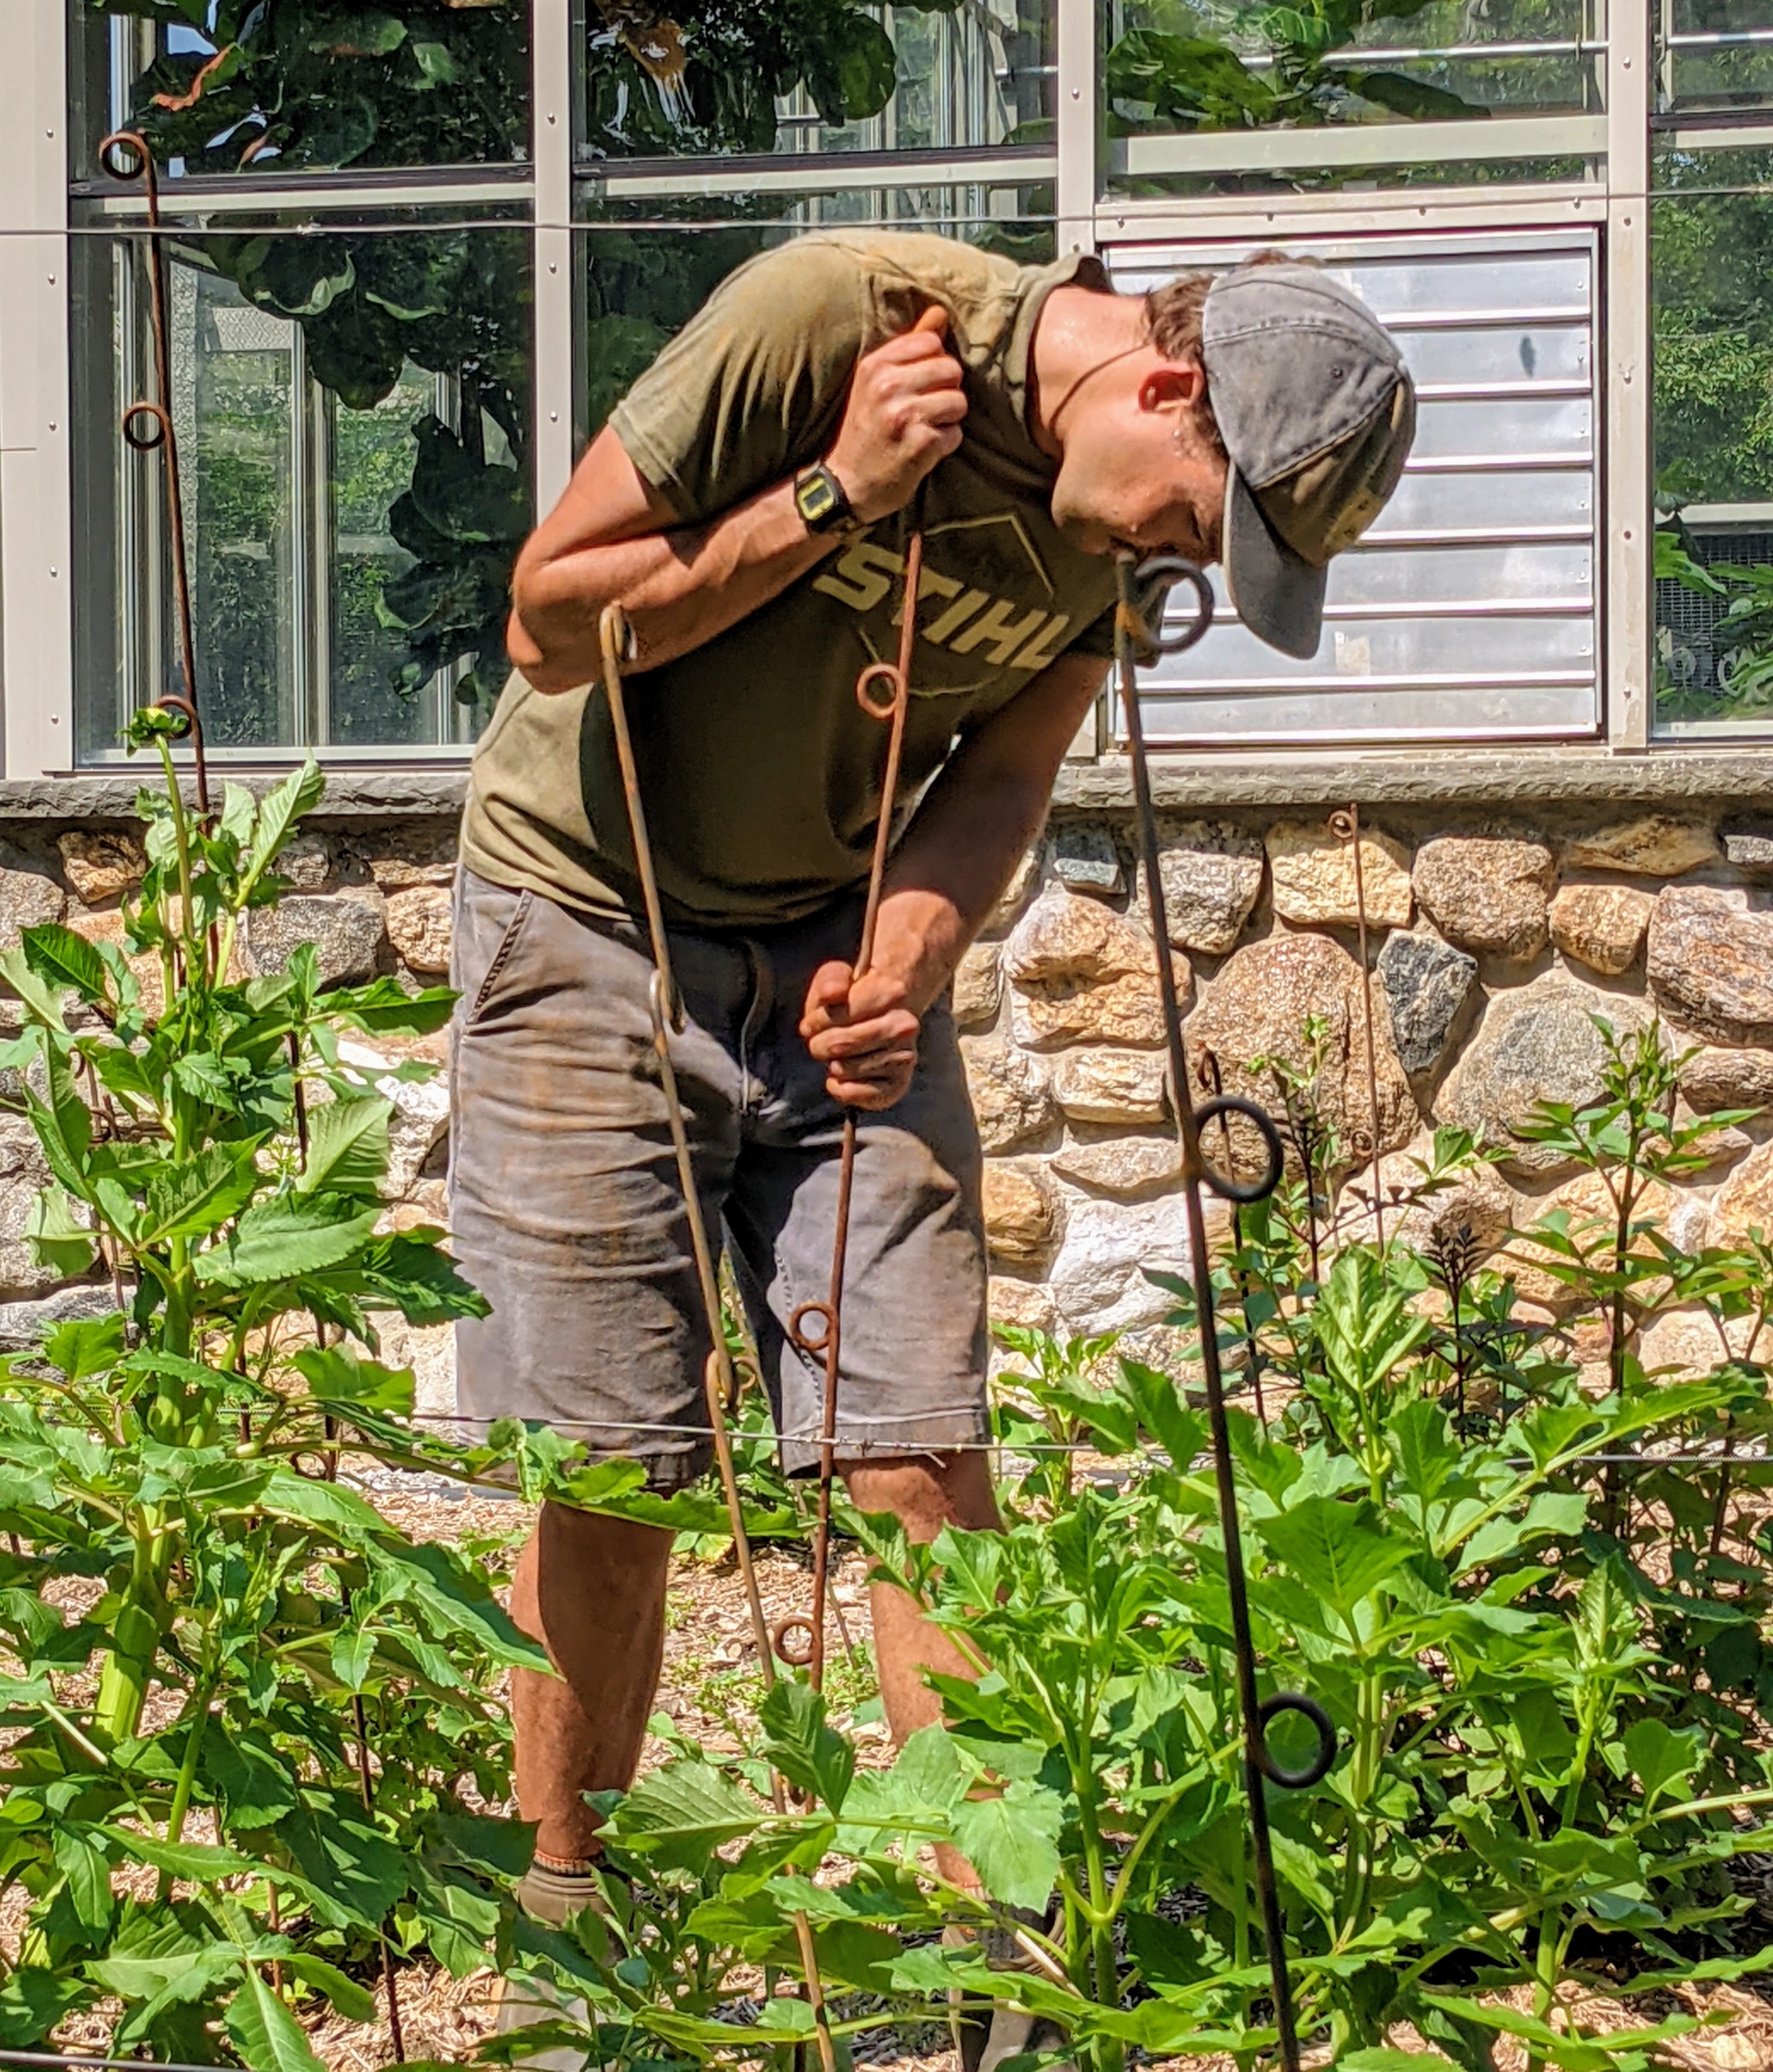
Yesterday, Brian replaced all the shorter three-foot stakes with five foot stakes. He carefully pushes each stake into the exact hole of the shorter stake so as not to damage any of the tubers below. These tuberous plants have slender erect stems which are not always capable of supporting the large flowers, so they must be well-supported.
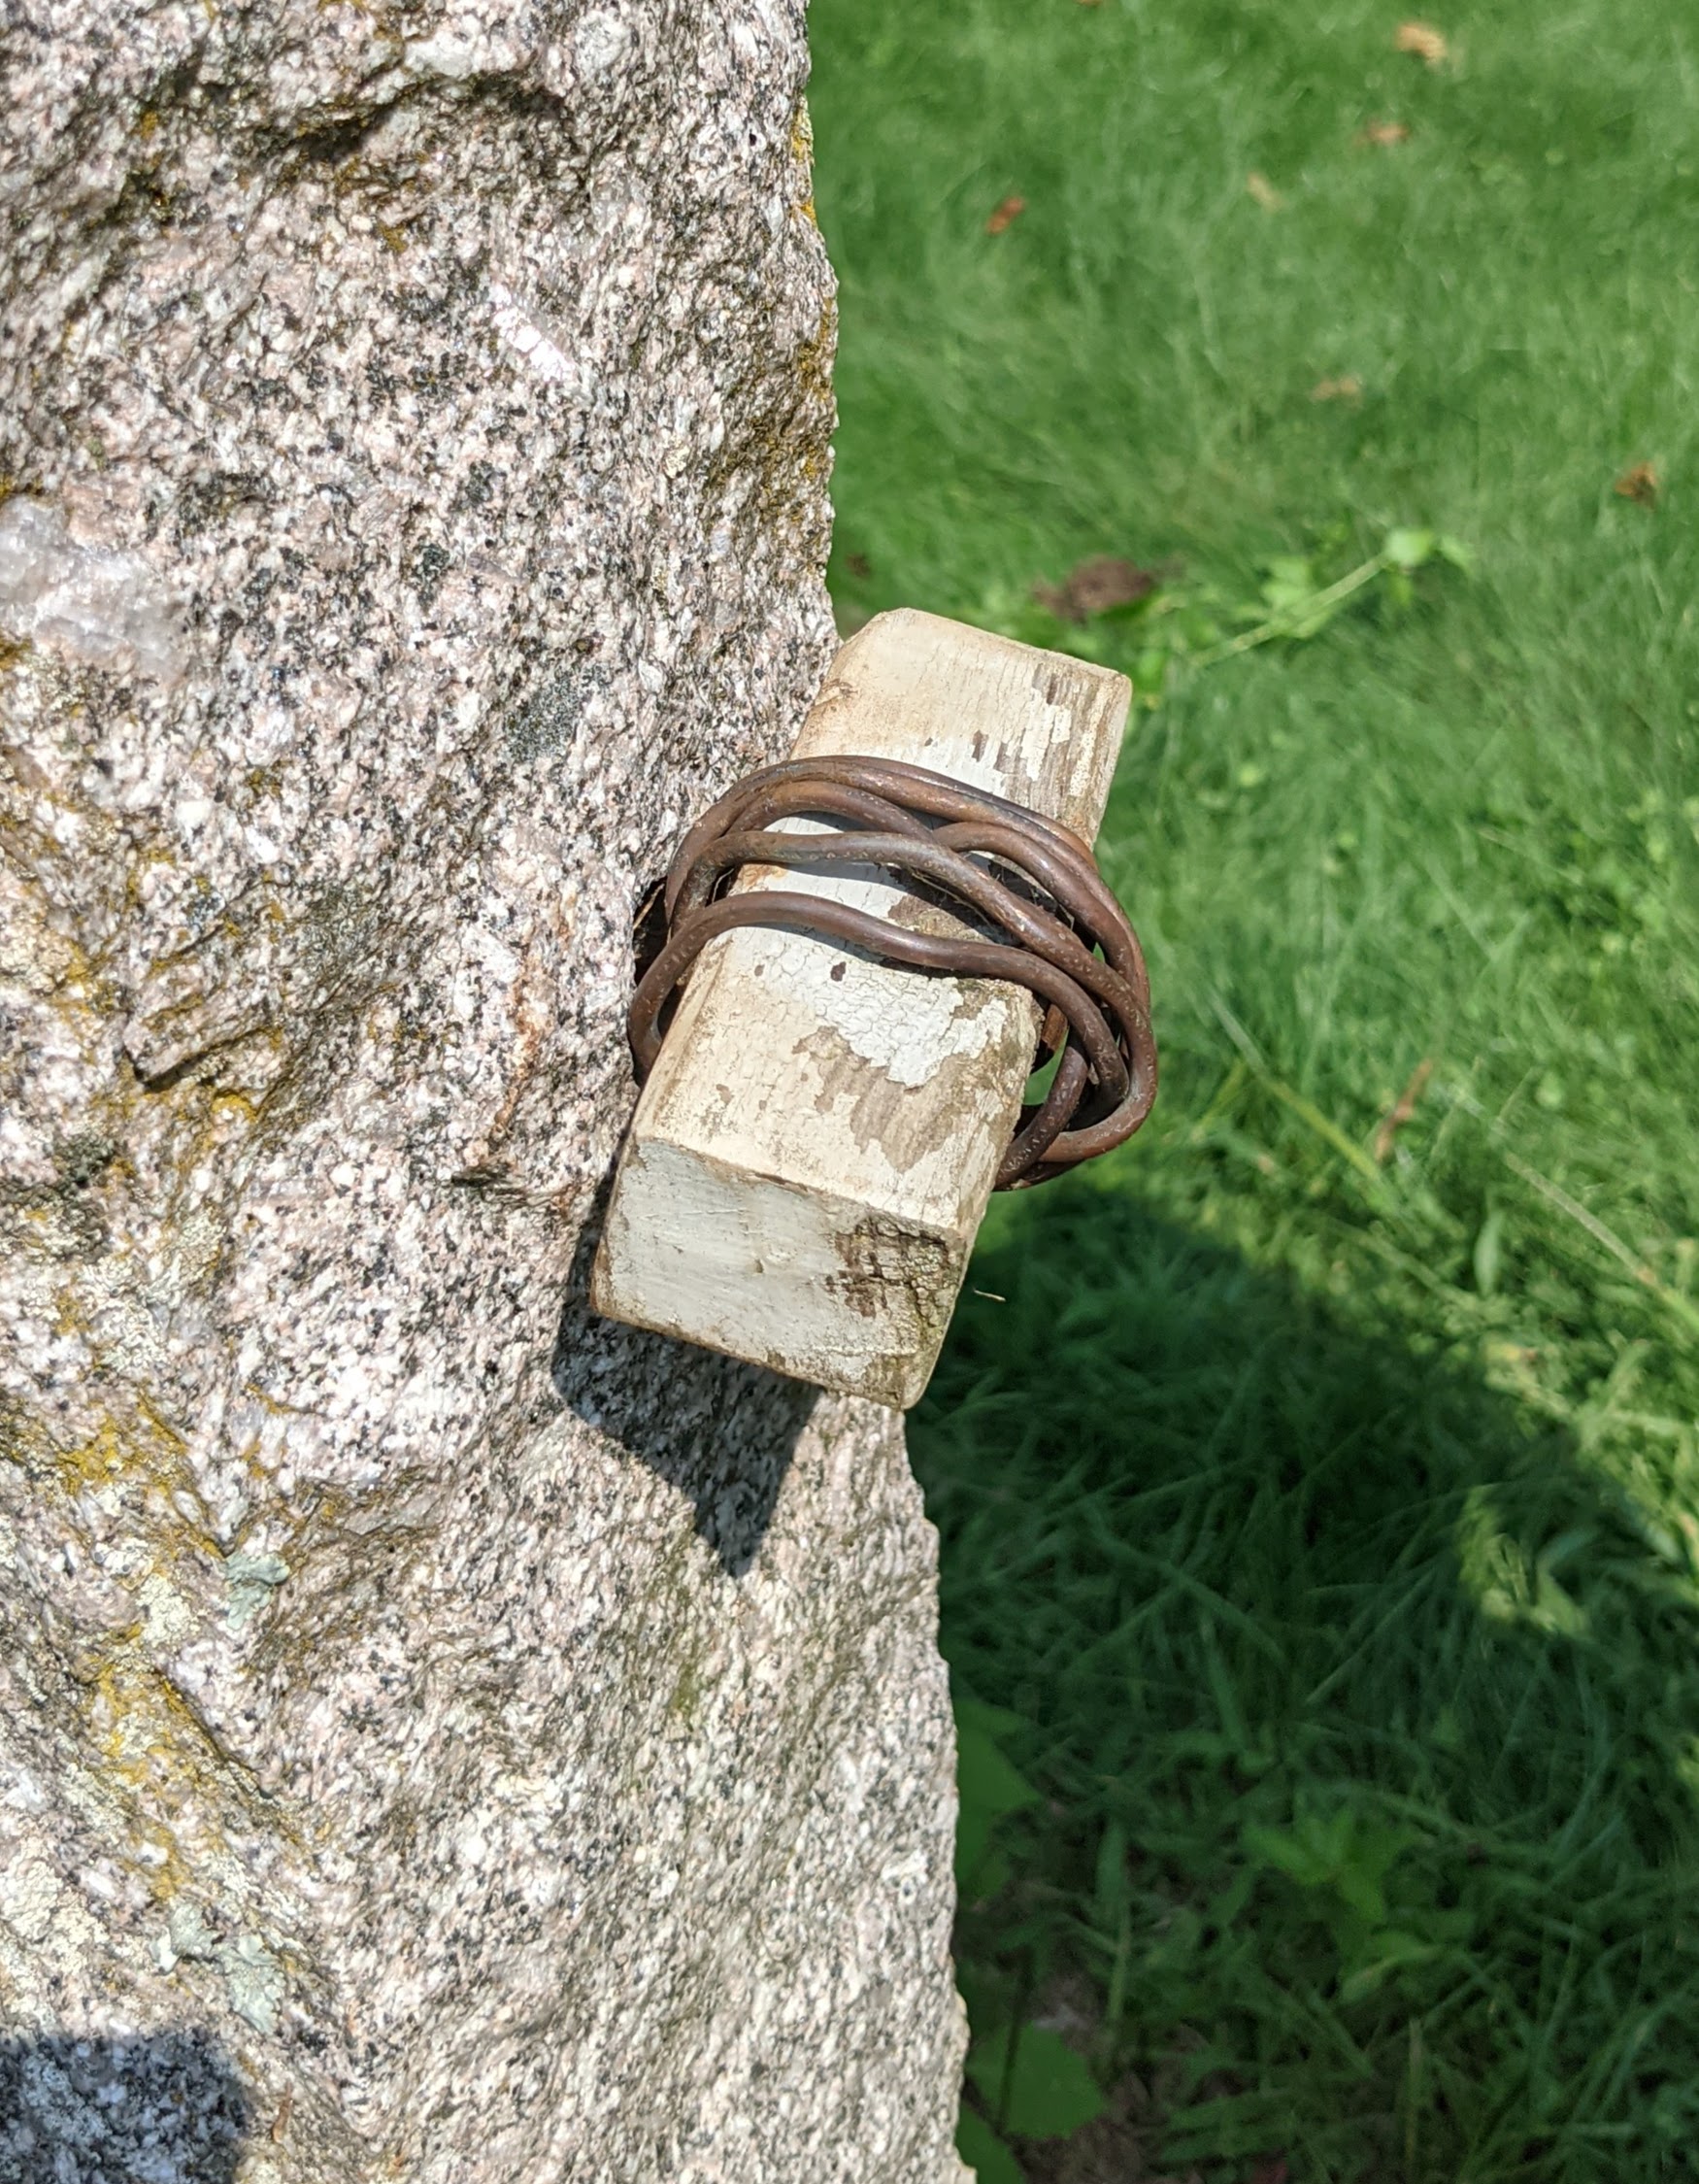
I designed these stakes for my gardens. I use similar stakes for my herbaceous peonies. The stakes are designed with eyes, so that twine can be threaded through multiple stakes at various heights for corralling plants.
The upright posts at the ends of this bed have heavy gauge copper wire laced through them for added plant support. I designed them, so the wire can be tightened or loosened depending on the need.
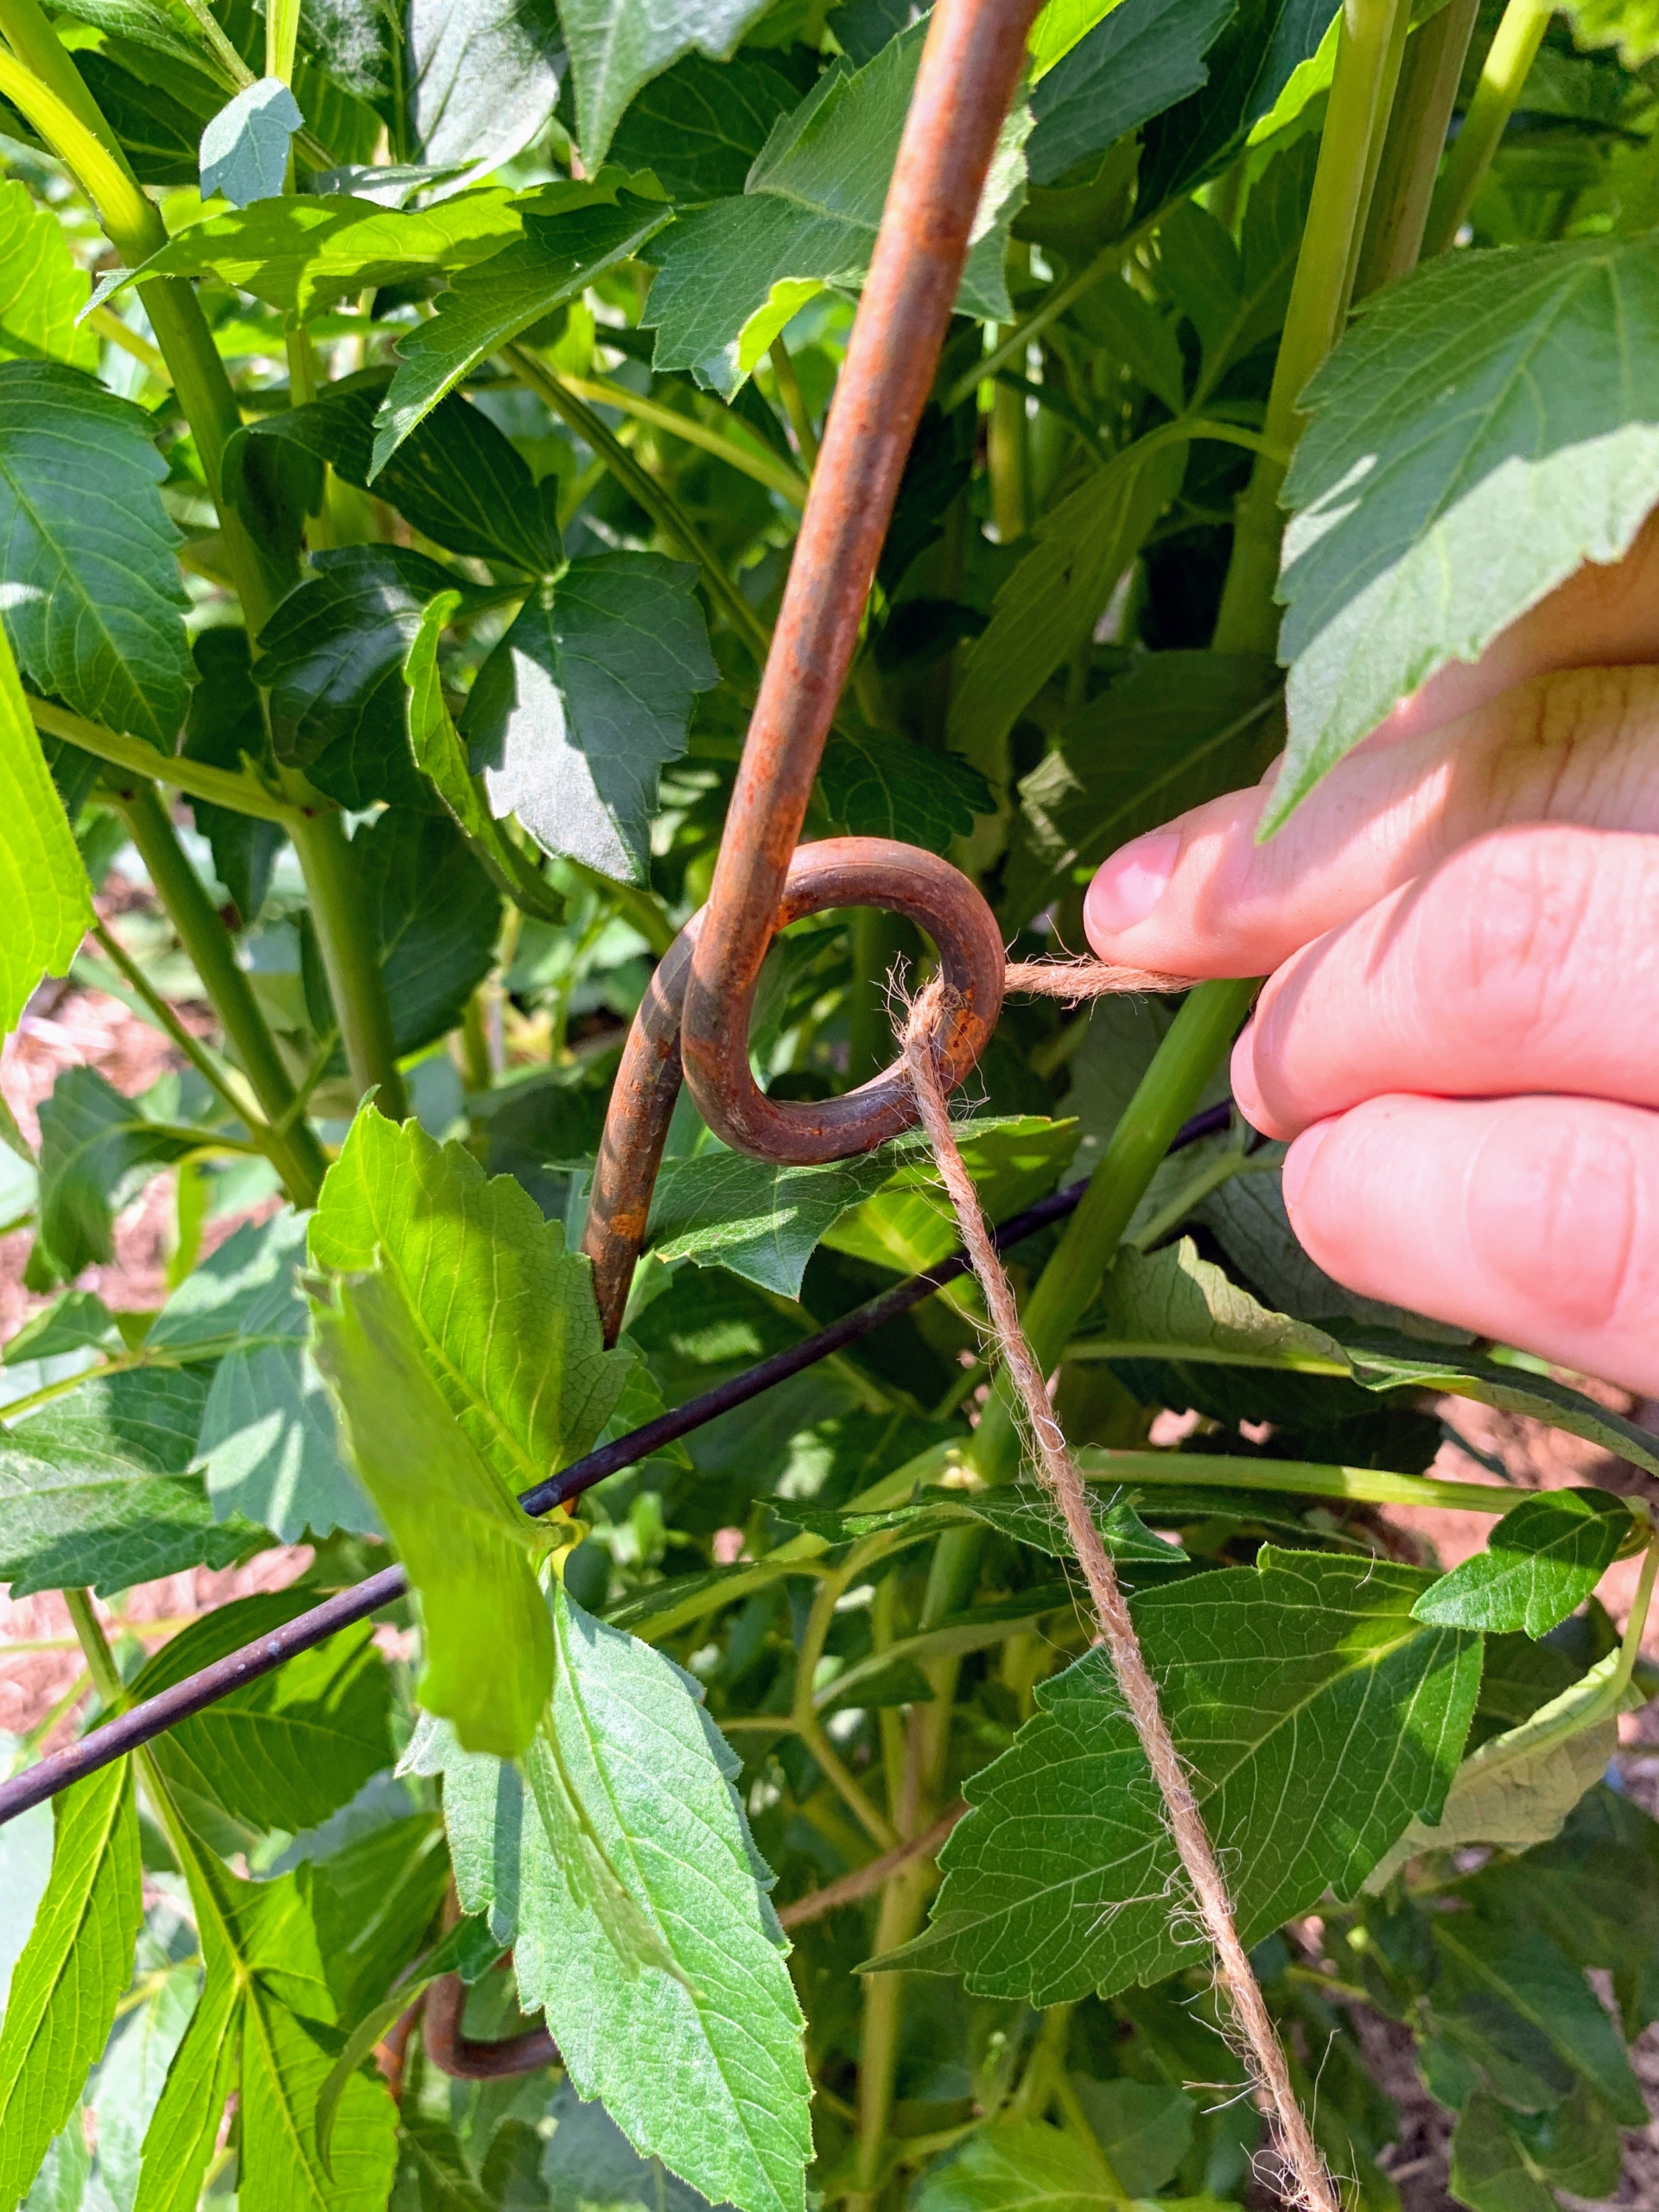
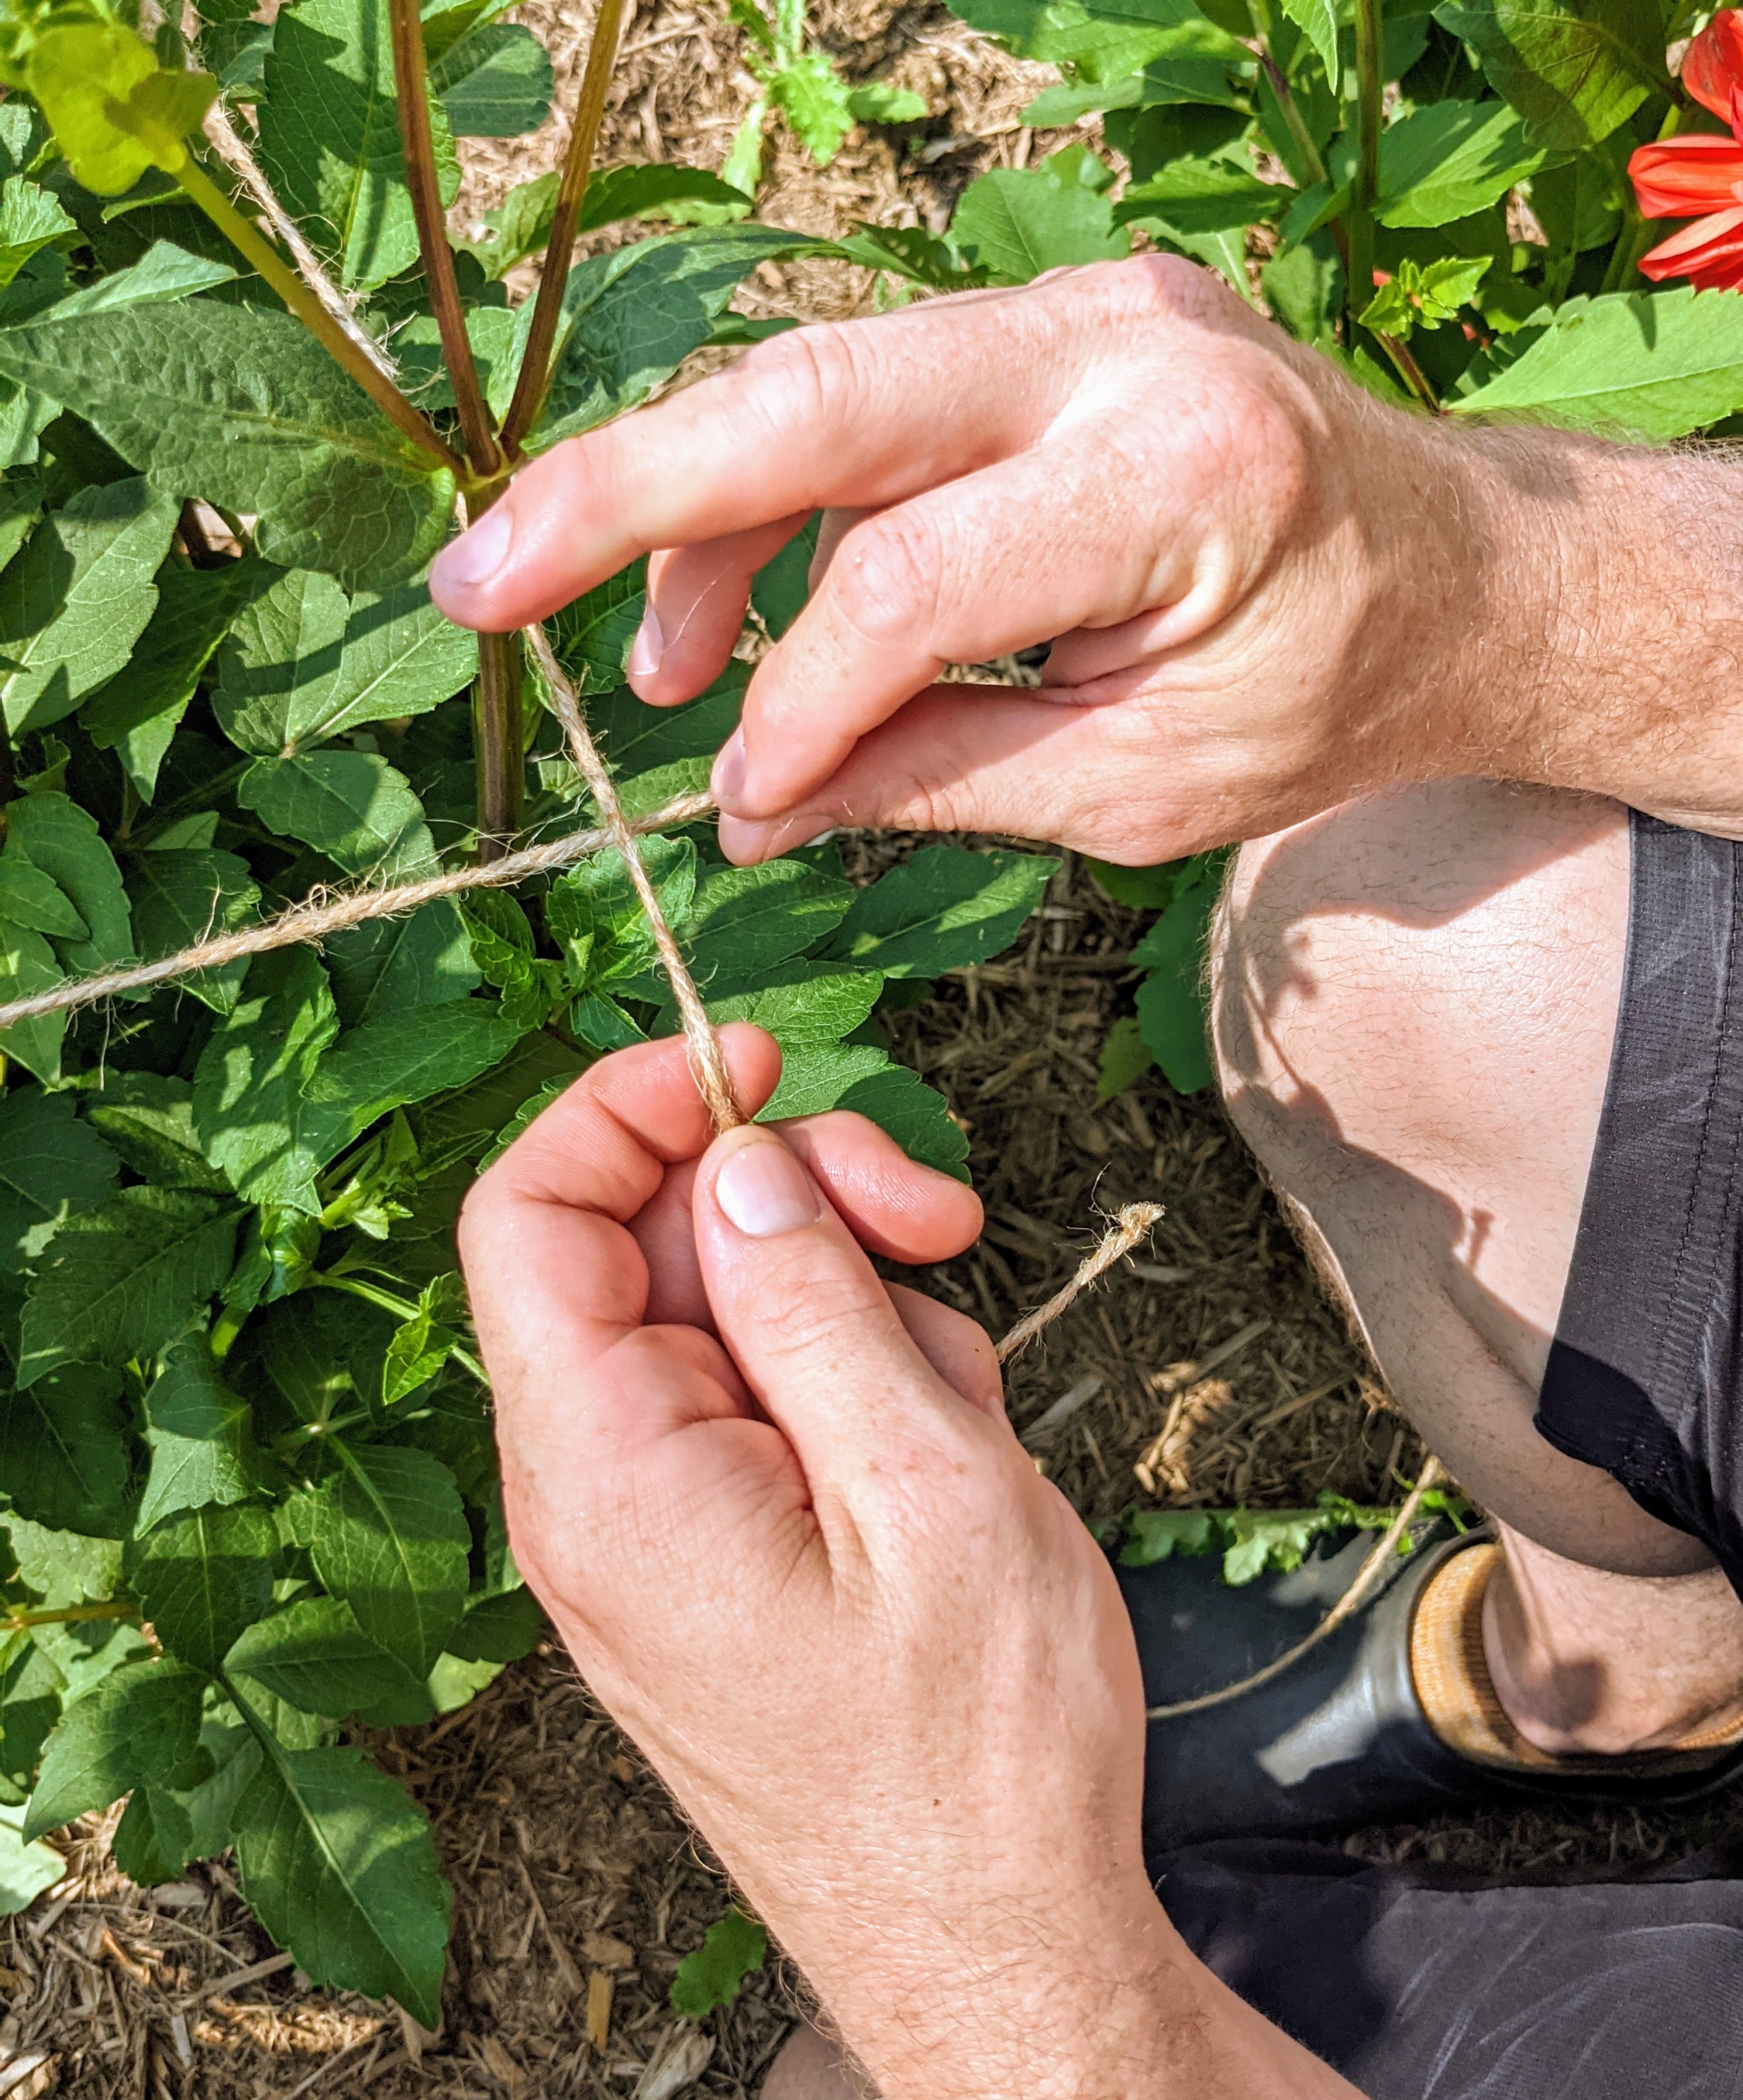
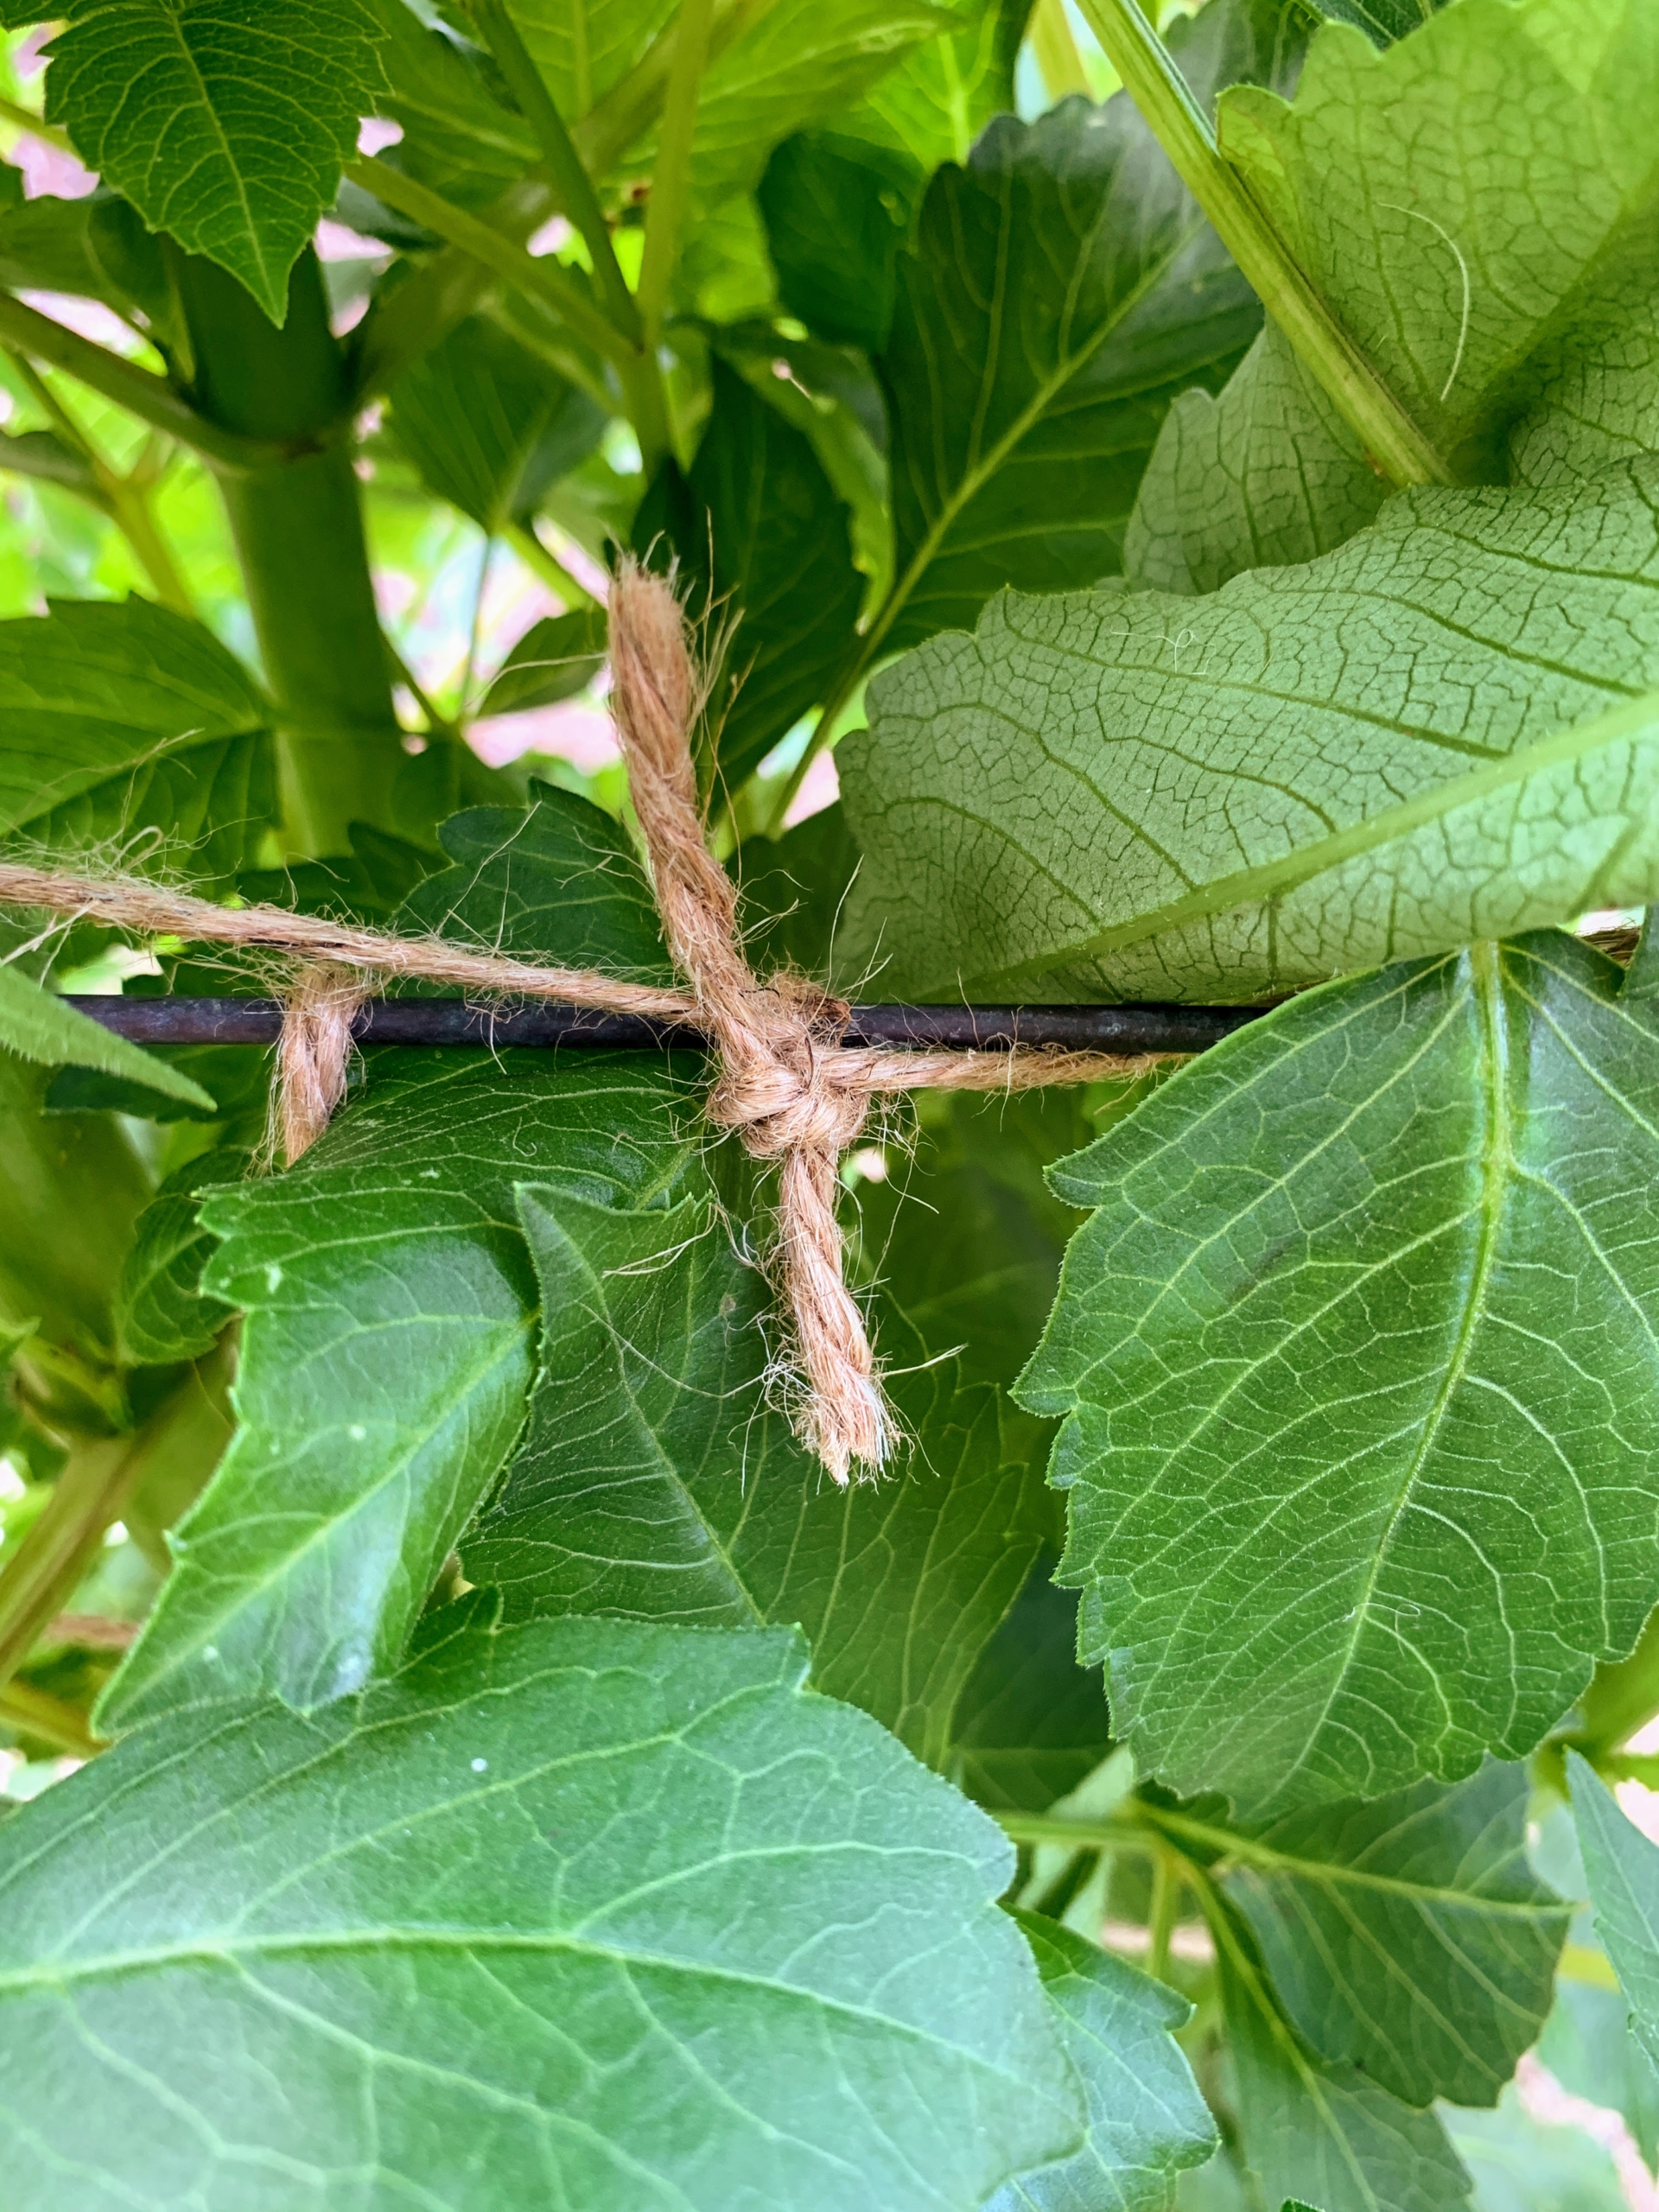
There are many different ways to support the growing plants. Here, Ryan uses jute twine pulled through the eye holes of the stake and then wrapped around the plant to hold the stems up.
Next, he ties a simple knot keeping all the branches of the dahlia corralled and upright.
Depending on the height of the dahlia, this may have to be done a couple of times to ensure the plant is well-supported.
These plants are developing so nicely. I am looking forward to seeing more and more of the gorgeous blooms later this season. What dahlias are in your garden? Share them with me in the comments section below.