It takes a lot of work to maintain the fencing here at my Bedford, New York farm.
The pasture fencing is made from 100-year-old white spruce railings. I purchased all the antique railings from Canada and when the fences were built here we used new cedar uprights to support them. A number of posts have deteriorated over the years and need replacing. Pete Sherpa and Fernando Ferrari, longtime members of my outdoor grounds crew, began replacing them last summer. It's a tedious process and has to be done by hand so as not to disturb or damage the antique wood. The duo is at it again this week and doing an excellent job.
Here are some photos, enjoy.
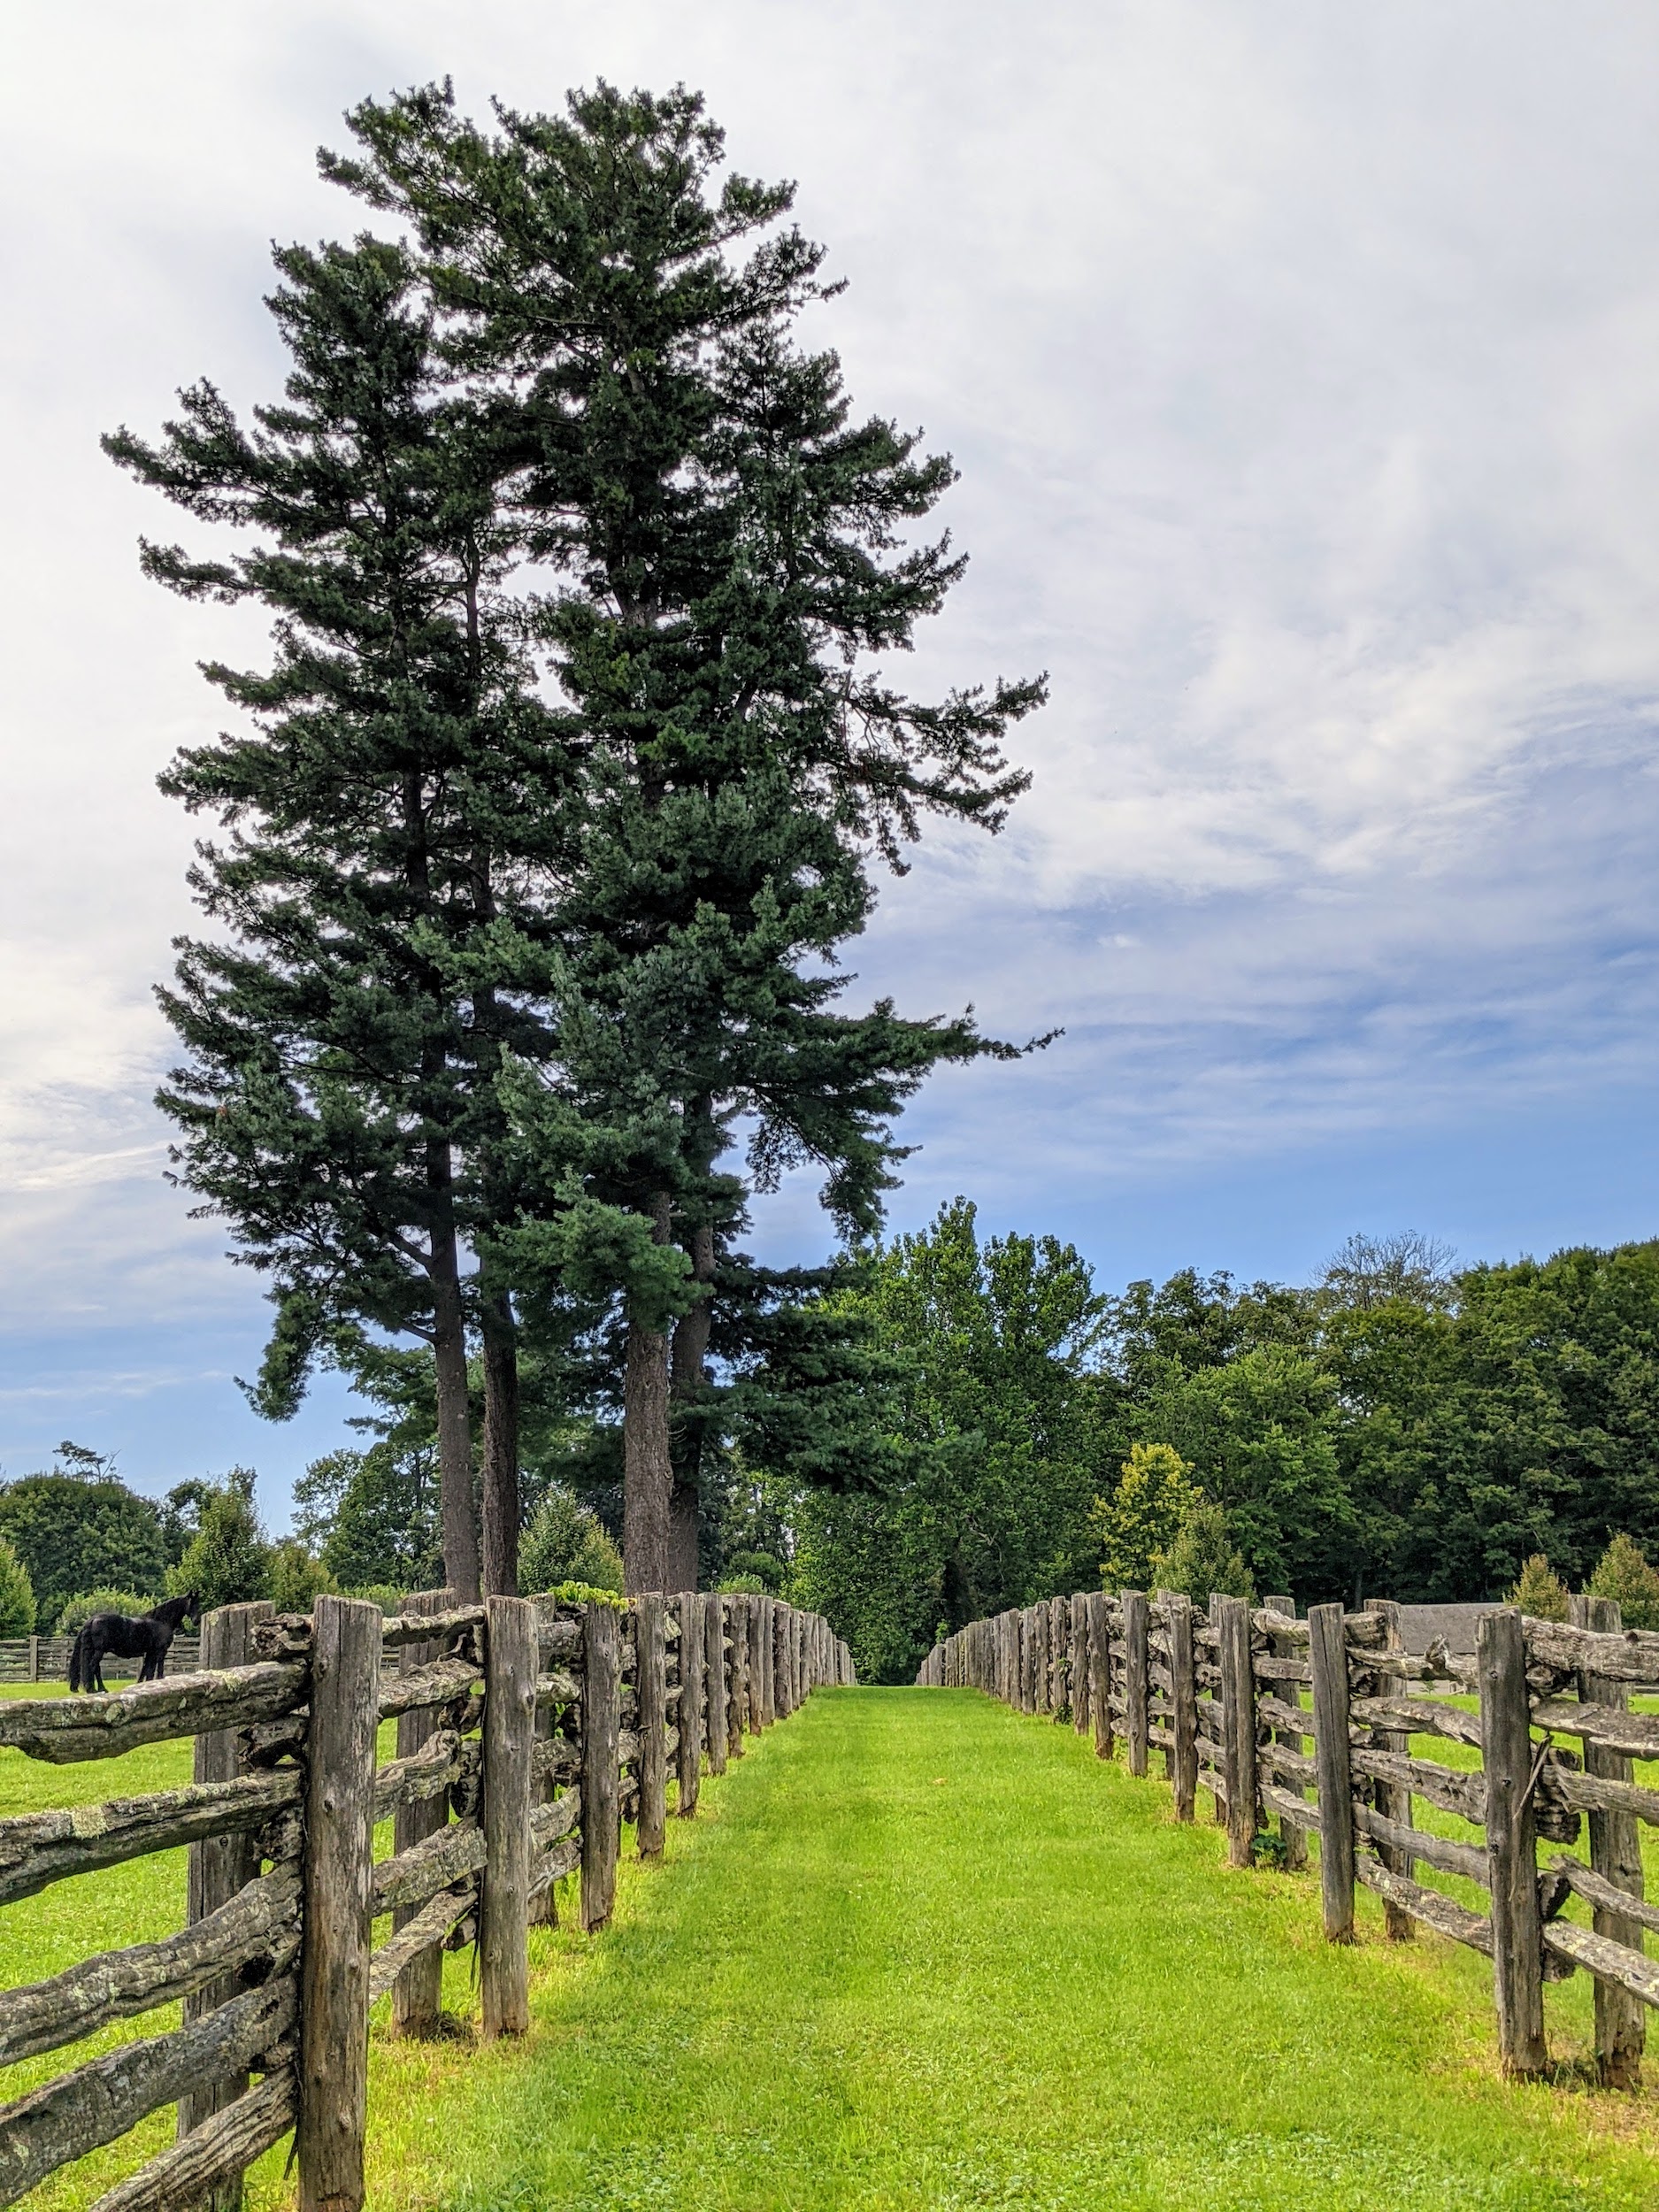
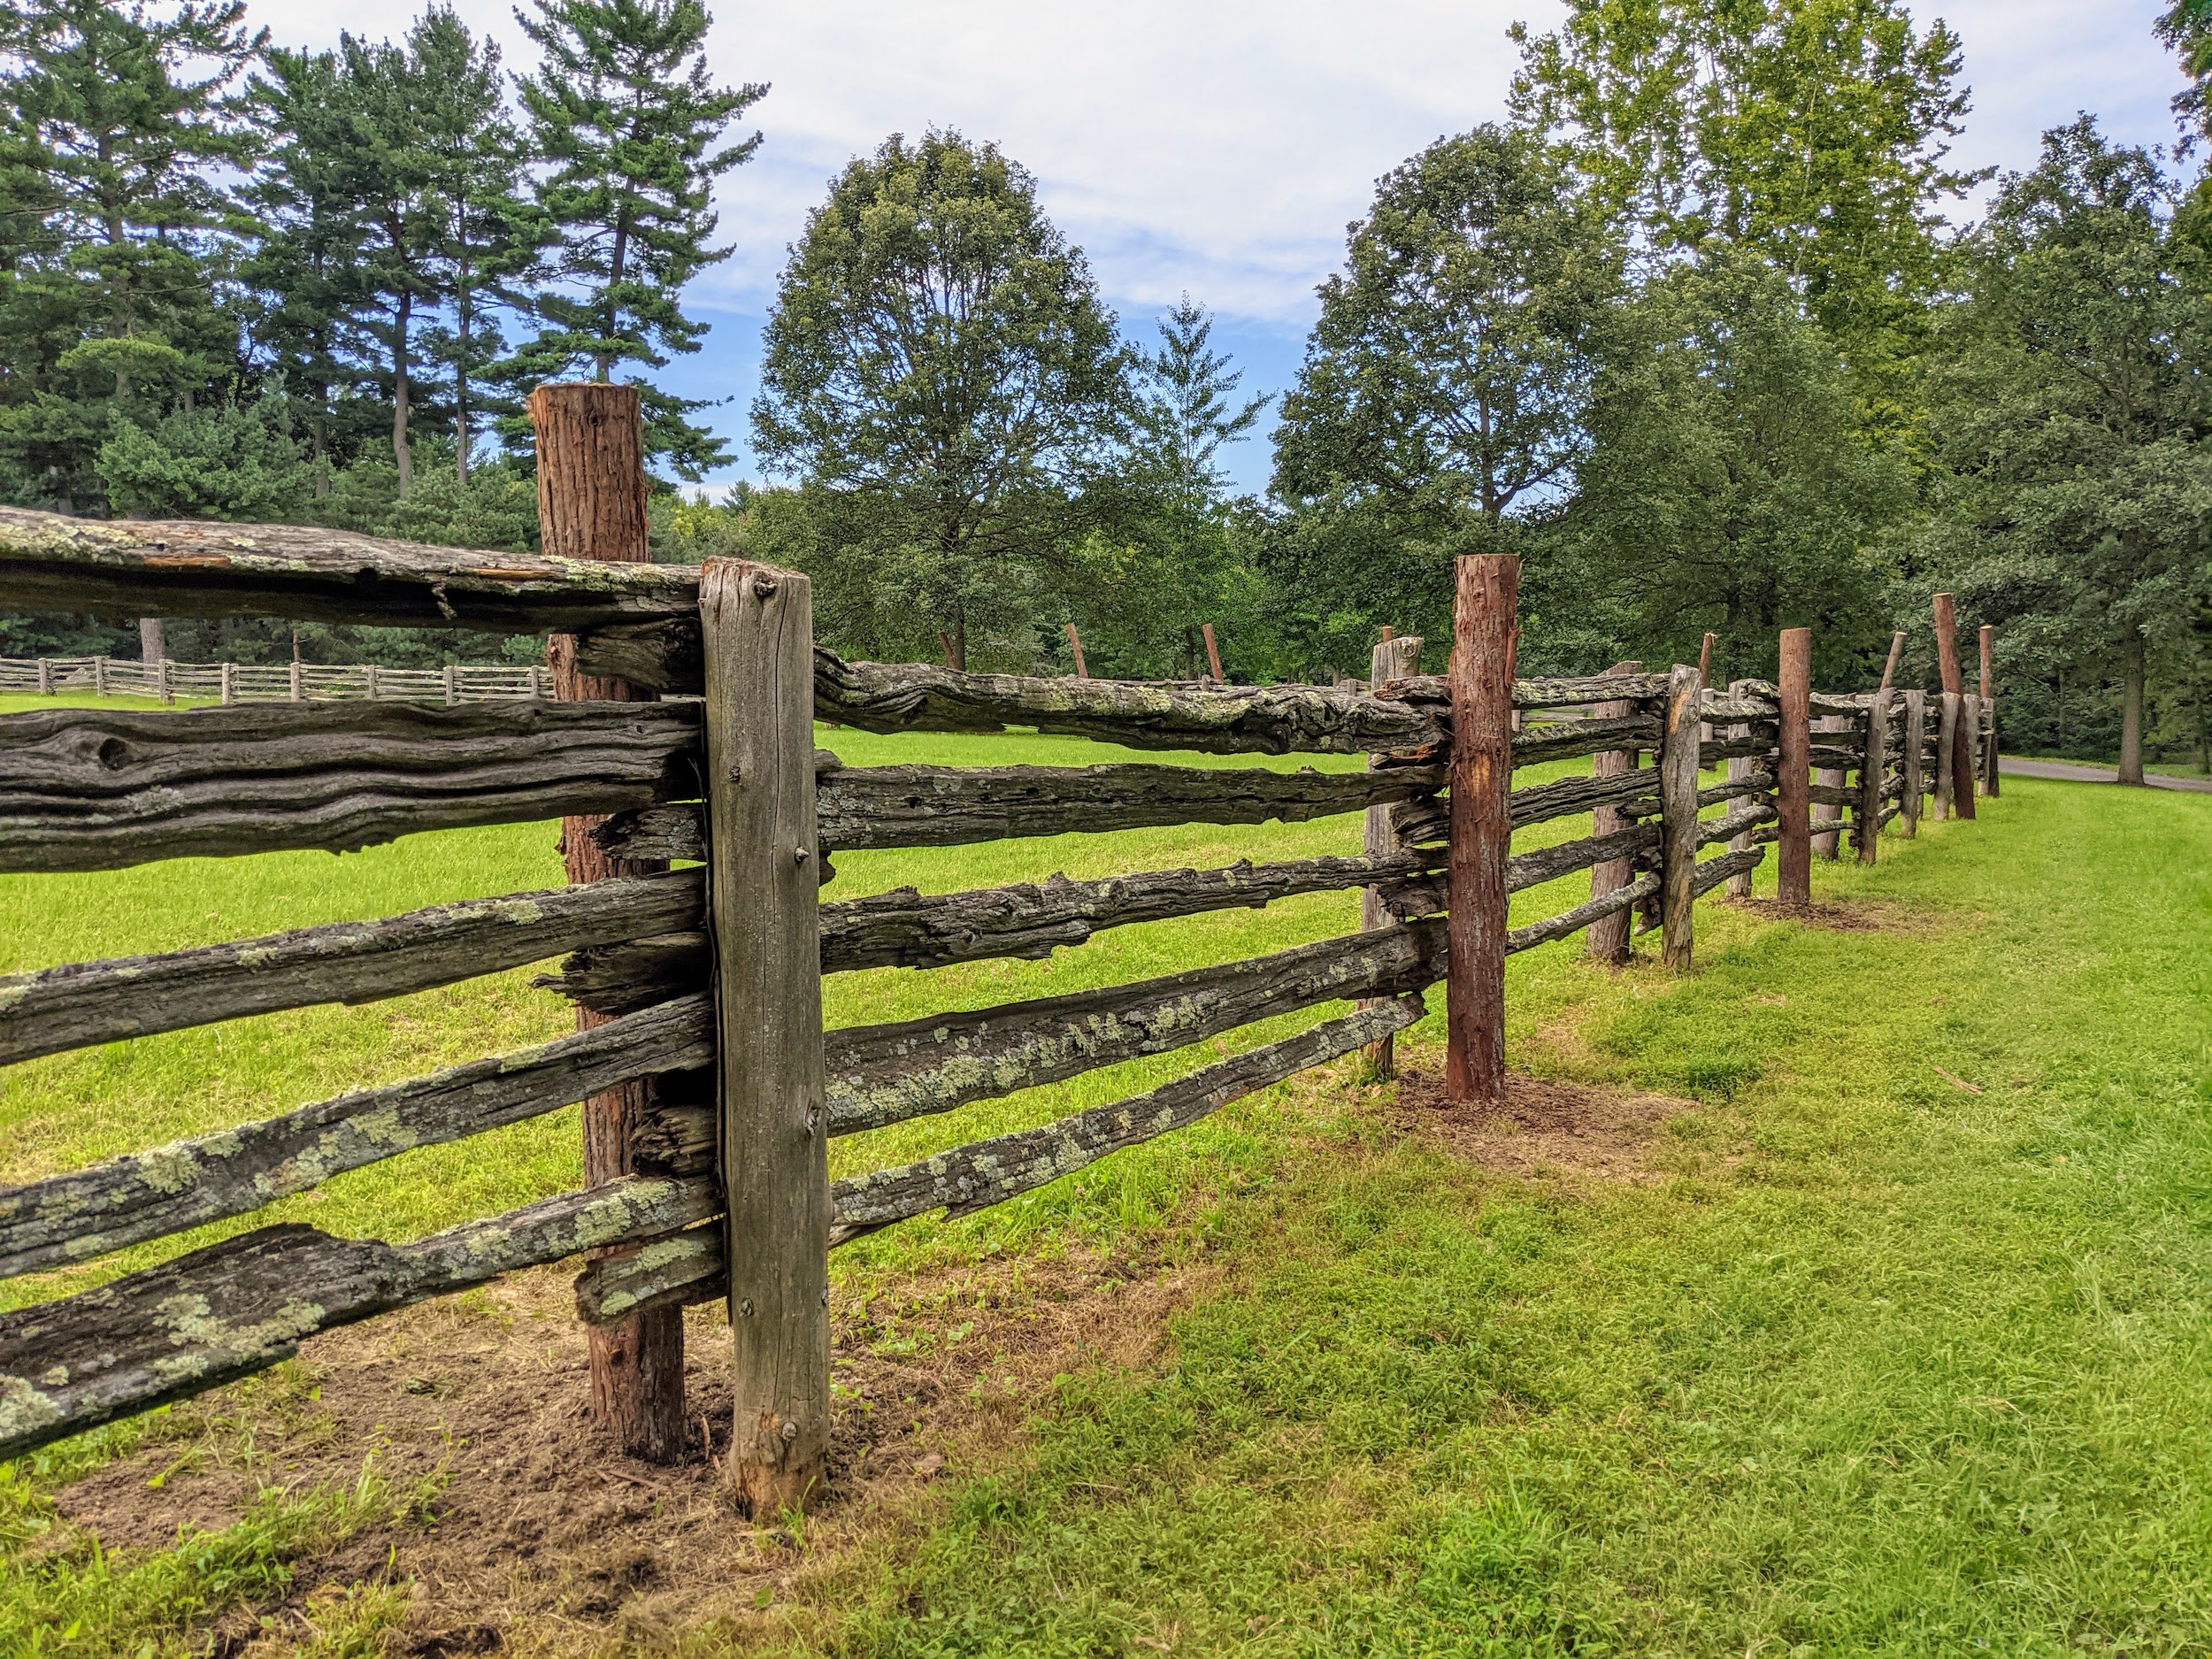
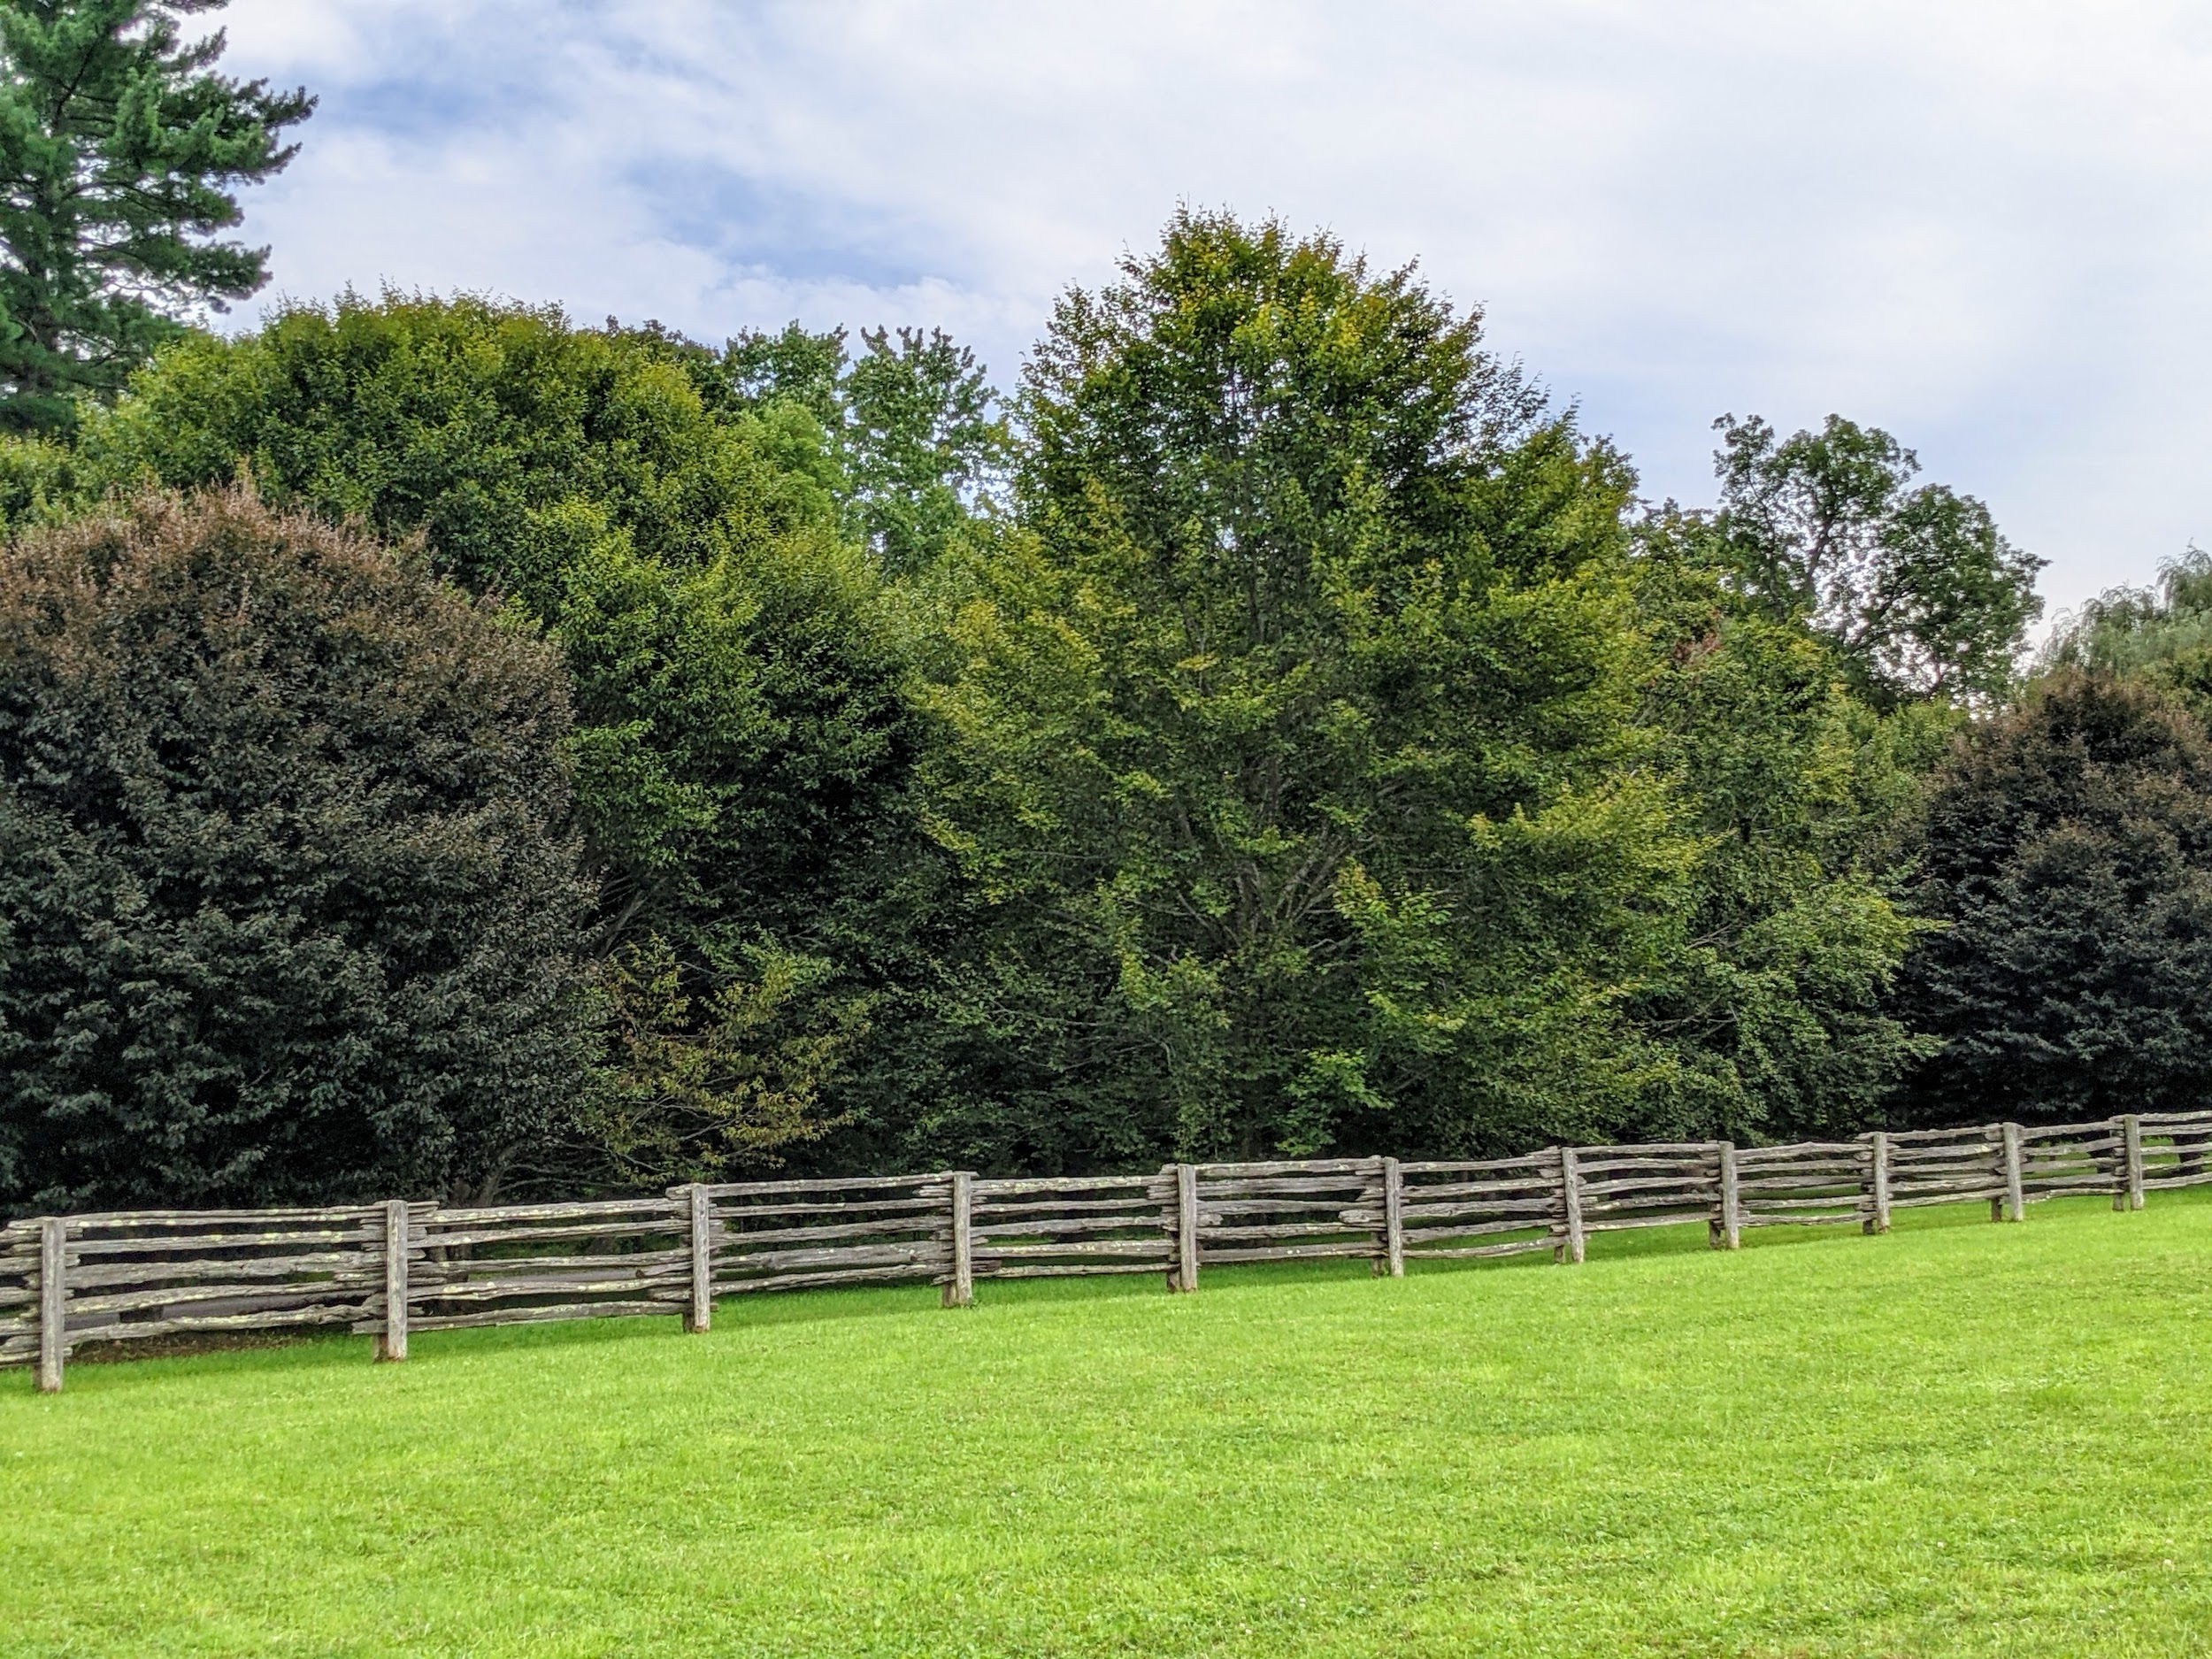
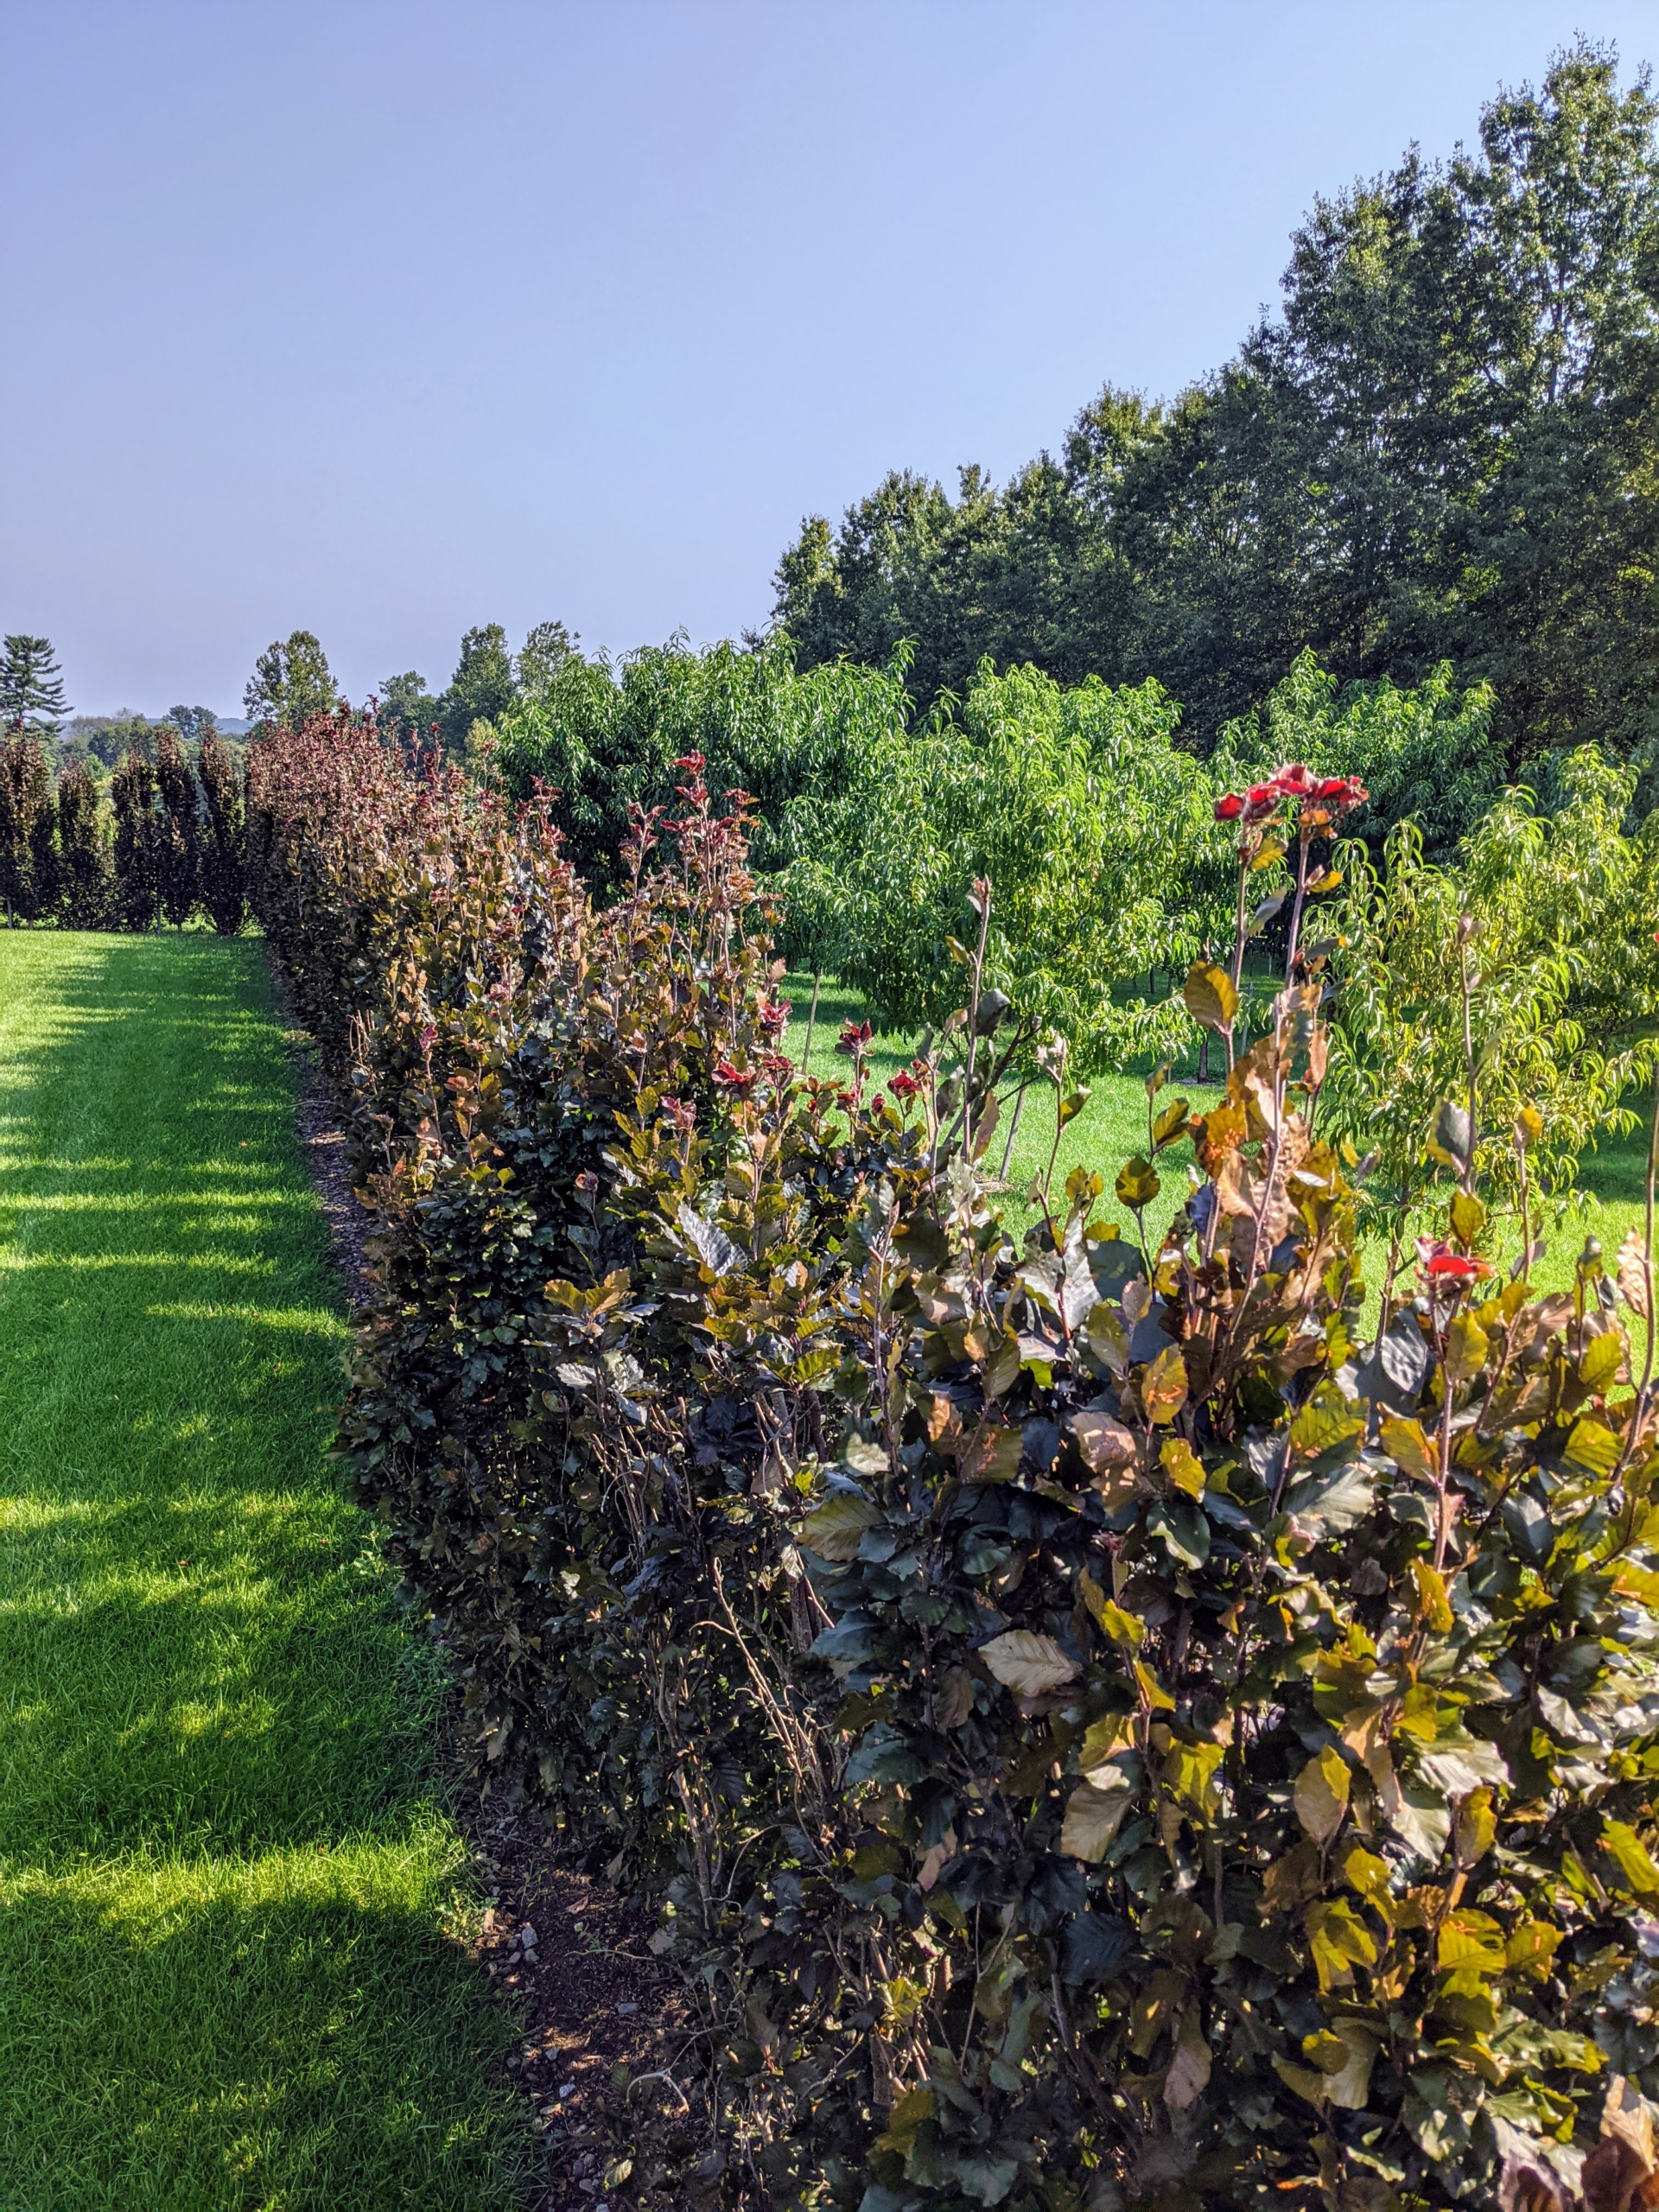
I have lots of fencing here on the farm. This antique fencing surrounds all my horse paddocks and various trees. The antique pasture railings were constructed into a split rail fence, but now many of these cedar uprights are wobbly and no longer support the railings as they should.
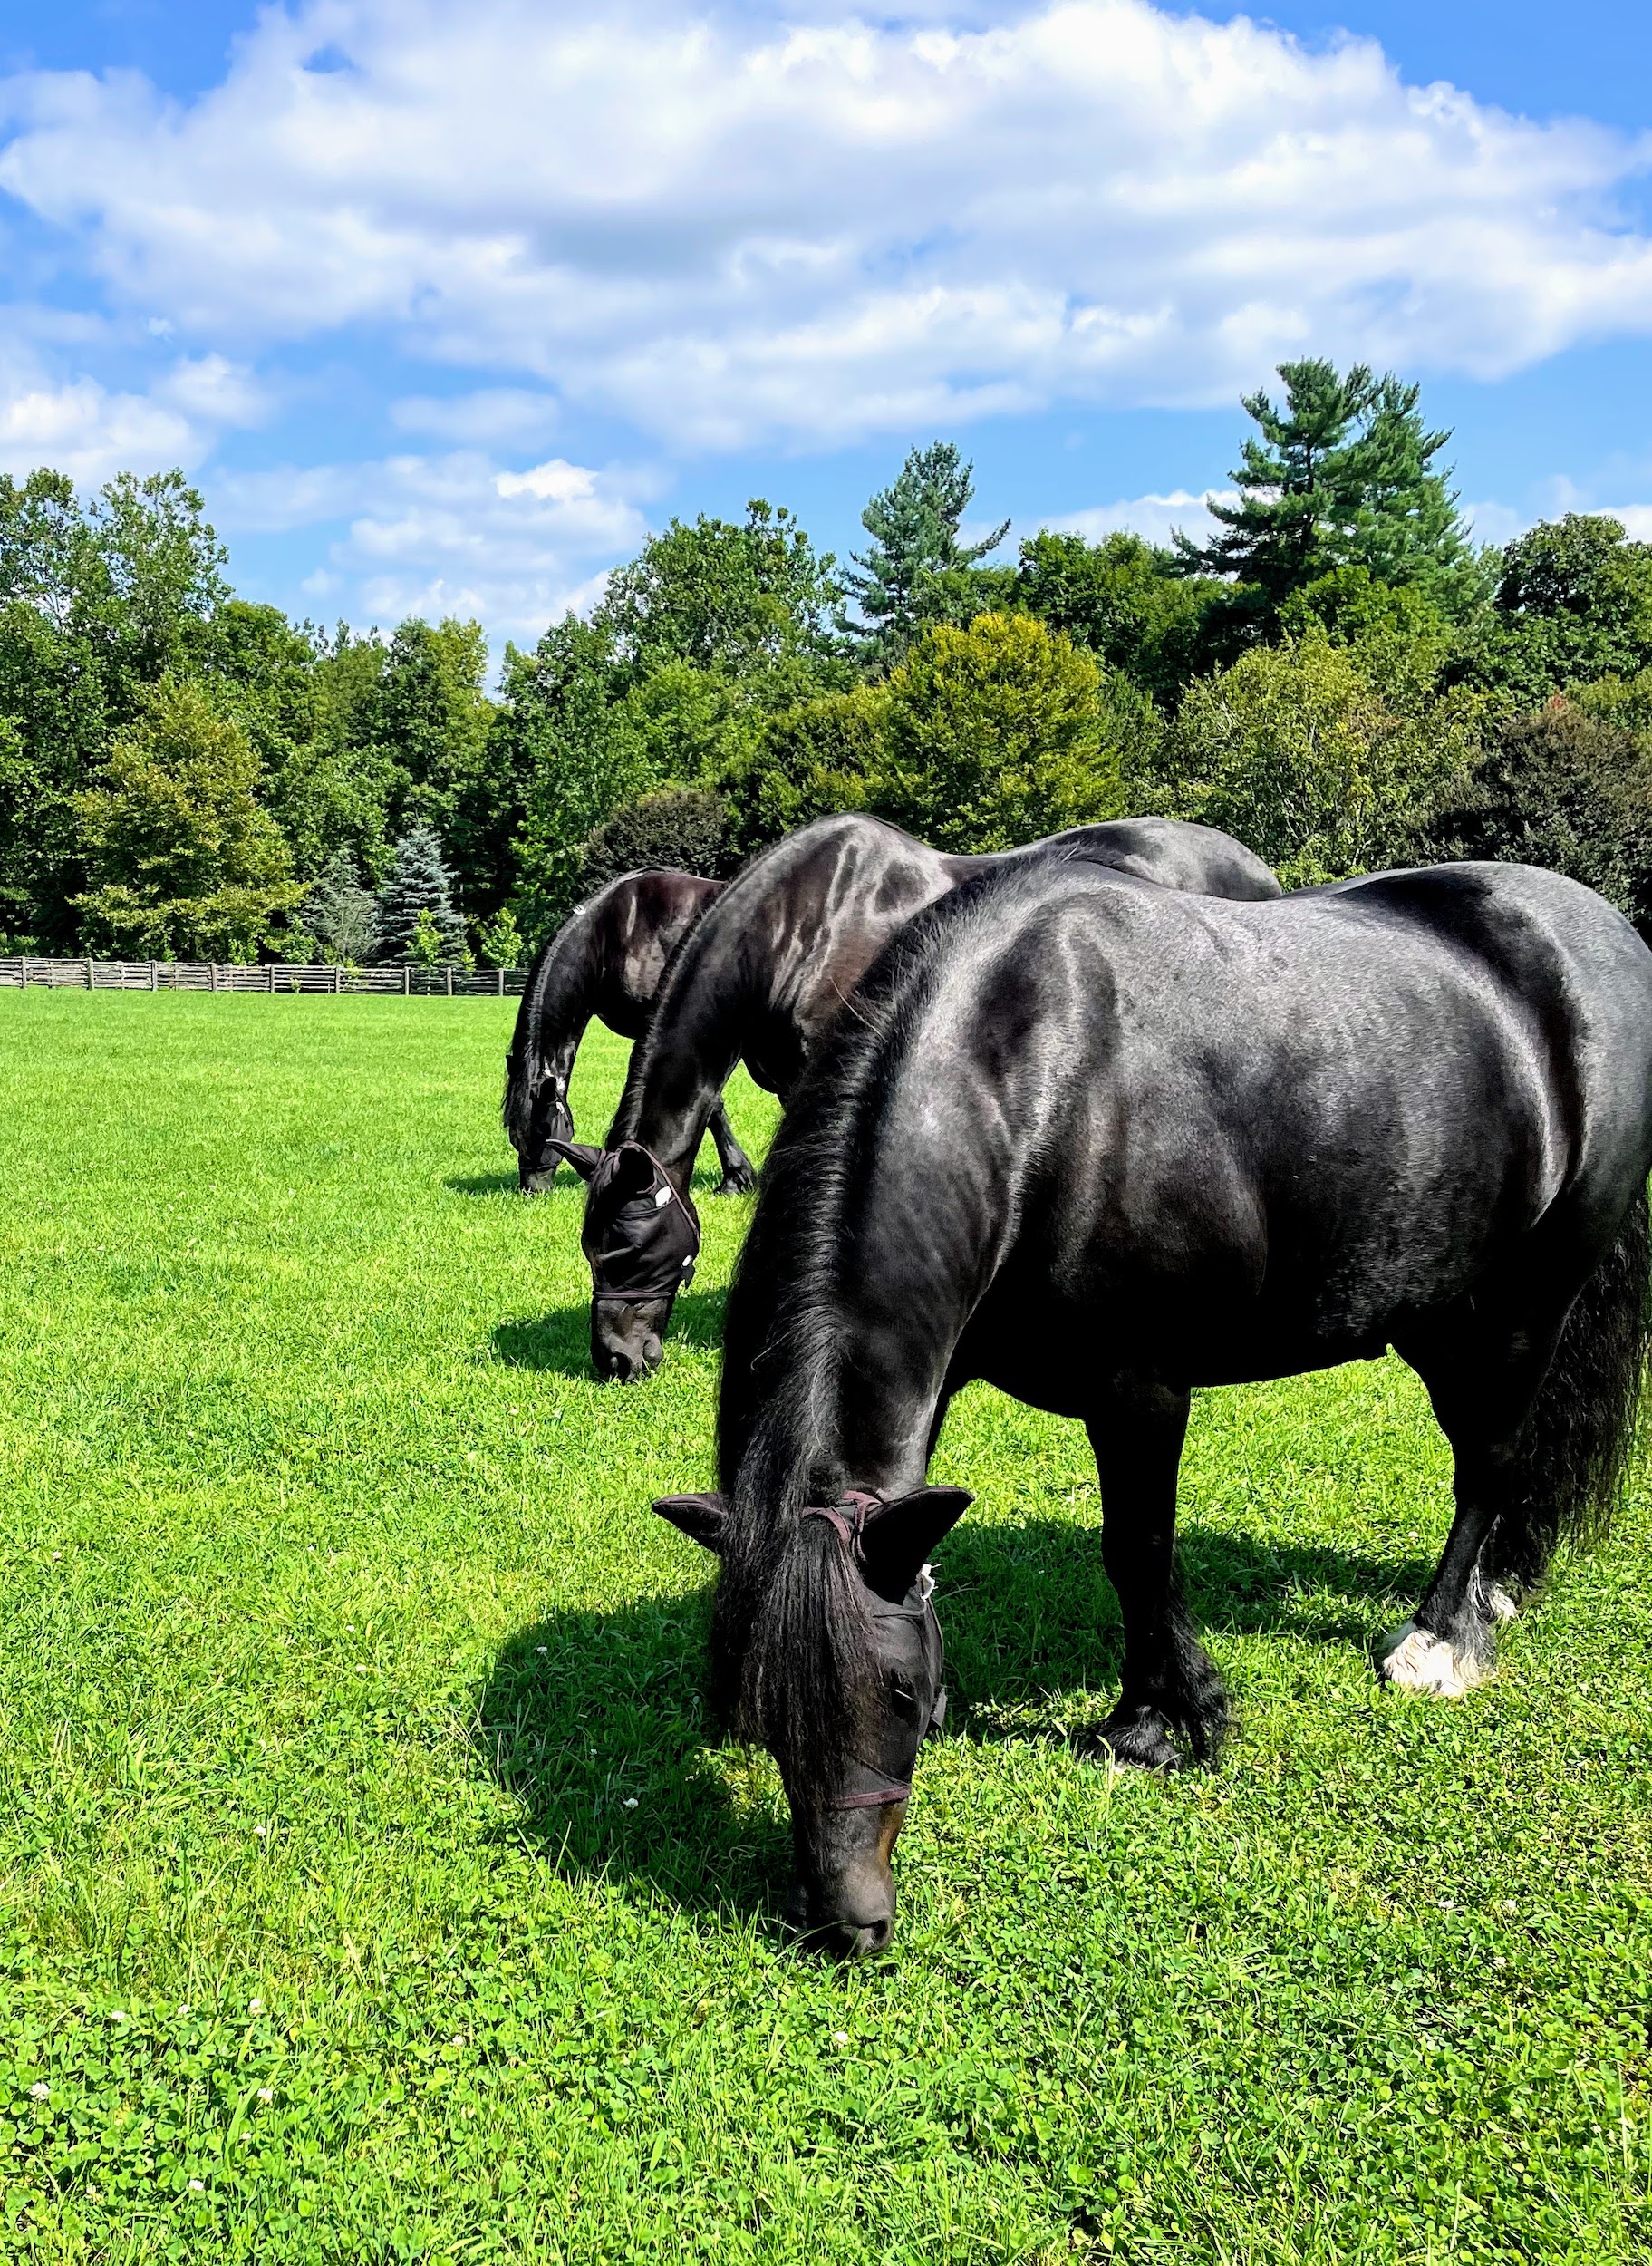
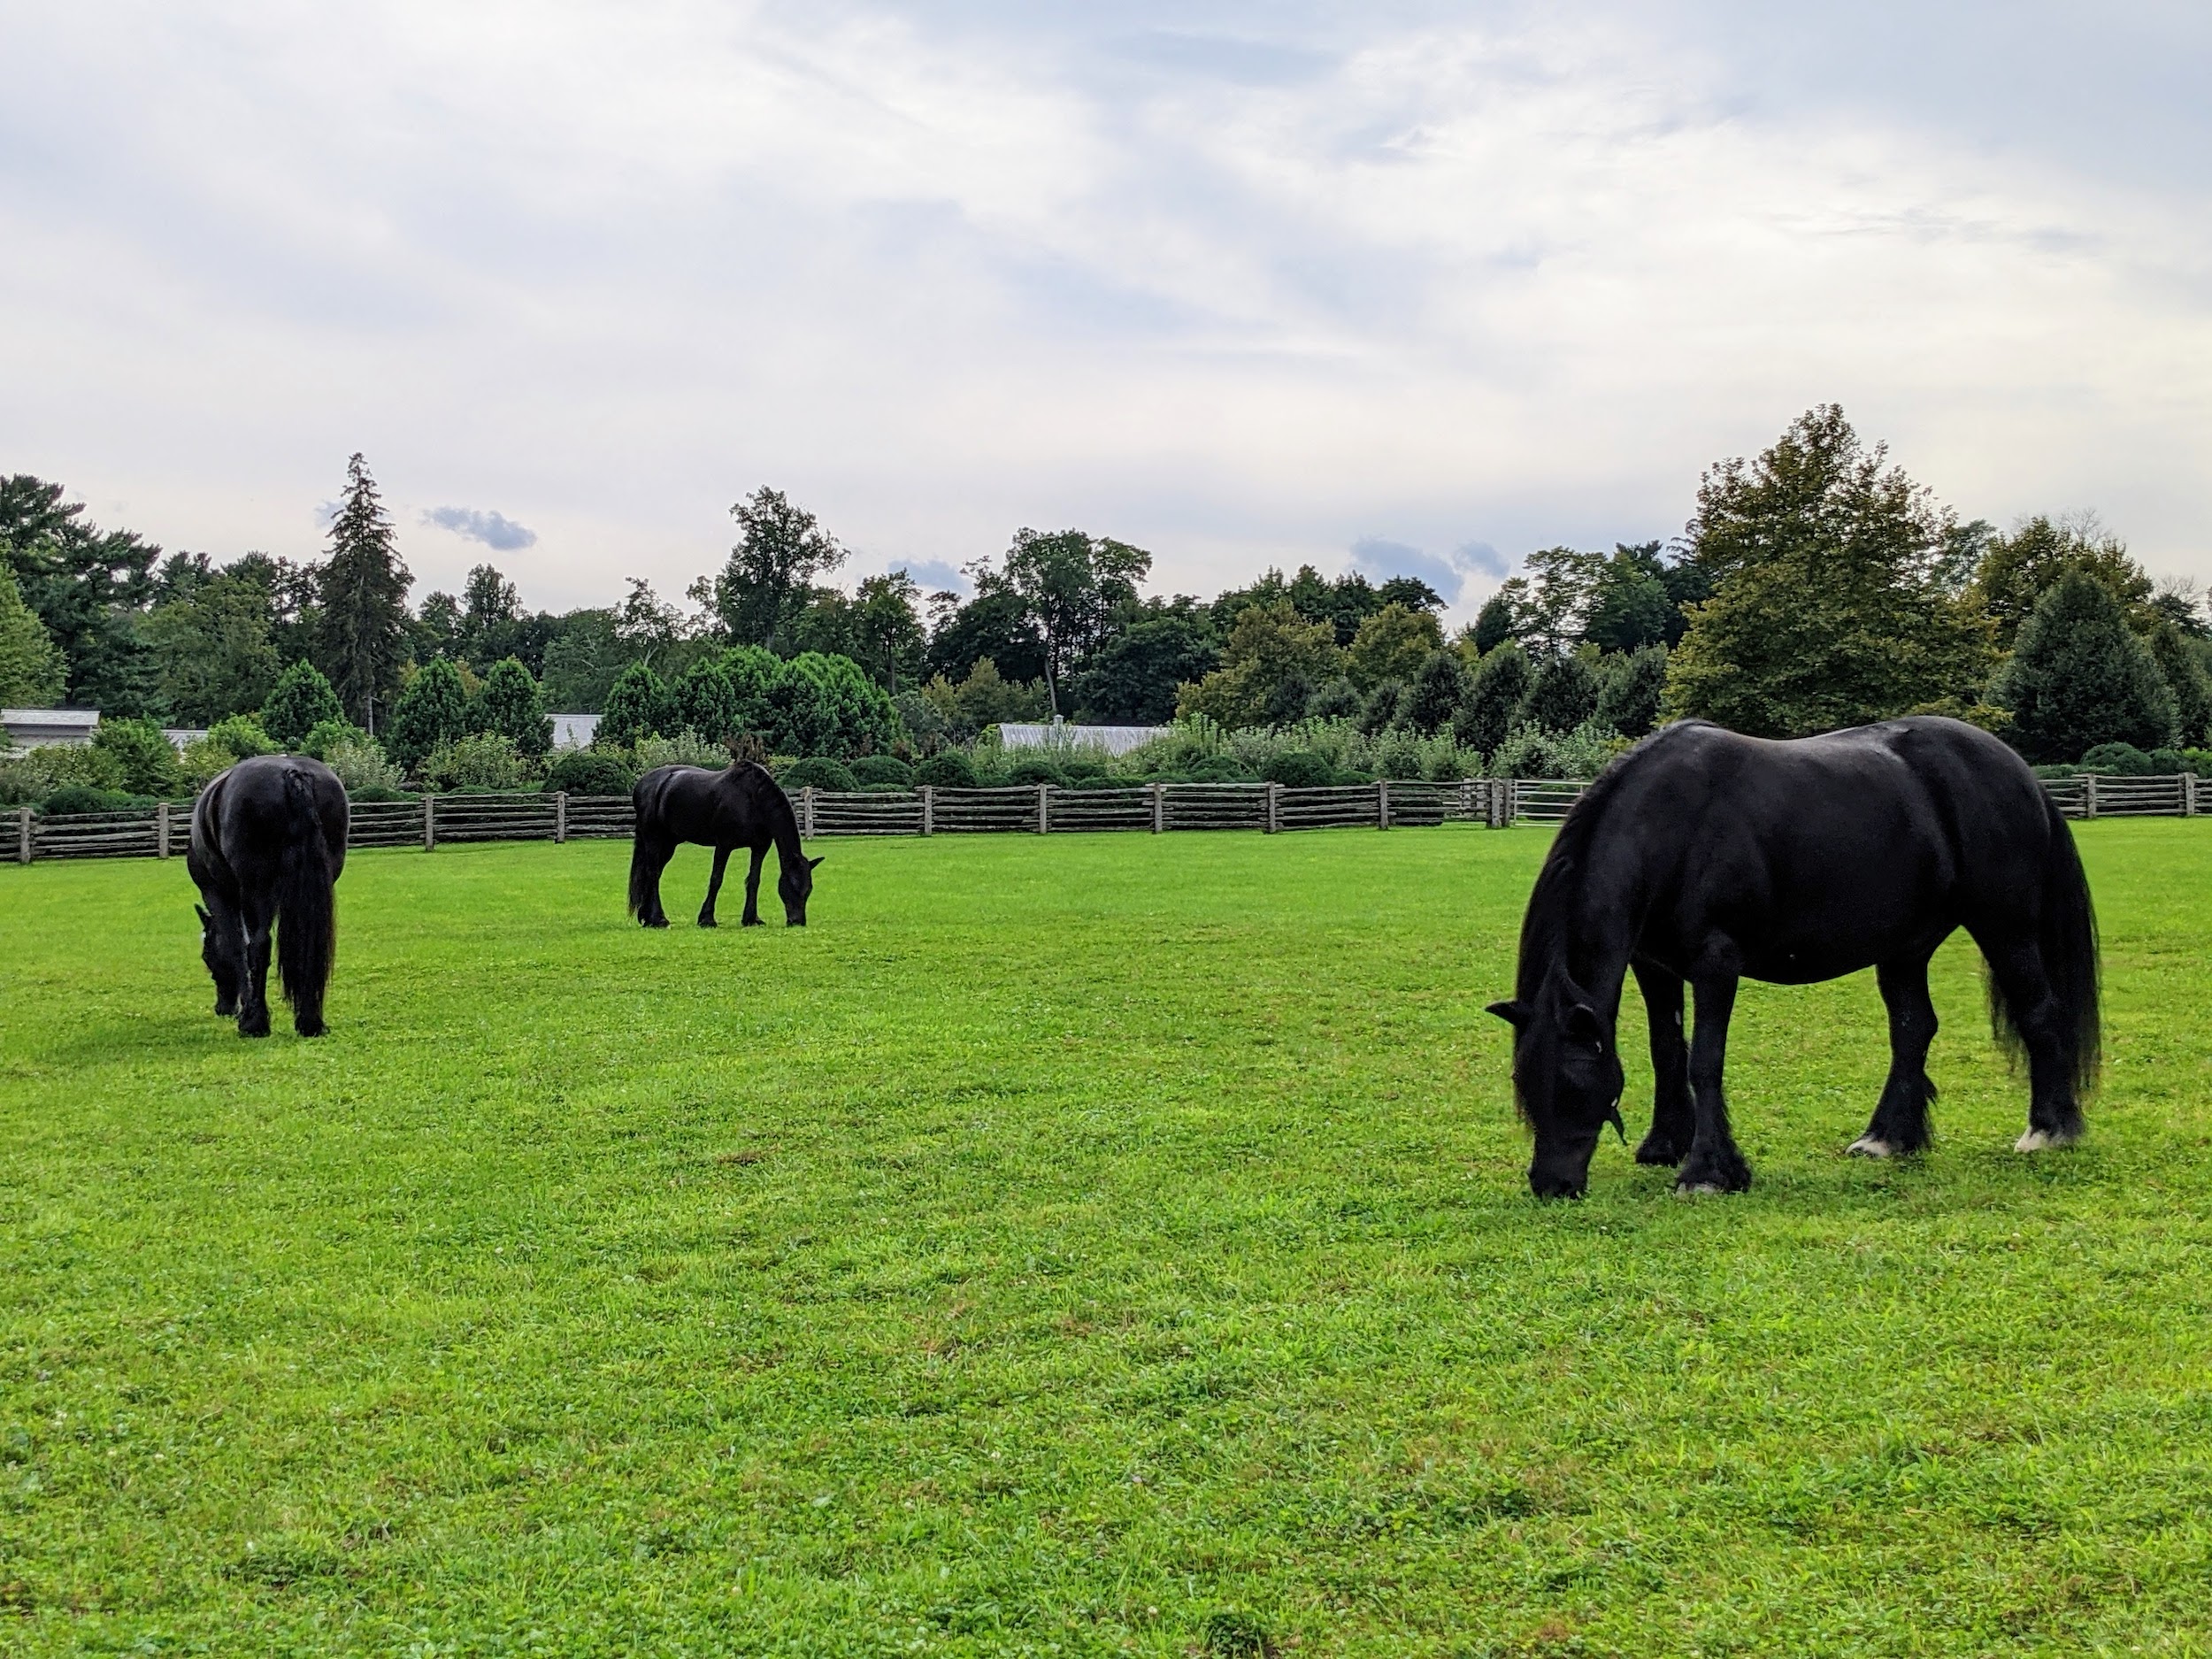
My Friesian horses, Fell pony, and my five donkeys get turned out into their paddocks every day, so it is important to maintain the fences and ensure they are all in good condition. This photo of Banchunch, Rinze, and Bond was taken by my stable manager, Helen Peparo.
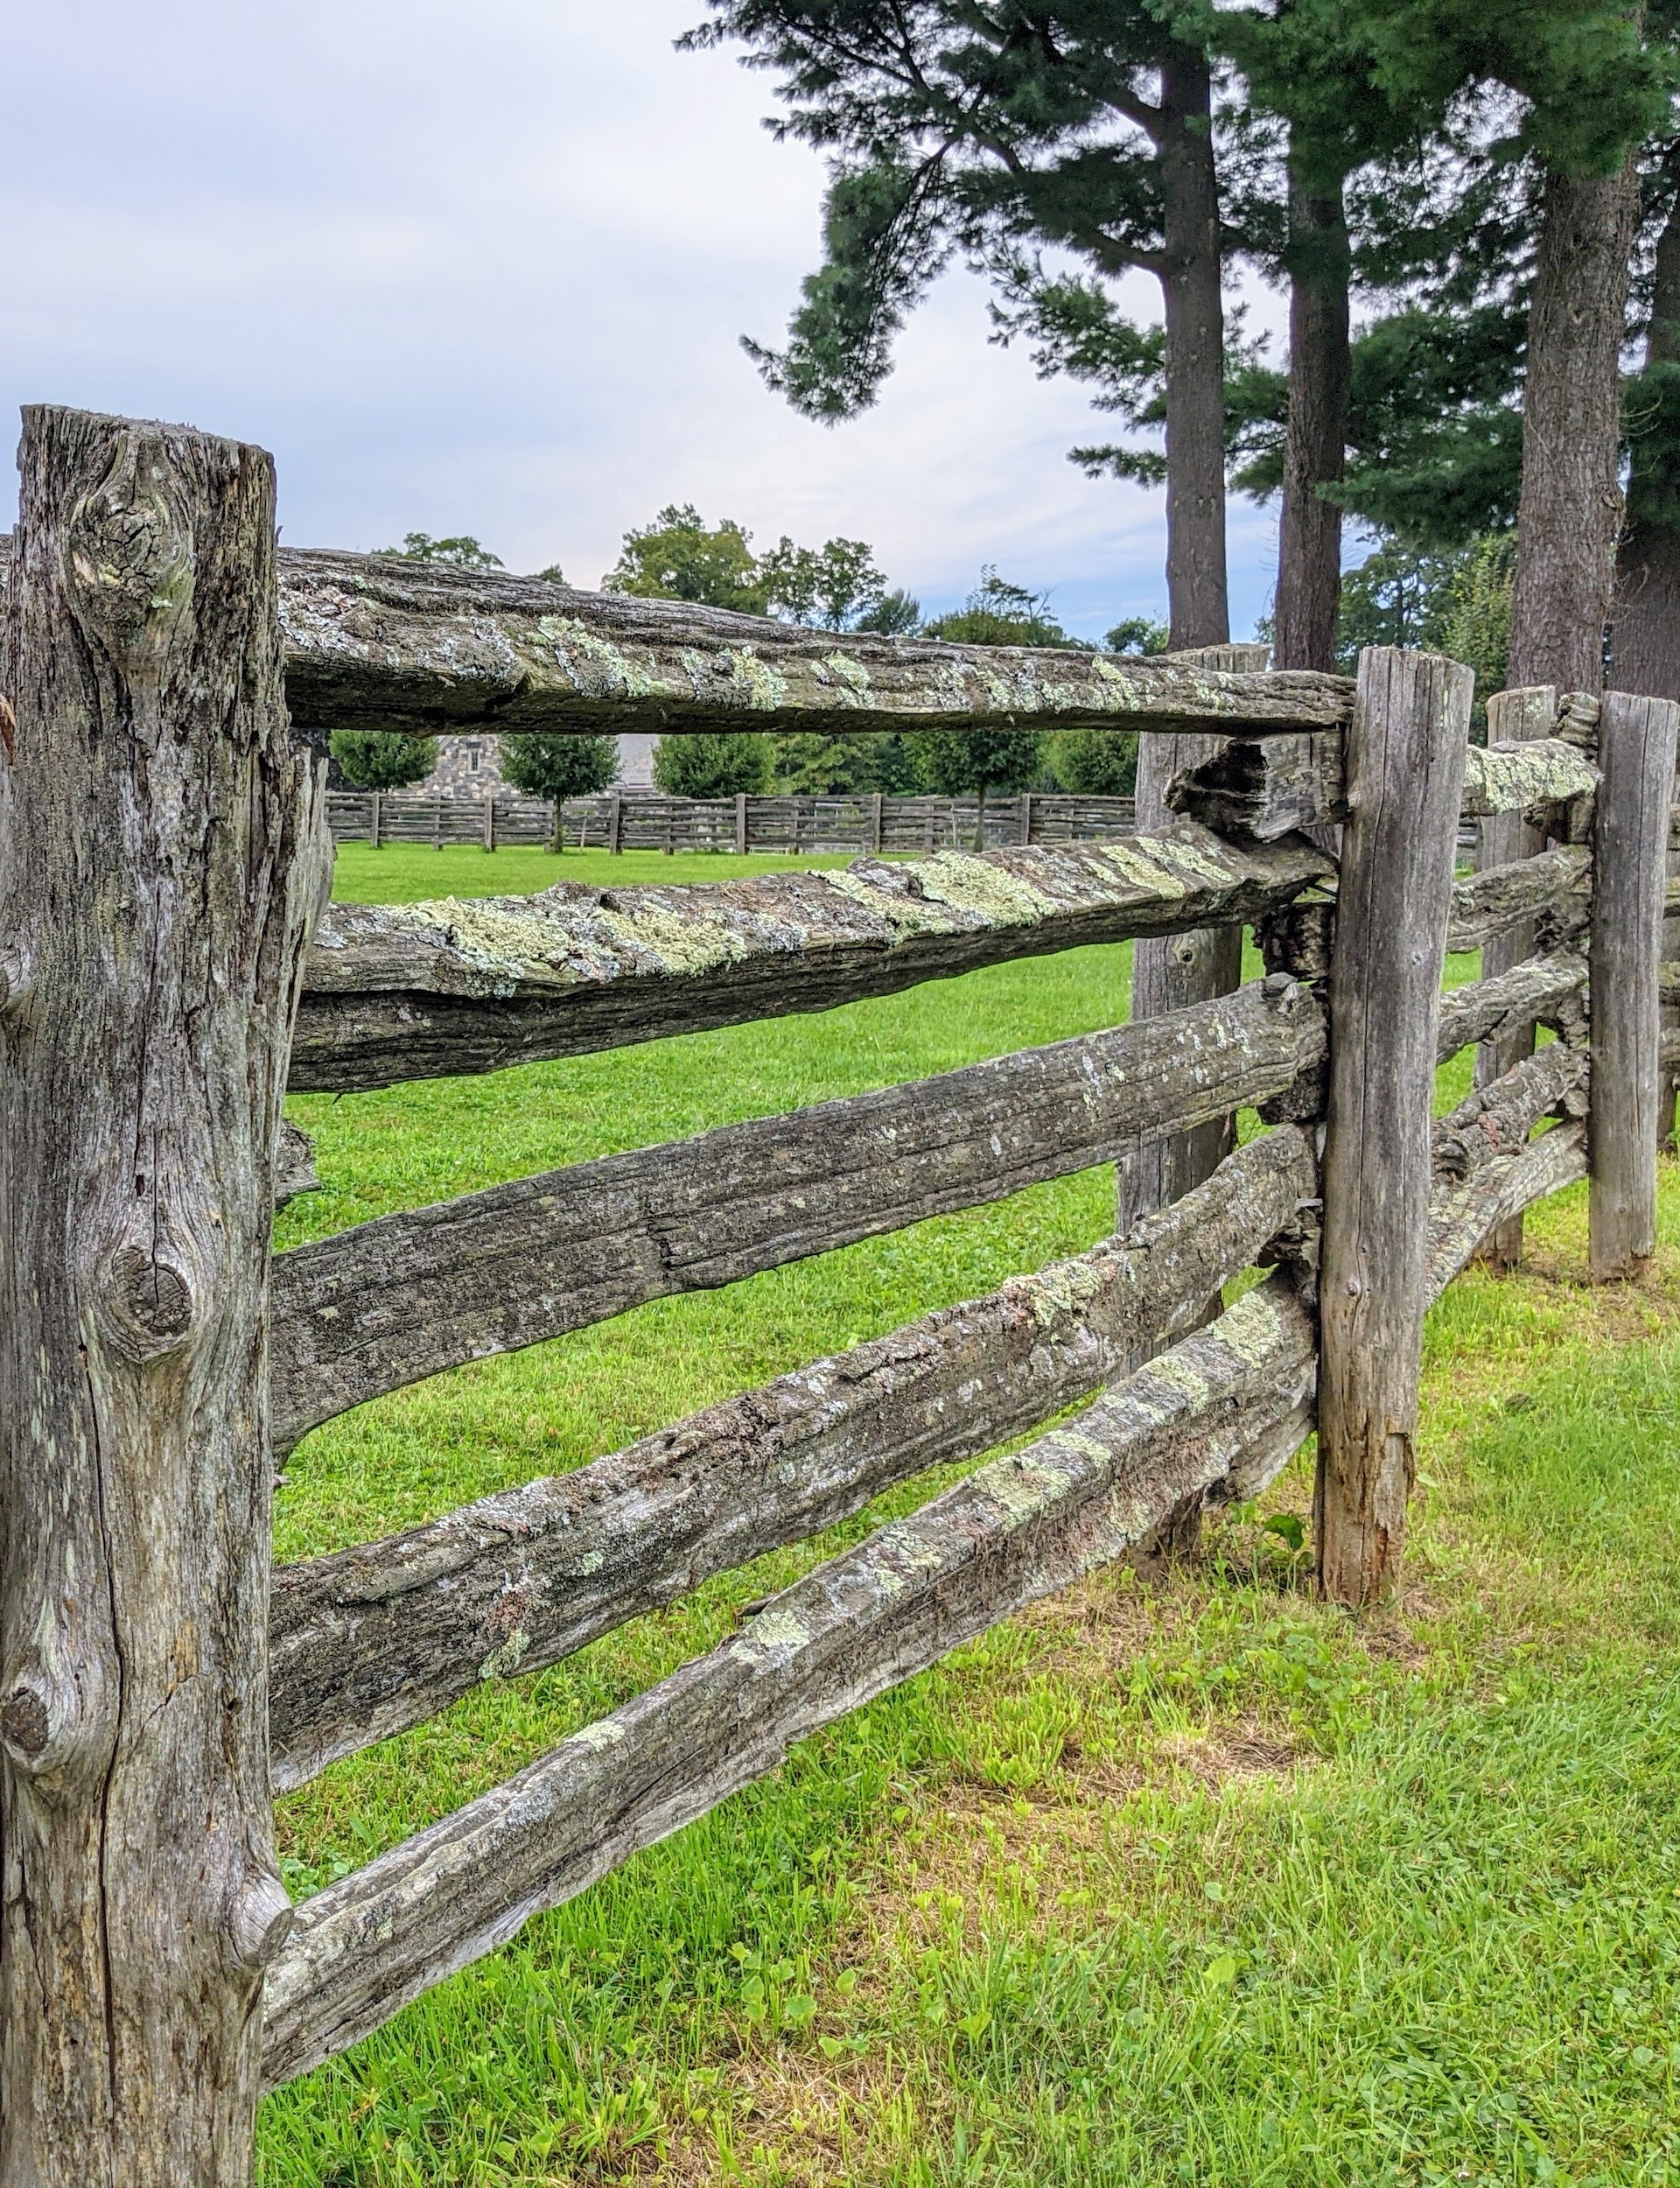
Here is a closer look at the fence with its original posts and antique railings. Many of you have commented on how much you admire these fences. The railings are sandwiched between two cedar posts and attached to the inside of one of them. The other supports the railings from the other side.
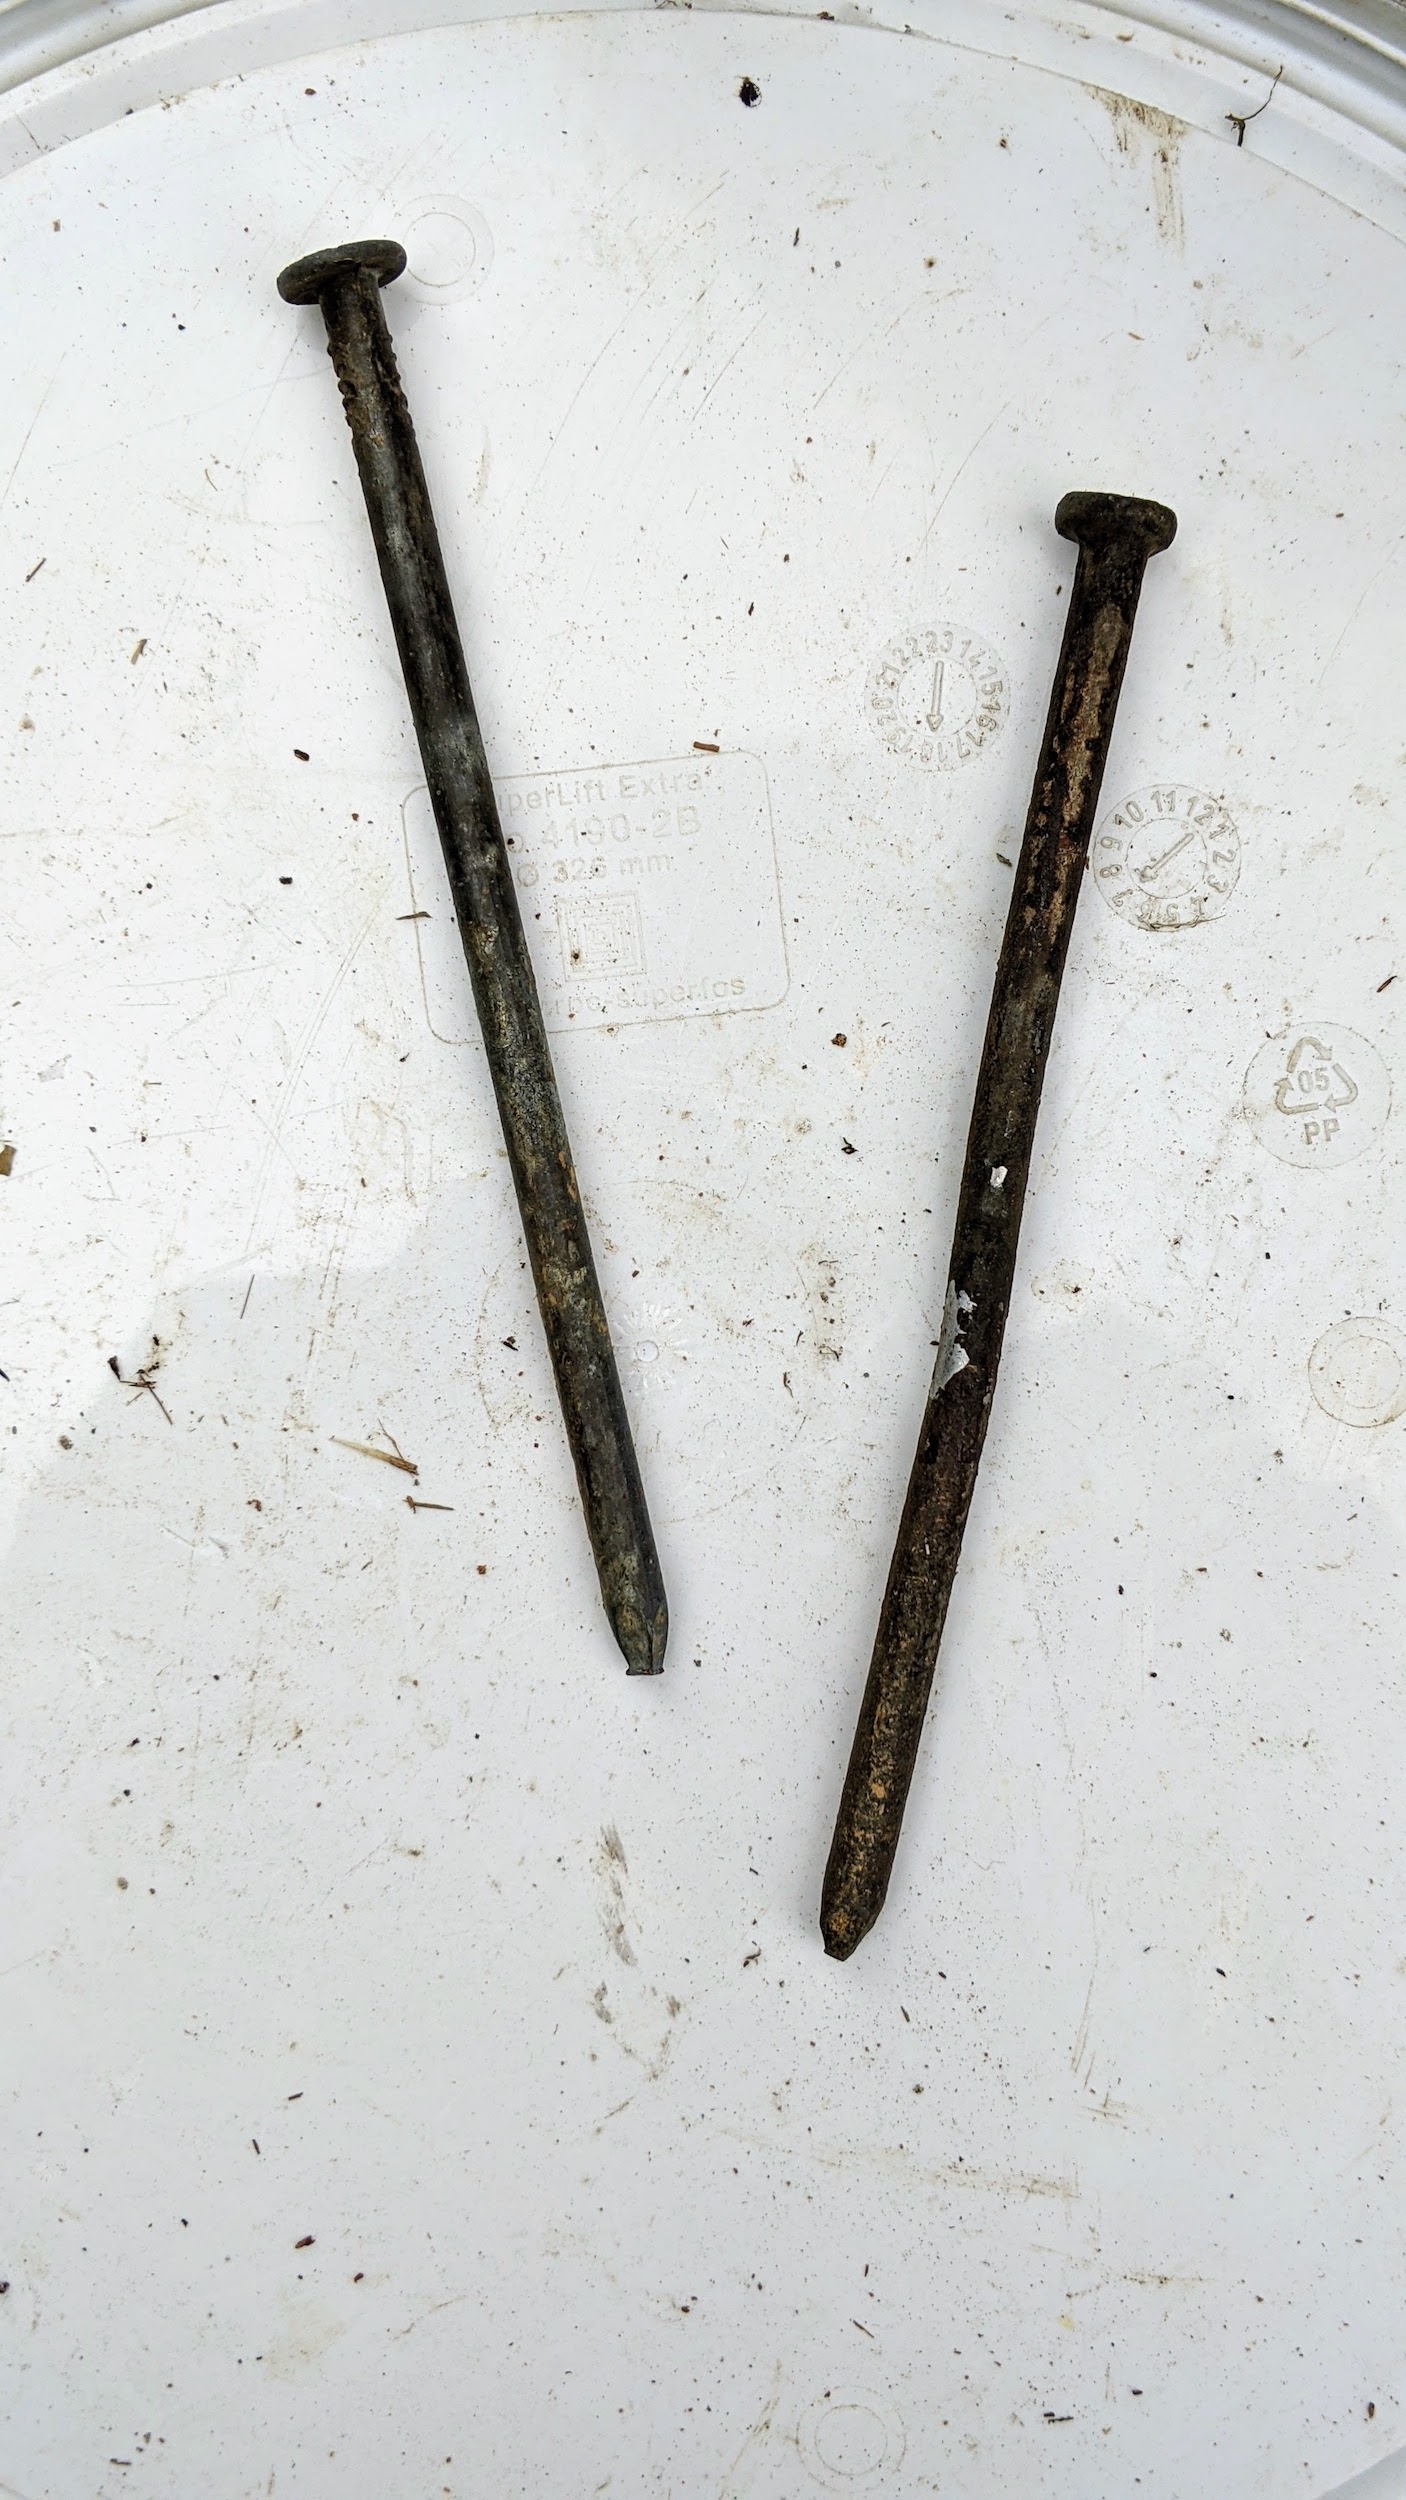
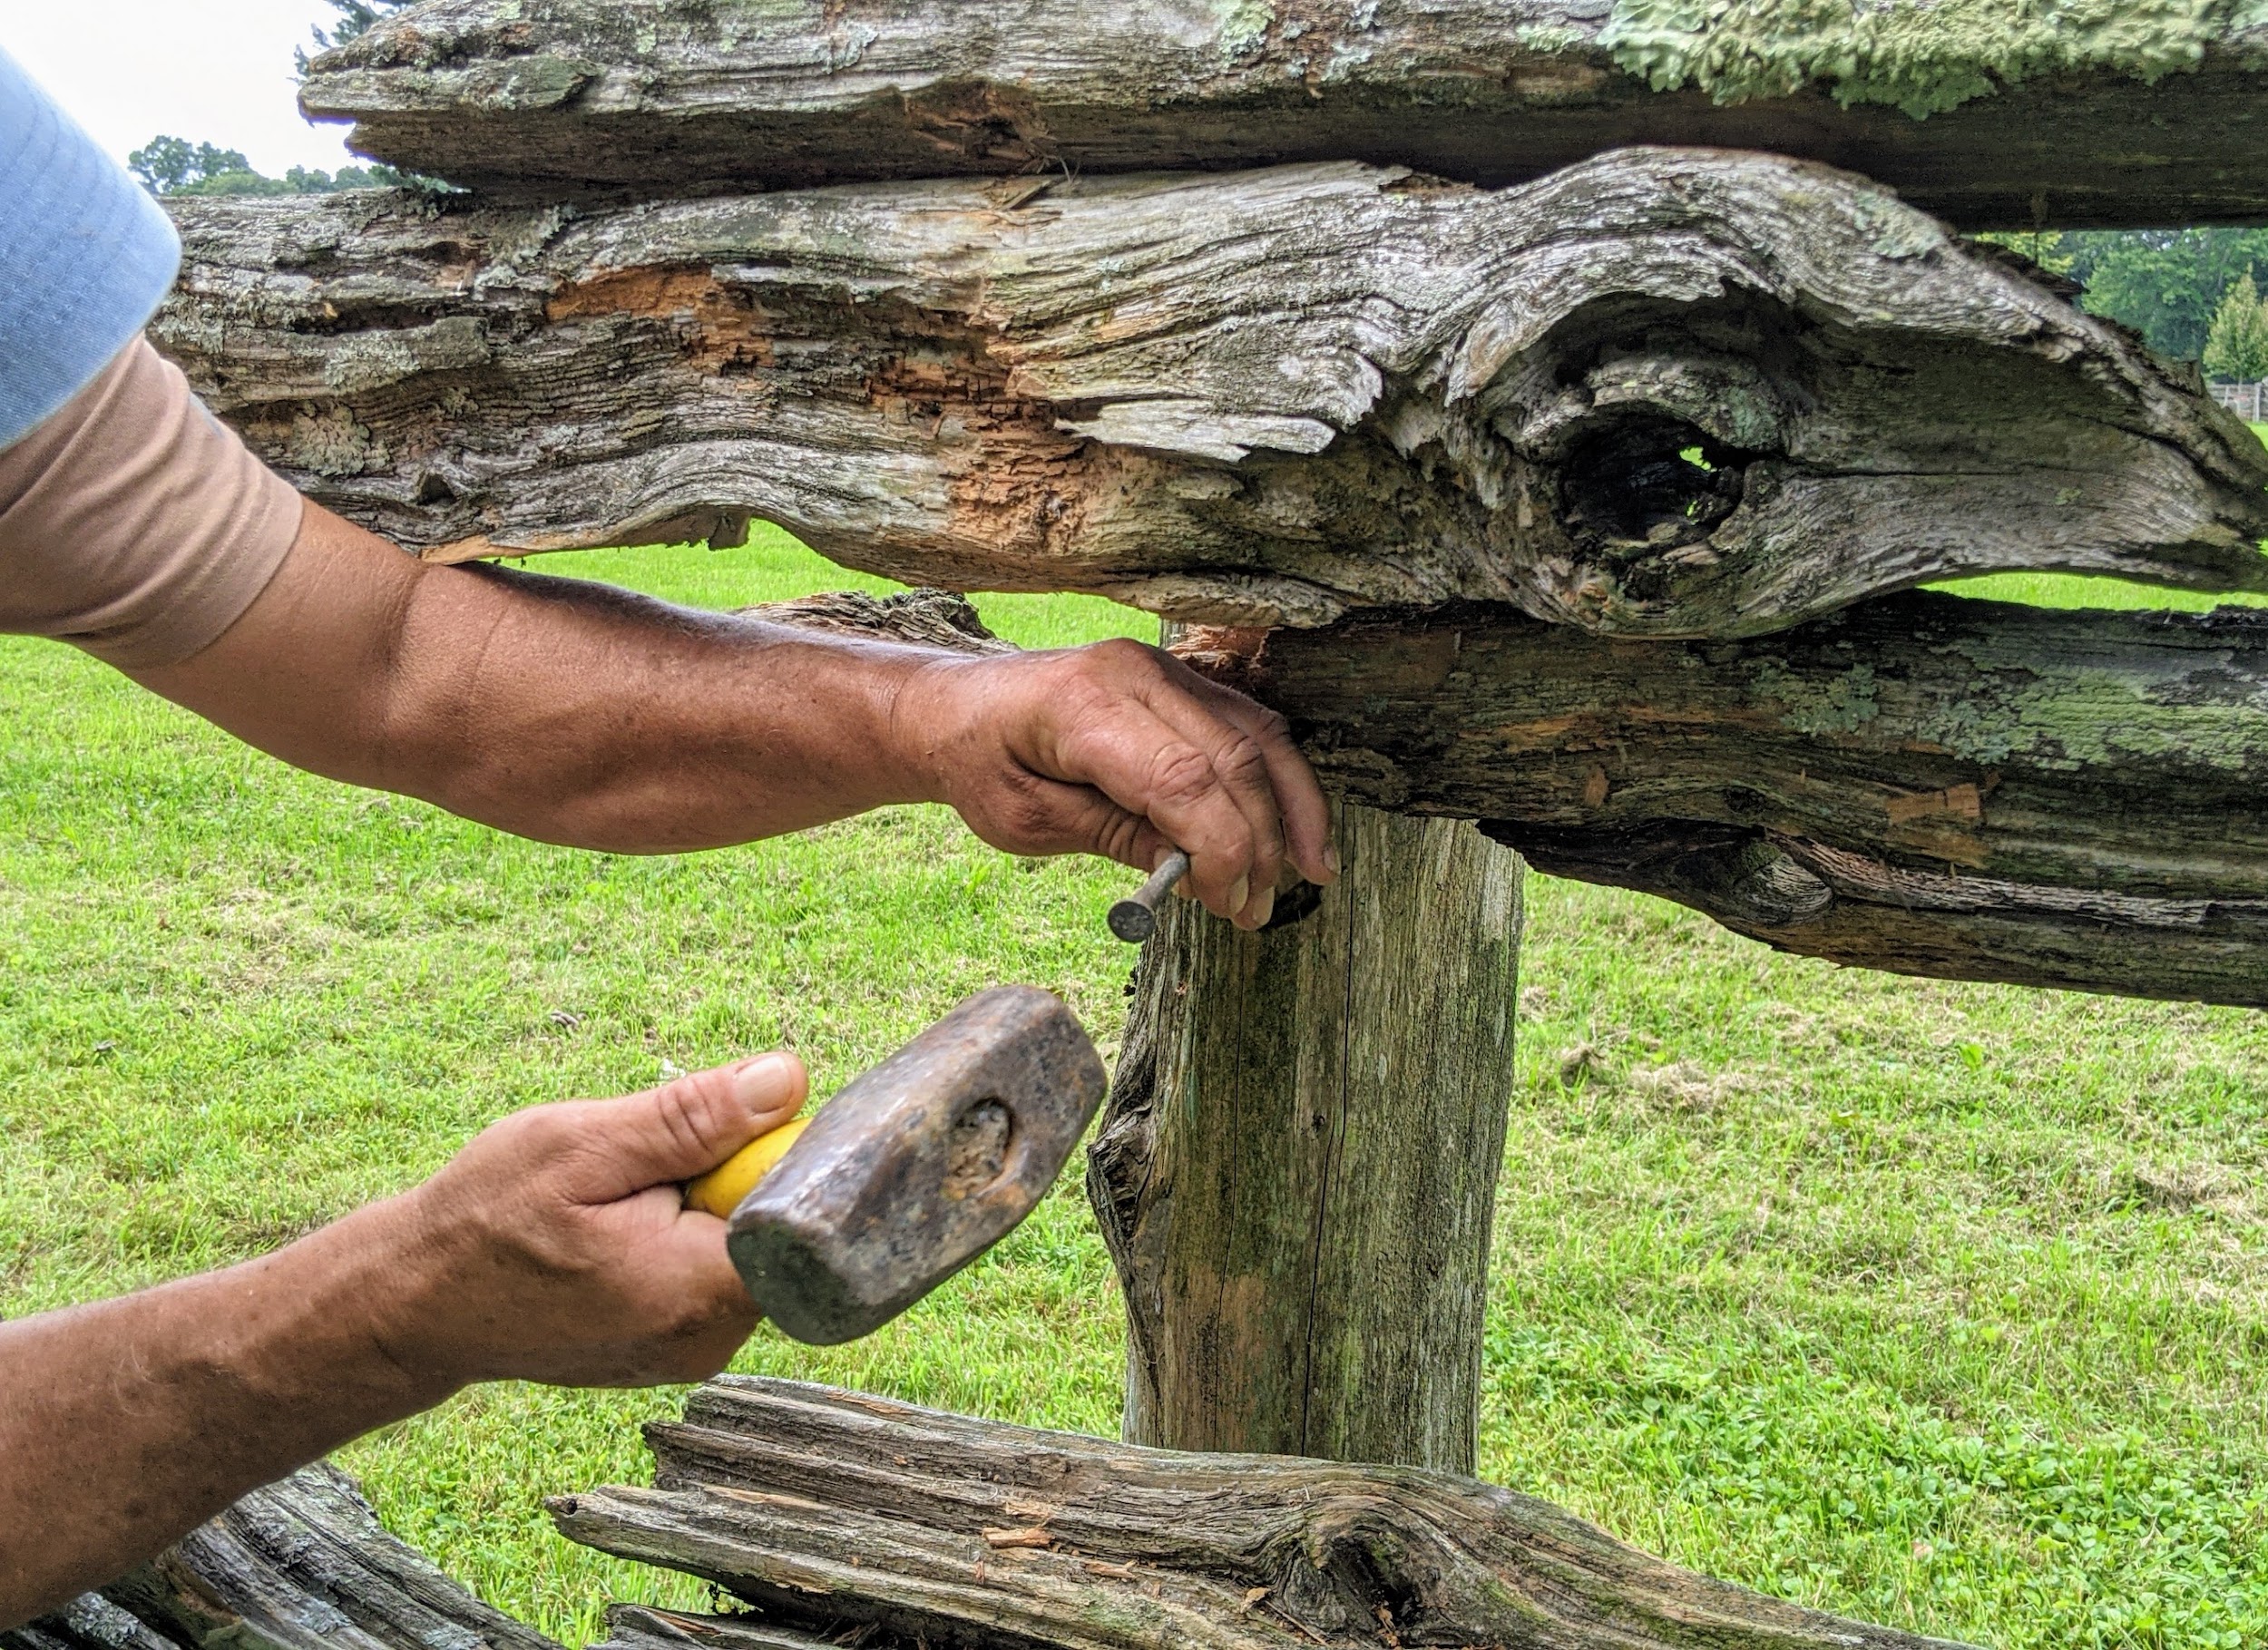
Here’s Pete removing nails from one of the railings after the post was pulled from the ground.
The nails used to secure the railings are quite long – four inches. It takes a bit of time to remove them so they can be reused.
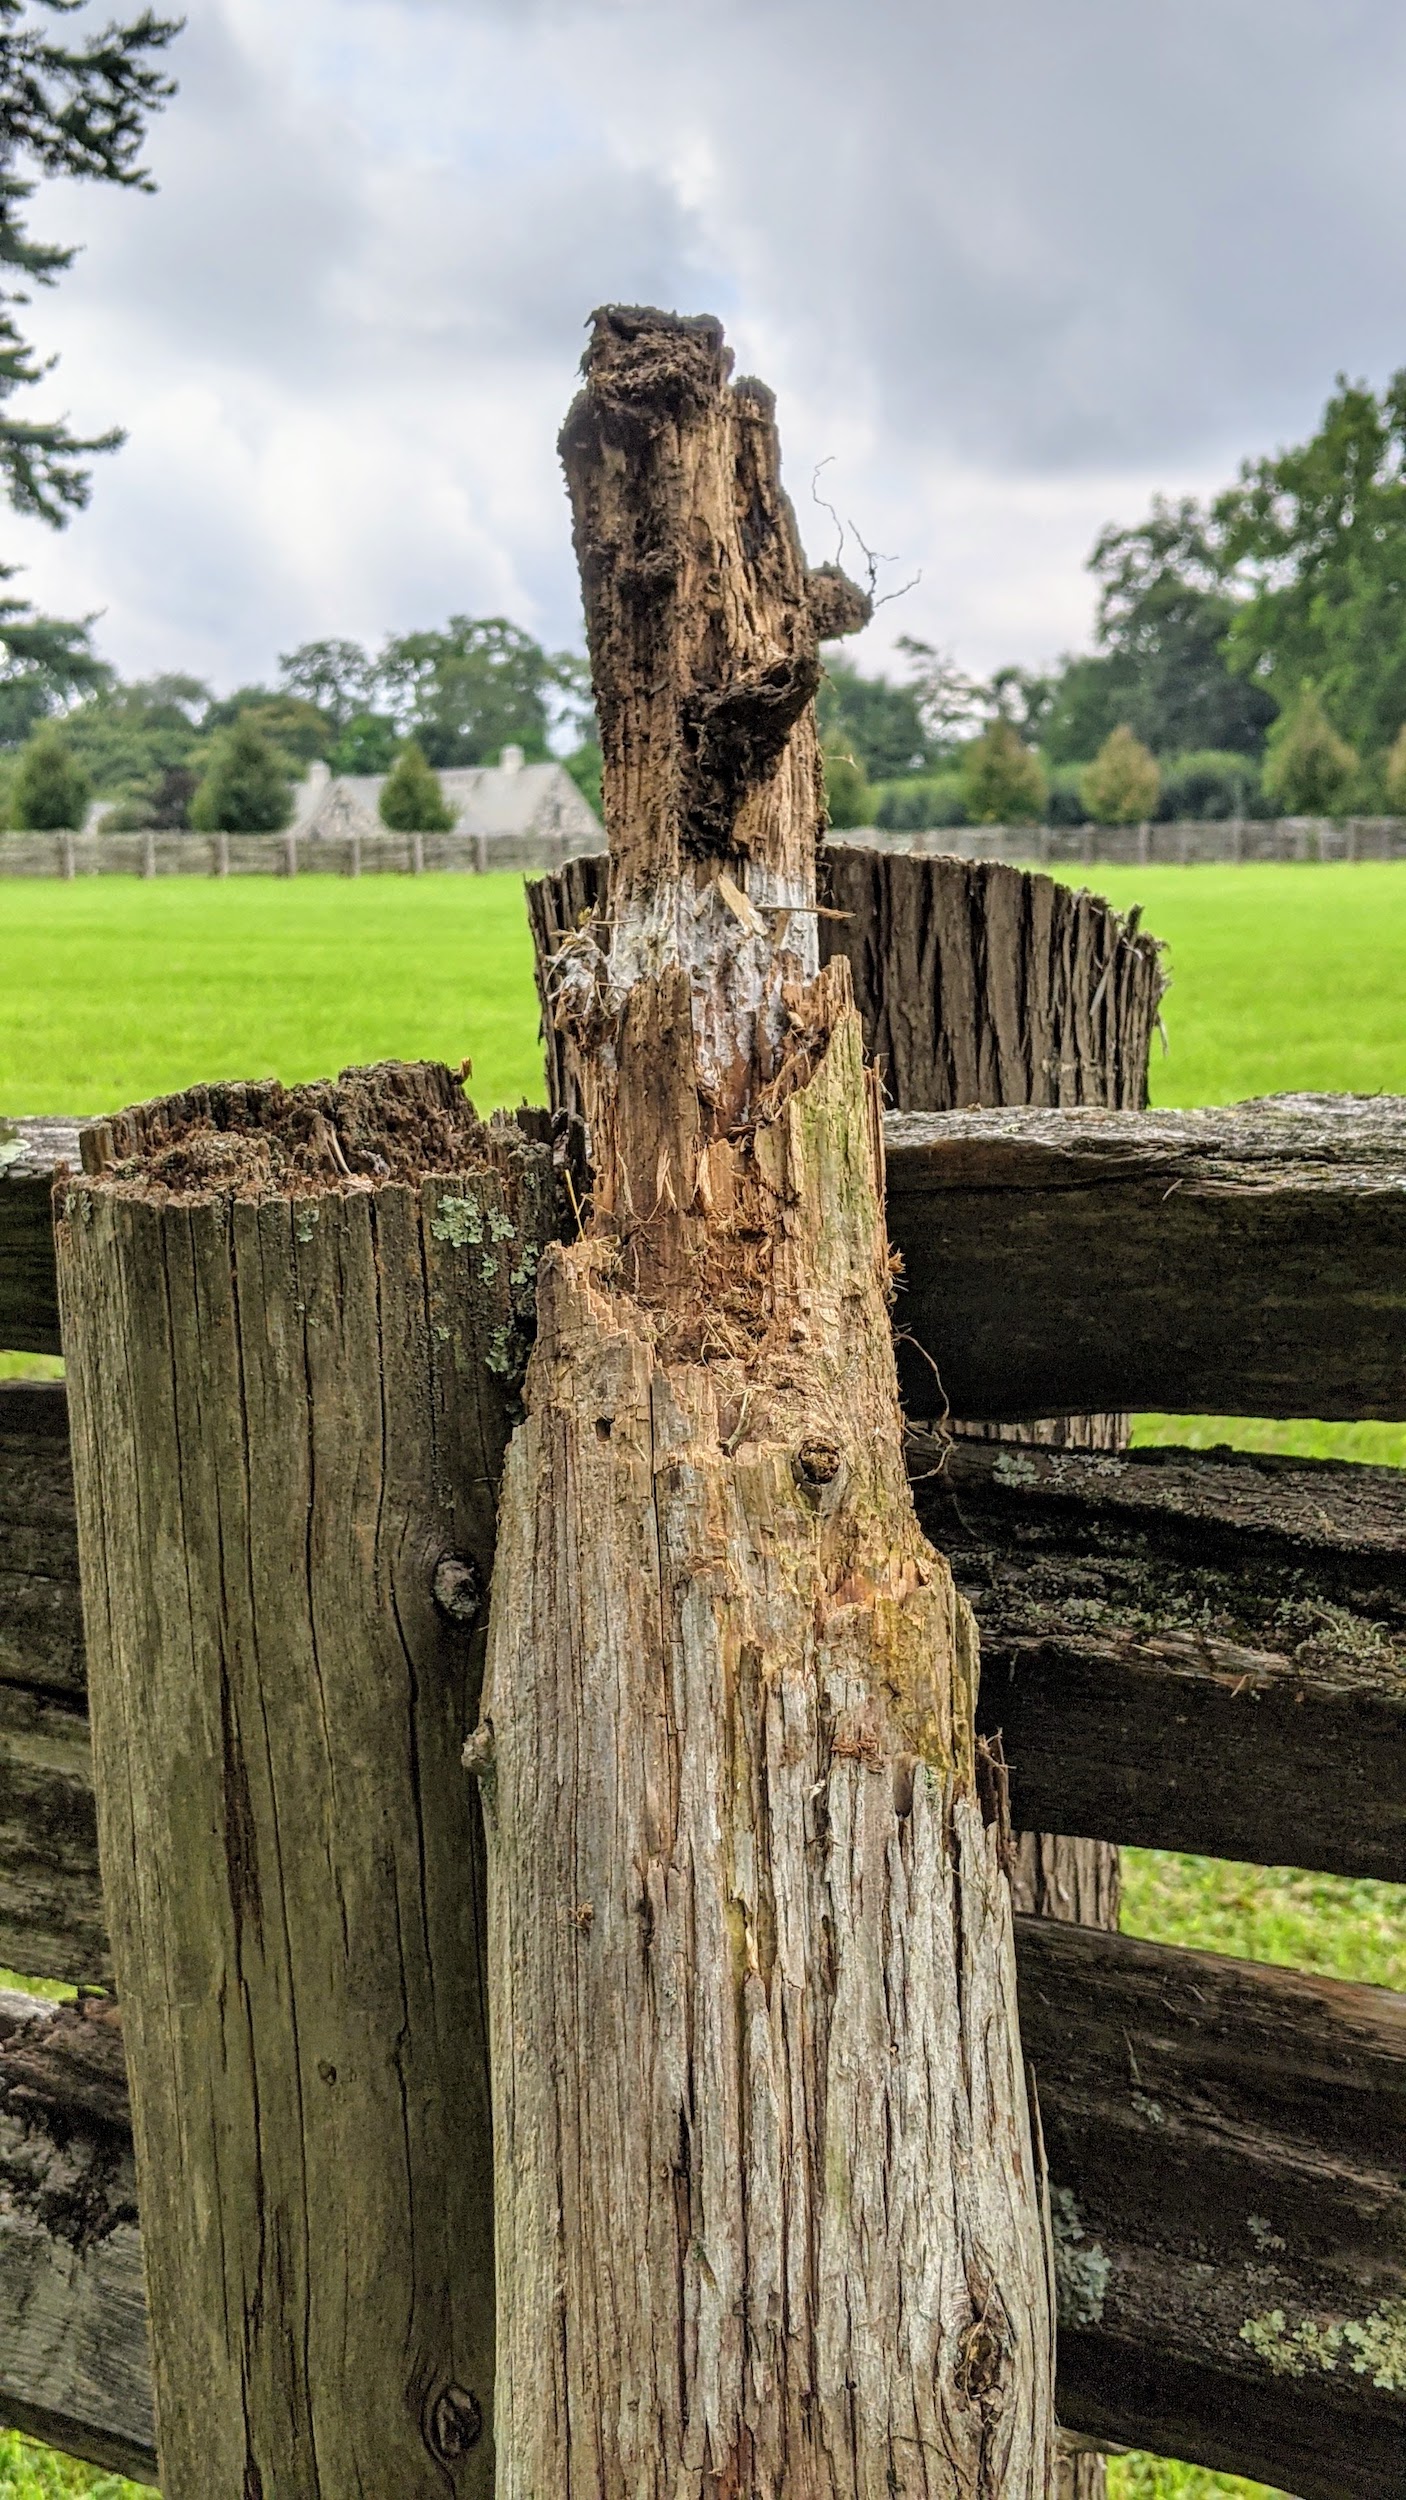
Some of the uprights were so worn, they broke during the removal process.
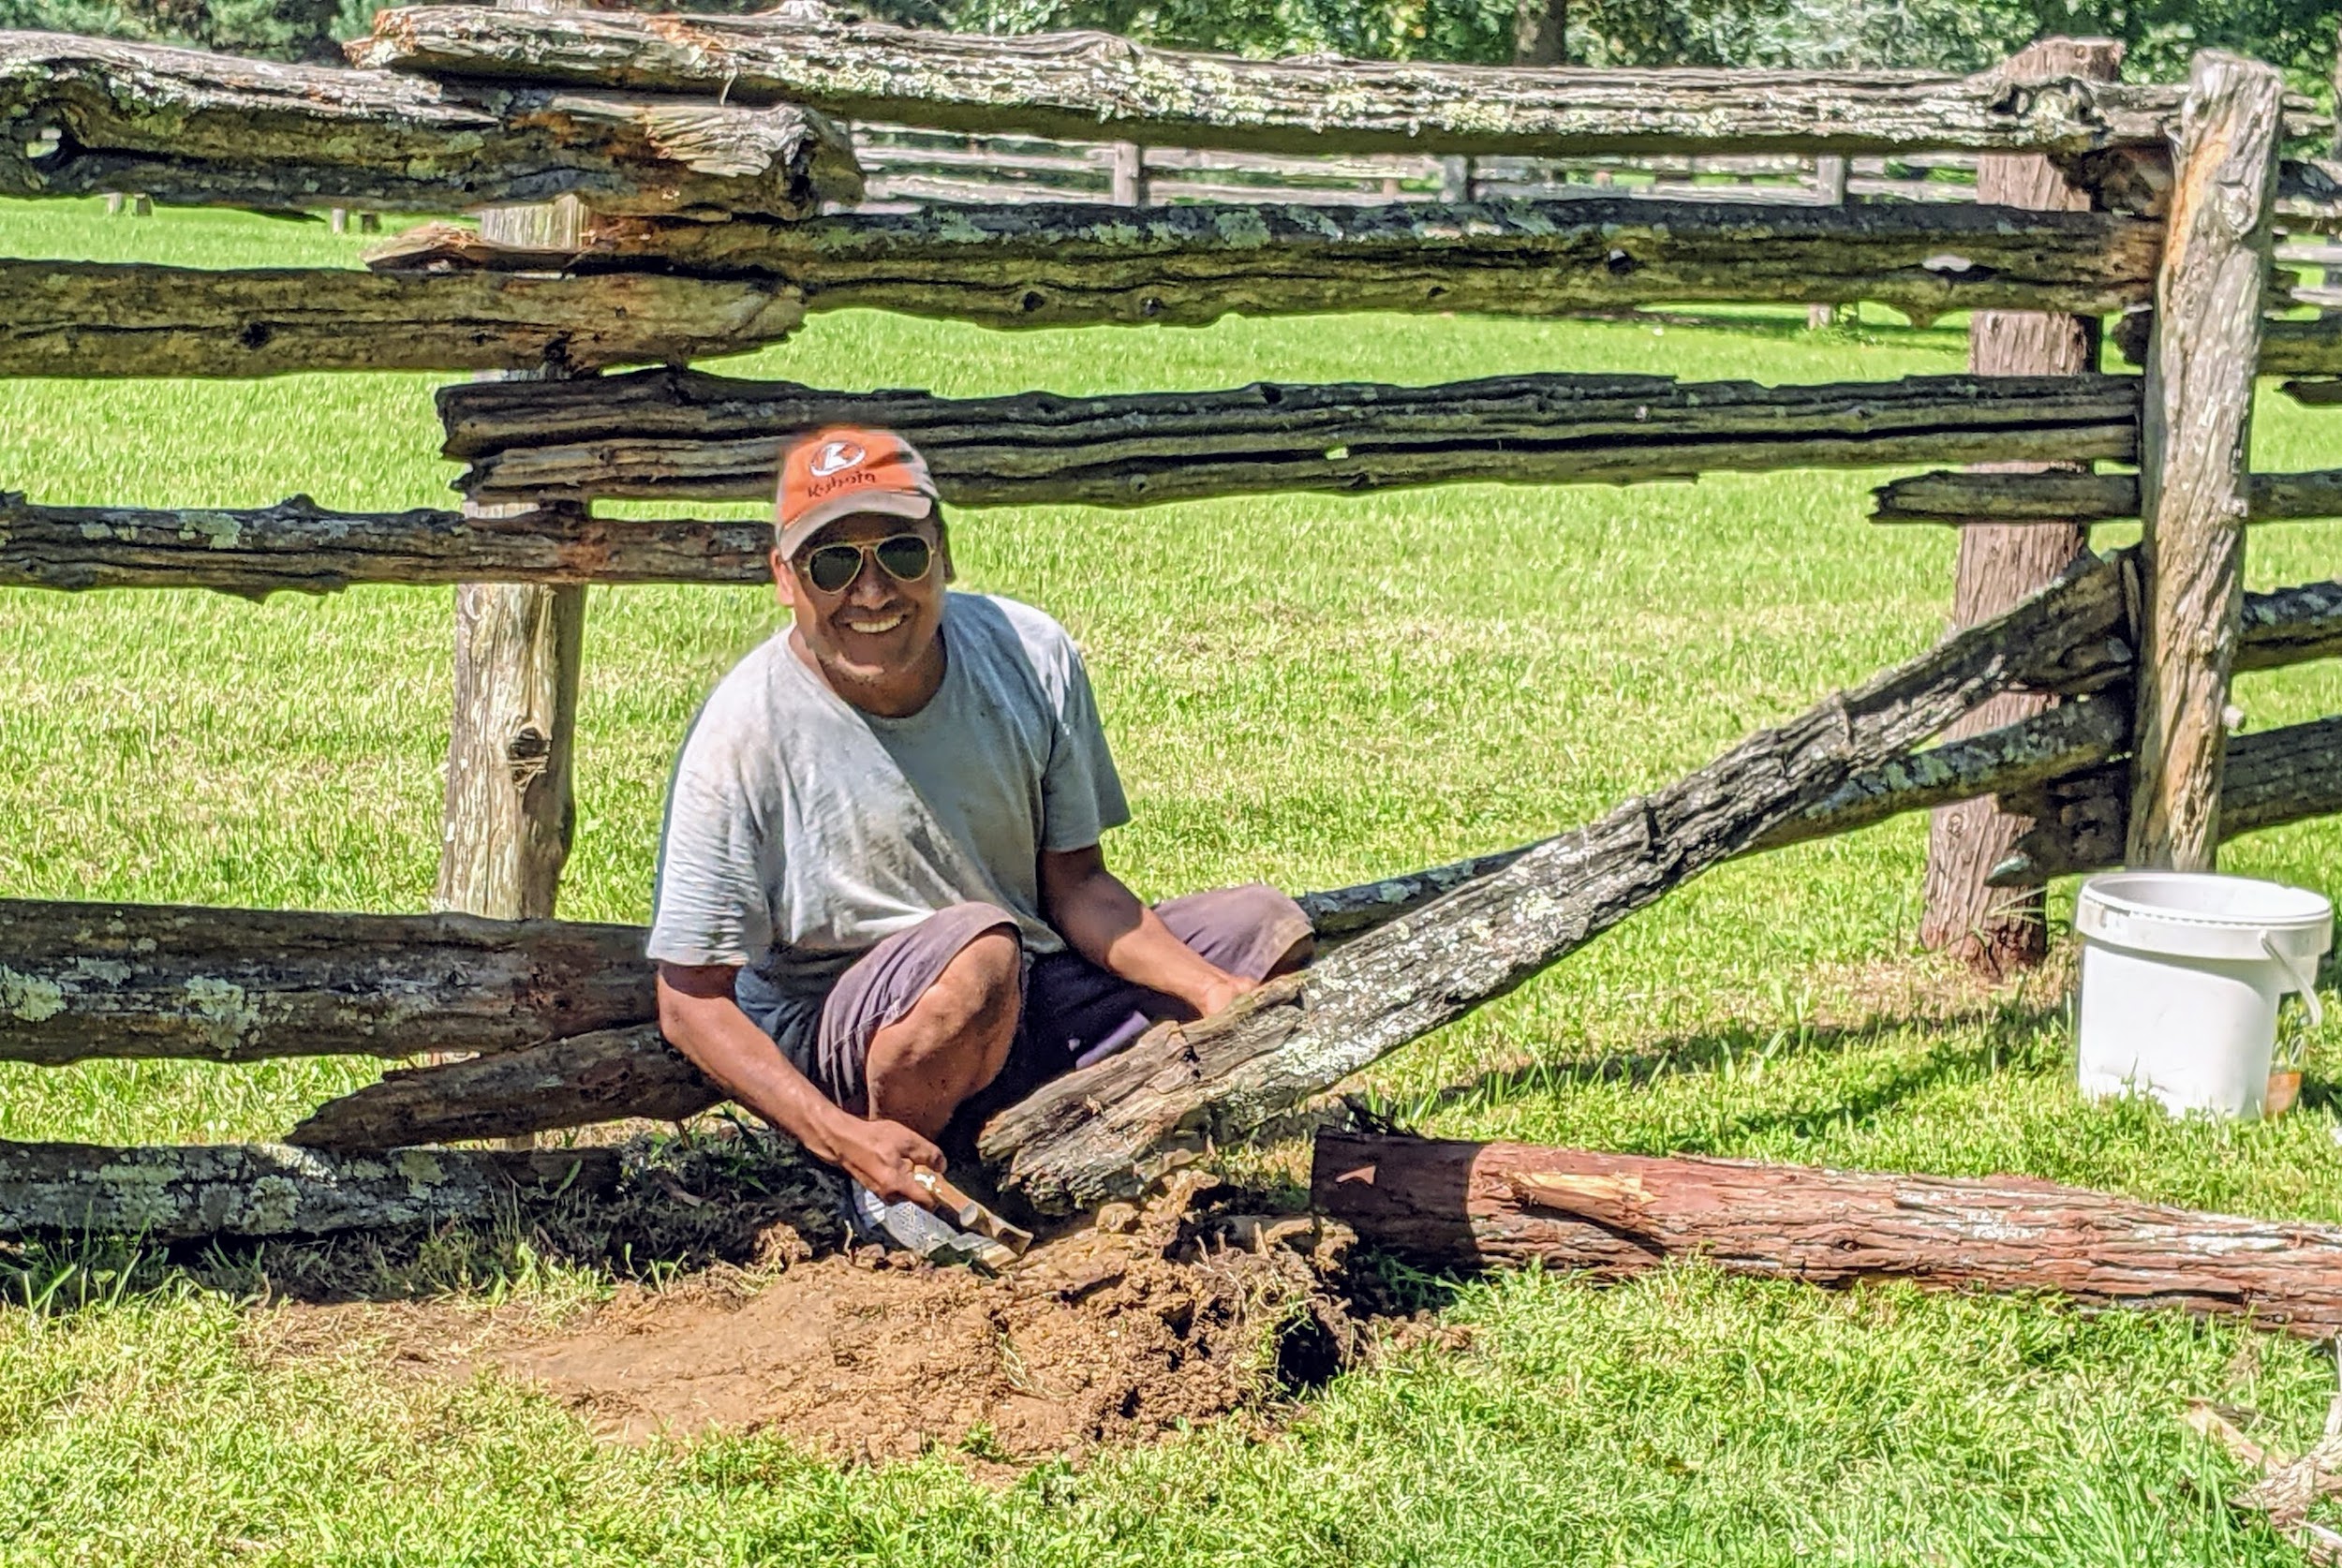
Here’s Fernando with another post – look how it has deteriorated. These posts will be chipped and repurposed as wood chip top dressing at a later time.
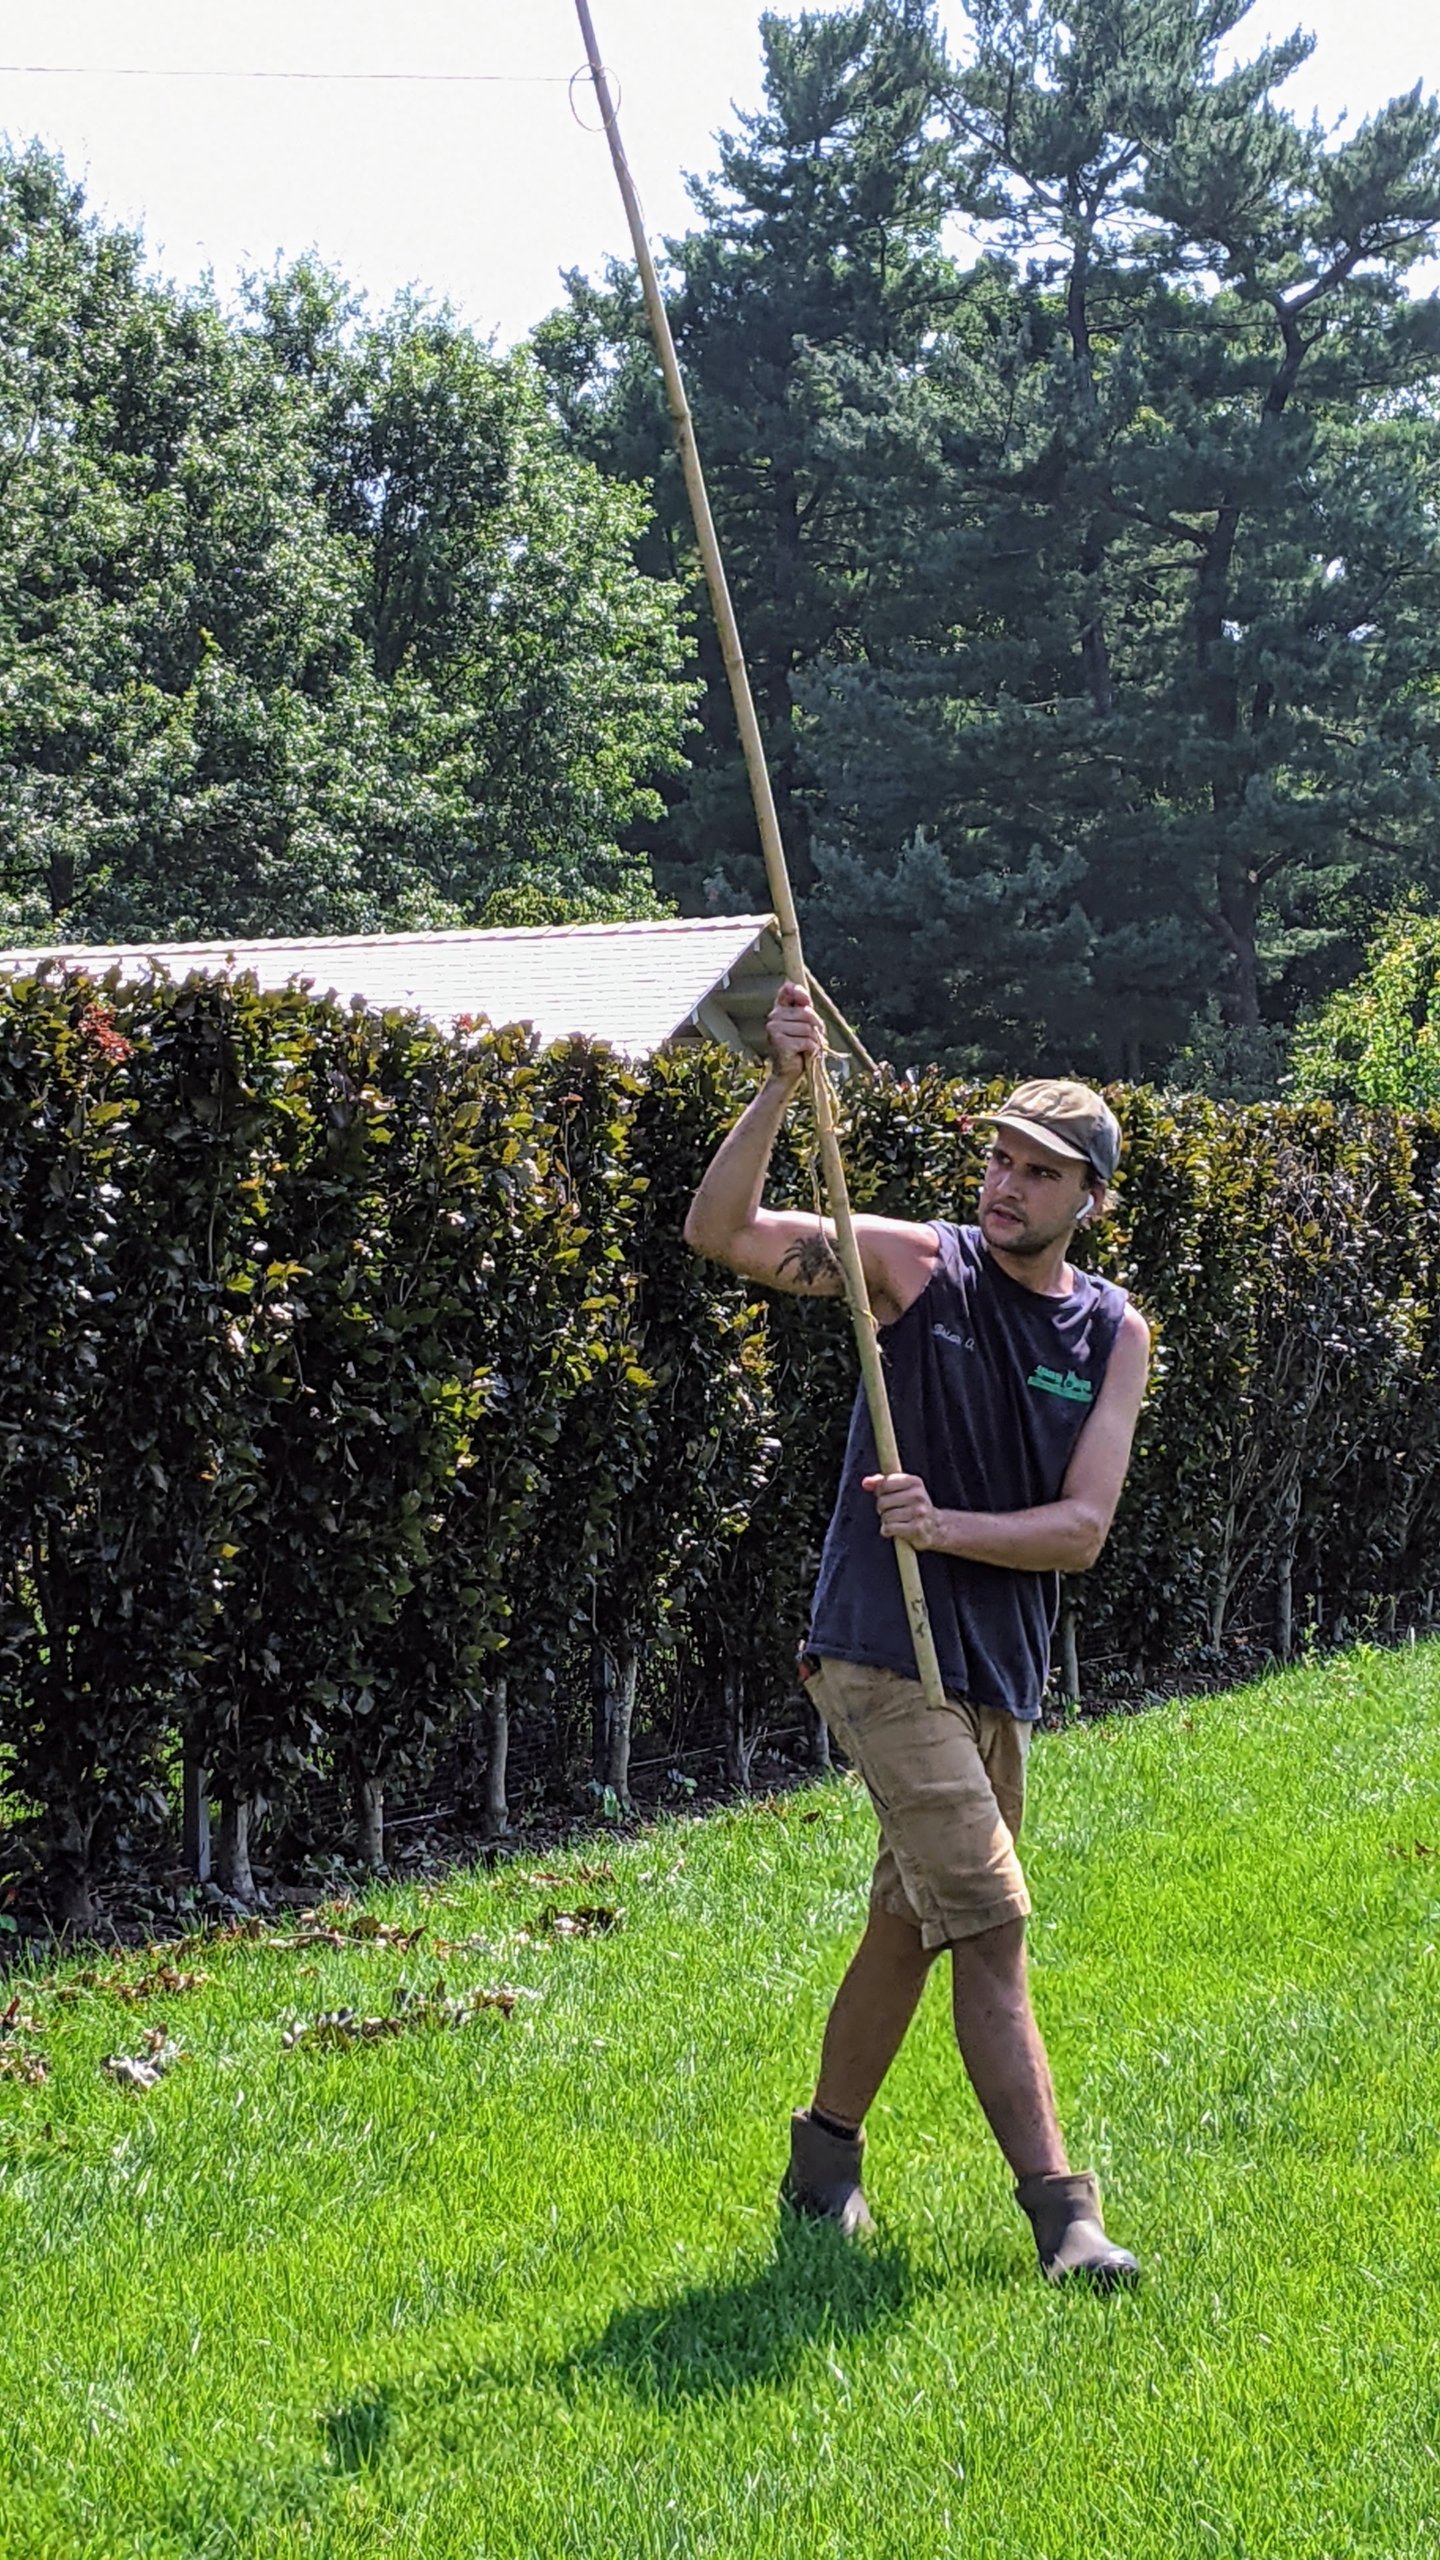
To remove one, Pete digs around the post by hand using a post hole digger, a hand tool used to manually dig deep and narrow holes in order to install fence posts.
Here’s a closer look at the post hole digger – this tool is available at any hardware store. A post hole digger is also known as a clamshell digger, because of its resemblance to the seaside shell.
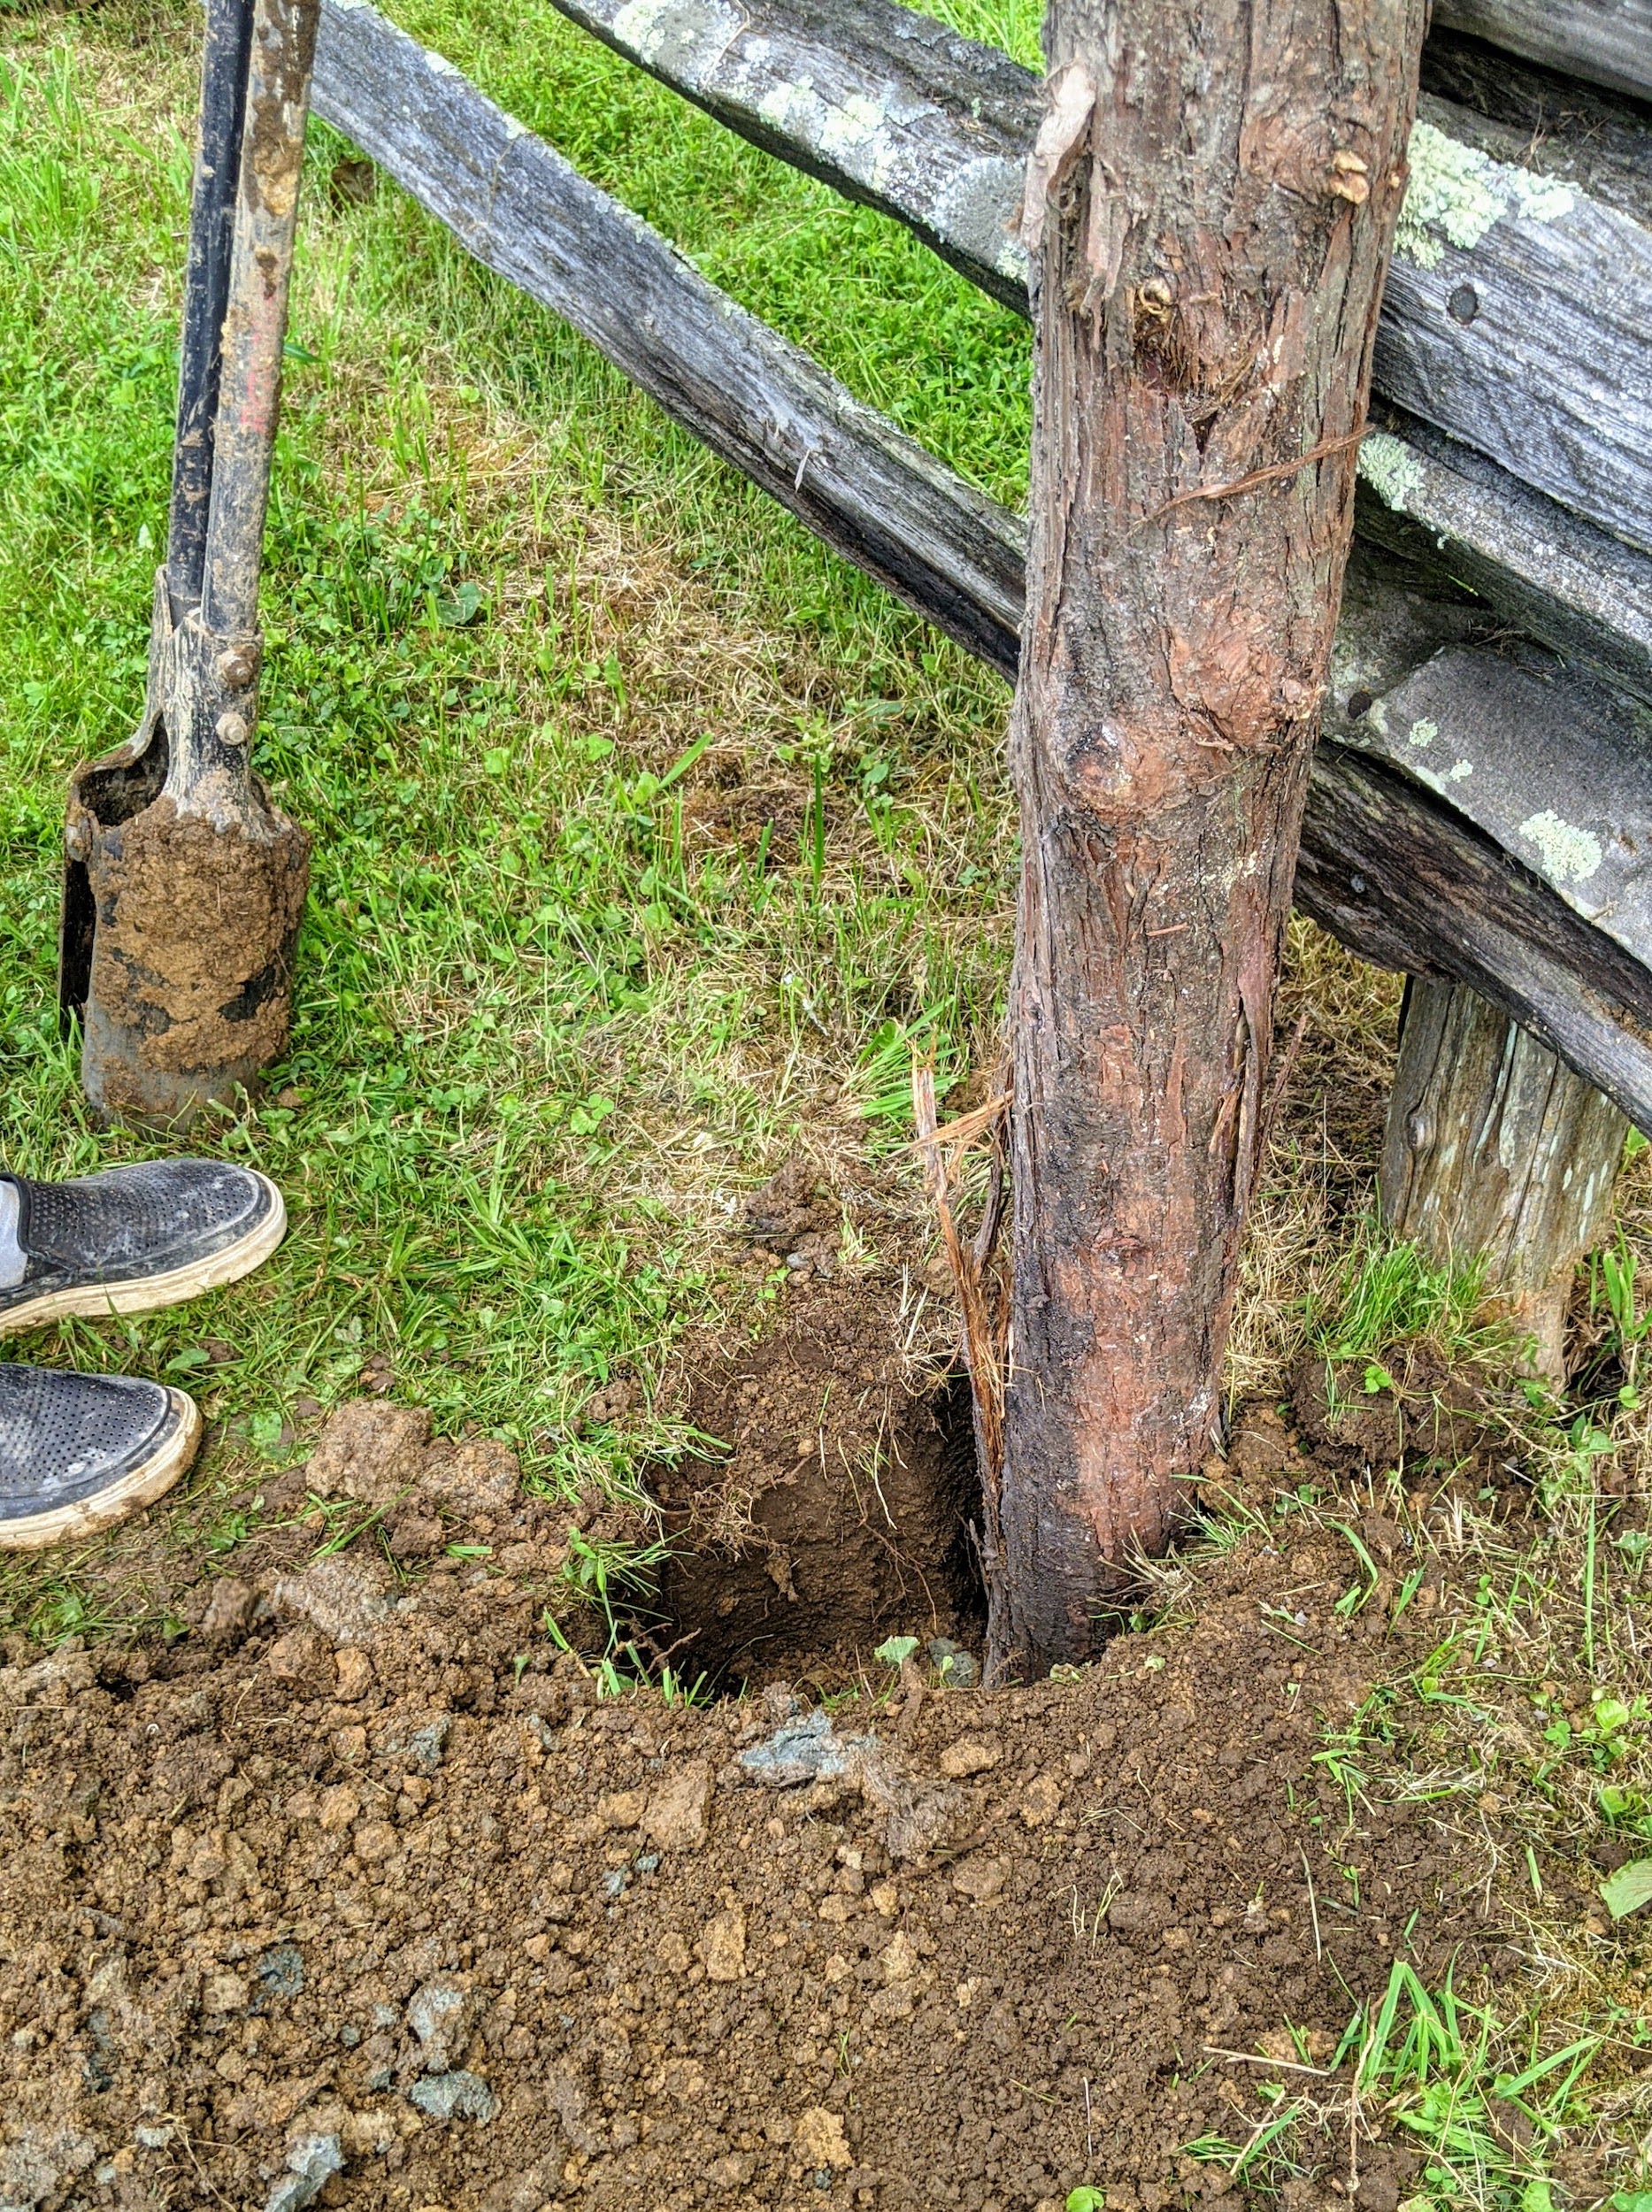
Once Pete has removed enough of the surrounding soil, he pulls out the old, deteriorated base.
See how deep these posts are in the ground – a good two to three feet.
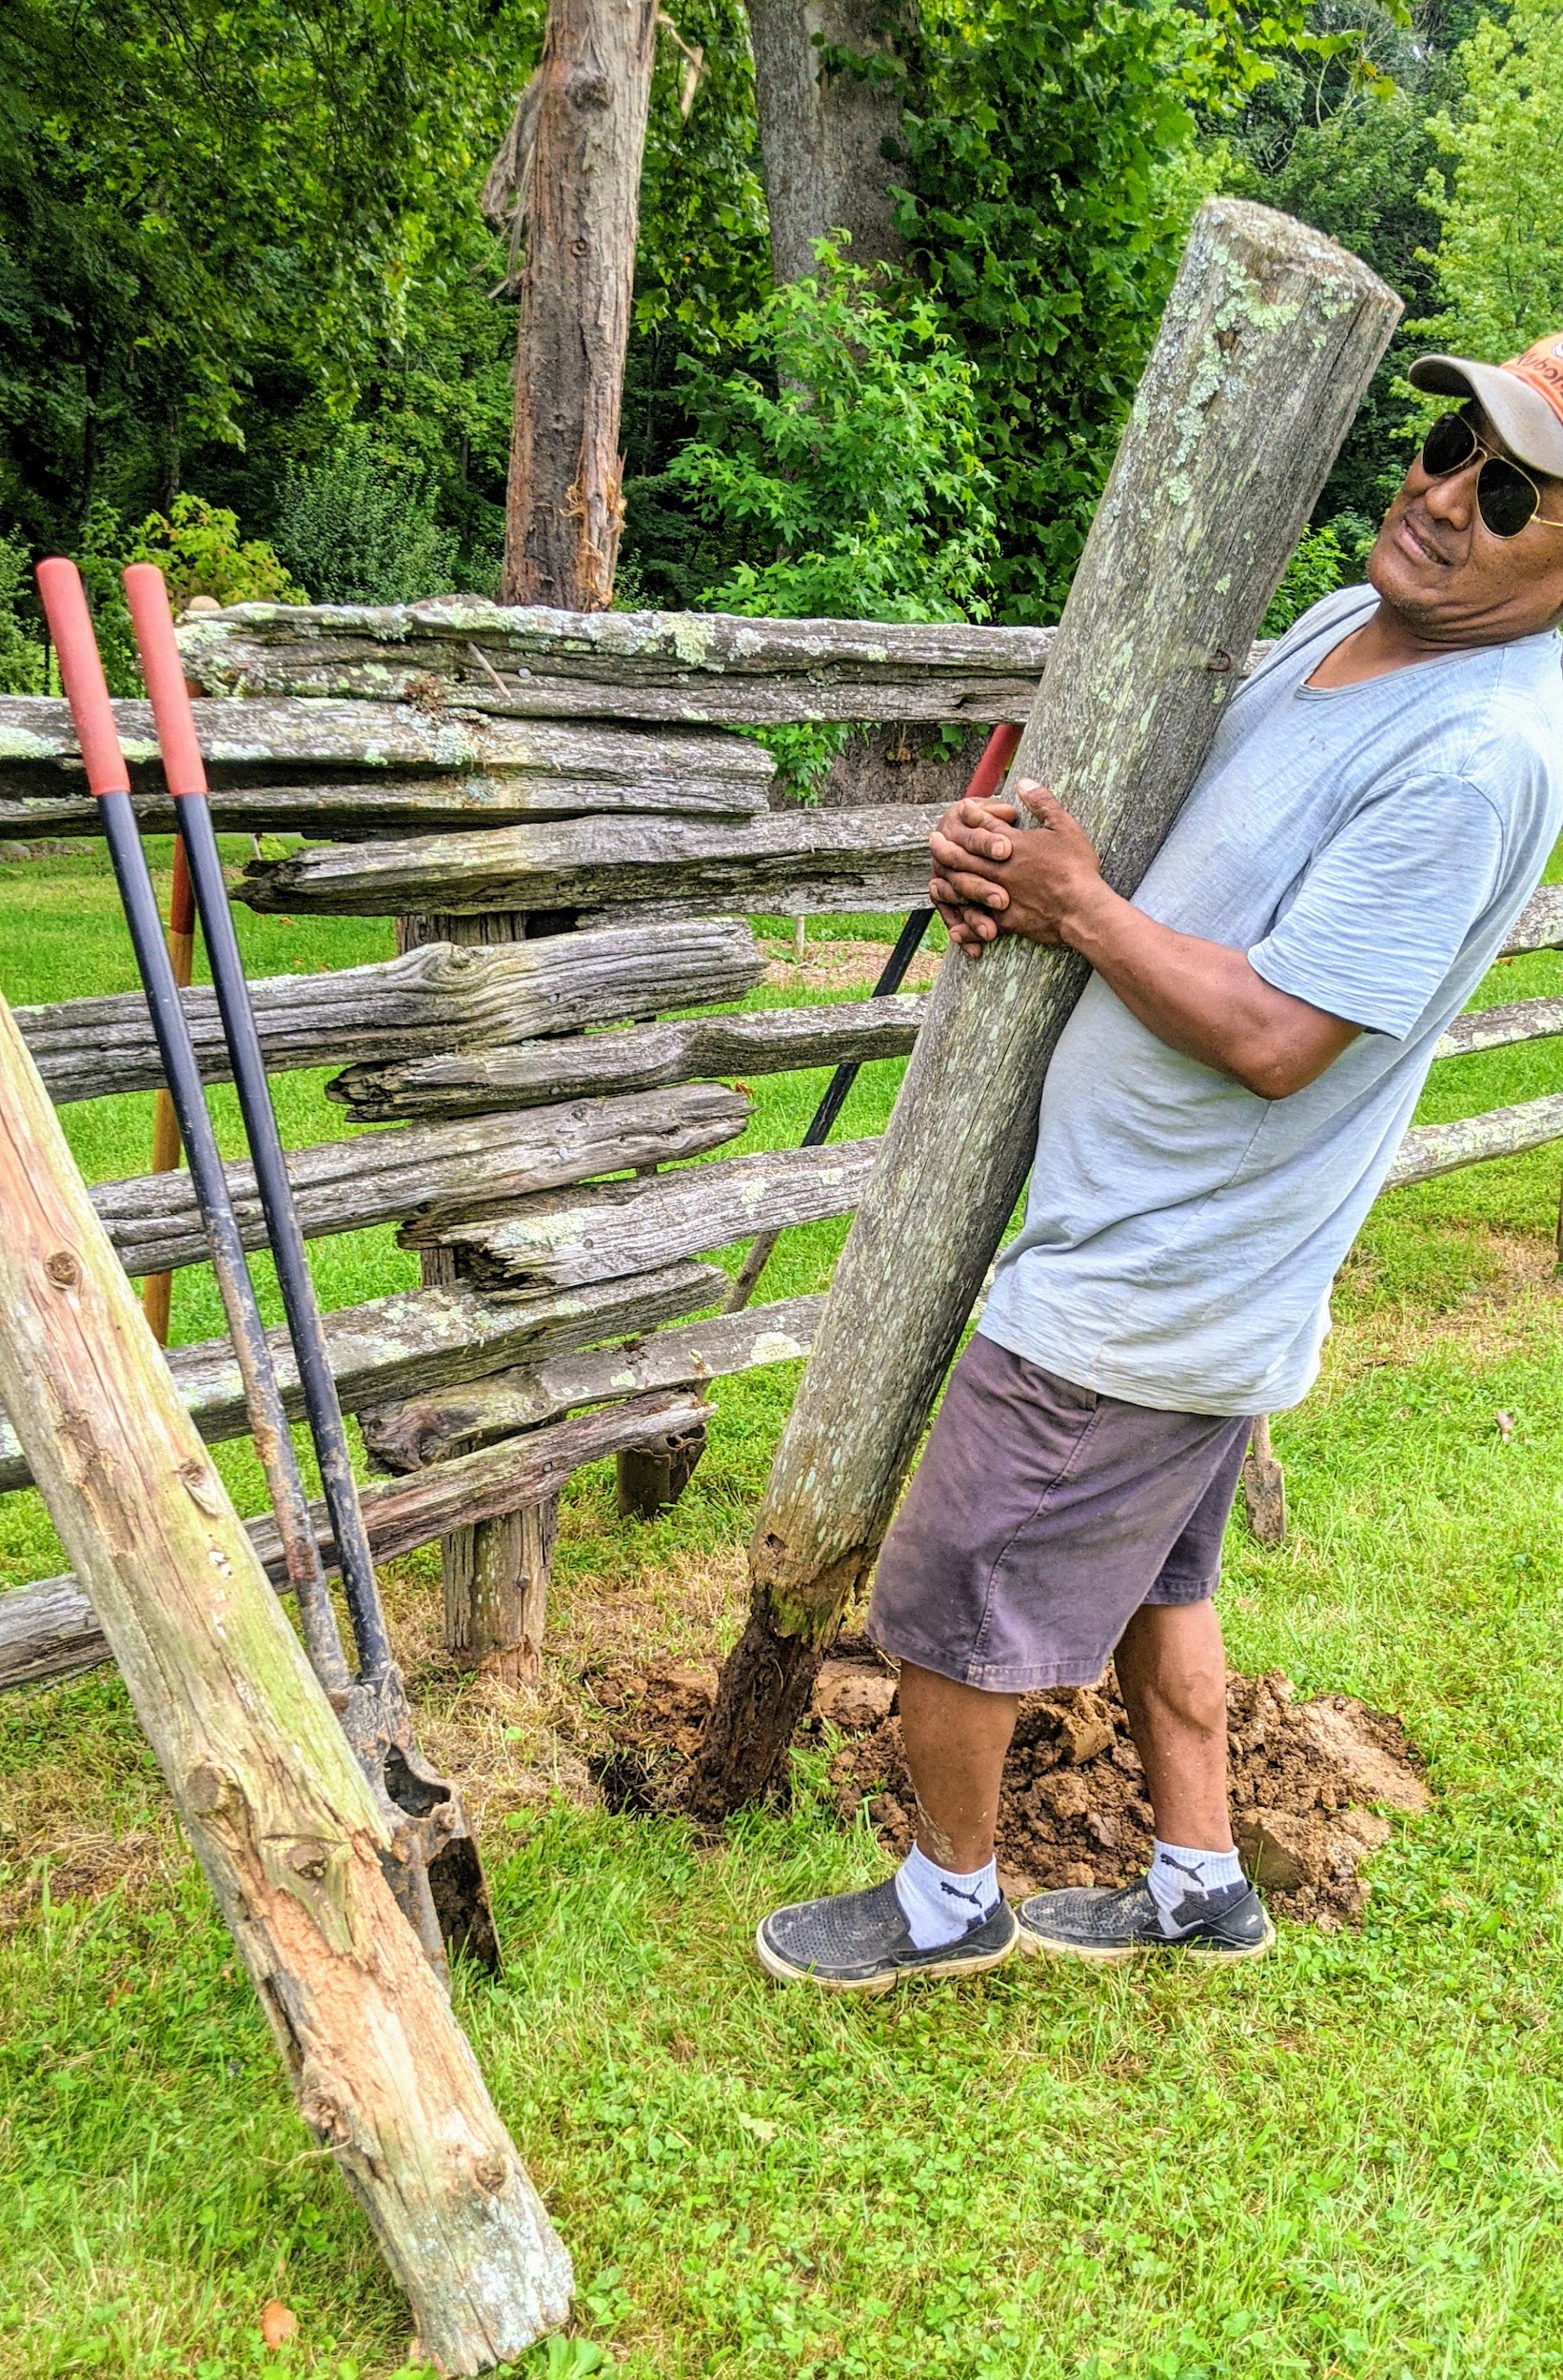
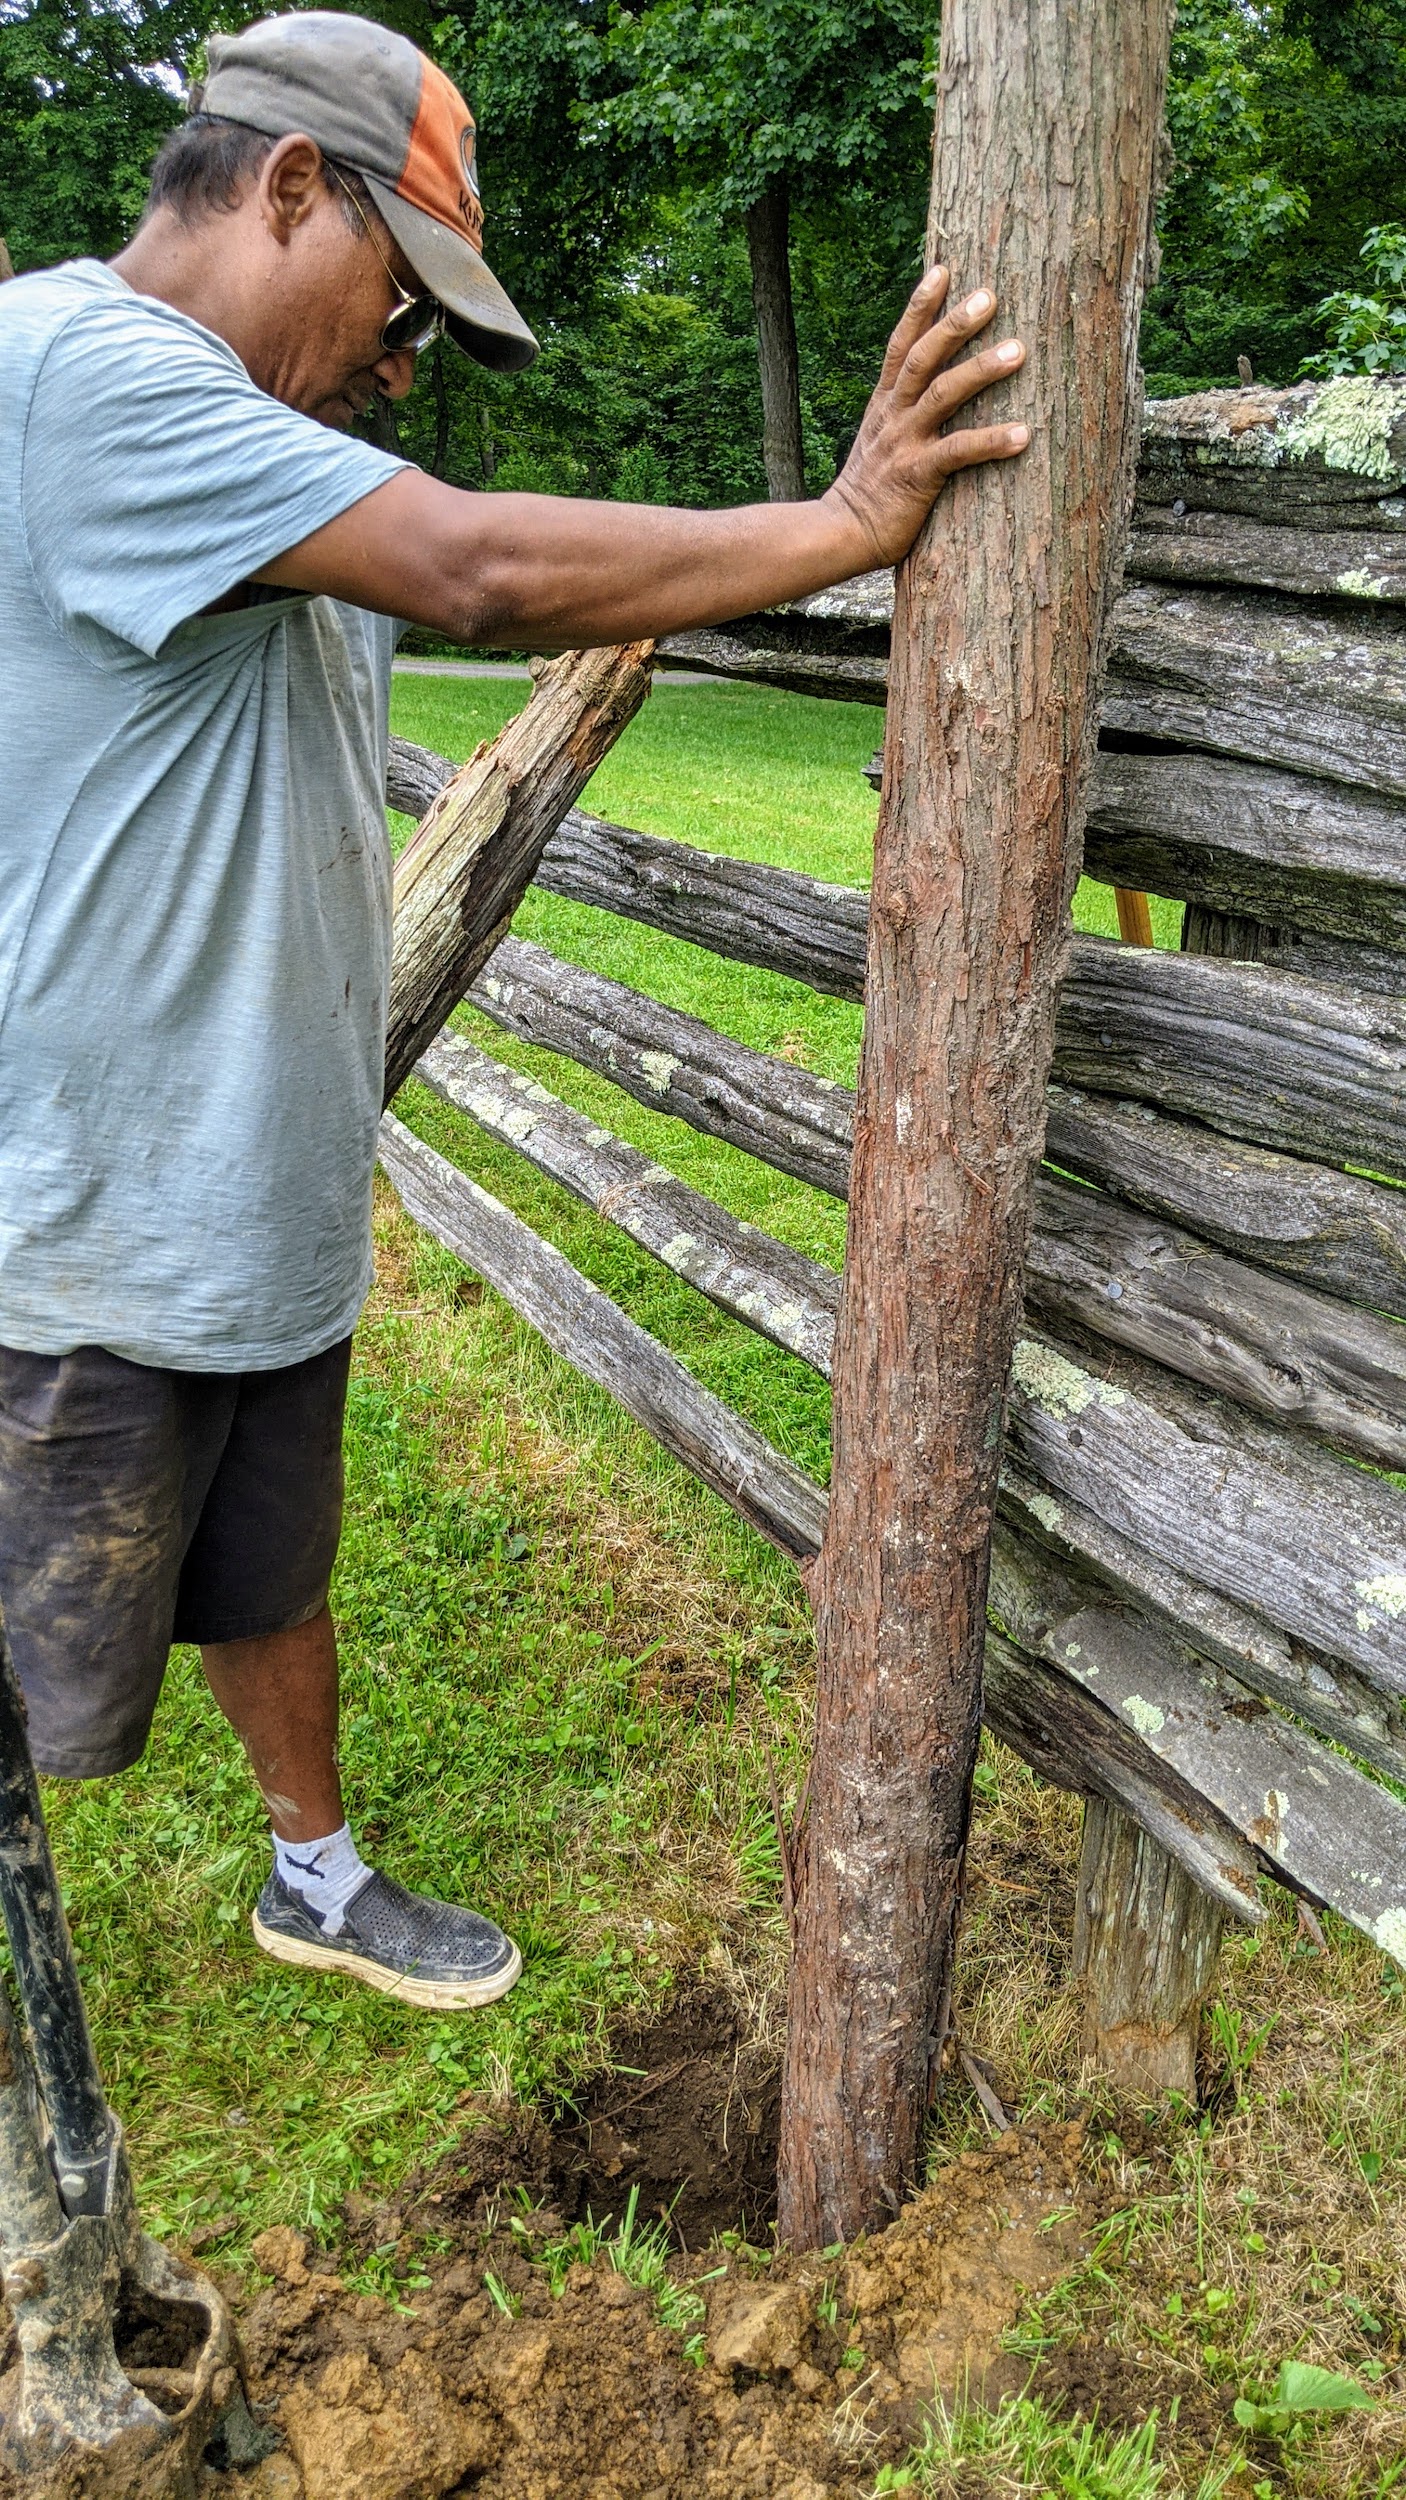
All the new uprights are placed next to the ones being removed.
Pete places a new cedar upright into the hole, adjusts it for level, and turns the post so that the nicest side faces out.
Each hole is more than three feet deep. The new posts will be very secure here – and no cement is needed.
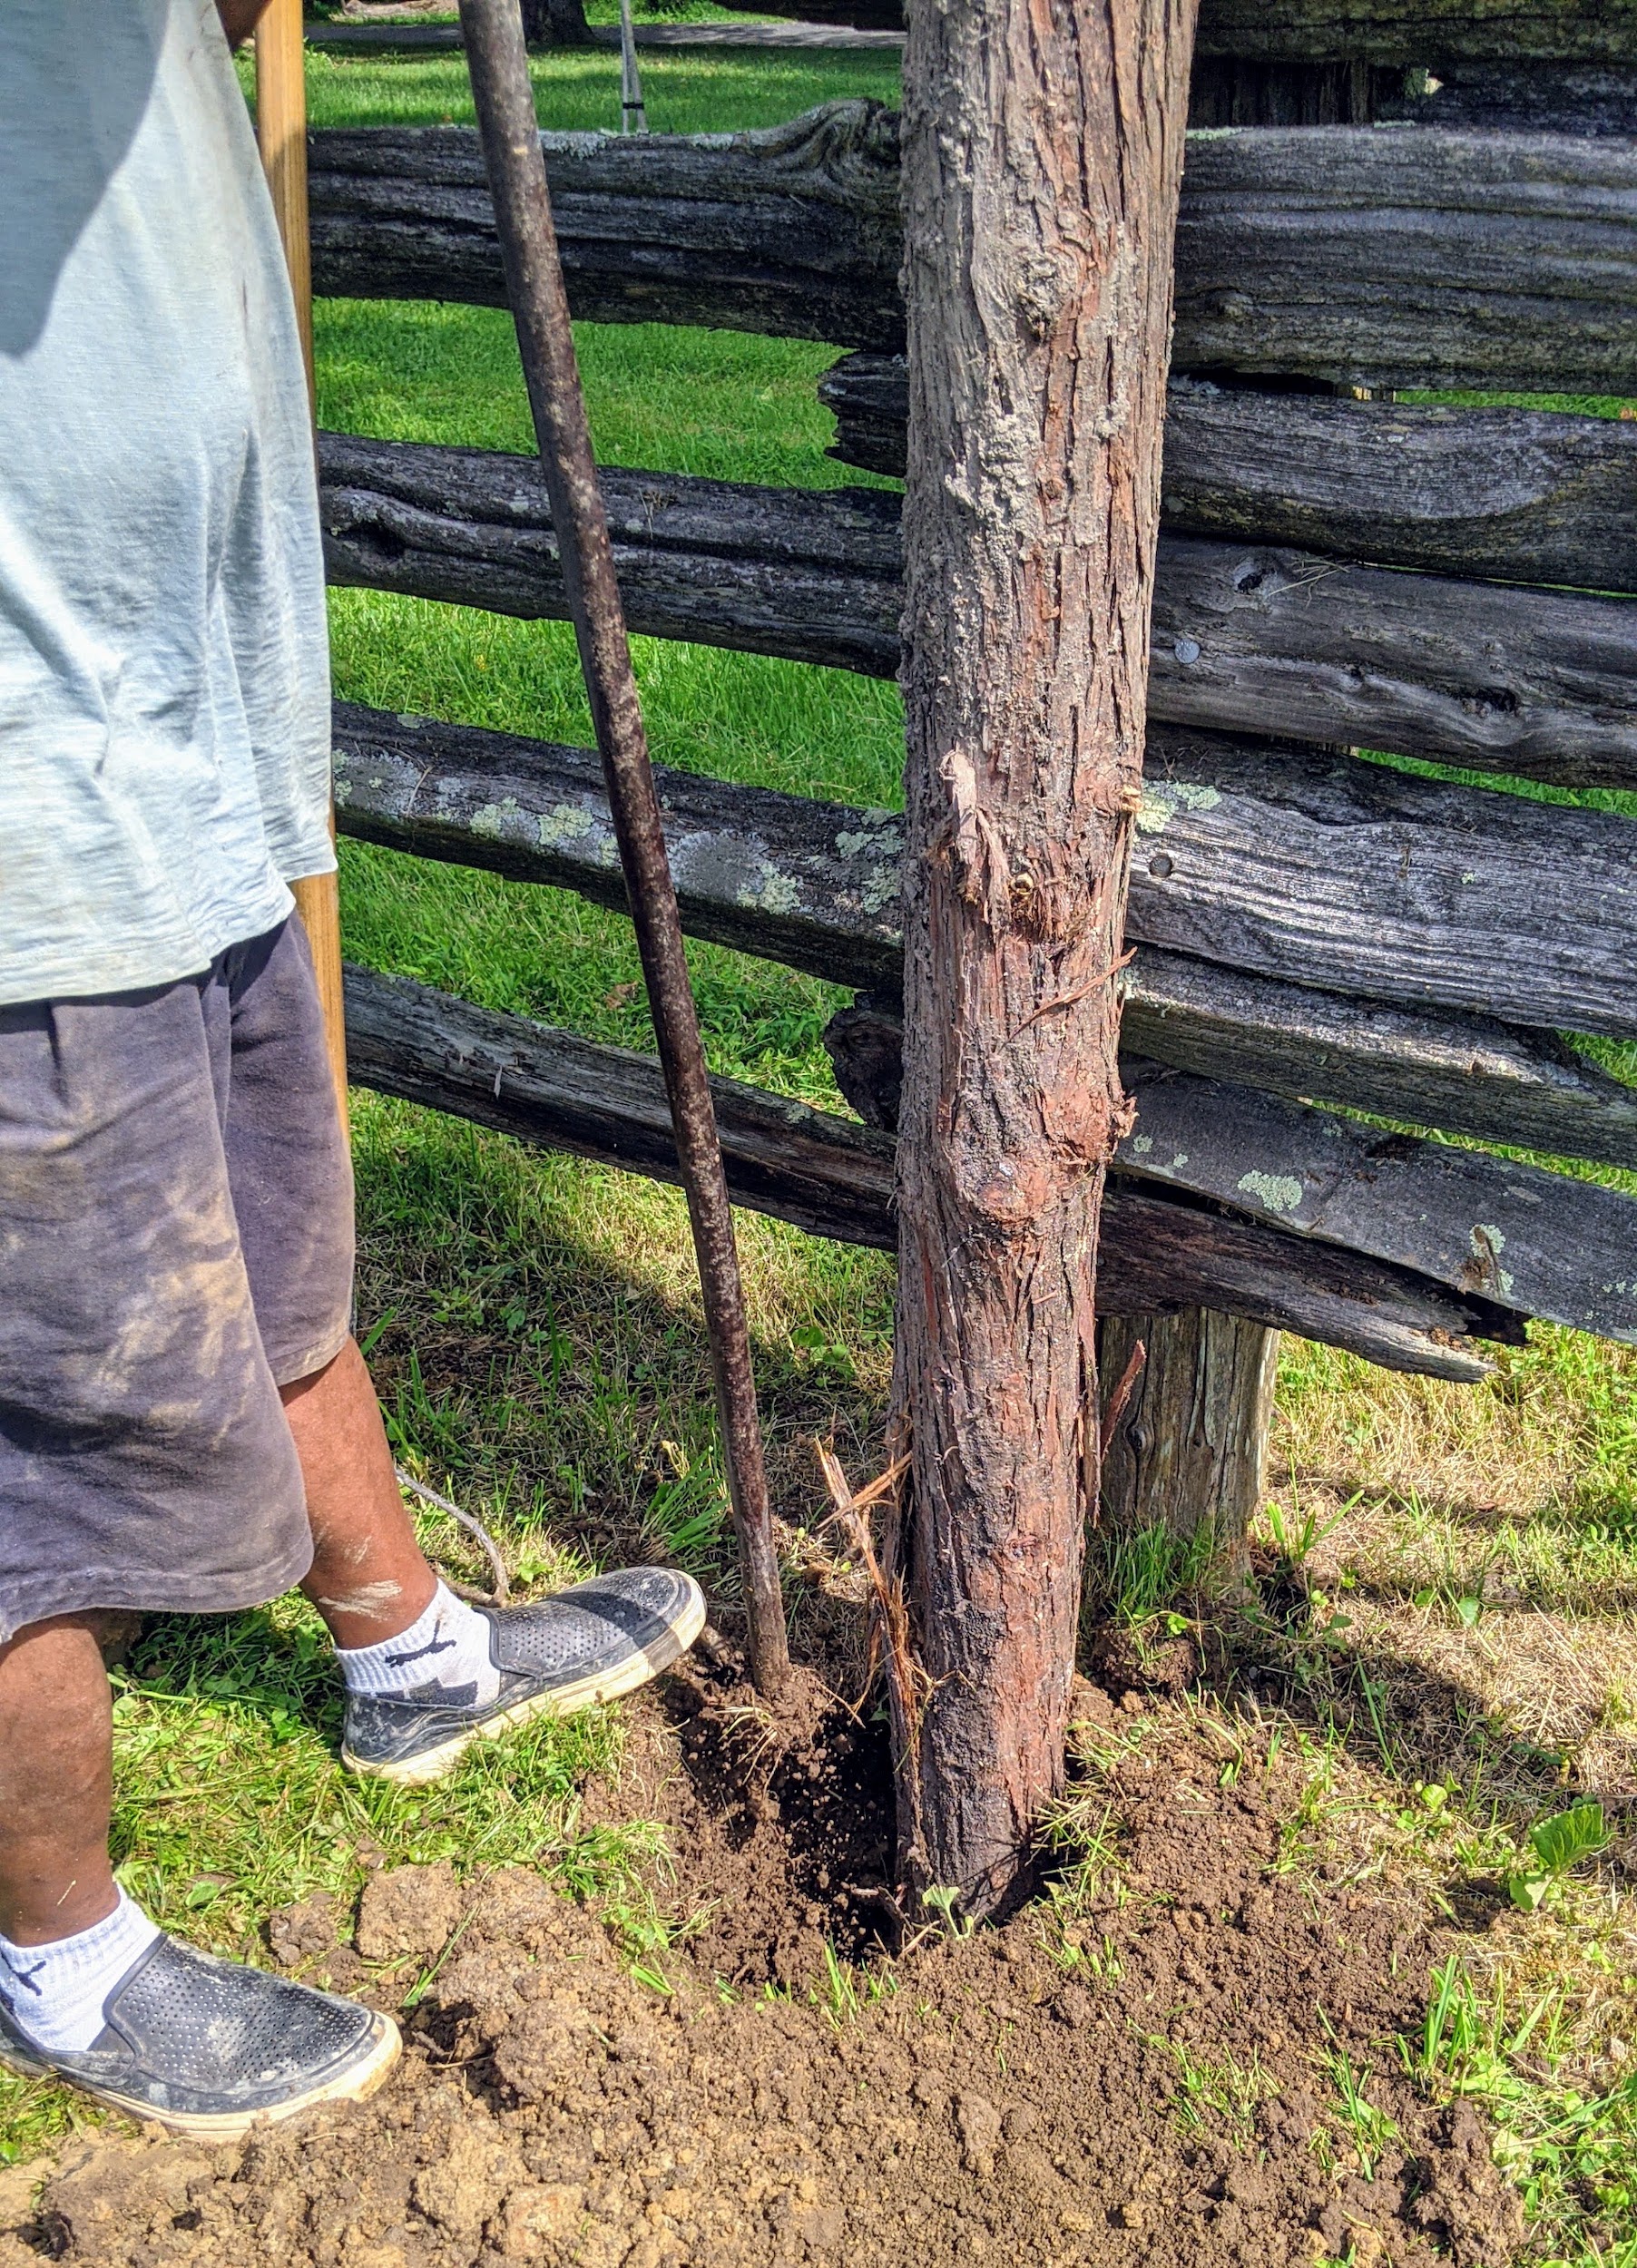
Pete uses a tamping bar to pack the soil tightly around the post as he backfills the hole with soil.
Once the post is secure, Pete rakes around the post to make the area neat and tidy.
And then Fernando attaches the railings to the post once again.
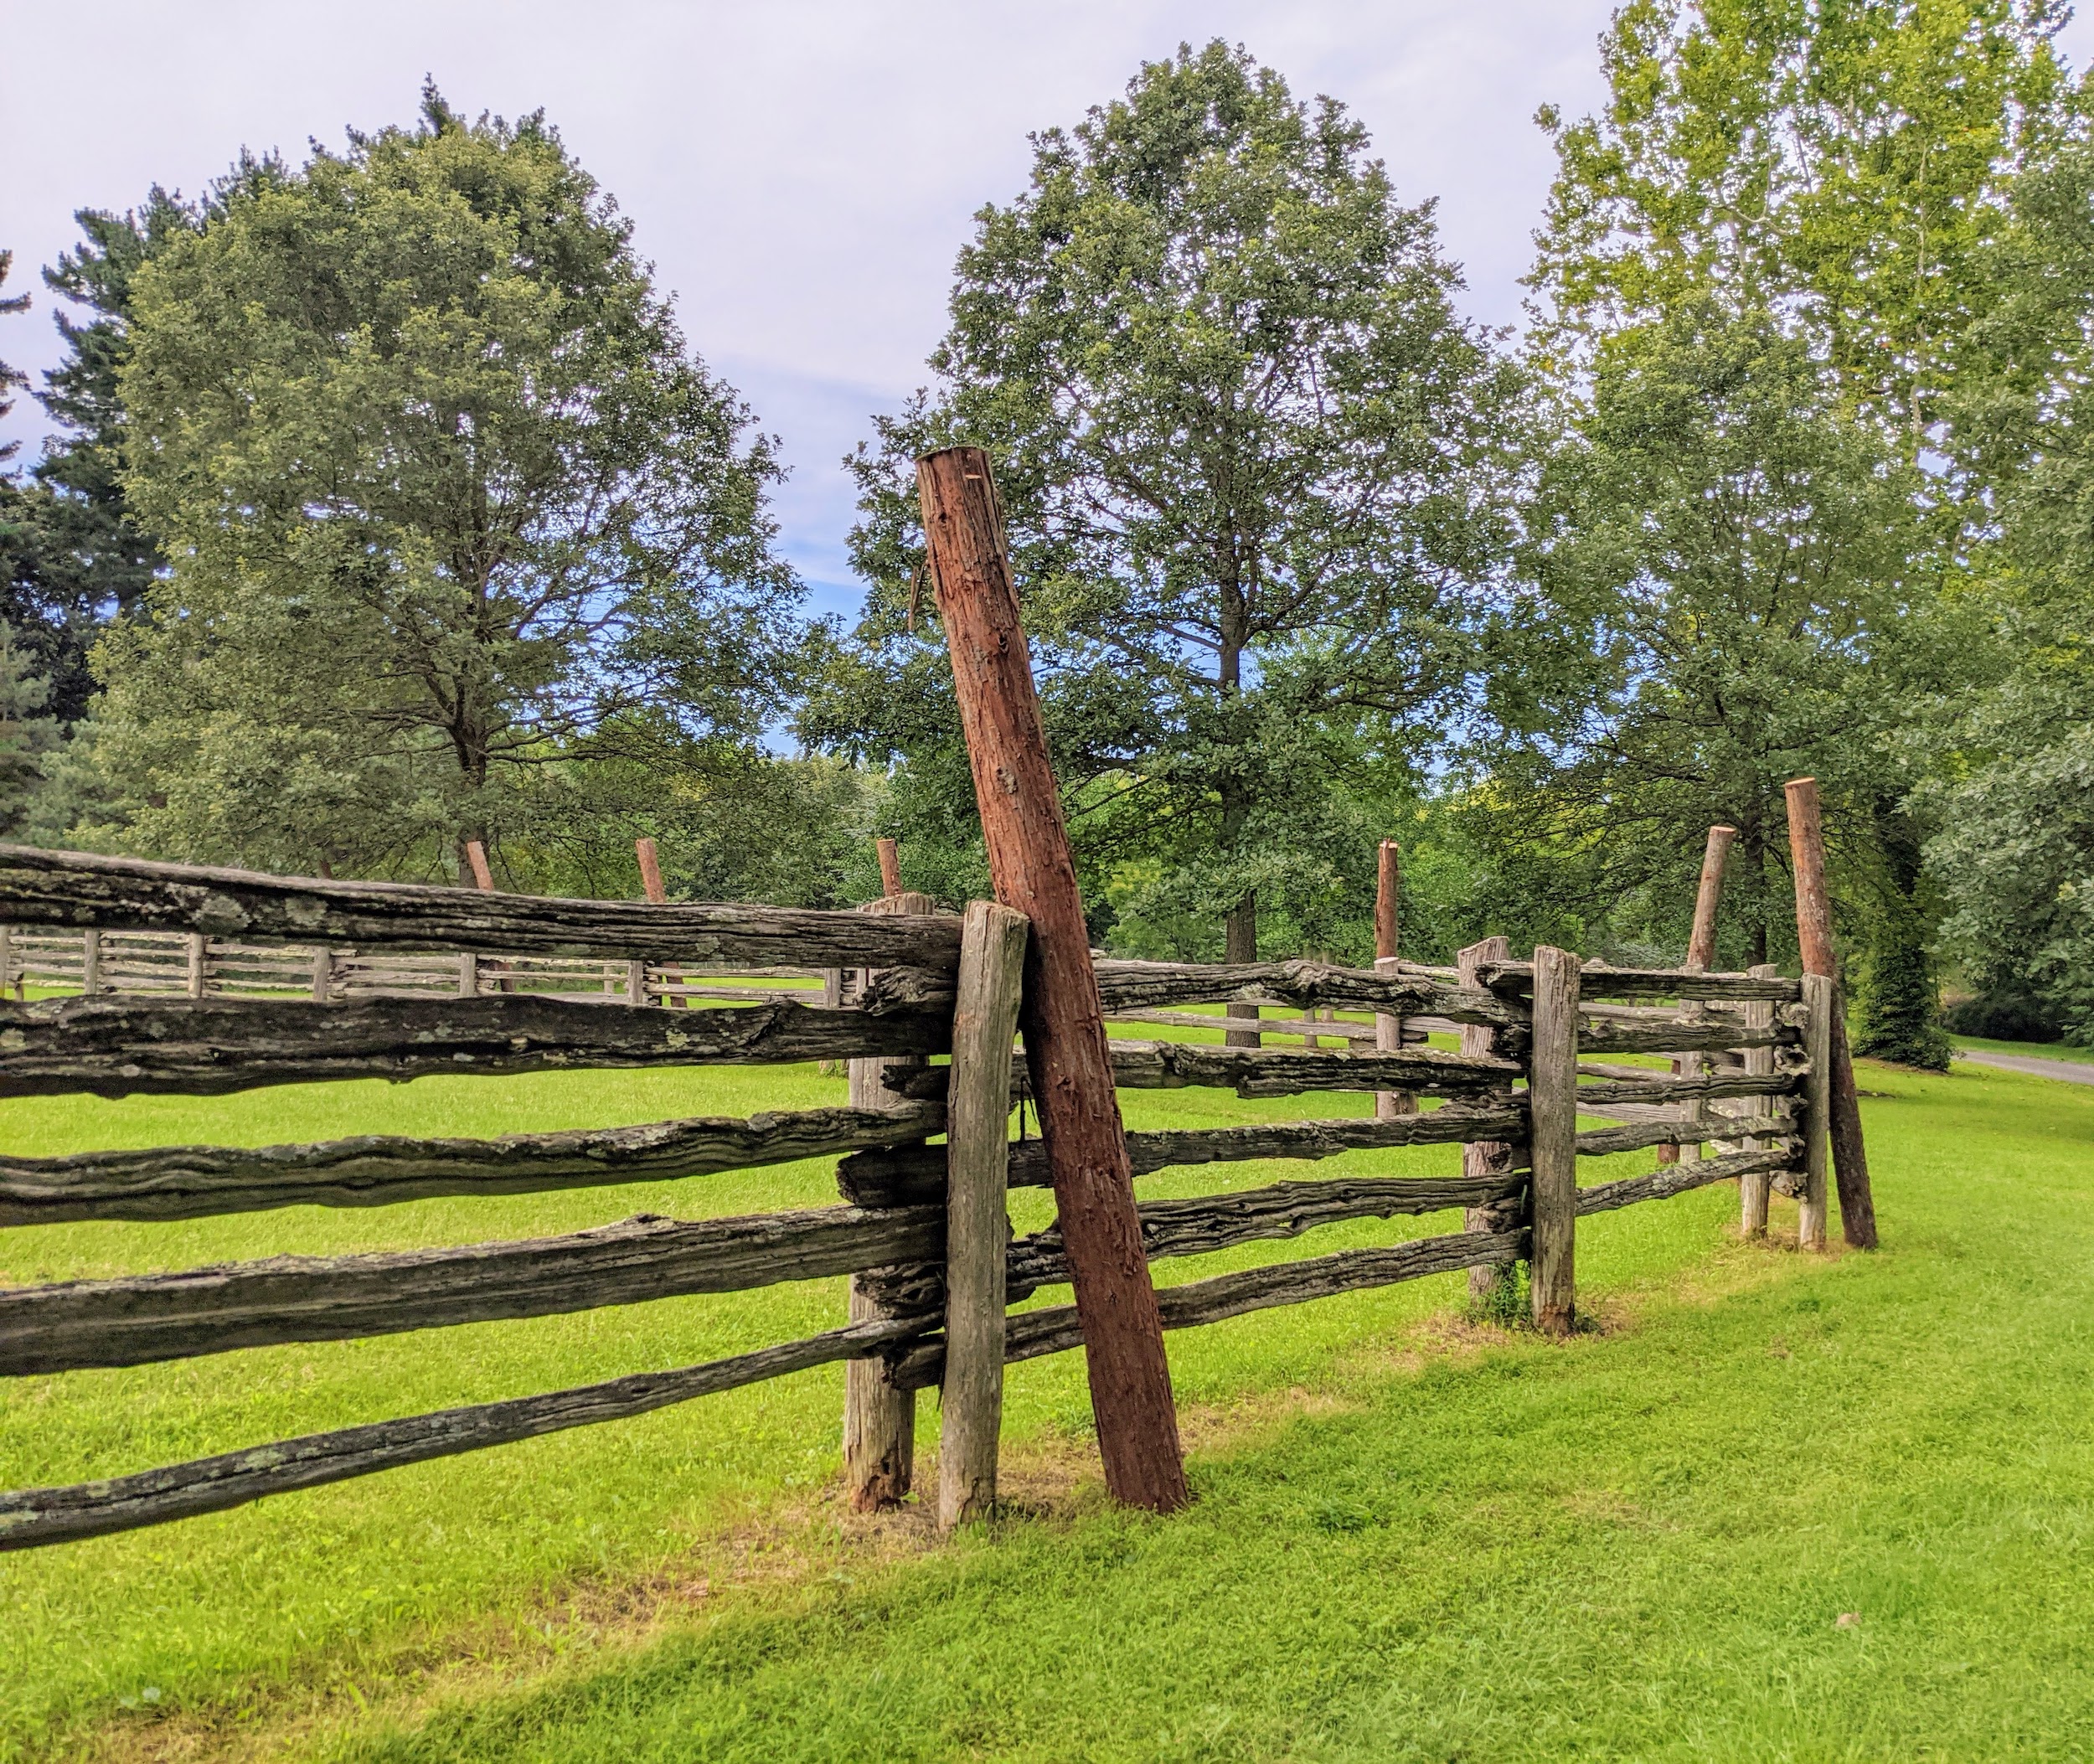
Here, one can see which posts were replaced and which ones are still in good condition. The next step is to cut the tops of the new posts, so they are all the same height as the fence.
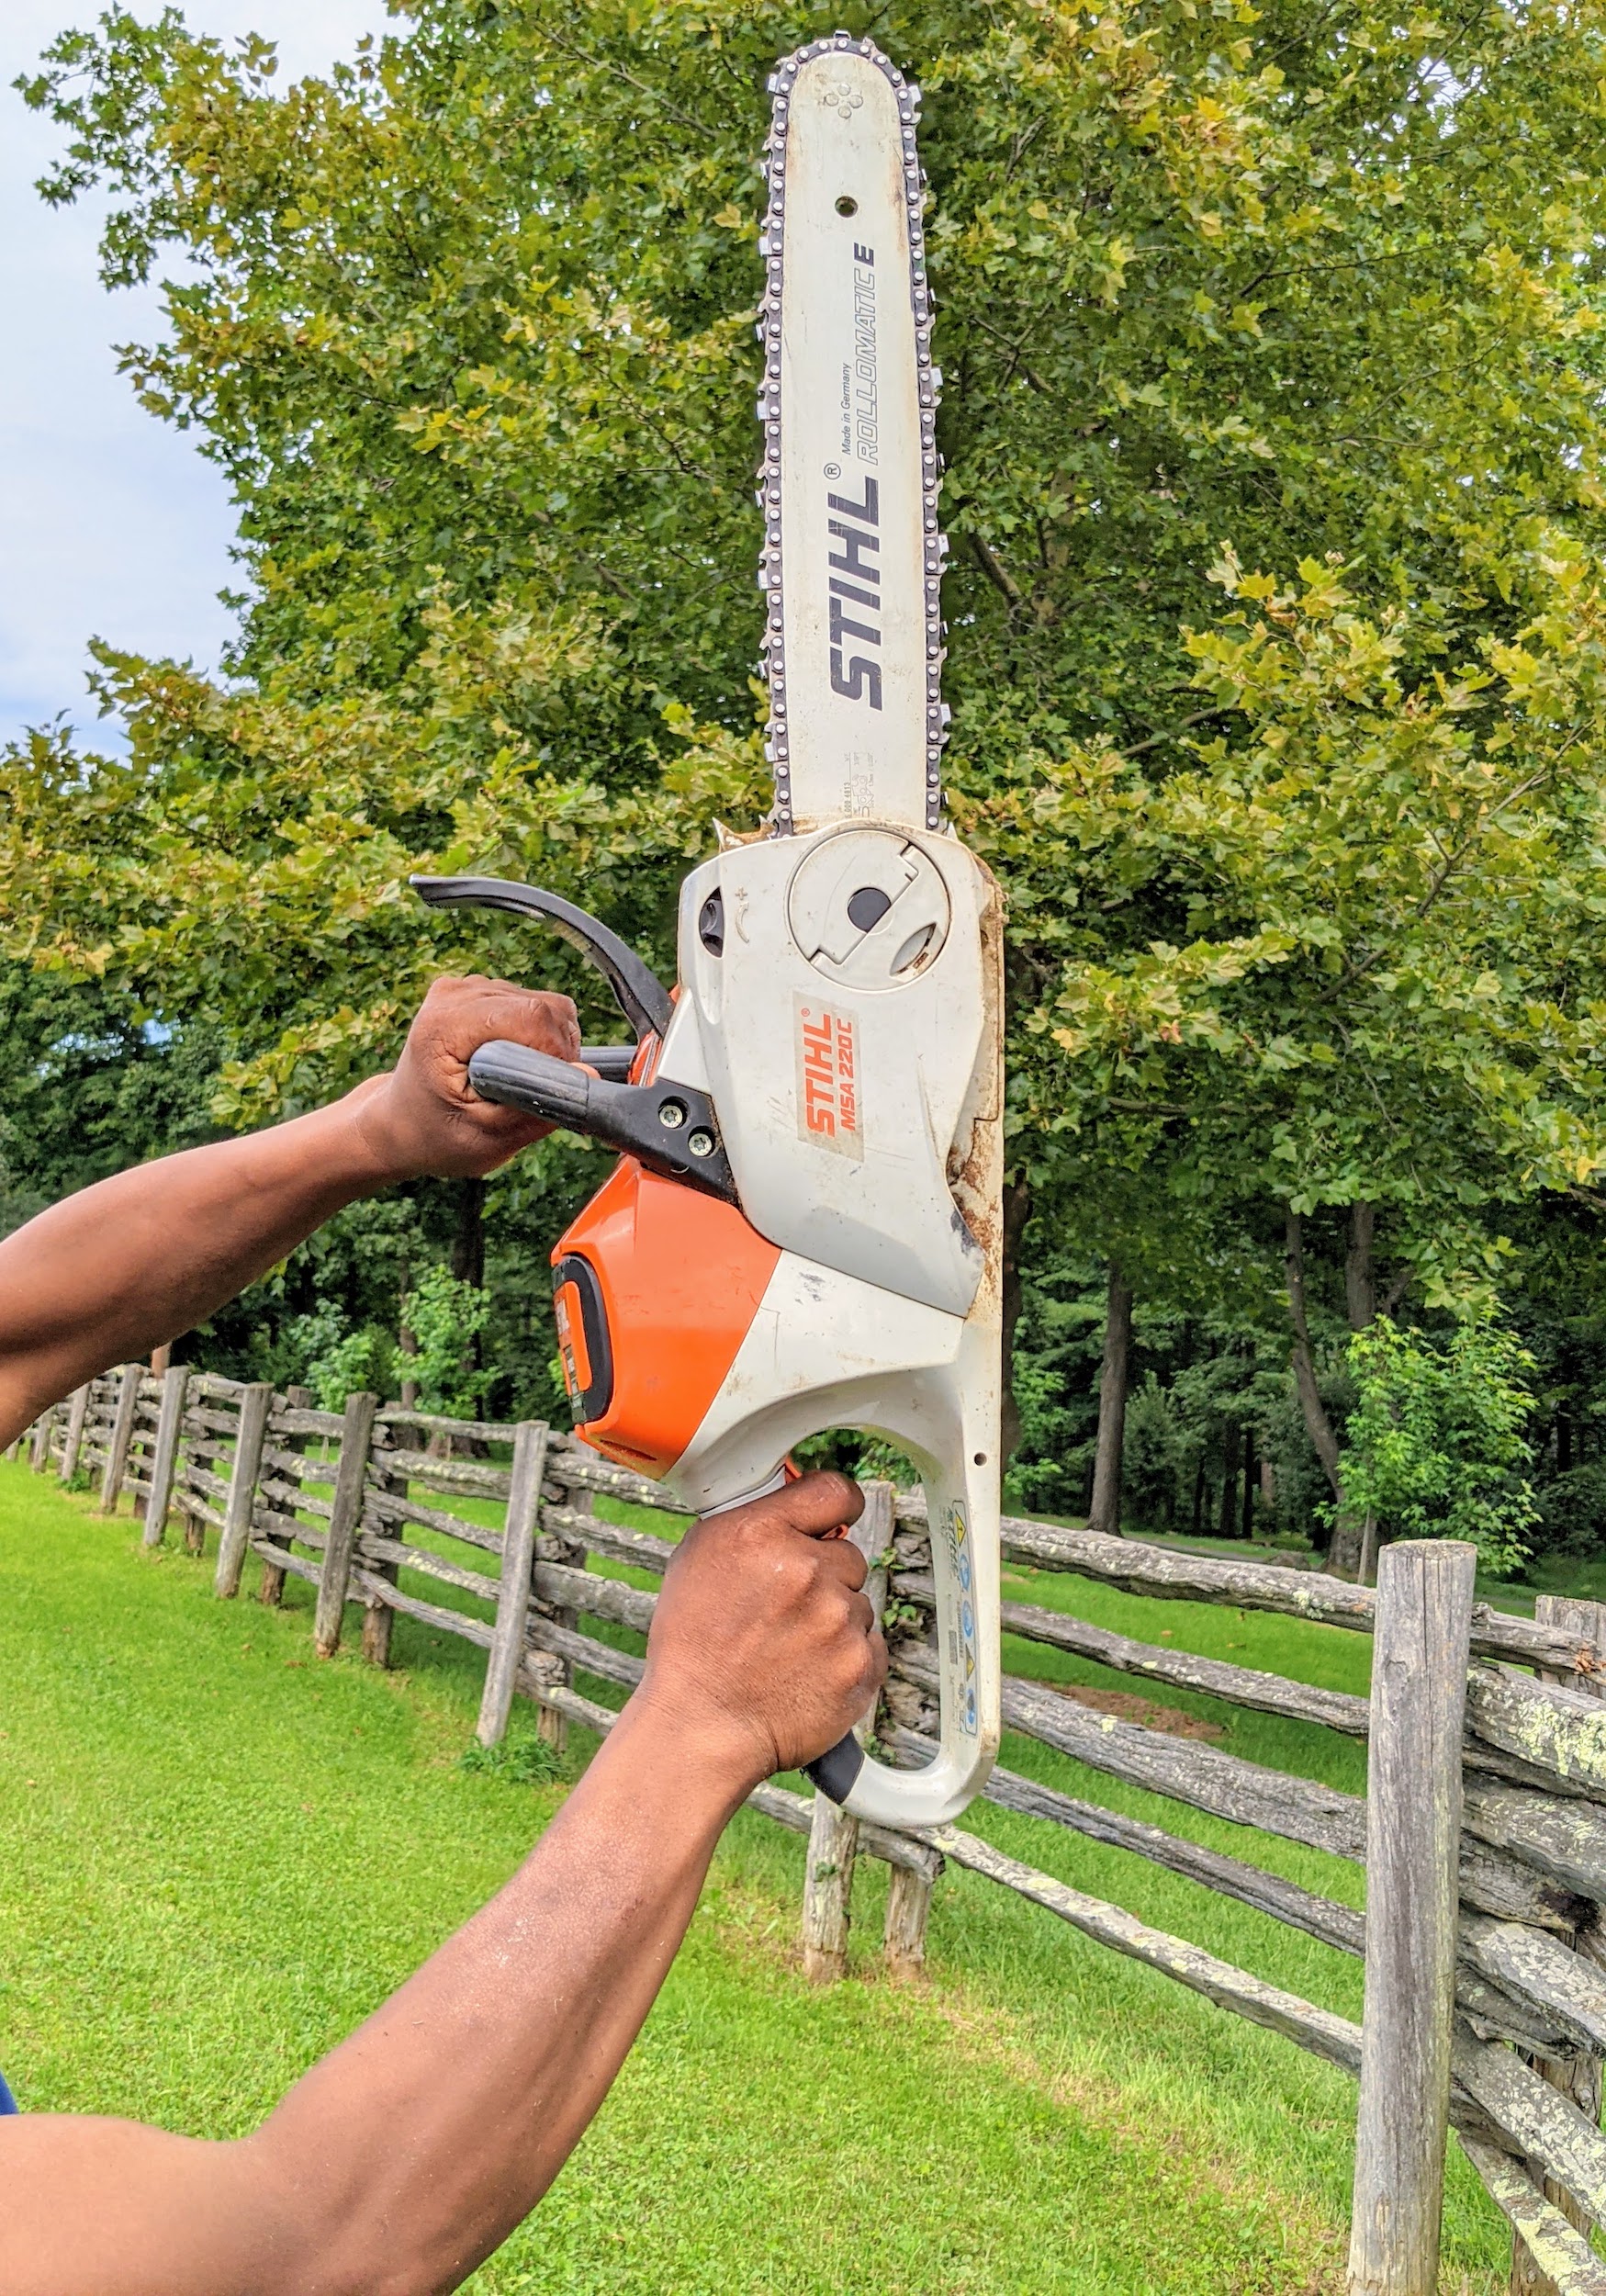
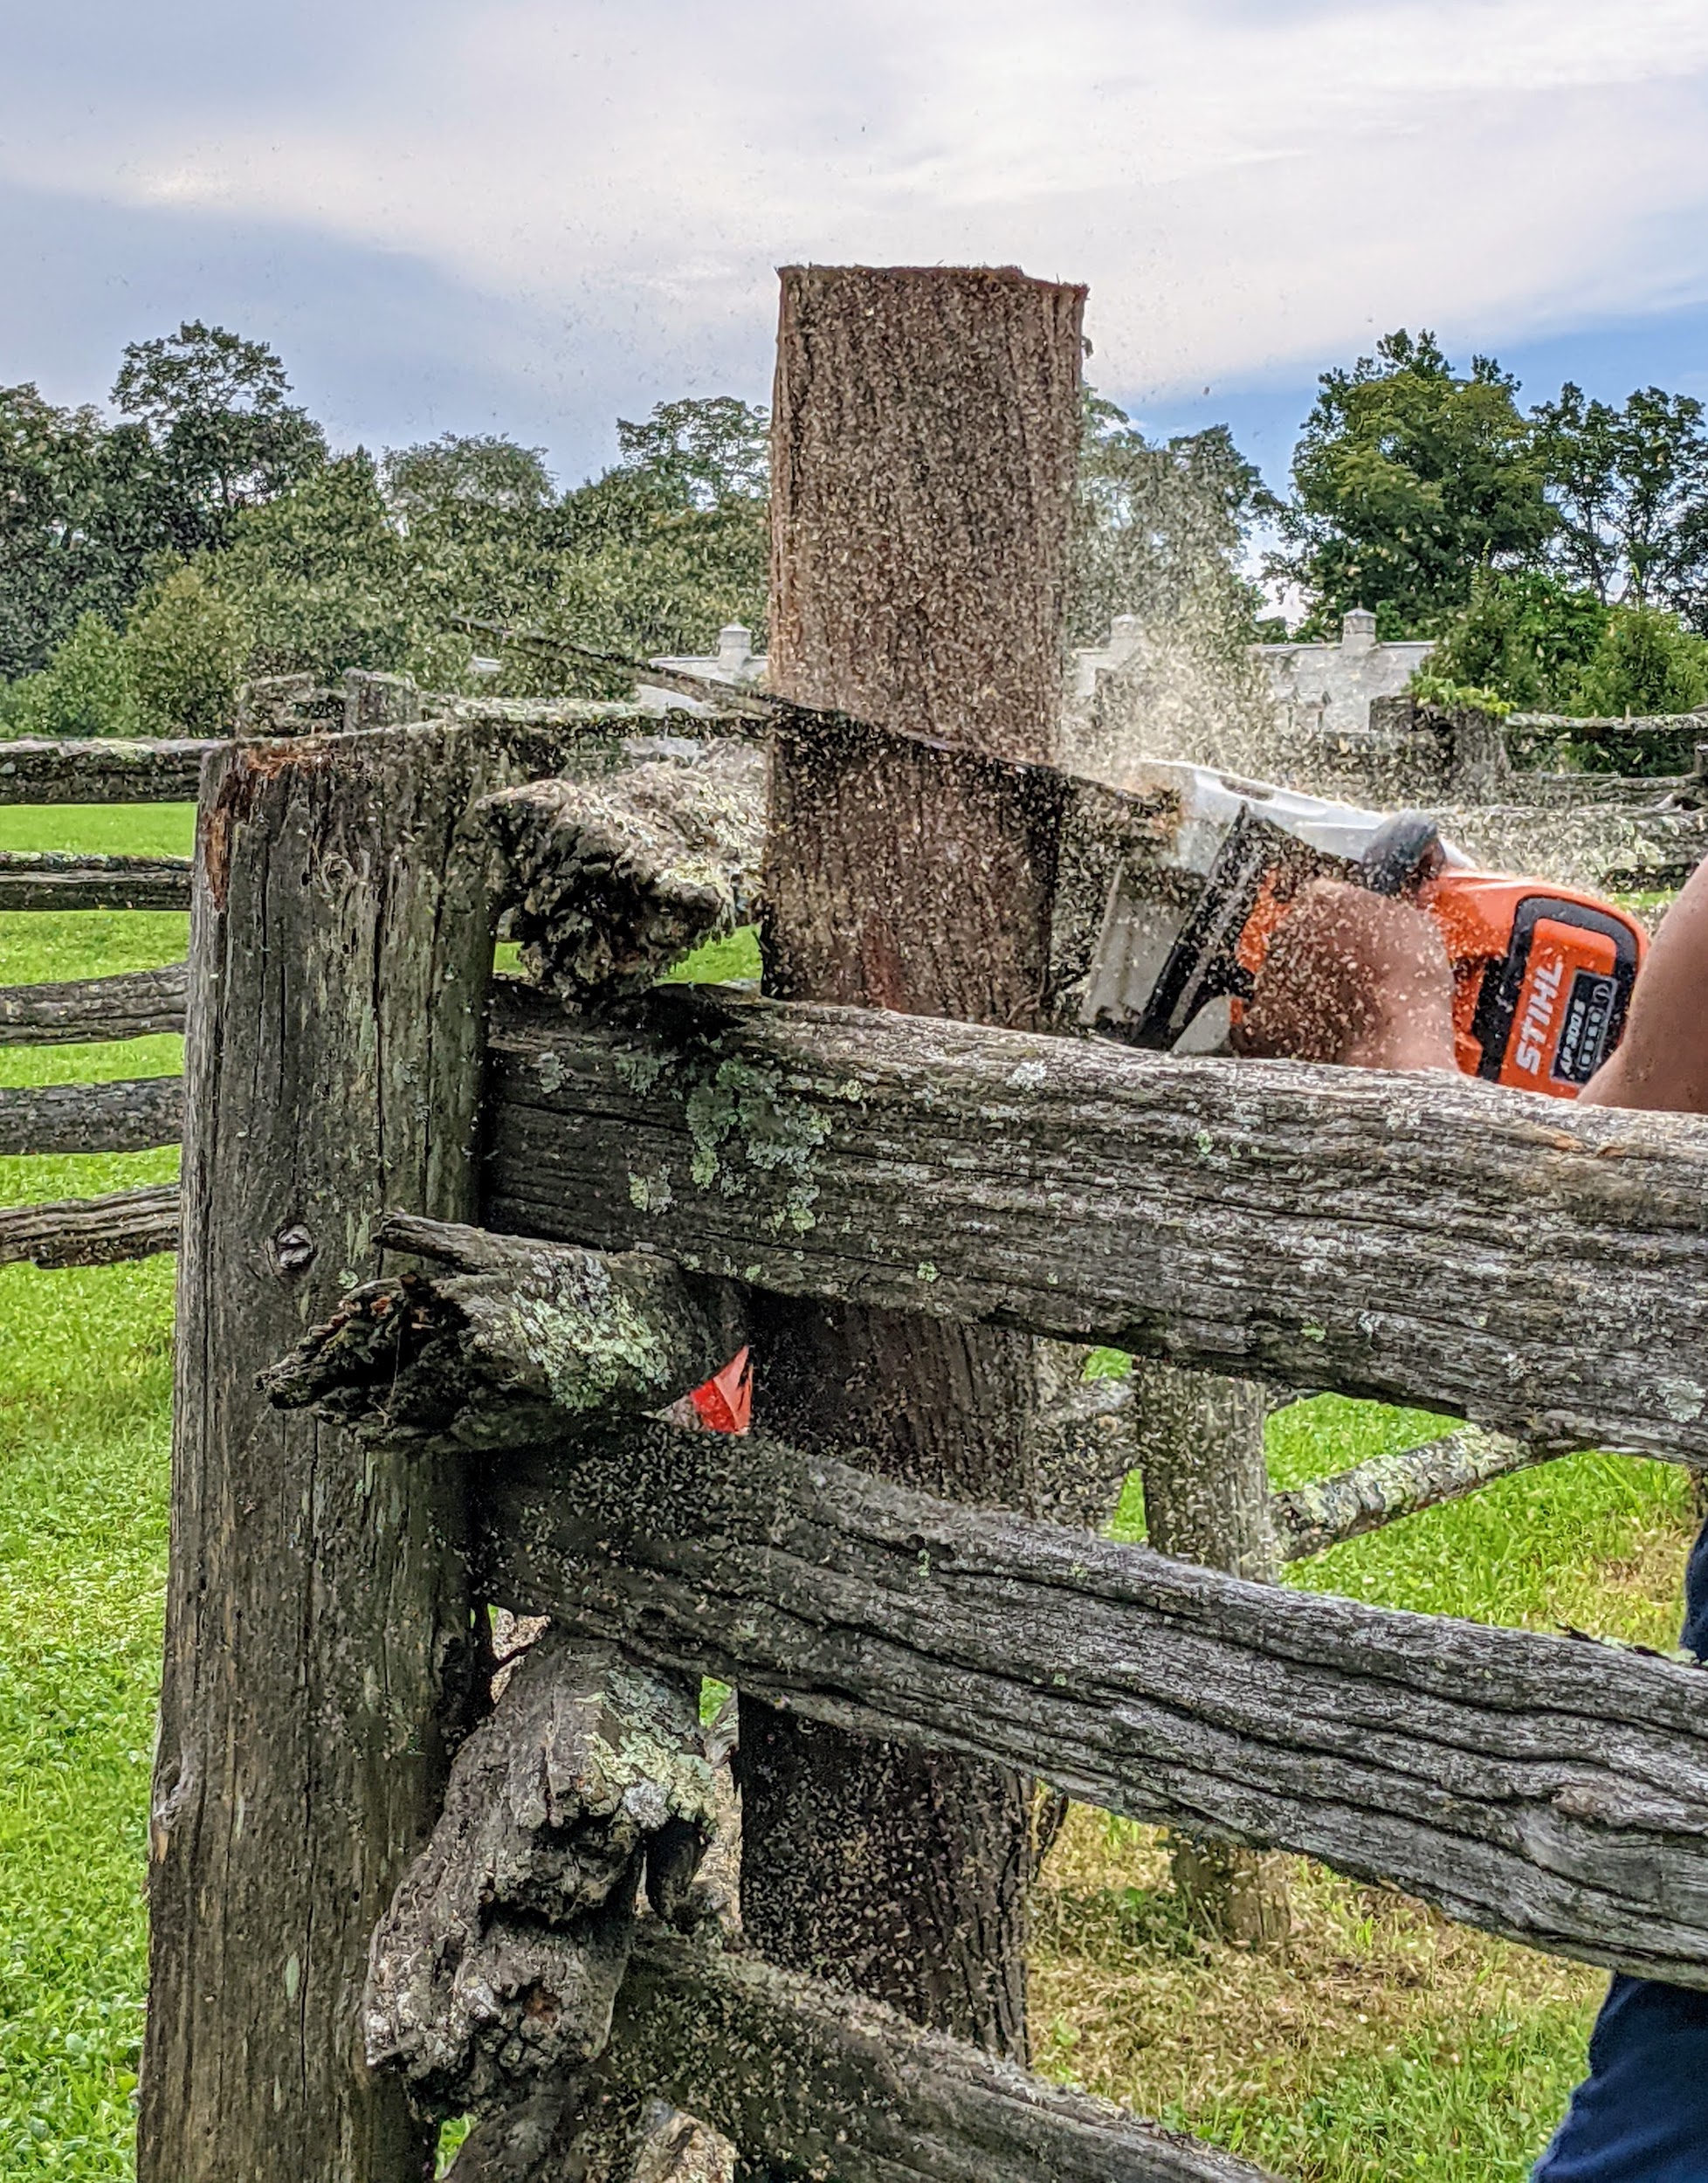
Pete uses our STIHL chainsaw. STIHL designed and built its first electric chain saw in 1926 and 94 years later, it is still one of its best pieces of equipment. This one is run on an AP 300 S Lithium-Ion Battery, which is powerful and compatible with a wide range of other STIHL tools.
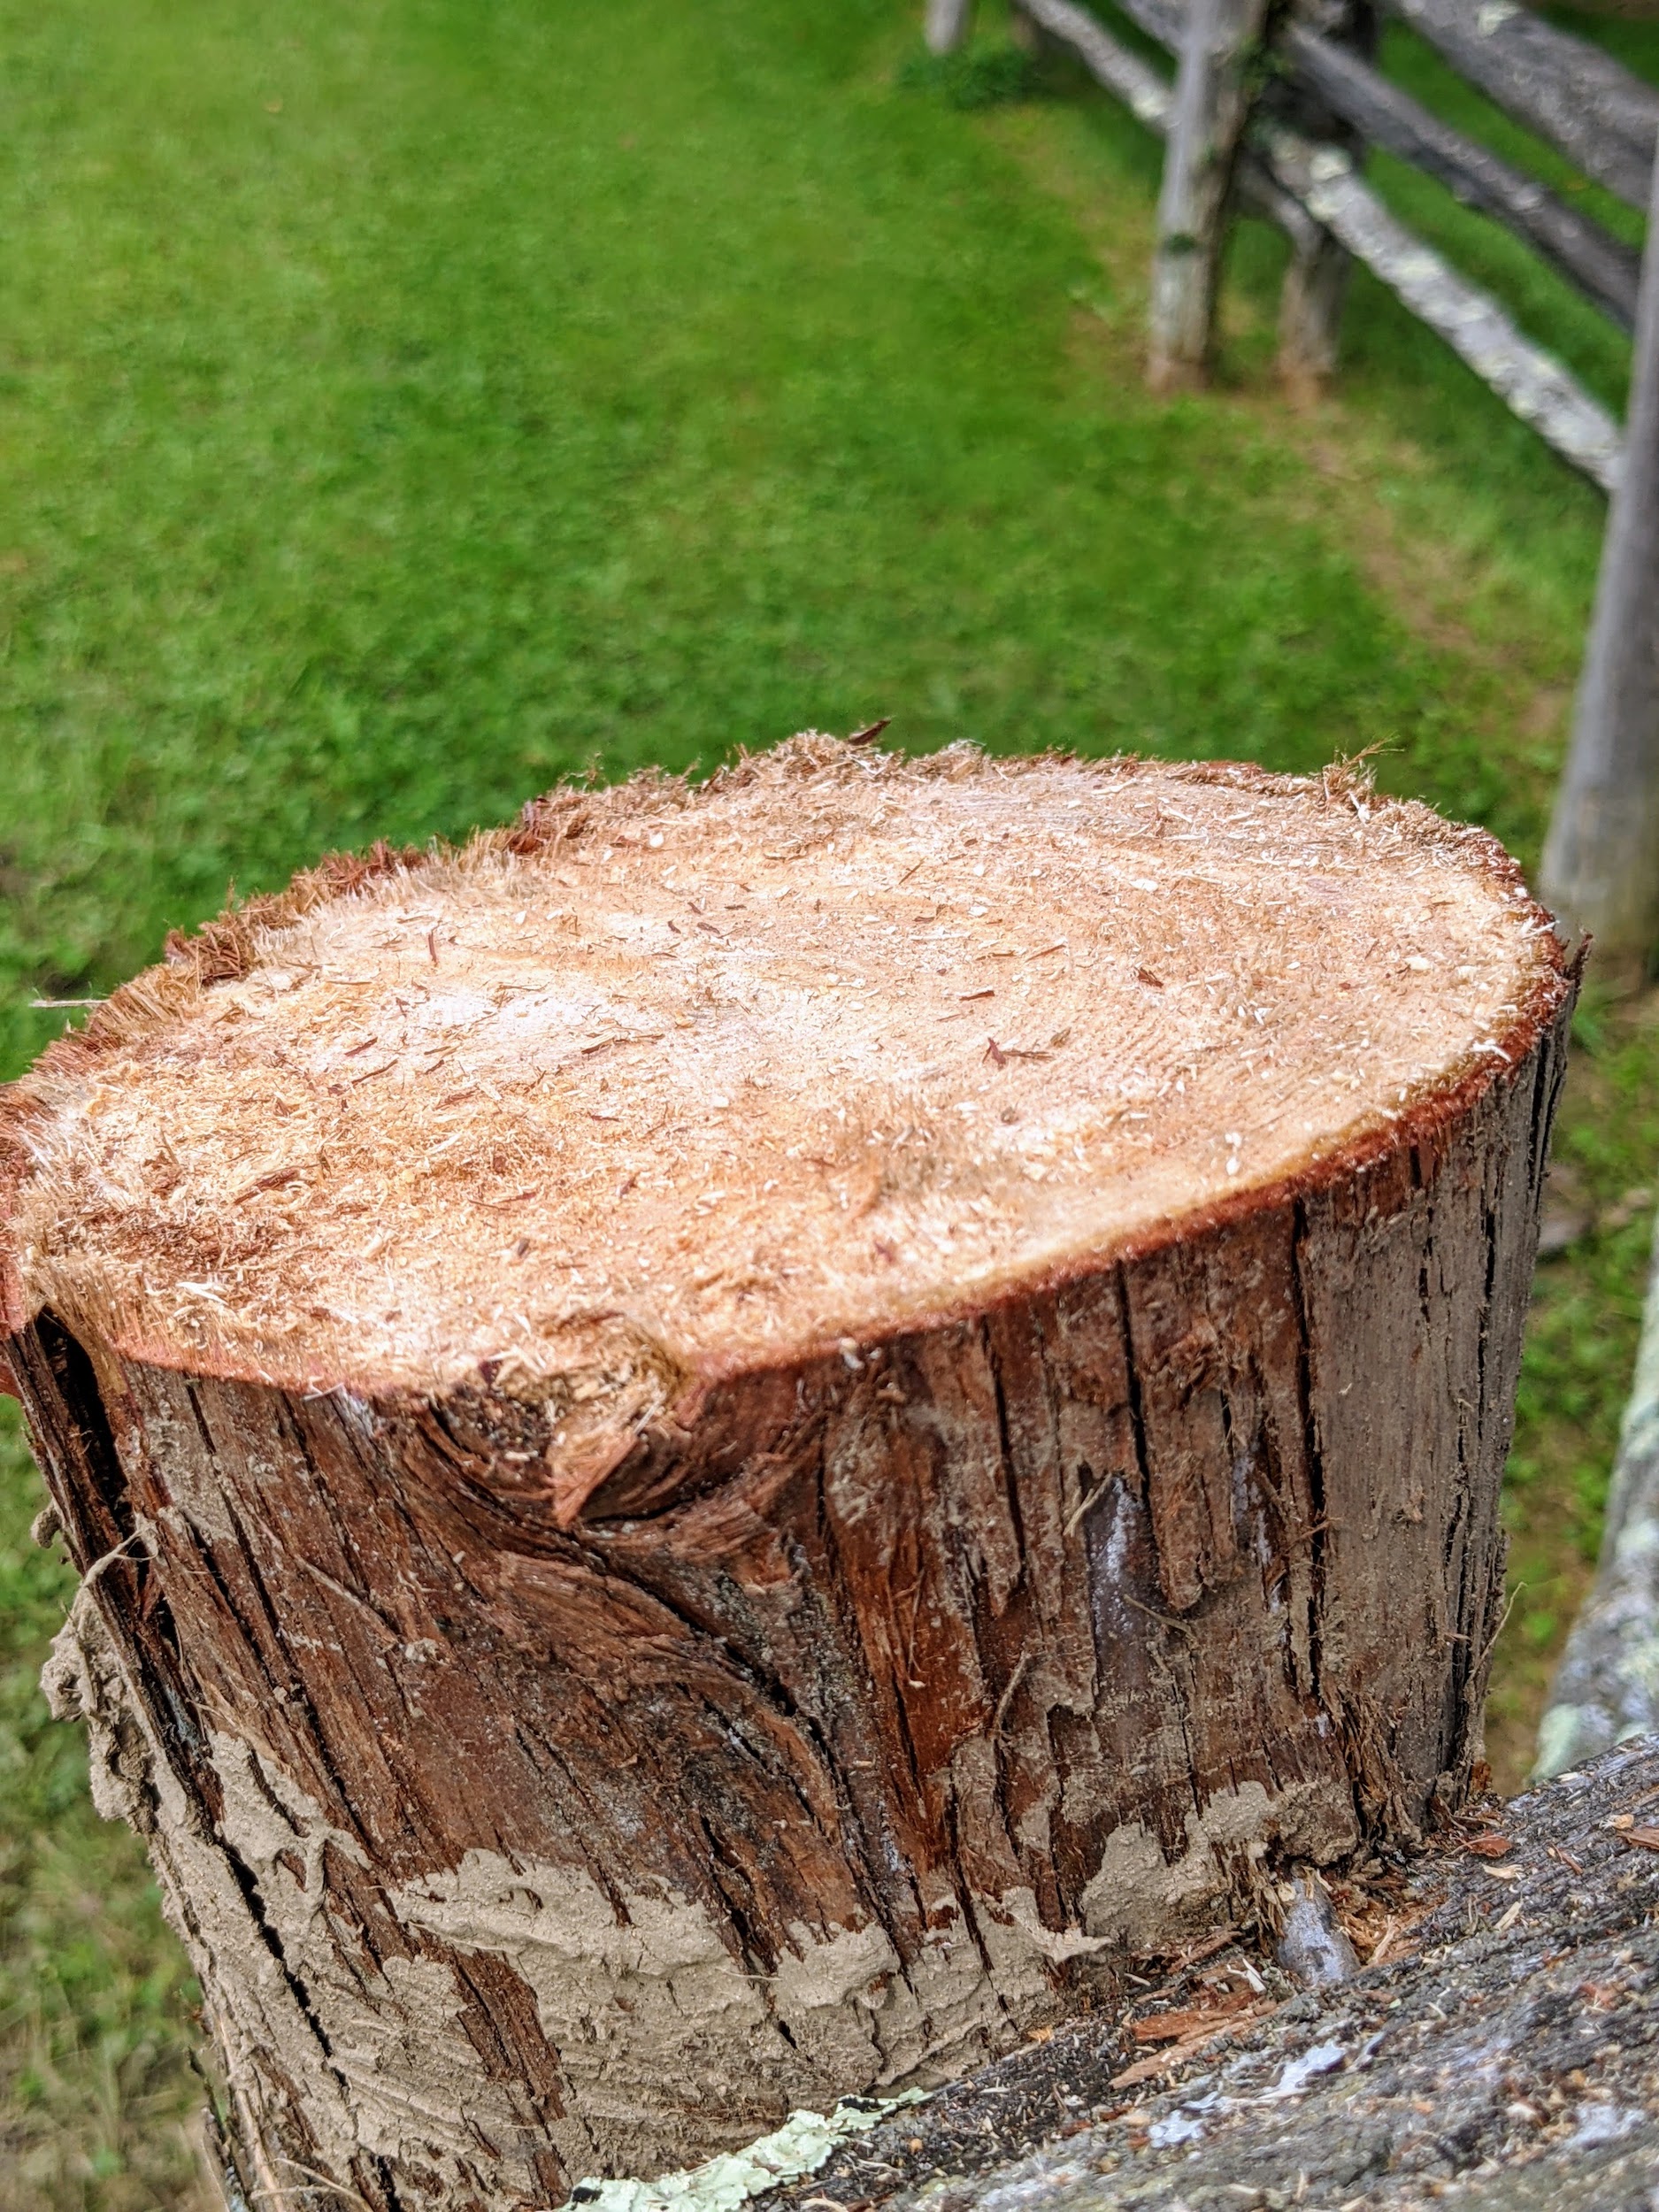
In just a few minutes, the post is cut.
This new post should last another 15-years or more. It is made of cedar. Cedar is extremely durable and holds up well to outdoor weather conditions.
No wonder we put in so much effort to maintaining these old fences – they look stunning against the backdrop of these lush American beech trees.
And the fences keep my handsome steeds safe in their pastures.
Another good pruning job is complete at my Bedford, New York farm - this time, on the purple columnar beech trees surrounding my swimming pool.
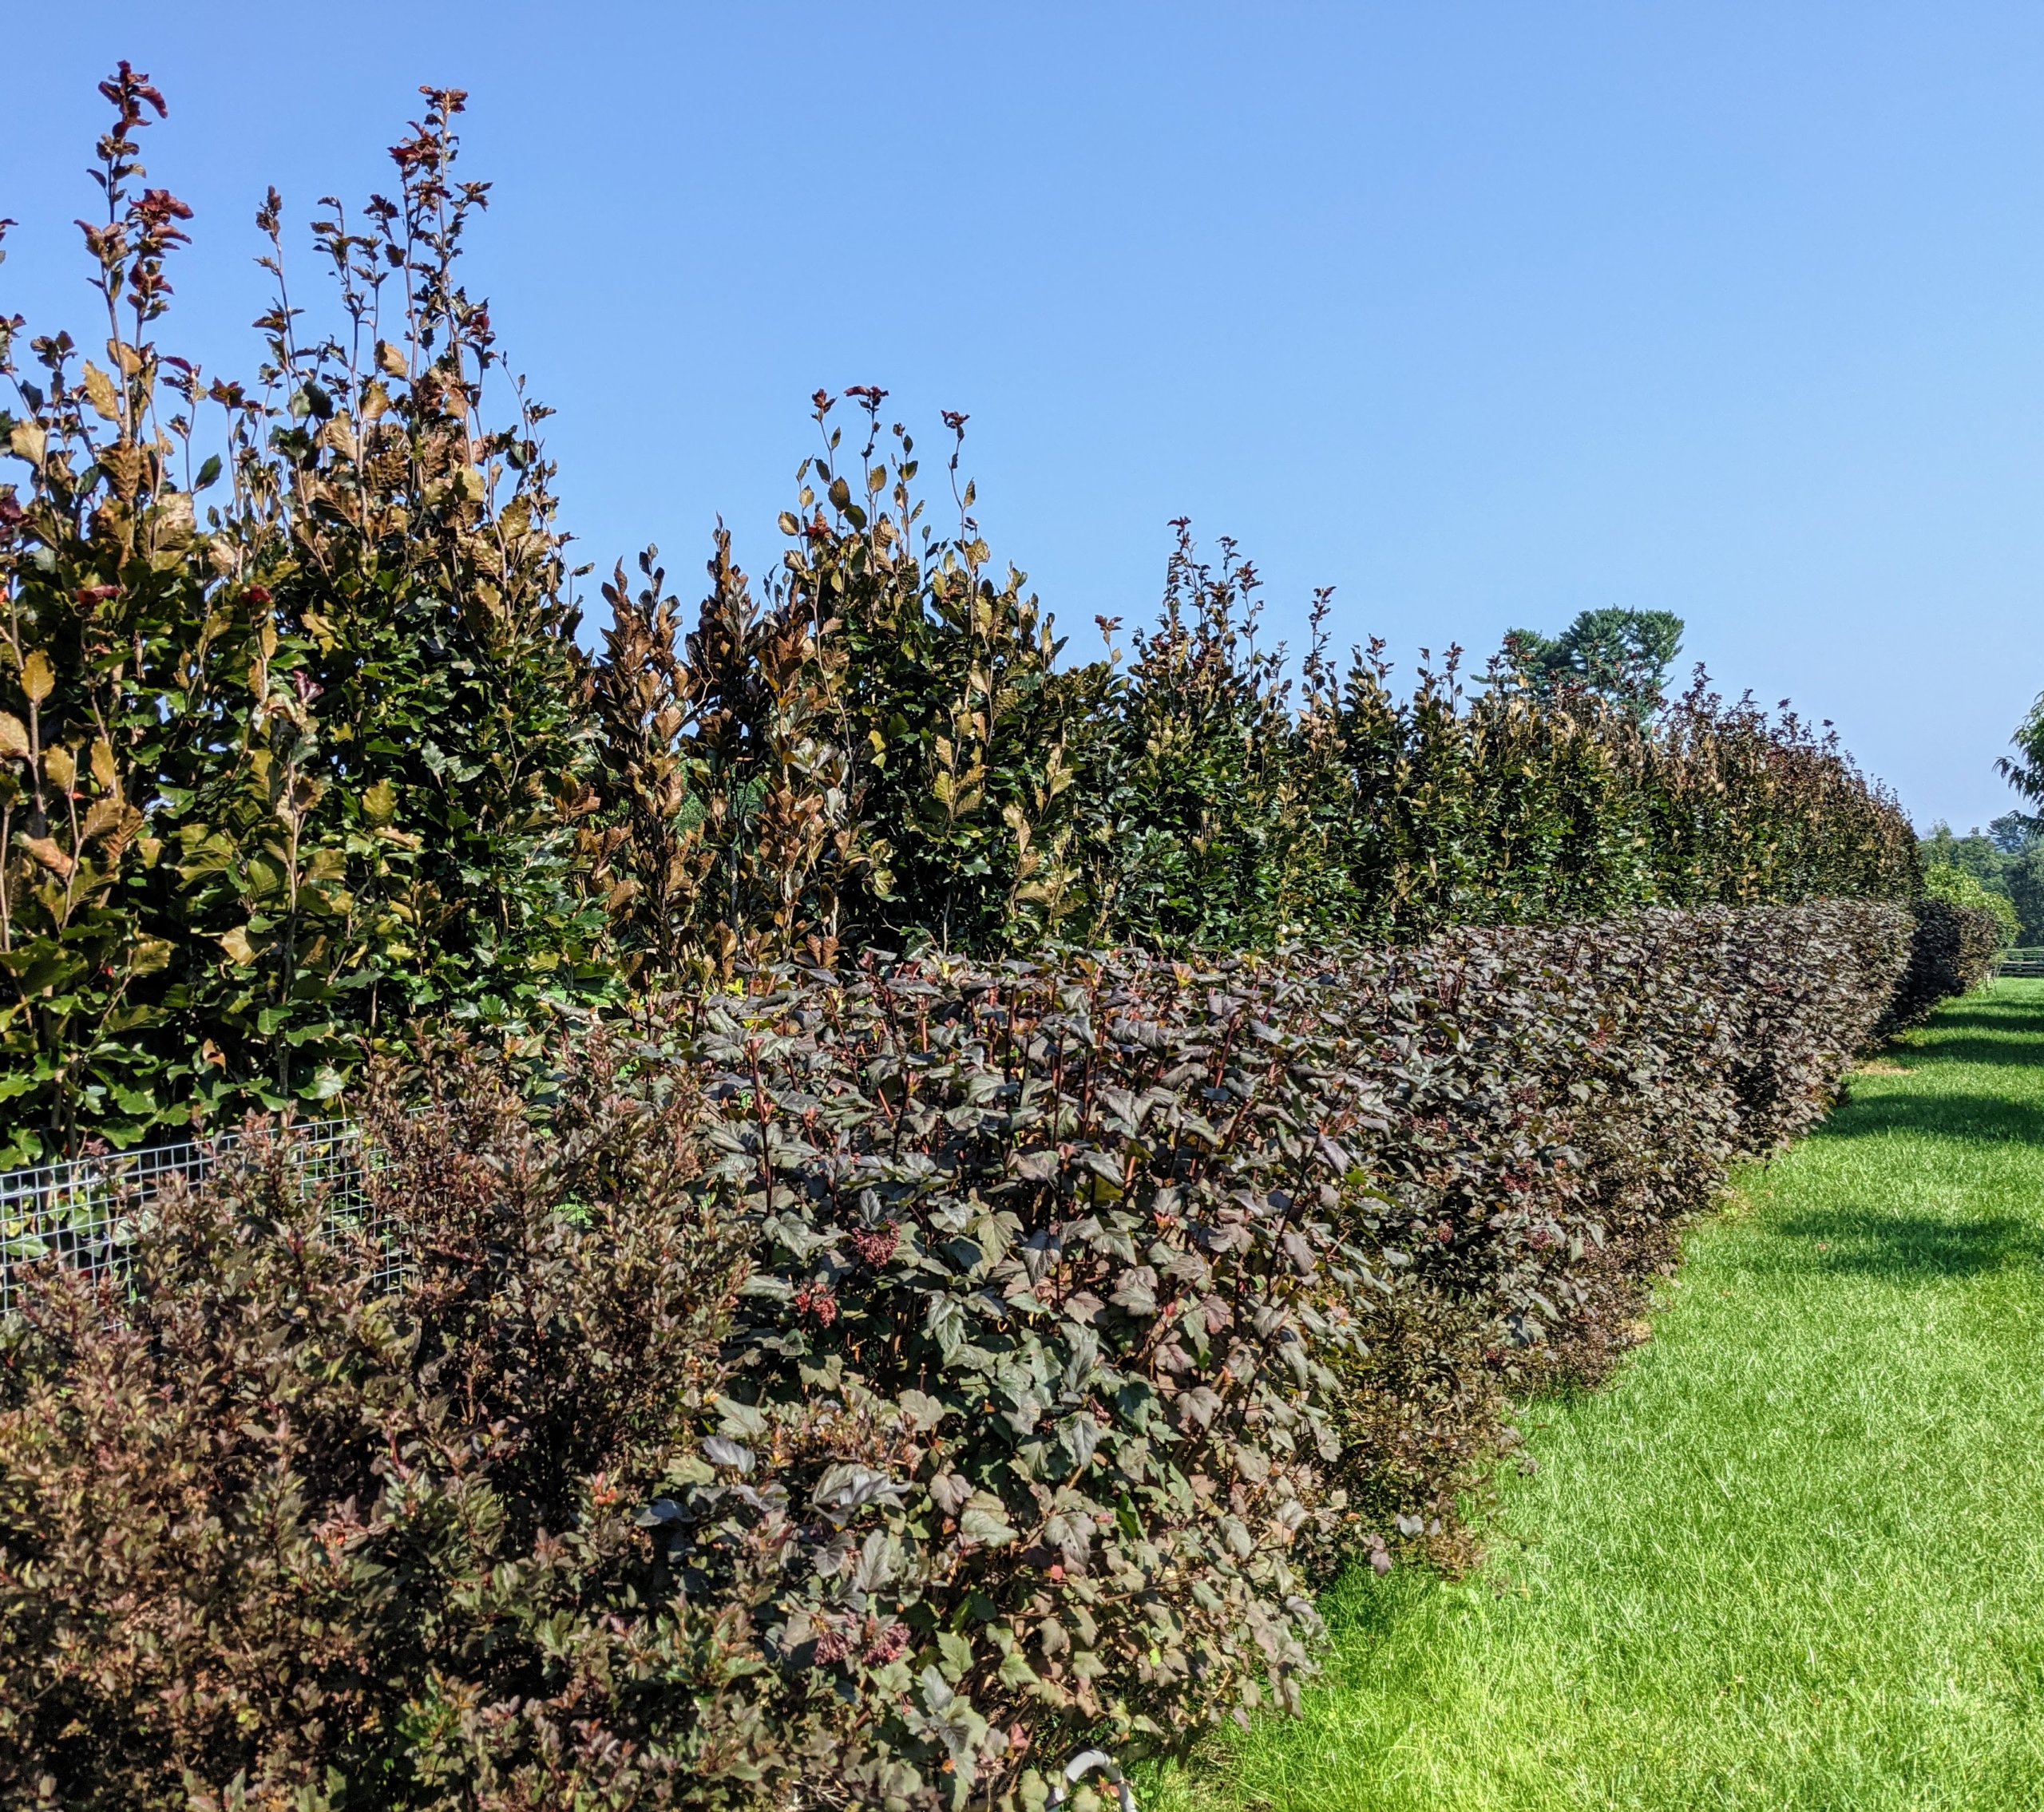
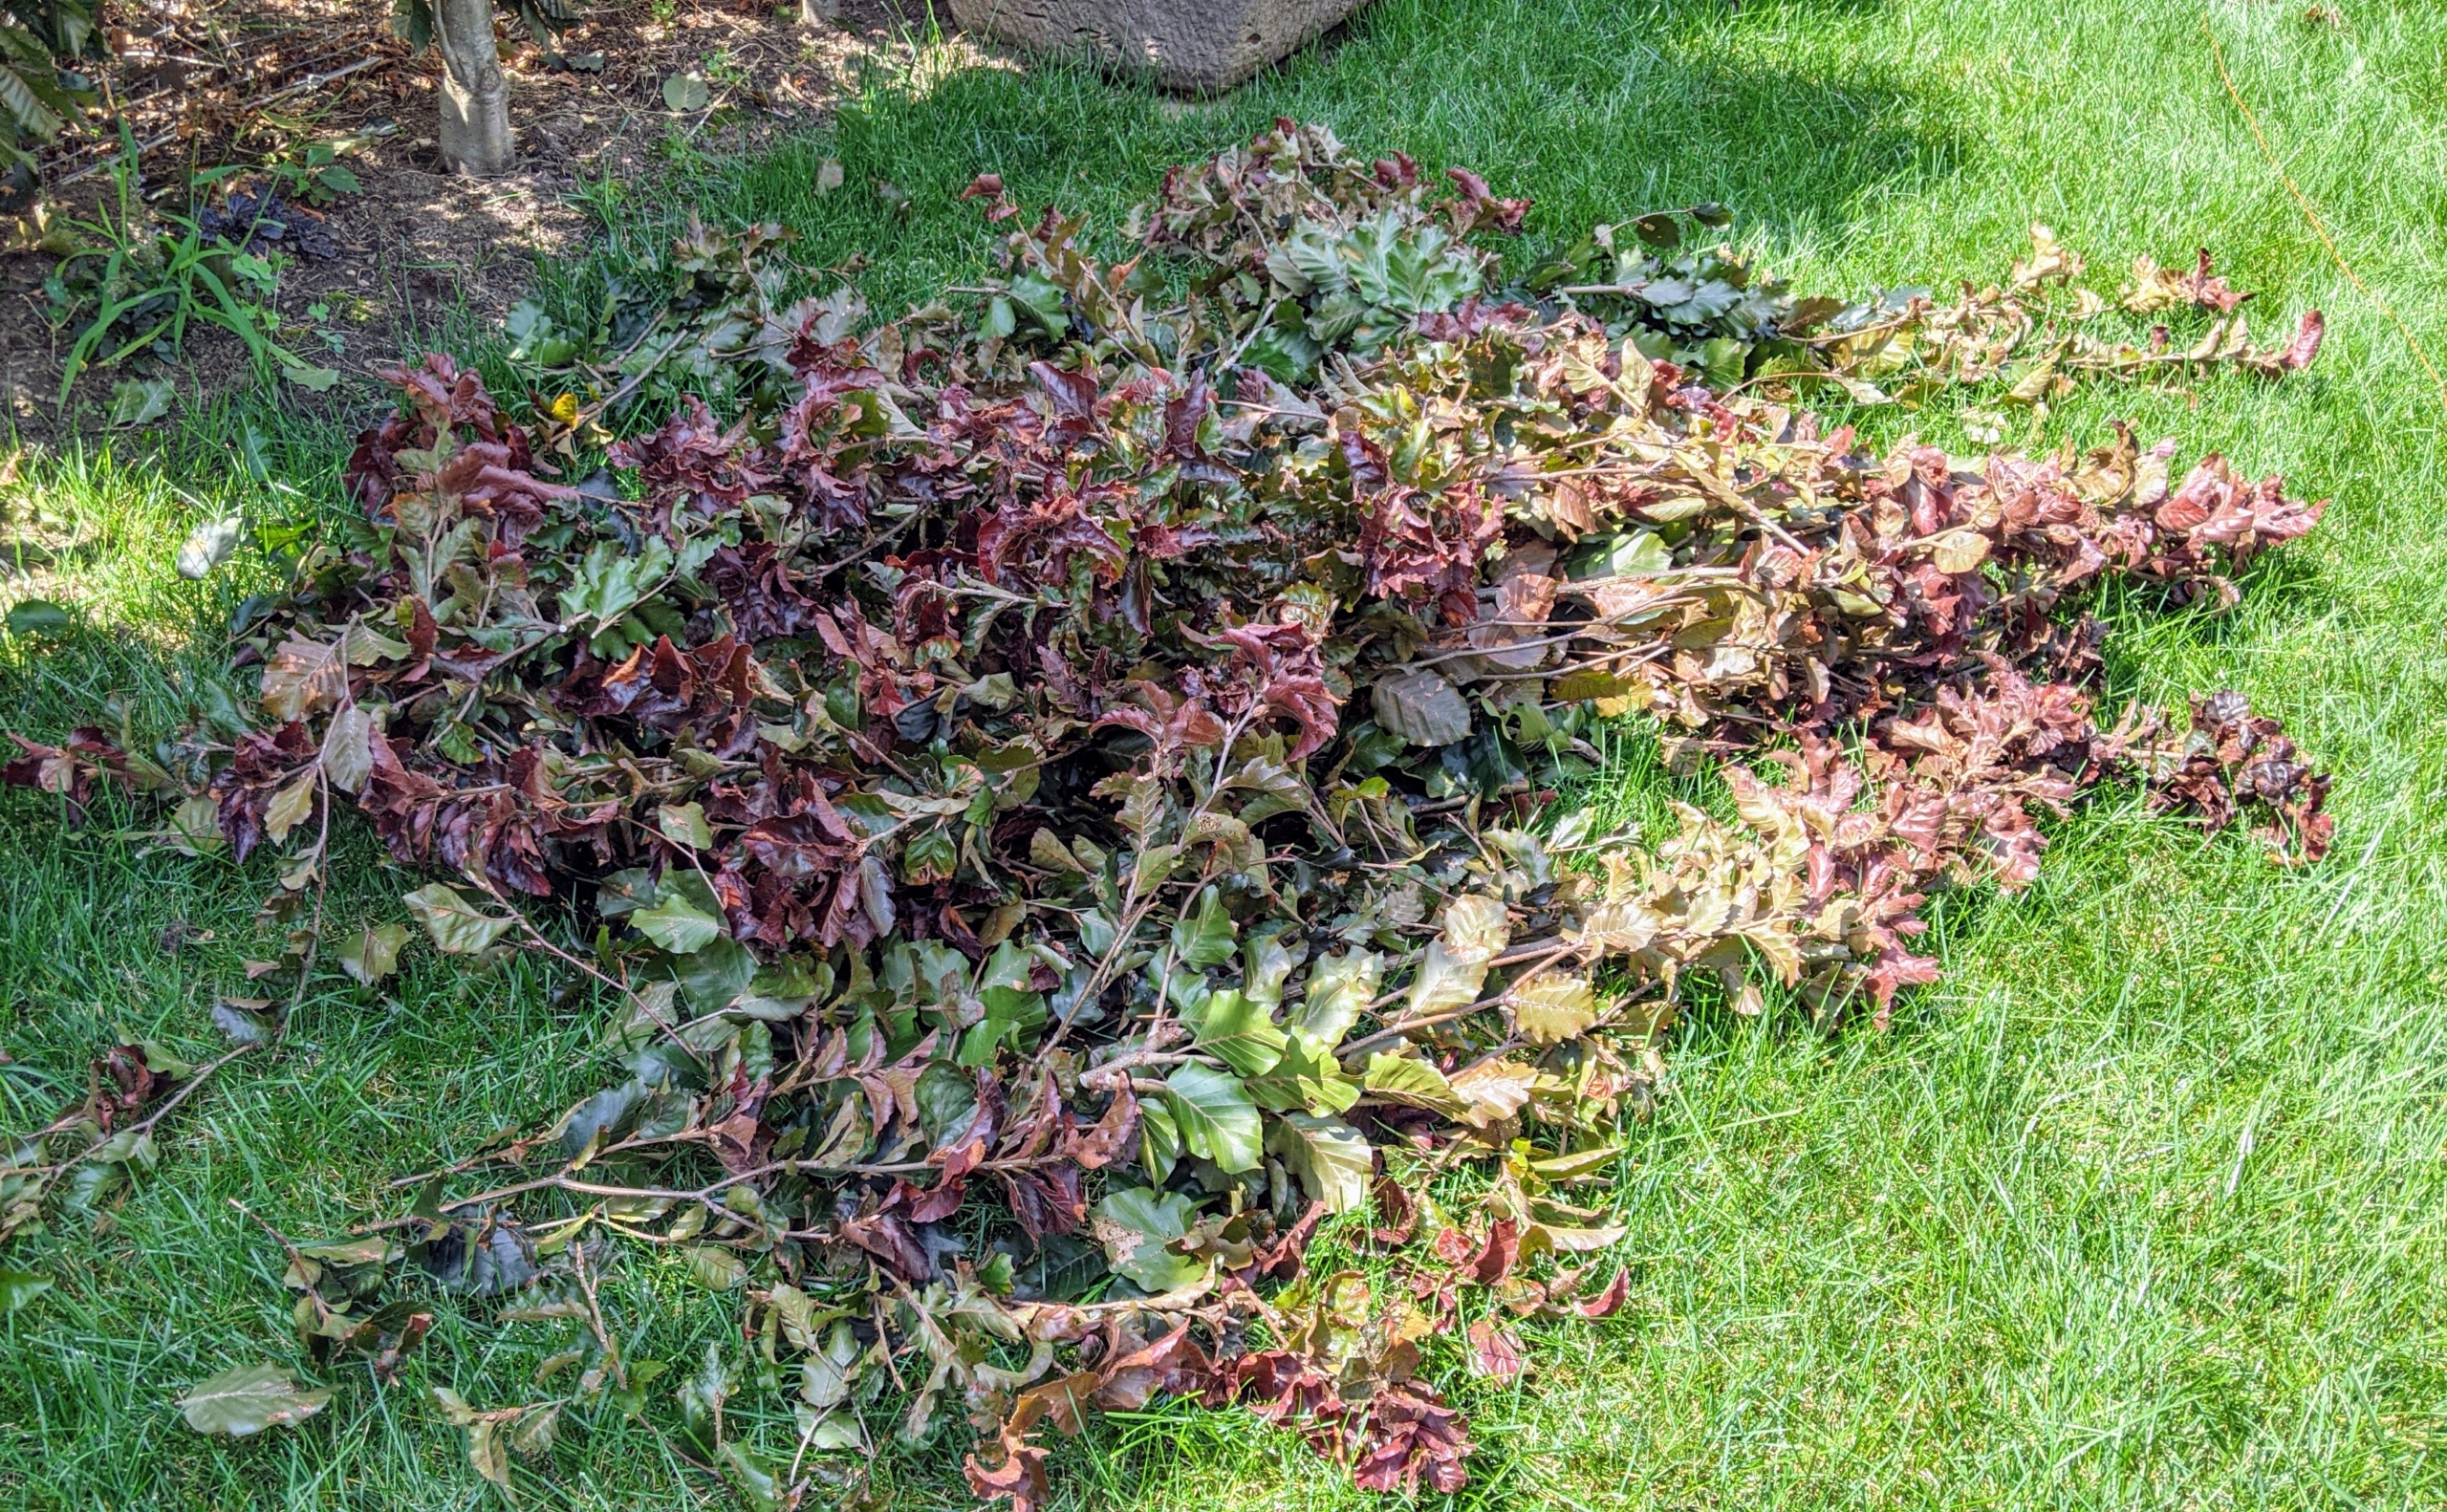
Back in 2018, we planted more than 170 purple columnar beech trees, Fagus sylvatica 'Dawyck Purple' along the inside of the pool fence. The columnar beech is a splendid tree with deep-purple foliage that holds its color all season long. It reaches 40 to 50 feet in height and only 10-feet wide which makes it perfect for tight spaces and for use as an interesting hedge. Last week, my gardeners gave the hedge a good pruning to keep all the beech trees healthy and looking their best.
Enjoy these photos.
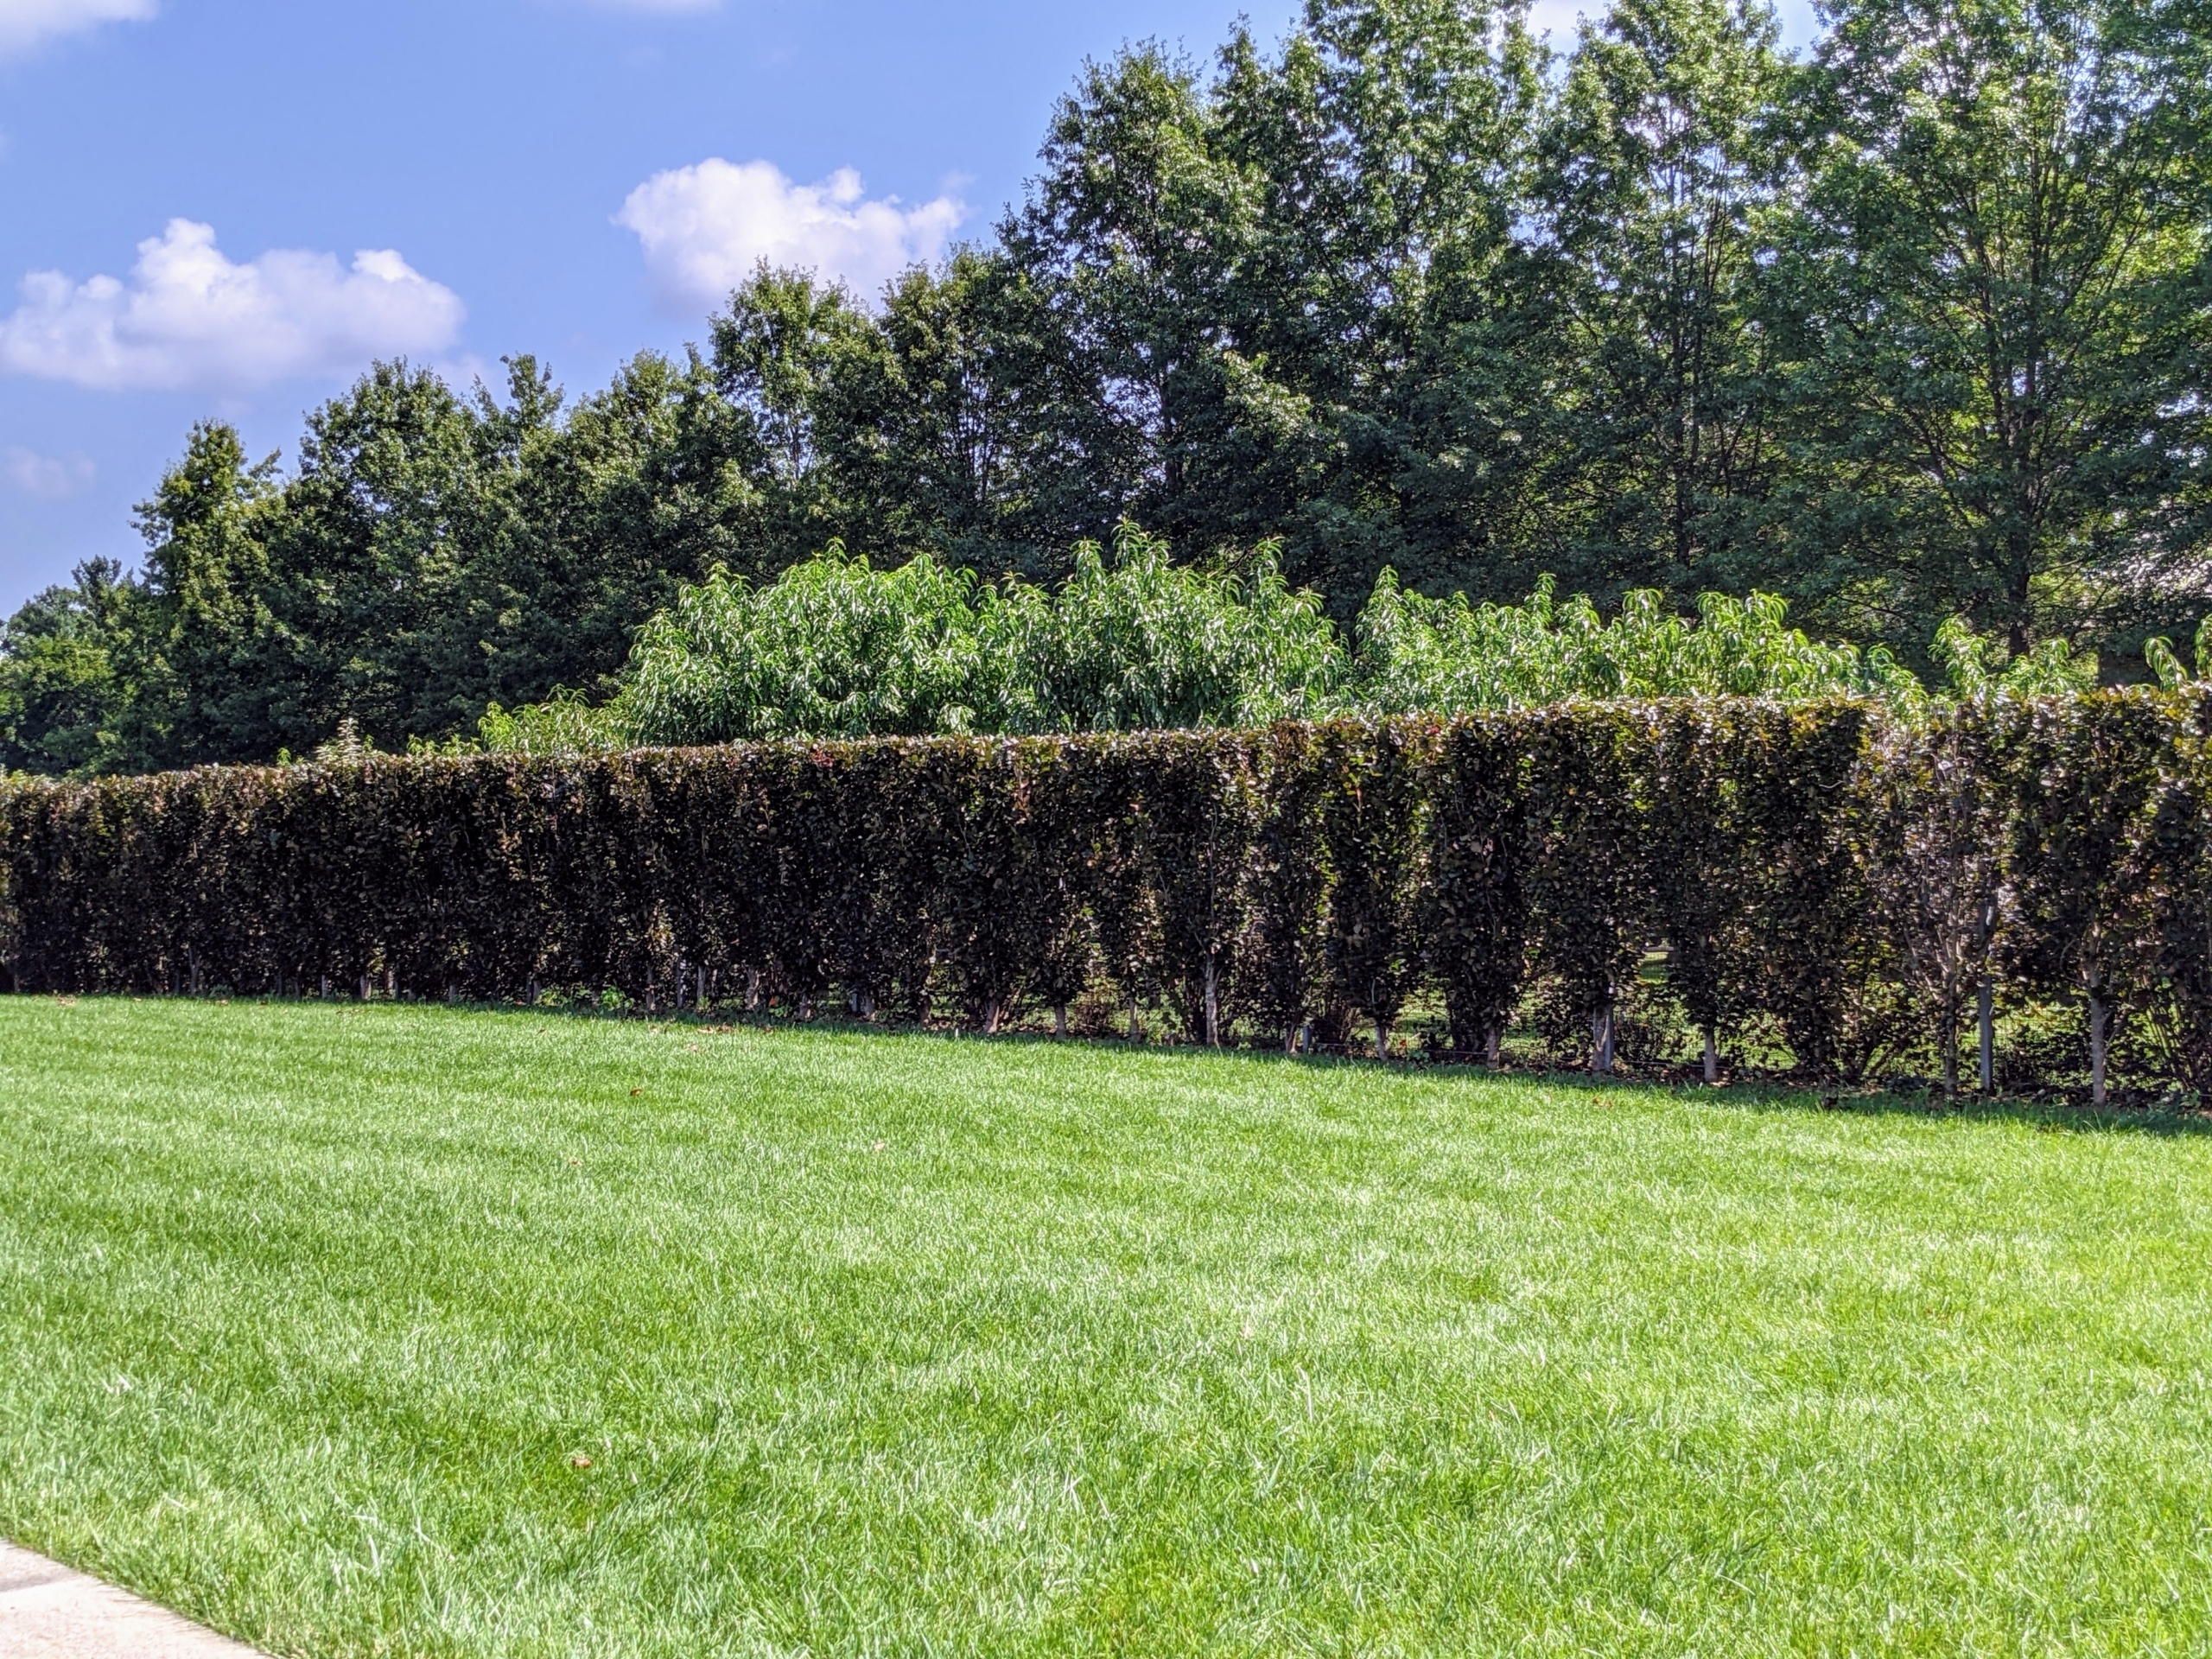
When planning the gardens around my pool, I wanted to create a natural border along both sides of my pool fence, so I chose a dark purple color palette. The hedge on the left is made of purple columnar beech trees, Fagus sylvatica ‘Dawyck Purple’. The shorter plantings on the right are Physocarpus opulifolius ‘Diabolo’ and Cotinus coggygria ‘Royal Purple’ shrubs.
Columnar beech trees are fastigiate meaning their branches slope upward more or less parallel to the main stem. I knew they would be perfect around the pool, but like all garden specimens, they must be well-maintained. I instructed my gardeners to prune them all at least a foot so they were all even.
Here’s a view from the top – they definitely need some pruning.
From this vantage point, one can see the hedge surrounding the enclosed pool. It is developing so nicely and disguises the fence very well.
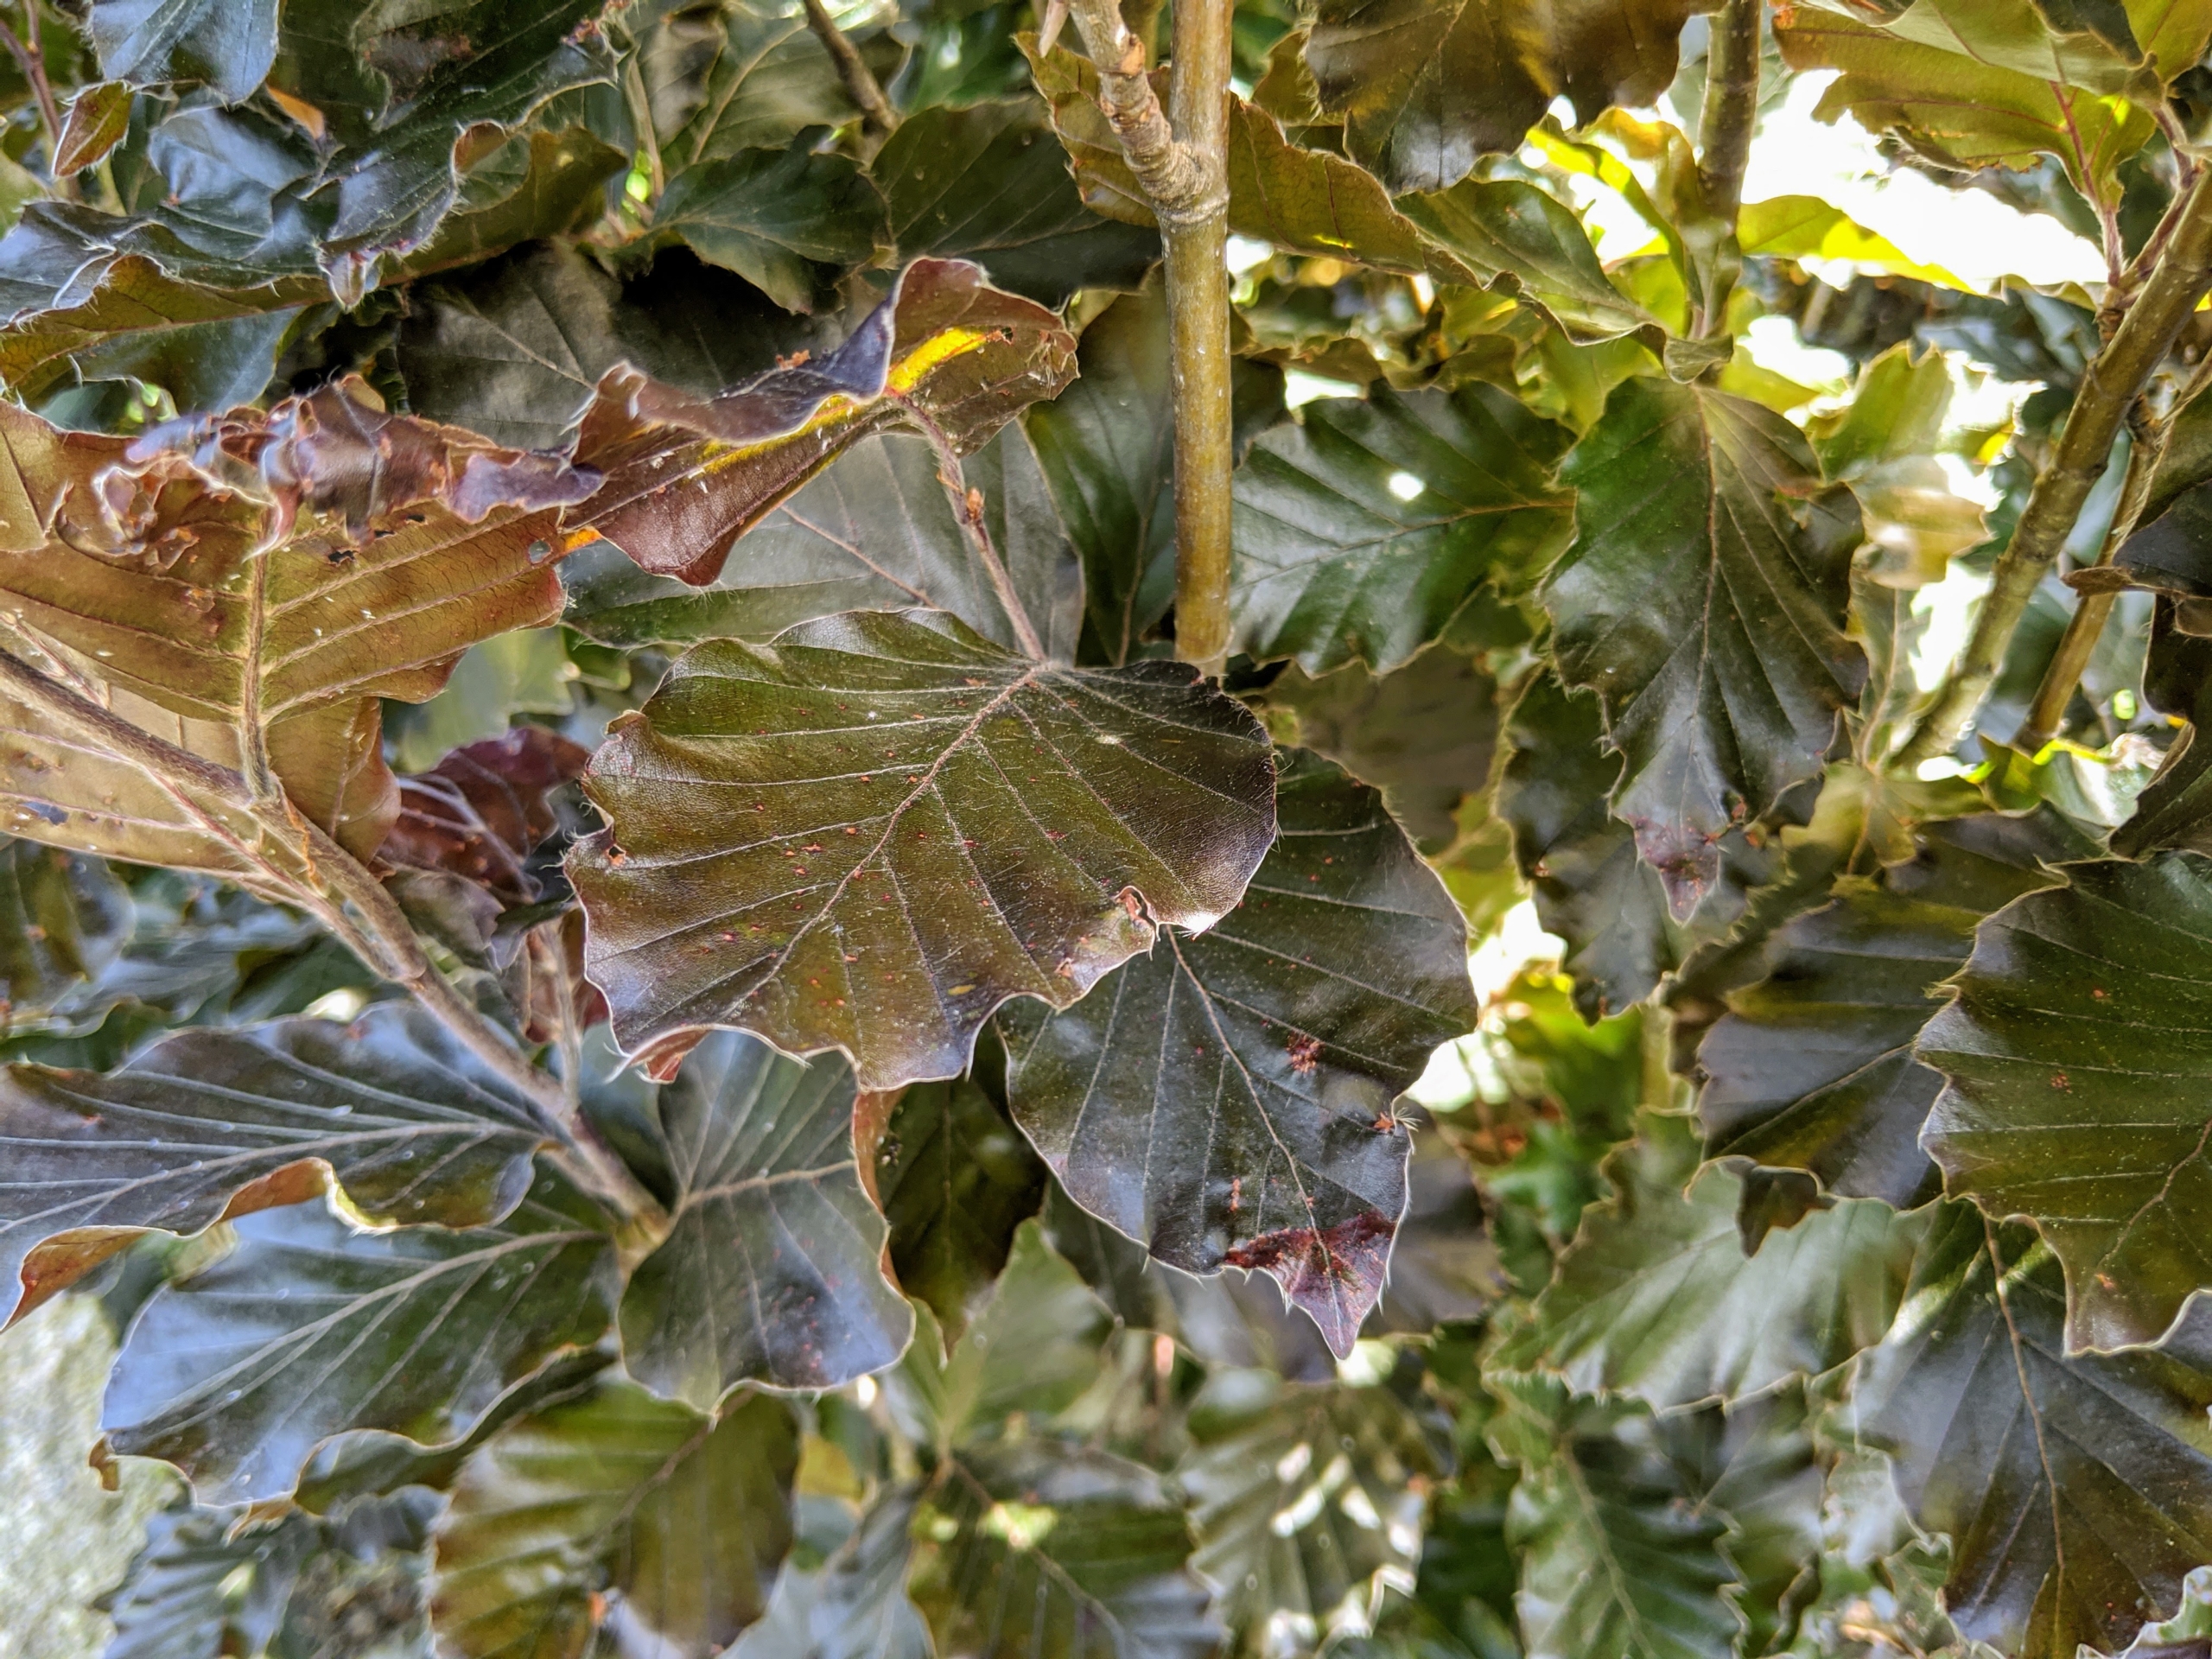
The leaves of the Columnar Purple Beech are rounded ellipses, two to four inches long and one to three inches wide, with an undulating margin and a slightly pointed tip. They are smooth and softly lustrous in the sunlight. In spring the new leaves are a vibrant, deep purple-red. As they mature in summer they become dark burgundy-purple, holding this color well through the hotter weather.
To ensure the pruning is perfectly straight, we always use a landscaping twine, so it is visible and can be pulled taut. The twine is pulled between bamboo poles and placed along the sections of the hedge. The yellow level is placed on the twine as a guide.
Here is the twine stretched over the hedge. Brian also checks the line and level several times to be sure everything is trimmed properly.
And as each section is done, Brian moves the bamboo stakes and twine to the next area to be pruned.
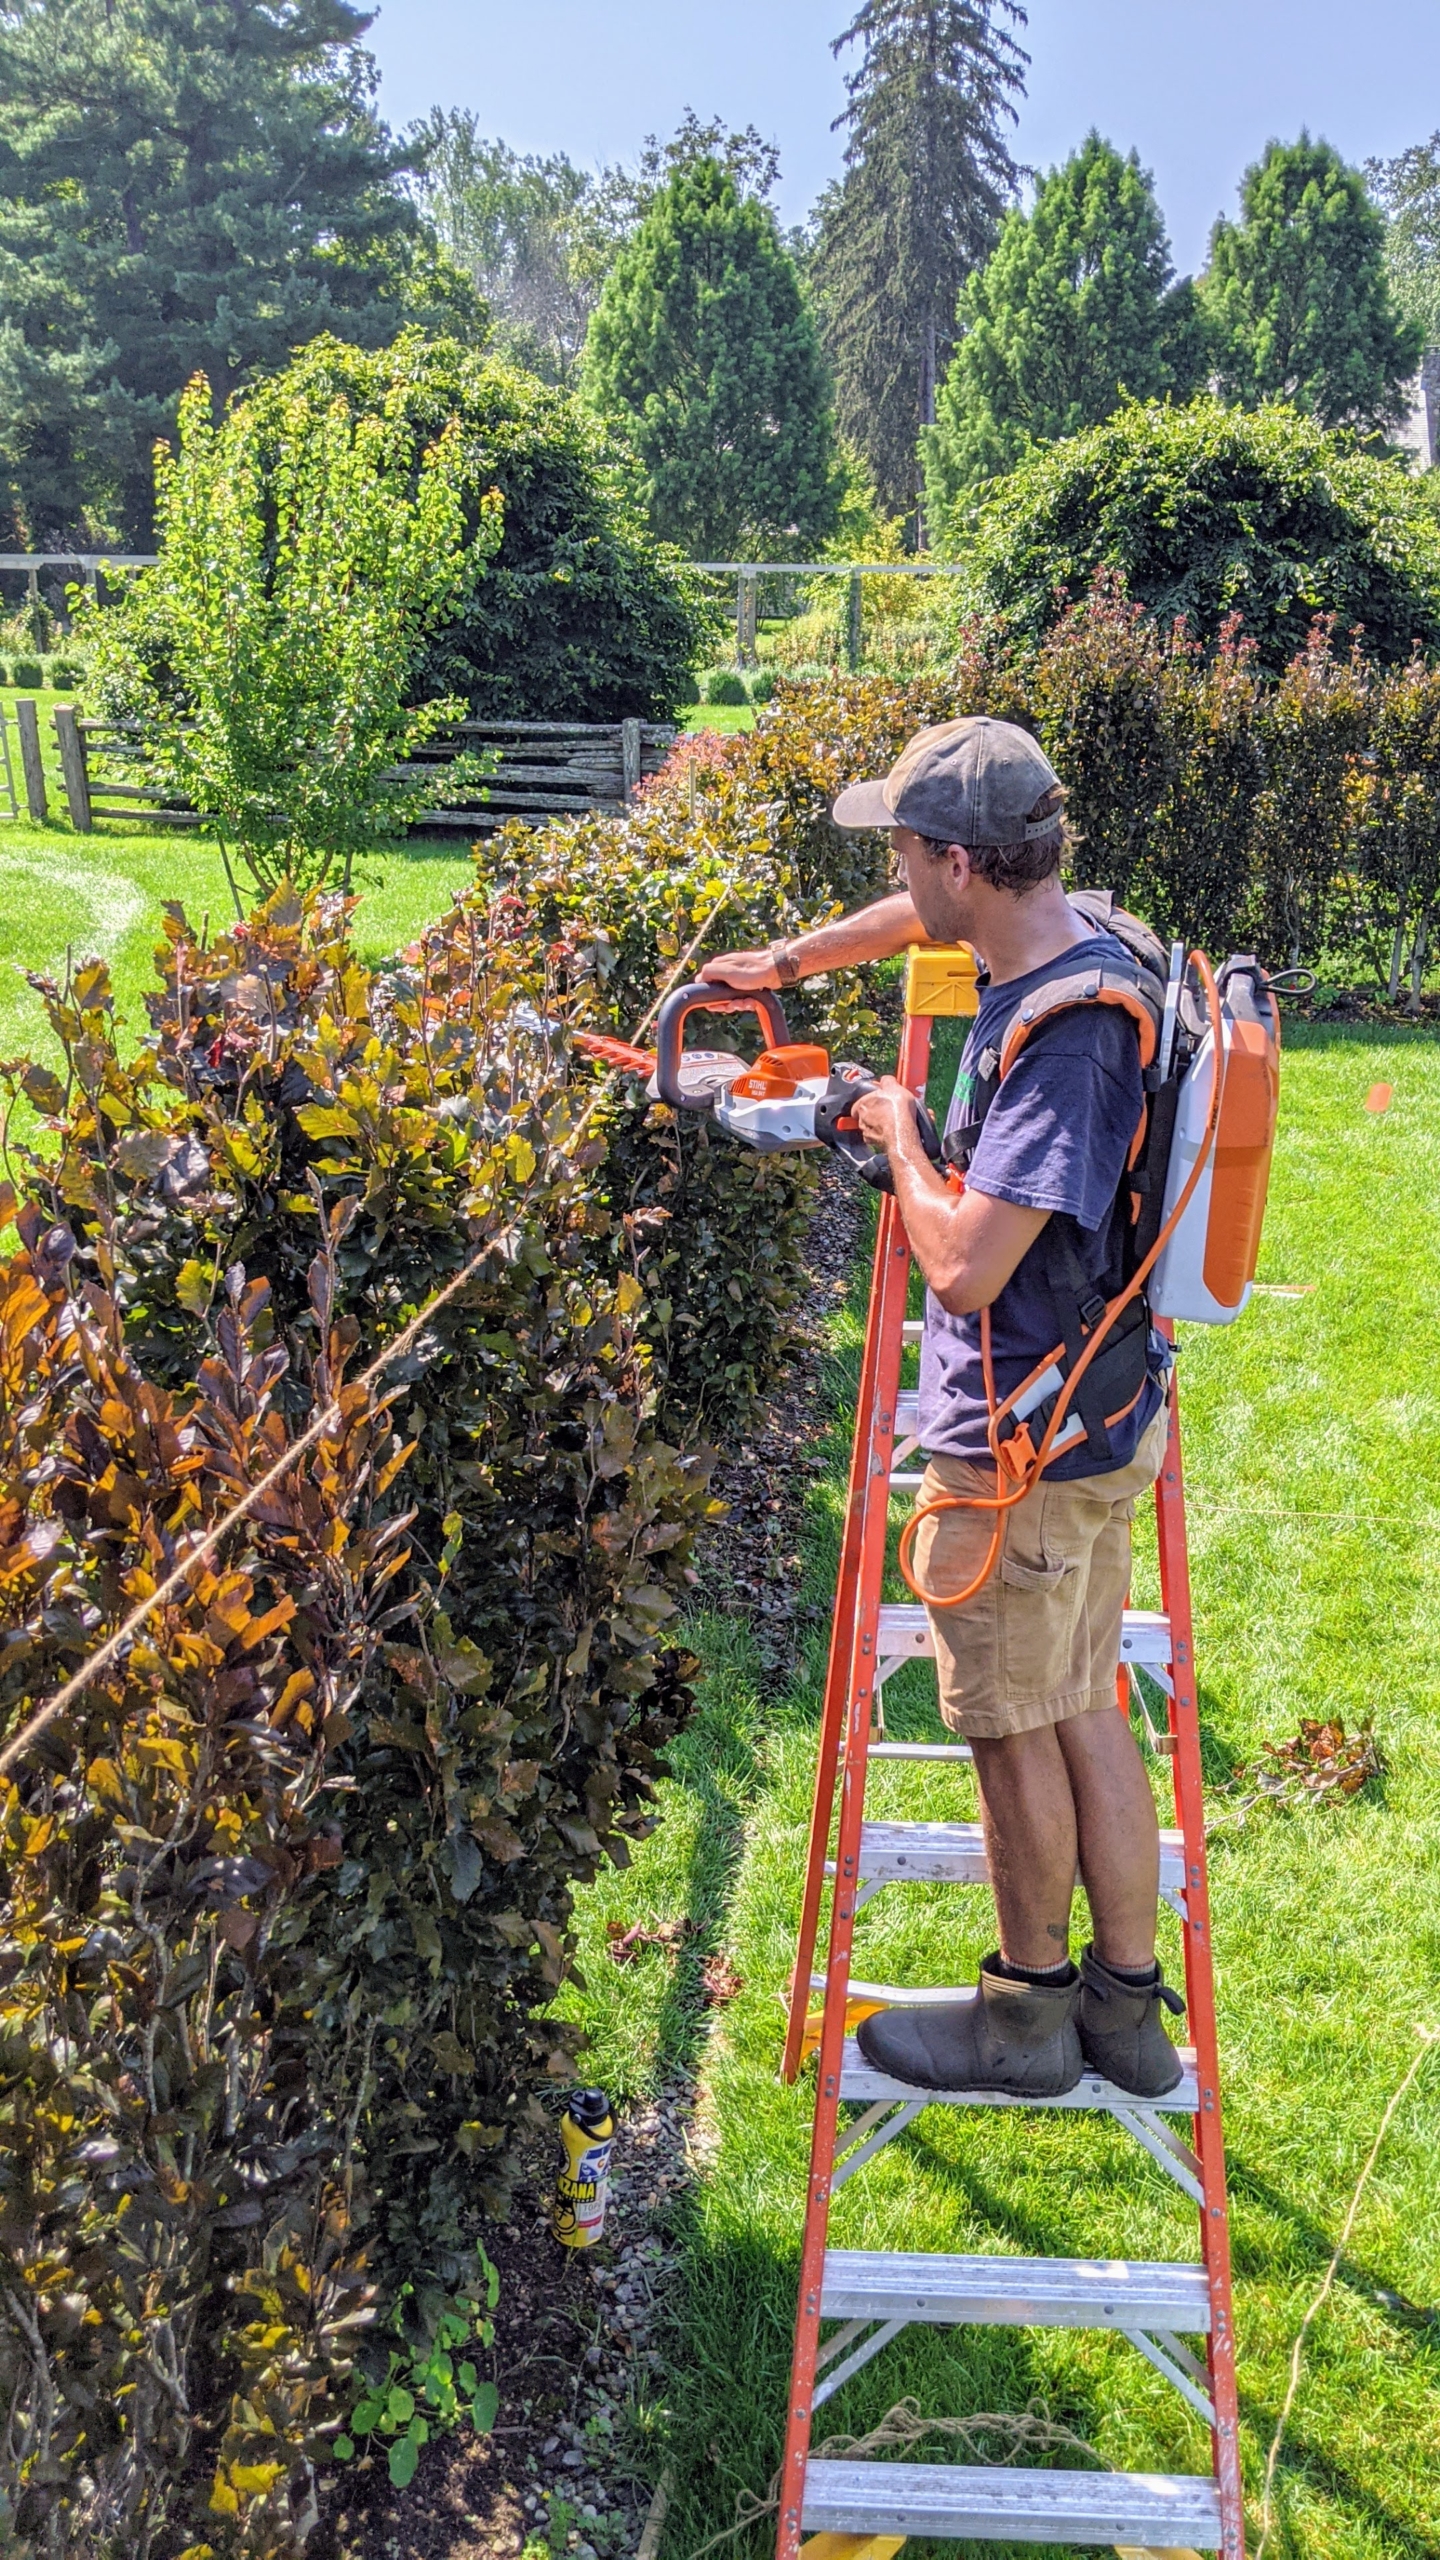
Ryan uses our STIHL battery telescoping hedge trimmers to trim off the long tops as a start. Pruning means to lop or cut off any superfluous branches or shoots for better-shape and better growth. These look fuller every year – in part because of our regular pruning.
This STIHL hedge trimmer is designed with less bulk than others of its kind. It features hardened, precision-ground cutting blades and anti-vibration technology, keeping hands steady during every job.
Brian uses the STIHL battery-powered hedge trimmers to lop off the tops more precisely. This trimmer is lightweight, starts instantly and delivers quiet, powerful performance.
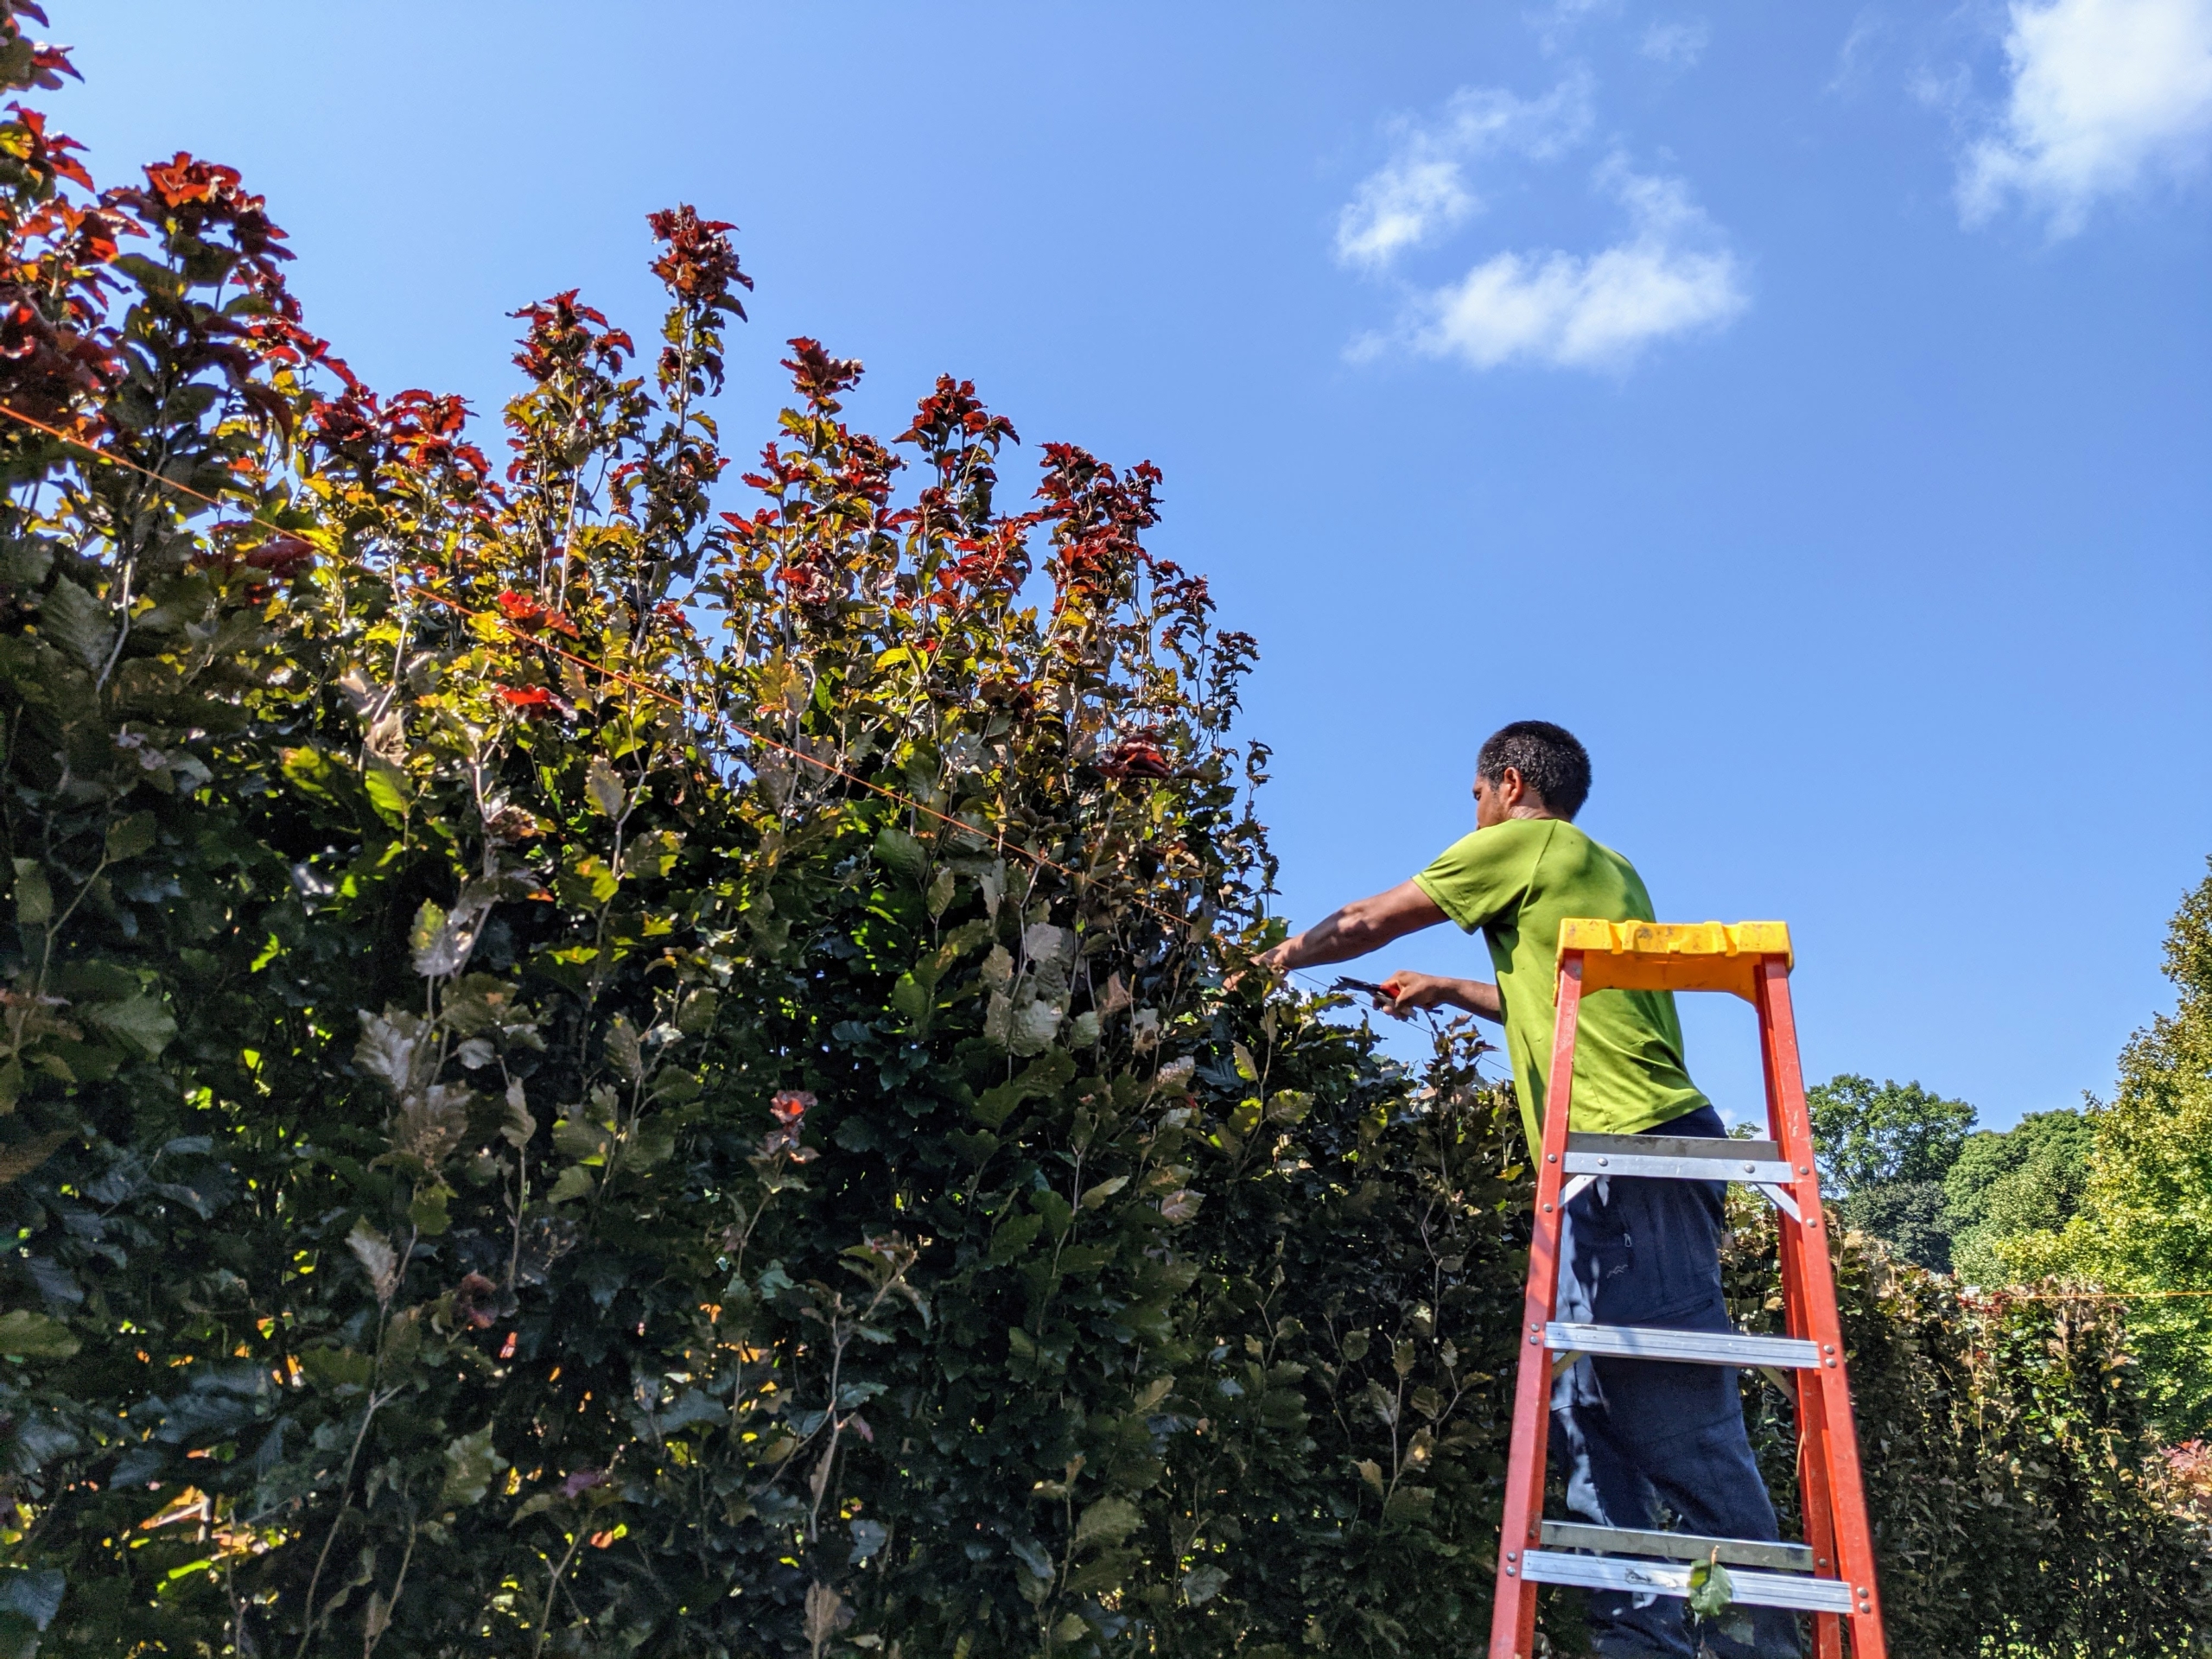
And Pasang works more closely to cut off any dead, diseased, damaged, non-productive, structurally unsound, or otherwise unwanted plant material.
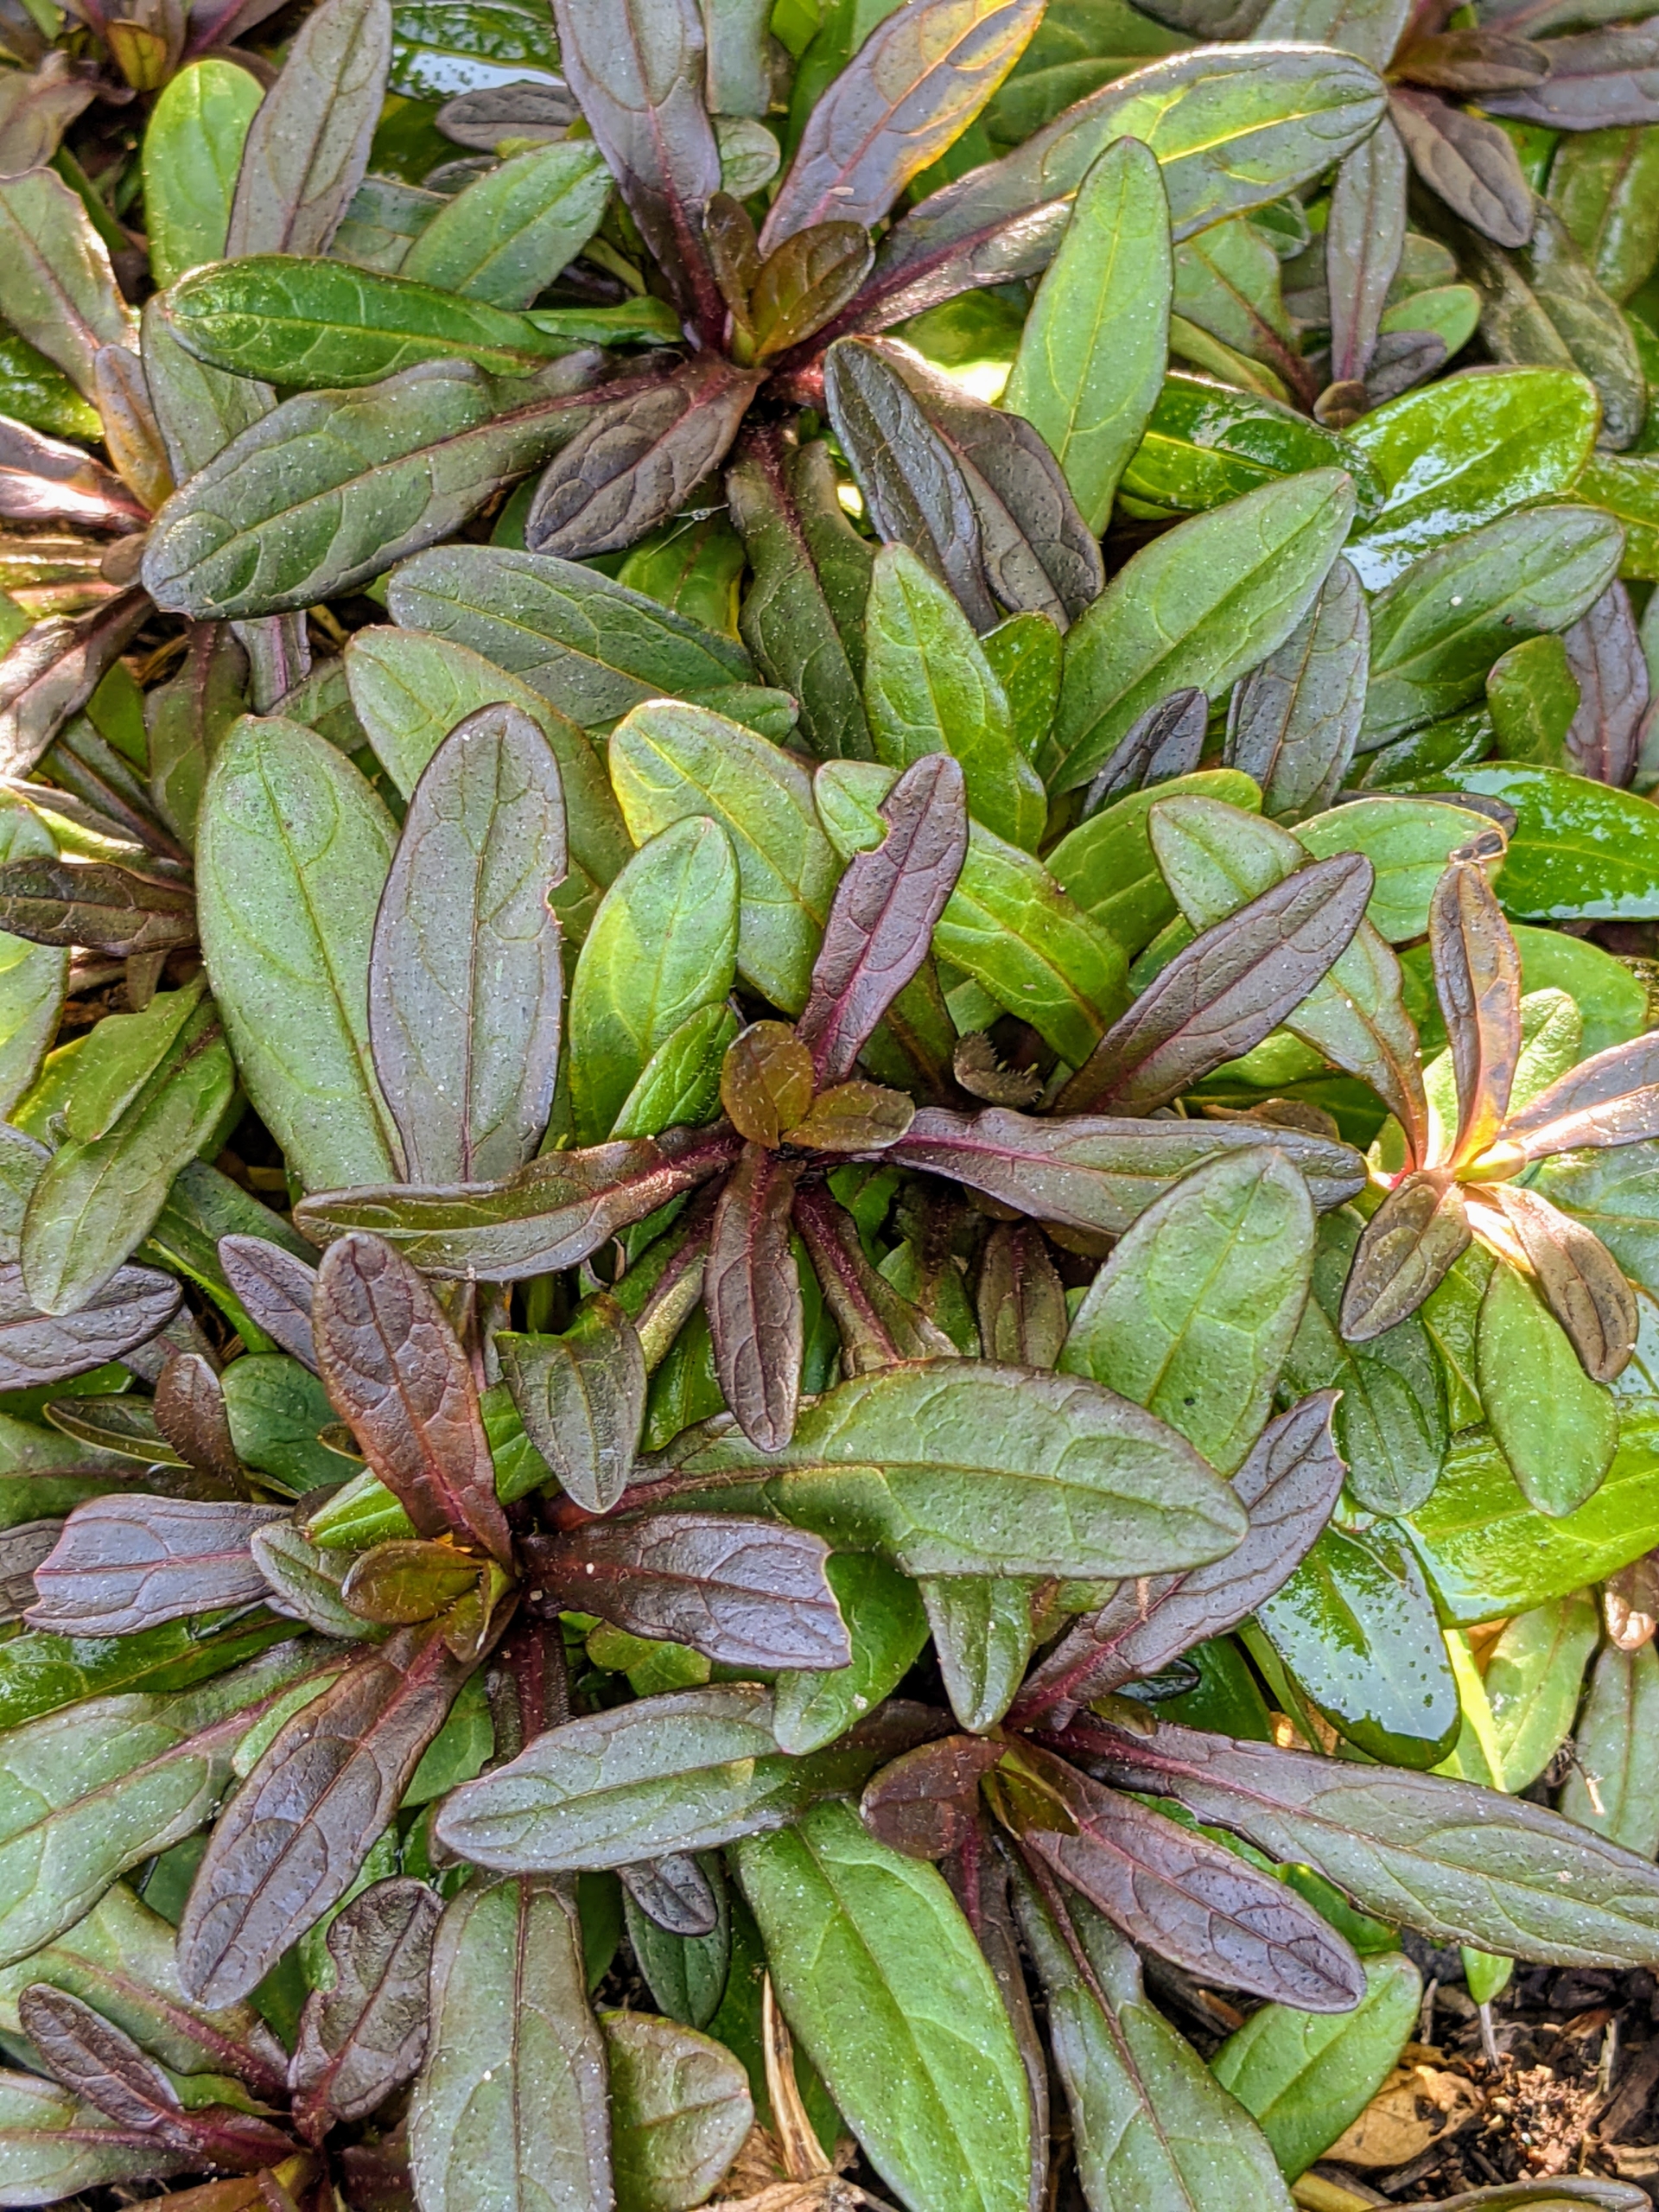
Beneath the hedge is a variety of dark-leafed plants. This is Ajuga ‘Black Scallop’ – a unique perennial in the mint family Lamiaceae, with most species native to Europe, Asia, Africa, and southeastern Australia. Ajuga has lush dark burgundy-black foliage that blankets the ground when mature. The Ajuga ‘Black Scallop’, also known as Black Scallop bugleweed, ground pine, carpet bugle, or just bugle, has very glossy foliage and bright blue flowers in late spring.
Ajuga ‘Chocolate Chip’ is a dwarf, spreading groundcover that creates a tight mat of rich, chocolate brown foliage with dark green undertones.
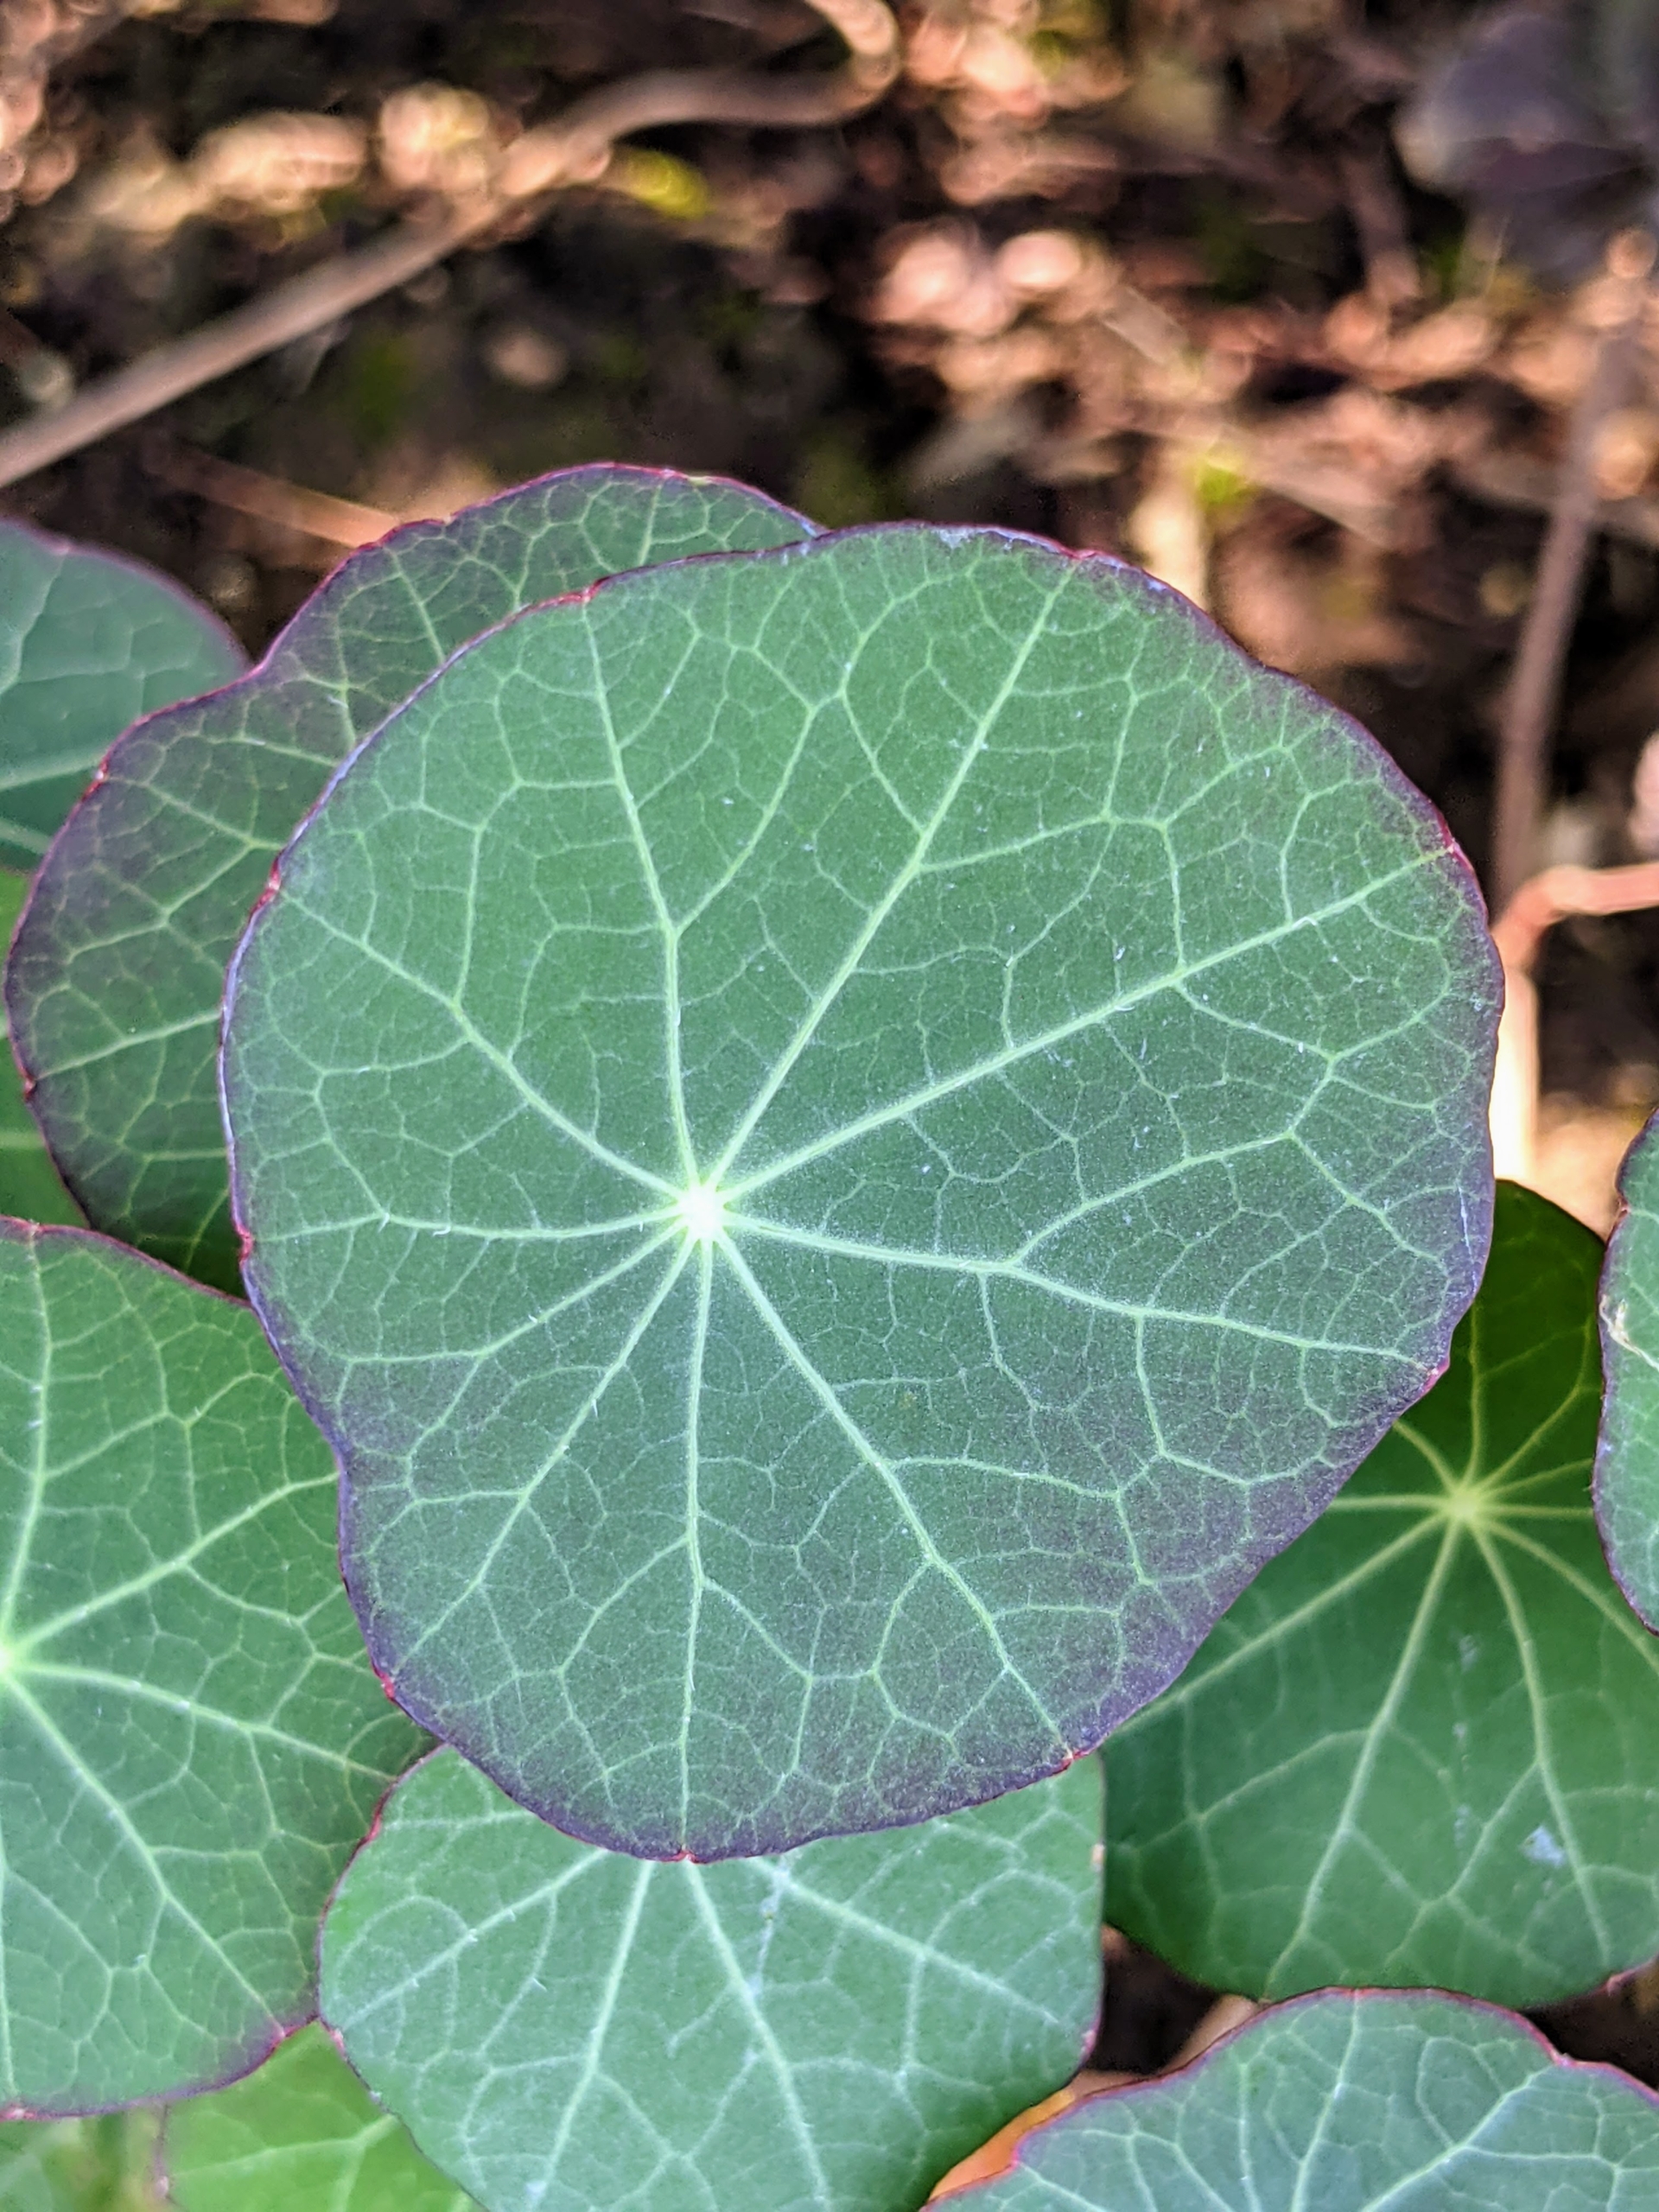
This is a Nasturtium. Nasturtium plants, Tropaeolum, are loved for their rich, saturated, jewel-toned colors. Planted in the spring after the threat of frost has passed, they are fast and easy to grow. Nasturtium is a genus of about 80 species of annual and perennial herbaceous flowering plants. It was named by Carl Linnaeus in his book Species Plantarum, and is the only genus in the family Tropaeolaceae. These flowers can vary in shade, but the most popular versions are orange, yellow, pink, red, or mahogany. There are also varieties in subdued shades of butter yellow and cream.
Here’s a closer look at the interesting leaves of Nasturtium. The leaves are circular, shield-shaped and grow on a trailing plant. They are fragrant, with a mustard-like scent.
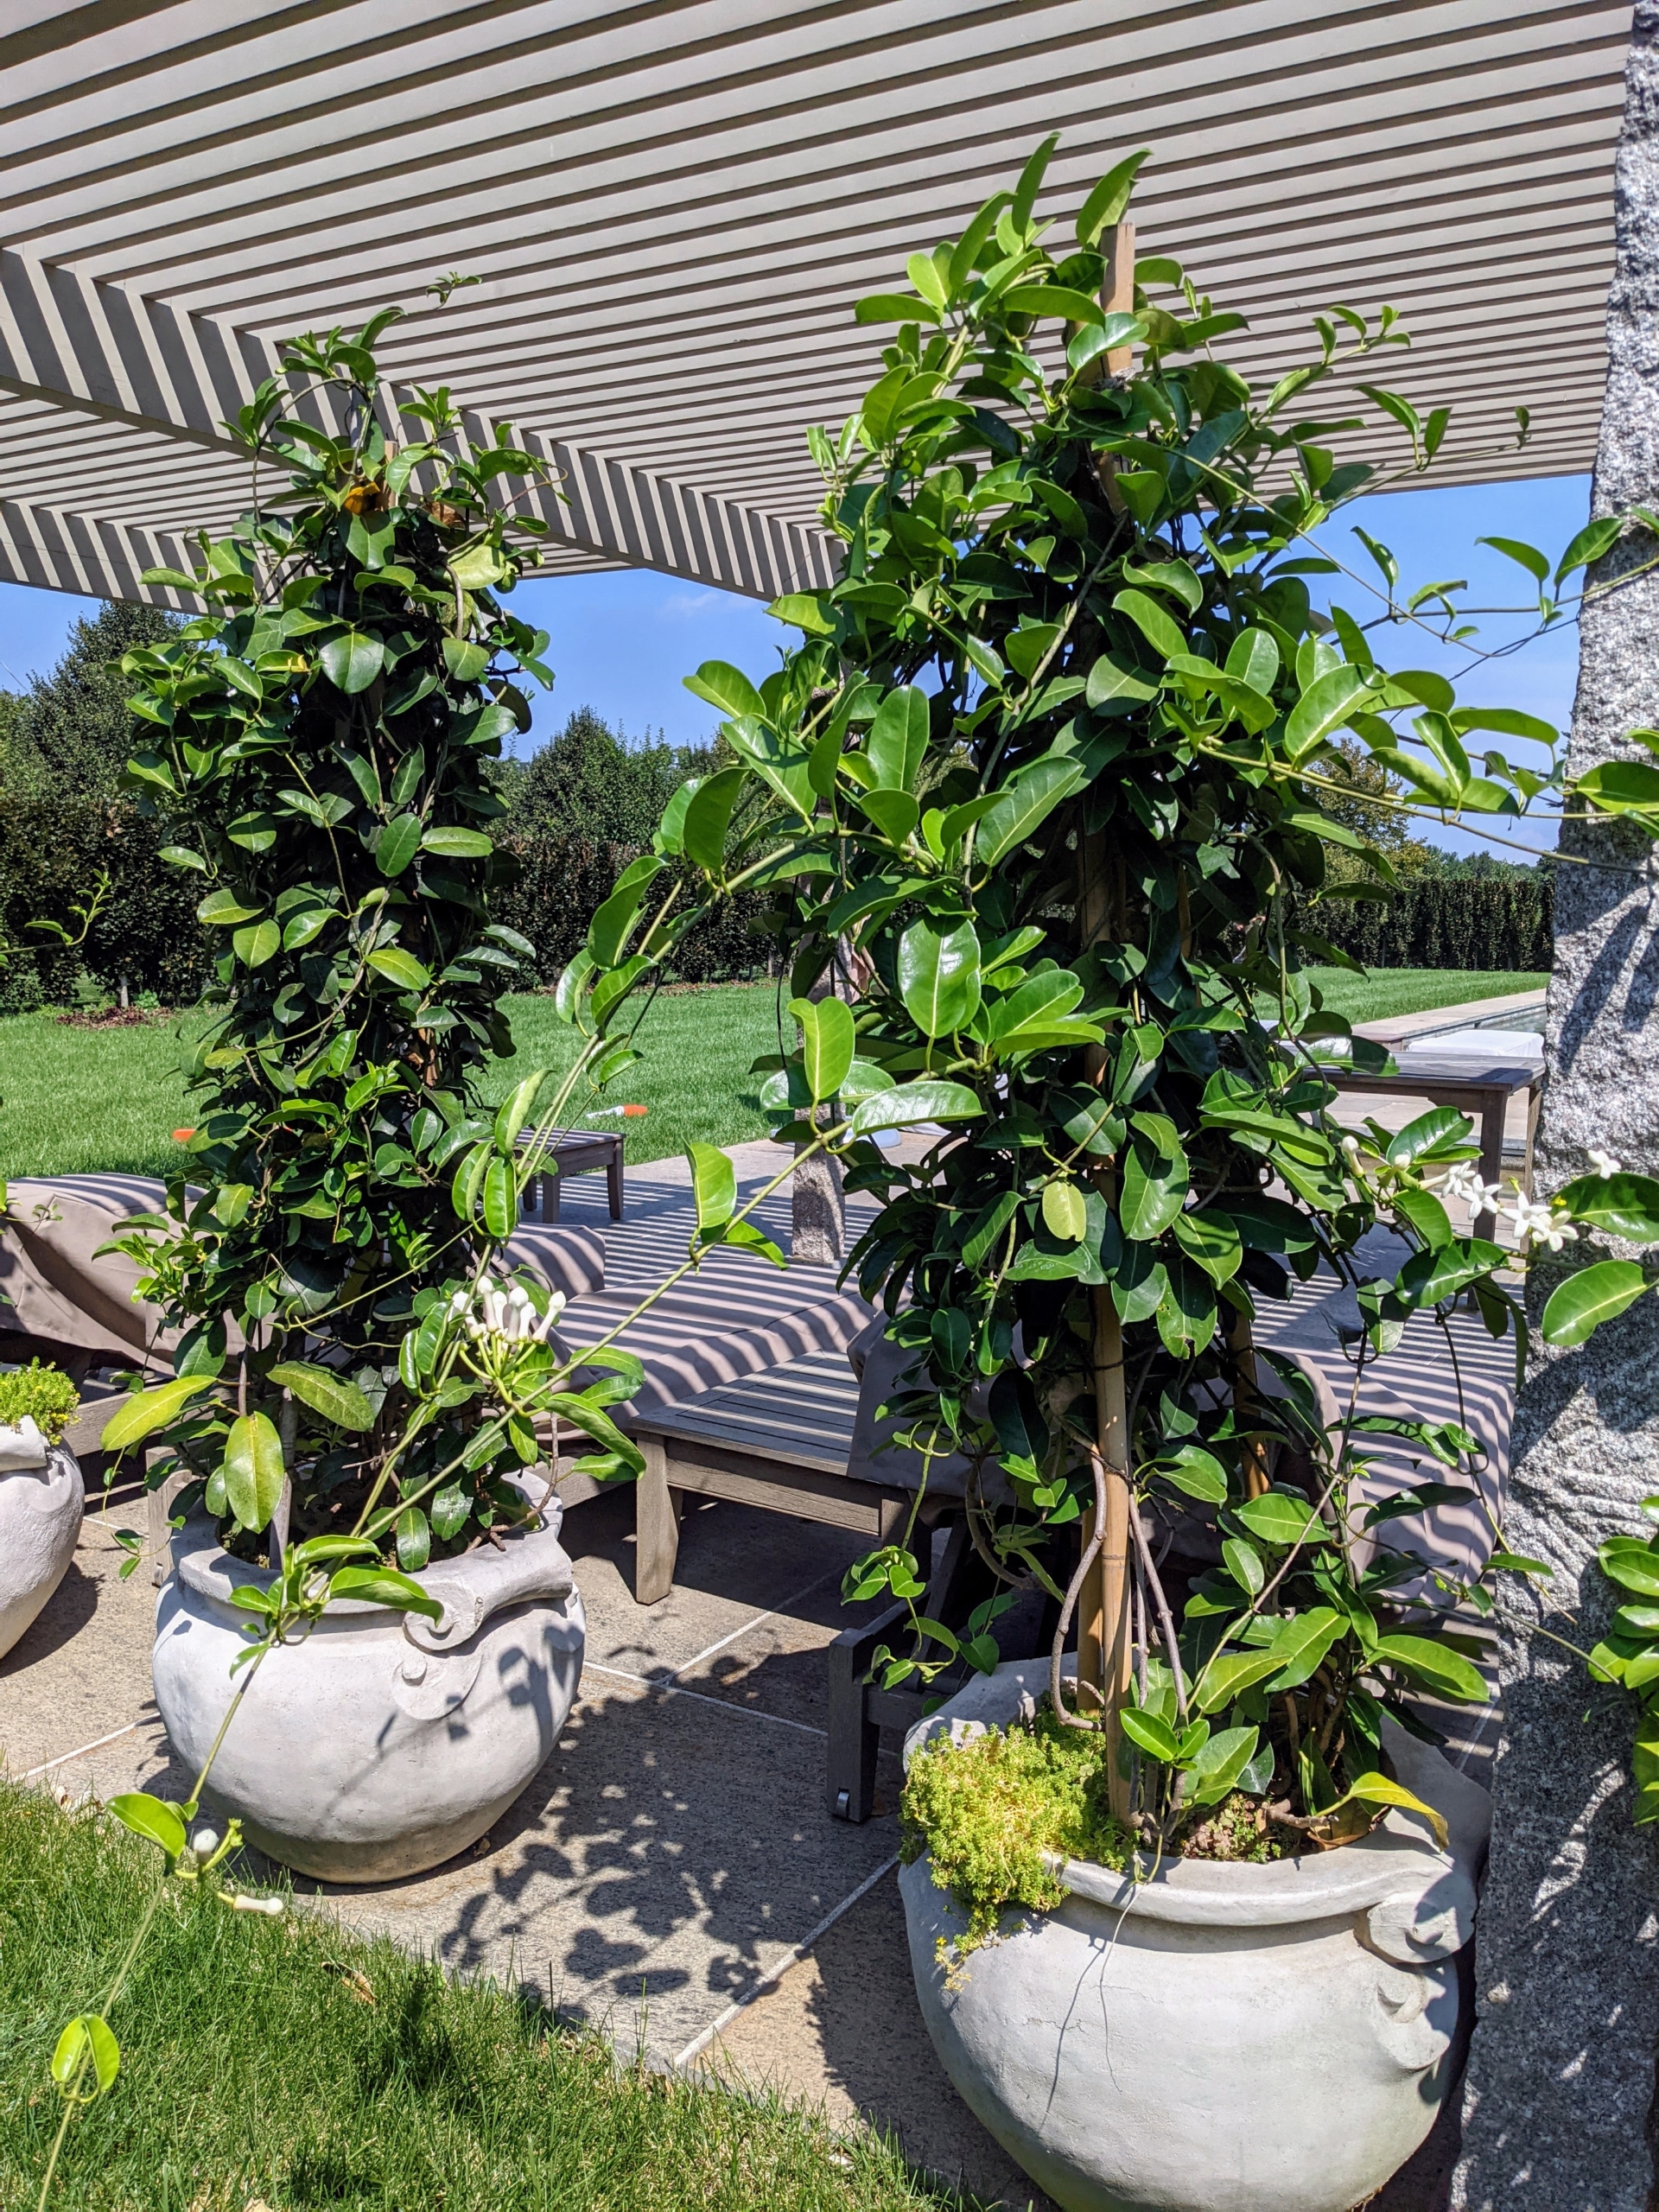
On one end, I have several potted Stephanotis – one of five to 10 species identified within the genus of twining vine-like shrubs. It is sometimes called Madagascar jasmine. The leaves are leathery, oval-shaped, and opposite, and the plant’s woody tendrils can grow to 20 feet.
The flowers are narrow, tubular, waxy horns about two inches in length that open to a crown of five lobes and stamens.
It doesn’t take long for the ground to fill with clippings – and this is just from one section.
To clean the area after pruning, Brian lightly blows any cut leaves and debris with STIHL’s backpack battery and handheld blower. The backpack battery eliminates the cost of fuel and engine oil and can be used for several hours before needing another charge.
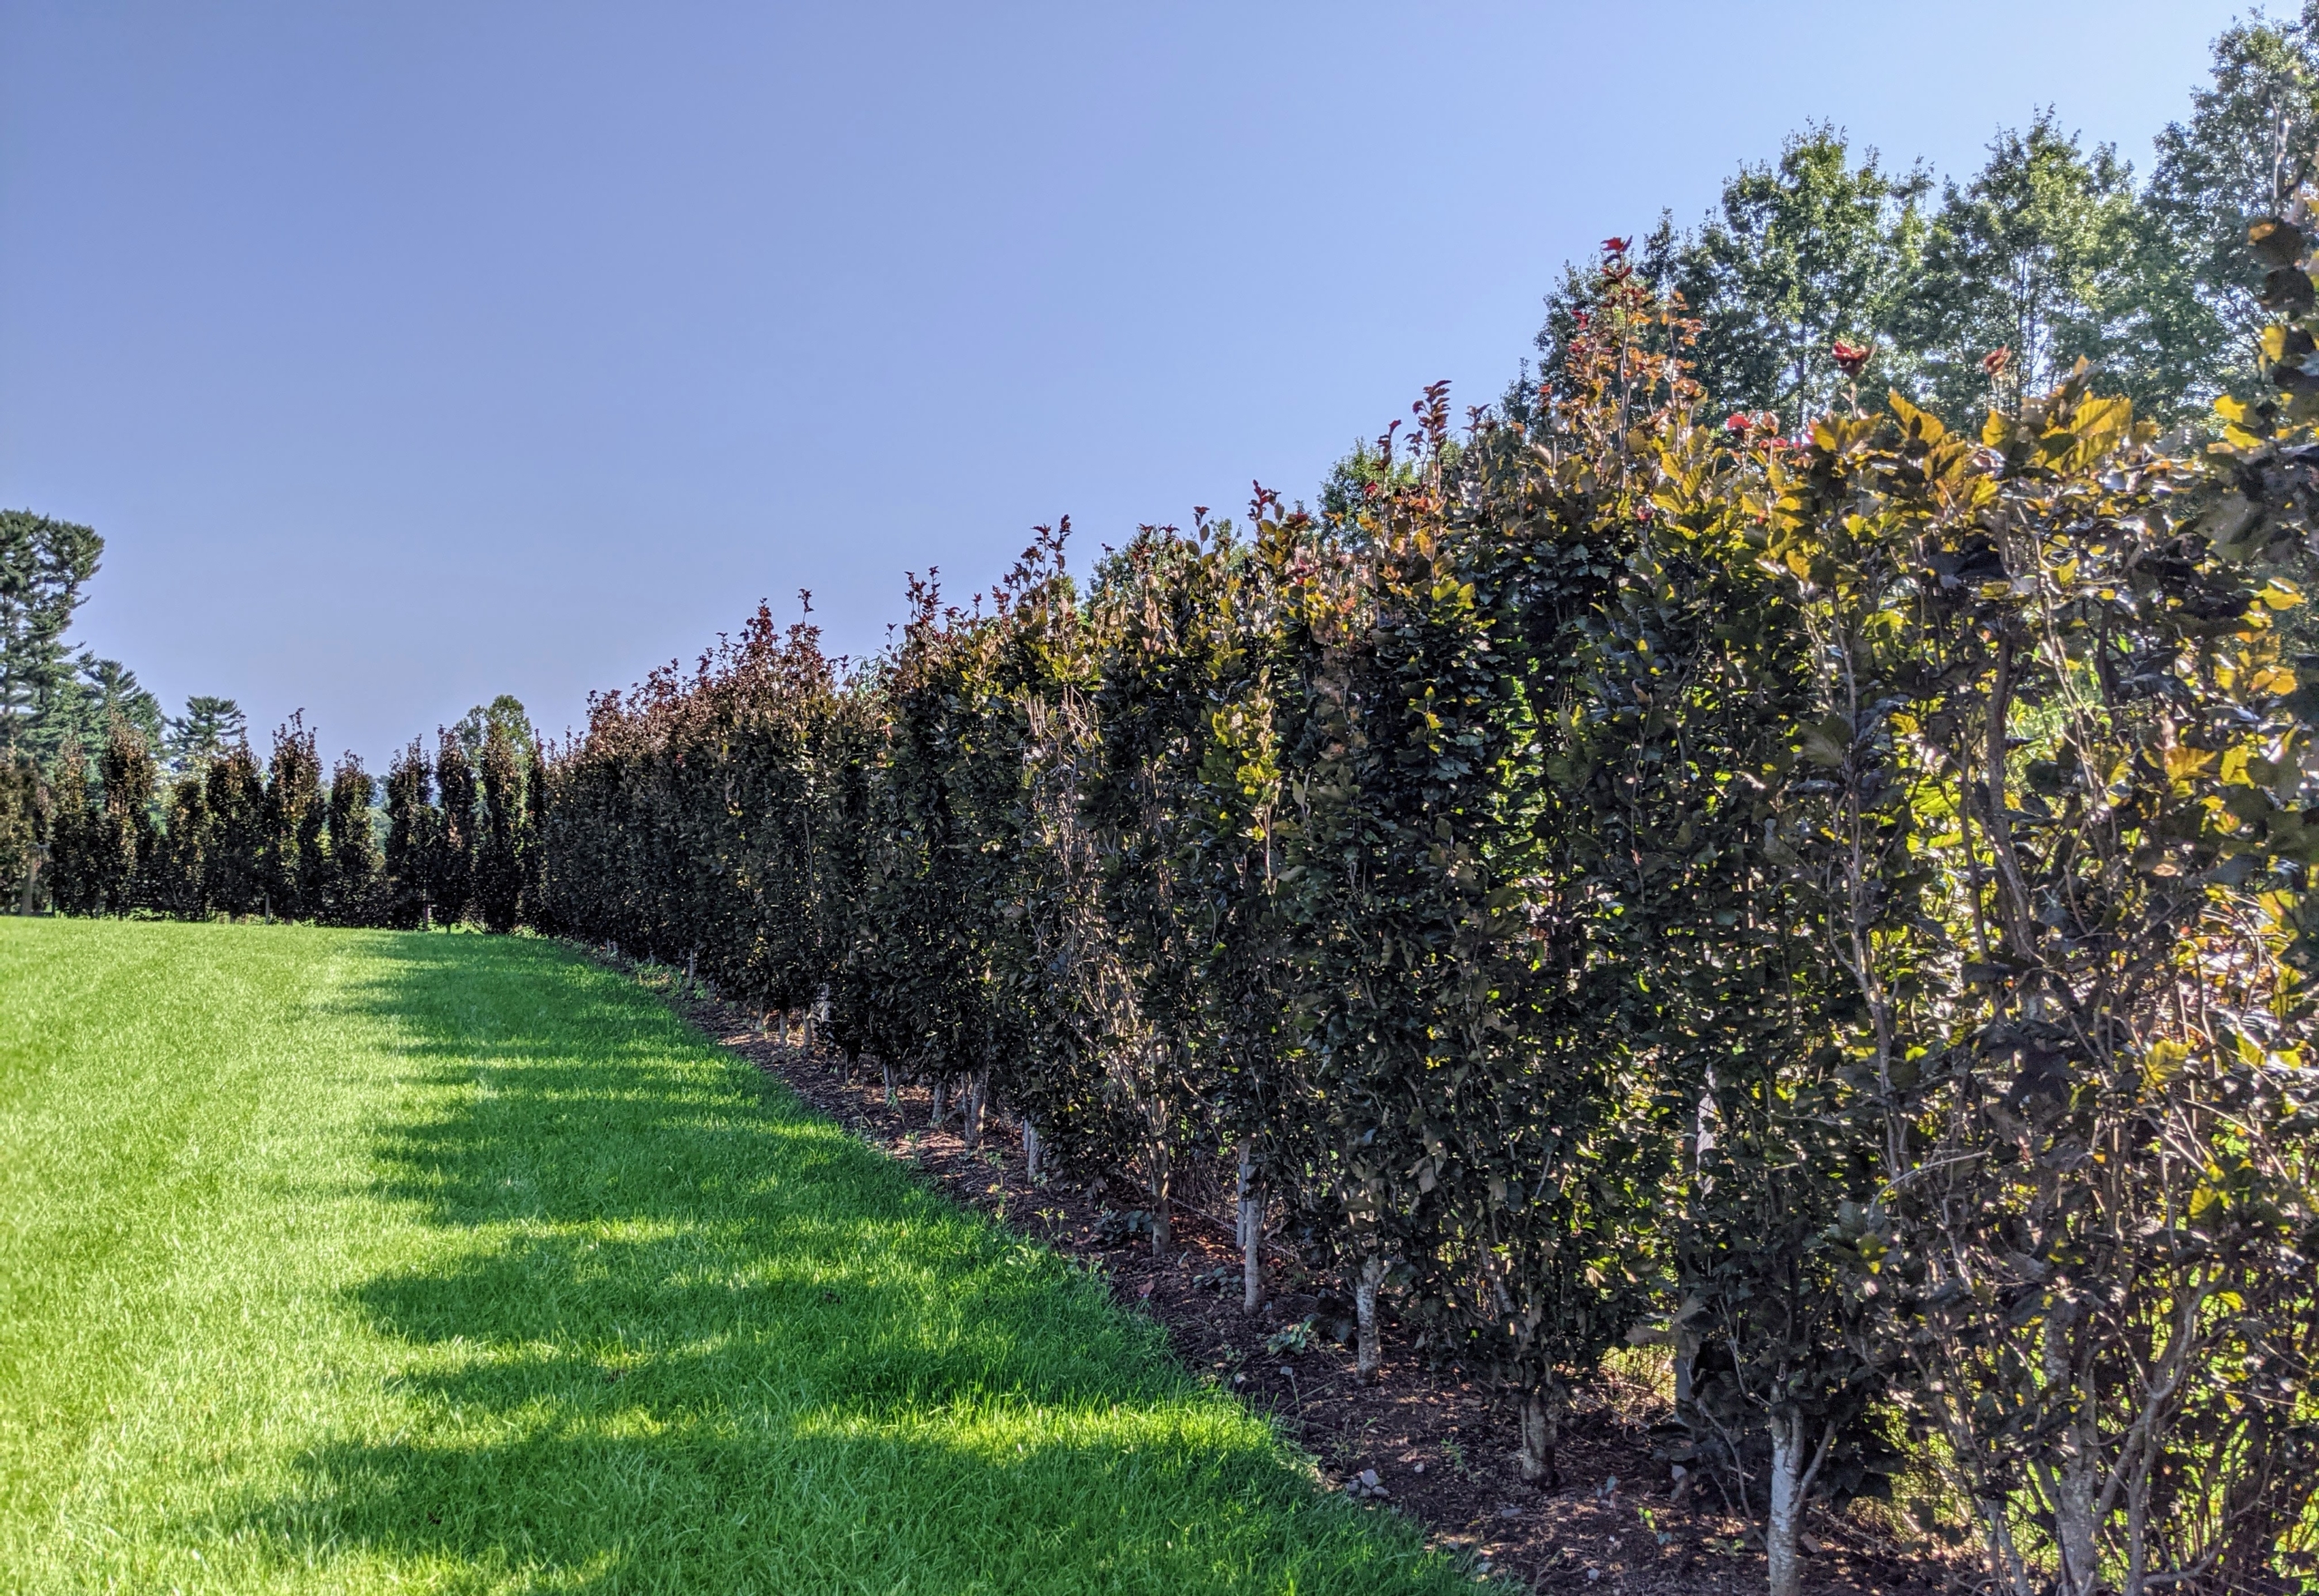
Here’s a look at one side of the newly pruned hedge – so straight all the way down.
Here’s the hedge from the outside of the pool fence – it looks so much better behind the growing skirt of Cotinus and ninebark.
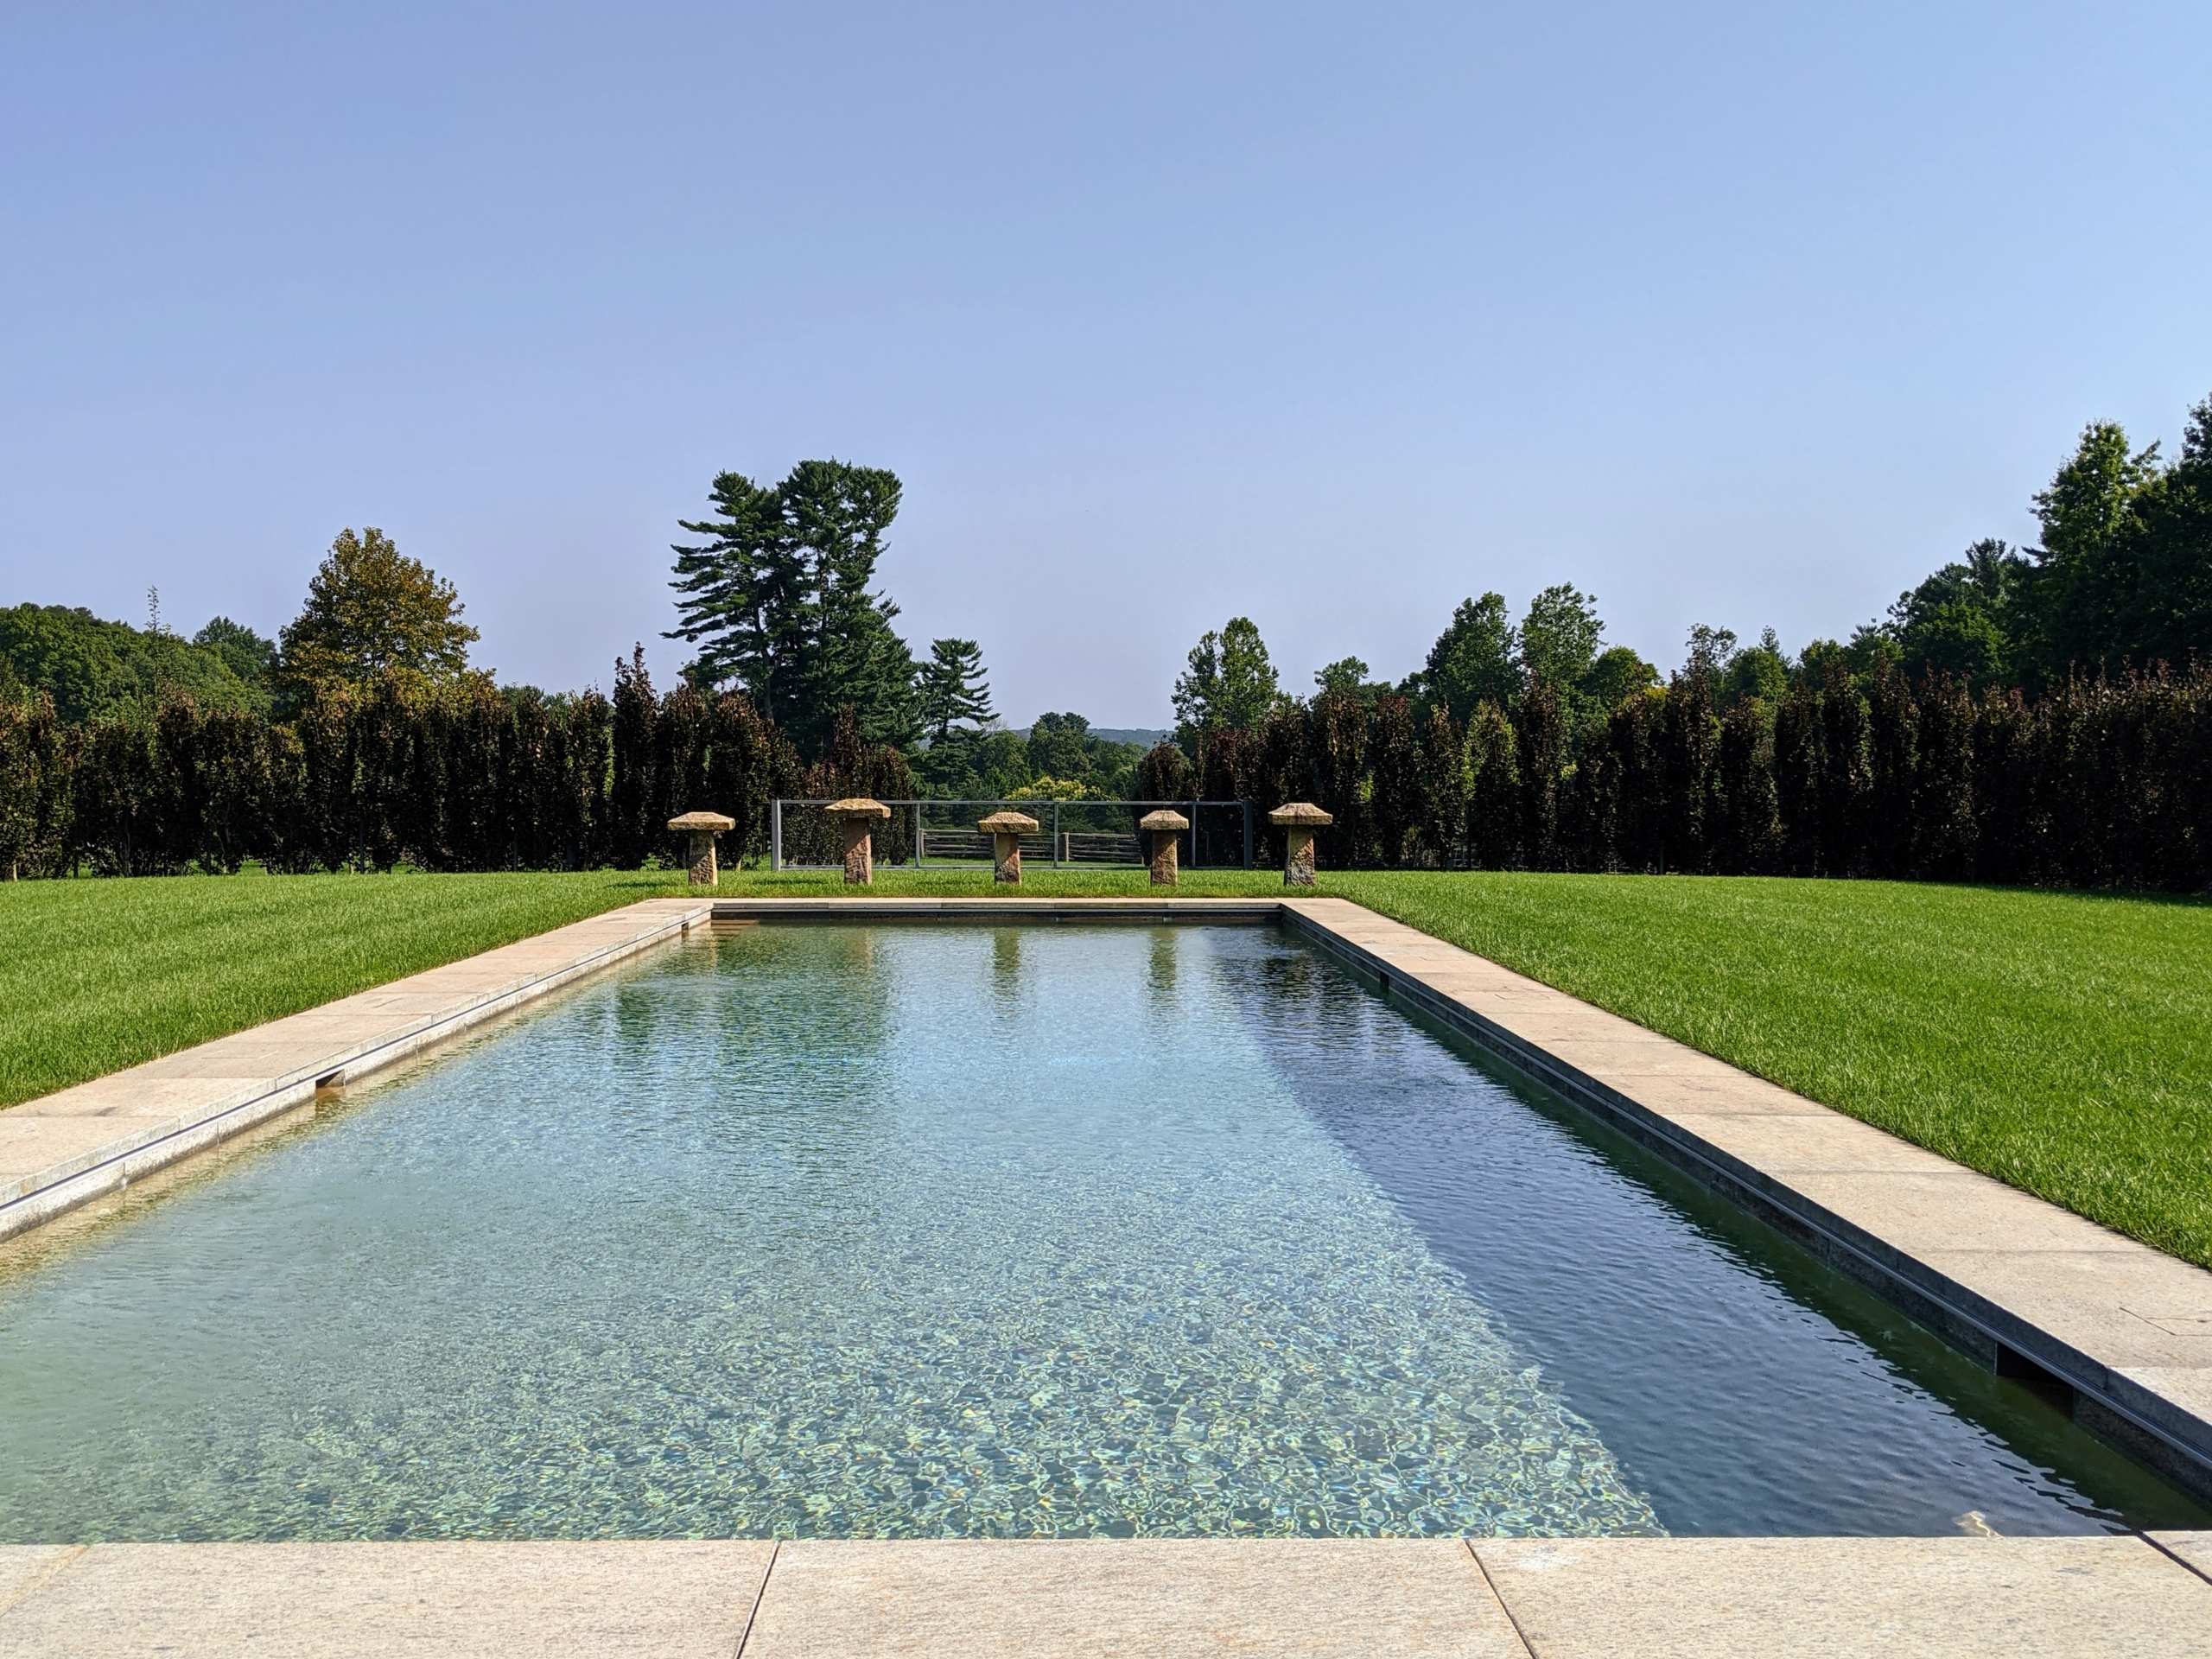
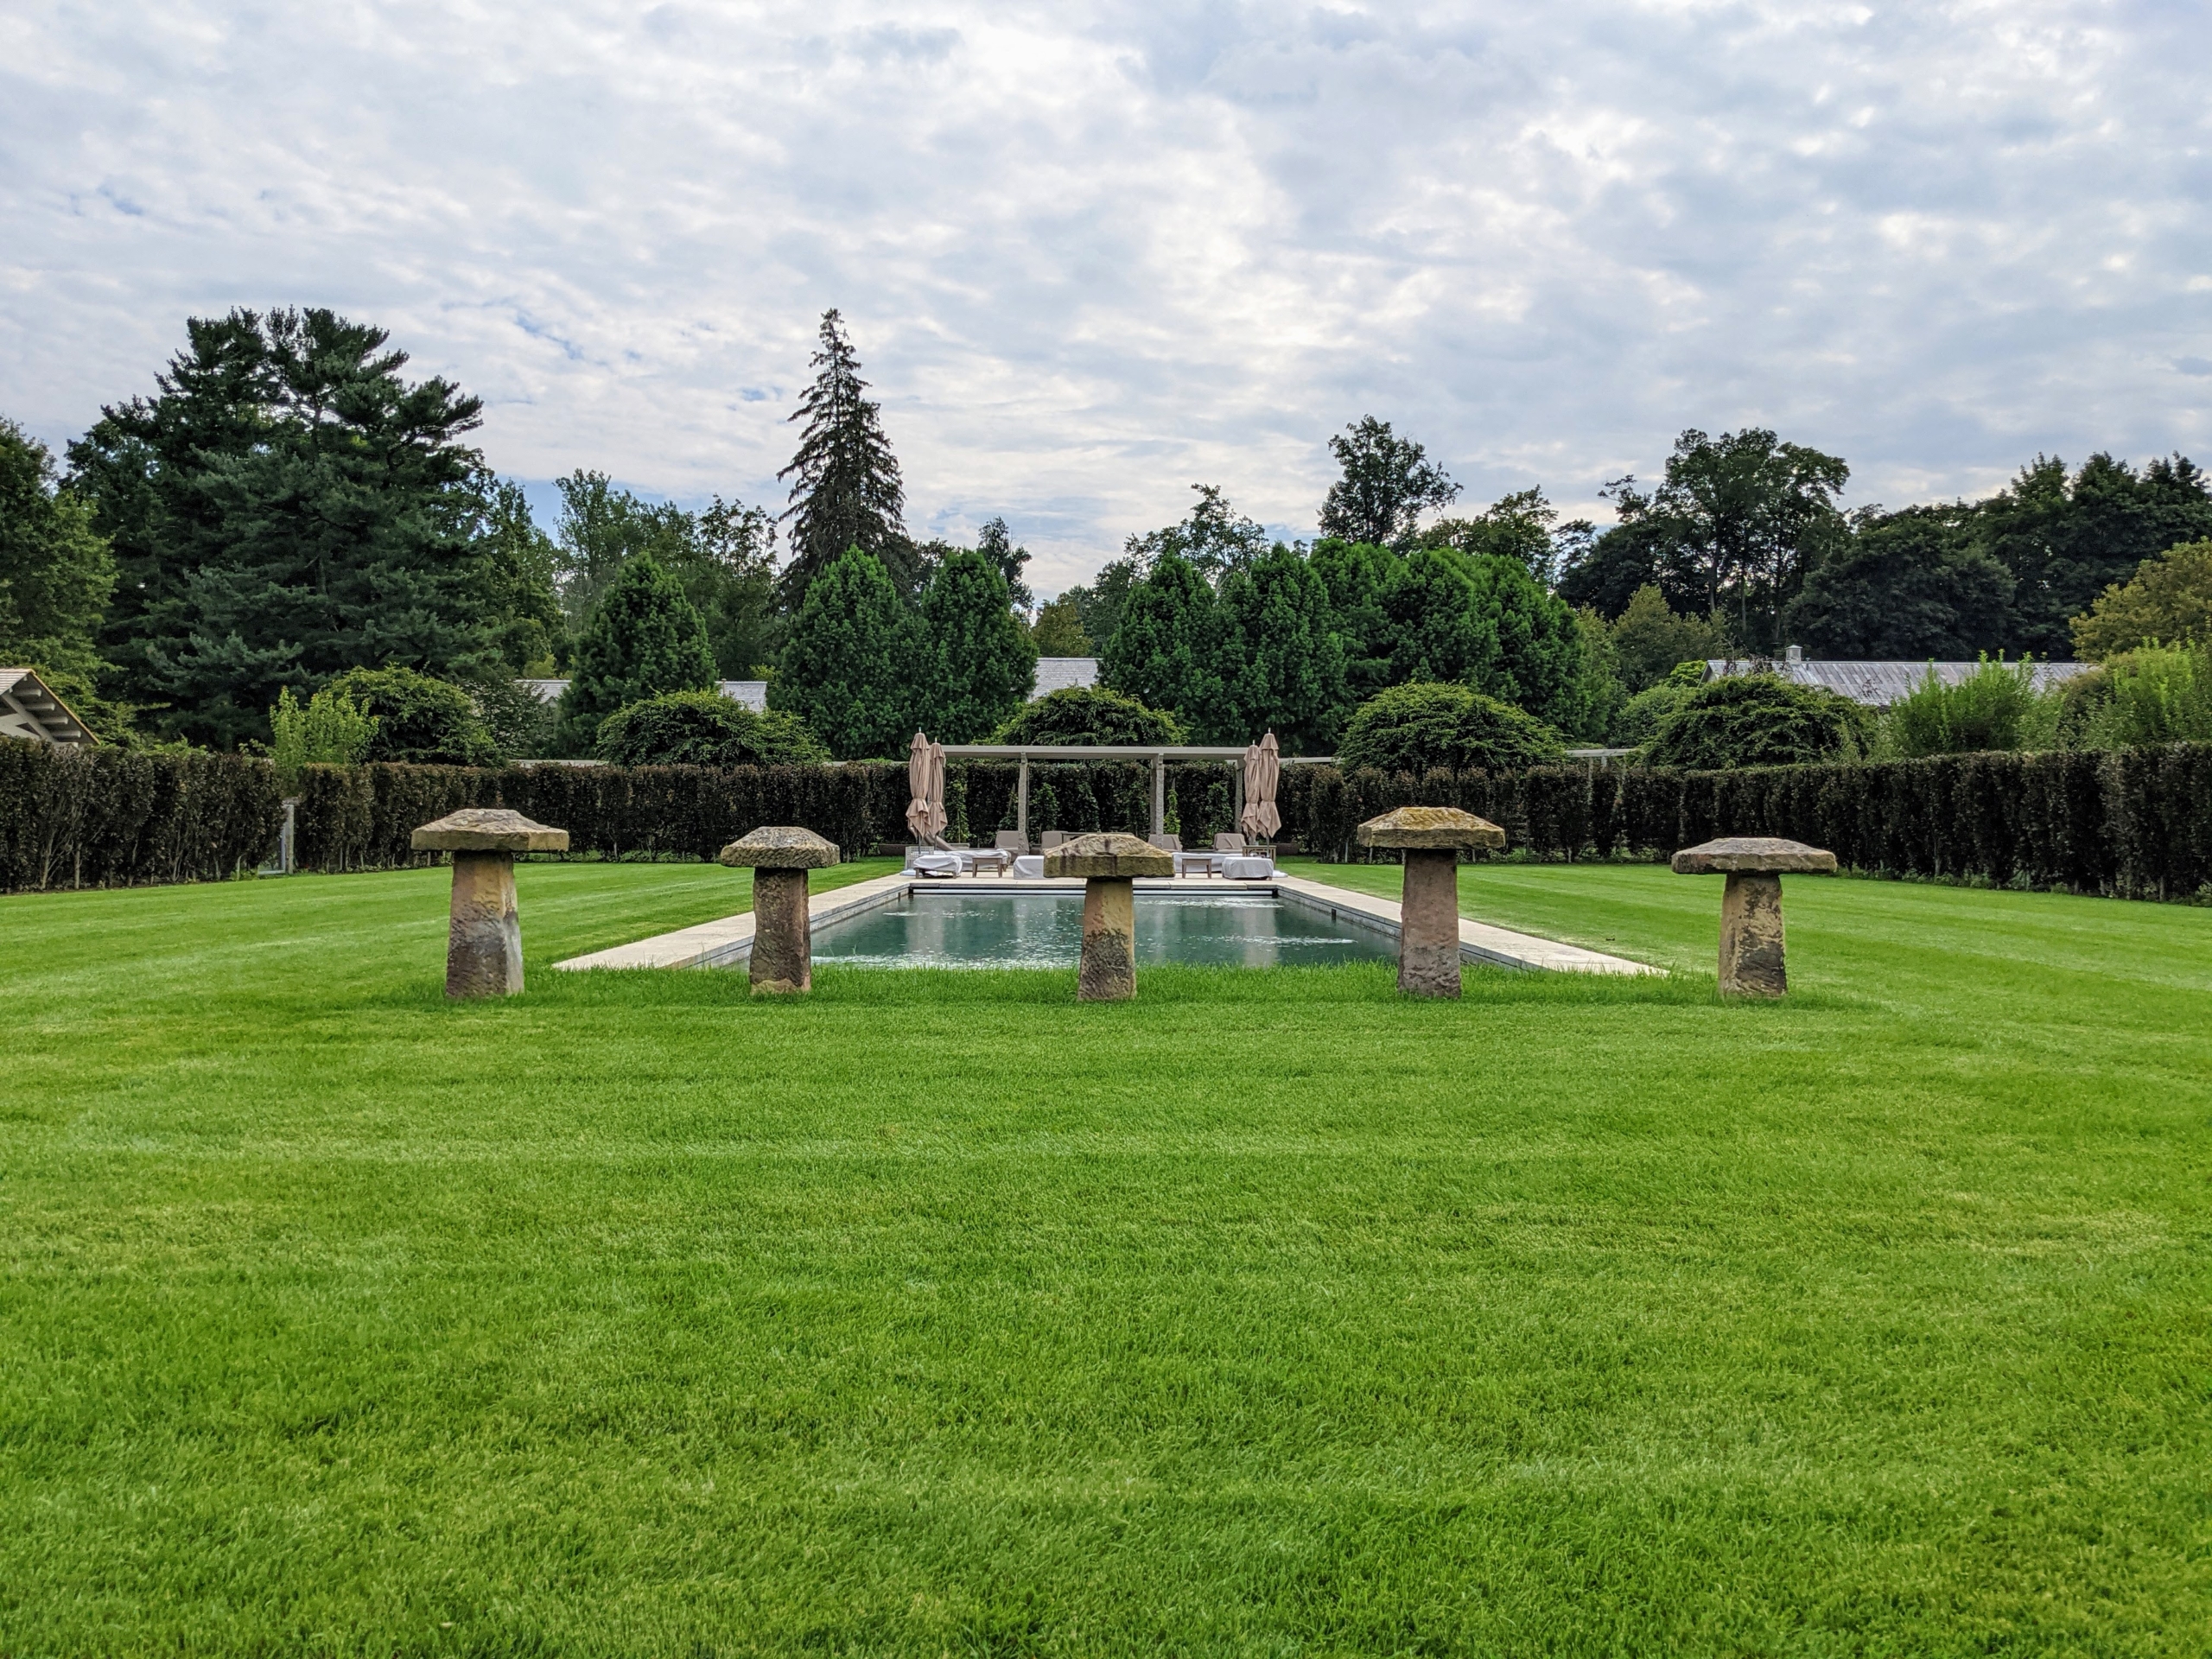
At the far end of the pool I have five staddle stones. Staddle stones were originally used in the 17th and 18th centuries as support bases for granaries, hayricks, and game larders. They typically looked like giant stone mushrooms, but mine are square – a more rare and unique version. I wanted the pool to look as natural as possible where I could enjoy the panoramic views of the landscape with my family and friends. I’ve worked hard to develop the surrounding gardens and am so pleased with how well they’ve grown. This is one of my favorite summertime areas of the farm.
Replacing doors and adding elegant and functional shades can really transform a room.
In my last blog, I talked about the latest project at my Bedford, New York farm - the renovation of a kitchen in my guest house, so it could be used for video and print shoots. Among the changes, I replaced the French doors to the terrace with new ones from Pella and added beautiful sheer rolling shades by Erik Bruce Inc. These updates really completed the space, and I am so pleased with how everything came out.
Enjoy these photos.
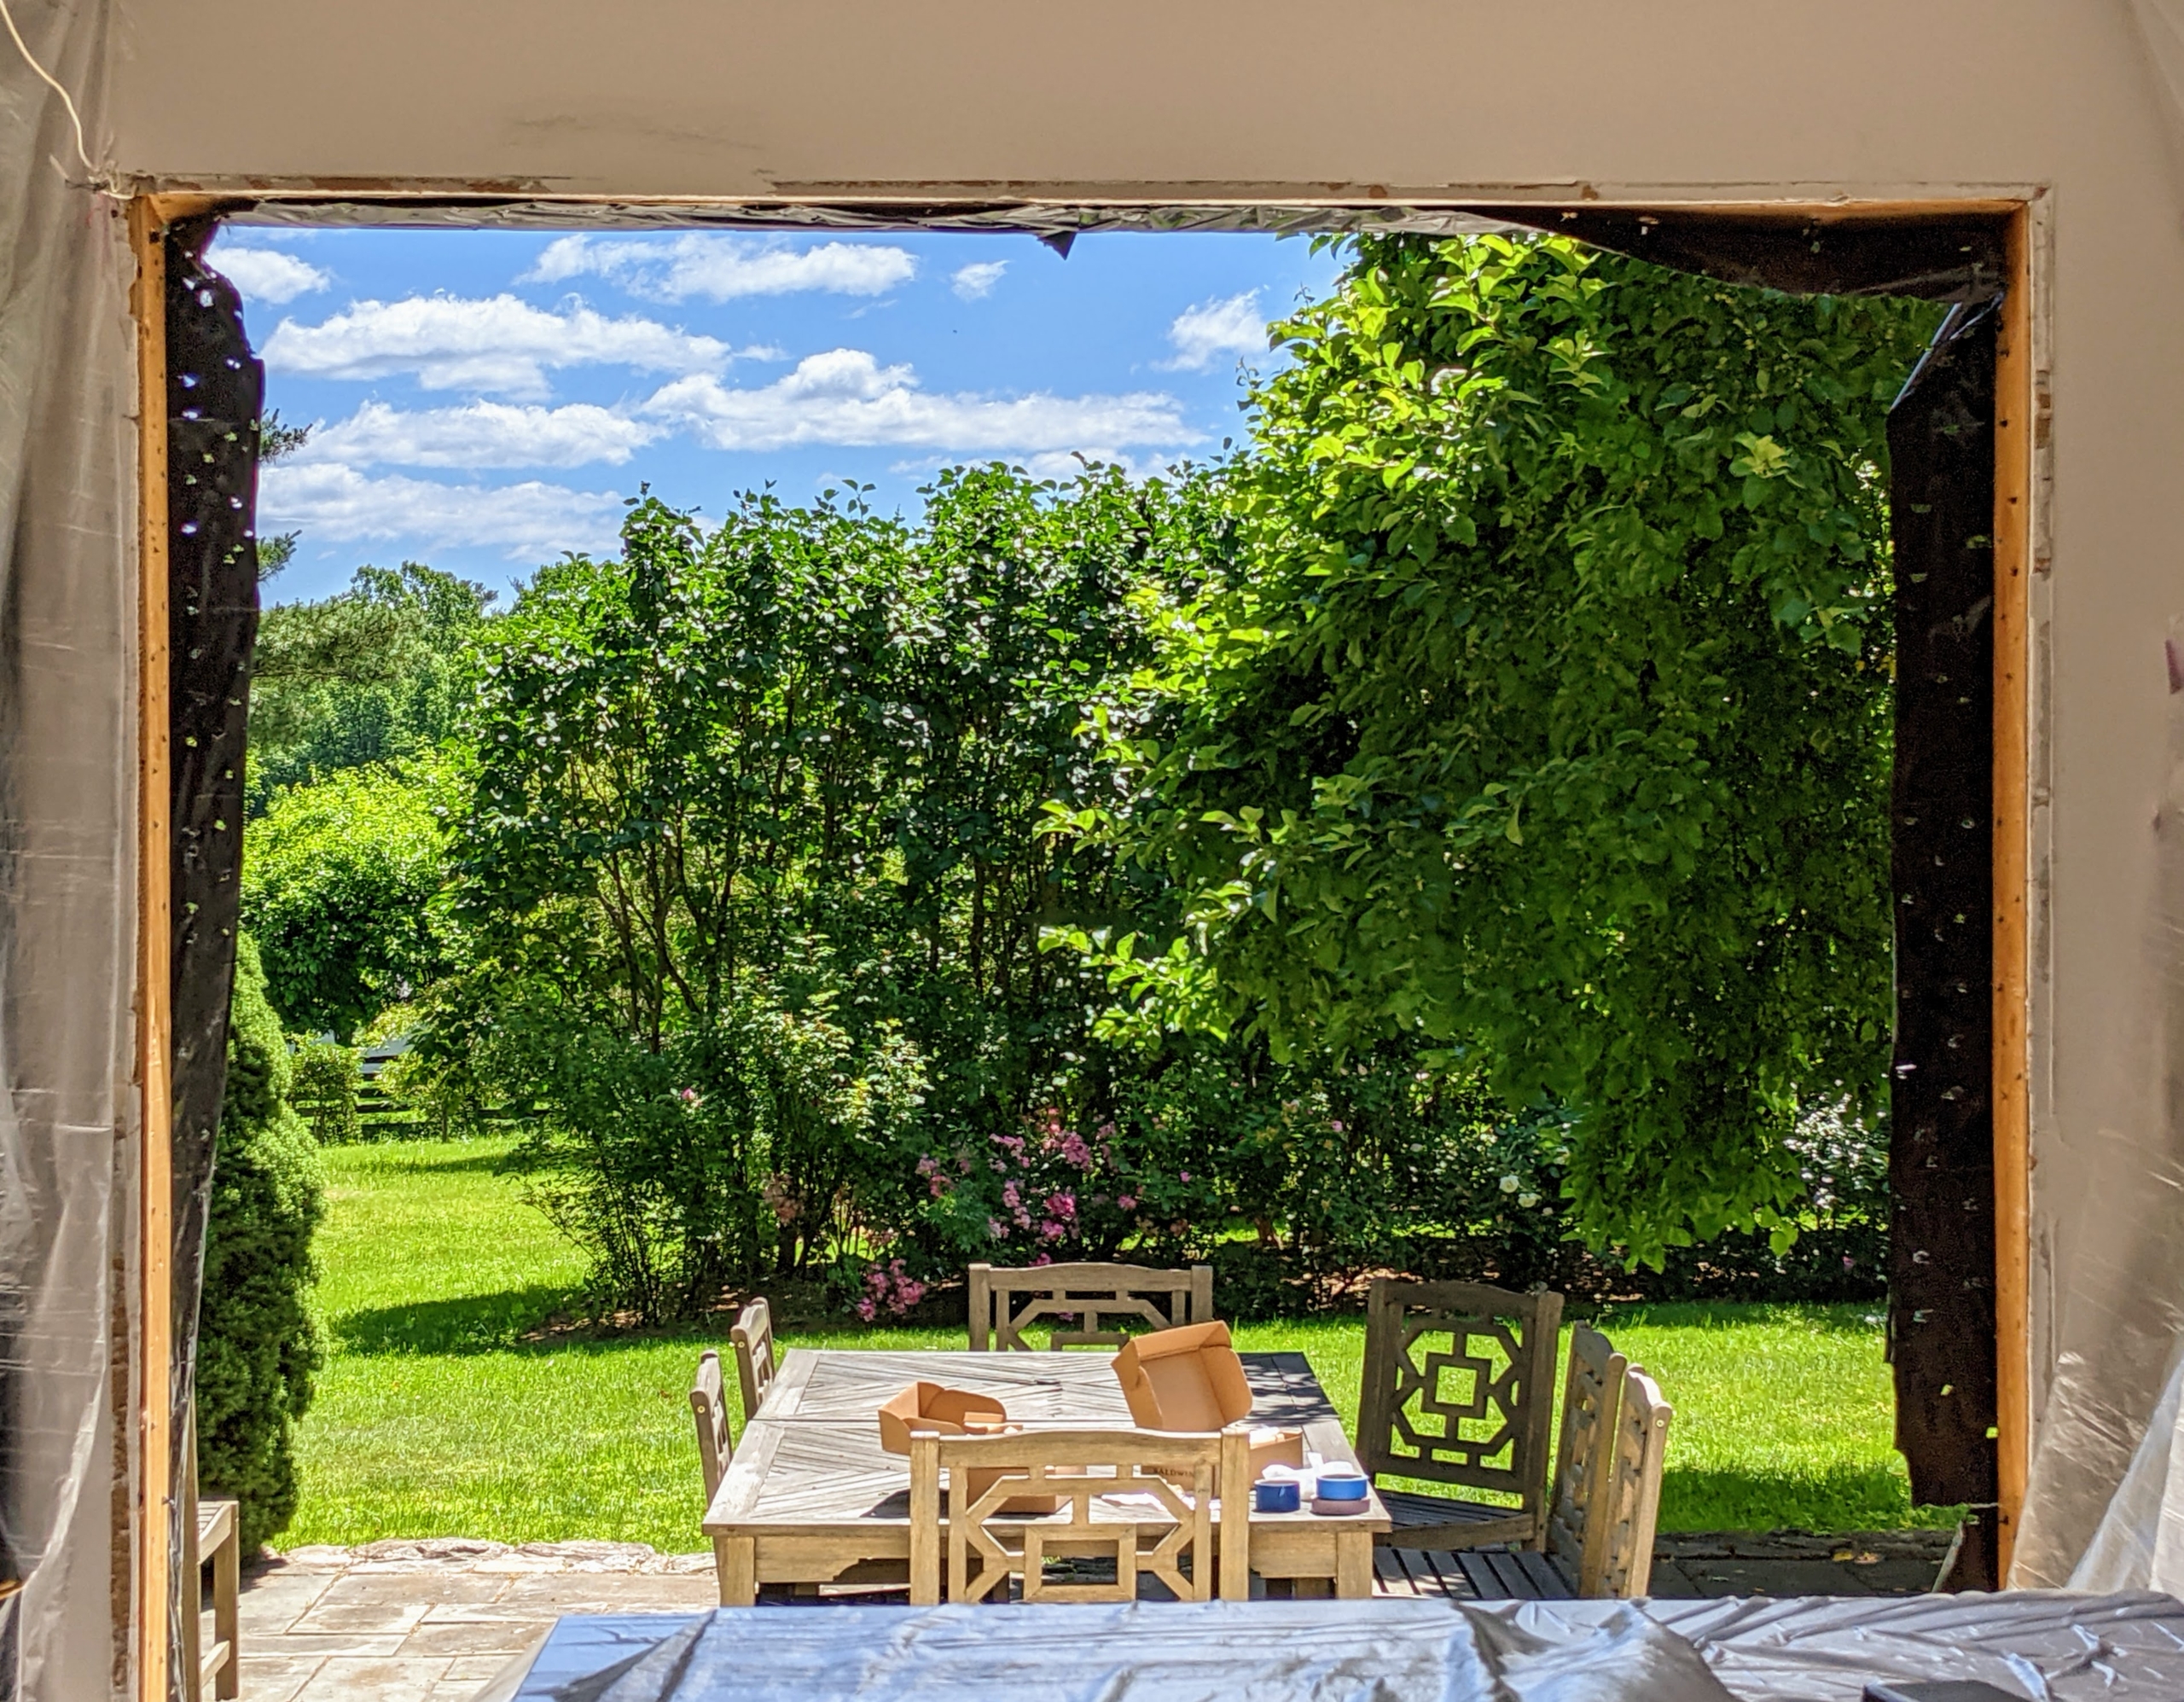
Outside this kitchen is a beautiful stone terrace looking out onto one side of my allee of fragrant lilacs and roses. As part of this kitchen project, I wanted to replace the doors that had deteriorated over time. The old doors were removed and the opening was prepared for the new doors to be installed.
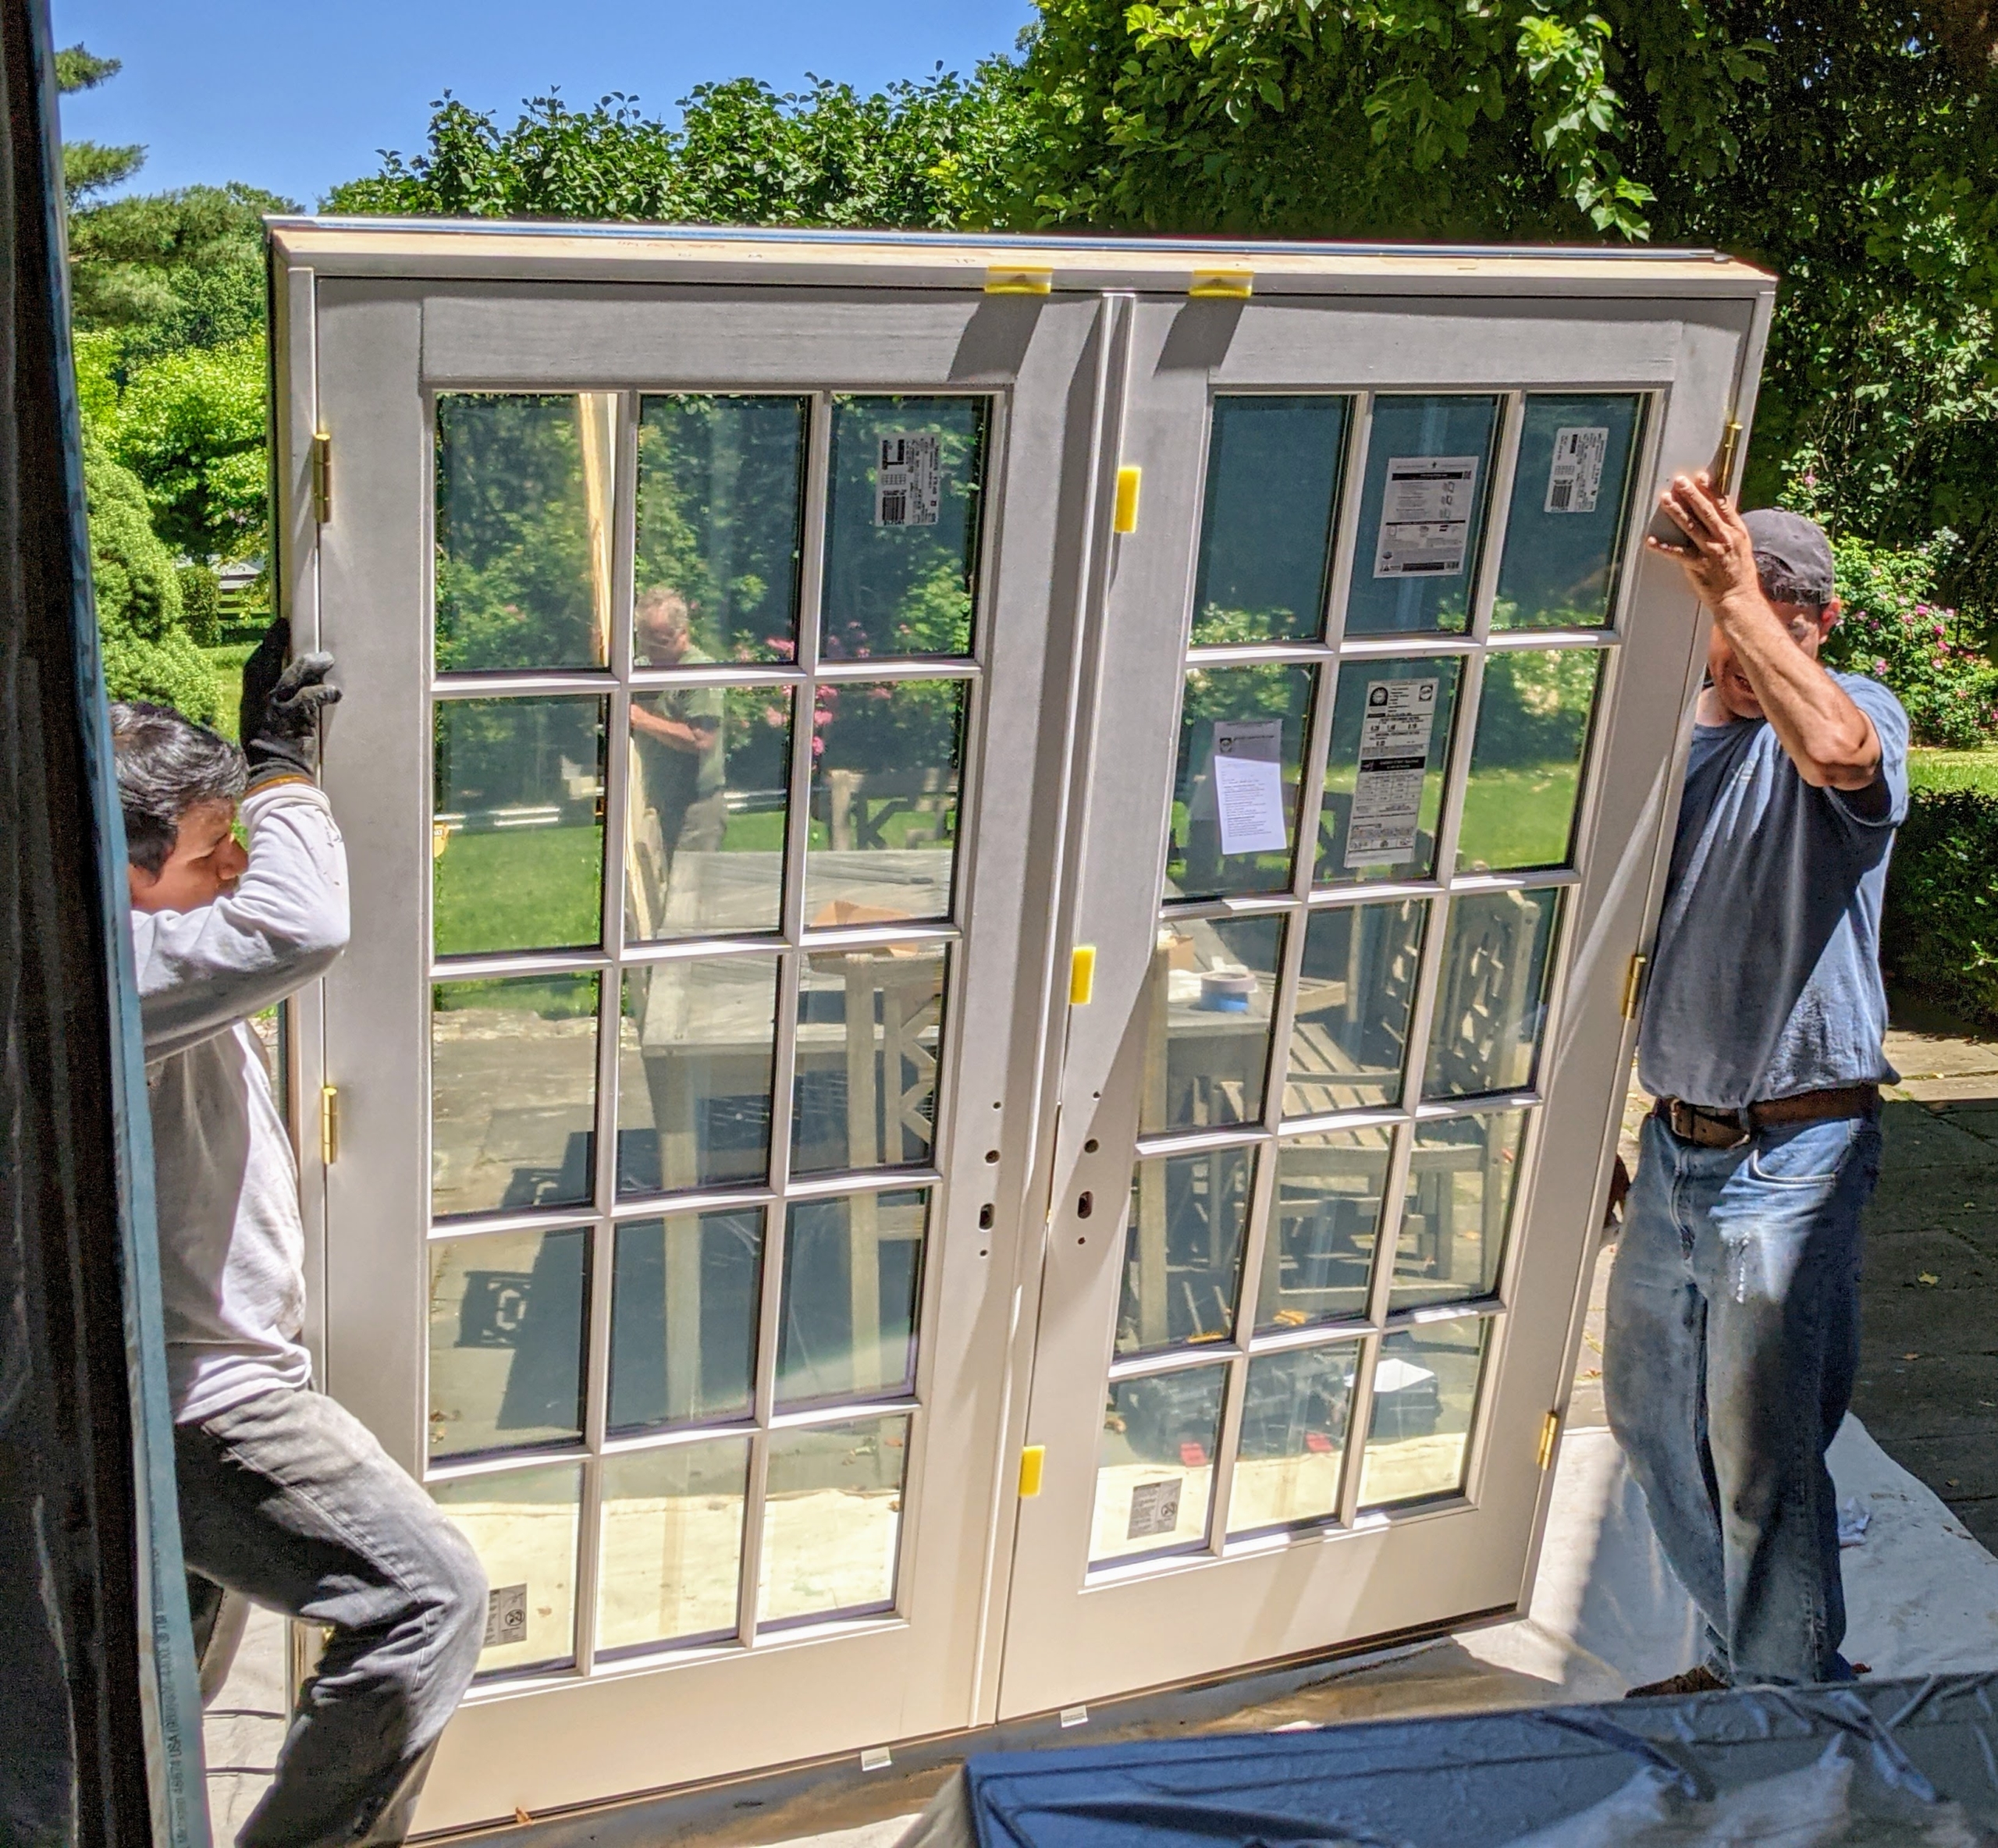
The doors are carefully carried to the opening and fitted perfectly level and plumb. These Pella hinged French doors allow true light into the room while maintaining exceptional energy efficiency.
The doors are secured and ready to be fully attached and insulated. Whenever installing doors, be sure to always measure the radius of the swing and ensure there is adequate space for the door to open and close. Pella doors can be either in-swing our out-swing.
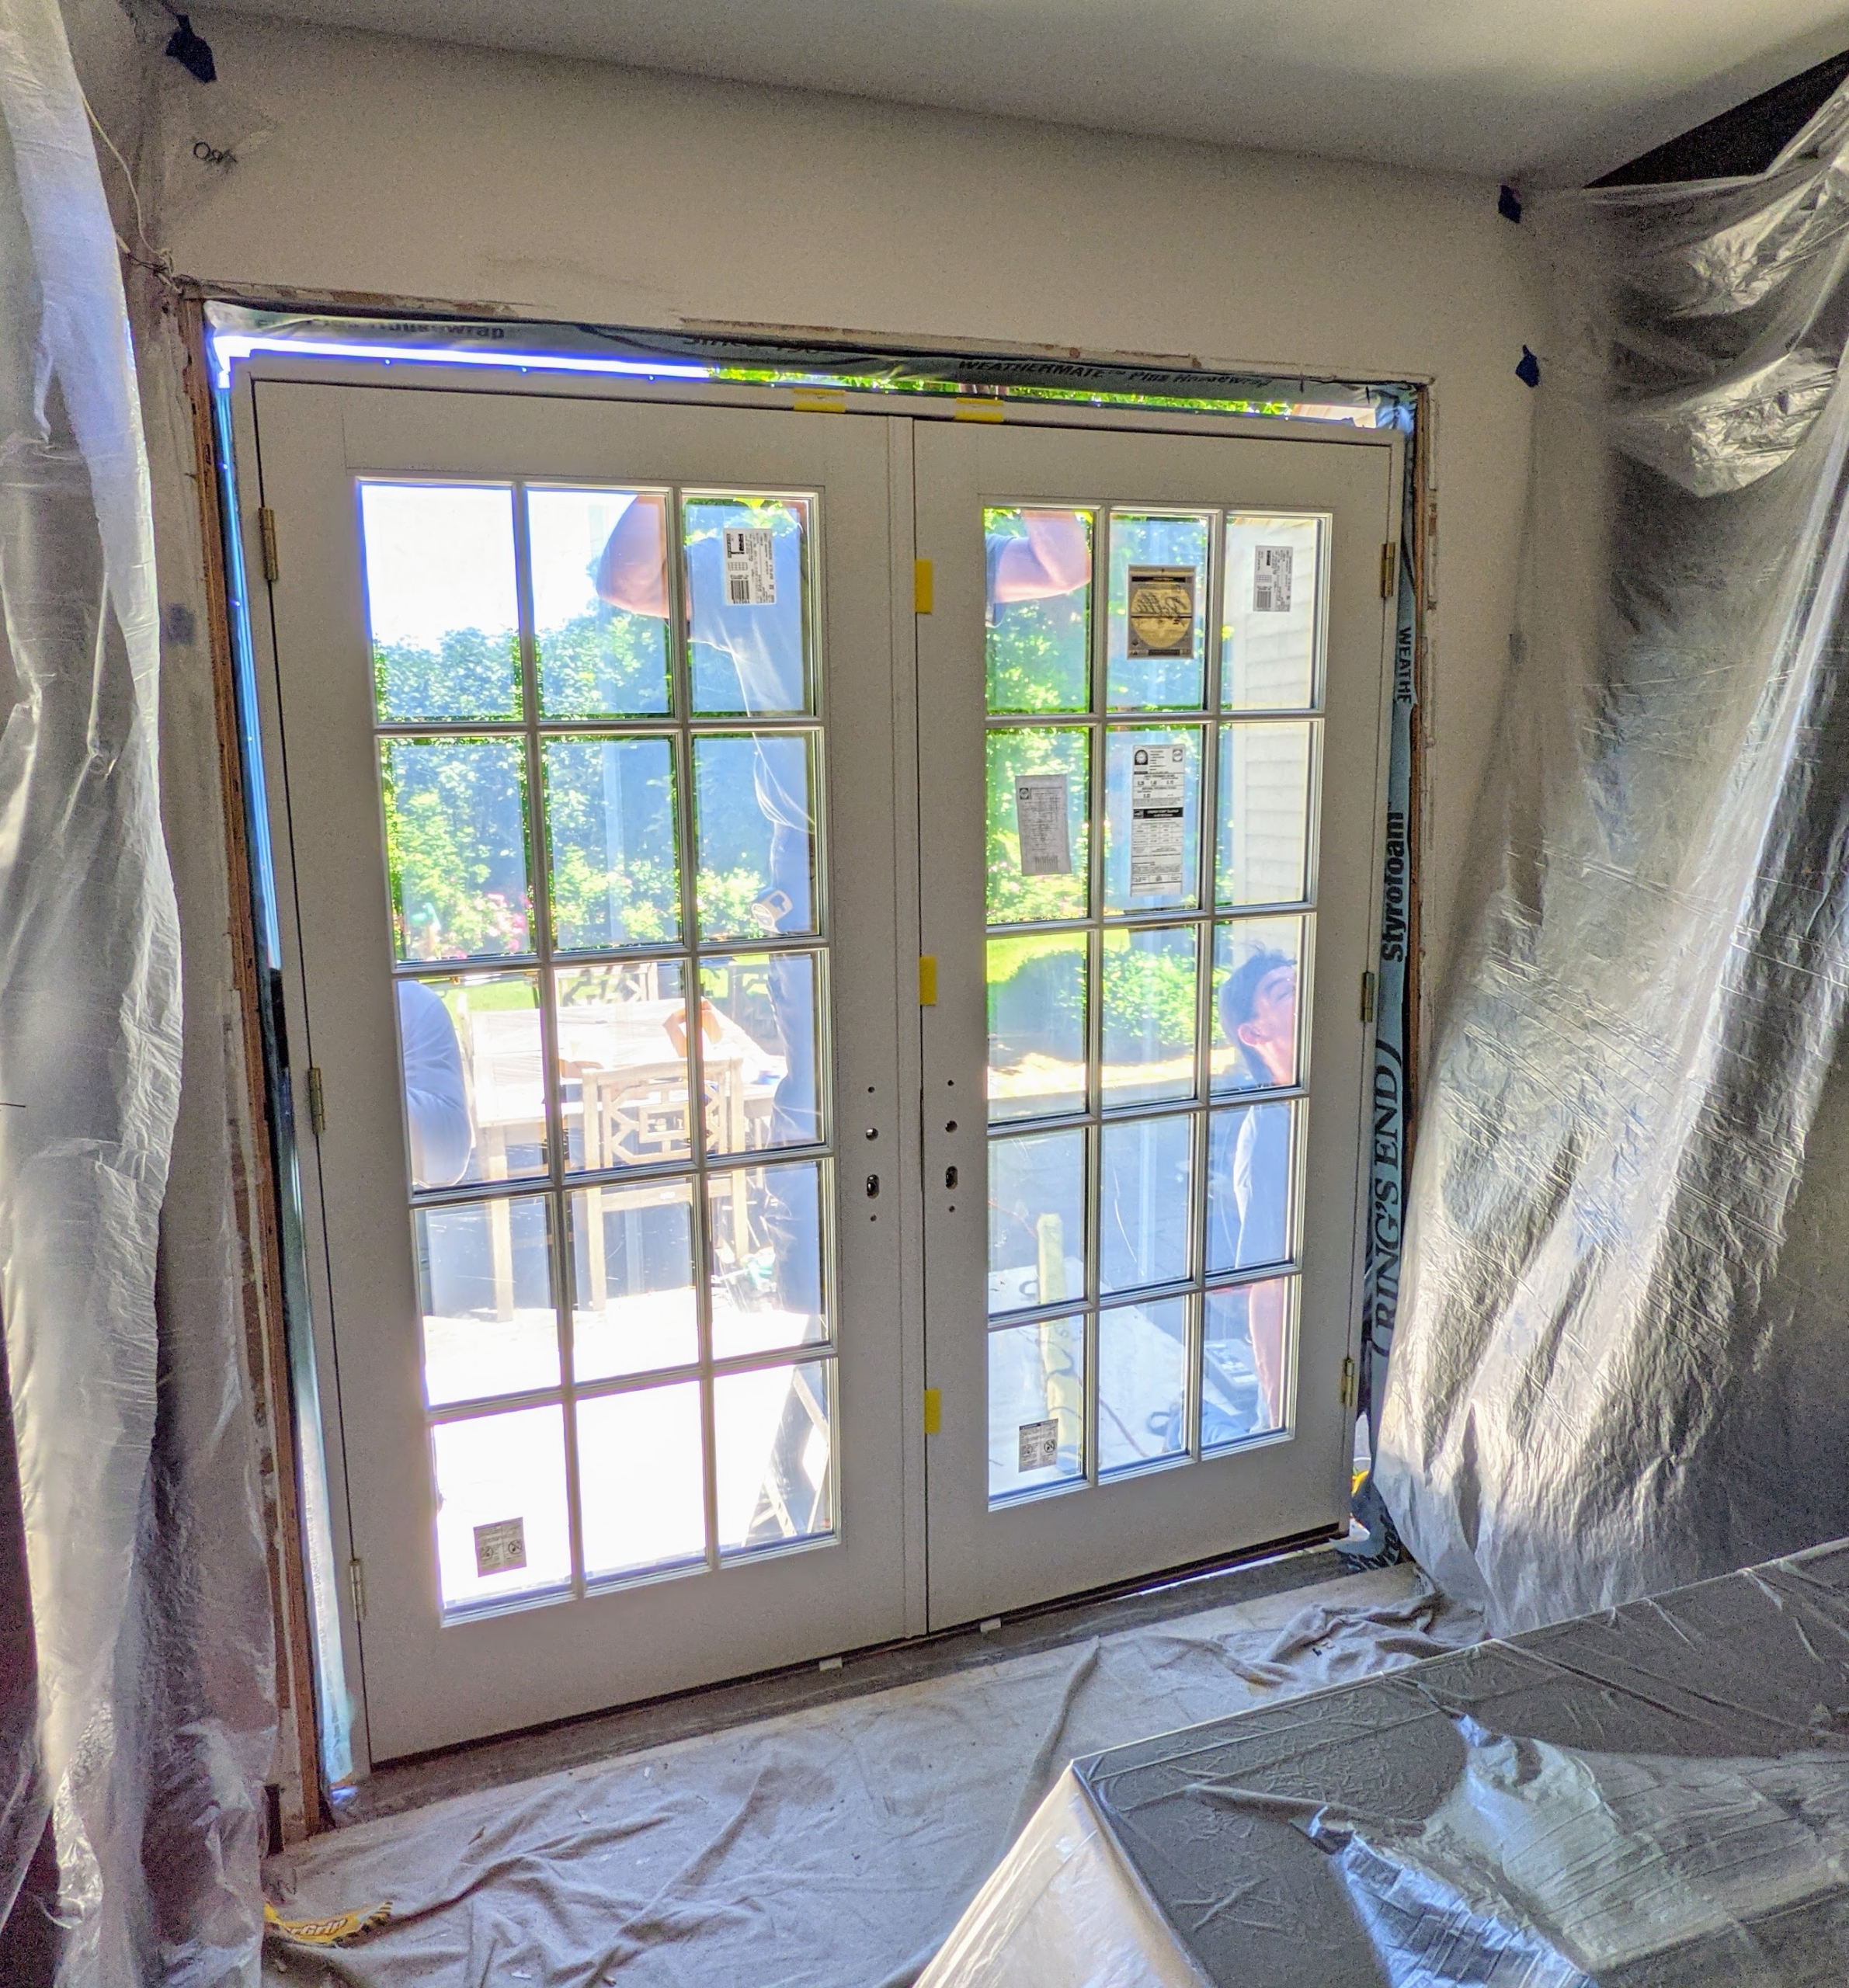
Next, the molding around the doors is matched to the rest of the moldings in the room and installed.
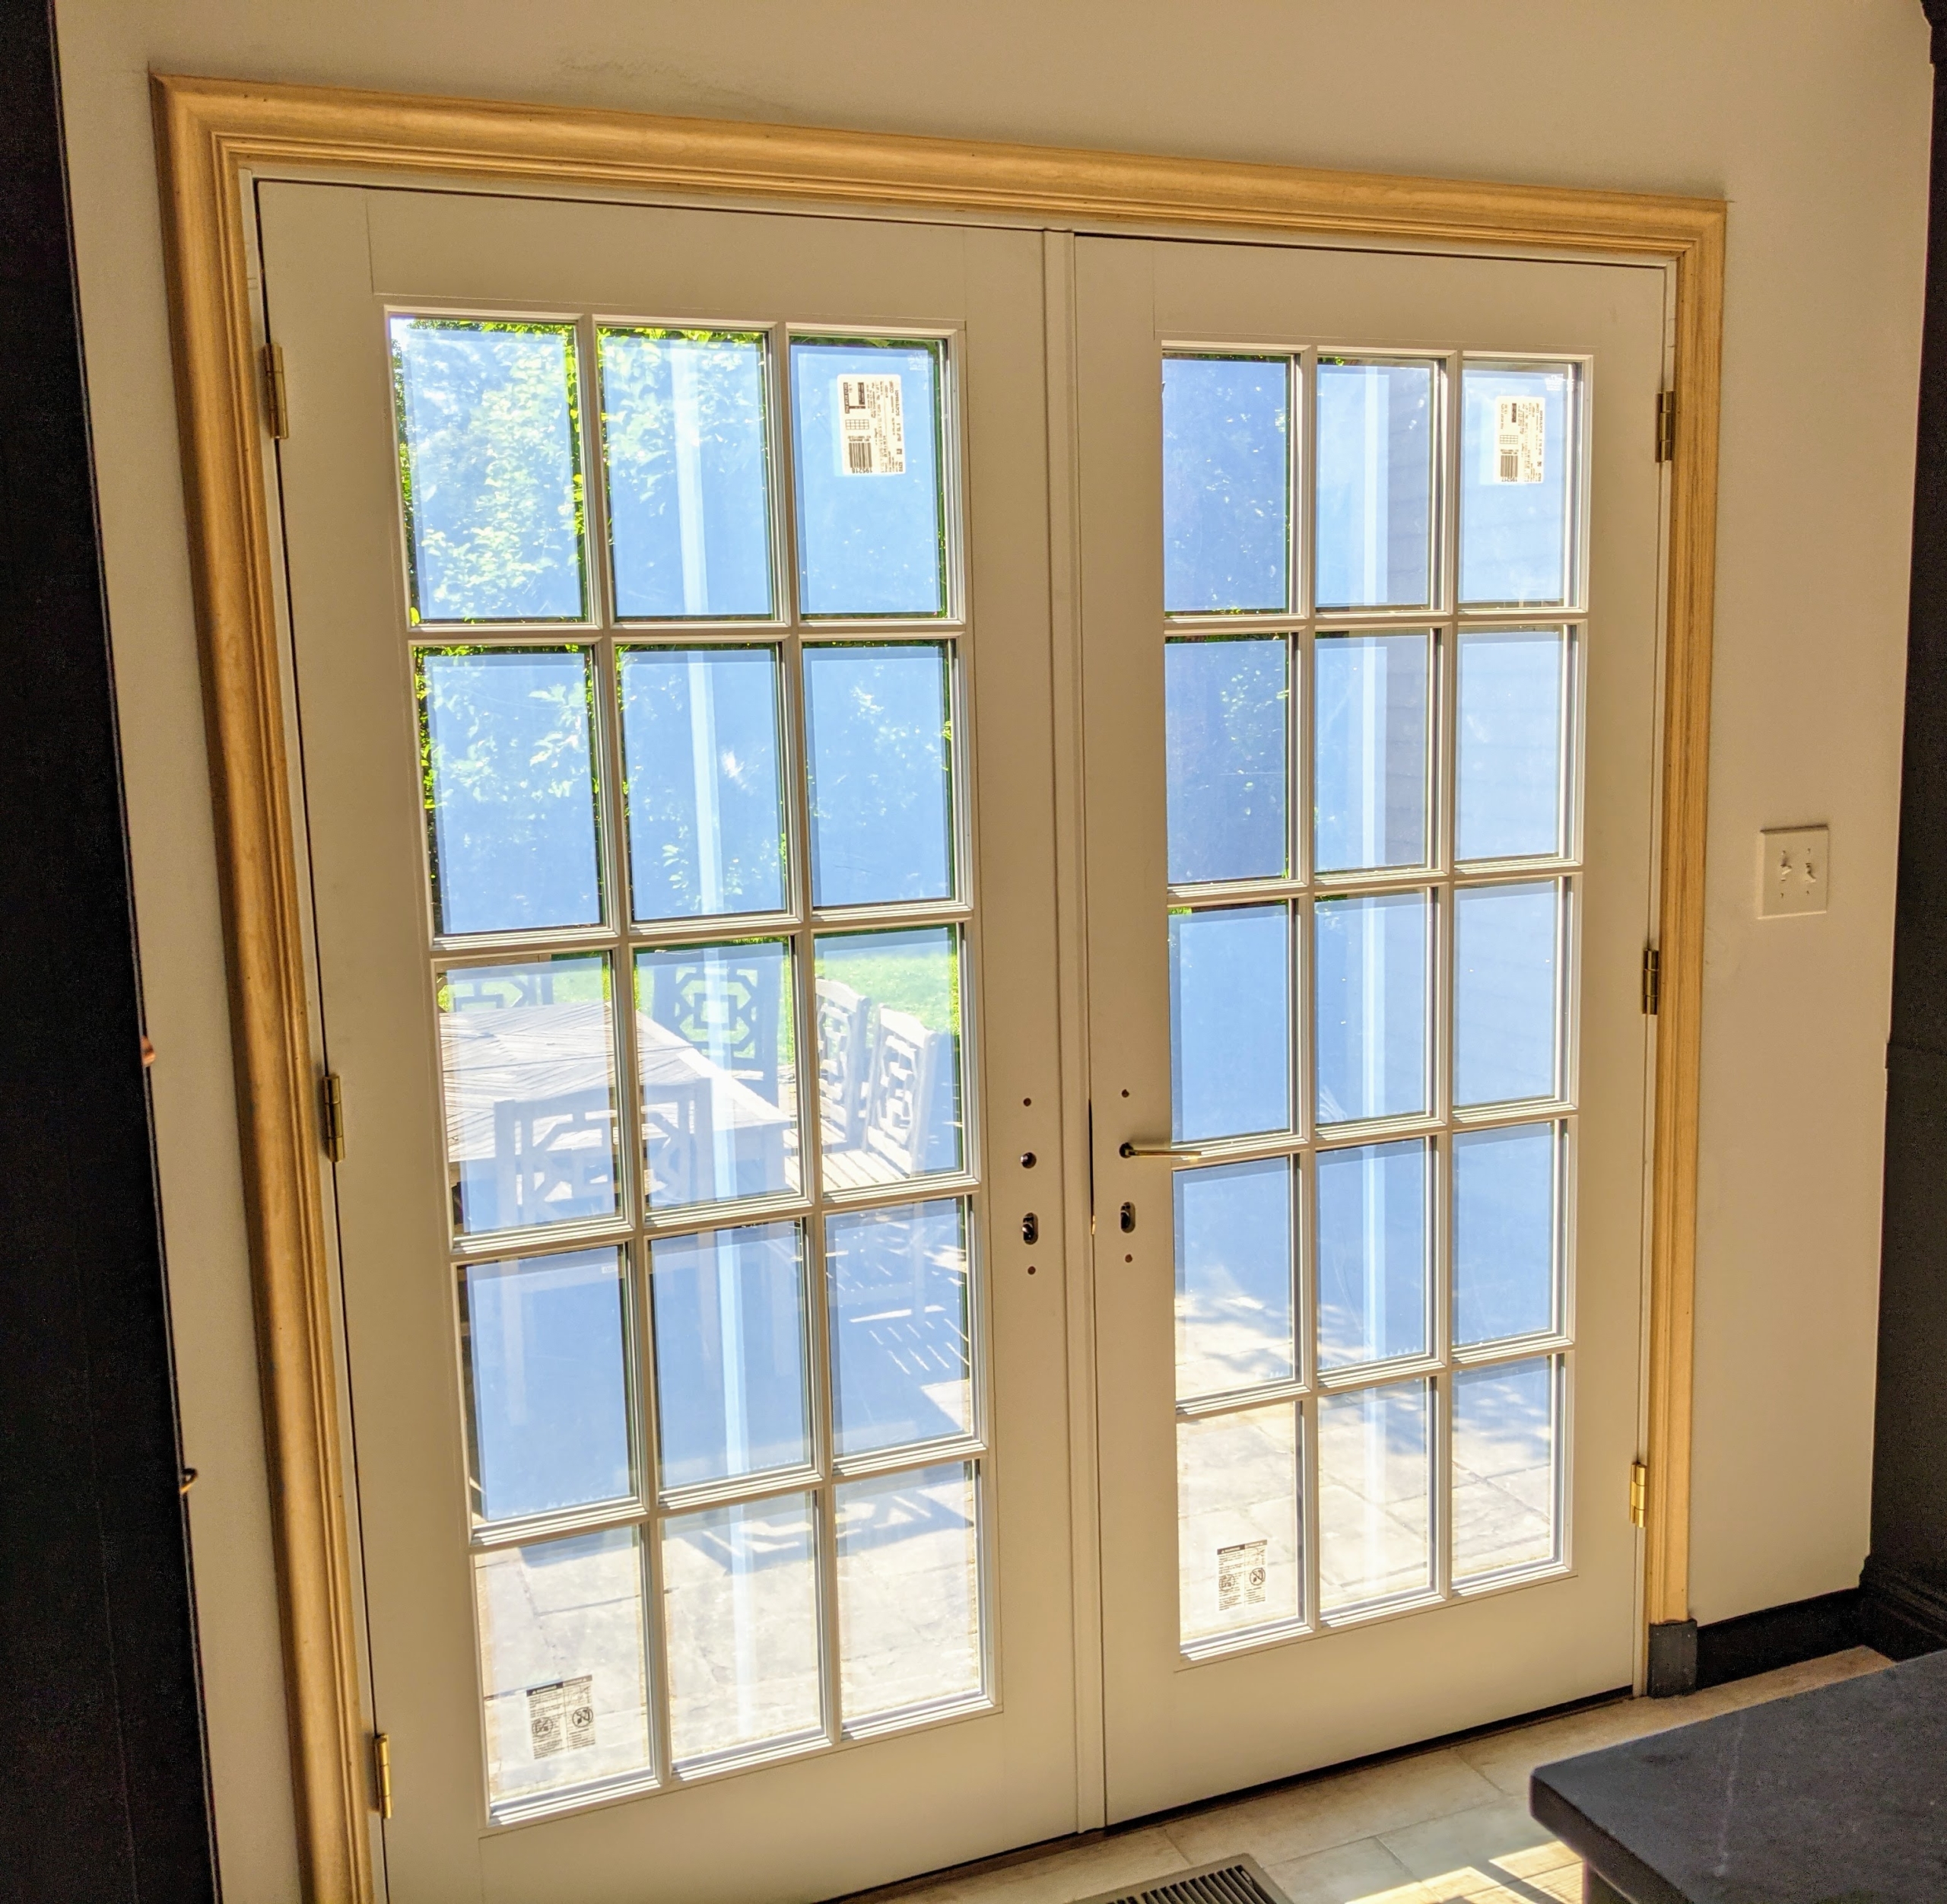
Here are the finished doors. Look how much great light comes into the kitchen. These doors will also allow fresh breezes in and out. This house has three sets of French doors – all of them were replaced in the same way.
To go along with the rest of the kitchen’s decor, the doors were painted black. They look great with the brass hardware.
Next, I called on Erik Bruce Inc., to install shades on all the doors and windows in this house. The company’s owner, Eric Bruce, did all the shades for my Winter House, Summer House, and Tenant House – I’ve known him many years. Because everything was pre-measured, all the shades are delivered labeled with the room name.
Each shade was removed from its plastic wrapping and placed by its assigned window or door. Appropriate brackets are also placed next to each shade. Putting all the supplies near the designated work spaces make the process more efficient.
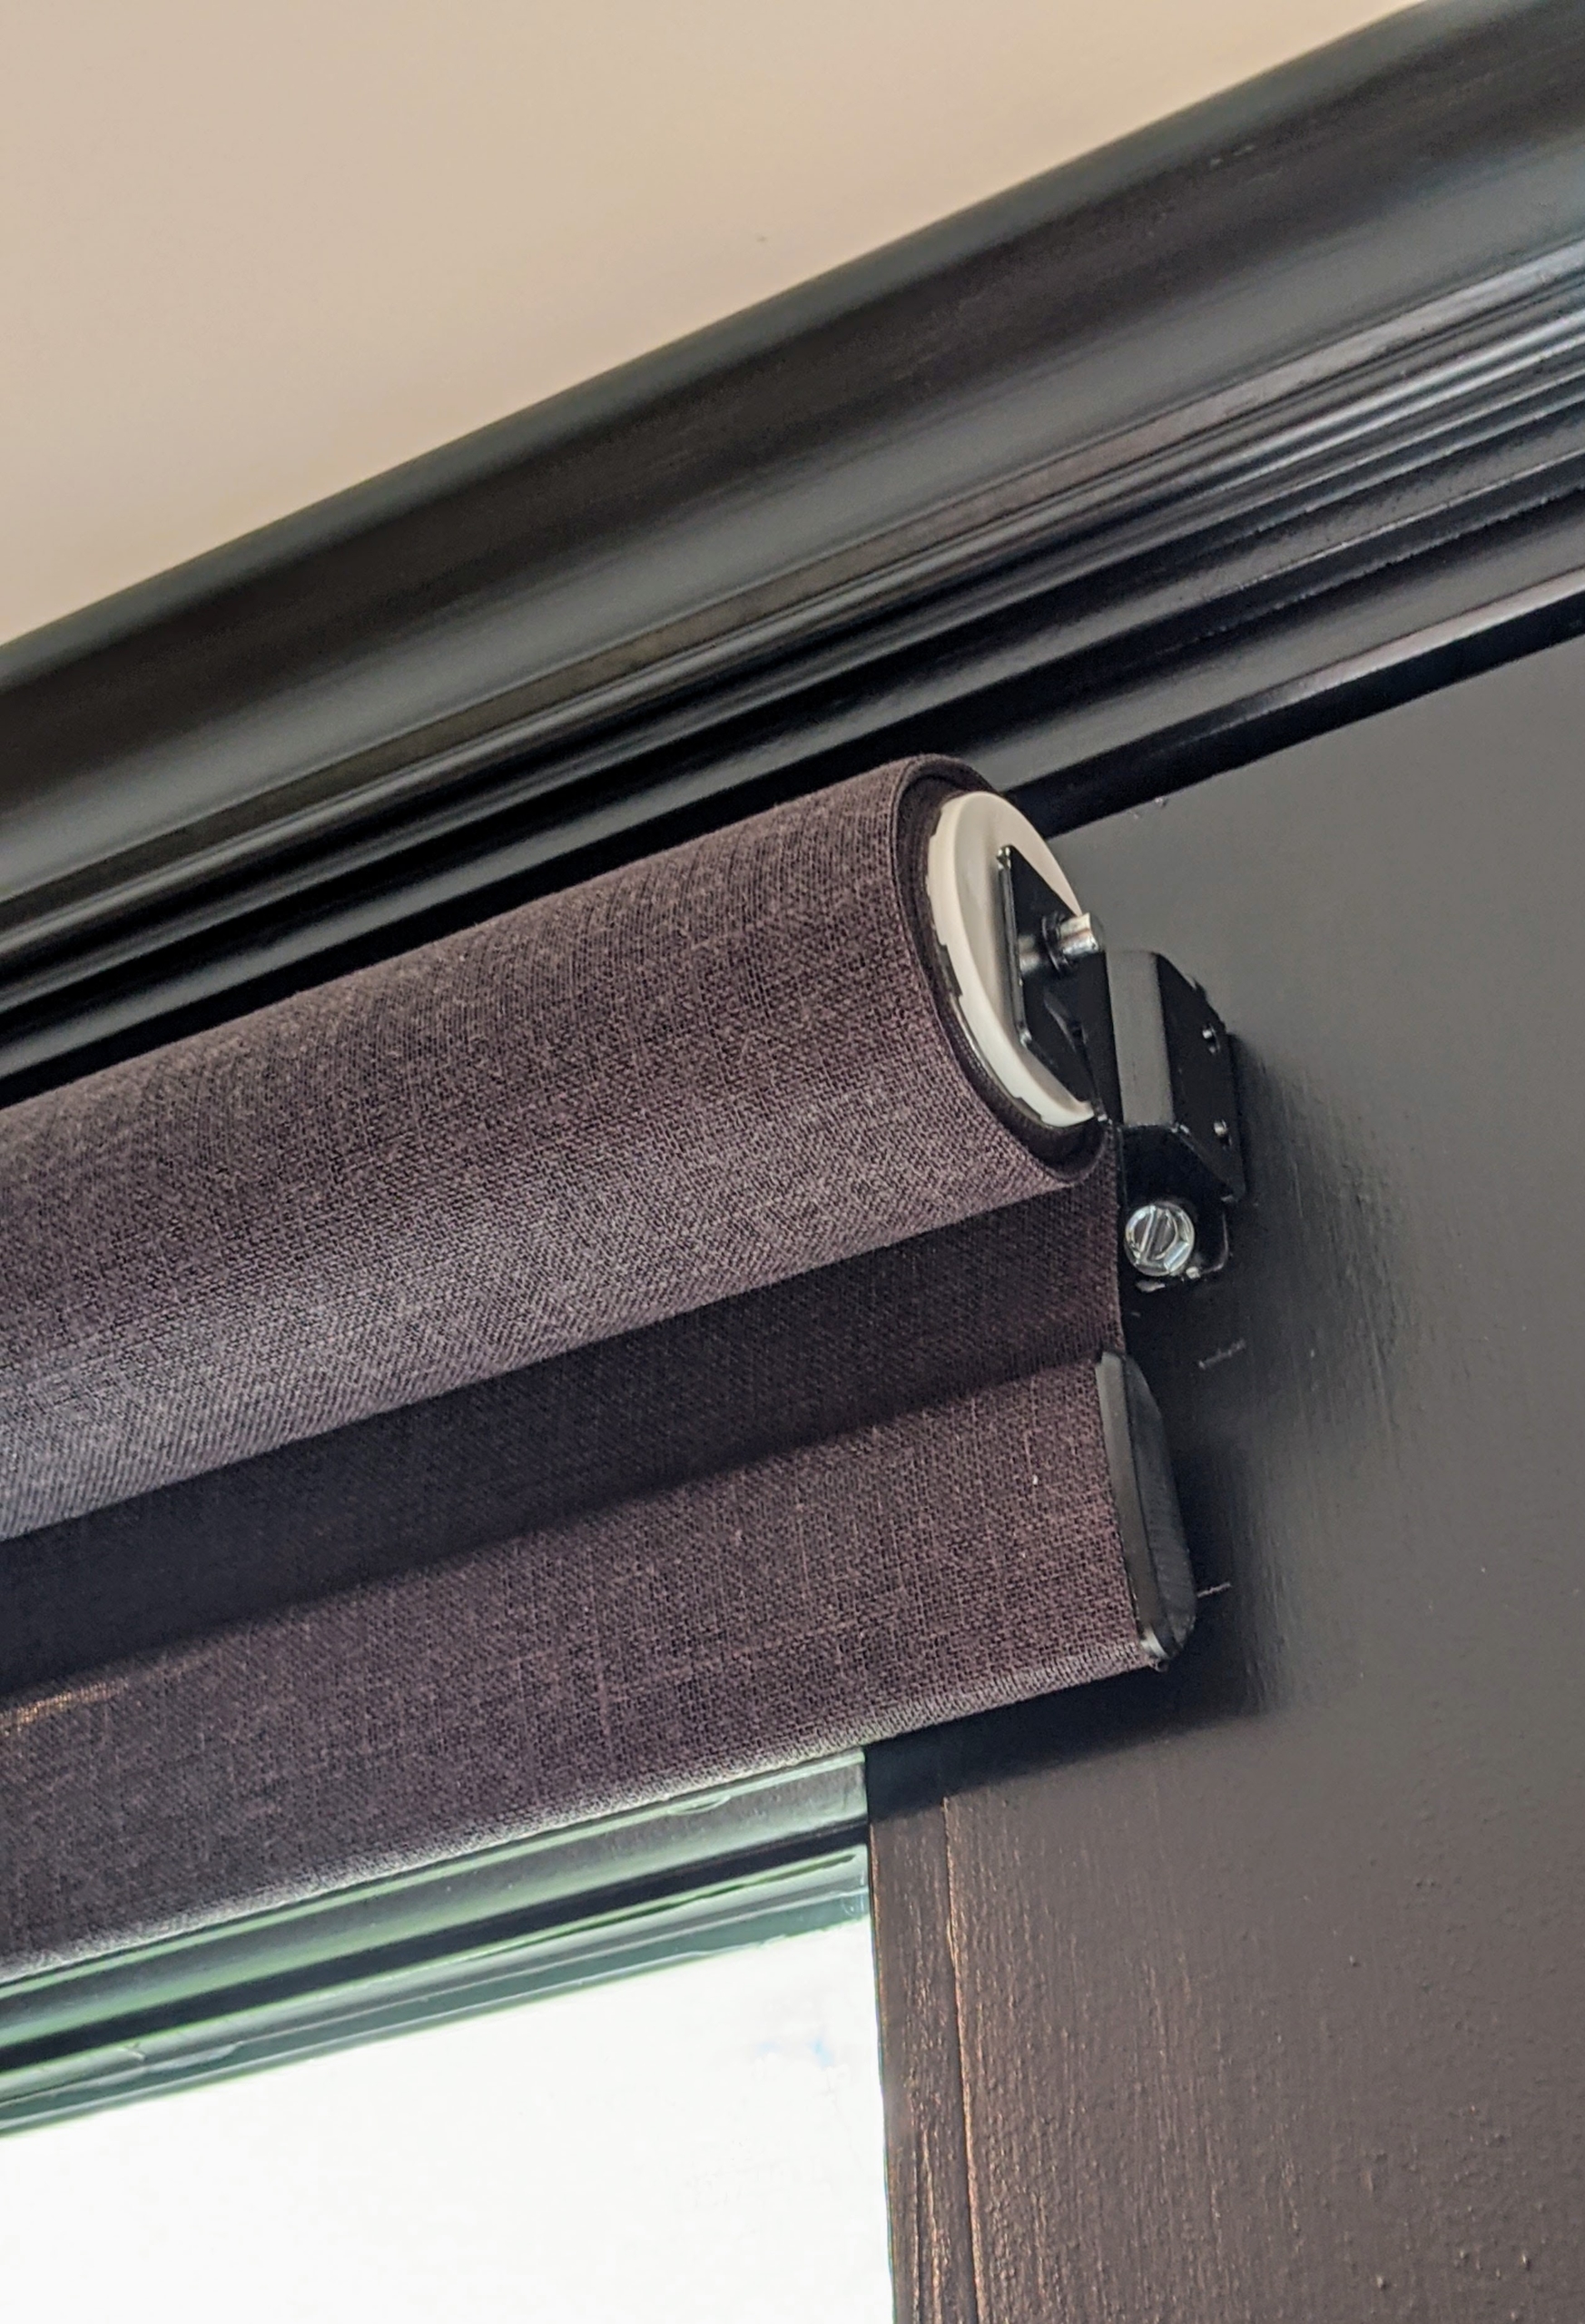
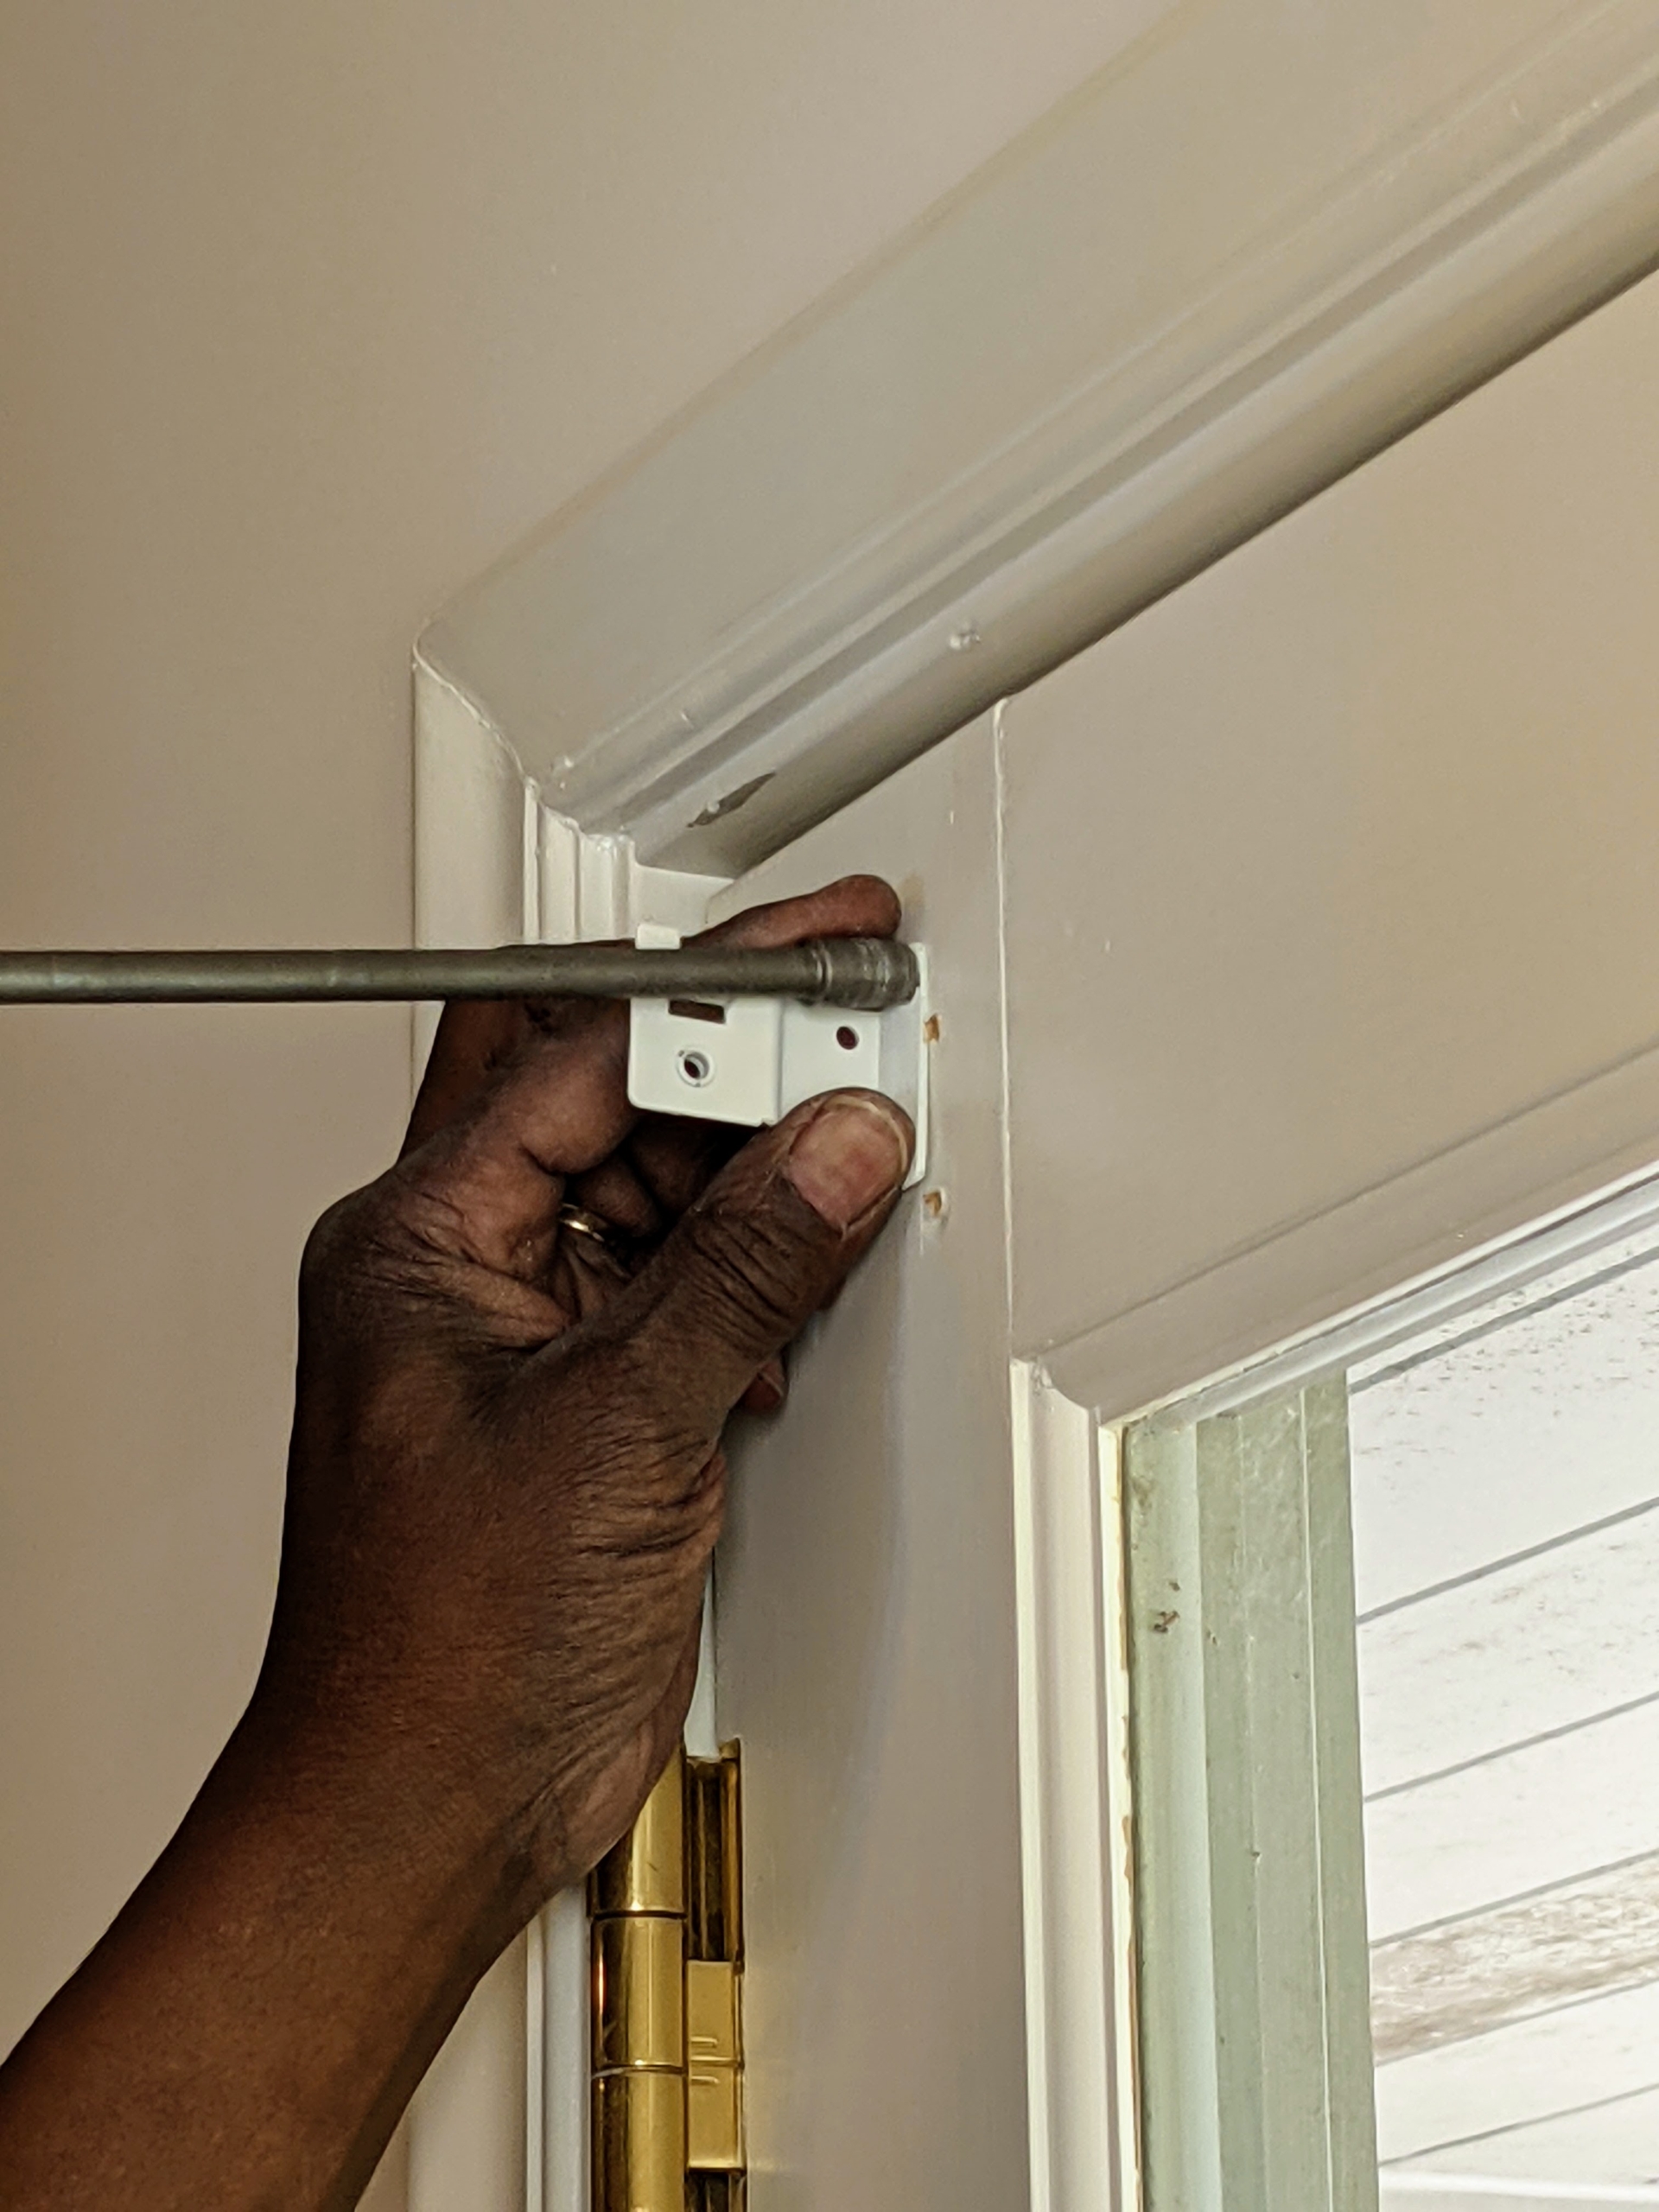
These shade mounting brackets hold the shade securely in place and allow it to move smoothly without falling out.
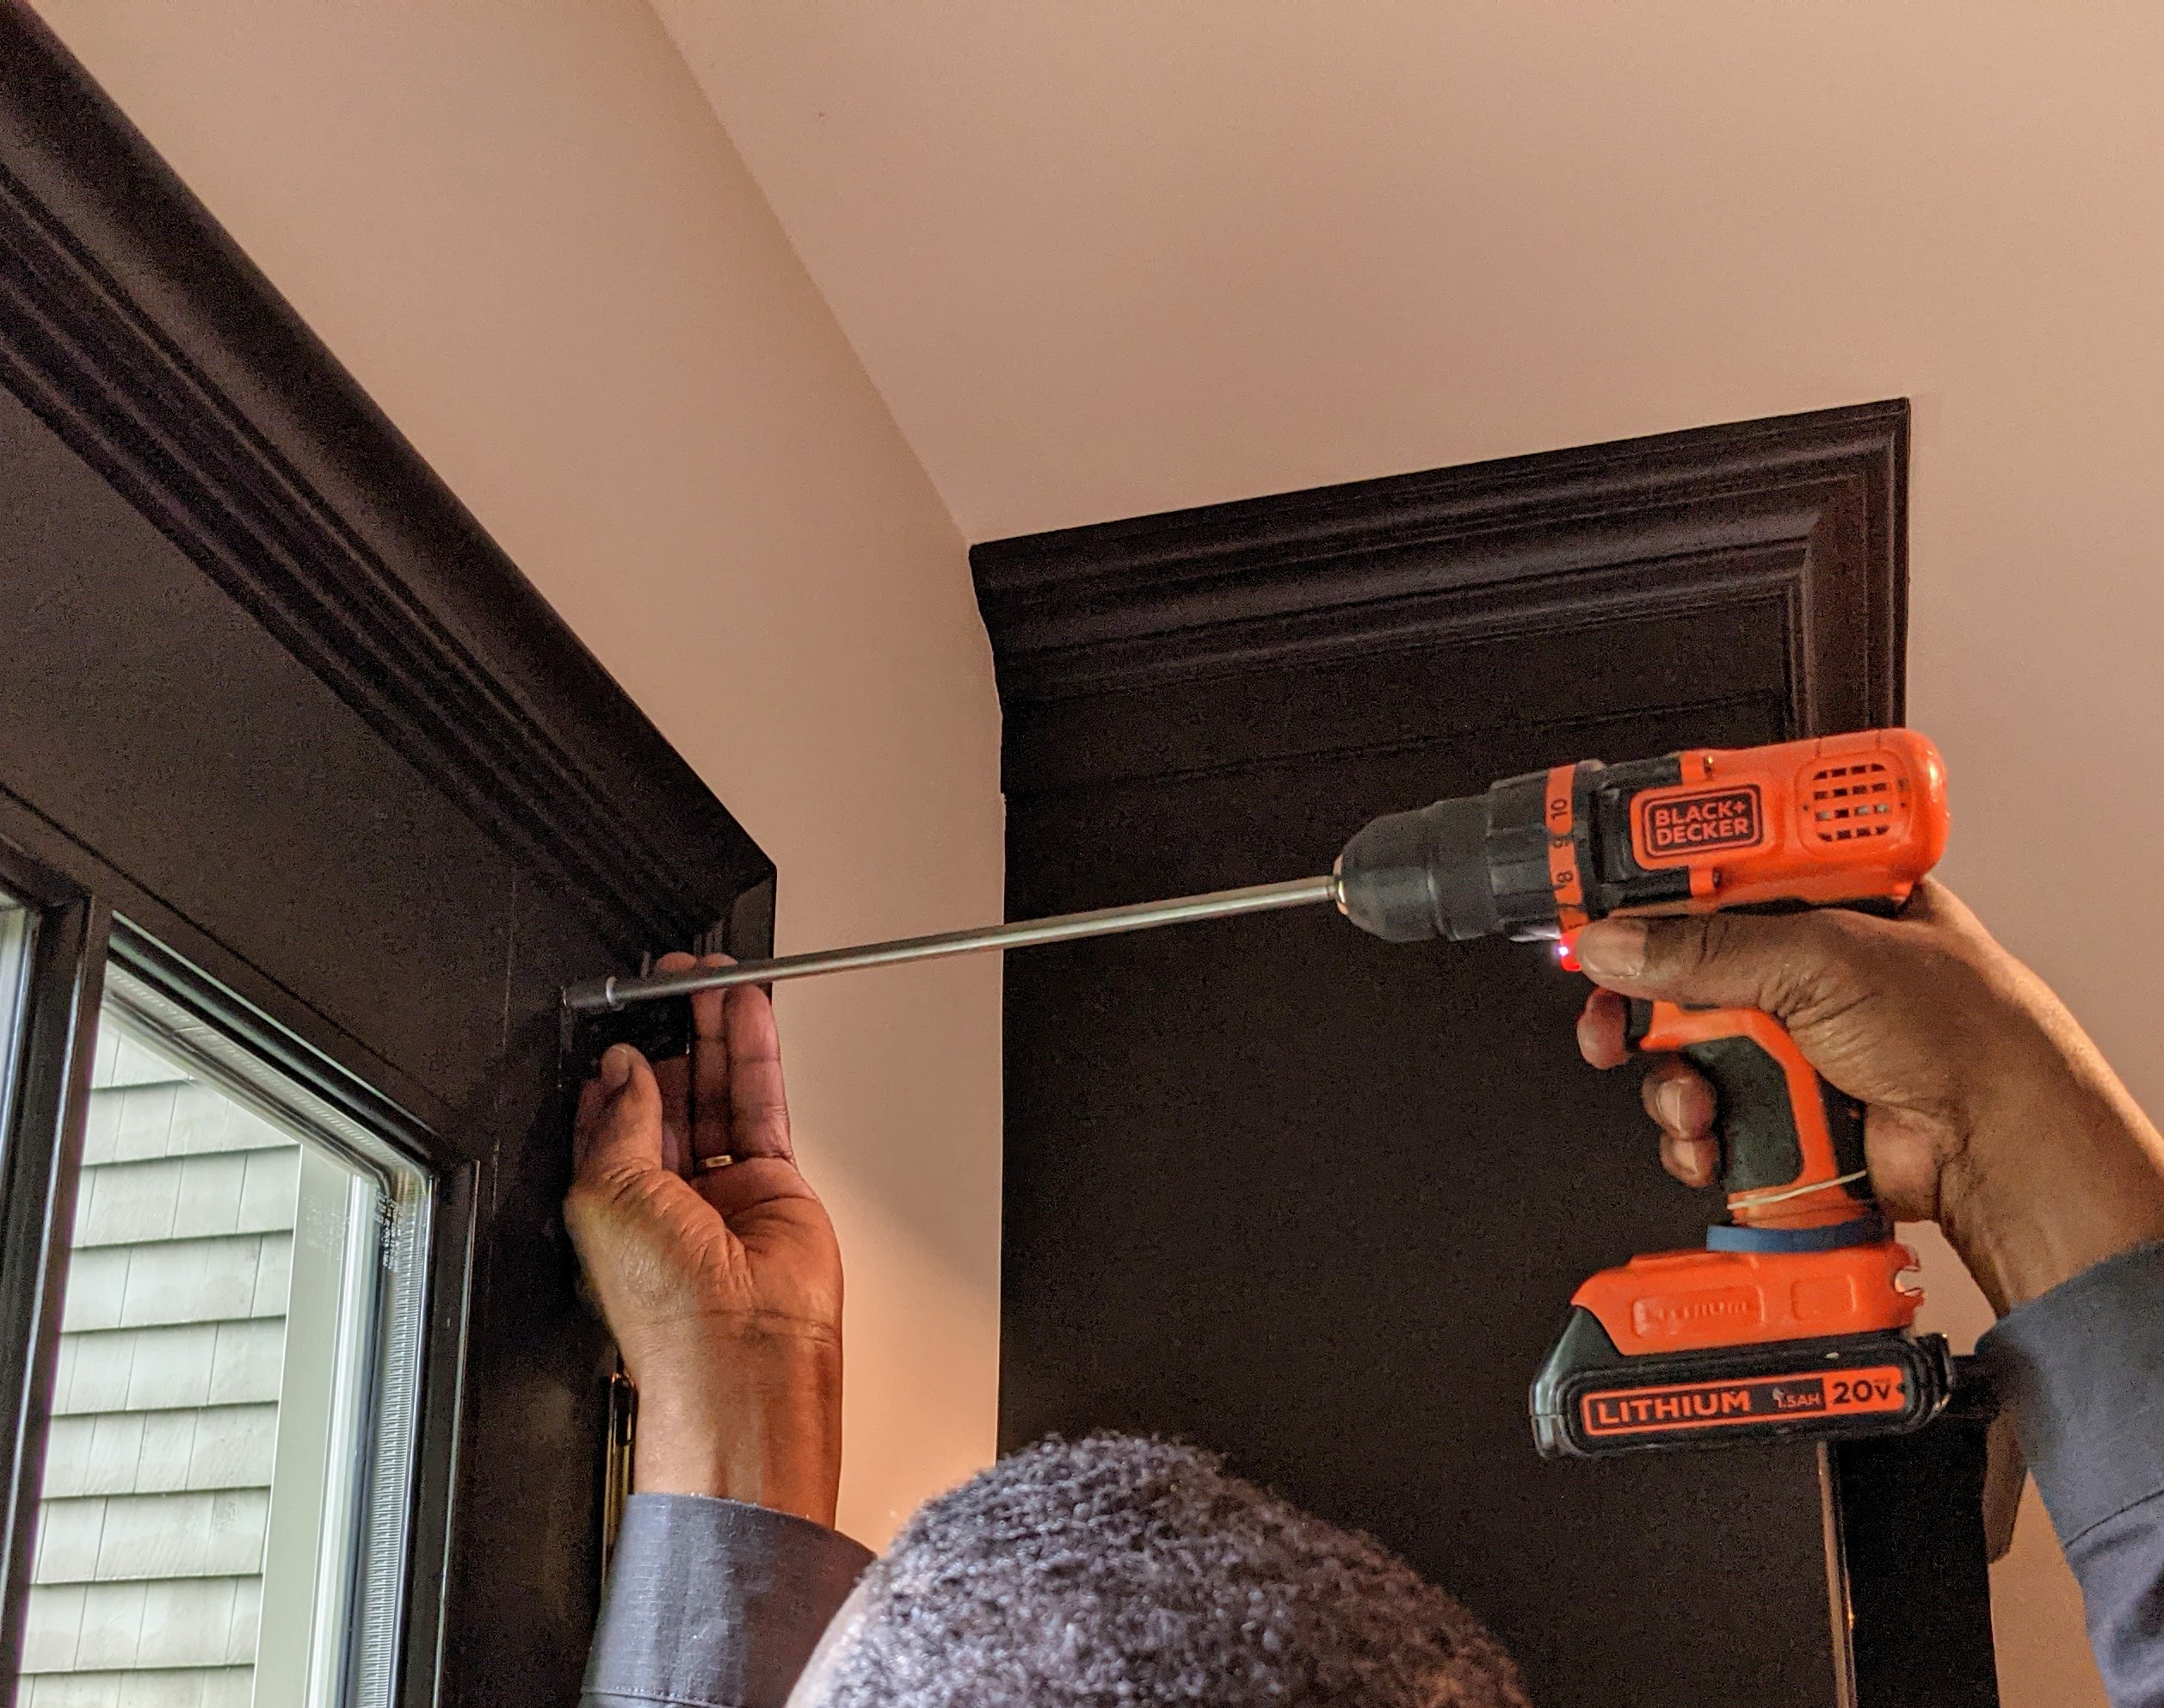
Tony carefully screws in the mounting brackets – one slightly above each side of the window or door being covered.
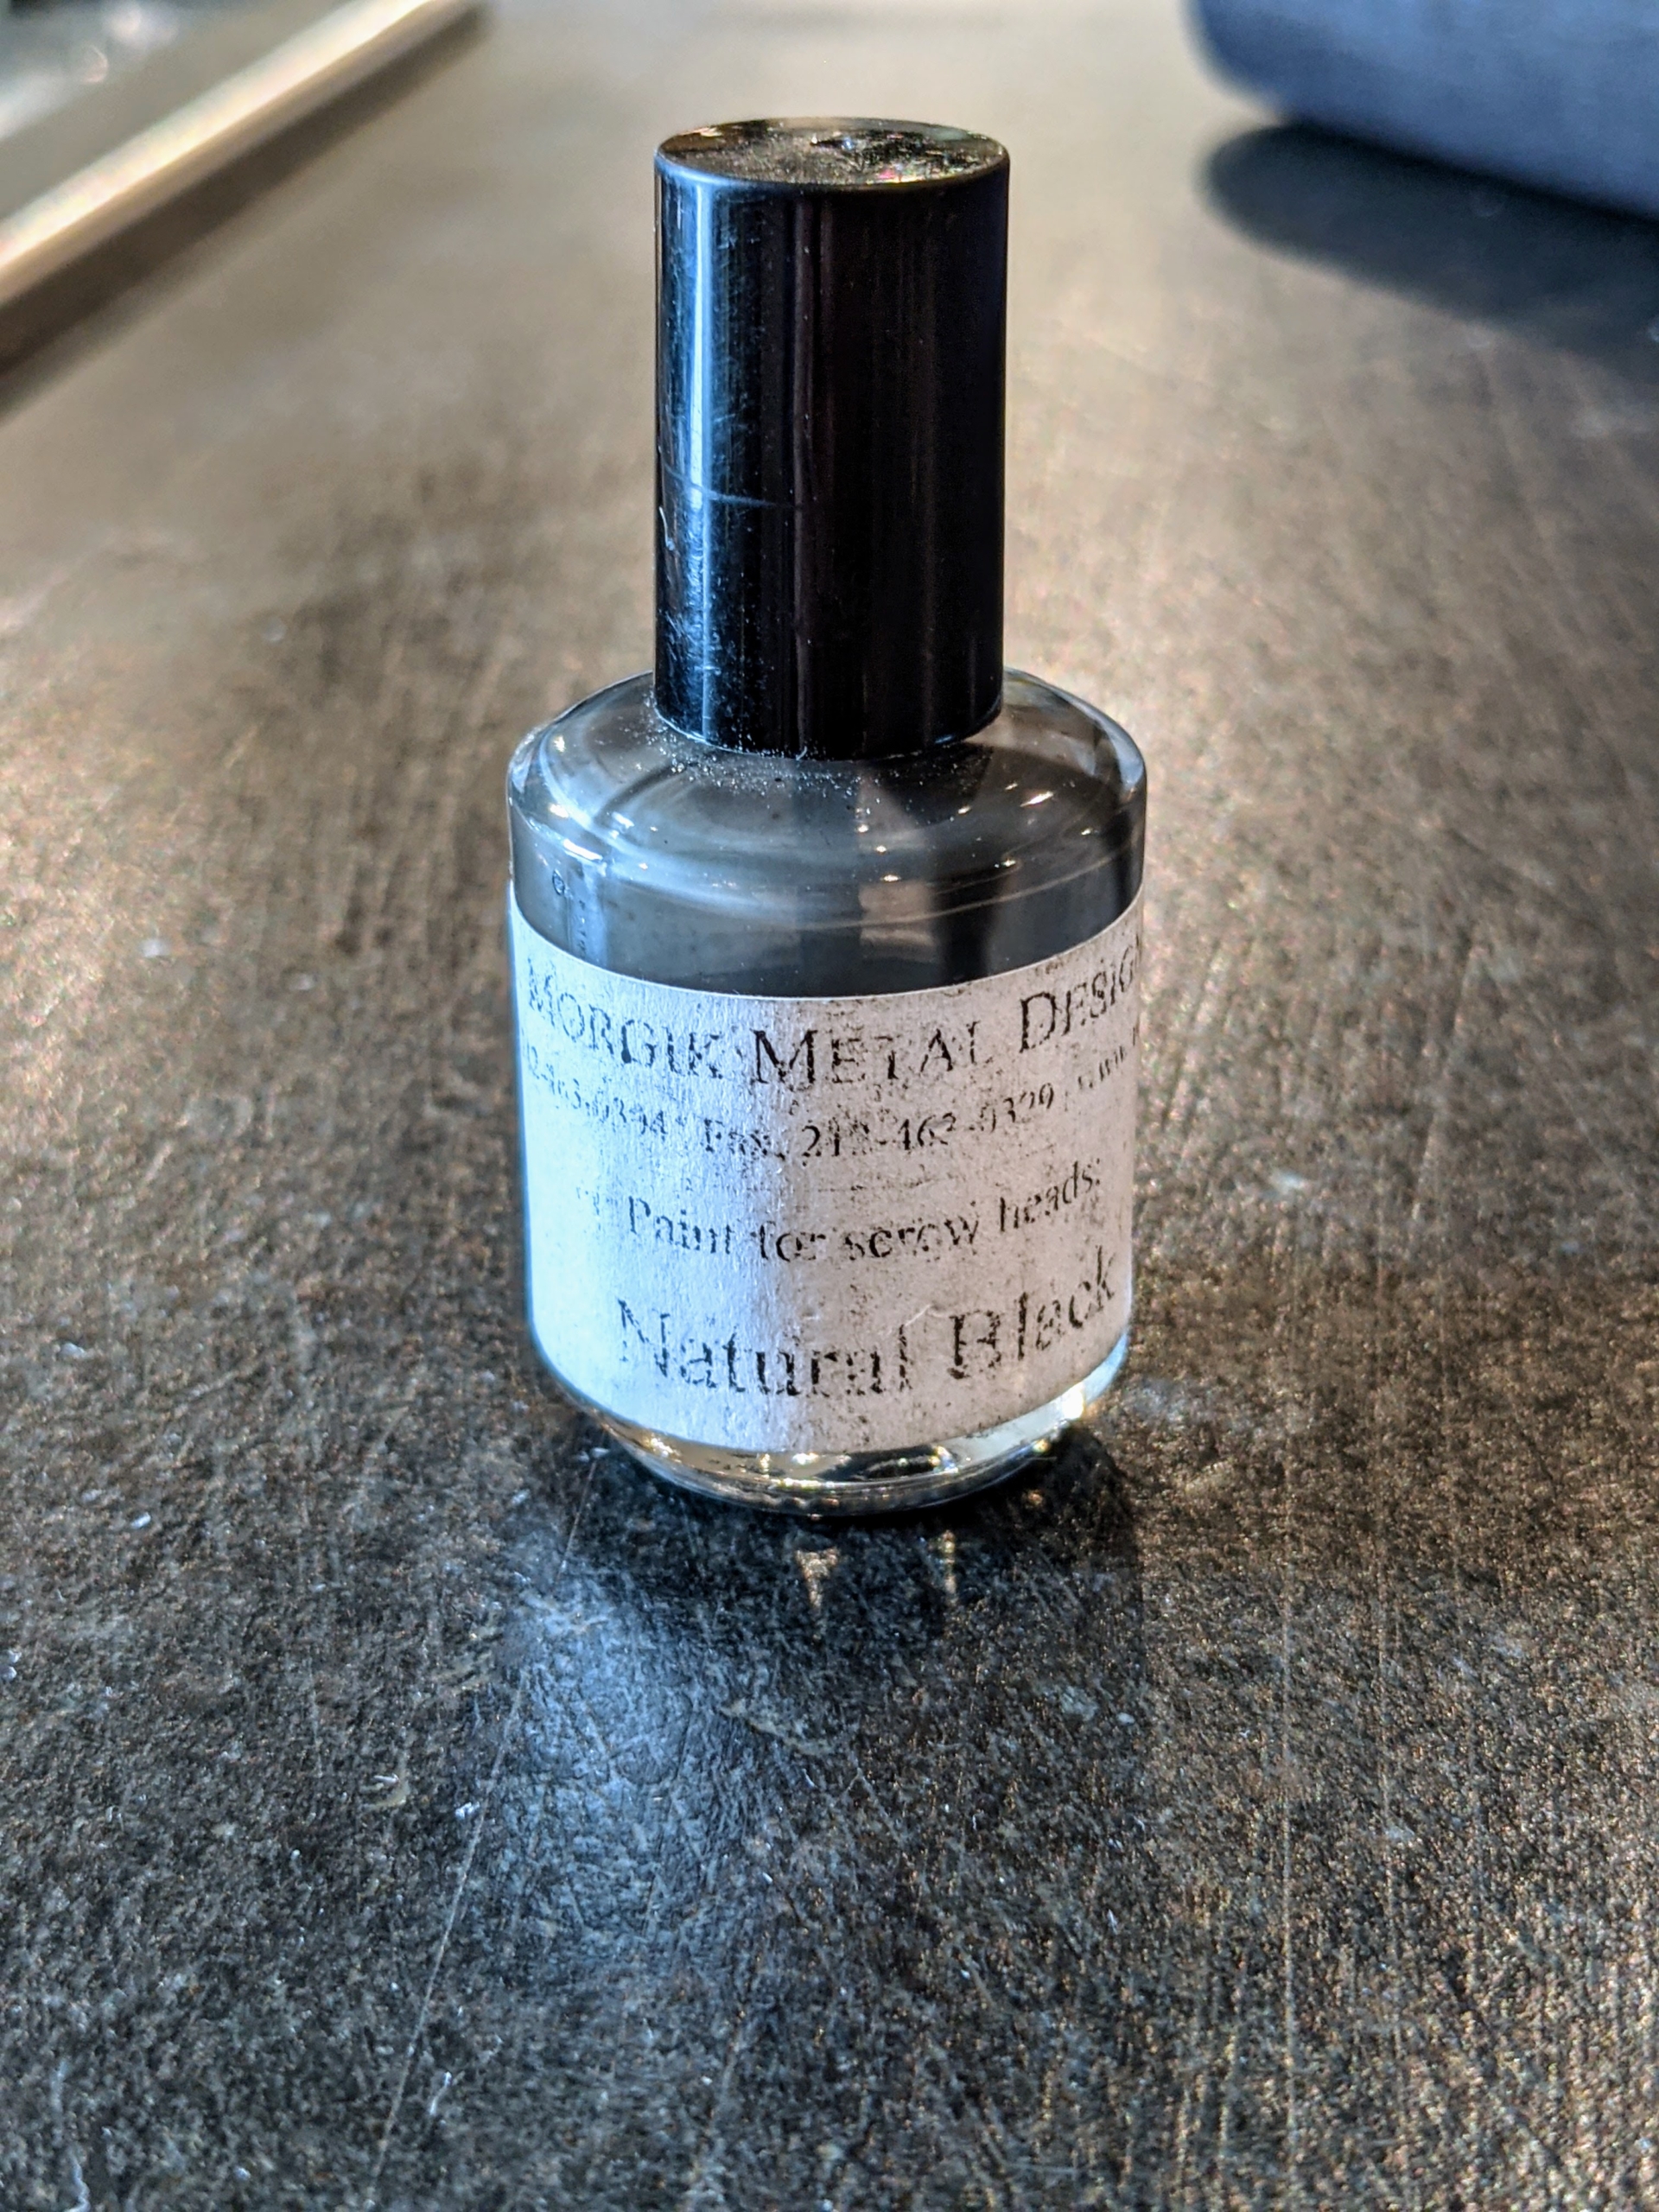
And then Tony paints the heads of the screws the same color as the bracket – in this case, black.
The paint is kept in nail polish bottles and brought to every installation.
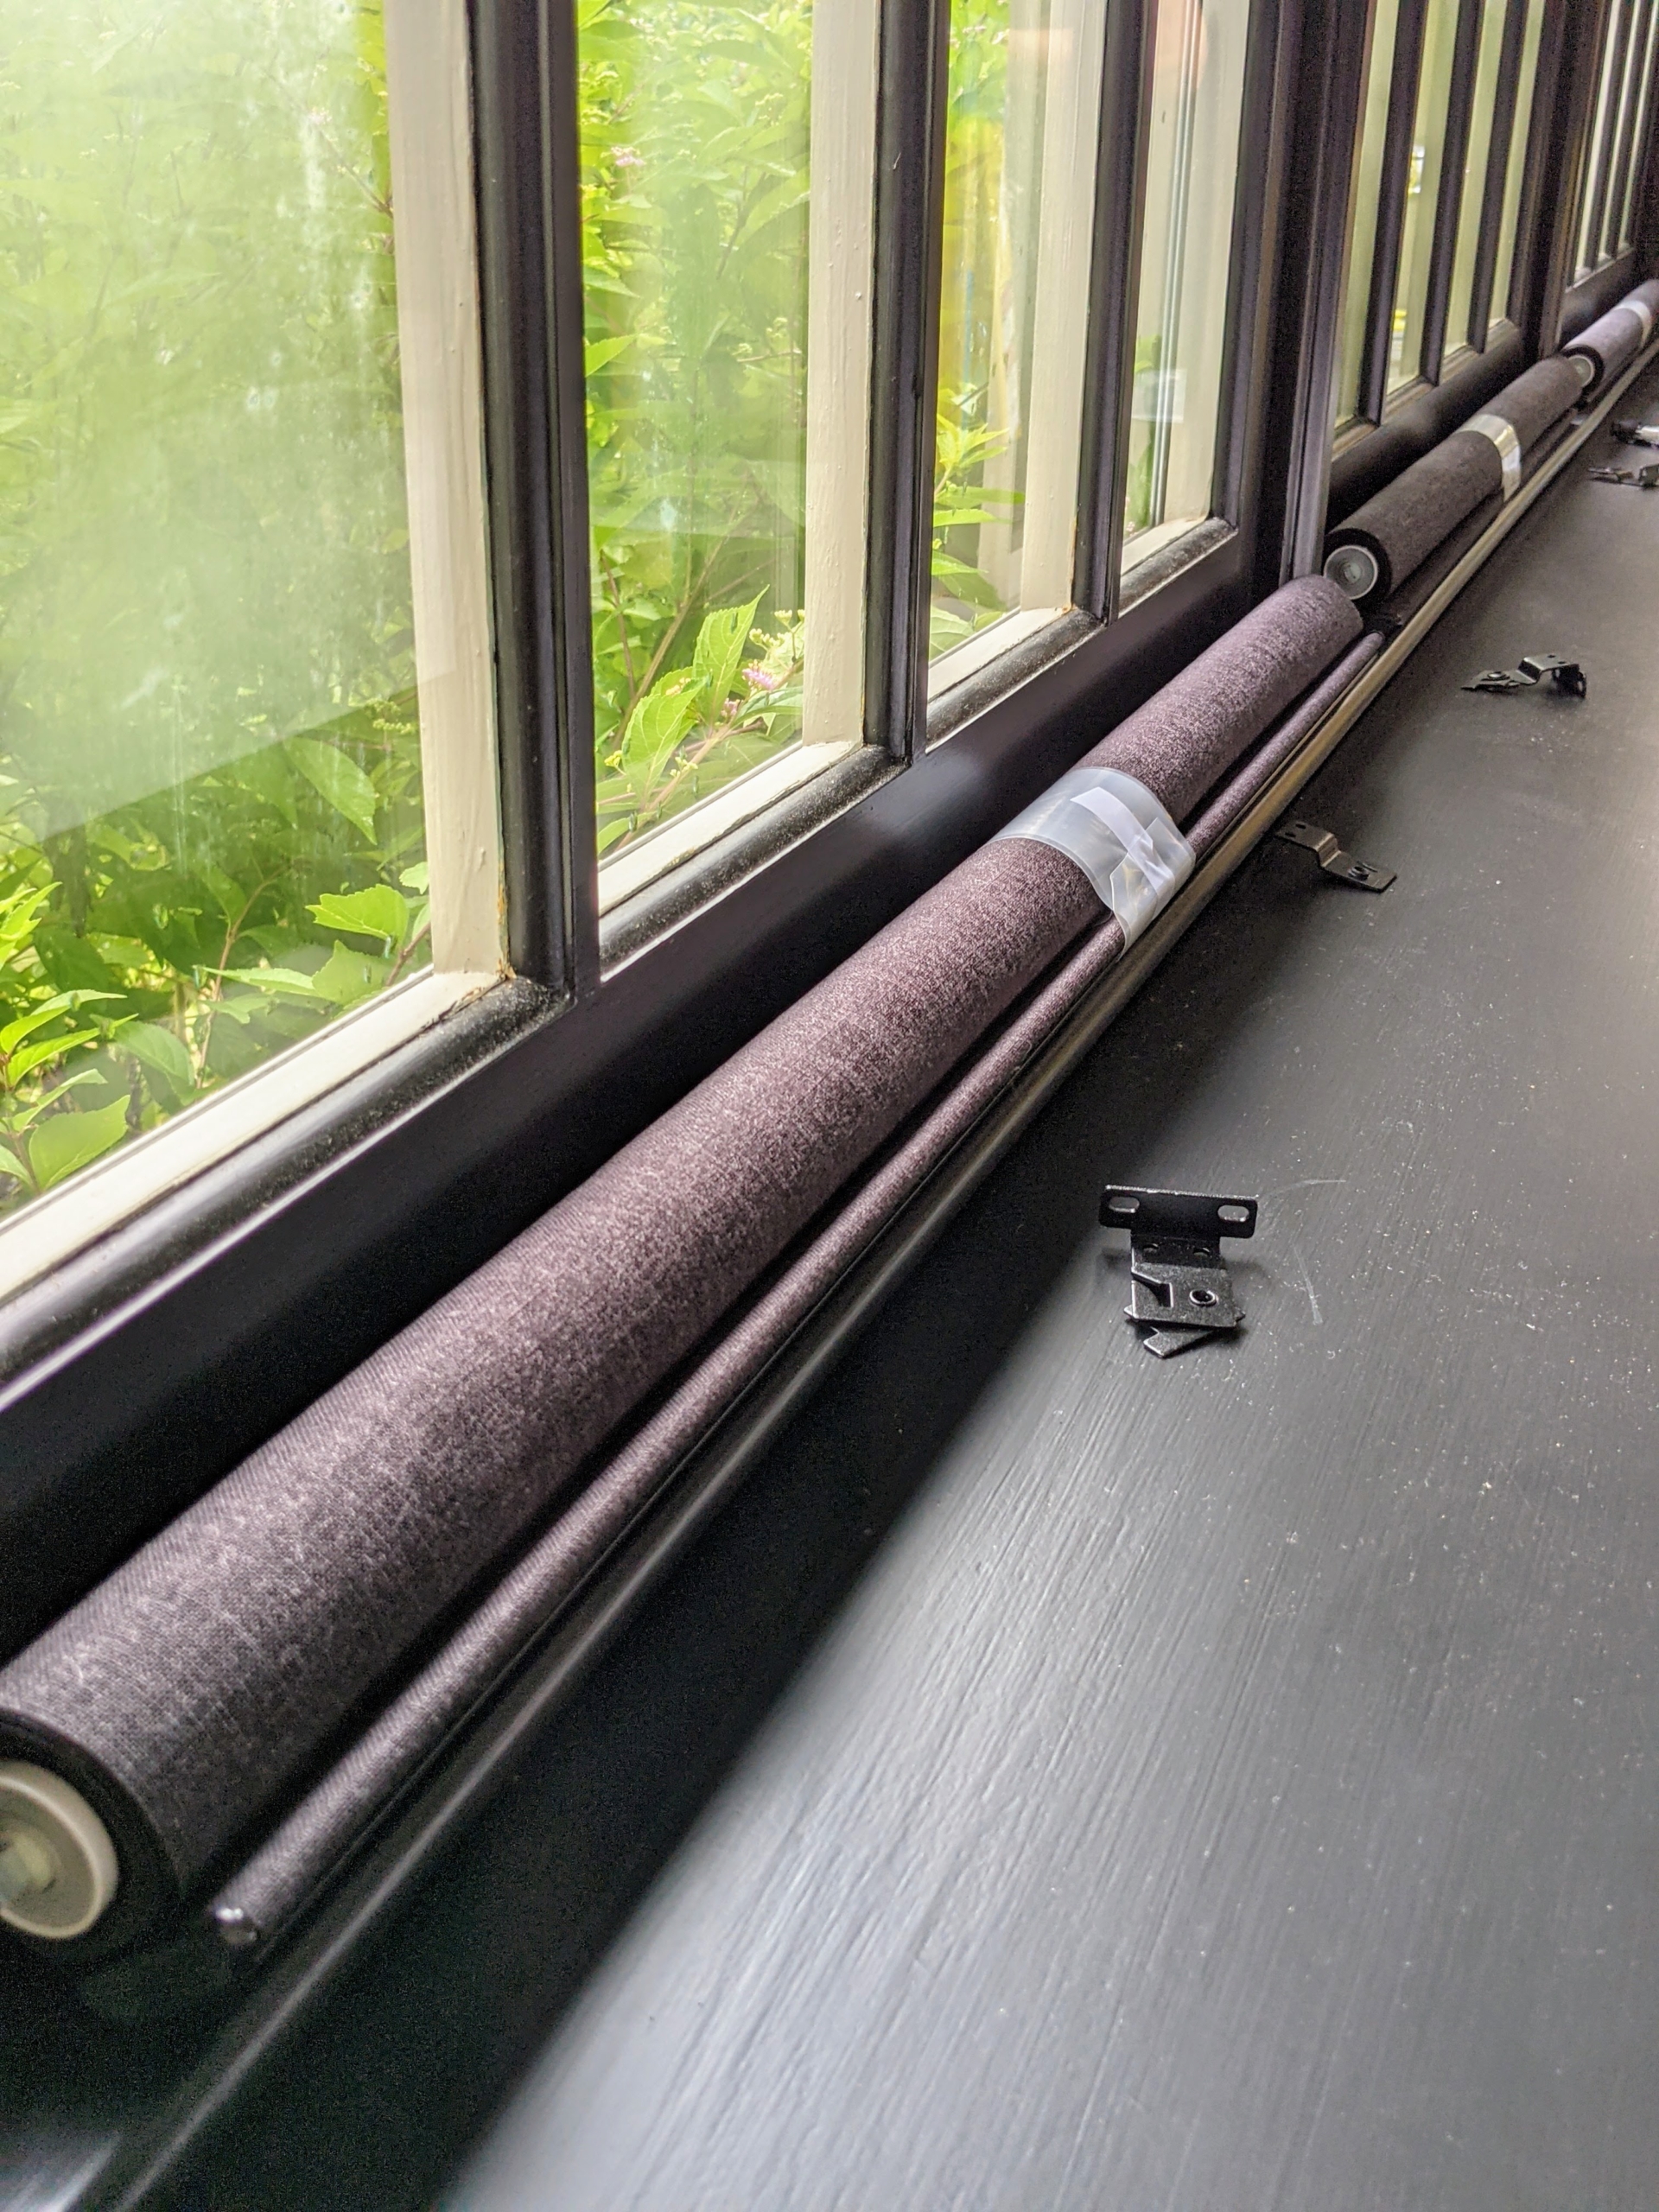
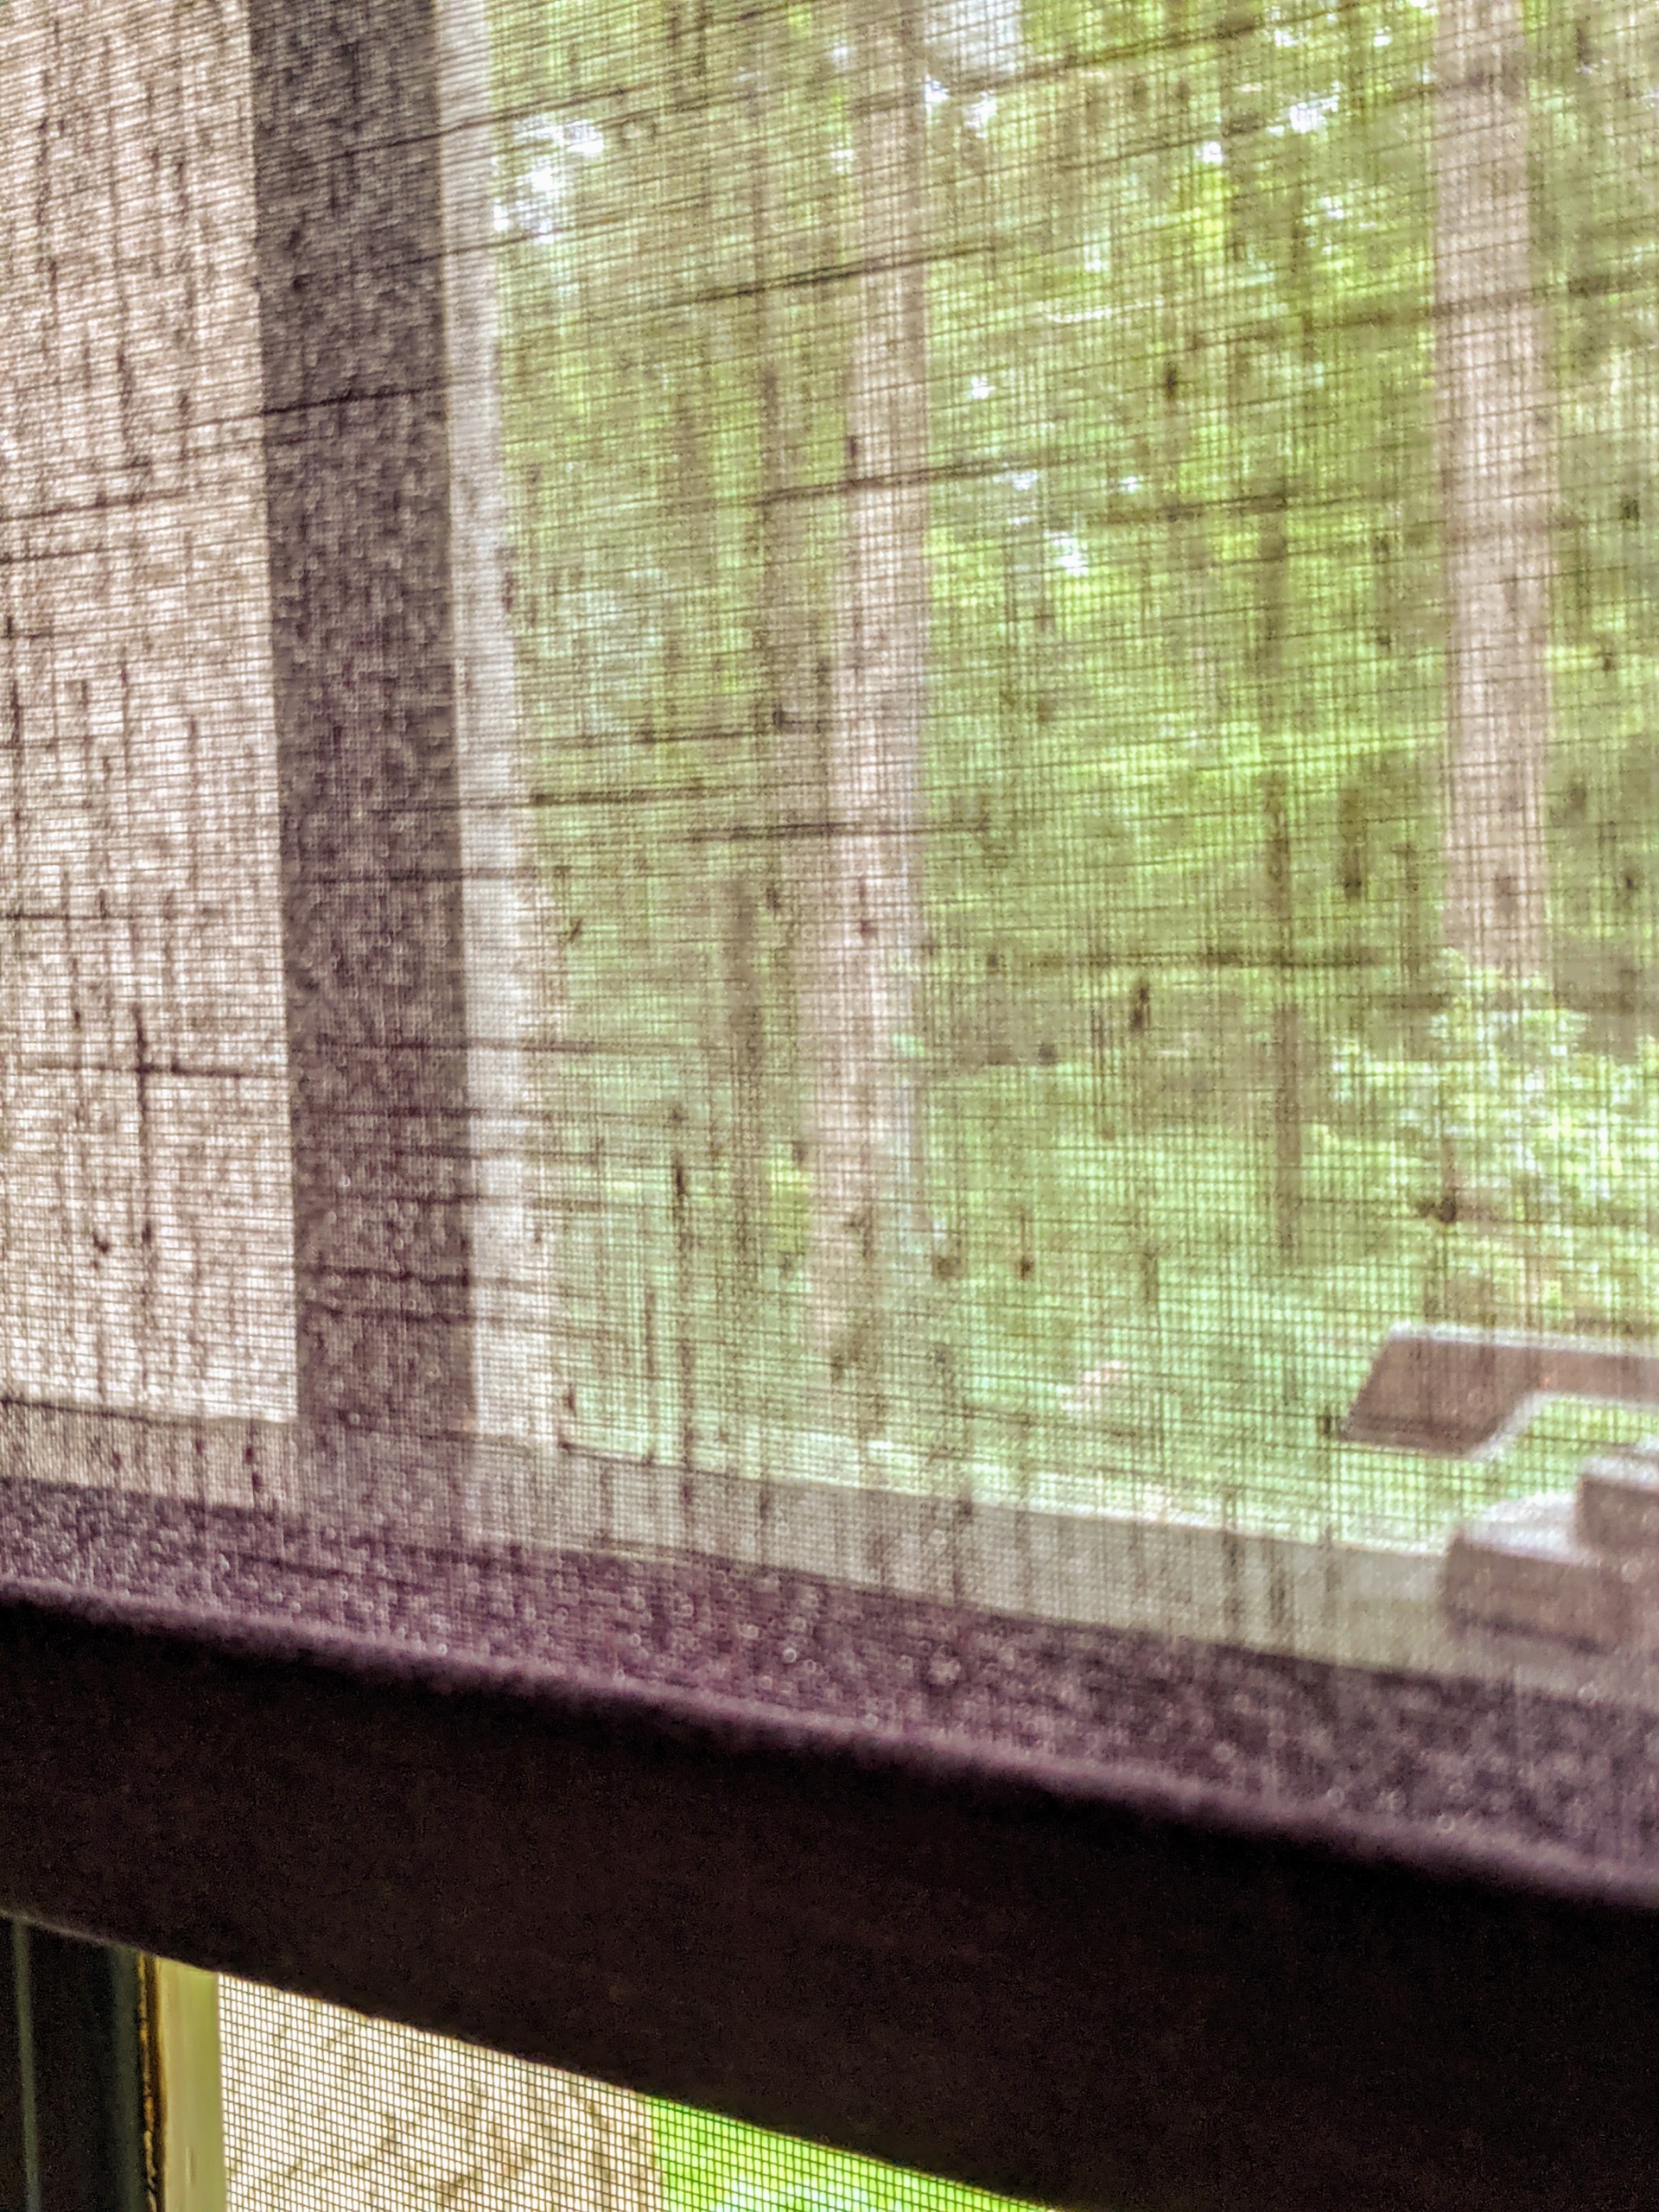
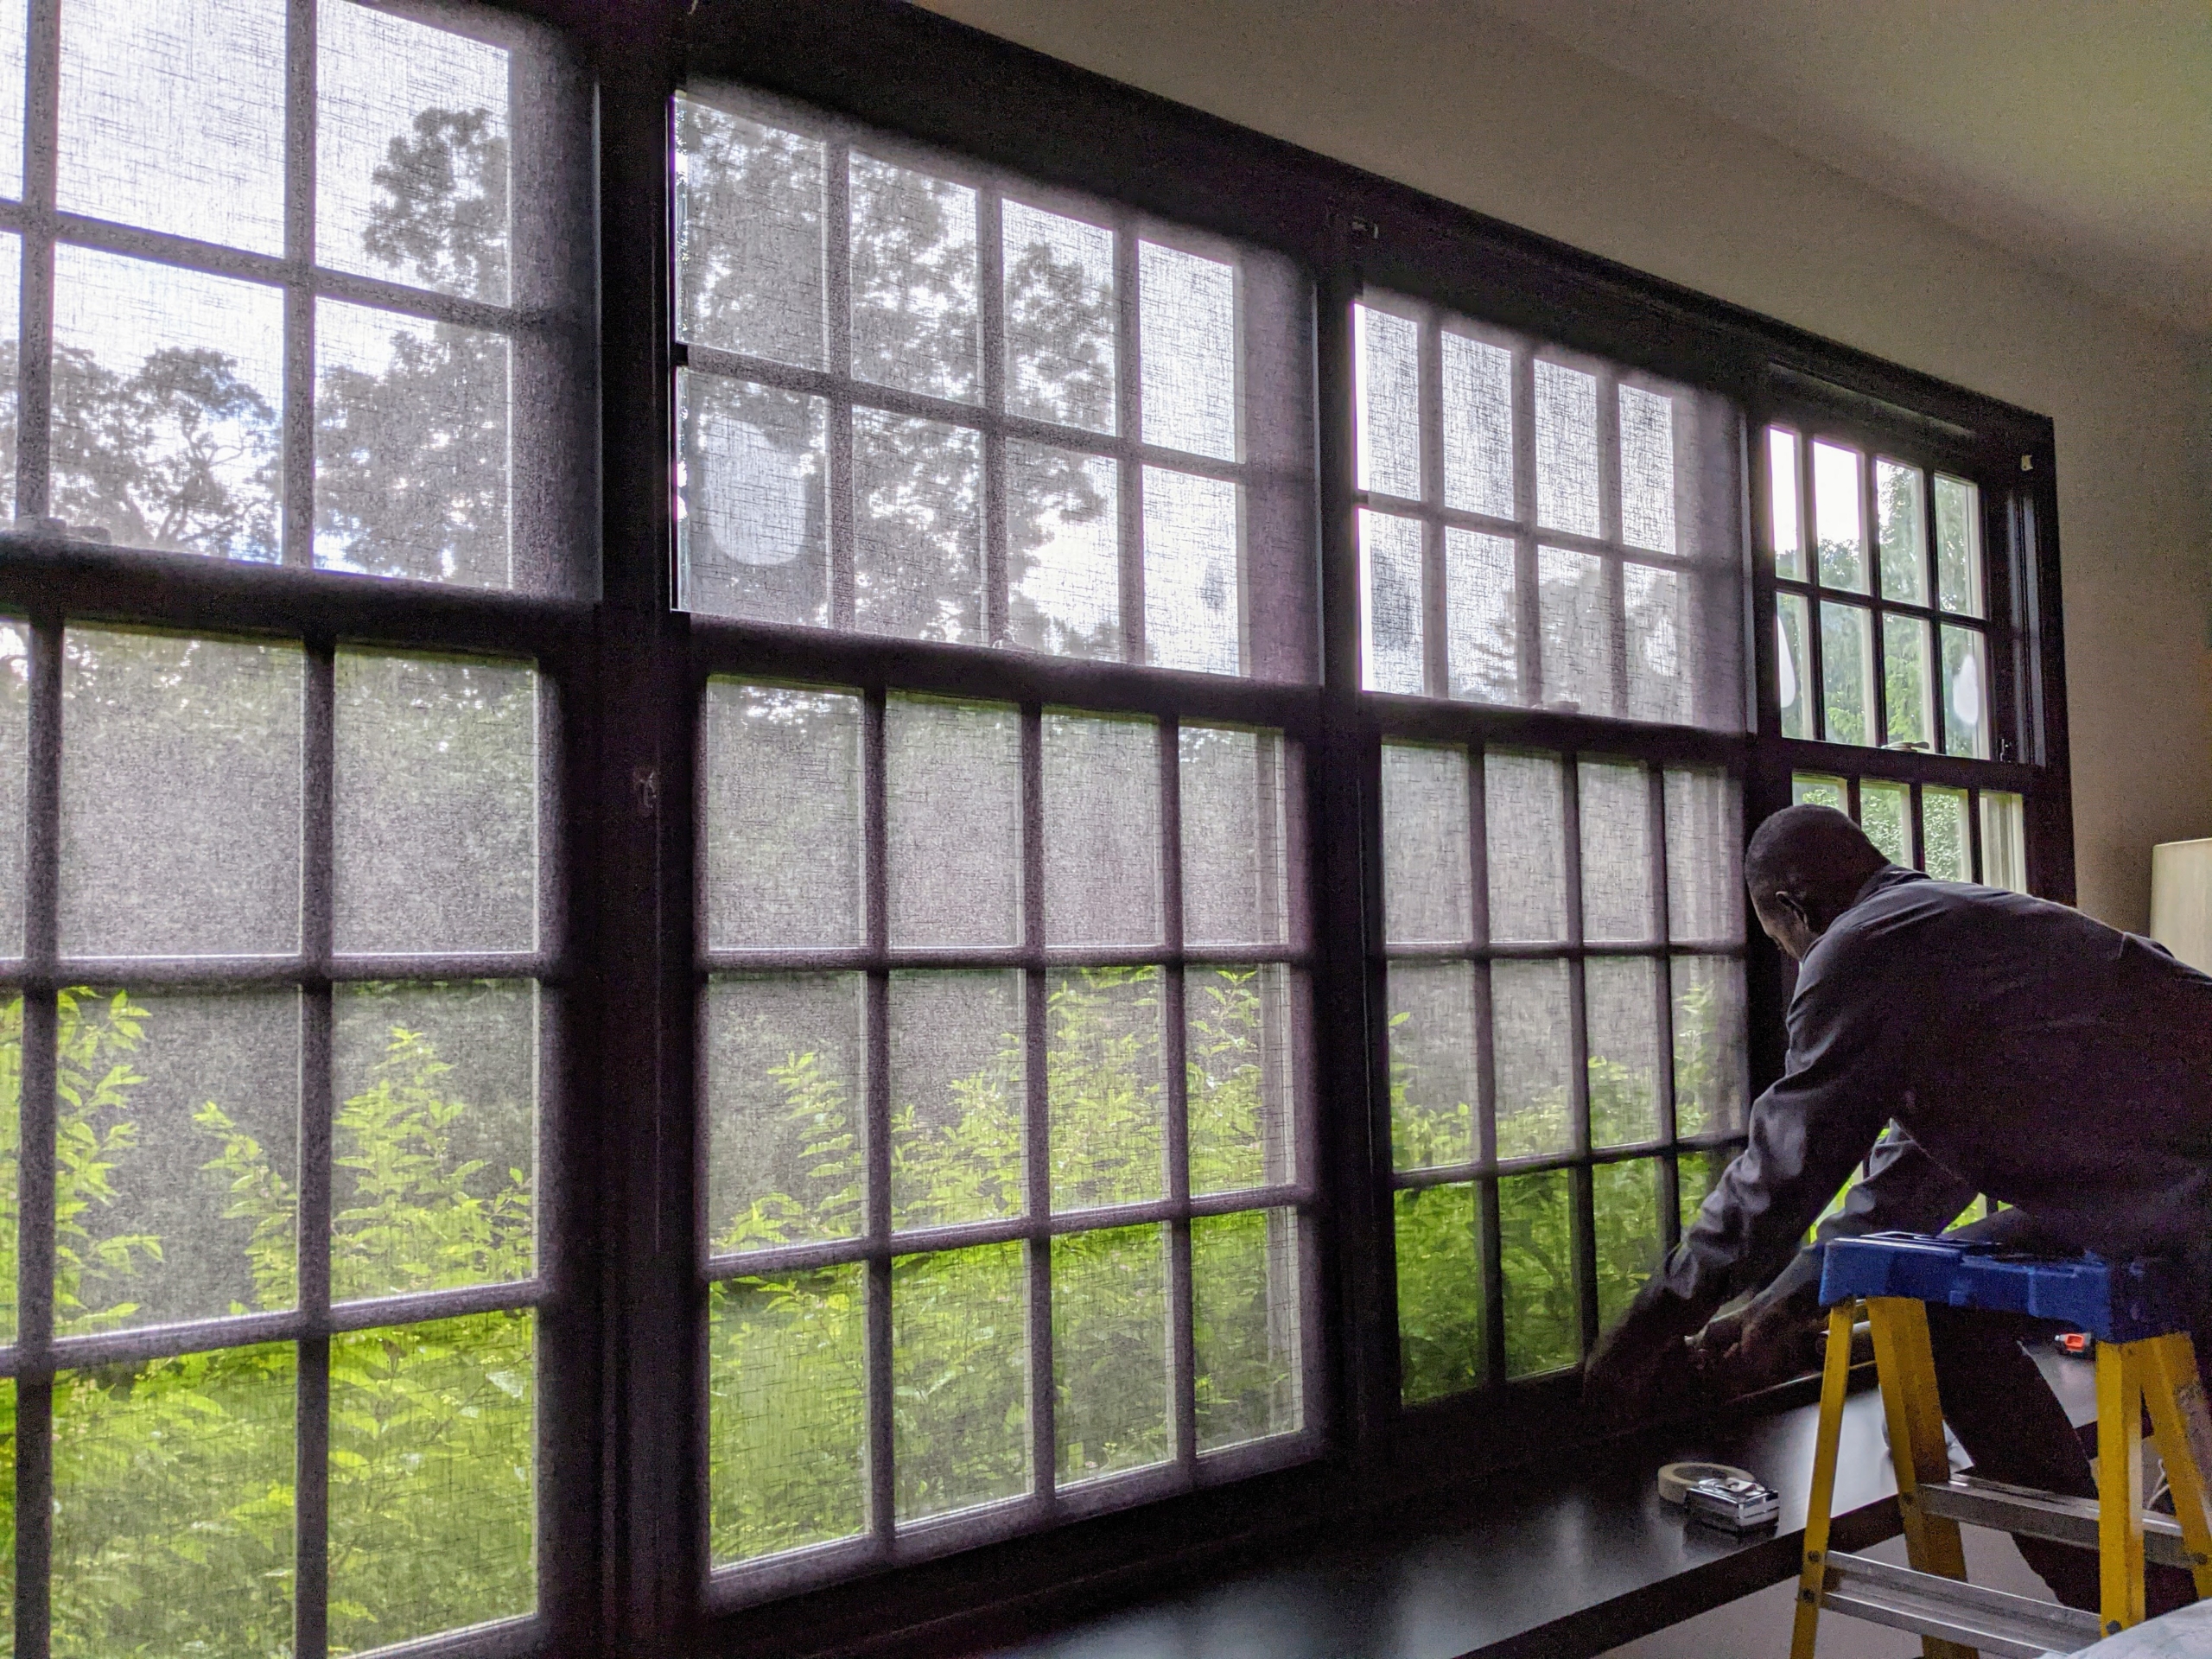
These are manual roller Husk II shades in granite. They work perfectly with the room’s black color scheme.
Look how sheer they are – they let the light in, but not the glare. I love them.
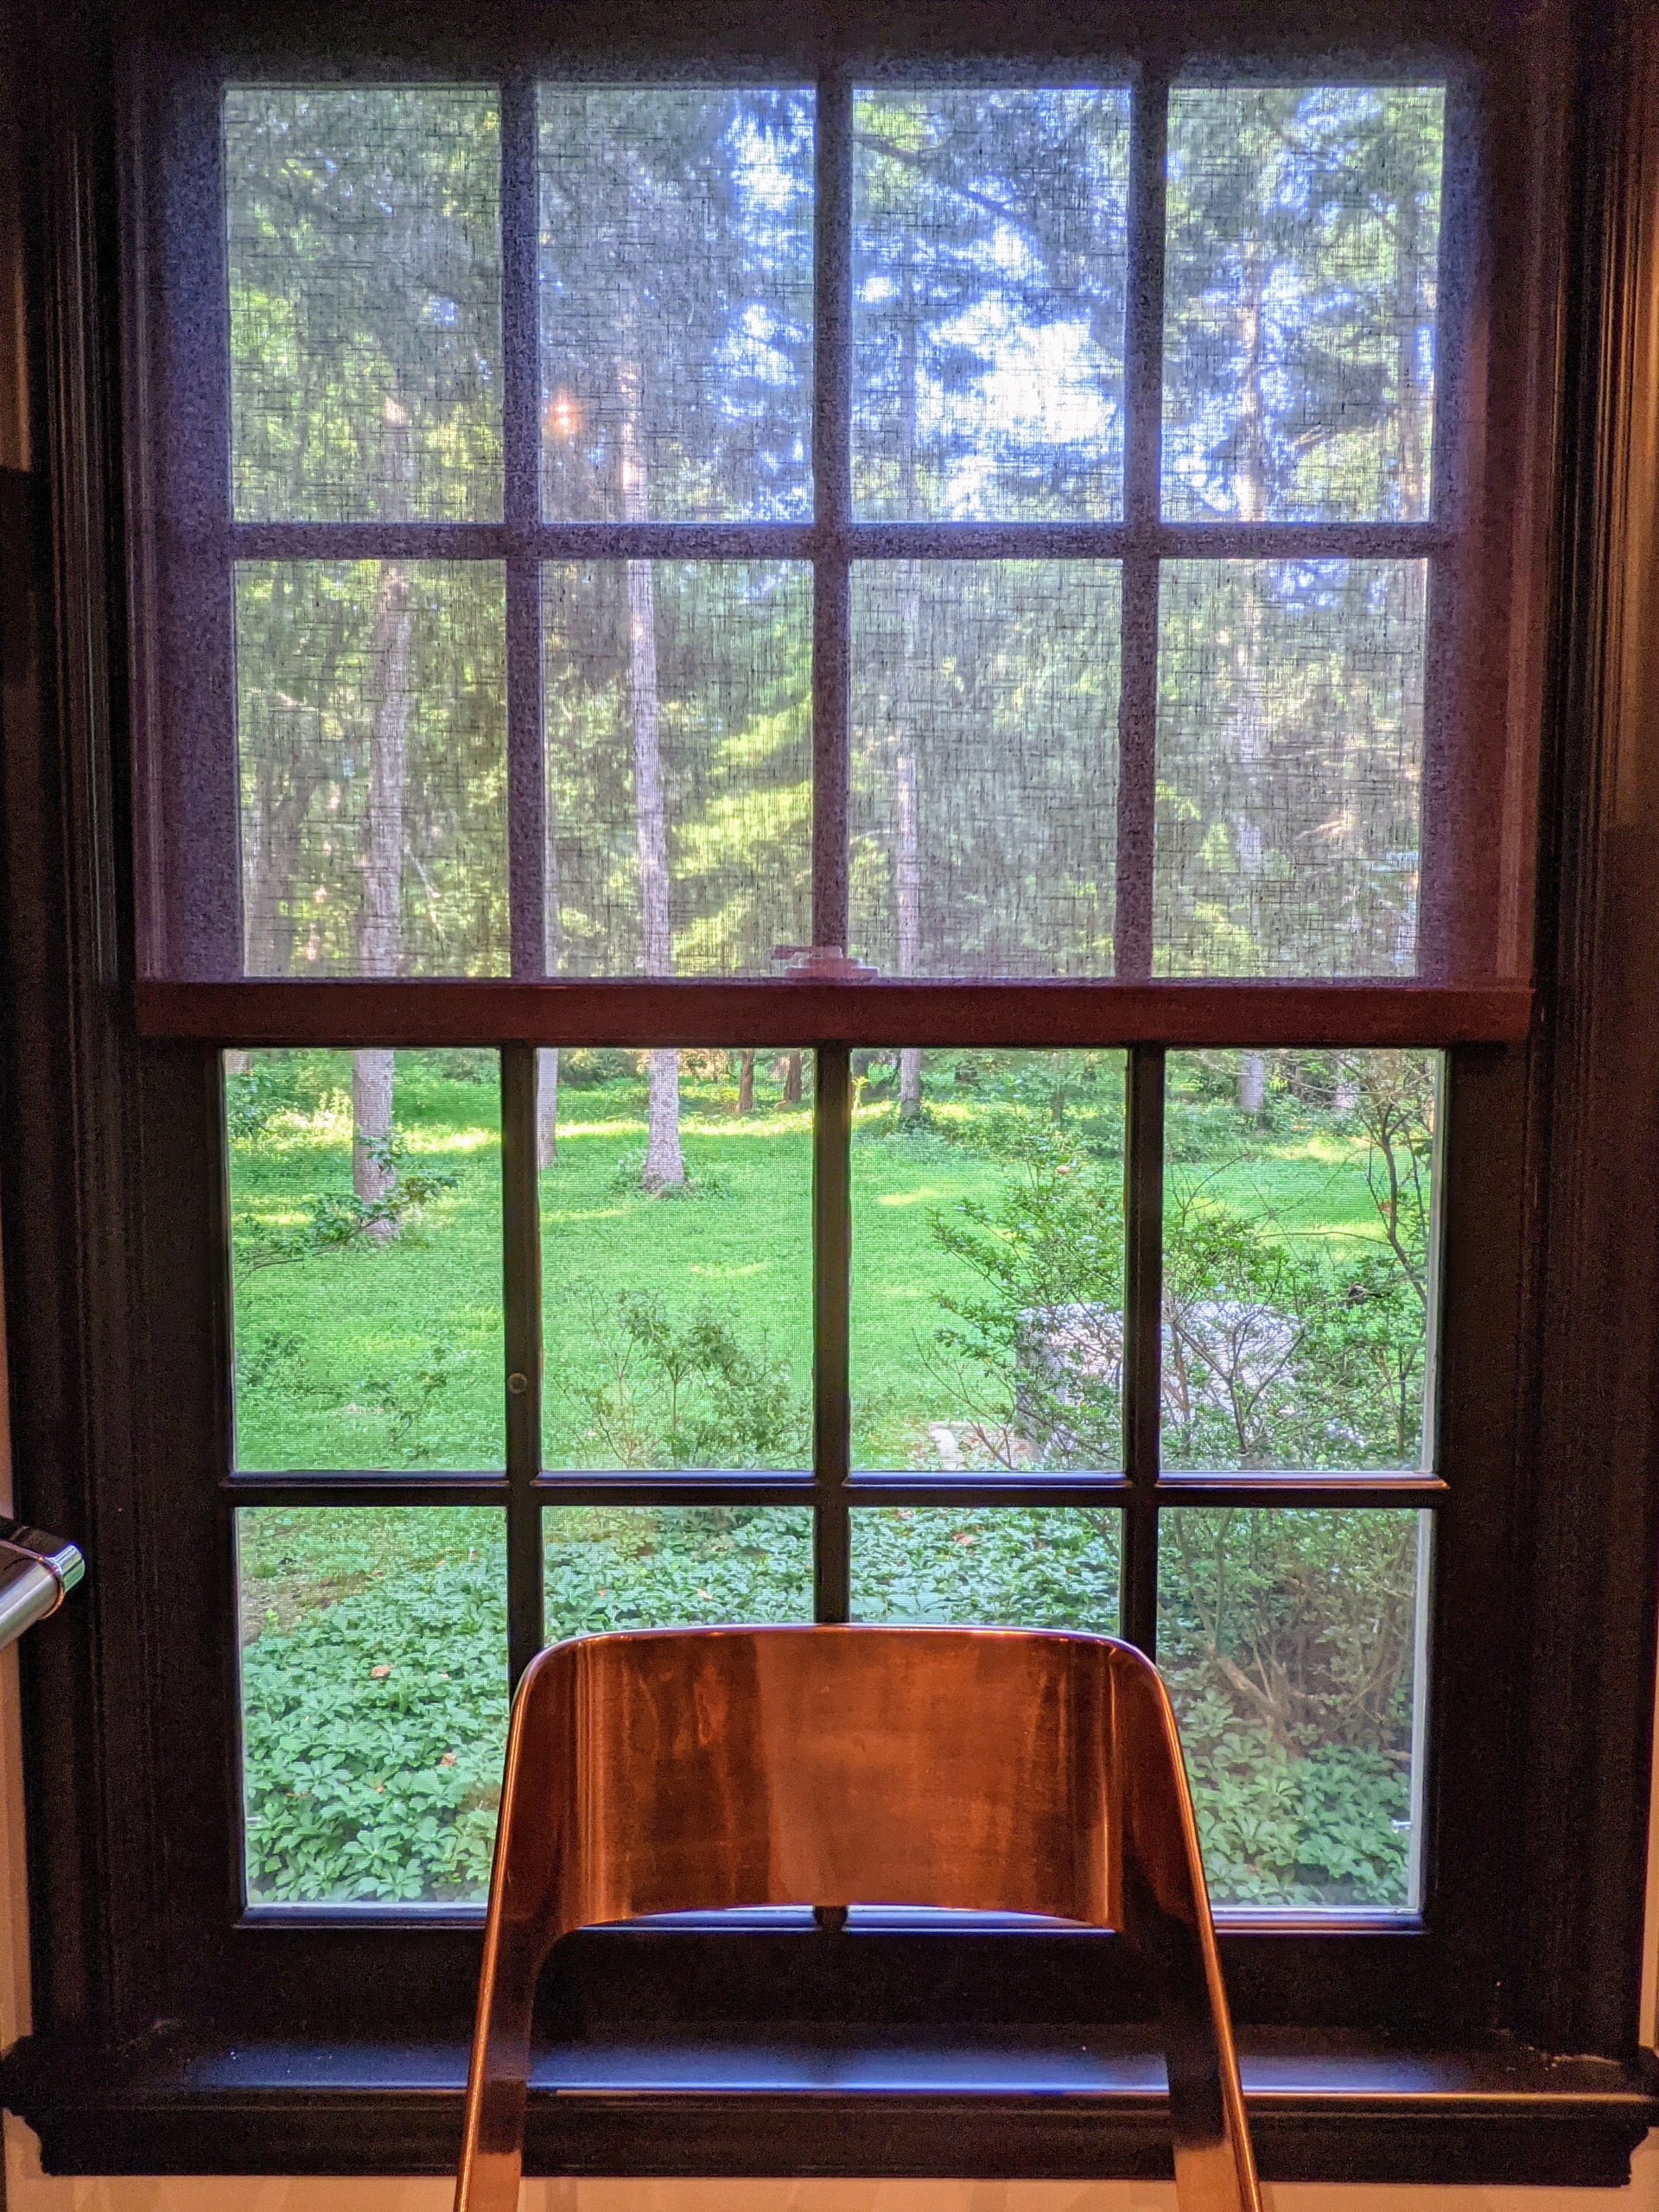
Here they are fully installed on the French doors from Pella. What do you think?
I also added the same shades on the kitchen windows.
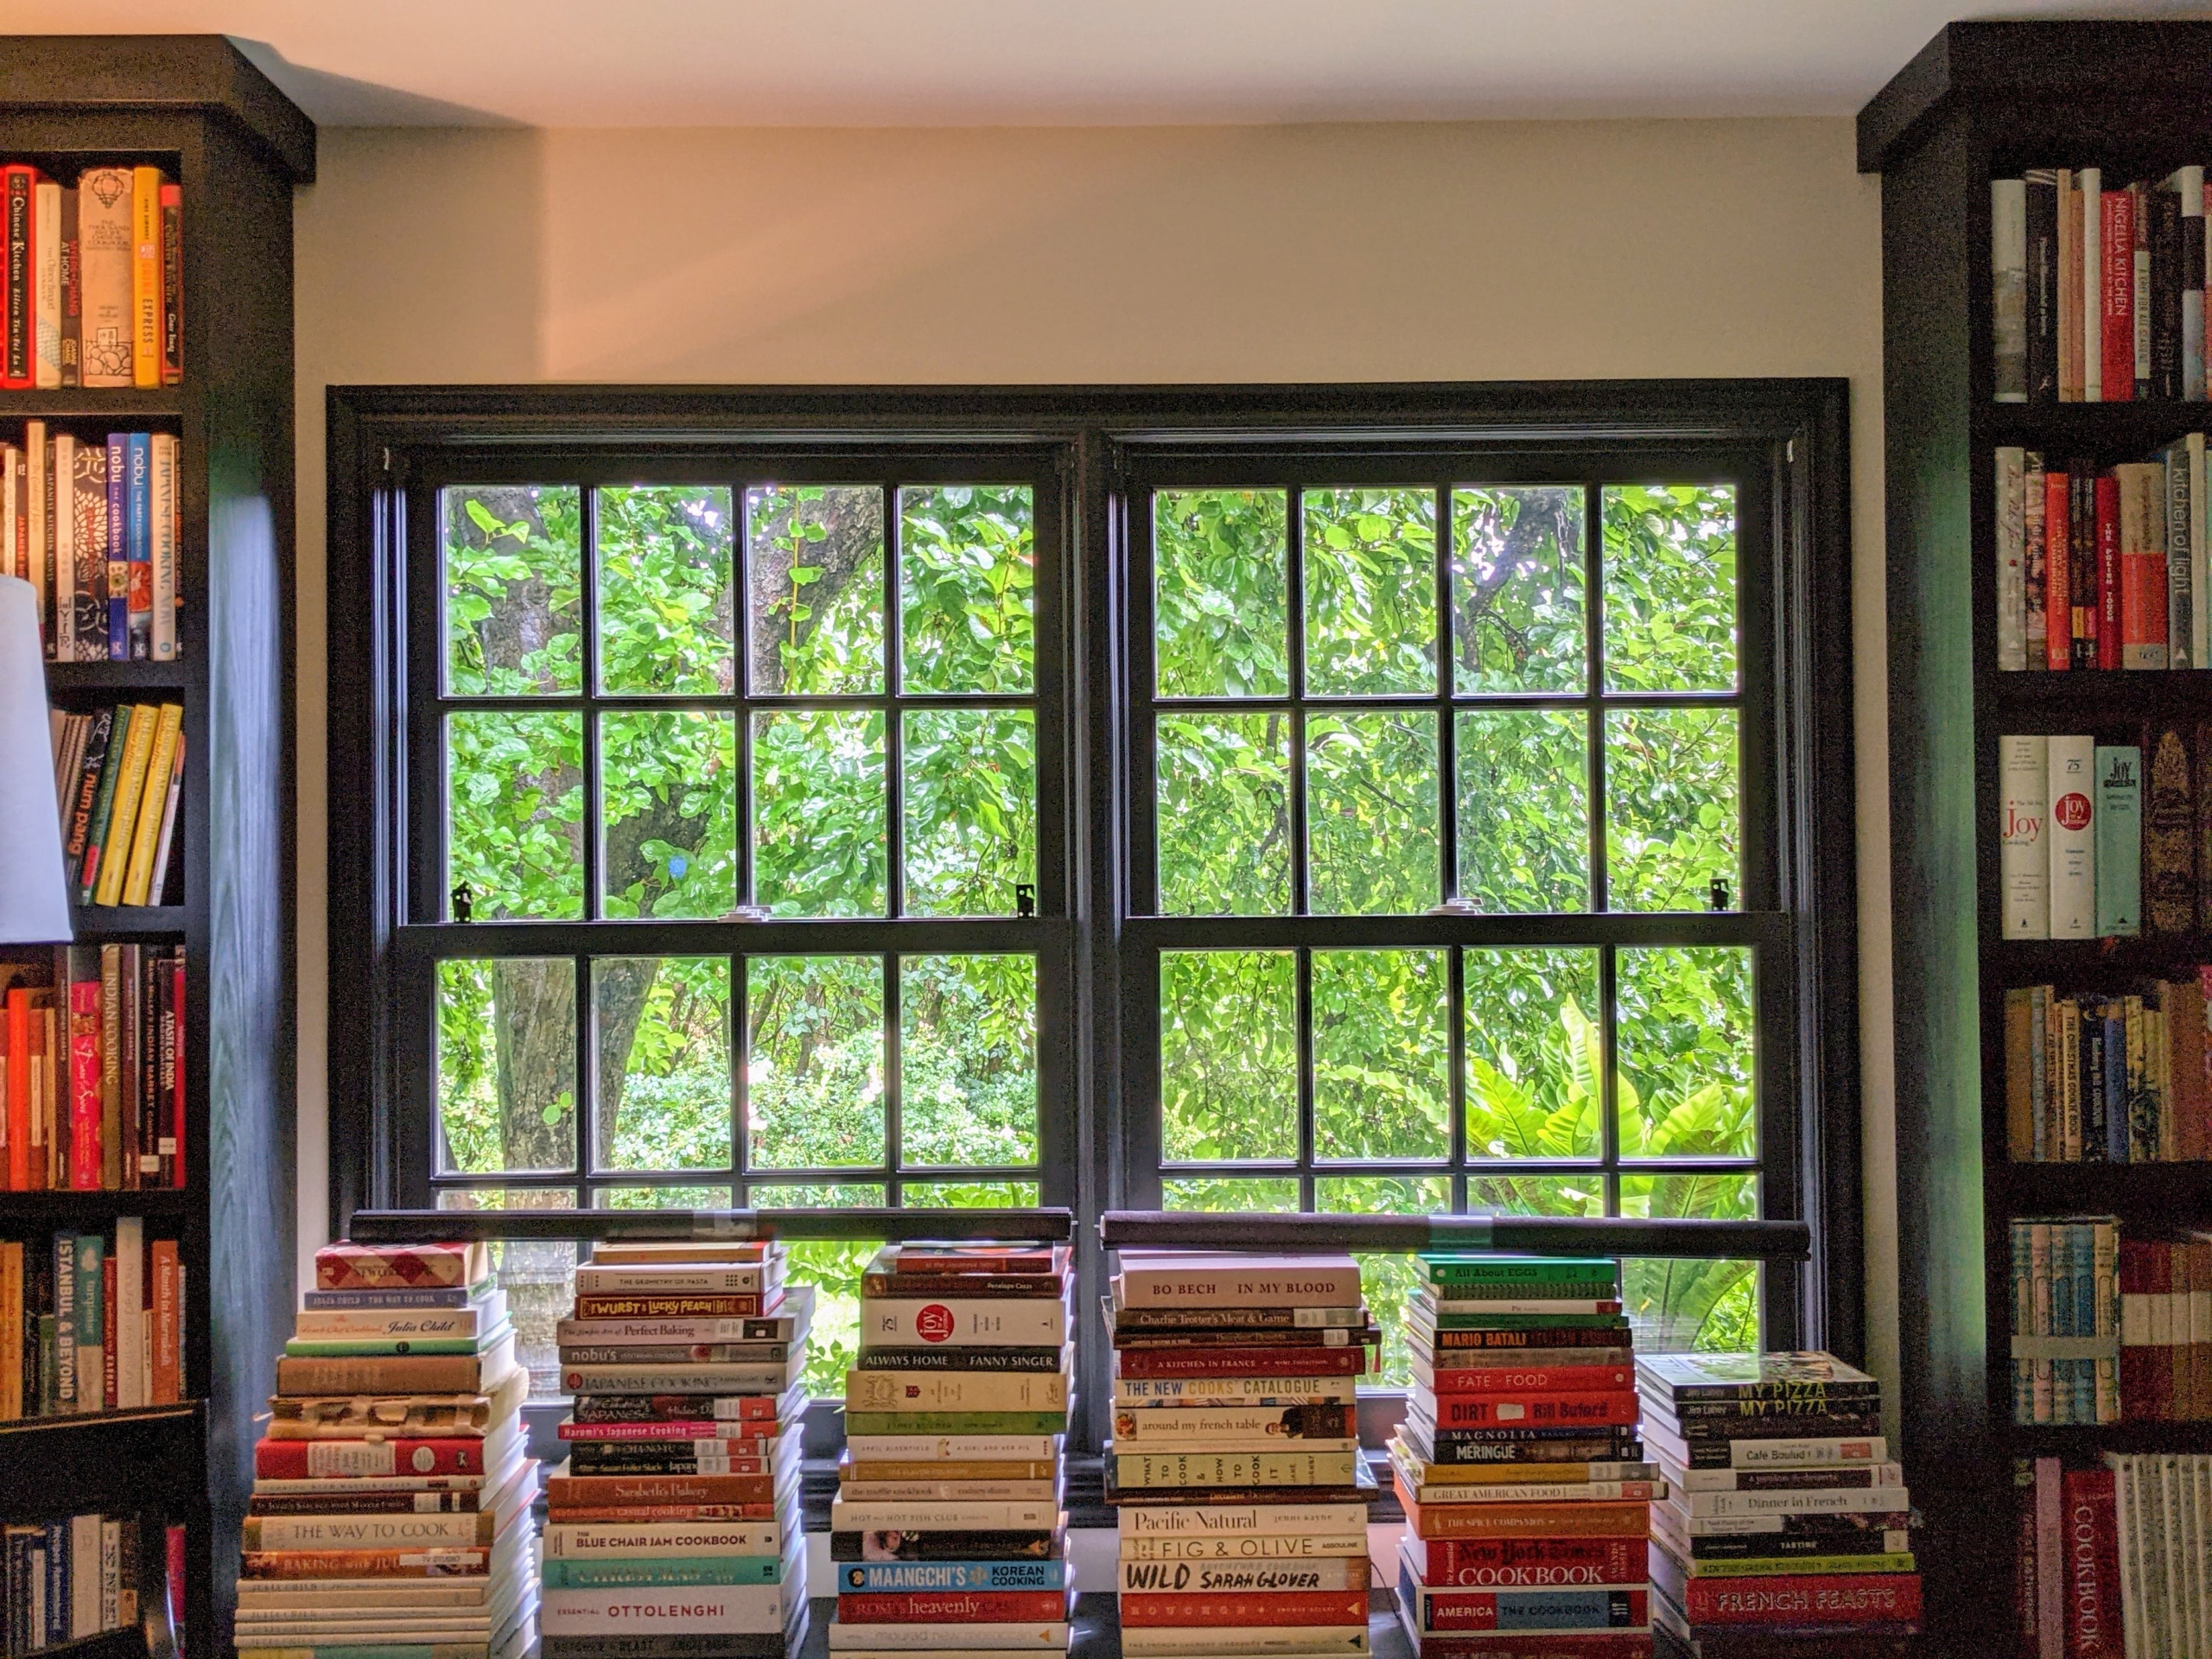
And to the adjacent cookbook library windows and doors.
These roller shades stay down with a handsome and weighted hem bar at the bottom of each shade.
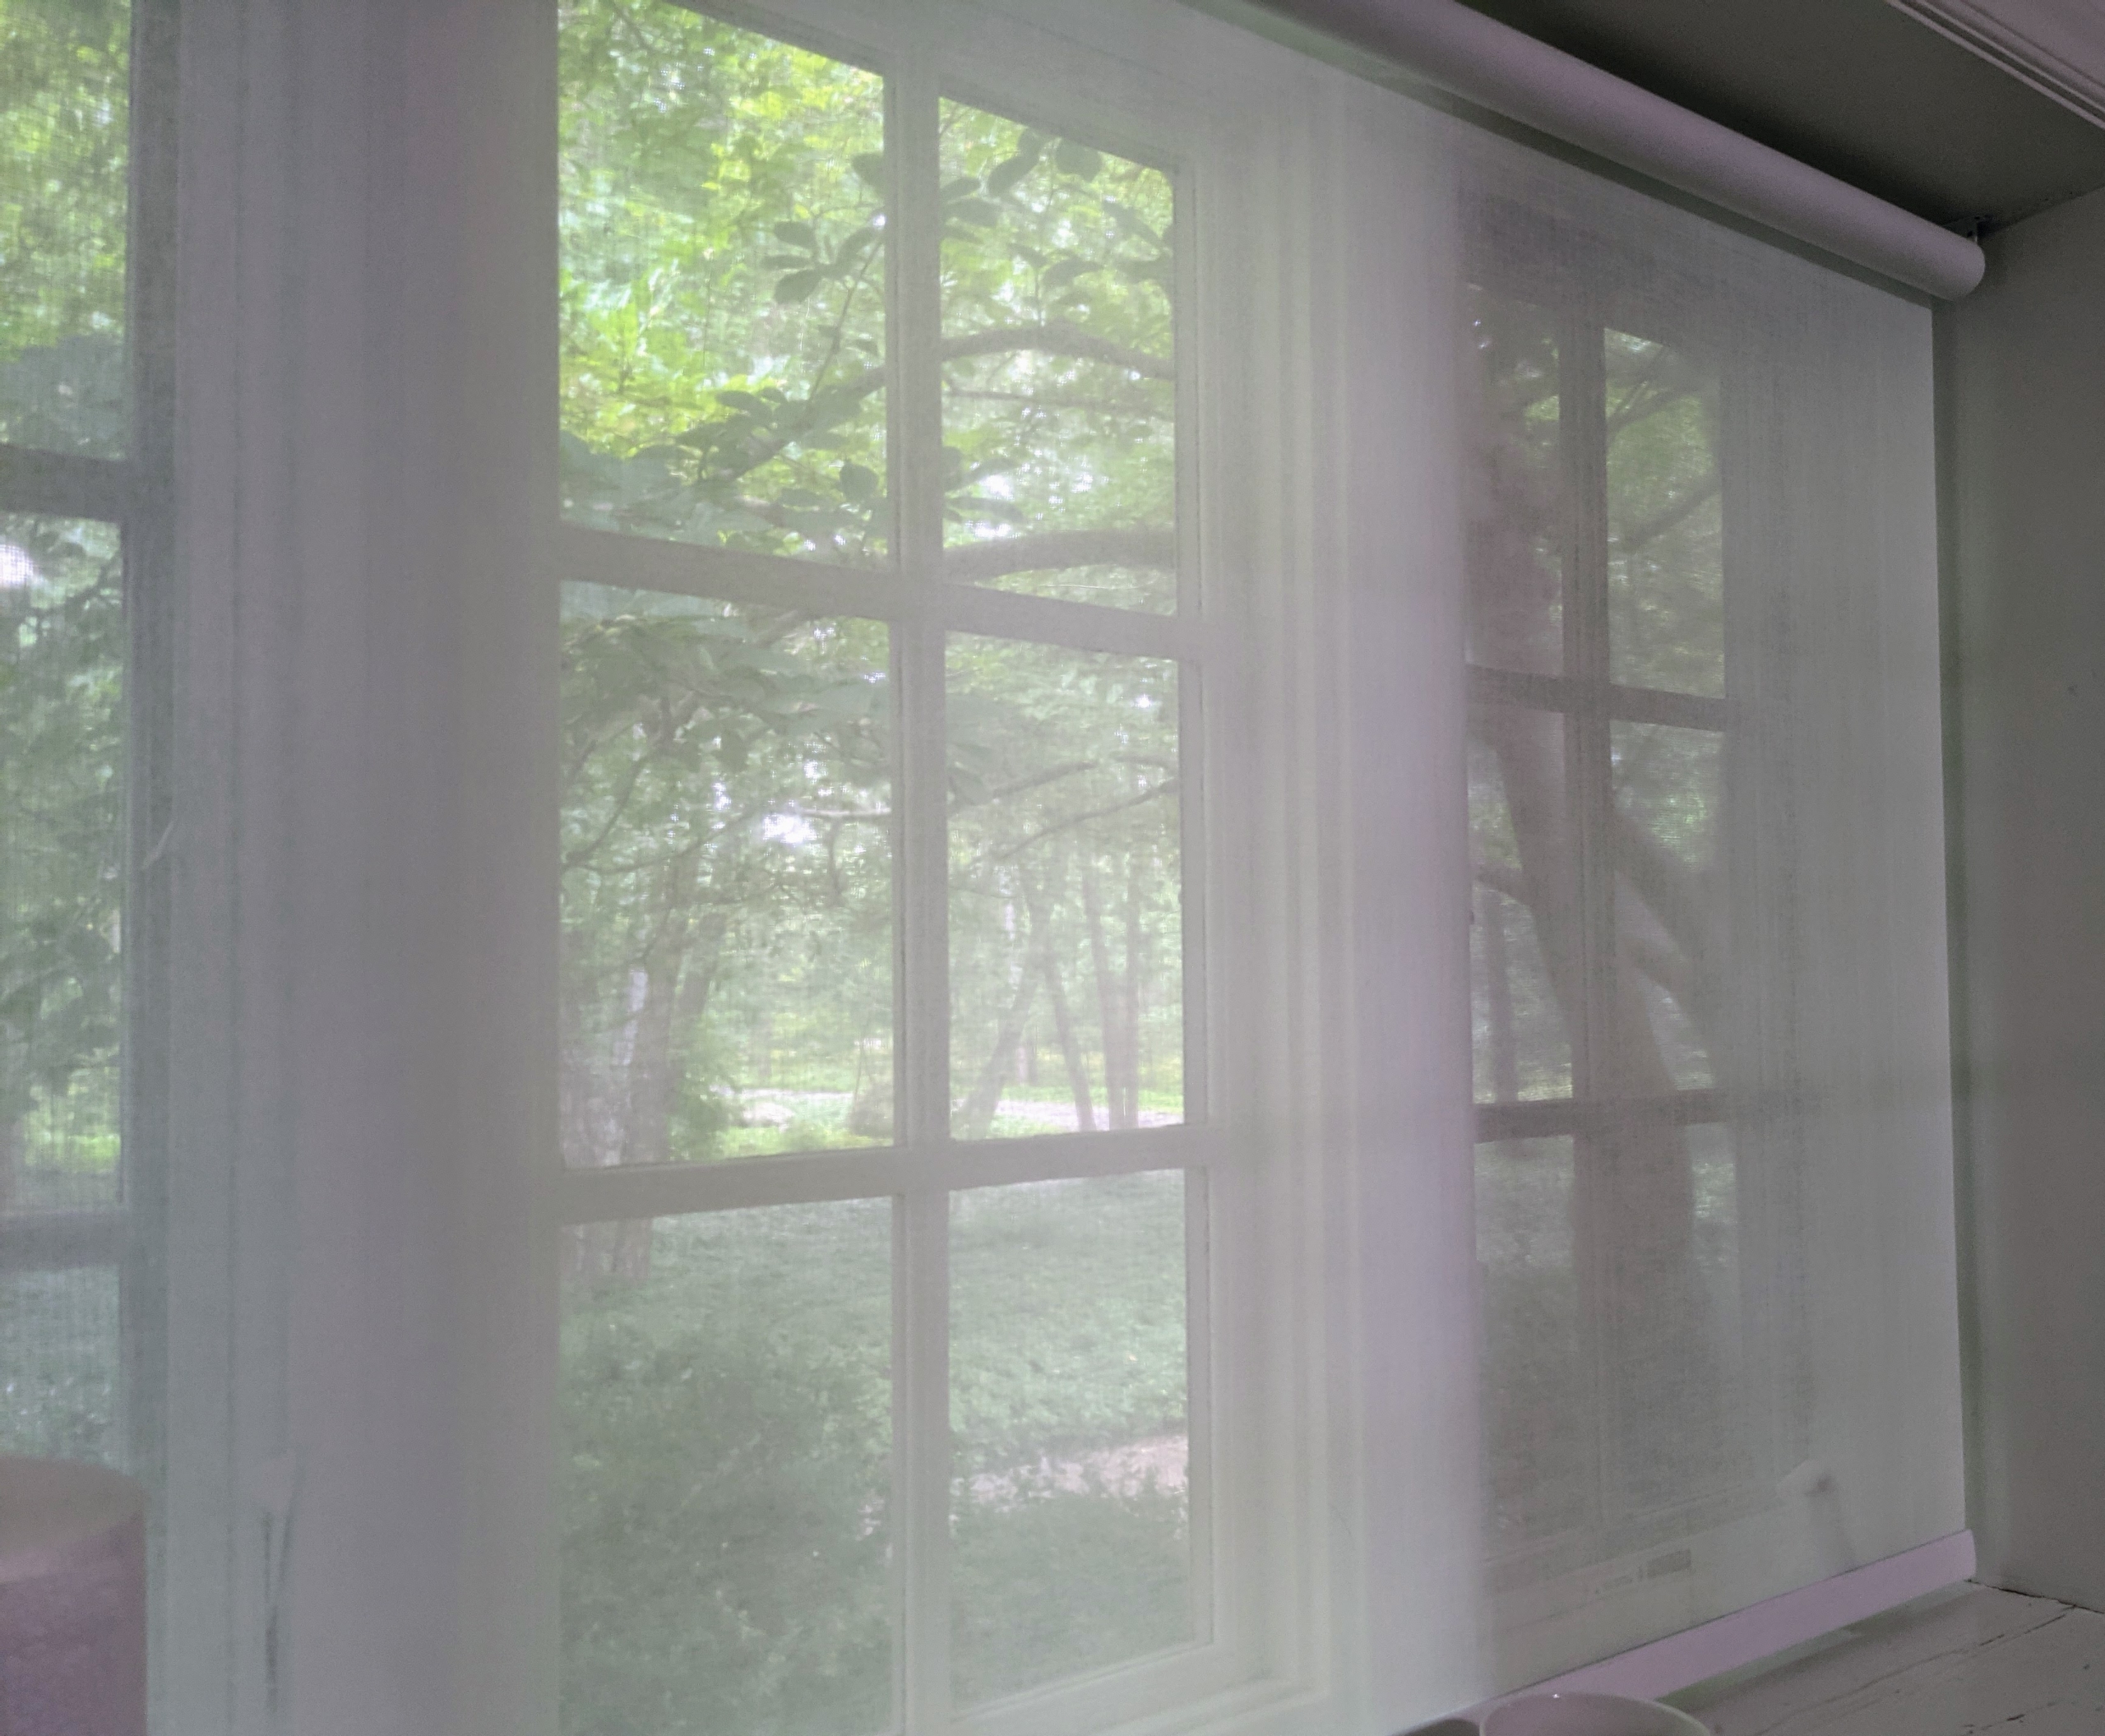
The same shades are also on this large window in the sunken living room. After each shade is installed, Tony tests the rolling tension several times to make sure it is perfect.
I also wanted to replace the shades in the other rooms of this house. Jay prepares the shades for installation. I chose a combination of Breezy off-white and Daybreak Dove for these rooms.
Everything is measured twice, sometimes three times, to ensure everything is lined up perfectly.
The same types of brackets are installed and the screws painted white.
This shade is in one of the guest bedrooms – it is more opaque for privacy and light control for sleeping, but still keeps the room looking bright and cheerful during the day.
All the shades look so crisp and clean. Shades are not only decorative, but functional, keeping heat out in warmer months and keeping warmth contained inside during winter. Adding window treatments is a great finishing touch to any space.