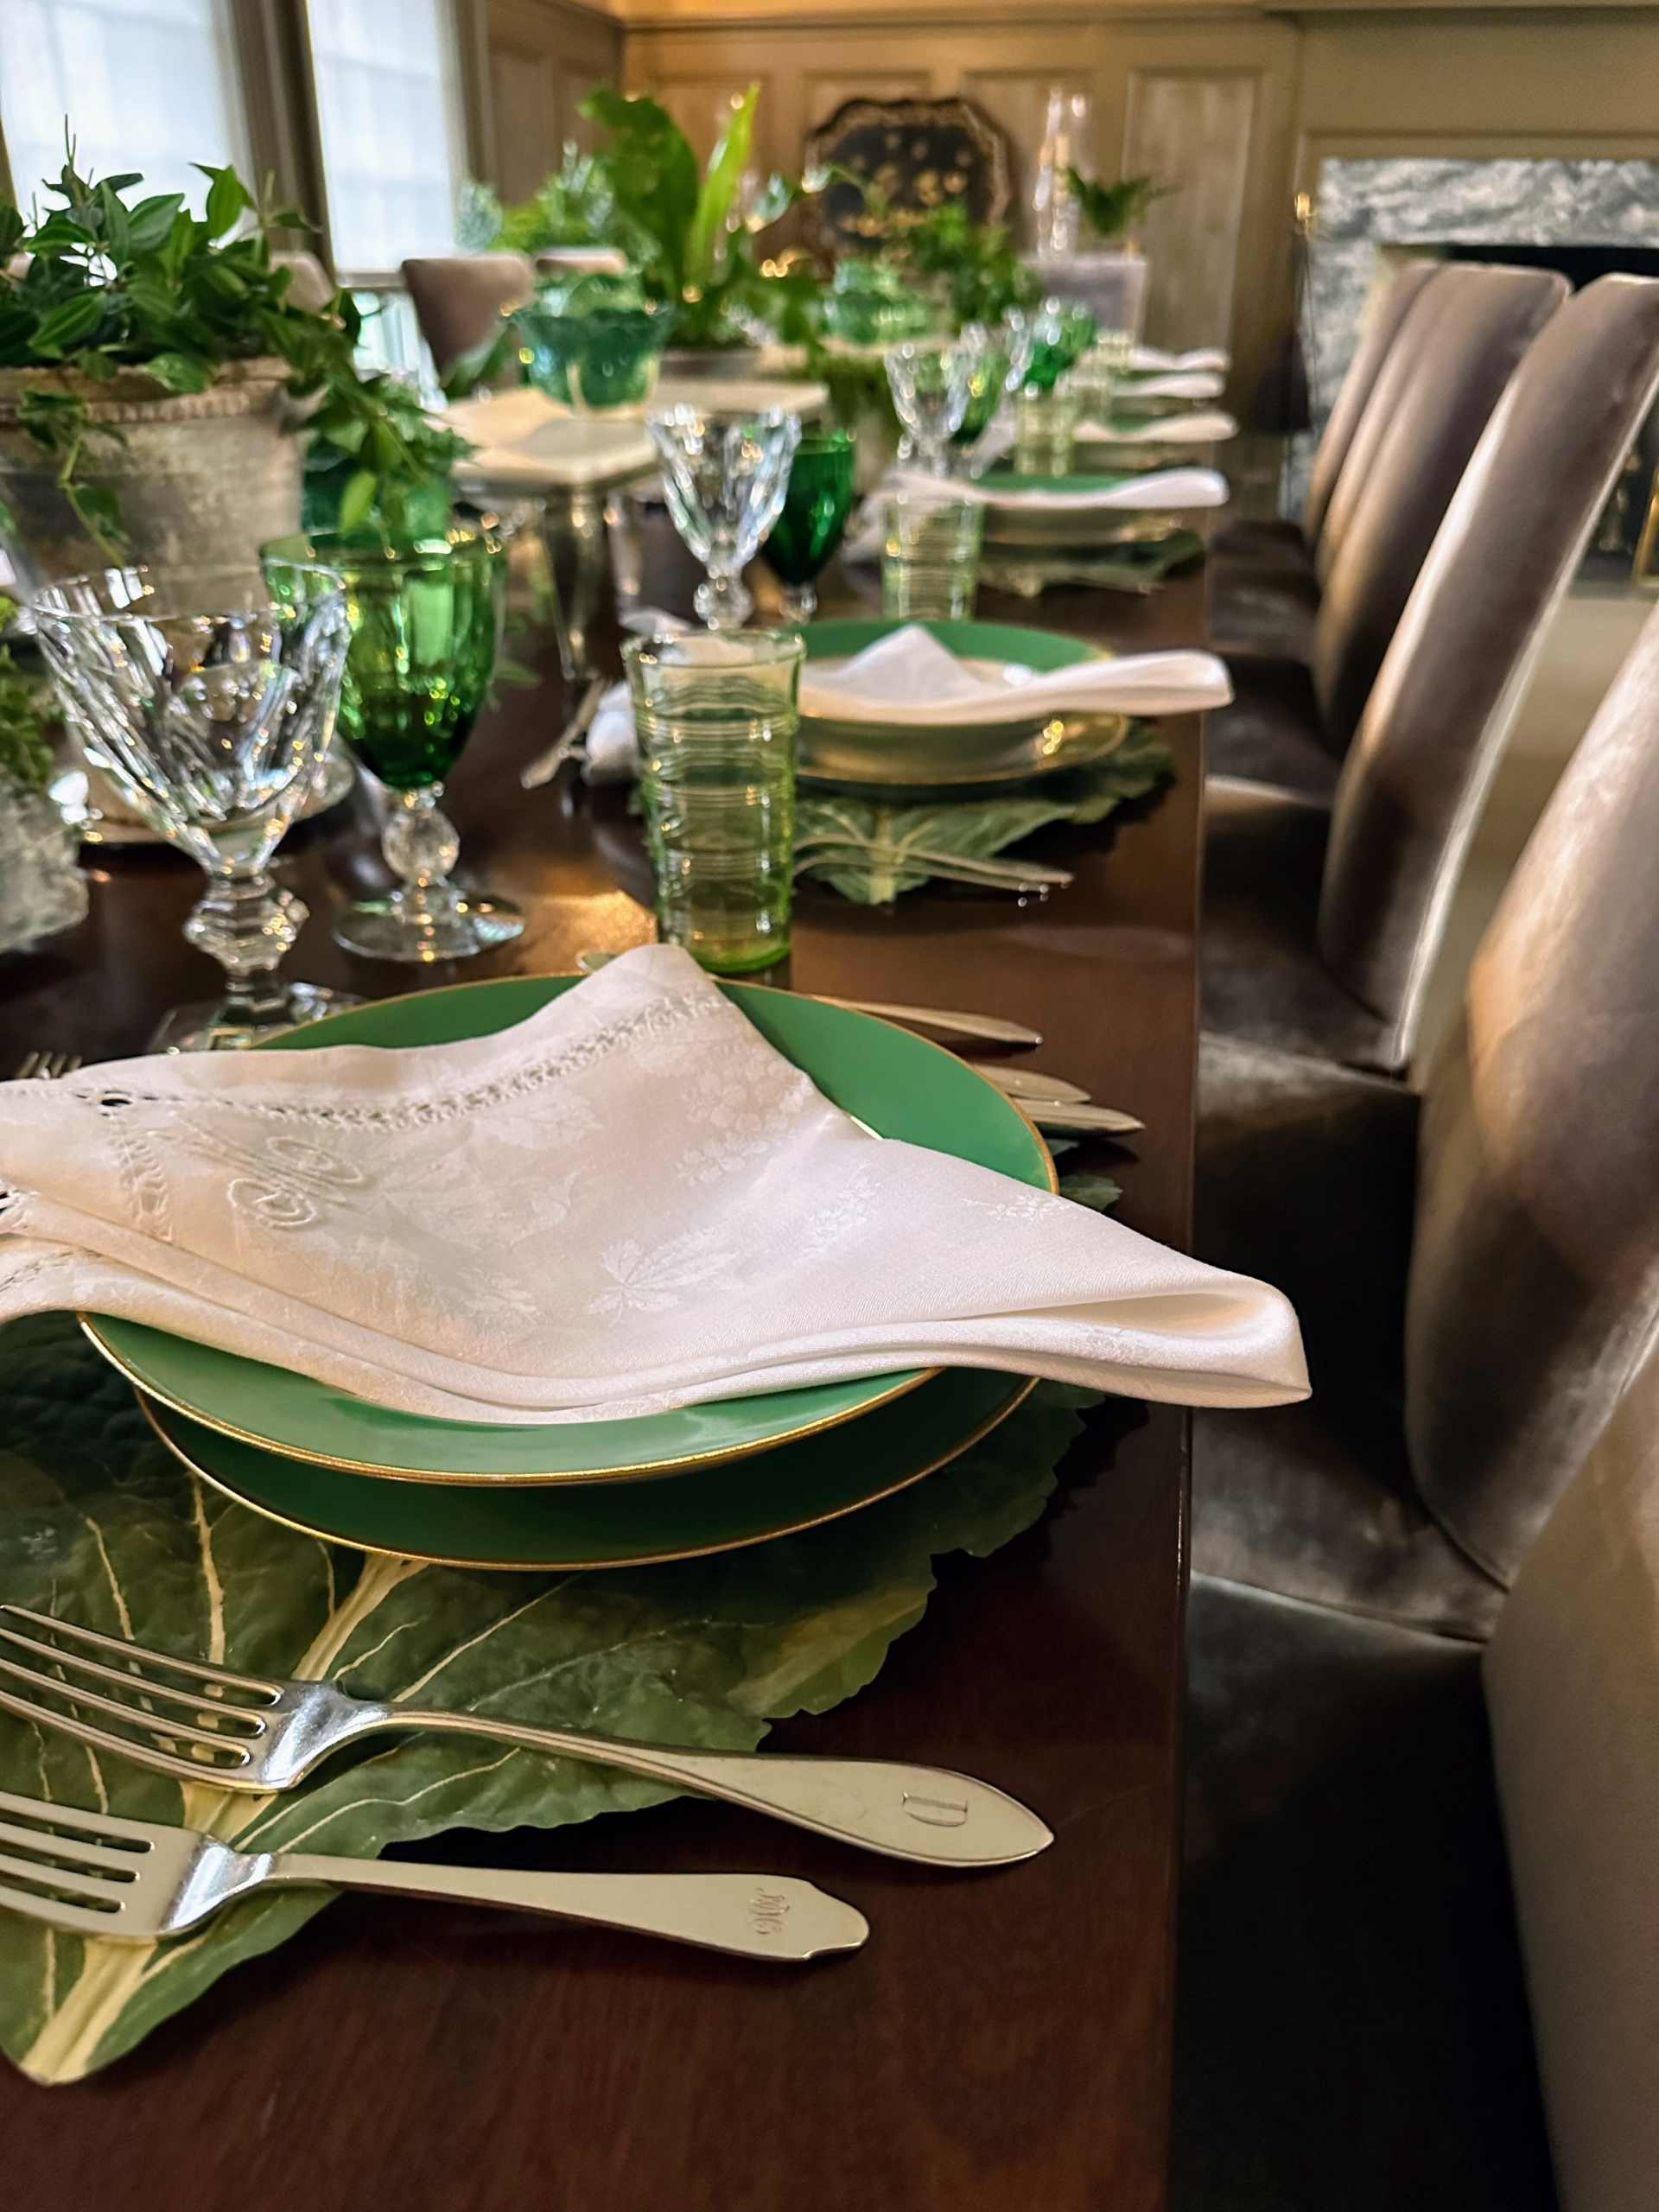
Whenever I entertain, I always fill my home with beautiful houseplants.
Houseplants bring life to any room. I love all kinds of container plants, and over the years I have amassed quite a collection. Most of my houseplants are kept in the greenhouse, where they can be nurtured properly, especially during colder seasons and times when I’m away. When preparing for a party, or when something beautiful is in bloom, I like to bring them into my Winter House where they can be enjoyed. This weekend, I had a lovely selection of ferns, orchids, selaginella, peperomia, and various succulents to welcome my guests for my St. Patrick's Day Dinner.
Here are some photos, enjoy.
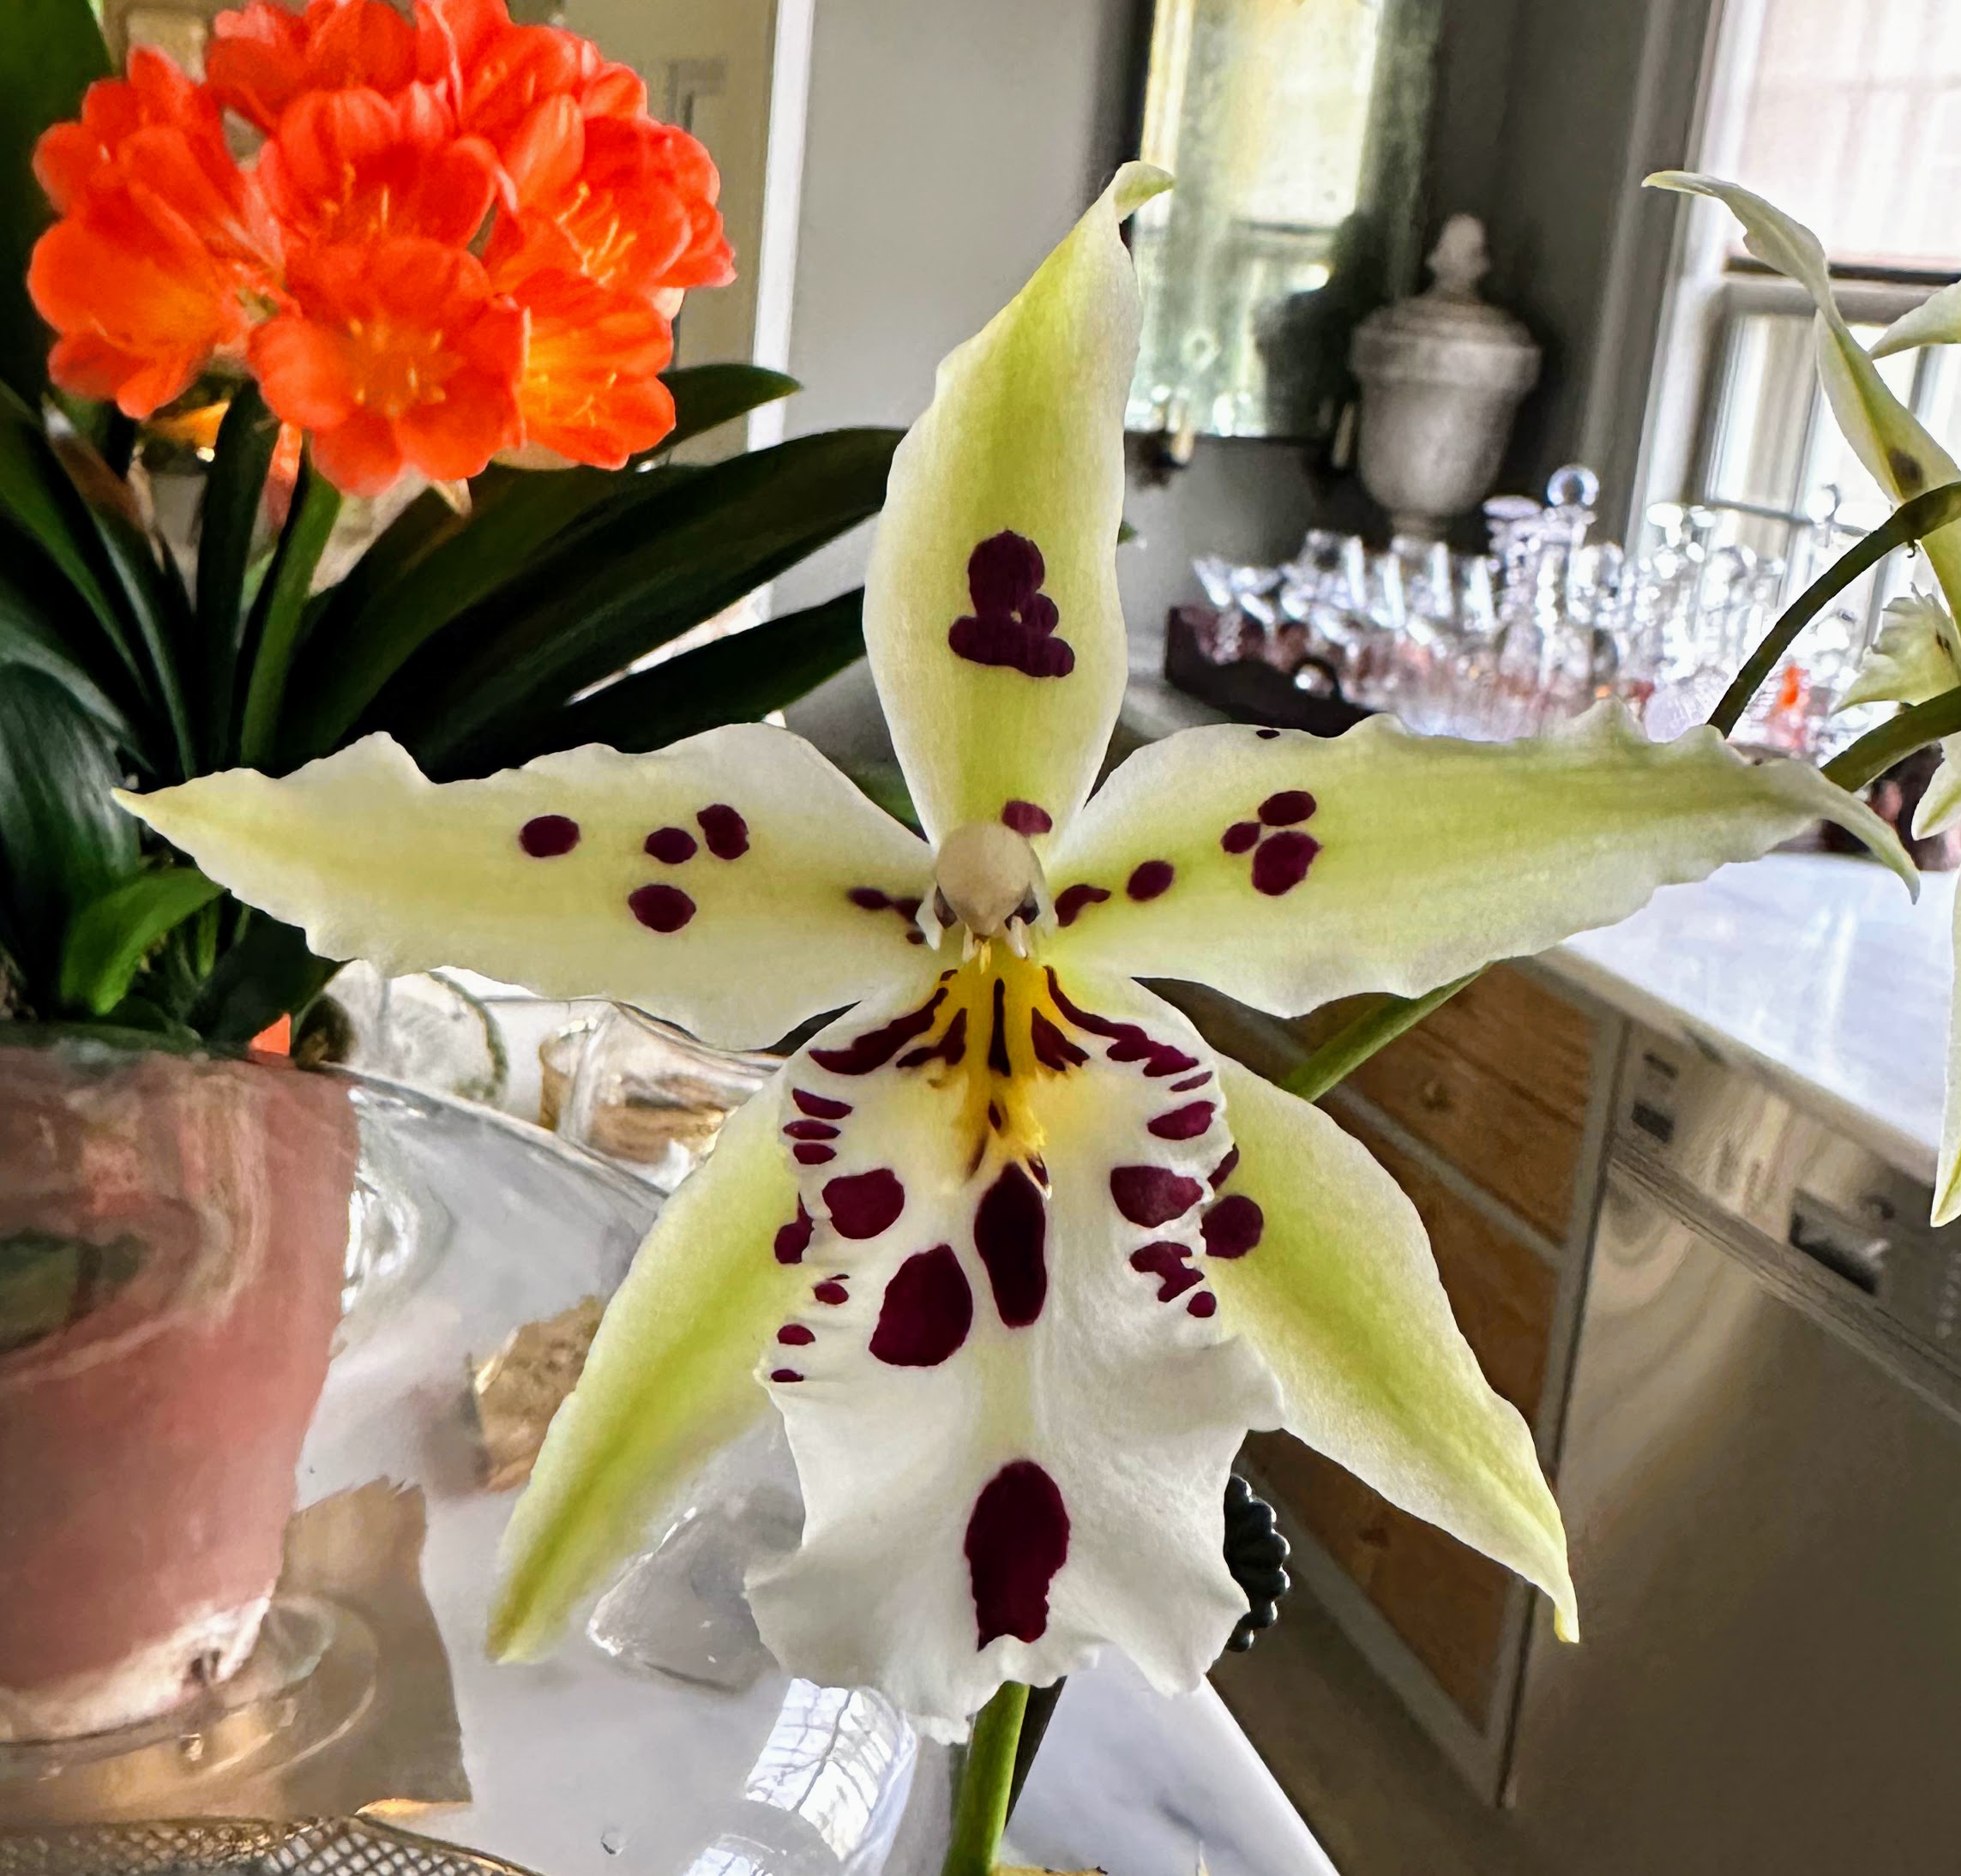
Not only do houseplants enhance the overall appearance of a space, but they’ve also been known to increase creativity, reduce stress, and eliminate air pollutants. Whenever I am home, I always enjoy seeing gorgeous flowering plants. Look at this orchid. When keeping orchids, south and east-facing windows work best. West windows can be too hot in the afternoon and north-facing ones are usually too dark. This Dendrobium has gorgeous white blooms with dark pink to purple markings.
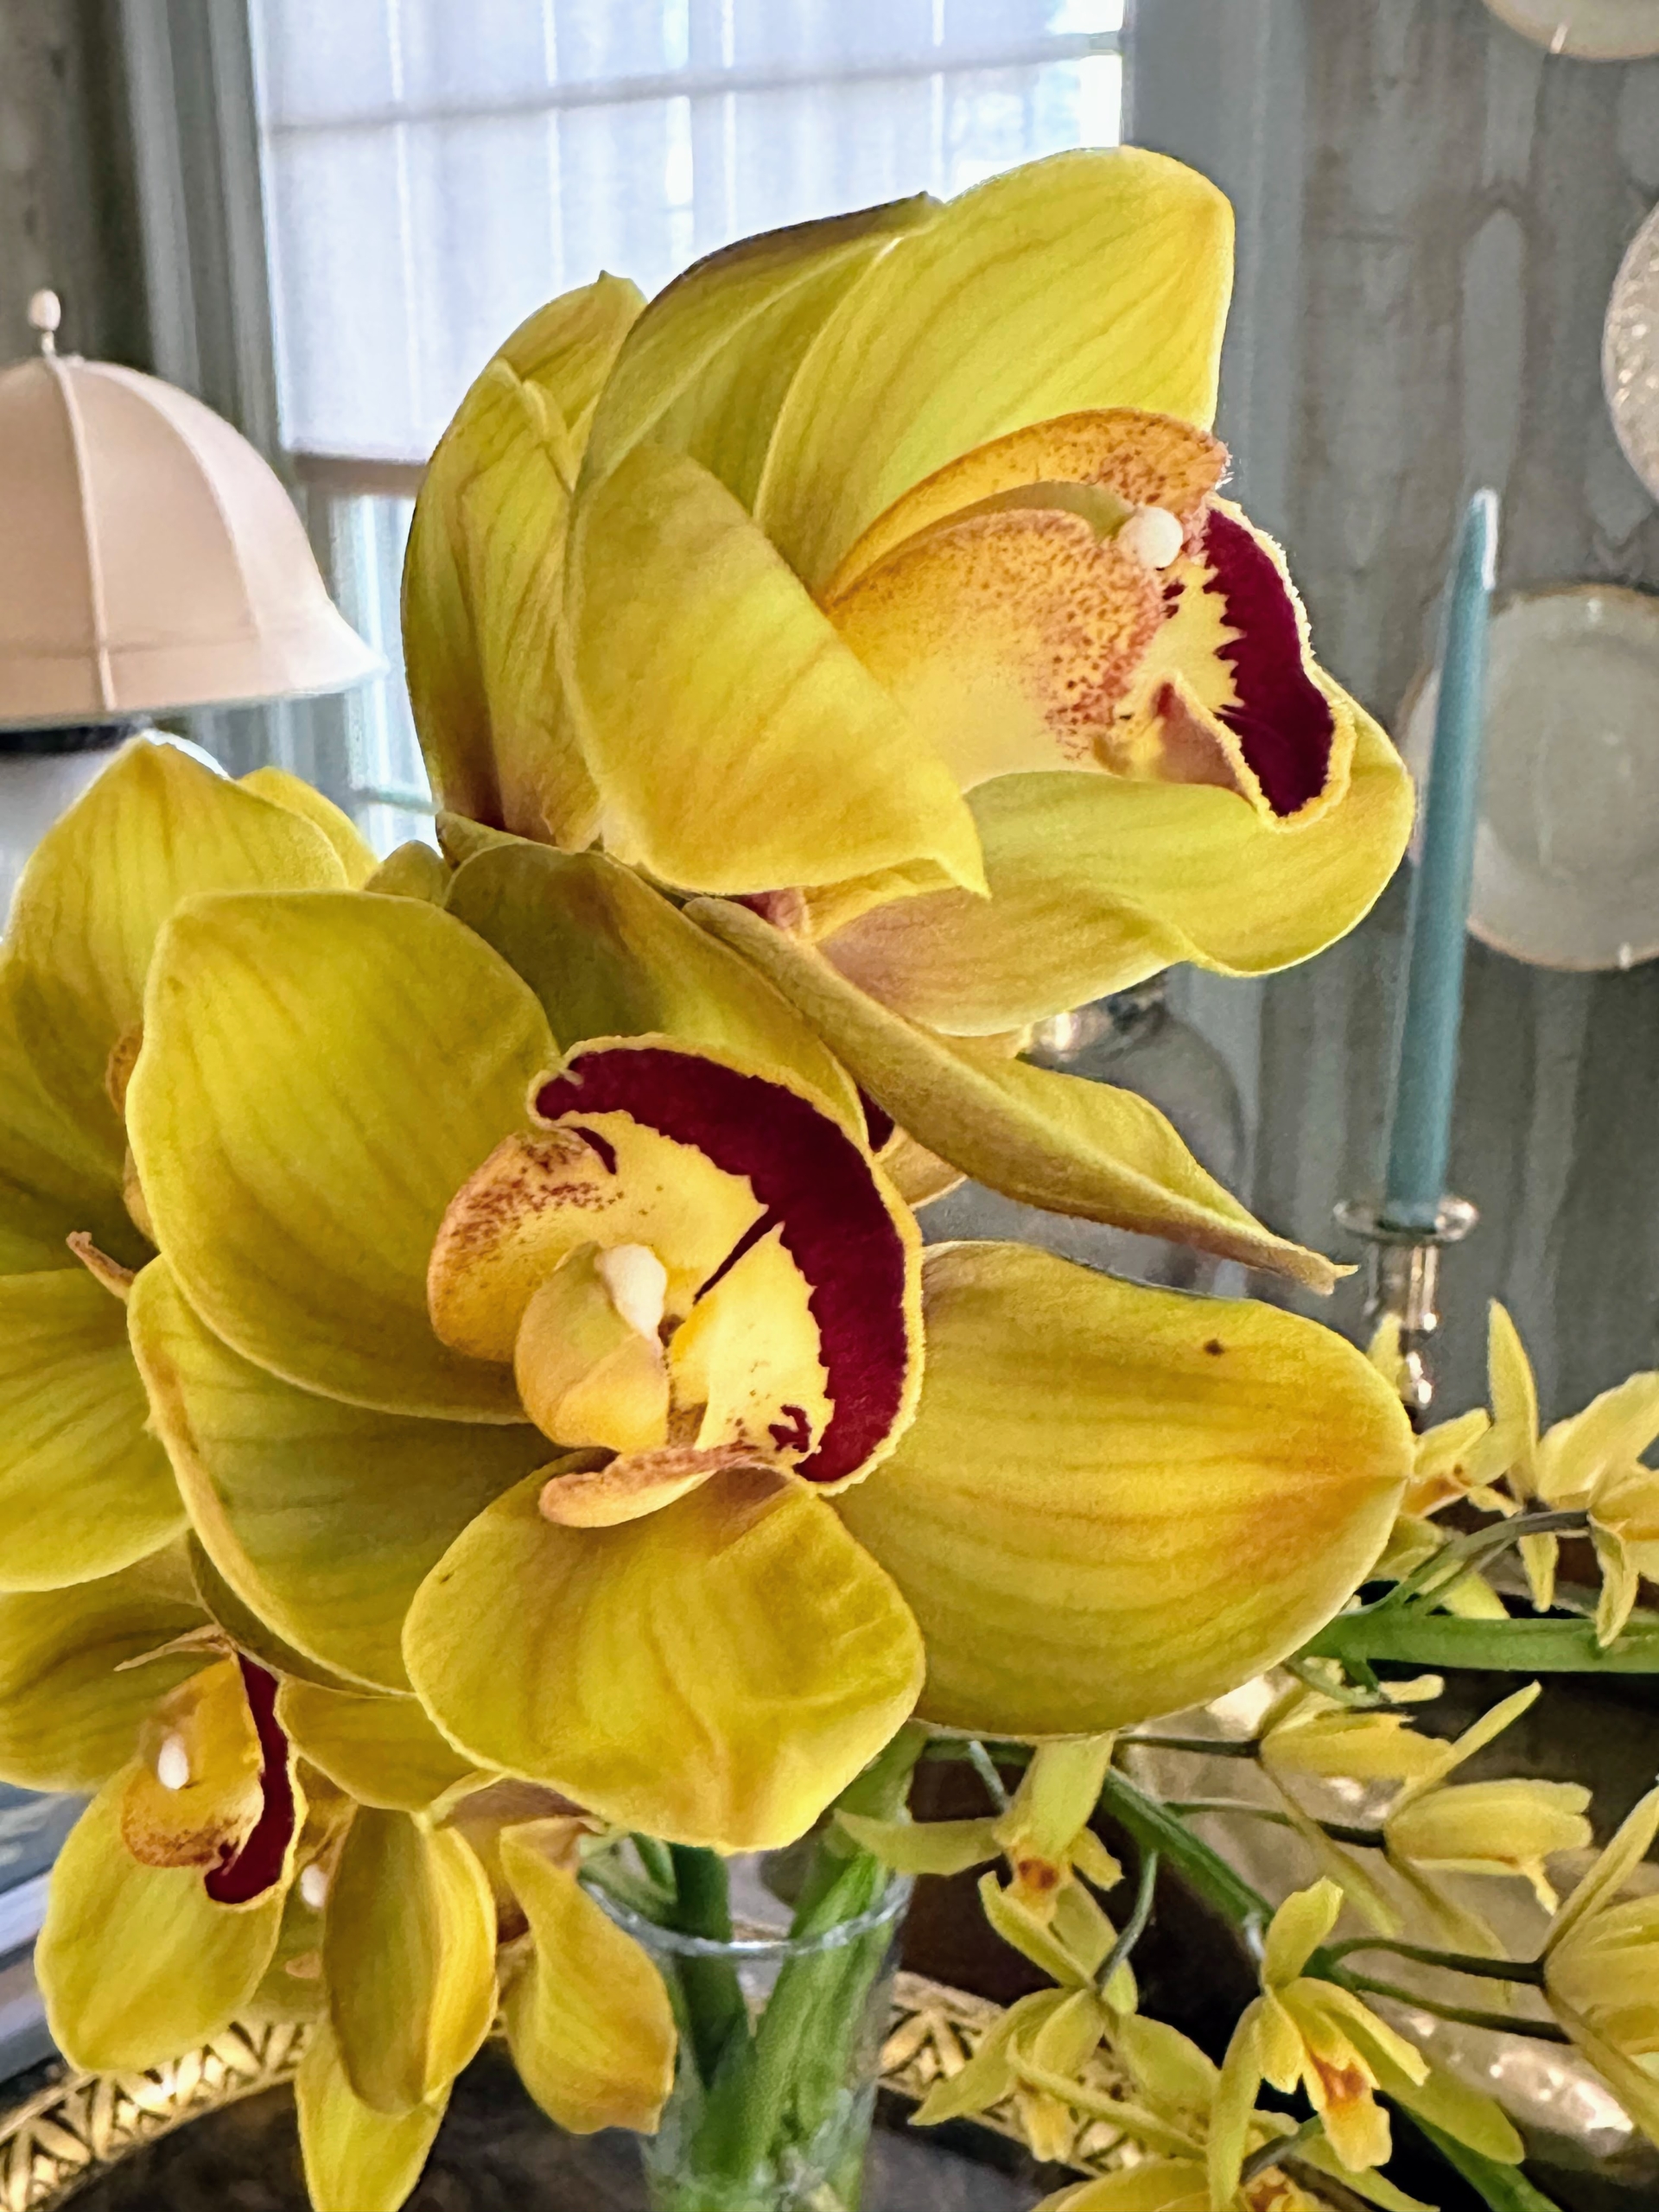
A vase of cut Cymbidium orchid flowers sits on a table. I love the golden-yellow blooms. Cymbidium, or boat orchid, is a genus of more than 50-evergreen species in the orchid family Orchidaceae. Cymbidium orchids are prized for their long-lasting sprays of flowers, used especially as cut flowers or spring corsages.
Although generally thought of as a tropical plant, orchids grow on every continent, from the Arctic Circle to the southernmost jungle, except Antarctica. The size of orchids depends on the species. They can be quite small or very large. However, every orchid flower is bilaterally symmetric, which means it can be divided into two equal parts.
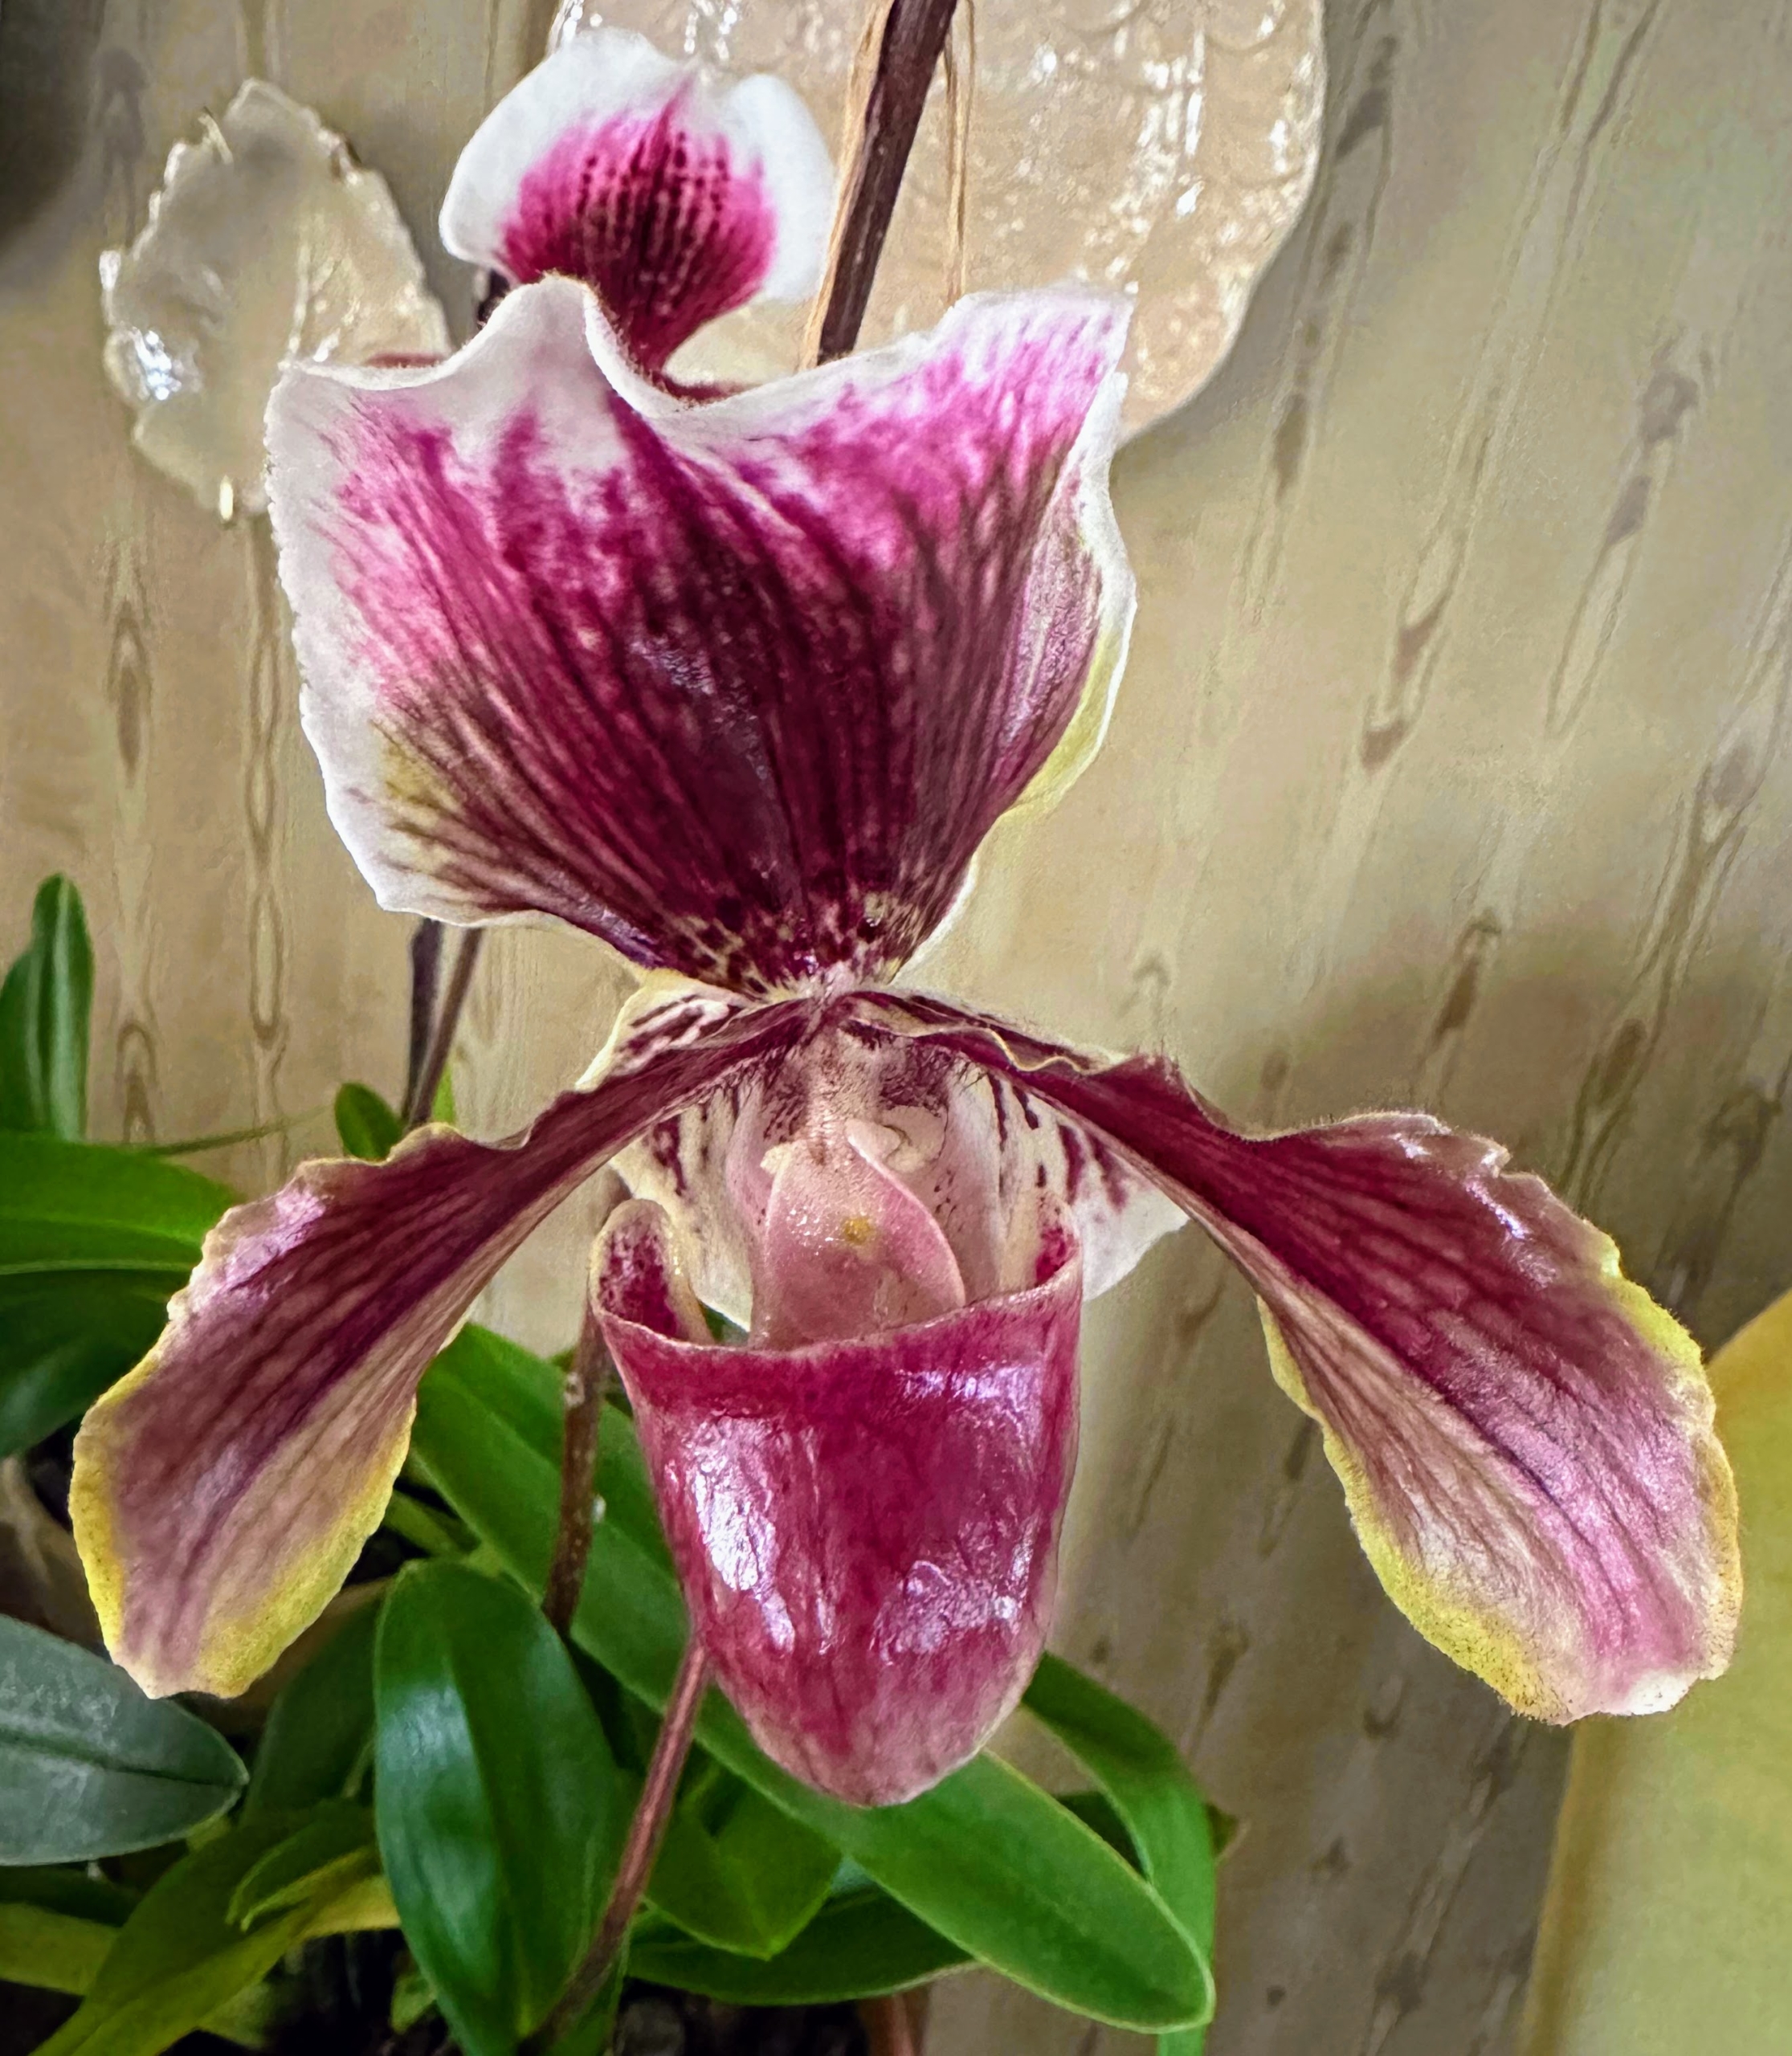
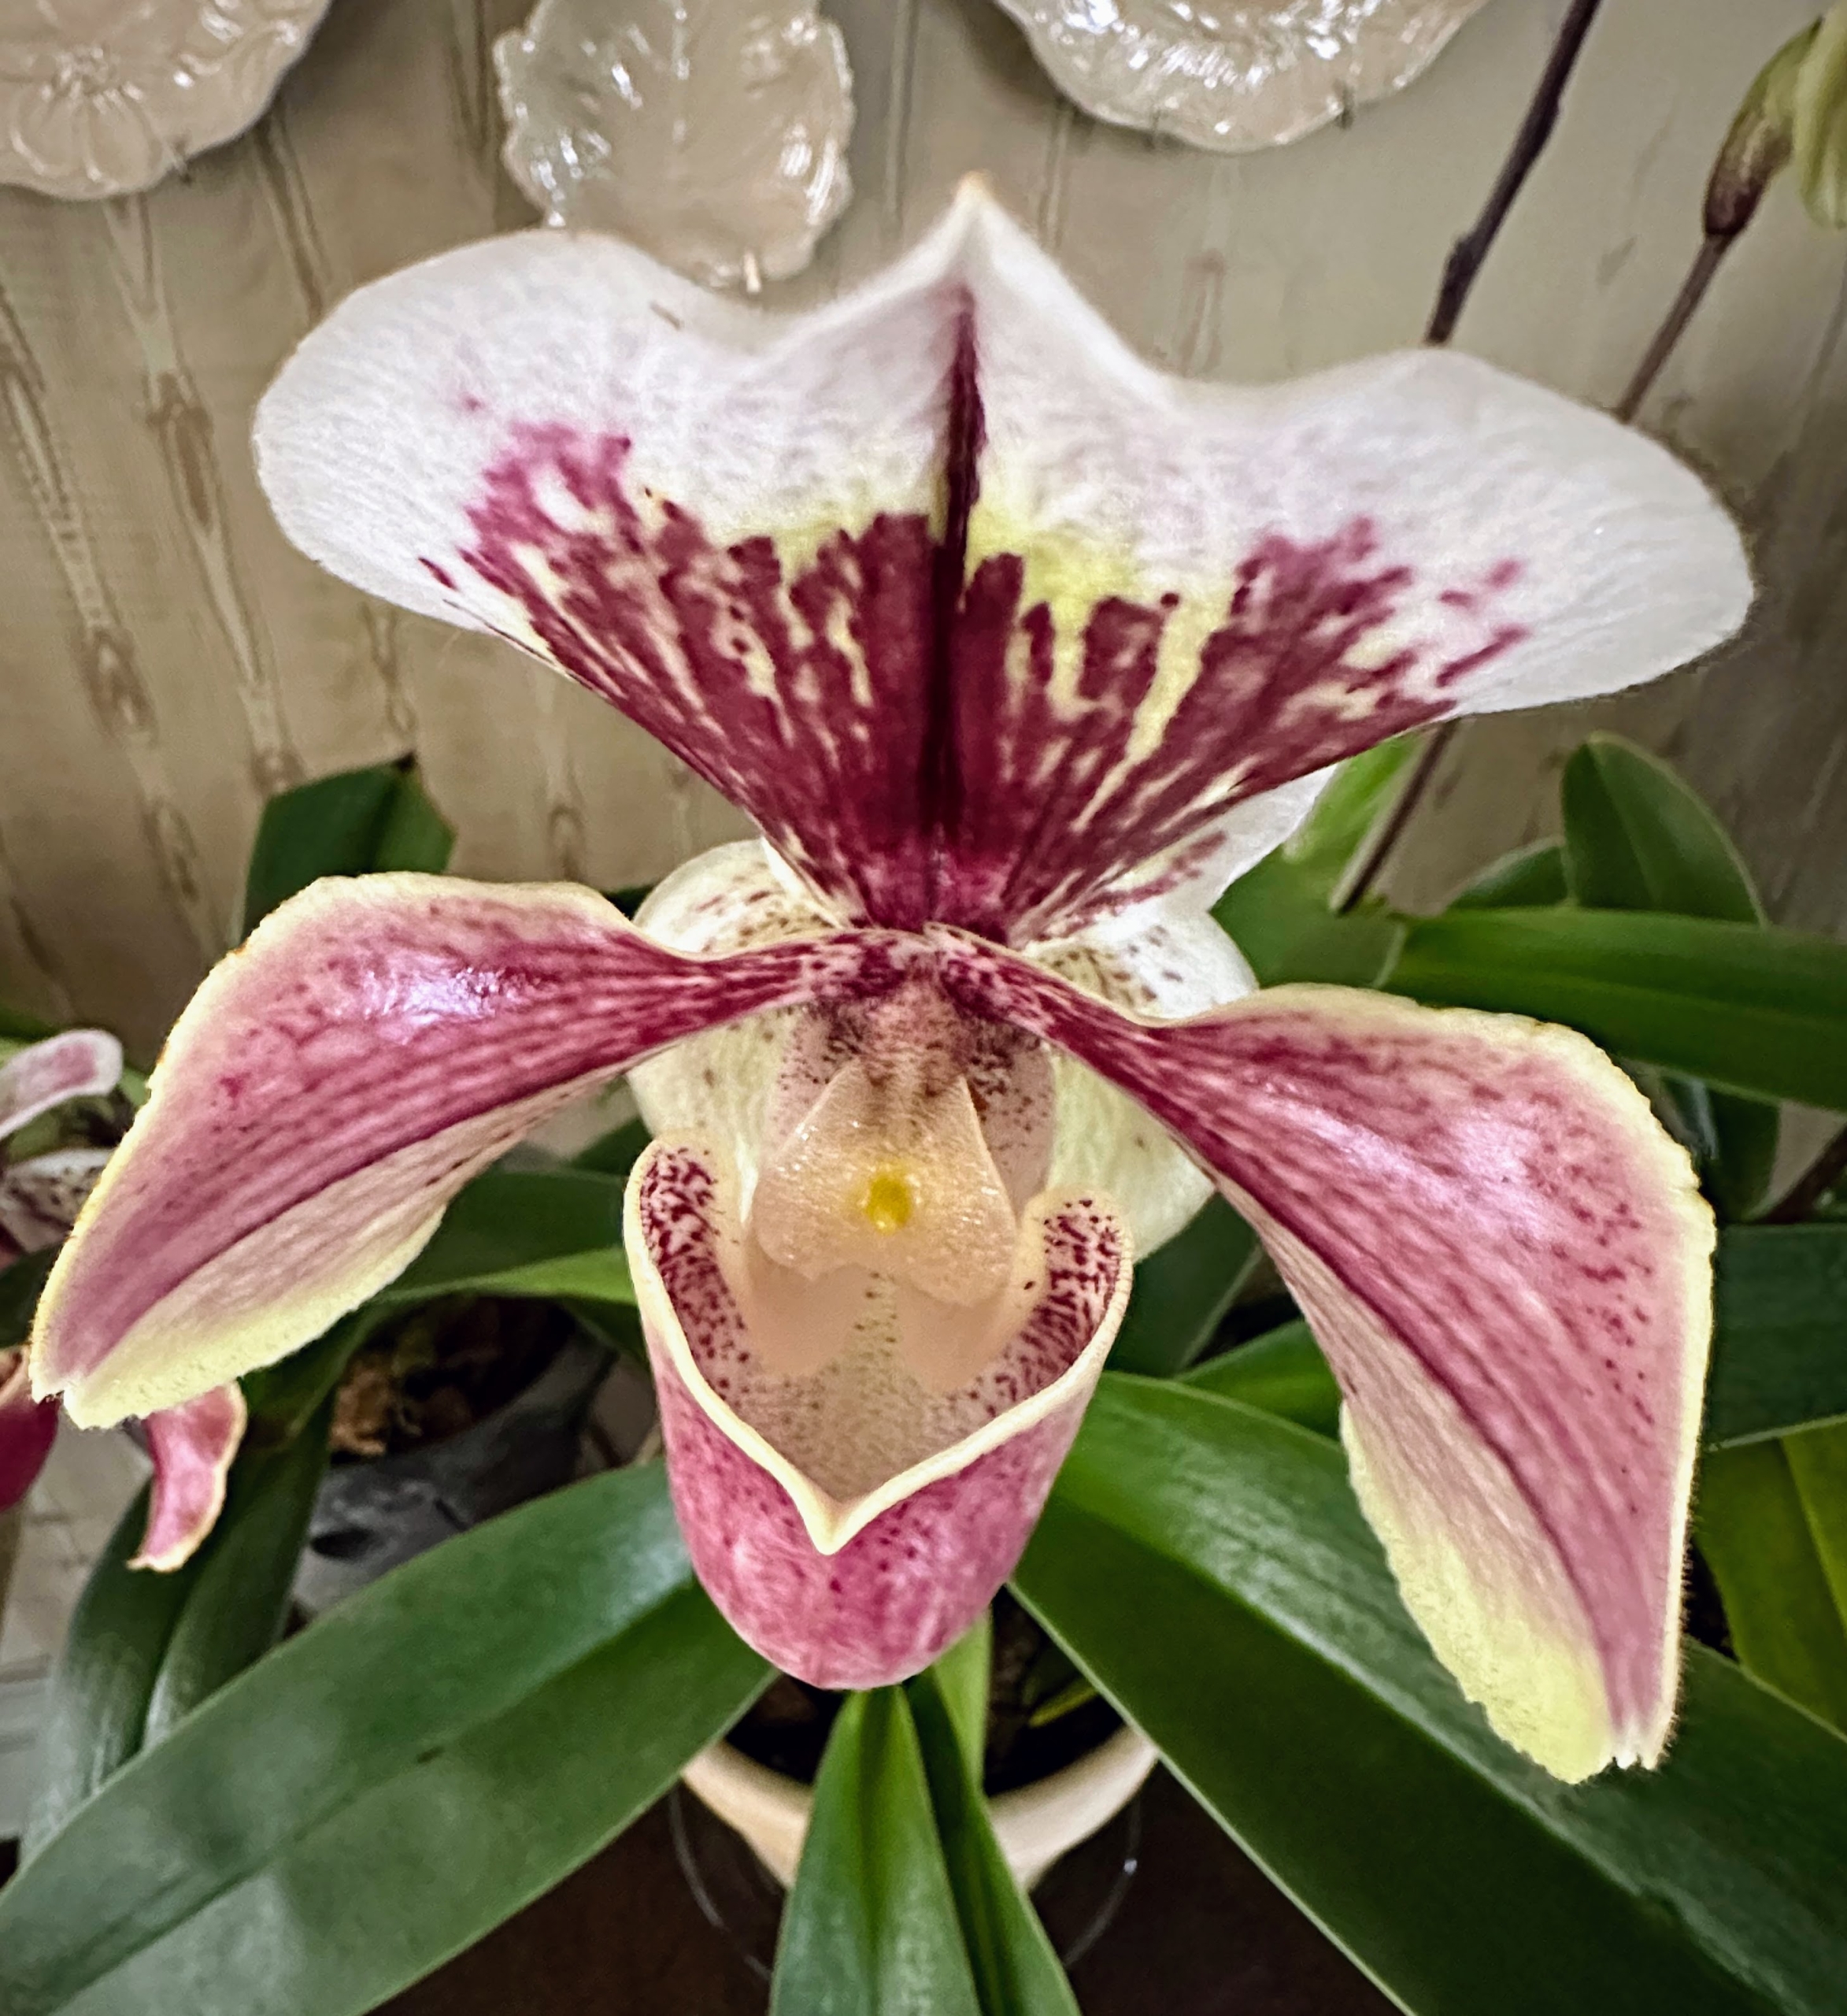
This is a “slipper orchid” – one of my favorites. The key to growing these plants is to keep the root systems strong and healthy. These plants have no bulbs or stems to store moisture and nutrients, so it is important to maintain their roots.
Here is another slipper orchid with its beautiful dark burgundy markings. Paphiopedilum orchids are often called ‘lady slippers’ or ‘slipper orchids’ because of their unique pouch-like flowers.
Caring for orchids is a daunting process for many, but if one takes the time to understand their basic needs, and to use all the proper orchid care supplies, there’s no reason why these beautiful plants won’t continue to thrive and bloom.
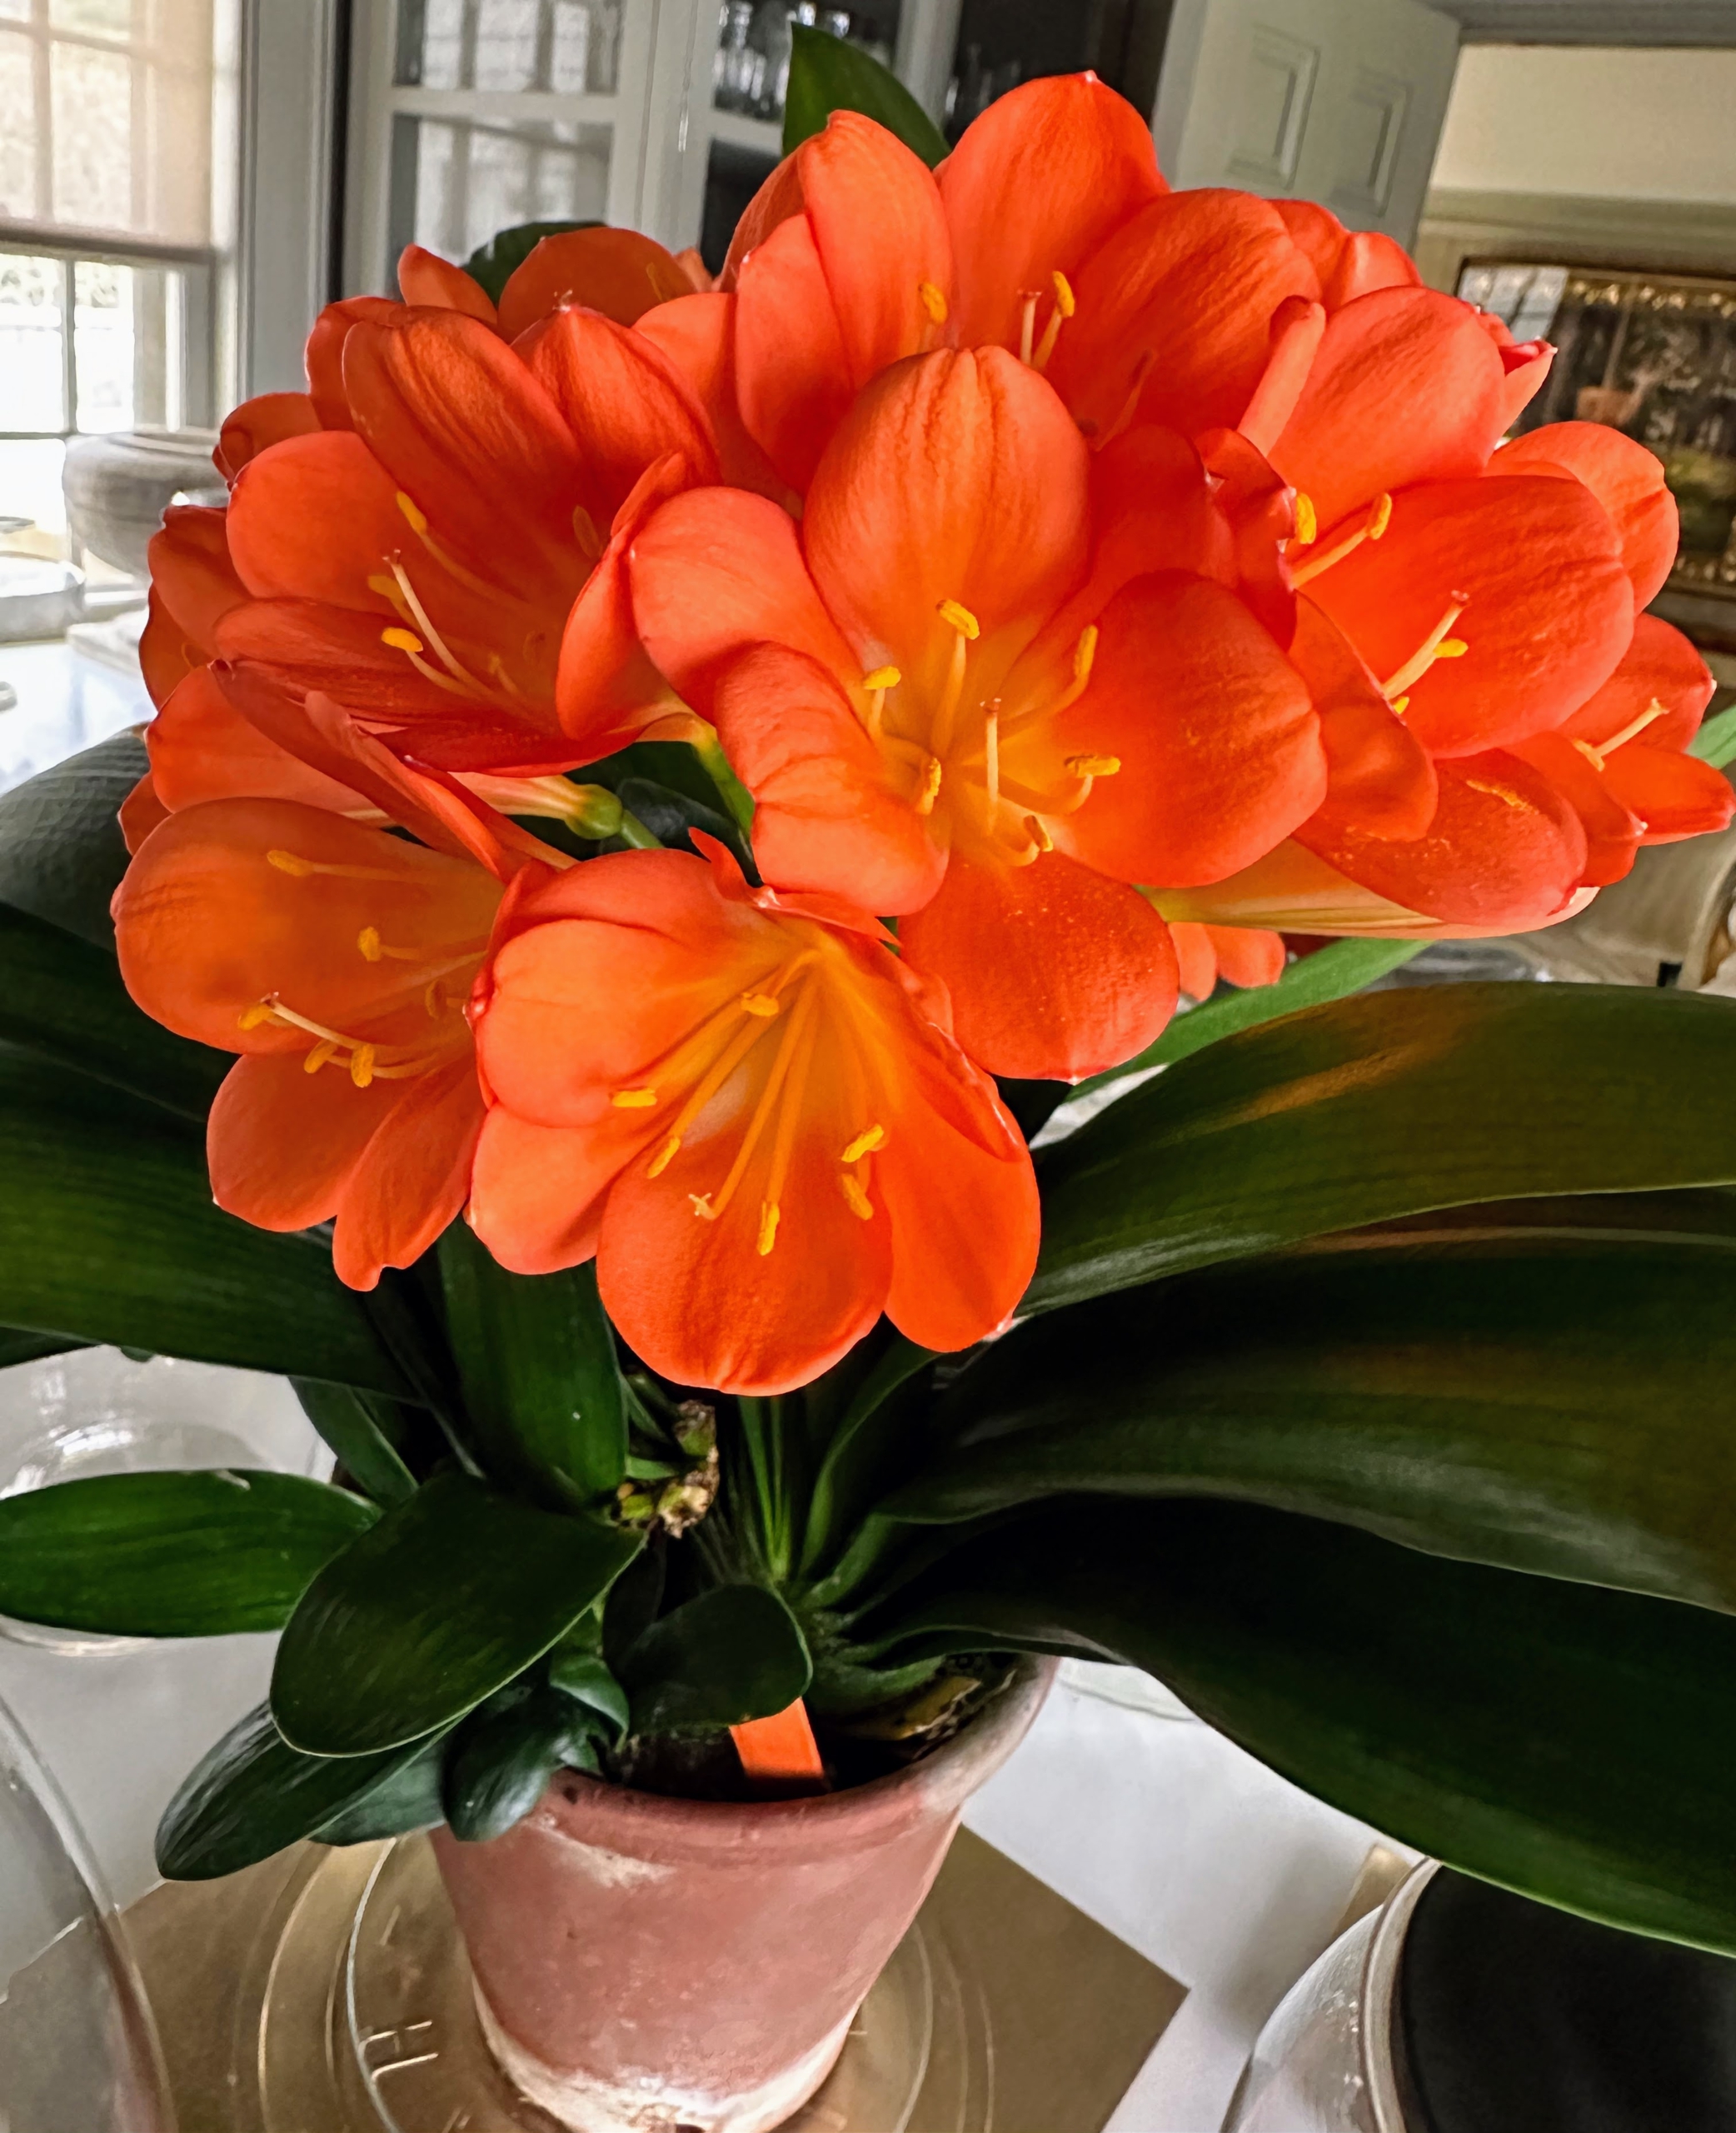
Prized for its gorgeous flowers, the clivia miniata is an elegant plant with large clusters of funnel-shaped orange-red flowers that bloom from early winter to mid-spring. This plant sits on a table in my servery along with some colorful orchids – I see them every morning.
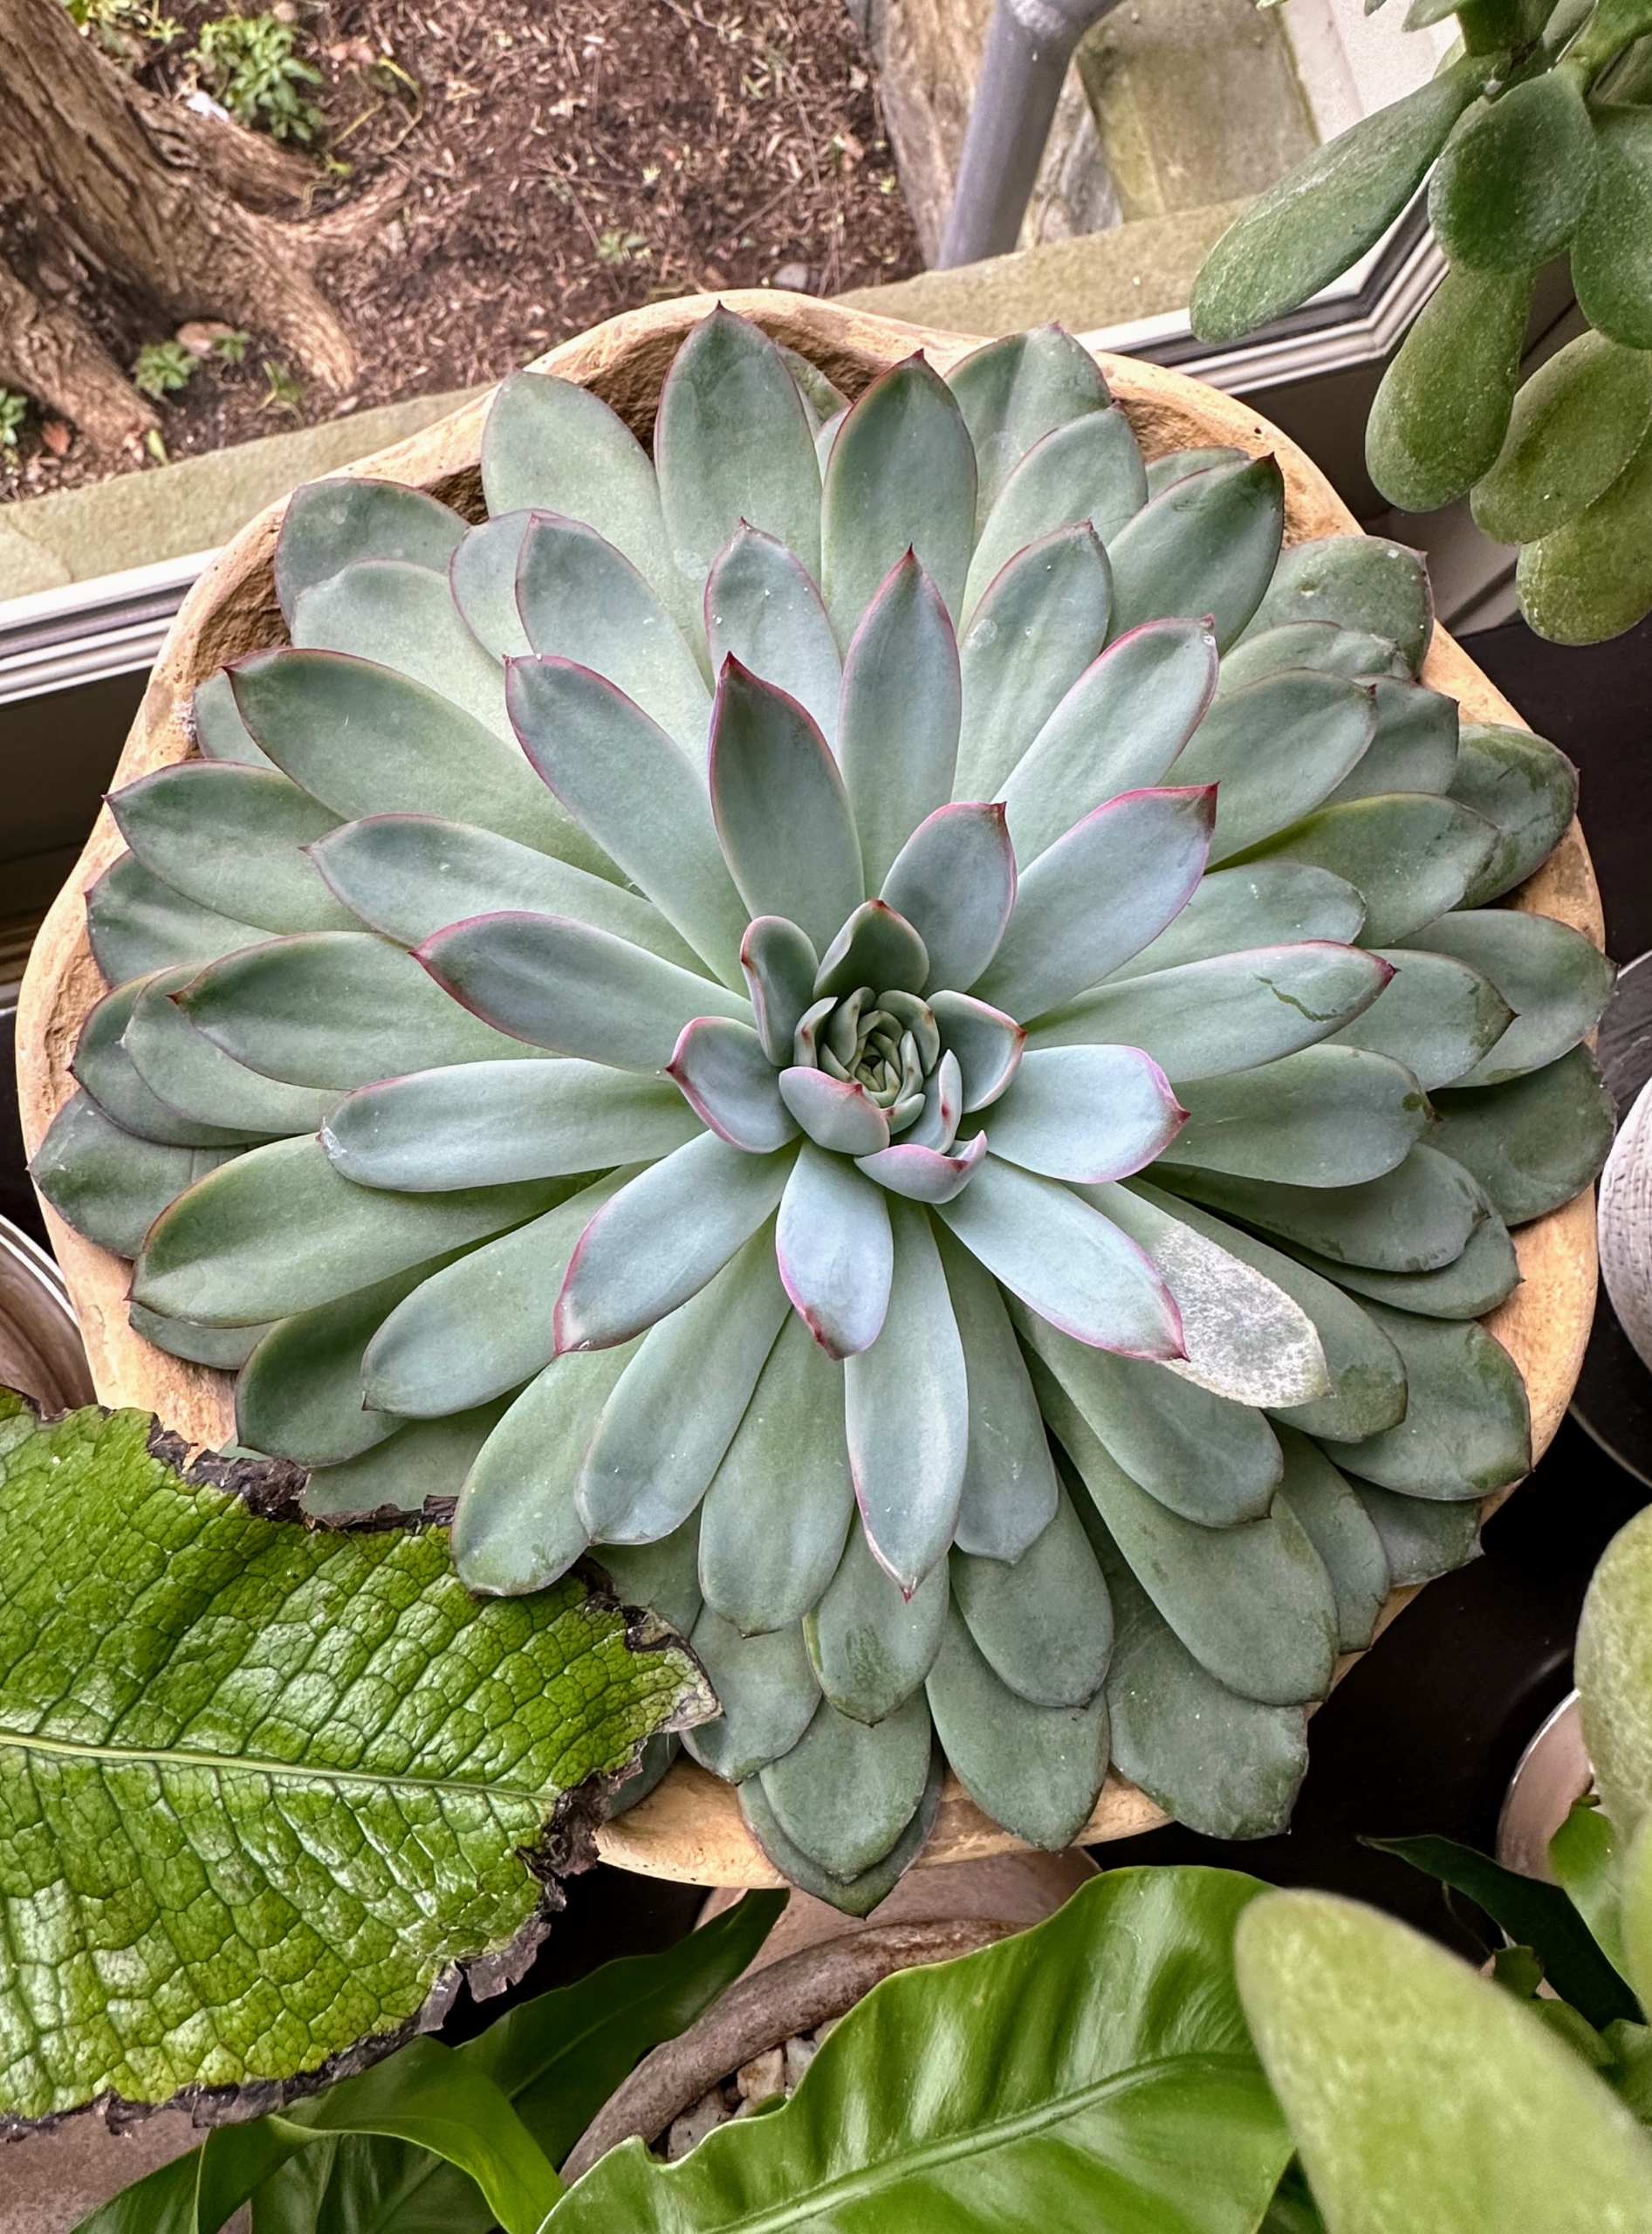
I also like to display potted plants on my indoor porch where there is plenty of light. If you like growing plants, but don’t really have the time to care for them properly, consider growing succulents. Succulents are so easy to maintain and are able to survive prolonged drought because they store moisture in their fleshy stems, roots, and leaves. Some succulents look like smooth stones, while others feature perfect rosettes like this.
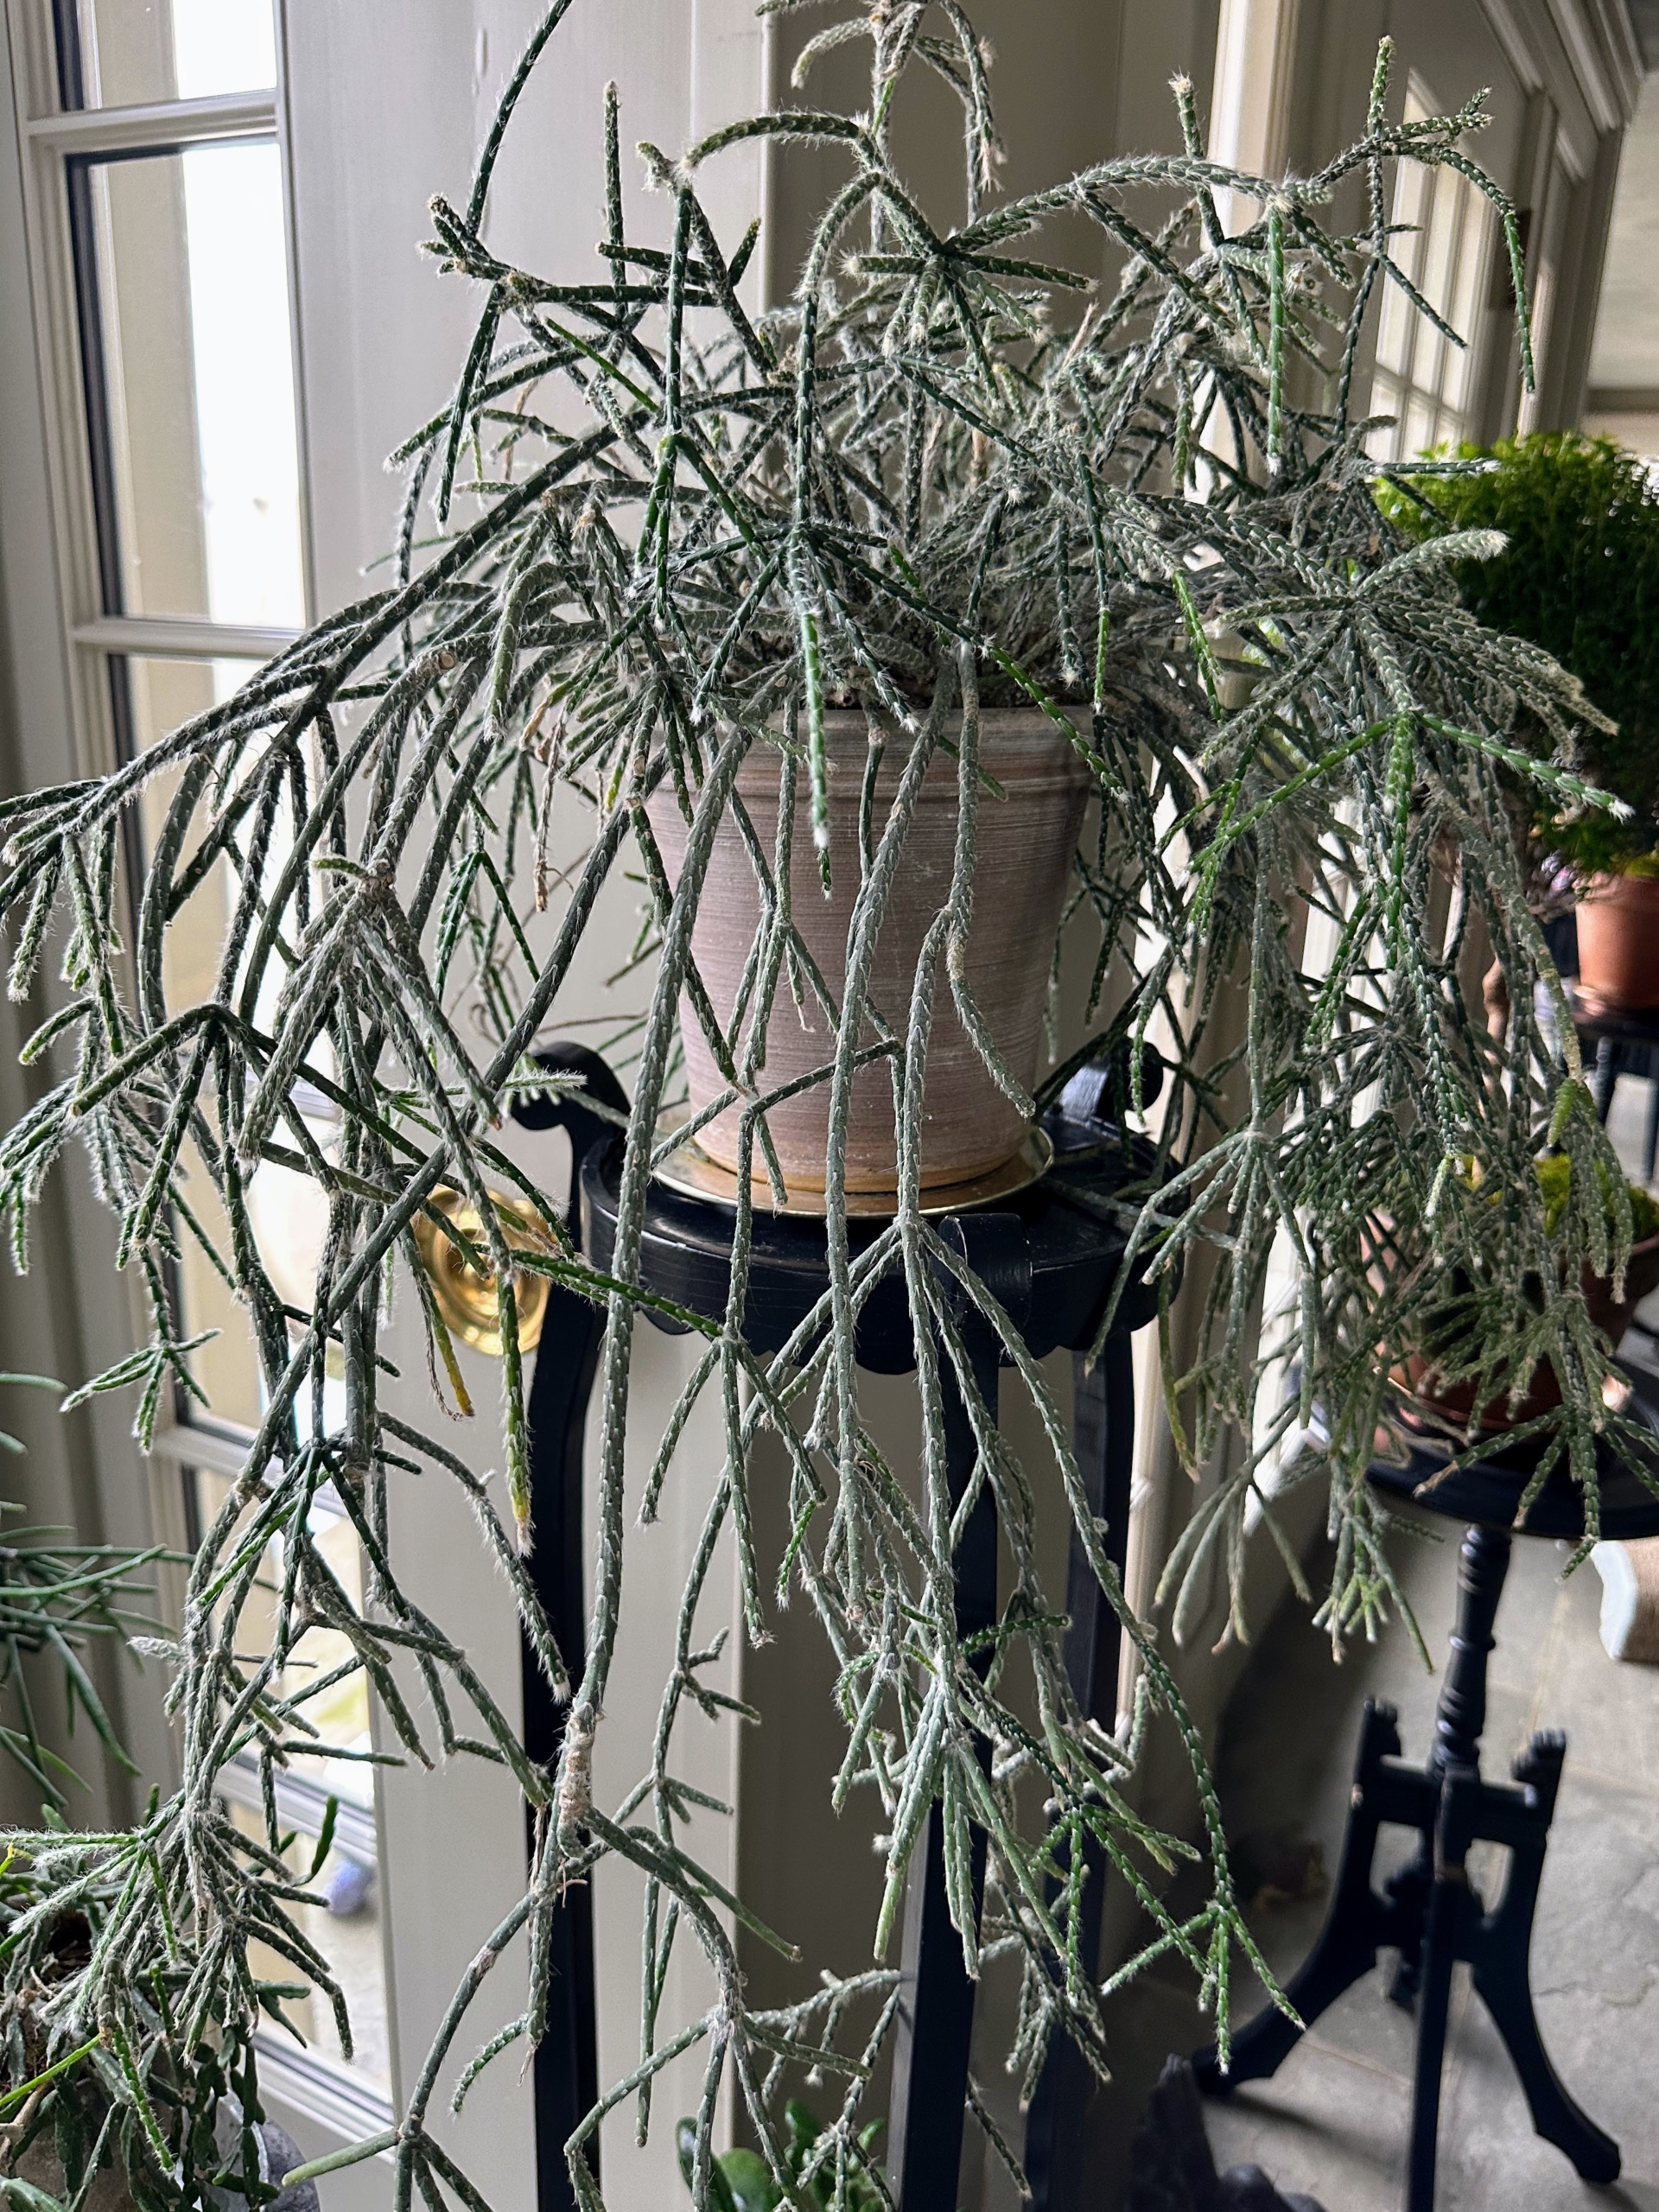
This is a potted rhipsalis, native to the rainforests of South America, the Caribbean and Central America. Rhipsalis is a cacti genus with approximately 35 distinct species. I have many types of rhipsalis. Rhipsalis specimens have long, trailing stems making them perfect choices as indoor plants on pedestals or tall tables.
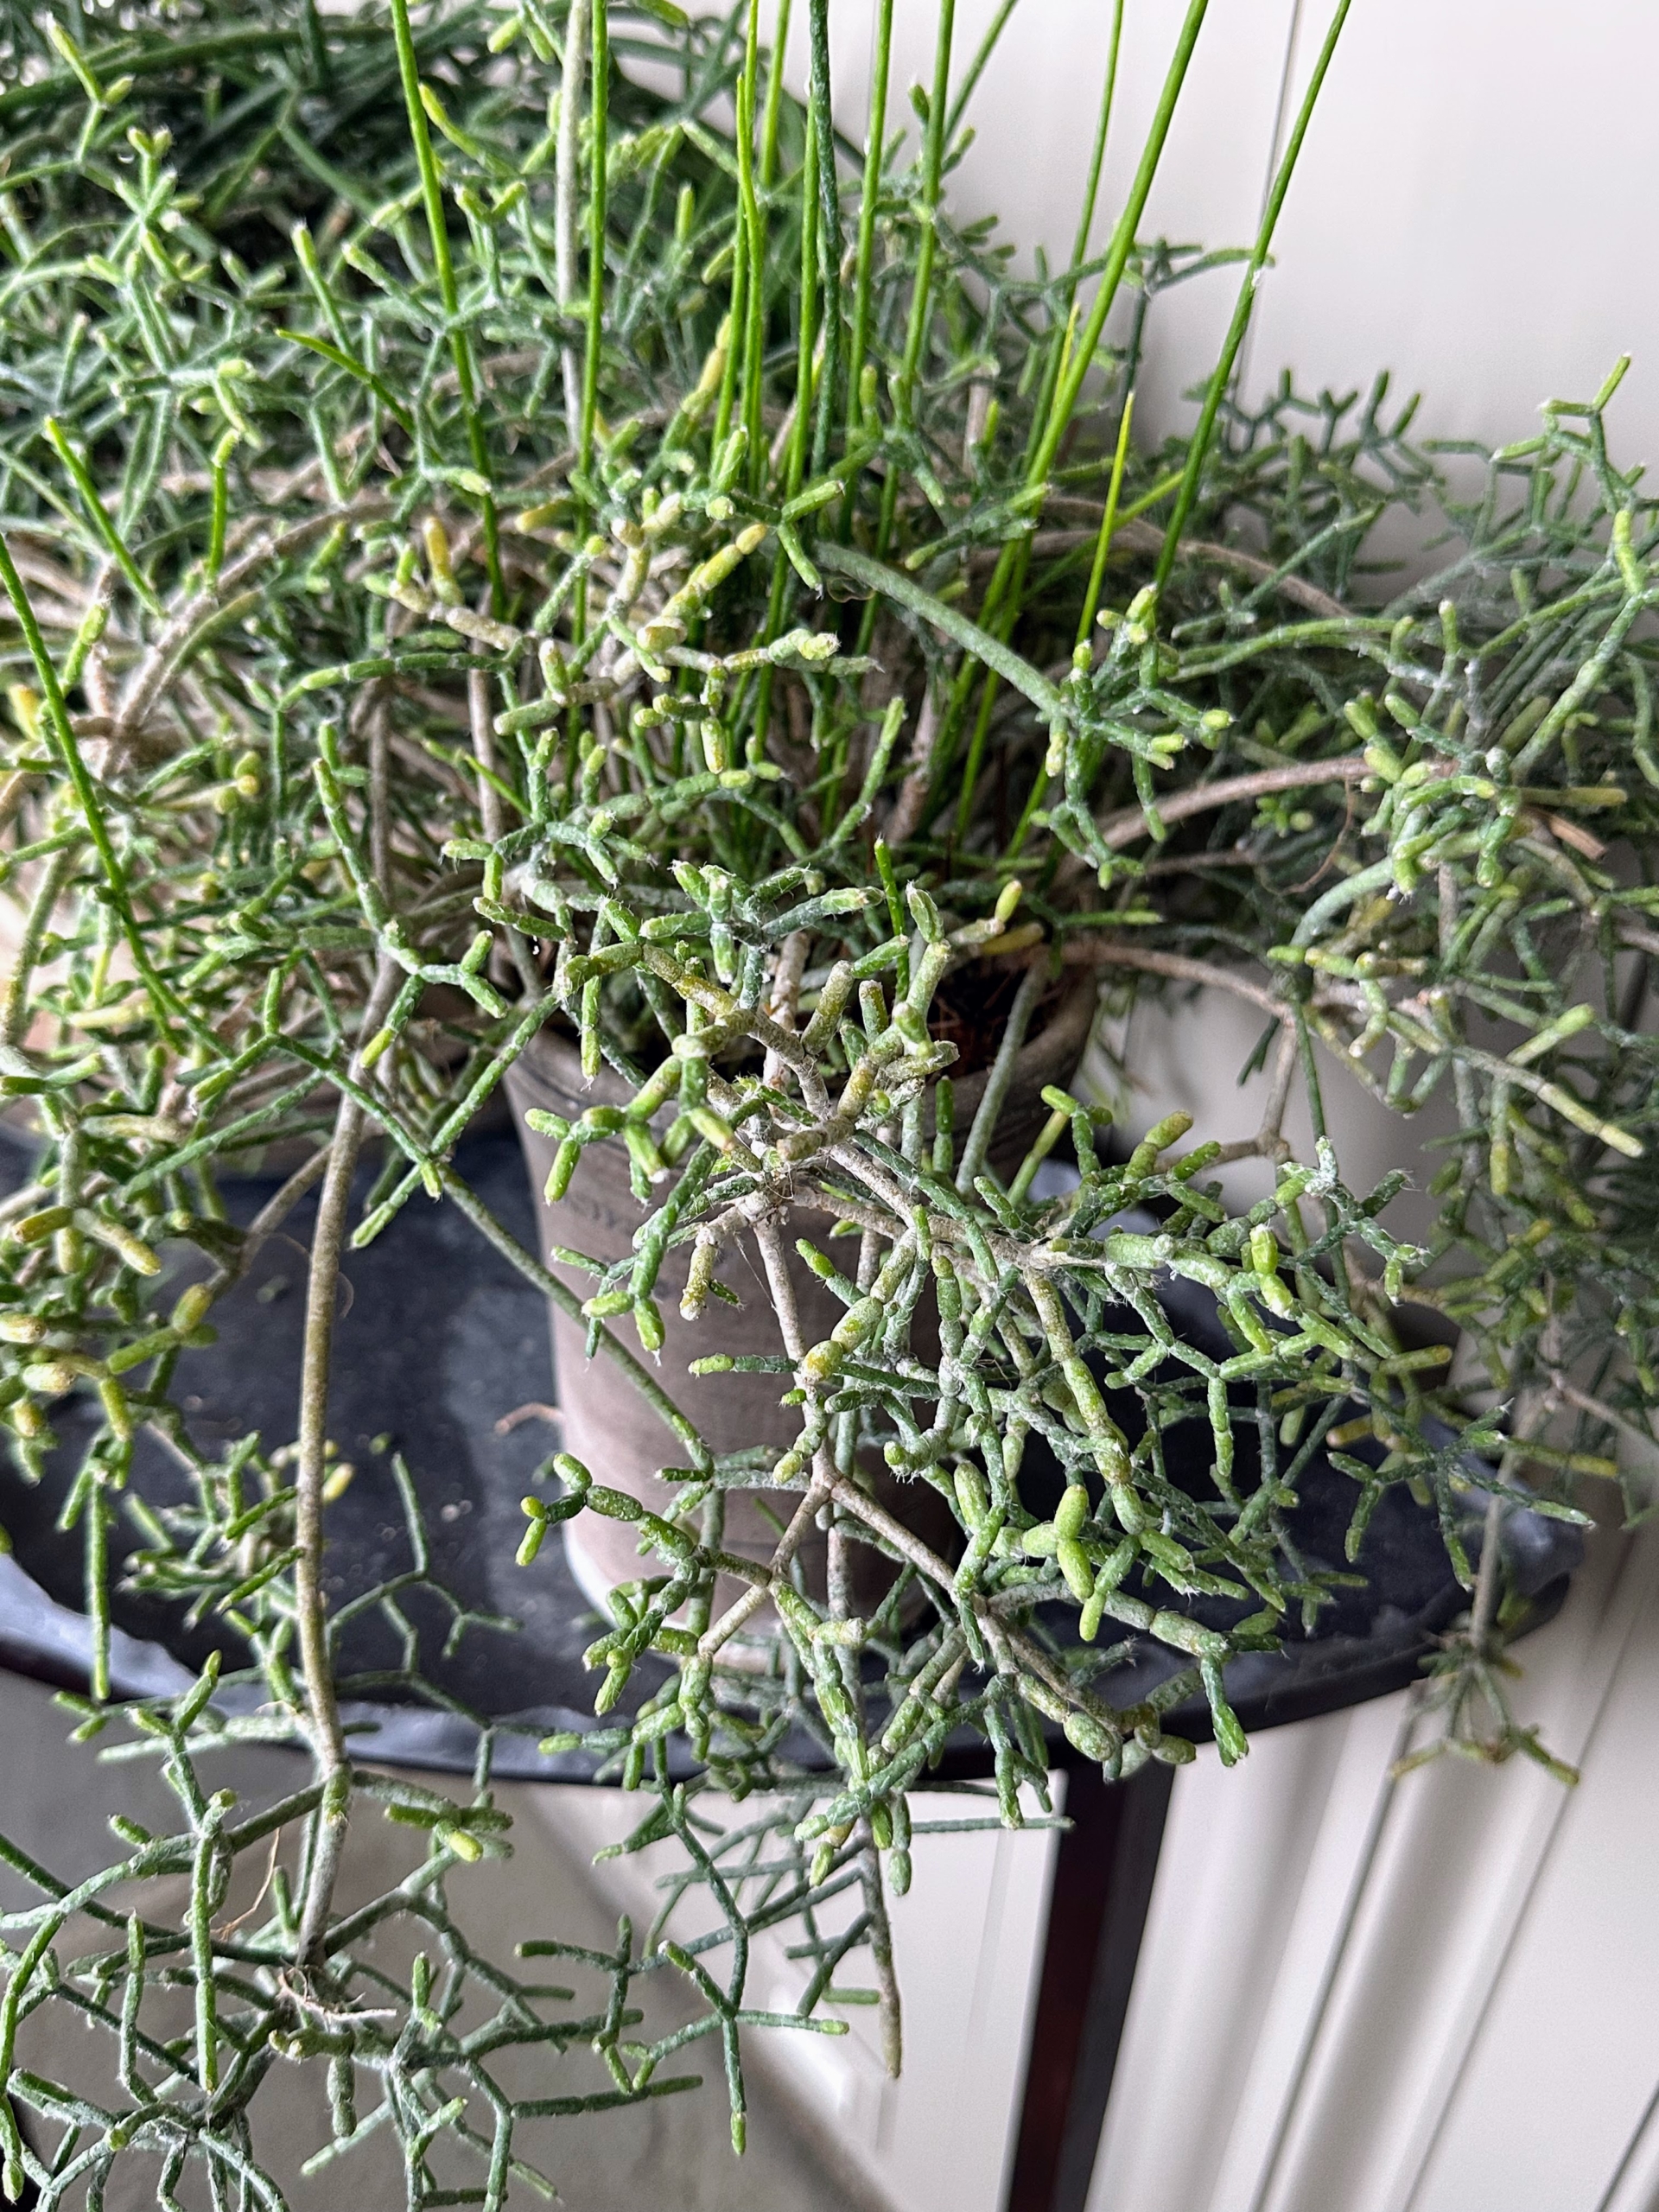
And here is another rhipsalis. These plants prefer bright, indirect light. Rhipsalis plants also appreciate a good misting now and again and watering about once a week, or whenever the soil becomes dry. Also known as chain cactus or mistletoe cactus, the thread-like succulent stems are narrow, green and can grow several feet long.
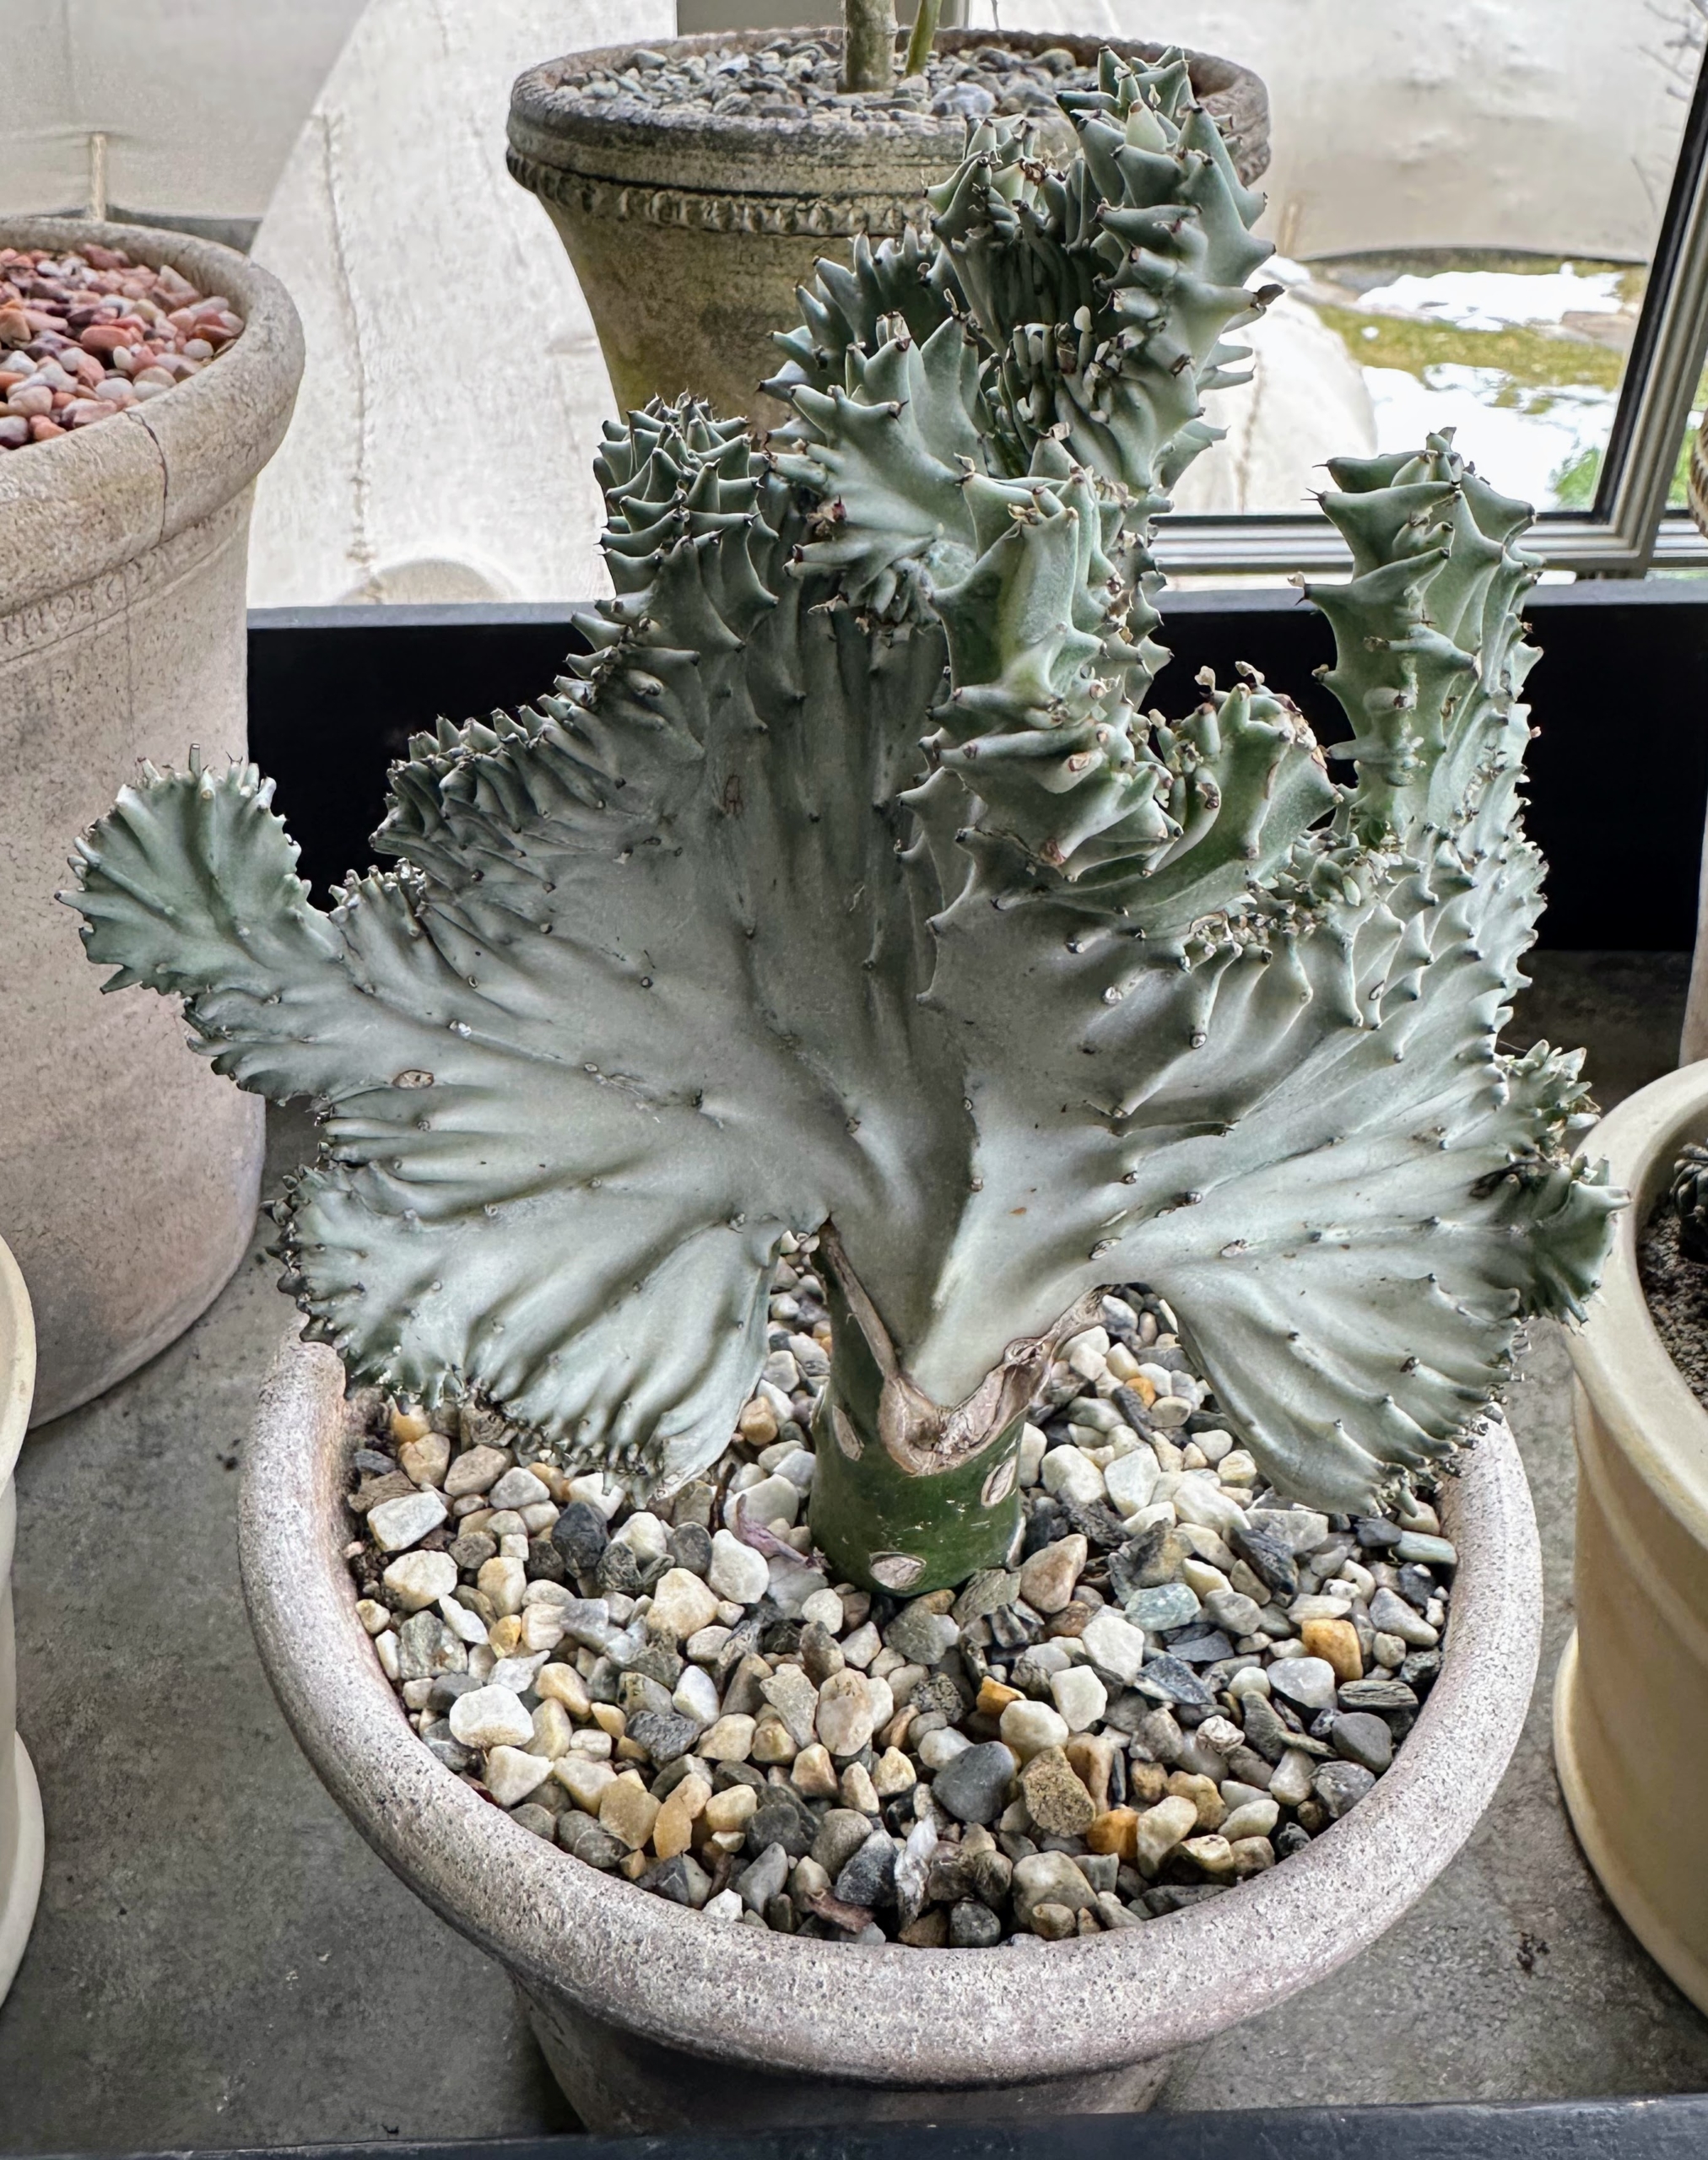
This is Euphorbia lactea is also known as a “Coral Cactus.” It is a species native to tropical Asia, mainly in India. The showy part of the plant, the section that resembles coral, is called the crest. The ridges are spiny, with short spines.
Portulacaria afra is a small-leaved succulent plant found in South Africa. These succulents commonly have a reddish stem and leaves that are green. They are simple to care for and make easy houseplants for a sunny location.
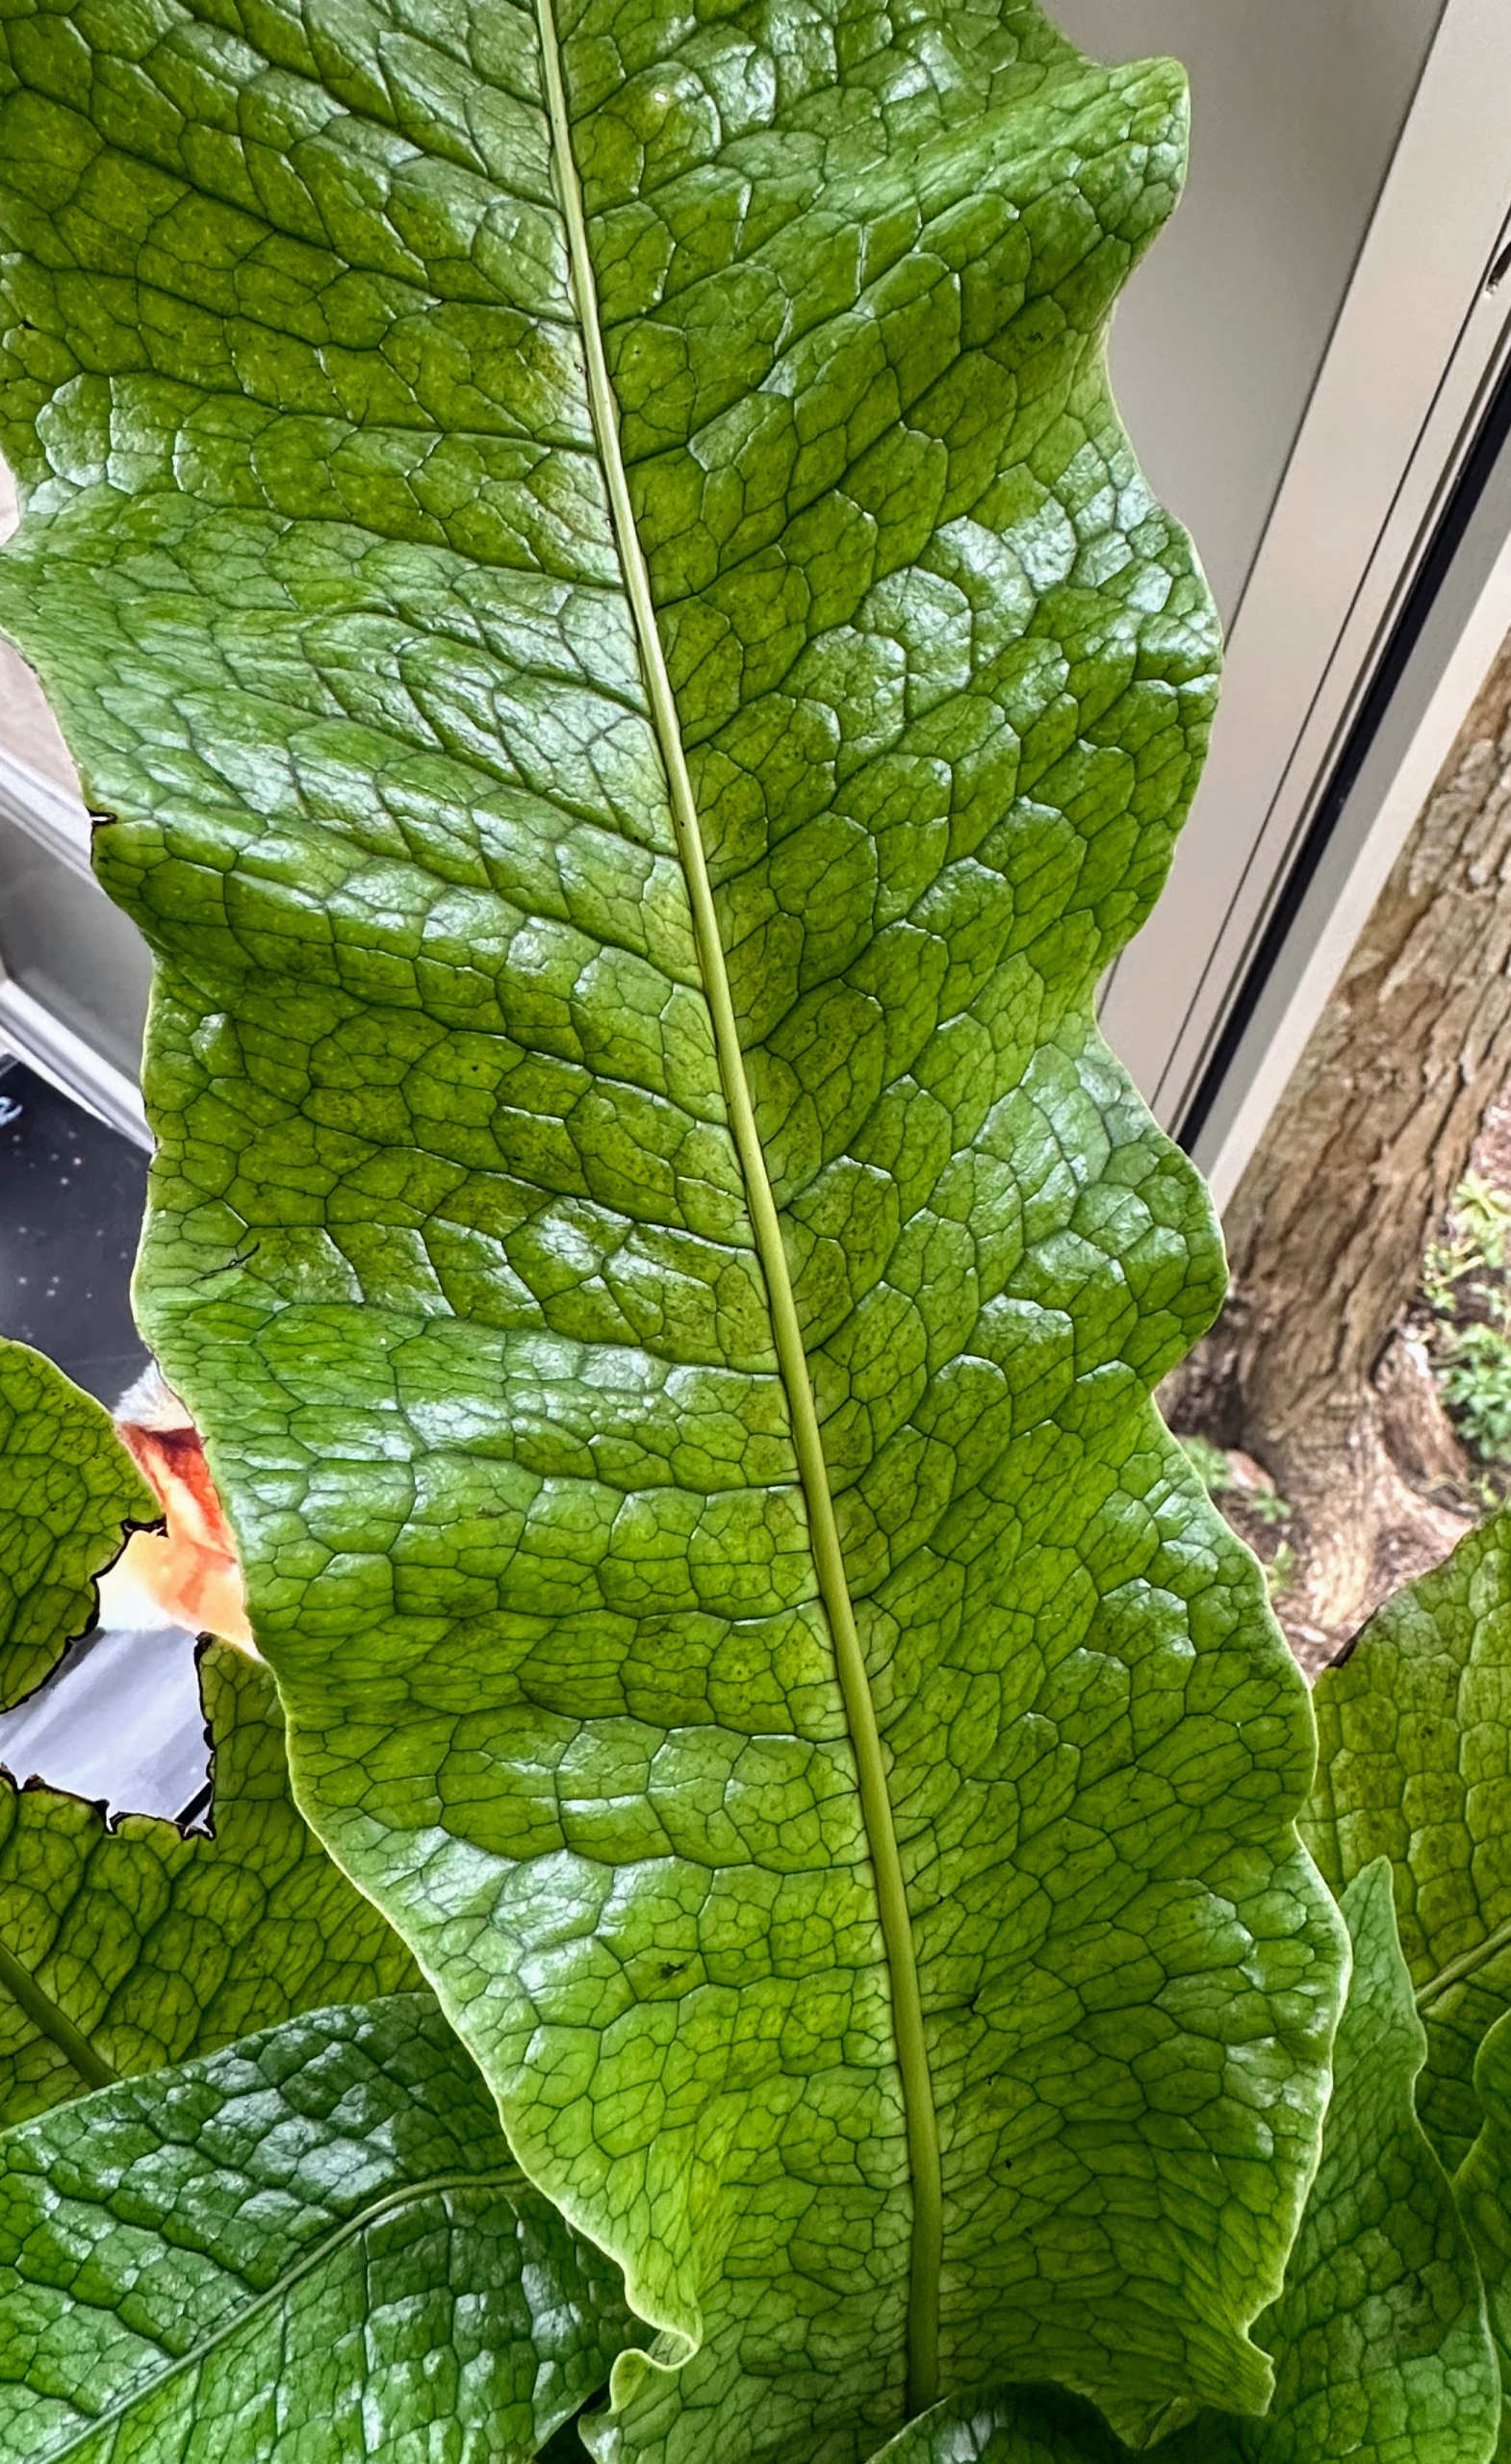
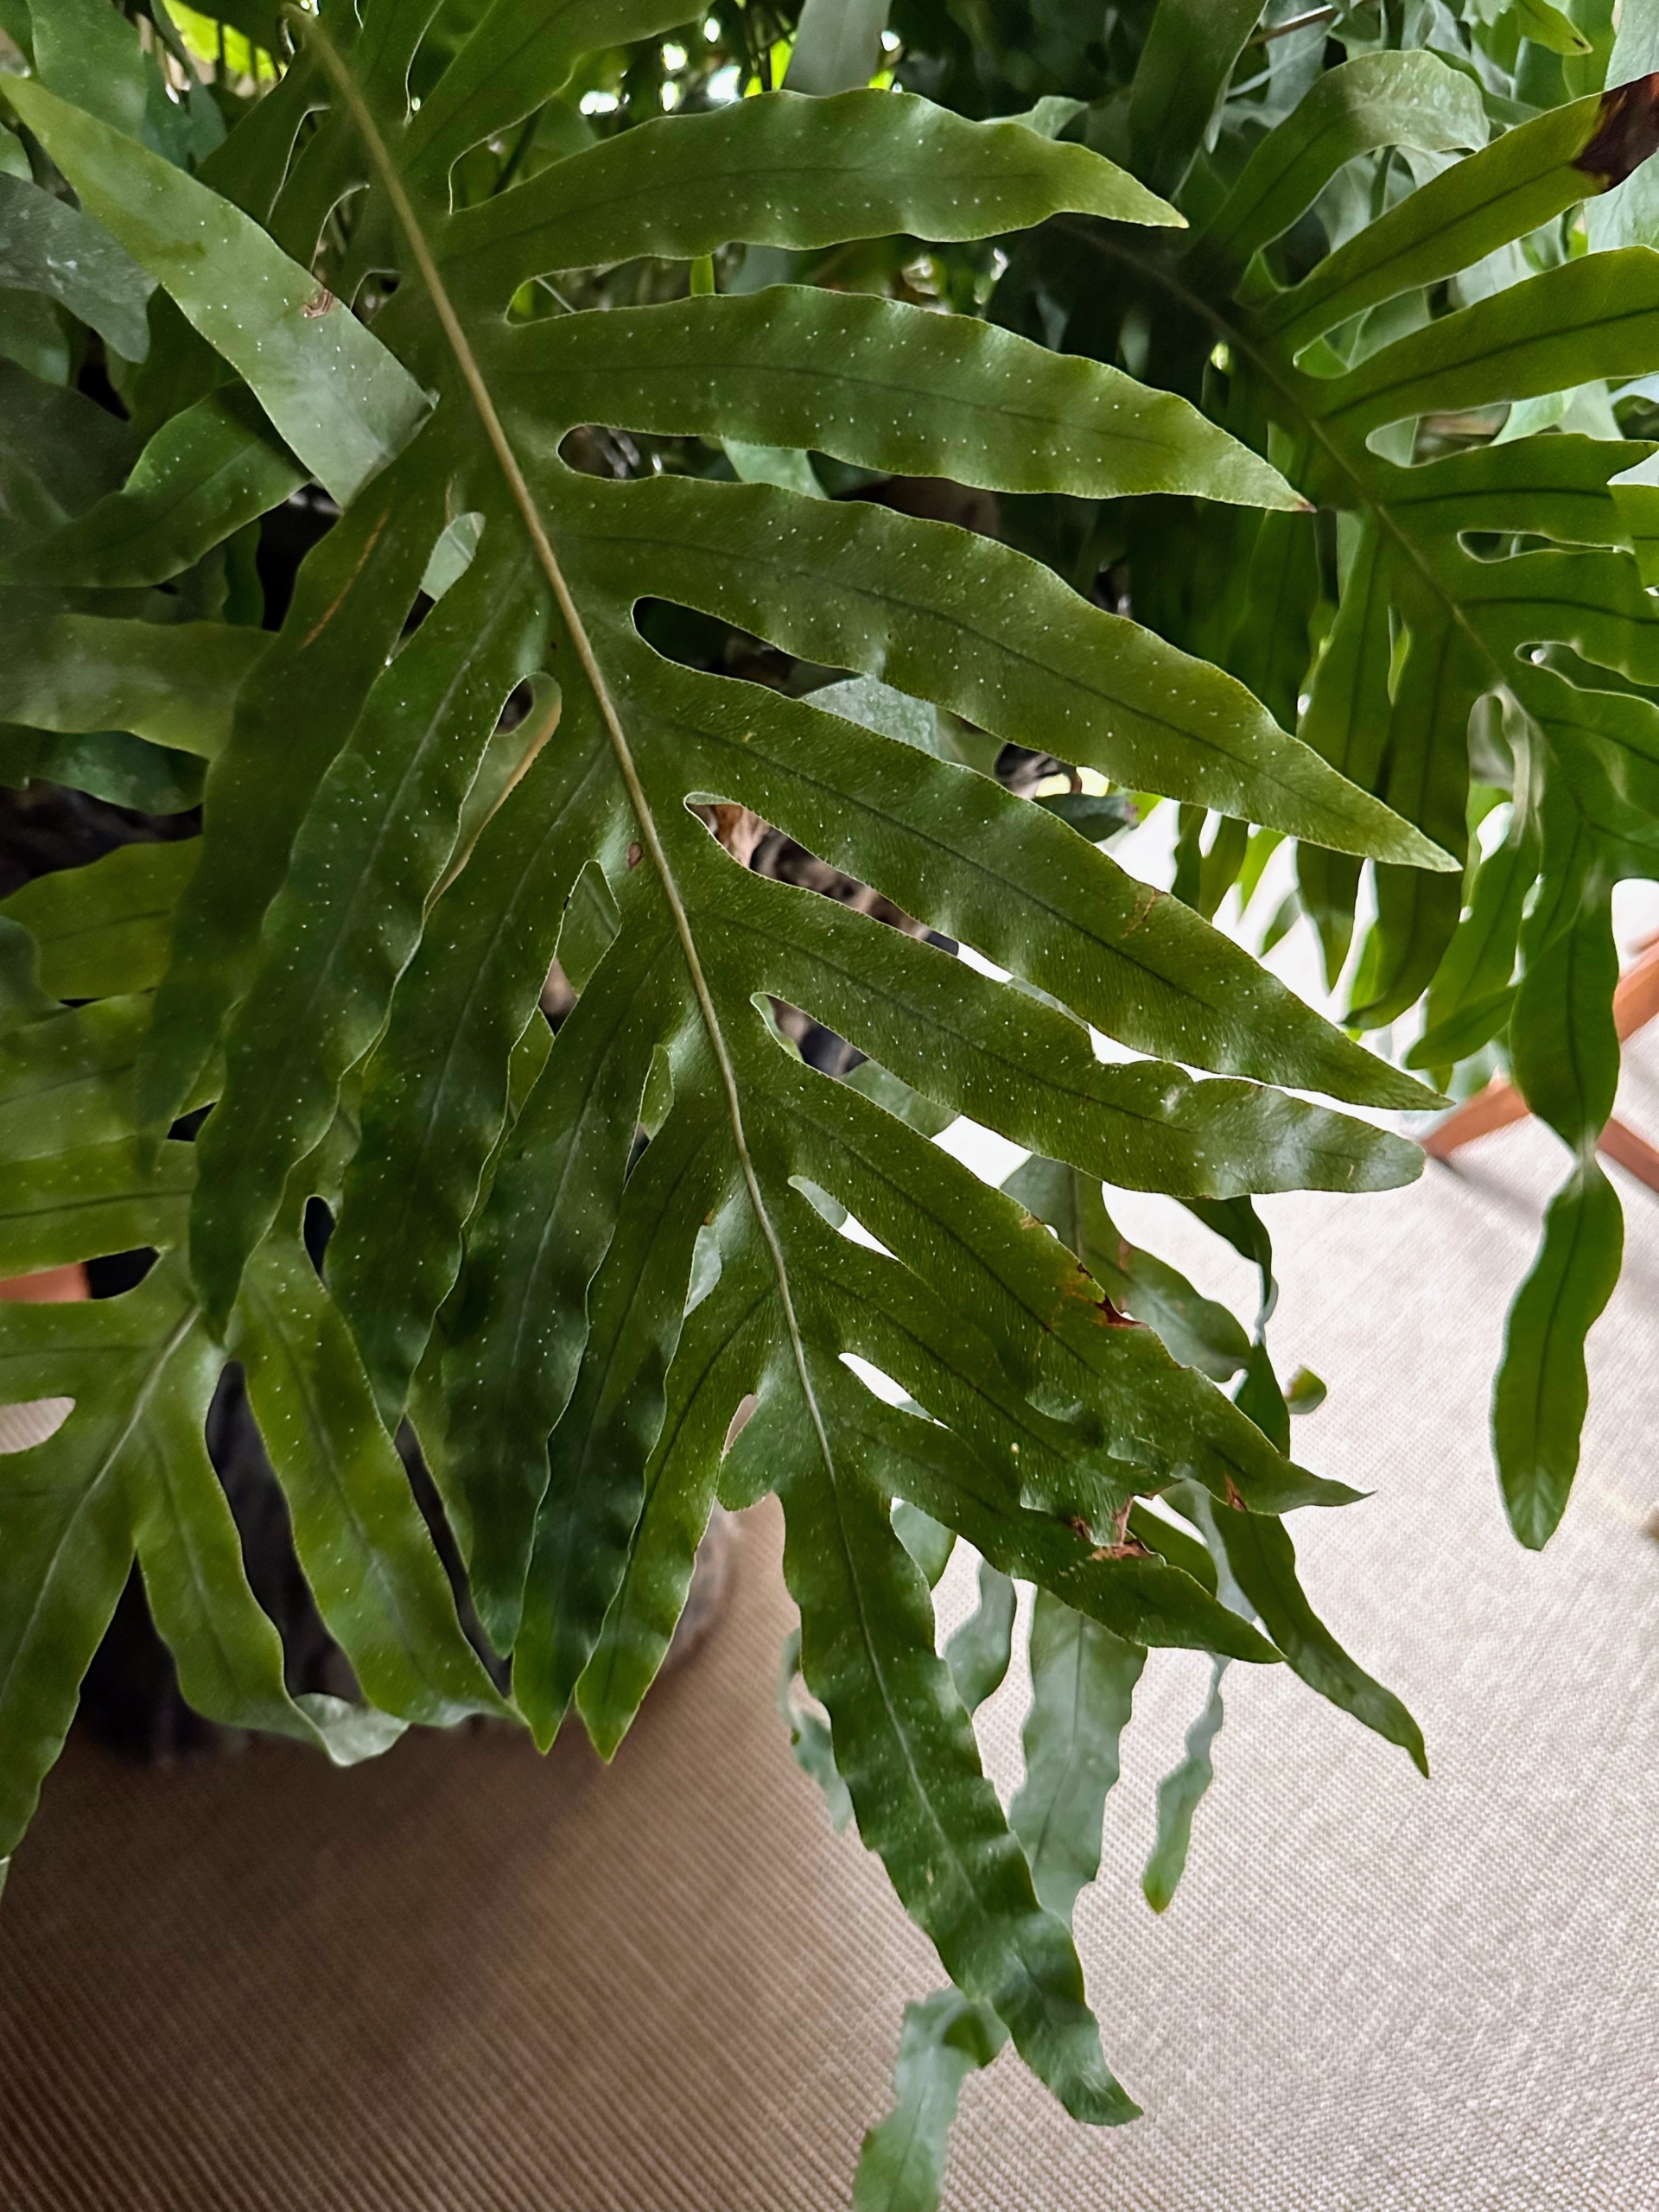
This Crocodile Fern, sometimes known as an alligator fern, a crocodyllus fern, or a crocodile plant, is native to Southeast Asia and Australia where it is found growing epiphytically on trees in warm, brightly lit and humid jungles. It derives its name from the flat tessellated fronds that resemble the patterning on crocodiles.
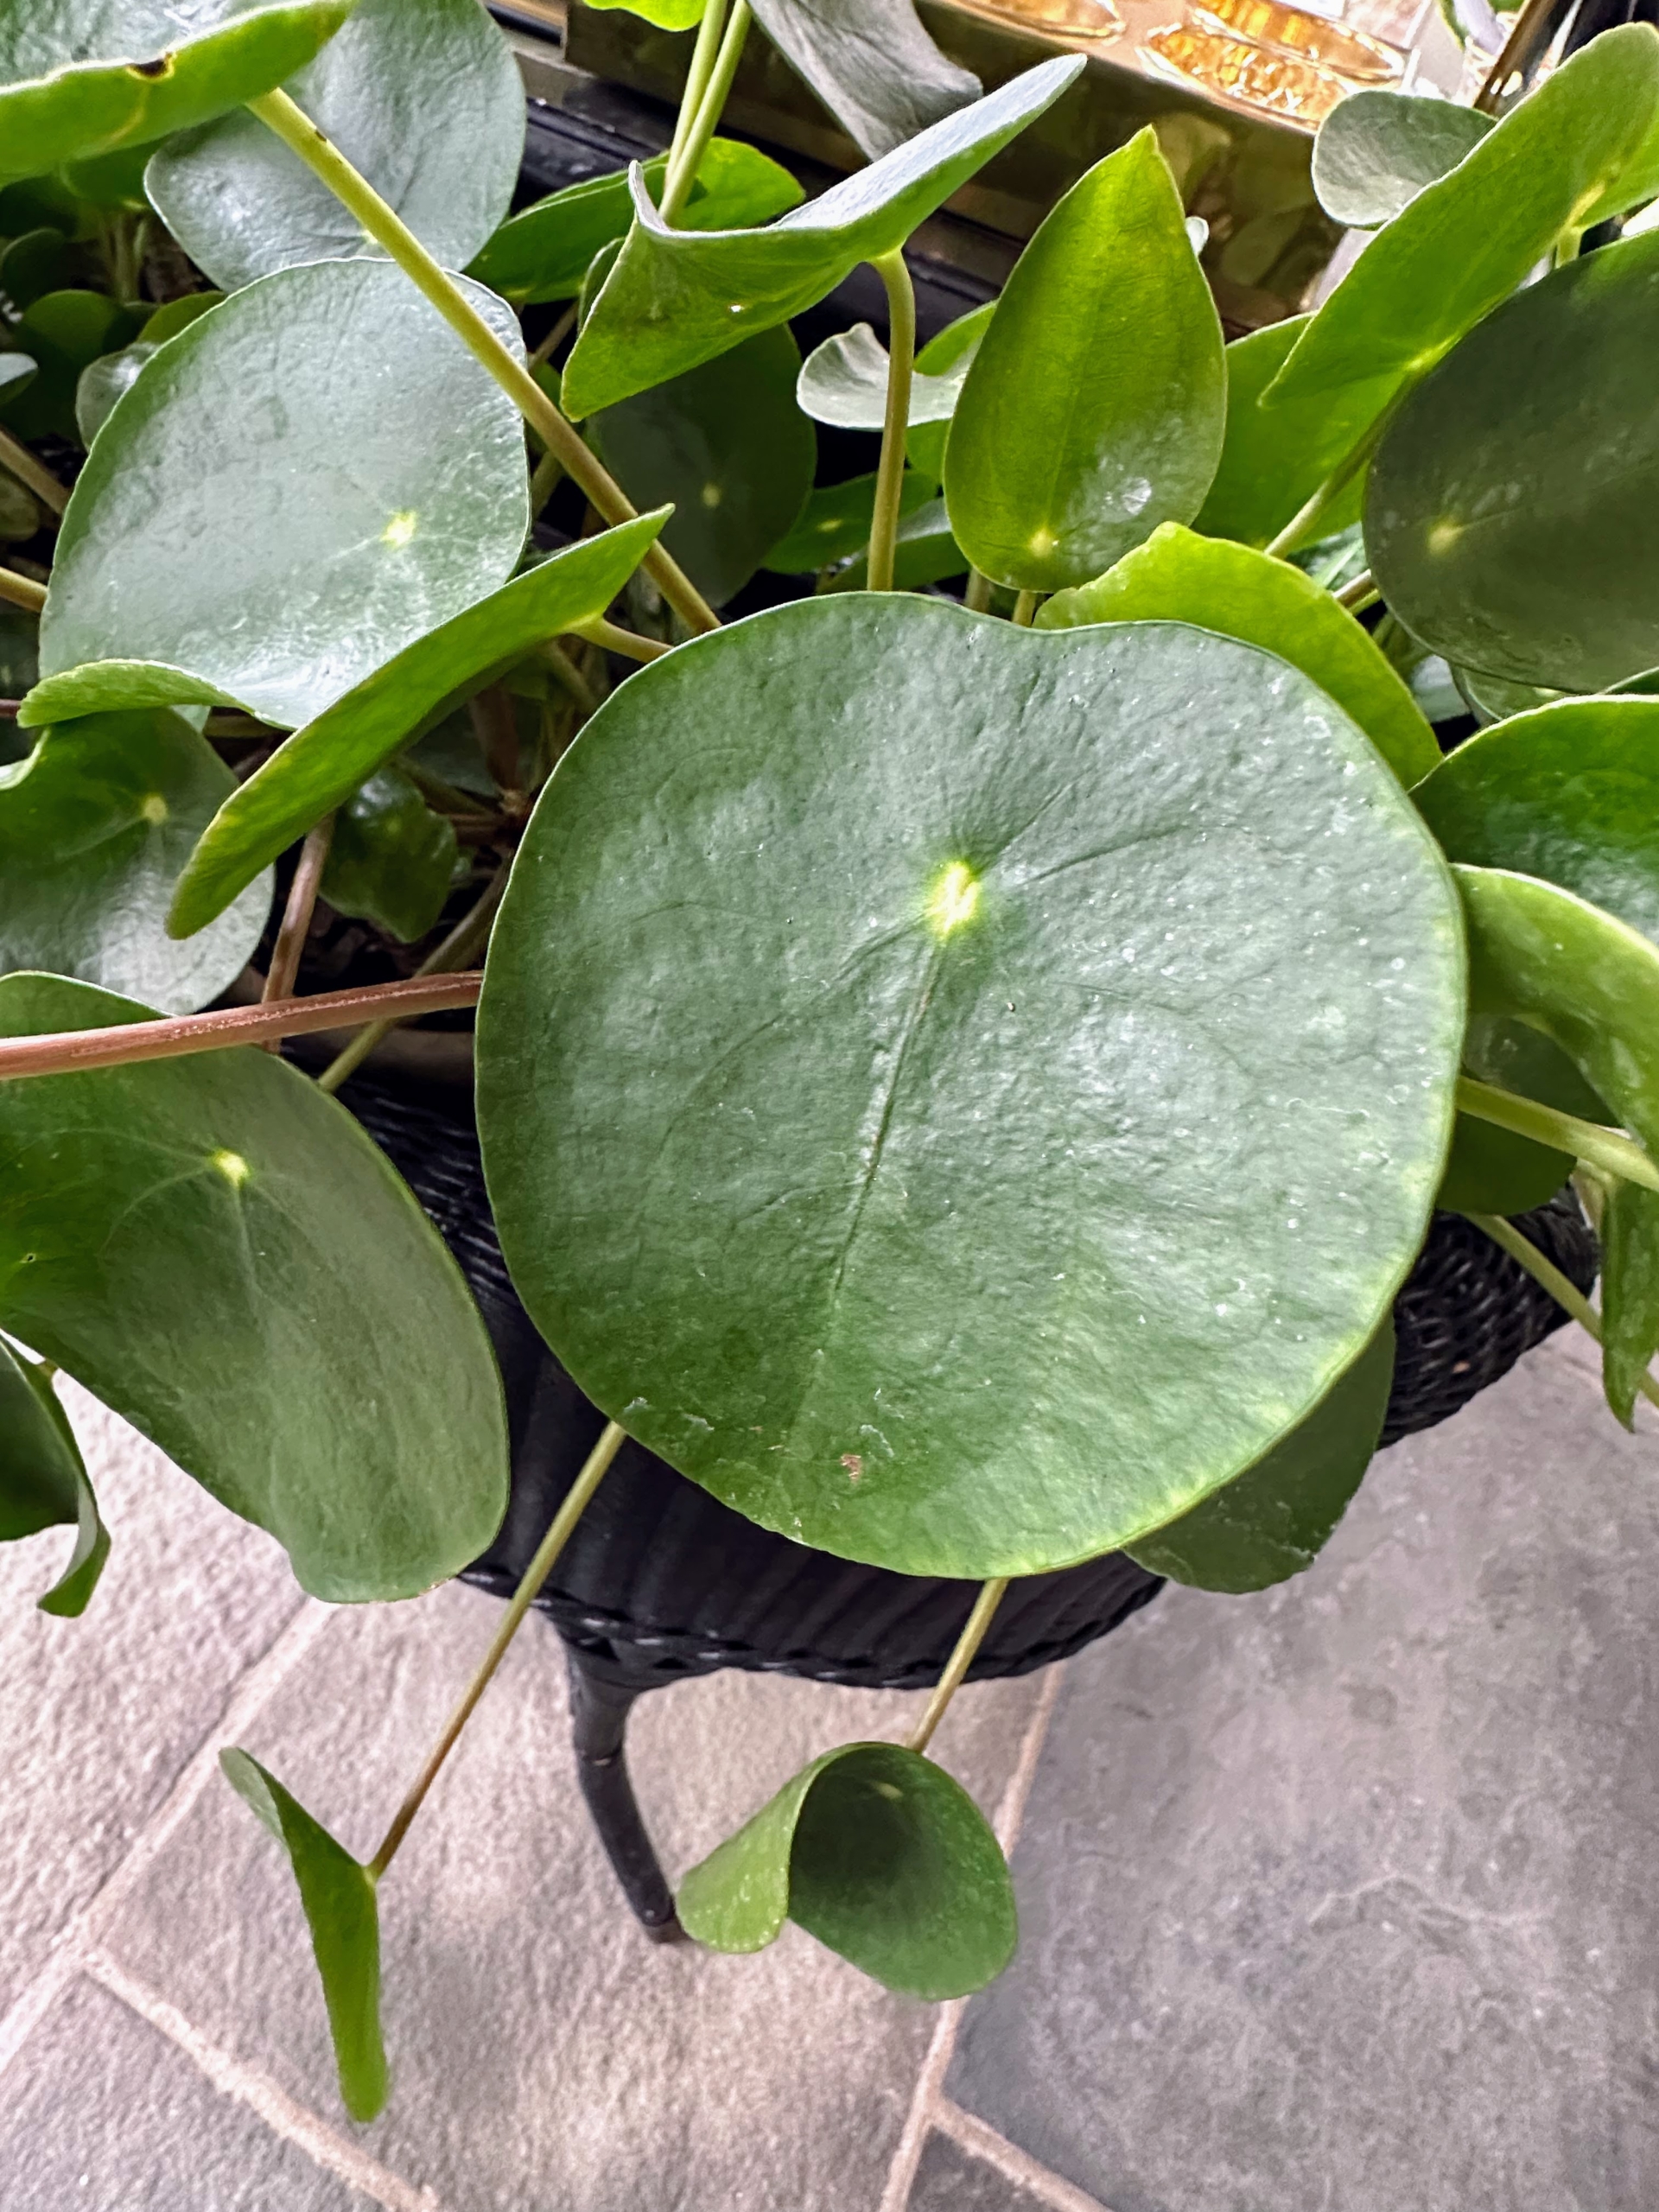
Guests always admire my Chinese money plants, Pilea peperomioides. It has attractive coin-shaped foliage. This flowering perennial is native to southern China, growing naturally along the base of the Himalayan mountains. It is also known as coin plant, pancake plant, and UFO plant.
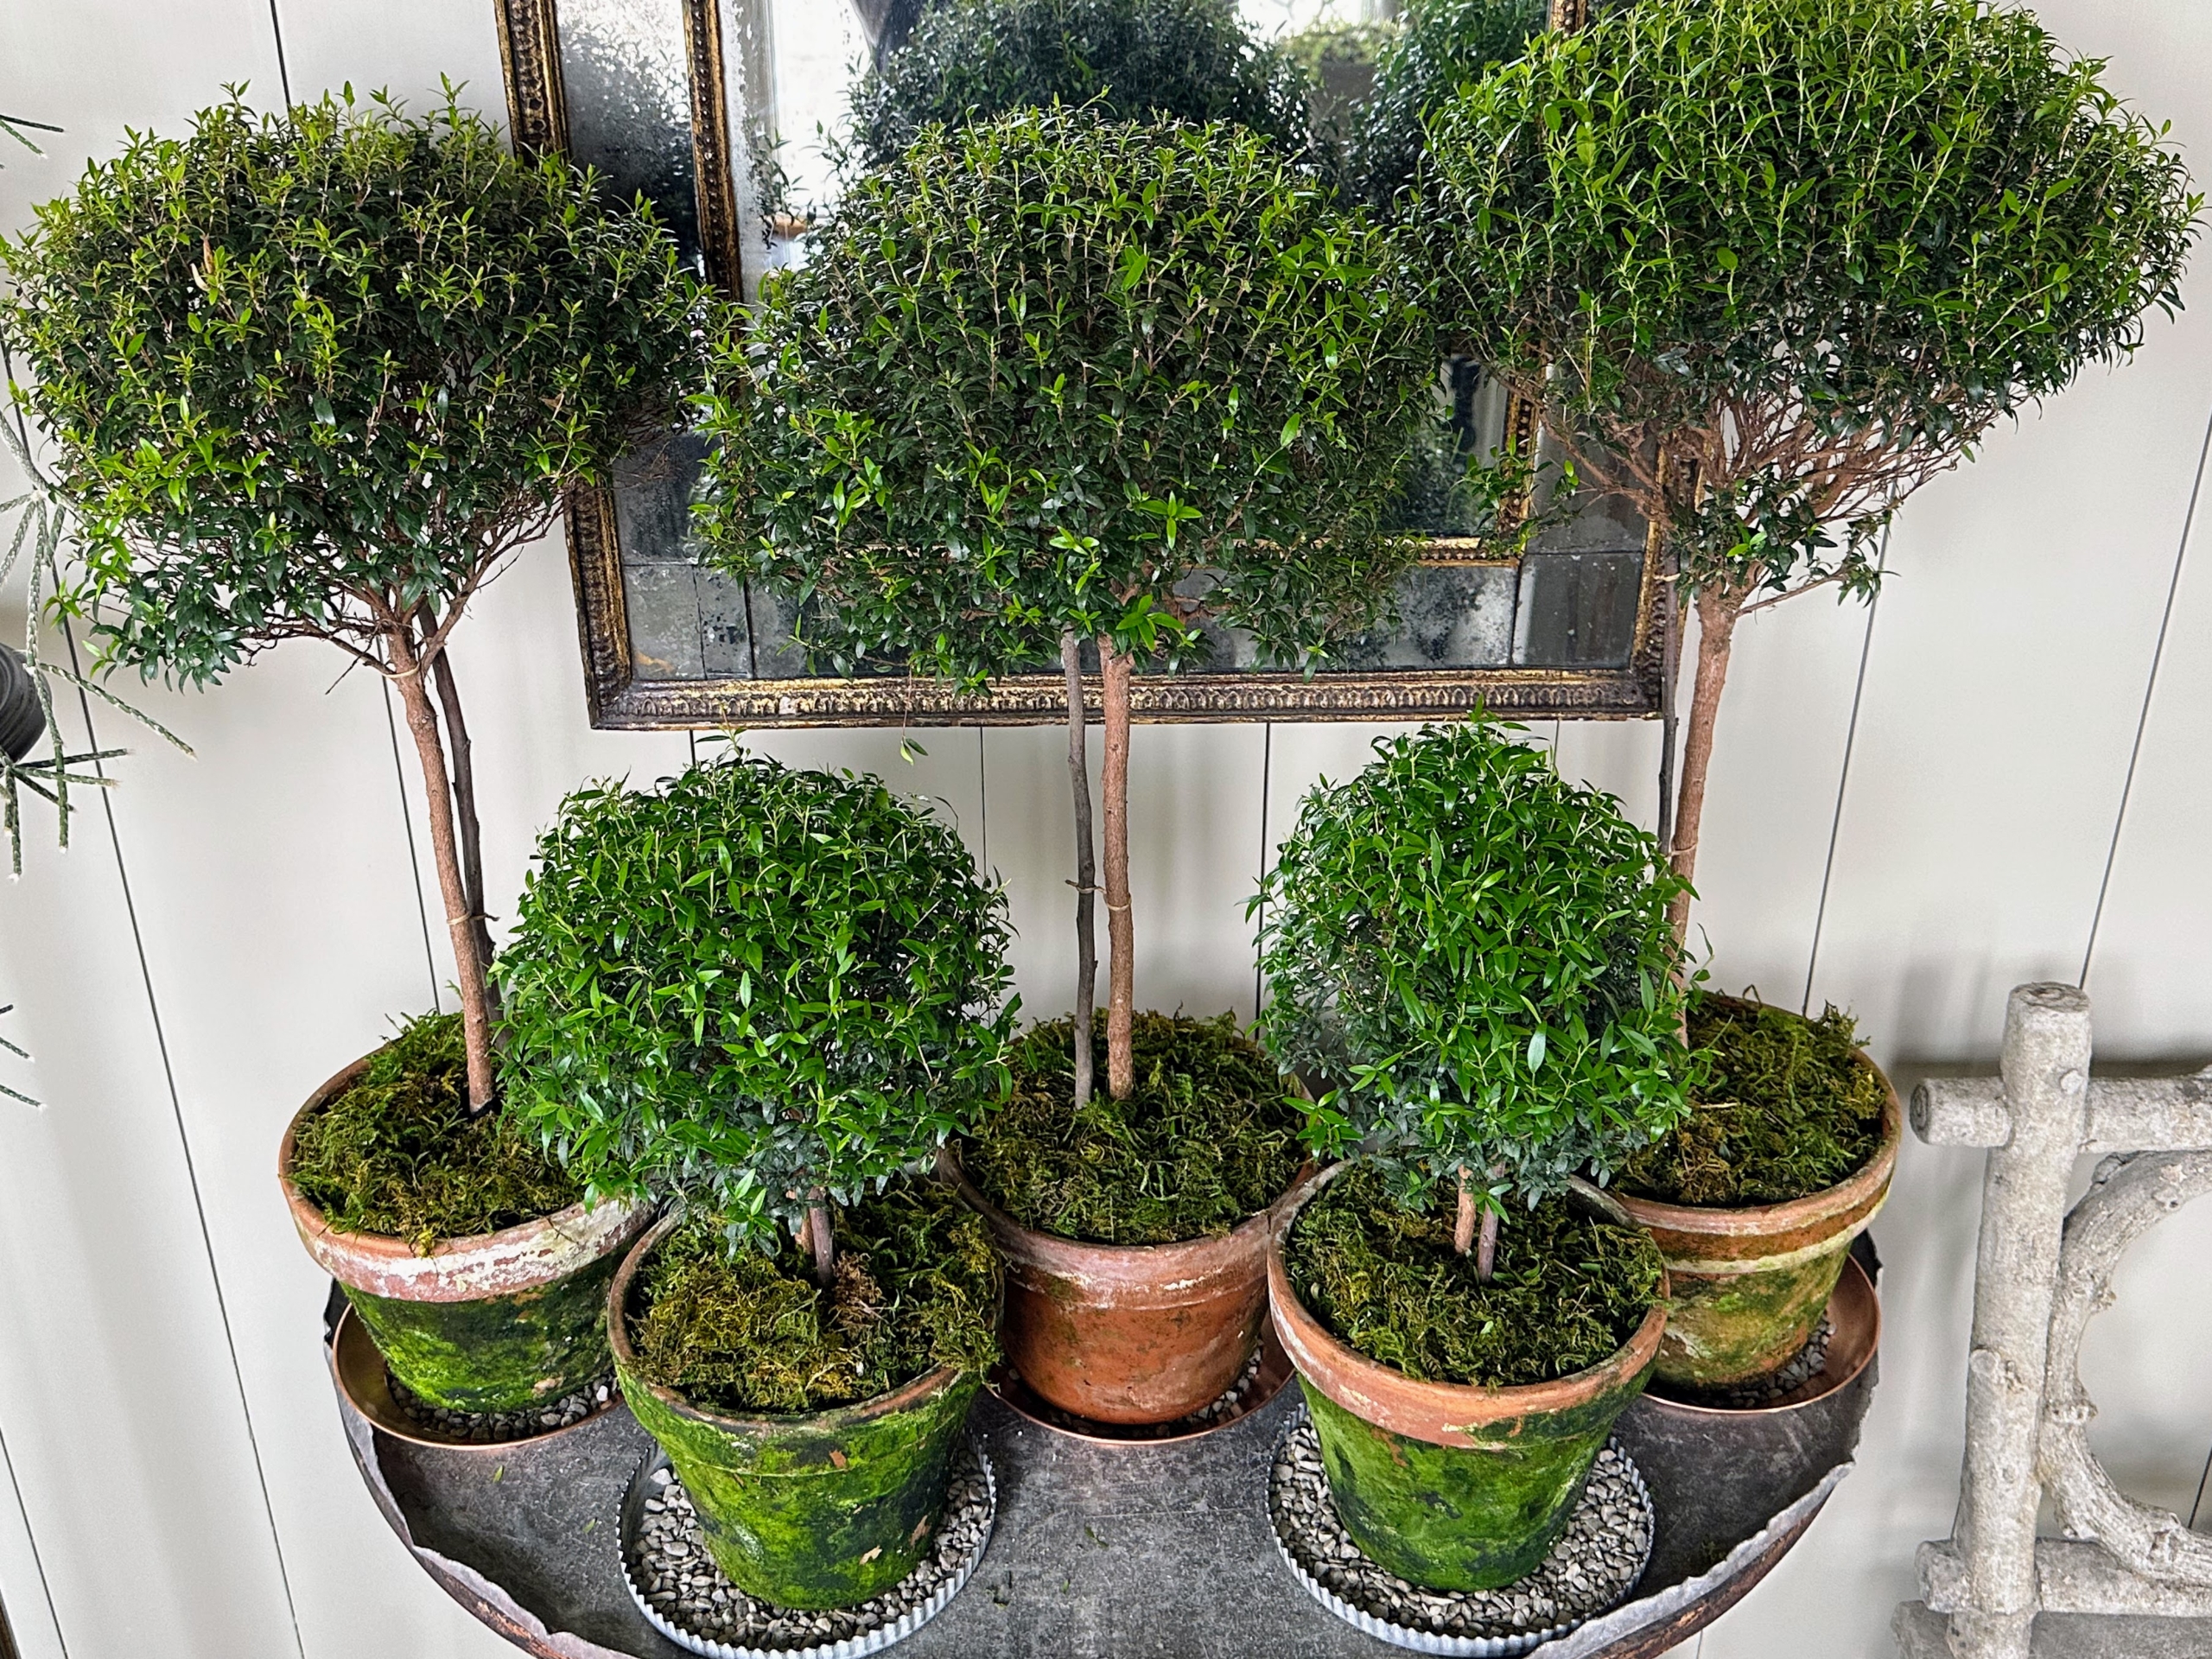
One table is filled with these charming topiaries. Topiary is the horticultural practice of training perennial plants by clipping the foliage and twigs of trees, shrubs and subshrubs to develop and maintain clearly defined shapes.
This succulent, Haworthiopsis coarctata, has long stems packed with robust succulent leaves. It is normally dark green but sometimes shows a rich purple-red when in full sunlight.
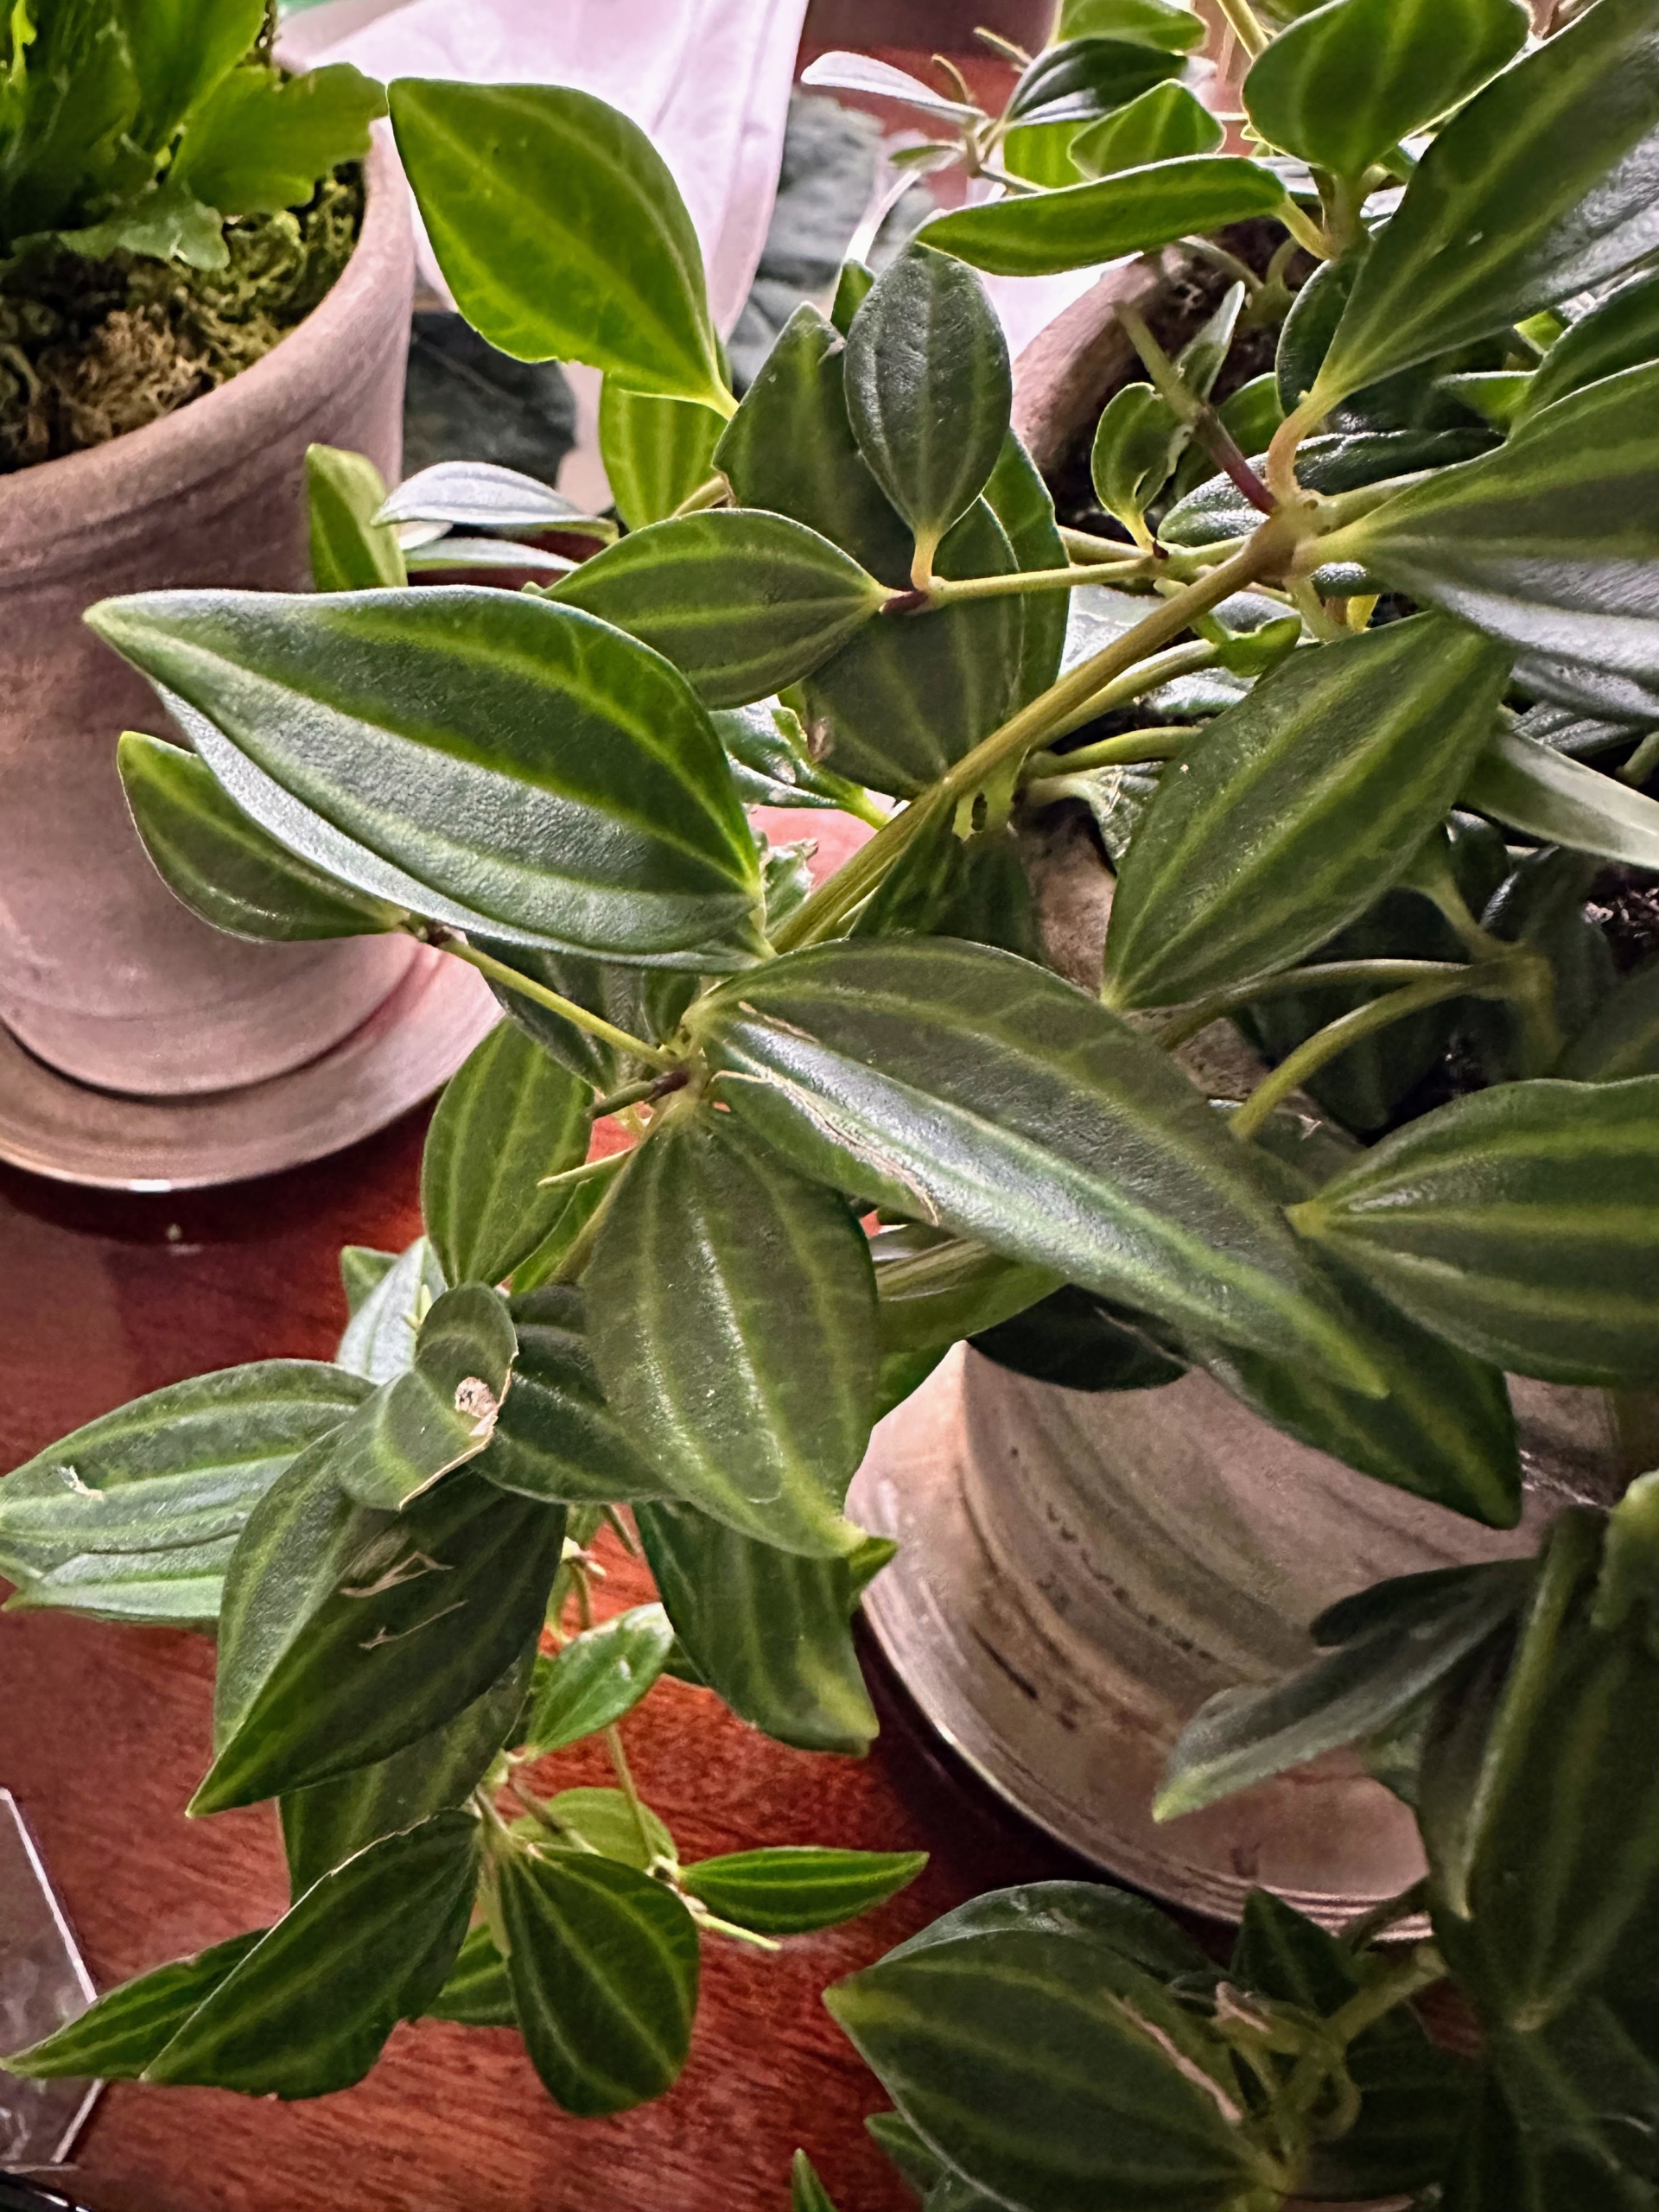
This Peperomia has almond-shaped leaves that are variegated with alternating stripes of dark and light green. Most varieties of Peperomia plants prefer medium to bright indirect light, but can tolerate low indirect light.
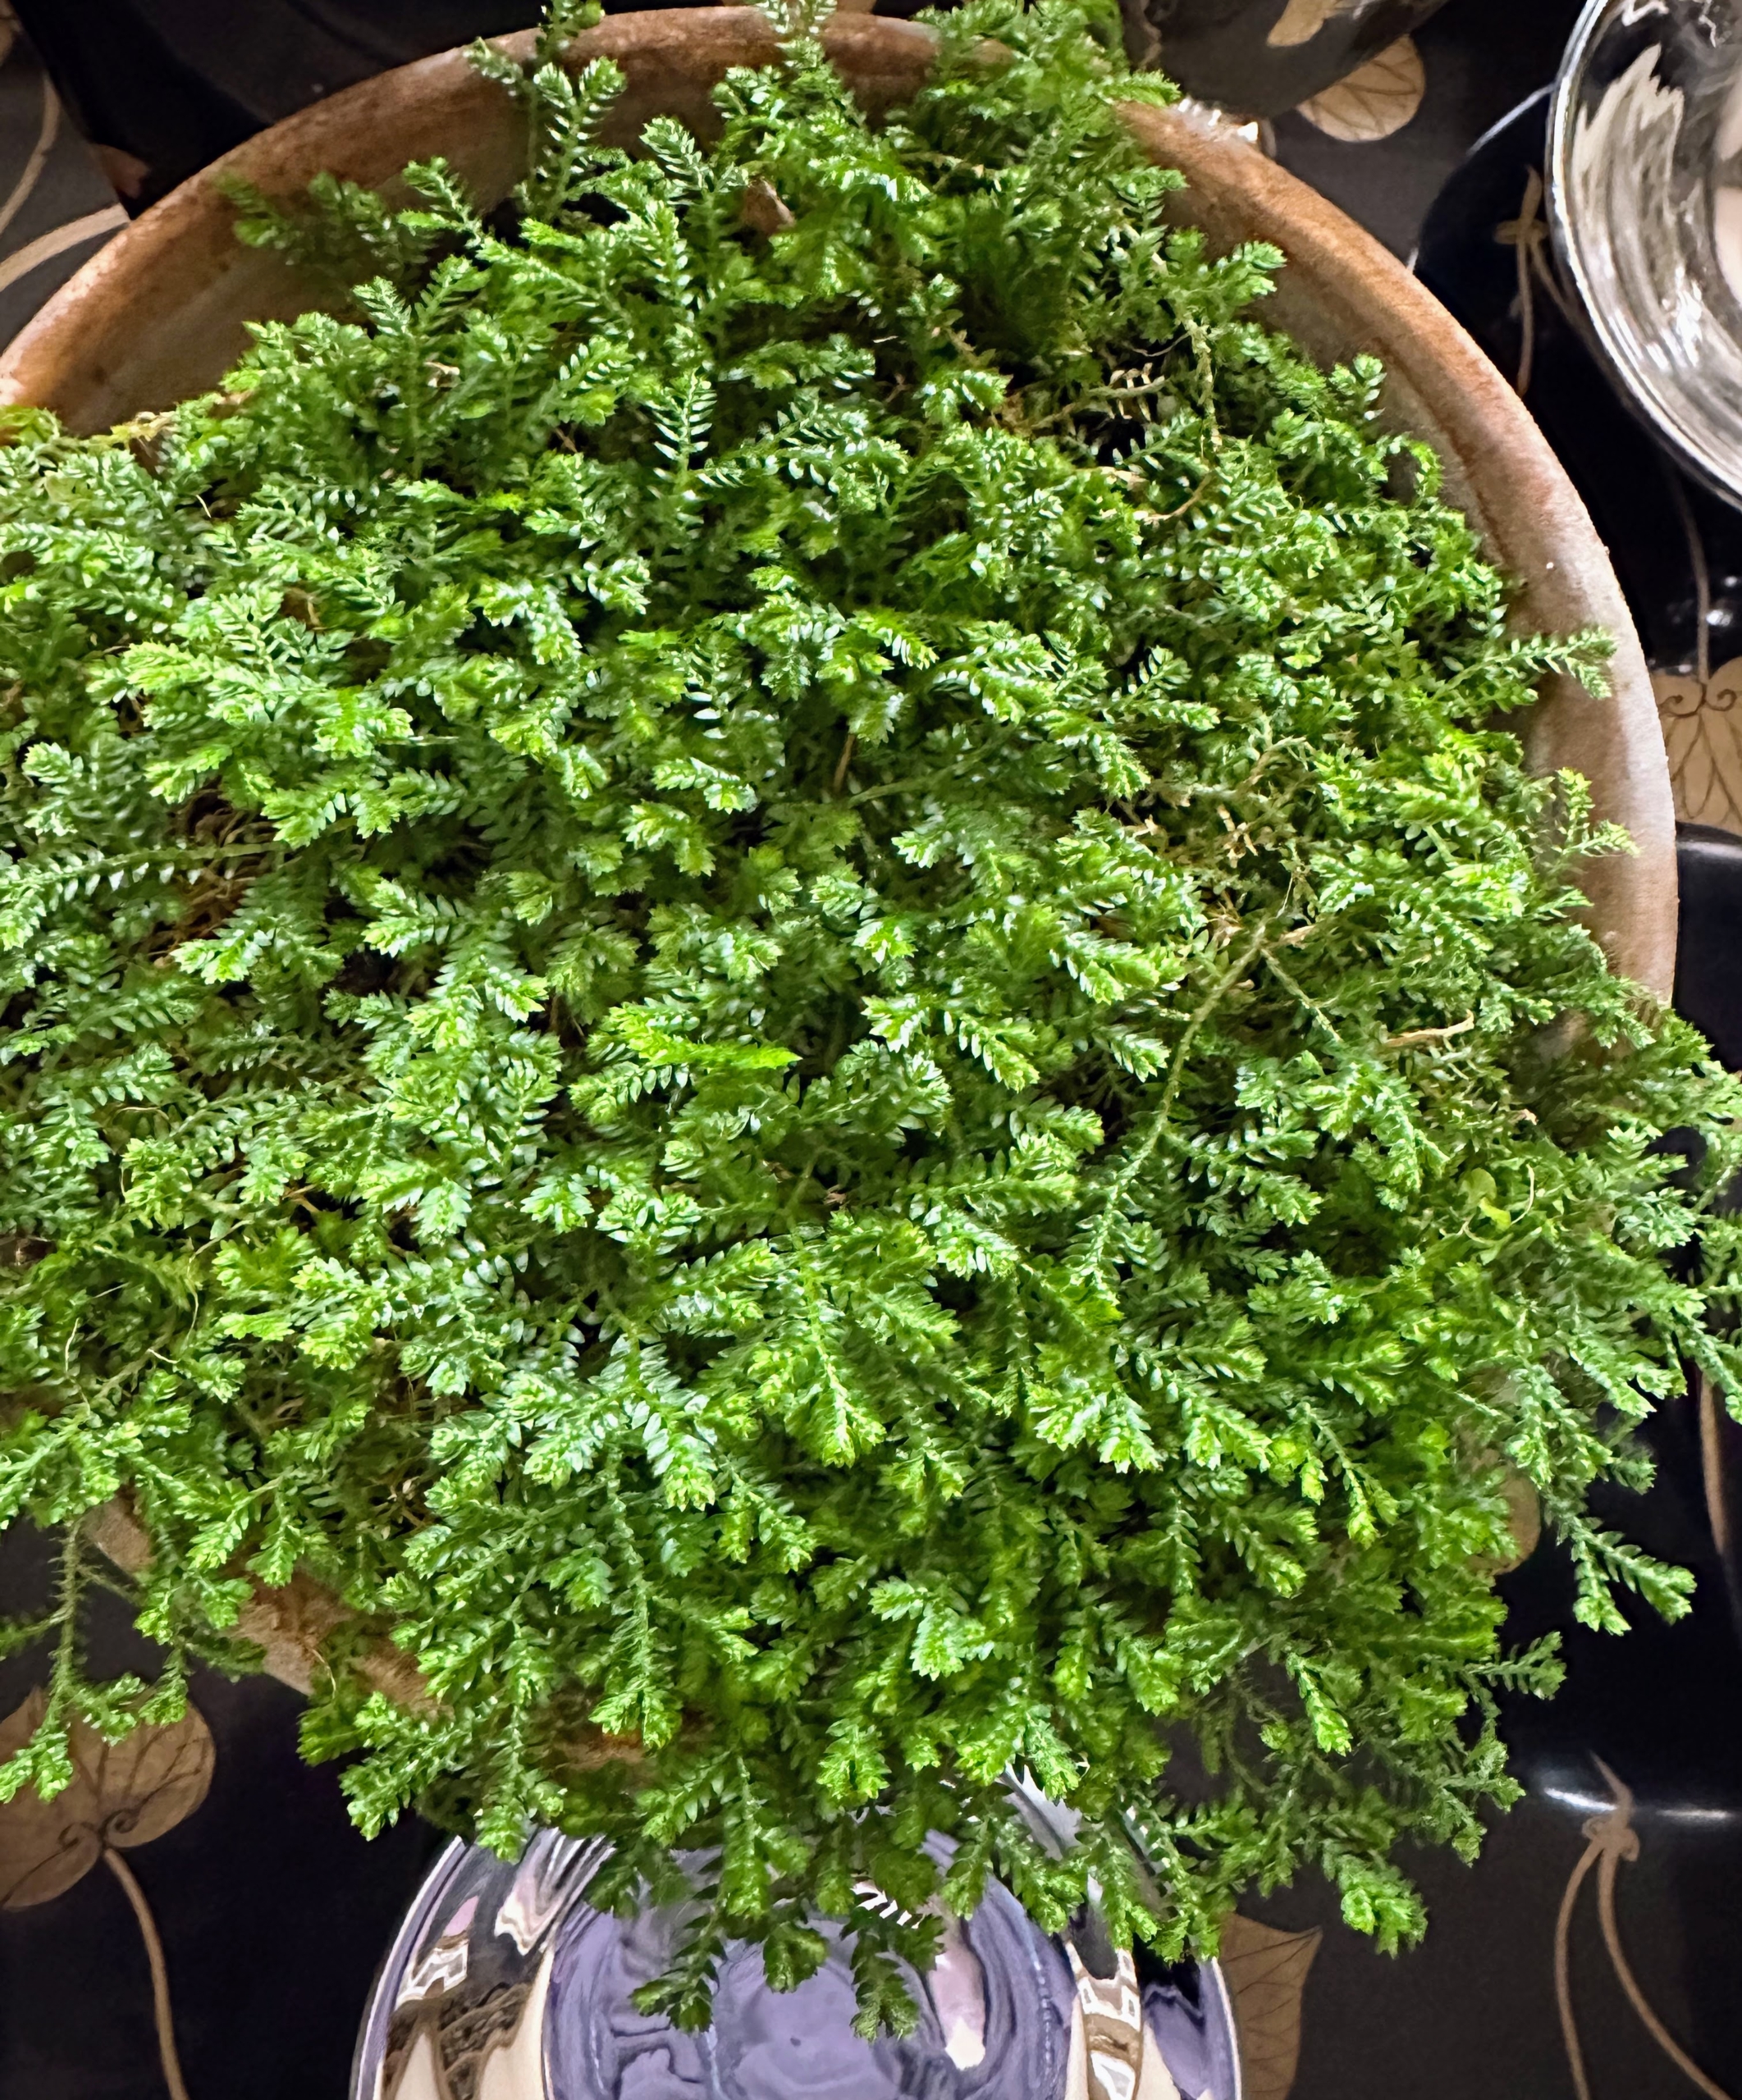
This is selaginella. Selanginella is the sole genus of the vascular plants in the family Selaginellaceae. It can be potted up on its own or used as an underplanting.
This large blue fern is in my Brown Room – an interesting looking fern with large fronds and a pleasant green-blue color. Its ability to tolerate lower-light conditions and relatively easy care make it a great choice for any fern lover.
And did you see the latests photos on my Instagram page @MarthaStewart48? I hosted a lovely St. Patrick’s Day dinner over the weekend for 12 friends. I will share more of those images on my next blog. Be sure to check back again tomorrow.
Our new brick and stone footpath project continues in the goose and peafowl enclosures.
If you follow my blog regularly, you may have seen my recent post showing my outdoor grounds crew using dozens of pressed red clay bricks that once surrounded my pool at my former East Hampton home to line a footpath inside and outside my Silkie chicken pen. I also instructed the crew to do the same from the entrance of the goose yard all the way to the peafowl coop. This path allows visitors to walk through easily even on the muddiest of days.
Here are some photos, enjoy.
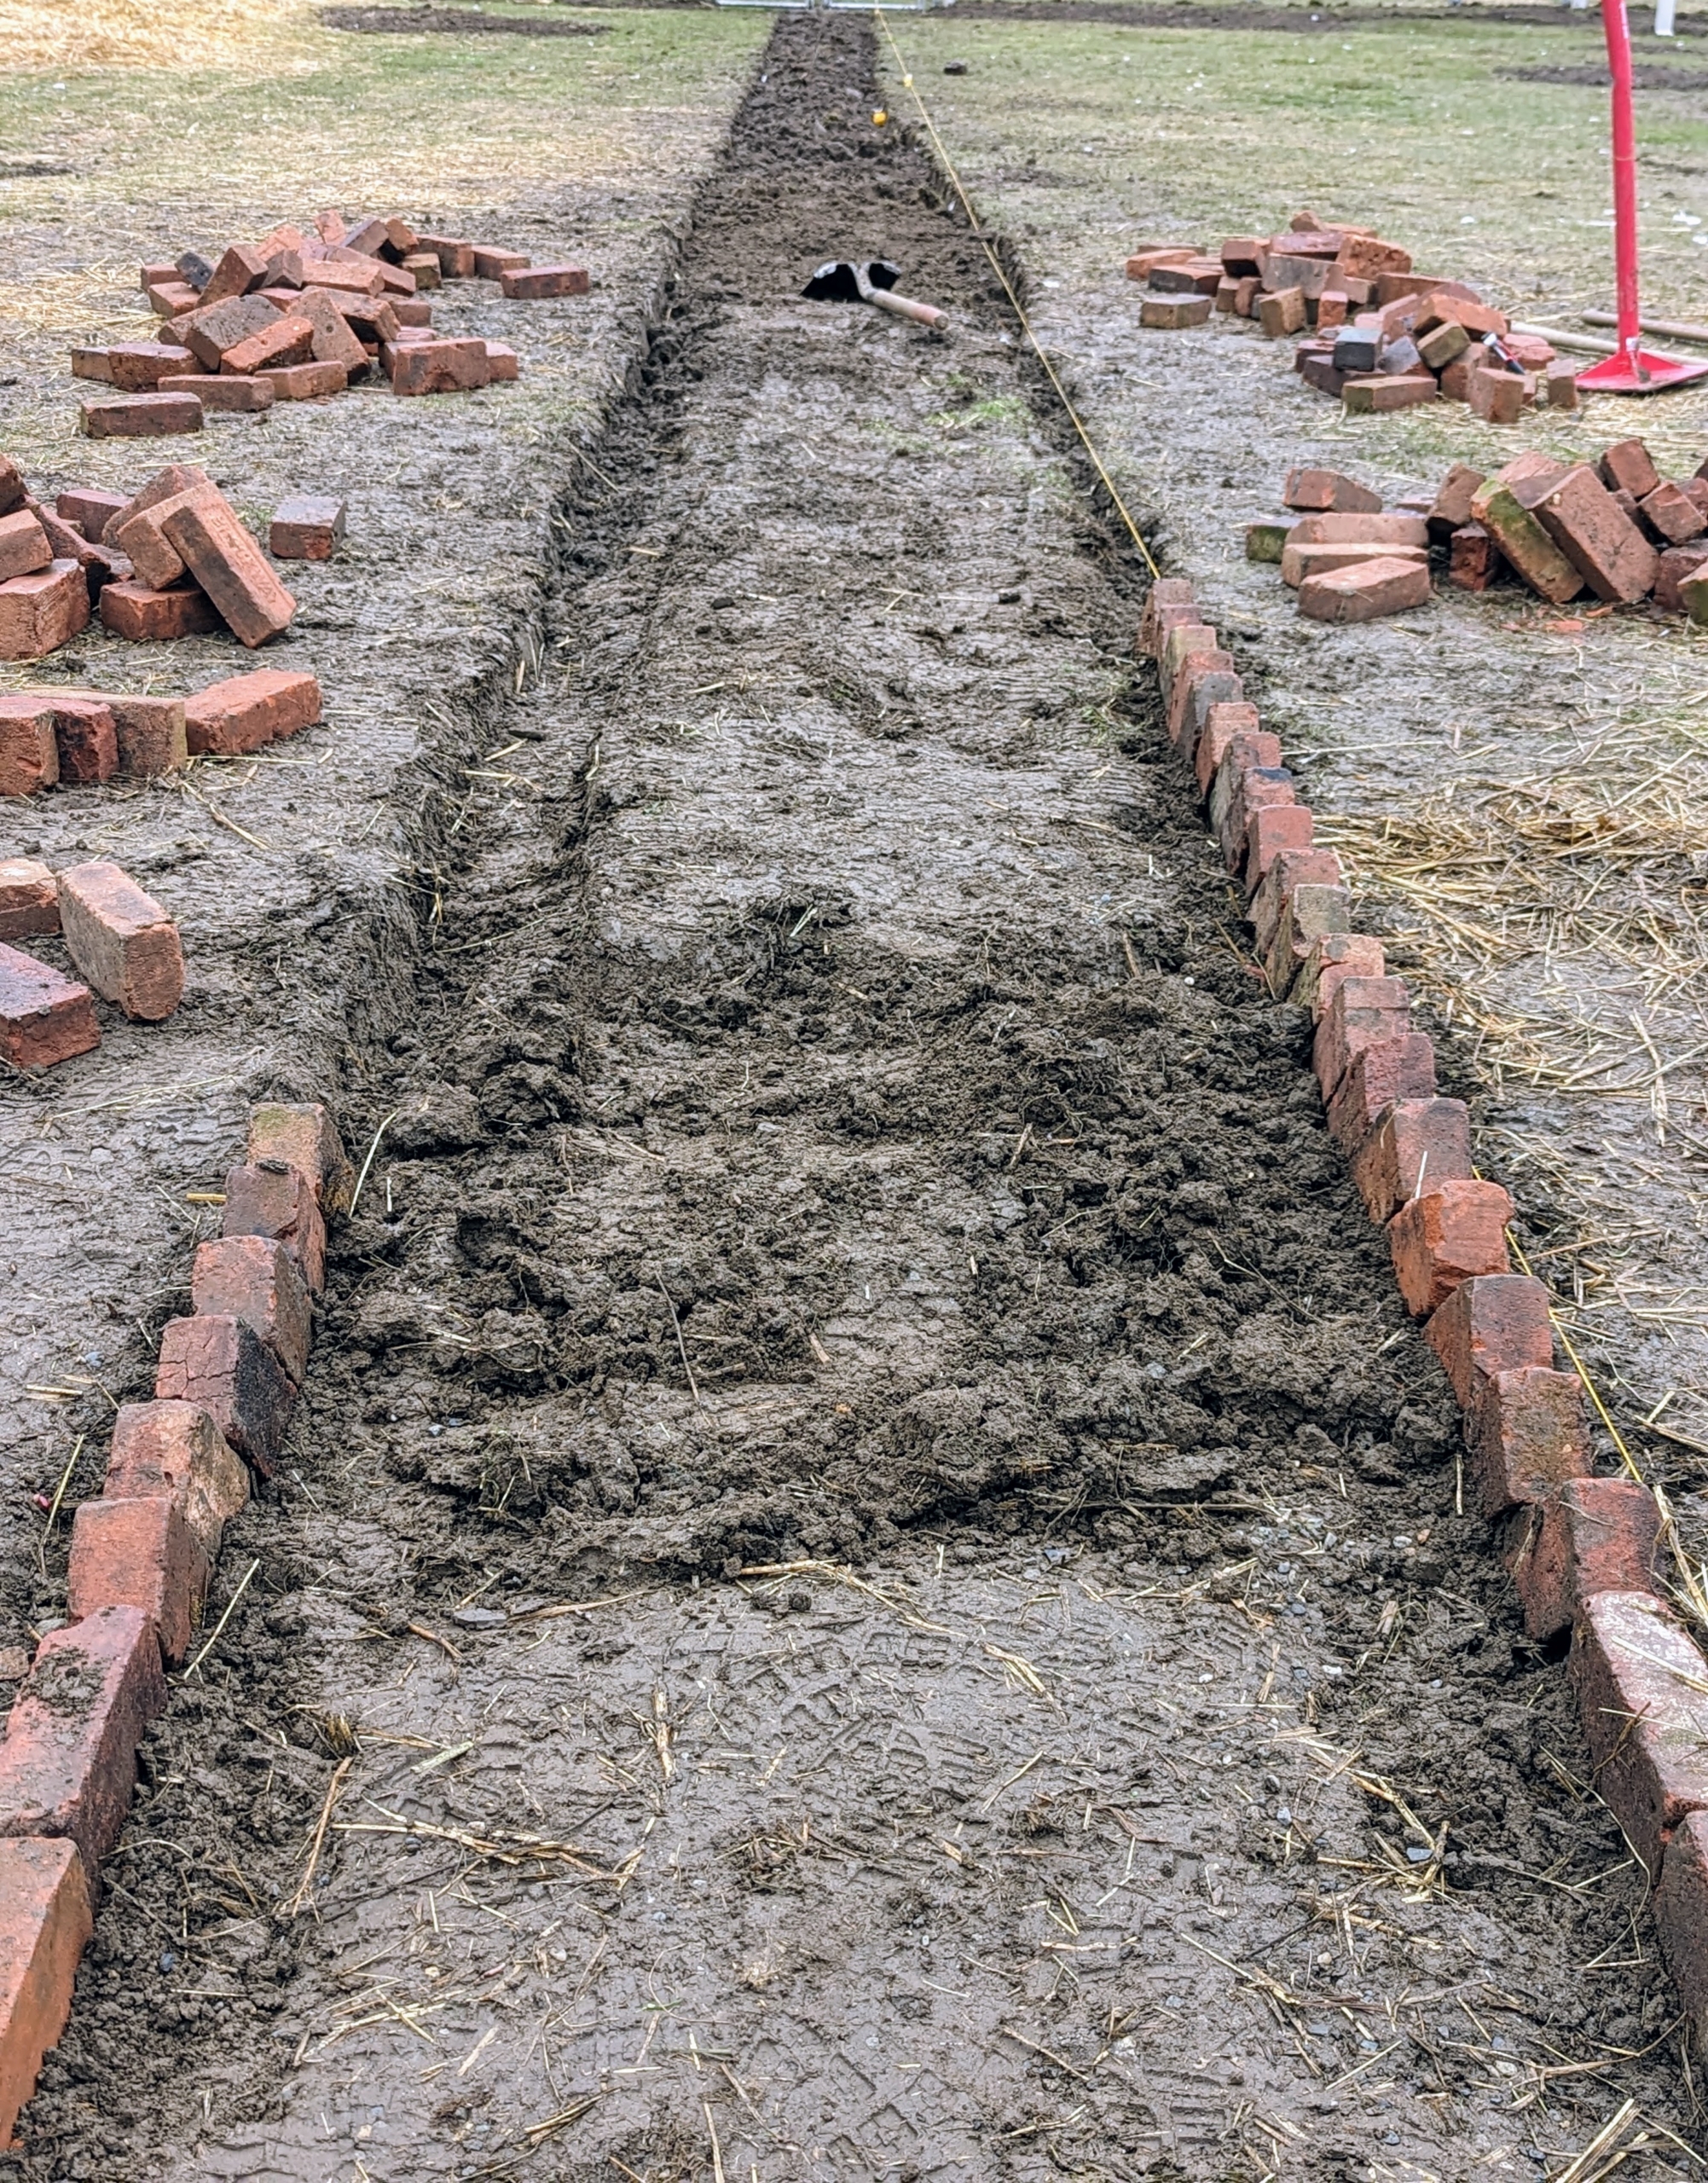
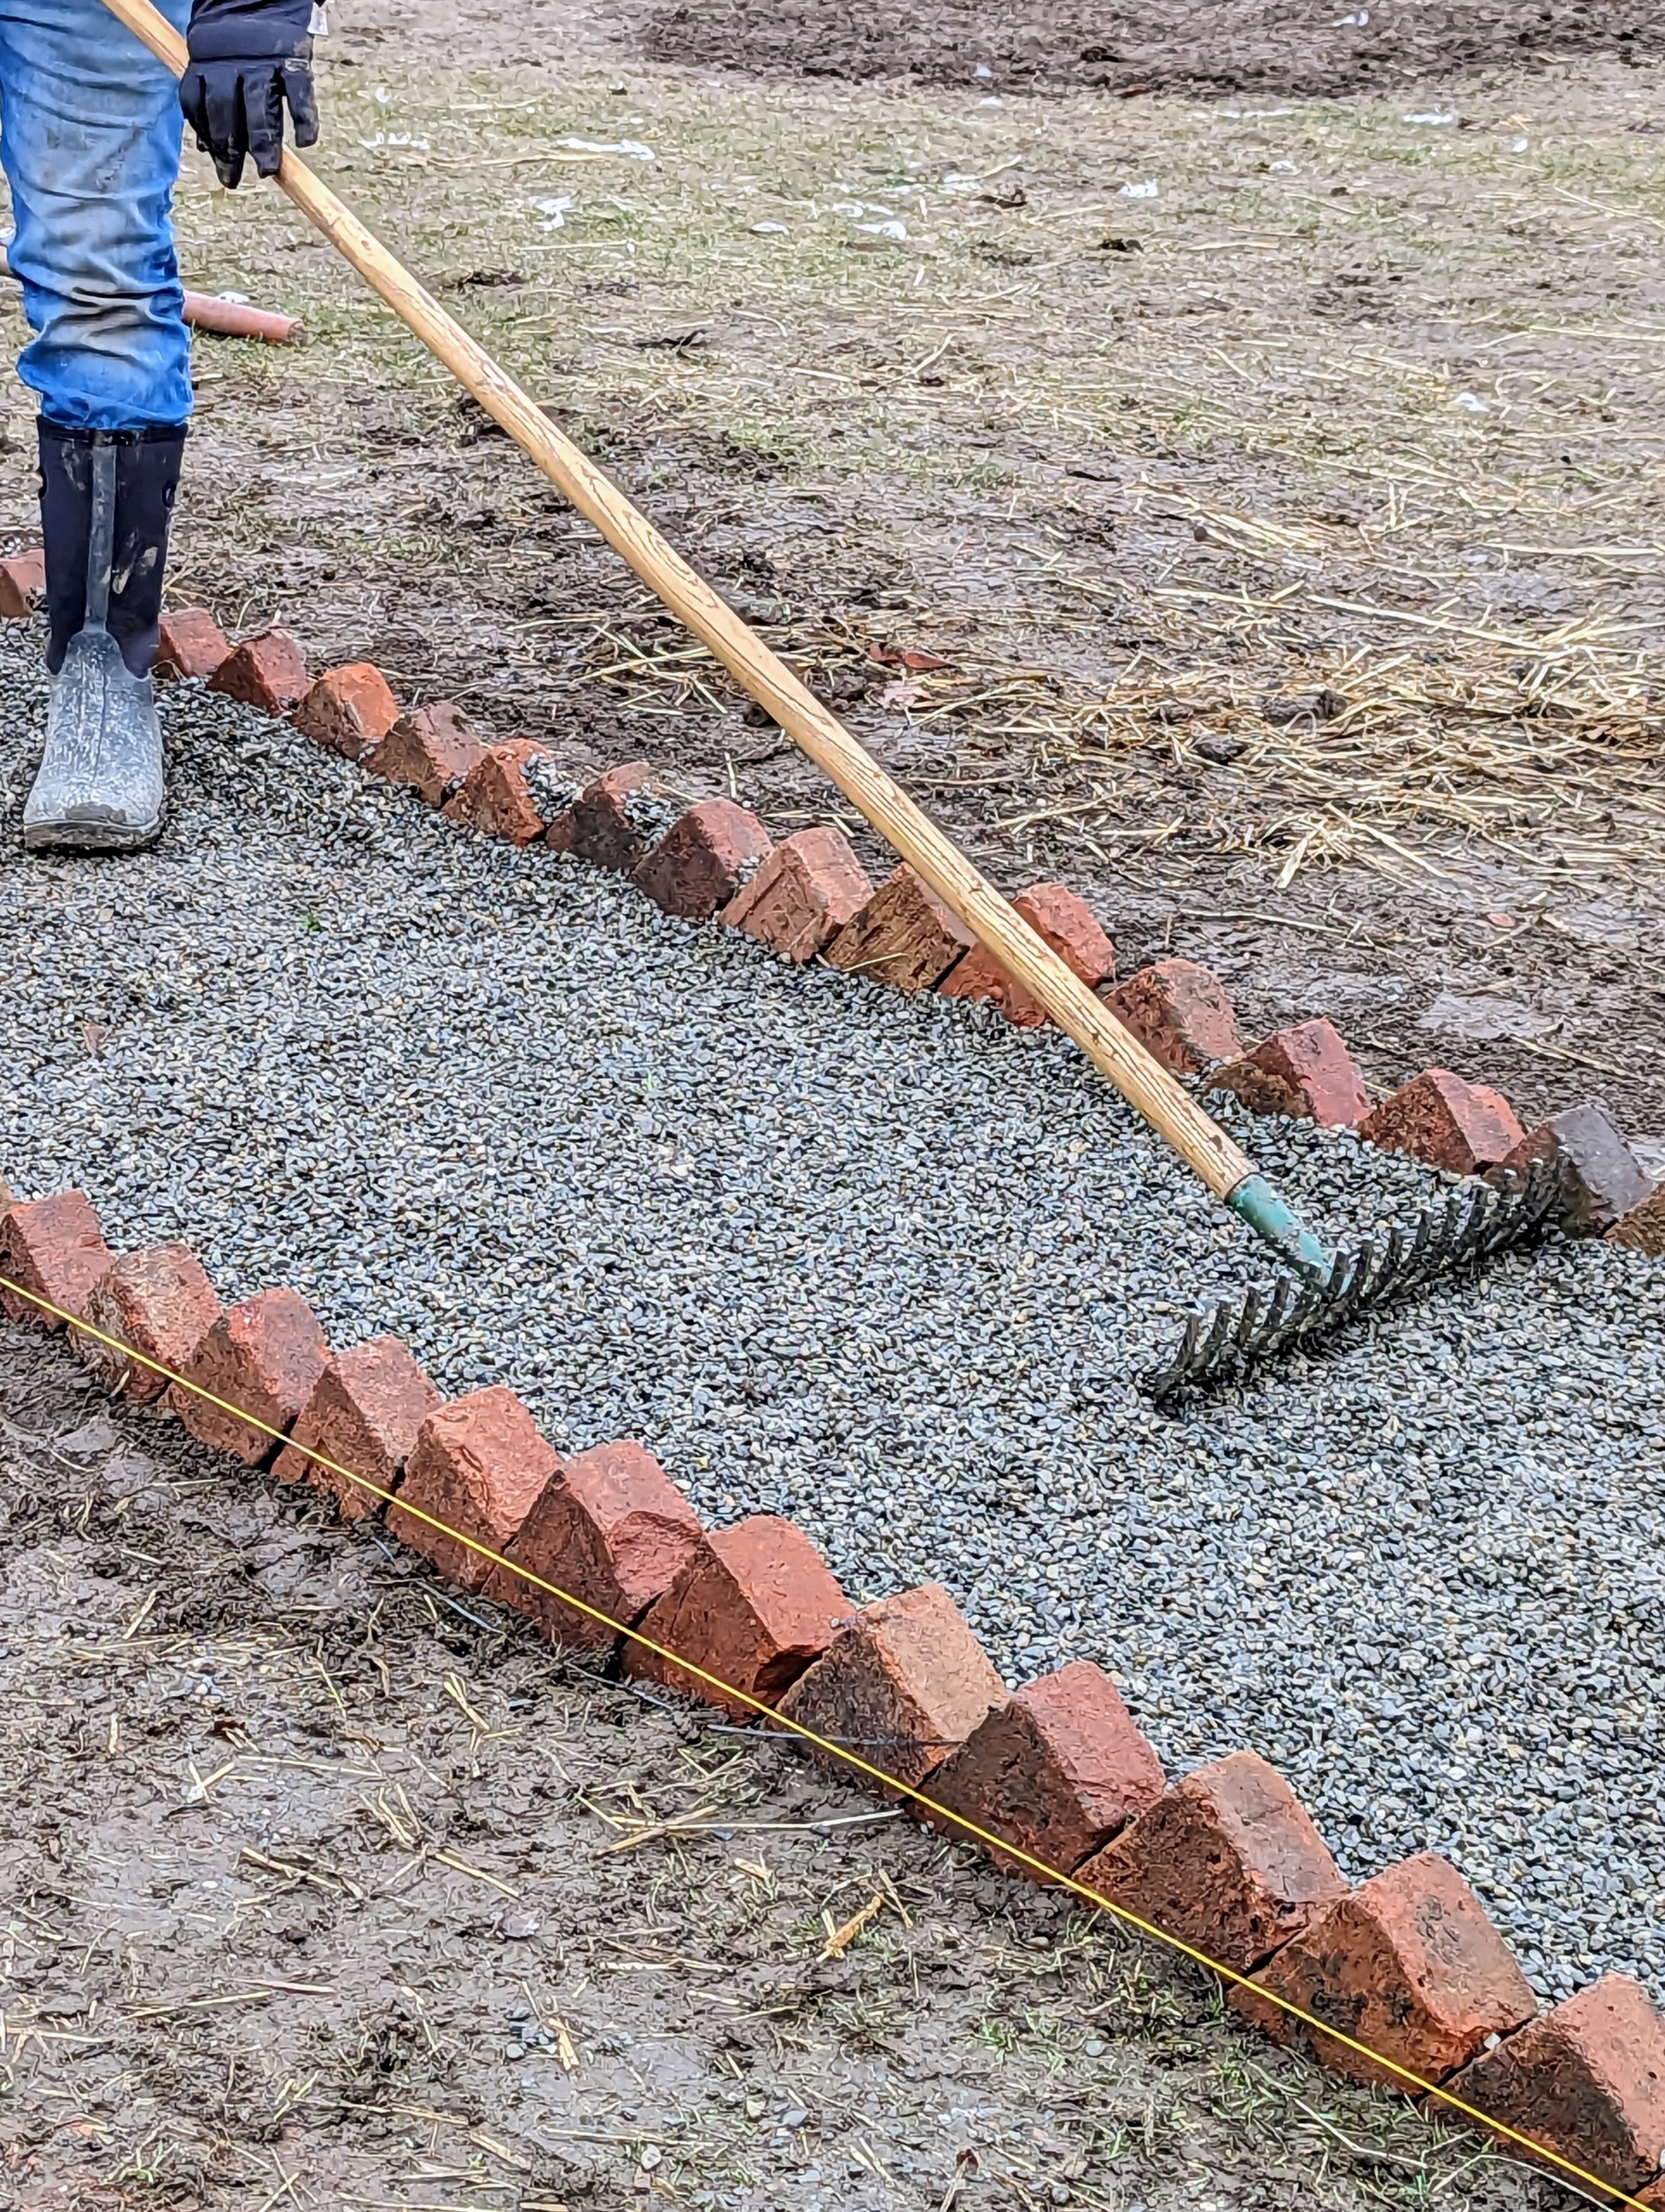
Earlier this month, I decided I wanted to create proper footpaths inside my bird pens. Doing this would look neat and tidy, but also provide good, sturdy, and hopefully dry footing for anyone who enters the enclosures. Here, the sod was removed from a path in front of the goose pen to the front of the peafowl pen – it measures 36-inches across.
I have thousands of these red clay bricks. “Pressed red” is the general term given to solid red bricks traditionally manufactured from clay, pressed into individual molds by hand, and then heated at very high temperatures. Each of these antique and vintage bricks measures about eight and-a-half inches by four inches.
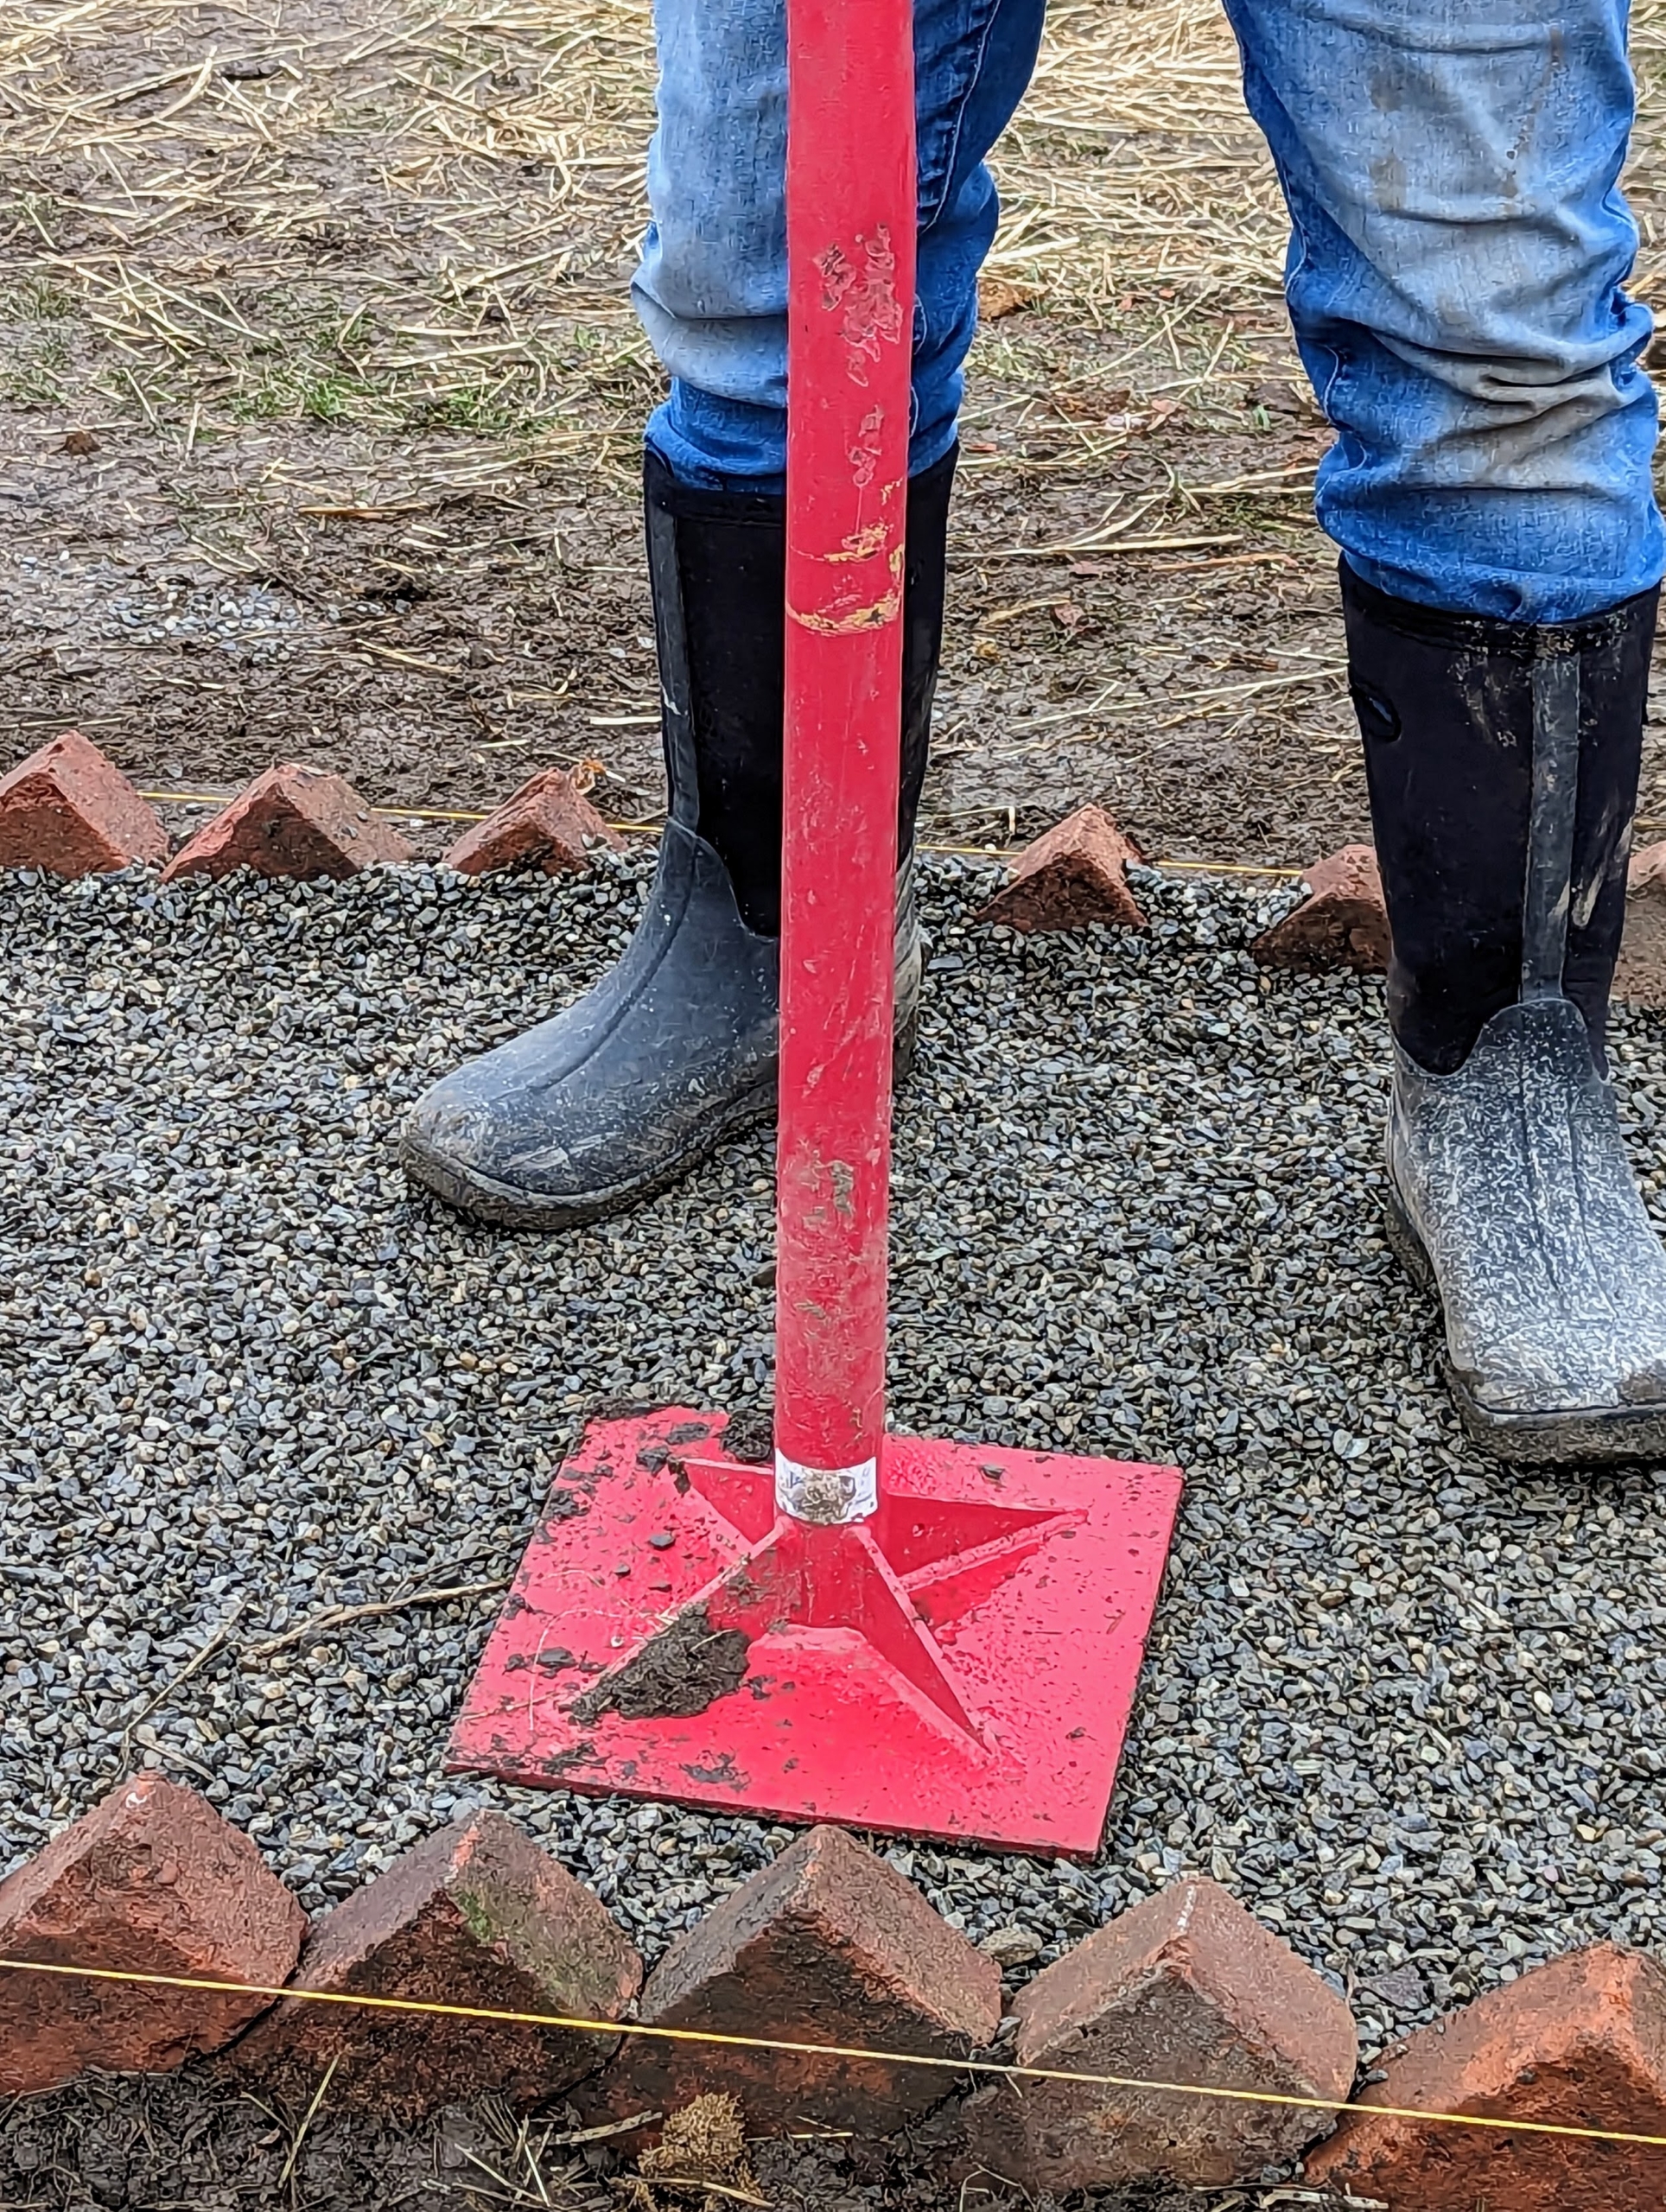
Before each brick is put down, Pete creates a narrow trench just wide enough for the brick and about five inches deep.
And then one by one, he angles the bricks and positions them in a sawtooth style, laying one on another at a 45-degree angle. It isn’t hard to do, but it must be done carefully, so everything is straight and perfect.
Pete uses the end of the hammer to gently tap the brick into place. In time, the soil will fill in any gaps and keep the bricks secure.
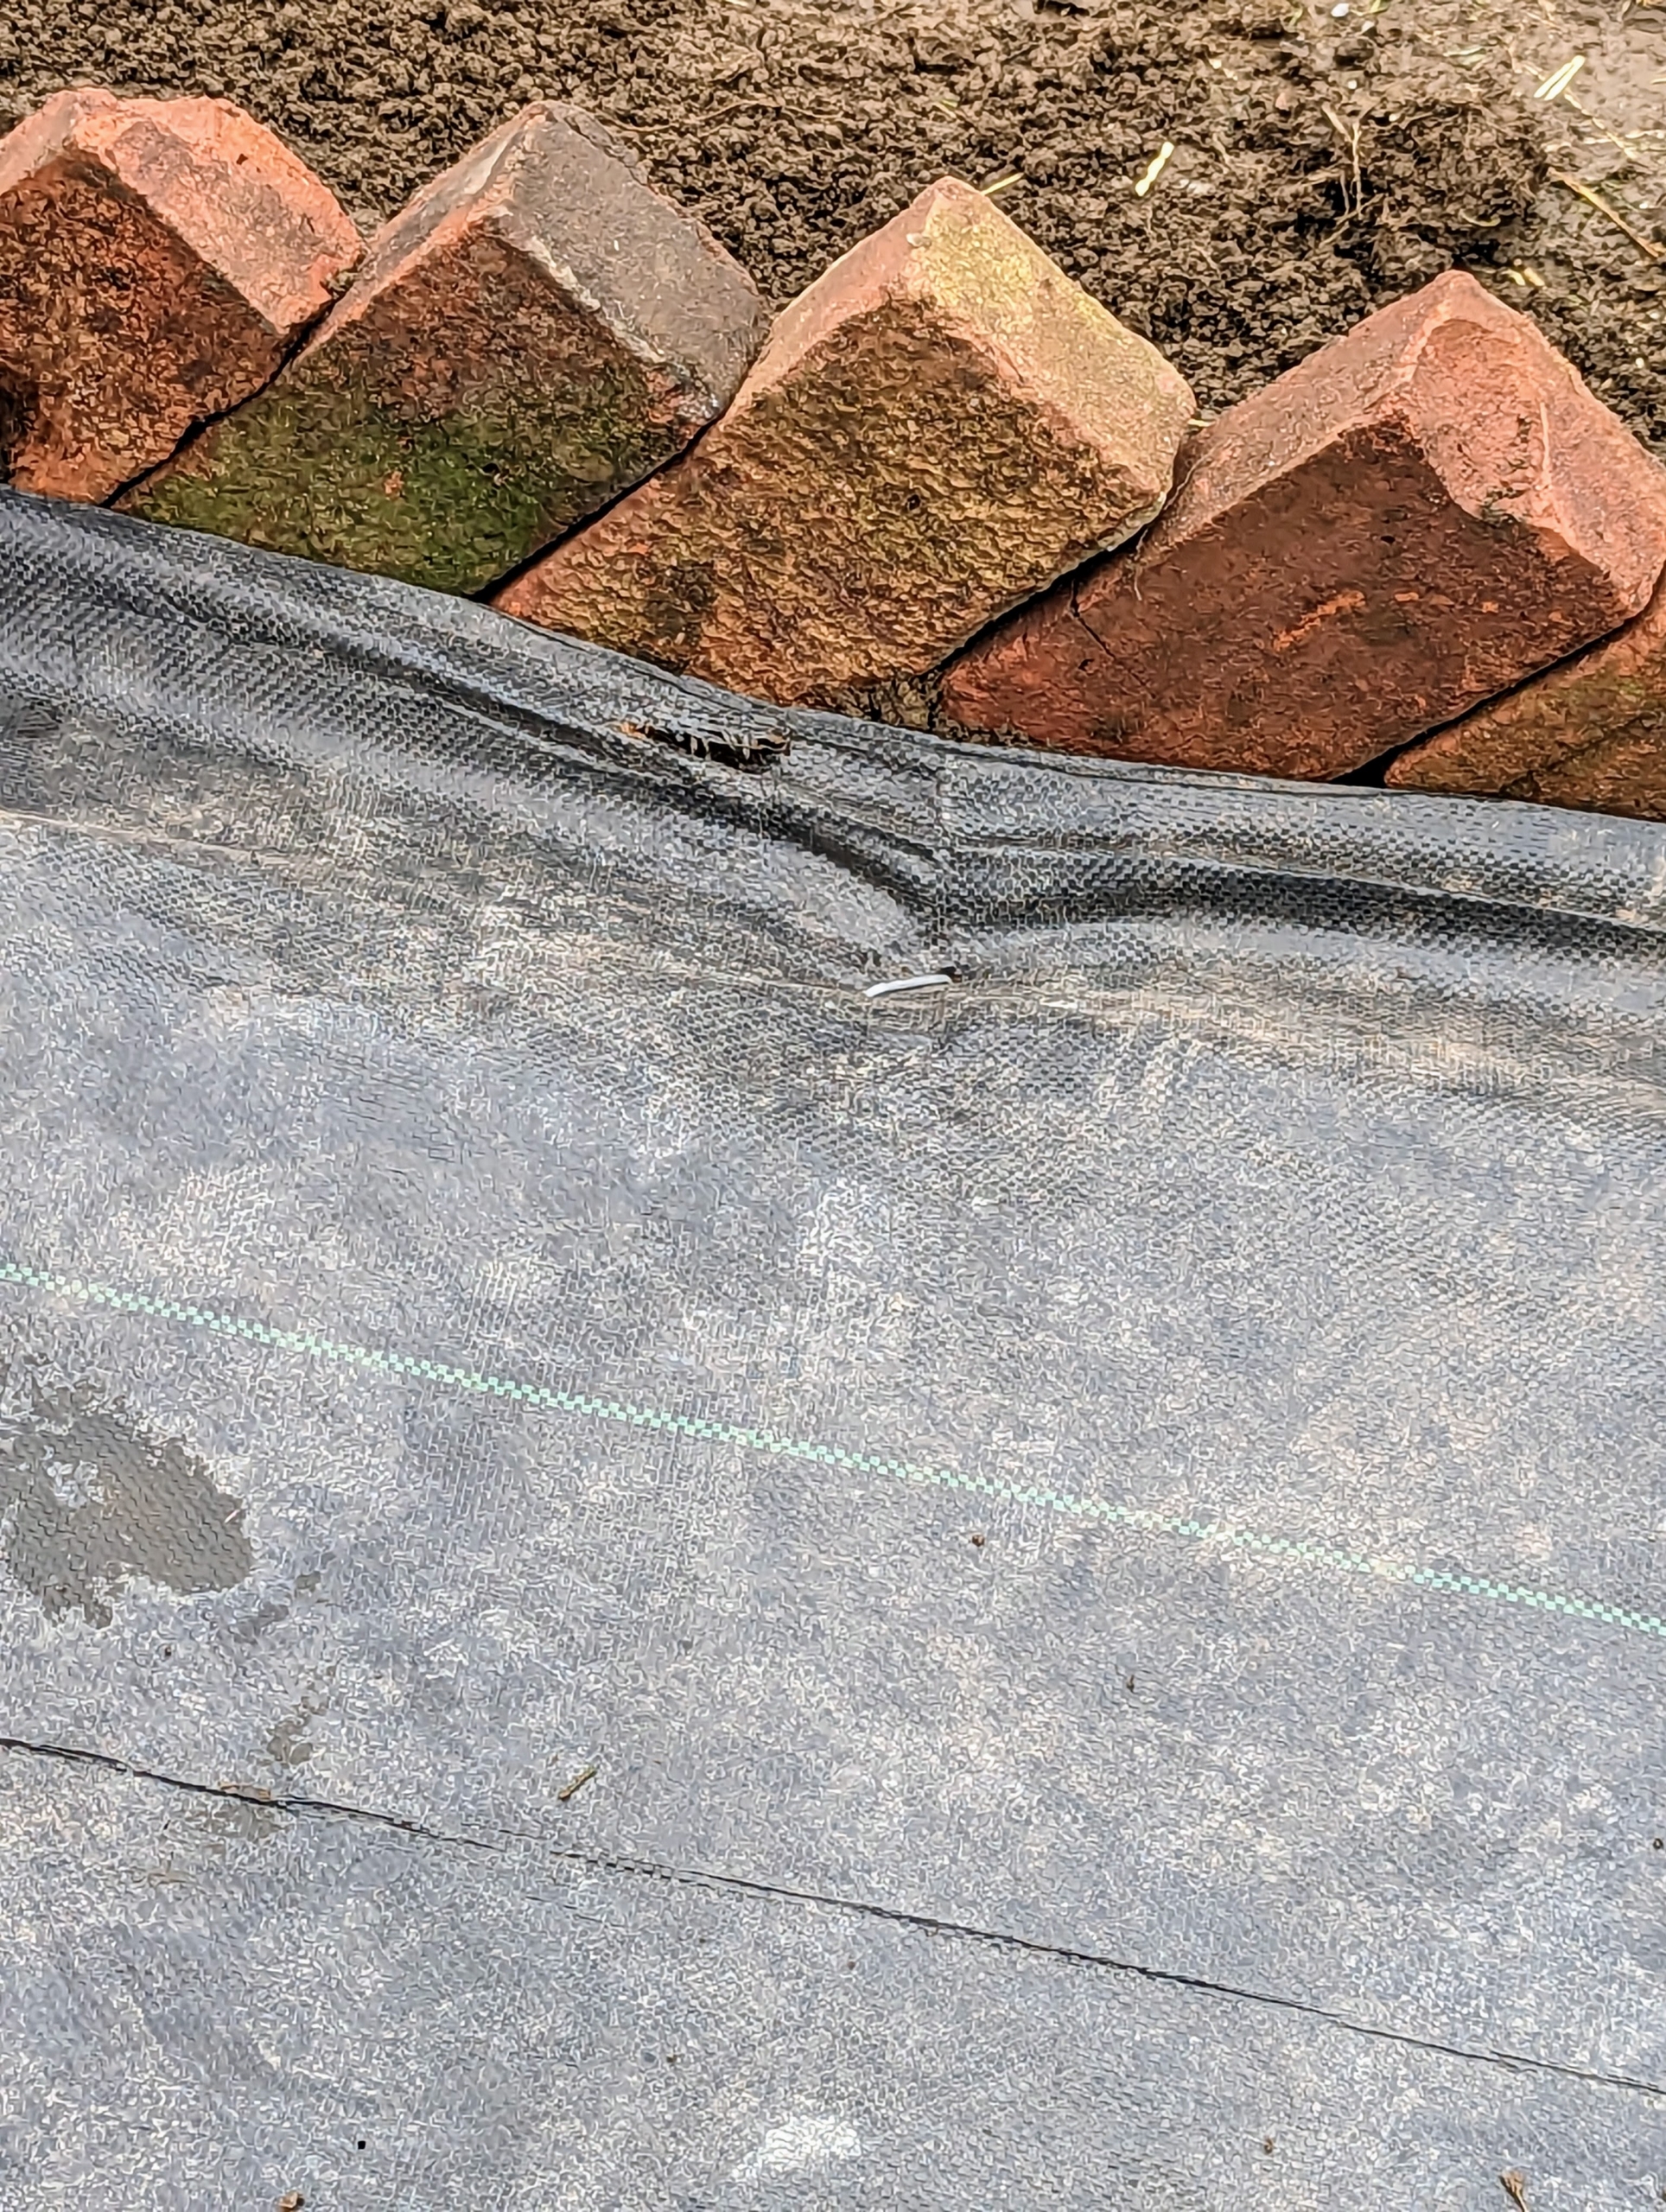
From this angle, one can see how helpful the twine is to keeping the bricks straight. Using bricks to line the footpaths handsomely defines the boundaries between the grass and the path.
This sawtooth brick pattern is ideal for edging garden borders or pathways. It is easy and quick to do. I have a large supply of these bricks, but if doing at home, one should have about 10-percent extra materials in case of breakage – clay bricks can break.
Pete works on both sides simultaneously.
Here he is almost done putting down all the bricks.
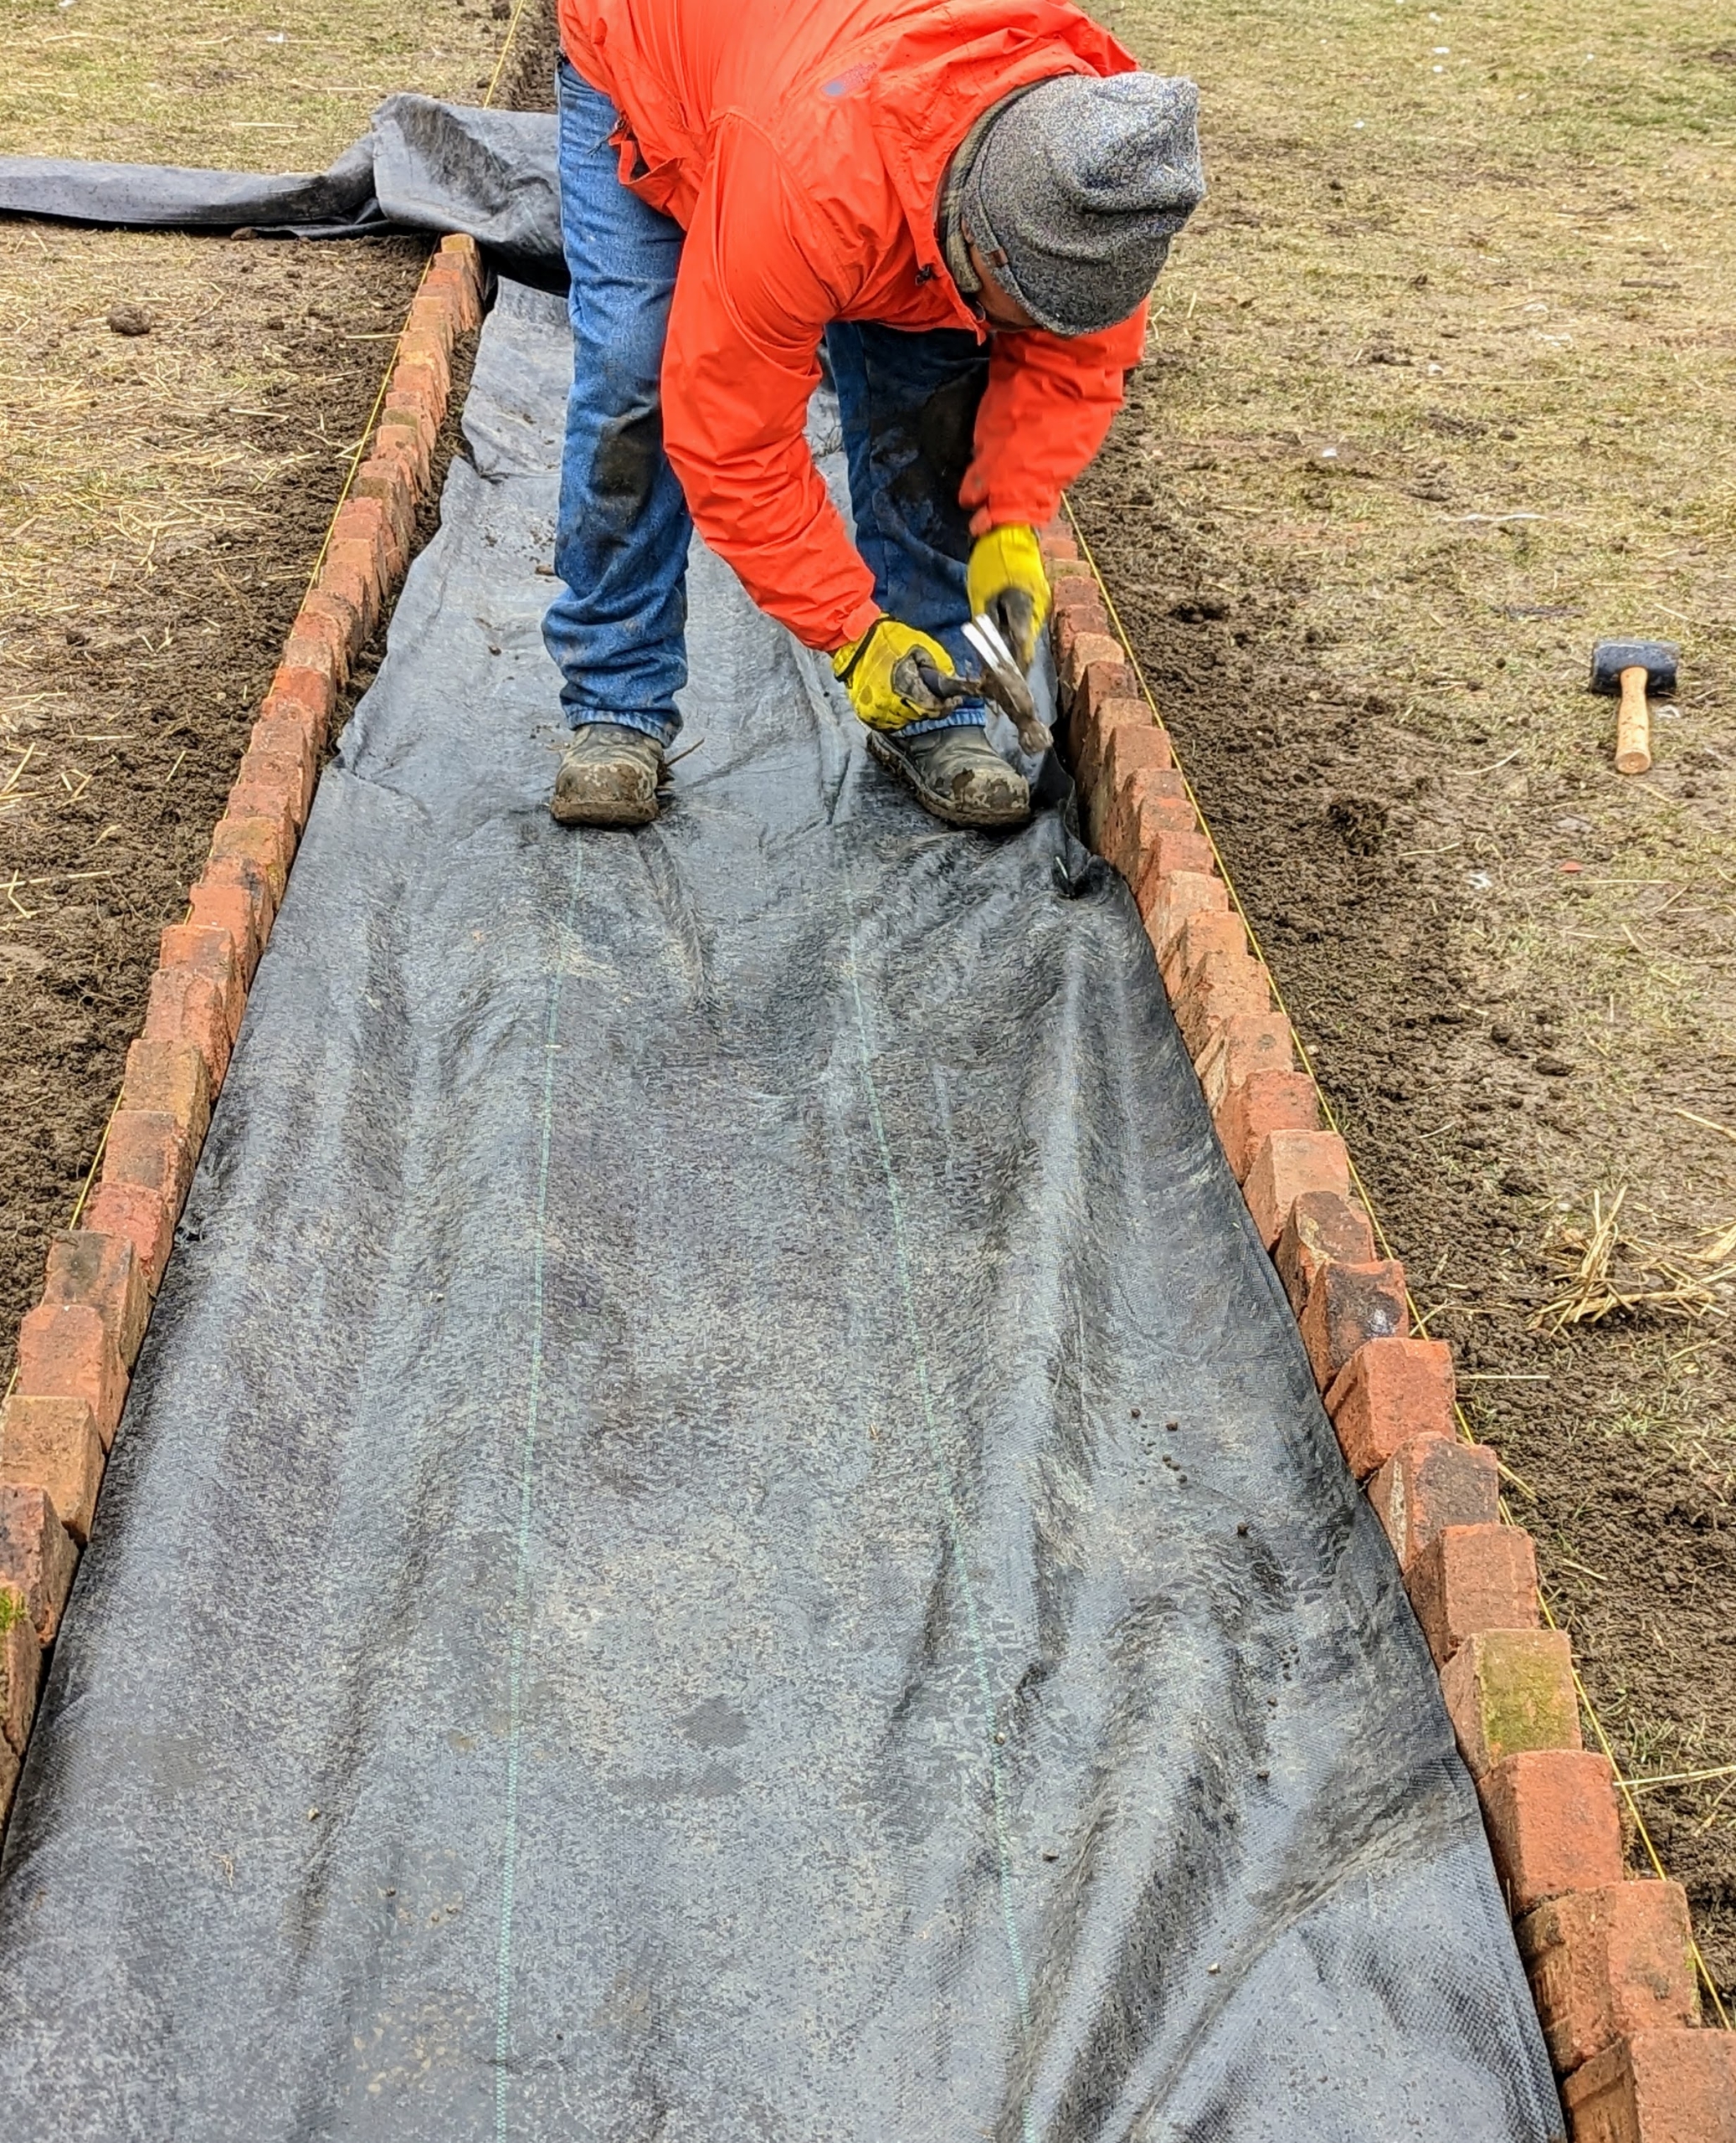
Once the bricks are in place, the weed cloth is cut to size within the path and carefully put down between the bricks.
Pete hammers in sod staples at various points to keep the cloth secure.
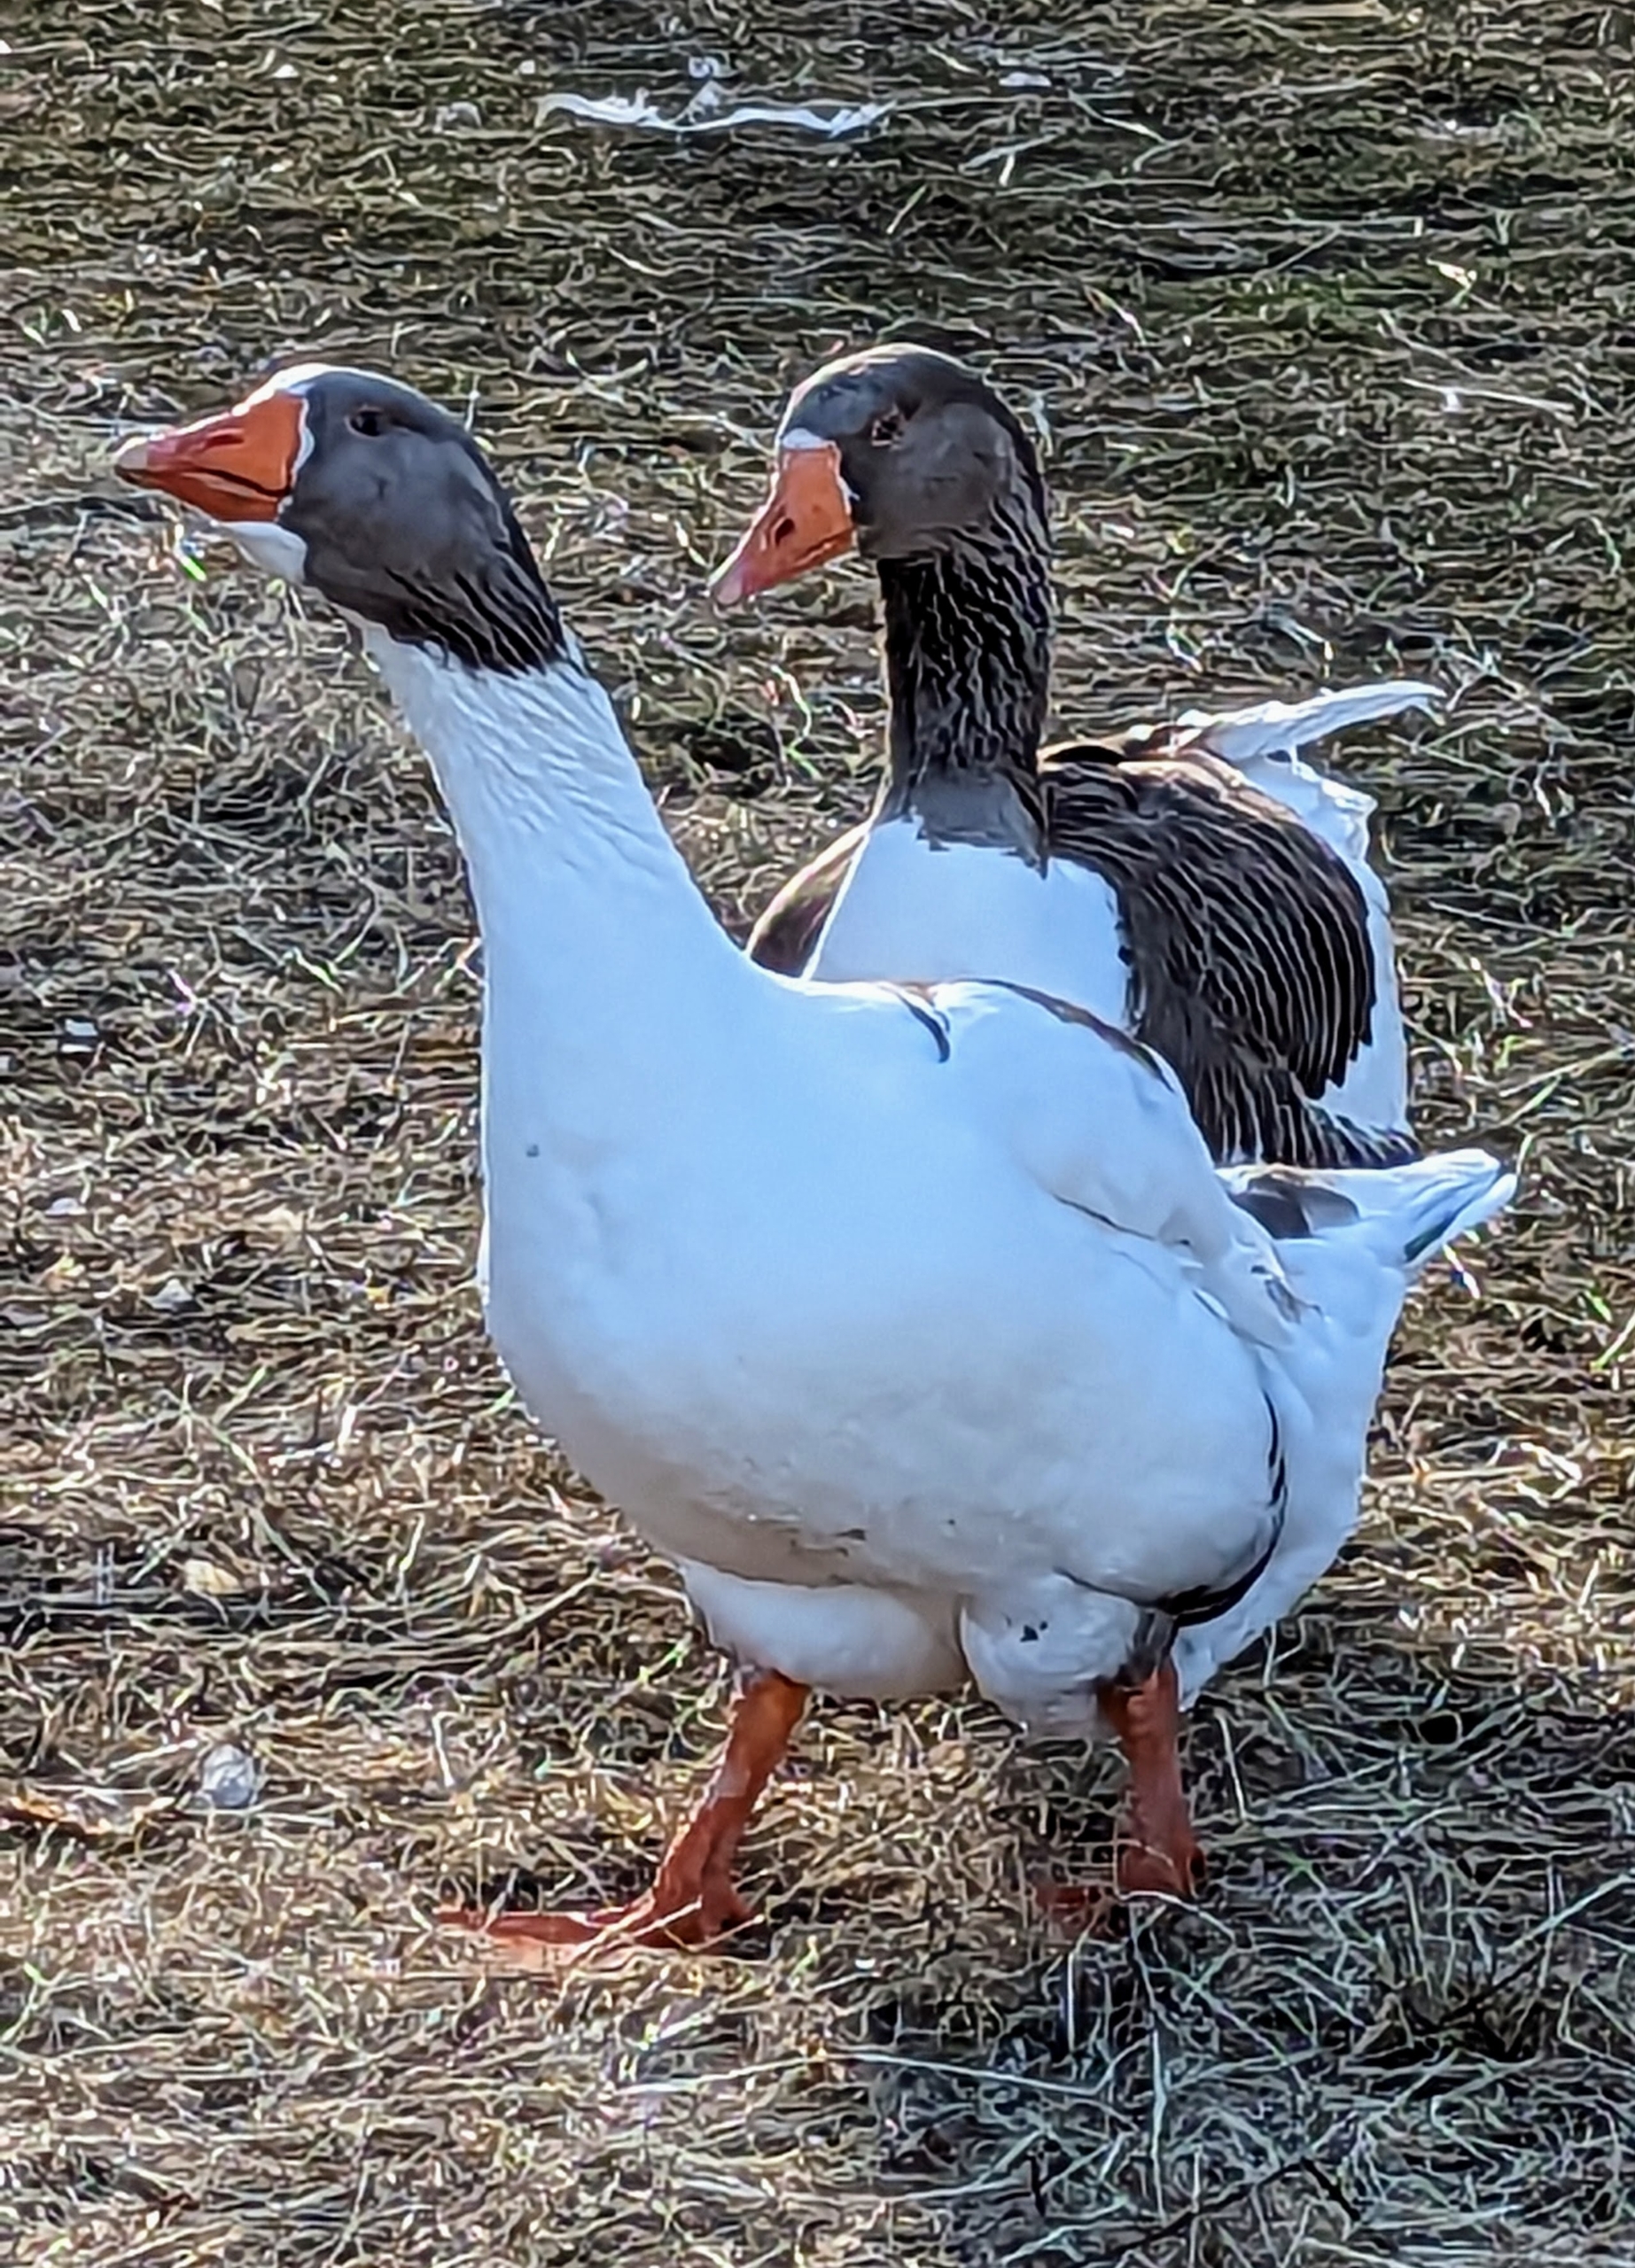
The geese see all the activity and want to know what is going on. These two are walking over to check it out. The birds are always so curious.
And here are the Chinese geese. Because these birds are exposed to a lot of activity around the farm, they are not fearful of the noises or the movements.
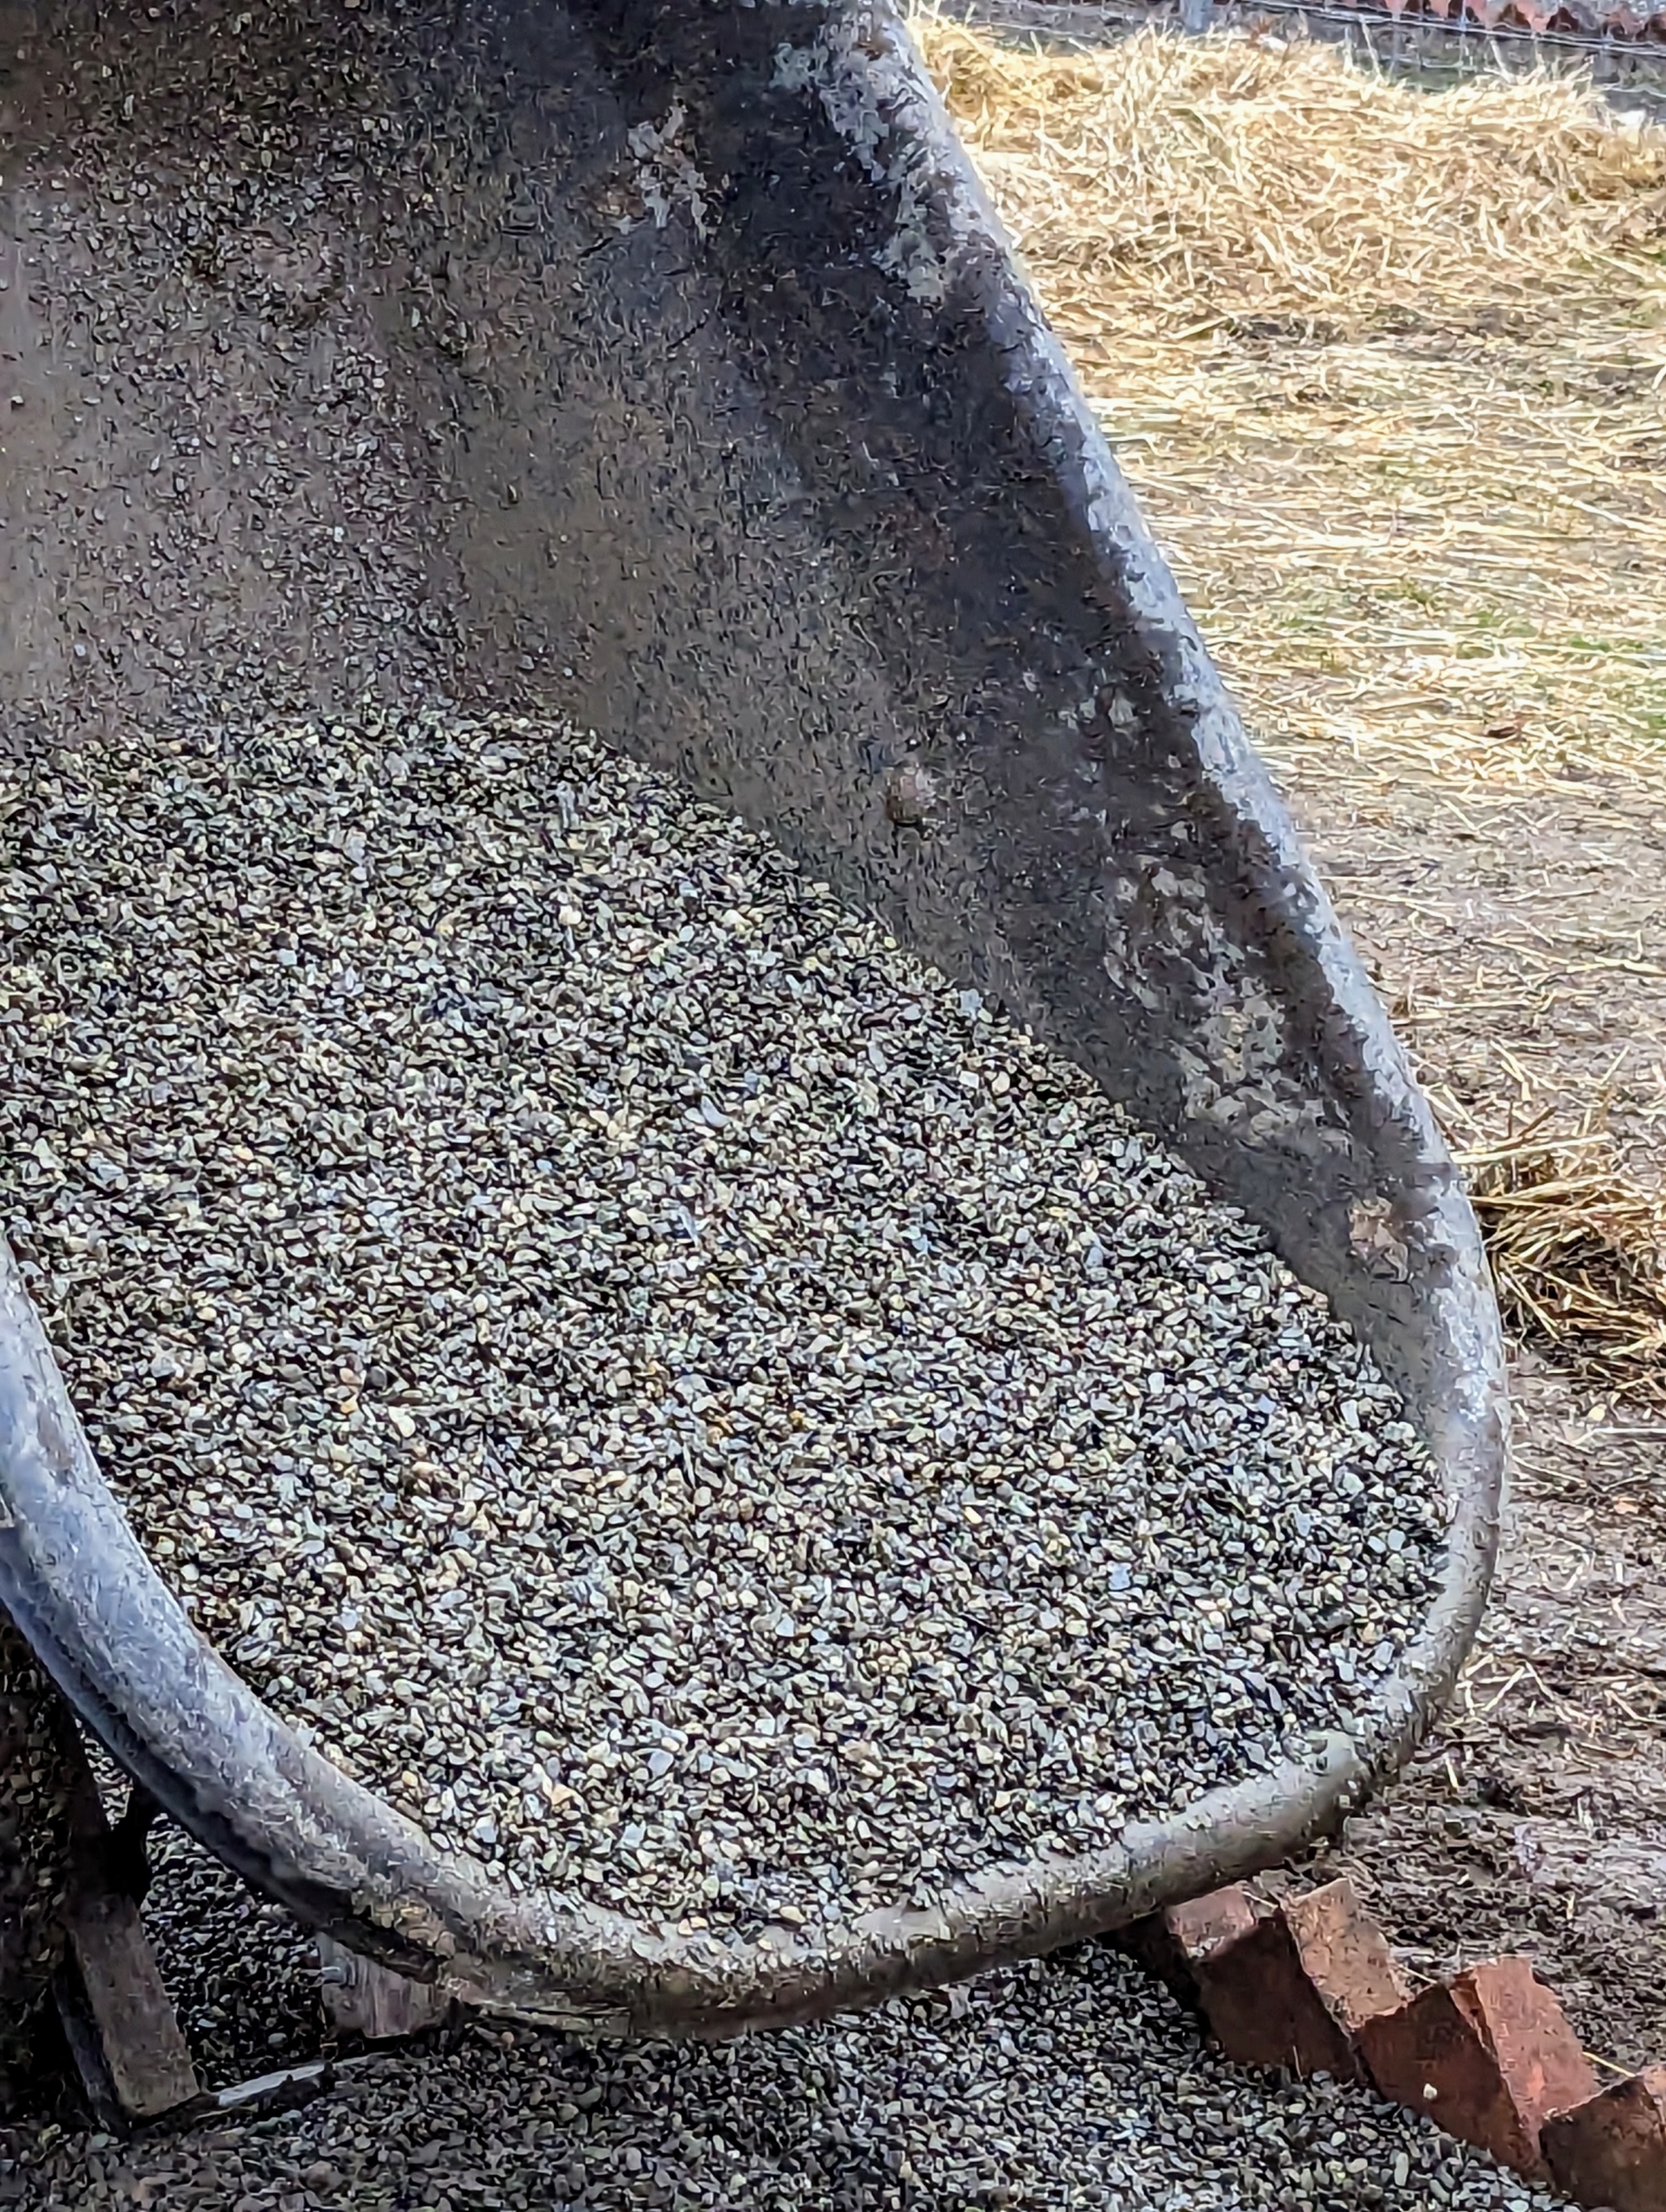
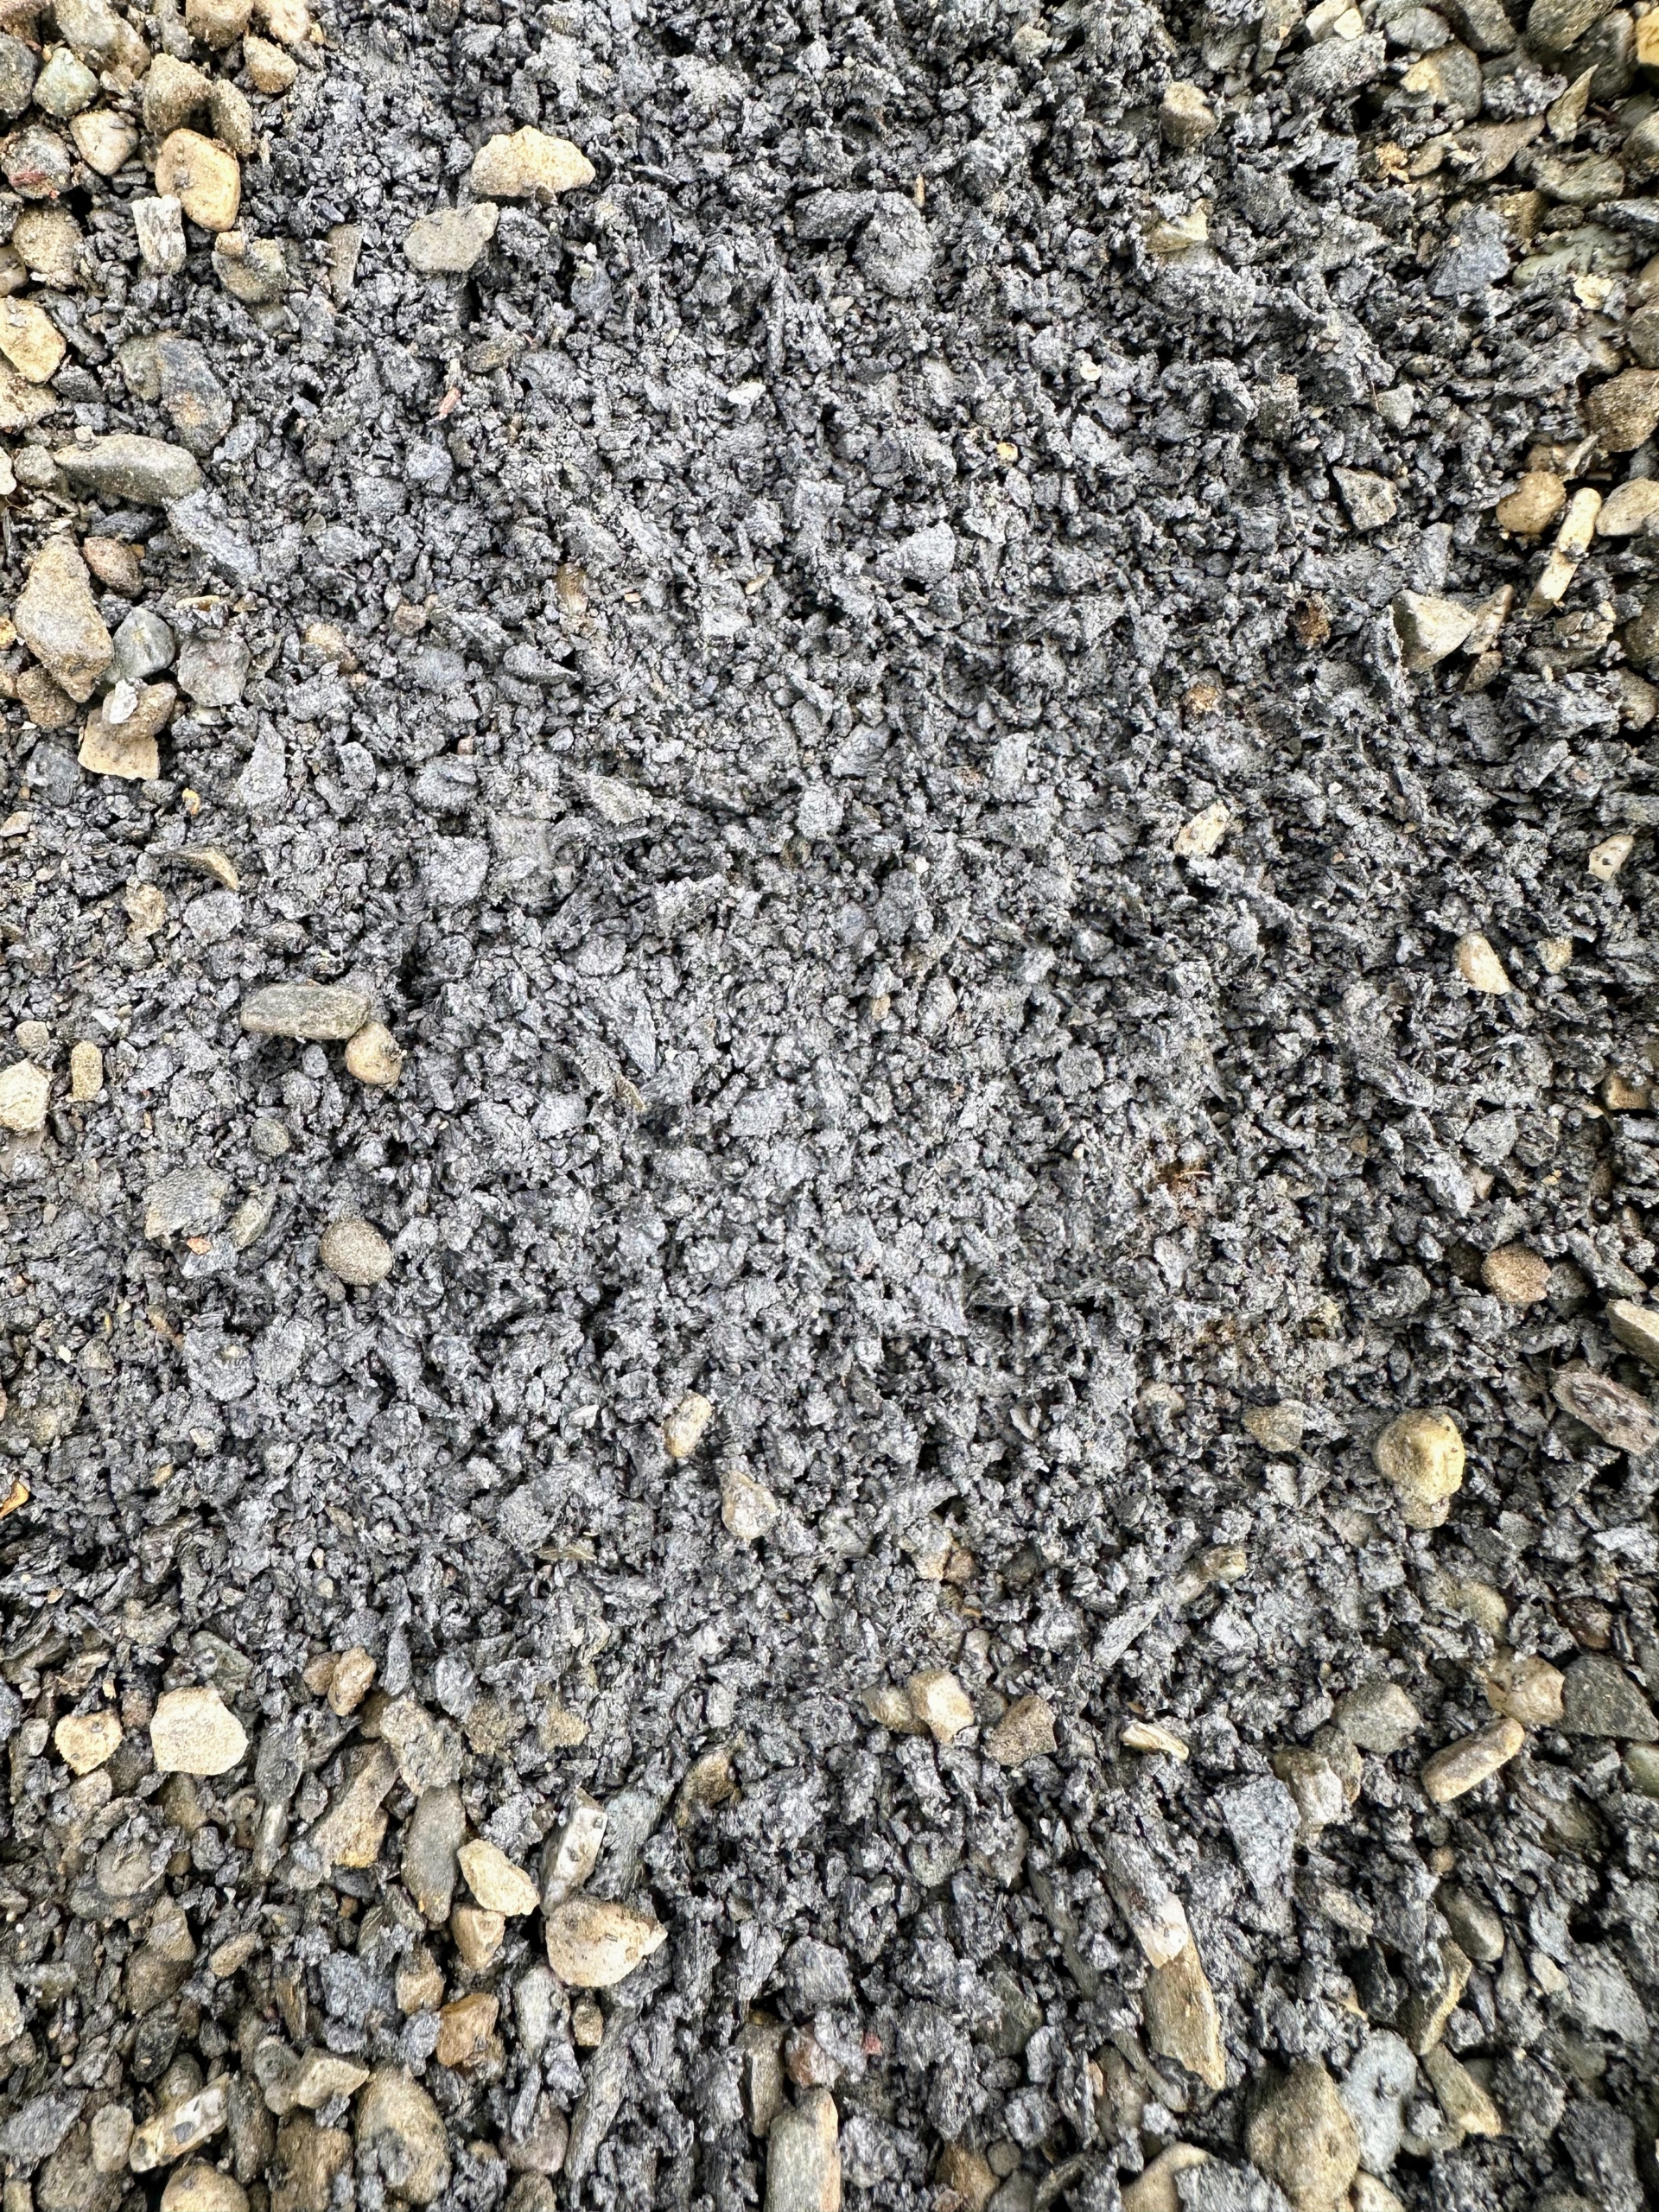
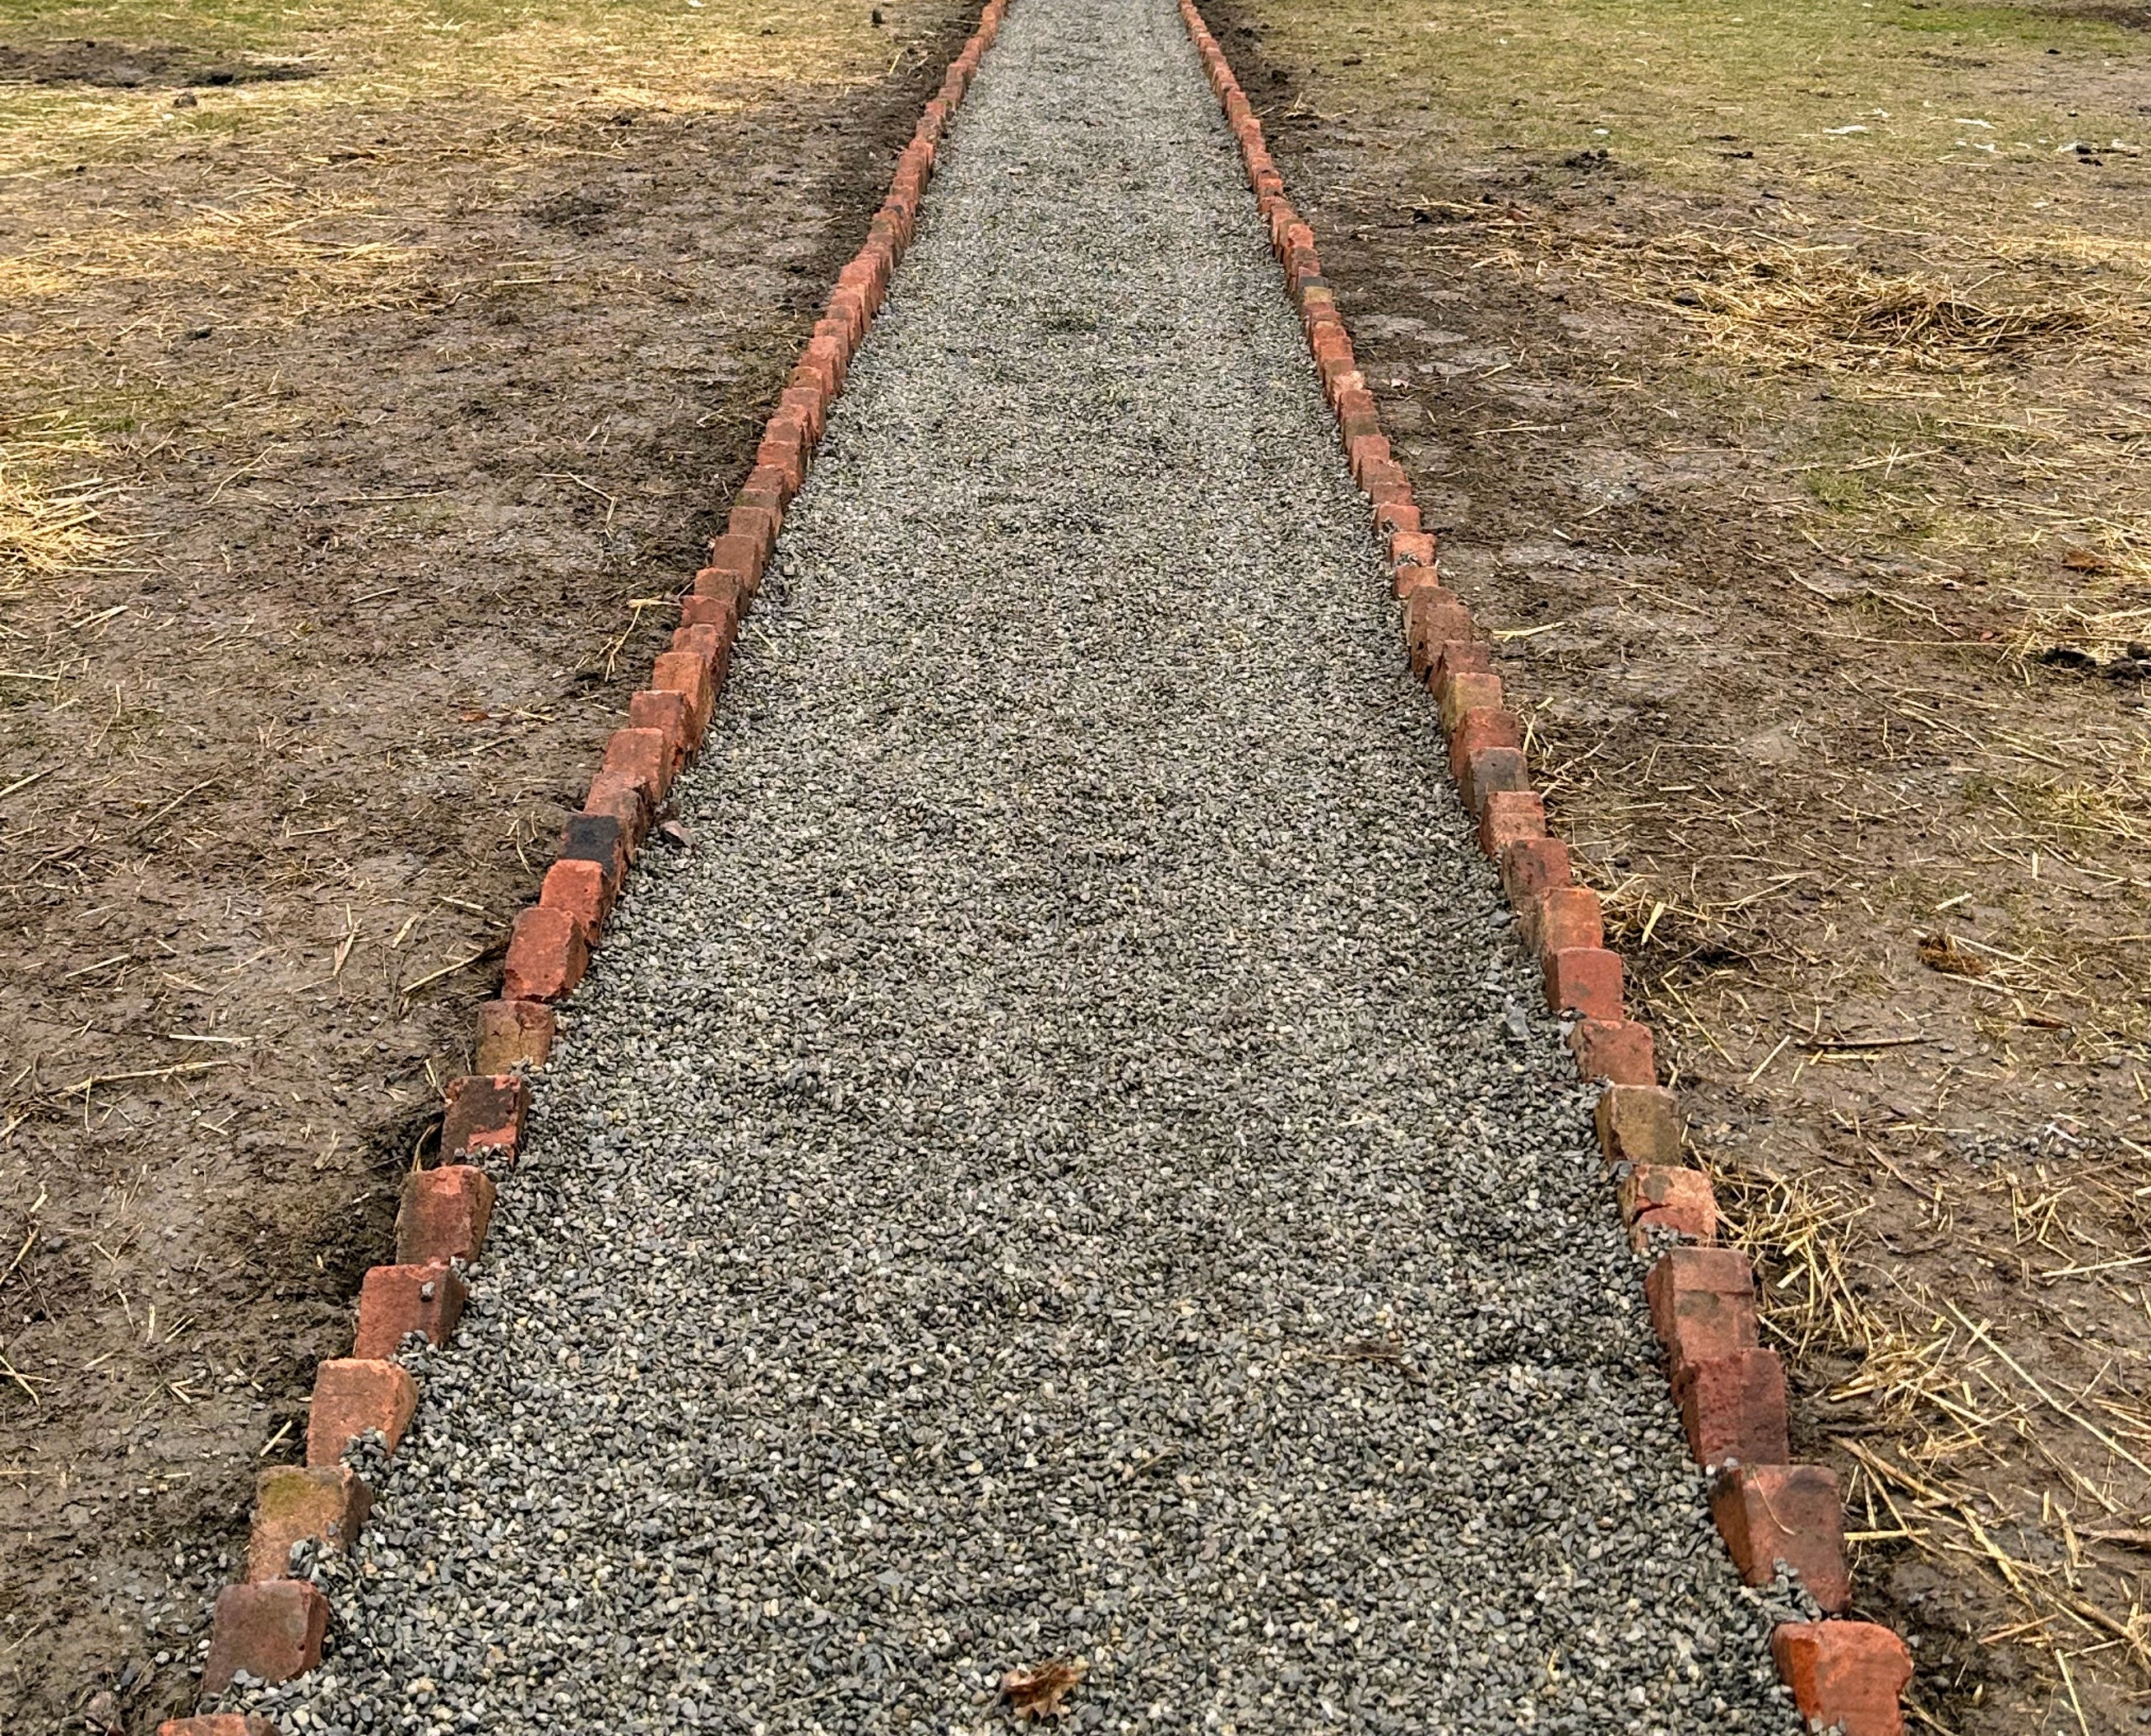
Stone dust is a non-porous material, which is good to use under the gravel. It will stop heavy rain water from seeping below and reduces the risk of shifting or damaging the stones. A layer of gravel is placed on top of the weed cloth.
And then the gravel on top of the stone dust. All around the farm, I like to use quarter-inch native washed stone. Each stone is about the size of a pea. This same gravel stone is also used to line the paths in my flower cutting garden. It s nice to keep everything uniform when possible.
Here, one can see the stone dust beneath the gravel stones – the layers should not be too thick. Pete and Fernando only dropped about two inches of each along the path.
The gravel is spread evenly with a hard rake.
Afterwards, Fernando goes over it with a gravel tamper. A tamper is a tool with a long handle and a heavy, square base used for leveling and firmly packing gravel, dirt, clay, sand, and other similar materials.
The path looks good – now onto the peafowl extension.
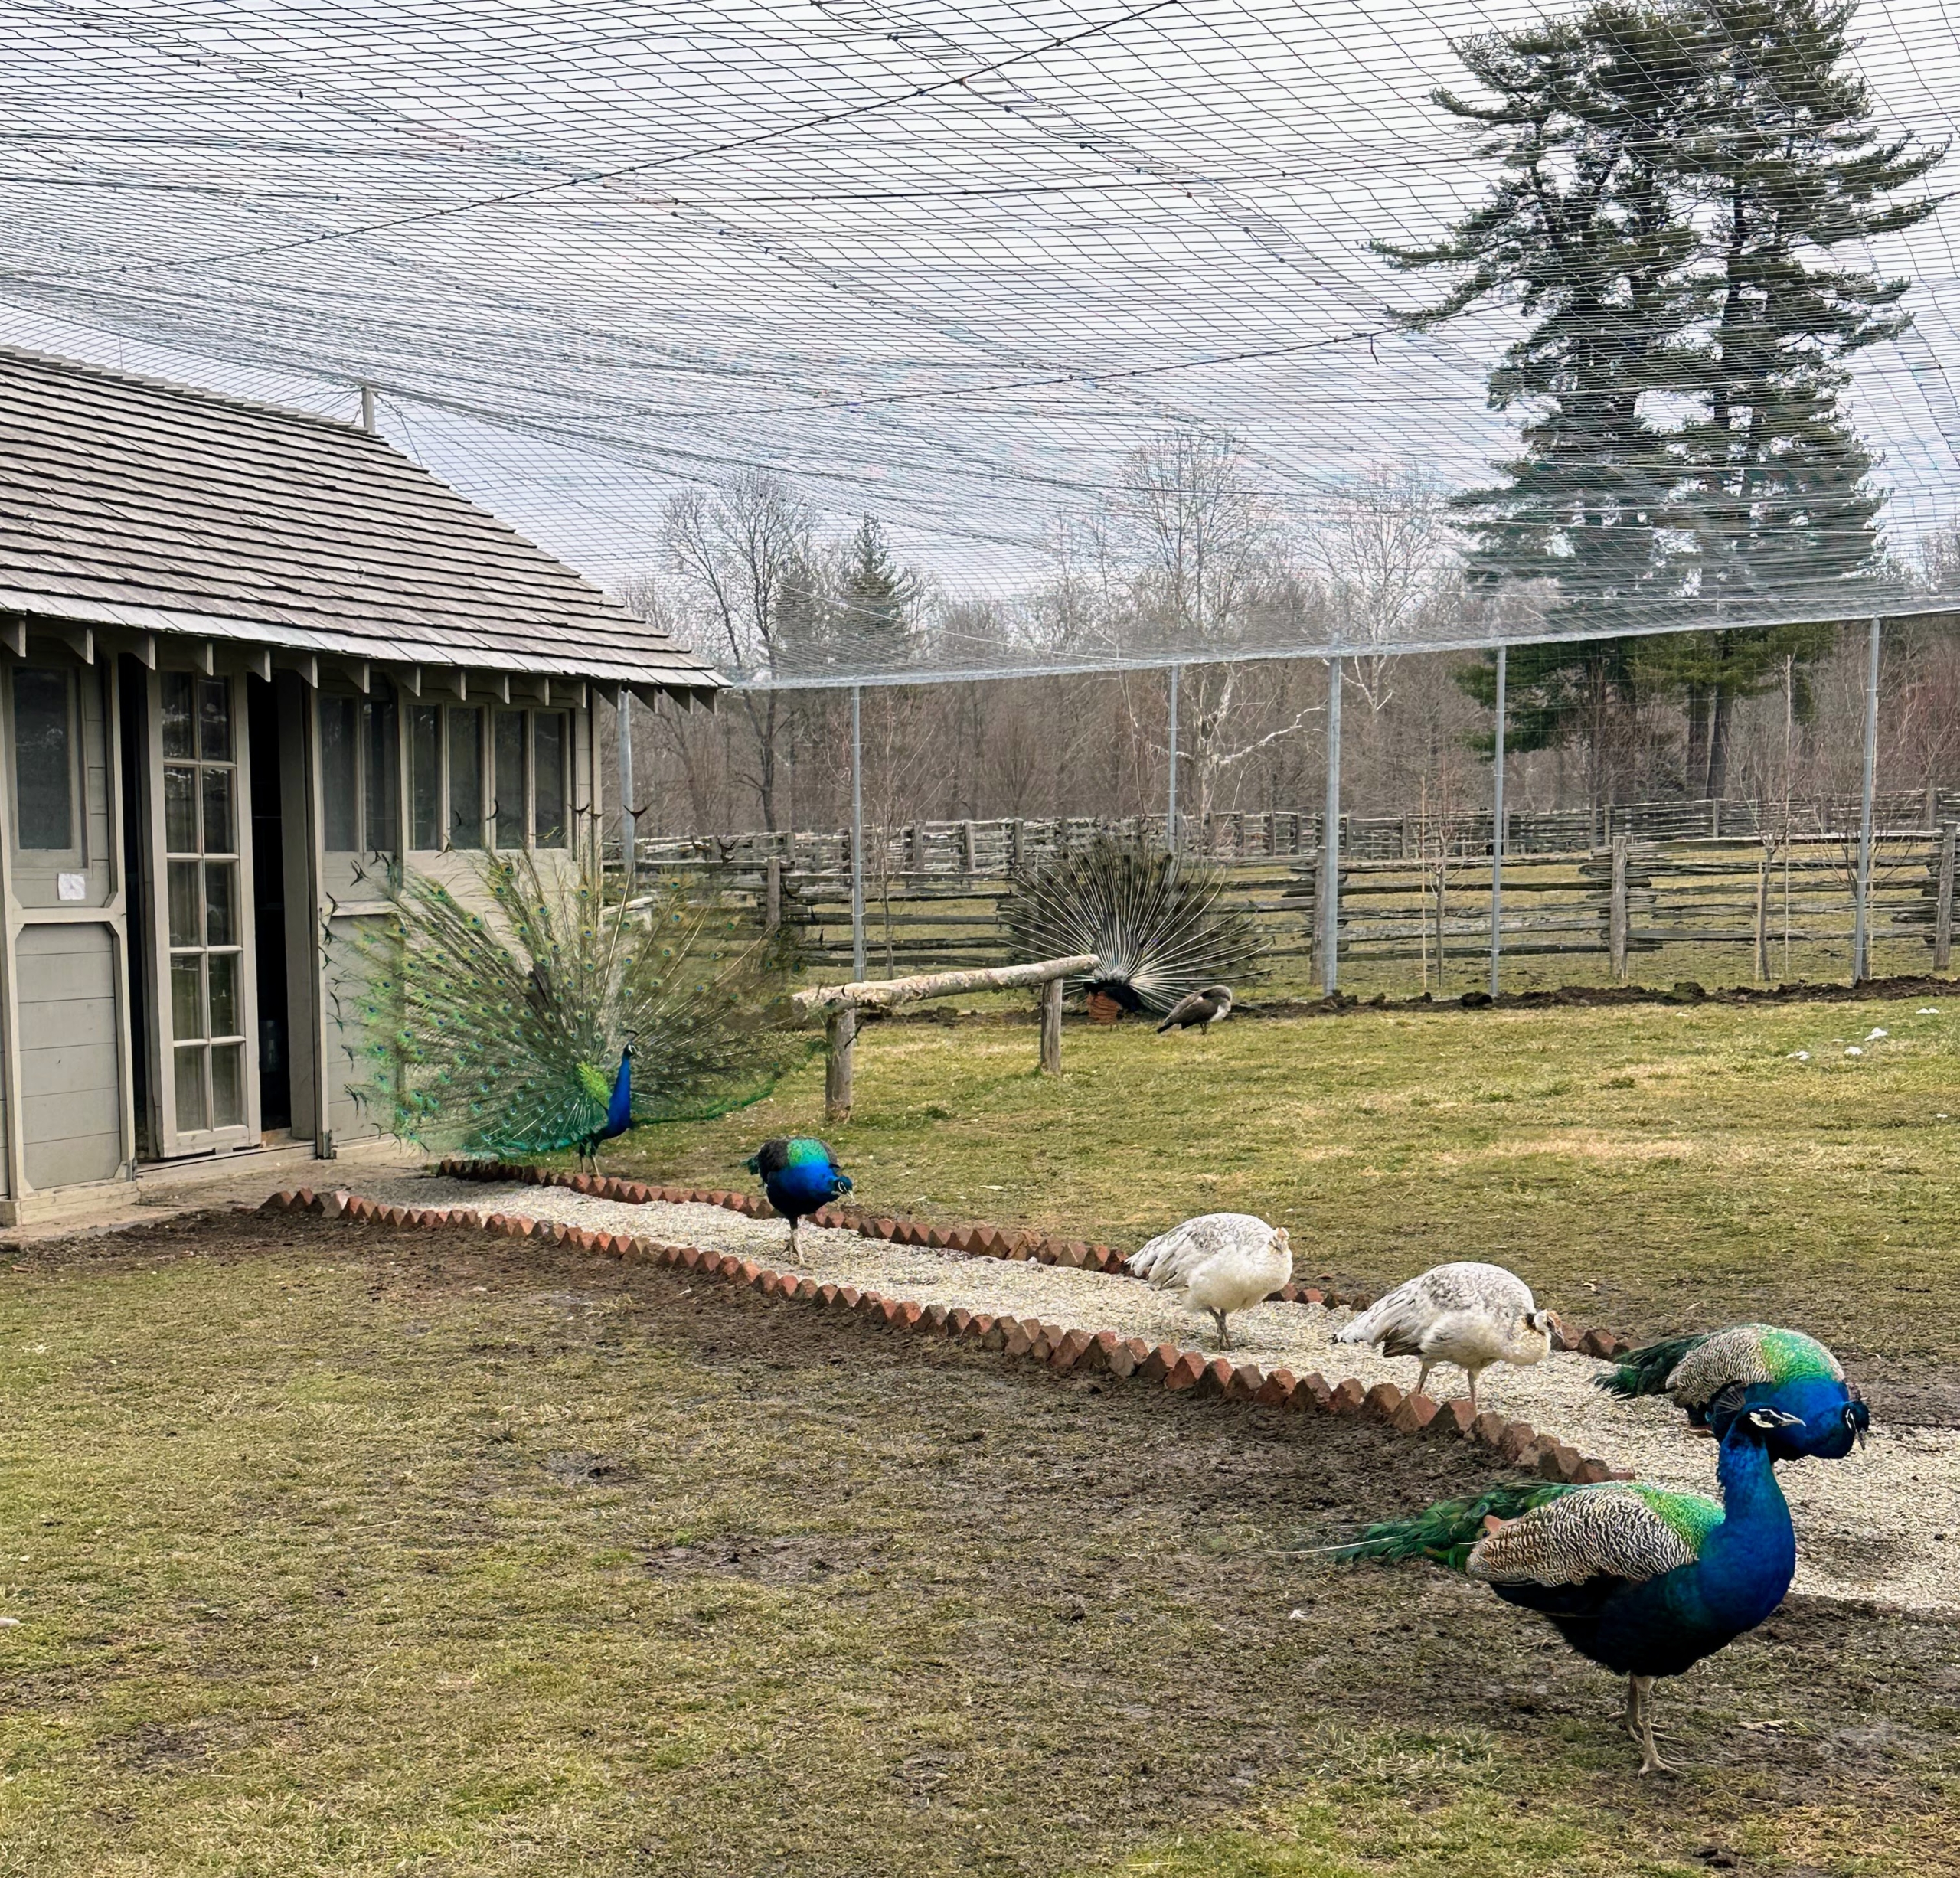
Once the path in the peafowl pen was all done, the peacocks and peahens all walked over to inspect the new addition to their enclosure. In the wild, peafowl forage for plants, insects, and other small creatures which they can find on the ground. They are omnivores, which means that they eat both plants and animals. This peacock is probably looking for worms.
In all, I think they like it – they all walked over right away to check it out. They seem to like the feel of the gravel under their feet.
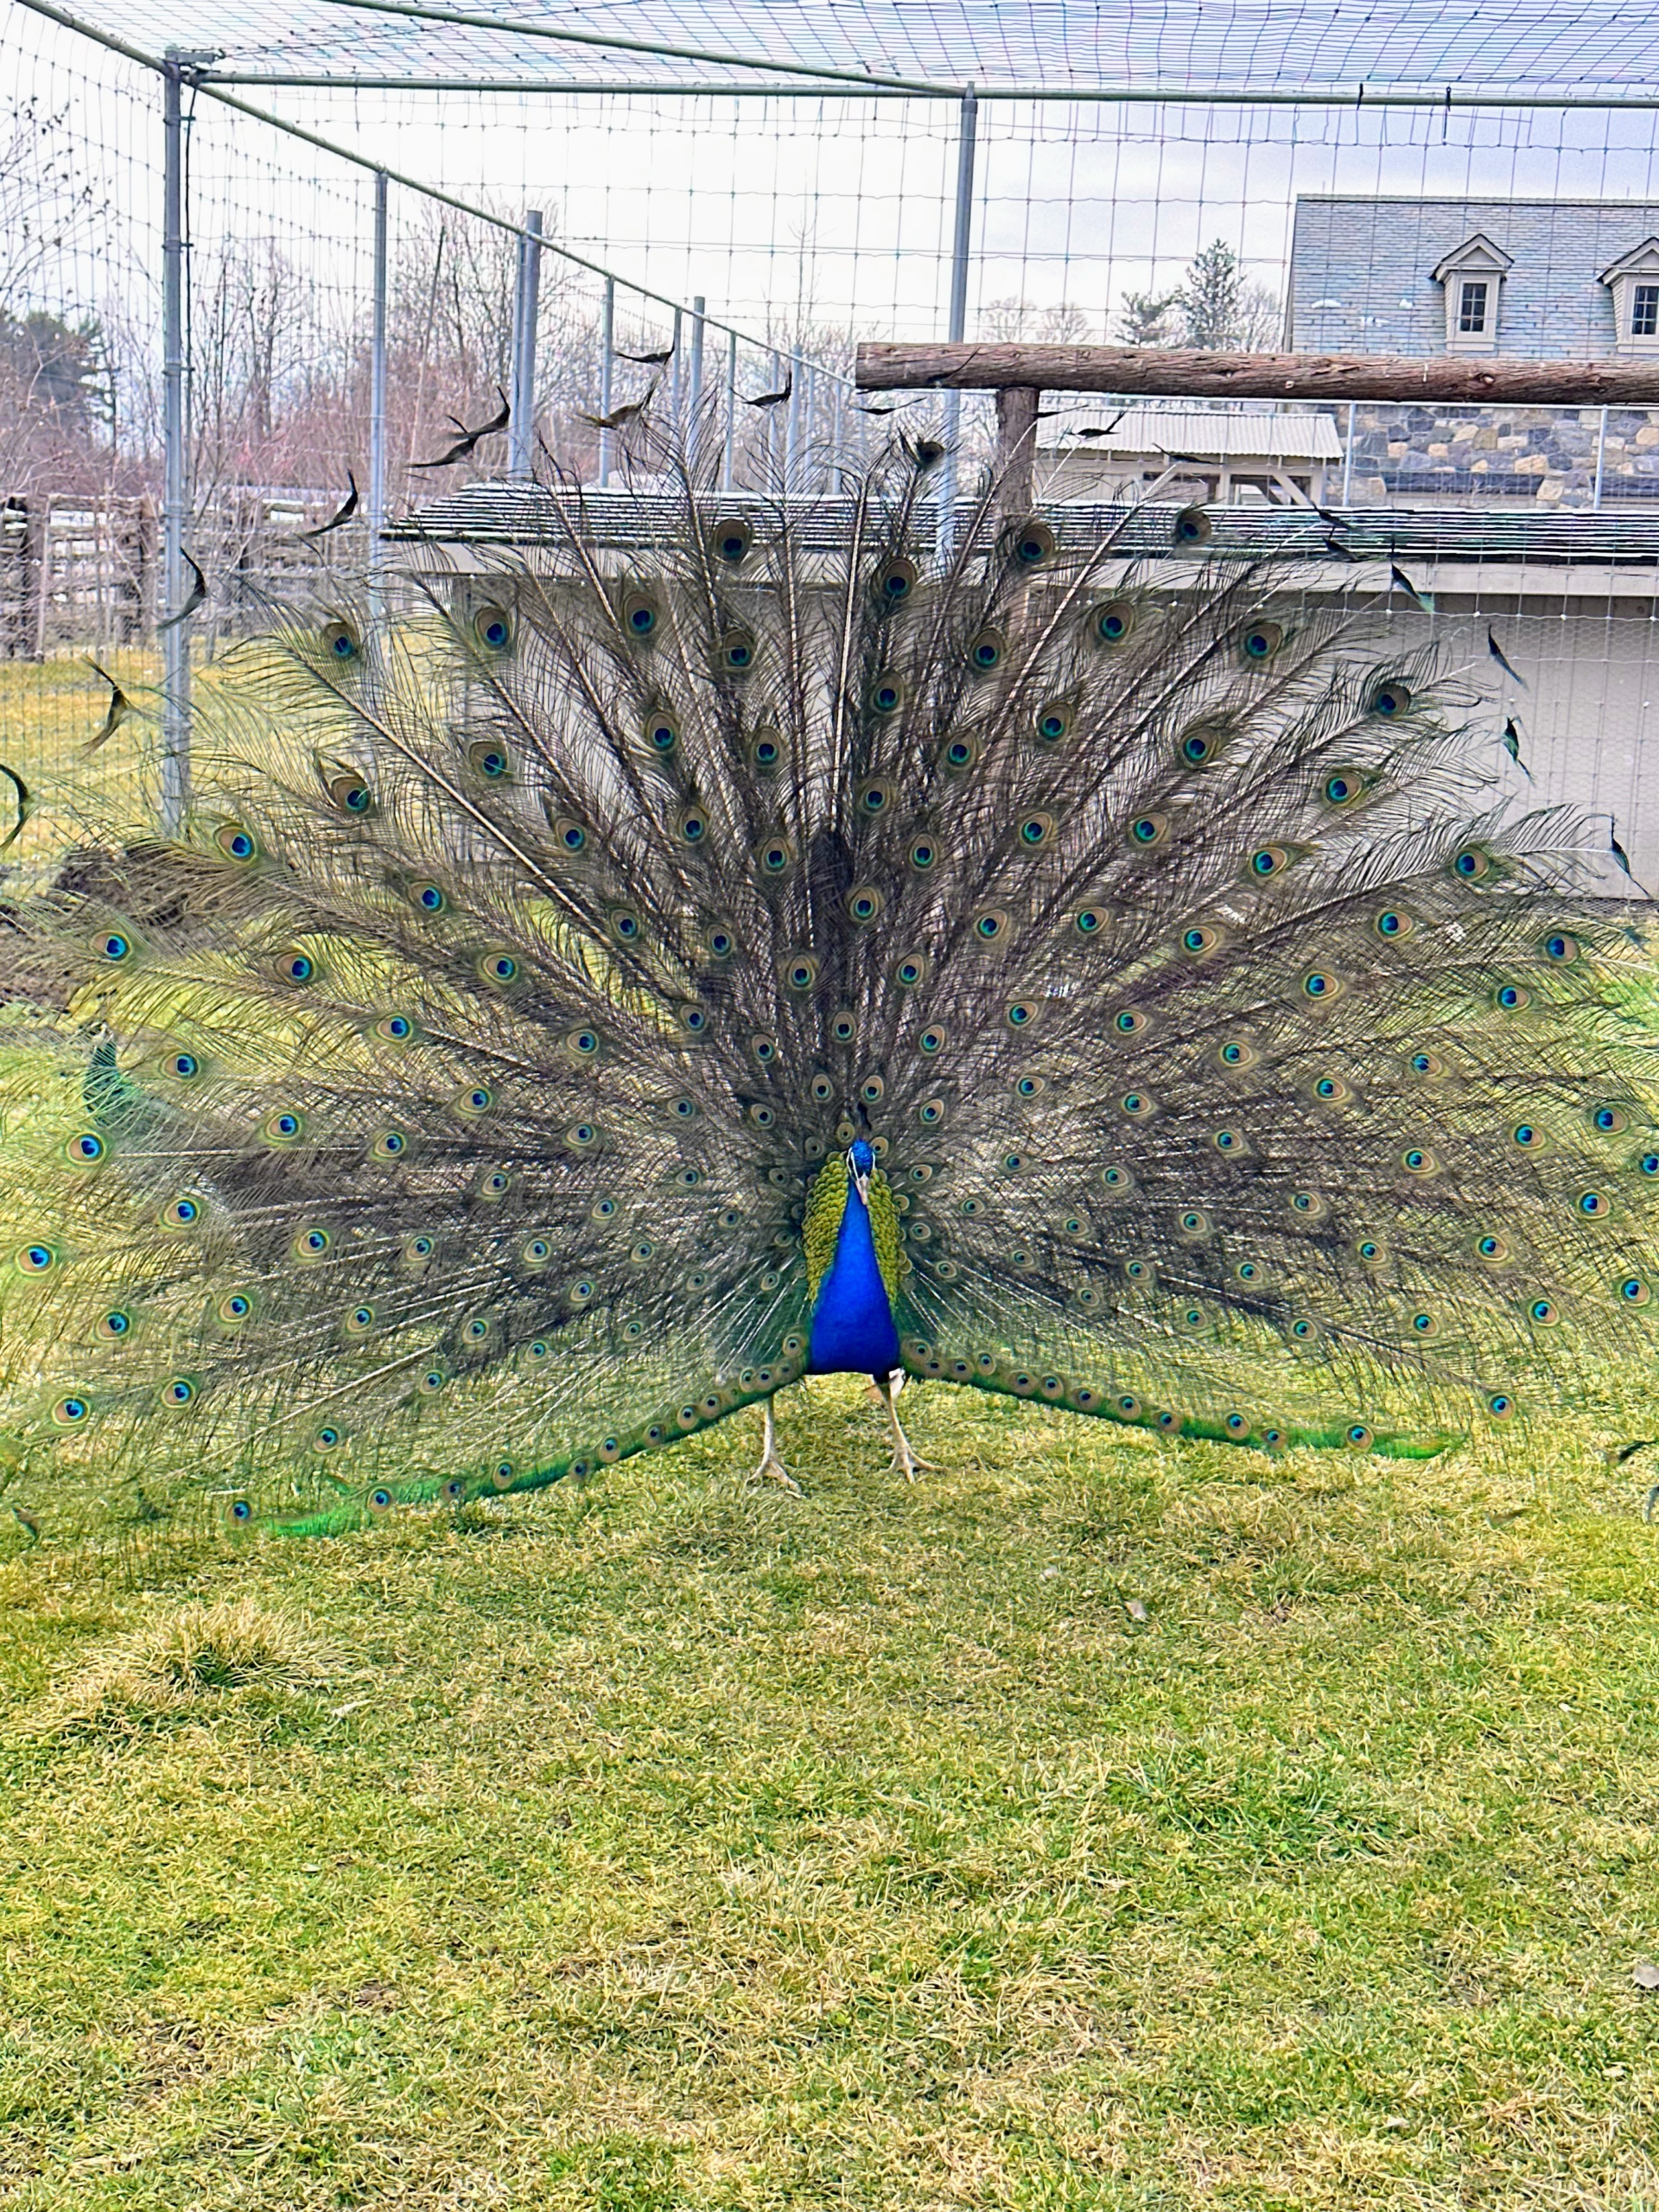
Most of them came over, except for the peacocks who had other things on their minds. This peacock is showing off its long and colorful tail feathers. It is the beginning of mating season for these birds, and he is doing his mating dance for the peahens. I am glad this stone path project is done – there are so many more to do at the farm.
On this St. Patrick's Day, a mix of sun and clouds is expected over Skylands, my well-loved home in Maine, with temperatures in the high 30s - hopefully melting more of the snow from this week's nor'easter.
The recent storm which covered my Bedford, New York farm with several inches of white also hit the Seal Harbor area - residents there got a total of about seven to eight inches. Cheryl DuLong, who helps me care for Skylands, takes many pictures around the property, especially in winter when I am not able to visit as often. She sent me these images yesterday, showing the beautiful snow around my home.
Enjoy.
Further up north at my home in Maine, the nor’easter dropped several inches of snow over two days. It was also quite windy, so the snow came from all directions, sticking to nearly every surface and every side of the trees.
Very similar to the conditions here in New York, the snow in Maine was heavy and wet. In this photo, one can see some of “Rockefeller’s Teeth” – large blocks of granite lining an edge to serve as guardrails. These coping stones are cut roughly and spaced irregularly to create a more rustic and natural appearance. This area includes hemlocks, spruce, and cedar trees.
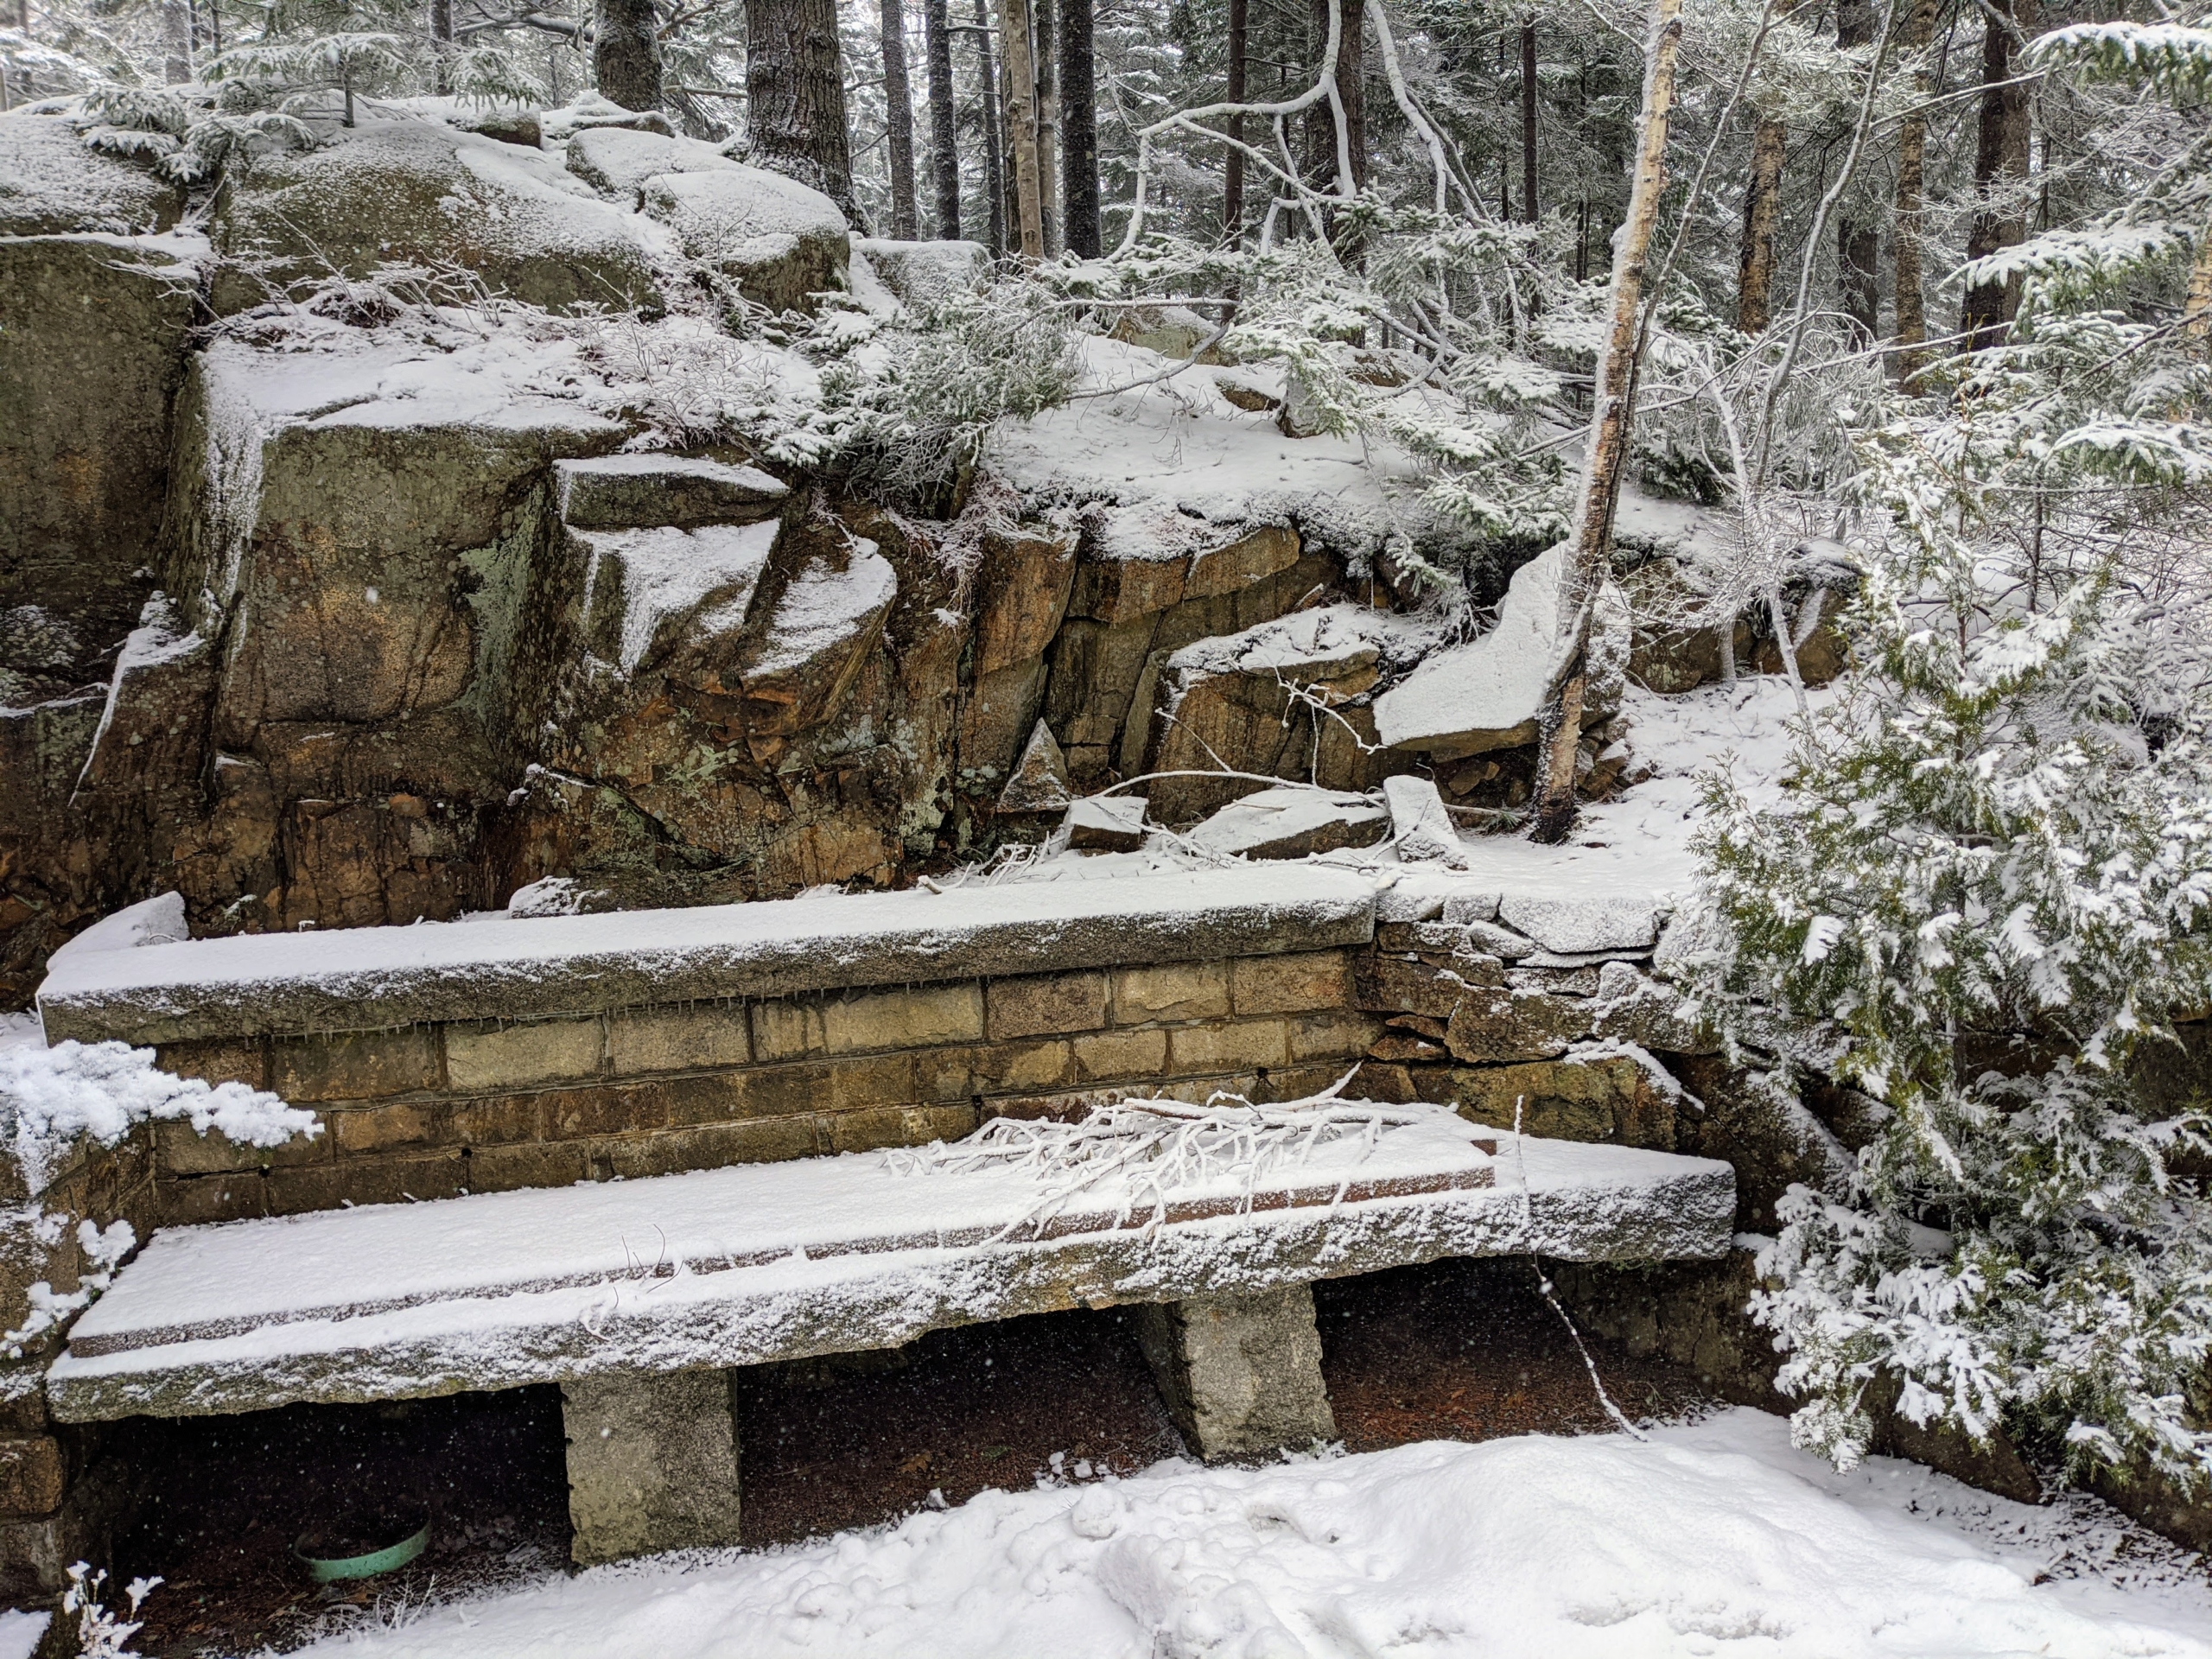
This is a bench just off my back porch. I like to put the asado grill here during summer to use for our outdoor dinners.
Here is a little fir tree just outside my laundry room window. Beyond this tree is a pool where my grandchildren loved to look for frogs when they were younger.
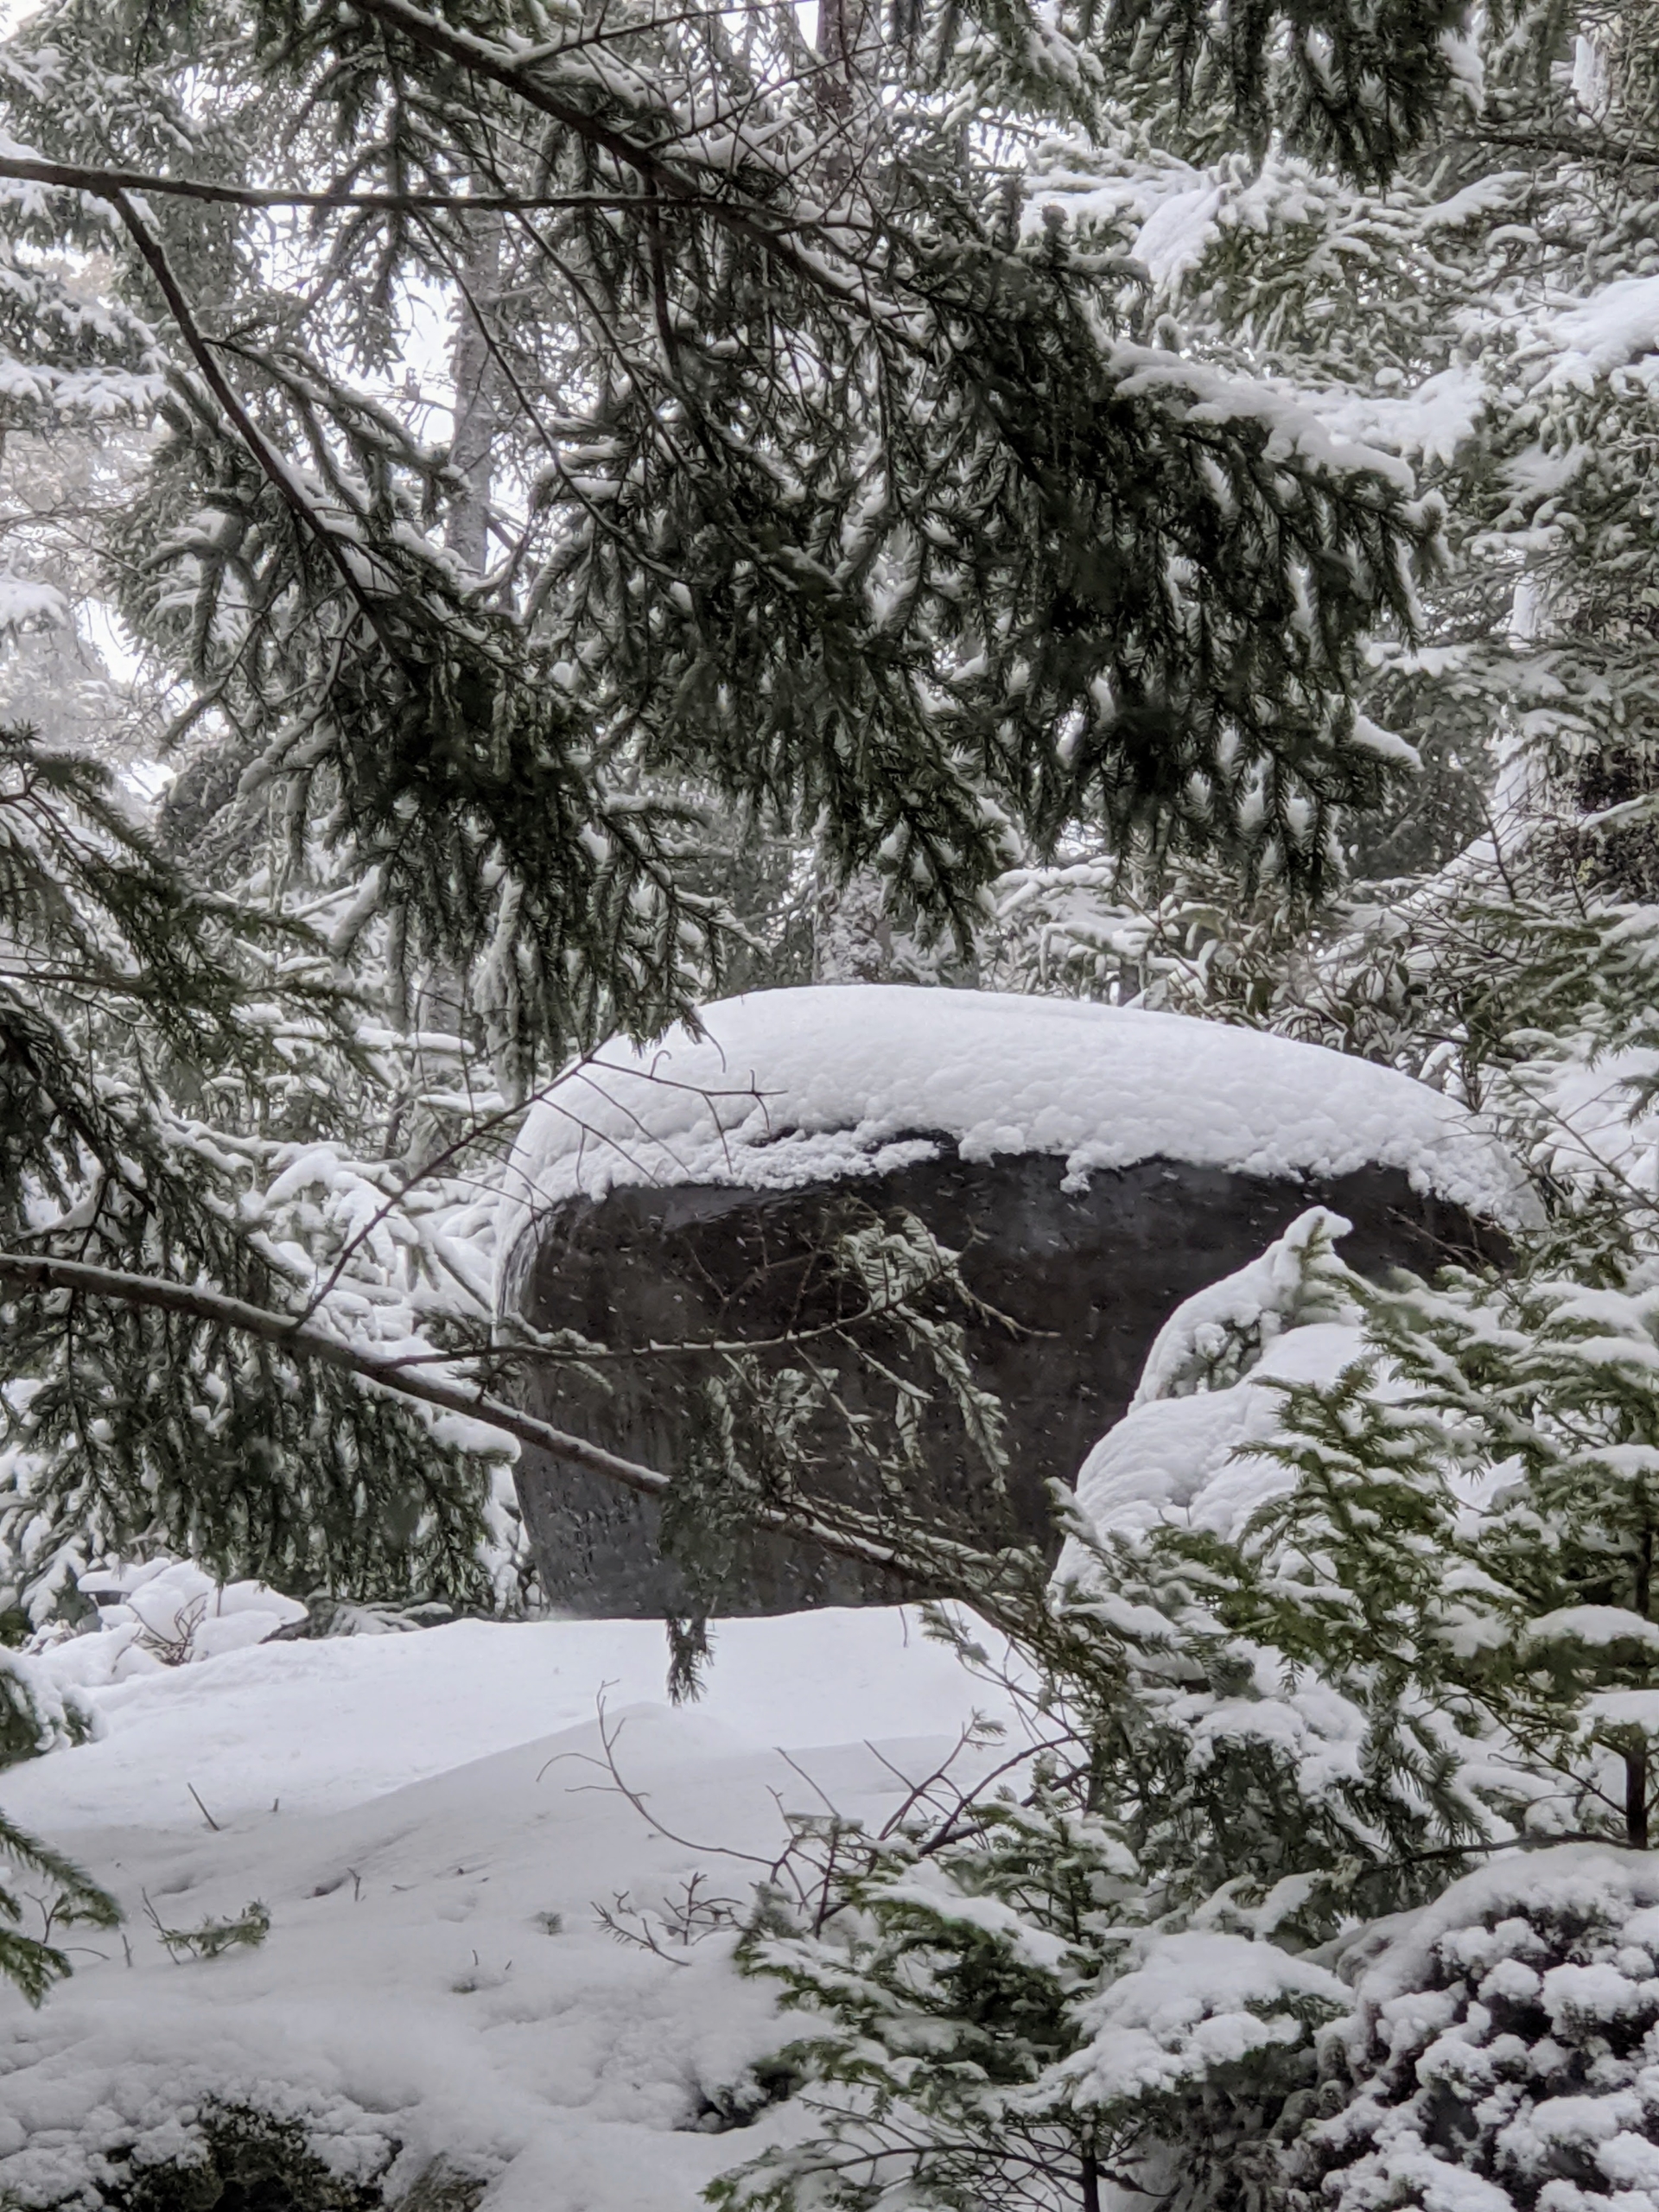
The snow weighed down many of the branches, but fortunately all remained intact. We always try to dust off any snow where we can.
These steps are from the main terrace and join the path to my guest house. The wooden box above covers and protects the ornamental urn inside during the cold season. This photo was taken around 11am on the first day of snow.
The snow drifts made it hard to decipher these narrow stairs leading to the West Terrace. To the left, one can see some of the high bush blueberry branches – the fruits from these bushes are some of the sweetest I’ve ever had.
Here are more of these native blueberry bushes. In summer, we try to harvest as many as possible before the birds get to them.
This is one of Cheryl’s favorite views – the reflection on the dining room window showing the trees and the ocean. It’s hard to see, but yes, all that white is the ocean.
This sundial was installed when the house was built. It is above the doors of the Living Hall, which open out to the main “cracked ice” terrace. The surrounding kiwi vines are original to the house and have grown so beautifully all these years.
Even when it’s snowing, my outdoor grounds crew is hard at work. Here is our new Kubota tractor moving some old stone and debris from a current project. This tractor is so helpful around both my farm and this home in Maine – it’s one of my favorite pieces of equipment.
Even in the coldest of winter, the mountain laurel holds onto its leaves, categorizing it as an evergreen. Here, the leathery deep green foliage stands out among all the surrounding bare tree branches.
Hard to identify some of the plantings under all the snow. This is a tree peony on the main terrace just outside the living room window.
This view is of Skylands’ front circle and the center garden planted with hay-scented ferns, purple smoke bushes, and spruce trees, Picea orientalis ‘Skylands’. When I found these trees, I got many to plant here in Maine. This entire day remained cloudy overhead – everything looked very gray.
This is large black urn we use for planting small trees in the summer. It is covered to keep the inside from falling rain and snow. One can see how much snow has accumulated so far.
Cheryl also does a thorough tour of the house every day to make sure everything is in good, working order. Here, she checks the gutters. They are clear of any leaves – crucial during a storm, so water drains properly.
This is a view looking out from an upstairs window down at the Counsel Circle where my family enjoys gathering on summer nights. The snow was really coming down harder by early afternoon.
From this terrace, one should see Seal Harbor and Sutton’s Island beyond the trees, but it is so cloudy and foggy, it’s hard to see anything – but it’s all there. Cheryl says this terrace had already been shoveled once, but the fast snow quickly covered it all over again.
Here’s another second floor view looking down at the main stairs of the large terrace. I am already looking forward to my spring visit to Skylands when I plant all the outdoor containers. It’s one of my favorite times of the year.
On the calendar, winter turns to spring in just a few days. In fact, Skylands is expecting a warmer weekend with temperatures in the mid-40s and possibly some rain next week – only “Mother Nature” really knows. Happy St. Patrick’s Day!