I've already started my spring planting, have you?
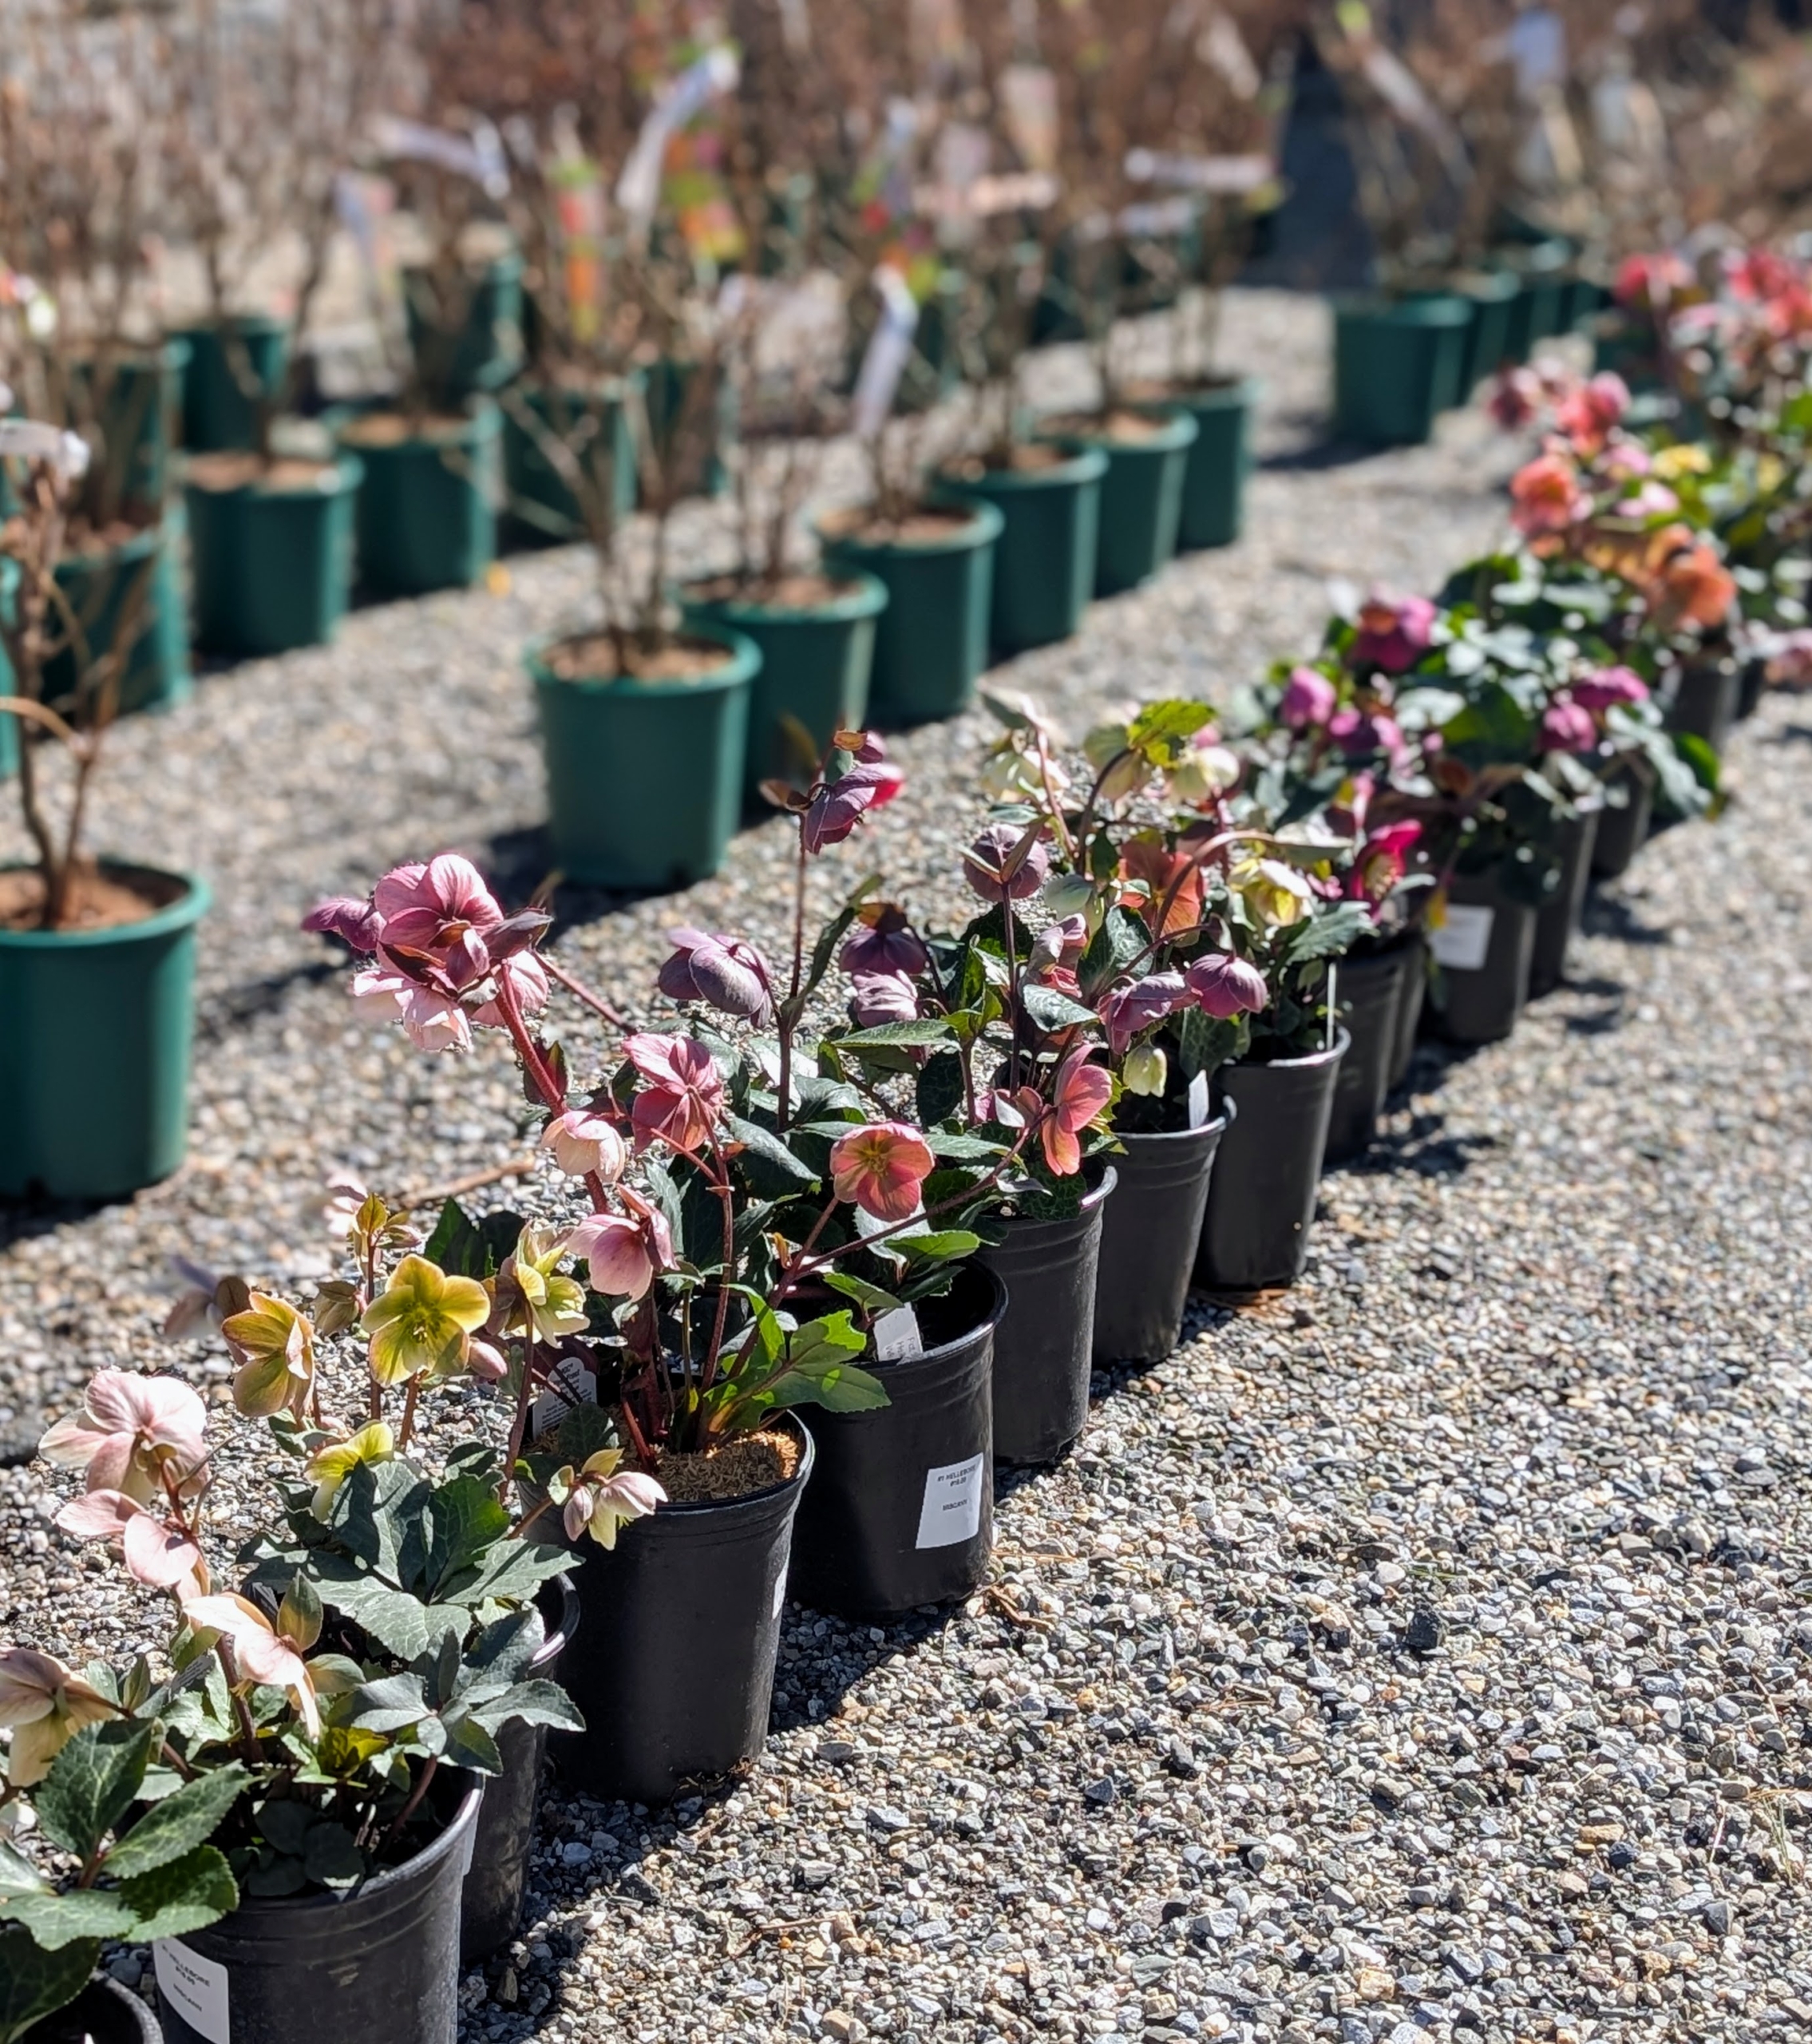
Every year I add lots of plants to both existing gardens as well as new spaces. Earlier this week, I purchased a selection of beautiful potted hellebores for an area outside my Tenant House that gets partial shade and dappled sunlight. I already have hellebores growing in these gardens, but I wanted to fill in the spaces a bit more. Hellebores begin to bloom in March and continue through the spring until the end of May.
Enjoy these photos.
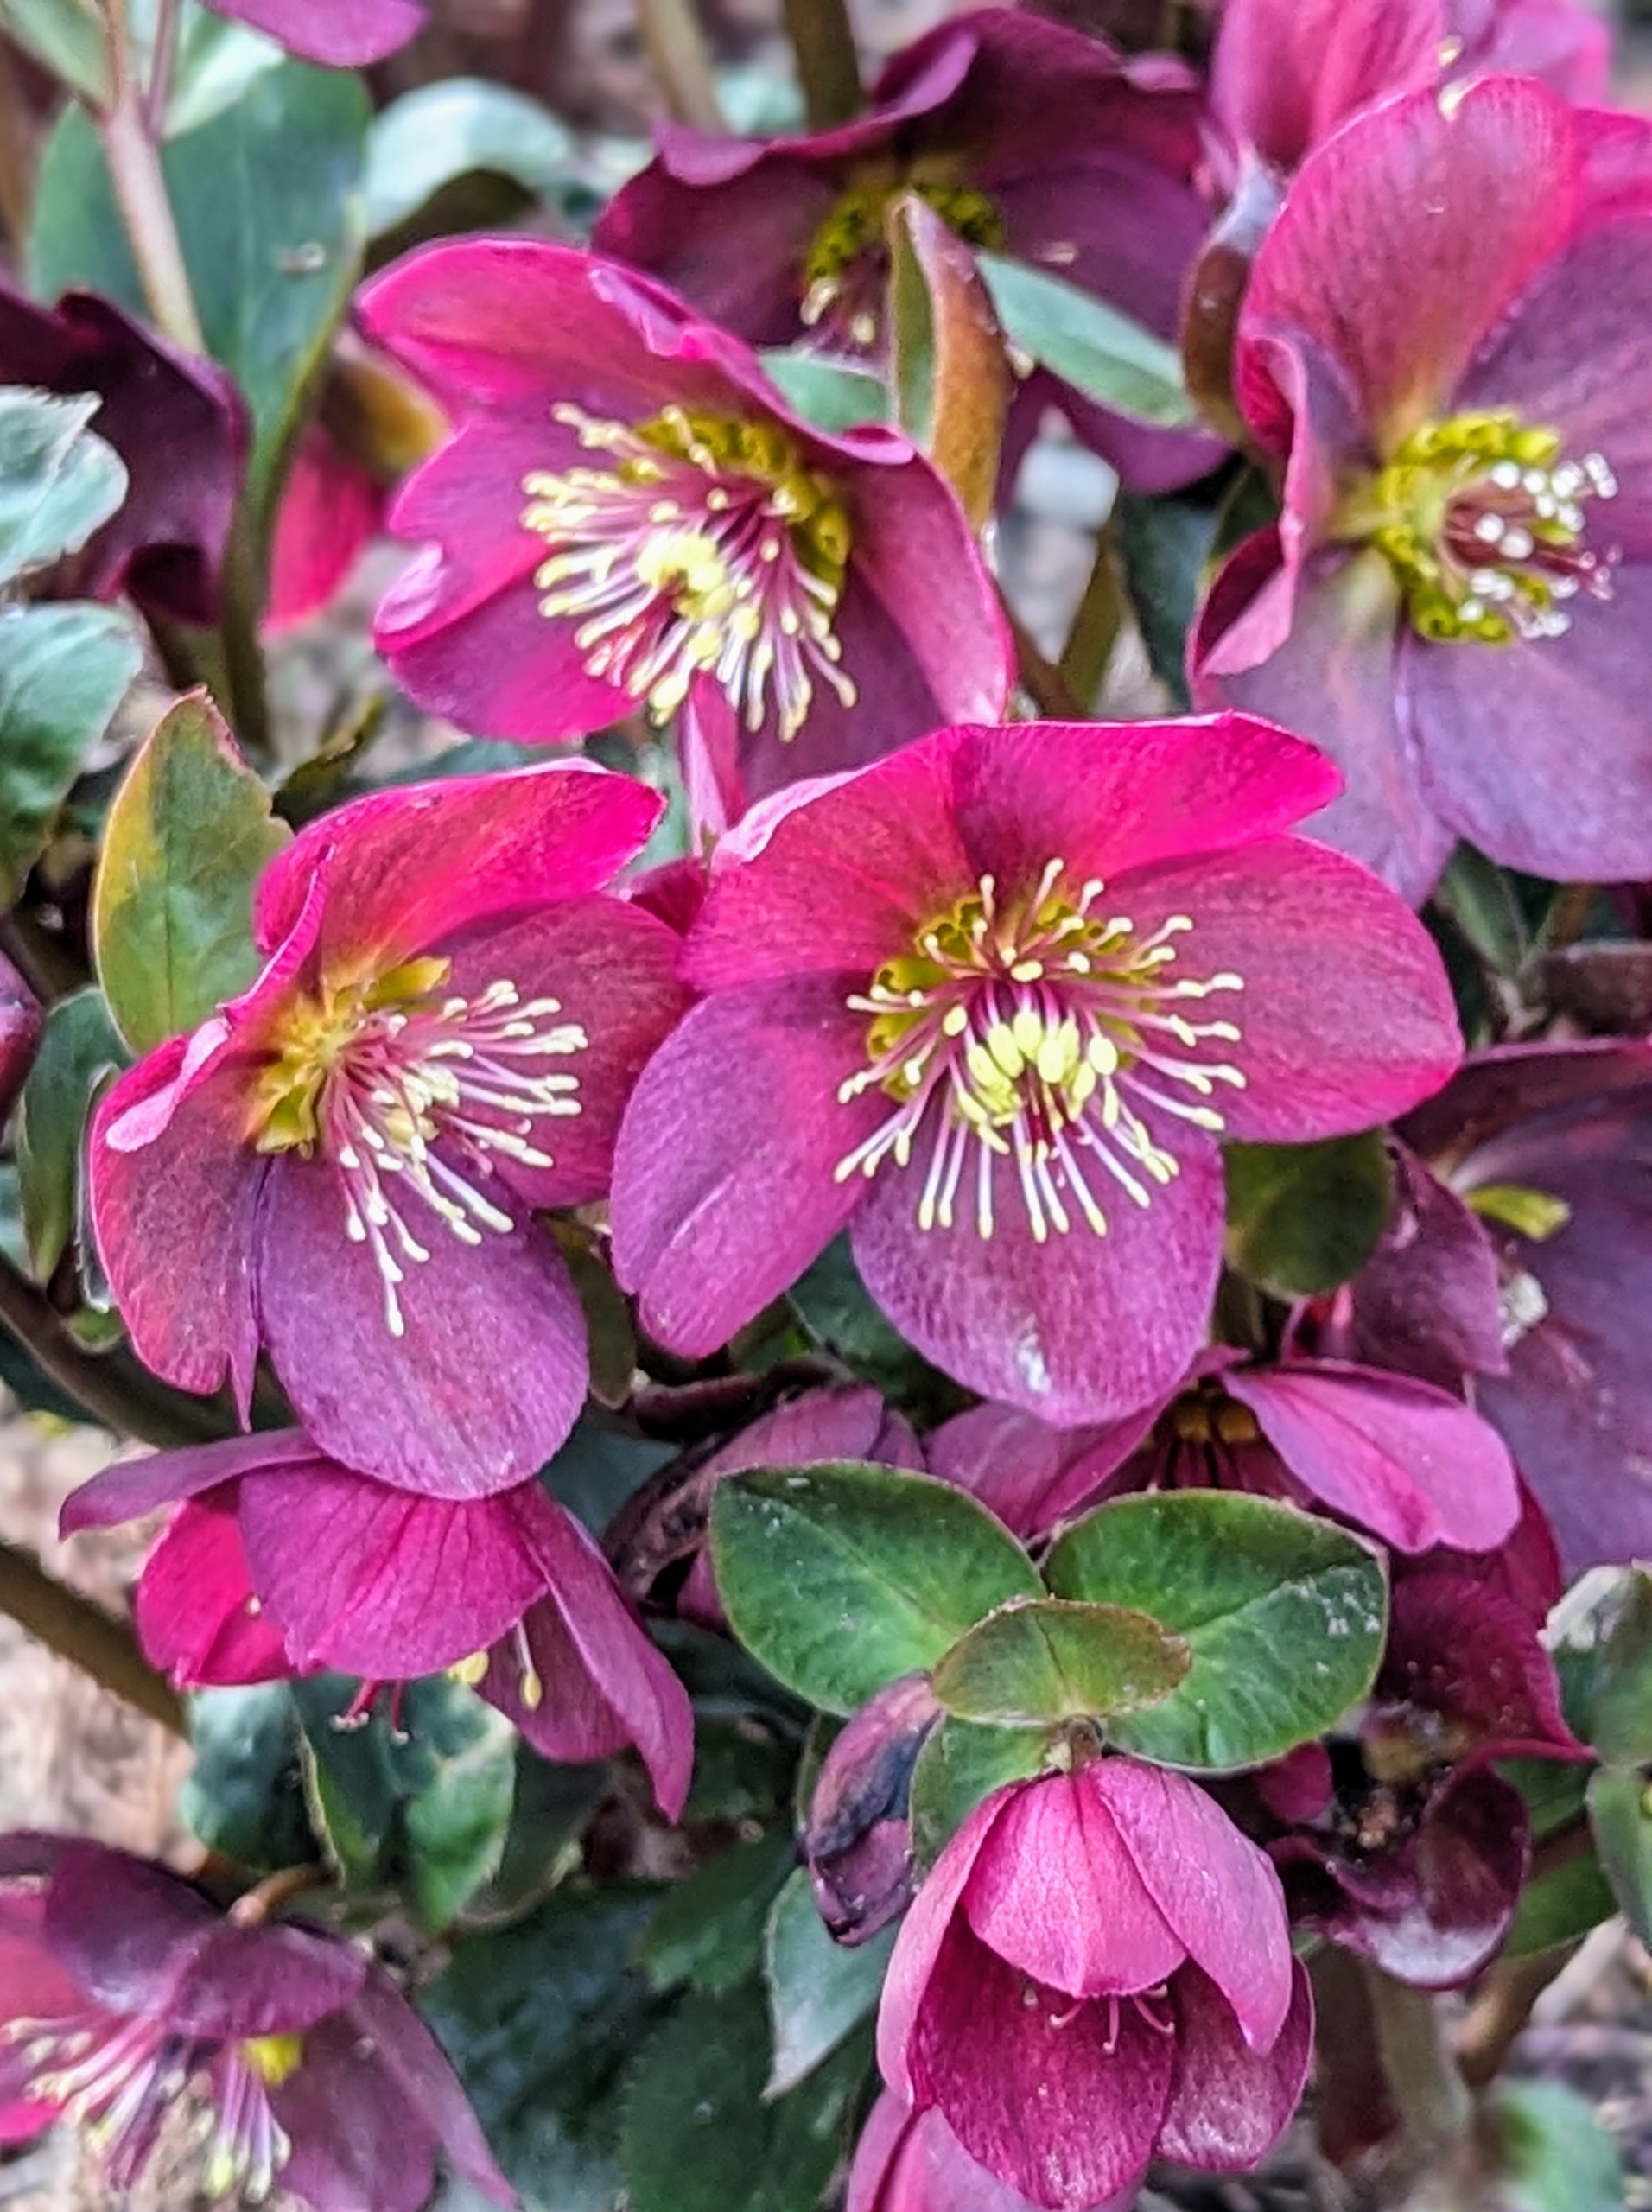
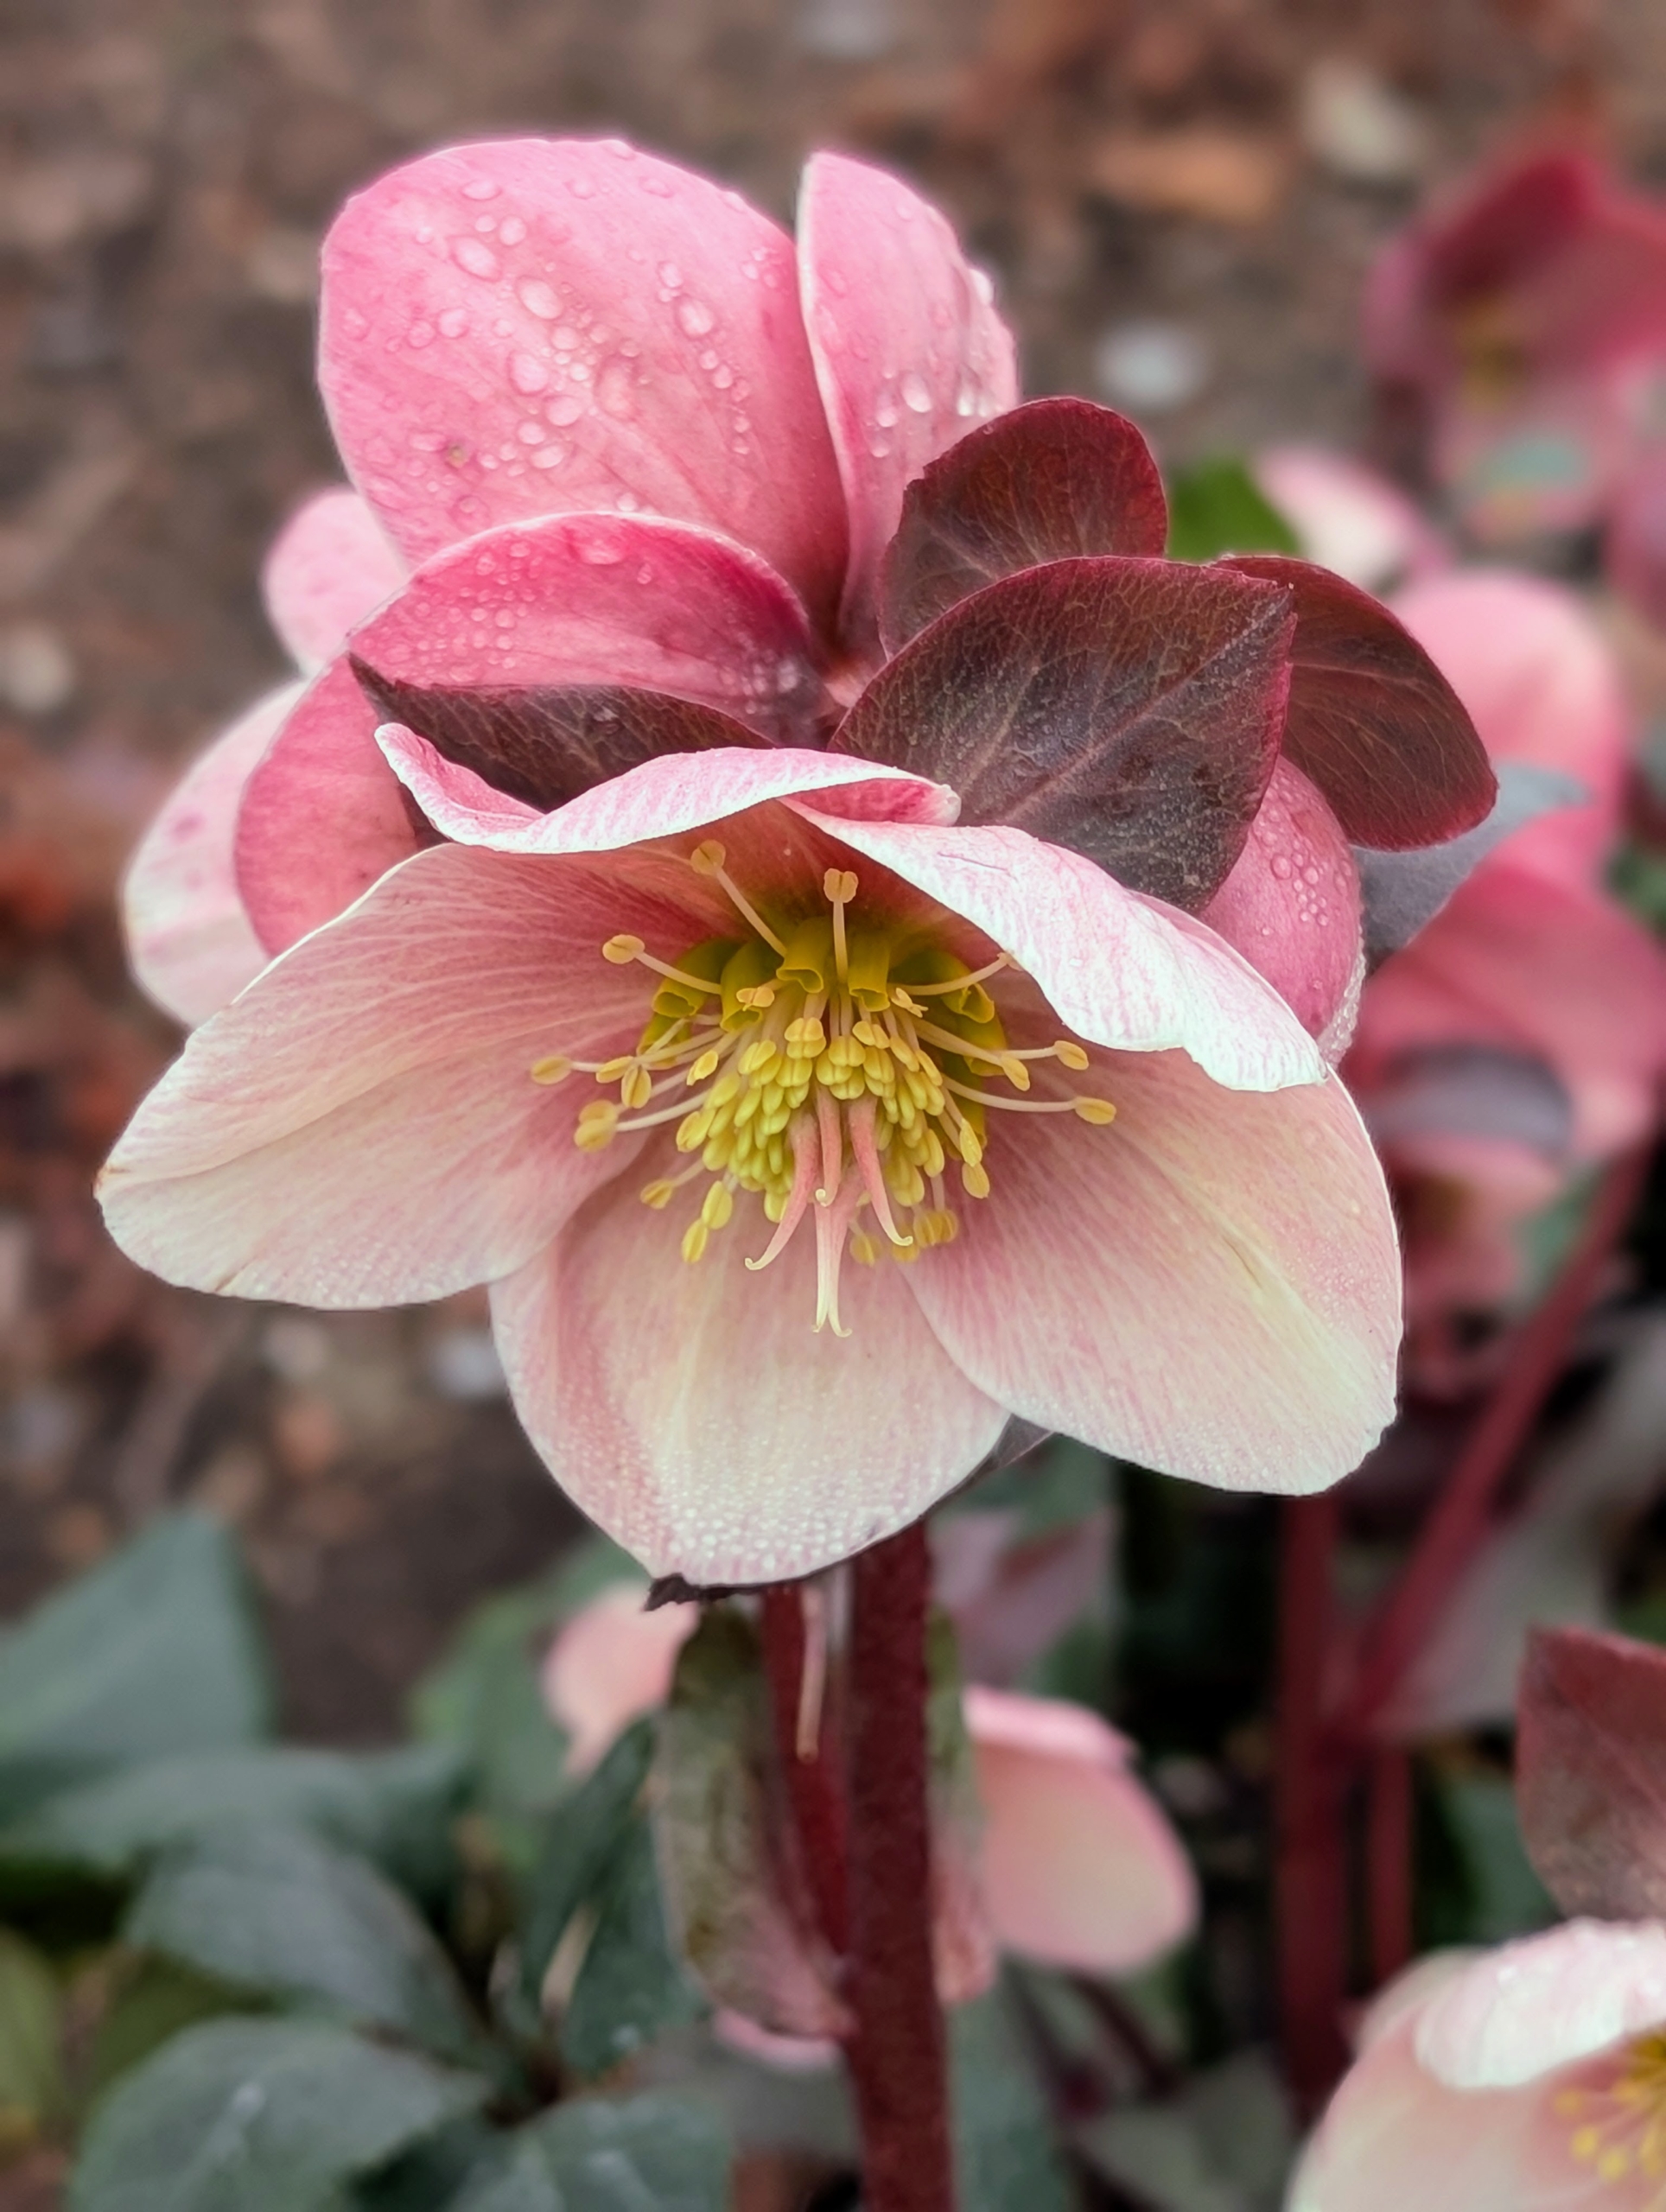
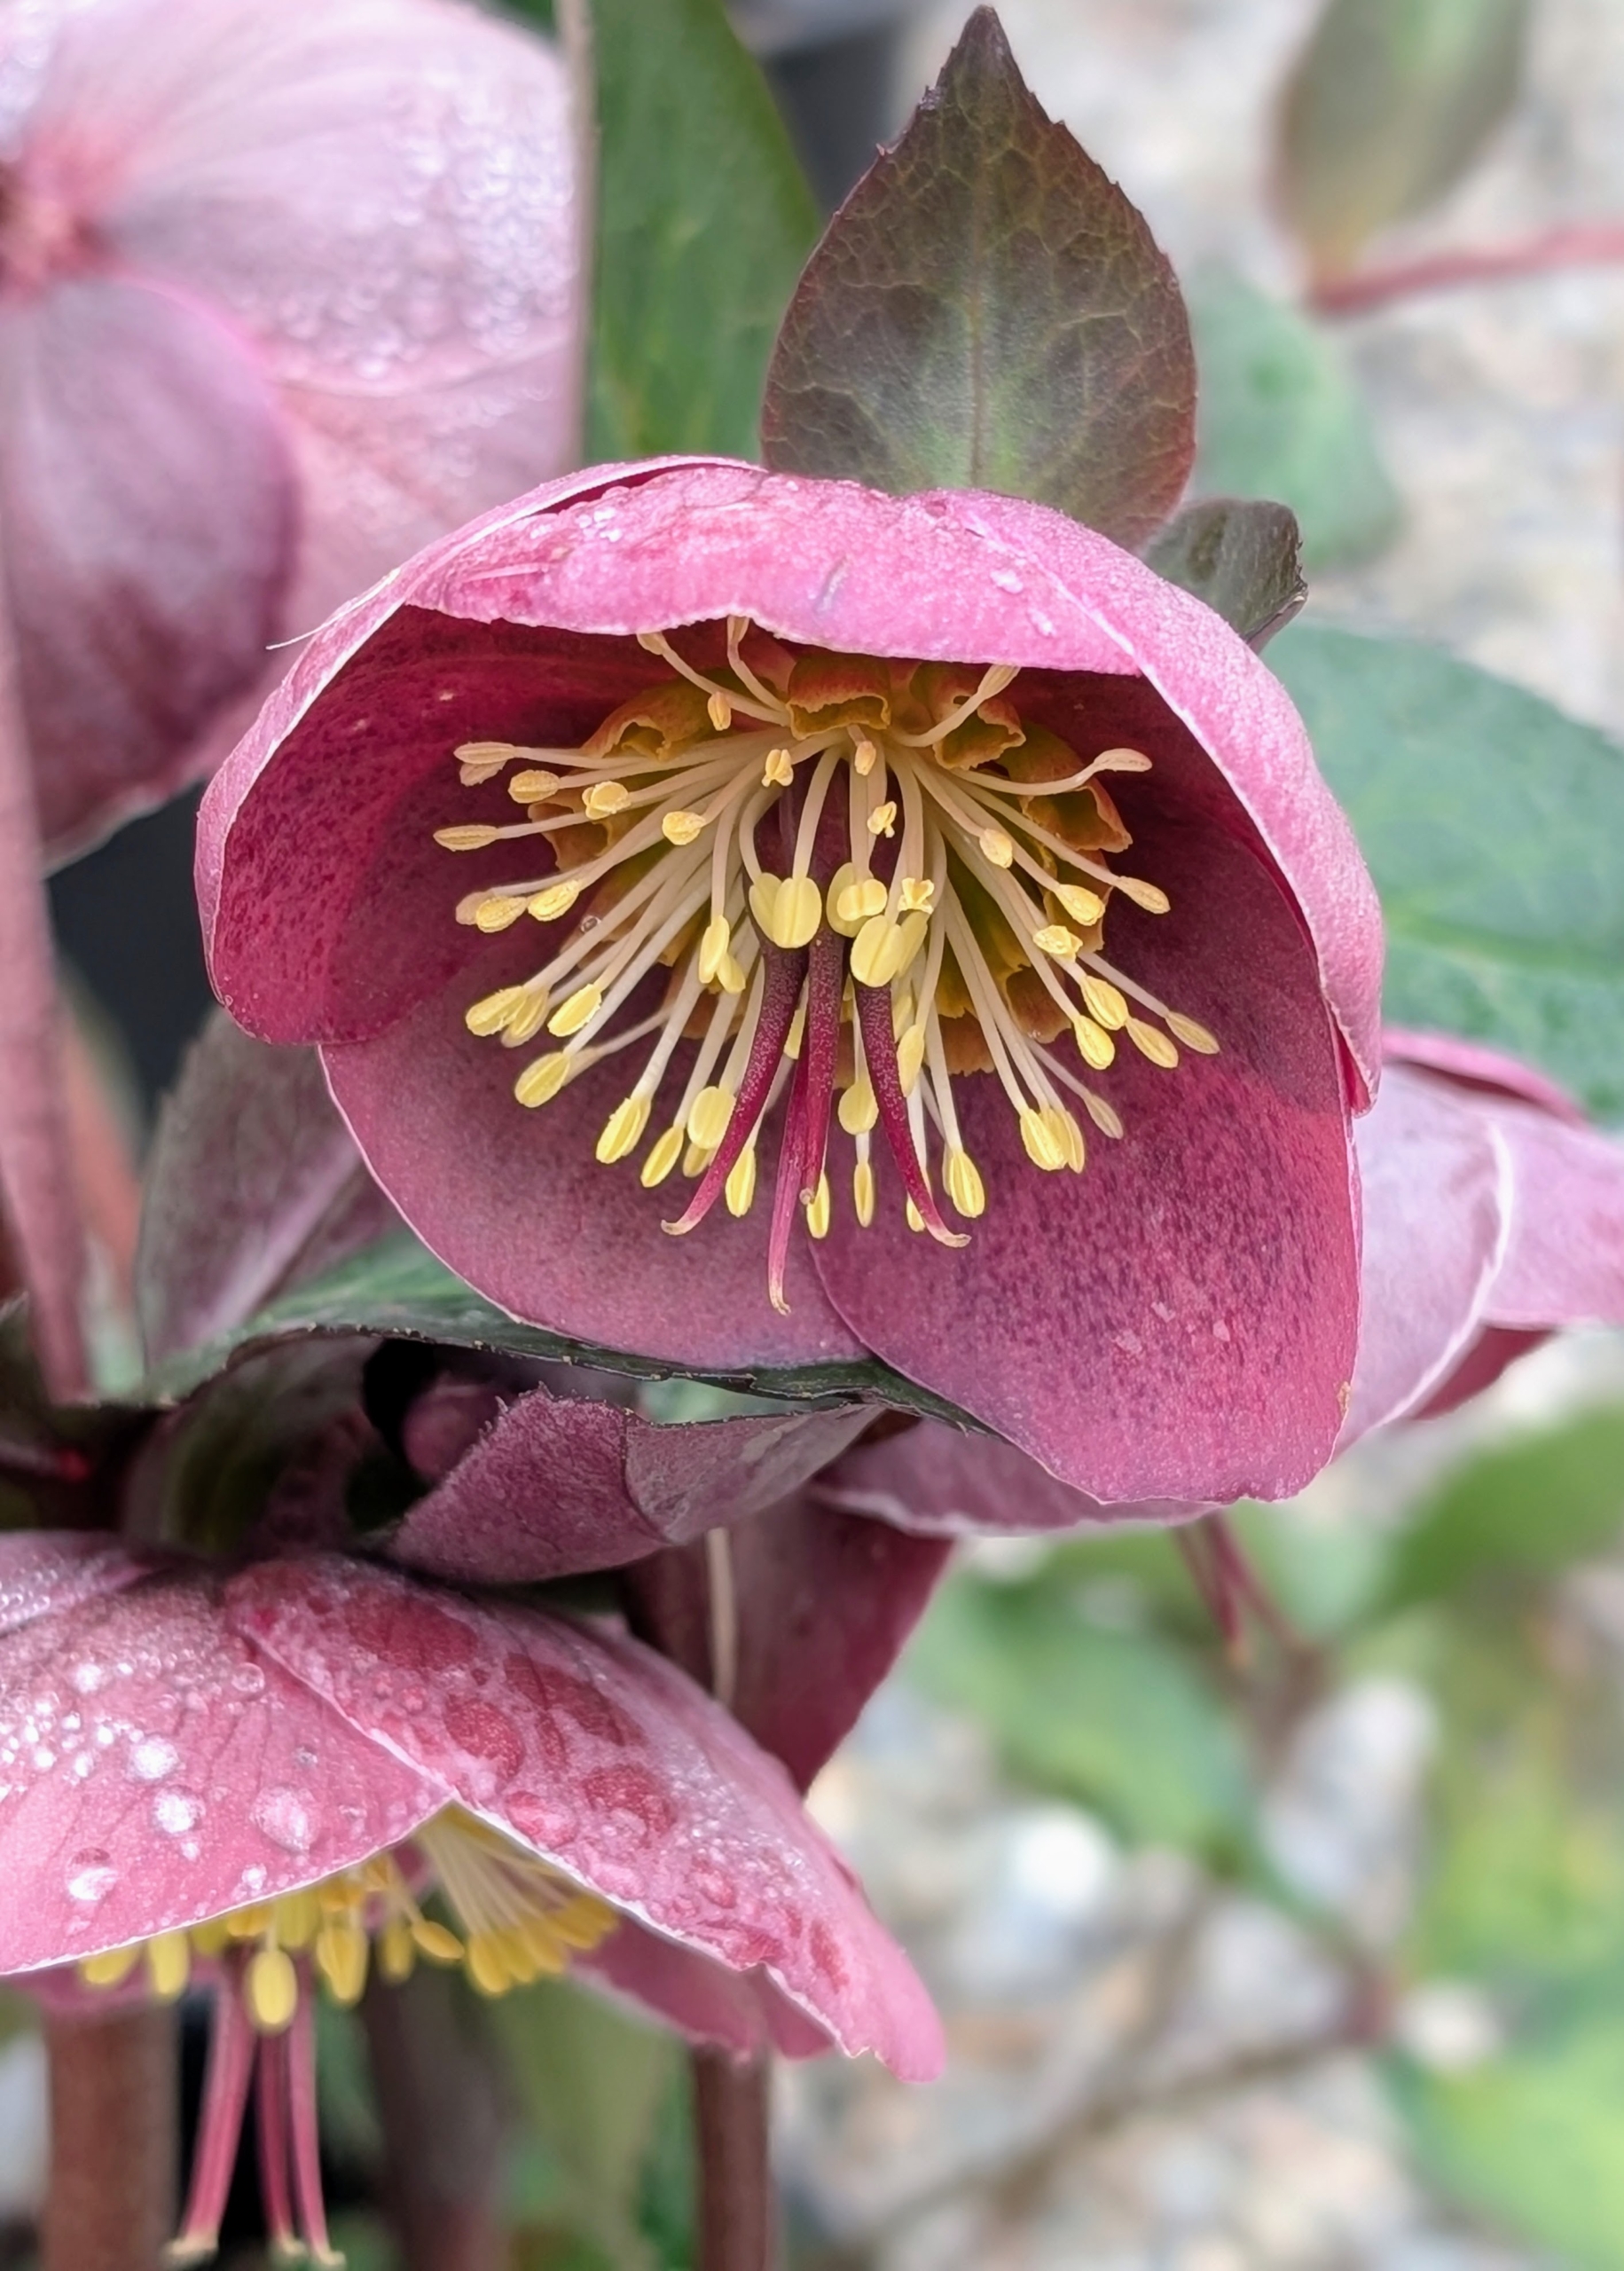
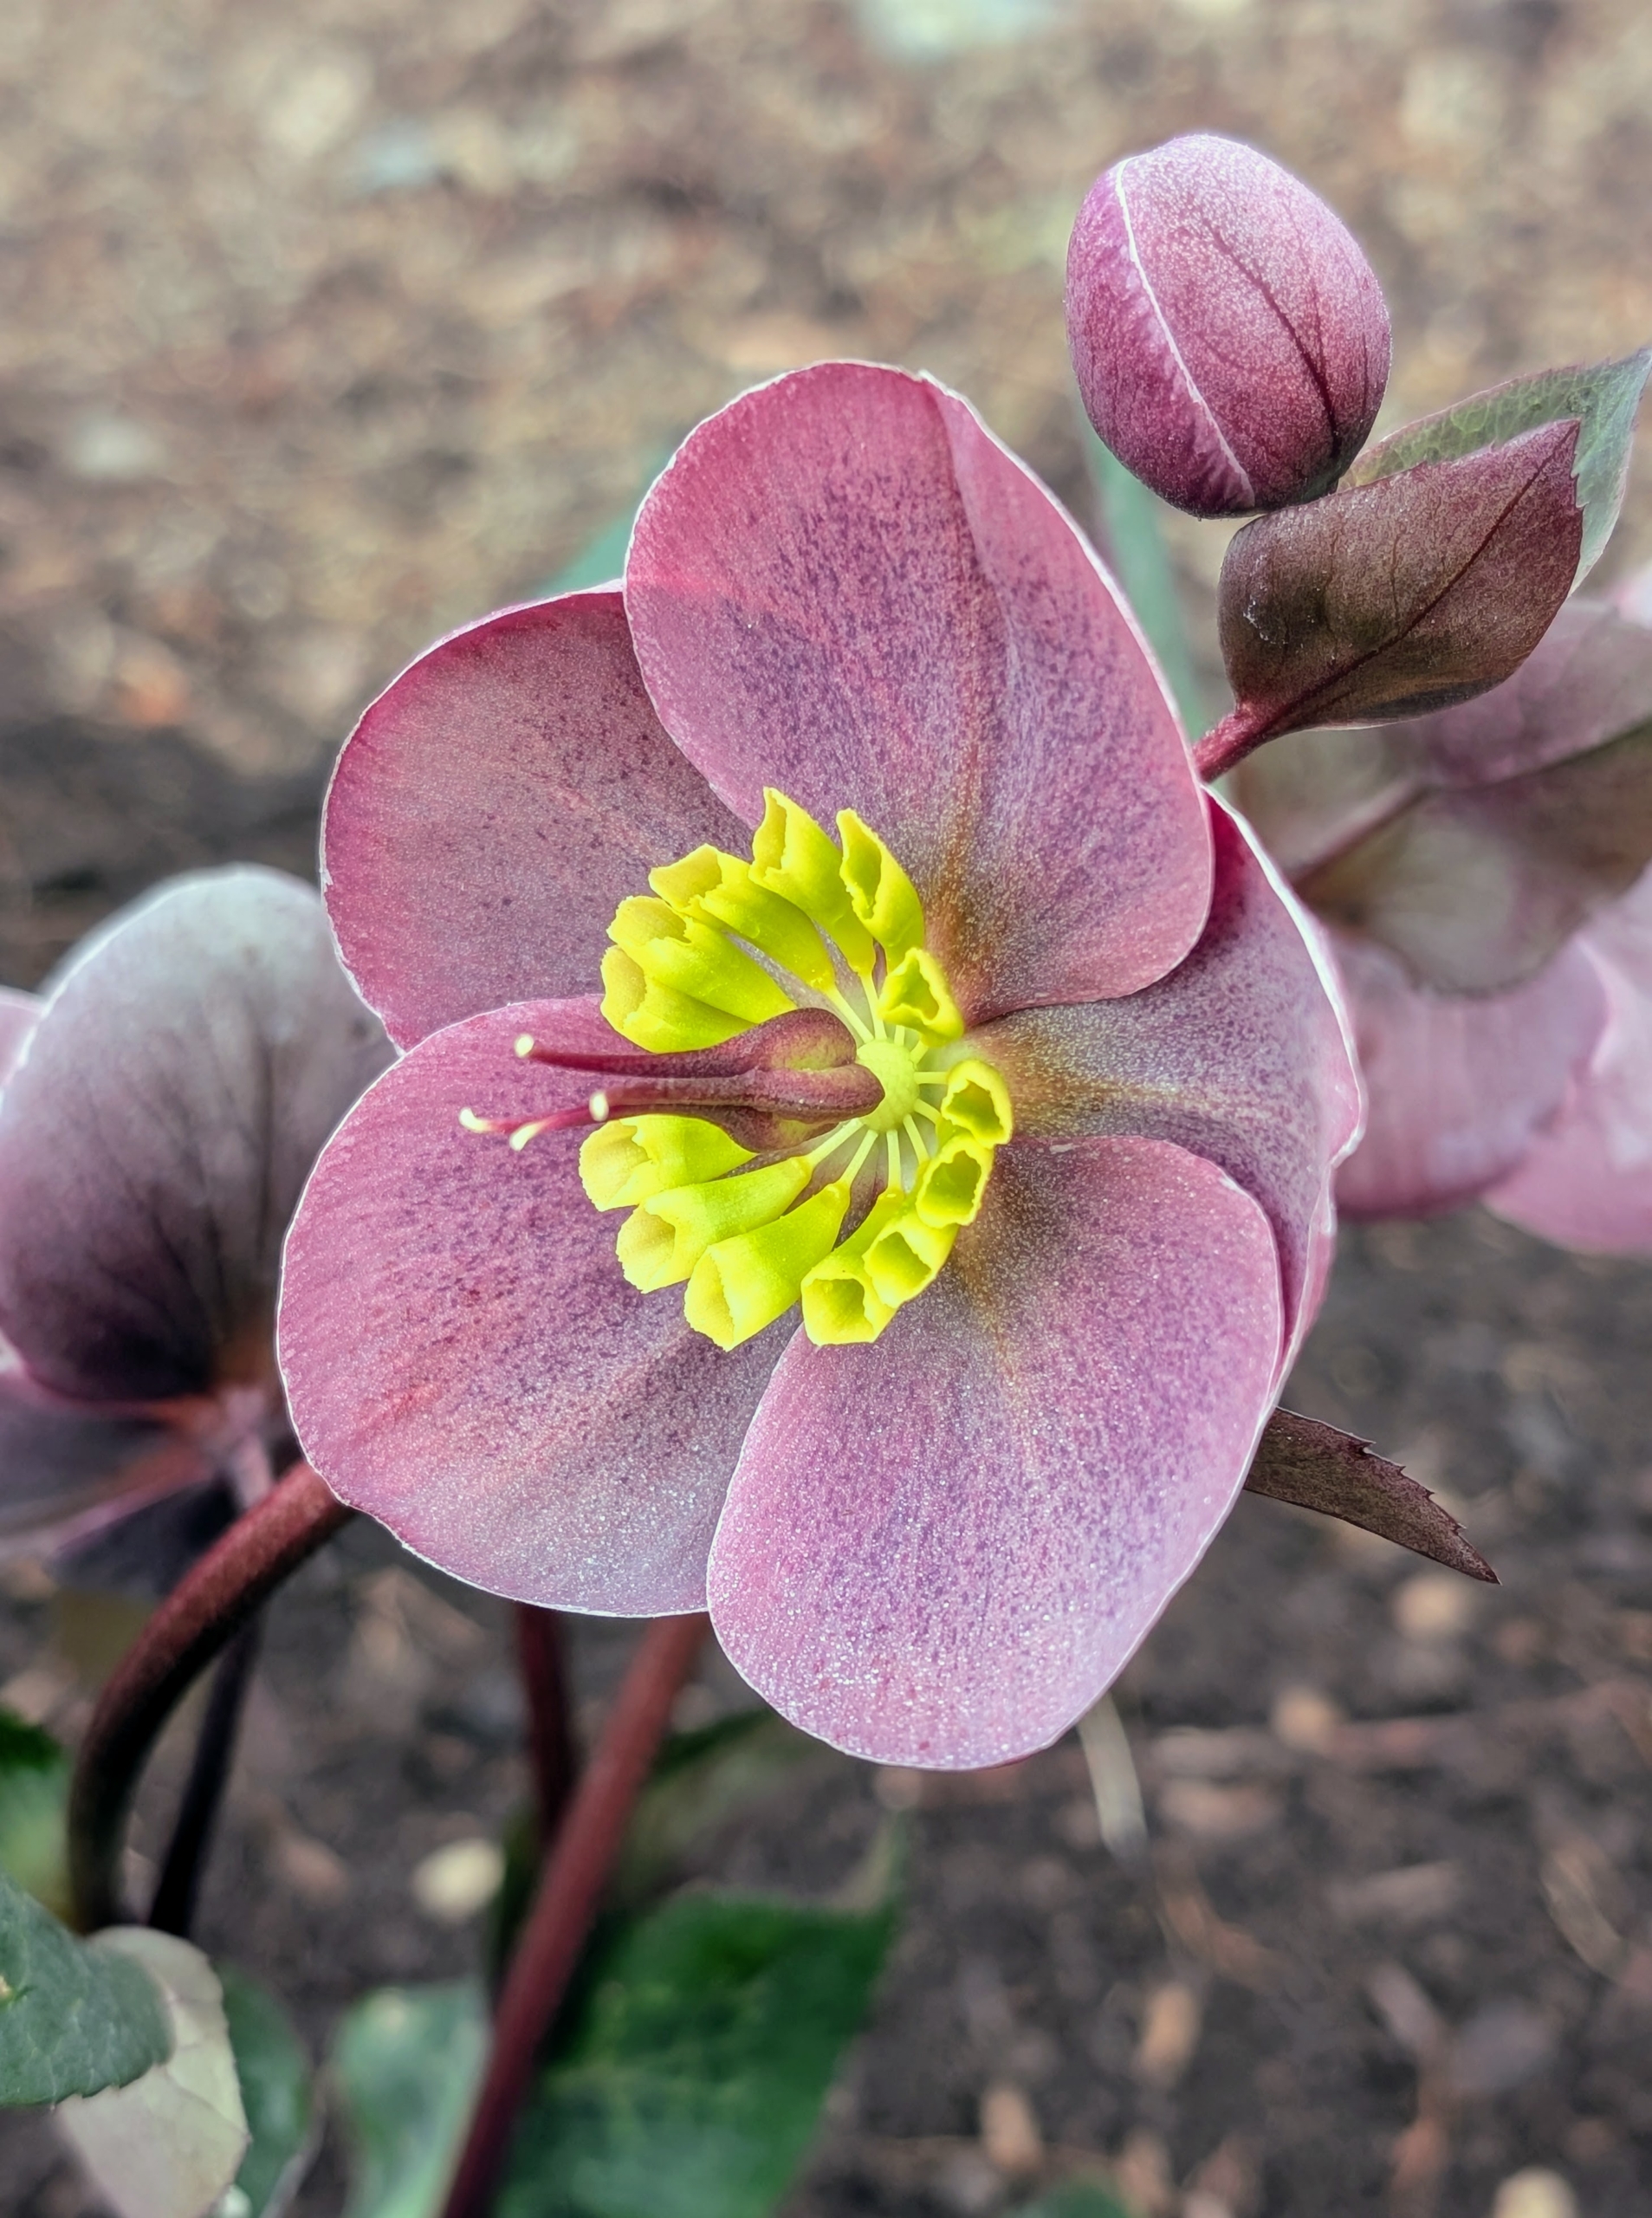
Hellebores are among the earliest perennial flowers to bloom in spring. Hellebores are members of the Eurasian genus Helleborus – about 20 species of evergreen perennial flowering plants in the family Ranunculaceae. They are very popular because they are easy-to-grow and are able to resist frost.
They are sometimes known as Lenten rose or Christmas rose because of the appearance and early flowering time. I’ve had hellebores in my gardens for many years.
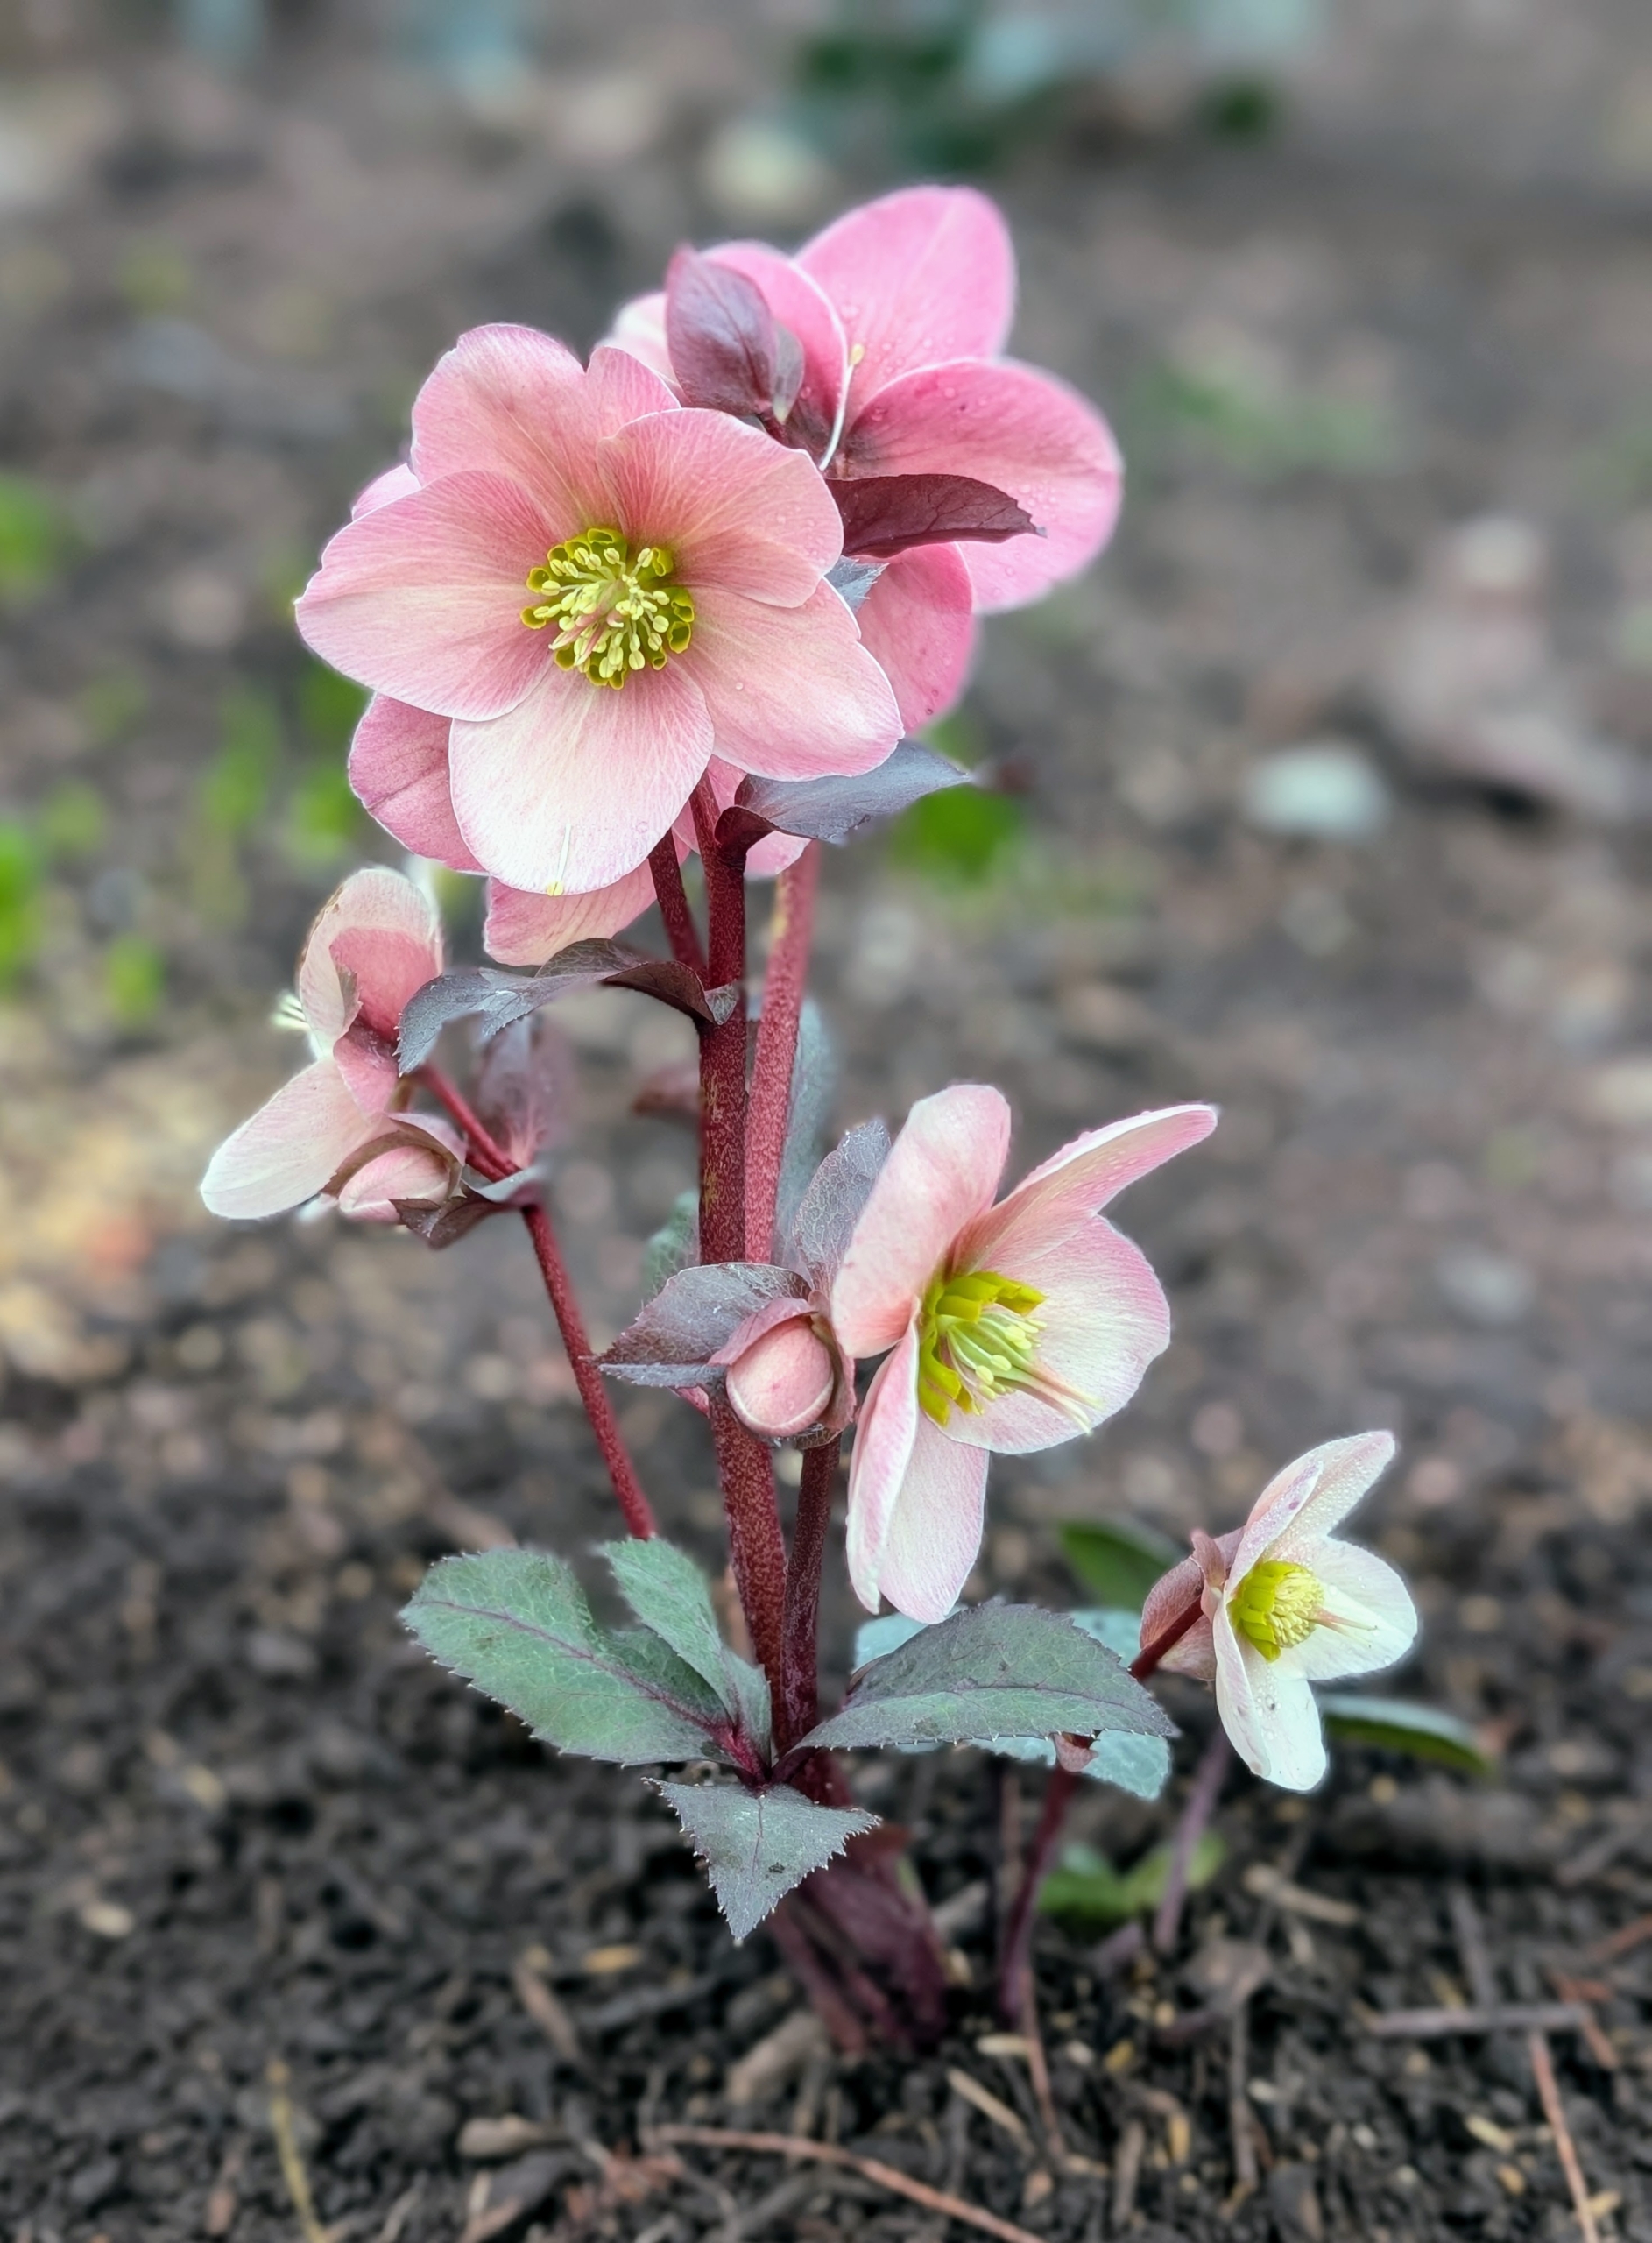
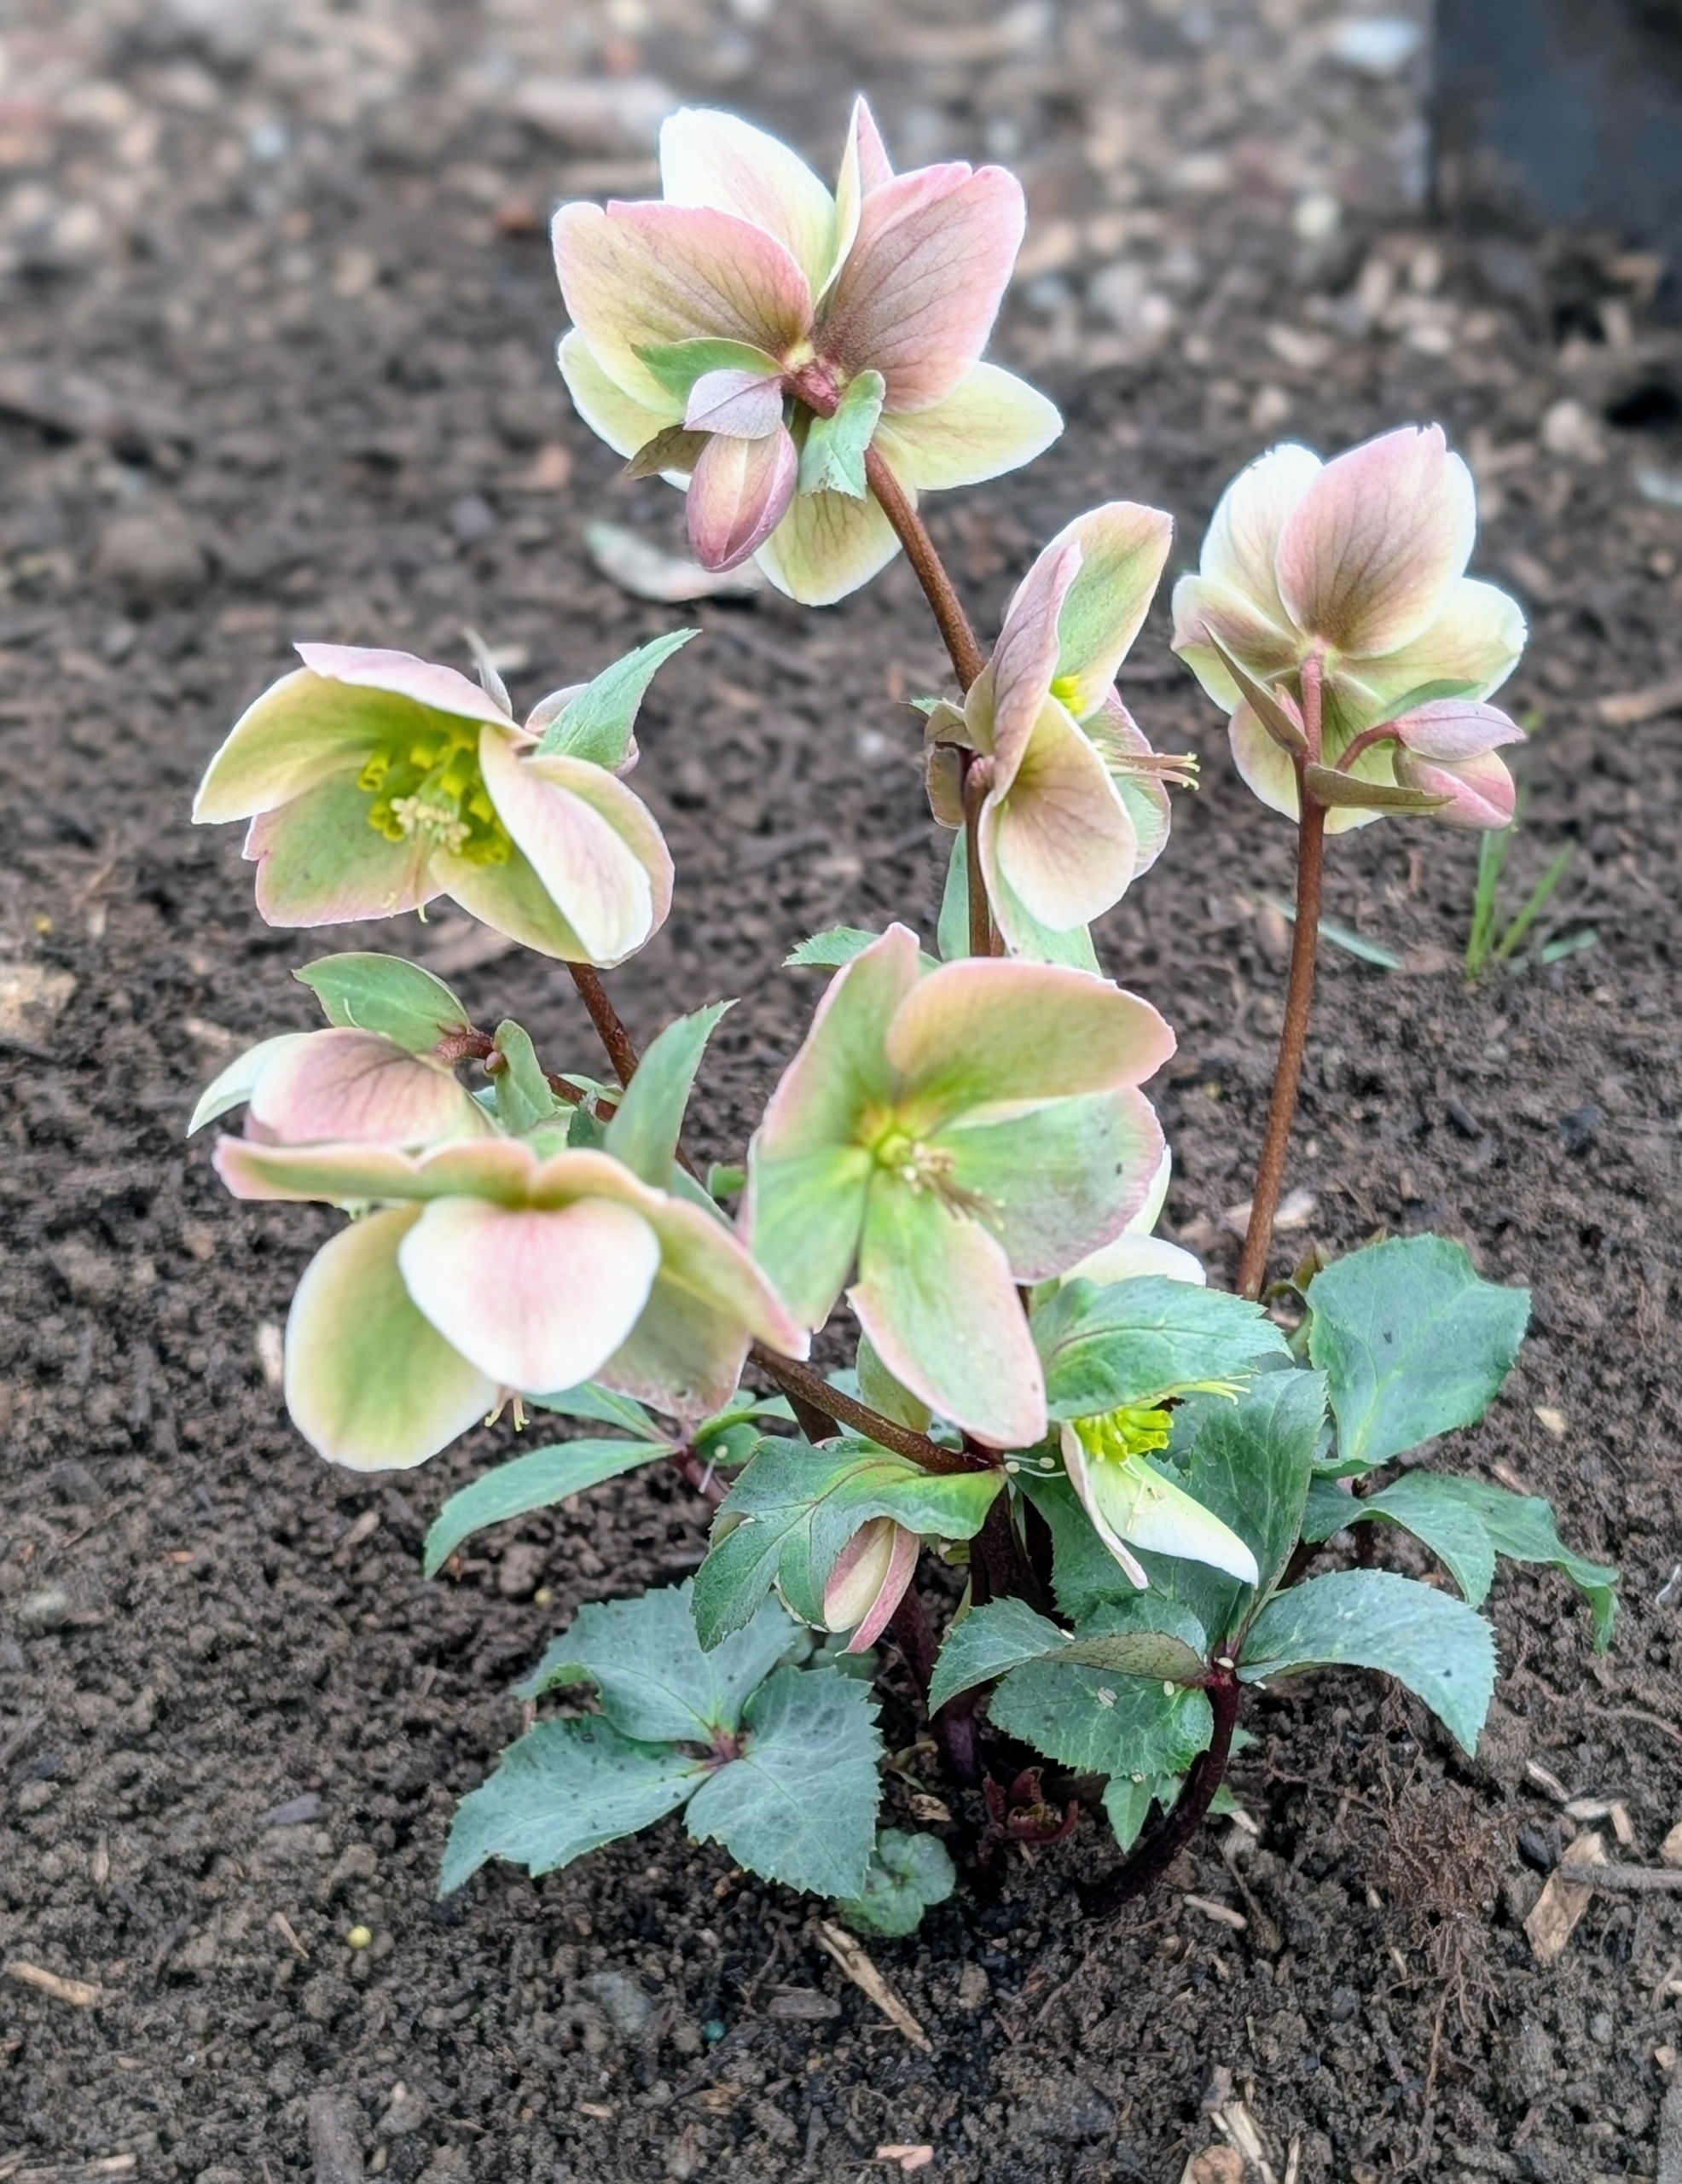
Hellebores come in a wide range of dark and light colors including shades of white and cream, maroon, apricot, yellow, green, metallic blue, slate, and dusky pink with or without contrasting markings.
To me, hellebores are must-haves for any gardener’s collection. I grow them under my allée of lindens, outside my studio, and in the beds near my Tenant House.
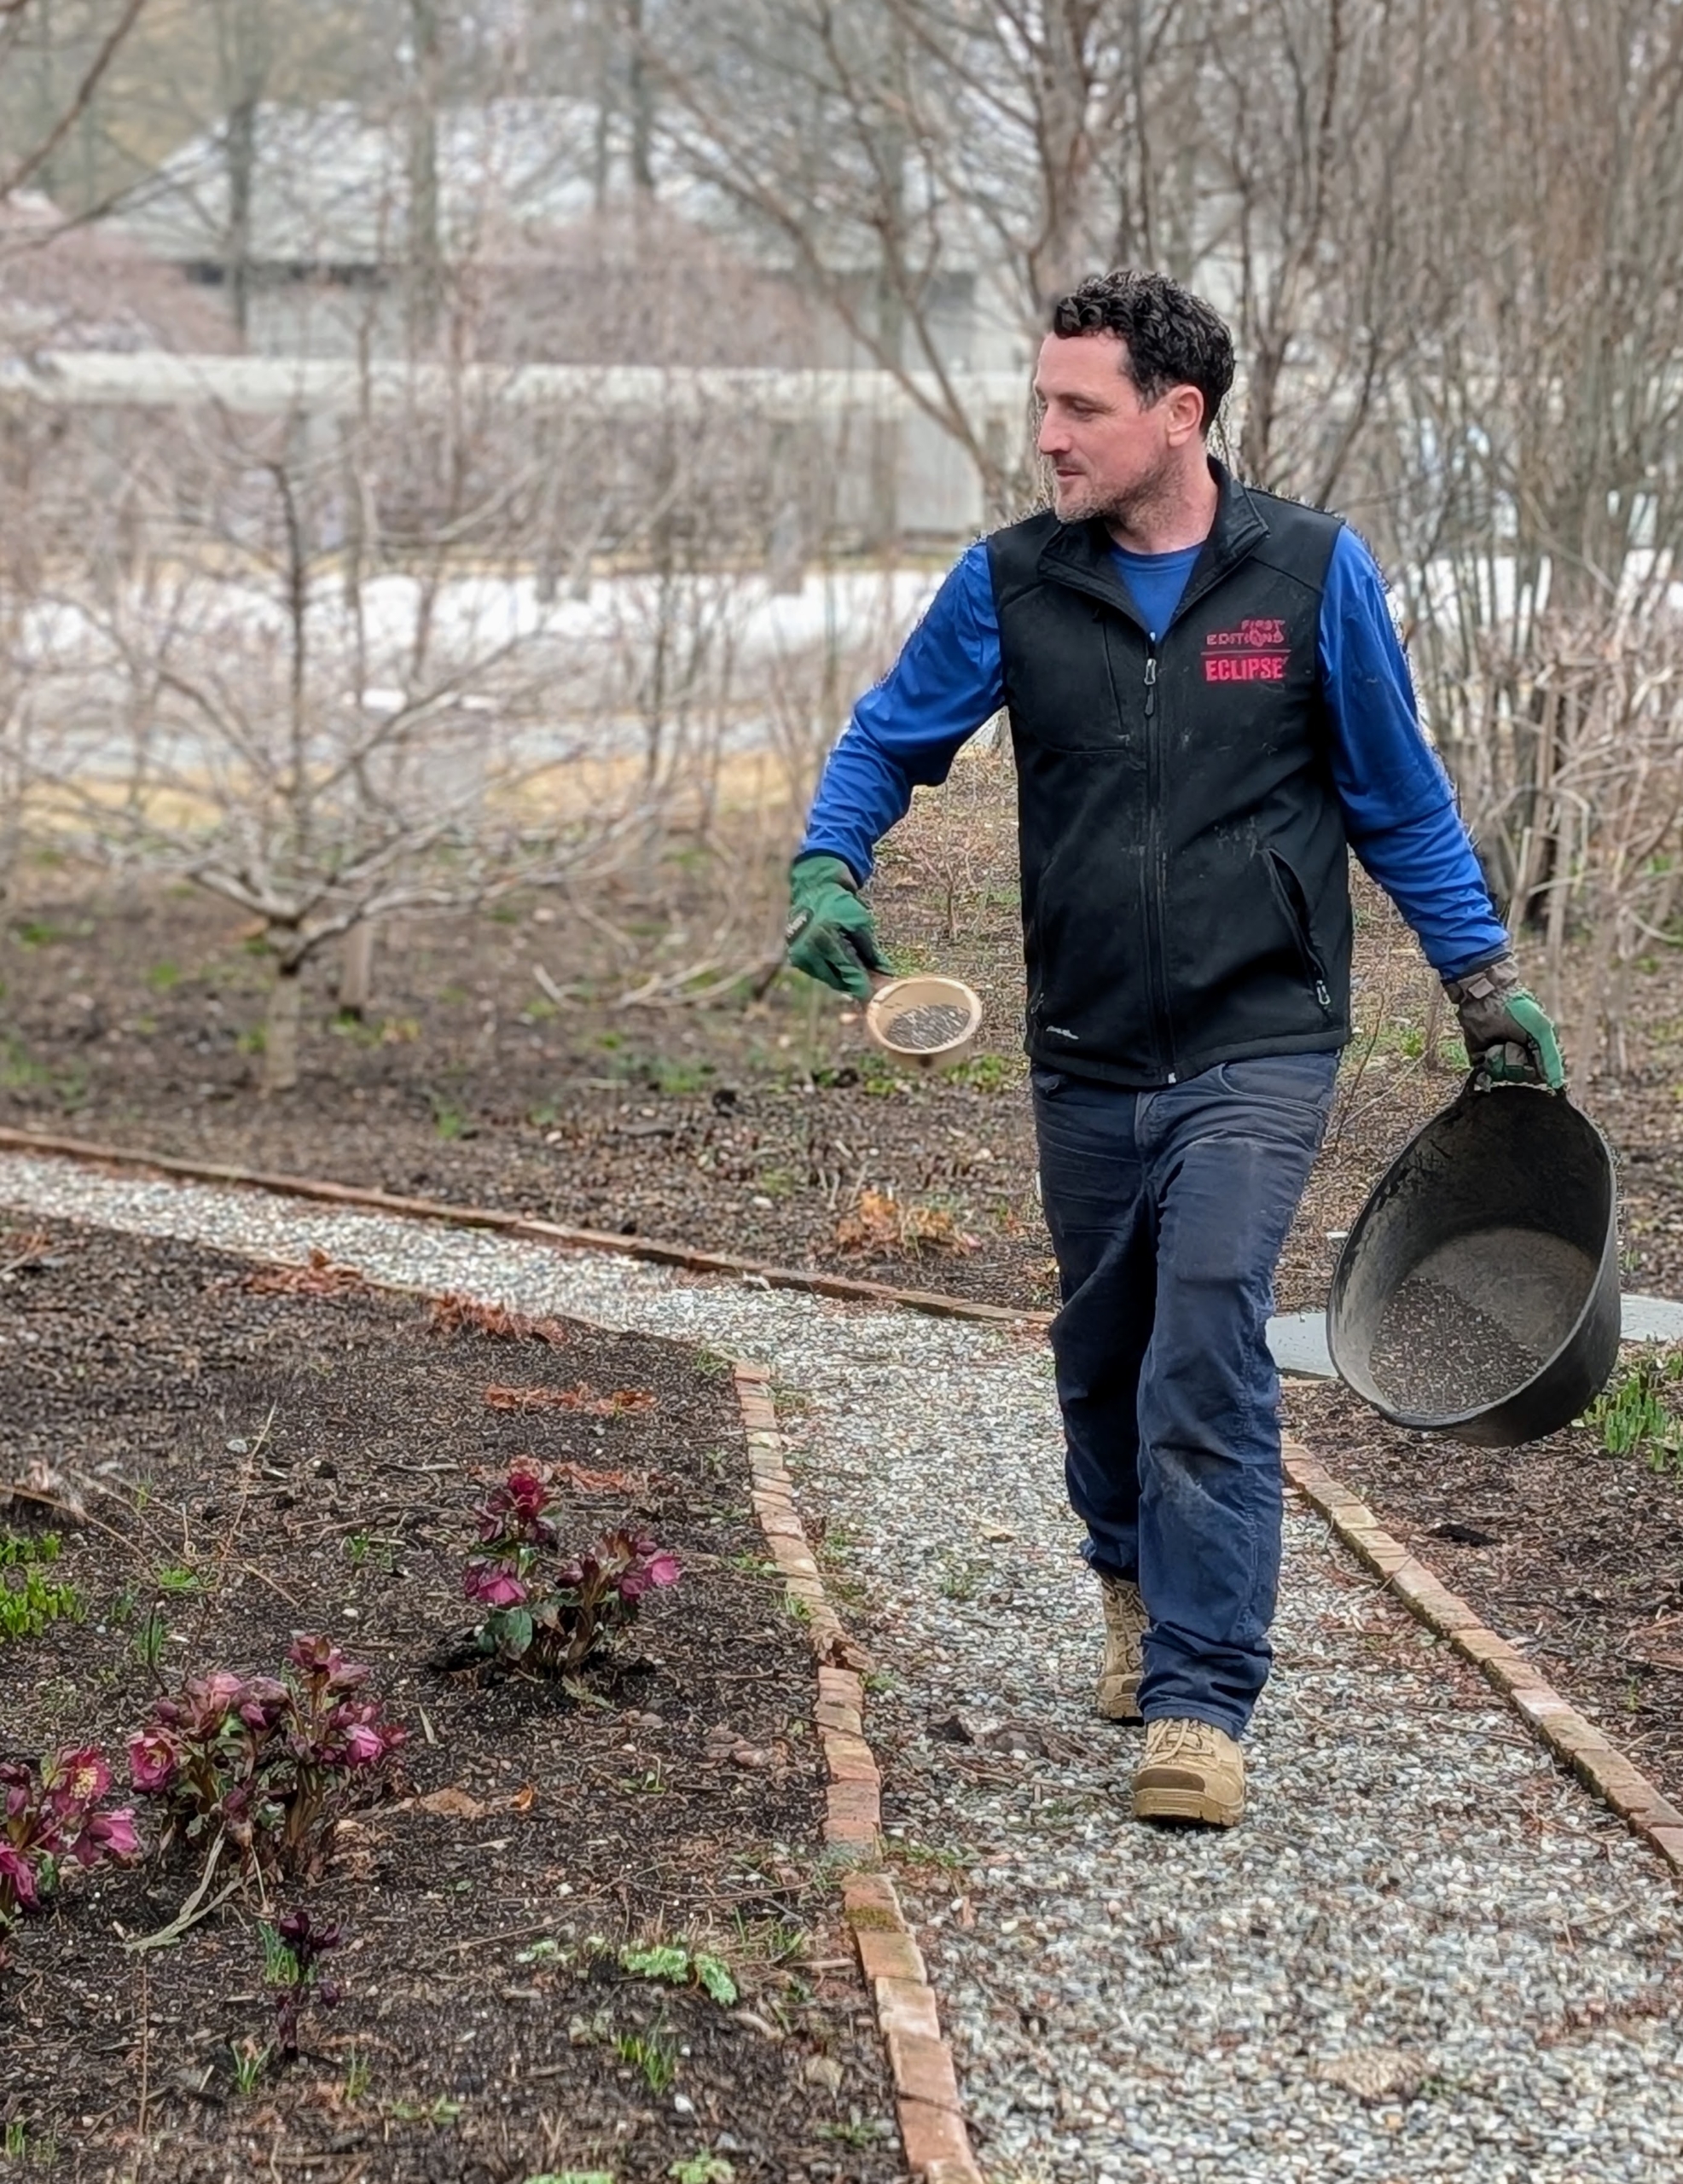
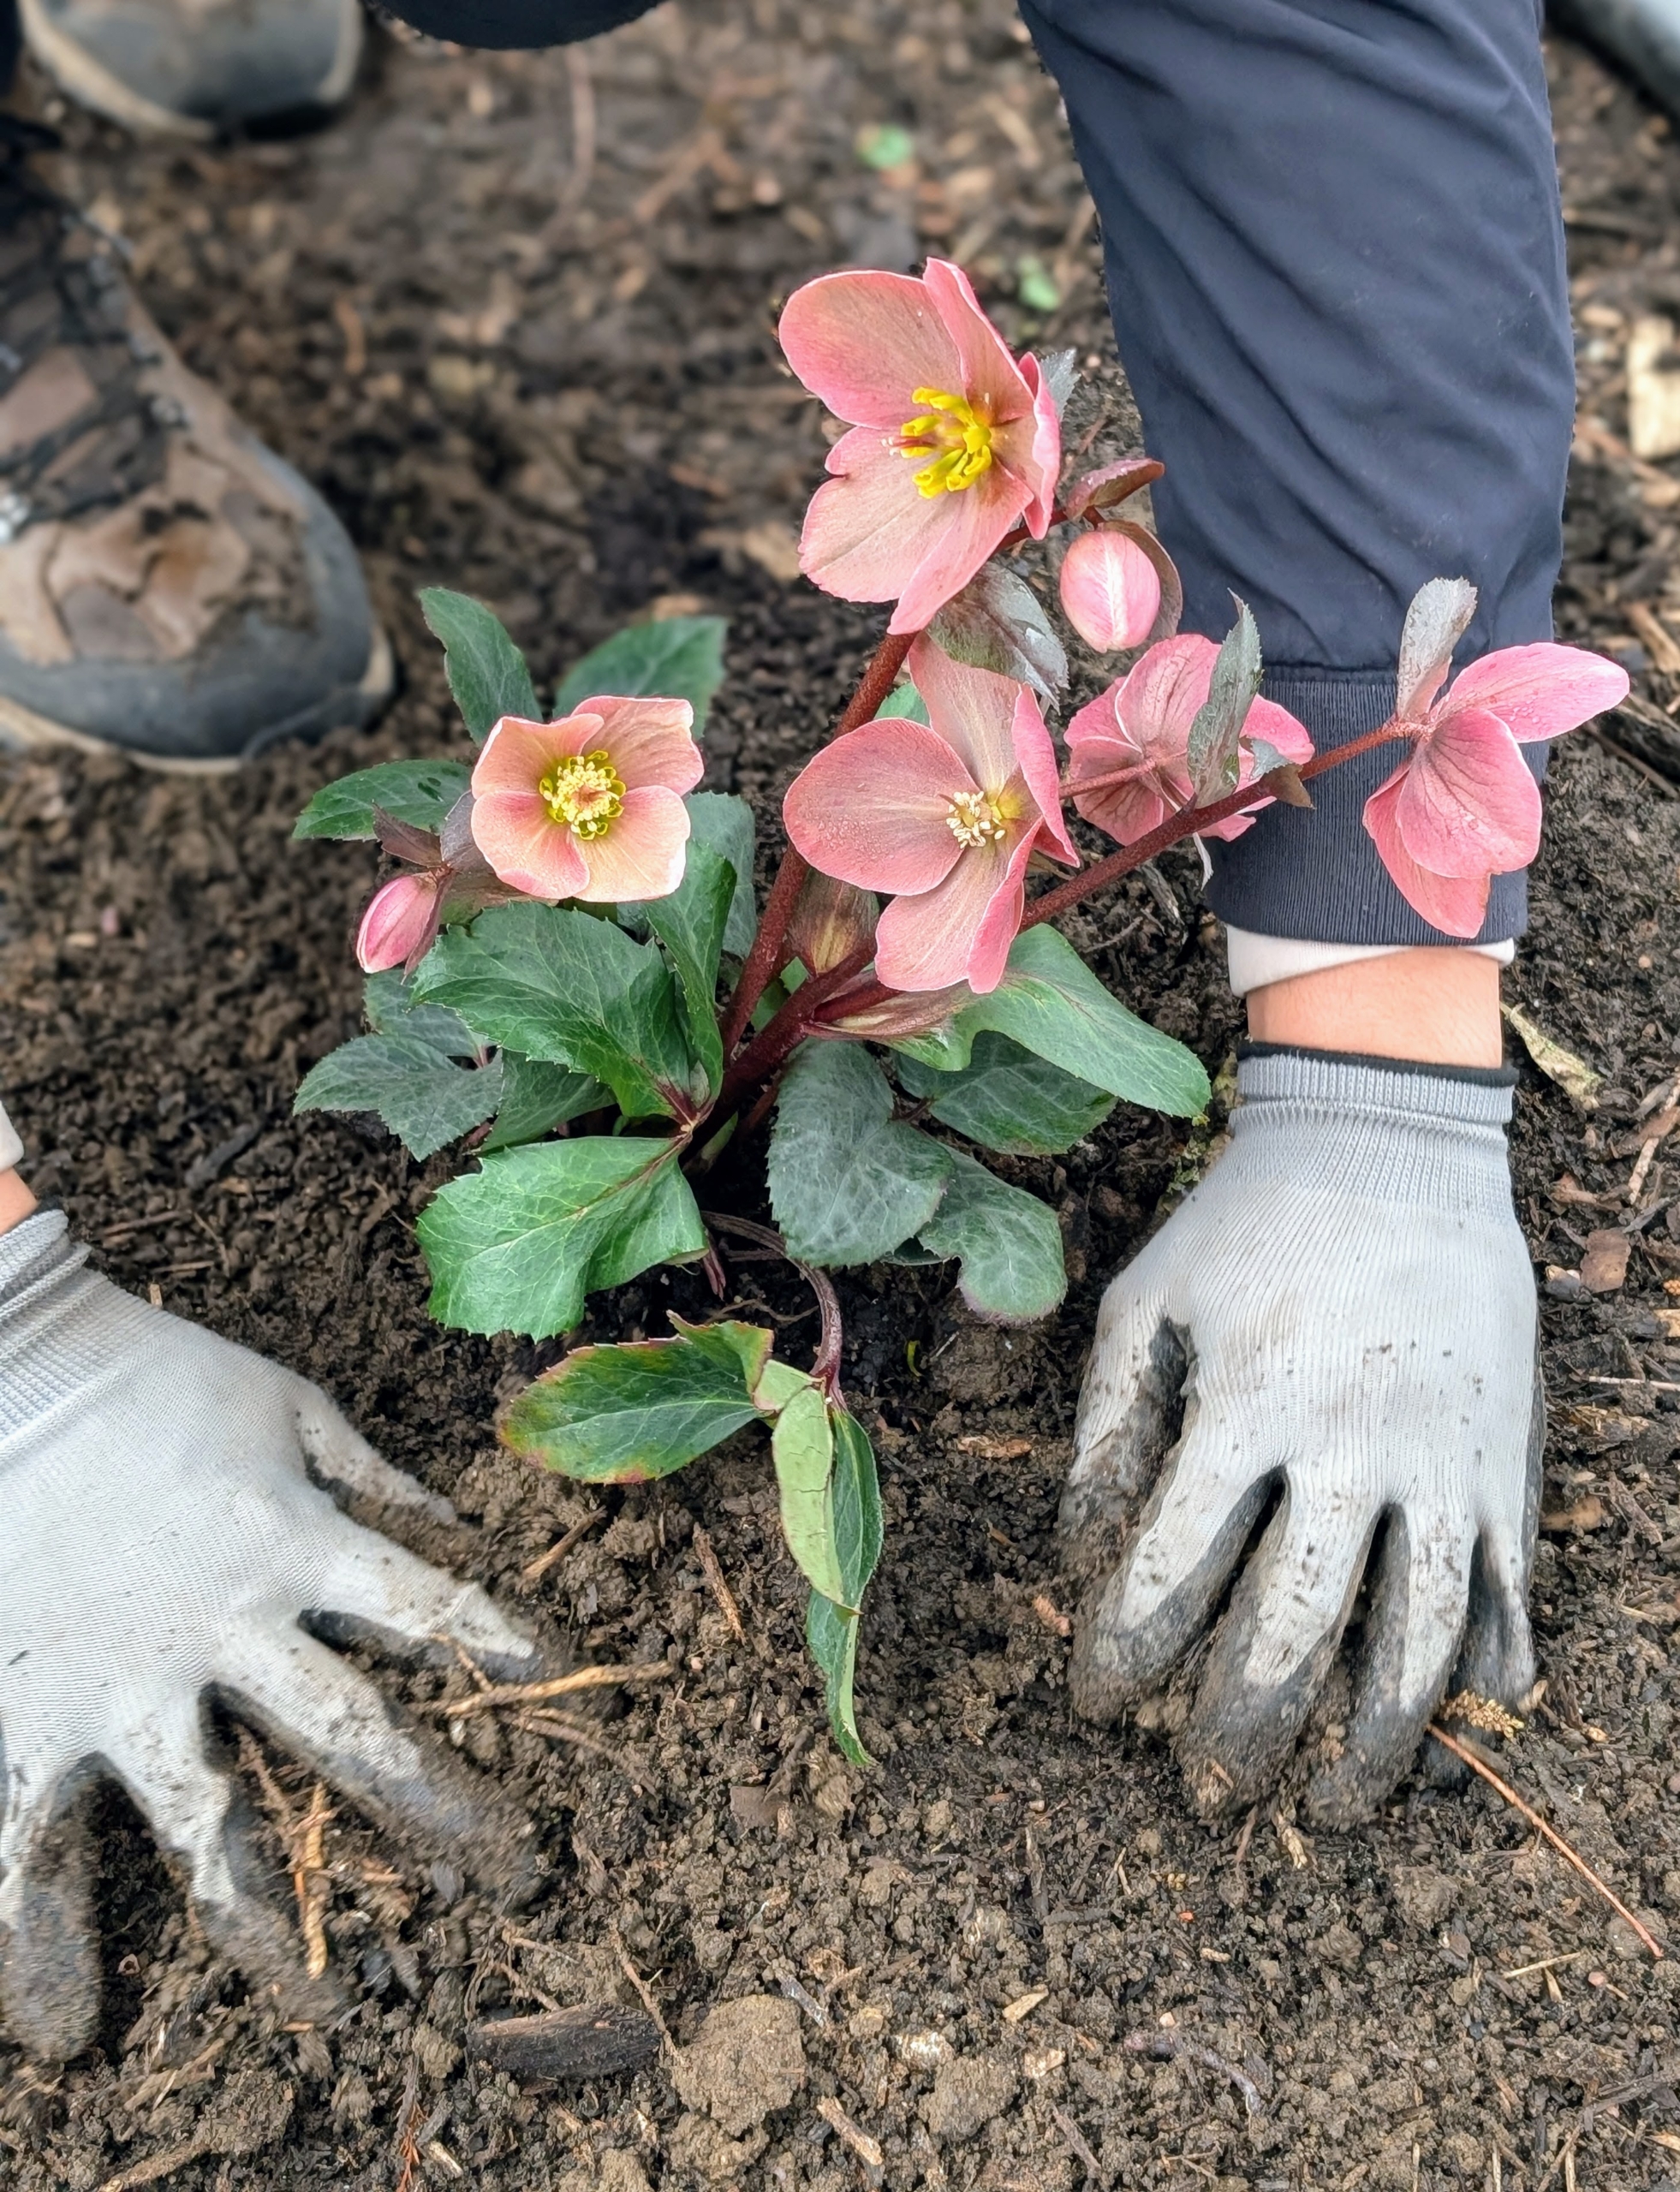
Earlier this week, I purchased a variety of flowering hellebores. The plants behind them are azaleas for another exciting gardening project.
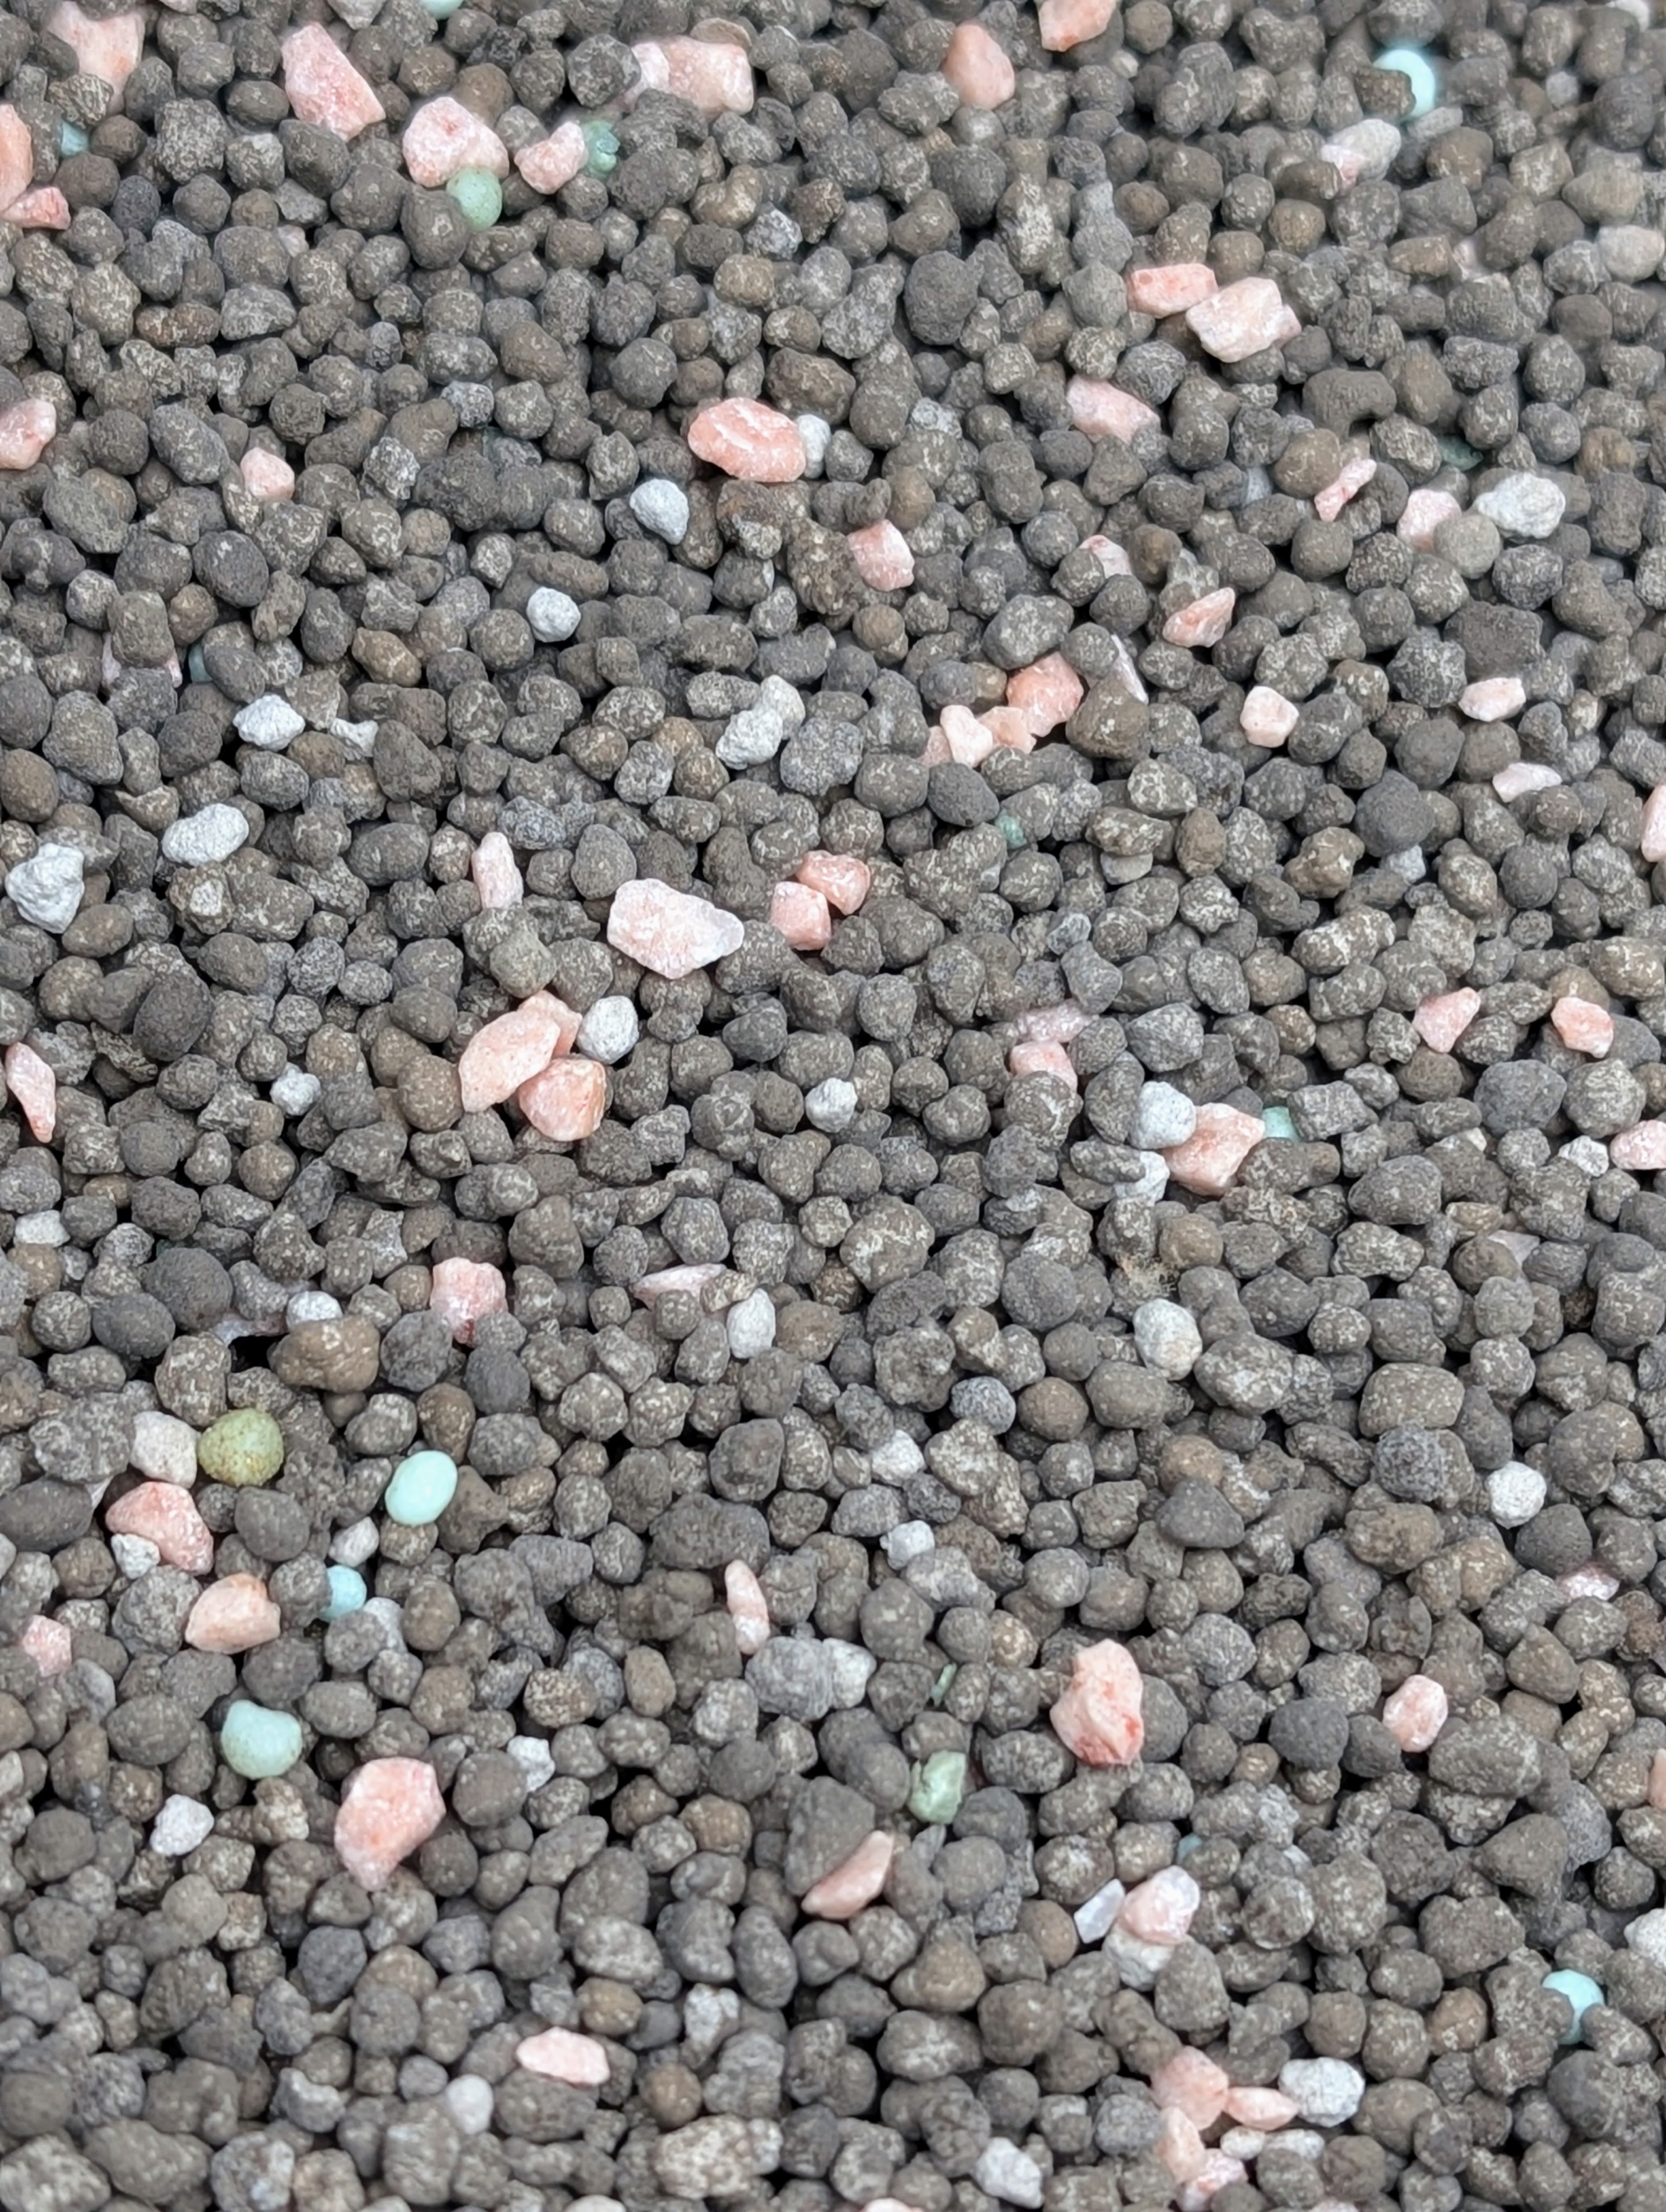
I decided these hellebores would be great planted outside my Tenant House, adding to the hellebores planted there last year. Ryan fertilized all the areas to be planted.
We use an all-purpose formula with a good balance of nitrogen, phosphorous, and potassium.
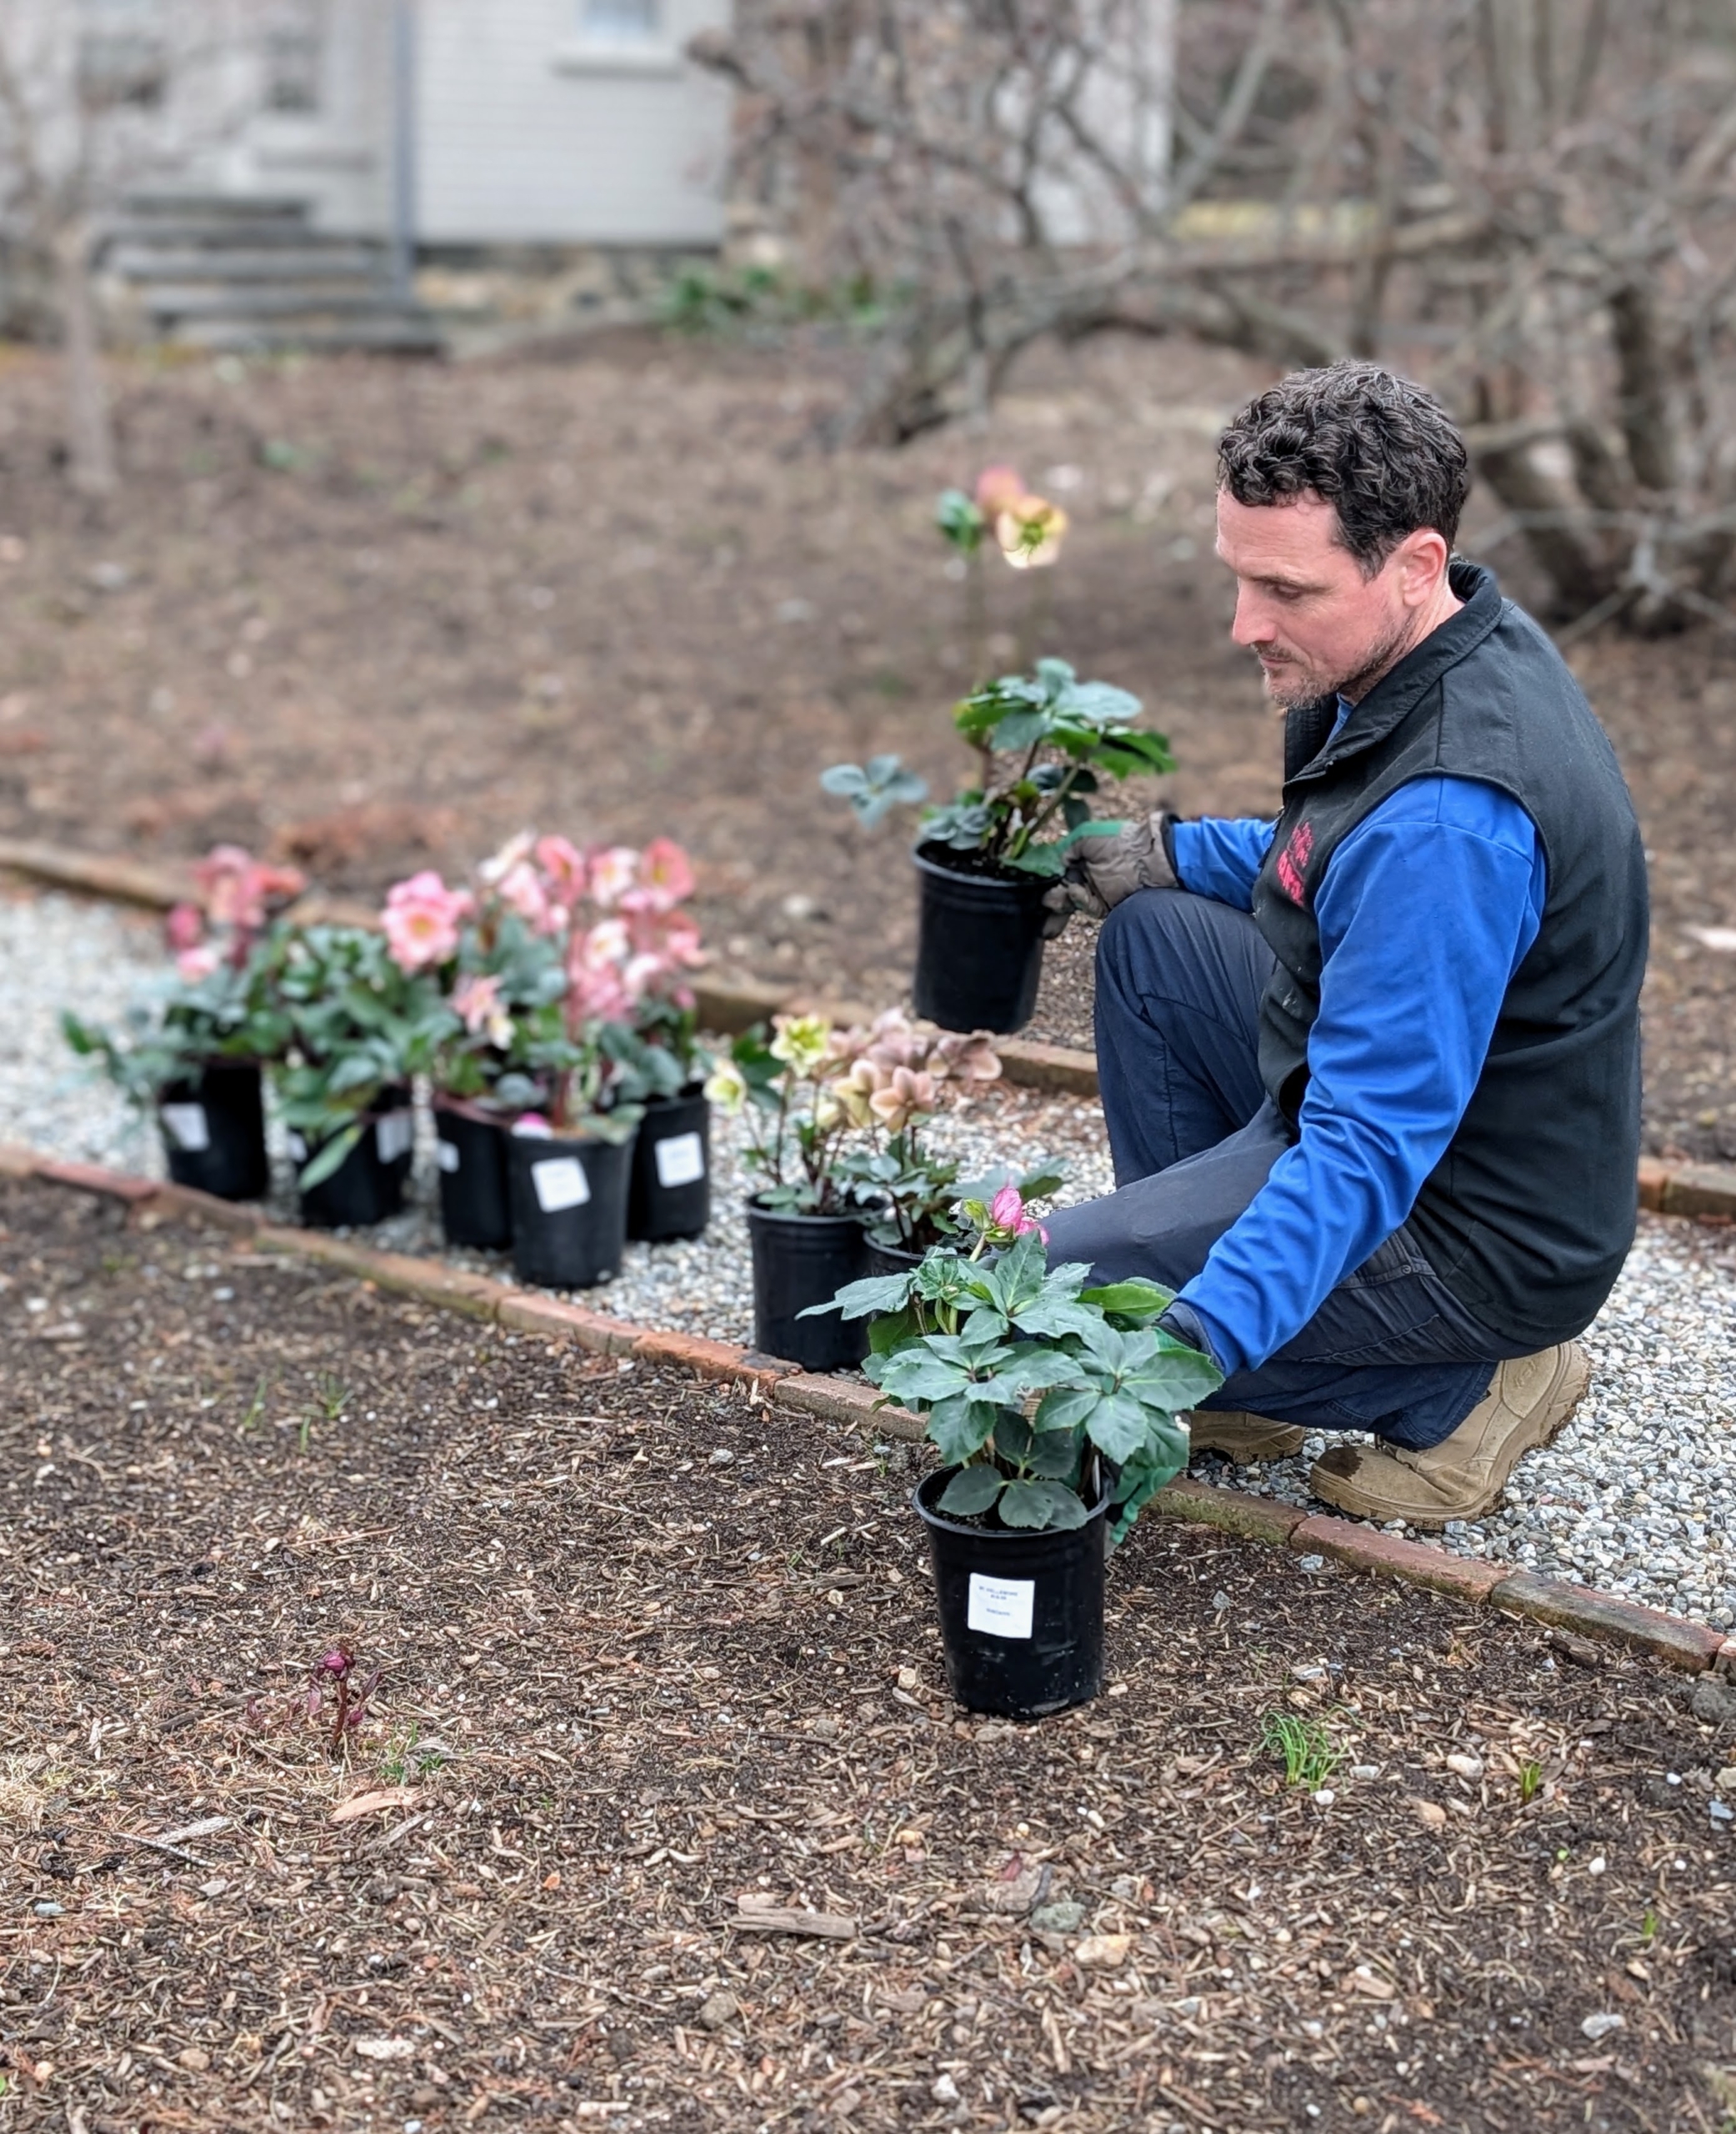
Ryan brings all the hellebores to the planting site, so he can determine which ones will go where.
Then he places the potted specimens in the exact planting locations.
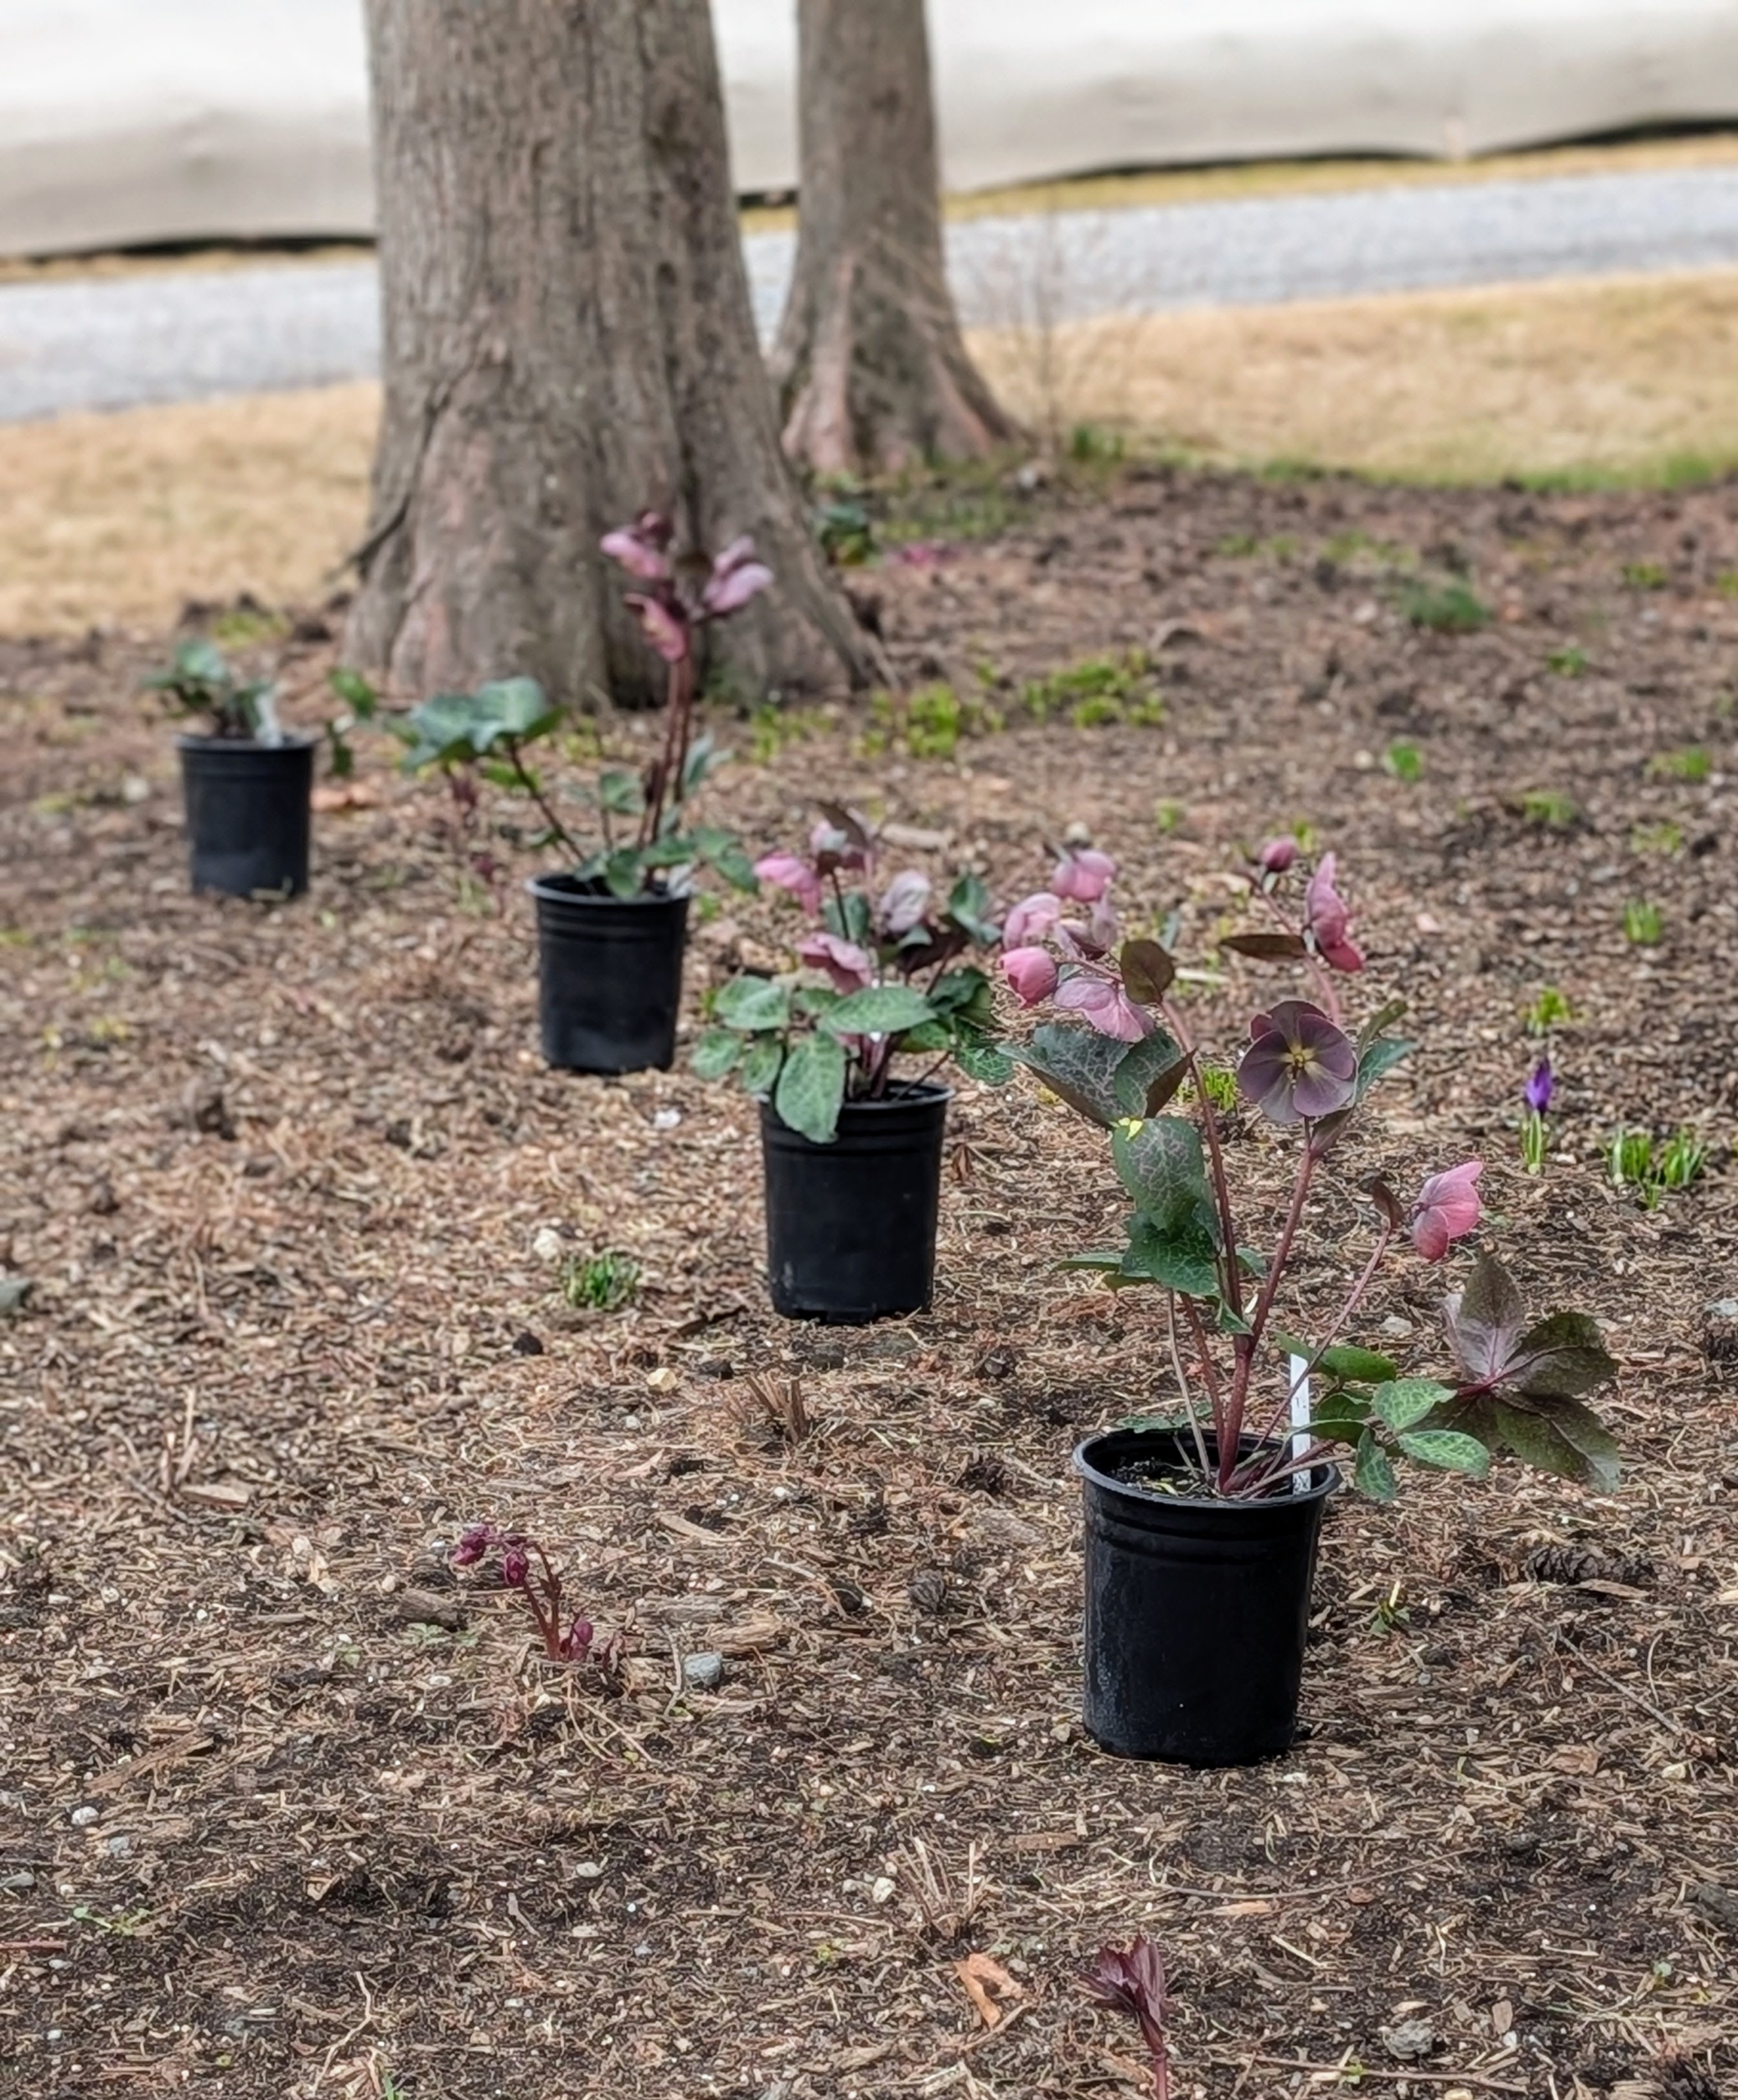
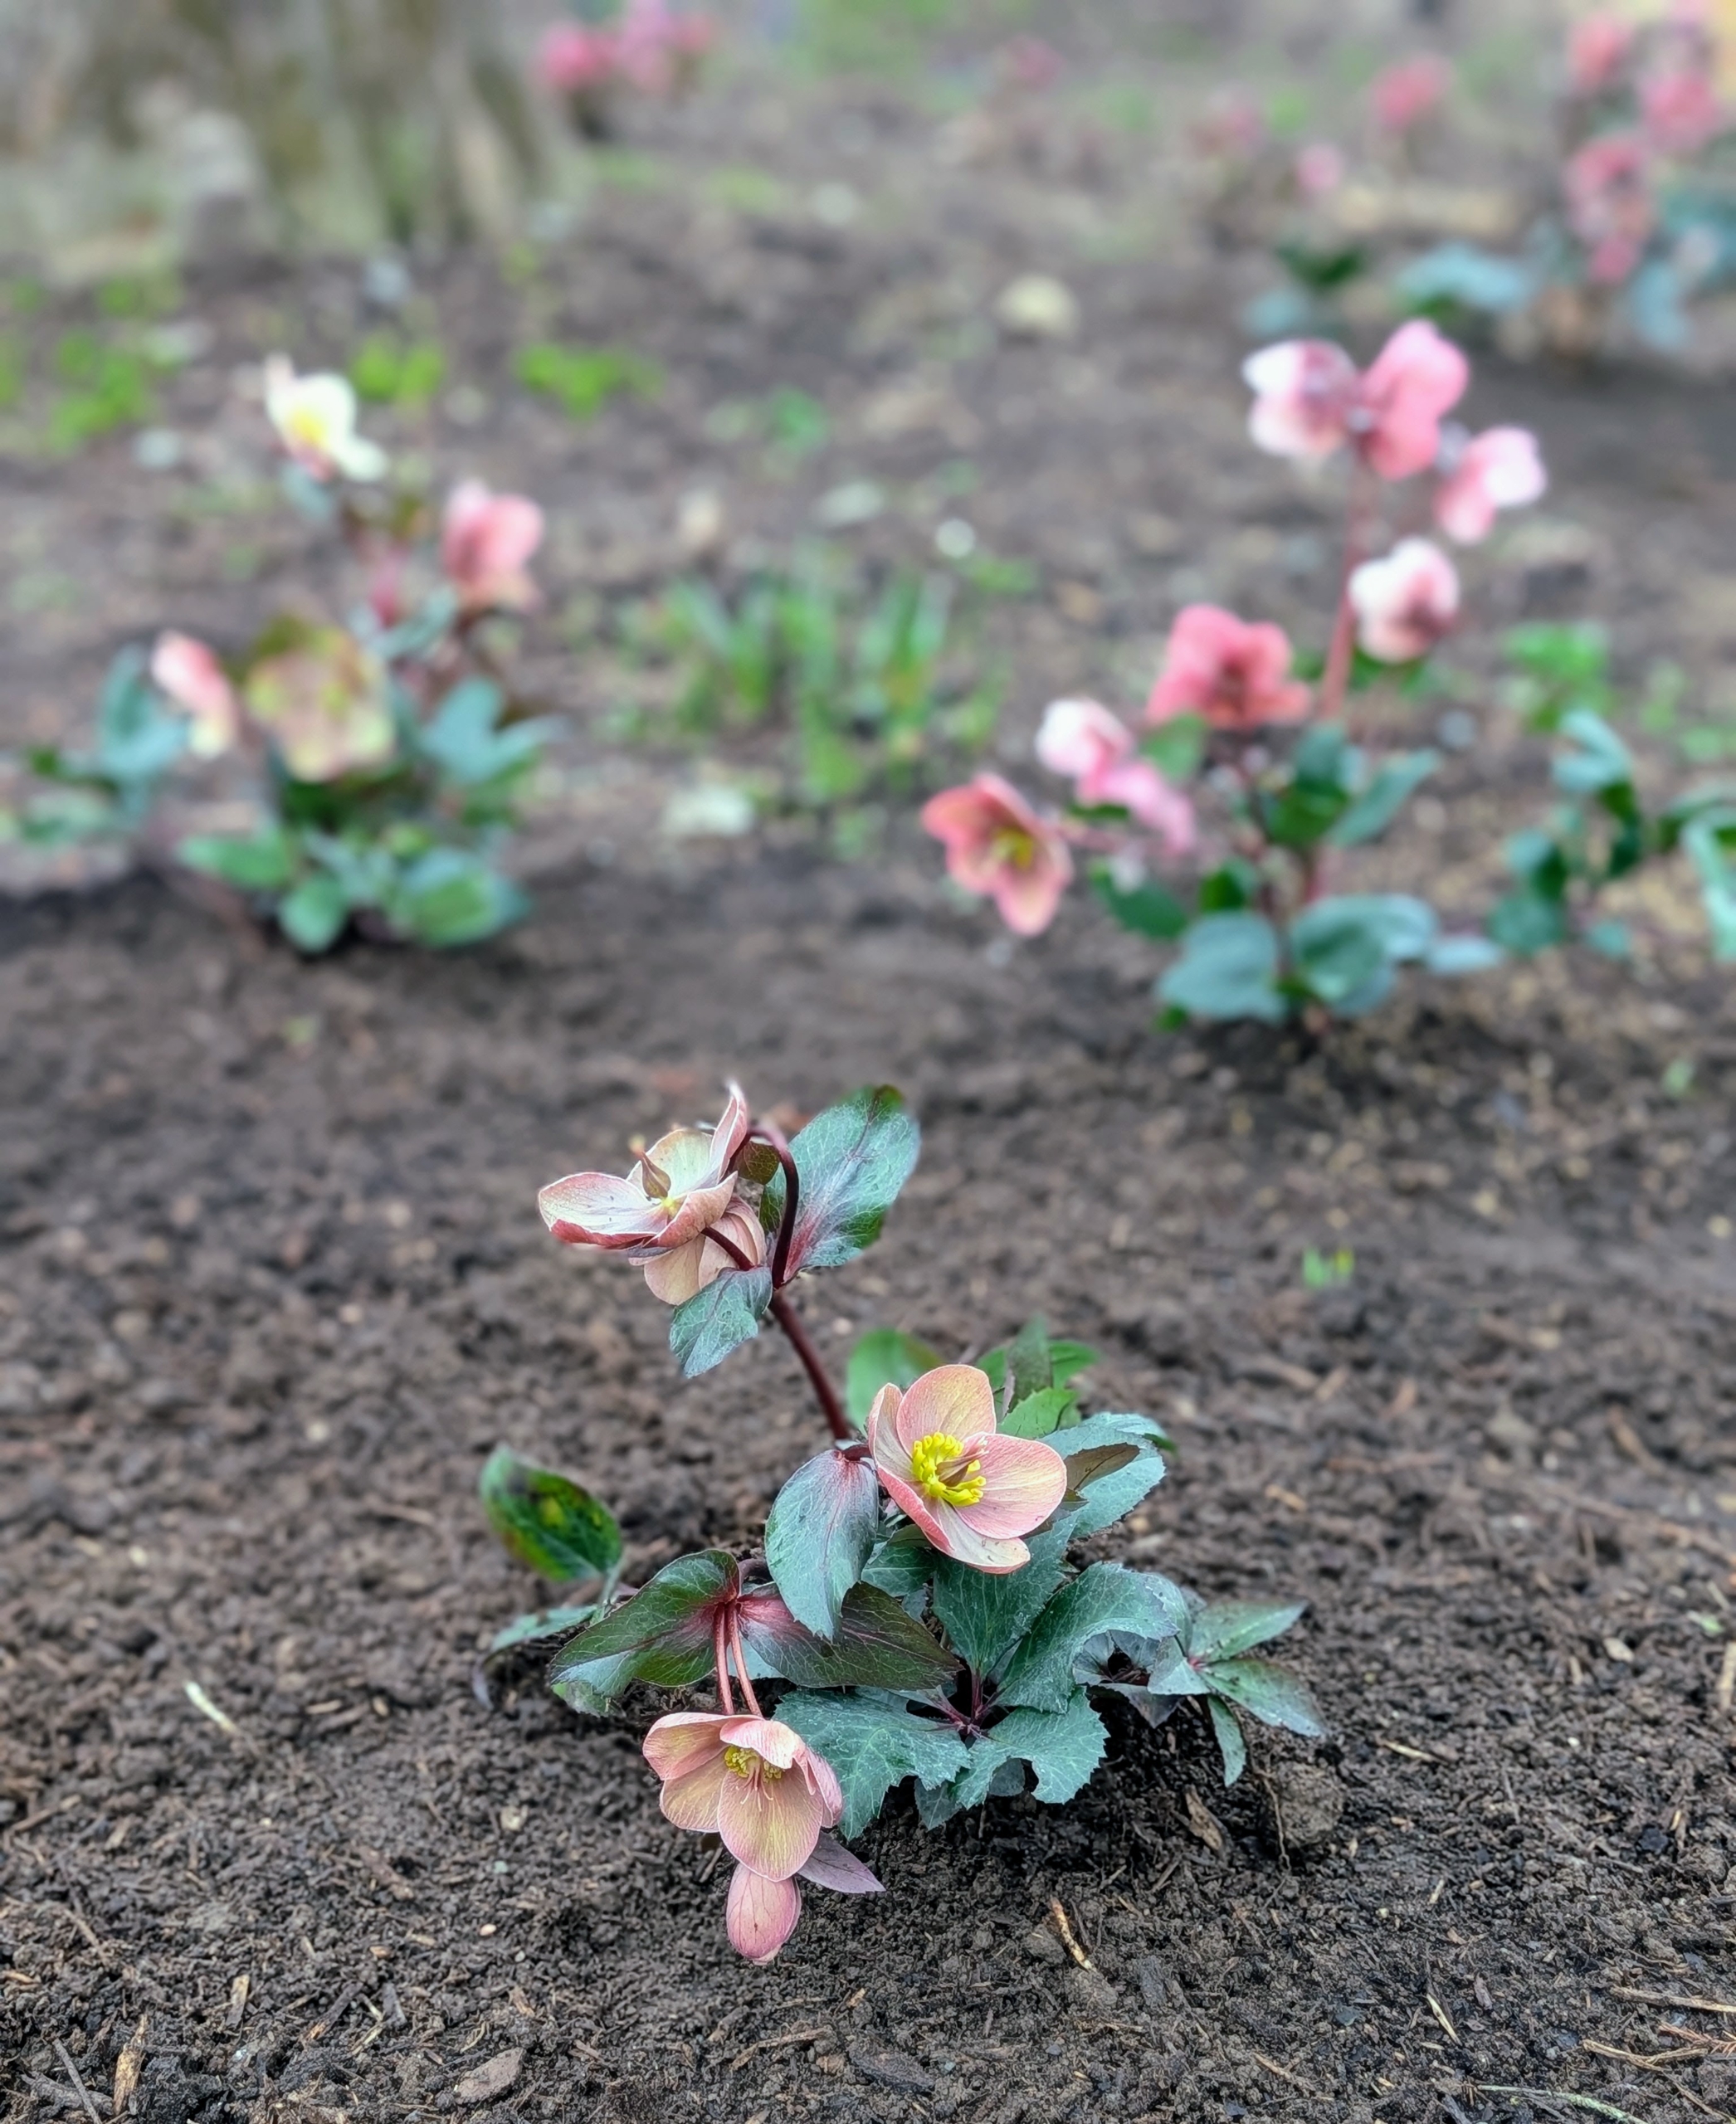
Hellebores should be planted about two-feet apart since they spread. The area is mixed with other perennials with foliage and blooms in similar colors. They will come up soon.
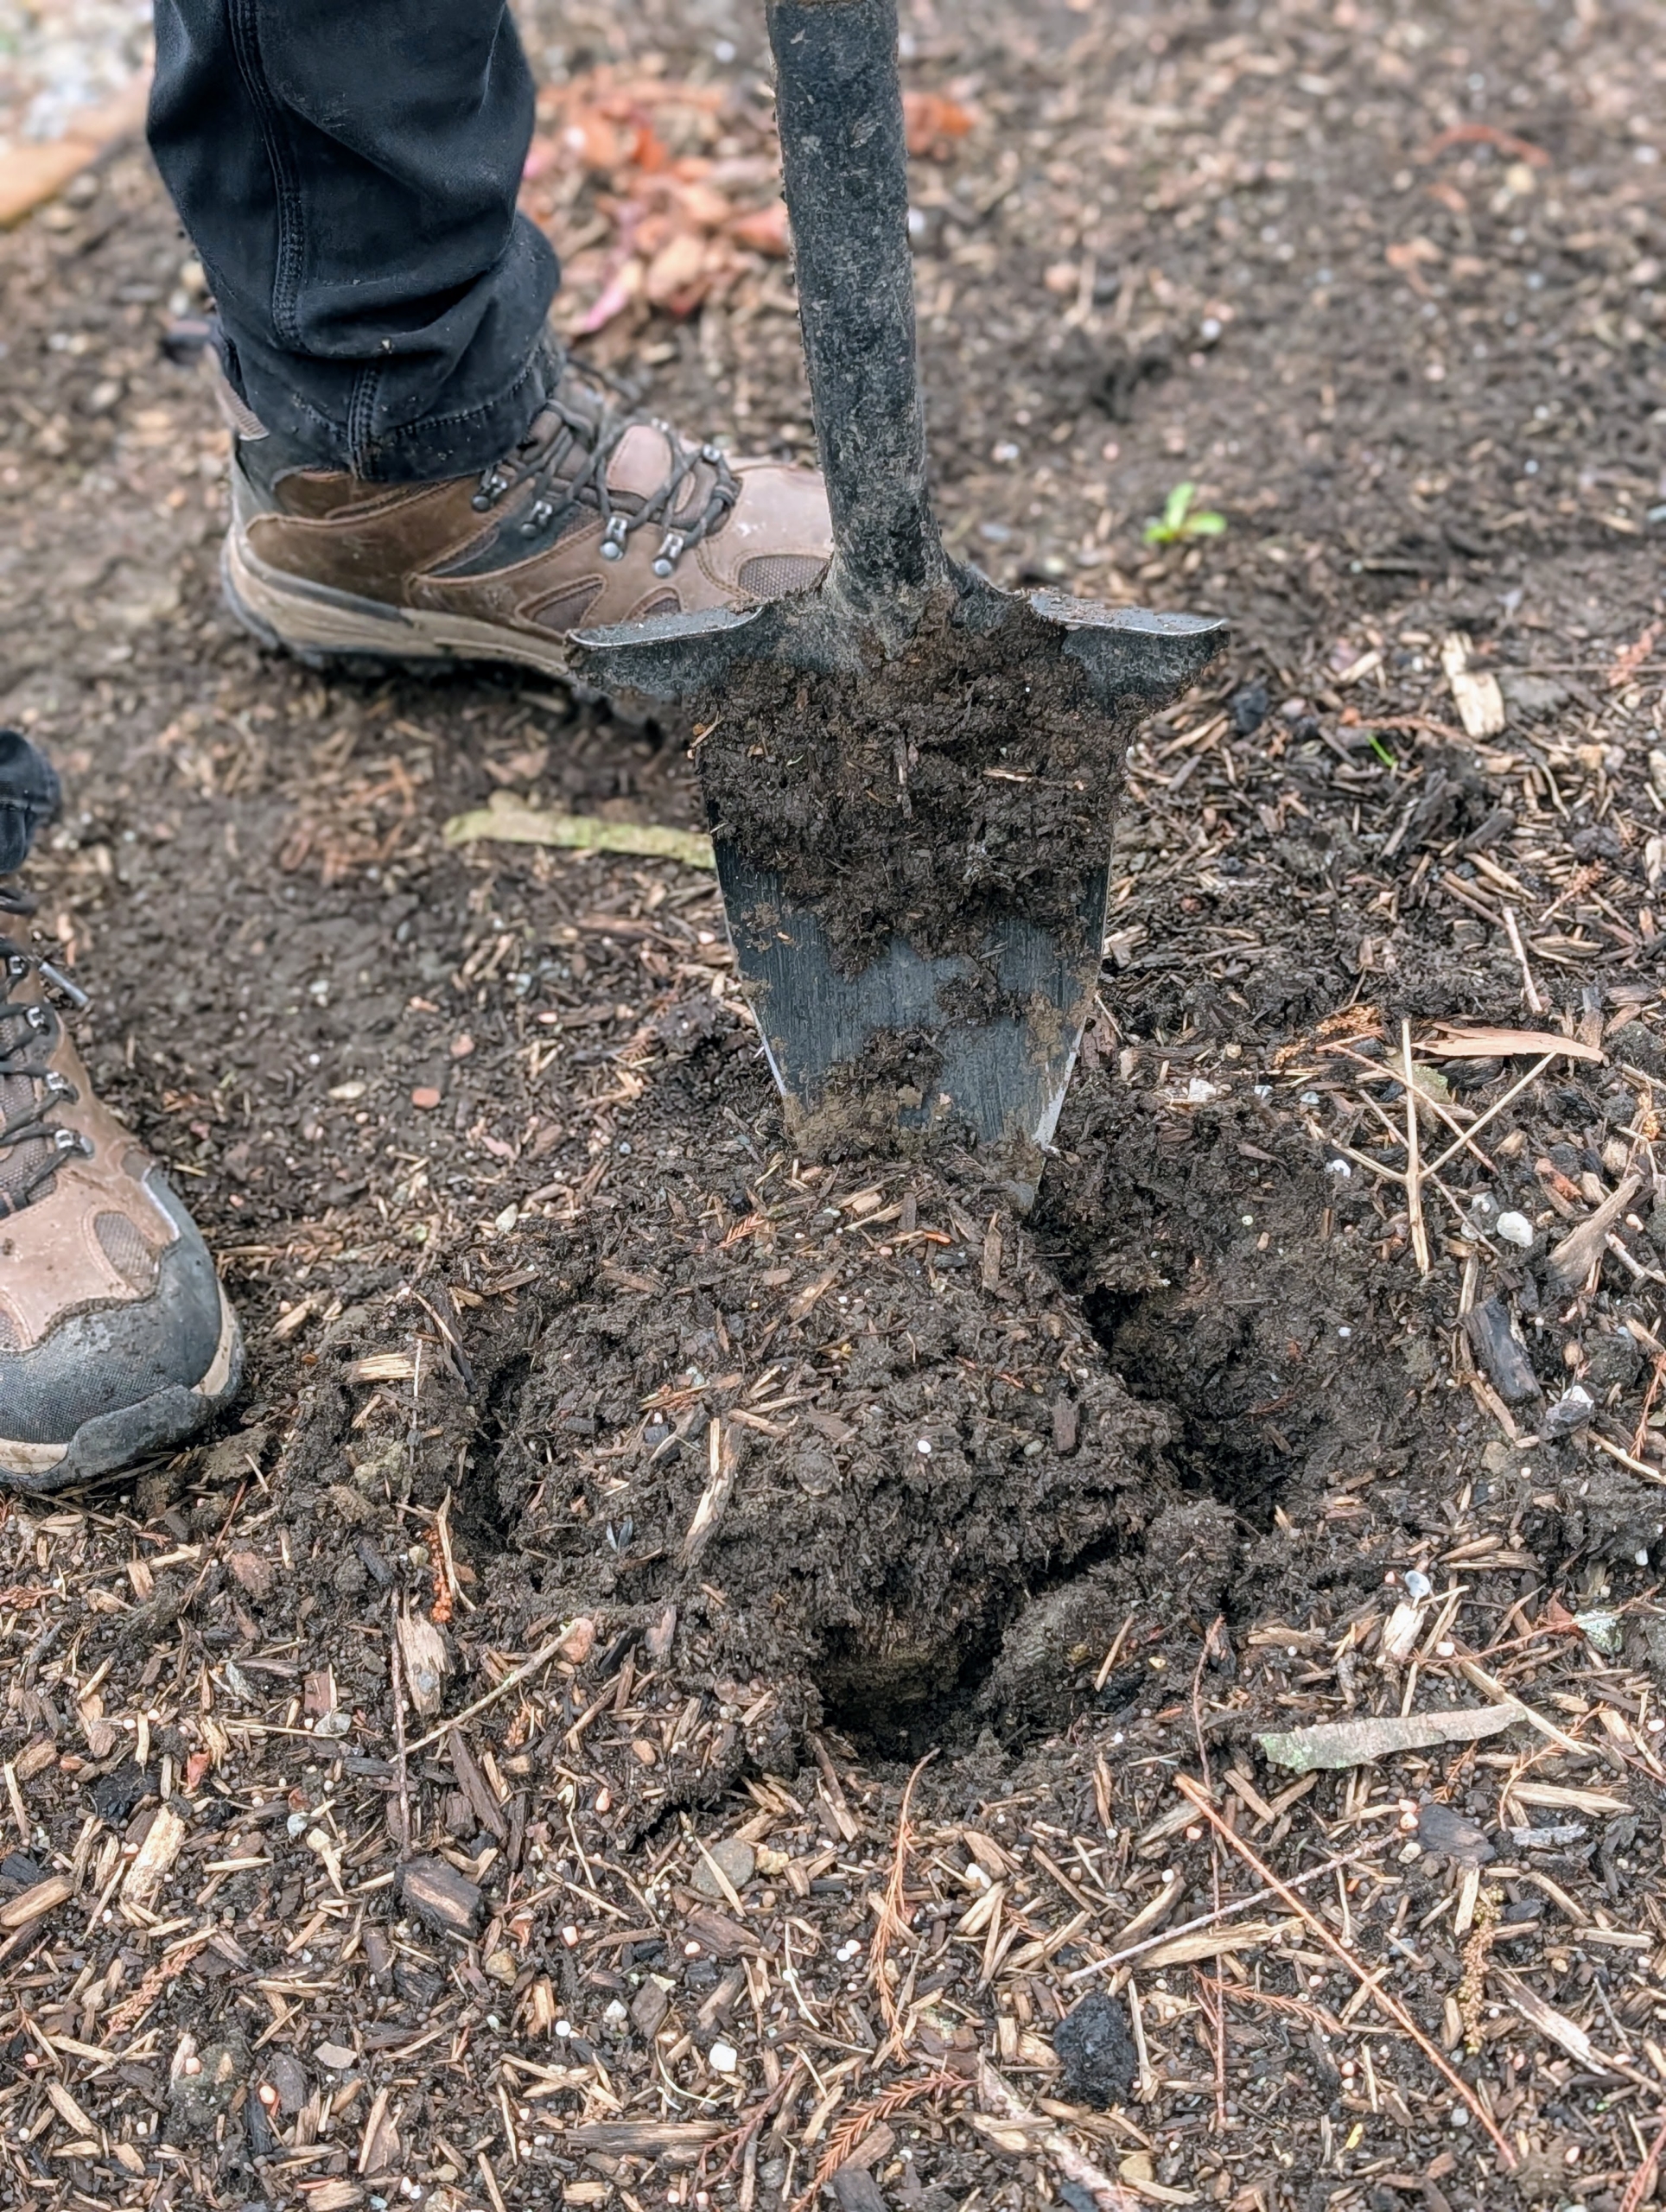
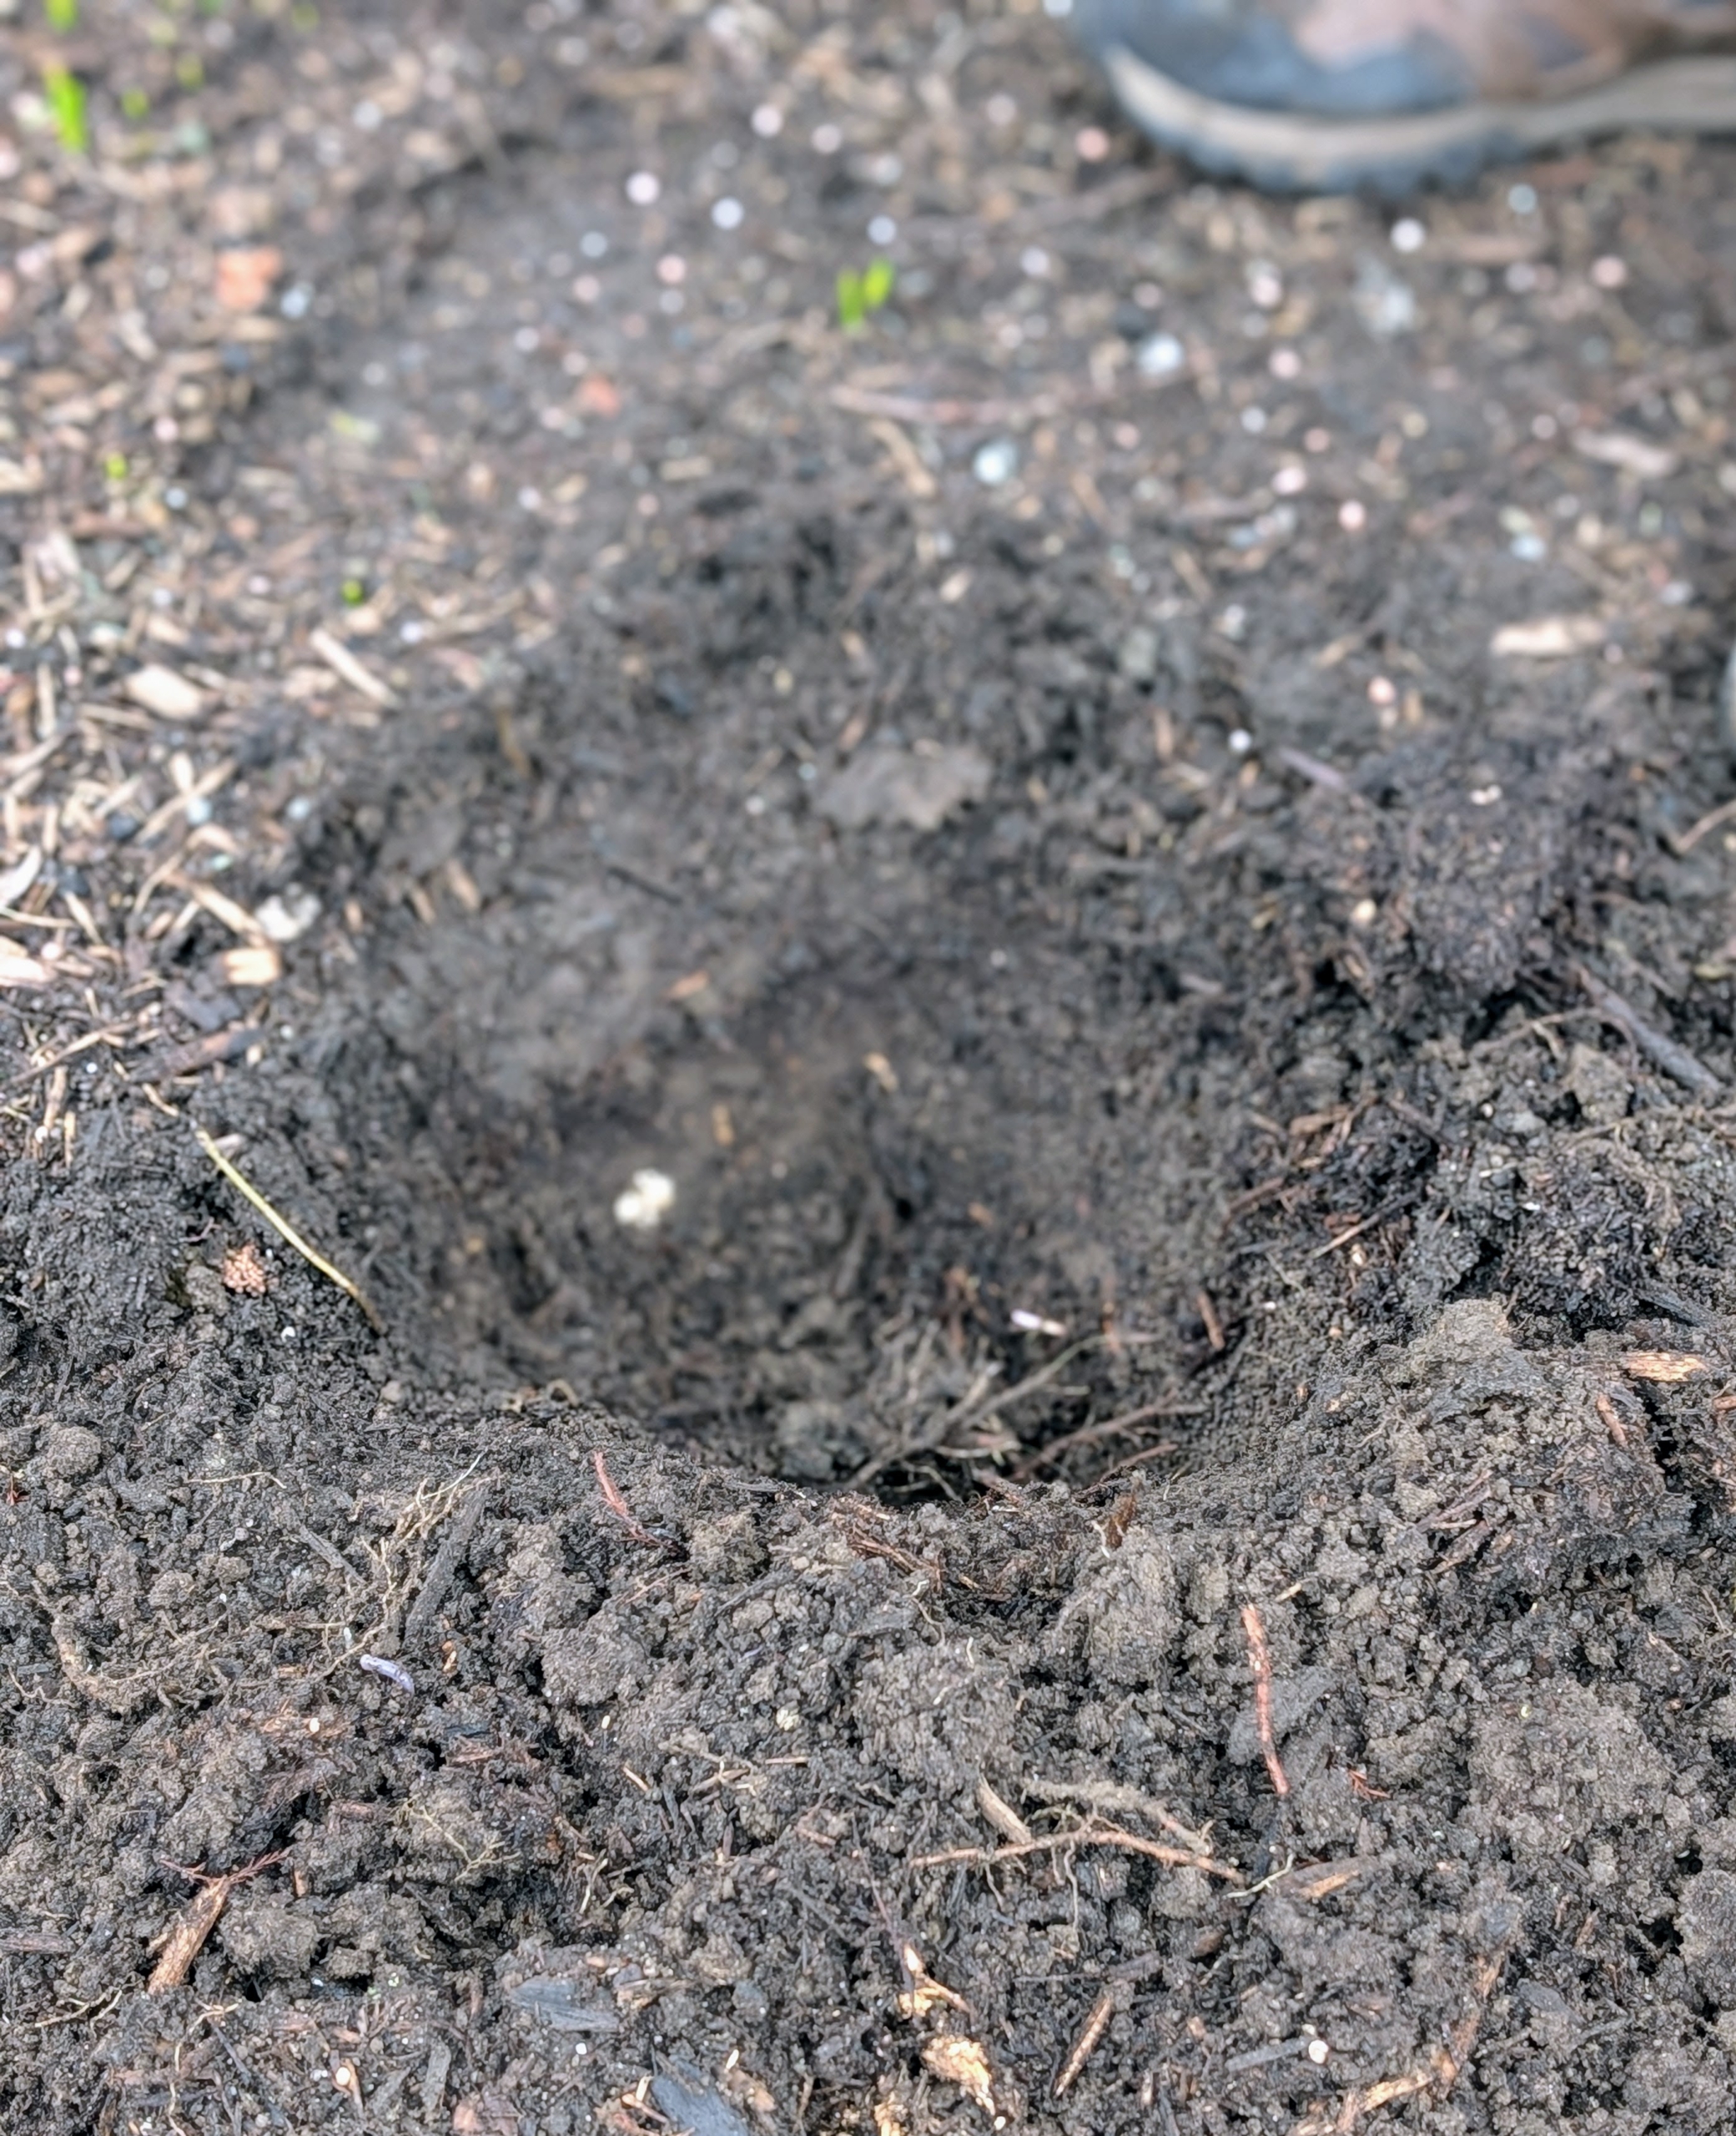
A hole is dug at least twice the size of the plant’s root ball. Fortunately, the ground is pretty soft, but use a spear-headed spade like this if necessary.
This hole is about six to eight inches deep.
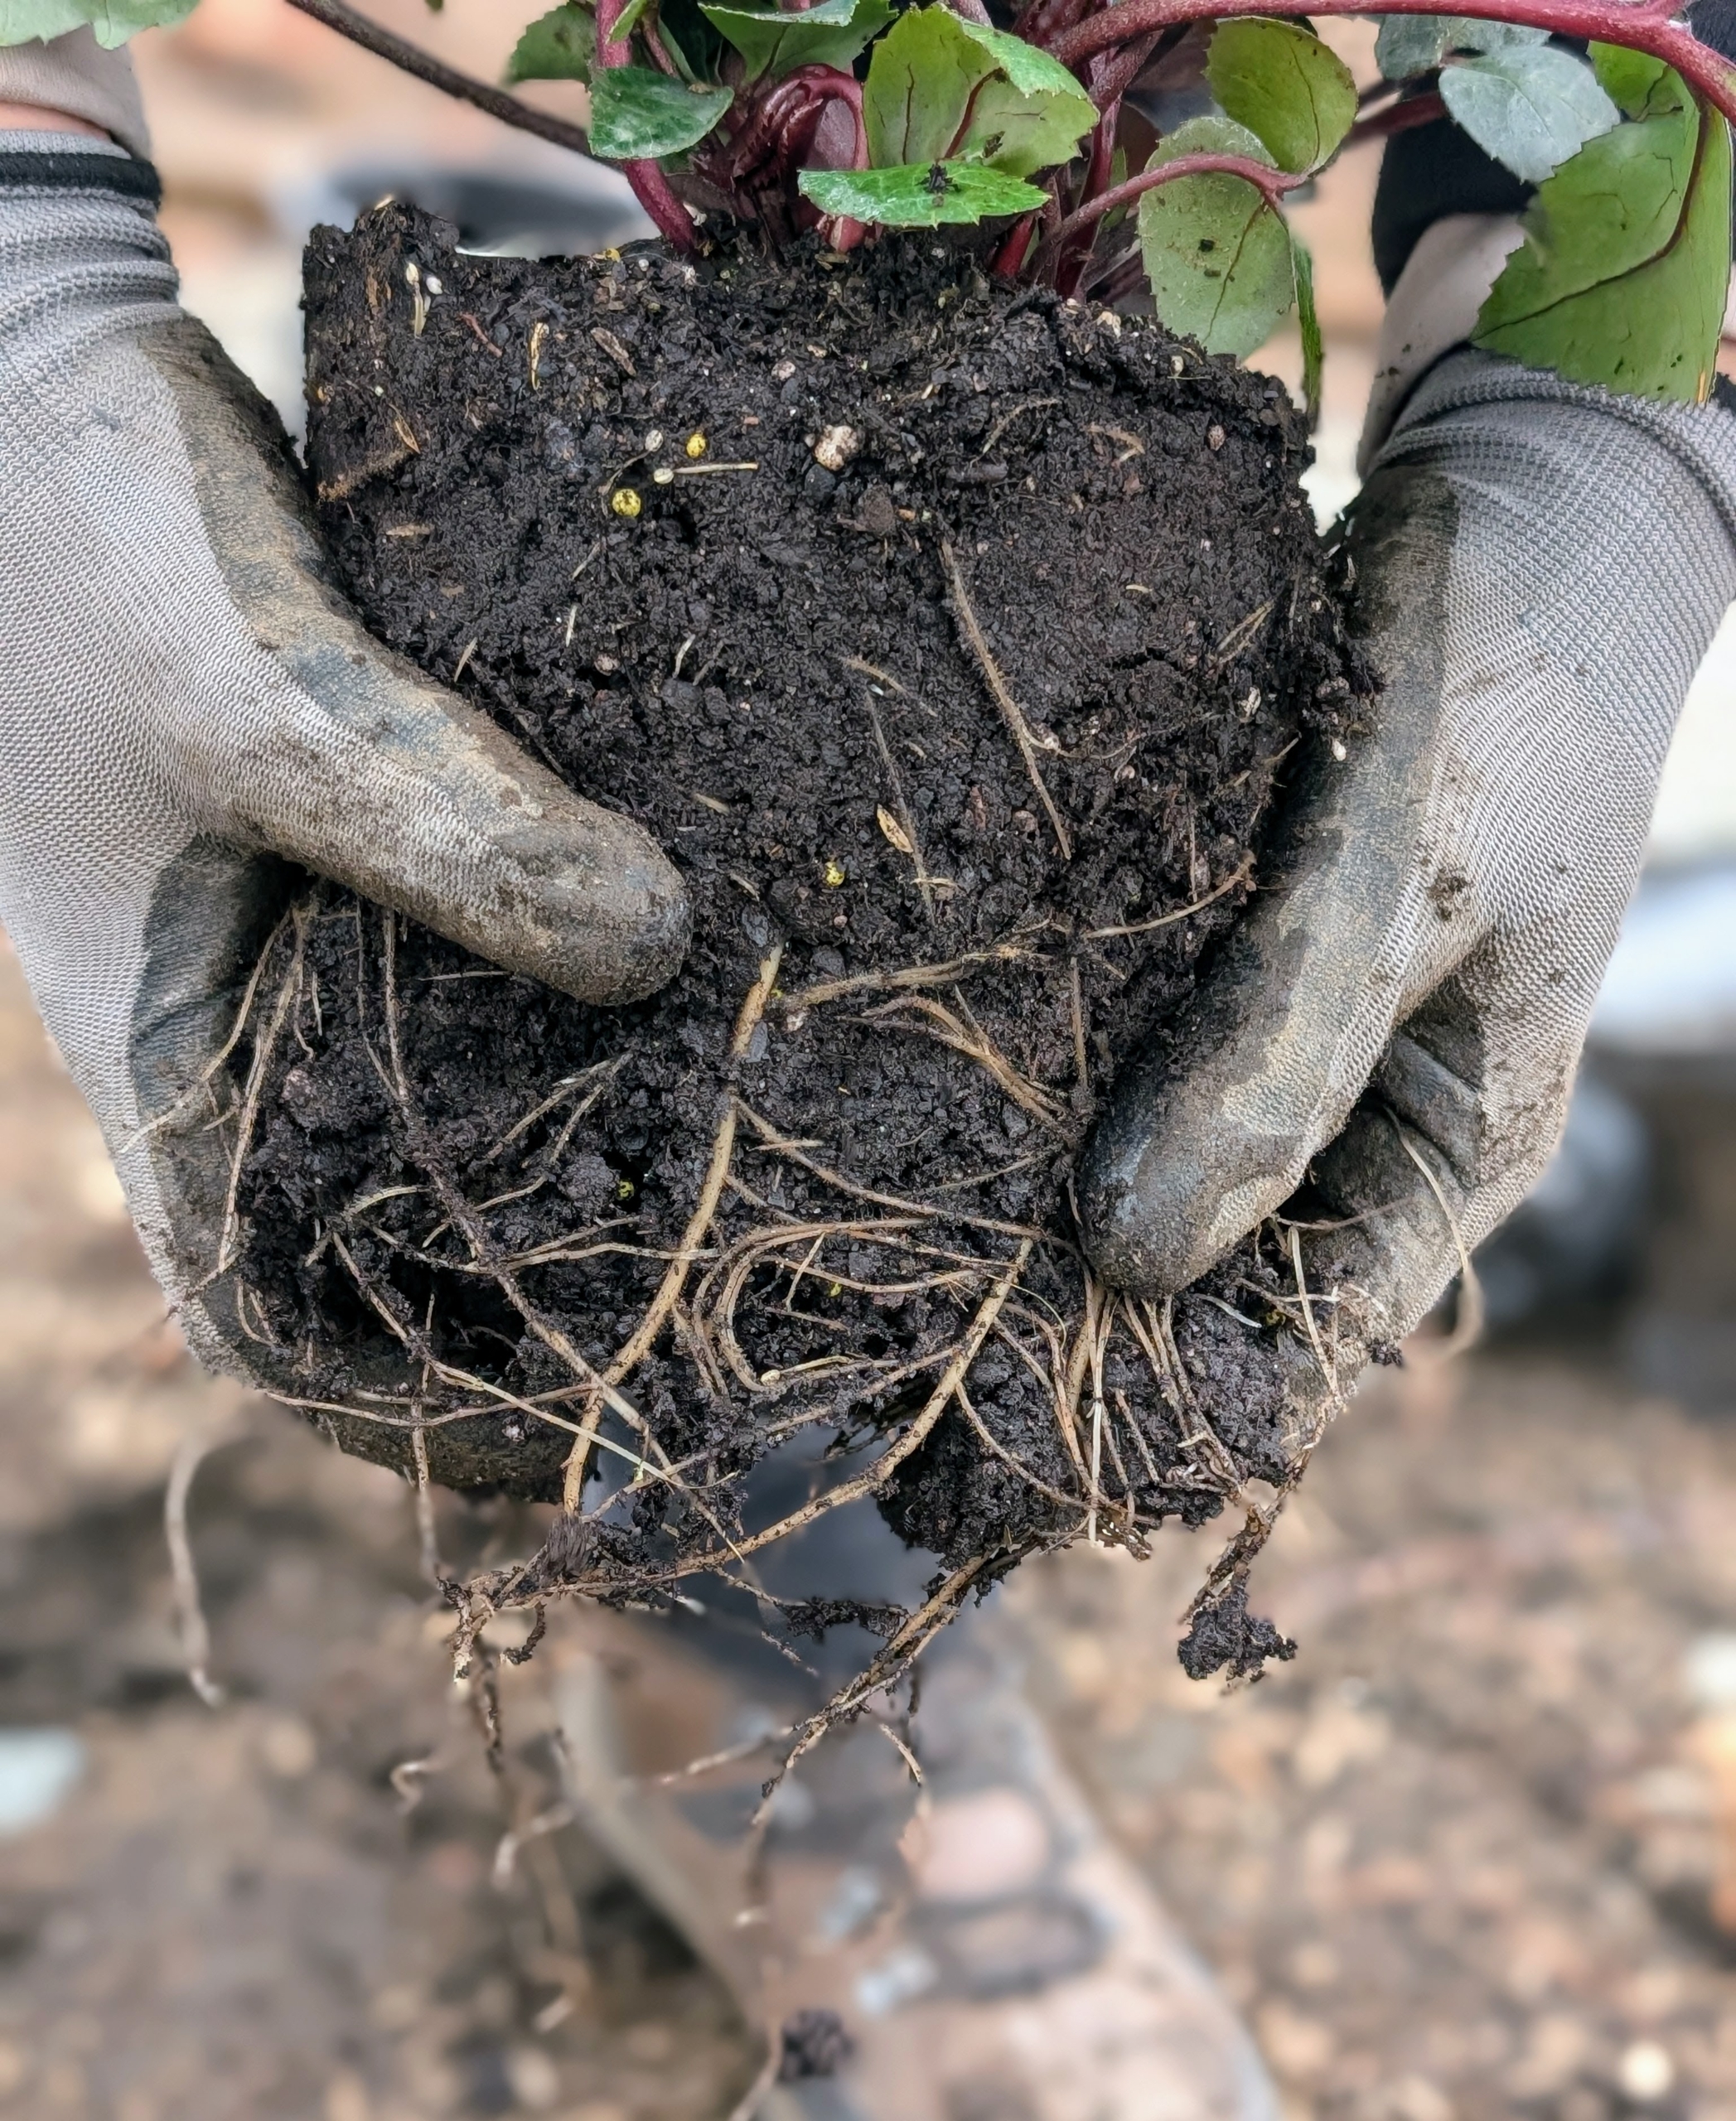
Before planting, the root ball is scarified, meaning the roots are teased and sometimes intentionally cut to encourage and stimulate growth.
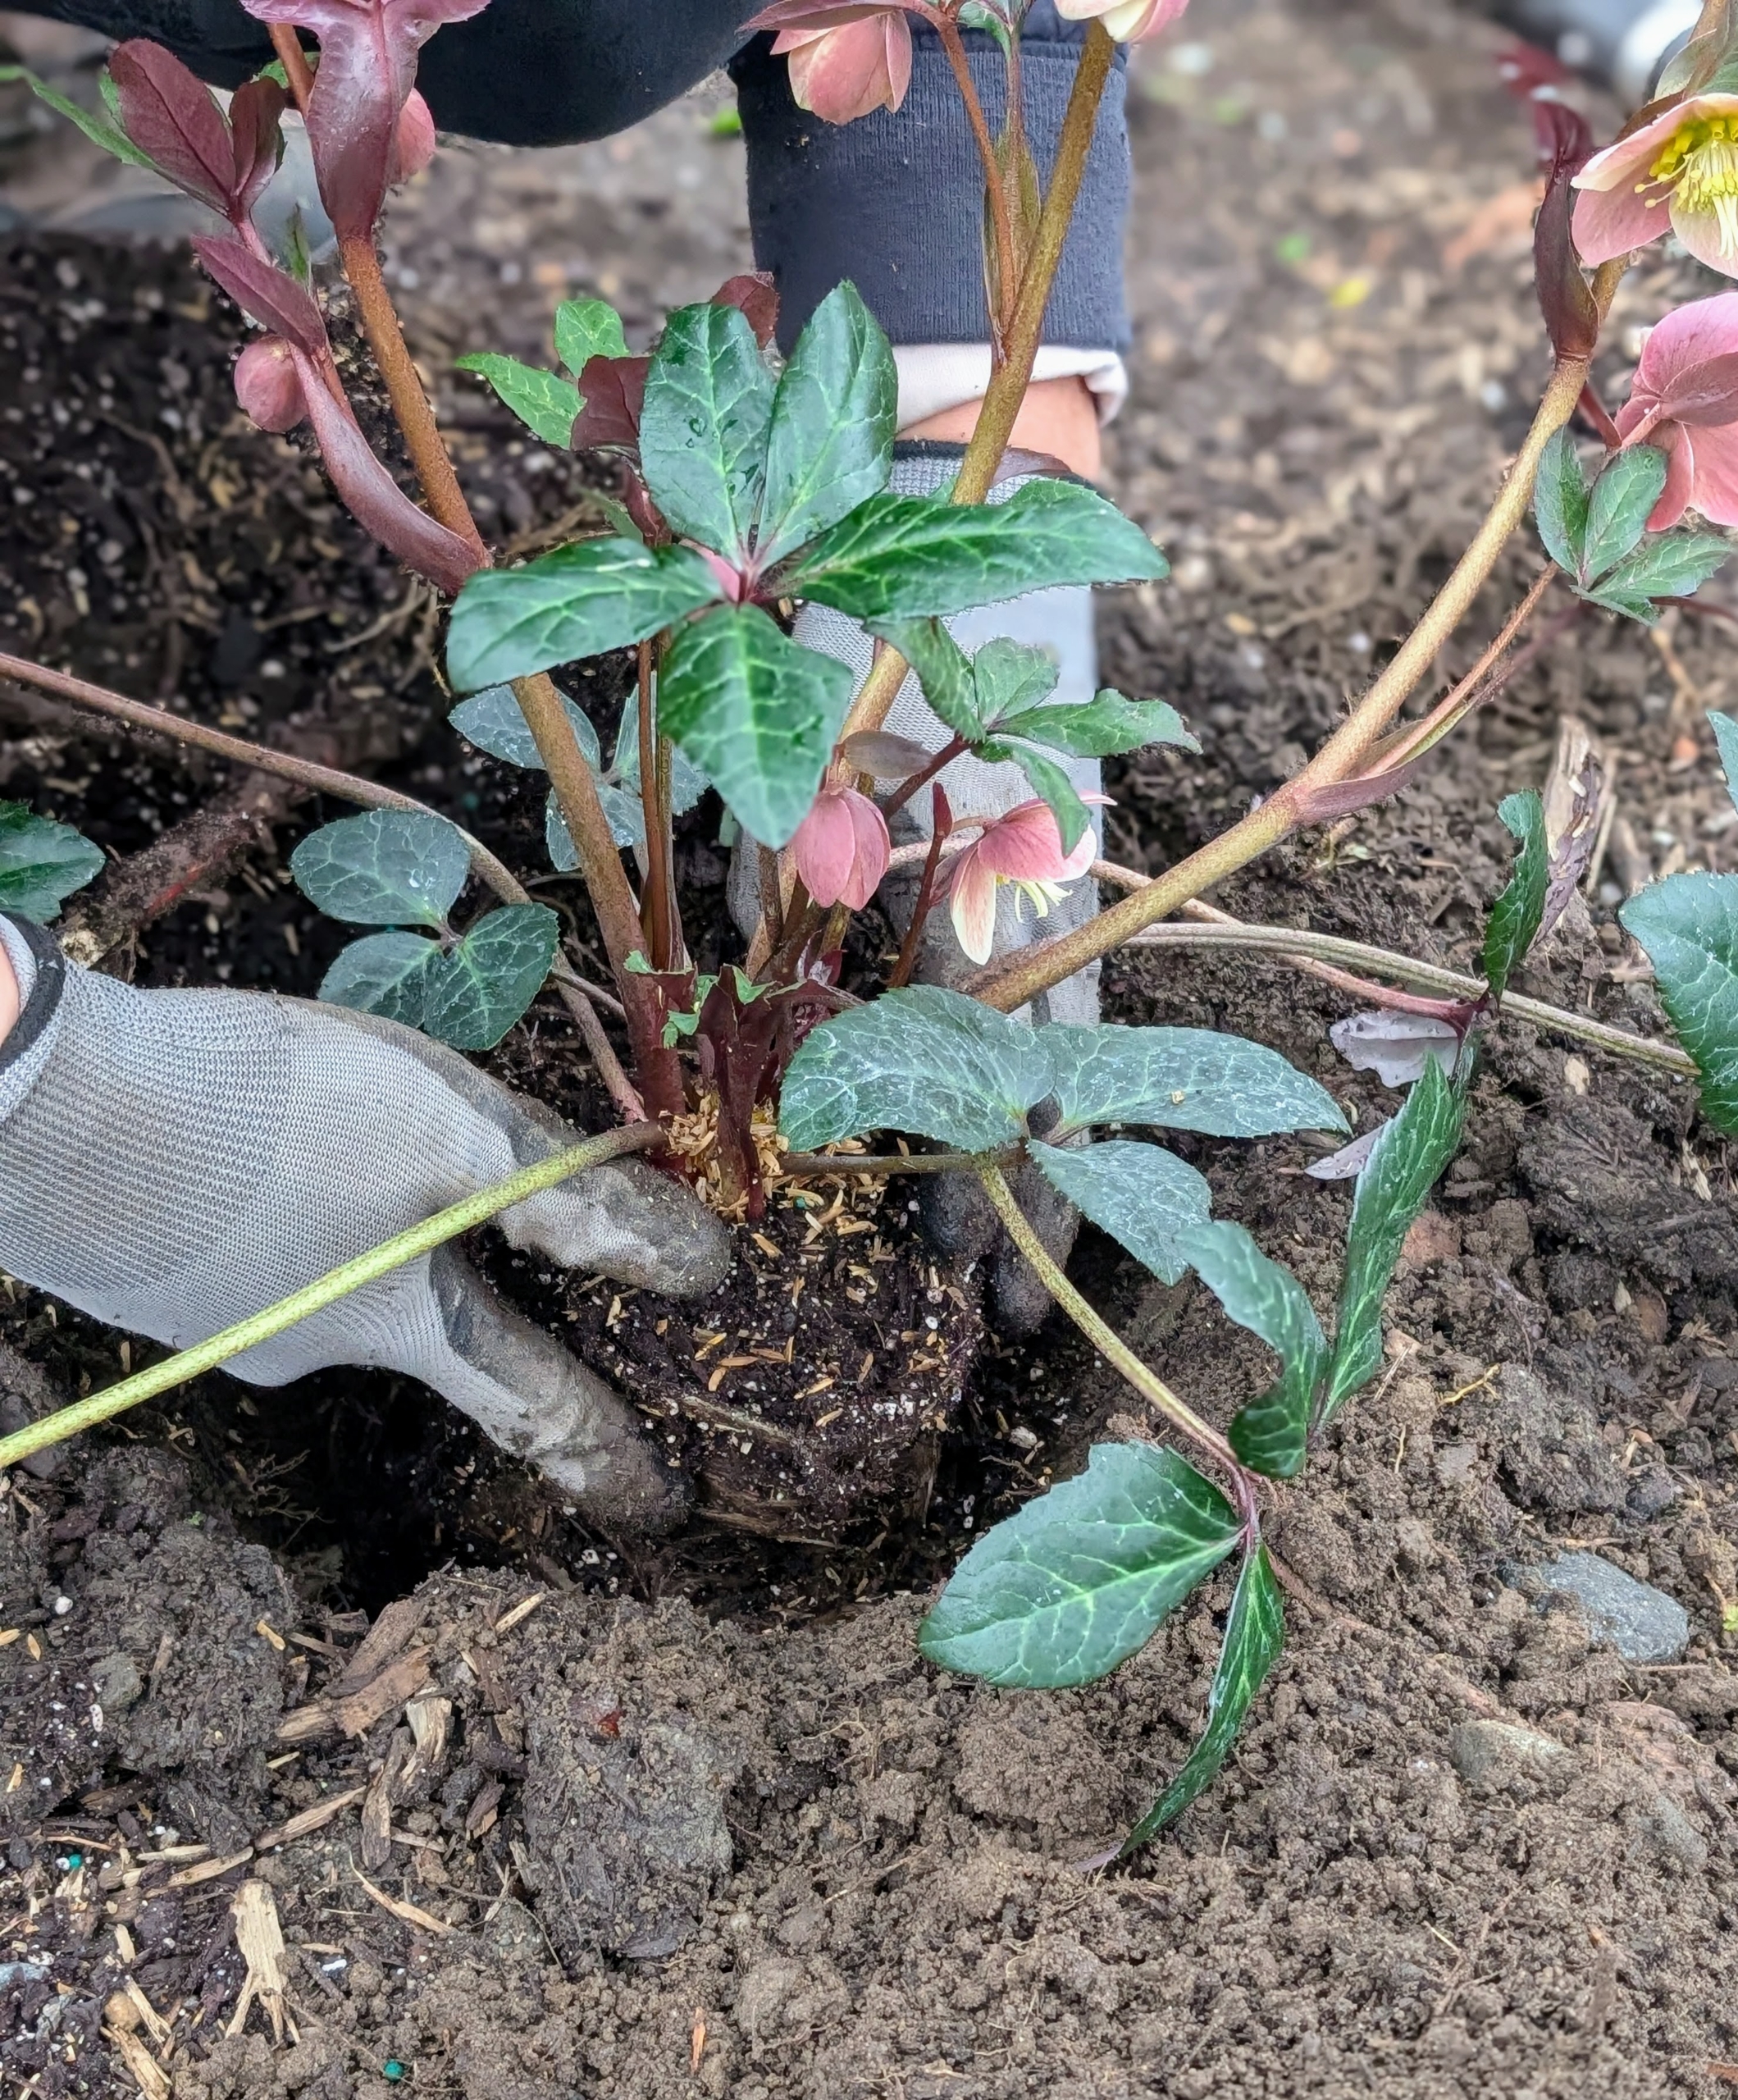
Matthew places the specimen into the hole so it is at the same height as it was in the pot.
Once the hellebore is in the hole, it is backfilled and the surrounding soil is gently tamped down to create good contact.
Here is one completely planted. Hellebores do best underneath deciduous trees where they are shaded by foliage in summer, but are exposed to full sun after the trees have dropped their leaves in fall.
Unlike the blooms of most other flowering plants, hellebore flowers do not consist of petals, but of sepals, which serve to protect the flower. These flowers also tend to nod.
These plants are also fairly deer and rabbit resistant. Some of the varieties planted in this space include Helleborus ‘Pink Frost,’ Helleborus hybrid ‘Lenten Rose,’ Helleborus ‘Rio Carnivale,’ Helleborus ‘Frostkiss Anna’s Red and ‘Frostkiss Molly’s White,’ Helleborus ‘Frostkiss Pippa’s Purple,’ and Helleborus ‘Pink Frost,’
While hellebores do spread, they are considered slow-growing plants that can take up to 18-months to reach their mature size.
Overnight showers provided a good drink. Once the plants are well-established, hellebores require little upkeep. If you’re out shopping for spring plants, consider the hellebore – you’ll love them in your garden. And please pick up a copy of my latest book, “Martha Stewart’s Gardening Handbook: The Essential Guide to Designing, Planting, and Growing.” It’s out now!
Today is the first day of spring and all of us here at my Bedford, New York farm are thinking about the gardens. In fact, the season’s first peas are already in the ground.
Peas thrive in cool weather, and young plants can even tolerate light frosts. It’s important to plant peas as soon as possible in spring in order to get a full harvest before hot summer temperatures arrive. Yesterday, my gardeners planted different varieties of peas outside in my vegetable garden. They also planted fava beans, also known as the broad bean, an ancient member of the pea family.
Enjoy these photos.
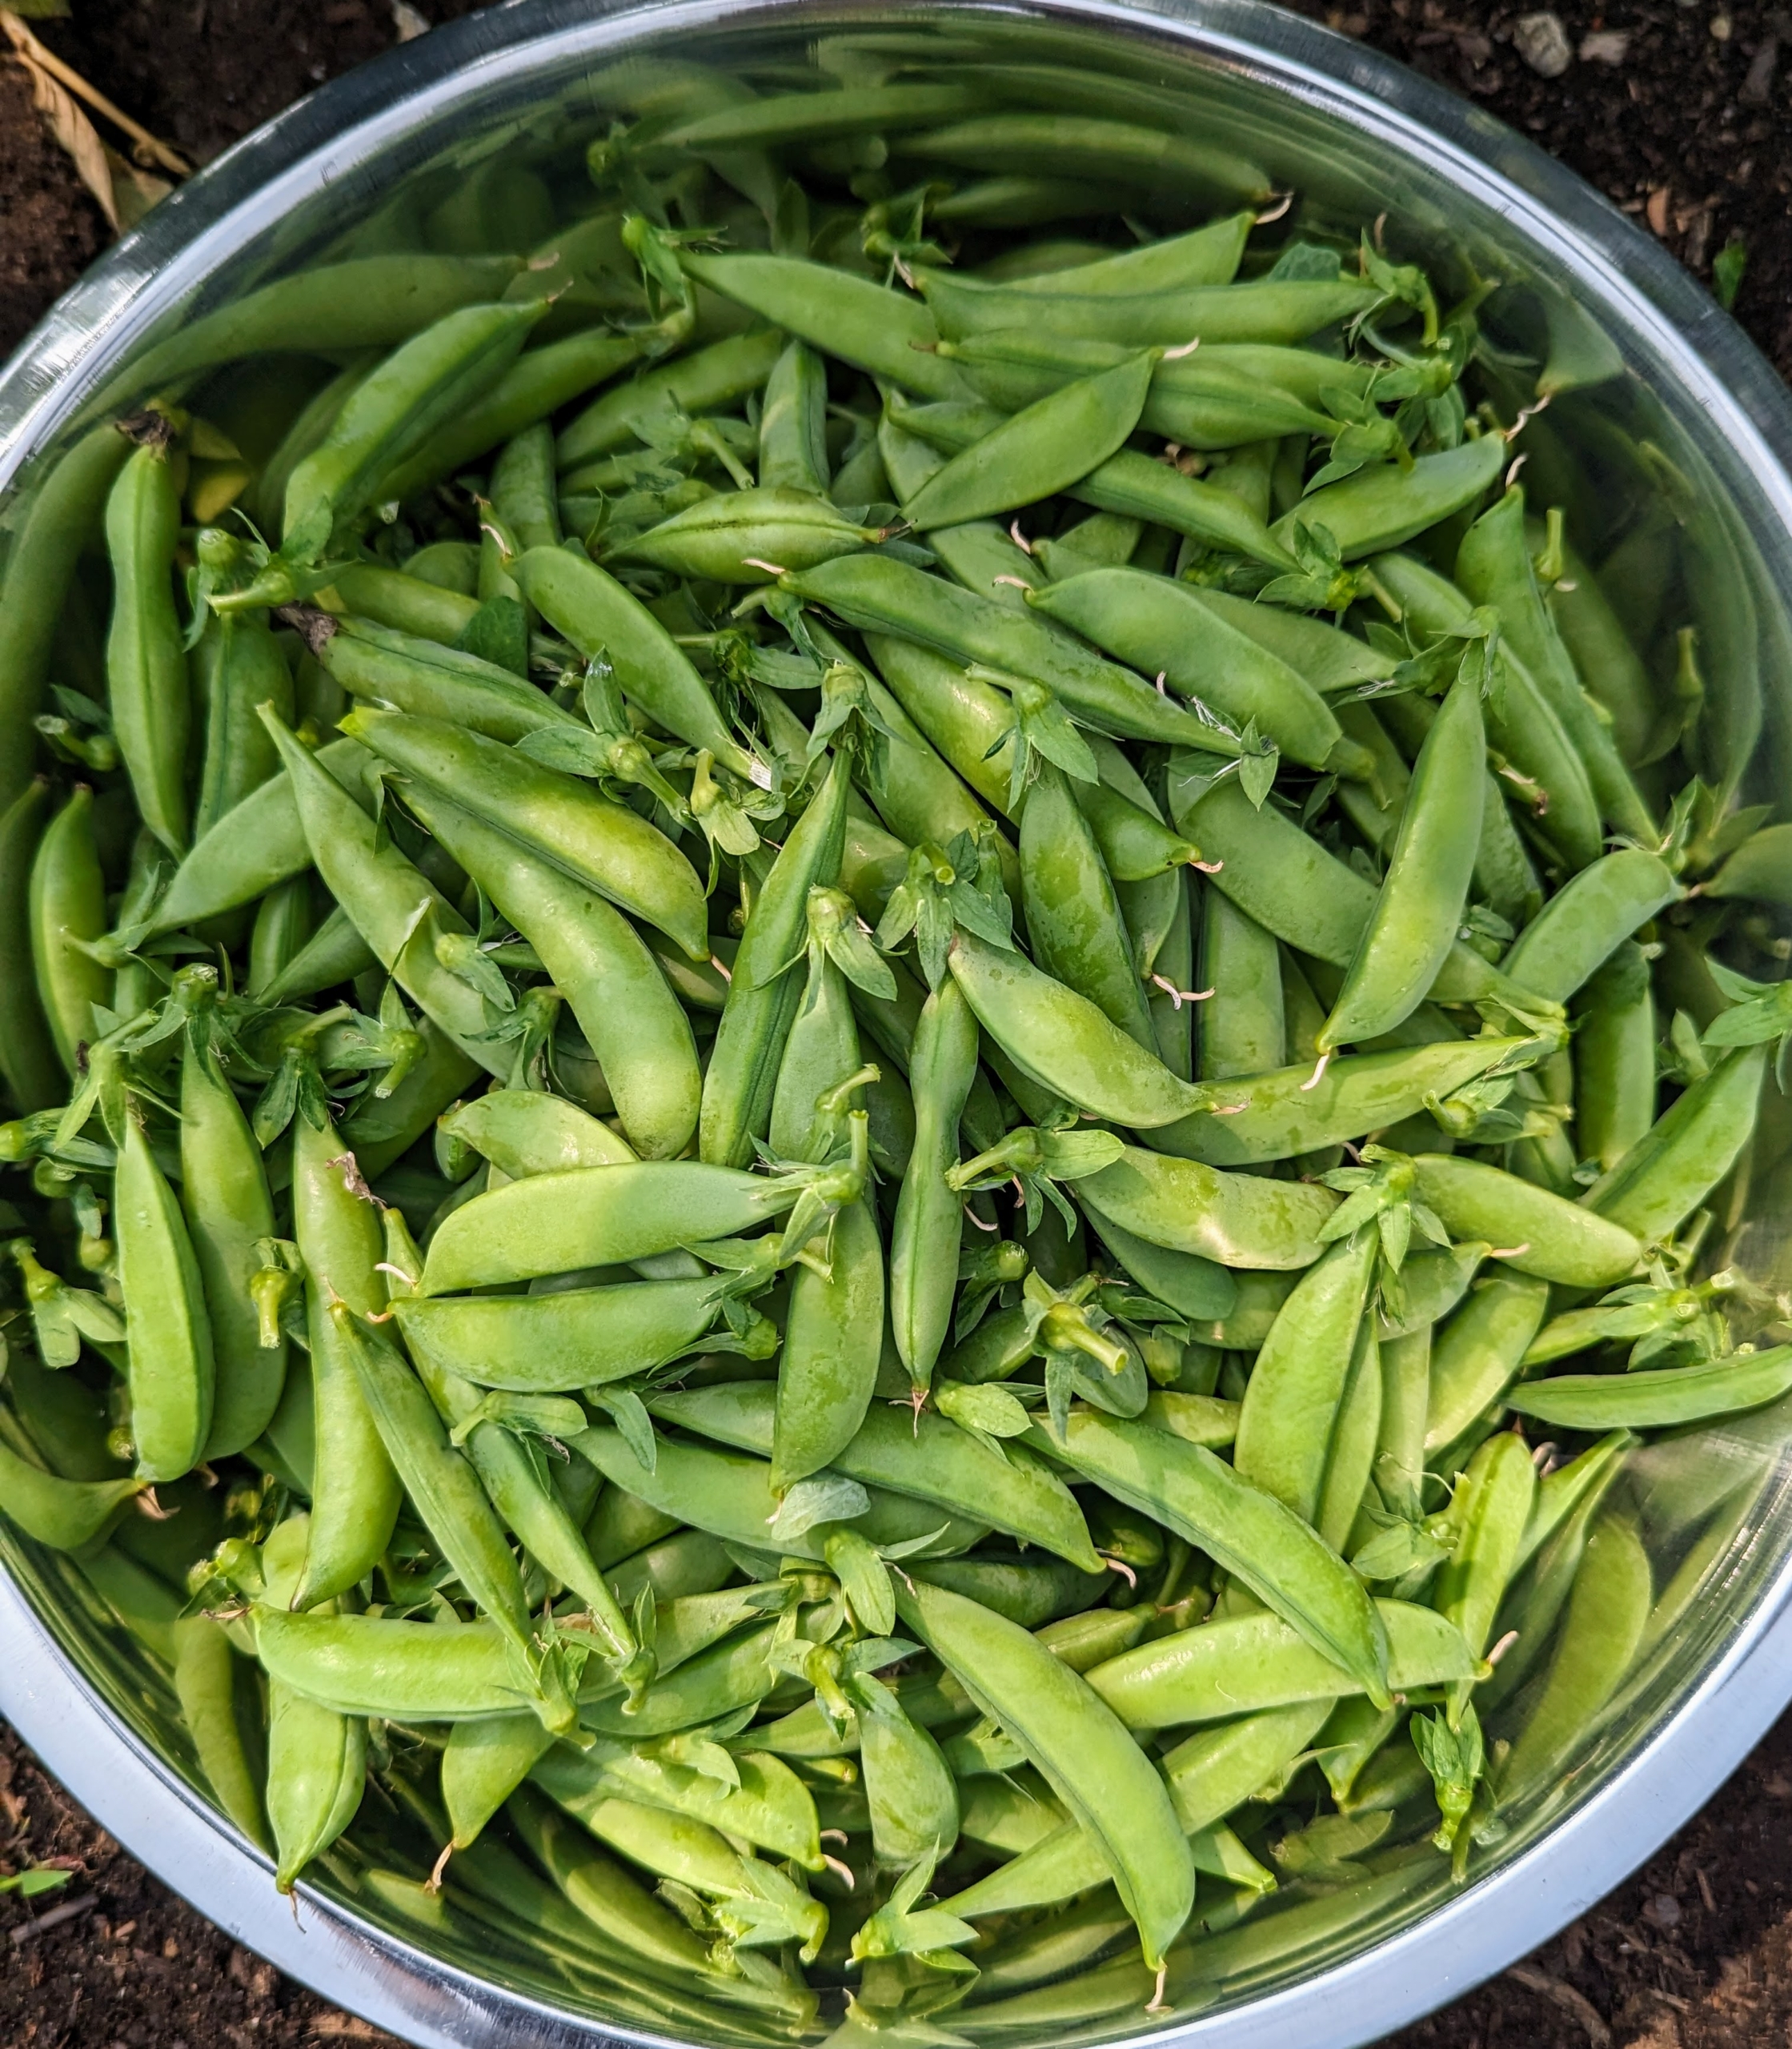
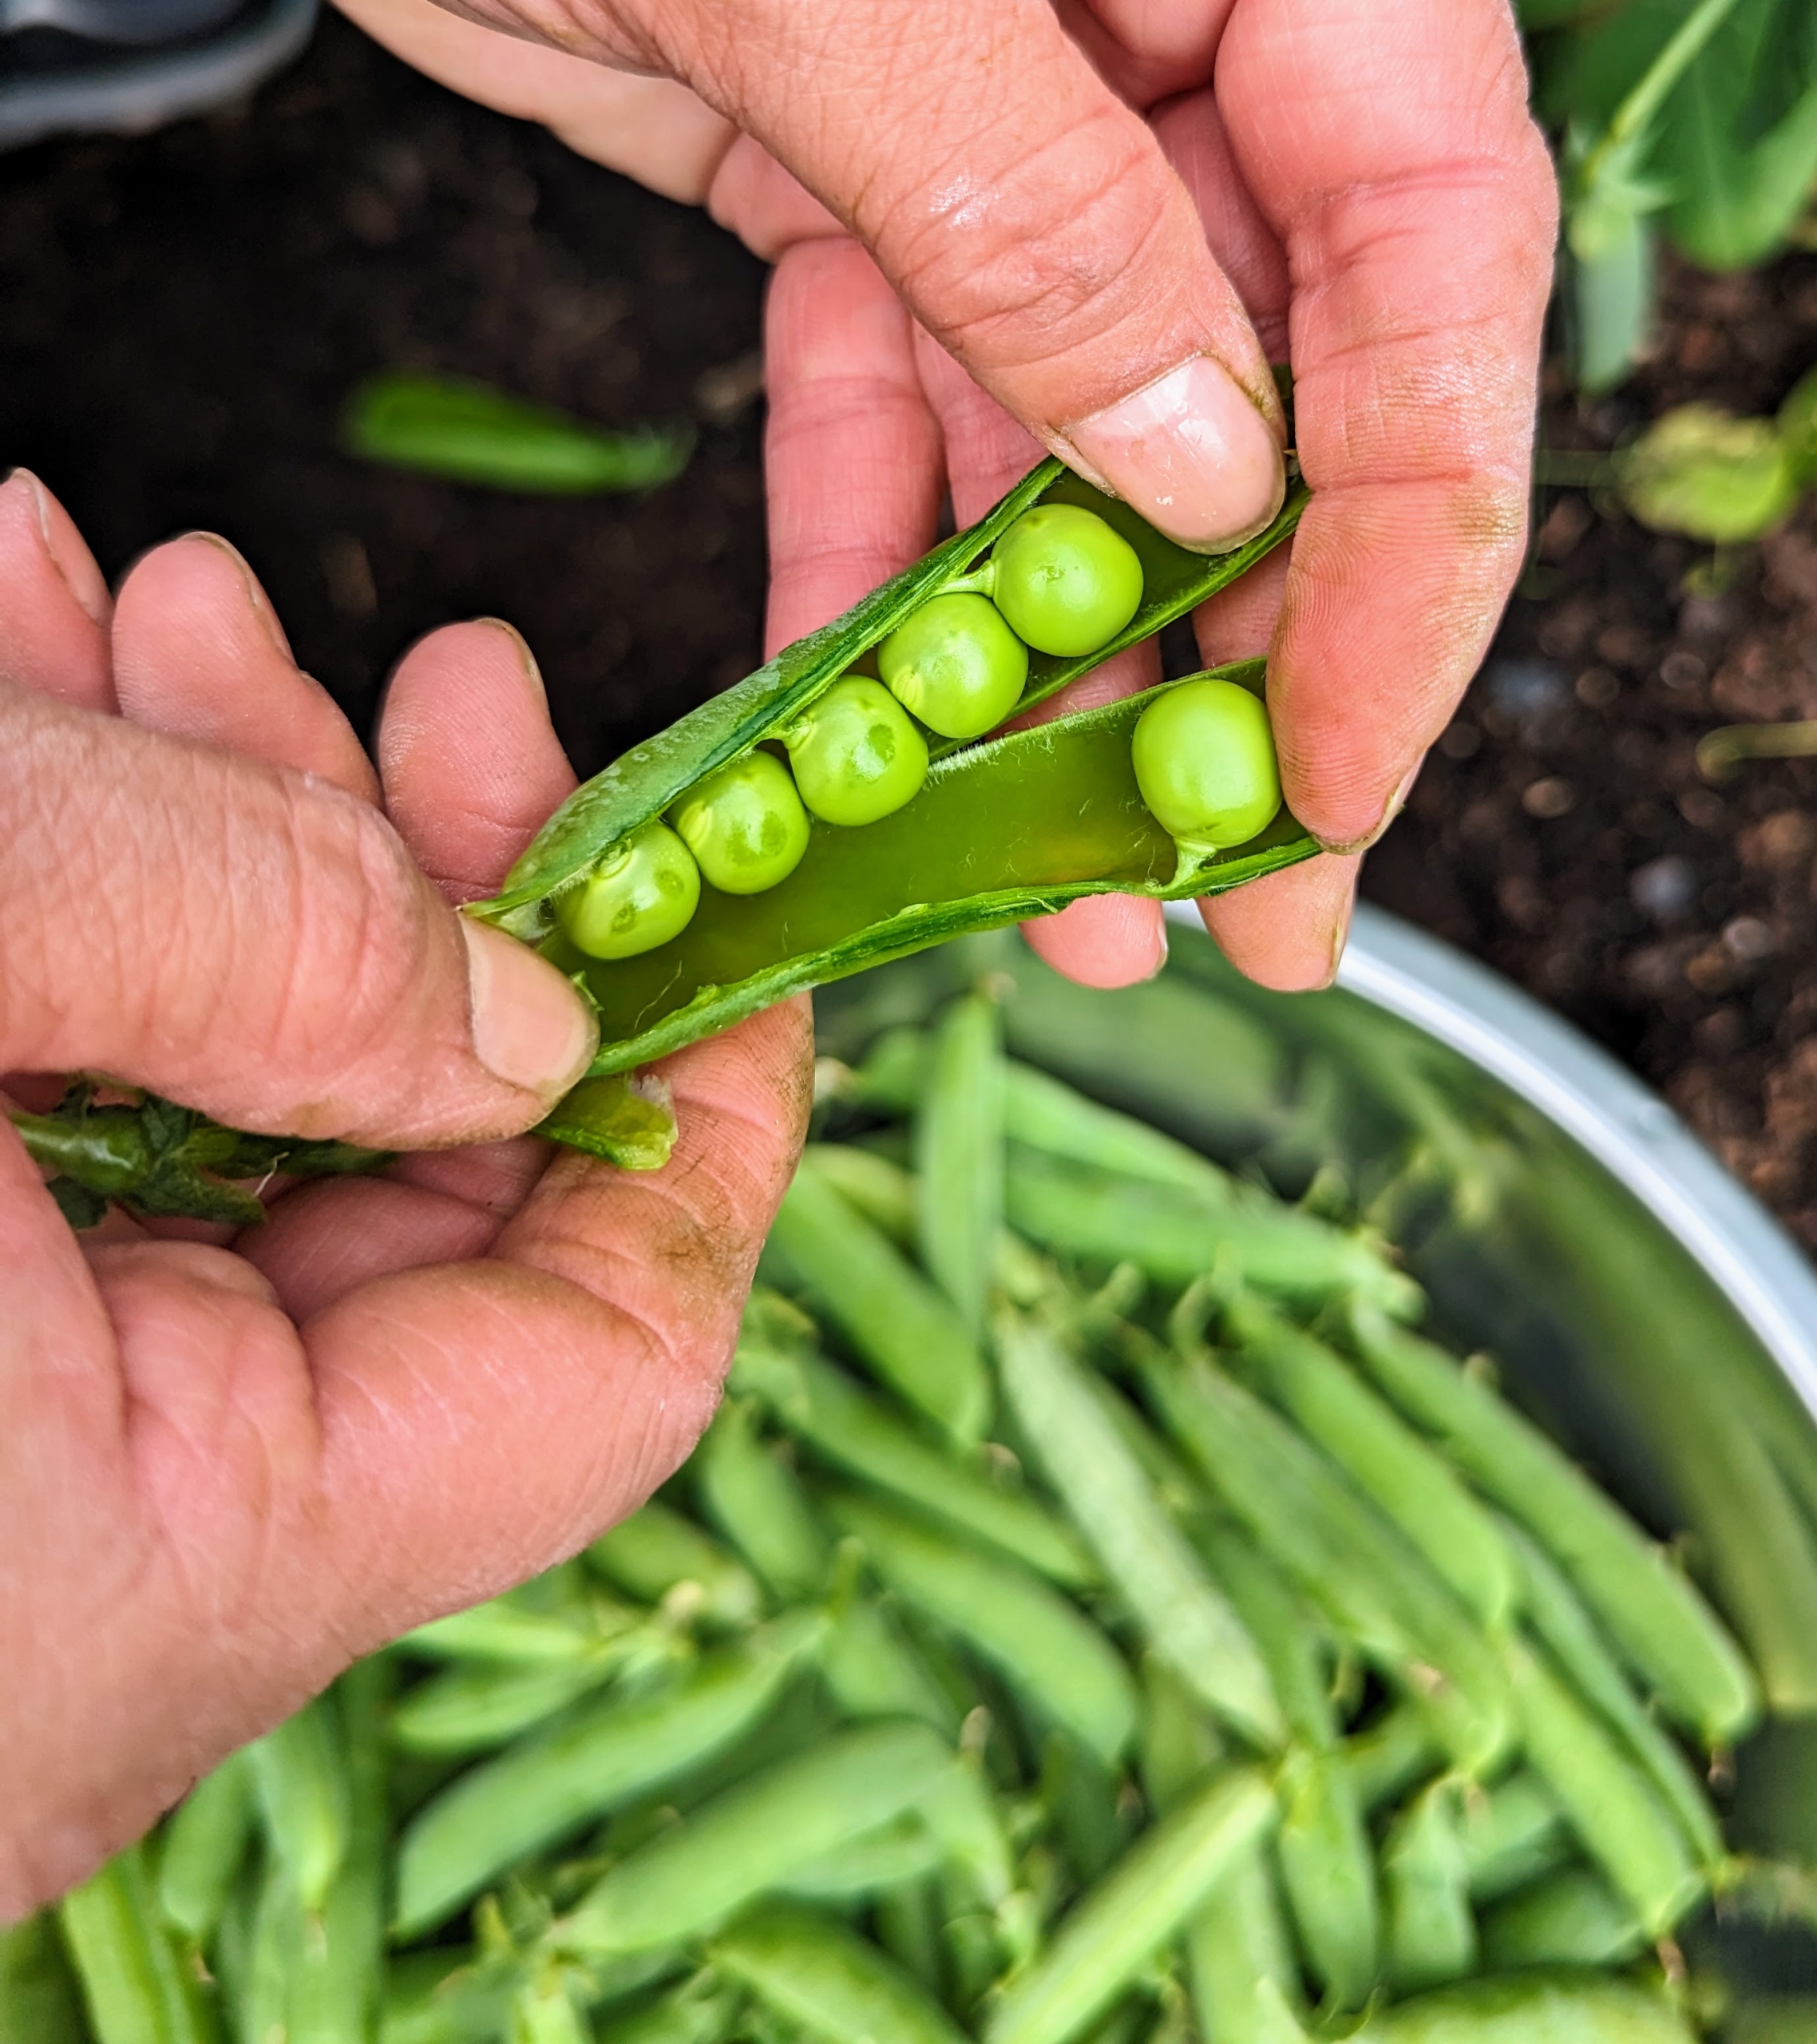
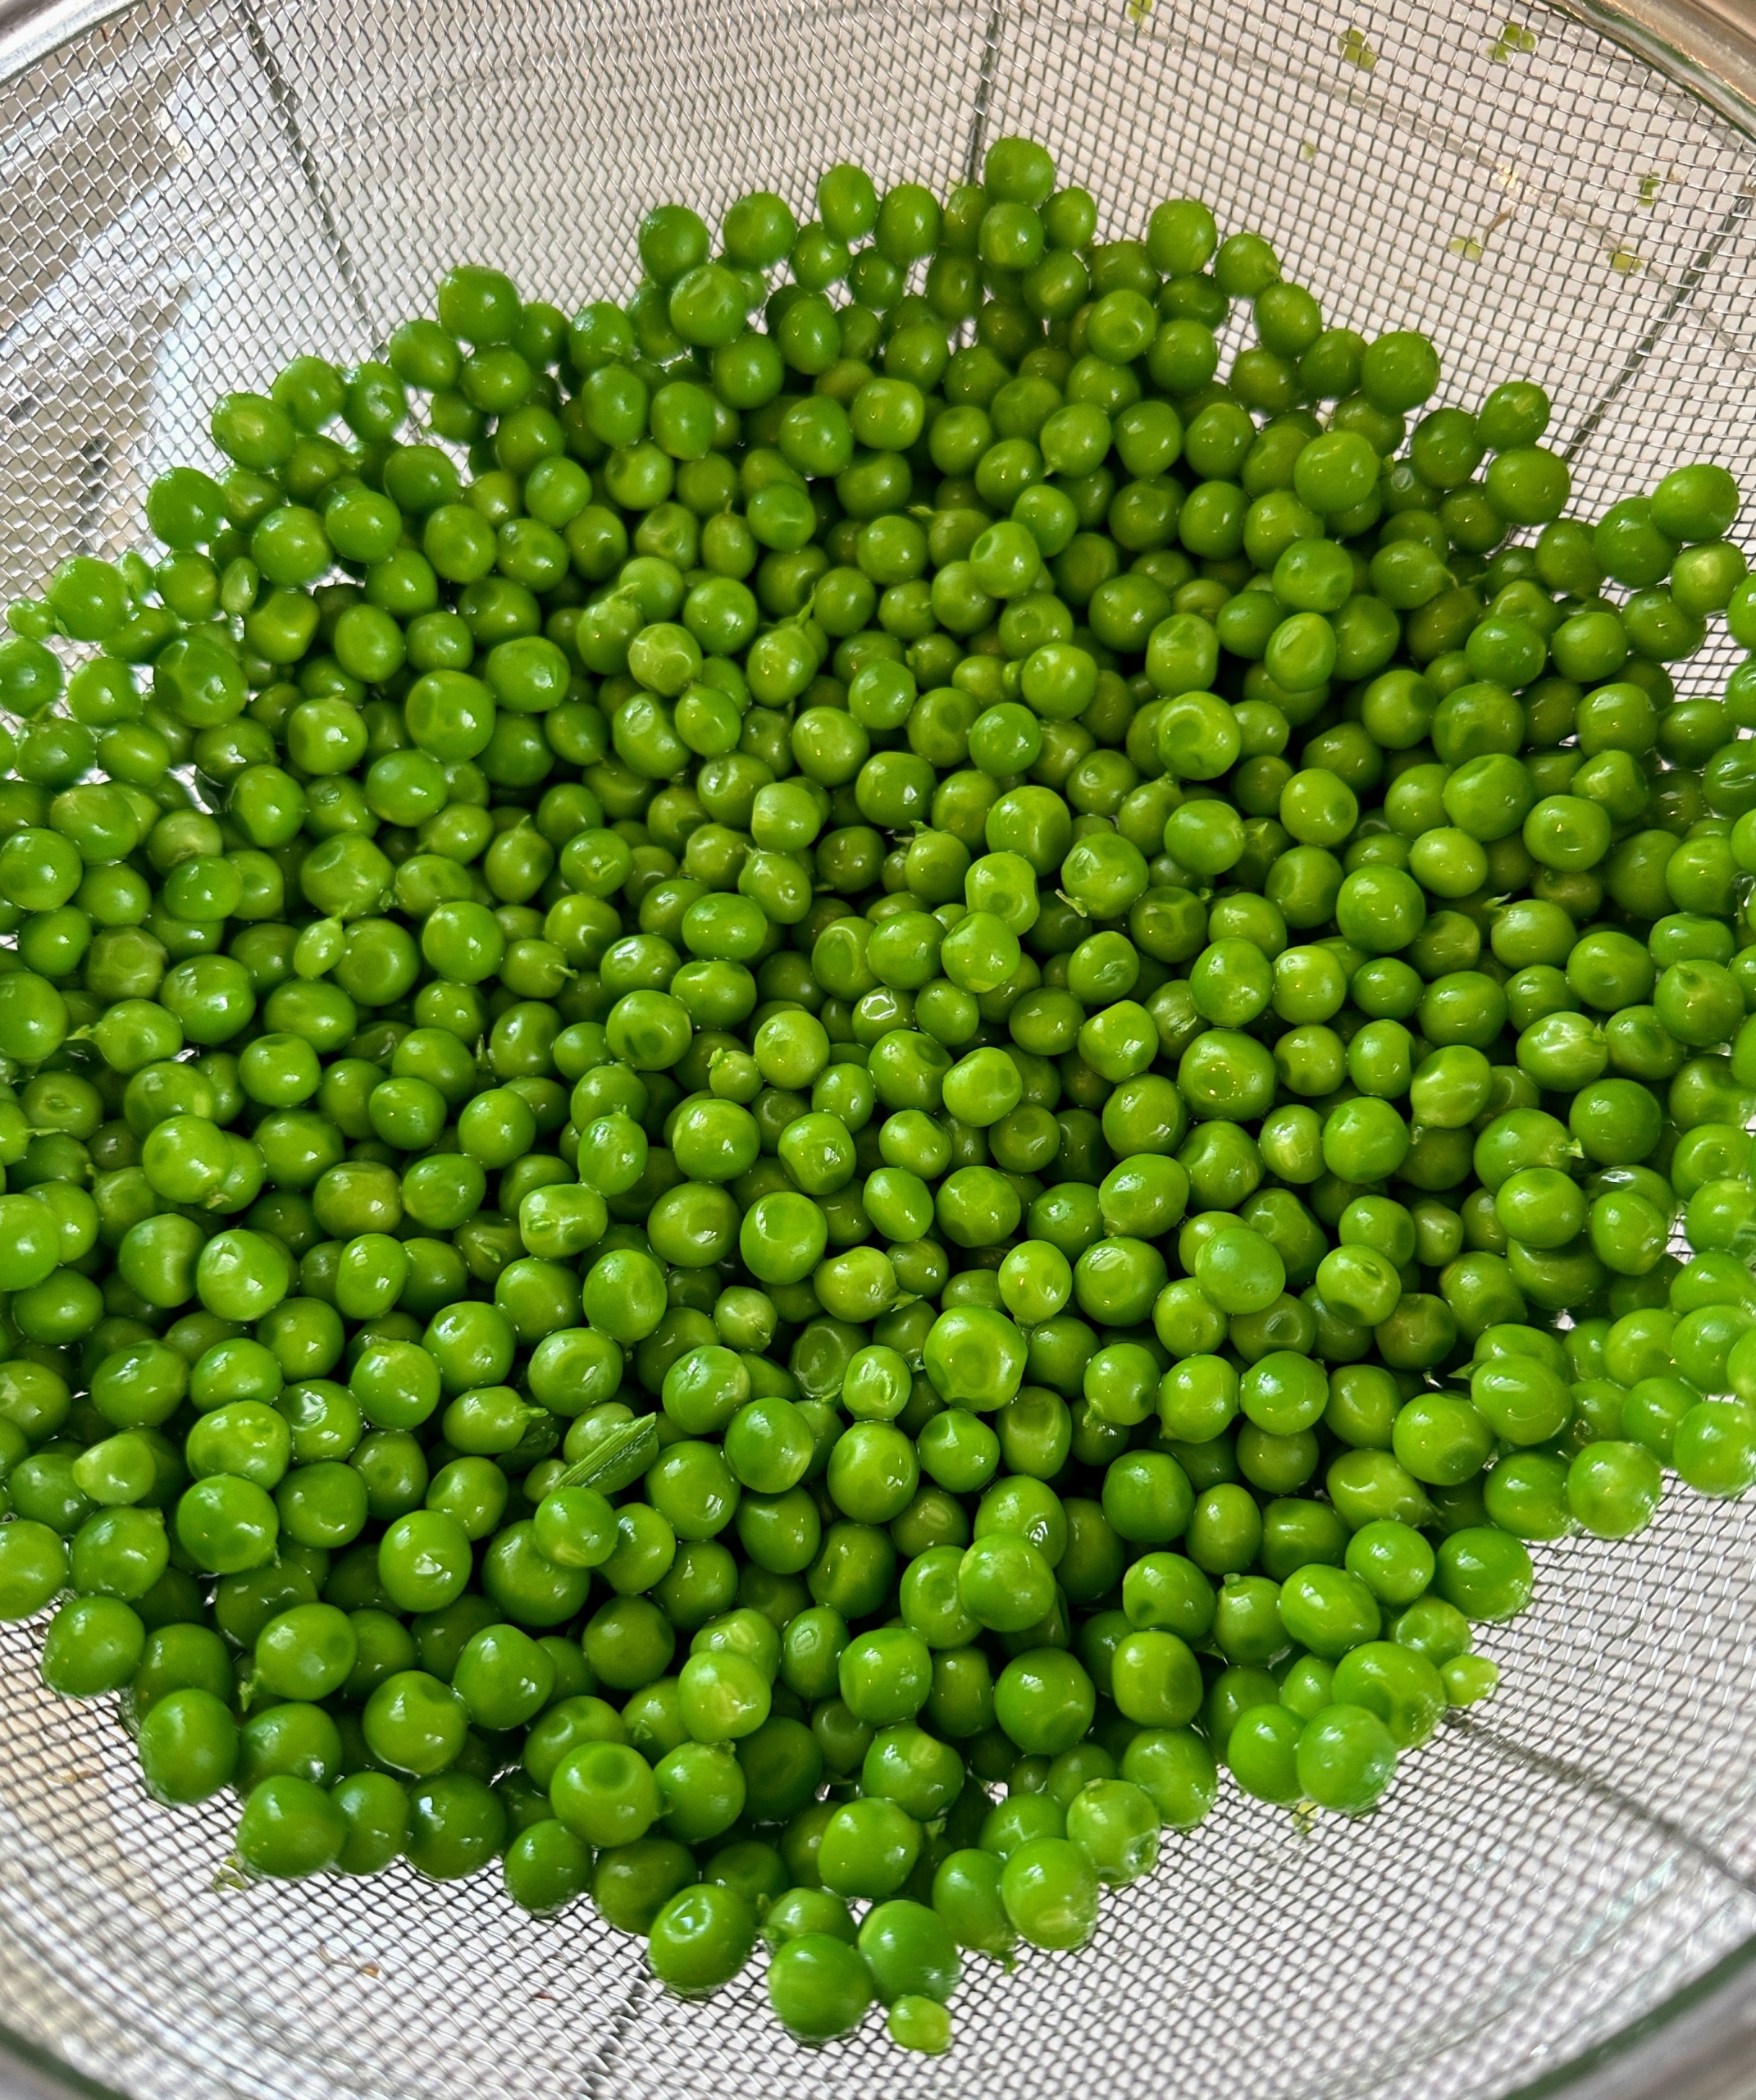
Snow, snap, and shelling peas are all members of the legume family. Snow peas are also known as Chinese pea pods. They are flat with very small peas inside, and the whole pod is edible. Snap peas are a cross between snow peas and shelling peas – the whole pod is eaten and has a crunchy texture and very sweet flavor. Shelling peas are also sometimes called garden peas, sweet peas or English peas. The pods are firm and rounded, and the round peas inside need to be removed, or shelled, before eating. The peas are sweet and may be eaten raw or cooked.
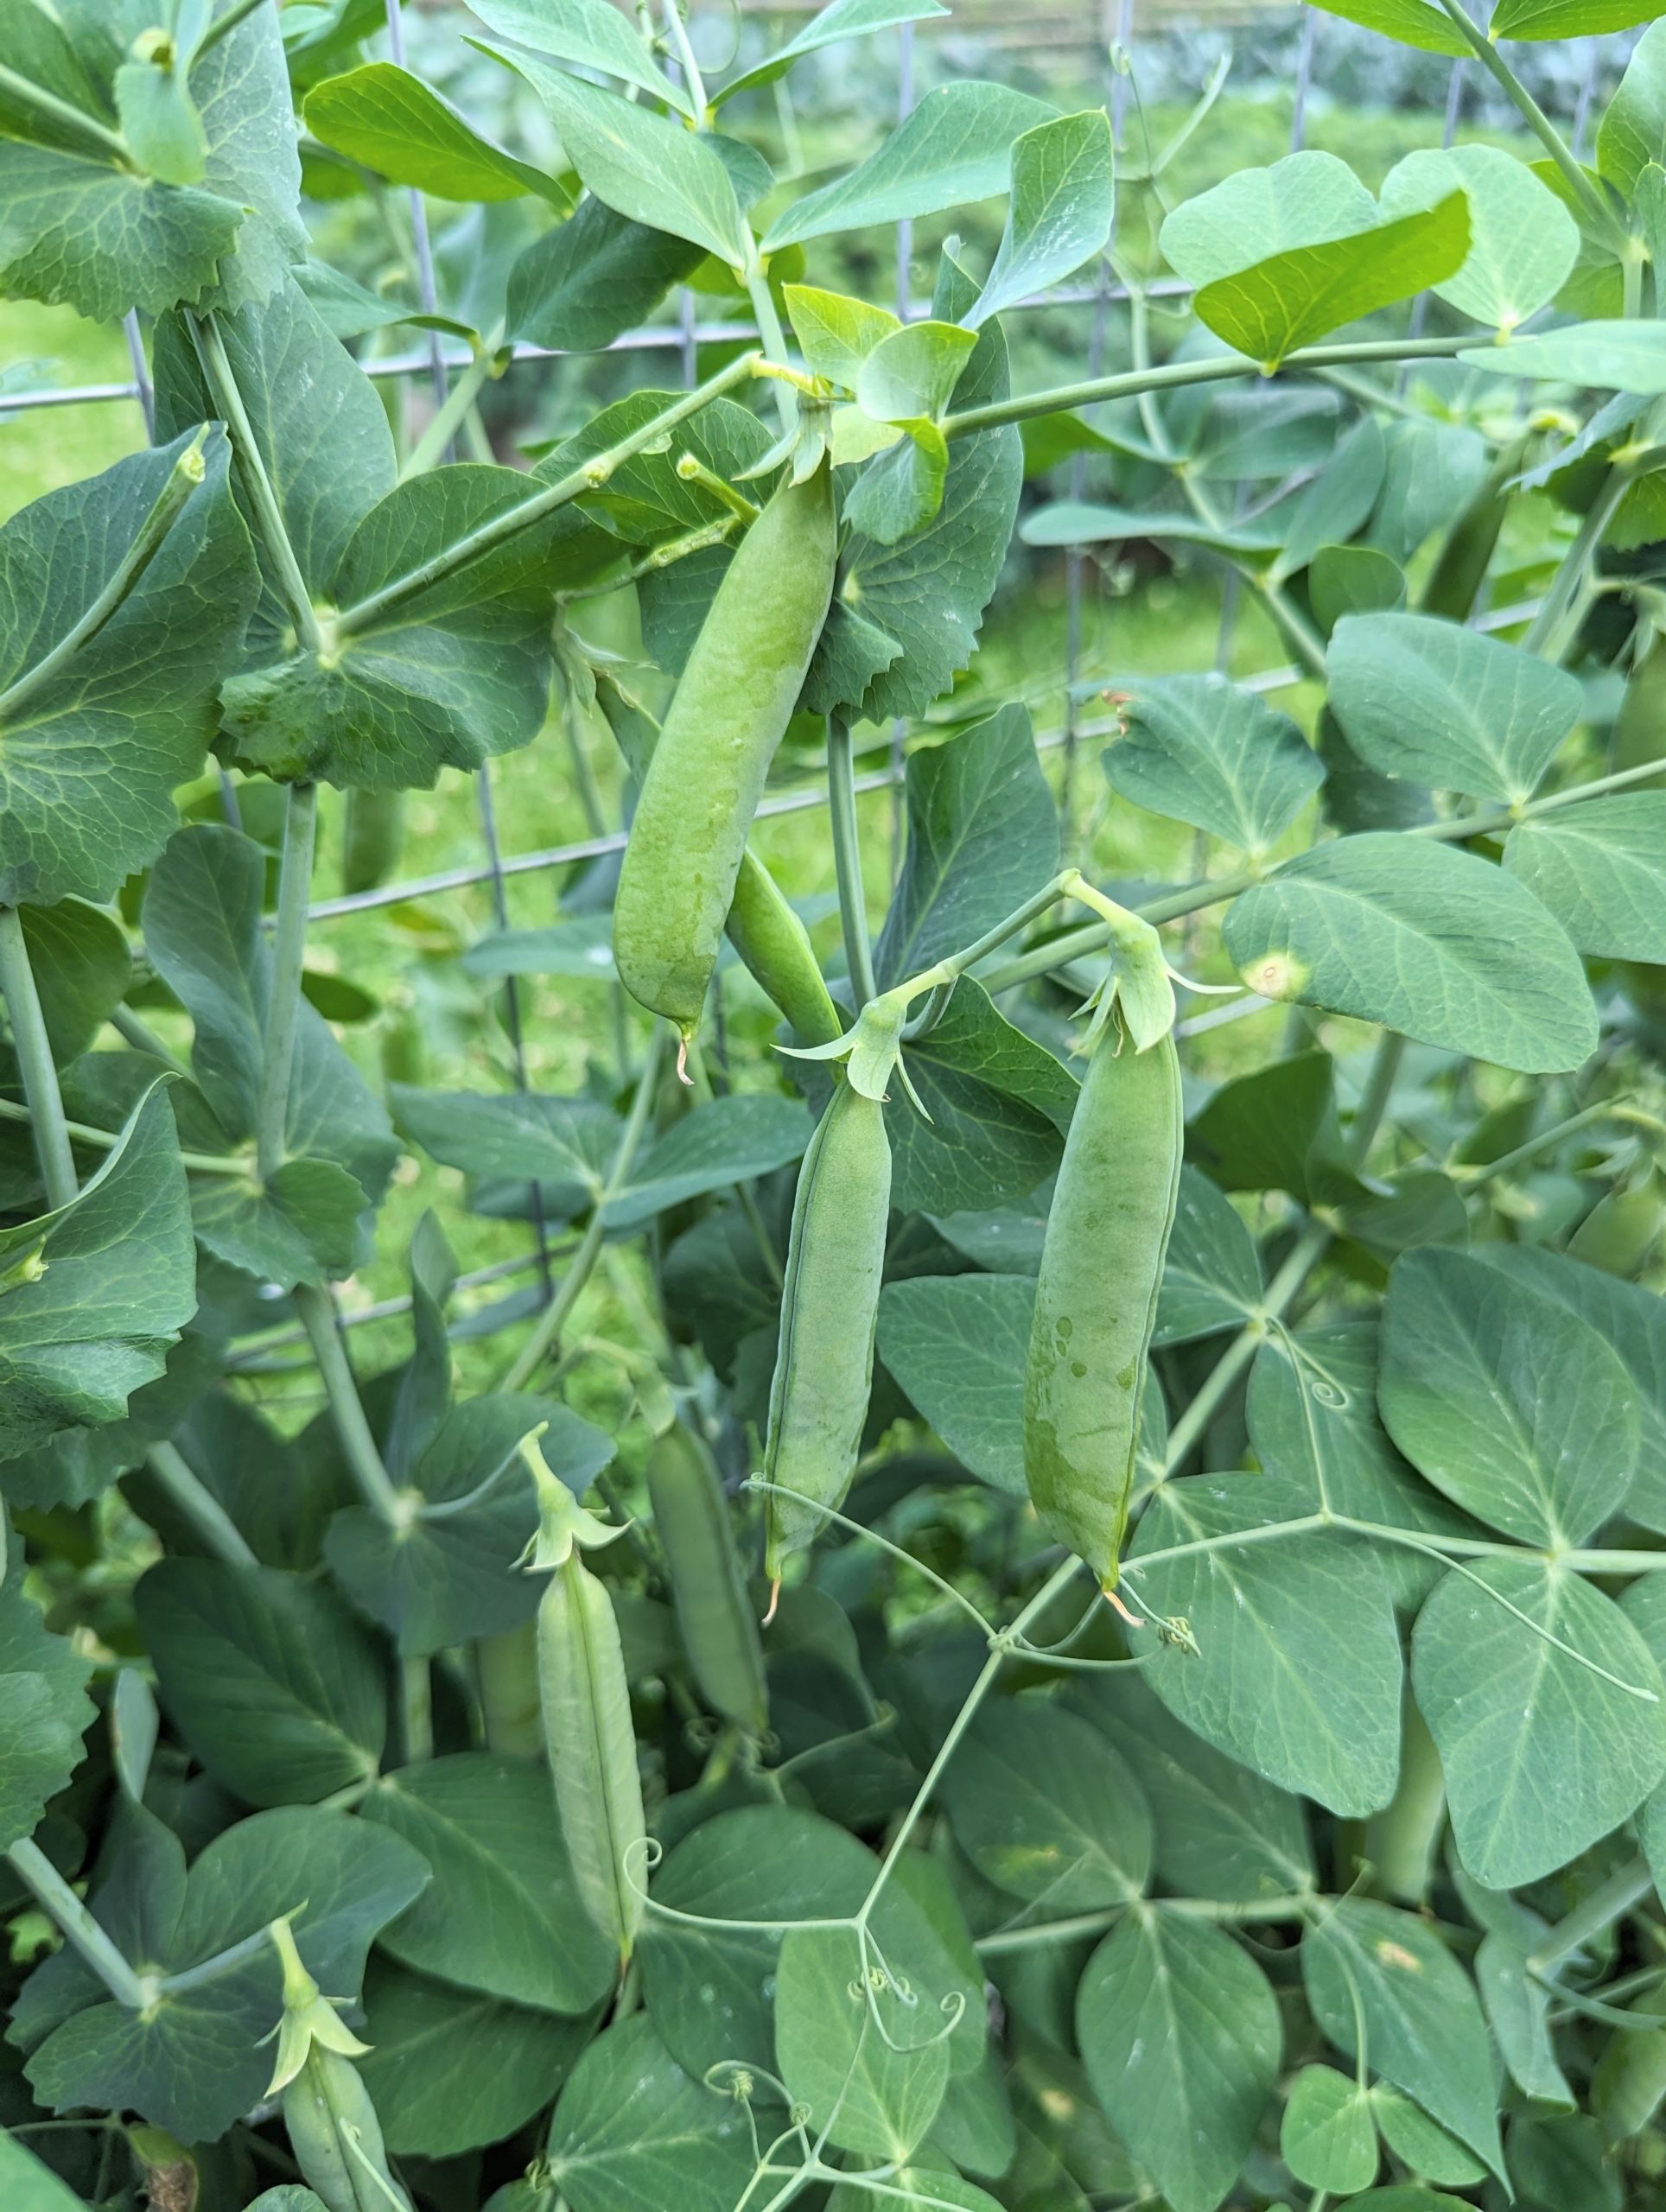
Peas grow vertically and hang from tendrils latched on trellis structures. I have always grown peas in my garden.
These are shelling peas. The pods can range in size from four to 15-centimeters long and about one-and-a-half to two-and-a-half centimeters wide. Each pod contains between two and 10-peas. In general, shelling pea plants yield about a half-cup of peas per plant.
Peas are packed with nutrition – high in protein and fiber.
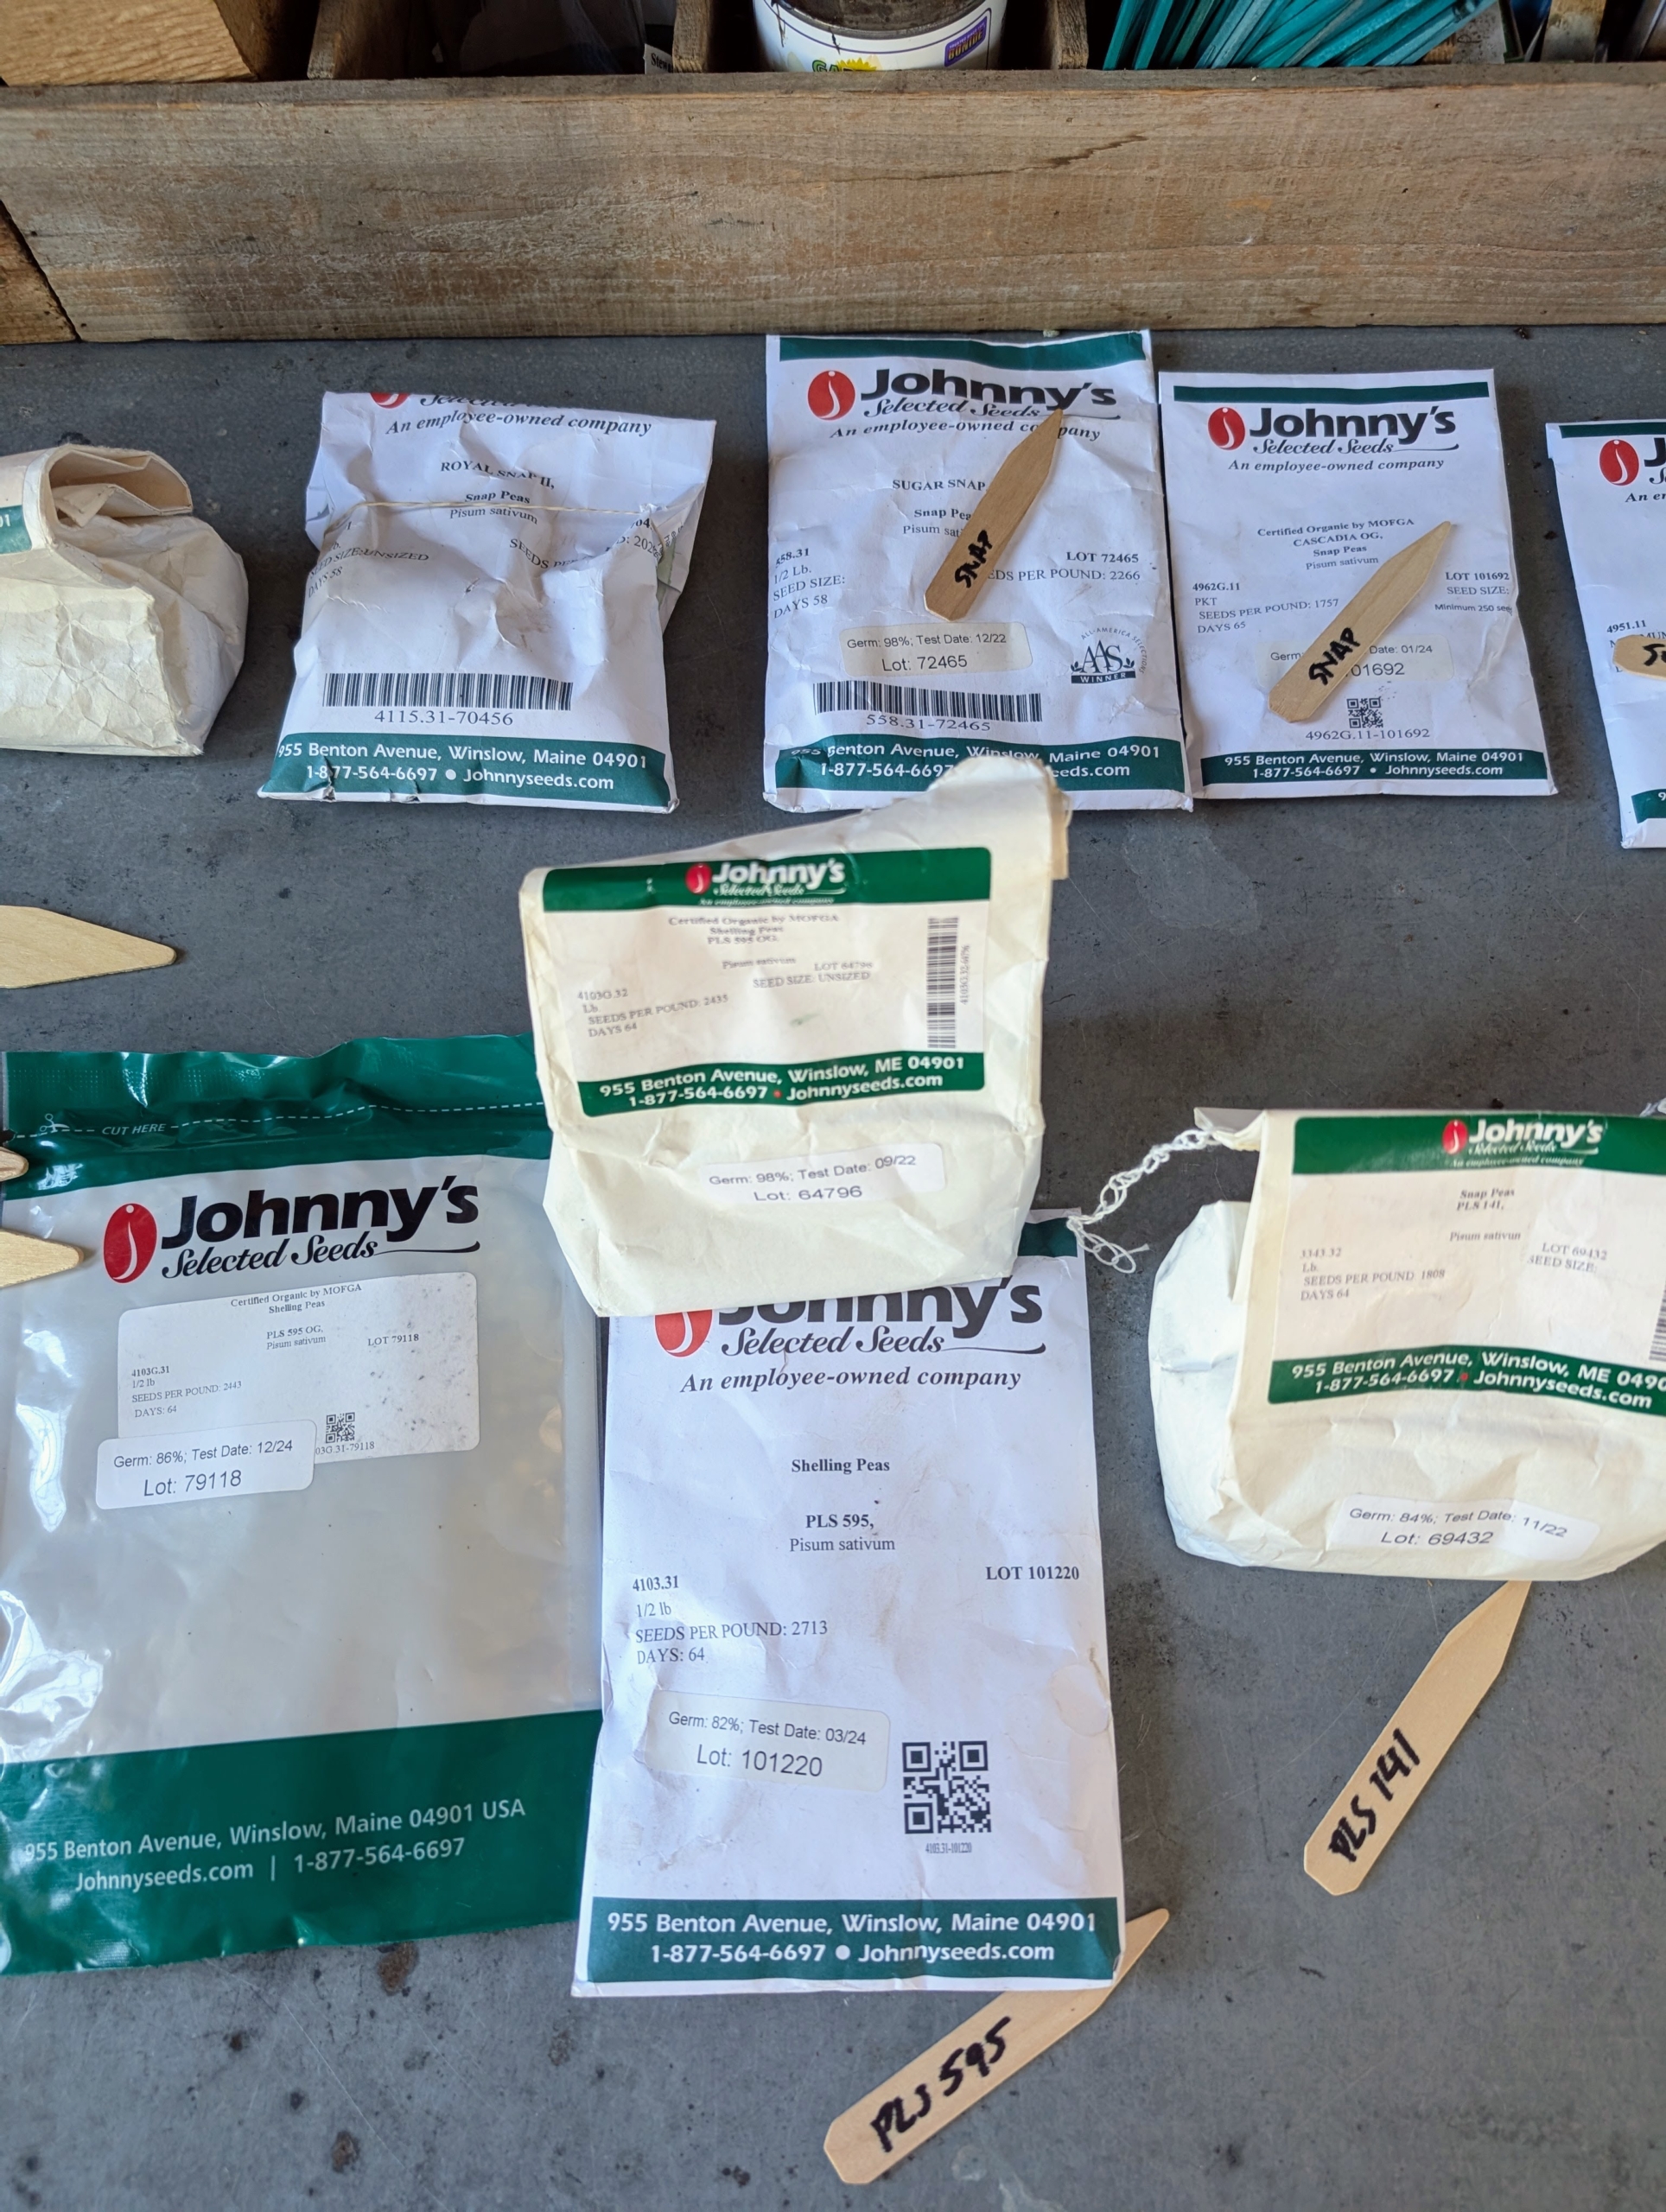
This season’s peas are from Johnny’s Selected Seeds, a source I have used for many years. Johnny’s Selected seeds is a privately held, employee-owned organic seed producer in Winslow, Maine. Johnny’s offers hundreds of varieties of organic vegetable, herb, flower, fruit and farm seeds, along with all sorts of gardening supplies and accessories.
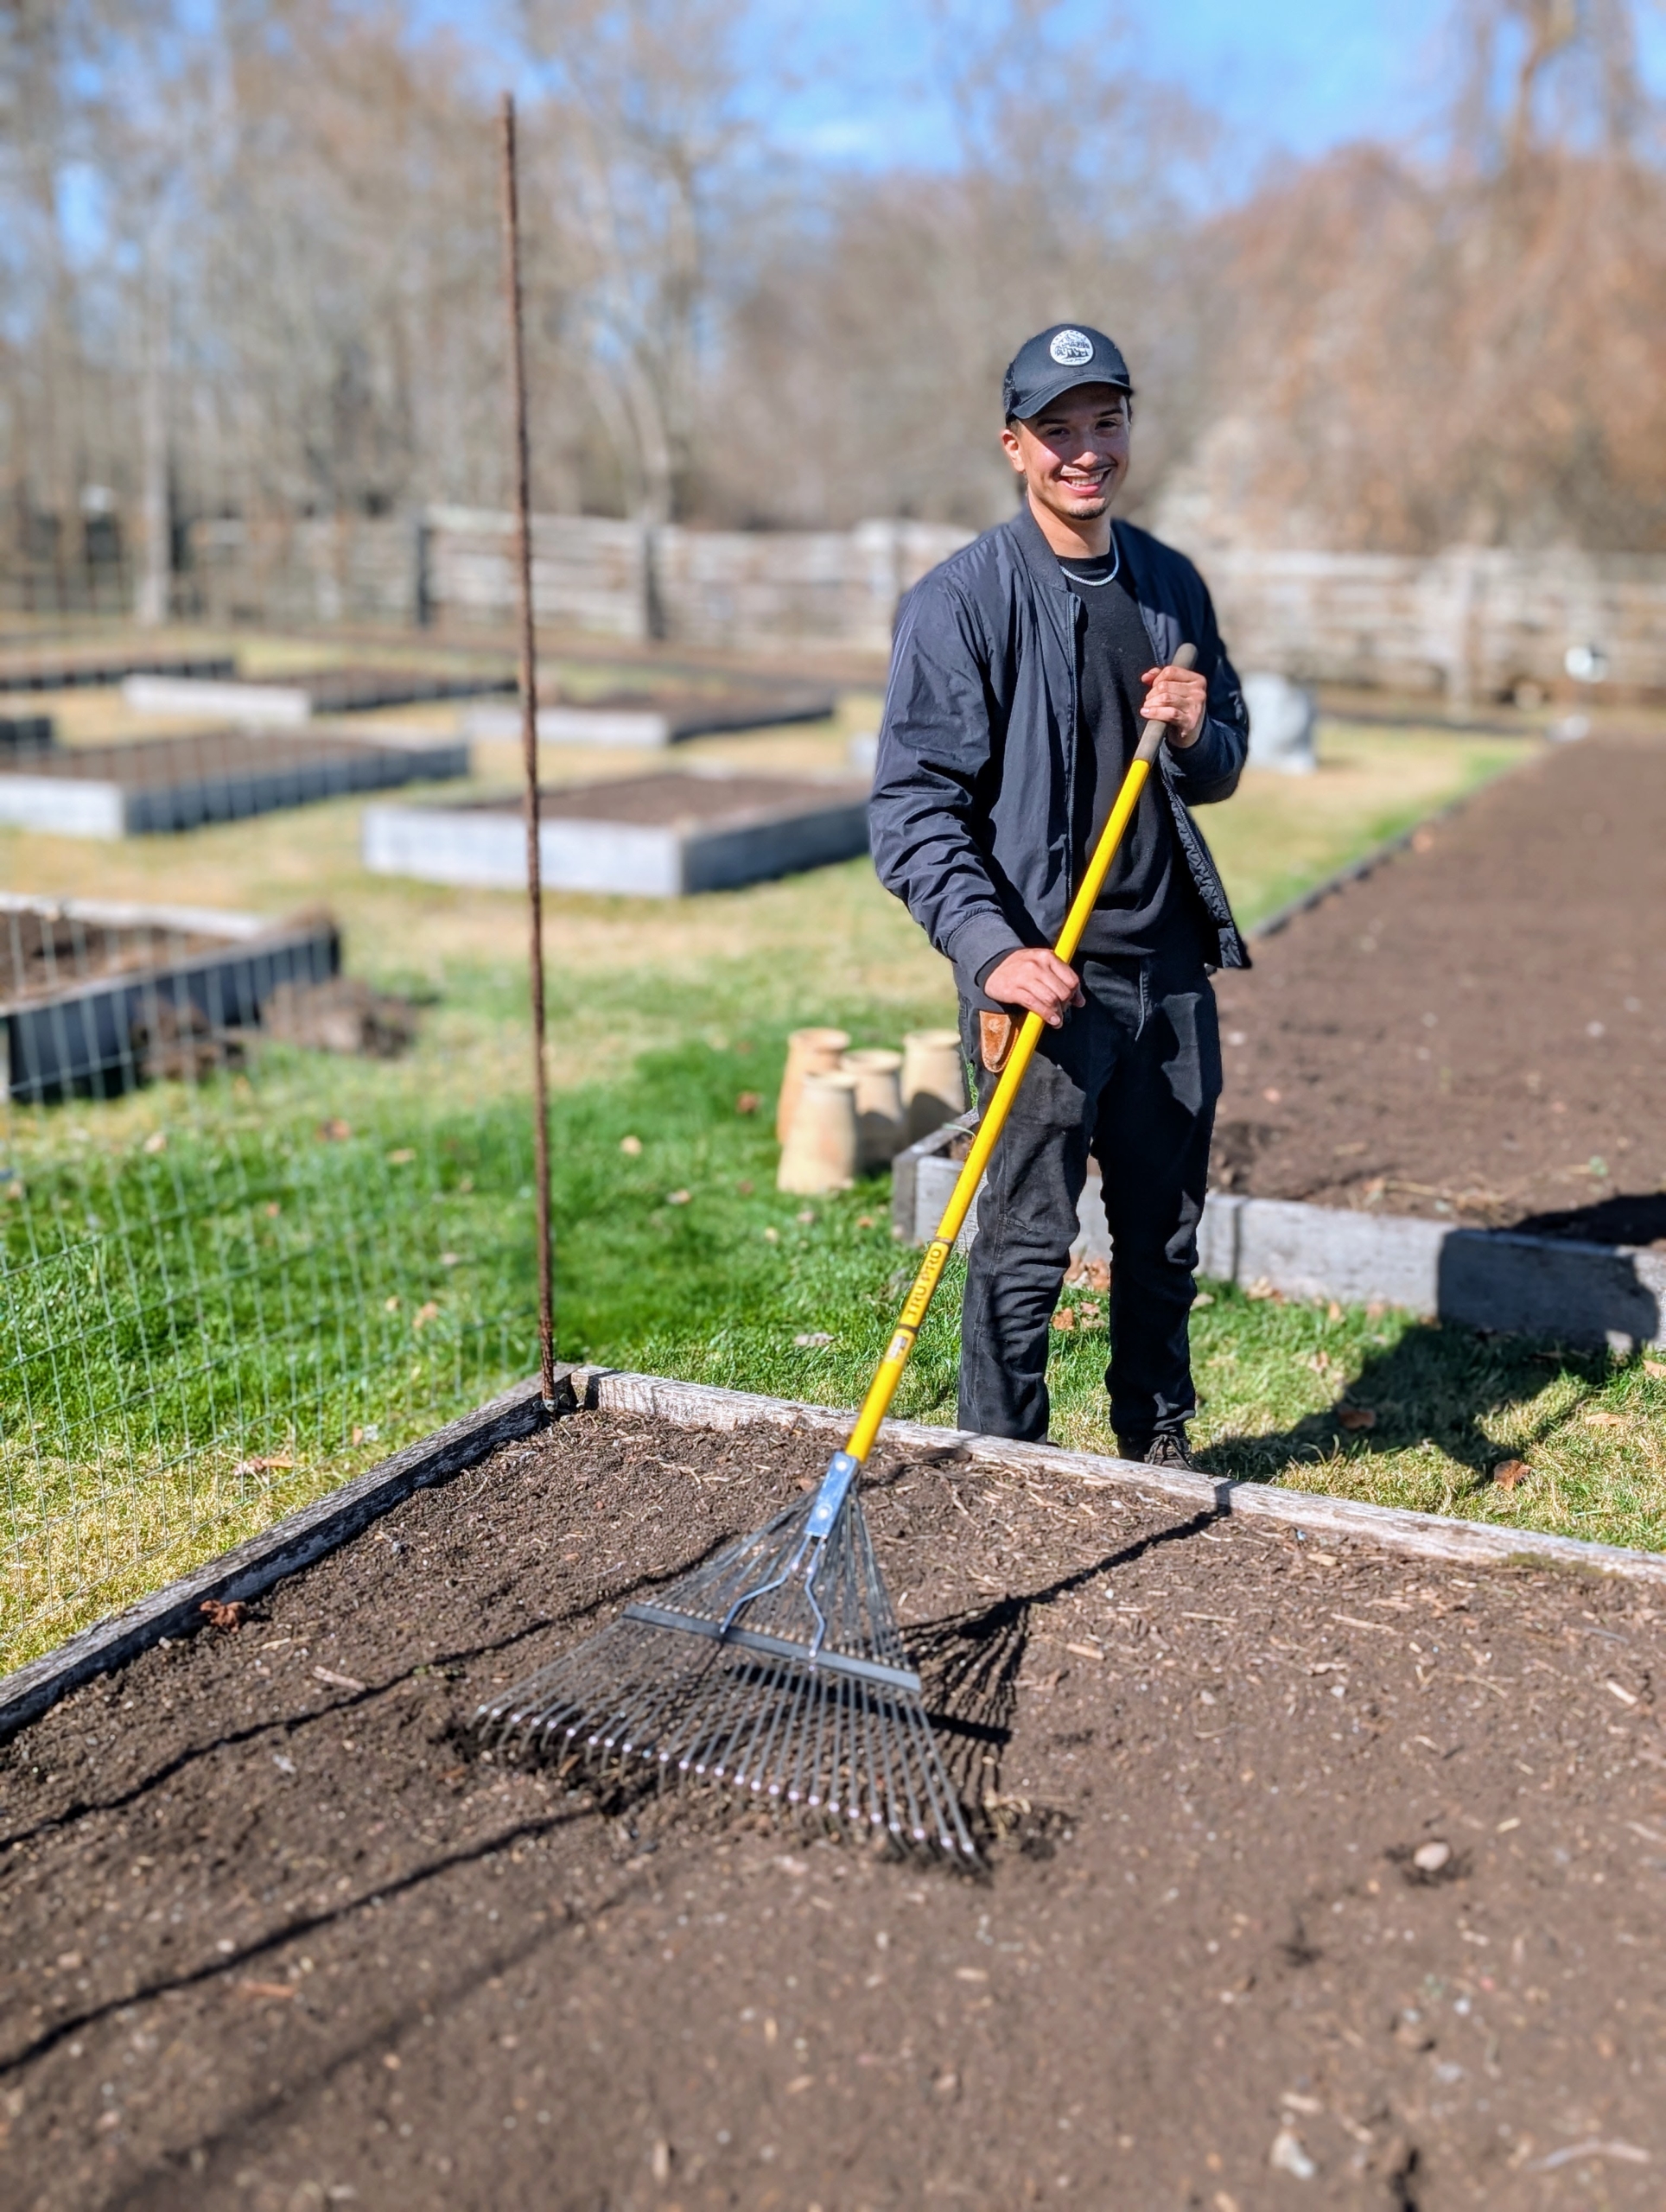
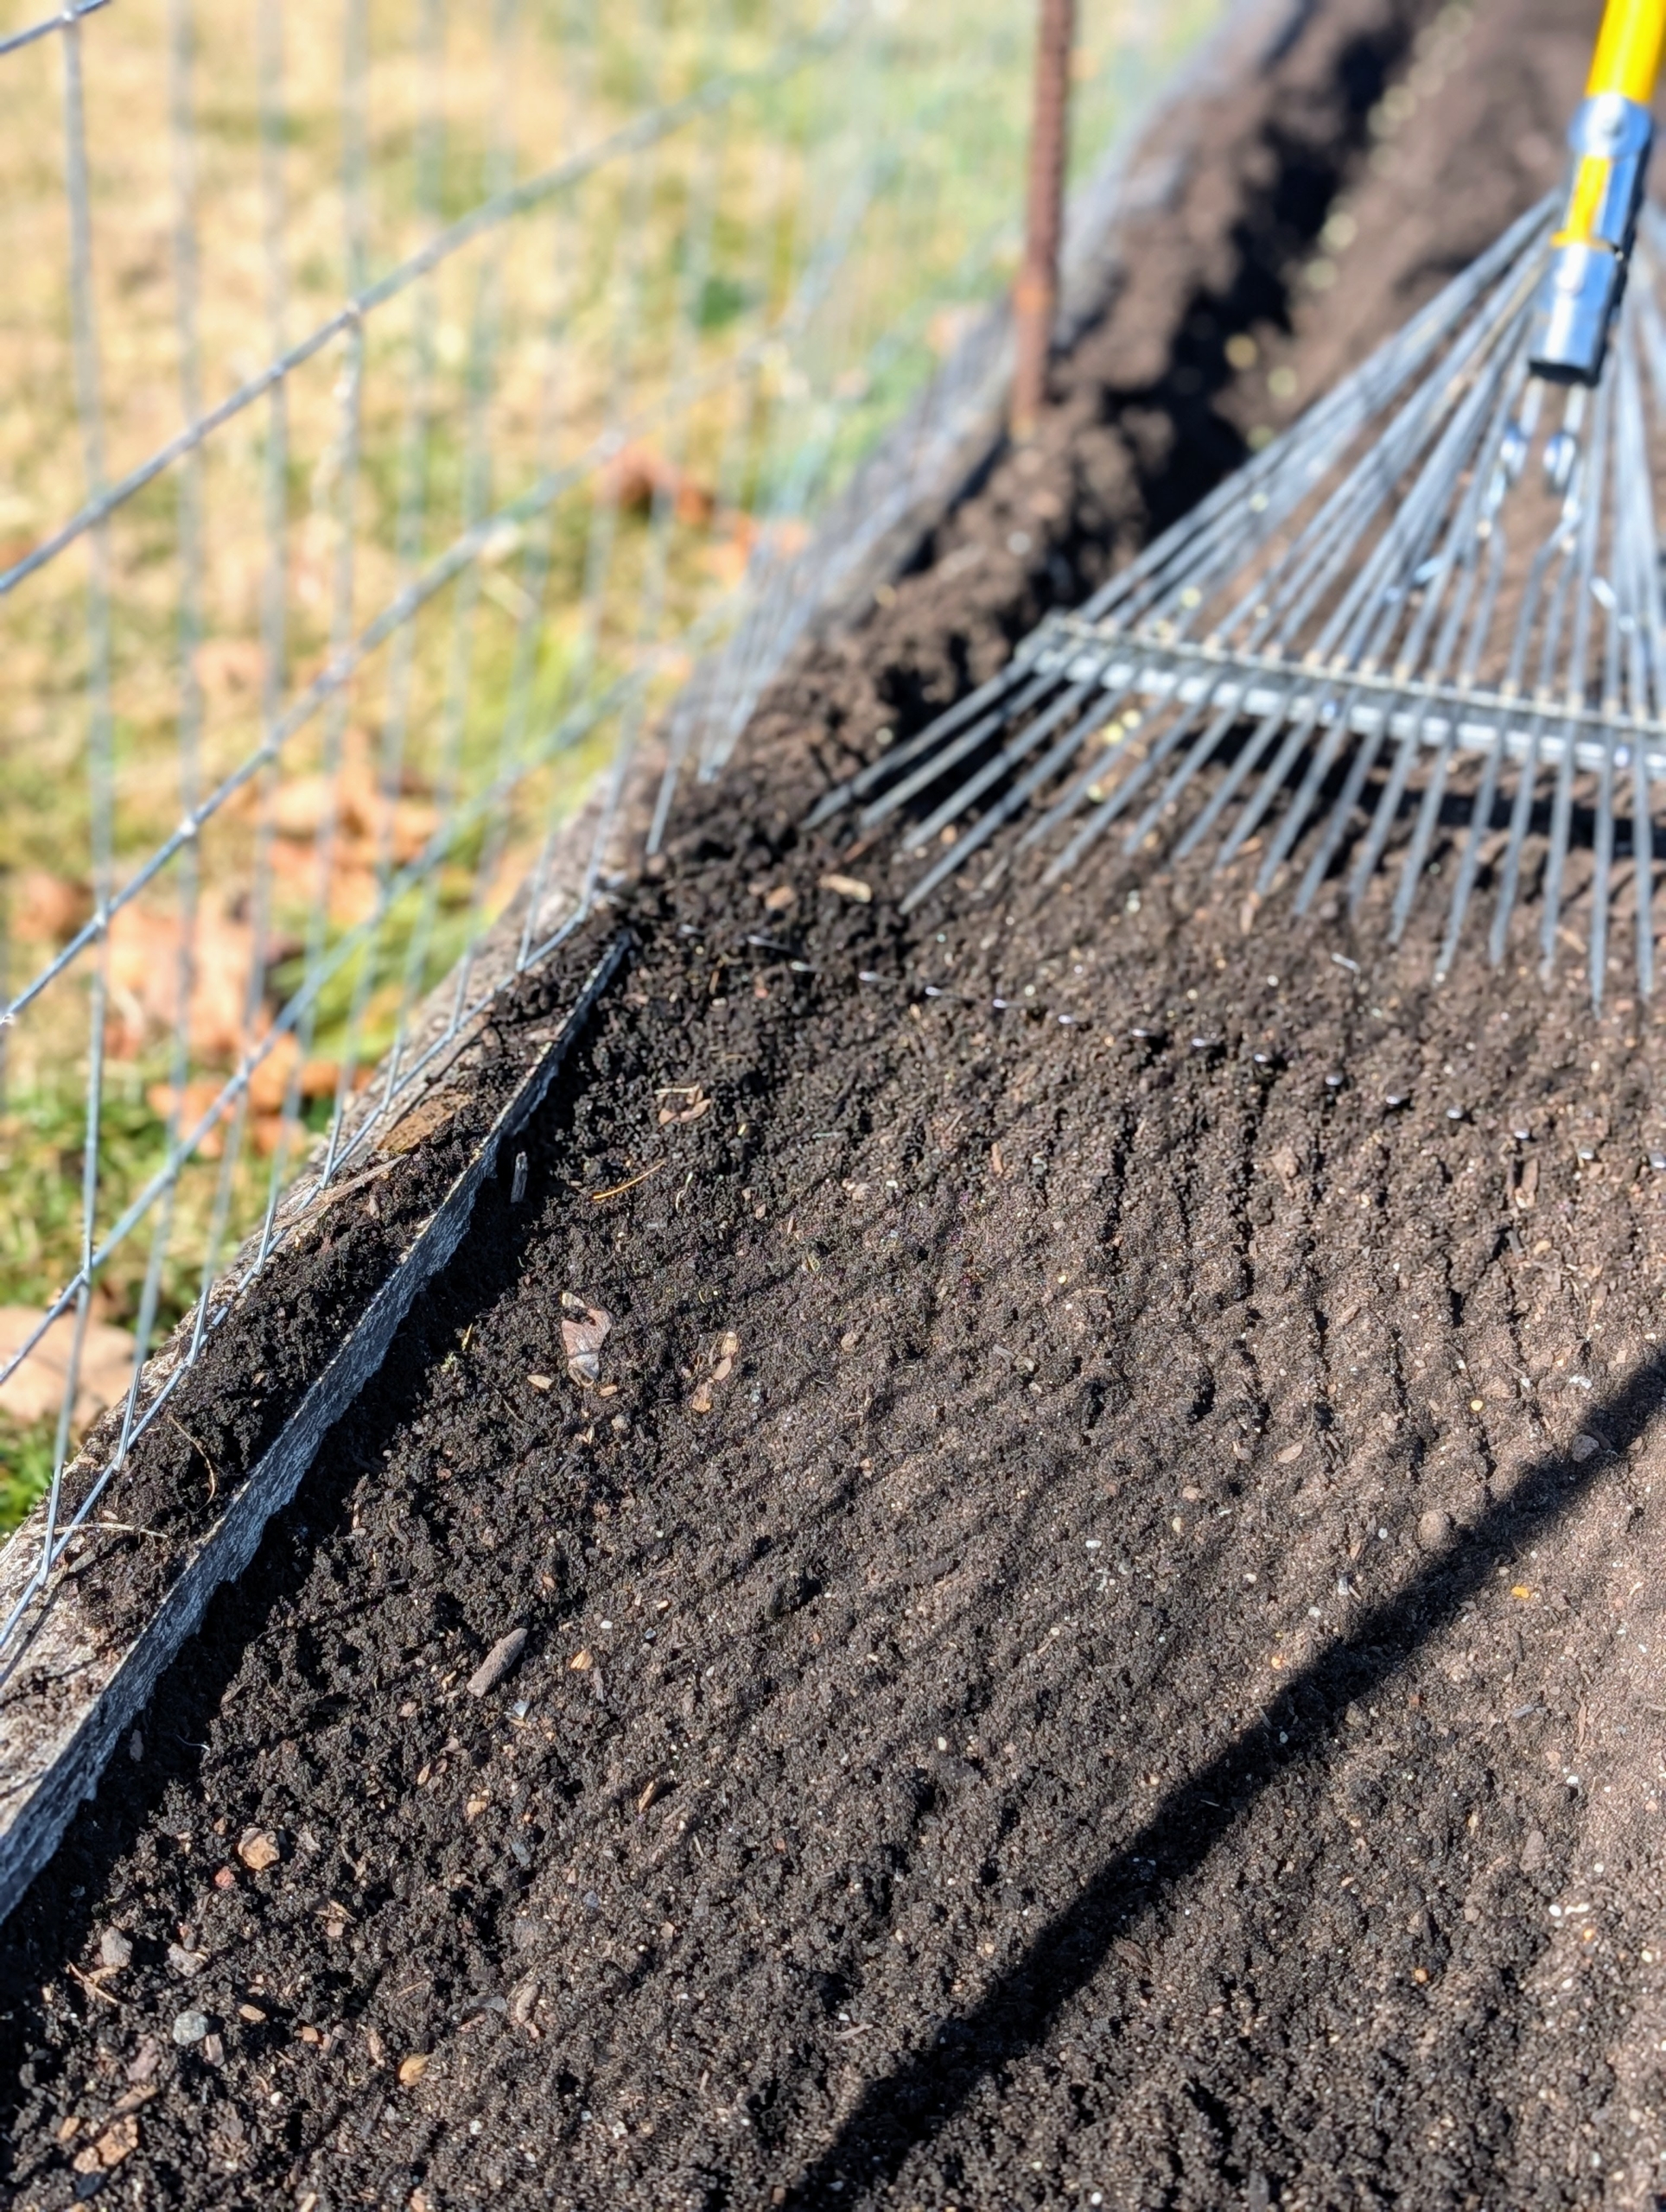
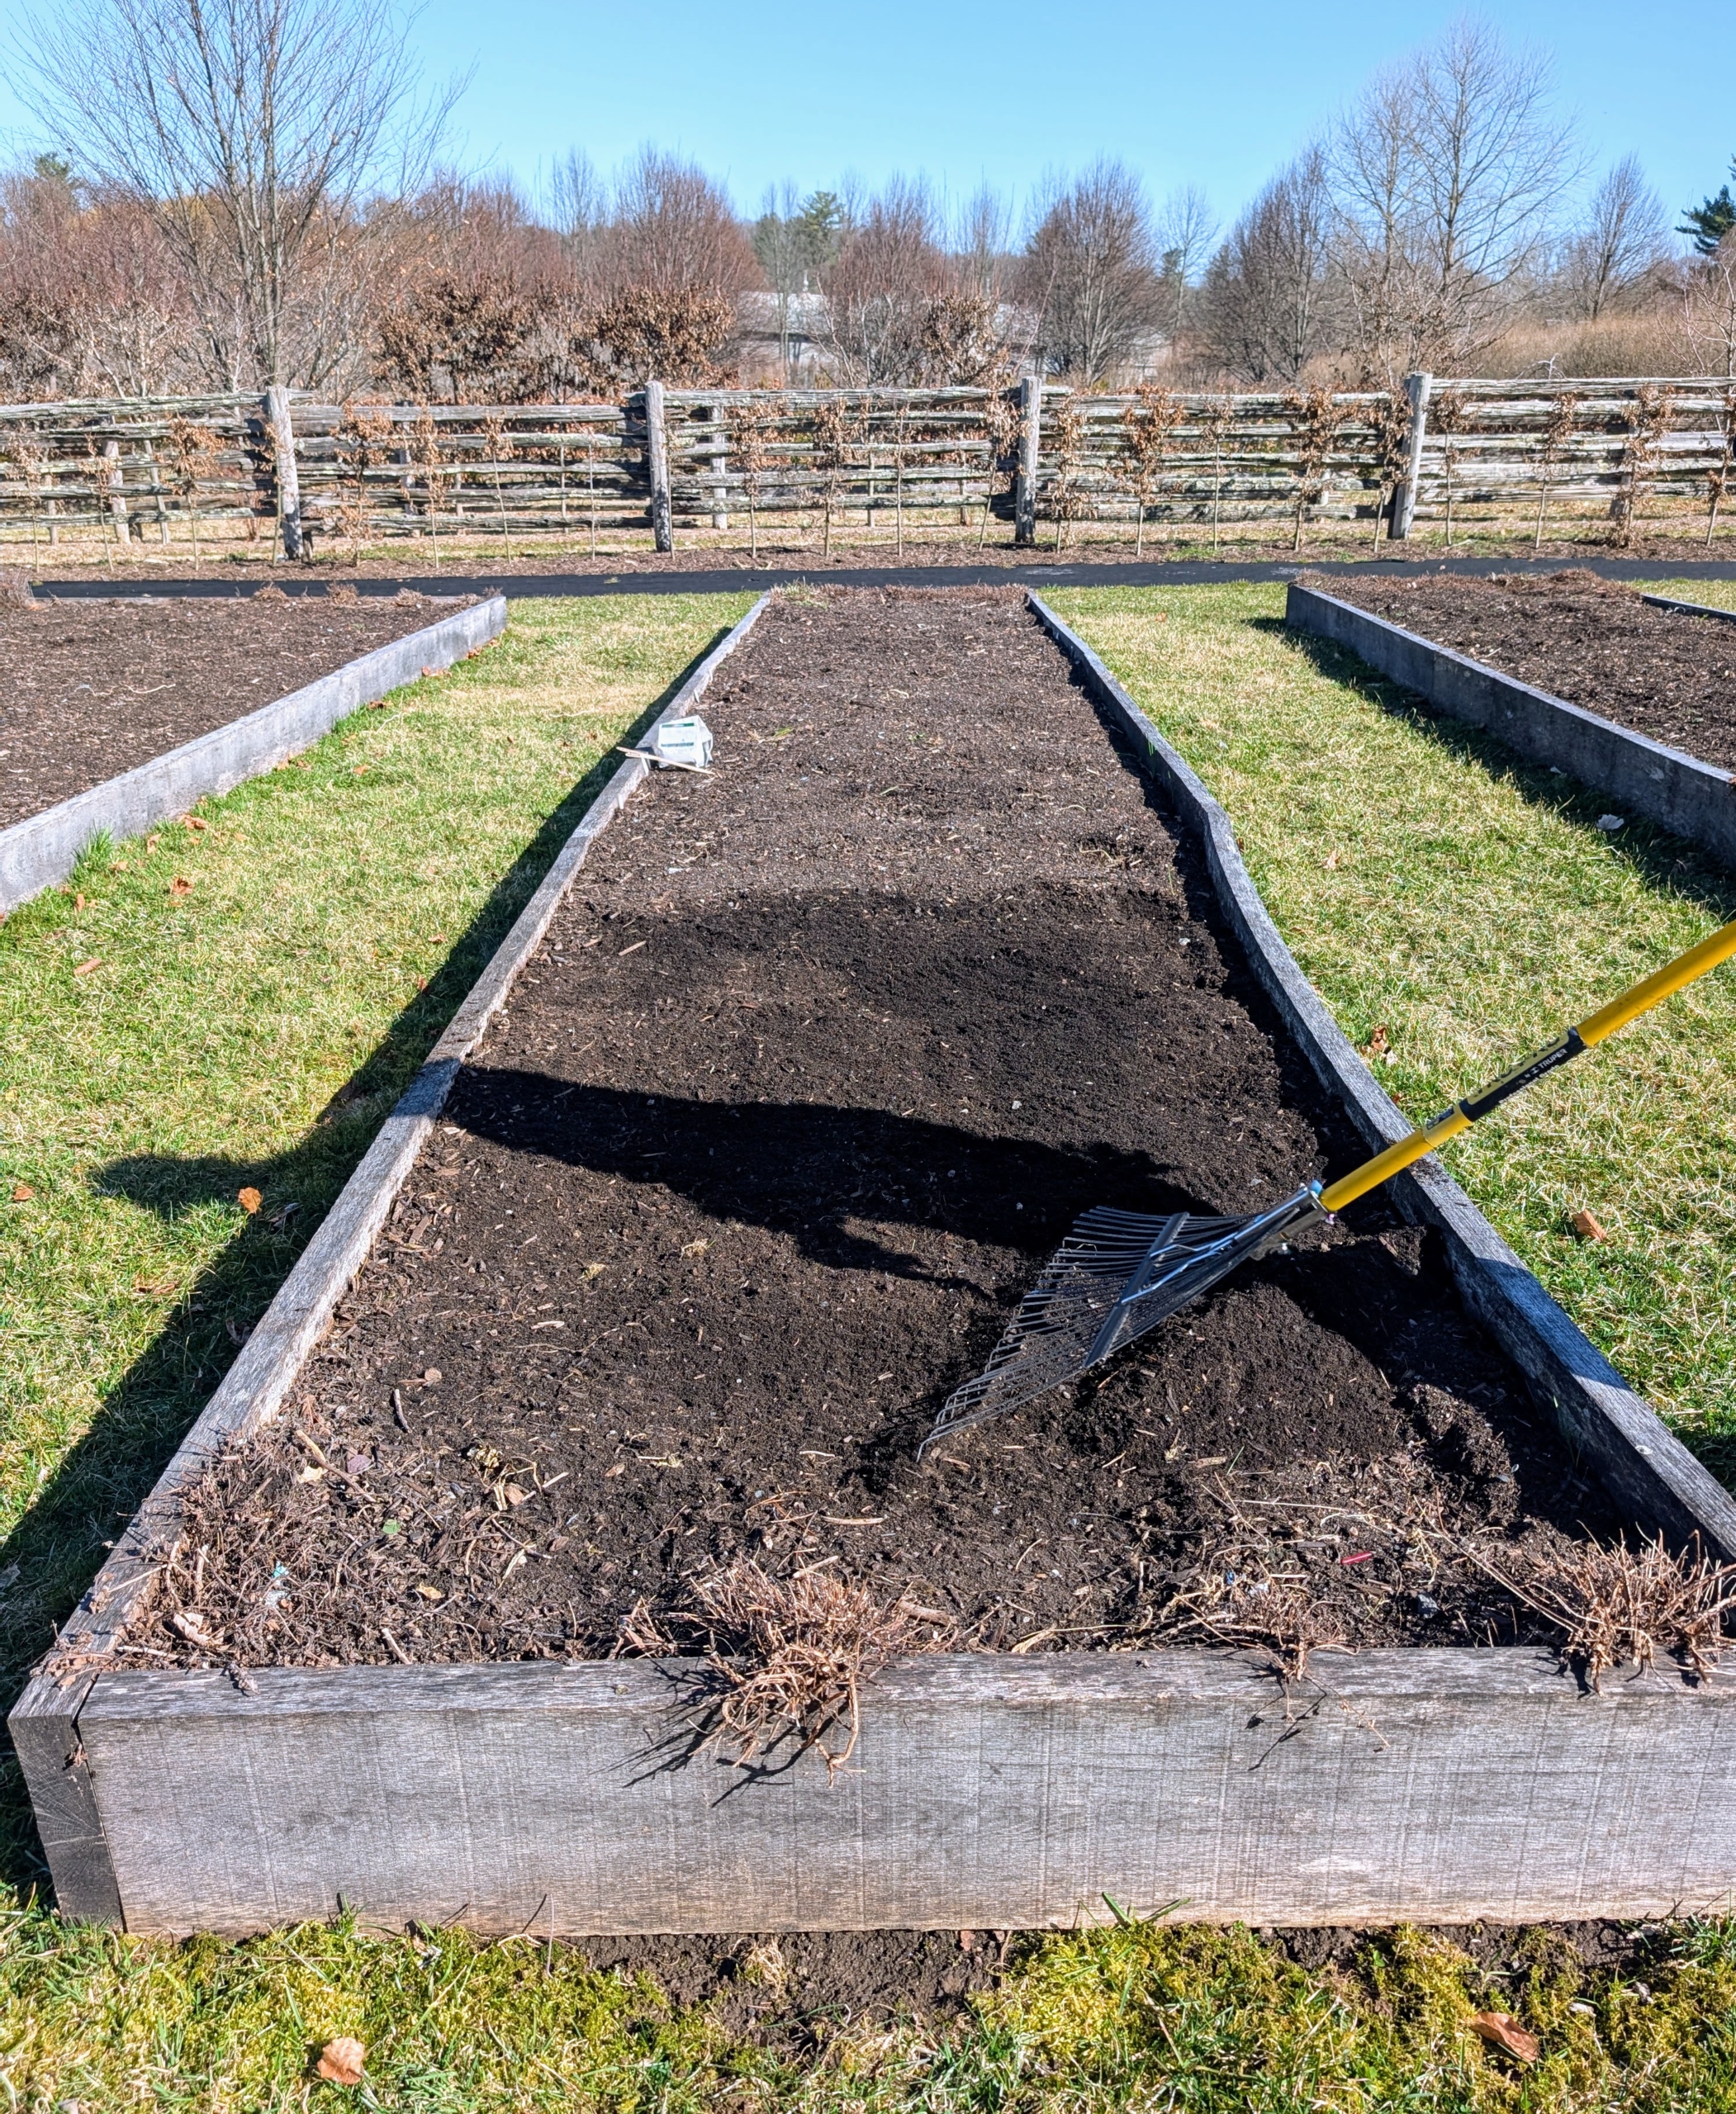
Out in the vegetable garden, Matthew cleans and rakes the large center bed for peas. We plant them in this bed surrounded with trellis fencing.
The bed is all prepped. Ryan and Matthew discuss which side will be dedicated to edible pods and which side will have shelling peas.
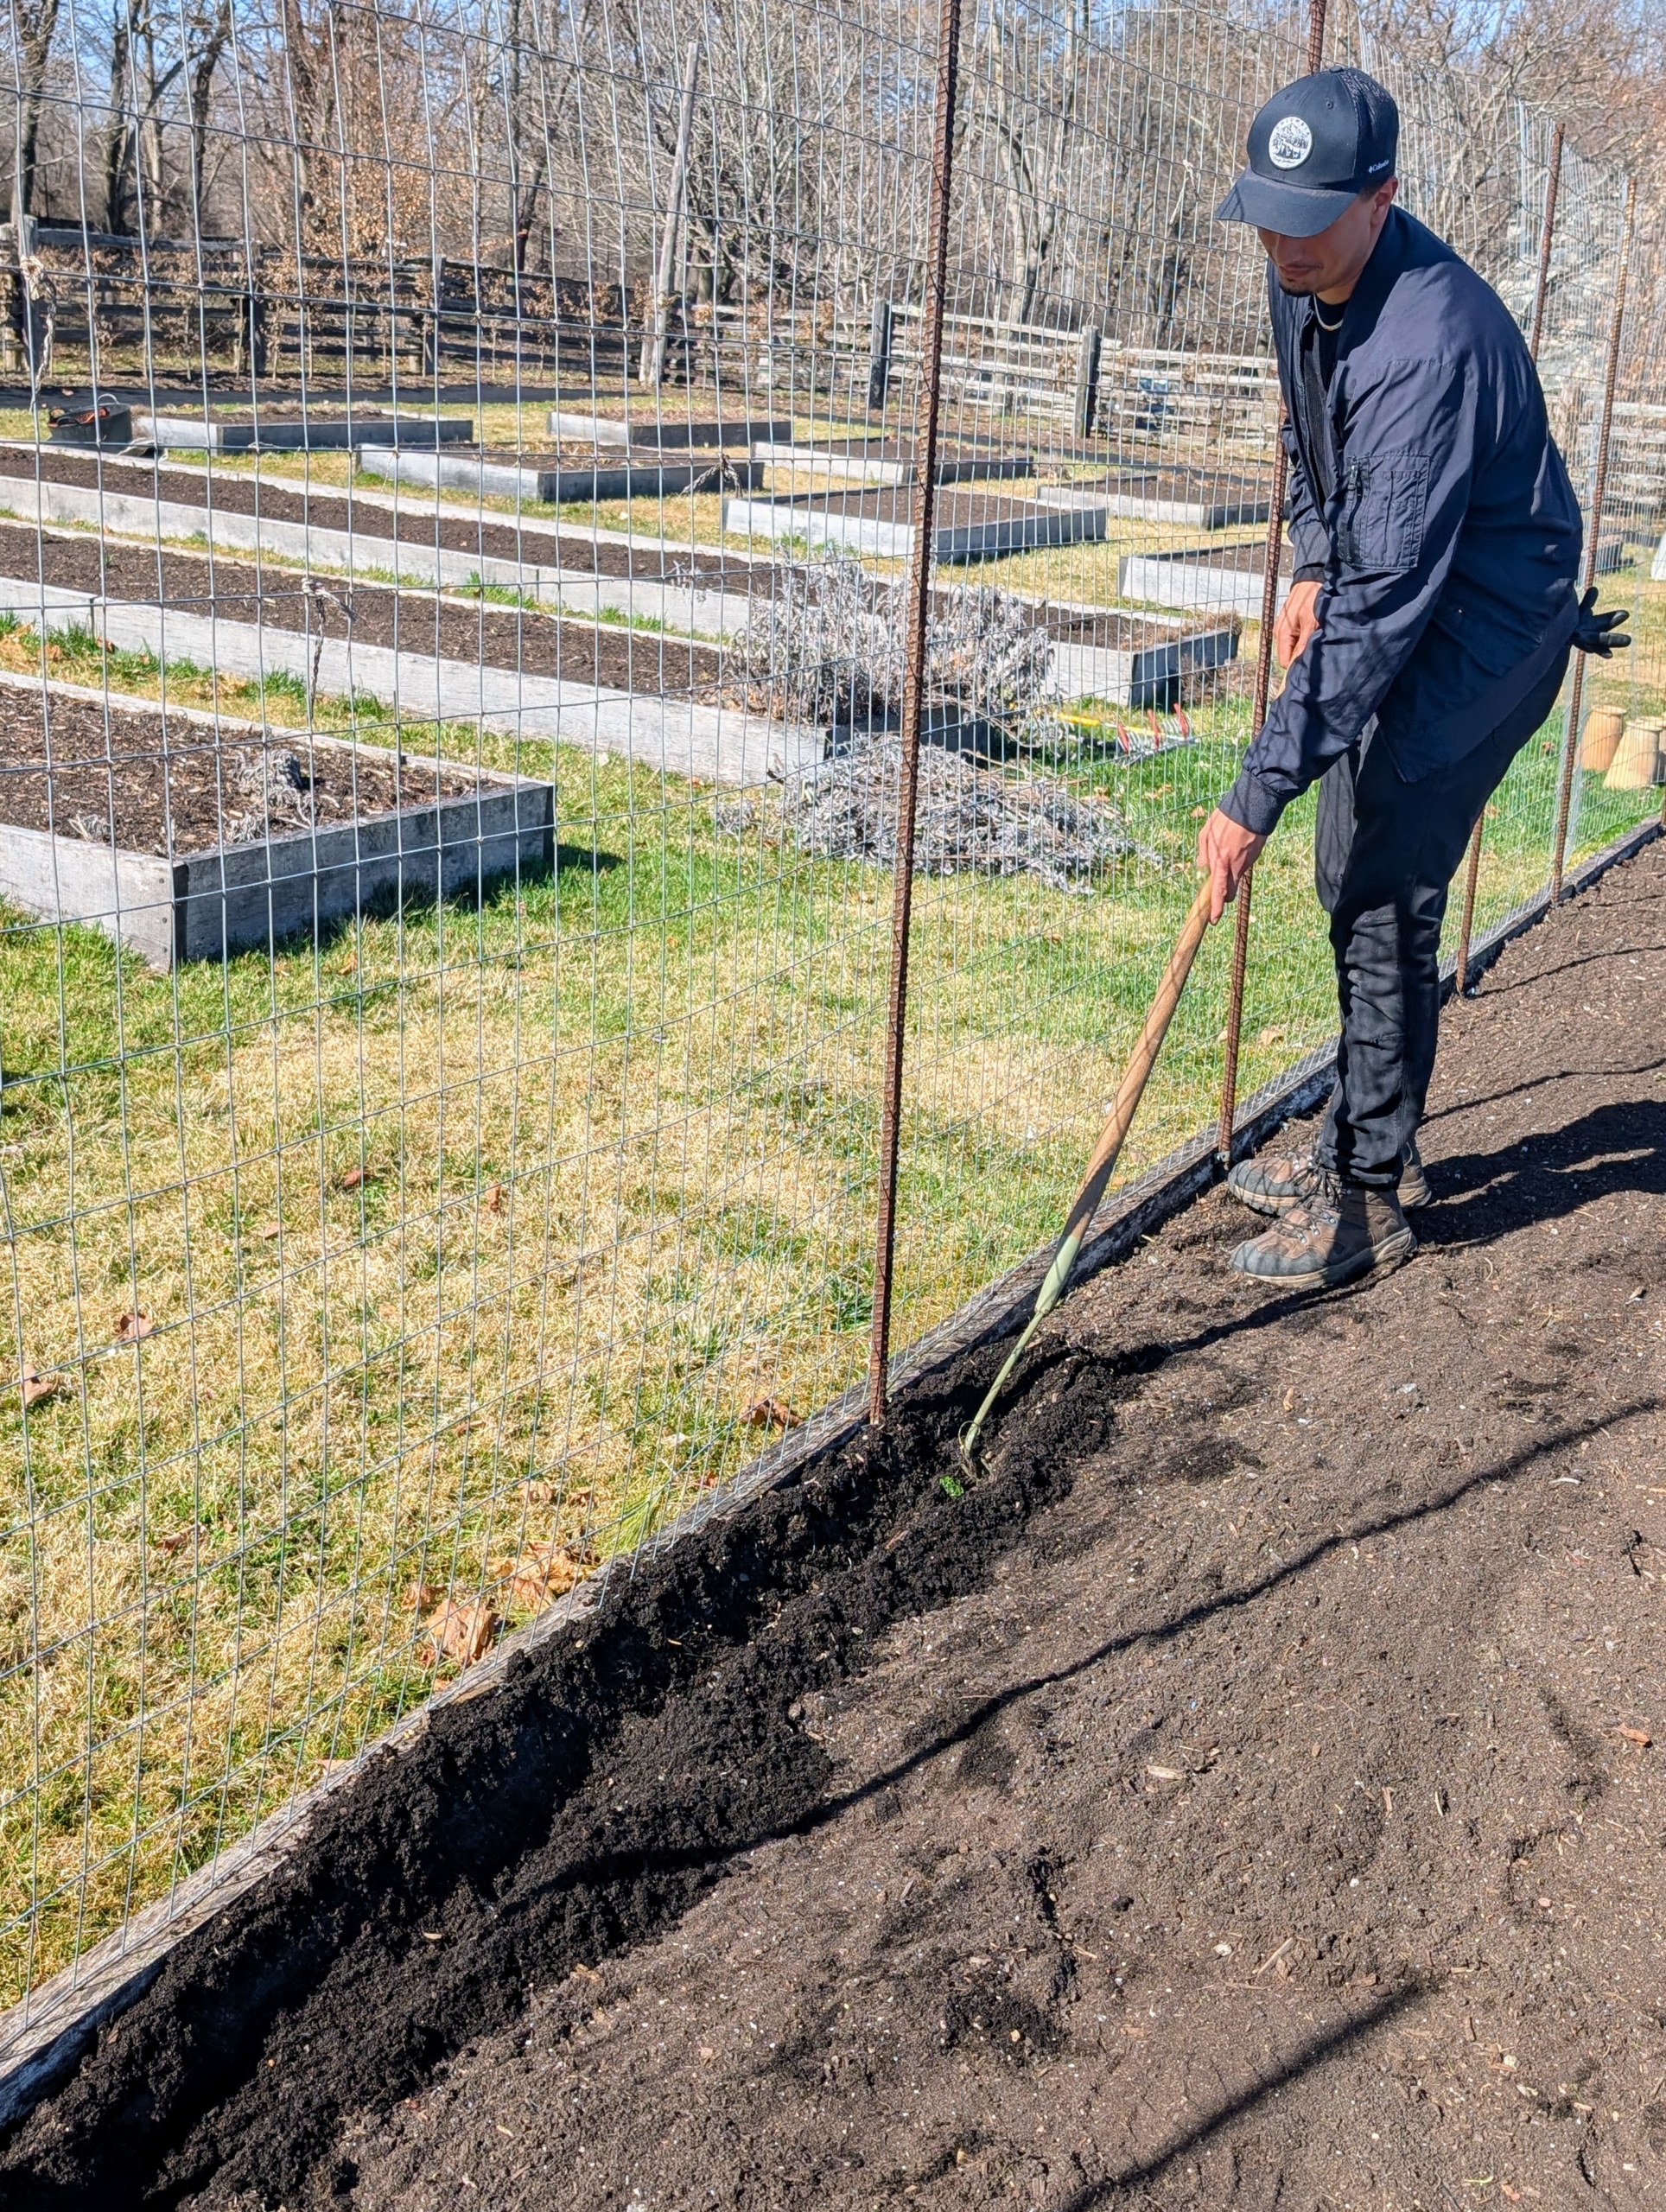
Matthew starts by digging a shallow furrow in the soil using a hoe. The furrows don’t have to be deep – two inches will work nicely.
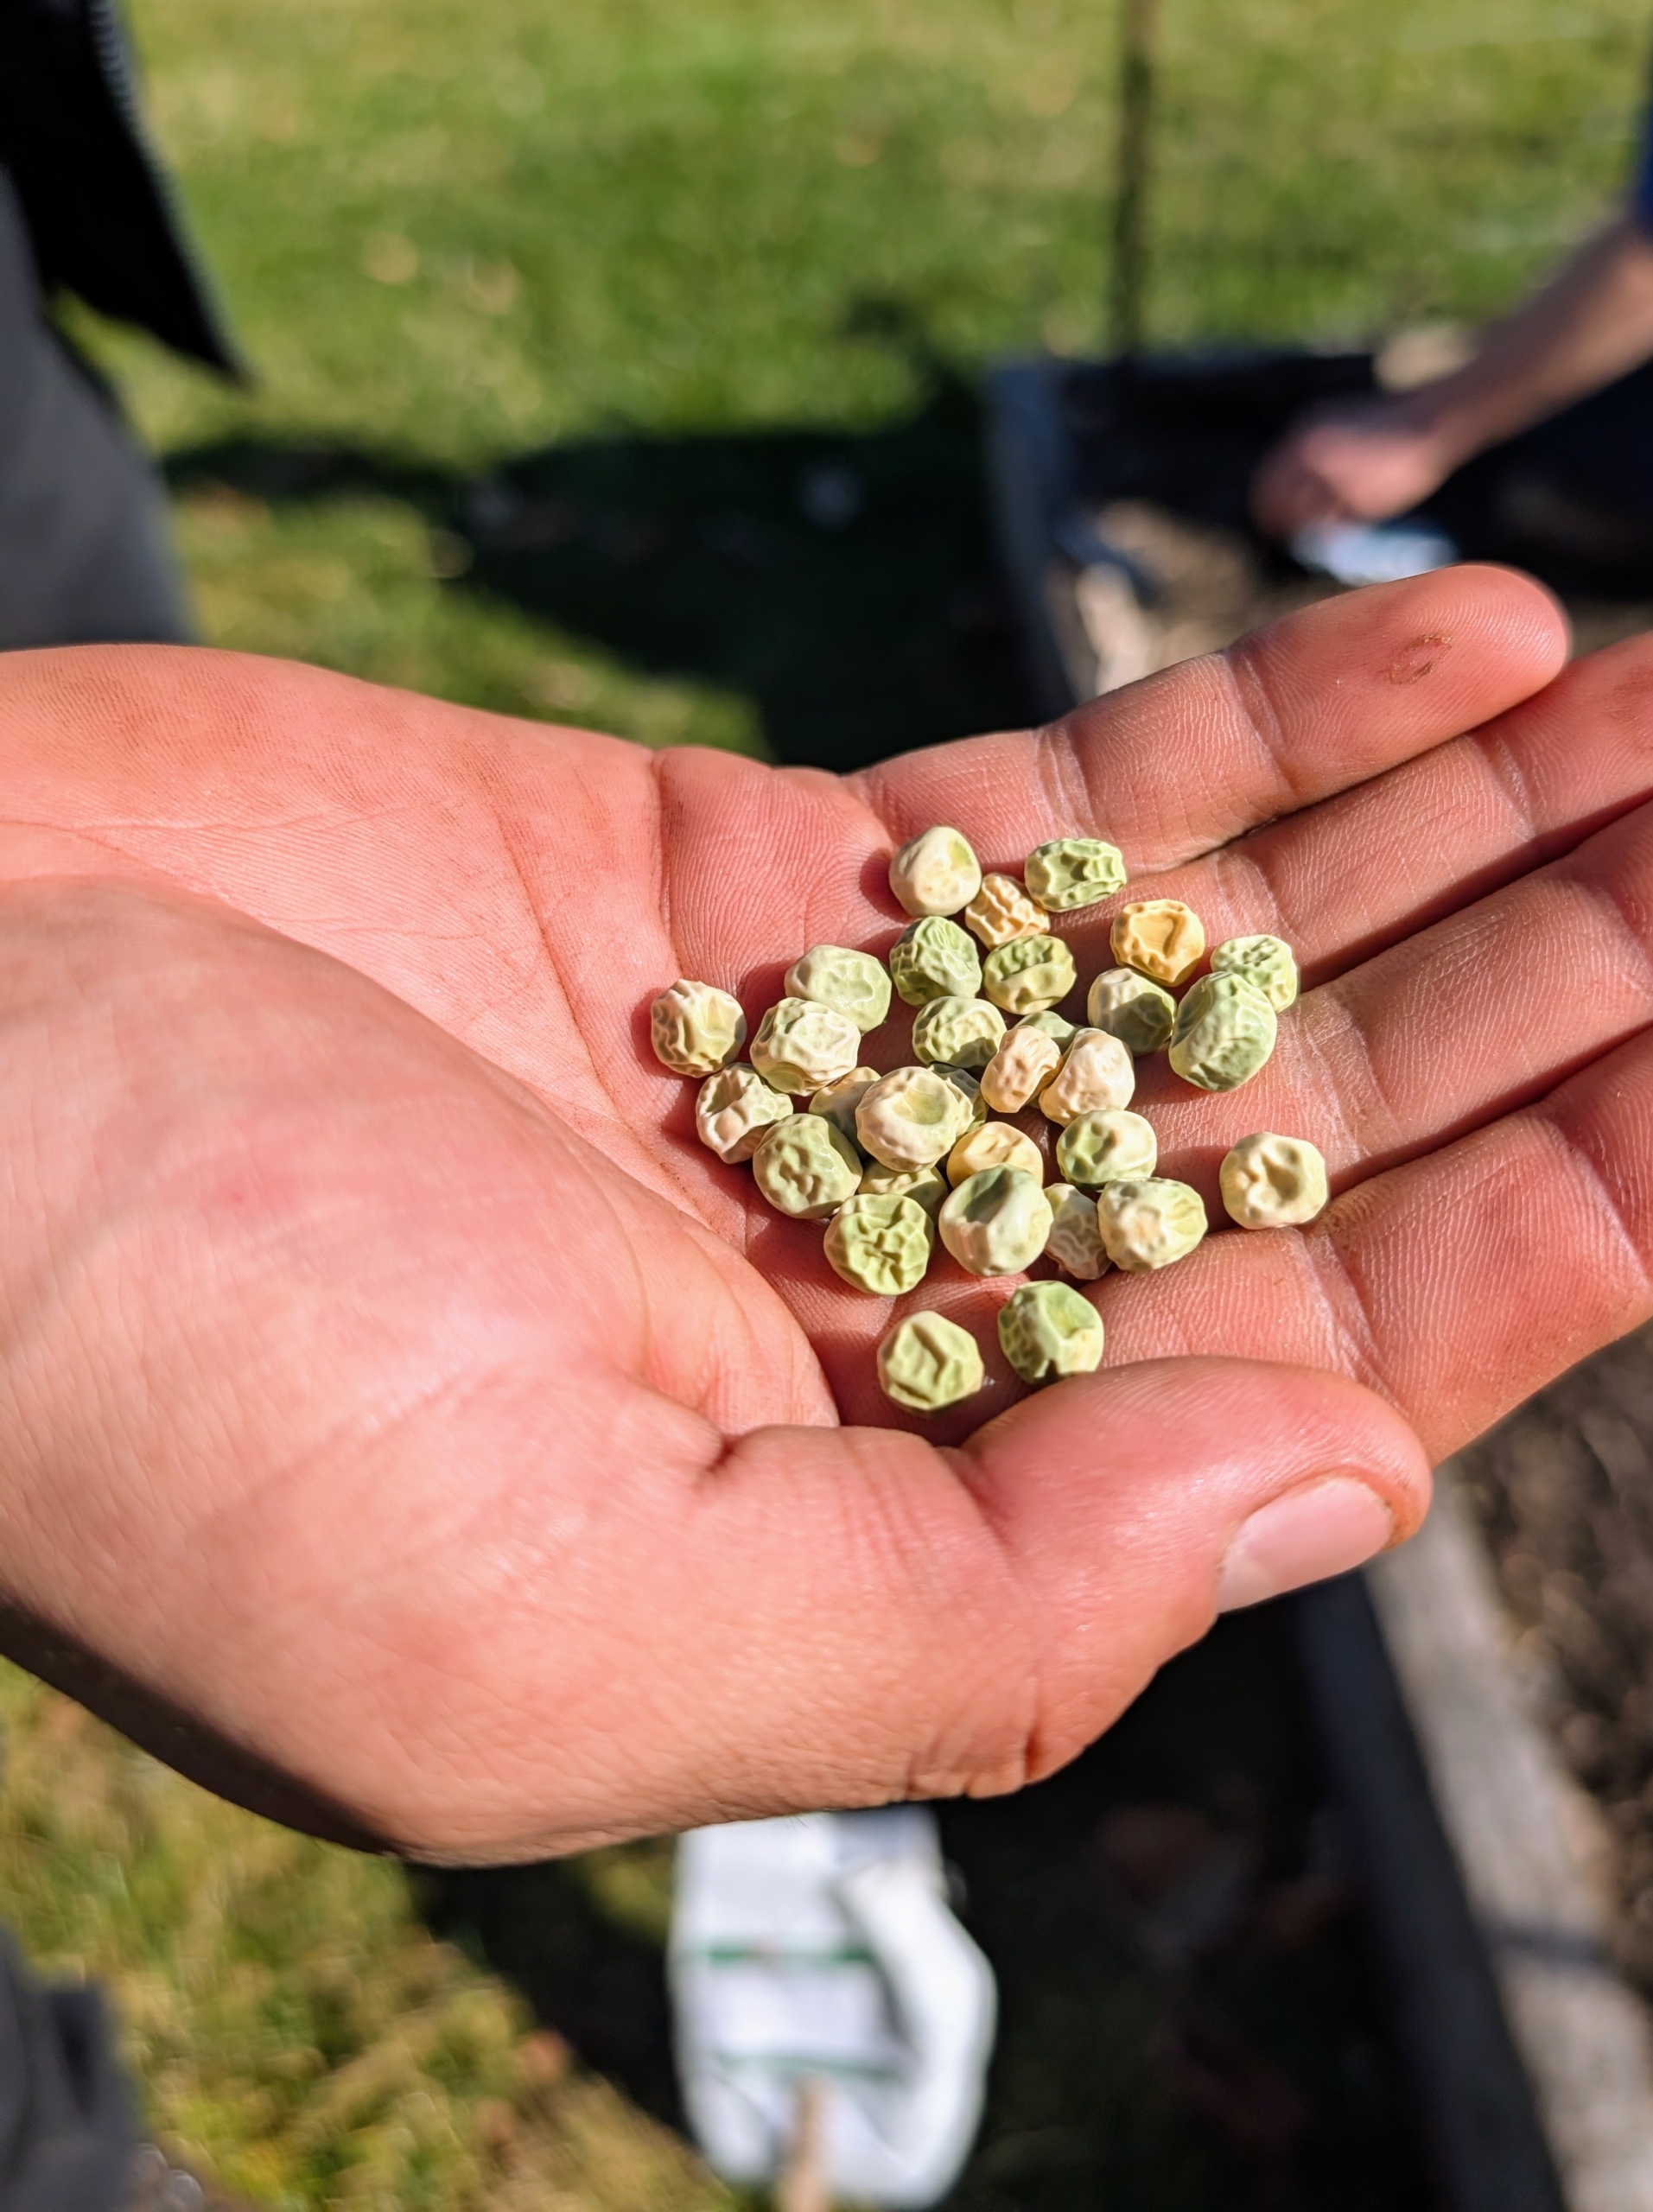
The pea seeds are hard, wrinkled, and inedible.
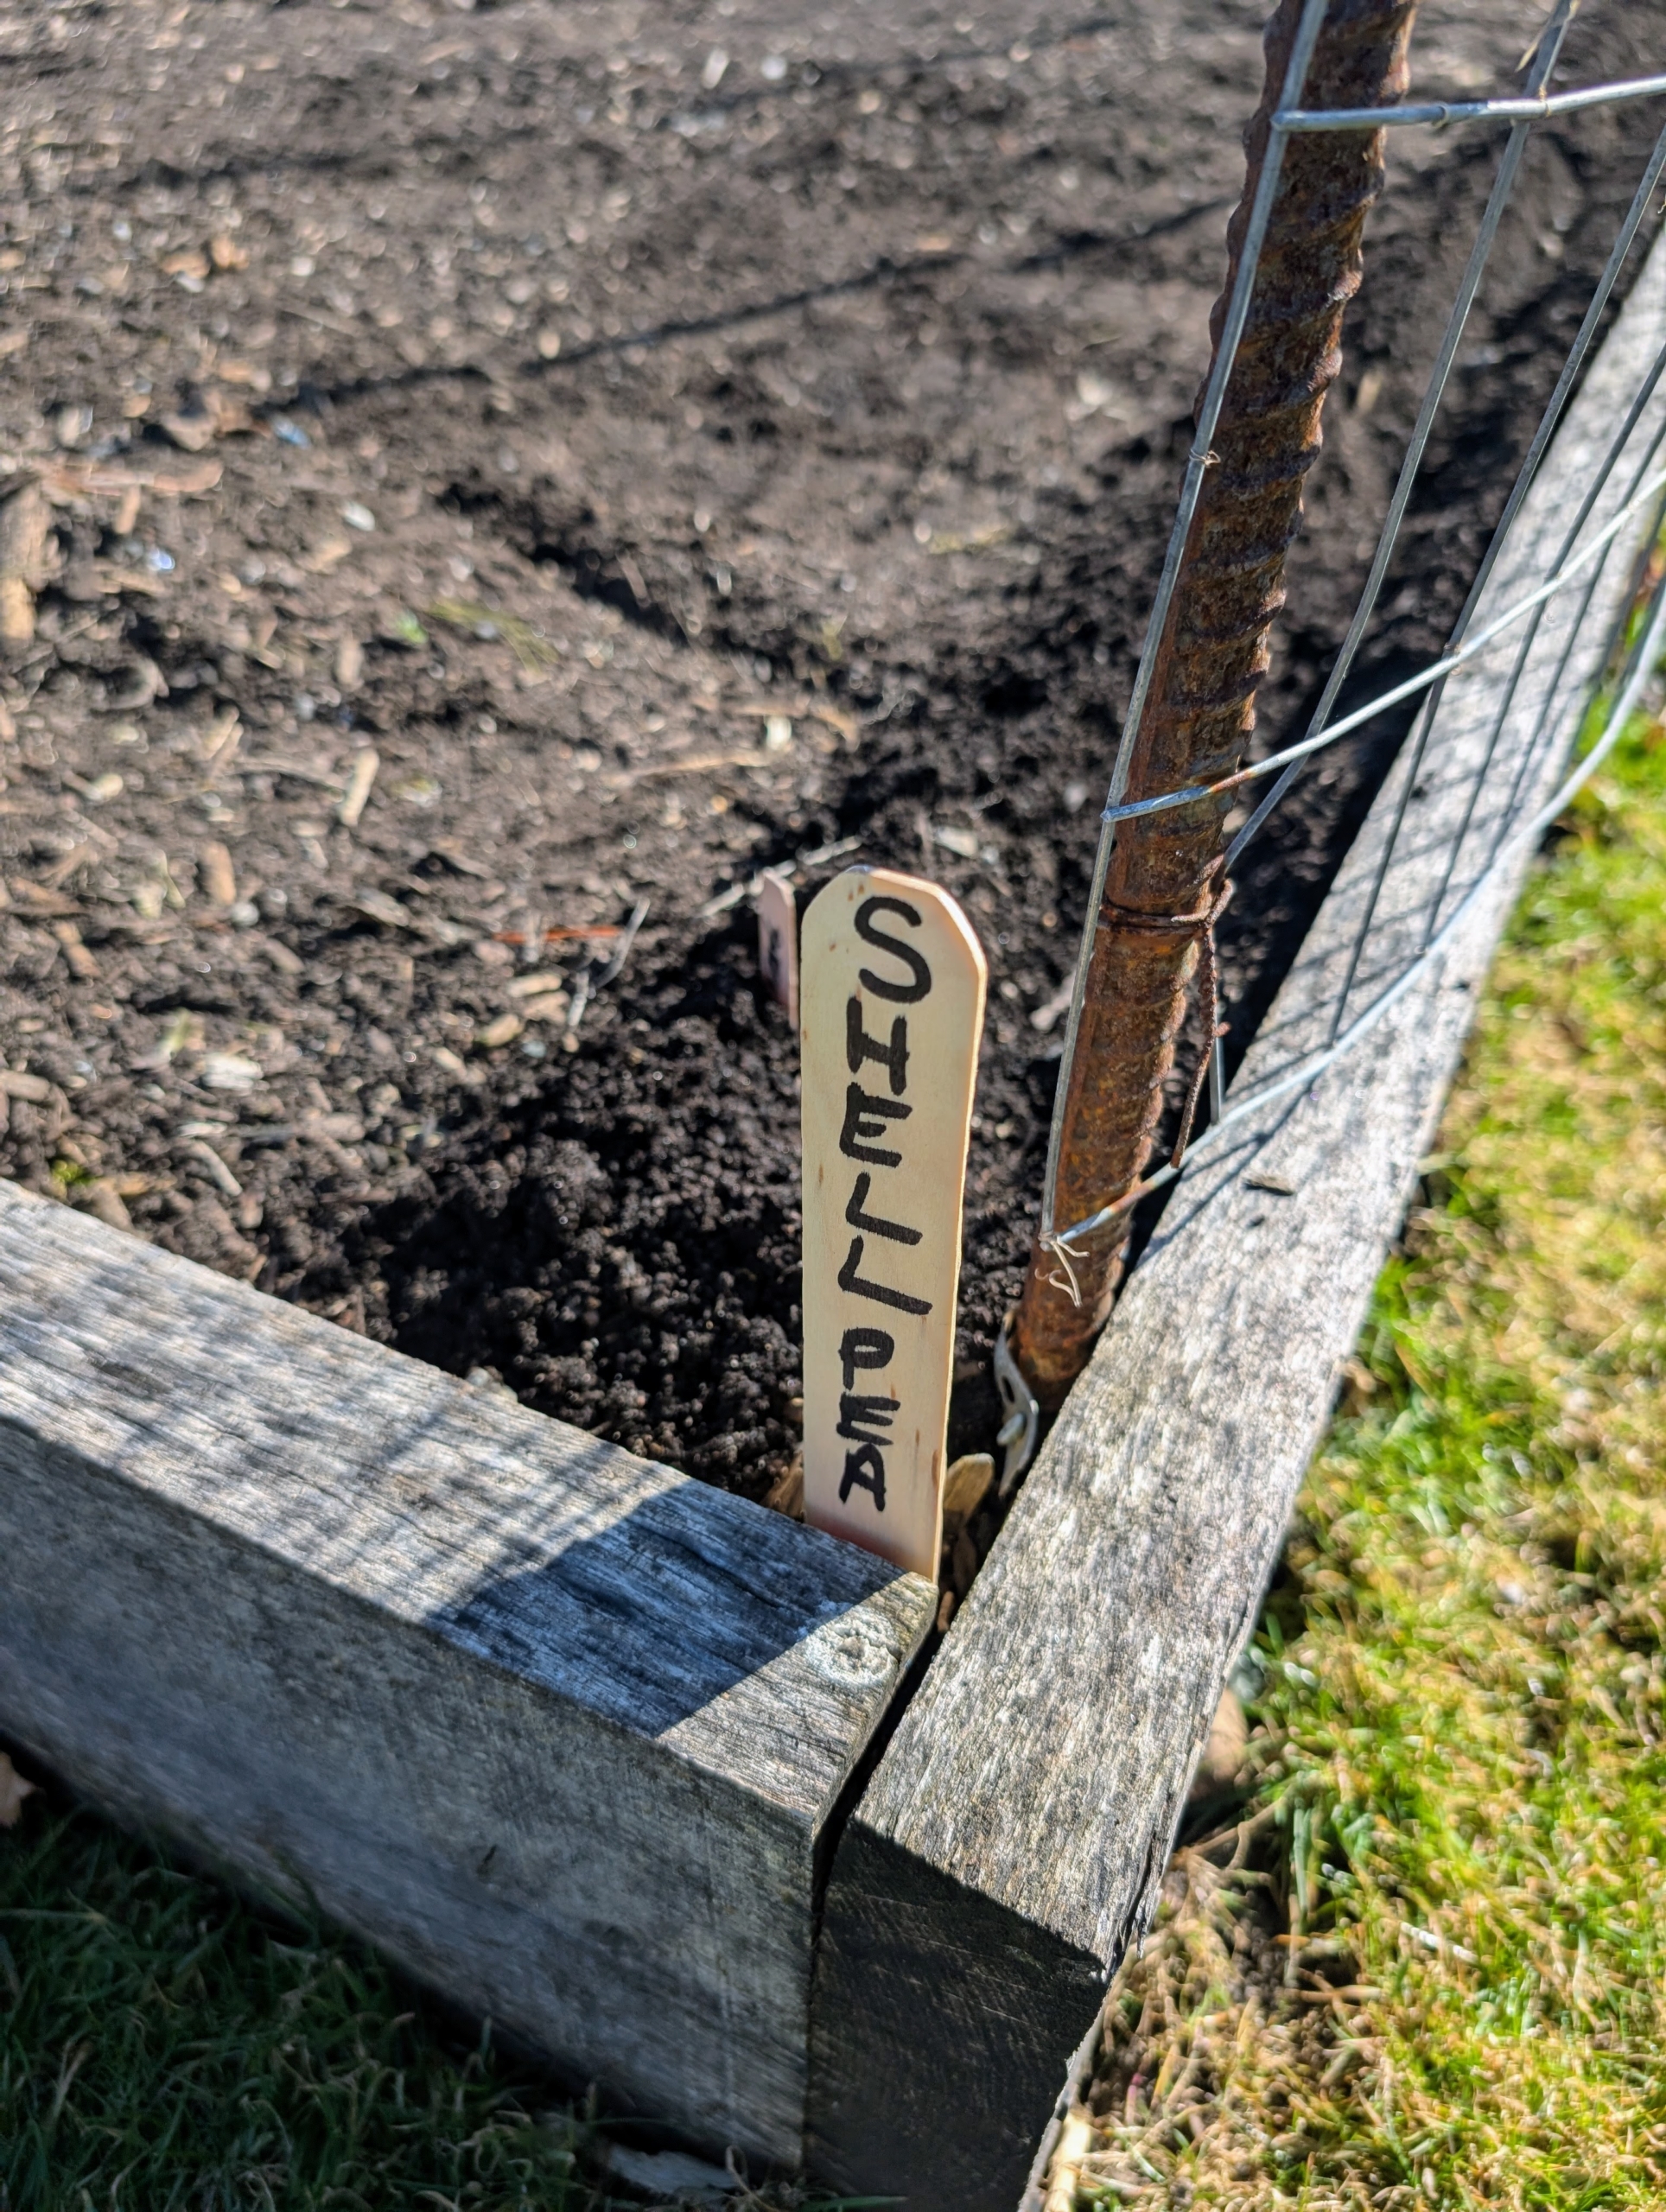
The types of peas are written on large markers and placed at the edge of the bed.
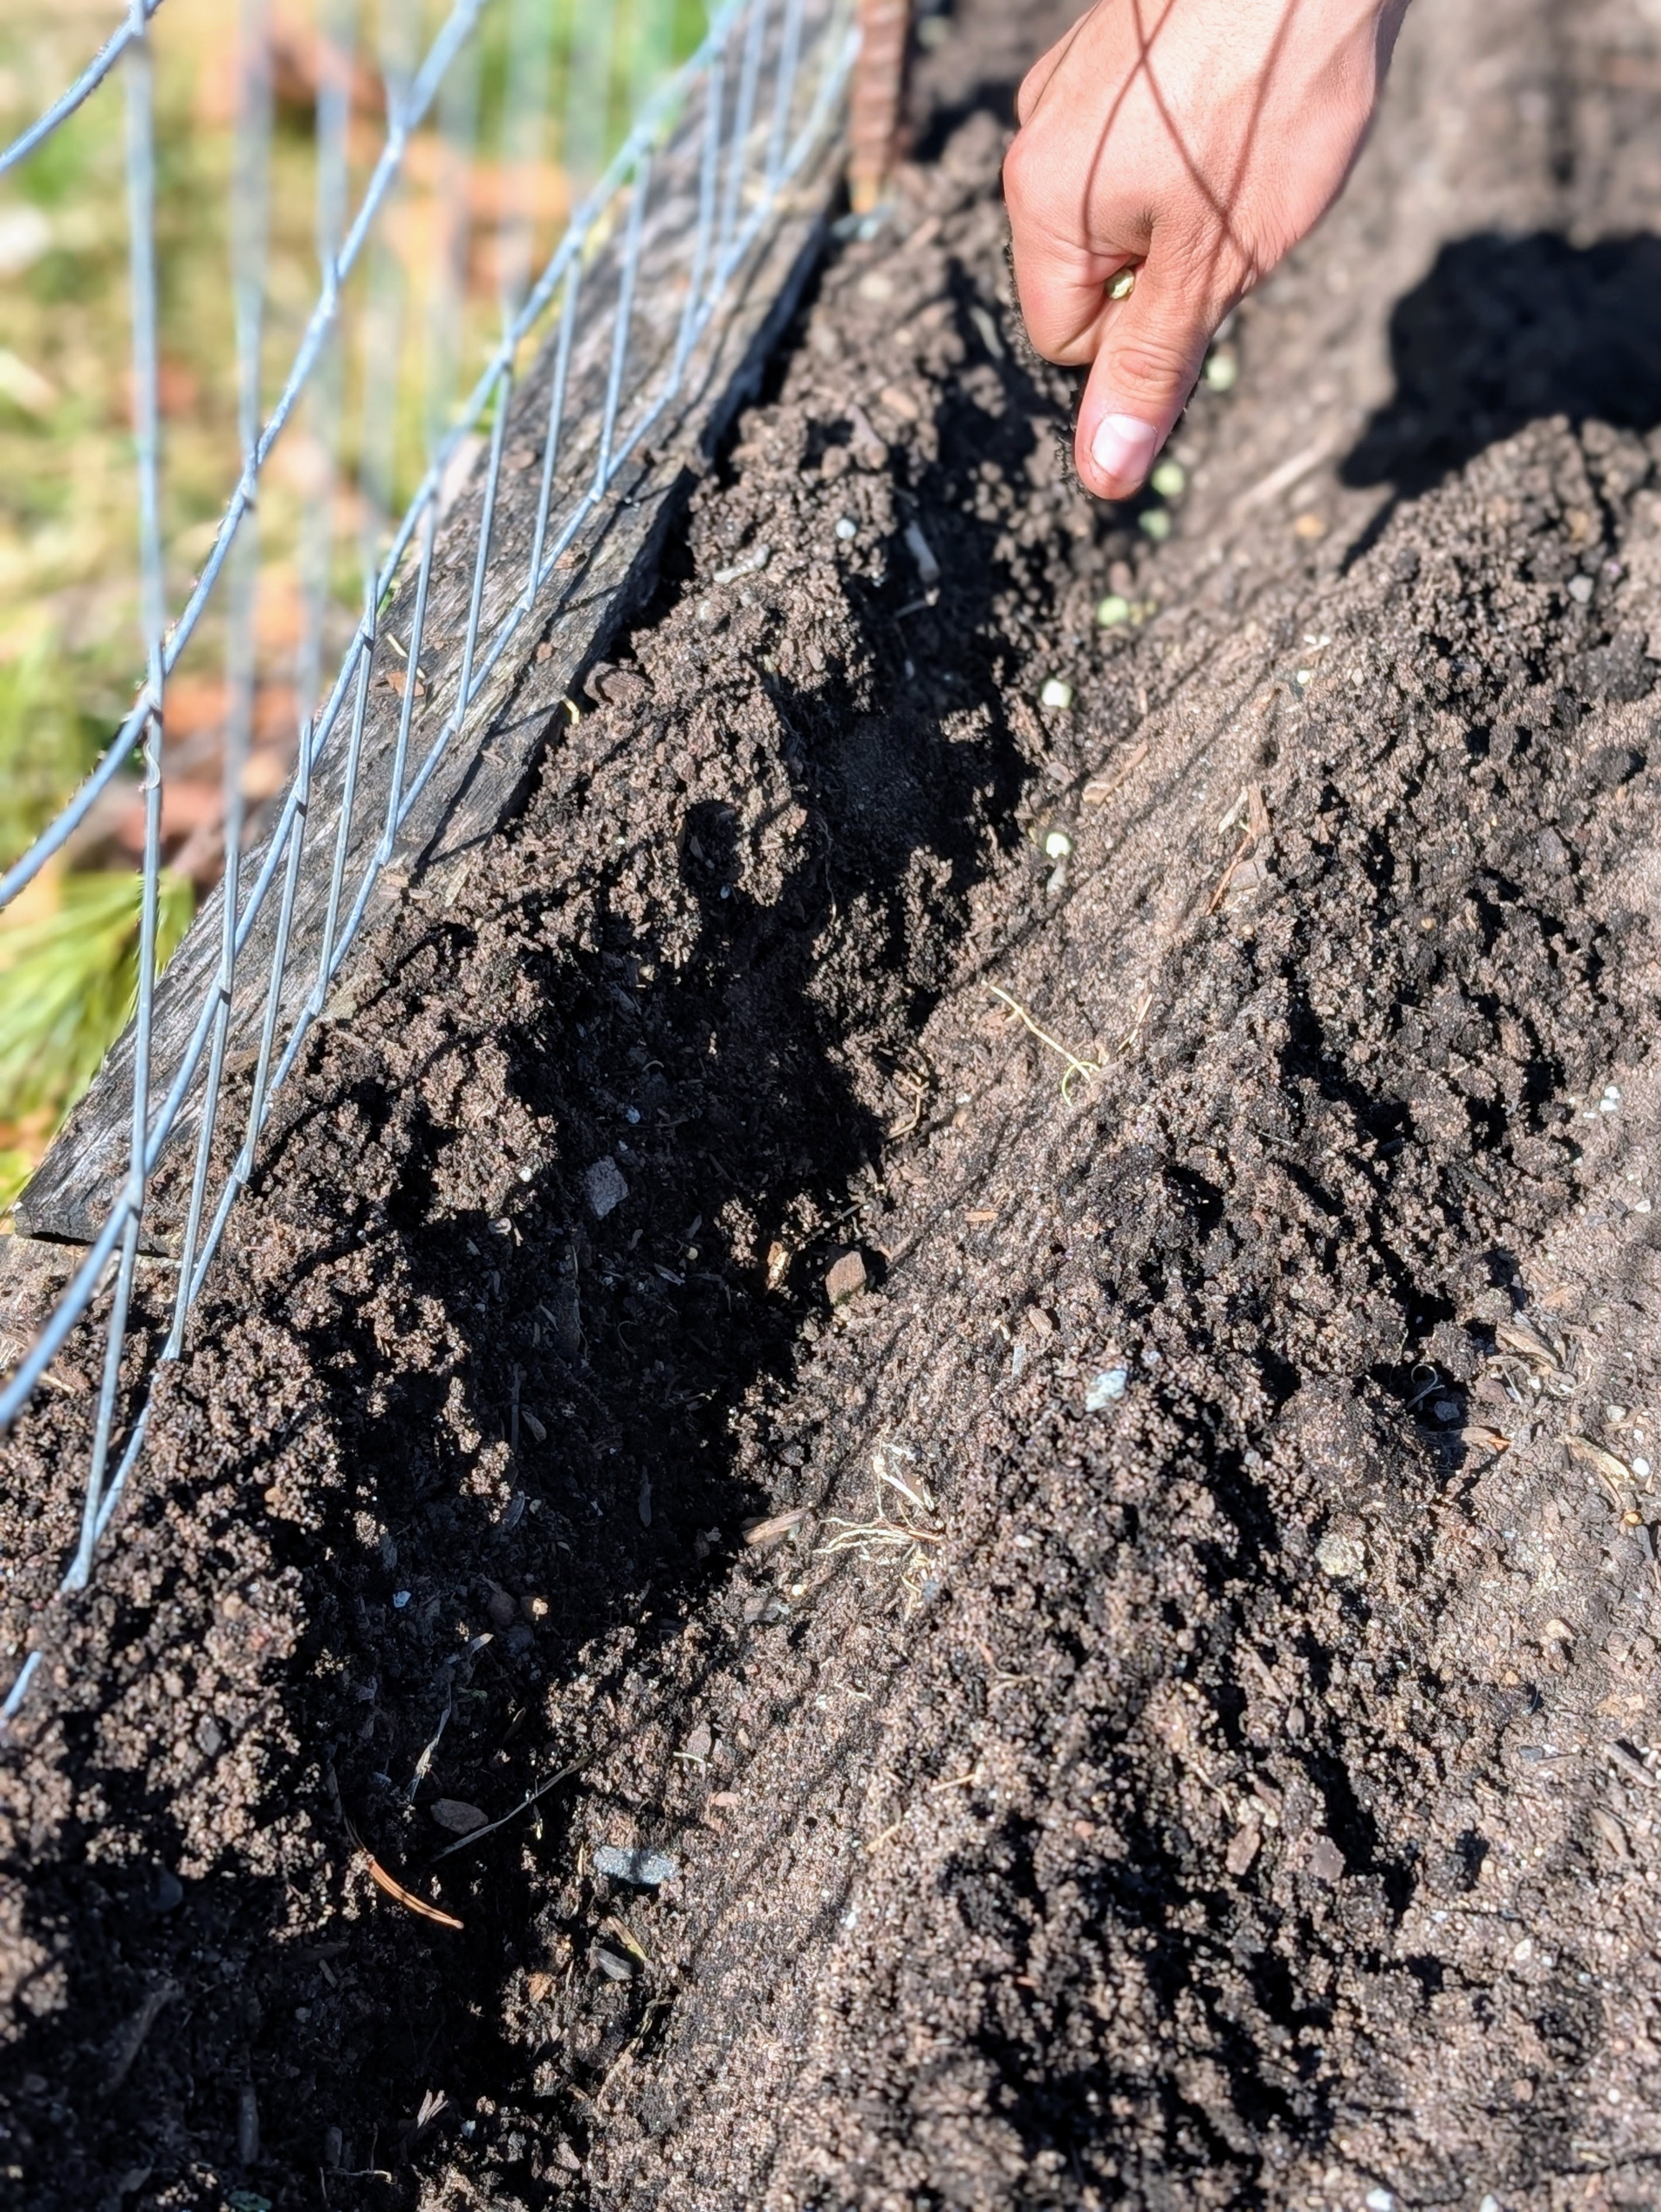
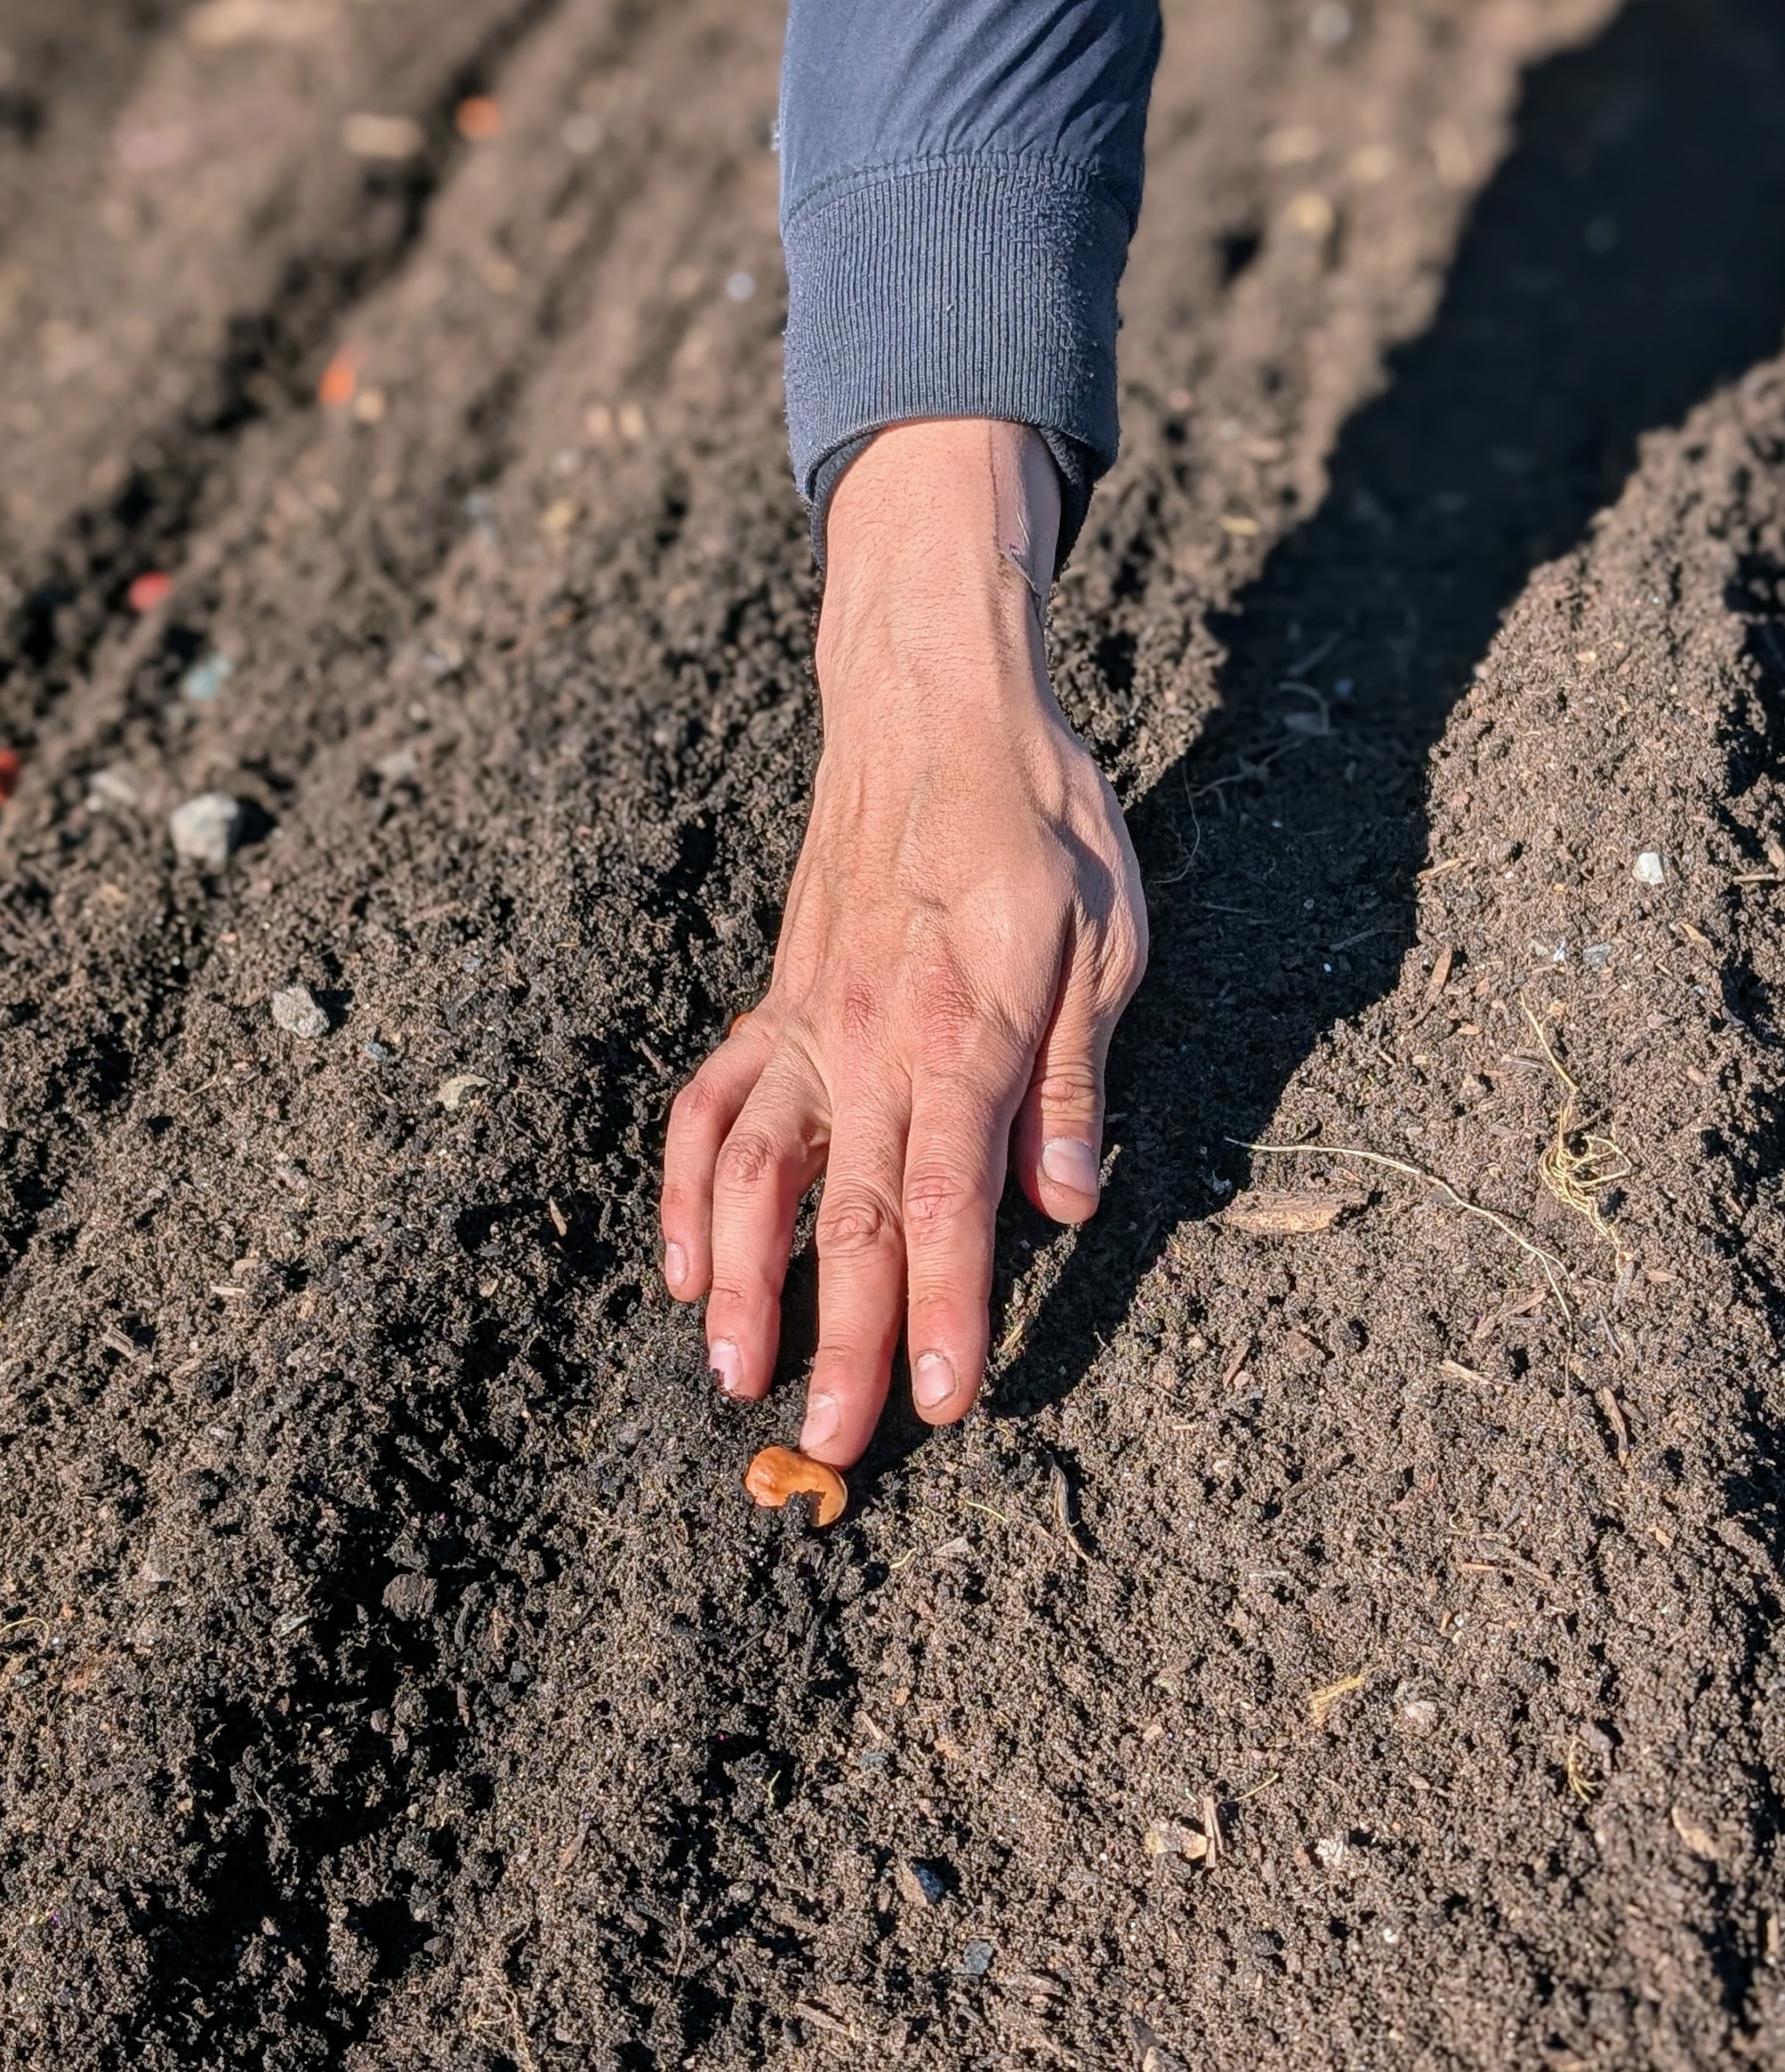
Matthew drops the seeds into the furrow about one to two-inches apart.
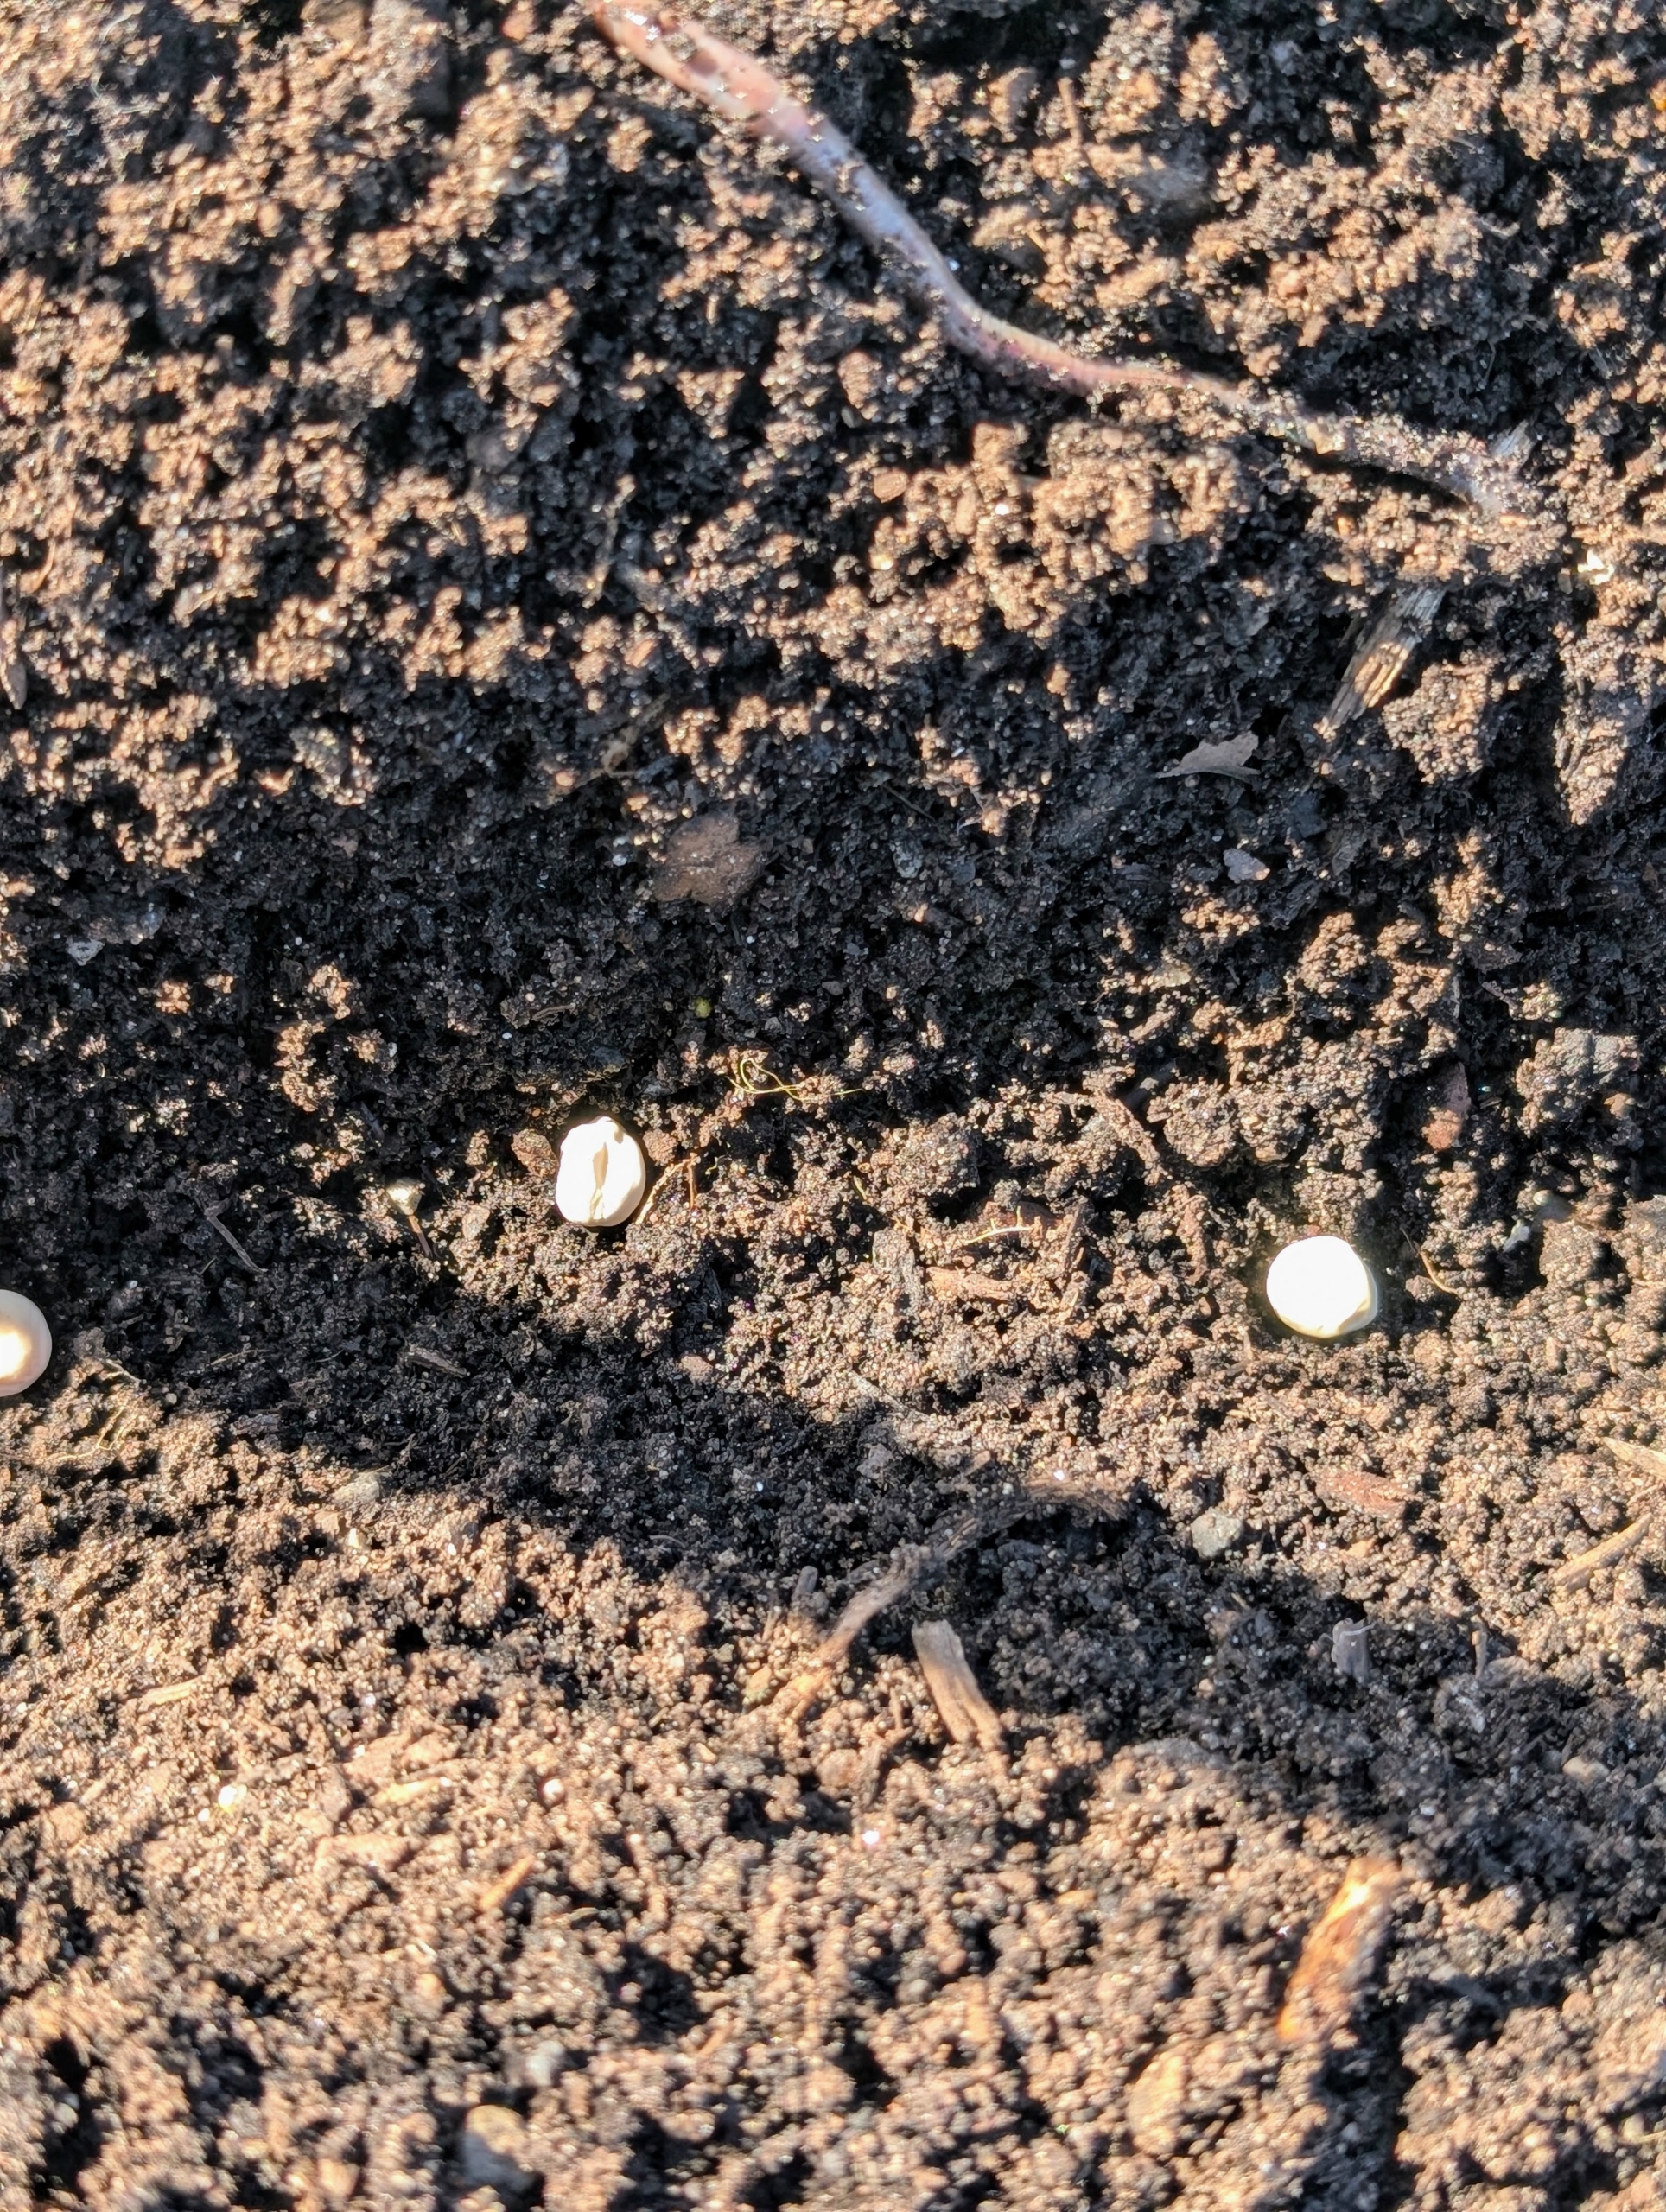
Here, one can see the seeds well-placed in the furrow. Sow pea seeds four to six weeks before the last spring frost, when soil temperatures reach 45-degrees Fahrenheit.
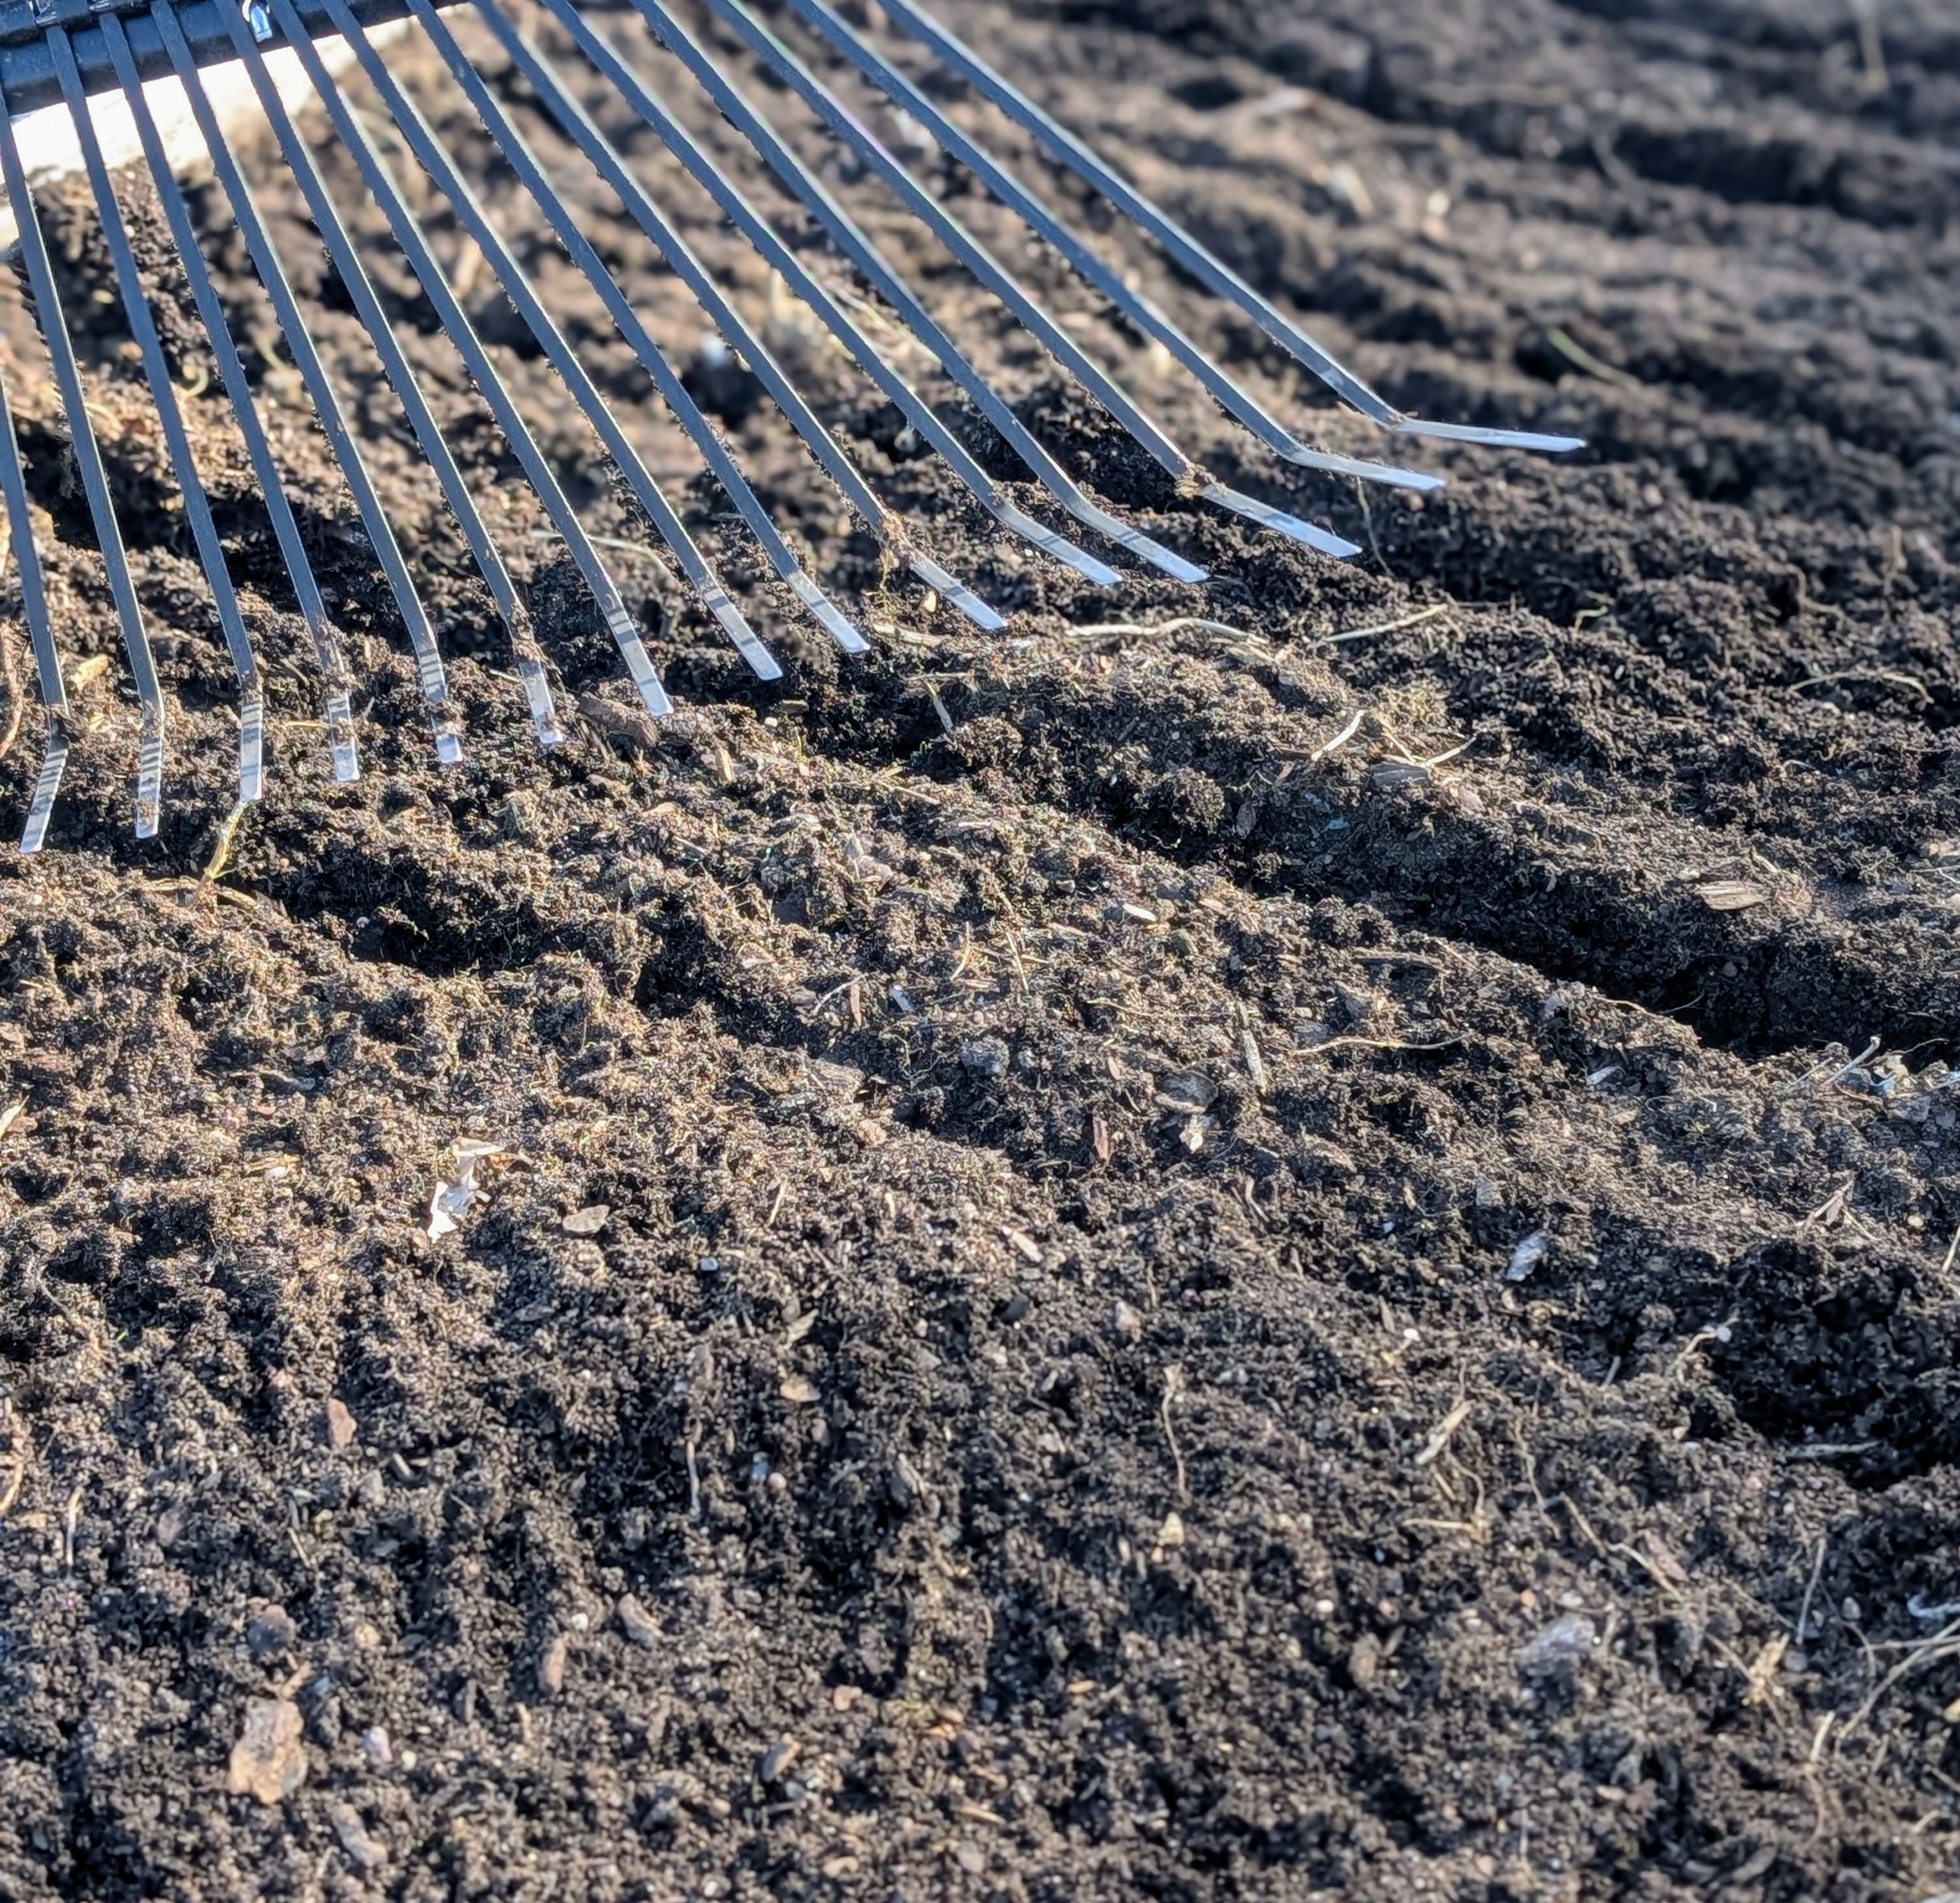
Once all the seeds are in the ground, Matthew uses the back of a soft rake to cover them.
Nearby, this year’s fava bean bed is also cleaned and raked. In my garden, I always practice crop rotation. This is the practice of planting different crops sequentially on the same plot of land to improve soil health, optimize nutrients in the soil, and combat pest and weed pressure. Last year, this bed was used for kale.
Ryan uses Johnny’s Bed Preparation Rake to make furrows in the bed.
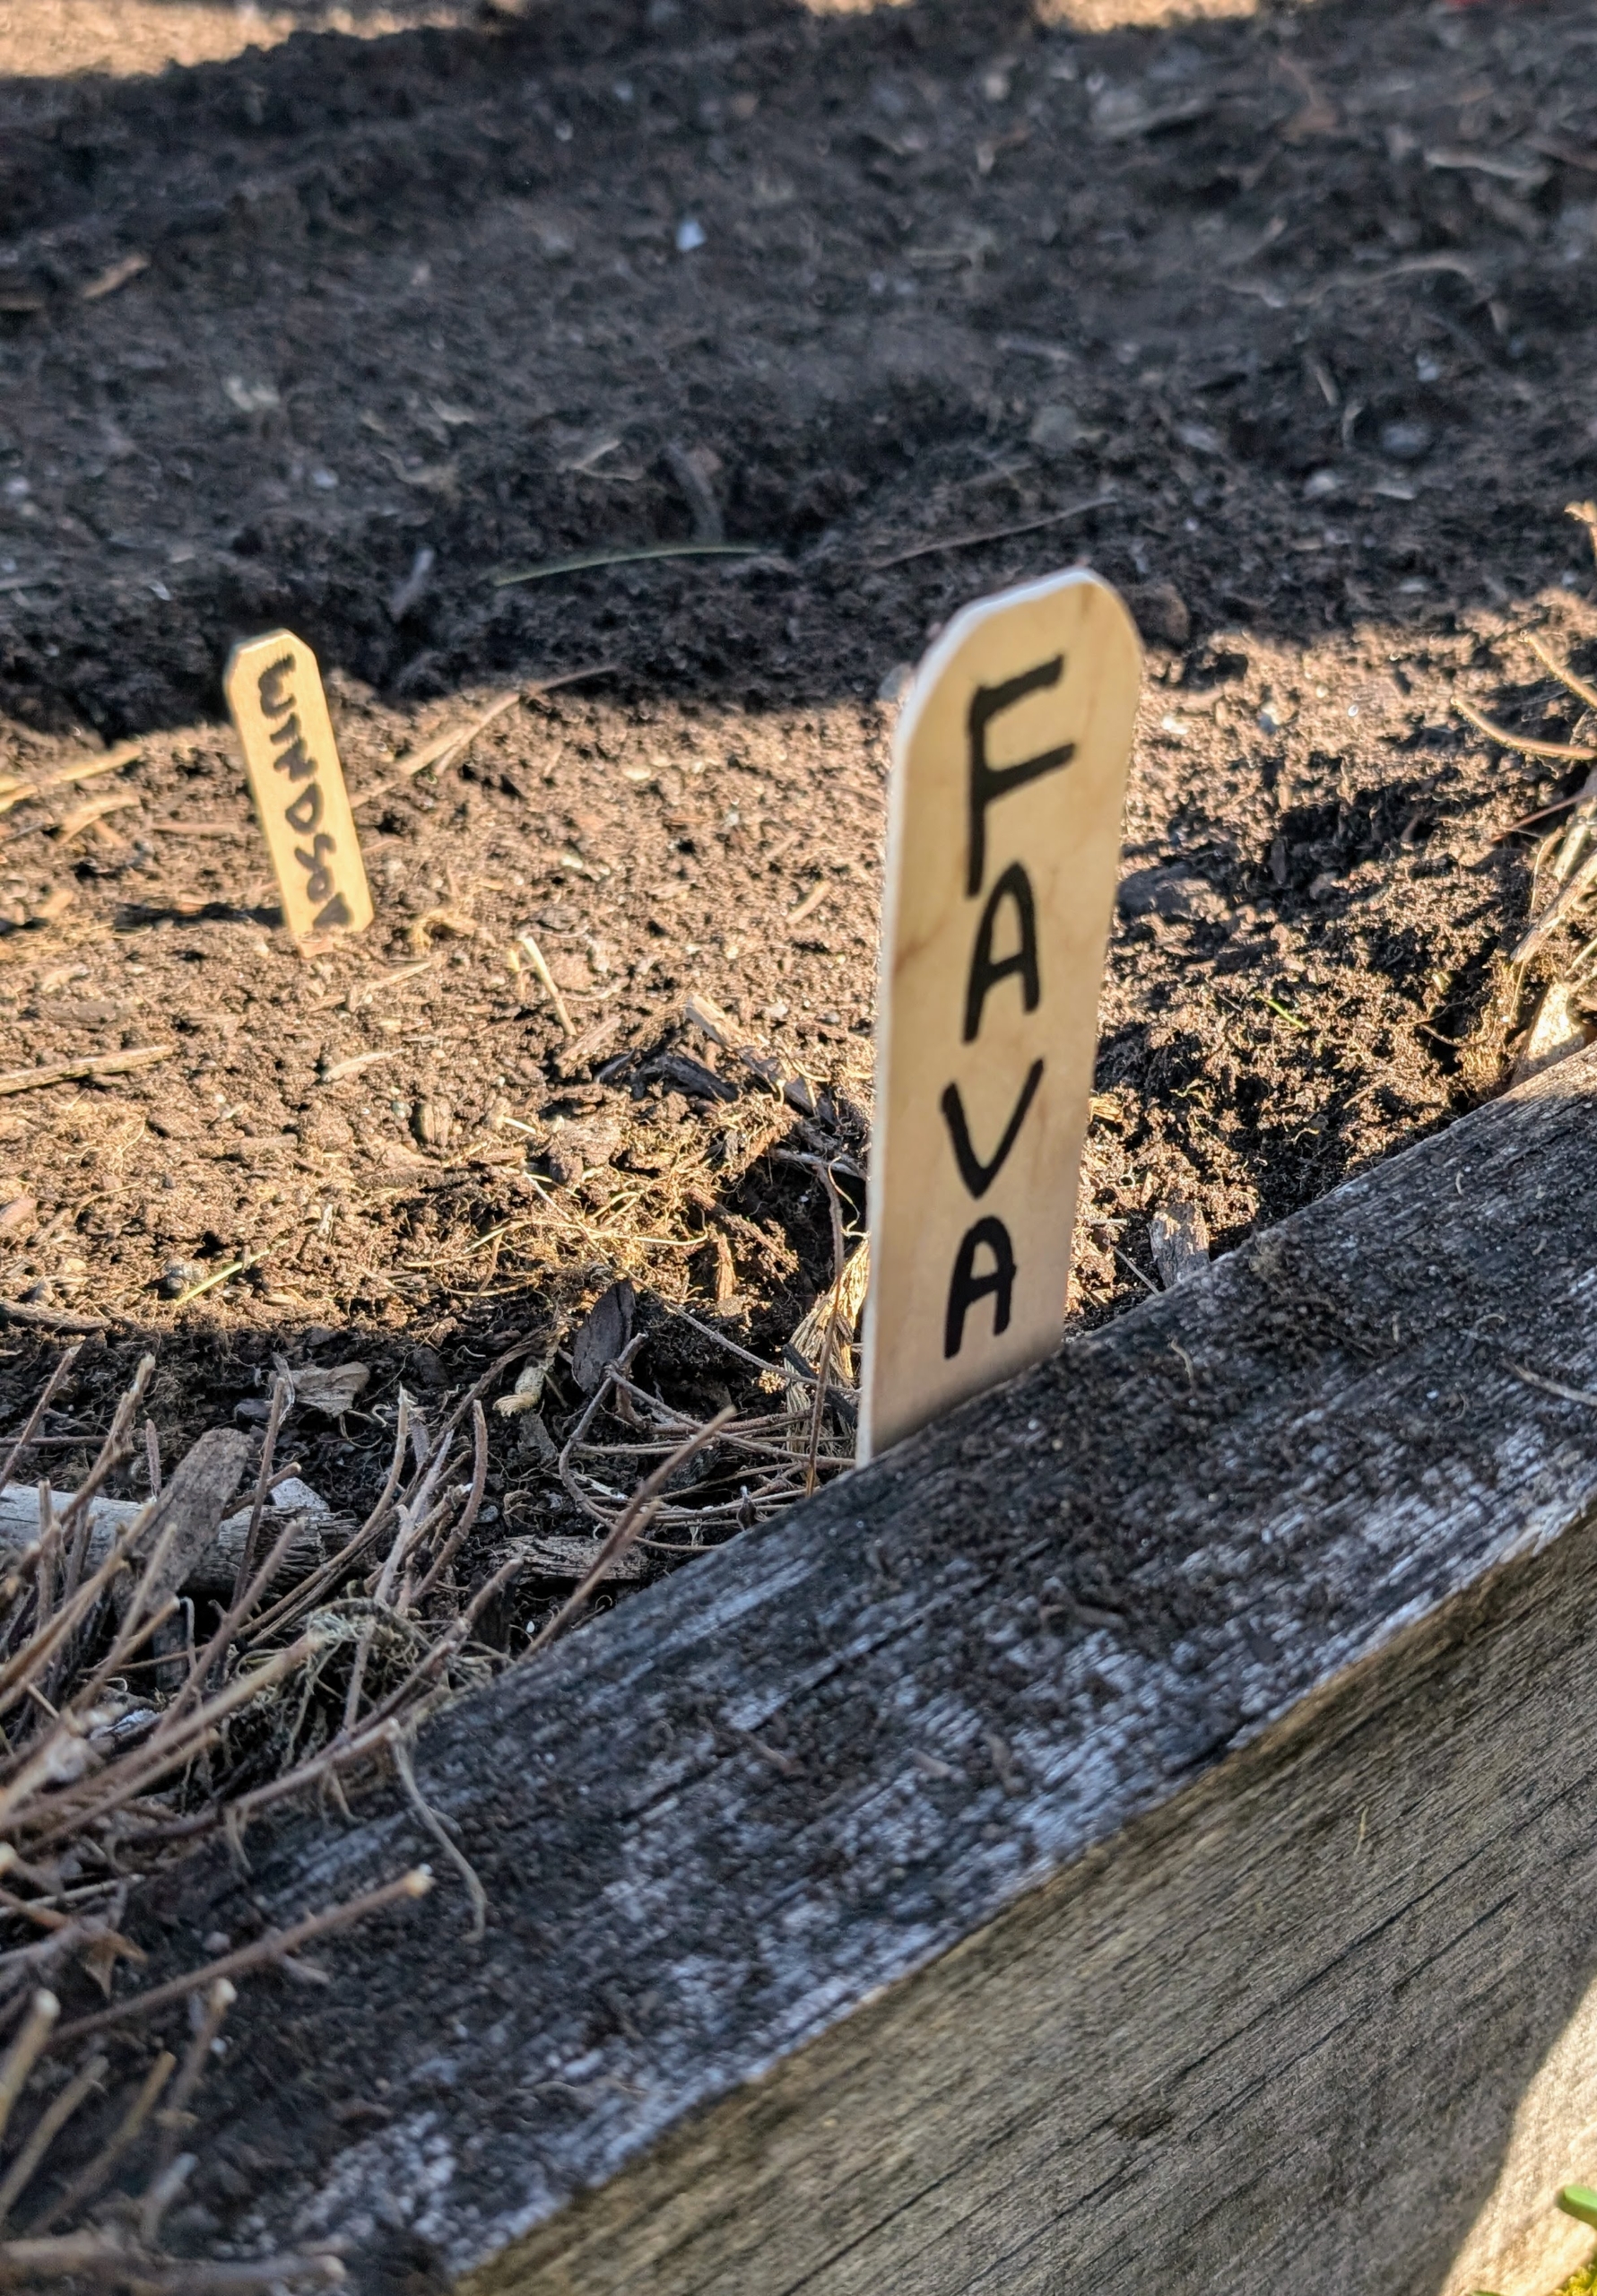
Another marker is used to indicate what crop and variety is planted.
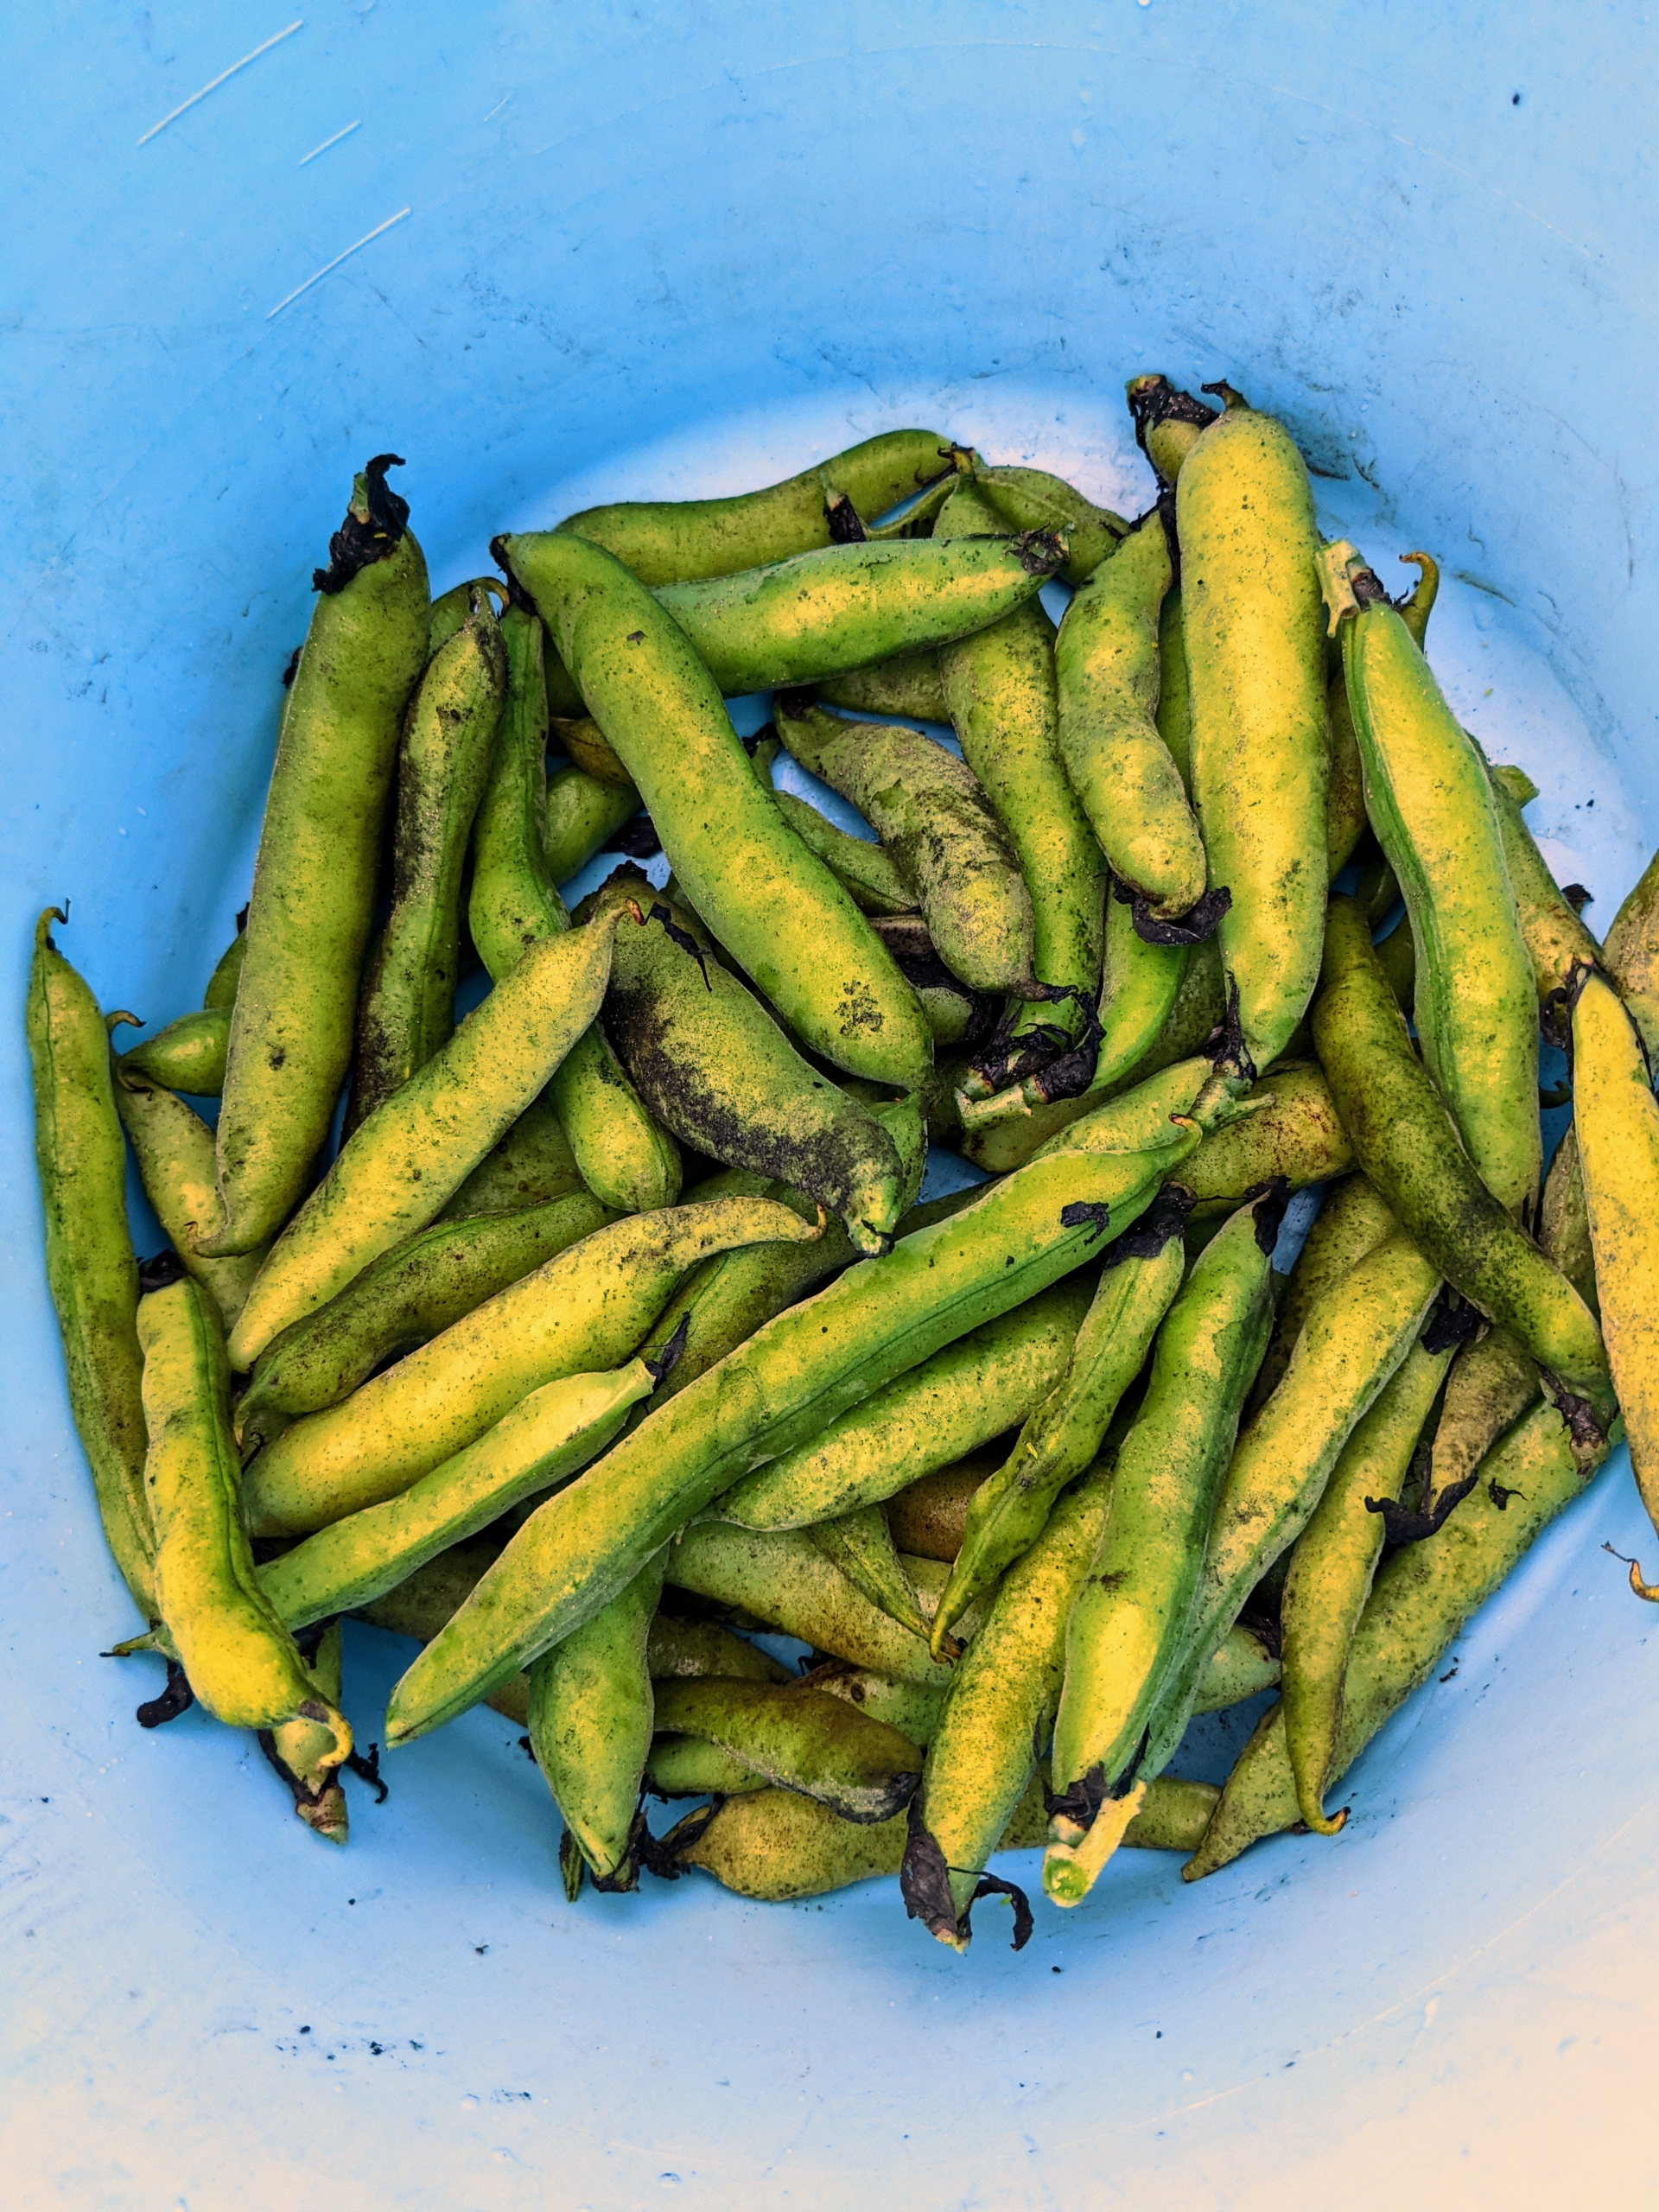
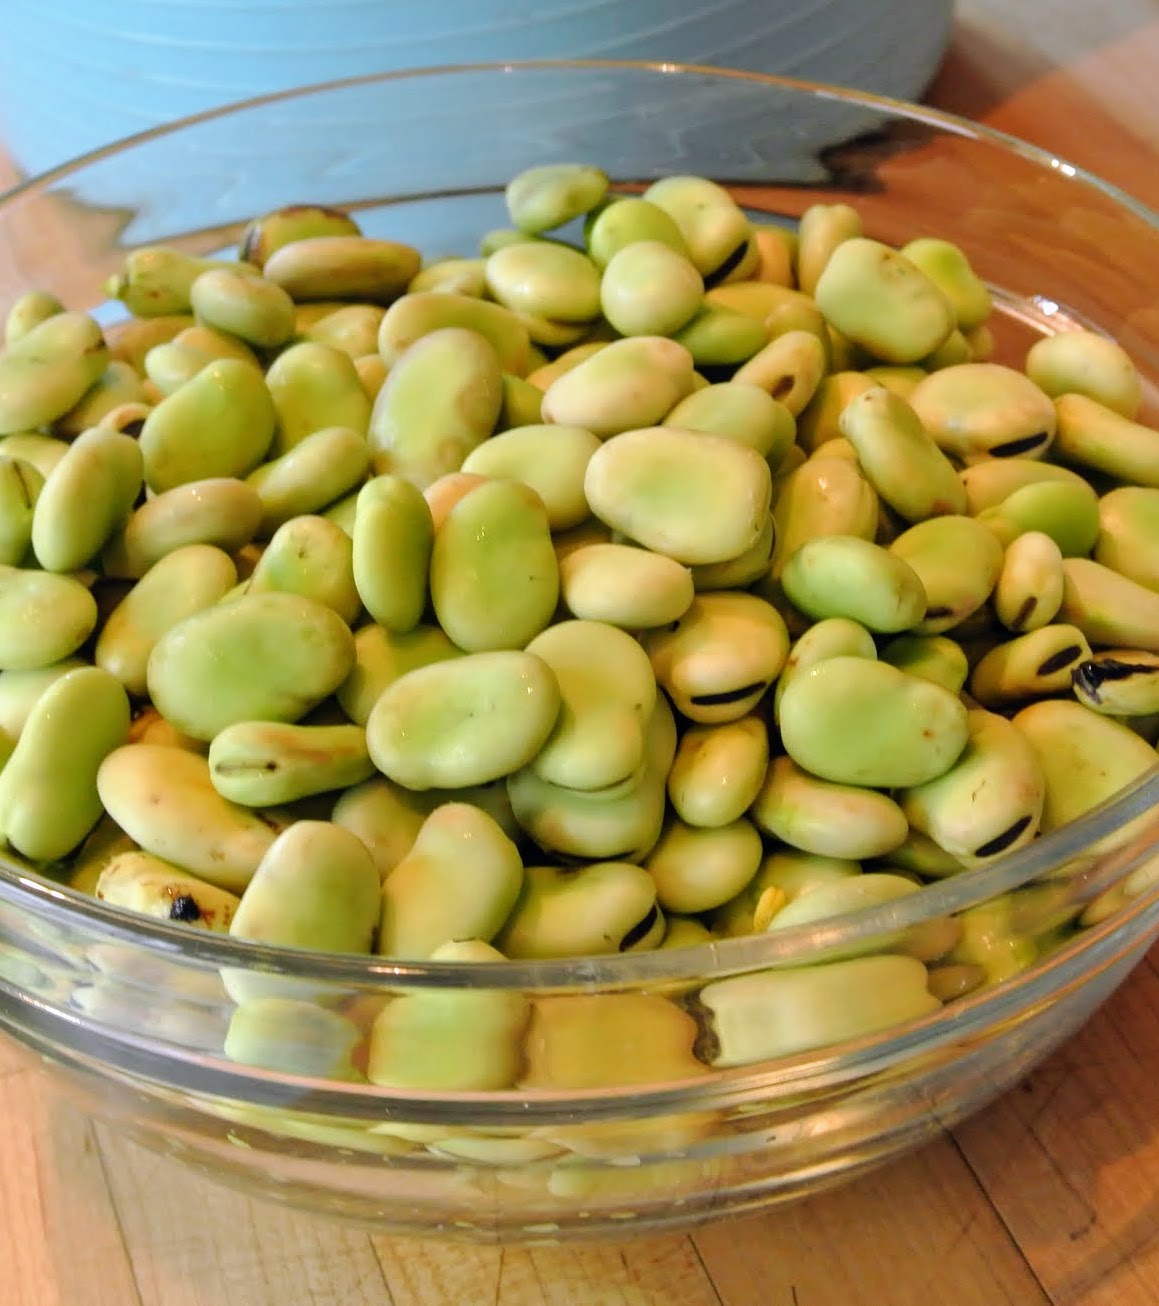
These are fava beans, Vicia faba. Fava bean pods grow on bushy plants with several stems, reaching two to four feet tall.
Here they are shelled. They have a nutty taste and a buttery texture.
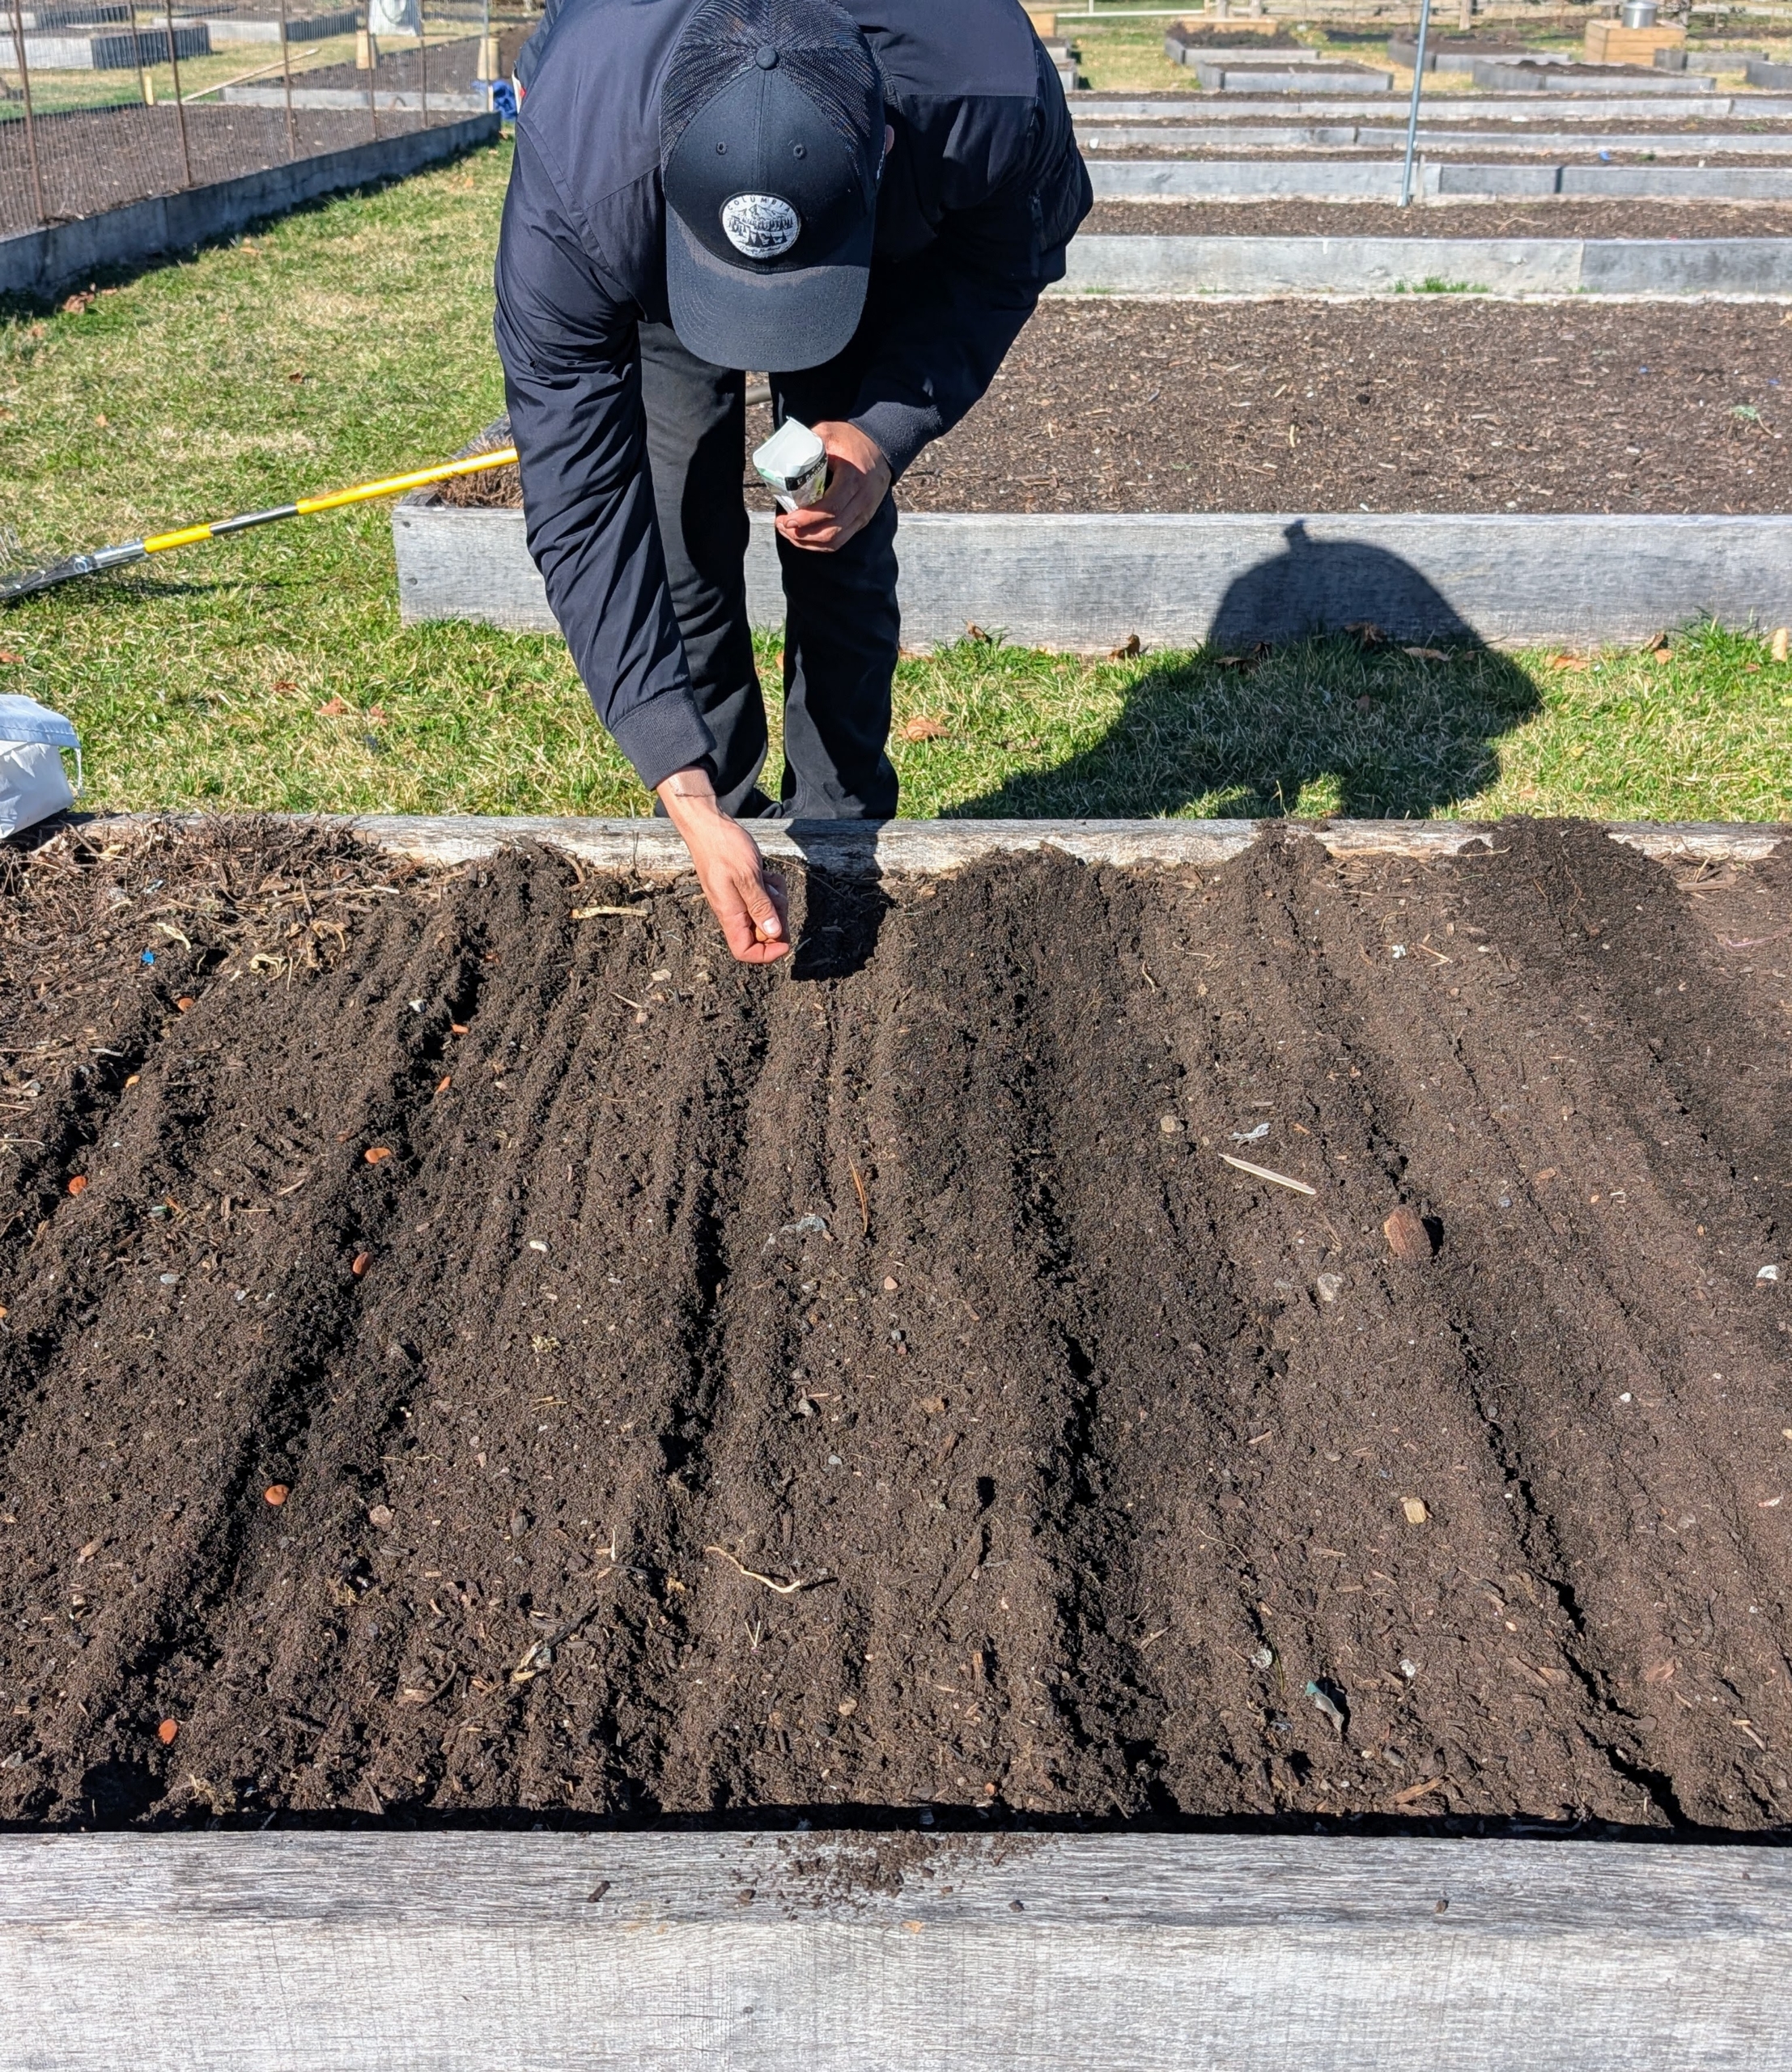
Matthew drops the seeds in the furrows making sure there is ample space in between them to grow. This is called direct sowing, or planting seeds in the garden, rather than starting seeds indoors earlier and transplanting them outside. Some crops do better planted directly into the ground. These plants won’t experience the stress of transplanting and will not need time to adjust to their new growing conditions.
Matthew fills about a third of the bed with fava beans. And do you know… Fava beans are also nitrogen-fixers? They improve soil quality by adding nitrogen.
The seeds are planted at least four or five inches apart.
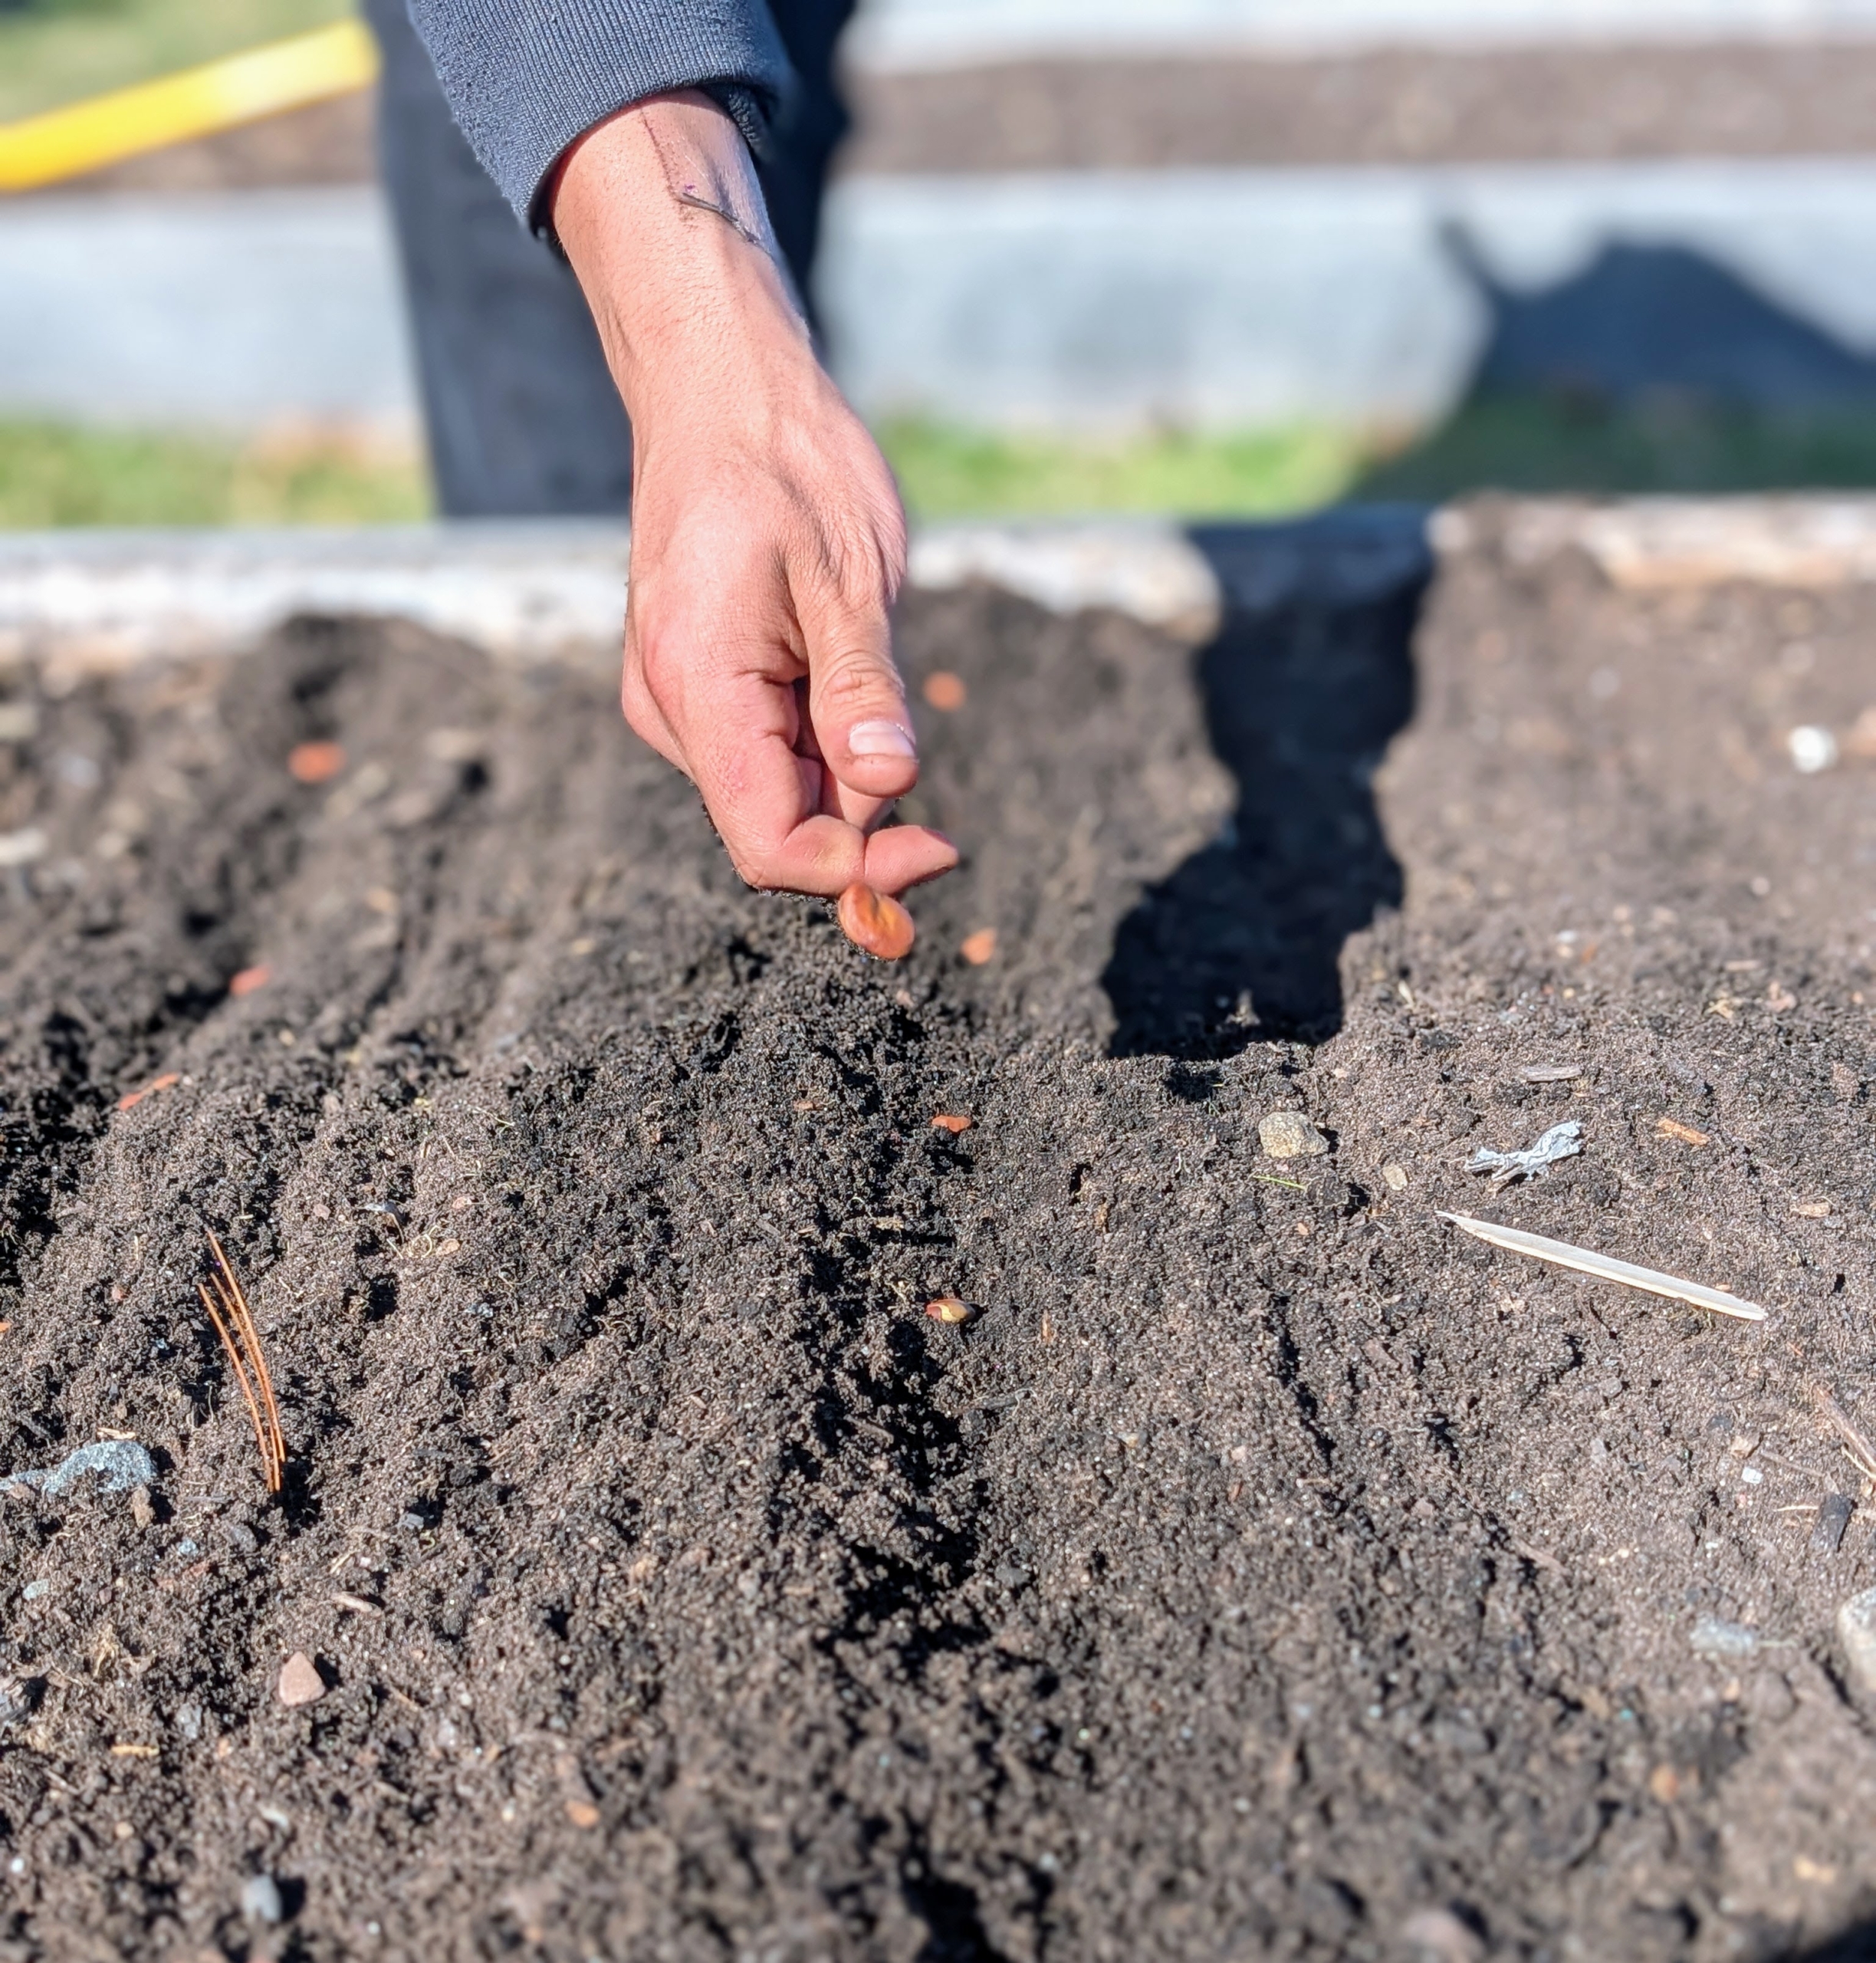
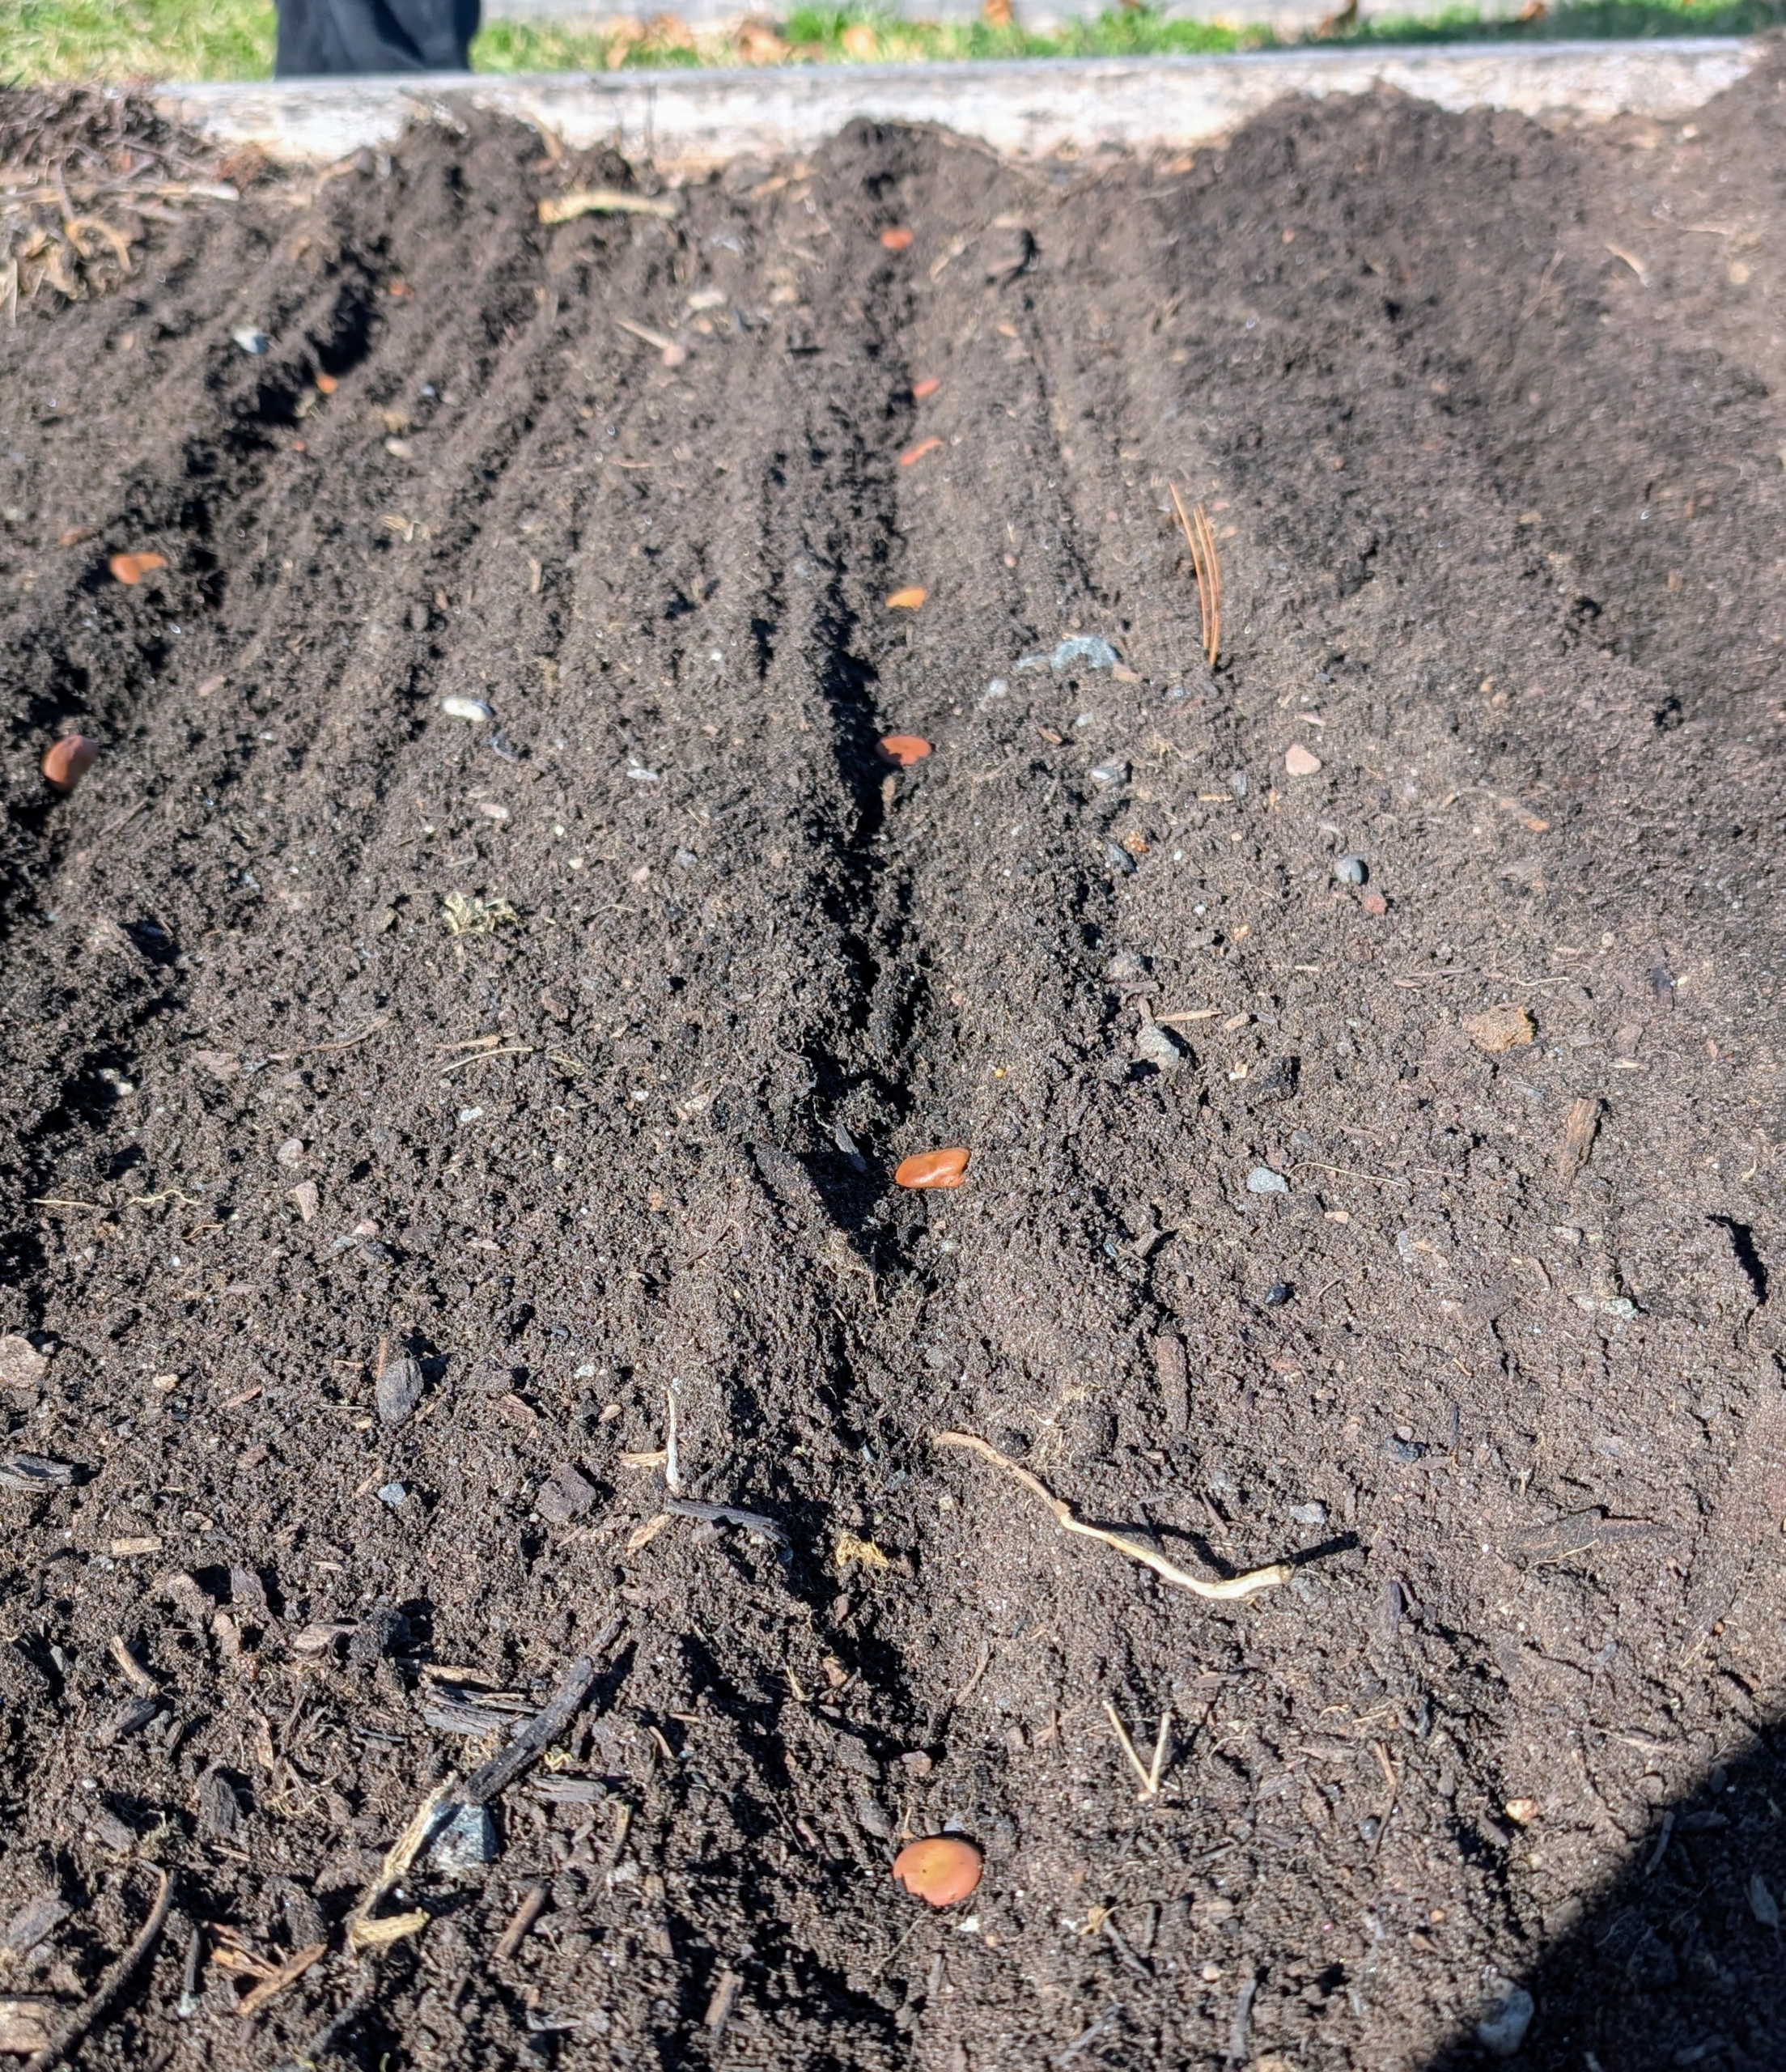
After dropping all the seeds, Matthew follows behind and pushes each seed about two inches into the ground with his finger.
And then the furrows are backfilled and the area is raked. A marker is also placed where planting ended. The gardening season is here!
Spring officially starts tomorrow and I already have a busy list of projects planned for my farm.
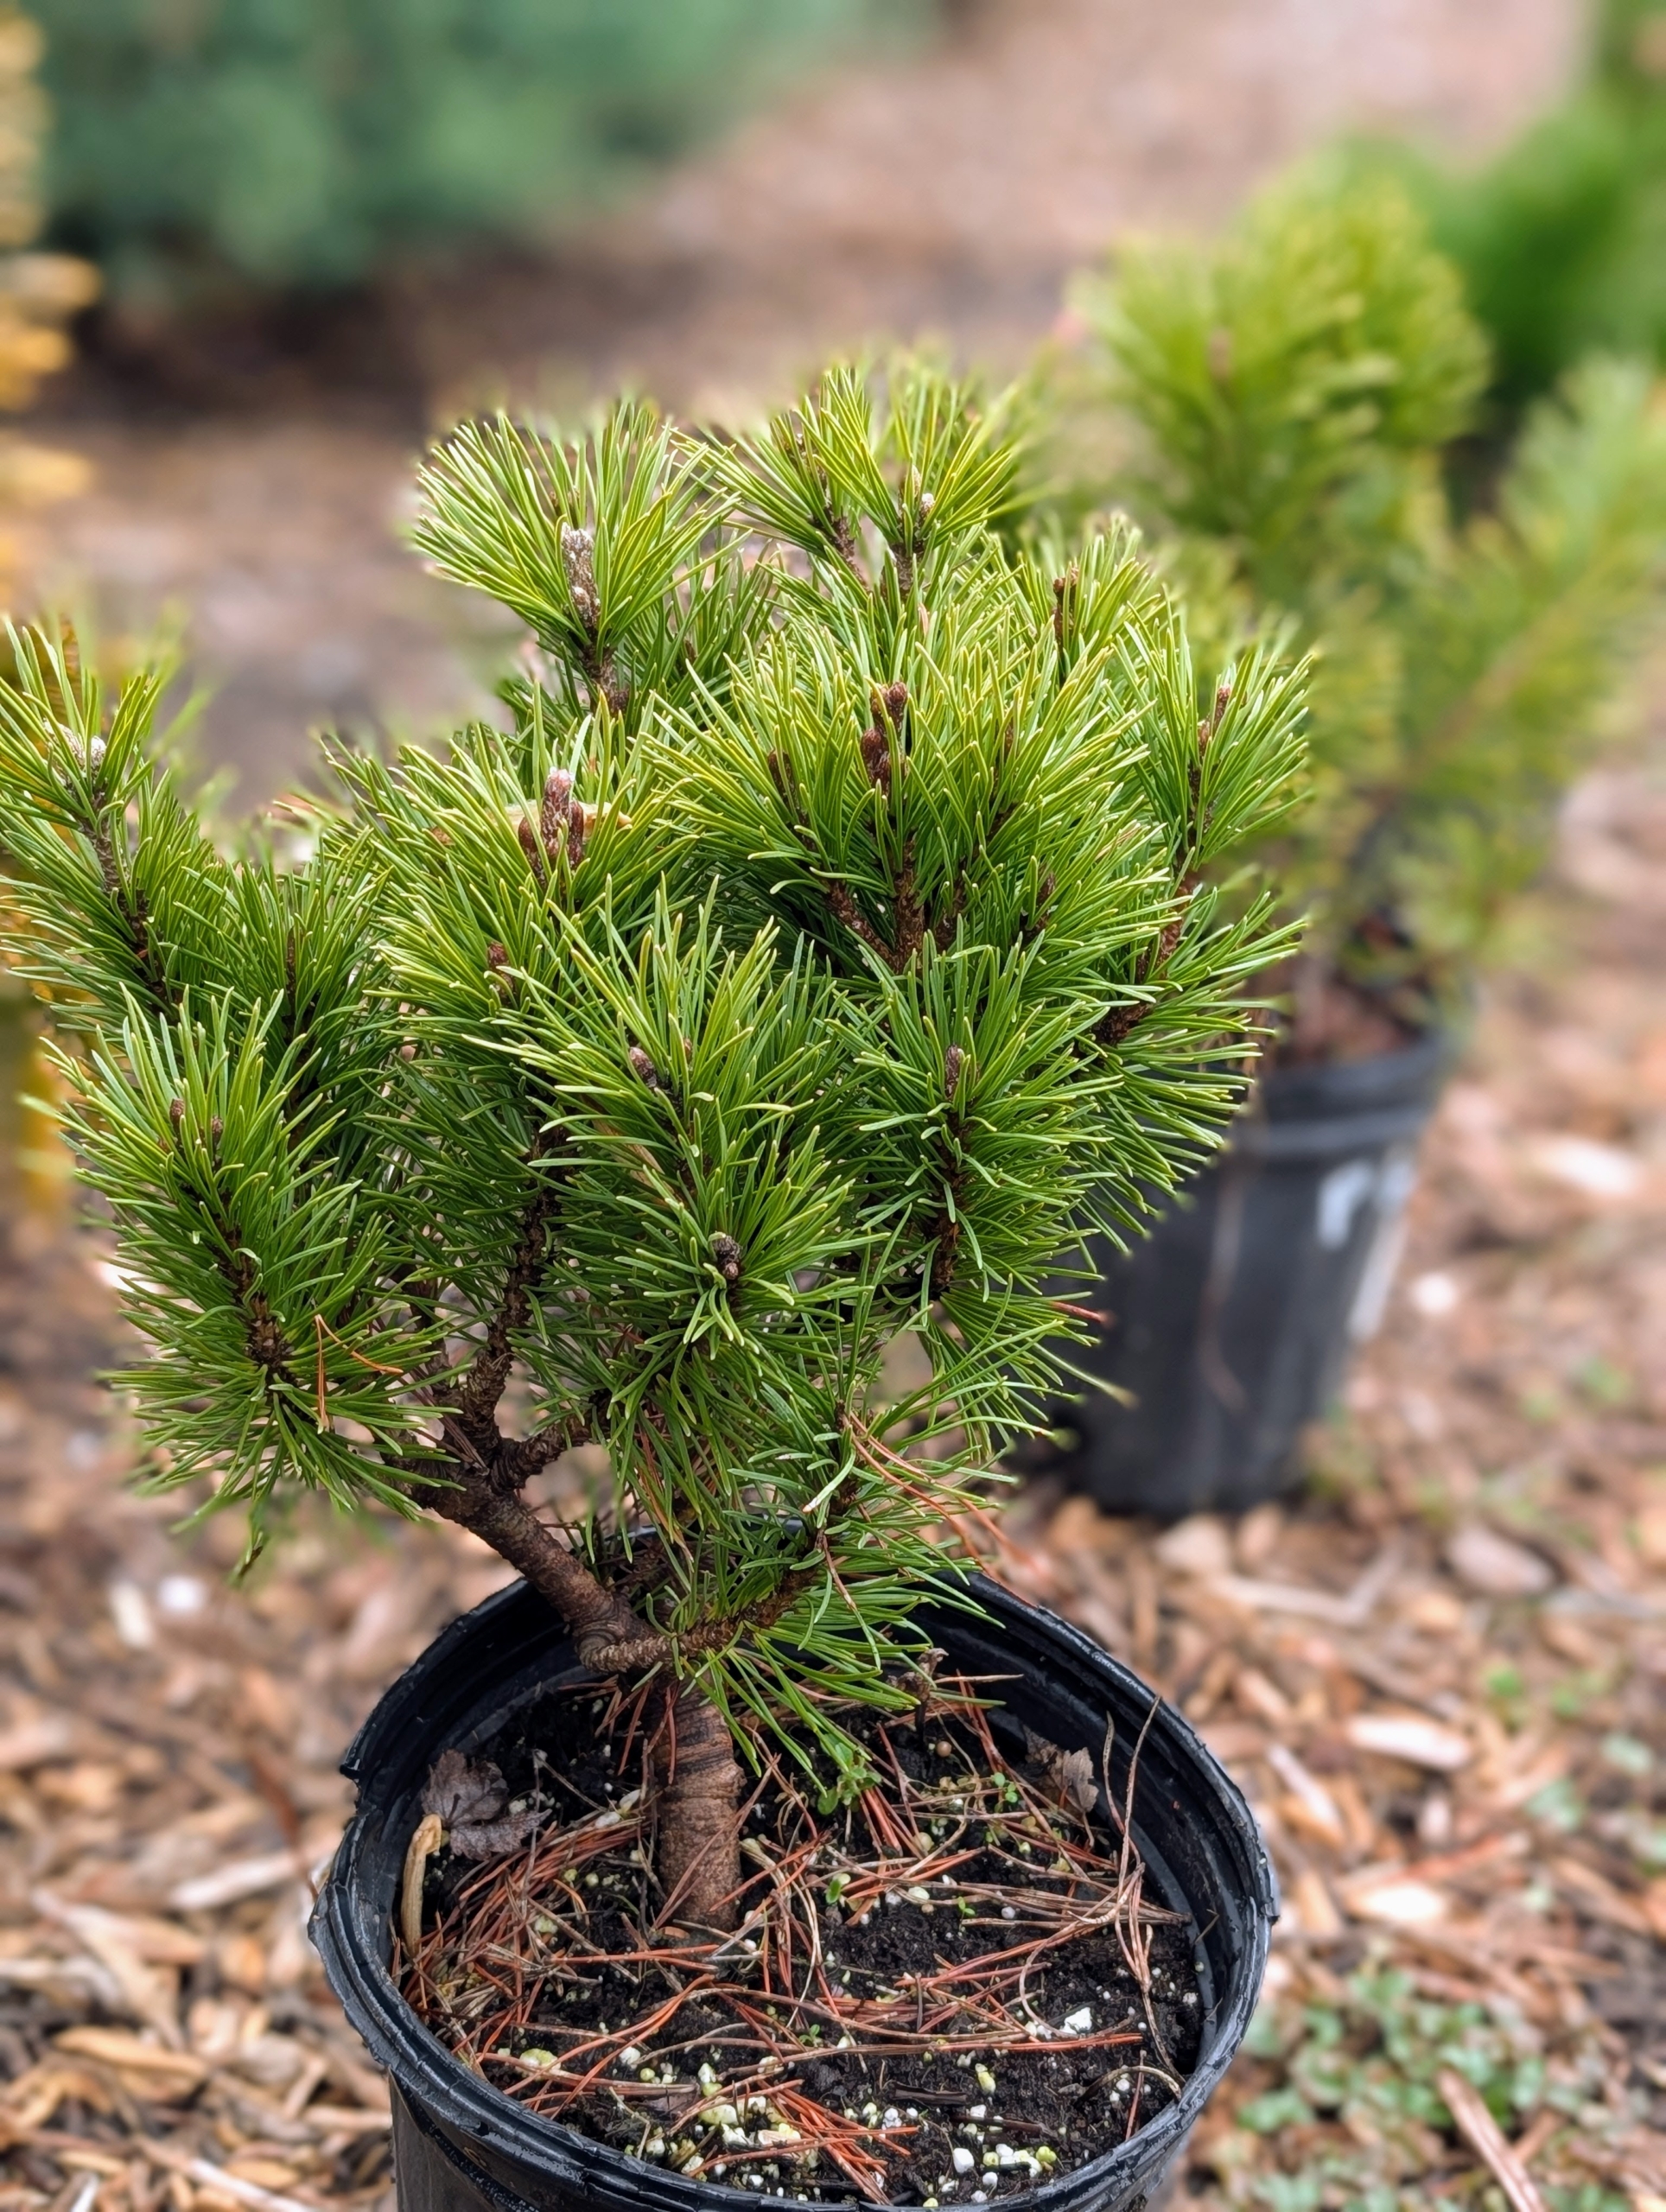
I'm always looking for ways to improve my gardens. I love planting interesting perennials that add texture, growth and beauty throughout the year. I also enjoy arranging large groups of certain plantings to create borders and appealing displays. Yesterday, my outdoor grounds crew planted Mugo pines along the edge of my pinetum. Mugo pines are conifers with dark green needles on dense branches. They're slow growing and mature to a size of five feet tall by 10-feet wide. I am also expanding the garden for more evergreens. Spring planting is underway!
Enjoy these photos.
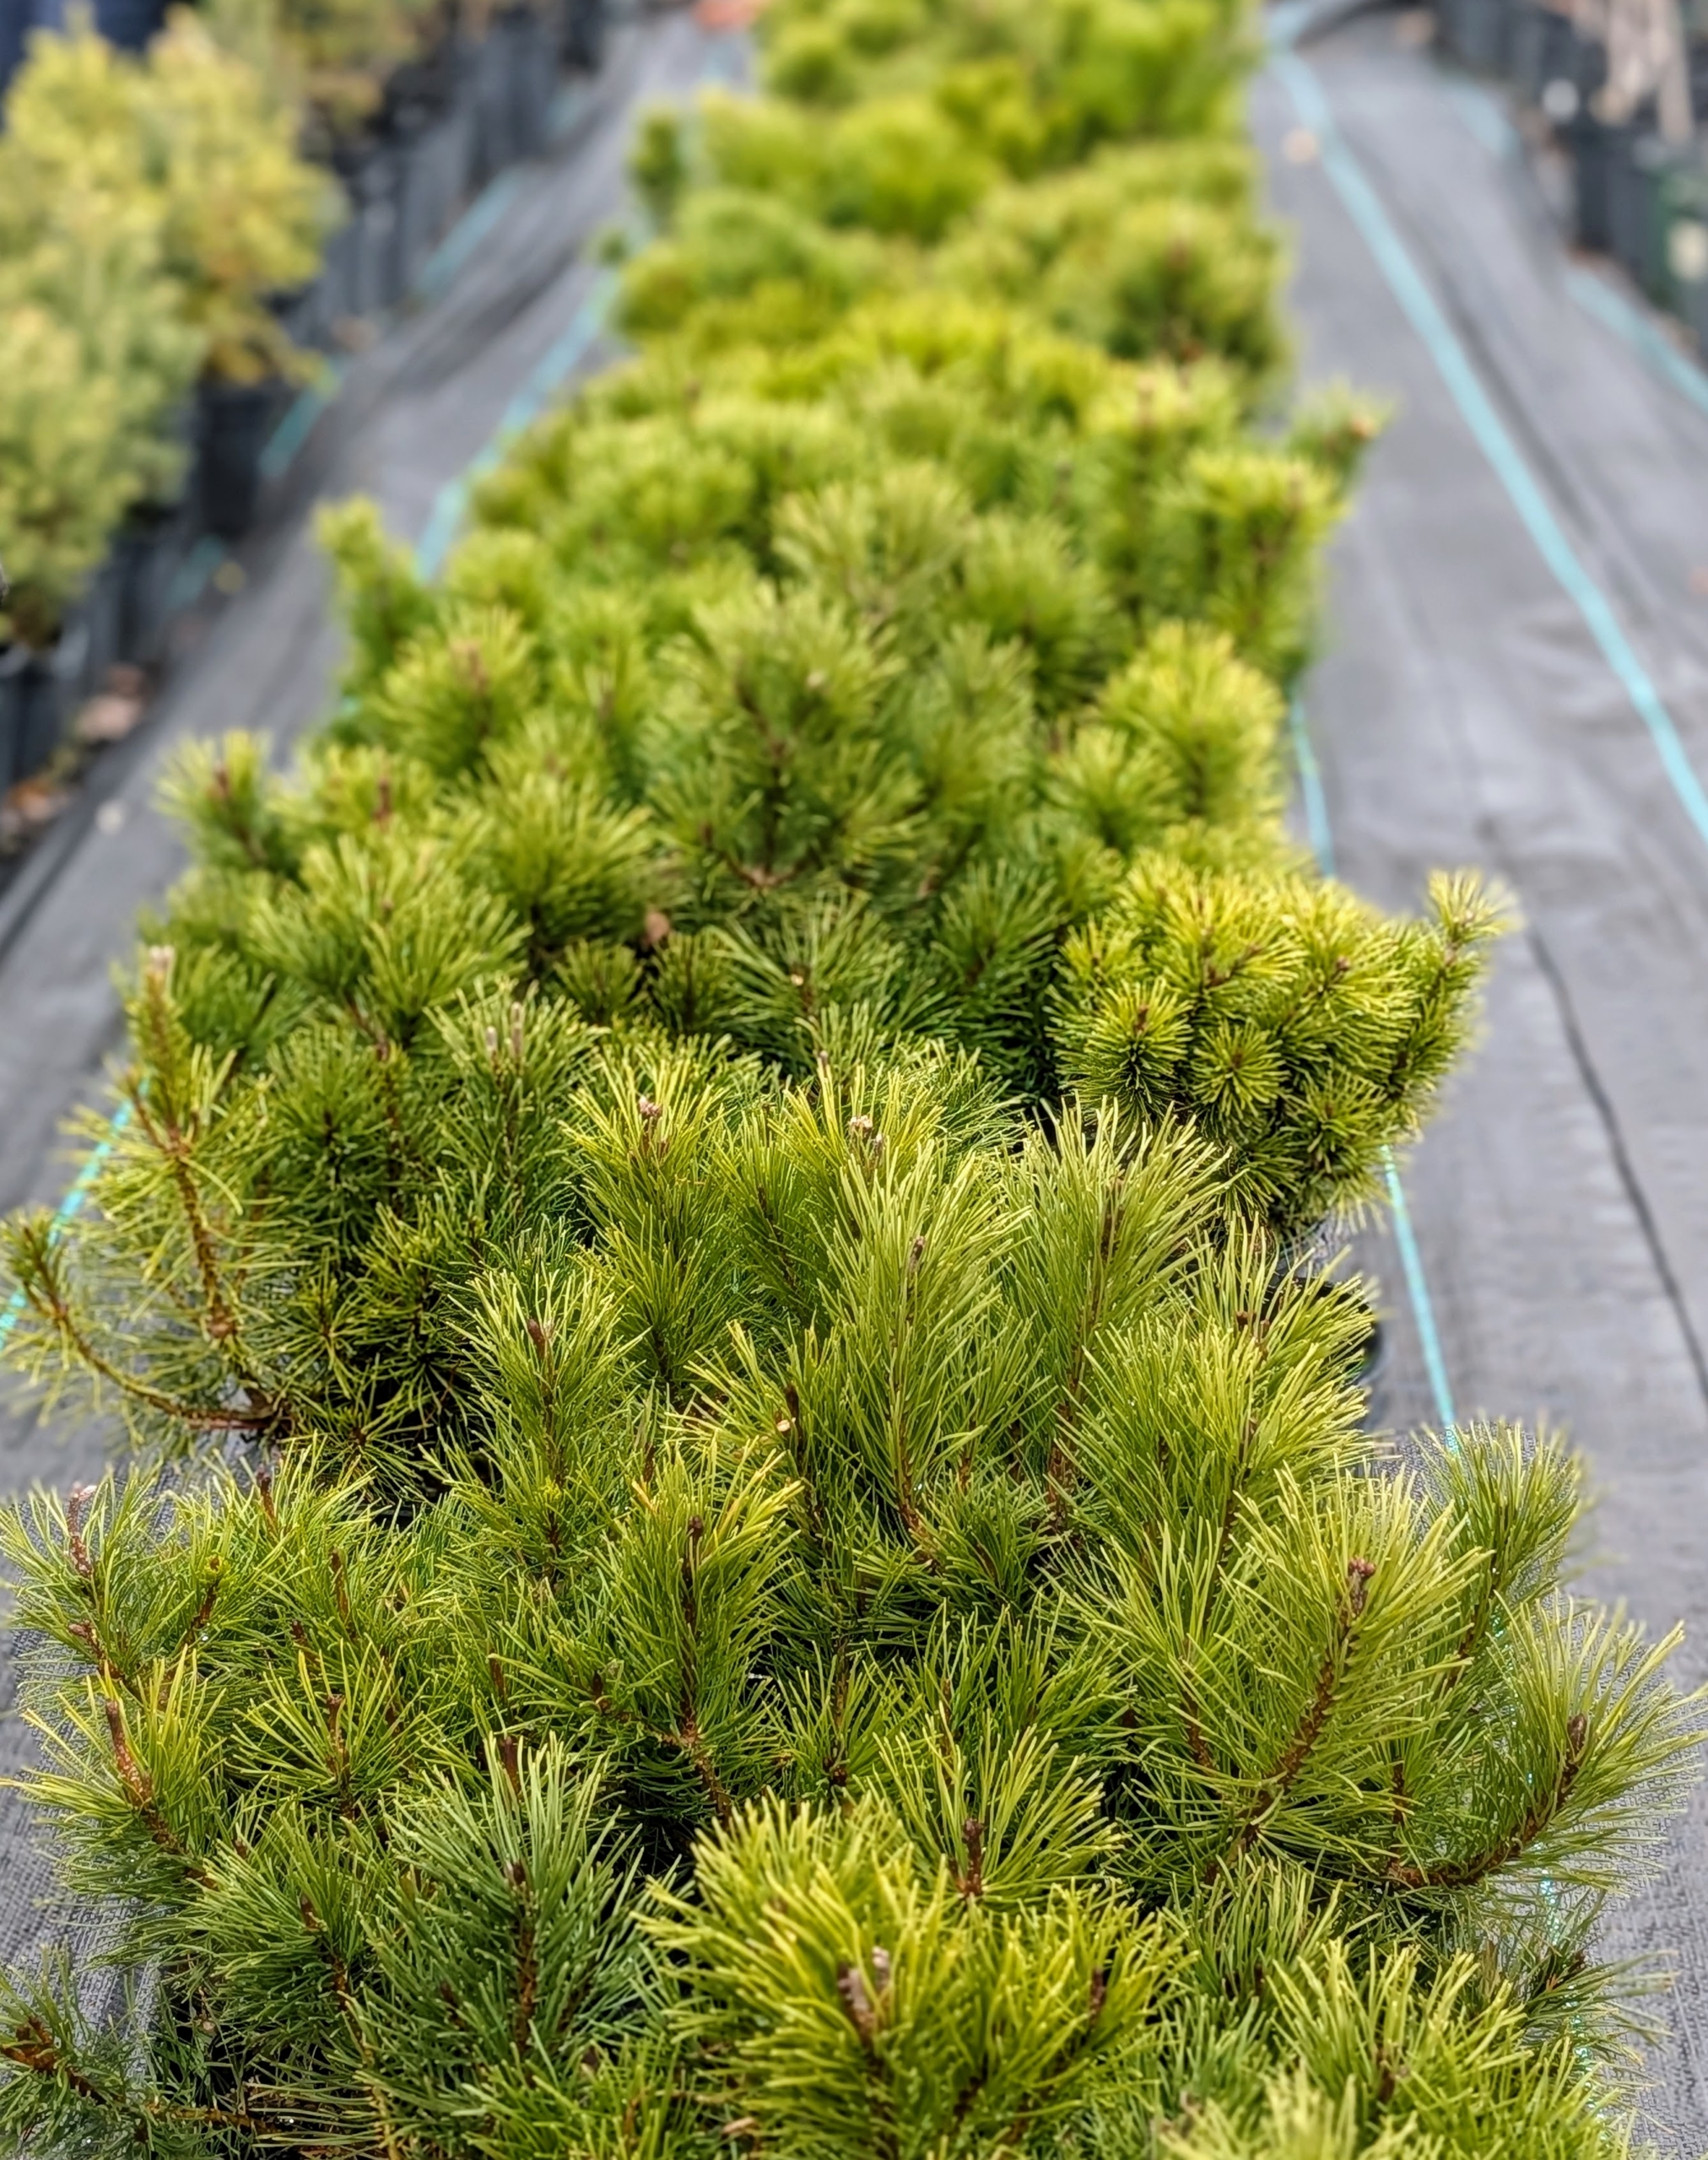
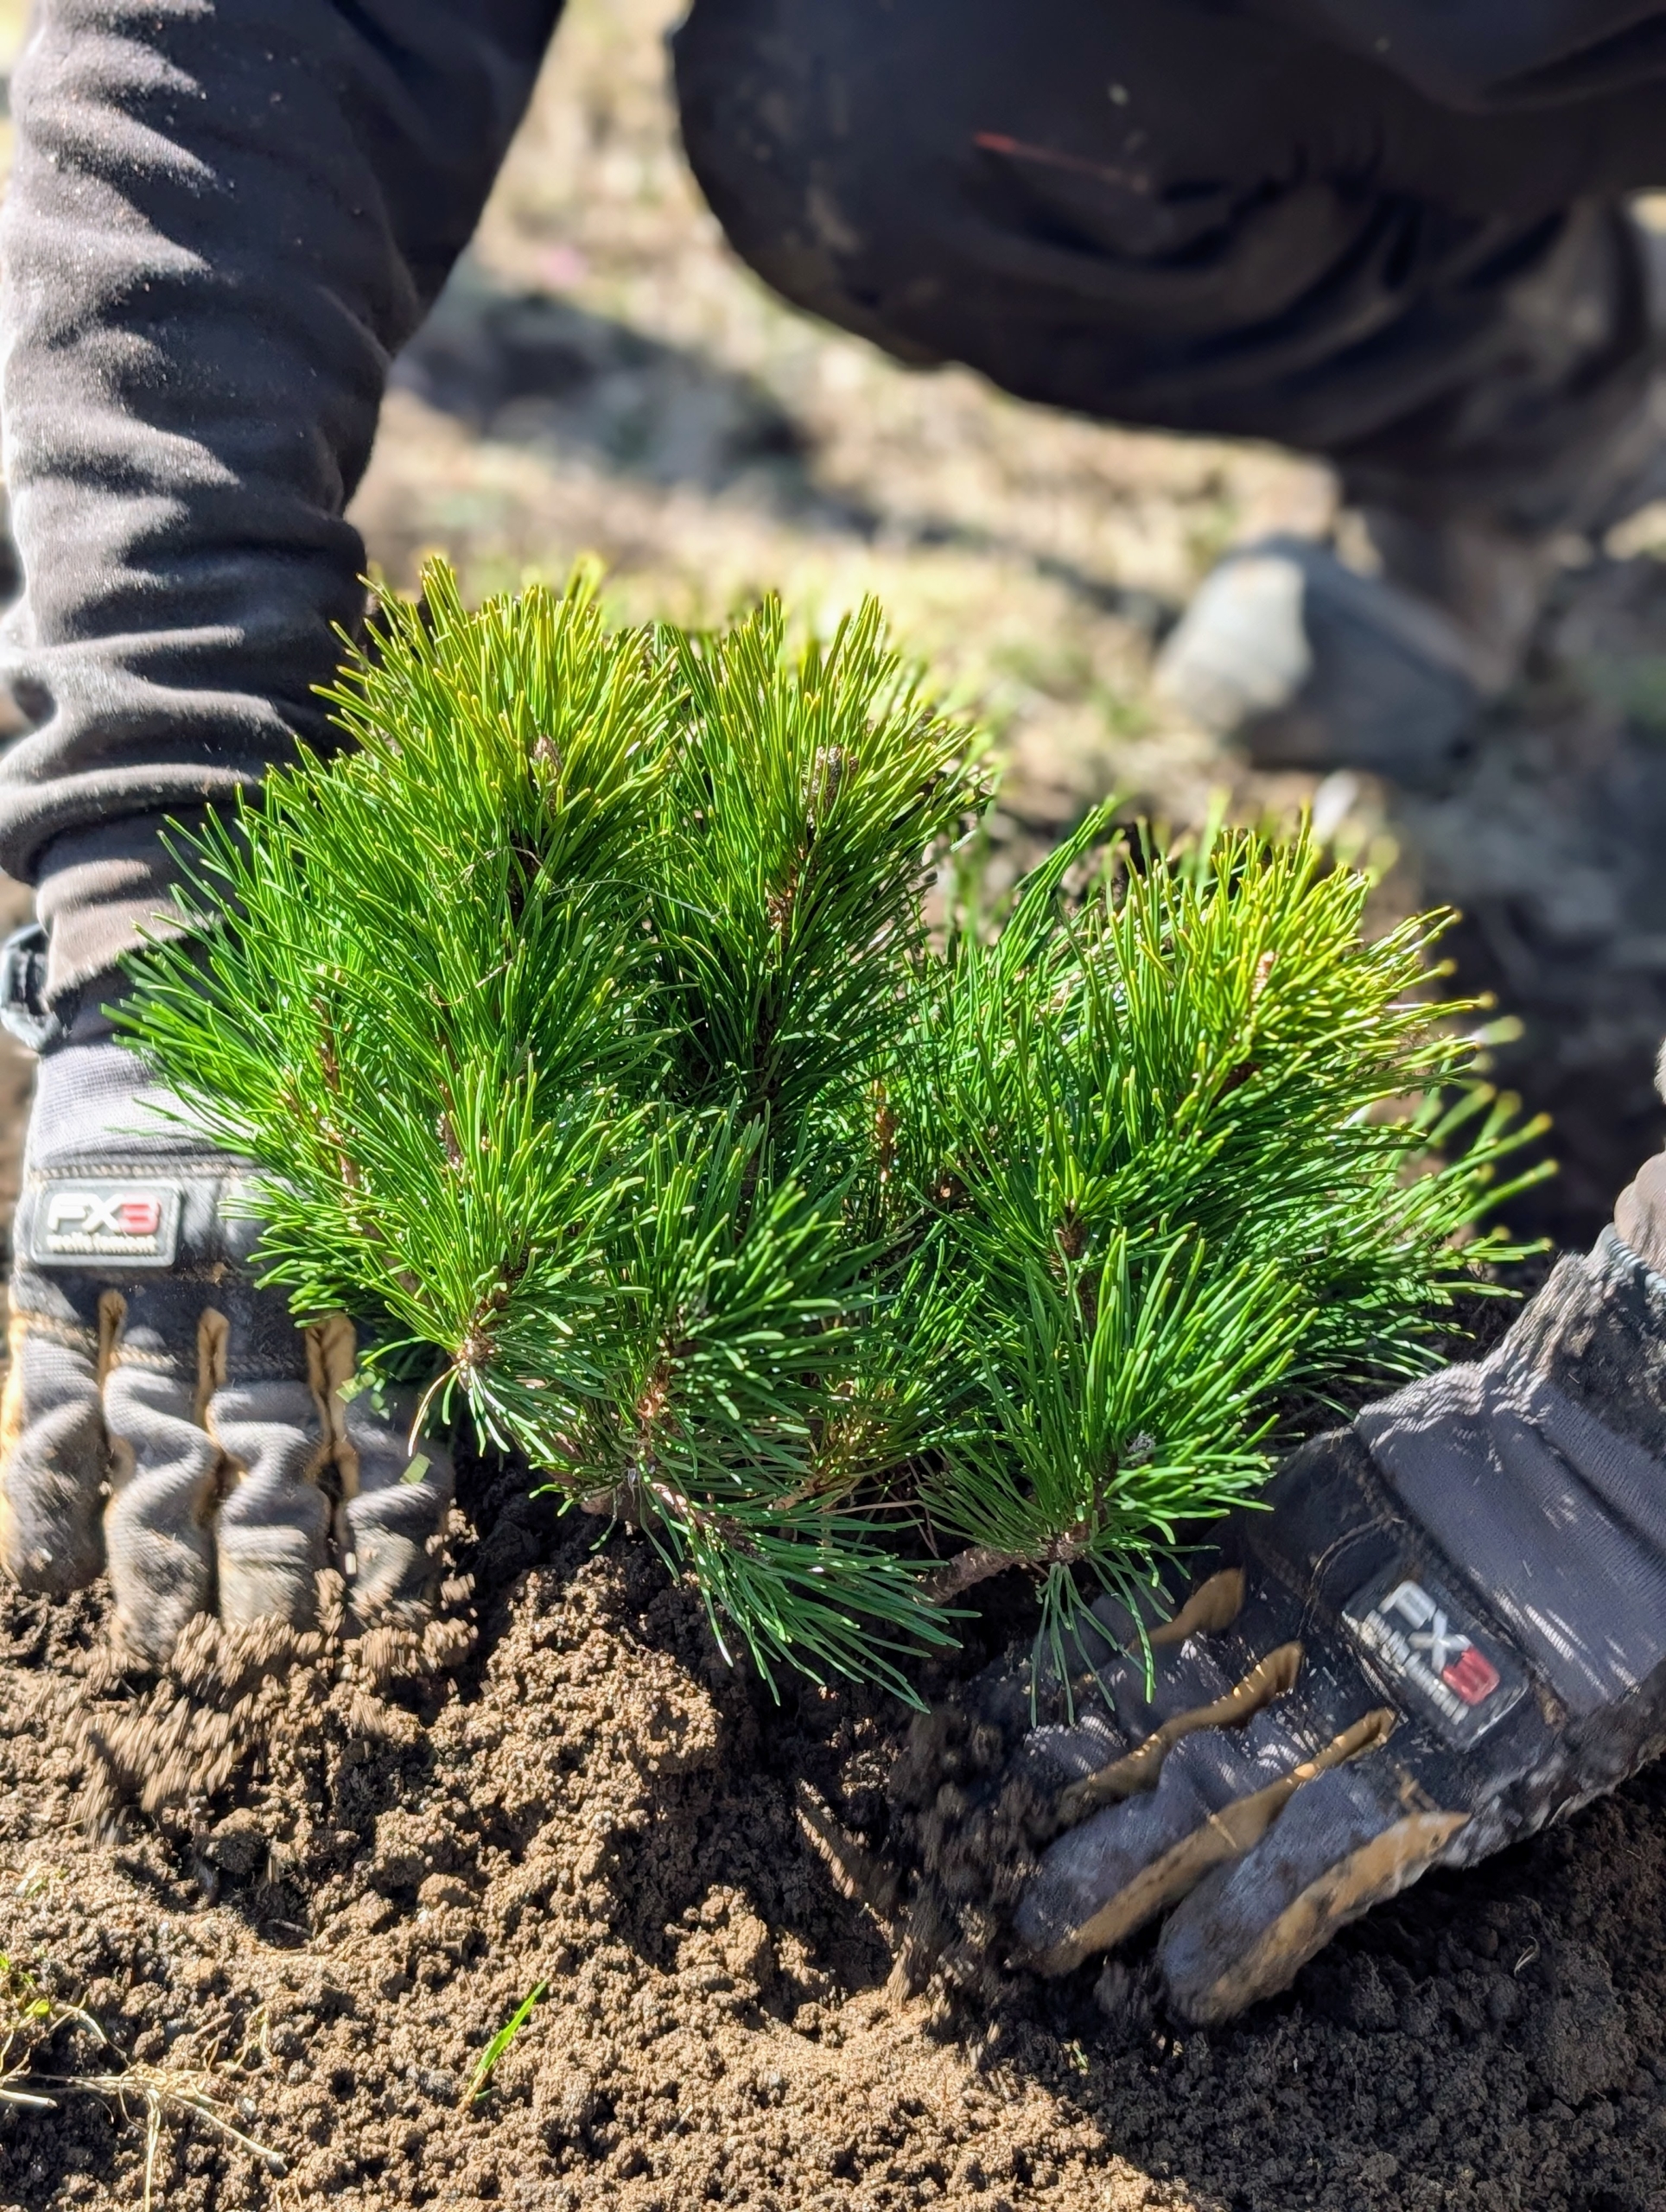
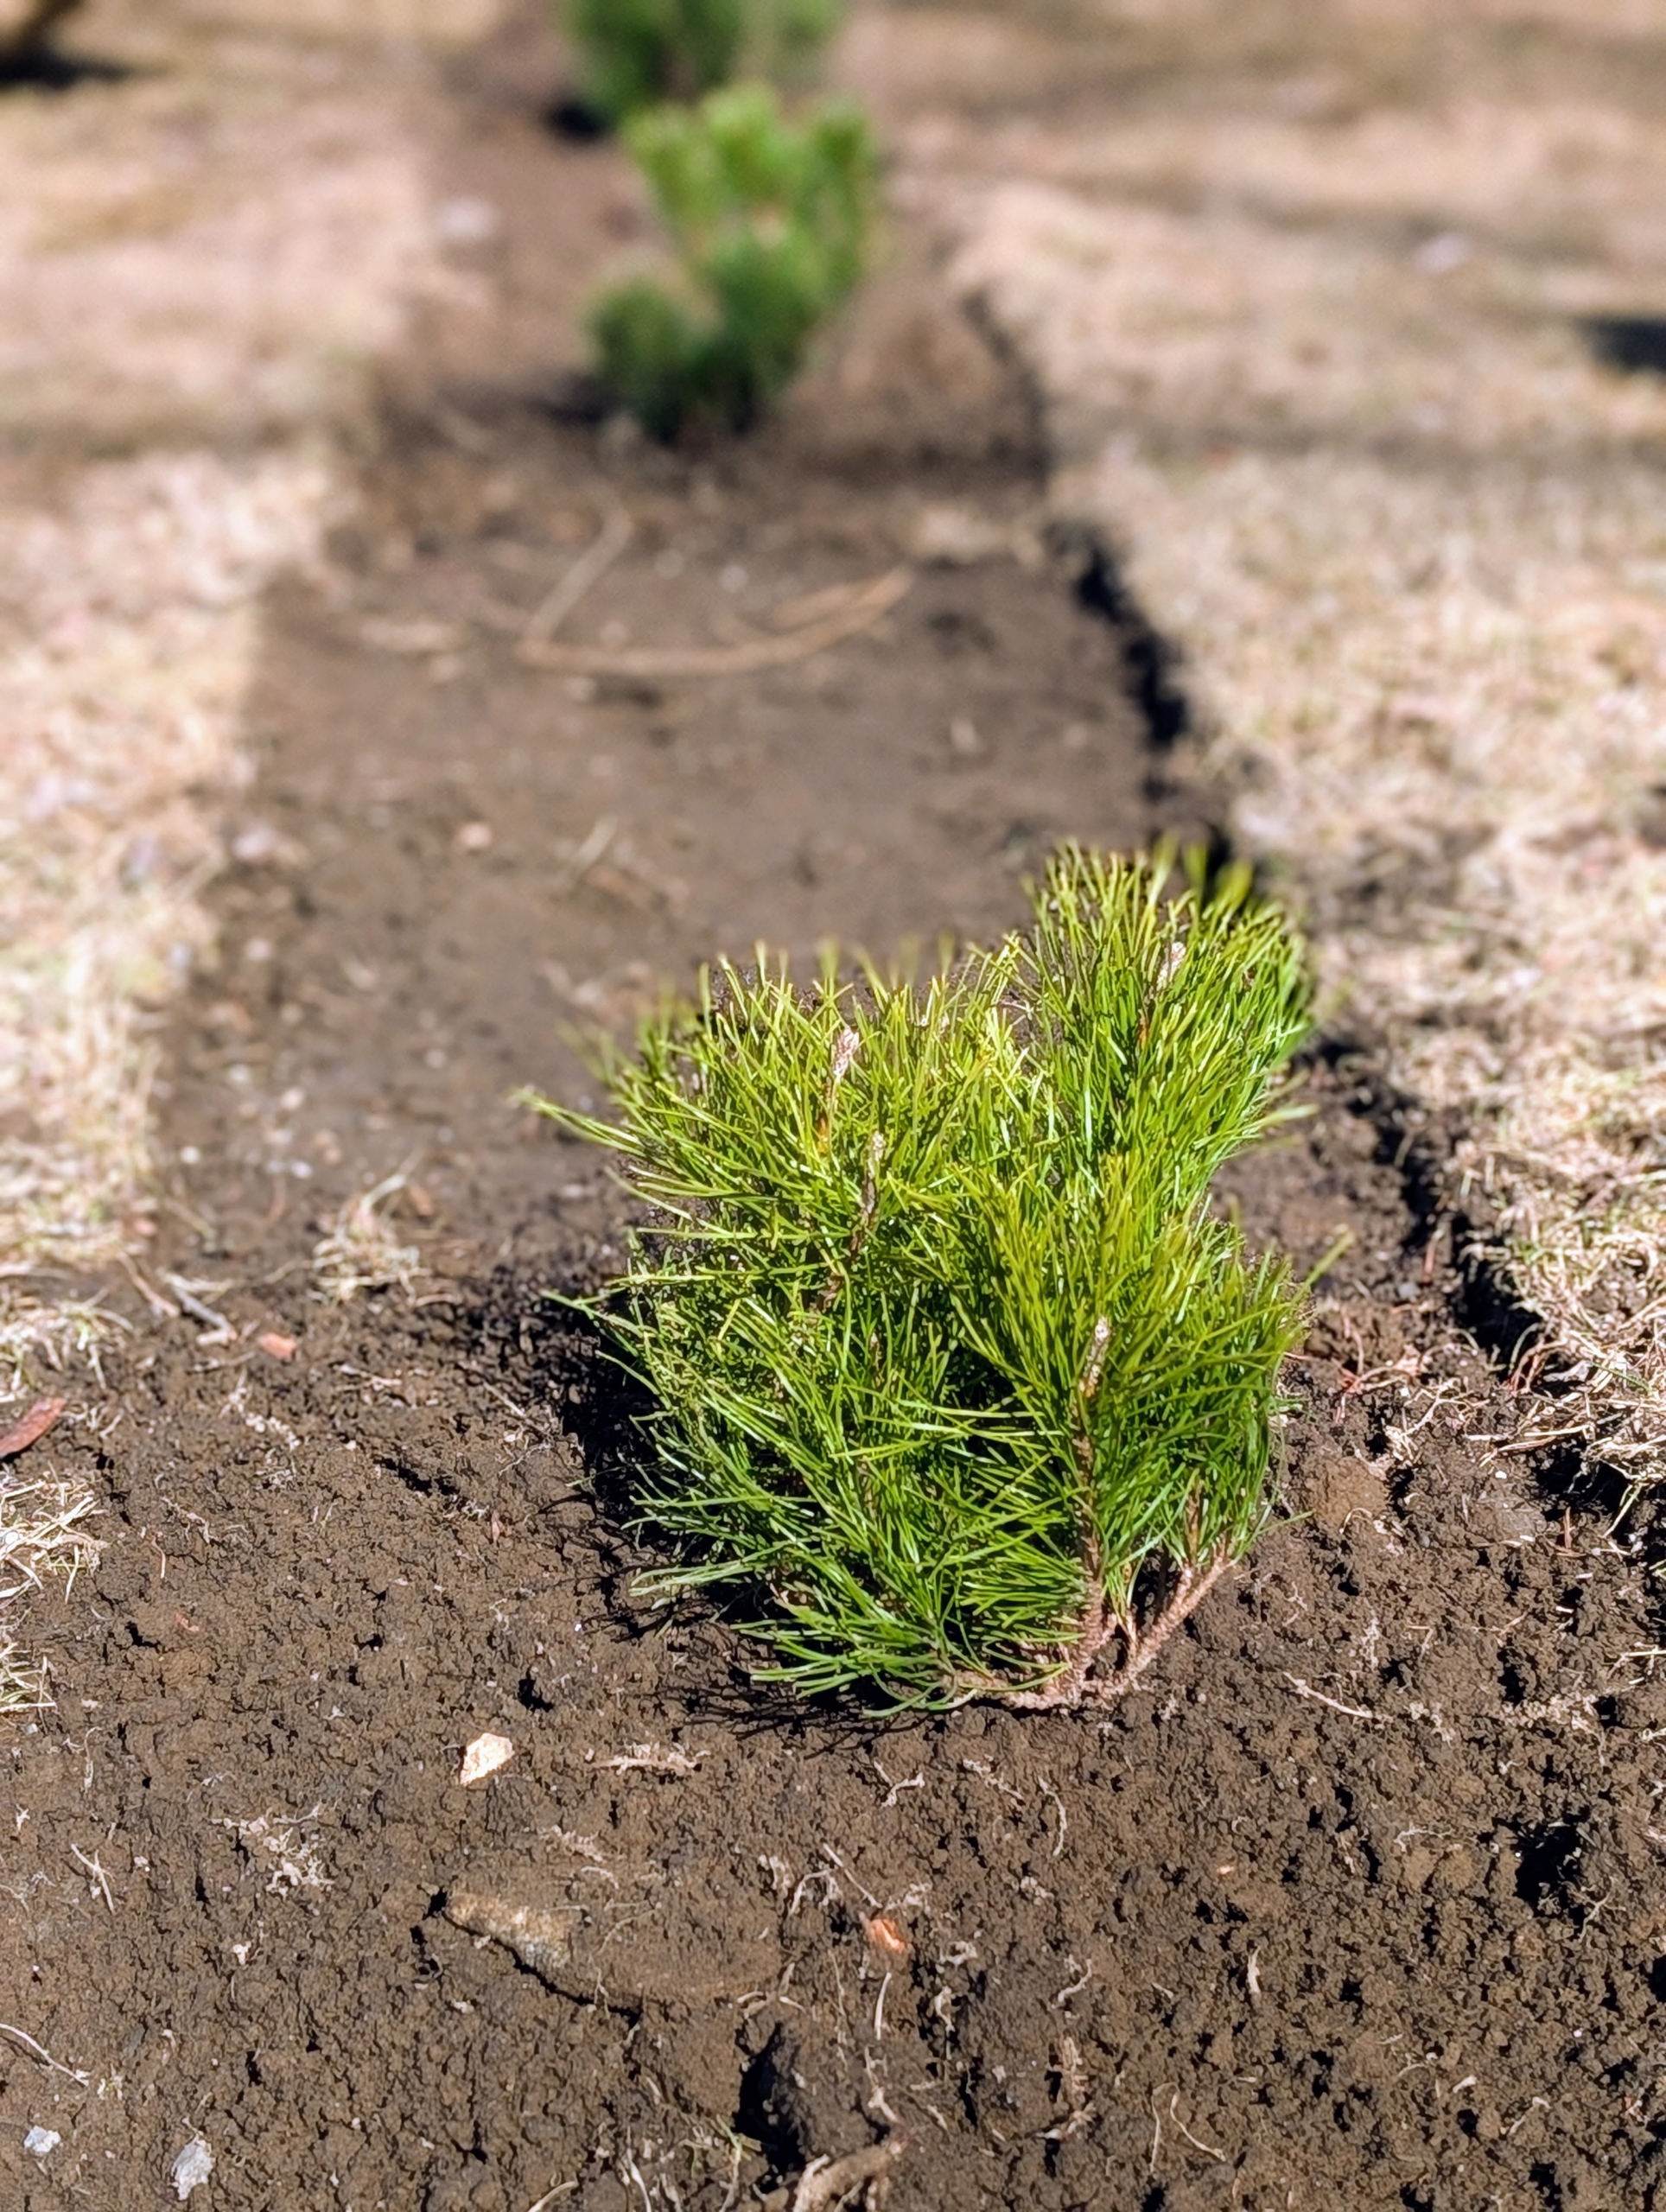
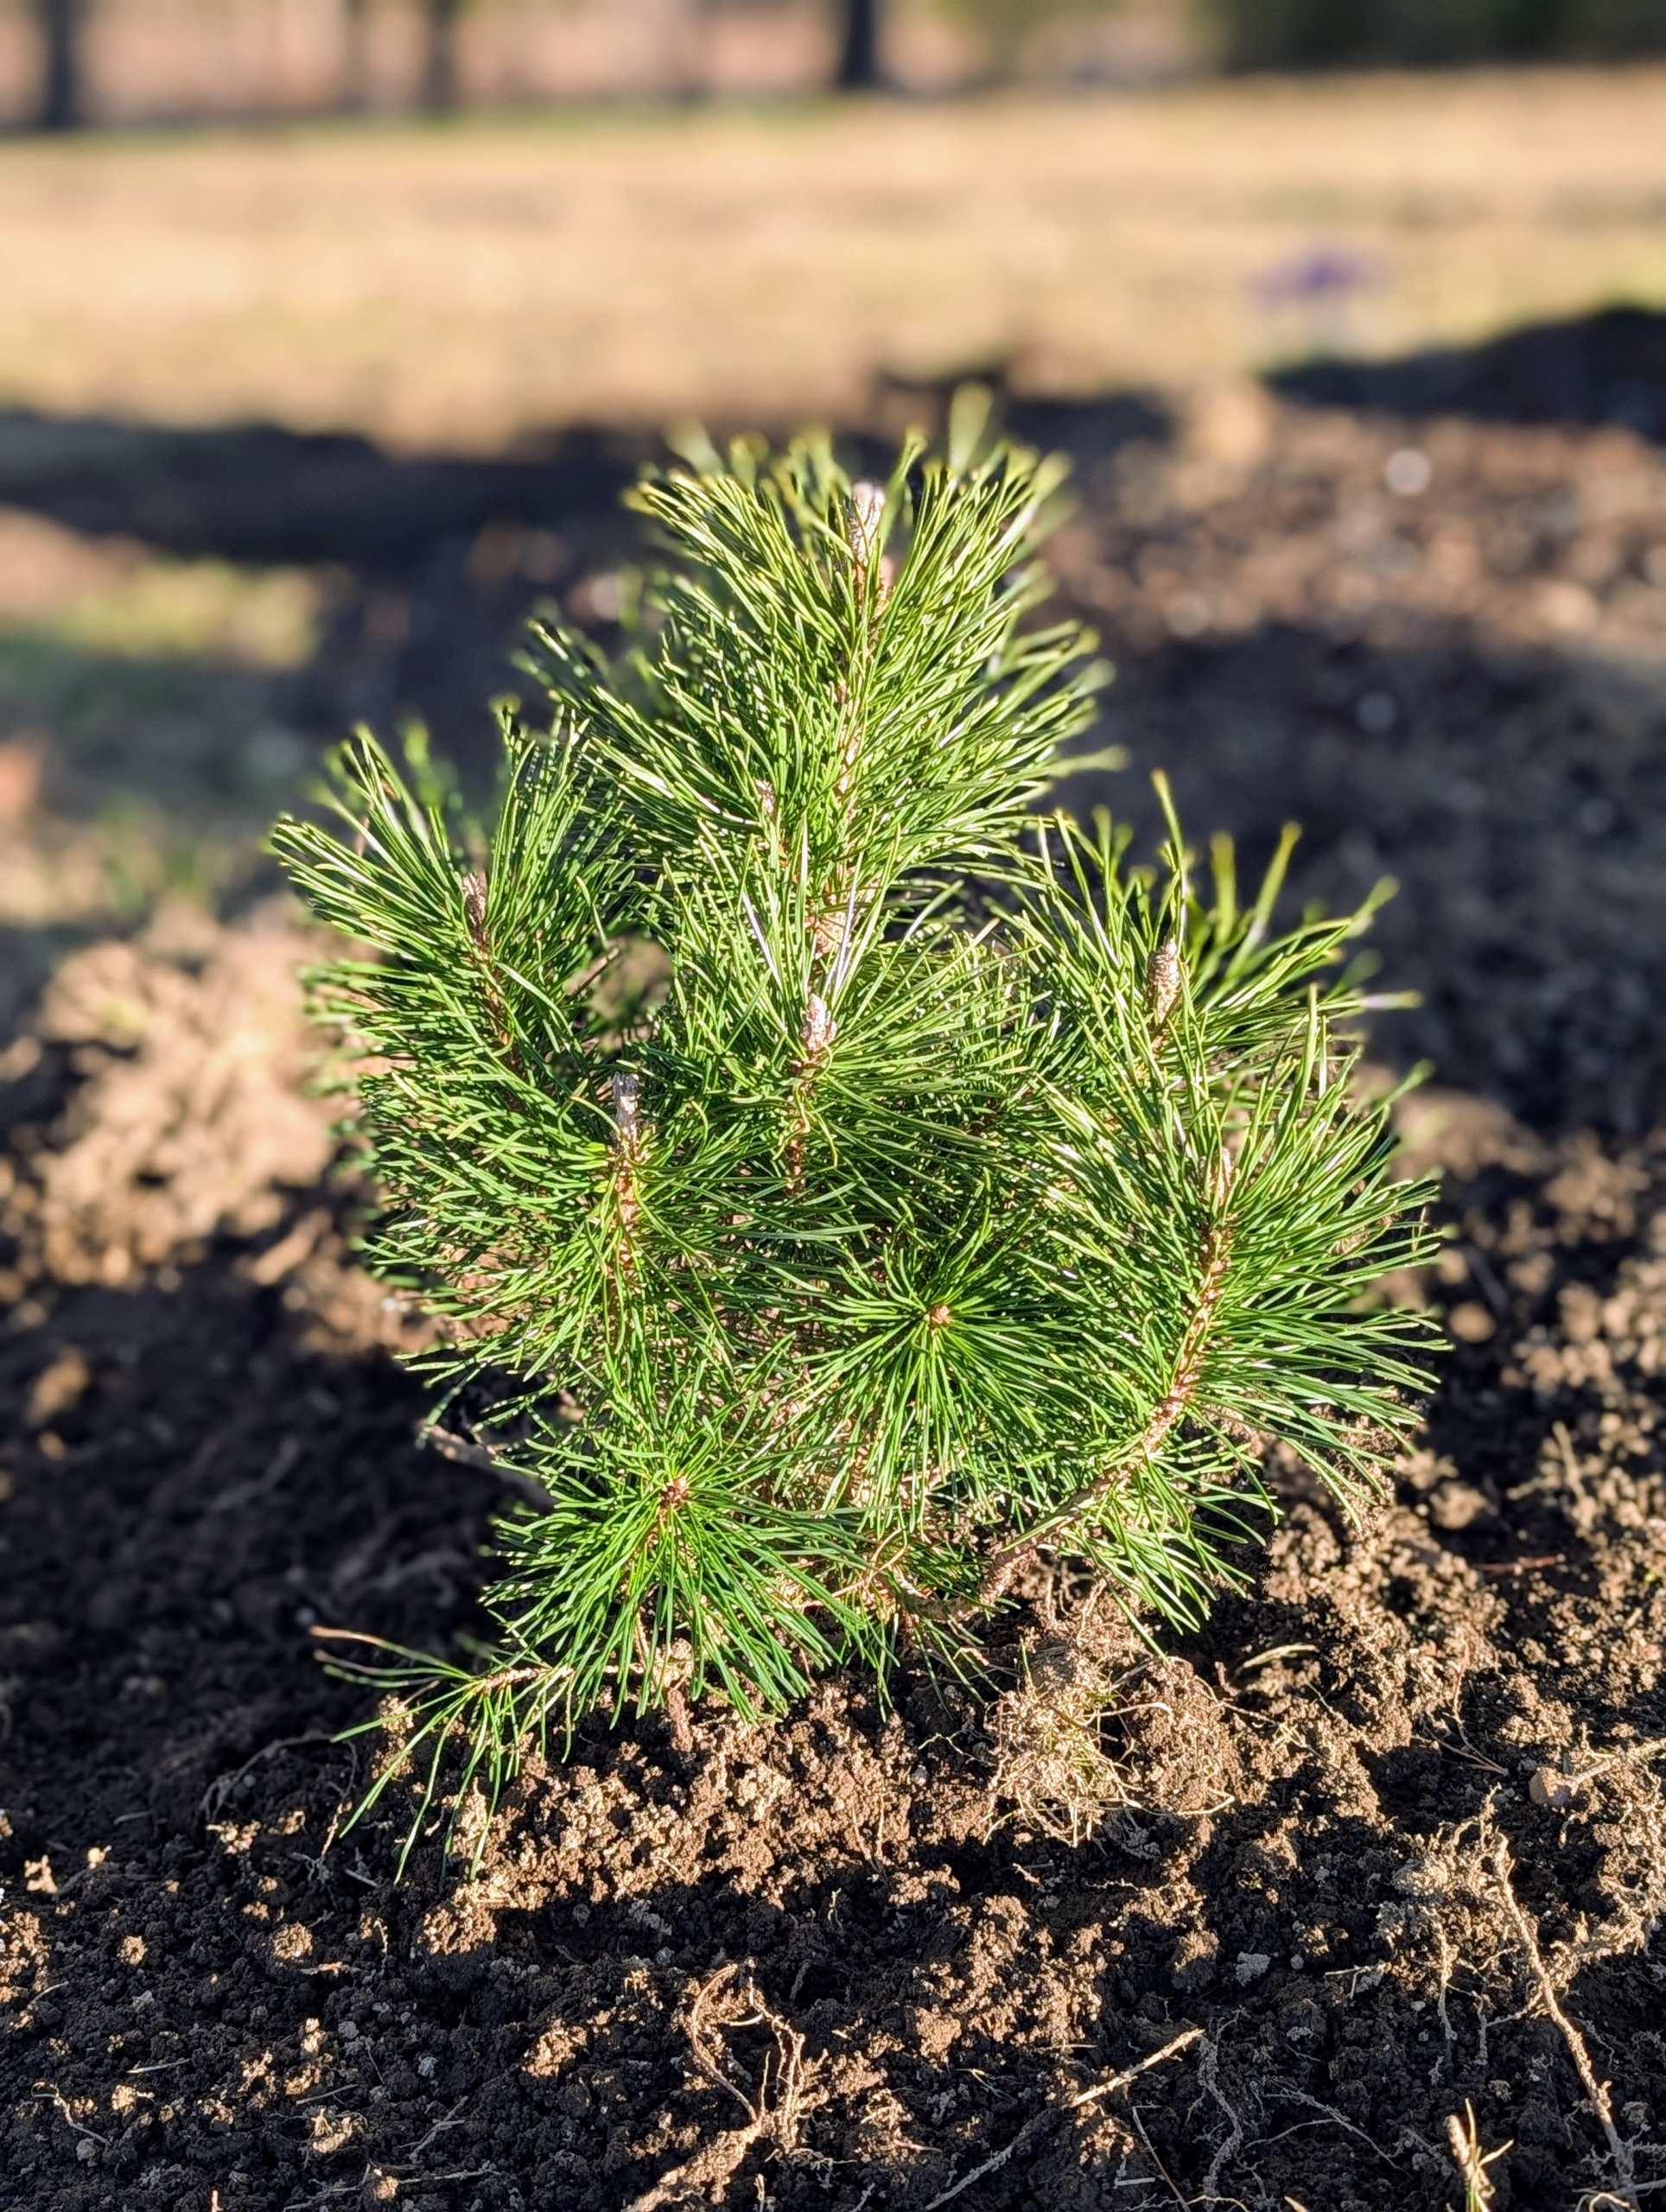
Mugo pines are popular and interesting evergreens. They add texture, color, and pleasing shape to the garden. I nurtured these specimens from bare root cuttings and they’ve done so well these last couple of years. It’s time to plant them in their permanent spots.
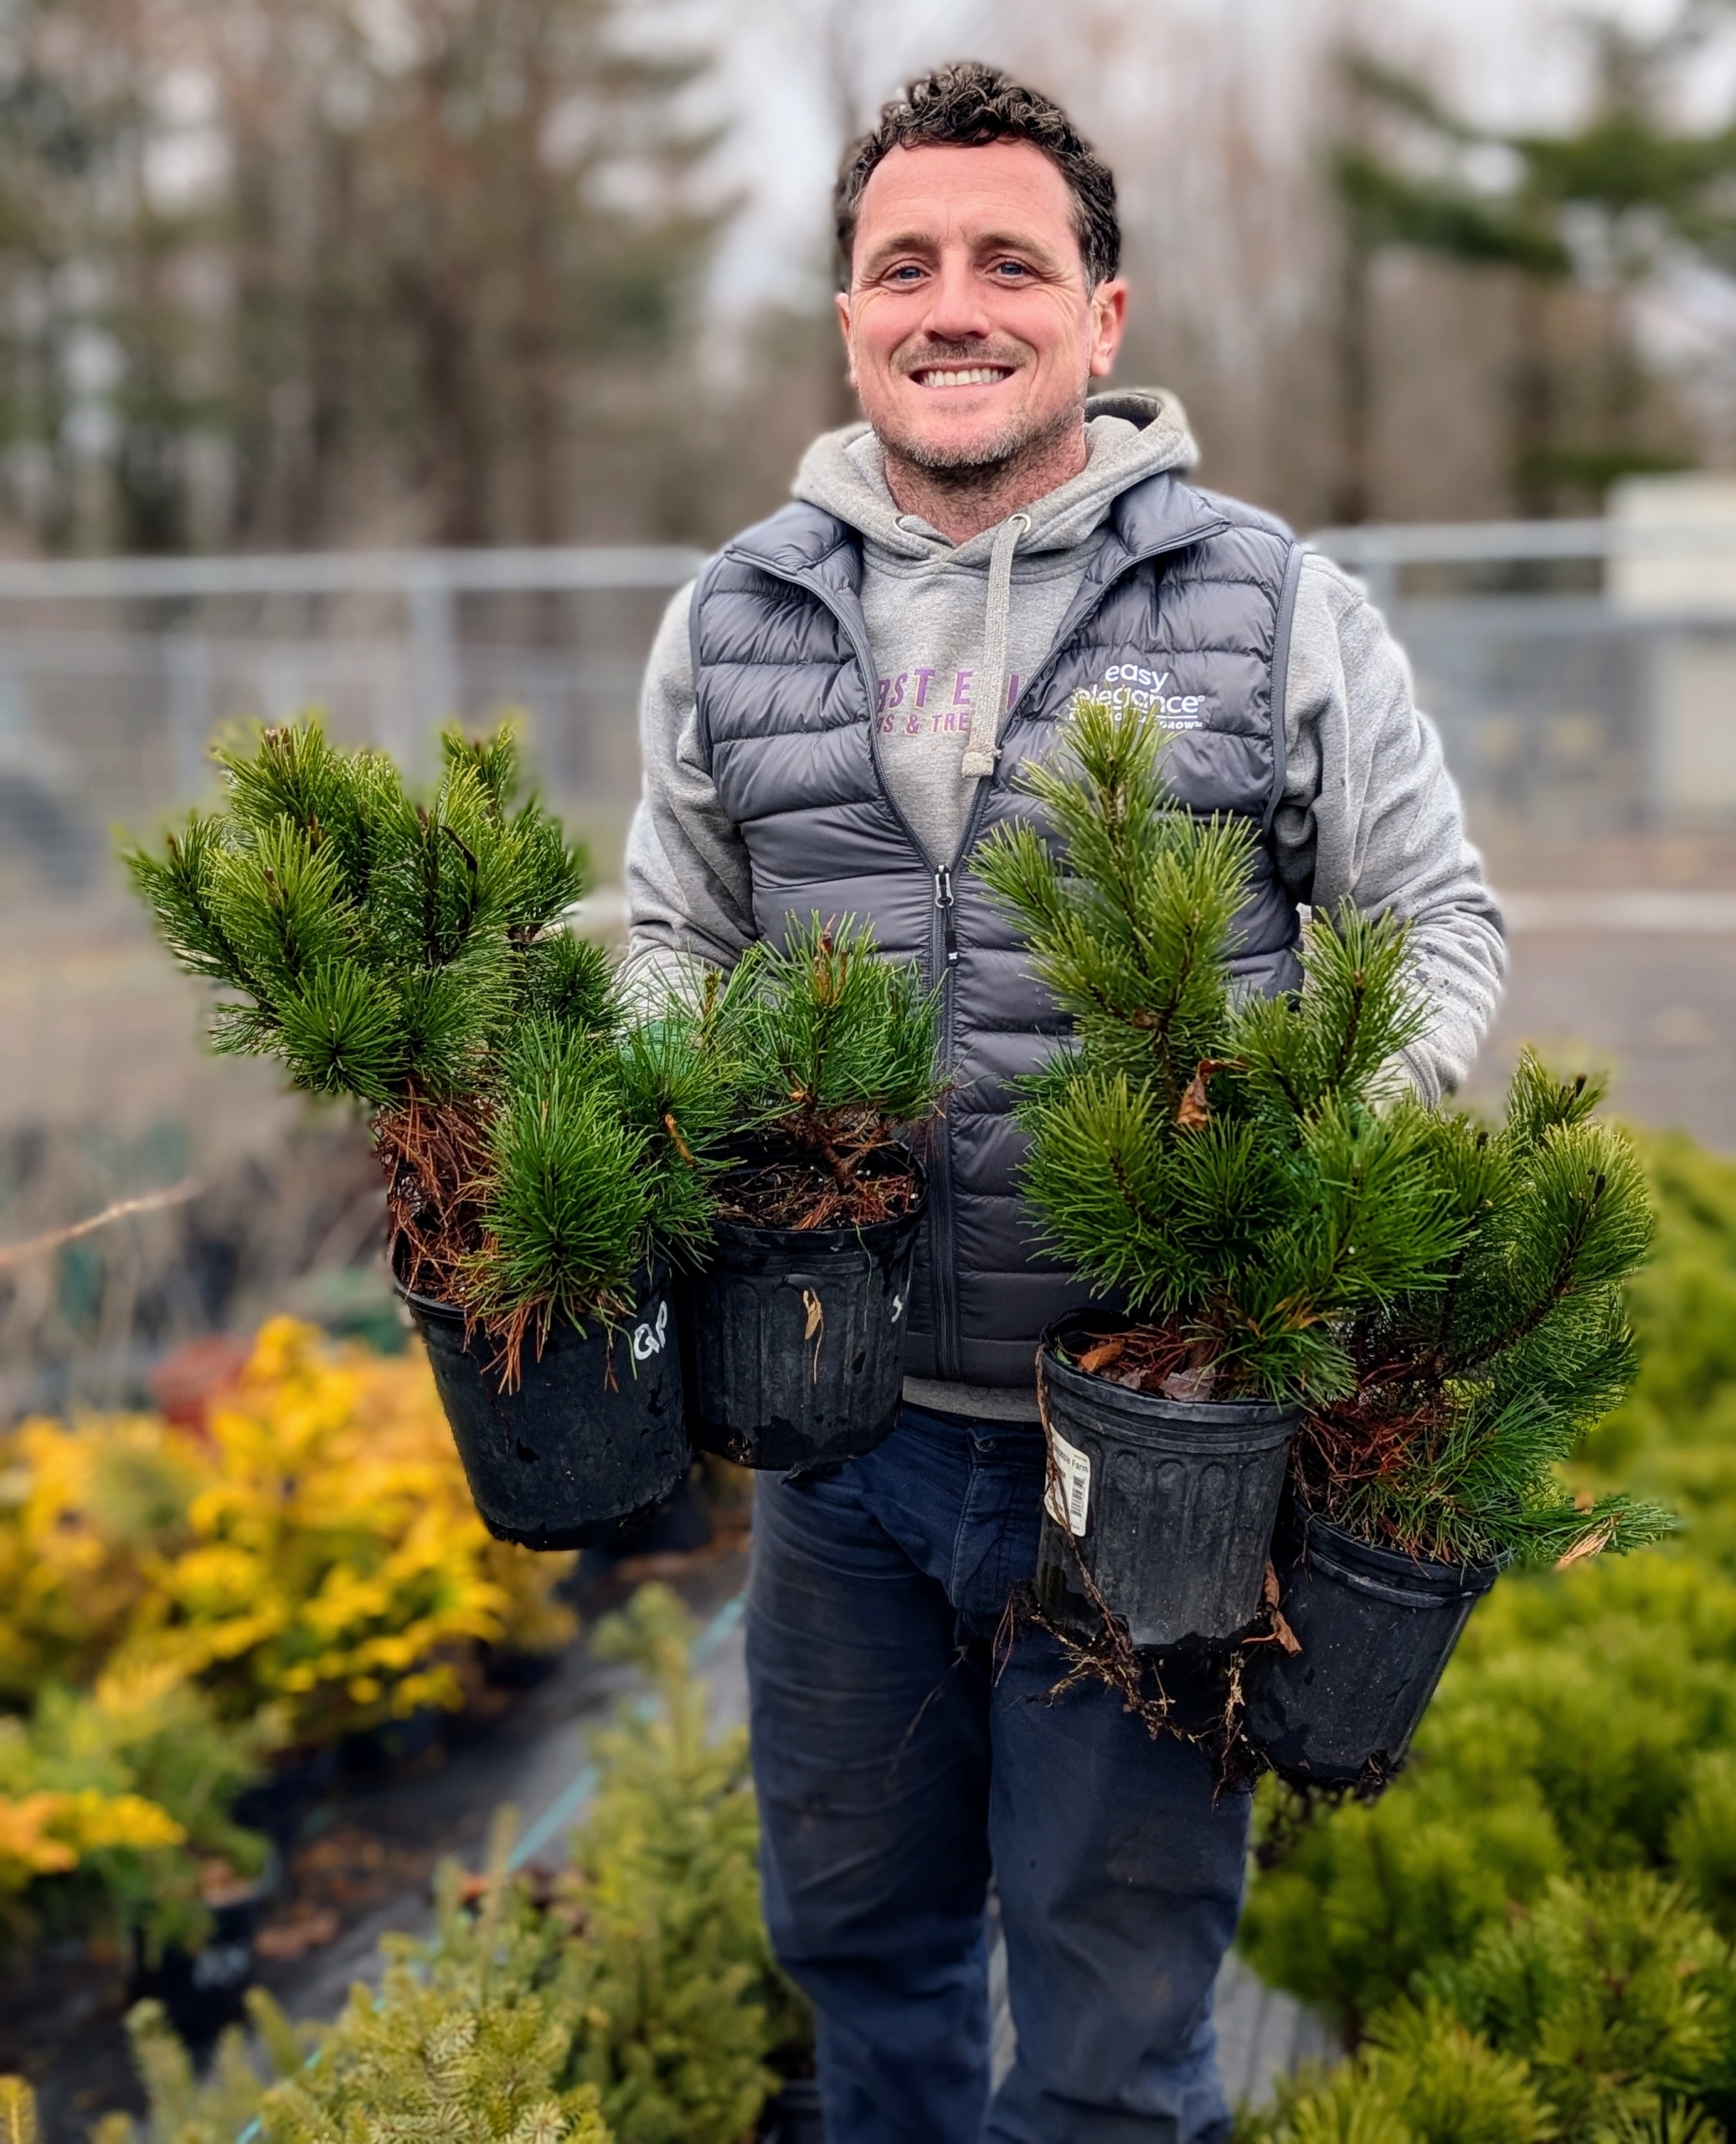
Here’s my head gardener, Ryan McCallister, moving a selection of Mugo pines to my pinetum for a border.
Mugo pines, Pinus mugo, are dense shrubs native to mountainous areas in central and southern Europe. The will make a nice border for this garden.
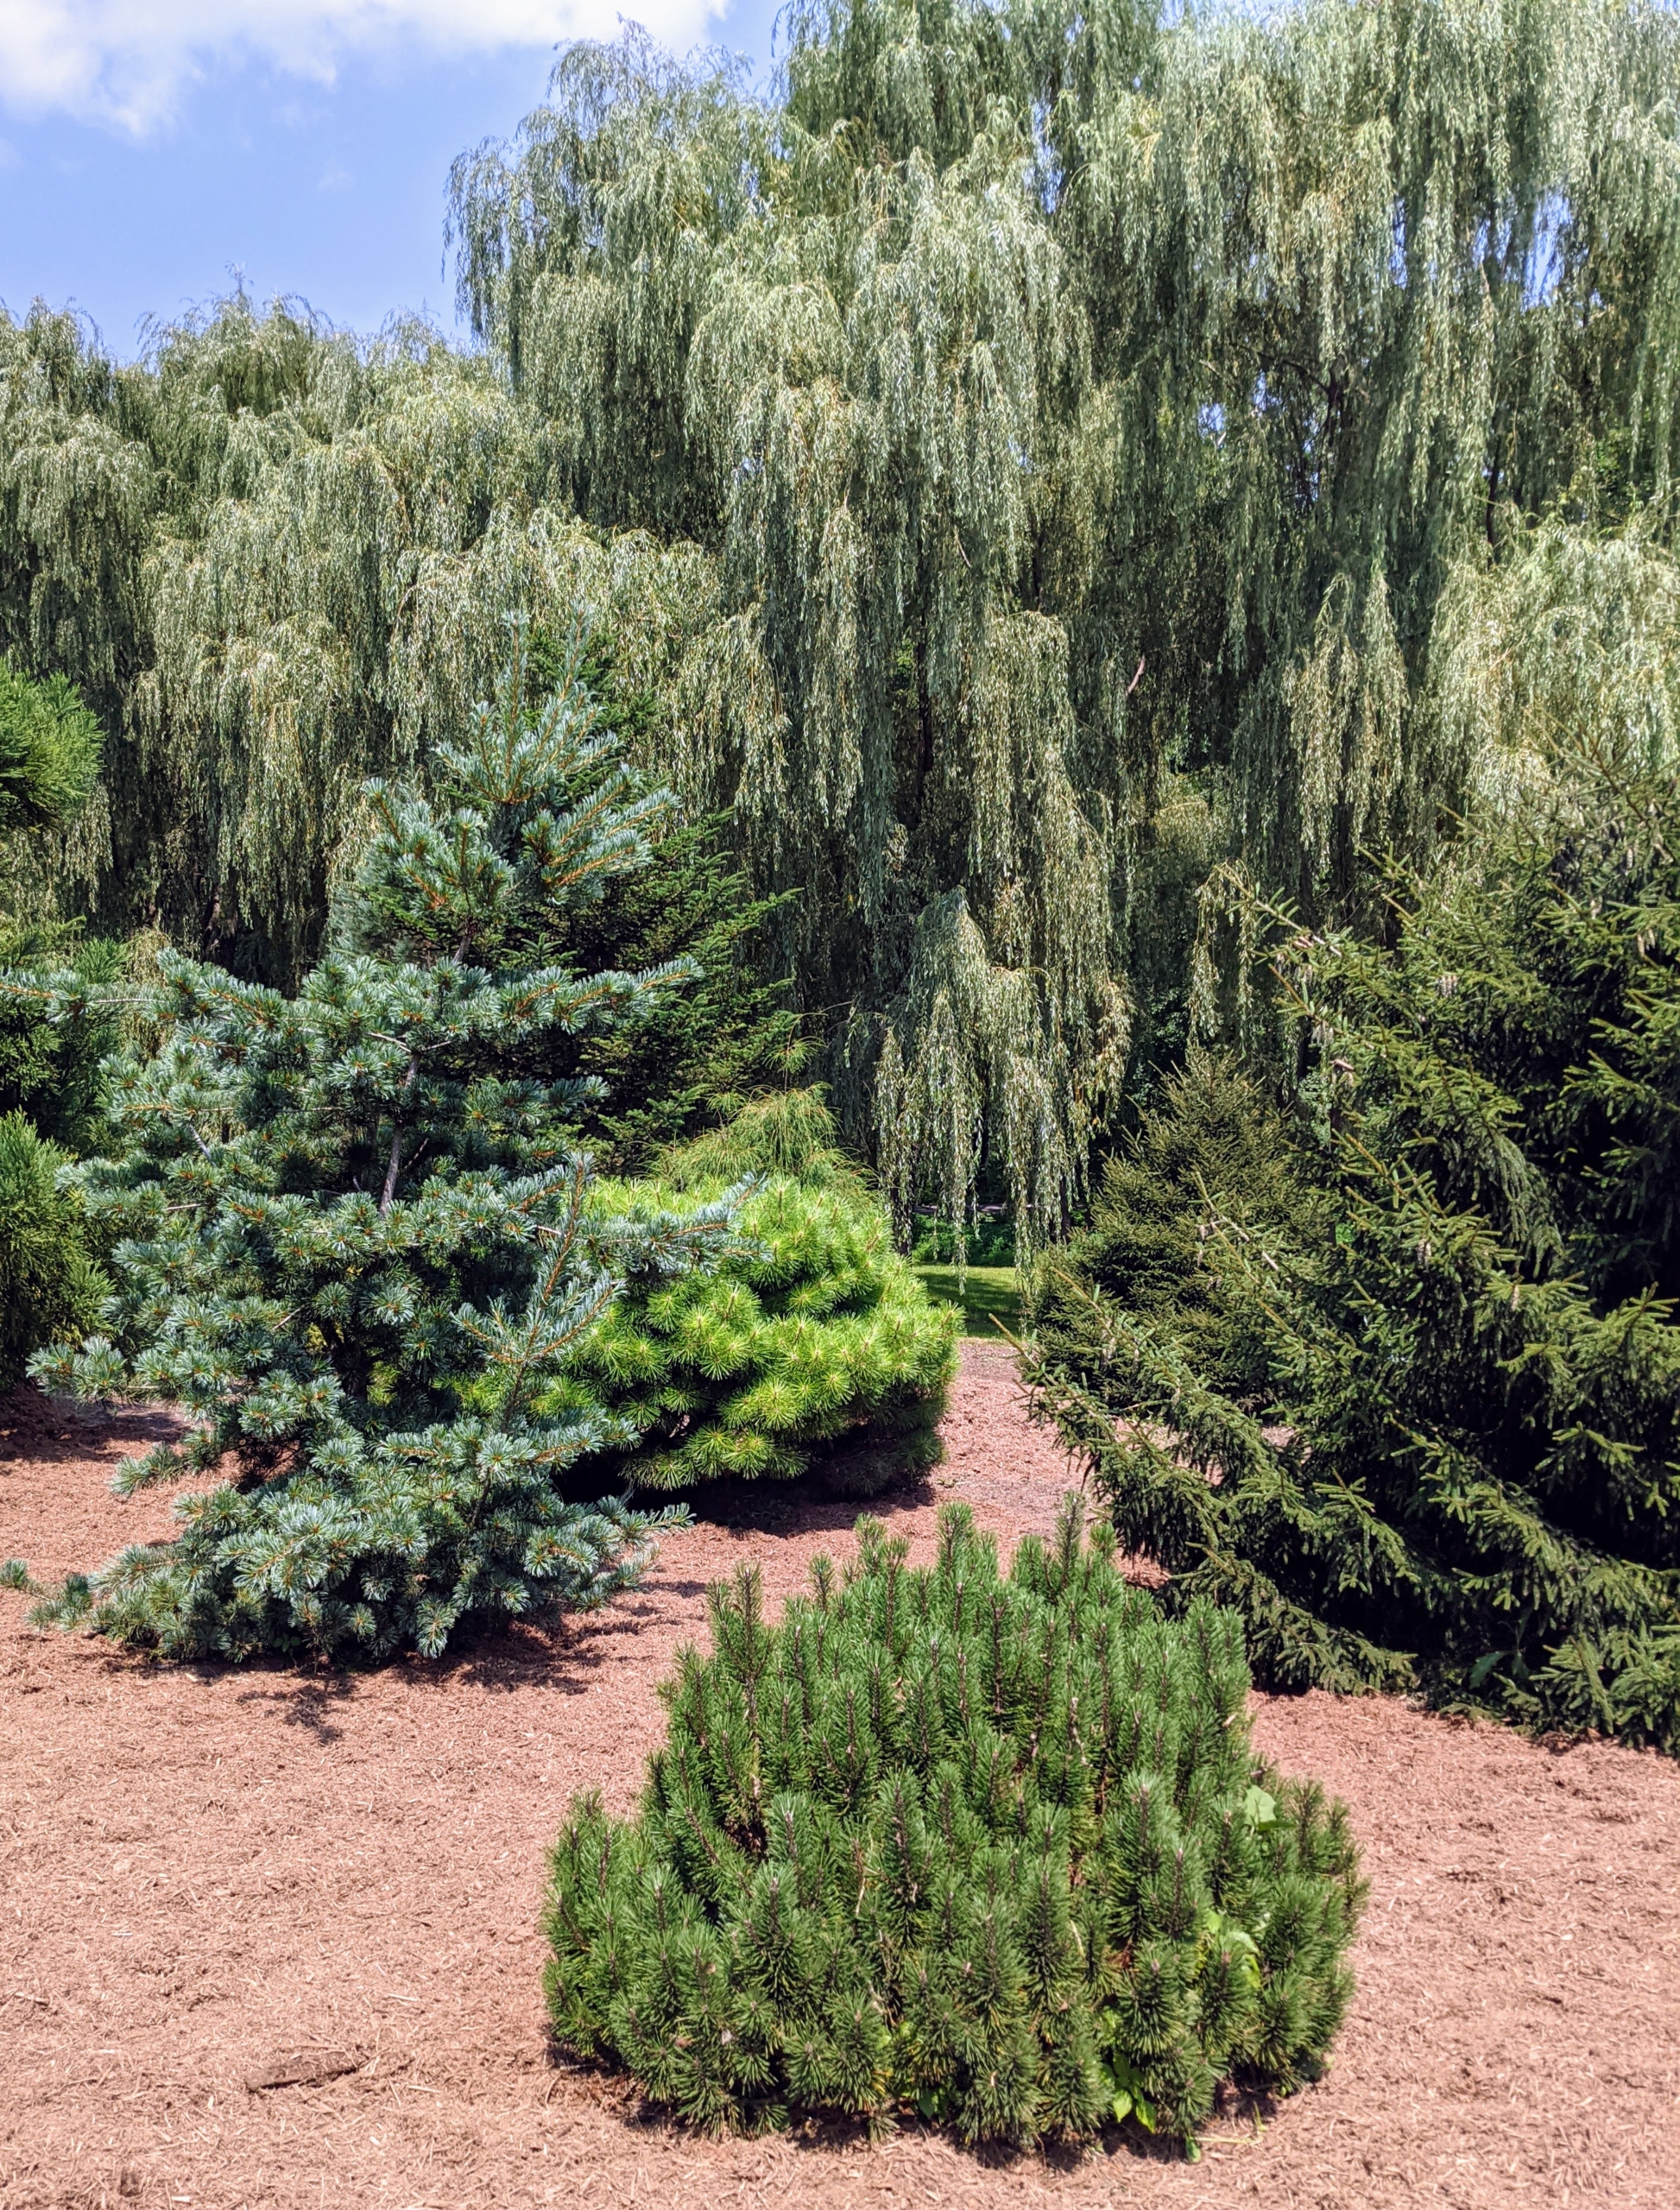
This is my pinetum in summer. It is filled with many different shapes and sizes of evergreens. Over time, this area will fill out more and more.
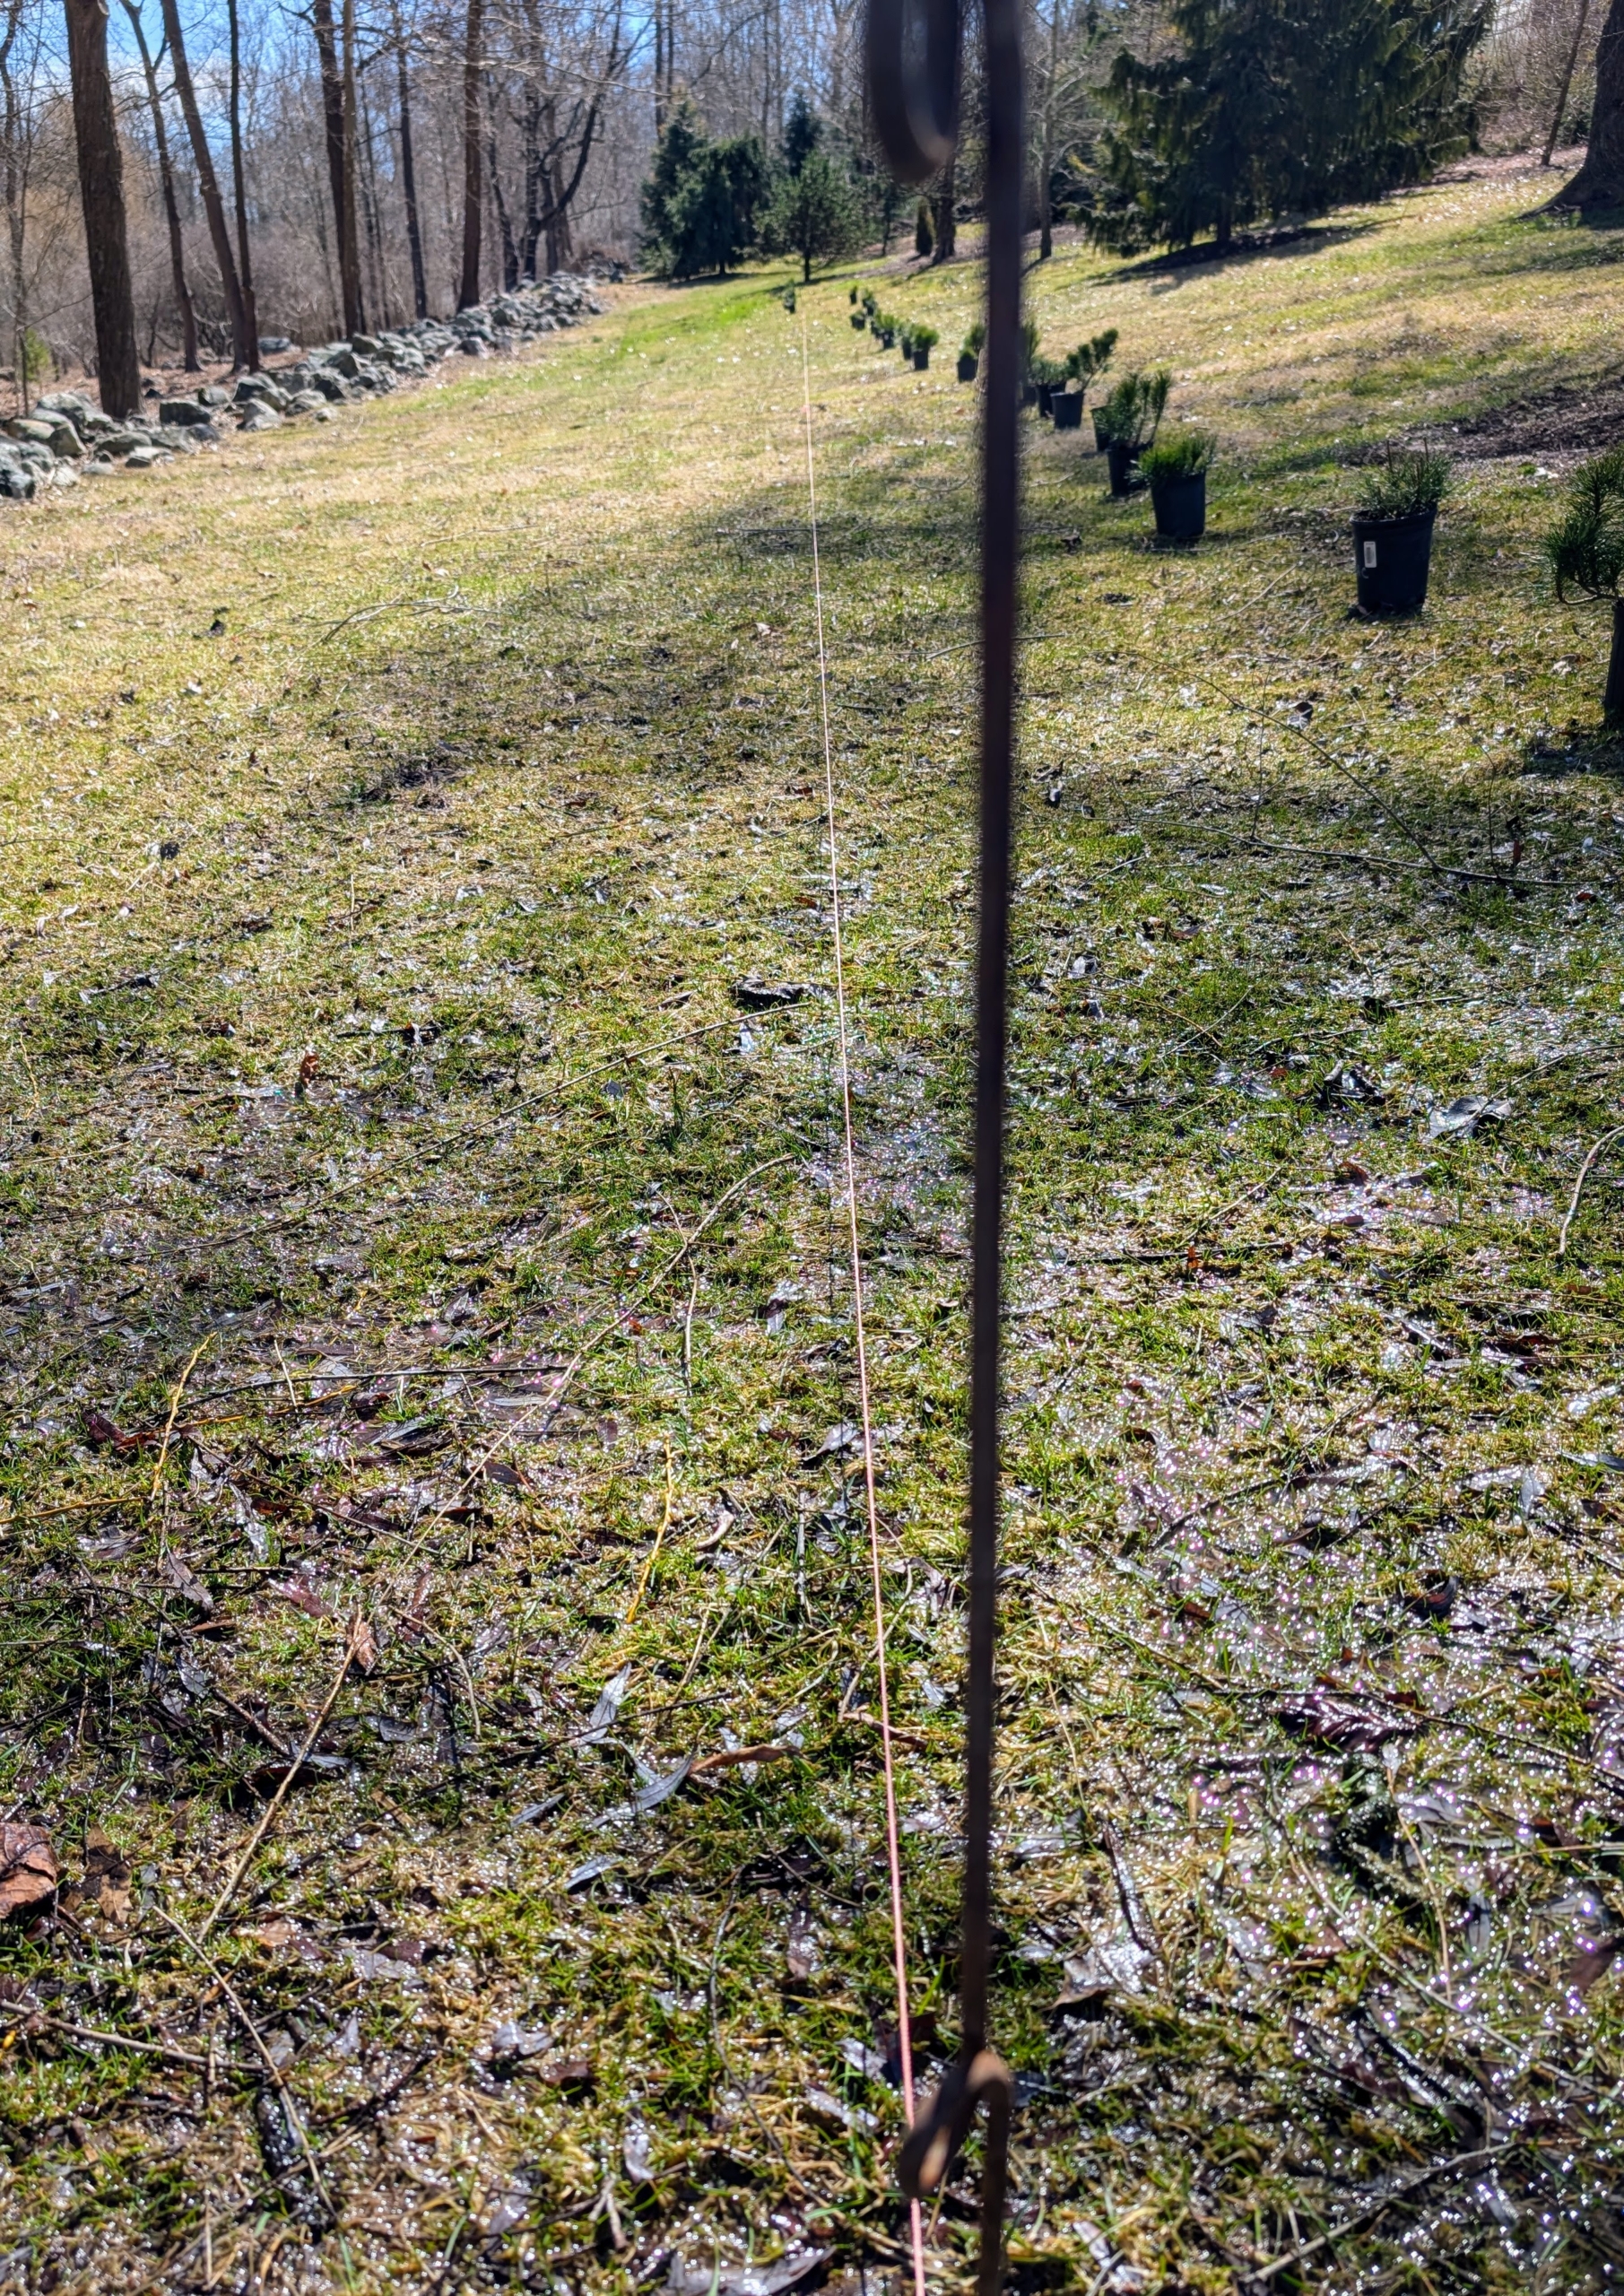
All the potted pines are unloaded and placed to the side while the area is prepared for planting.
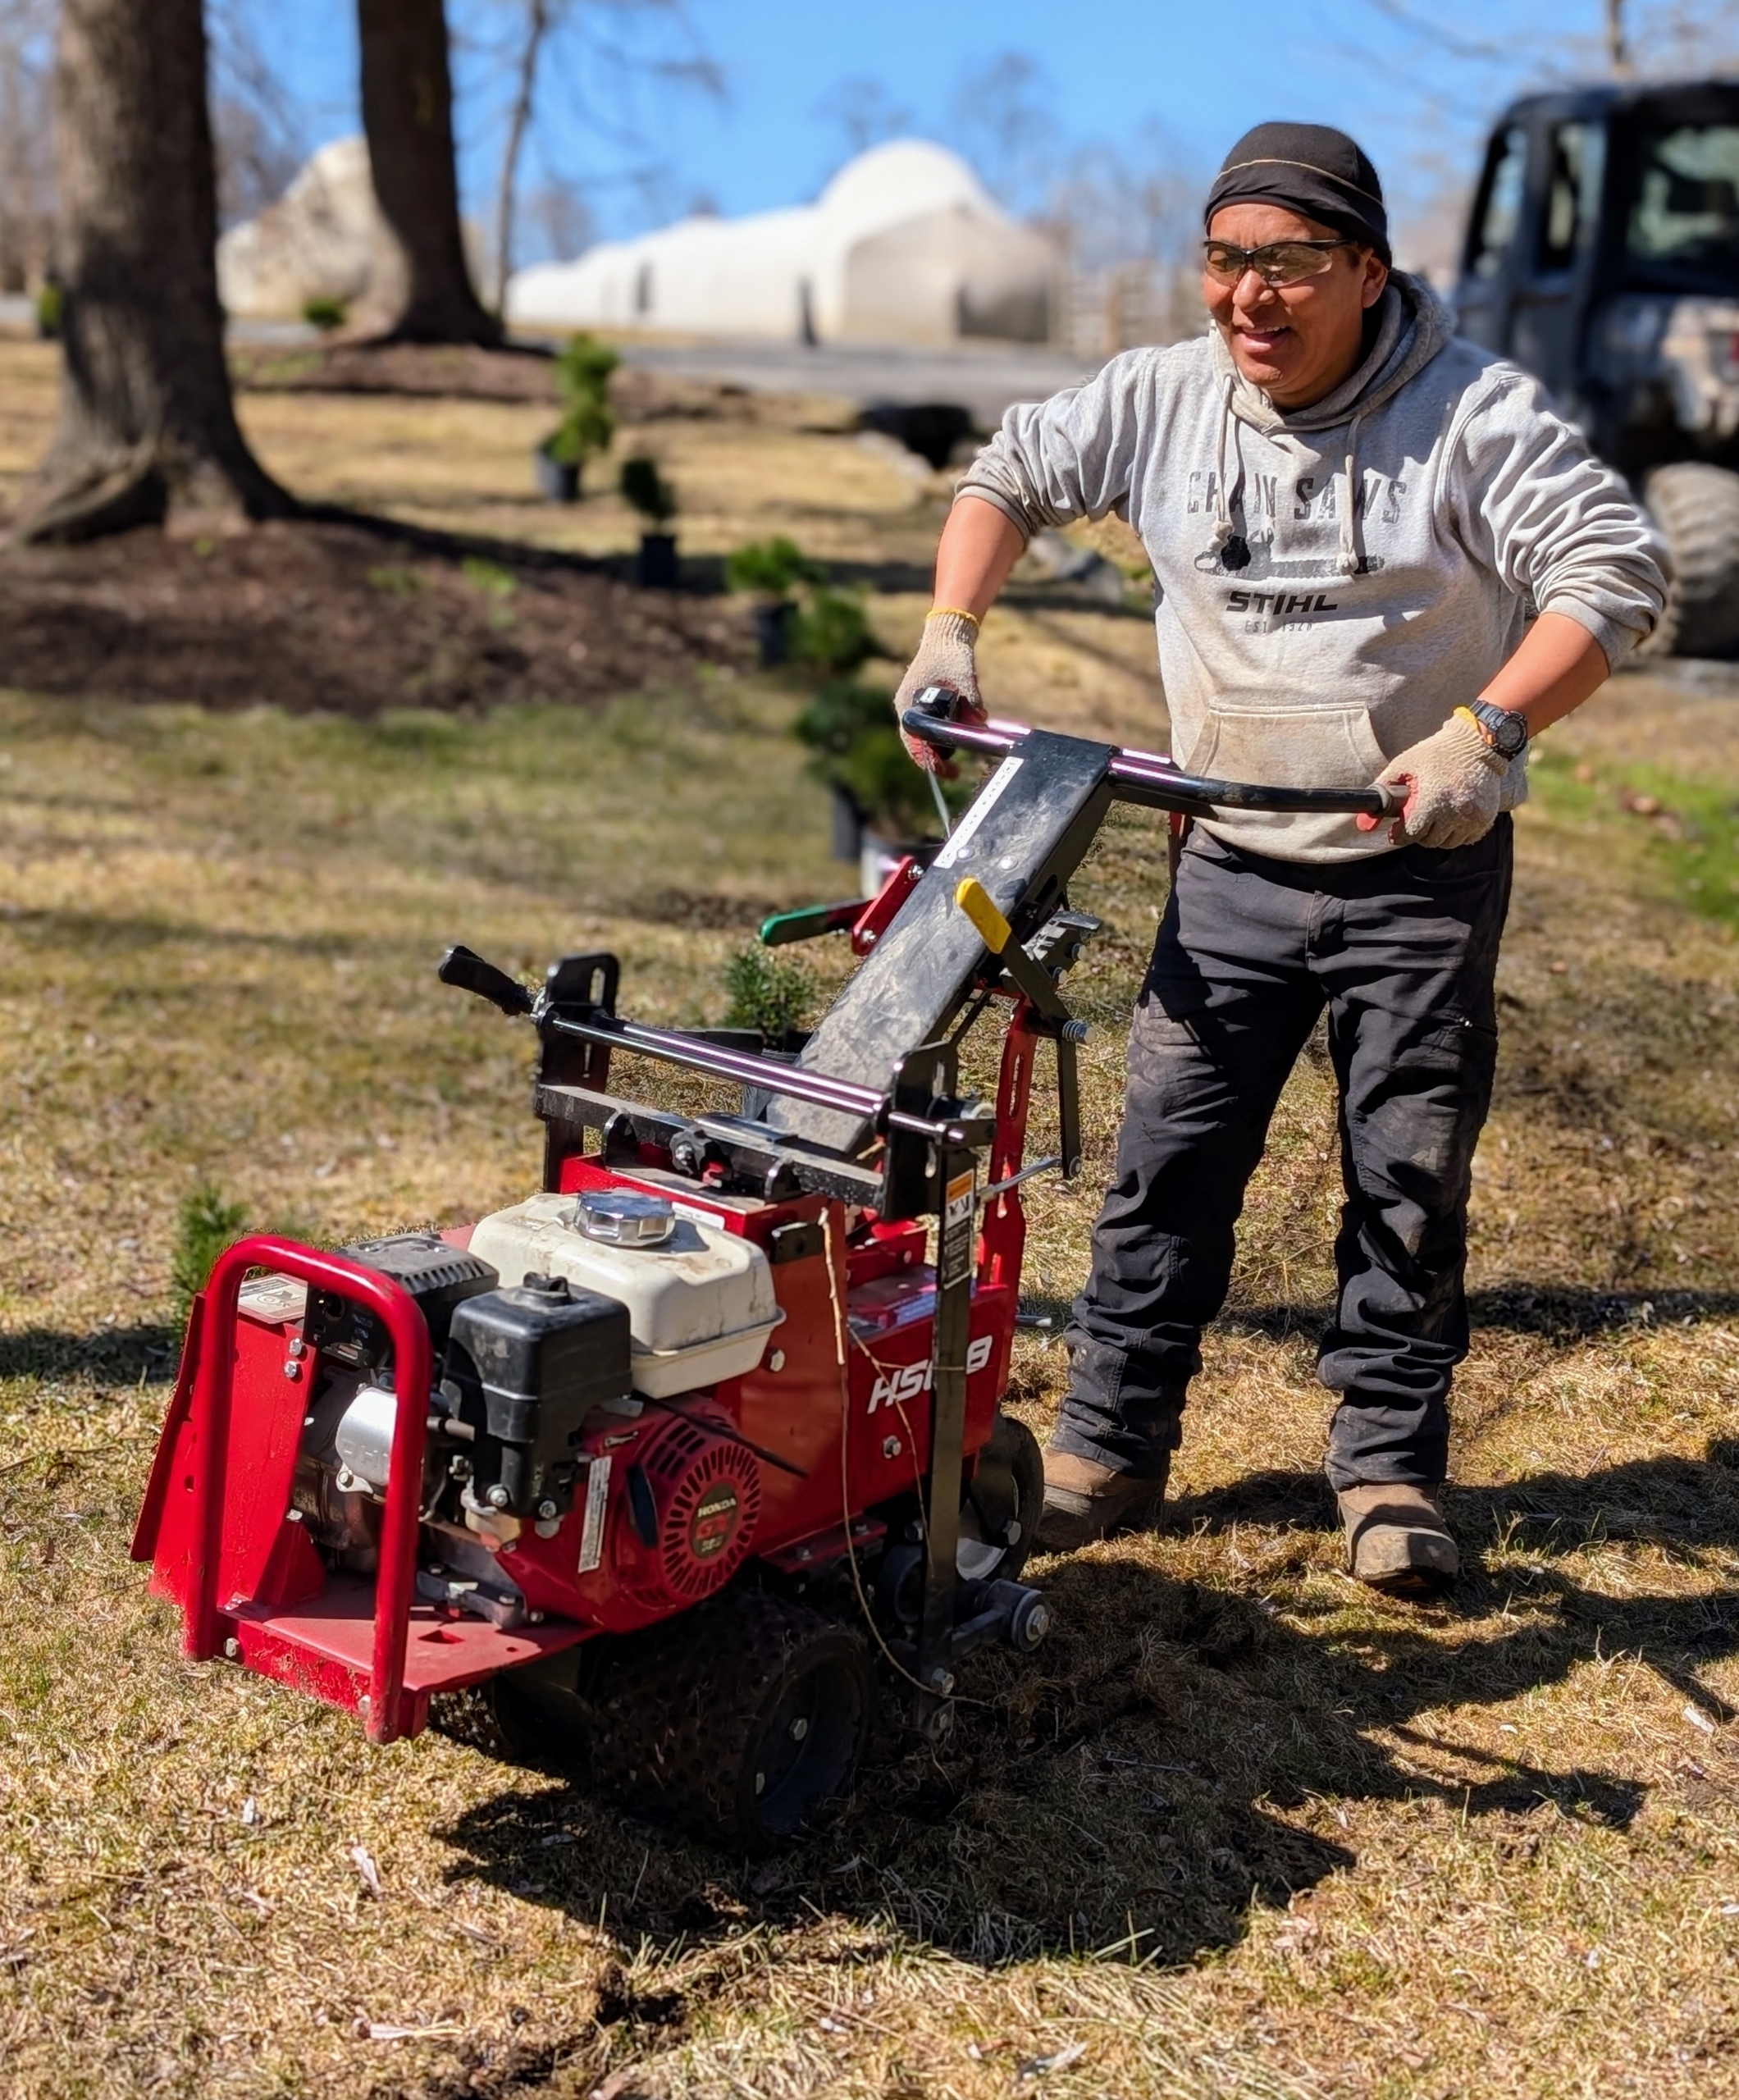
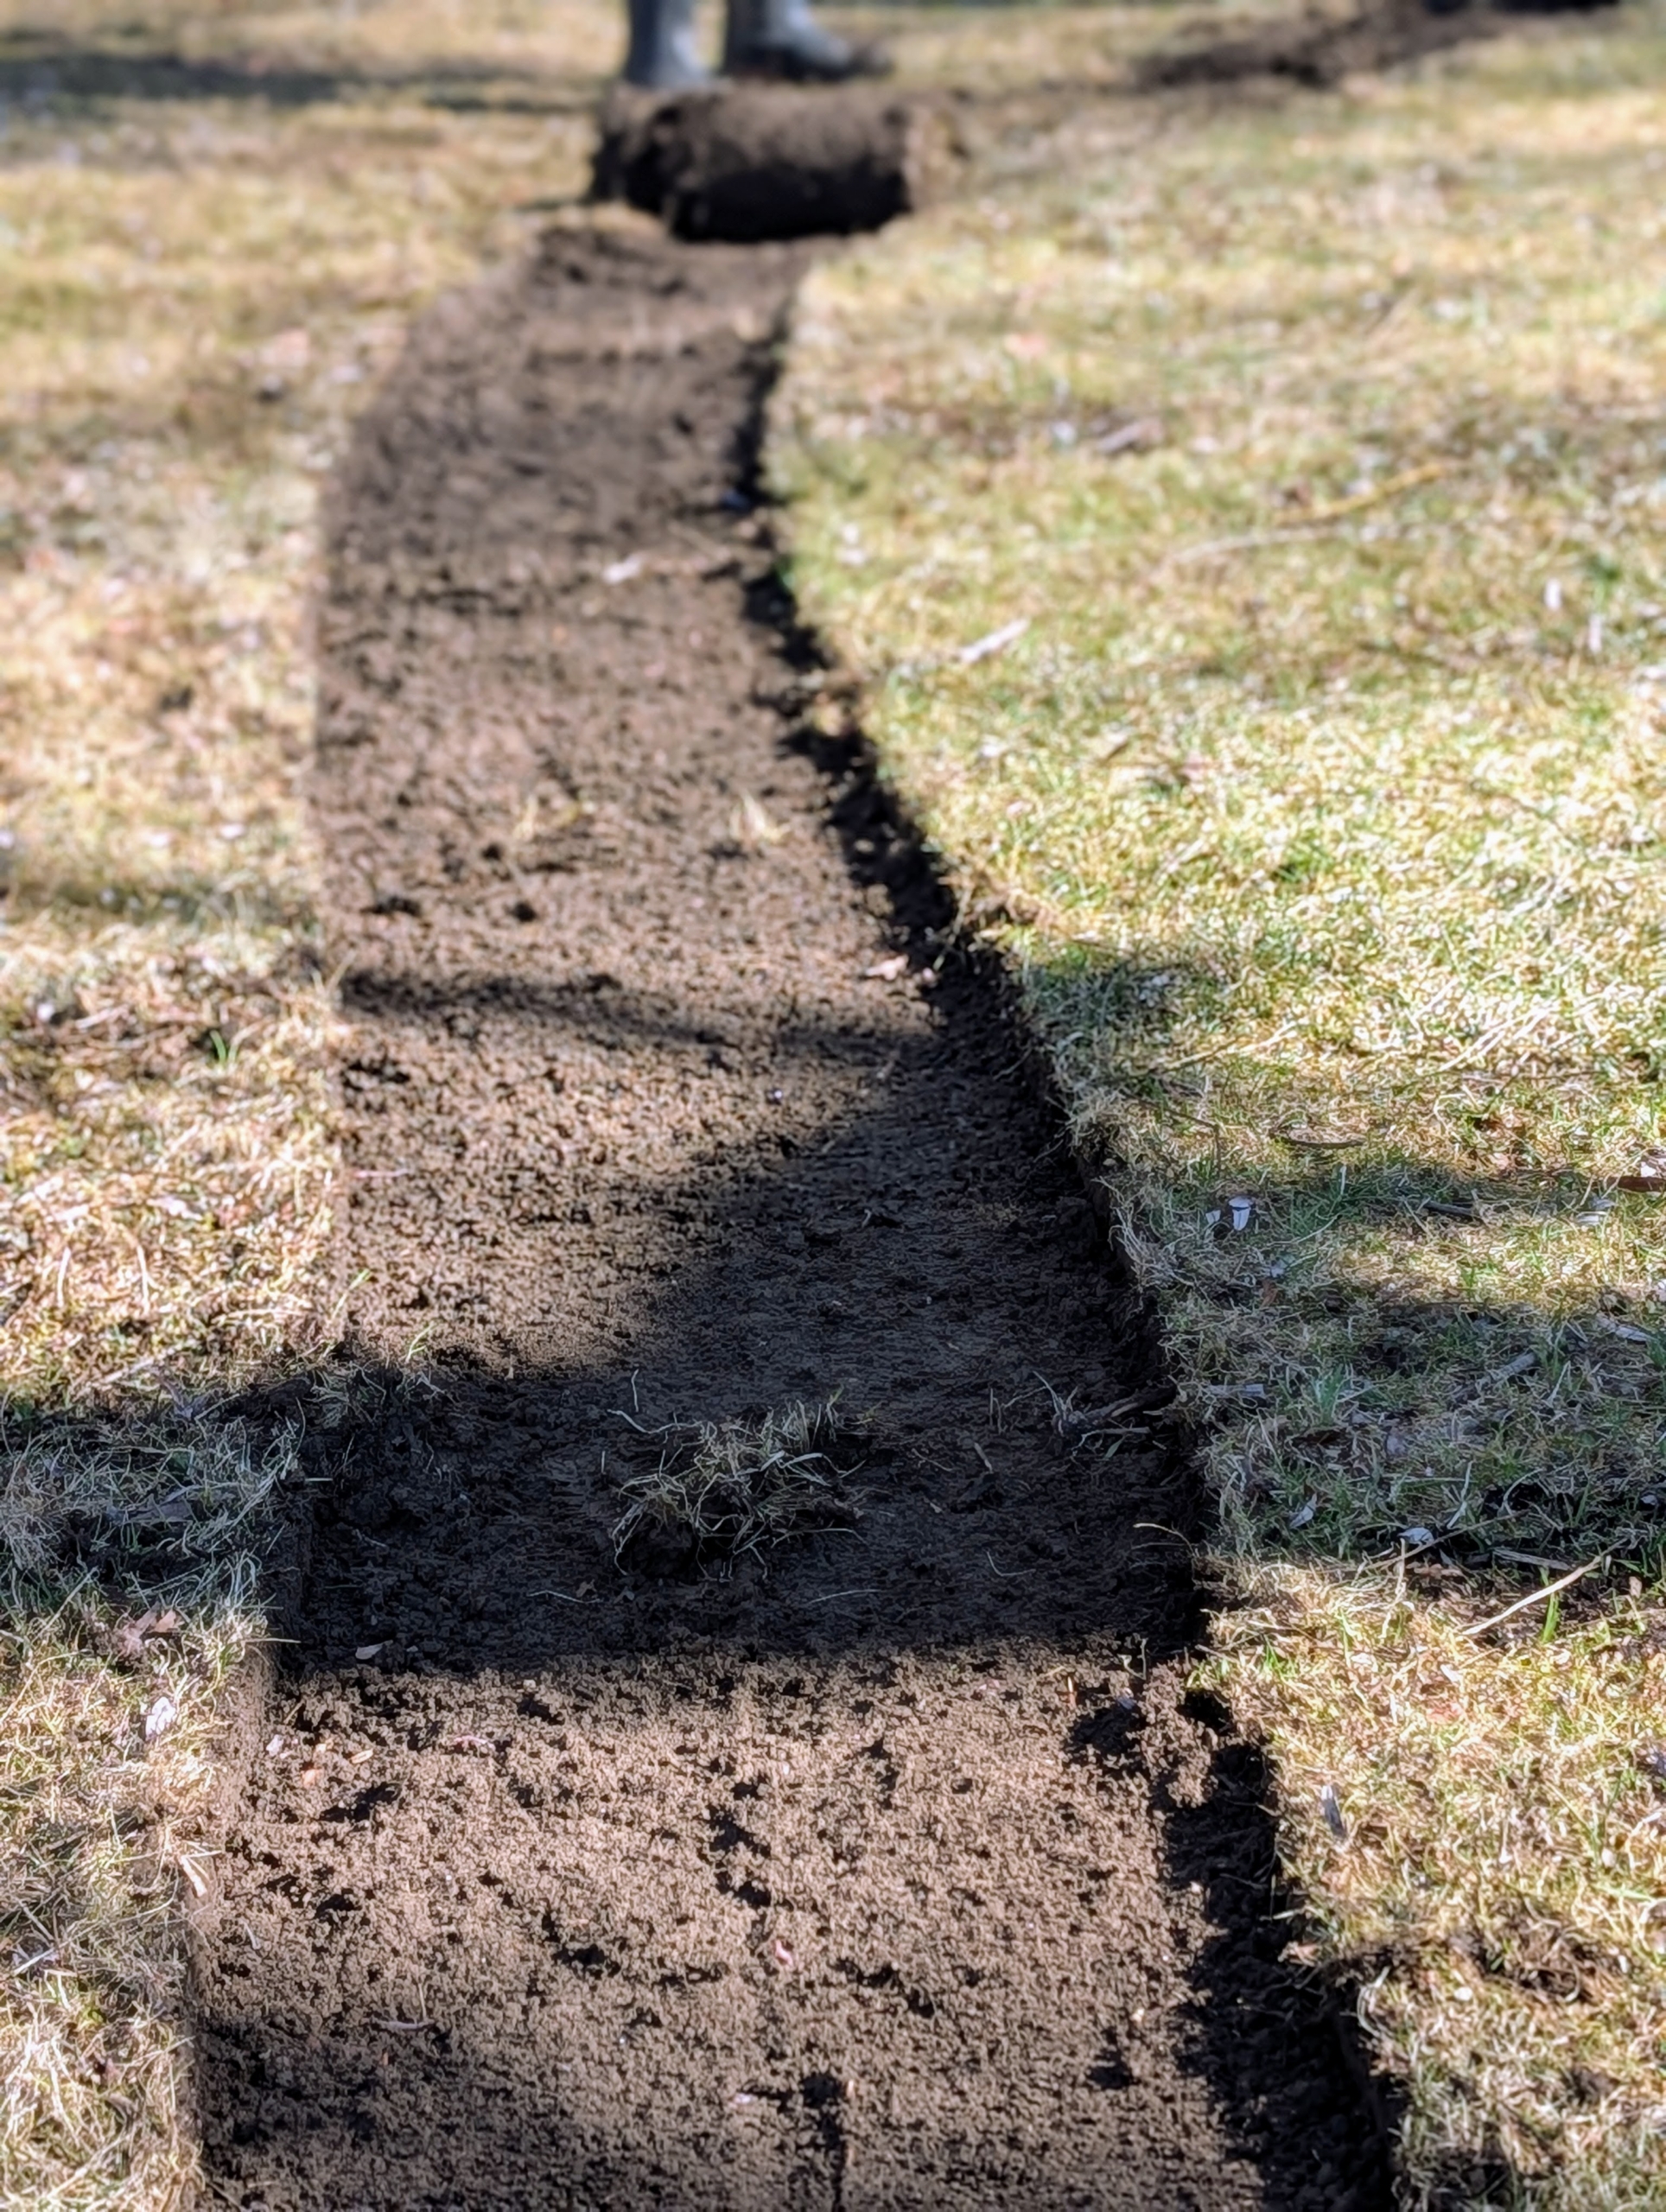
Gardener’s twine and stakes are used to mark the new edge of this bed. The twine also serves as a guide for the motorized sod cutter.
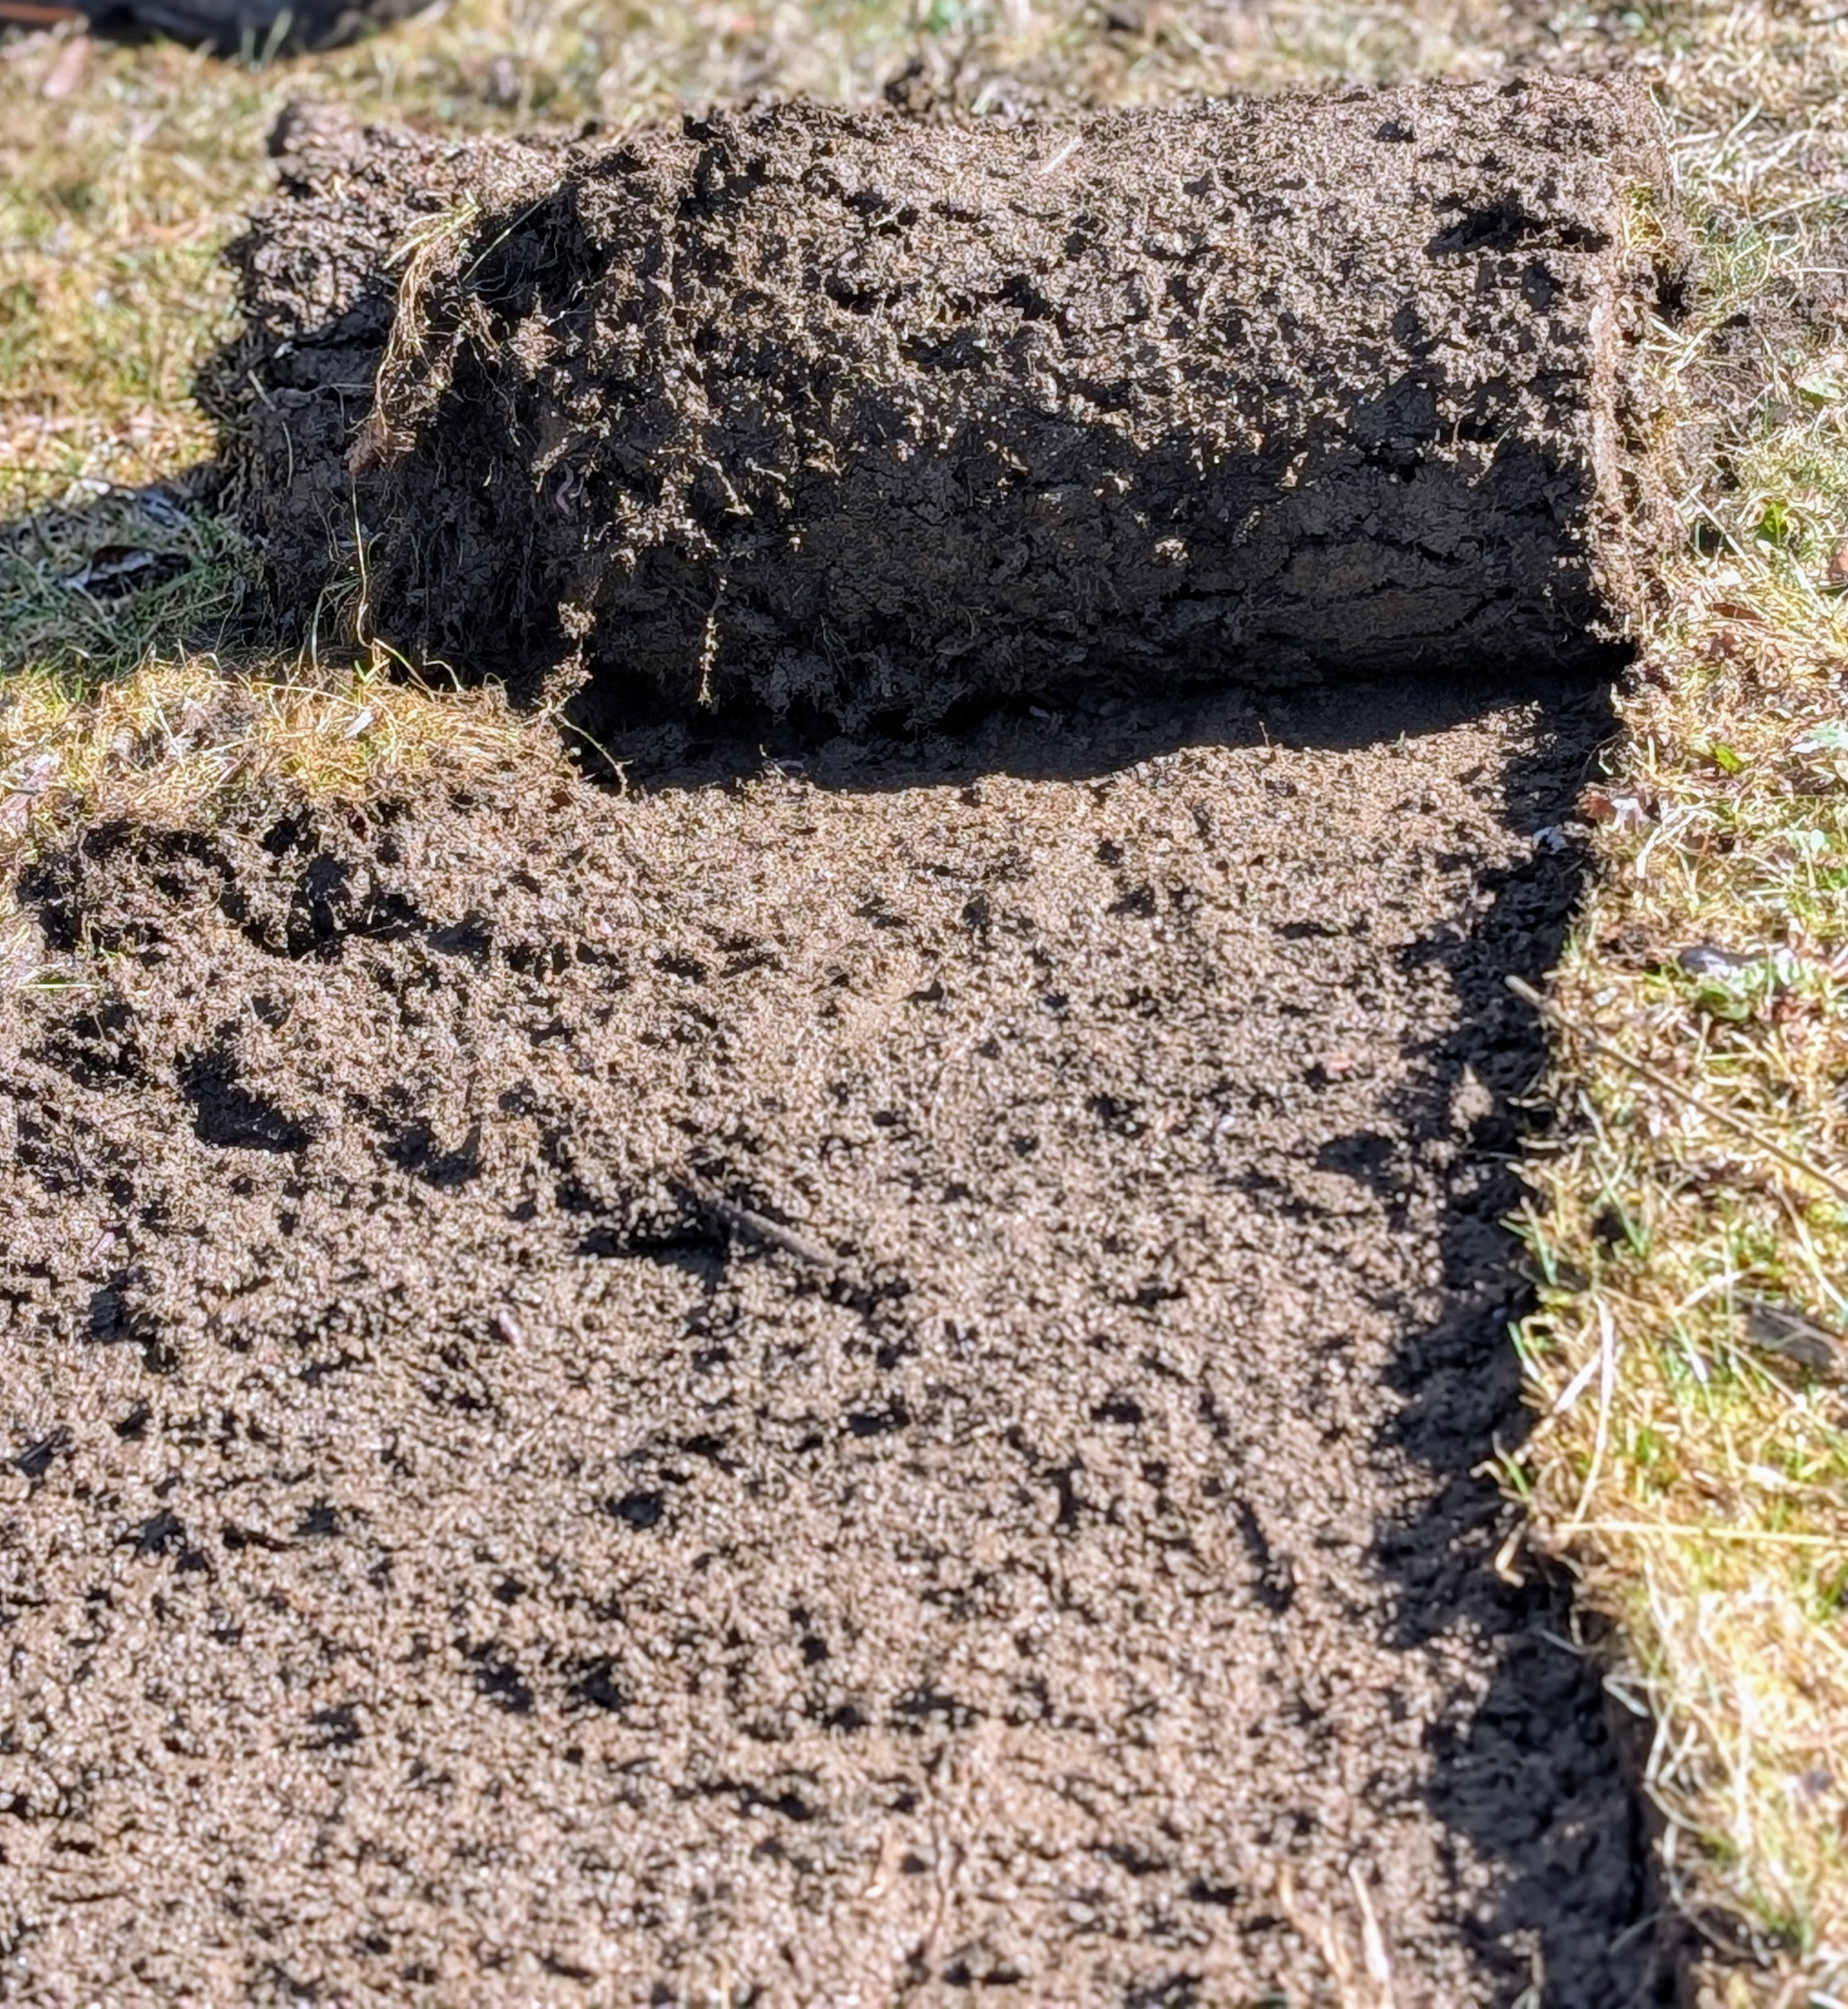
Here’s Phurba cutting the sod around the space. There are different types of sod cutters, but they all essentially cut grass at the roots so entire sections of sod can be removed to expose the bare ground underneath it.
Once the sod is cut, it is rolled up in strips. Doing this right away makes it easier to see where the sod has already been cut.
Here is a section of the bed after the sod is removed.
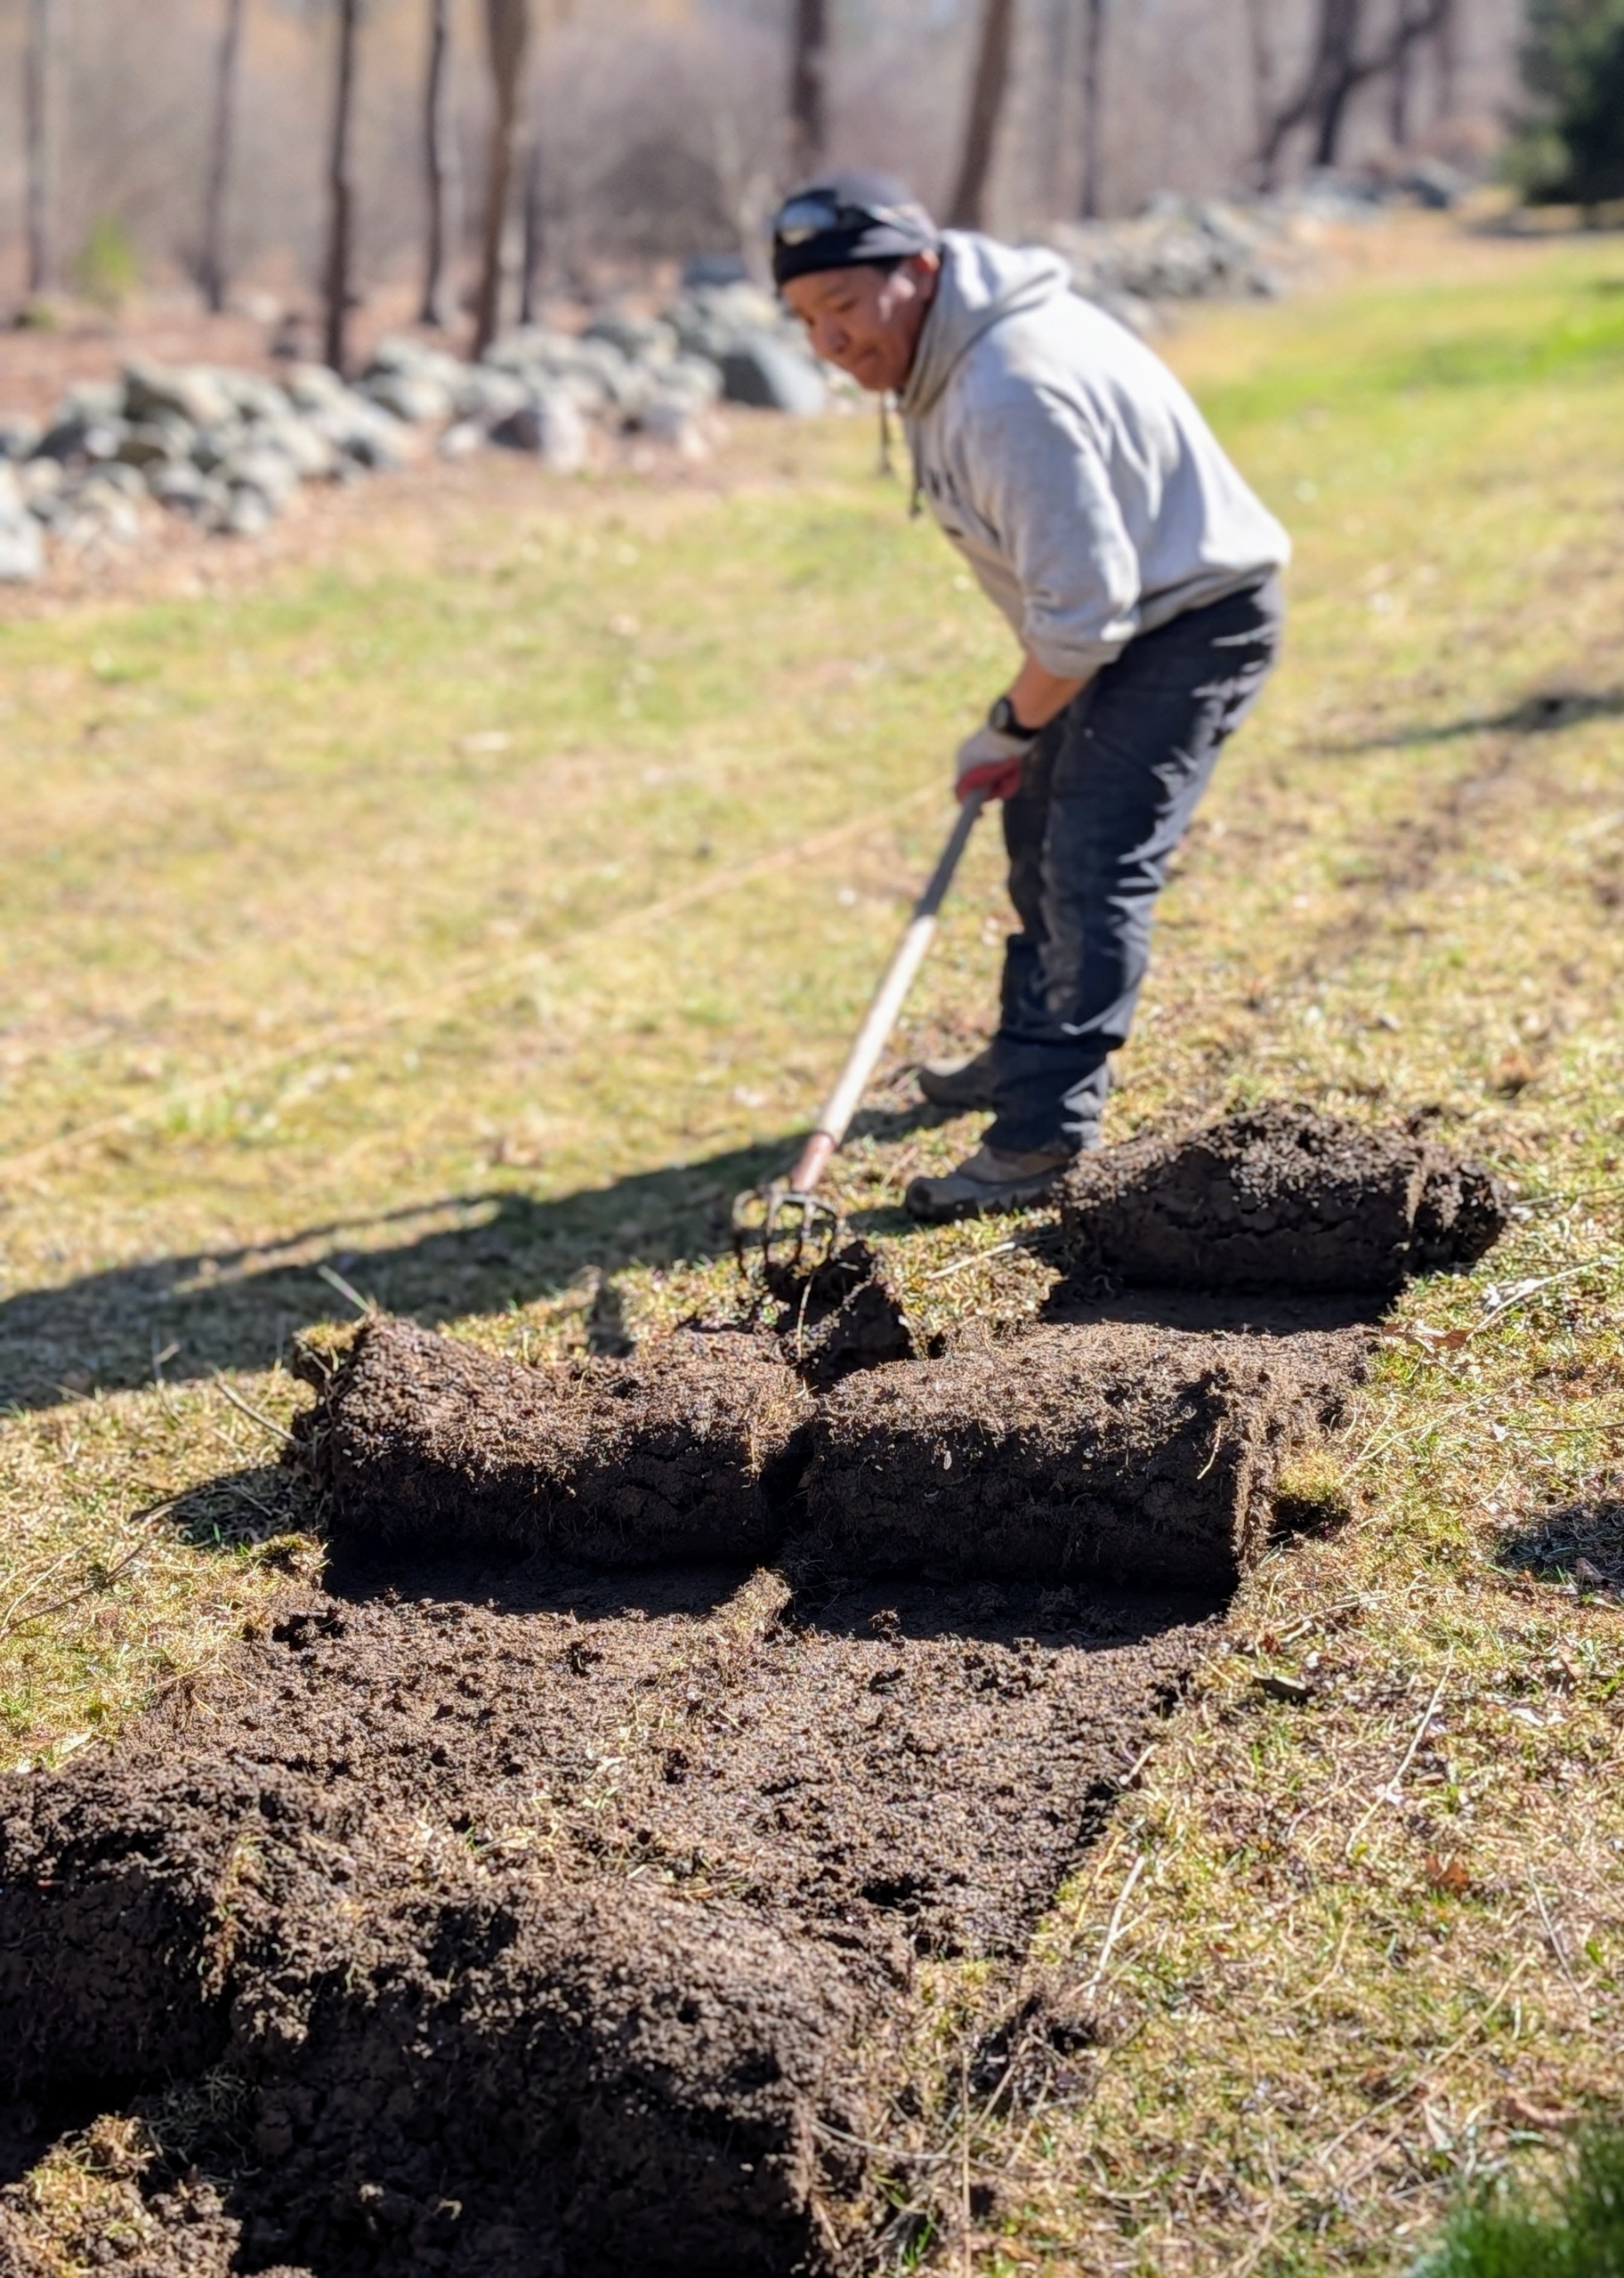
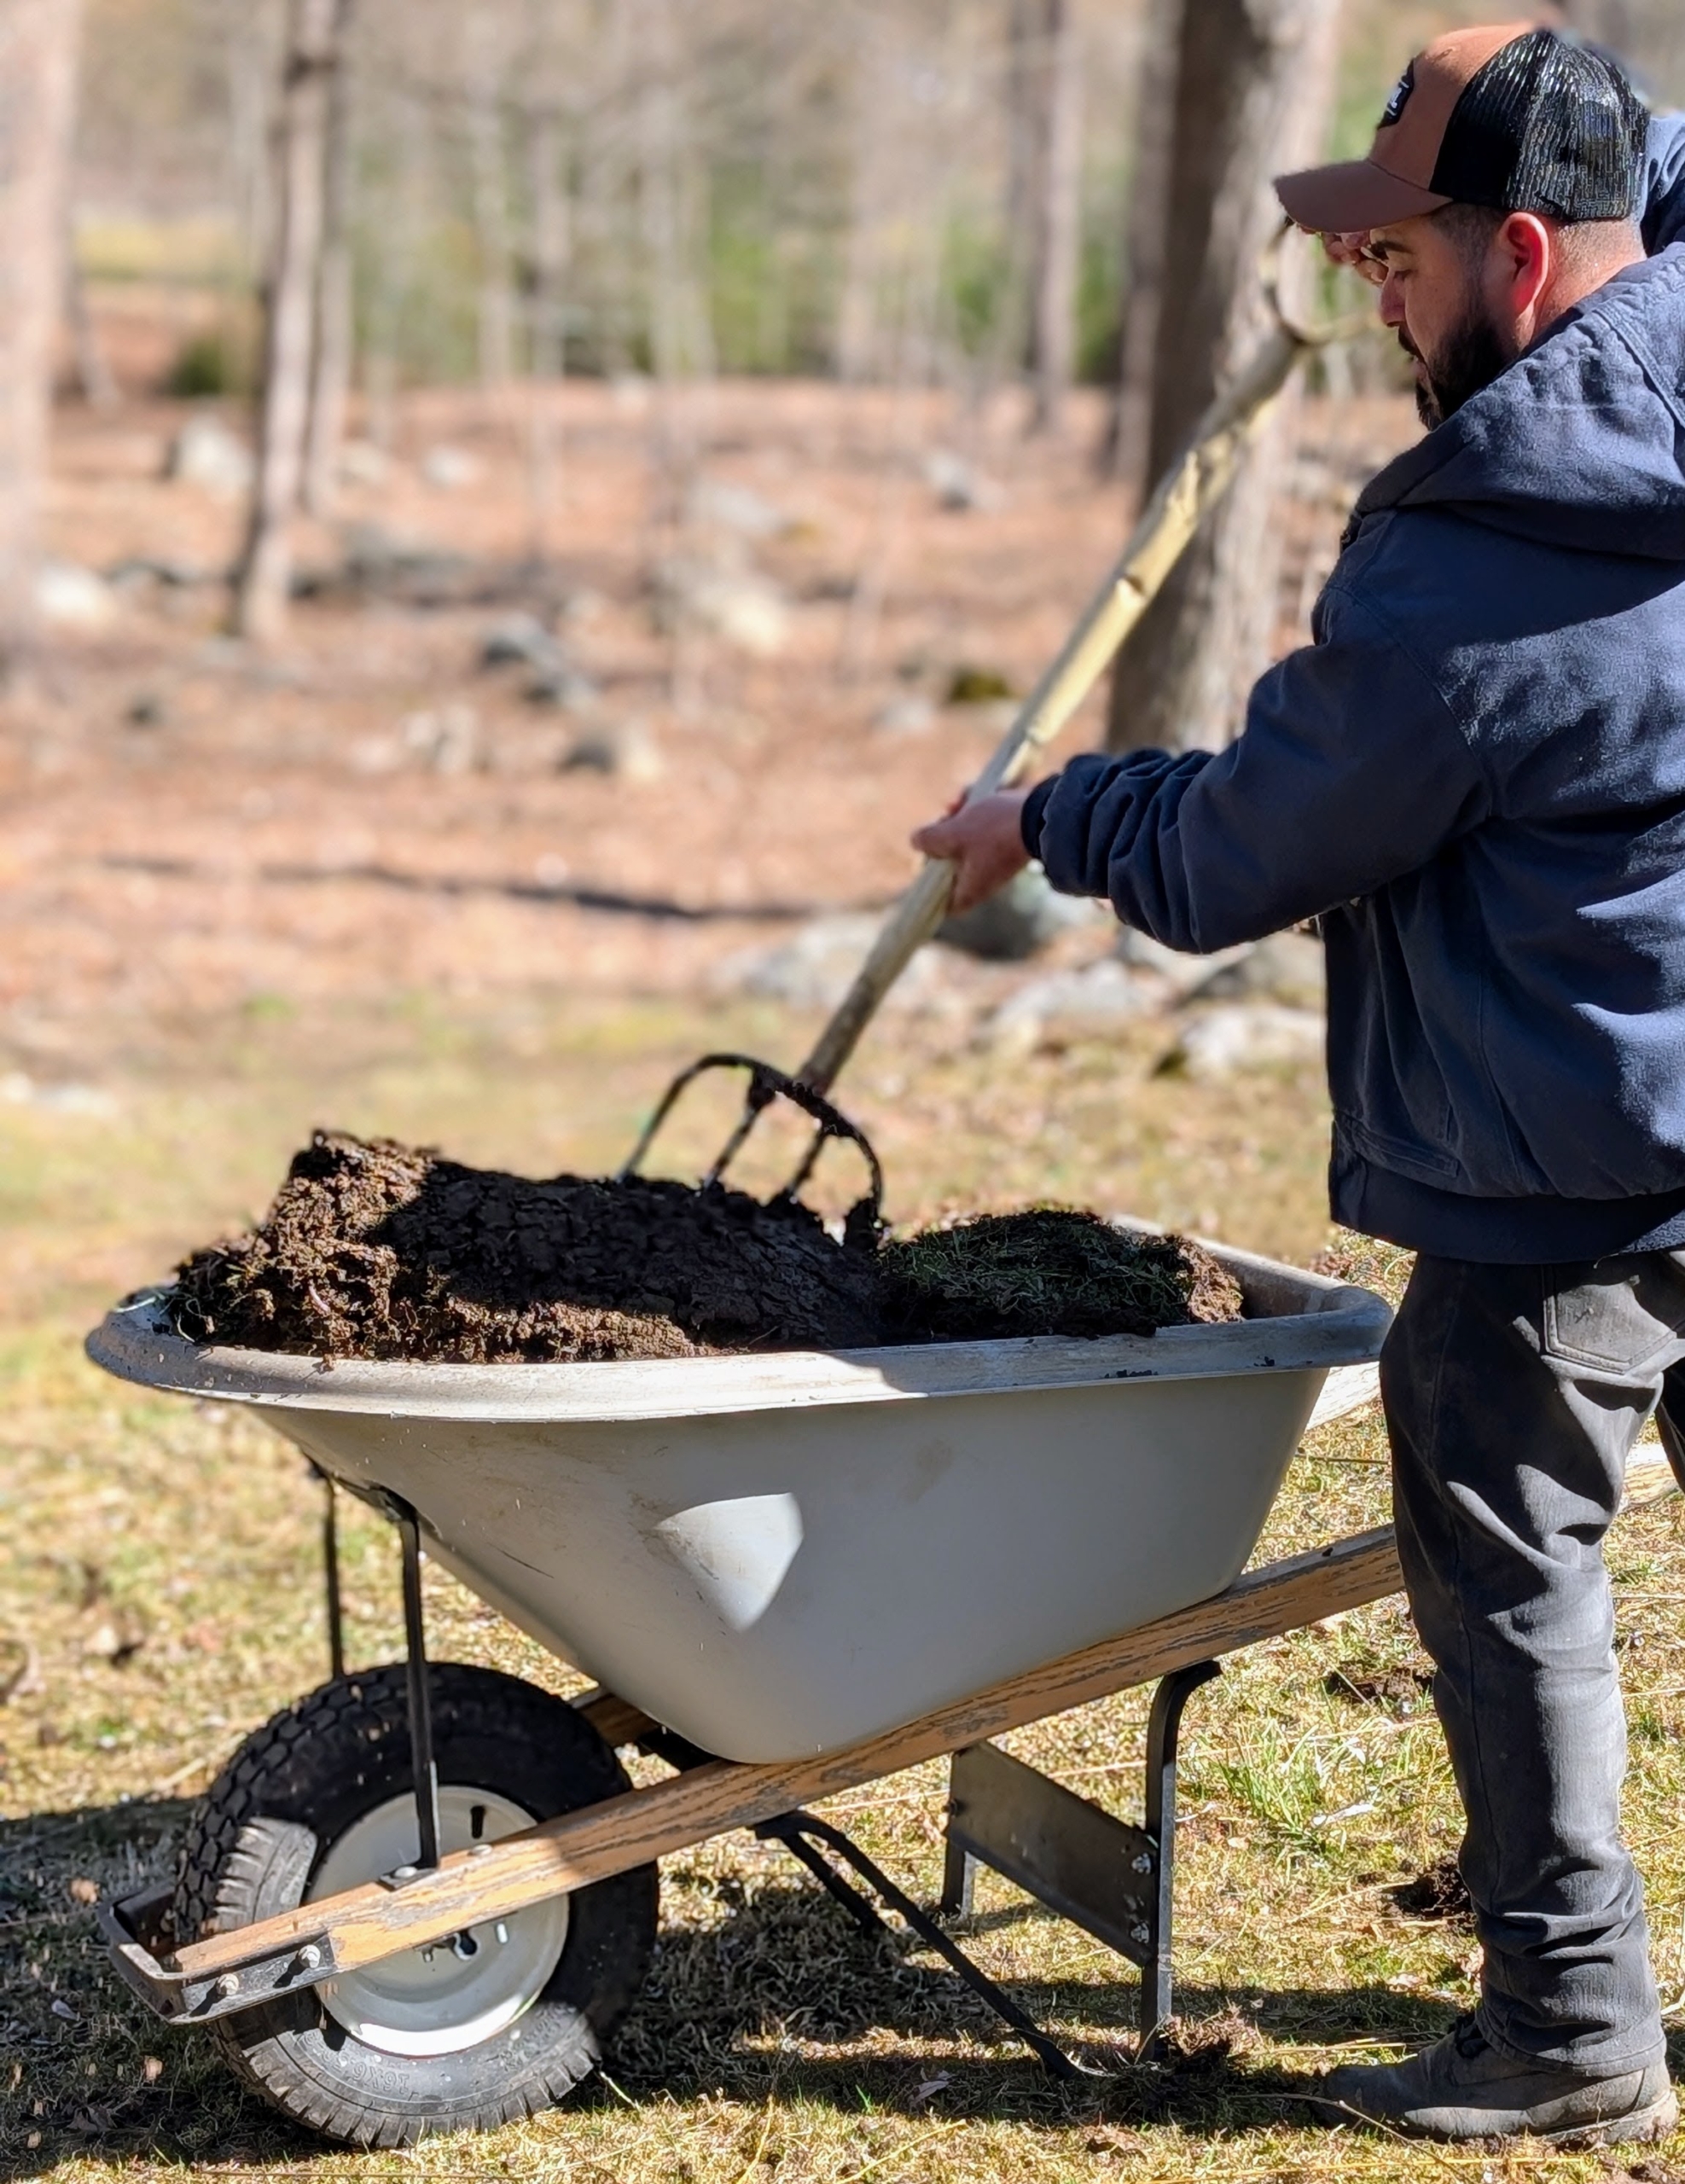
Phurba works in another area to roll up the sod. I never like to waste anything around the farm. The usable sod will be put in other areas needing grass.
Adan picks up the heavy rolls to fill the wheelbarrow.
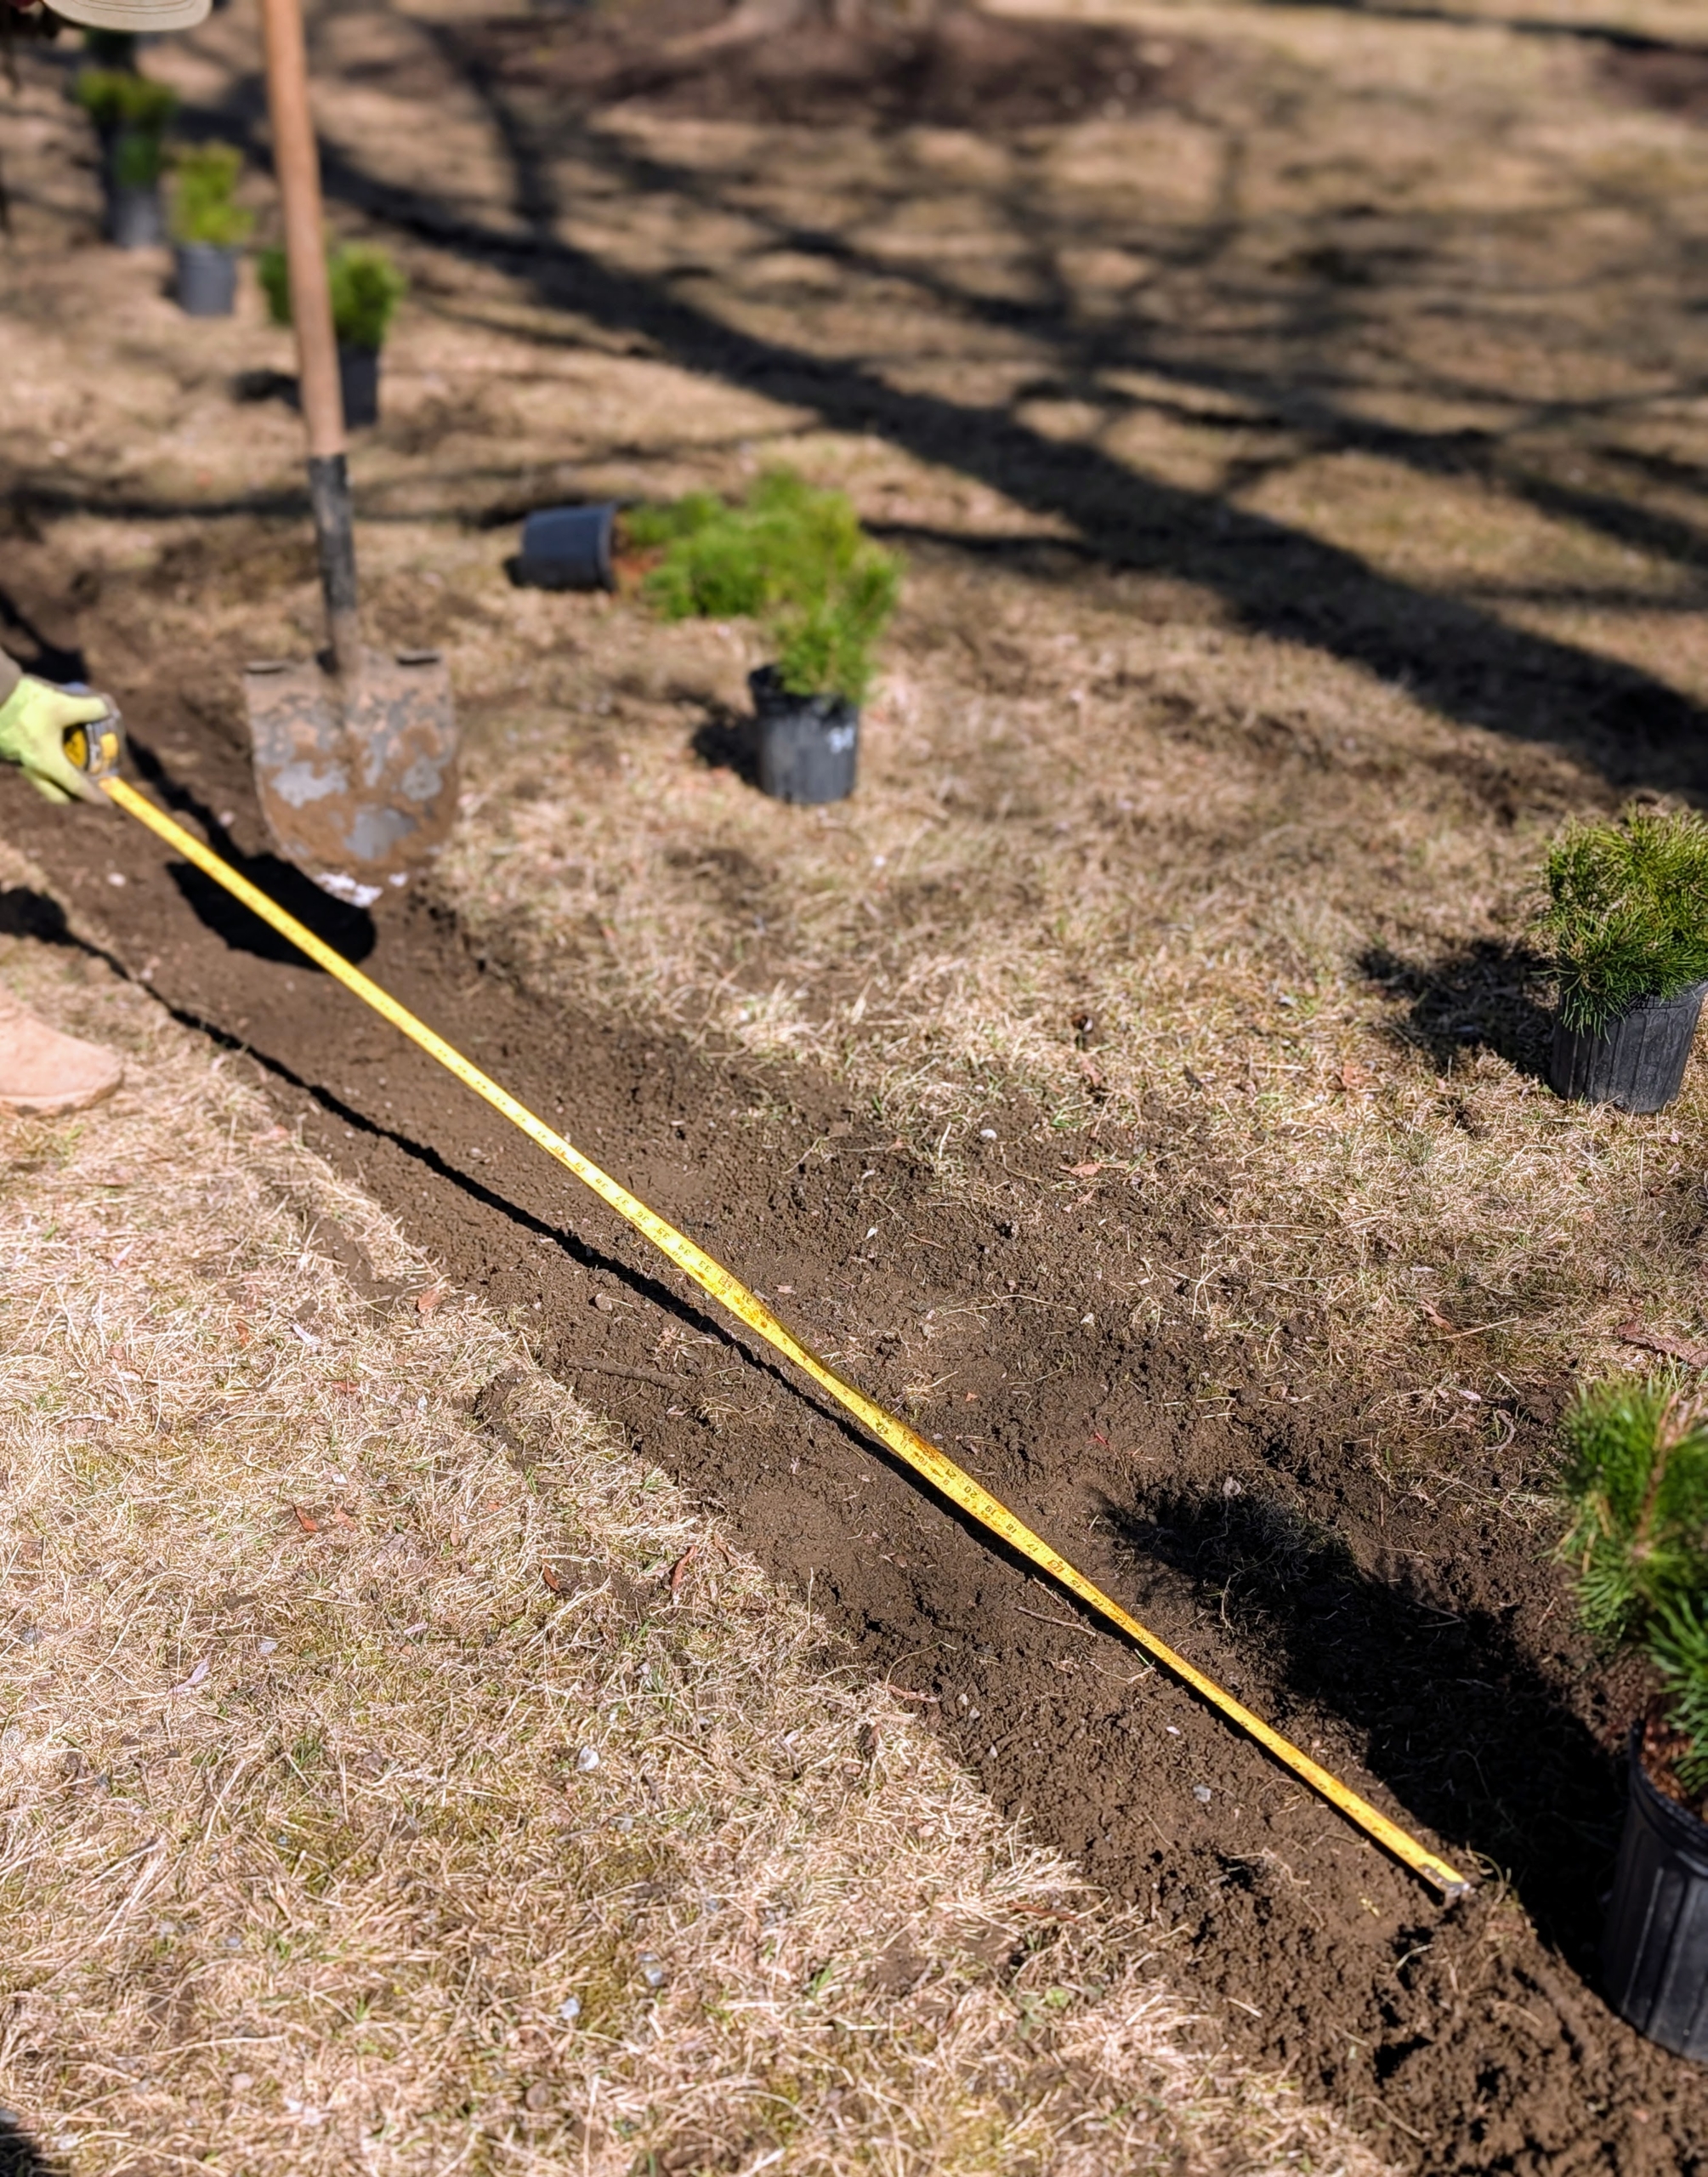
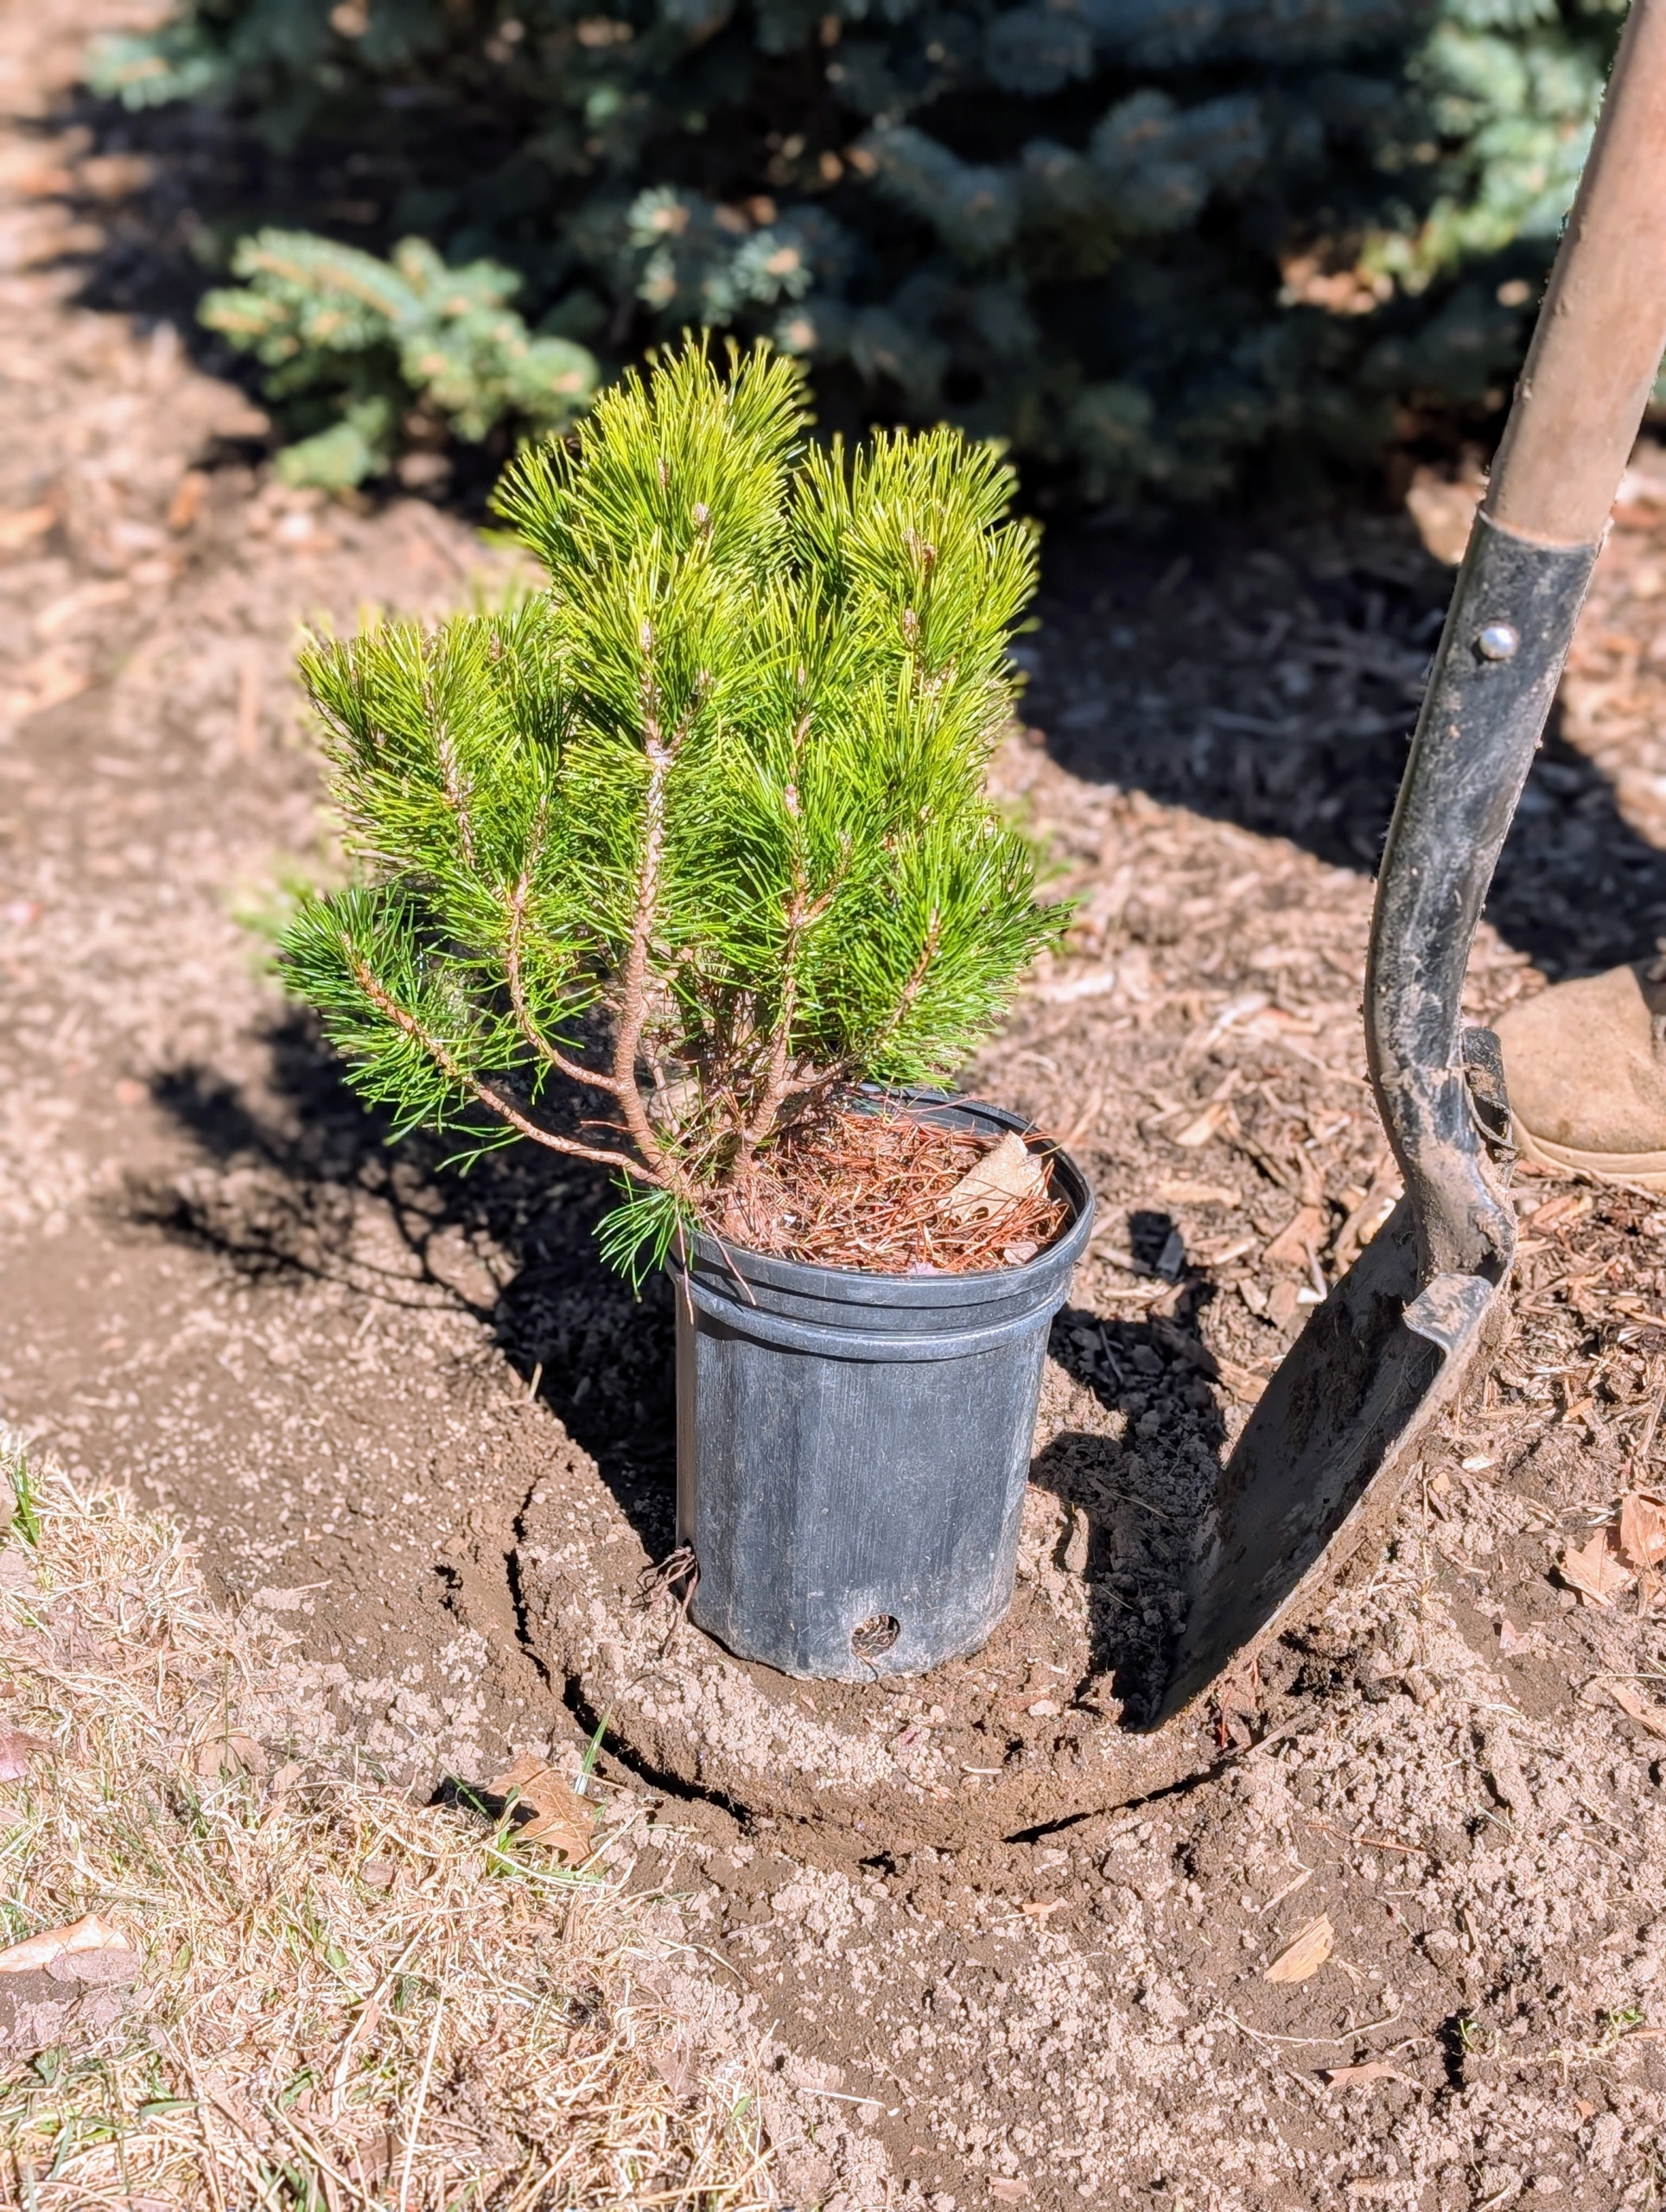
The space between each Mugo pine is measured for accuracy. One can also eyeball the distance – four to five feet depending on established plants nearby. They all need adequate room to grow.
Holes are dug twice as wide as the root balls, but no deeper. Once in the hole, the top of the root ball should be a half-inch higher than the soil surface.
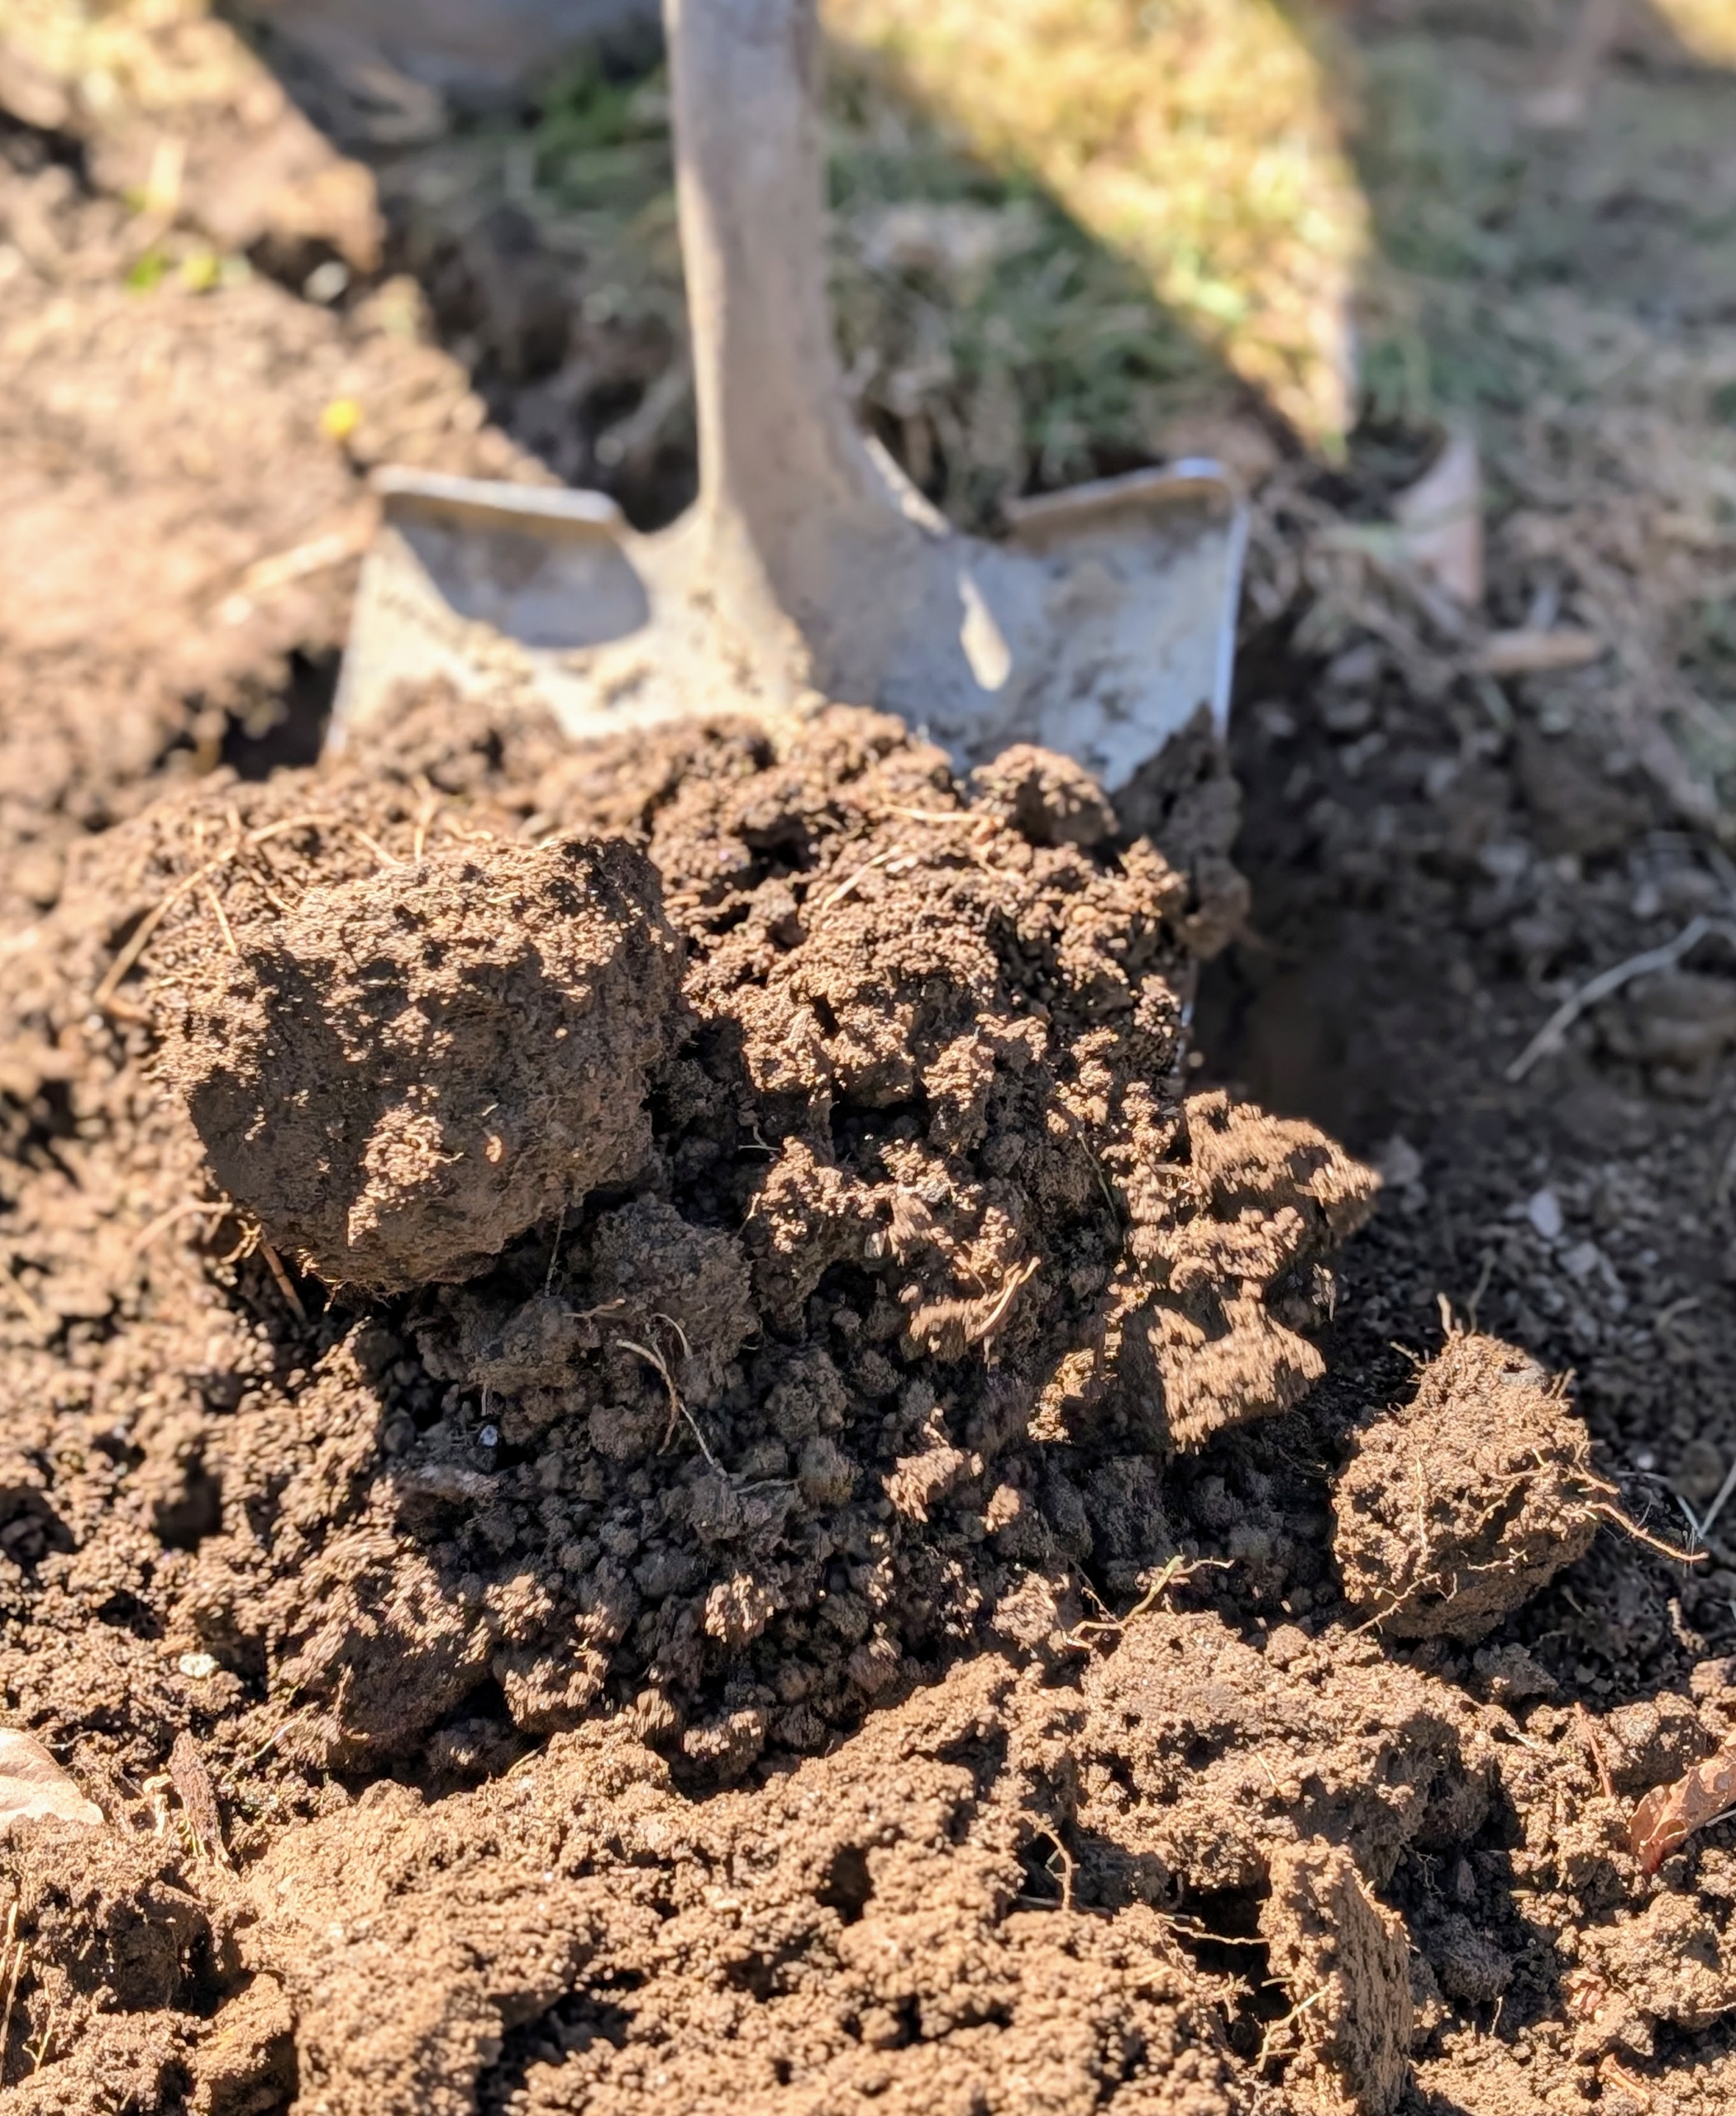
We’ve had a lot of rain lately, so the soil is quite moist and soft.
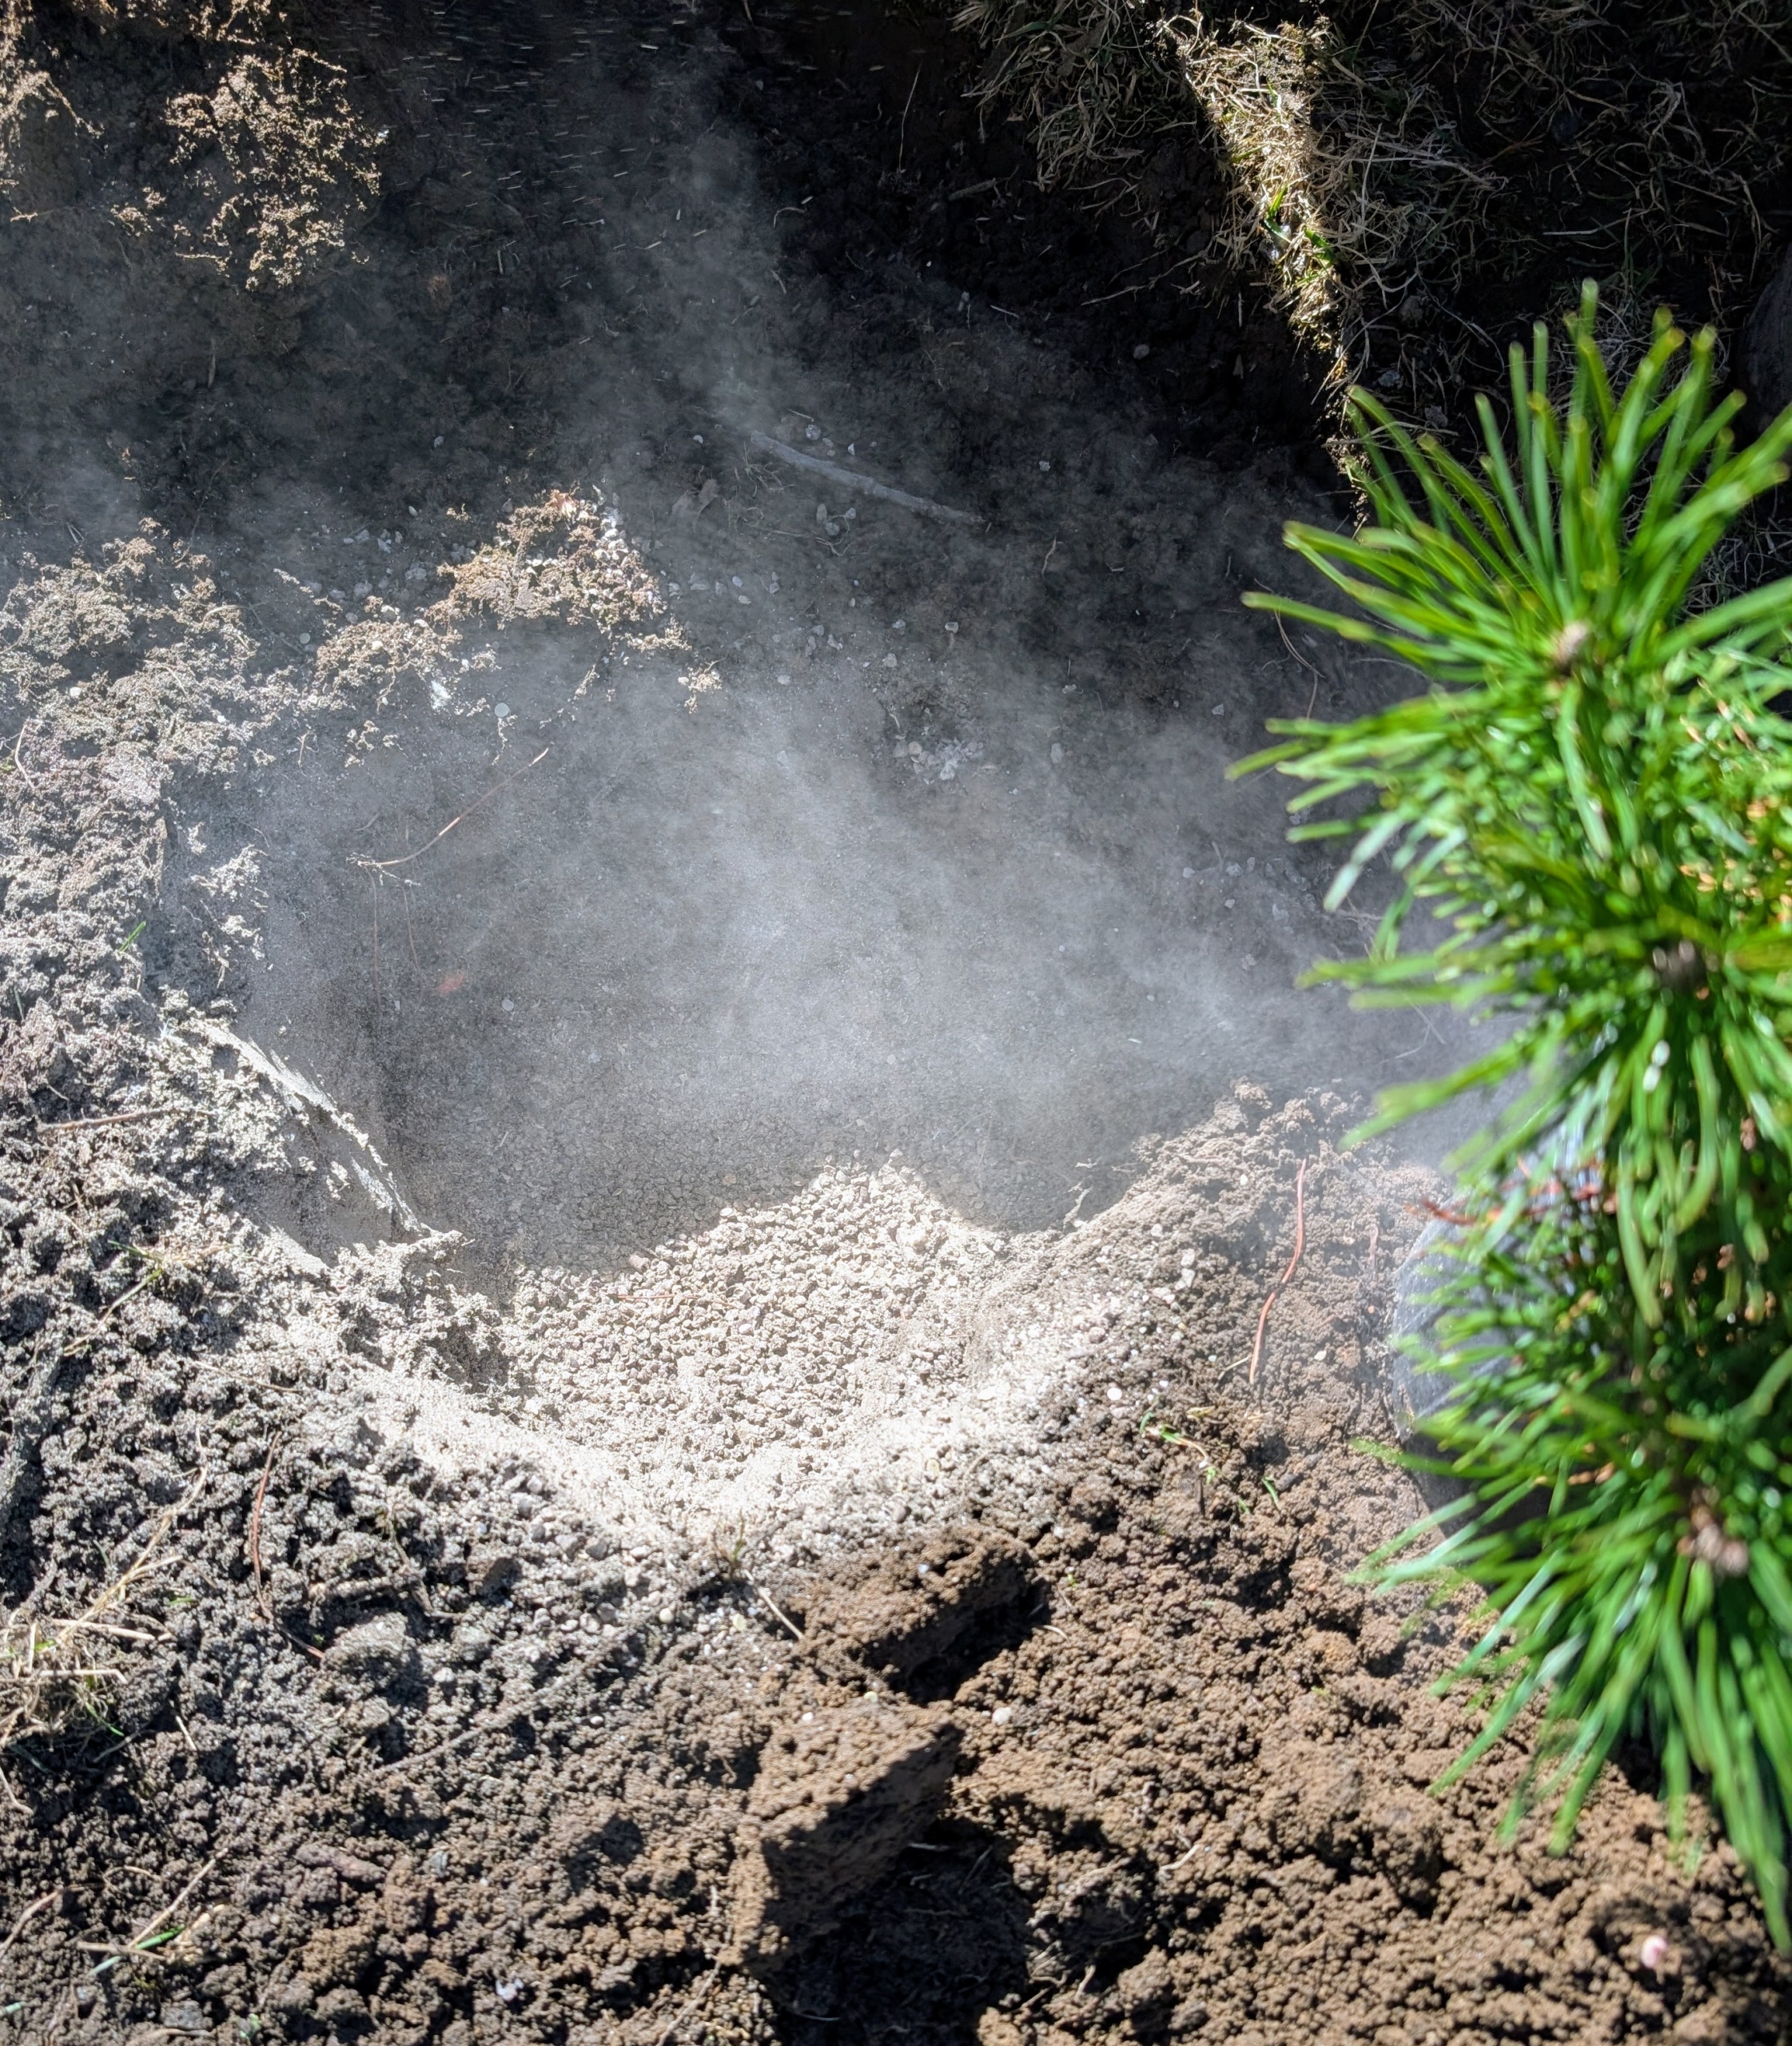
I always say, “if you eat, so should your plants.” Use fertilizer specifically formulated to help transplant survival and increase water and nutrient absorption. Pasang drops a generous handful of fertilizer into the hole and mixes the granules with the existing soil
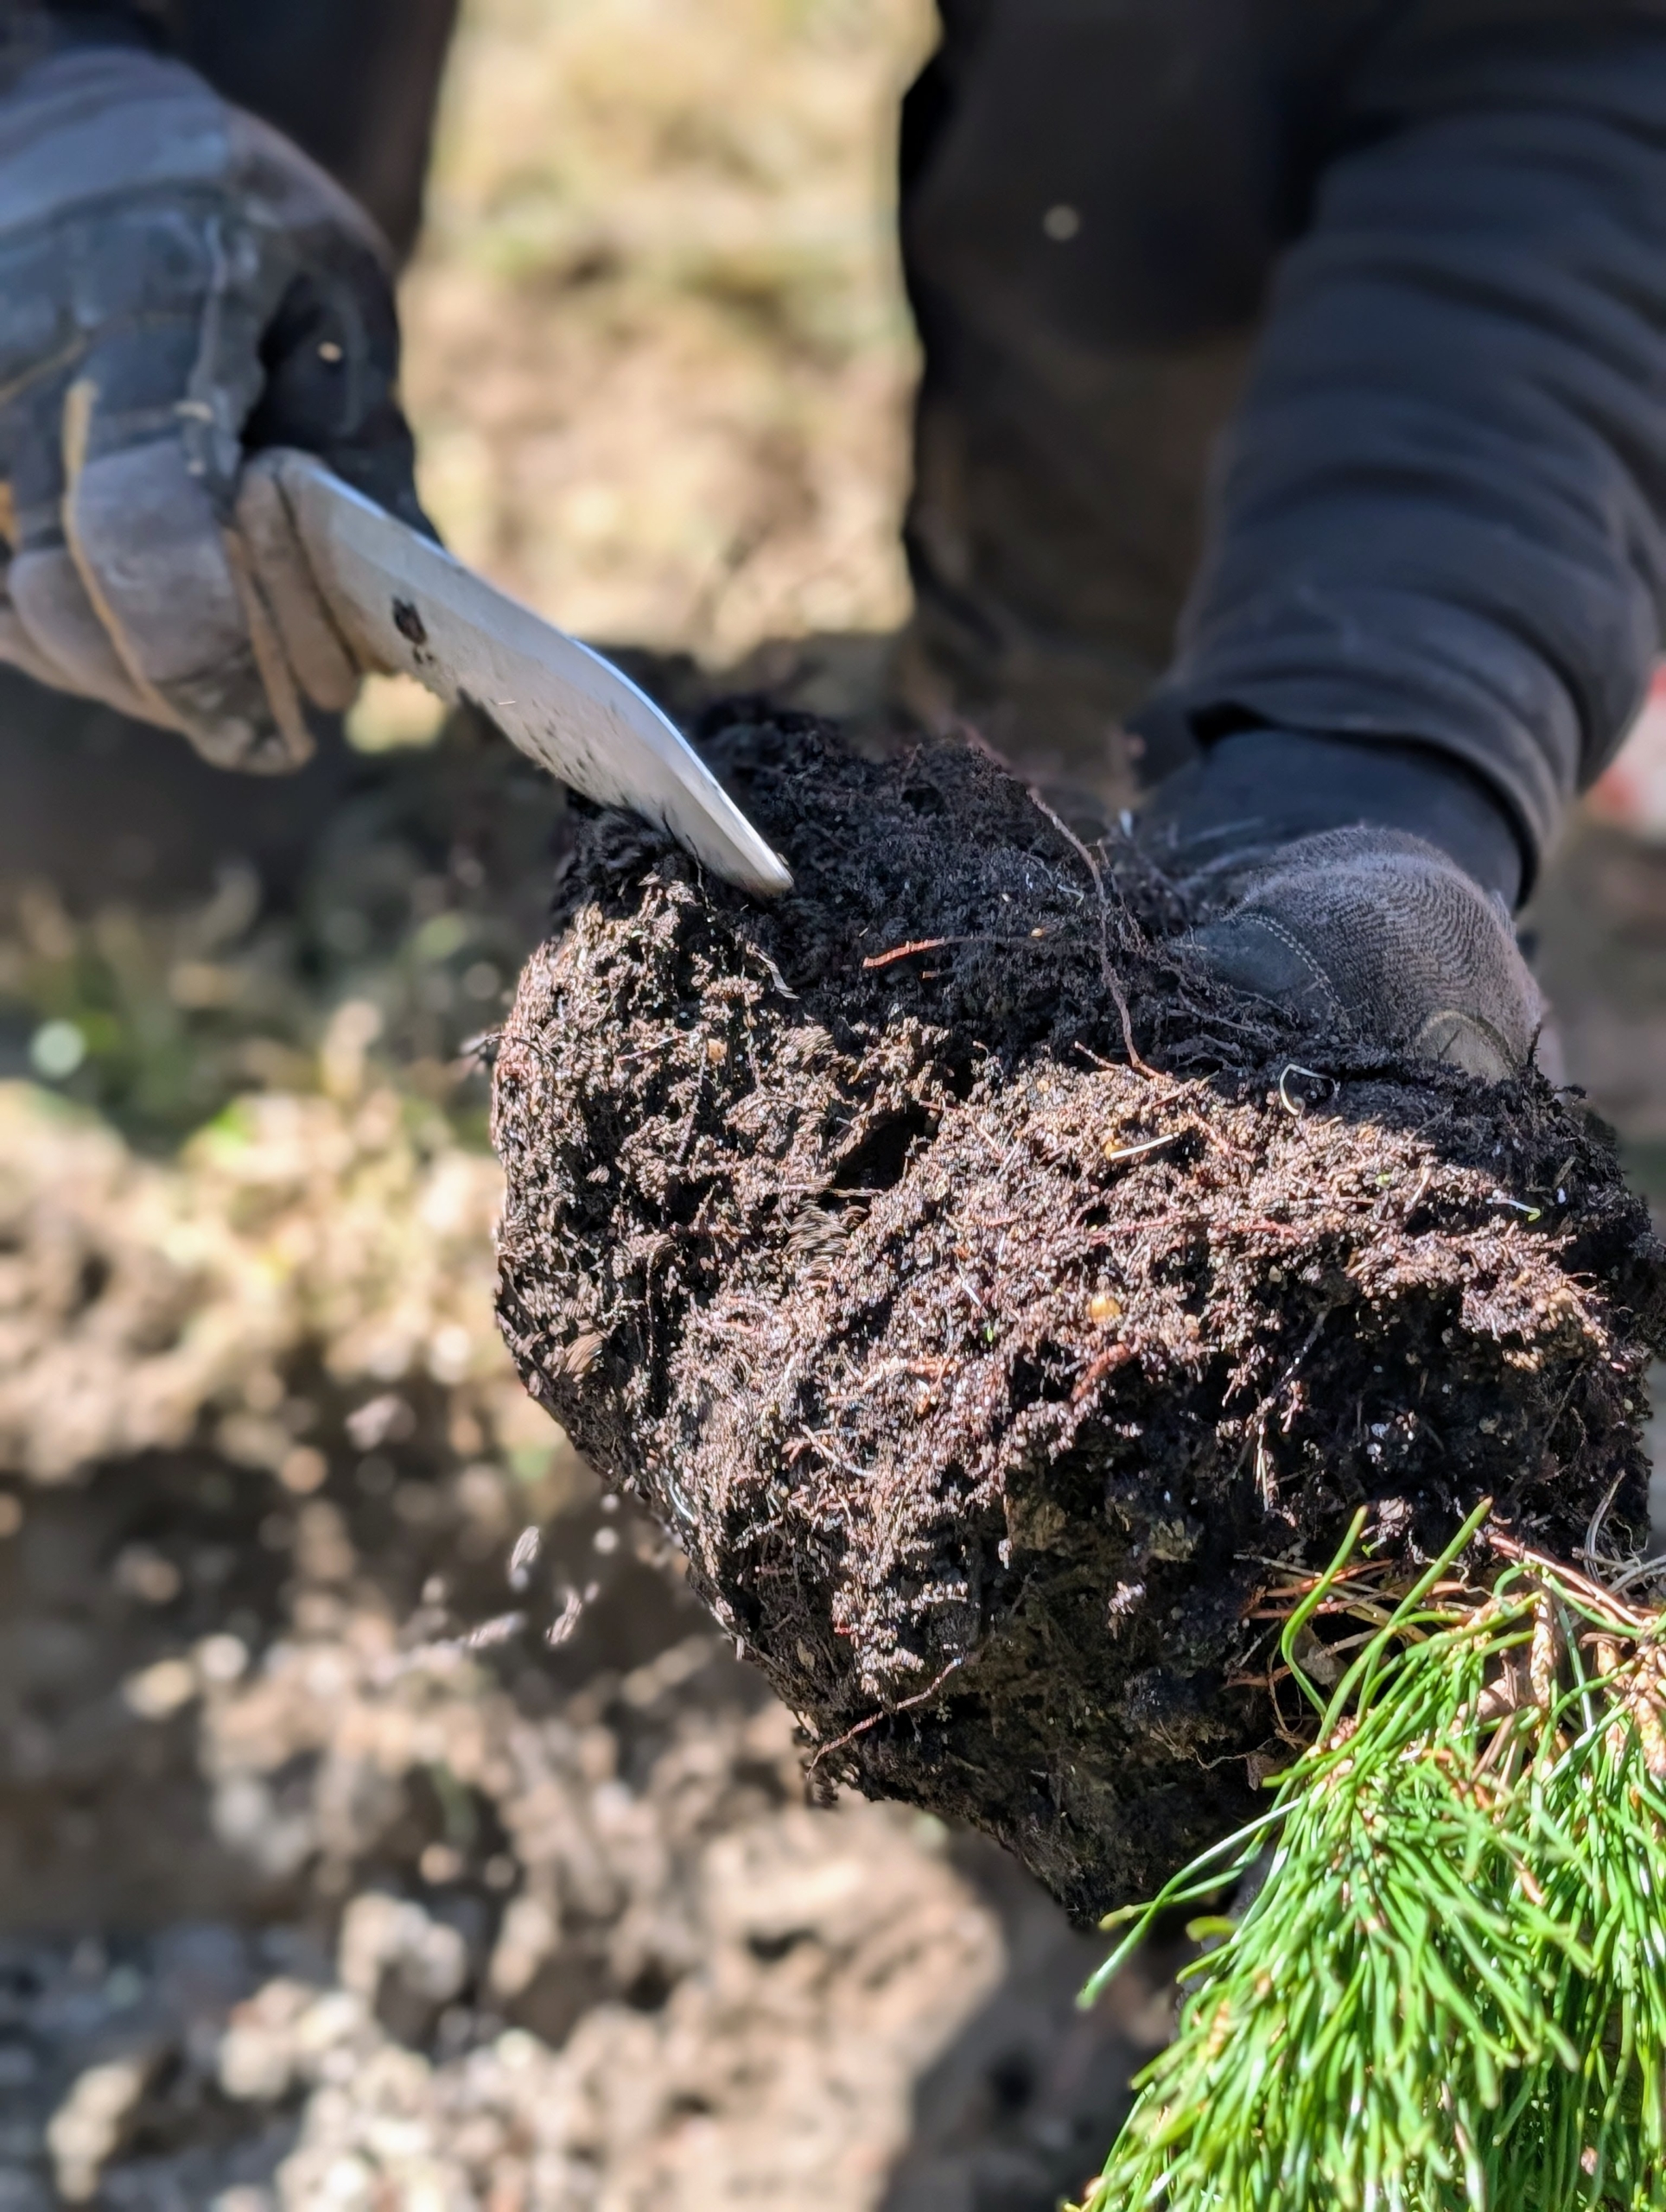
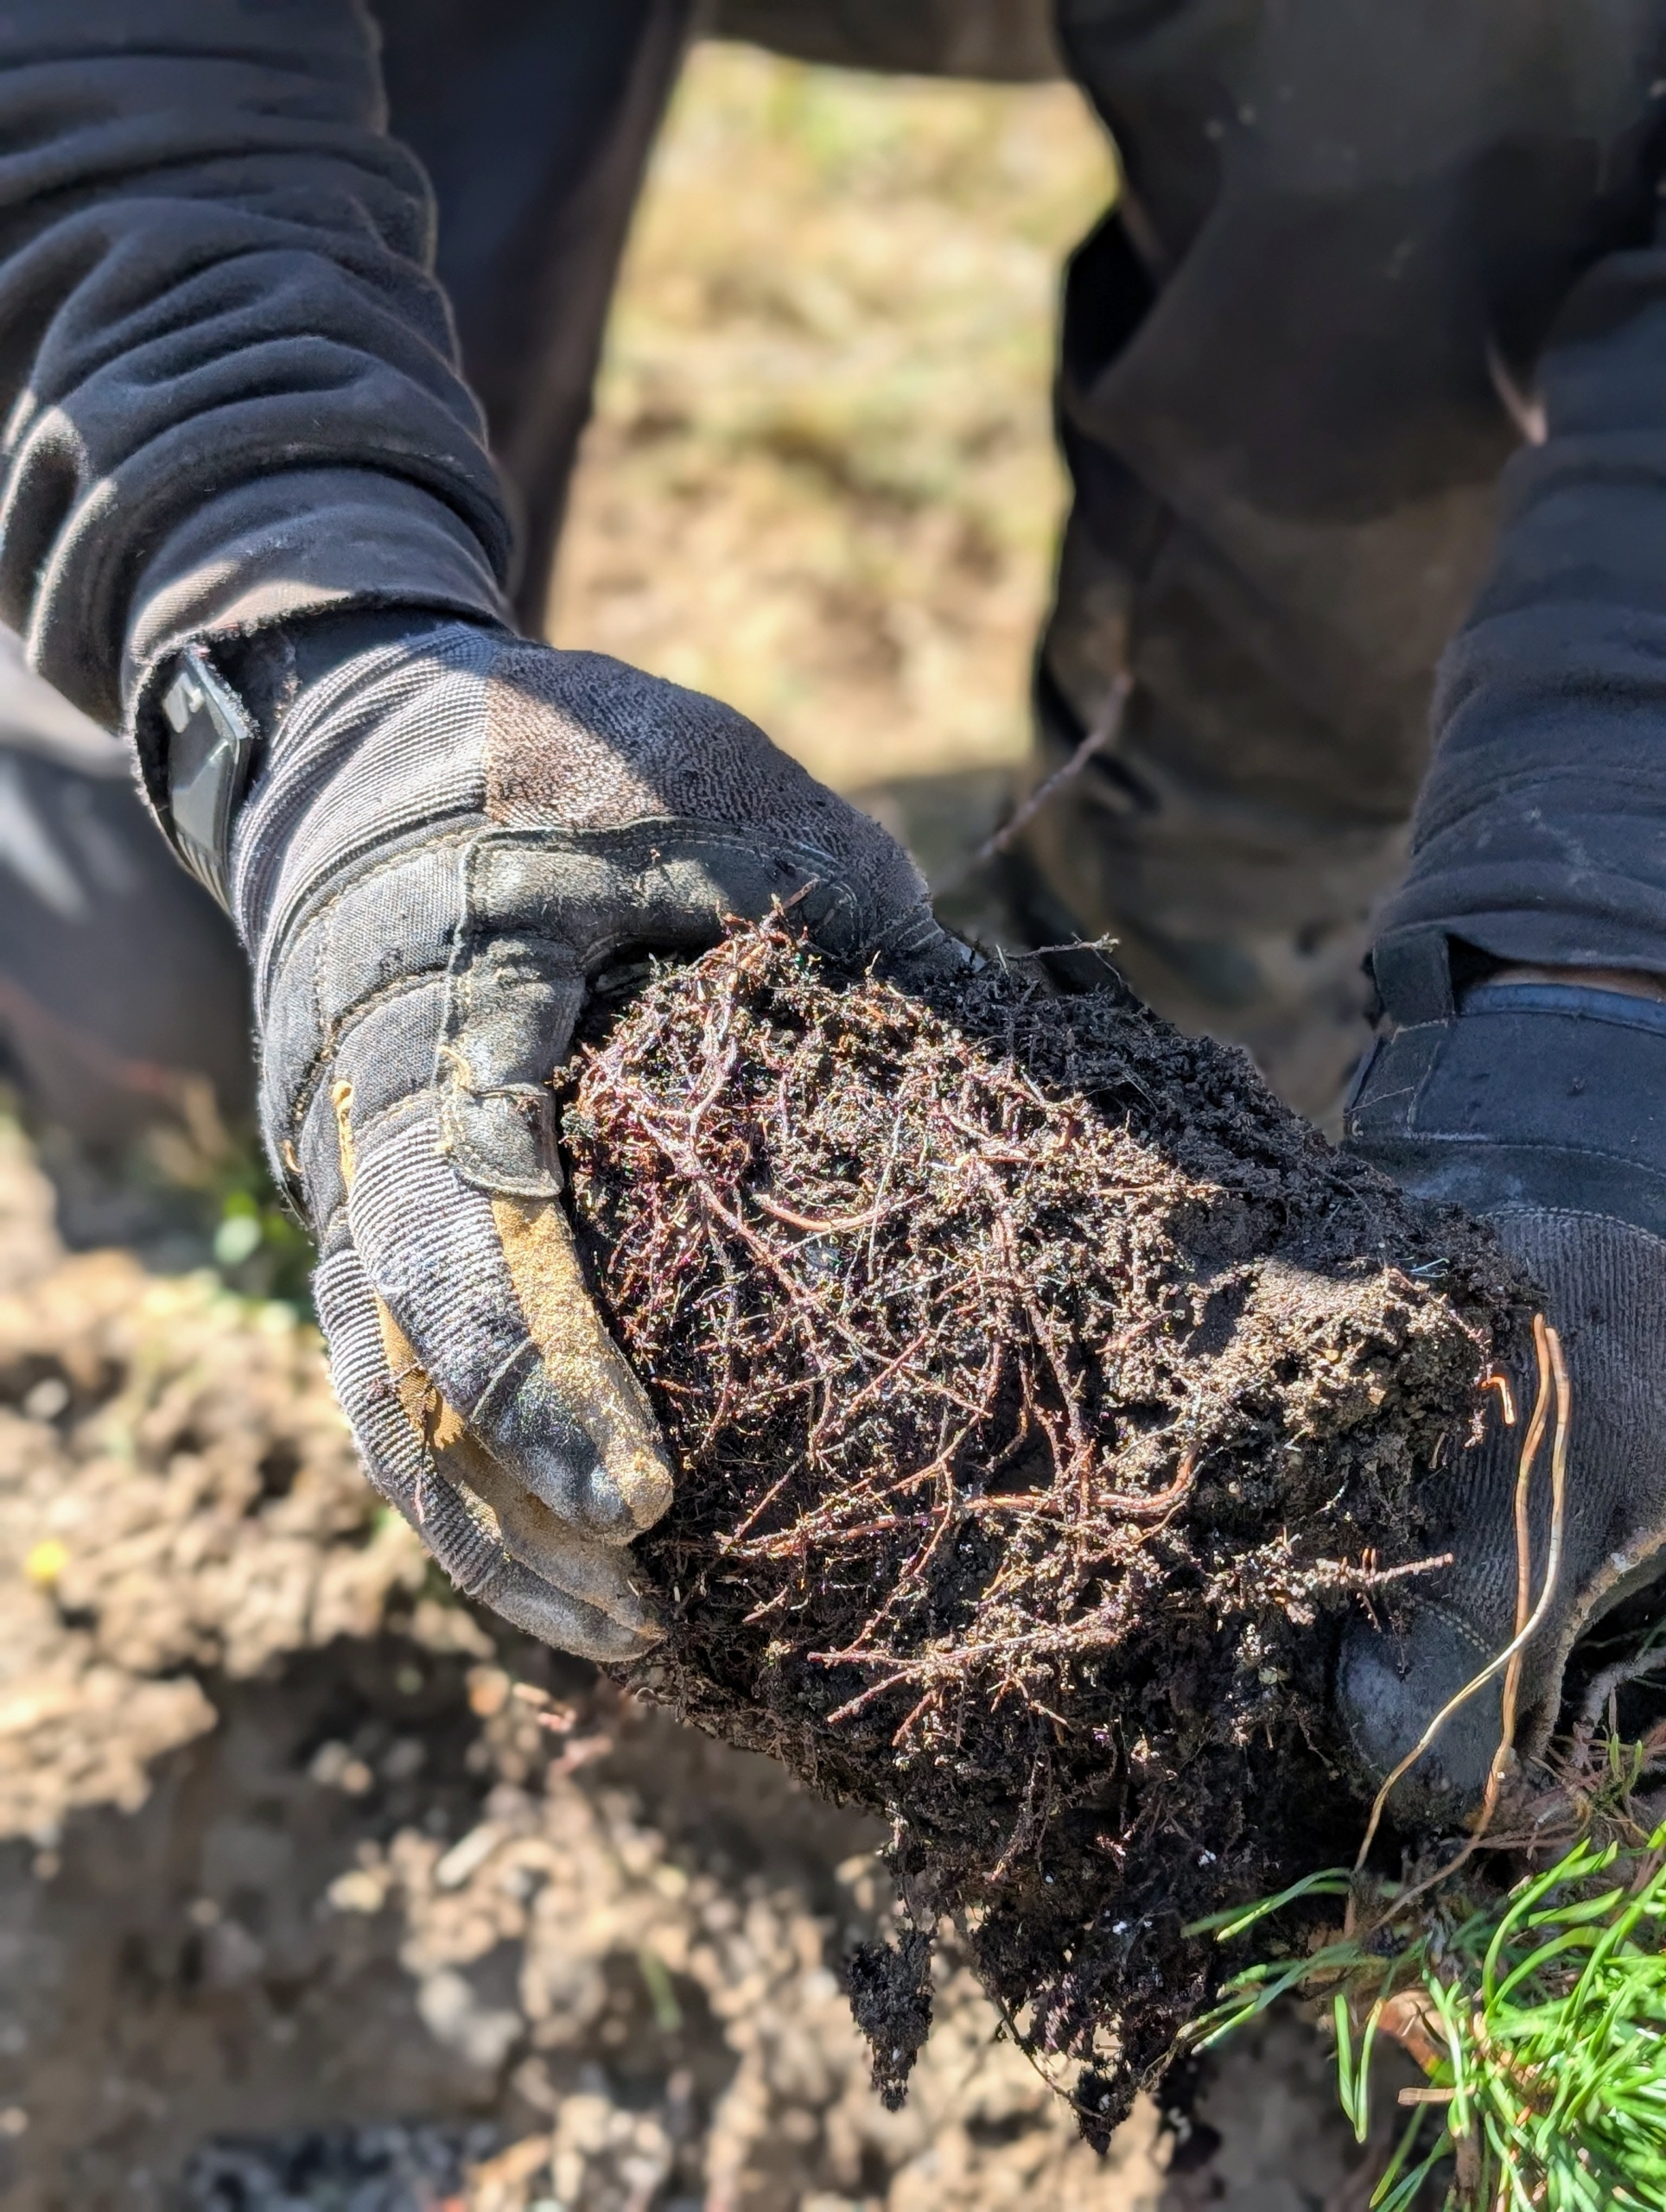
Then using a hori hori knife he scarifies the roots of the specimen. Scarifying stimulates root growth. Essentially one cuts up small portions of the root ball to loosen the roots and create beneficial injuries. This helps the plant become established more quickly in its new environment.
Pasang also uses his hands to tease the bottom roots.
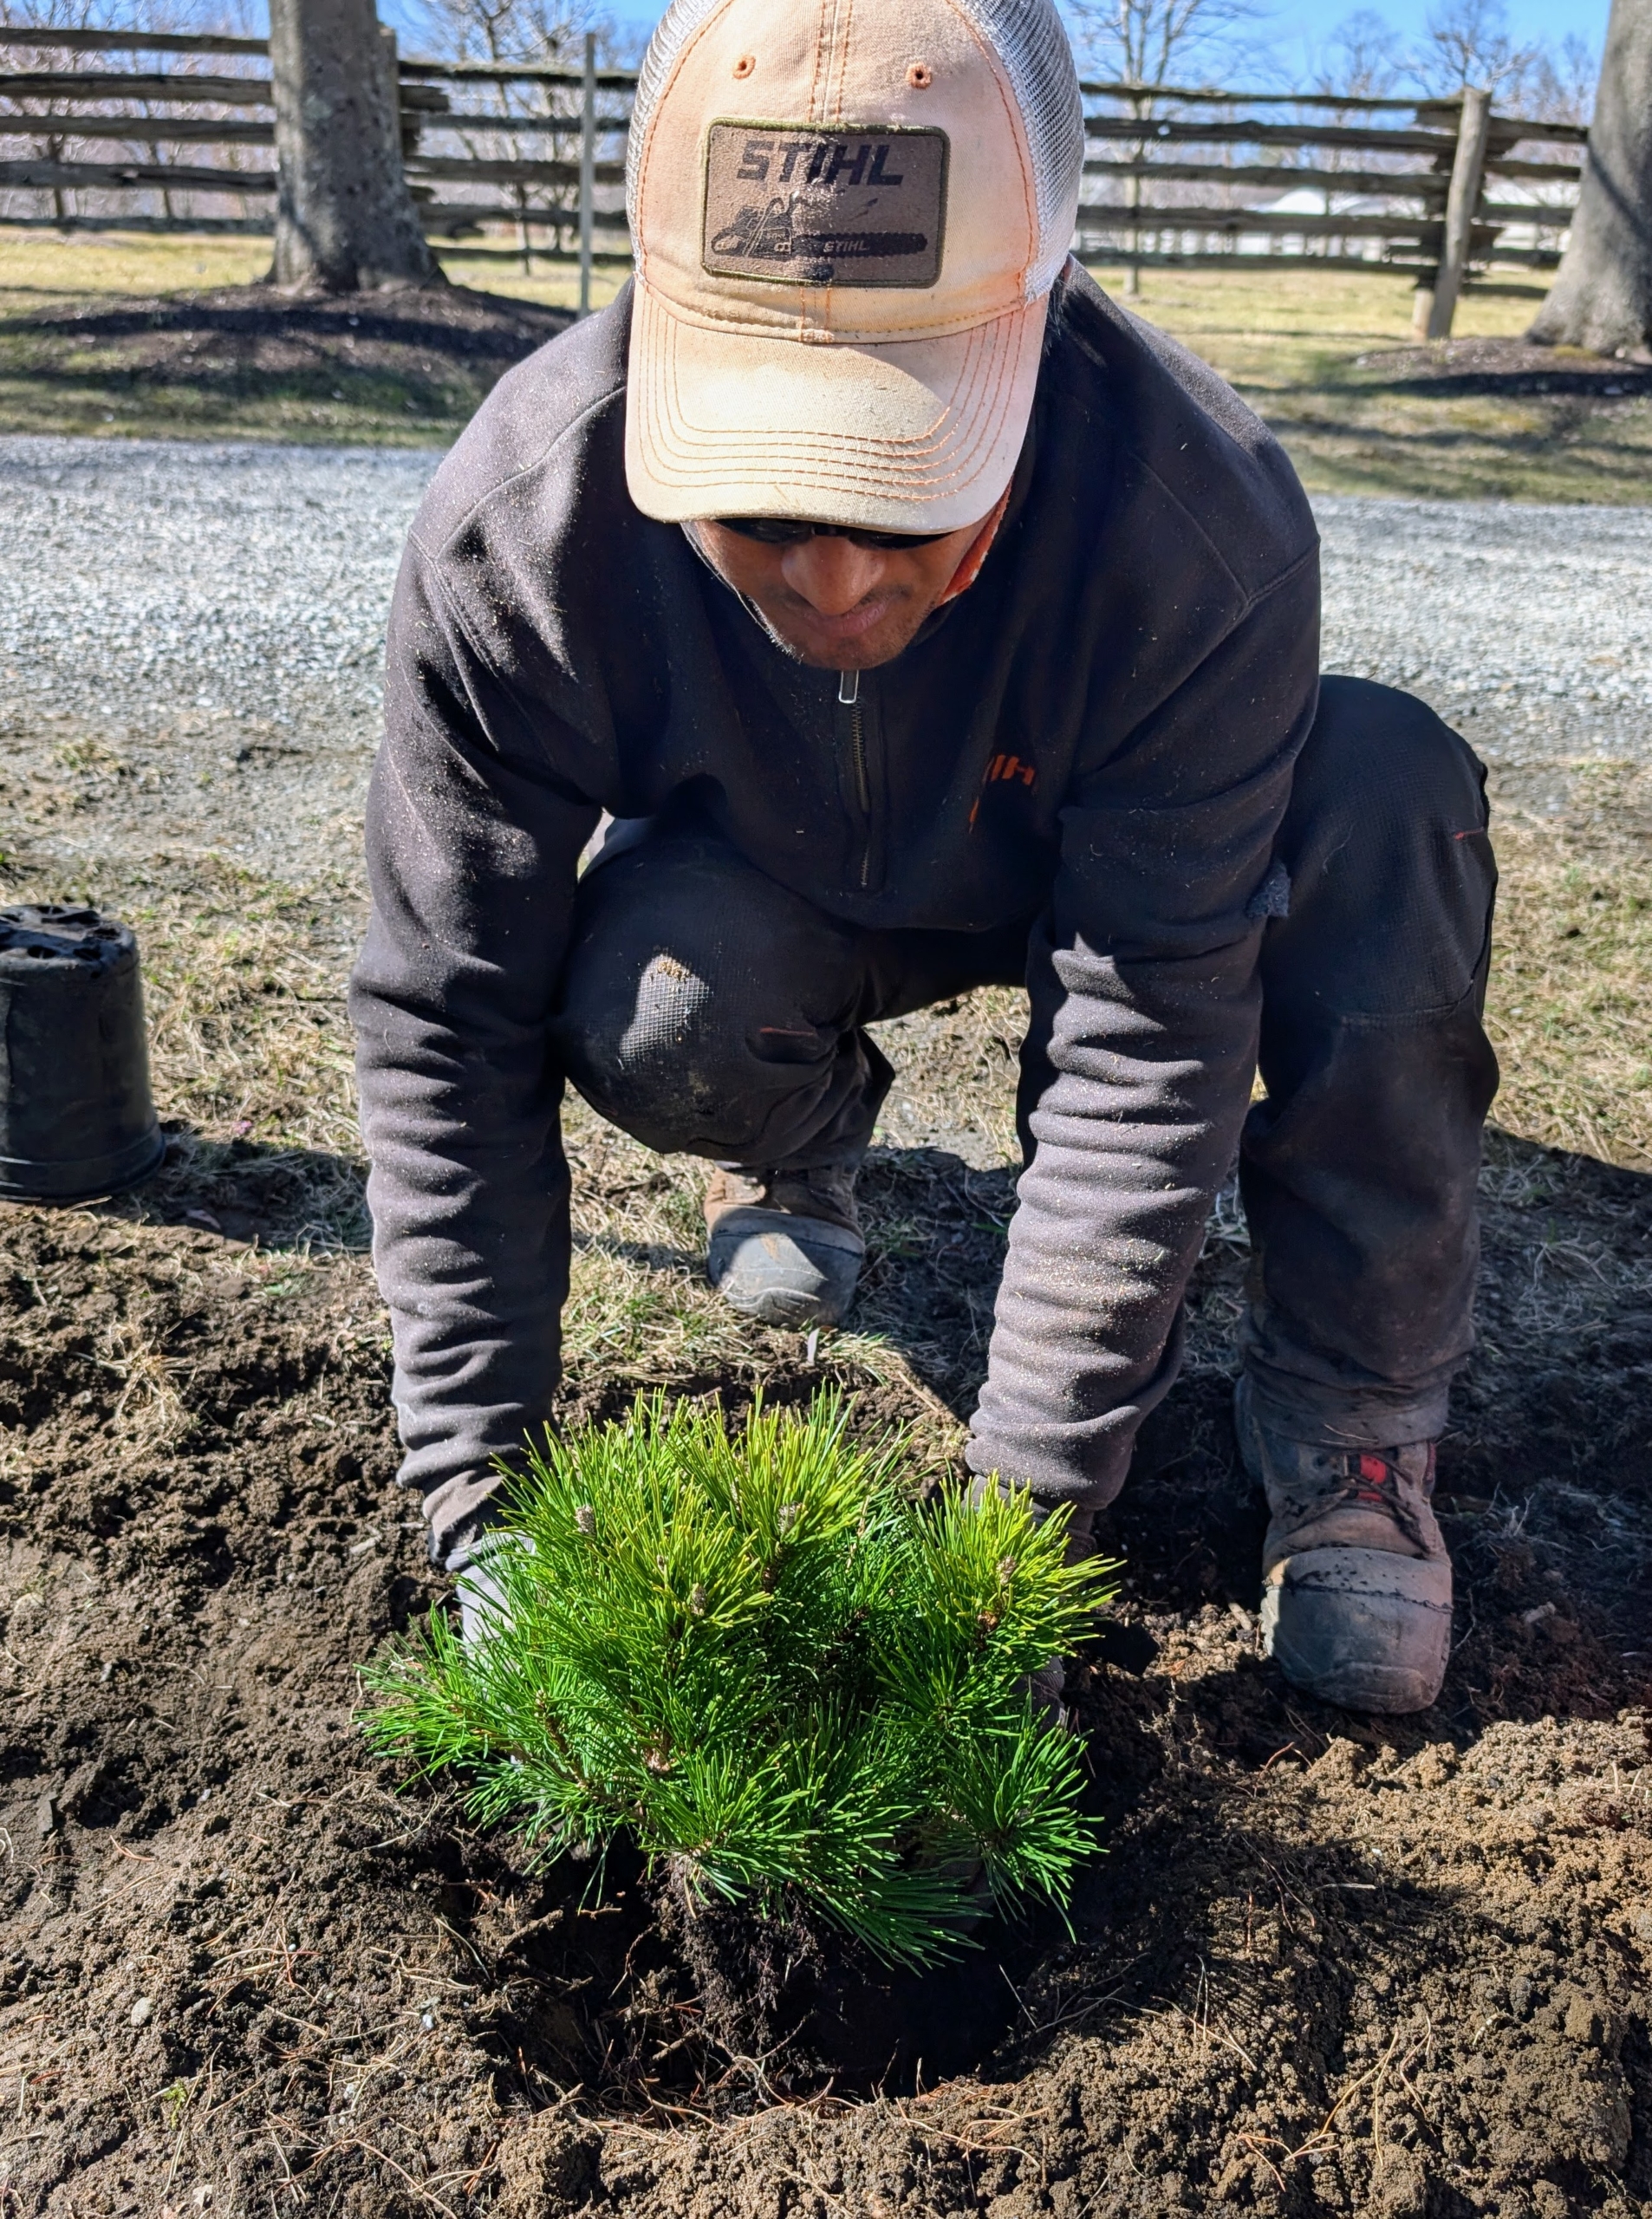
The plant is placed into the hole at the proper height – the nicest side faces out to the carriage road.
Always be careful to plant at the right depth. Planting too deep can kill any shrub or tree.
Finally, it’s backfilled. After putting a new shrub or tree into the ground, be sure to keep it slightly moist for its first year as it takes root.
Mugo pines are low-maintenance and highly resilient to various weather conditions. I’ll share more photos of this pinetum project in another blog.