It's very important to keep up with the maintenance at my Bedford, New York farm - especially the four miles of carriage road that meander around my homes, my gardens, my pastures, and through the expansive woodland.
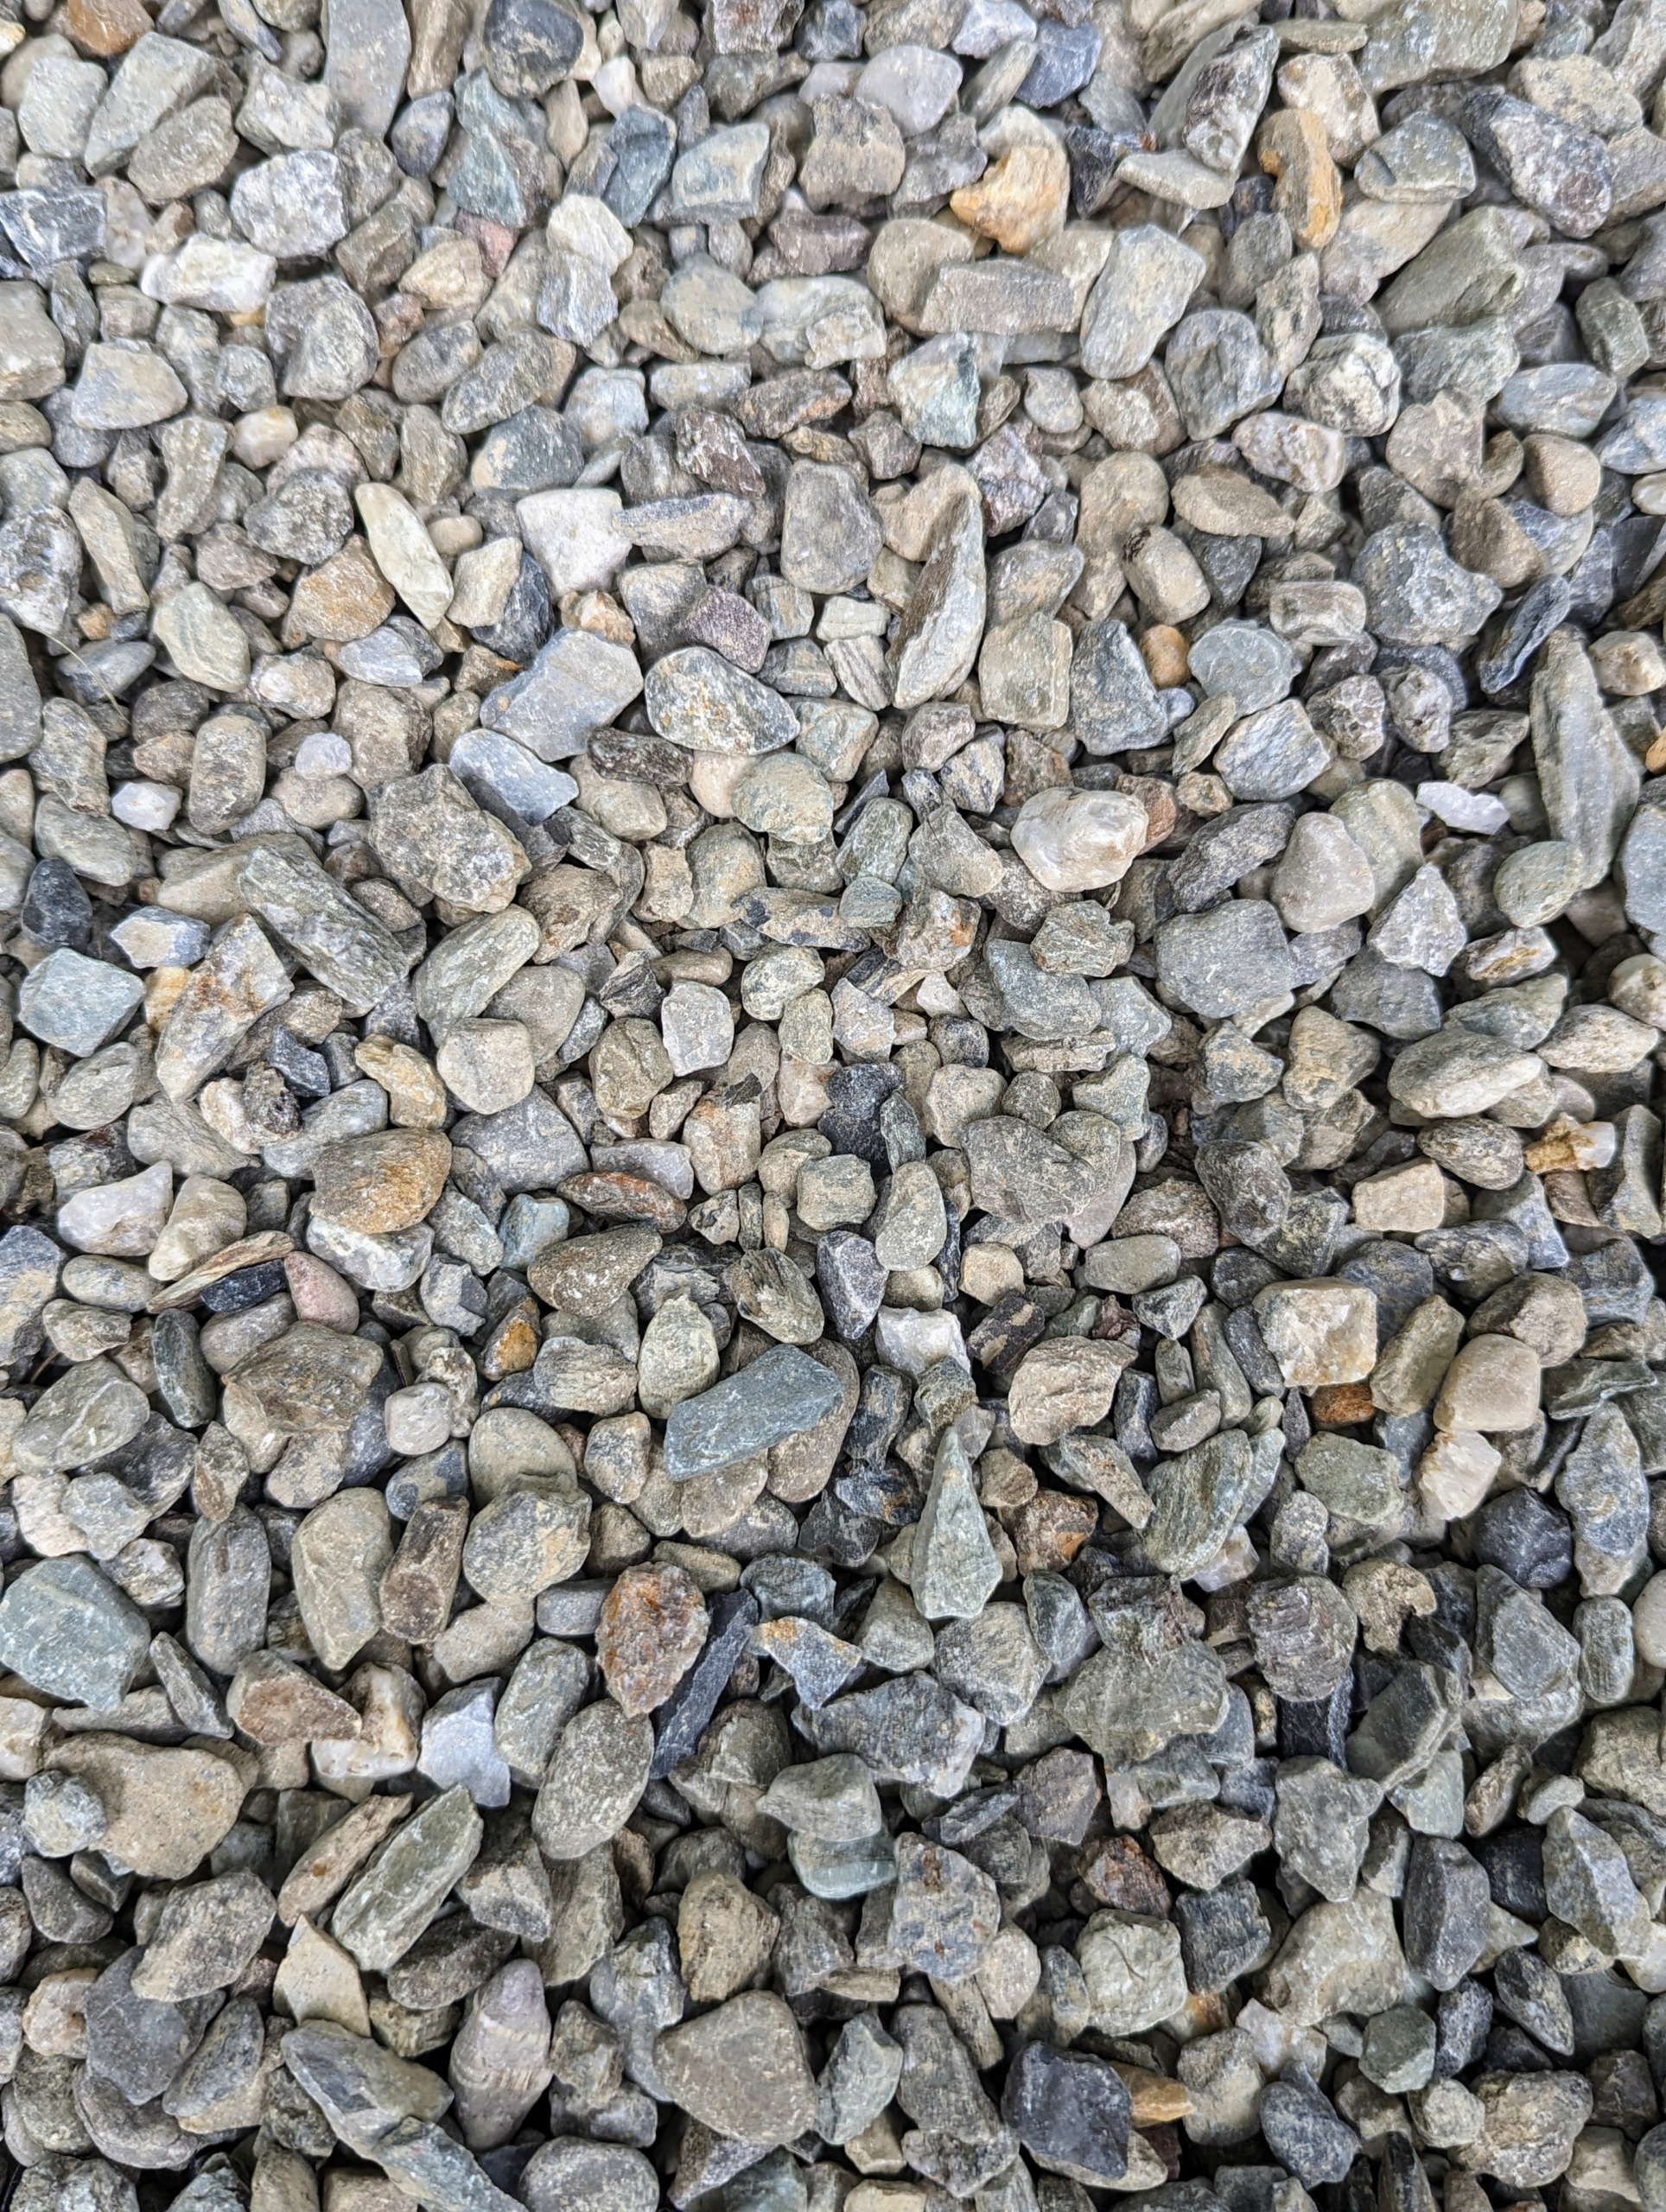
Every year, my outdoor grounds crew edges all the roads to make sure they are neat and tidy. This summer it was also necessary to re-cover the roads with a fresh layer of gravel. Once the 3/8-inch native washed stone was dropped, it had to be spread evenly, so the gravel was level and properly graded on the surface. Over the last several weeks, Pete Sherpa and Fernando Ferrari took on the tedious task.
Here are some photos, enjoy.
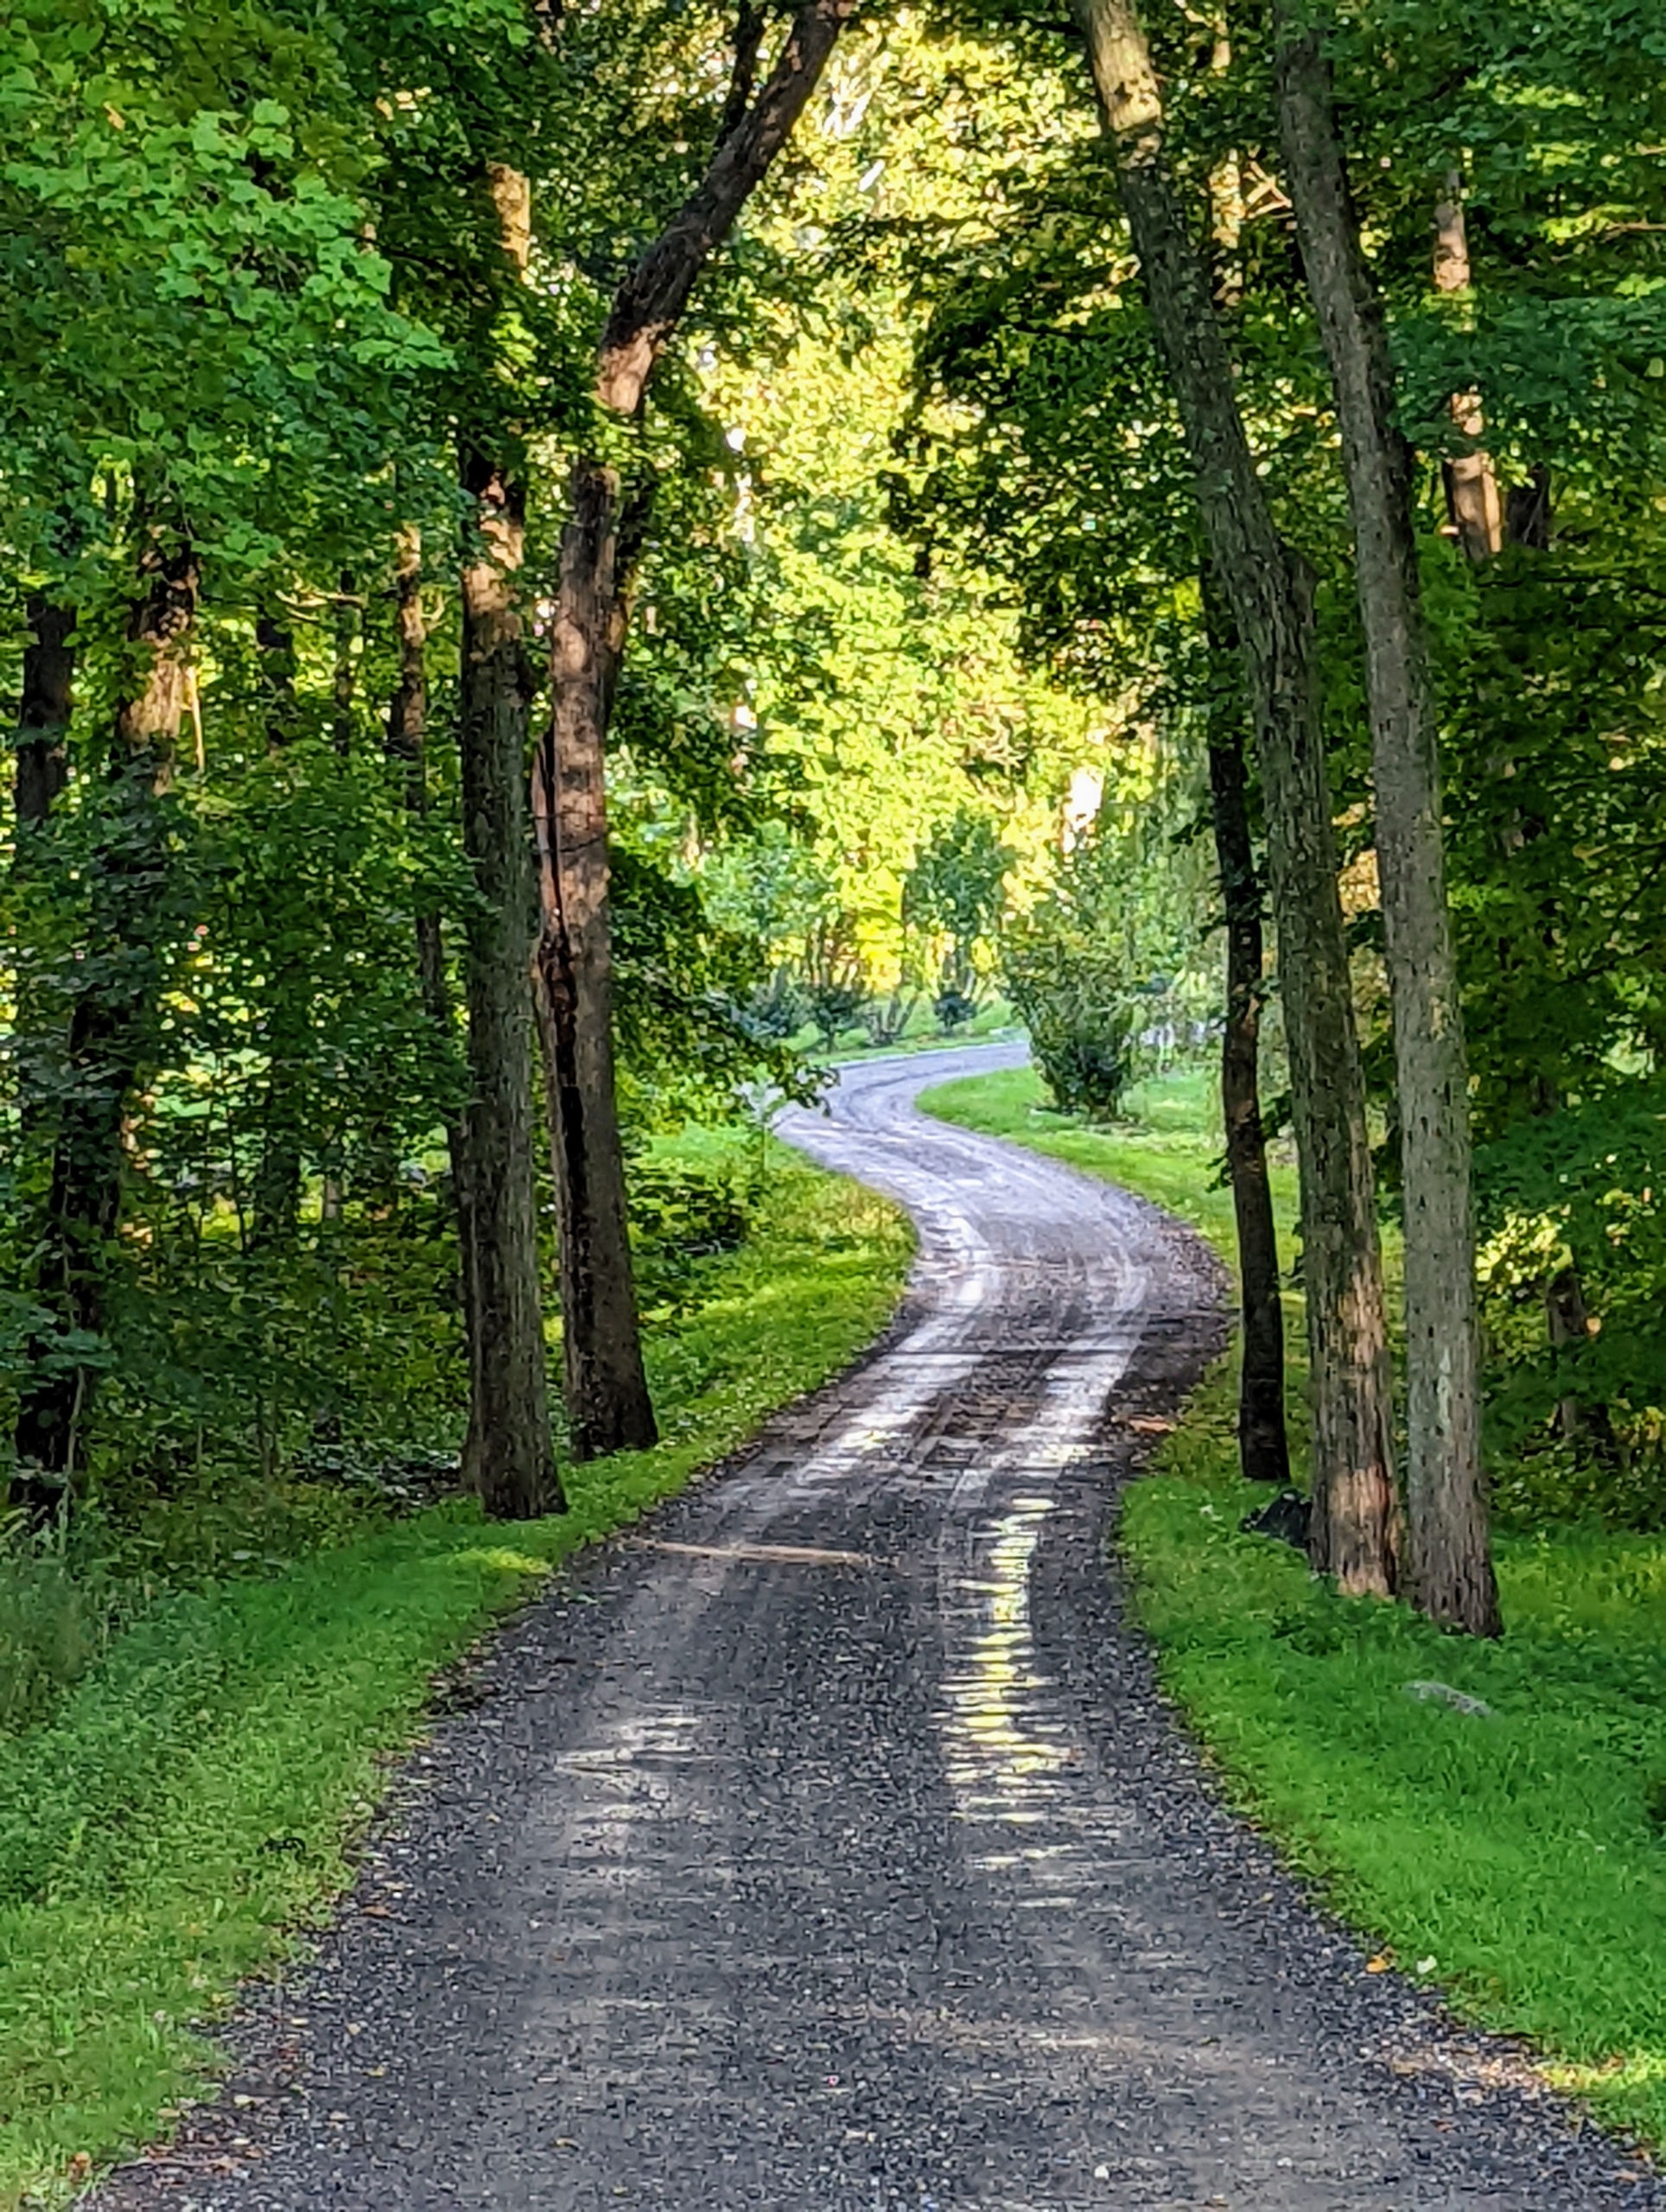
My farm sits on 153-acres of land that includes four miles of gravel-covered carriage road. Gravel roads are attractive and accumulate less pollutants over time, but it is important to keep them well-maintained.
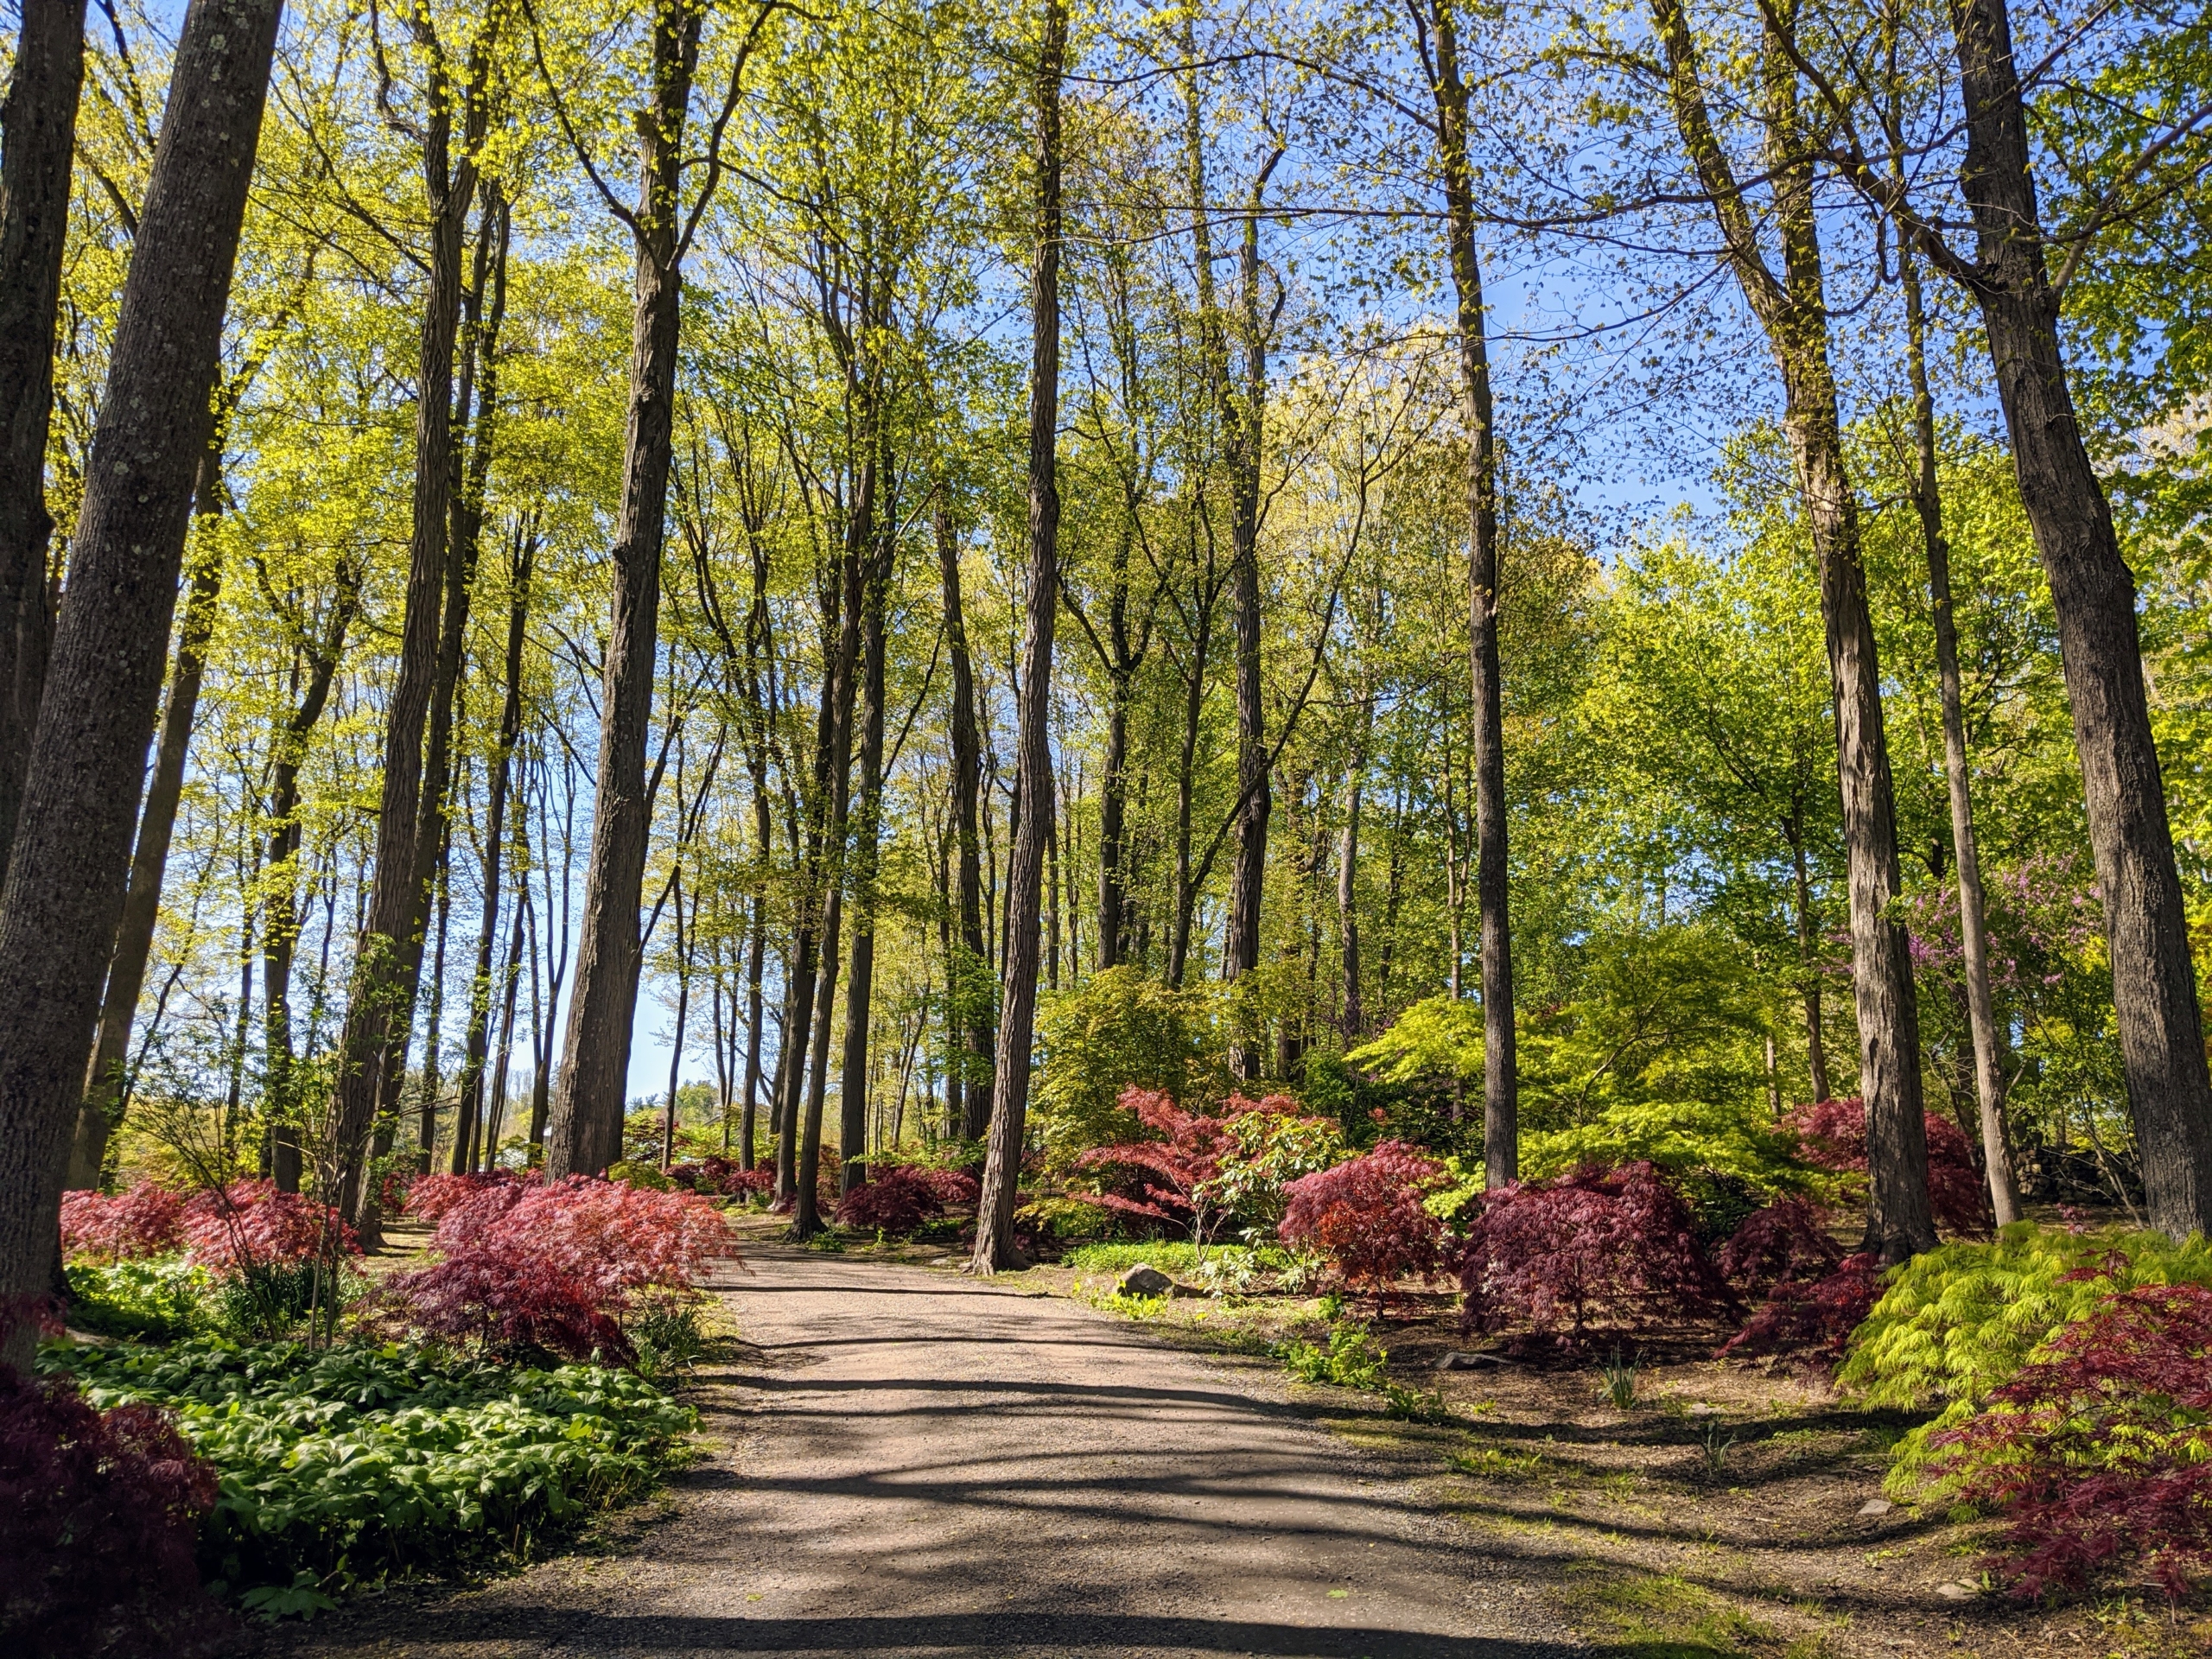
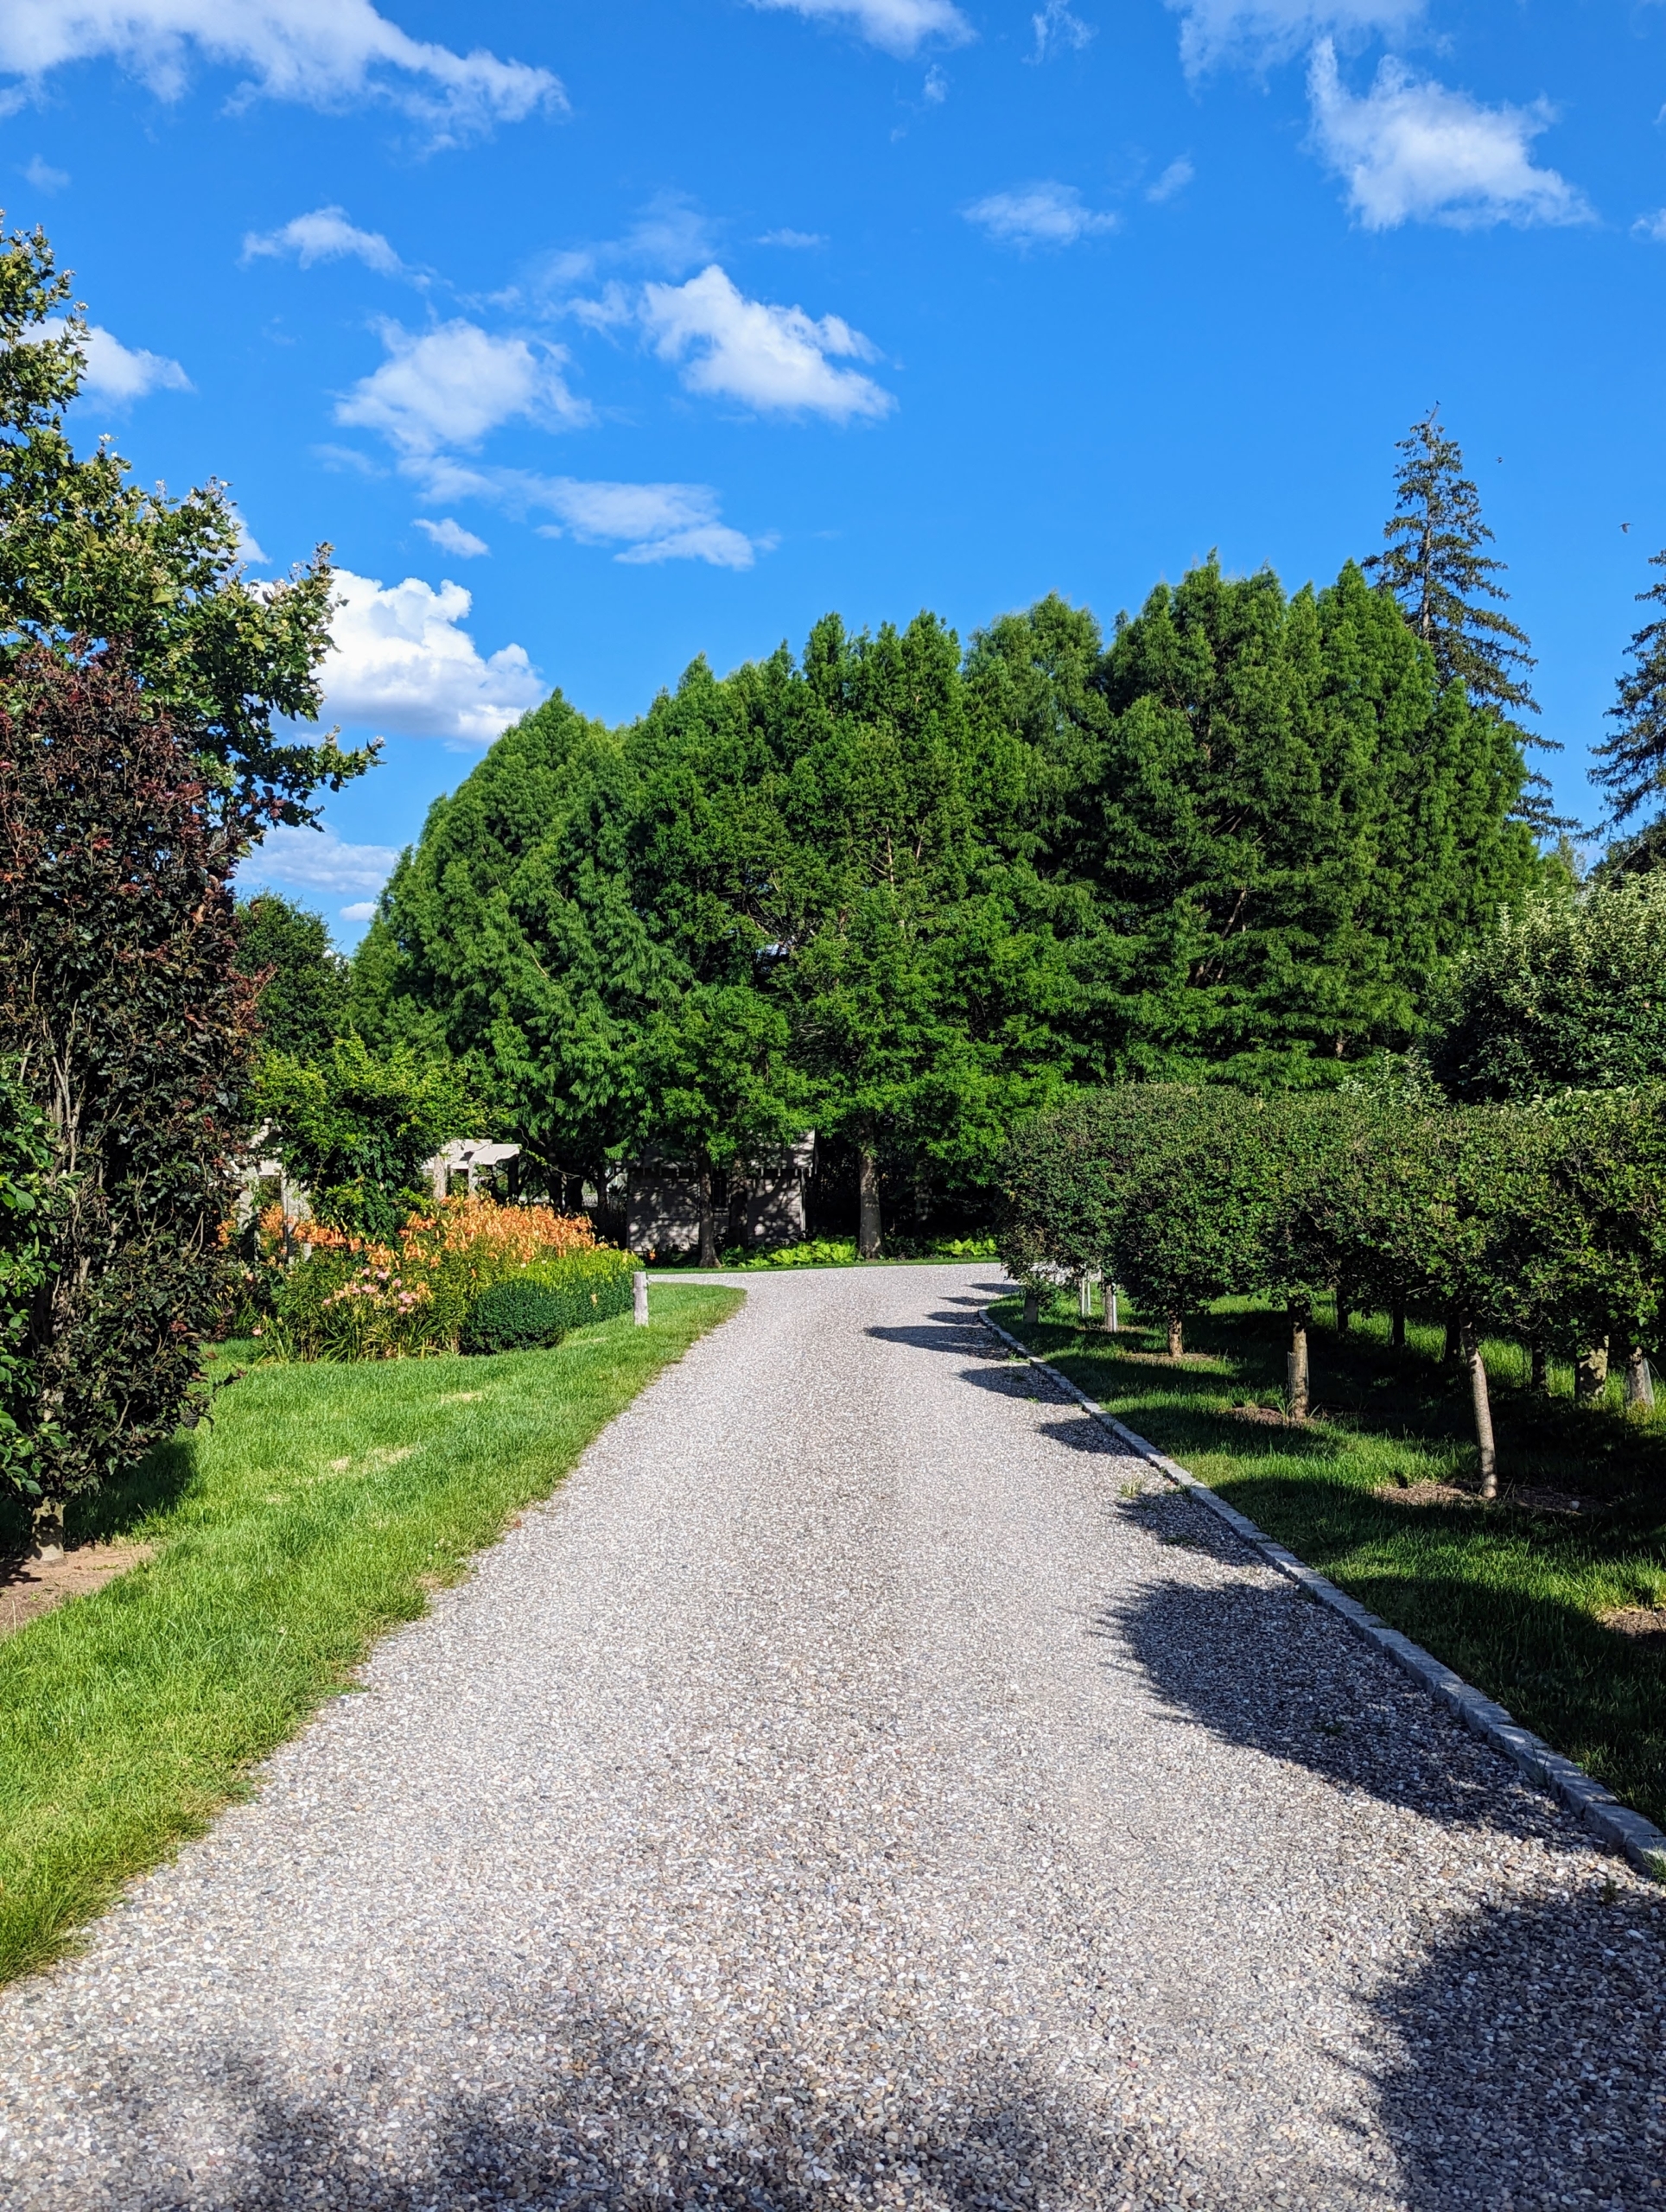
This photo shows the carriage road leading into my Japanese Maple Tree Woodland. All the carriage roads were designed with my horses in mind. Whenever I can, I enjoy riding my horses around the farm, visiting all the other animals and viewing the gardens.
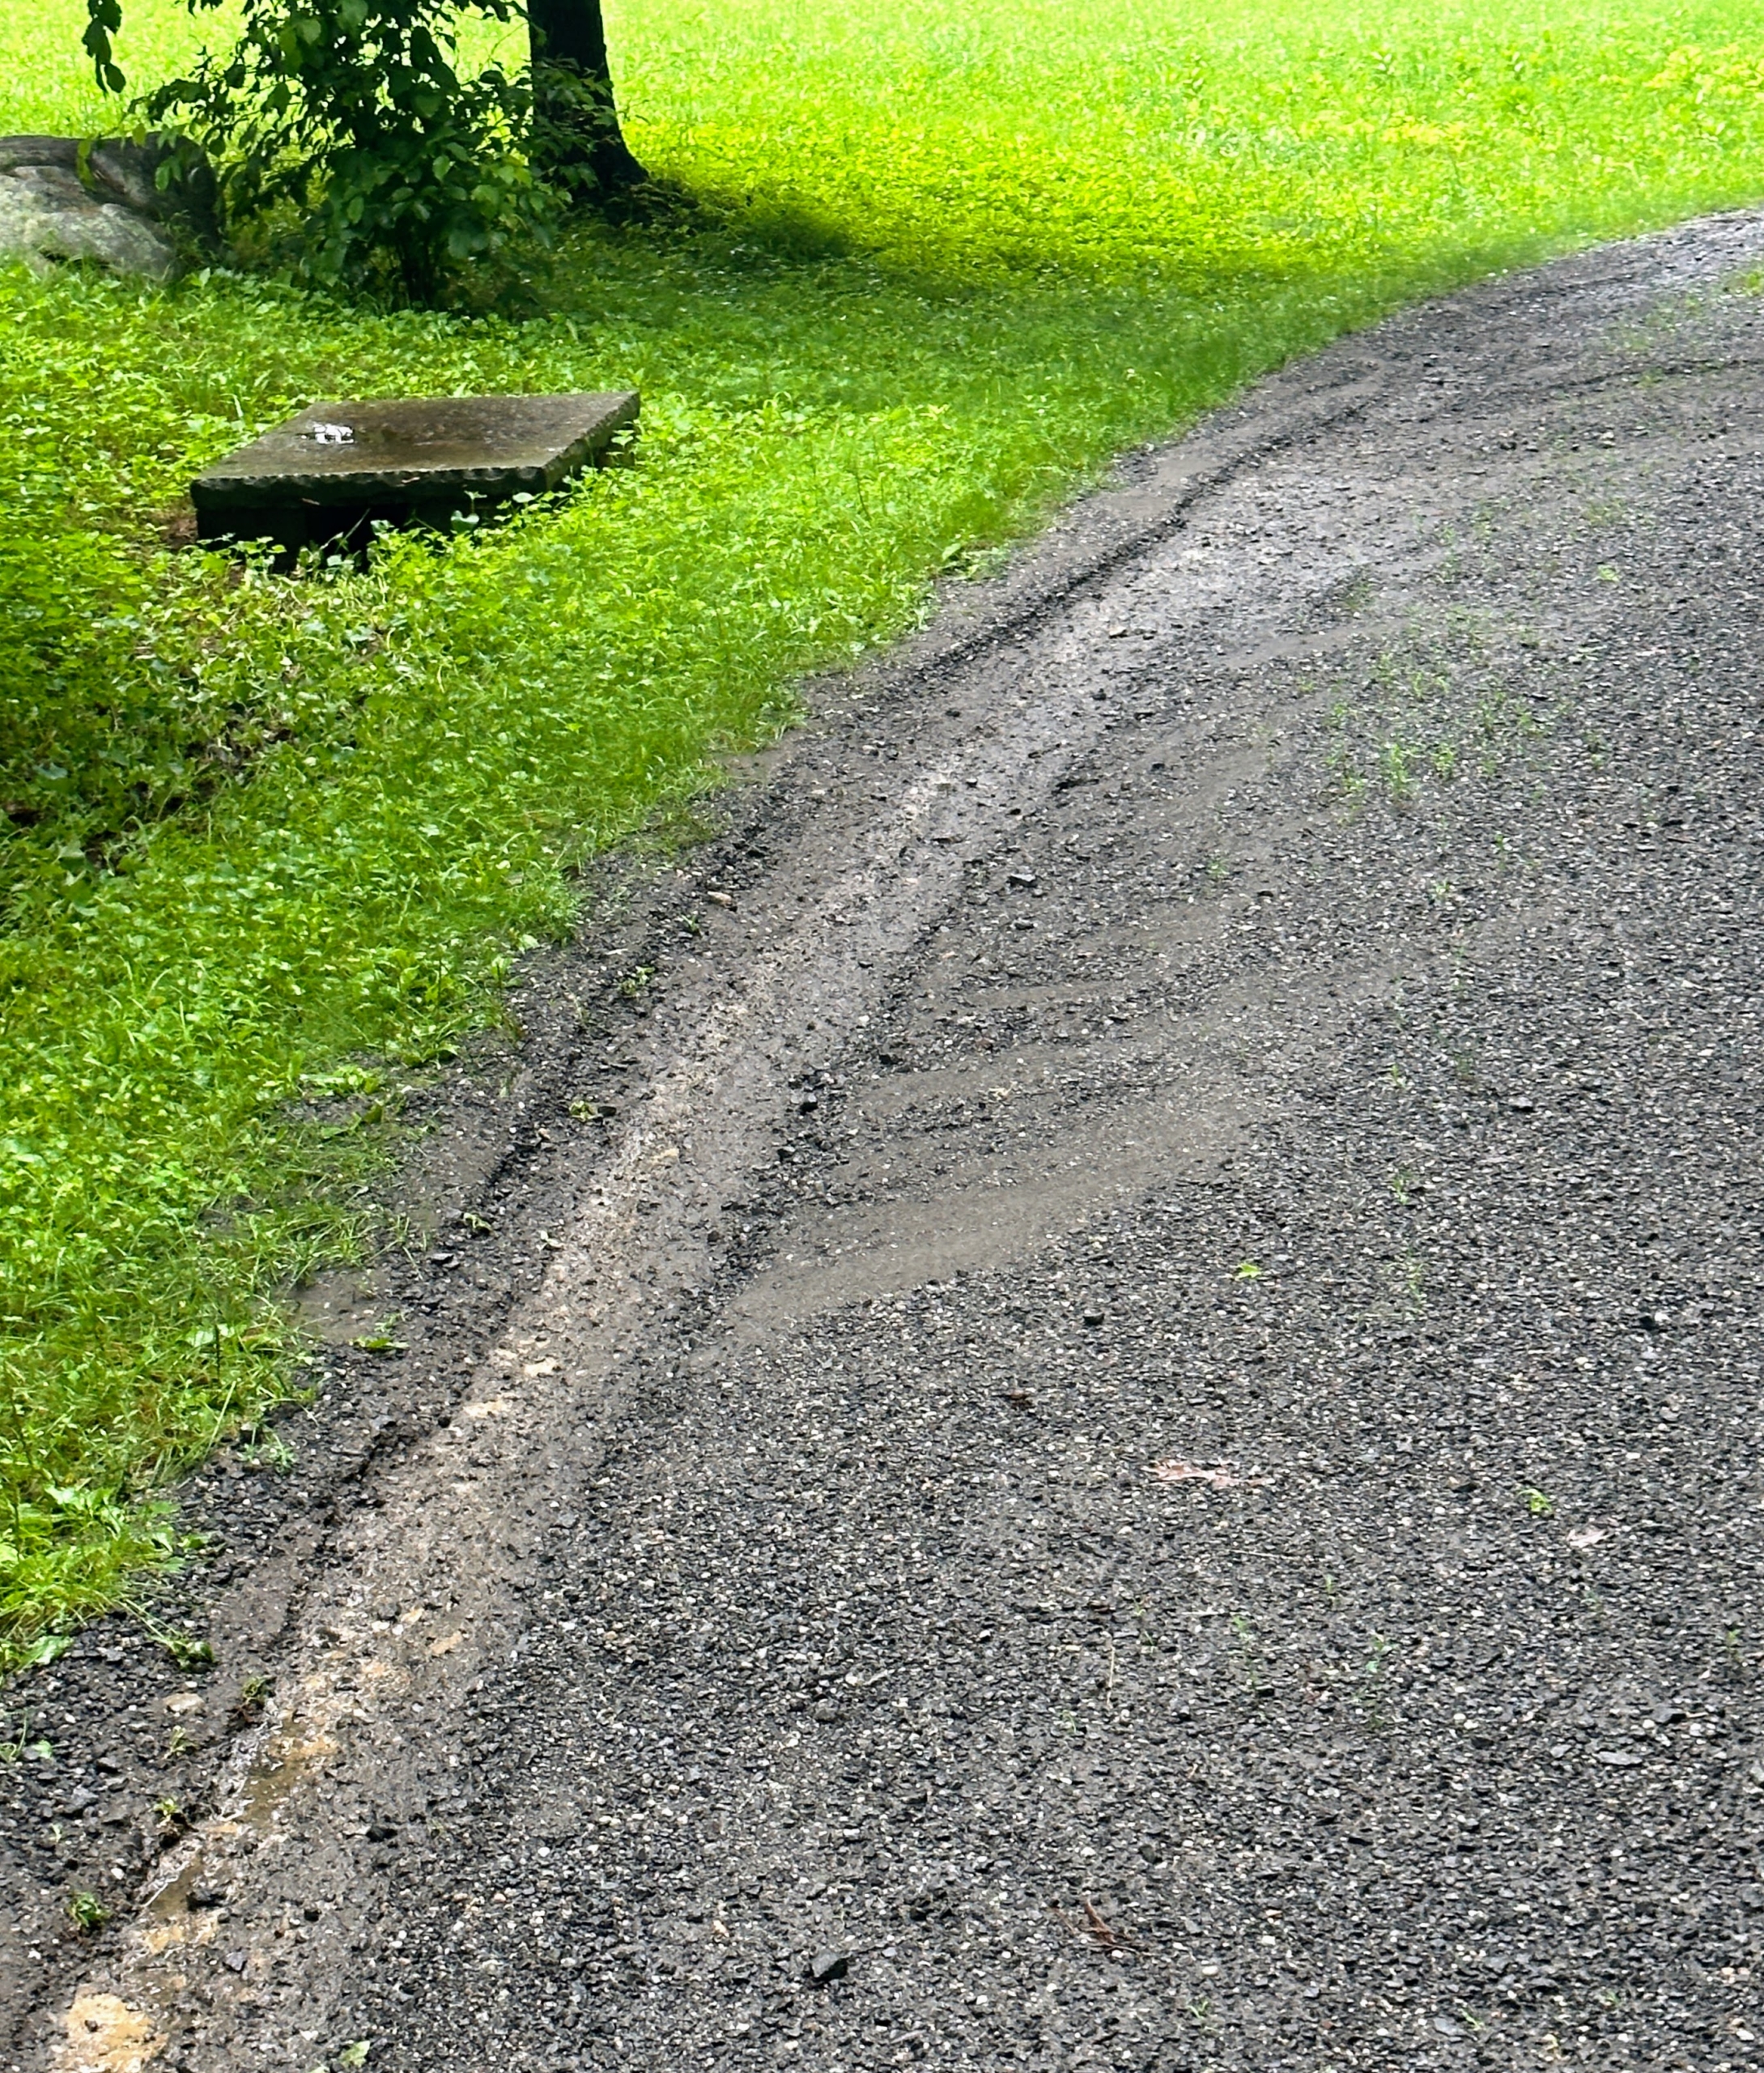
Over time, the gravel shifts, storms cause holes in areas where rain water tends to pond, and heavy use creates ruts.
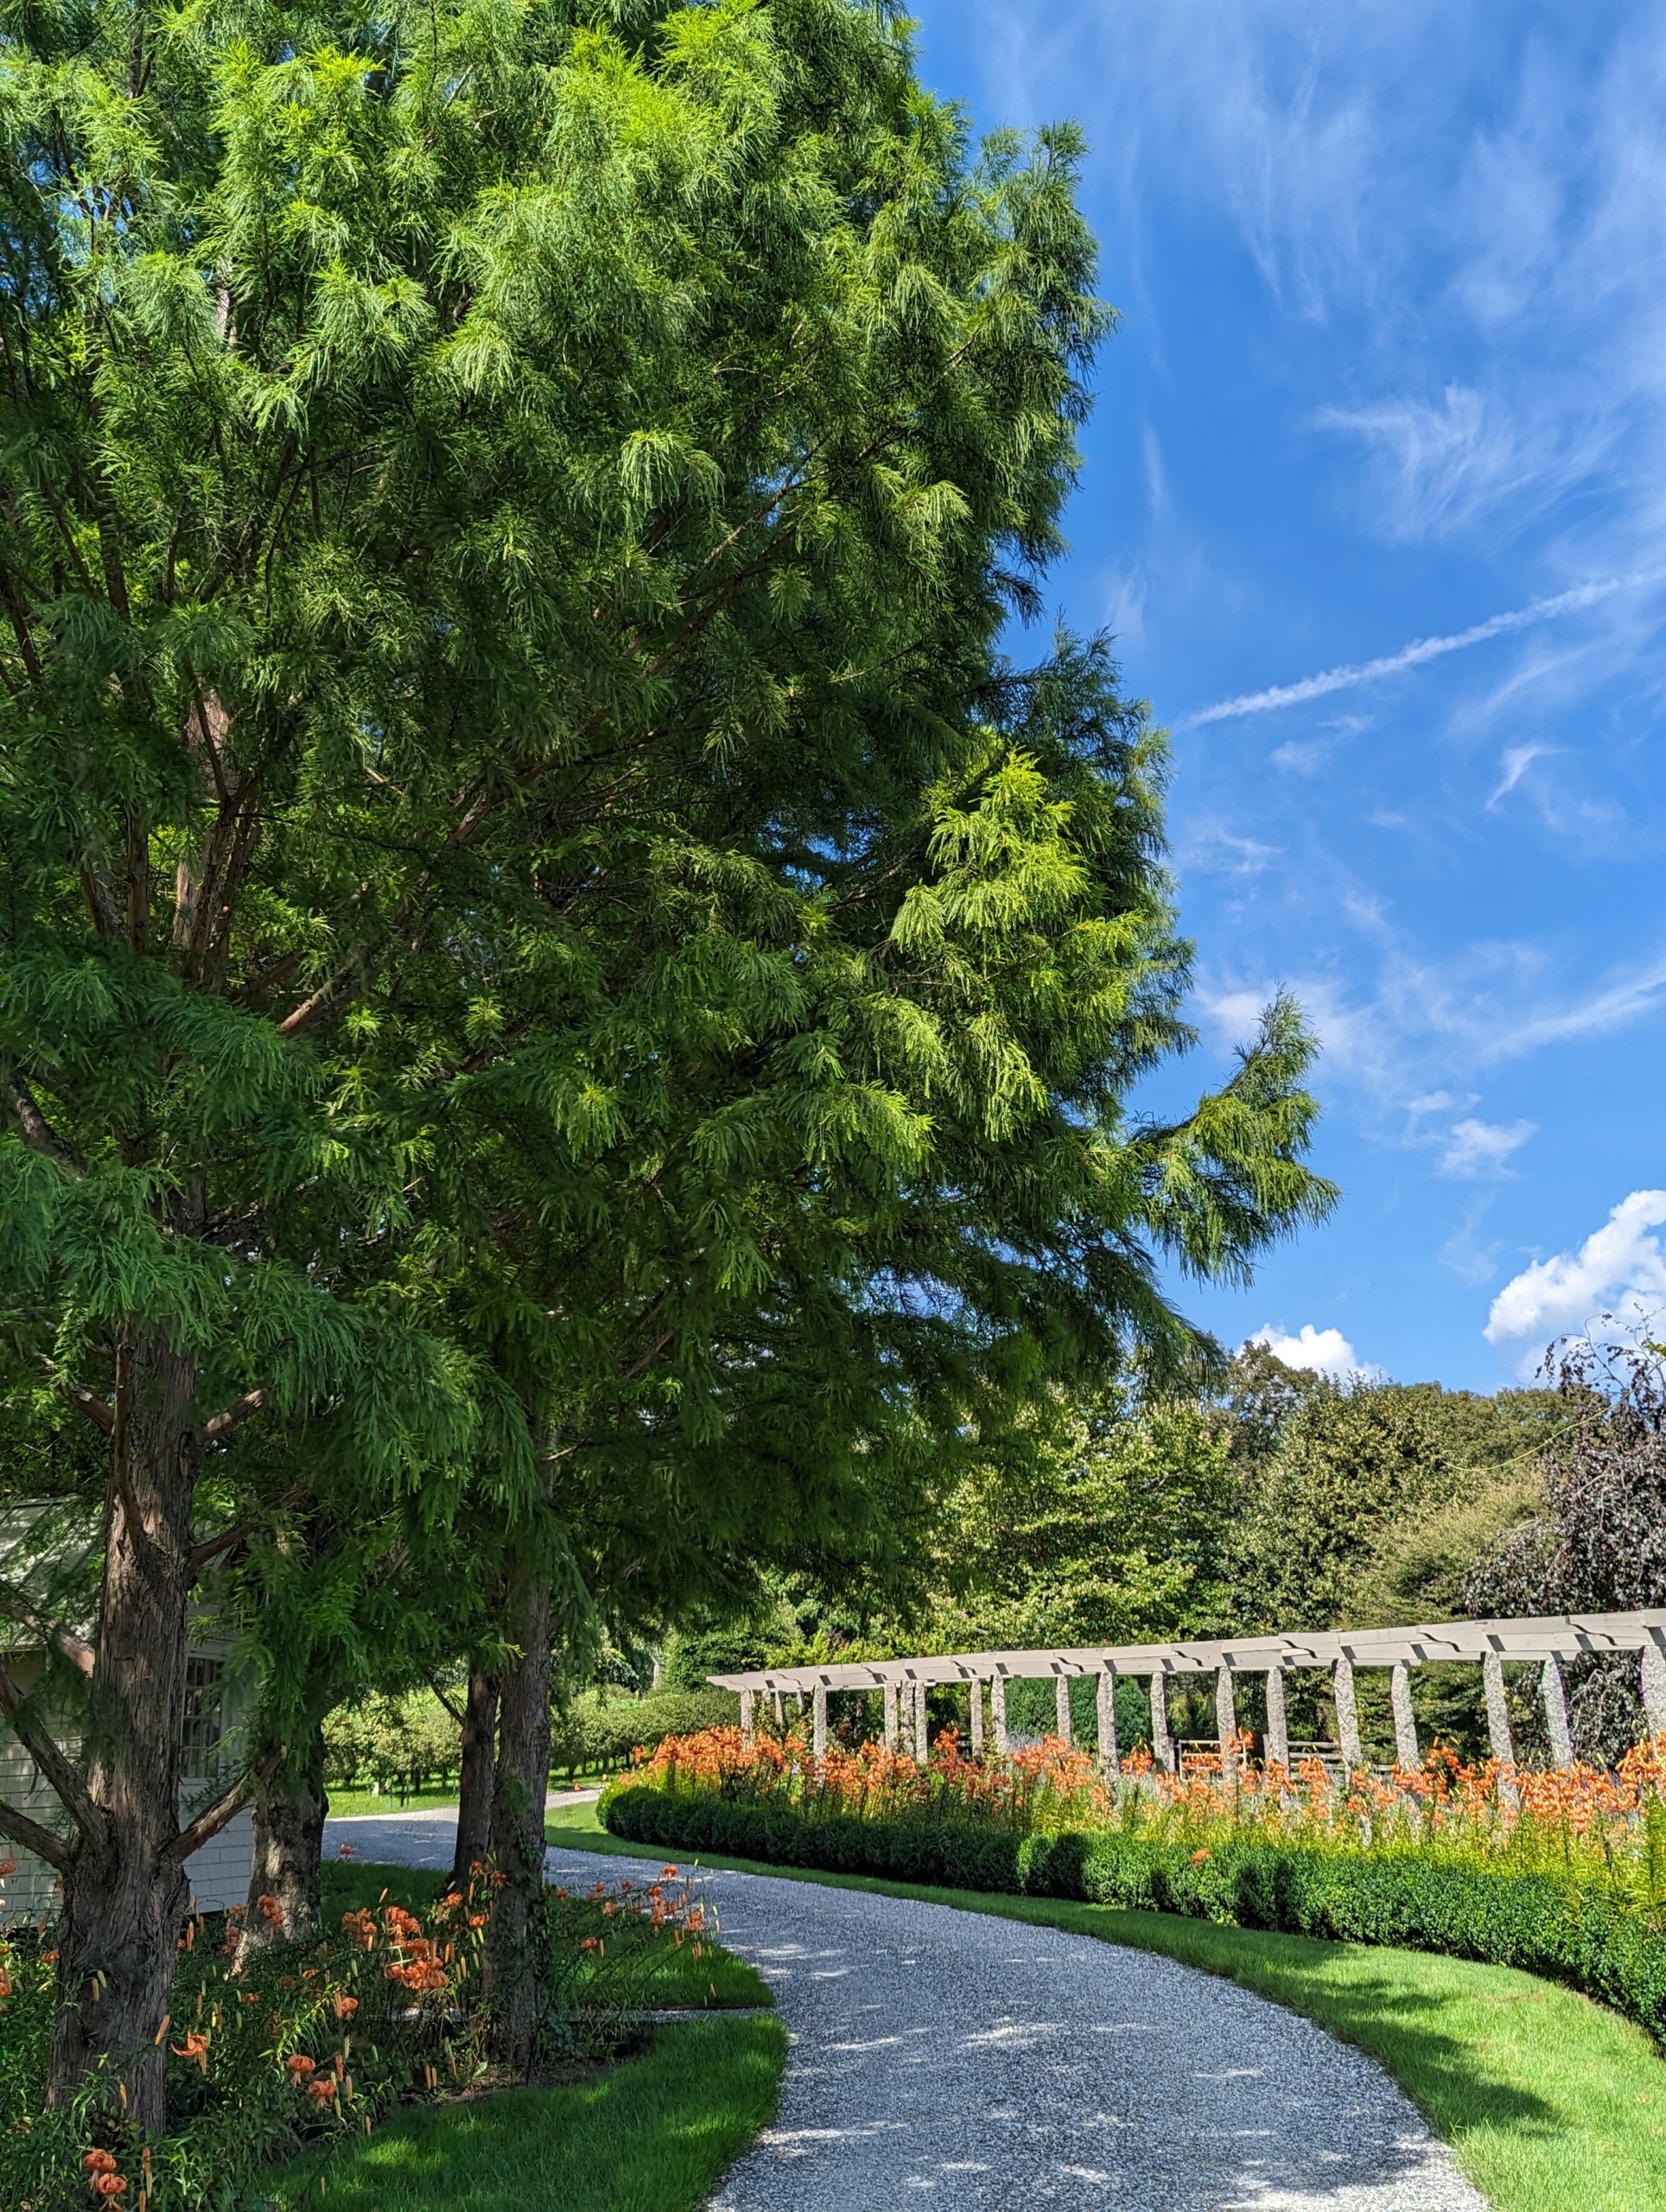
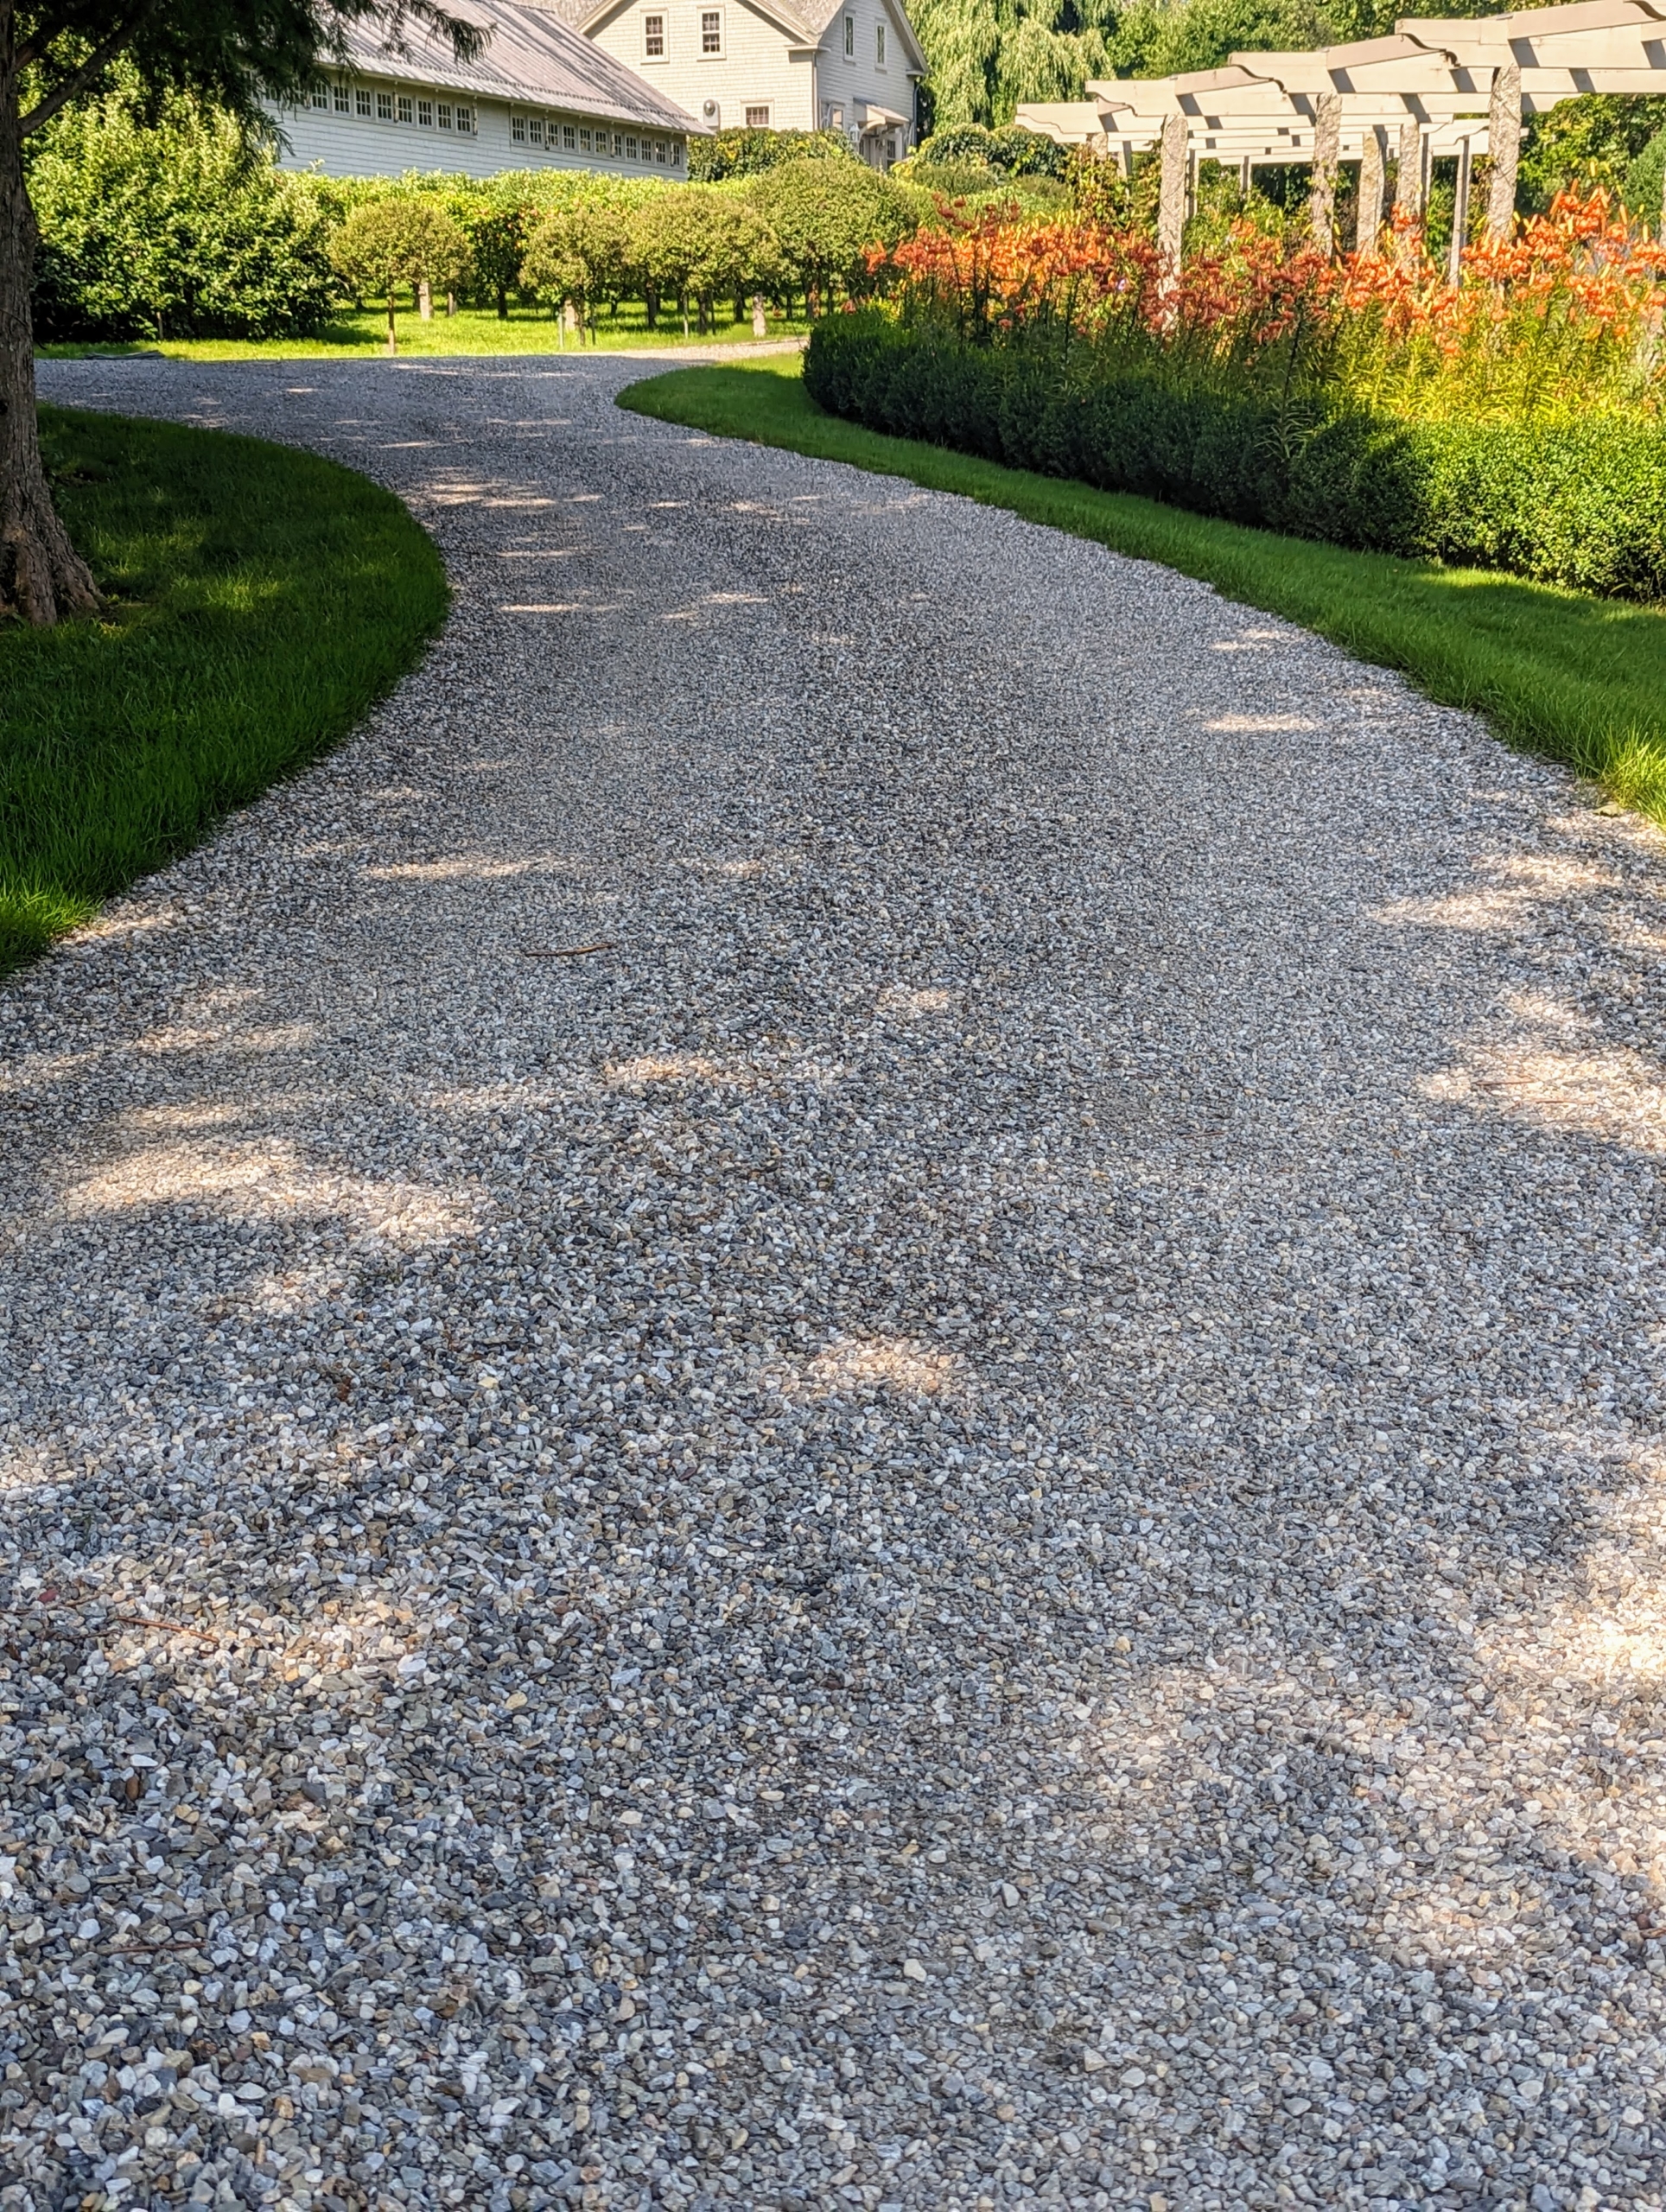
High traffic areas such as this carriage road alongside my winding pergola often need attention and are edged and raked a couple times a year.
Strong storms cause run-off that also washes the road gravel away like this area along the carriage road through the azalea border.
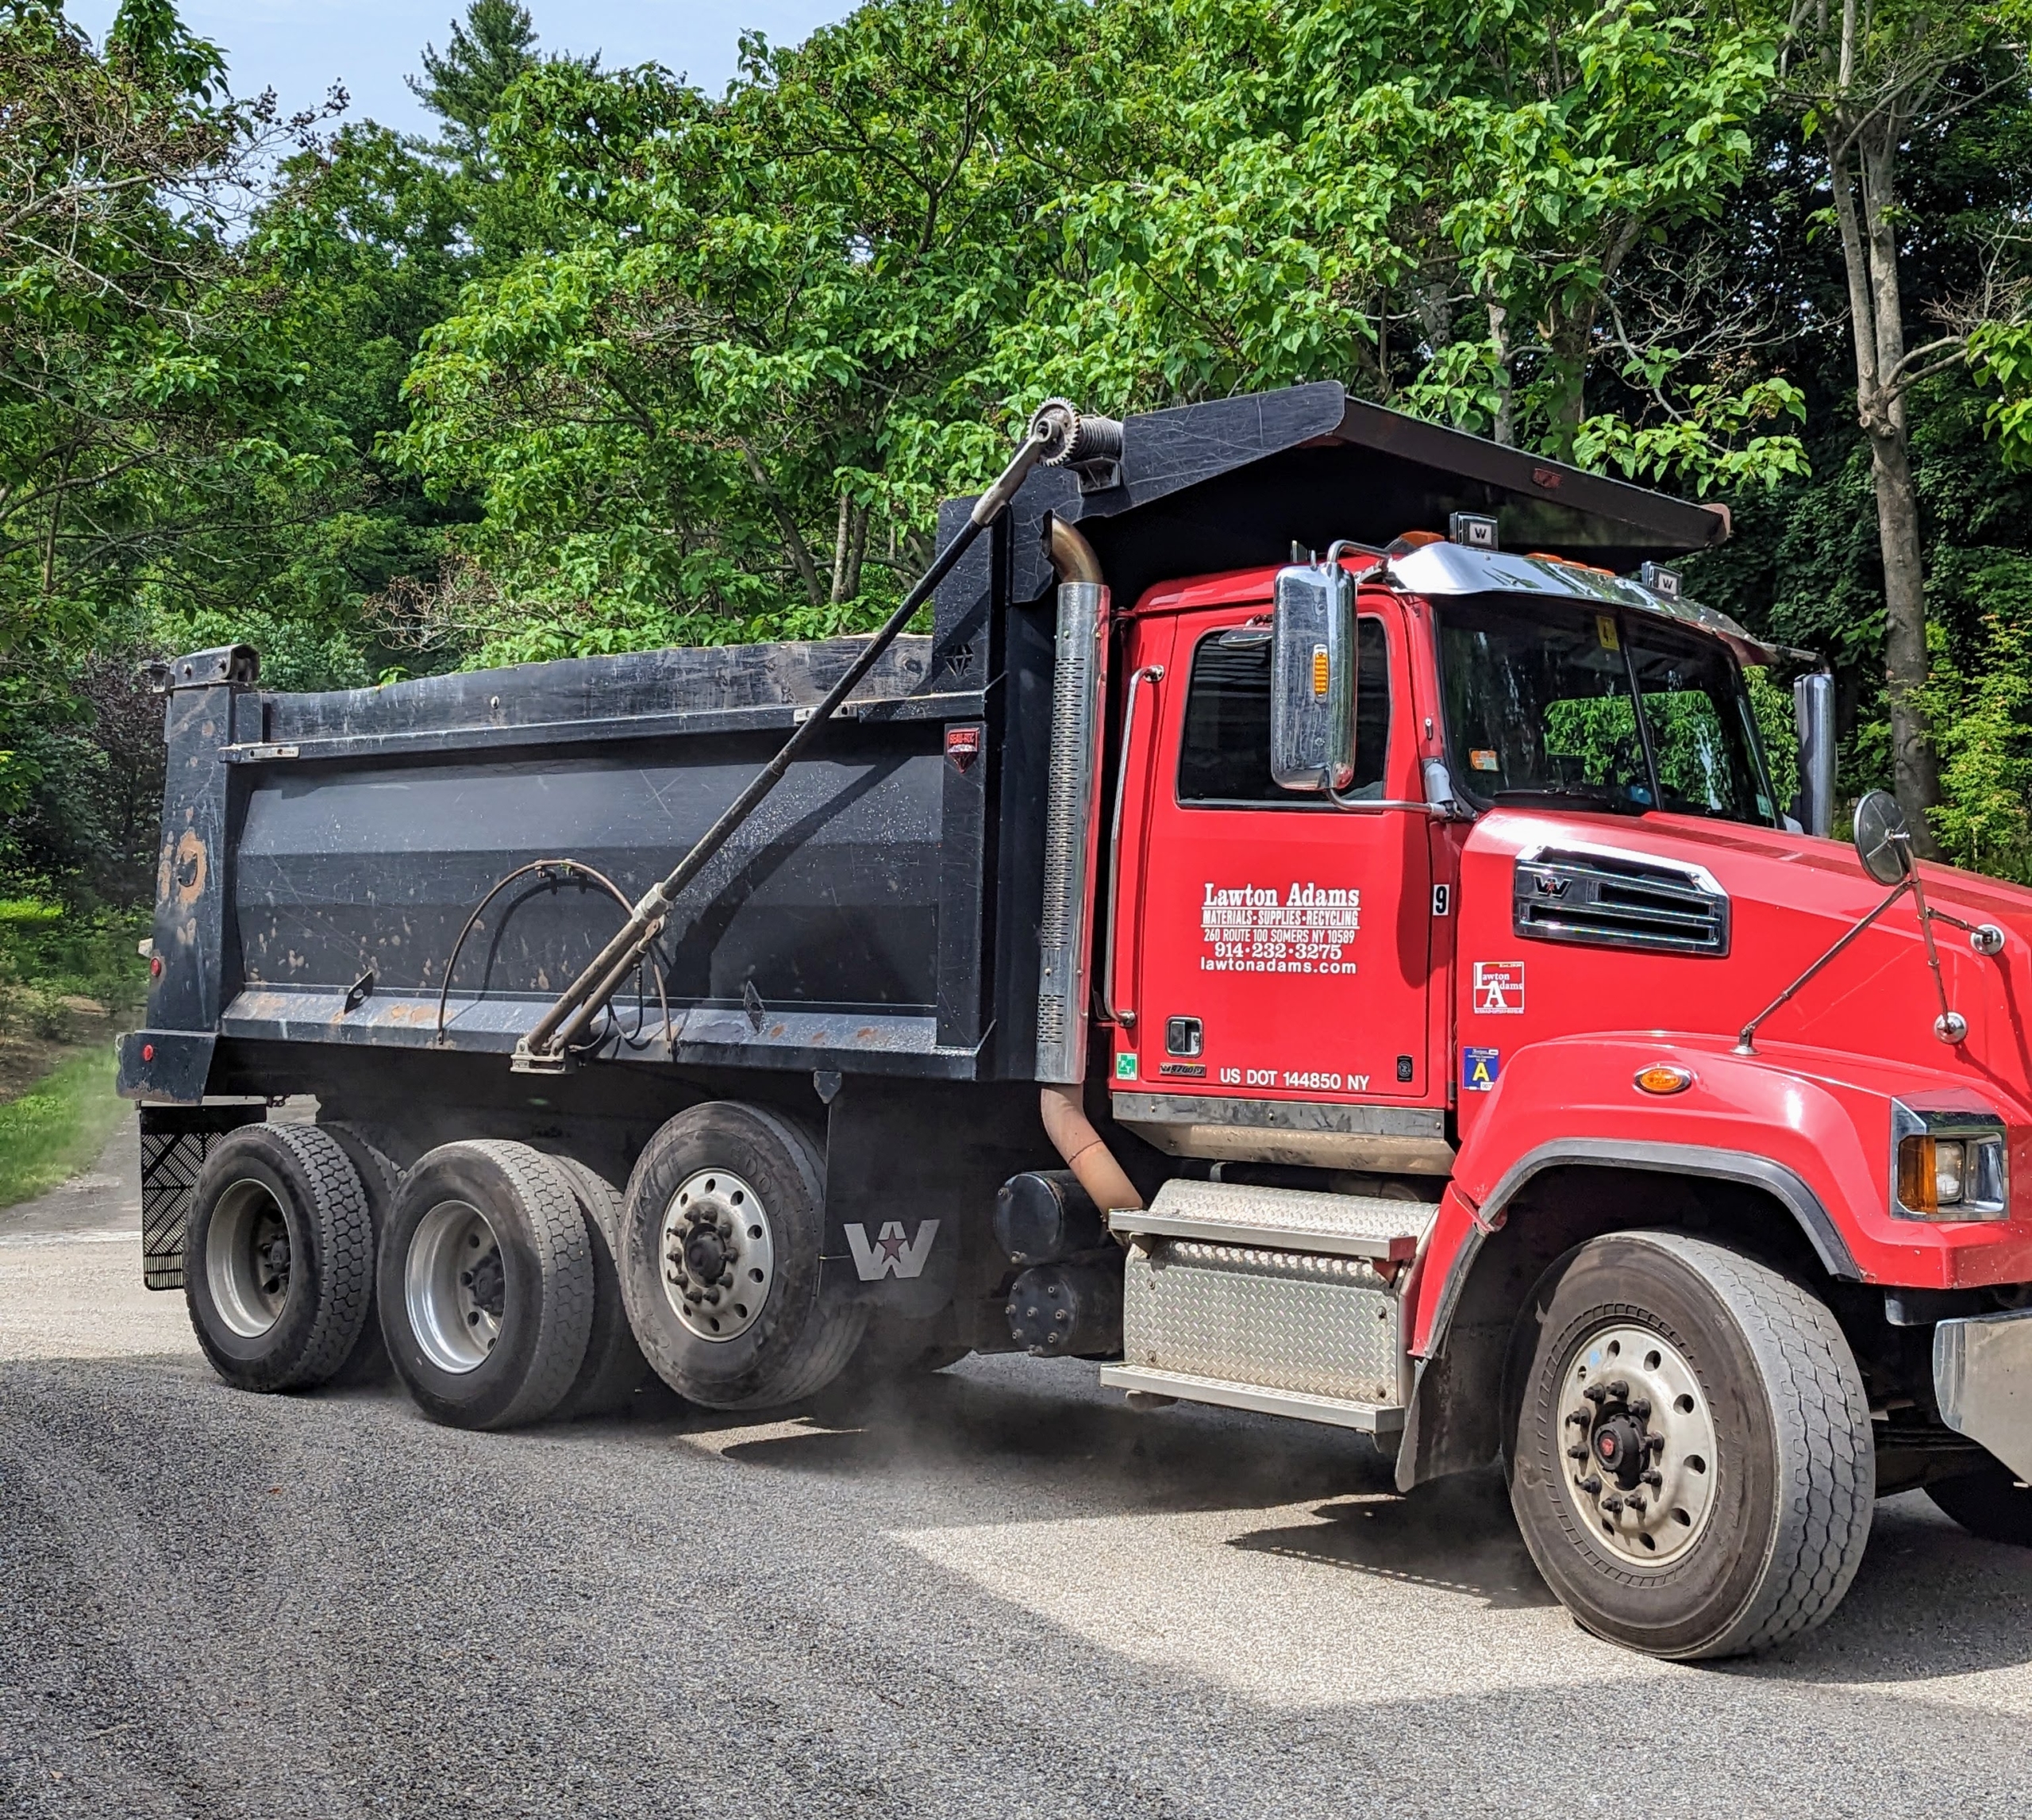
Earlier this summer, we called in our friends from Lawton Adams Materials, Supplies & Recycling – a company in Somers, New York that offers a large variety of construction and landscaping materials including sand, gravel, topsoil, mulch, wall stone, and more.
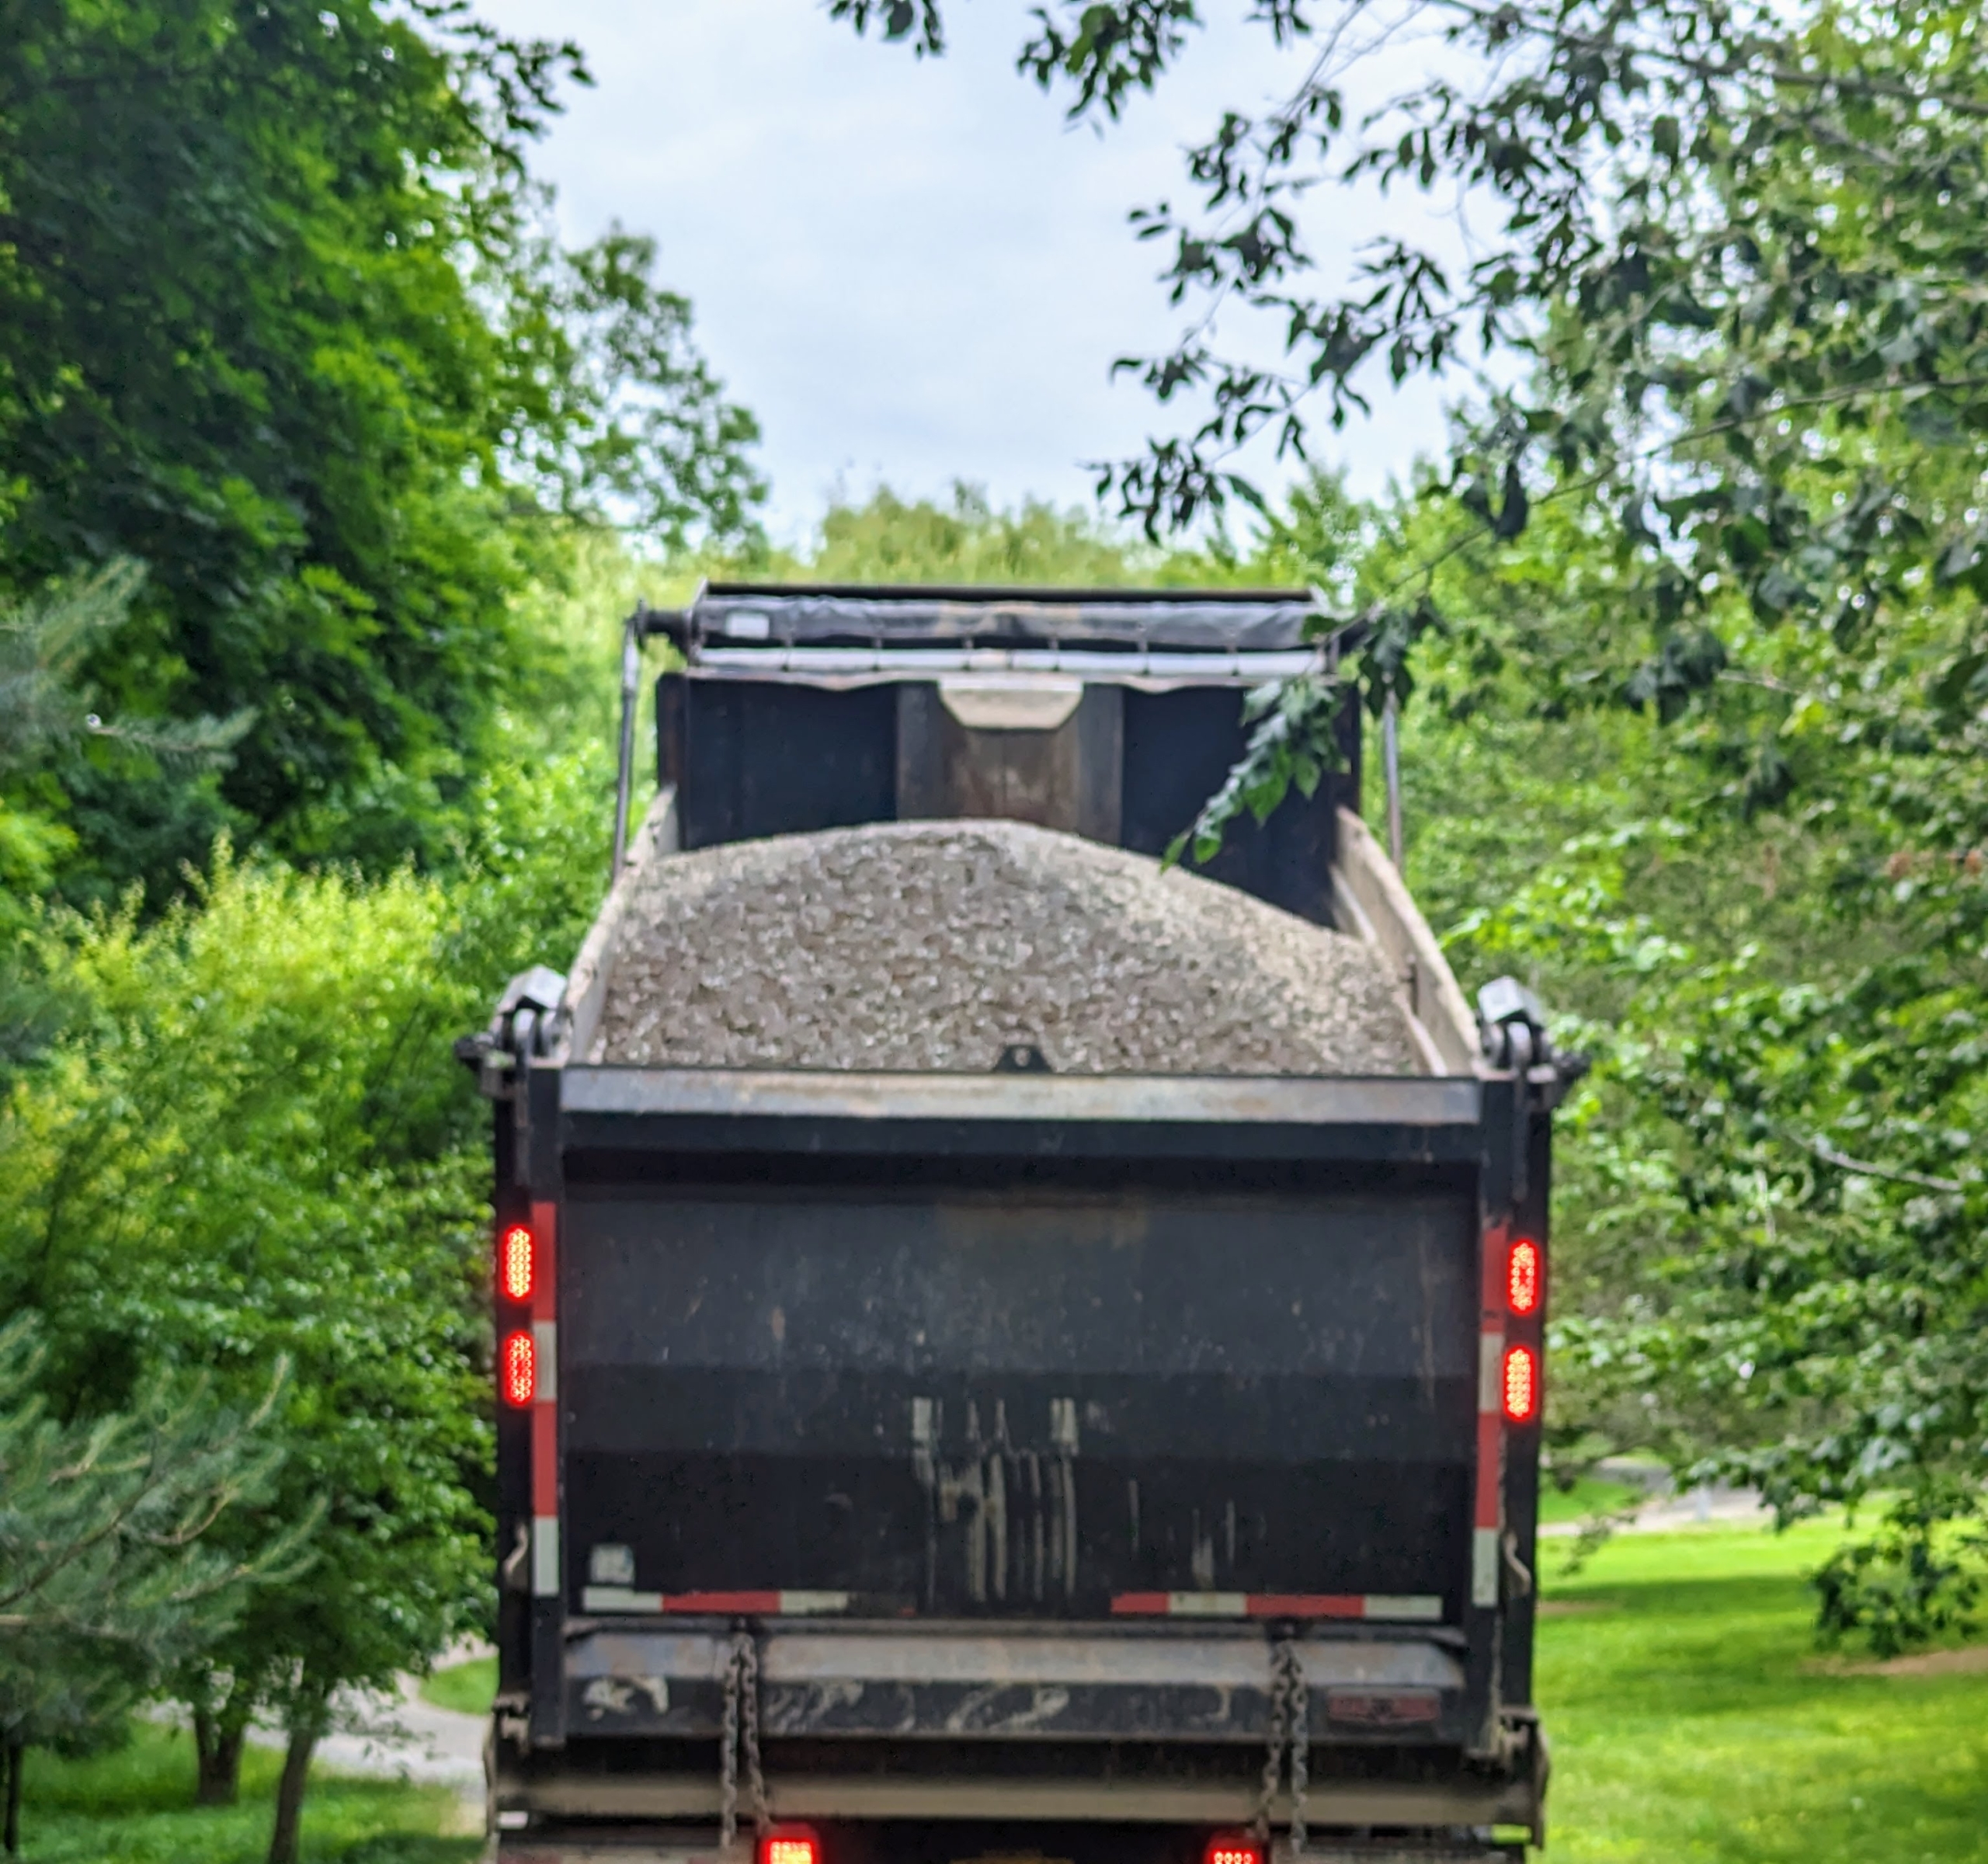
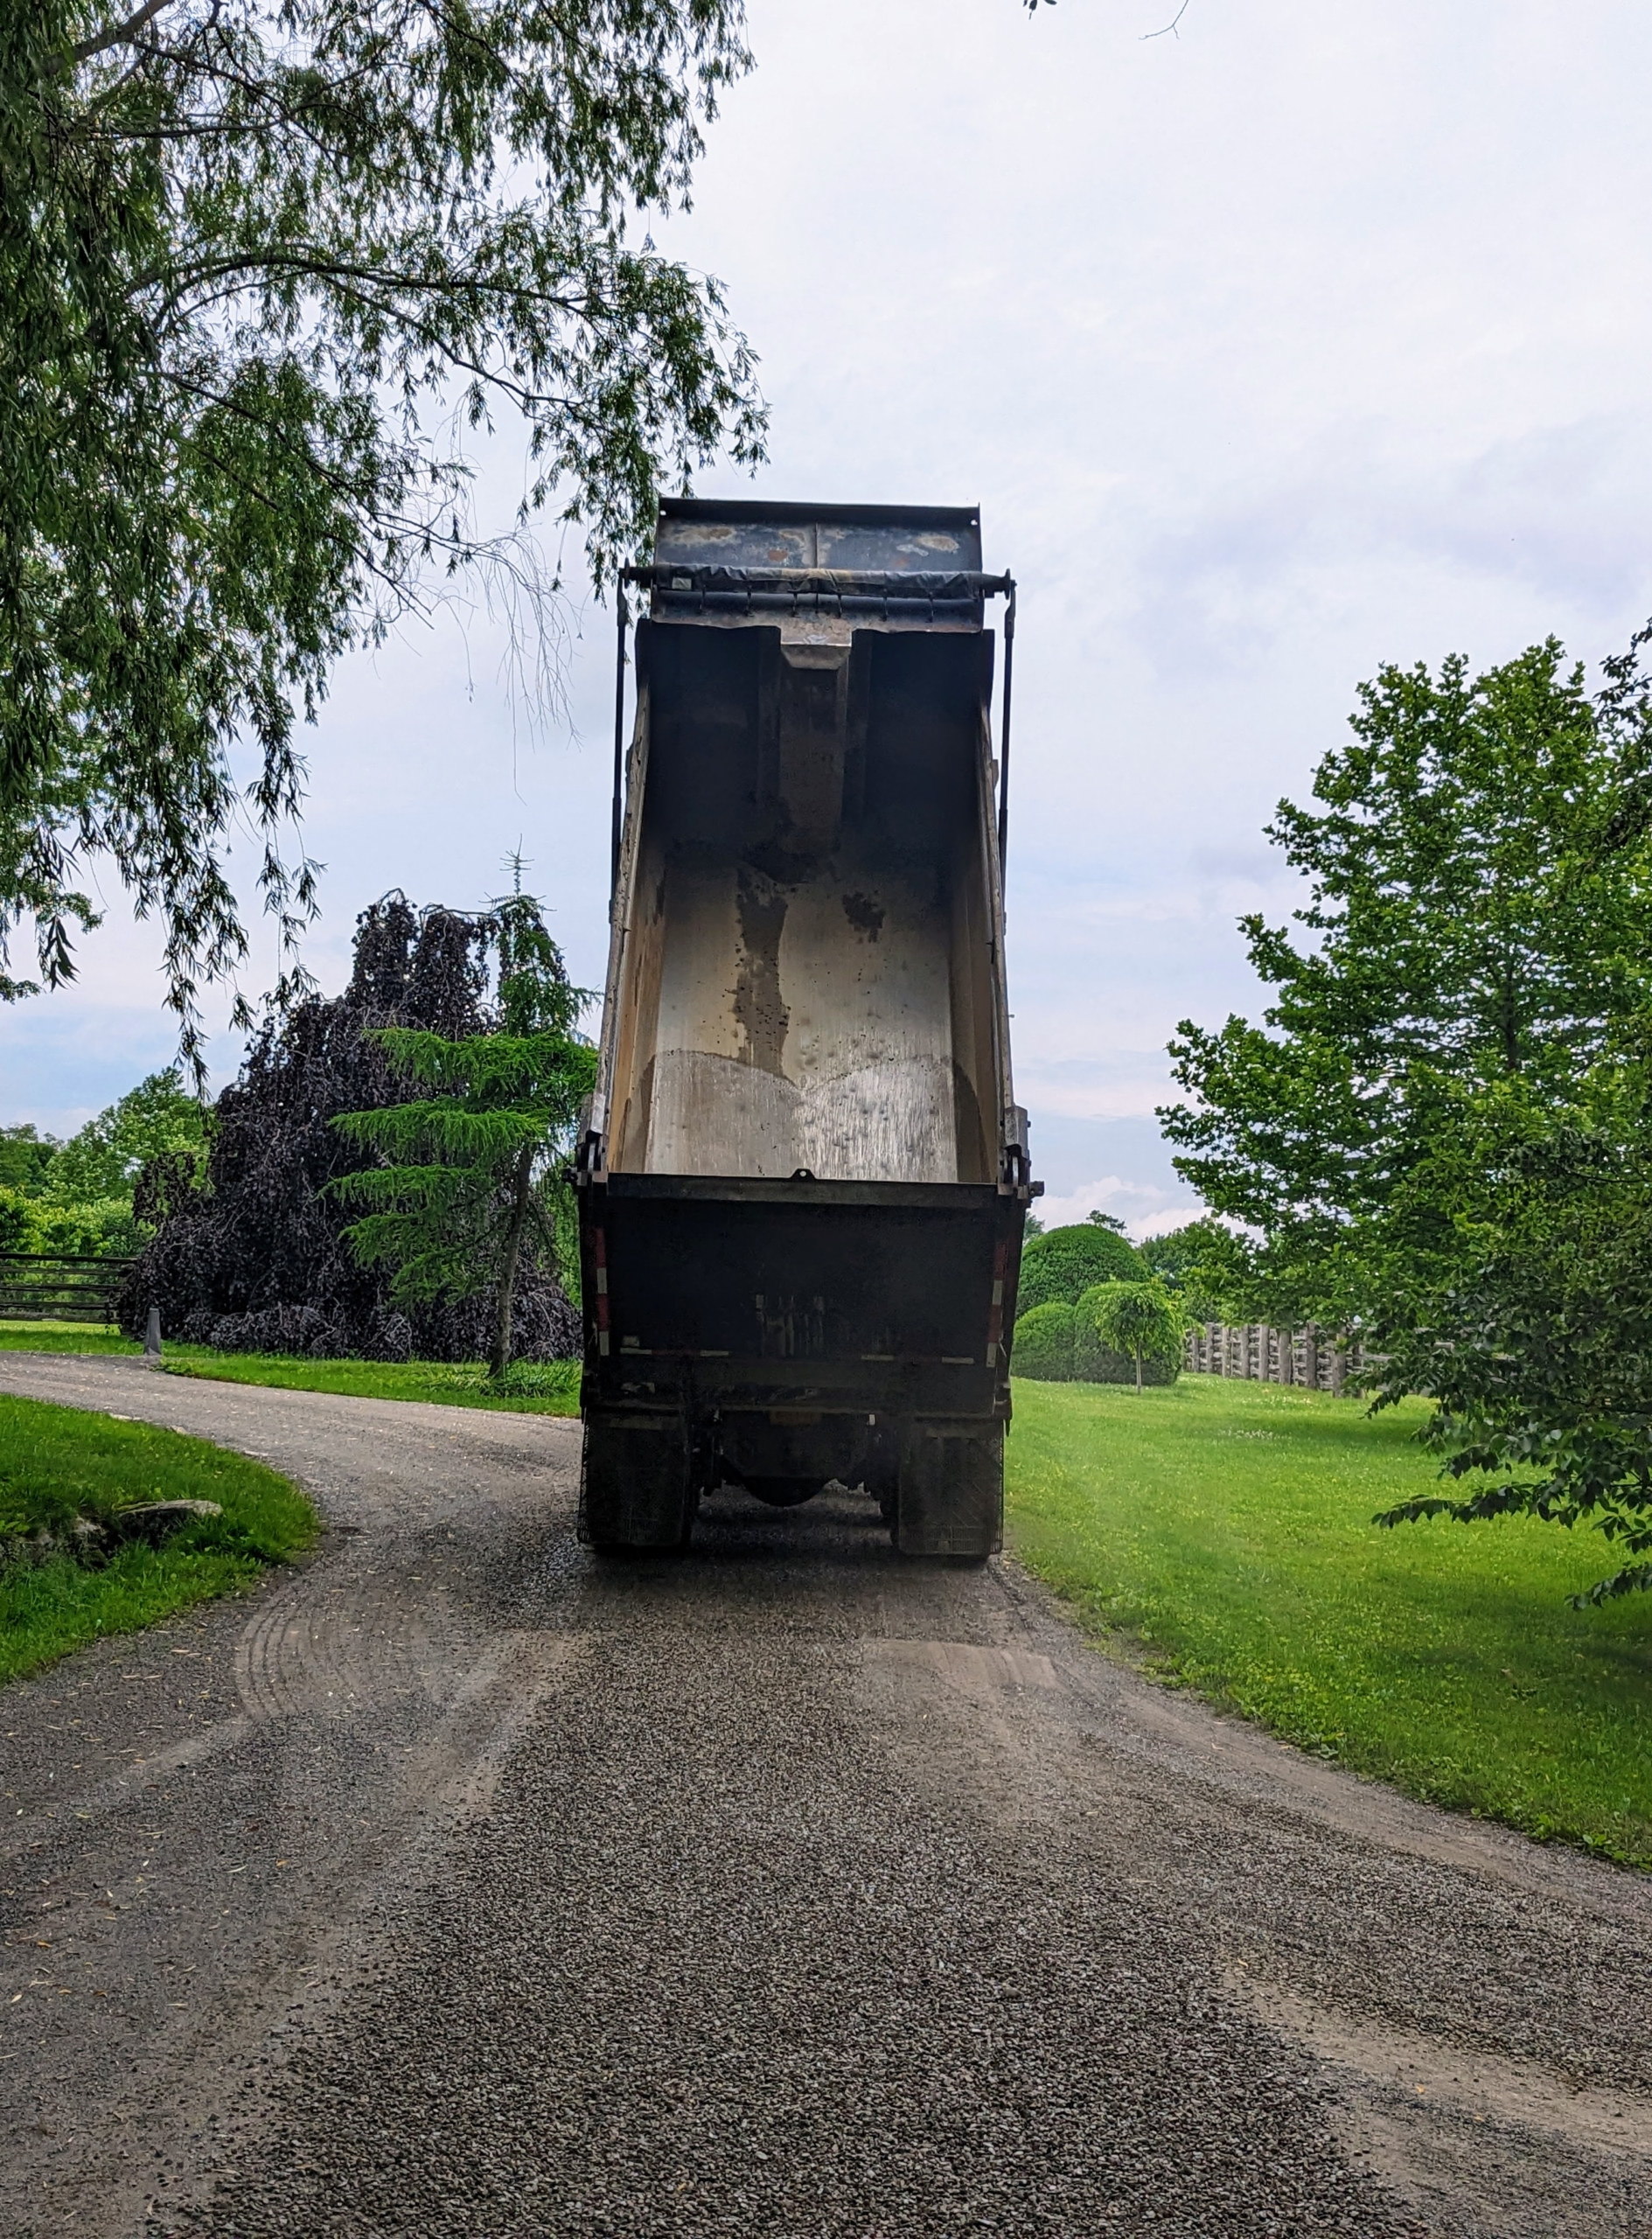
Large 10-wheel dump trucks can carry anywhere from 13 to 25 tons of gravel per load. Here is a truck filled with the 3/8-inch native stone gravel I selected. It would take many truck loads to cover the entire four miles of carriage road here at the farm.
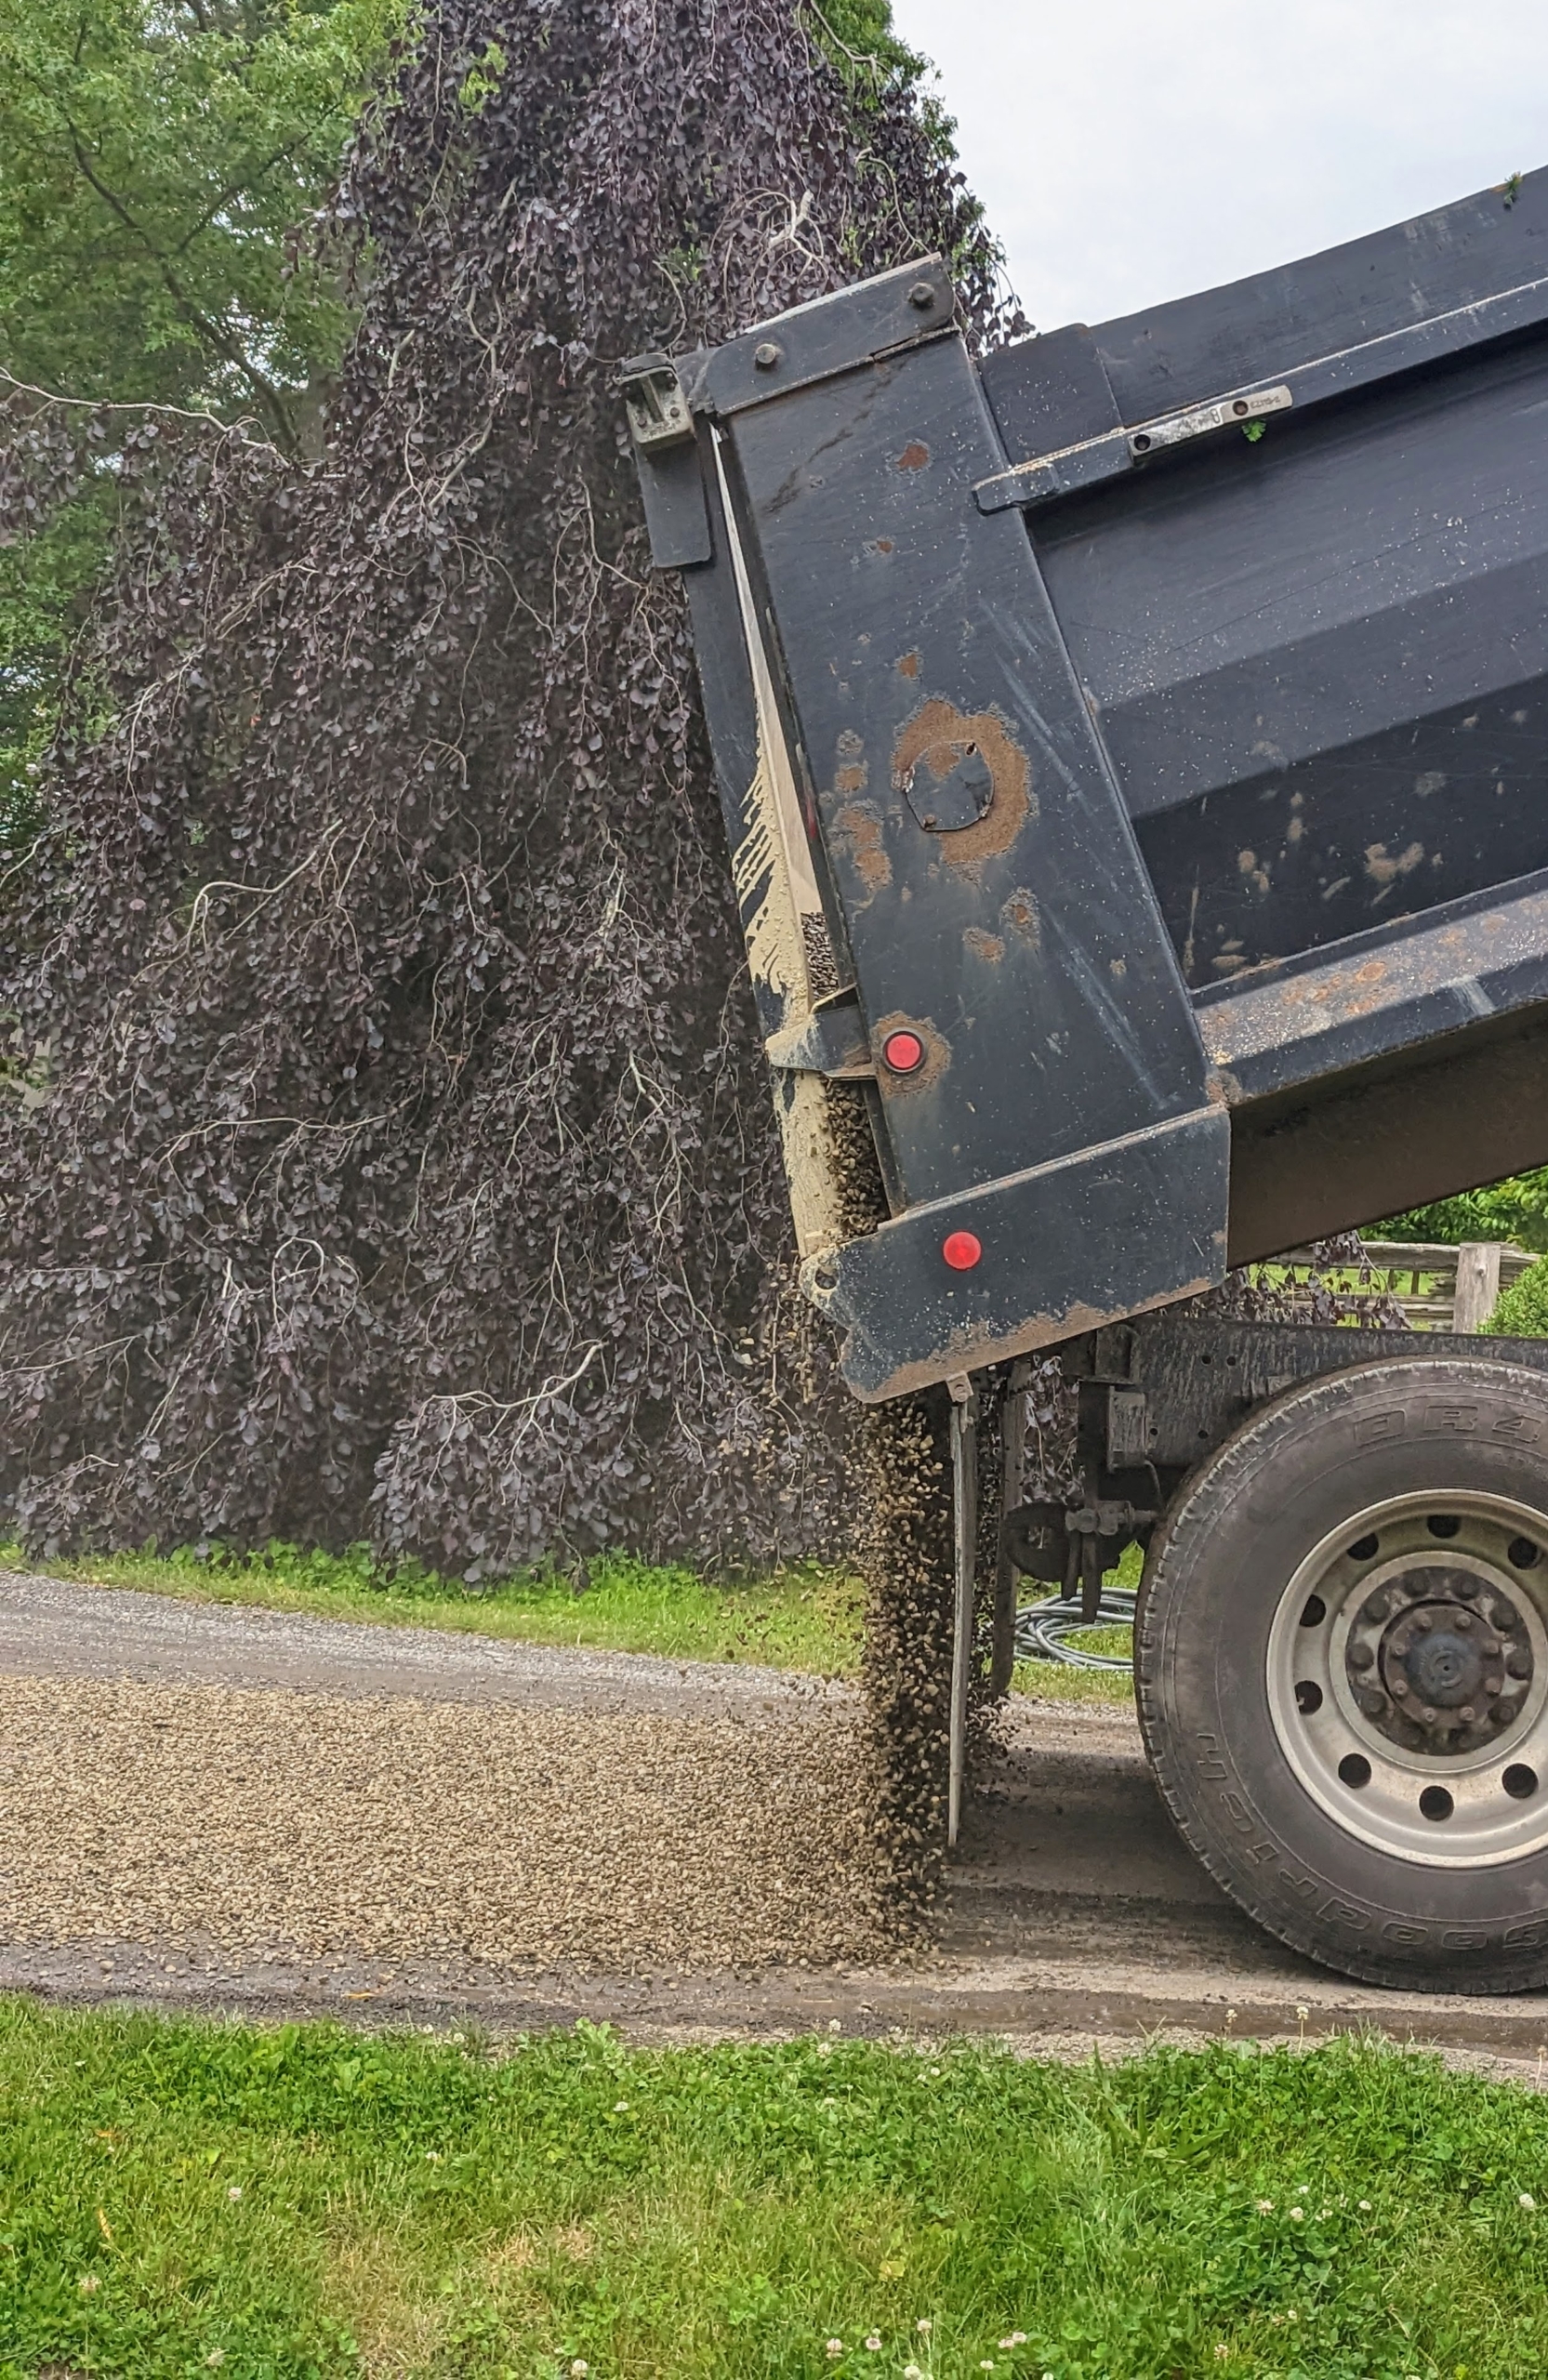
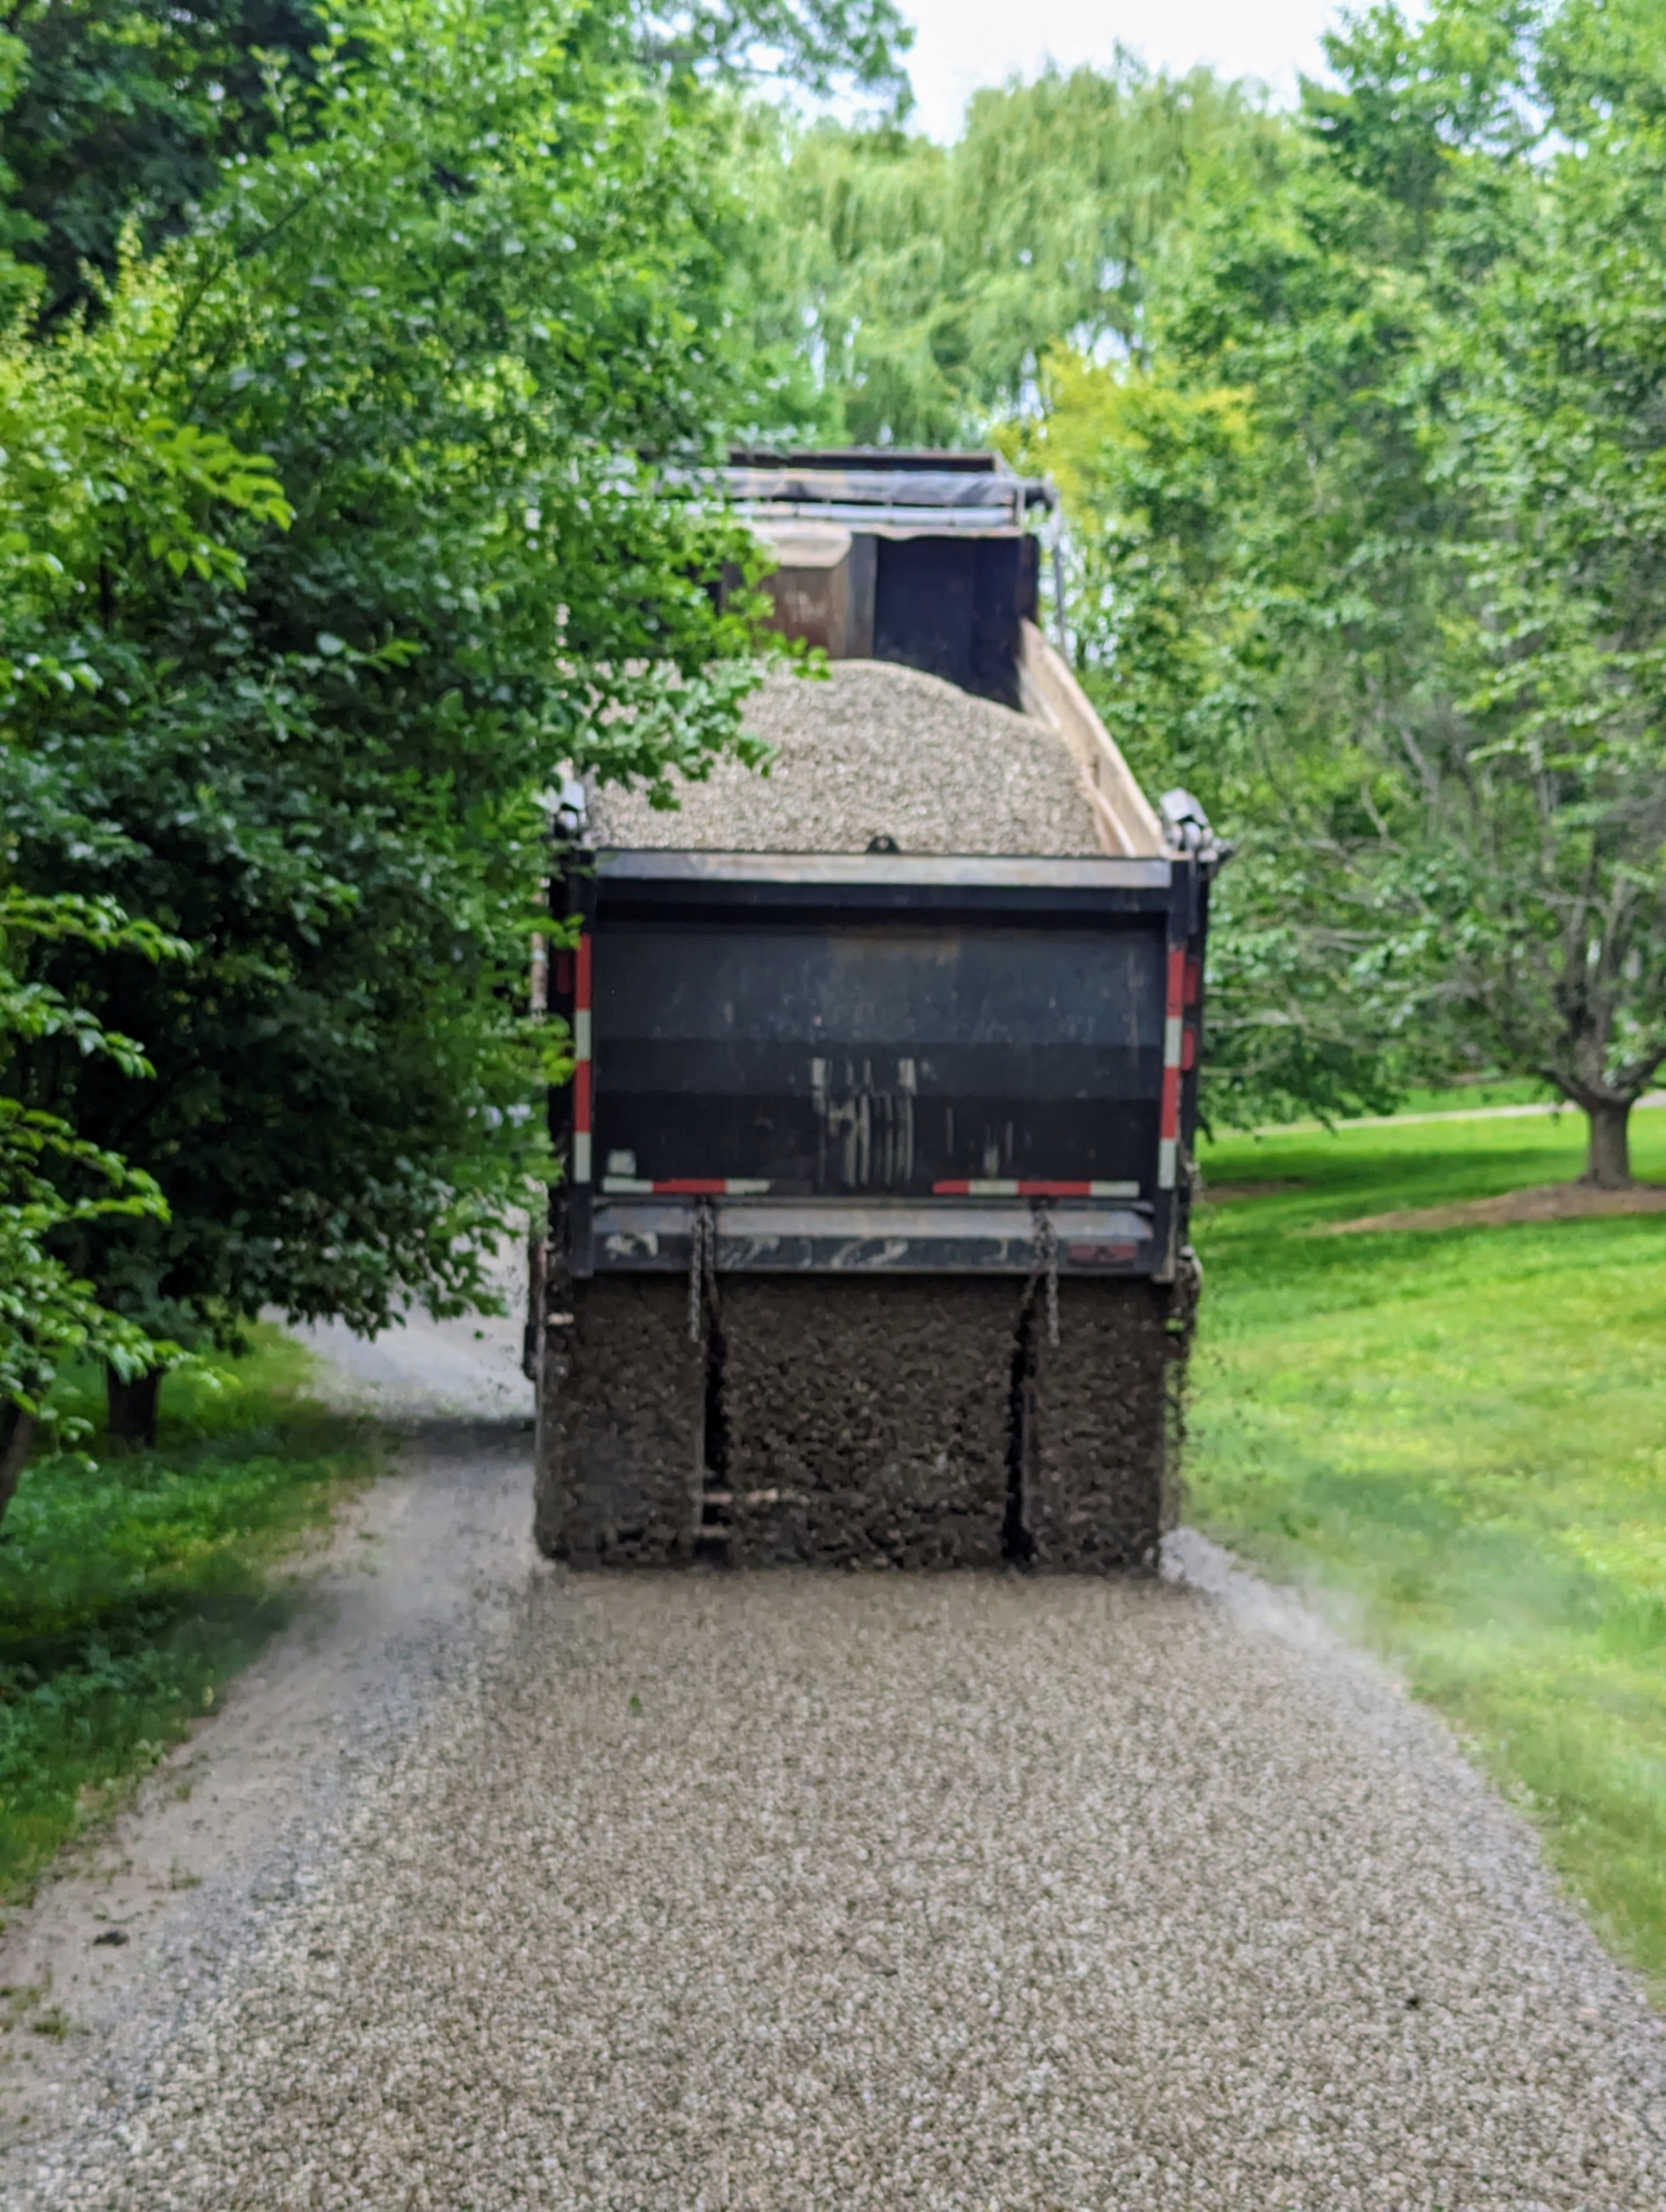
As the truck moves along the carriage road, the gravel is released from the bottom of tailgate.
The gravel is dropped slowly and evenly.
Here is the back all empty and ready to go back to the facility for another load.
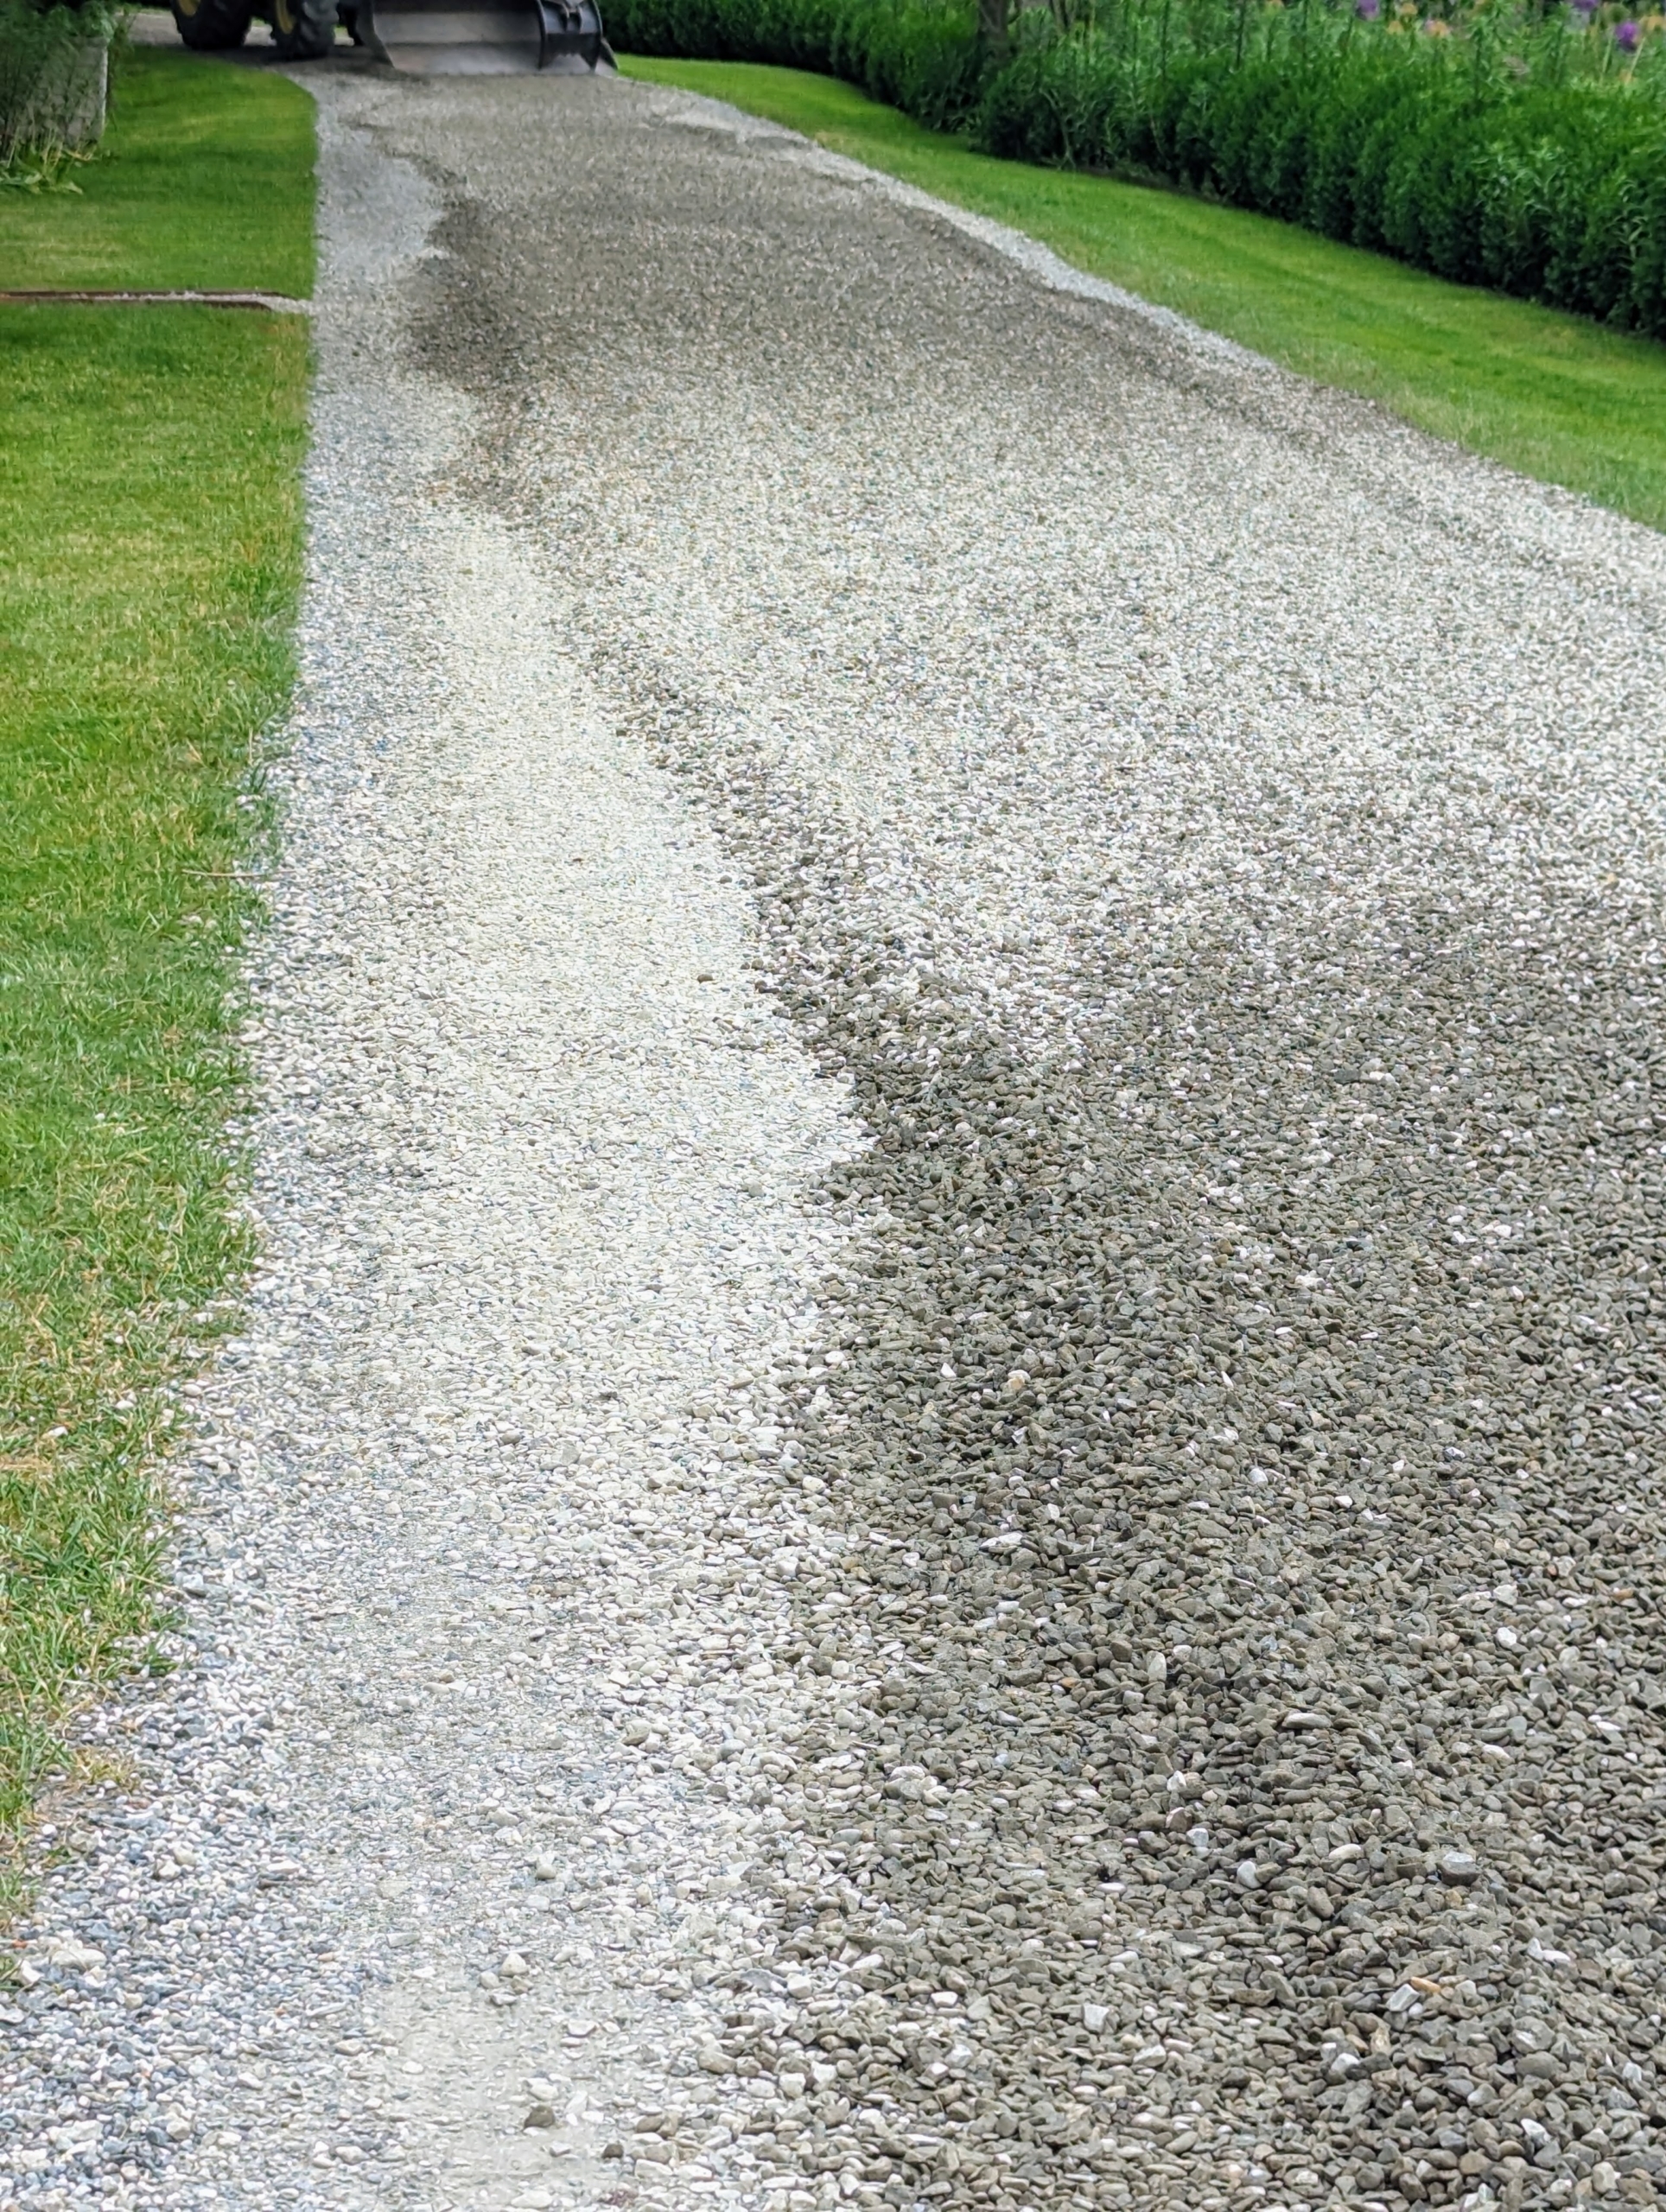
And here is what it looks like once it is dropped. The gravel is in the center of the road and now needs to be raked to fill the width of the 12-foot wide surfaces.
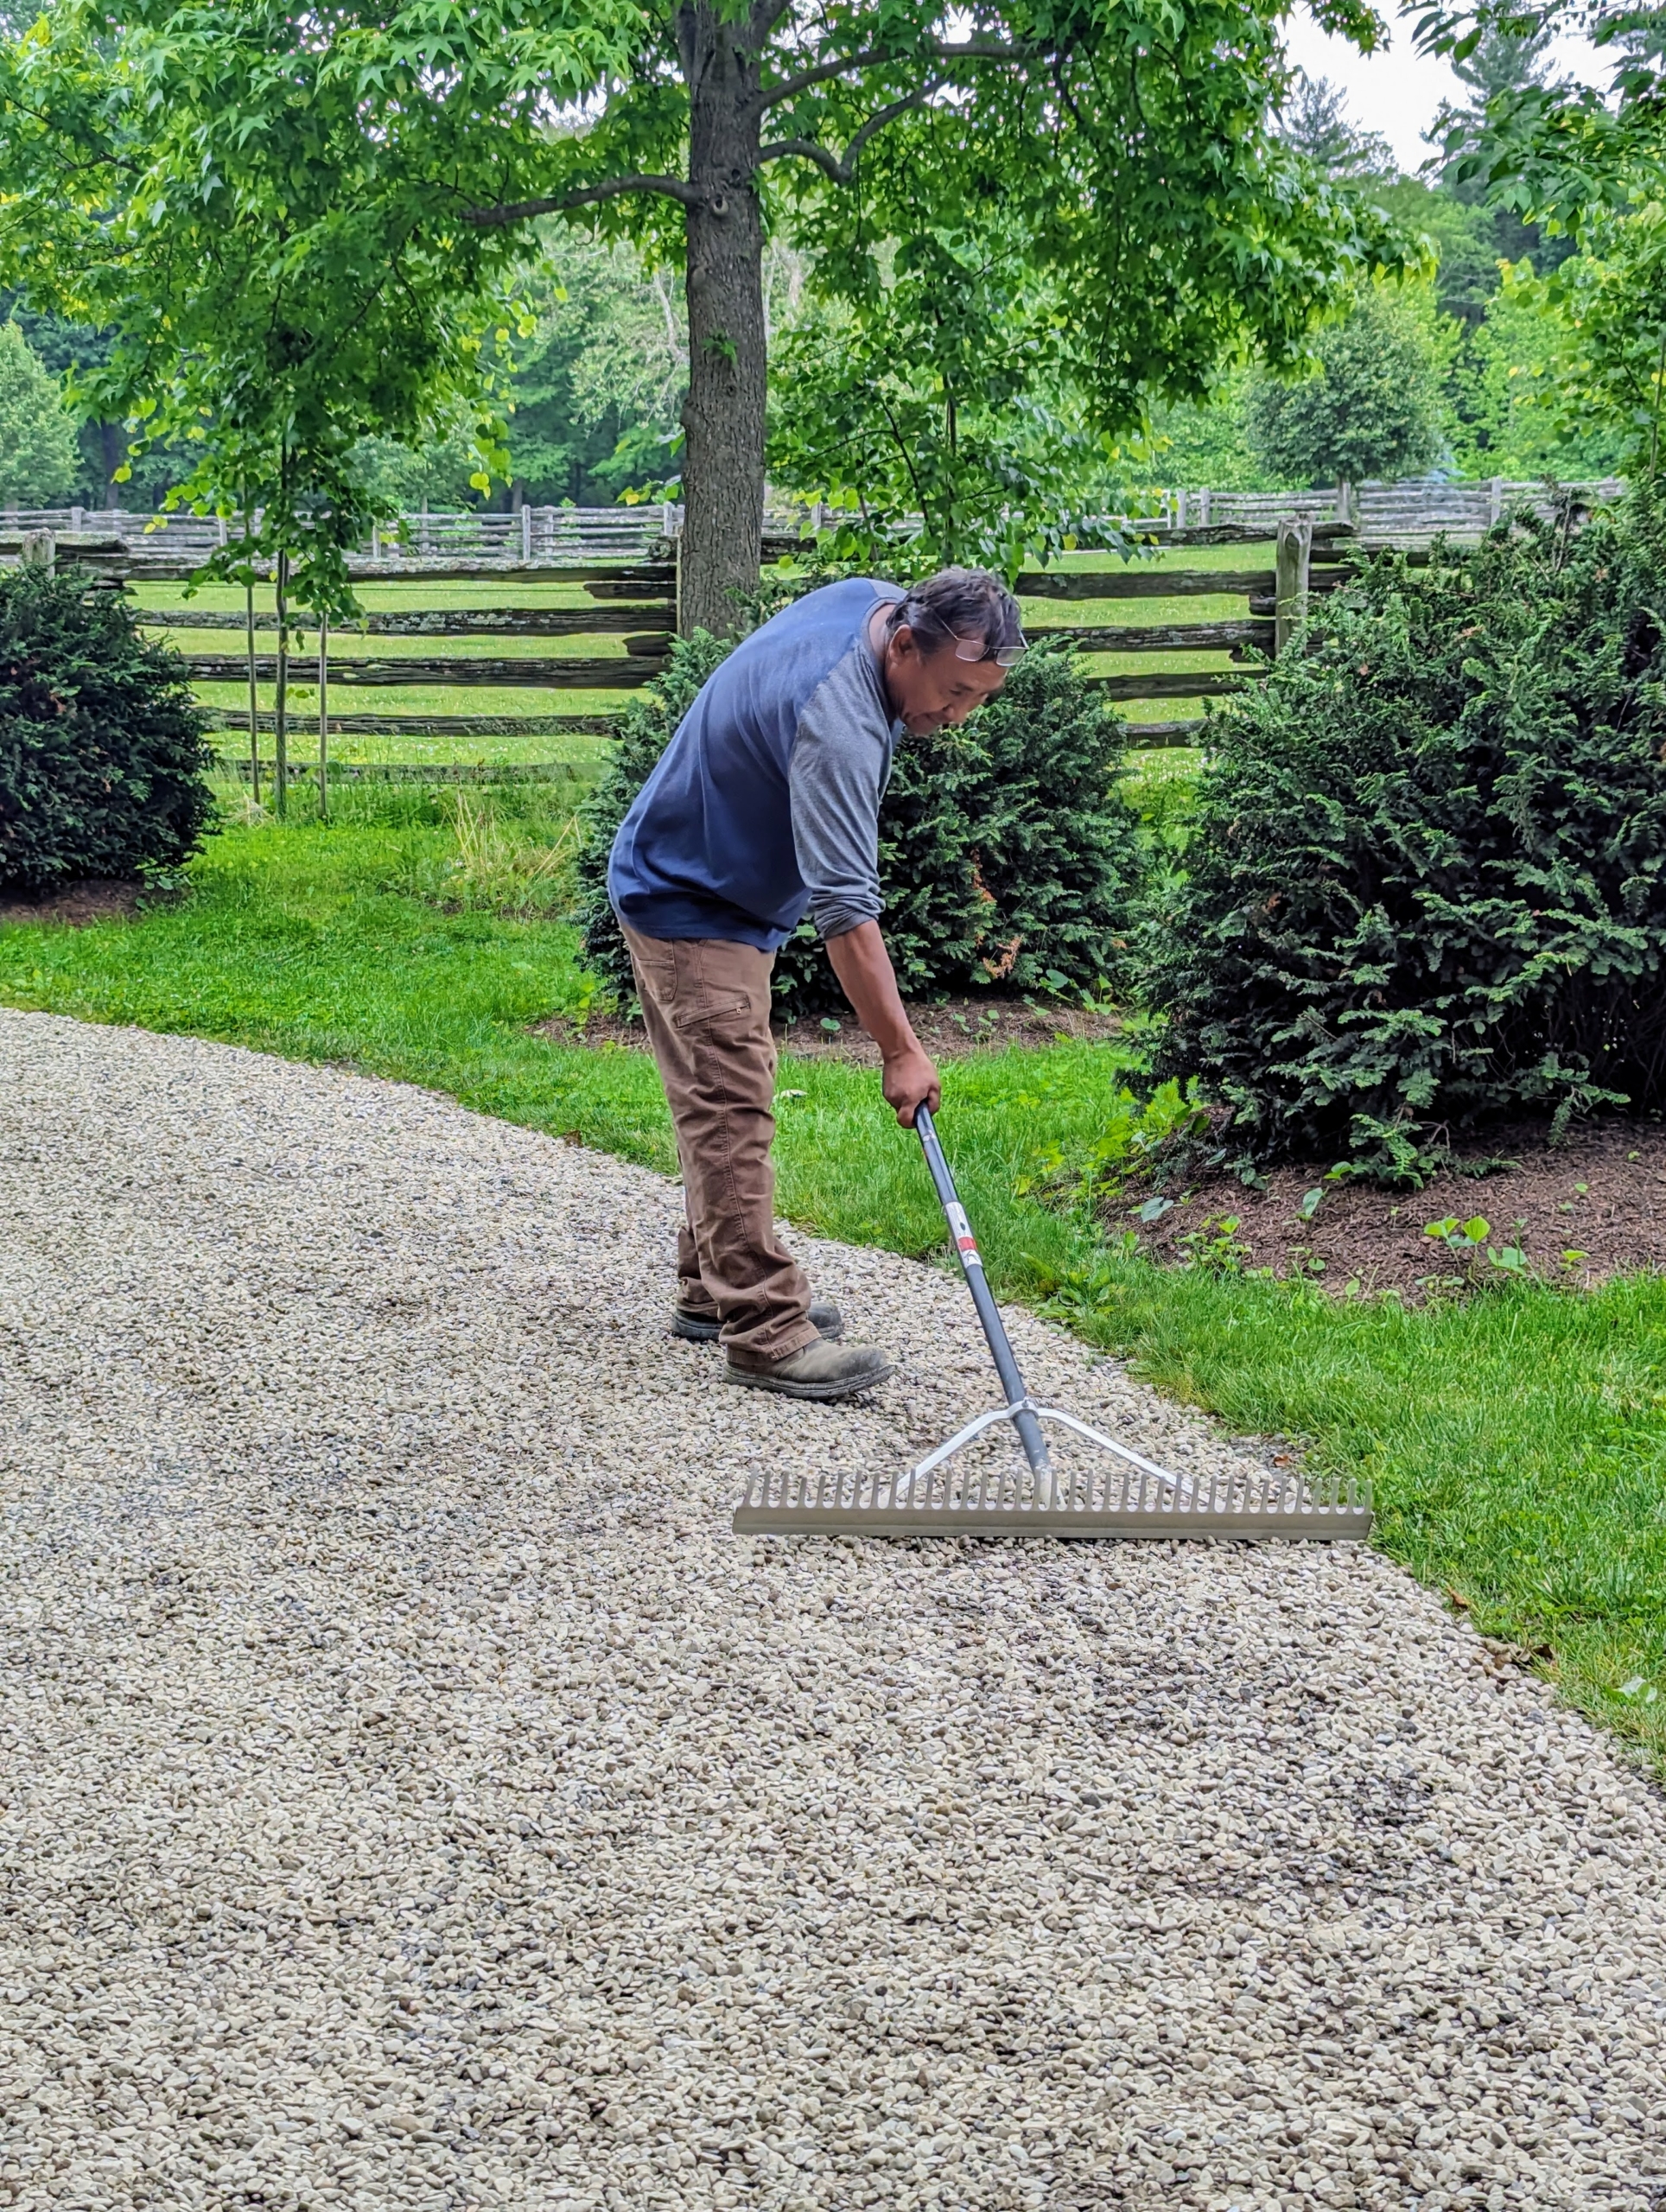
Pete uses a landscape rake to spread and level the gravel to the edge of the road. This area is also high traffic. It leads from the allée of lindens to my chicken coops.
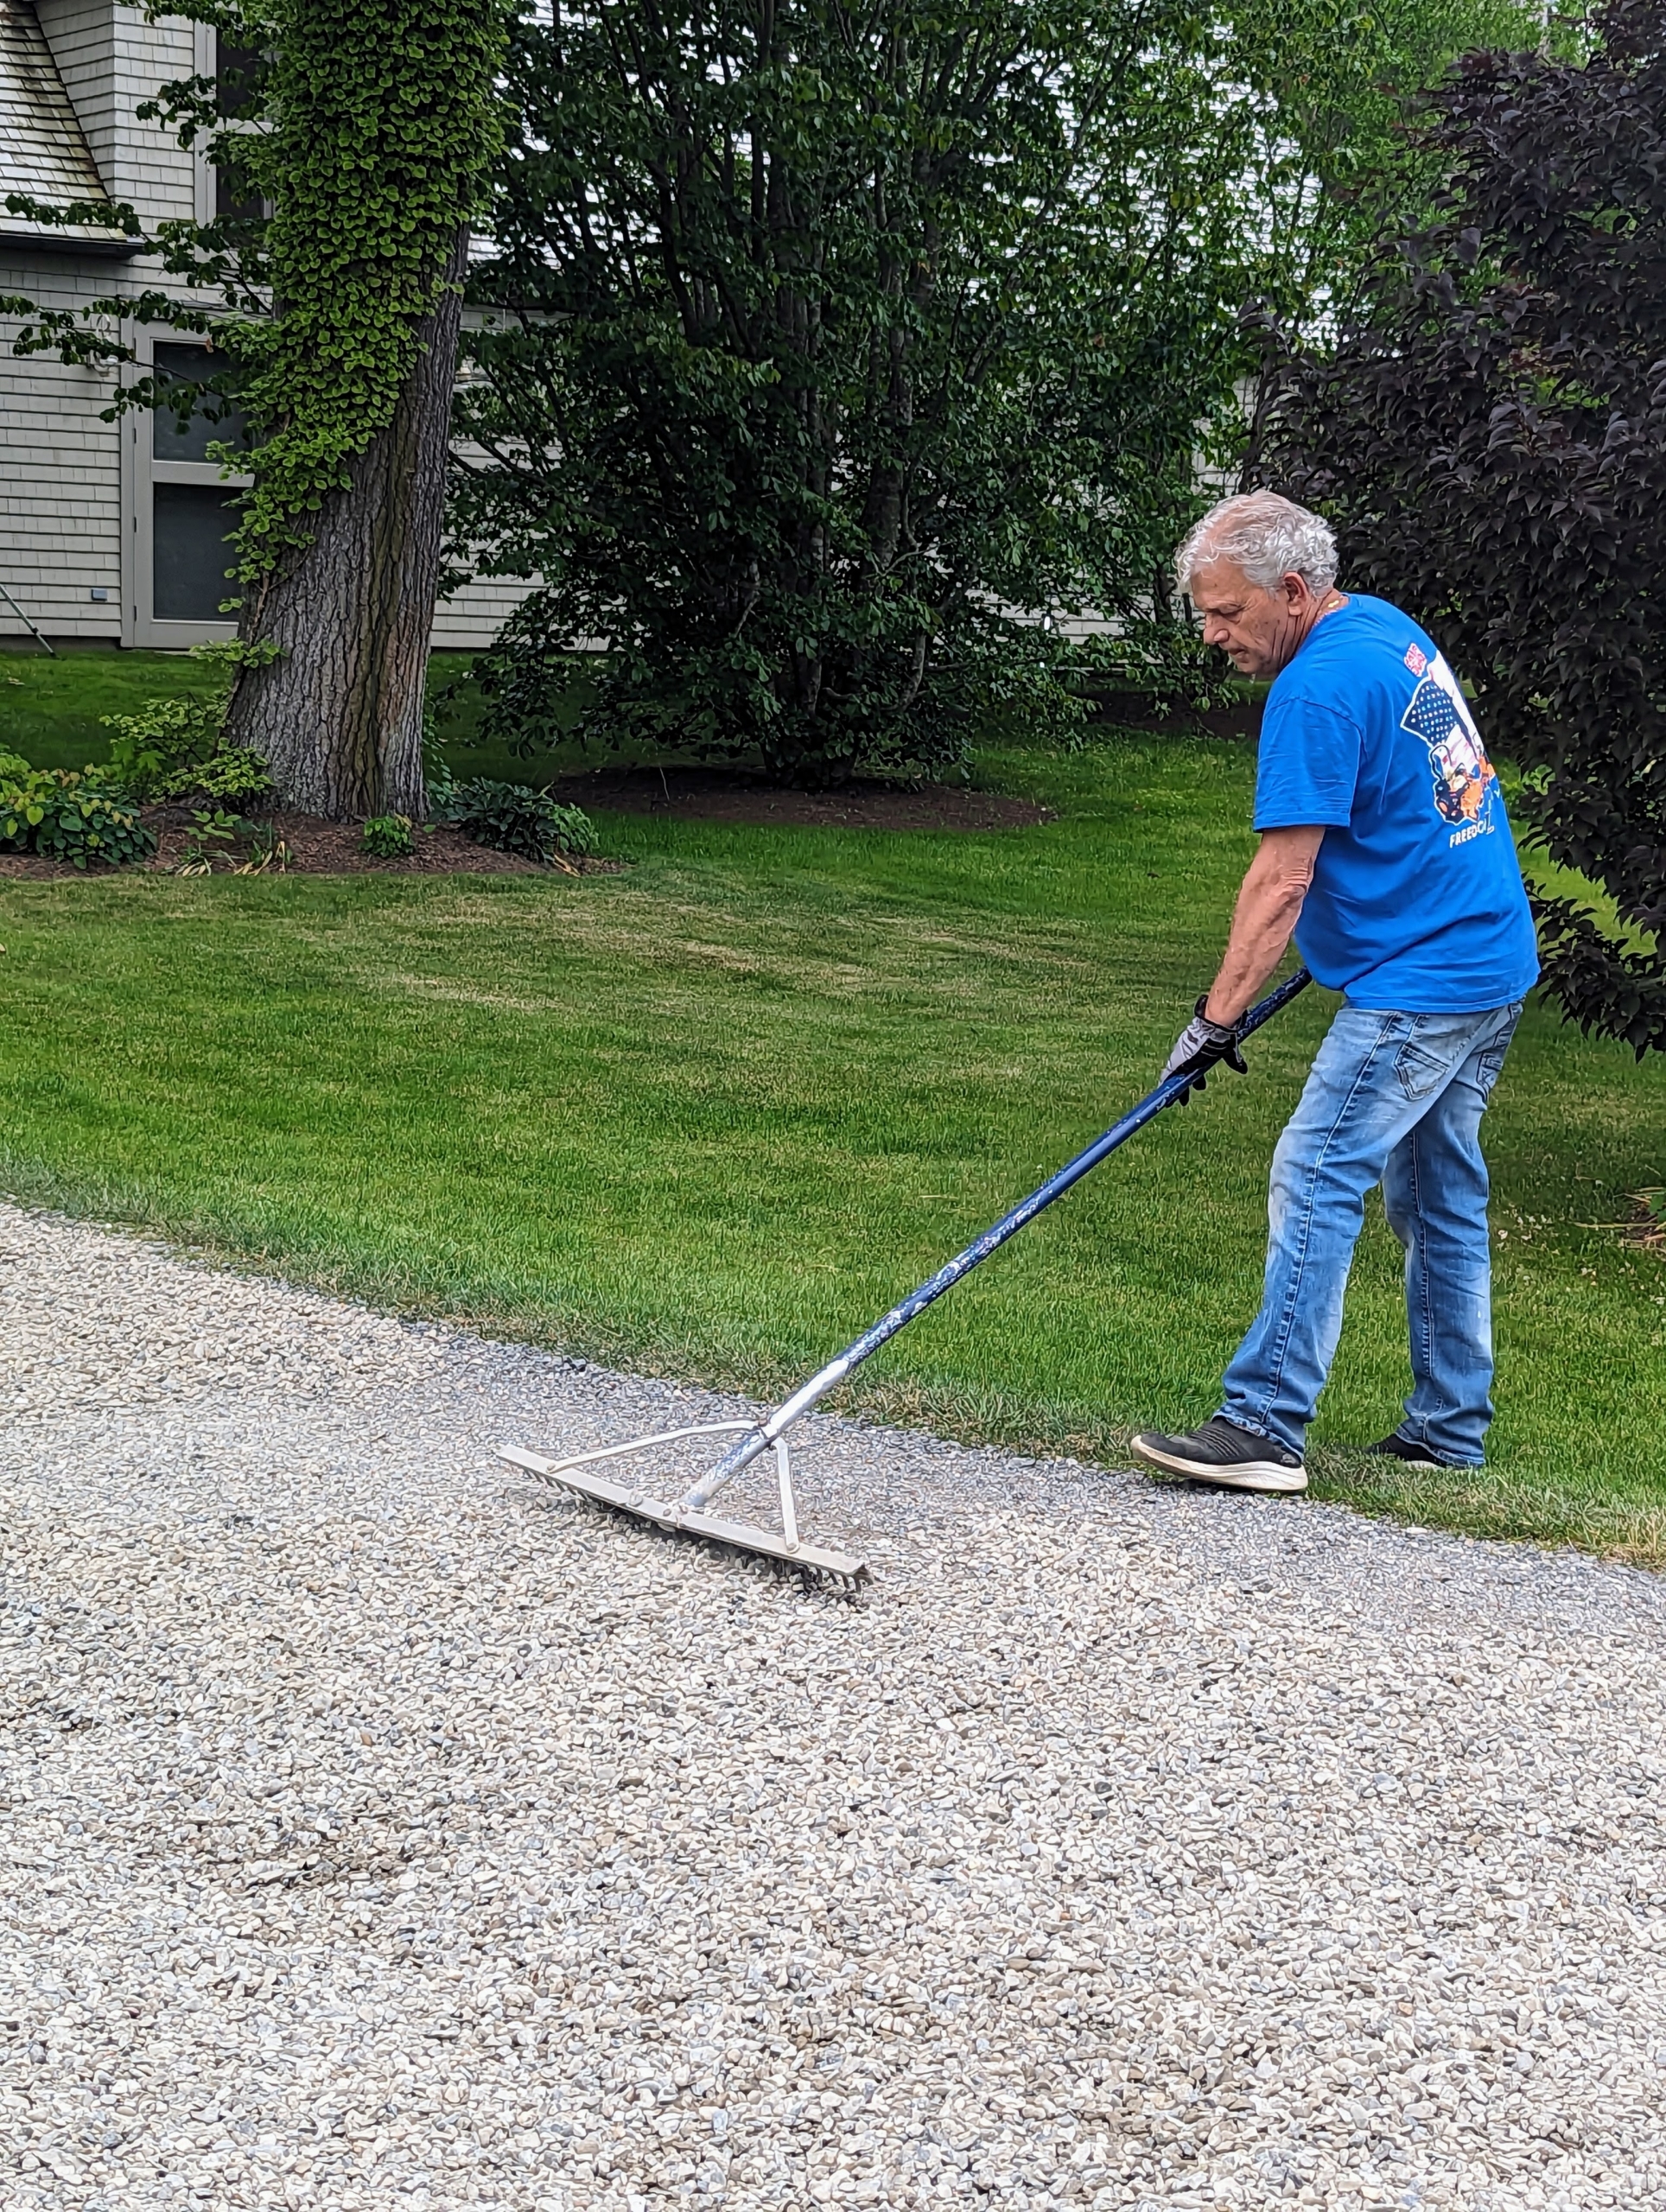
Fernando is in another area also leveling and spreading the gravel dropped by the dump truck.
This stone is not only pretty, but water drains more quickly through small stones and gravel, so it is good to use around the farm.
Around the stable, Pete also uses the tractor bucket to level and spread the gravel over a larger area.
And then Fernando manually rakes it closer to the stable buildings. We do a lot of our projects by hand – it takes longer, but the jobs are done more carefully and very nicely. Fernando also uses a landscape rake. This razor-back aluminum landscape rake has a wide head and teeth to level gravel quickly and smoothly.
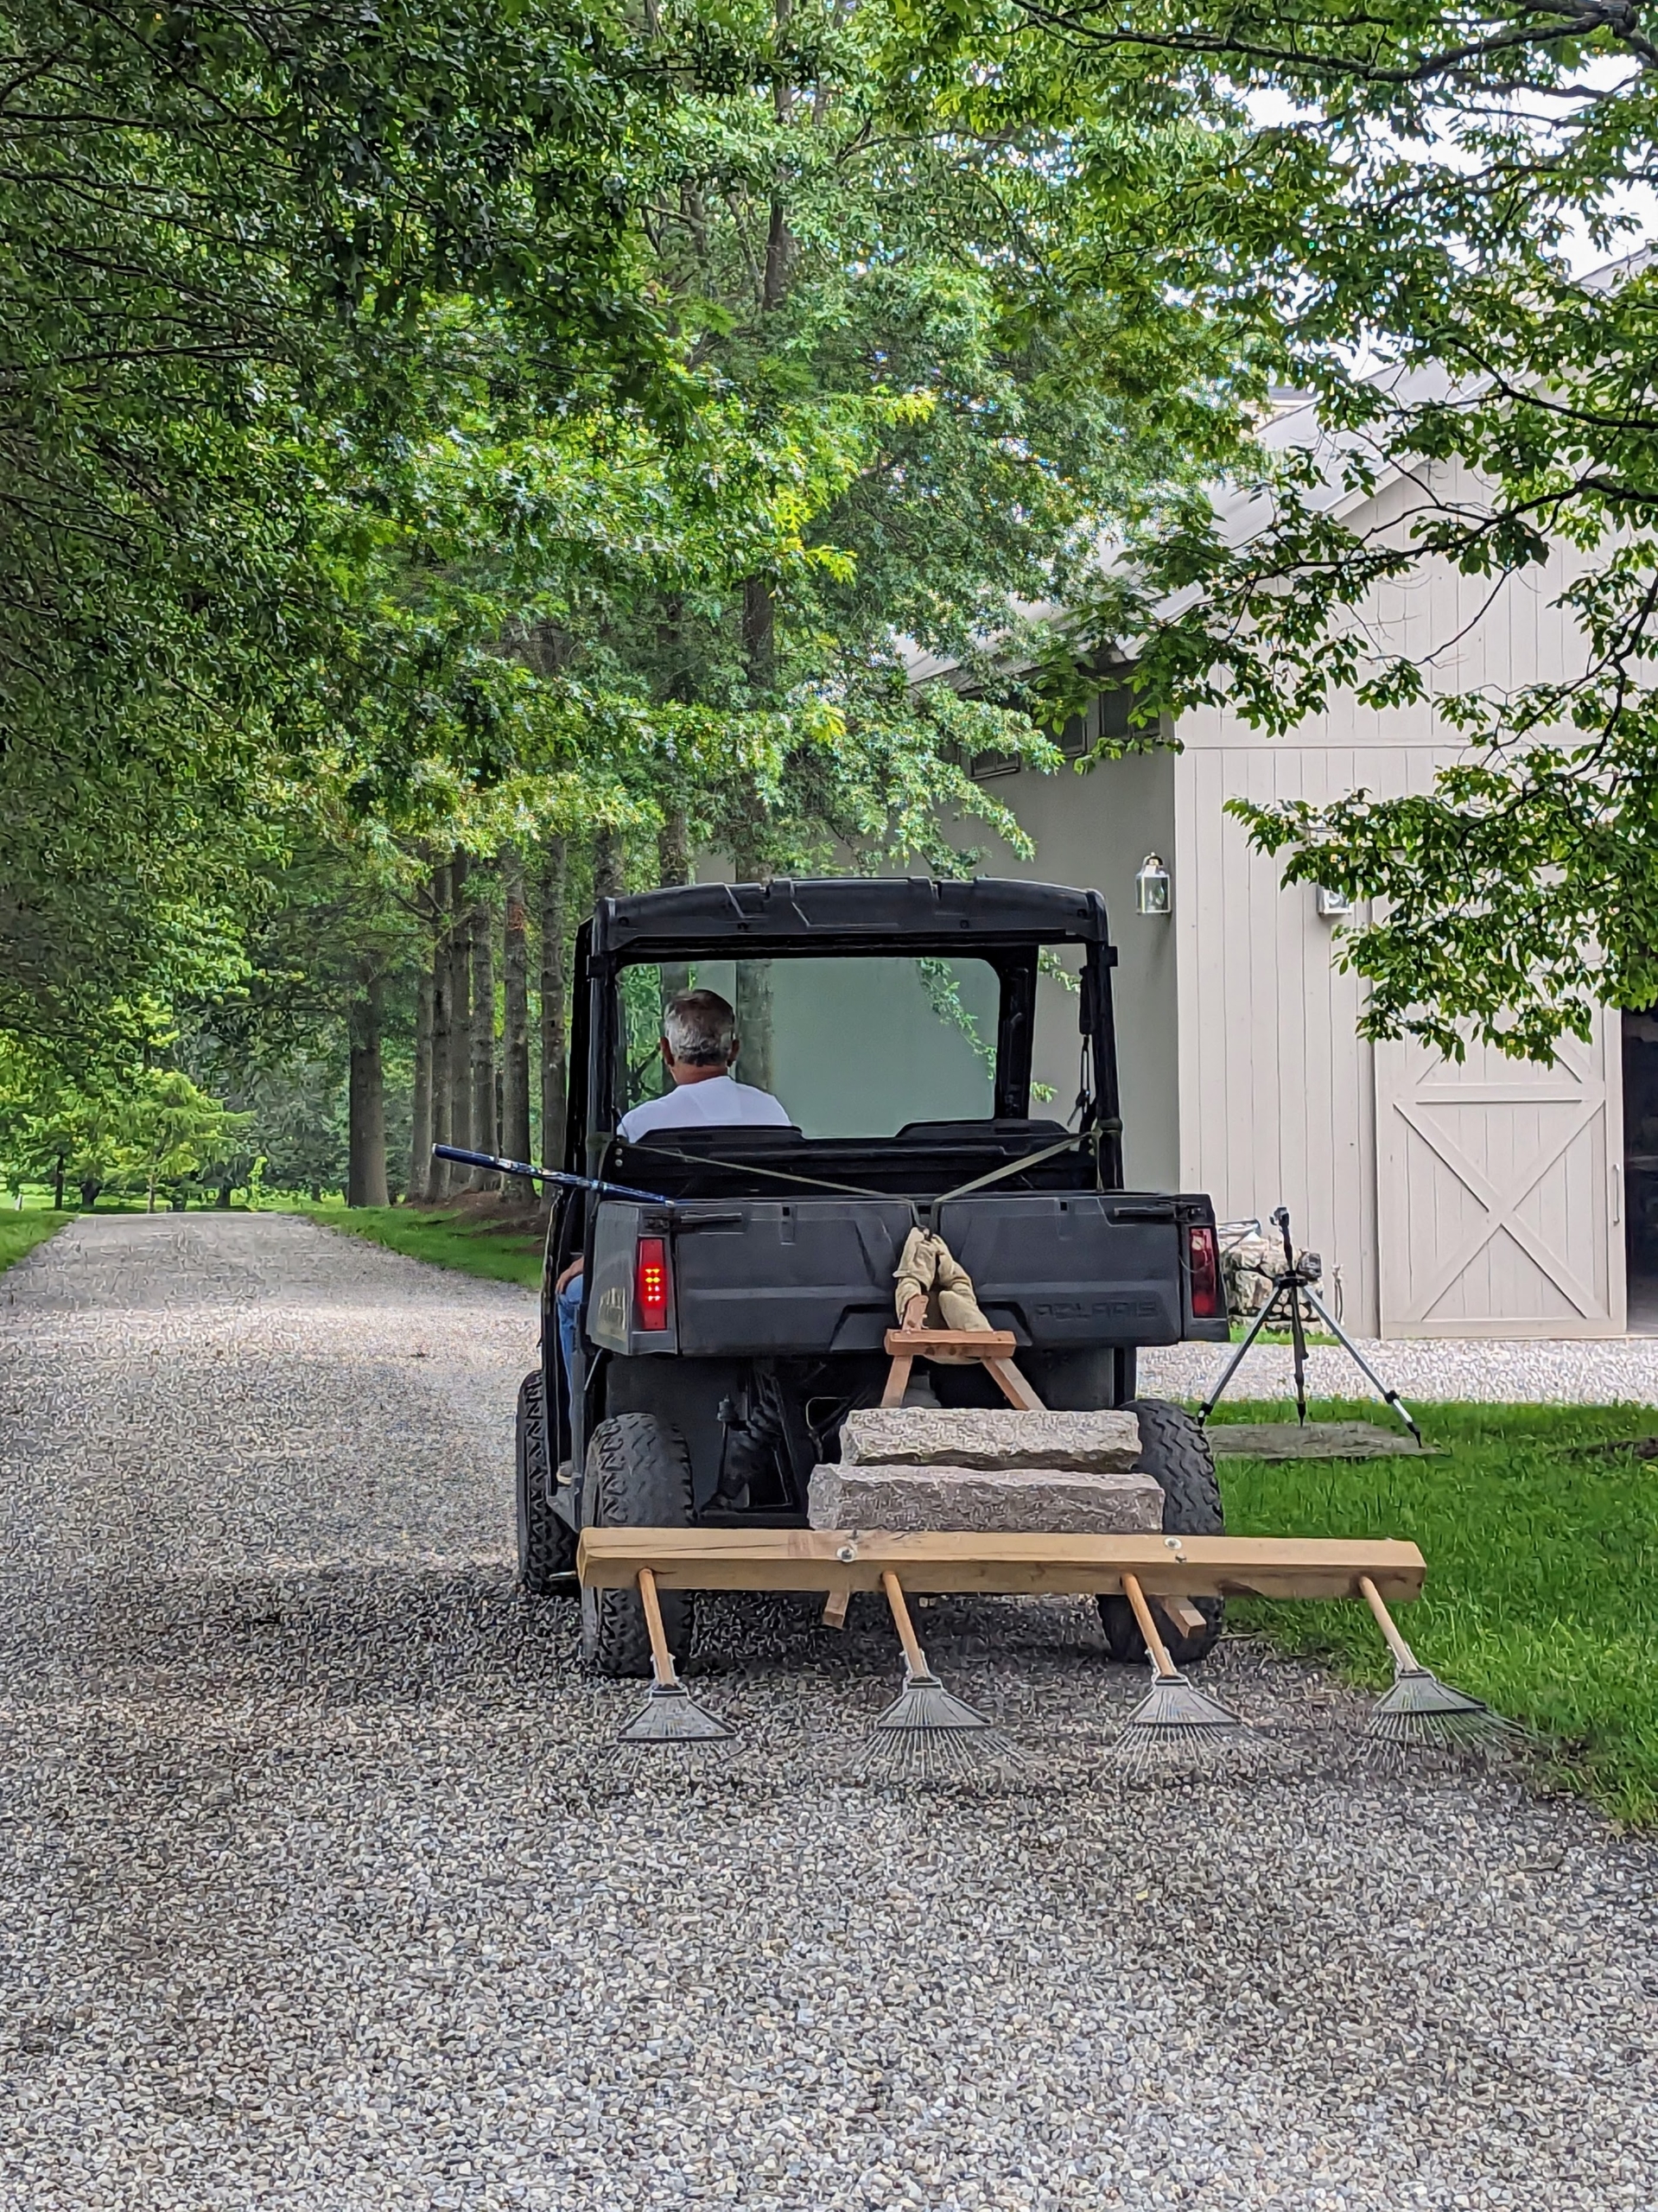
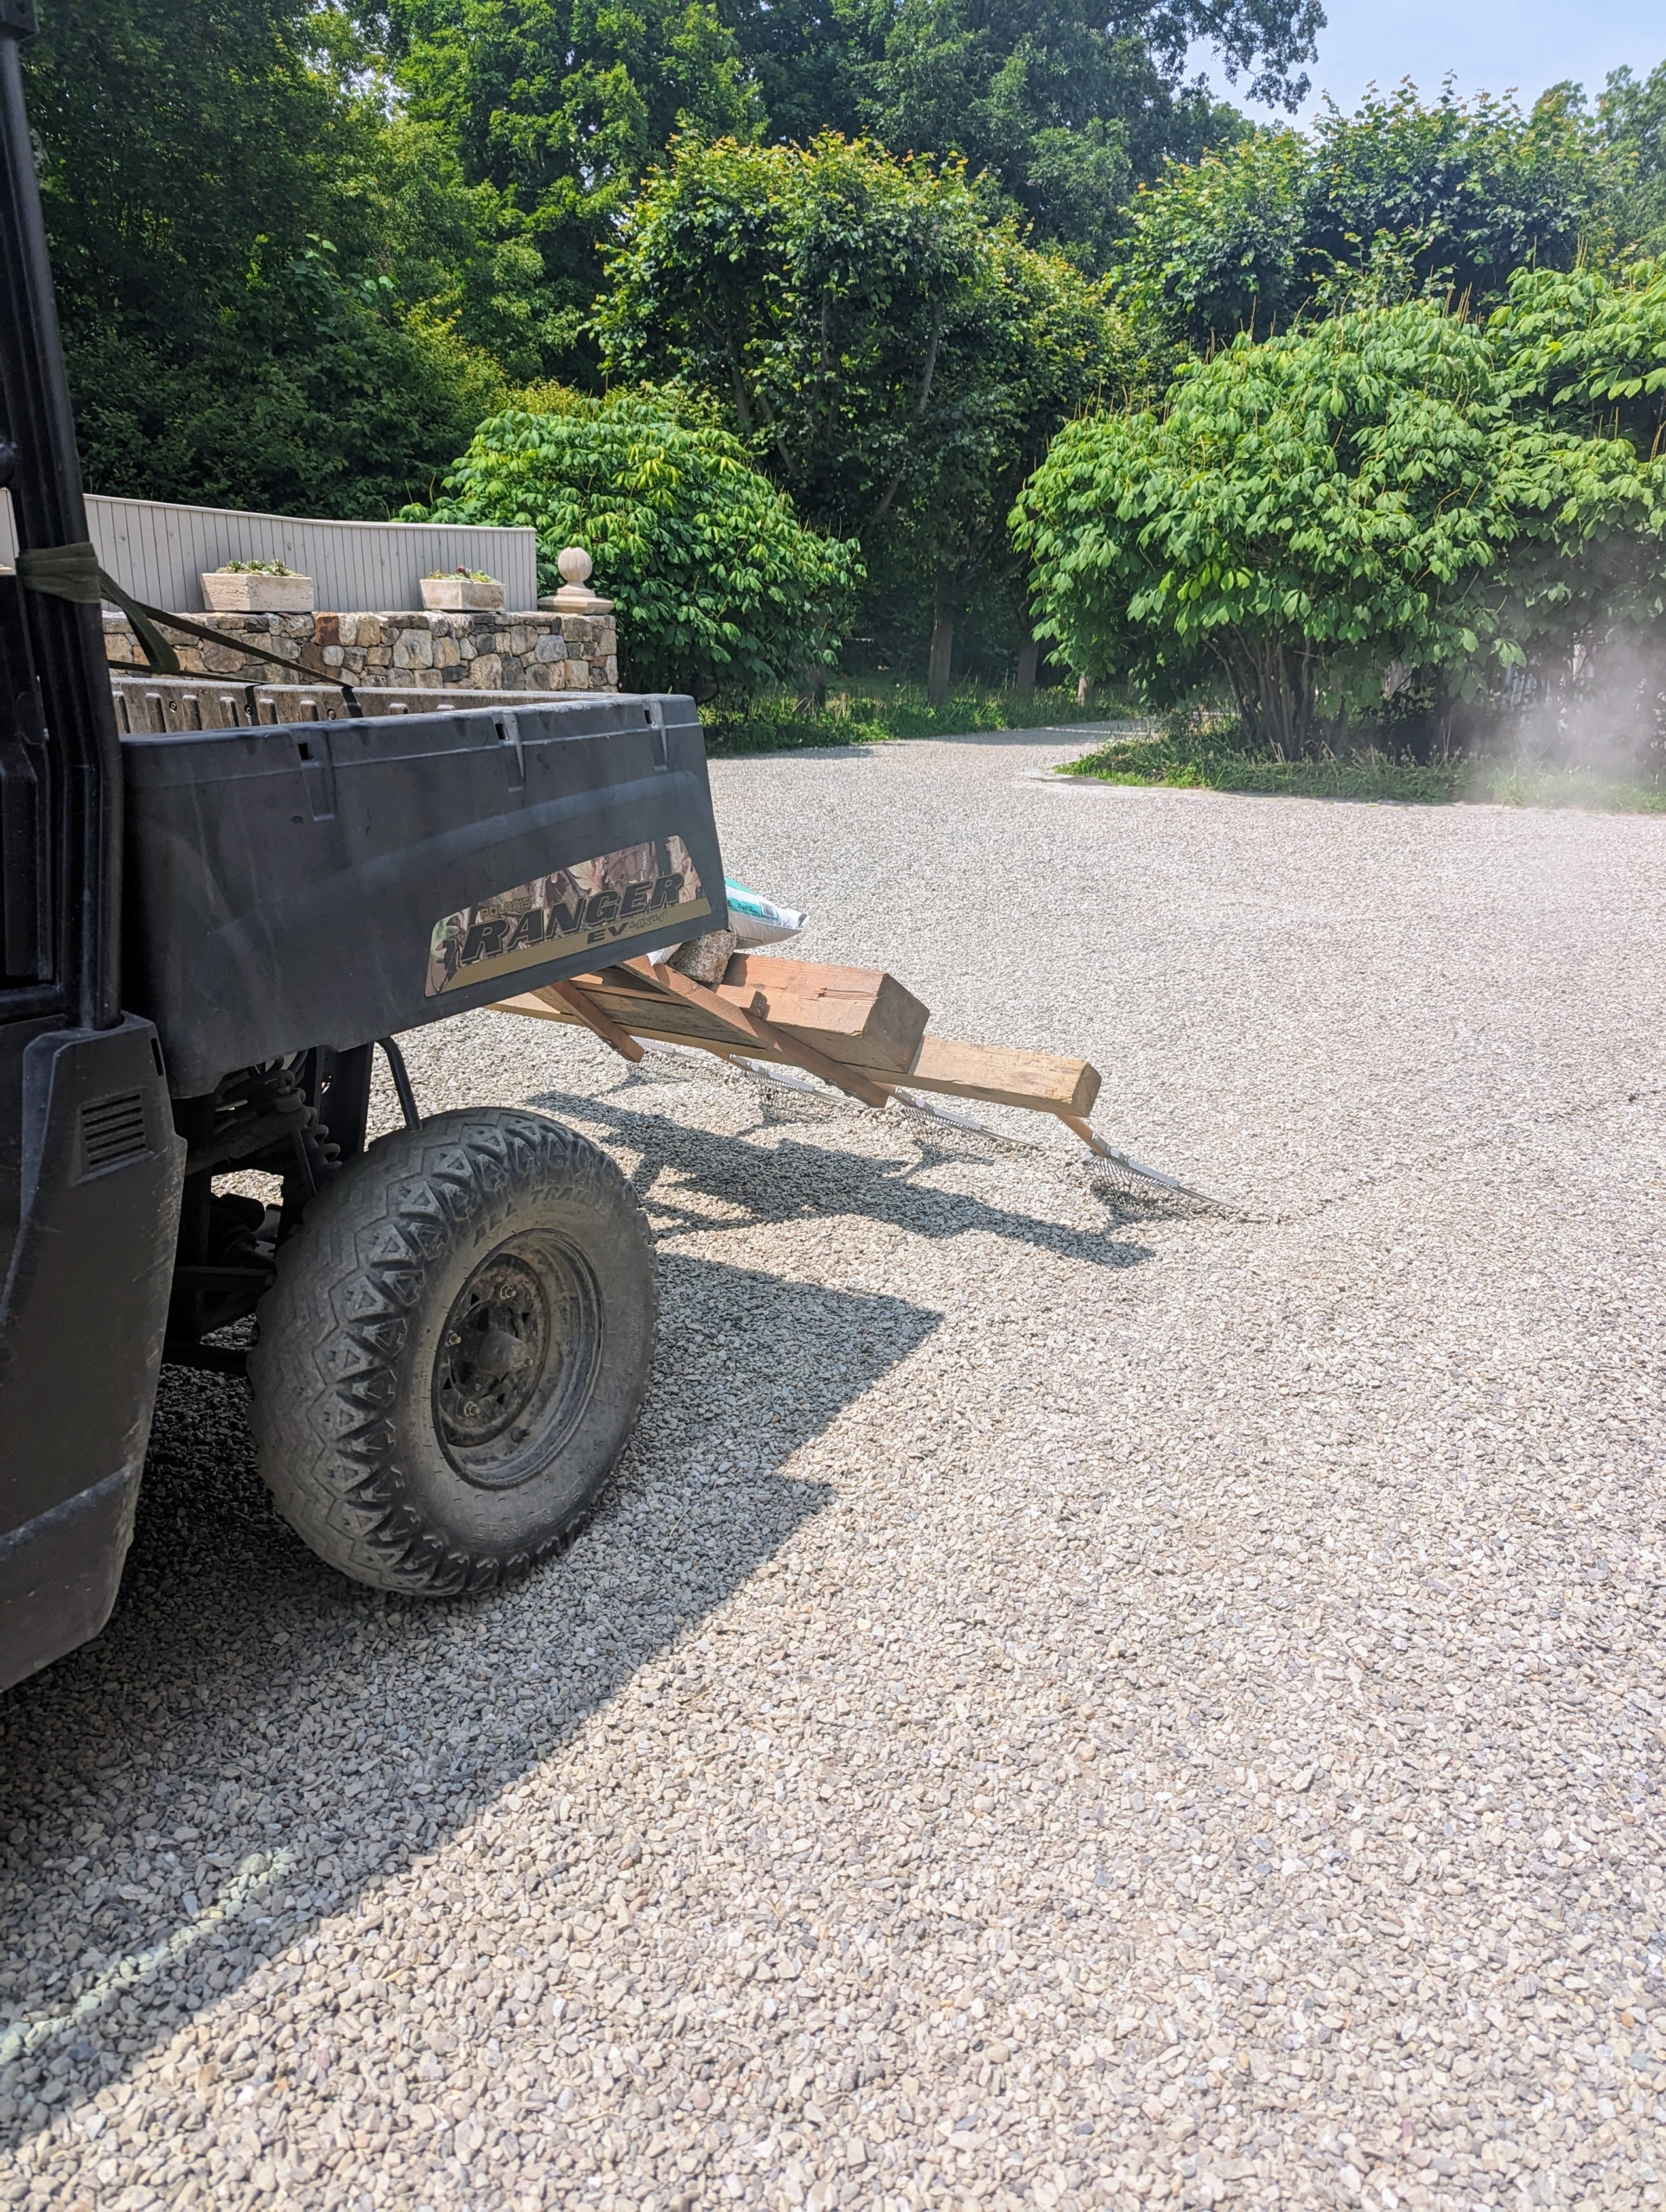
Fernando also takes on the task of “raking the roads.” This attachment is made from four soft garden rakes secured to a wooden frame. Here is Fernando in our Polaris Ranger pulling the rake.
We created this special device to rake the gravel, so it is even. This is done every couple of weeks to keep the roads looking neat and tidy.
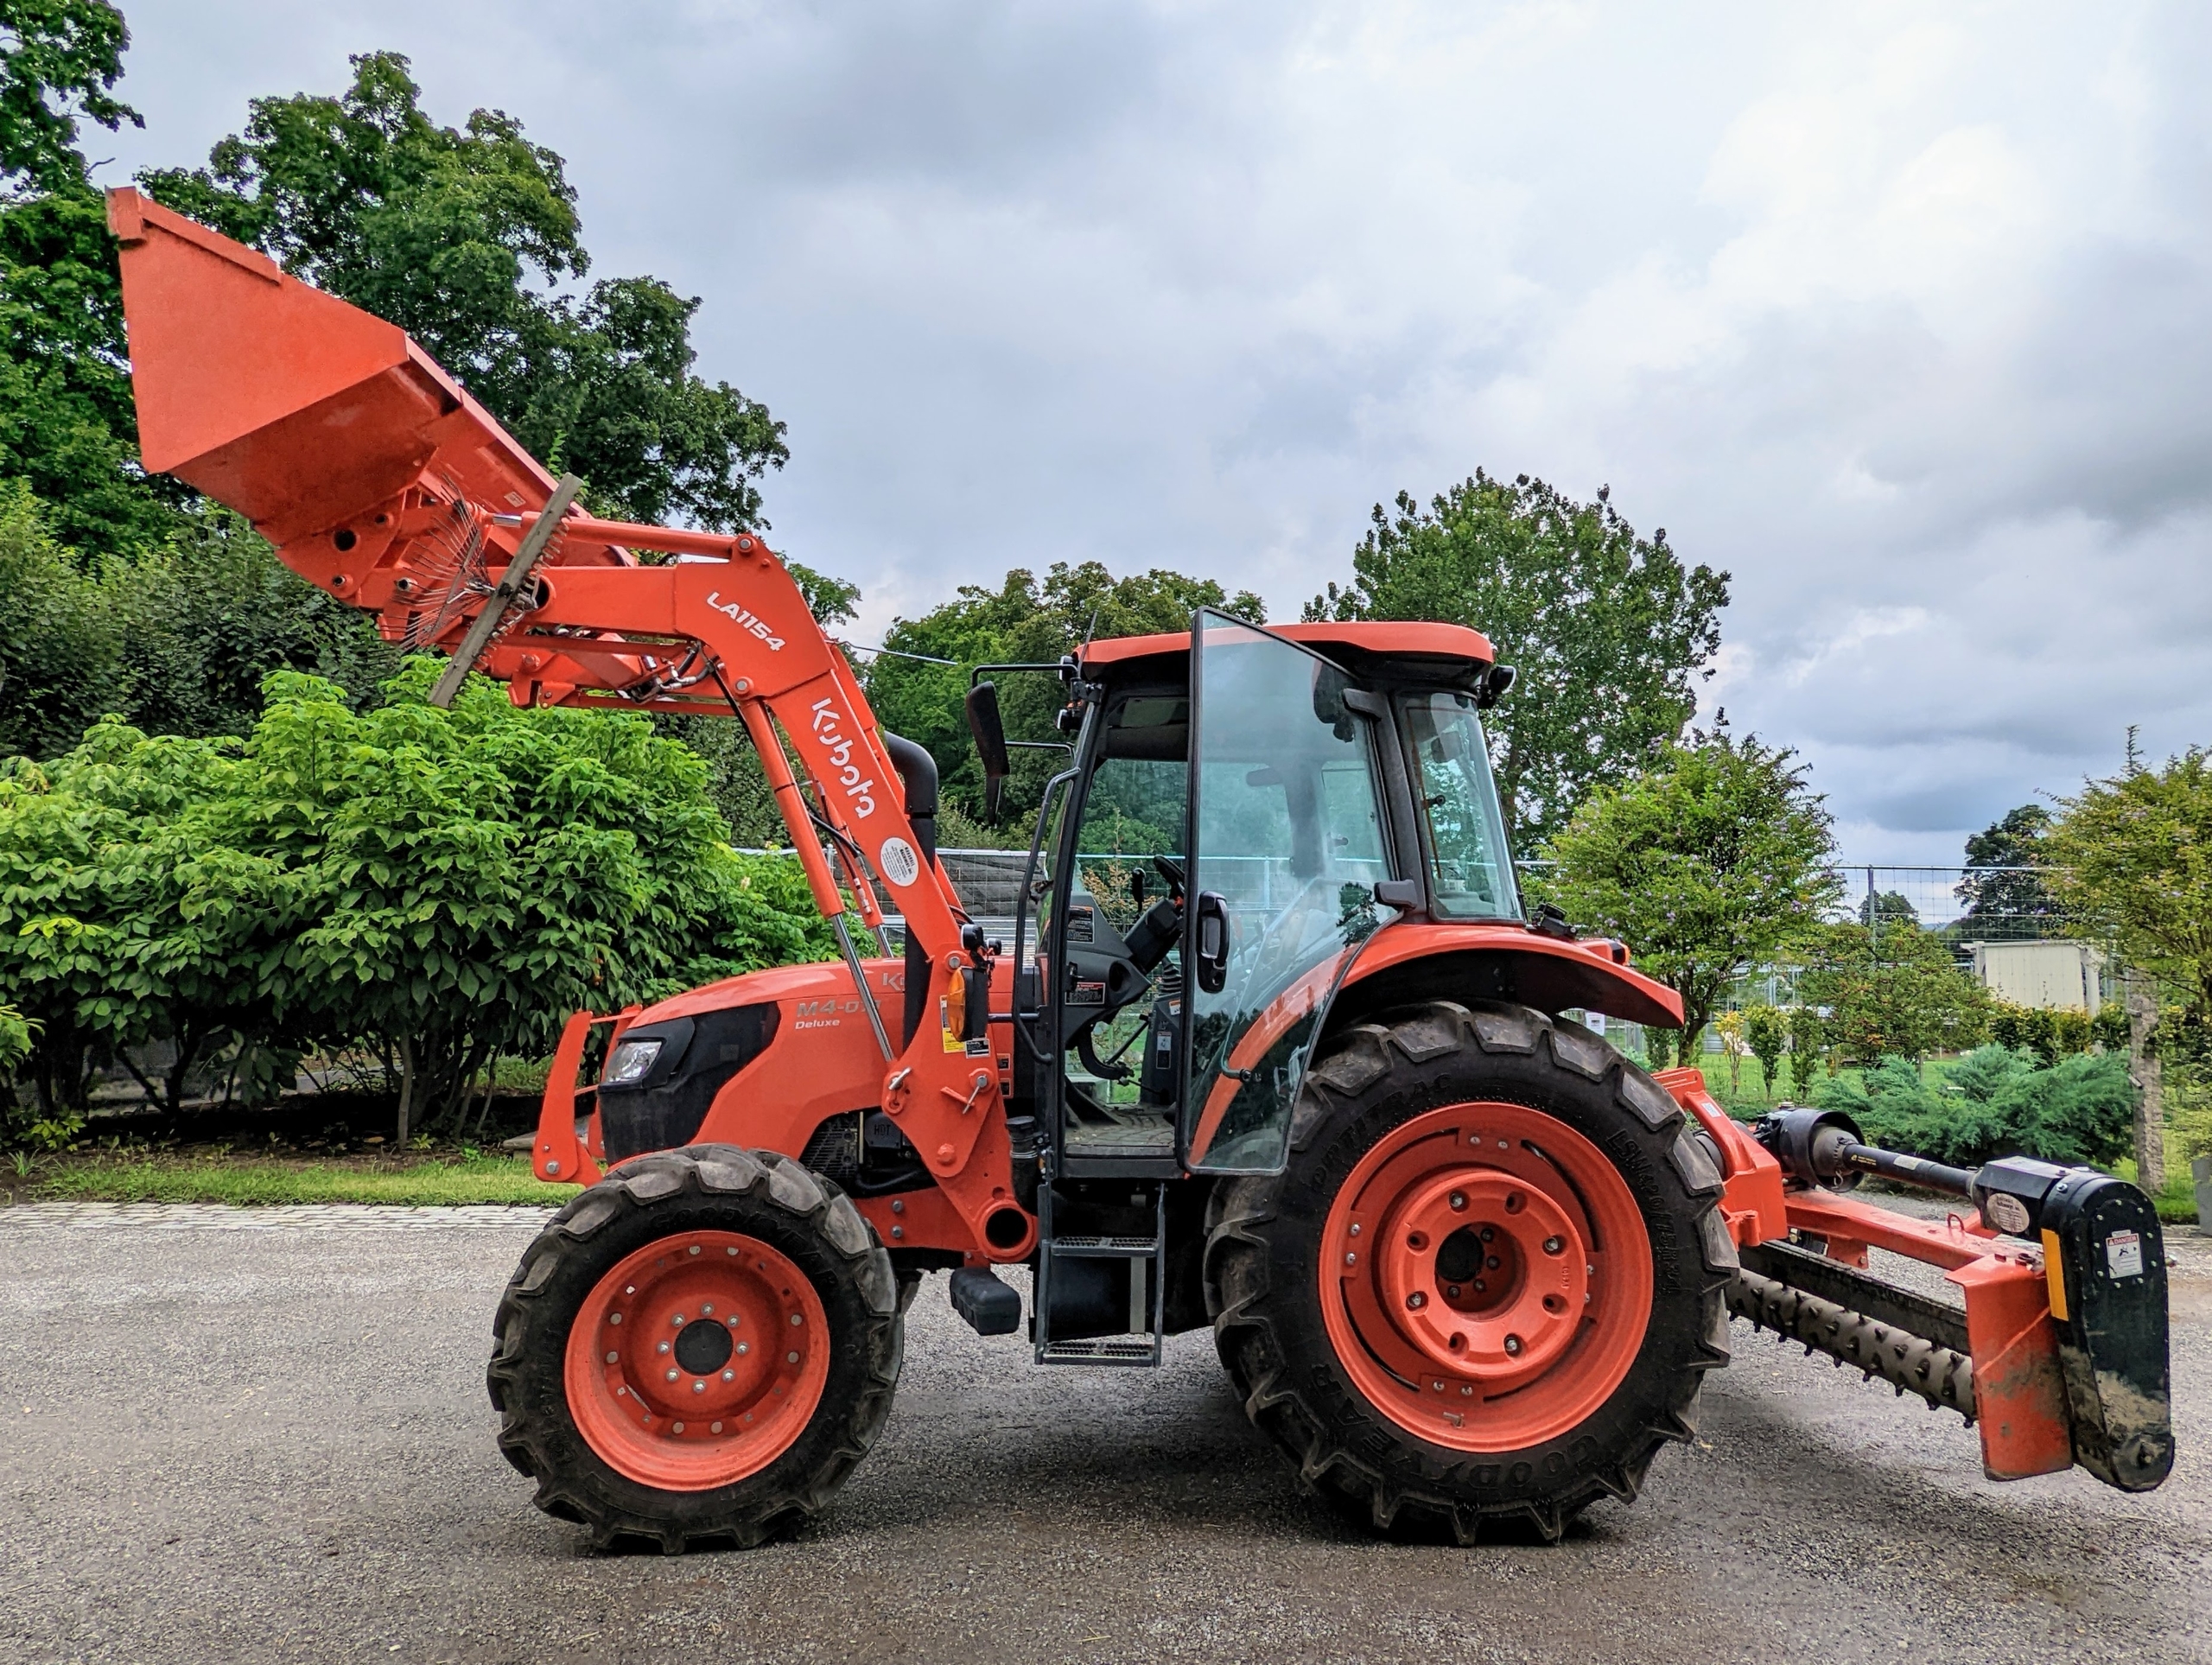
This is our Kubota M4-071 tractor. It’s designed to use auxiliary equipment such as the L1154 front loader that helps us transport so many things around the farm – potted plants, mulch, wood, etc.
On the back is our Land Pride PR1690 Power Rake. This piece of equipment has a 90-inch rake to work on large properties. We are using it to rake and grade the carriage roads, but it is also capable of windrowing soil, rocks, and debris in a field.
Here is a closer look at the roller of the power rake. When it is lowered onto the road surface and tilted to the proper angle, this attachment moves the gravel and road dust to the center, creating the proper crown for the surface. There should be about a three-percent slope from the shoulder to the center of the road. On less used roads, the power rake freshens up the existing gravel as it turns and brings any compacted gravel to the surface.
When maintaining a road it is important to ensure it has a crowned driving surface and a shoulder area that slopes directly away from the edge for water drainage.
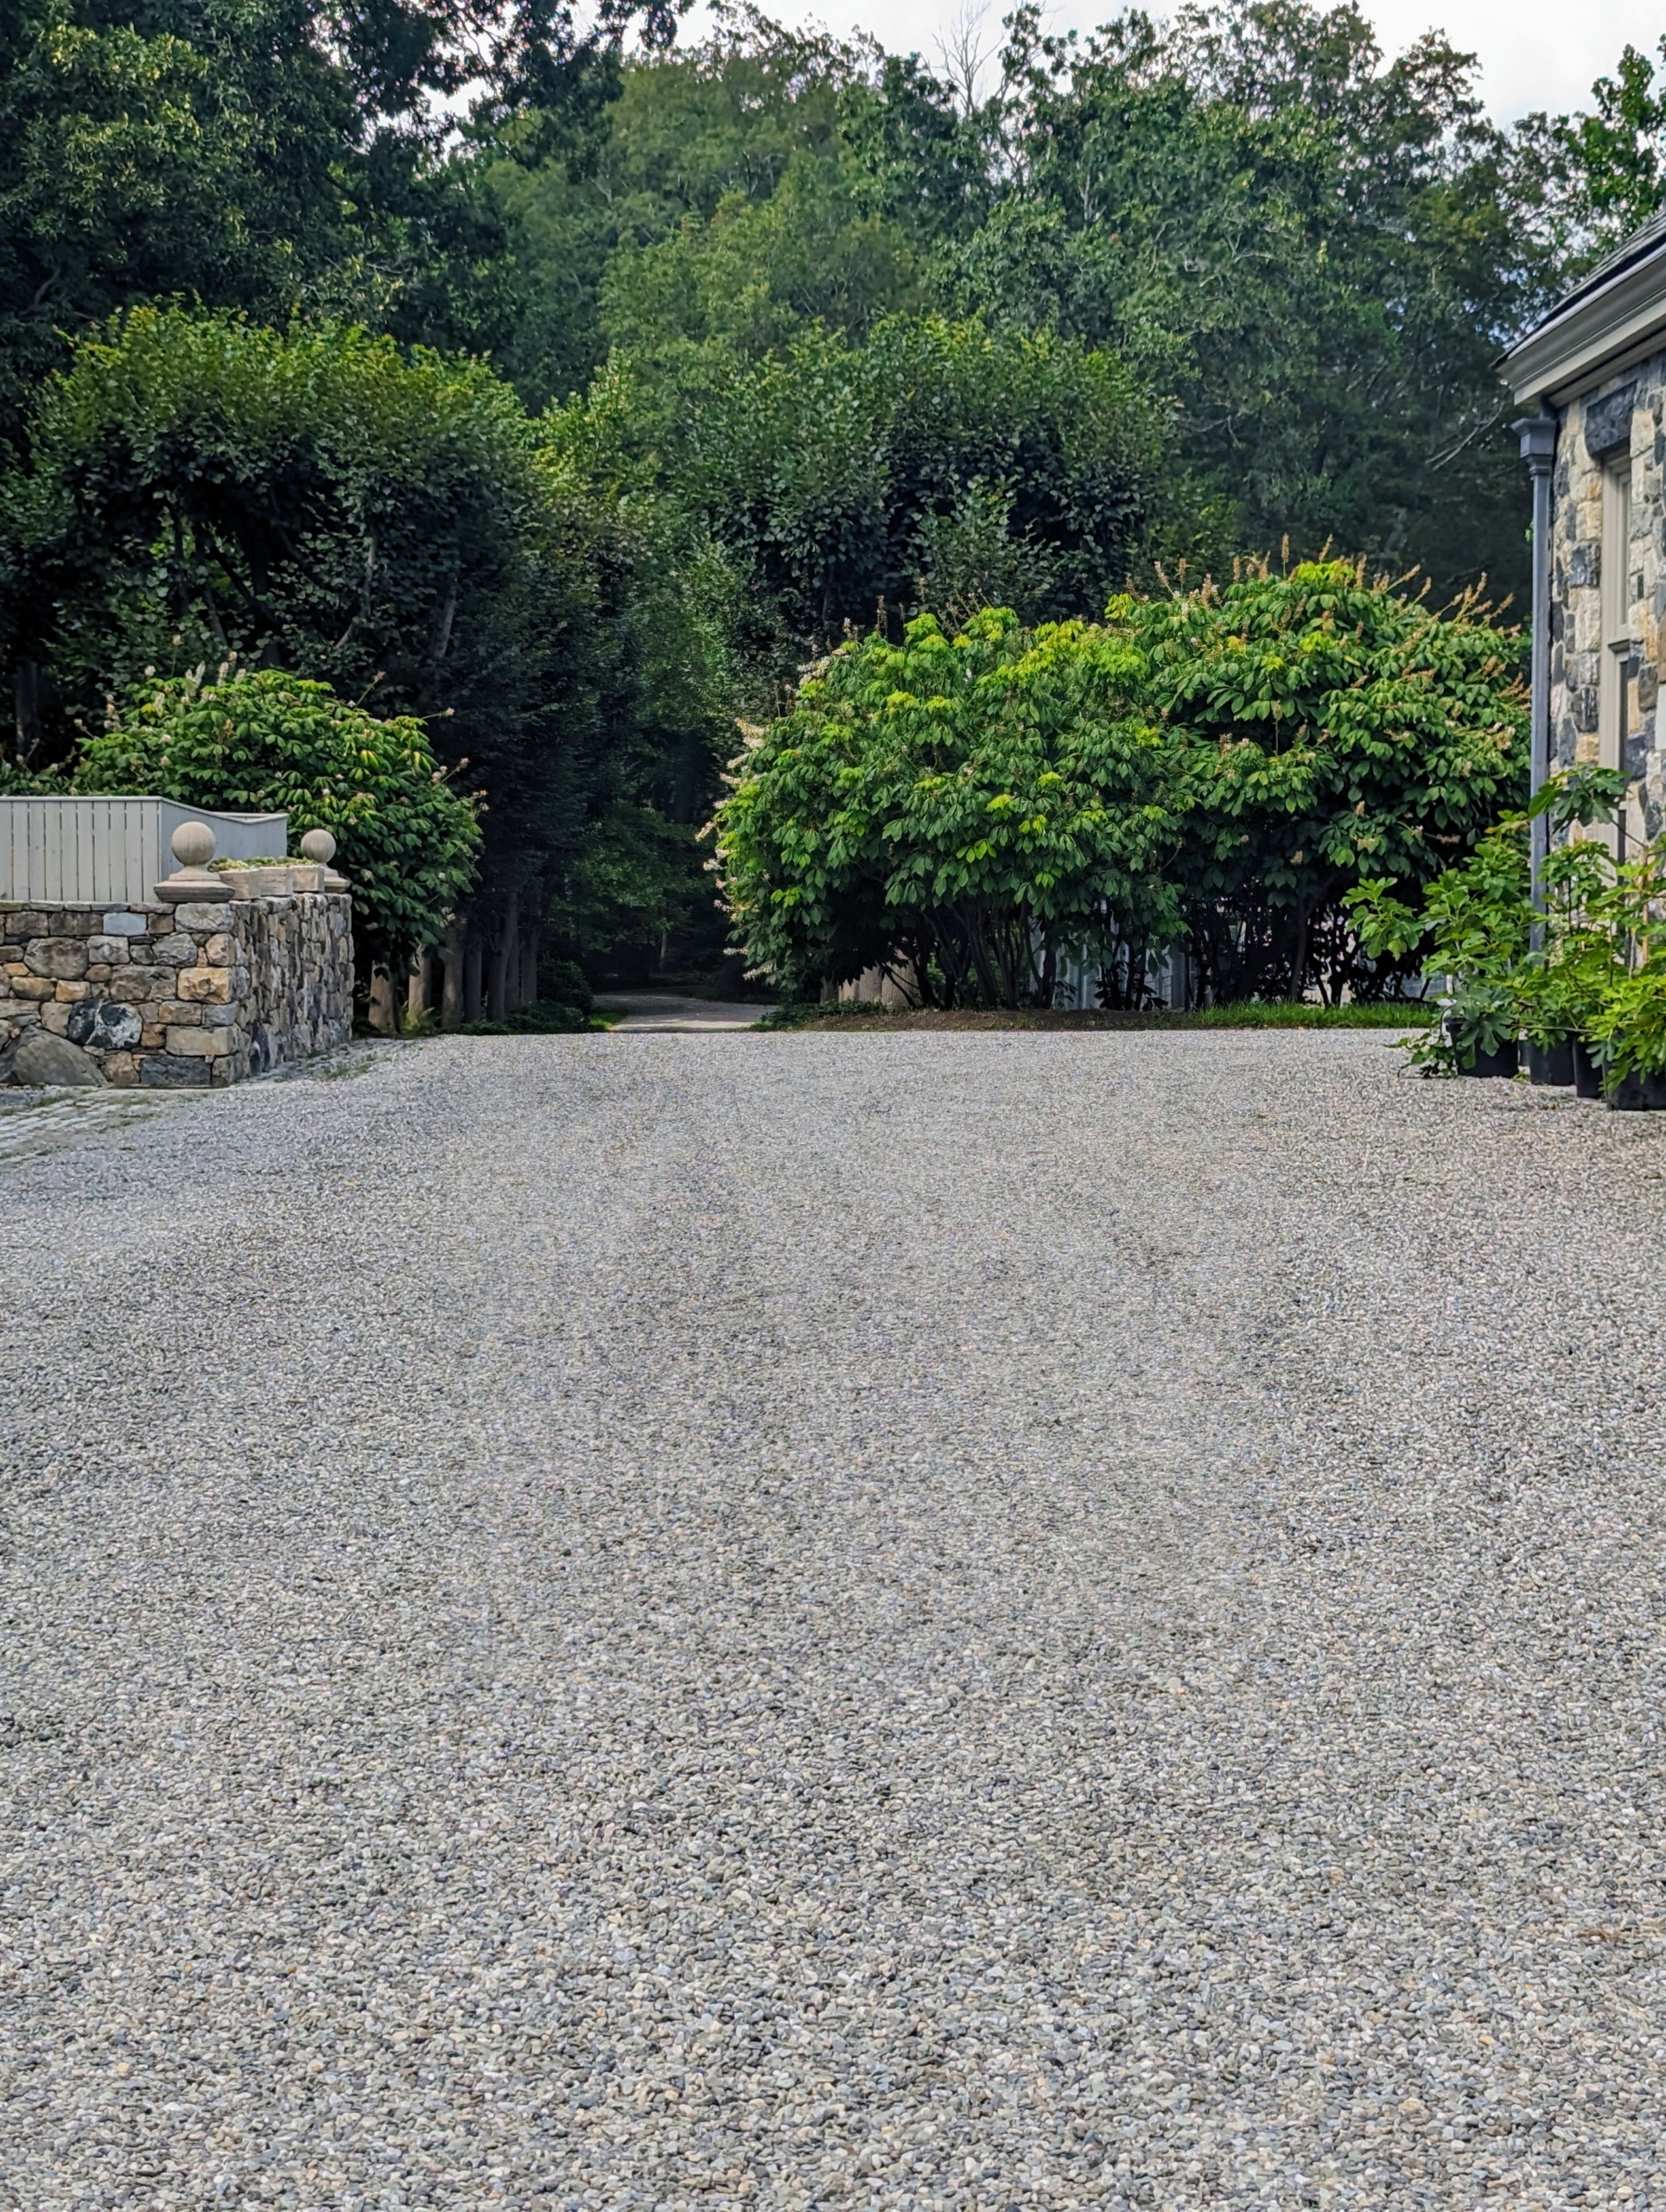
Here is the finished area behind my stable with the allée of lindens in the distance – it looks great.
And here is the carriage road near my Winter House with the stately grove of bald cypress trees ahead. I love how the roads look after they are done.
This time of year is always fun at my farm because there’s so much growing in the vegetable garden.
It's important to check the garden every day - one never knows what will be ready for picking. At last check, we had cucumbers, okra, eggplants, artichokes, onions, kale, and more - all thriving and doing so well. And, we'll soon have tomatoes to pick too. I always look forward to having lots of farm-grown produce to use in my summer cooking and in salads.
Enjoy these photos.
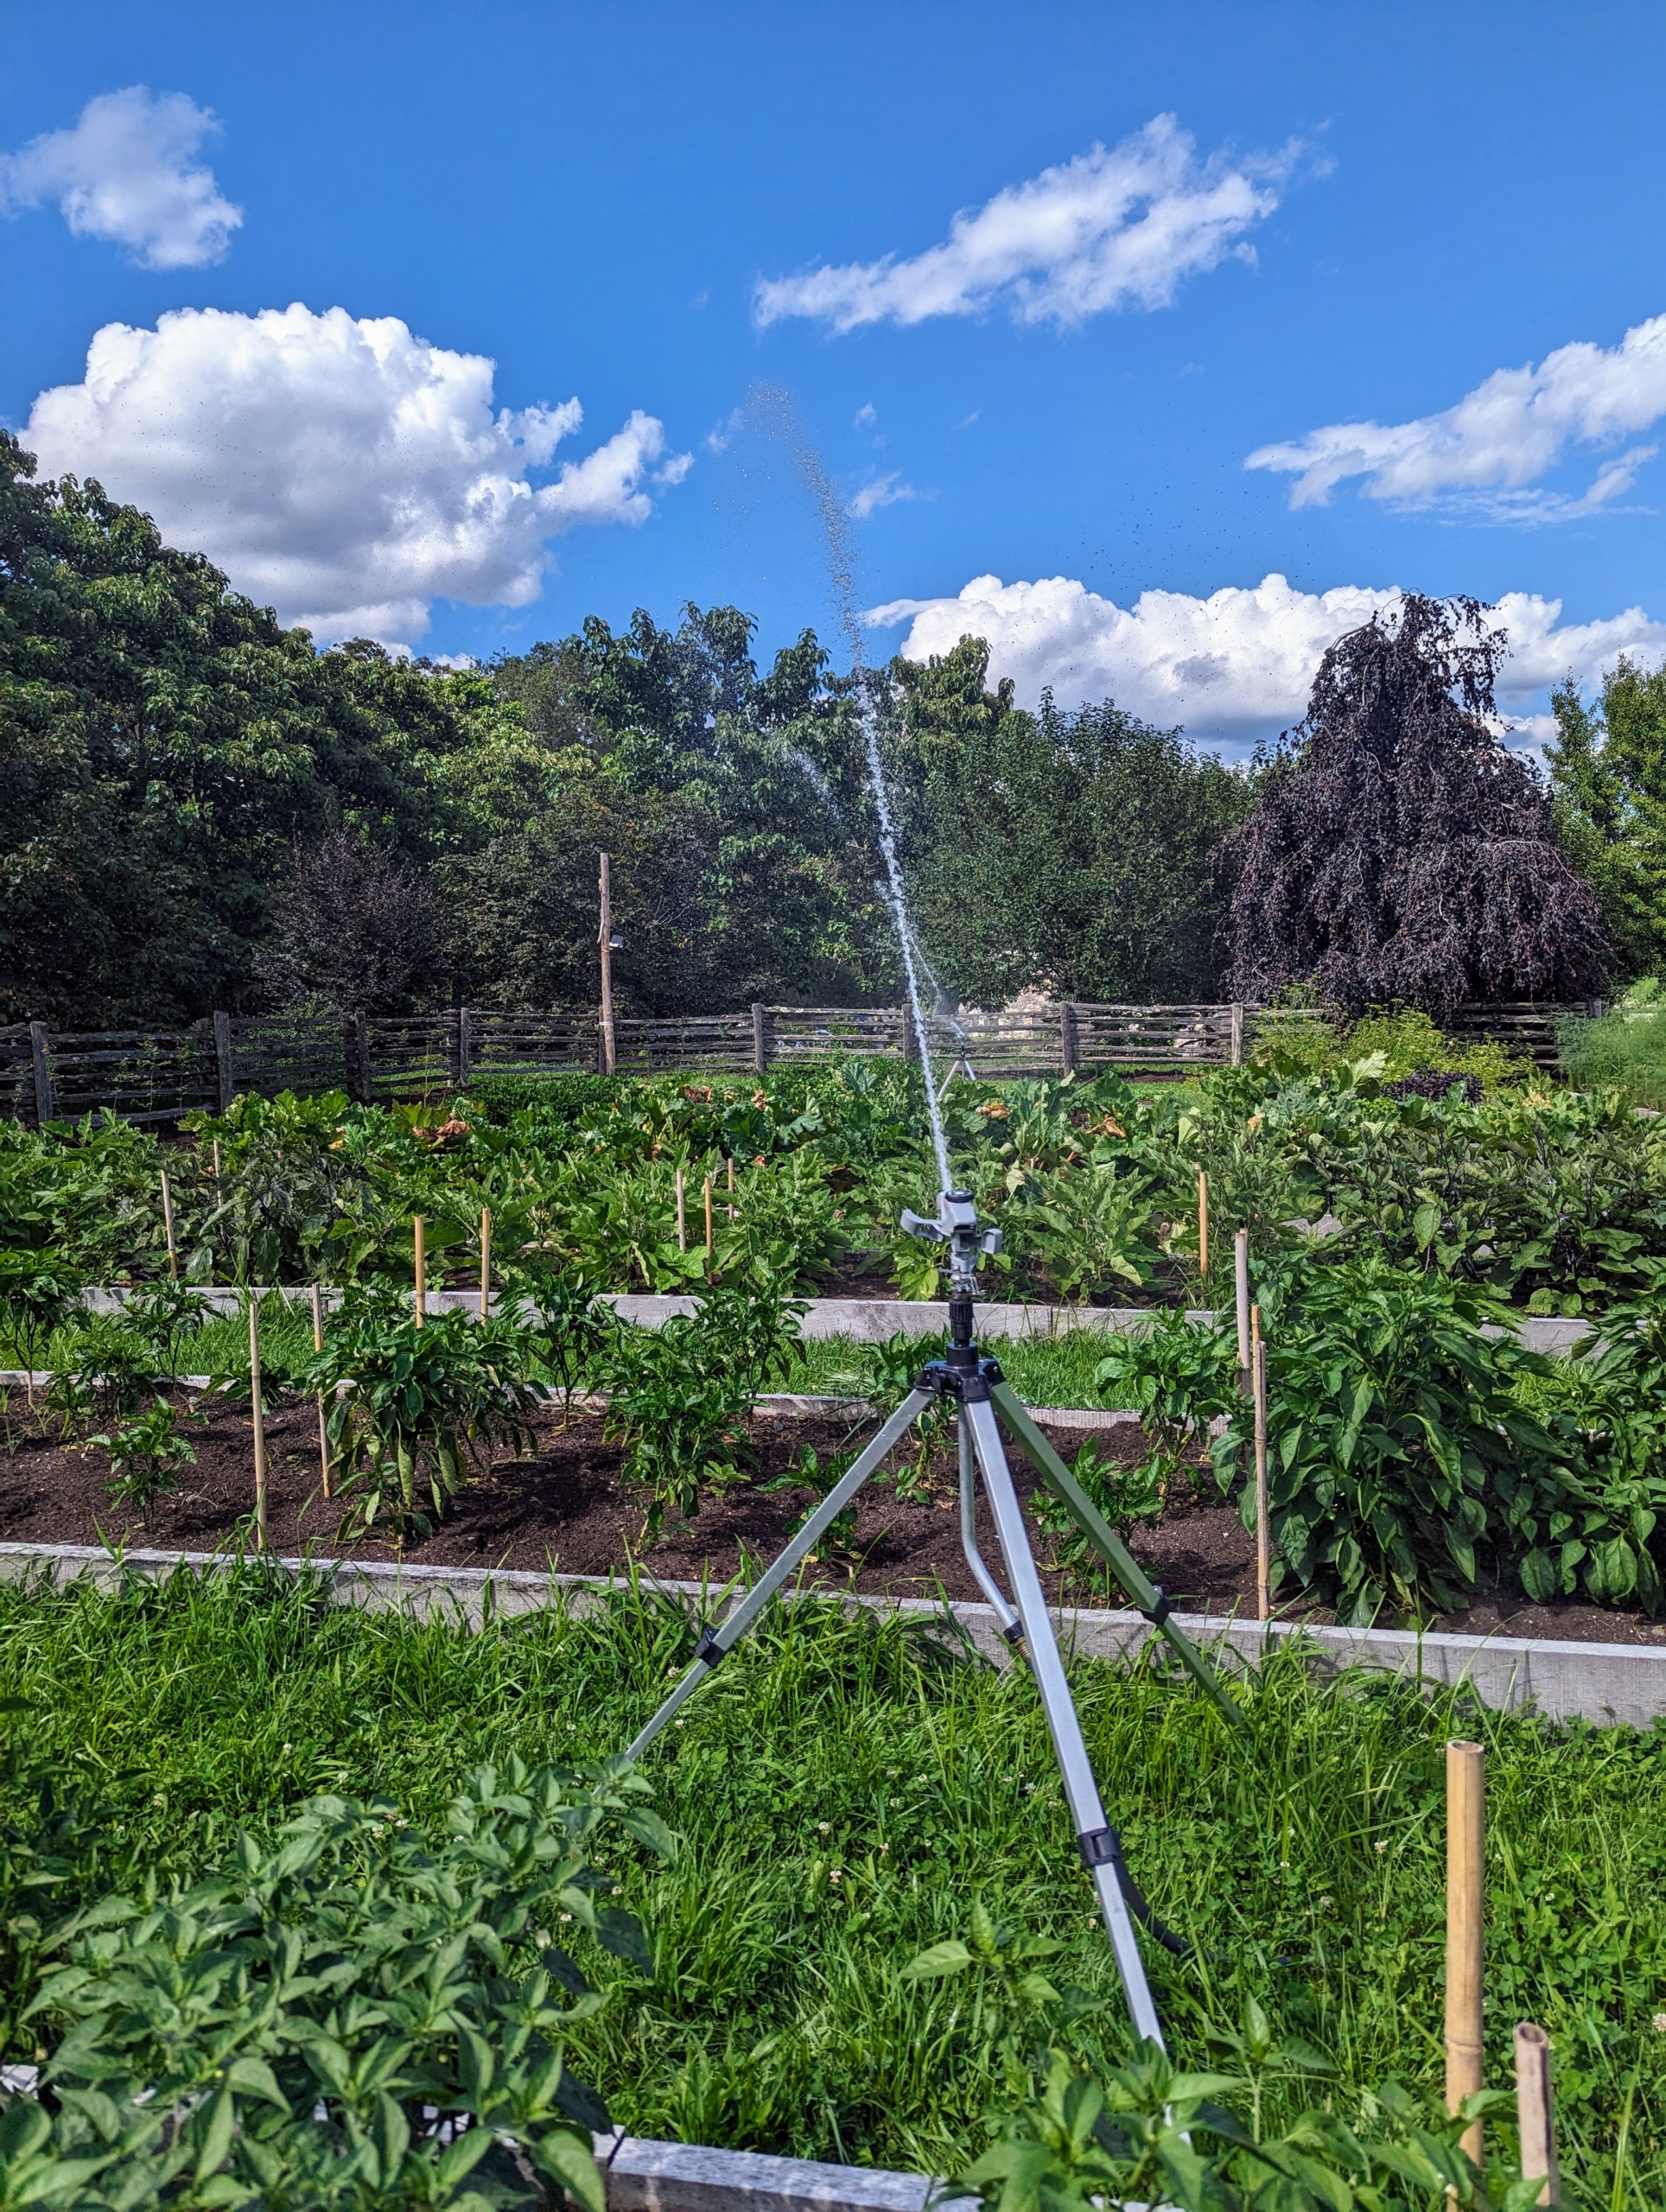
Here in the Northeast, August is typically very warm and dry, which means watering is a must in the gardens. This year, we’ve been fortunate – we’ve also had some good soaking rains. There’s a good chance of rain again tomorrow, but when it’s needed, we water, water, water.
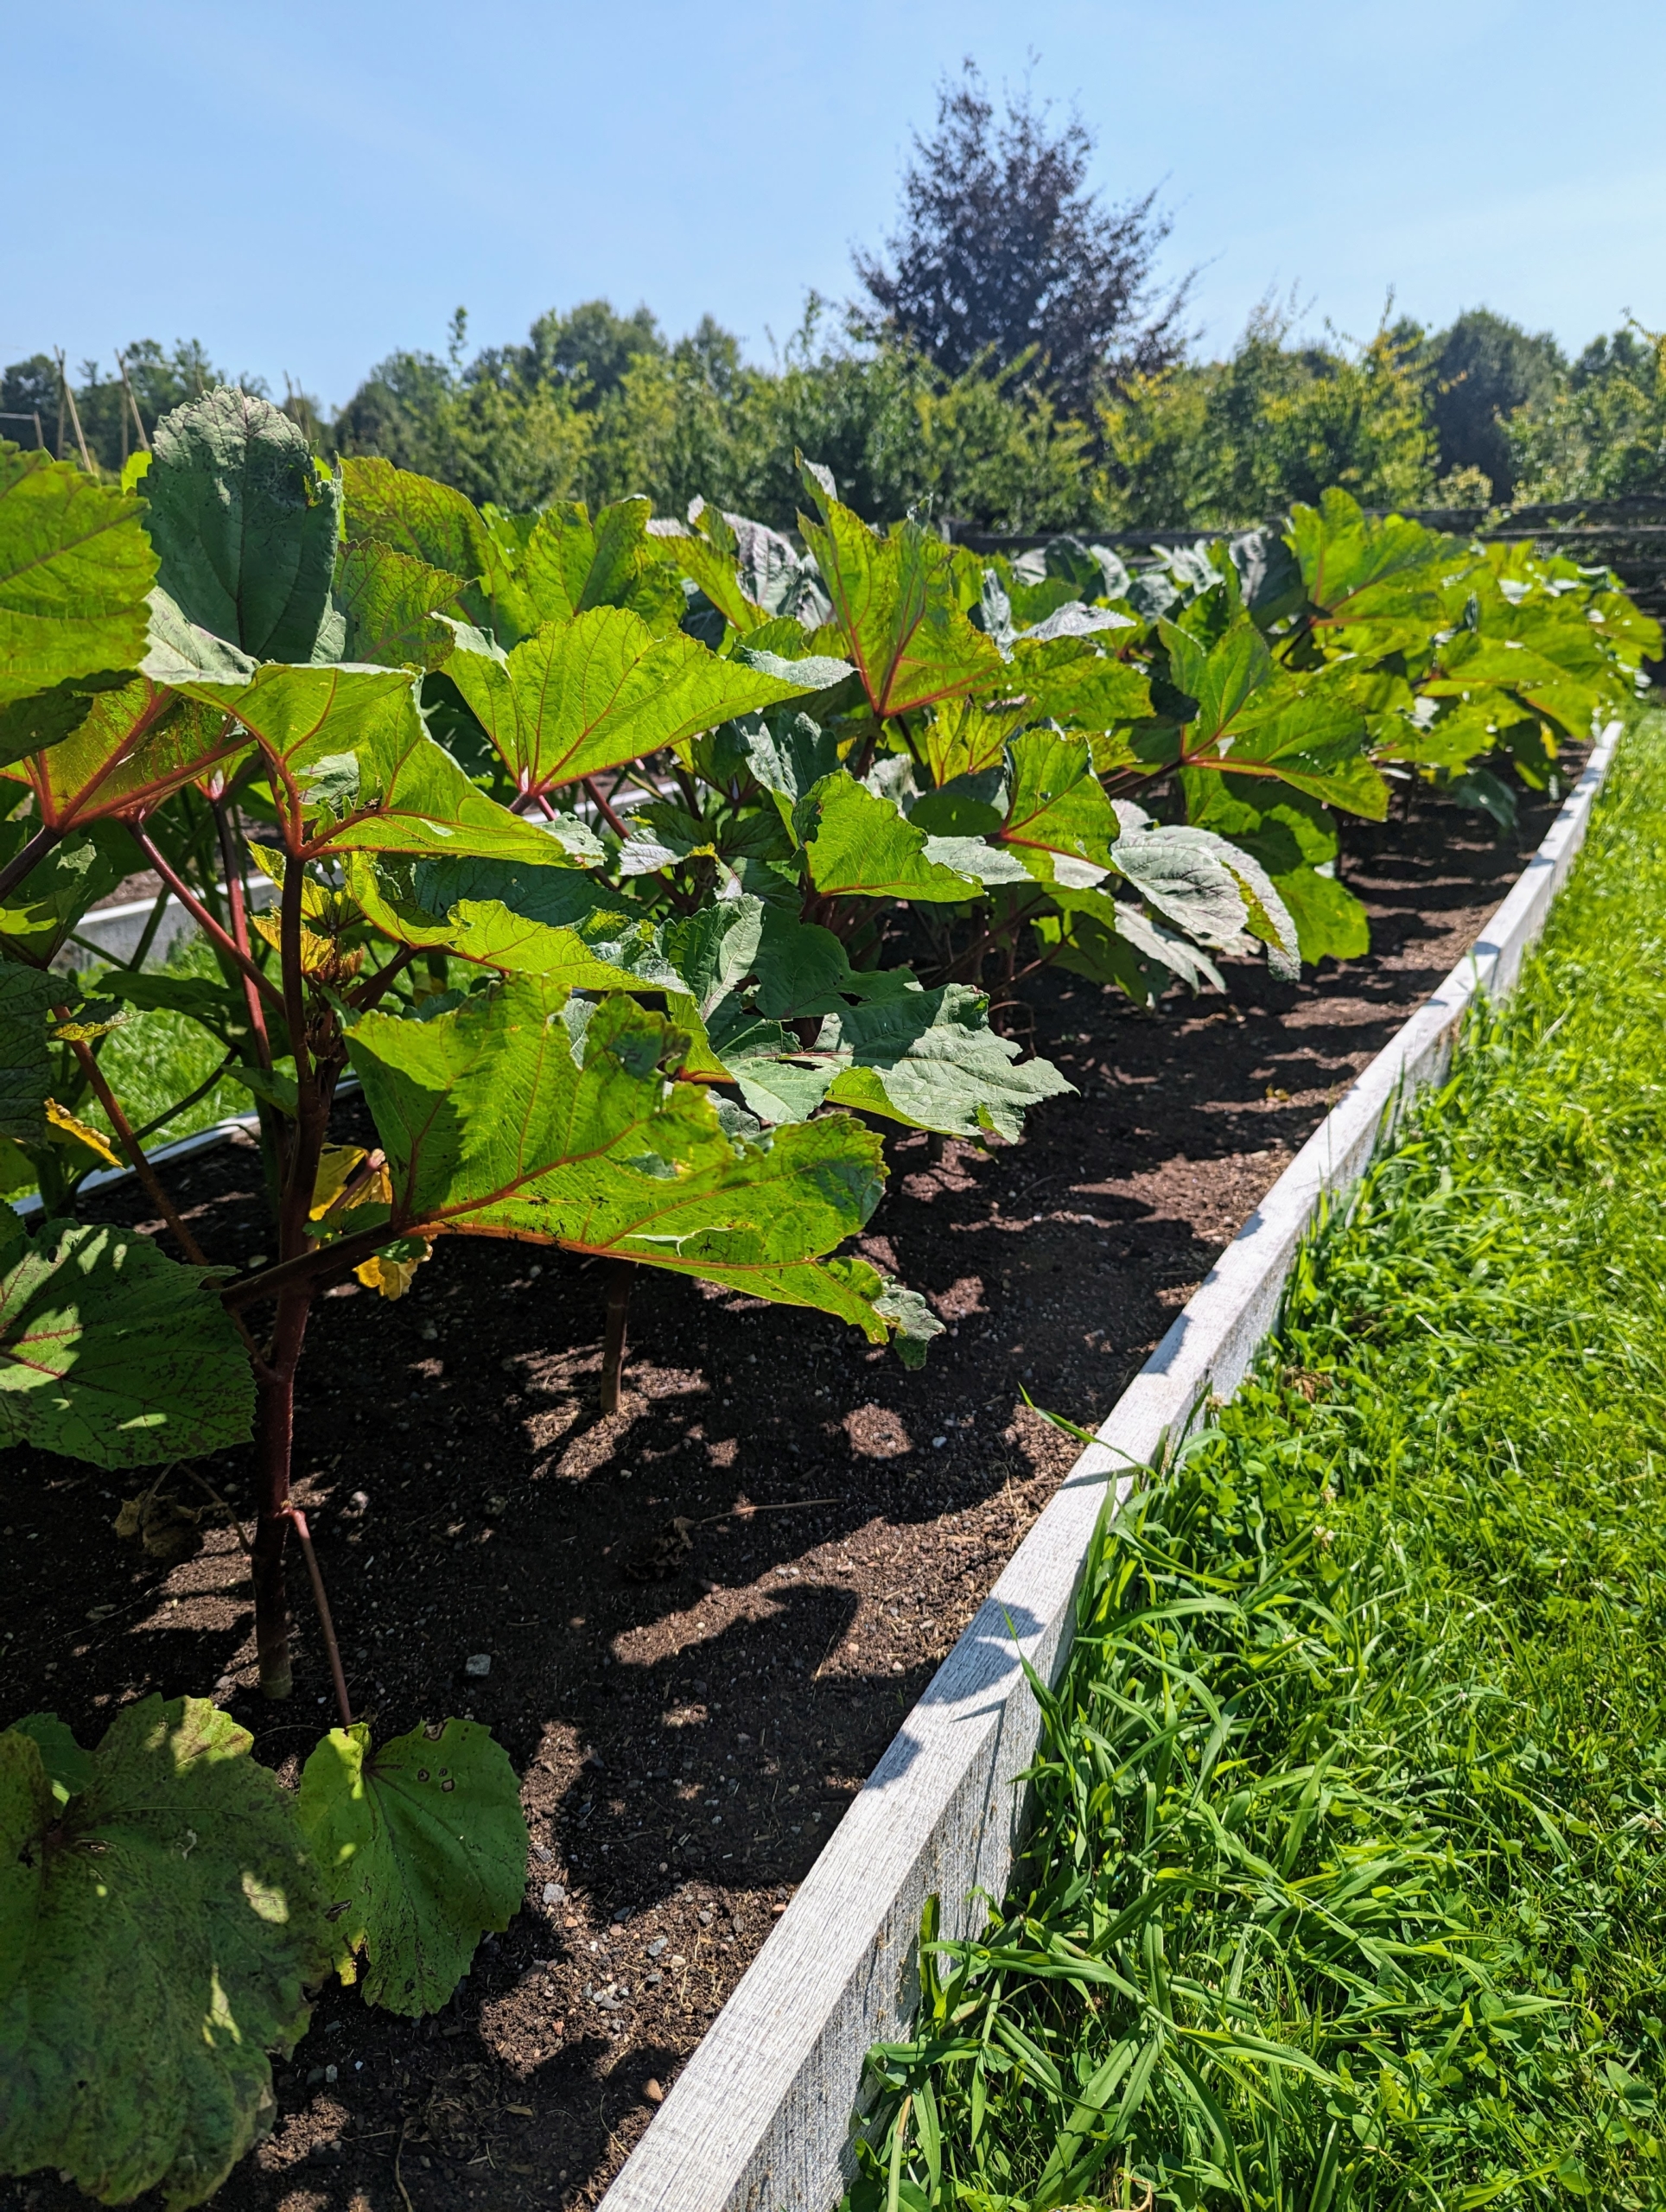
This new half-acre vegetable garden is thriving. Here is our bed of okra. Okra leaves are medium to large in size and oblong to heart-shaped, and covered in small bristles or spines.
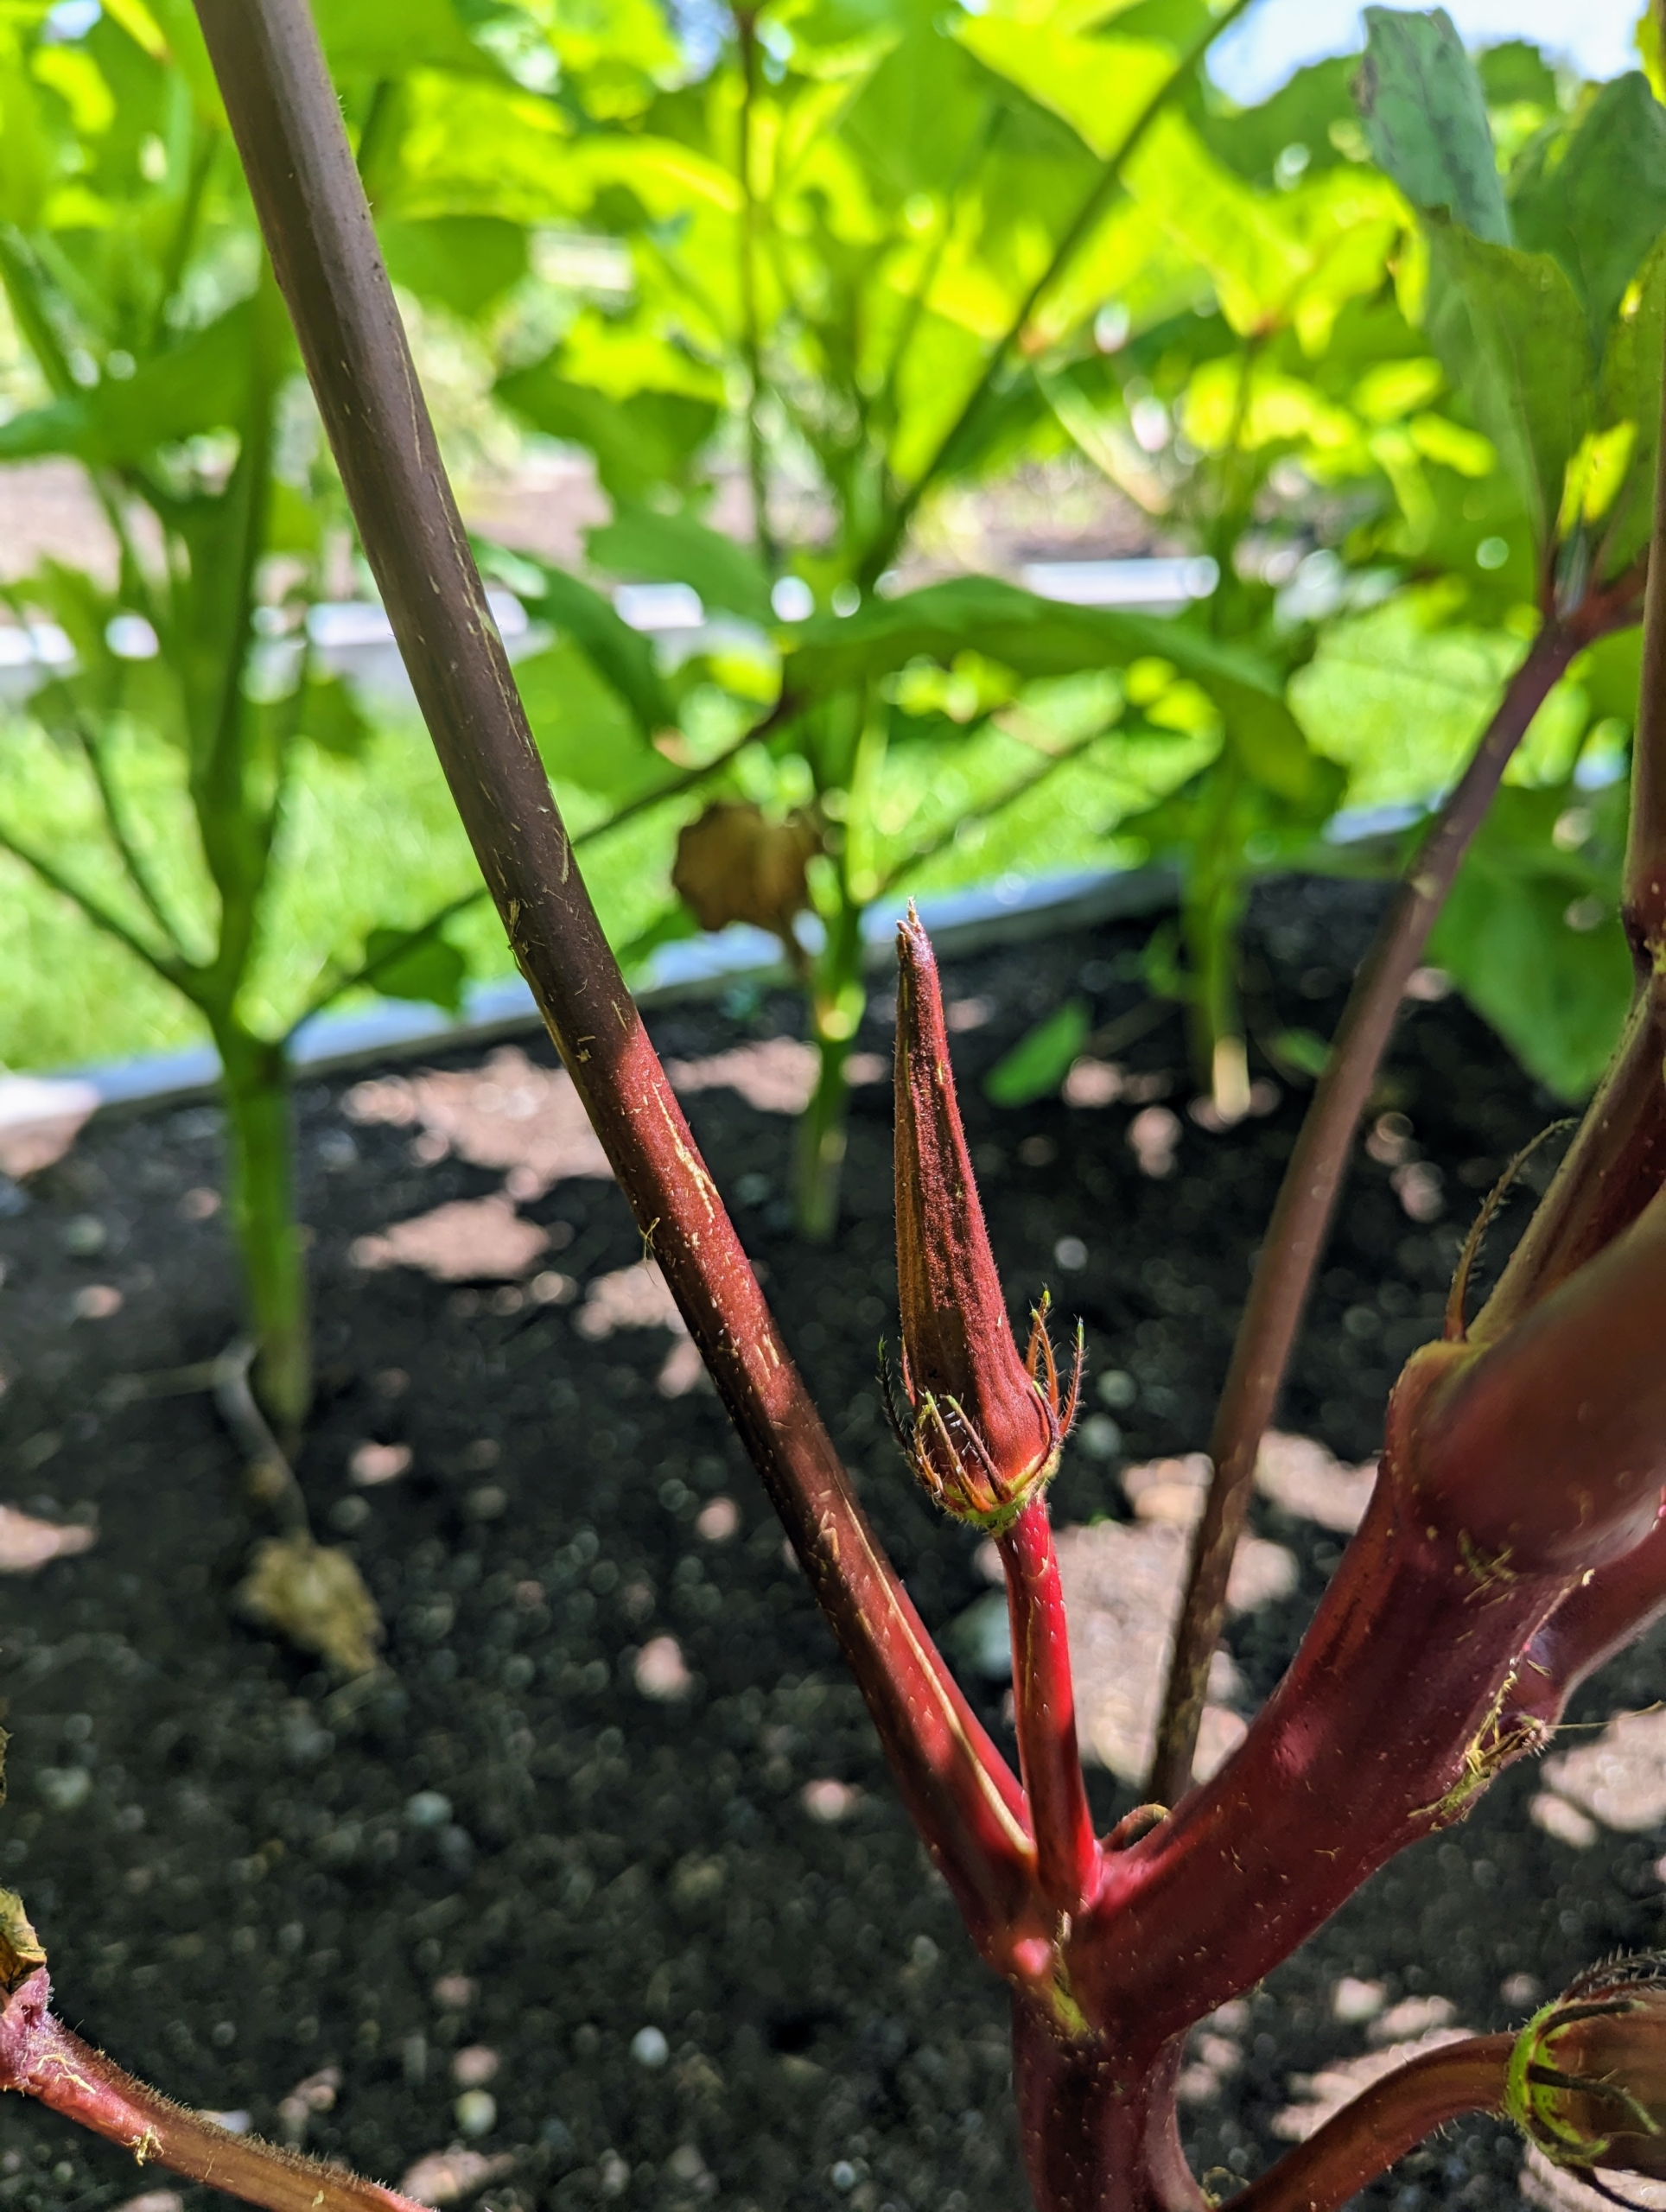
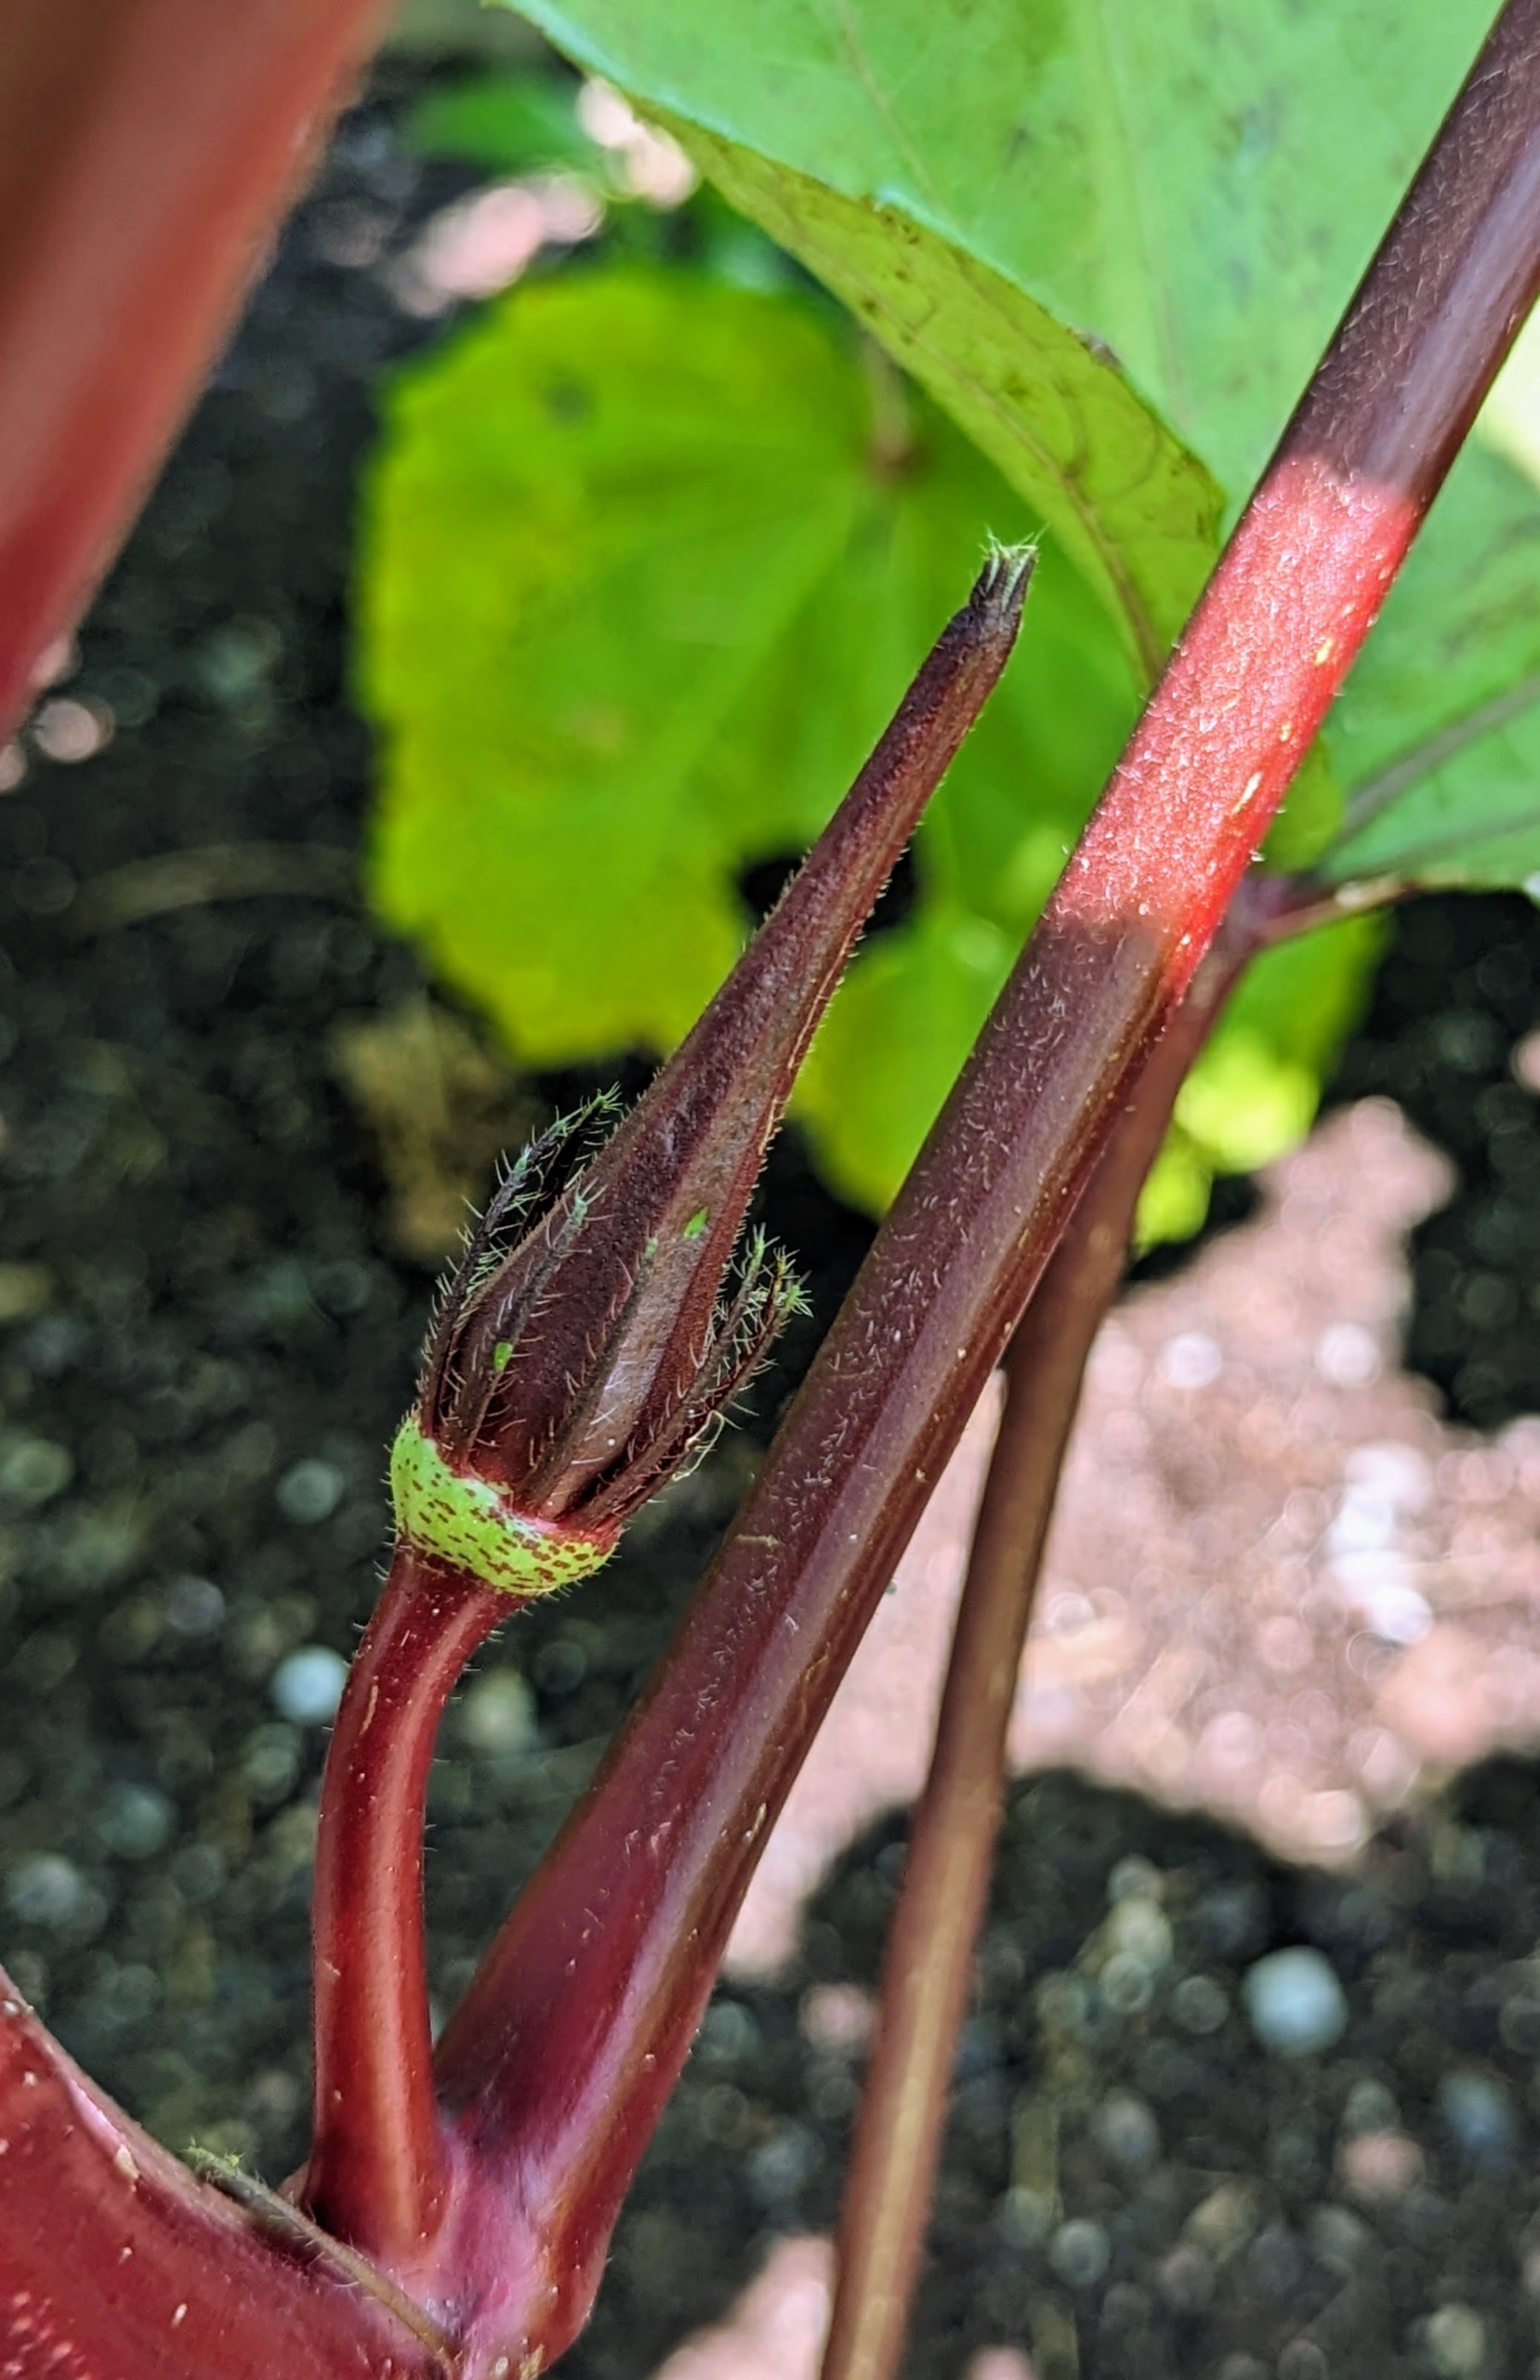
And then look closer for the fruits. I love okra, but for some, okra is too slimy when cooked. Okra is very healthy, however – it’s high in fiber, vitamin-C and full of antioxidants, so give it try! Okra or Okro, Abelmoschus esculentus, is also known in many English-speaking countries as ladies’ fingers or ochro.
Okra is a “cut-and-come-again” vegetable. Keep cutting the pods every day or two, and they will keep on growing. The okra is ready when they’re about three to four inches long.
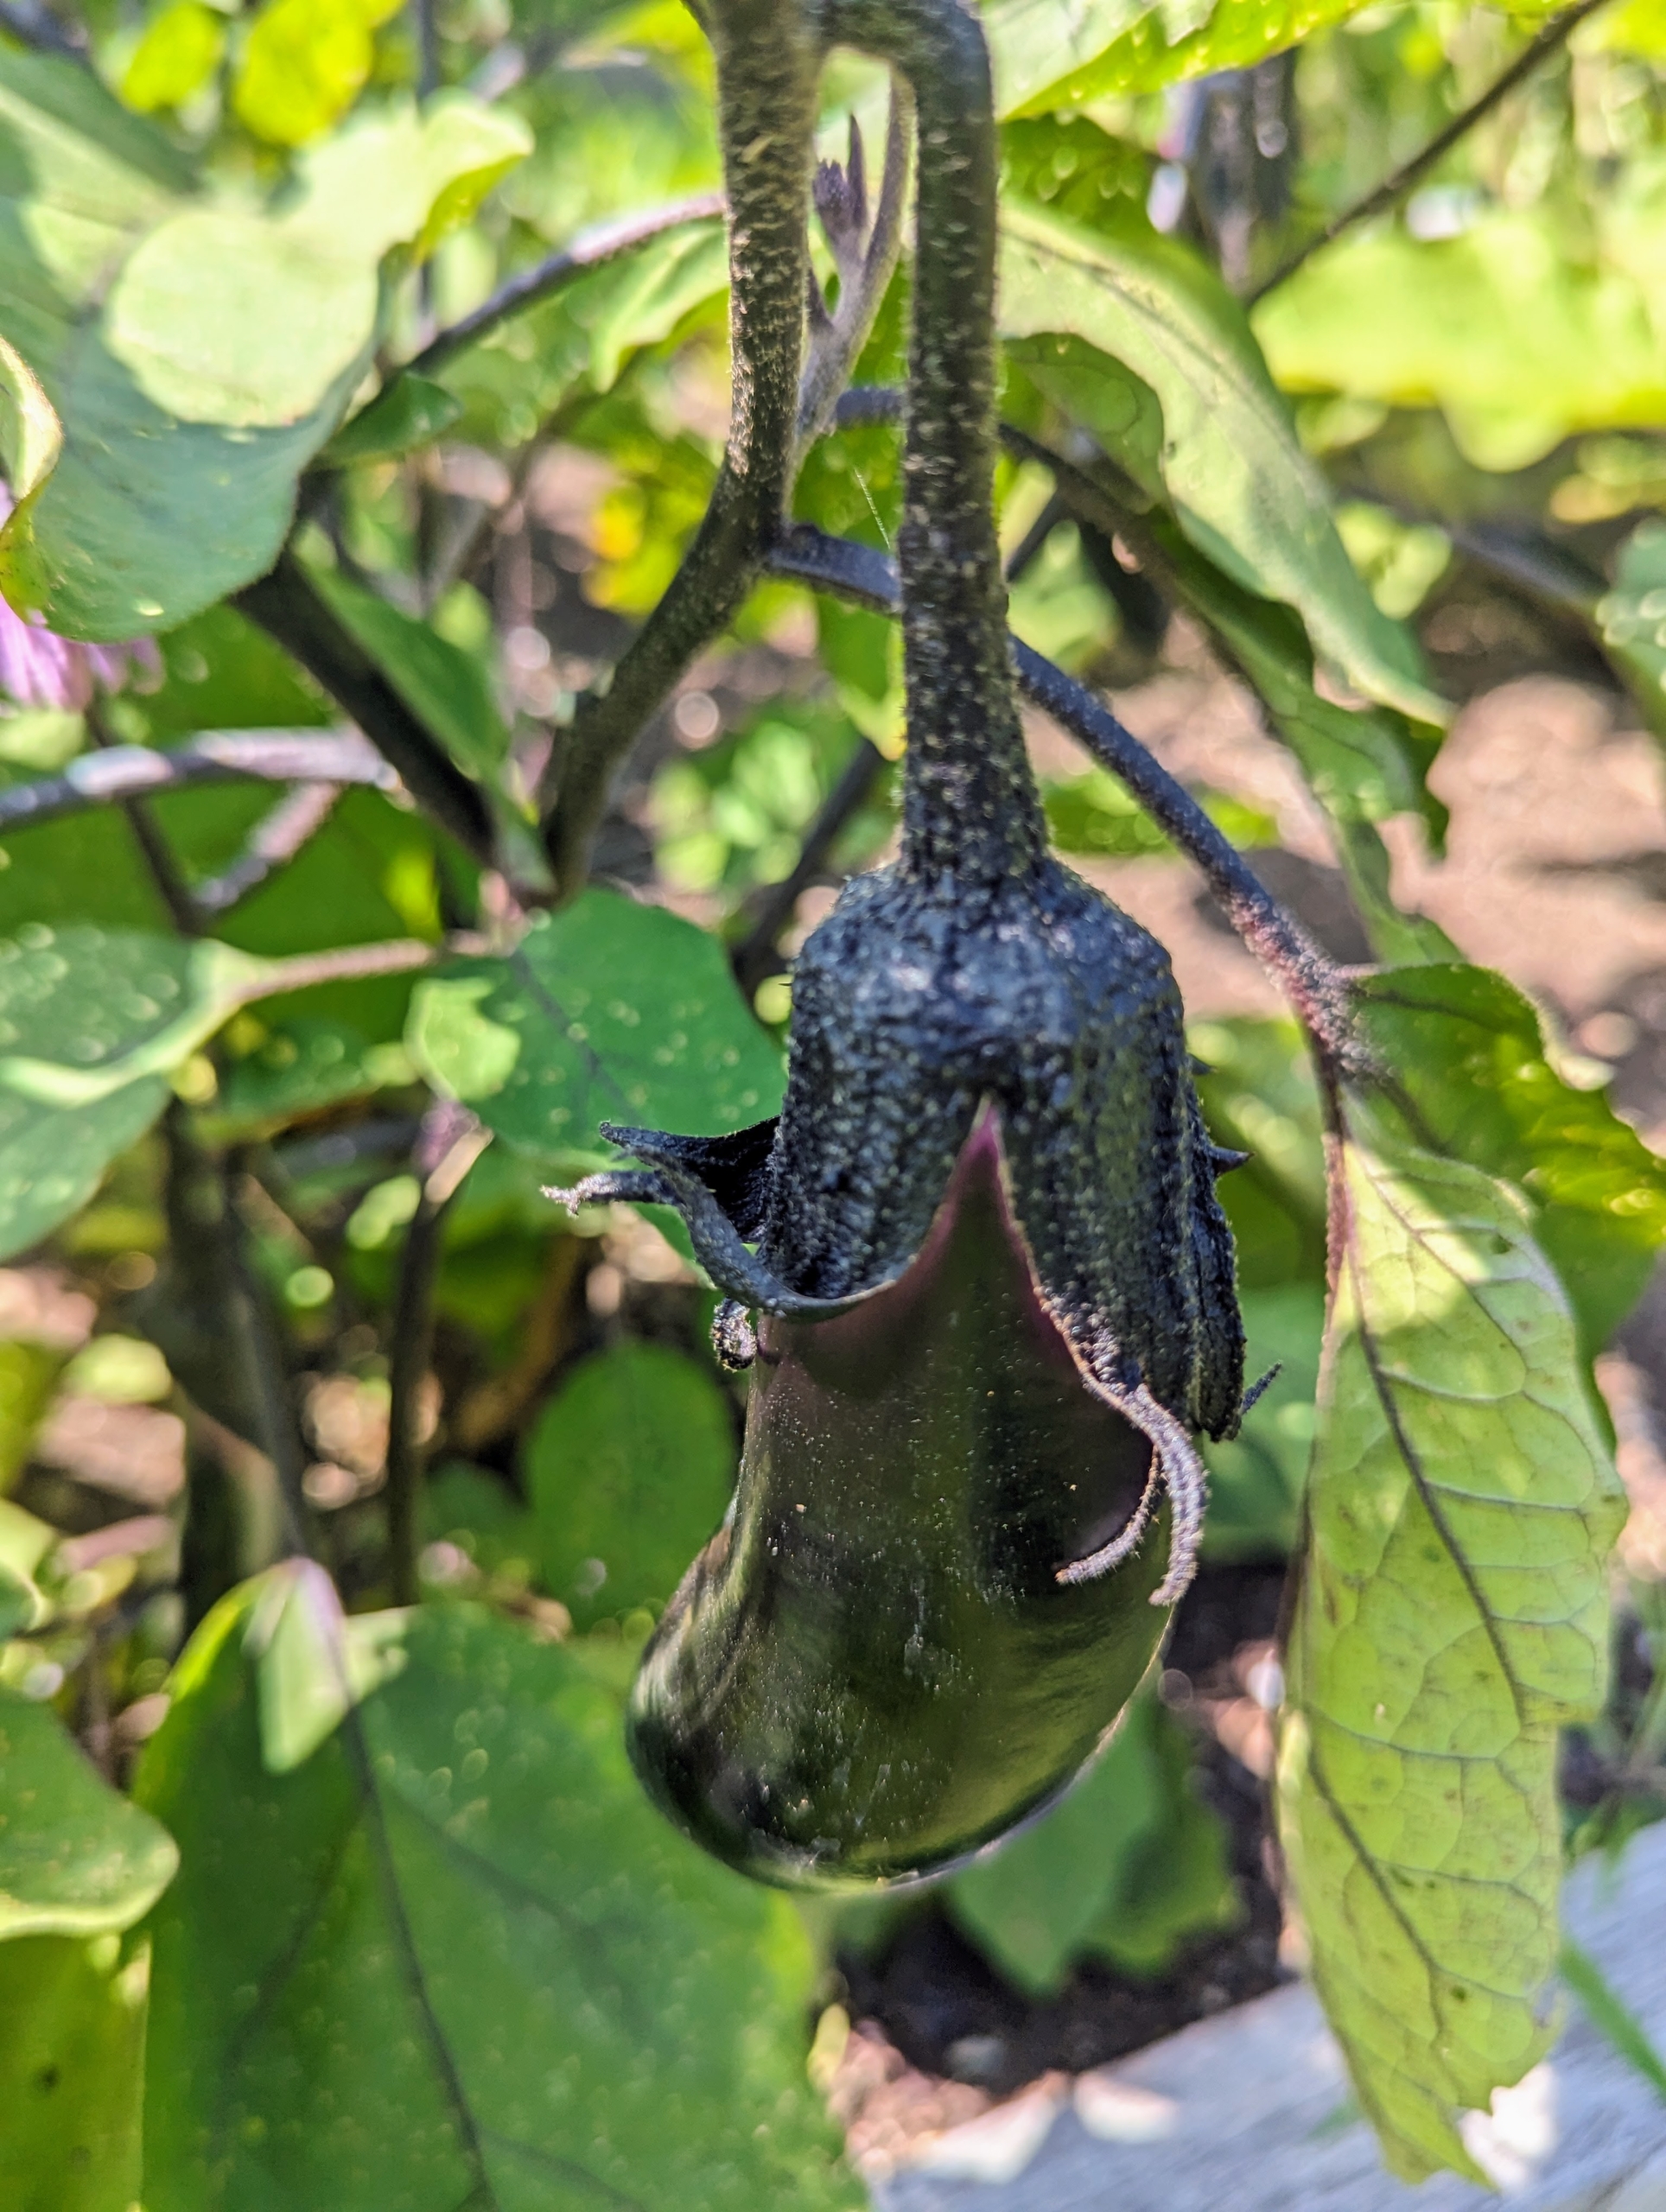
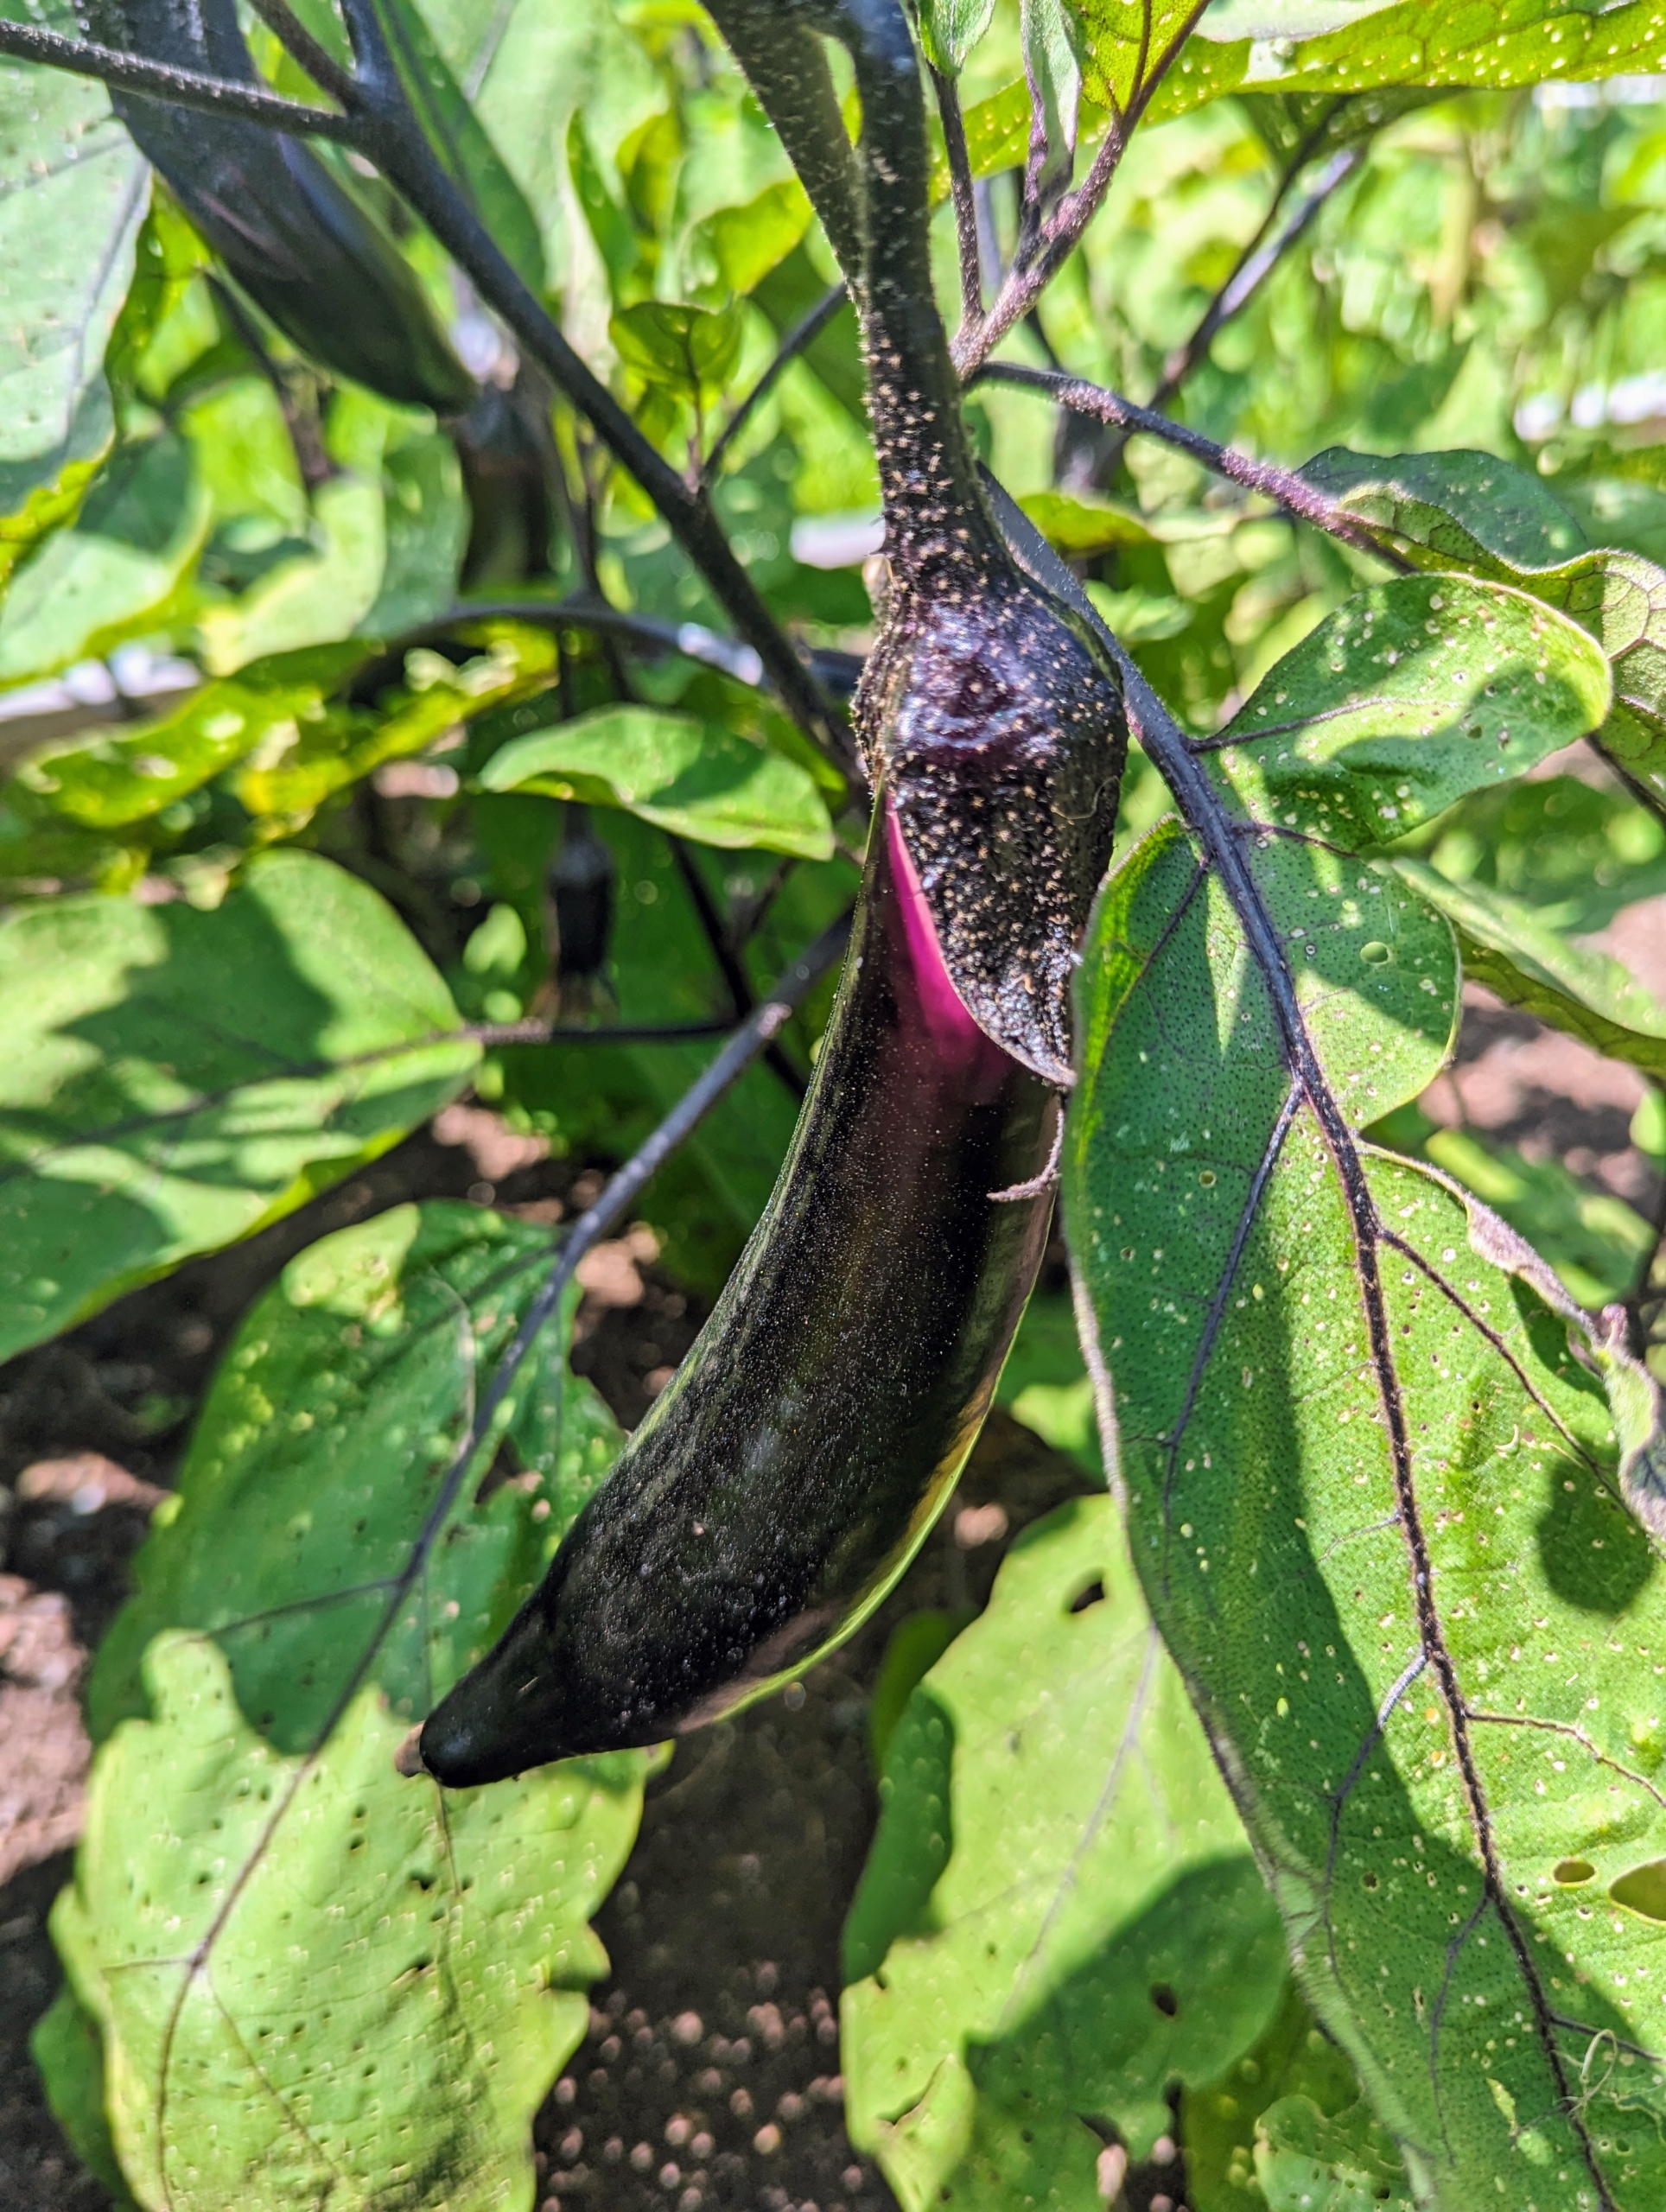
We have already harvested lots of eggplant, but there are more growing. It’s a good season for eggplants.
Pick eggplants when they are young and tender. Picking a little early will encourage the plant to grow more, and will help to extend the growing season. I prefer to pick them when they are smaller.
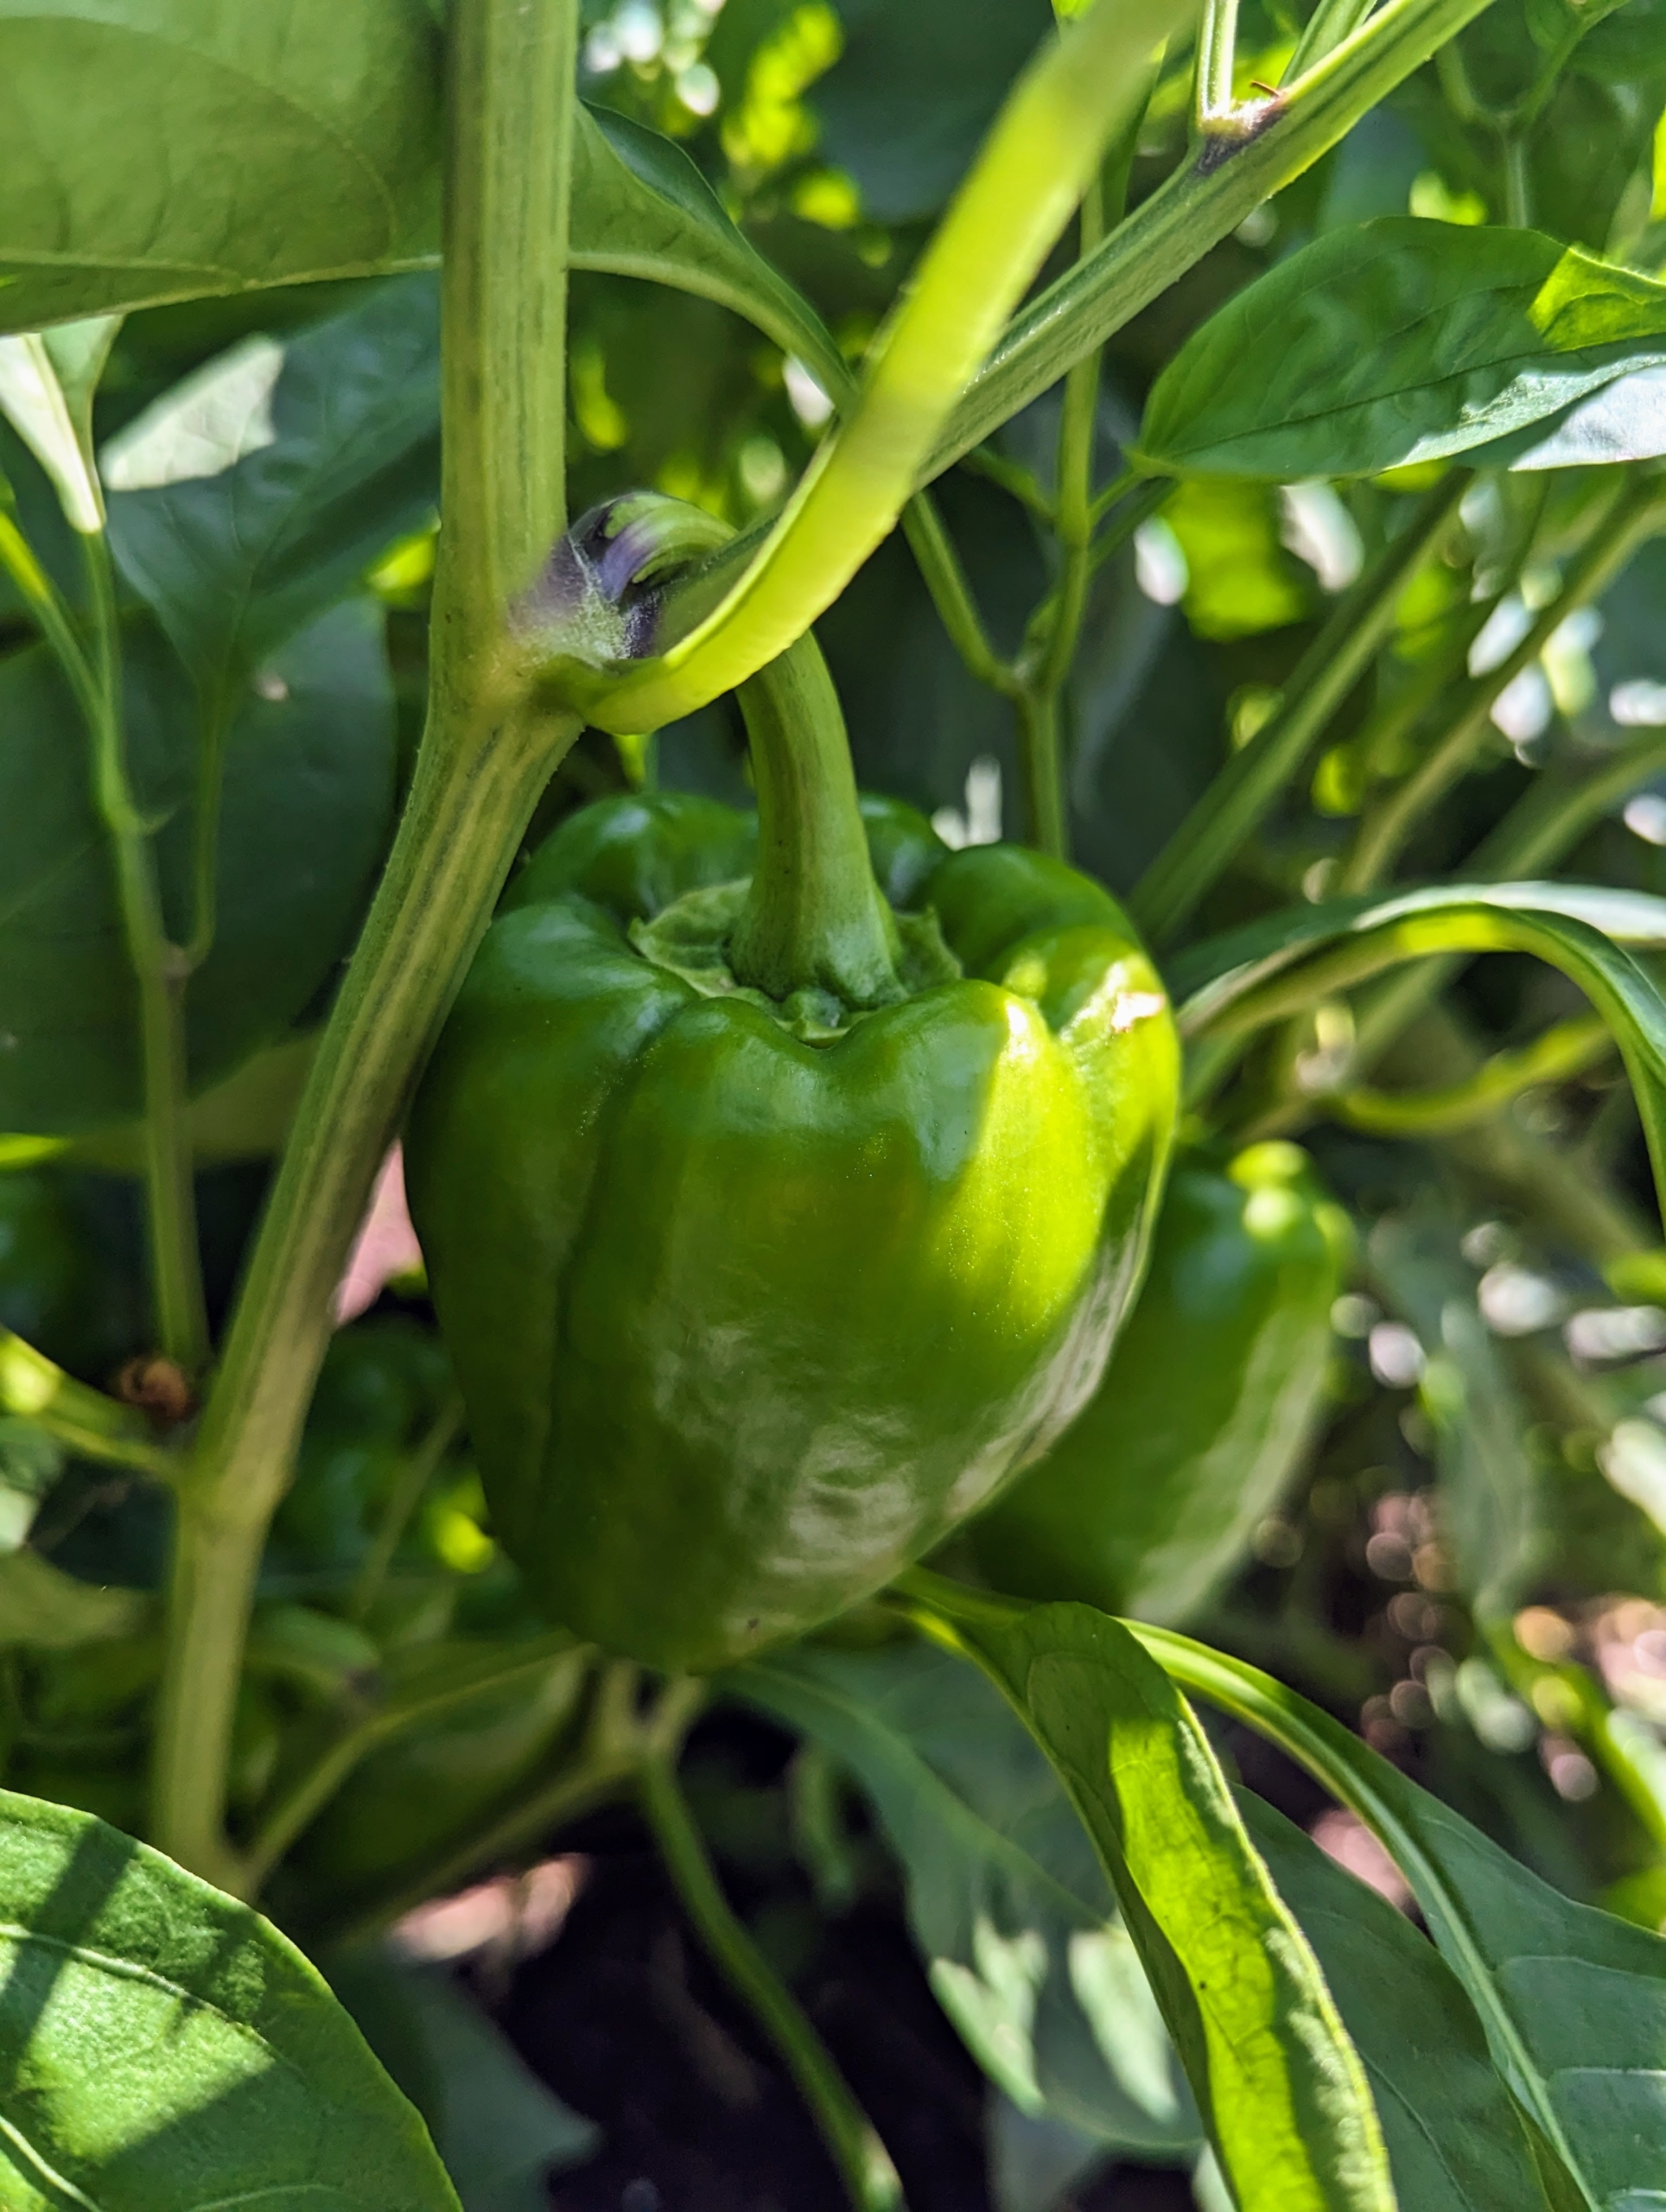
Sweet bell peppers are popular in the garden – all grassy in flavor and super-crunchy in texture. I love making stuffed peppers – so easy and so delicious.
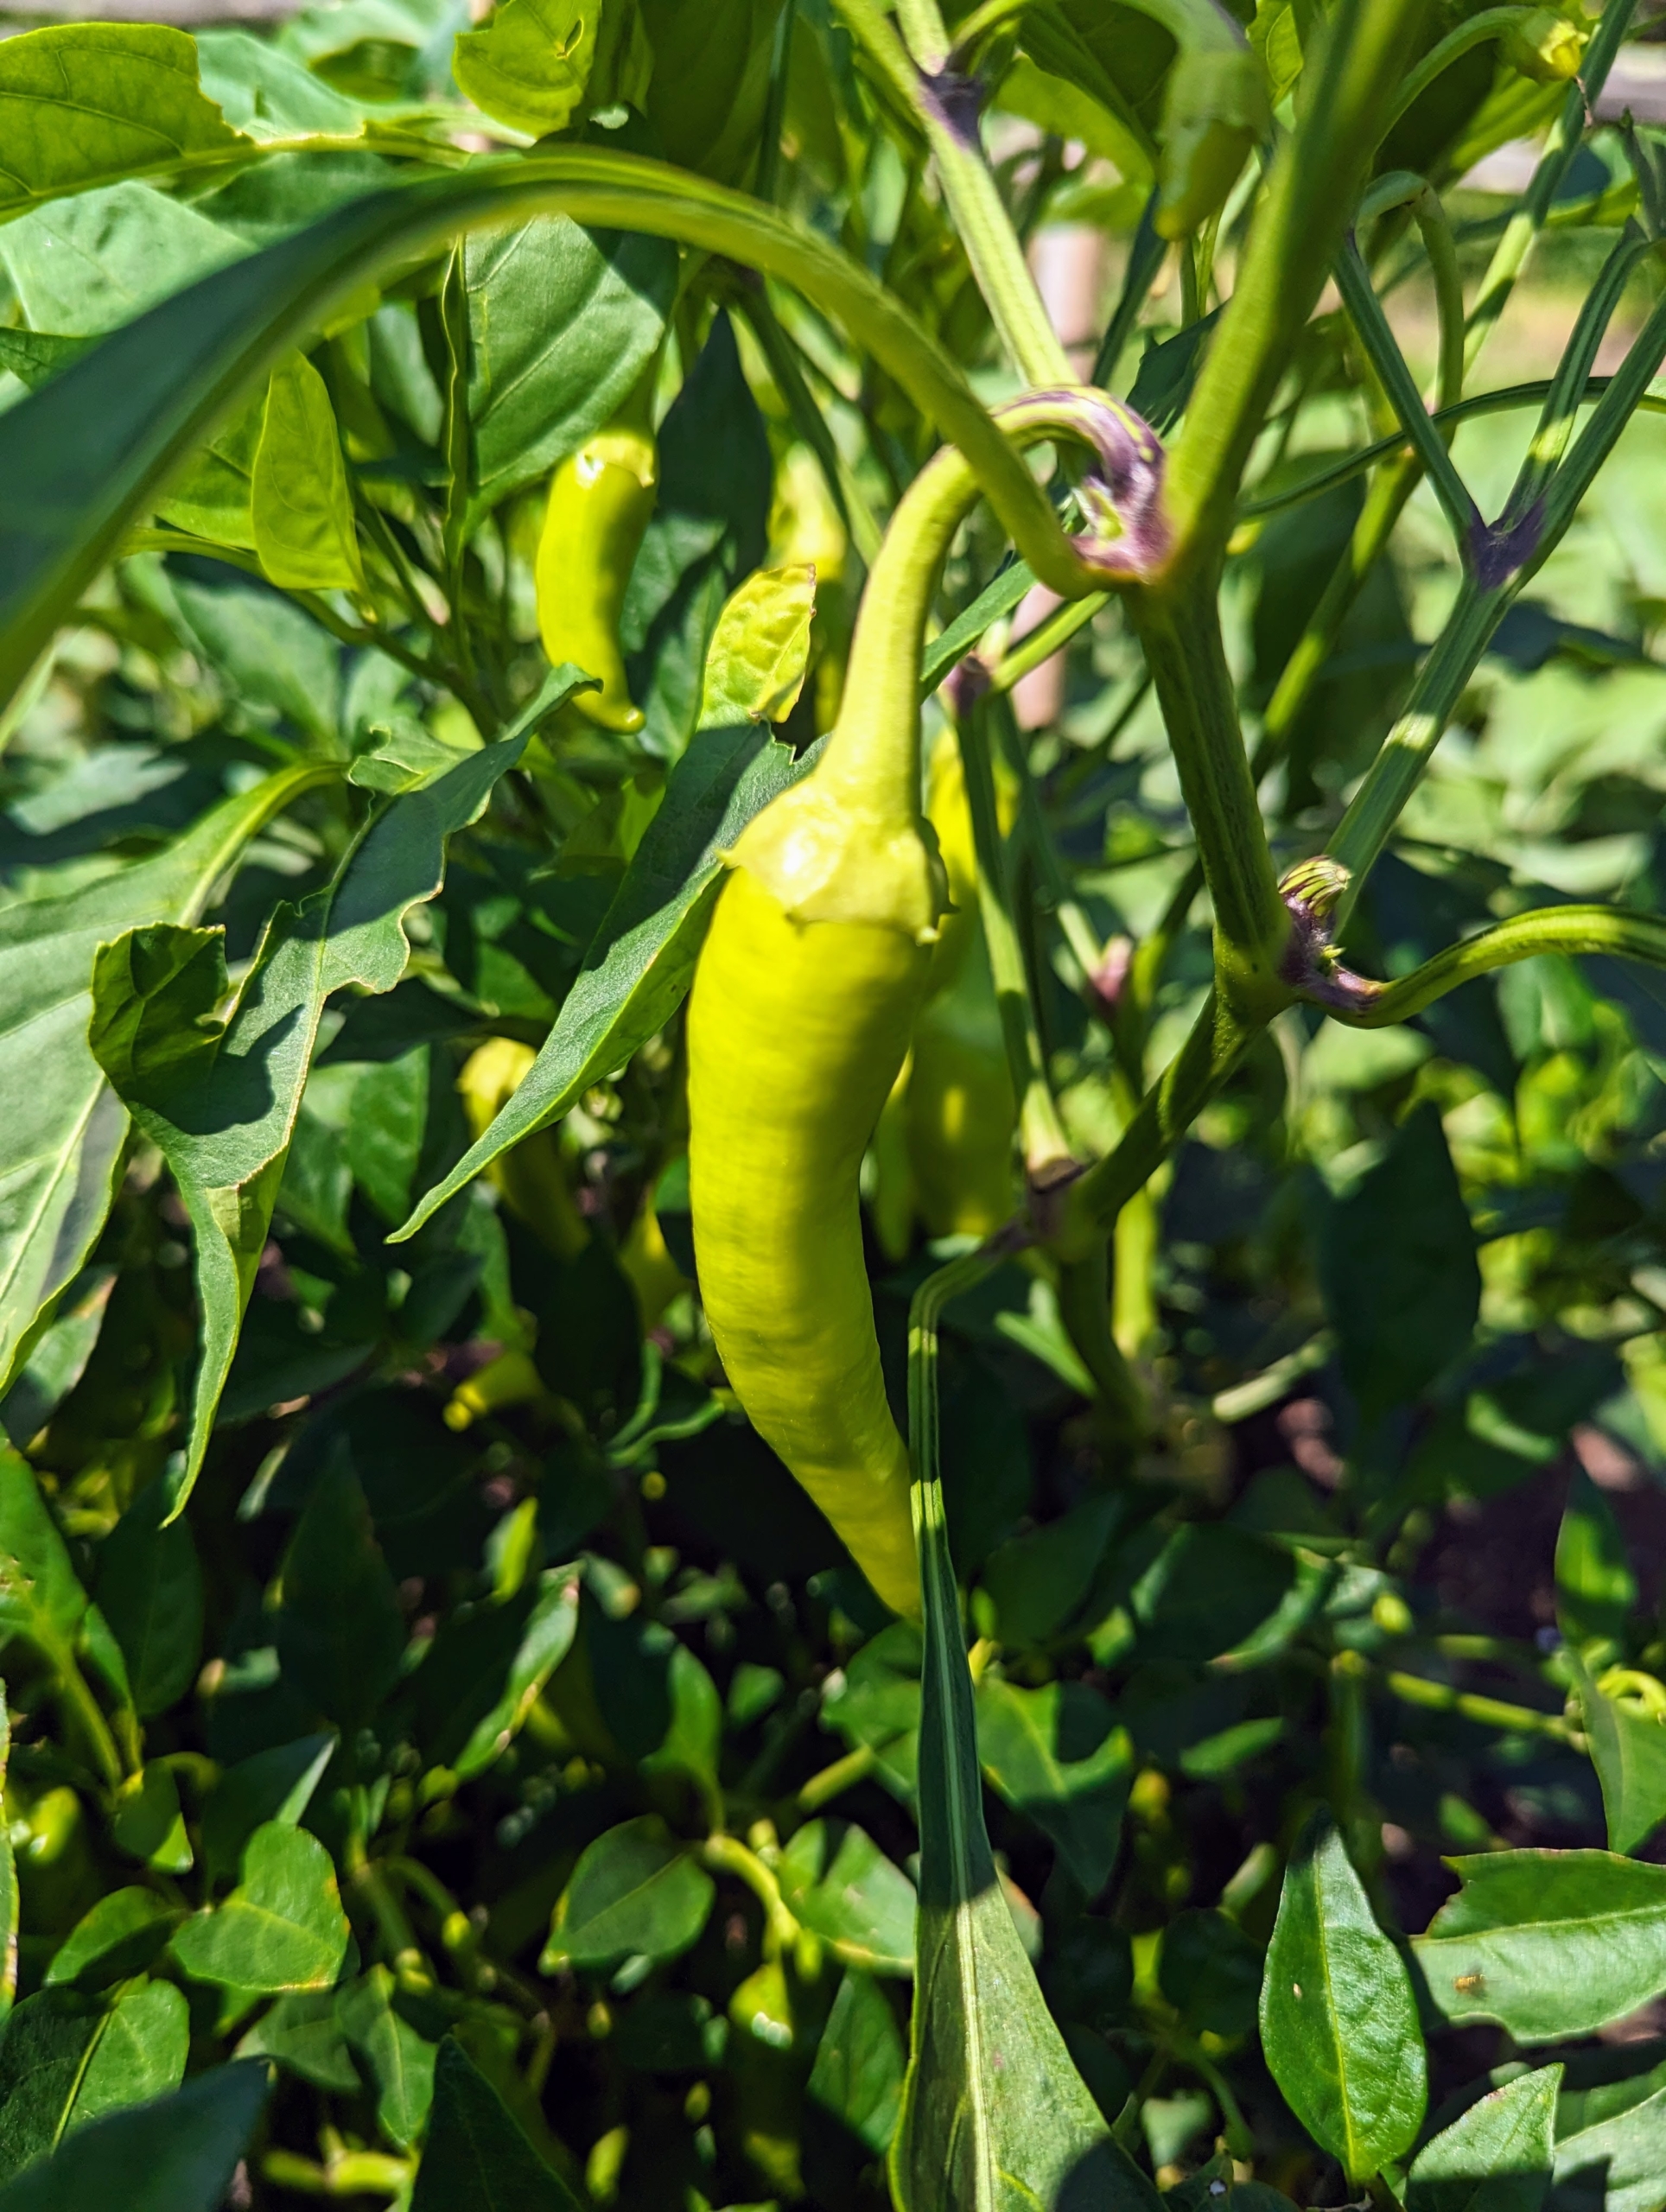
We have so many peppers growing – sweet and hot. Always be careful when picking peppers – keep the hot ones separated from the sweet ones, so there is no surprise in the kitchen.
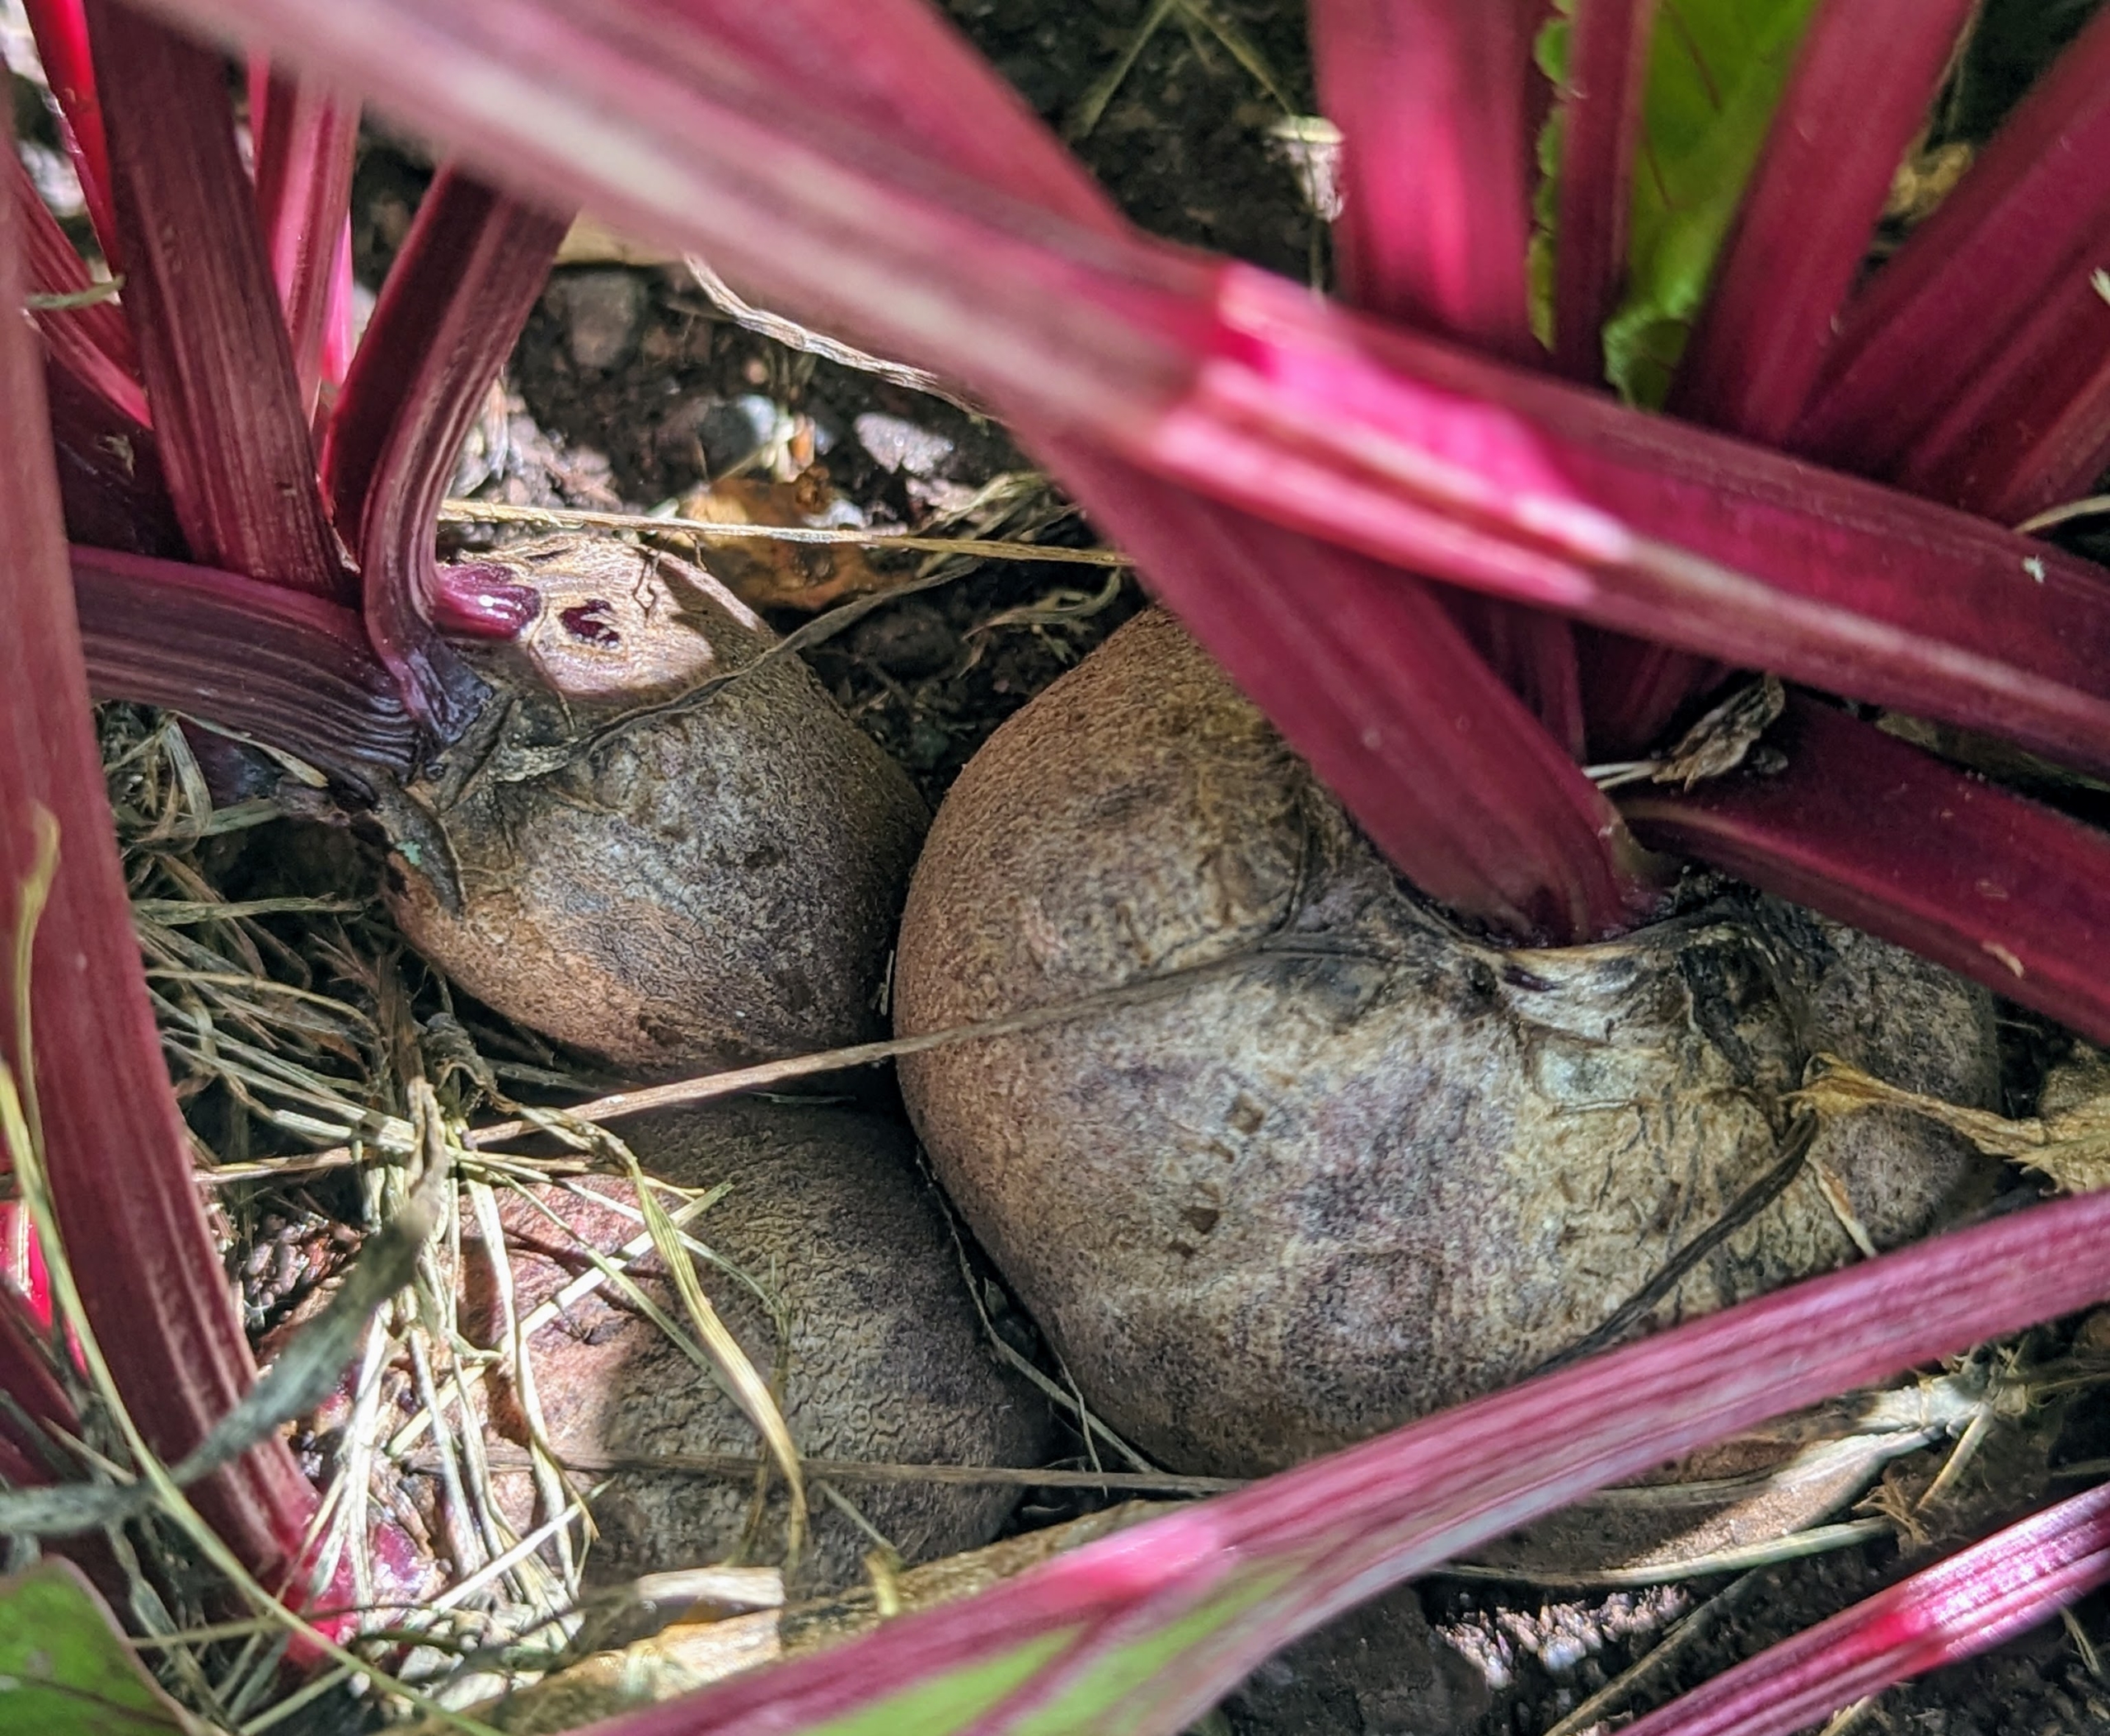
Beets – the beetroot is the taproot of the beet plant, and is often called the table beet, garden beet, red or golden beet or simply… beet. Beets are highly nutritious and very good for maintaining strong cardiovascular health. It’s low in calories, contains zero cholesterol and is rich in folates, vitamin-A, B-complex and antioxidants.
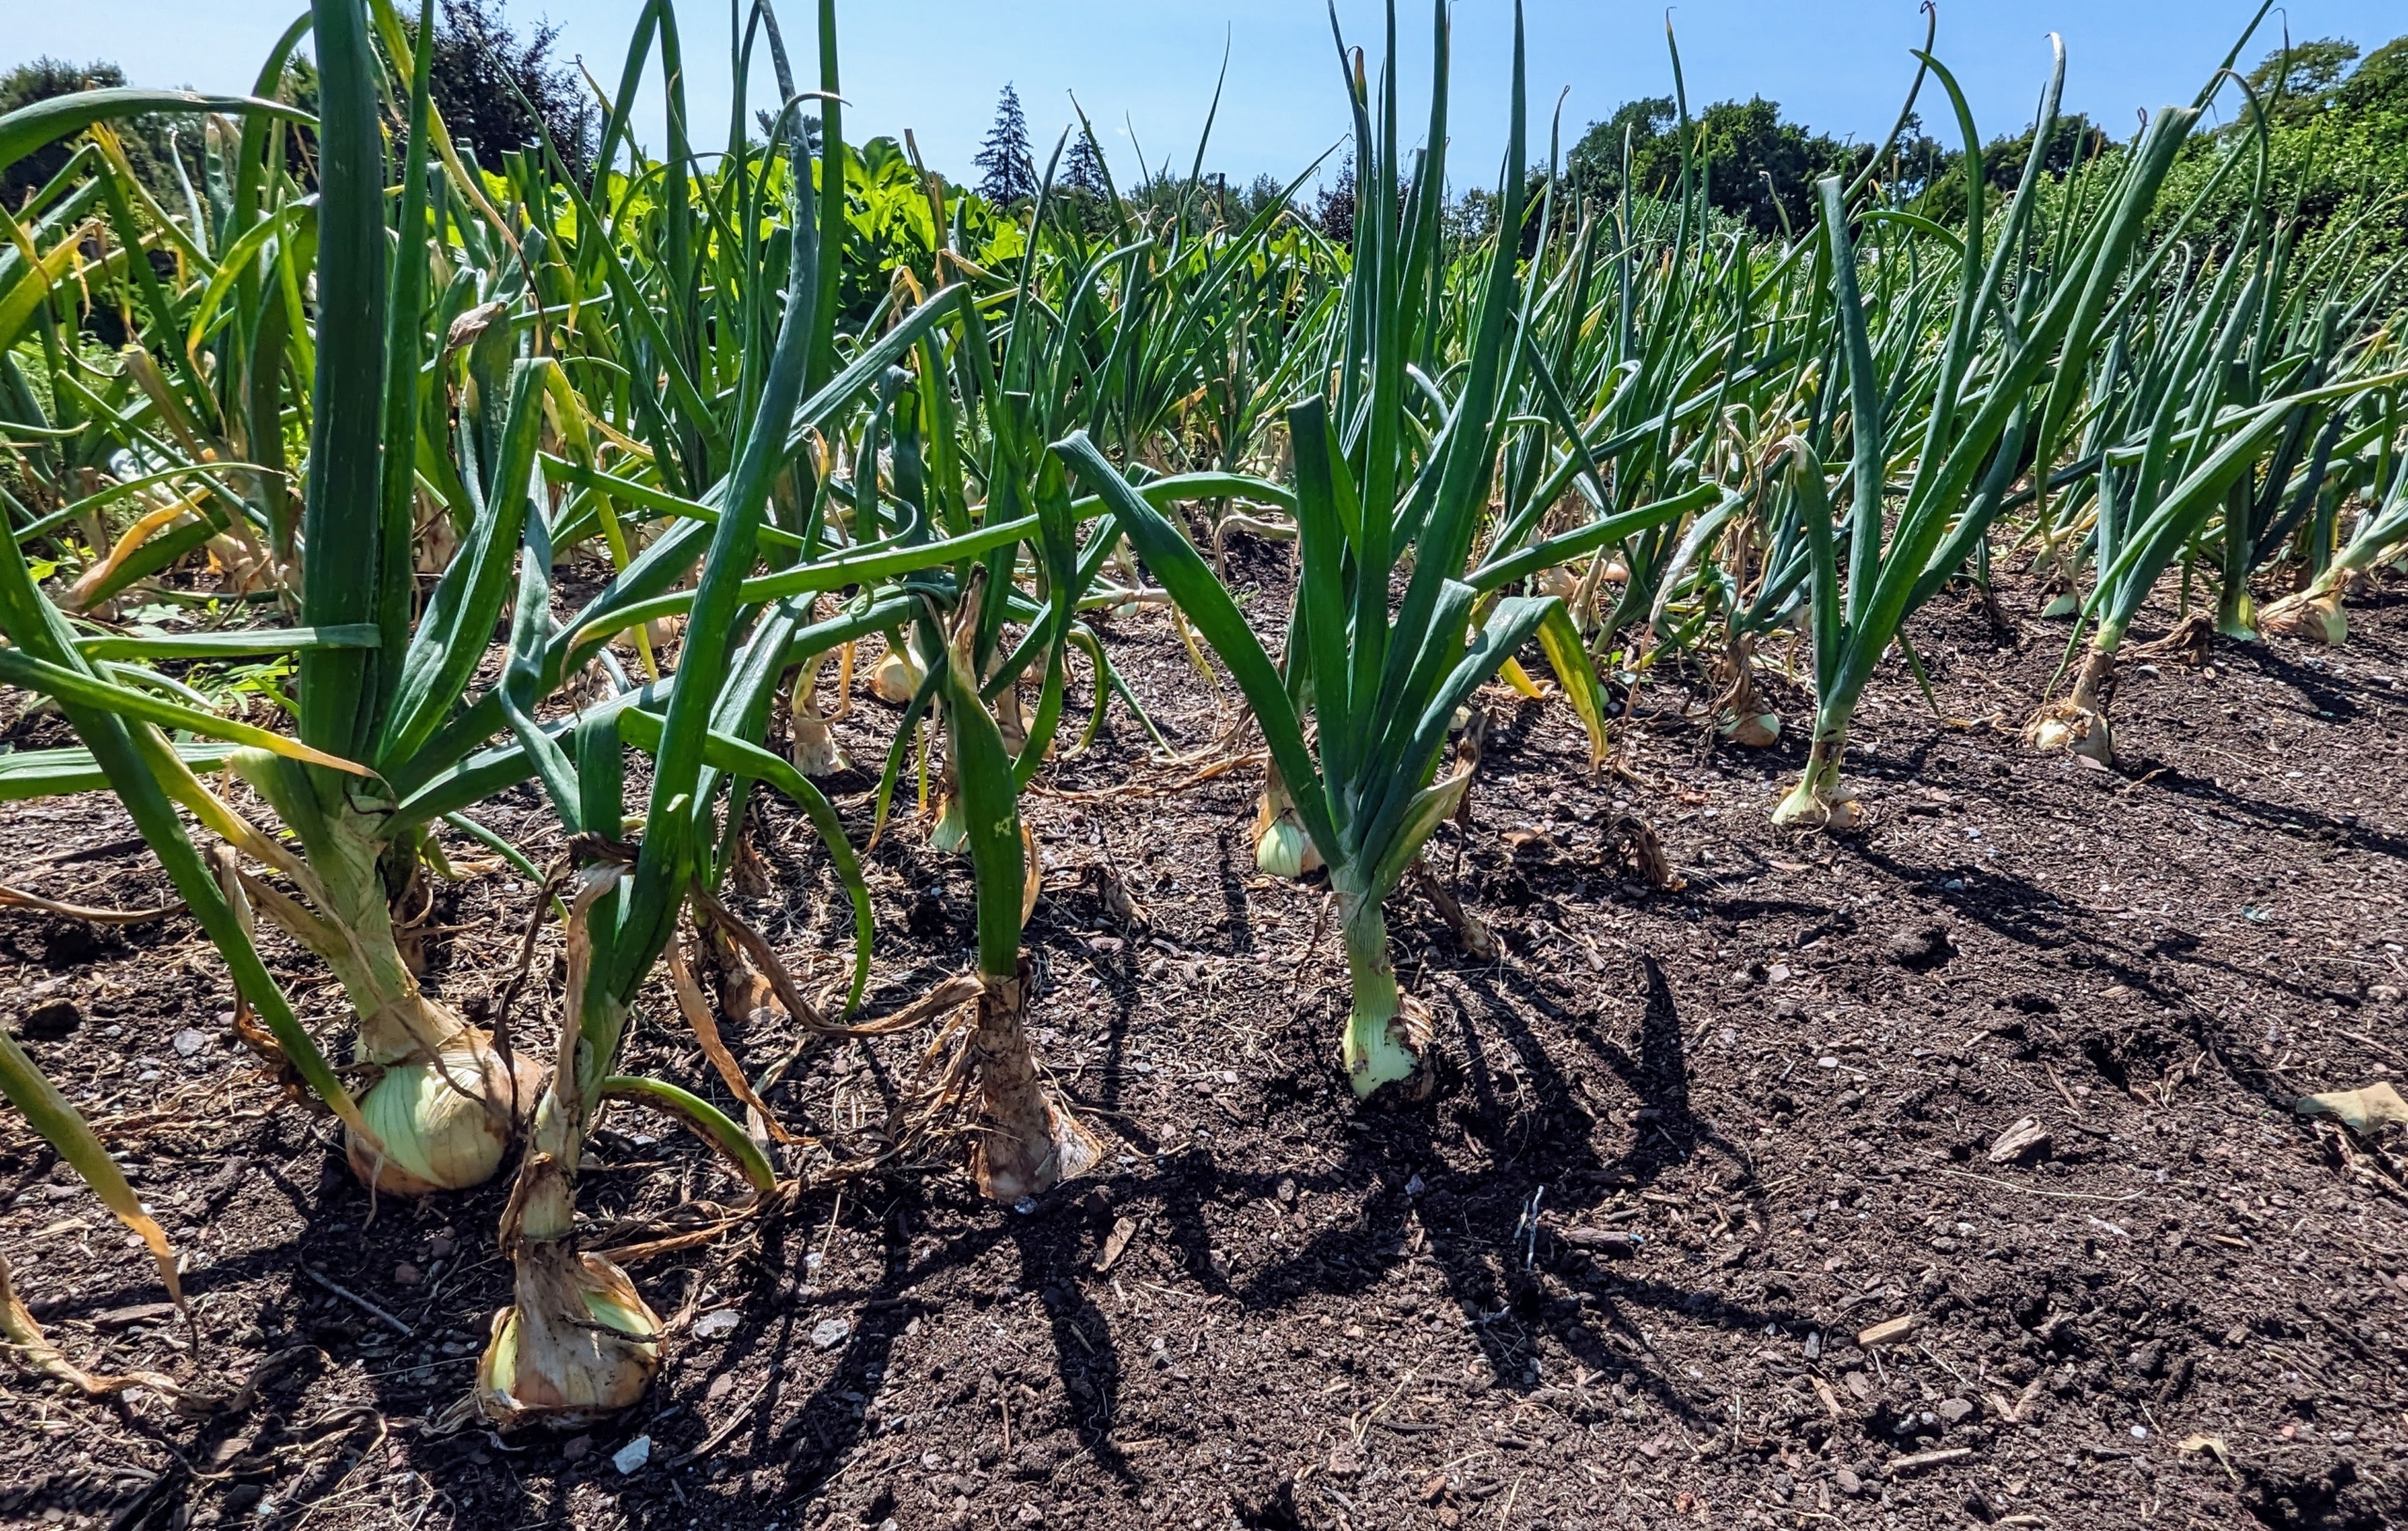
Our onions are doing excellently also. We planted a lot of white, yellow and red onions.
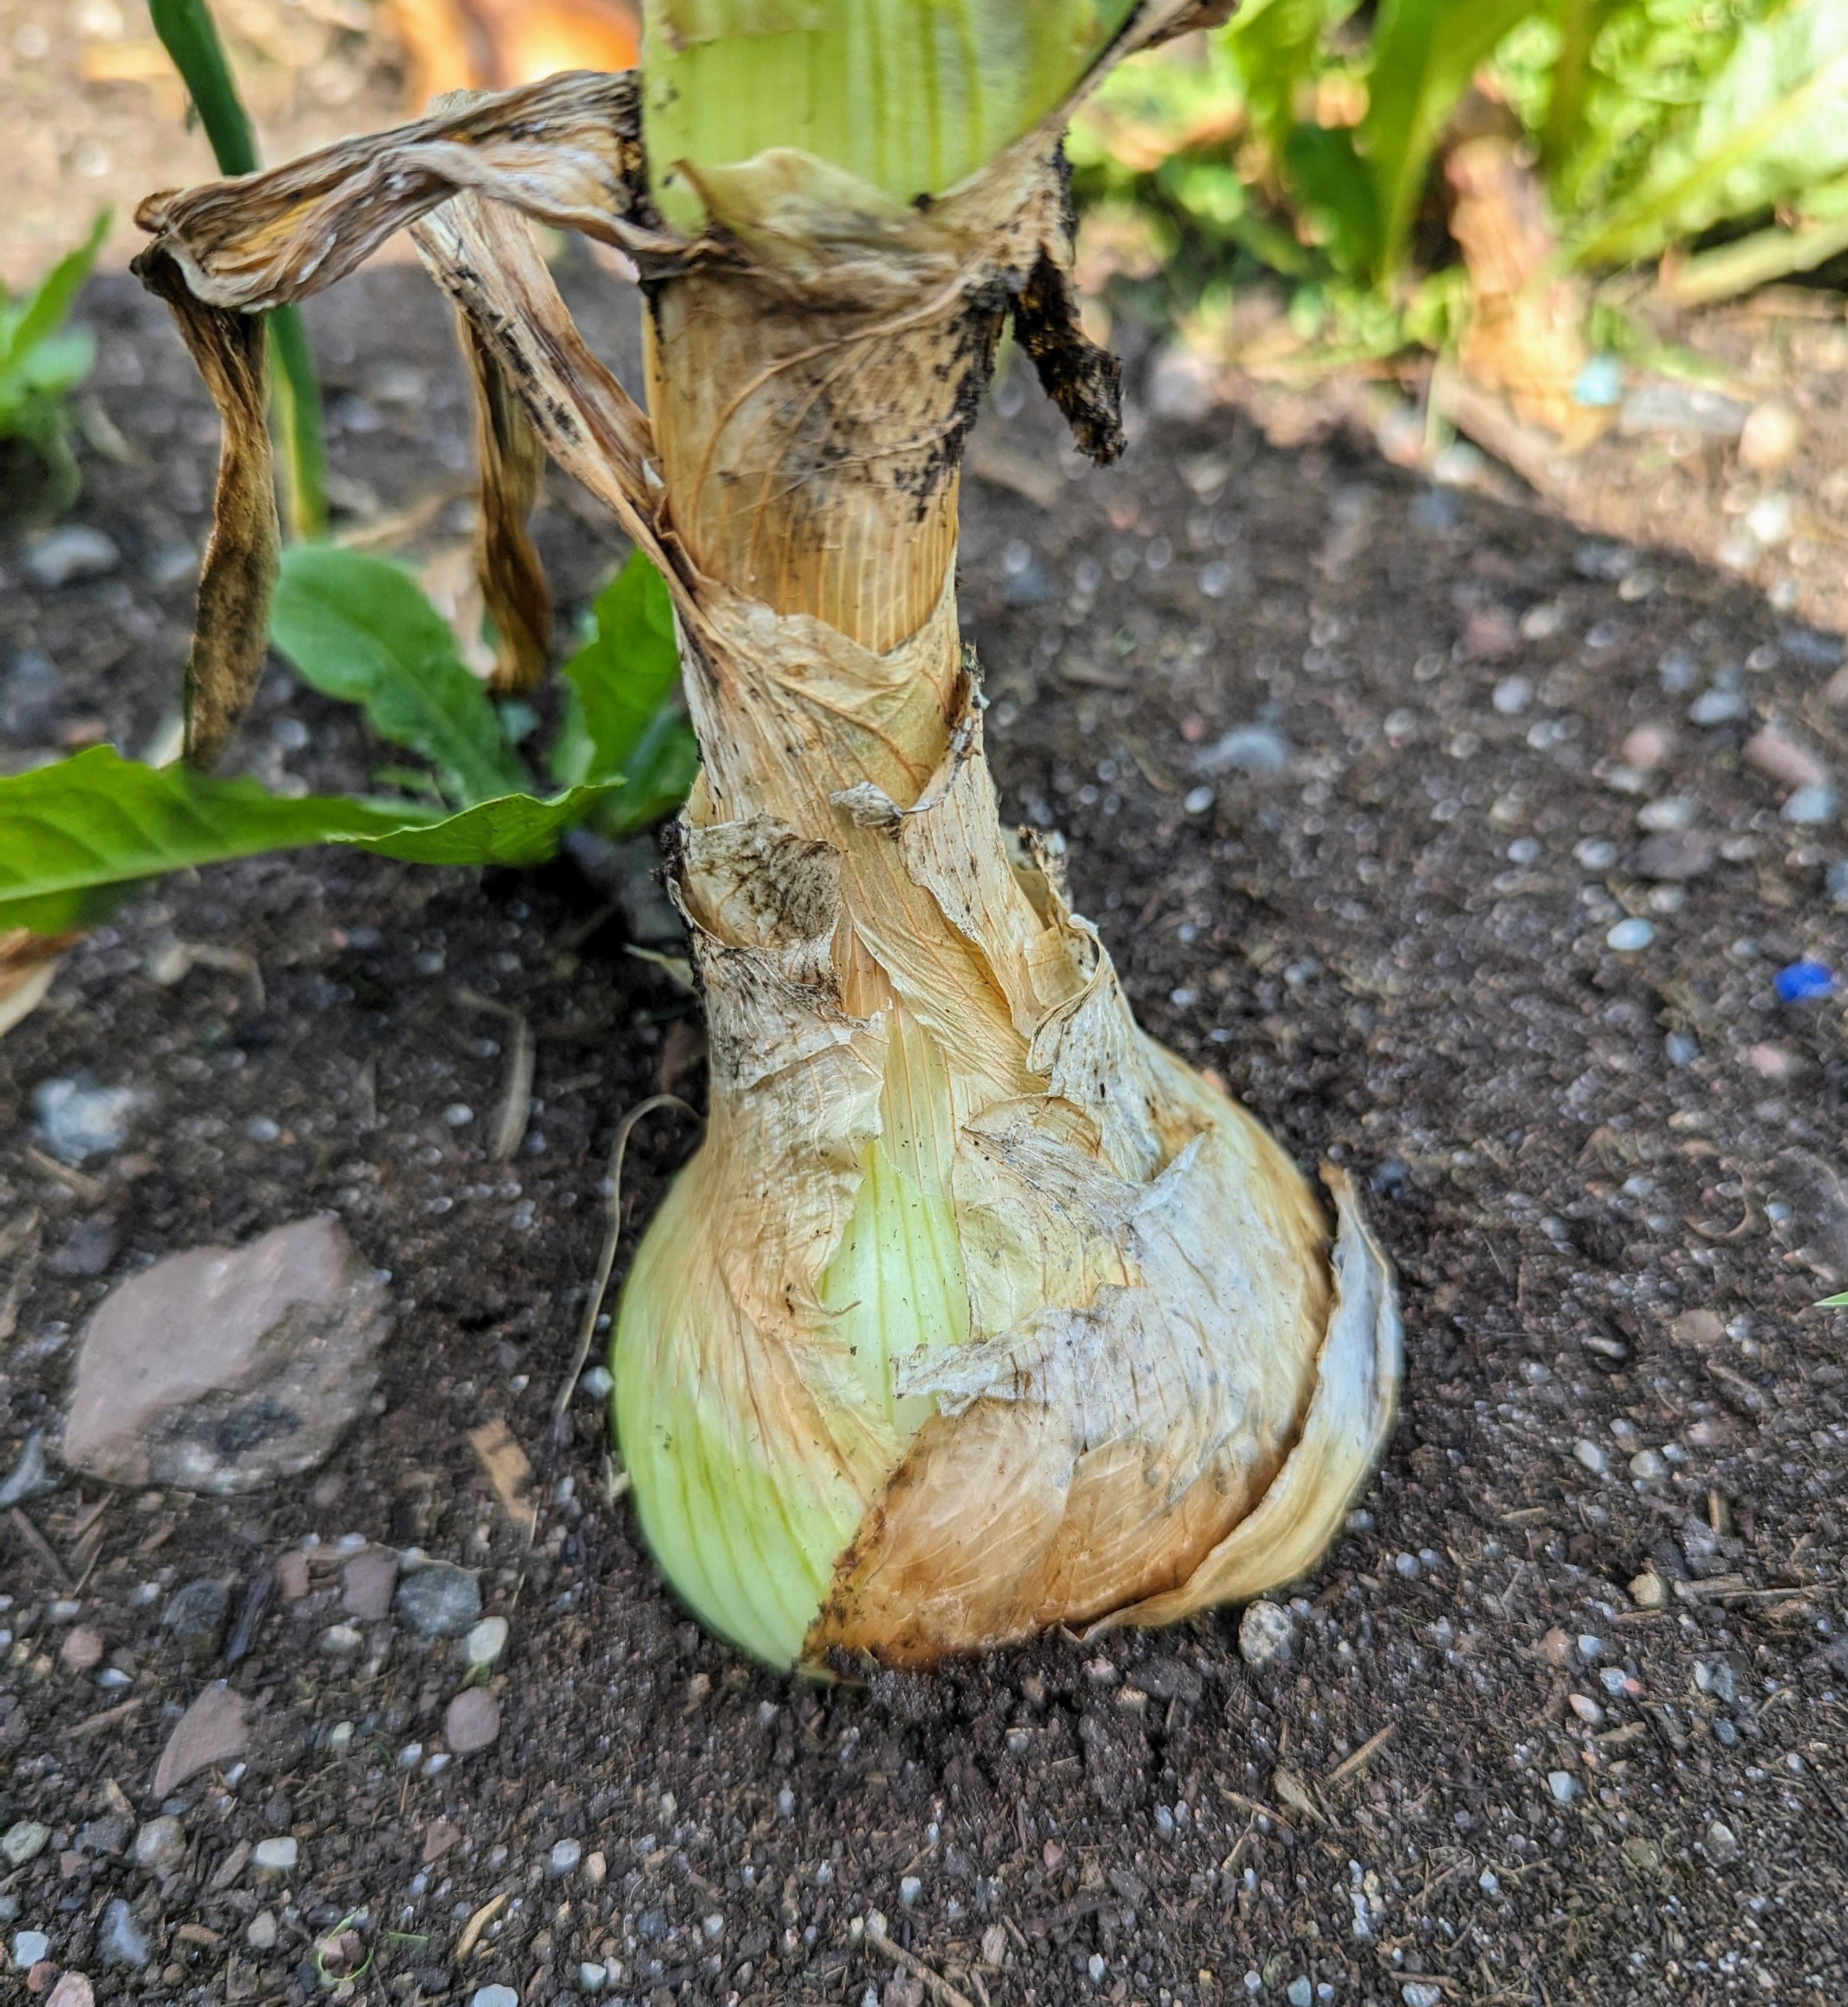
Here’s a closer look at one of our onions. Onions are harvested when the underground bulbs are mature and flavorful. The telltale harvest sign is when the stalks turn yellowish or brown, dry out a bit, and topple over.
There were a few ready to pick. This is our first harvest of onions.
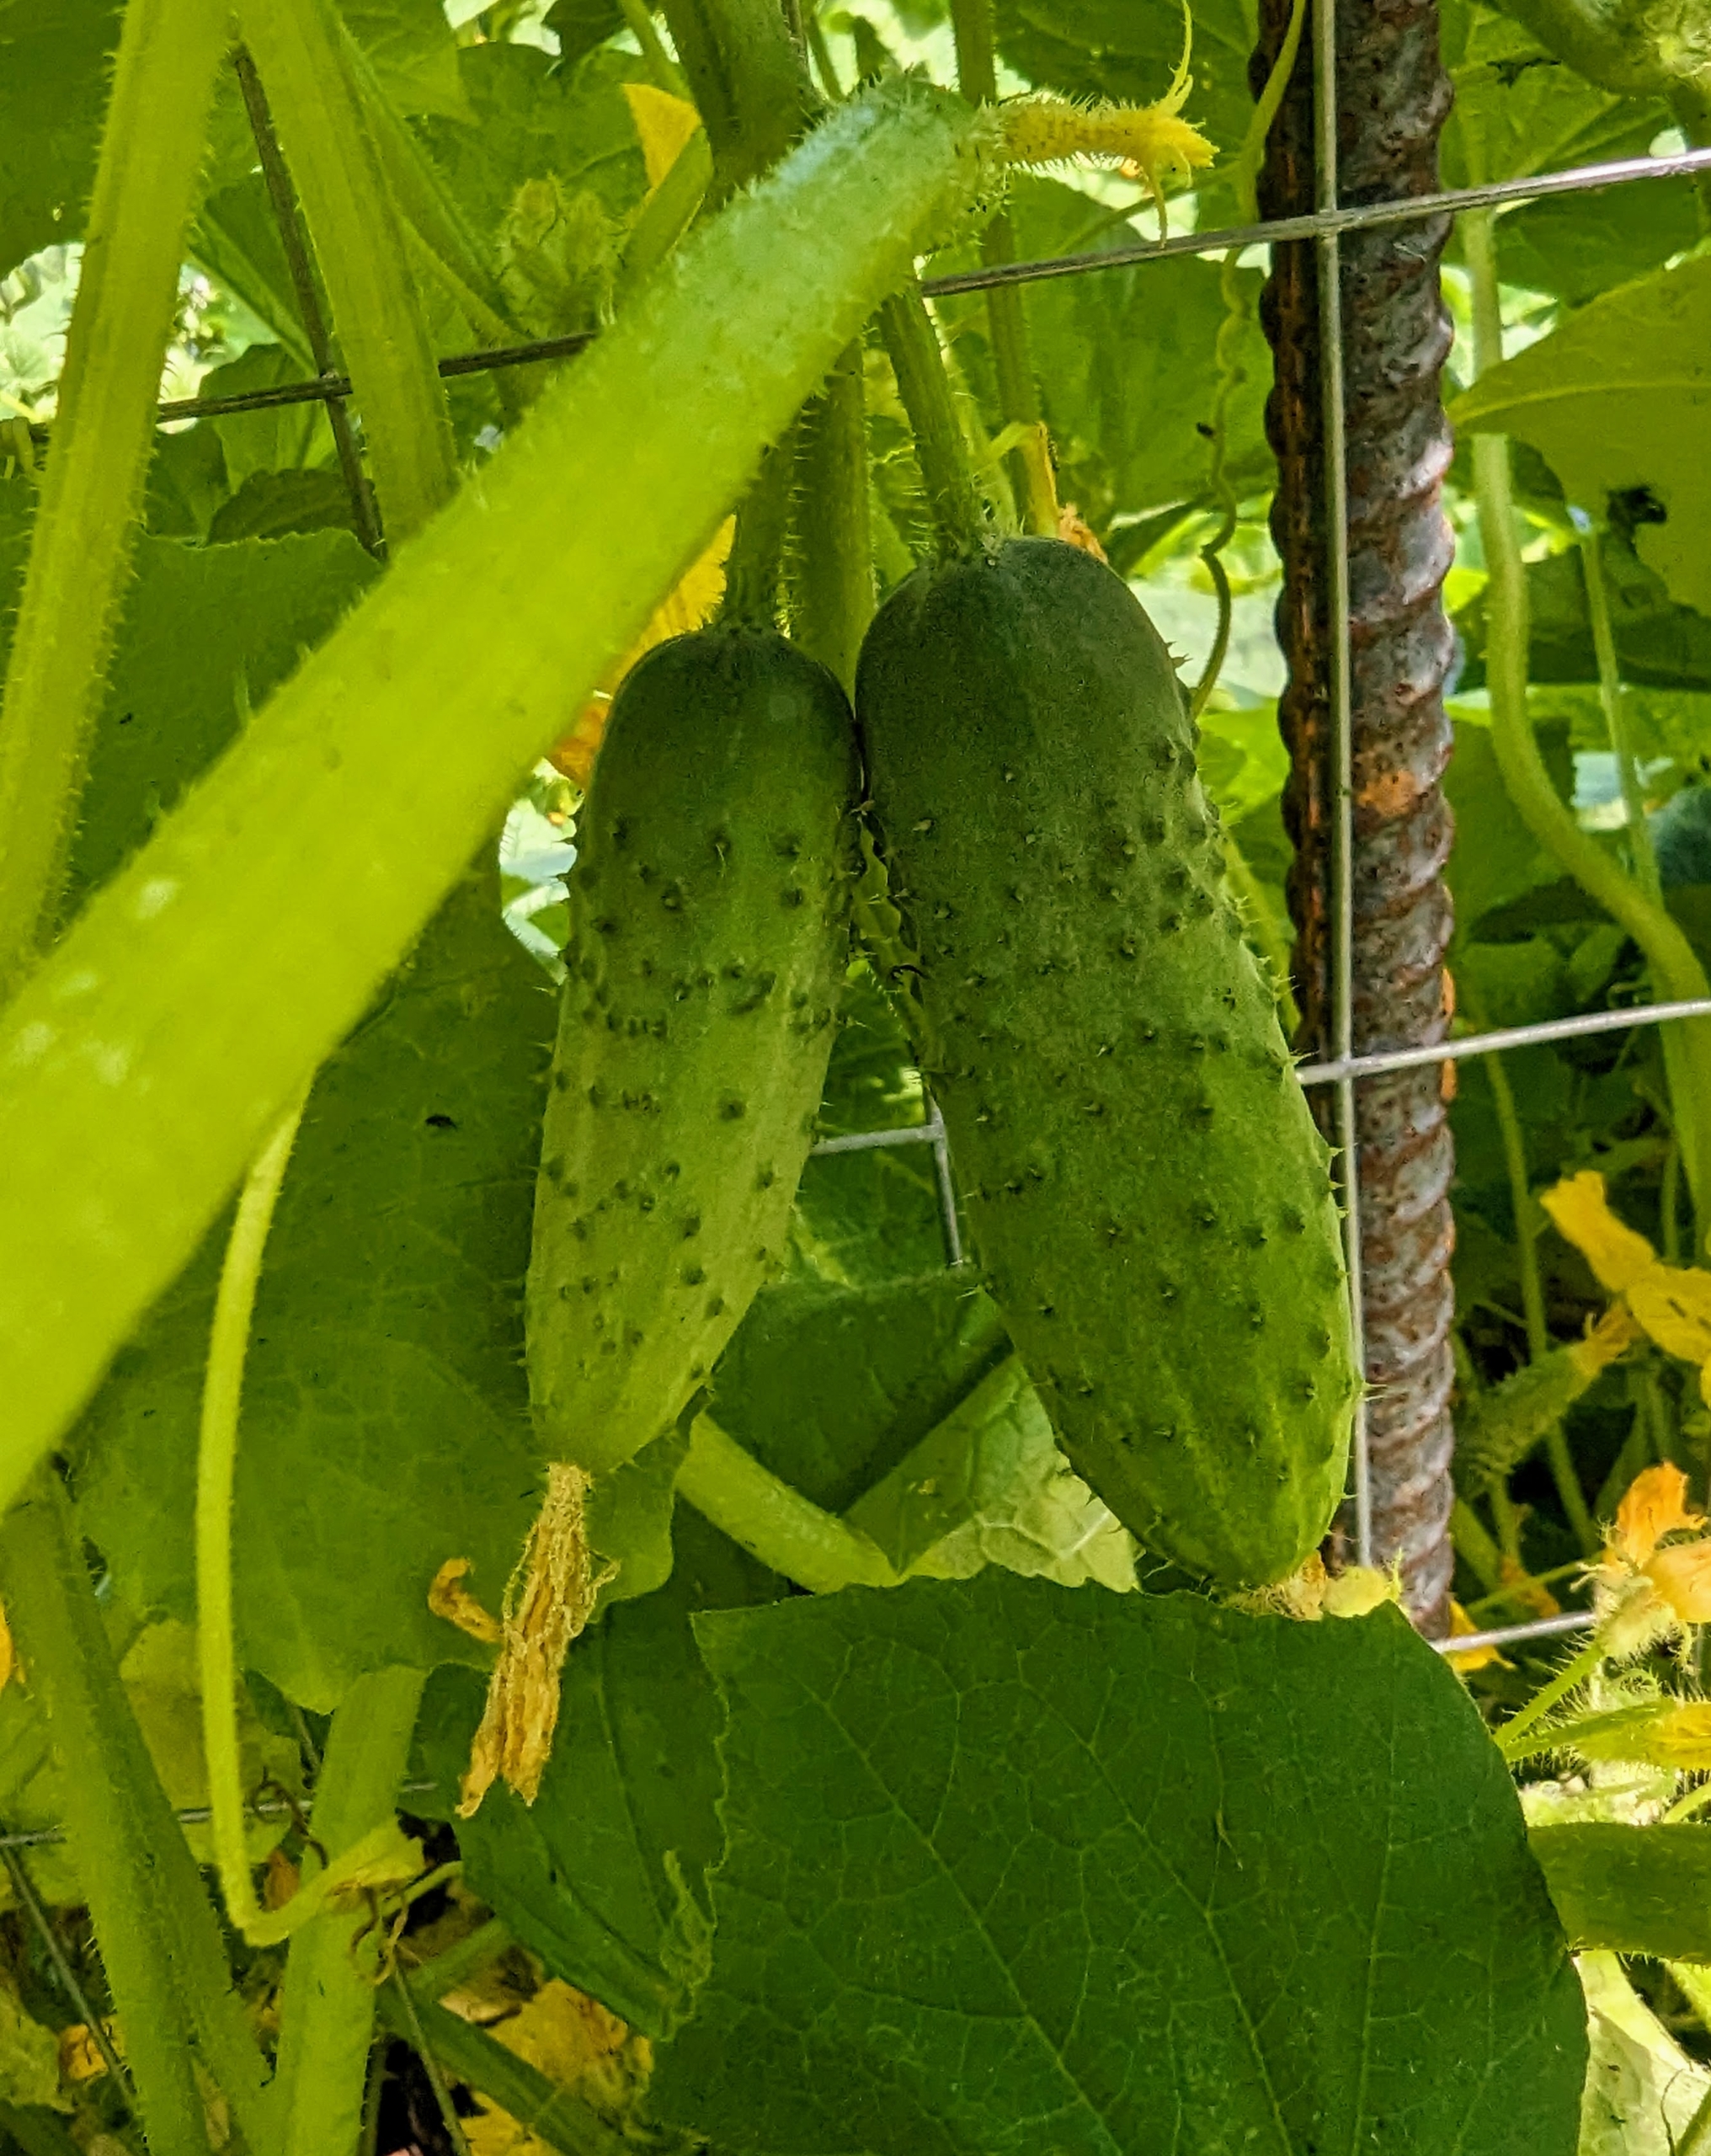
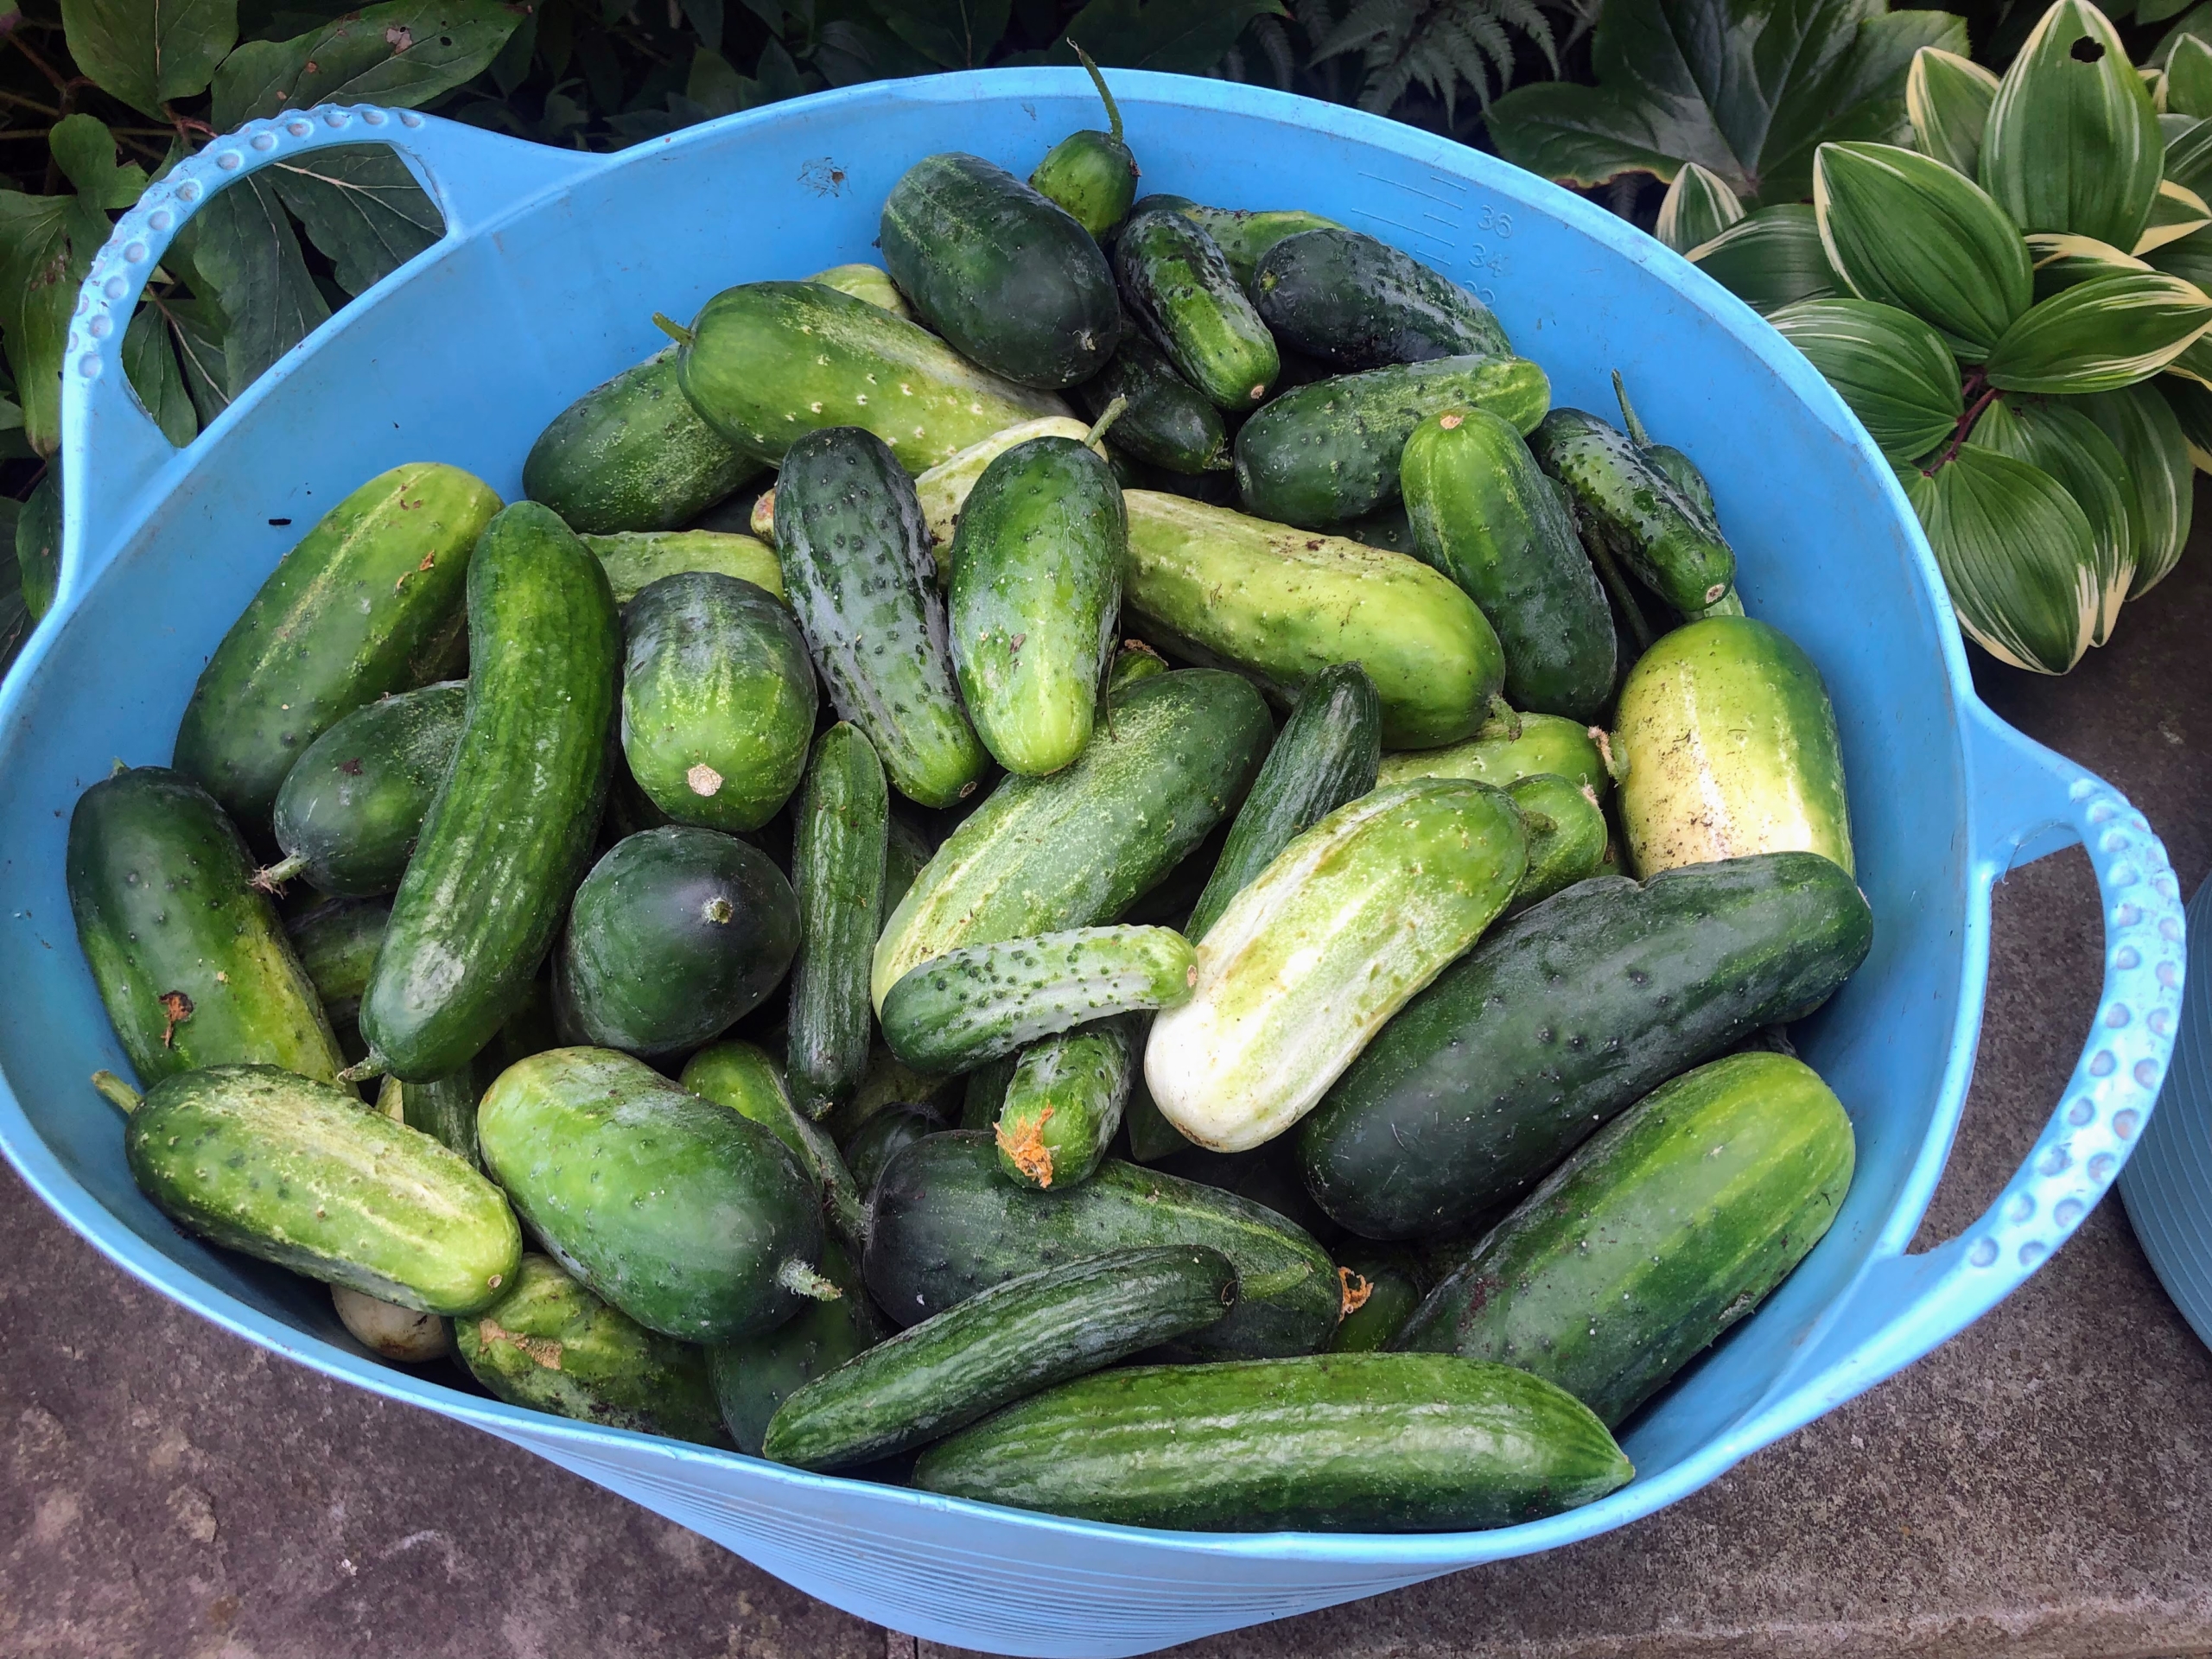
Look at the cucumbers! These are perfect, and we have so many this season. All growing in the center of the garden on our fence-trellis.
Cucumbers, Cucumis sativus, are great for pickling – I try to find time for pickling every year.
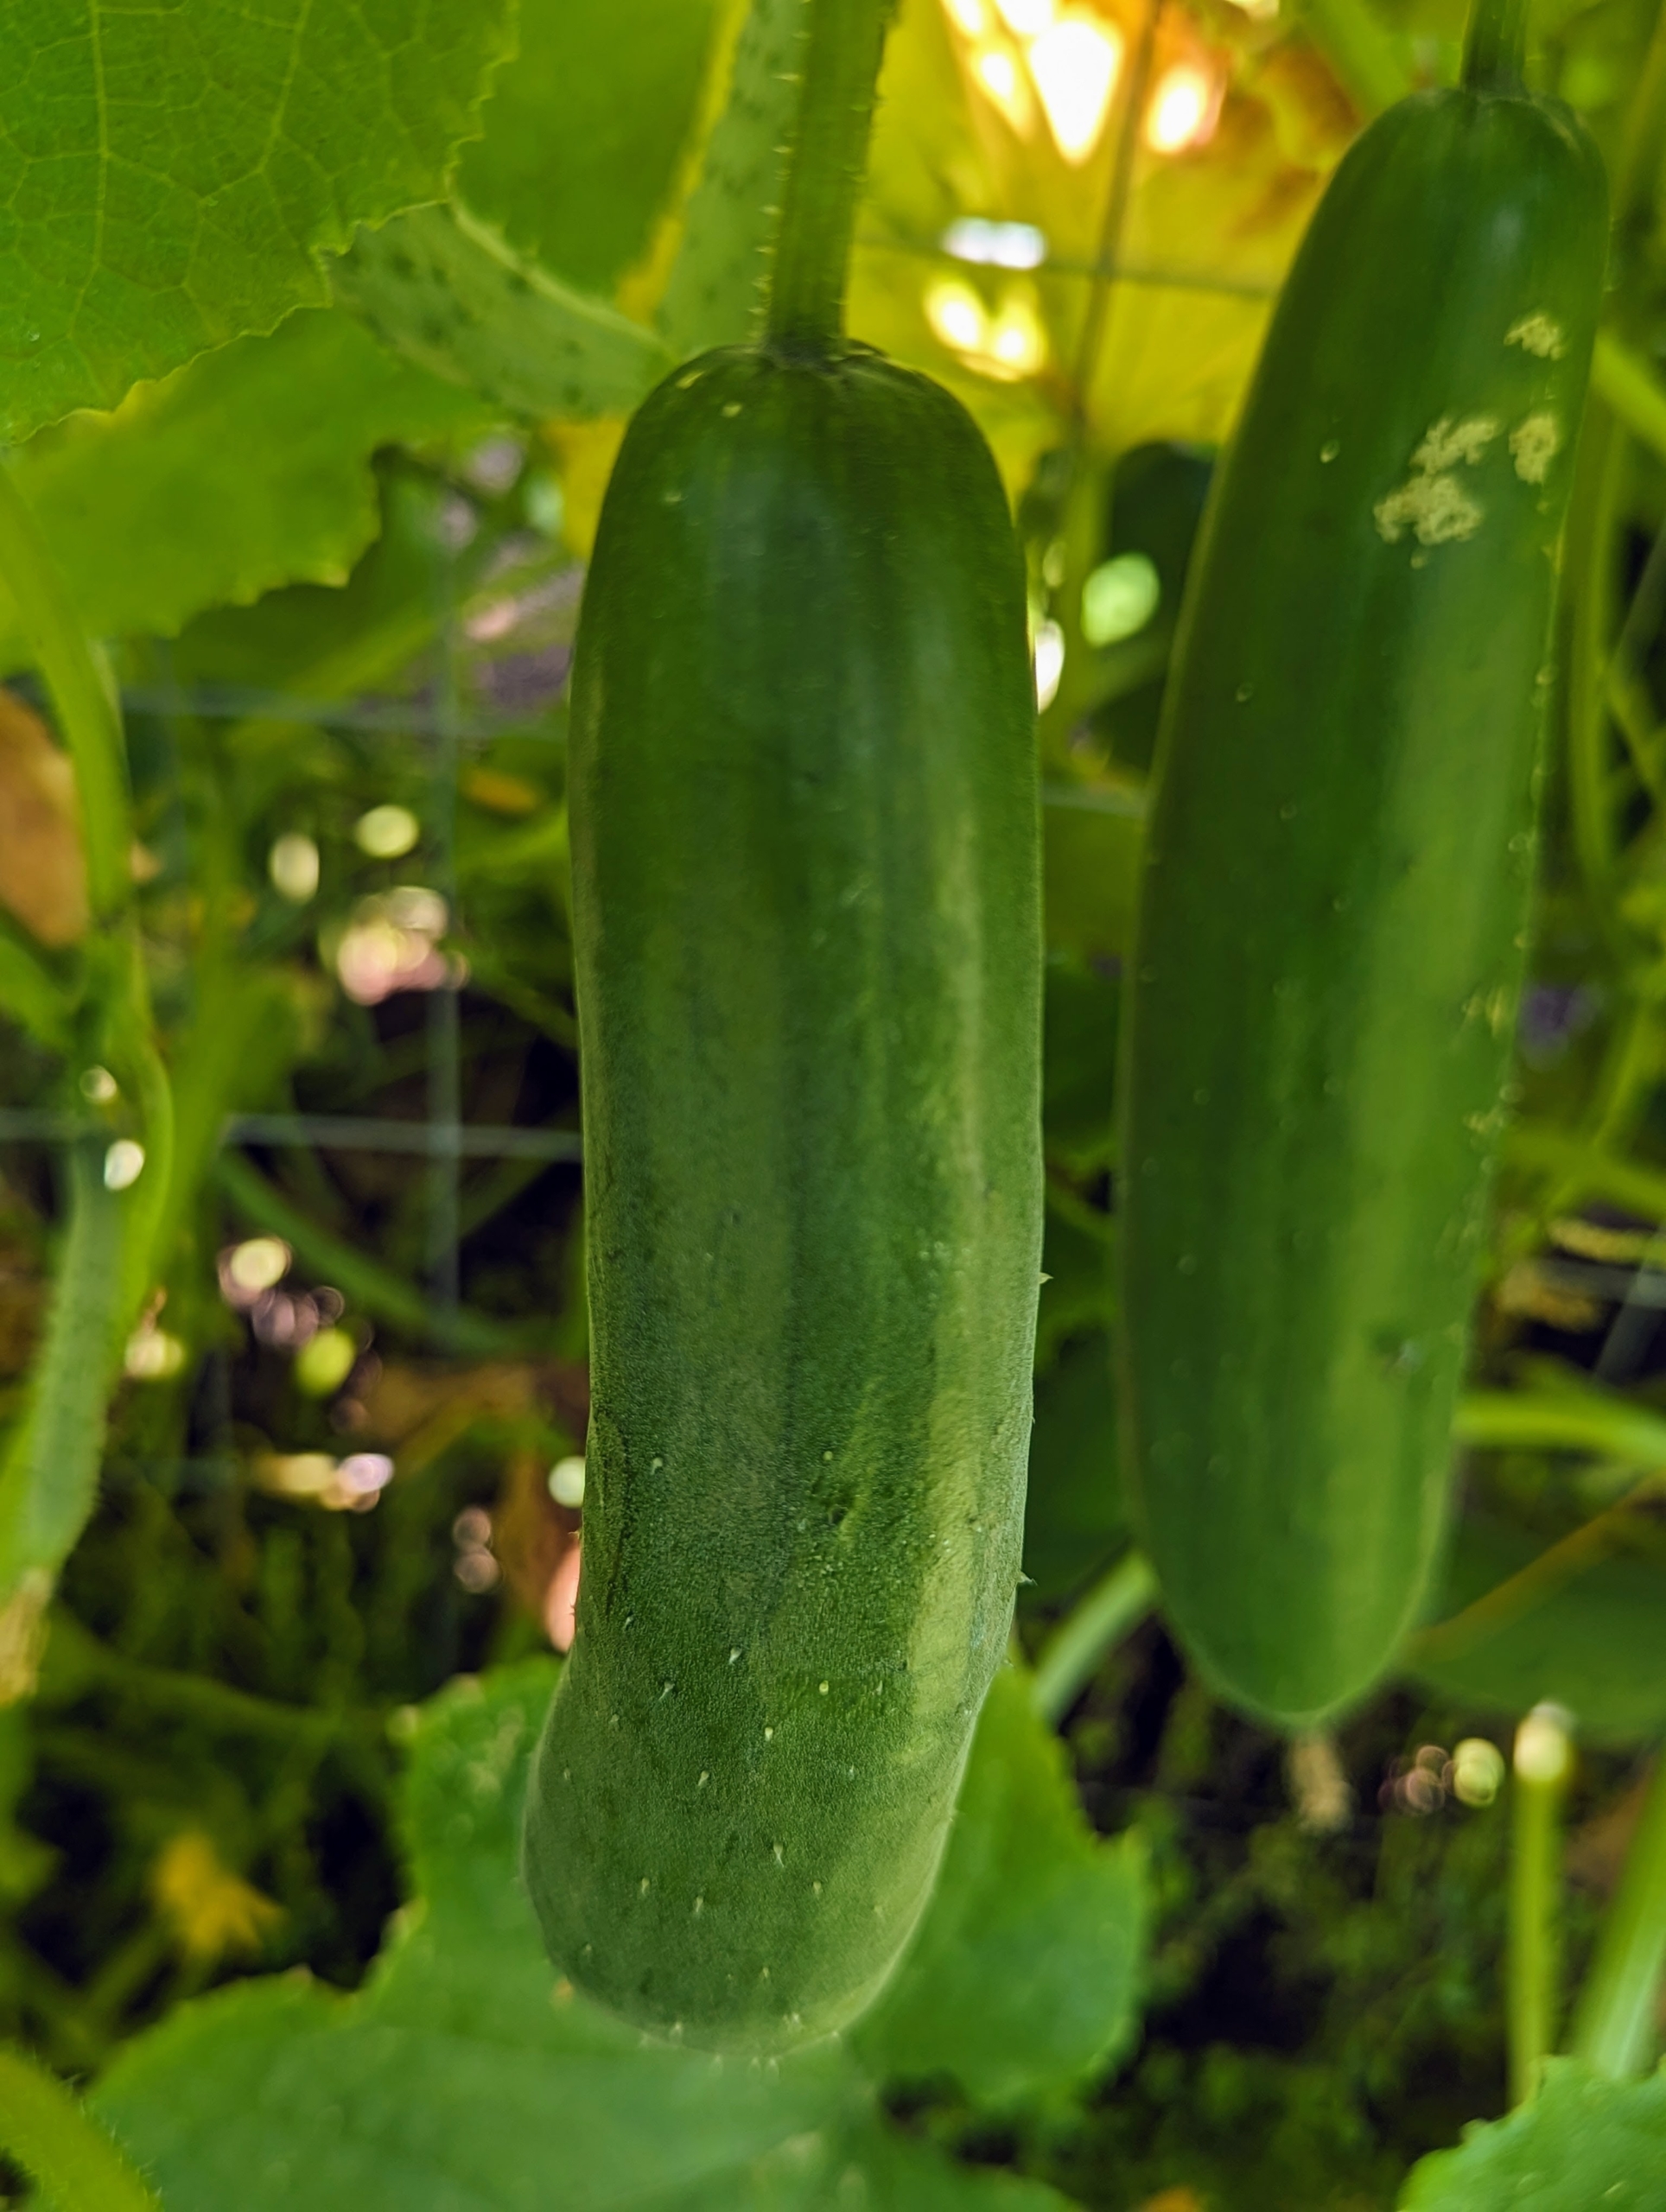
Cucumbers require a long growing season, and most are ready for harvest in 50 to 70 days from planting. The fruits ripen at different times on the vine, but it is essential to pick them when they are ready. If they are left on the vine too long, they tend to taste bitter.
One can harvest any time of day, but when possible, the best picking time is early morning, when the sun is just clearing the eastern horizon and greens are still cool and dew-covered from the previous night.
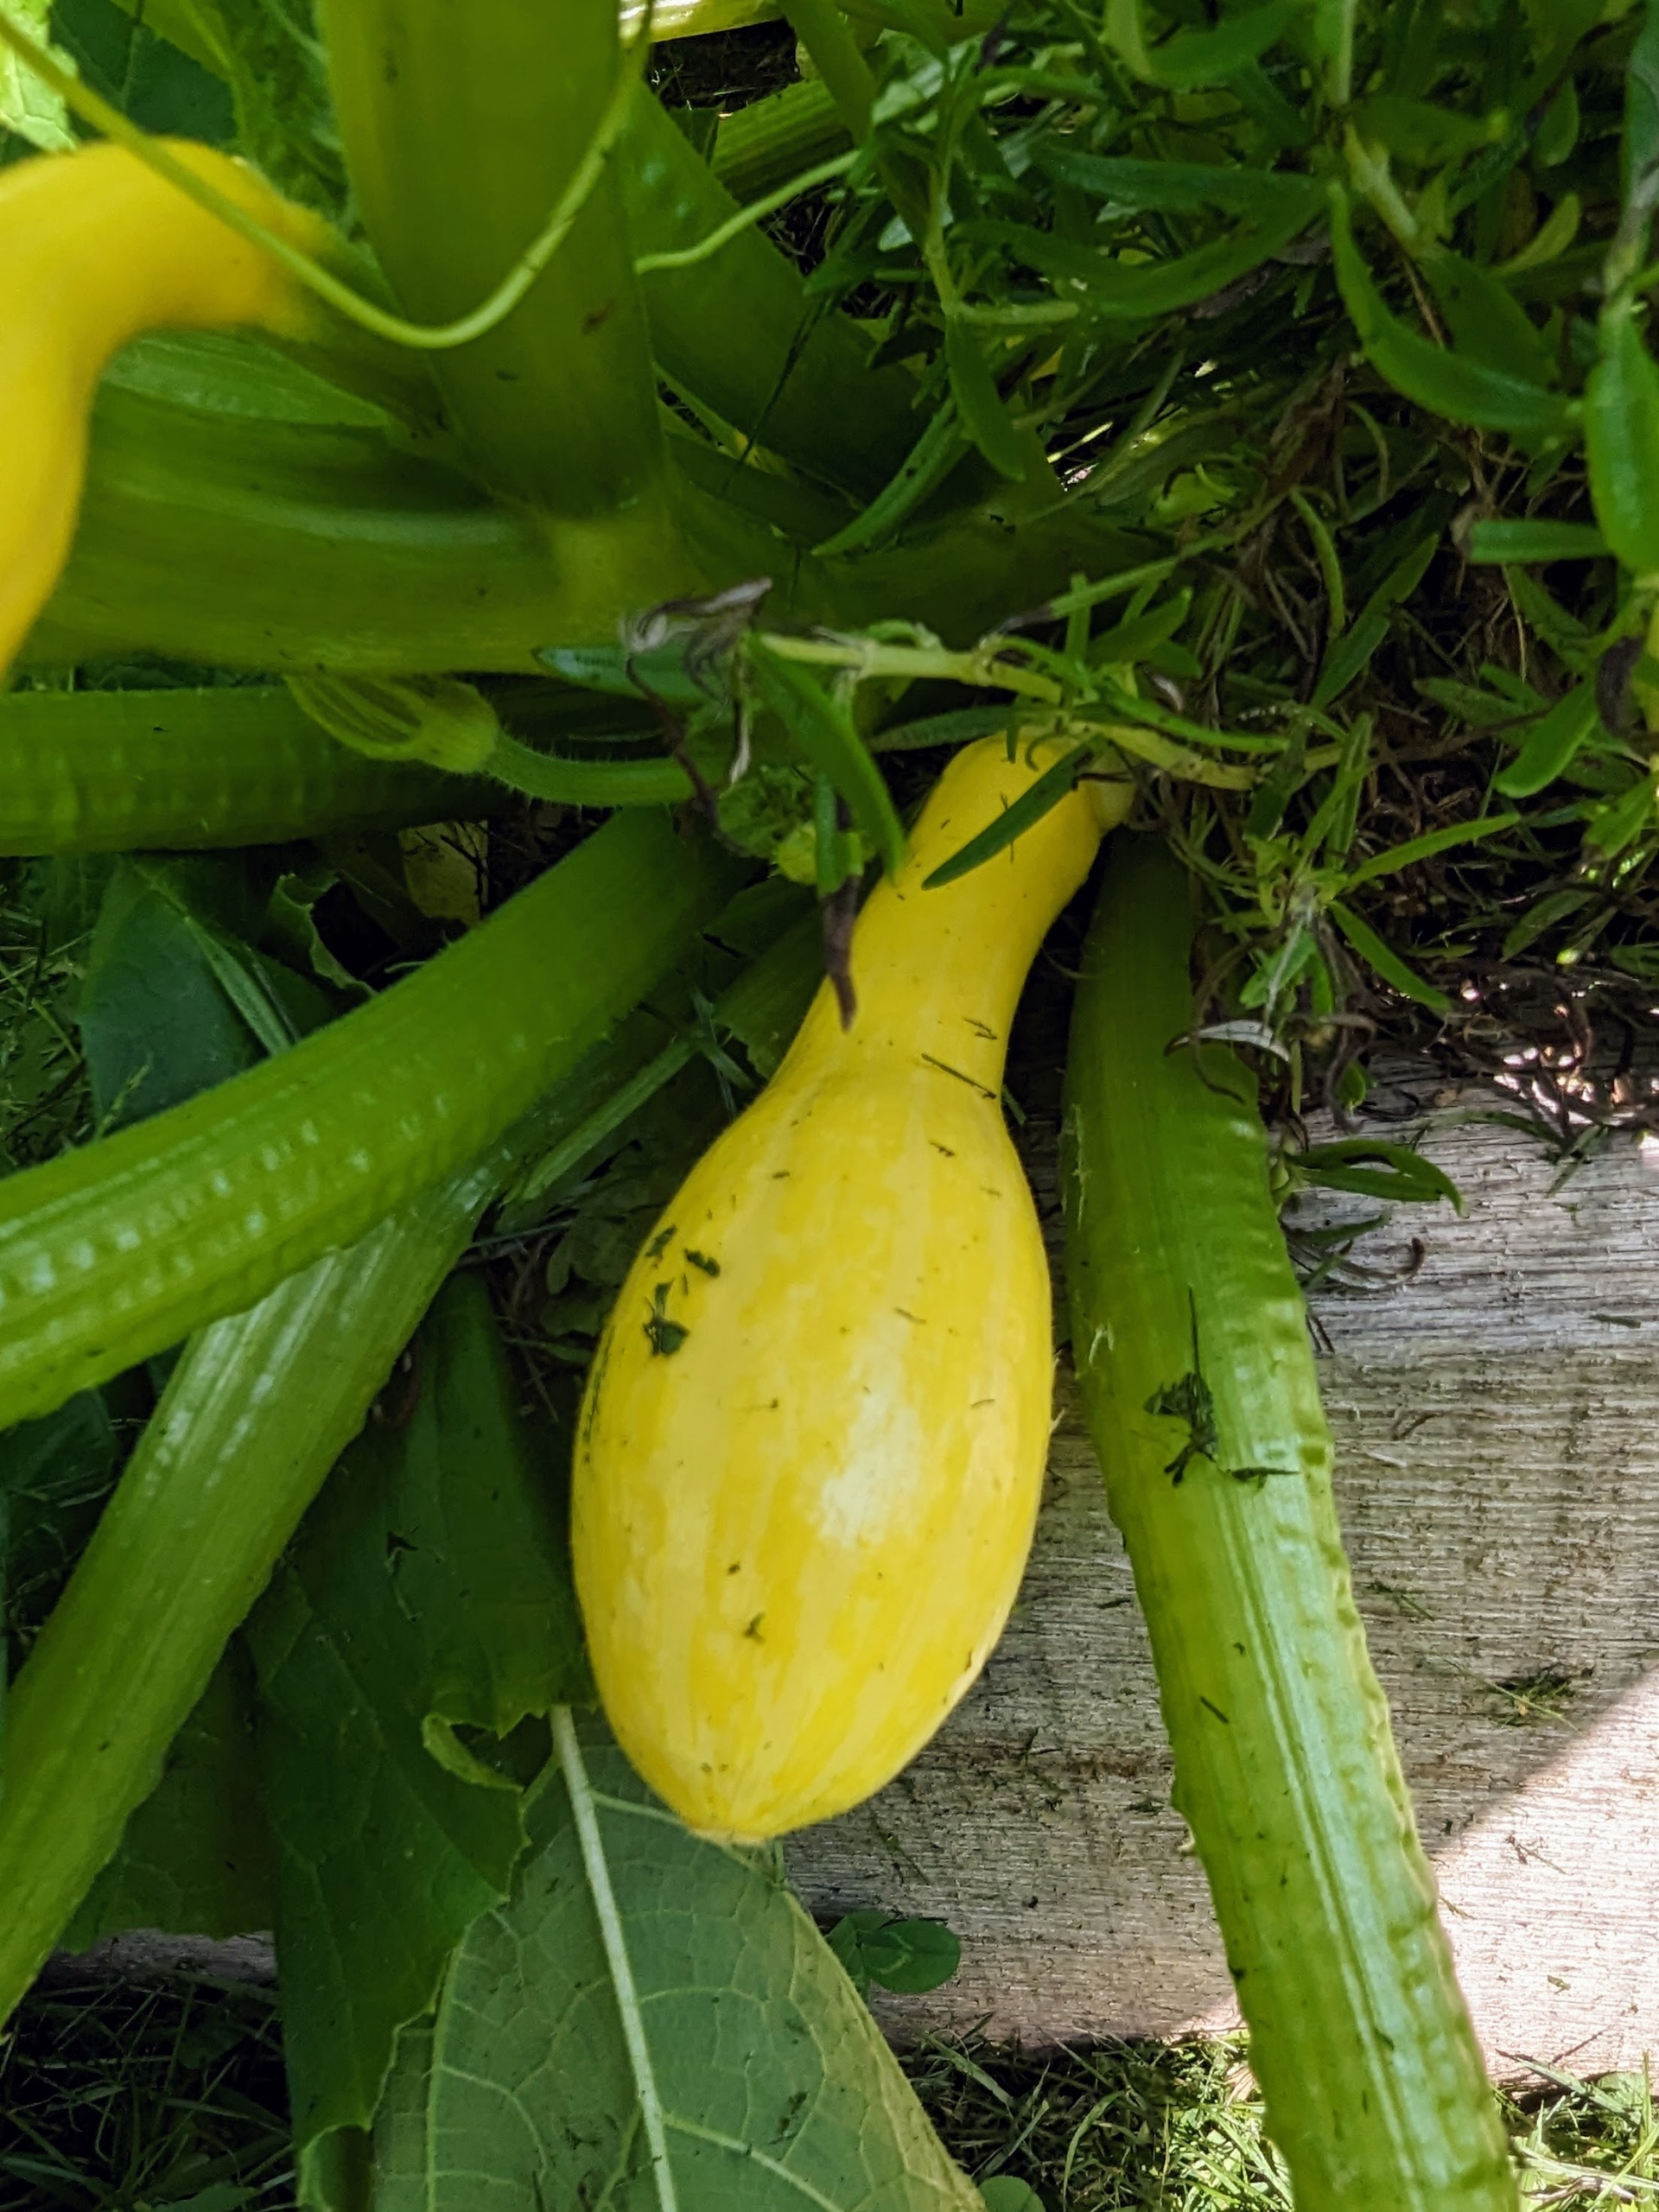
And this yer, we’ve had bounties of summer squash for all to share.
Our bed of kale is still going strong – very pretty with ruffled leaves. Kale or leaf cabbage is a group of vegetable cultivars within the plant species Brassica oleracea.
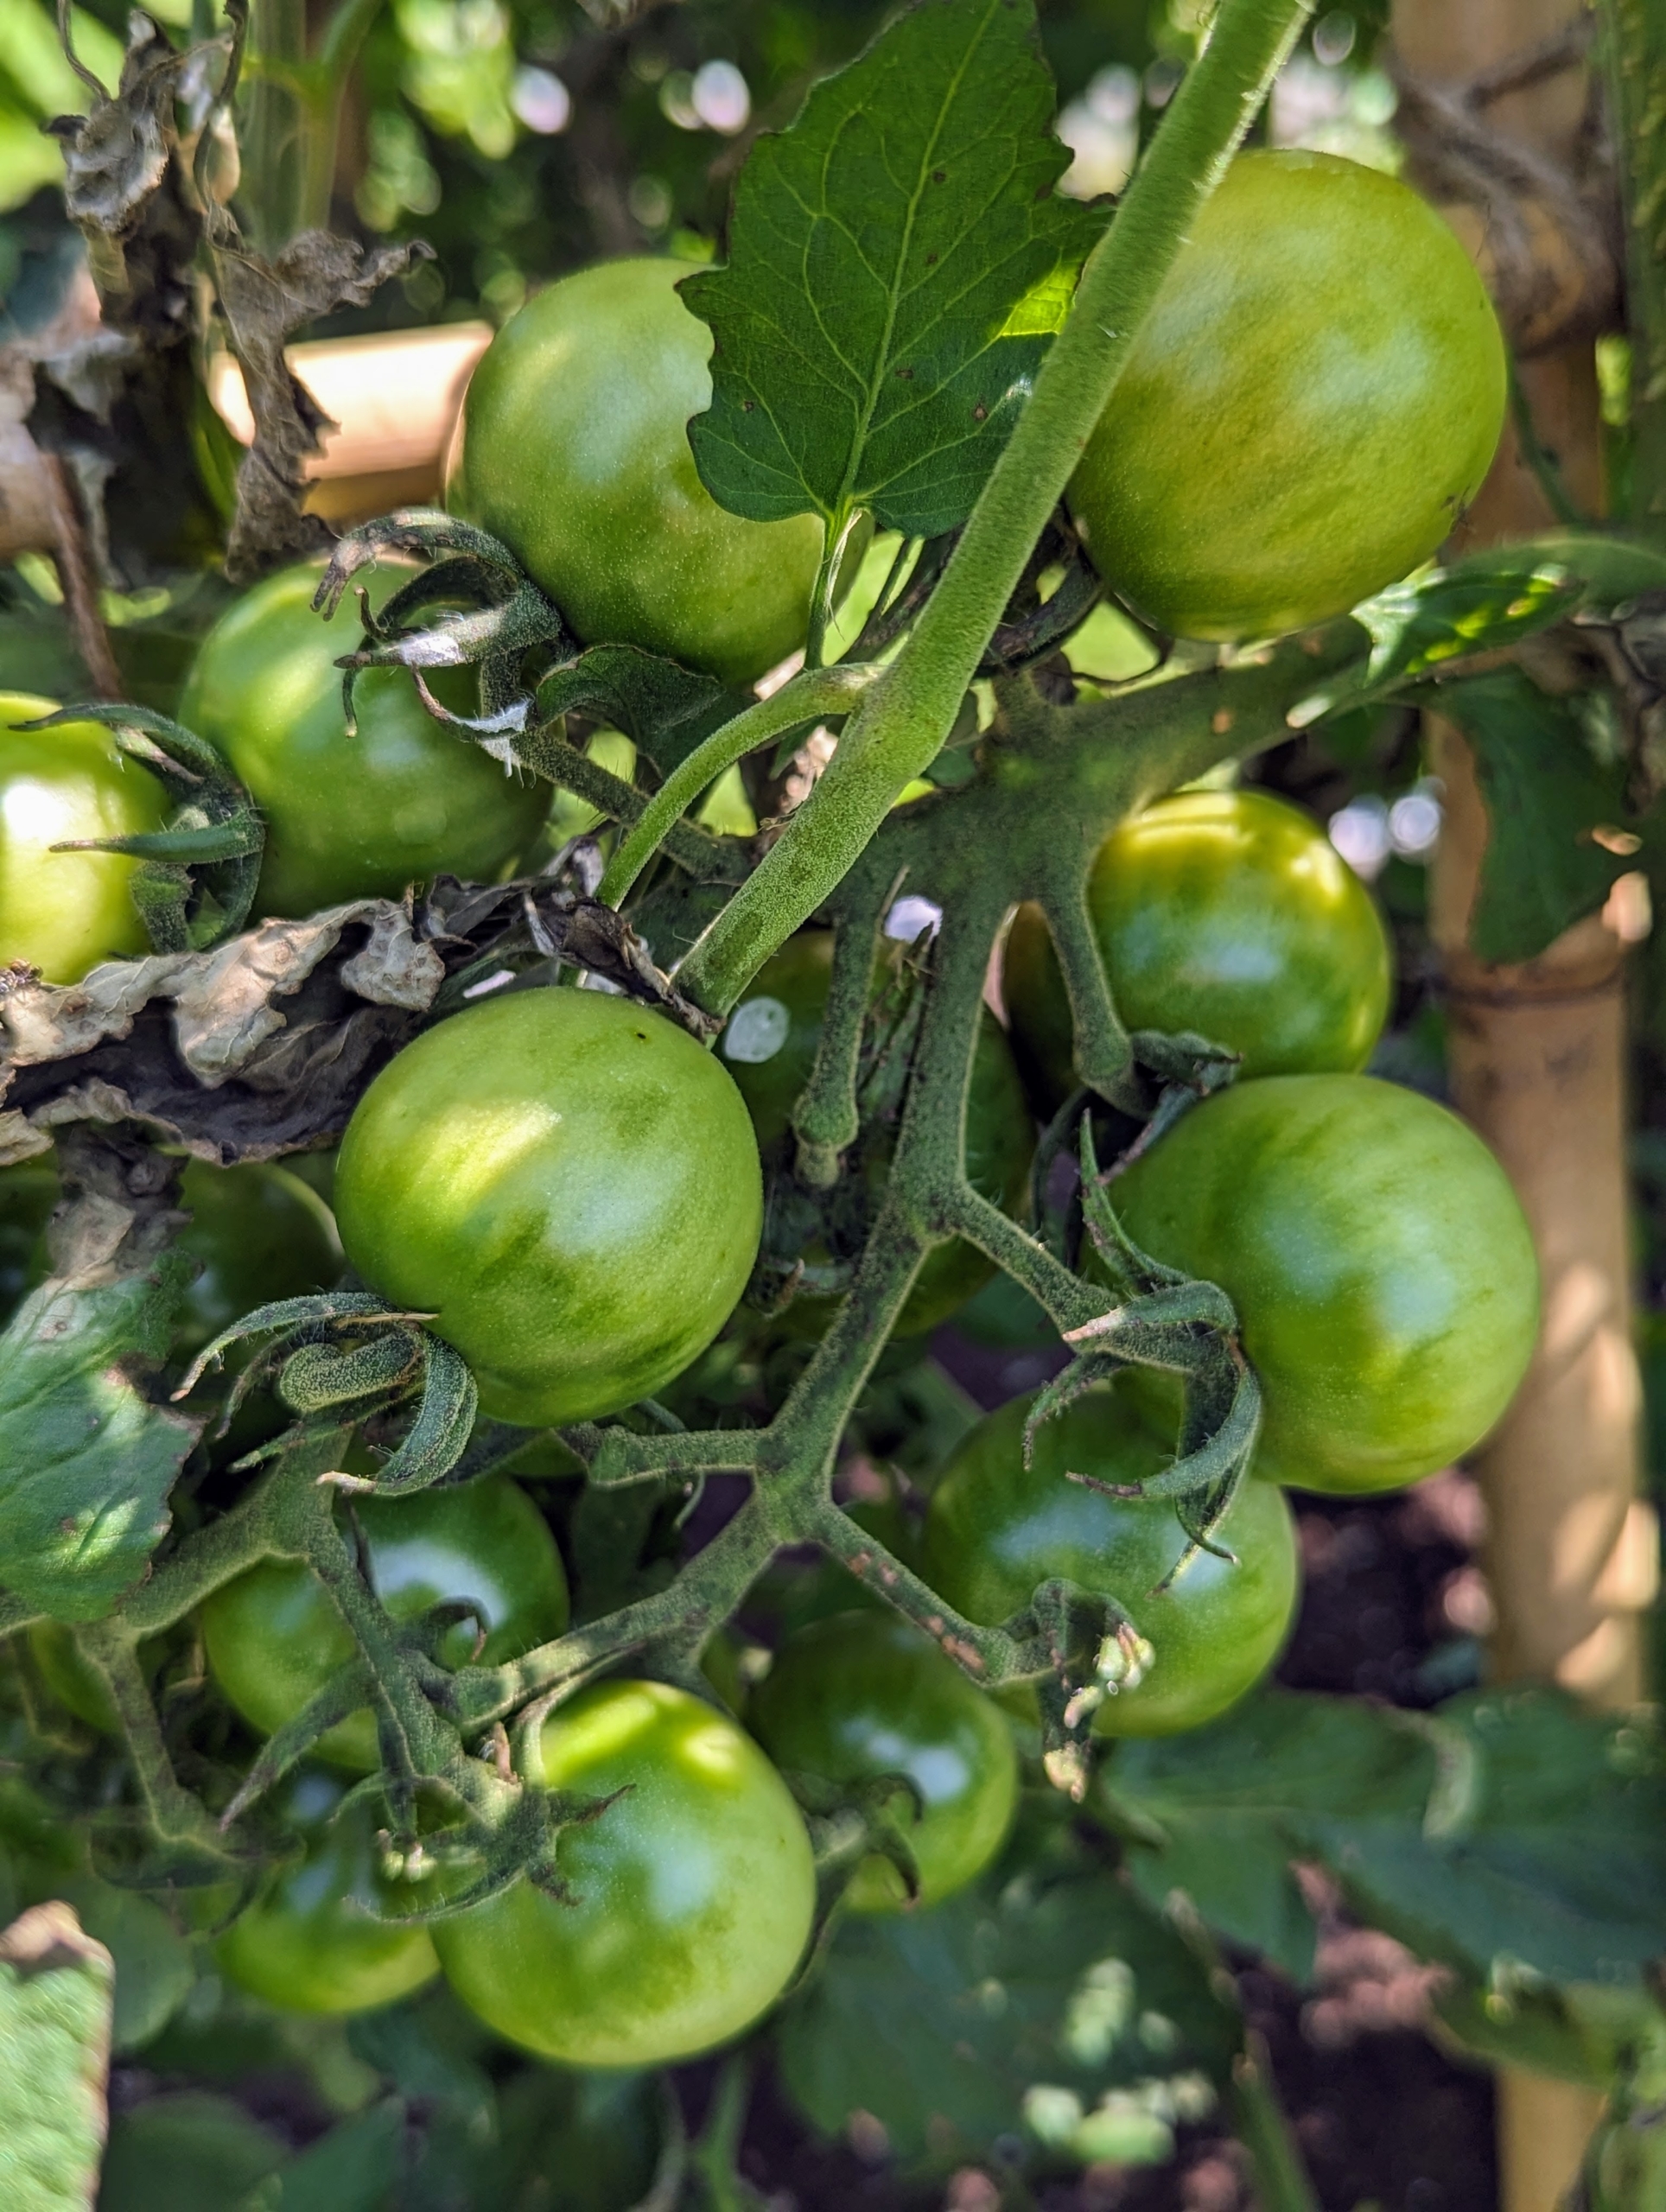
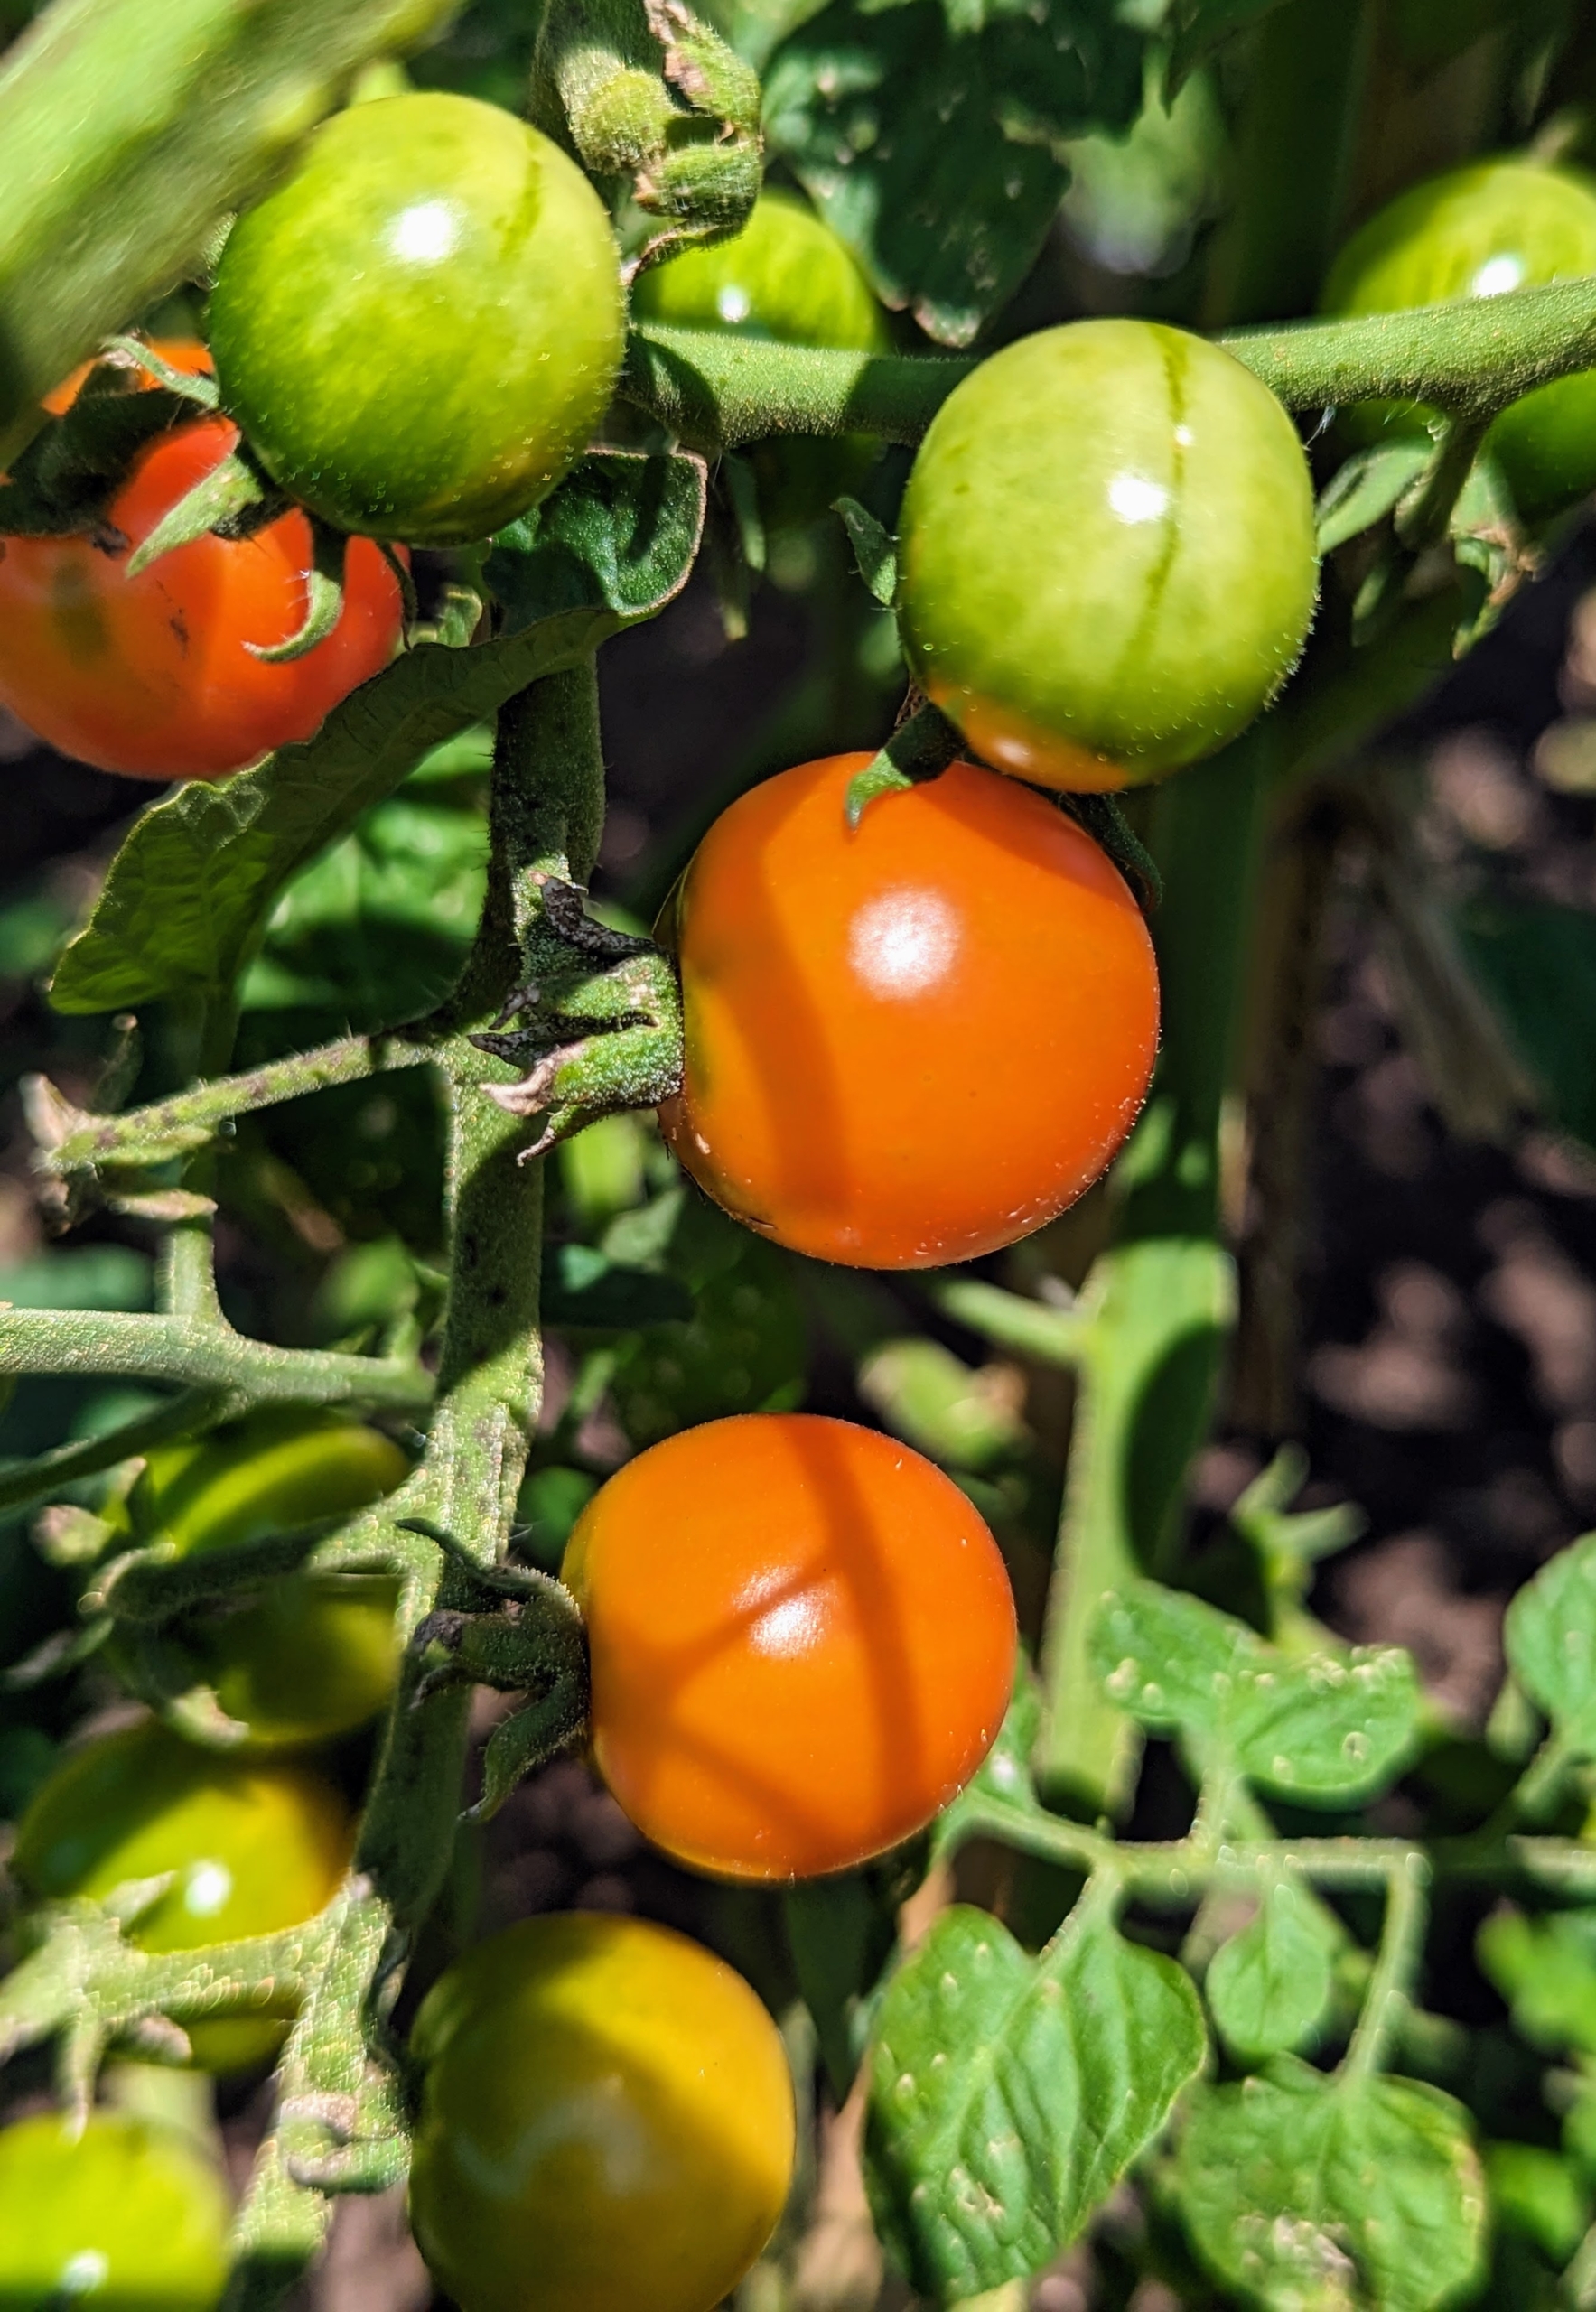
And then there are the tomatoes. Everyone waits so patiently for the tomatoes. In early August, gorgeous green fruits begin to grow.
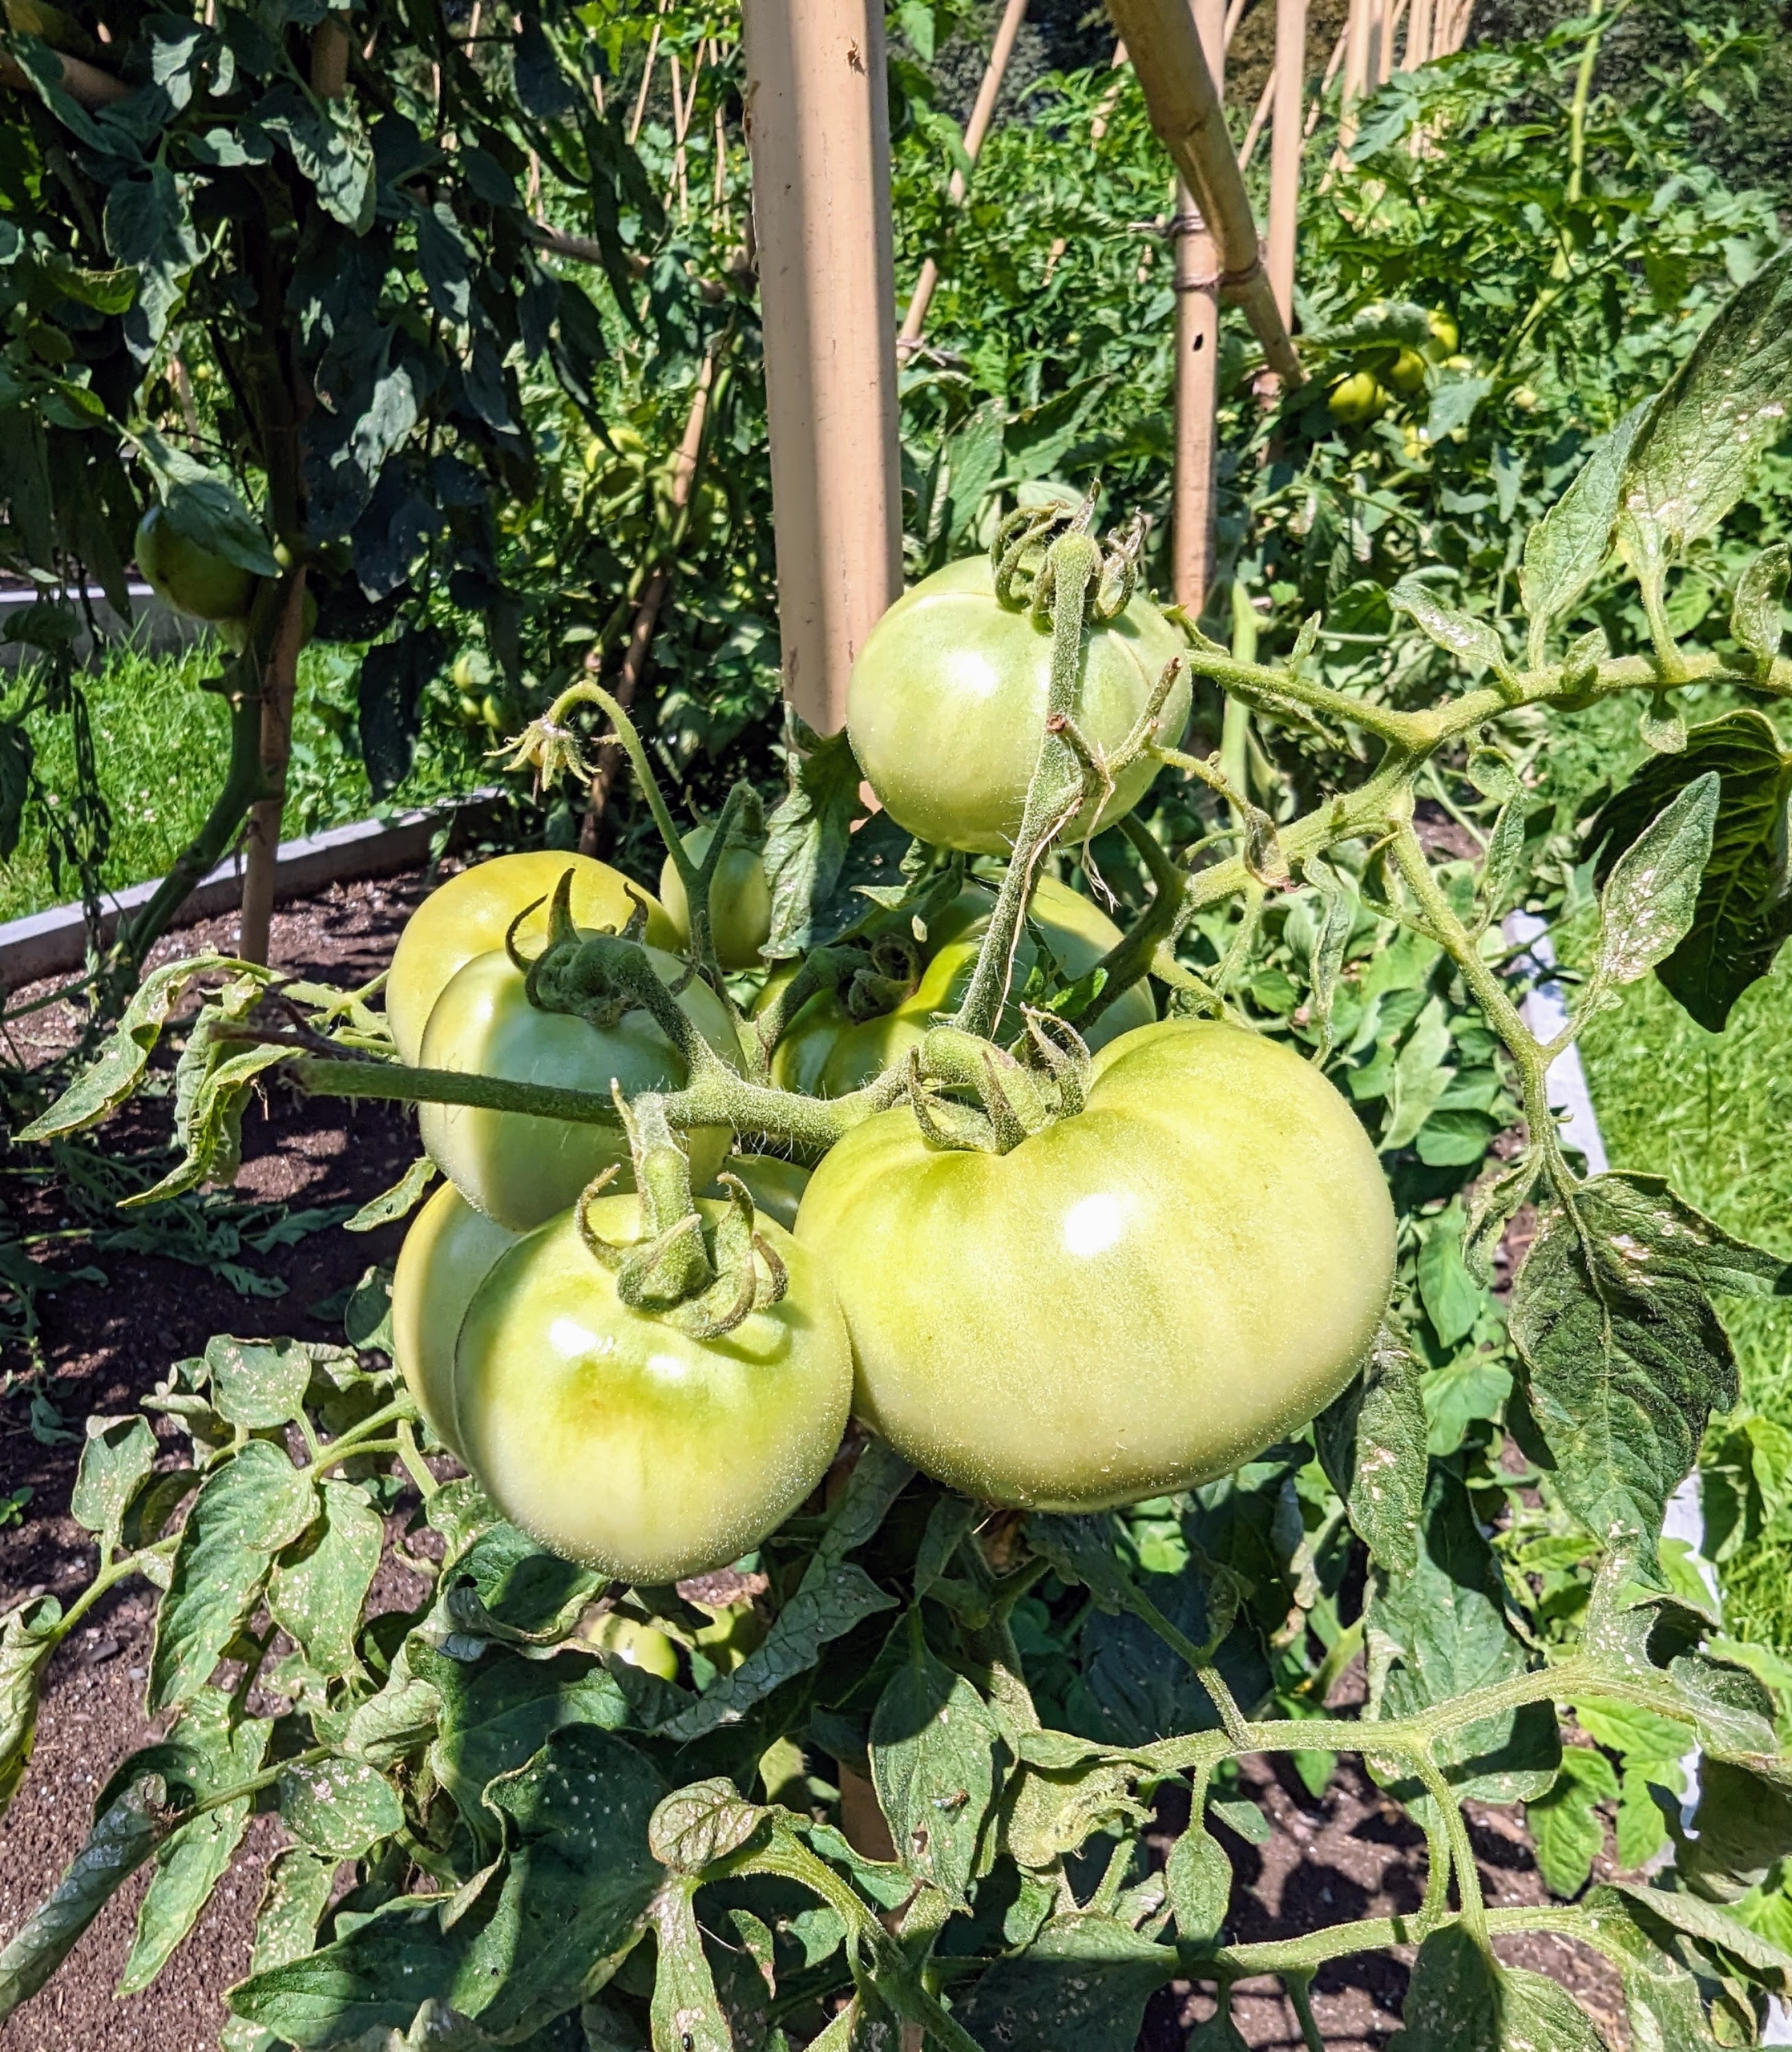
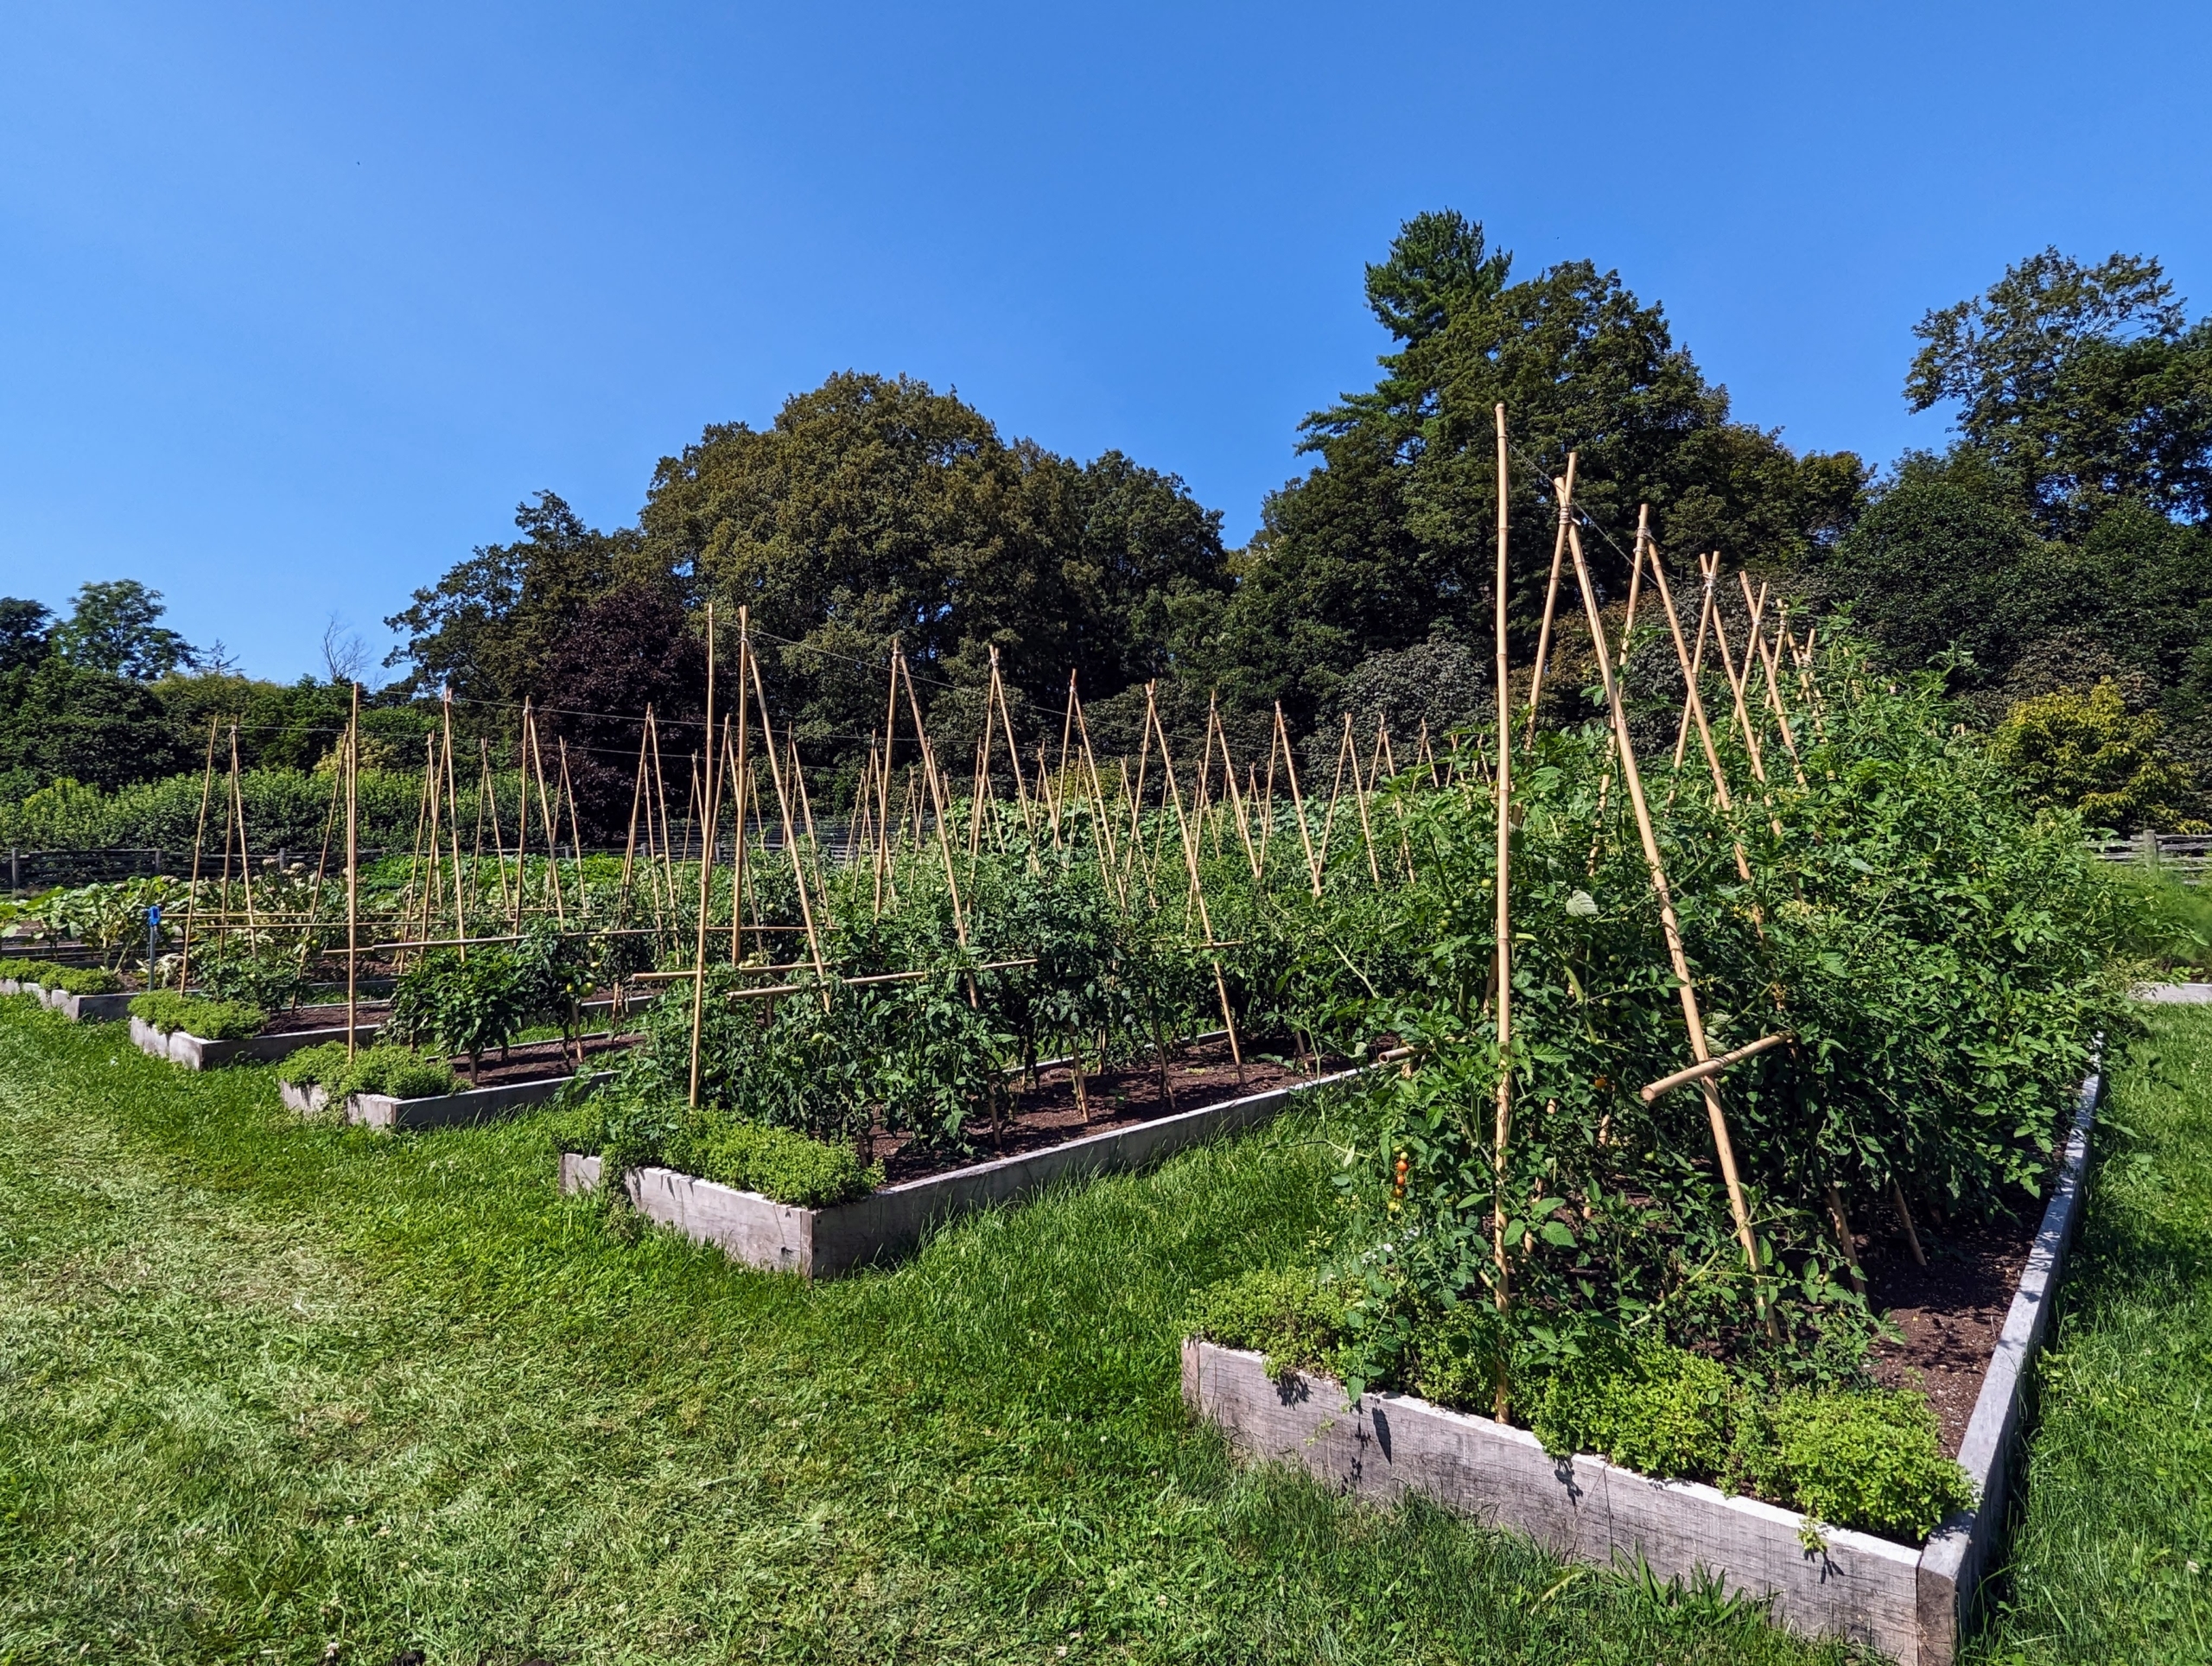
We planted more than 120-tomato plants this year. All the plants are well-supported by bamboo stakes. We’re growing both hybrid and heirloom varieties. There are already so many fruits growing, but they need a little more time before harvesting.
Some of them are already red. Tomatoes are heat loving plants, so all the hot weather really helps our crops – the tomato vines are laden with fruit.
My garden just keeps on giving. I hope your gardens are just as productive as mine are this year. Enjoy your home-grown bounties.
Here's an encore blog from my visit to Virginia a couple of years ago. This one originally ran on June 9th, 2021.
I always try to make the most of every business trip I take - visiting gardens and other interesting places that inform and inspire me.
Earlier this spring, during a brief visit to Northern Virginia for a garden club appearance, I stopped in Upperville, to tour the former estate of prominent philanthropists, Paul and Rachel "Bunny" Mellon. The 700 acre property includes the Main Residence, gardens, and the Oak Spring Garden Library - all maintained by the Oak Spring Garden Foundation. OSGF is a nonprofit organization created by Bunny and dedicated to sharing her gifts and ideas. Its main mission is to support and inspire fresh thinking and bold action on the history and future of plants, including the art and culture of plants, gardens and landscapes.
Enjoy these photos.
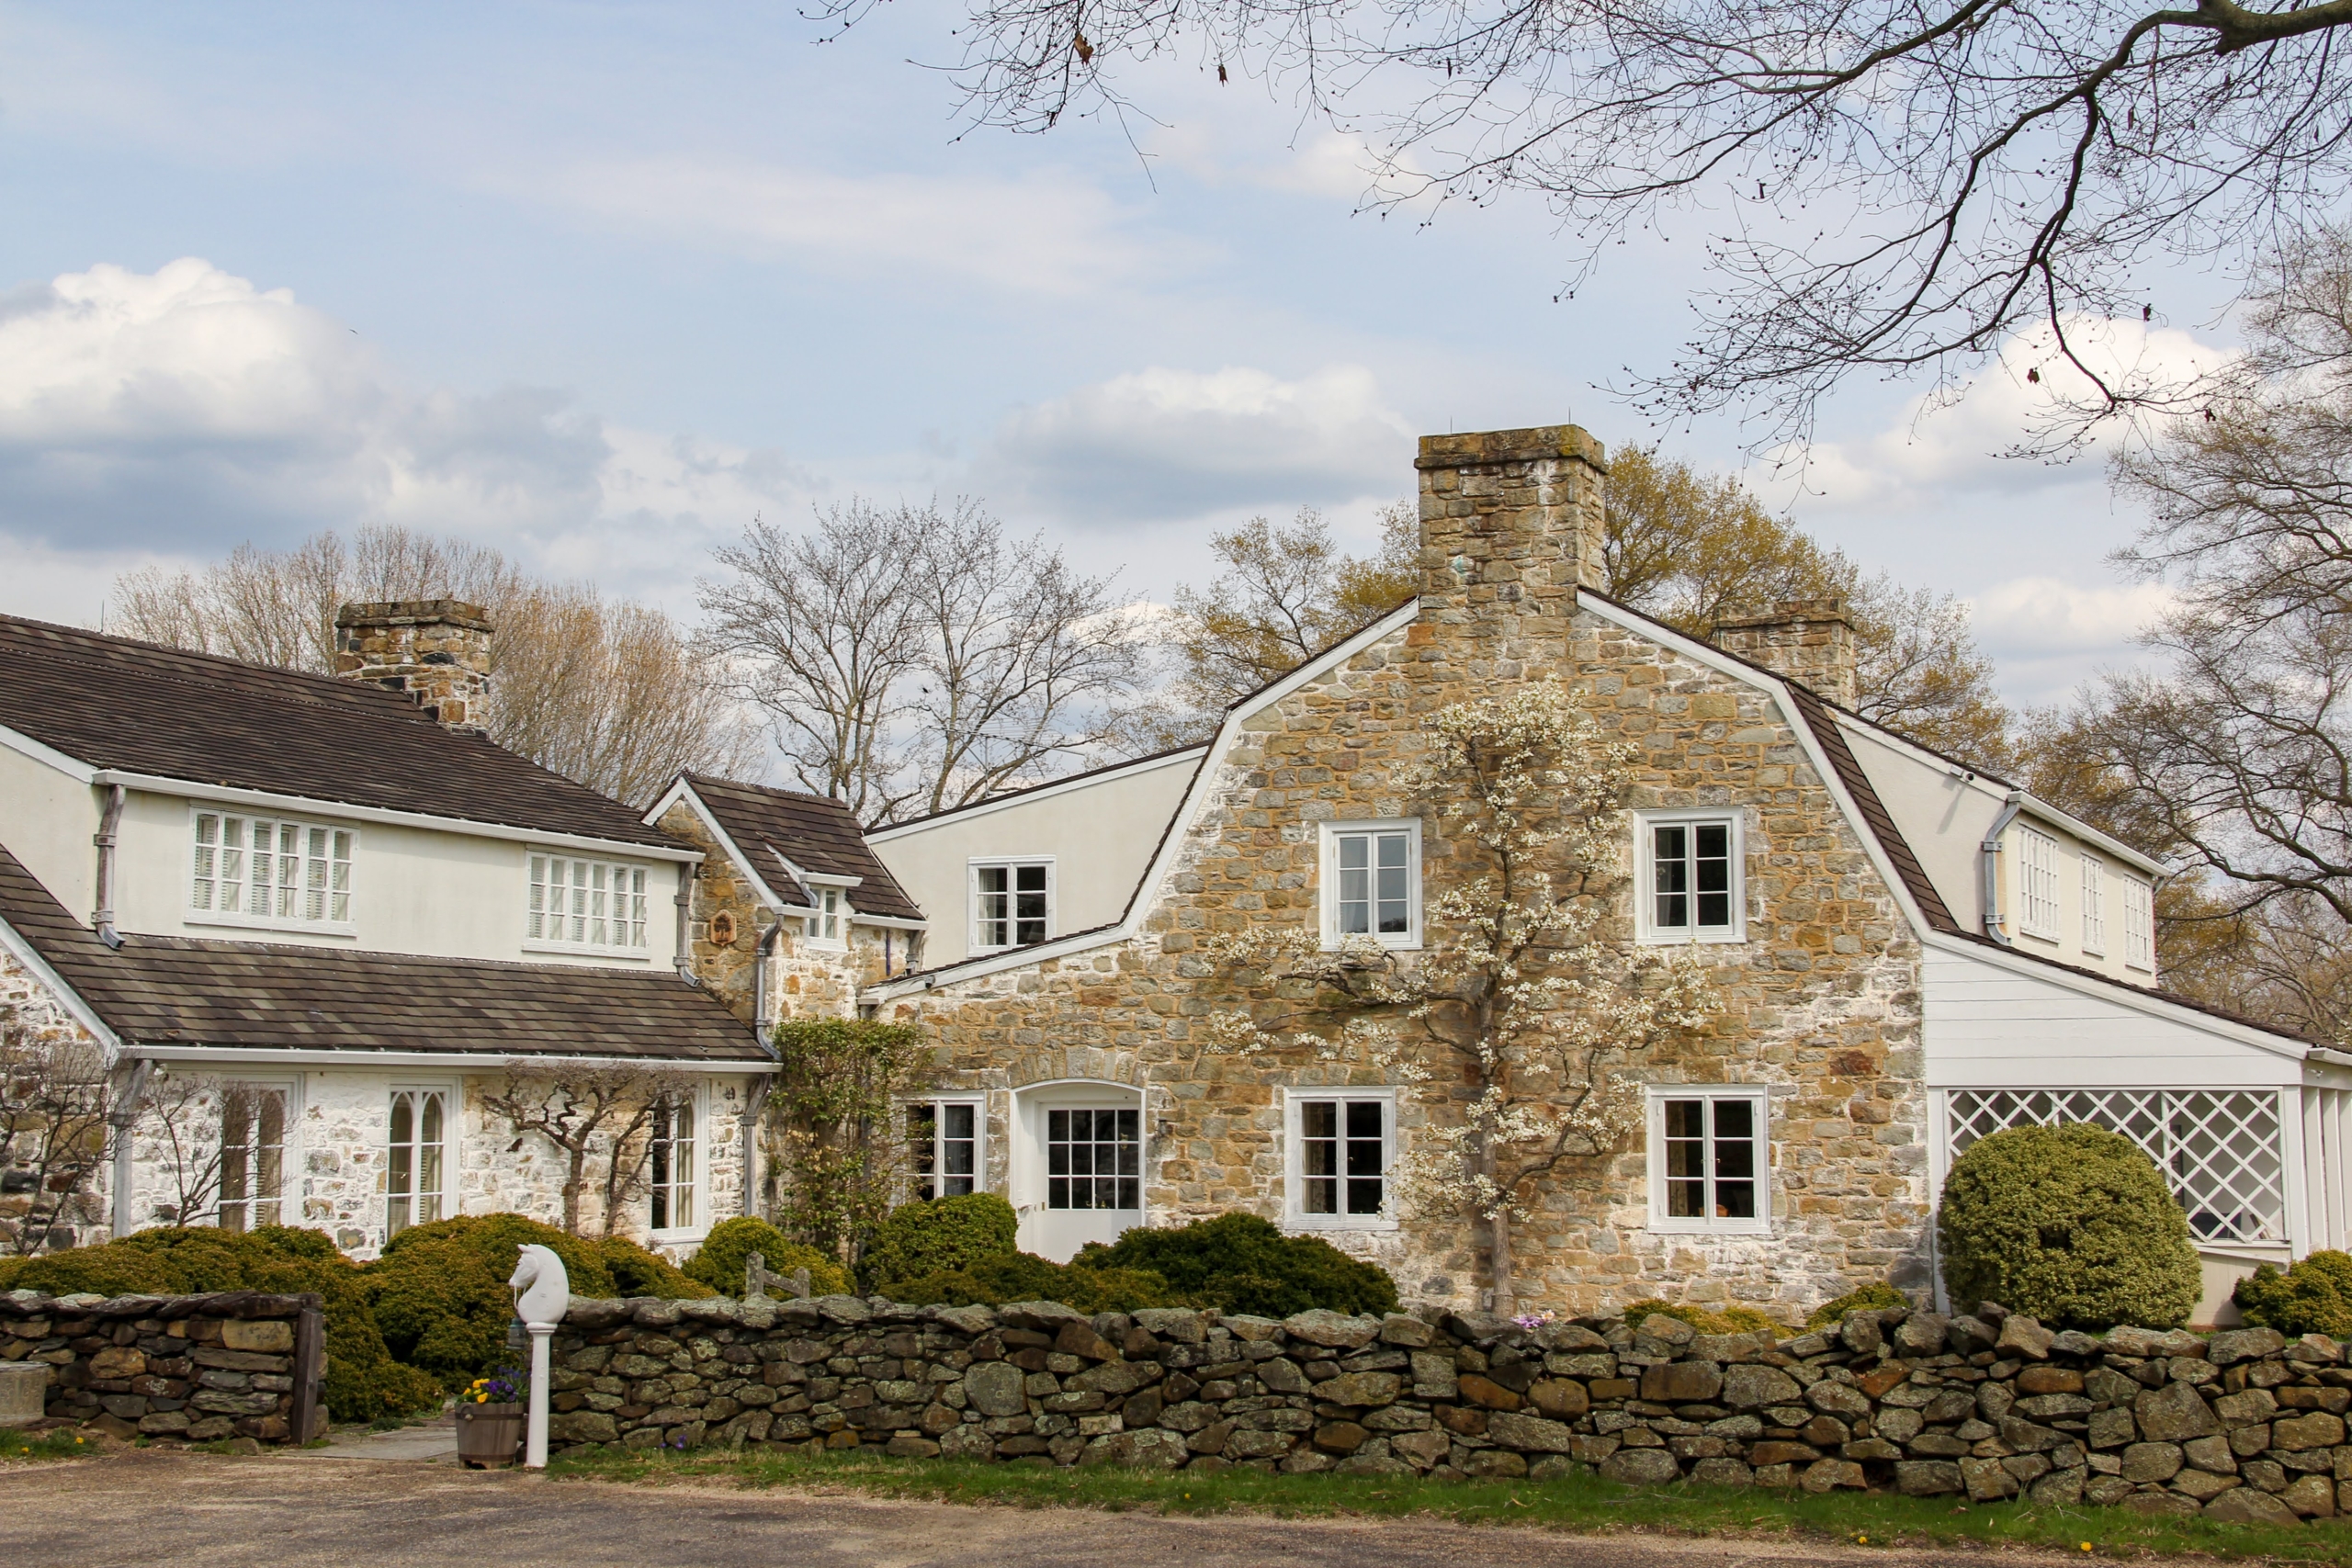
Paul and Bunny Mellon maintained residences in Europe, North America and the Caribbean, but their primary home was this estate in Upperville, Virginia called Oak Spring Farm. This is the front facade of the home. An Asian pear tree is espaliered against the front wall. (Photo by Max Smith, Oak Spring Garden Foundation)
This is a view into the brick hallway in the Mellon’s residence and the front door.
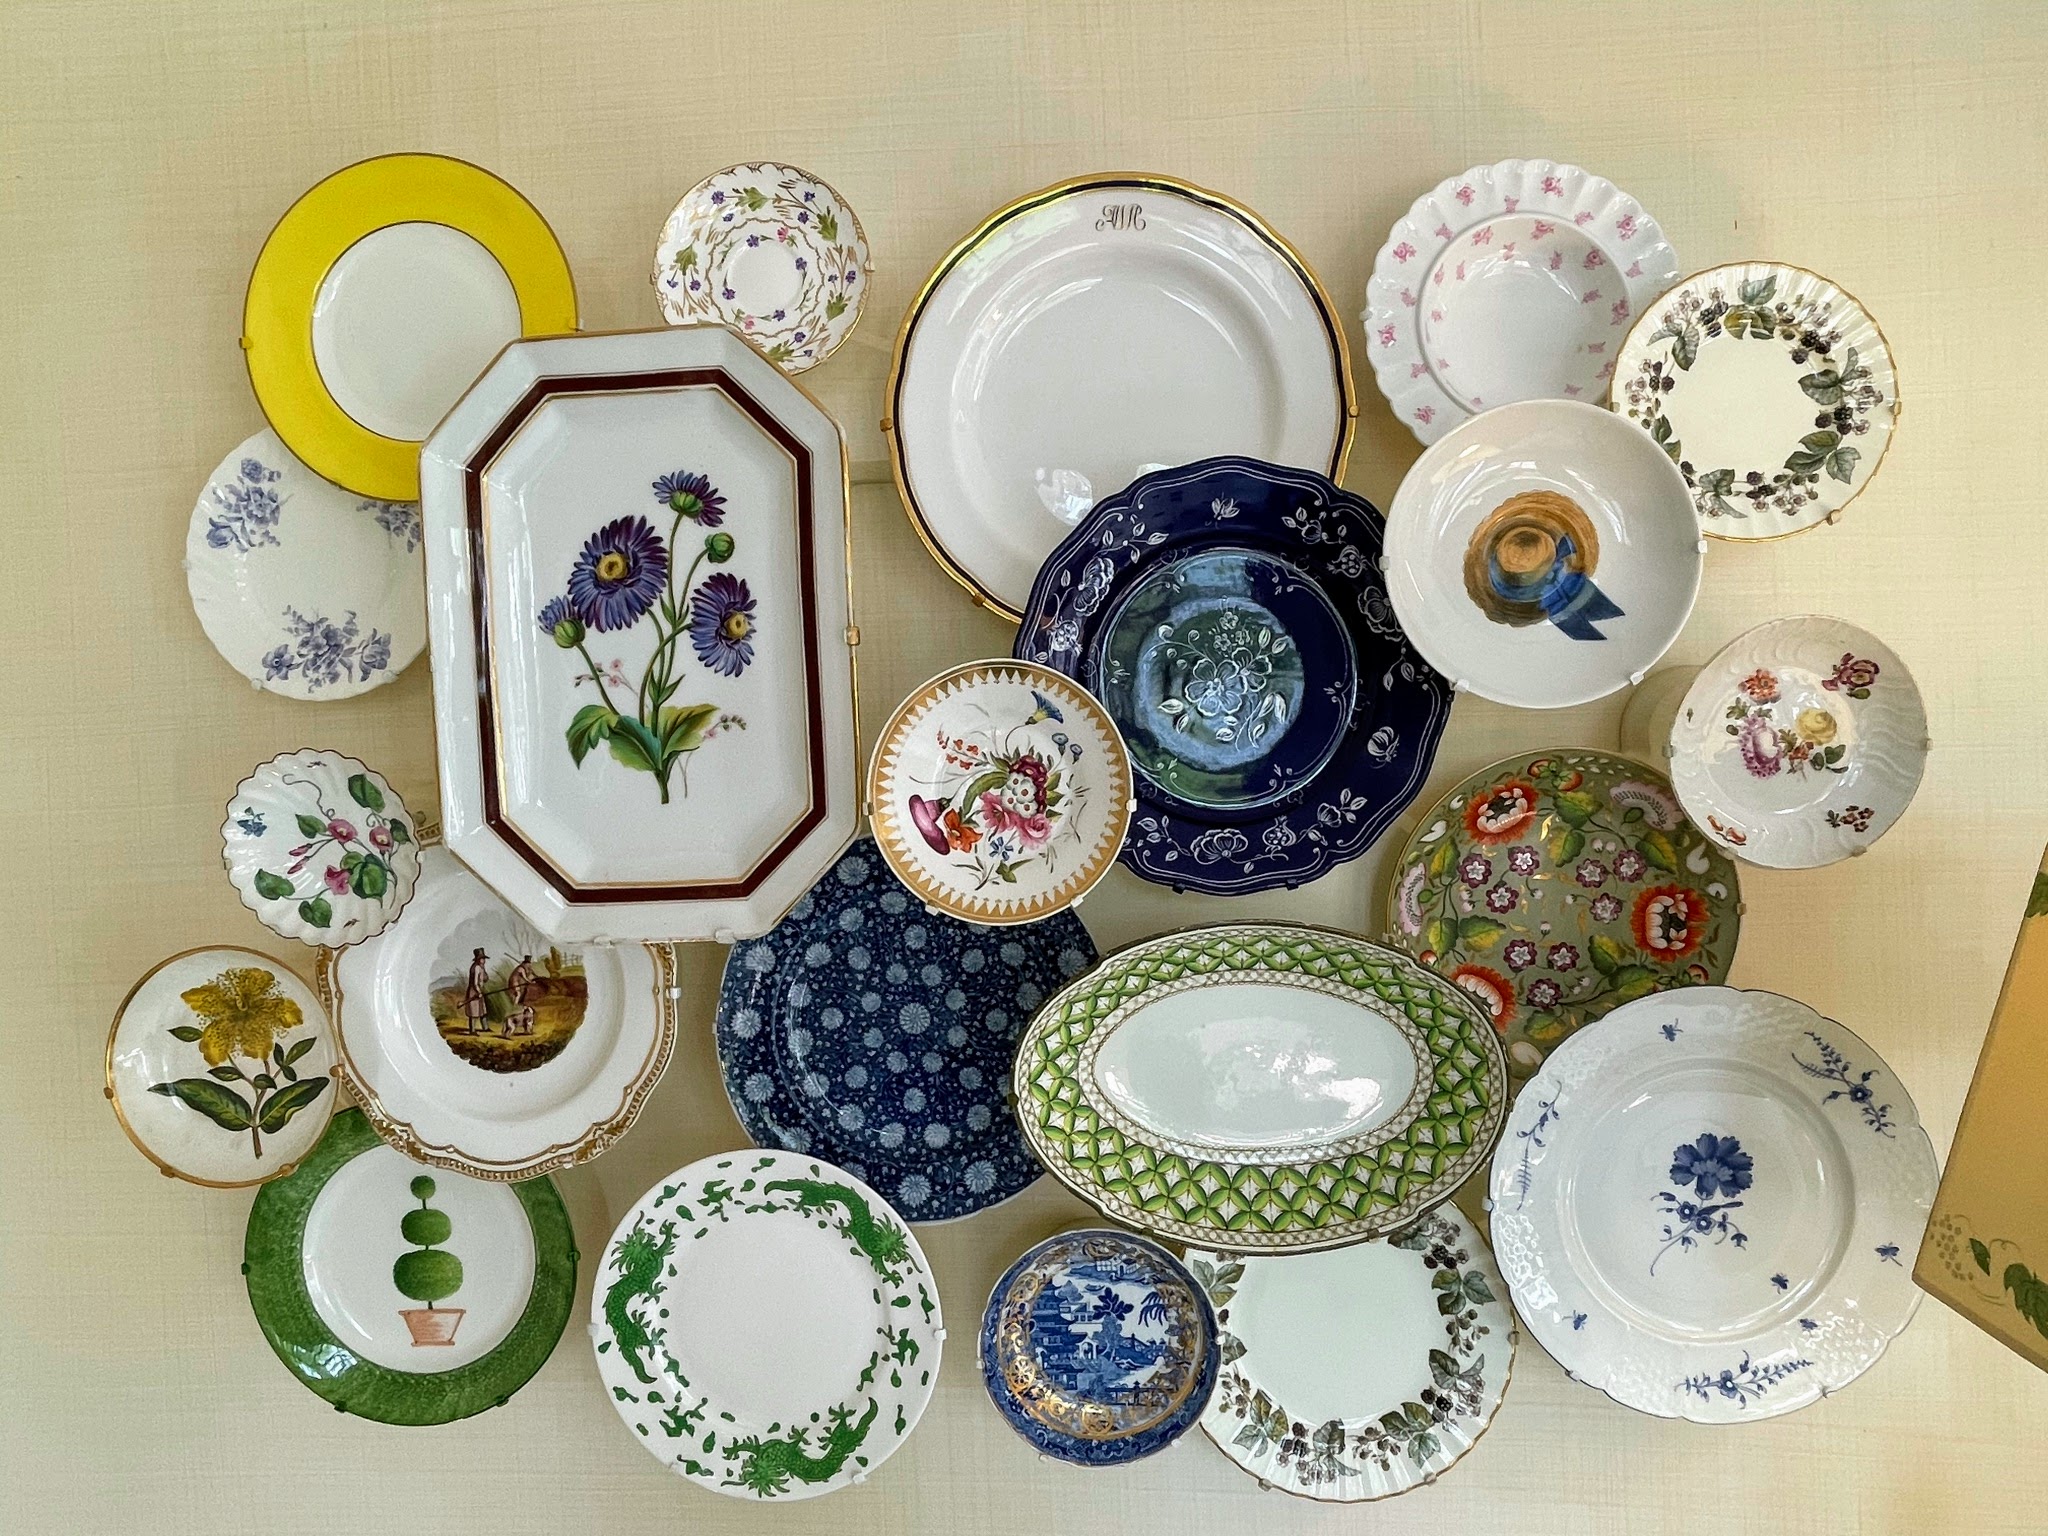
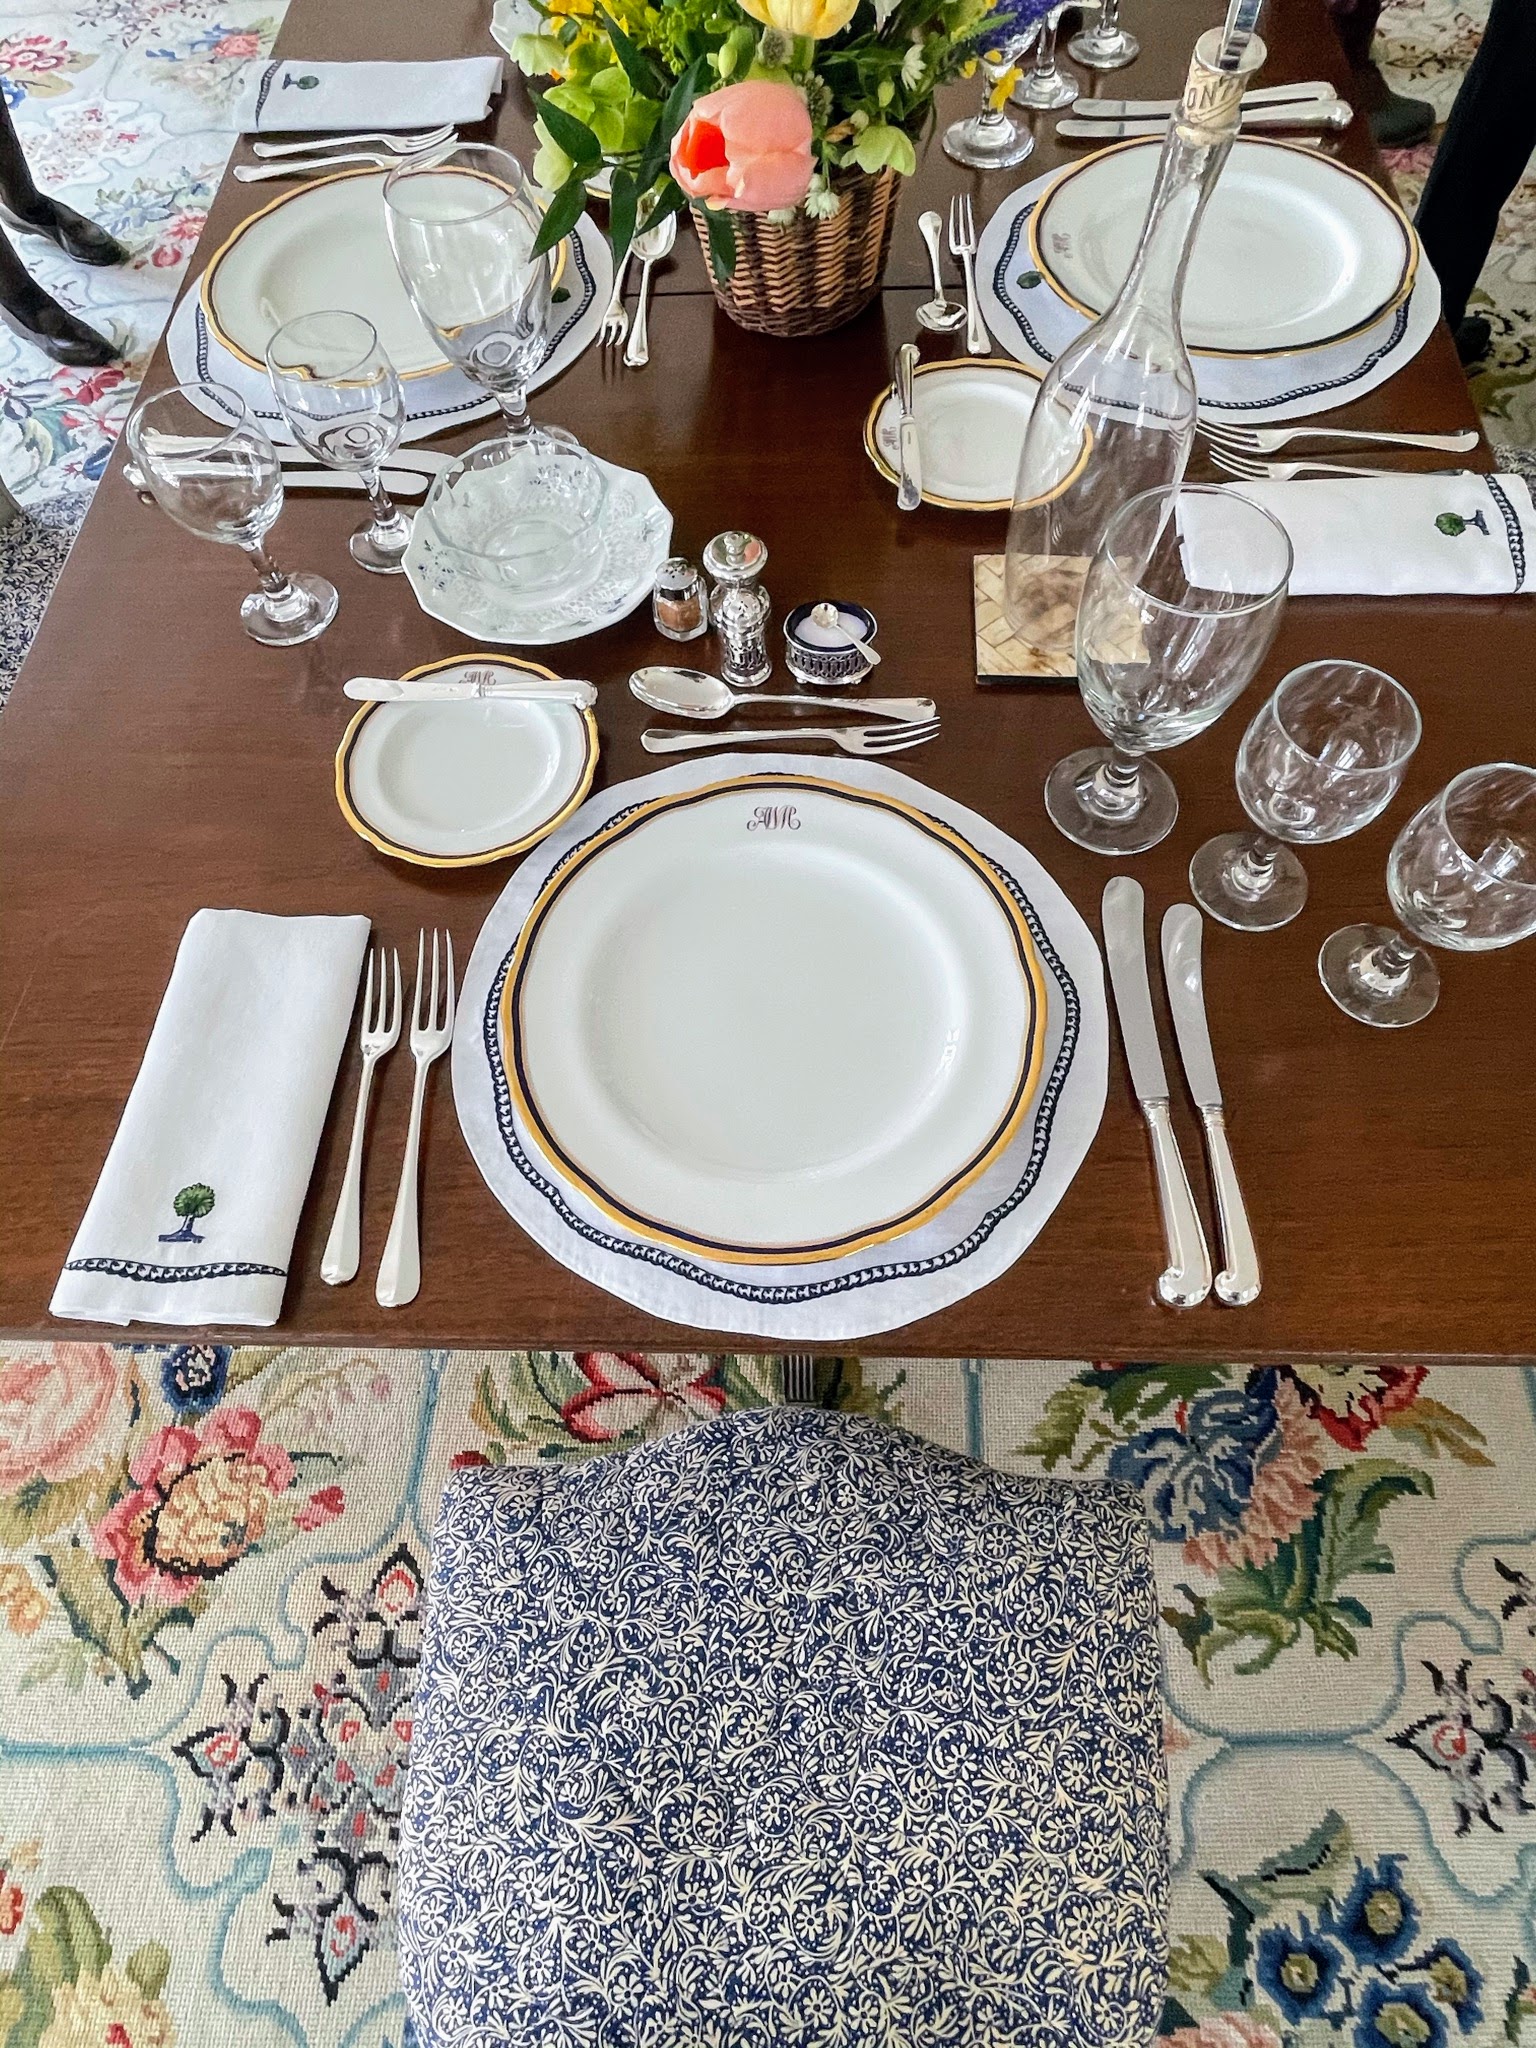
Outside the Dining Room is this display of ceramics belonging to the Mellons. Most of Mrs. Mellon’s ceramics were sold at Sotheby’s after her death in 2014, but a selection of pieces were kept and used here.
Paul Mellon was the son of Andrew Mellon, one of the longest-serving U.S. Treasury Secretaries. Here are Andrew’s monogrammed place settings in the Dining Room. Embroidered linens were designed by Hubert de Givenchy.
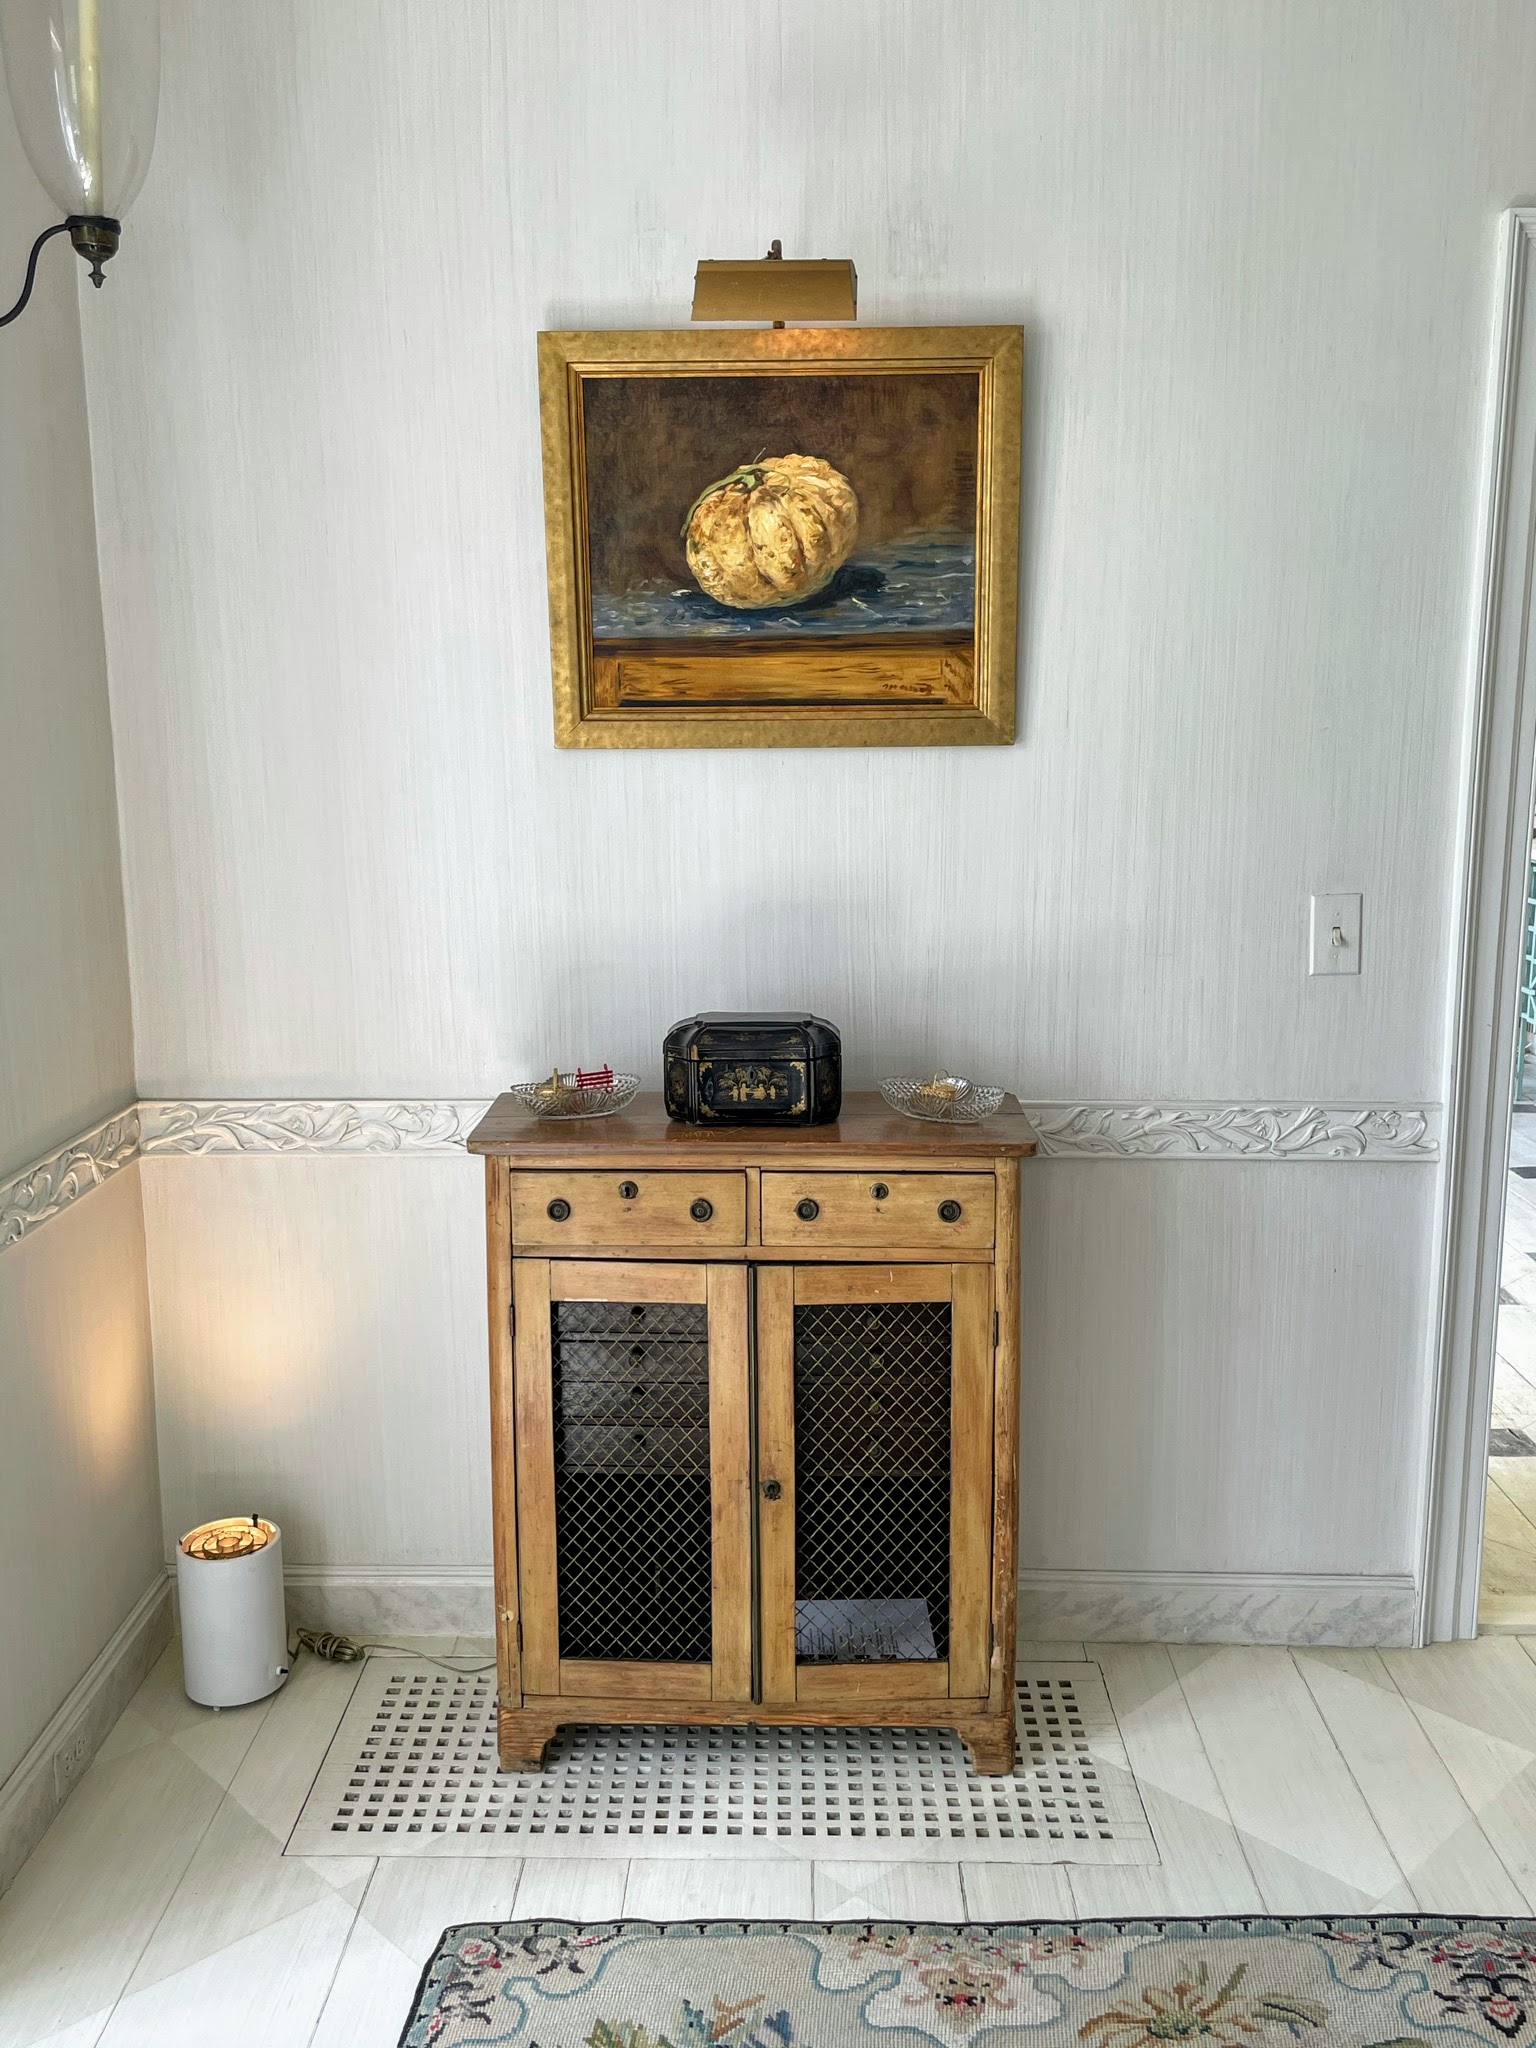
This is a facsimile of “The Melon” by Edouard Manet, c. 1880, oil on canvas in the Dining Room at Oak Spring. The original was donated to the National Gallery of Art by Paul and Bunny.
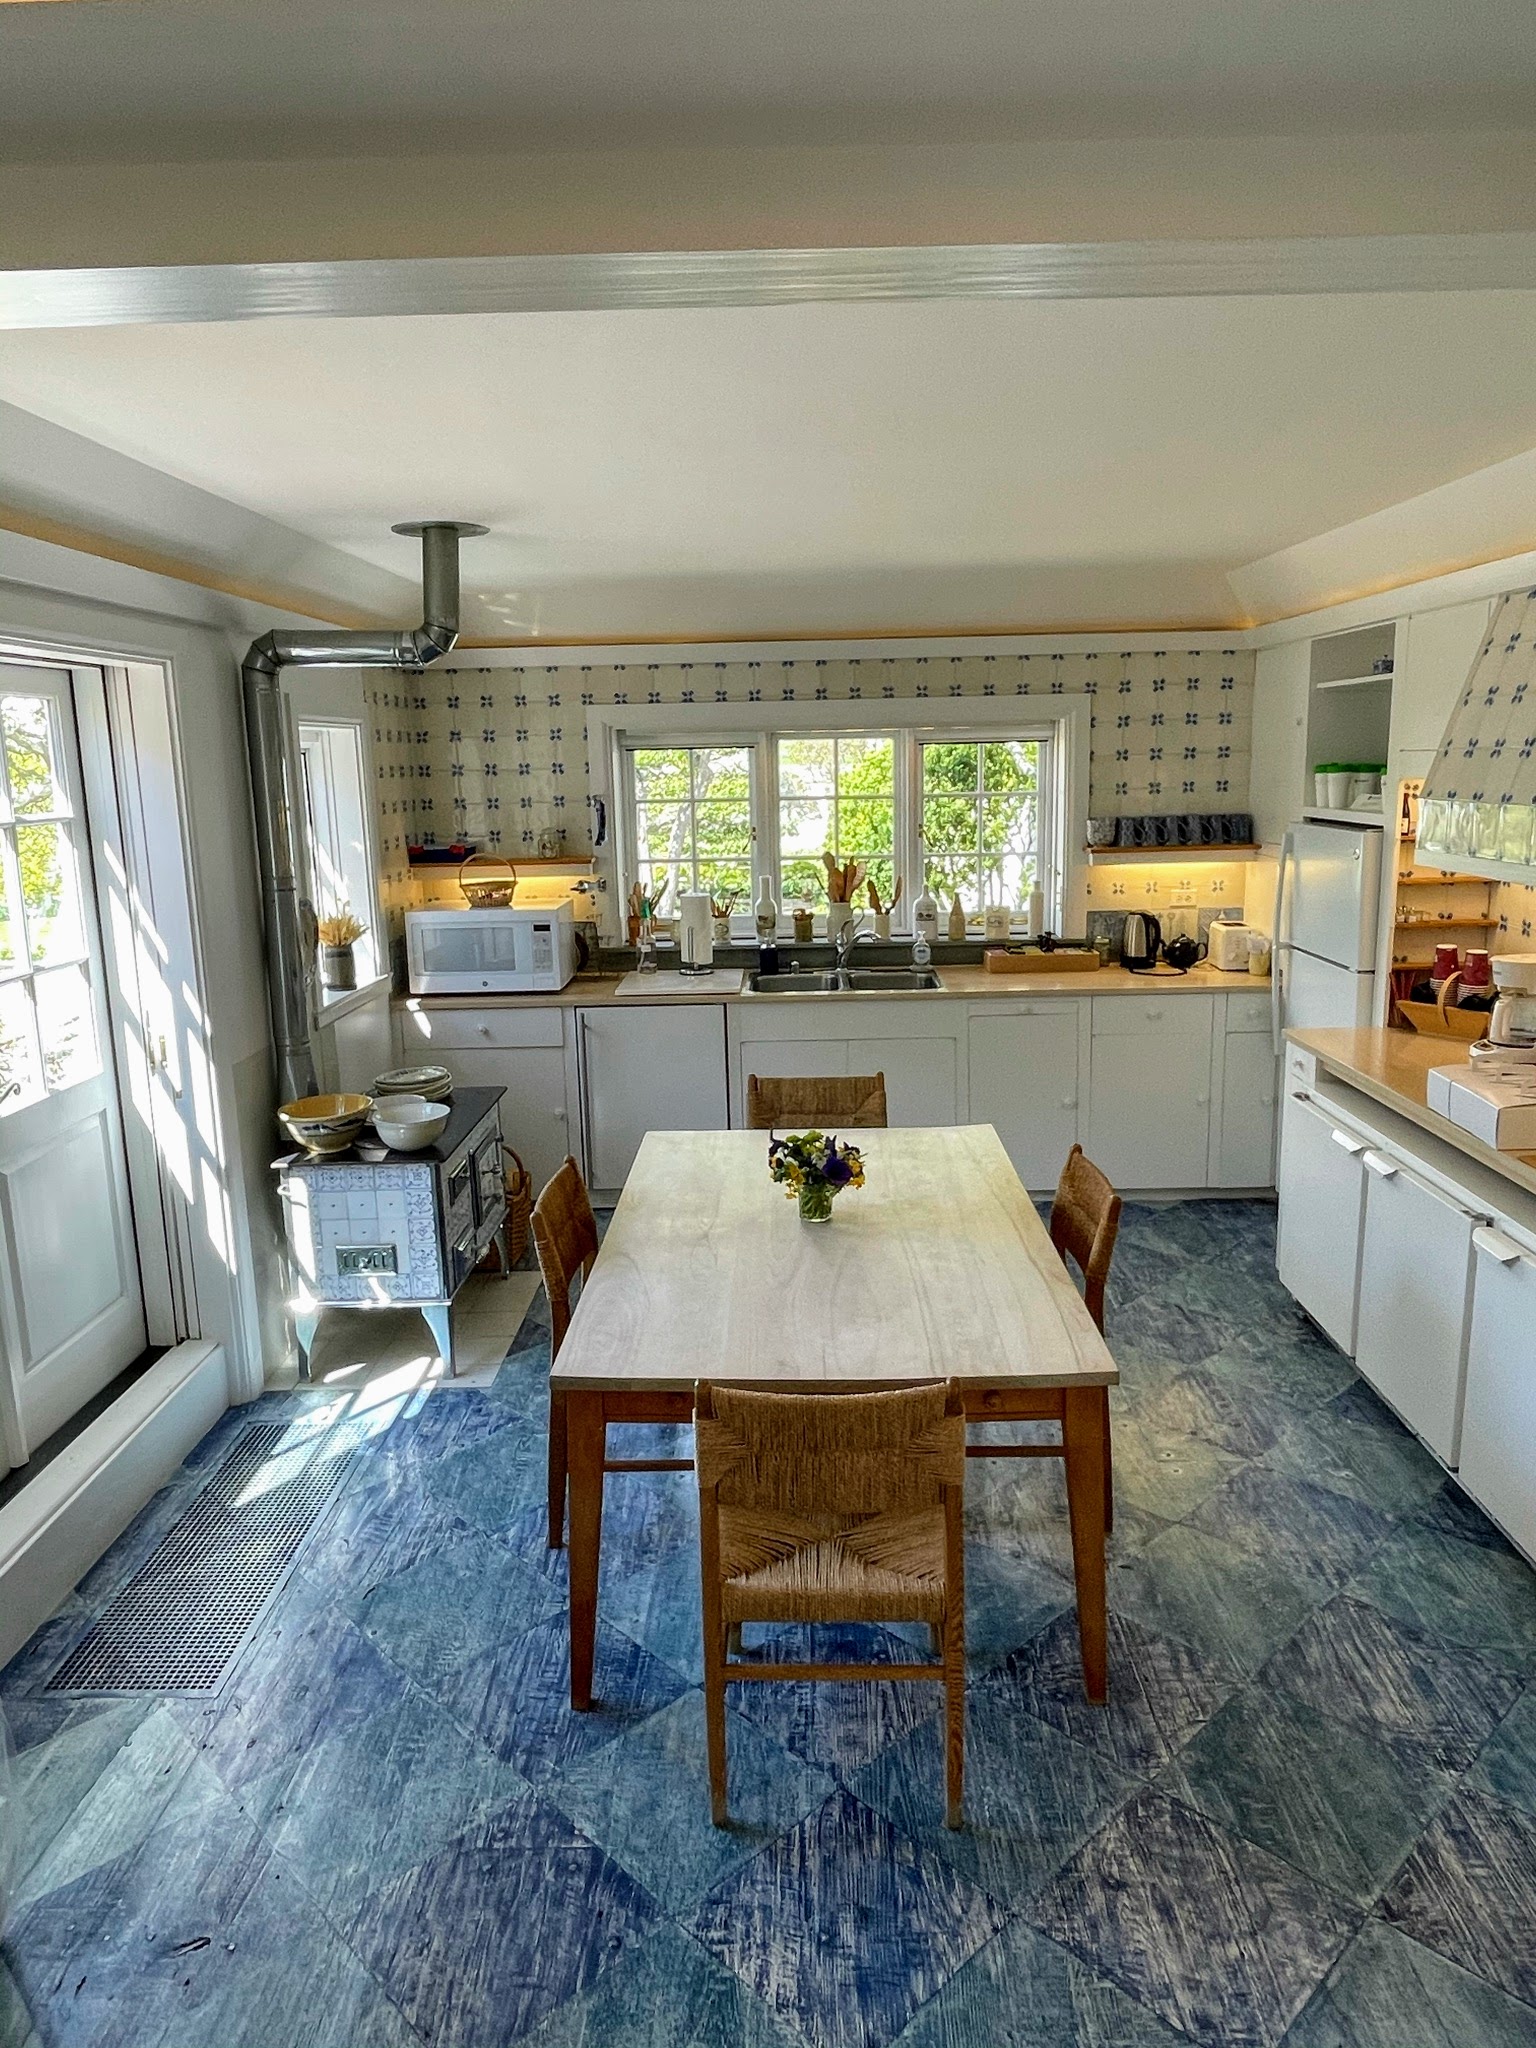
This is the Blue Kitchen, or Sunday Kitchen, at Oak Spring. Portuguese tiles, featuring Bunny’s signature blue diamond patterned floor, are beautifully maintained. The windows offer great views of the garden.
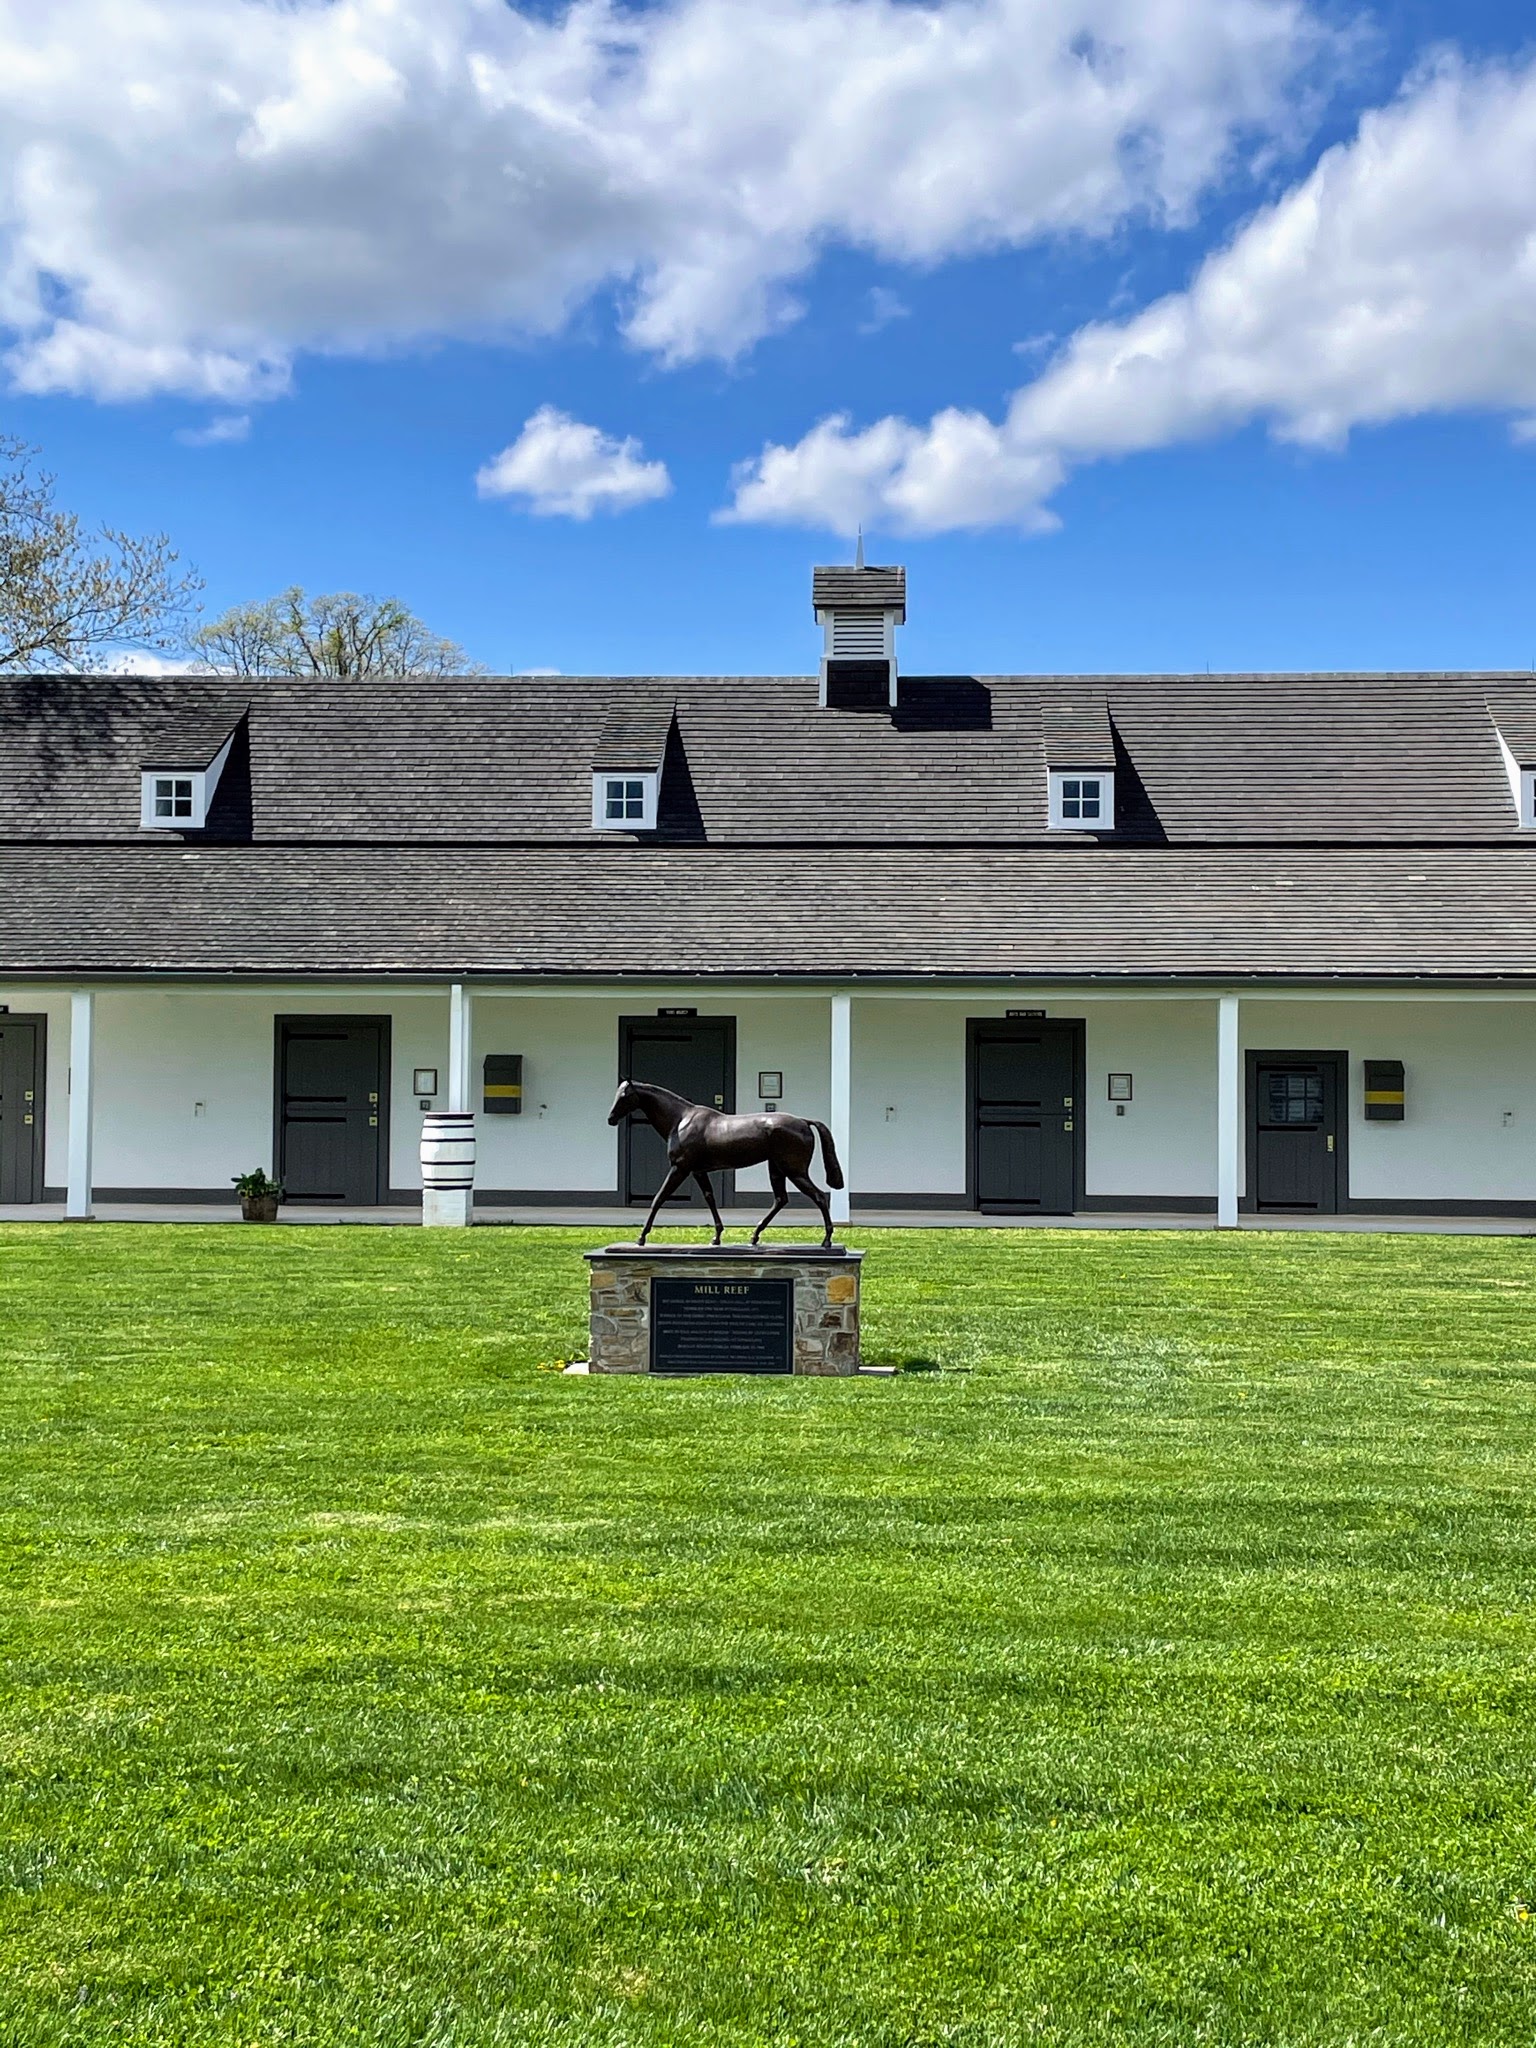
Here is a statue of Mill Reef in the Broodmare Barn courtyard. Mill Reef was probably Paul Mellon’s most successful racehorse. He raced in Europe between 1970 and 1972, where he won the Epsom Derby, the Eclipse Stakes, the King George VI and Queen Elizabeth Stakes, and the Prix de l’Arc de Triomphe.
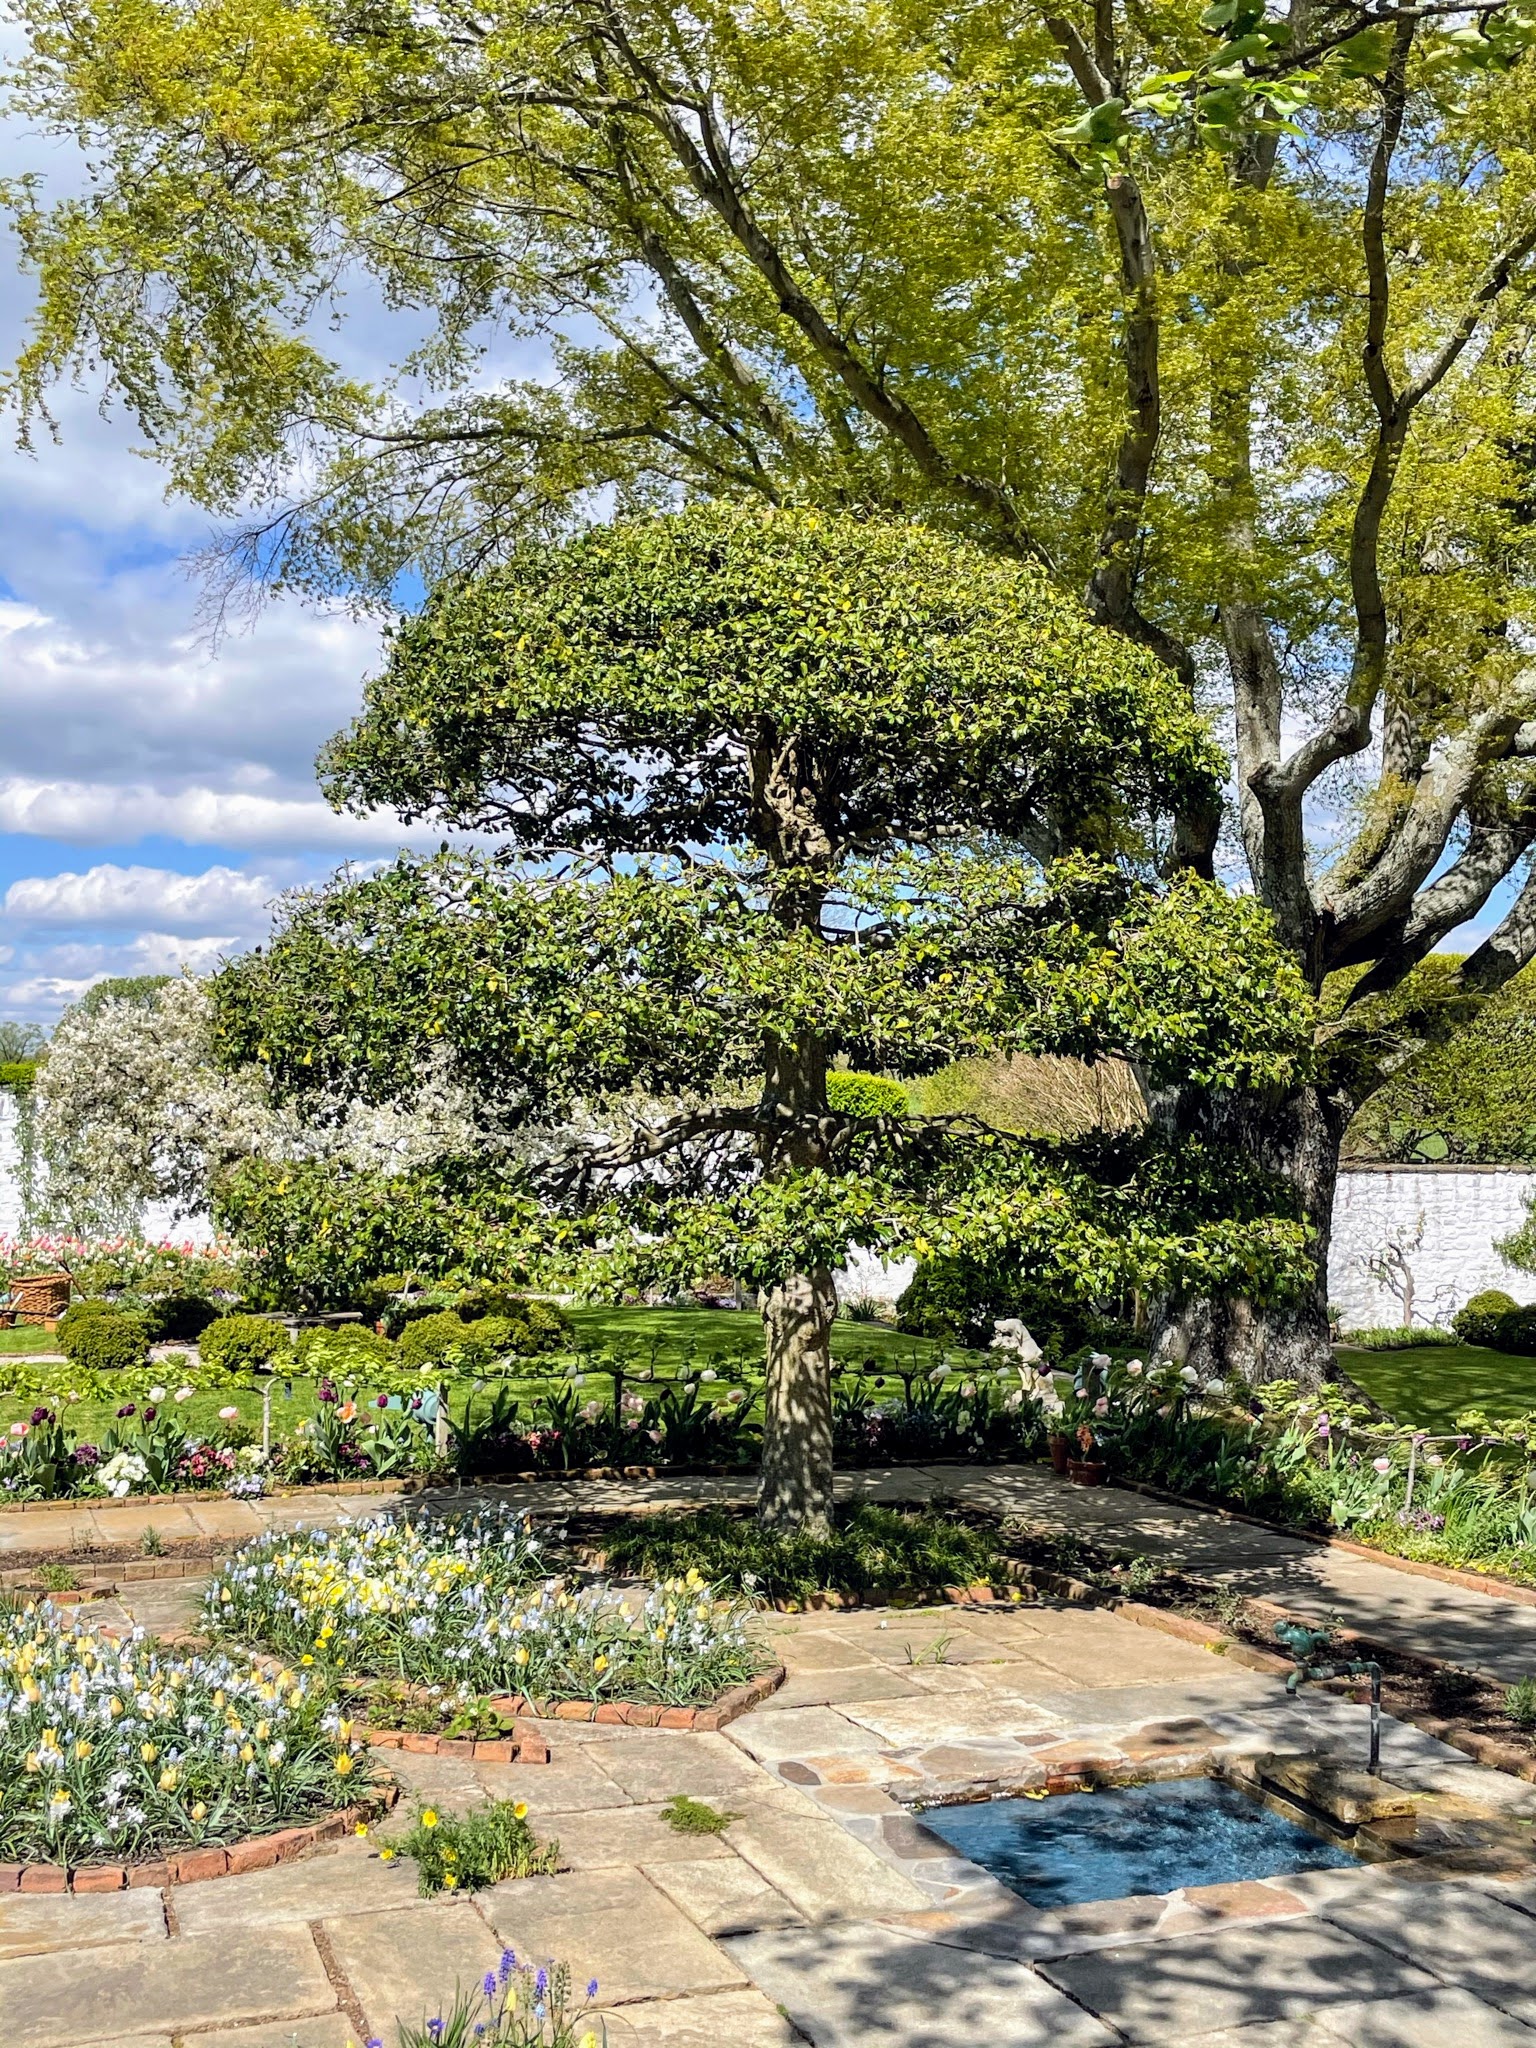
Here is a topiary American Holly tree standing over planting beds shaped like butterflies and a small reflecting pool. Bunny Mellon developed a love of plants and gardens at a young age. She began collecting botanical books when she was just 10 years old. She also loved garden design. In fact, you may know that Bunny designed gardens for some of her dearest friends, including the Rose Garden and the East Garden at the White House for Jacqueline Kennedy.
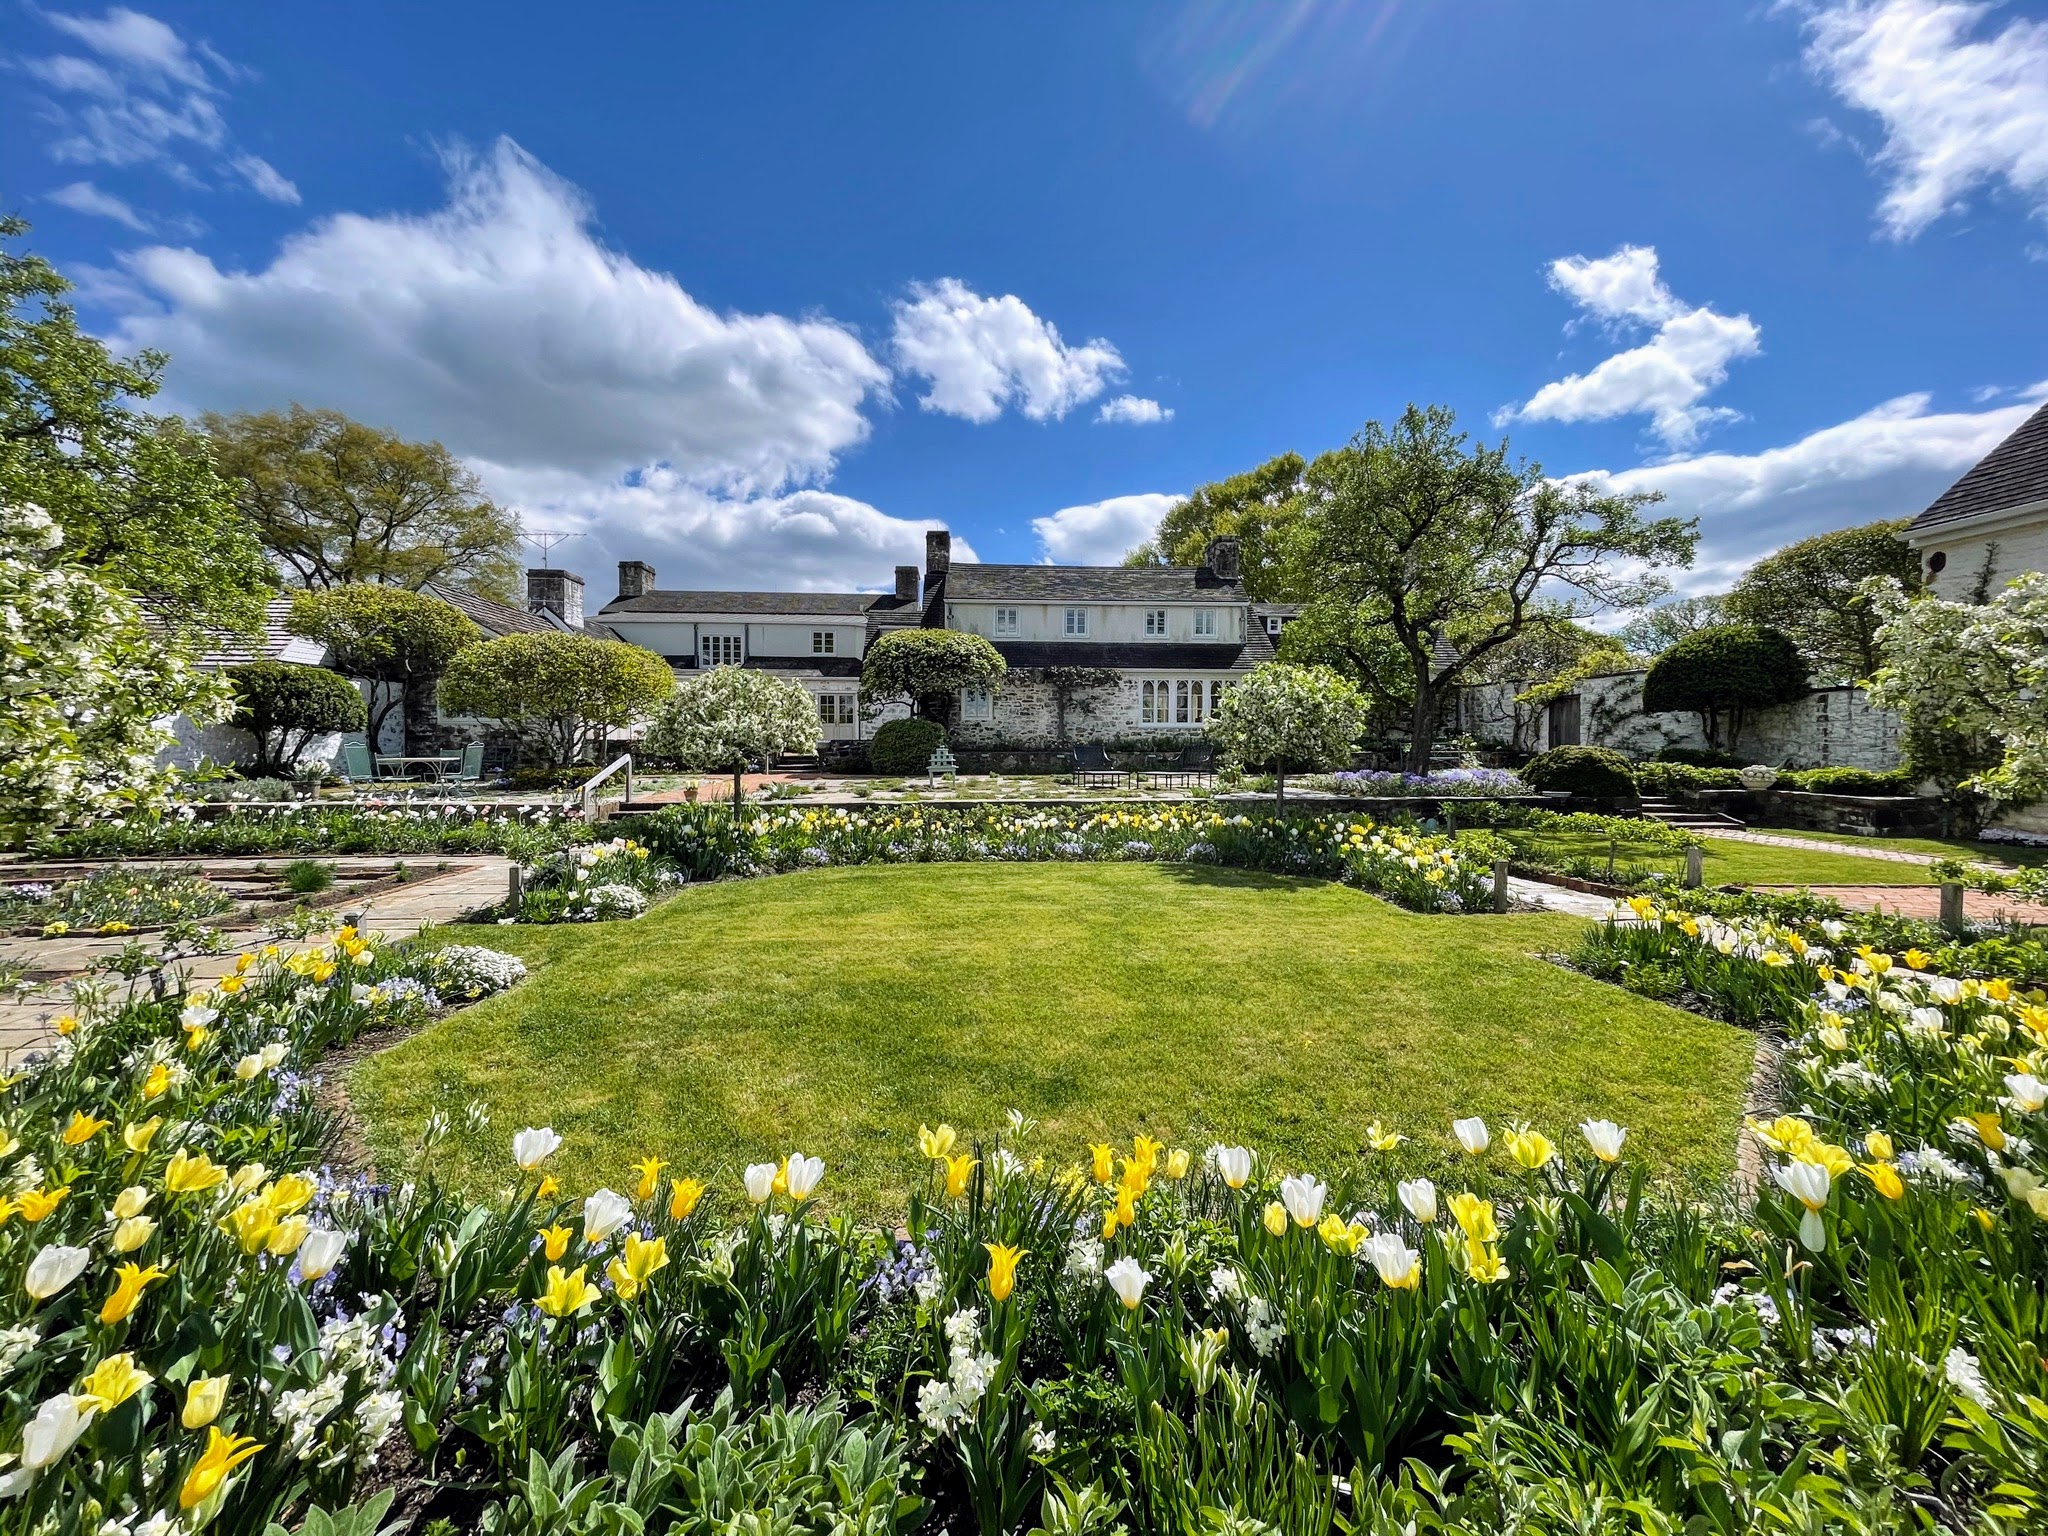
Many of Bunny’s garden designs at Oak Spring remain intact. Tulips and Narcissus line the beds surrounding the square garden. This view looks south toward the Mellon’s residence.
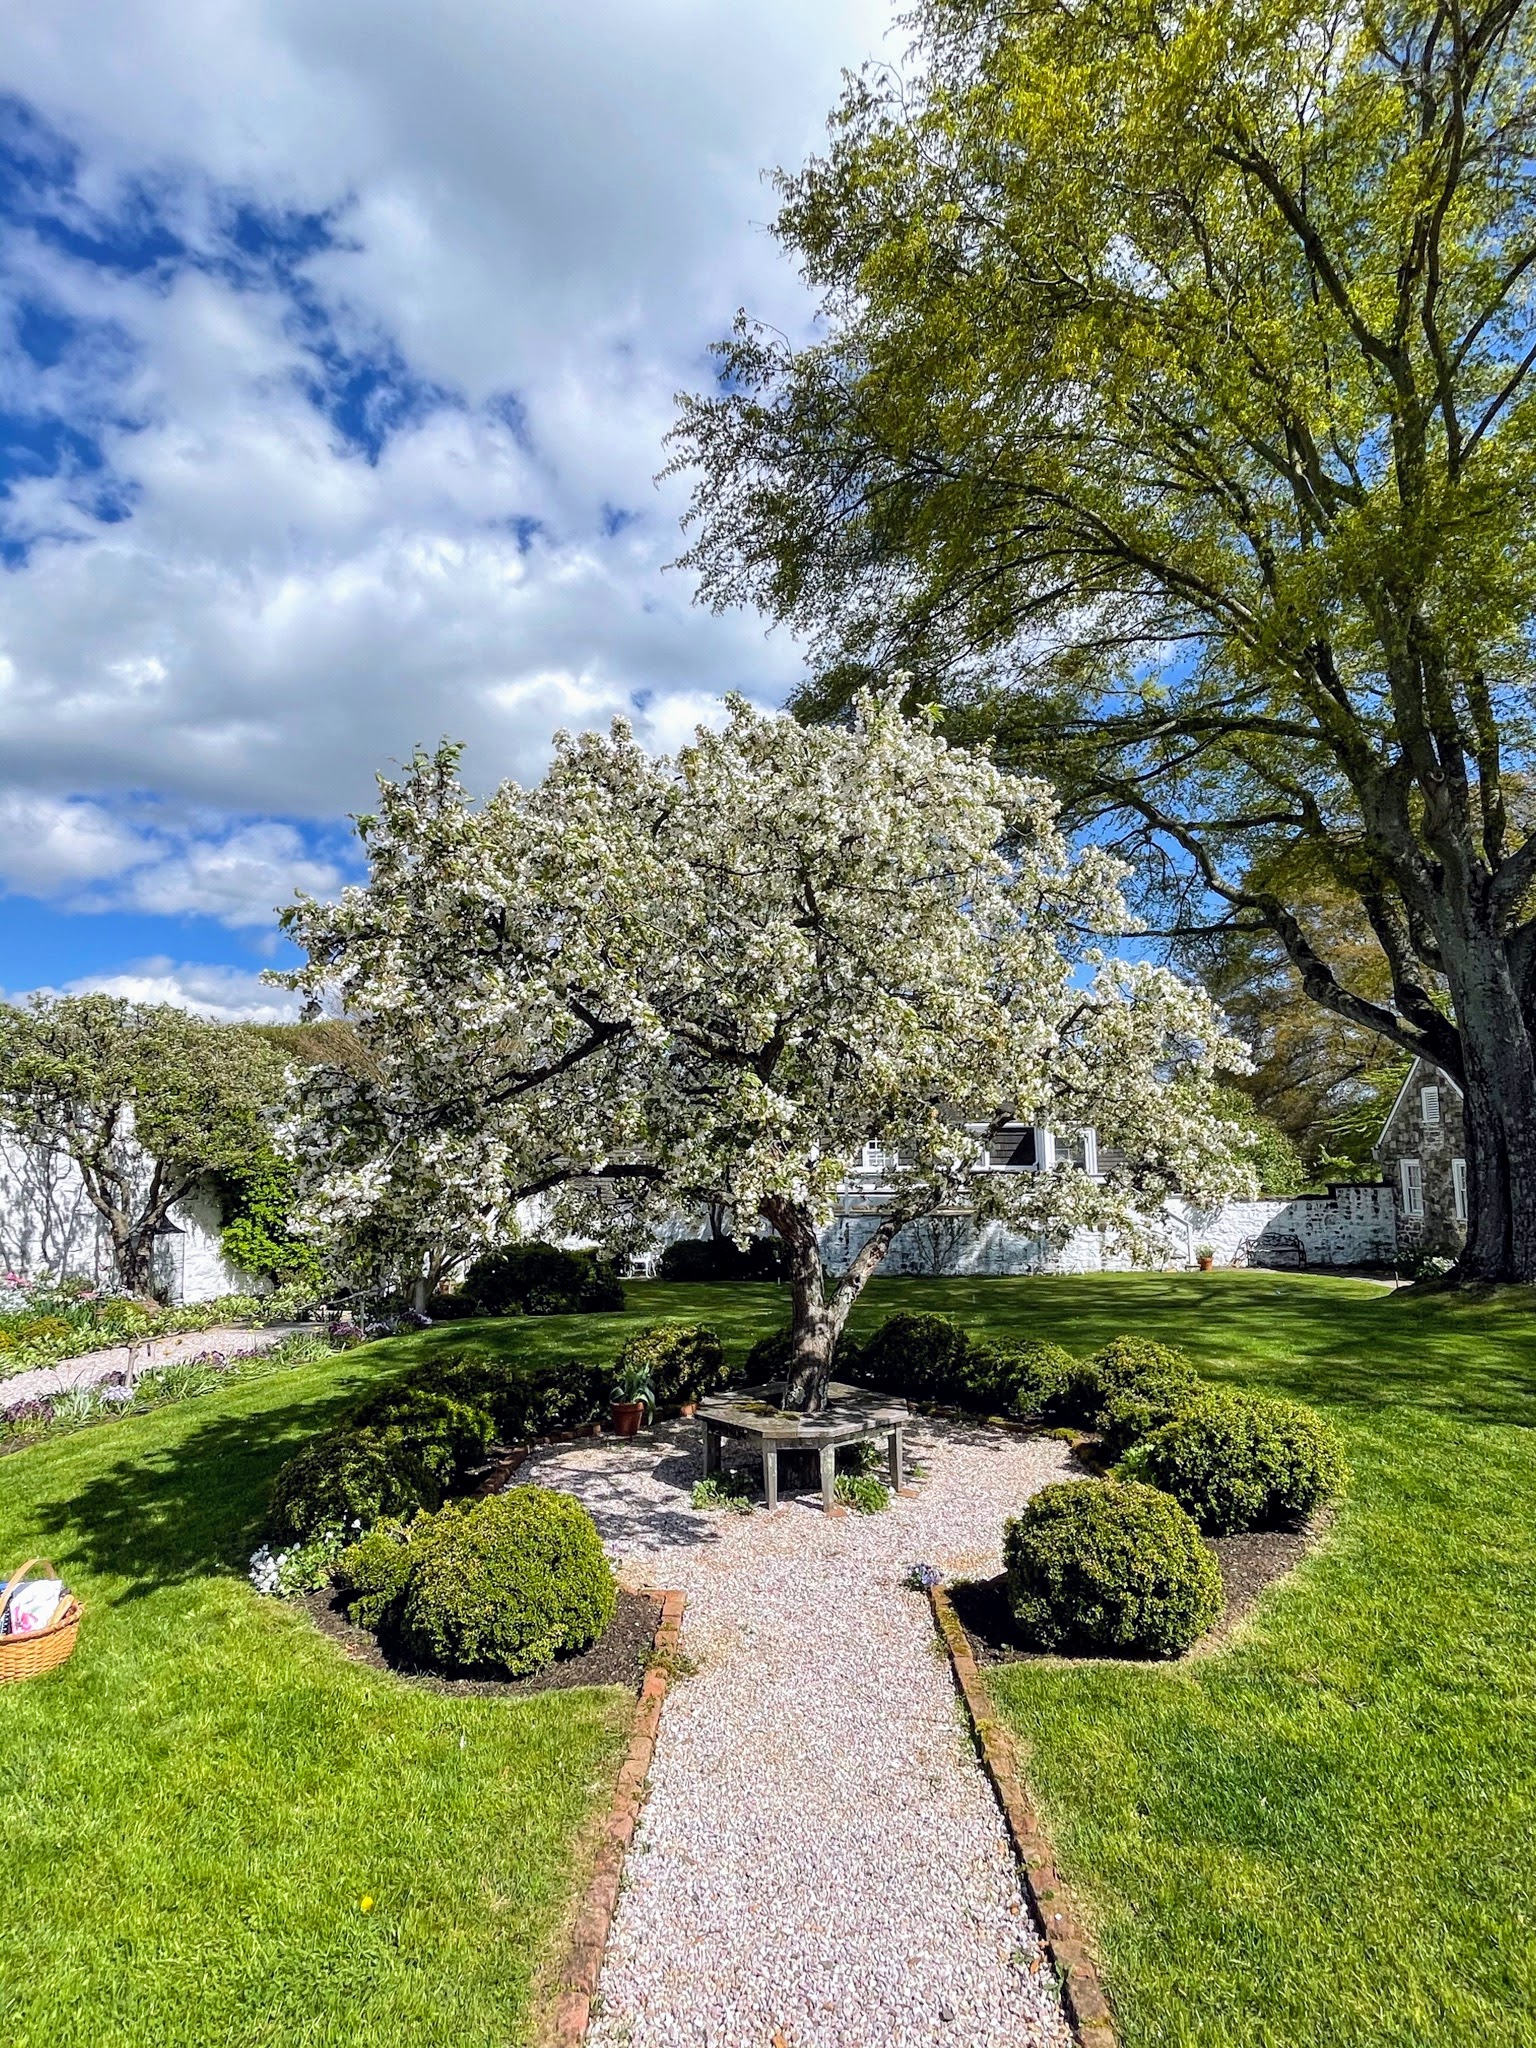
This tree is Malus ‘Katherine’. Malus is a genus of about 35 species of deciduous trees and shrubs from Europe, Asia and North America. The name comes from the Latin for apple. ‘Katherine’ is an upright, spreading crabapple that matures to 20 feet tall. It was discovered as a chance seedling in Rochester, New York in 1928. Pink buds open to pinkish-white, double flowers in spring, then fade to white. The flowers are followed by greenish-yellow crabapples blushed with red that mature in fall and persist into early winter.
Here’s a view toward the schoolhouse along the wall beds. Tulips fill out the wall beds on the northern side of the garden. Apple trees are trained against the wall in the candelabra style of espalier.
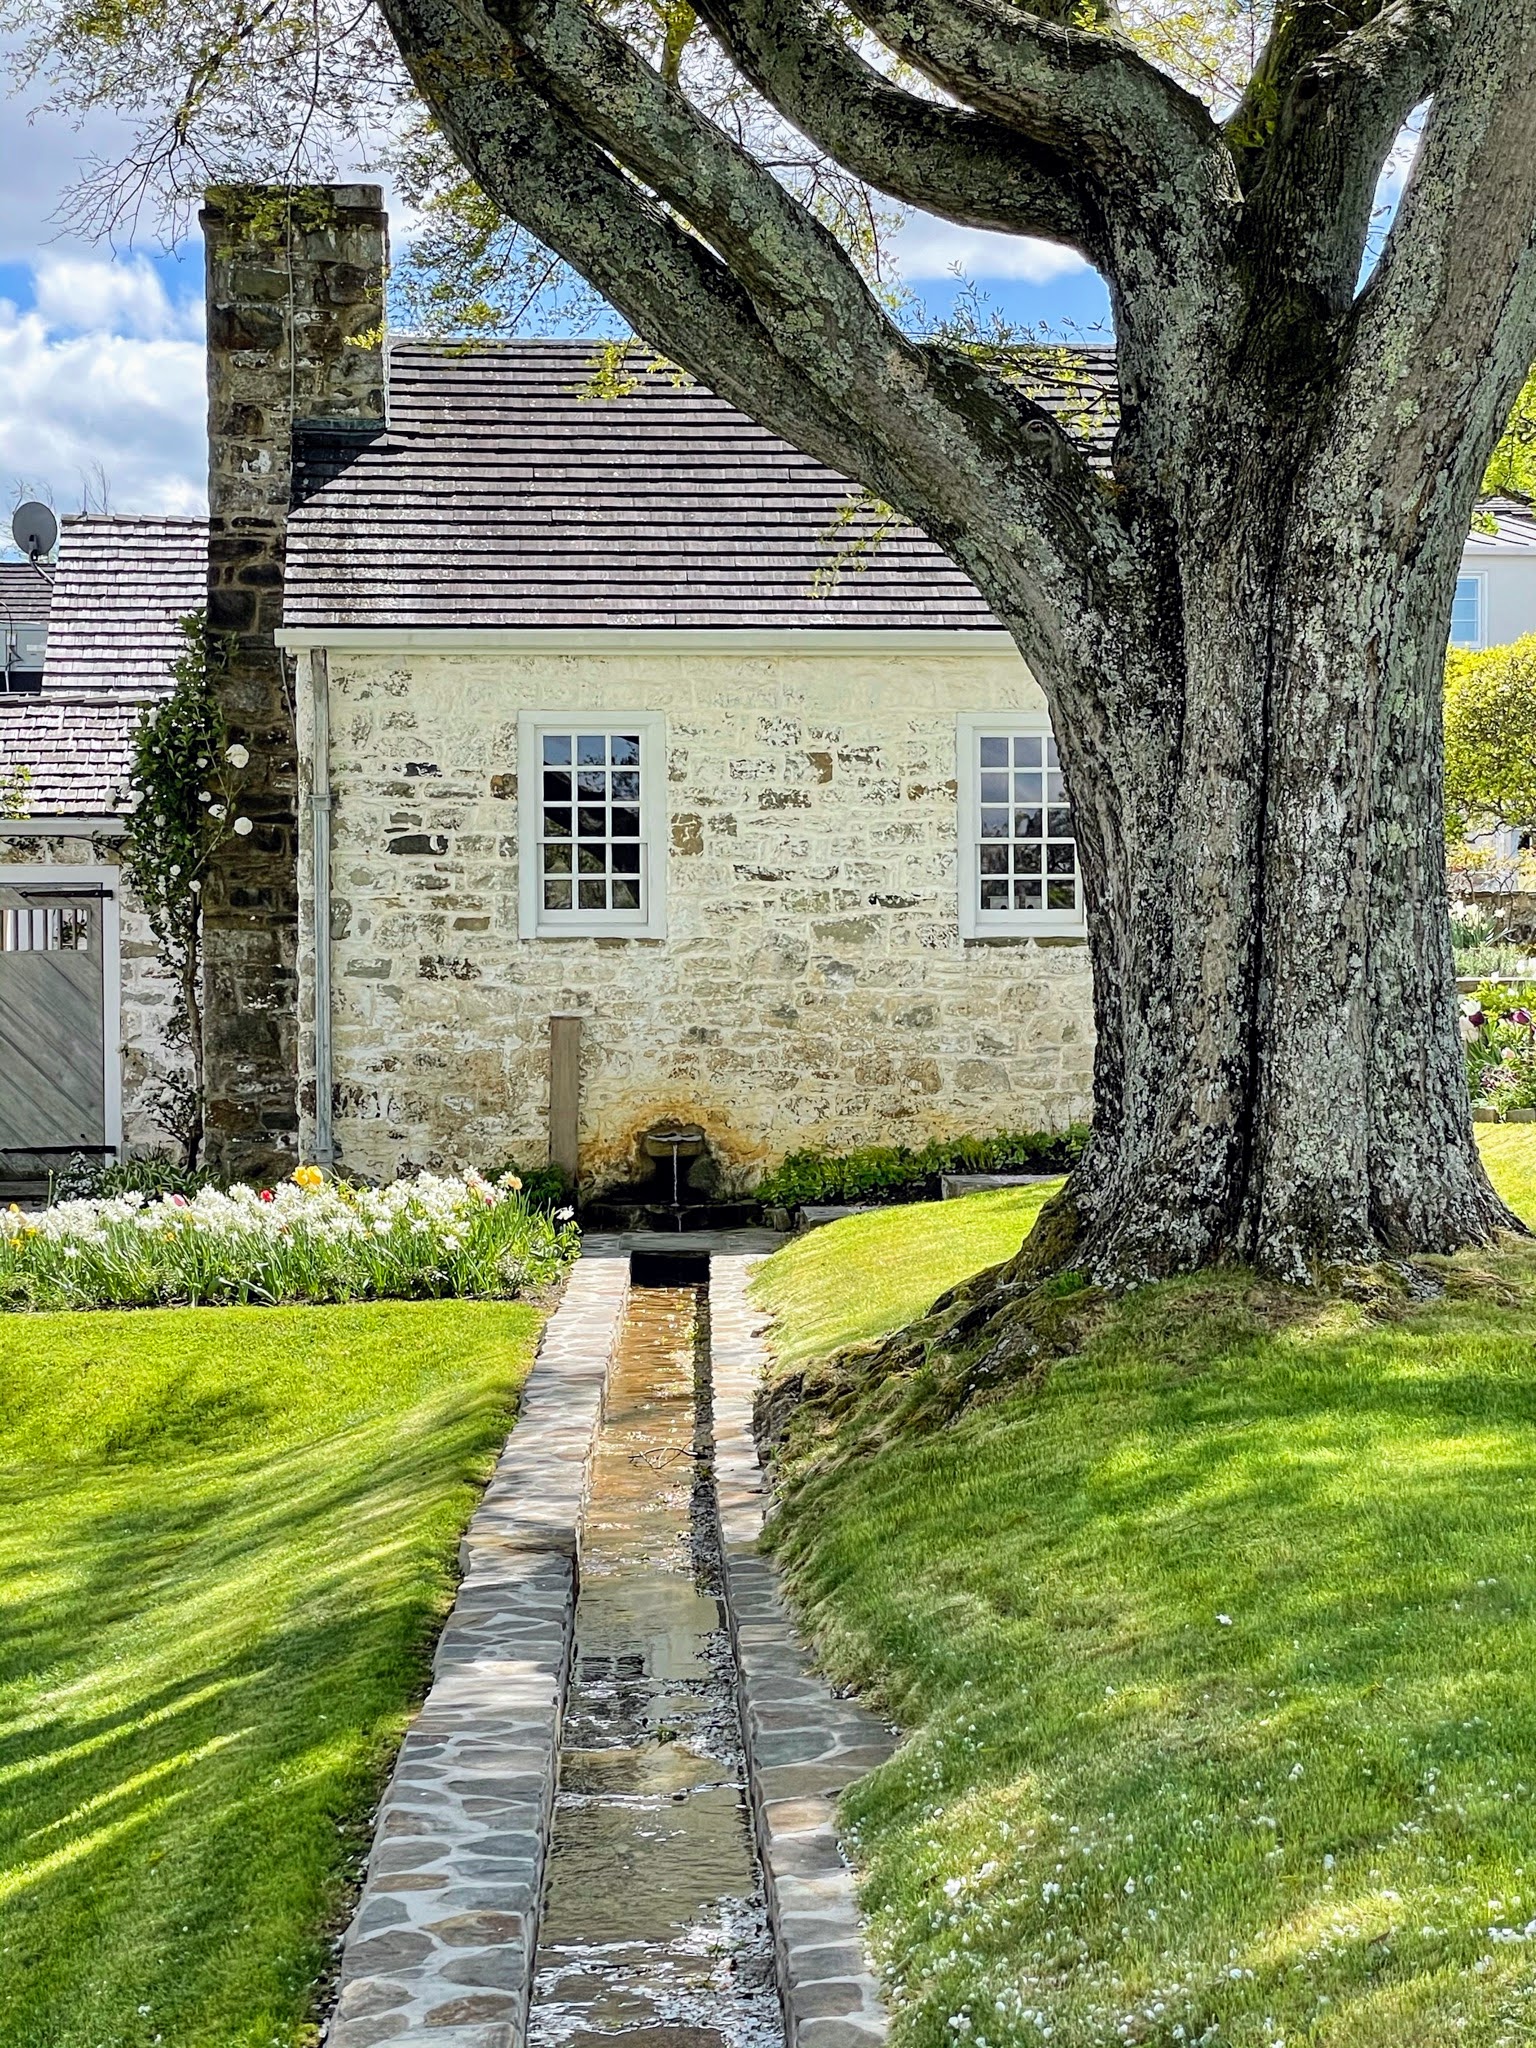
A burbling fountain extends from the wall of the Honey House and feeds a linear stream that cuts across a portion of the garden adjacent to the croquet lawn.
Inside the Honey House is a carved stone bird bath by William Edmondson (c.1874-1951), the first African-American folk art sculptor to have a solo exhibition at the Museum of Modern Art in New York City.
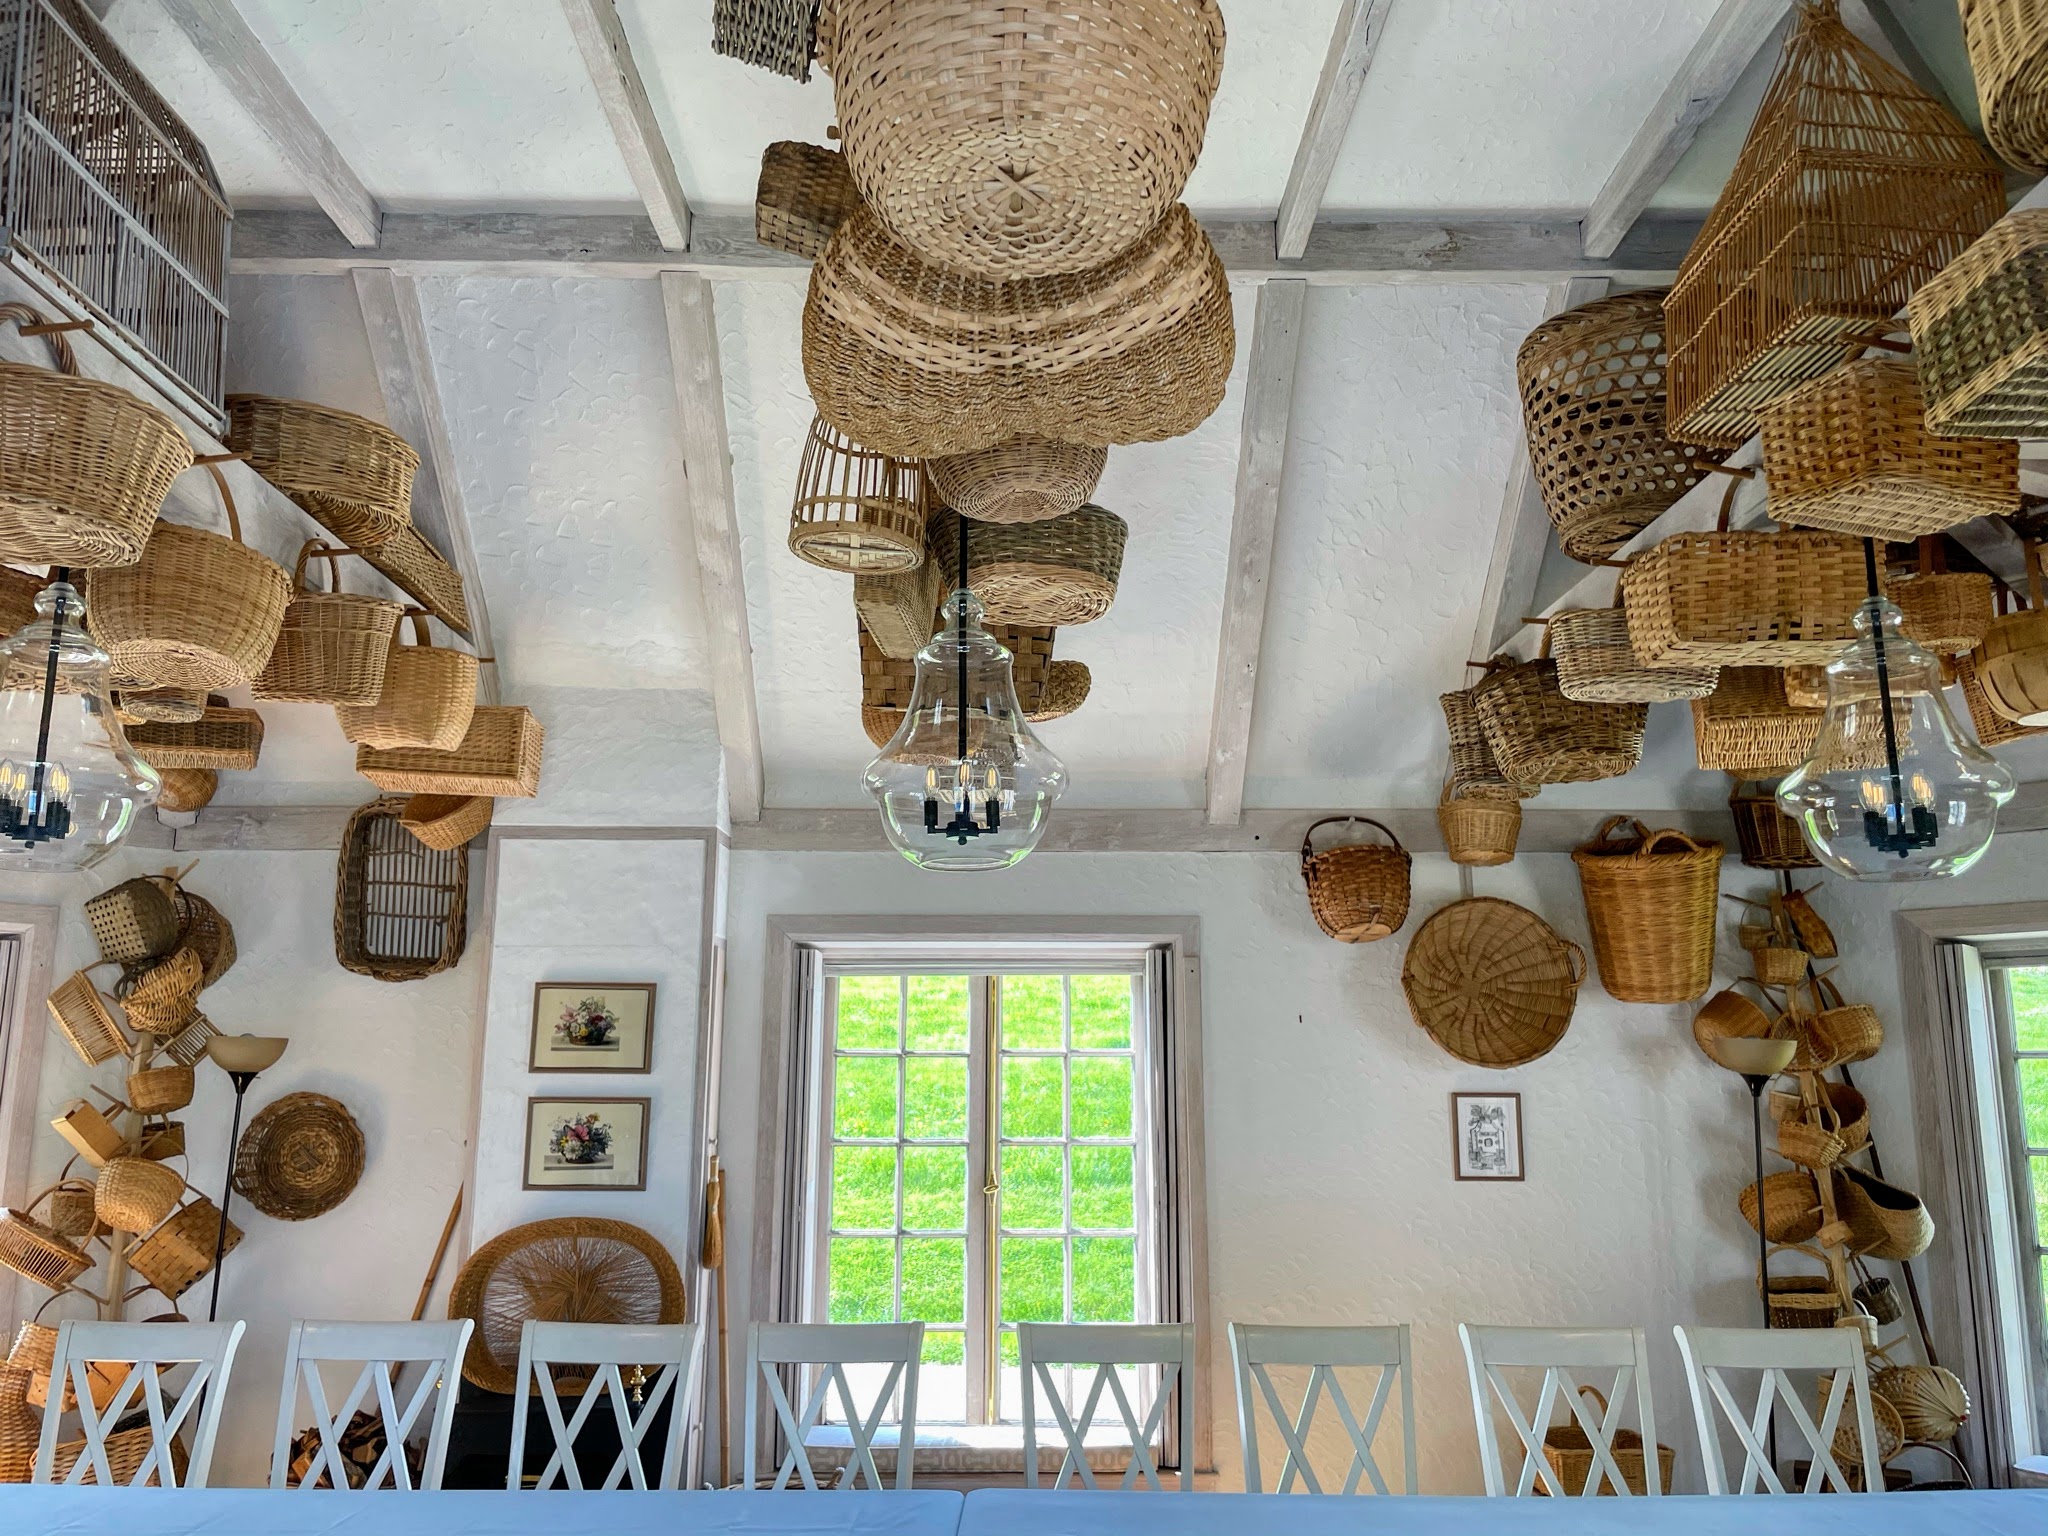
Here’s an arrangement of baskets on the ceiling of the Mellon’s Basket House. When Mrs. Mellon was alive, this room was a place for rest and relaxation. It is now used as a meeting and education space for visitors to the Oak Spring Garden Foundation who come to participate in workshops, short courses, and other programs.
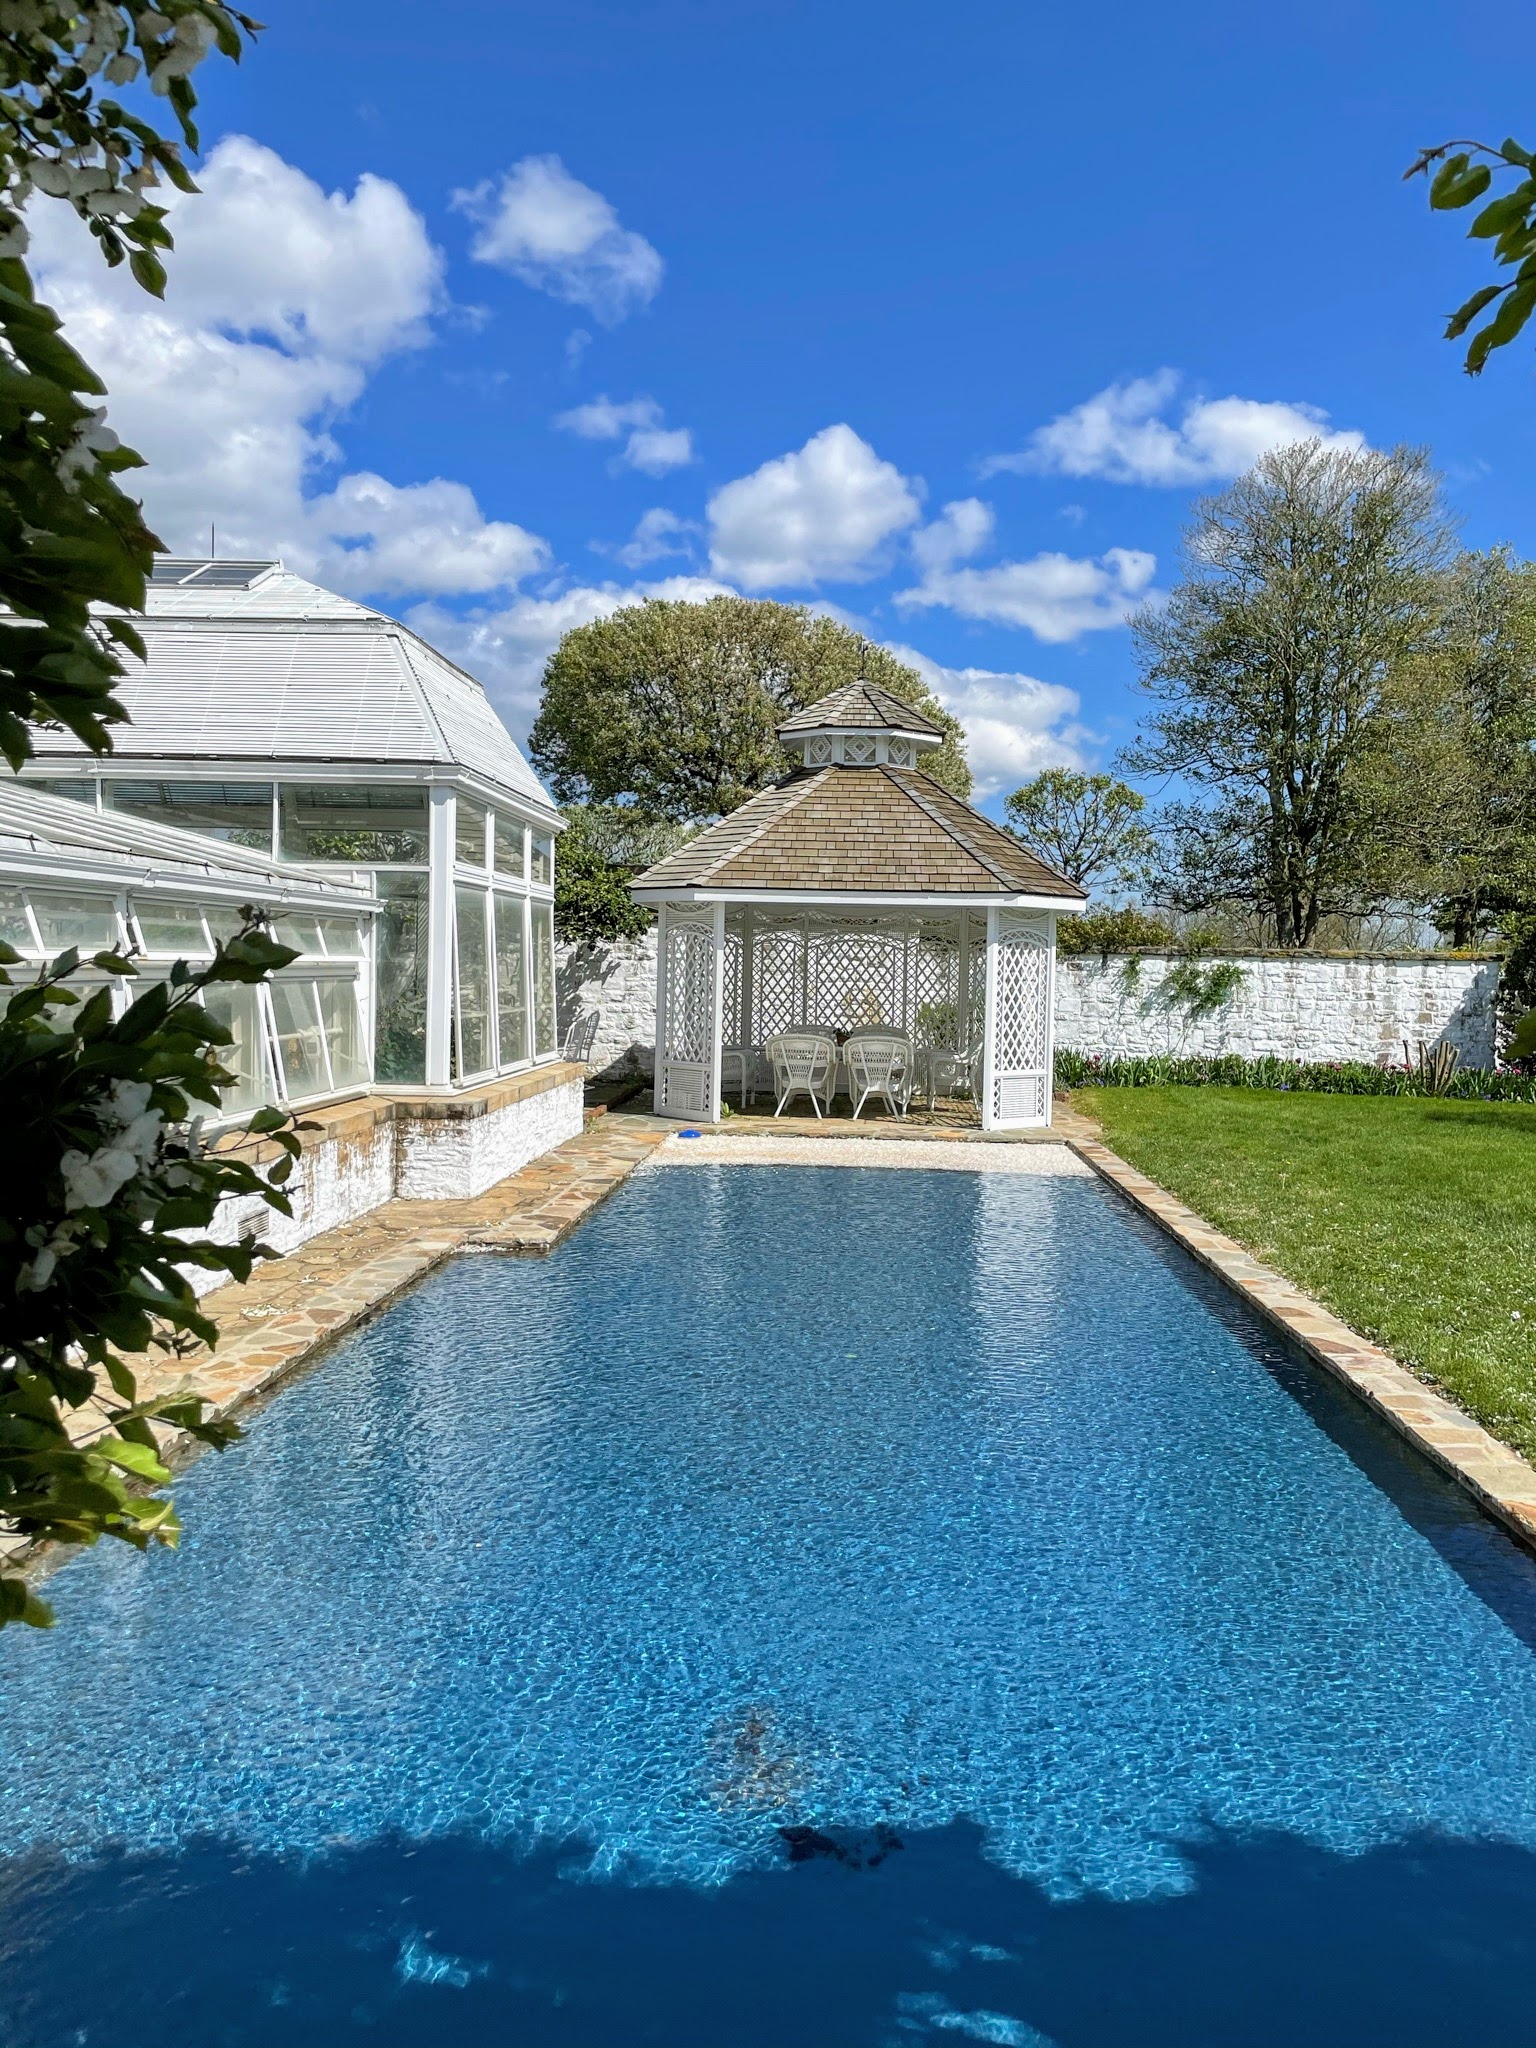
This is a reflecting pool in front of the Formal Greenhouse. Sitting at the end of the pool is the Cake House – a gazebo so named because it was used to shade the wedding cake when Bunny Mellon’s daughter, Eliza Lloyd, married Derry Moore, the 12th Earl of Drogheda in 1968.
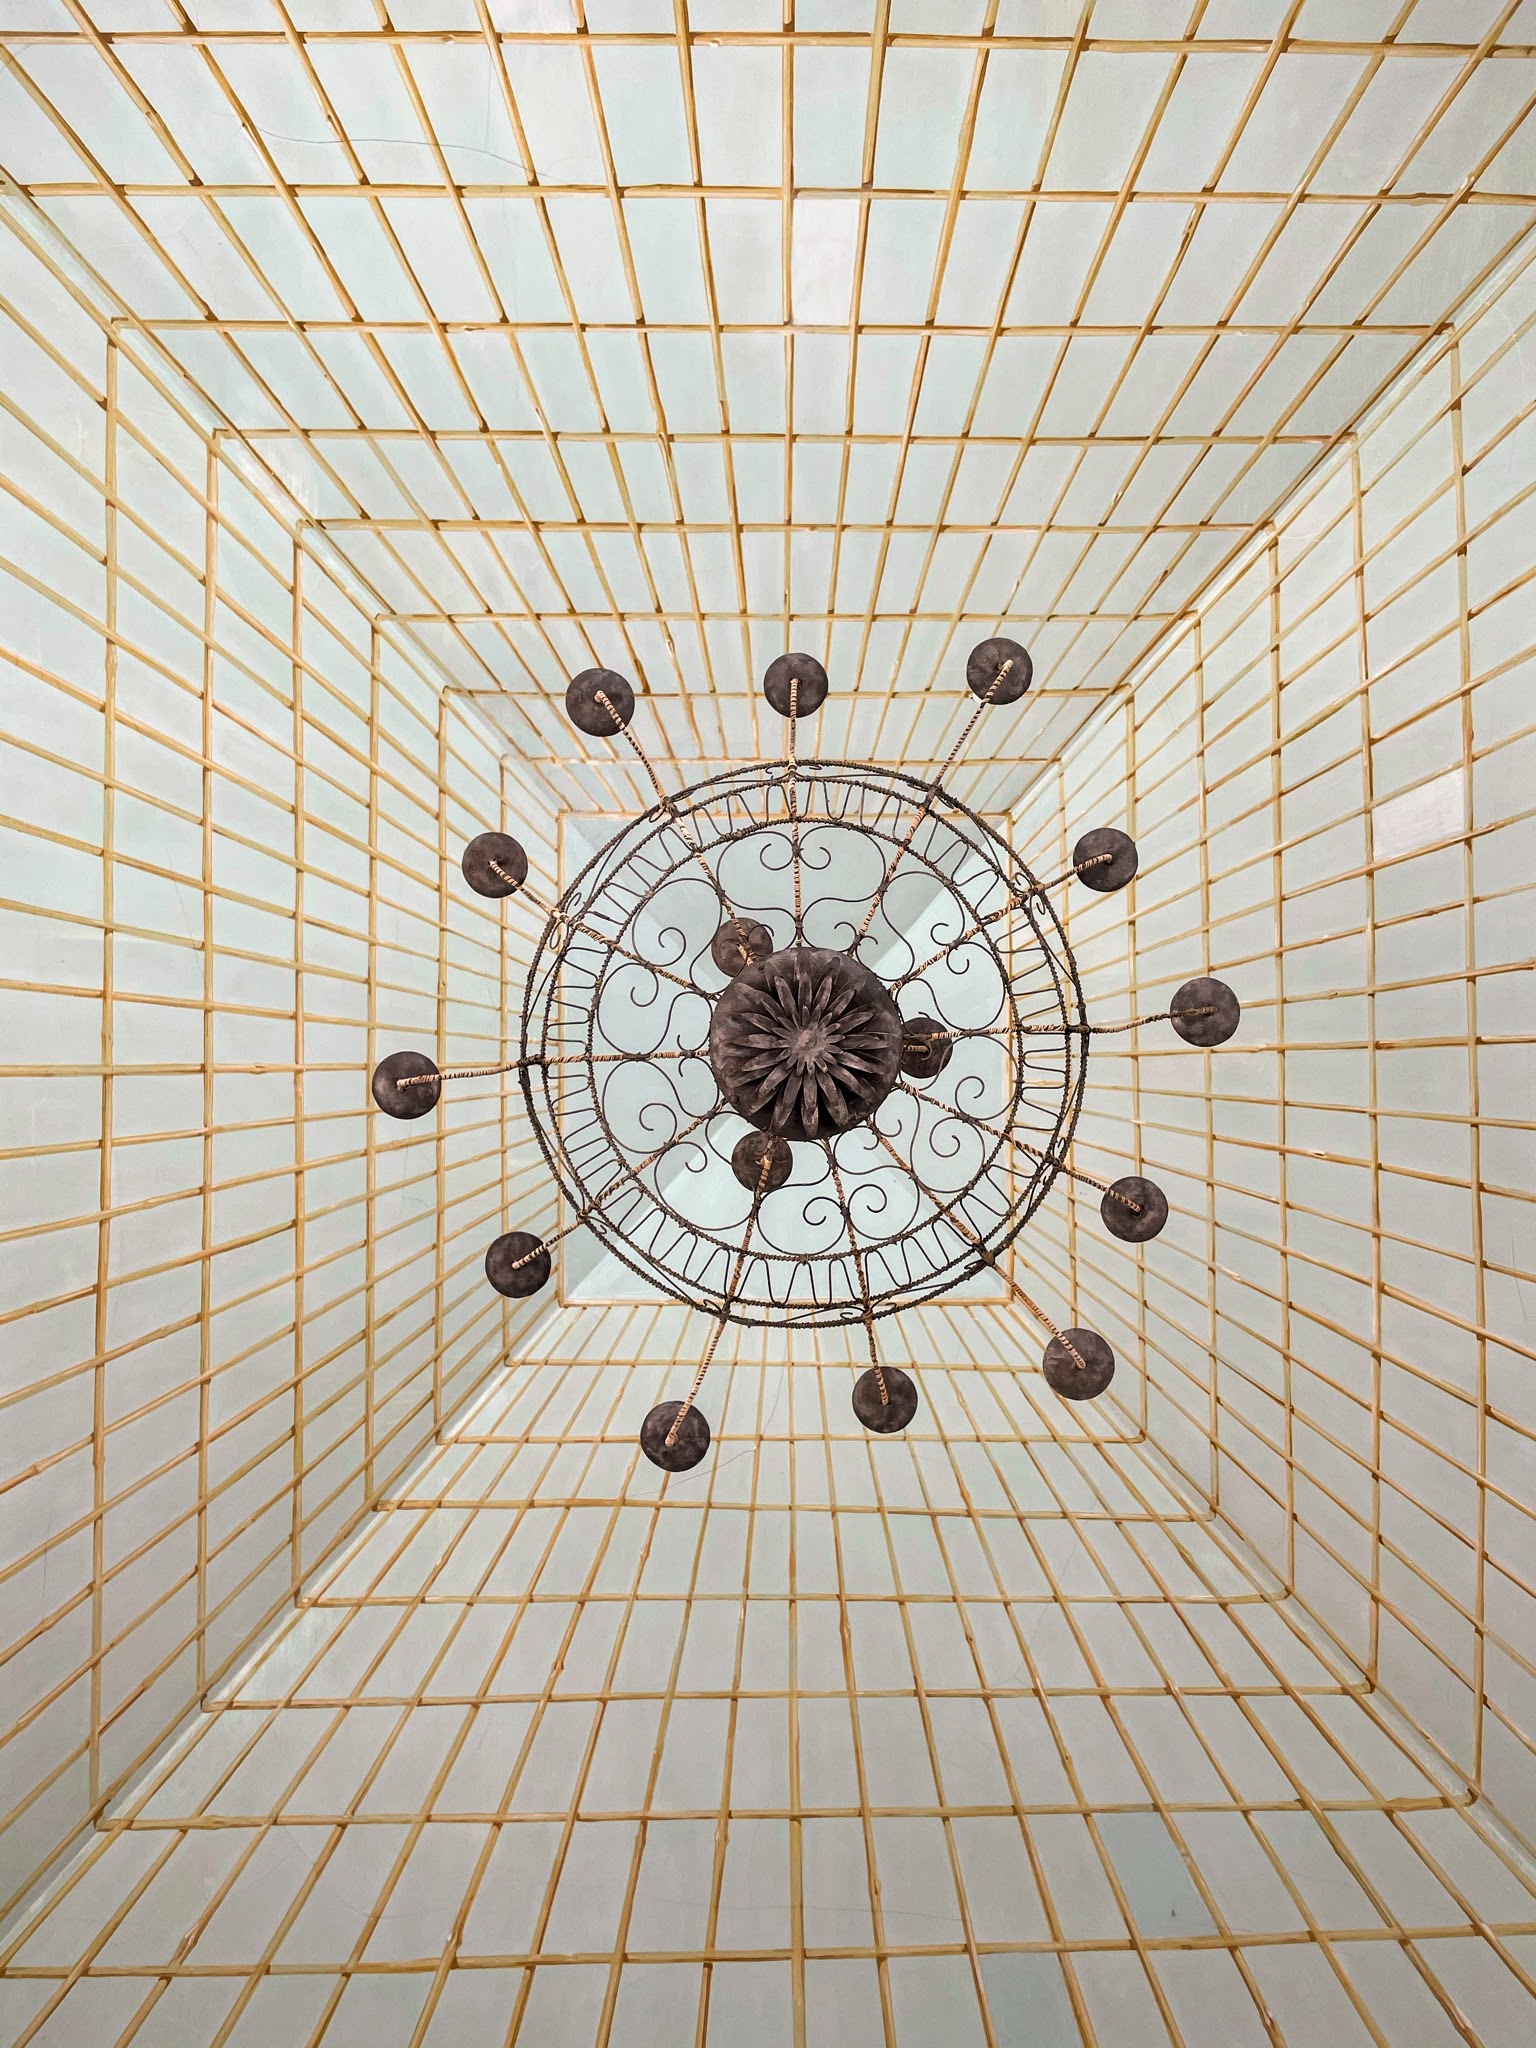
Looking directly up at the vaulted ceiling in the central room of the Formal Greenhouse is this decorative chandelier.
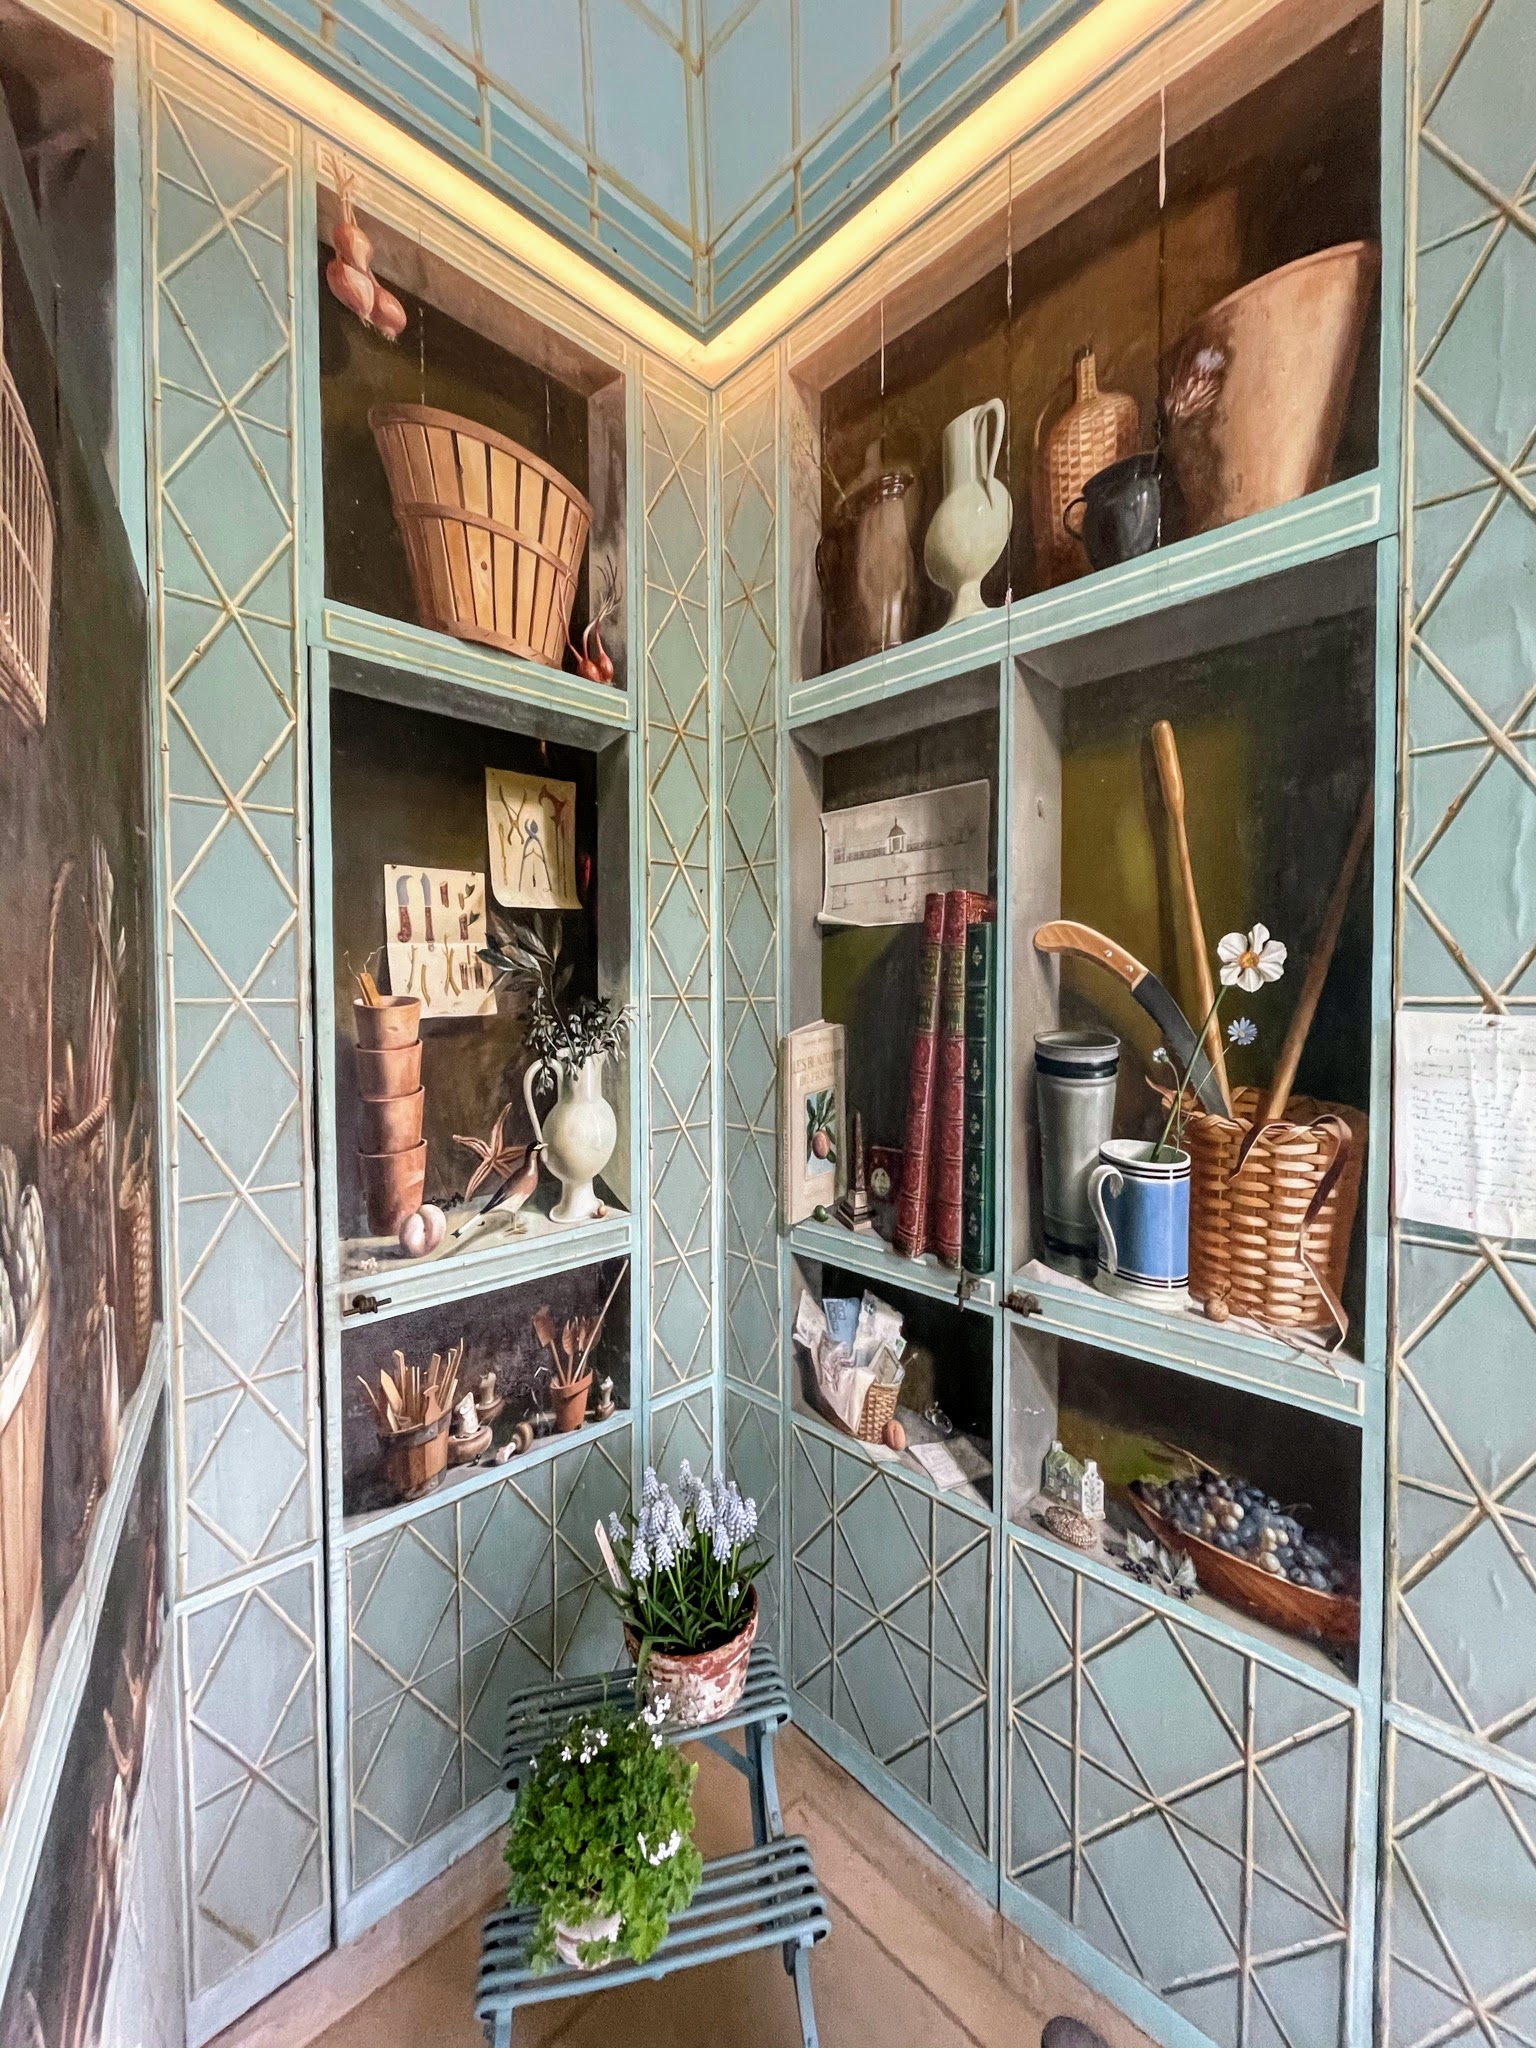
The central room of the Formal Greenhouse is surrounded with a mural in the trompe l’oeil style by the french artist Fernand Renard. The work was commissioned by Bunny and serves as a sort of visual biography of her, depicting many real world objects she owned and things about which she was so passionate.
Sometimes the real physical objects in the greenhouse can be hard to distinguish from the objects painted on the walls. Look closely…
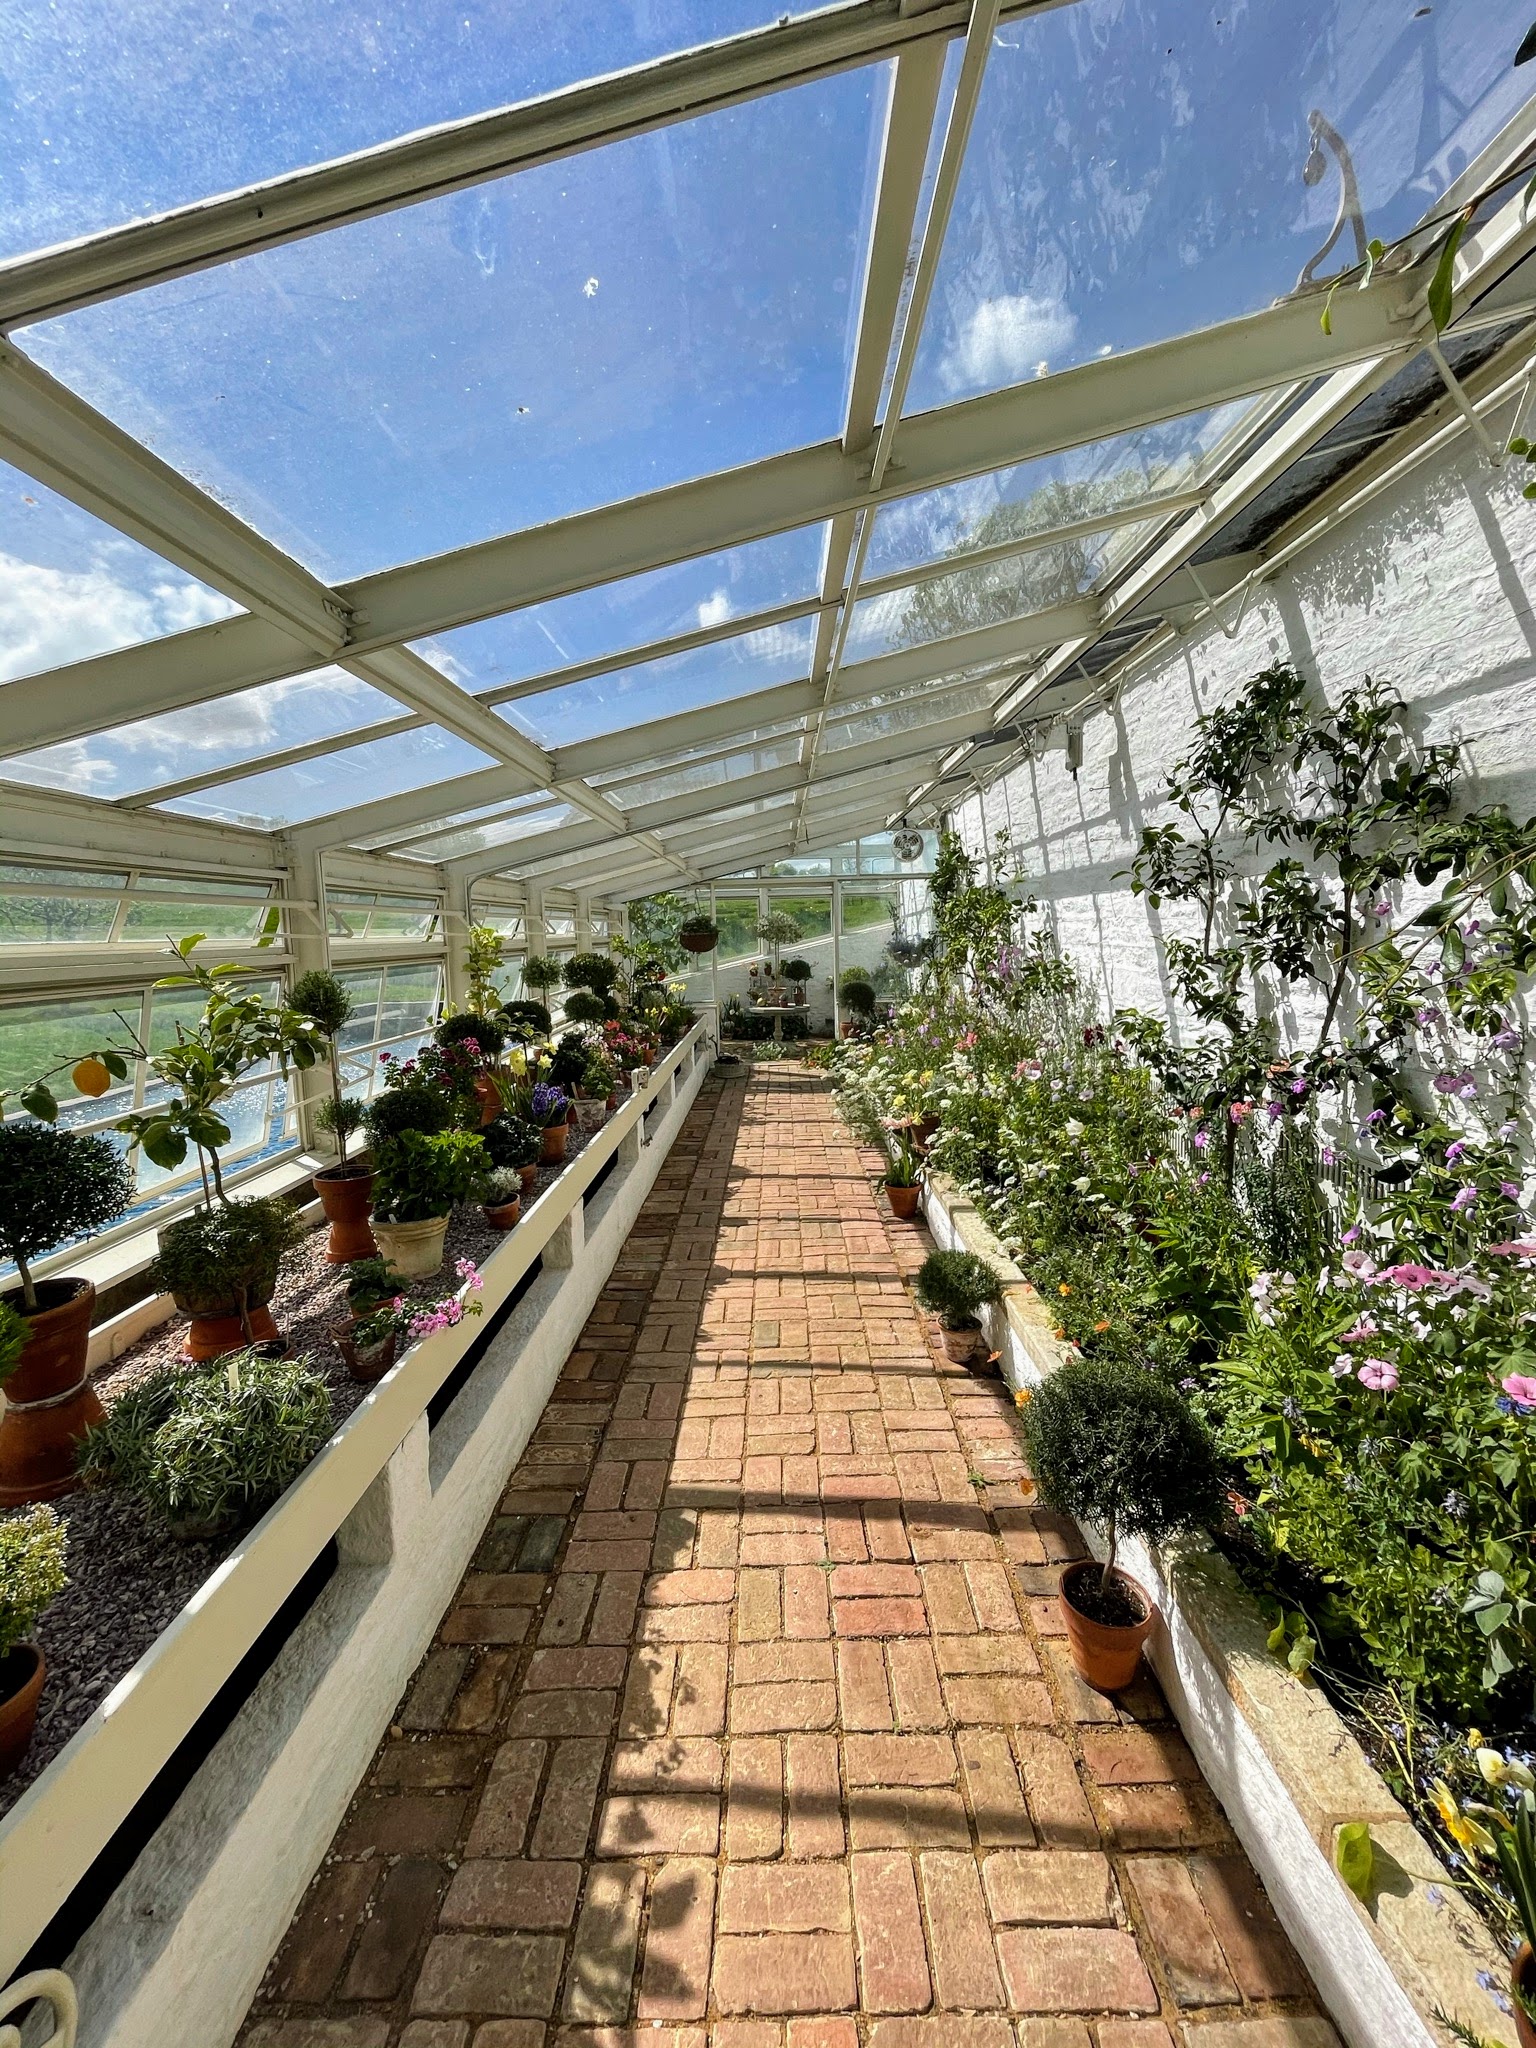
A few feet further is the inside of the Formal Greenhouse – still filled with plants.
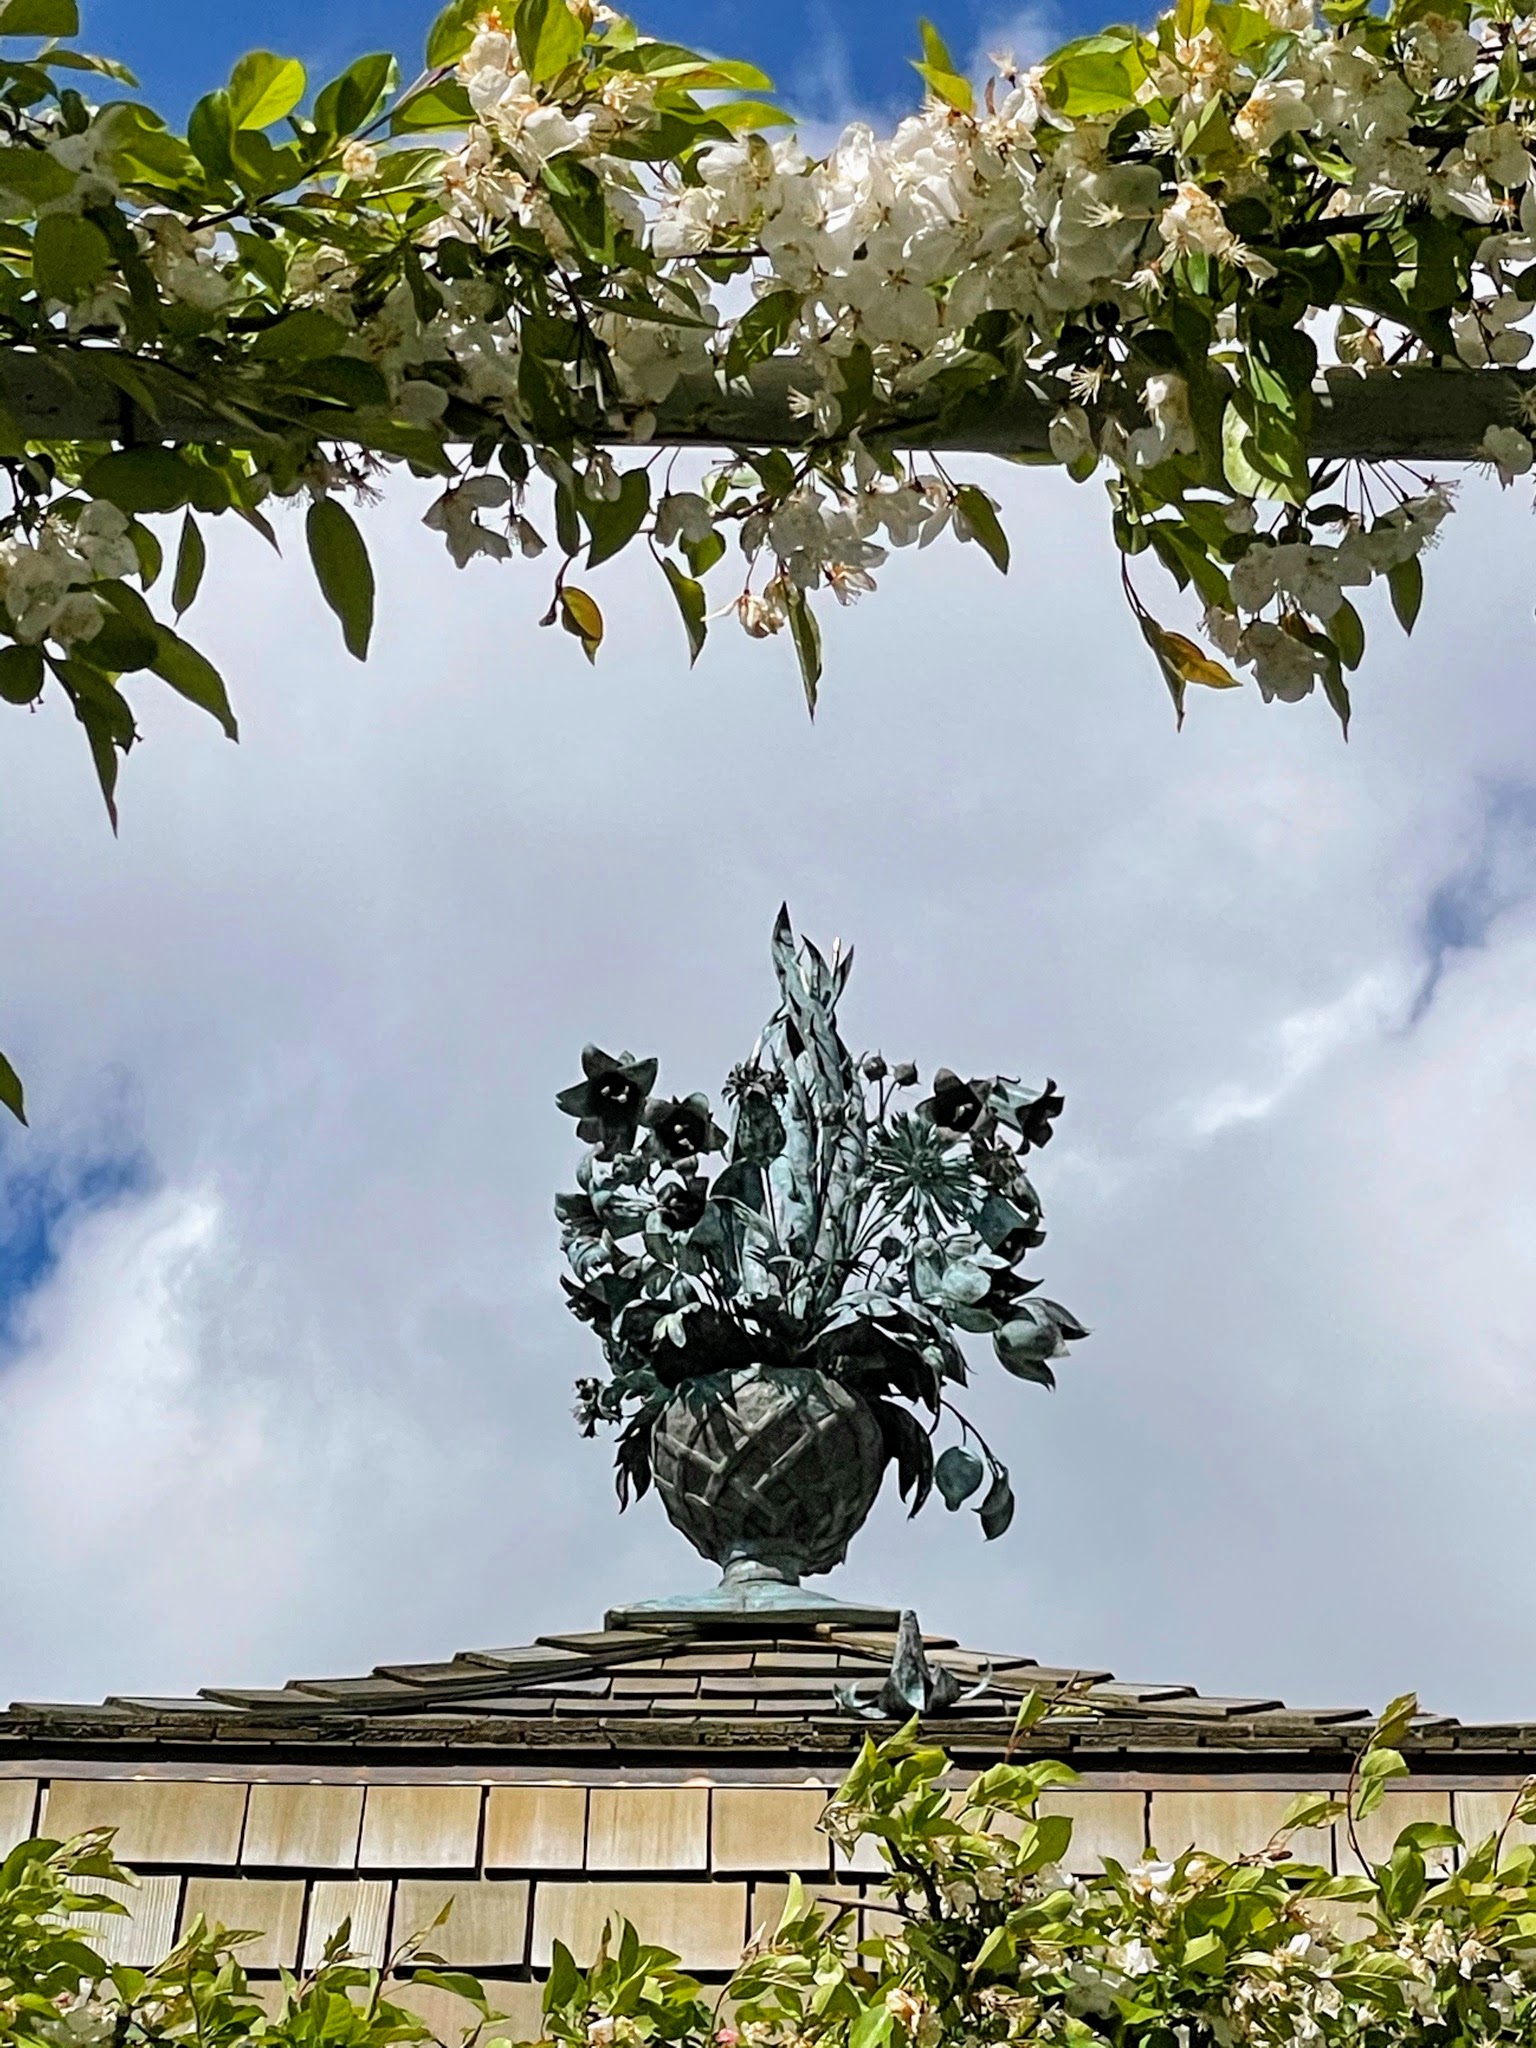
Back outside – a replica finial on top of the Formal Greenhouse. The original was designed by the Tiffany artist-jeweler Jean Schlumberger. Exposure to the elements and deterioration led to the original being taken down for conservation in 2018. It is now on display in the nearby Oak Spring Gallery.
This is the main gallery of the Oak Spring Garden Library. The library contains around 19,000 rare books and objects relating to plants, gardens, and landscapes – some dating back as early as the 14th century. The library was built close to the home in 1981 as a gift from Paul to Bunny. It was expanded in 1997 to contain her growing collection of books, manuscripts, and art. Mrs. Mellon’s wish was that this collection continue to be a resource for scholars after her death. In 1993 she established the Oak Spring Garden Foundation with the purpose of maintaining and sharing those collections. (Photo by Max Smith, Oak Spring Garden Foundation)
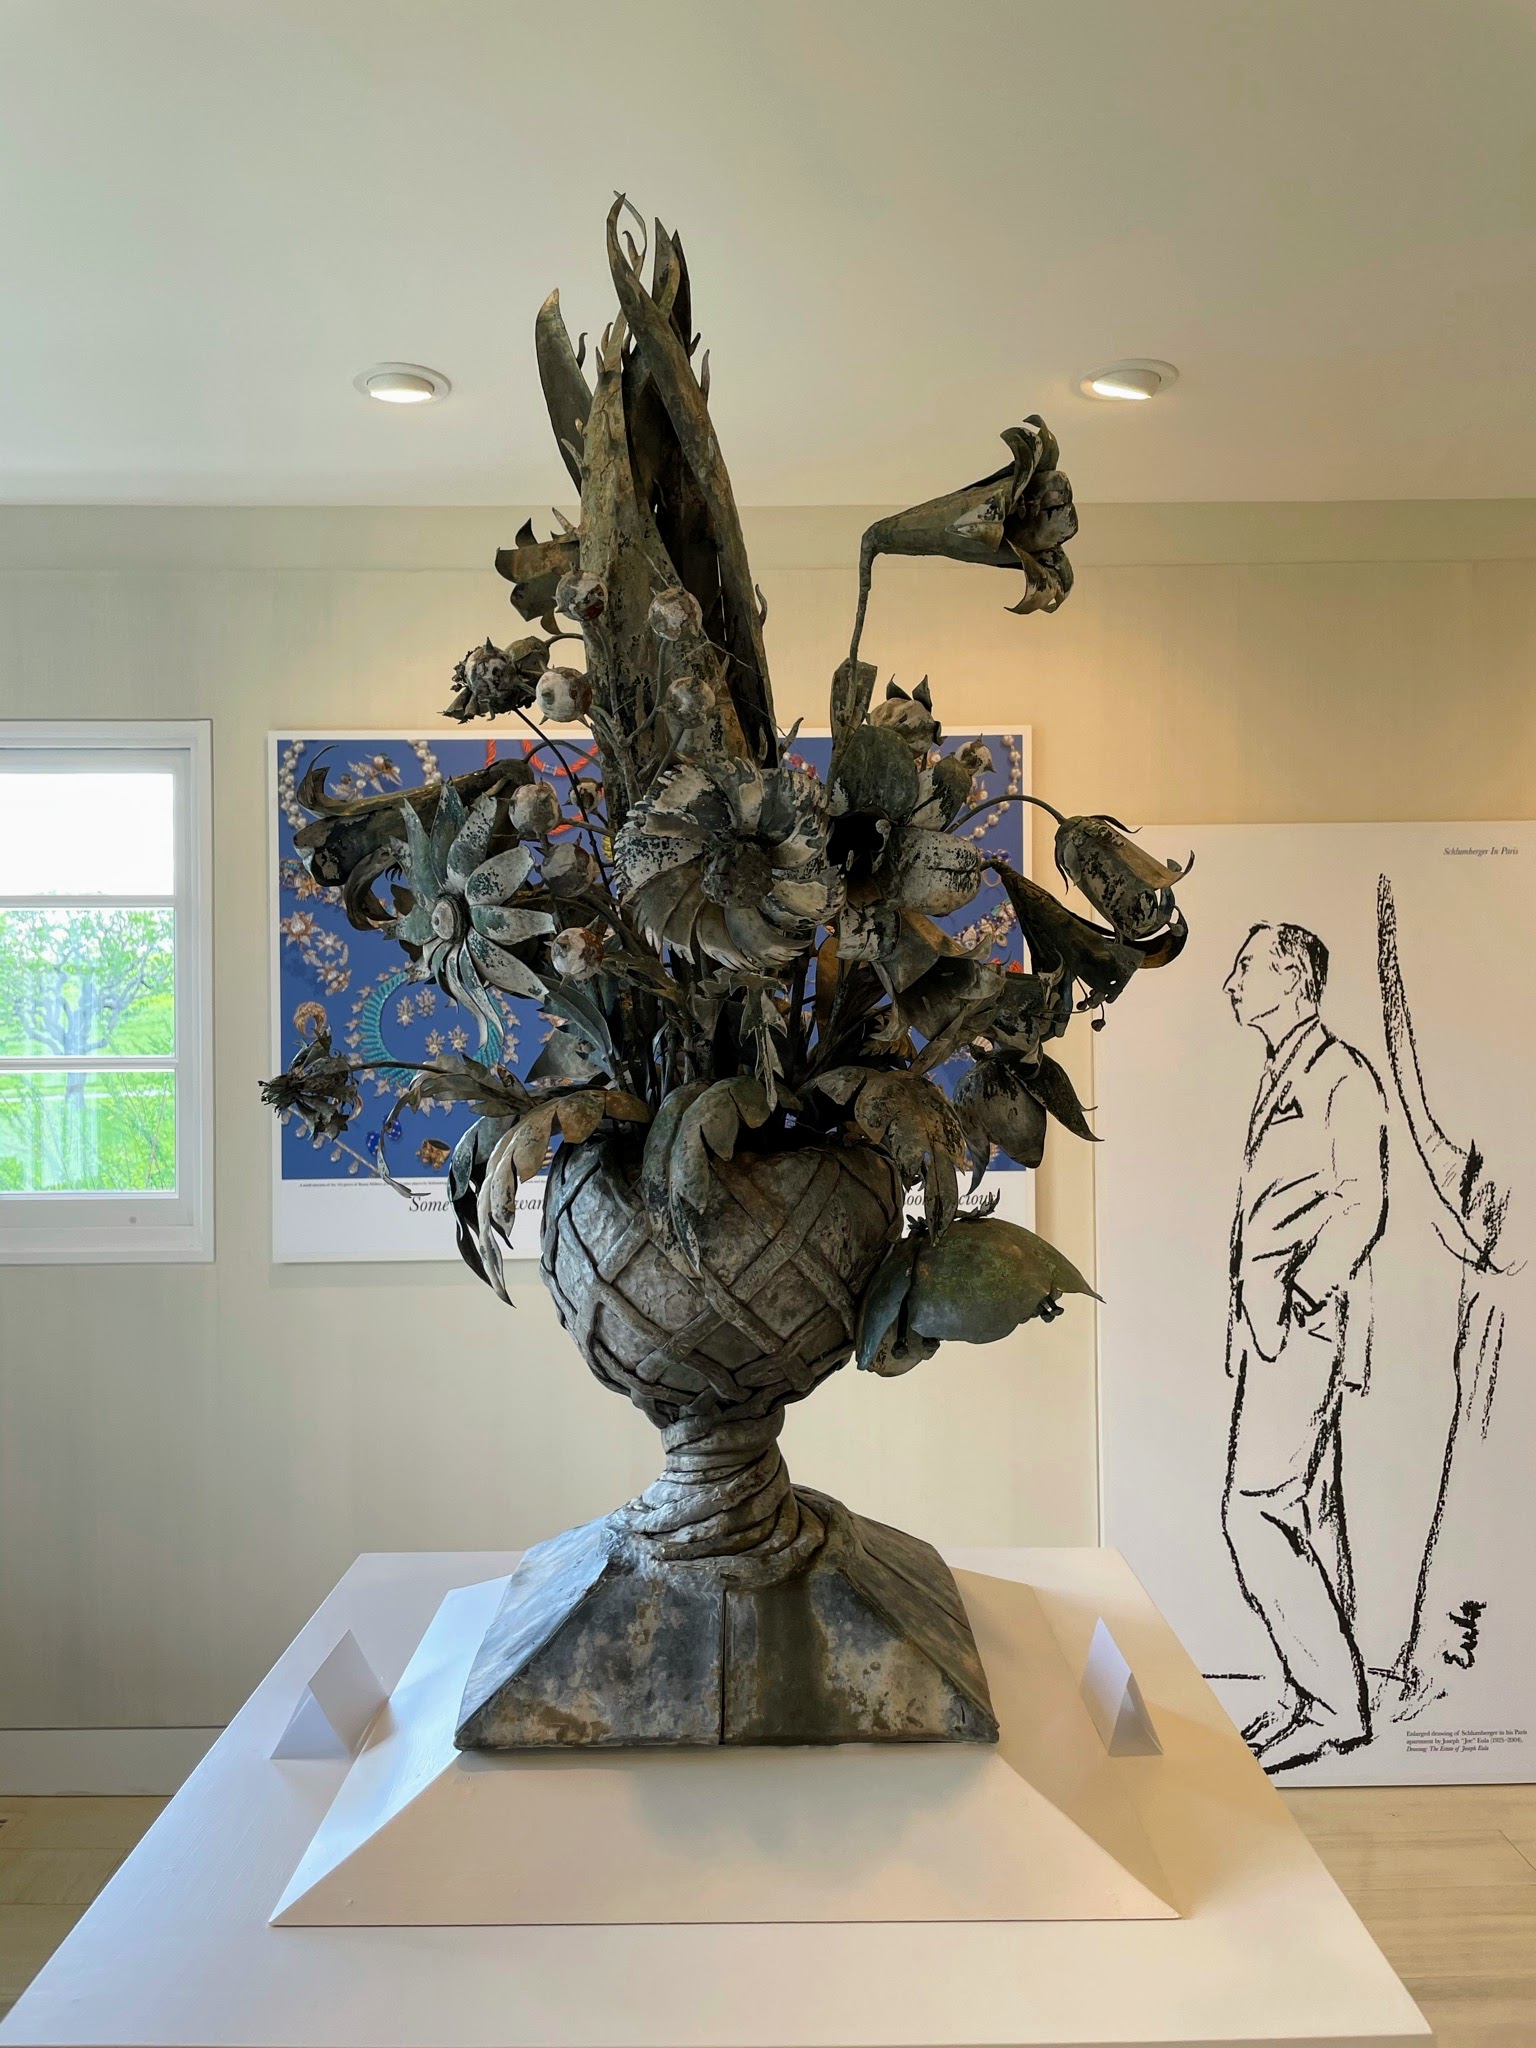
And here’s the original Greenhouse Finial on display. It is being featured as part of an exhibit about its designer, Jean Schlumberger, and his creative partnerships with Bunny Mellon.
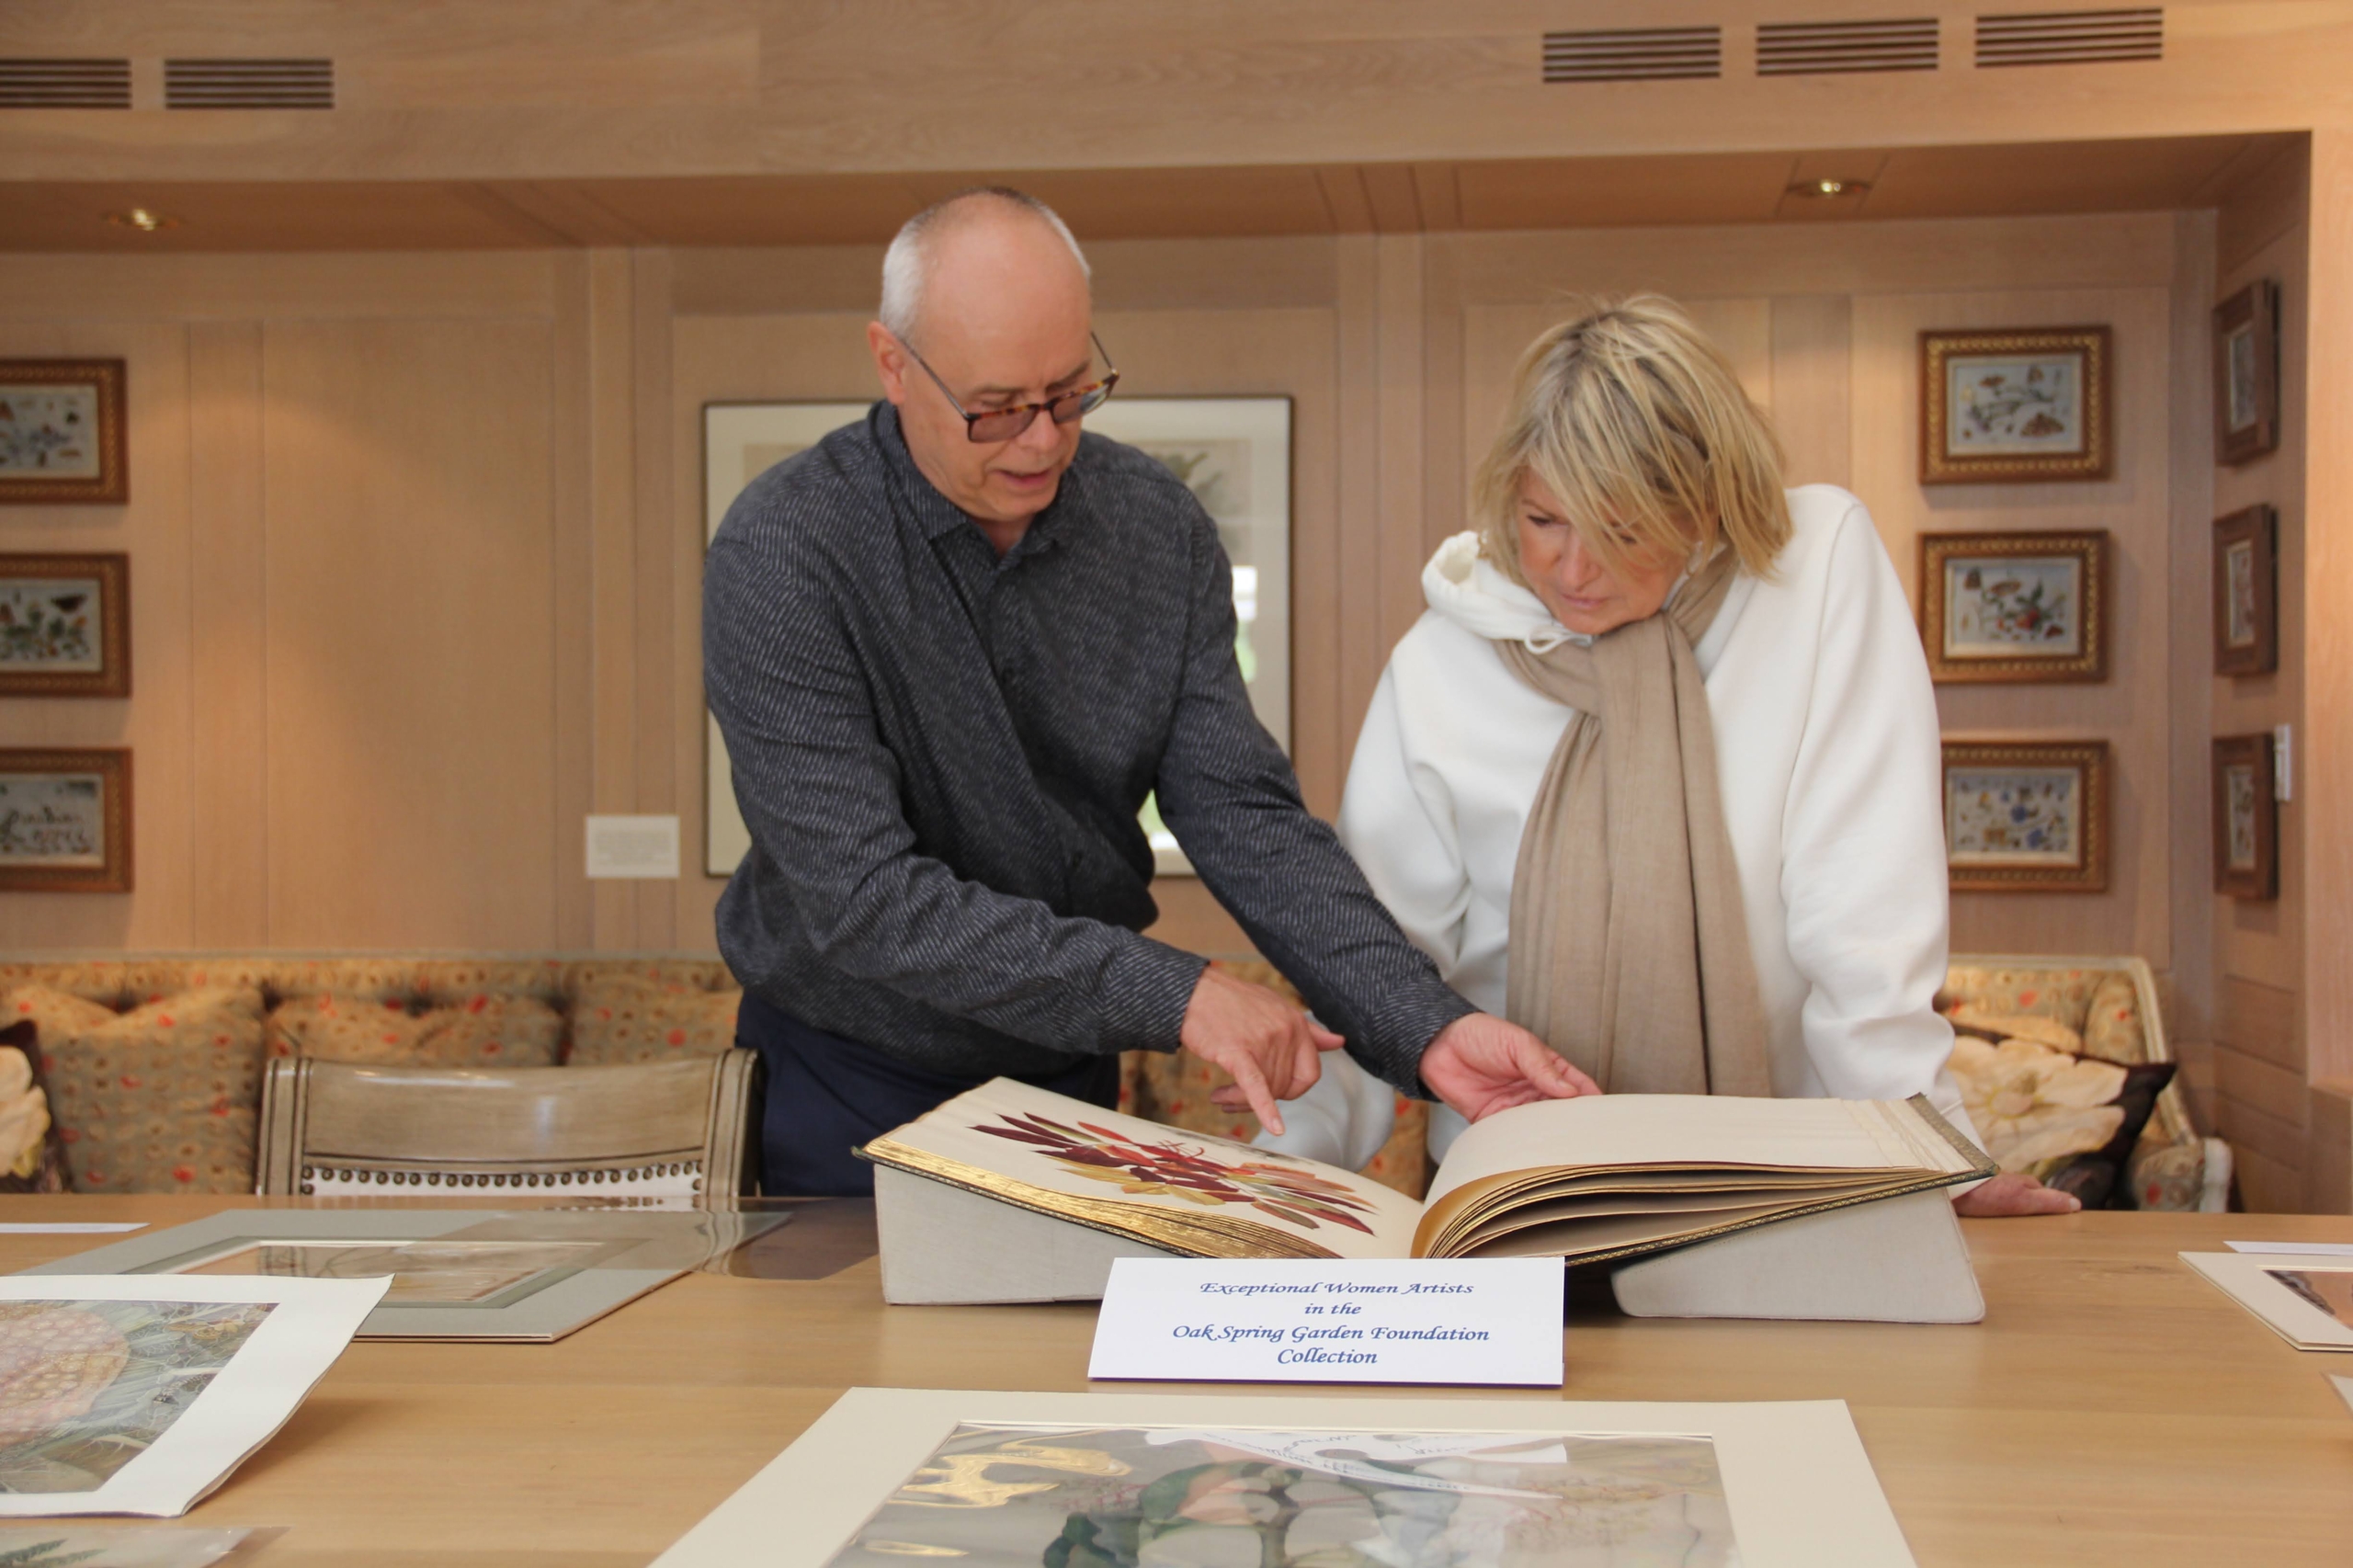
Here, OSGF Head Librarian, Tony Willis, shows me a selection of works from the Oak Spring collections by exceptional women artists. (Photo by Max Smith, Oak Spring Garden Foundation)
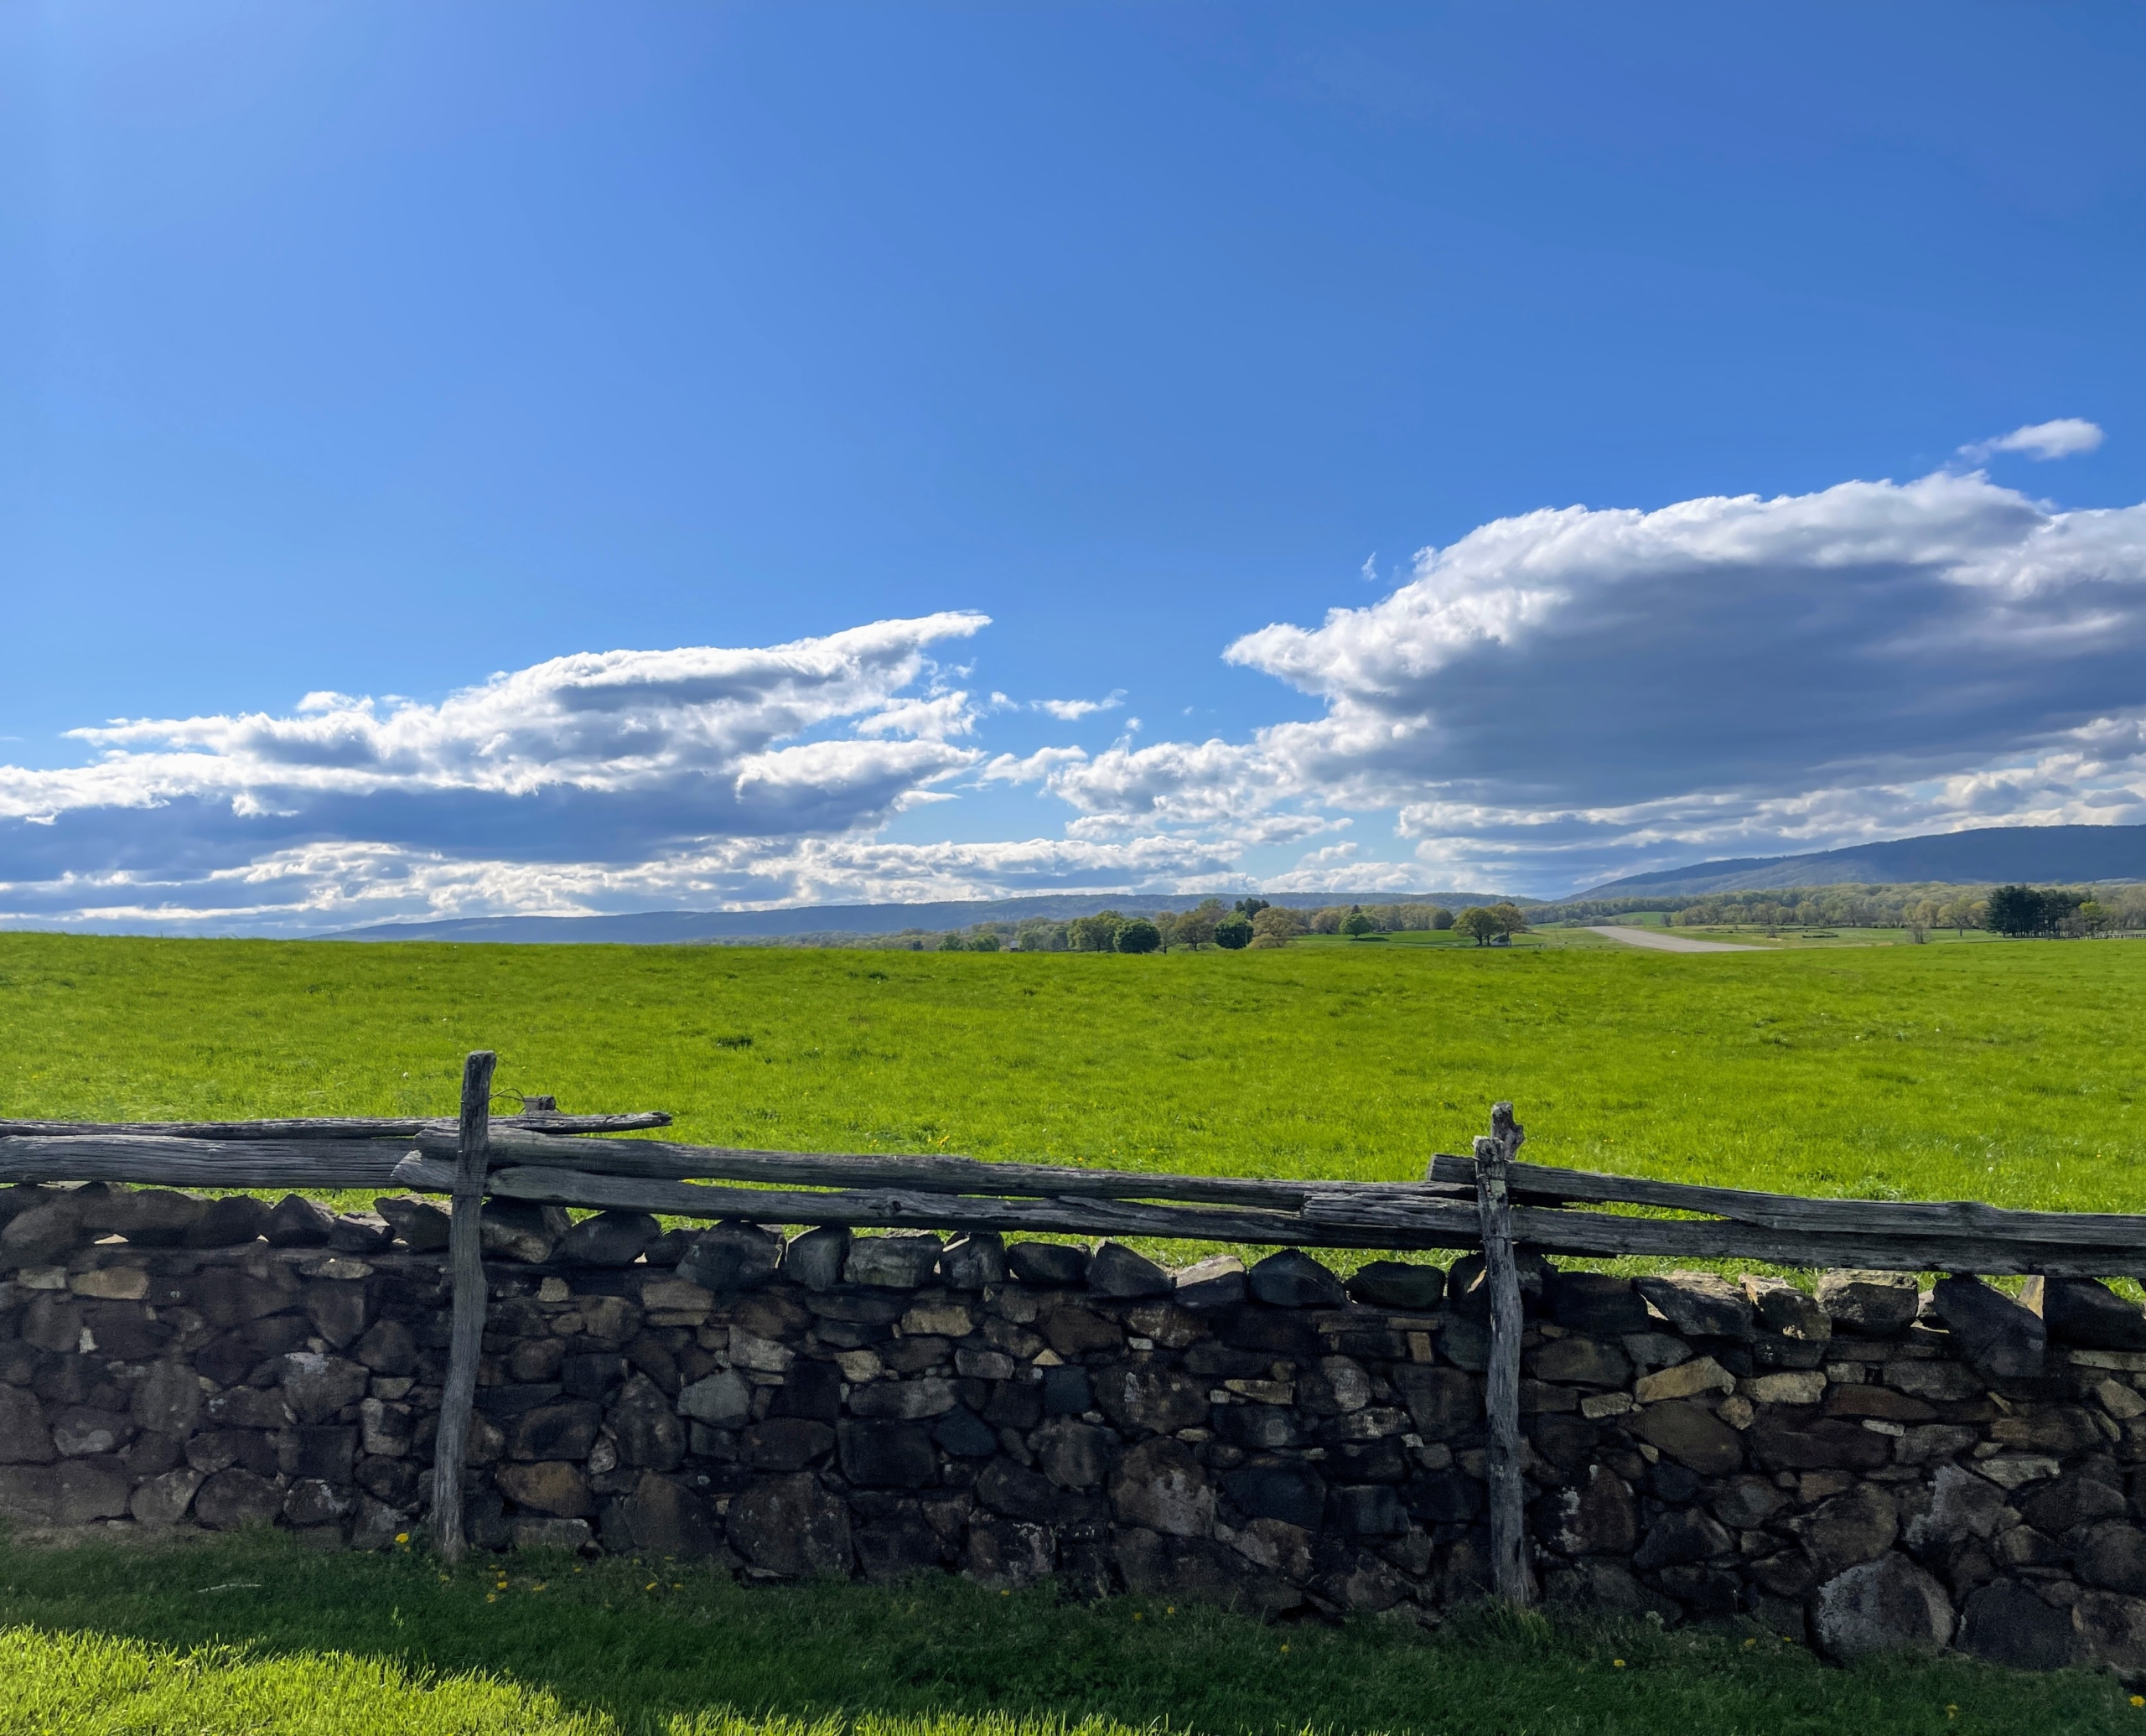
This view from the Road of Rokeby shows the Blue Ridge in the background. This was the Mellon’s first foothold in Virginia, purchased in 1931 by Andrew Mellon for his son, Paul. Here you can also see the mile-long airstrip that the Mellons used for their private jet.
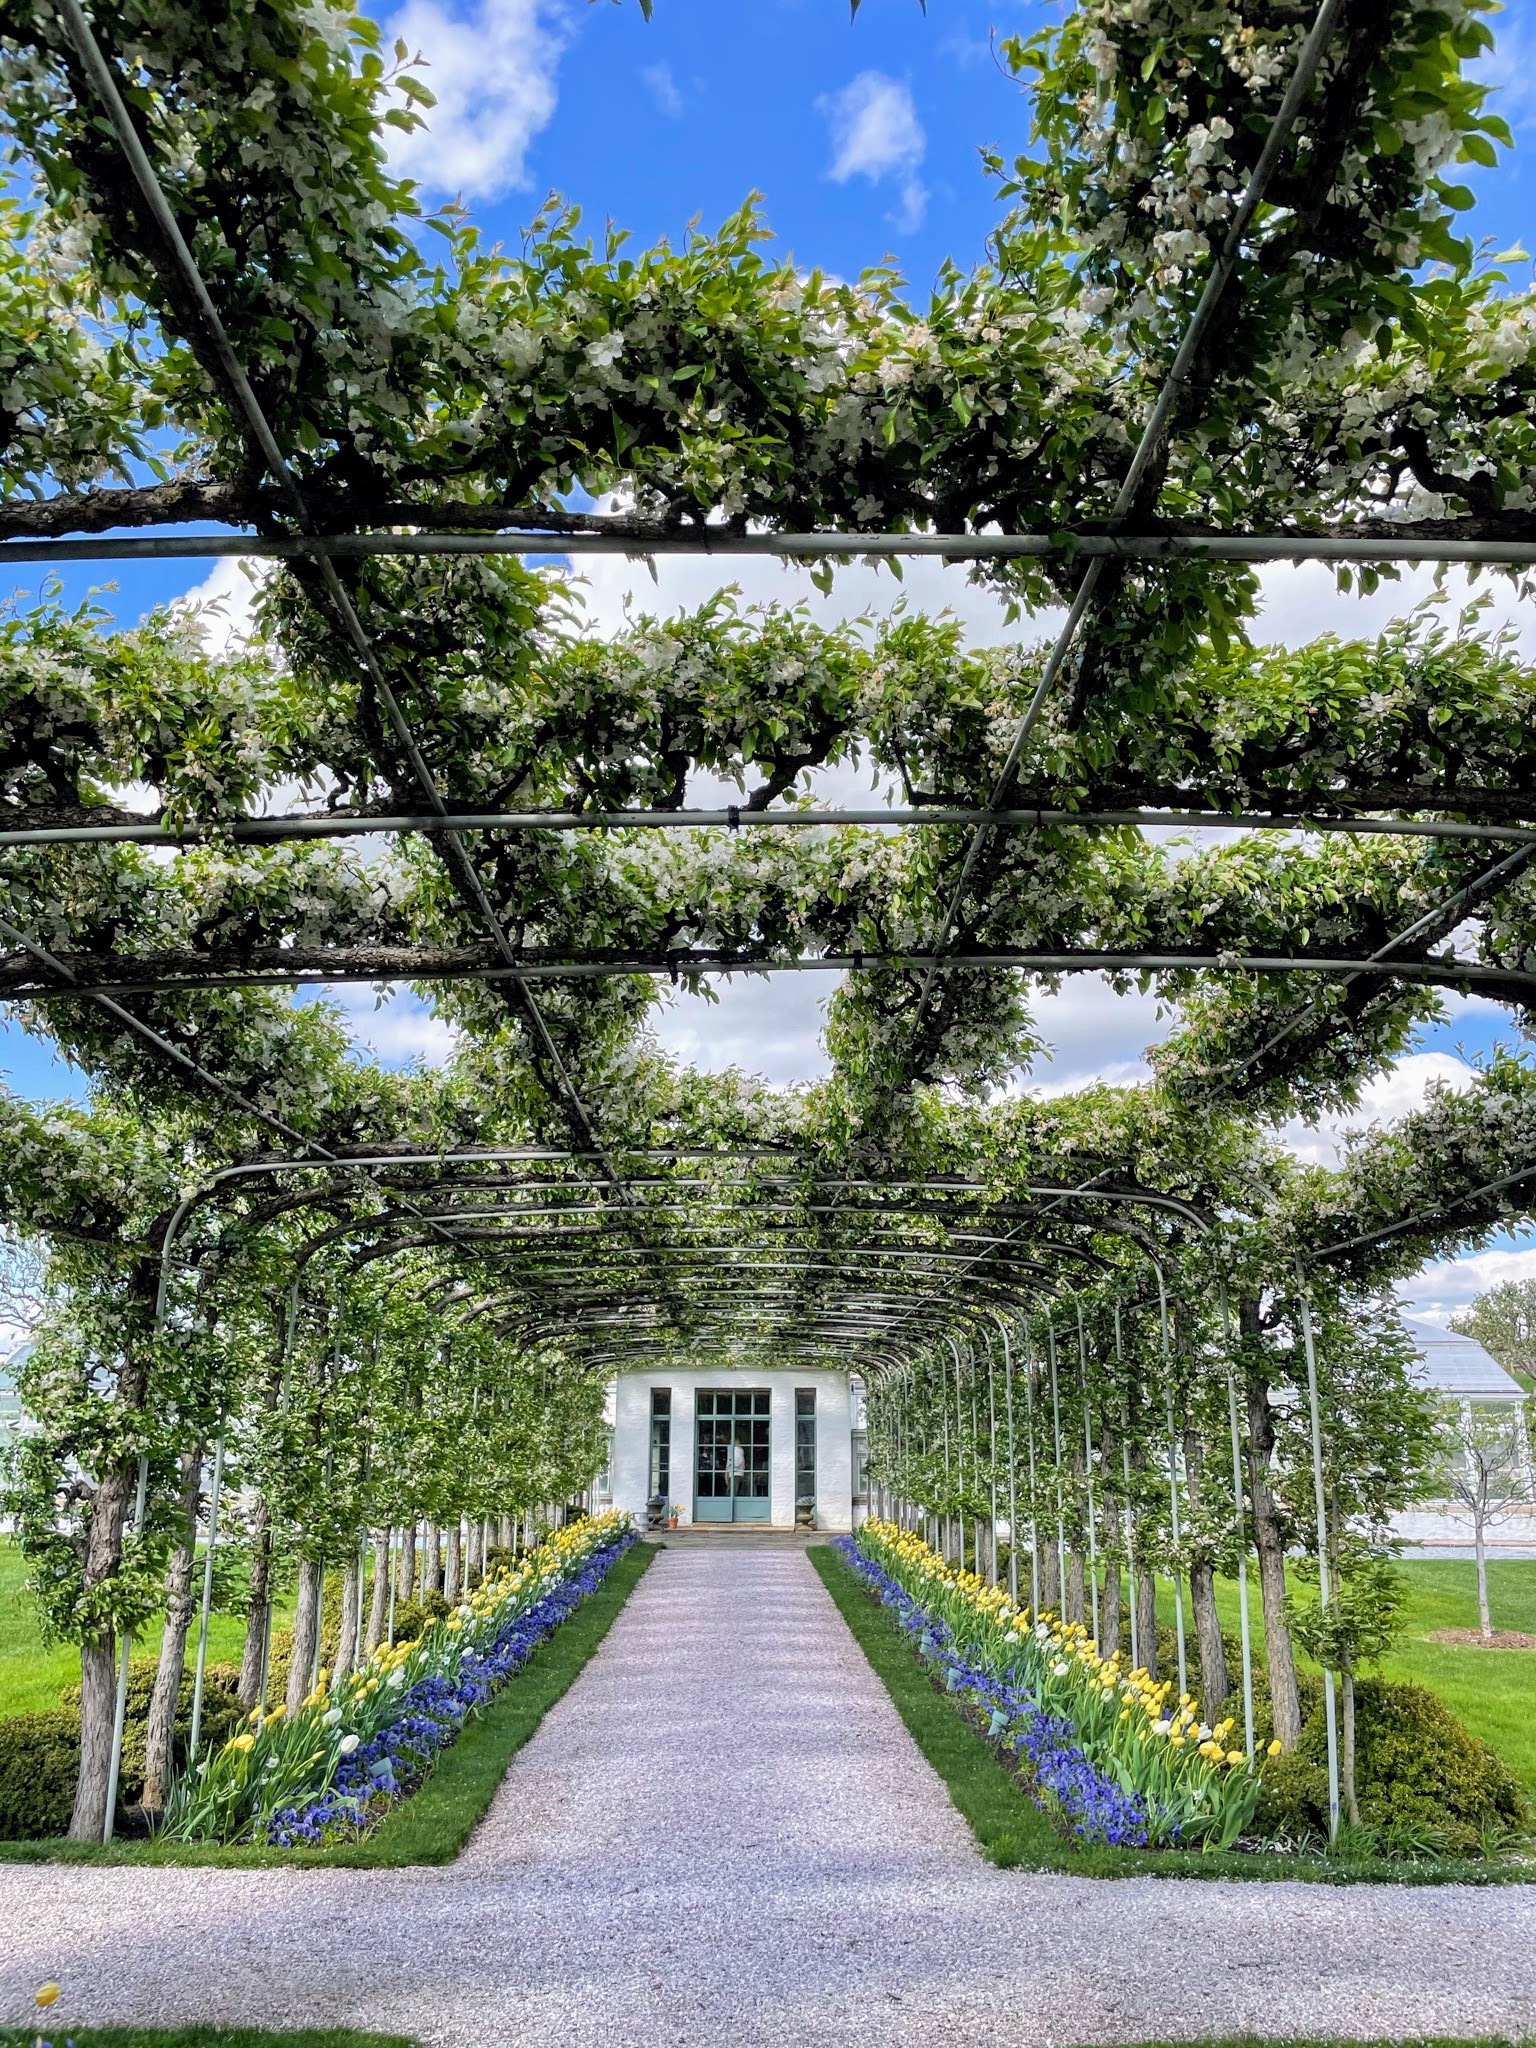
And this is one of Oak Spring’s most recognizable features – the arbor of pleached Mary Potter crabapple trees. In mid-April, the trees bloom, filling the arbor with soft white blossoms. When they begin to fall, it is like a snow flurry – I am sure it is breathtaking. The Oak Spring Garden Foundation is not open to the public for general admission, but its facilities are used to host researchers, artists, and writers who come through a Fellowship or Residency program. The OSGF also hosts short courses and workshops relating to plants, gardens, and landscapes. Please go the web site at OSGF.org to learn more.