A new planting project is underway at my Bedford, New York farm.
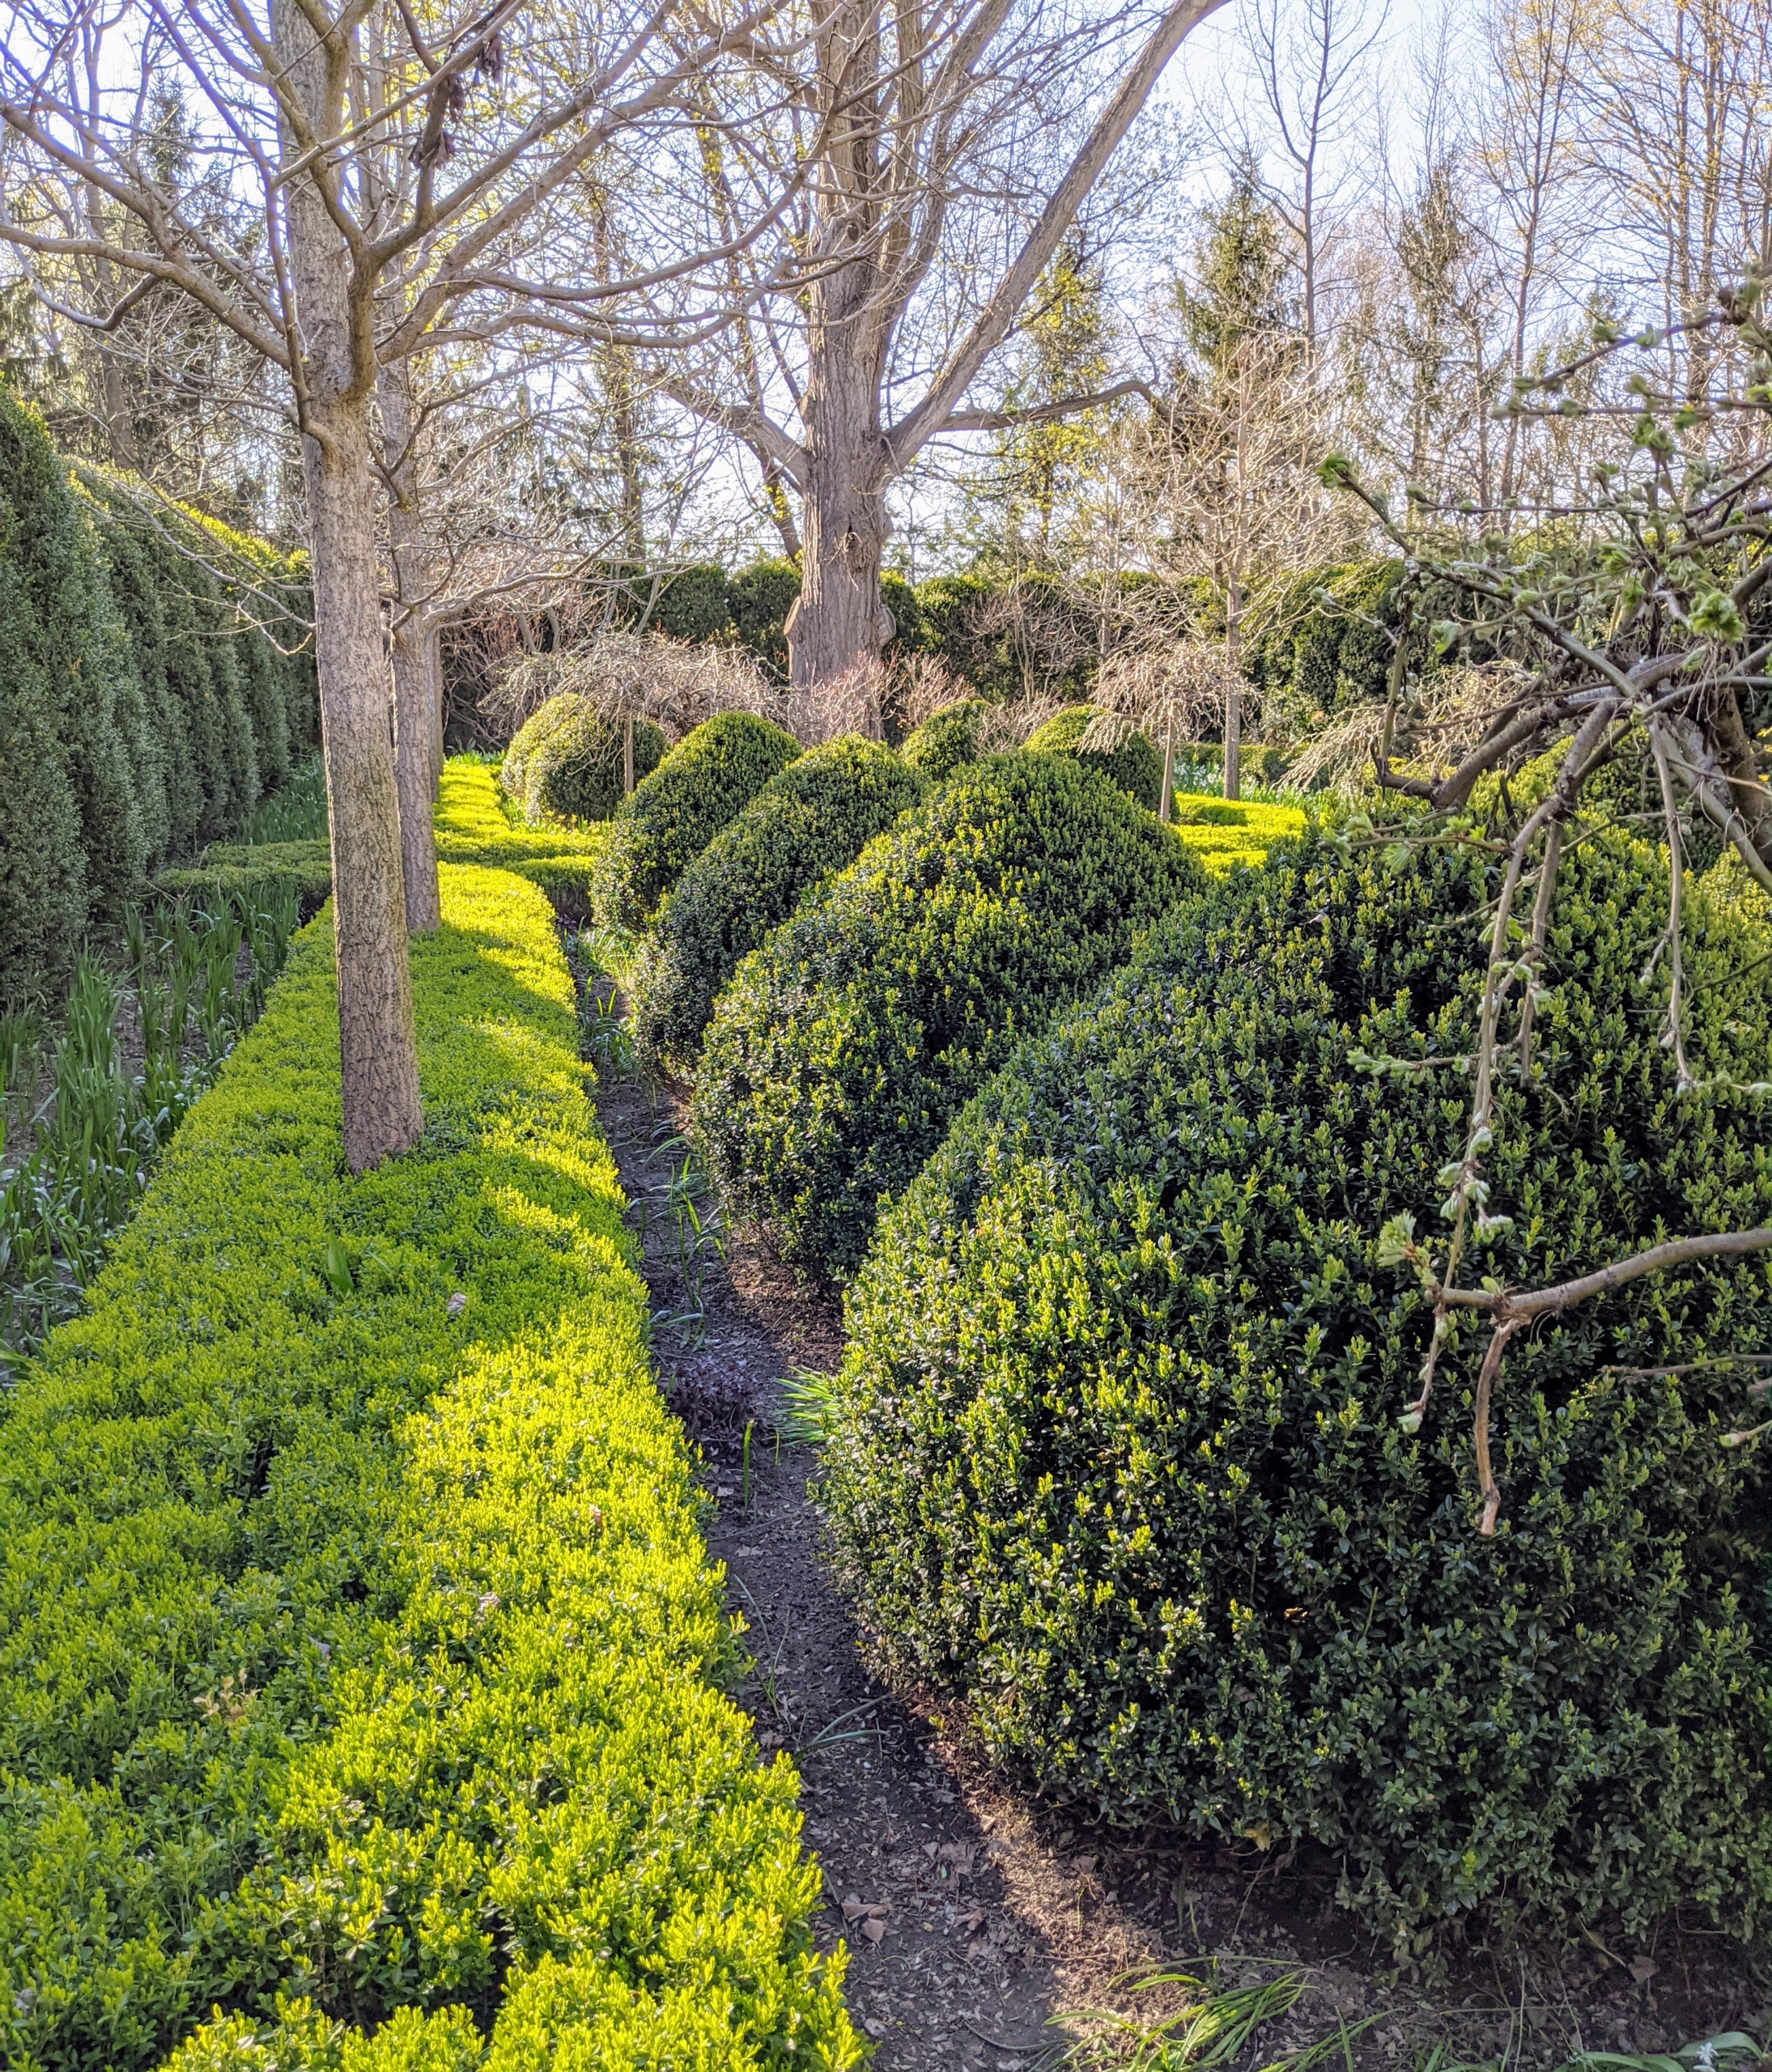
I love boxwood, Buxus, and have hundreds of shrubs growing on my property. I use boxwood in borders and hedges, as privacy screens, as accent plants in my formal gardens, and of course in the long allee to my stable. When I can, I like to grow my own boxwood from cuttings. This process takes time and patience, but seeing them mature is very rewarding. Last weekend, I received hundreds of young boxwood branches that were ready to root in a cold frame behind my main greenhouse. It will be fun to see them develop.
Here is our process, enjoy.
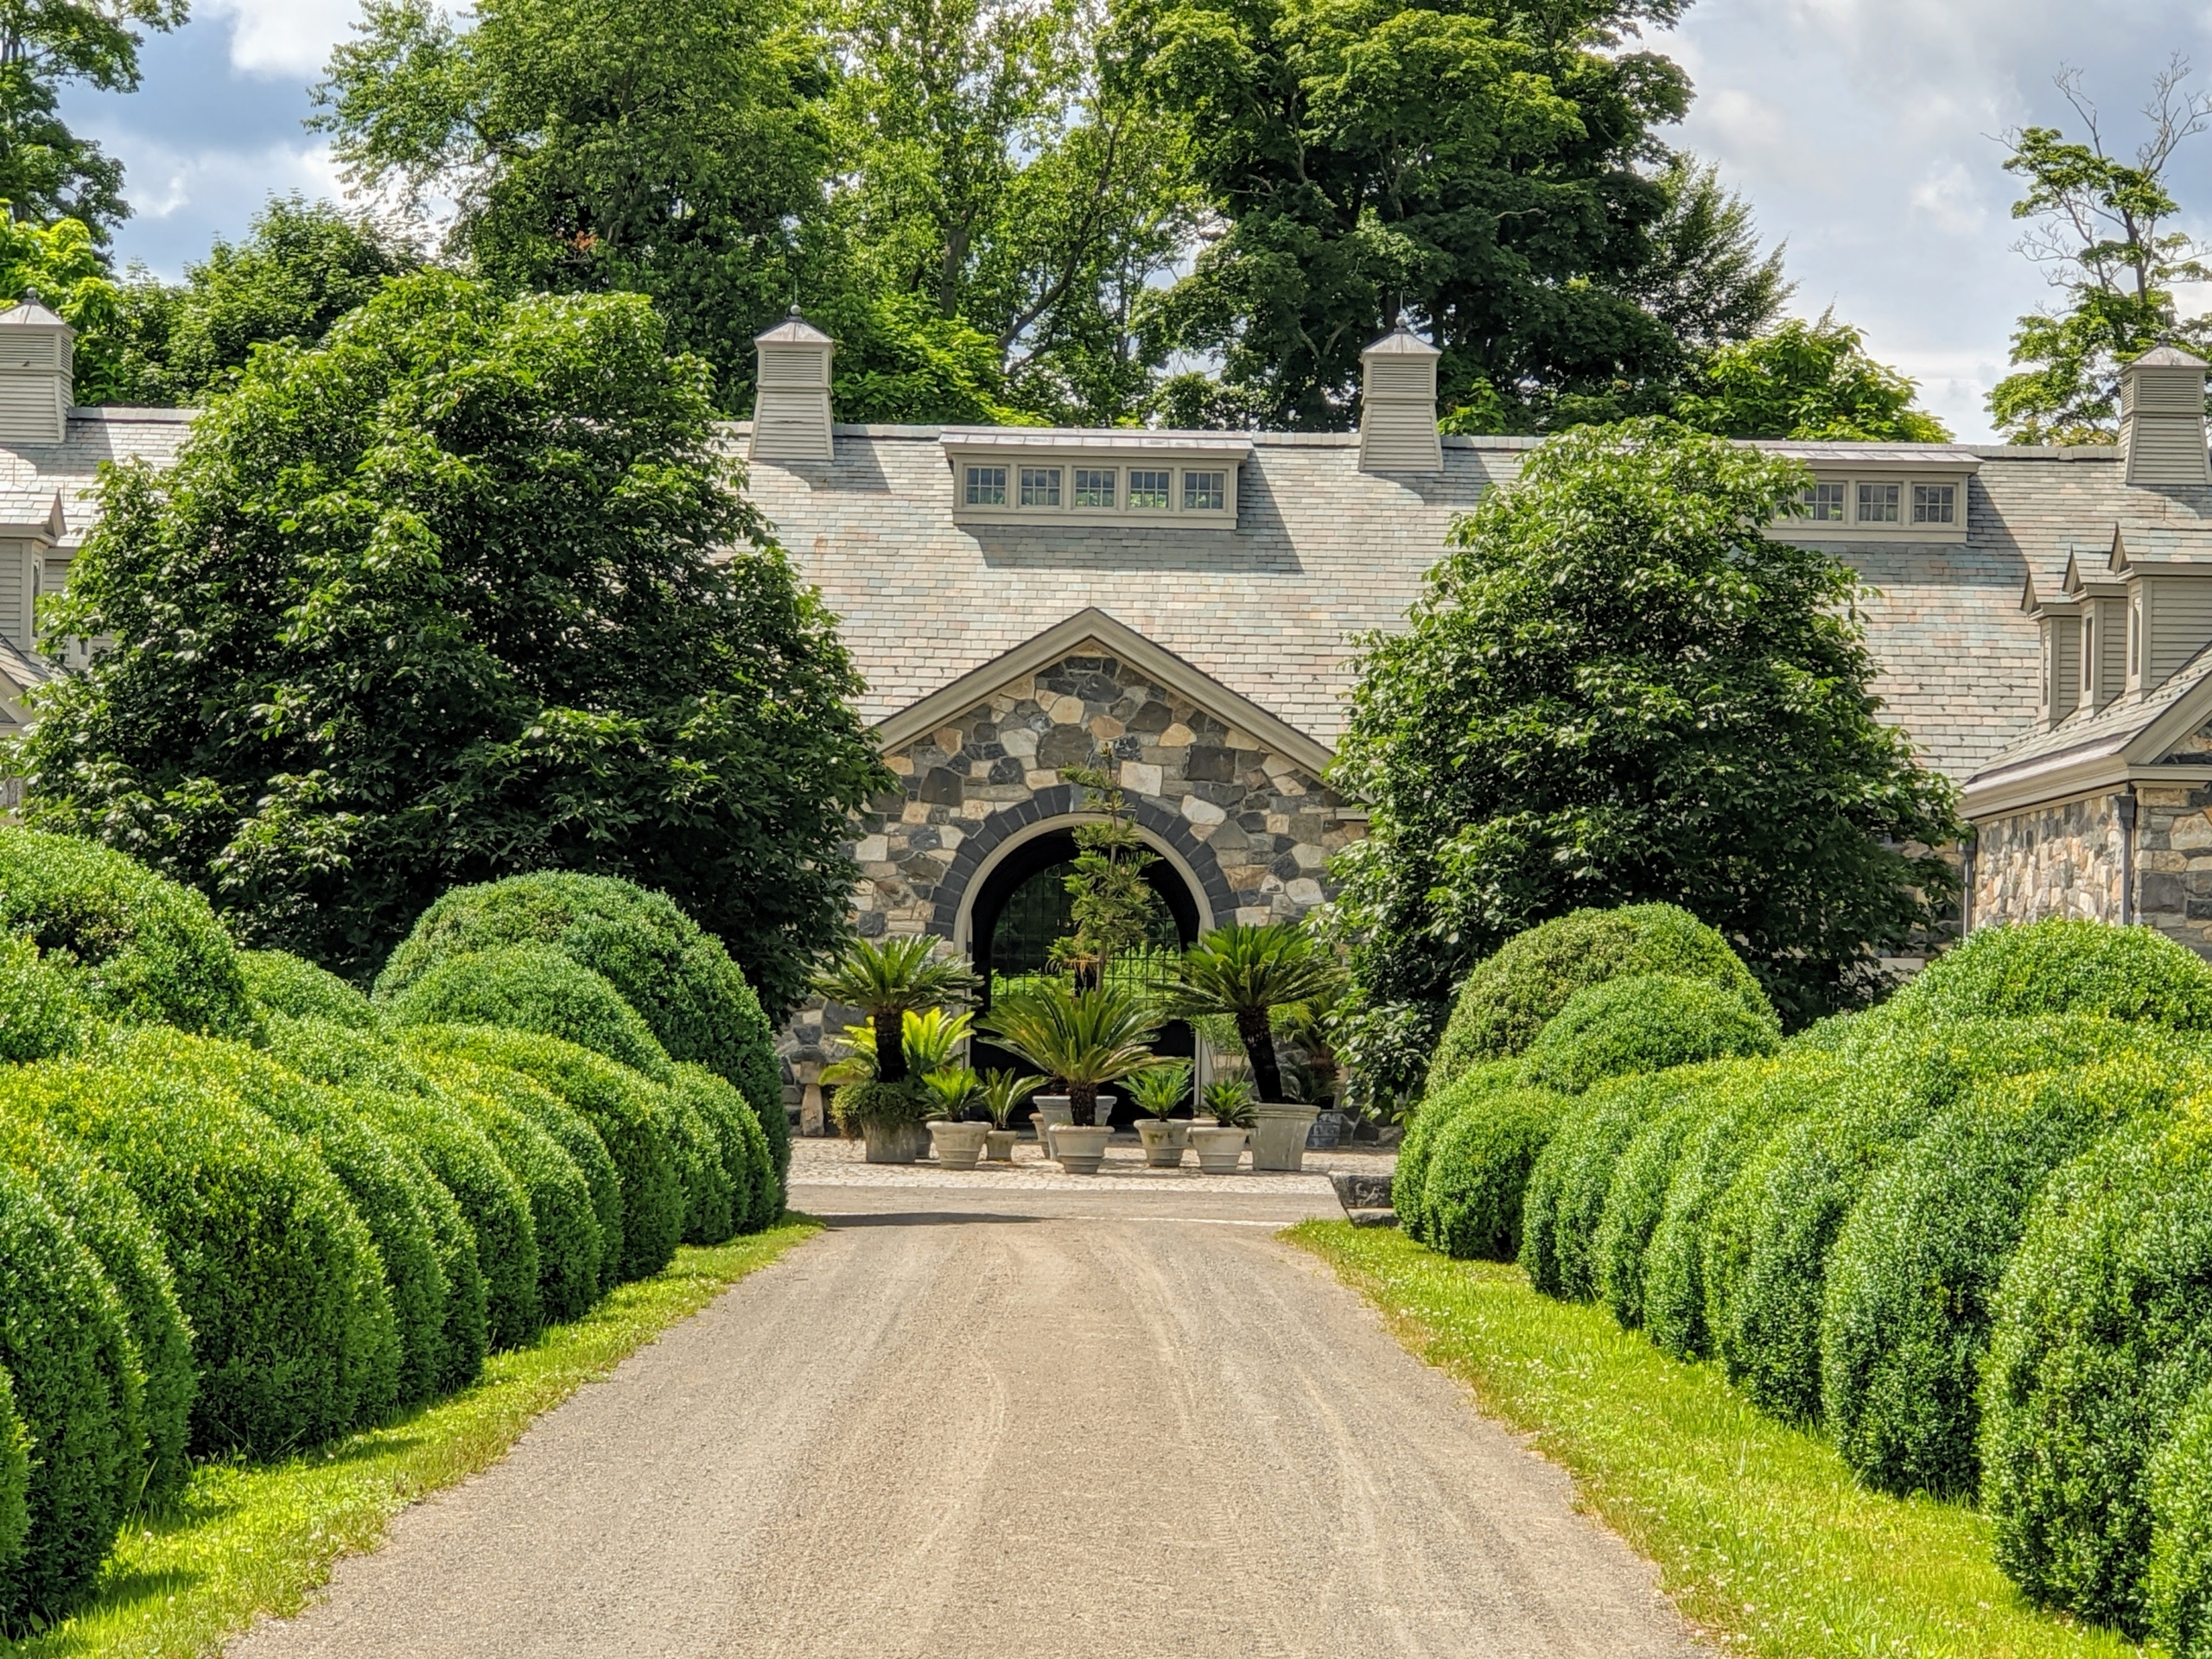
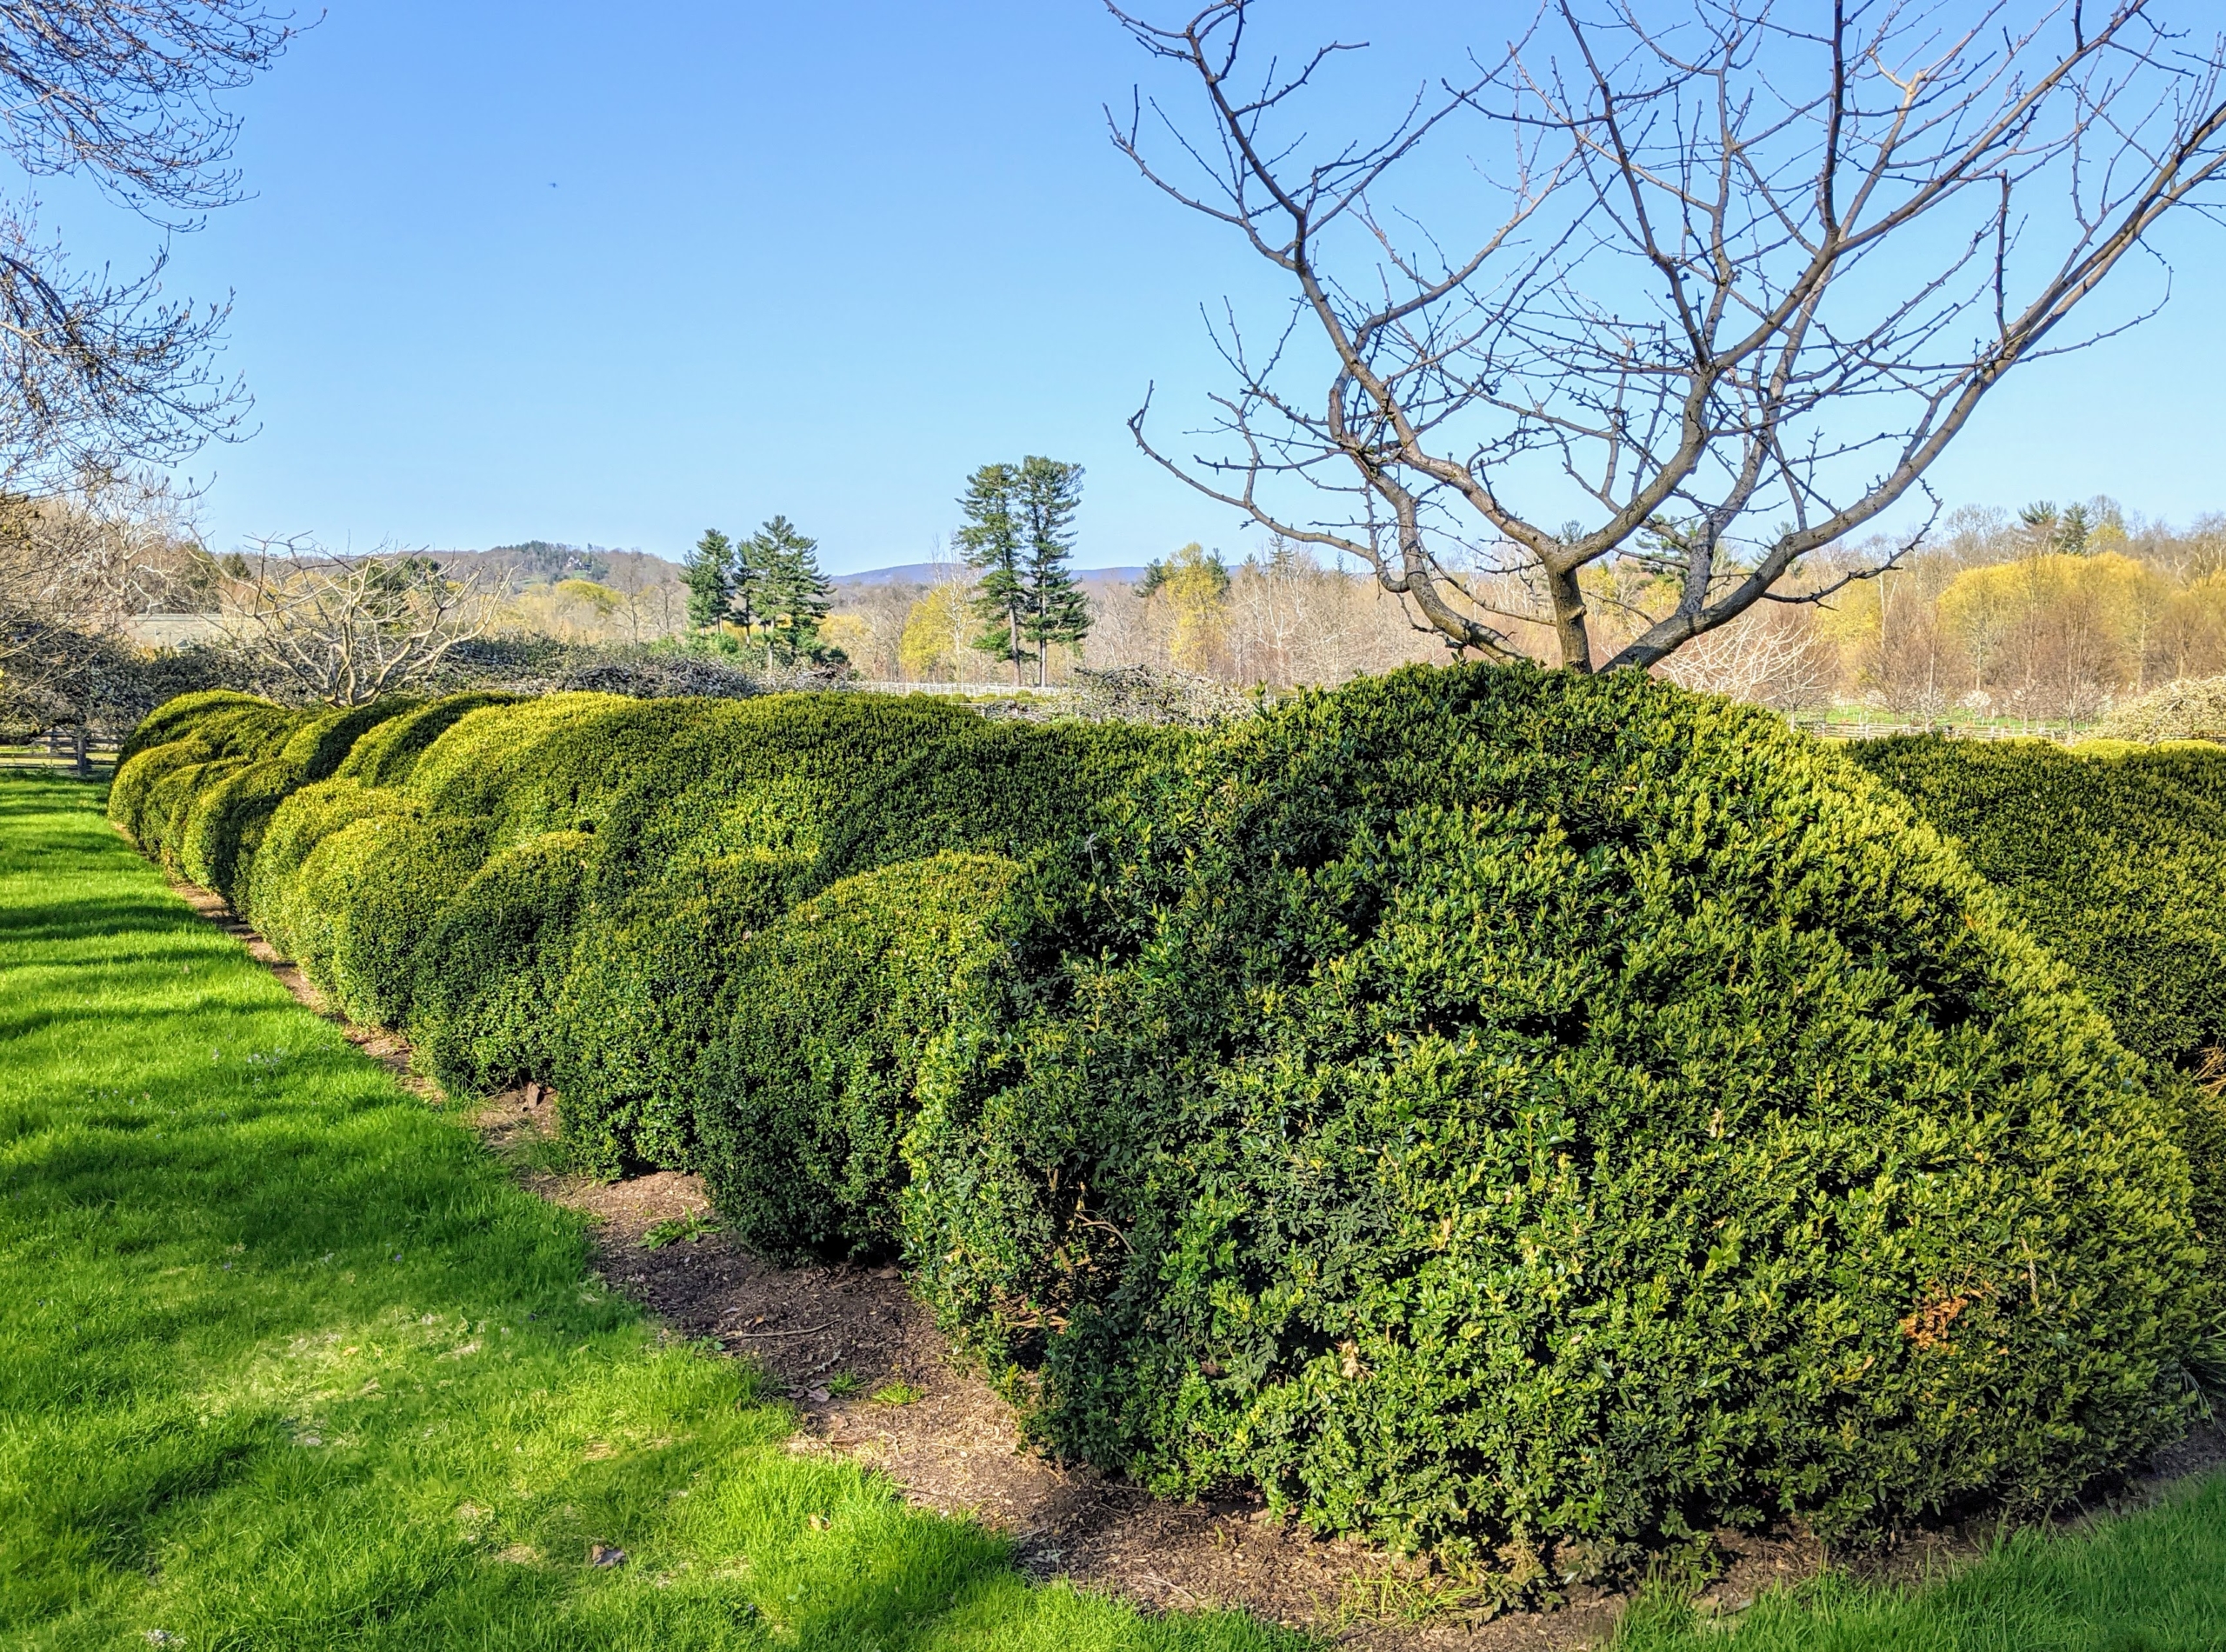
I am so proud of the growing boxwood around my farm. This is a section of my long 450-foot Boxwood Allee. It runs from my stable all the way to the carriage road that leads to my hayfields and woodlands. It is so lush and green. I take very special care of these specimens.
This is my sunken Summer House Garden – a more formal garden with both English and American boxwood. Boxwood, a popular evergreen shrub in garden landscape, is a very ancient plant. Its ornamental use can be traced back to 4000 BC Egypt. The early Romans favored it in their courtyards. The wood itself is harder than oak and its foliage is dense and compact. Because of its growing habit, boxwood can be sculpted into formal hedges, topiaries, and other fanciful shapes.
These boxwood shrubs surround my herbaceous peony garden bed.
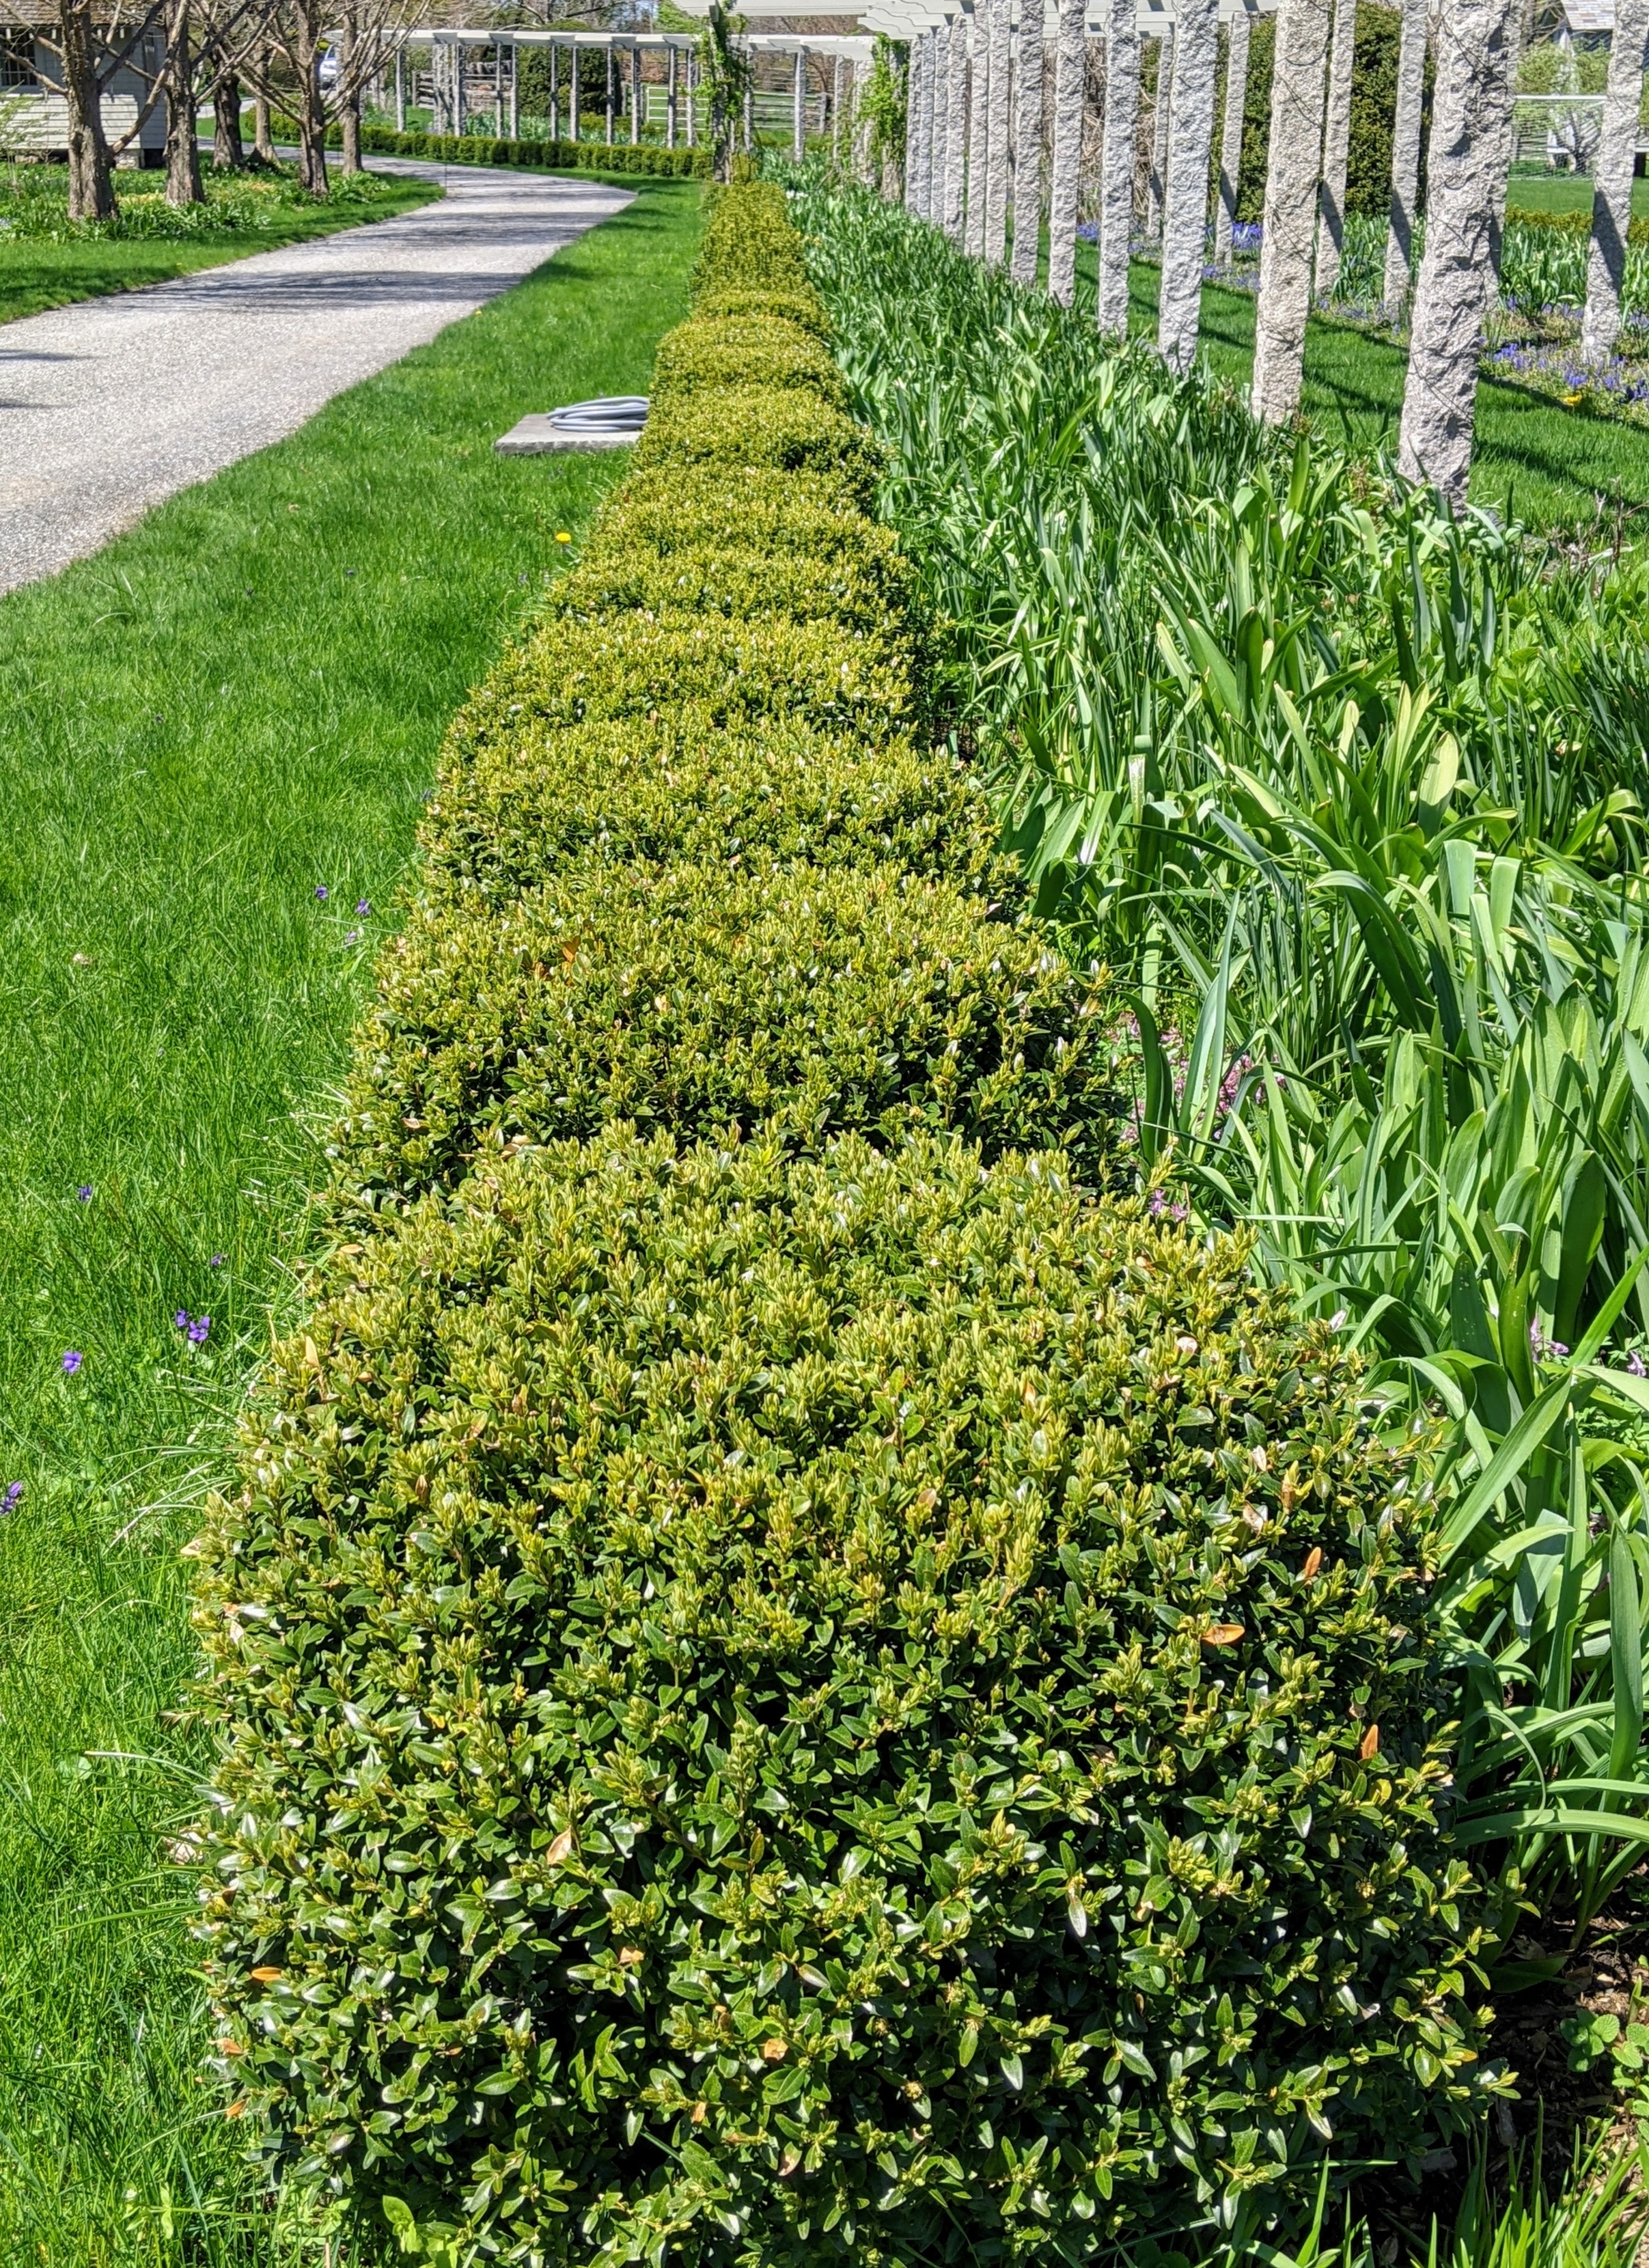
In 2017, I decided to line both sides of my clematis pergola with boxwood. There are more than 300-shrubs planted here, and they continue to thrive.
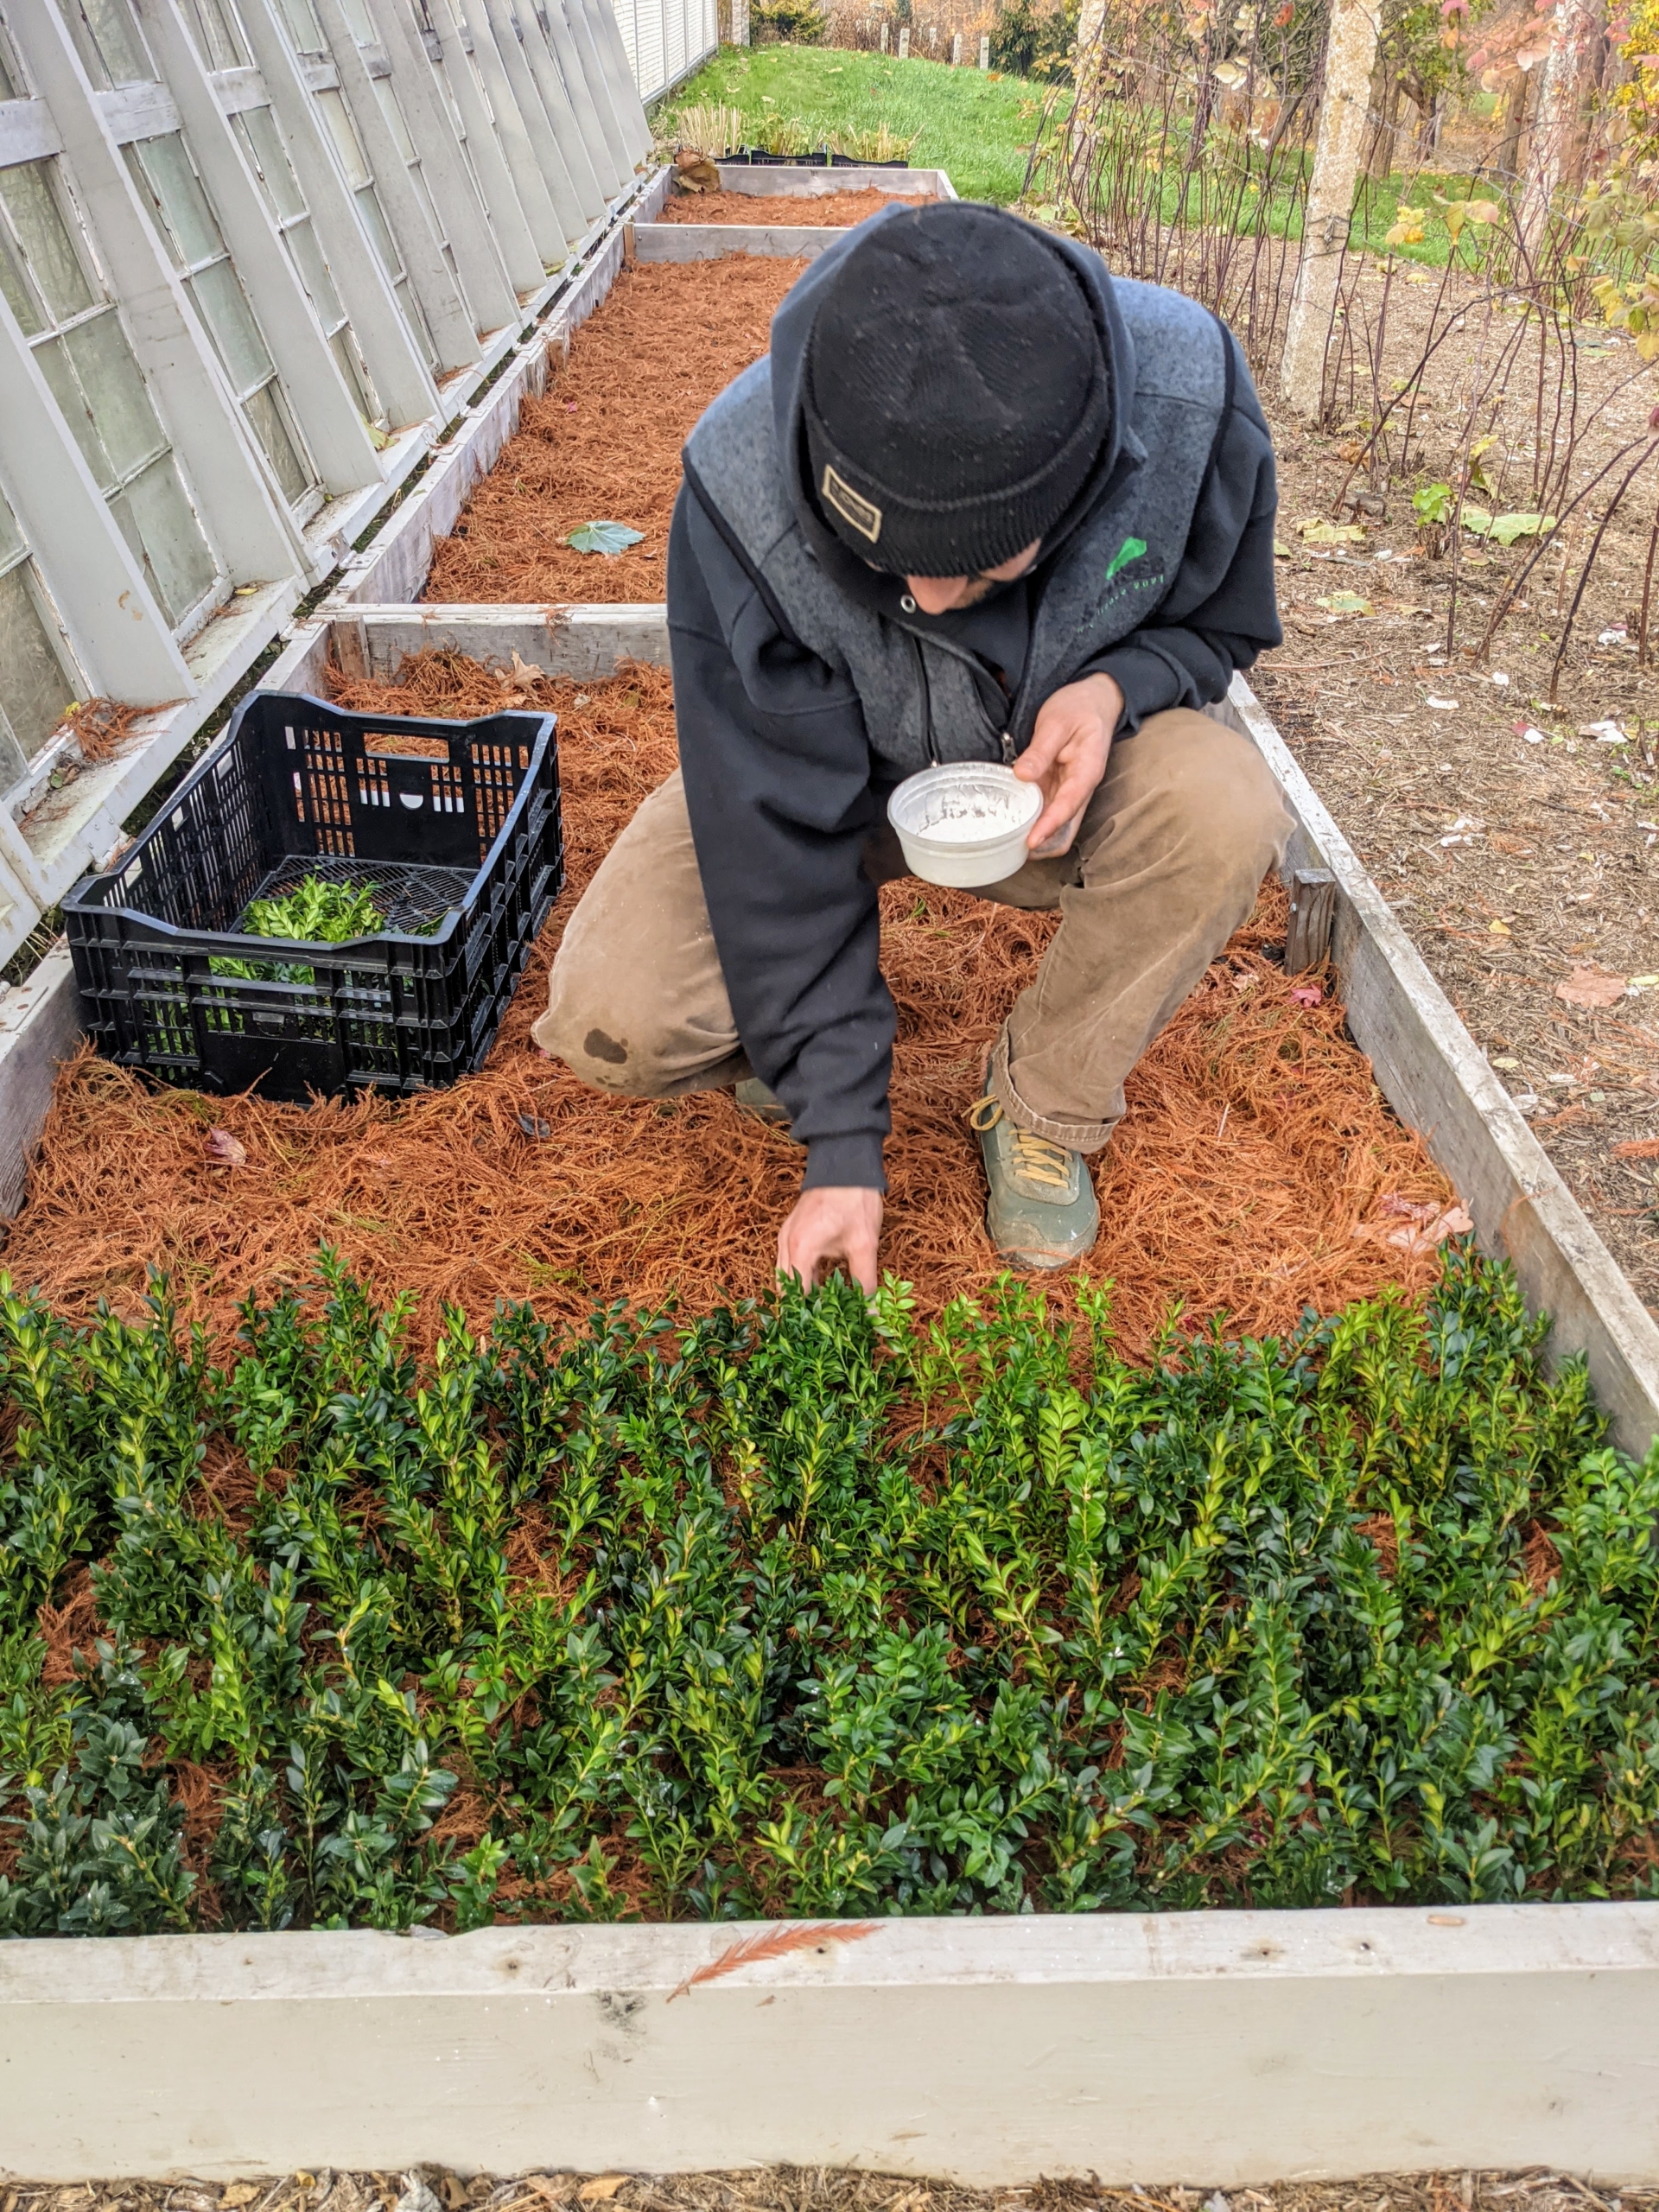
The boxwood shrubs along my pergola were grown in this “nursery” patch located in one area of my vegetable garden next to my chicken coops. The soil is rich with nutrients, so they grew well and quickly. These bare-root cuttings were planted earlier this year and are also doing so well.
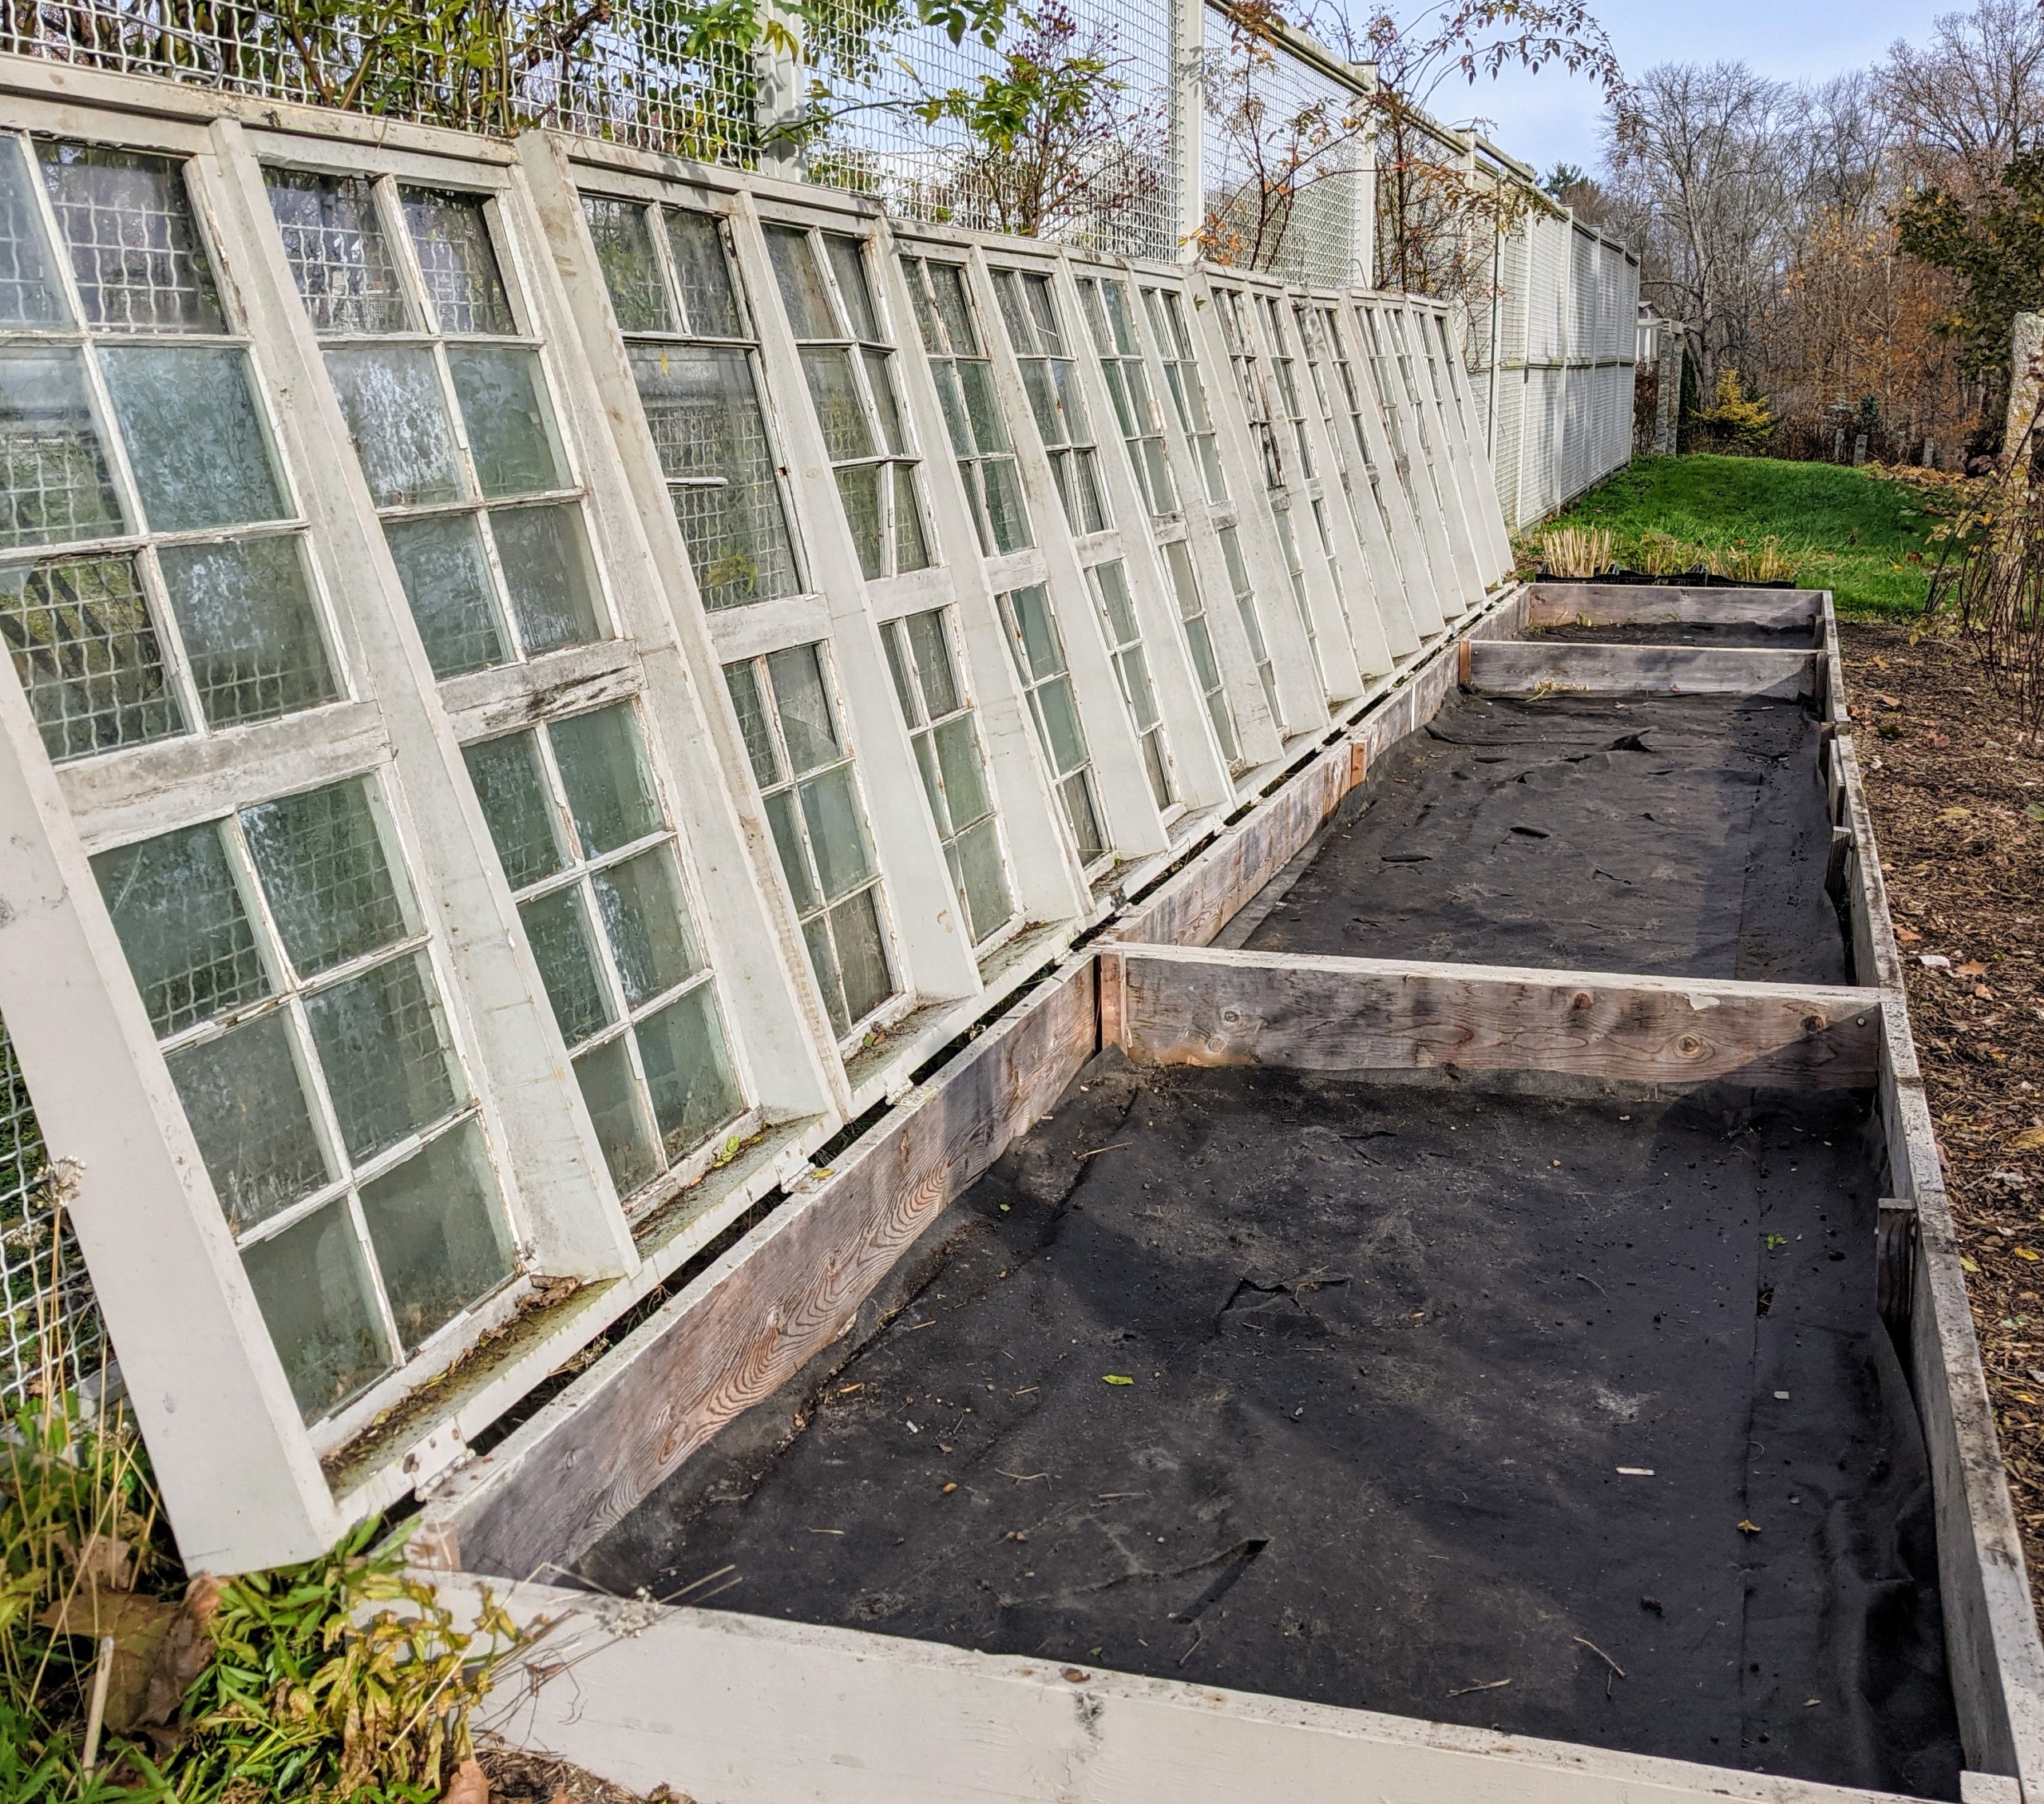
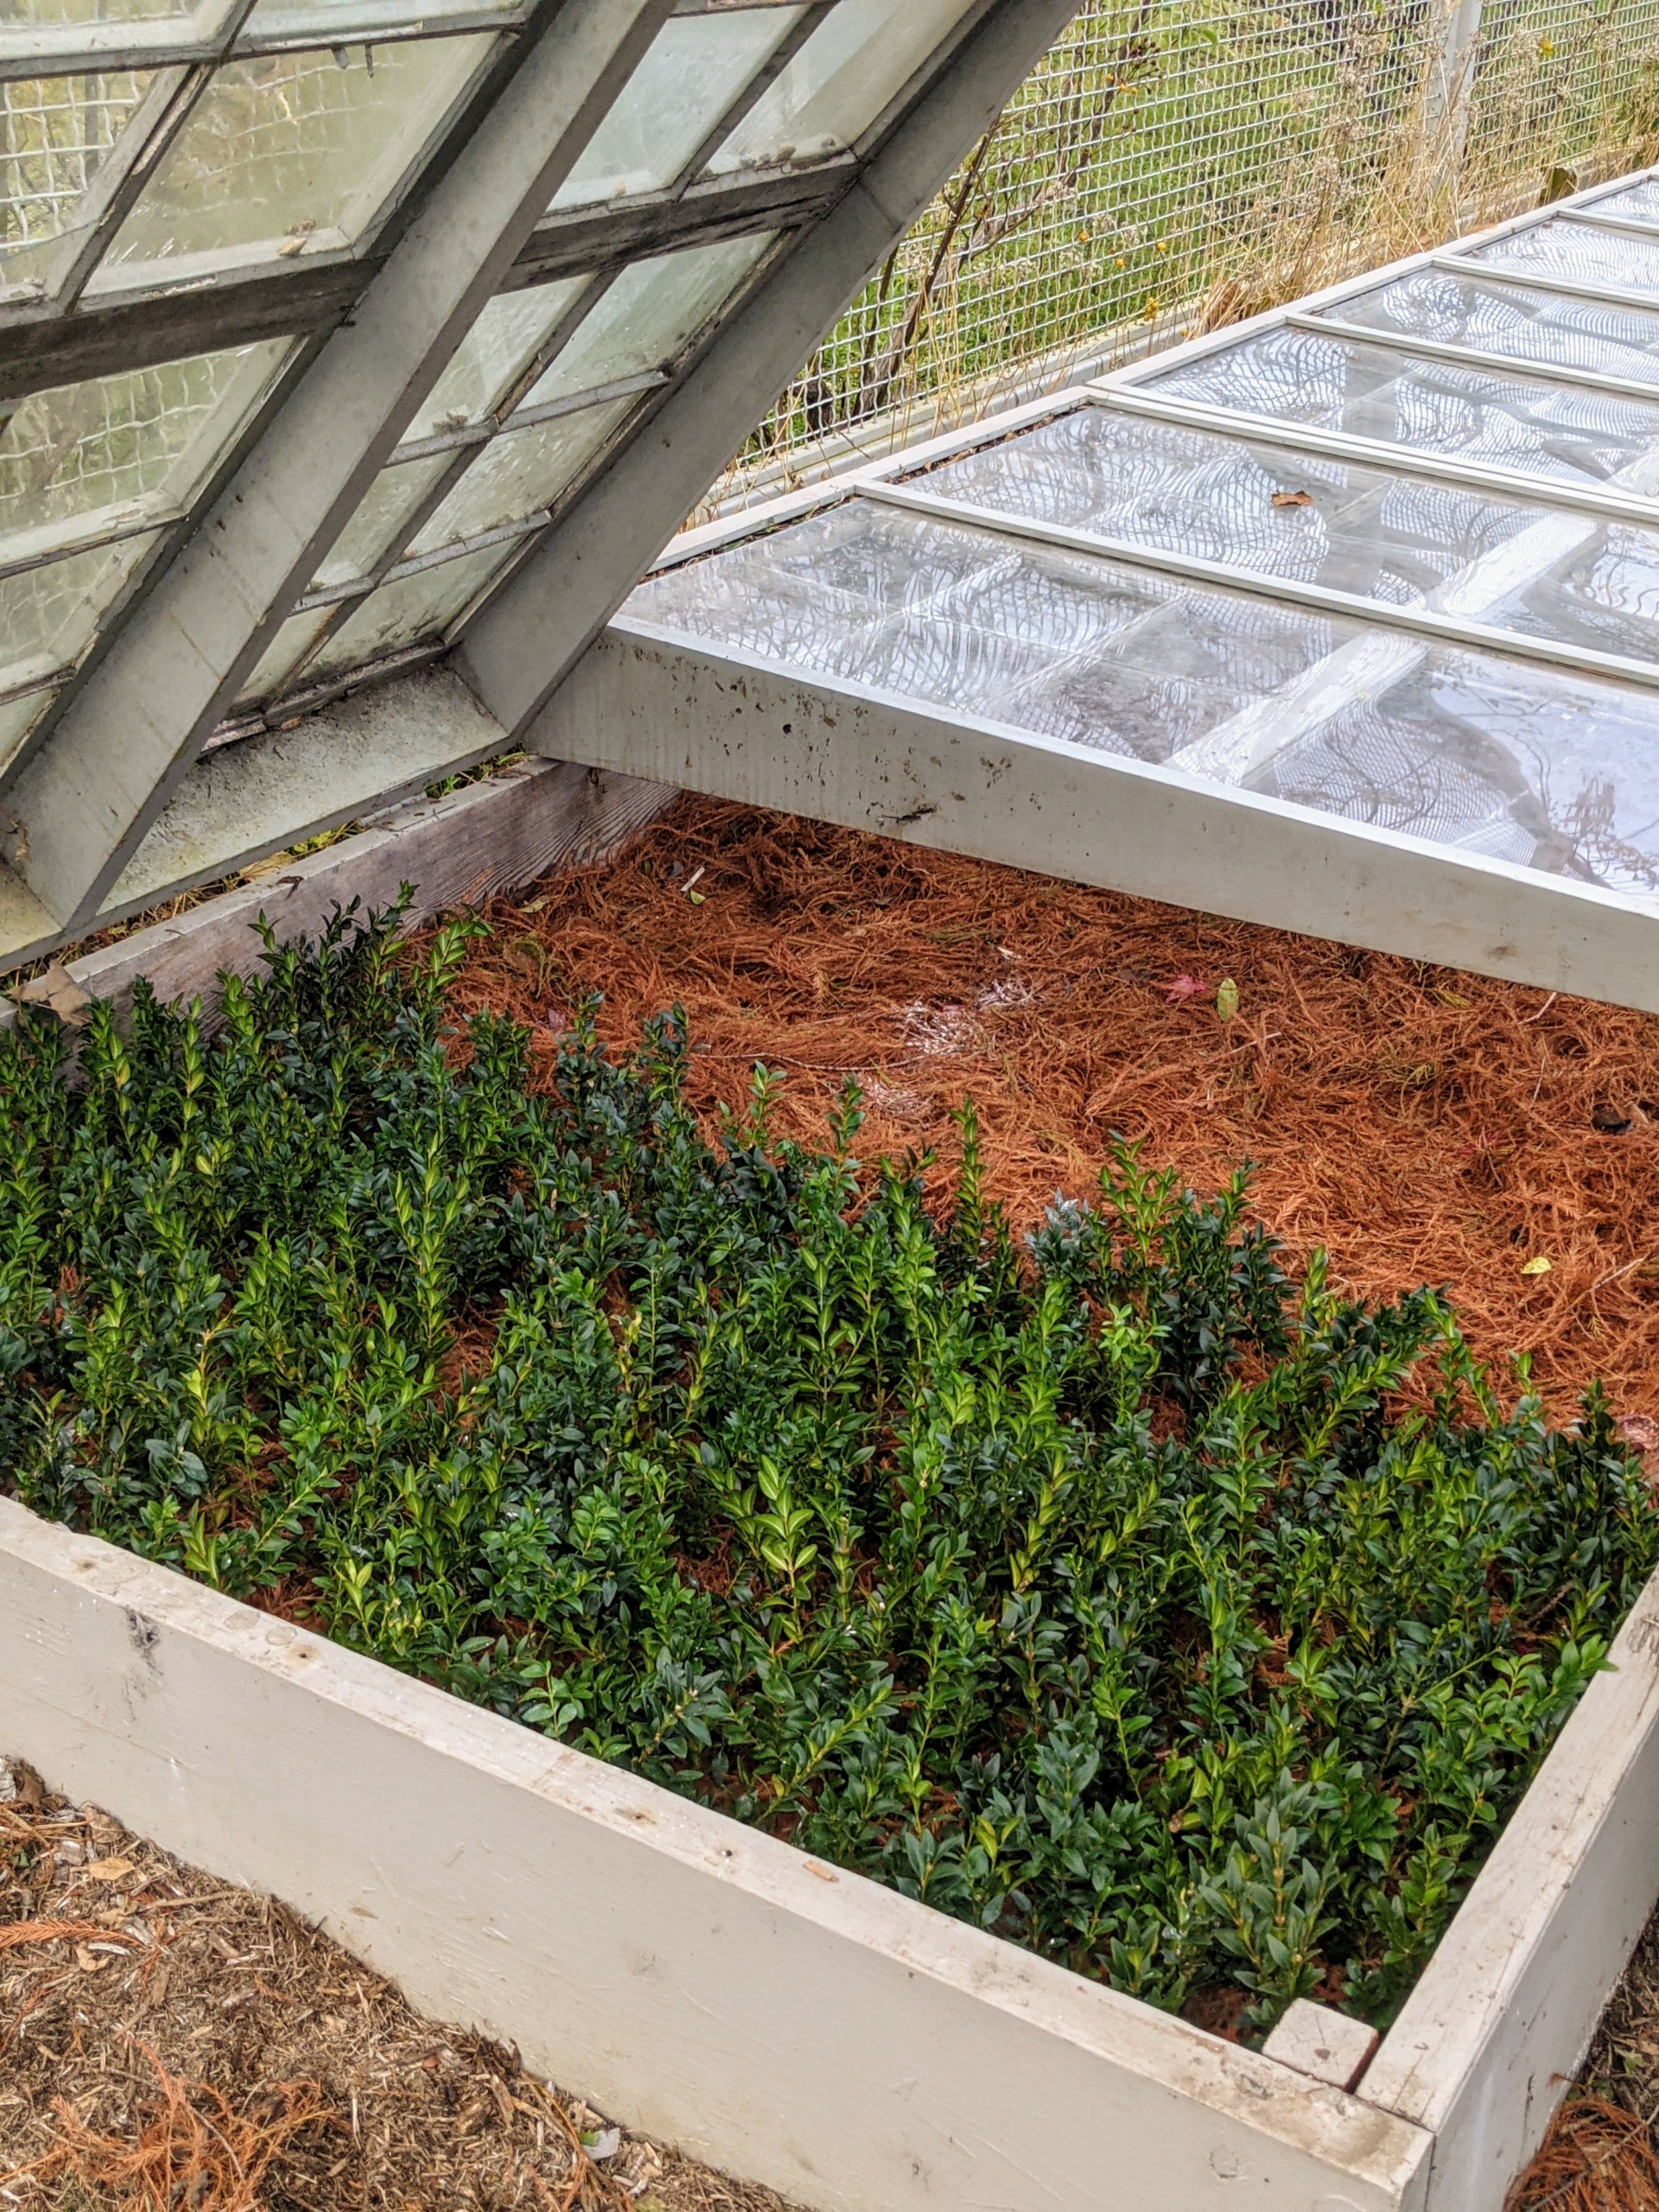
This is one of two large cold frames behind my main greenhouse. A cold frame is a transparent-roofed enclosure, built low to the ground that utilizes solar energy and insulation to create a microclimate suitable for growing or overwintering plants. Historically, cold frames were built as greenhouse extensions tucked against the outer walls with southern exposure outside Victorian glasshouses.
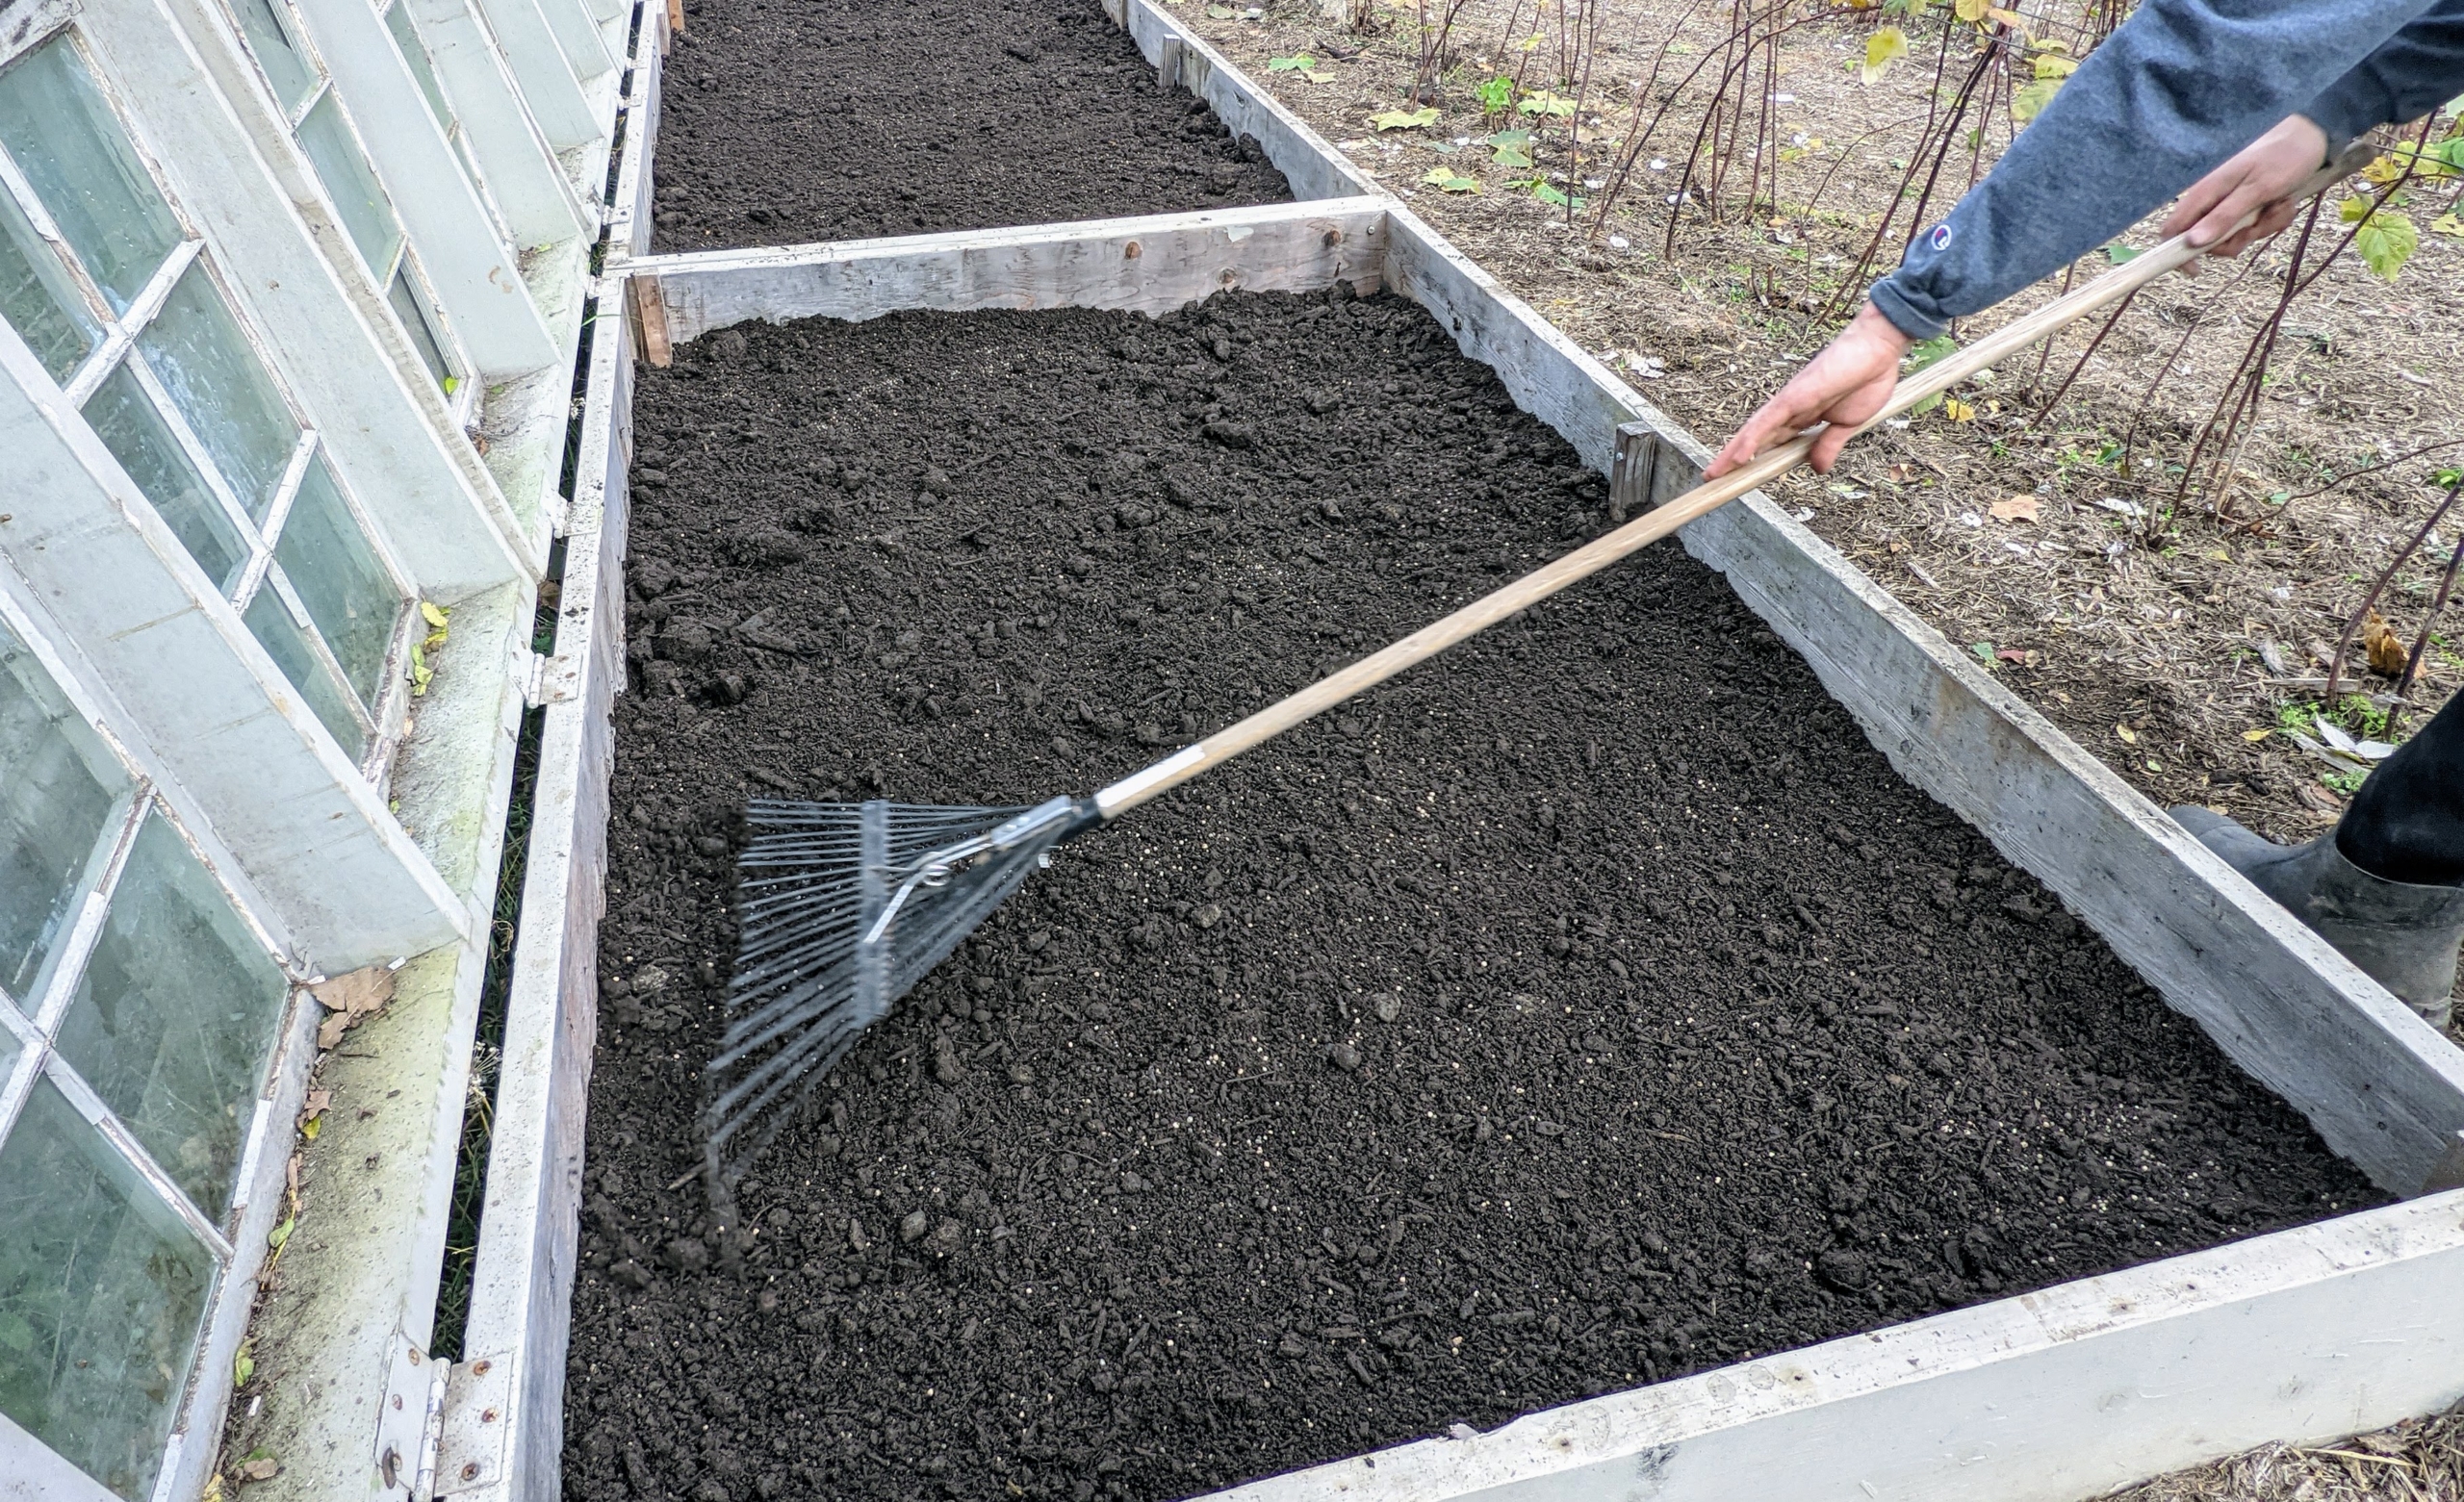
To start, the cold frame is filled with a fresh layer of compost that is made right here at my farm. It is a blend of composted manure and plant materials.
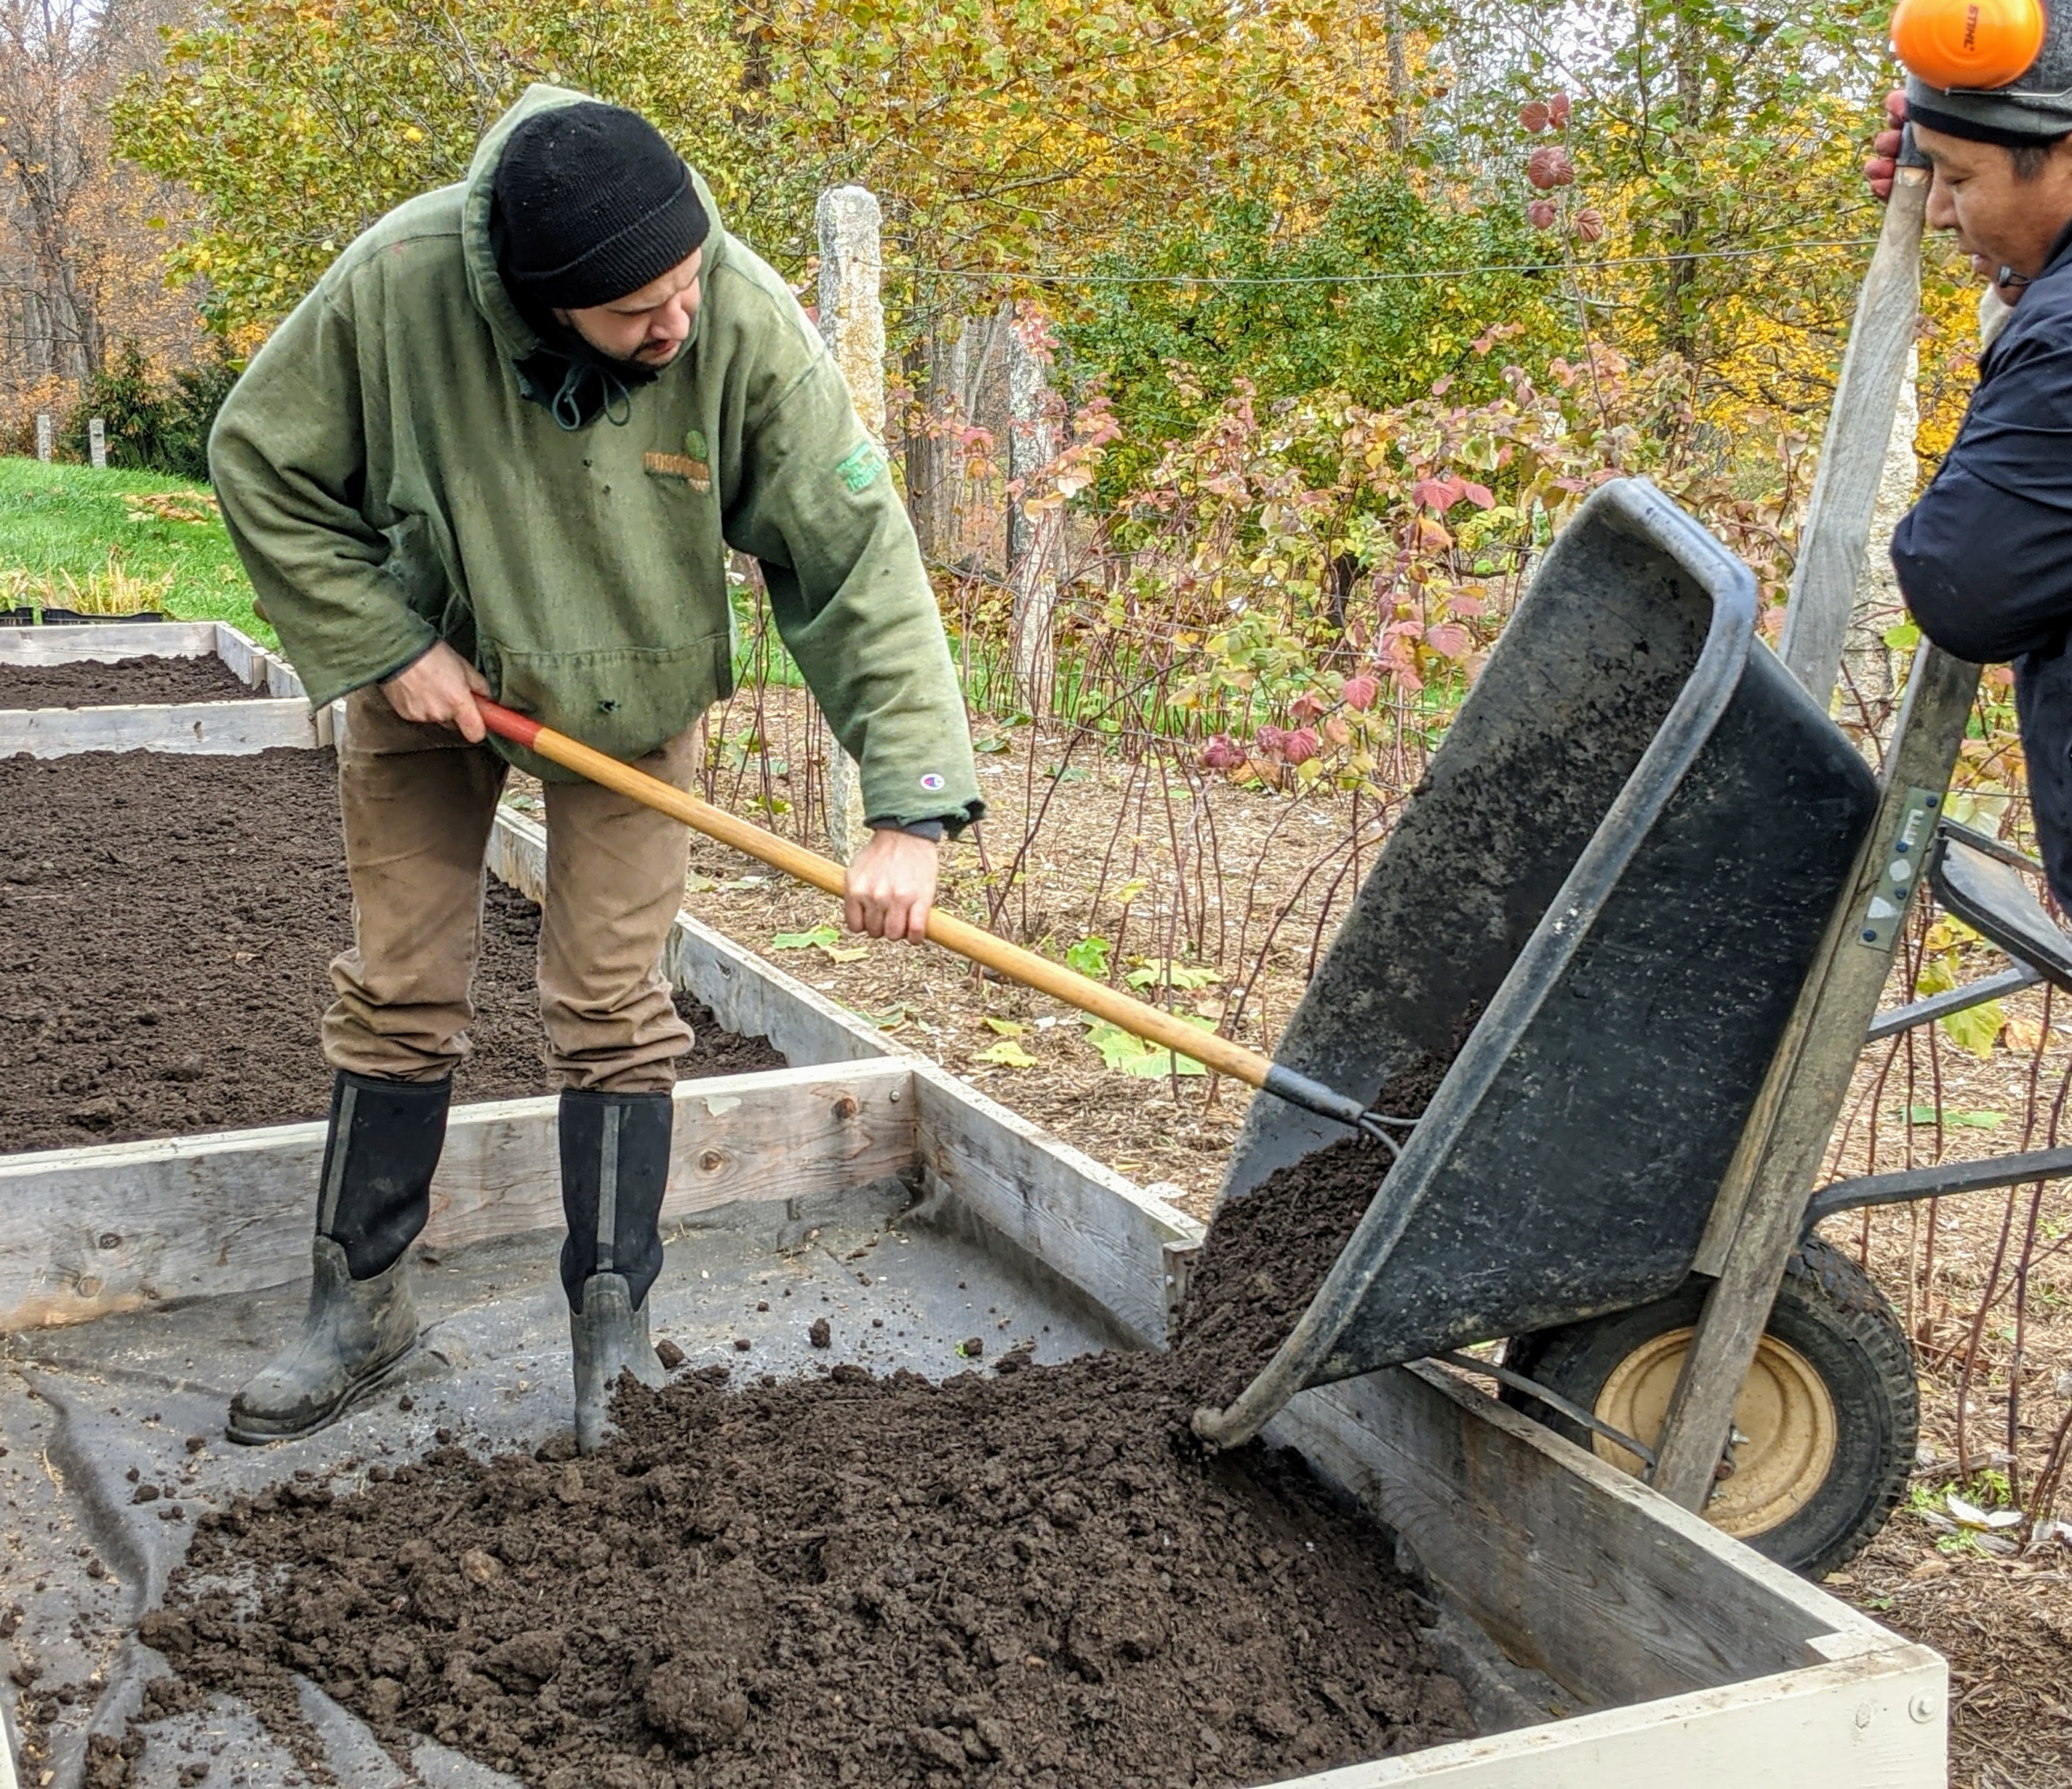
Brian spreads a two to three inch layer of composted soil across the entire cold frame.
Then he sprinkles a generous amount of fertilizer. Slow-release, balanced fertilizers are best for boxwood.
Brian mixes the fertilizer into the soil mix.
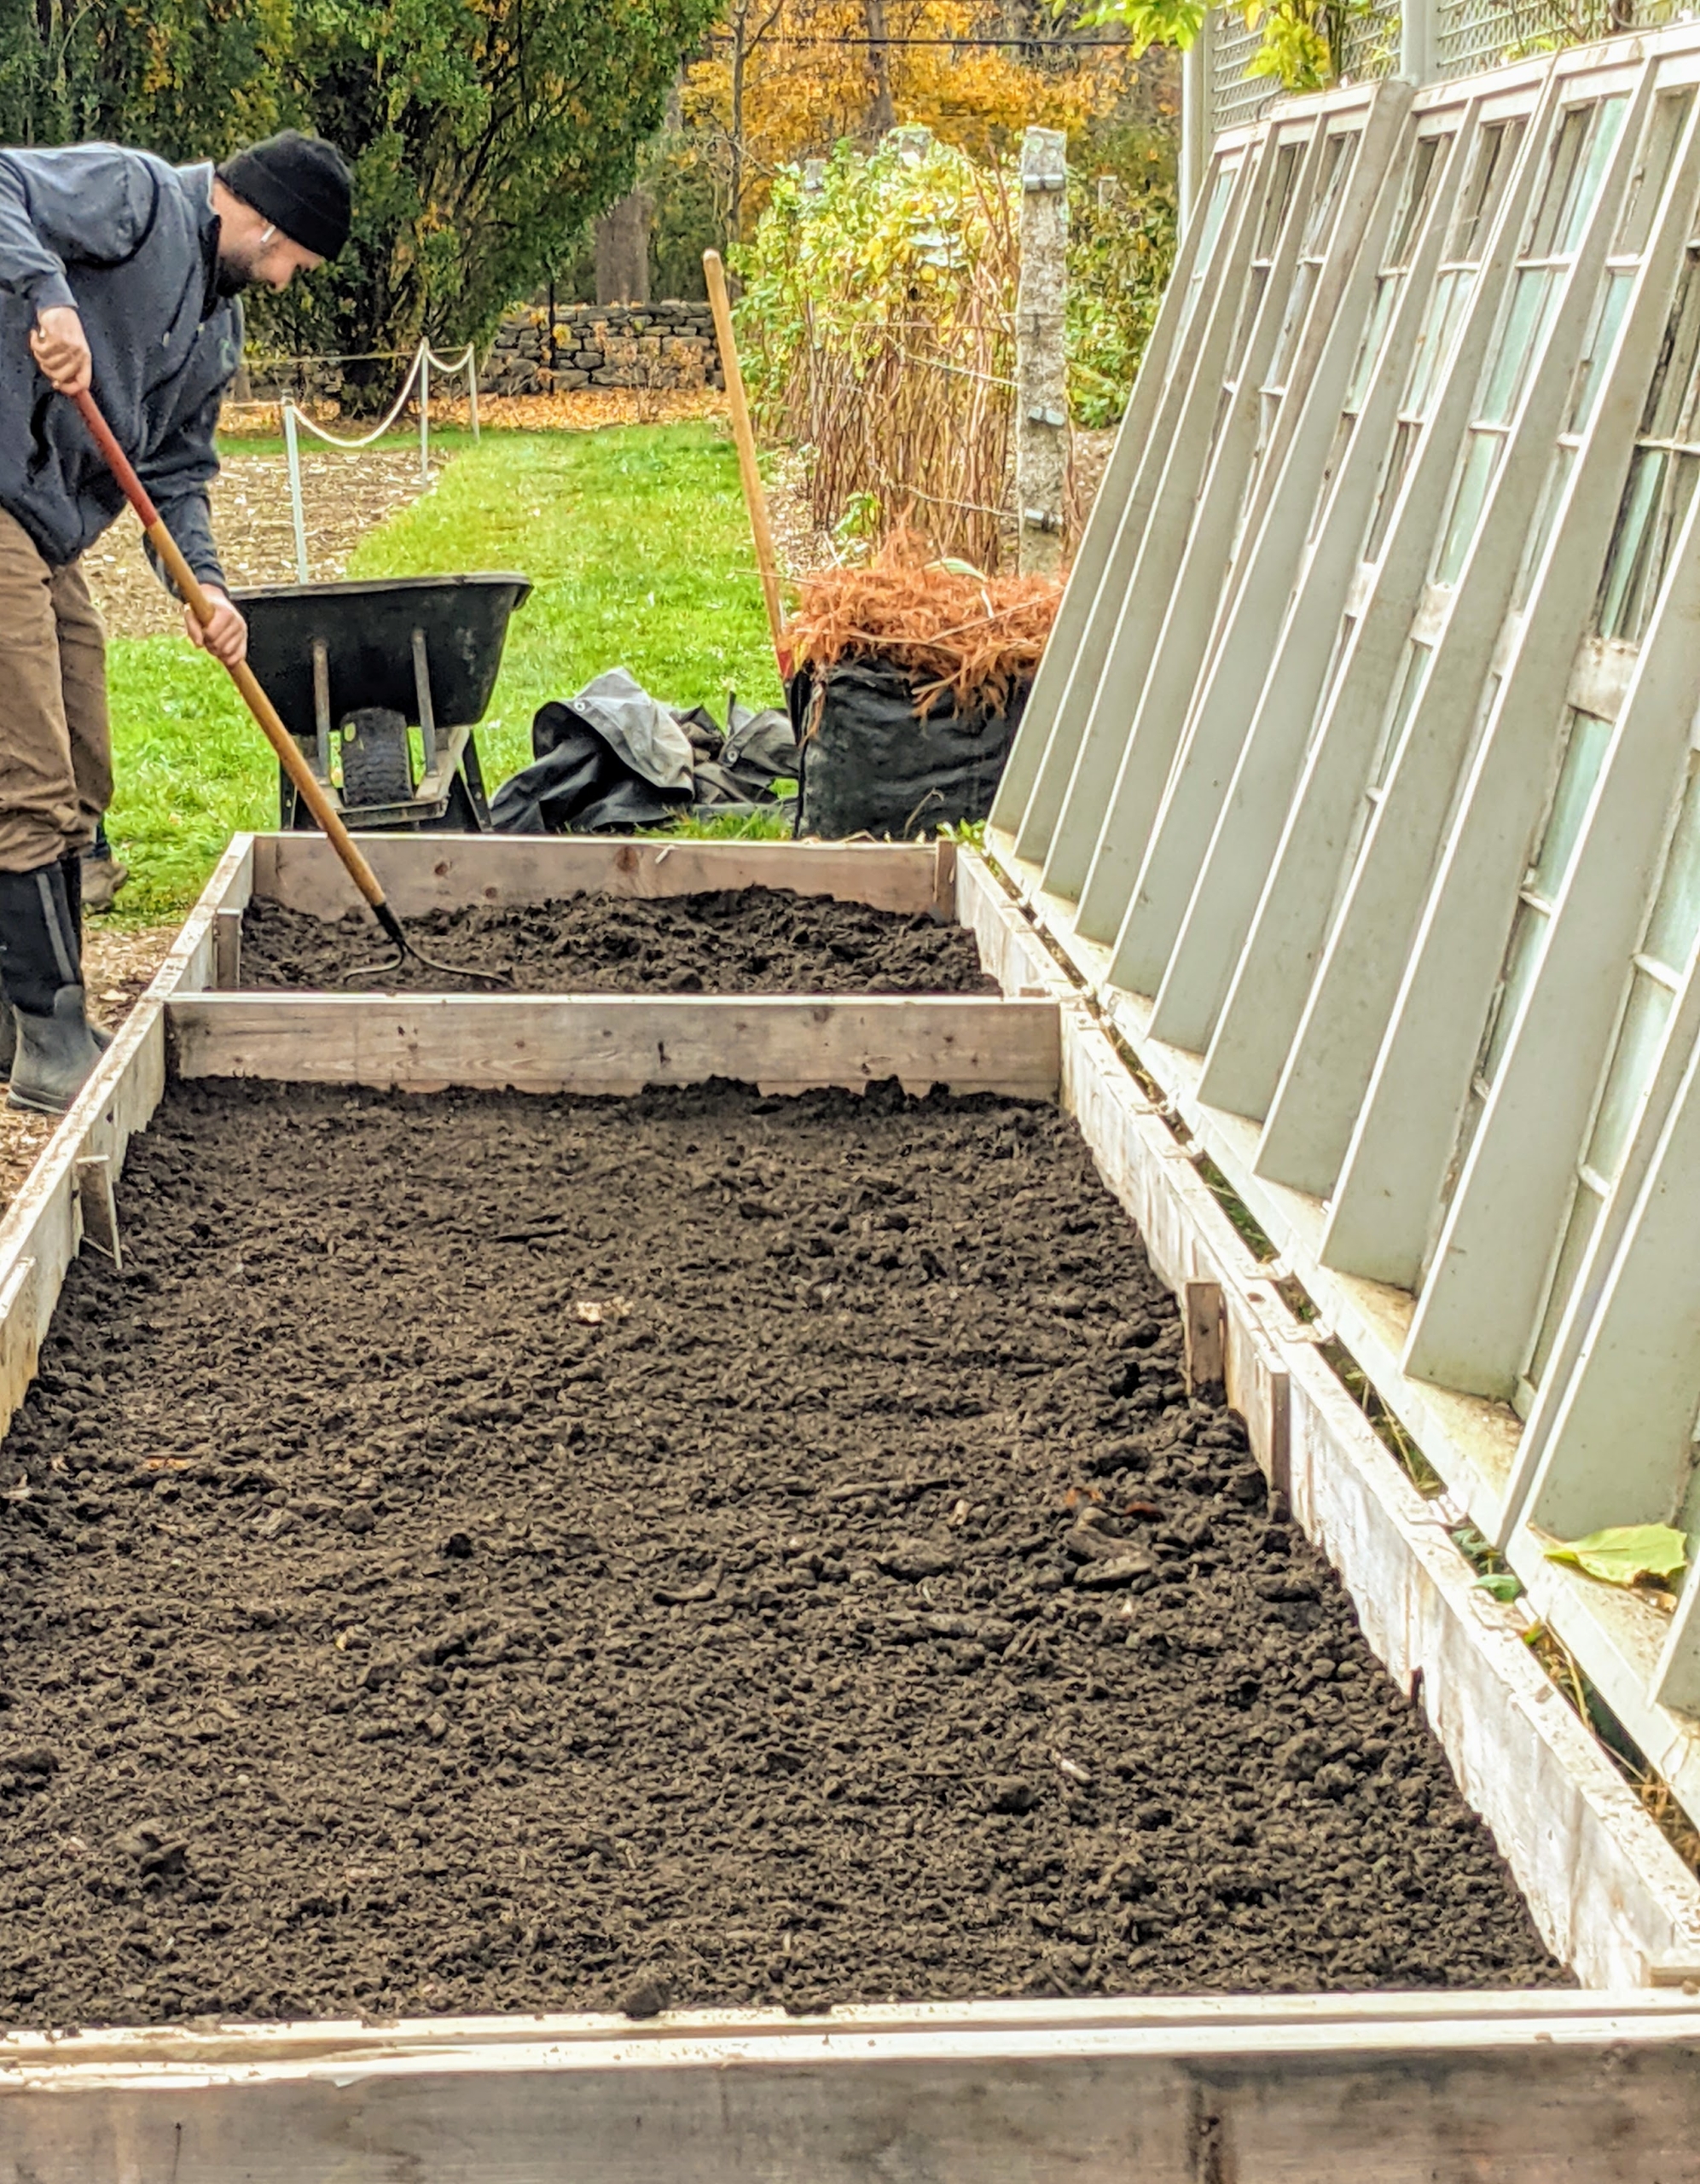
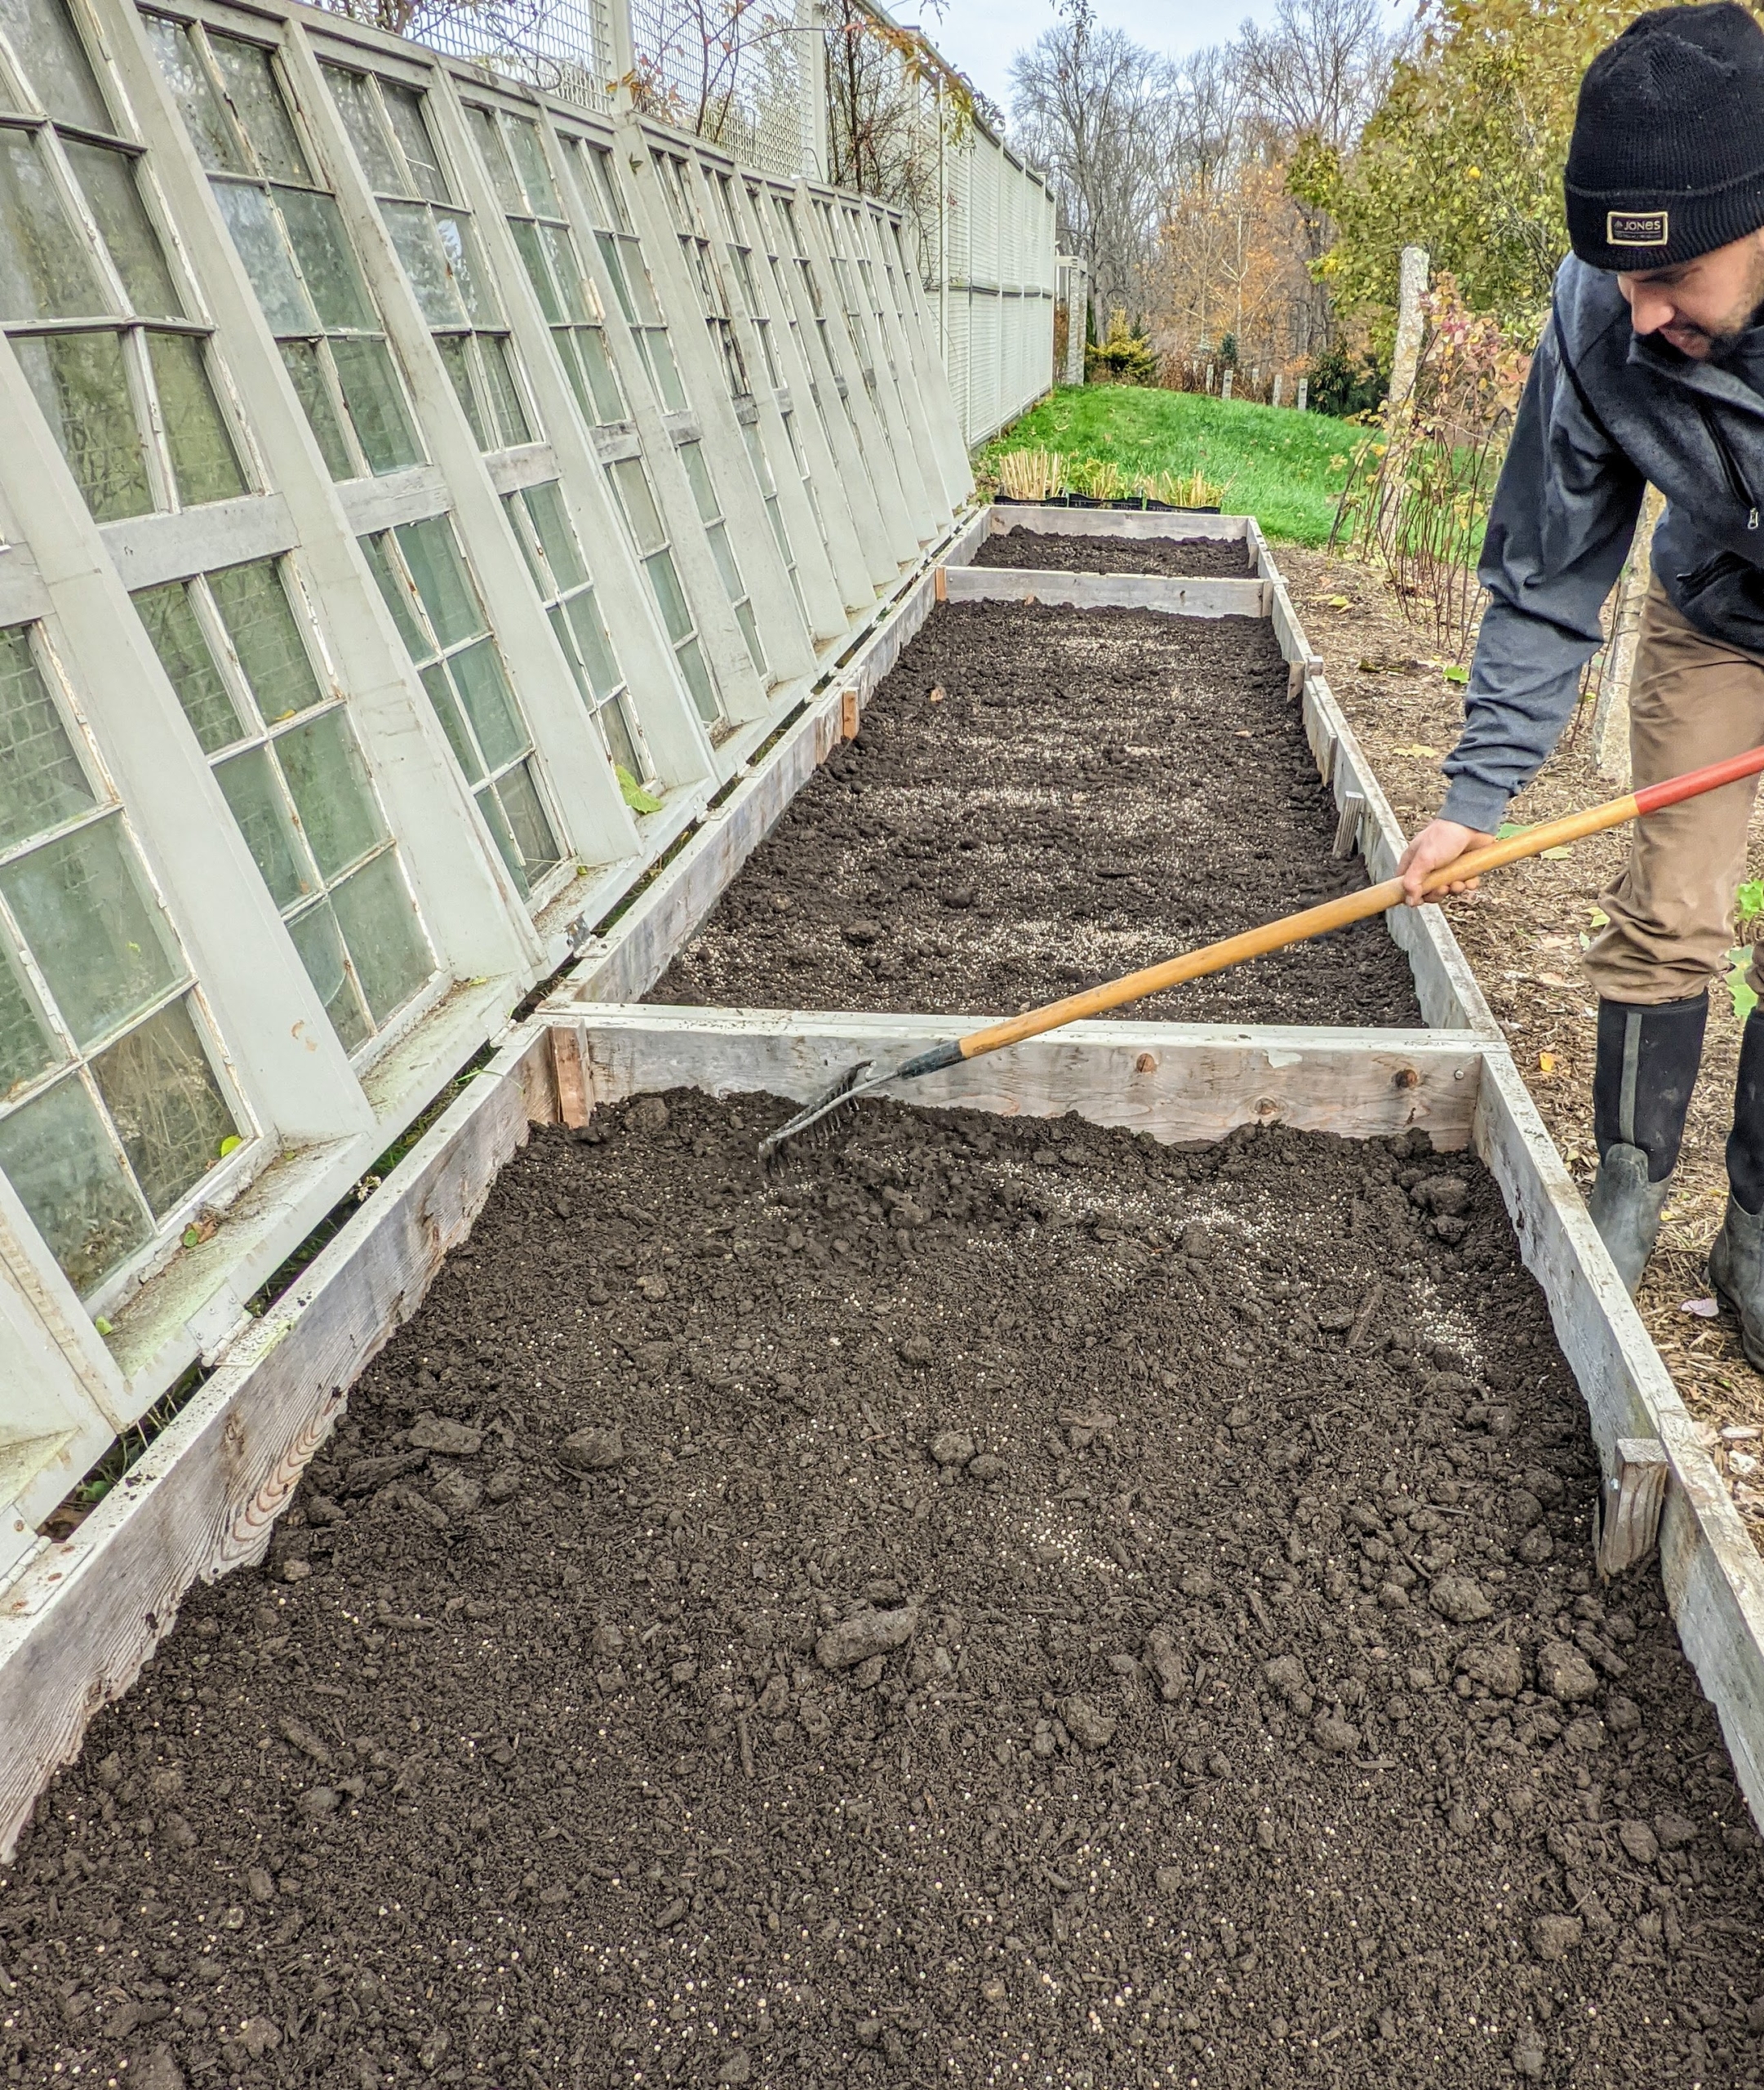
And then with a soft rake, levels the medium and removes any detritus or stones and other organic material that did not decompose.
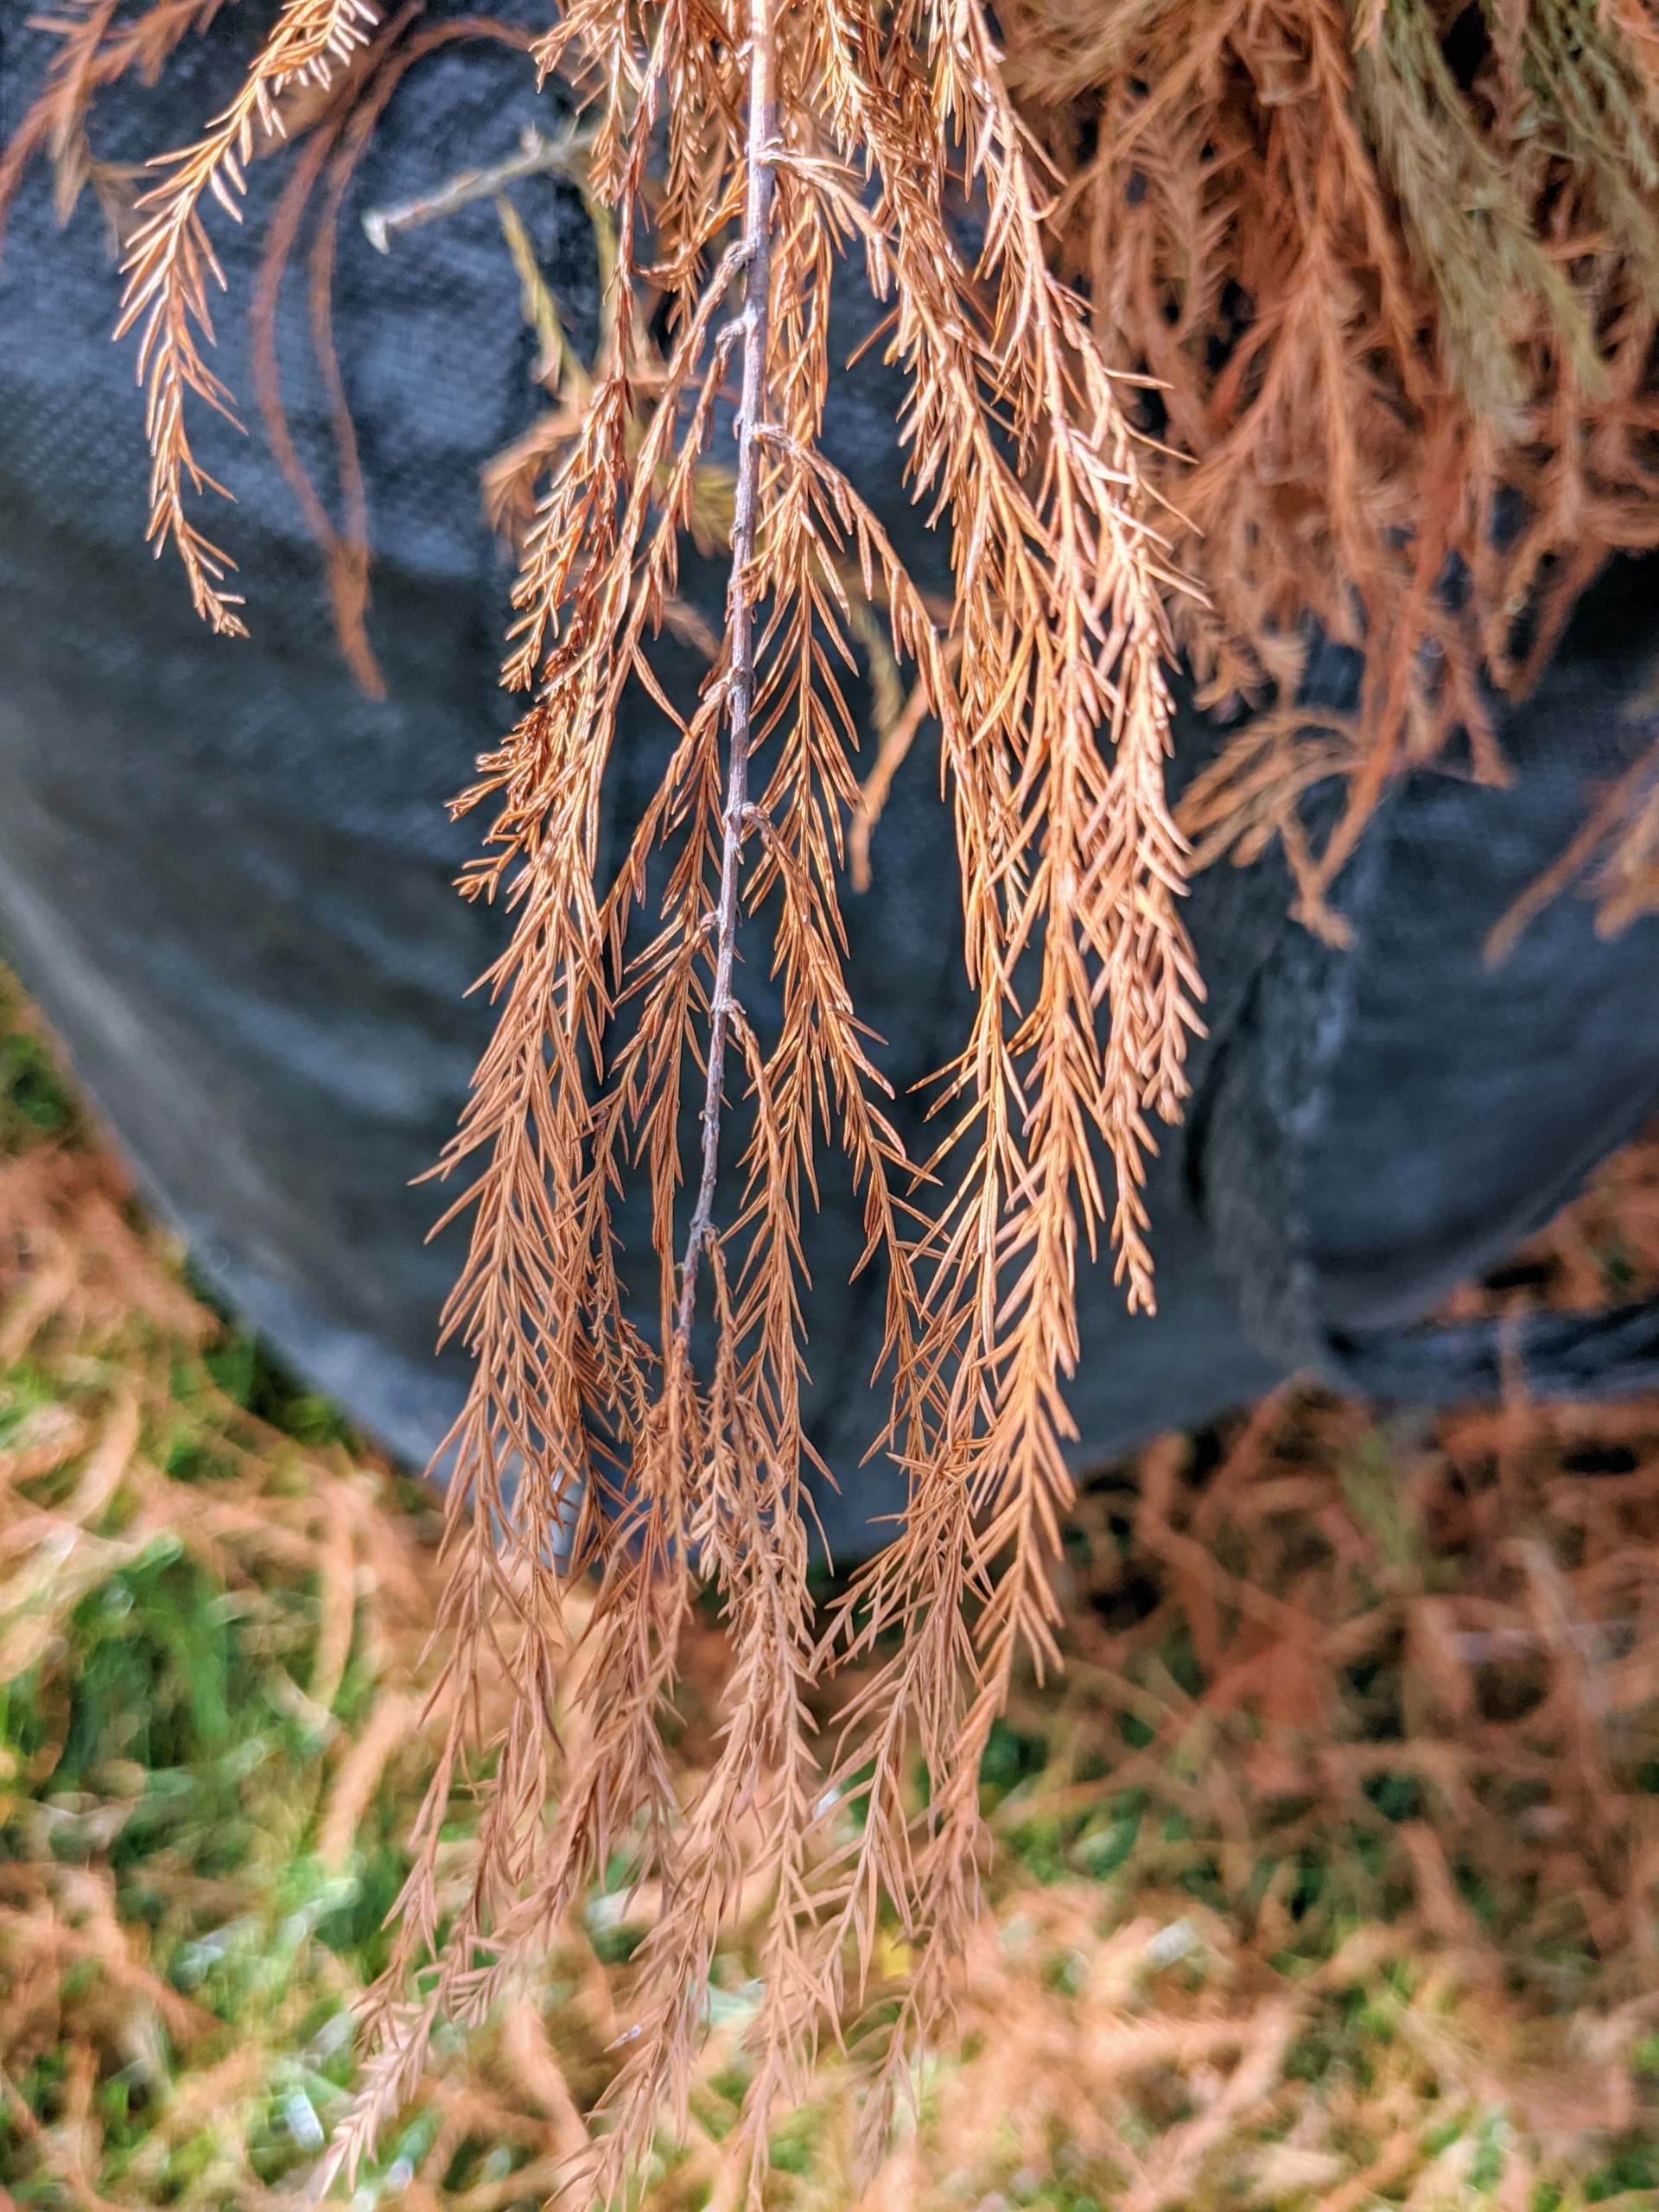
I wanted to use the fallen foliage from my bald cypress trees as mulch for the boxwood cuttings, so Brian filled three of my Multi-Purpose Reusable Heavy Duty Tote Bags with the bald cypress leaves – these bags are so useful for carrying, organizing, and storing so many things indoors and out.
Bald cypress trees are deciduous conifers that shed their soft needlelike leaves in the fall. In fact, they get the name “bald” cypress because they drop their leaves so early in the season. Their fall colors are tan, cinnamon, and fiery orange.
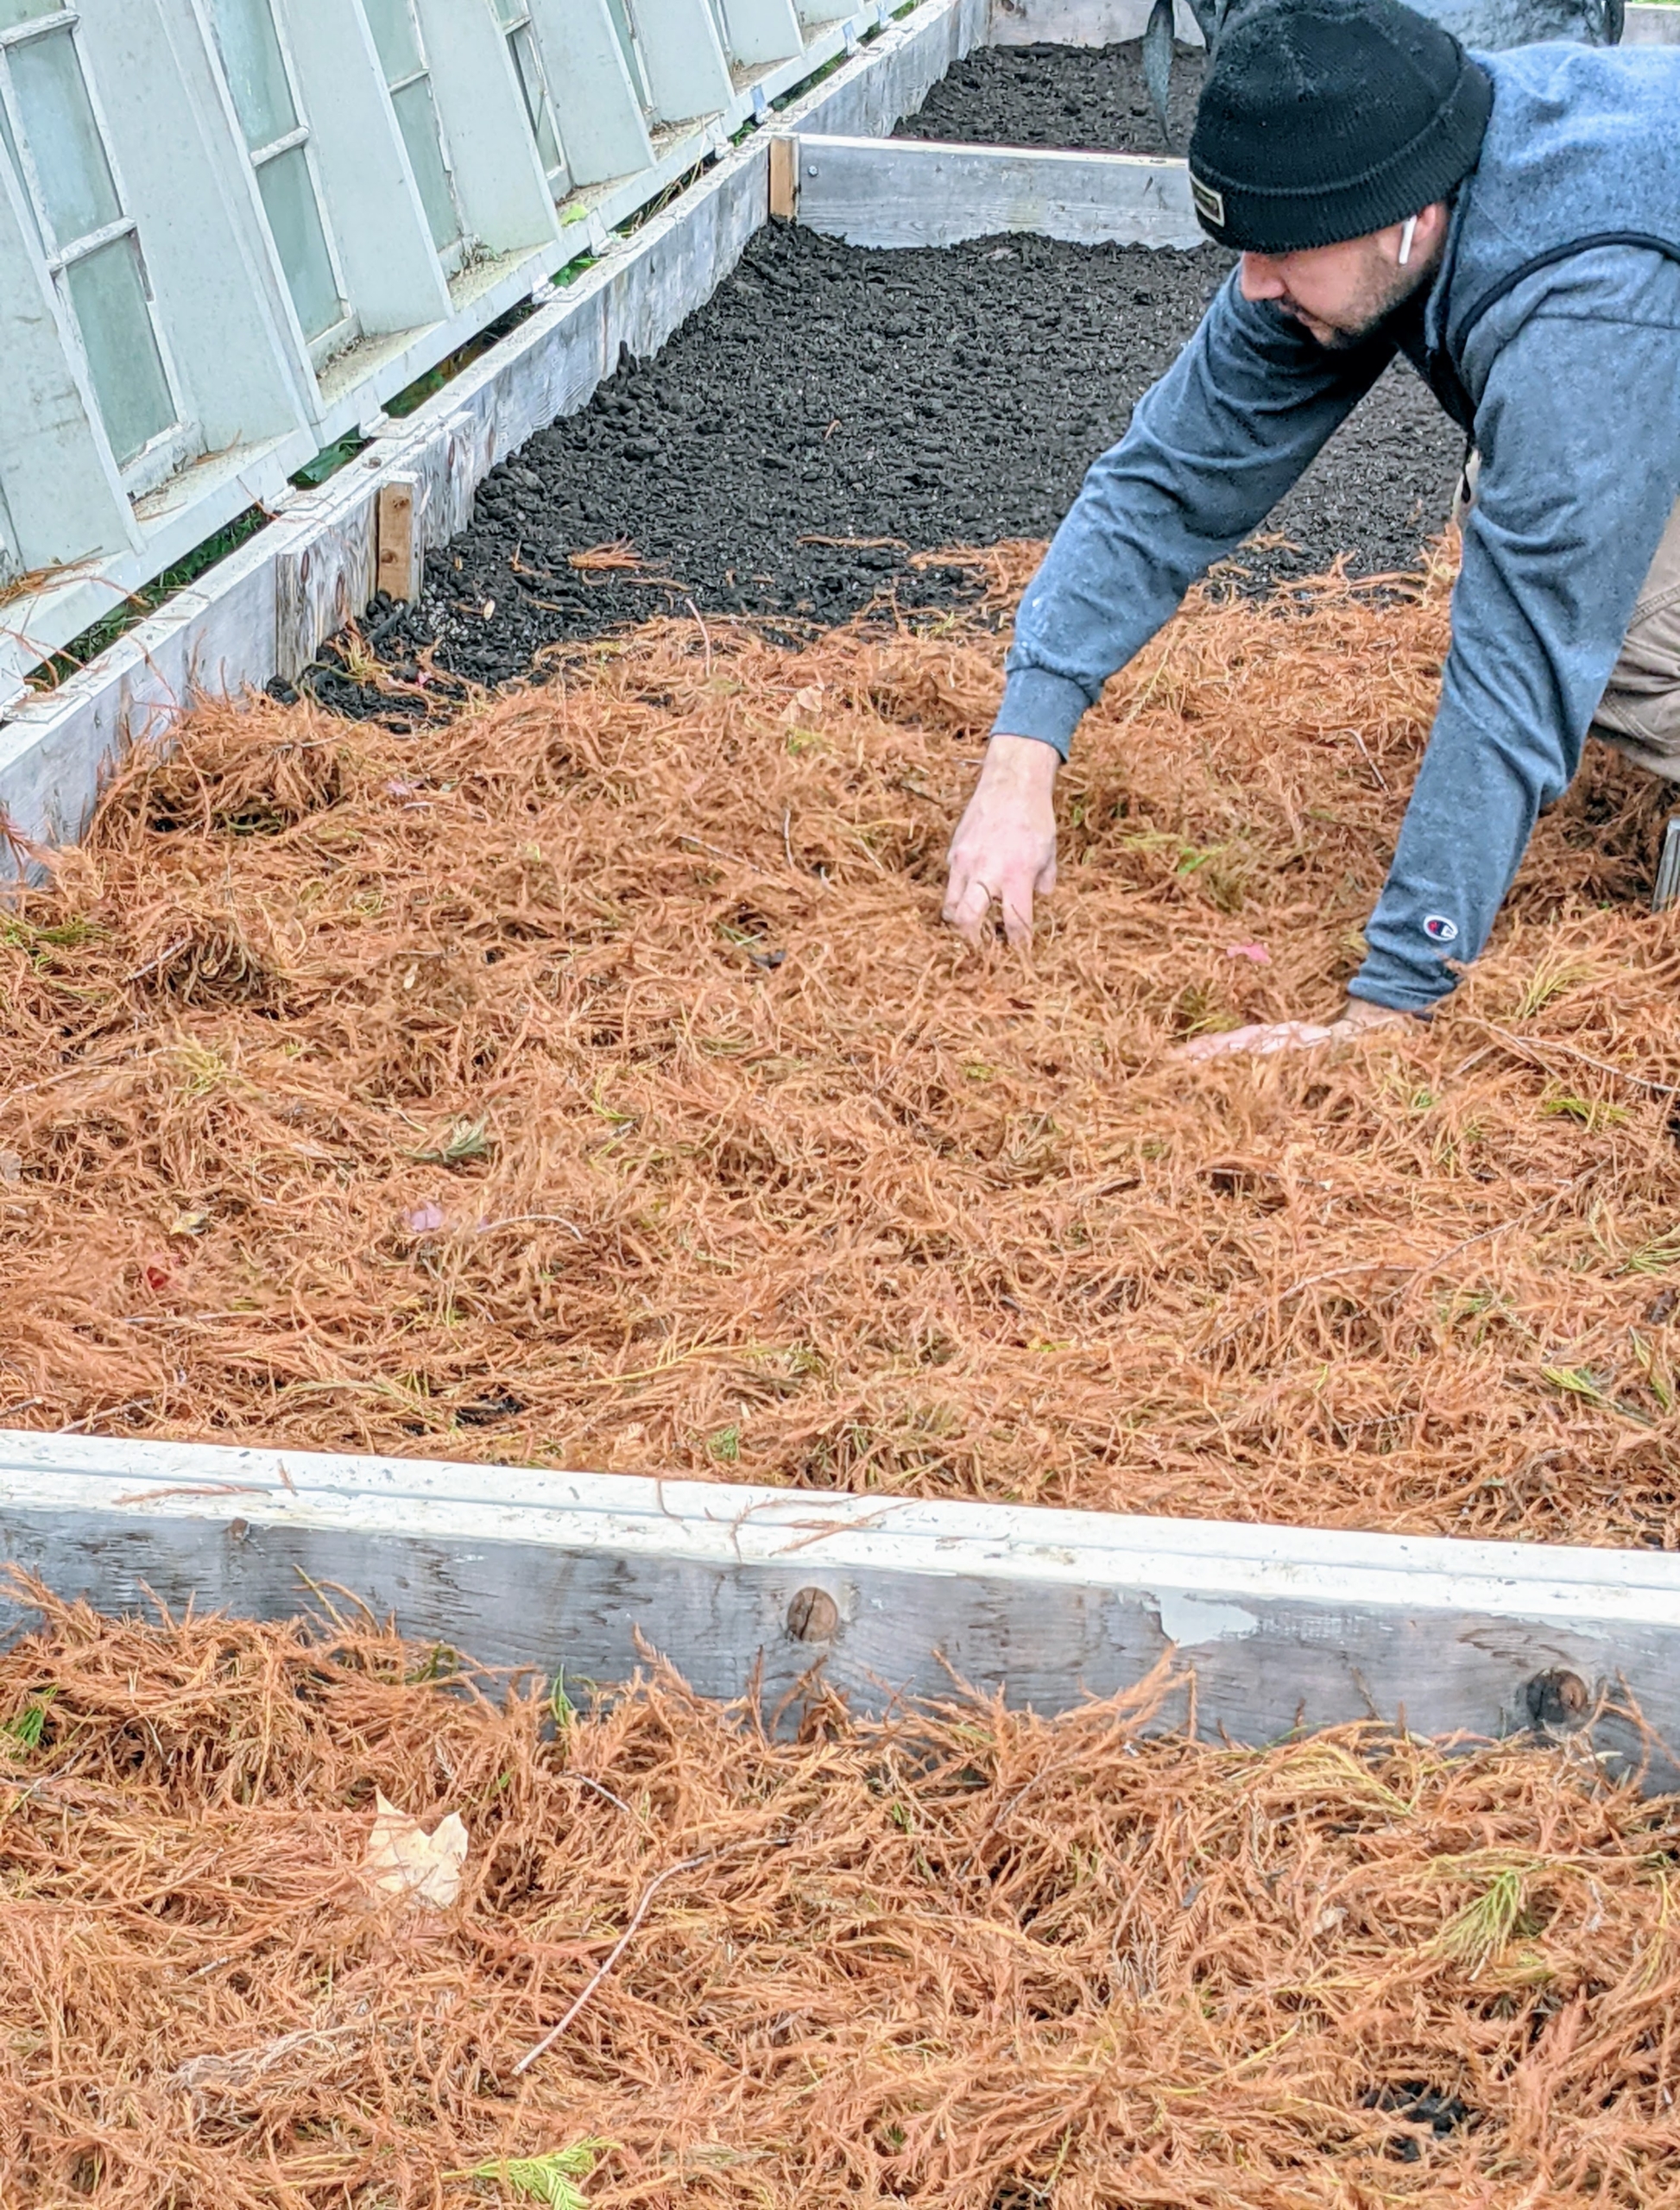
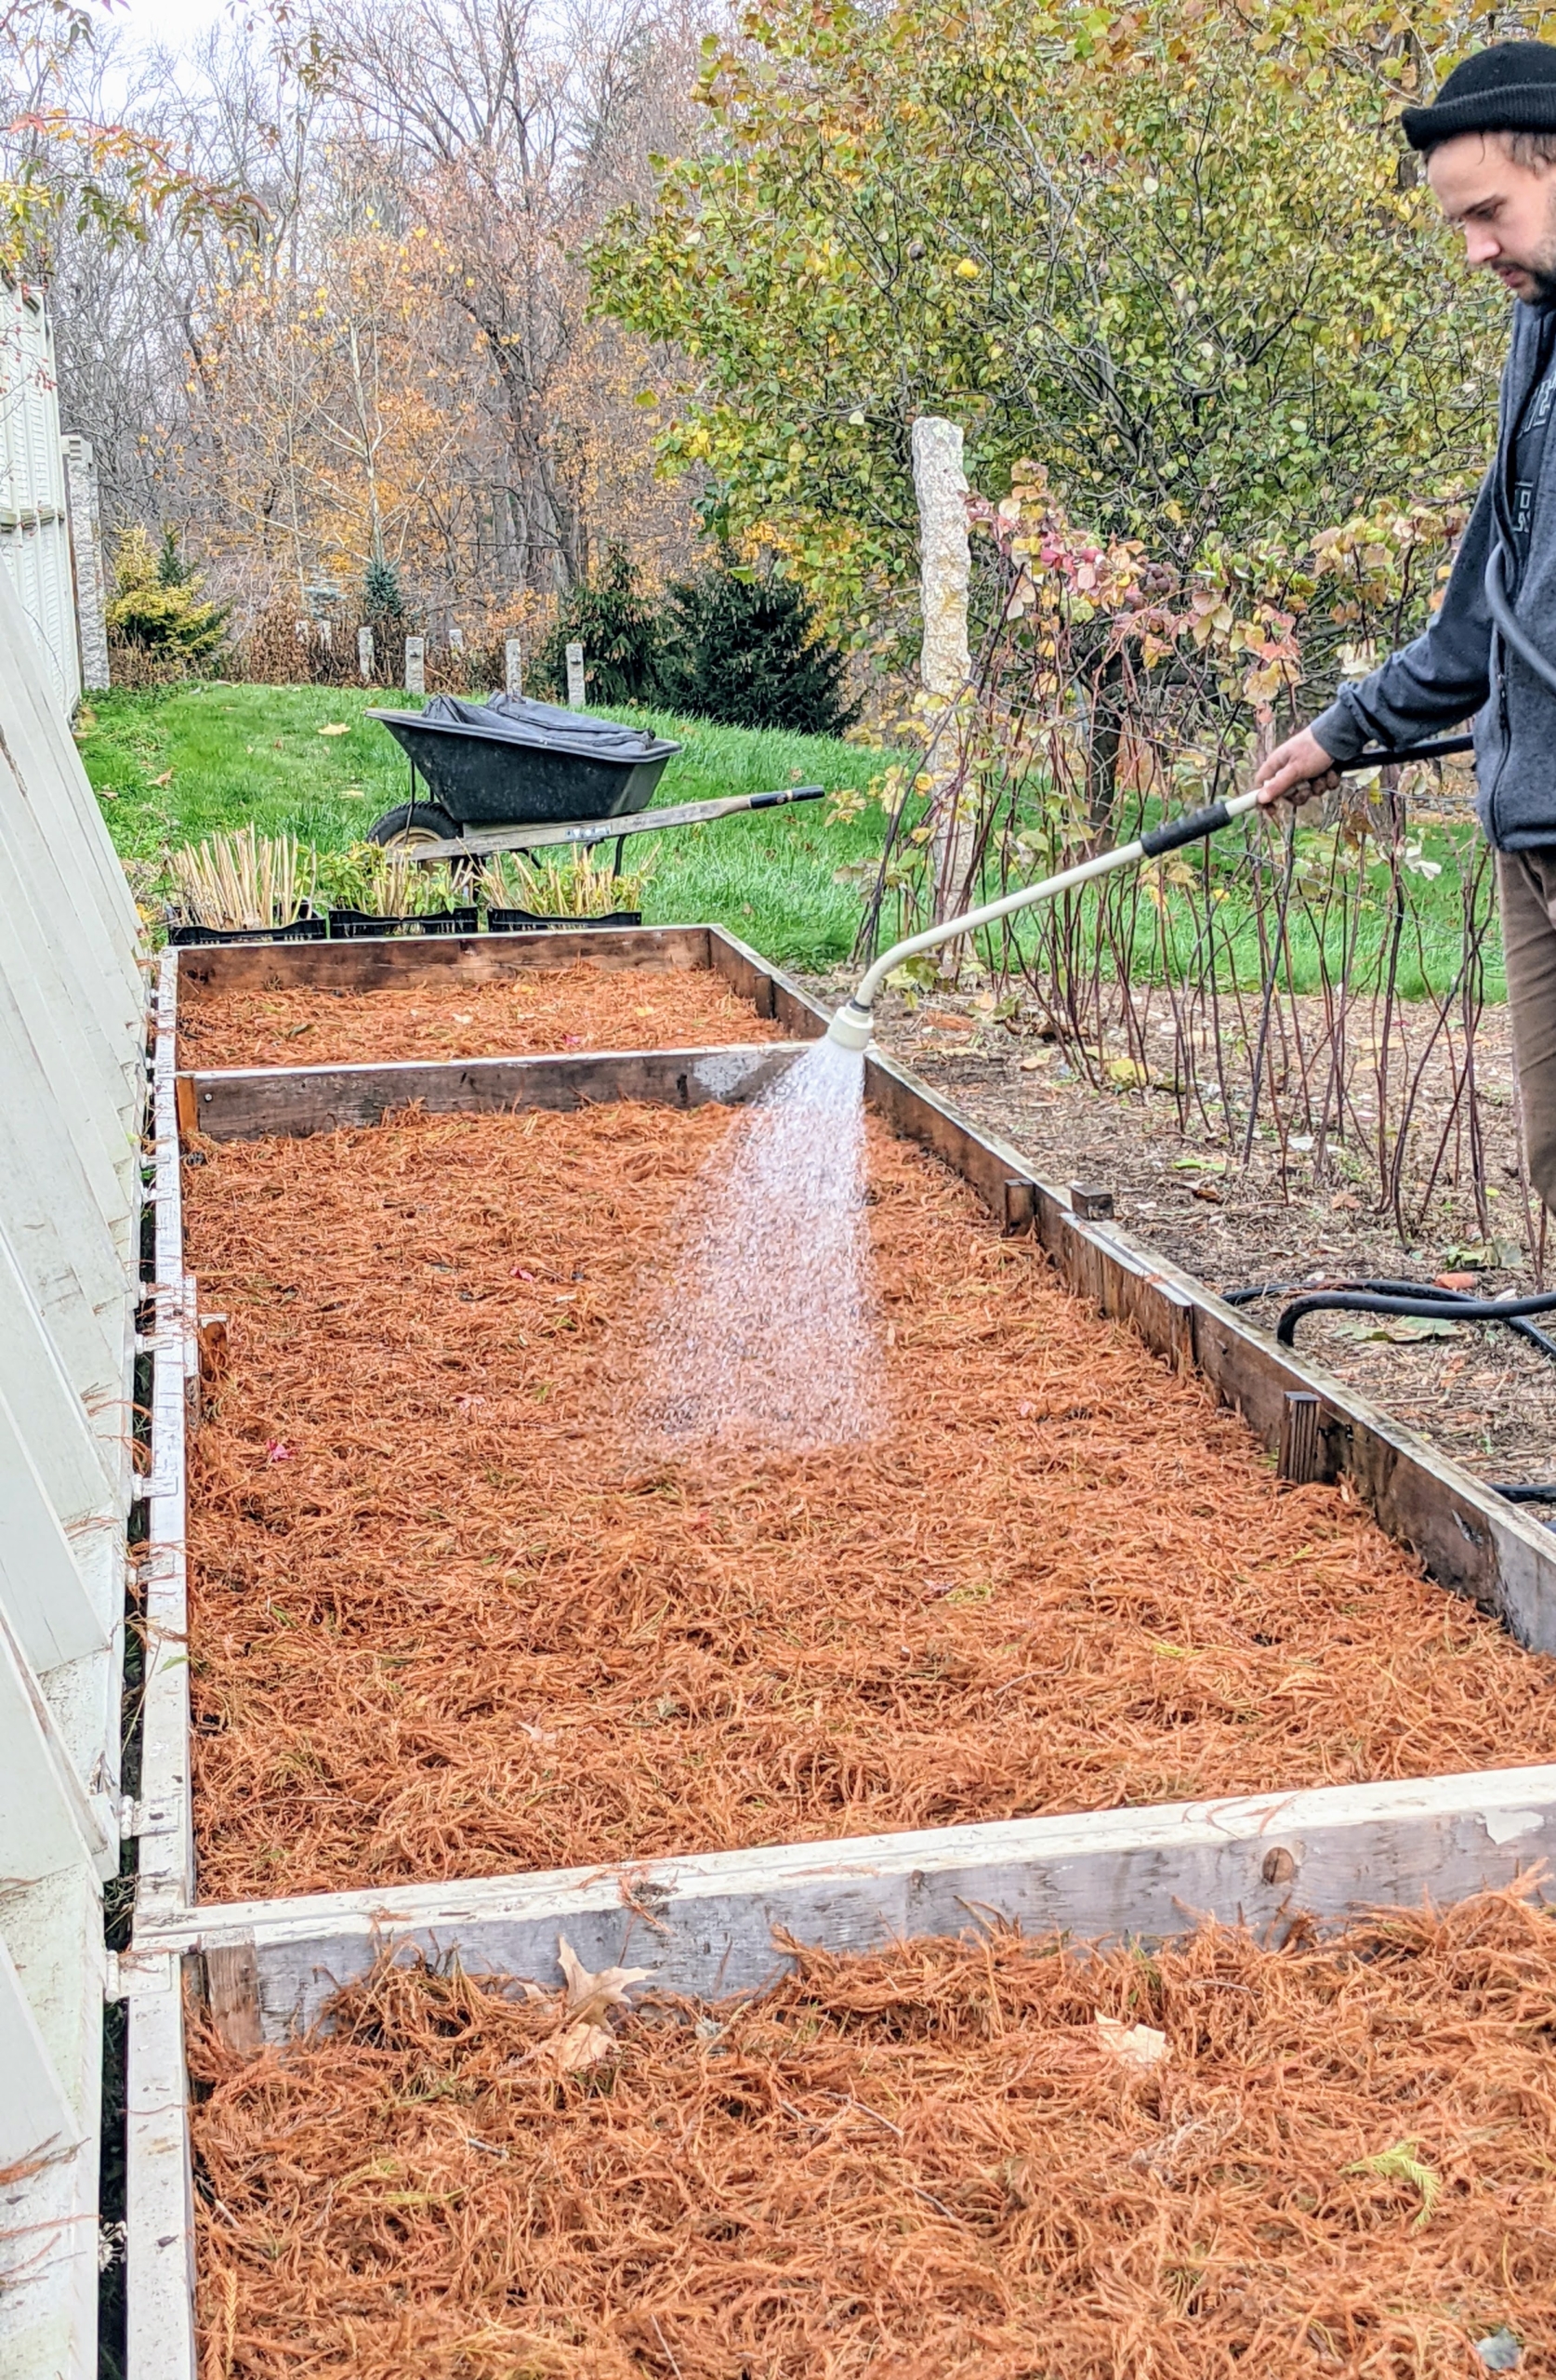
Look how pretty the foliage looks as top dressing in the cold frame. Brian spreads the foliage removing any big branches.
Next, he gives the bed a good drink.
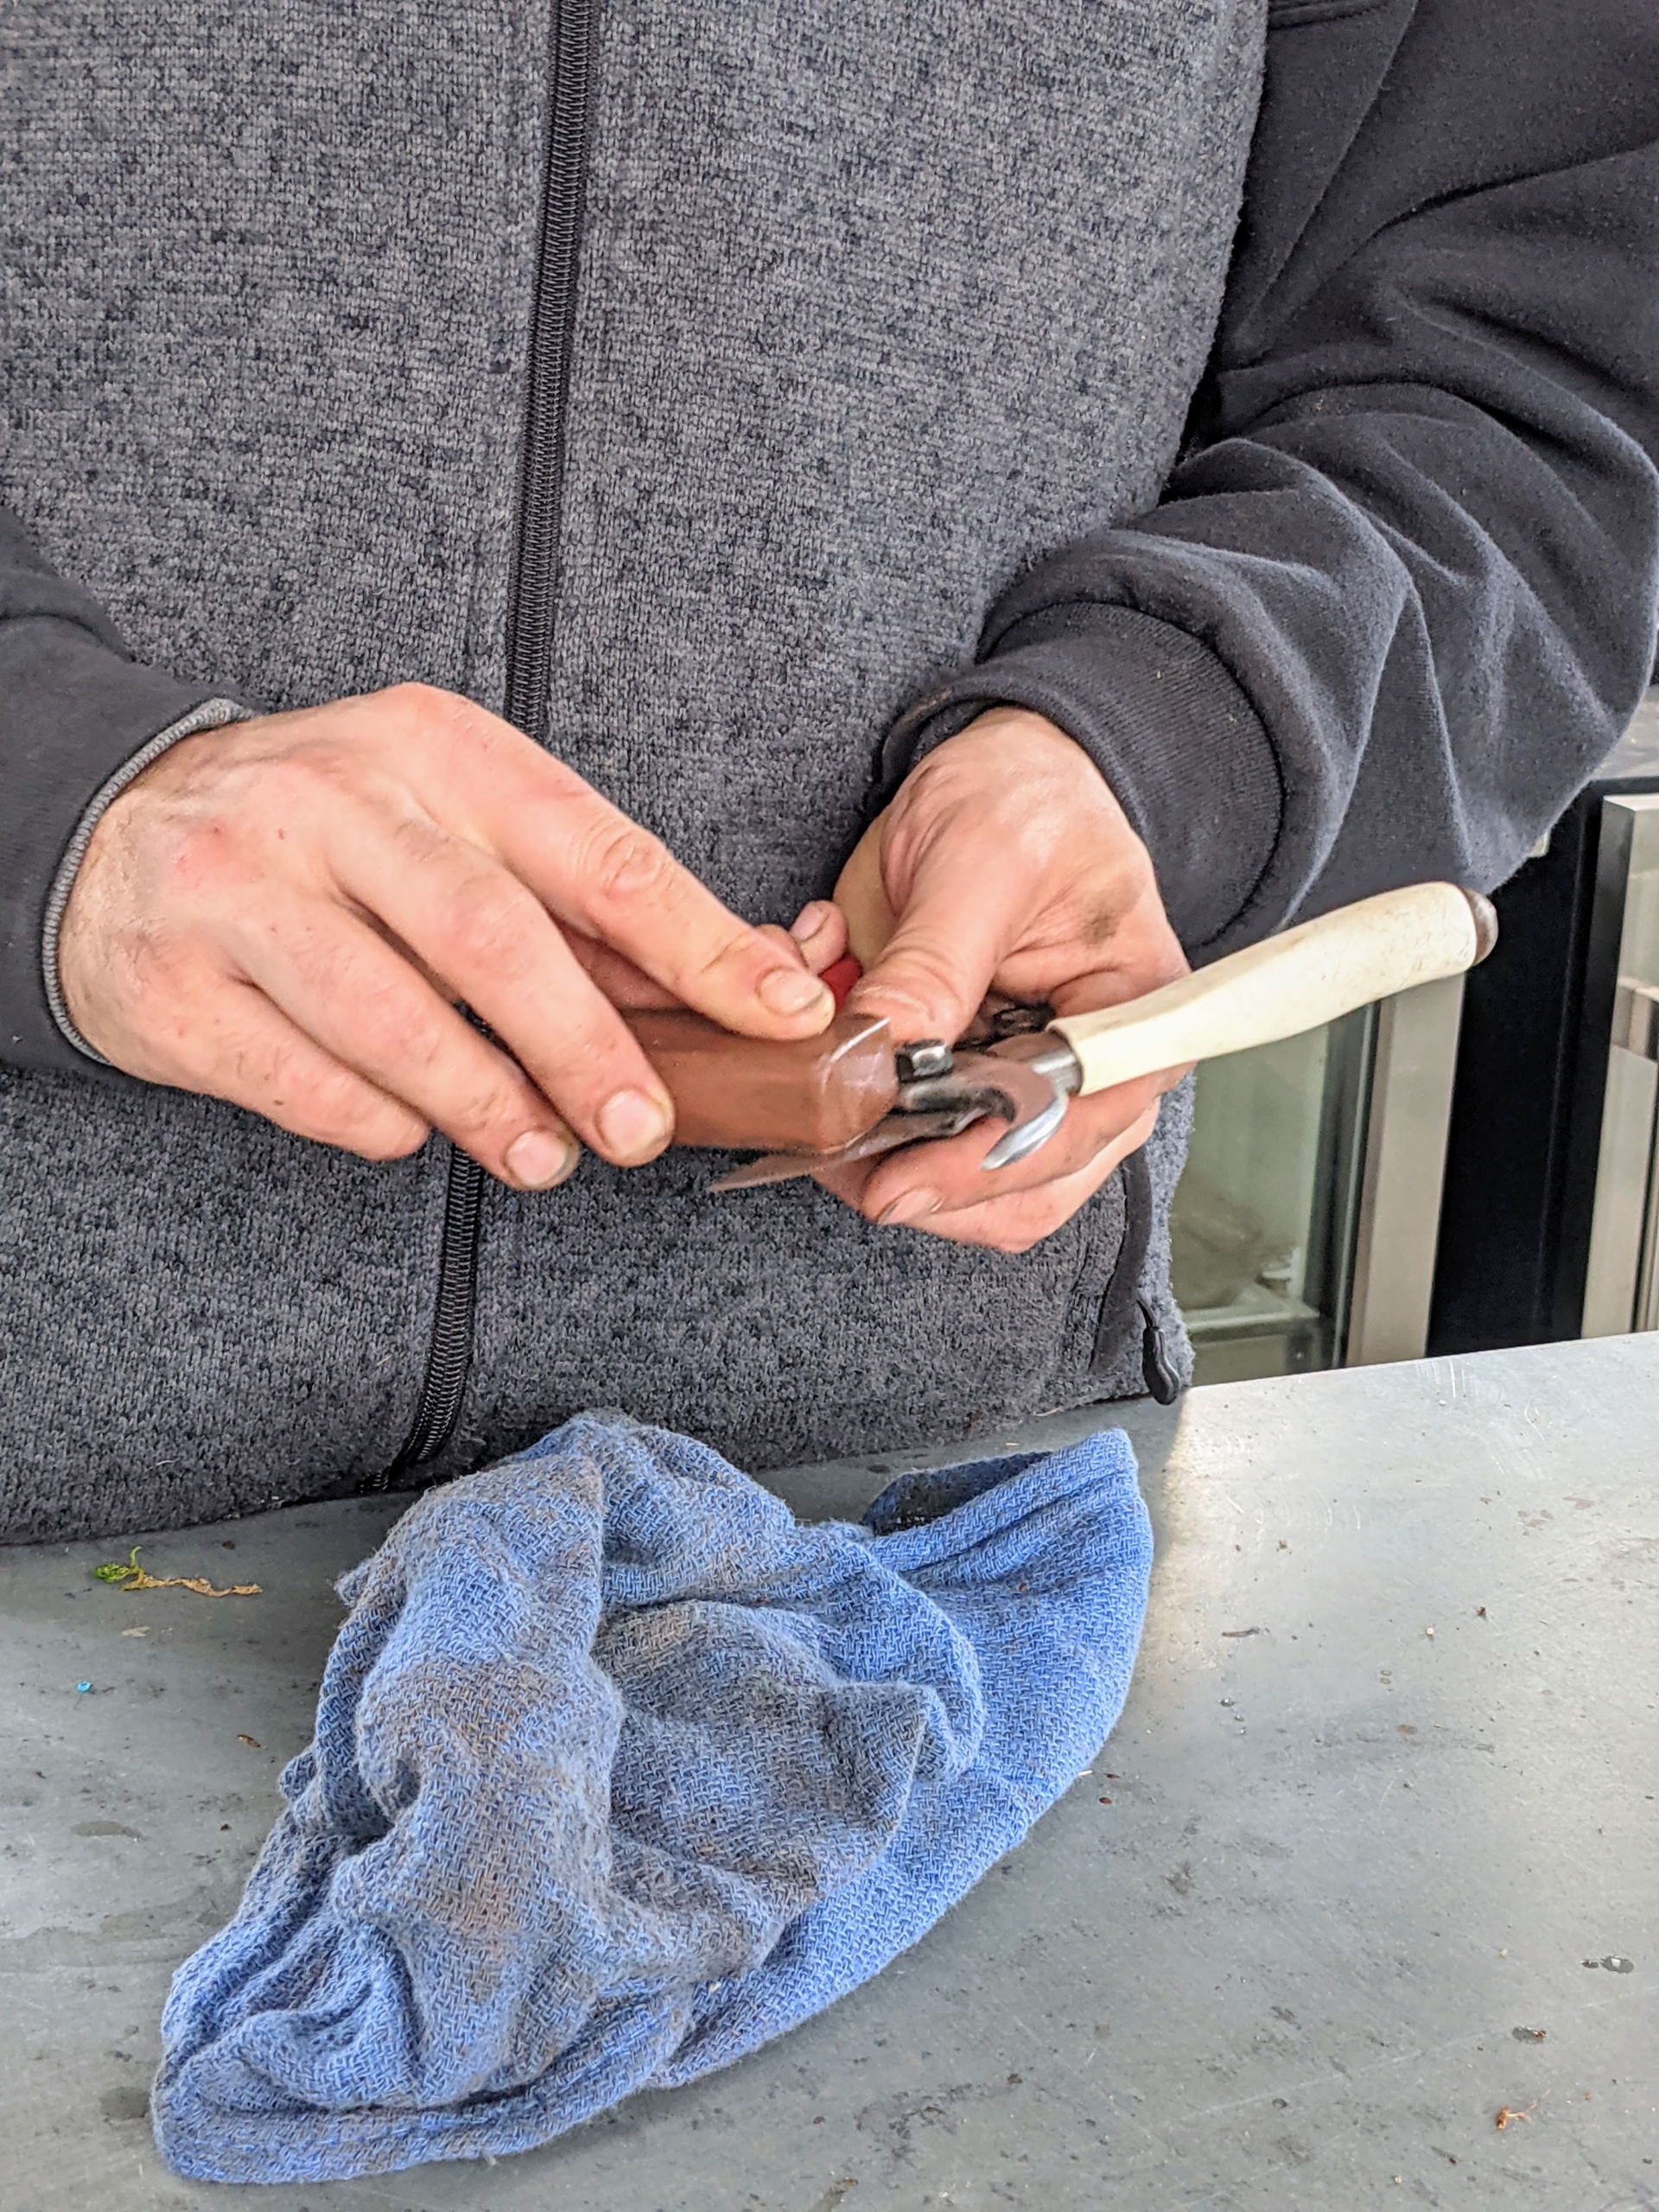
To prepare the cuttings, Brian starts by thoroughly cleaning and sharpening his pruners. If you’re an avid gardener, you know sharp pruning tools not only make chores easier to complete, but they also make cleaner cuts, which allow plants to heal faster. Making clean cuts exposes them to less damage from diseases, insects, fungi, and weather extremes. Everyone on the crew cleans, sharpens, and conditions their pruners, snips, and shears regularly. The process only takes a few minutes, and it keeps these gardening implements in proper working order.
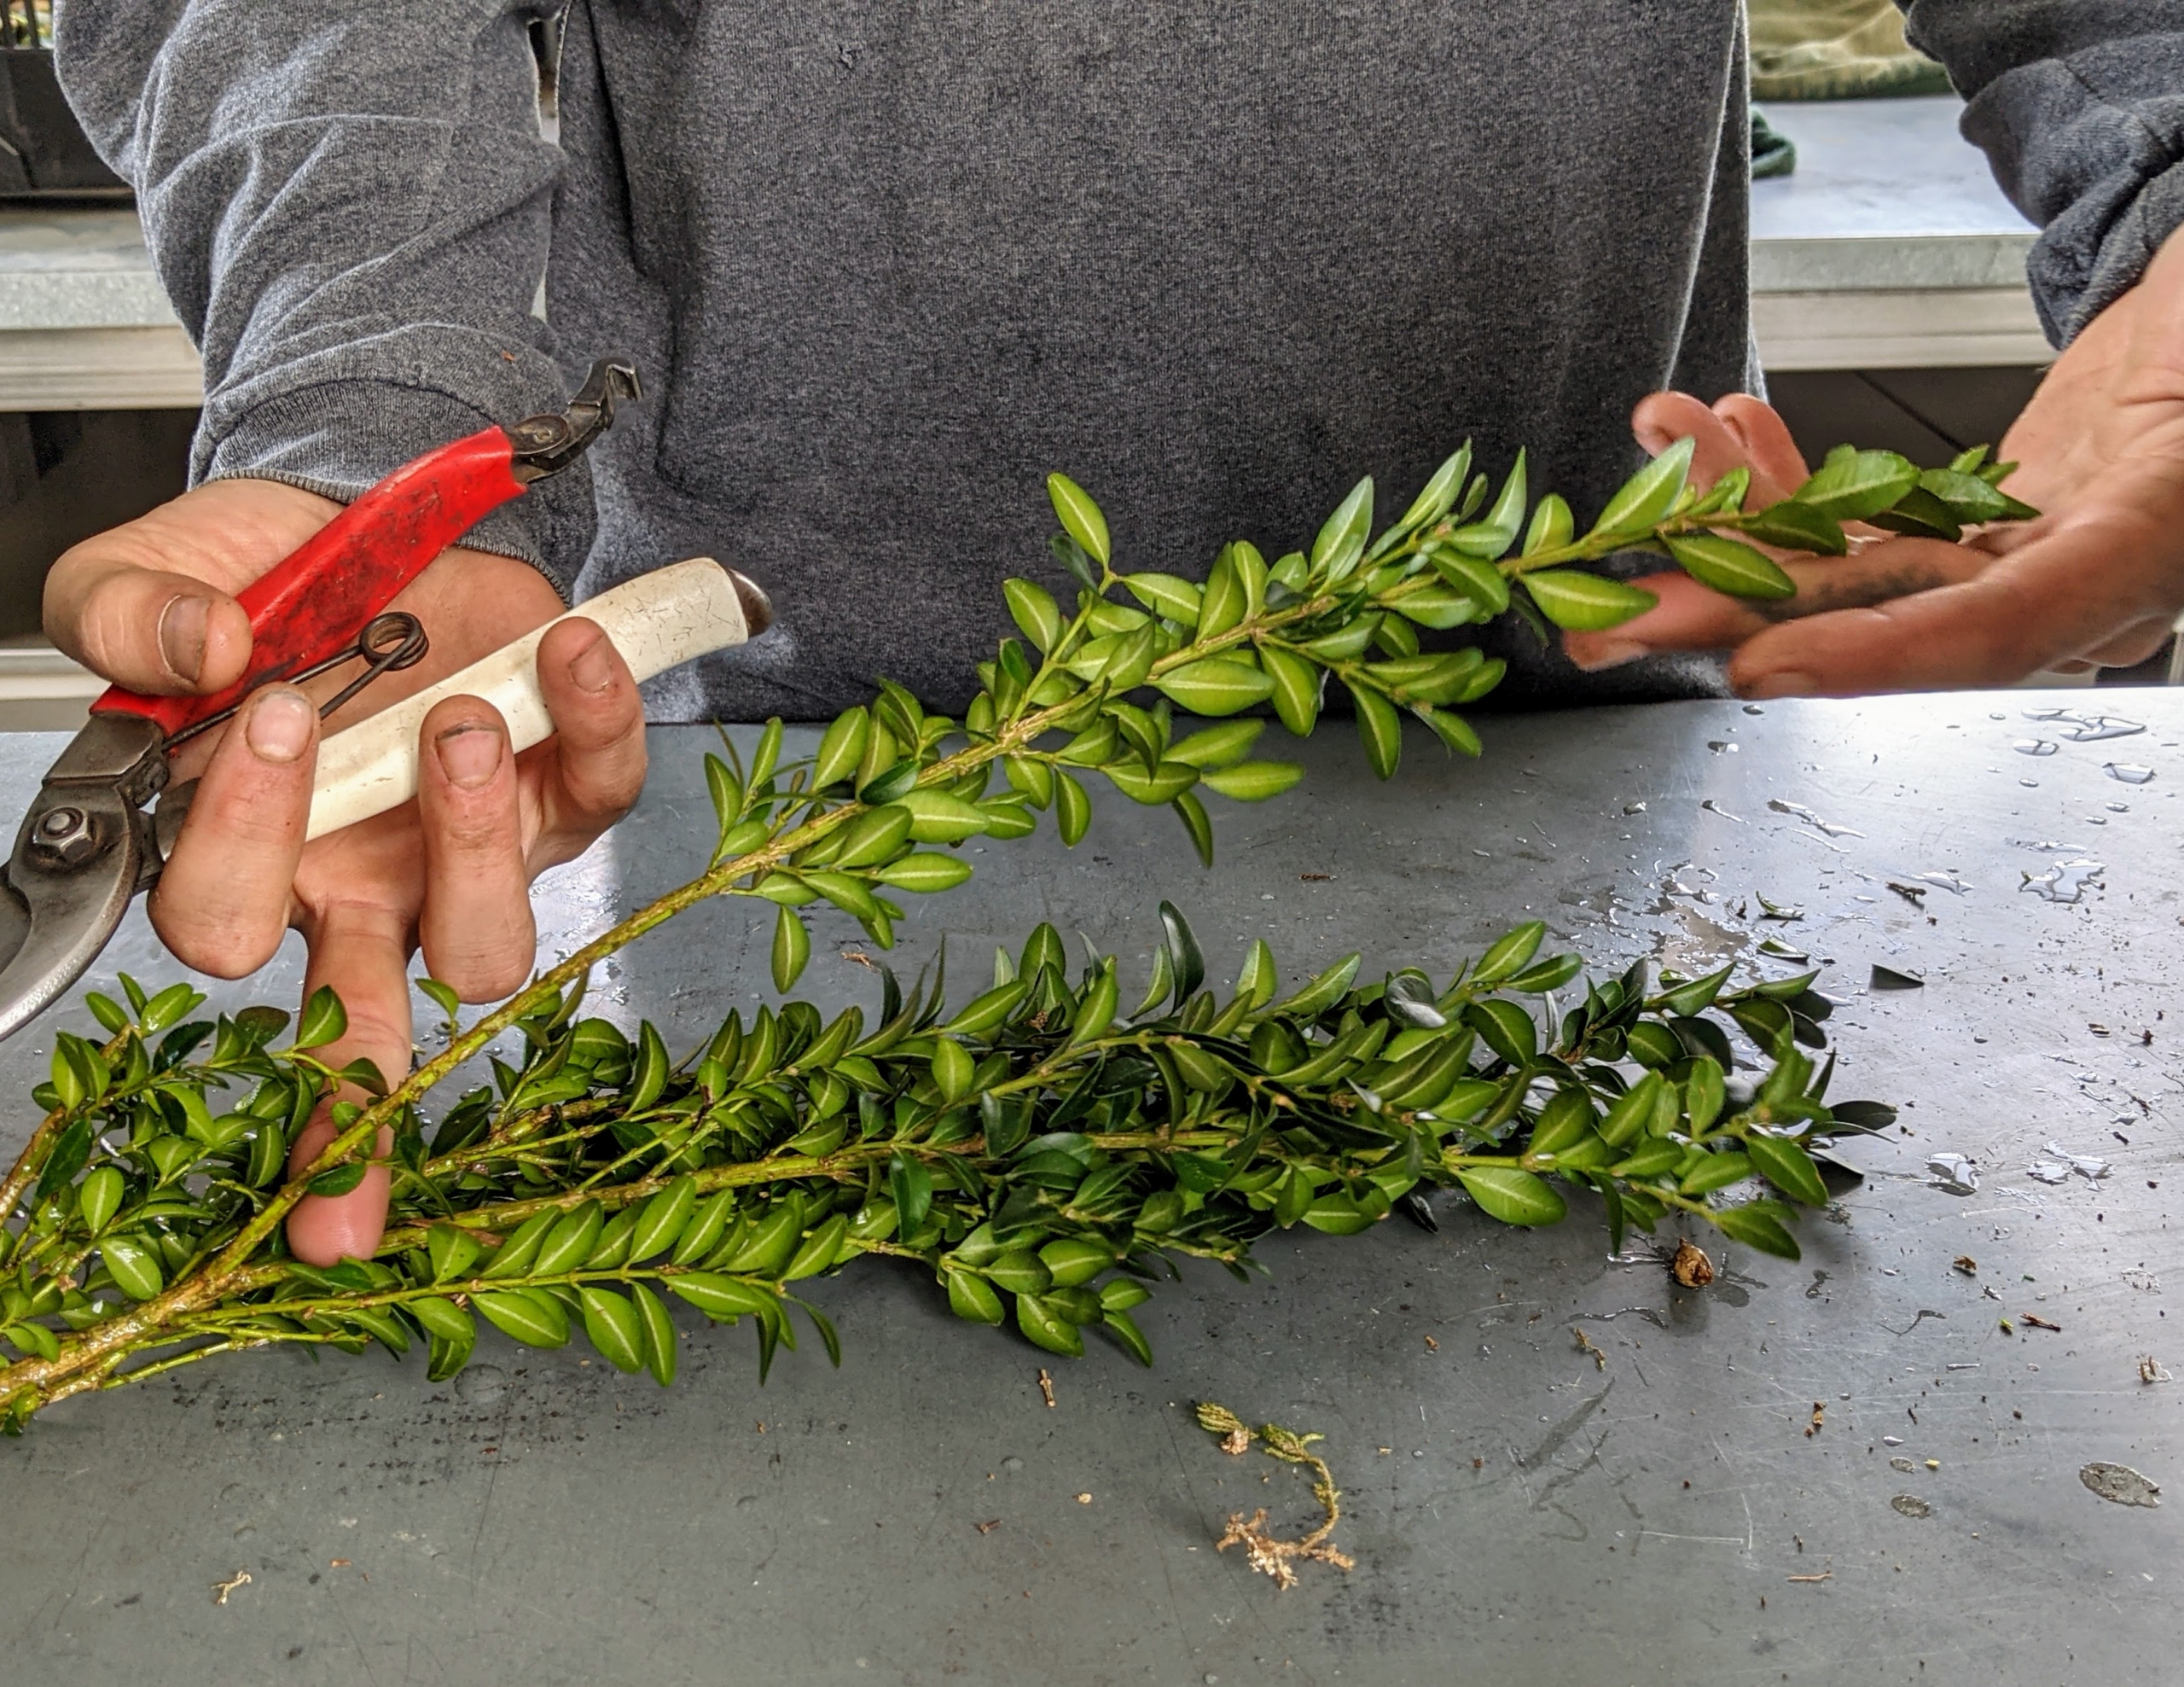
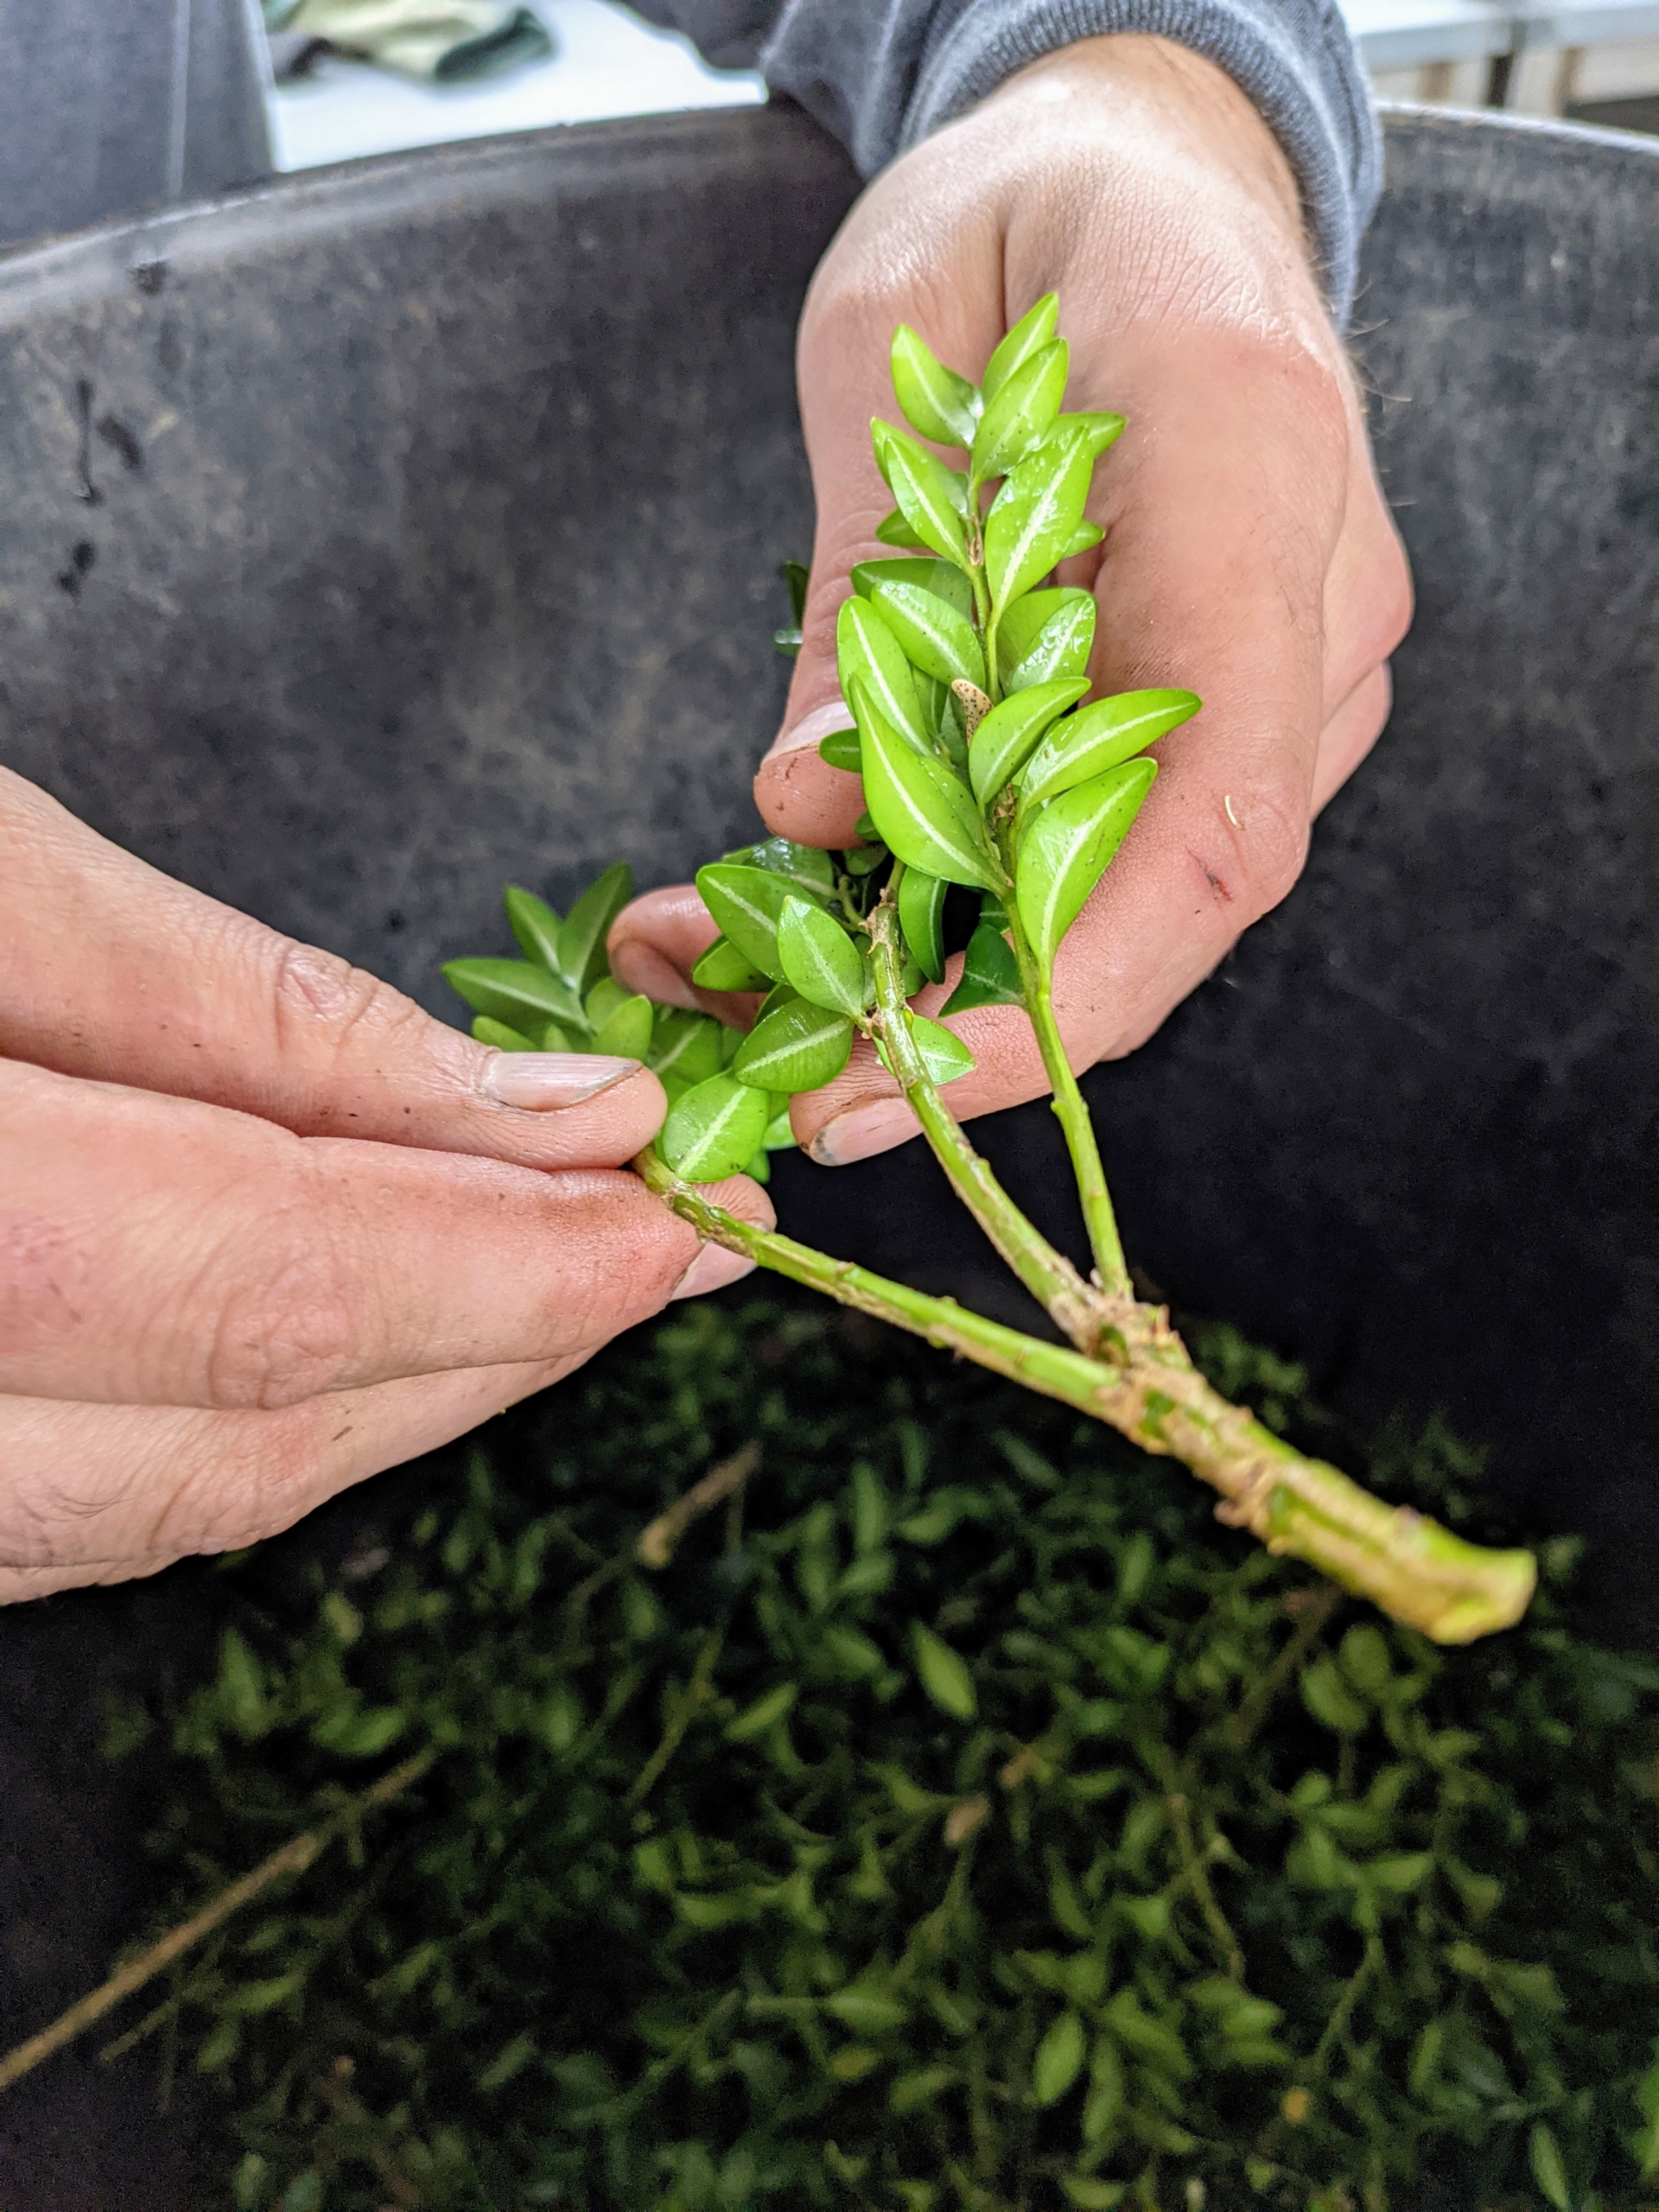
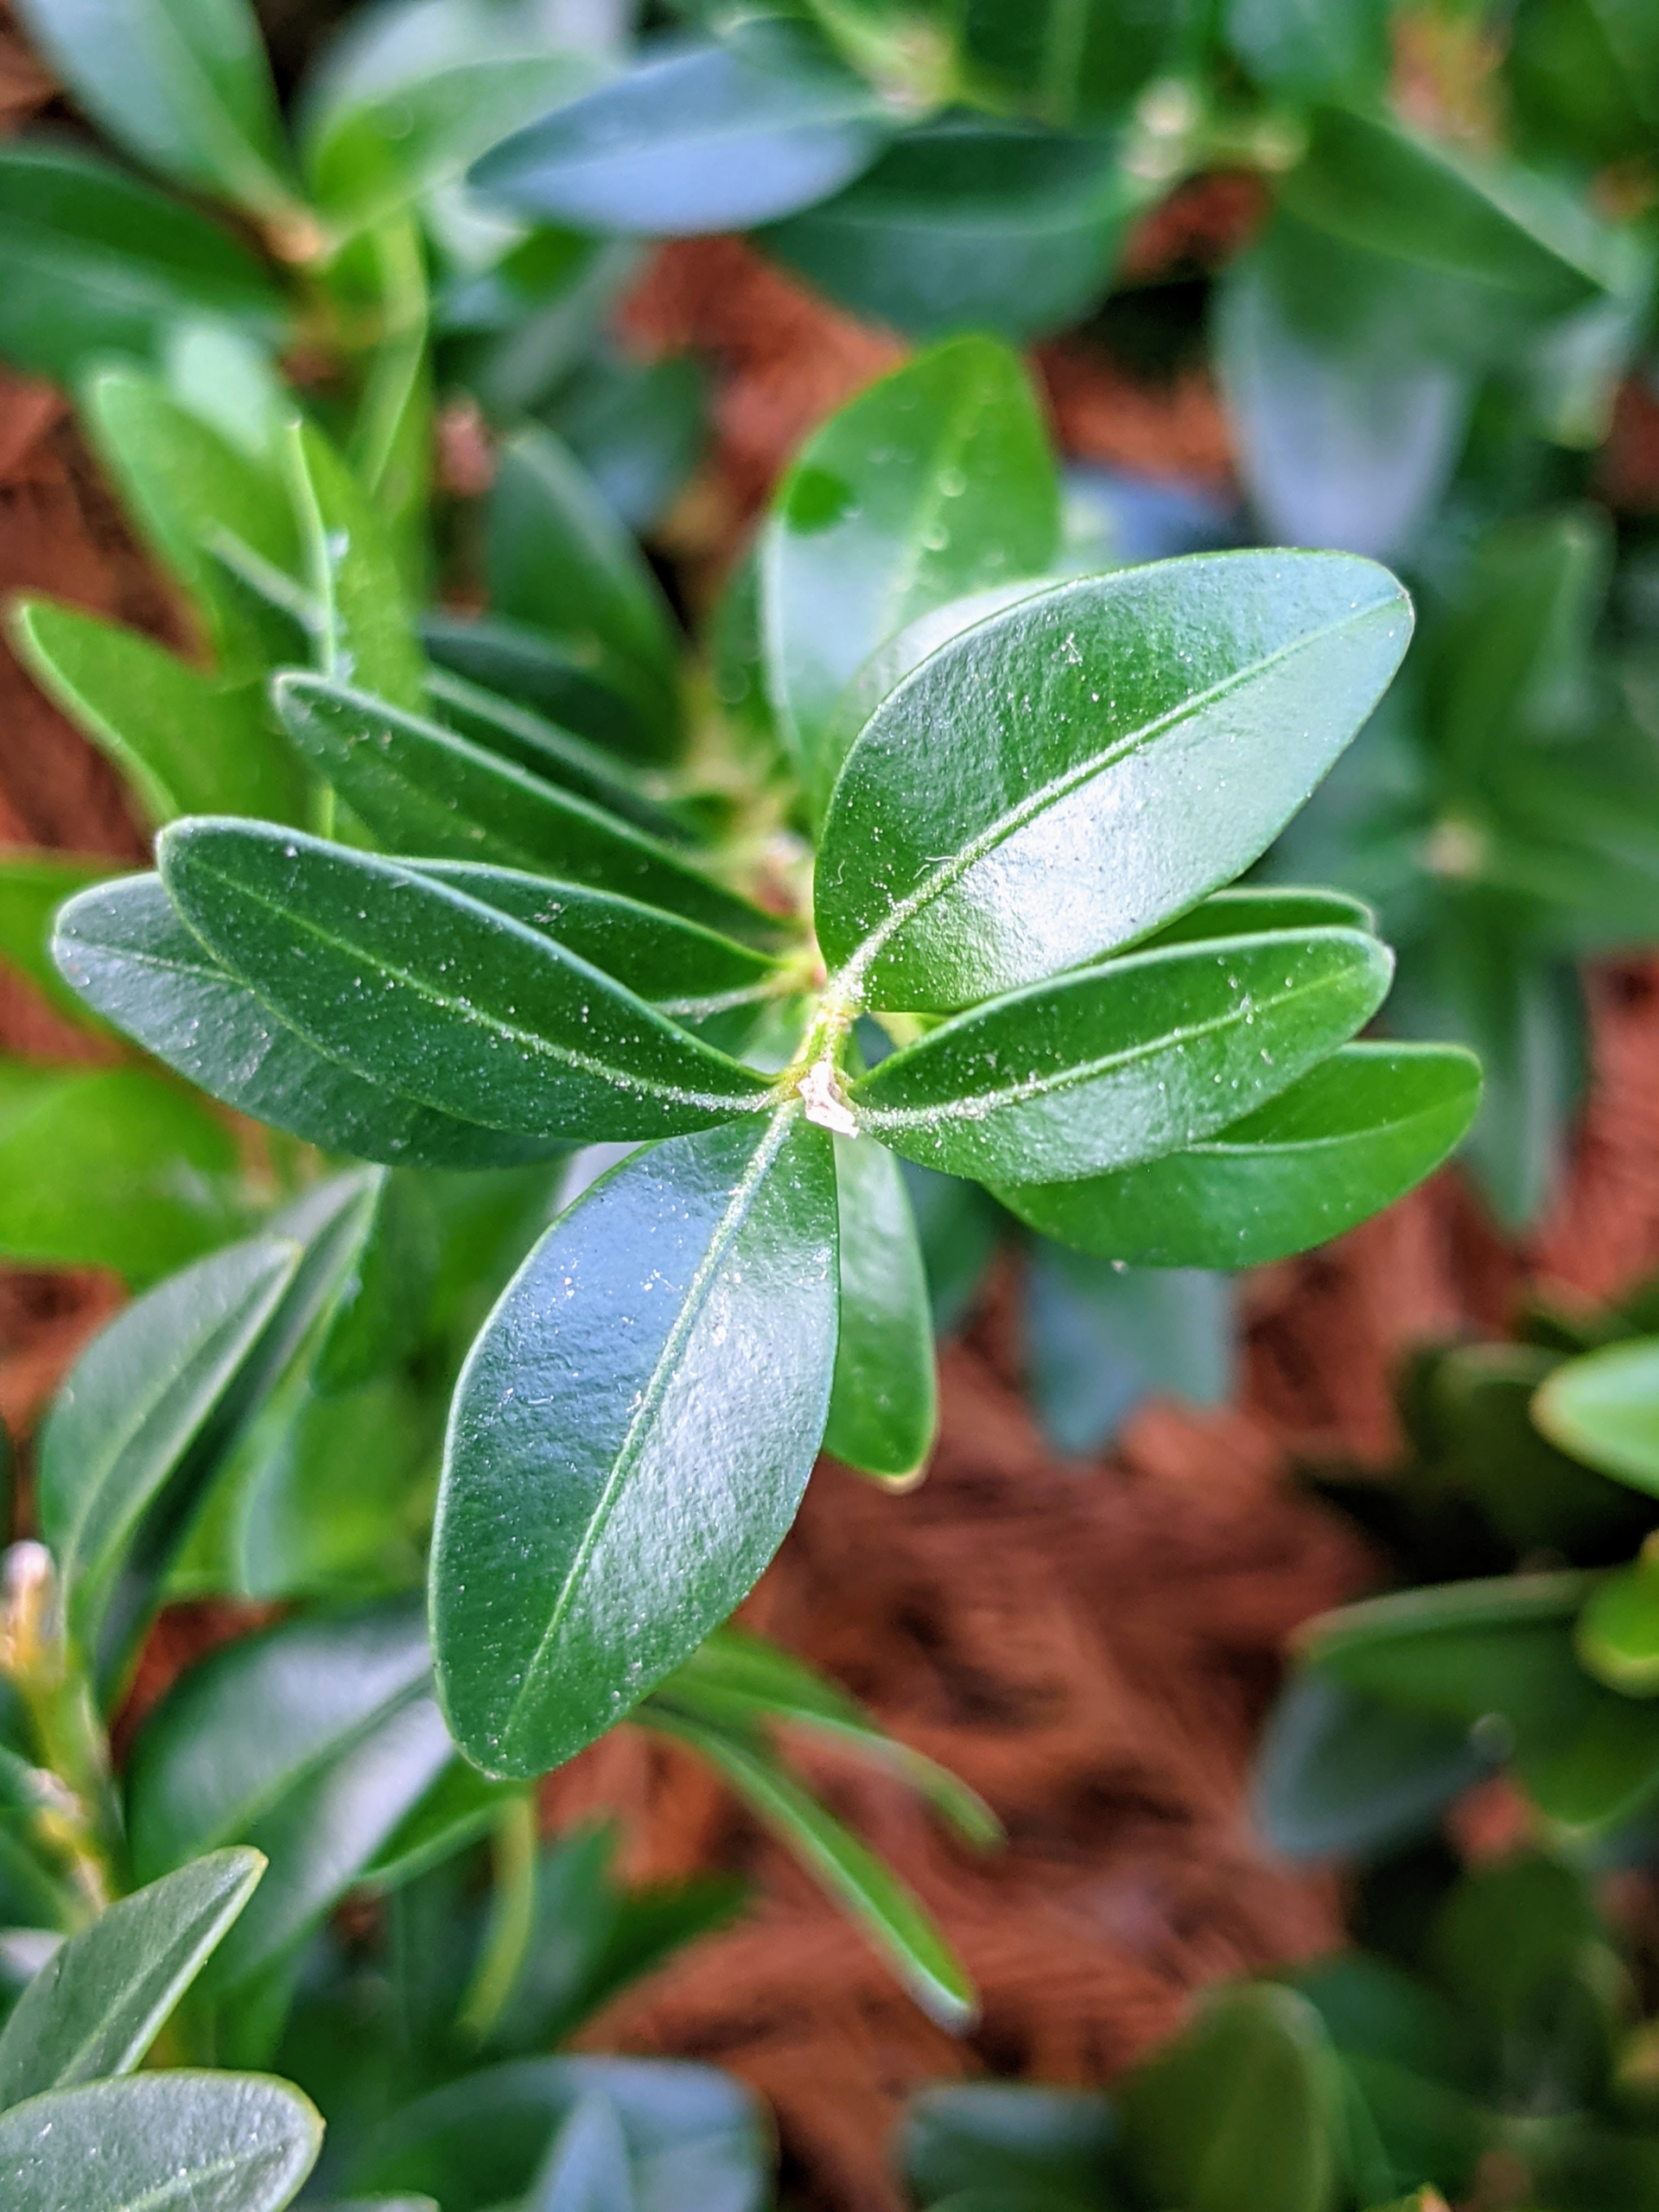
Brian trims the branches to six inch tips. When preparing the cuttings, make sure to only use healthy stems with no insect damage or discoloration. These cuttings are in excellent condition. They were delivered to me by my friend and boxwood expert, George Bridge, owner of George Bridge Landscape Design Inc.
Brian also removes any leaves from the bottom two to three inches of each stem.
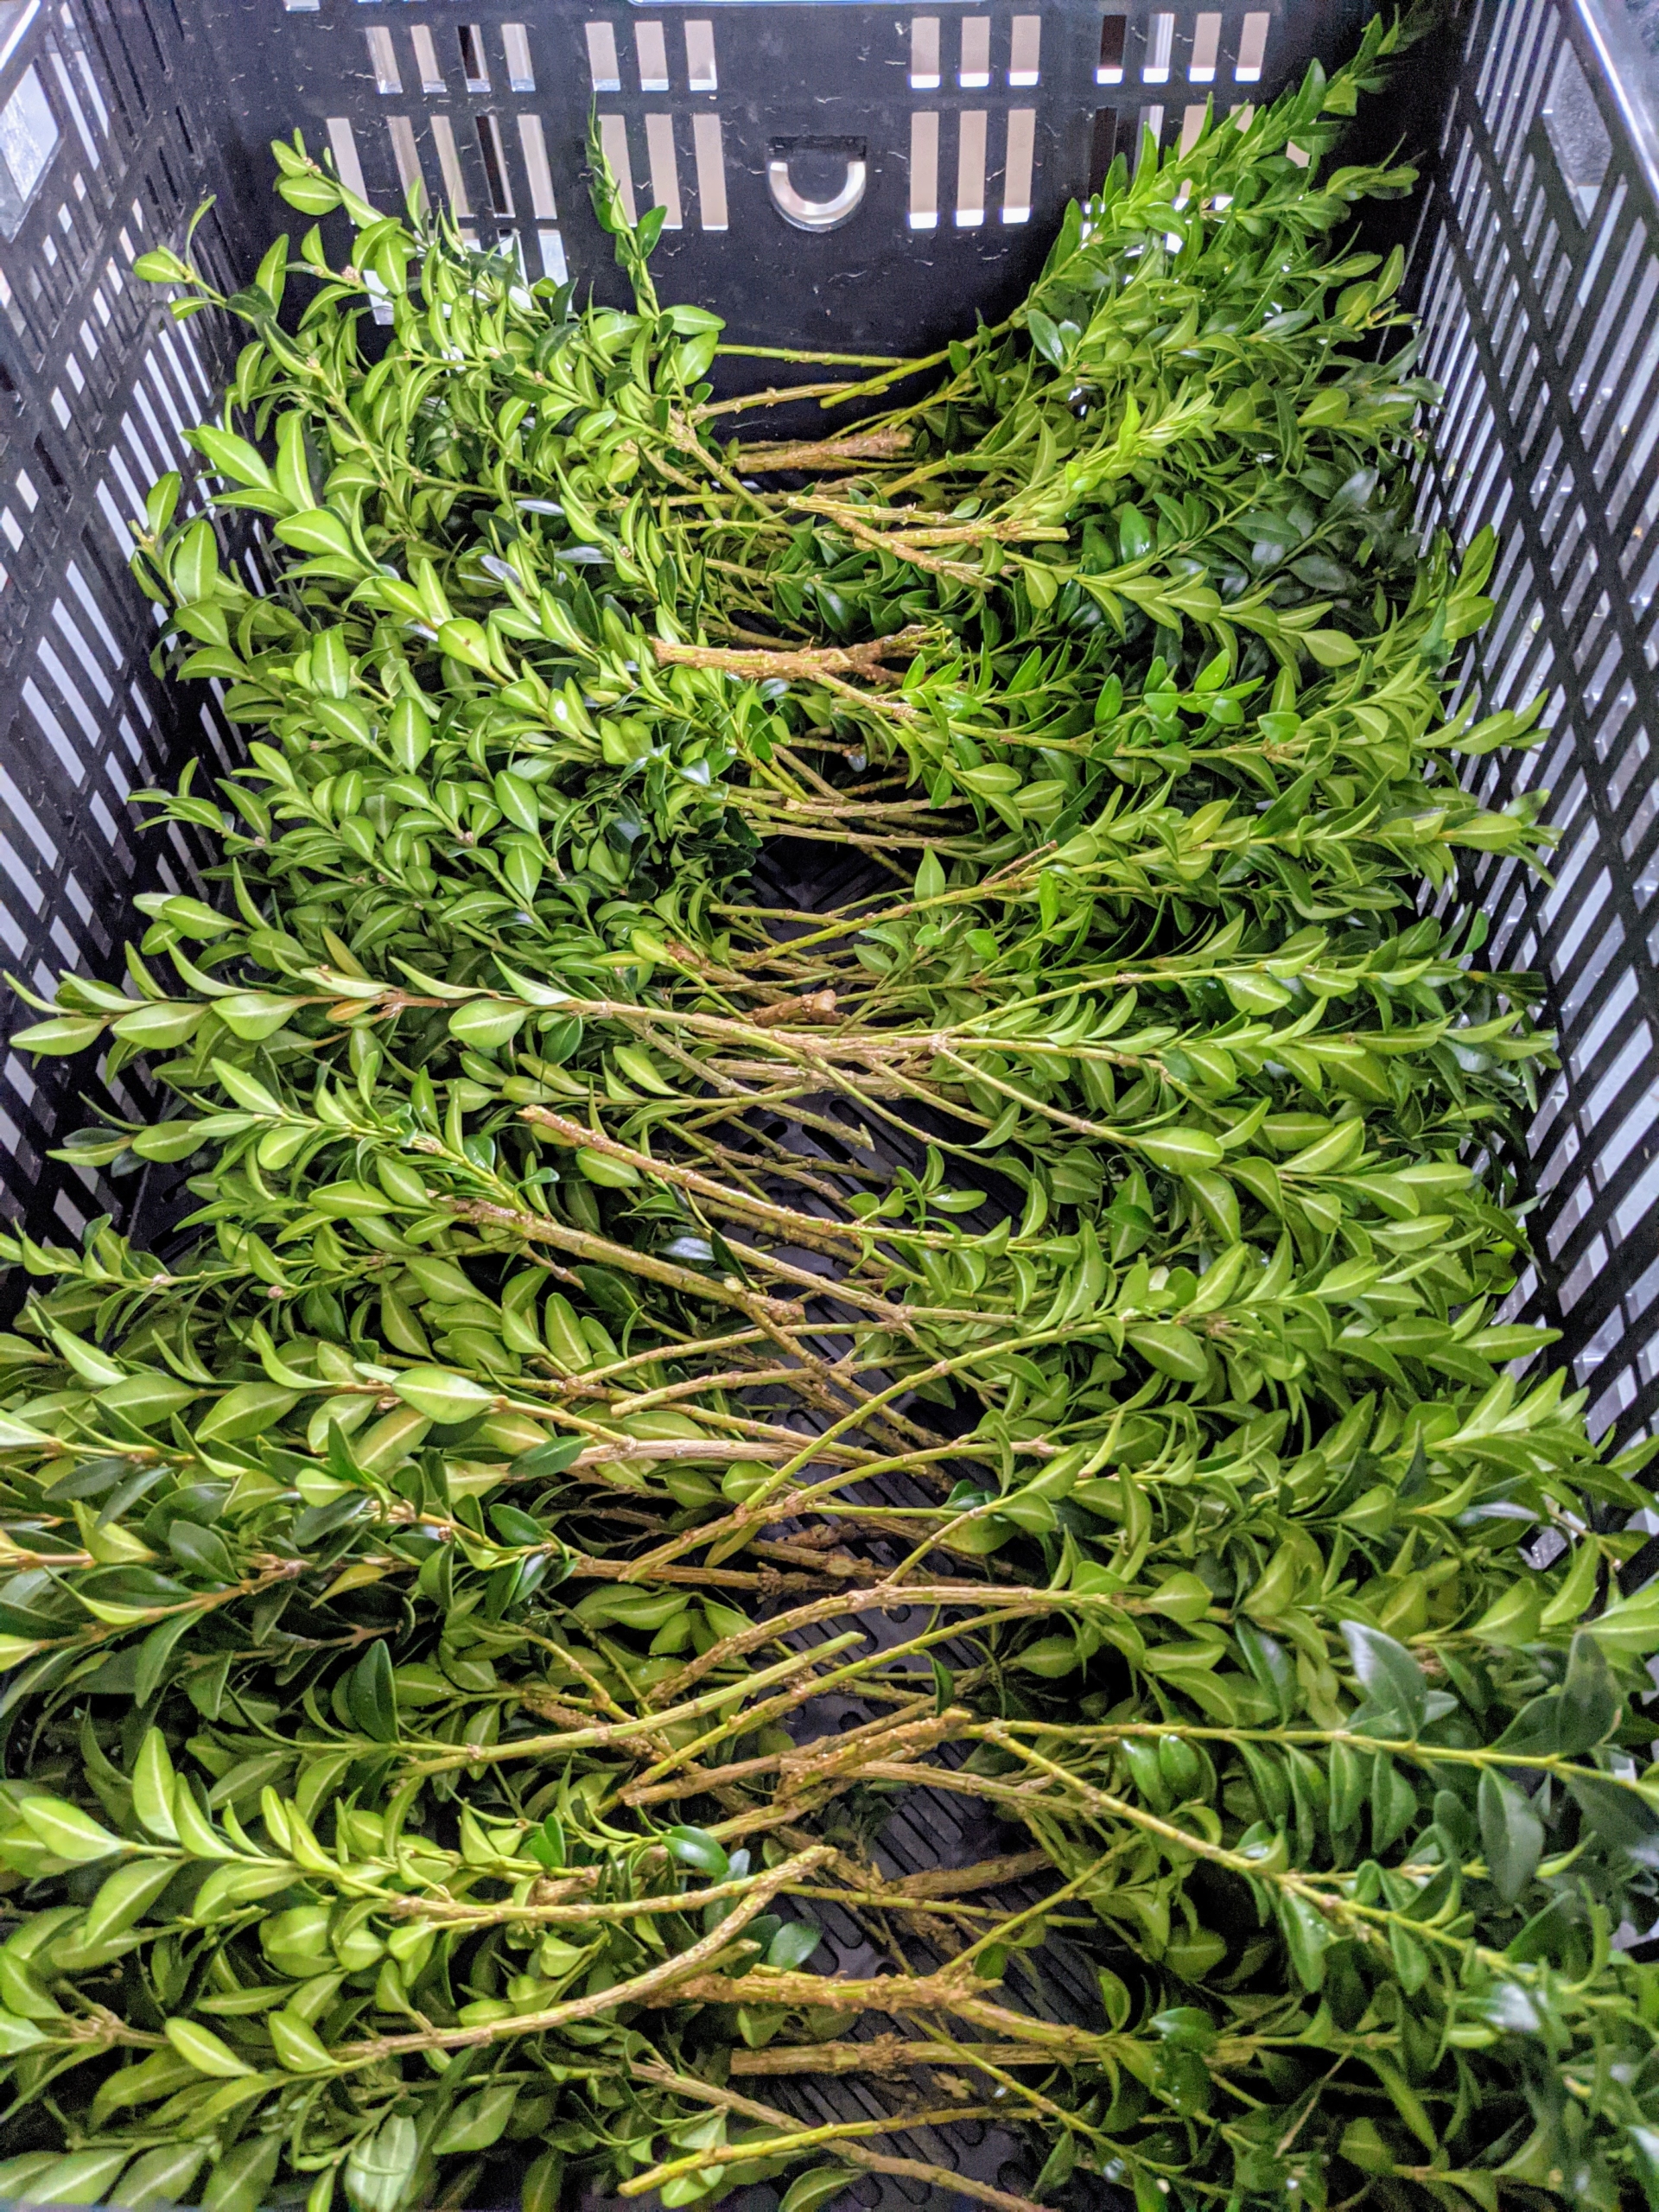
Once the cuttings are trimmed, Brian places them in a crate with the stems facing inward to keep them as clean as possible.
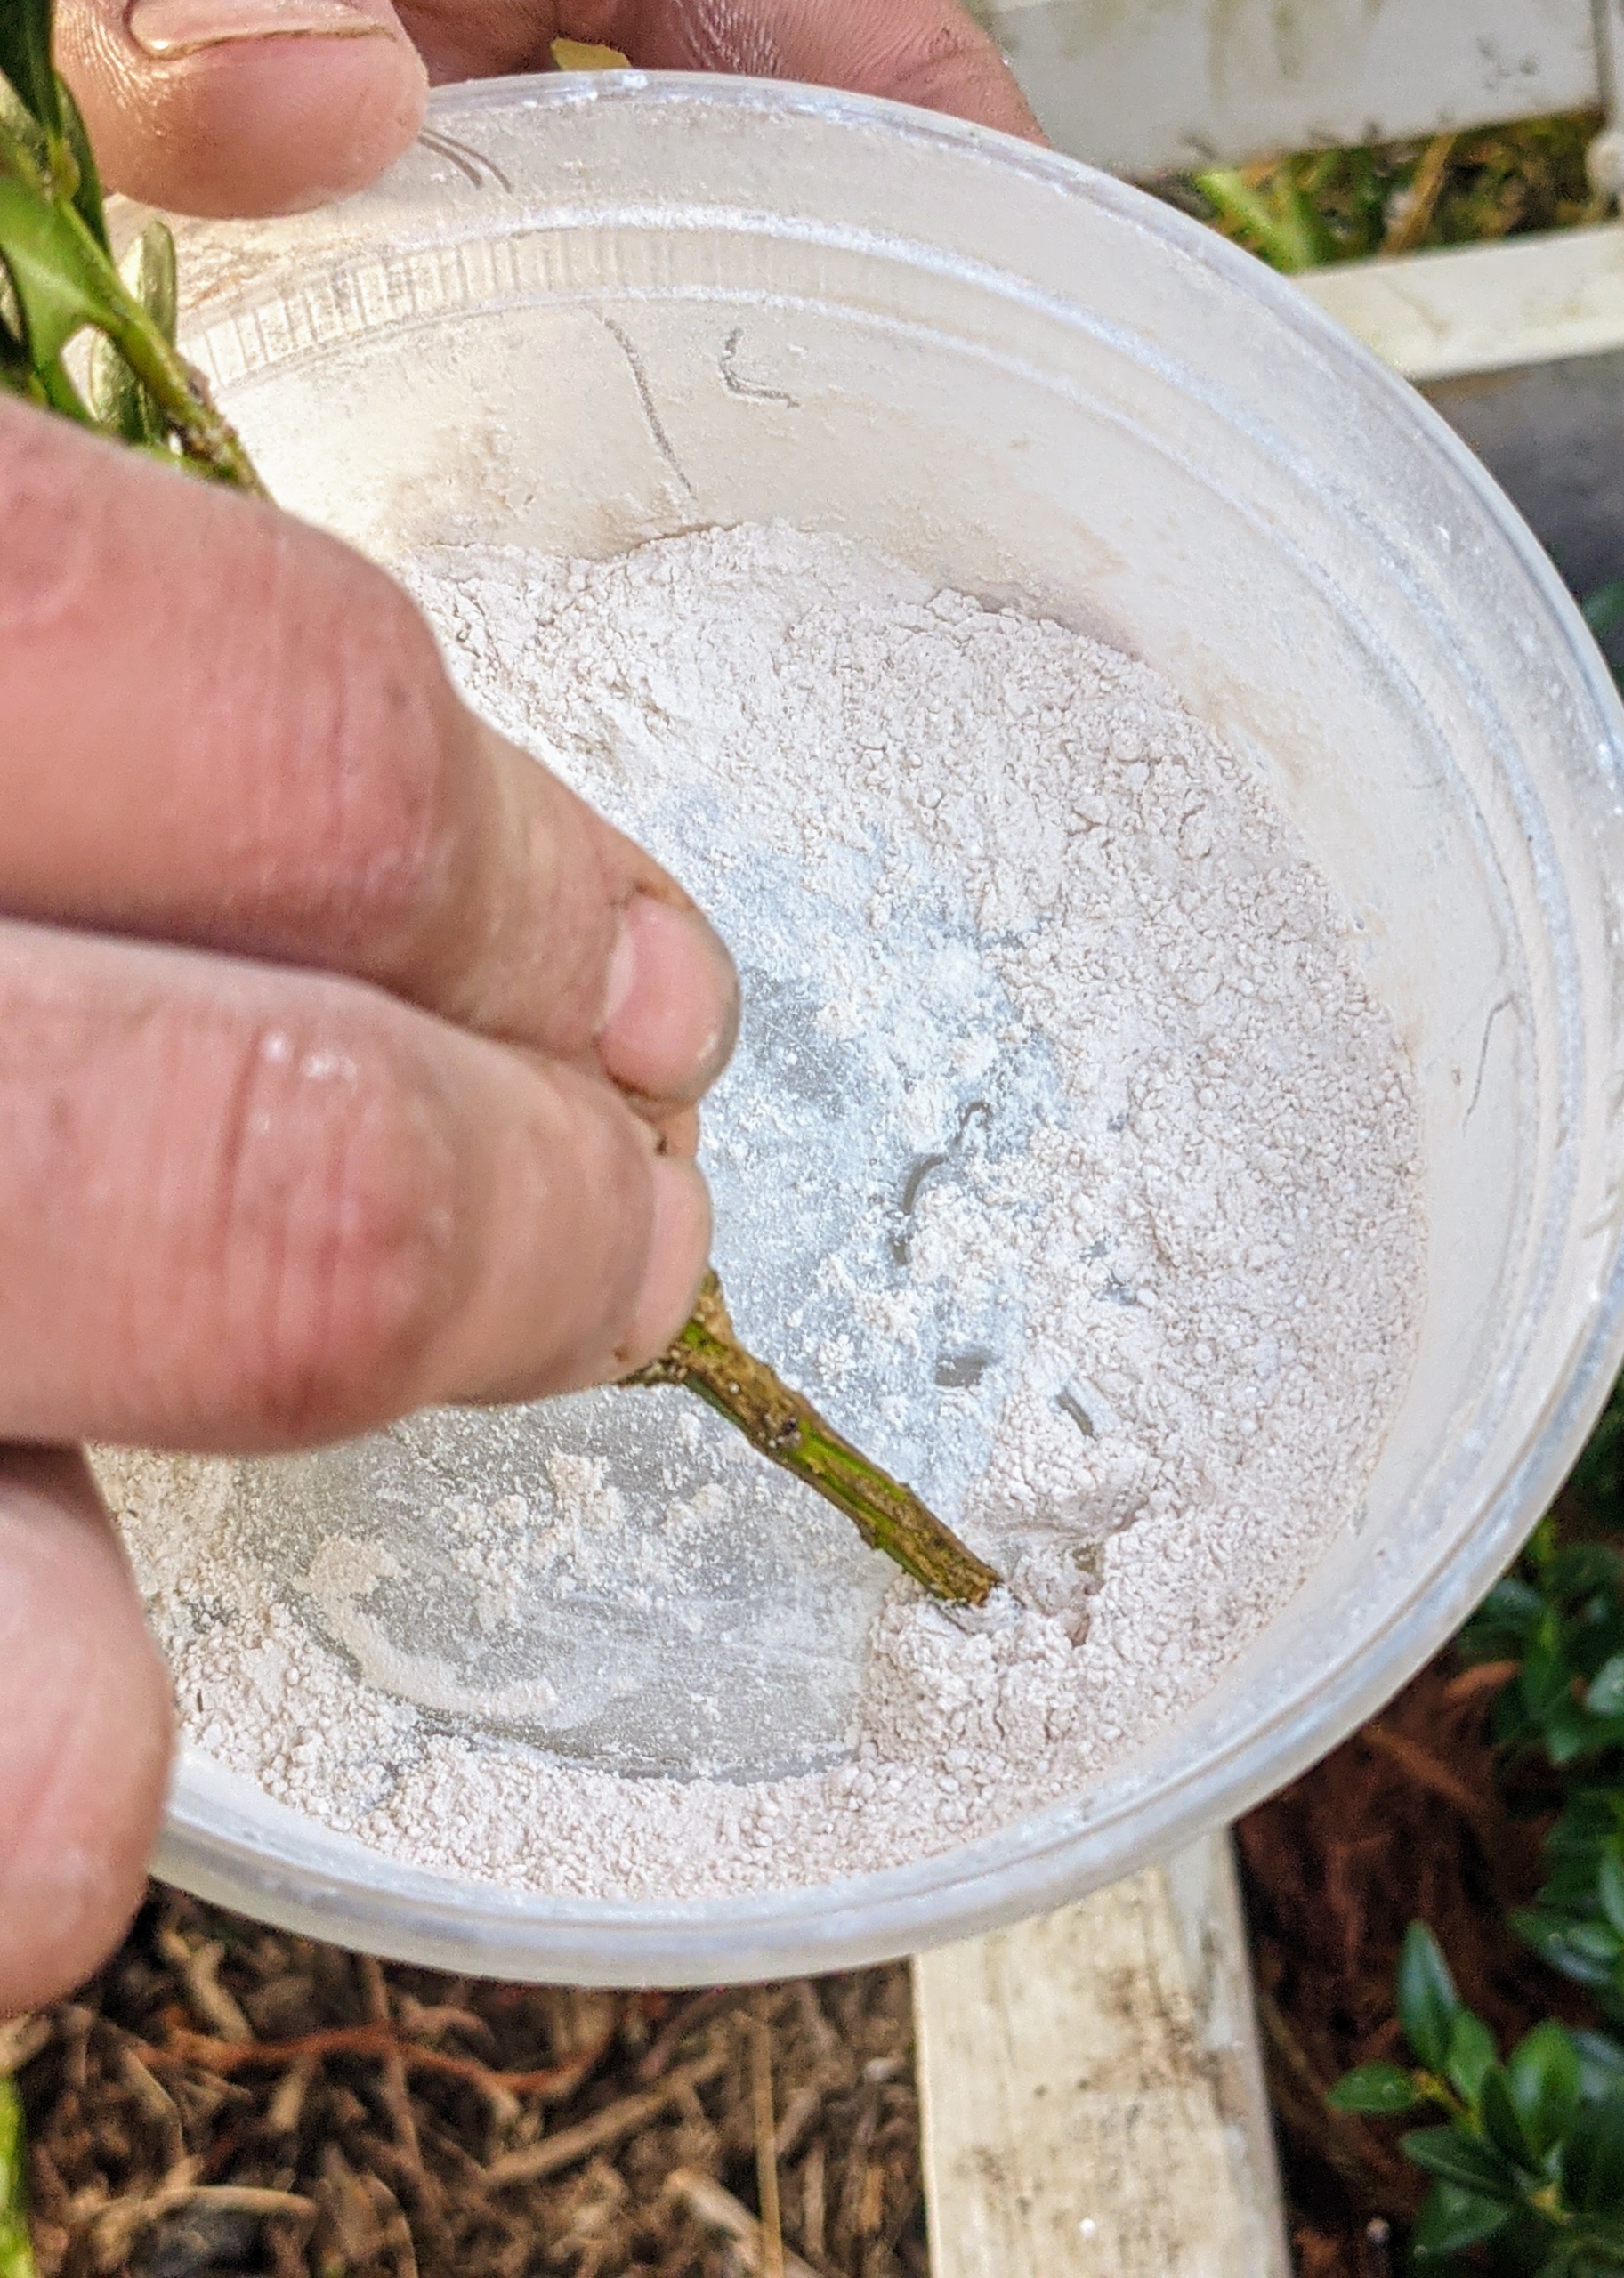
Next, Brian rolls the lower end of the cutting in powdered rooting hormone and taps the stem to remove the excess. Rooting hormones increase the chance of cuttings taking root.
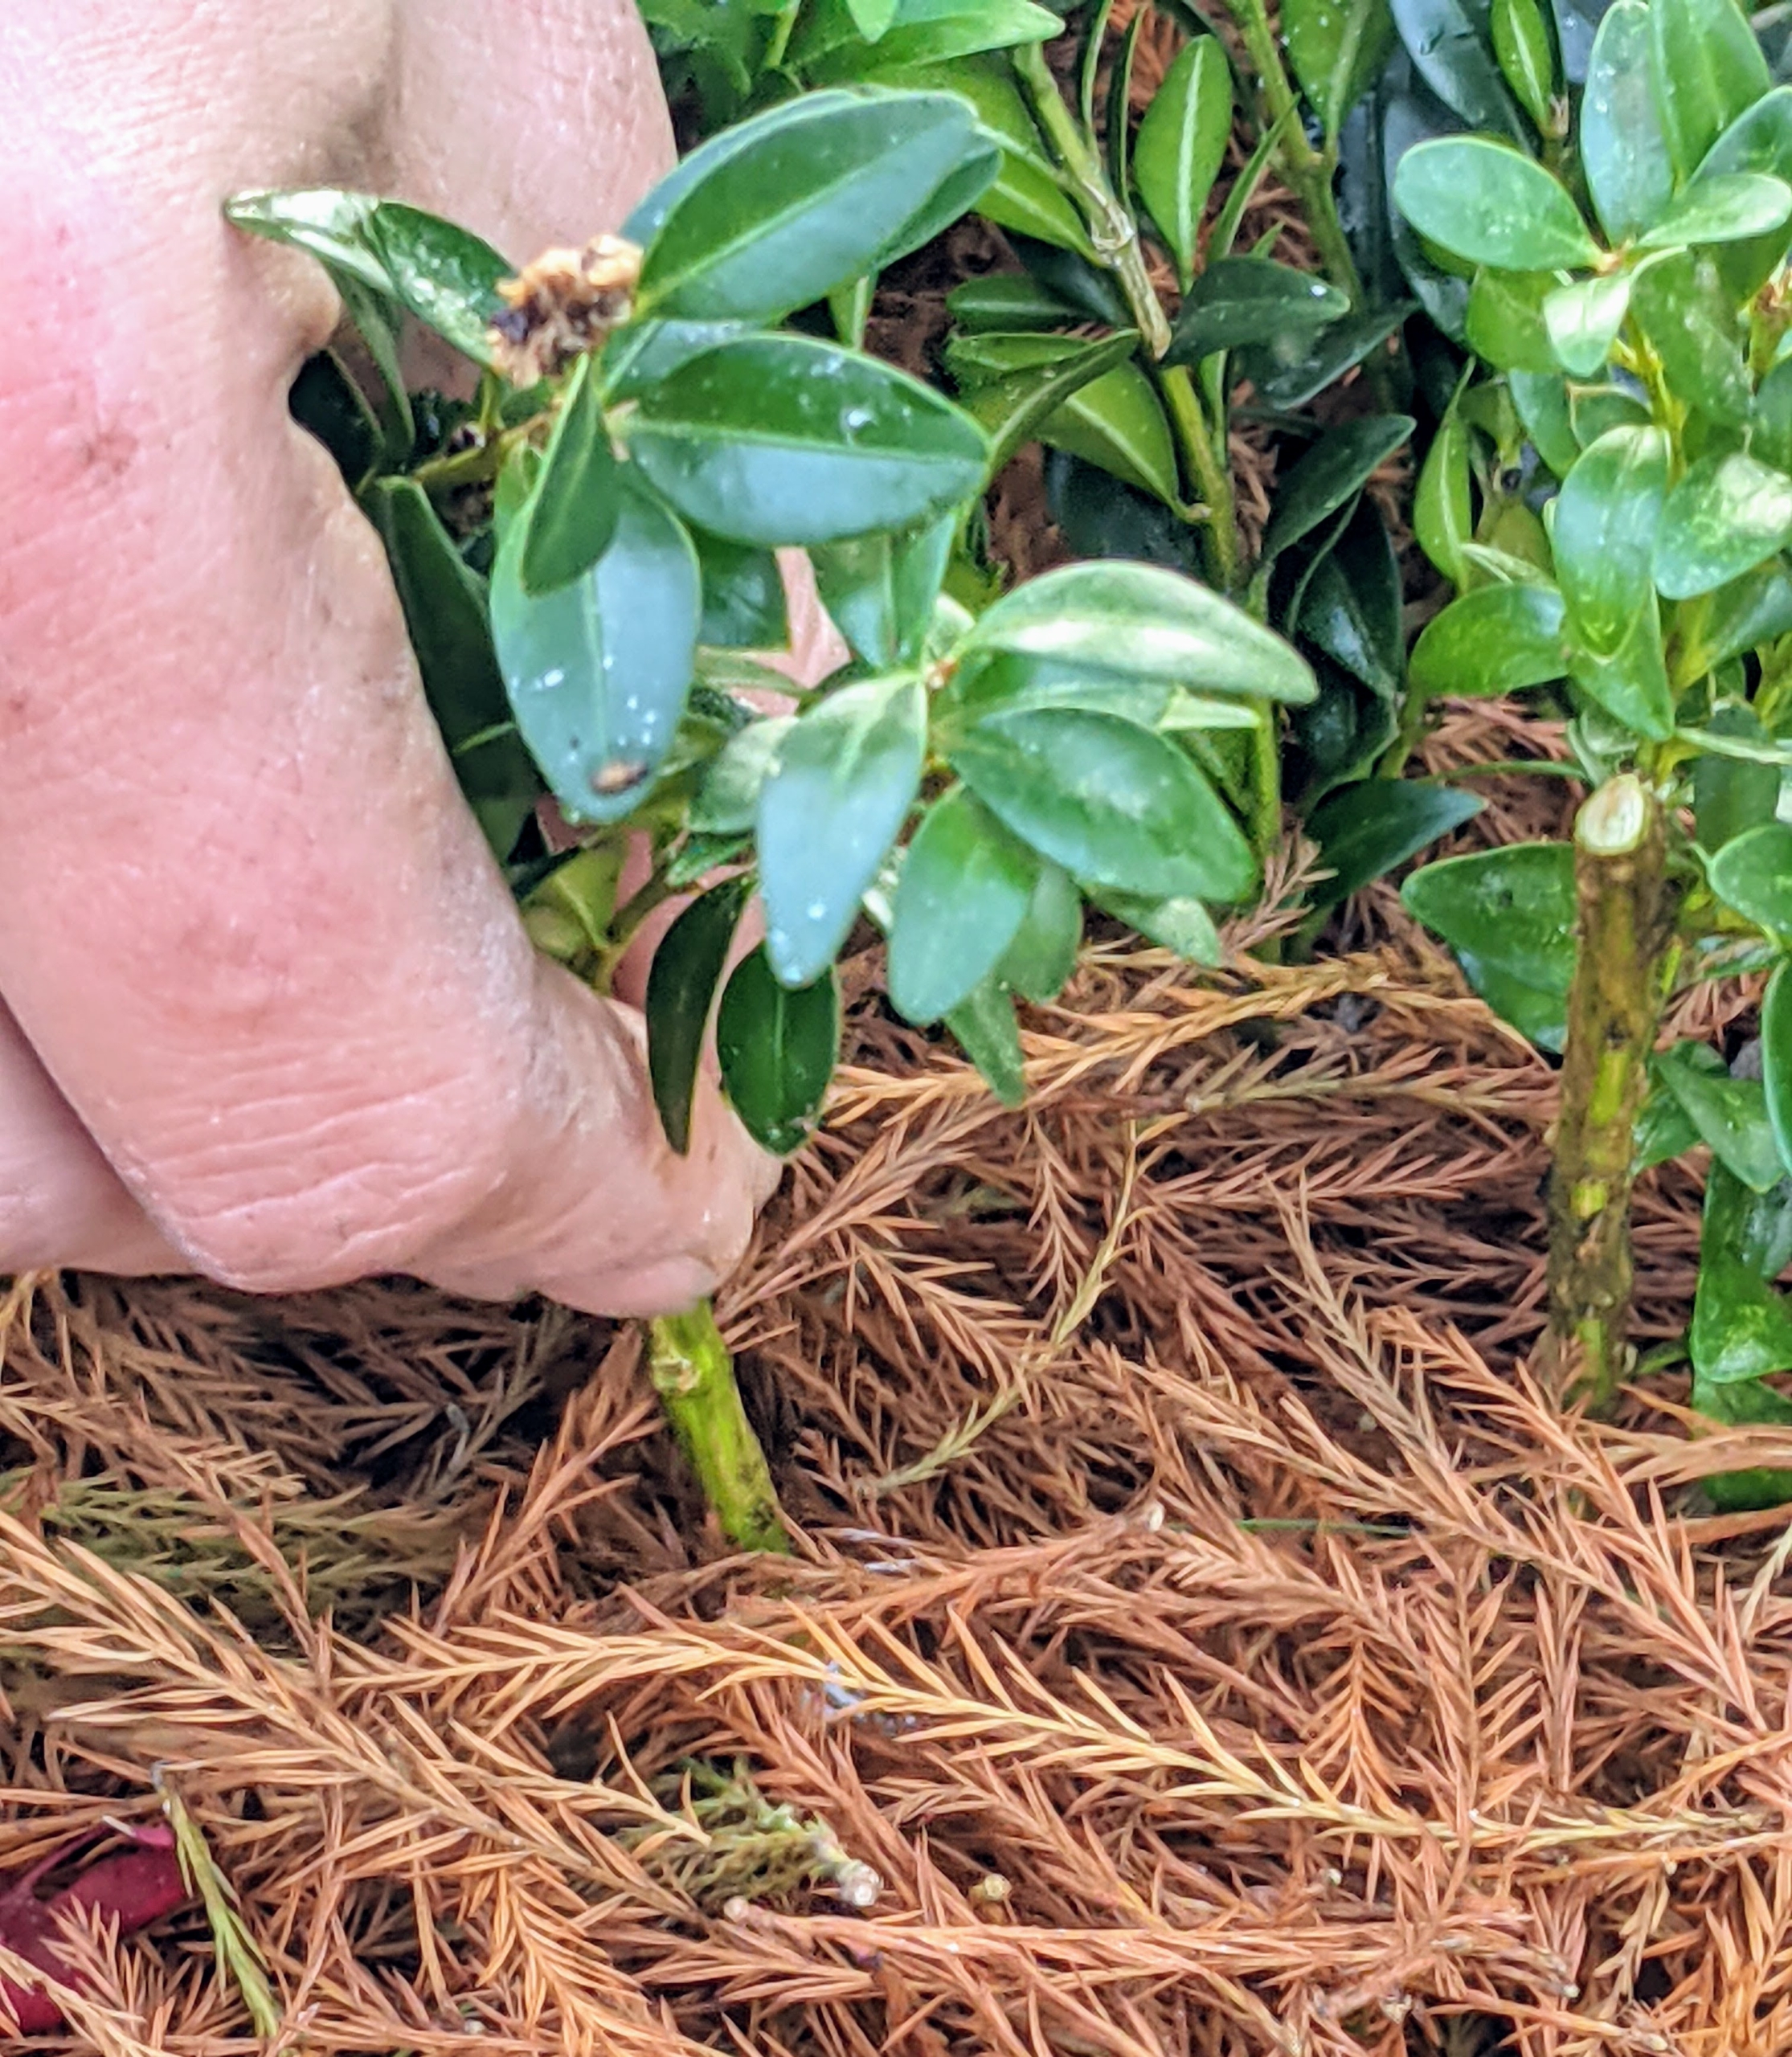
Then, he sticks the lower end of the cutting with the hormone powder into the rooting medium. He presses it firmly just enough to make it stand up straight.
This variety is American buxus sempervirens. American boxwood, or common box, is a broadly rounded, multi-branched, evergreen shrub or small tree in the Buxaceae family. It is native to western and southern Europe, western Asia, and northern Africa. The species-specific term sempervirens means “always green.”
This is just the first batch of cuttings. When complete, this entire cold frame will be filled with growing boxwood.
Keeping the cuttings here in the cold frame will ensure they get lots of warmth and access to indirect sunlight. They will also be kept moist to encourage growth.
These cuttings will remain here through the winter and then be transplanted in the outdoor “nursery” garden once they have well-established roots. And in two to three years, they will be beautiful shrubs ready to place in the gardens! Growing your own boxwood from cuttings… it’s a good thing. And a fun thing.
Watching gardens, groves, and allees evolve and expand is one of the great joys of gardening. I am always looking for ways to improve the beauty around my Bedford, New York farm.
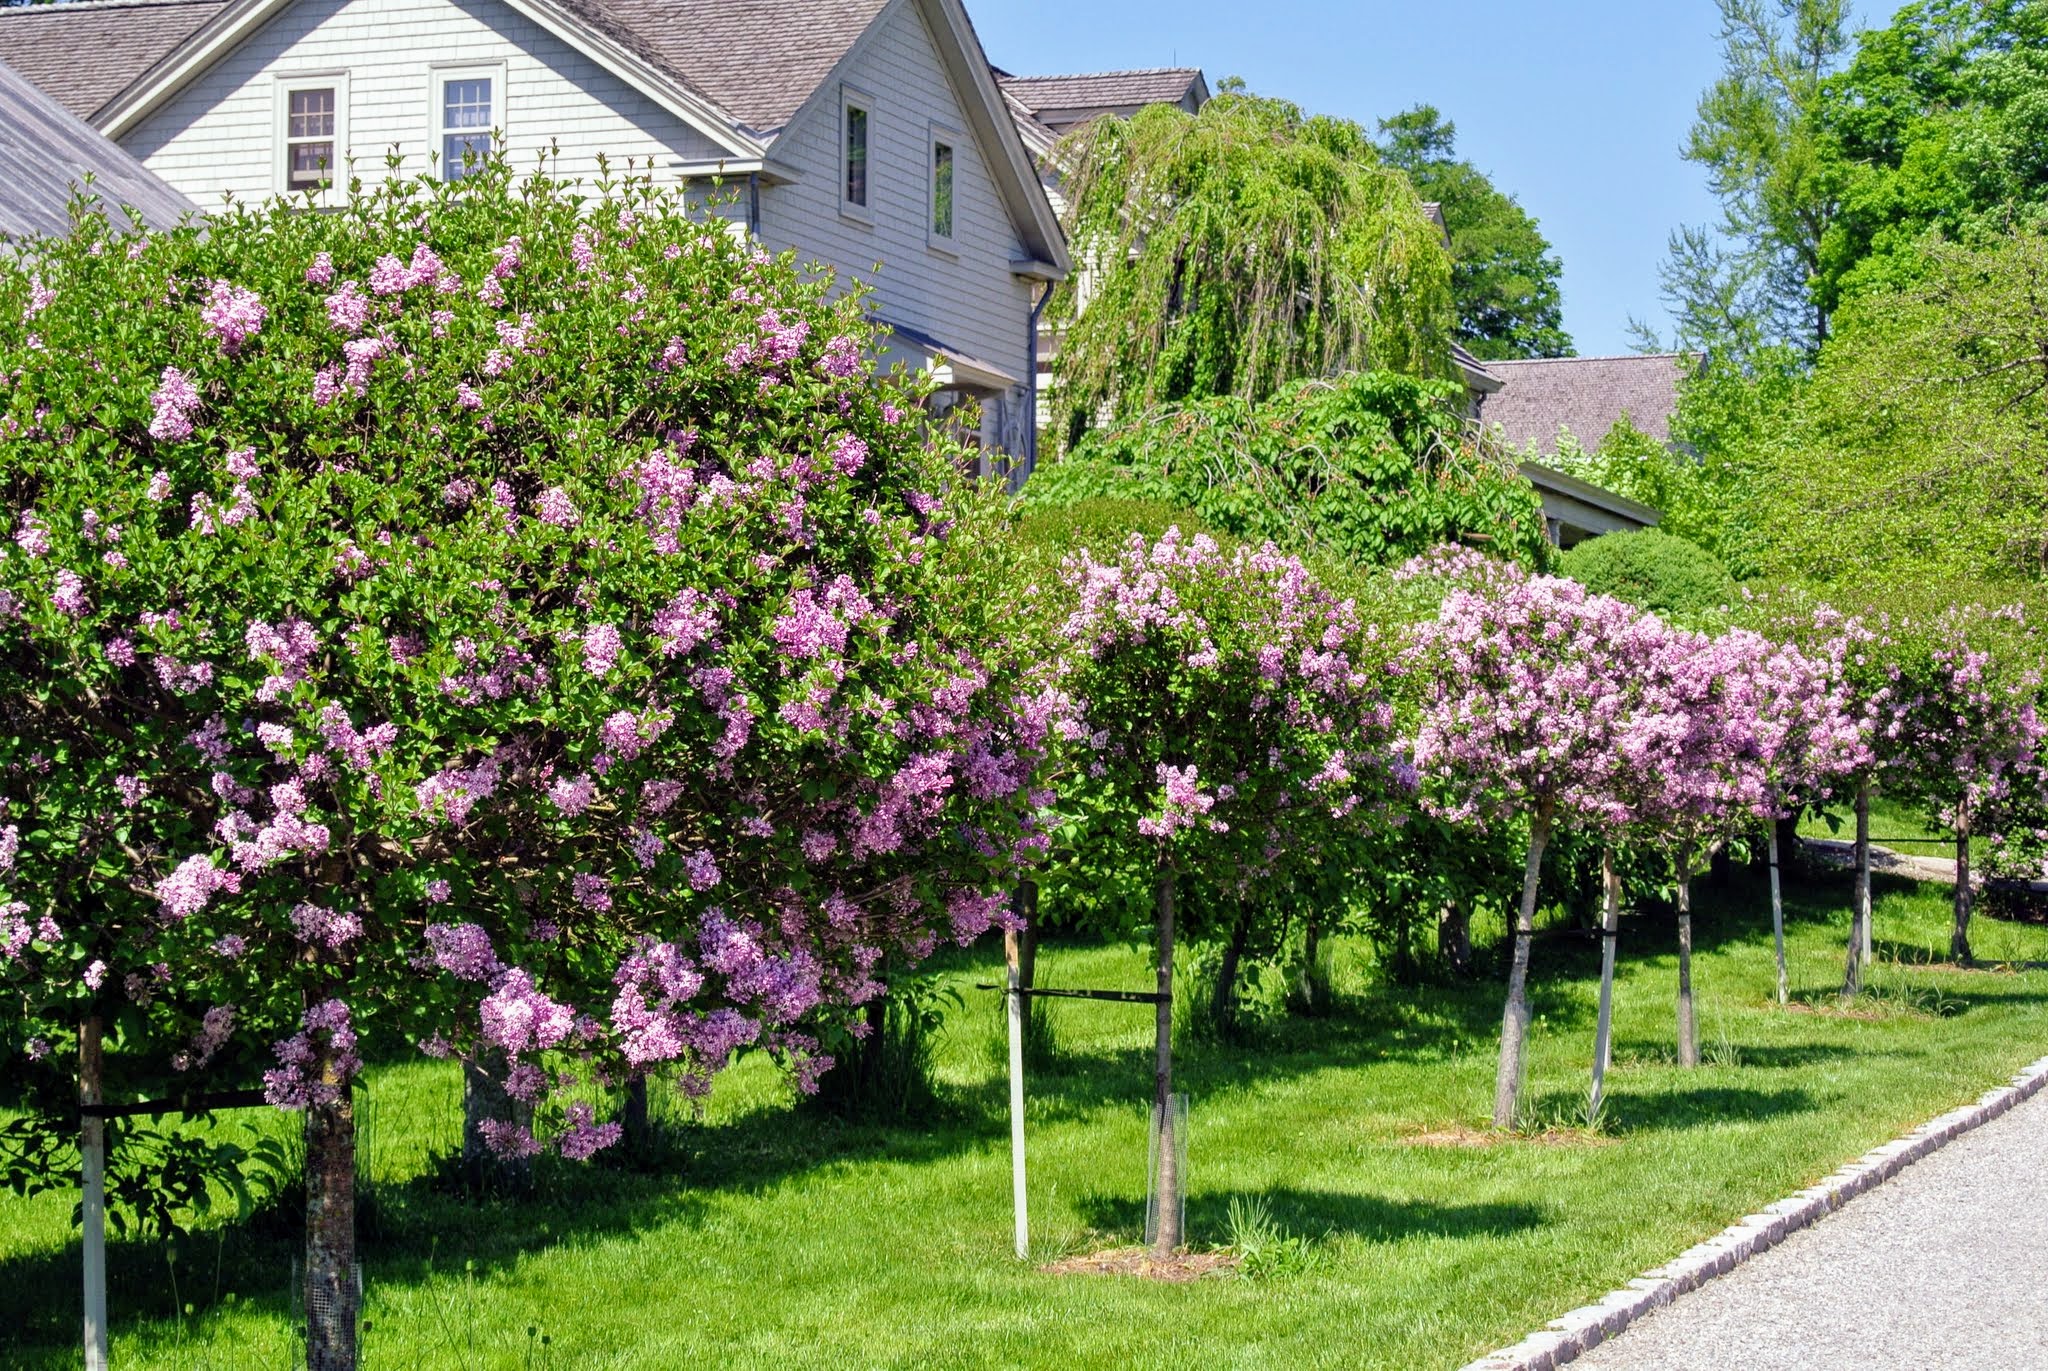
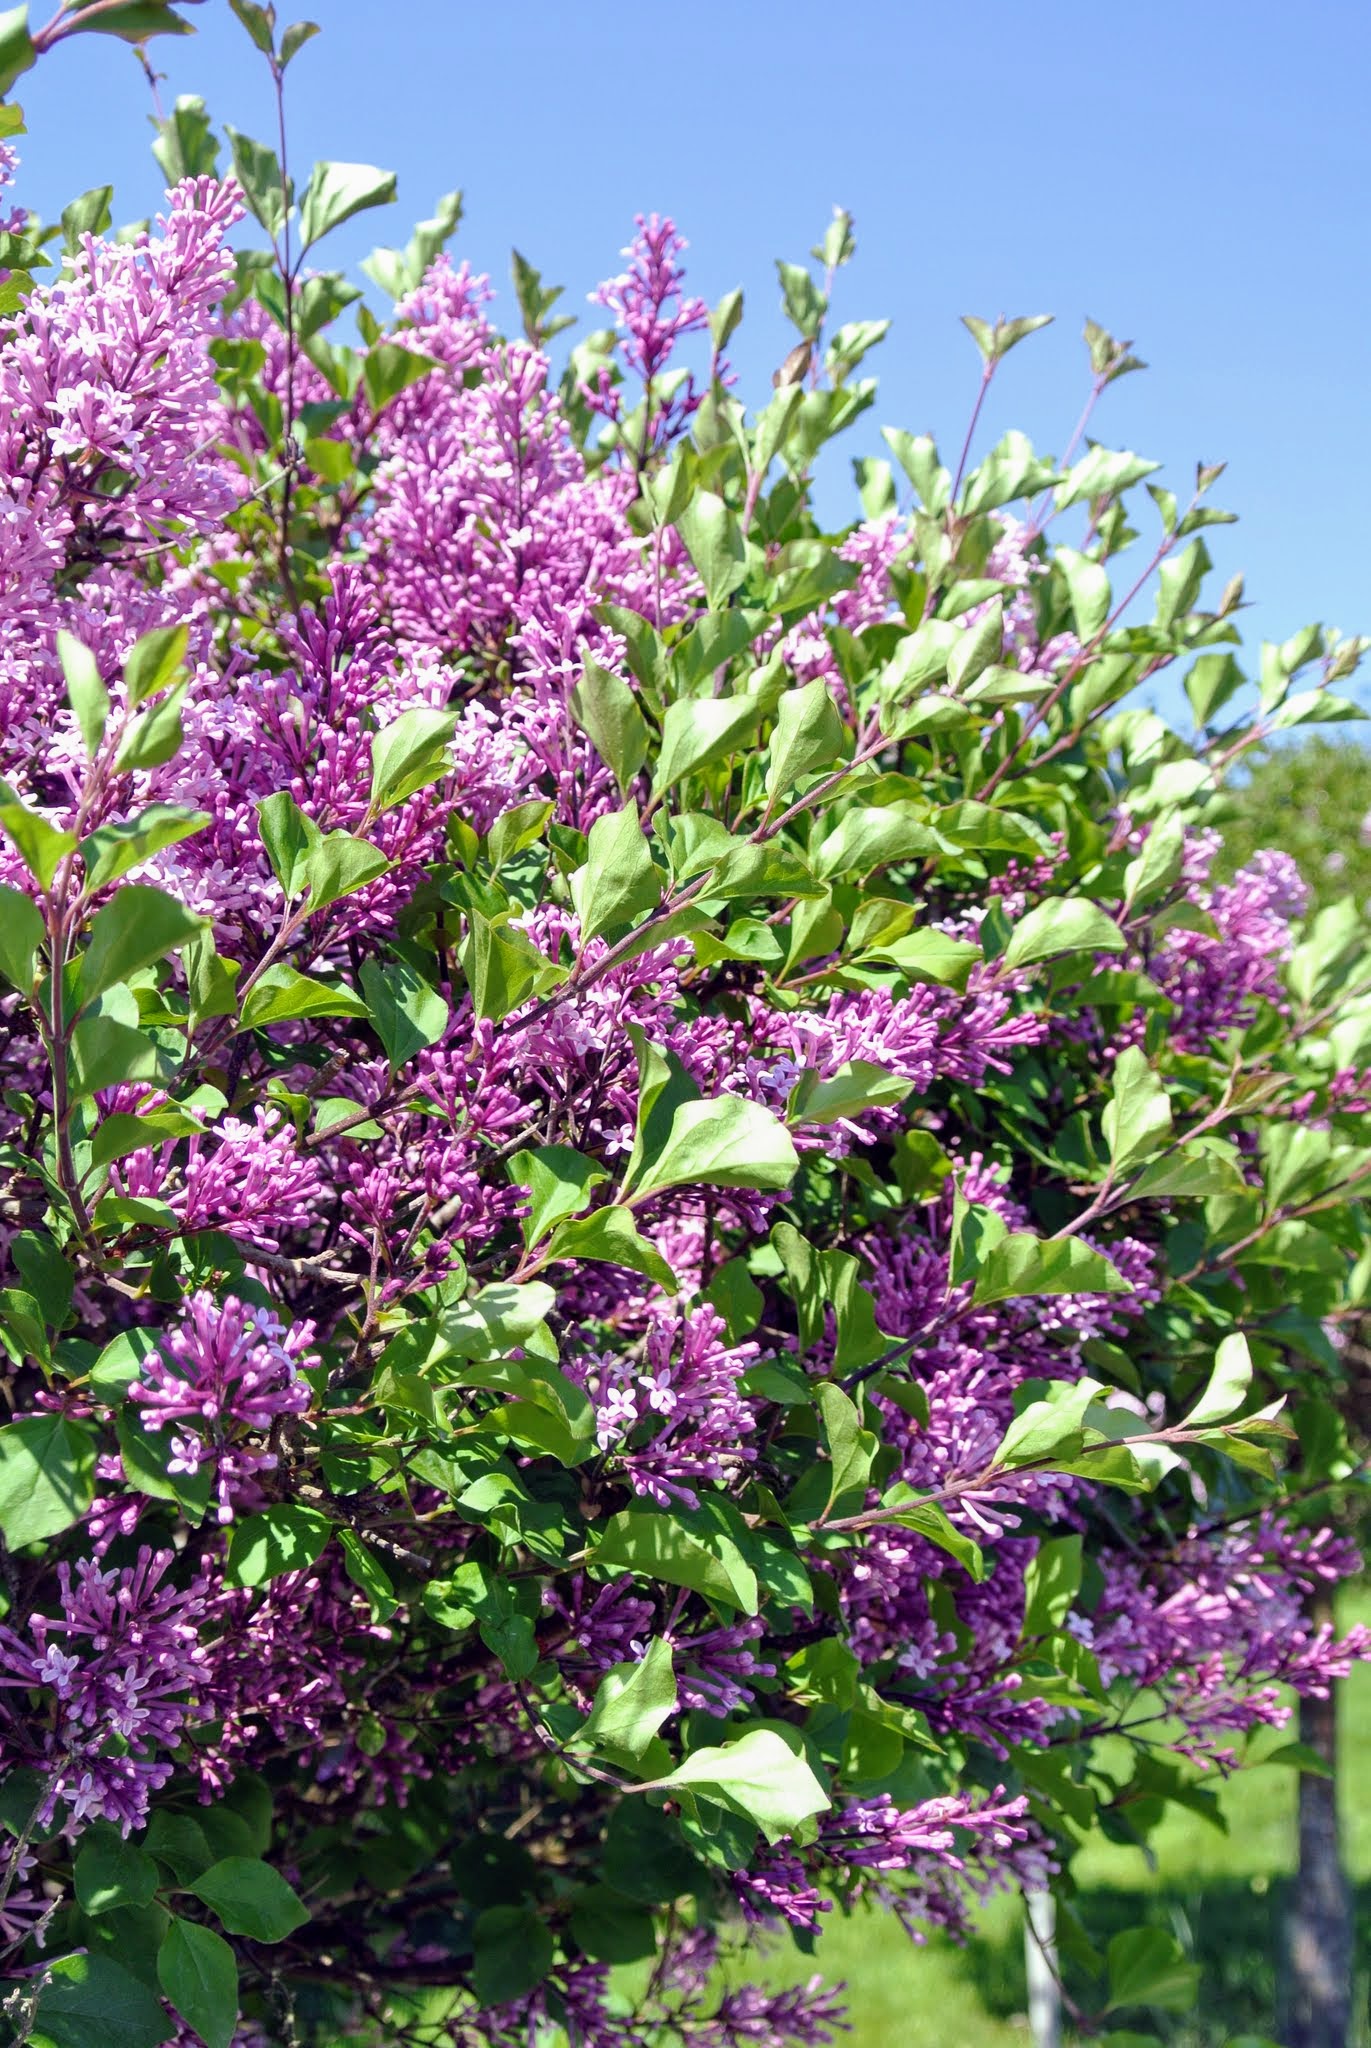
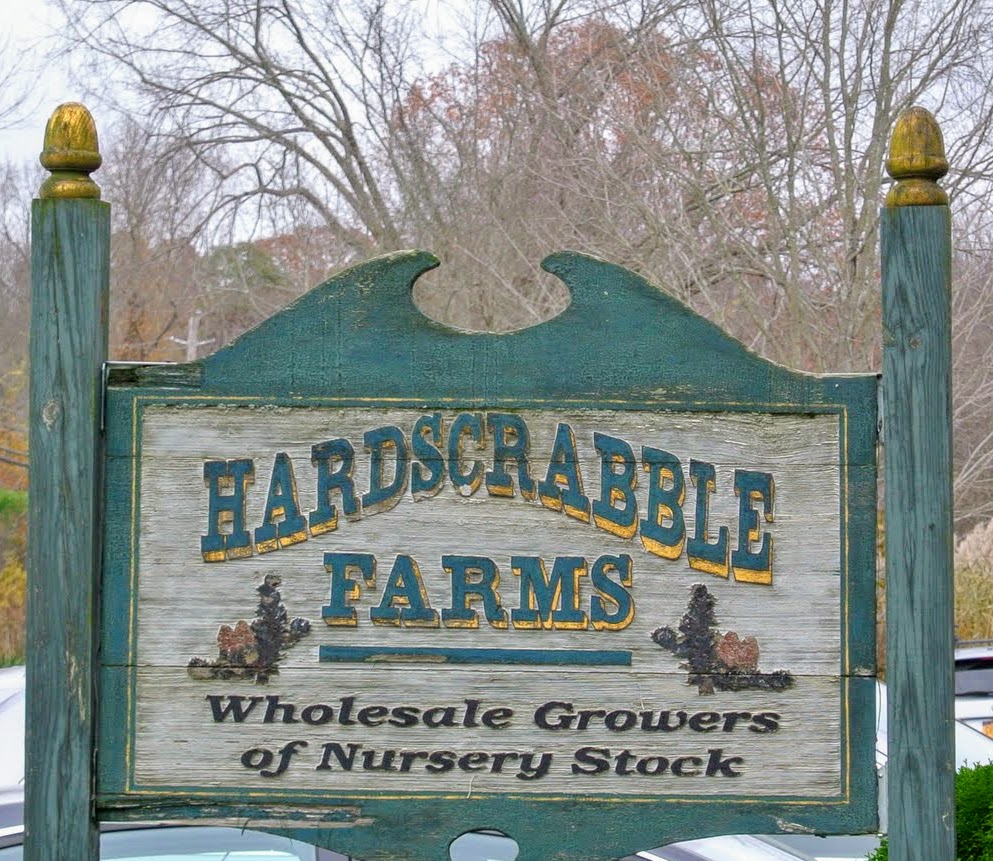
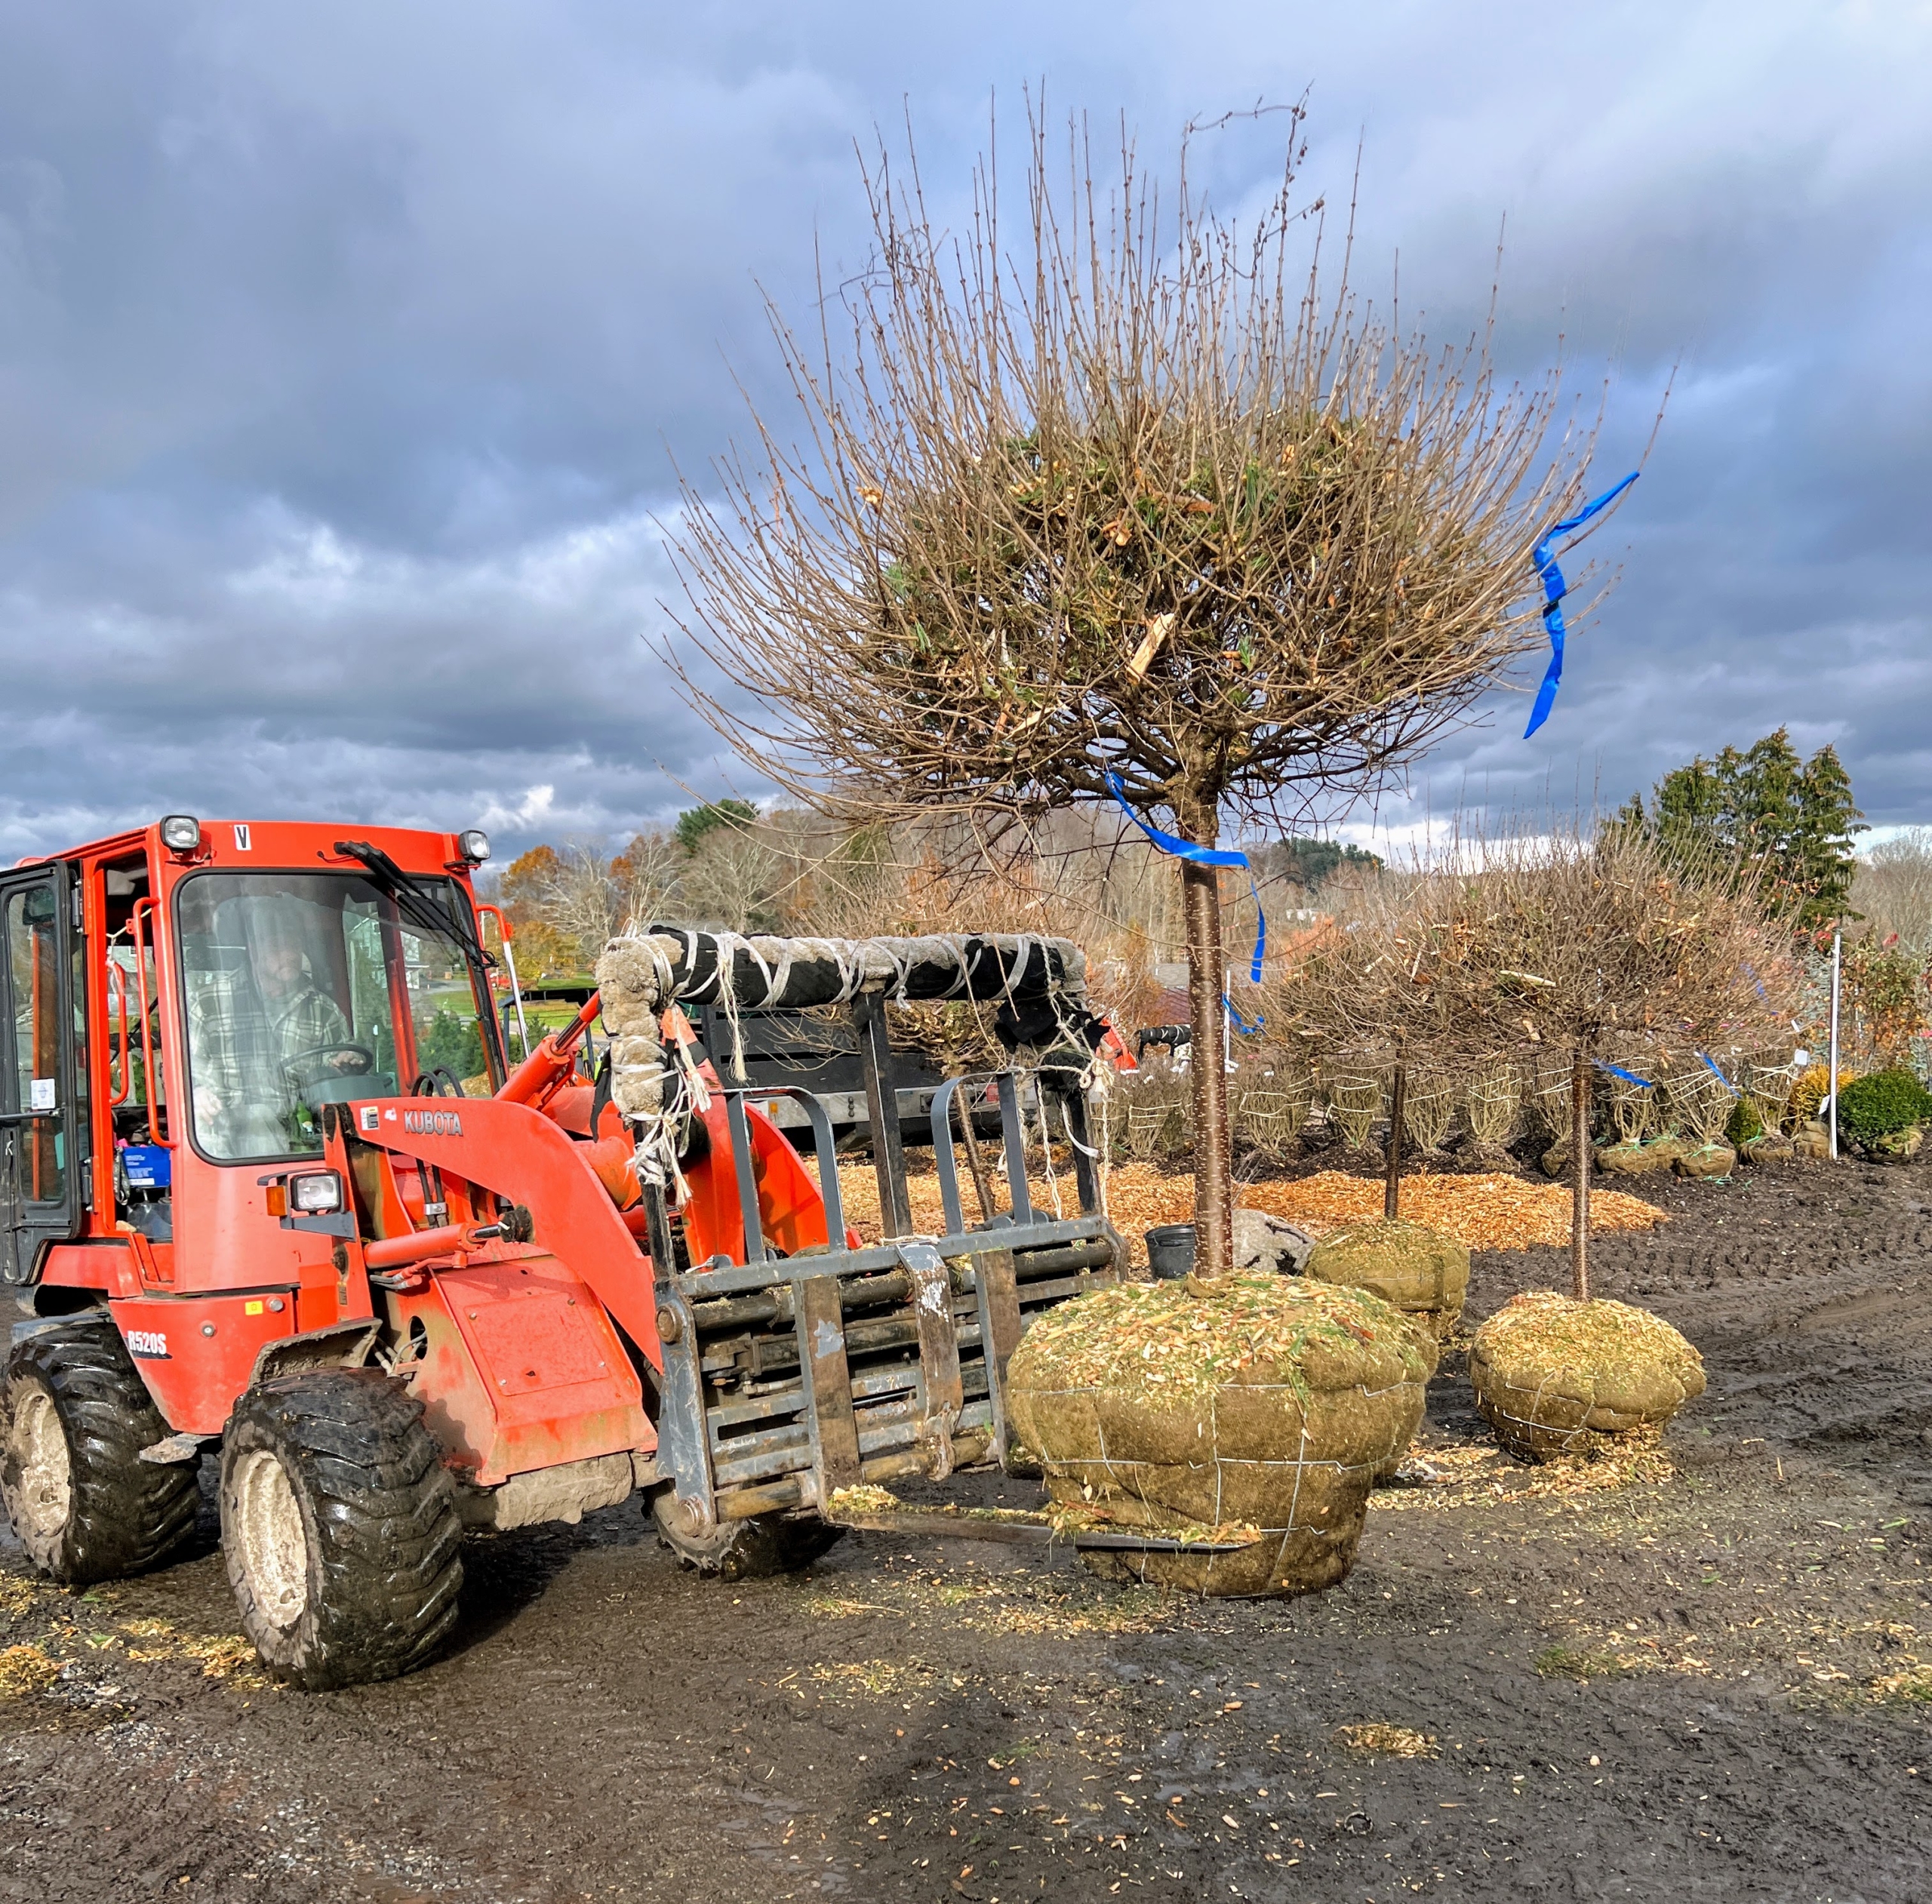
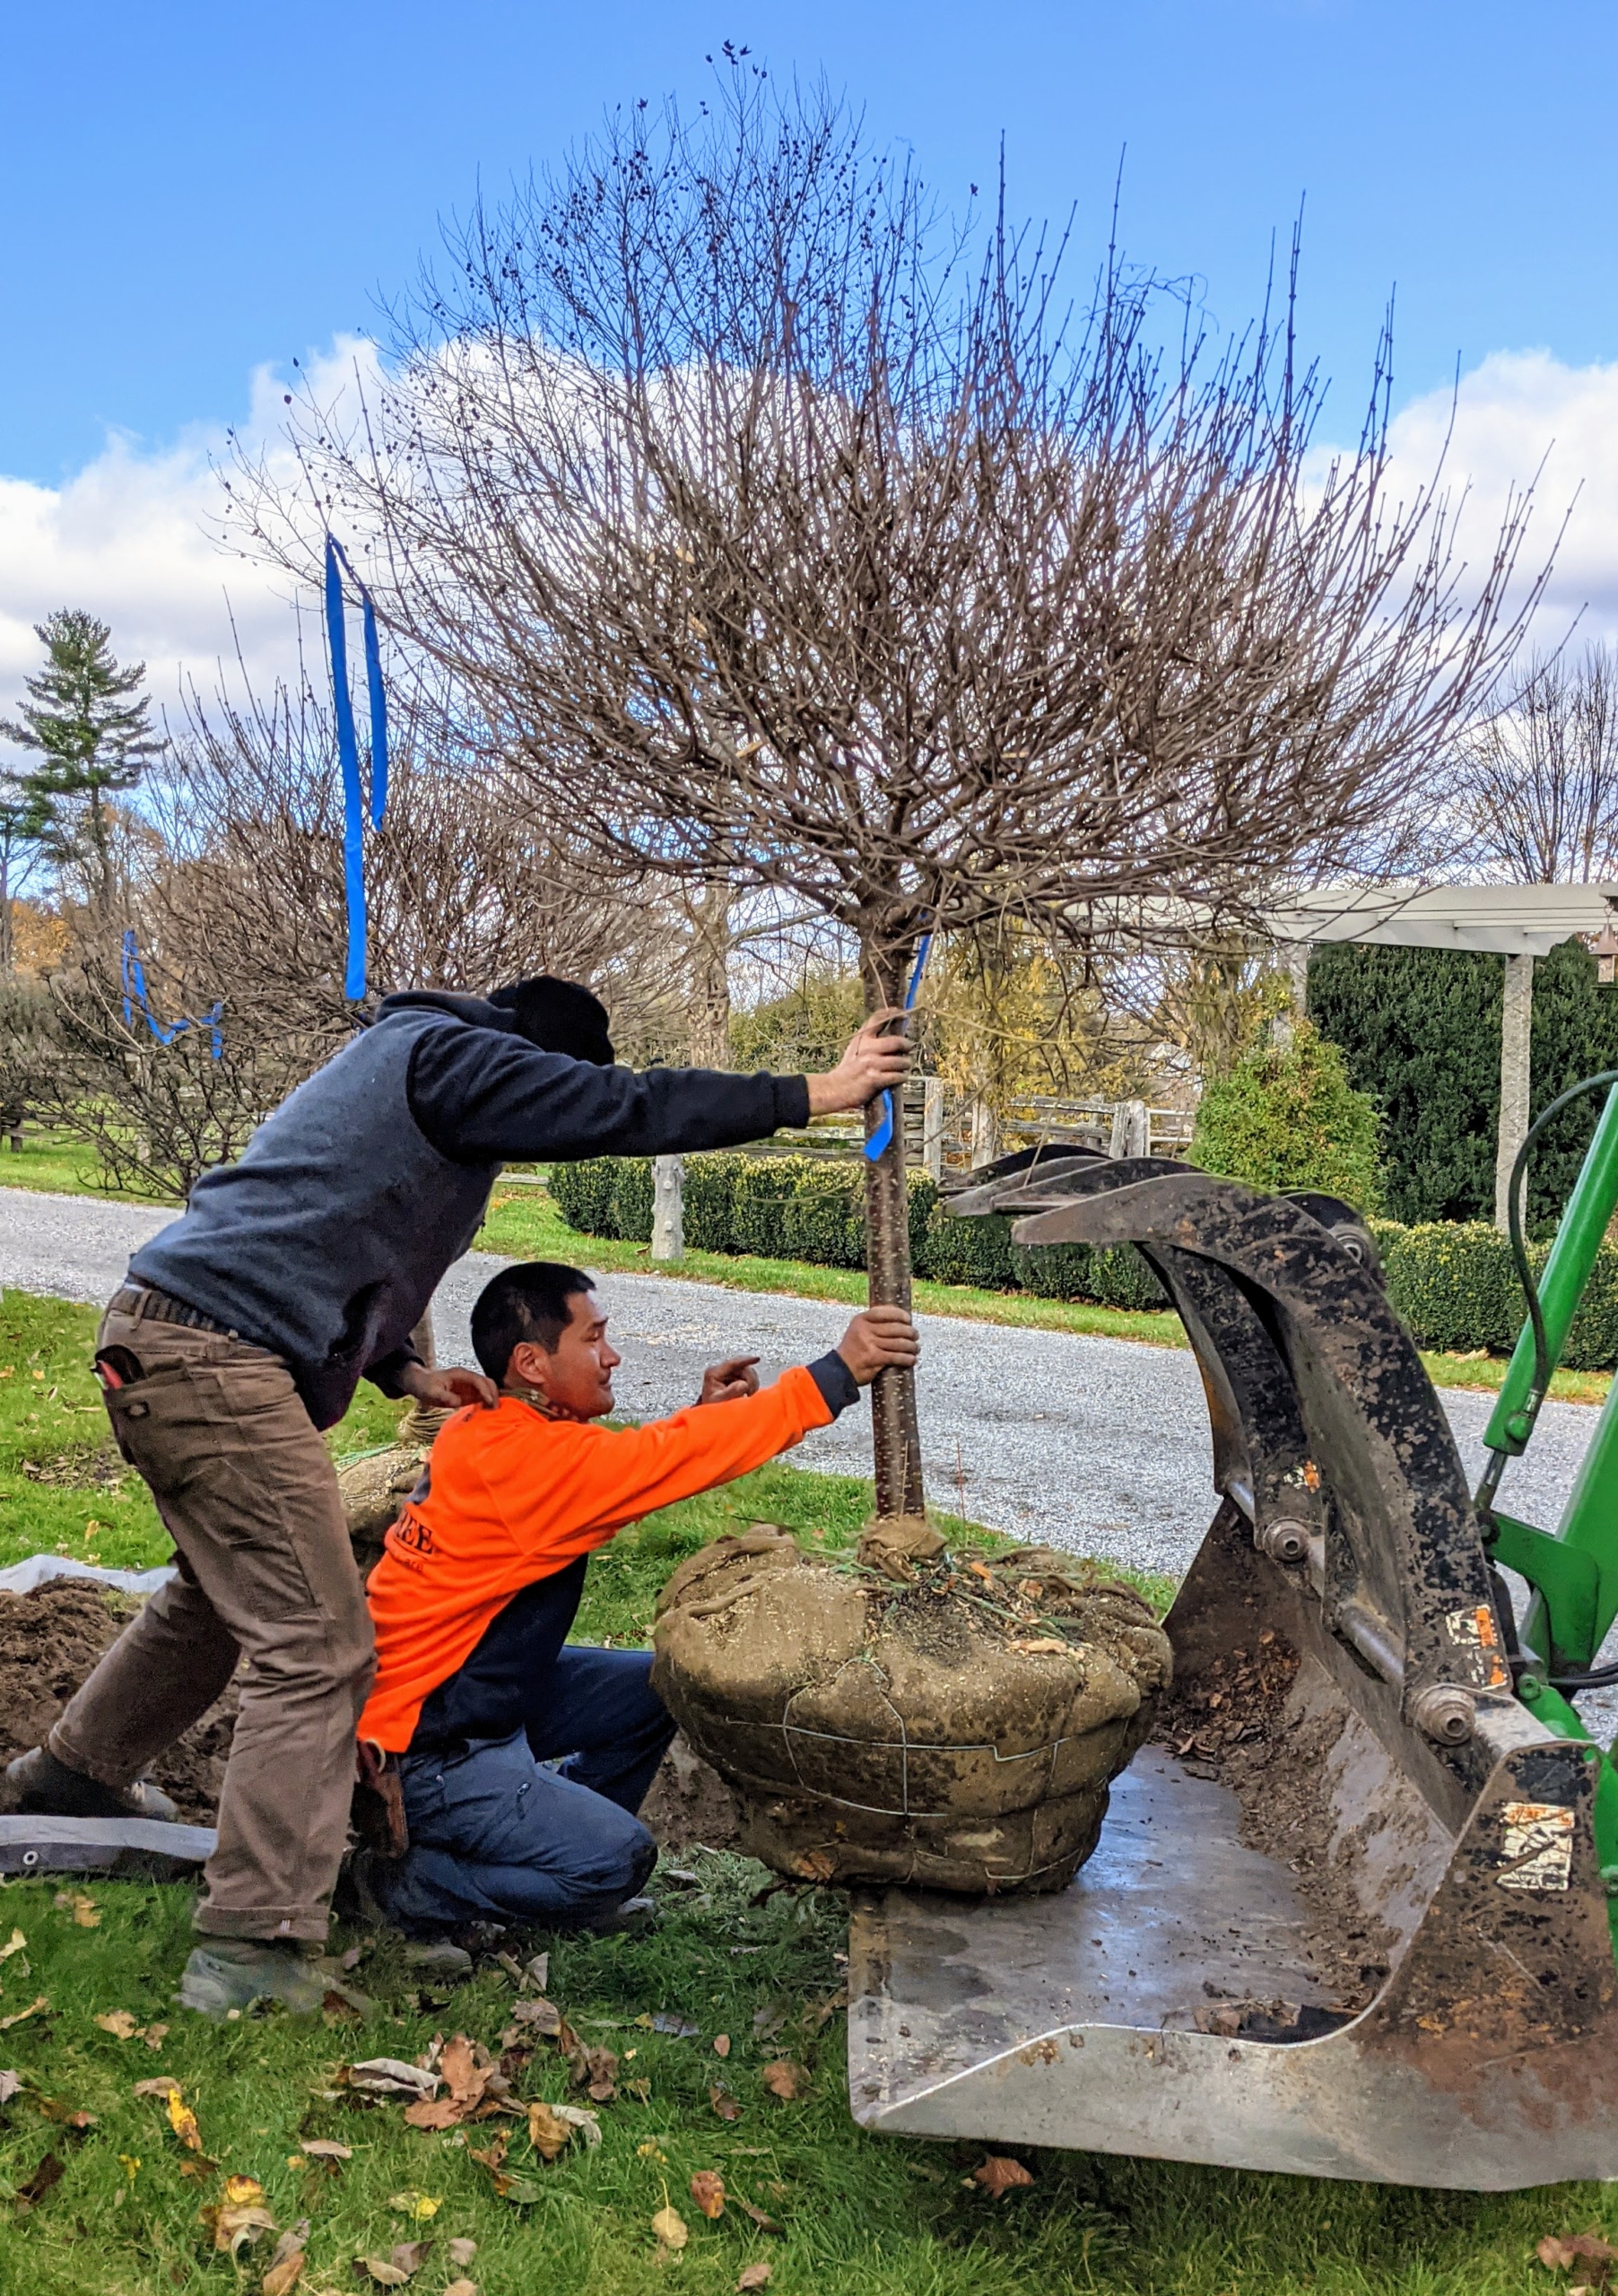
Recently, I purchased three new lilac 'Palabin' standards, Syringa meyeri, to plant in front of my dwarf apple espalier. These trees will extend the line of 'Miss Kim' lilac standards already growing in the space. These dwarf lilacs feature striking spikes of sweetly perfumed mauve pink blooms with neatly rounded heads and soft green foliage. The trees are from nearby Hardscrabble Farms, located in Westchester County, New York - a family owned and operated wholesale dealer that specializes in native species, ornamental conifers, evergreens, and perennials.
Here are some photos, enjoy.
If you follow this blog regularly, you may have seen photos of these gorgeous lilacs blooming in late May. These are blooming “Miss Kim” Korean lilac standards. These upright, compact lilacs bloom later than others, extending the season with fragrant flowers.
They feature long panicles of sweetly scented lavender blooms that burst from purple buds. I decided I wanted to expand the row with a few more trees and relocate one that was growing more slowly than the others.
Hardscrabble Farms is located on Hardscrabble Road in North Salem, New York – a short drive from my home. Hardscrabble has a very diverse, and healthy inventory of beautiful trees, shrubs, and plants. I see something new and interesting every time I visit.
The facility is located on more than 40-acres of land. Its helpful staff assists landscape professionals in selecting plant material, designing landscape spaces and delivering orders to the site. On this day, I went to pick up three Syringa meyeri ‘Palabin’ standards I knew would look great next to my existing ‘Miss Kim’ lilacs.
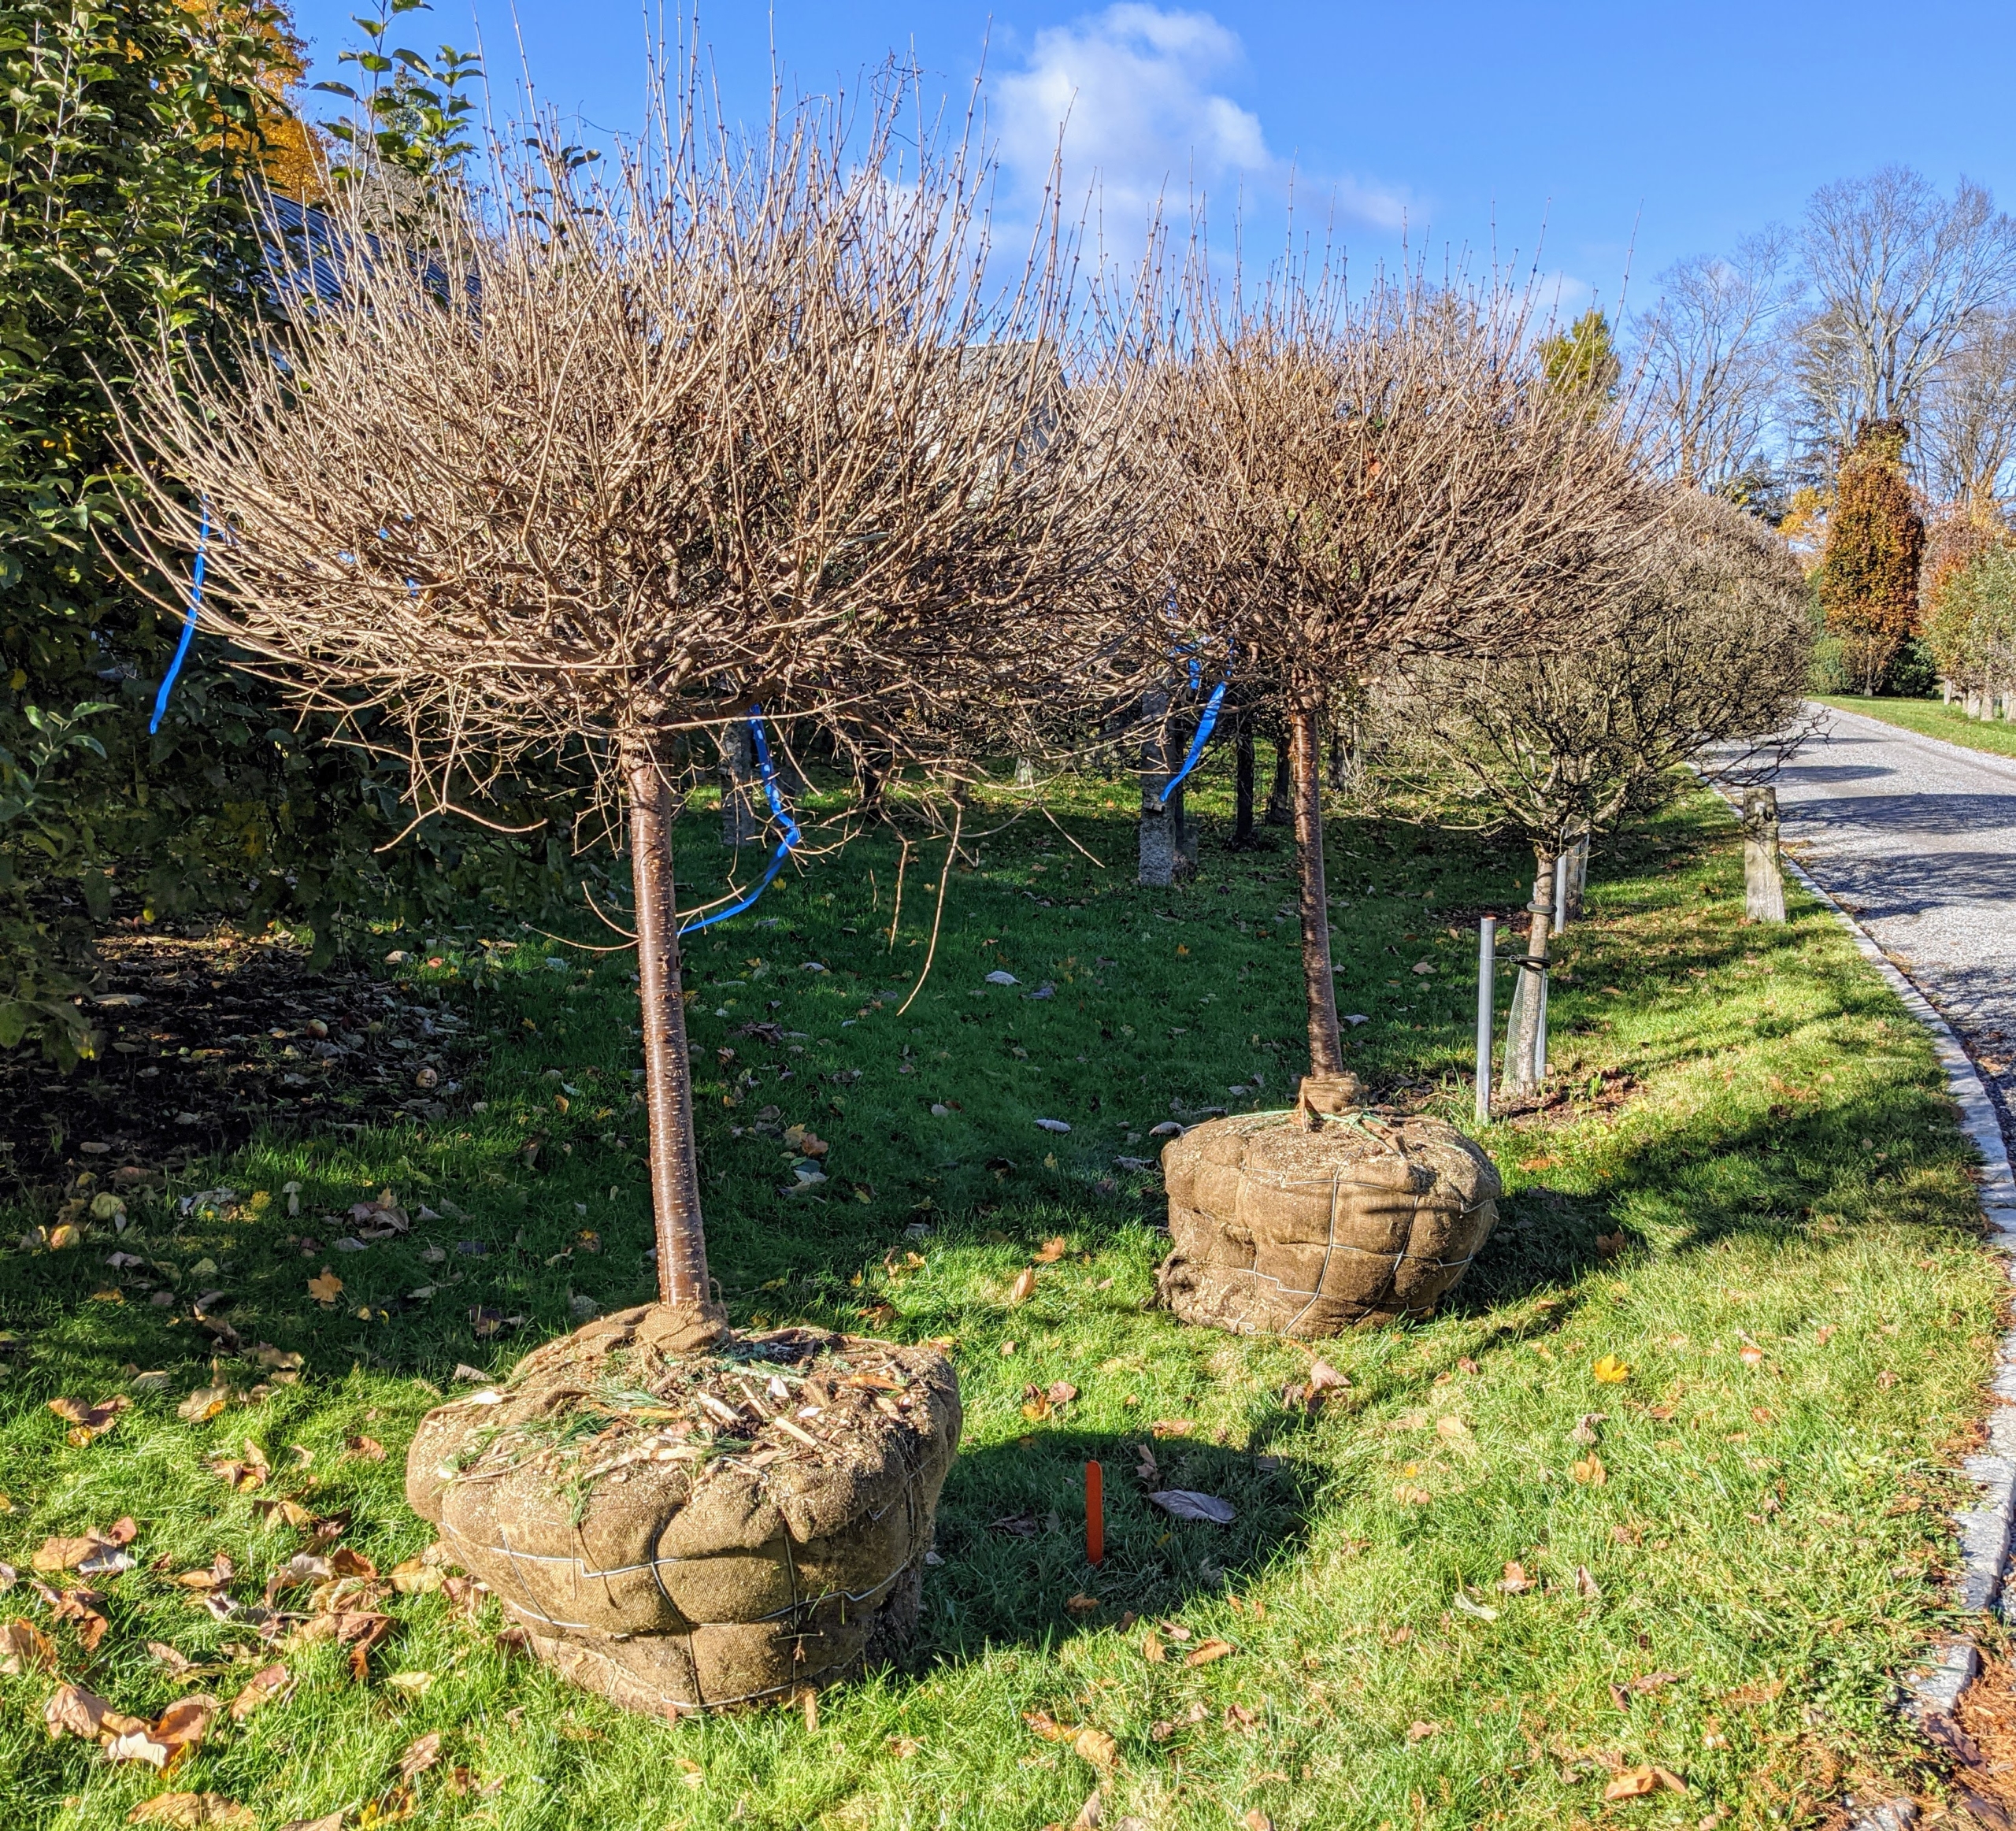
As soon as we got the trees back to my farm, I directed my outdoor grounds crew in placing them. Two were positioned at one end and the third was positioned in the middle to replace the smaller lilac to be moved. Don’t worry, the tree is just moving to the very end of the row where I feel it will do better.
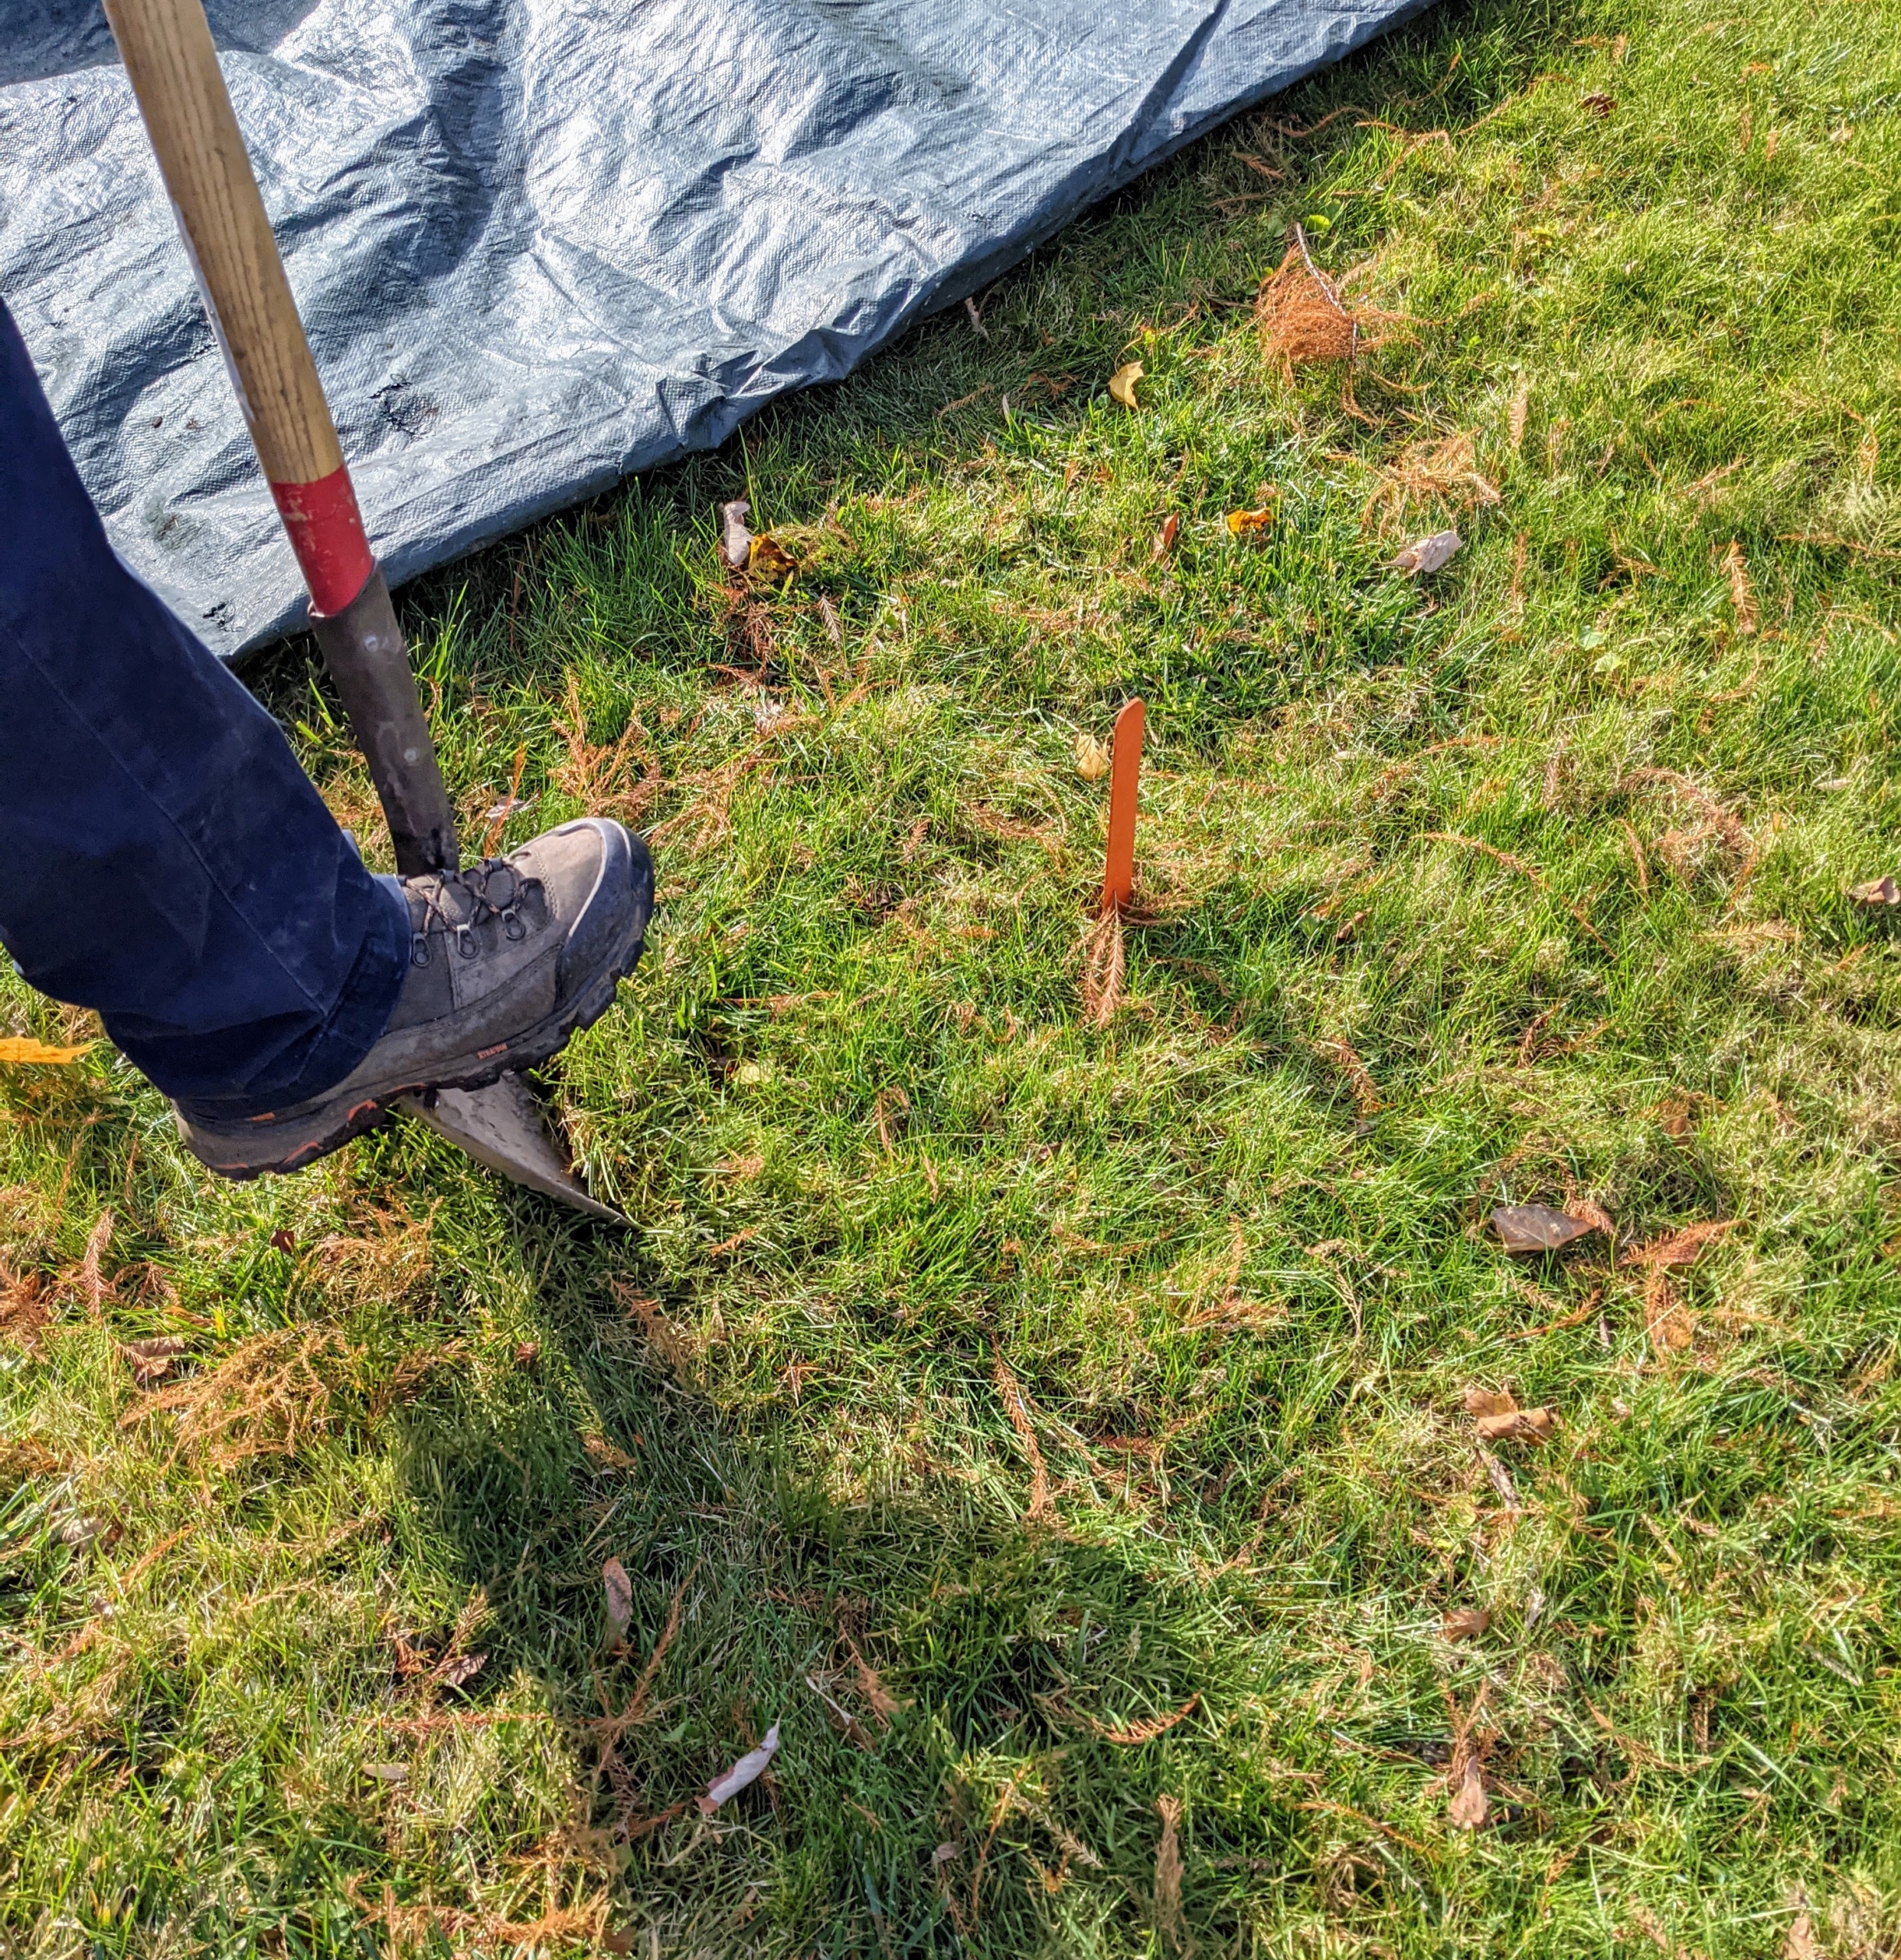
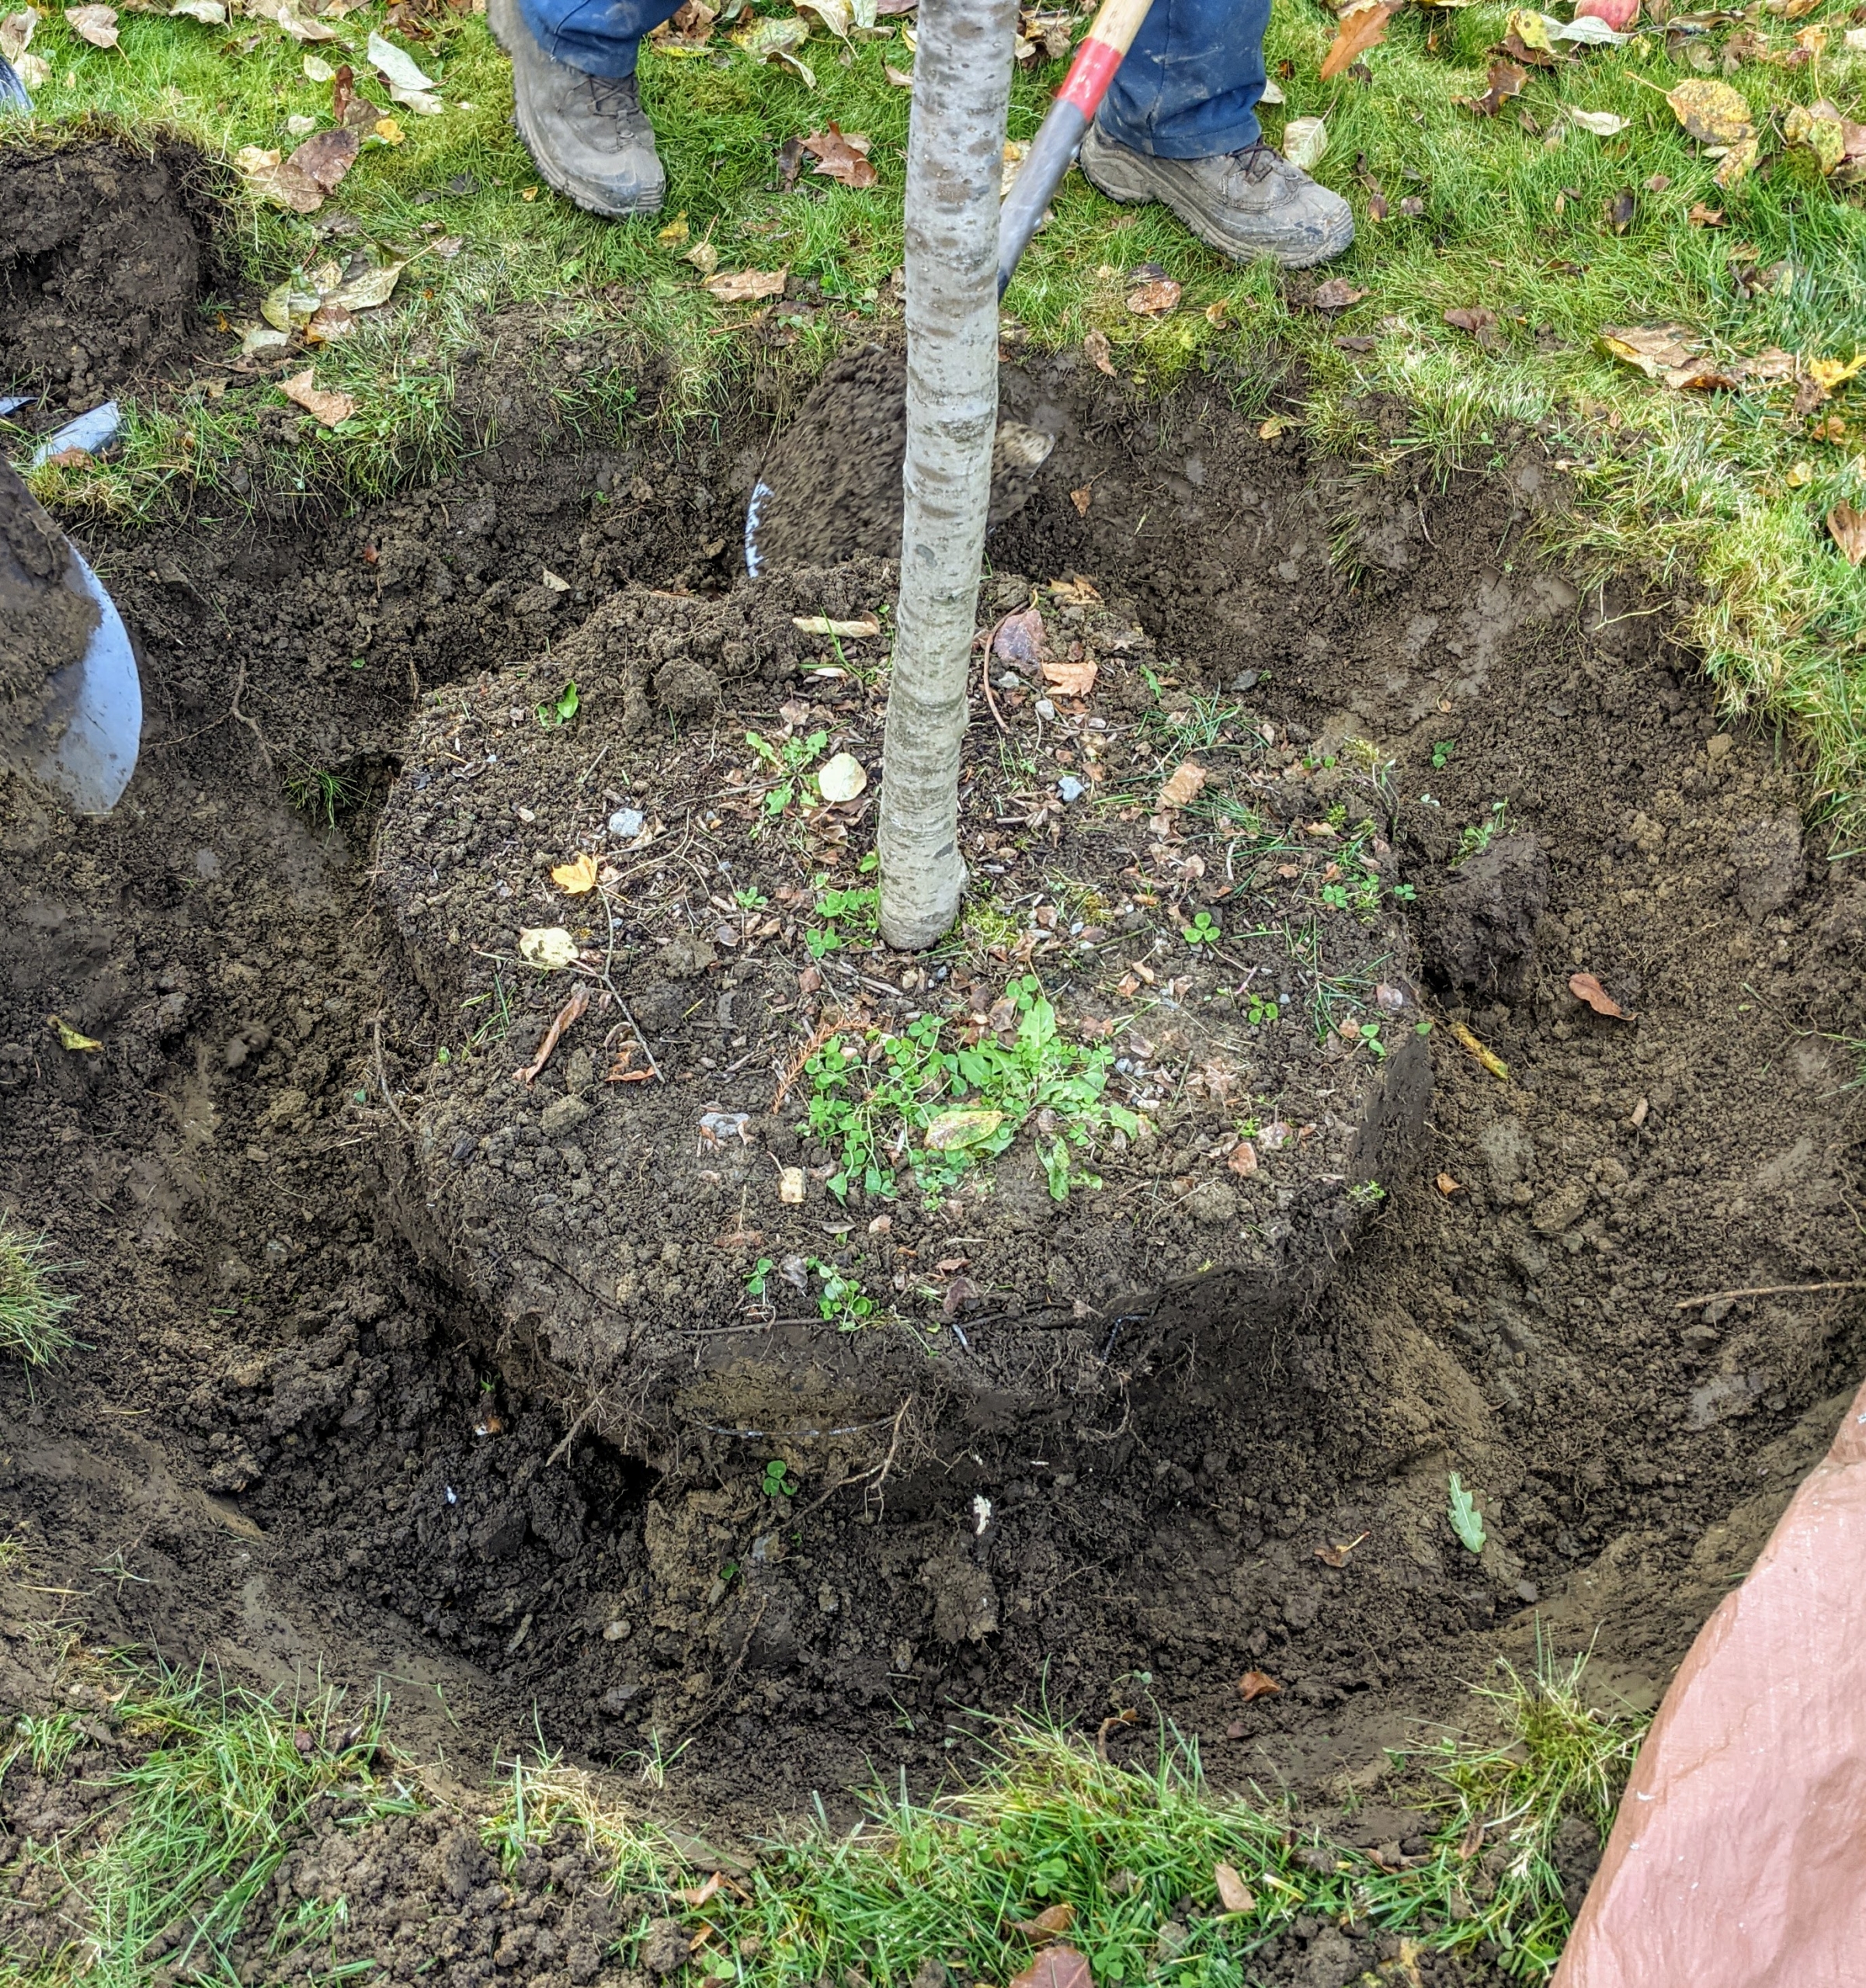
Using bright orange stakes, I marked exactly where the trees would go and the crew started digging.
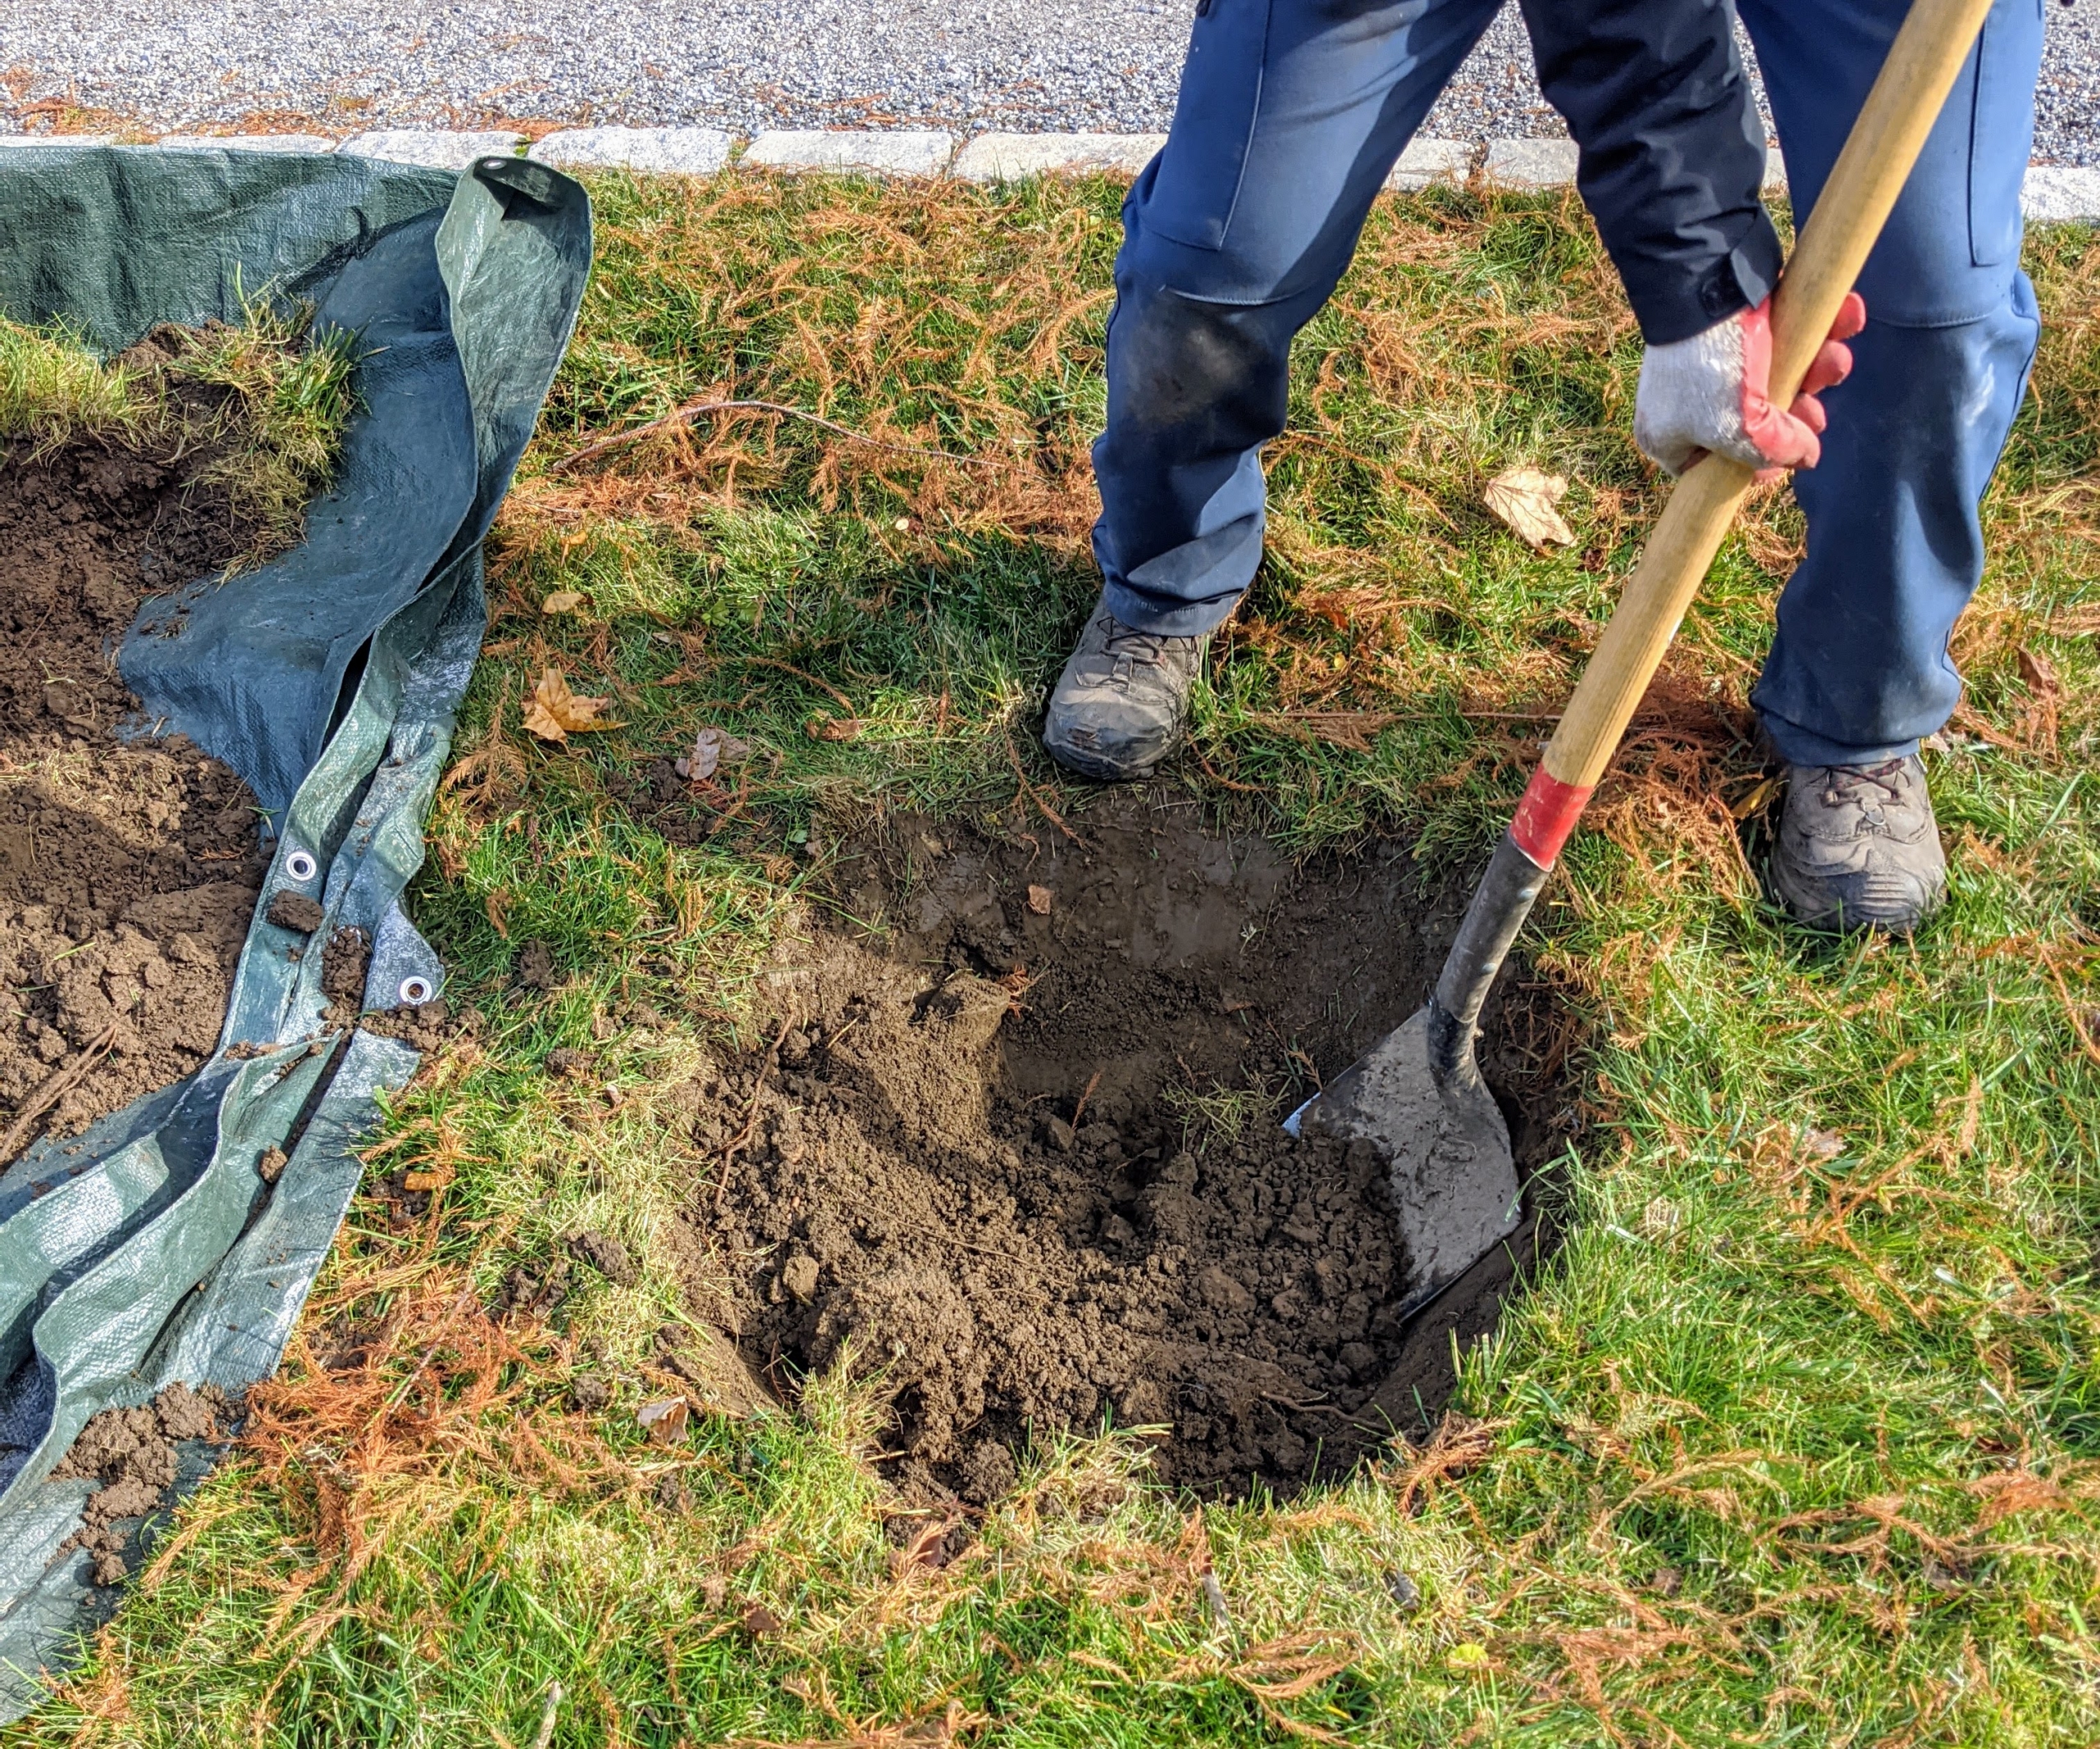
It wasn’t long before Domi dug the appropriate sized hole for the specimen. When planting a balled tree, always dig a hole that is two to three times wider than the diameter of the tree’s rootball. The depth of the hole should also be about two inches less than the rootball’s height.
All the holes dug are sprinkled with a generous amount of fertilizer. It is very important to feed the plants and trees, especially when they are transplanted.
For all our new trees, we like to use Roots with mycorrhizal fungi, which helps transplant survival and increases water and nutrient absorption.
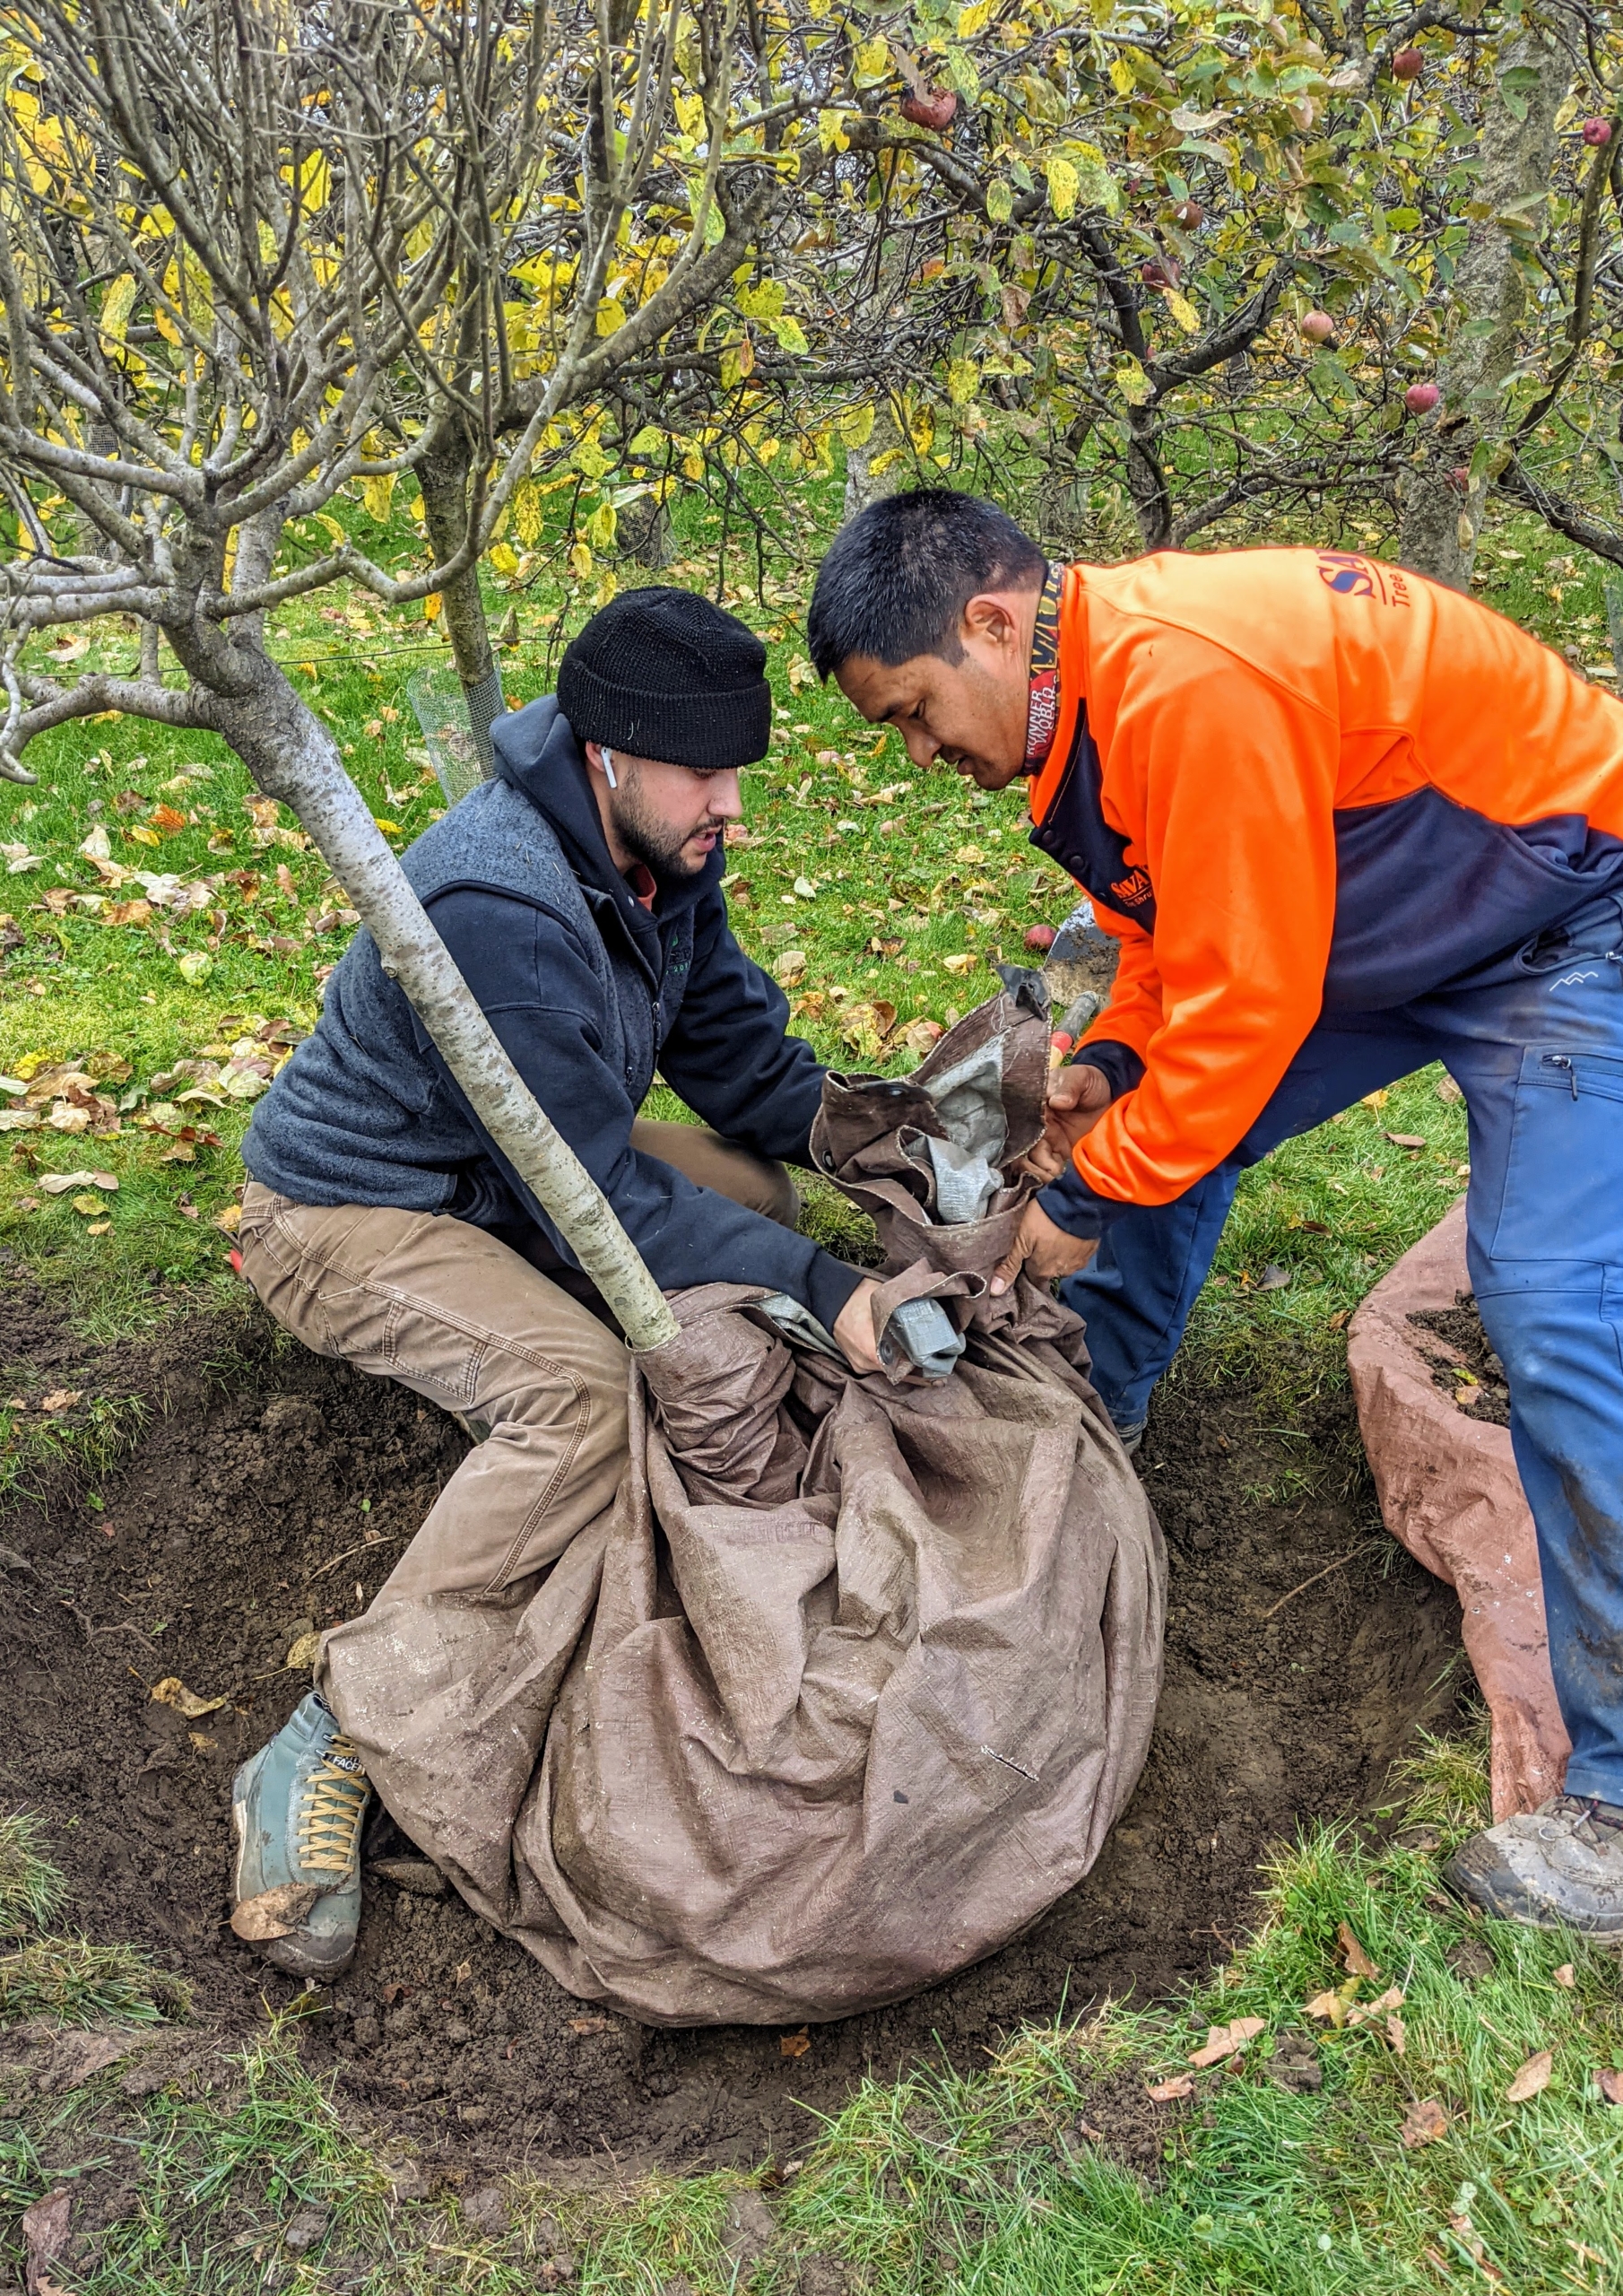
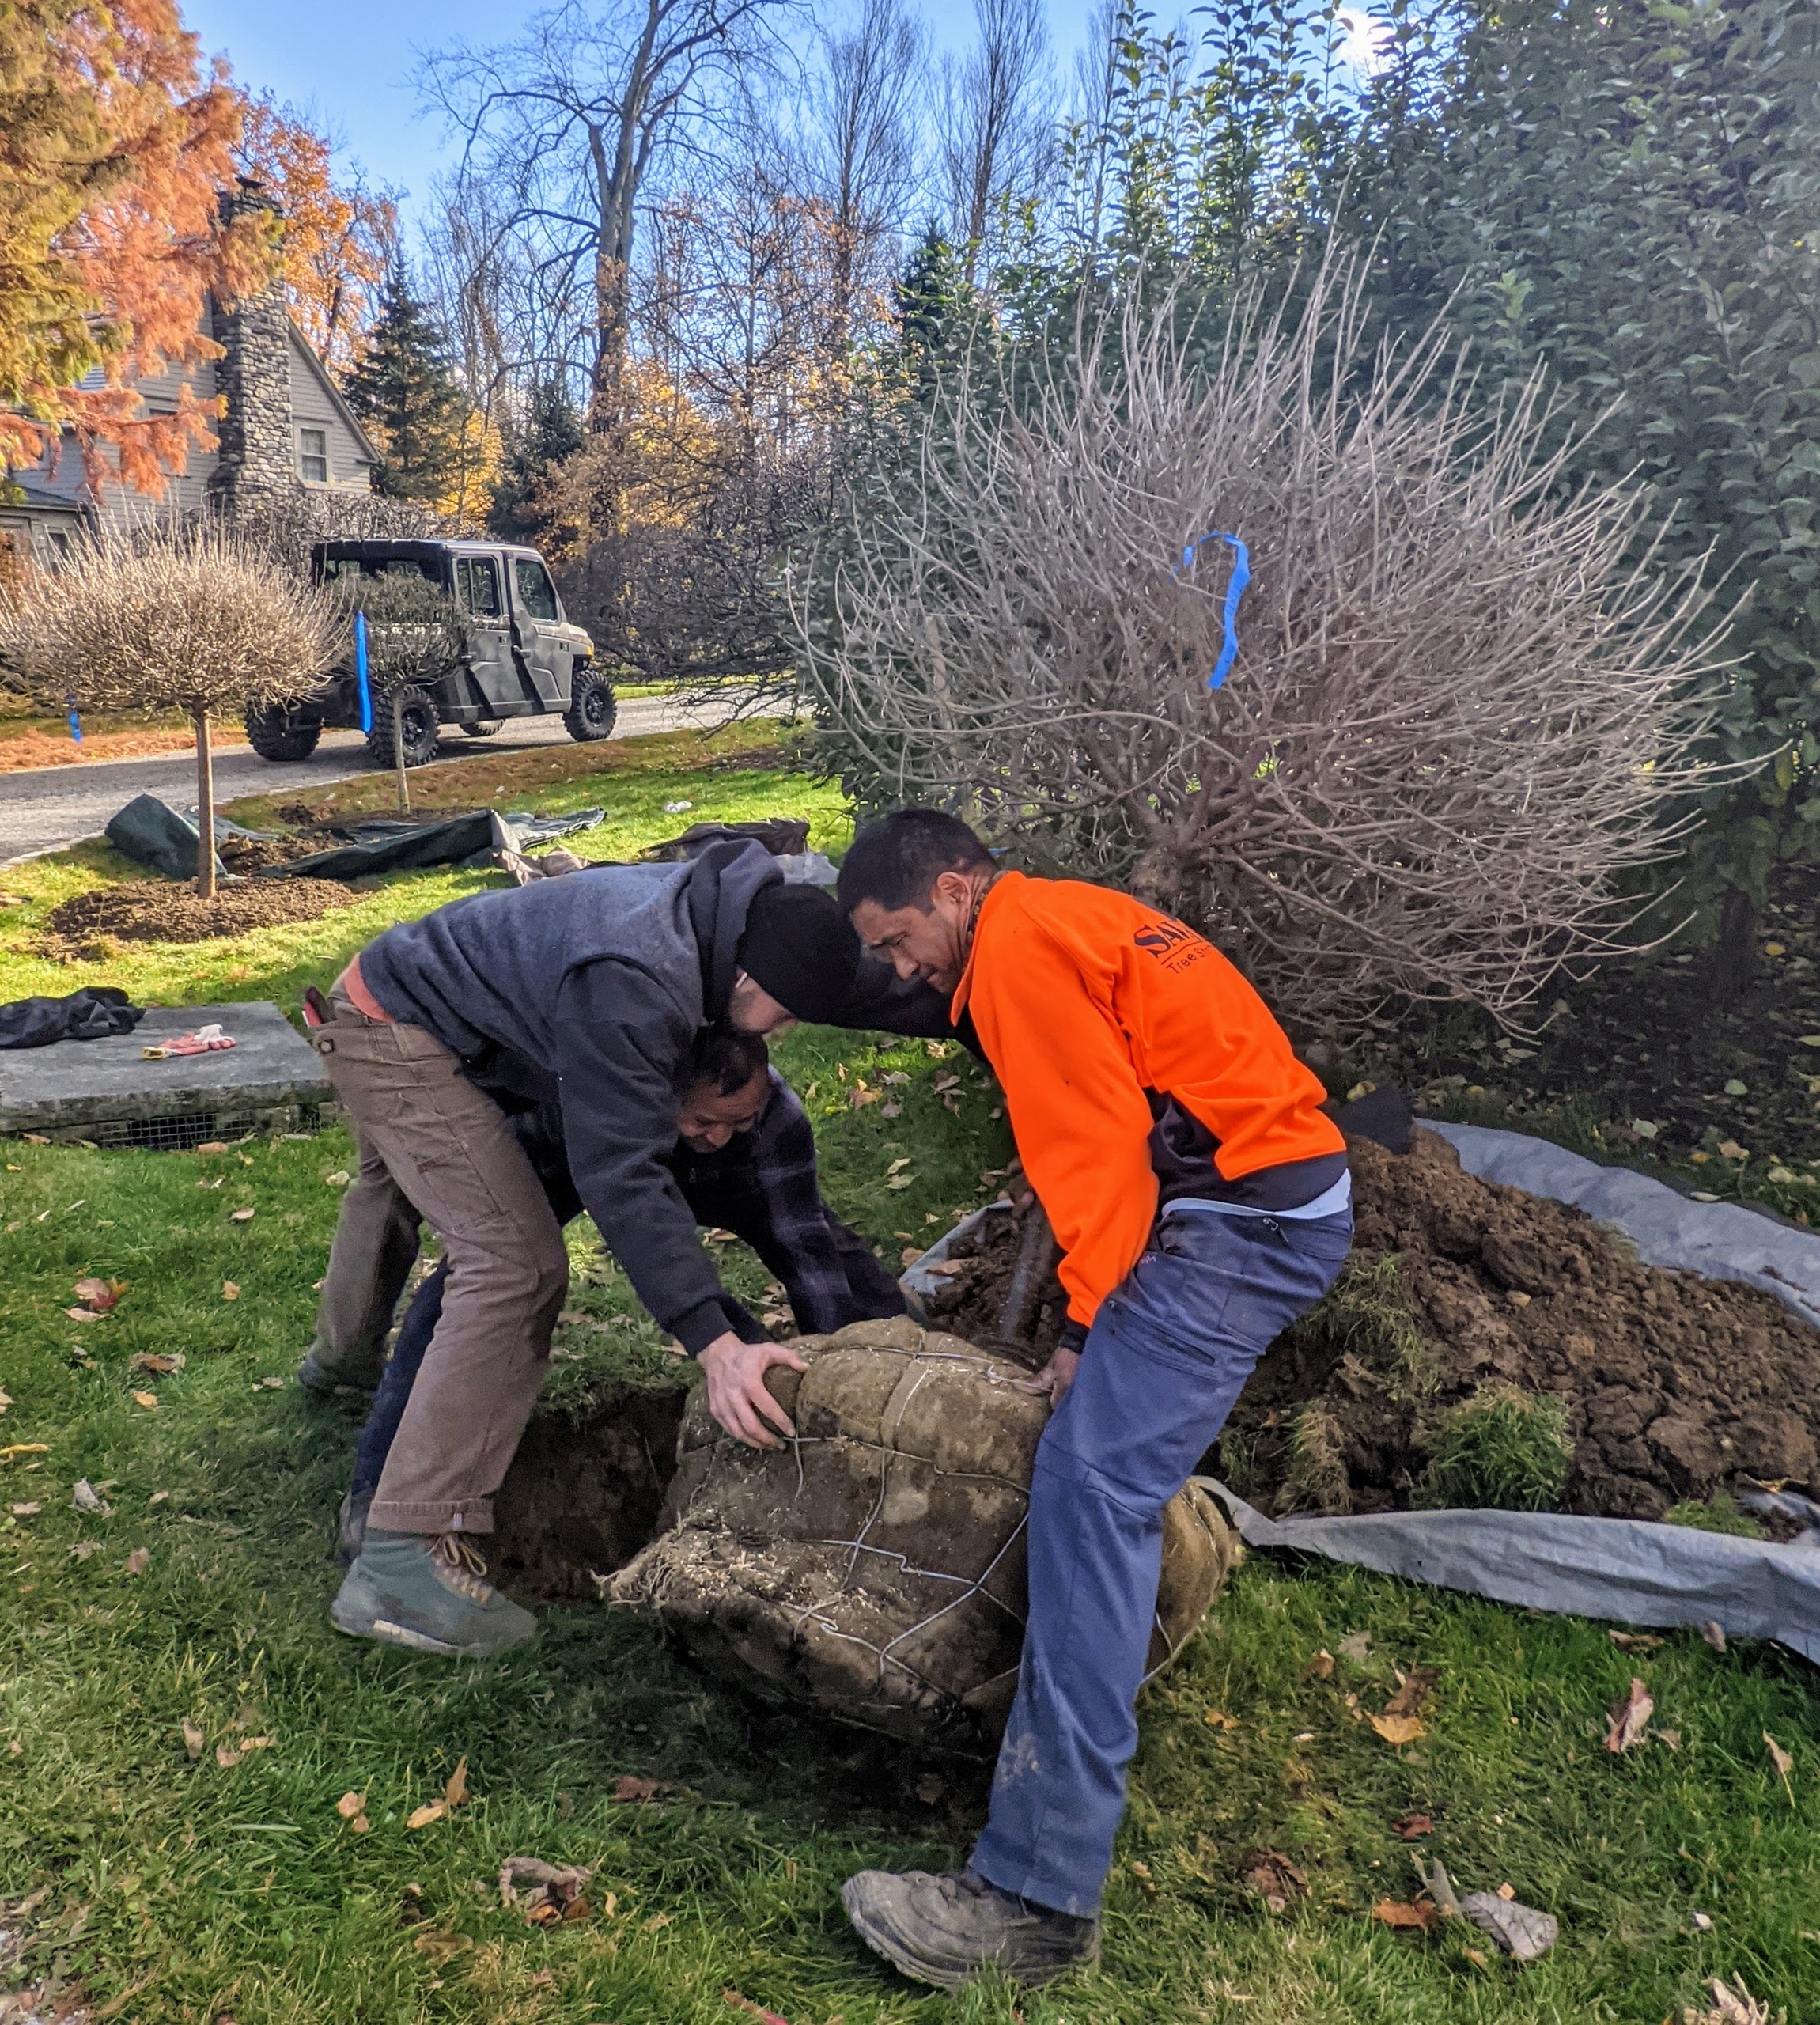
Meanwhile, Brian and Pasang remove the smaller tree that is being moved to the end. When removing a tree, dig around the outside of the rootball to keep it intact.
Brian and Pasang wrap a tarp around the rootball before transporting it to the new location. This has to be done carefully to prevent the rootball from falling apart.
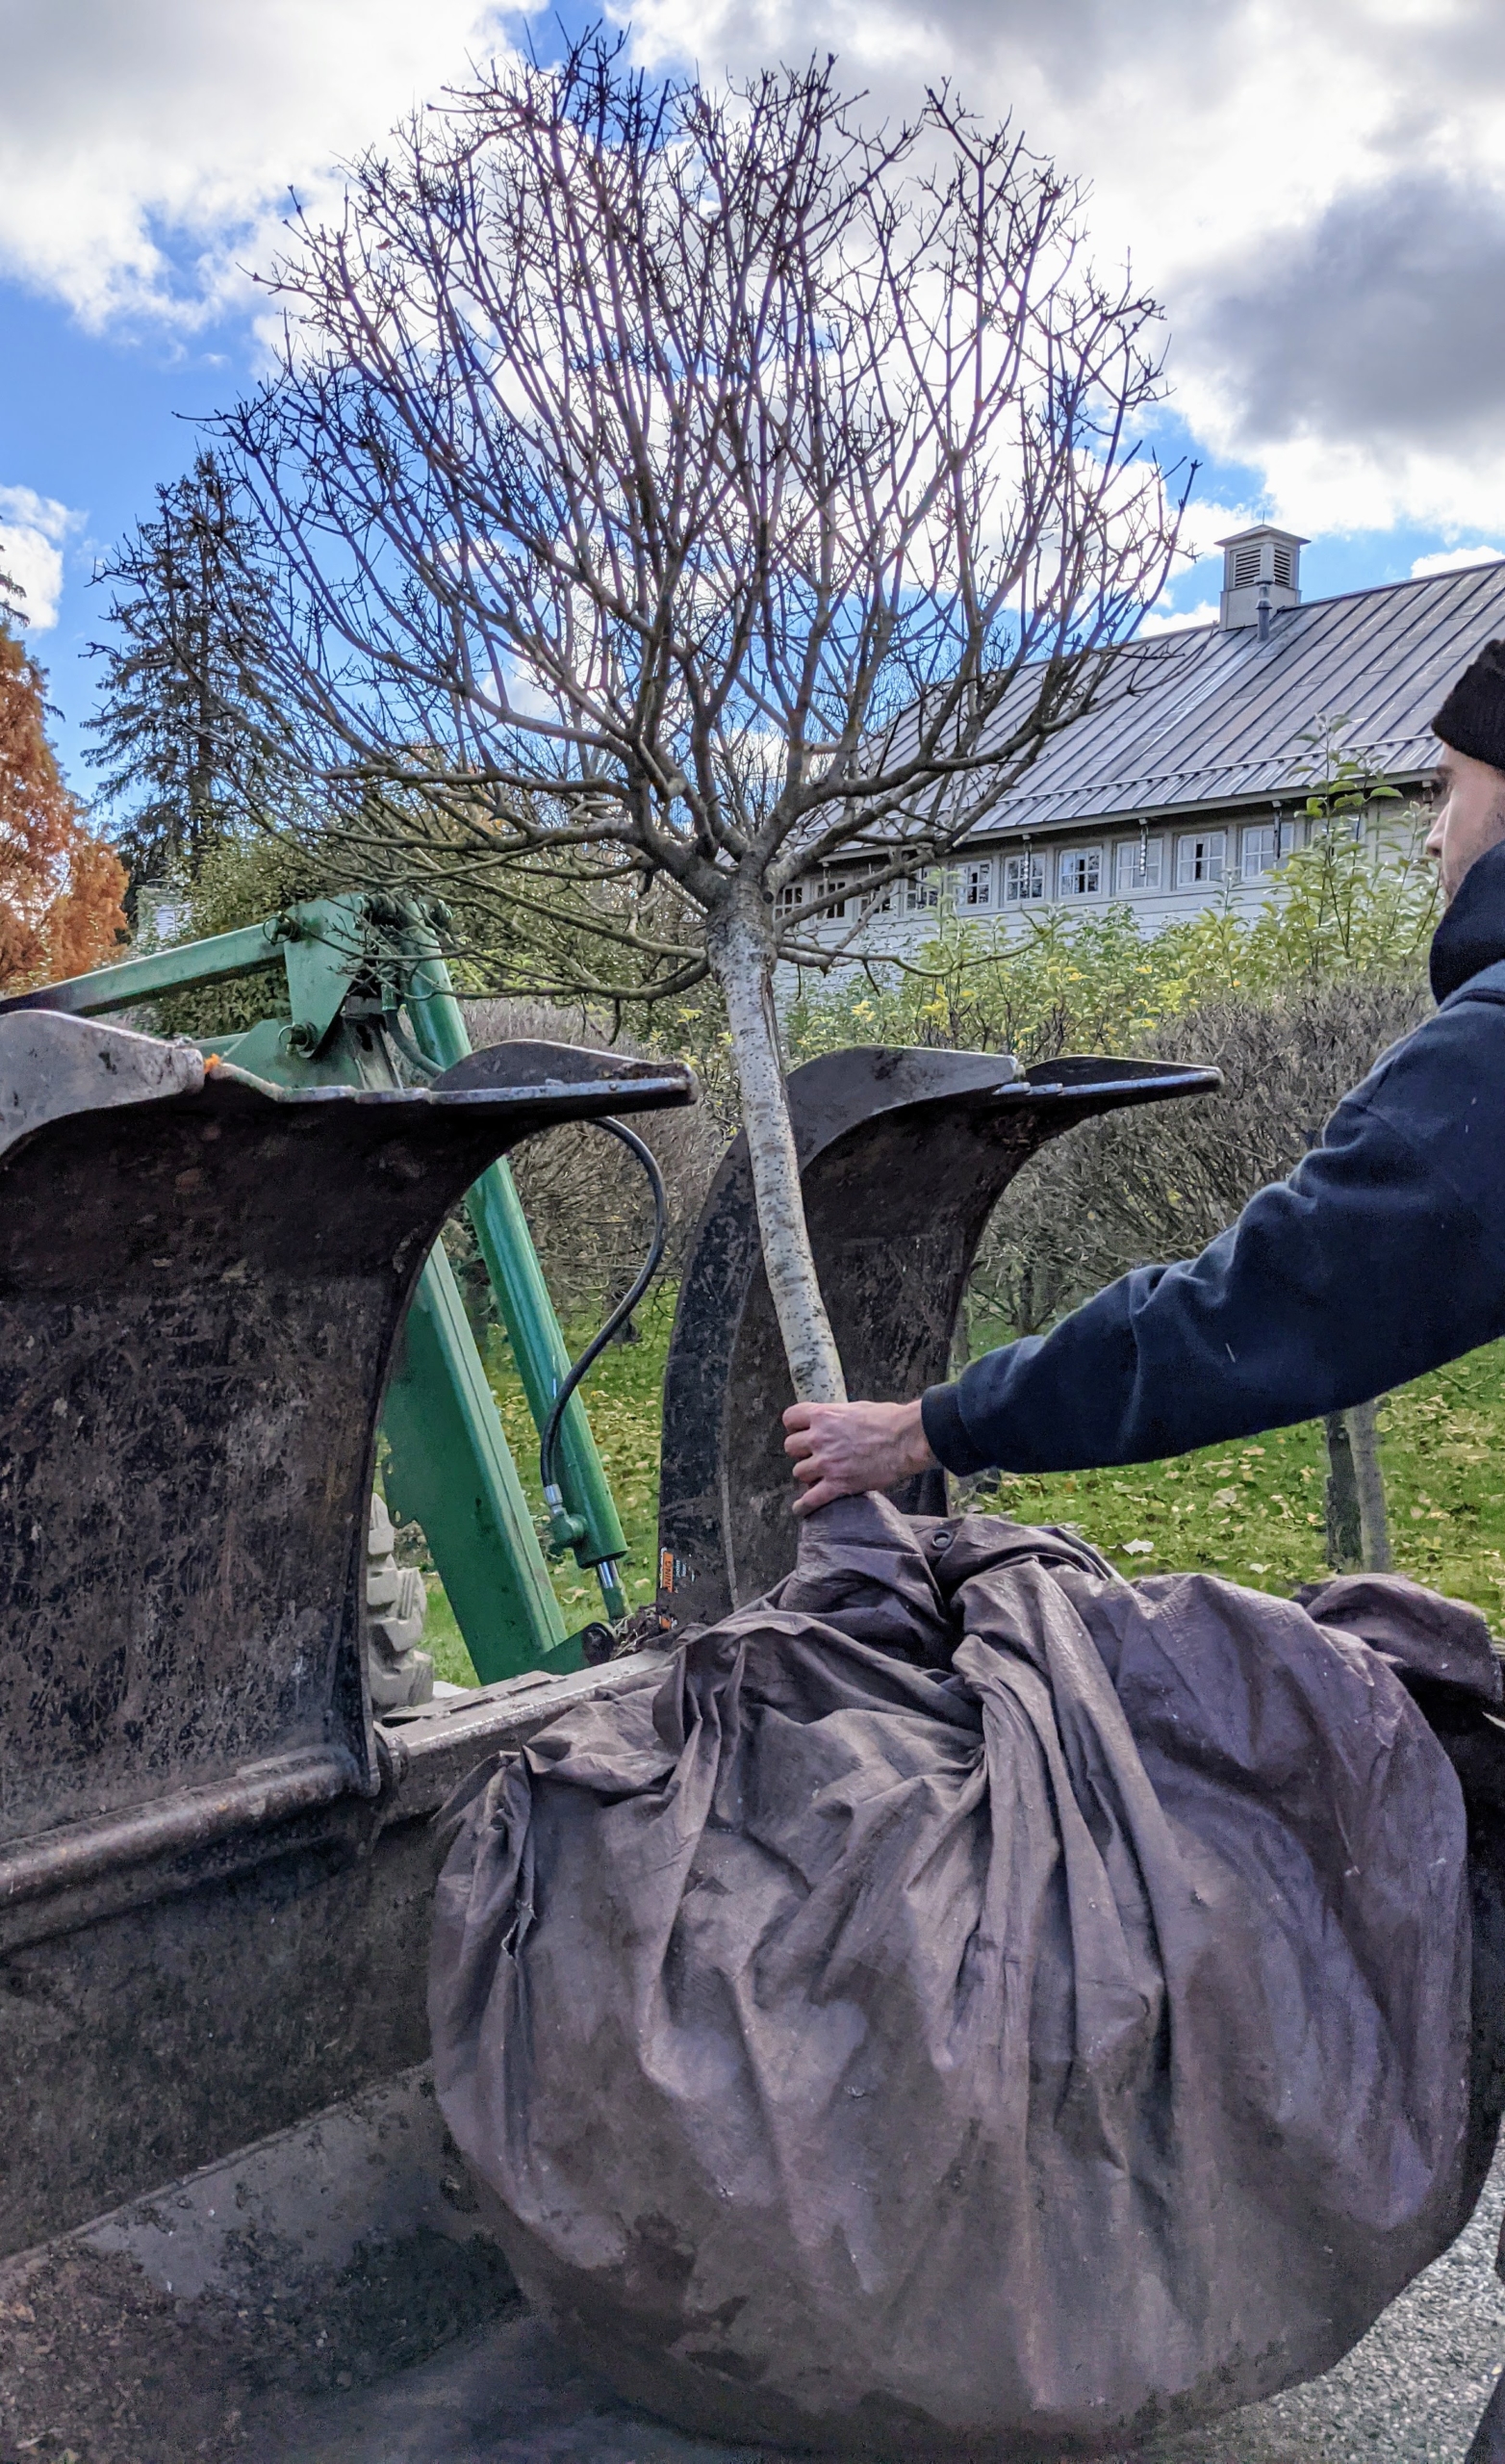
The tree is carefully placed in the front loader of a tractor and taken to the end of the row.
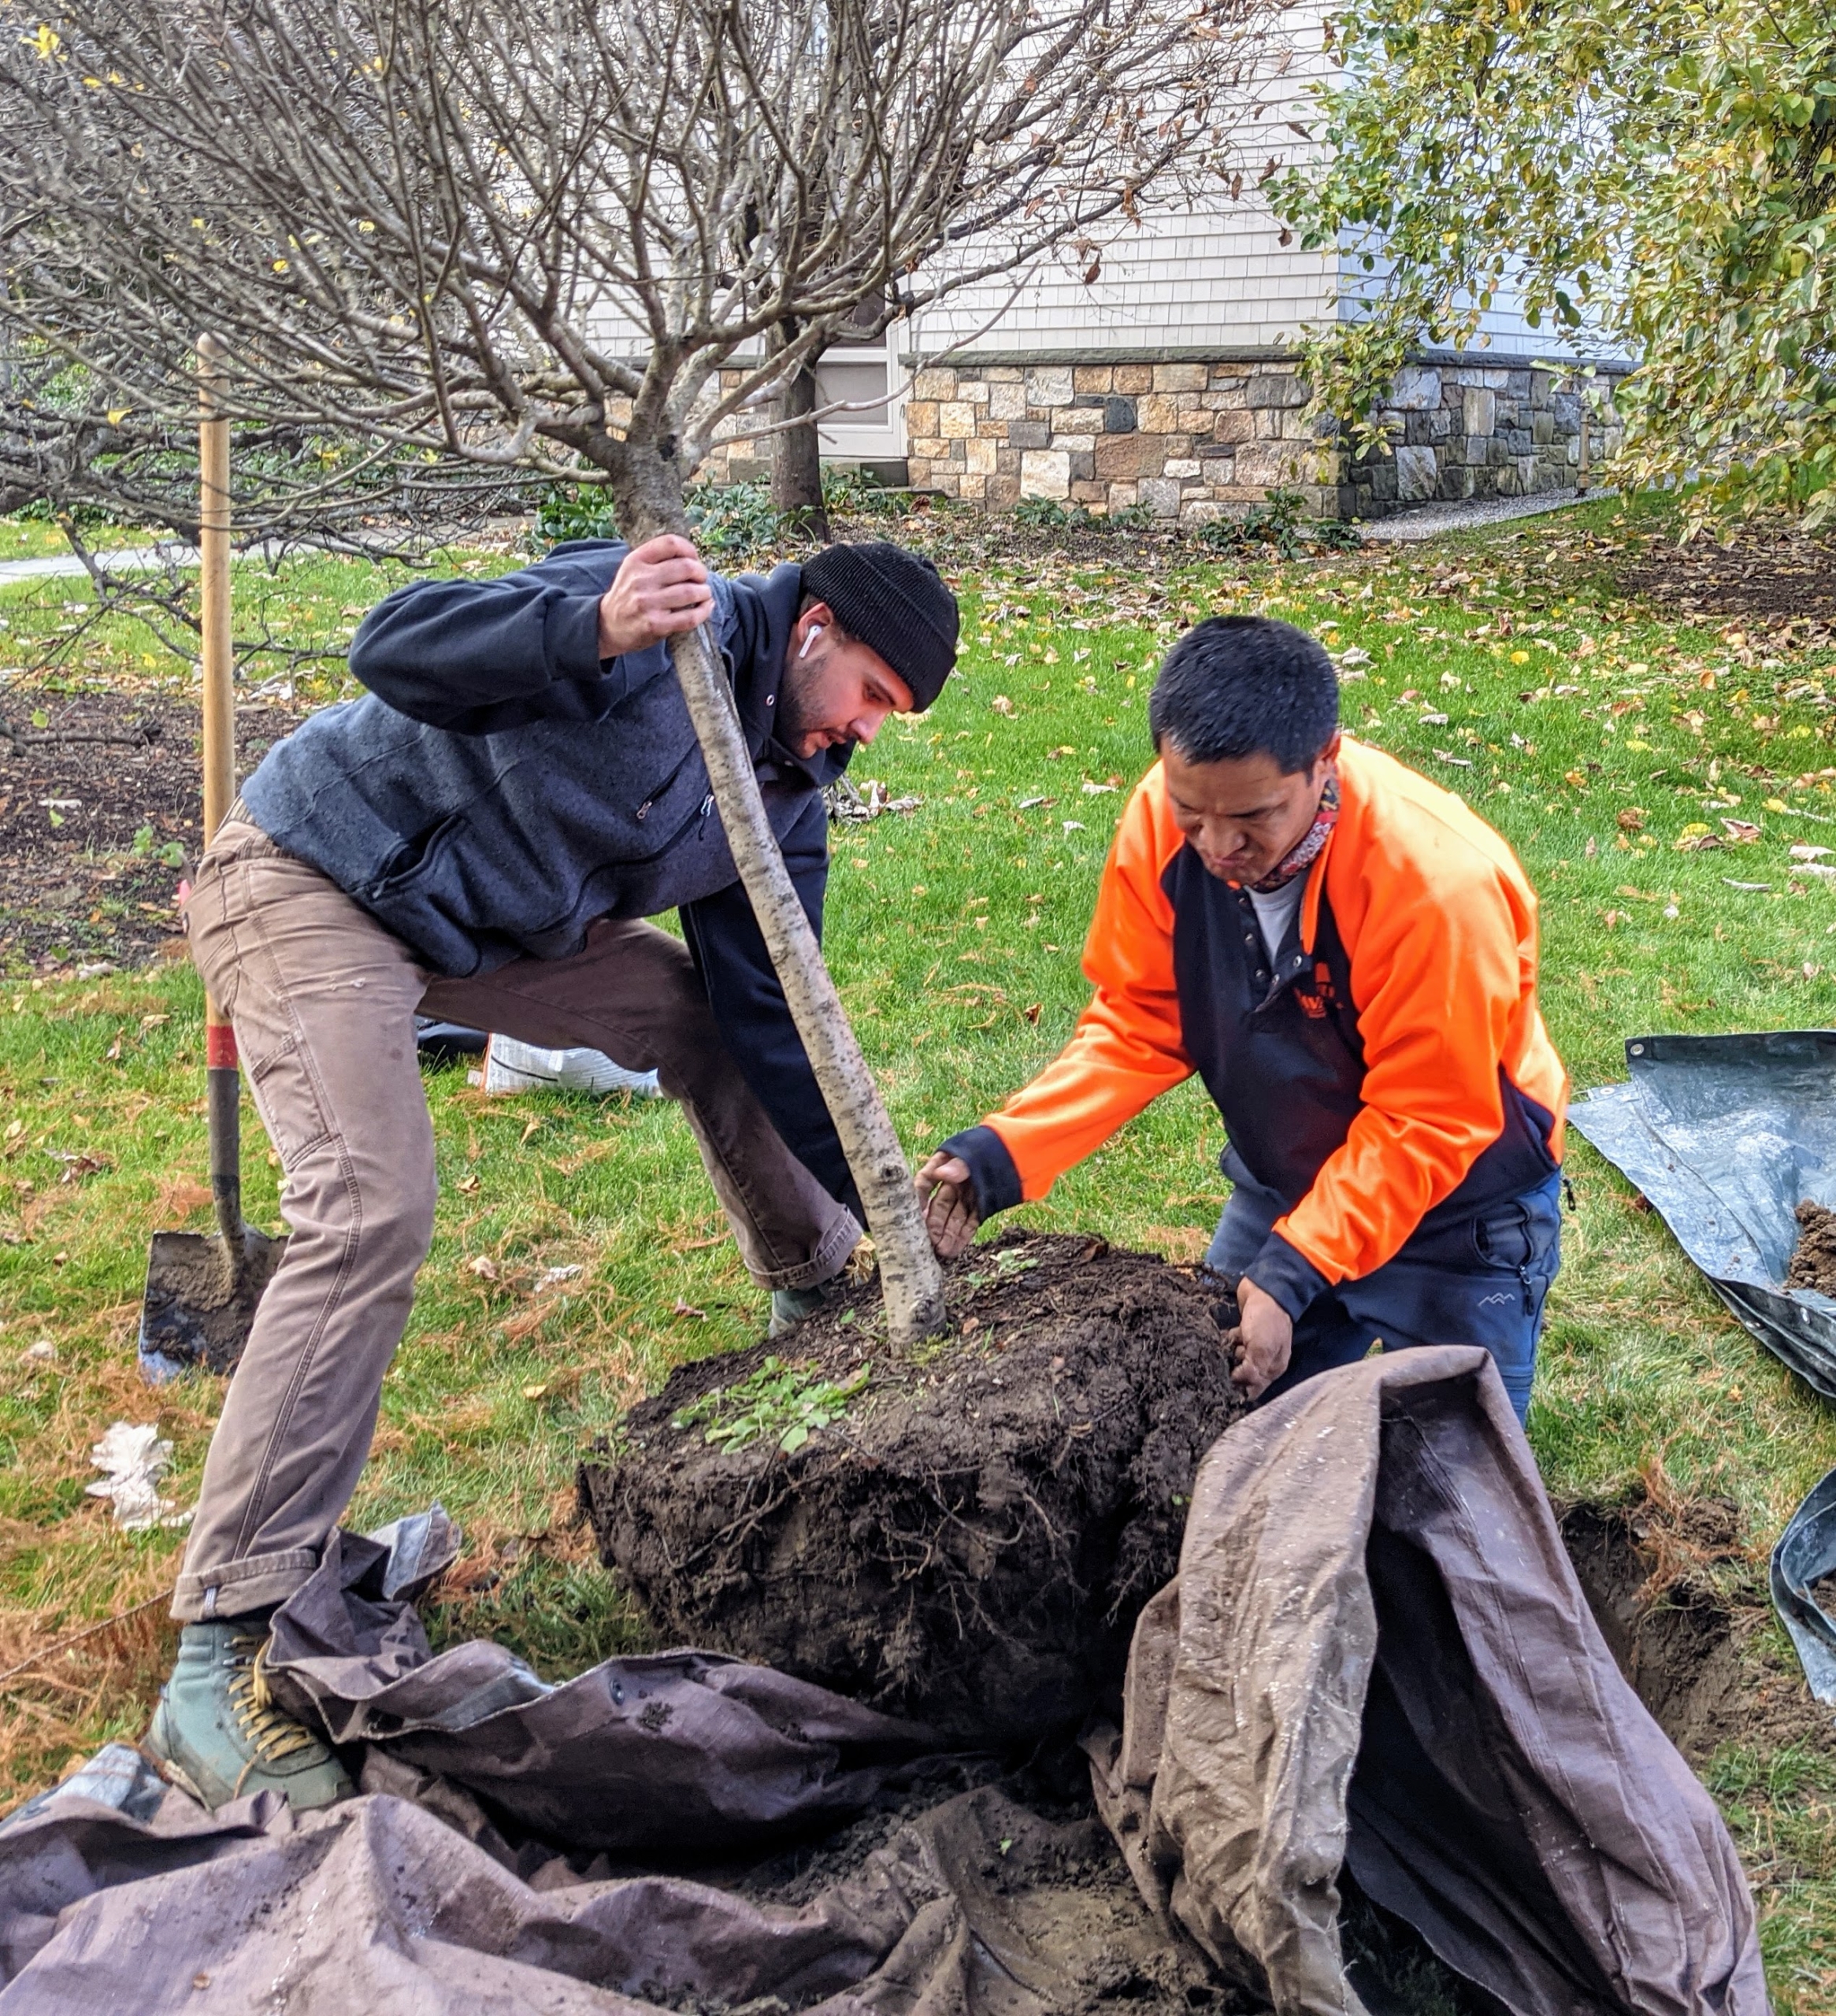
Then it is gently rolled out of the tarp and into the hole – with its best side facing the road.
Finally, the hole is backfilled and raked.
Next, one of the new trees is positioned in the tractor and taken to its new home.
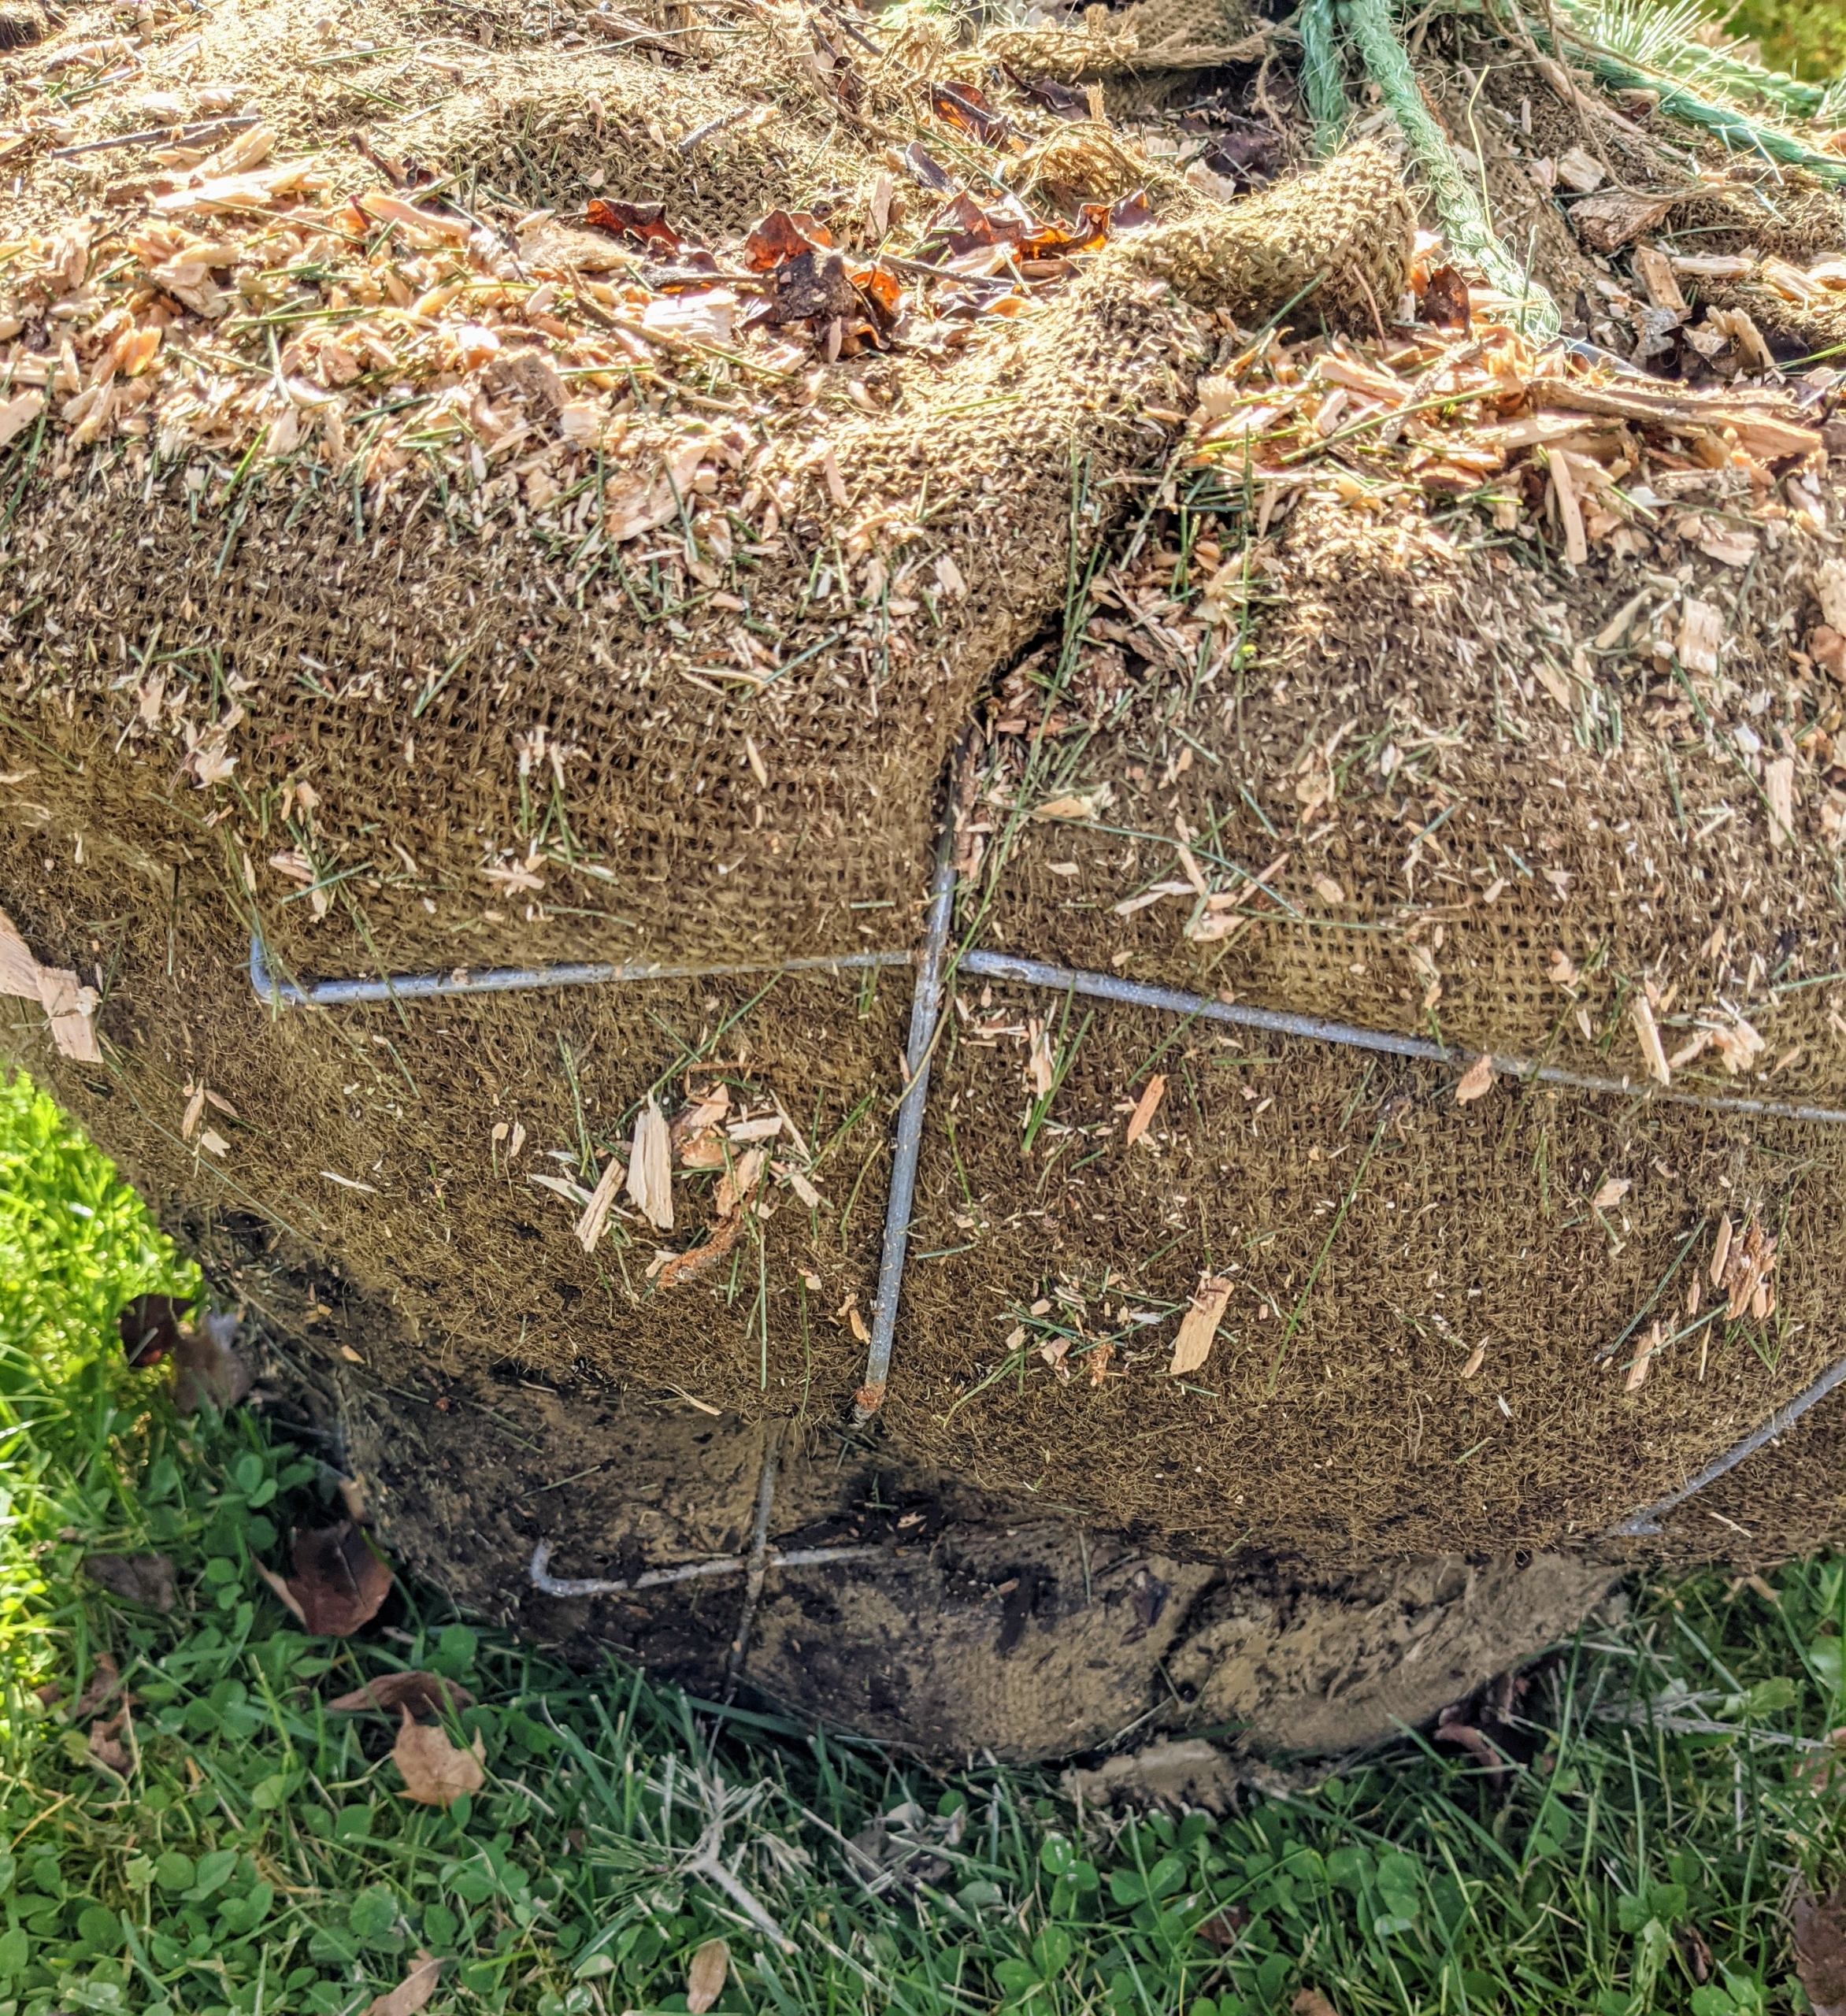
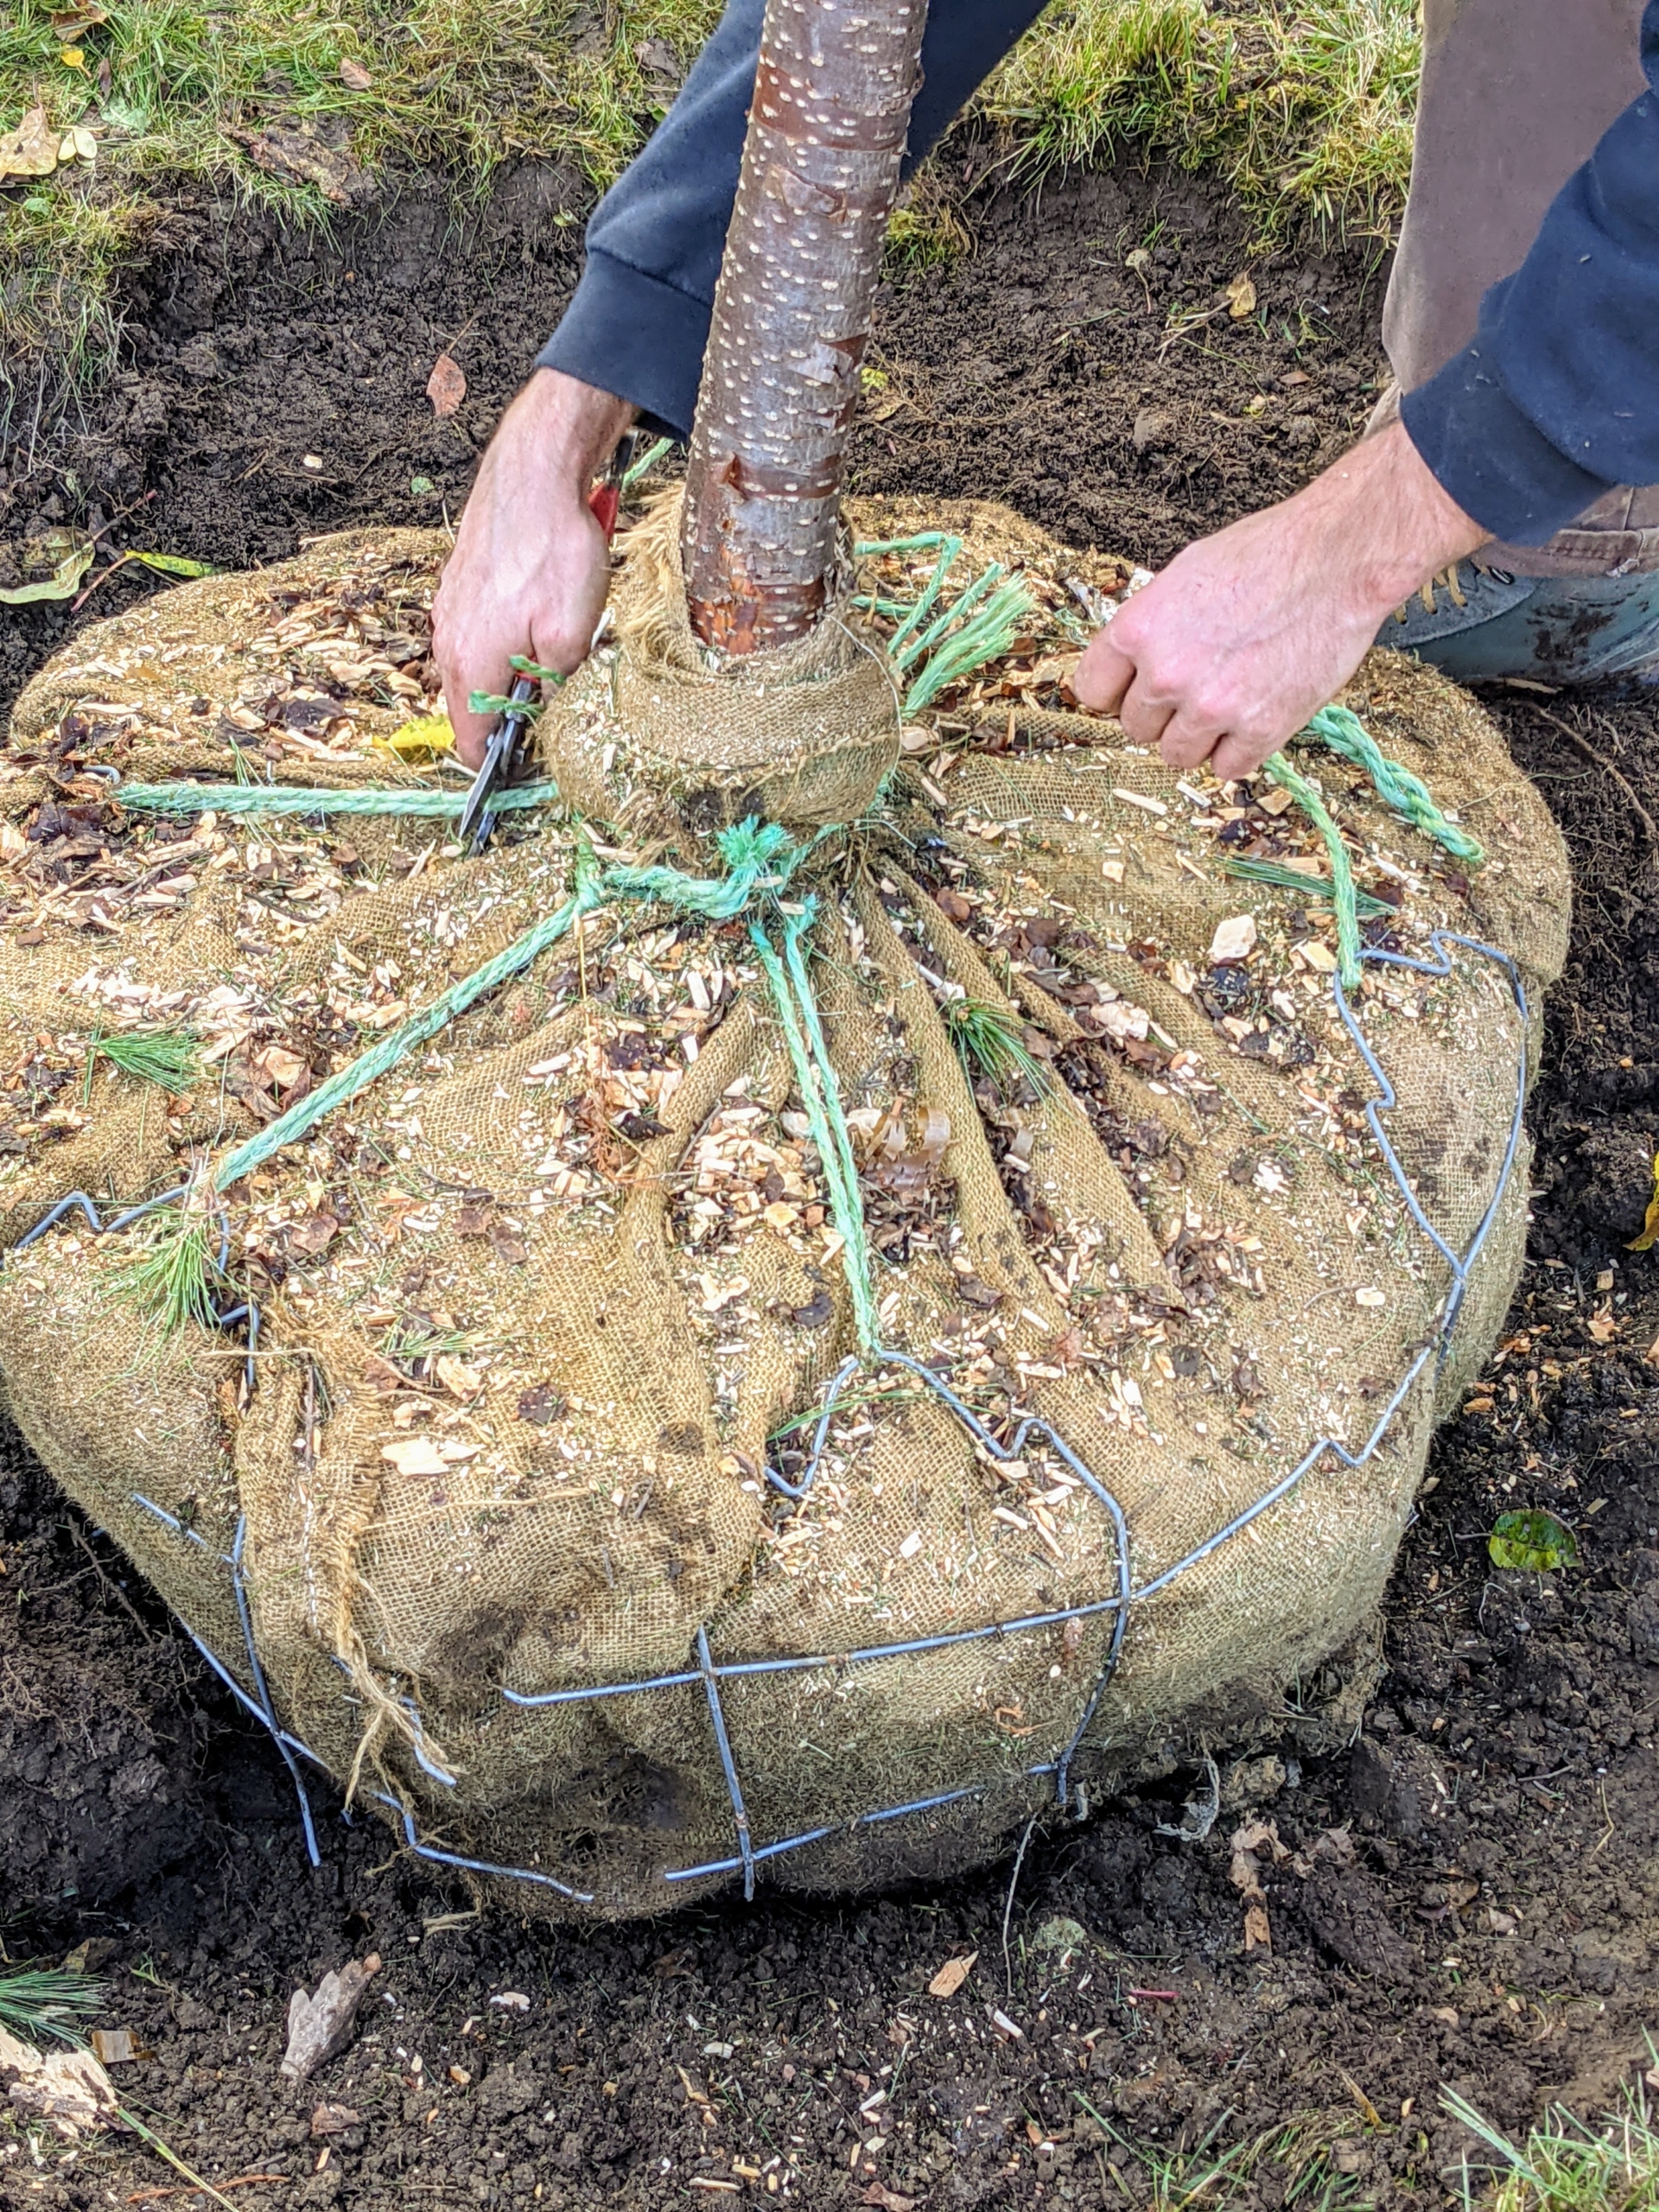
Balled and burlapped trees often come with wire baskets around the rootball. The cage is usually on the outside of the burlap covering. The purpose of wrapping the rootball with burlap and wire is to hold everything together so chunks of heavy soil do not fall out or tear roots, to protect the roots from dehydration and sunburn, to allow trees to be safely moved, and to reduce the chances of damage during transportation.
The crew uses the same process for lowering it into its new hole. When moving heavy trees, only hold it by the rootball and the base of the trunk – never by its branches, which could easily break.
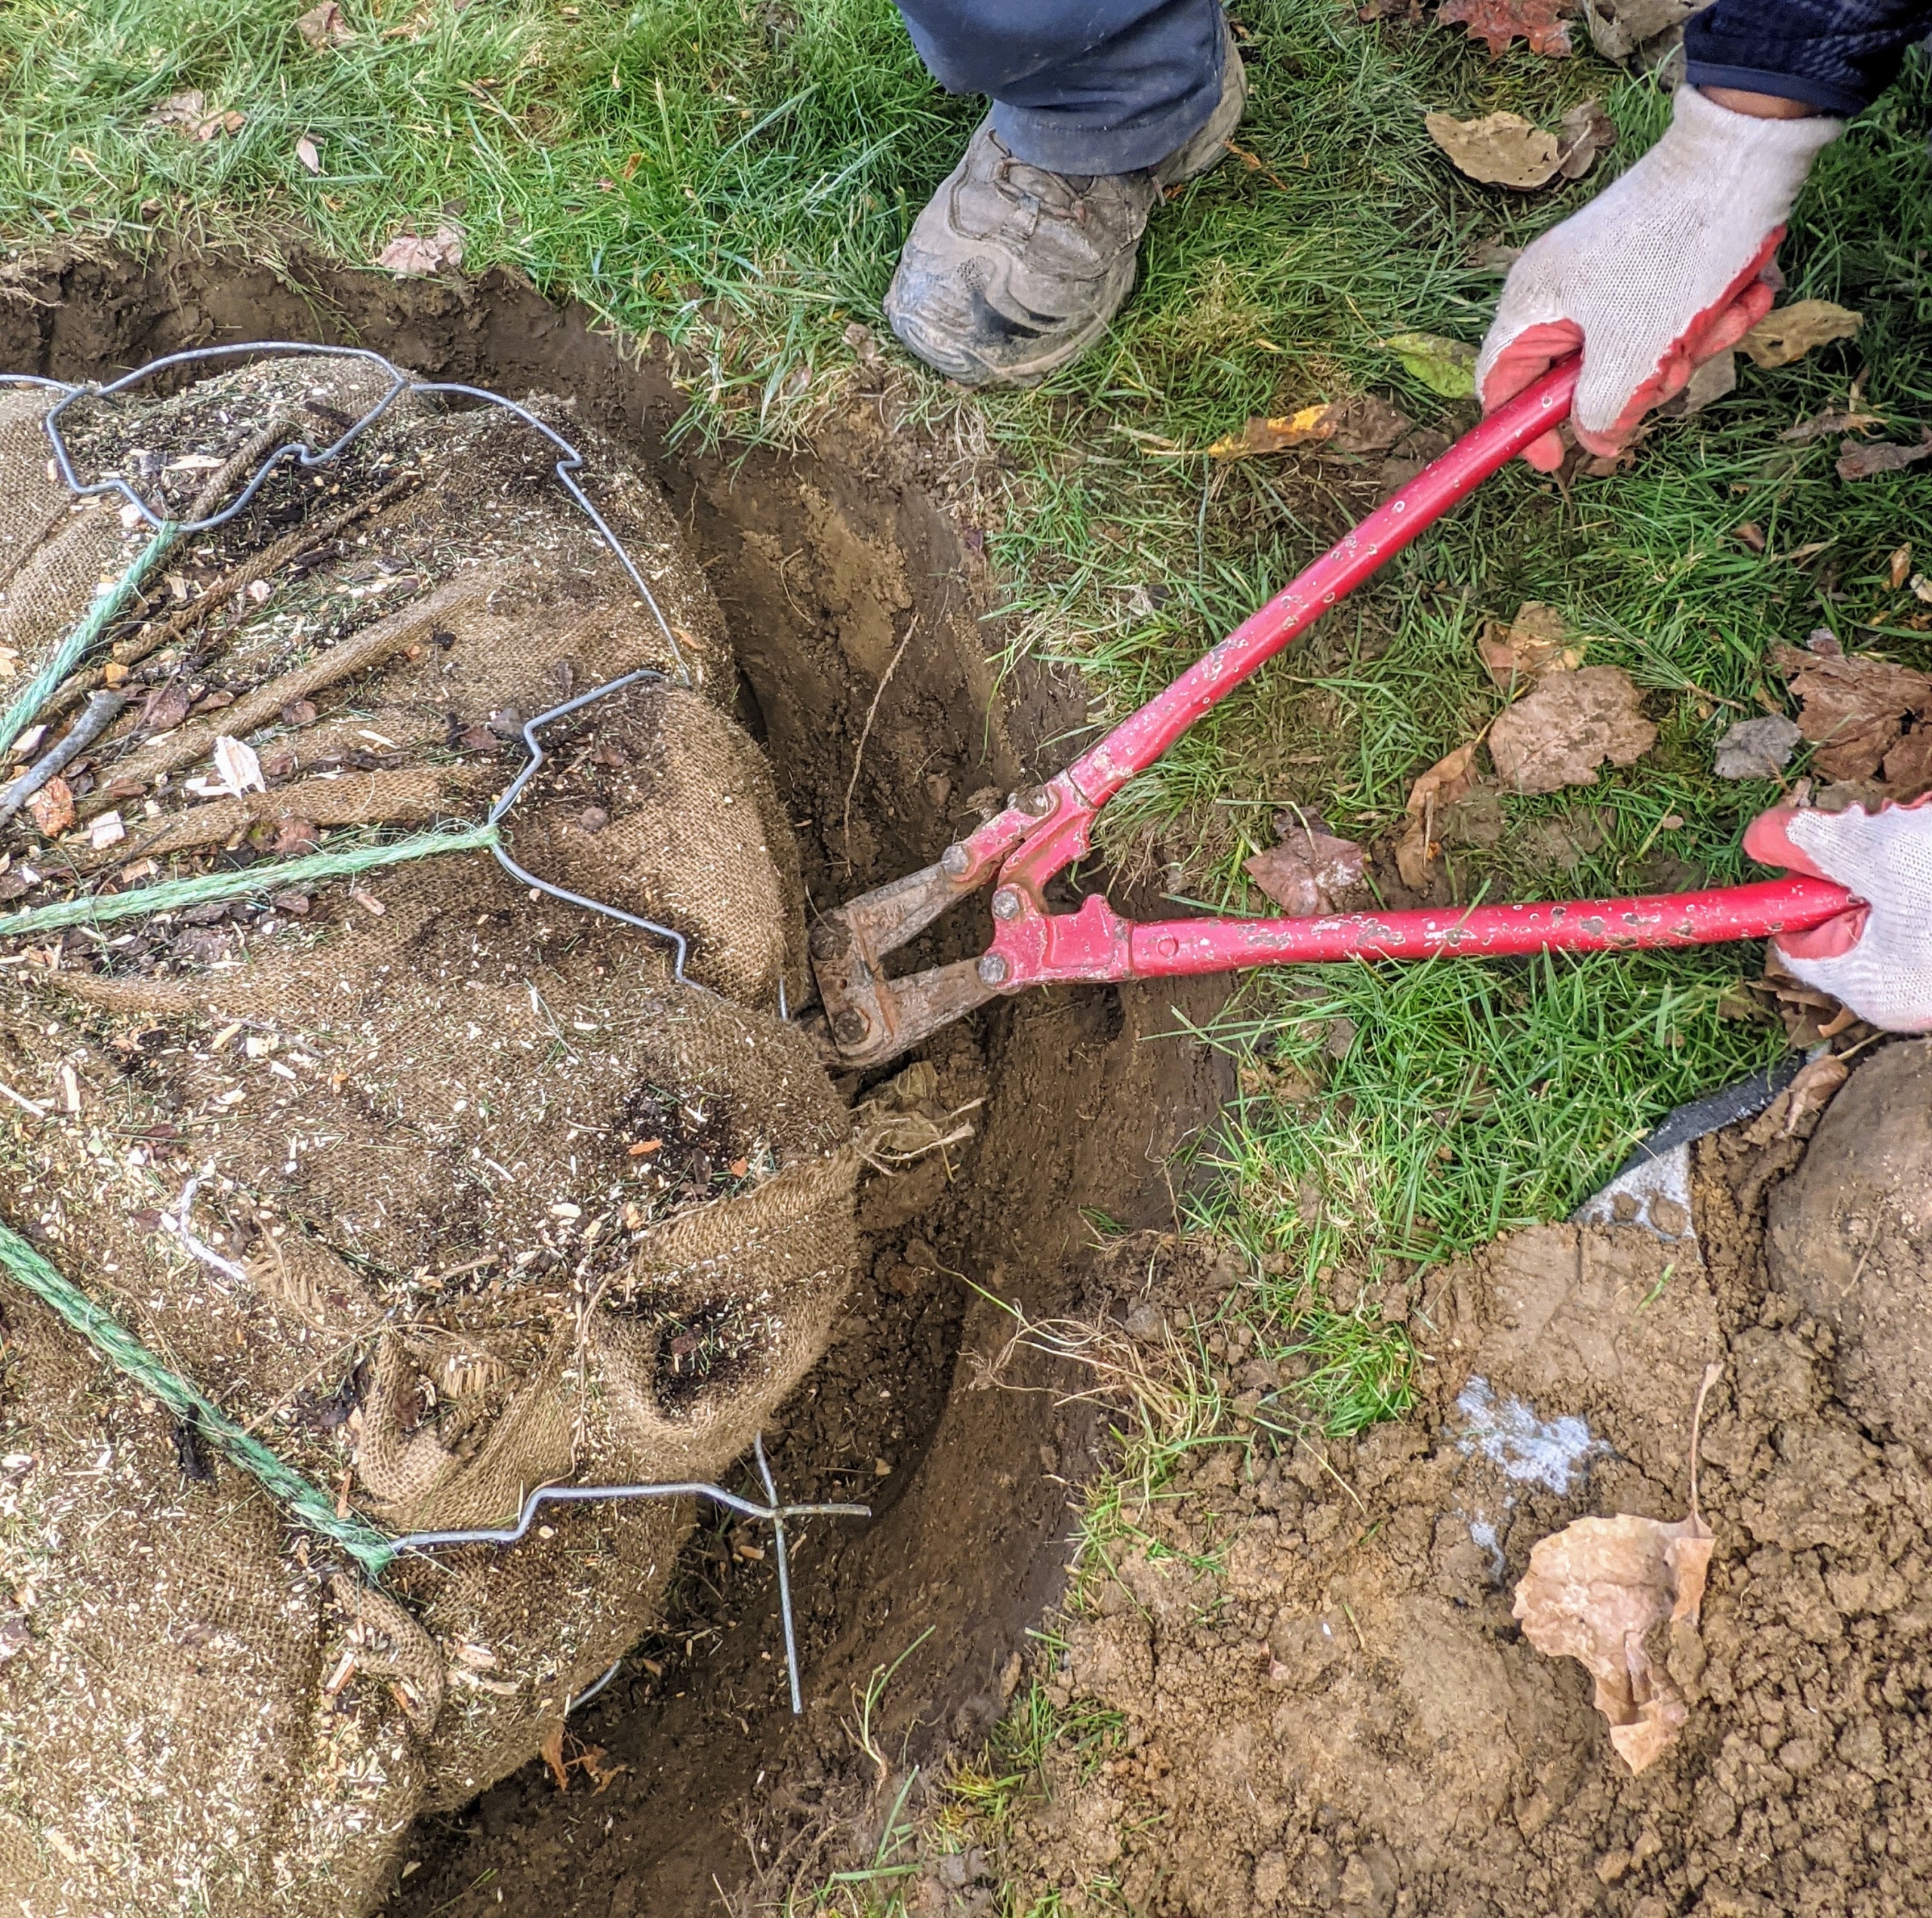
Domi cuts the wire cage. This is very important to do. Leaving it may dramatically reduce the ability of the tree’s roots to grow out into the surrounding soil. Some cut the cages and leave them in the ground, but I prefer to remove them completely, so there is nothing blocking the growing roots.
Brian cuts the protective twine holding the cage together and removes it.
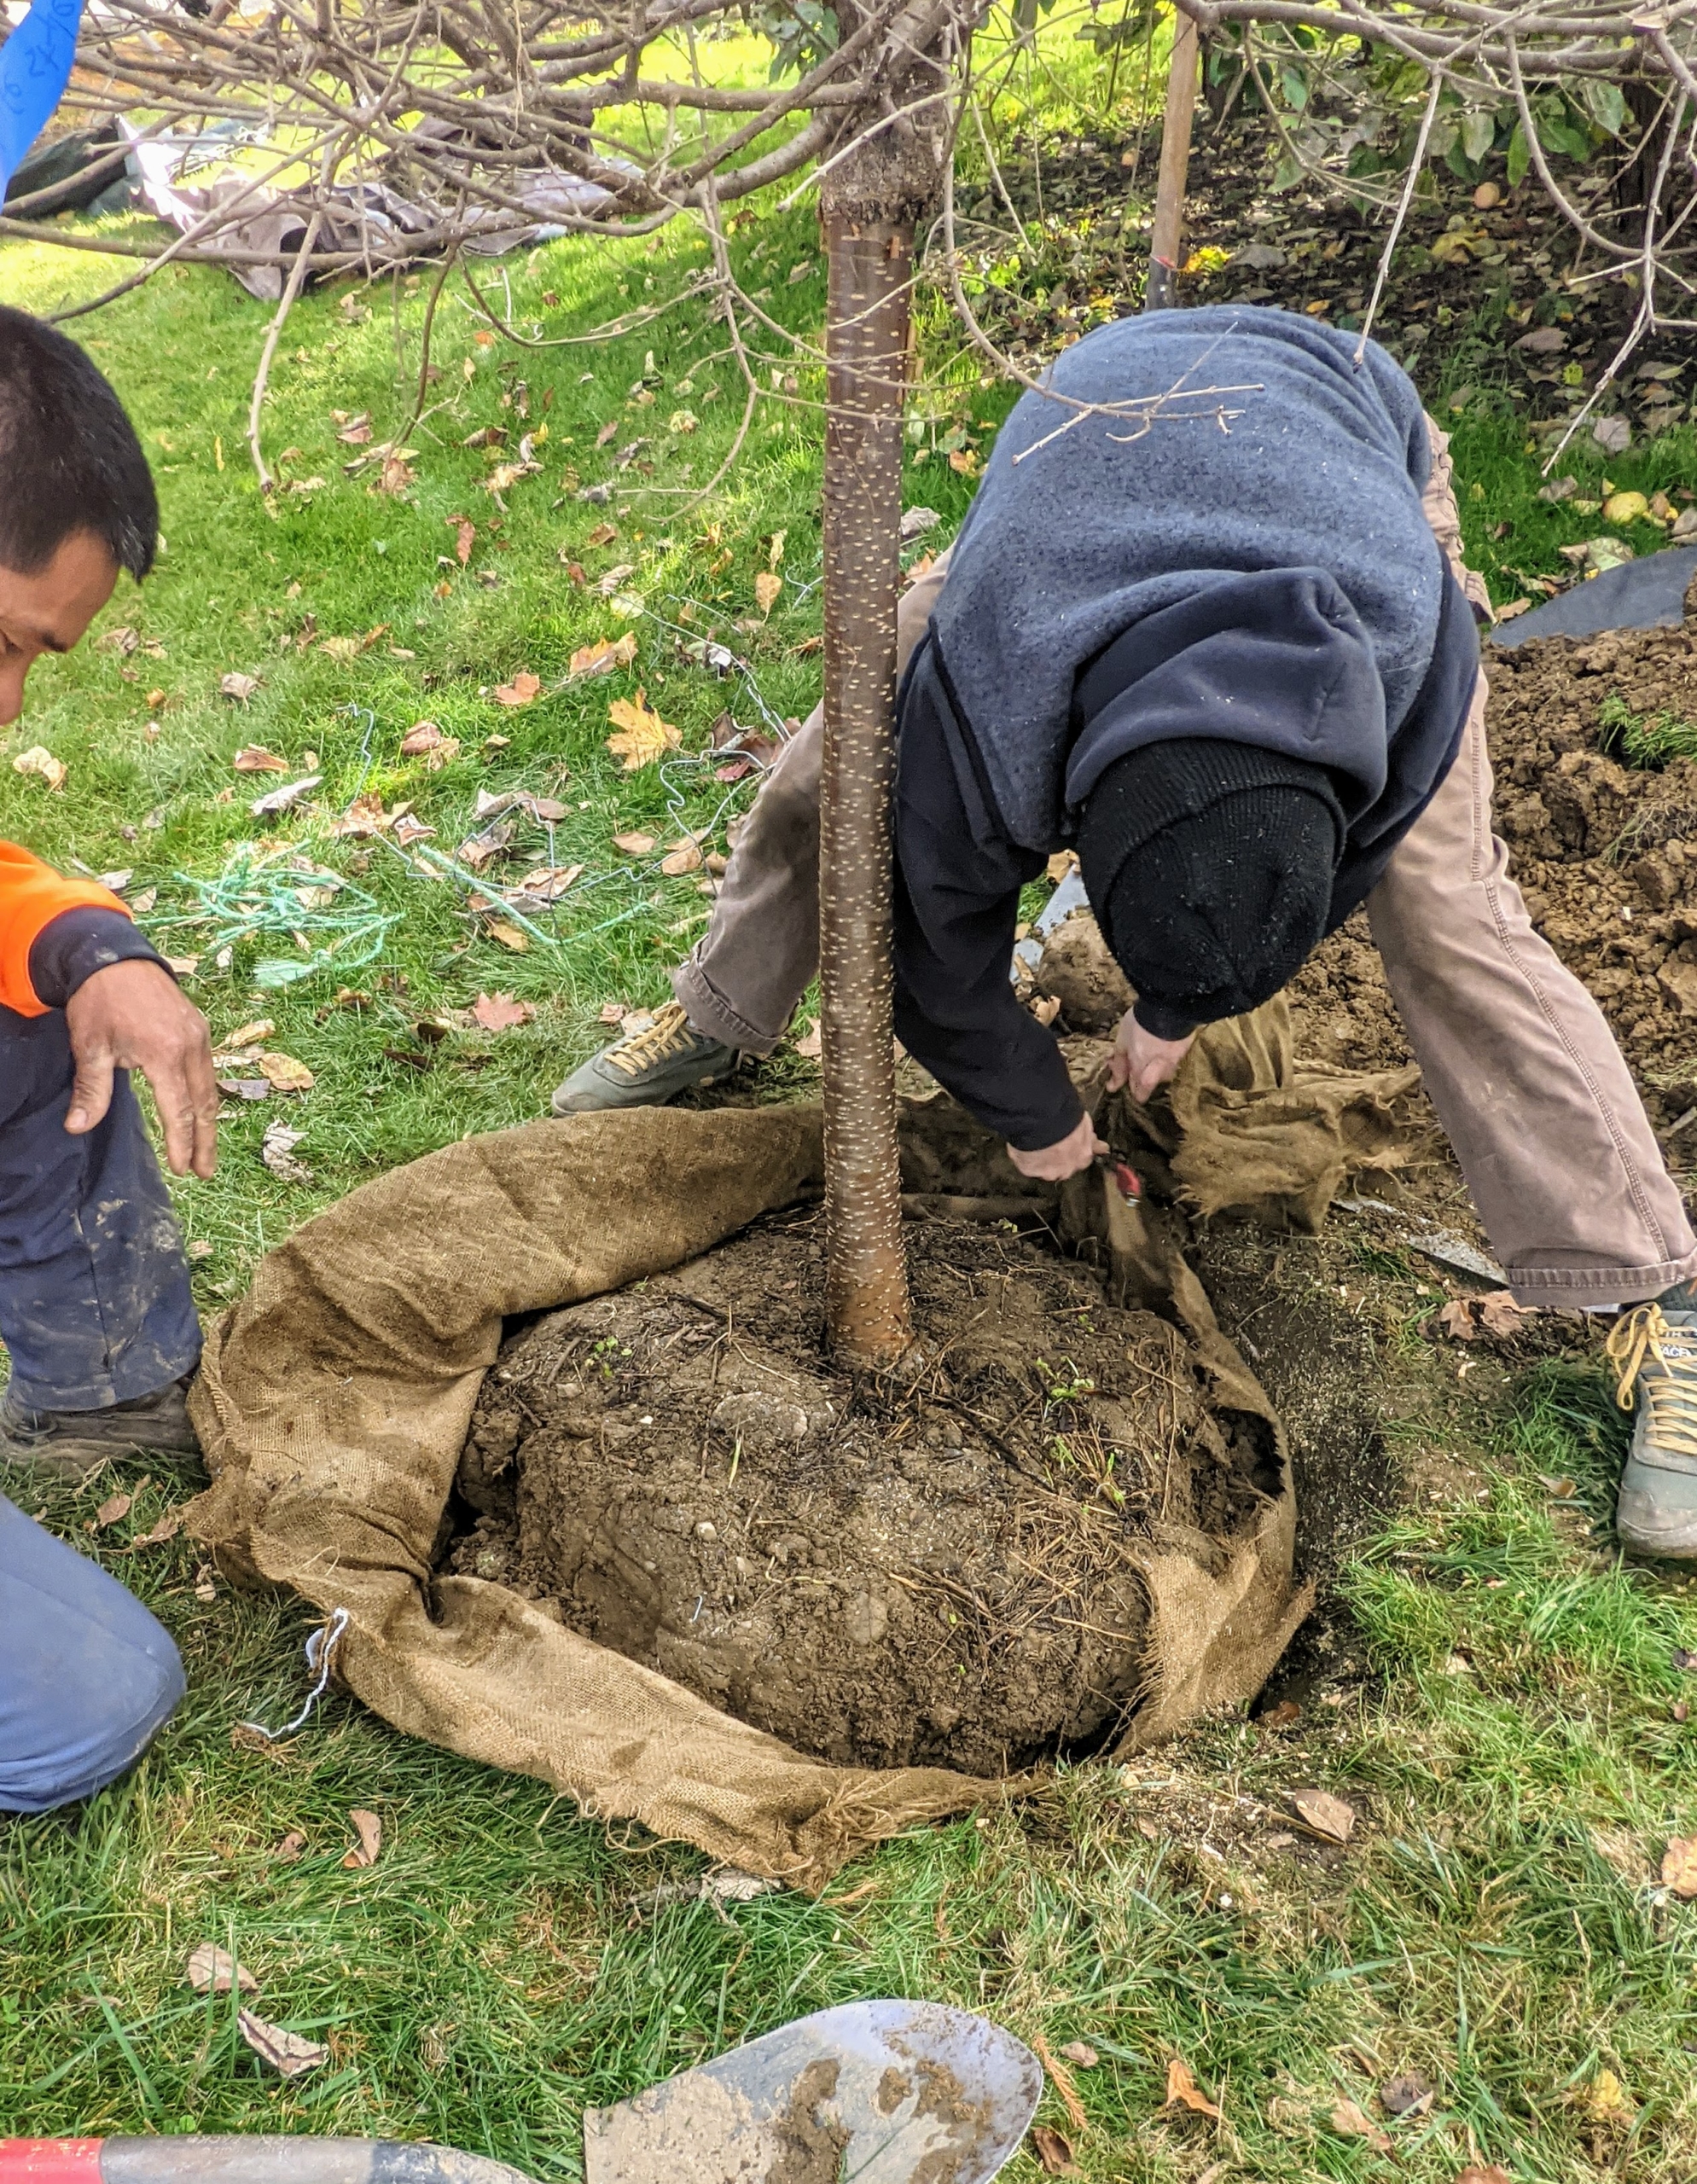
The burlap is also removed, so there is absolutely nothing constricting the tree’s growth.
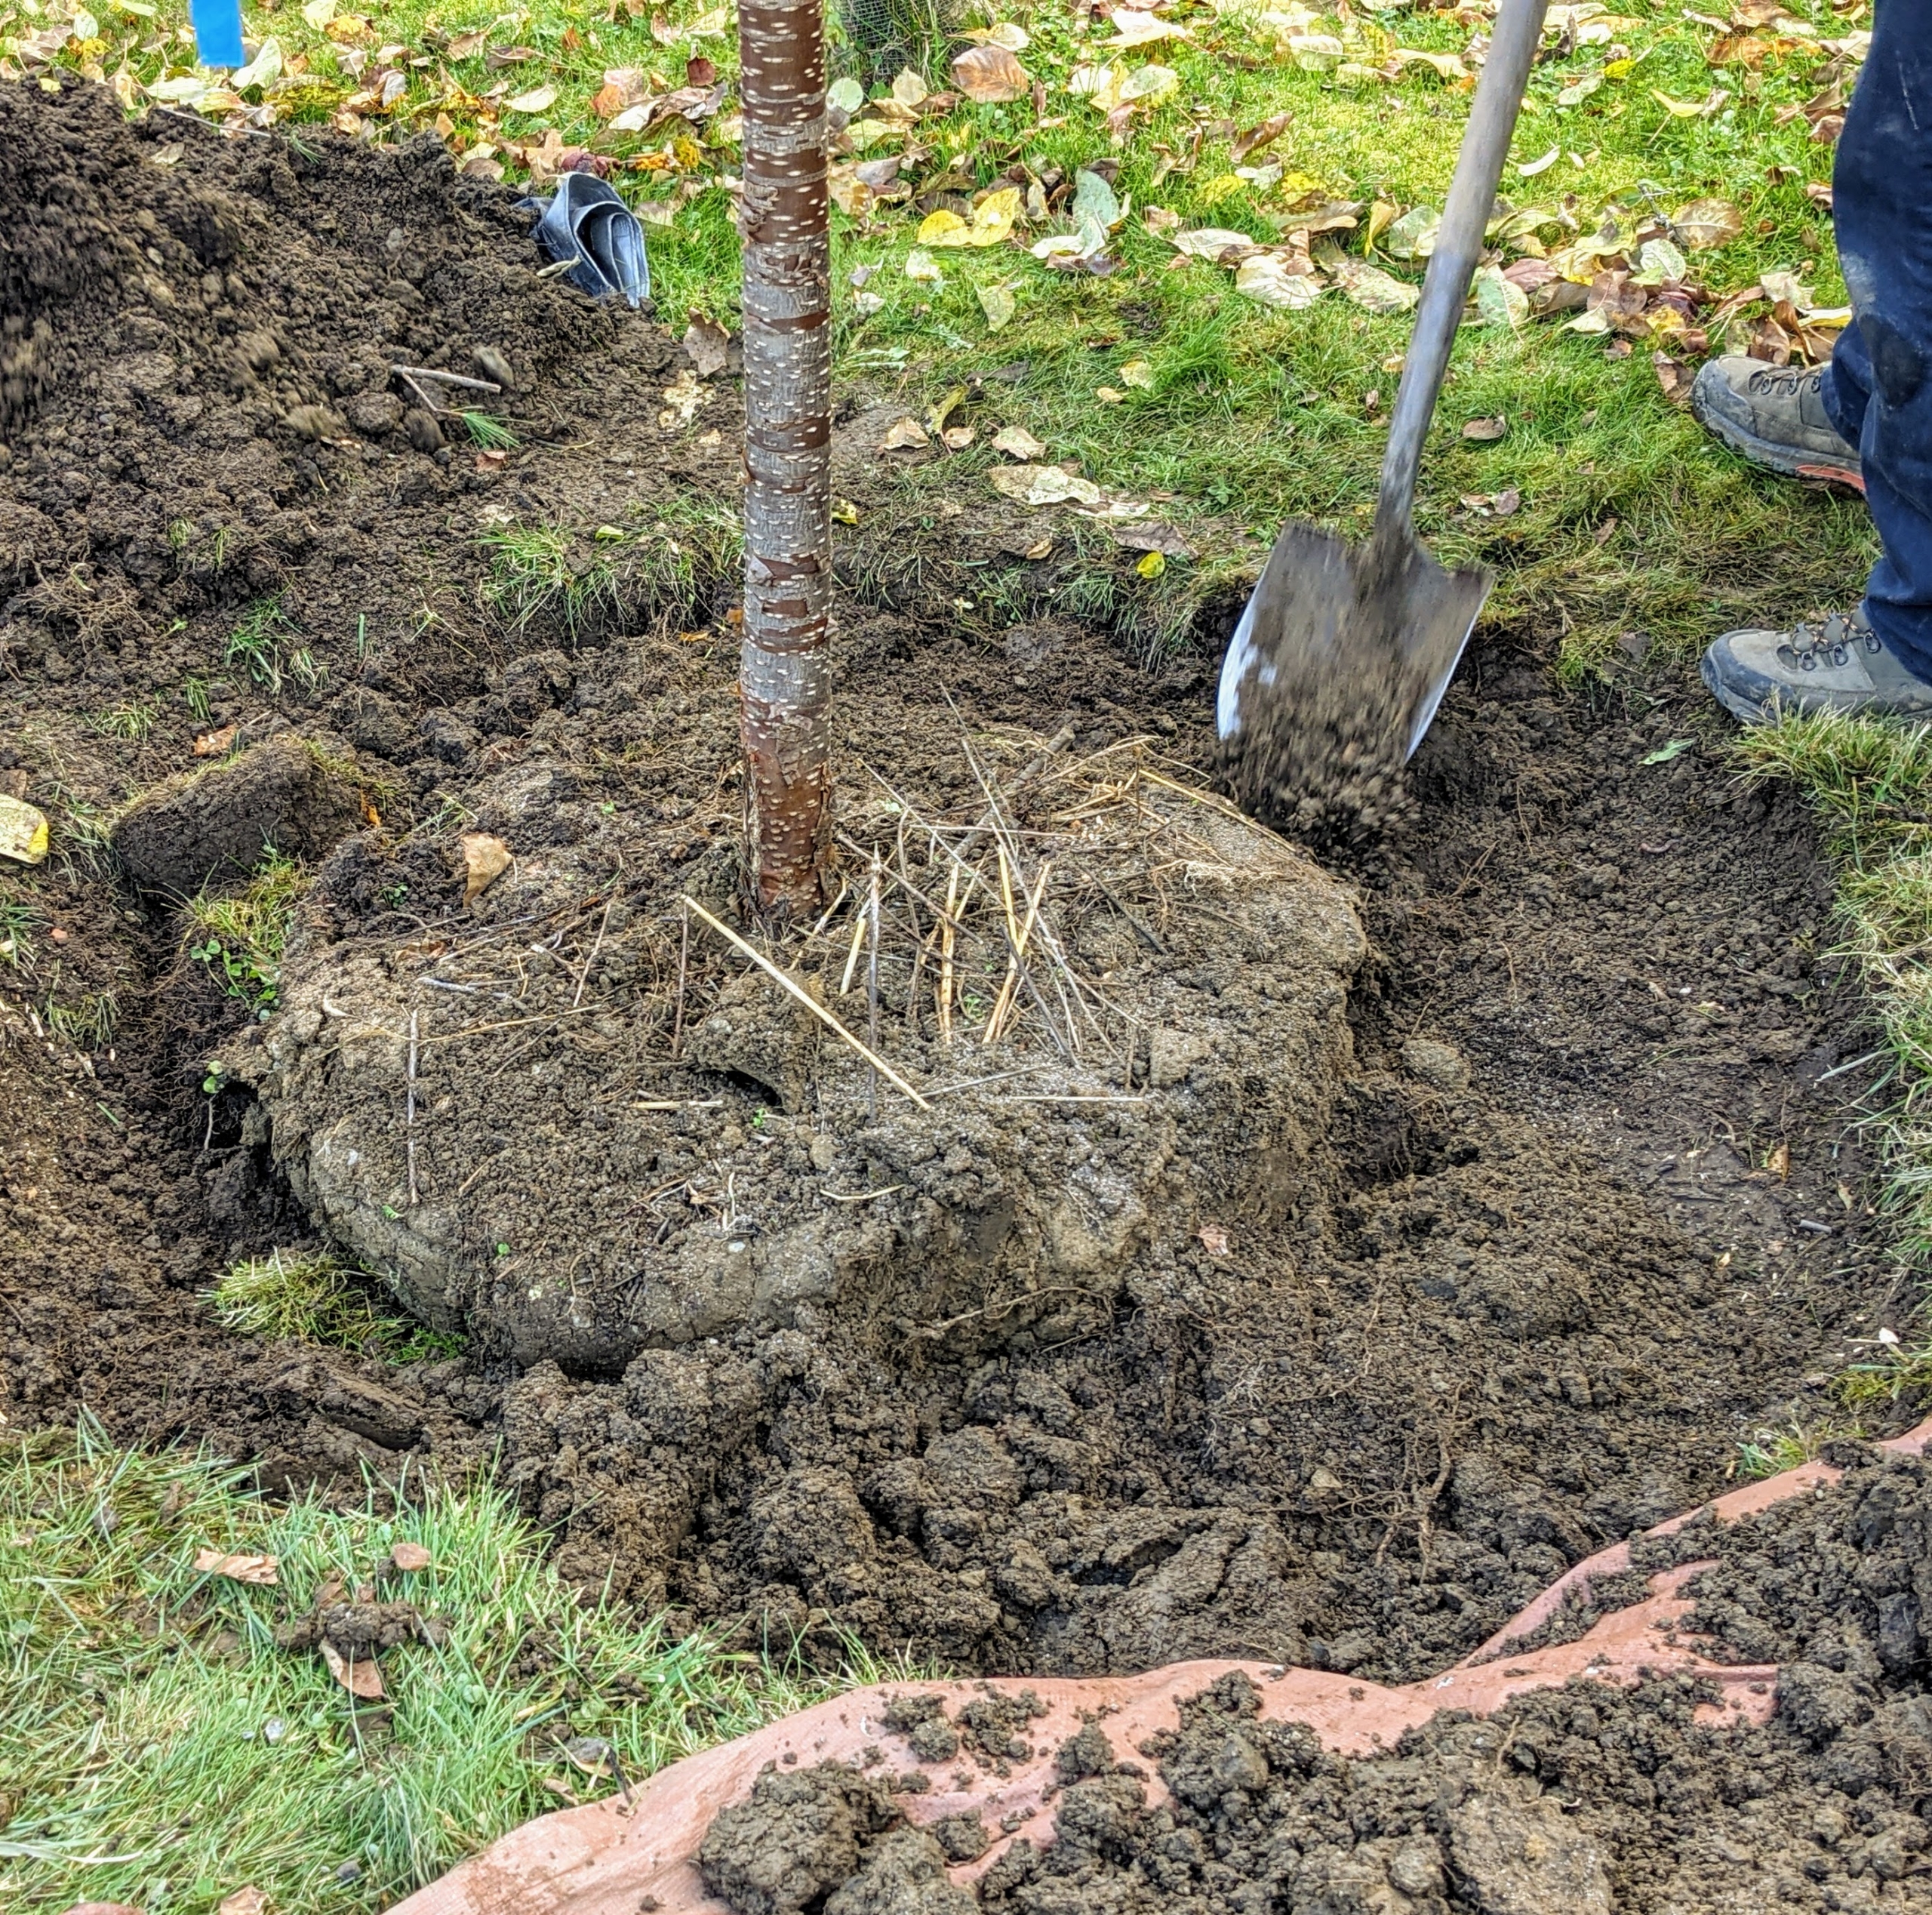
Once again, the crew turns the tree so its best side faces front and then Pasang backfills the hole. Remember the adage, “bare to the flare” – the all-important root flare of a tree is the foot or anchor of the tree. It should be exposed so that the tapered part of the trunk that meets the ground is visible and exposed to the air.
Brian also creates a bowl at the base of the tree pit, for added direction when watered.
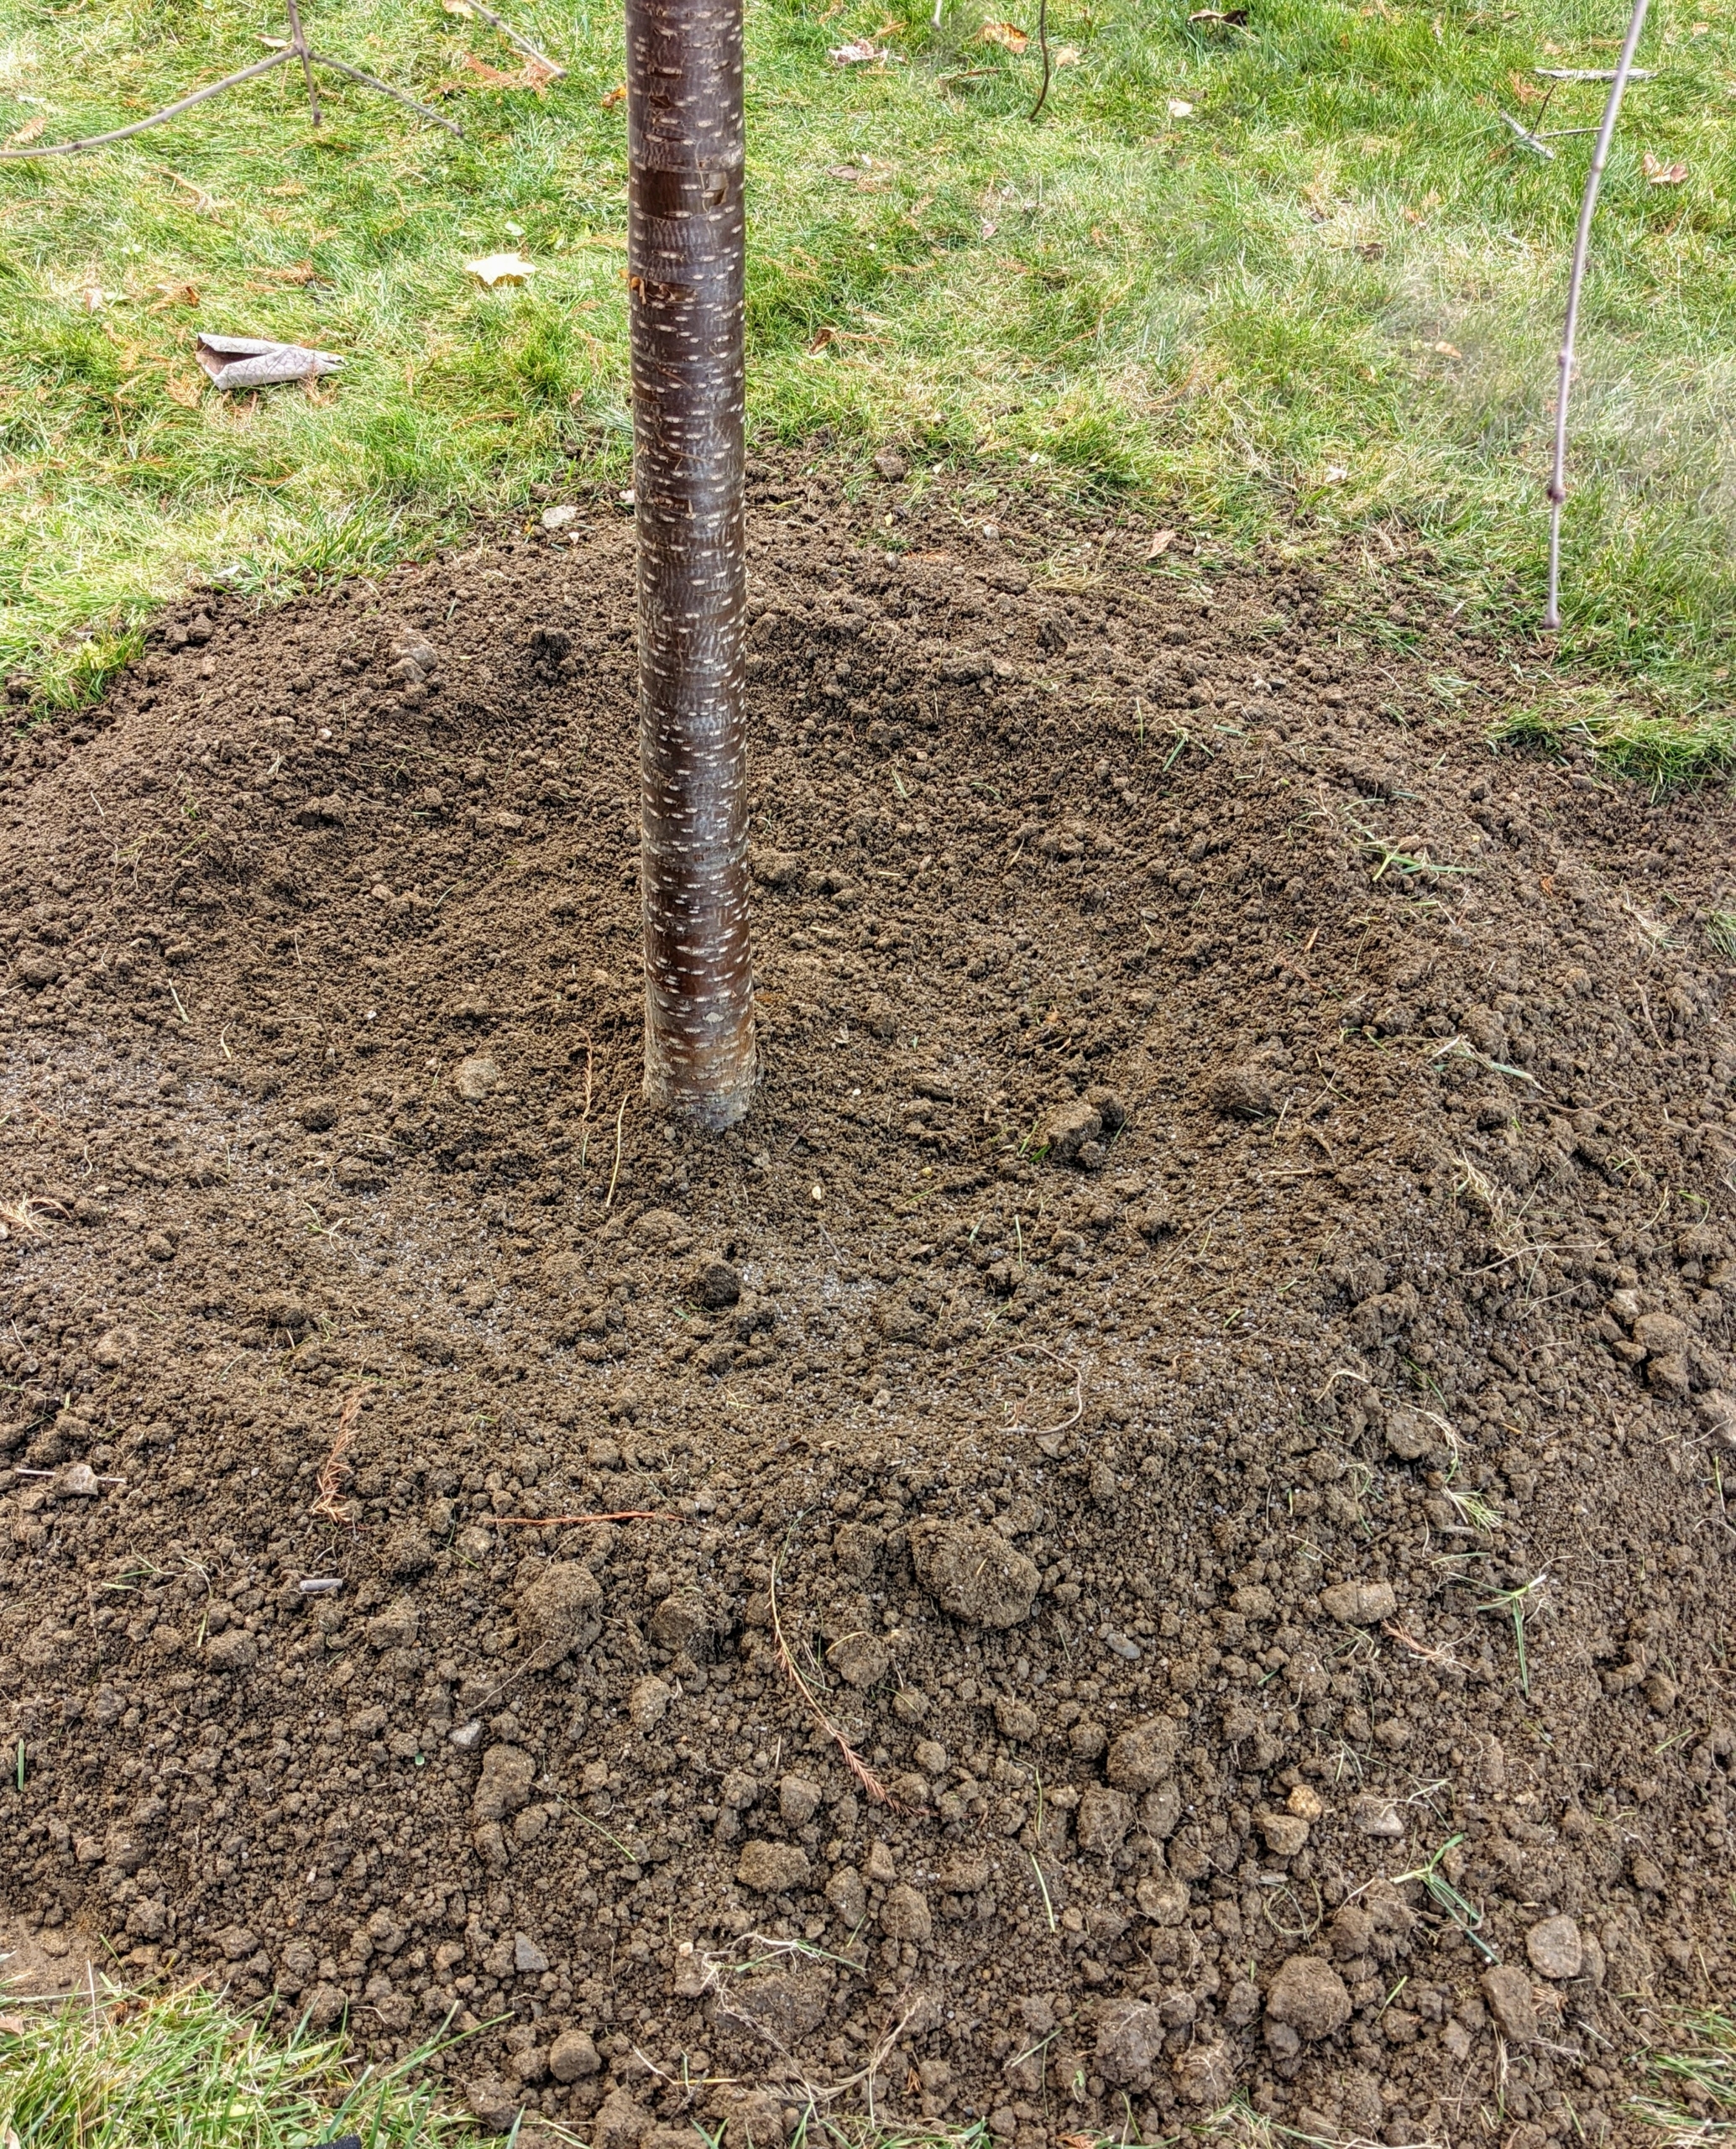
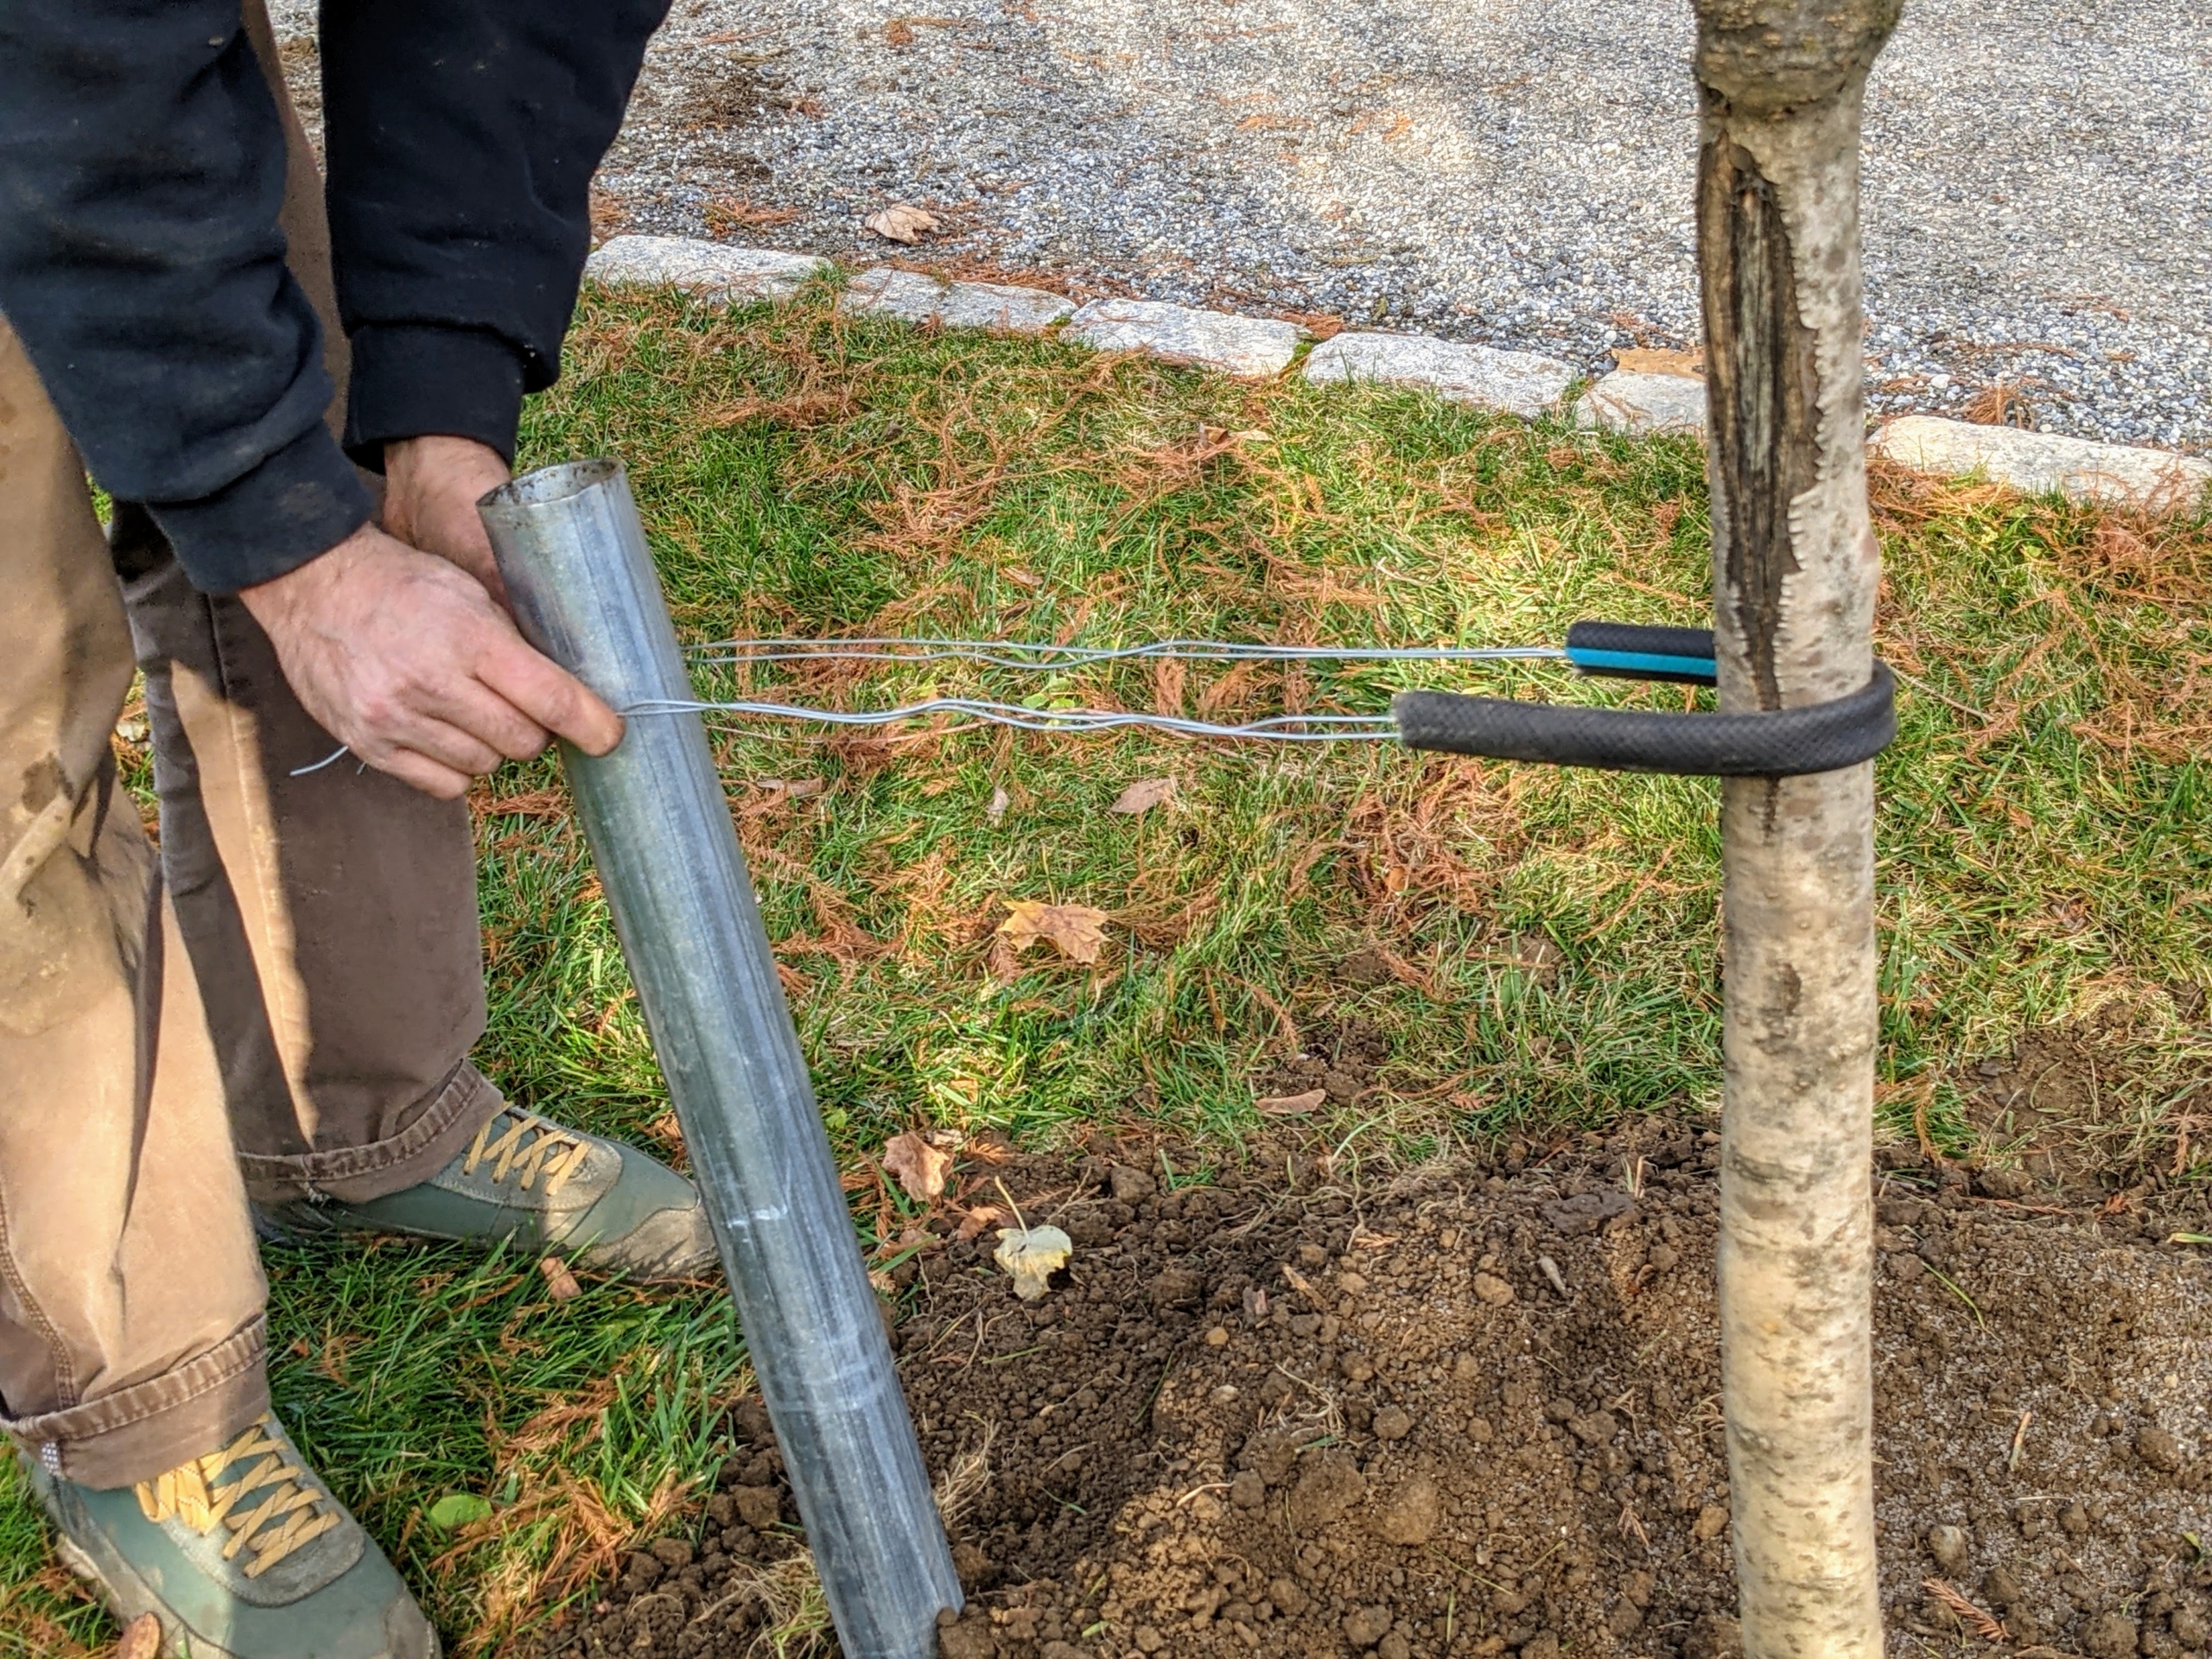
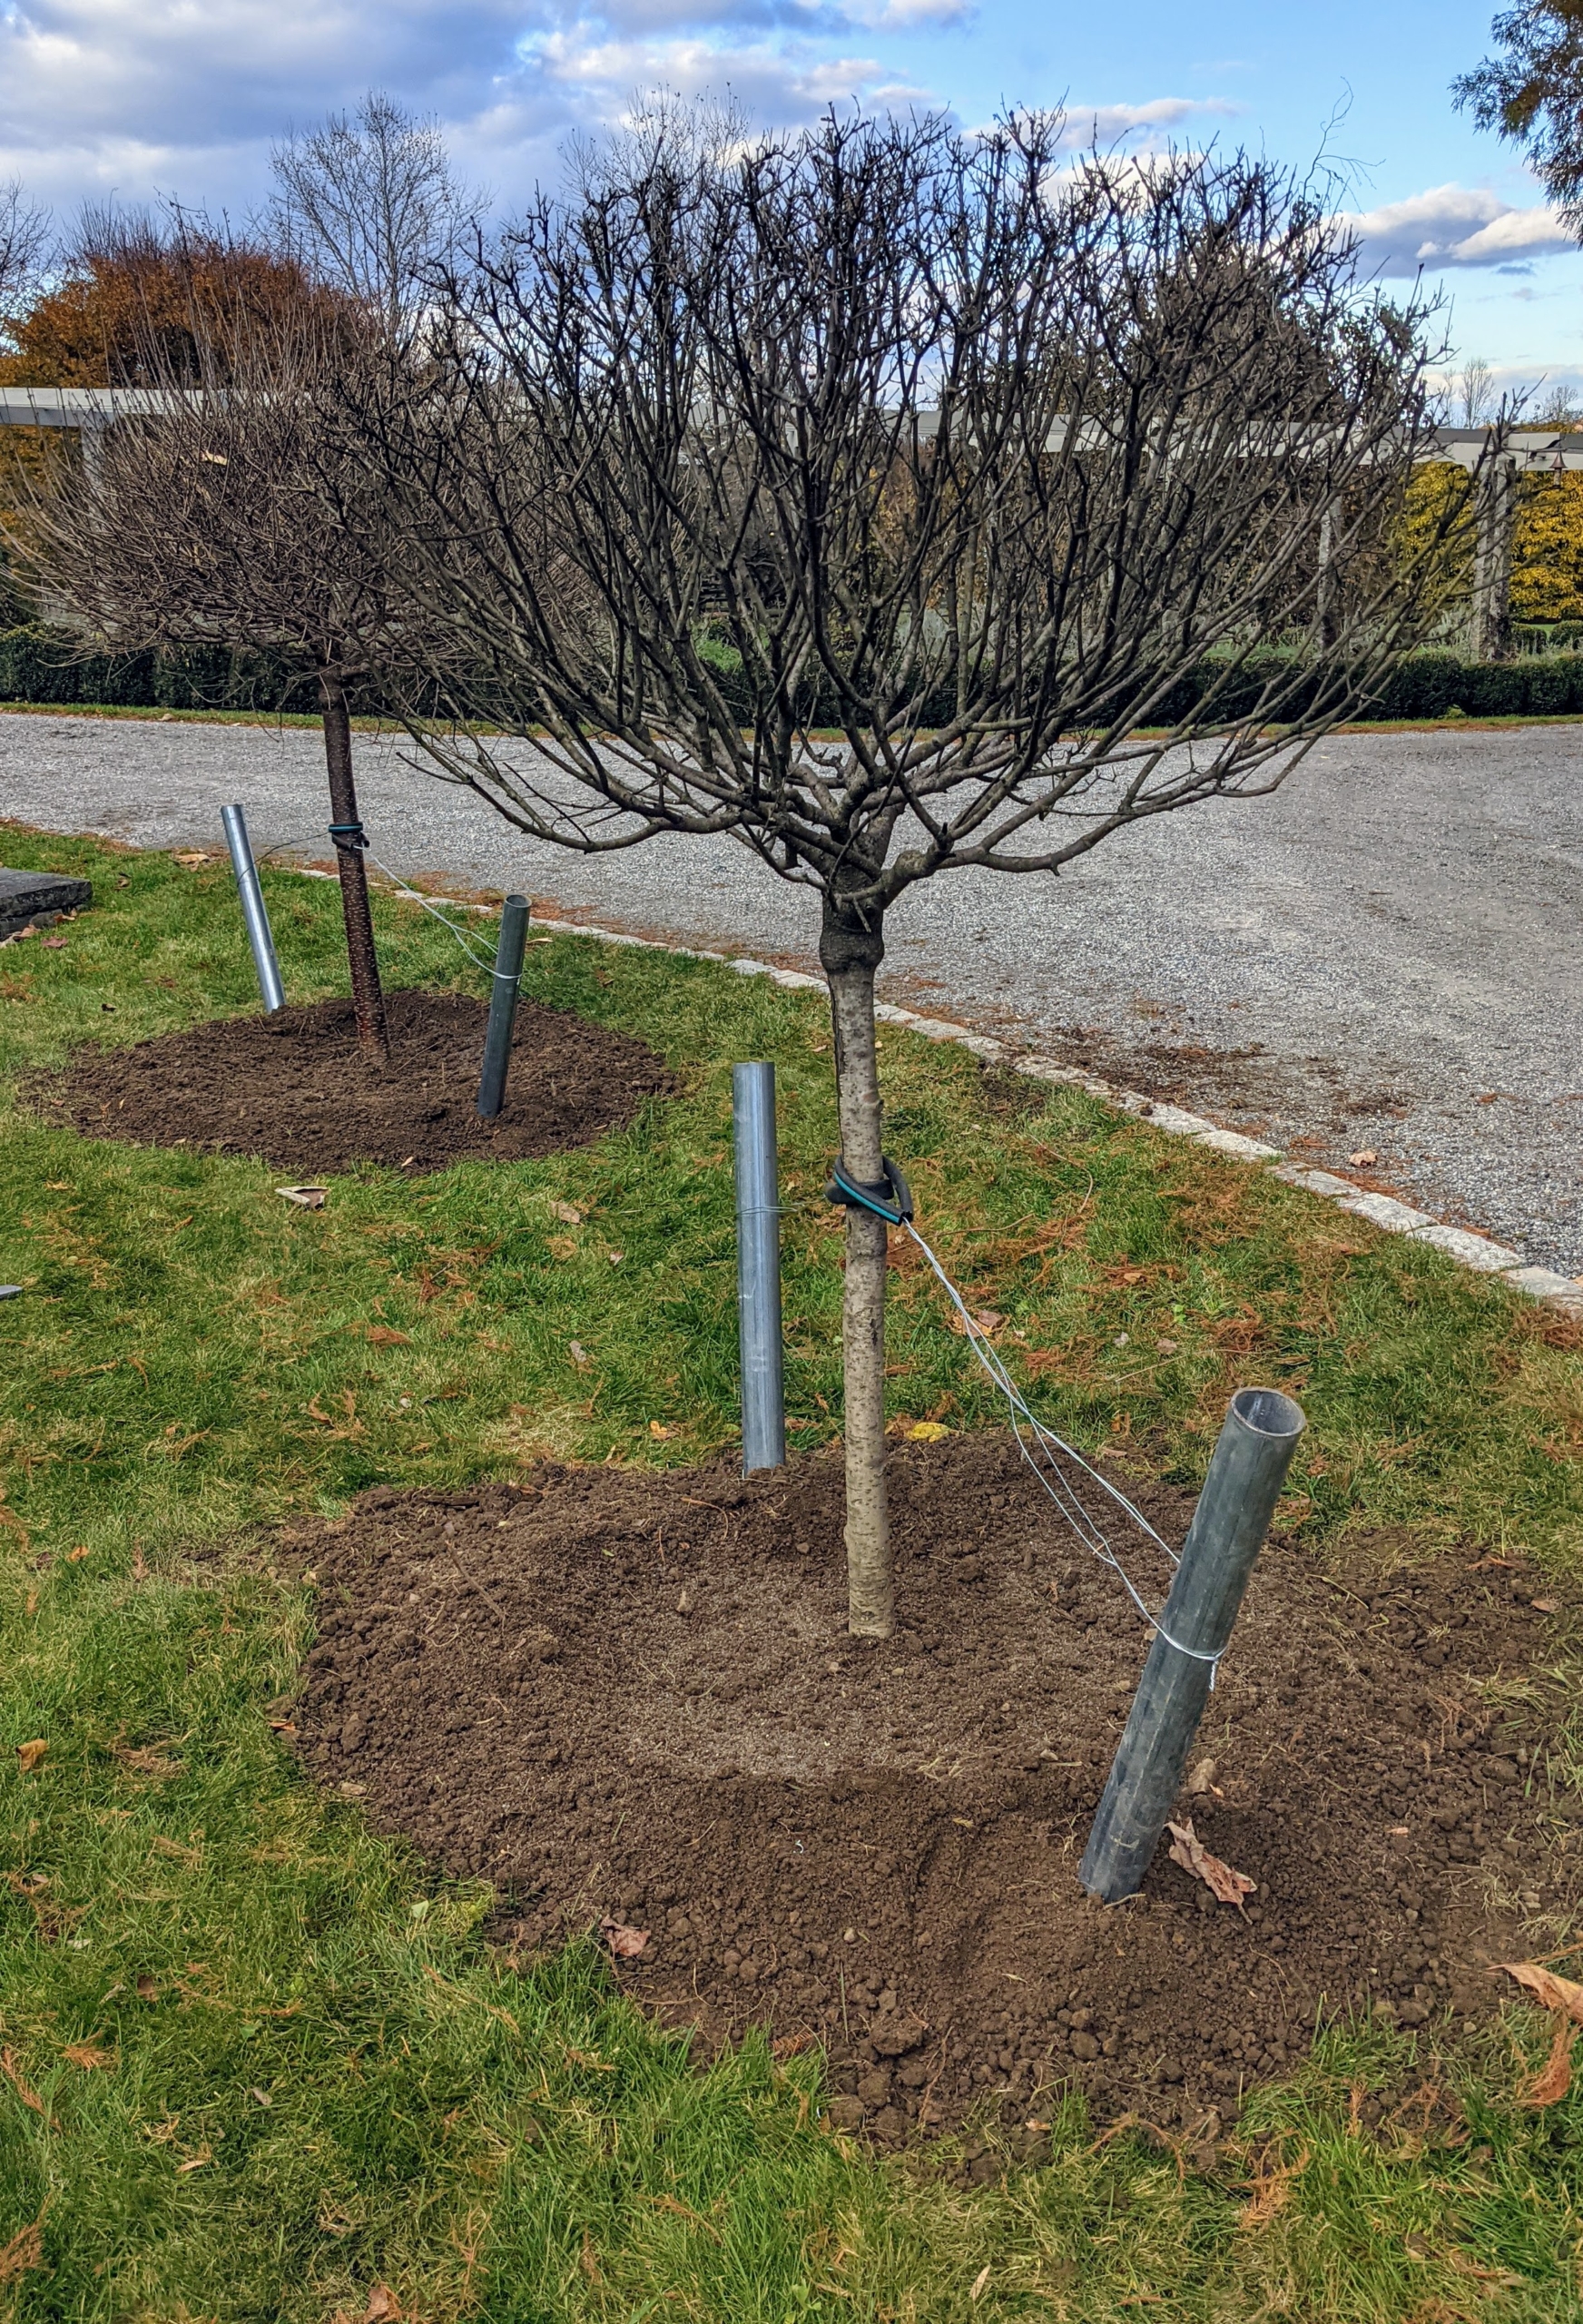
Next, Brian secures the tree to stakes. Here, we are using strong metal piping, wire, and tubing to support the tree for the first year. The tree should still be able to move slightly; too much movement will rub the bark away, too little will slow tree growth and development. The slight movement will help to generate stronger roots and, in the case of high winds, the tree is less likely to snap off.
These five to six foot trees will be very happy here. I am looking forward to seeing them all bloom come May. I’ll be sure to share the photos in spring.
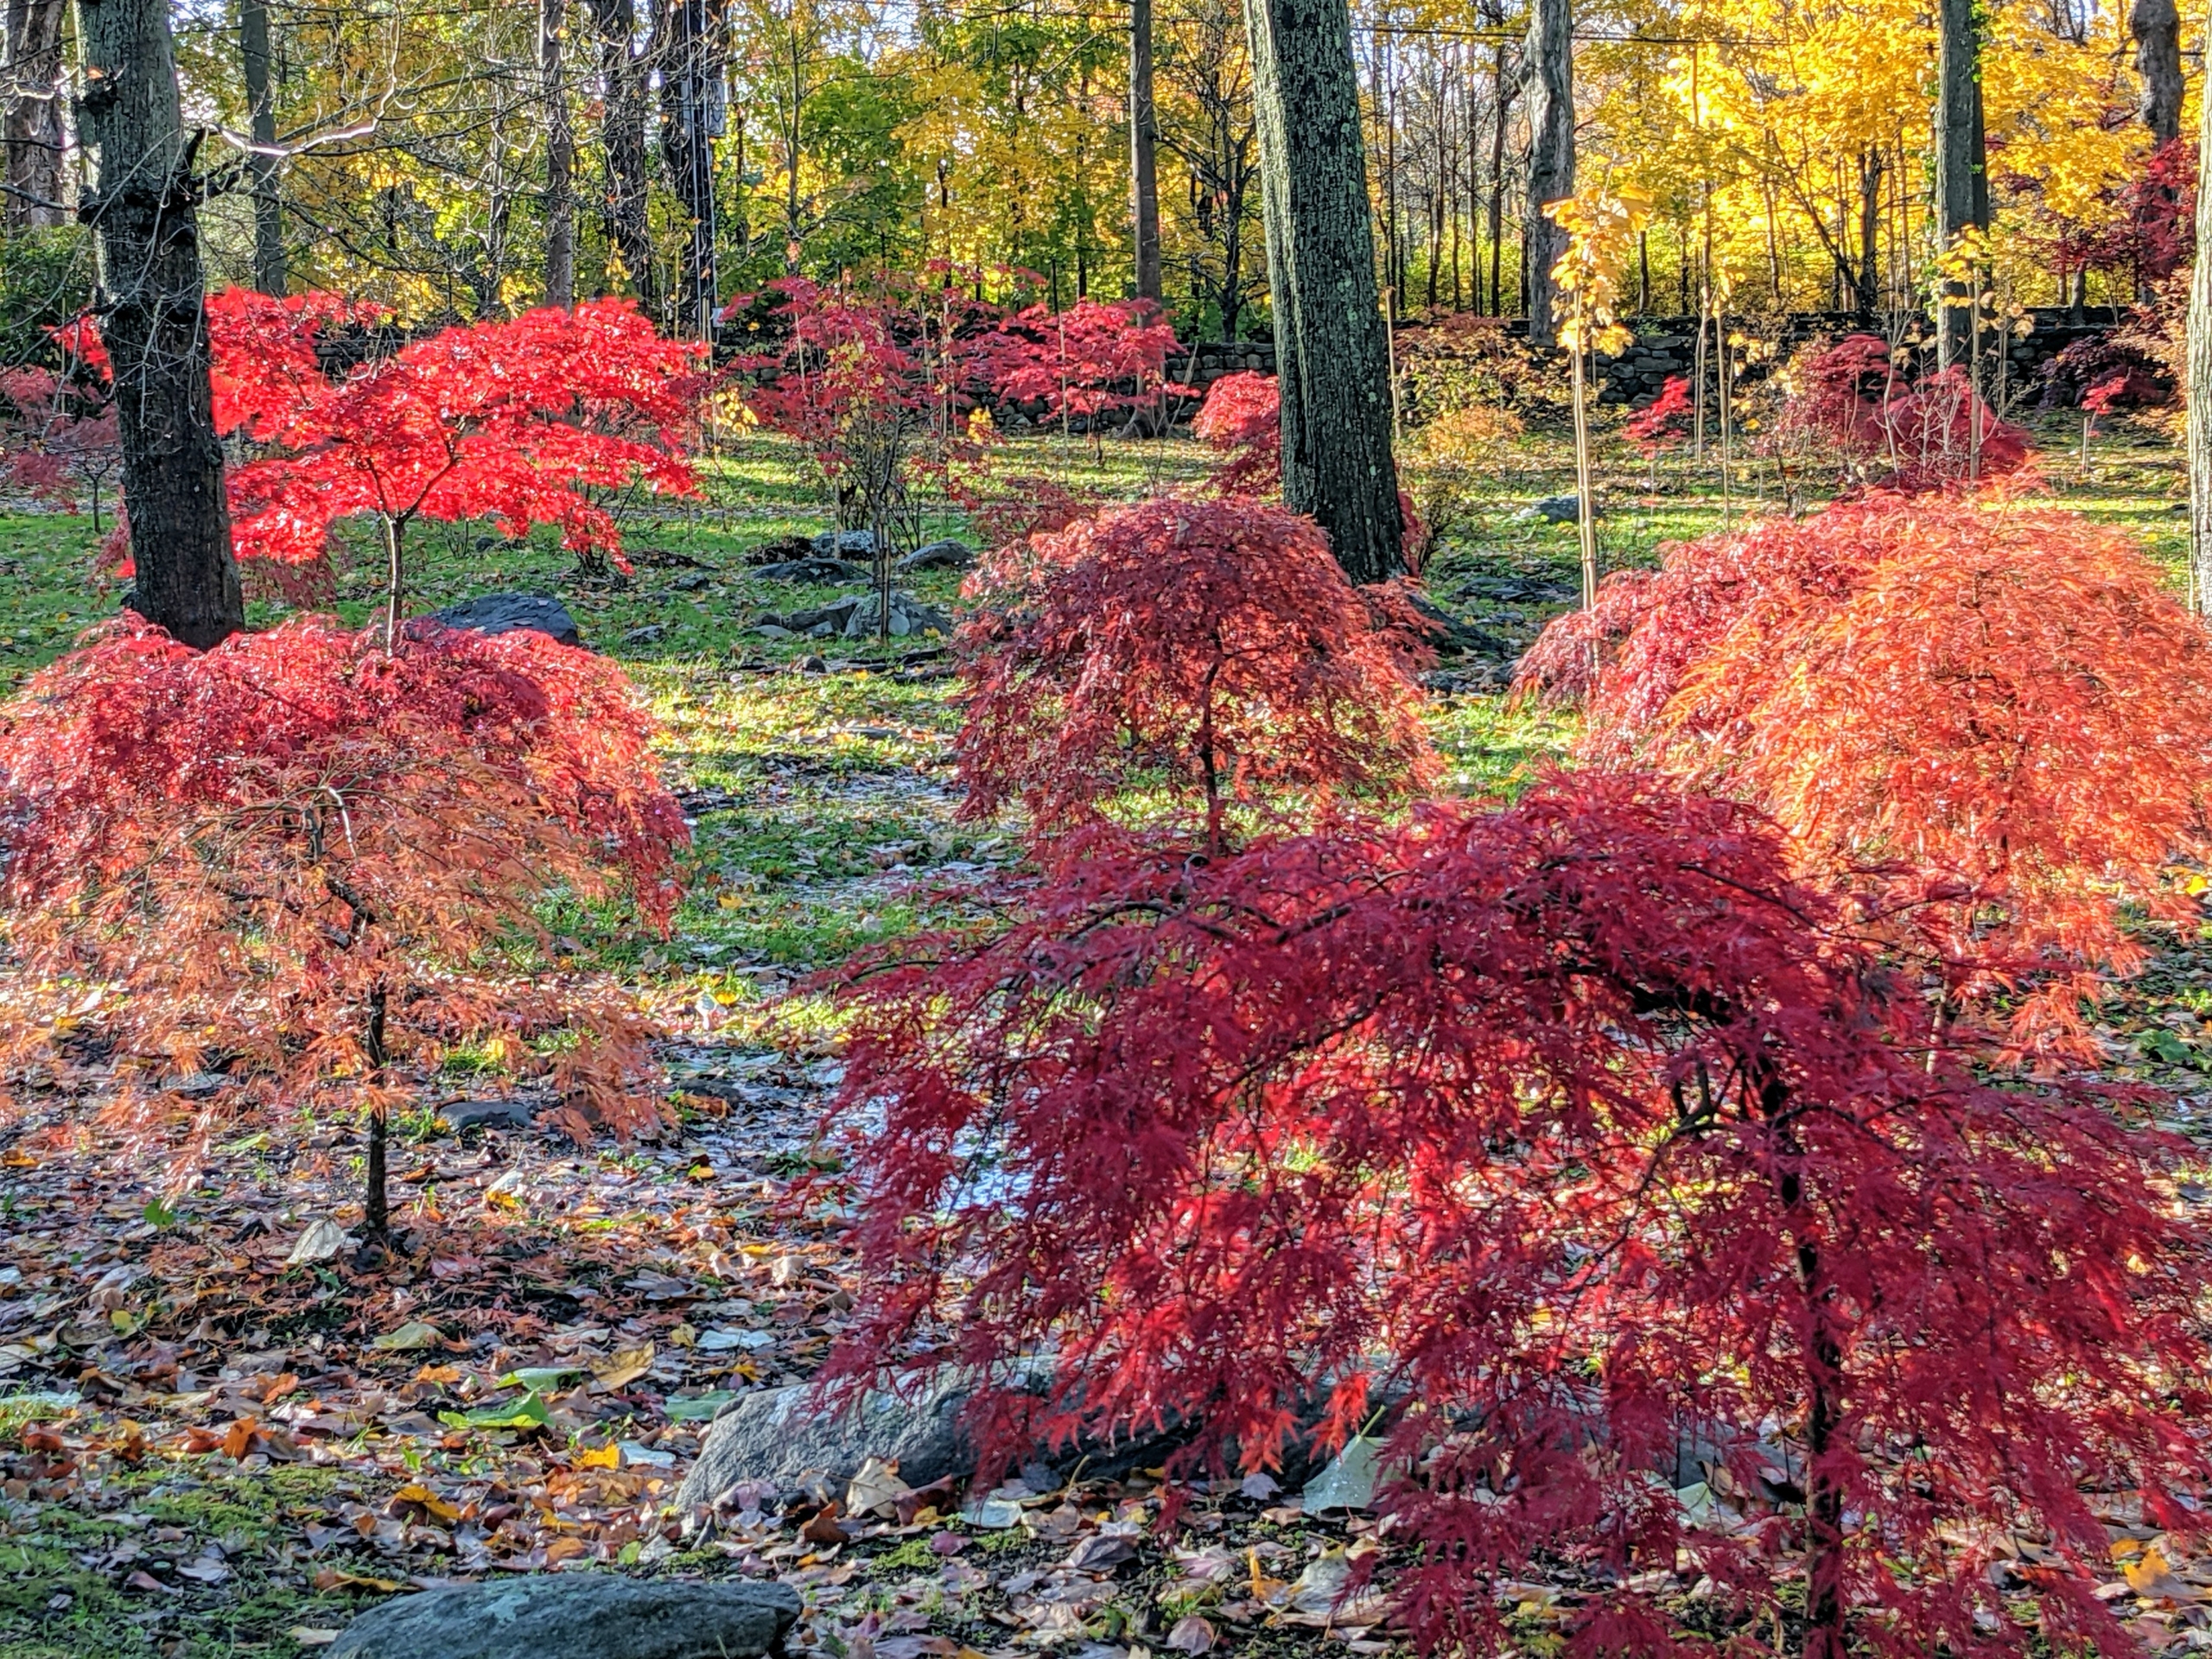
This time of year, my grove of Japanese maple trees is aglow with autumn color - I hope you saw the video on my Instagram page @MarthaStewart48.
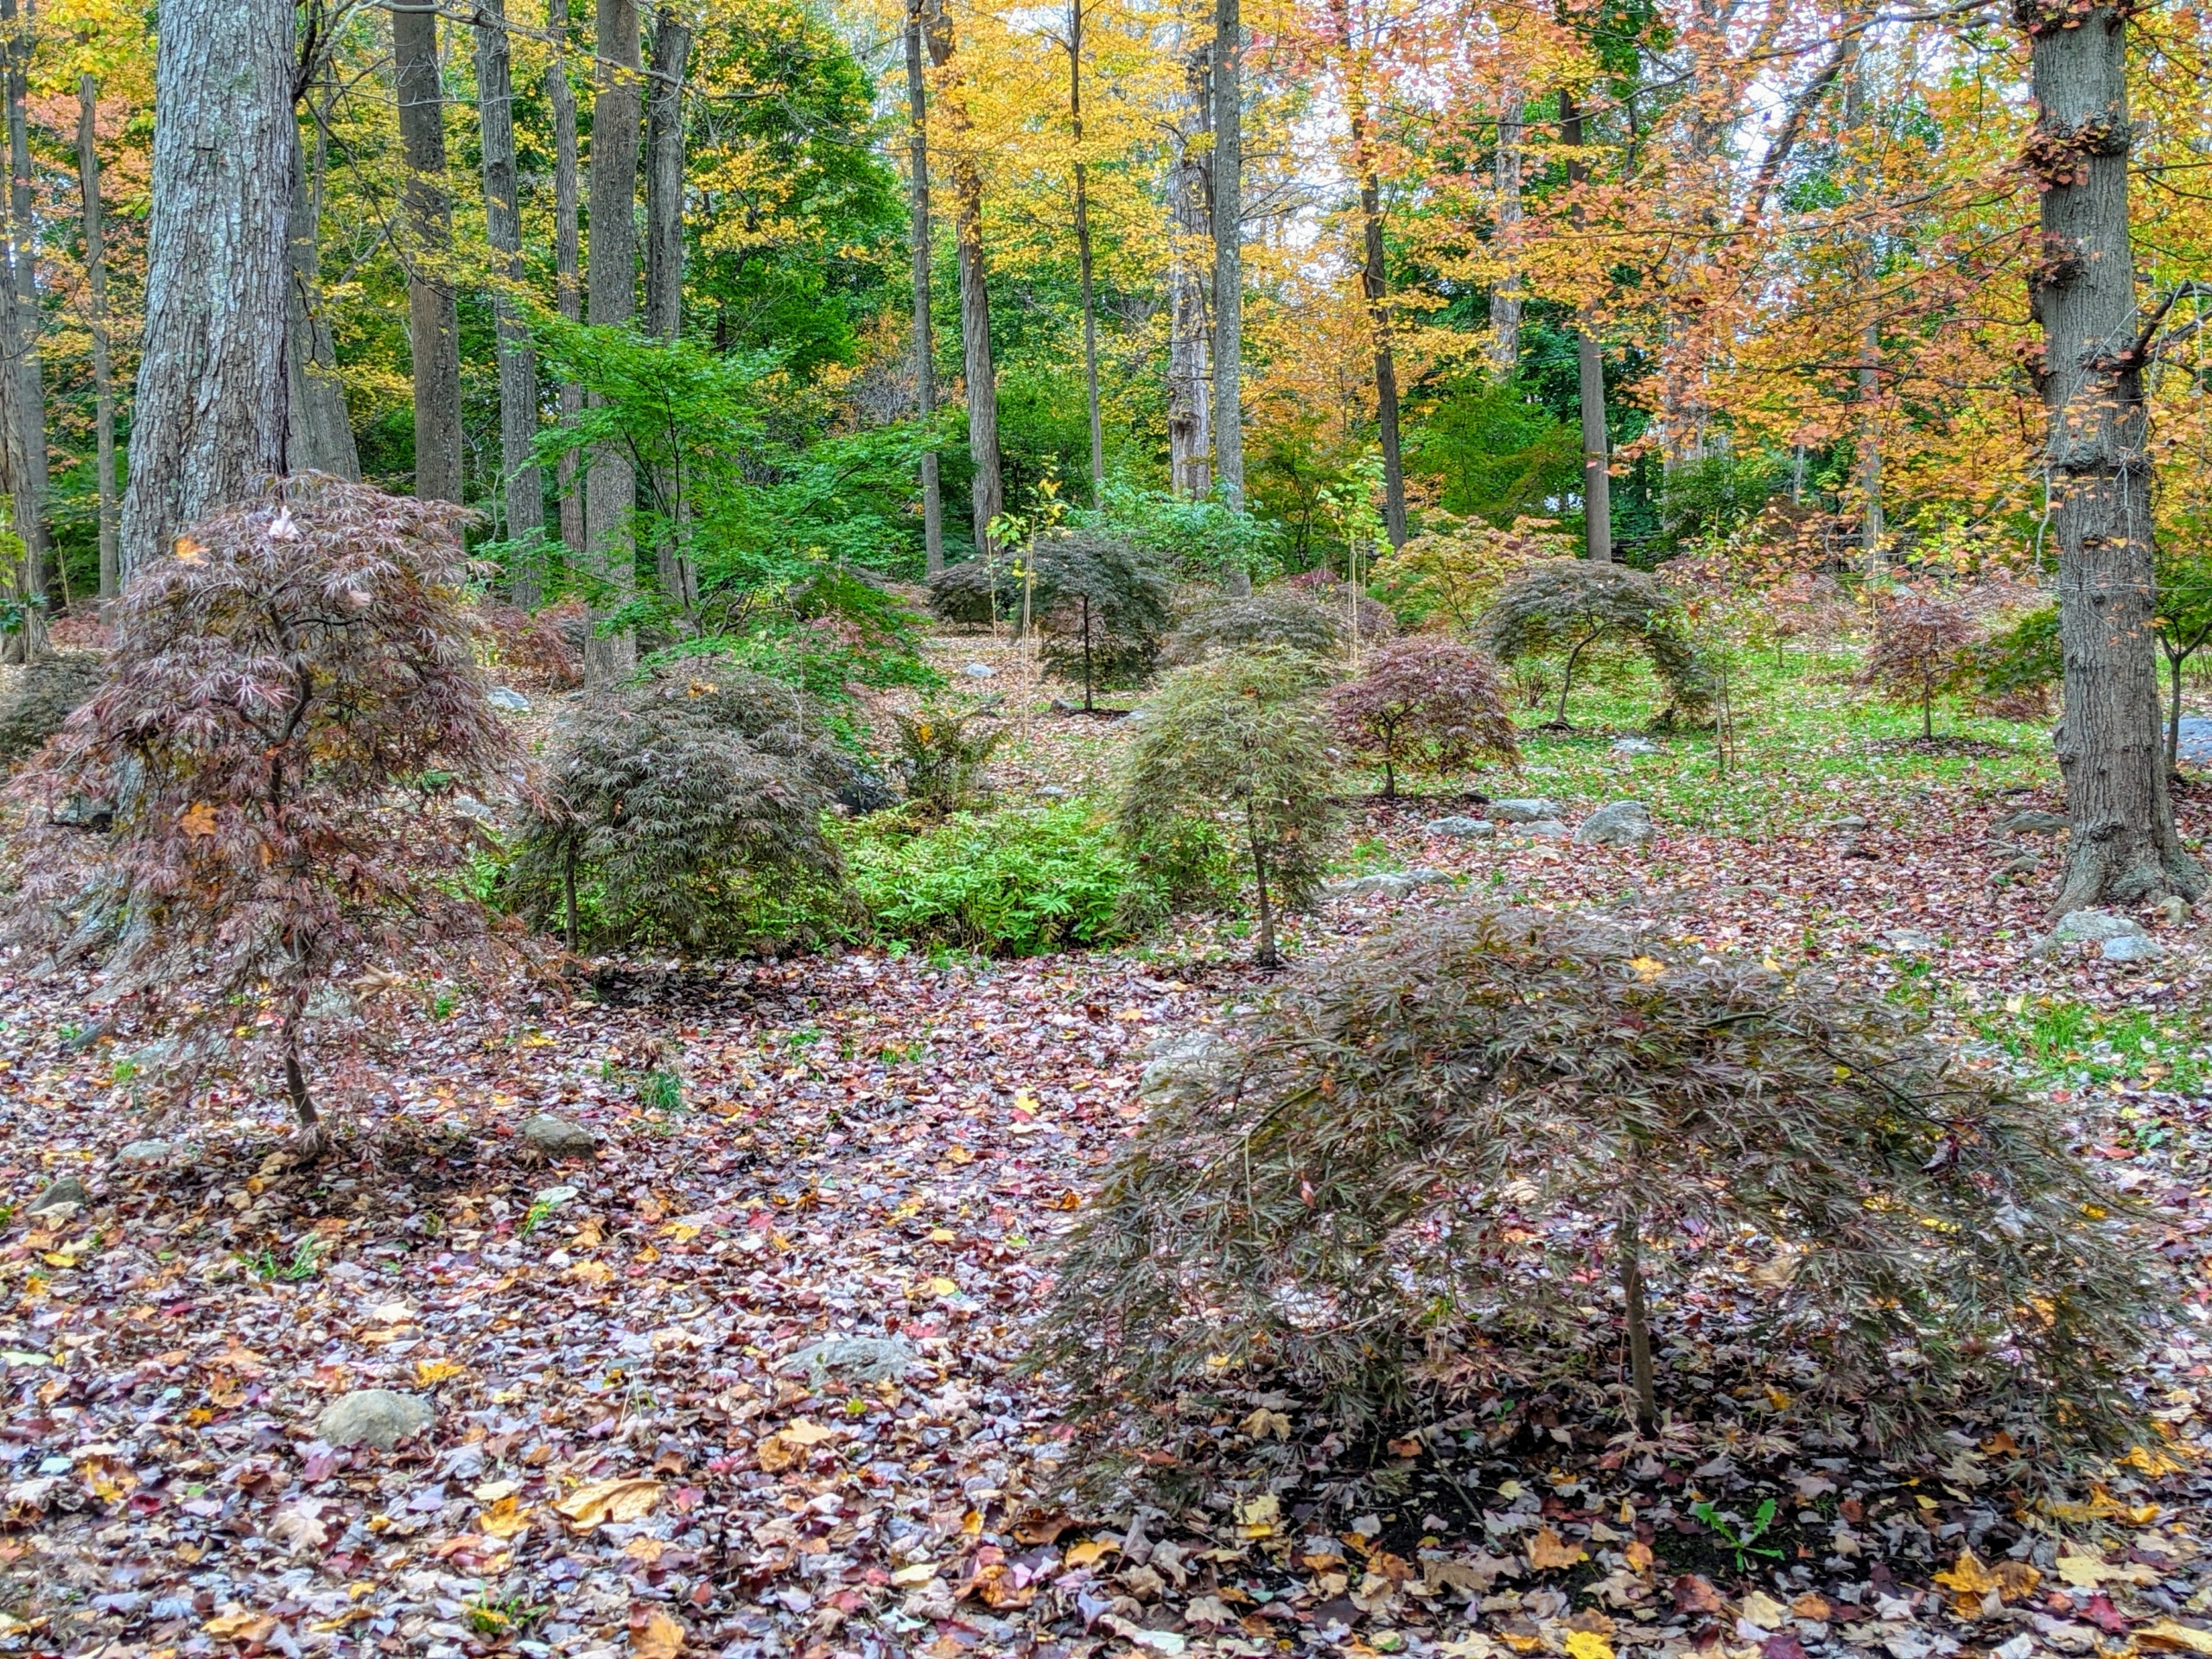
Many of my Japanese maples are varieties of Acer palmatum - trees that have been cultivated in Japanese gardens for centuries. Over the last several years, I’ve planted many of these trees in one section of a shade garden not far from my chicken coops and vegetable garden. I just love them and always look forward to their gorgeous display every fall. These specimens provide countless variations in size, leaf shape, and color, creating a landscape of beauty and texture.
Enjoy these photos.
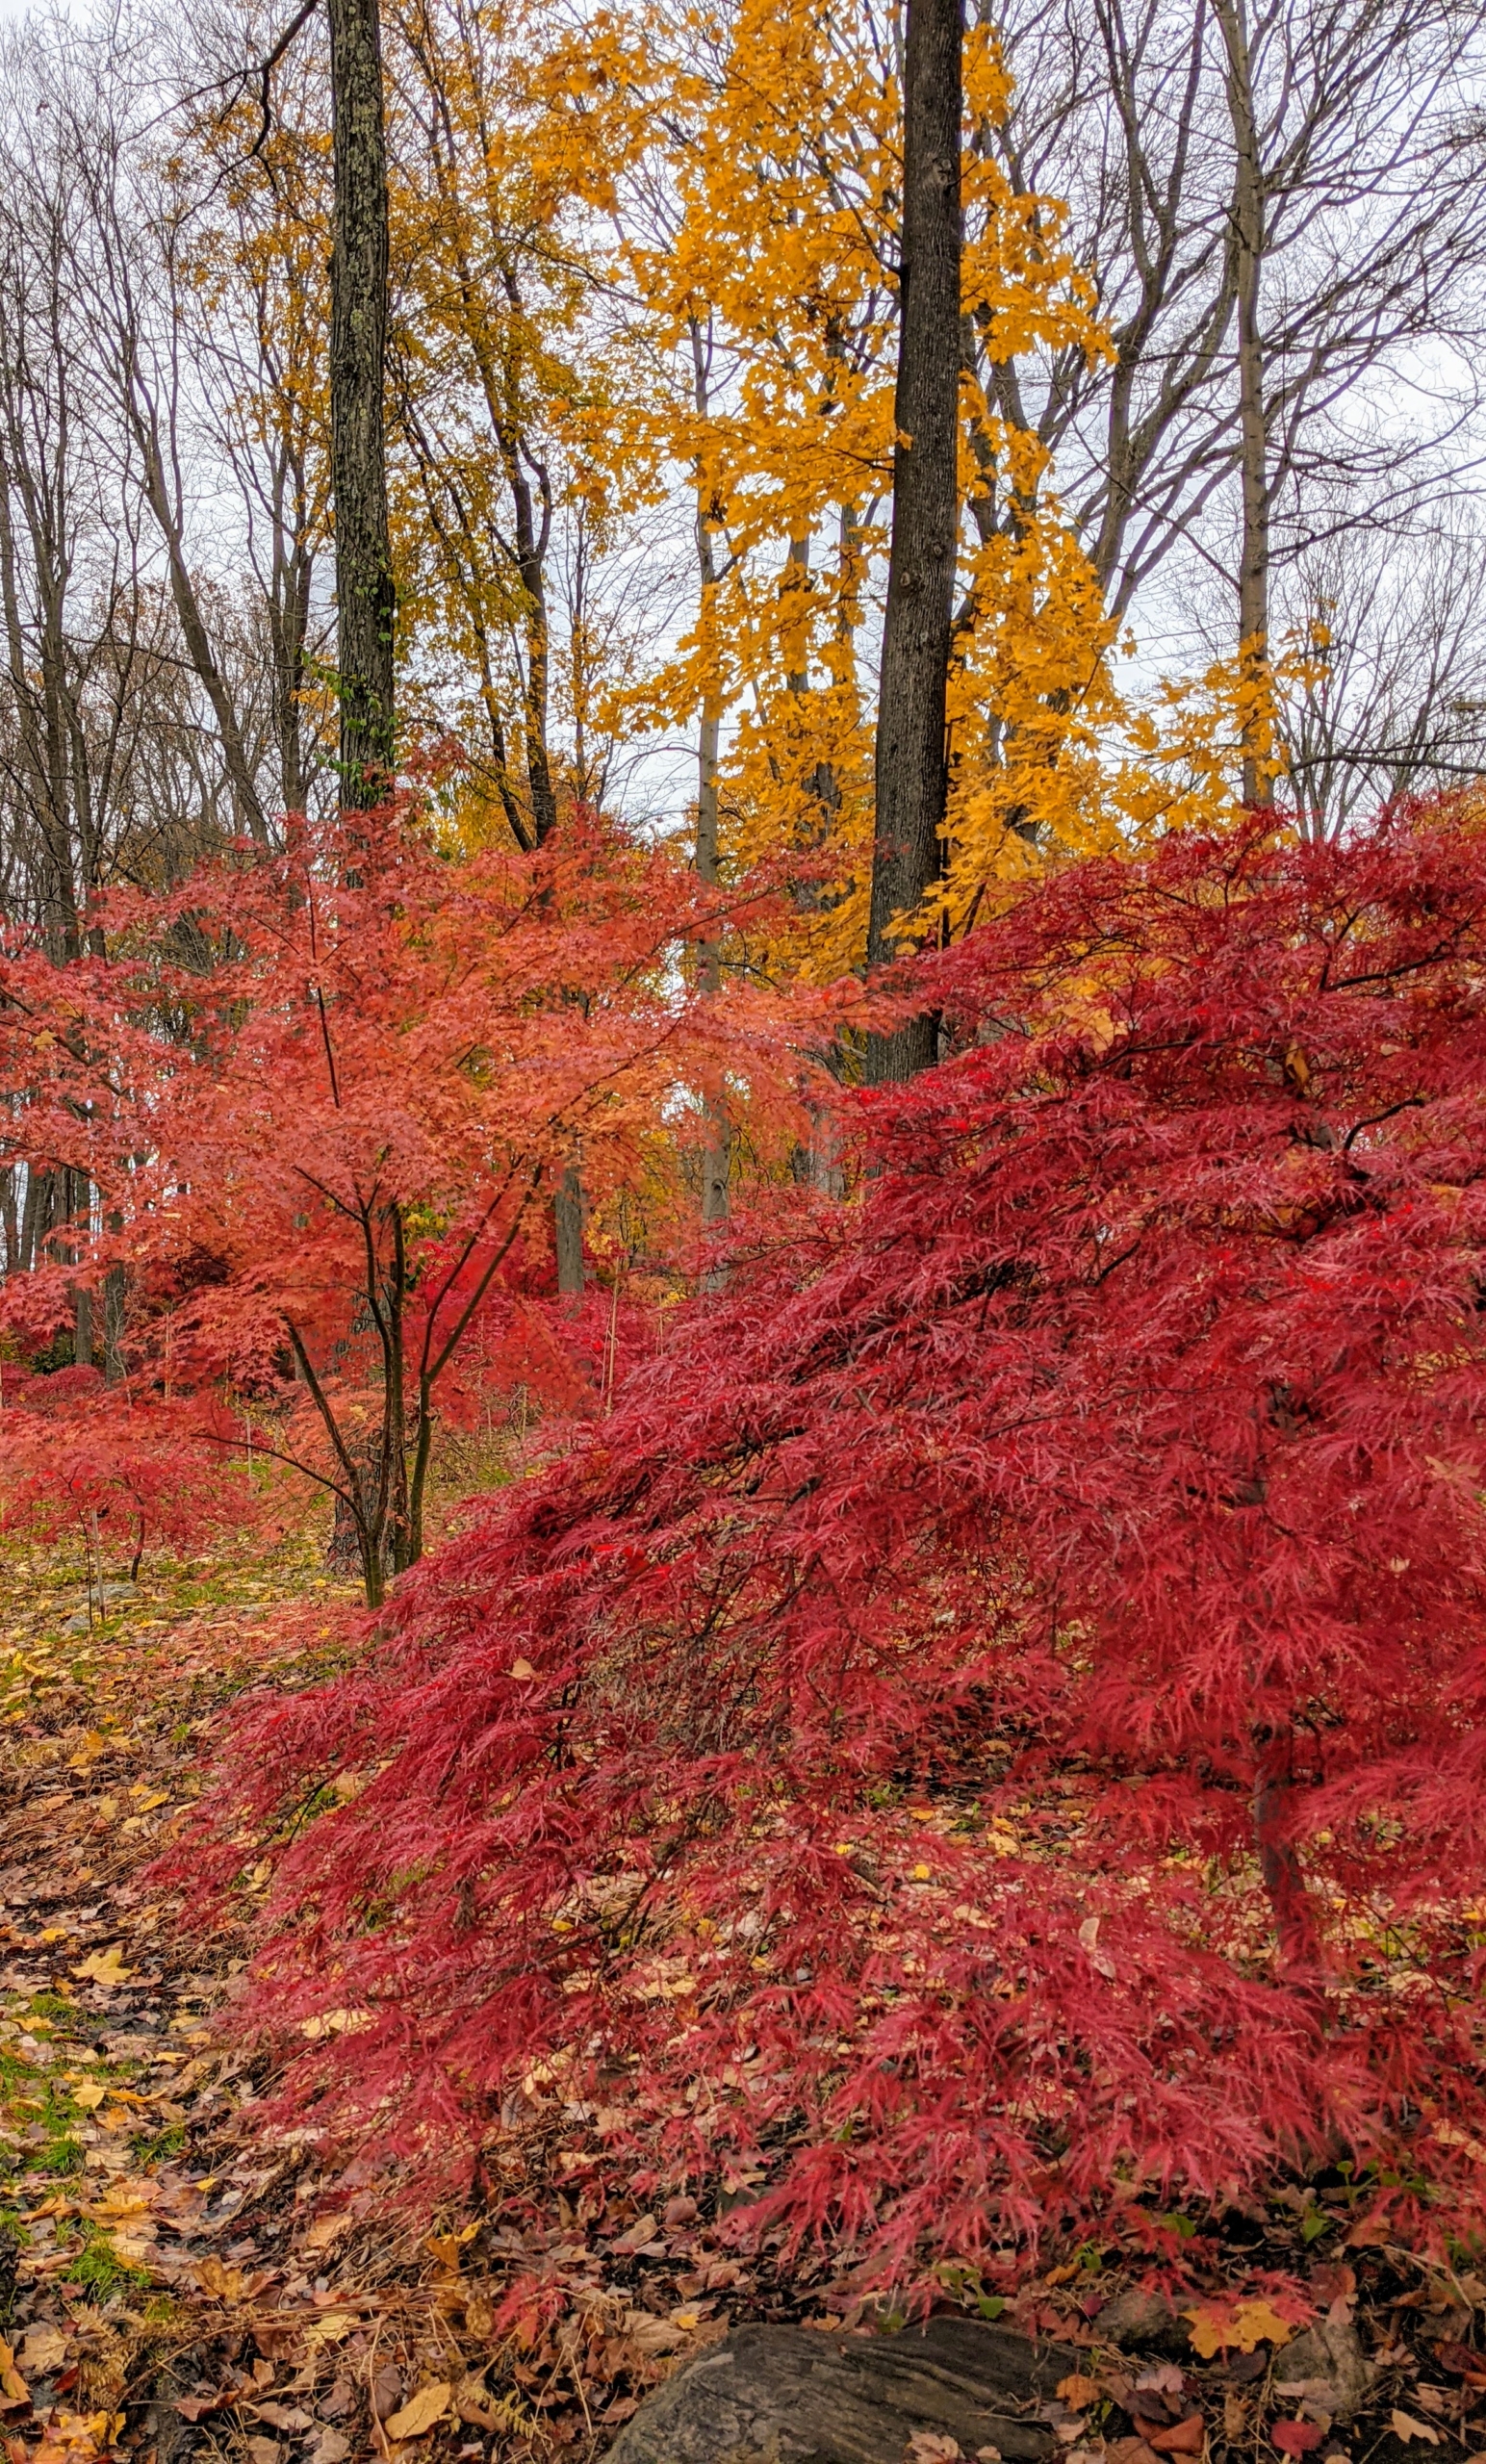
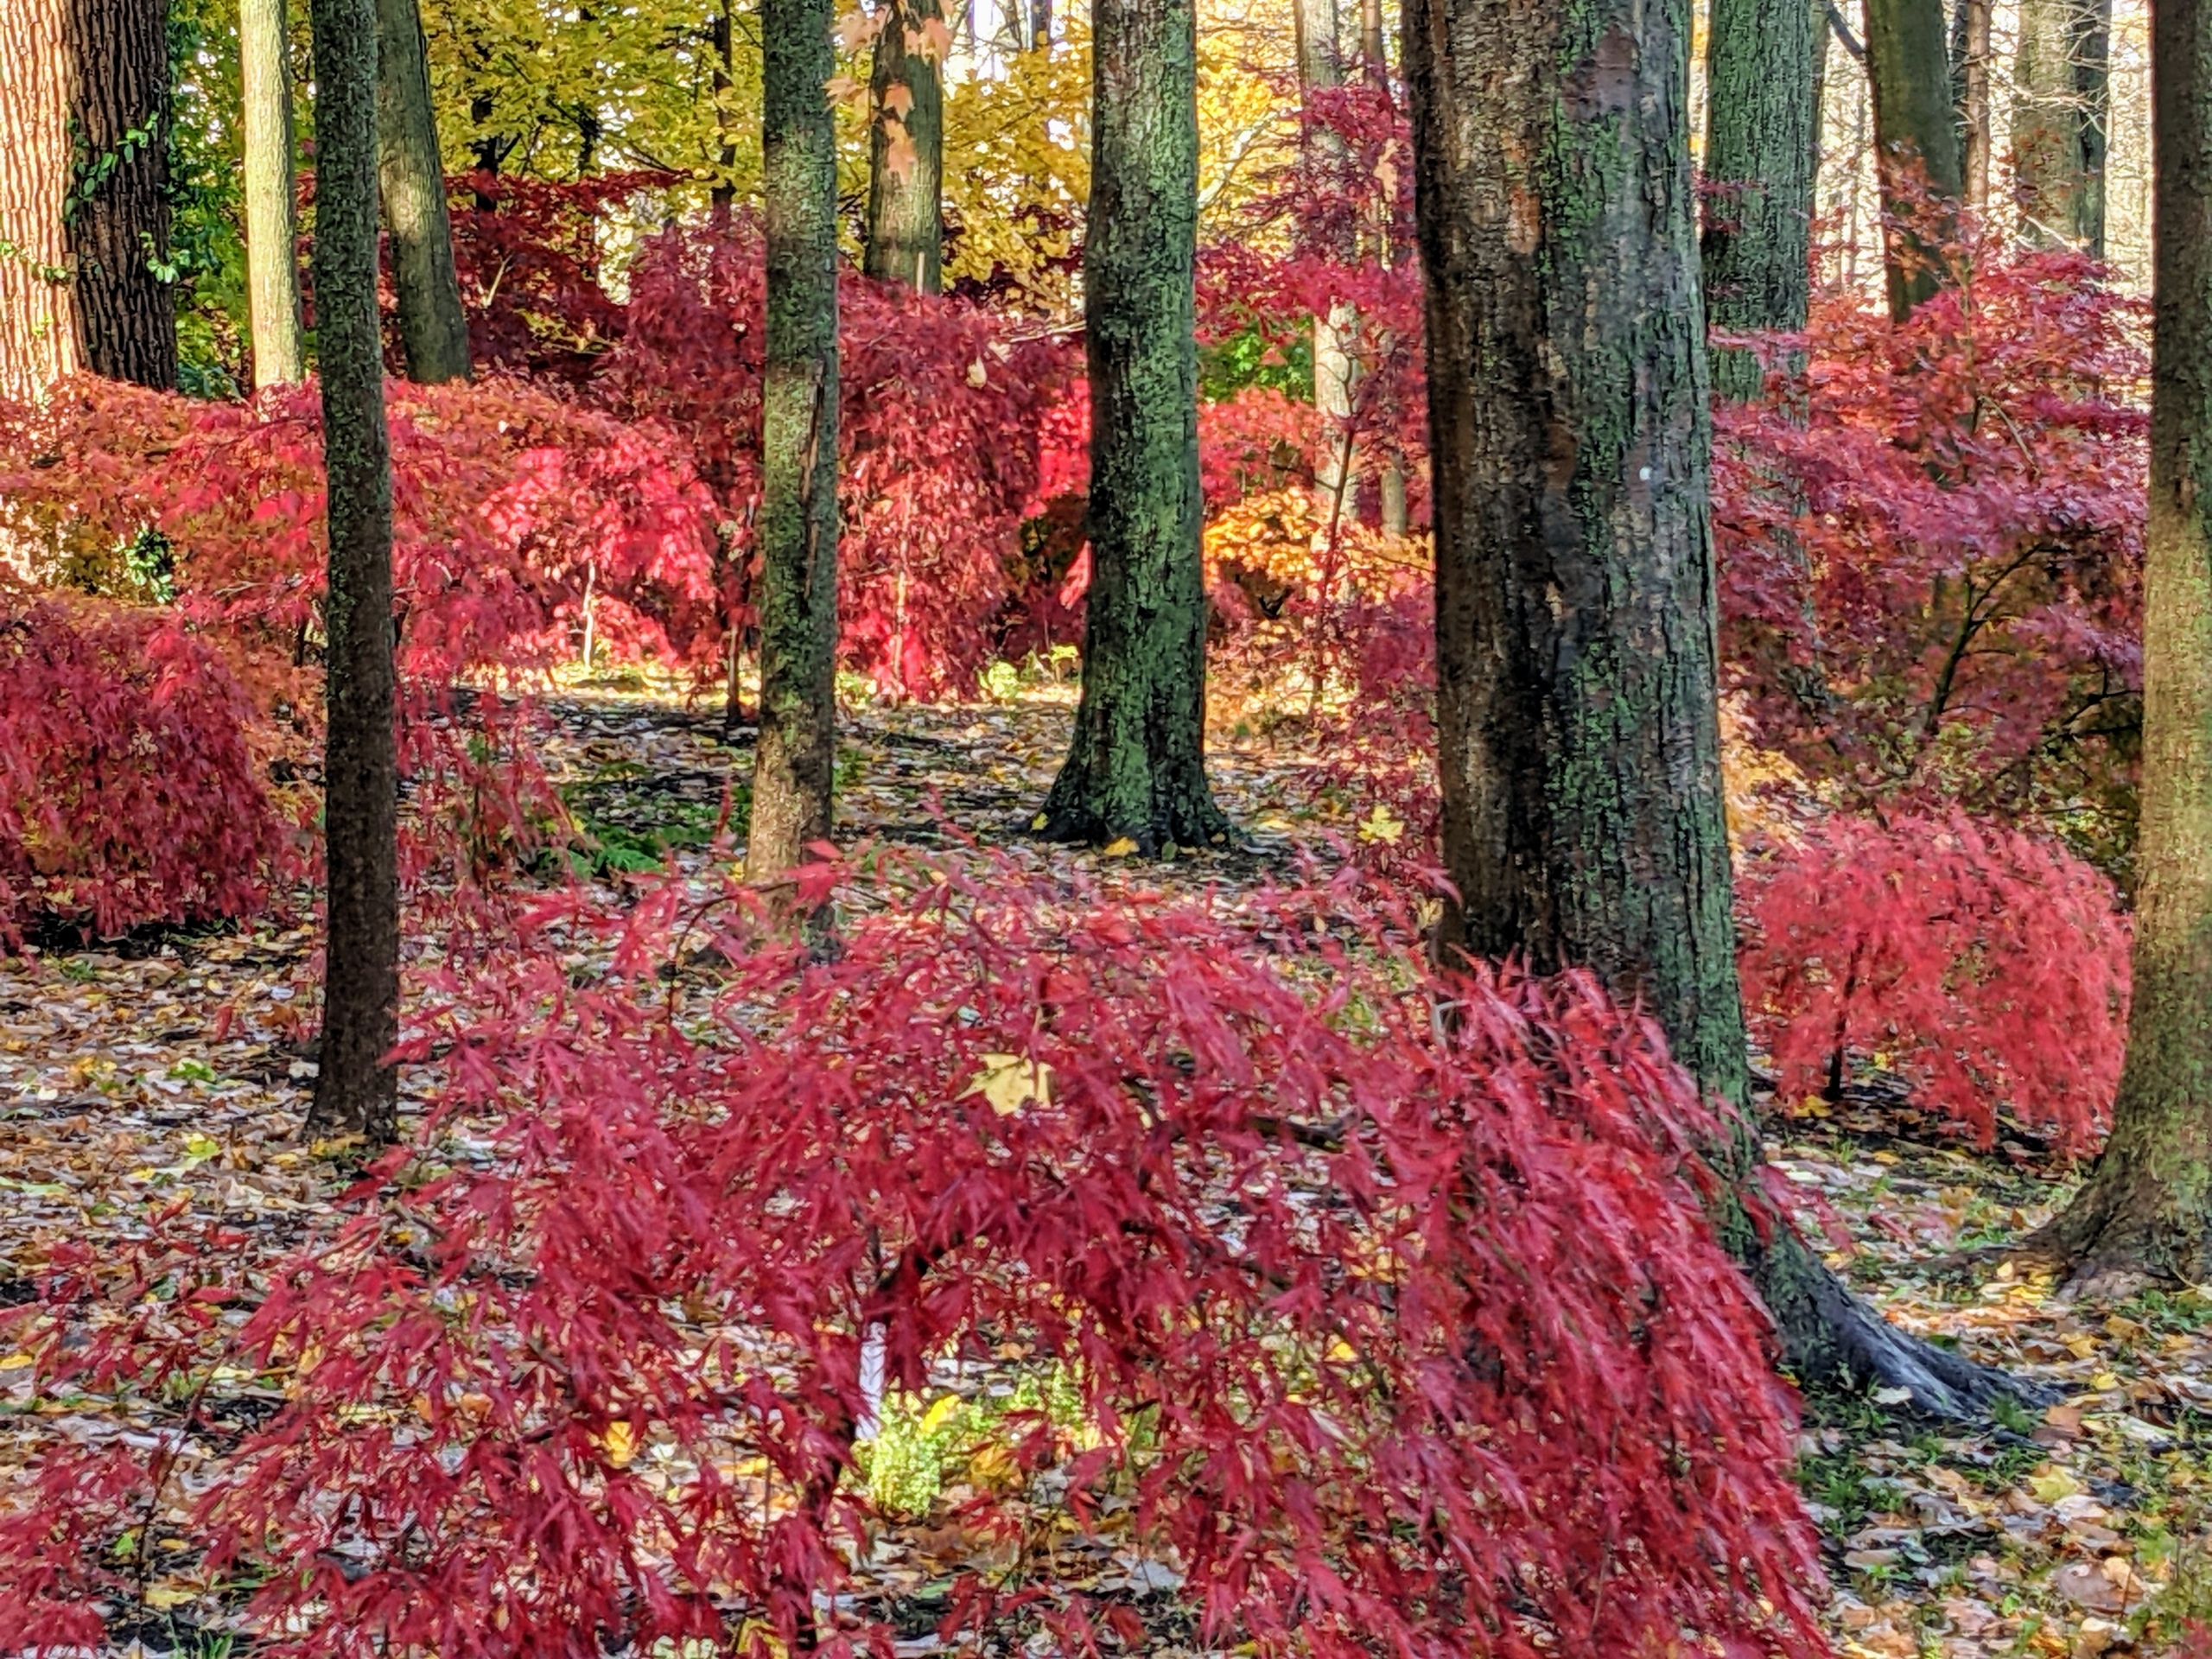
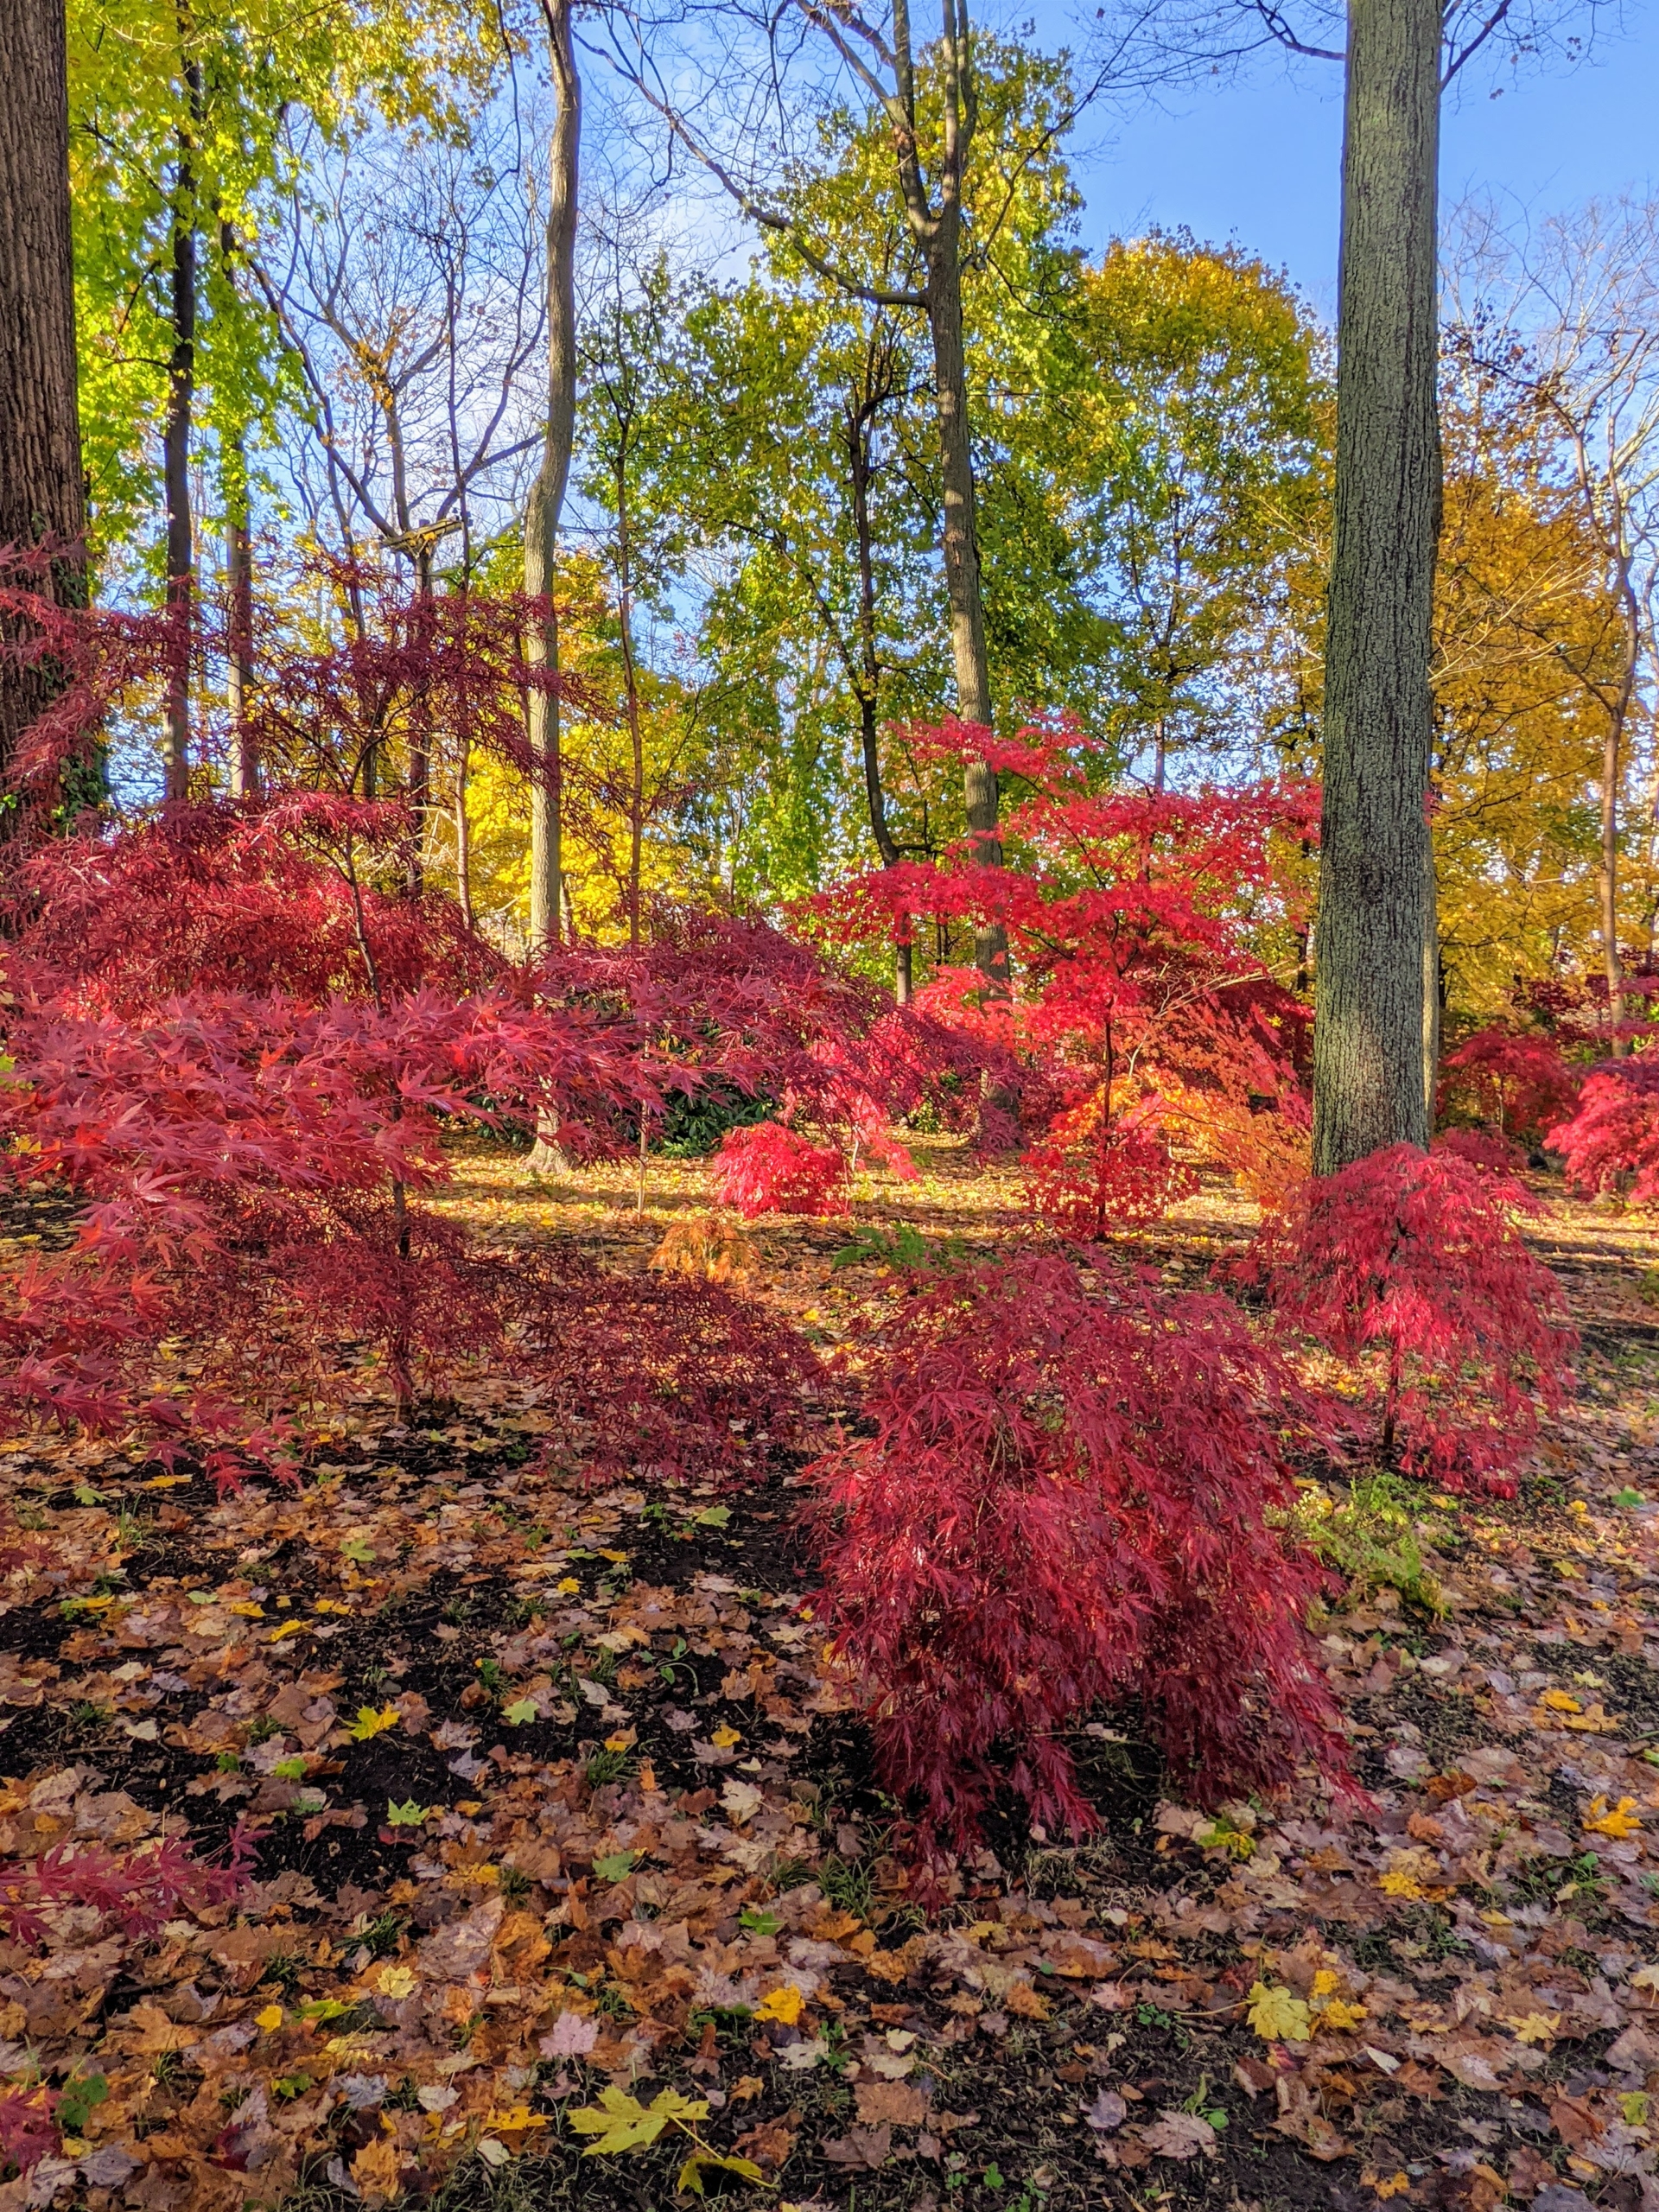
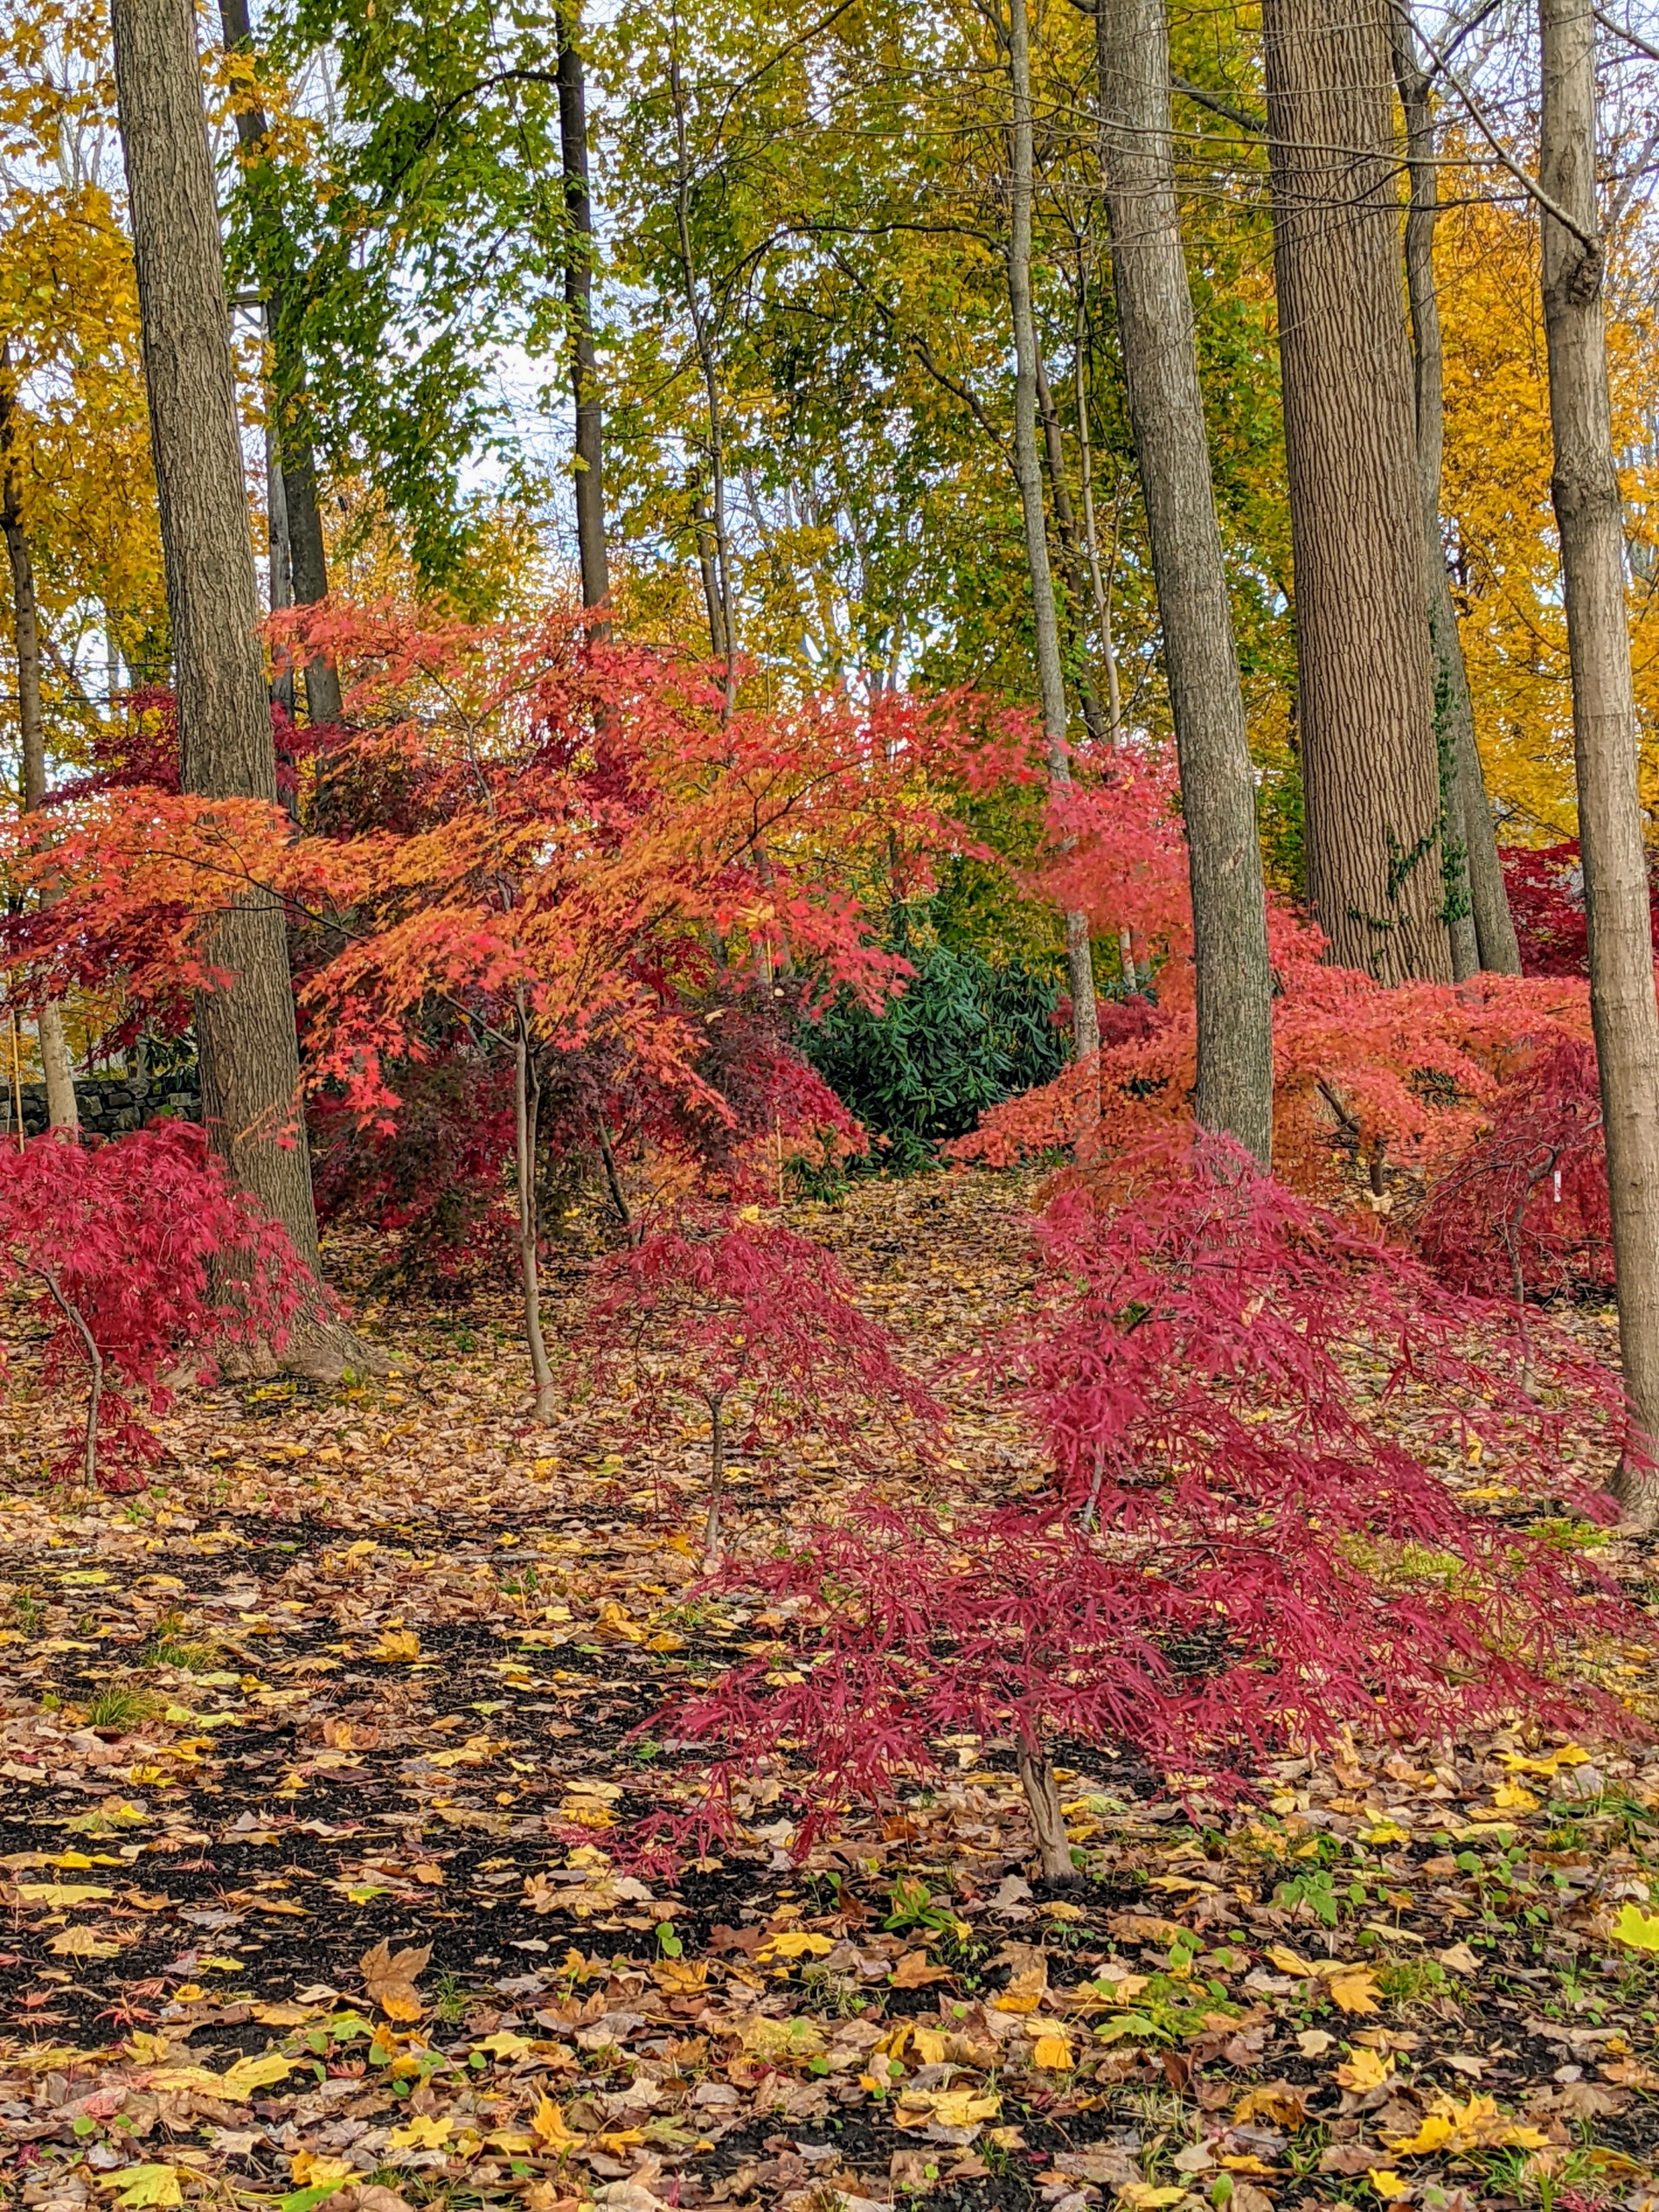
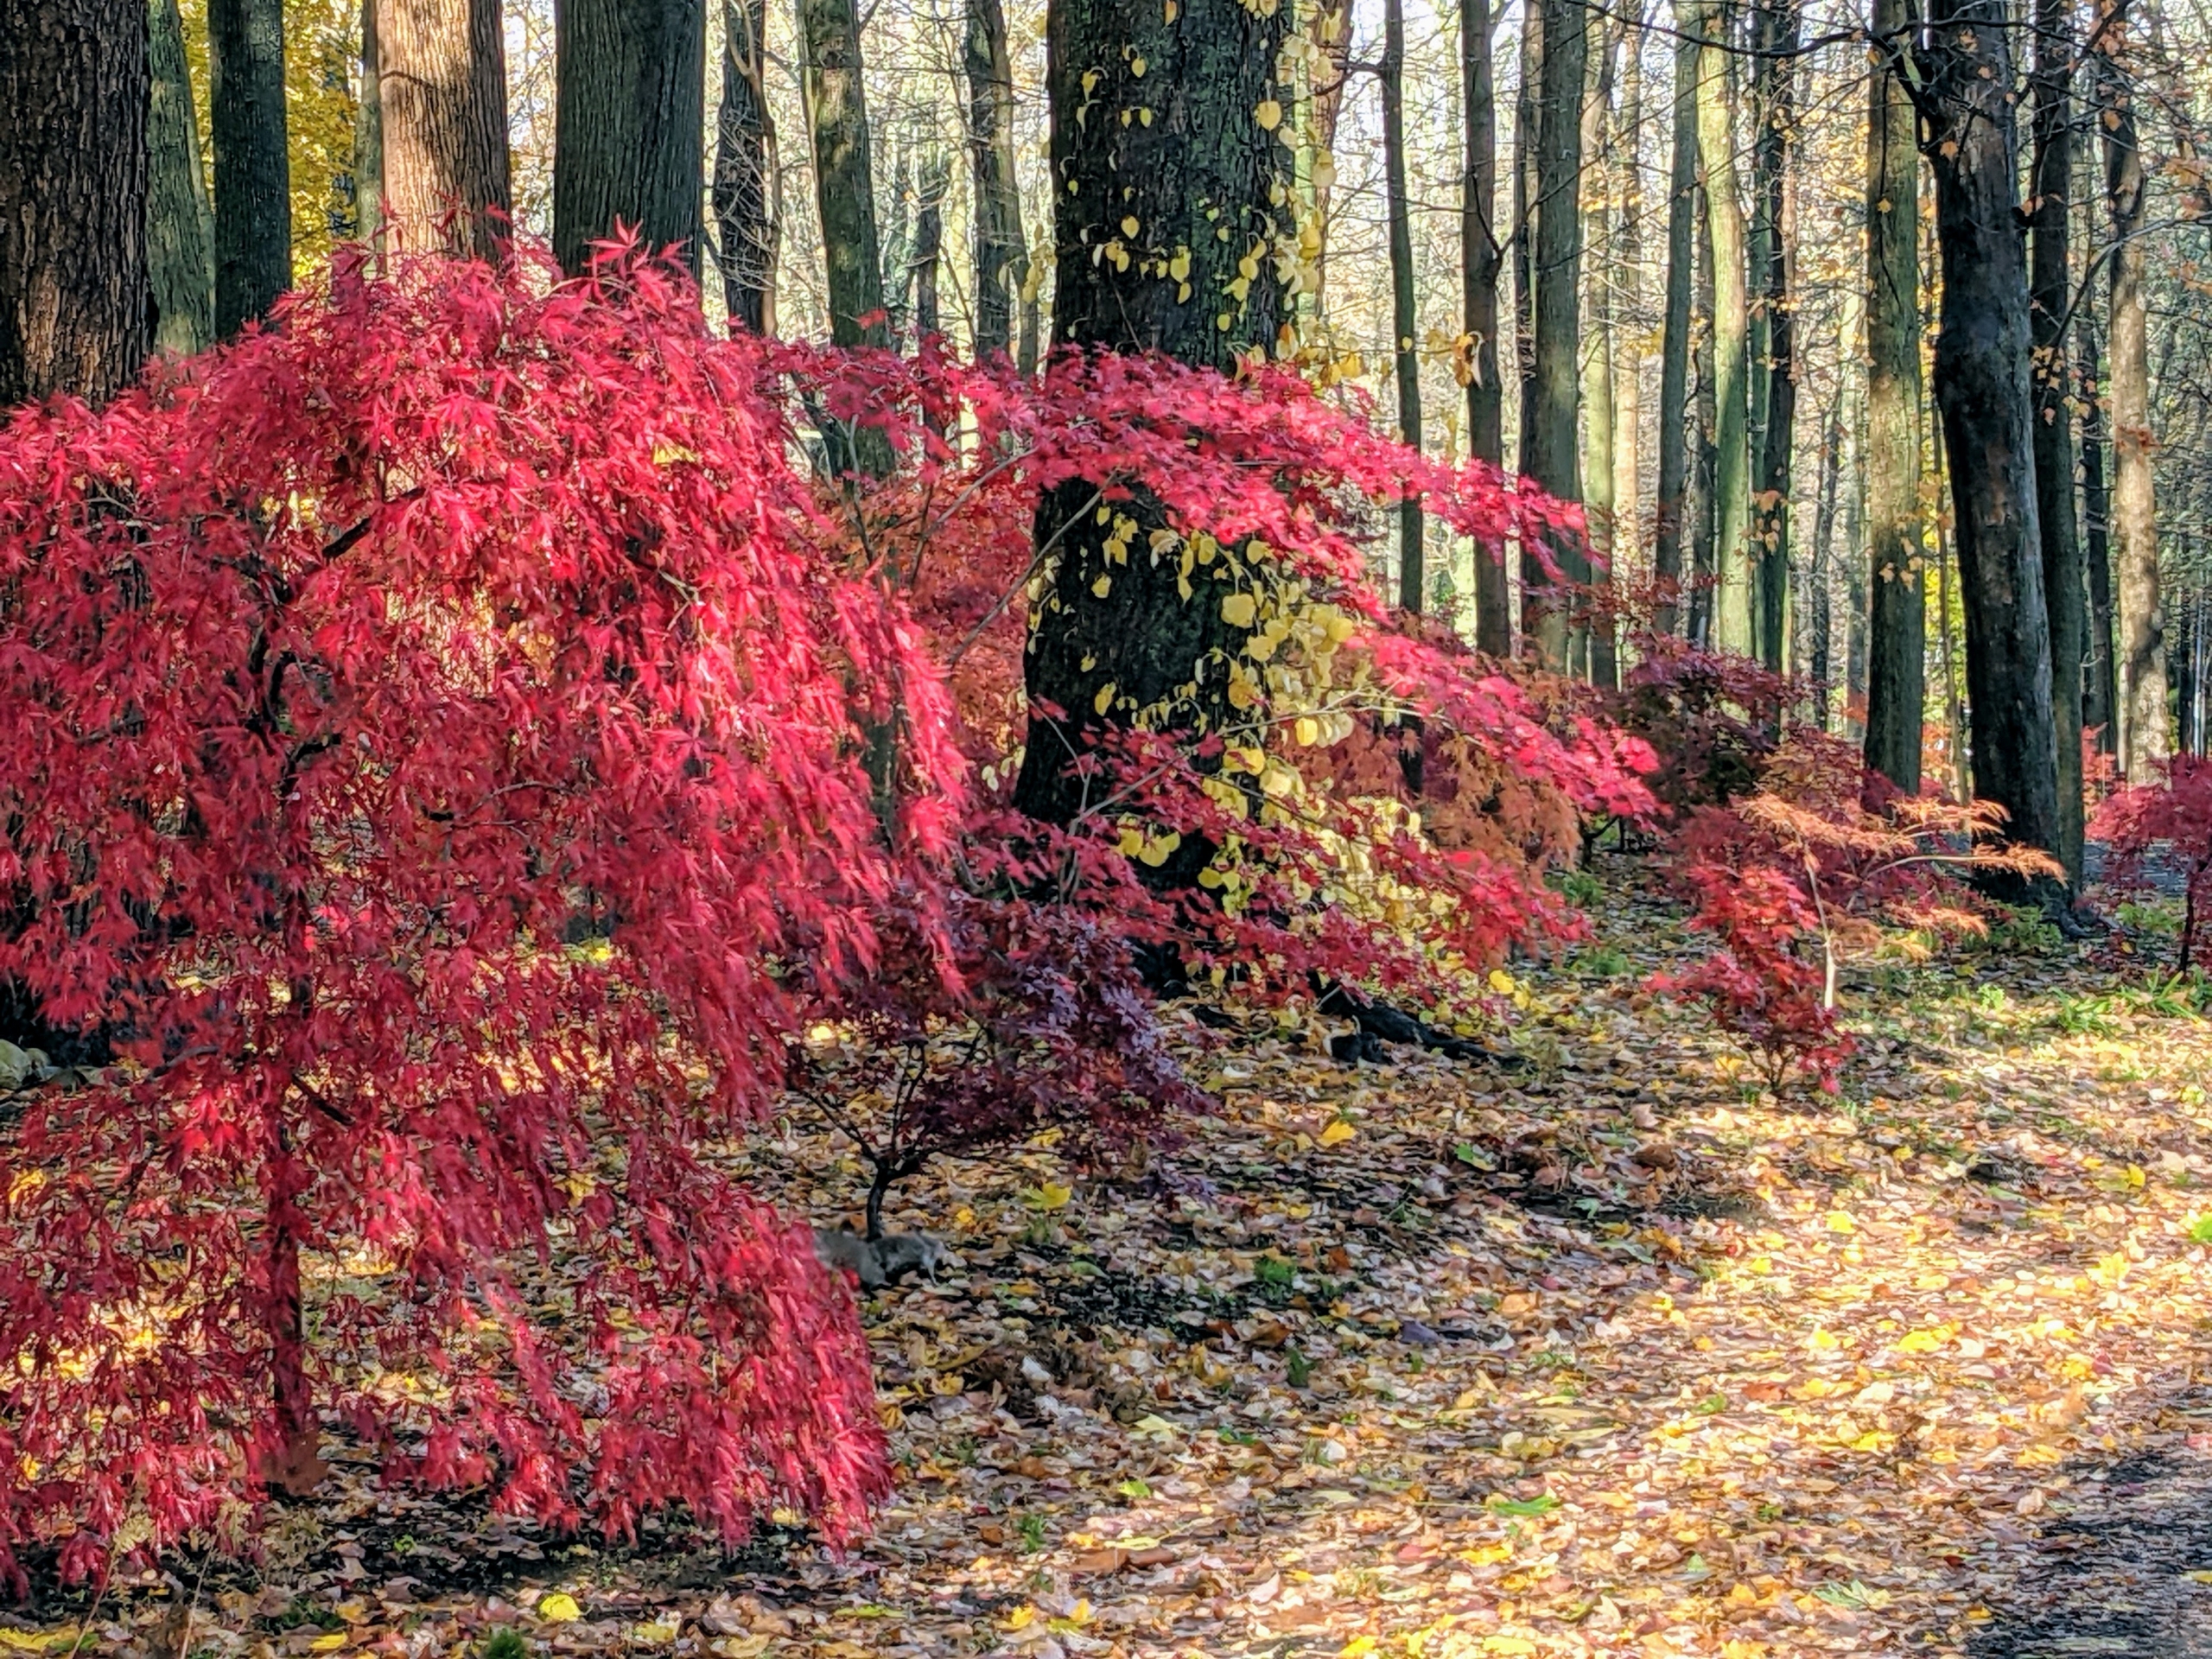
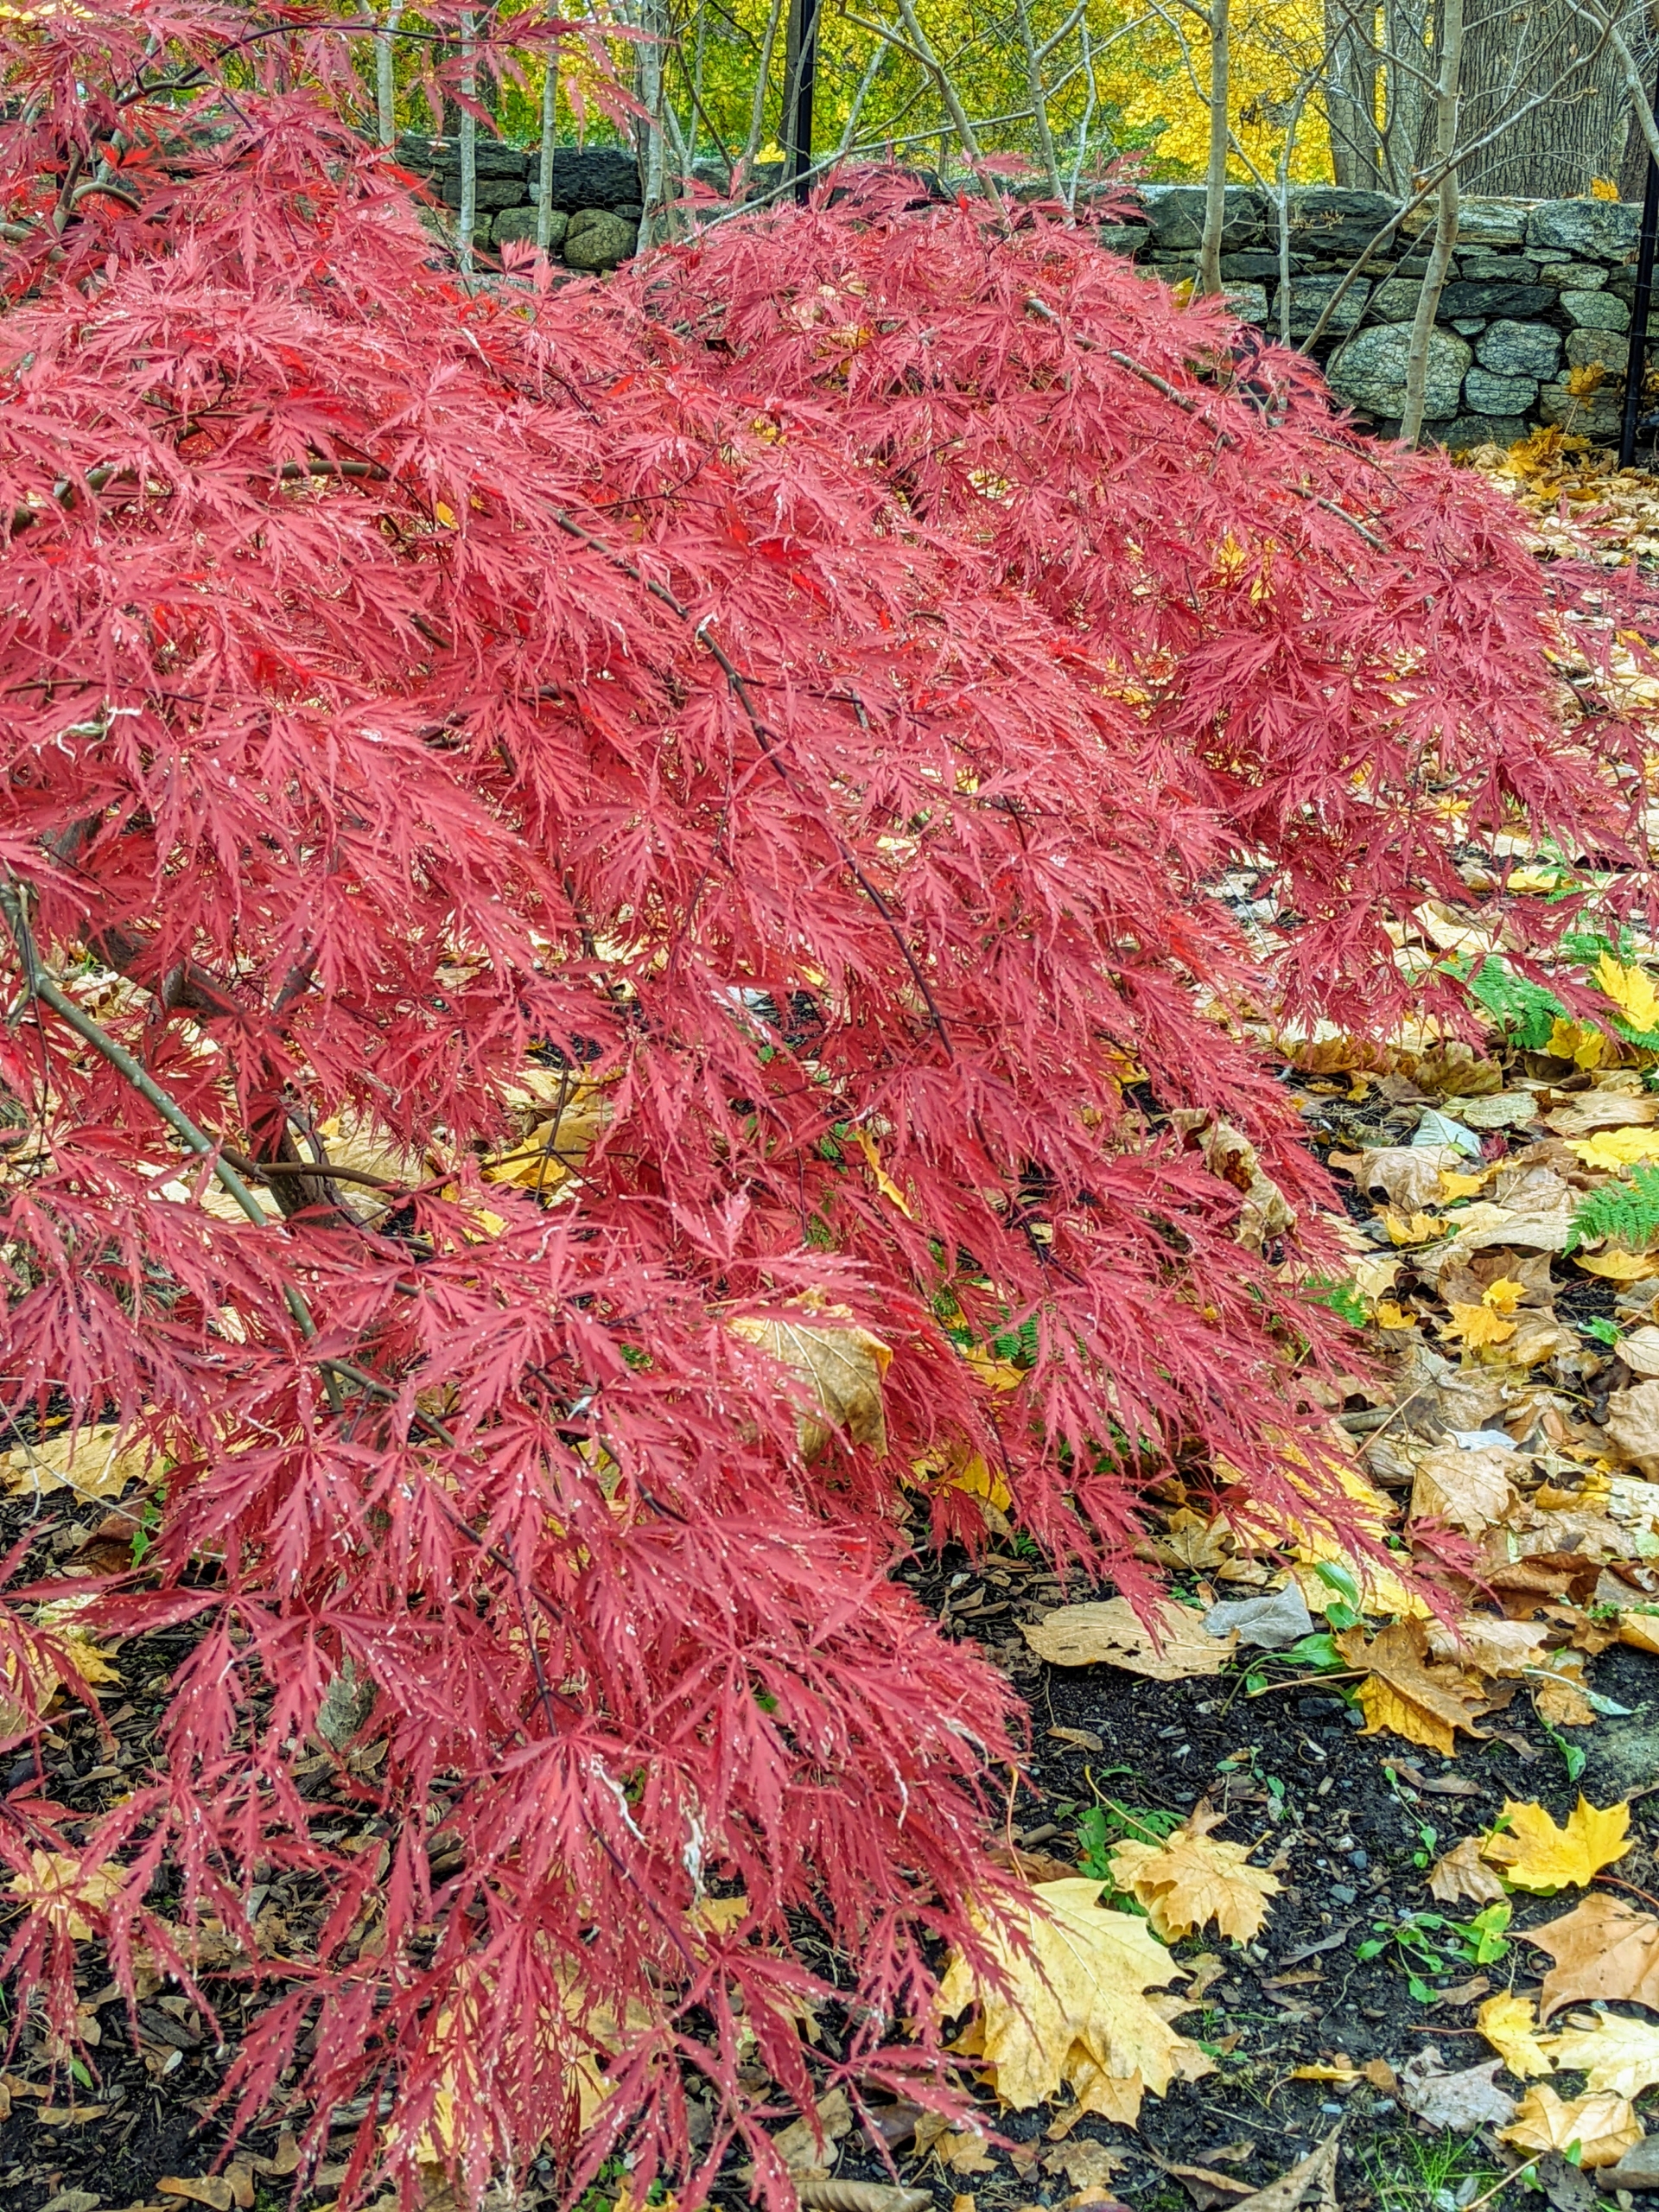
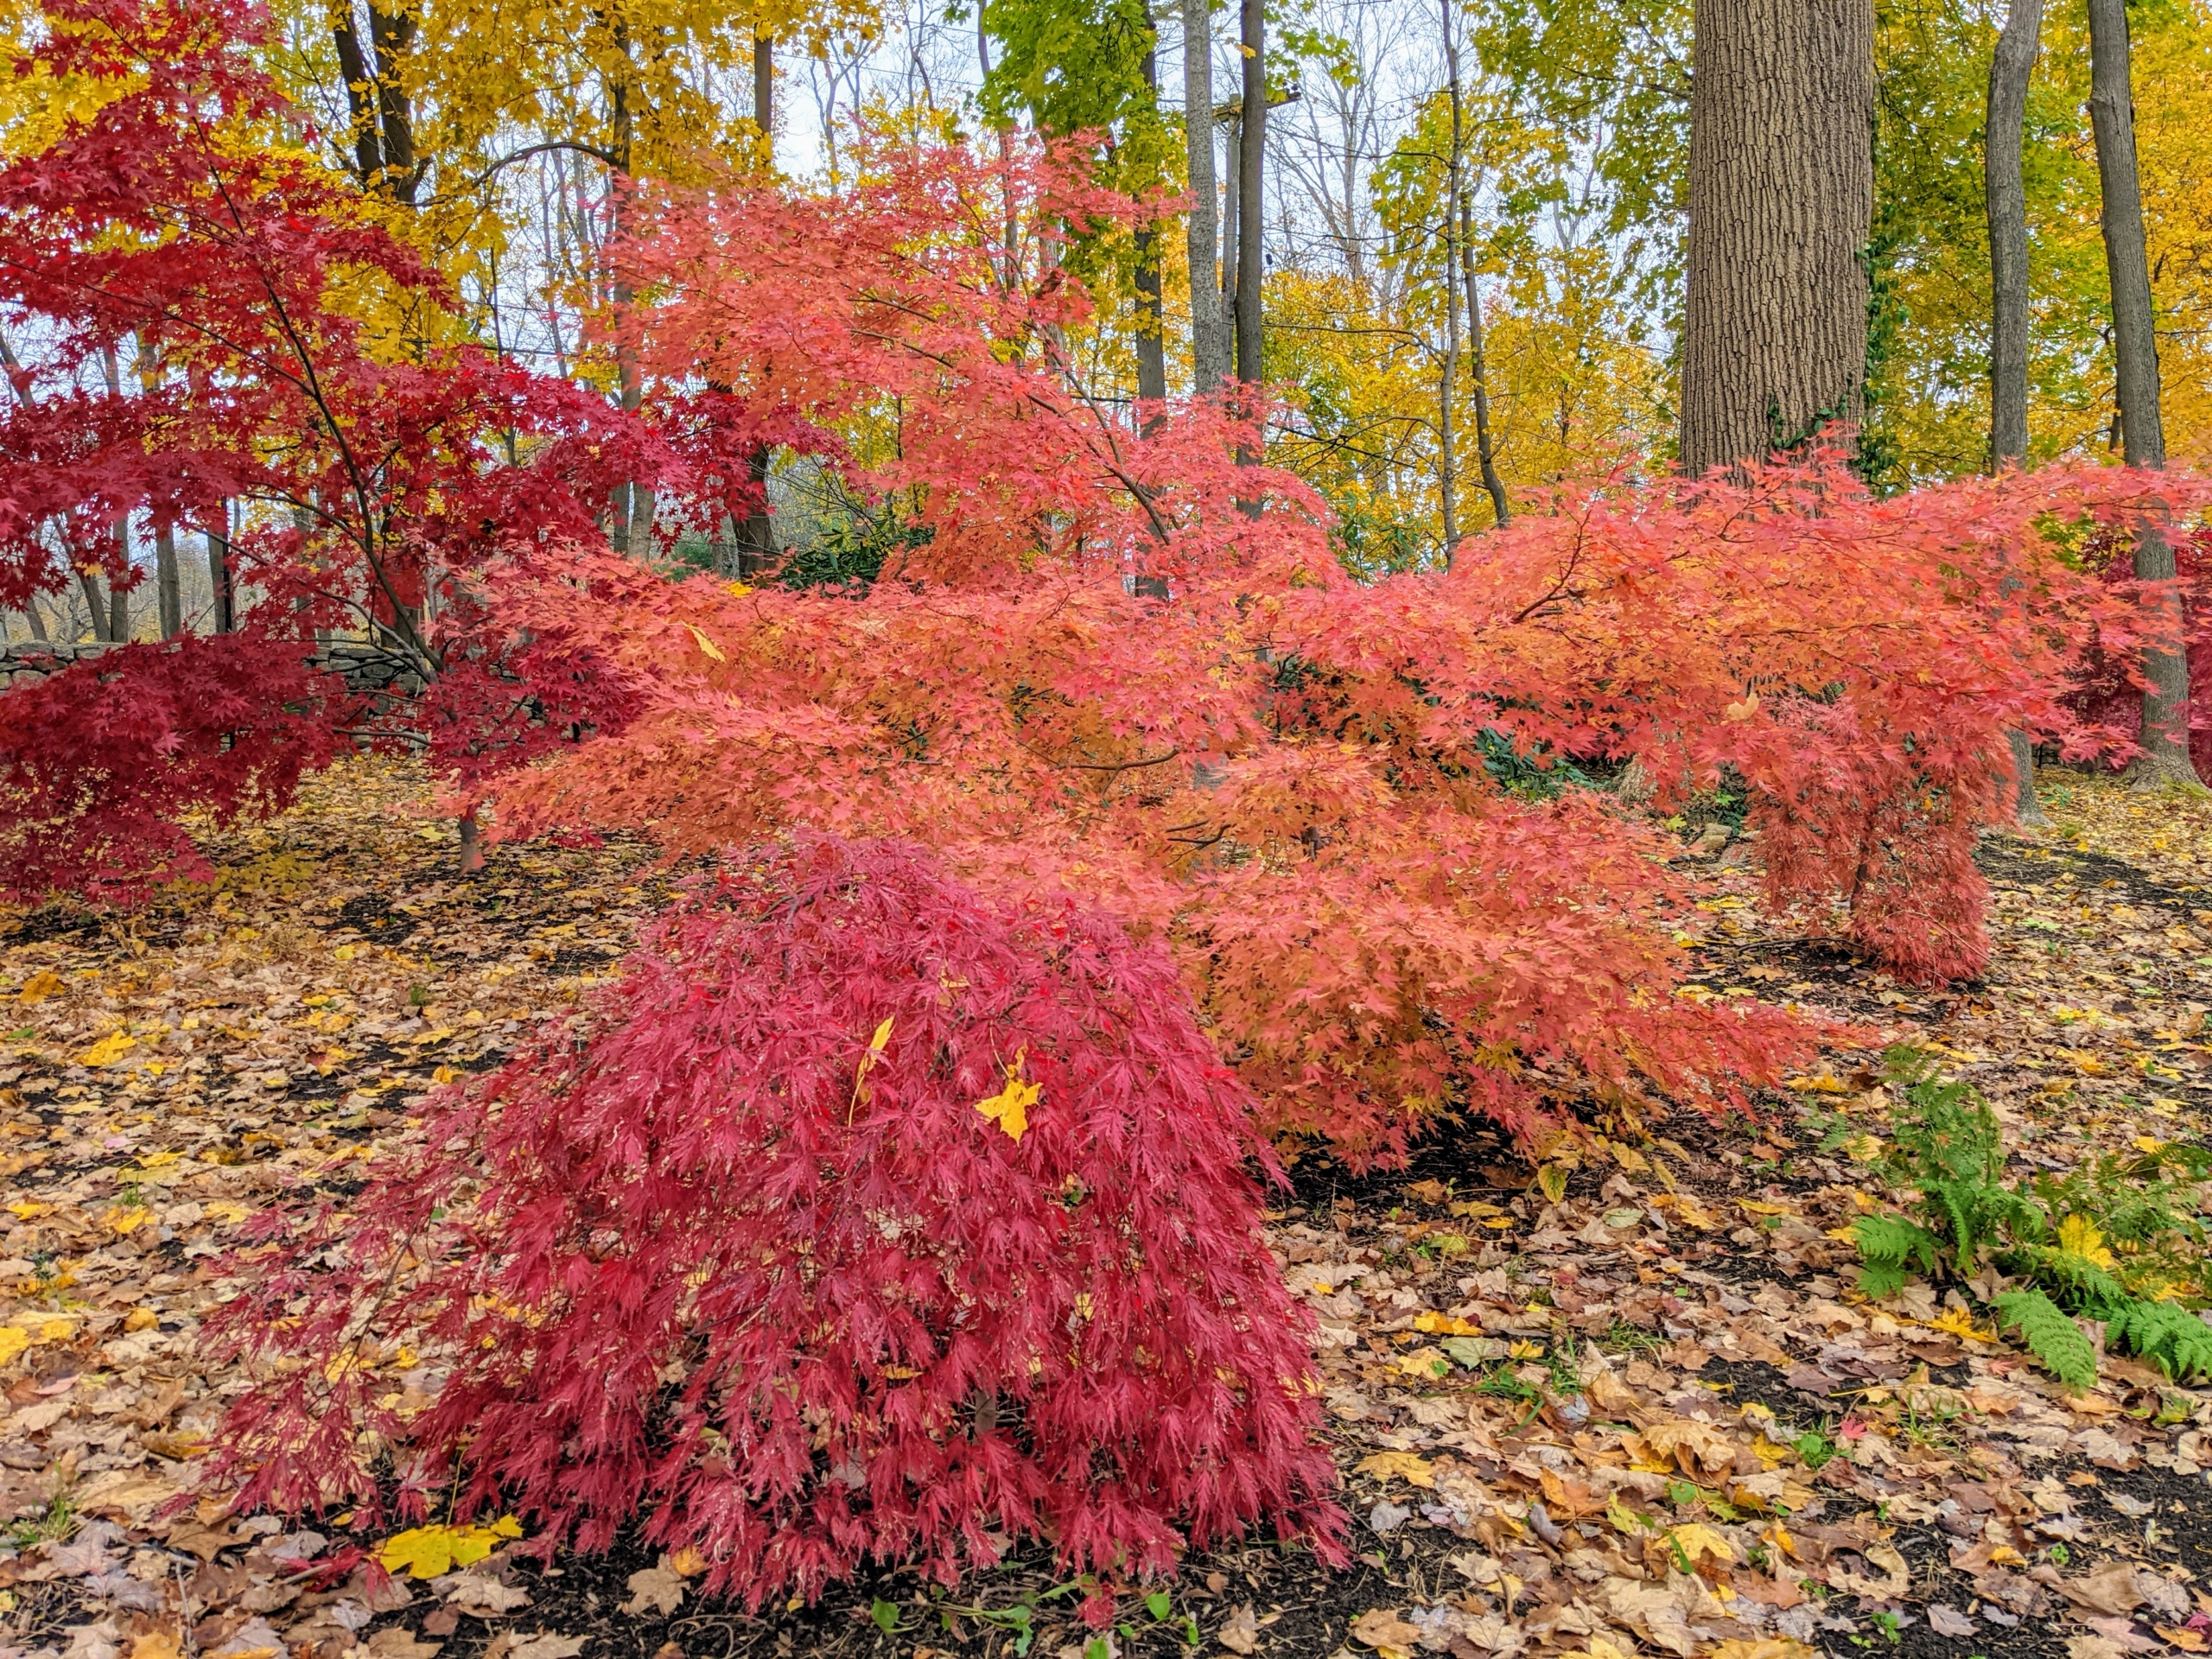
What a difference a couple of weeks make. This was my Japanese Maple Woodland earlier this month. The trees were still shades of green and purple-brown.
And this is my woodland now – filled with gorgeous, bright gold, orange, and red. During the active growing season, the maple tree produces large quantities of chlorophyll. Toward the end of the growing season, chlorophyll production slows and then stops all together. Without the active chlorophyll production, the red pigment in the leaves is exposed. Sunny days and chilly nights along with plenty of sun during summer and fall are the best combination for a good show of fall colors.
But those brilliant fall colors aren’t a guarantee. It really depends on the weather. Here in the Northeast, fall weather usually arrives in September, with temperatures cooling off rapidly at night even when the days are still warm. These cool nighttime temperatures trigger the leaf-changing process. Unusually warm early fall weather may even prevent the leaves from turning red. This is because the color changes occur with gradually cooling temperatures – not cold snaps.
Japanese maples are native to areas of Japan, Korea, China and Russia. In Japan, the maple is called the “autumn welcoming tree” and is planted in the western portion of gardens – the direction from which fall arrives there.
Japanese maples prefer dappled sun or part shade. I purposely planted them beneath larger trees in this area of the farm. The varying heights of these trees add a nice texture to the grove.
The best location is a sunny spot with afternoon shade. Red and variegated leaves need relief from the hot afternoon sun, but need the light to attain full color. Golden leaves reach this striking hue with dappled sun, and remain green in deep shade.
Japanese maples typically grow about one-foot per year for the first 50-years, but they can live to be more than a hundred.
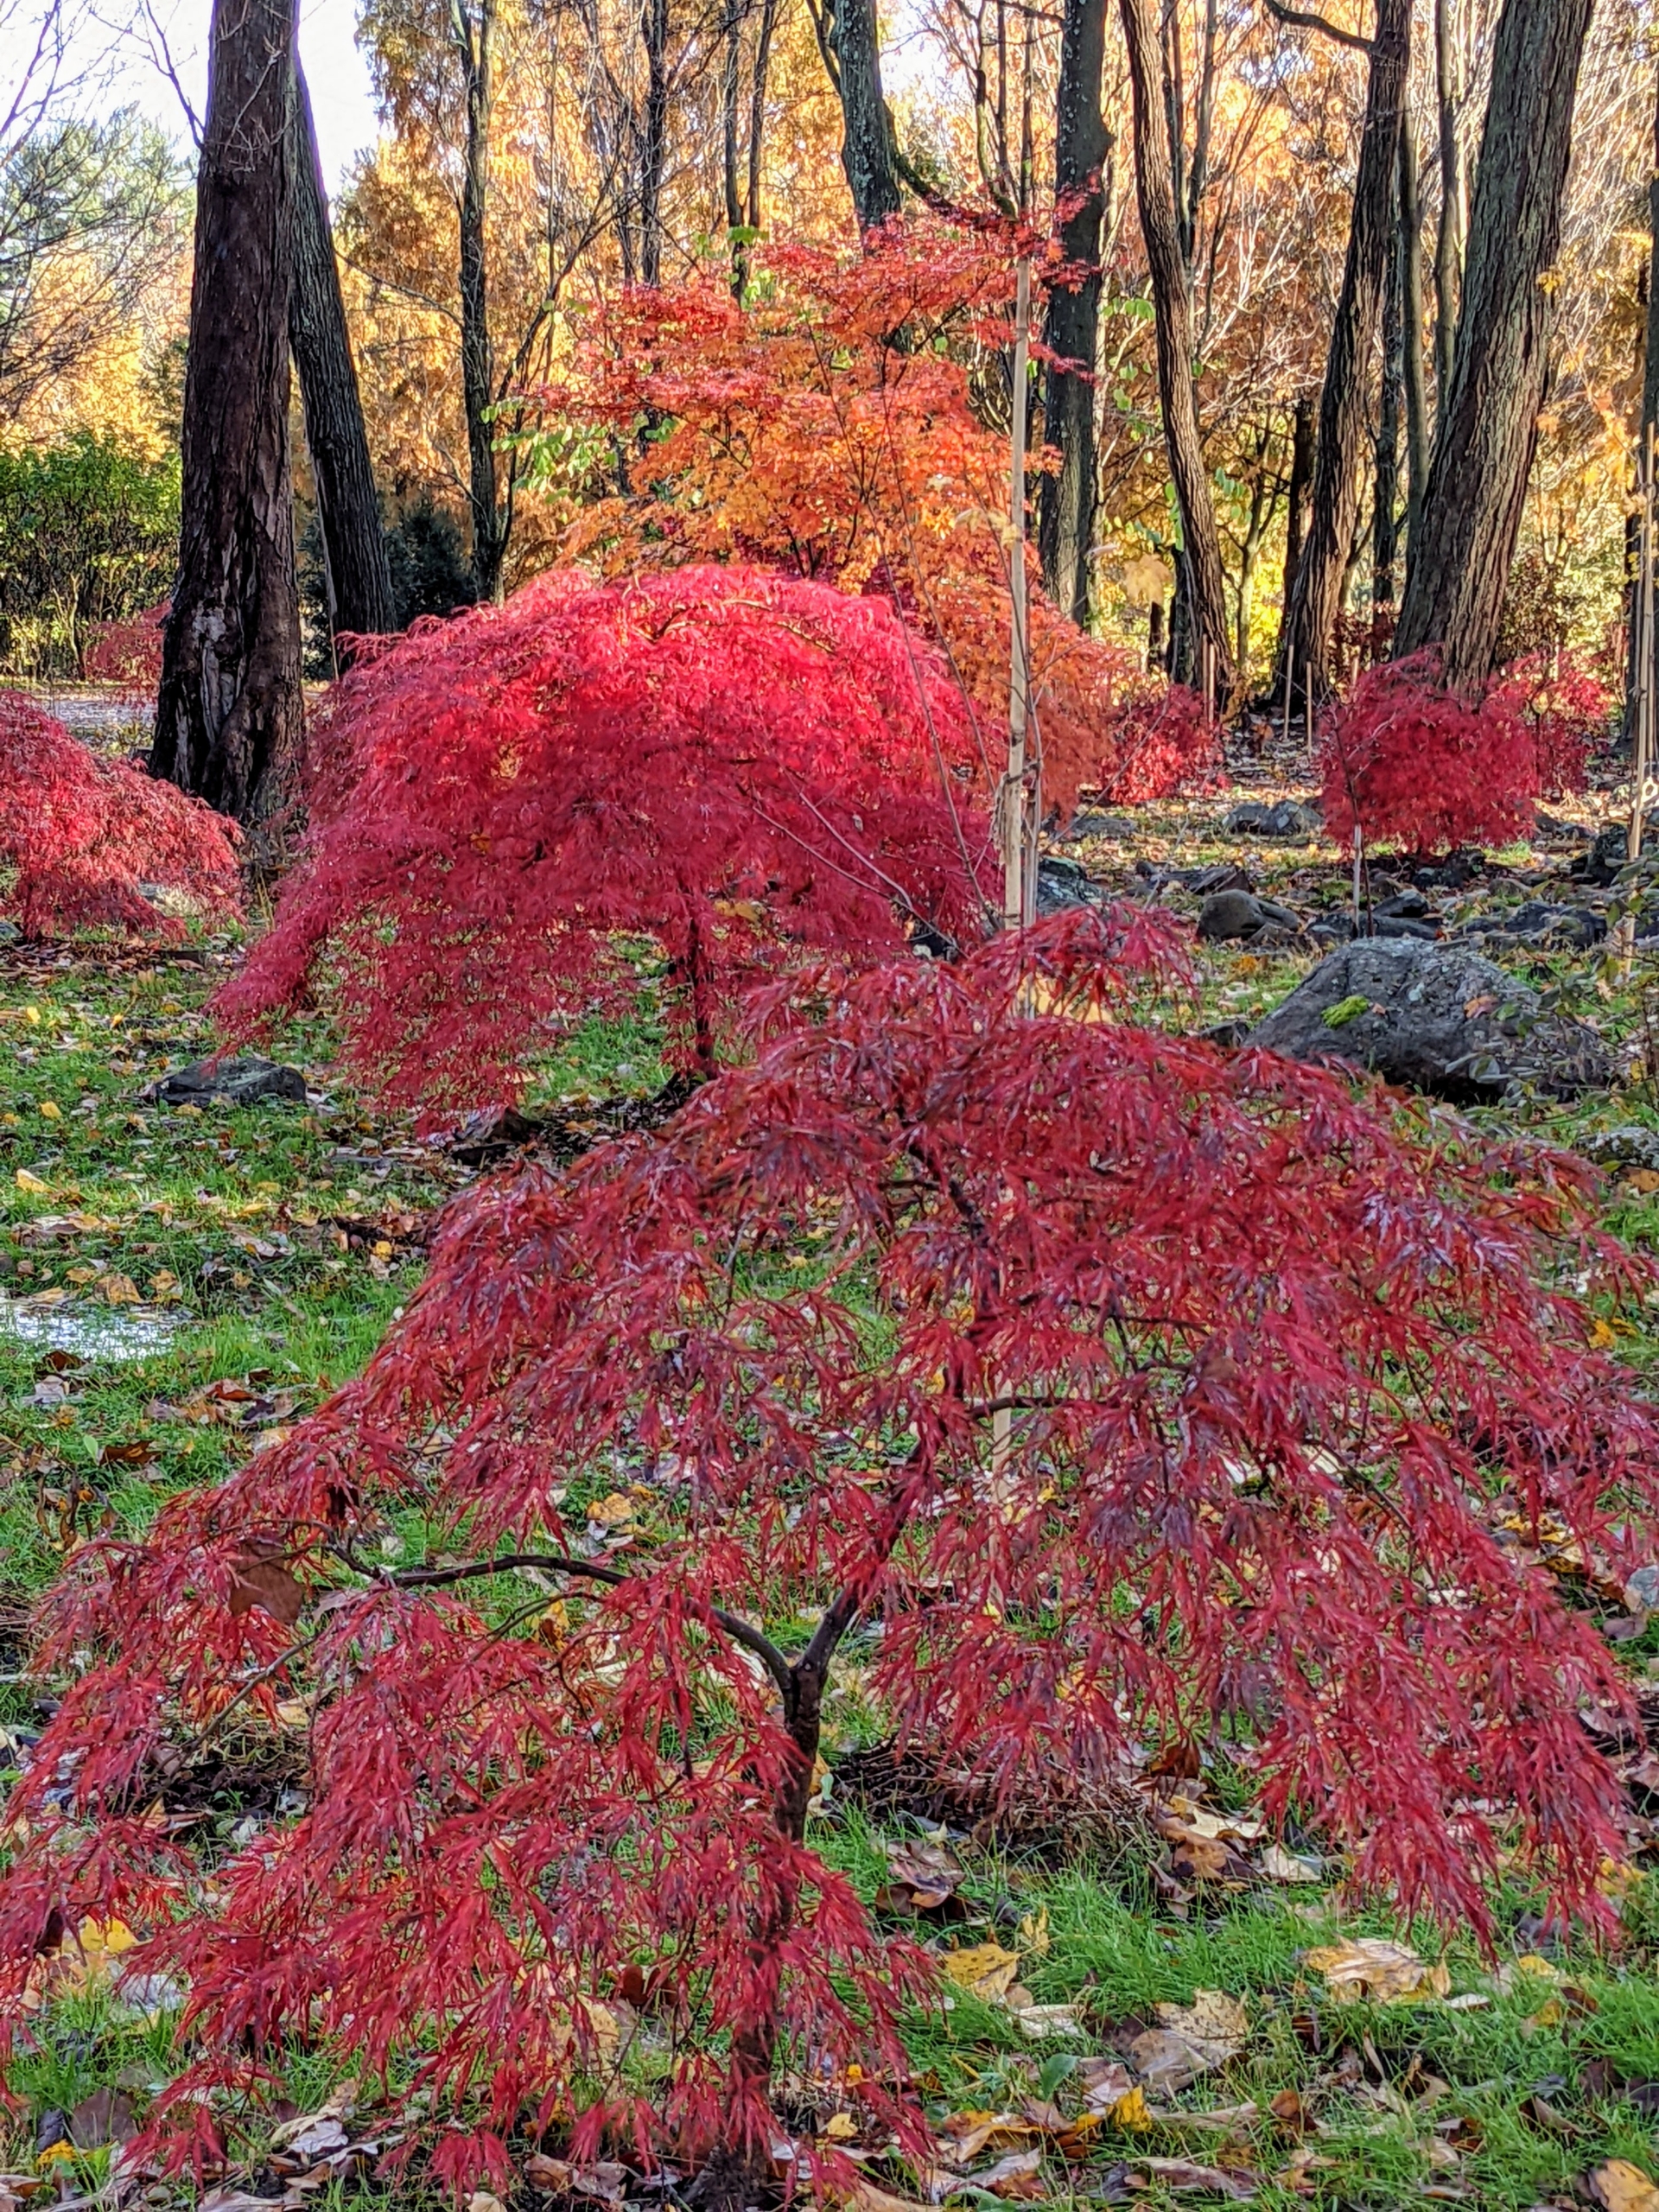
Their forms can be weeping, rounded, dwarf, mounding, upright, or cascading. I have included as many different forms as possible in this grove.
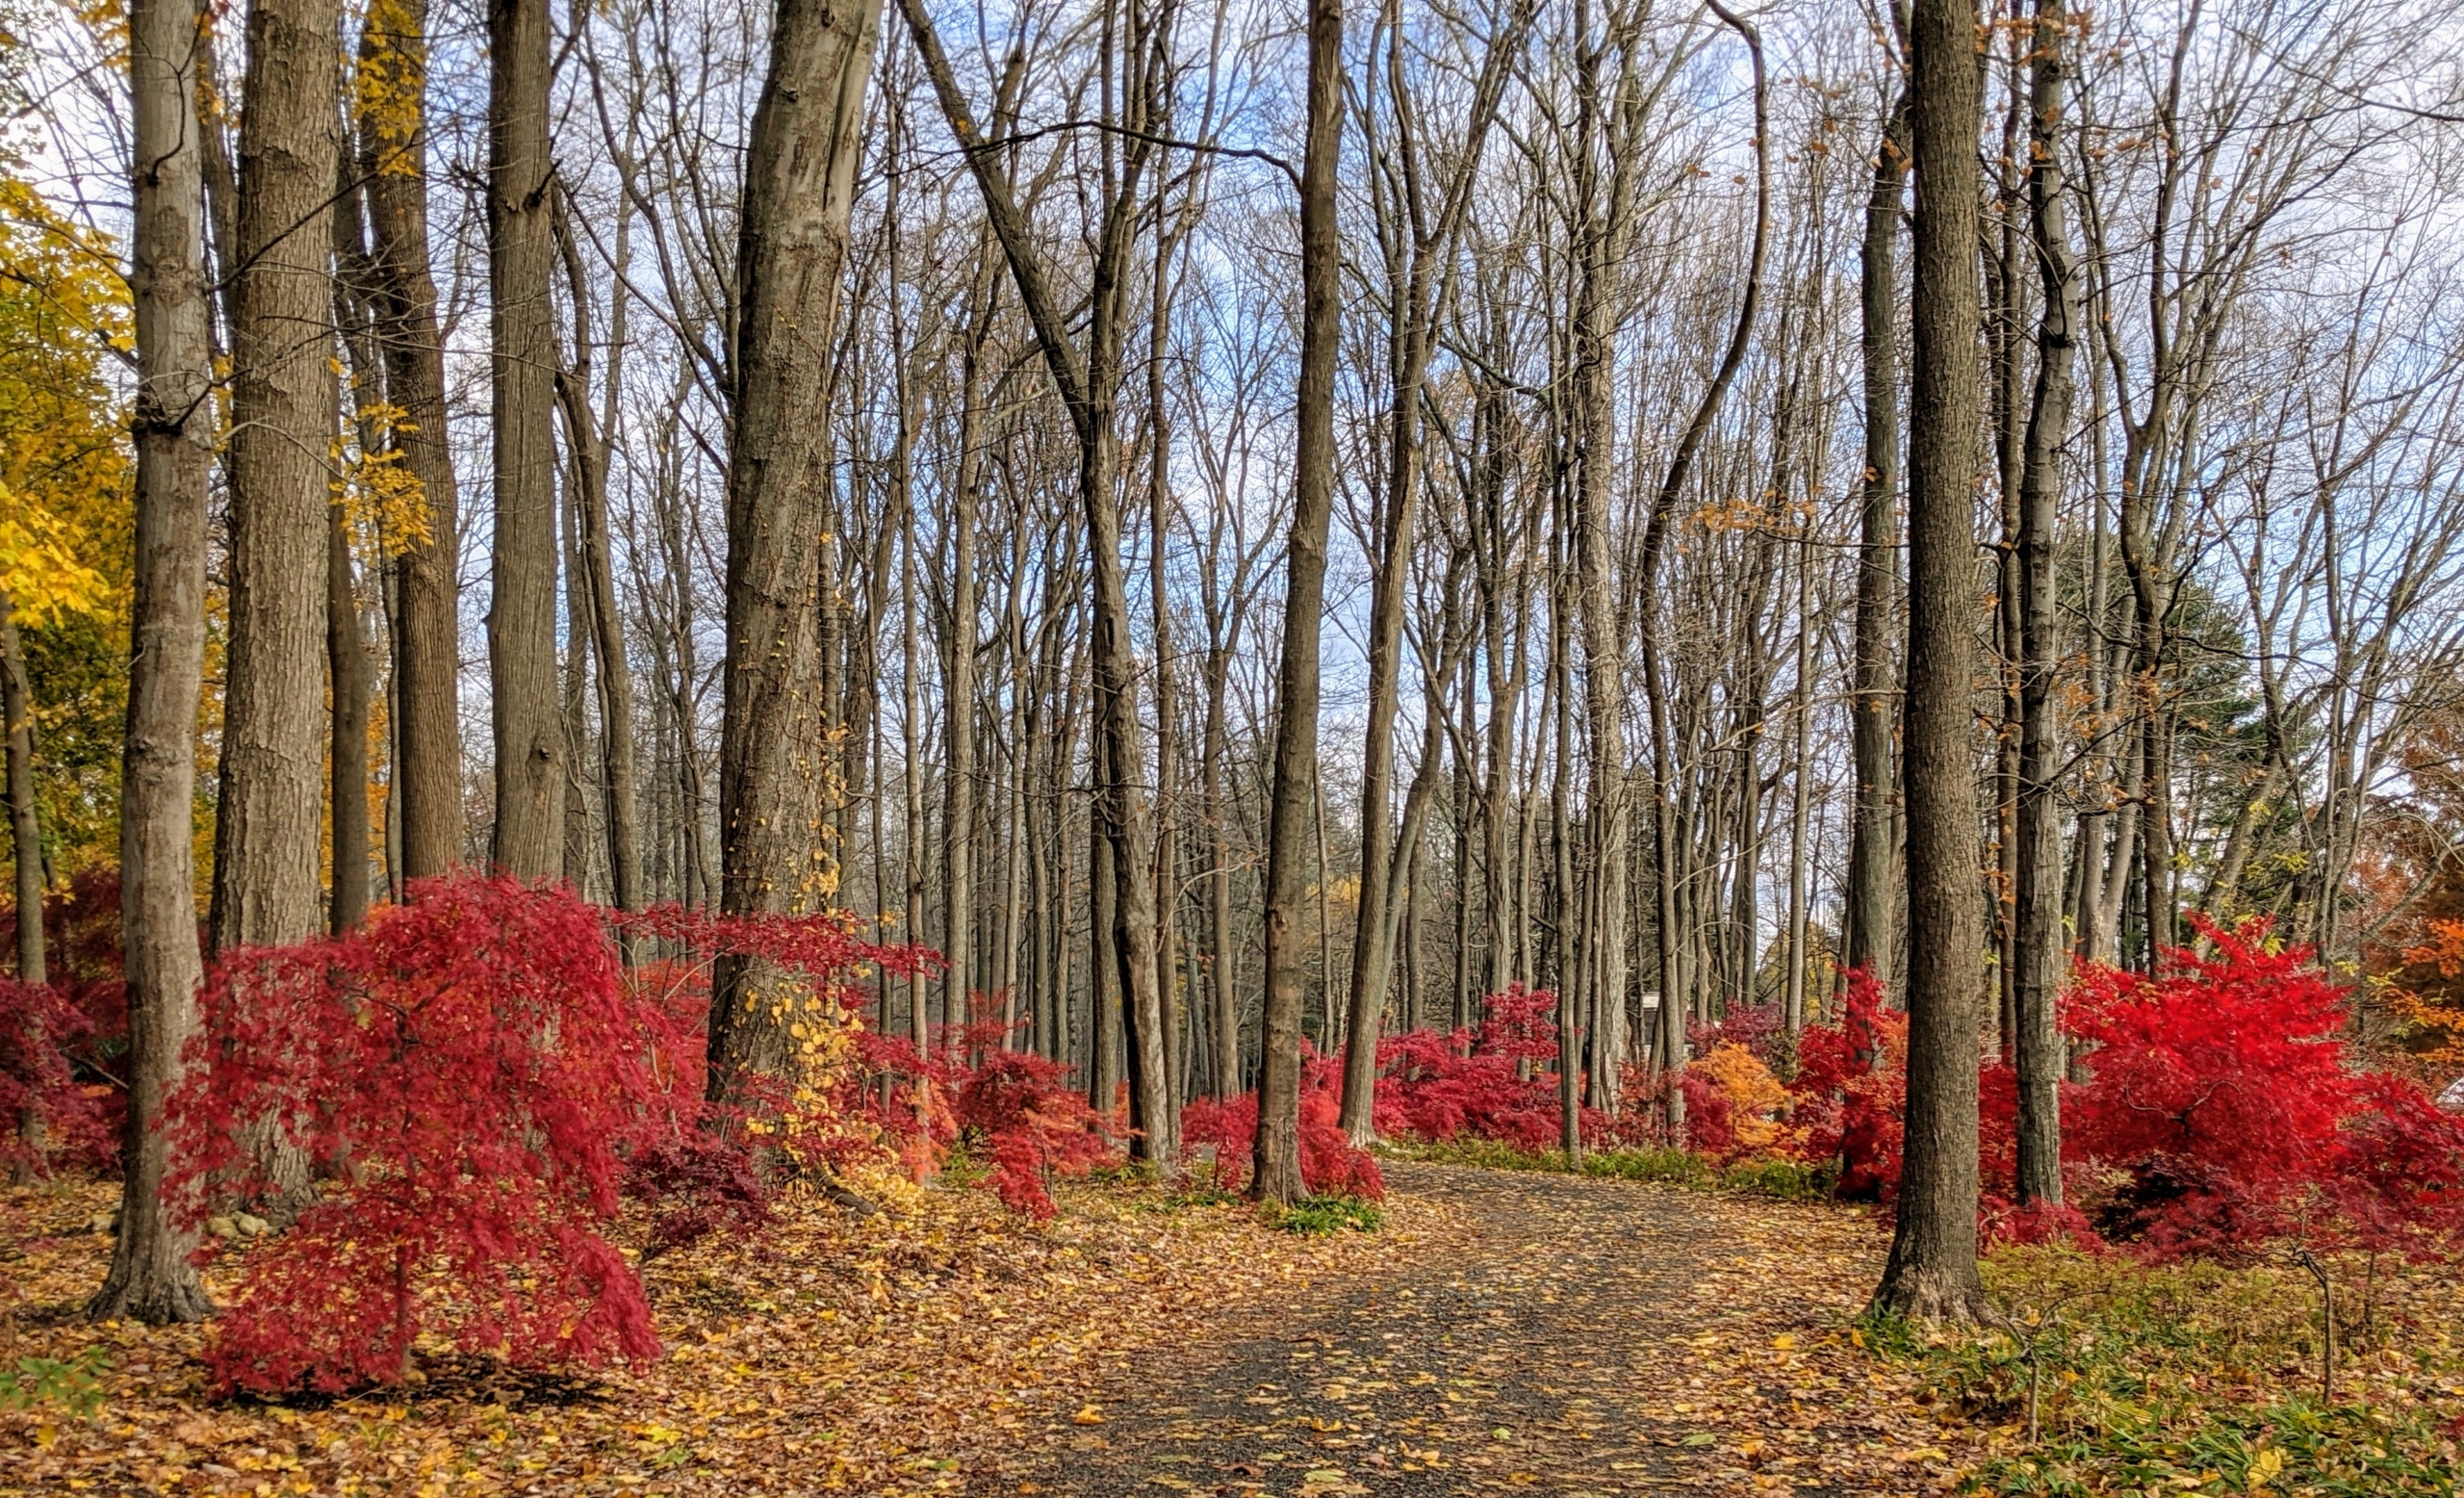
Japanese maple trees are particularly suitable for borders and ornamental paths because their root systems are compact and not invasive. Through this woodland grove, they line both sides of the carriage road.
Any heavy pruning should be done in late winter before leaf buds begin to open. I prefer to prune all the Japanese maples myself. I cut out scraggly interior twigs and branches and leave the structural branches alone. Small, corrective cuts can be made any time of year.
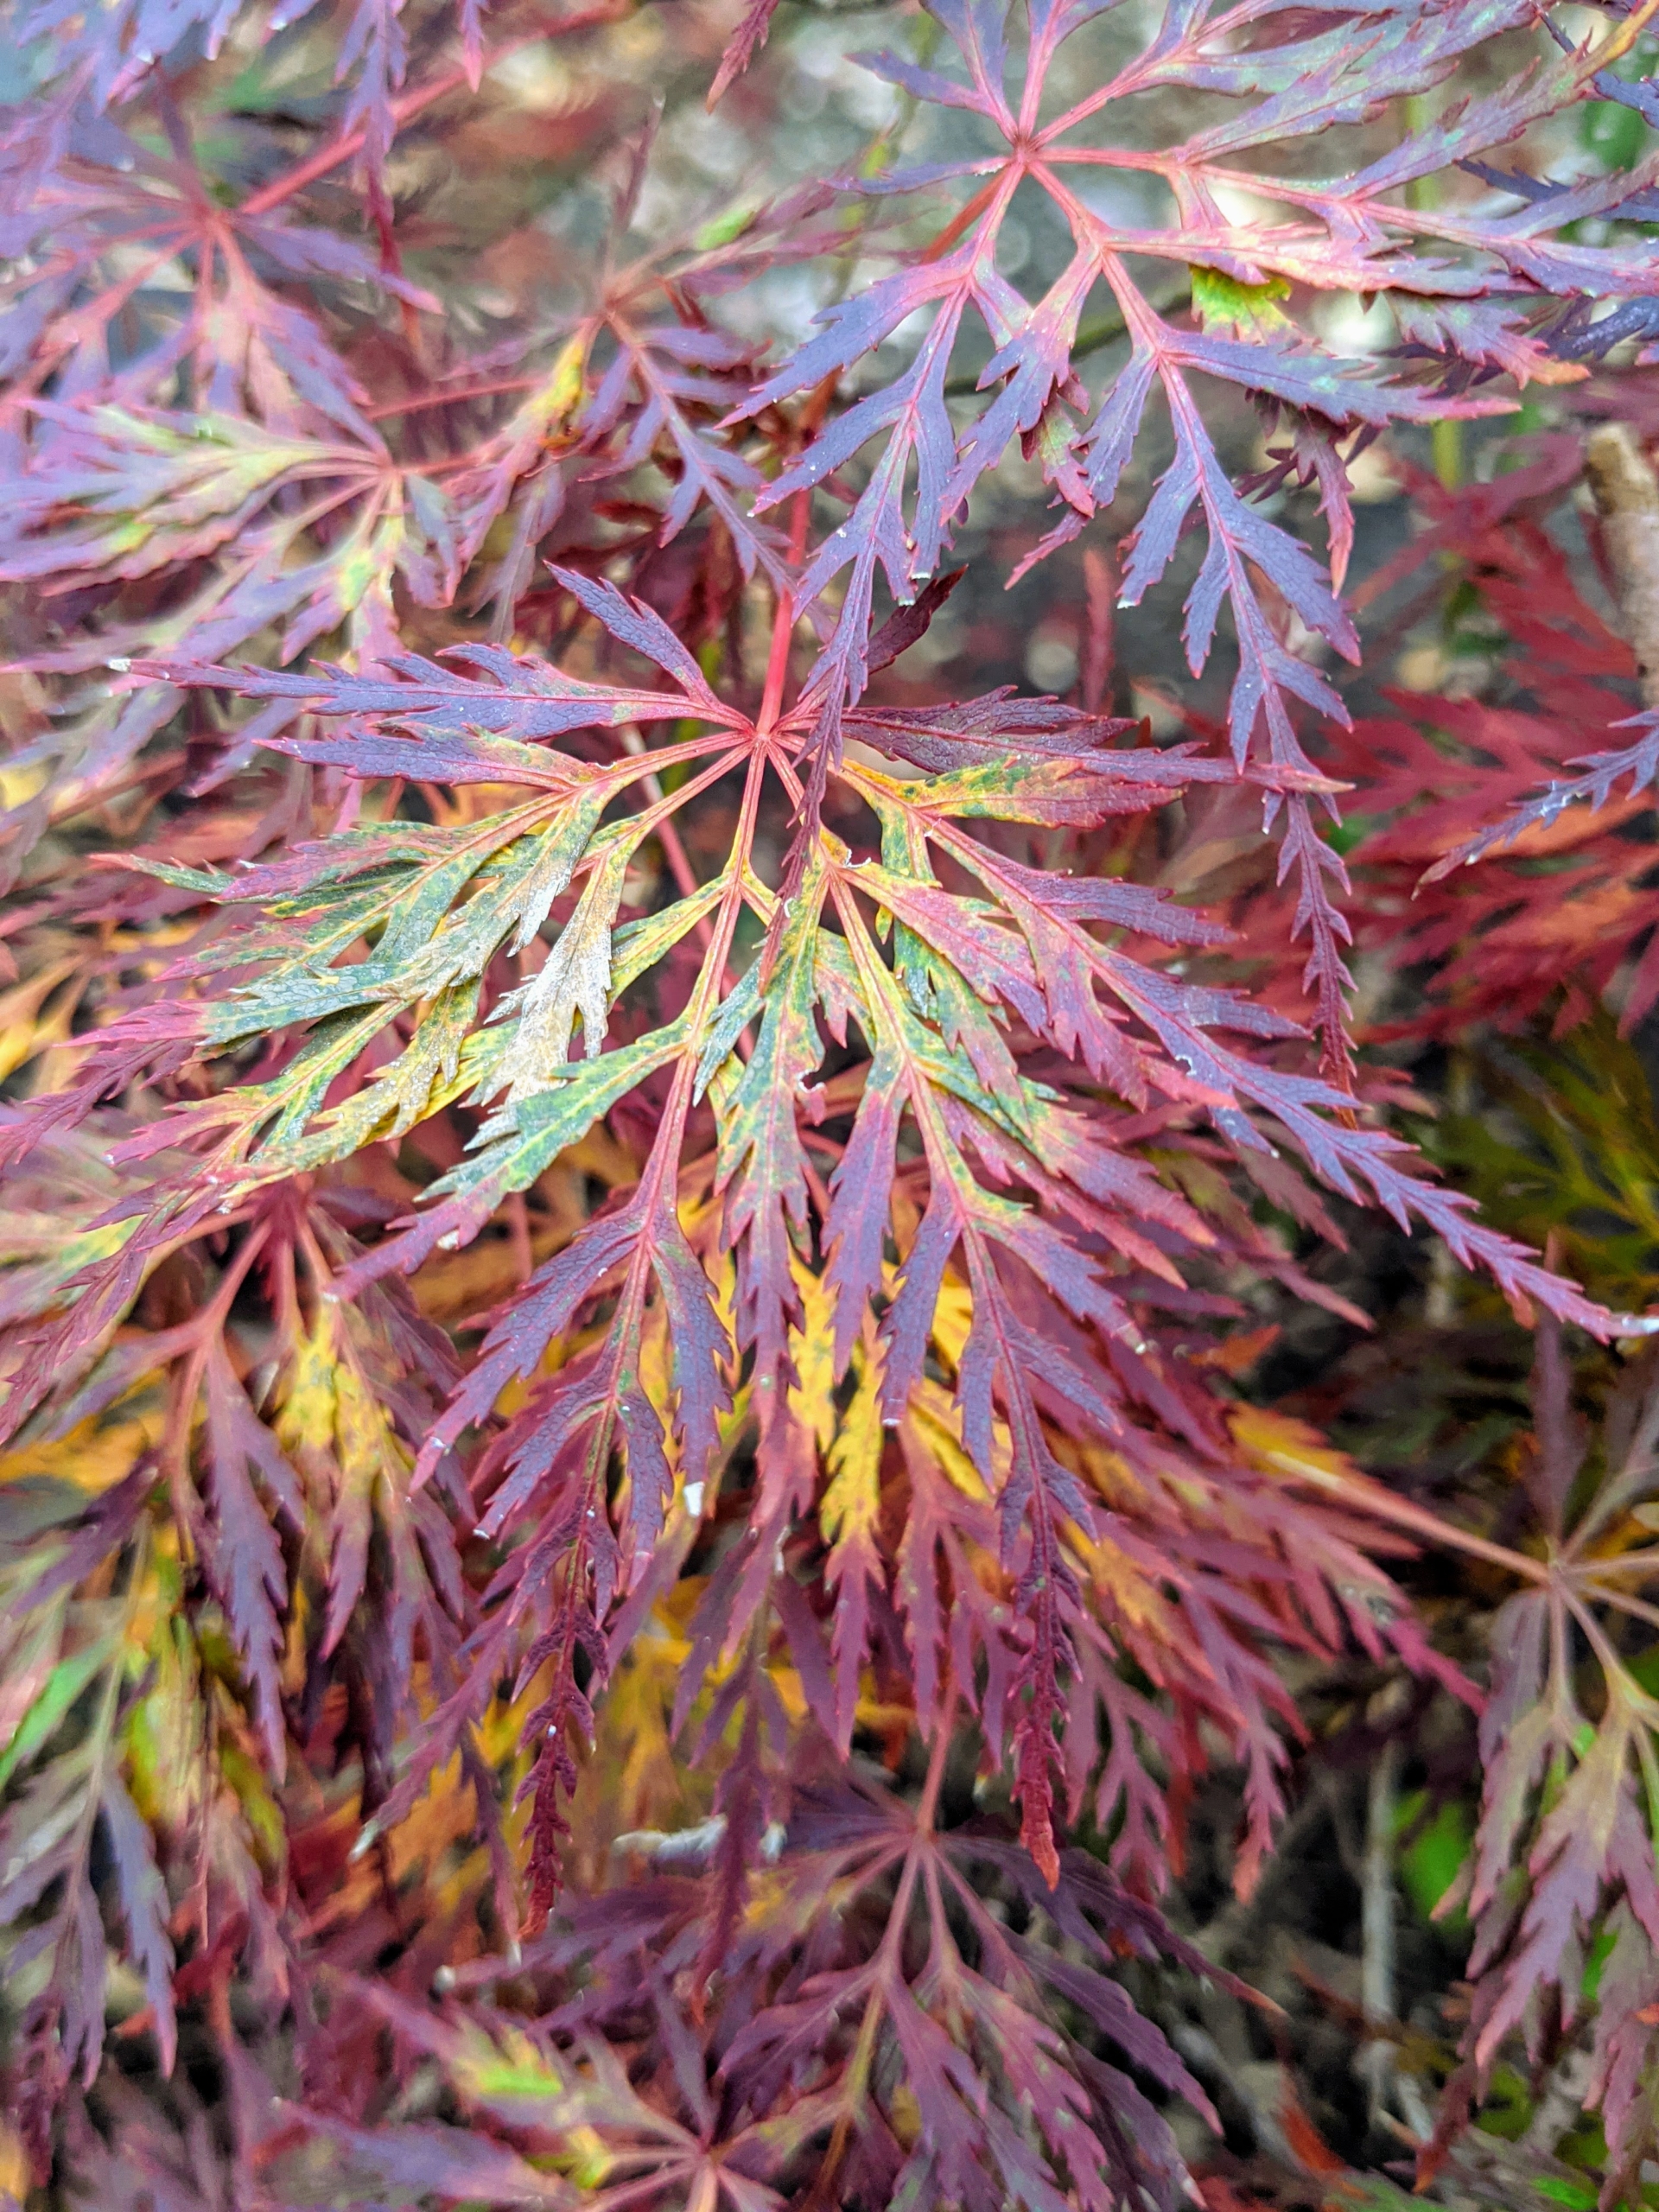
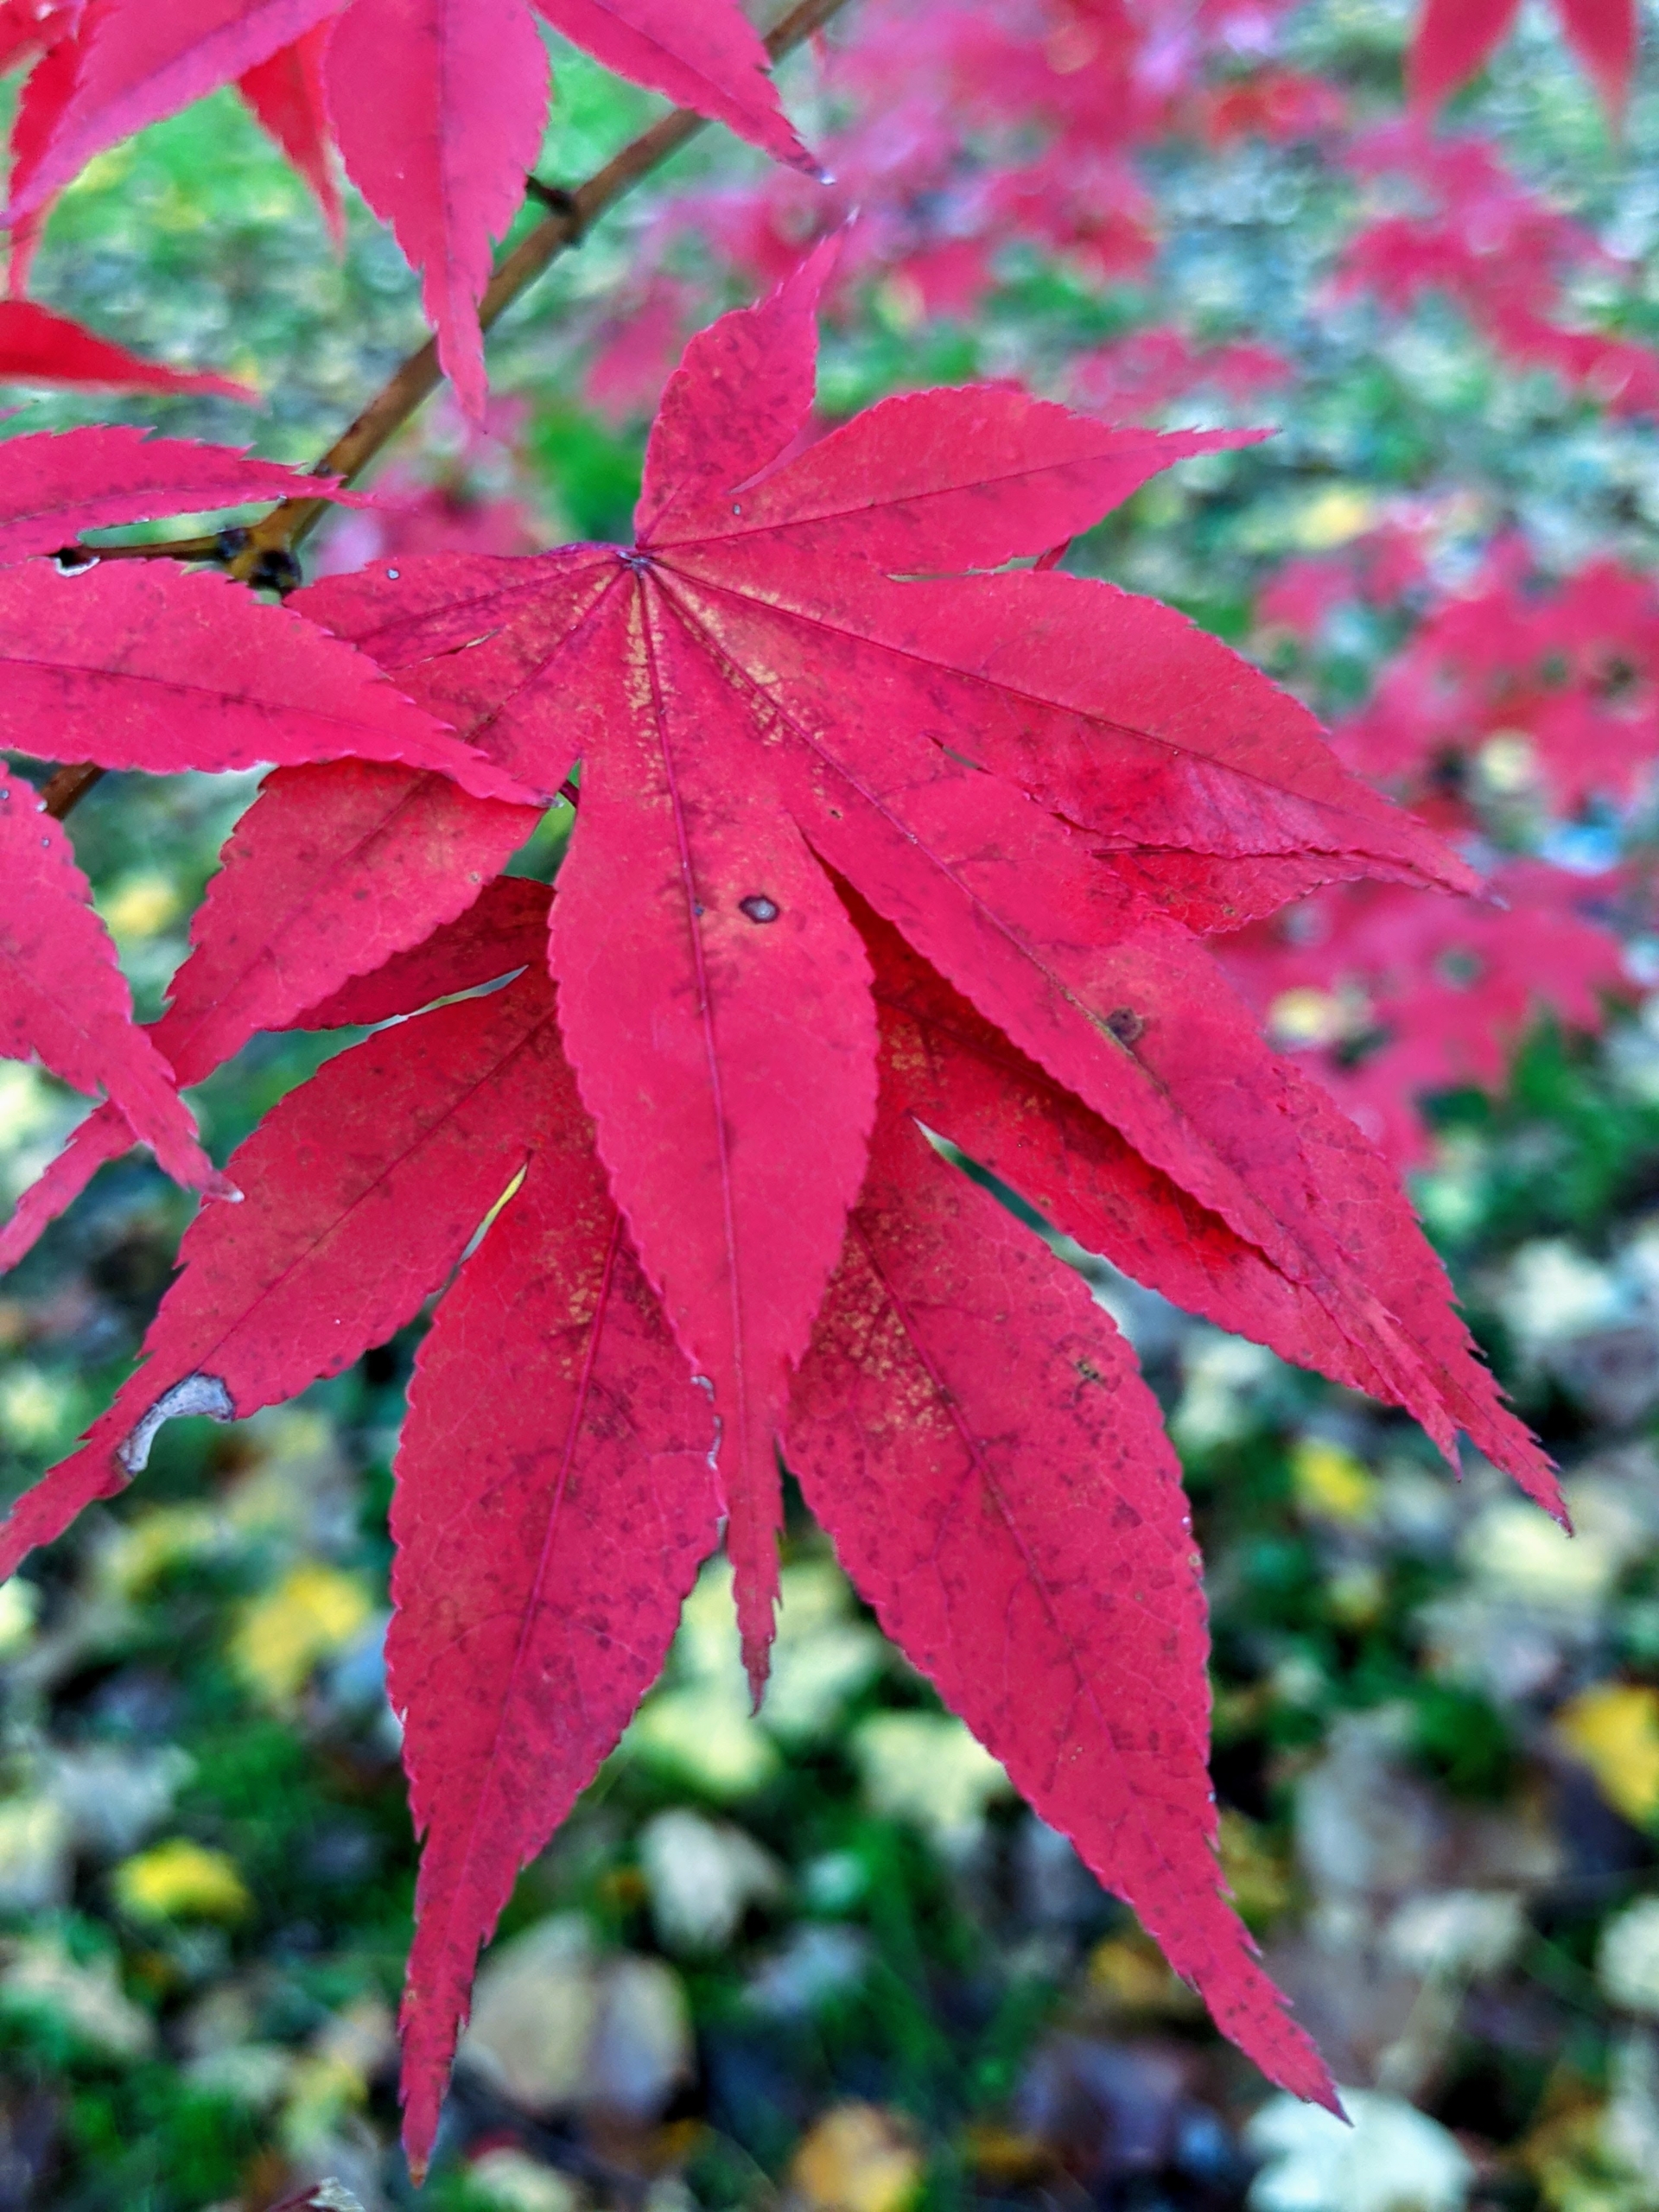
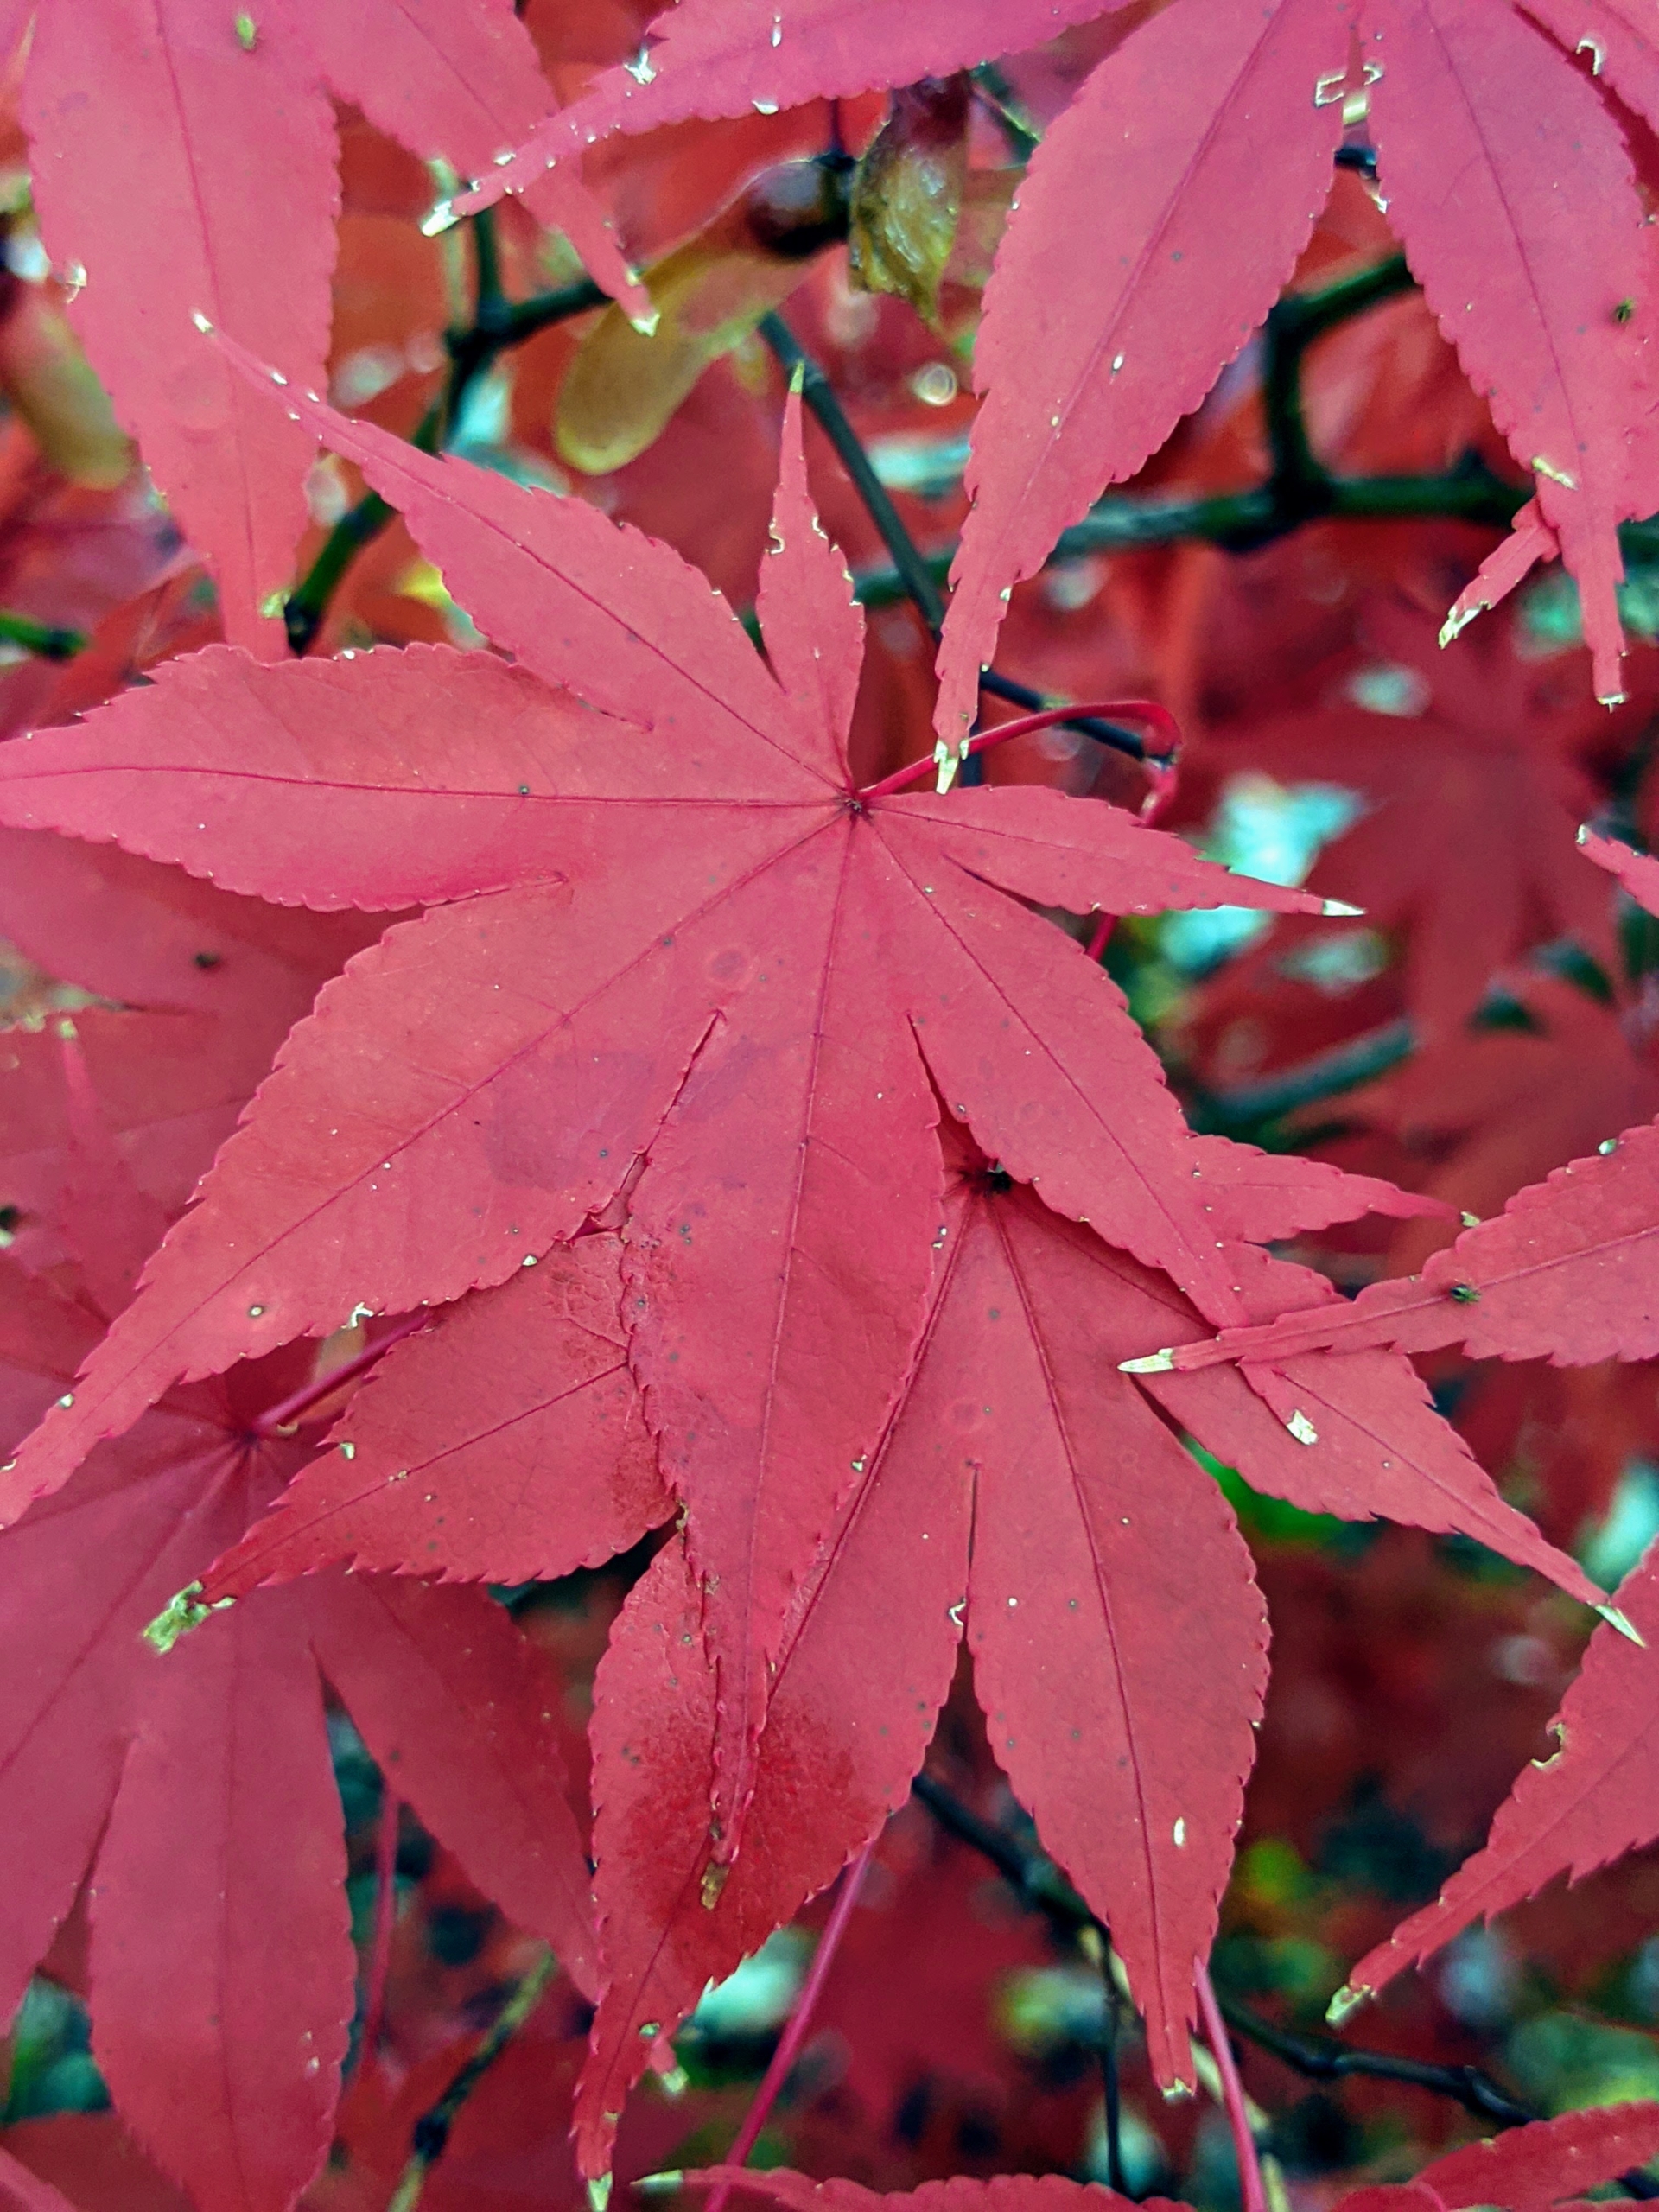
Red leafed cultivars are the most popular, followed by green shrubs with deeply dissected leaves. The leaves in the Palmatum Group are most typical of the wild species. The leaf lobes are more divided, nearly to the leaf base.
Japanese maple leaves range from about an inch-and-a-half to four-inches long and wide with five, seven, or nine acutely pointed lobes.
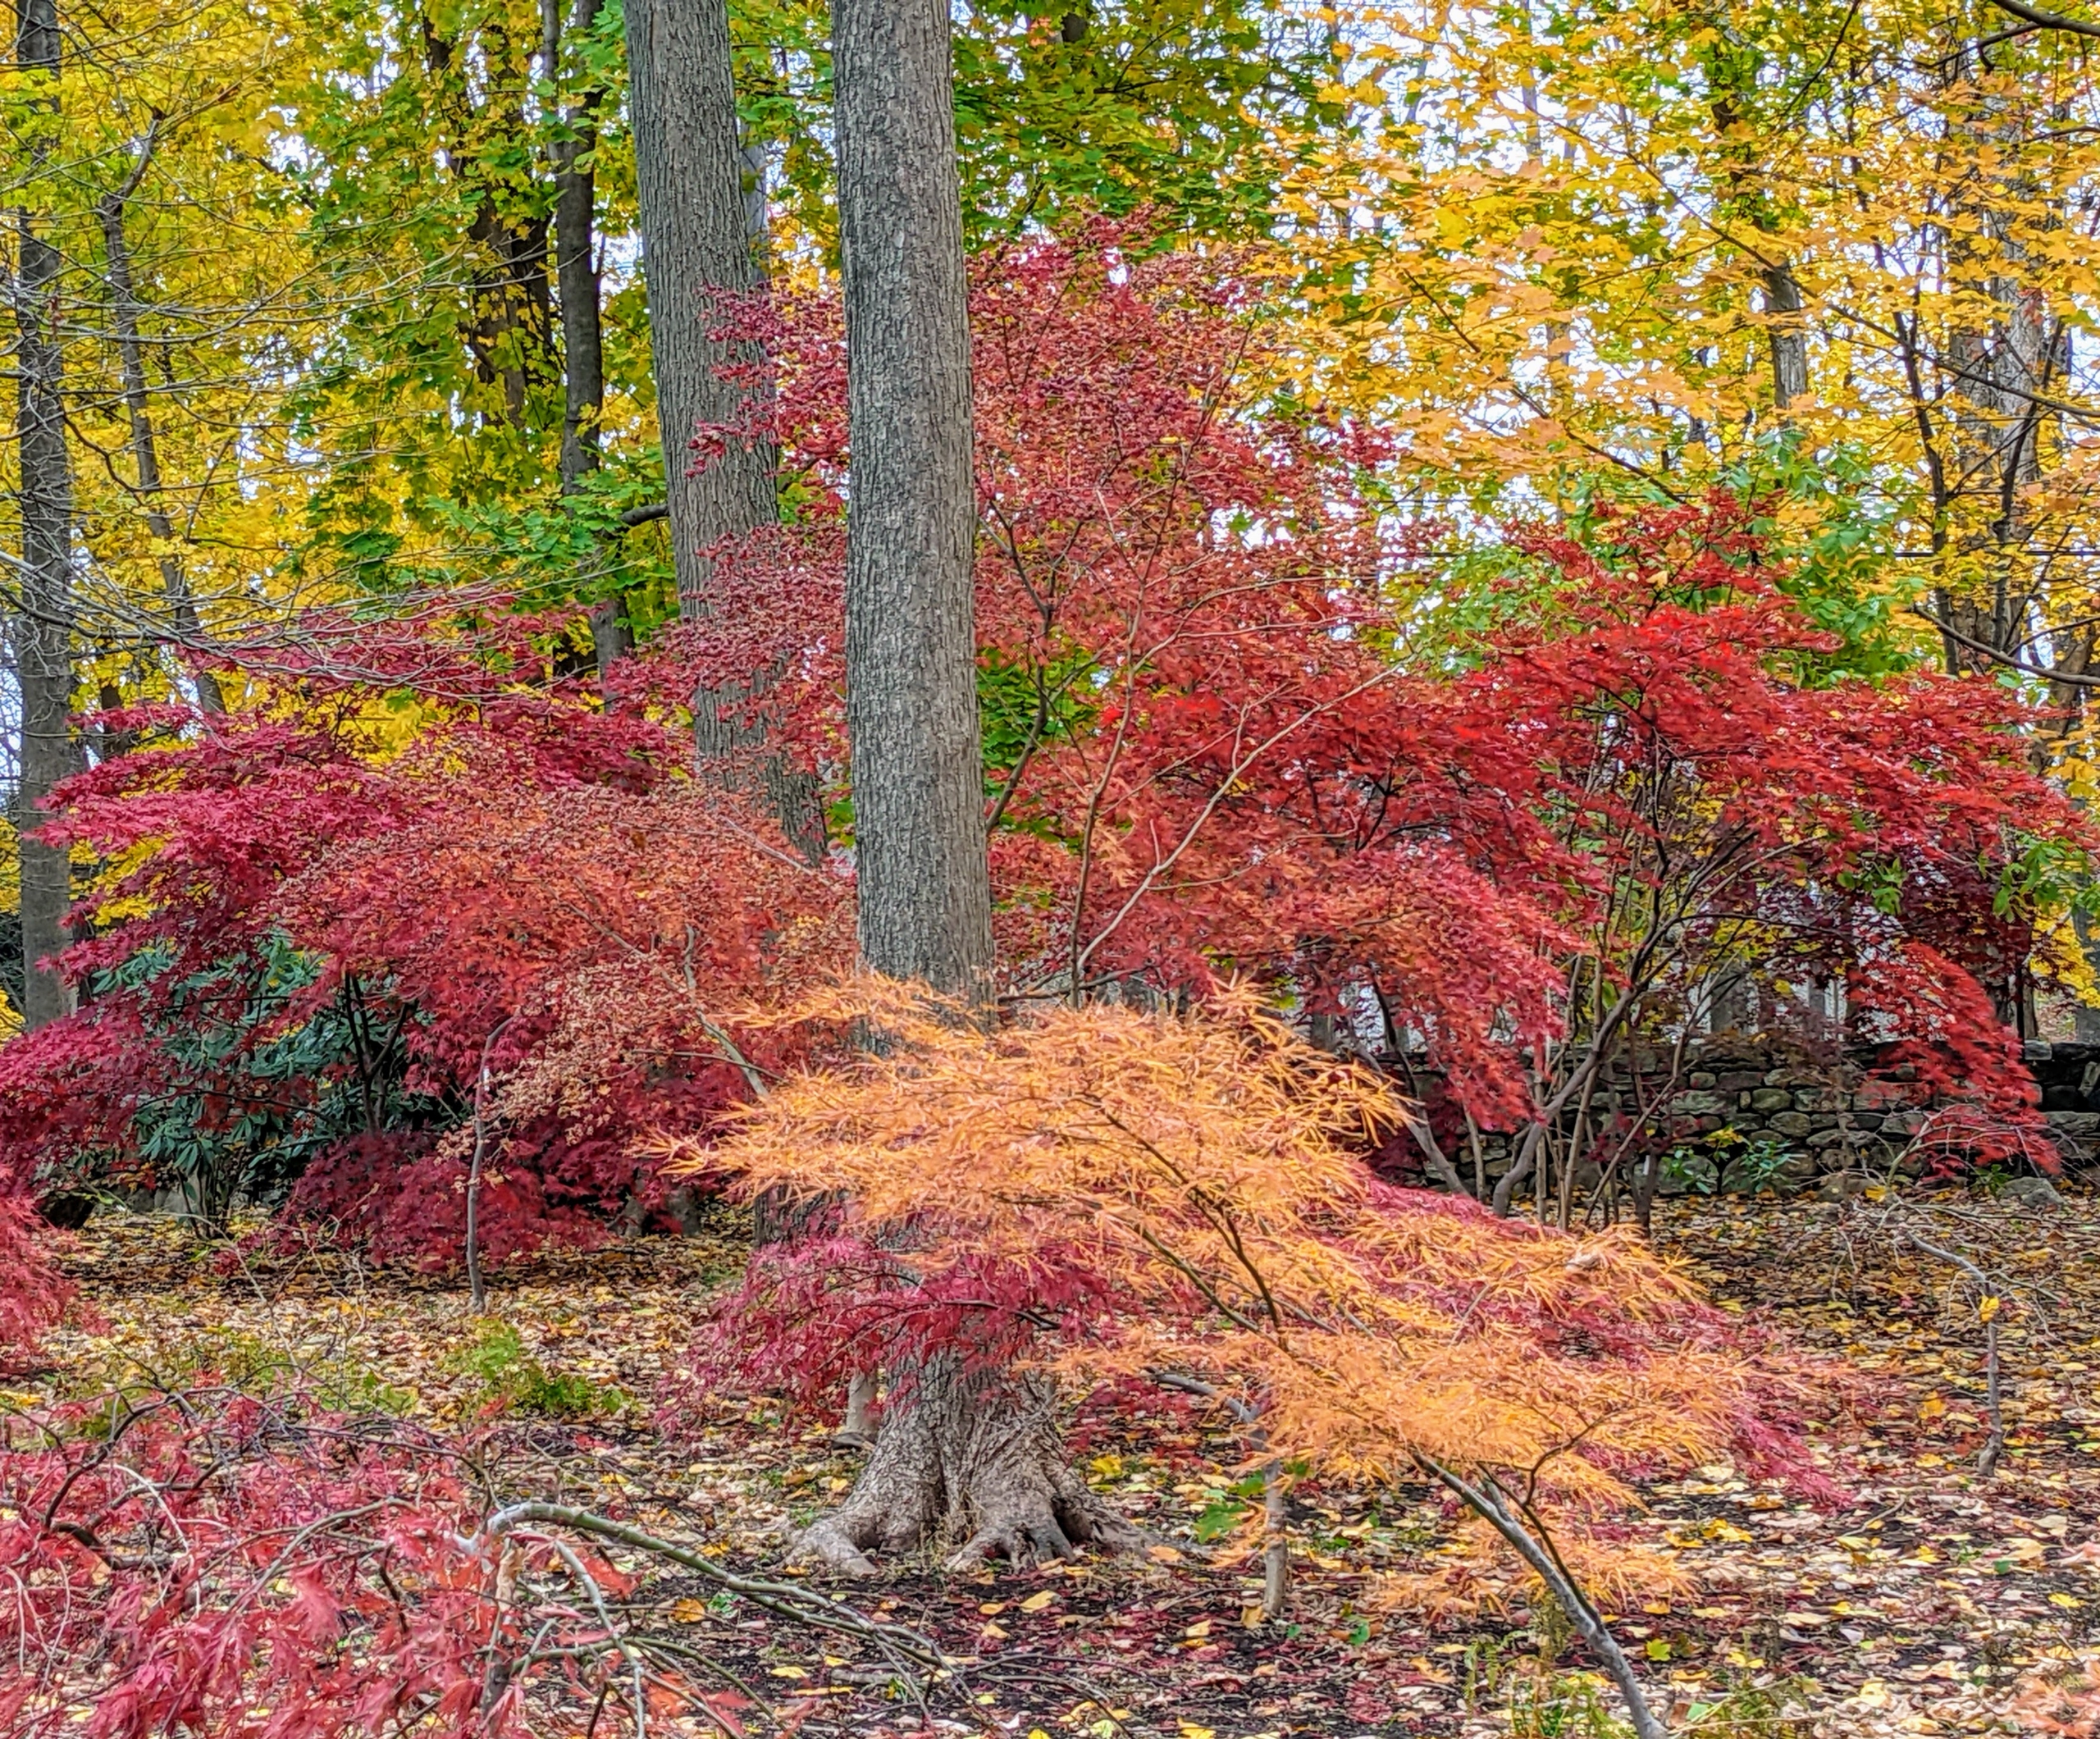
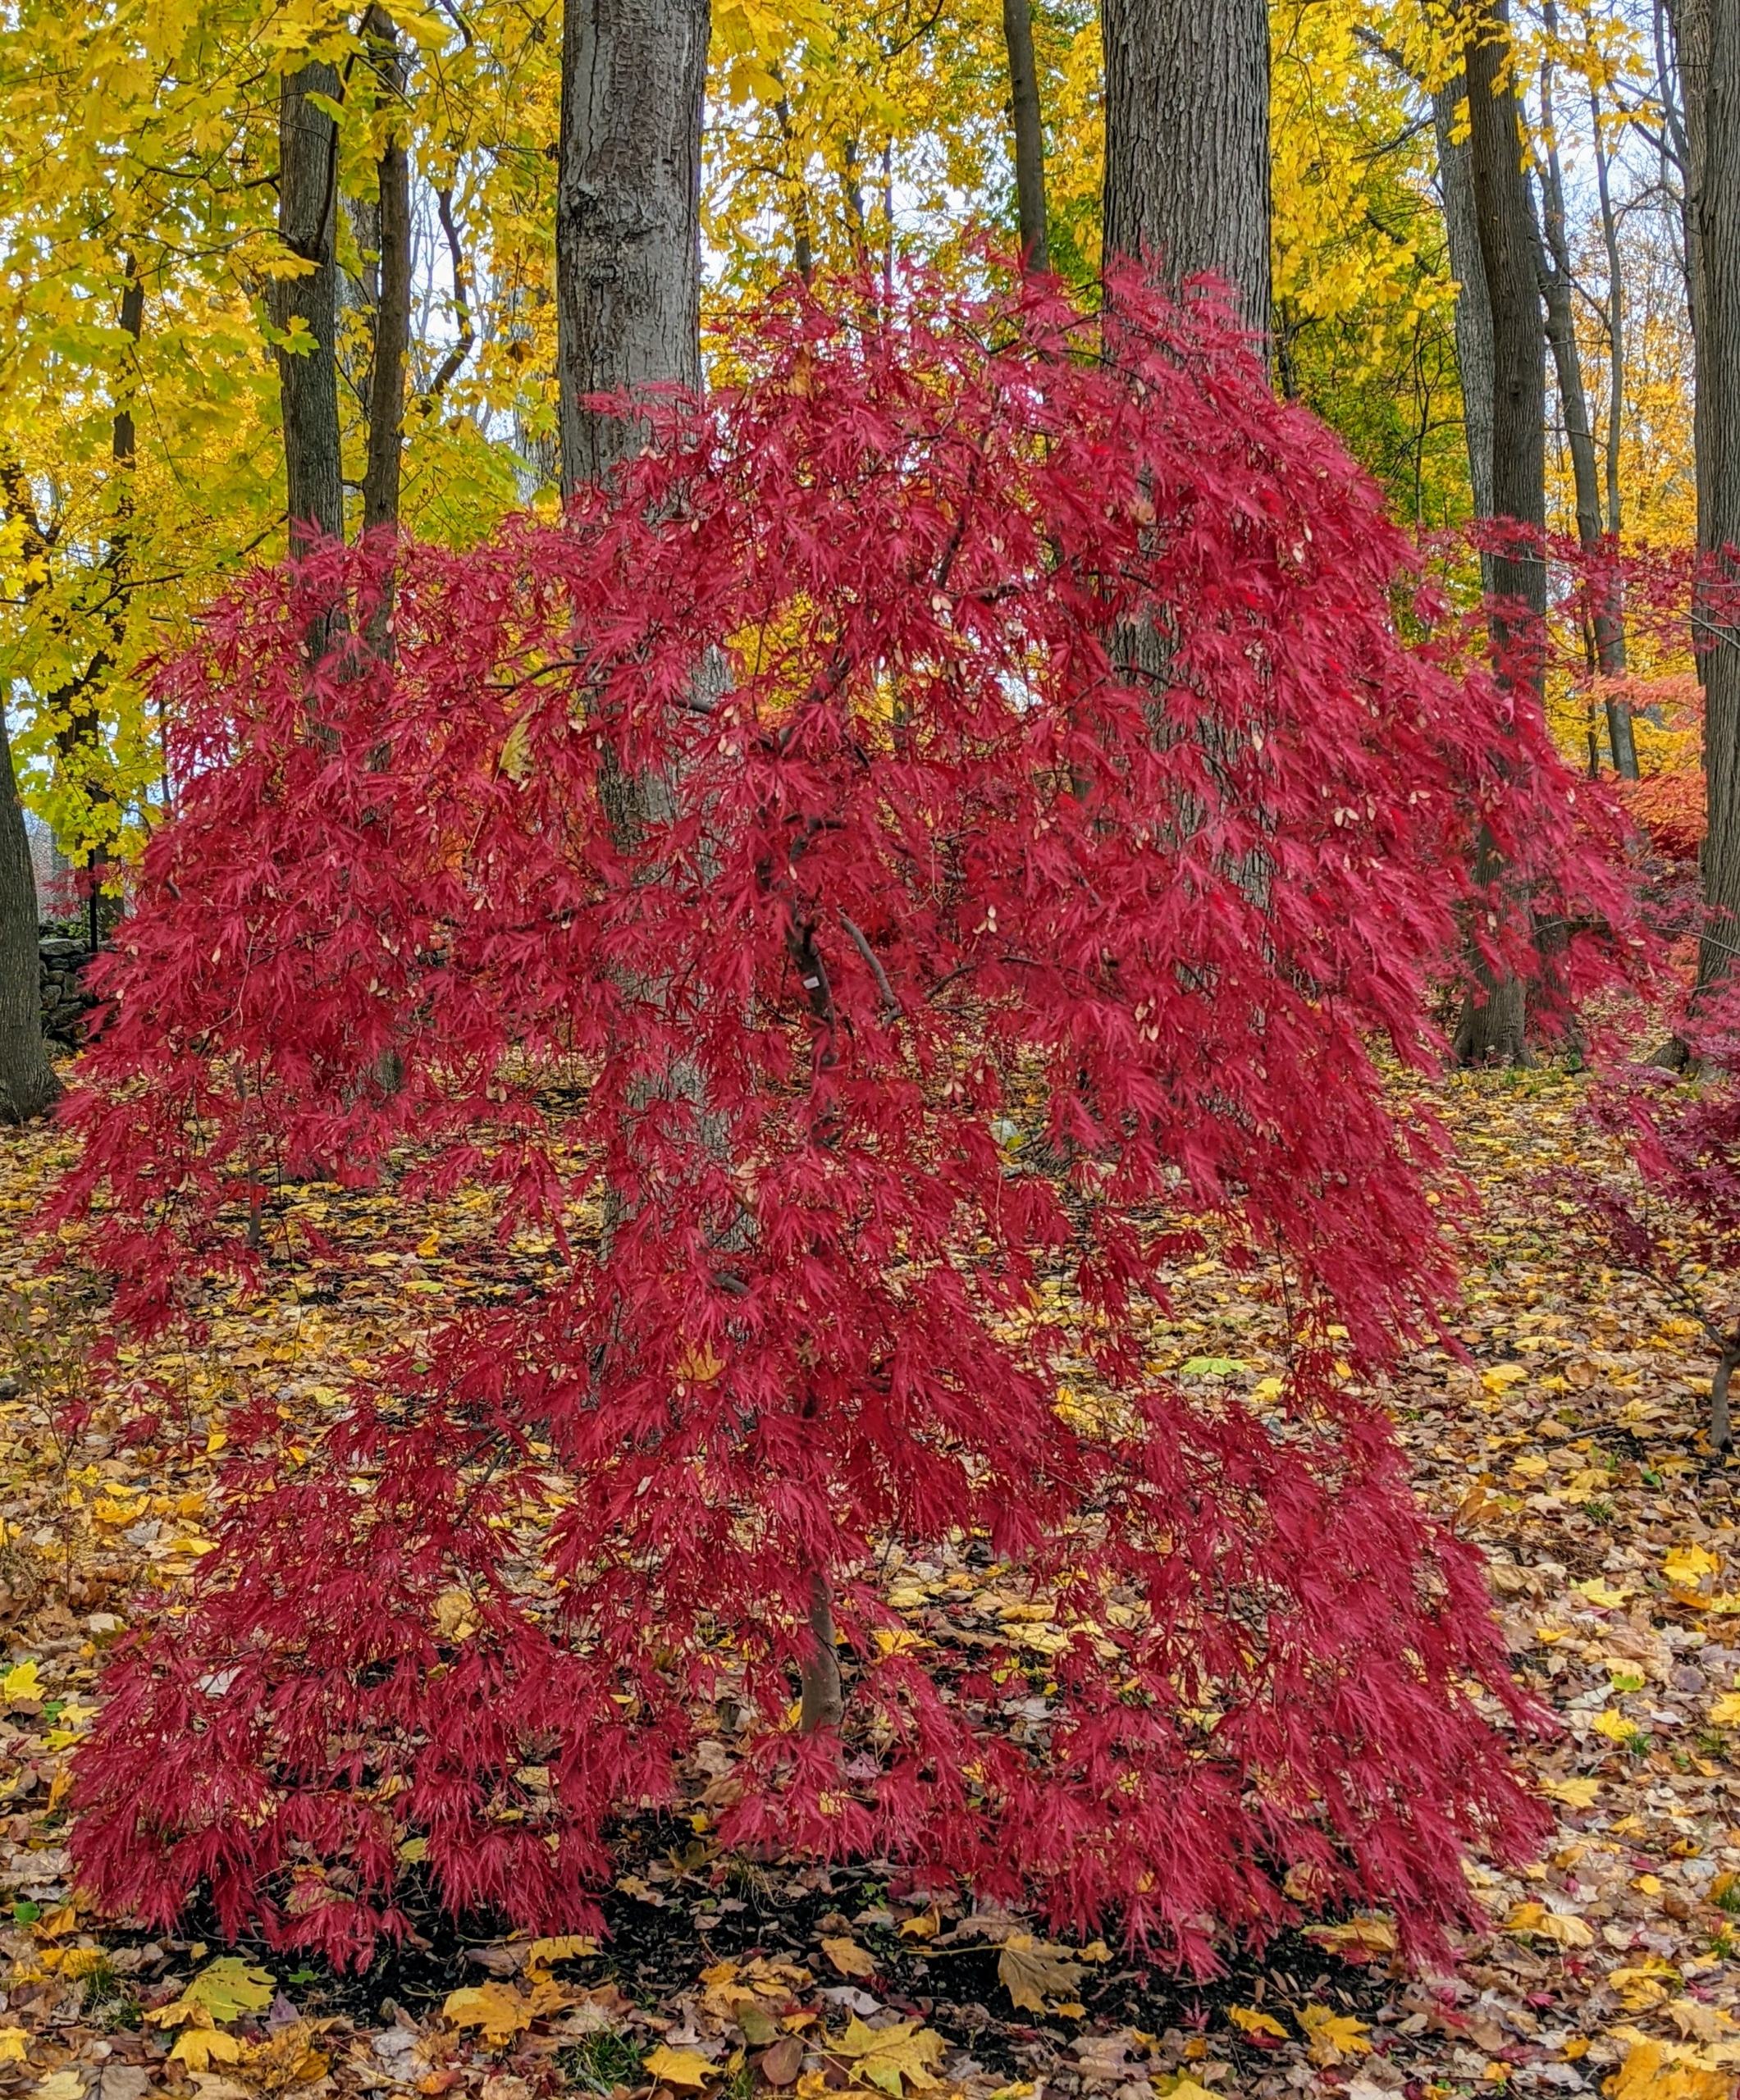
Acer palmatum ‘Tamukeyama’ is a graceful, mounding, dwarf maple tree with waxy, deep red bark, and beautiful cascading branches. The foliage is deeply lobed with a beautiful purple-red color throughout the summer. The color turns a bright showy red in the fall.
Acer palmatum ‘Red Pygmy’ is a semi dwarf ribbon-leaf Acer palmatum. It has leaves that emerge vivid red and turn to dark red to purple in the summer, and returning to brilliant shades of red and orange in autumn.
This is ‘Emerald Lace’ – a fast-growing, deciduous small tree with deep emerald green, lacy foliage. ‘Emerald Lace’ features finely dissected leaves that emerge bright green in spring with red petioles that remain red throughout the season. Summer color lightens to light green with red highlights. ‘Emerald Lace’ has great fall colors that run yellow to orange and finish up with fiery red. Here, one can clearly see the changing leaf hues.
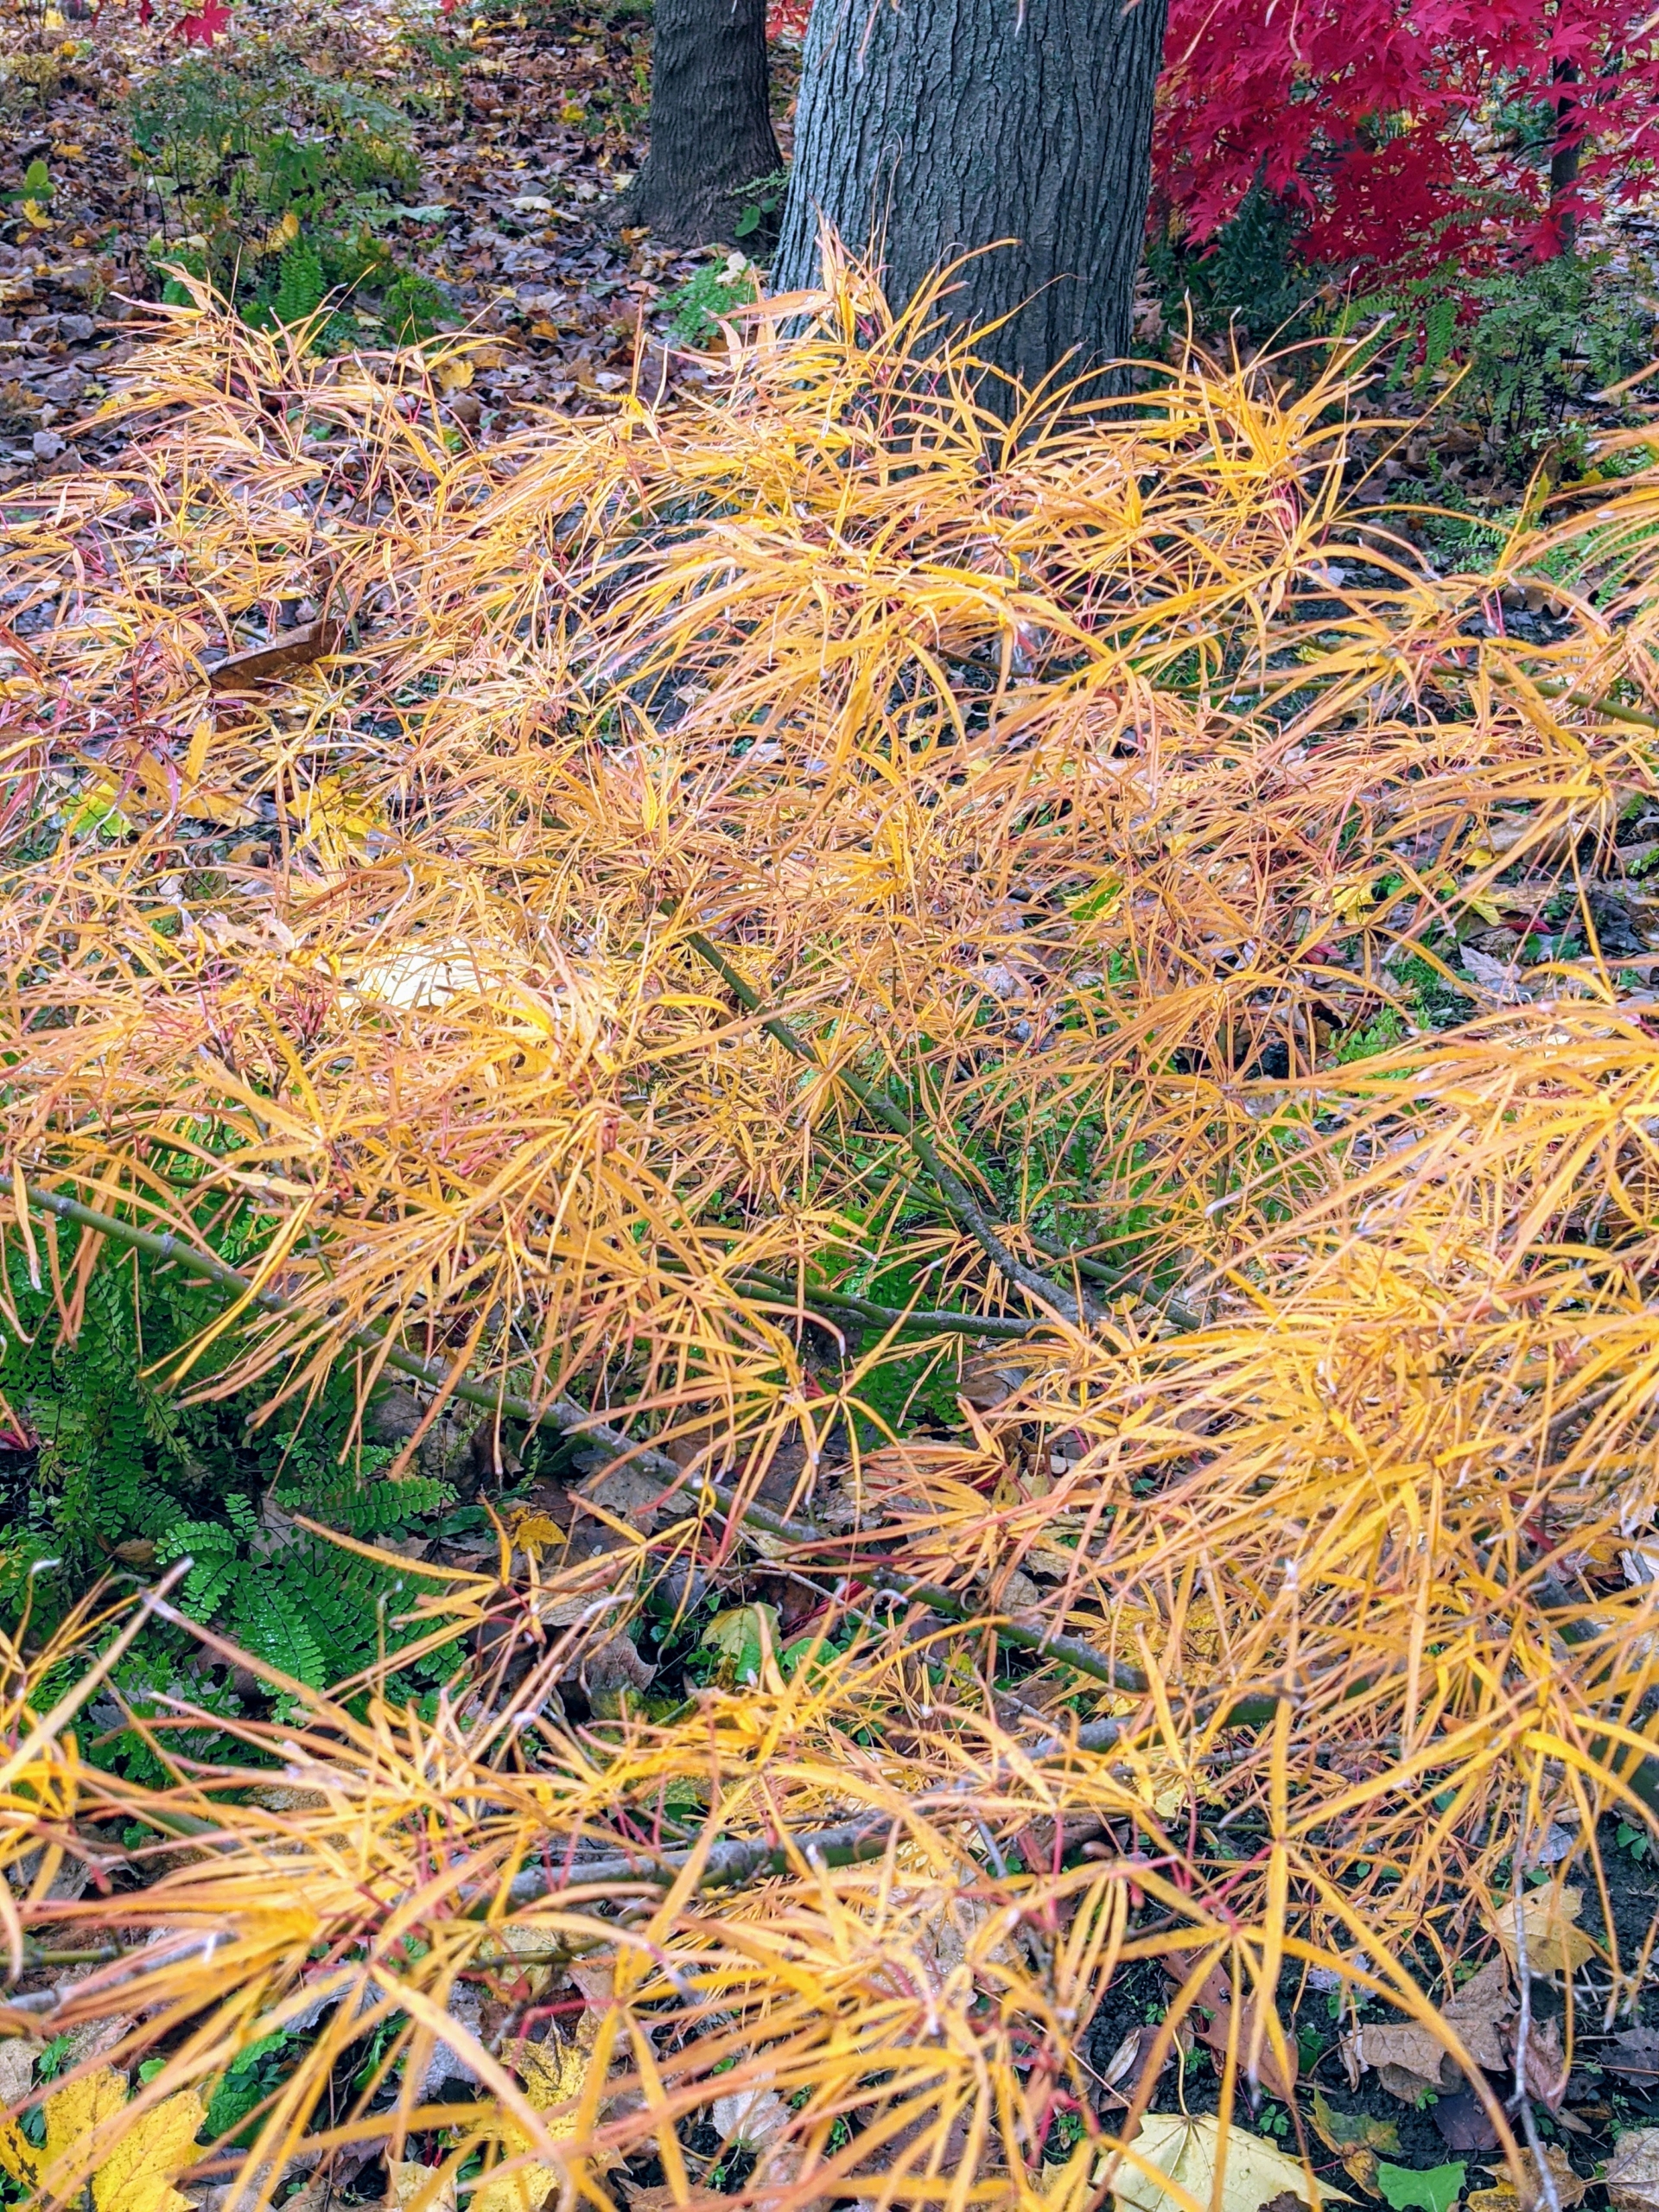
I love the bright yellow-gold color of this lace-leaf variety.
Acer palmatum ‘Winter Flame’ takes on a yellow, orange in autumn and then a fiery bright coral red in winter.
Acer palmatum ‘Hogyoku’ is rounded to broad-rounded, often with low branches. In autumn, colors include shades of yellow, bold red-purple and bronze.
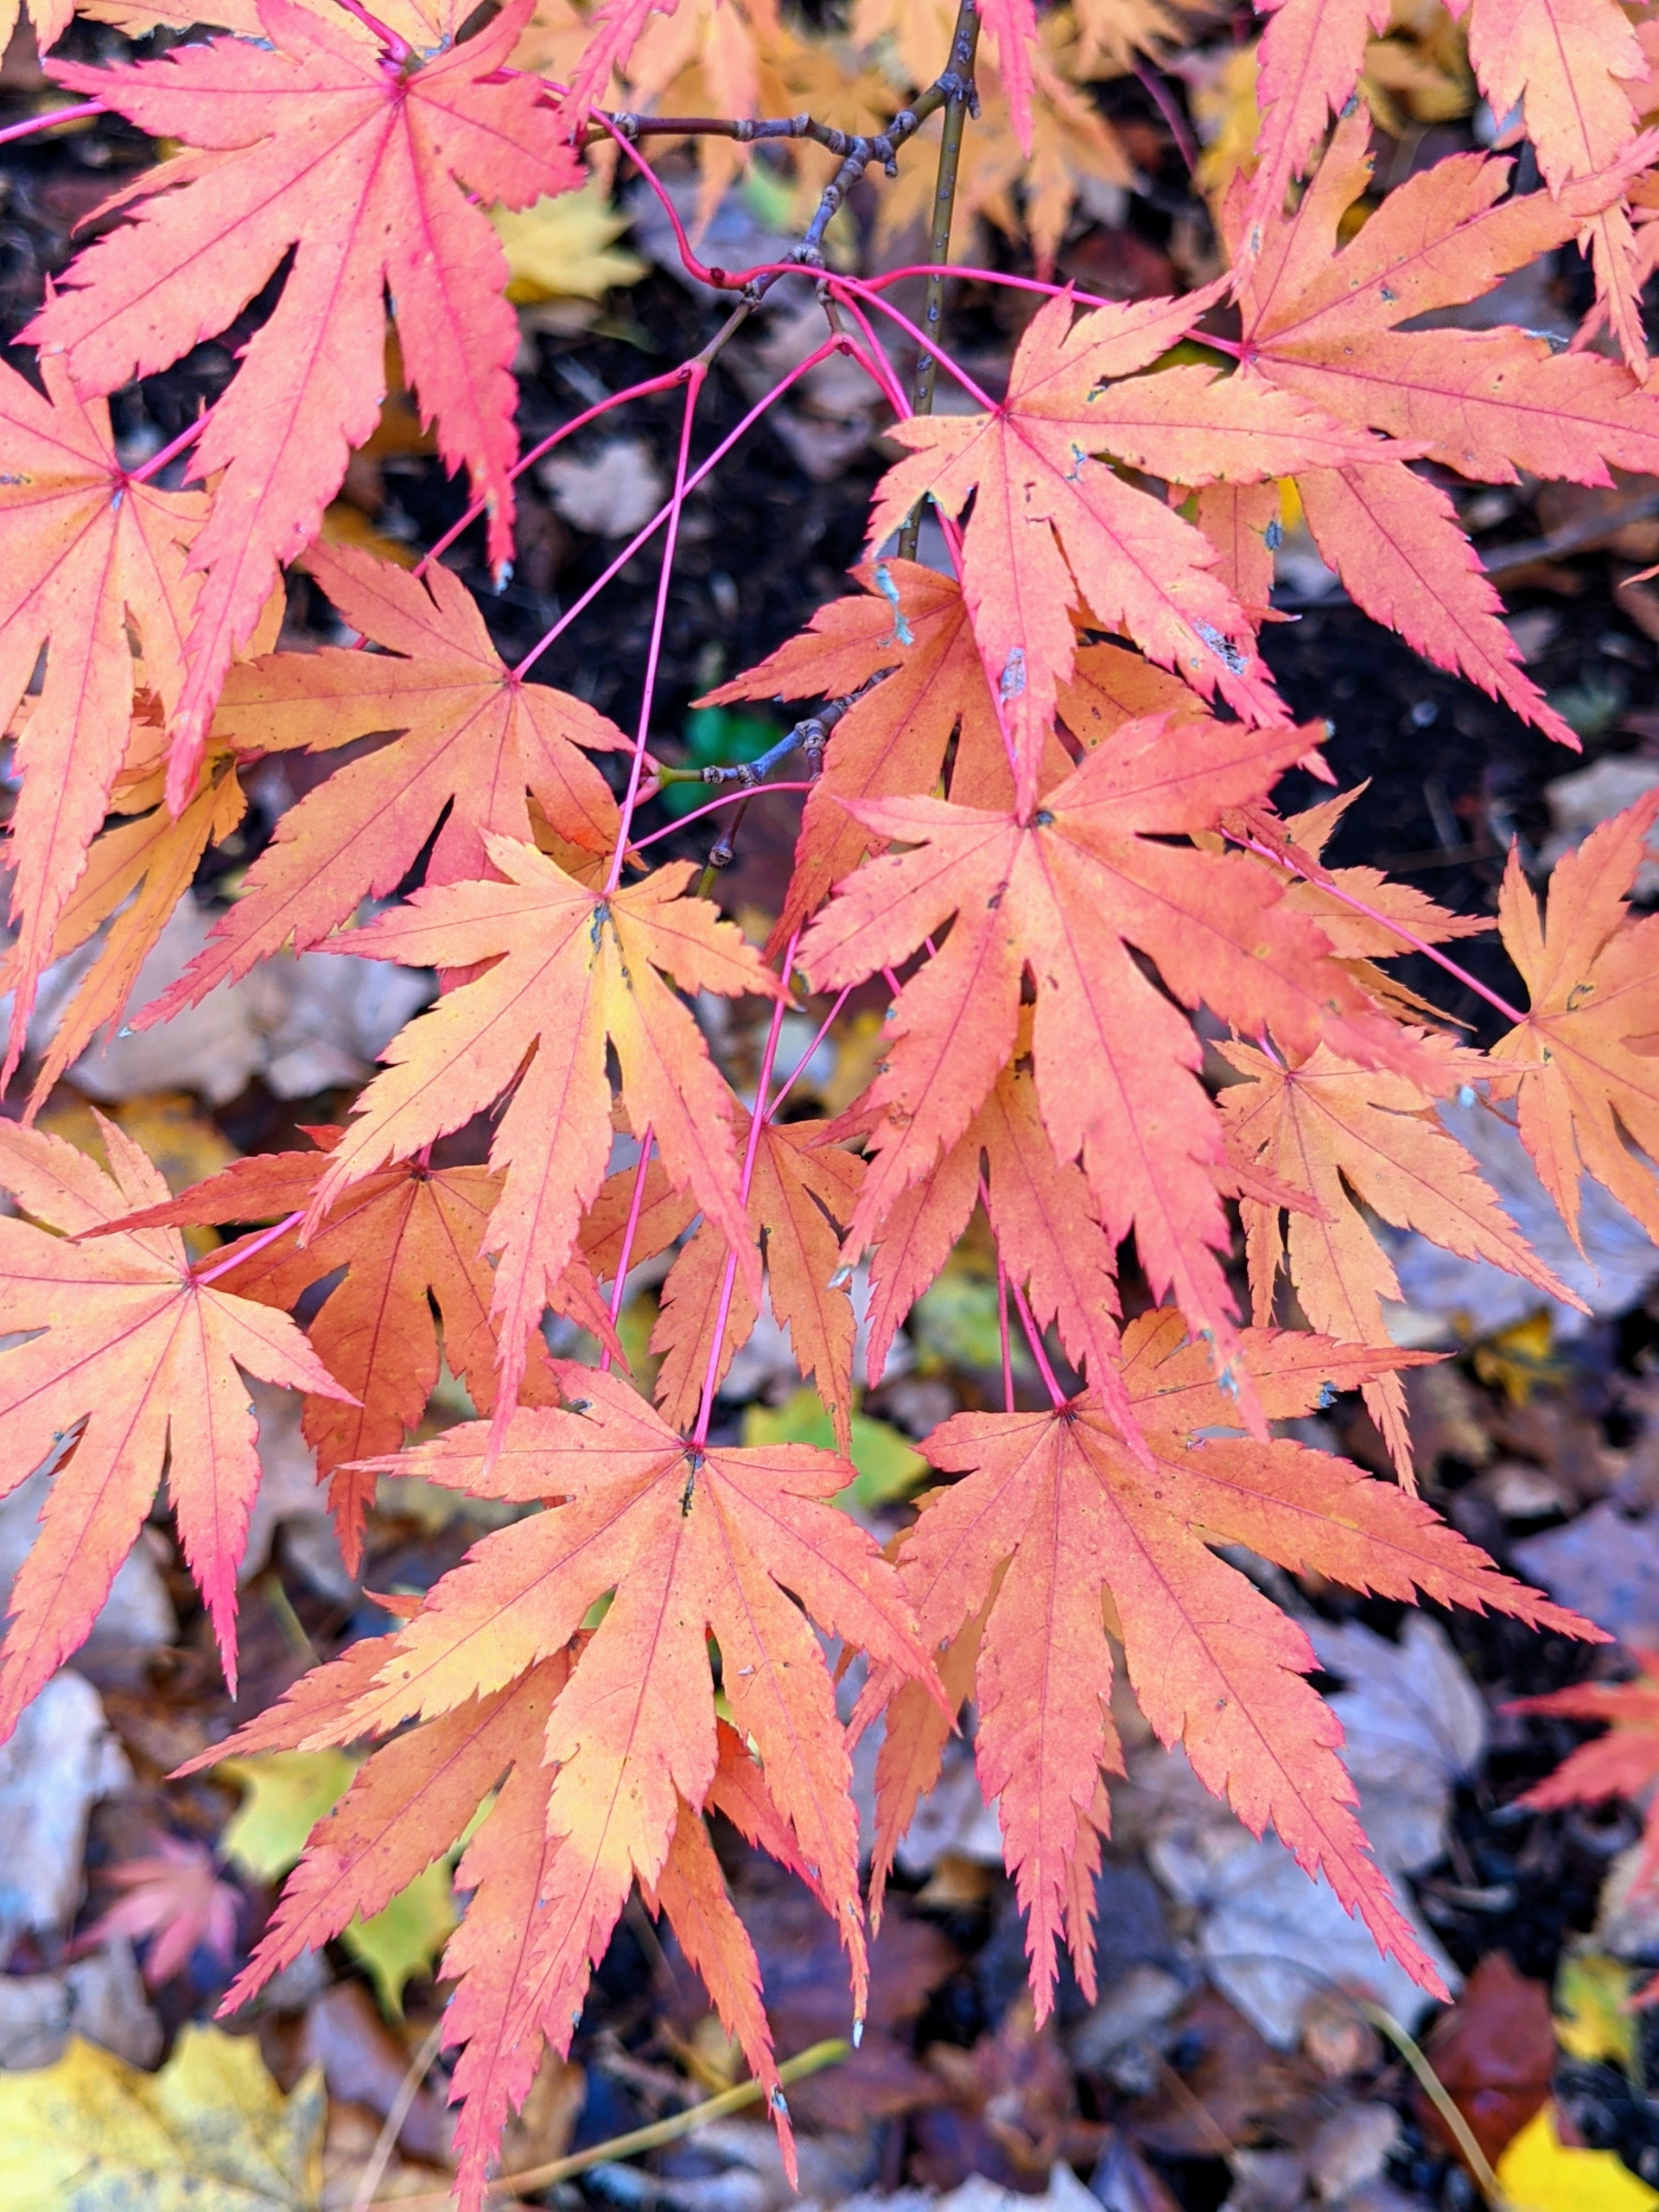
Acer palmatum ‘Osakazuki’ is an excellent small specimen tree with gracefully branched stems and lovely, deeply lobed, bright green leaves that emerge olive-orange in spring, and turn a brilliant crimson red in the fall, holding the color for several weeks. This variety thrives in dappled shade of woodland settings.
Few trees are as beautiful as the Japanese maple. With more than a thousand varieties and cultivars including hybrids, the iconic Japanese maple tree is among the most versatile small trees for use in the landscape.
I love the contrast between the bright reds, yellows, and greens in this grove. The heavy leaf cover on the ground also enriches the soil and adds even more fall color. I know my dear baby sister, Laura, would have loved this grove – it is absolutely stunning during this time of year.