I always enjoy growing my own plants, but there’s something even more exciting and gratifying about propagating them - producing plants by dividing, grafting, or taking the cuttings from existent stems. It’s an interesting and very easy-to-follow process.
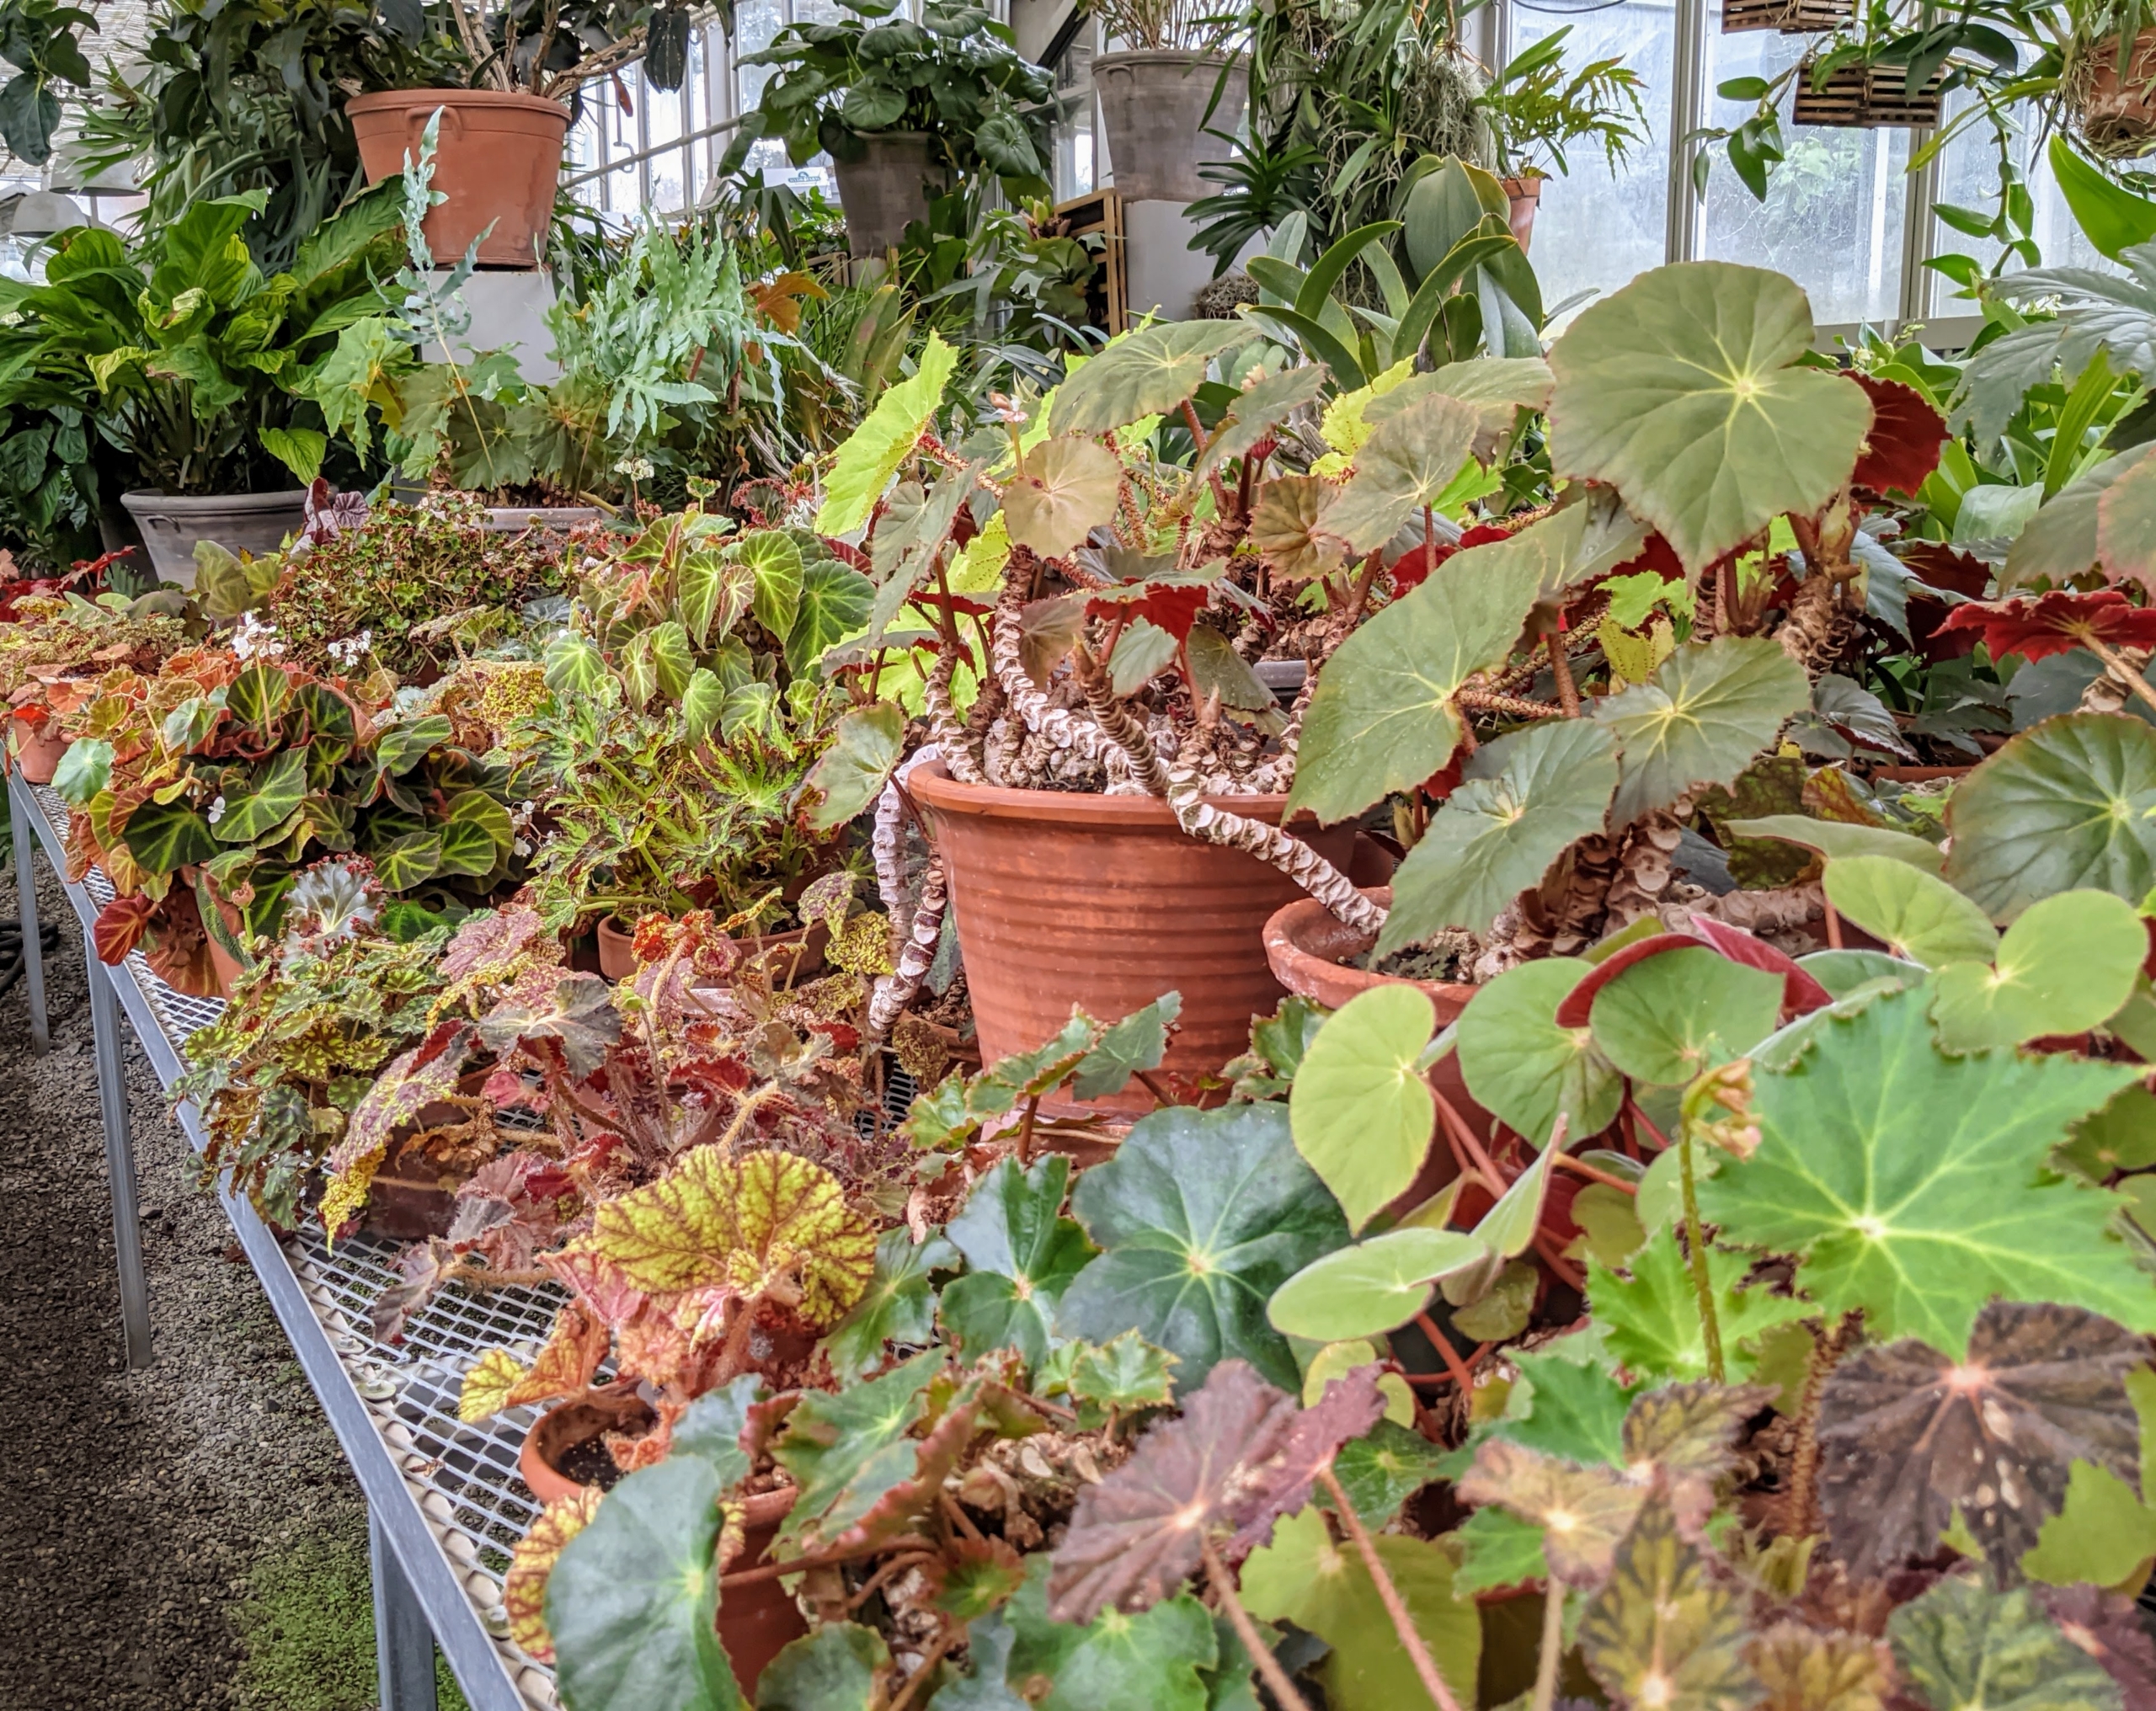
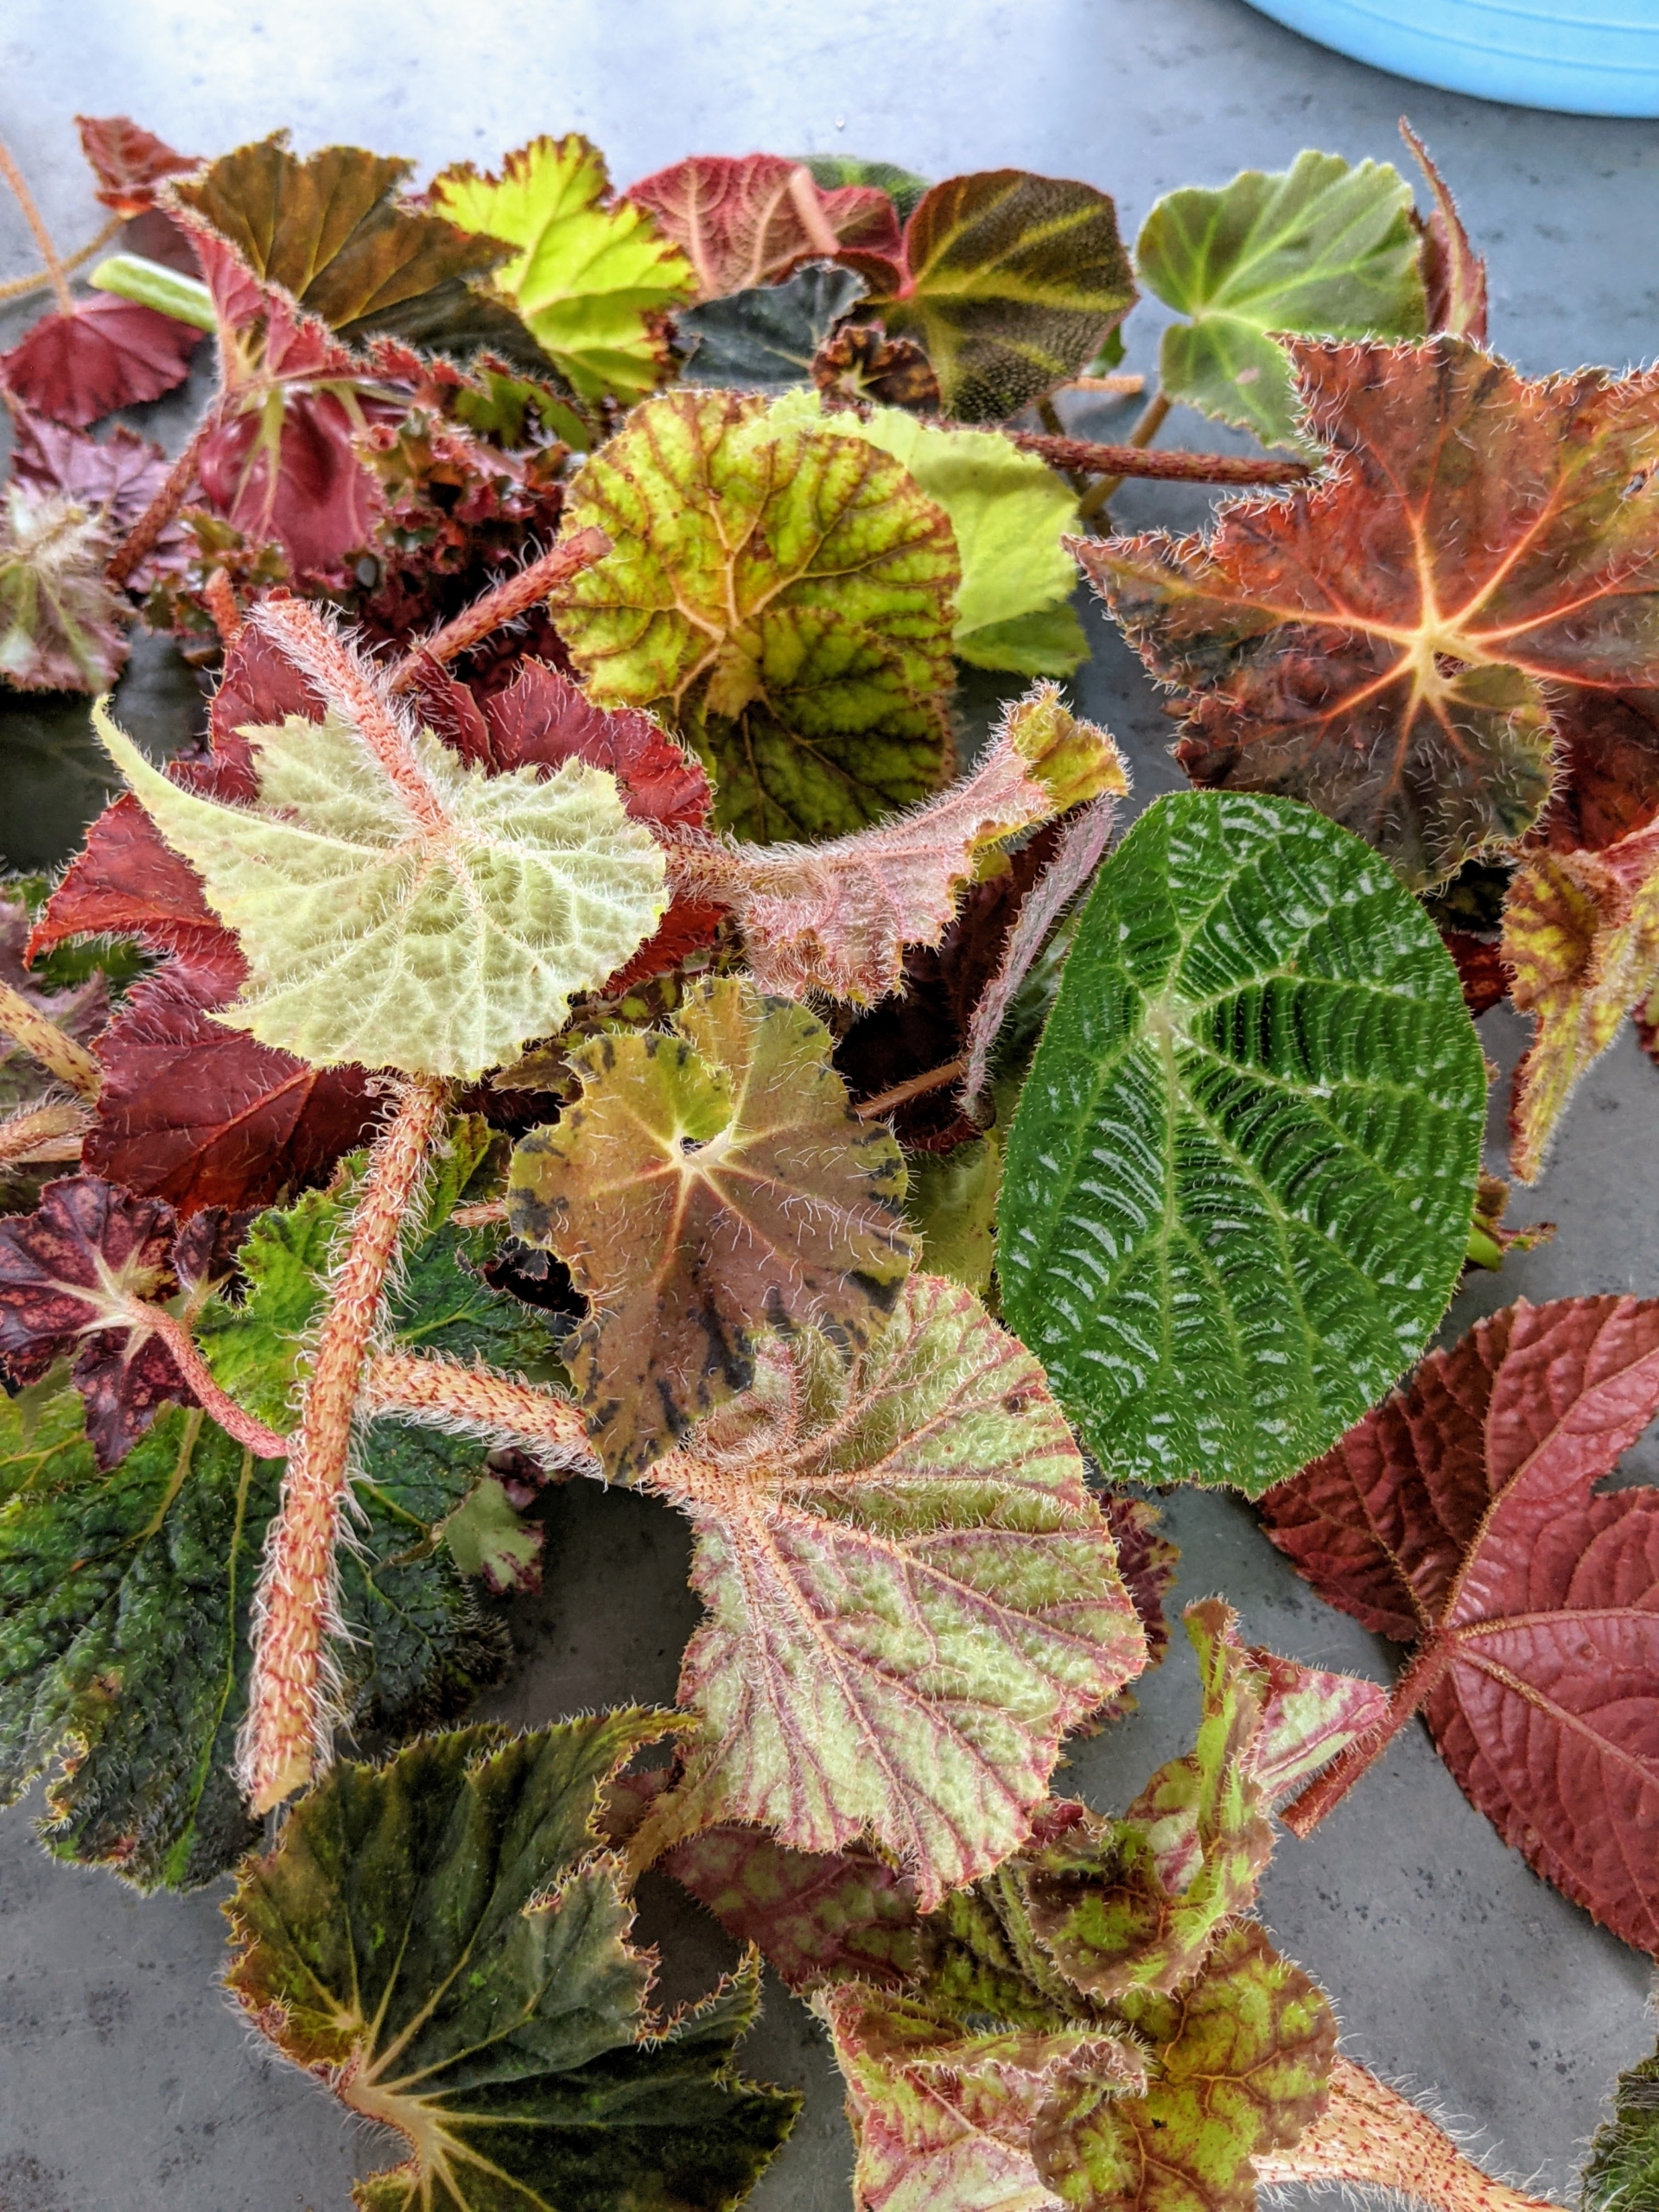
One of the easiest plants to propagate is the begonia. I have been collecting begonias for many years. The genus begonia contains about 1500 different plant species and hundreds of hybrids. Rhizomatous begonias are grown for their interesting and spectacular leaves. They come in many sizes, colors and textures, and can be small or large, smooth or veiny, decorated in bold accents of red, copper and silver or subtle shades of green. Yesterday, my head gardener, Ryan McCallister, selected some beautiful varieties to root.
Enjoy these photos.
In my main greenhouse I have a large collection of beautiful begonias, many of which were grown from leaf and stem cuttings. I keep these beautiful begonia plants on a long, sliding table, where they can be watched closely and maintained in a temperature and humidity-controlled space.
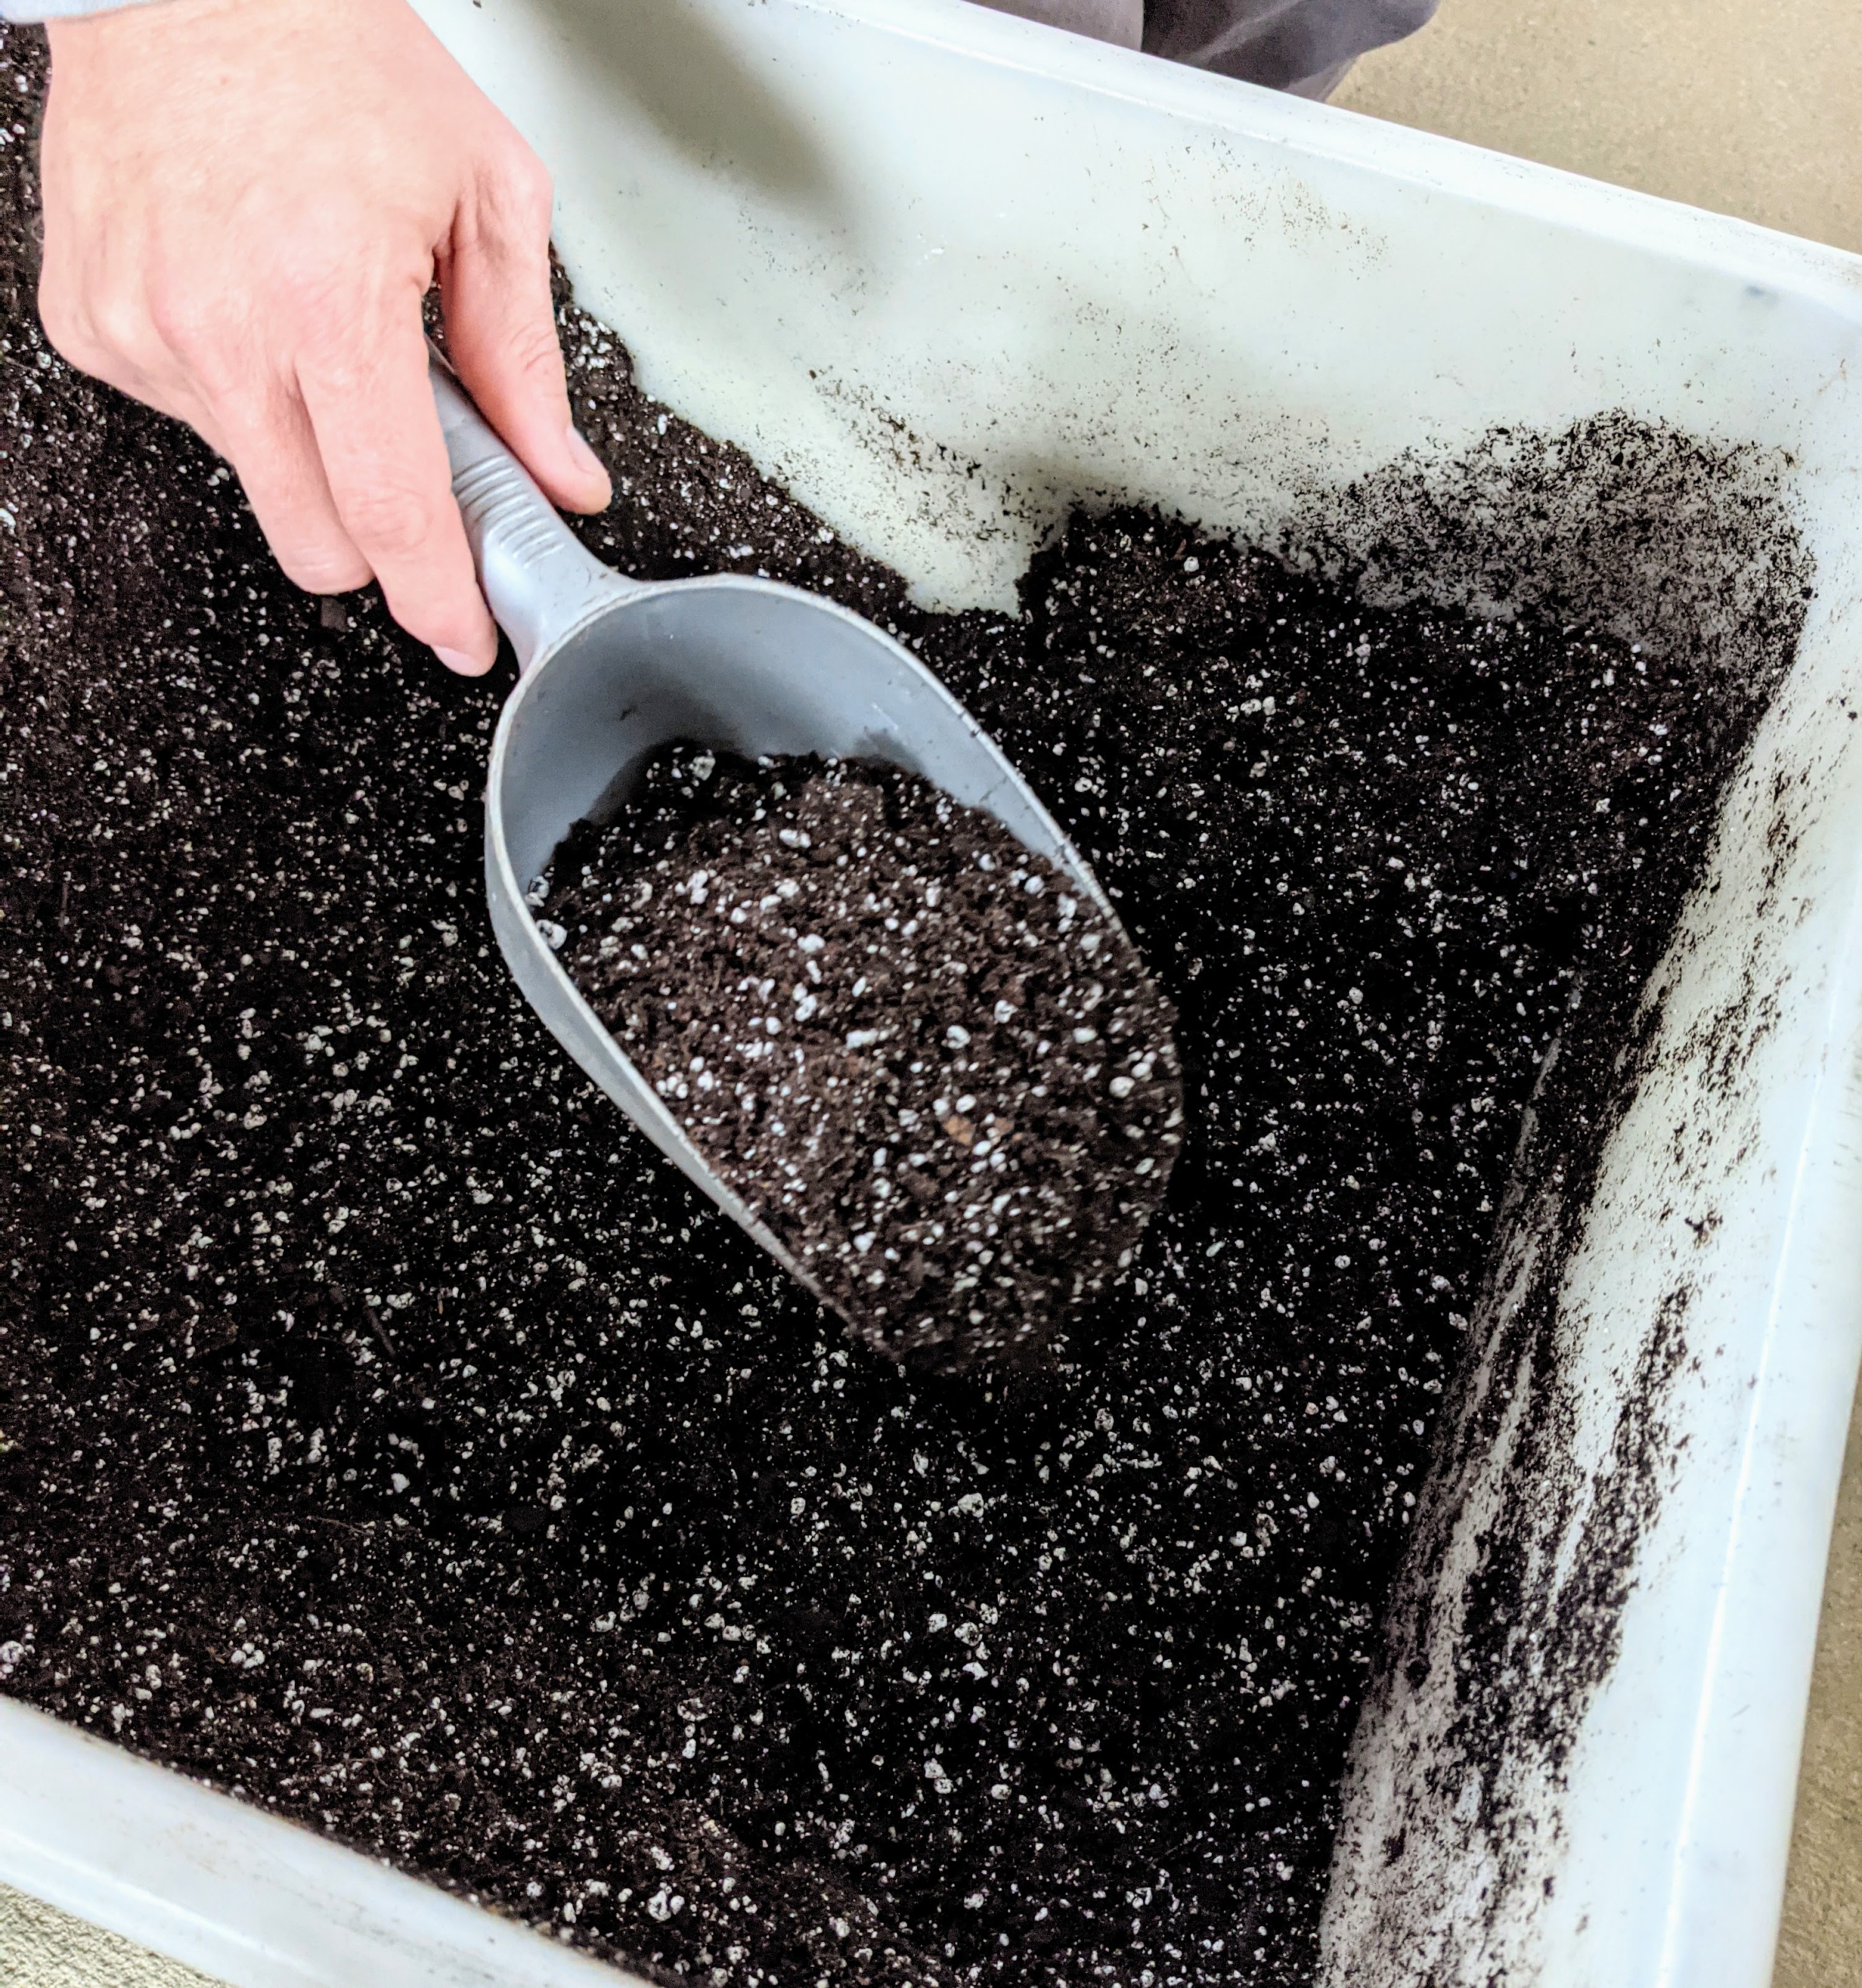
Begonias grow best in light, well-drained soil. It’s best to use a pre-made seed starting mix that contains the proper amounts of vermiculite, perlite and peat moss. Seed starting mixes are available at garden supply stores.
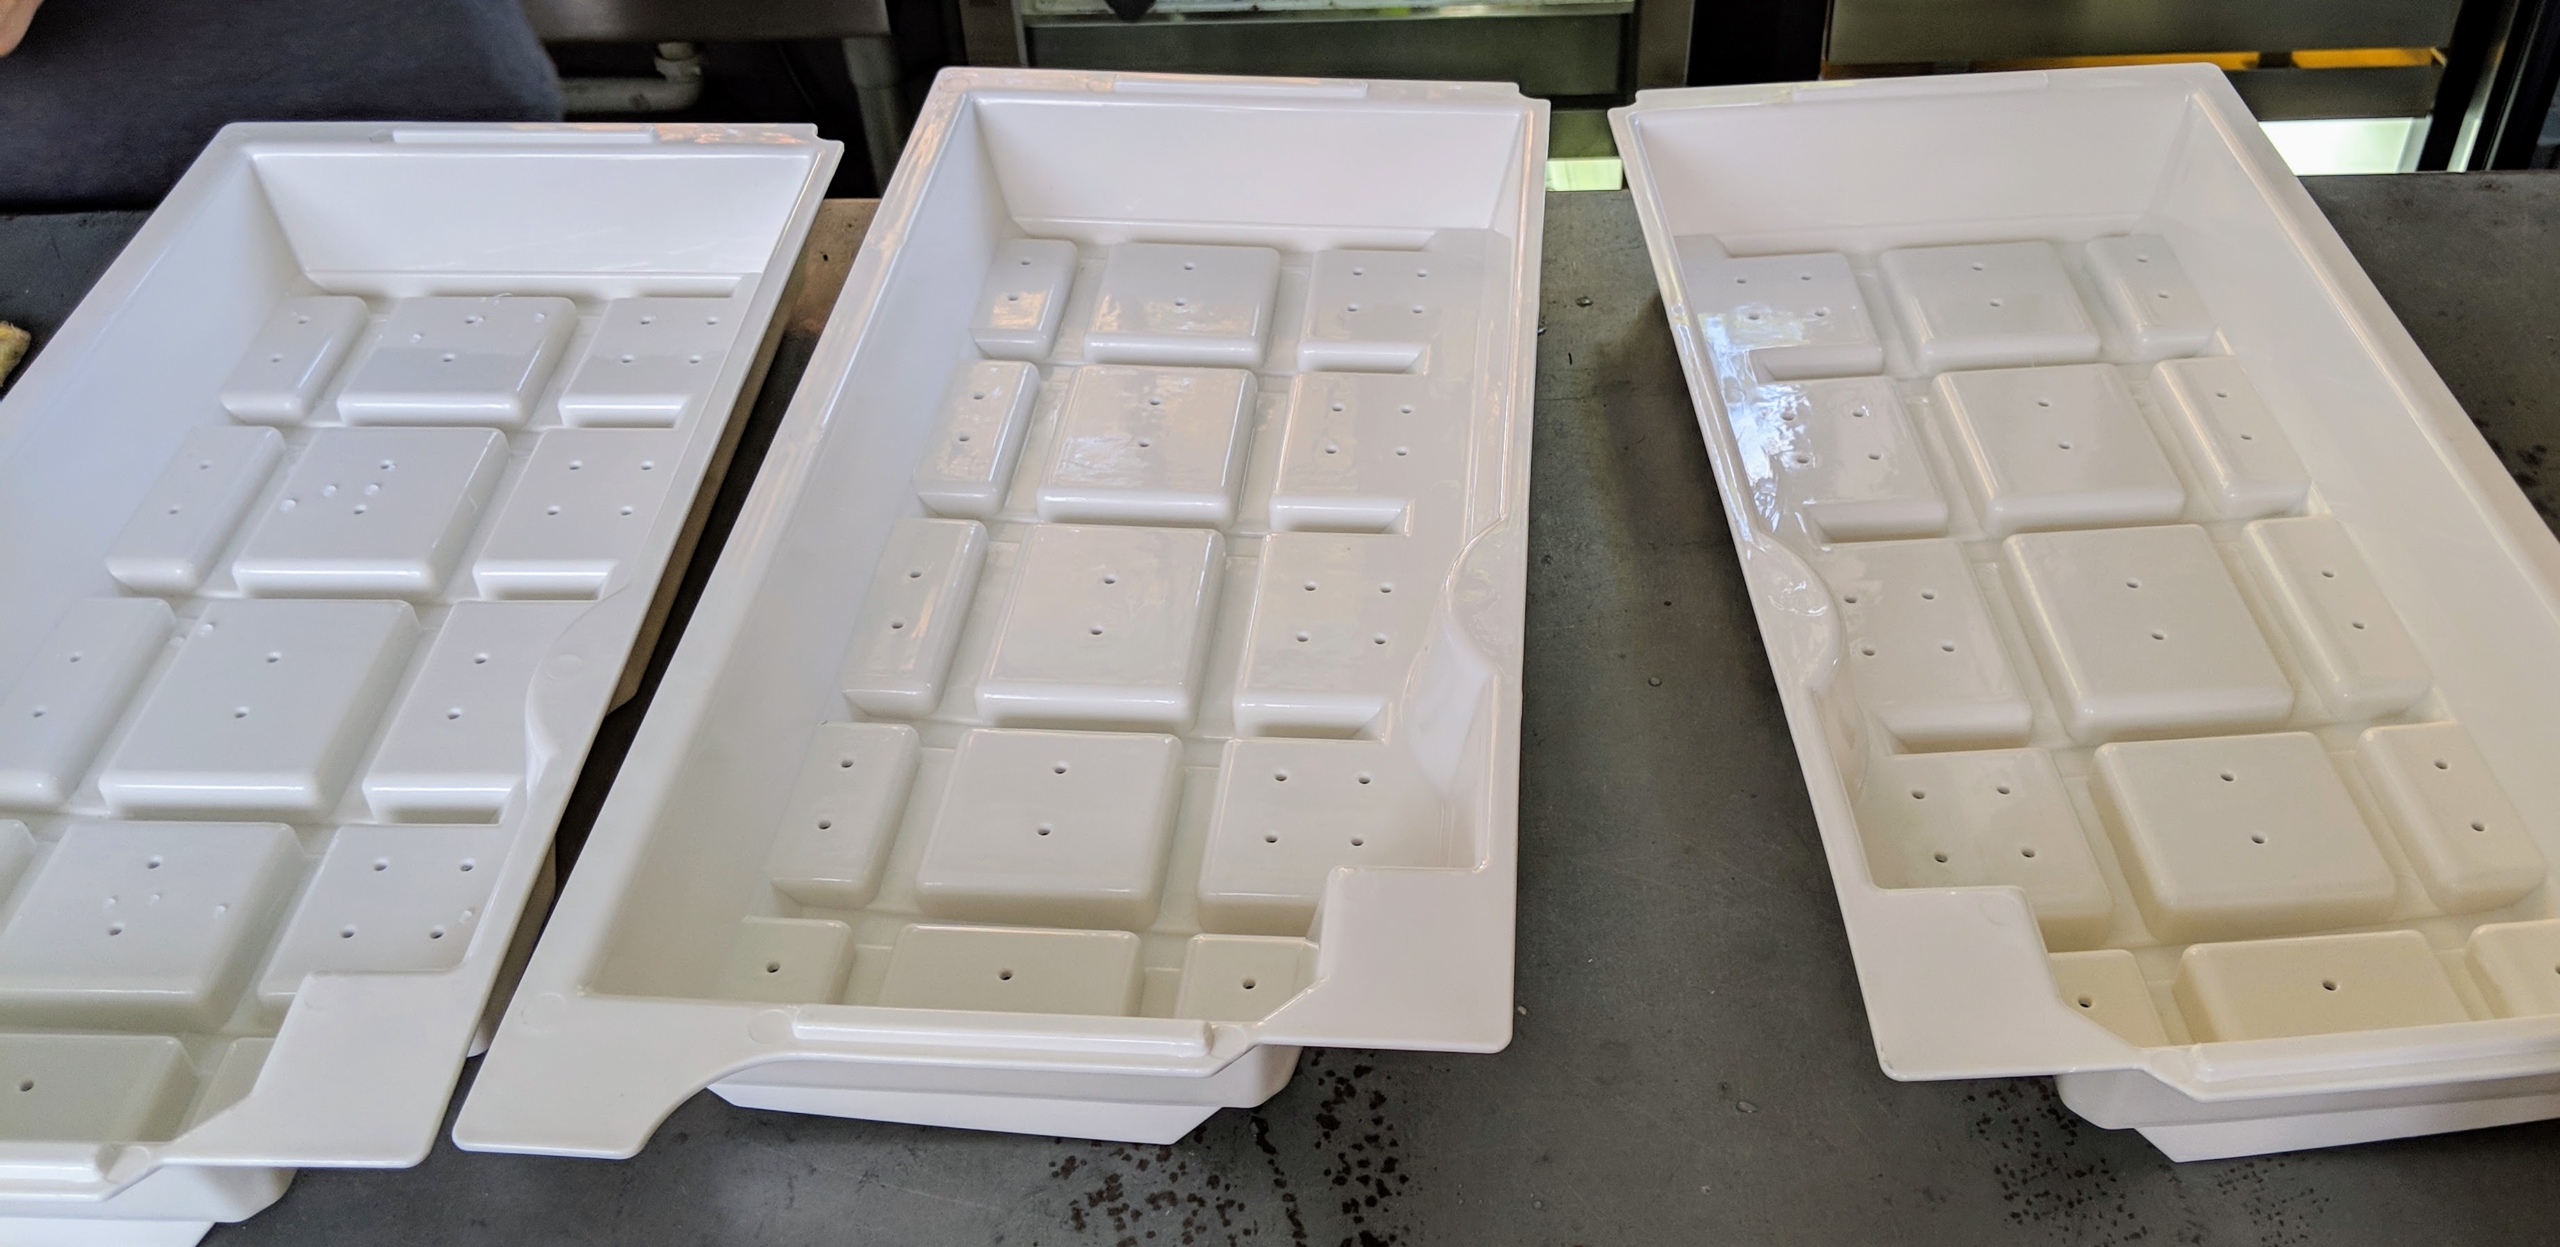
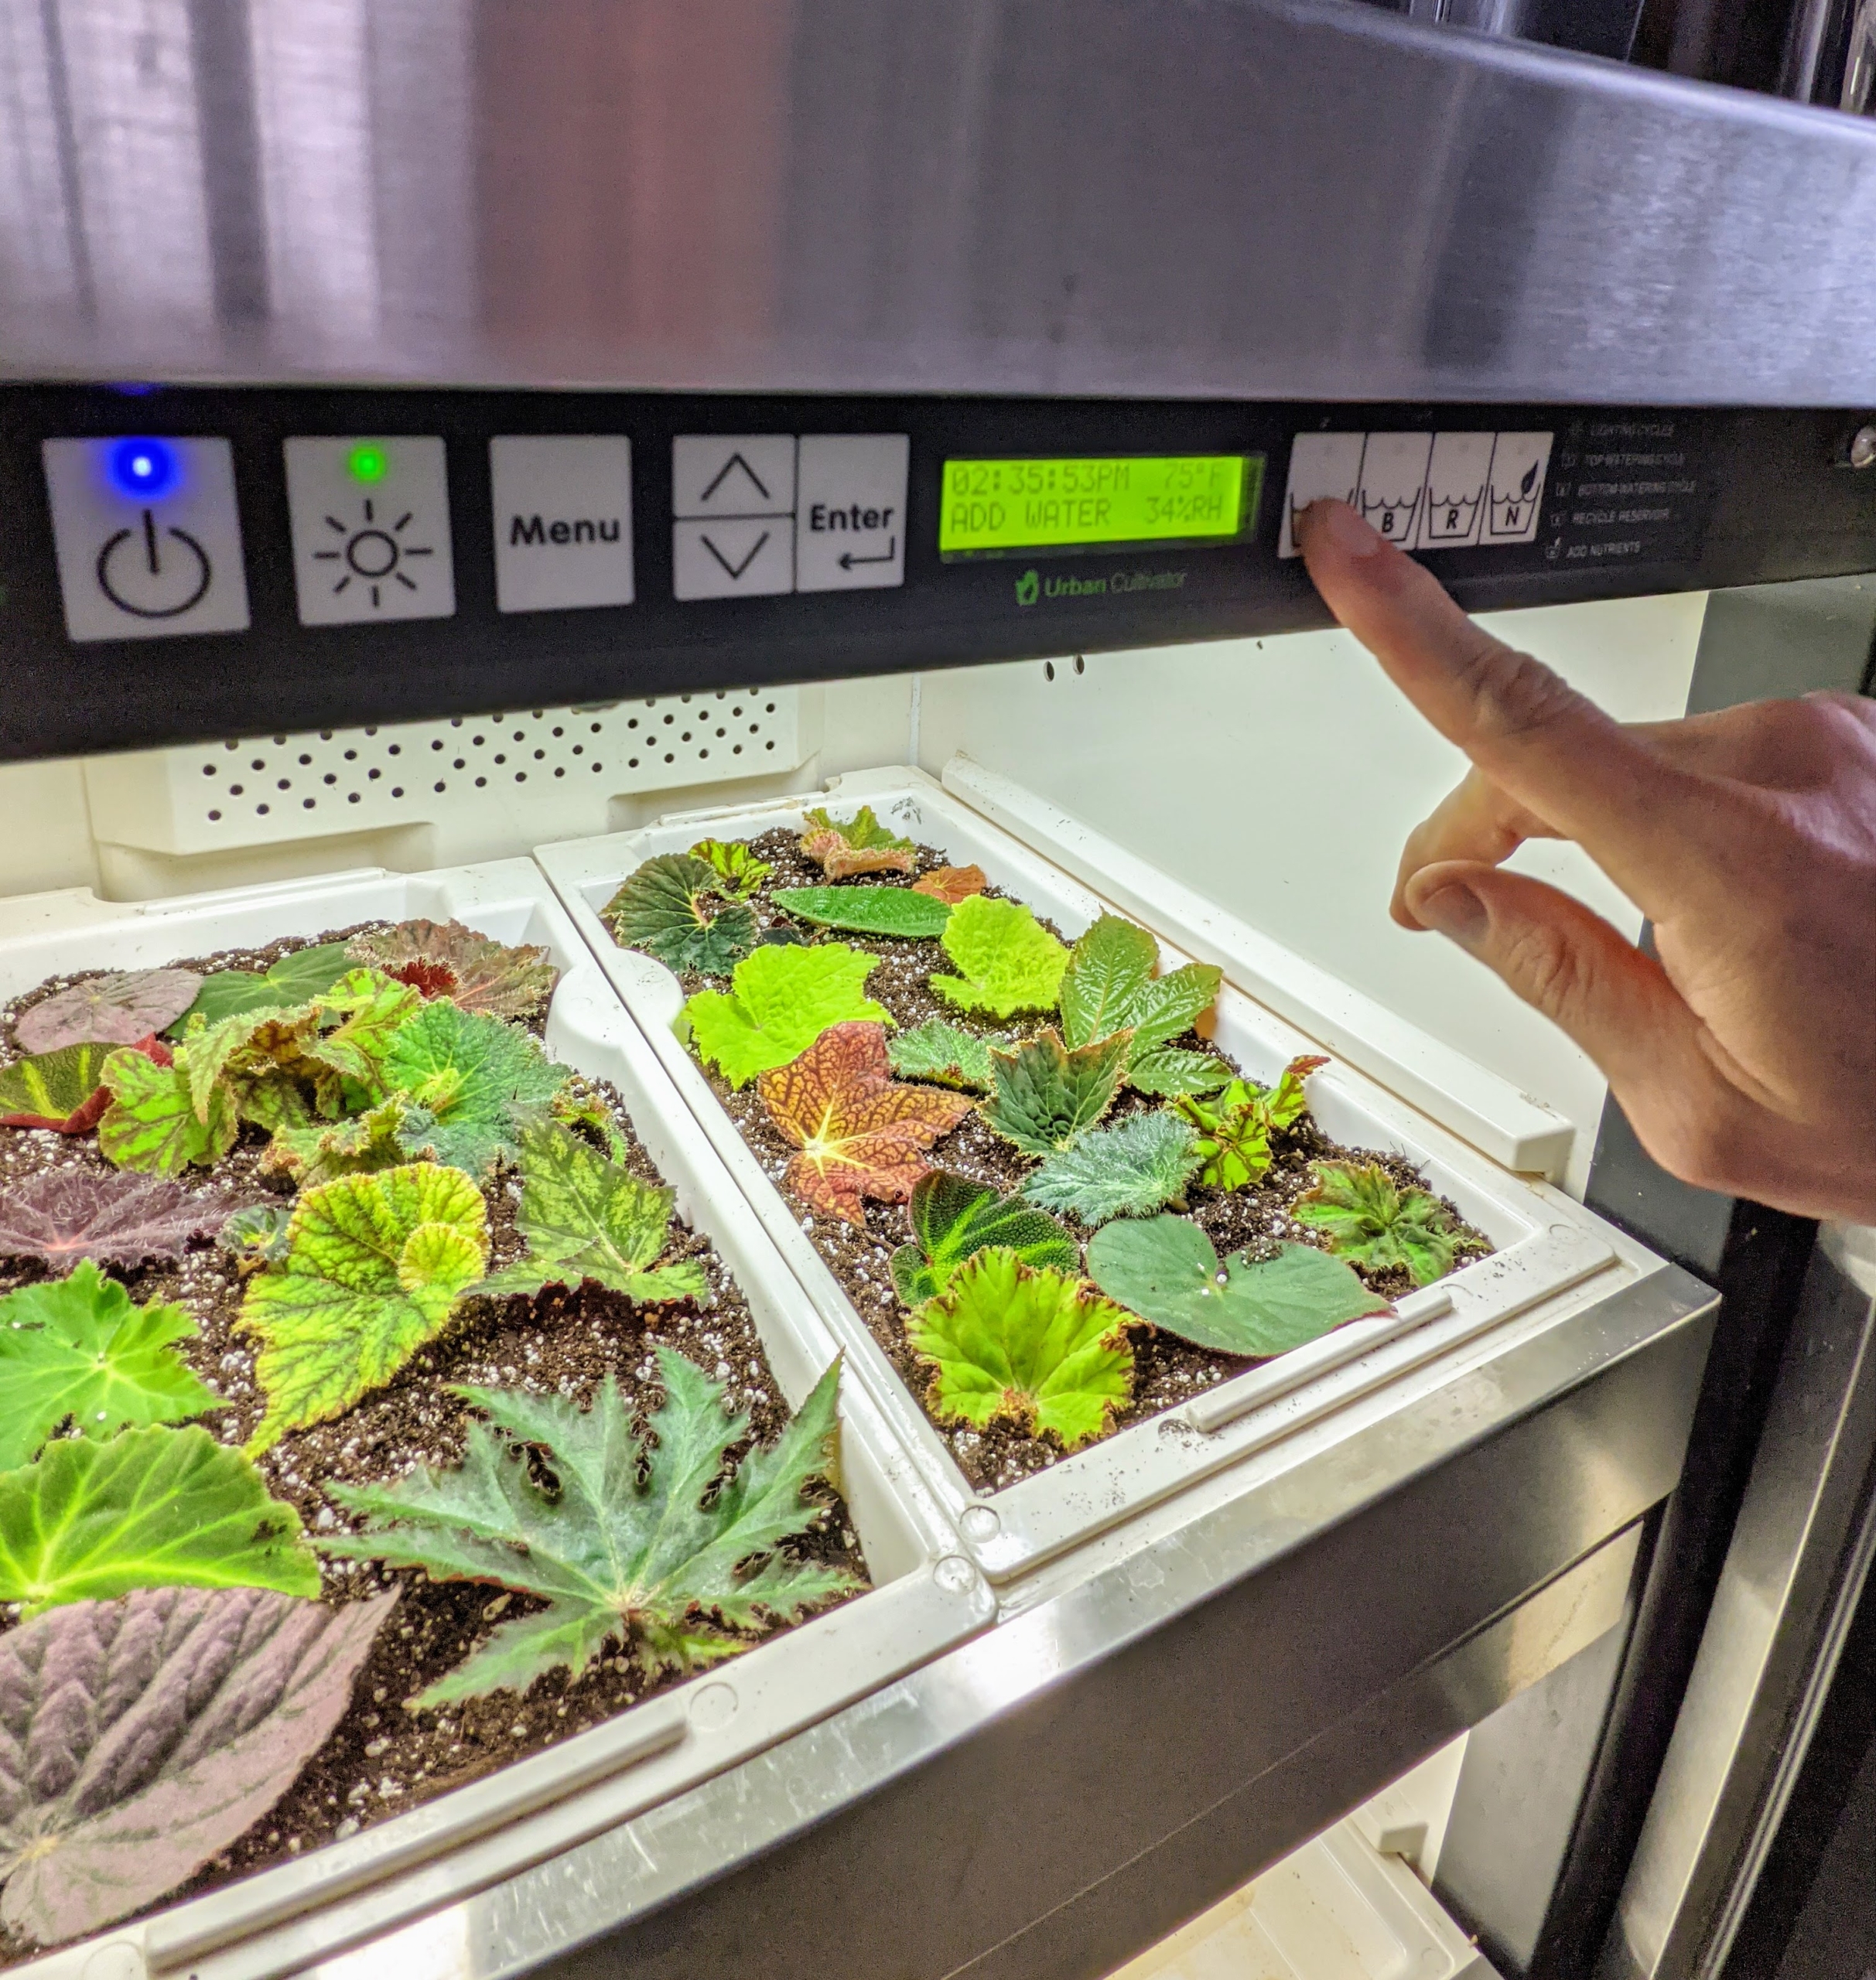
Ryan uses these plastic seedling trays made especially for our Urban Cultivator – an automated system that provides a self-contained growing environment with everything the plants need to thrive. These trays are made with indentations for adequate and equal water flow.
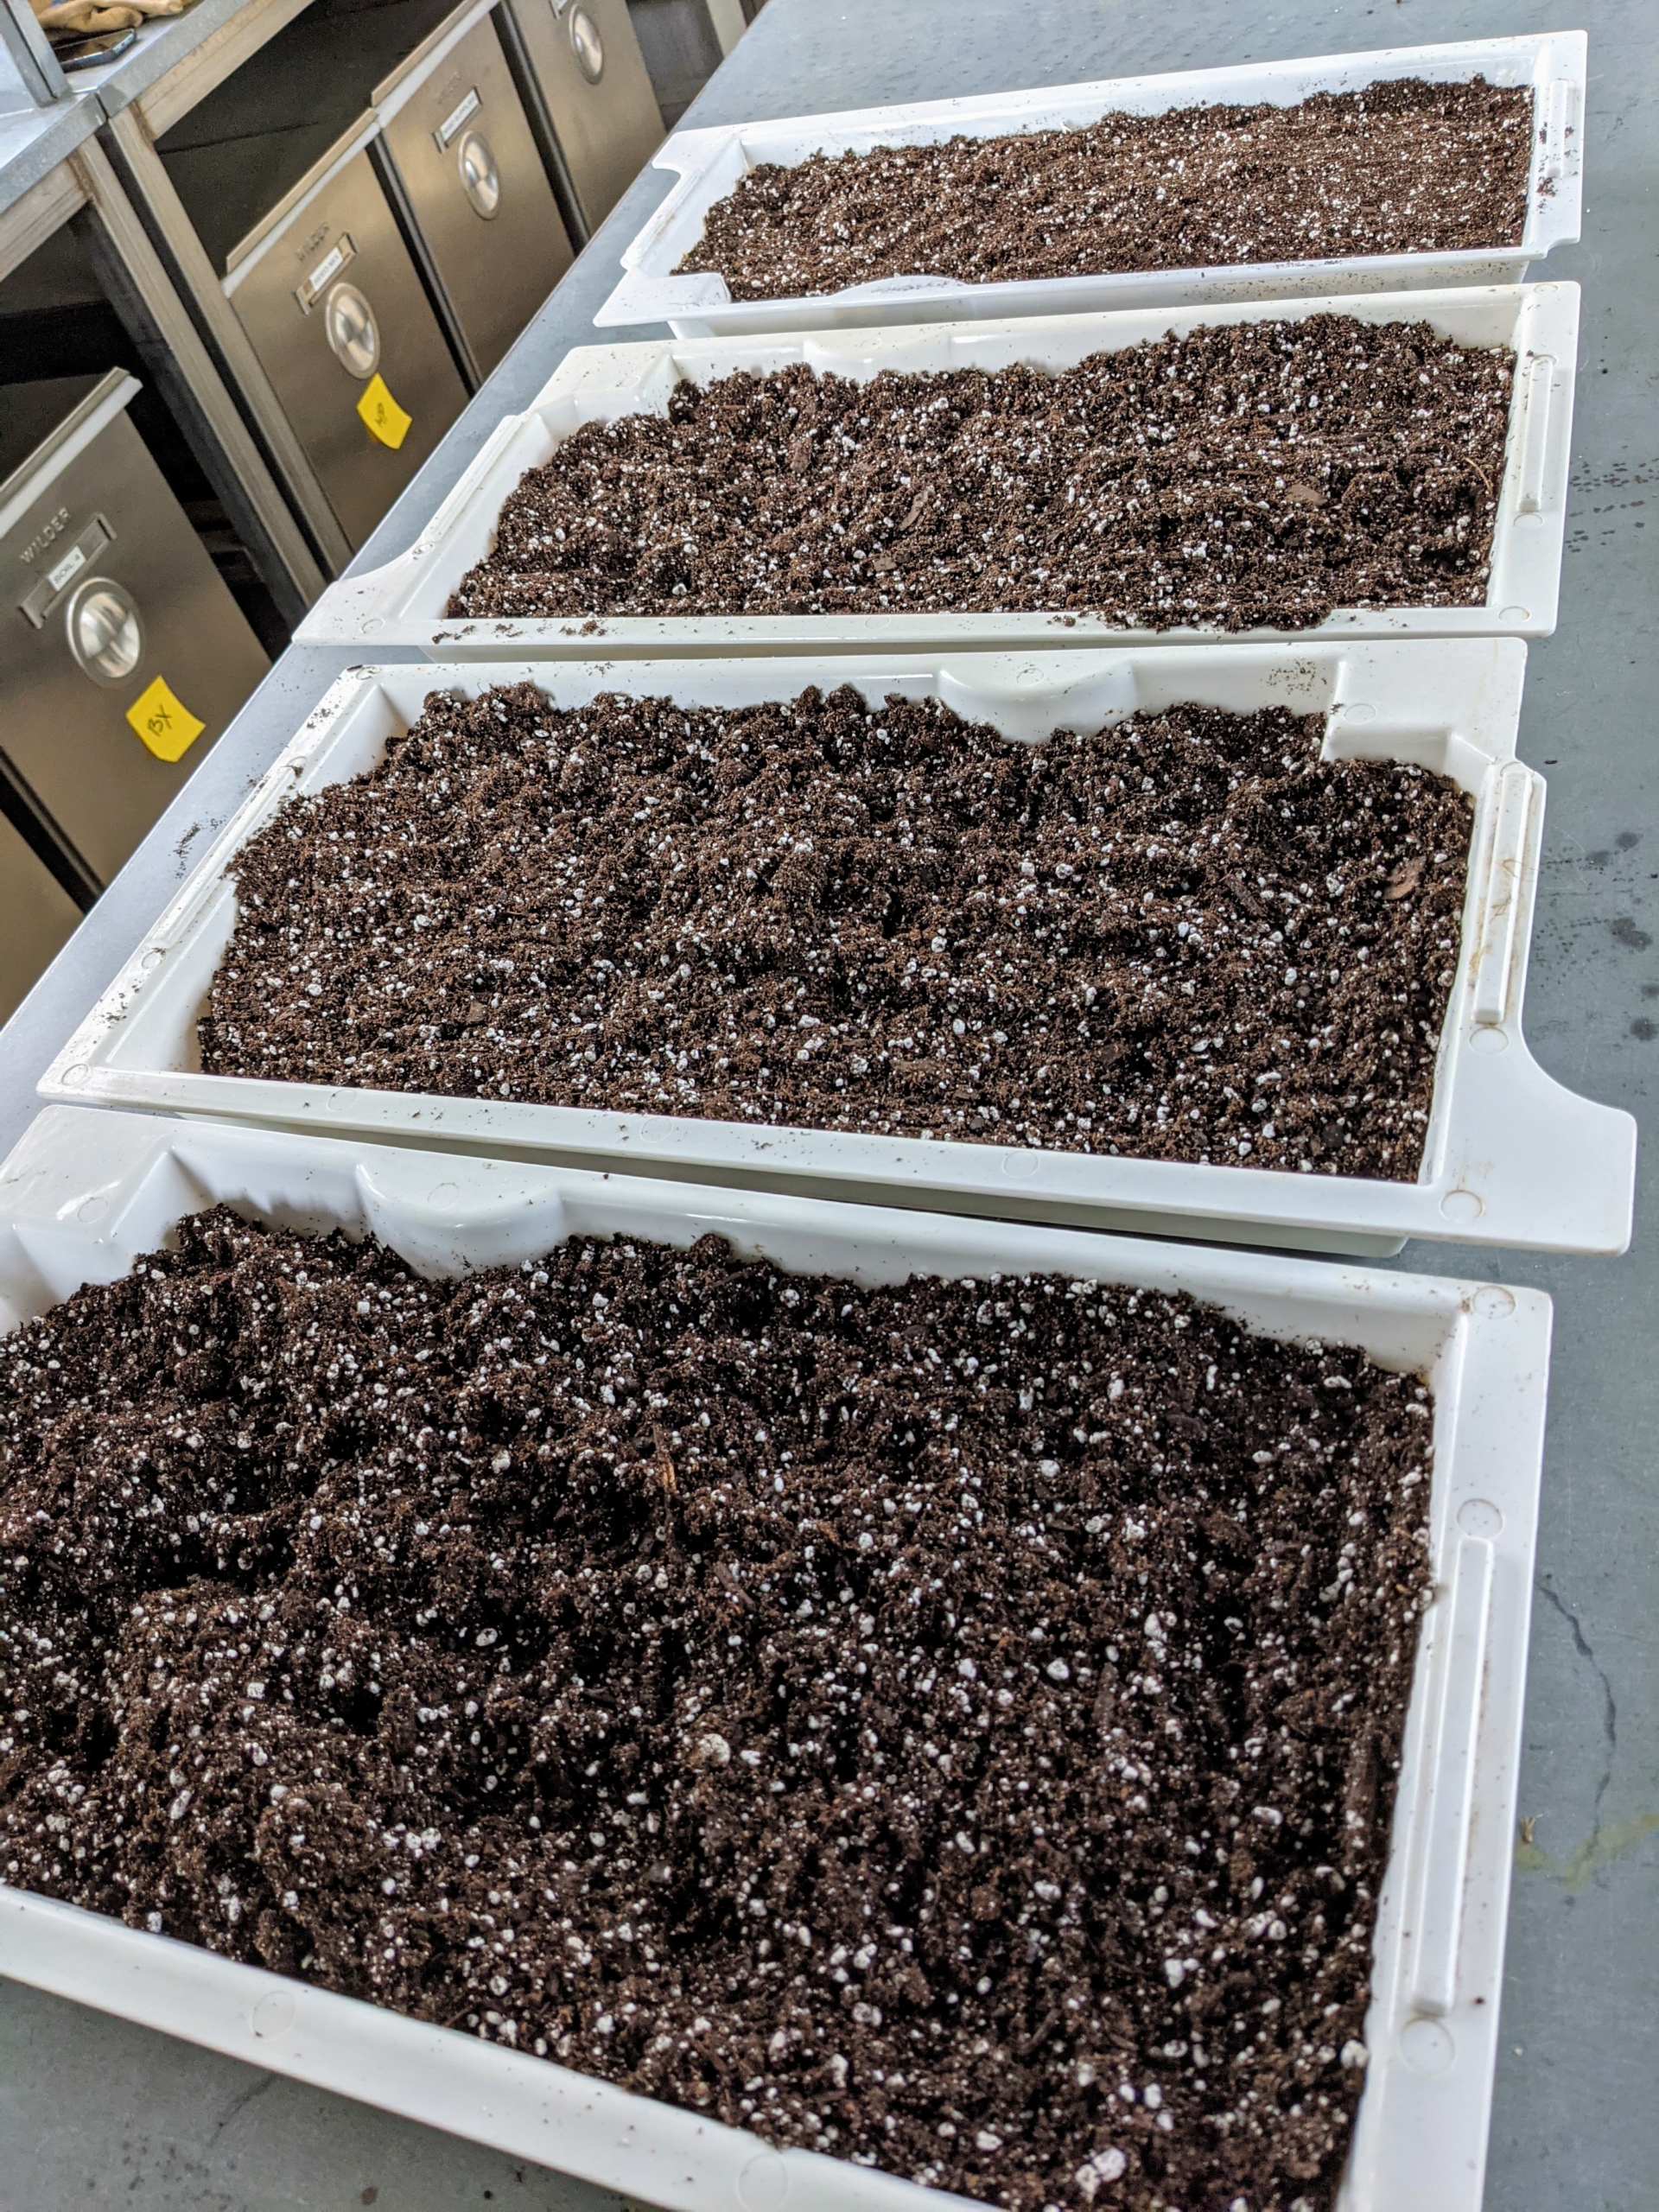
Ryan fills four trays with the light soil medium.
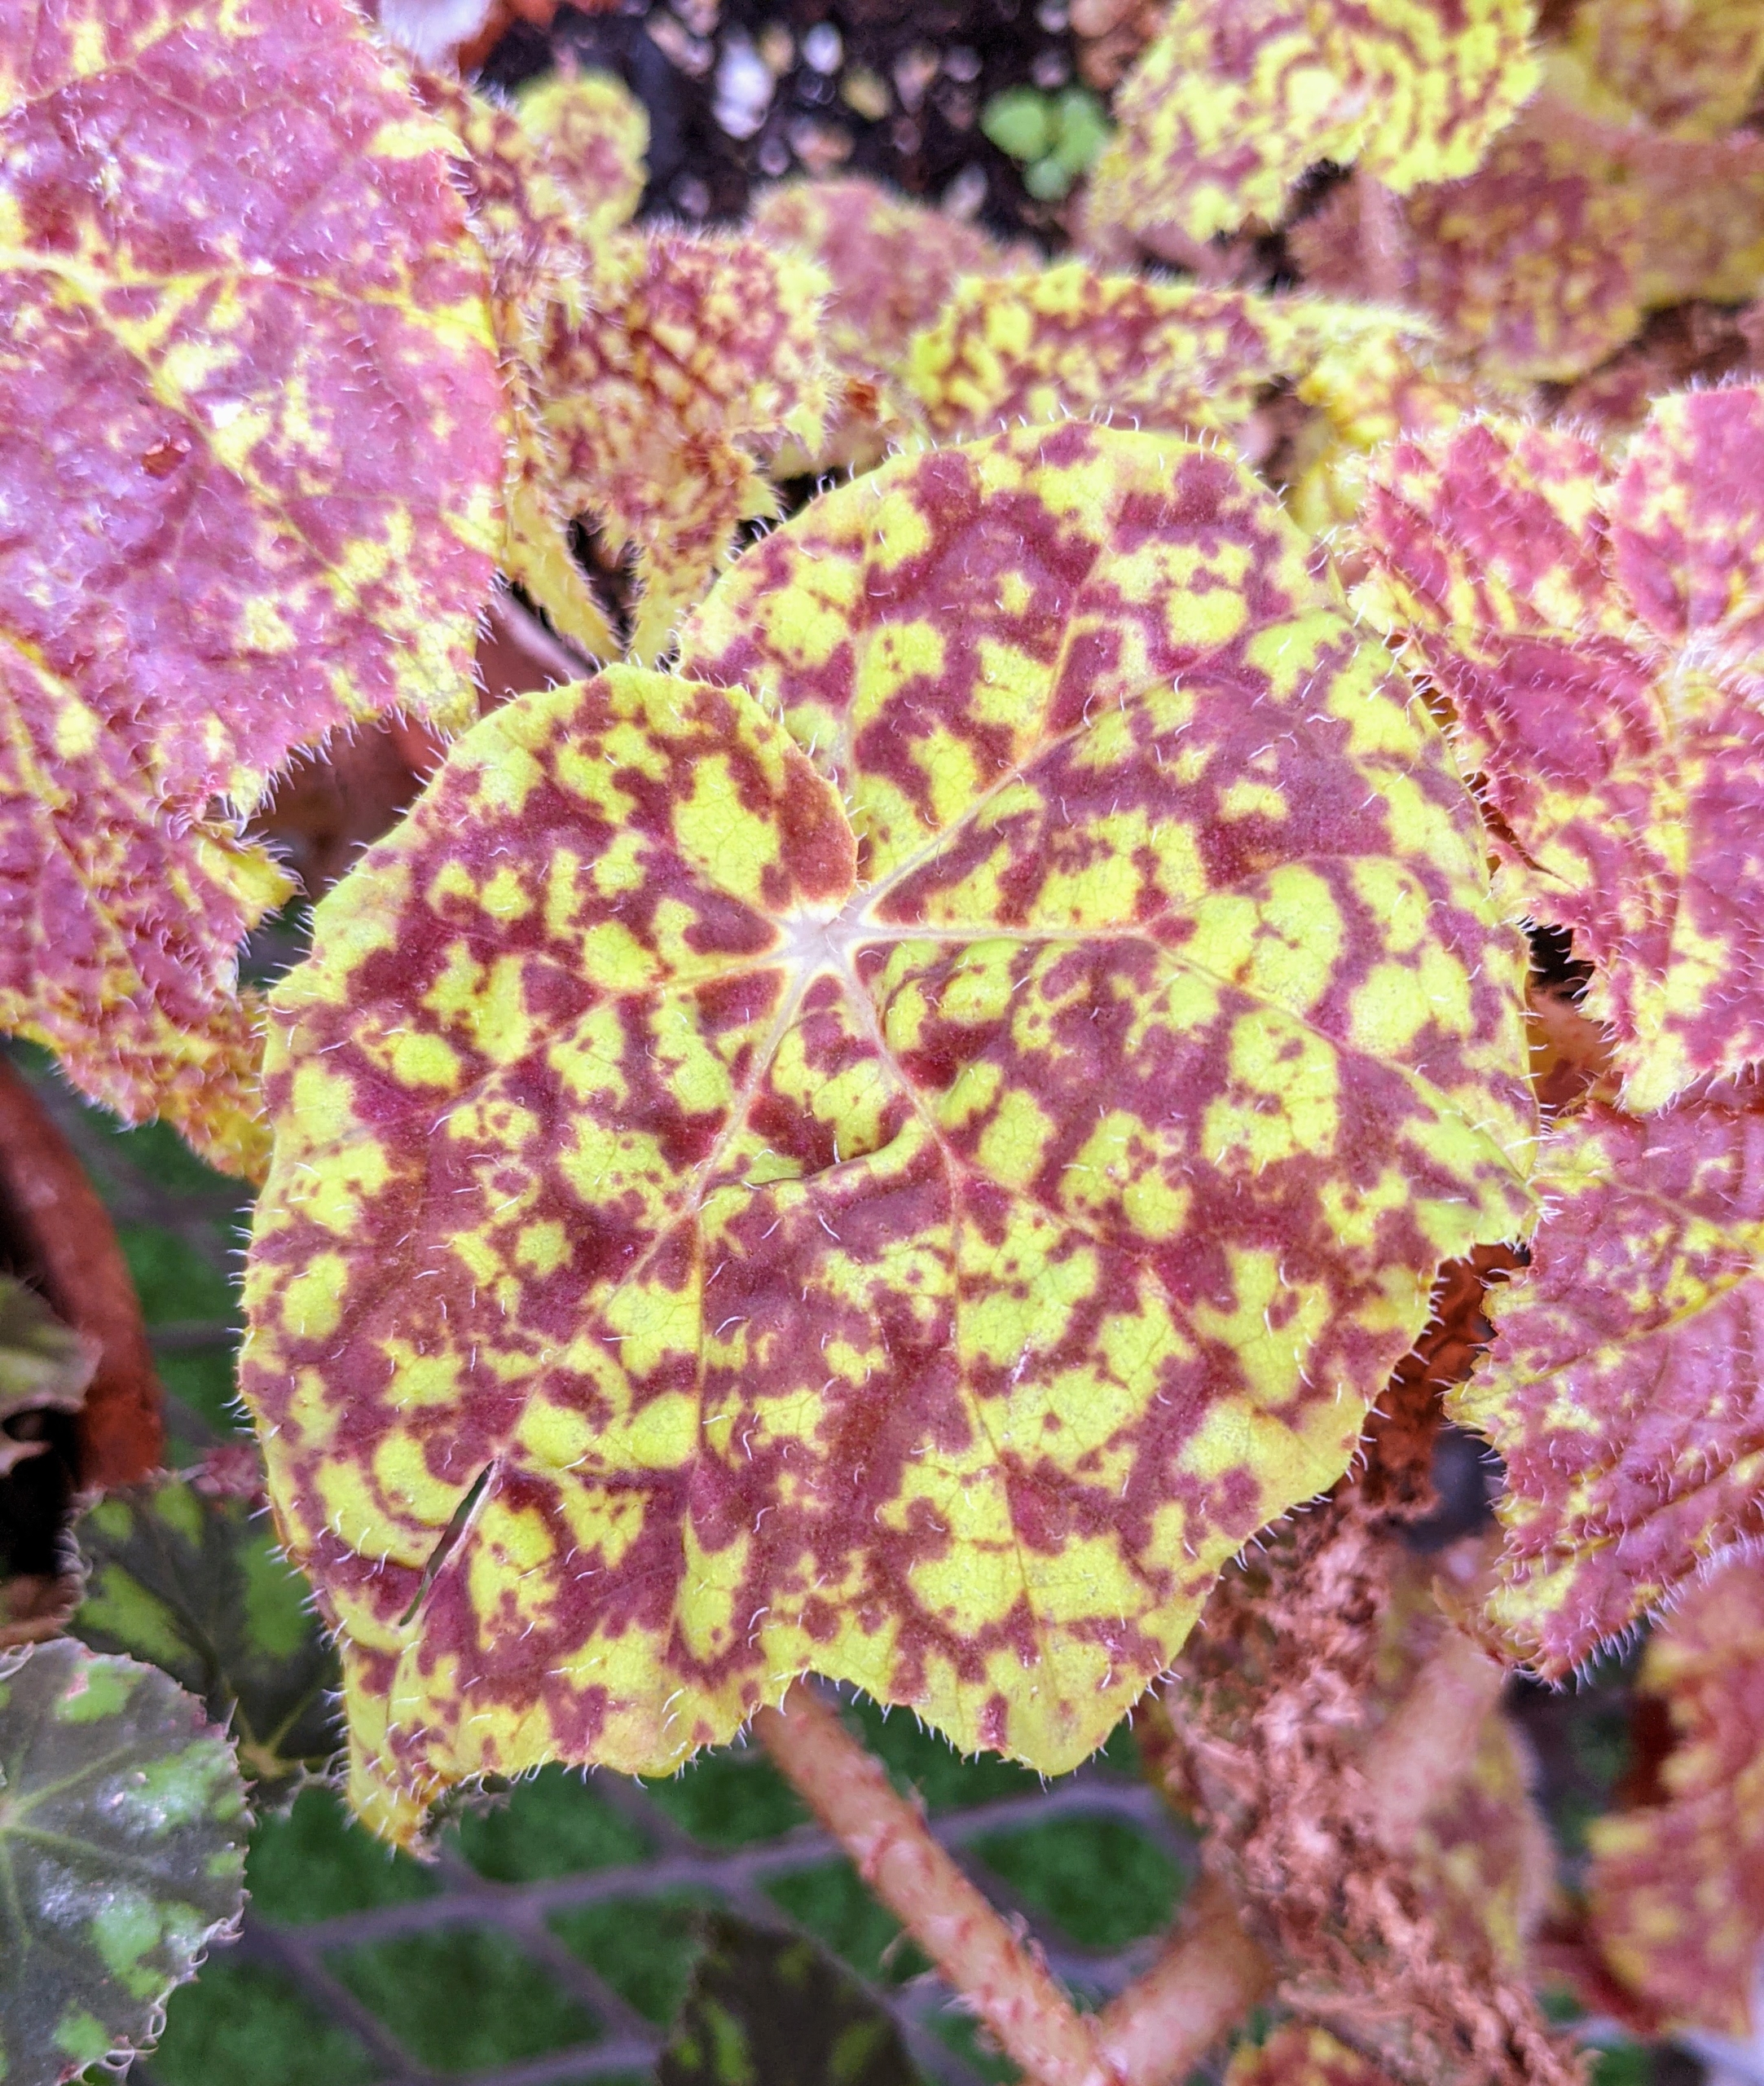
Next, Ryan goes into the greenhouse to trim some stems. Rhizomatous begonias range from small, delicate plants with one-inch wide leaves to large, robust specimens with 12-inch leaves. There is no end to the variety of leaf shape, color, and texture in the begonia.
Begonias are considered cool temperature plants and do best in temperatures ranging from 58 to 72 degrees Fahrenheit. I am always on the lookout for rare and unusual varieties. This one has green star shaped leaves with chocolate margins.
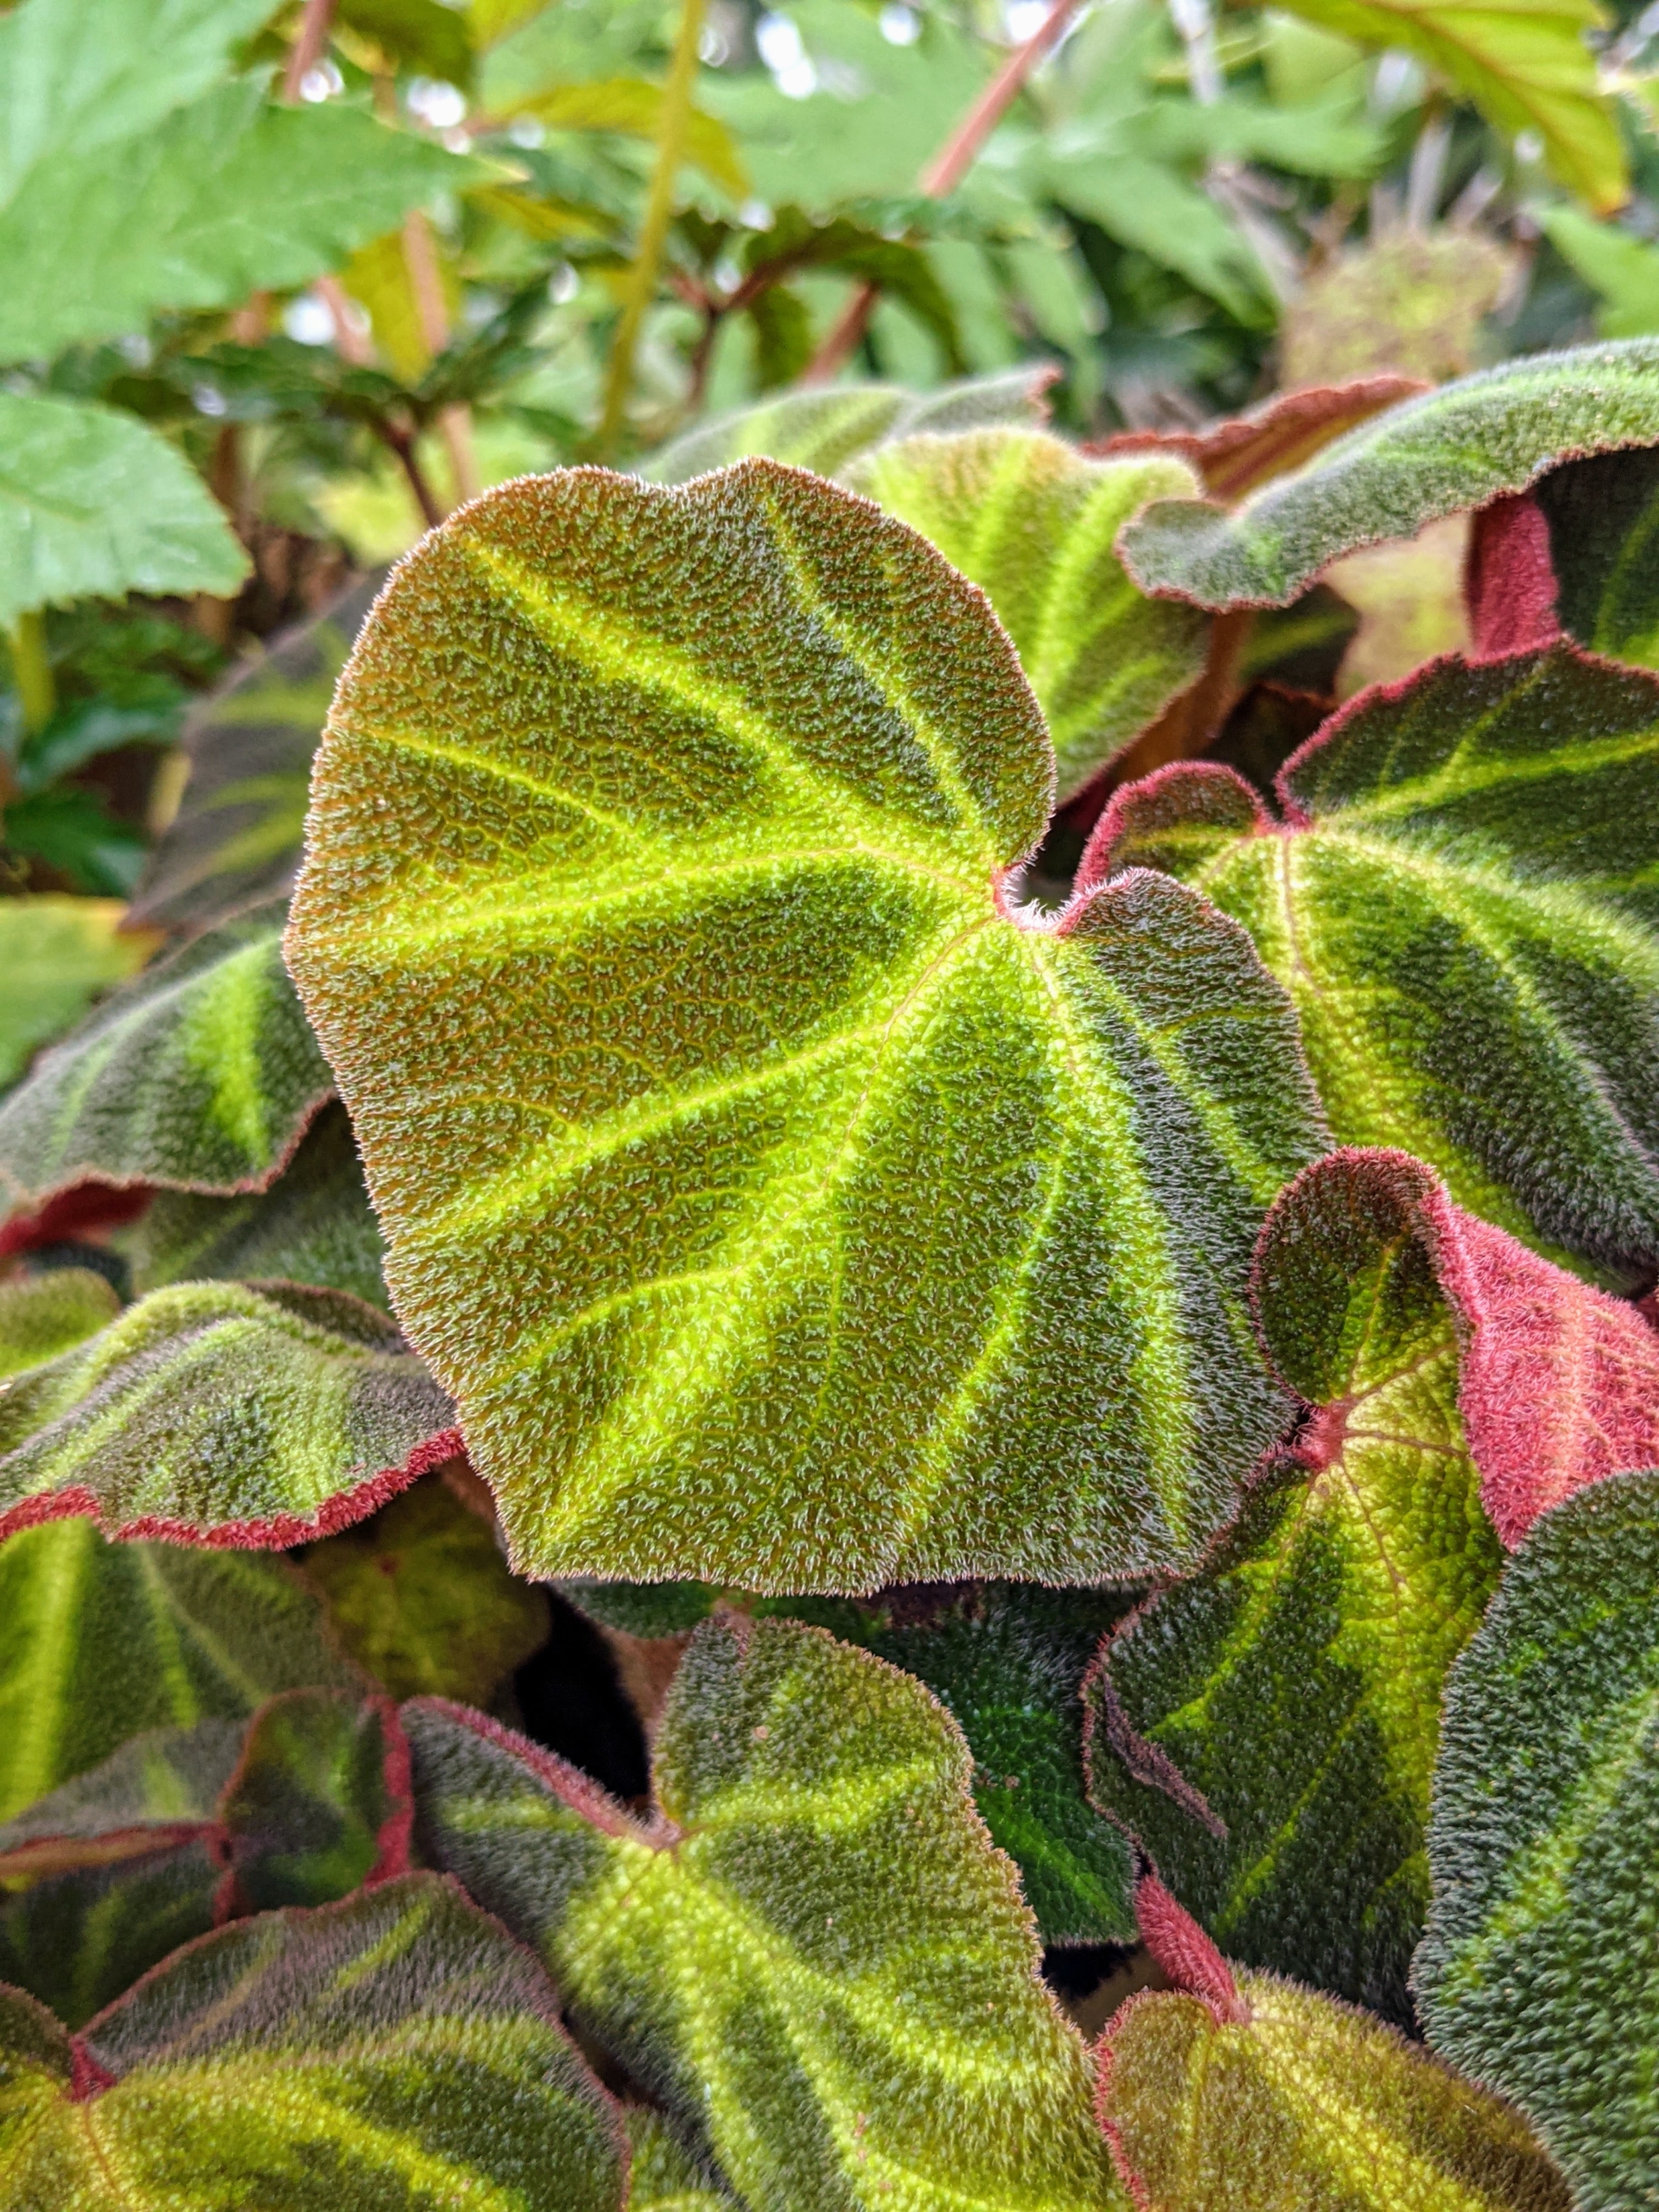
Begonia soli-mutata is a compact medium-sized species from Brazil. The heart-shaped leaf colors vary depending on its exposure to bright light, which is why its common name is “Sun Tan Begonia”.
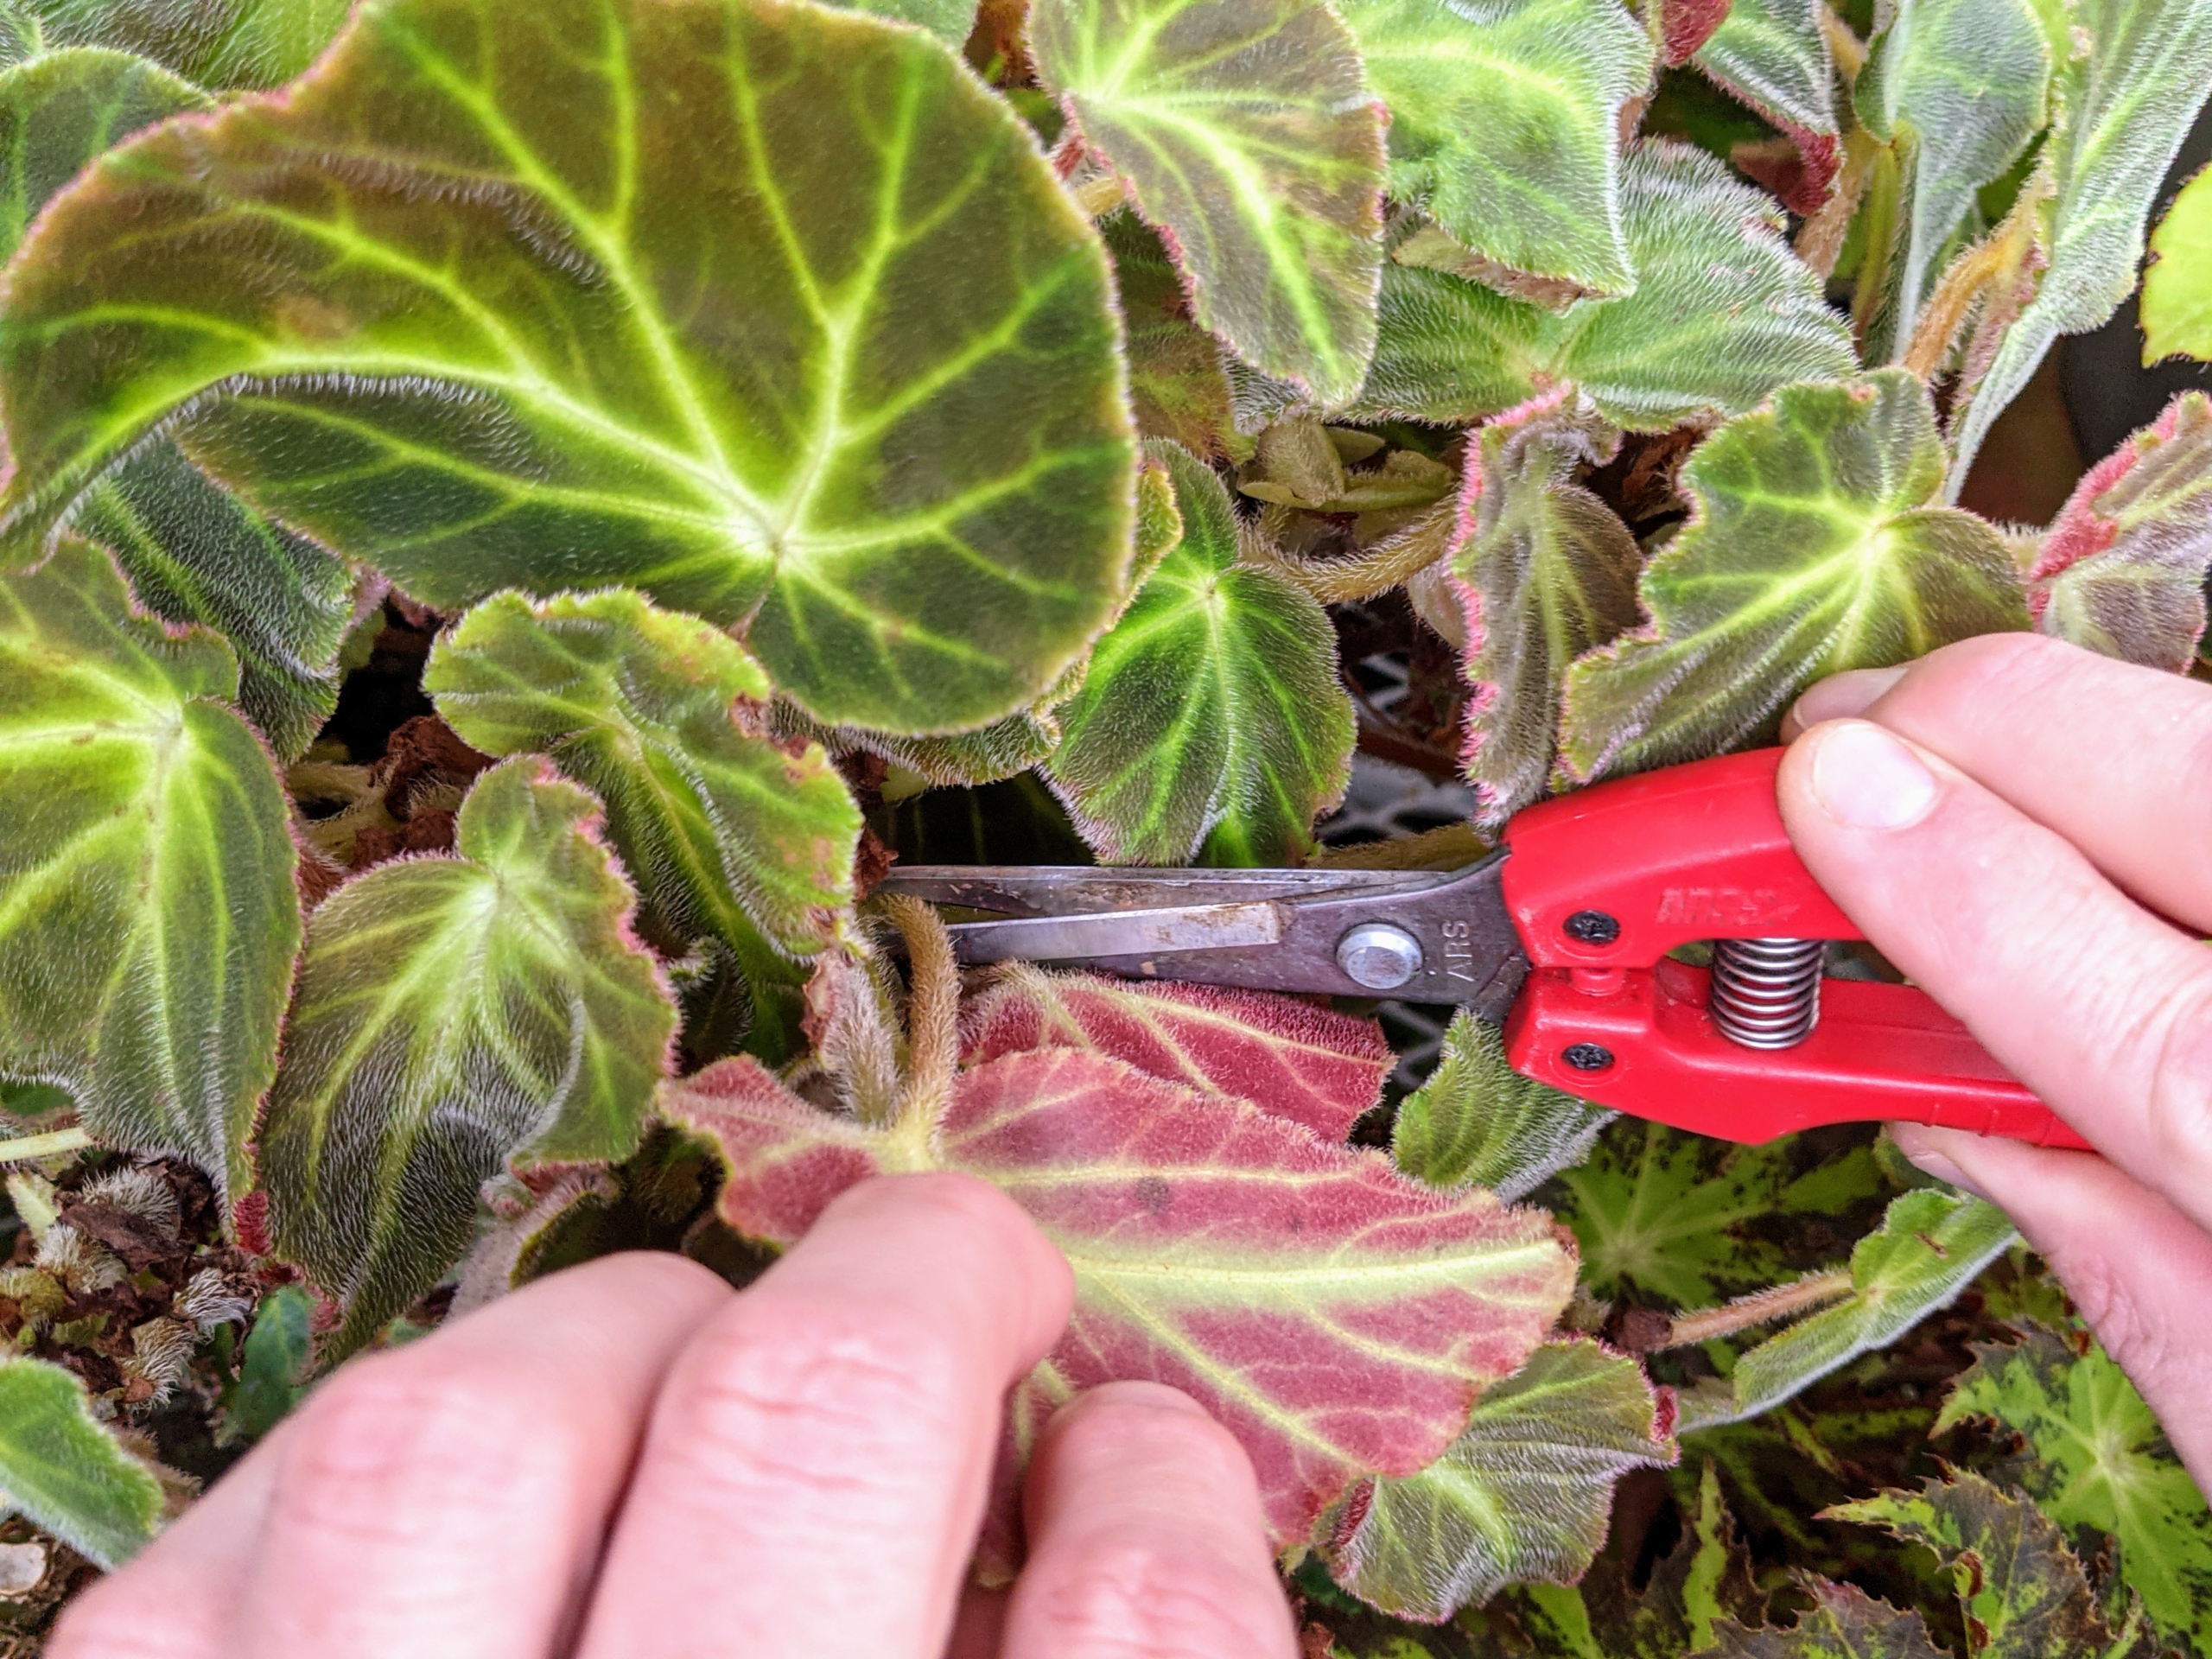
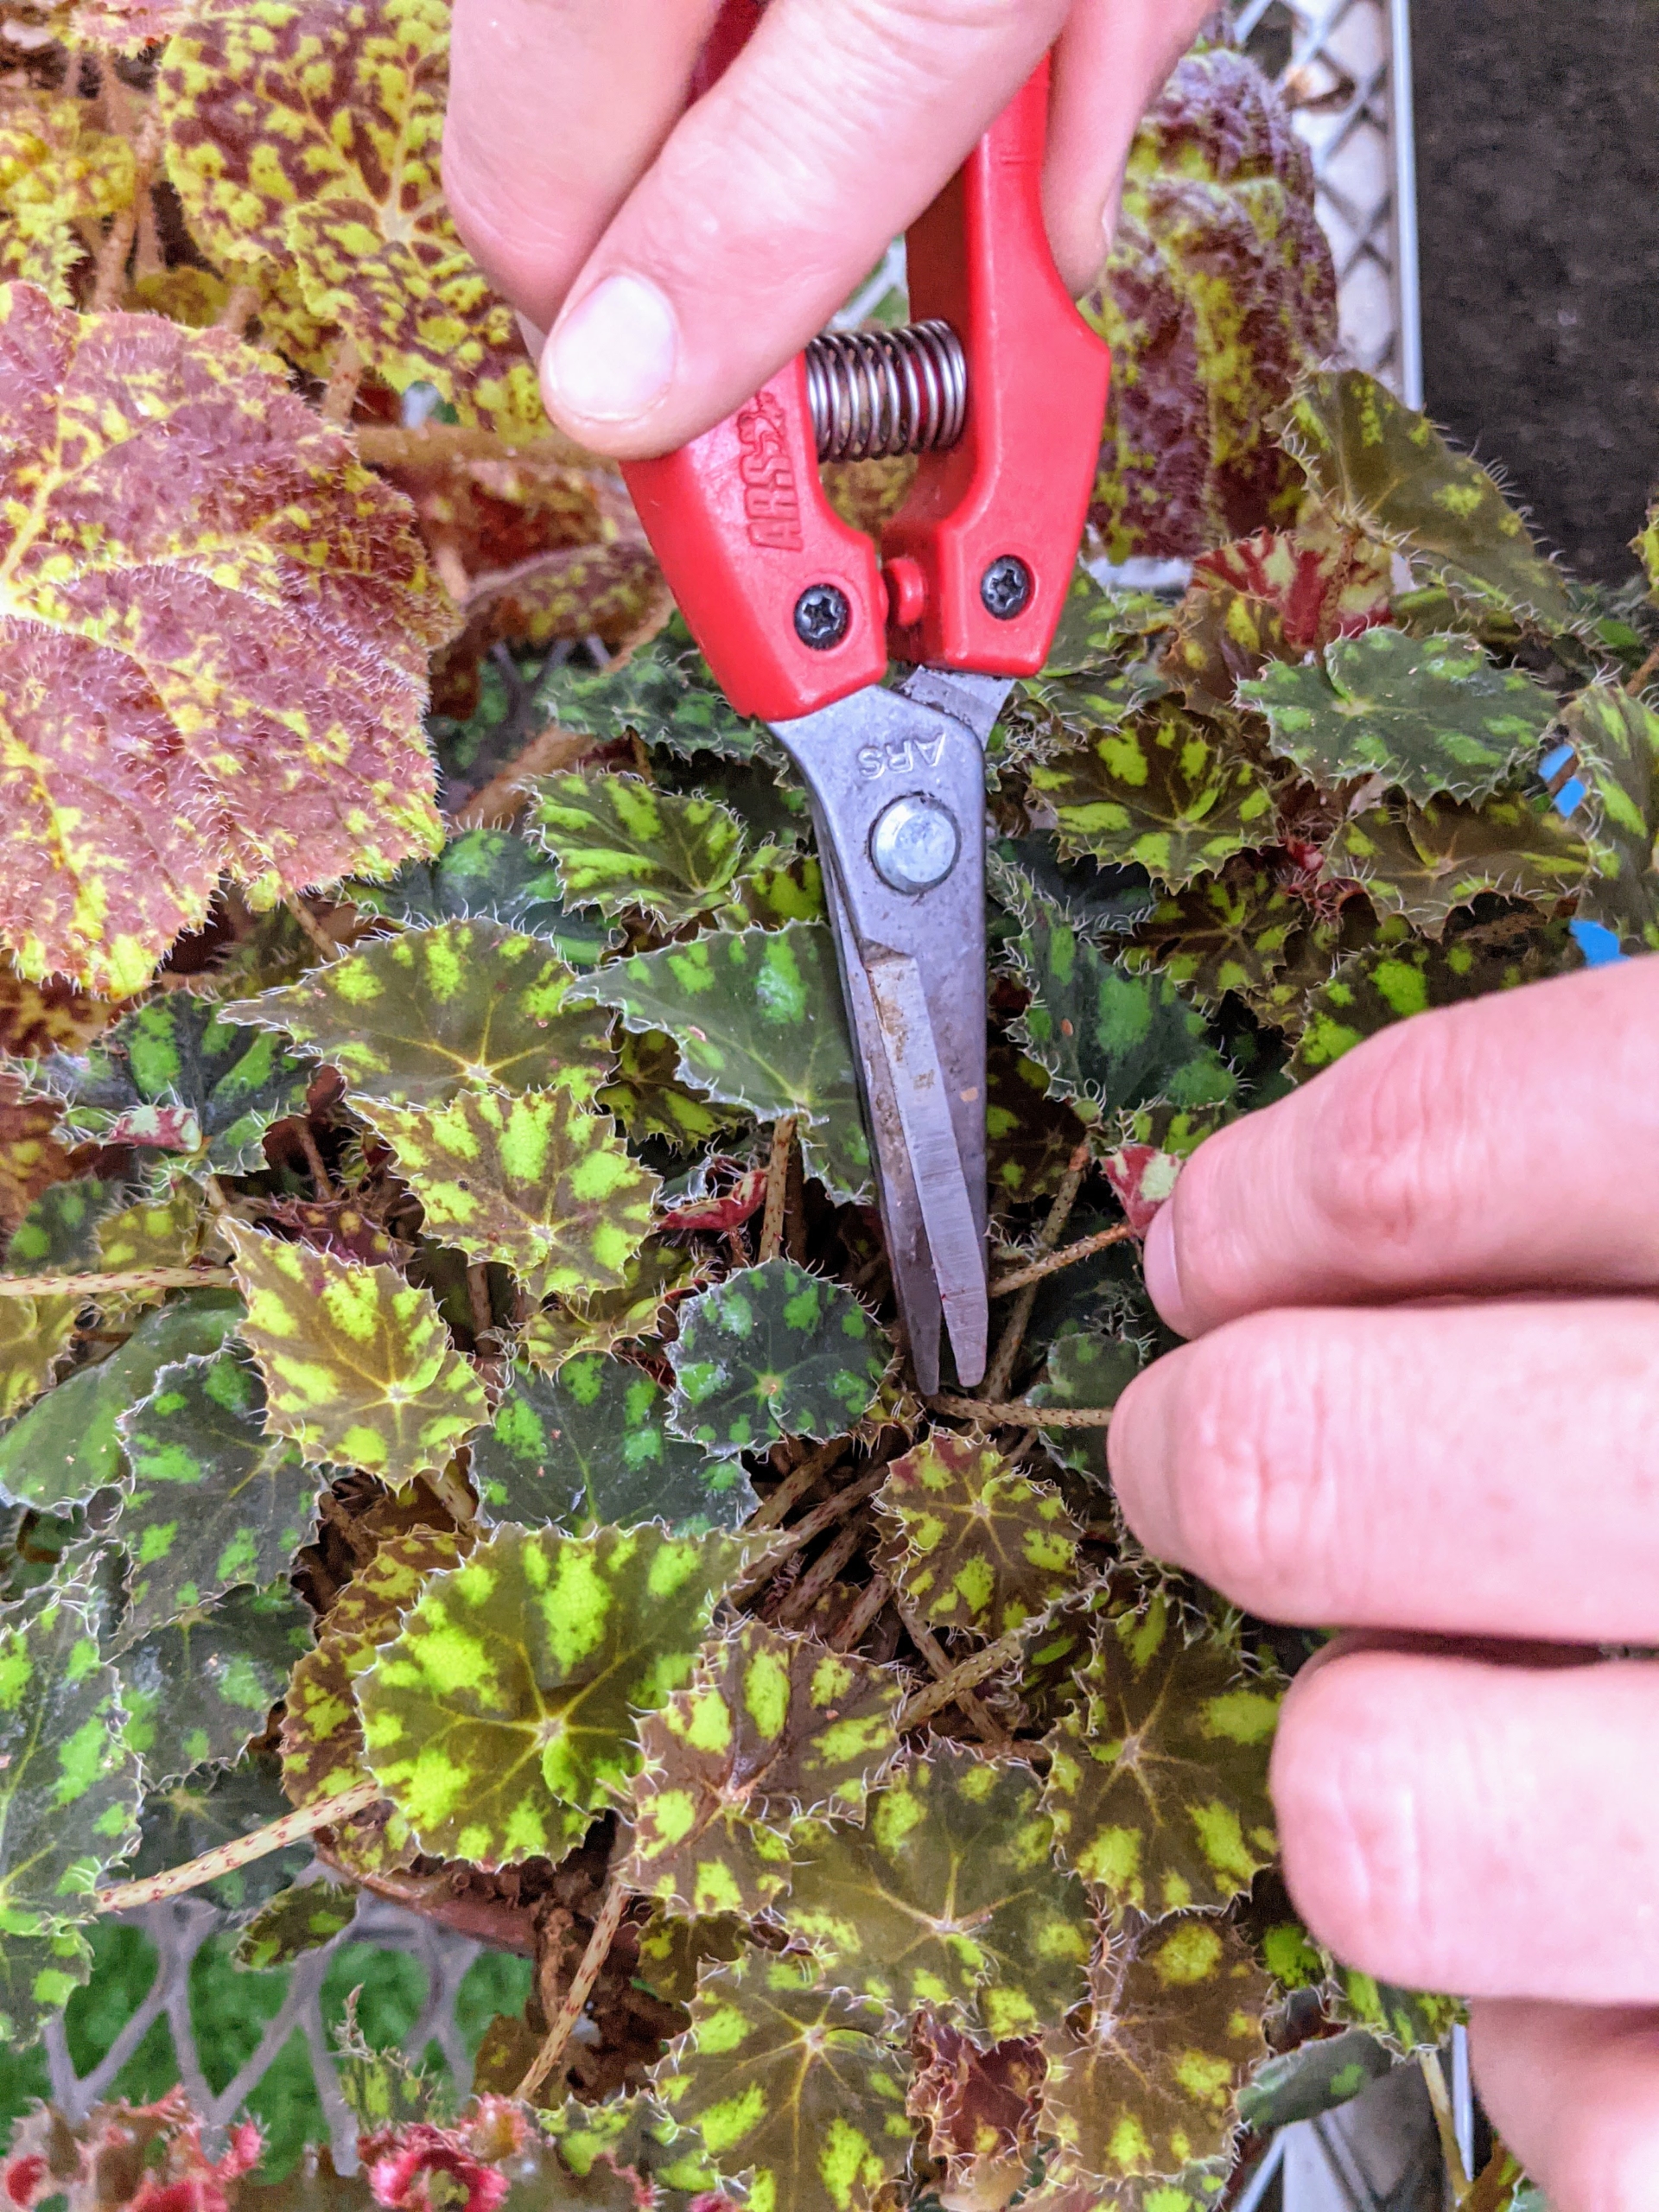
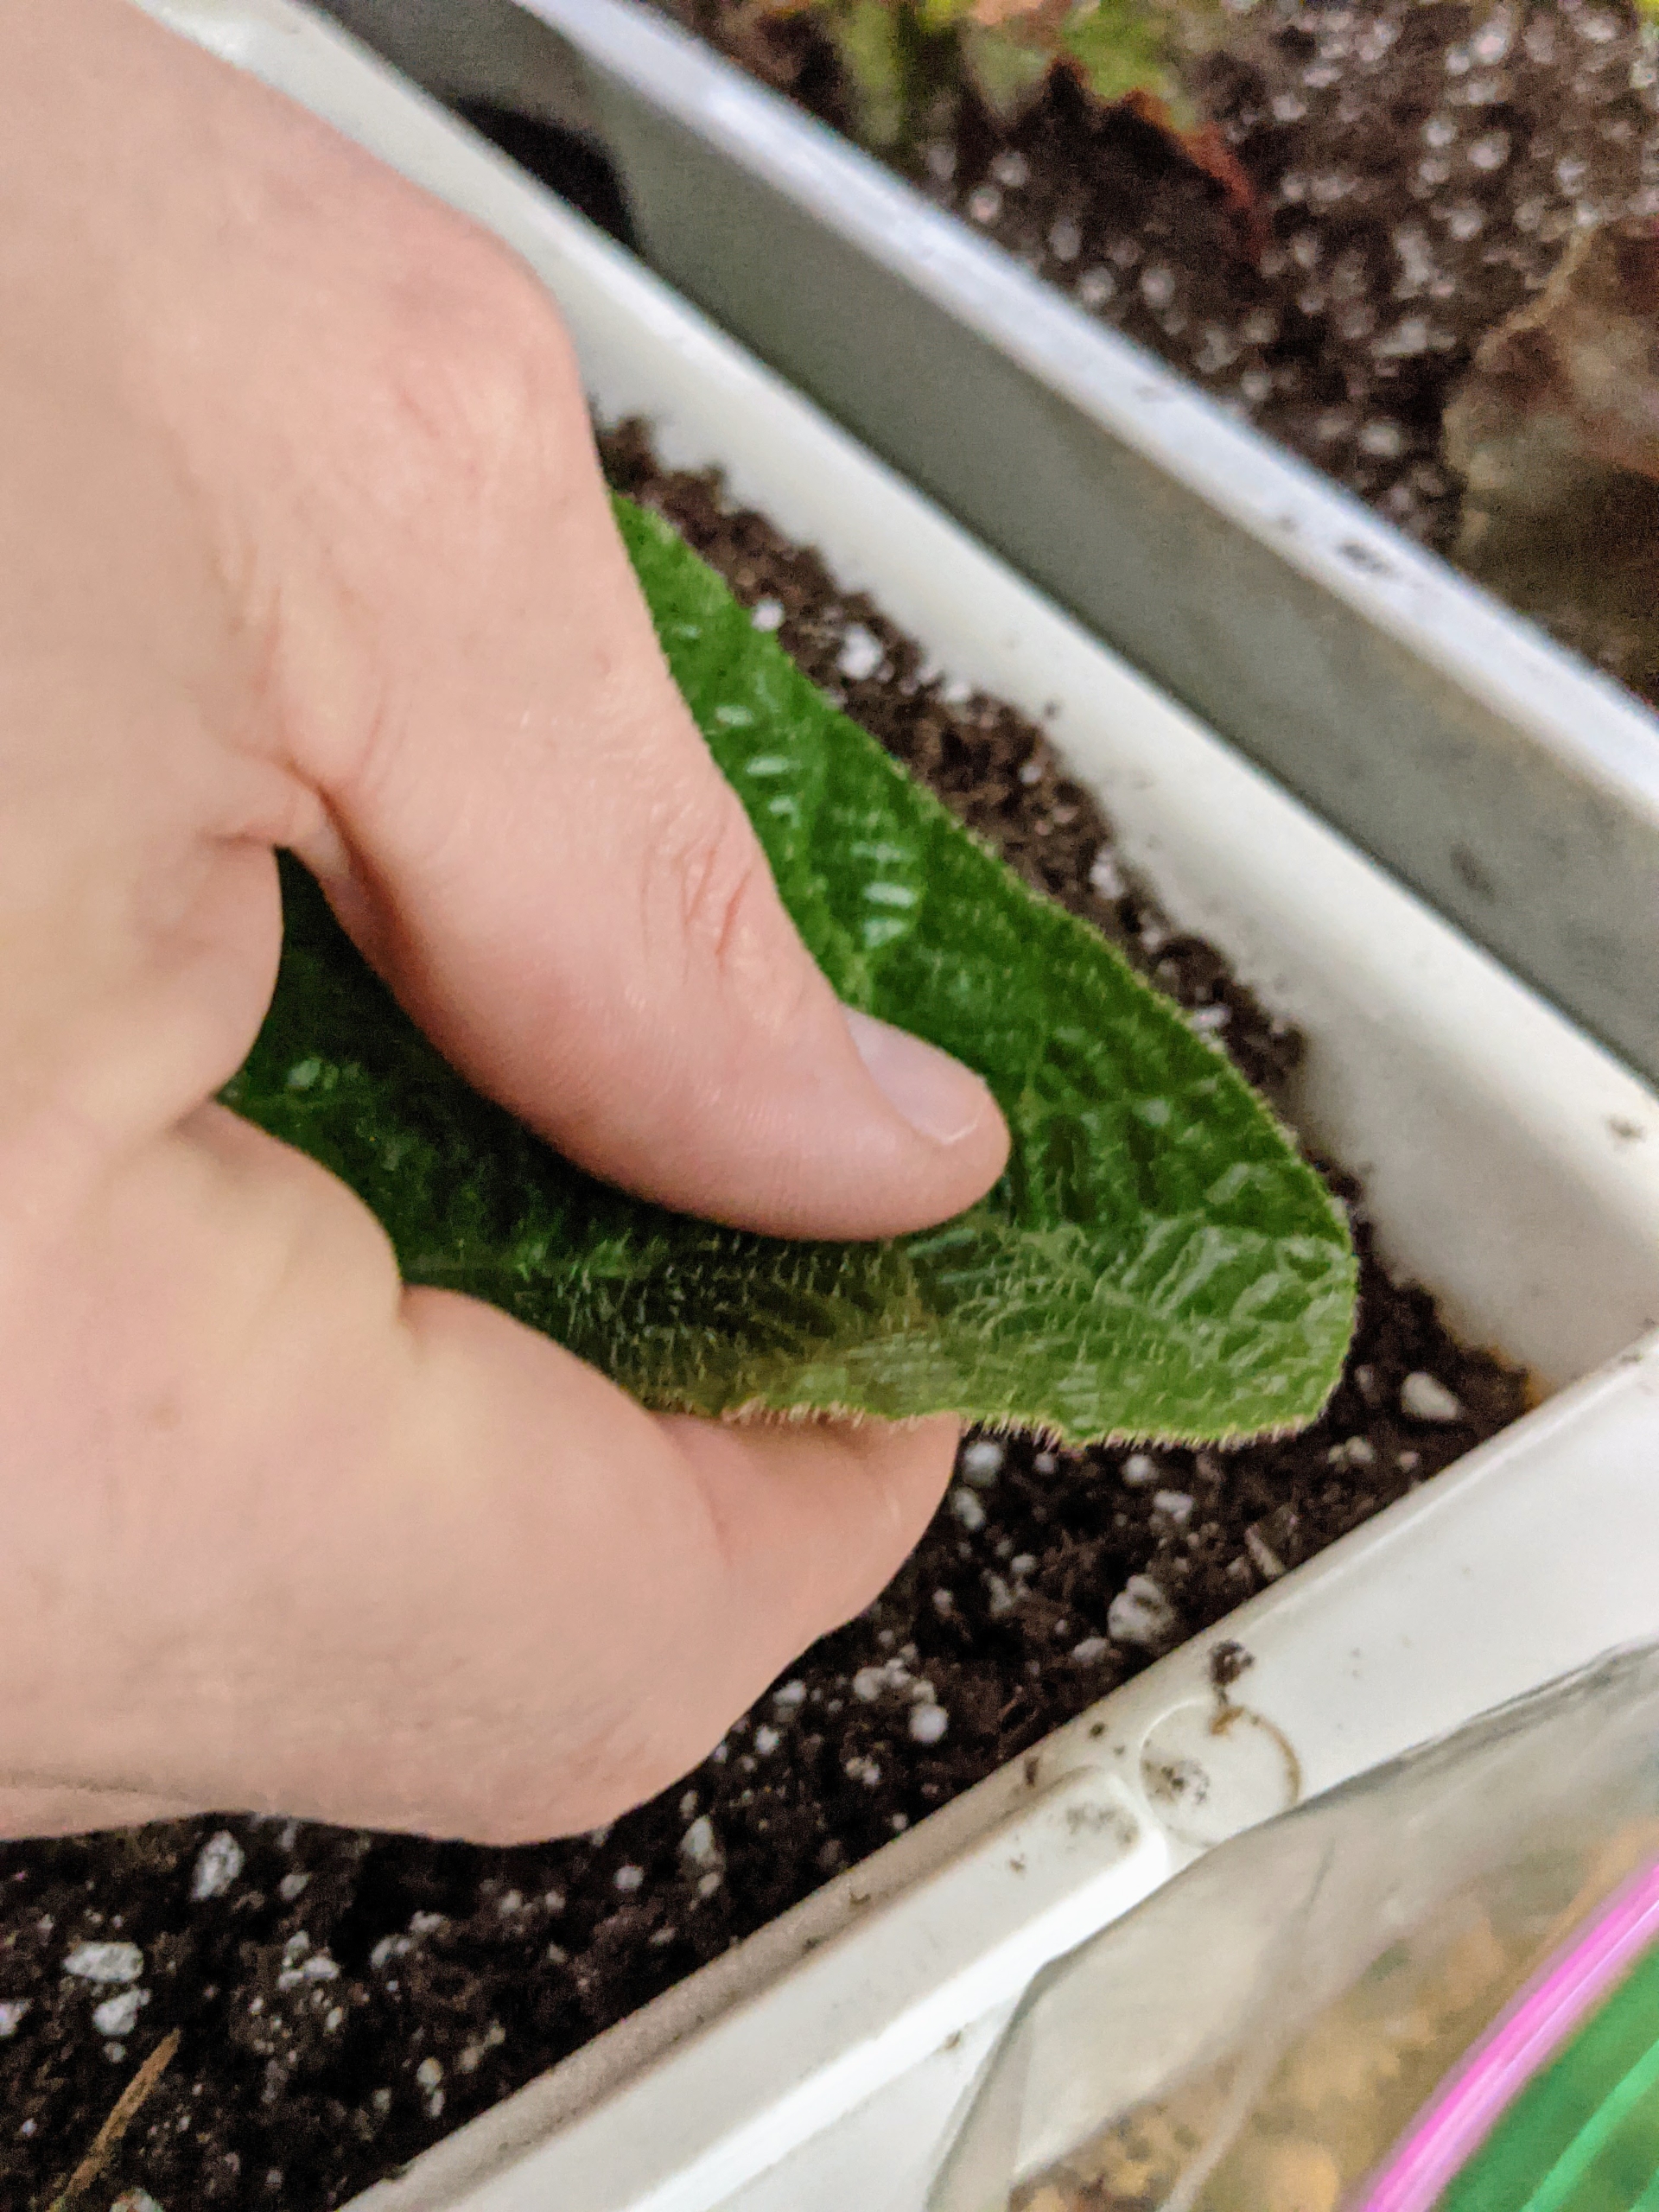
Several of my soli-mutata begonia plants were grown from leaf cuttings off a parent plant. The leaves are highlighted by a fine, reddish hue, which is also seen on the leaf undersides. Here, Ryan uses sharp snips to cut off a healthy leaf stem.
Ryan carefully selects mature stems for cutting, but leave those that are old and have become fibrous or woody.
Any viable leaves that fall off during regular plant grooming or repotting can also be saved for rooting purposes. Begonias are remarkably resistant to pests primarily because their leaves are rich in oxalic acid – a natural insect repellent.
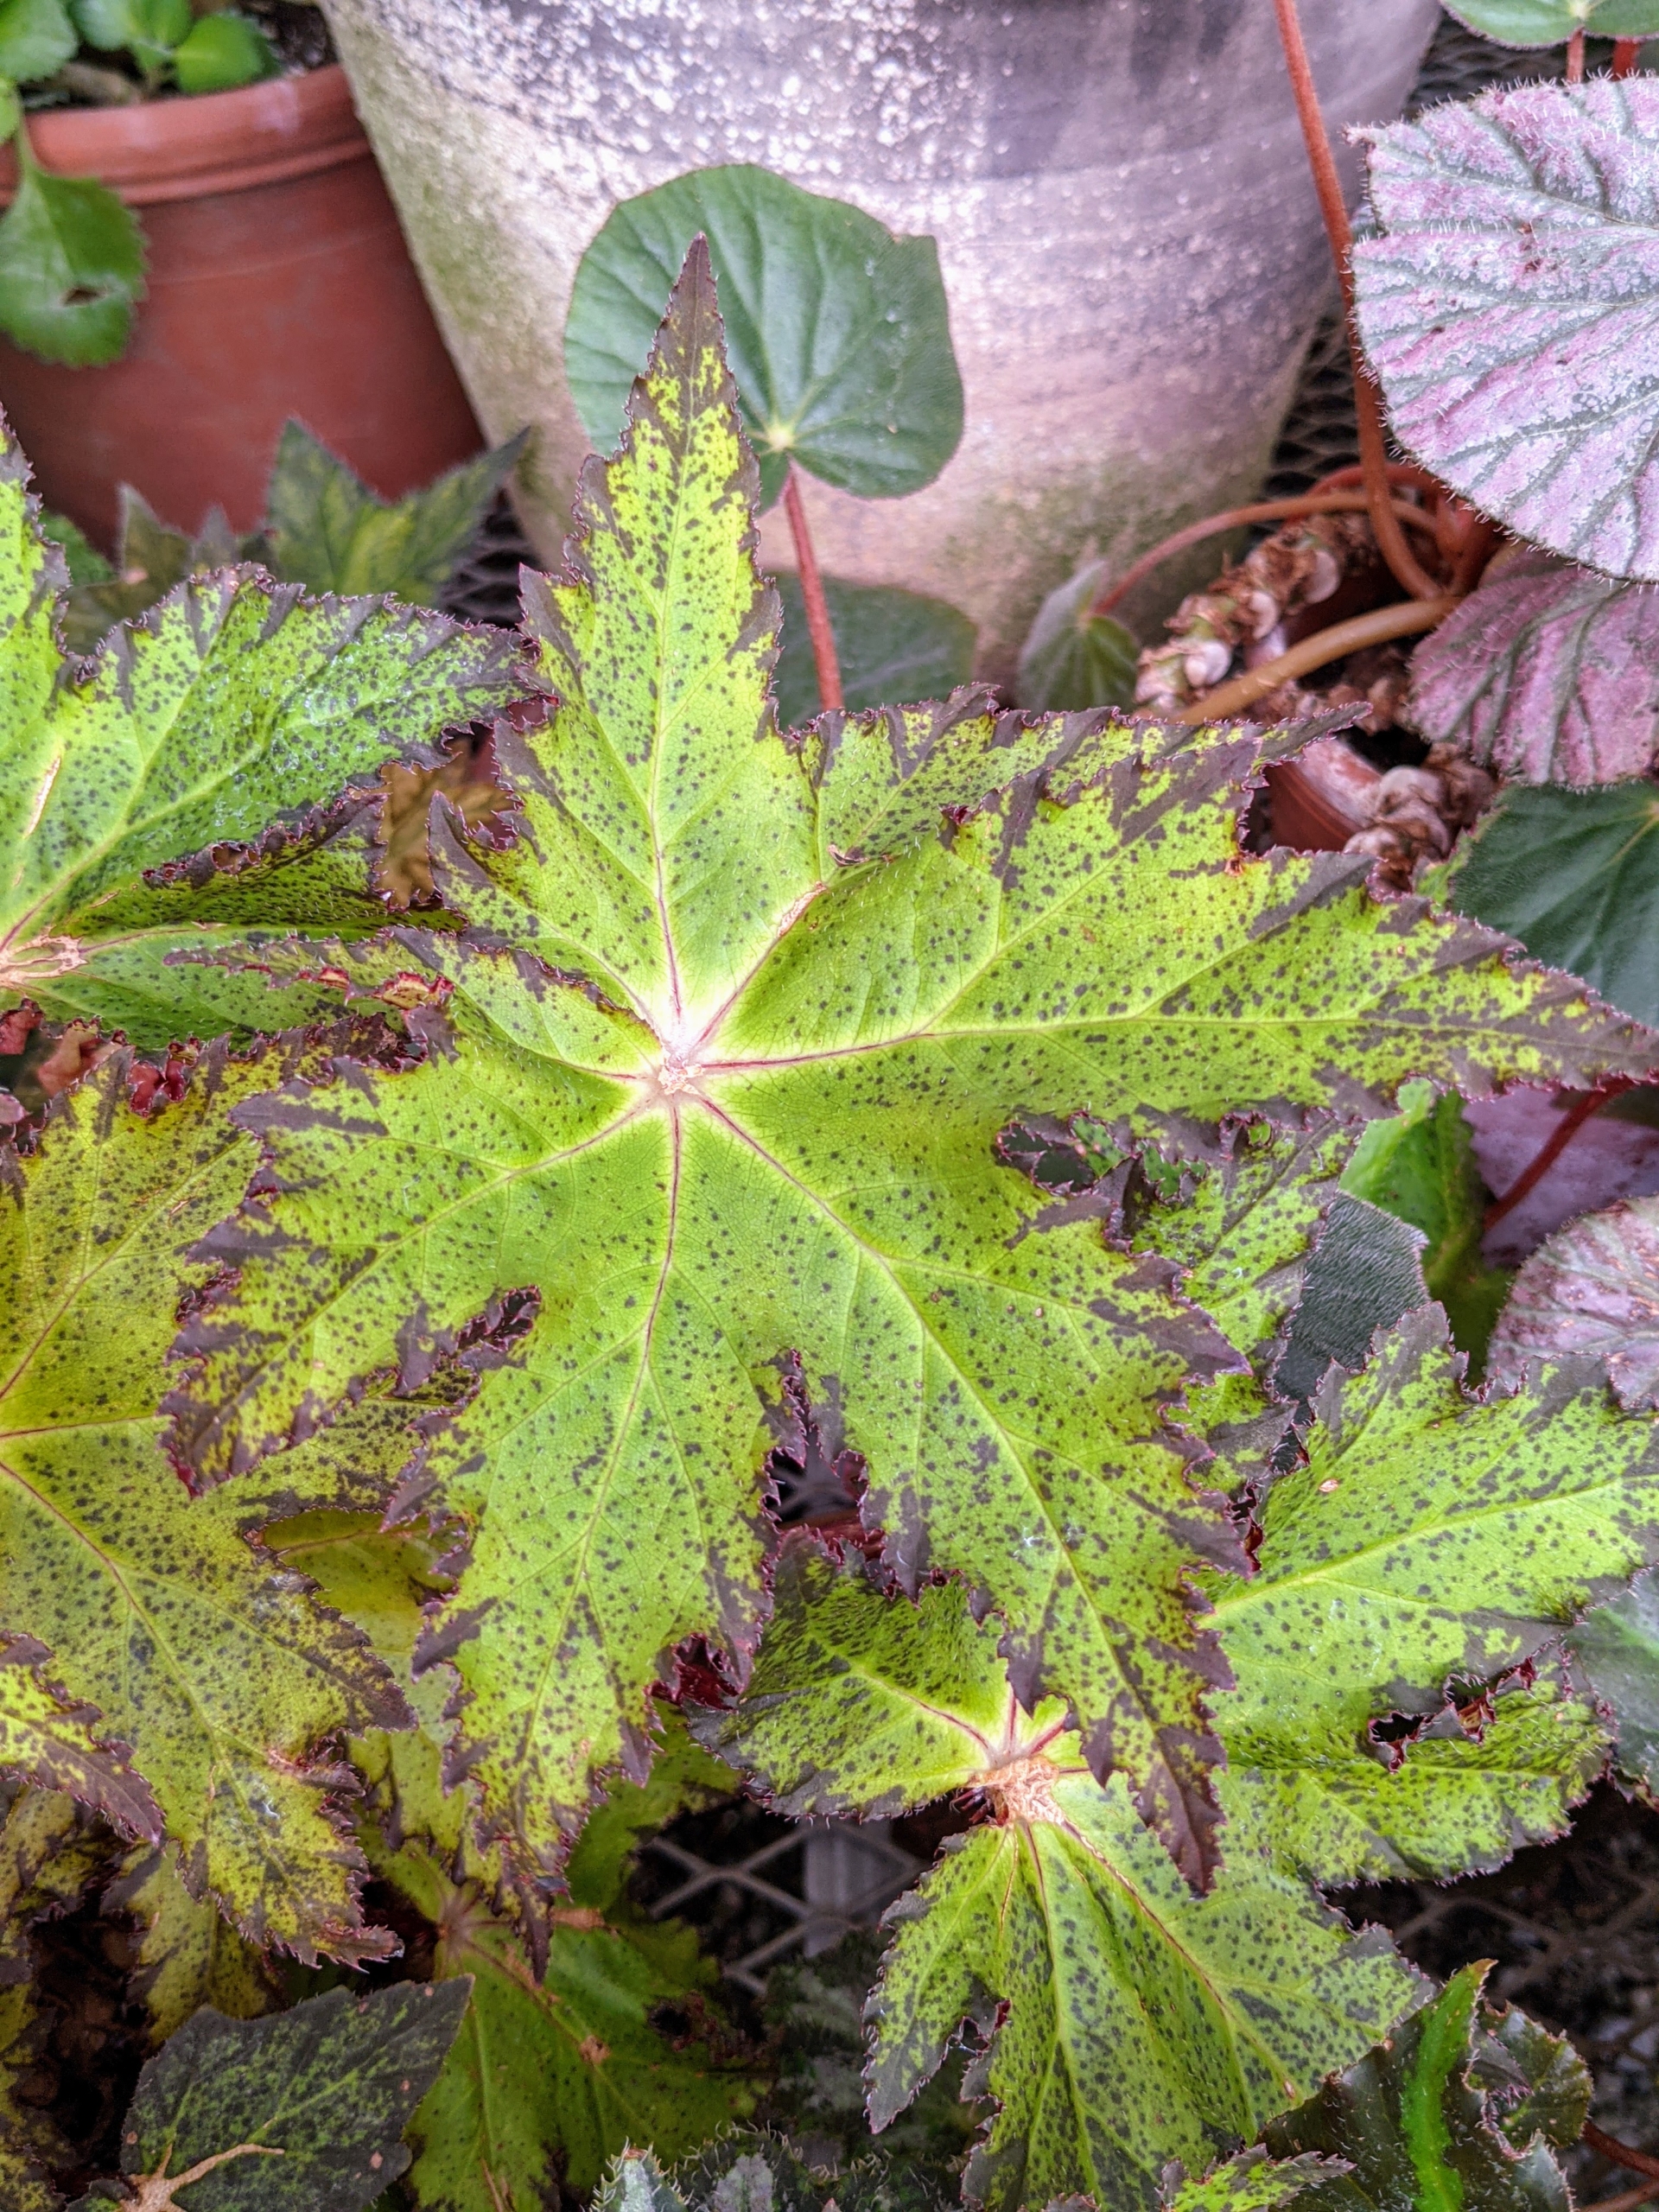
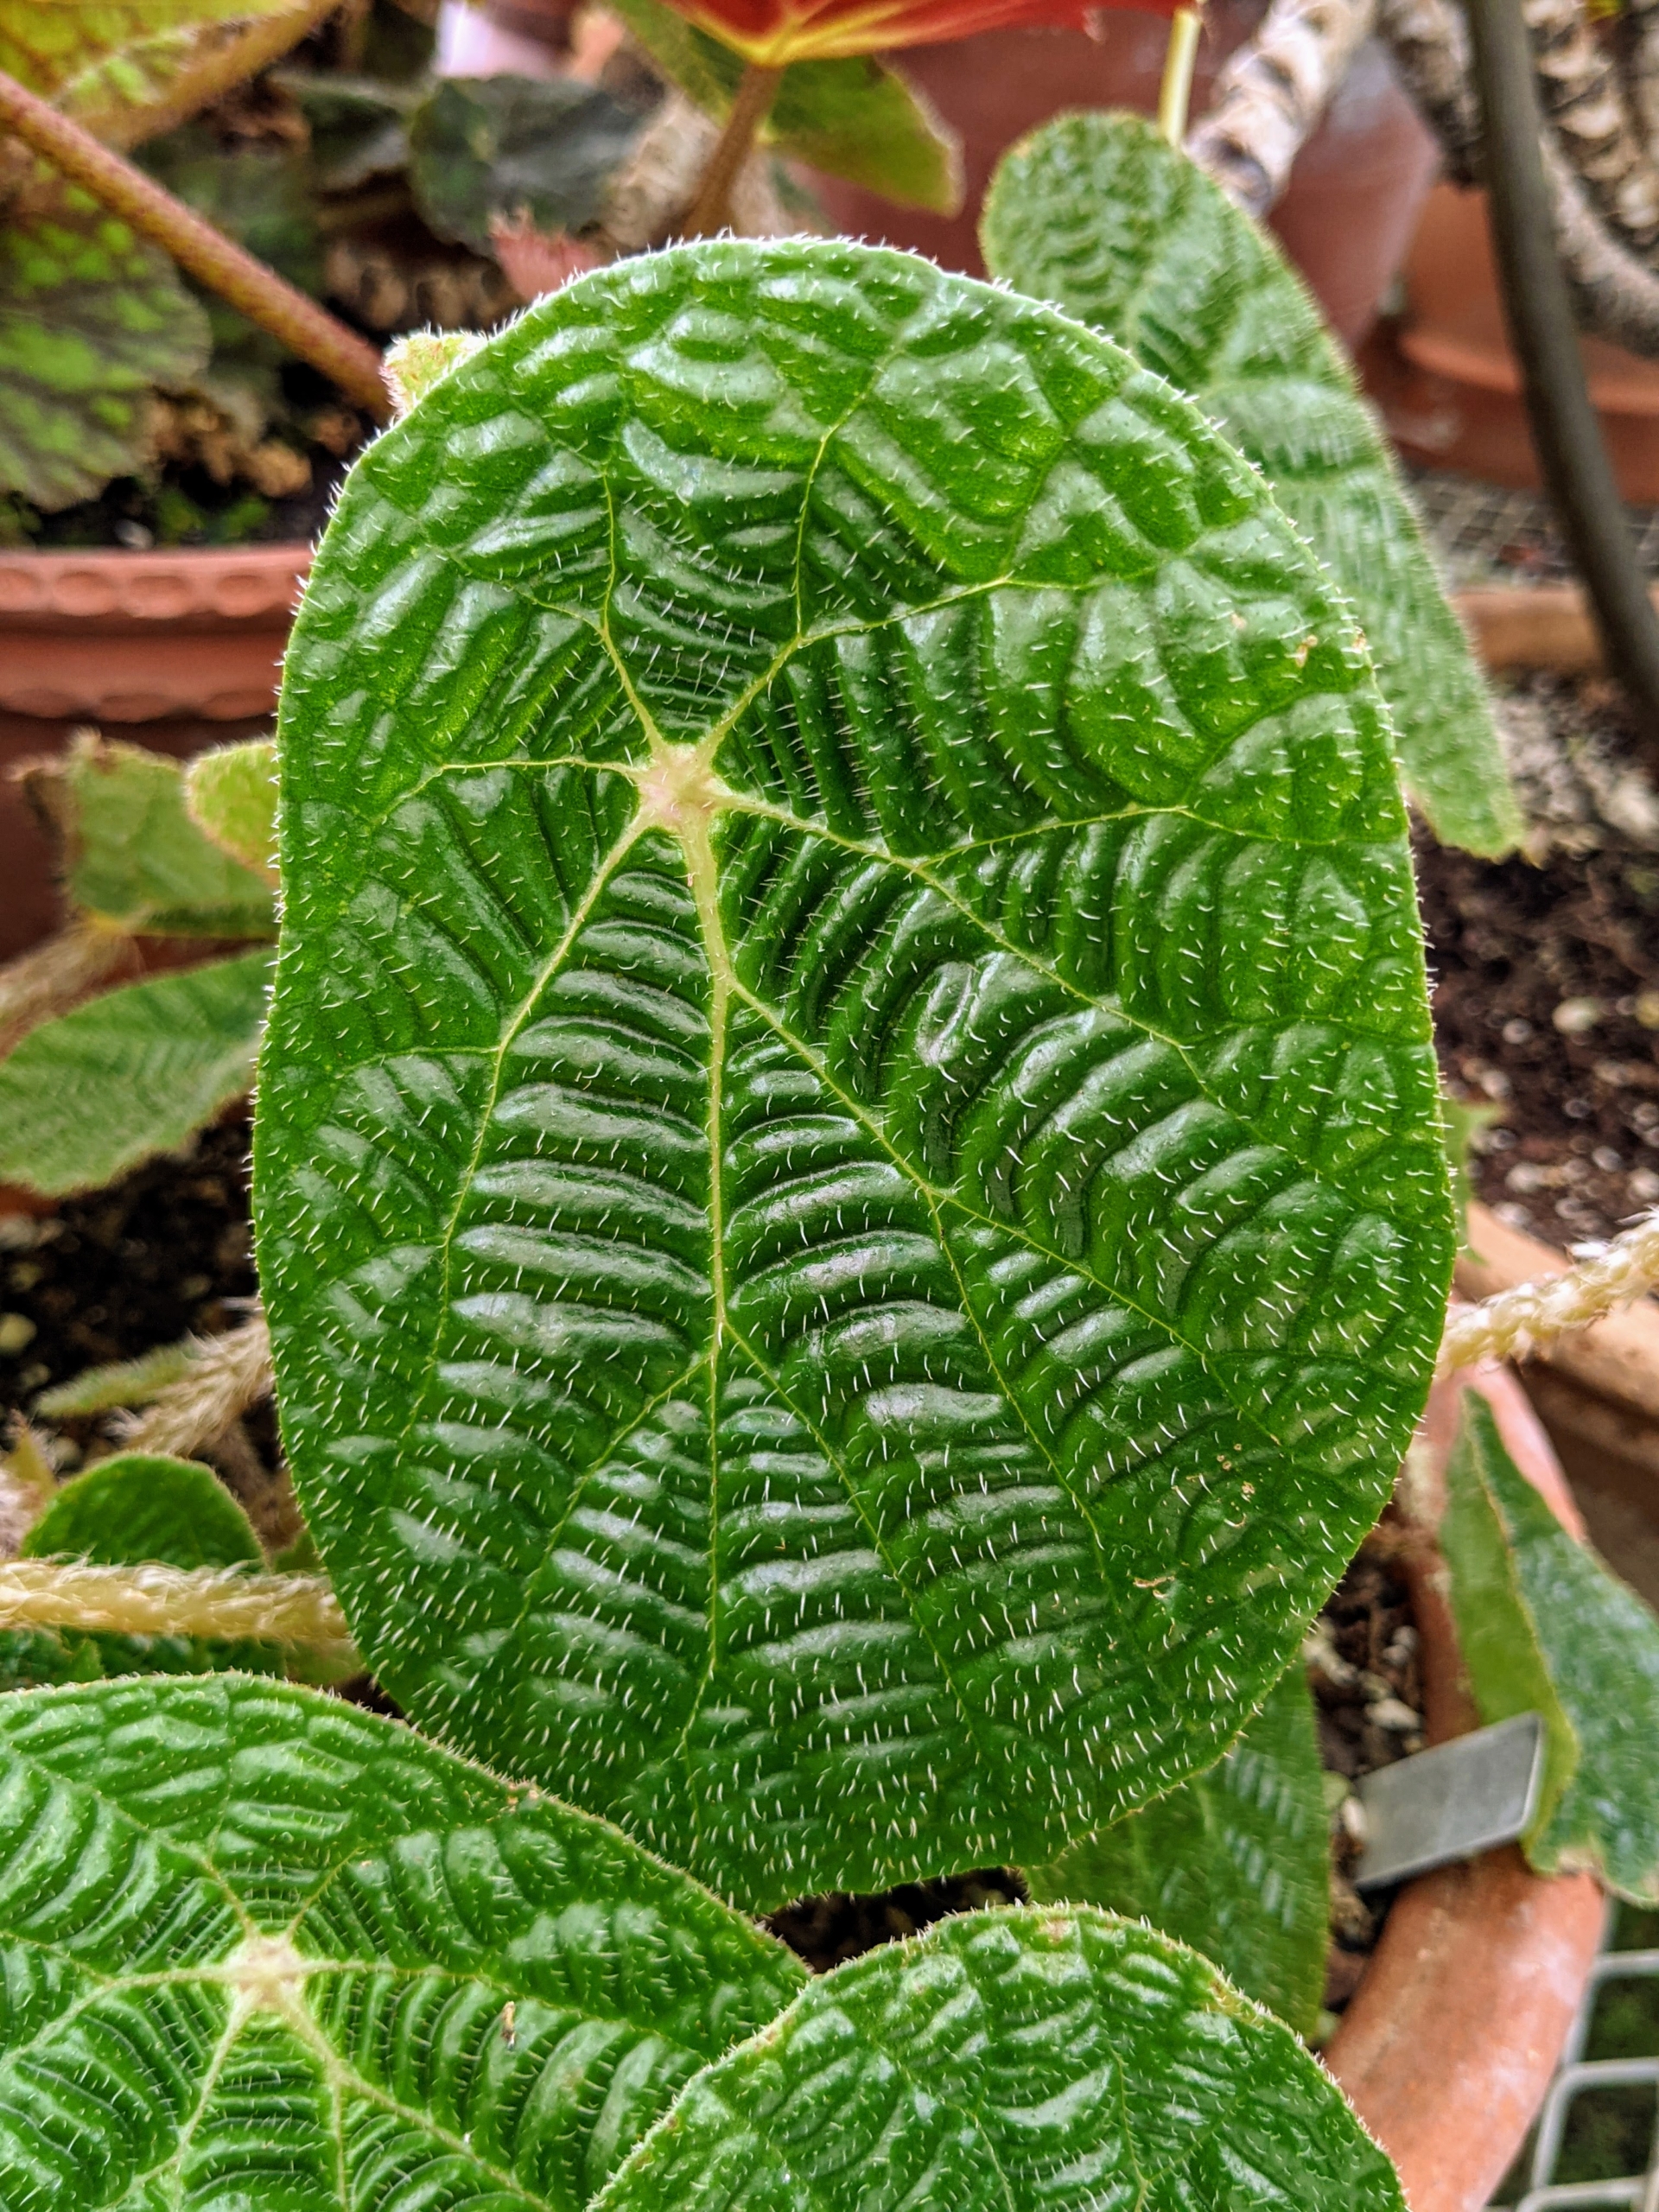
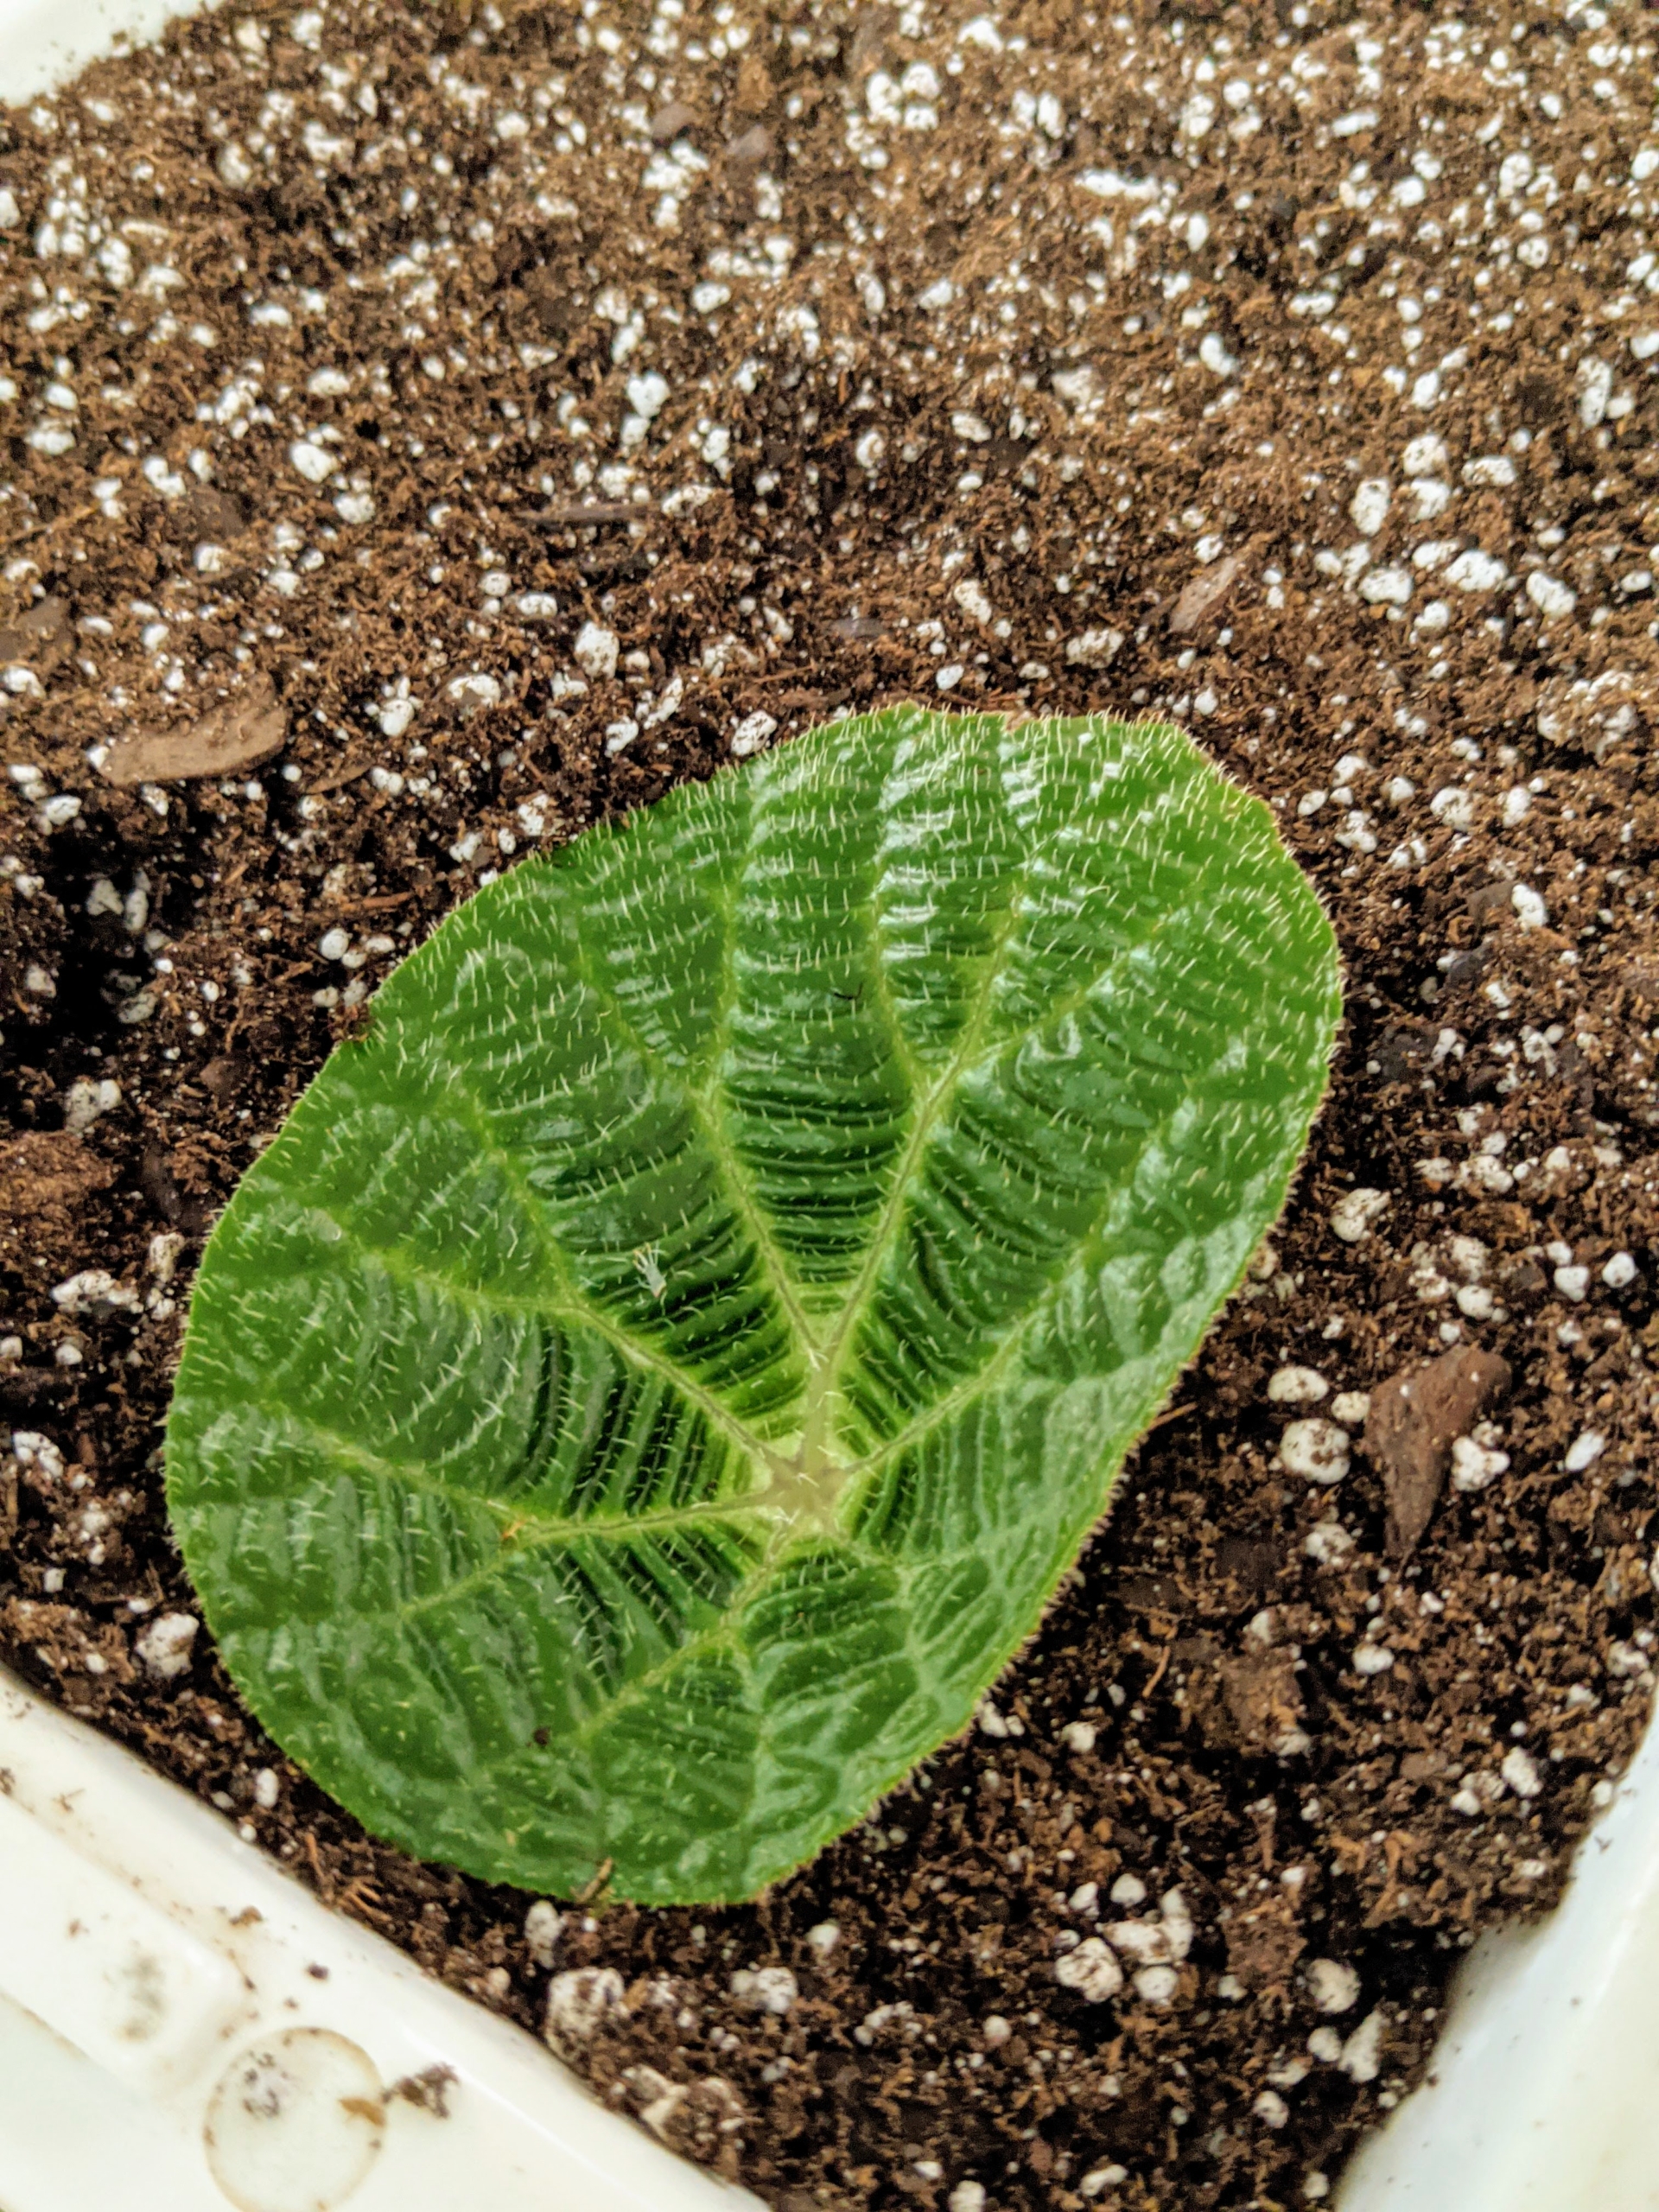
Begonia paulensis has large, shiny, green leaves with an extremely textured surface. It is light green and has a puckered texture. The leaf petioles are densely covered with white hairs. The pattern resembles a spiderweb and gives this species one of its common names, “The Spiderweb Begonia”.
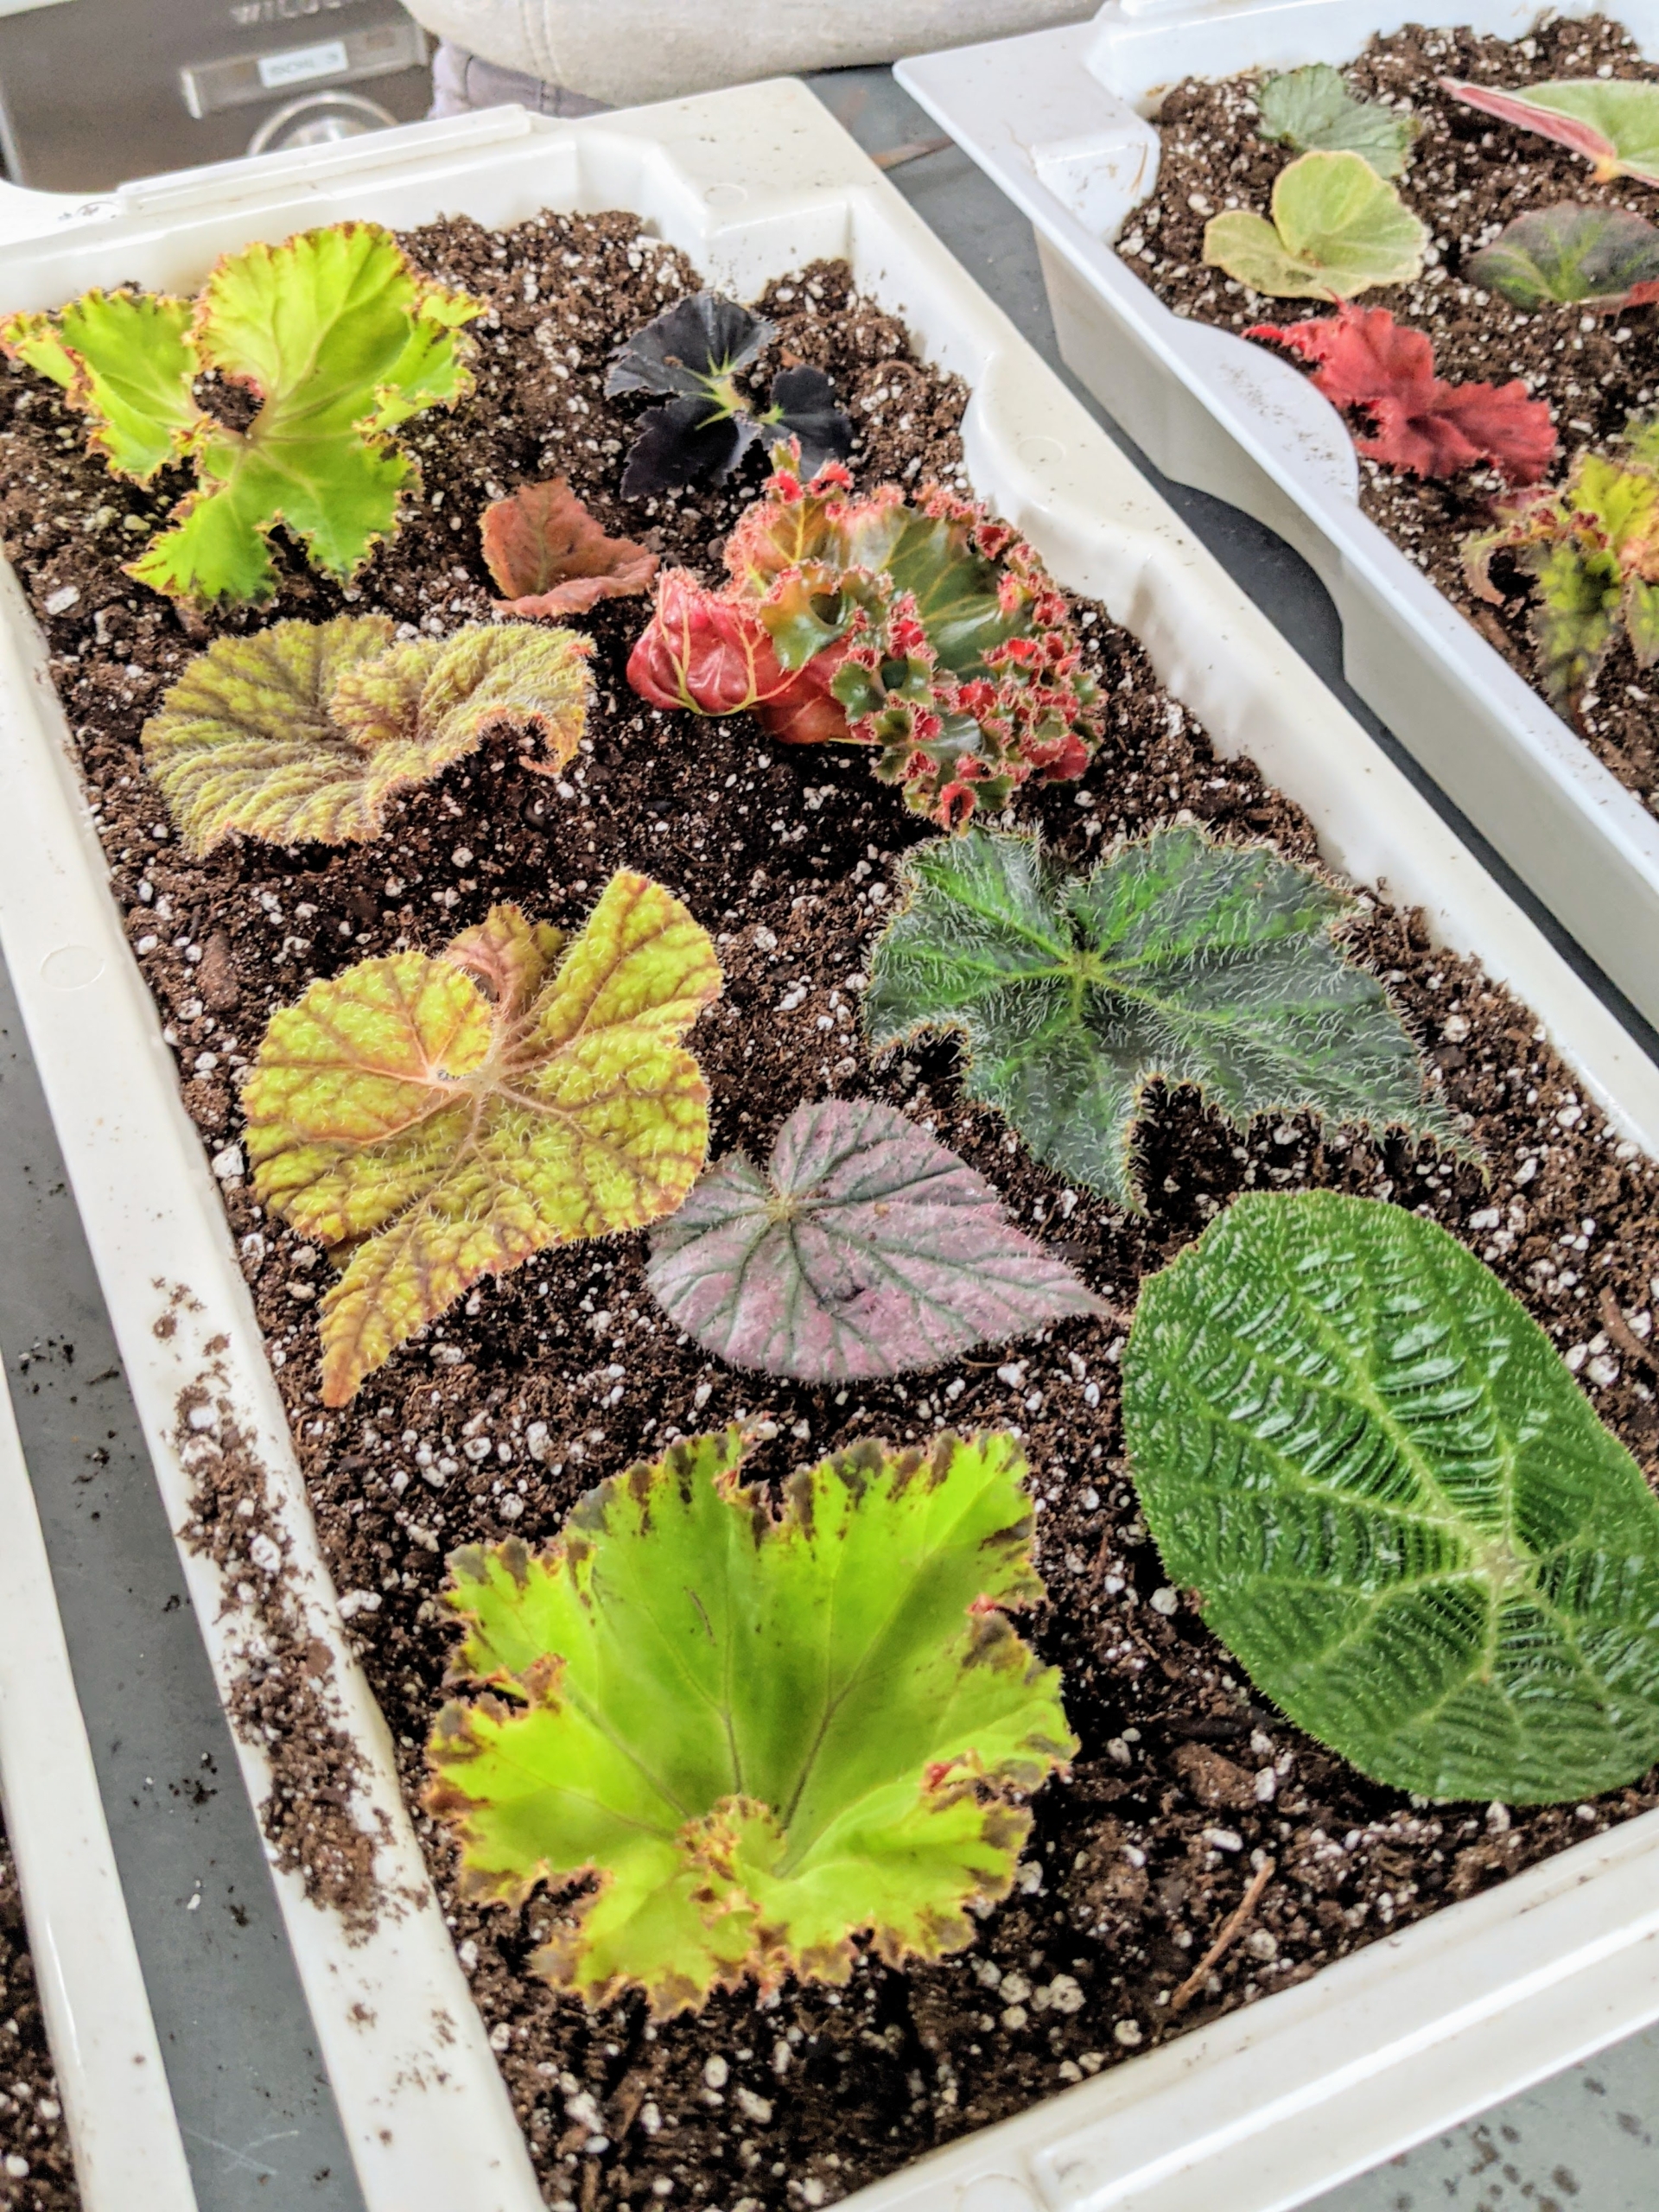
Here are the stem cuttings Ryan collected. Begonia leaves root easily. All one needs to do is snip a leaf, push its stem into potting soil, and keep it moist. After a few weeks, or more, one will start to see new leaves emerge.
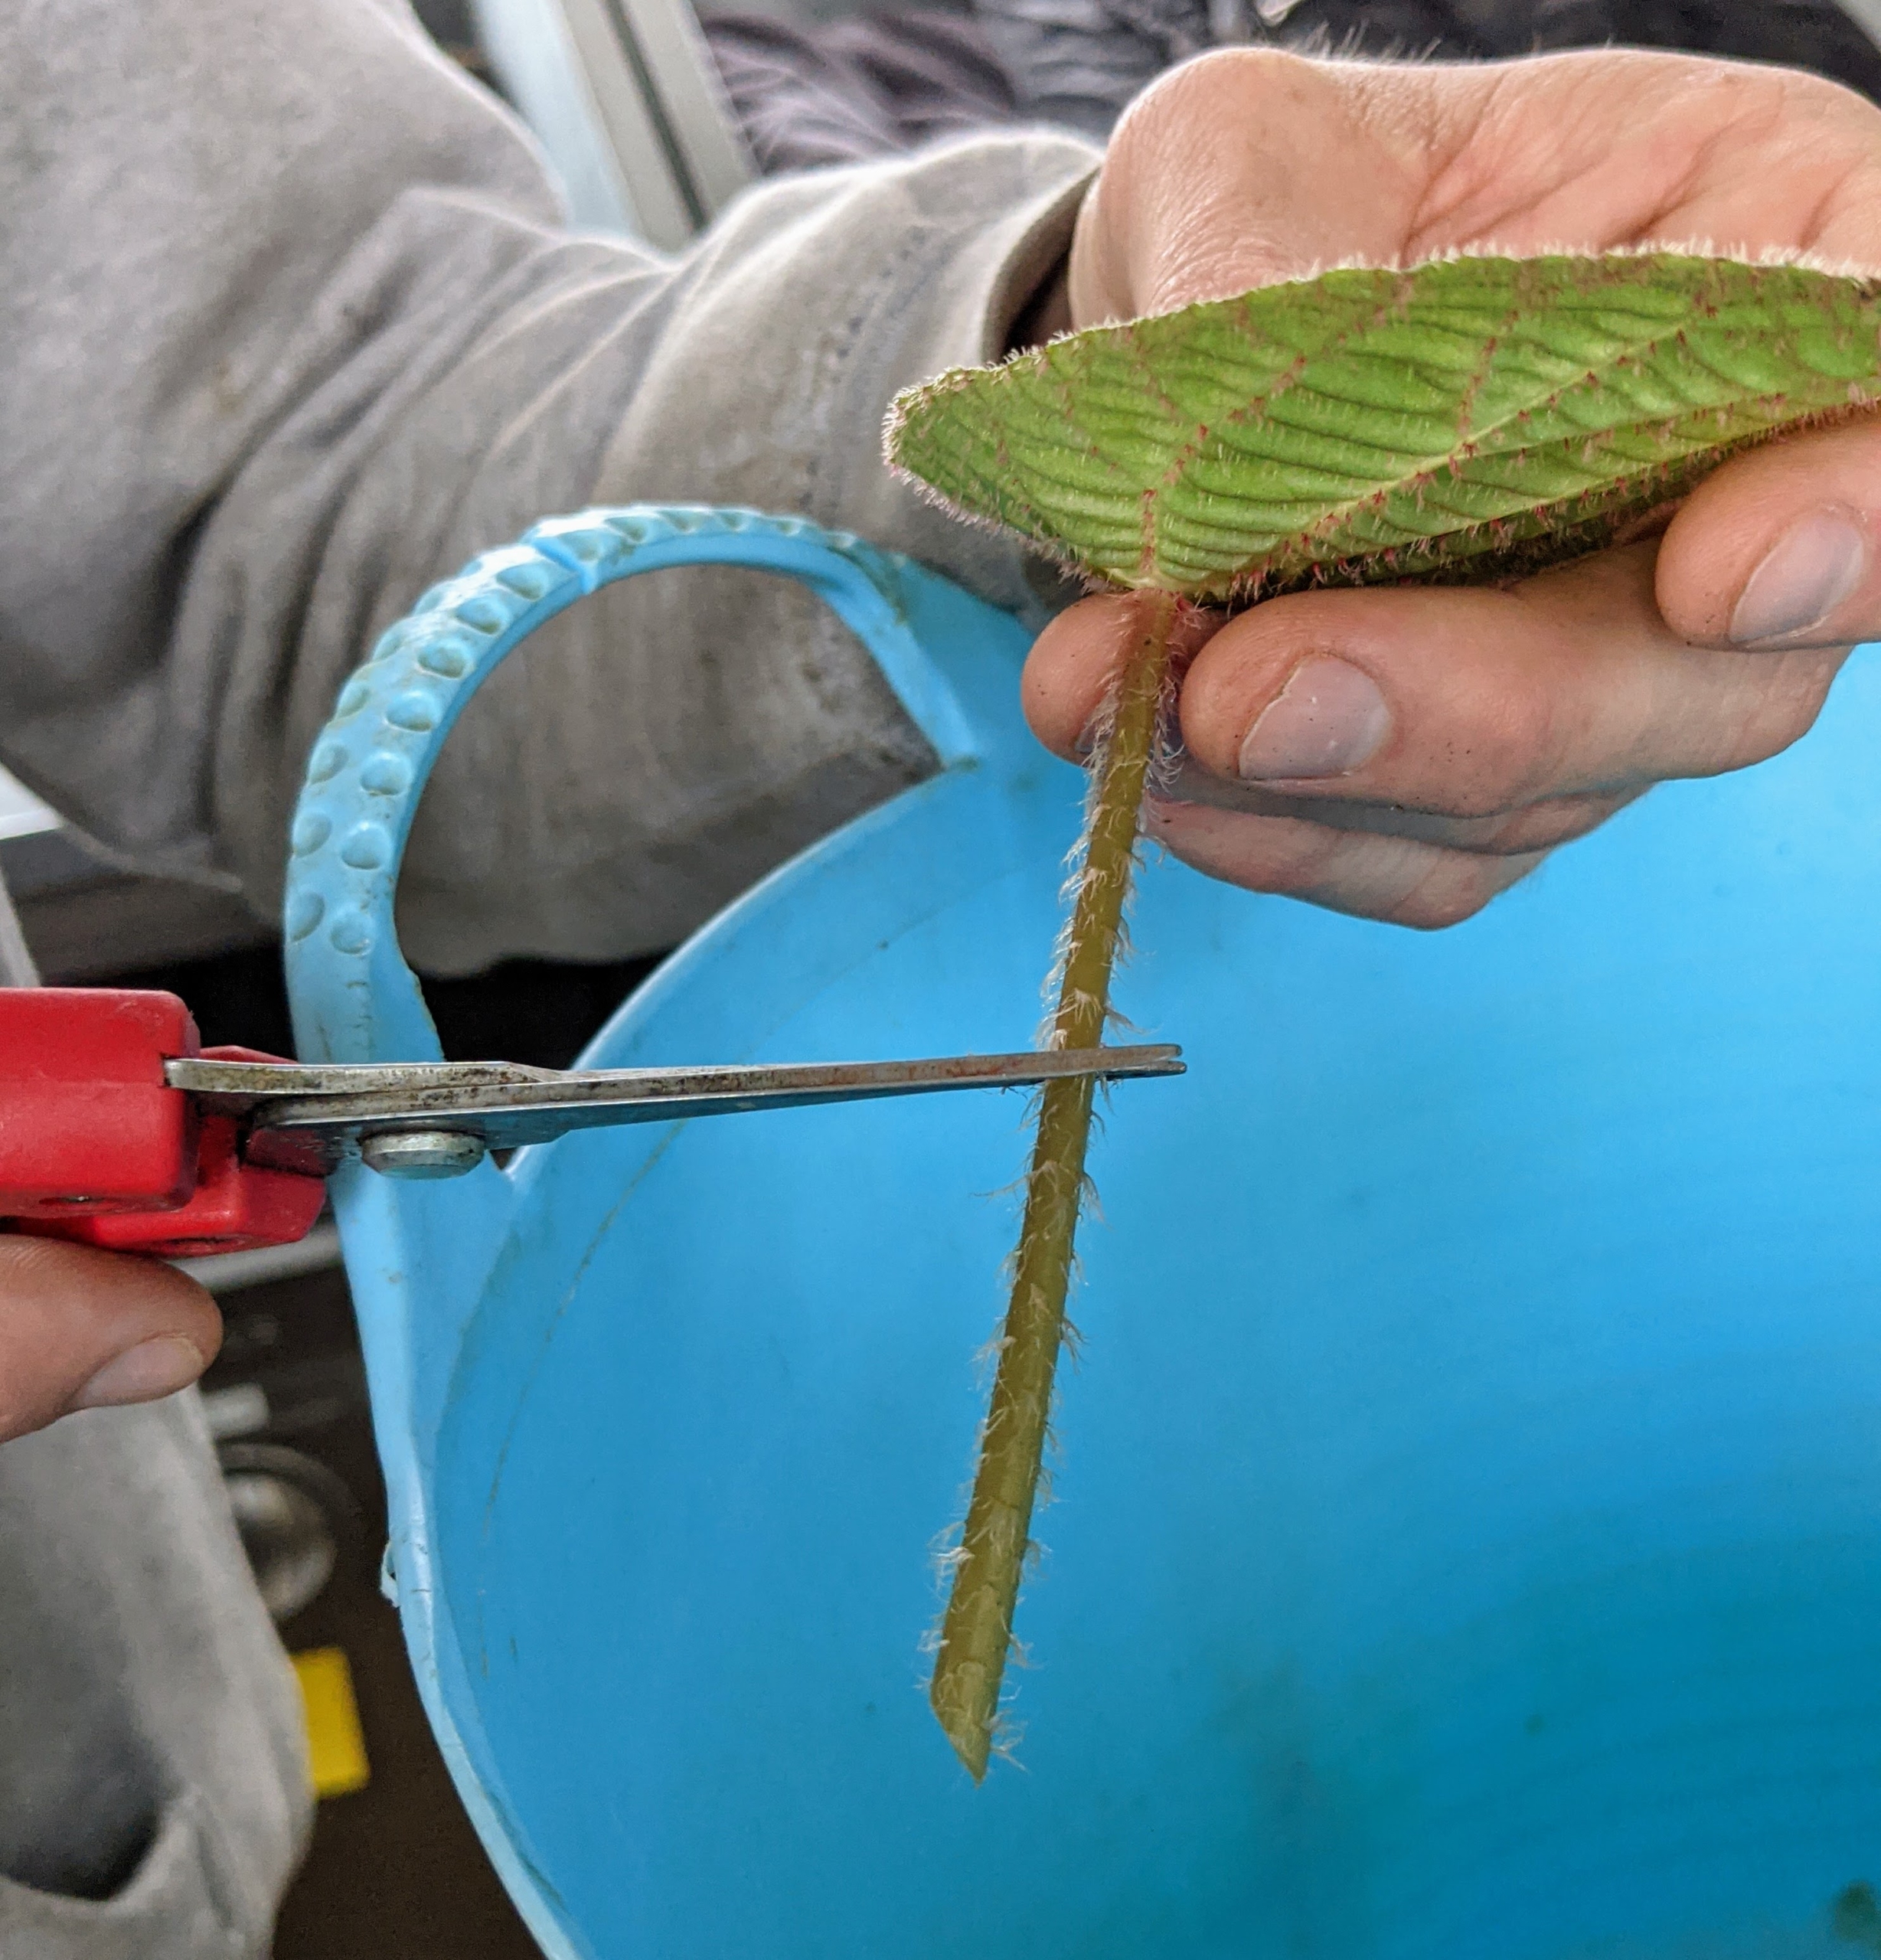
Ryan inspects each cutting and trims the stem down to about one to one-and-a-half inches long.
Then he sticks the leaf in the soil so that the petiole is covered but the rest isn’t. The petiole is the part where the leaf connects to its leaf stem.
All begonias can be propagated by rooting stem cuttings, sometimes called tip cuttings. The basic idea is that a plant will clone itself by sprouting roots on a piece of stem that is in a moist growing medium. Many begonias root easily, and one can use the similar technique of rooting them in water.
Ryan plants each one the same way – gently positions the stem and tamps down the medium to hold the cutting upright.
The leaves can be positioned closely together, but not touching.
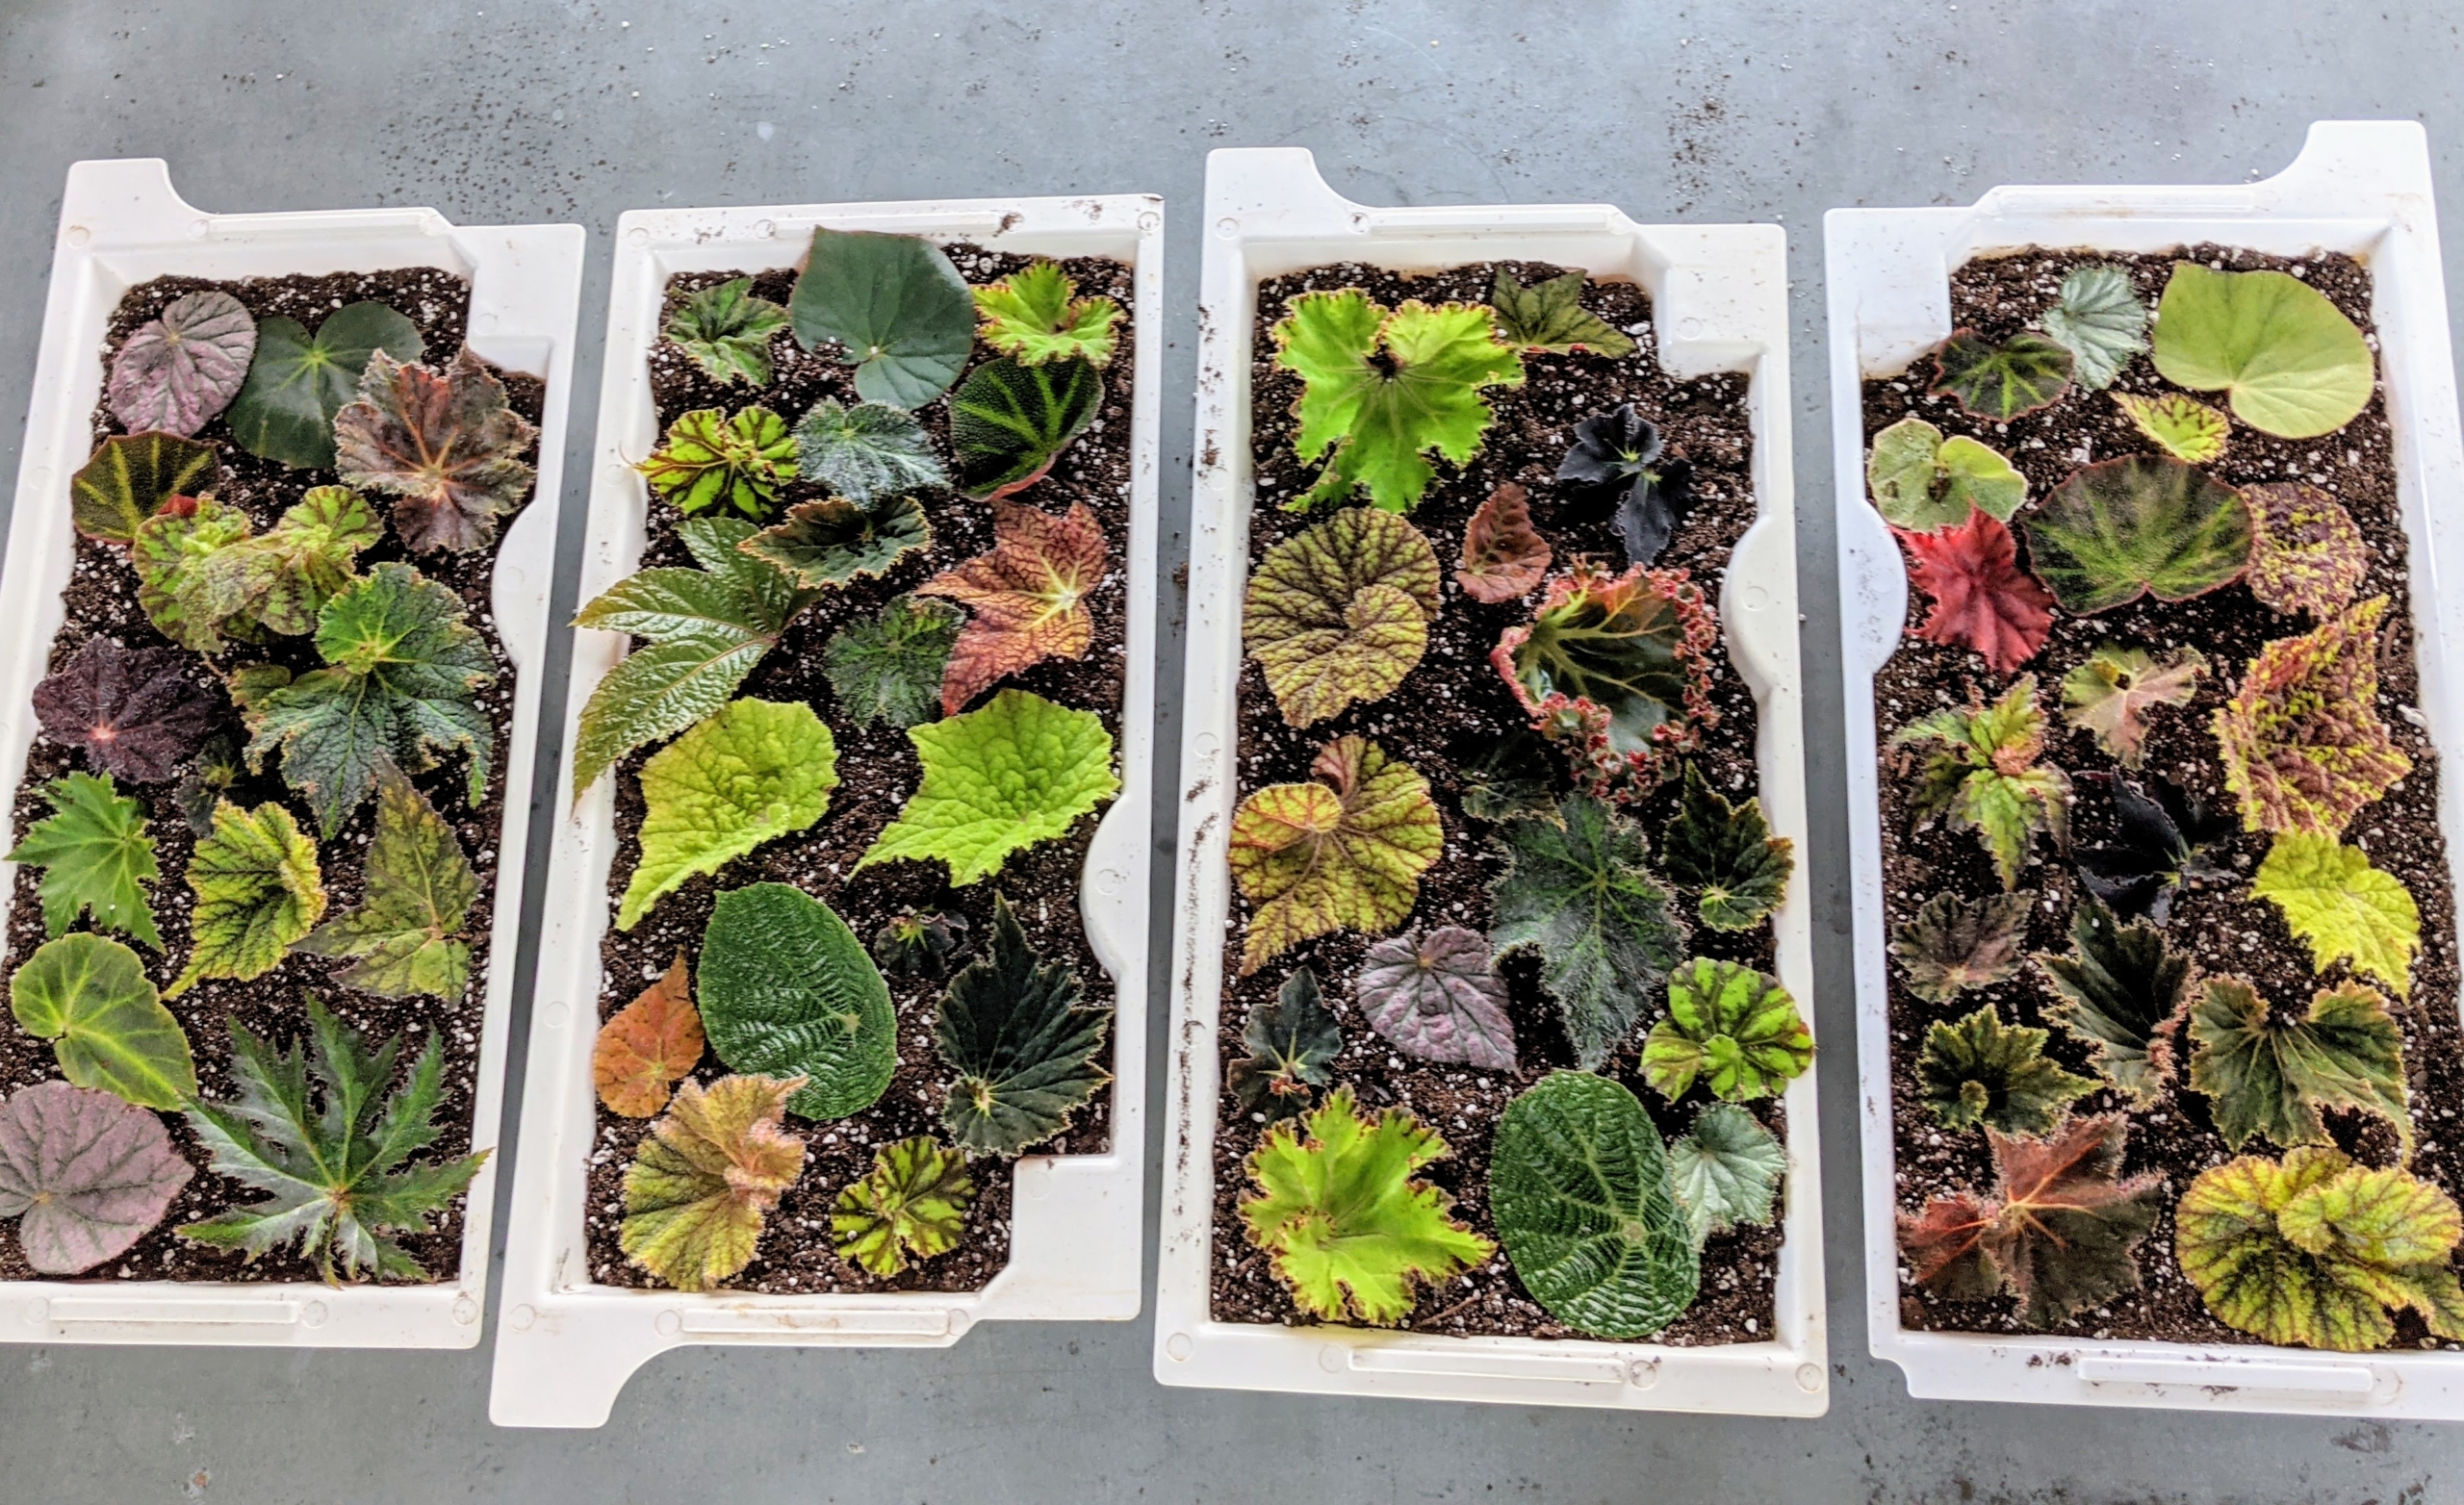
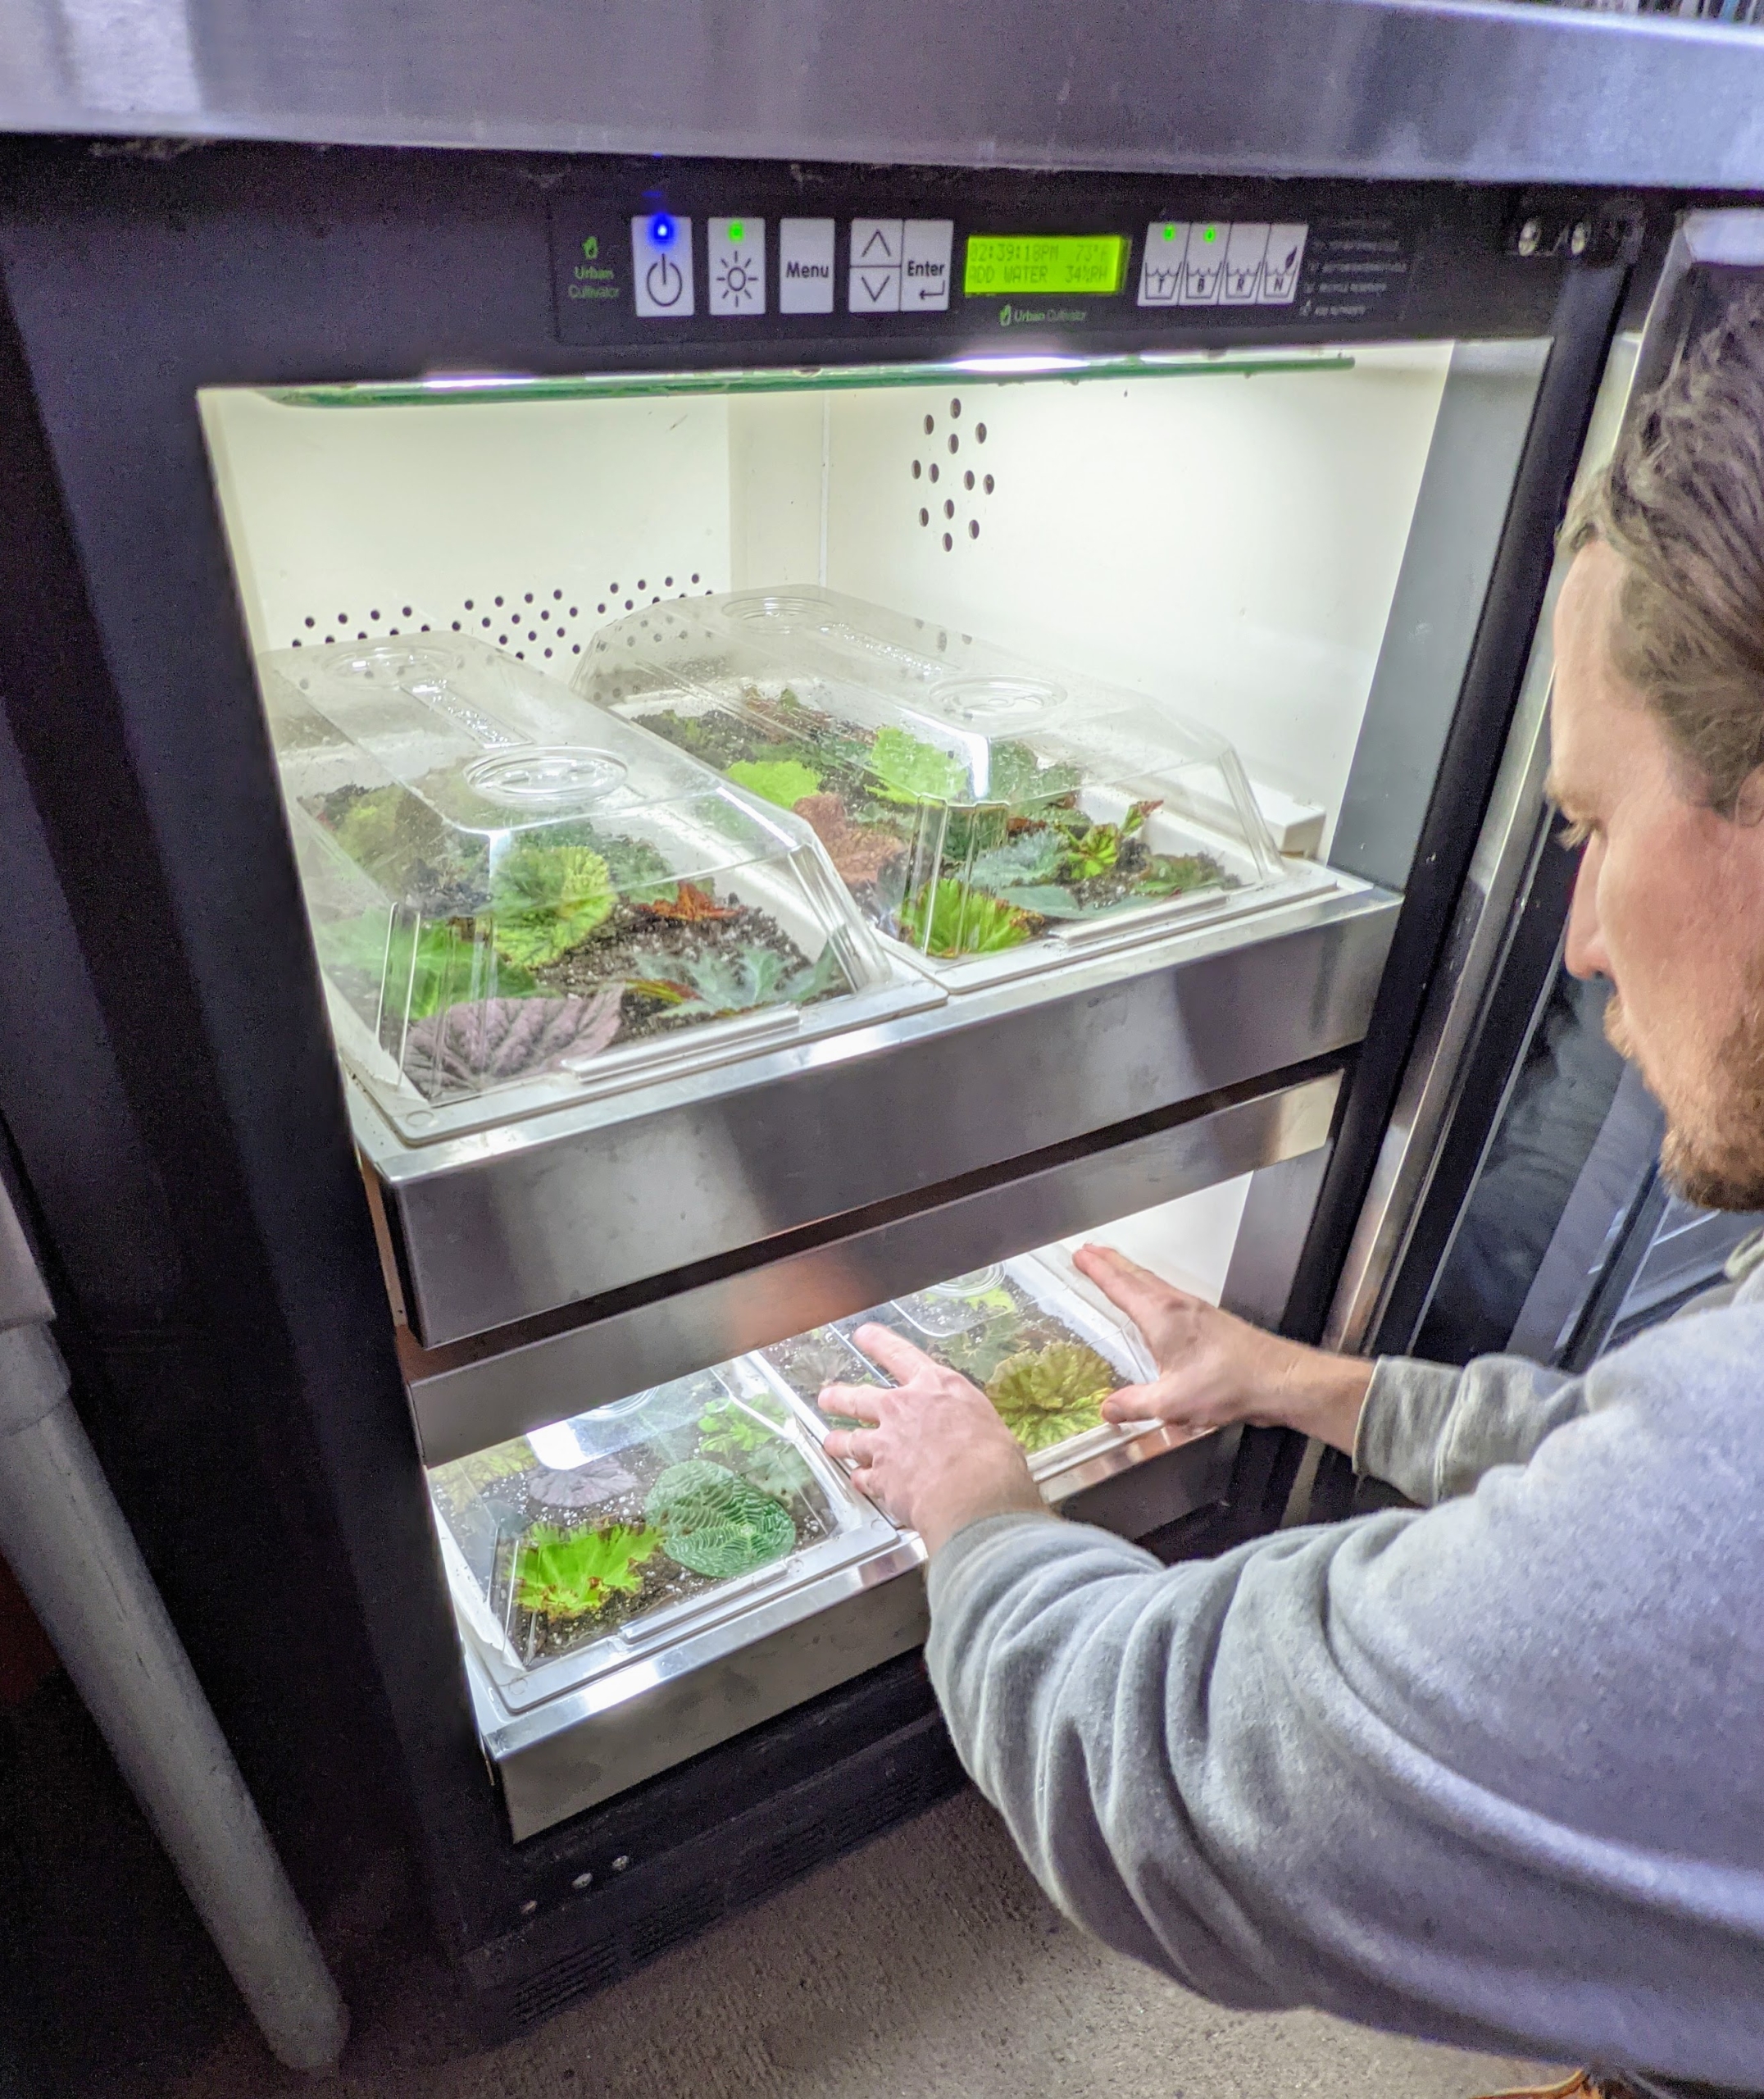
Here, Ryan has filled four trays with begonia stem cuttings. They are now ready to be placed into our Urban Cultivator.
The seed trays sit over these reservoirs and are automatically watered from the back of the unit. The water is absorbed through the holes at the bottom of each tray.
Ryan uses the Urban Cultivator residential unit in the head house. It takes up the same footprint as a dishwasher and is plumbed to water and electrical in the same way. Each residential machine has two grow shelves for the seed trays and pre-set control centers to ensure specimens get exactly the right amount of water, light, and humidity.
Once placed into the Cultivator, each tray is covered with a humidity dome. The humidity dome remains positioned over the seed tray until germination begins. In about six to eight weeks, we’ll have baby “plantlets” ready to be transplanted into containers. It’s that easy.
Here in the Northeast, we're expecting bitterly cold temperatures today - a big difference from the recent mild winter weather. Here's a blog that was originally posted on January 08, 2021. It ends this look back at some of our favorite entries, enjoy.
A brief trip south to escape the cold winter can be so invigorating.
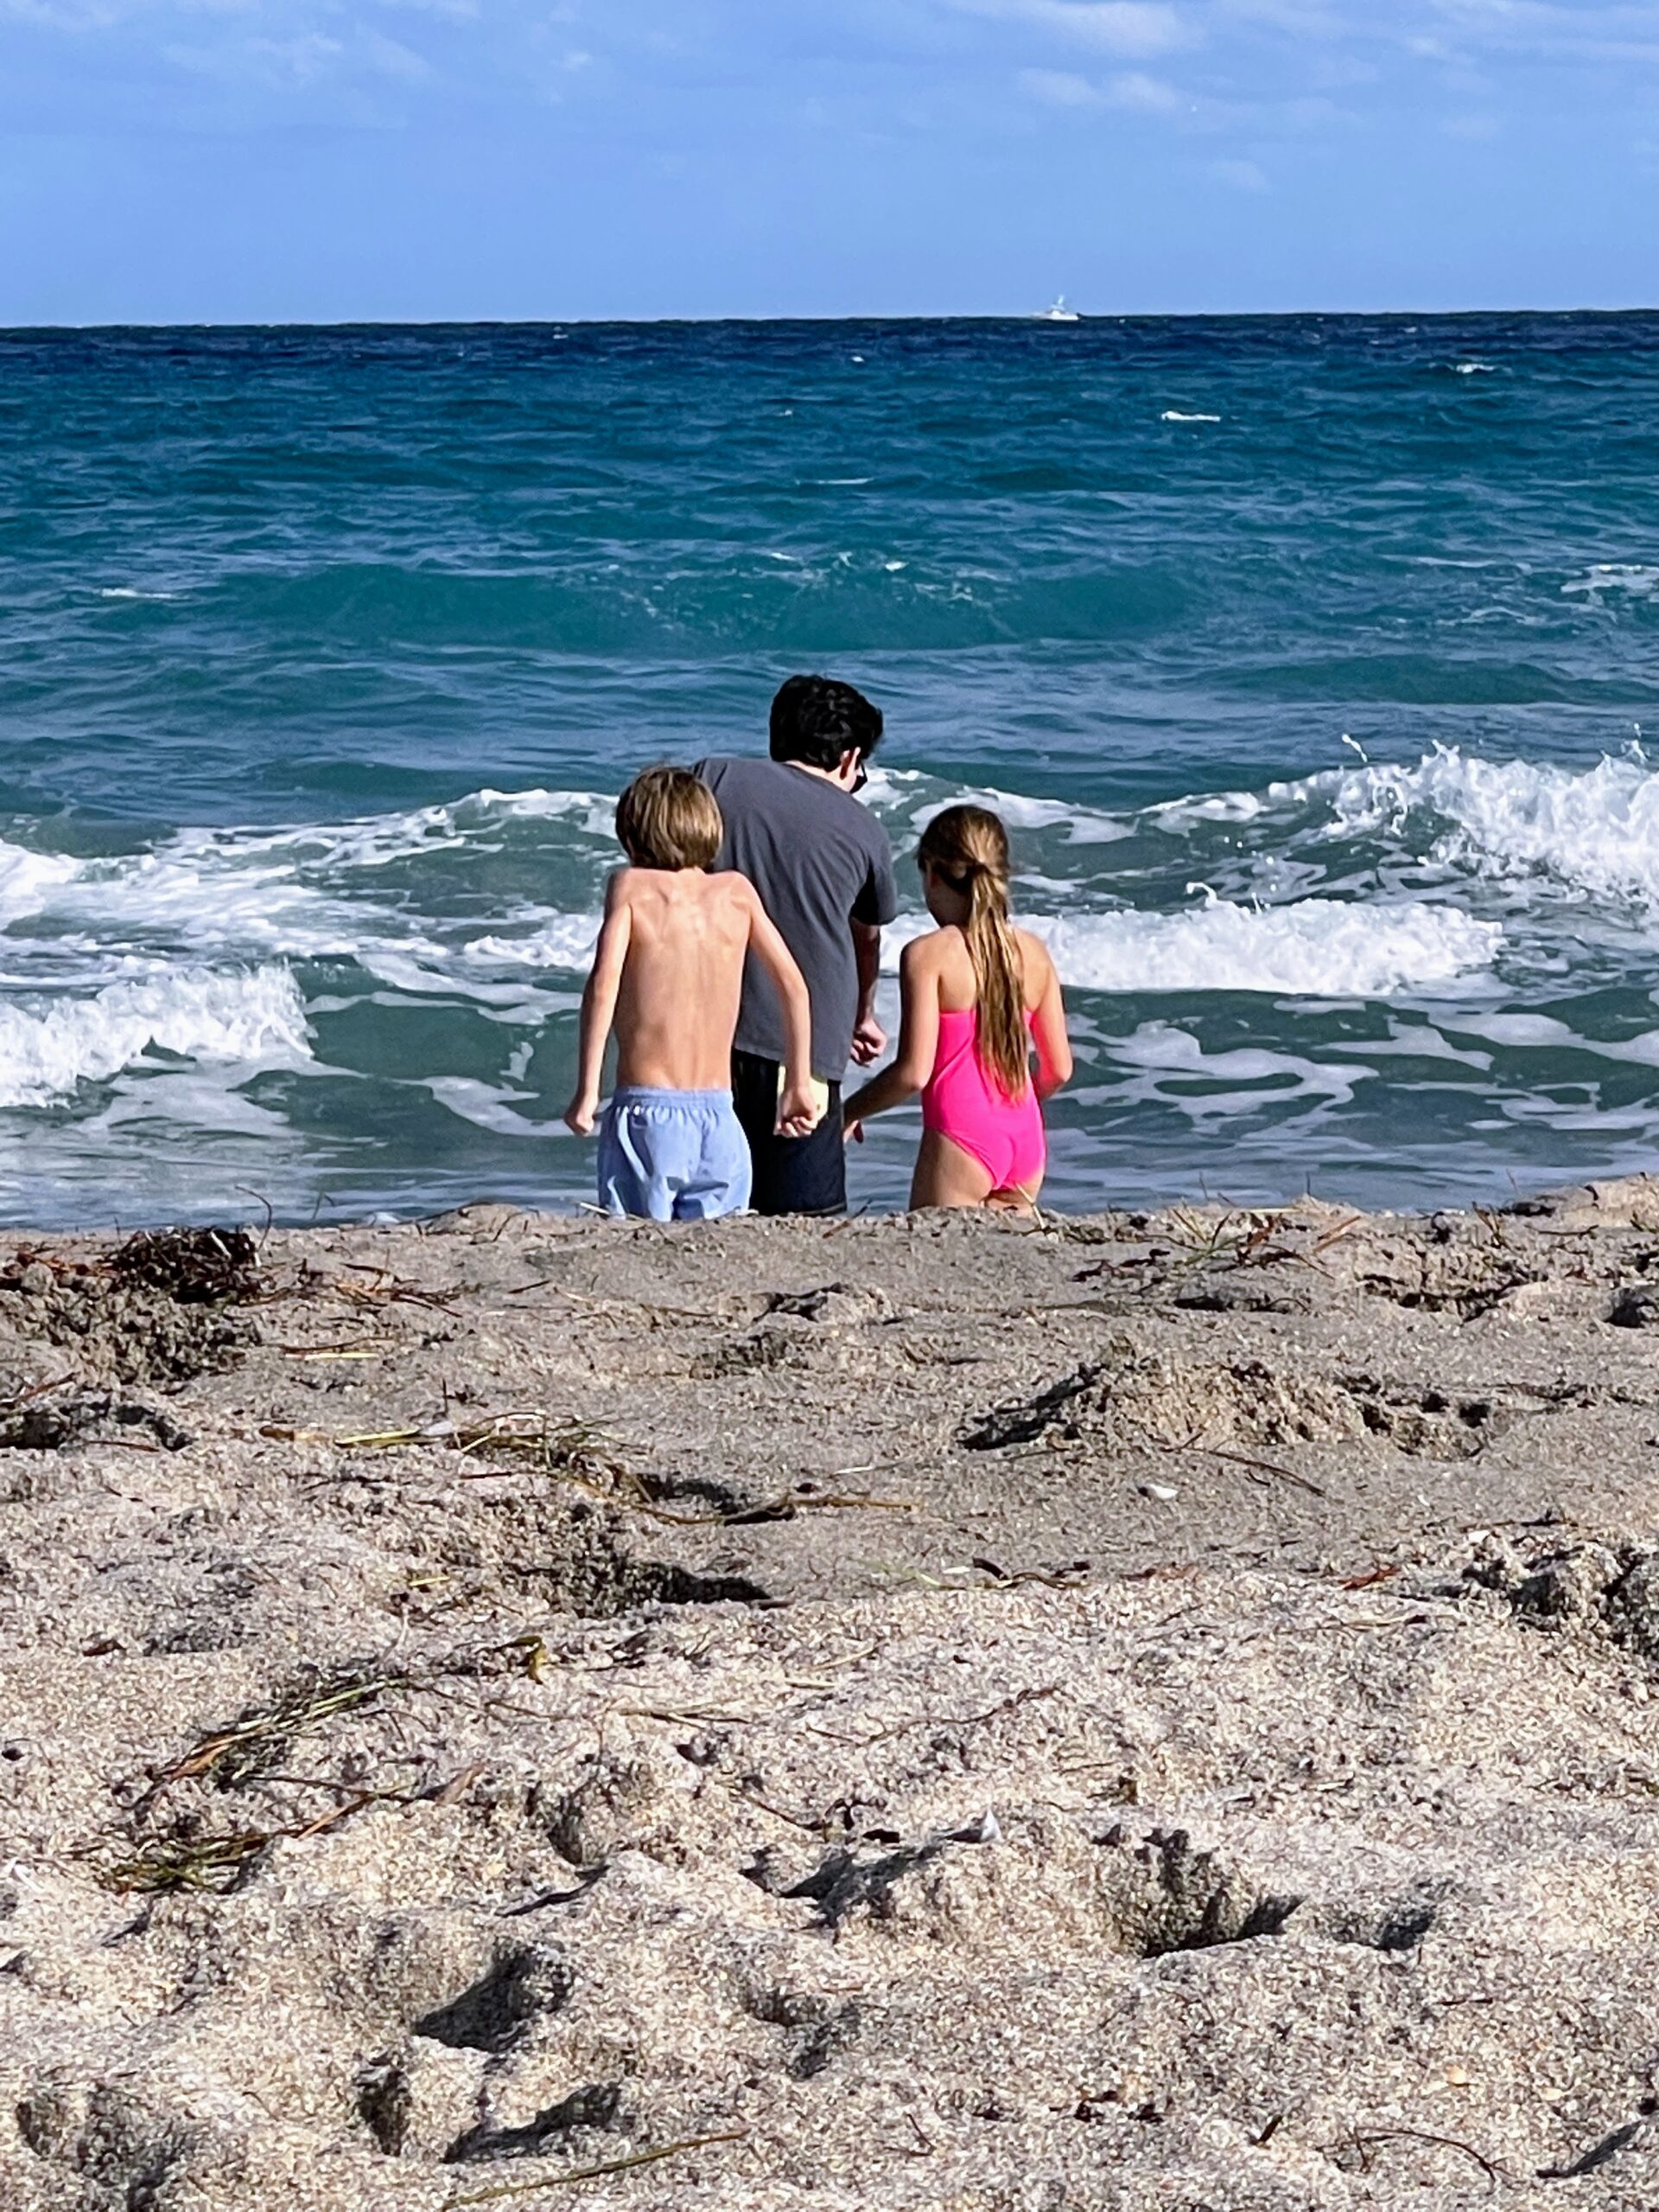
If you follow my Instagram page @MarthaStewart48, you may have seen photos from my recent holiday trip to Palm Beach, Florida. I was joined by my daughter Alexis, my grandchildren Jude and Truman, and our dear friend, Ari Katz. We spent most of our brief stay swimming and relaxing on the beach or by the pool, enjoying water sports, visiting a few shops around town, knitting, and watching movies - all done safely while adhering to CDC social distancing guidelines.
Here are a few photos from our trip, enjoy.
My family and I always try to do something special during the holidays – my grandchildren love the water, so we often go somewhere warm. Of course, one of the first things we did was spend some time by the pool. My daughter Alexis took this photo of Jude, Truman and our friend, Ari.
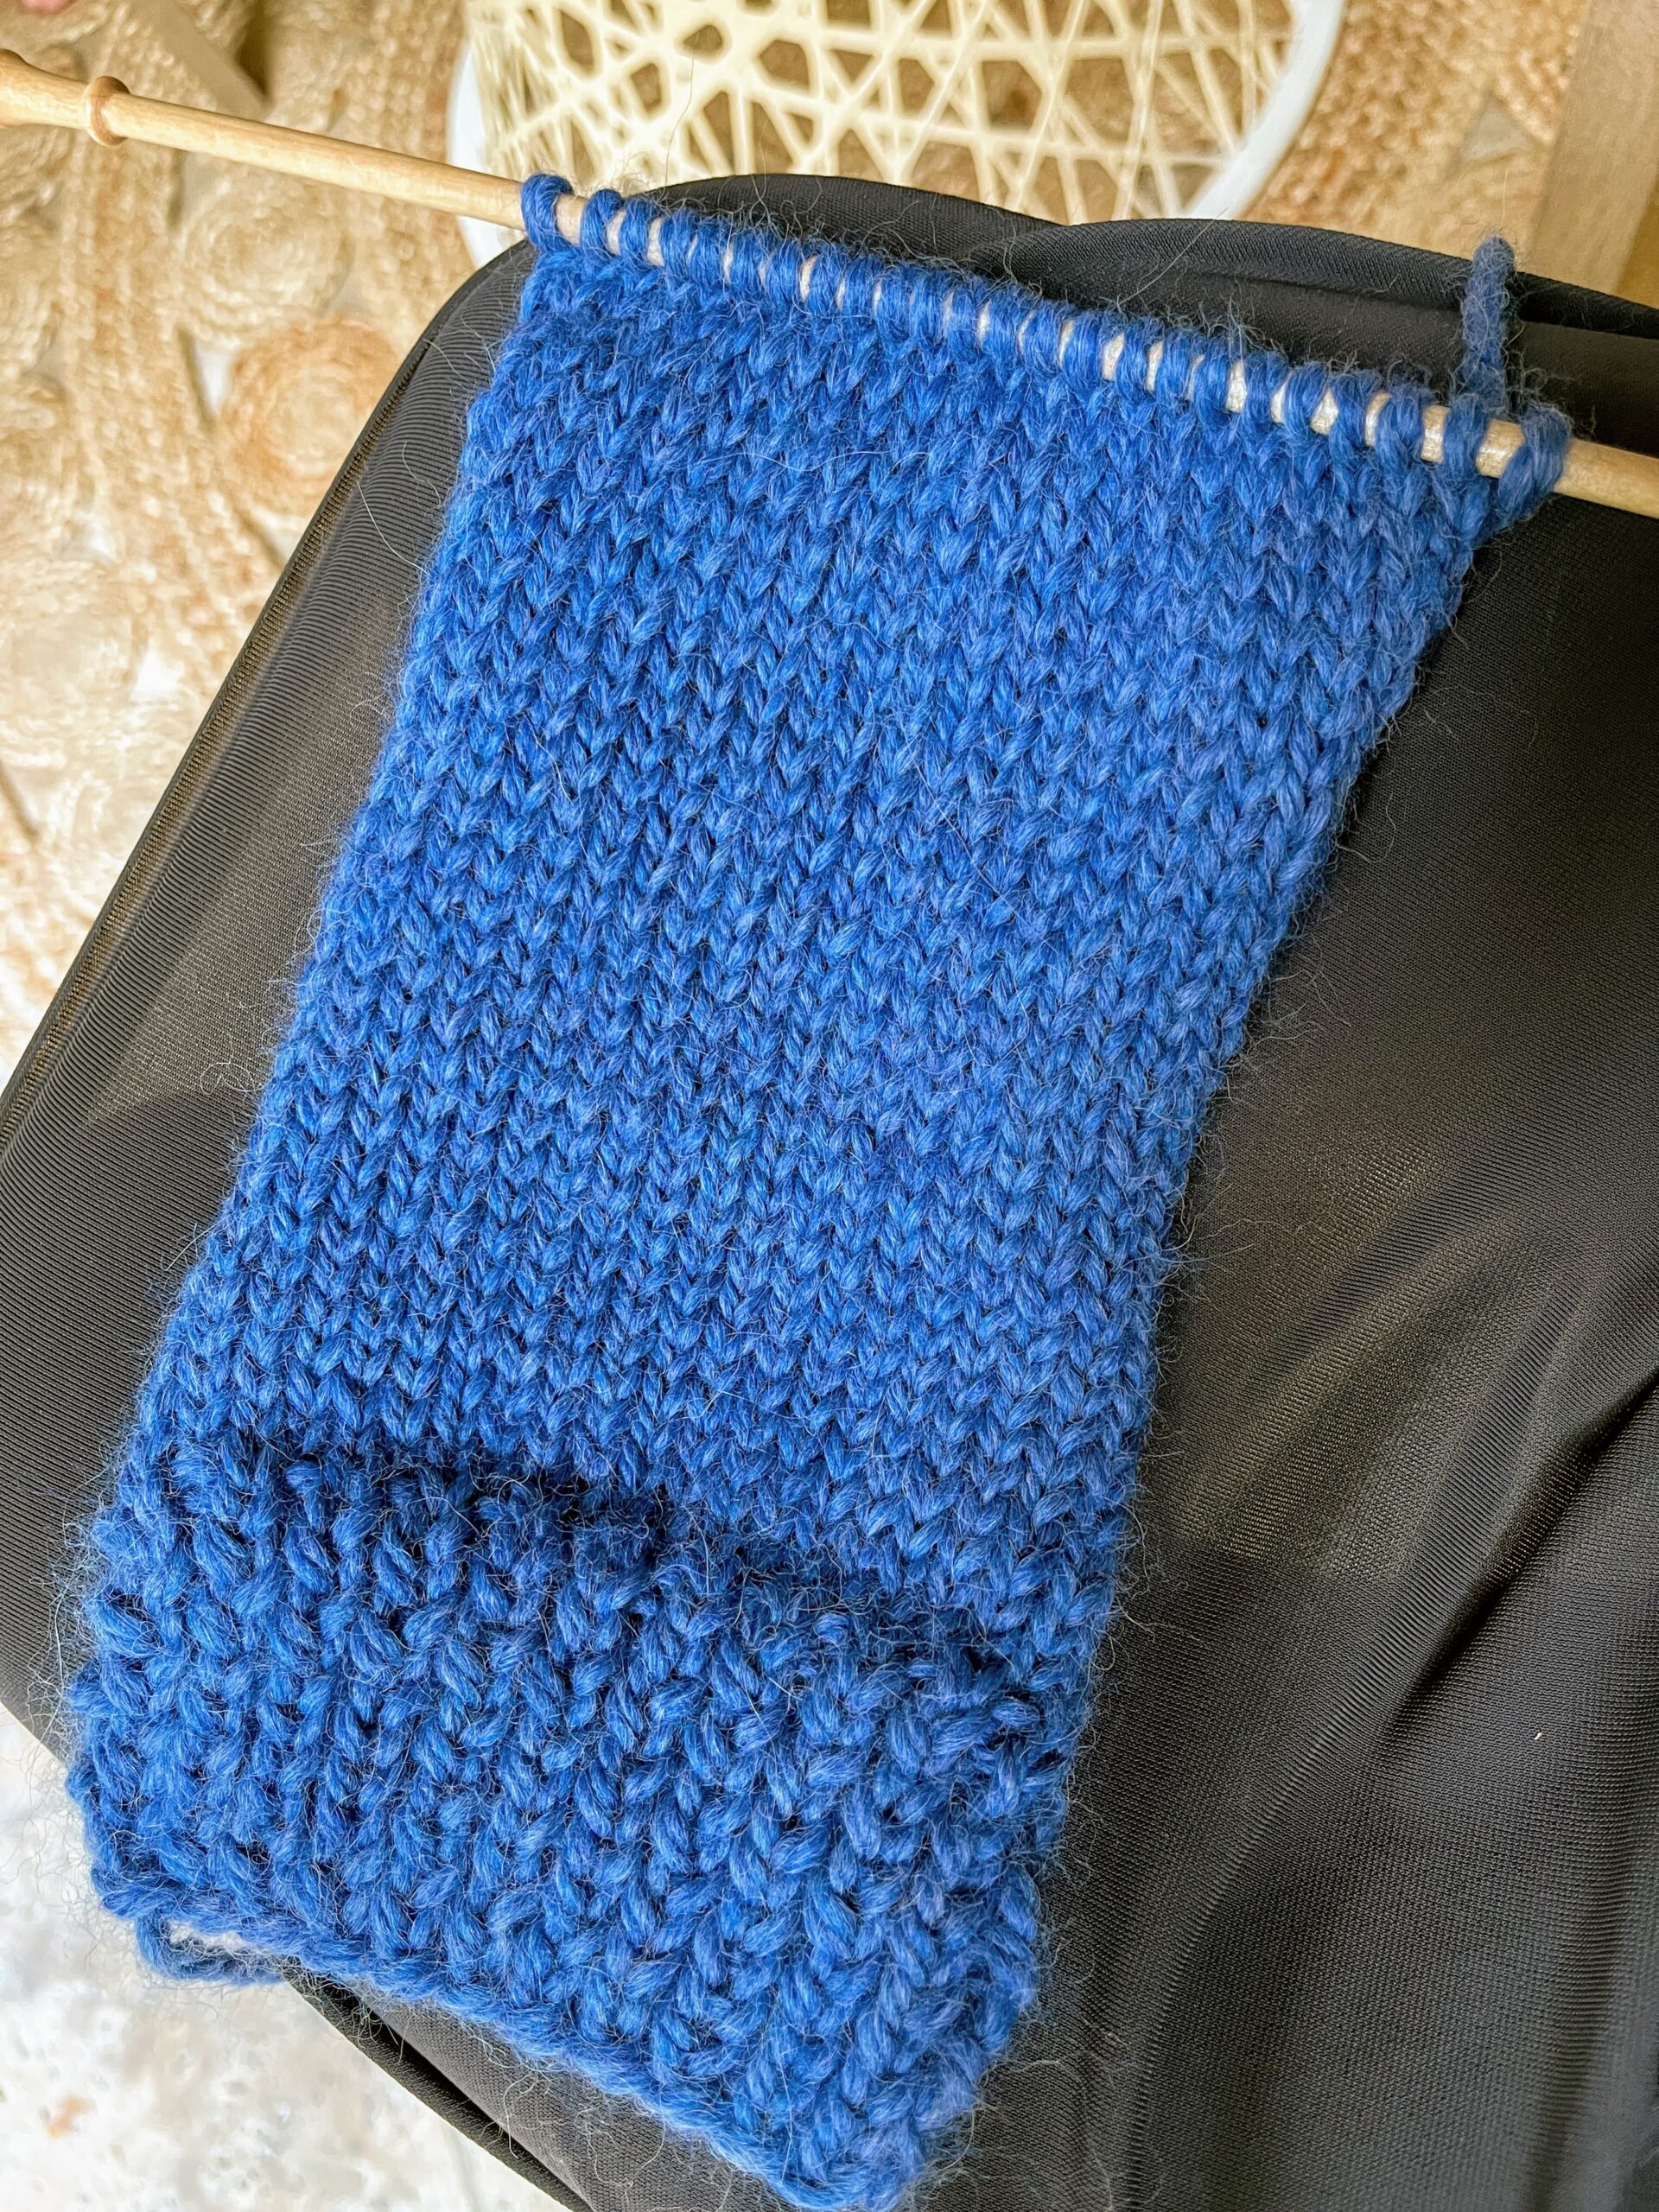
I love to knit and crochet. It is very relaxing. I find knitting a little faster for me. Here is part of my latest project. I am knitting four blue hats for two sets of twins boys.
We also spent time on the beach. It was windy, but that didn’t stop Ari, Jude, and Truman from heading toward the water.
Here is Jude trying to teach Ari how to do a front walkover flip.
Making shadows seemed a bit easier.
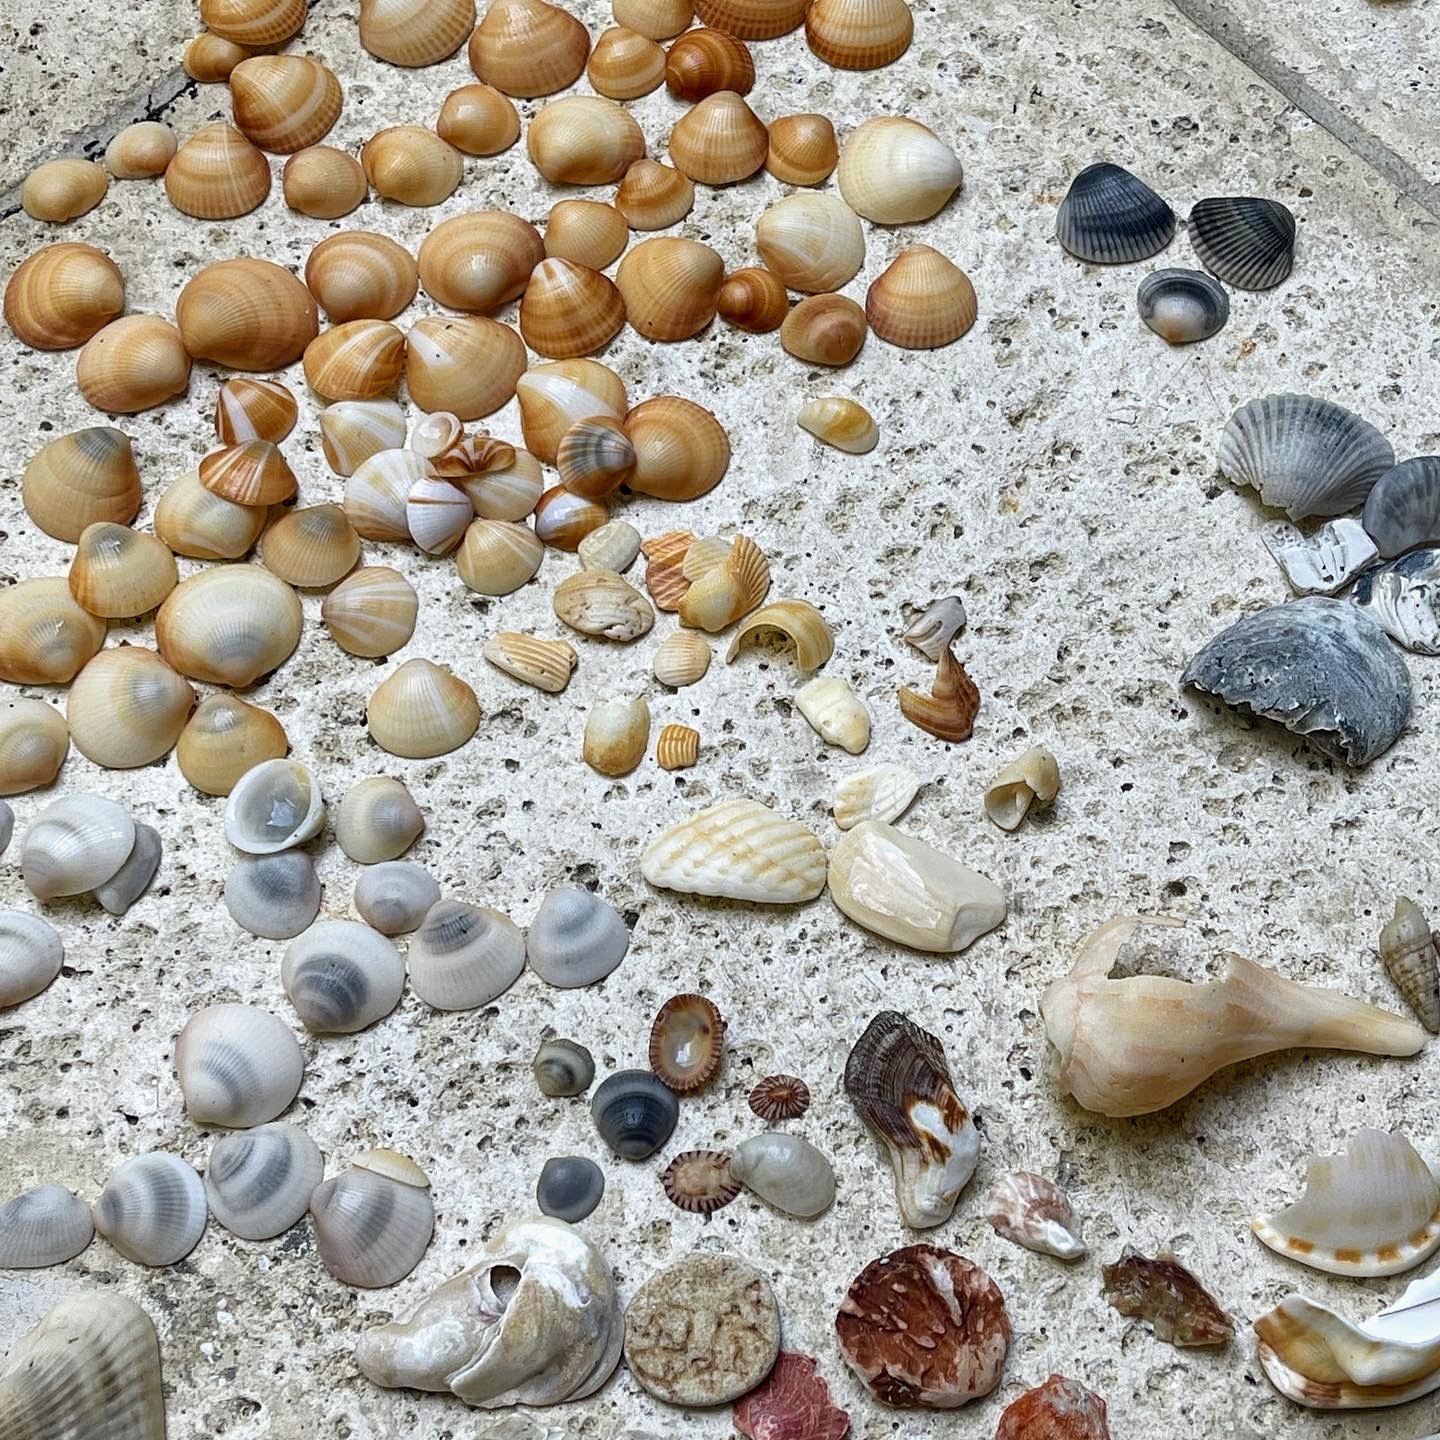
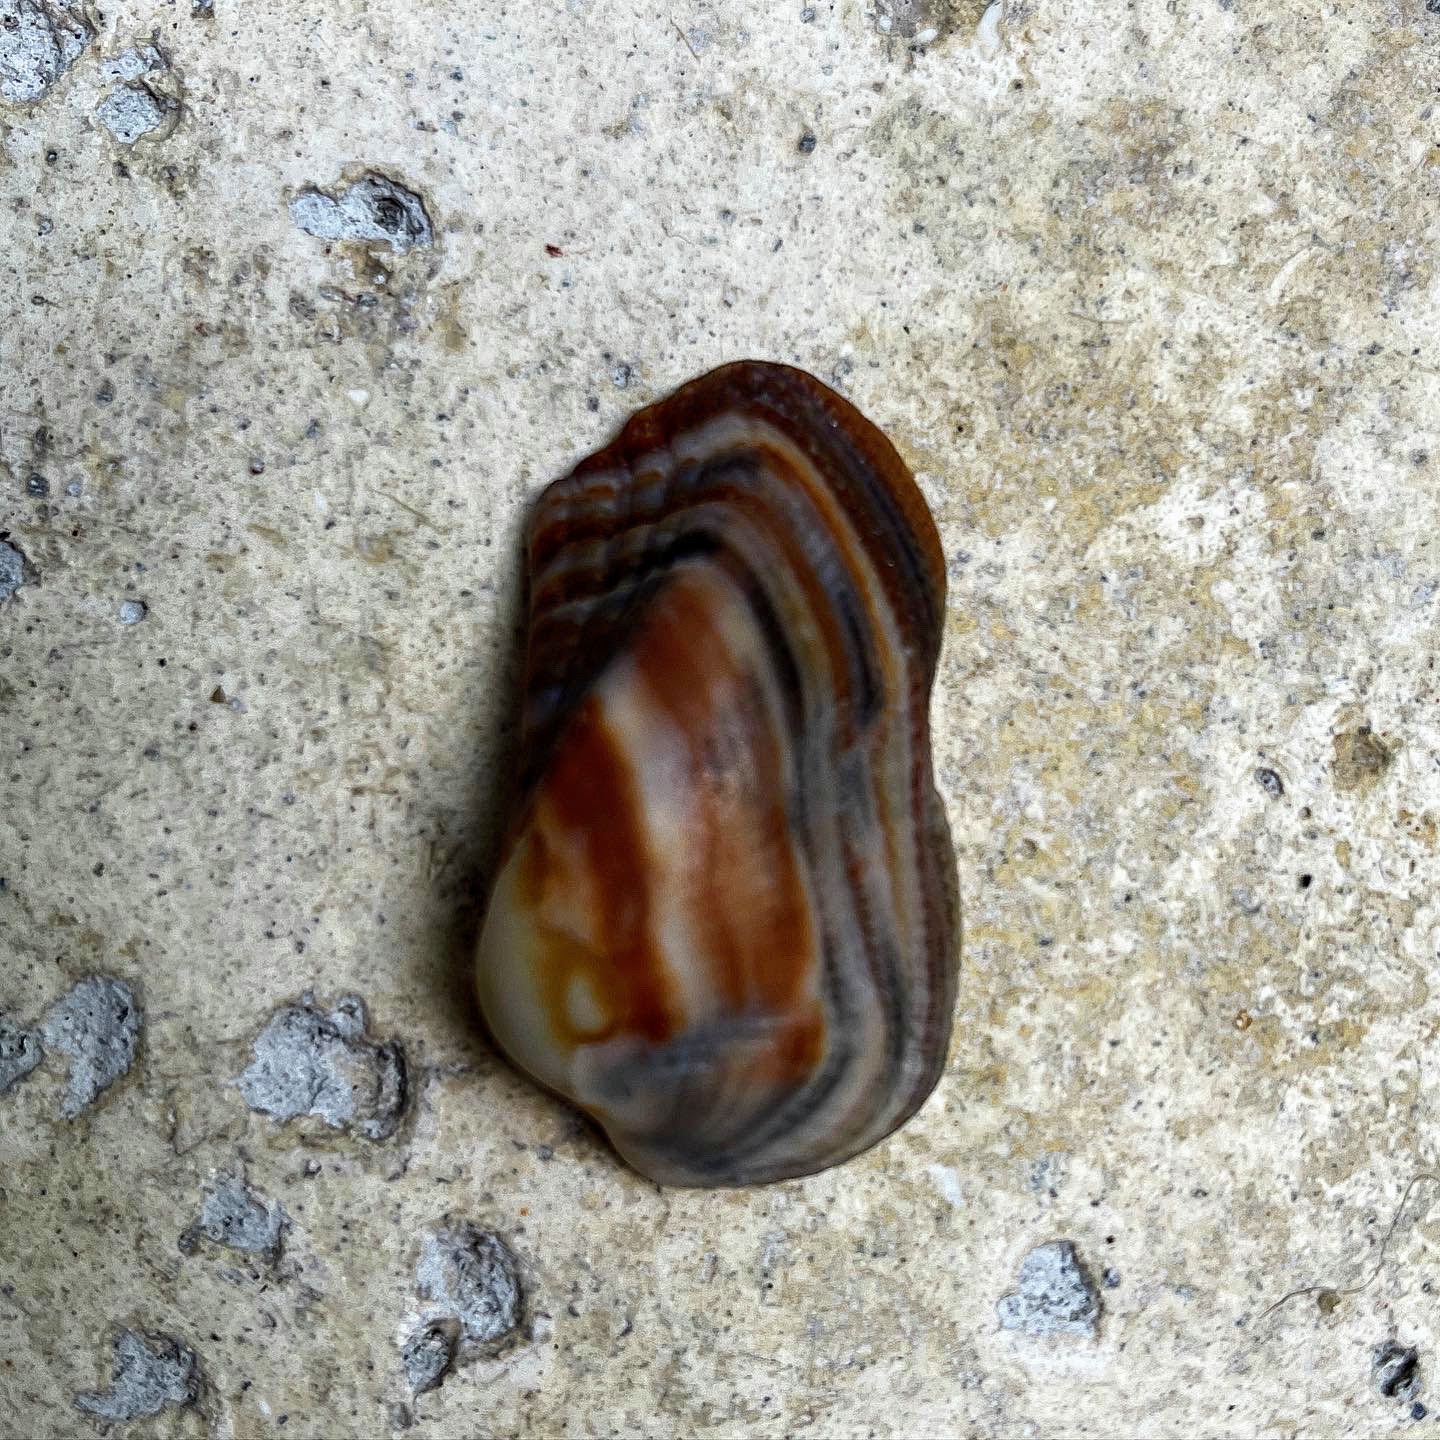
Jude loves to collect shells. Here are some of the shells she gathered – she picked out her favorites and then returned the rest to the beach later.
Organization is key – Jude sorted all the shells before selecting those she wanted to keep.
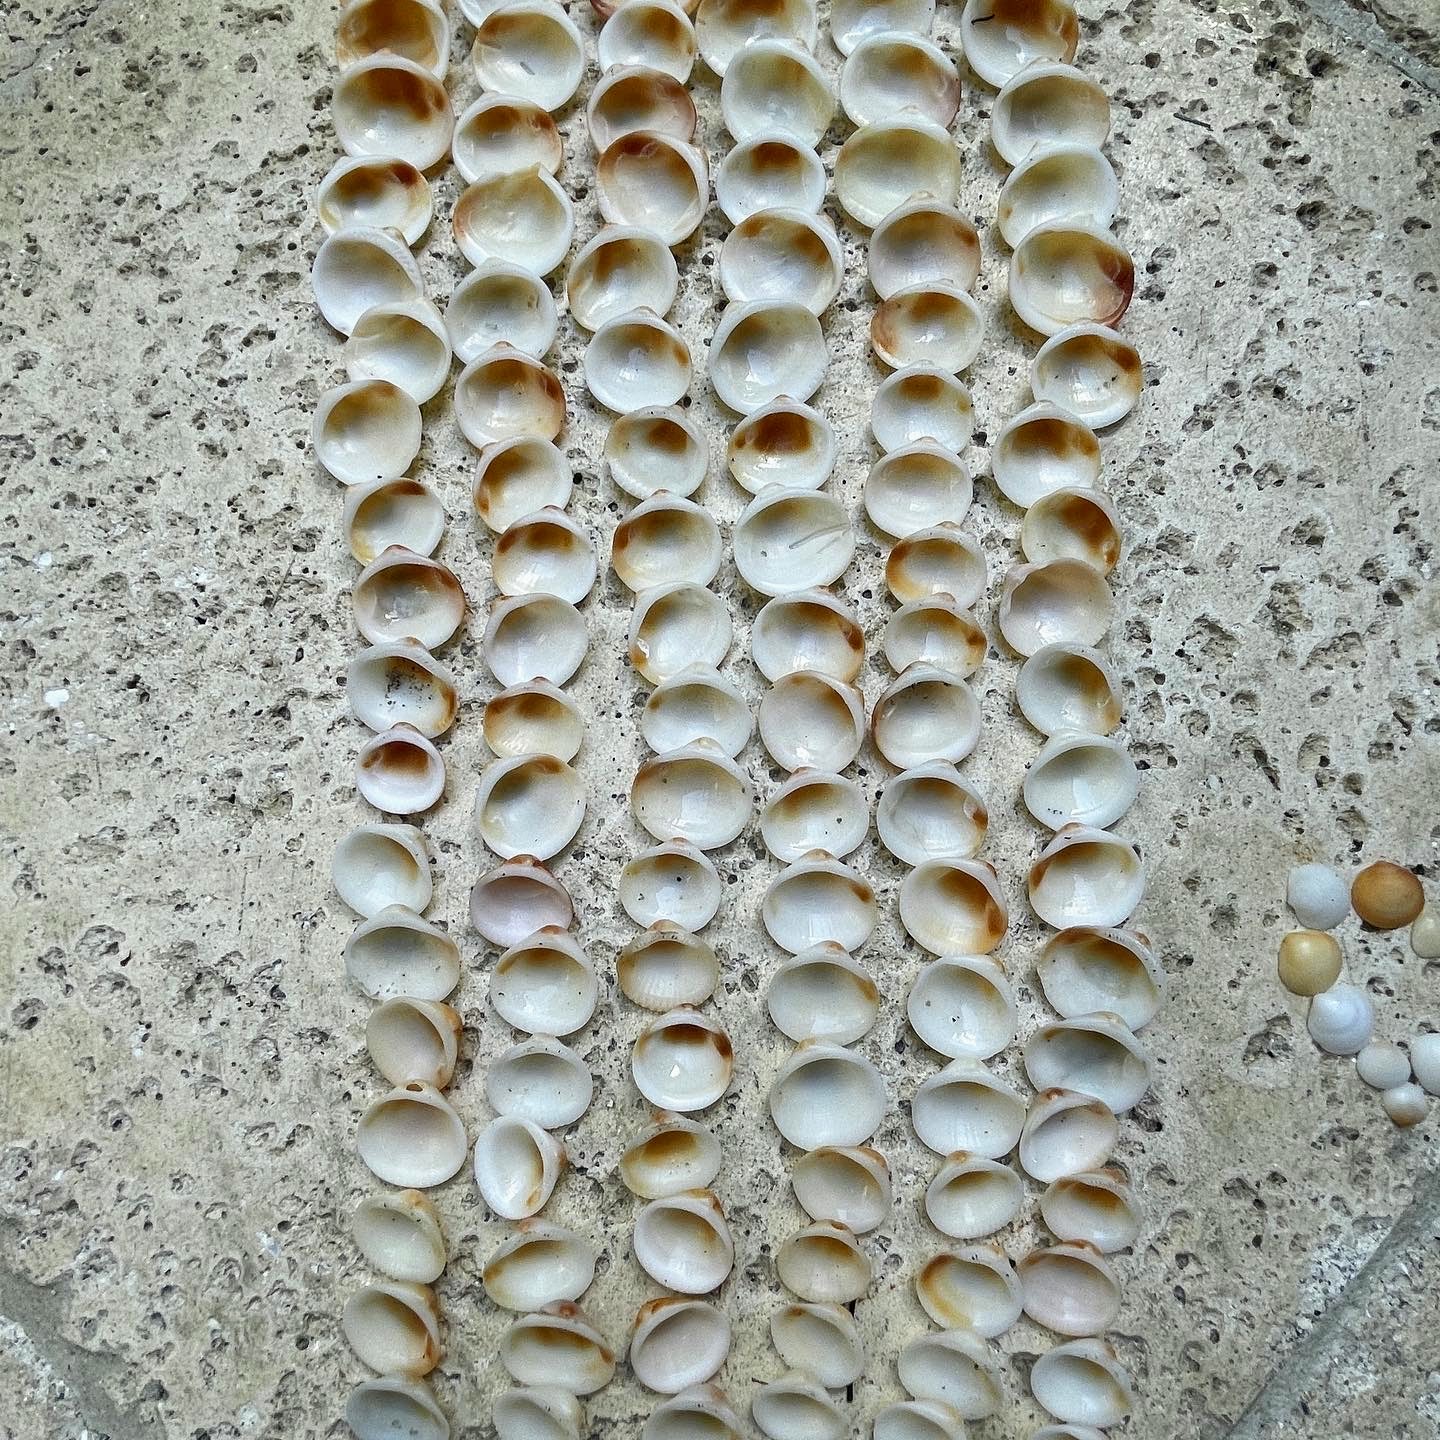
Jude wanted to make necklaces – here is one of her favorites.
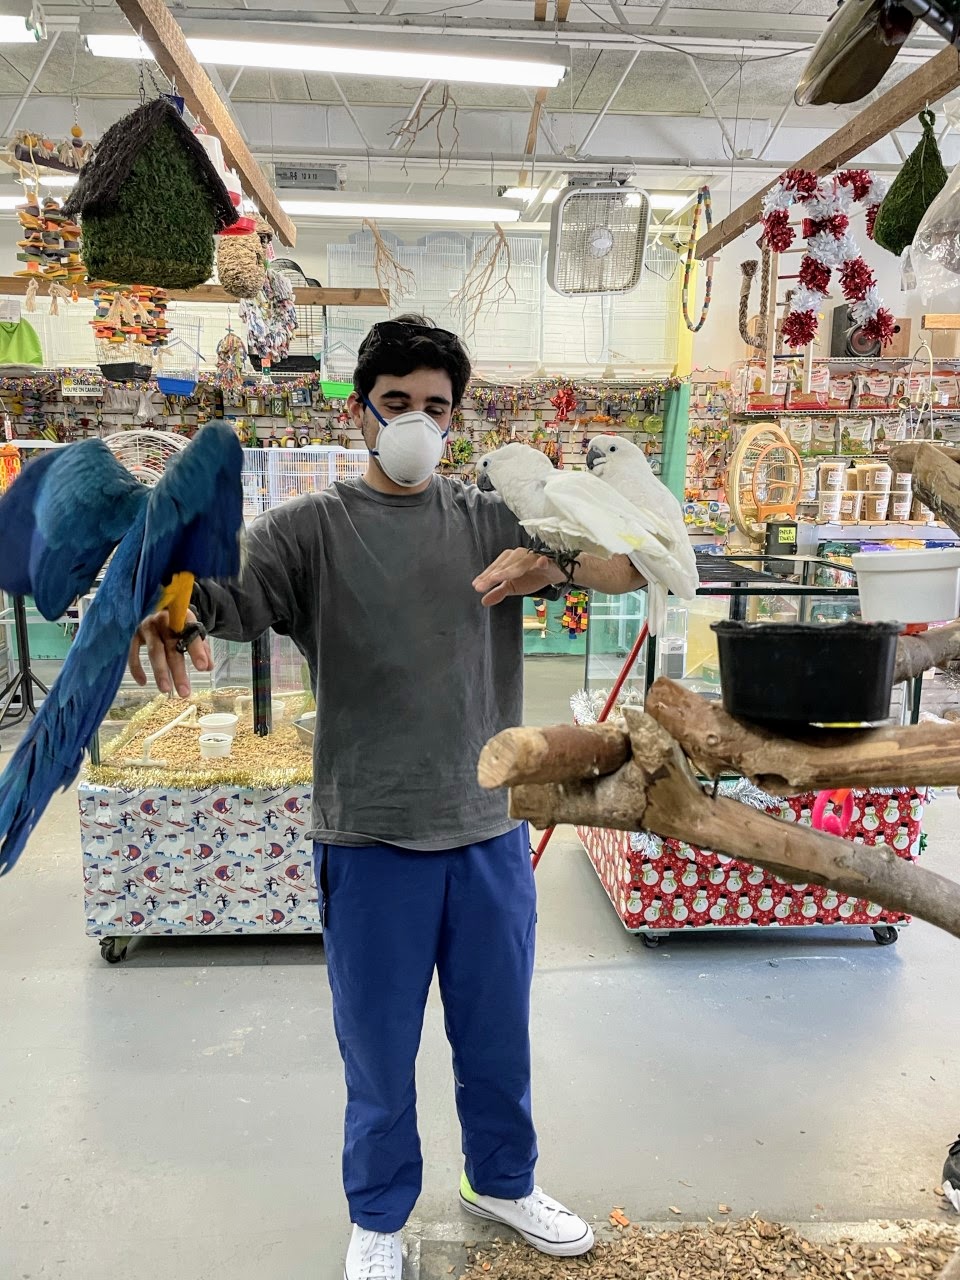
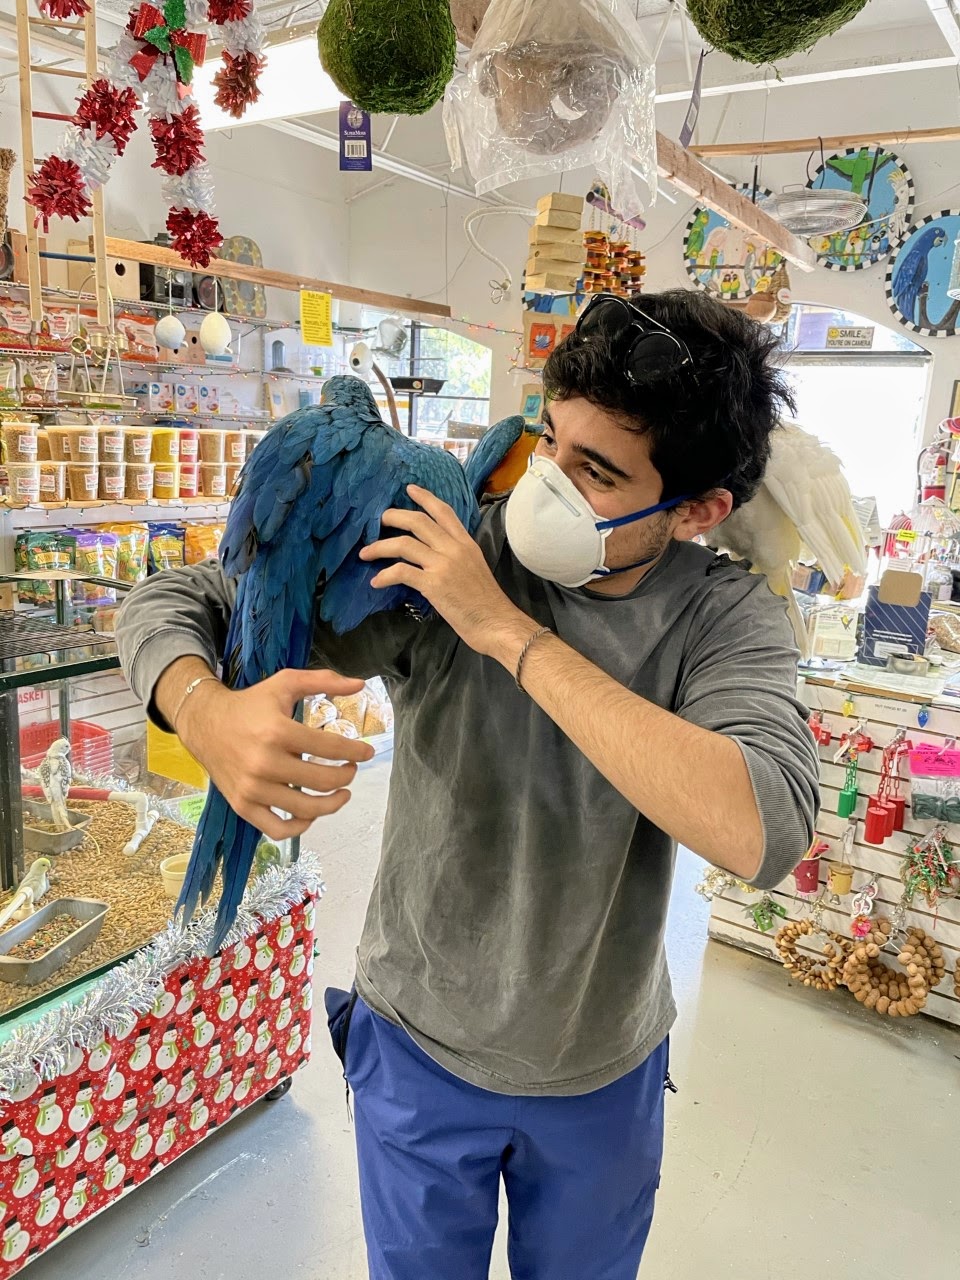
During one outing, Alexis and Ari visited Brenda’s Birds in Delray Beach. Ari is a young and passionate avian enthusiast – he has many pet birds at home. All the birds seemed to know he was friendly.
These macaws and cockatoos wanted to perch on Ari’s shoulder.
Here’s Alexis with a Moluccan cockatoo. Also called the salmon-crested cockatoo, the Moluccan is endemic to the Seram archipelago in eastern Indonesia. It is among the largest of the white cockatoos and very smart.
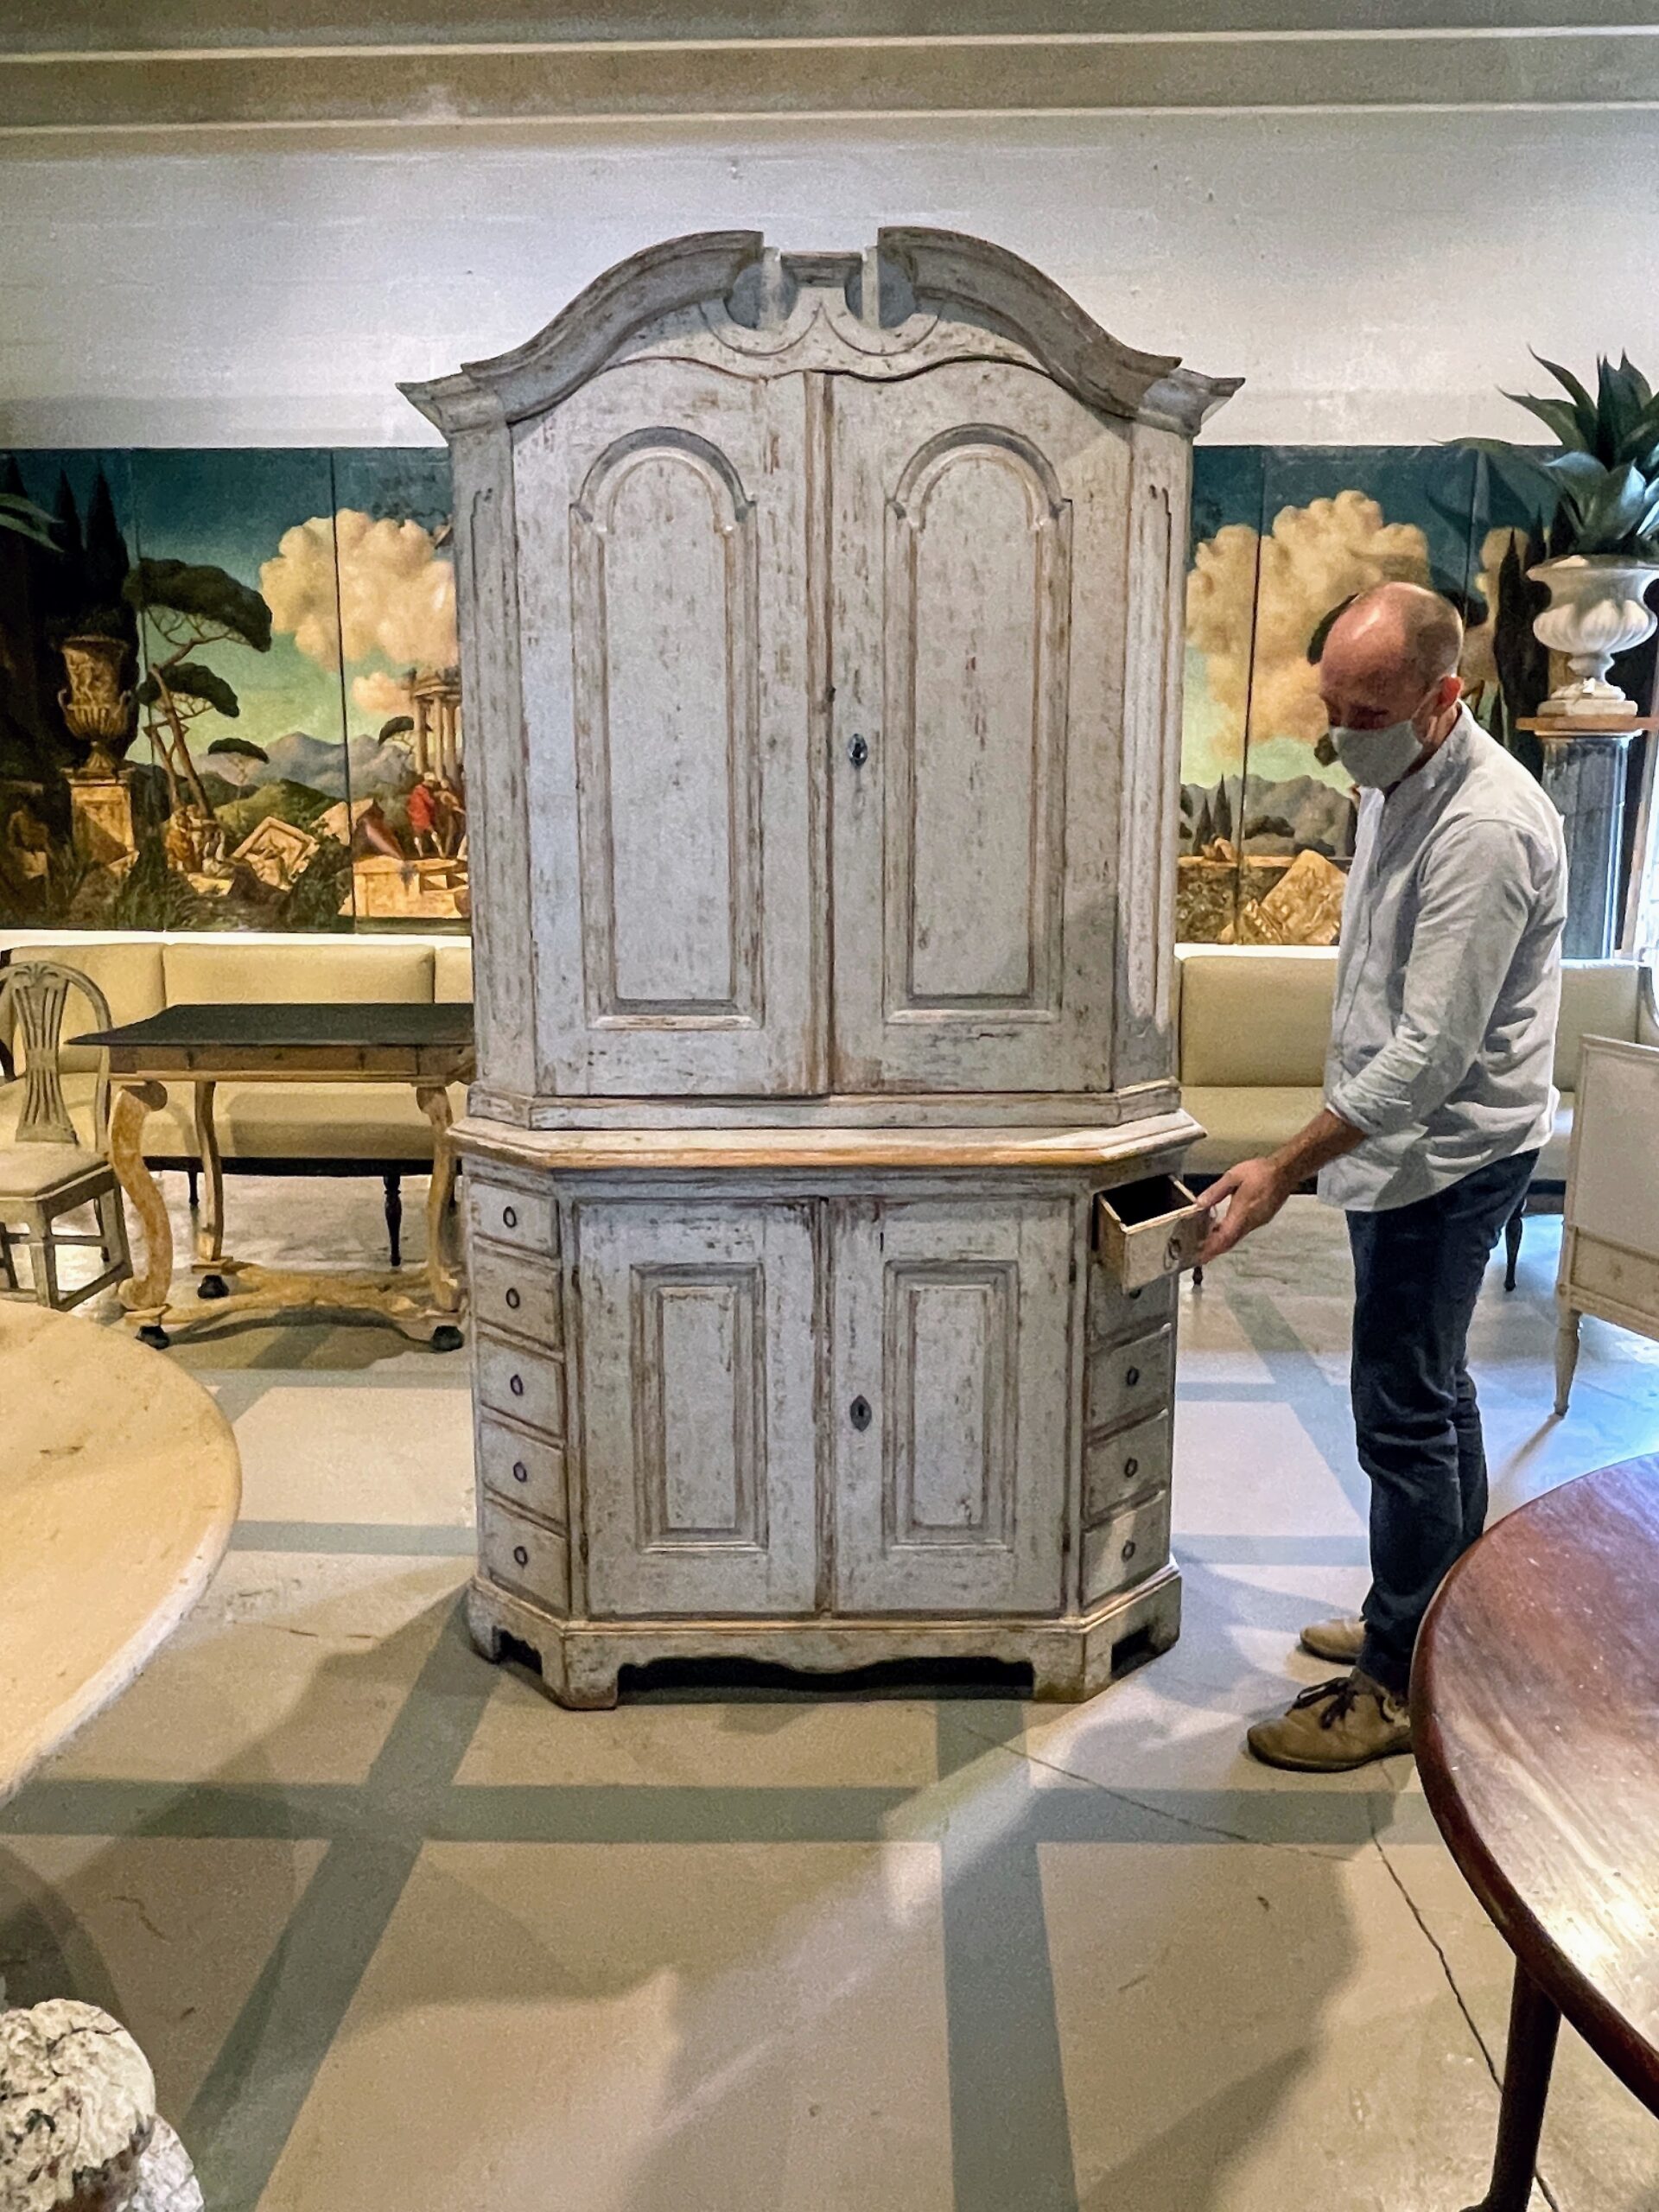
We also stopped at Casa Gusto, a new company of antiques, objects, and artworks on Georgia Avenue in West Palm Beach. This is a Rococo 10-drawer cabinet, circa 1760. It stands 85-inches tall by 48-inches wide.
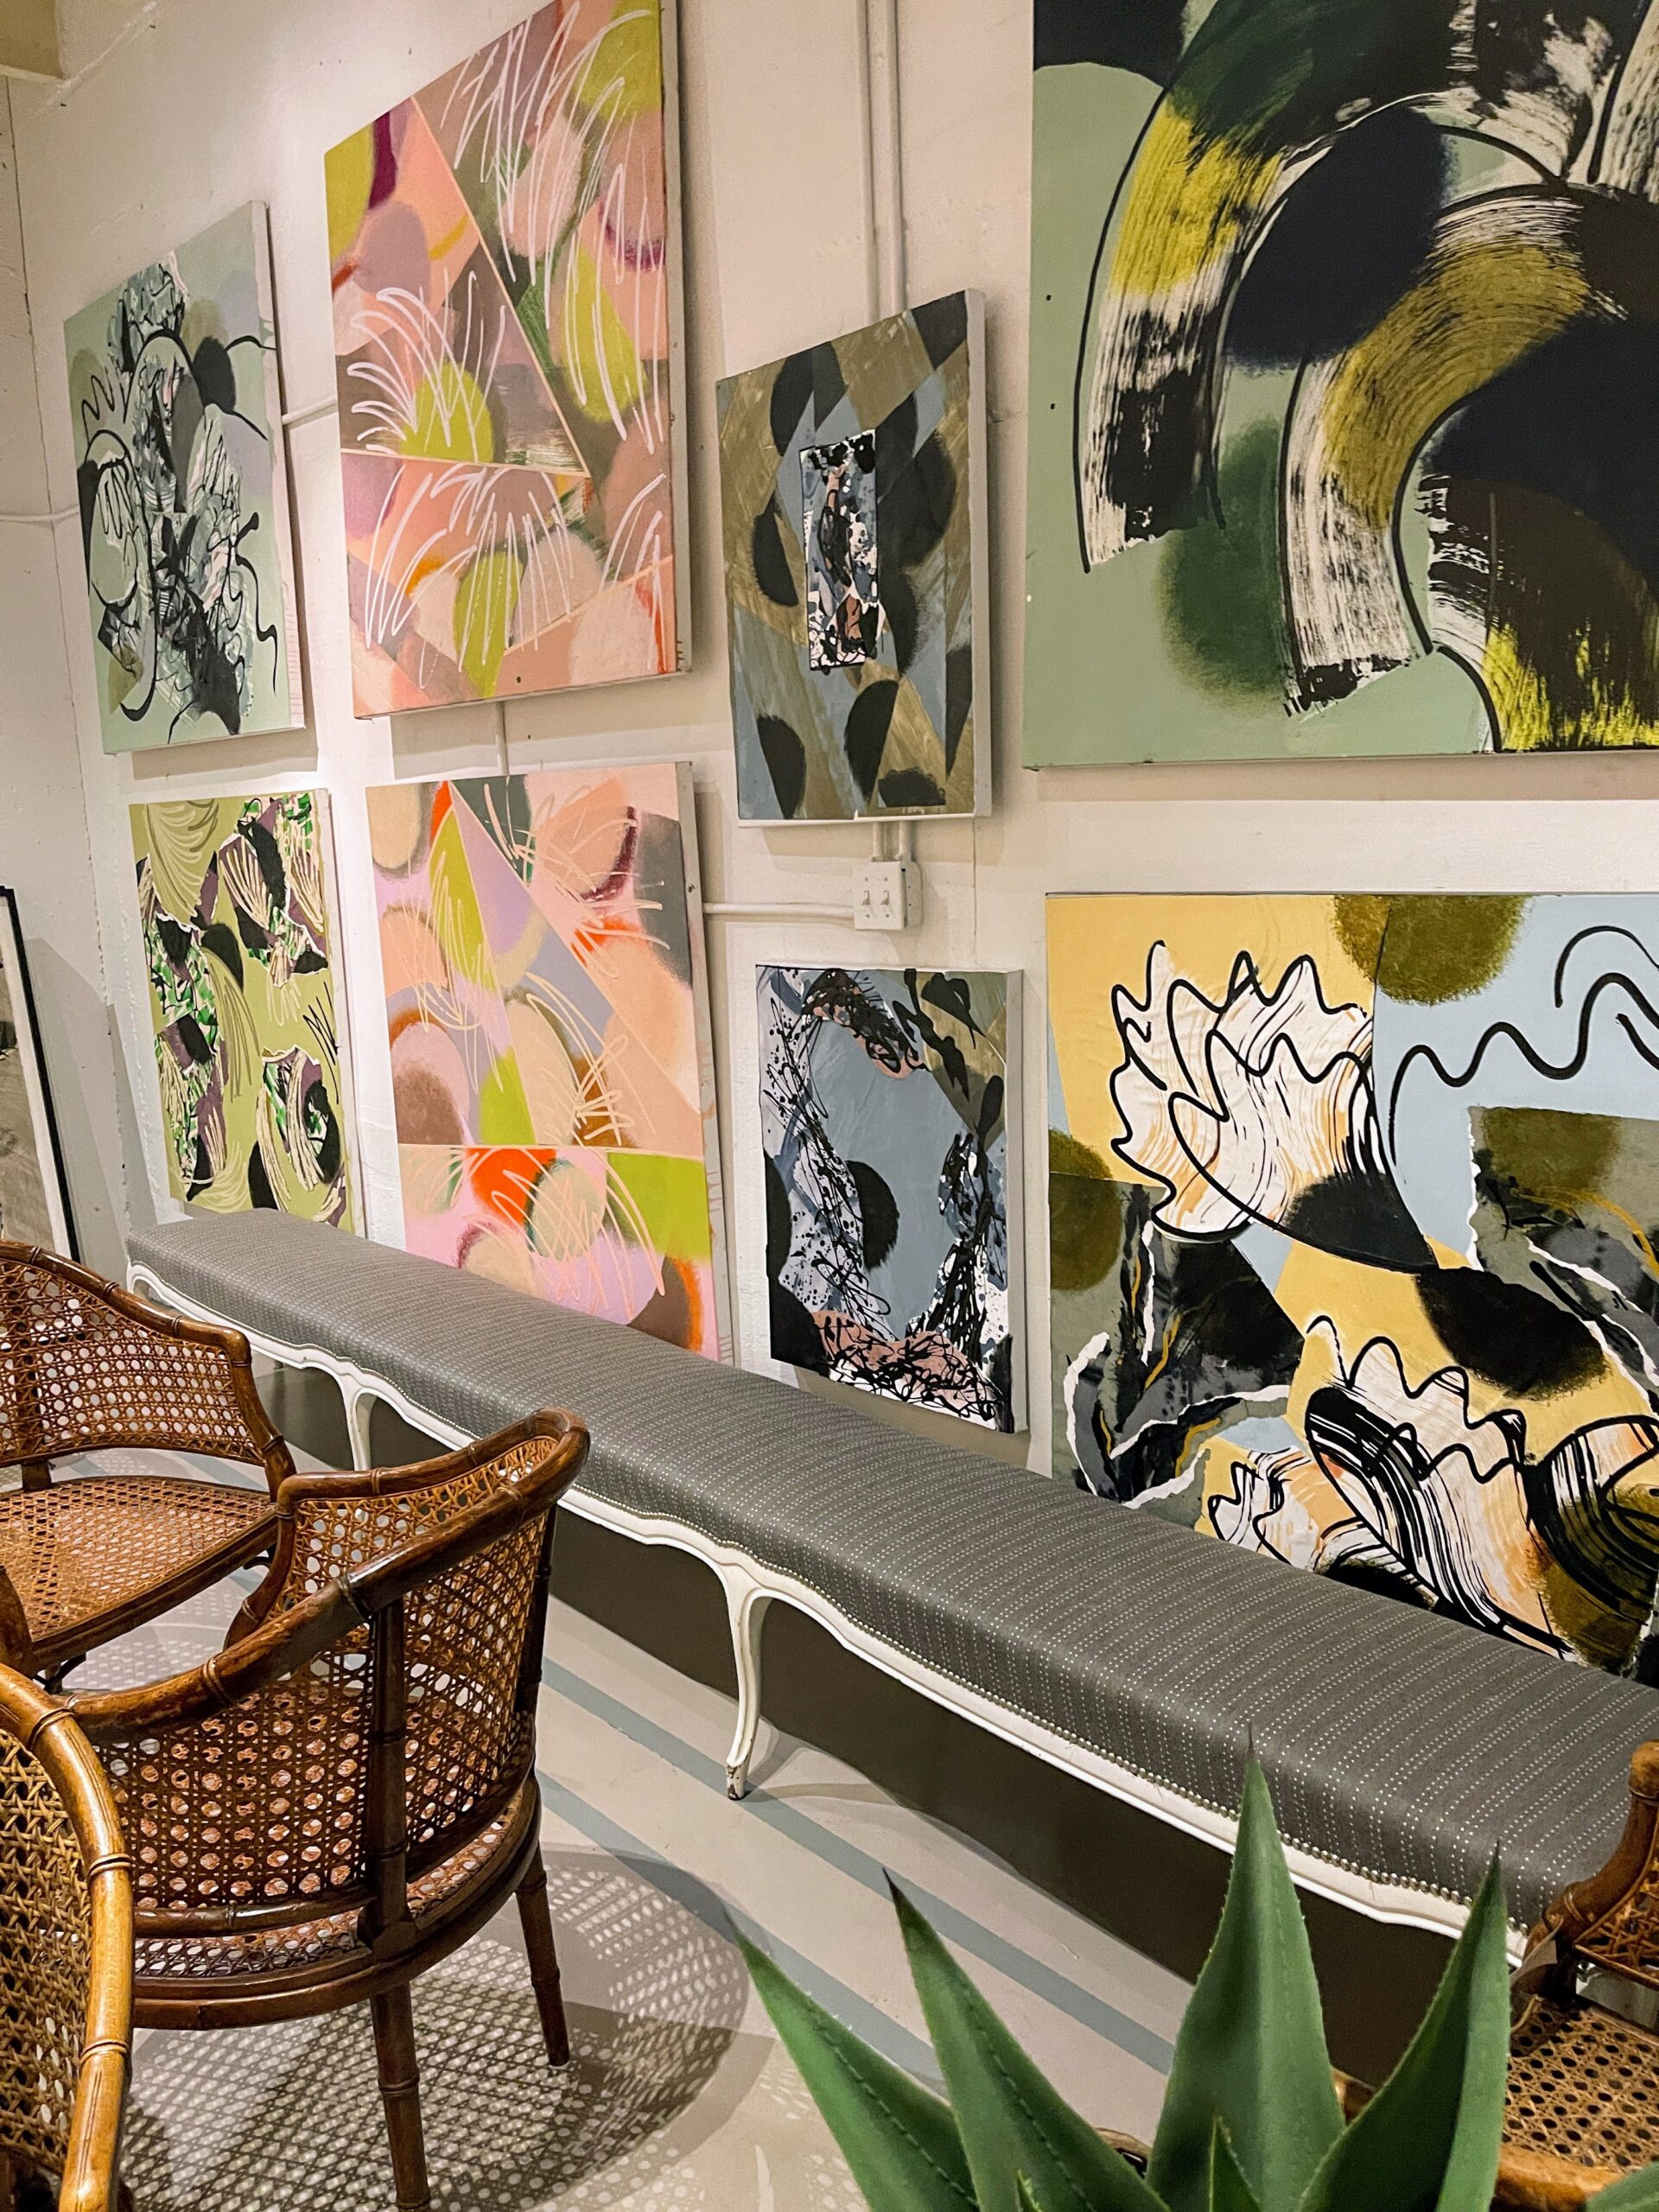
Some of the art work at Casa Gusto includes these papier-collage paintings by artist Catharine Warren.
Catharine is best known for her landscape-inspired abstract works and use of vibrant colors.
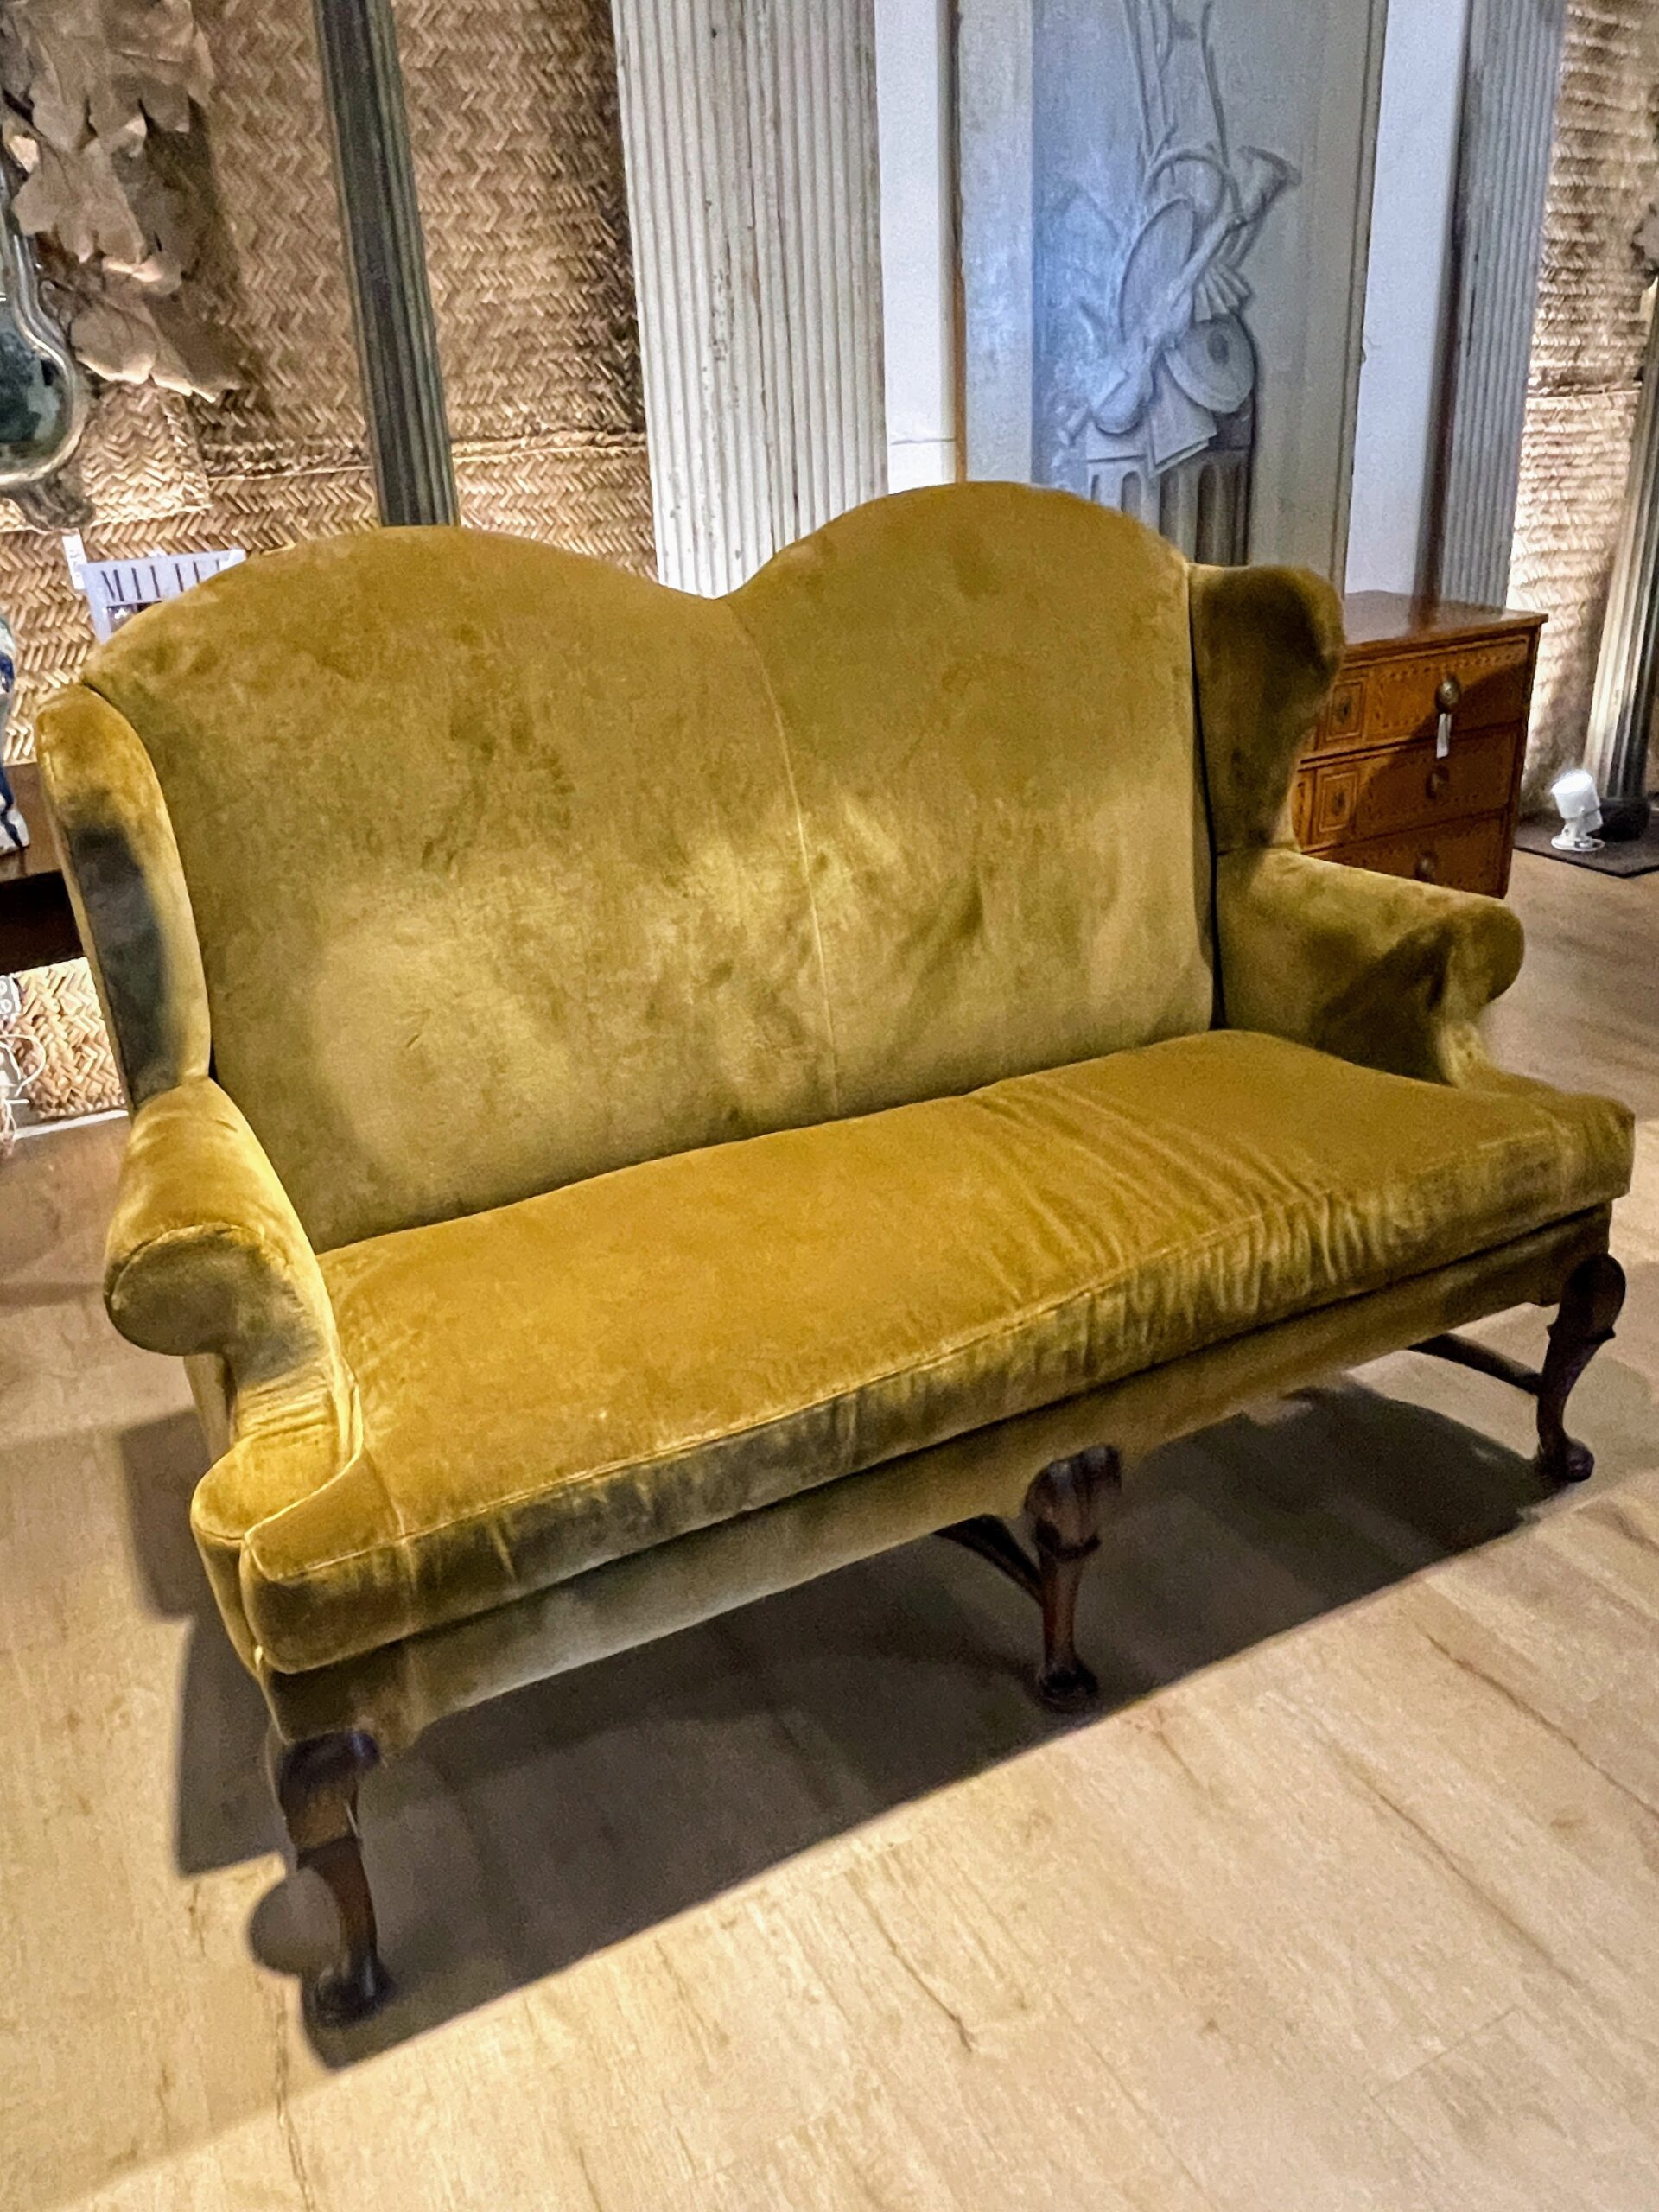
This is one of a pair of 1880 English George II style wingback sofas covered in Rodgers & Goffingon velvet upholstery.
I spotted another nice sofa. Here is one of a pair of 1930s northern canapés. A canapé is a piece of furniture similar to a couch, and is meant to describe an elegant sofa made out of elaborately carved wood with wooden legs, and upholstered seats, back, and armrests. Canapés emerged from France in the 18th century.
Here is the other. I admired the clean architectural lines.
Along another wall, a set of of six 18th century French dining chairs. The style is transitional – between Louis XV and XVI. Above the chairs – 18th century Granada Lebrillo Gigante bowls and plates – Spanish Lebrillo earthenware, made of hand crafted terra cotta, originating from Granada, Spain.
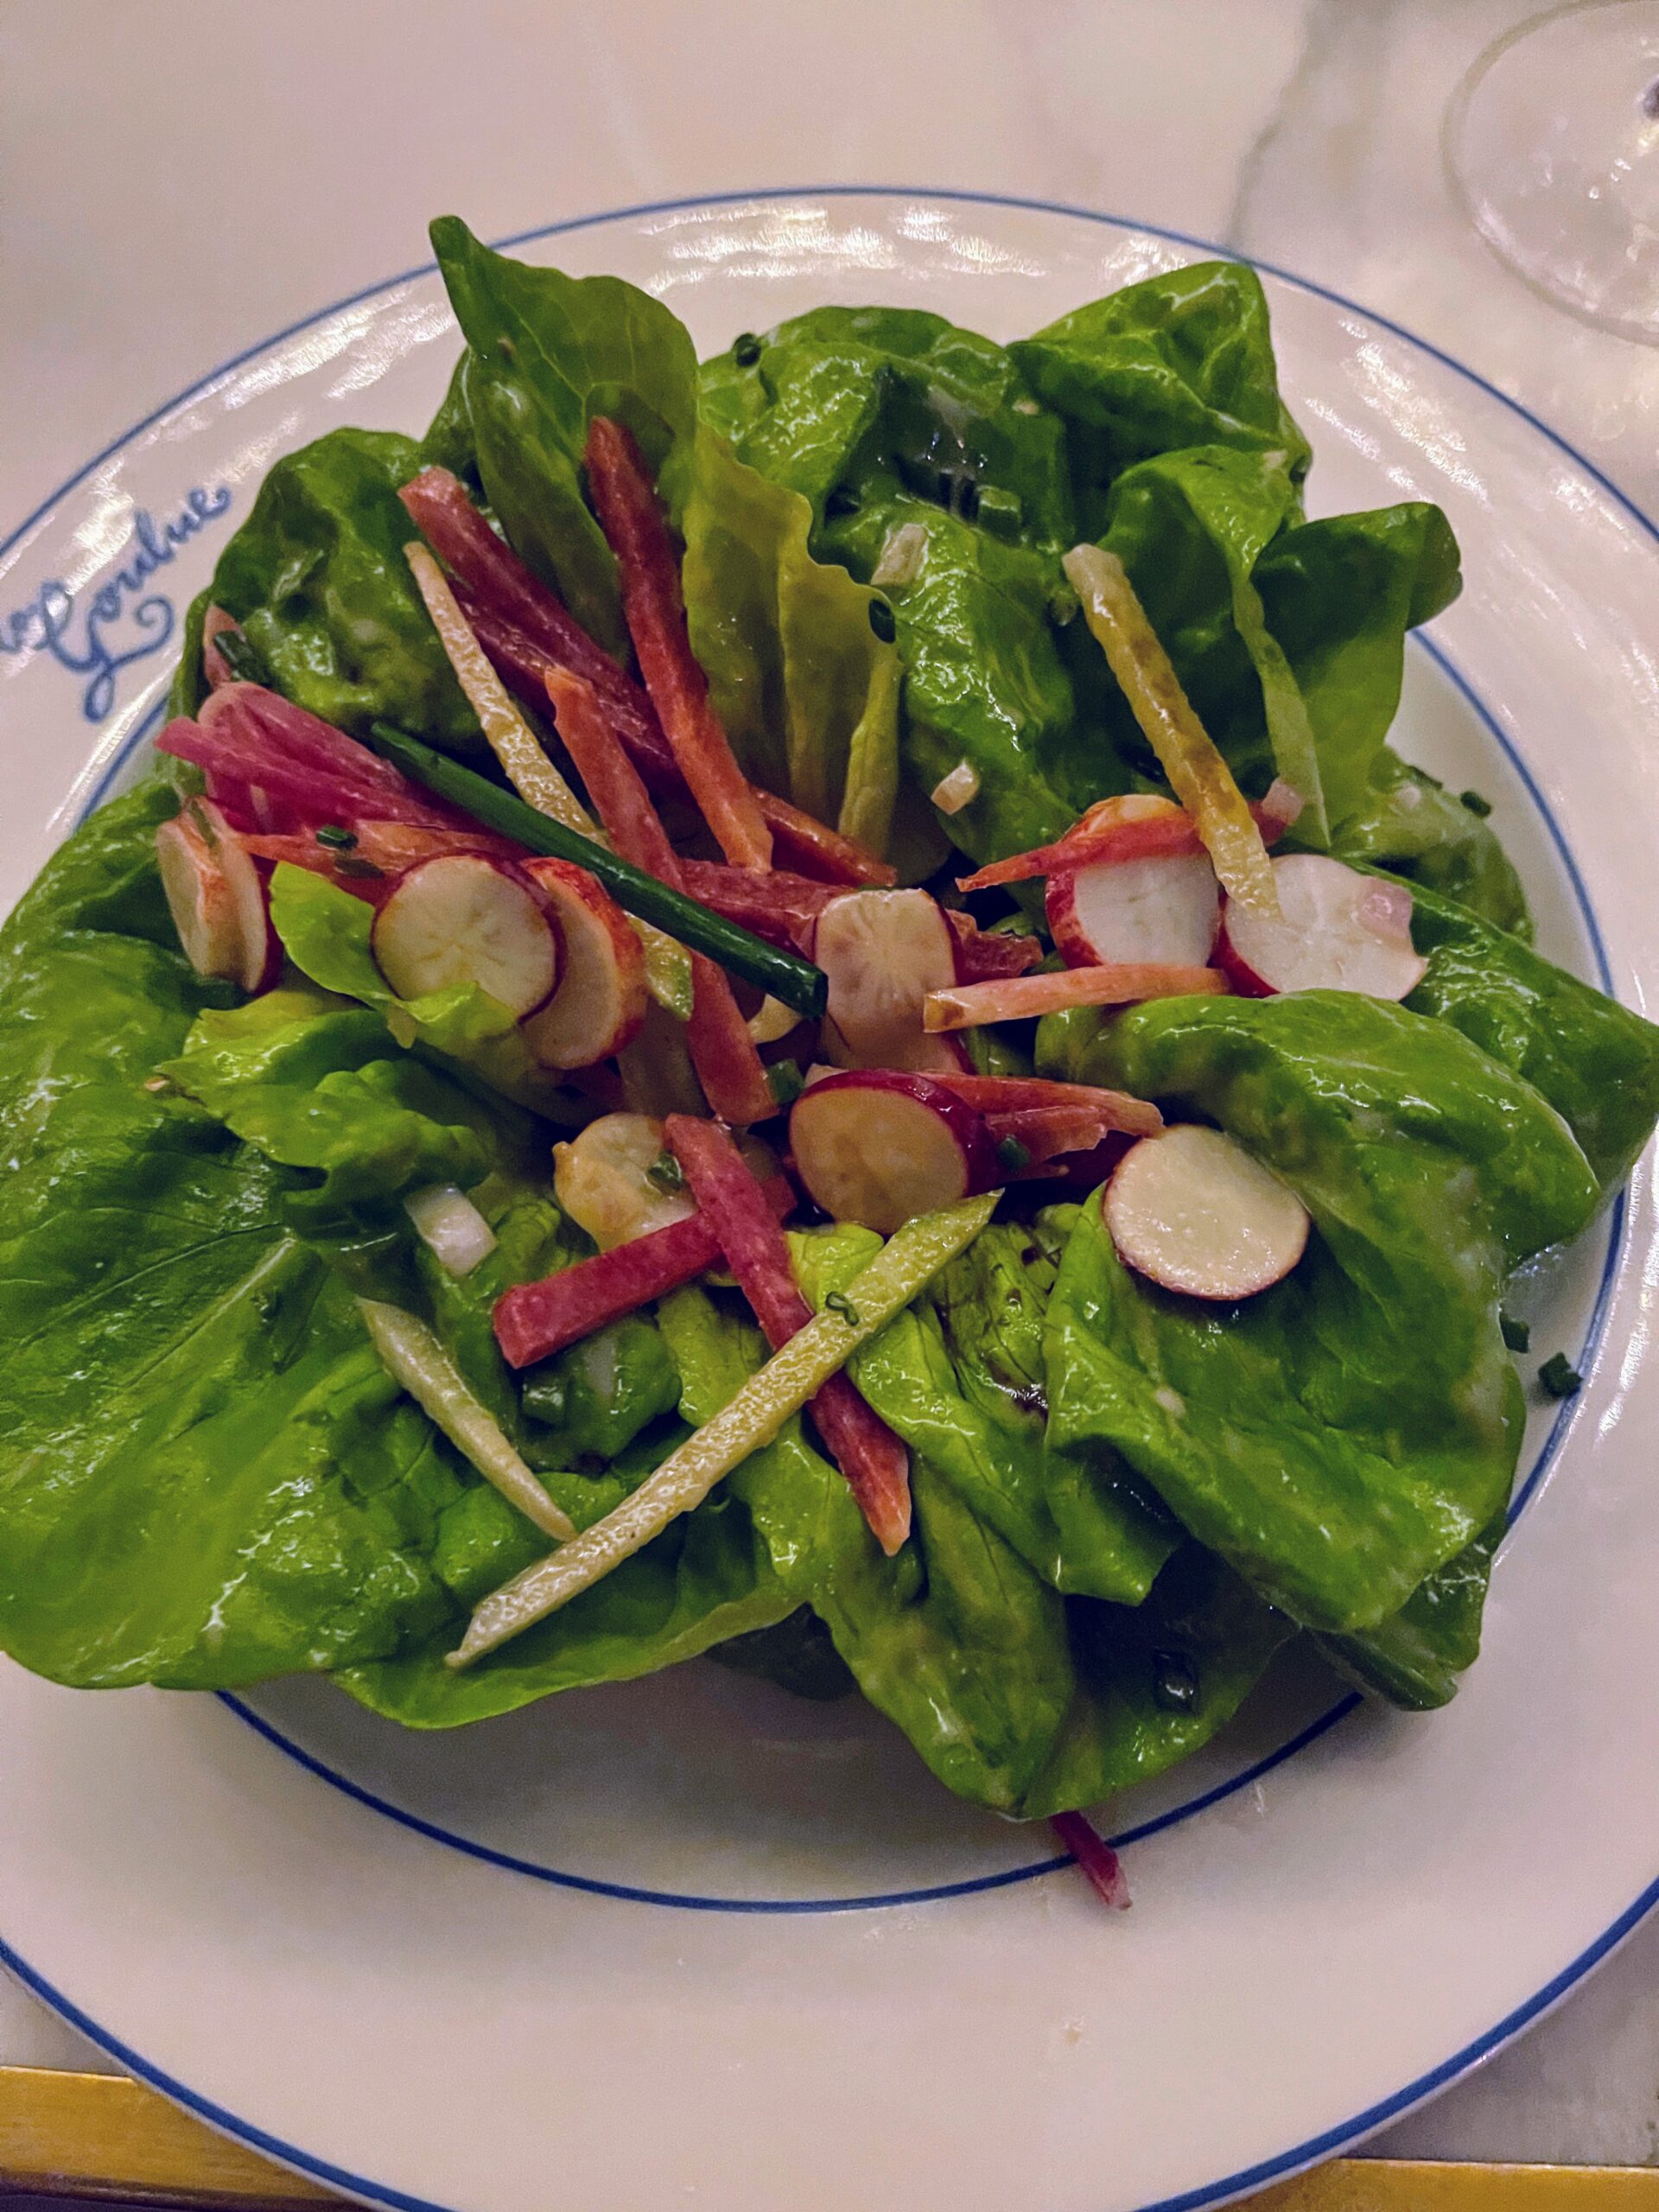
We ate in the French bistro, La Goulue. I chose this delicious green salad.
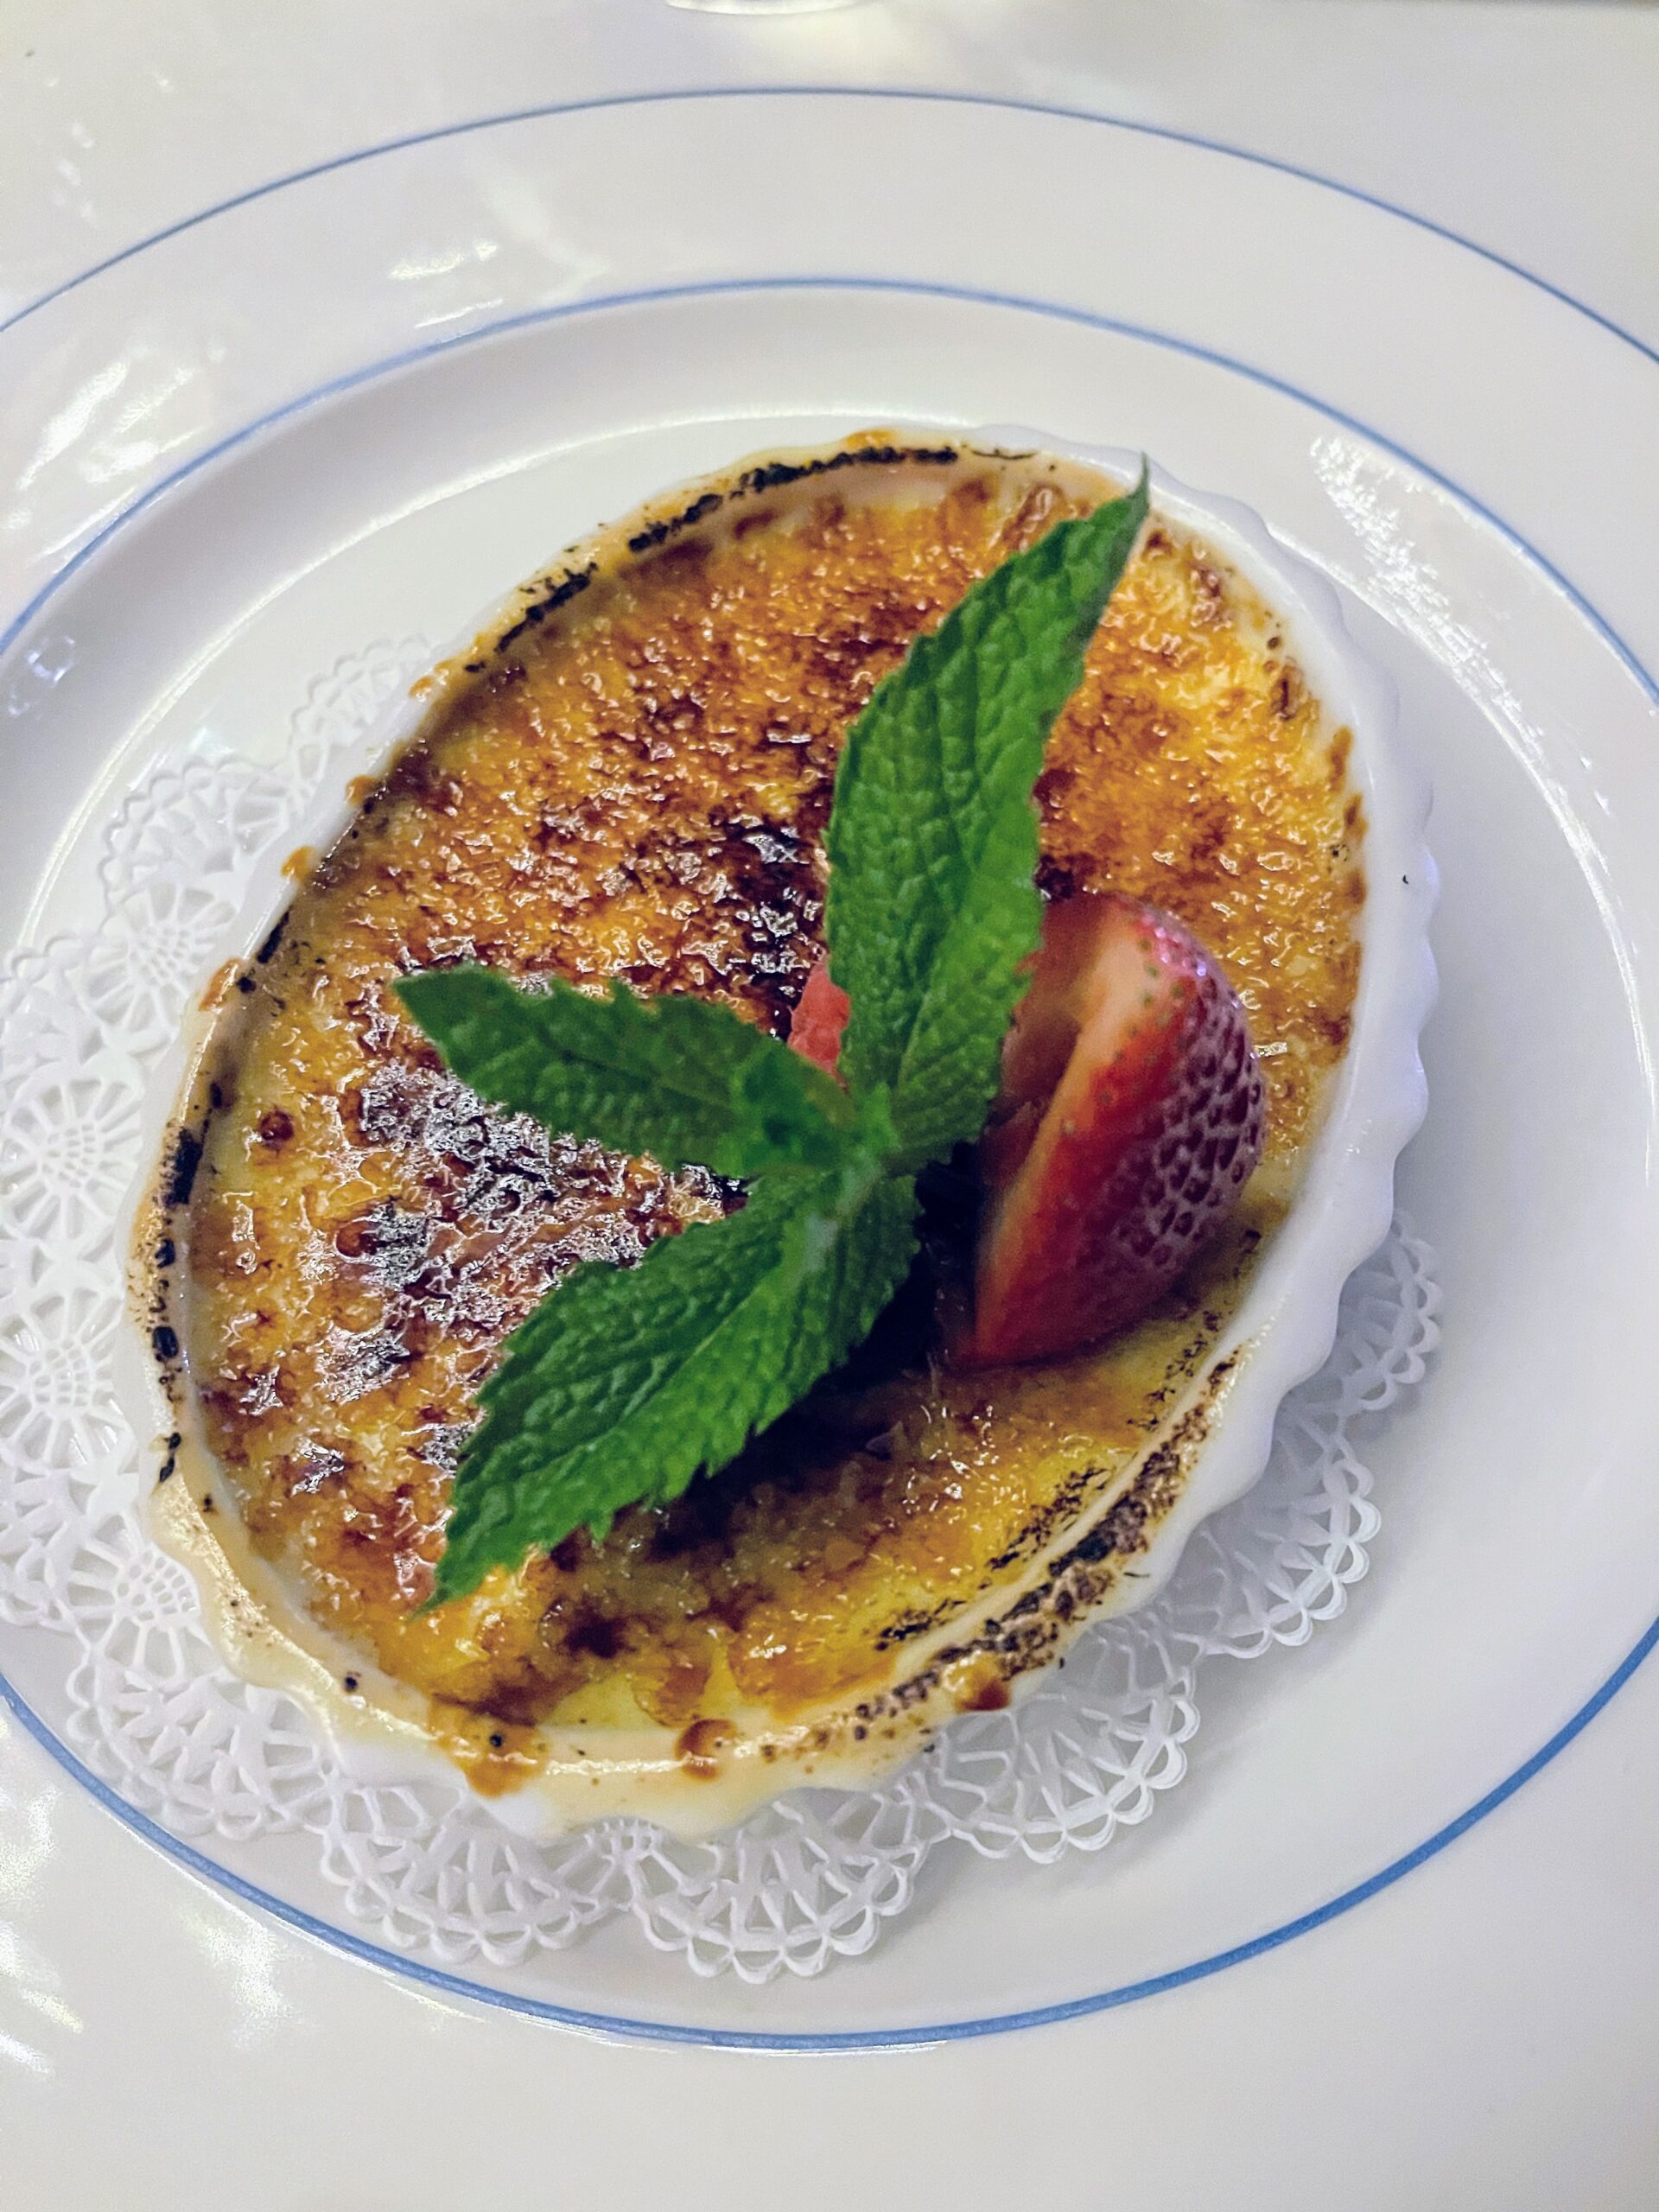
Among the desserts we also tried was this creme brulee – a bourbon vanilla custard with brown sugar crust, topped with mint and a strawberry.
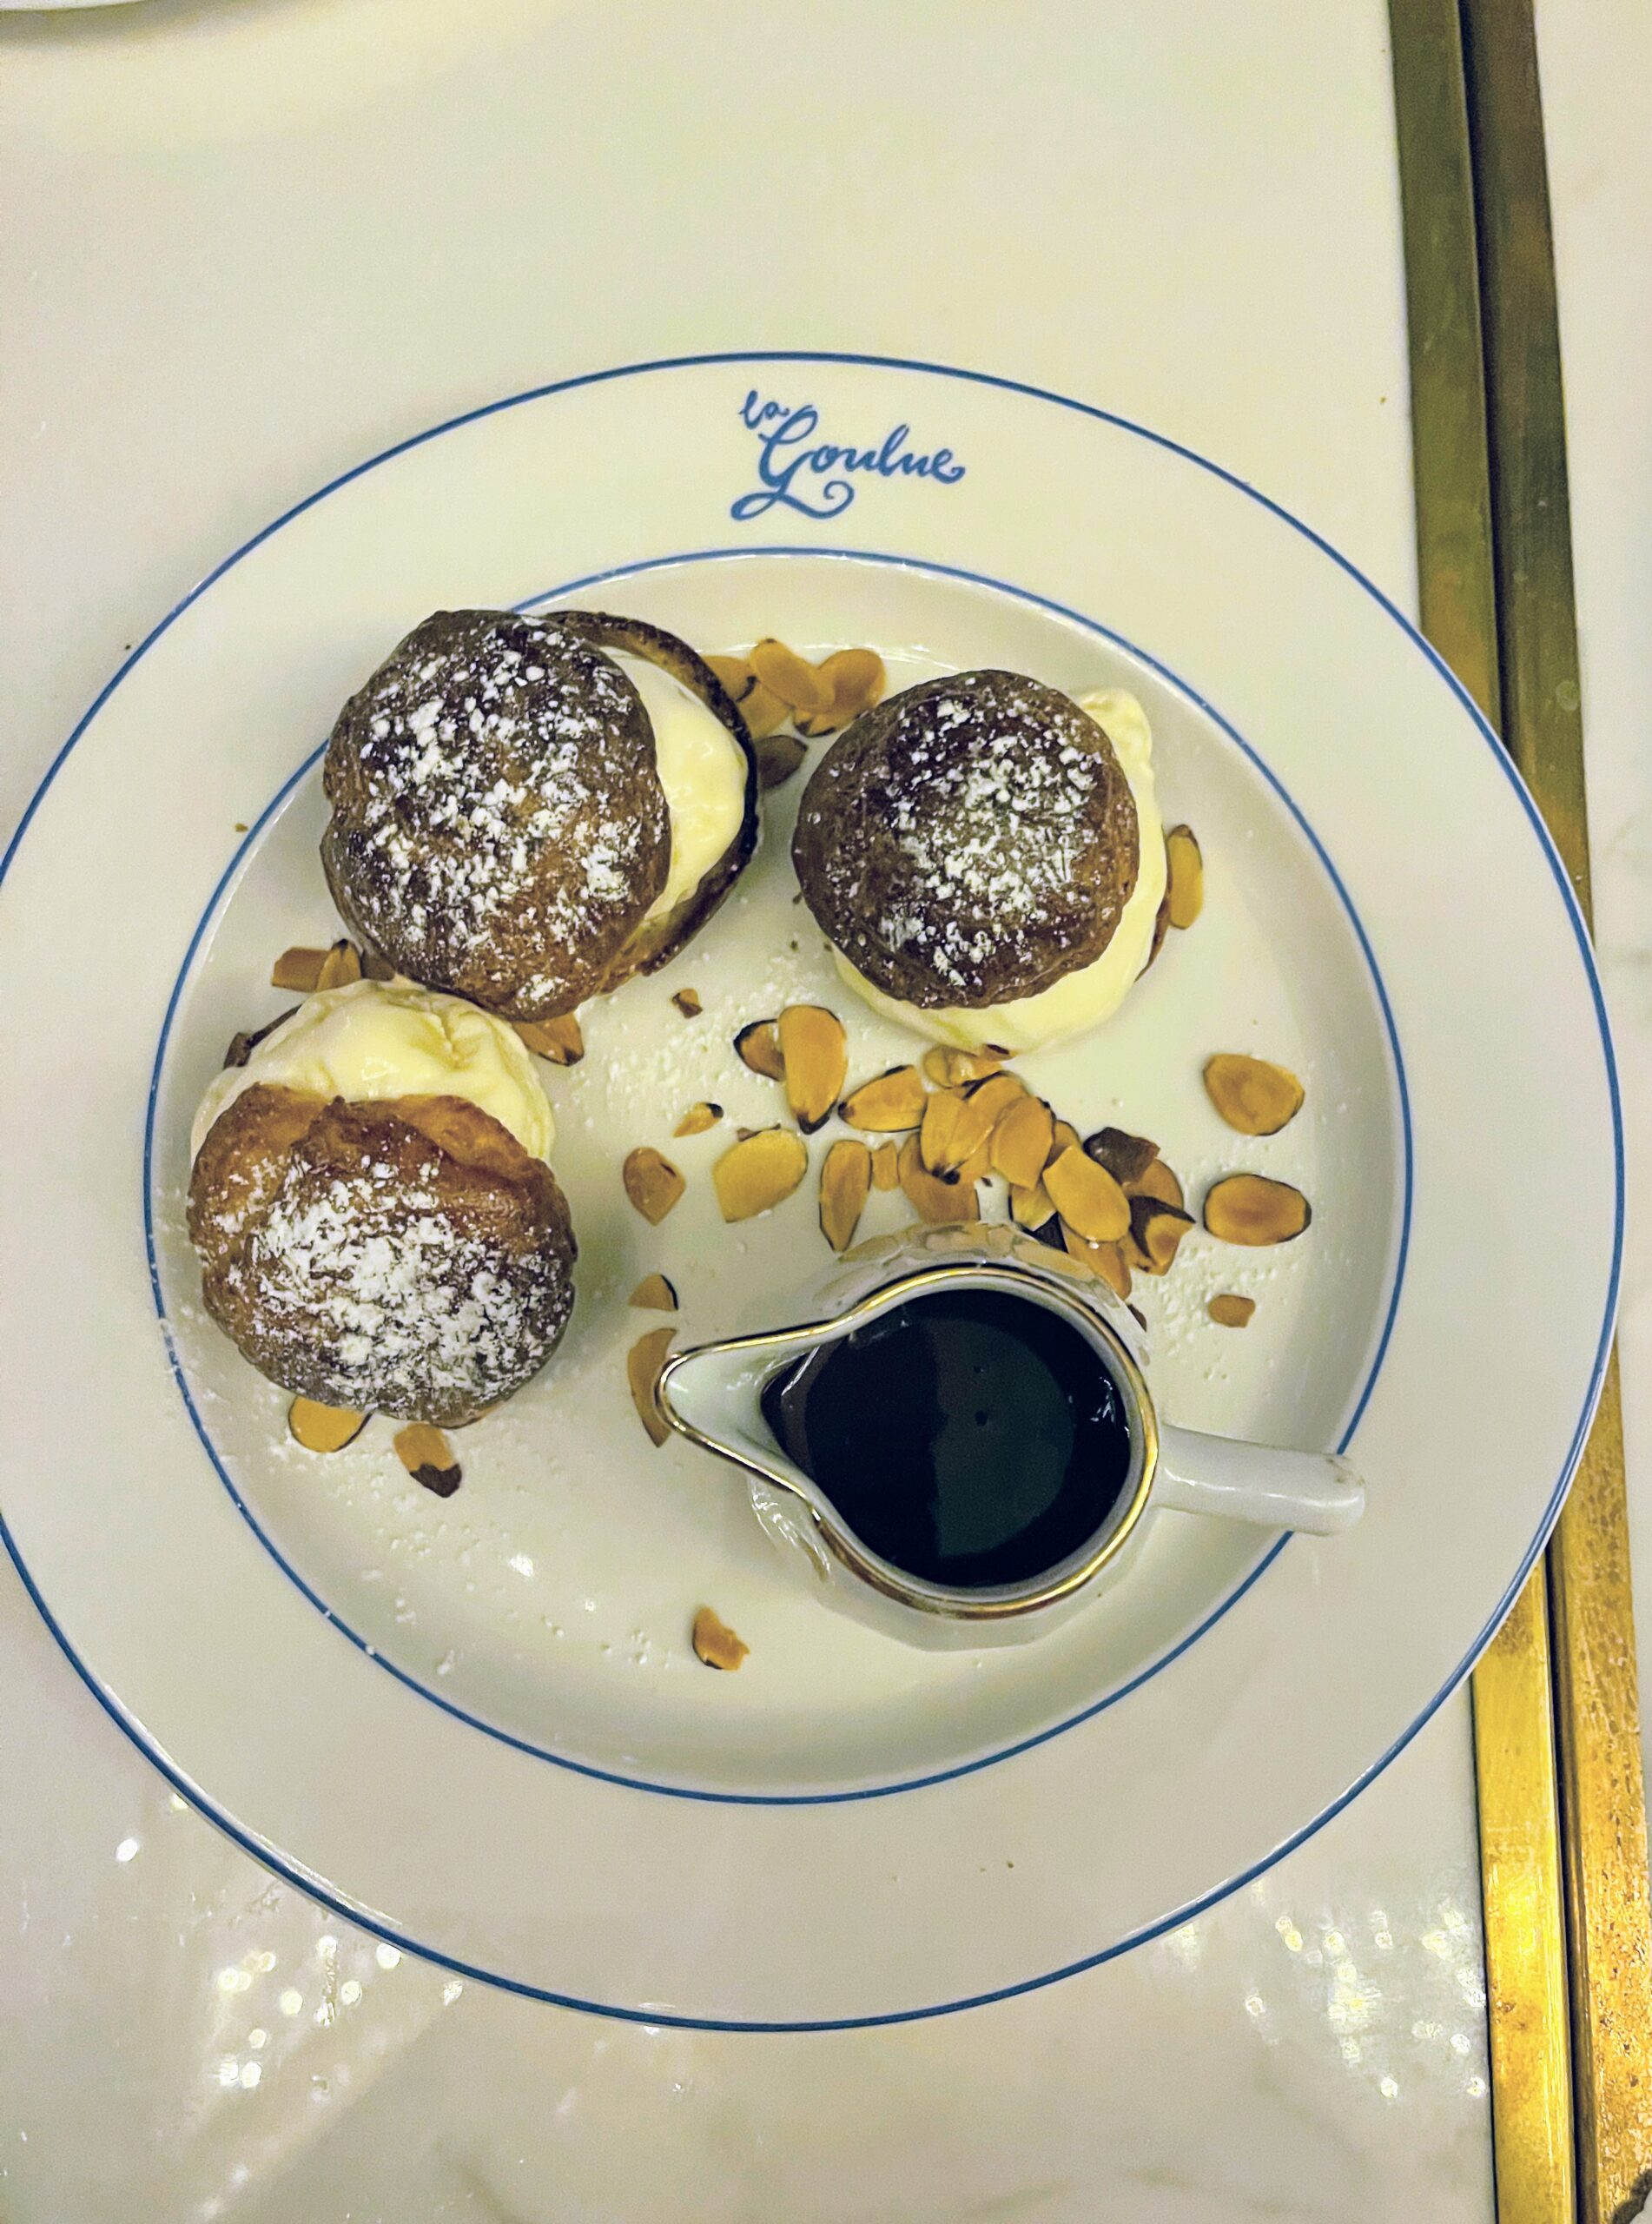
And look at these profiteroles – vanilla puffs served with warm chocolate sauce and toasted almonds. Everything was so delicious.
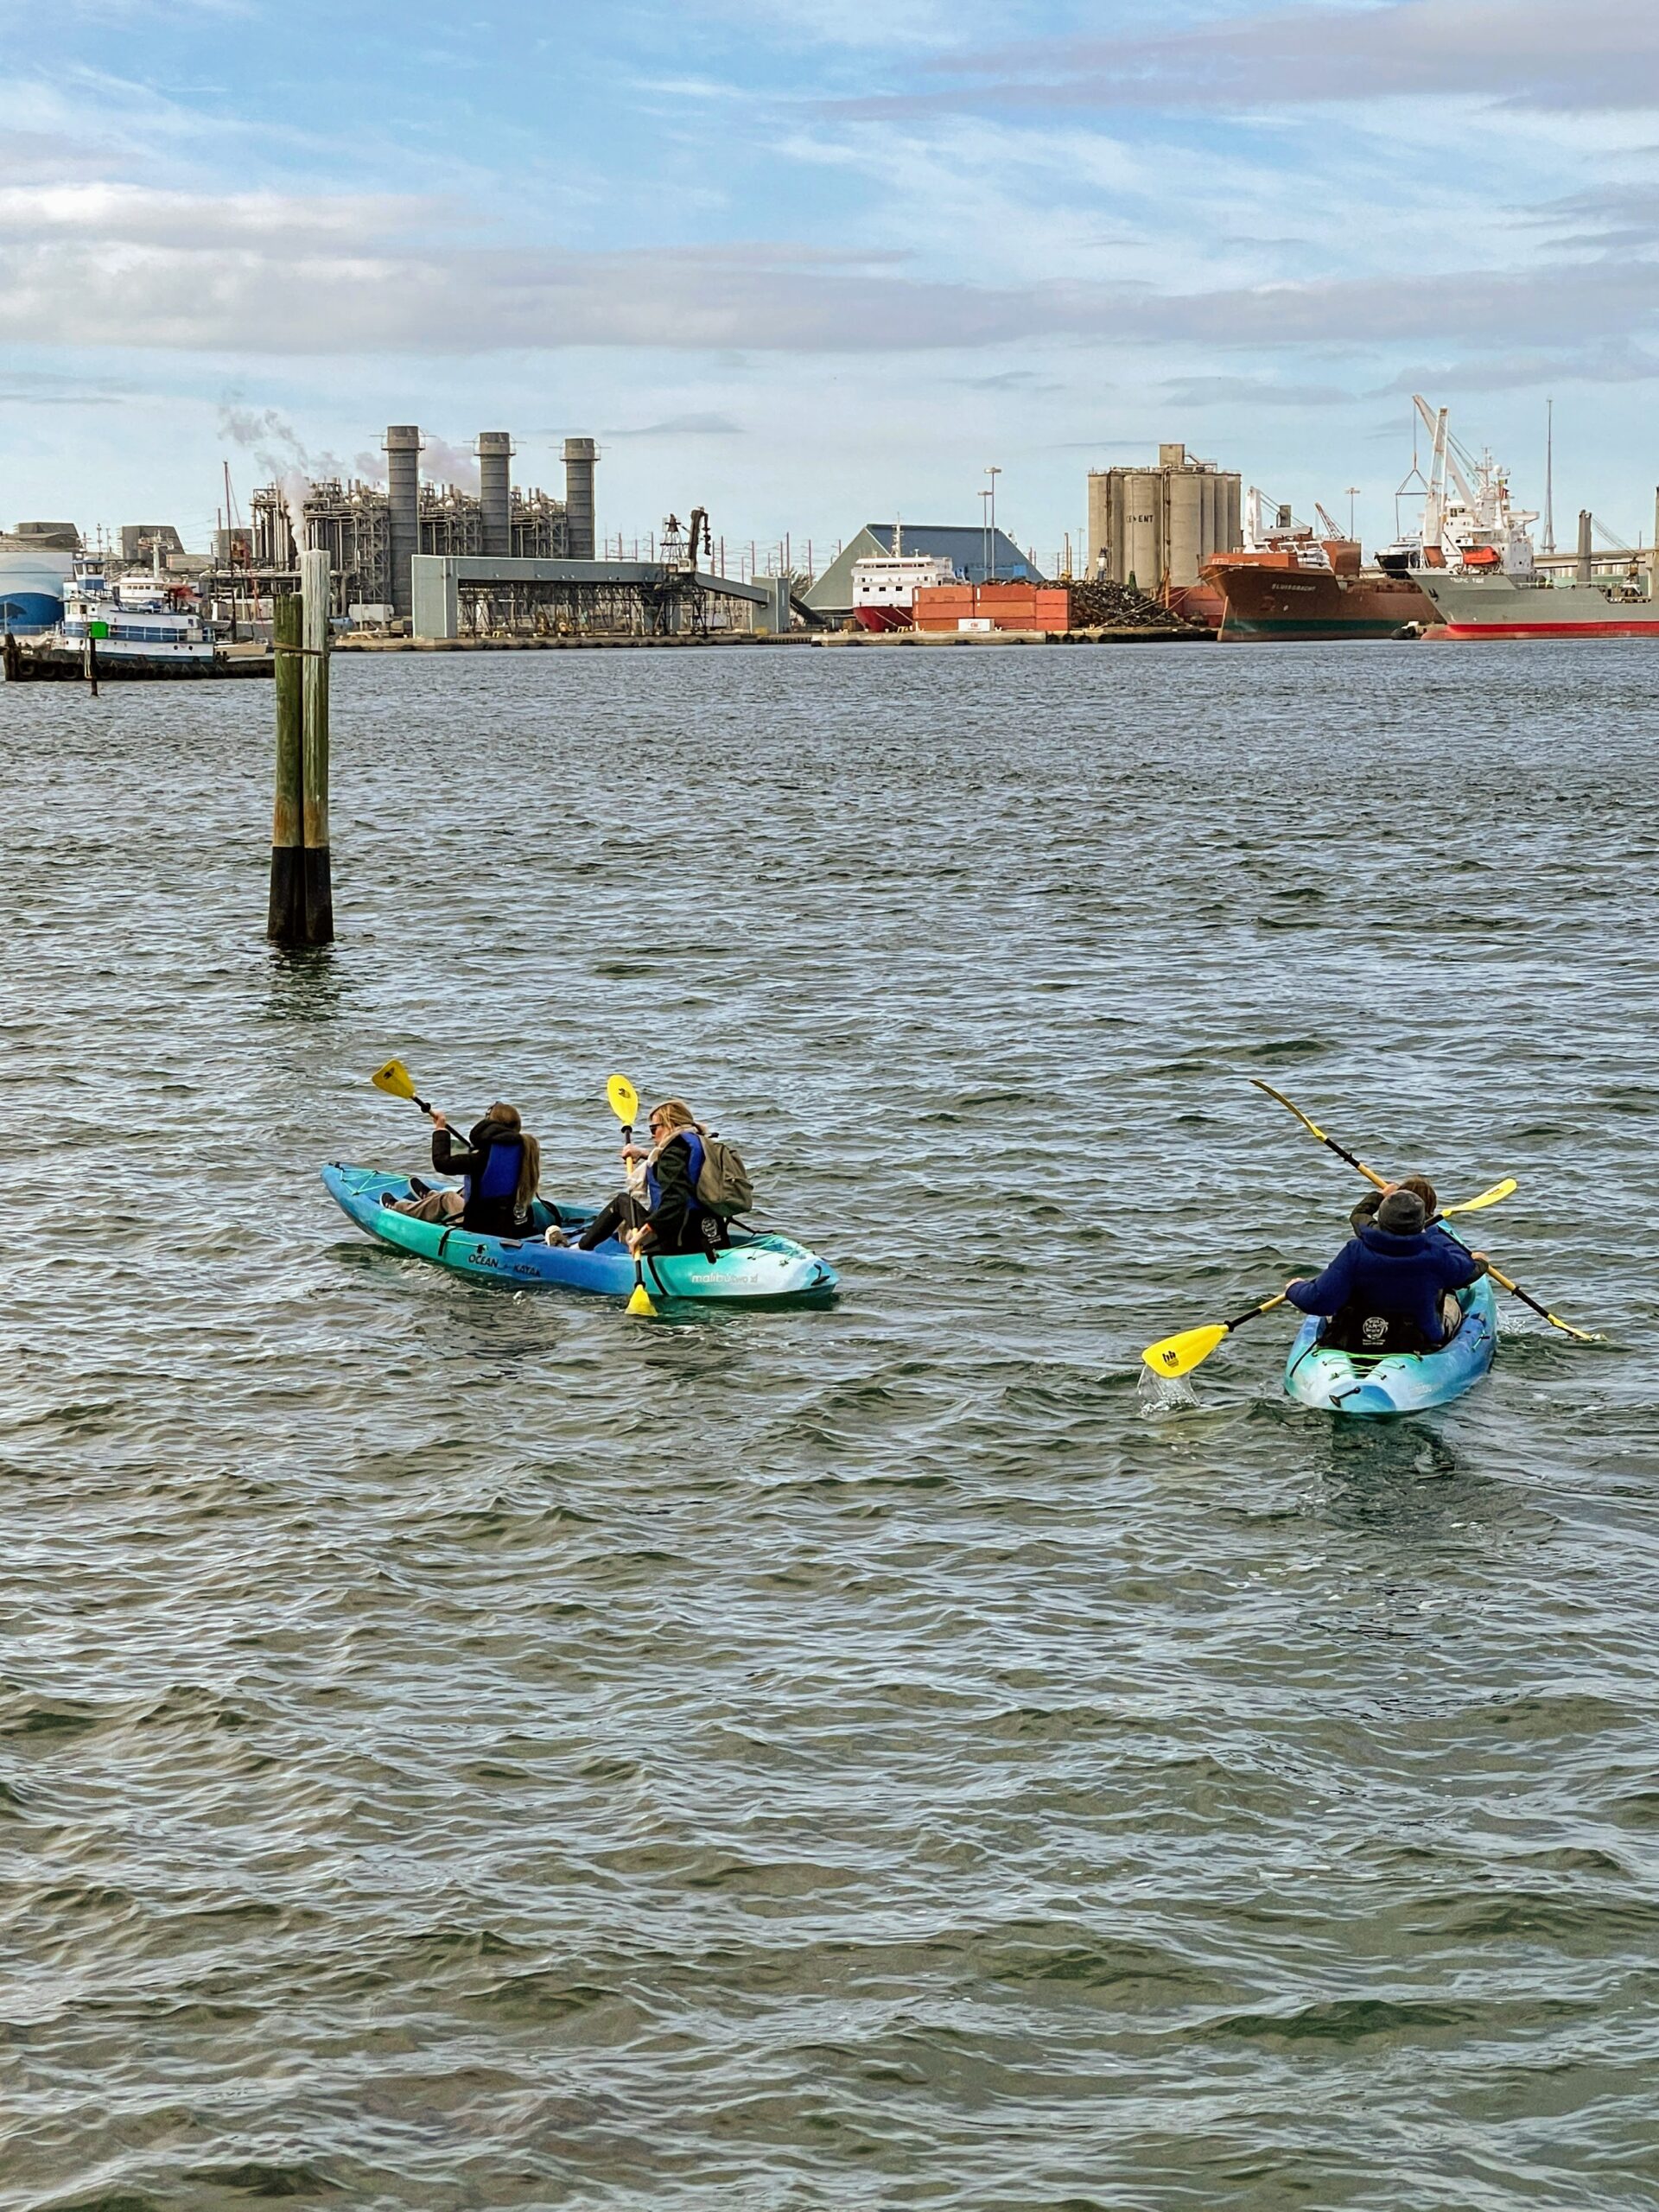
My good friend, entertainment banker and entrepreneur, Lisbeth Barron, made sure we had lots to do while we were in the area. She helped arrange some outdoor sports for Alexis, Ari and the children. Coordinated through VisitPalmBeach.com, on this day the four went kayaking in the intracoastal.
The four had a lovely time – they did quite well navigating through the wind and waters. In all, it was a safe and enjoyable few days away with my family – the best Christmas gift ever. Please go to my Instagram page @MarthaStewart48 for more photos from my trip and a video of Alexis, Ari, Jude, and Truman paddling!
Happy New Year! May 2022 be a better year for all of us. Here's a fun post from January 30, 2021.
This weekend, why not have a delicious steamed egg for breakfast?
So many of my readers and viewers ask me how to make the perfect steamed egg - when the white of the egg is firm, and the yolk is silky, creamy, and liquid gold. Steamed eggs, soft-boiled eggs, and hard-boiled eggs are all great with toast, or as an addition to salads, or even alone as a quick snack. My eggs are as fresh as can be - they come straight from my chicken coops every day. Eggs are also very nutritious. A large egg contains about six-grams of protein, plus other nutrients, including vitamin D and choline. And, best of all, making the perfect egg is so easy.
Here are some photos and my step-by-step method for steamed eggs, enjoy.
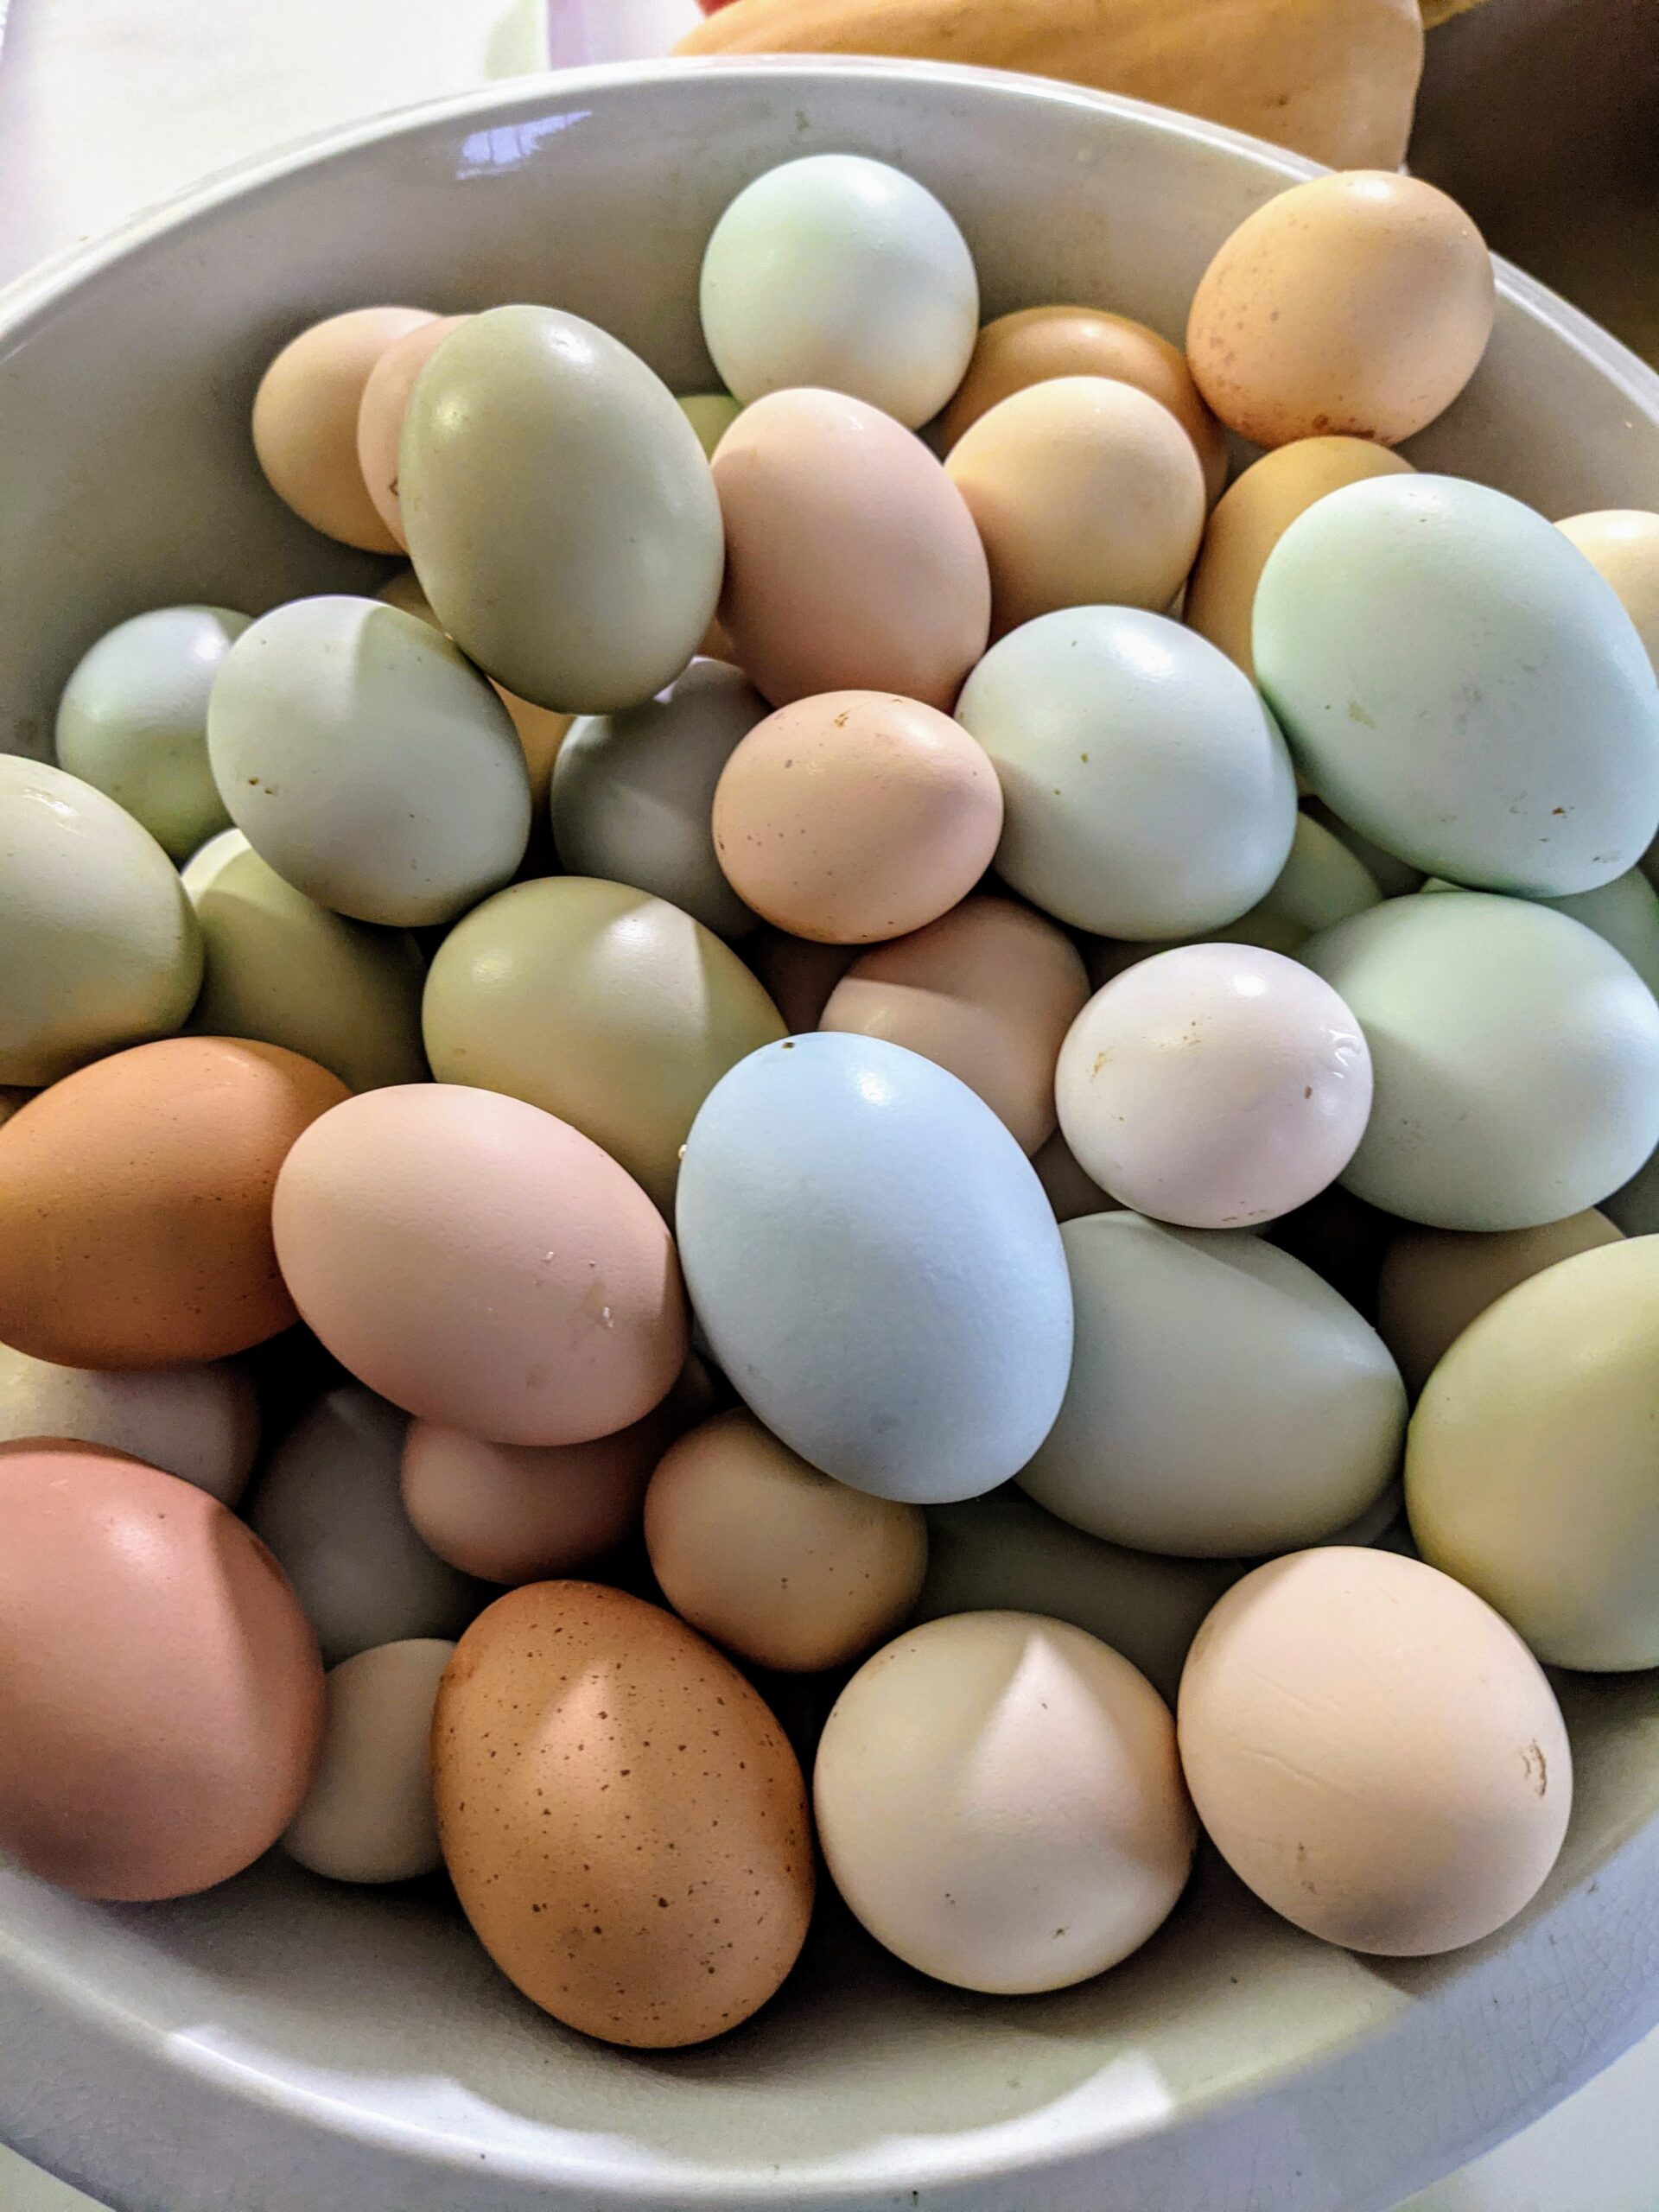
As many of you know, I’ve long enjoyed raising chickens. I began raising chickens many years ago, primarily for their delicious fresh eggs. And I use a lot of them. Aside from enjoying one or two myself on any given day, I share them with my daughter and grandchildren, I cook flavorful dishes such as frittatas for guests and my crew at the farm, and I use many eggs for various cooking shoots. Here is a bowl of fresh eggs on my kitchen counter. When hens lay eggs, they have a natural coating called the “bloom” that helps keep out bacteria. Washing eggs can drive some bacteria in through the pores of the shell, so I don’t wash them before cooking. I always just wipe them with a warm damp cloth to get rid of any dirt and place them in this giant bowl.
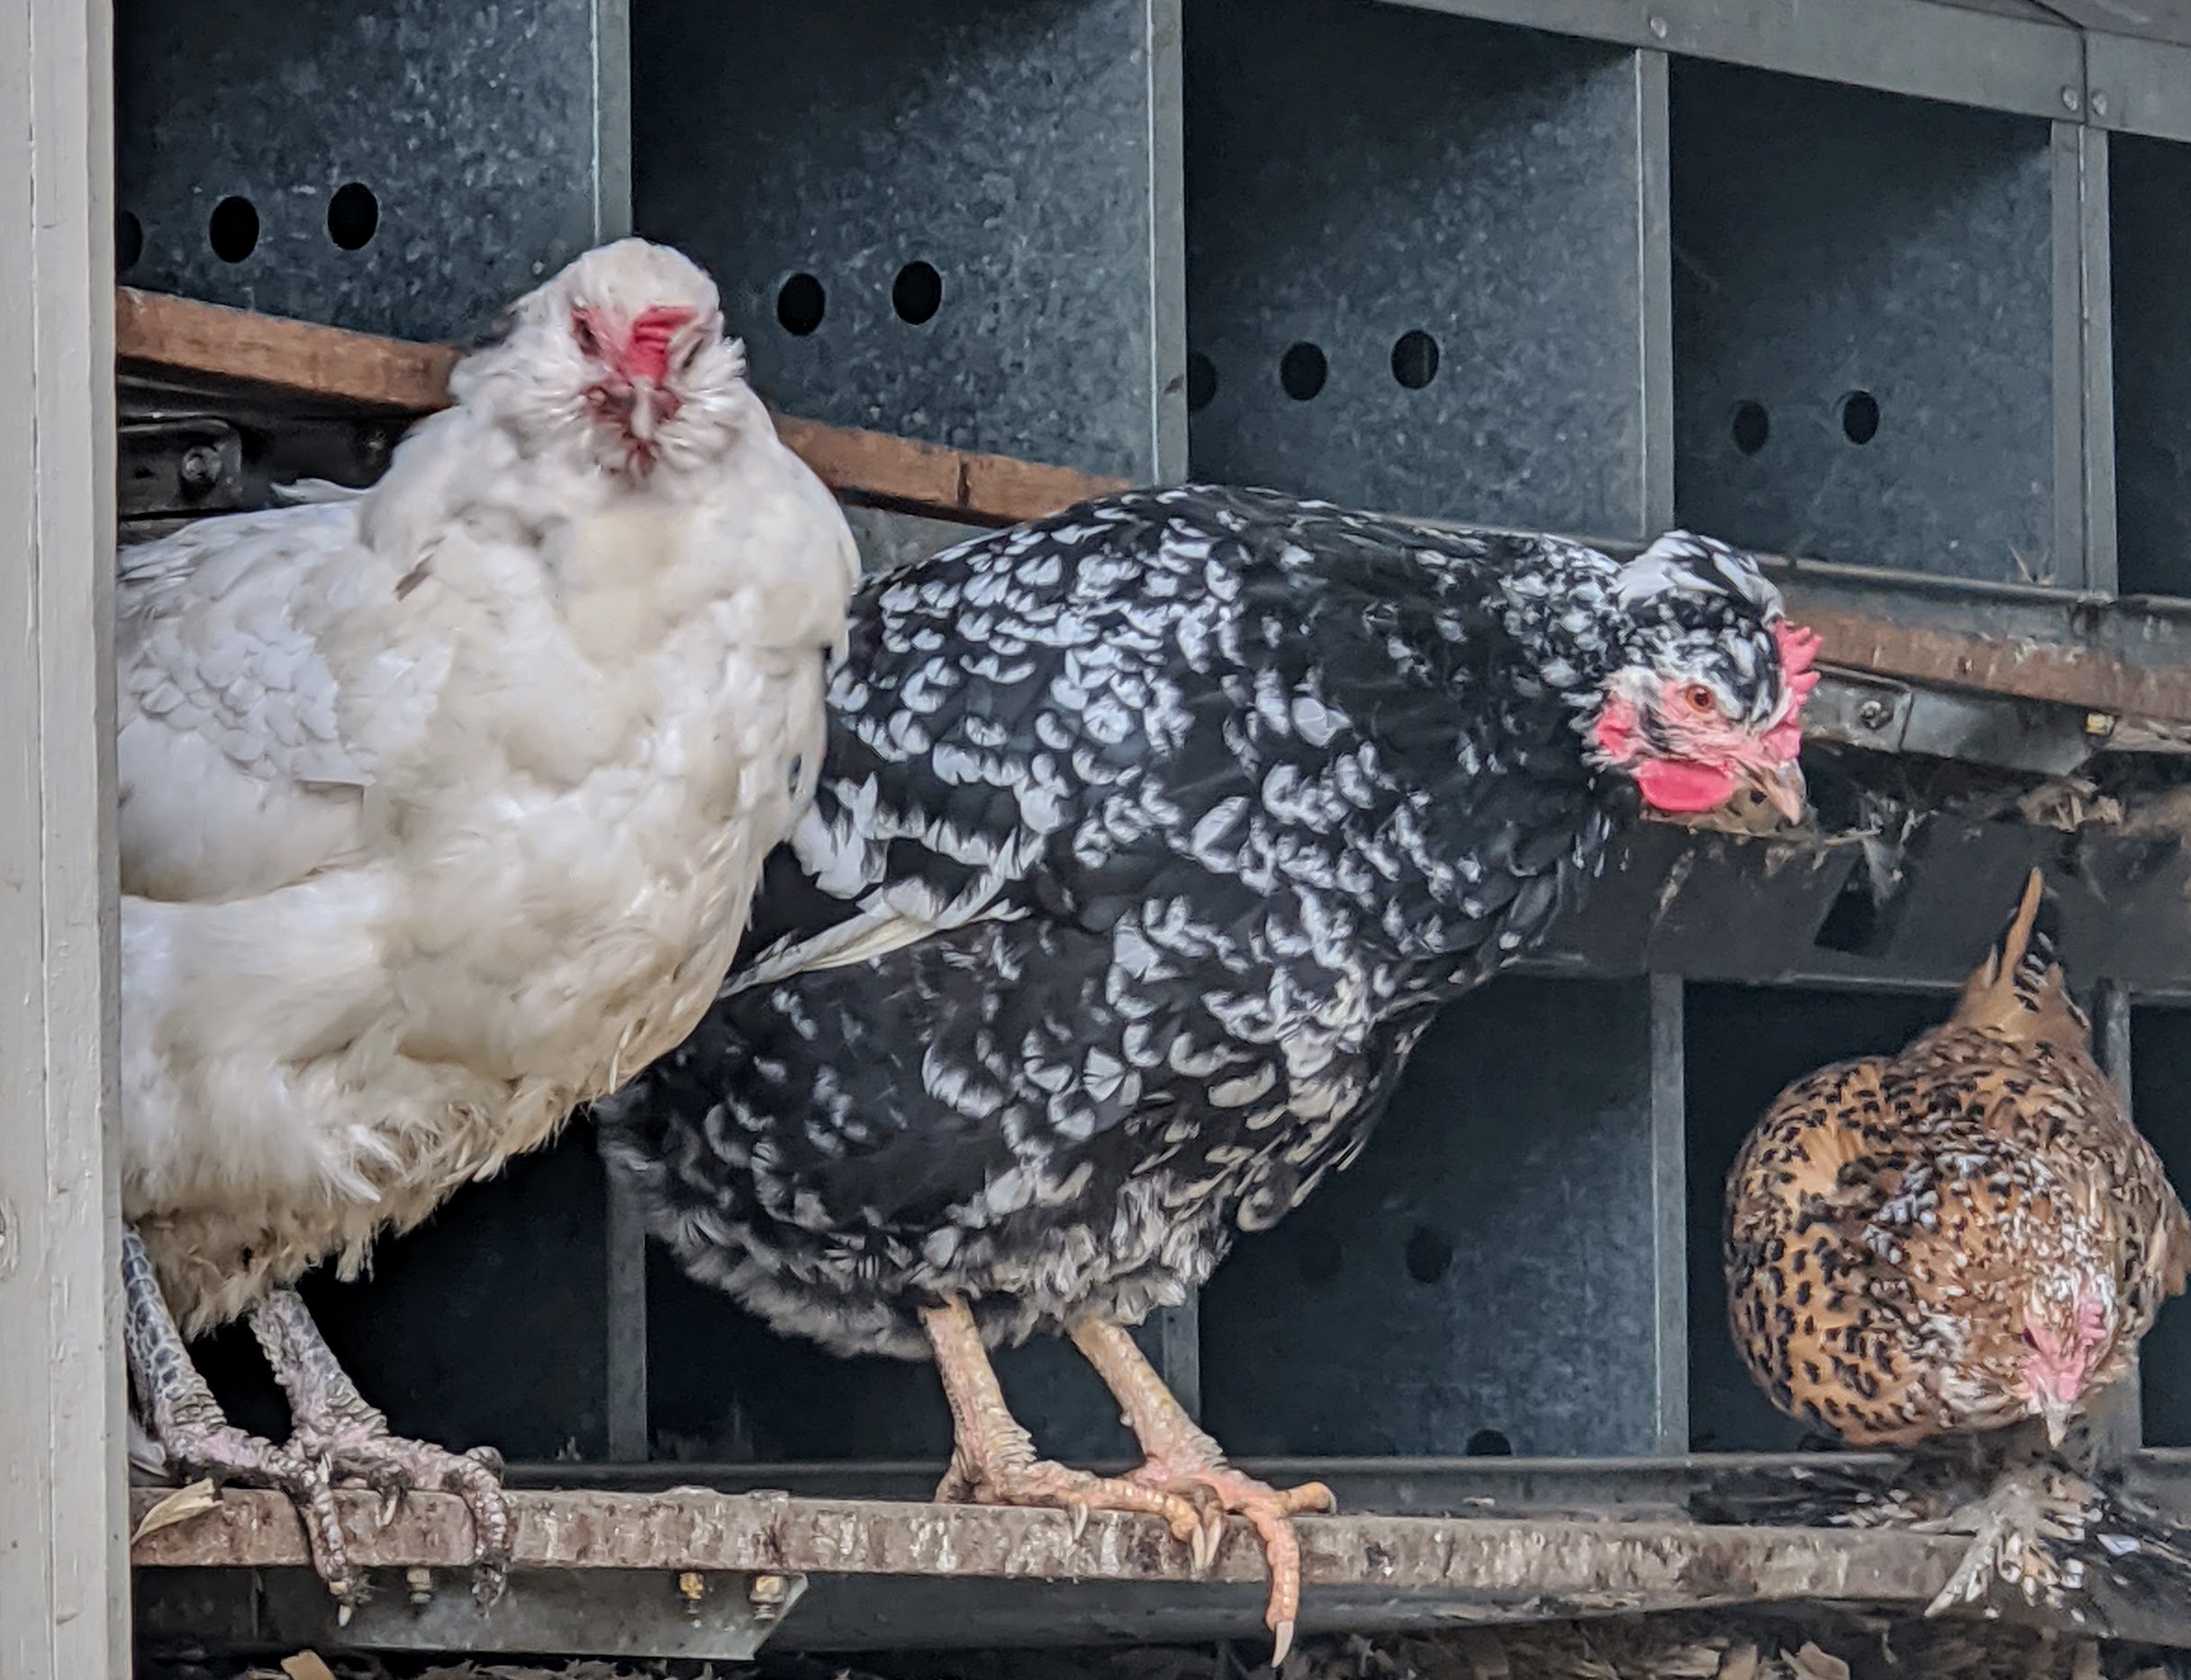
I have about 200-chickens down in my poultry yard. They’re all beautiful birds. I I’ve grown fond of caring for them, and learning about their many different breeds and varieties.
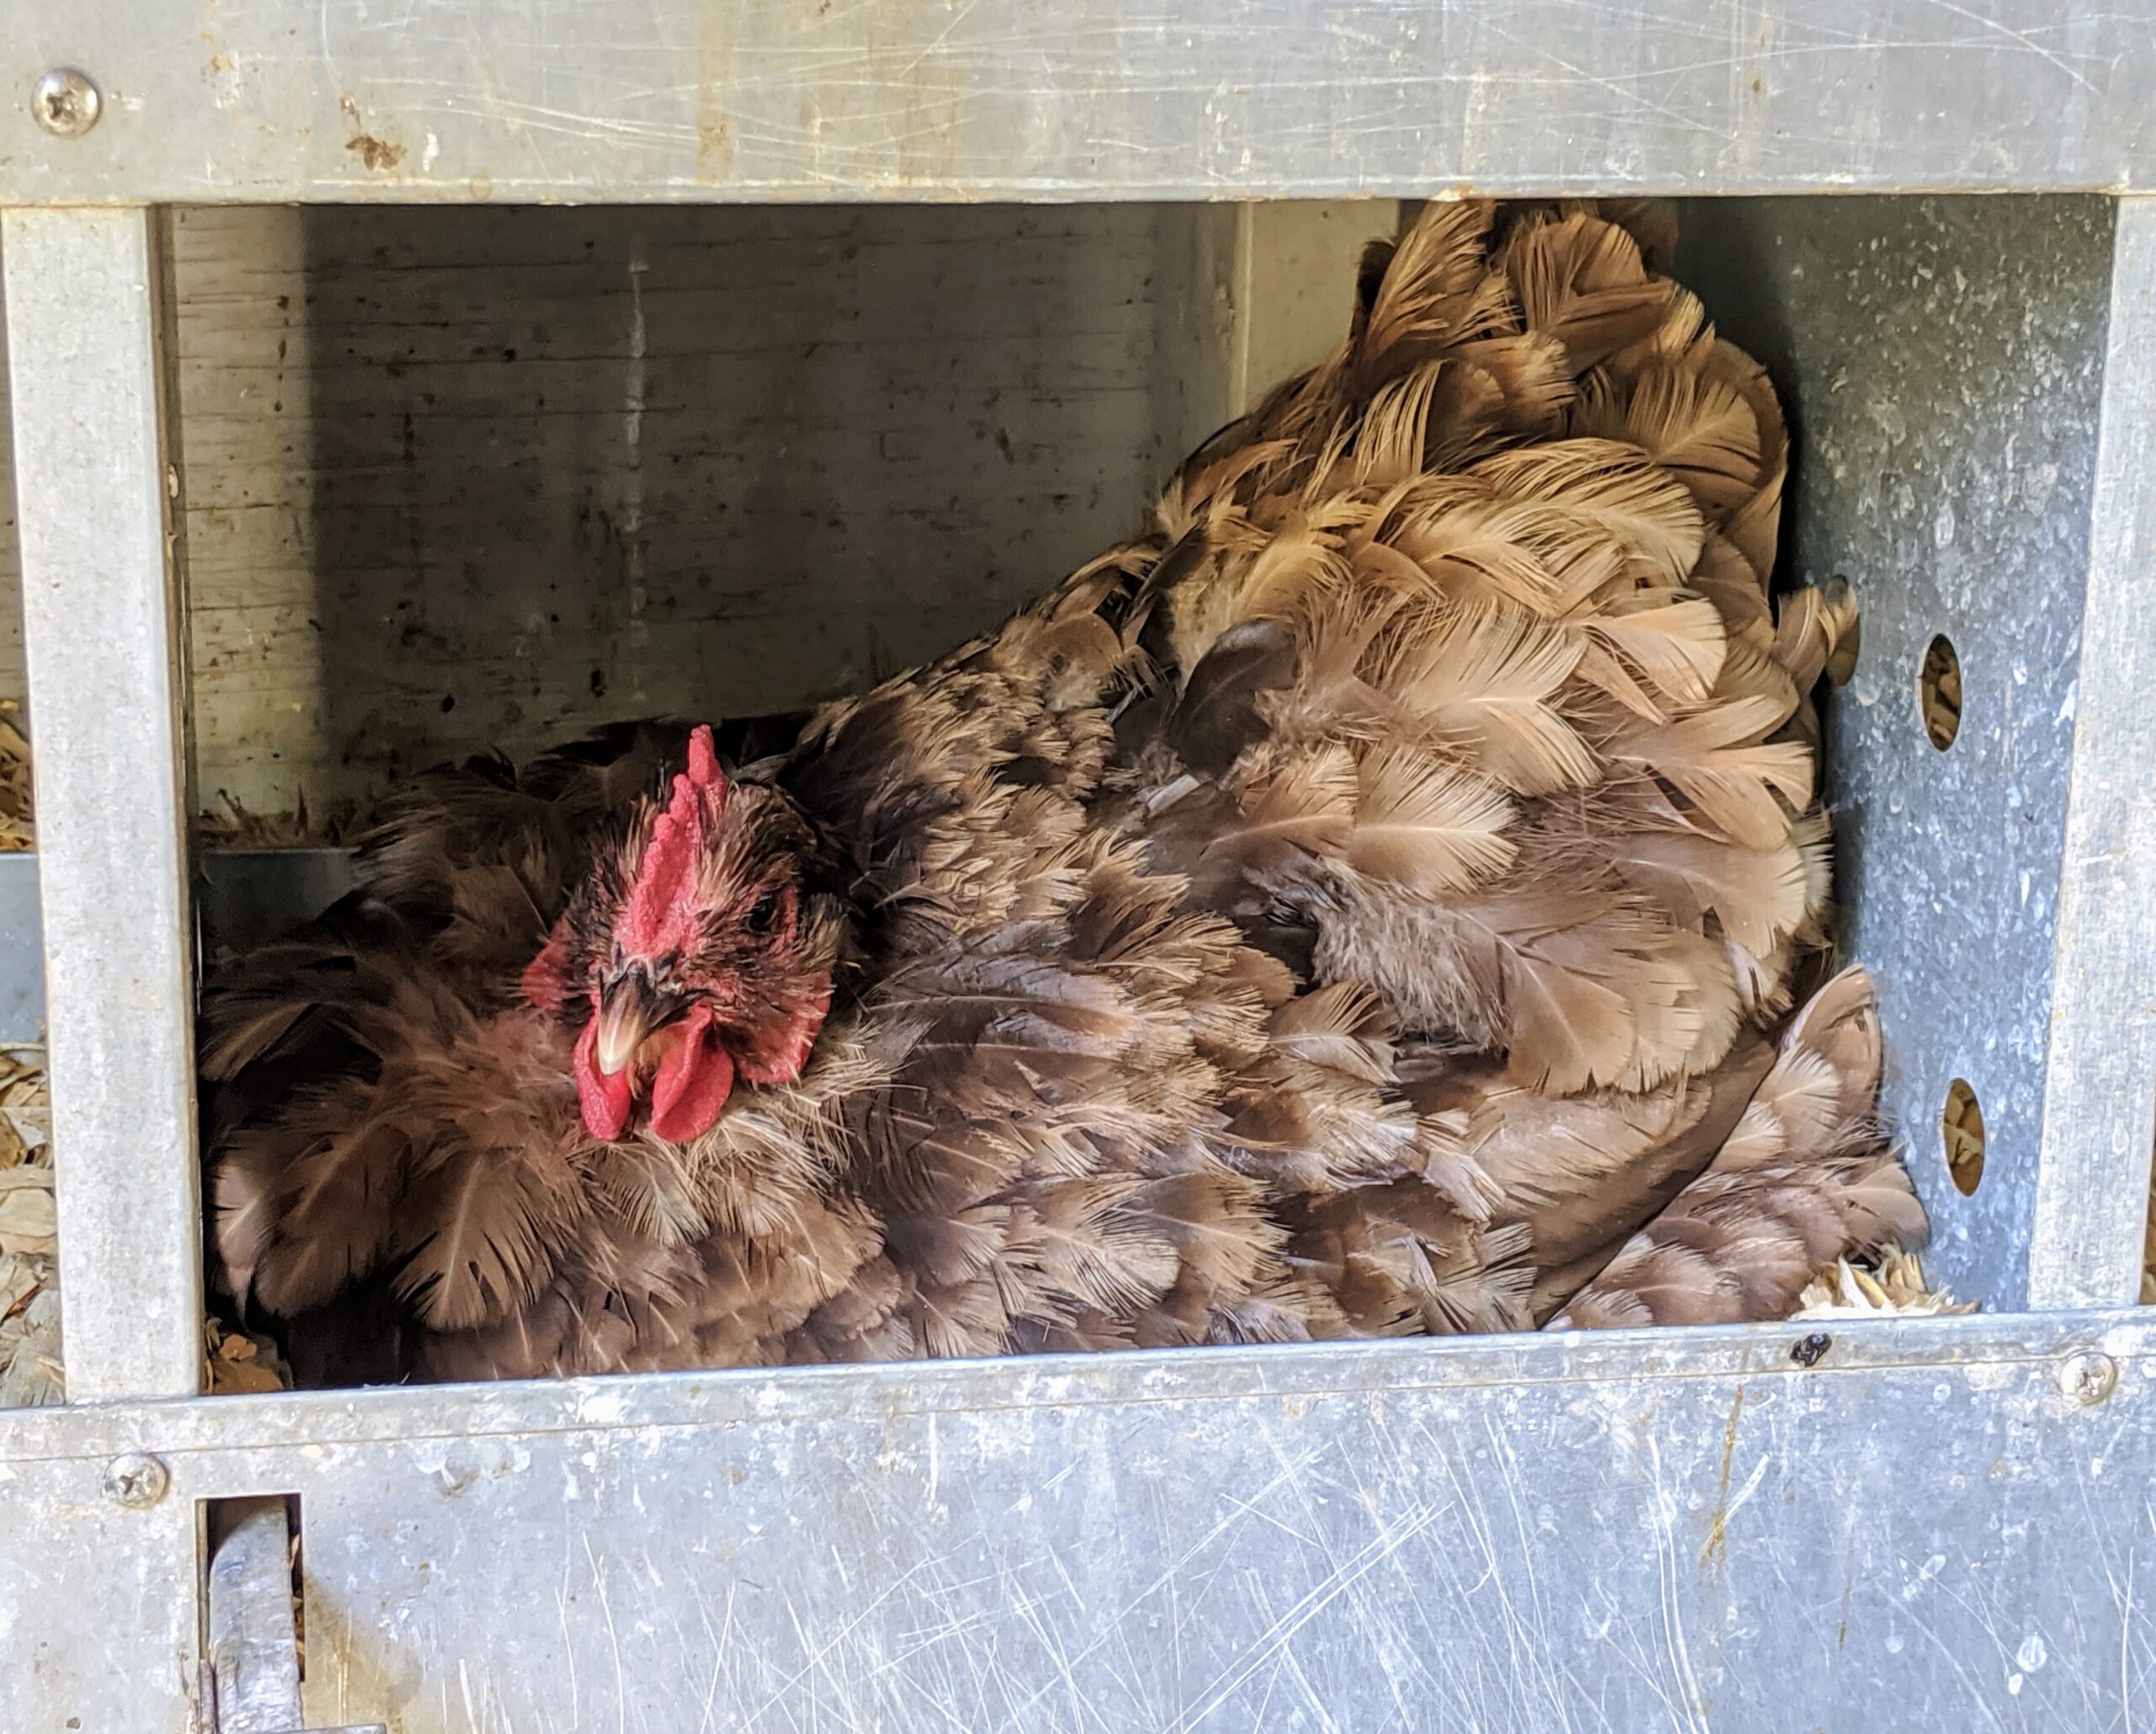
Here’s a hen sitting in her nesting box – I wonder if she’s sitting on an egg? In general, hens become mature enough to lay eggs around six months of age, though this varies slightly by breed. Healthy hens are able to lay an egg about once a day.
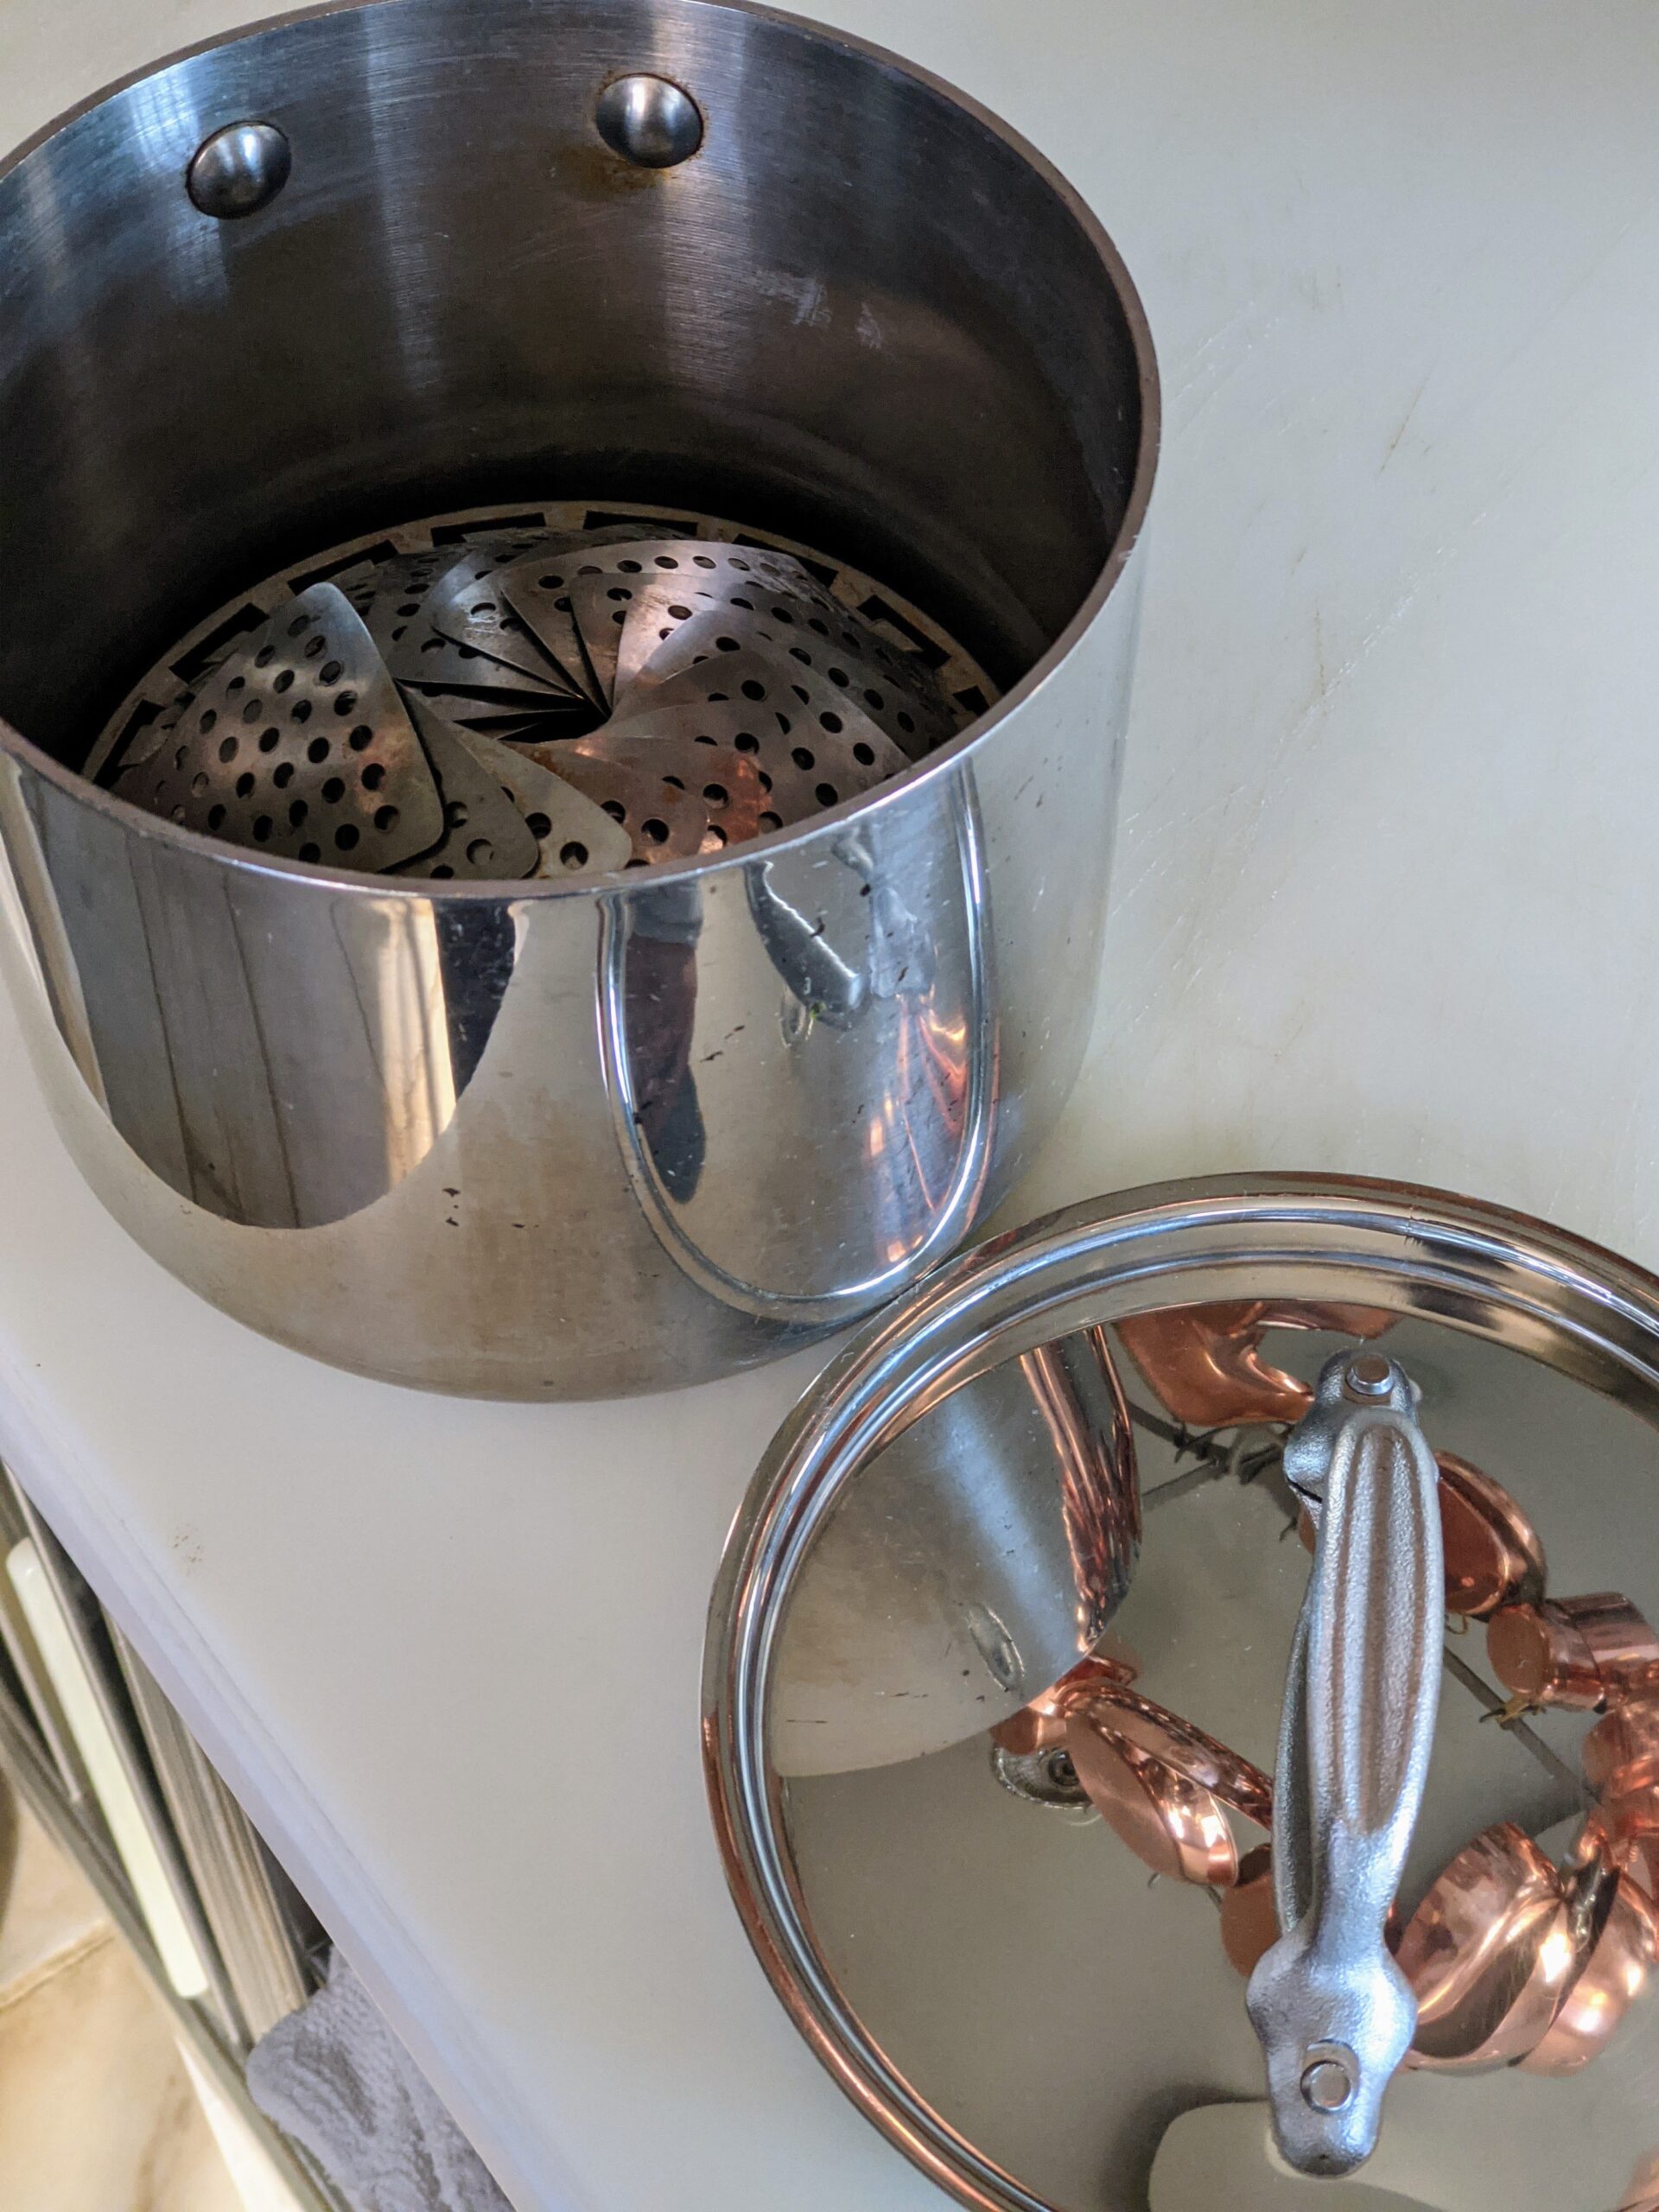
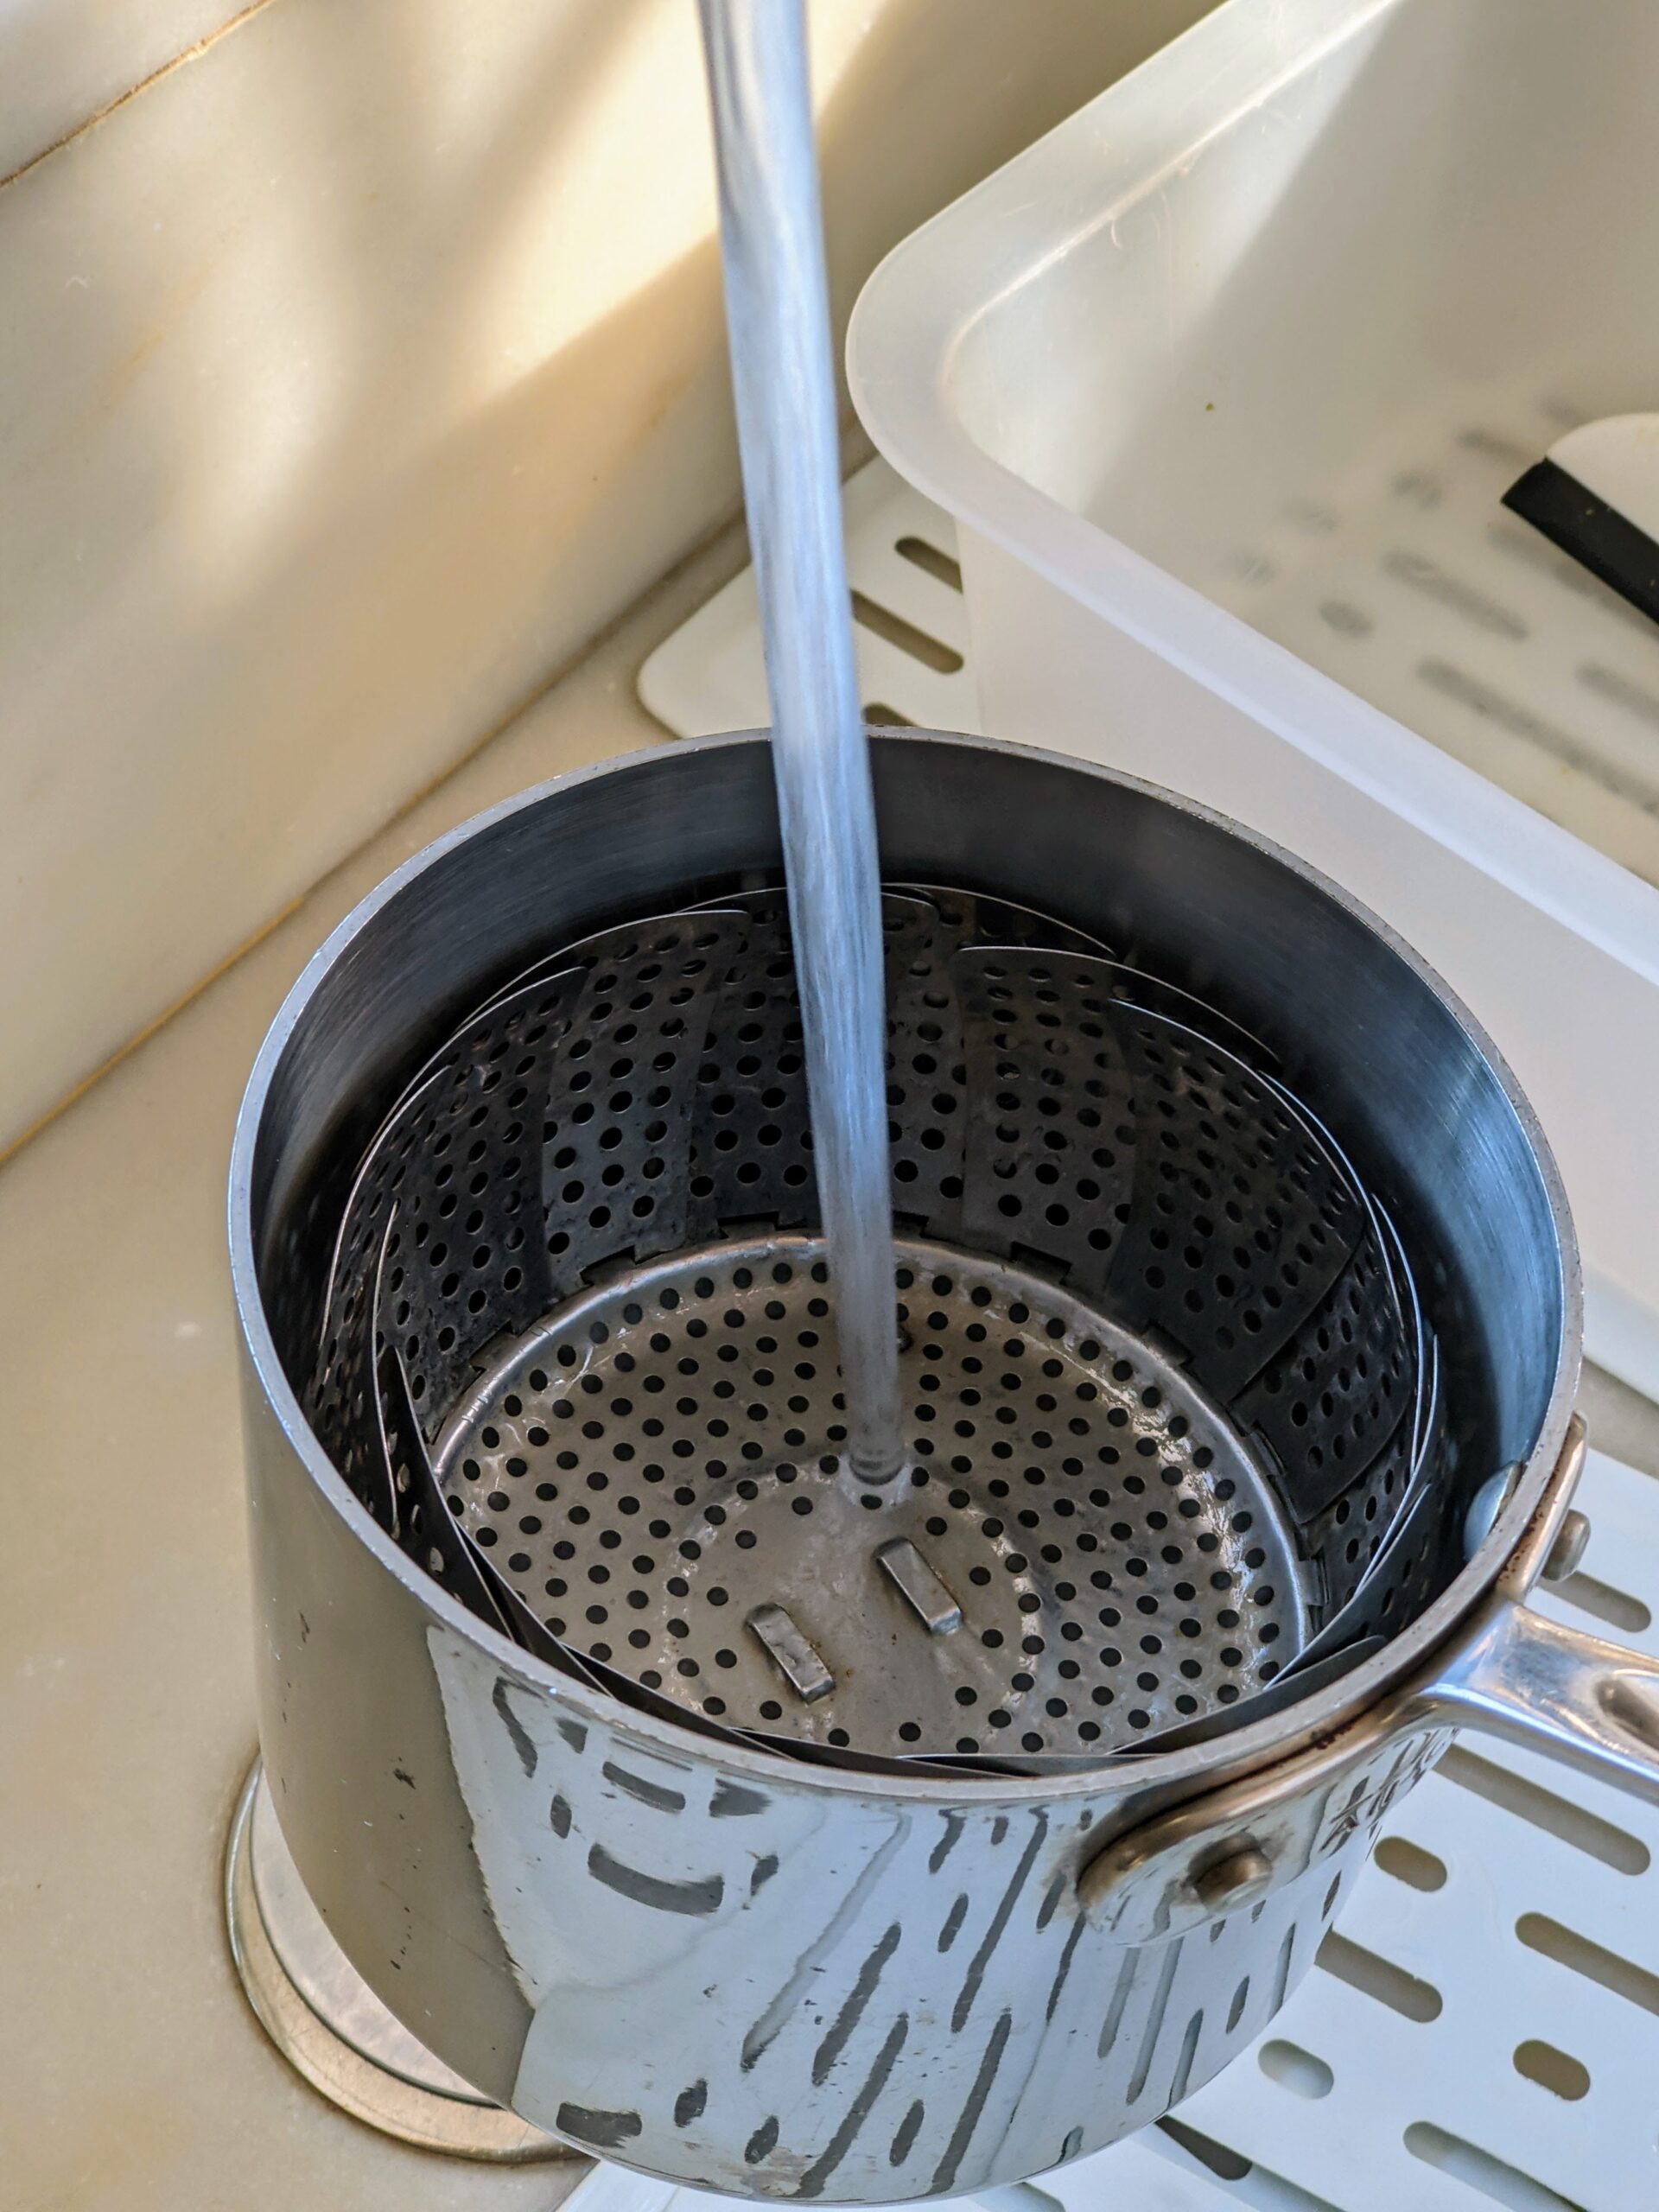
To steam the perfect egg, one needs a saucepan with a lid and a steamer.
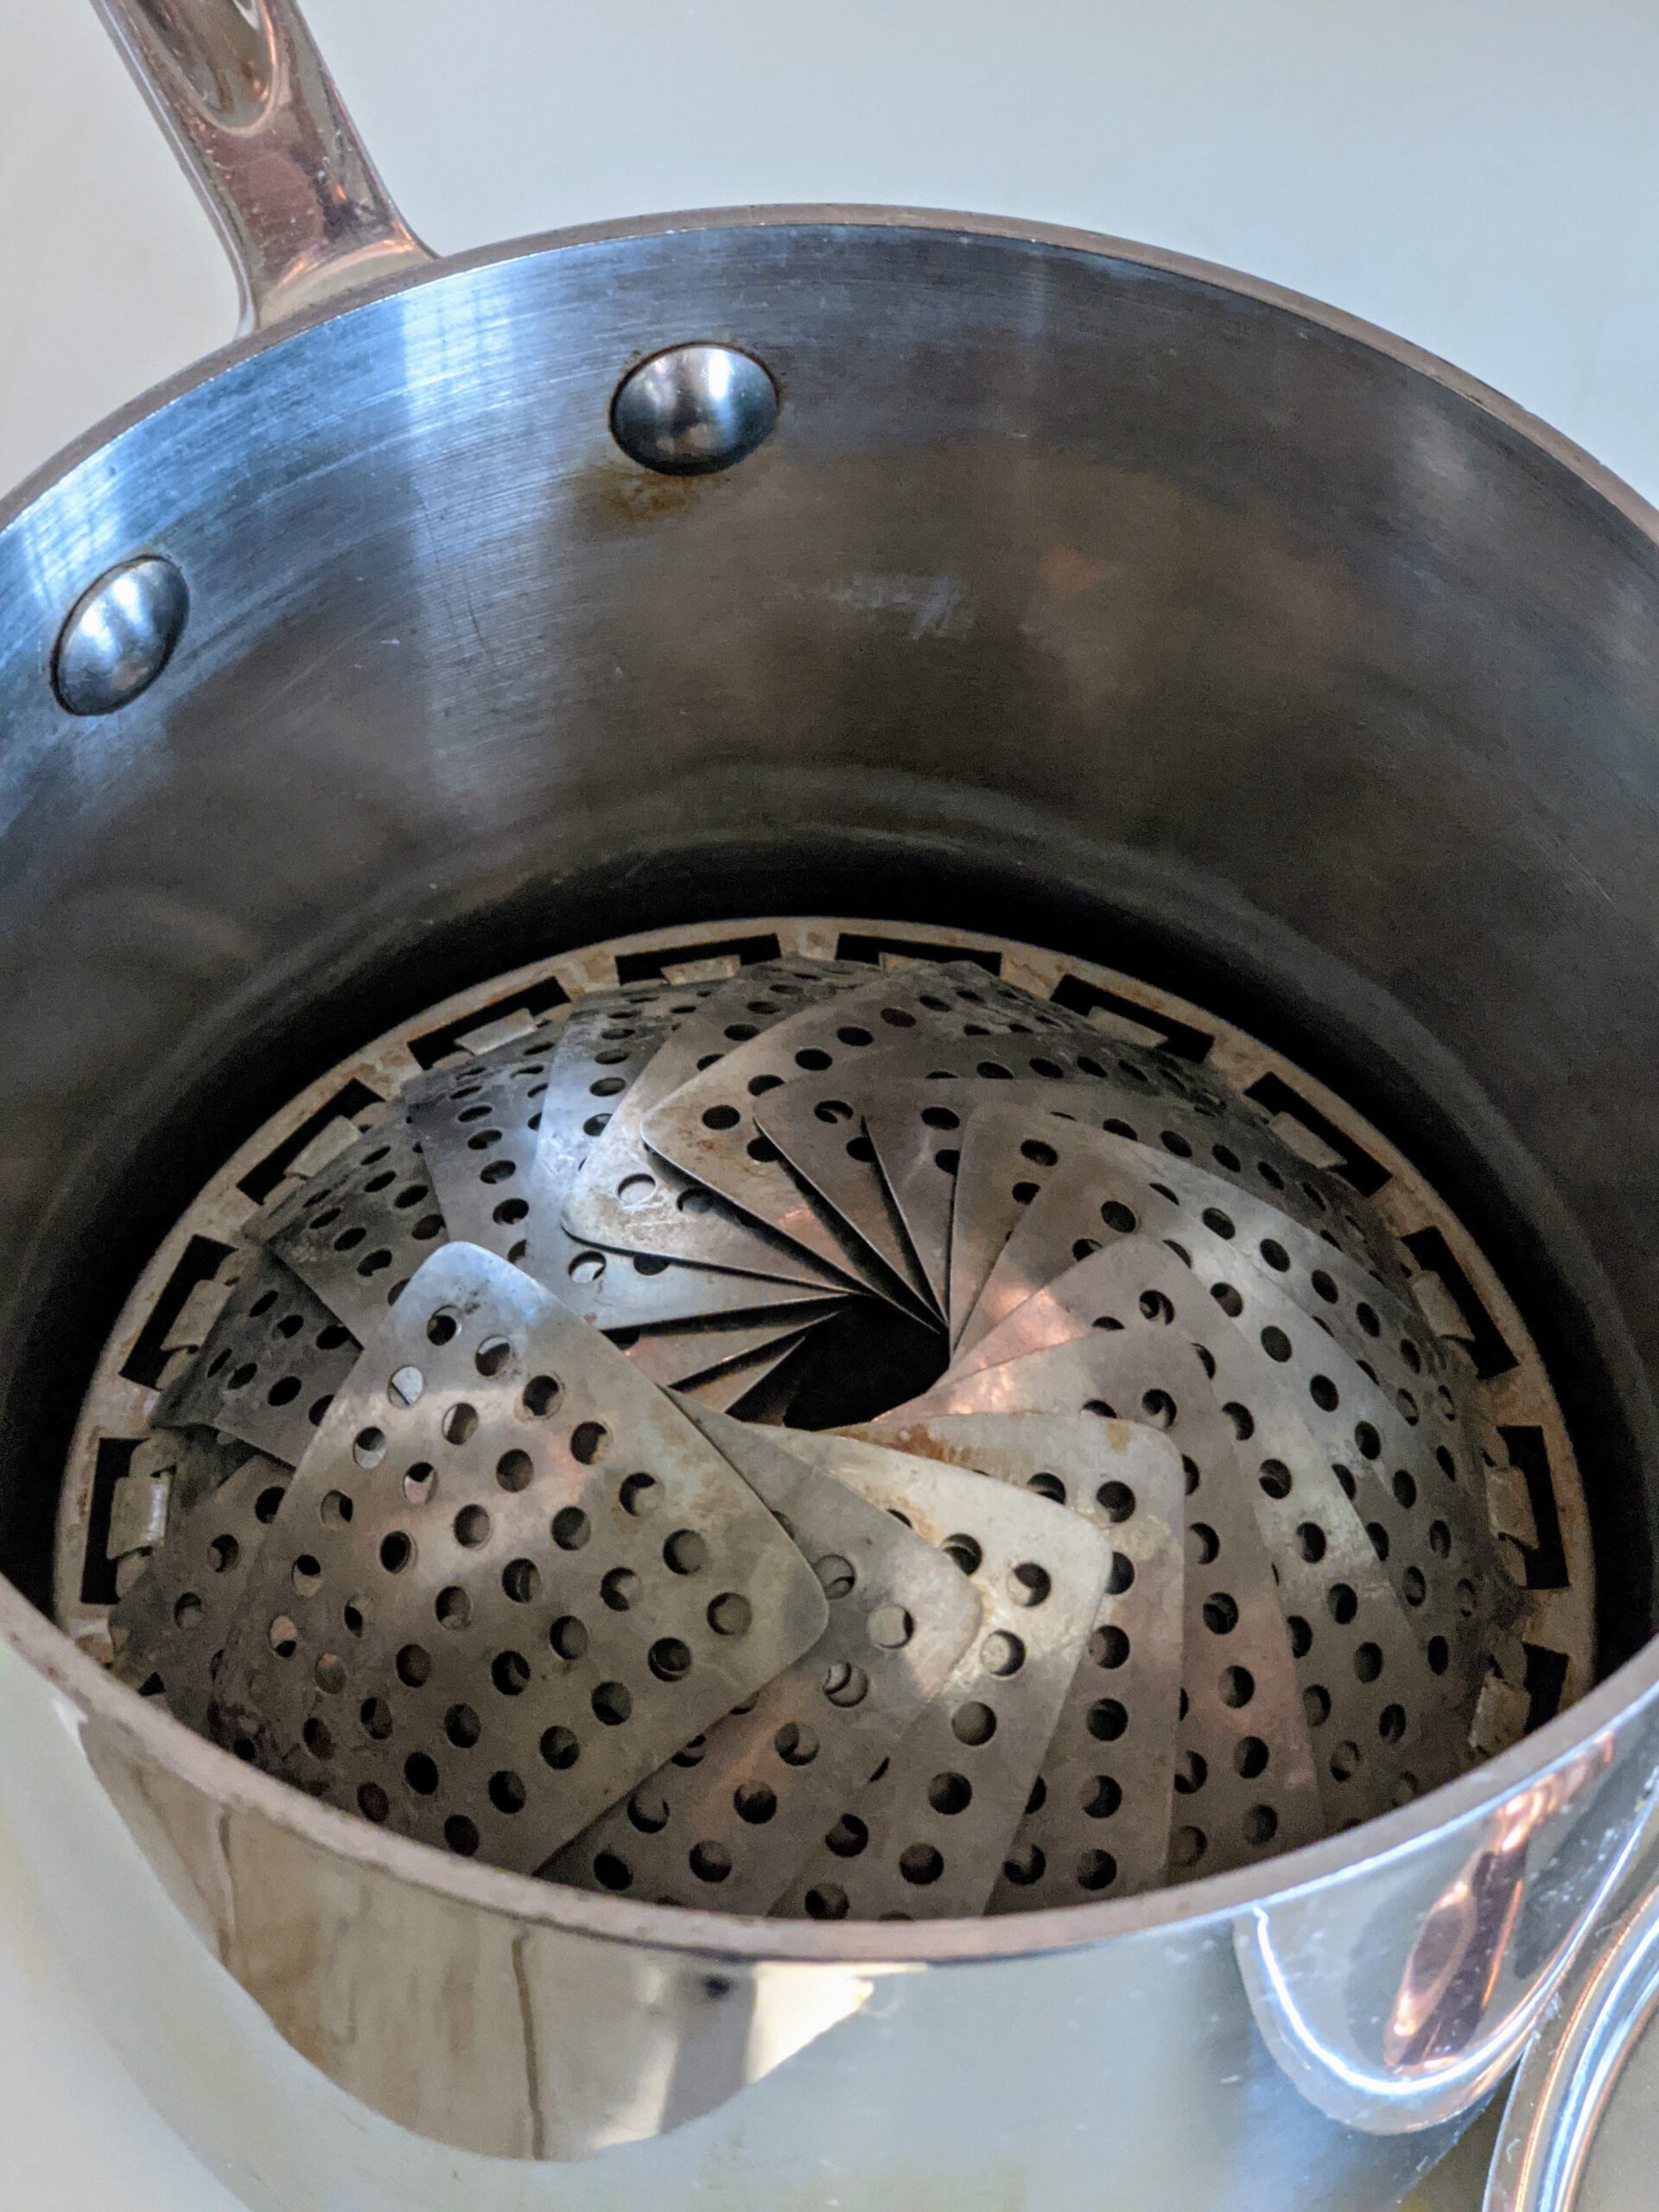
These stainless steel expandable steamer baskets are easy to find. This is my Martha Stewart steamer basket from Macy’s. The flaps collapse or open to fit various pots and pans.
Just fill the pot to the bottom of the steamer basket – about an inch-and-a-half.
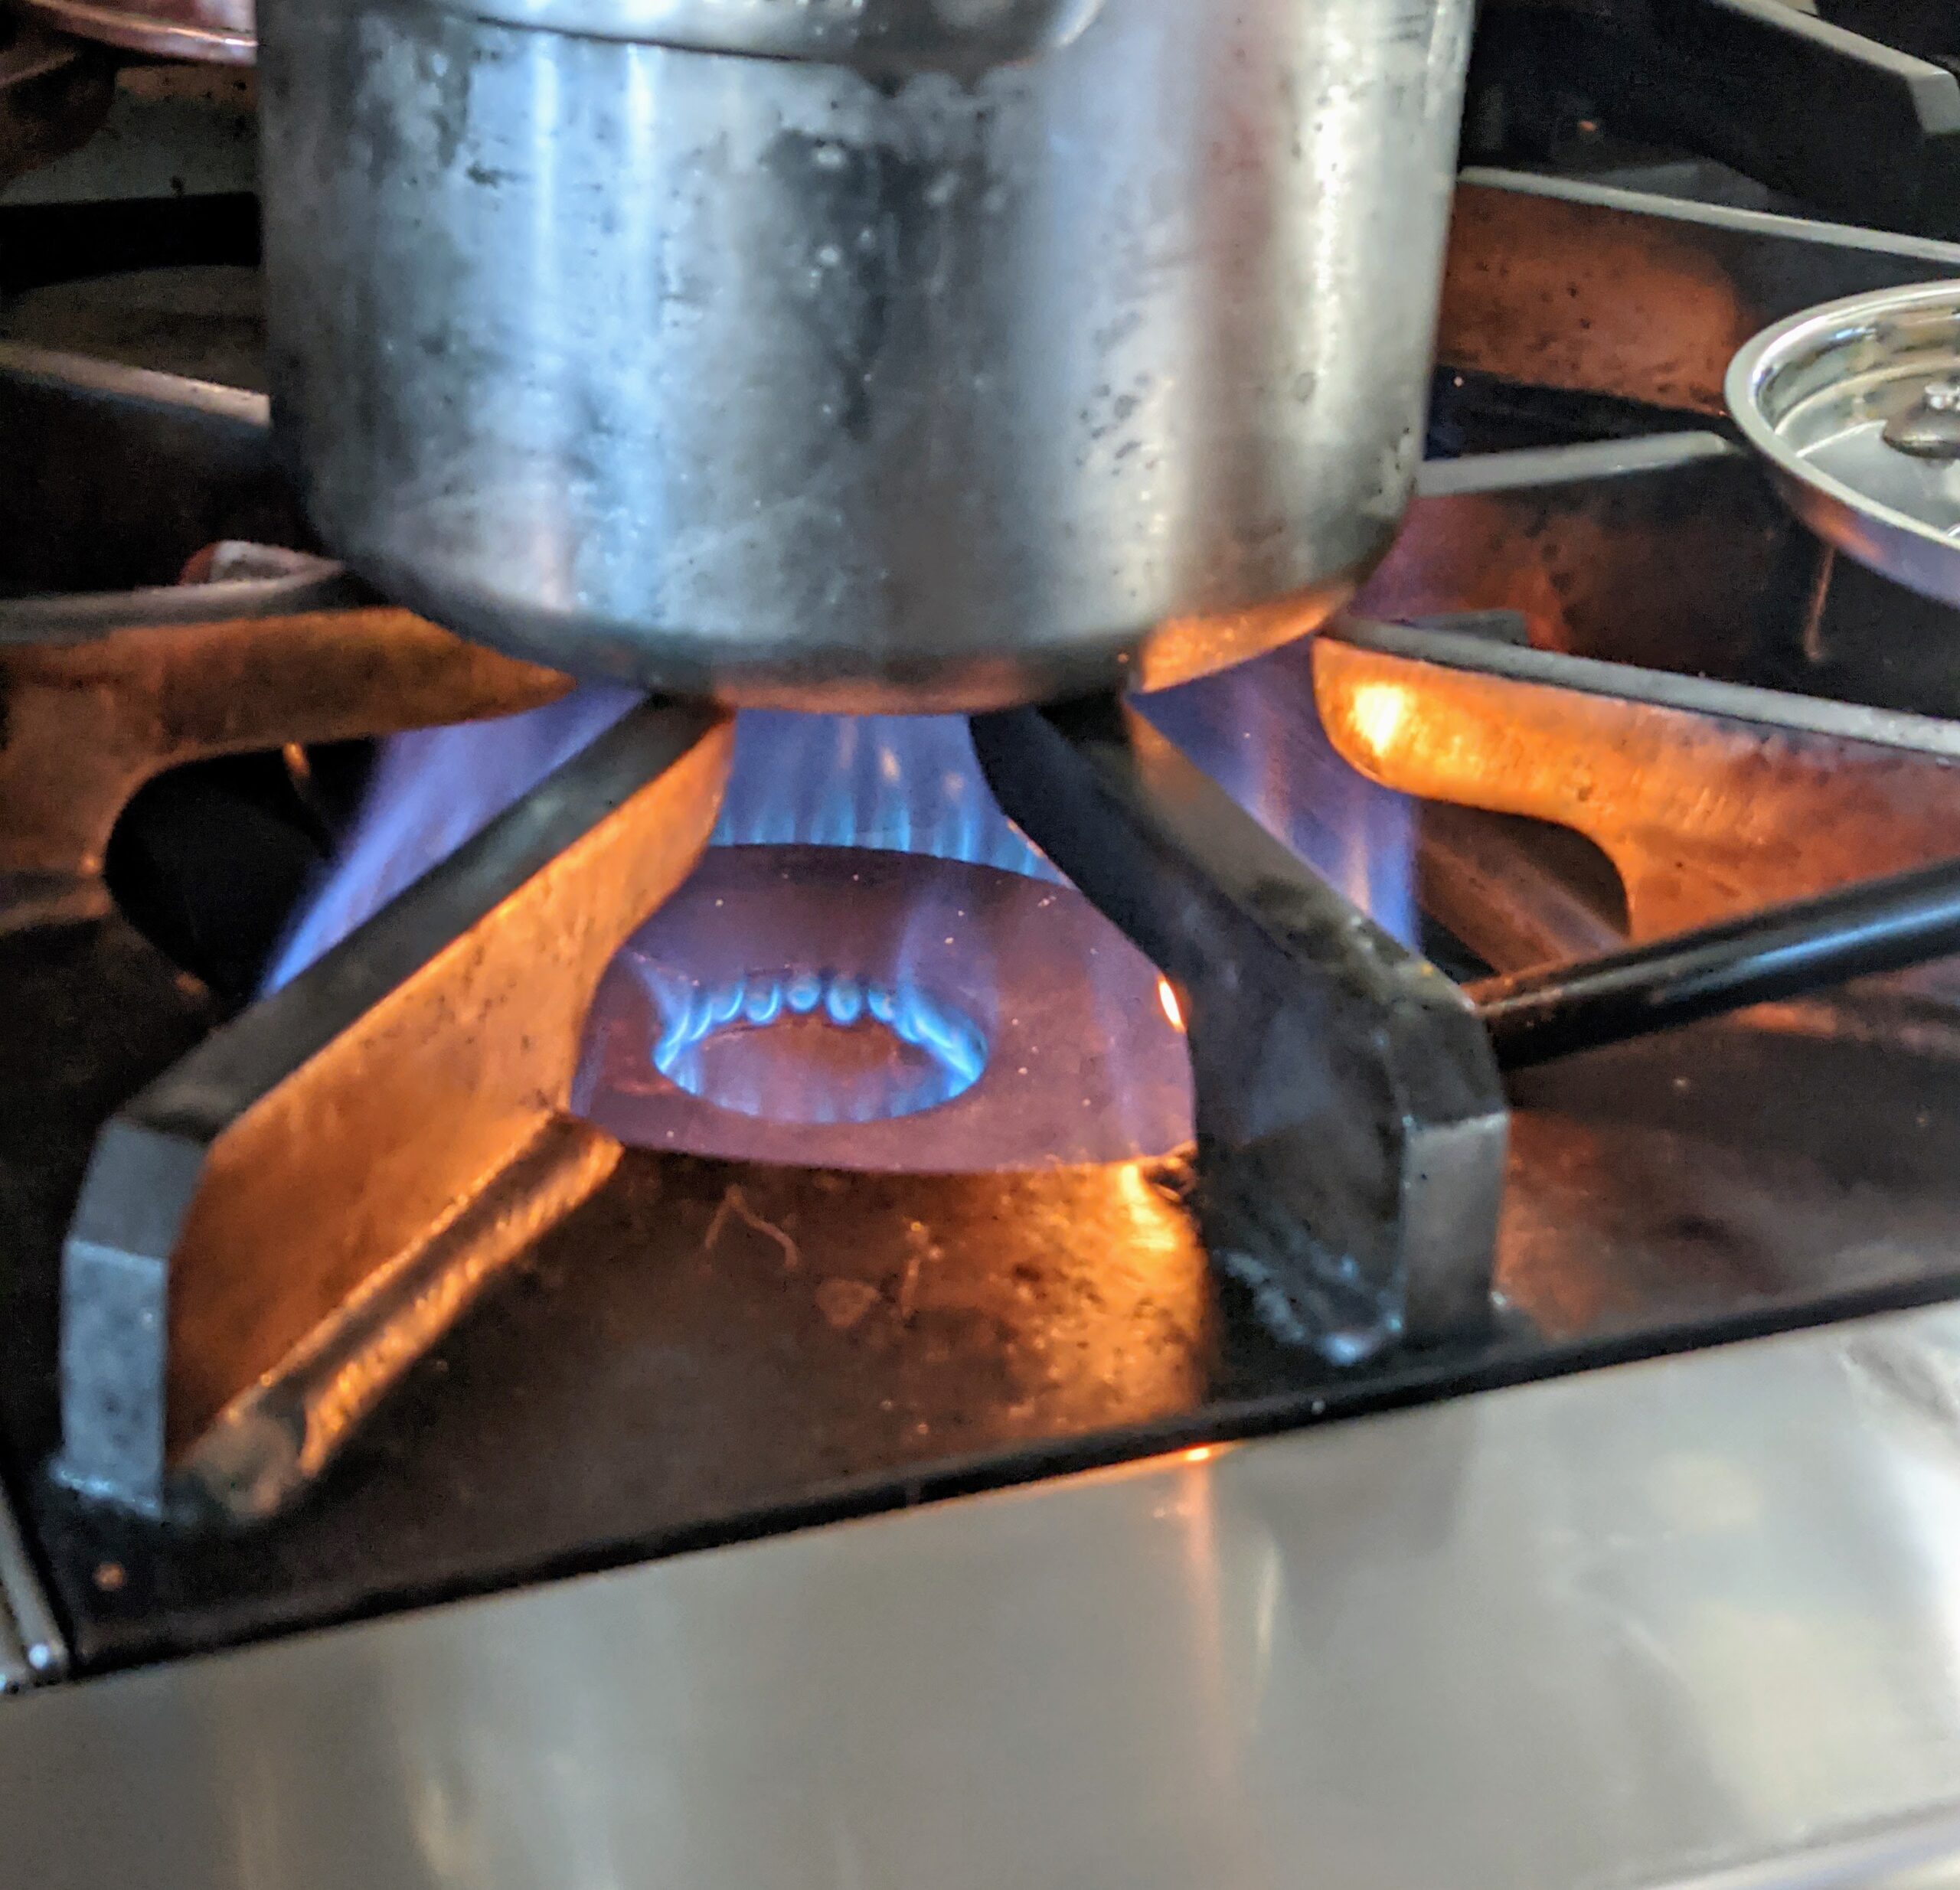
Then place the saucepan on the stove and turn it on high to boil.
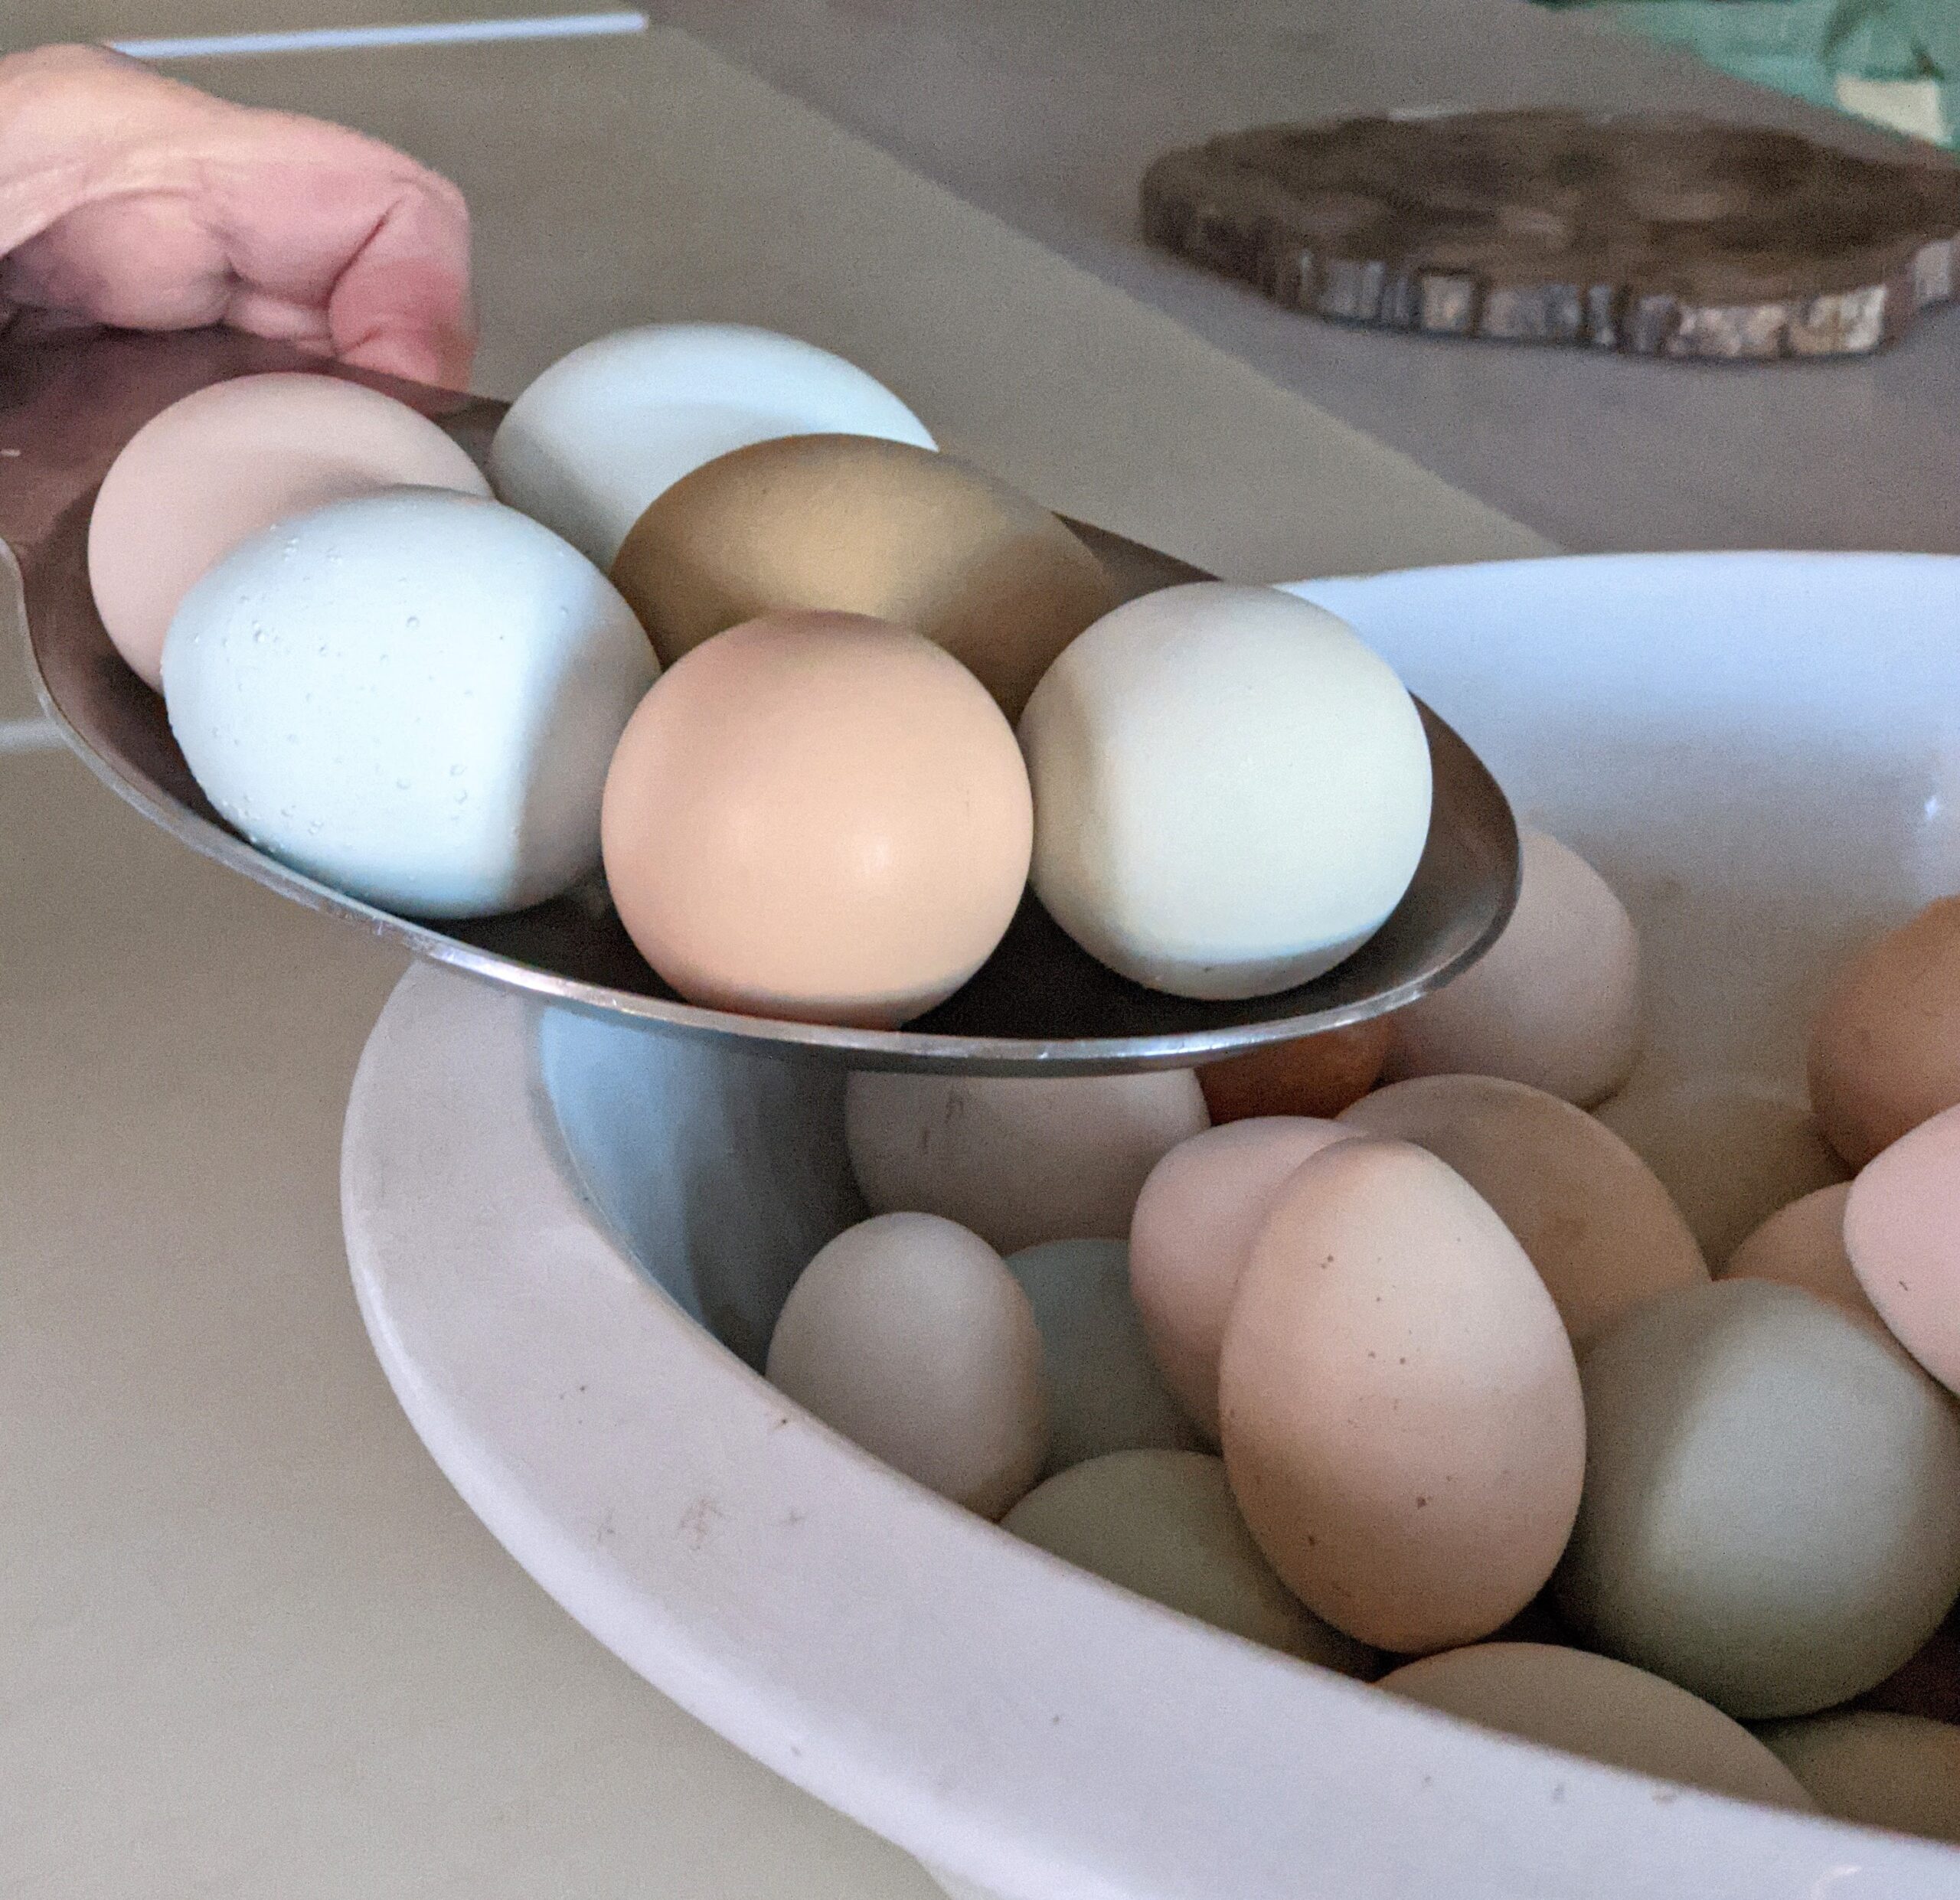
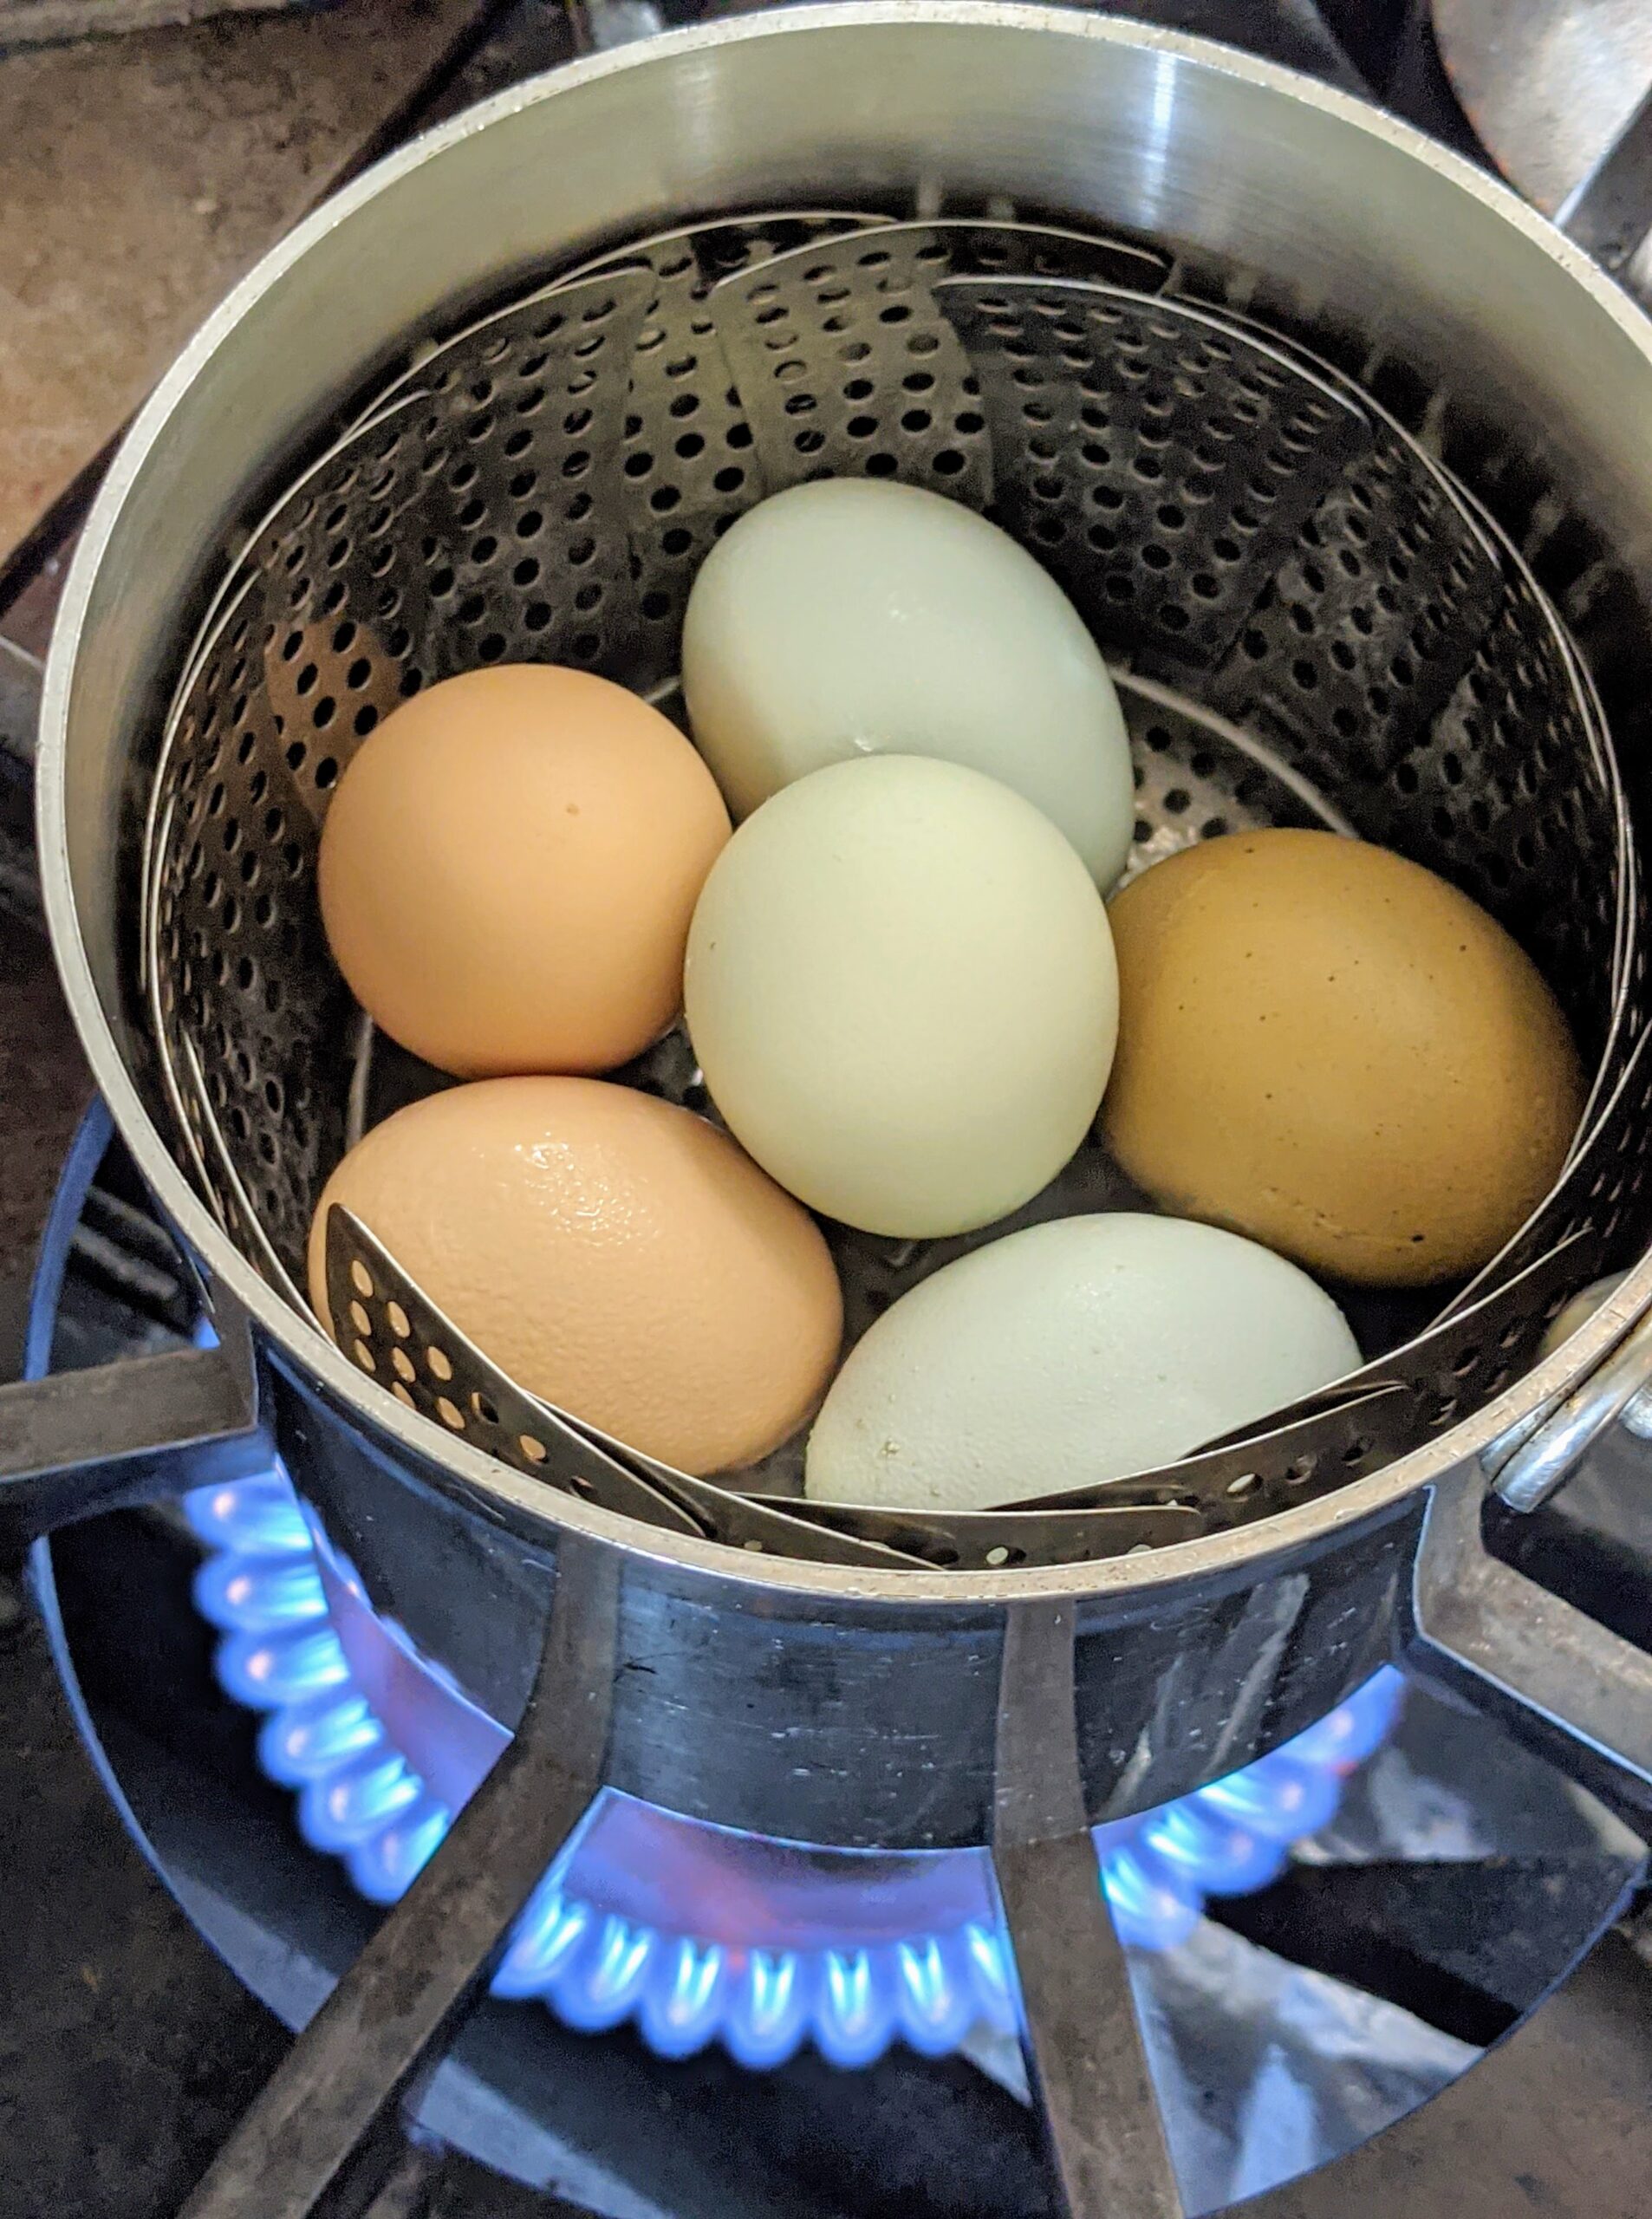
While waiting, select your eggs. I chose six large eggs. I do not refrigerate my eggs. Freshly laid eggs can be left at room temperature for at least a month.
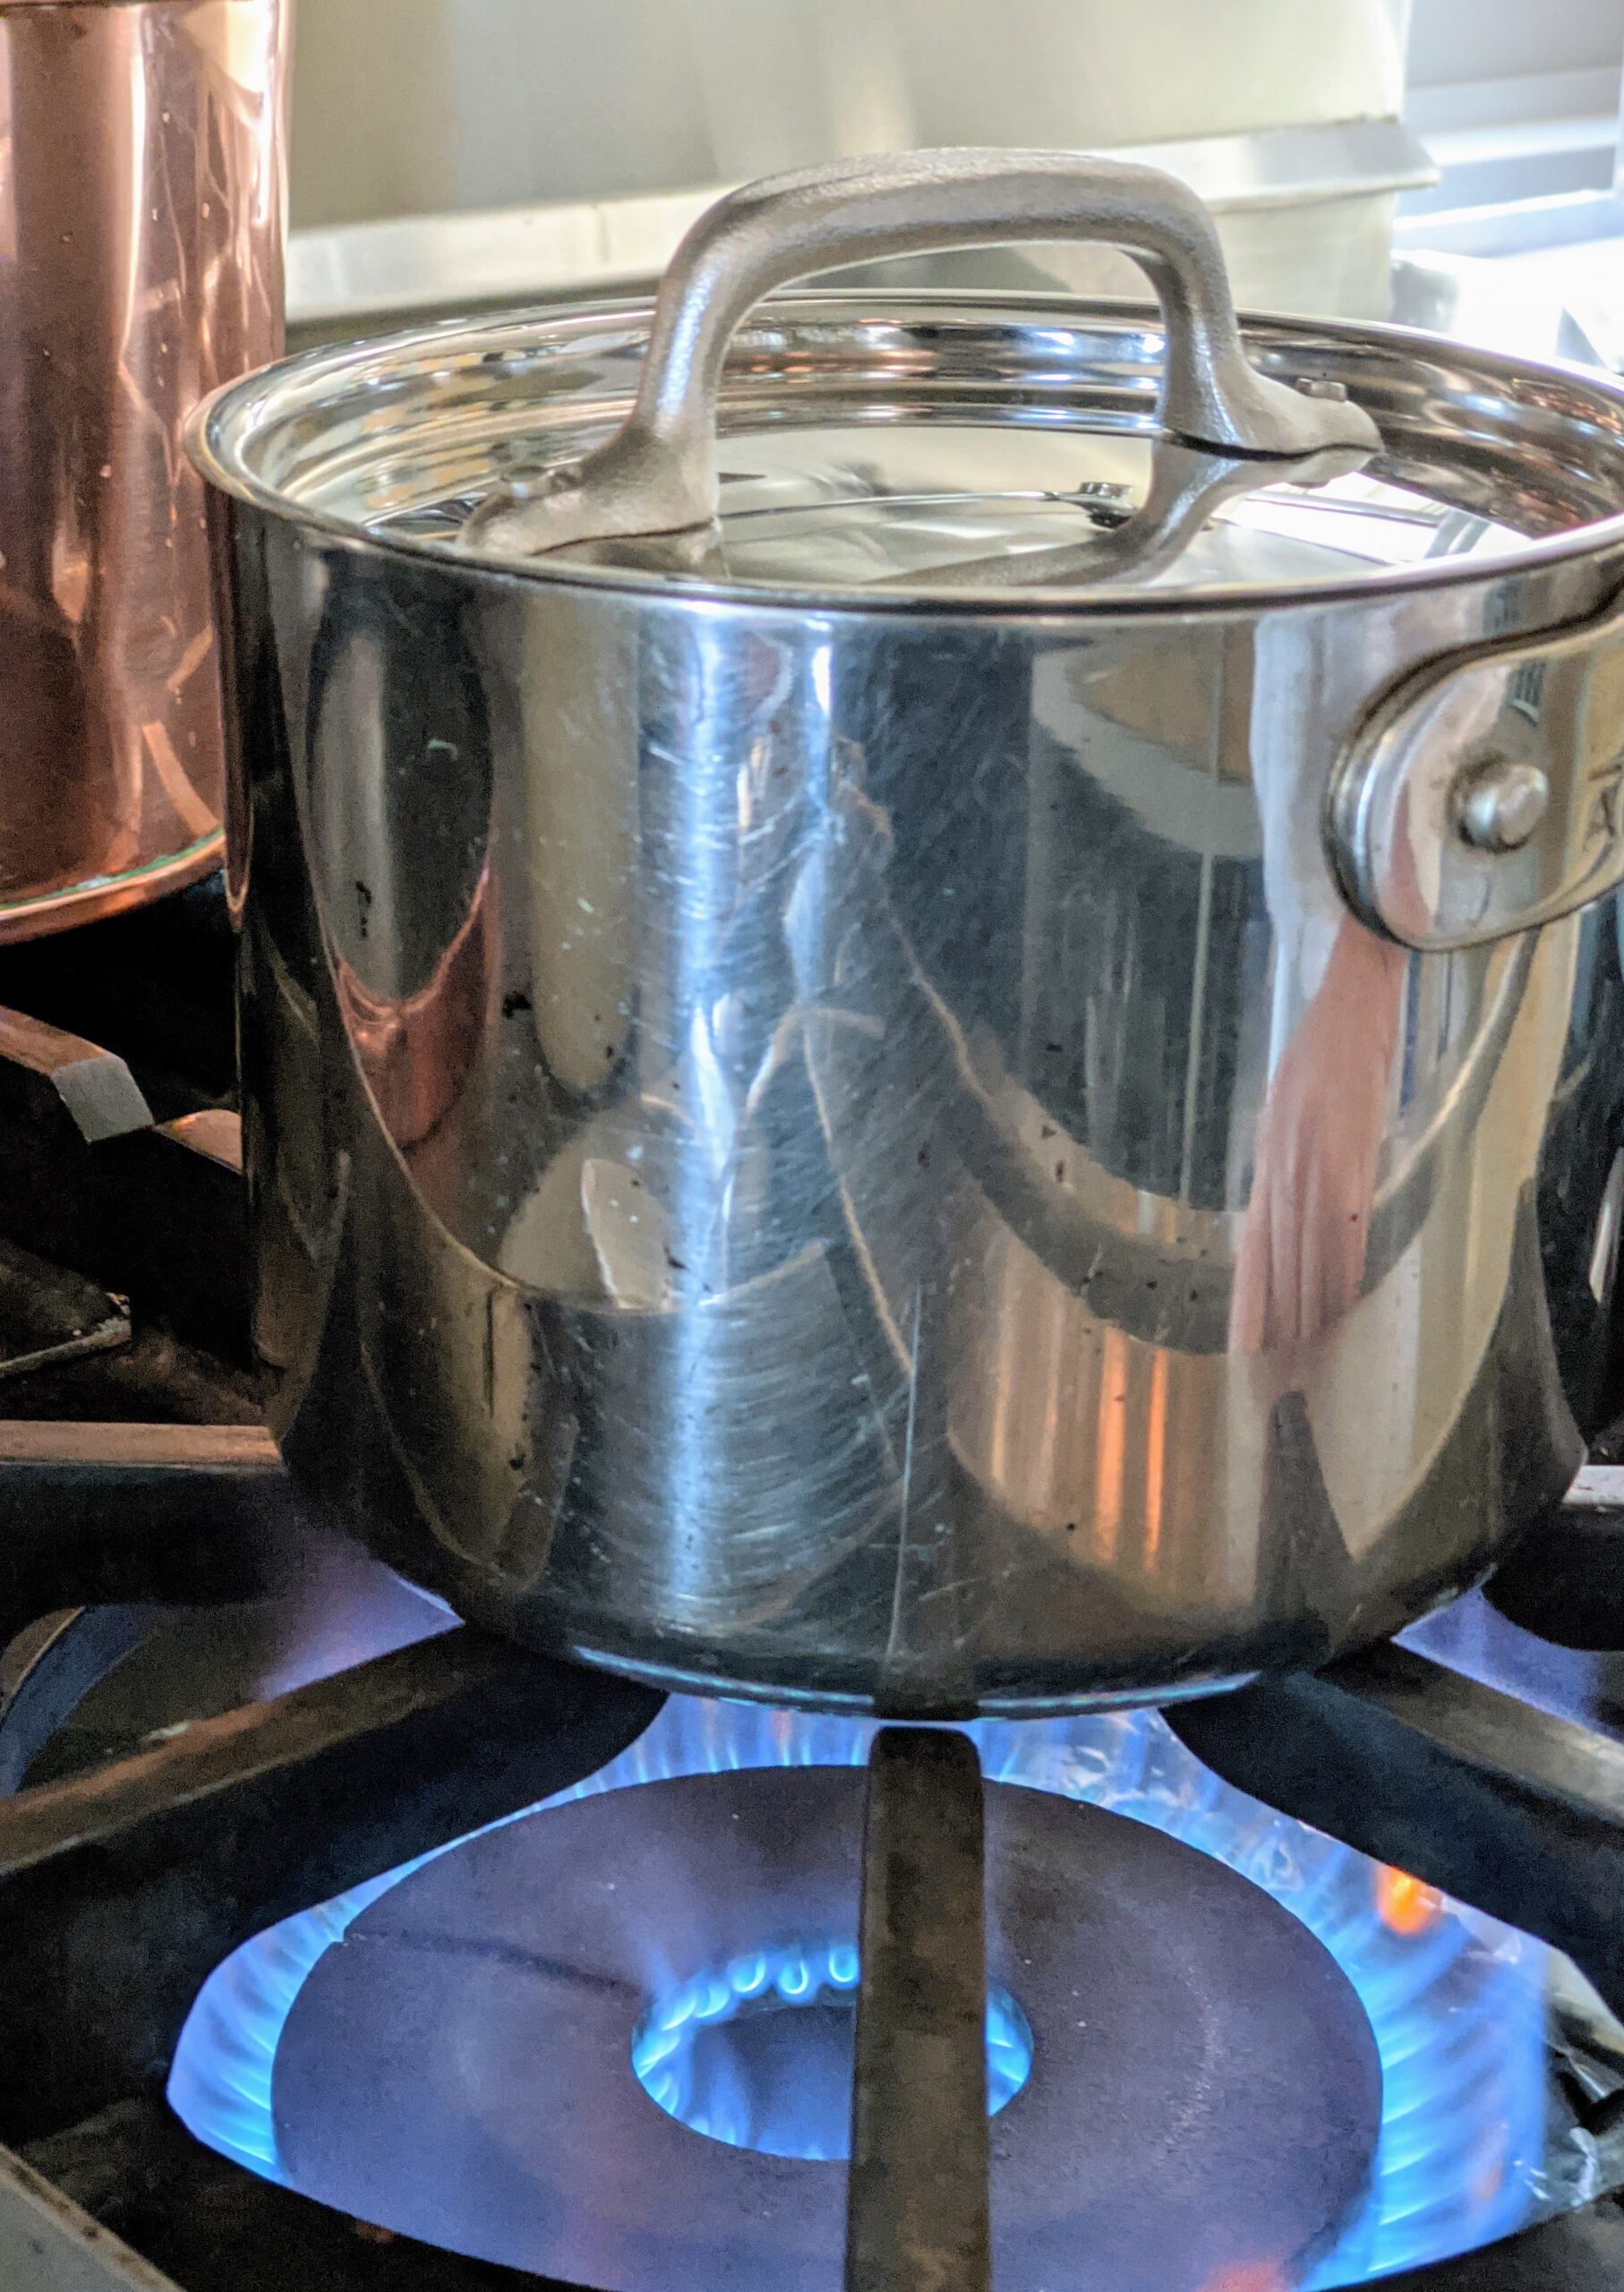
The water is just about boiling. A covered pot boils faster than an uncovered one because the cooling presence of the room’s atmosphere is greatly diminished. And notice, the lid is askew on top of the pot – just so it doesn’t boil-over.
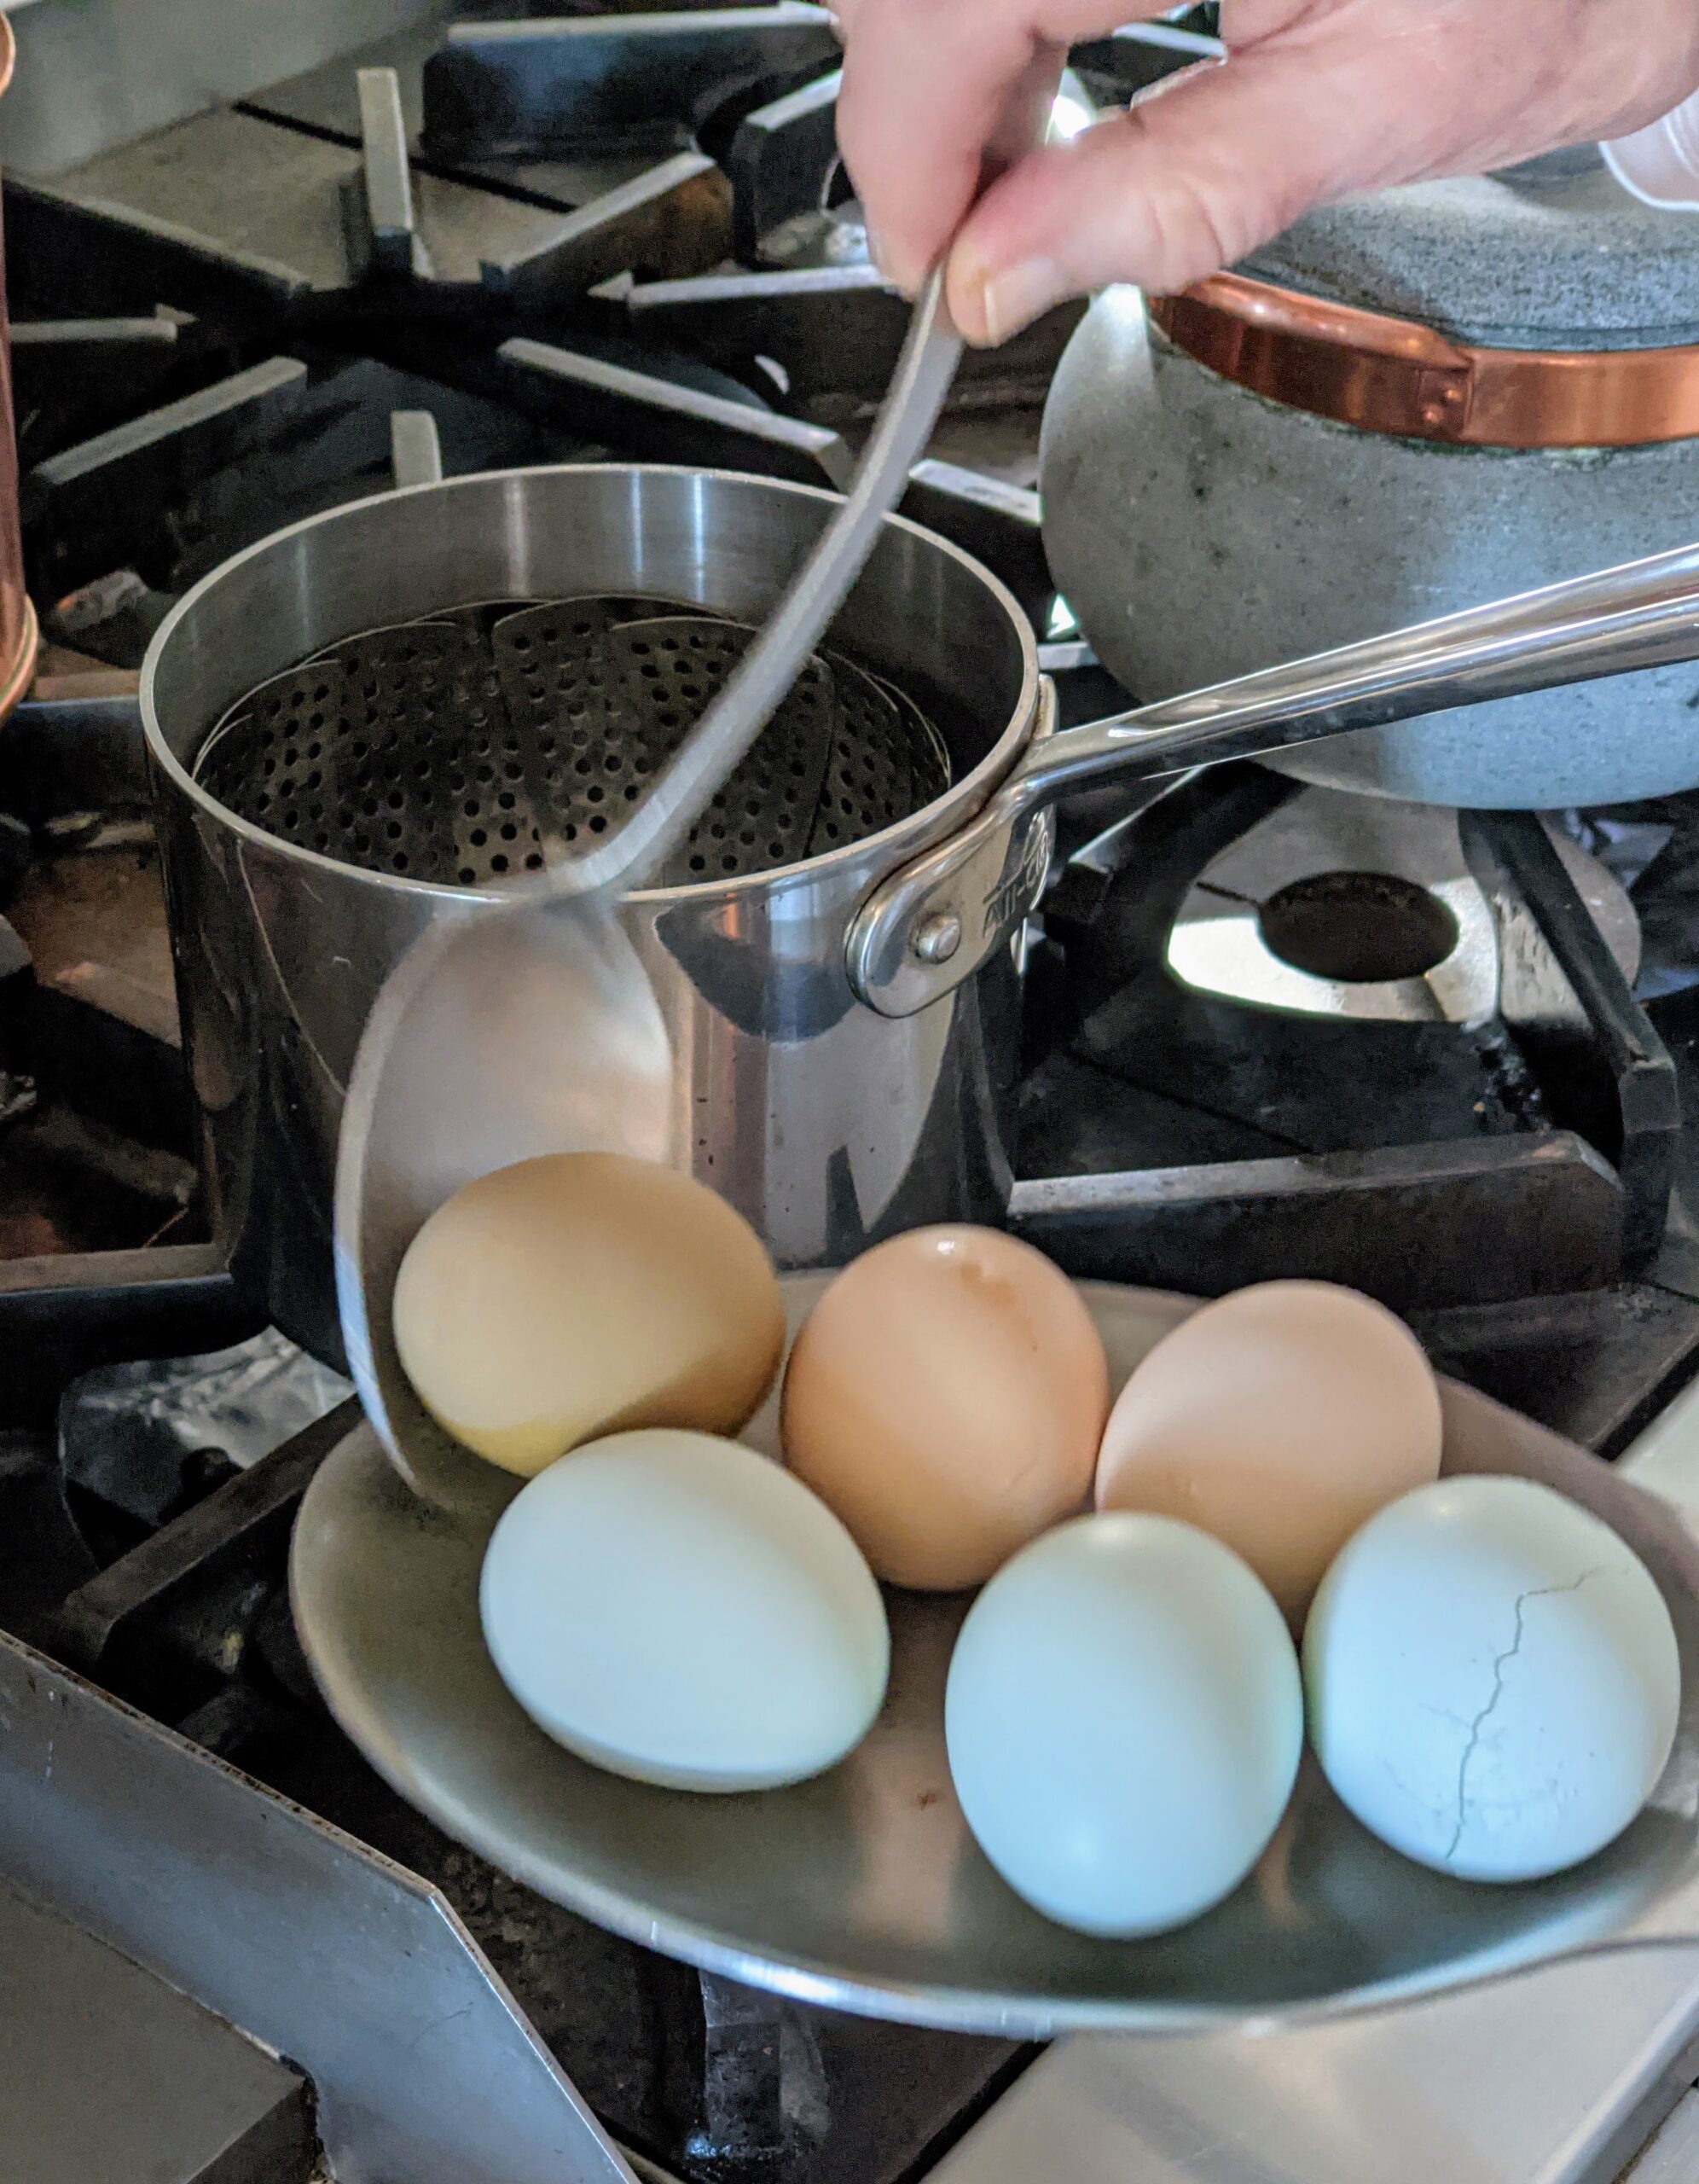
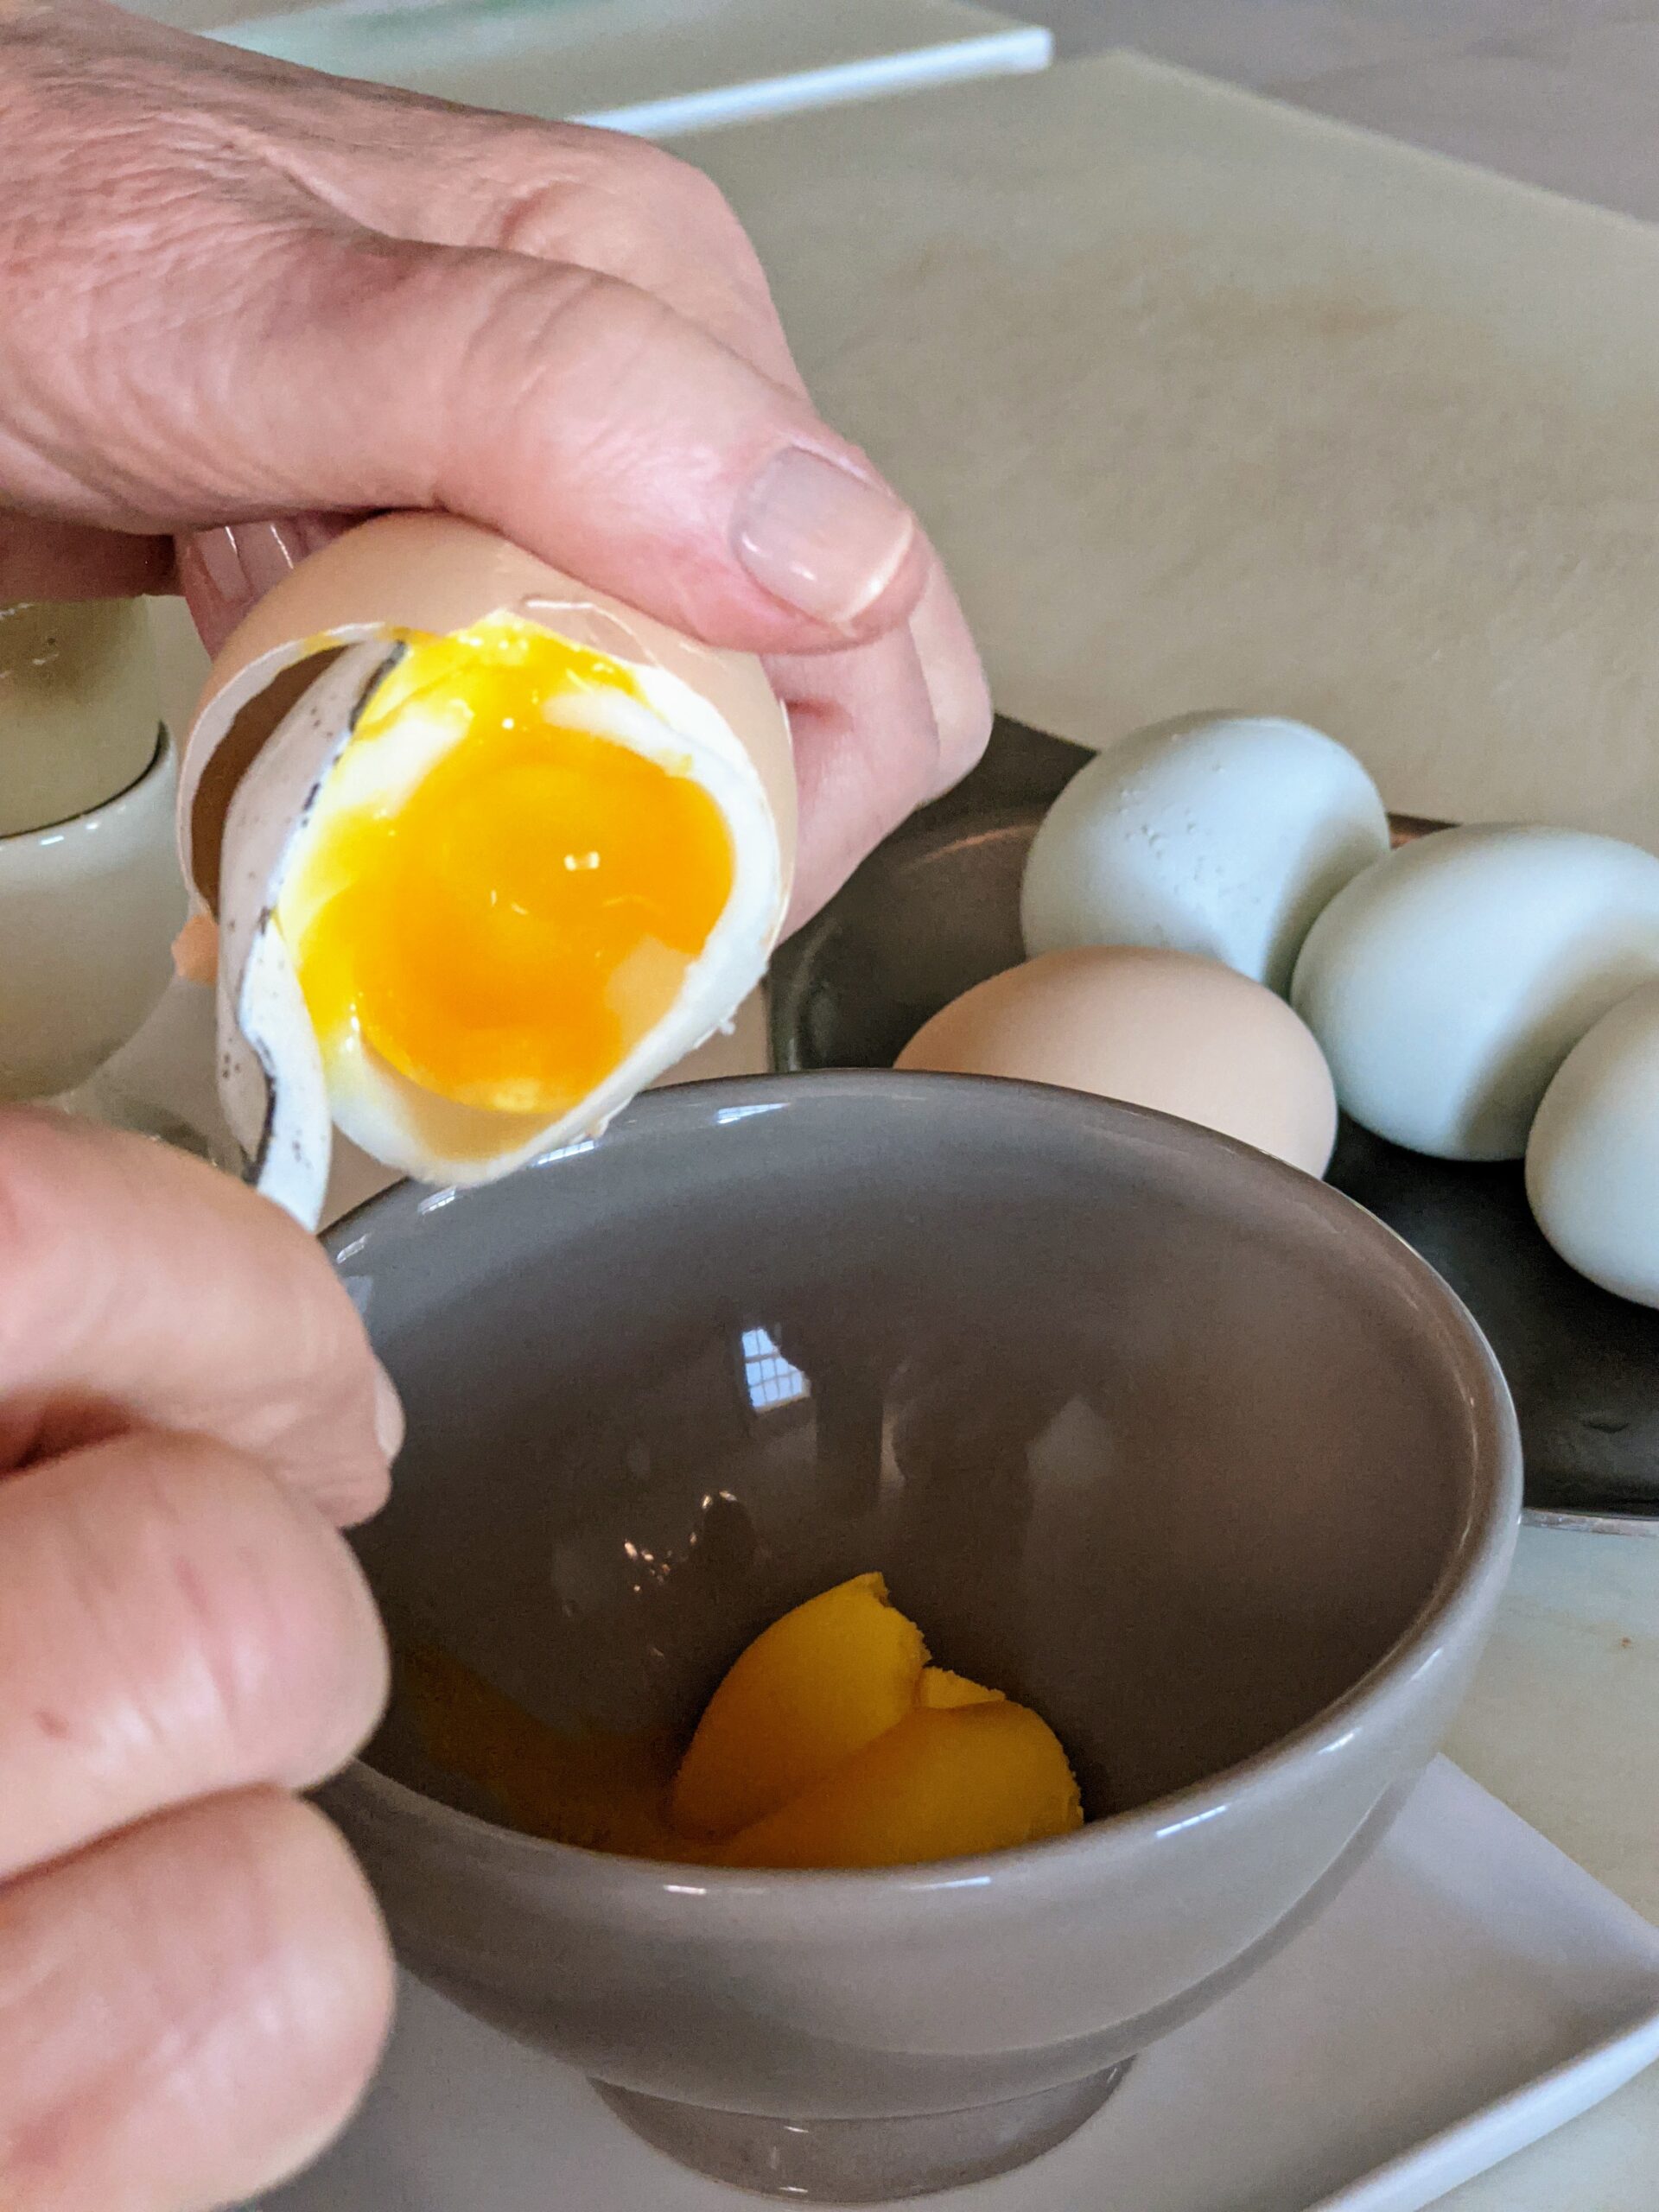
I’m using a large spoon to carefully move the eggs into the pot.
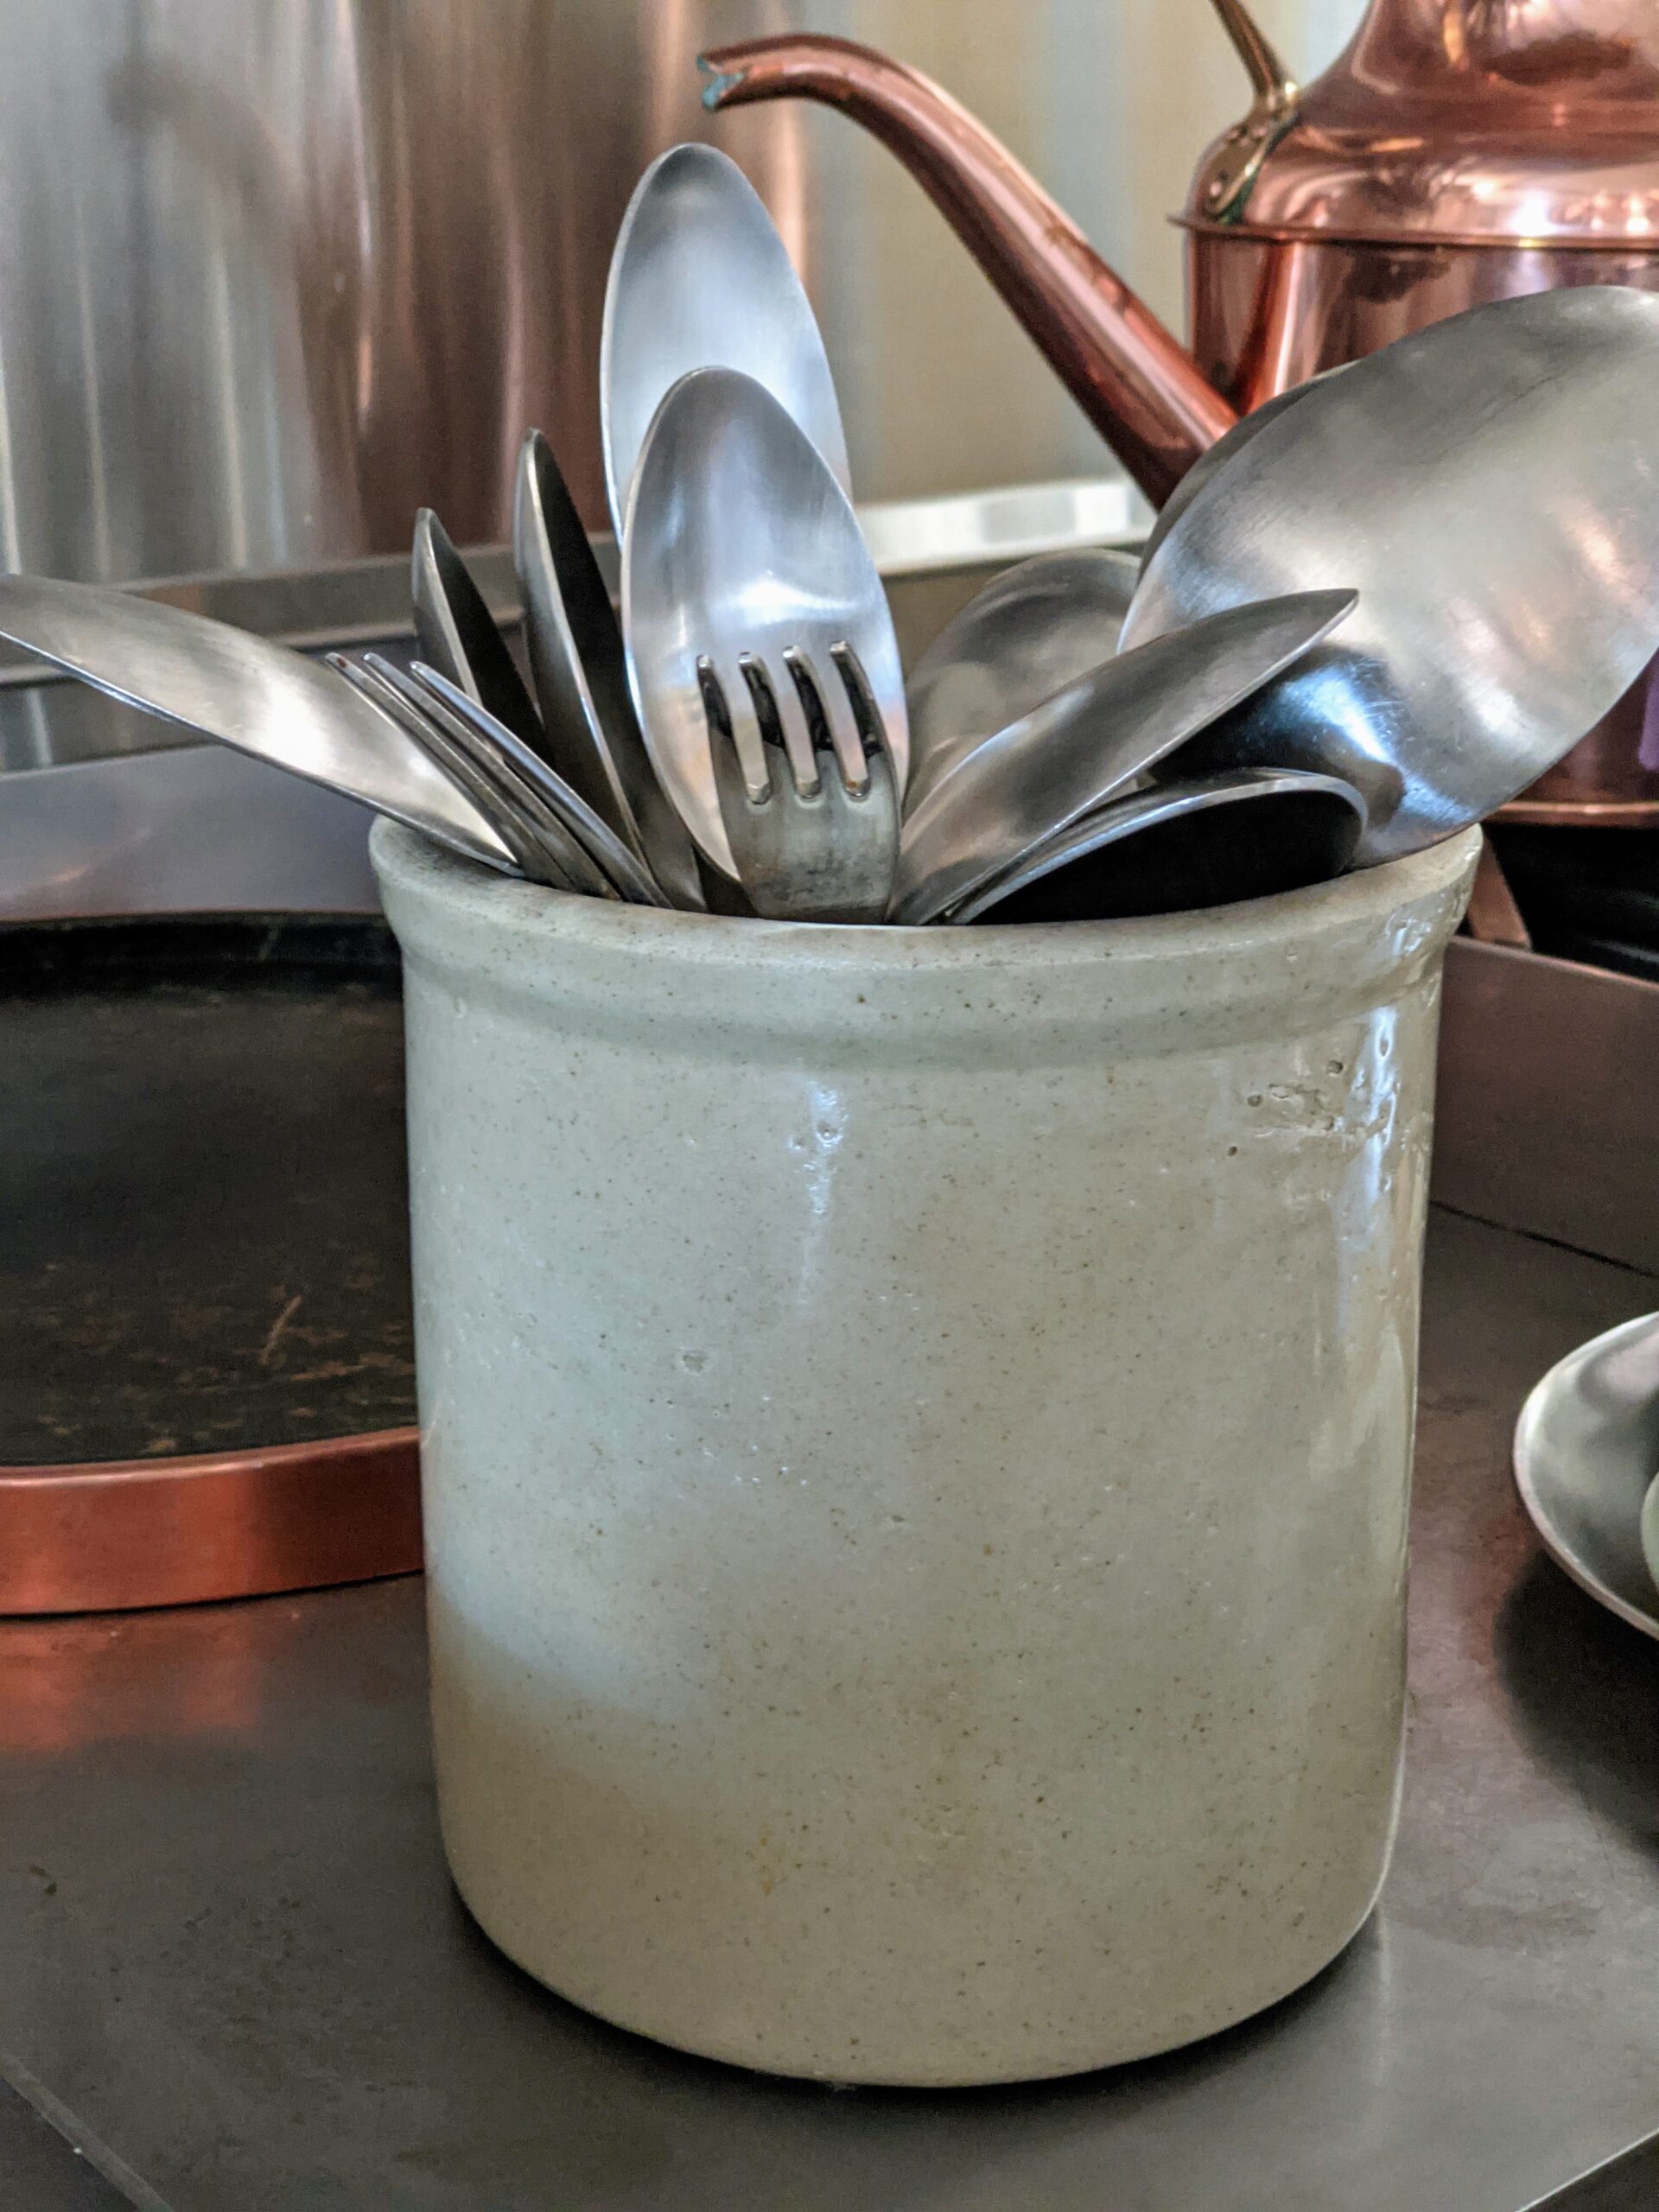
I keep a crock near my stove filled with tasting spoons – large spoons intended to lift out about a 1/2 tablespoon of liquid from a pan or pot for sampling. I also keep some tasting forks close at hand.
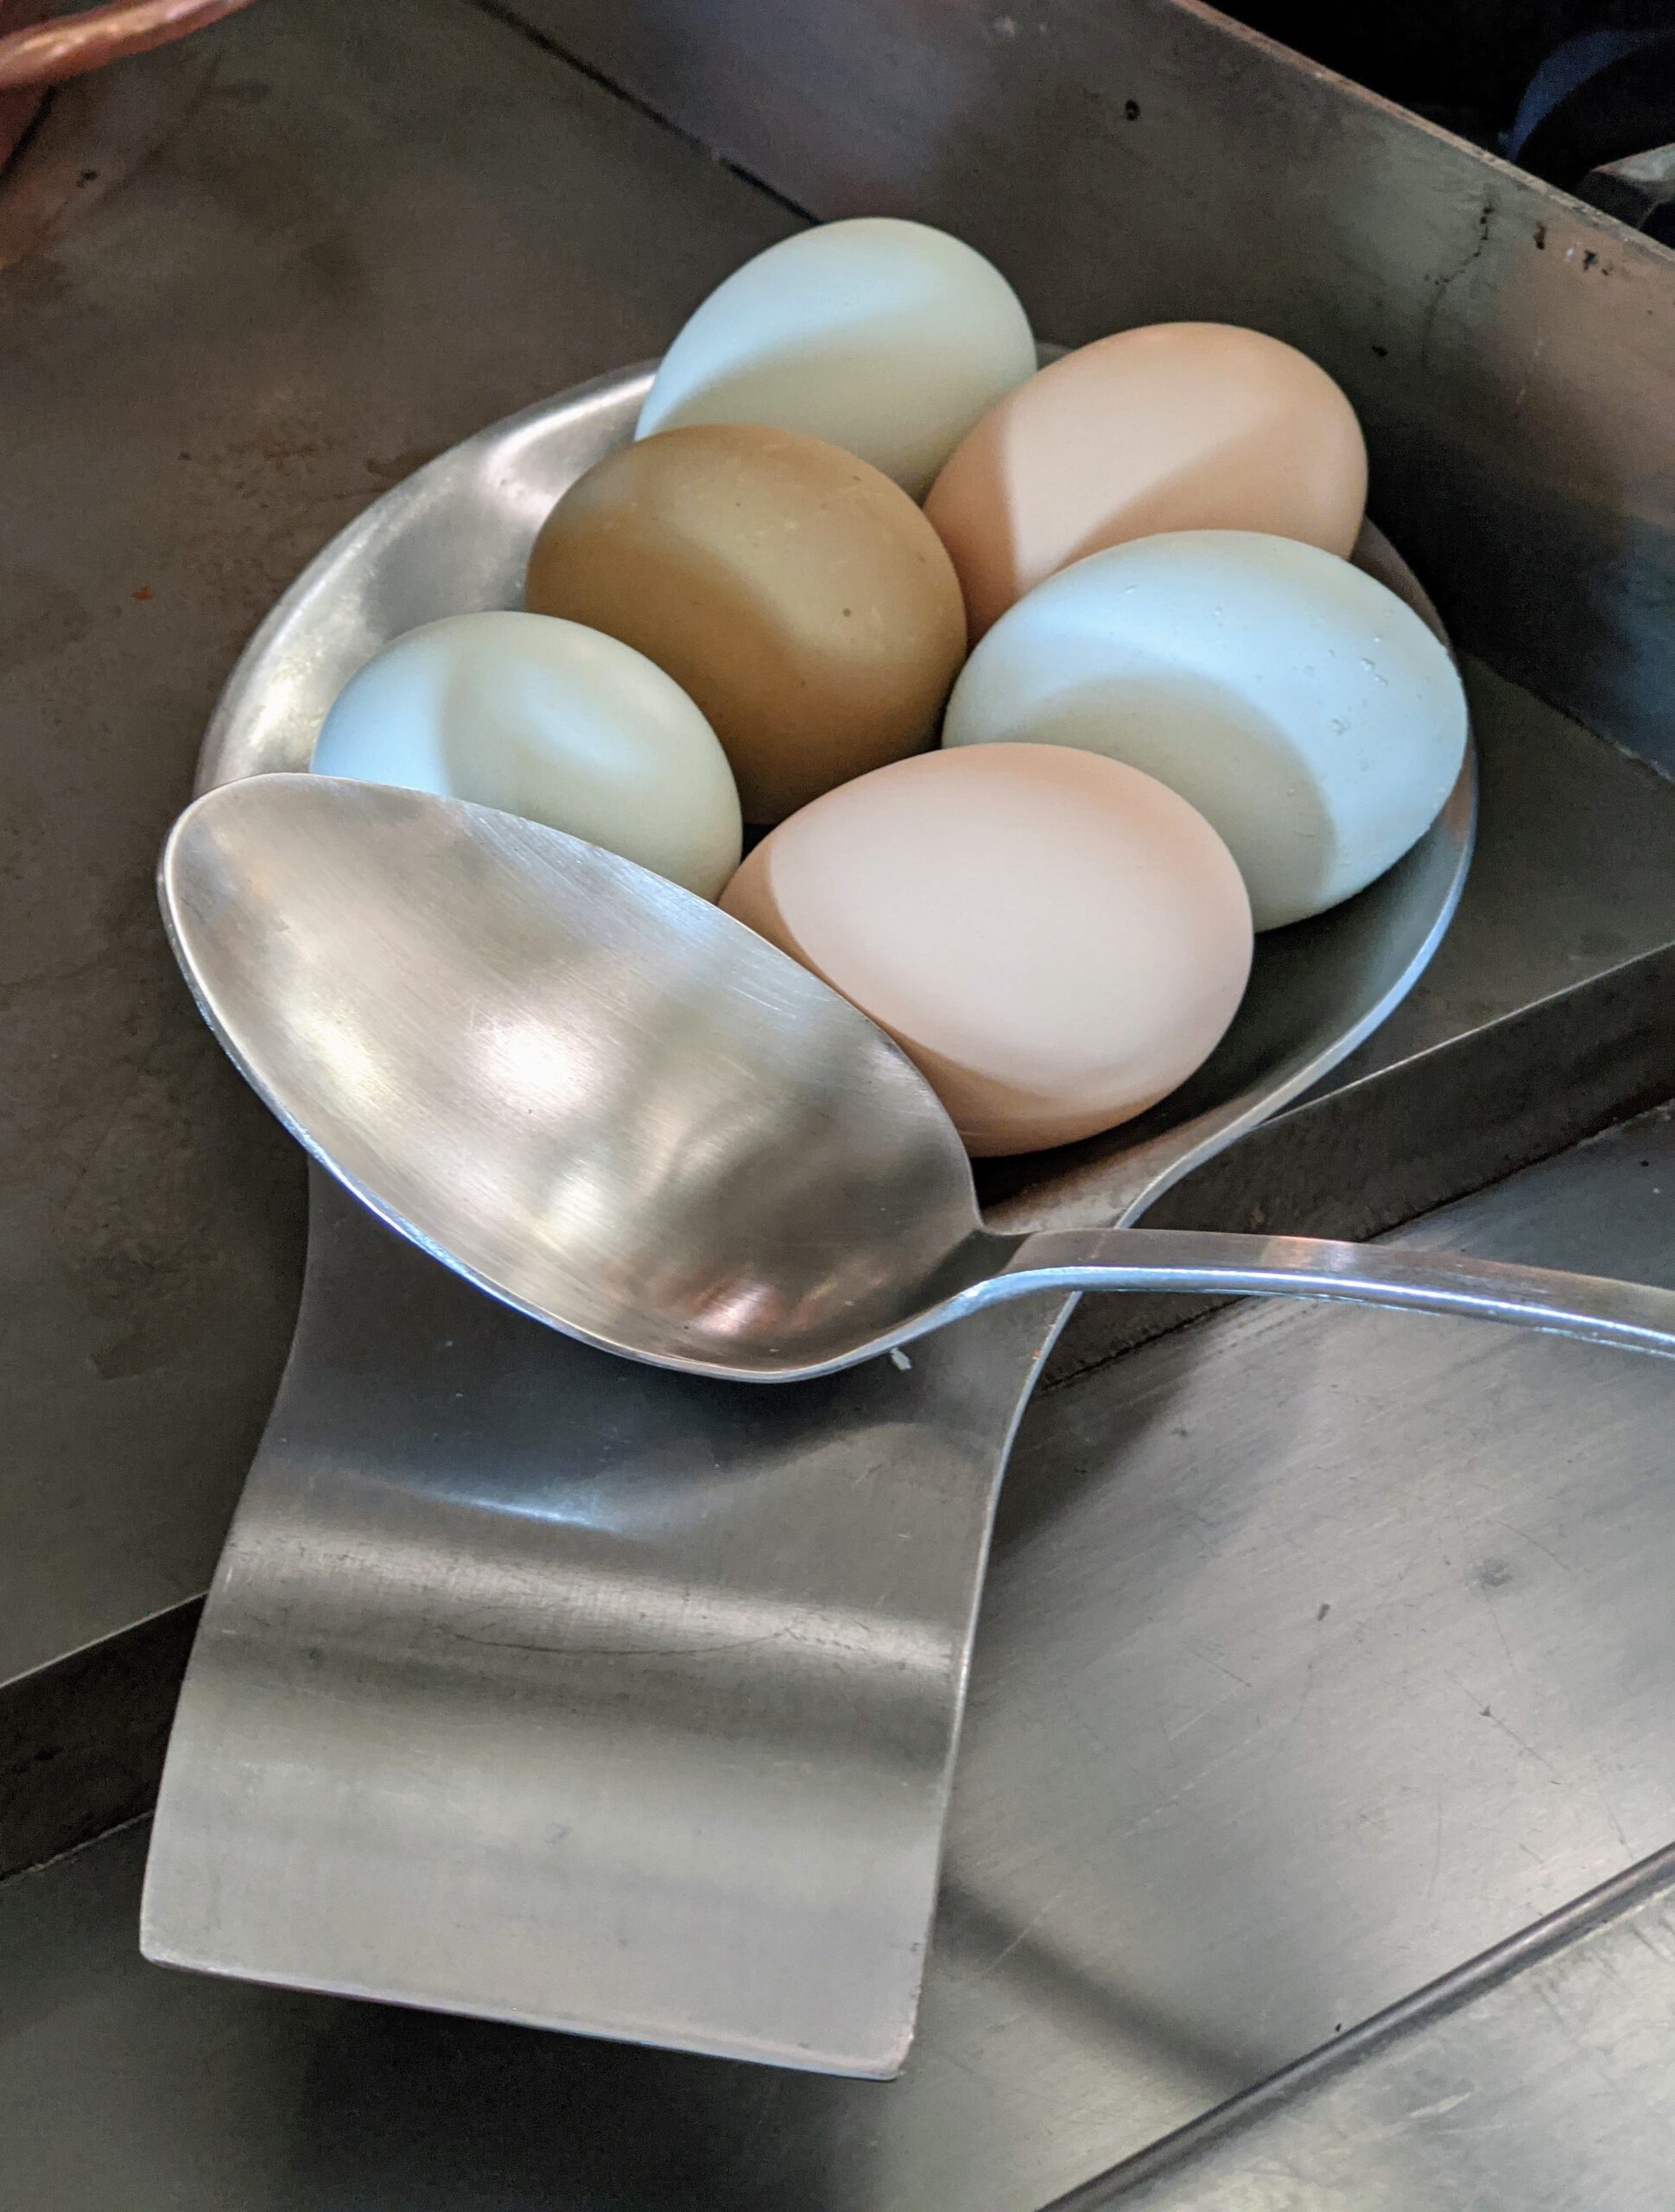
Place the eggs carefully into the steamer – six is enough for one layer of eggs in this pot. Try not to stack the eggs if possible.
Set the timer to four-and-a-half minutes.
Place the lid properly on the pot and wait.
Remove the eggs as soon as the timer goes off. Remember, these are large eggs, but depending on the size of the eggs and how one likes them, this time may need some adjusting.
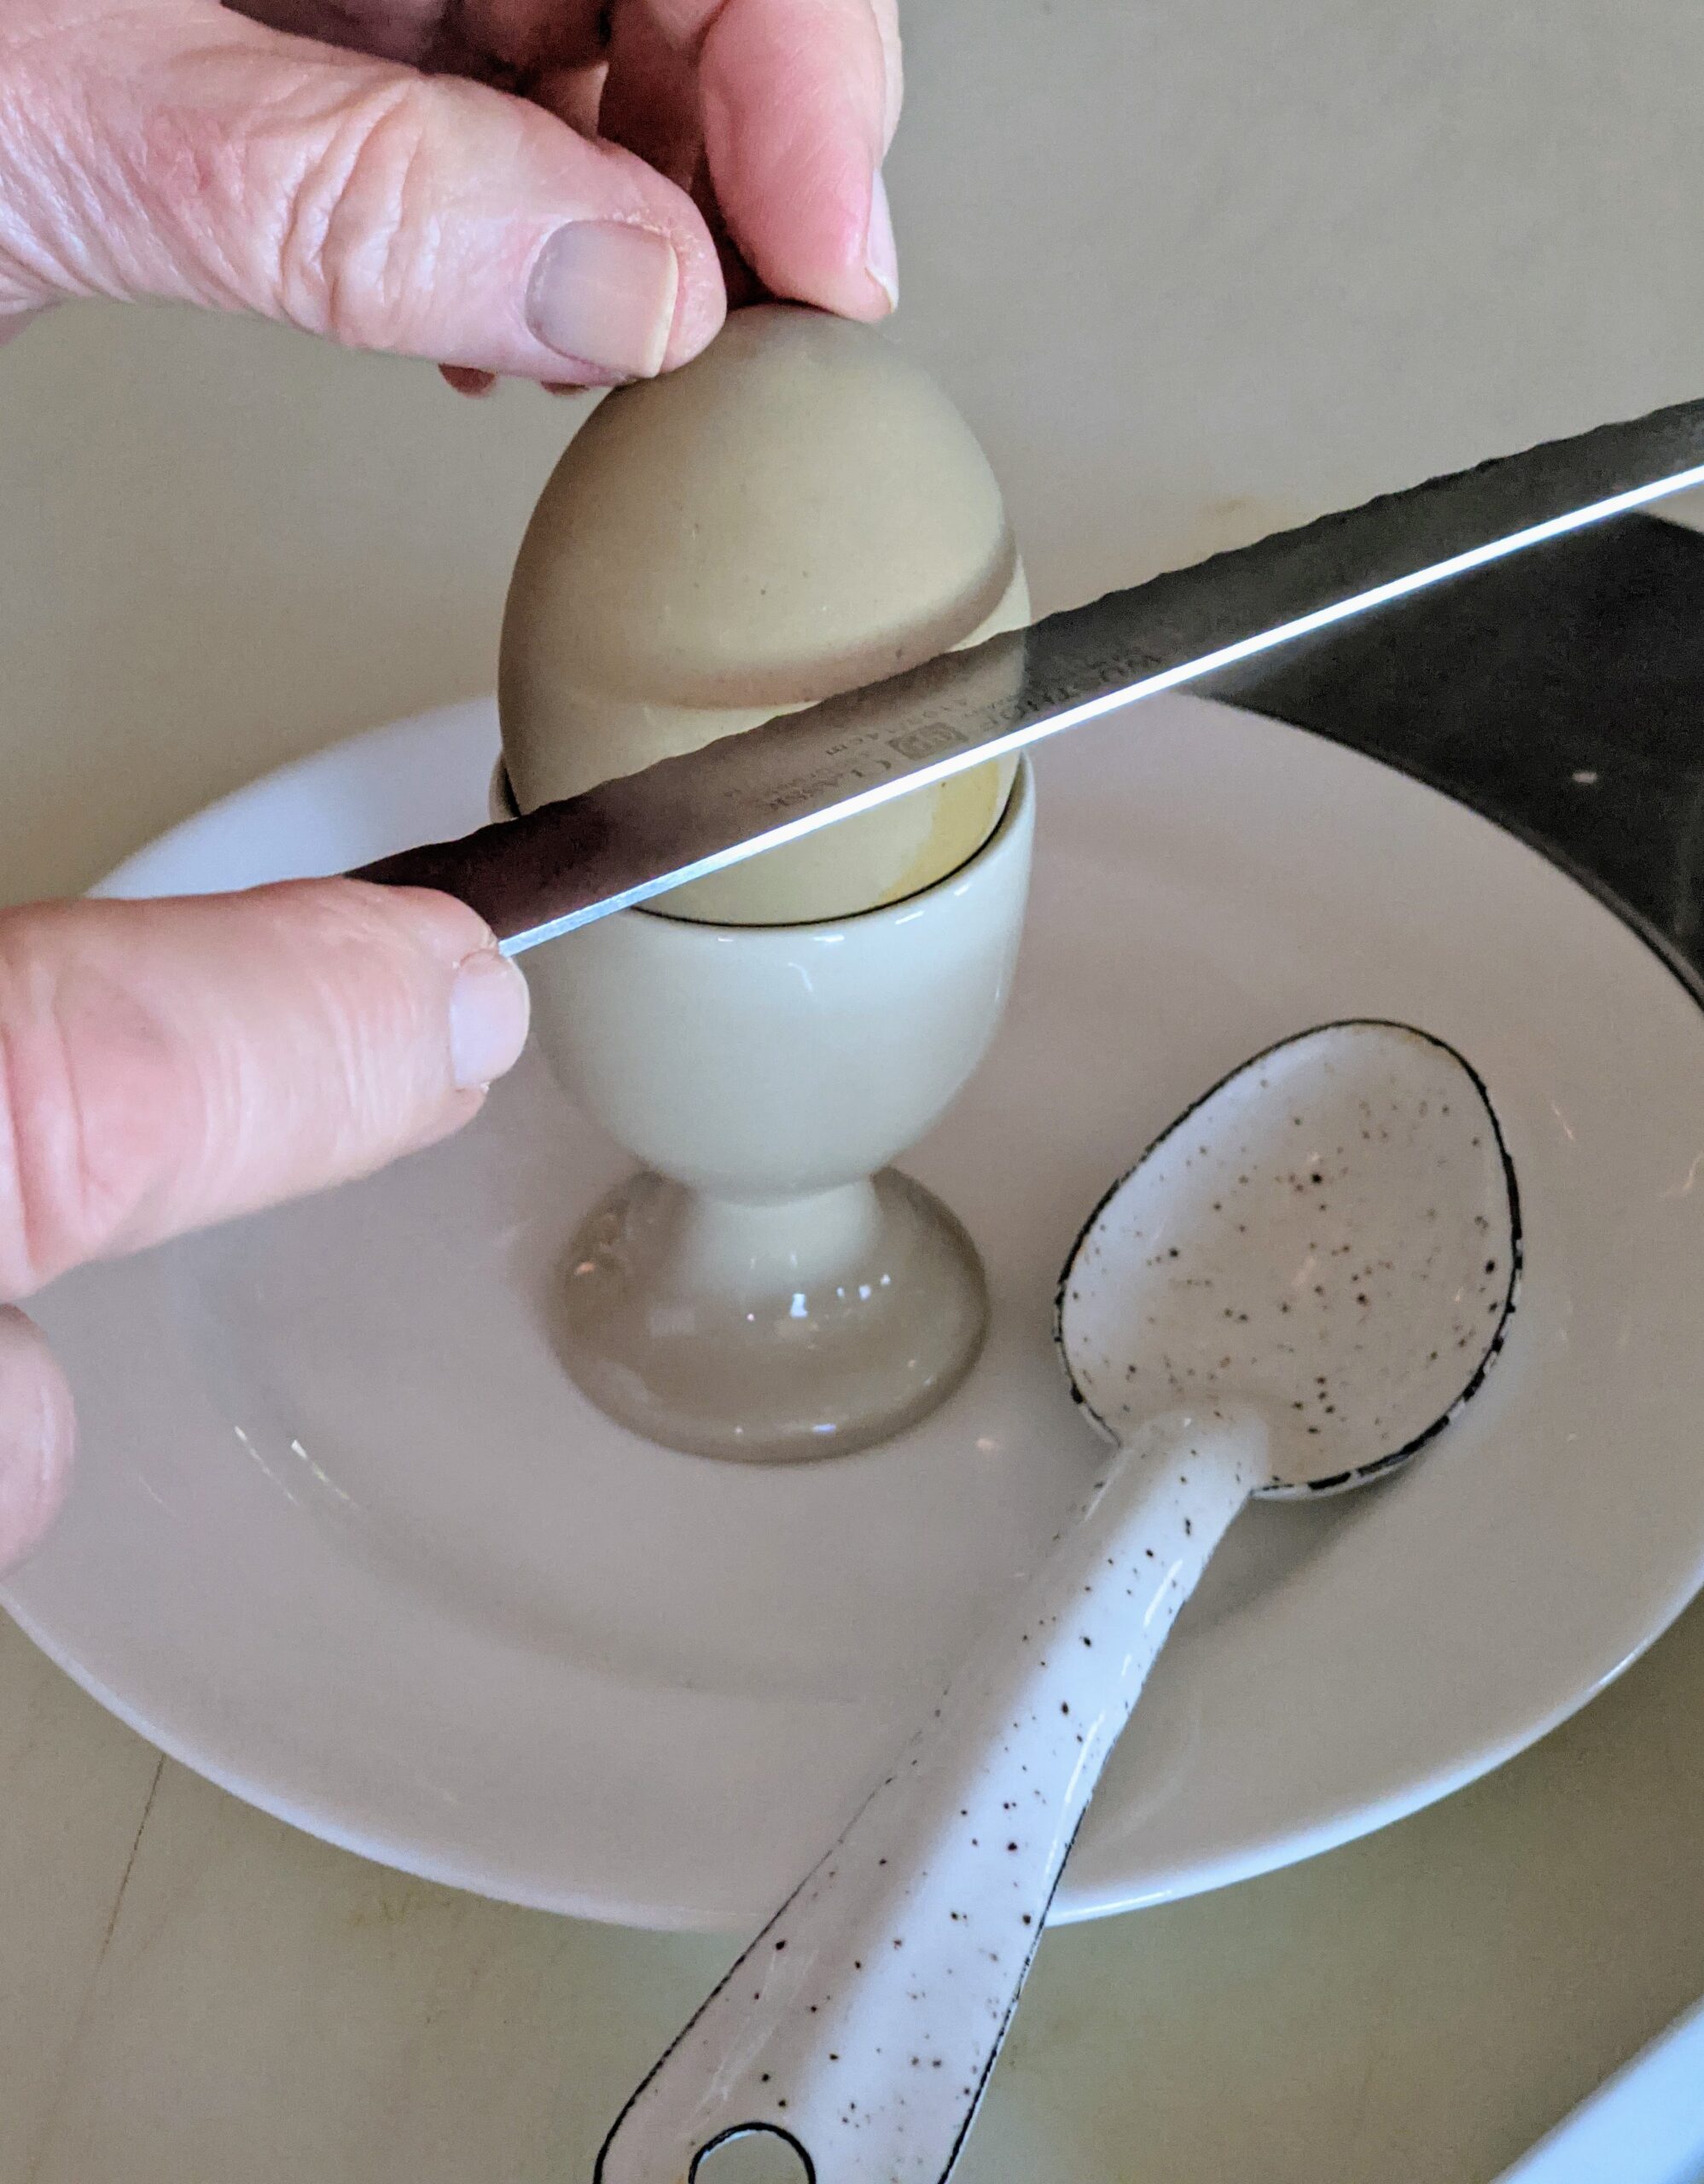
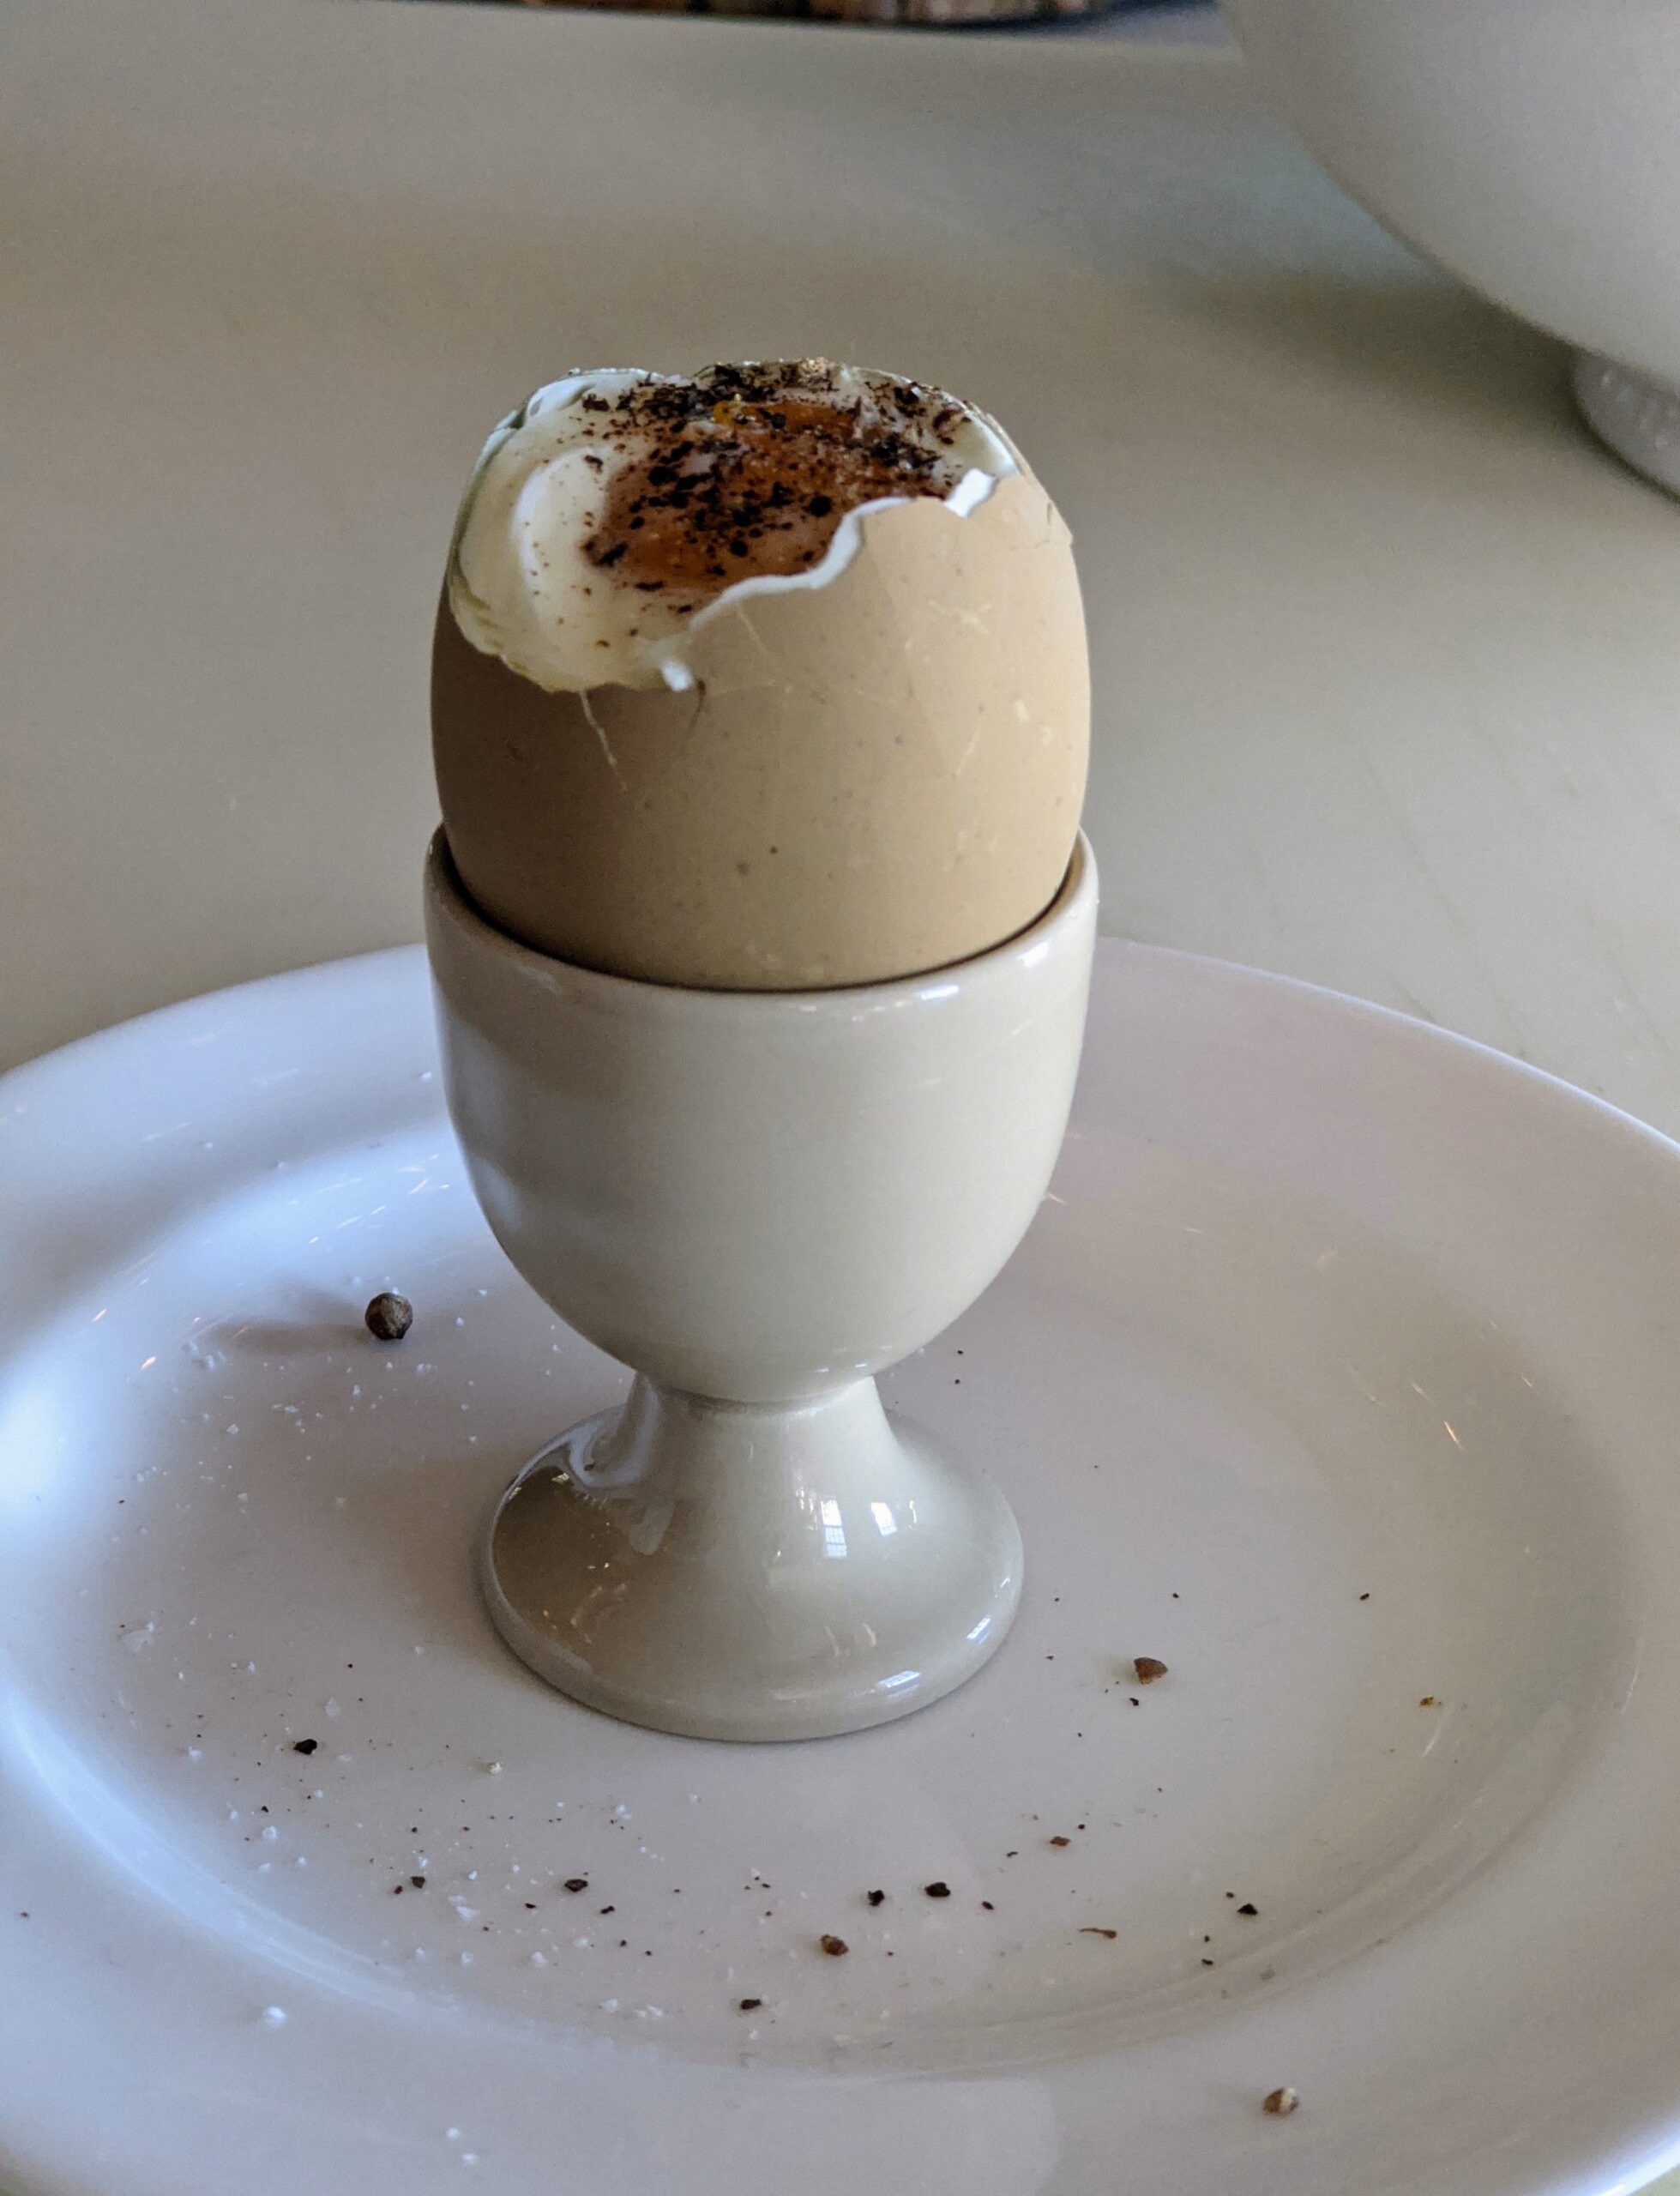
To serve eggs in their shells, I use the edge of a serrated knife to cut off the top.
Look at that beautiful gold color – it’s perfect. Egg yolks range in color from pale yellow to deep orange. The color of an egg’s yolk depends upon the hen’s diet. The darker color of a yolk indicates the hen is fed foods high in carotenoids or antioxidants, which are natural pigments found in greens. My chickens are fed the best scraps including organic vegetables from my gardens.
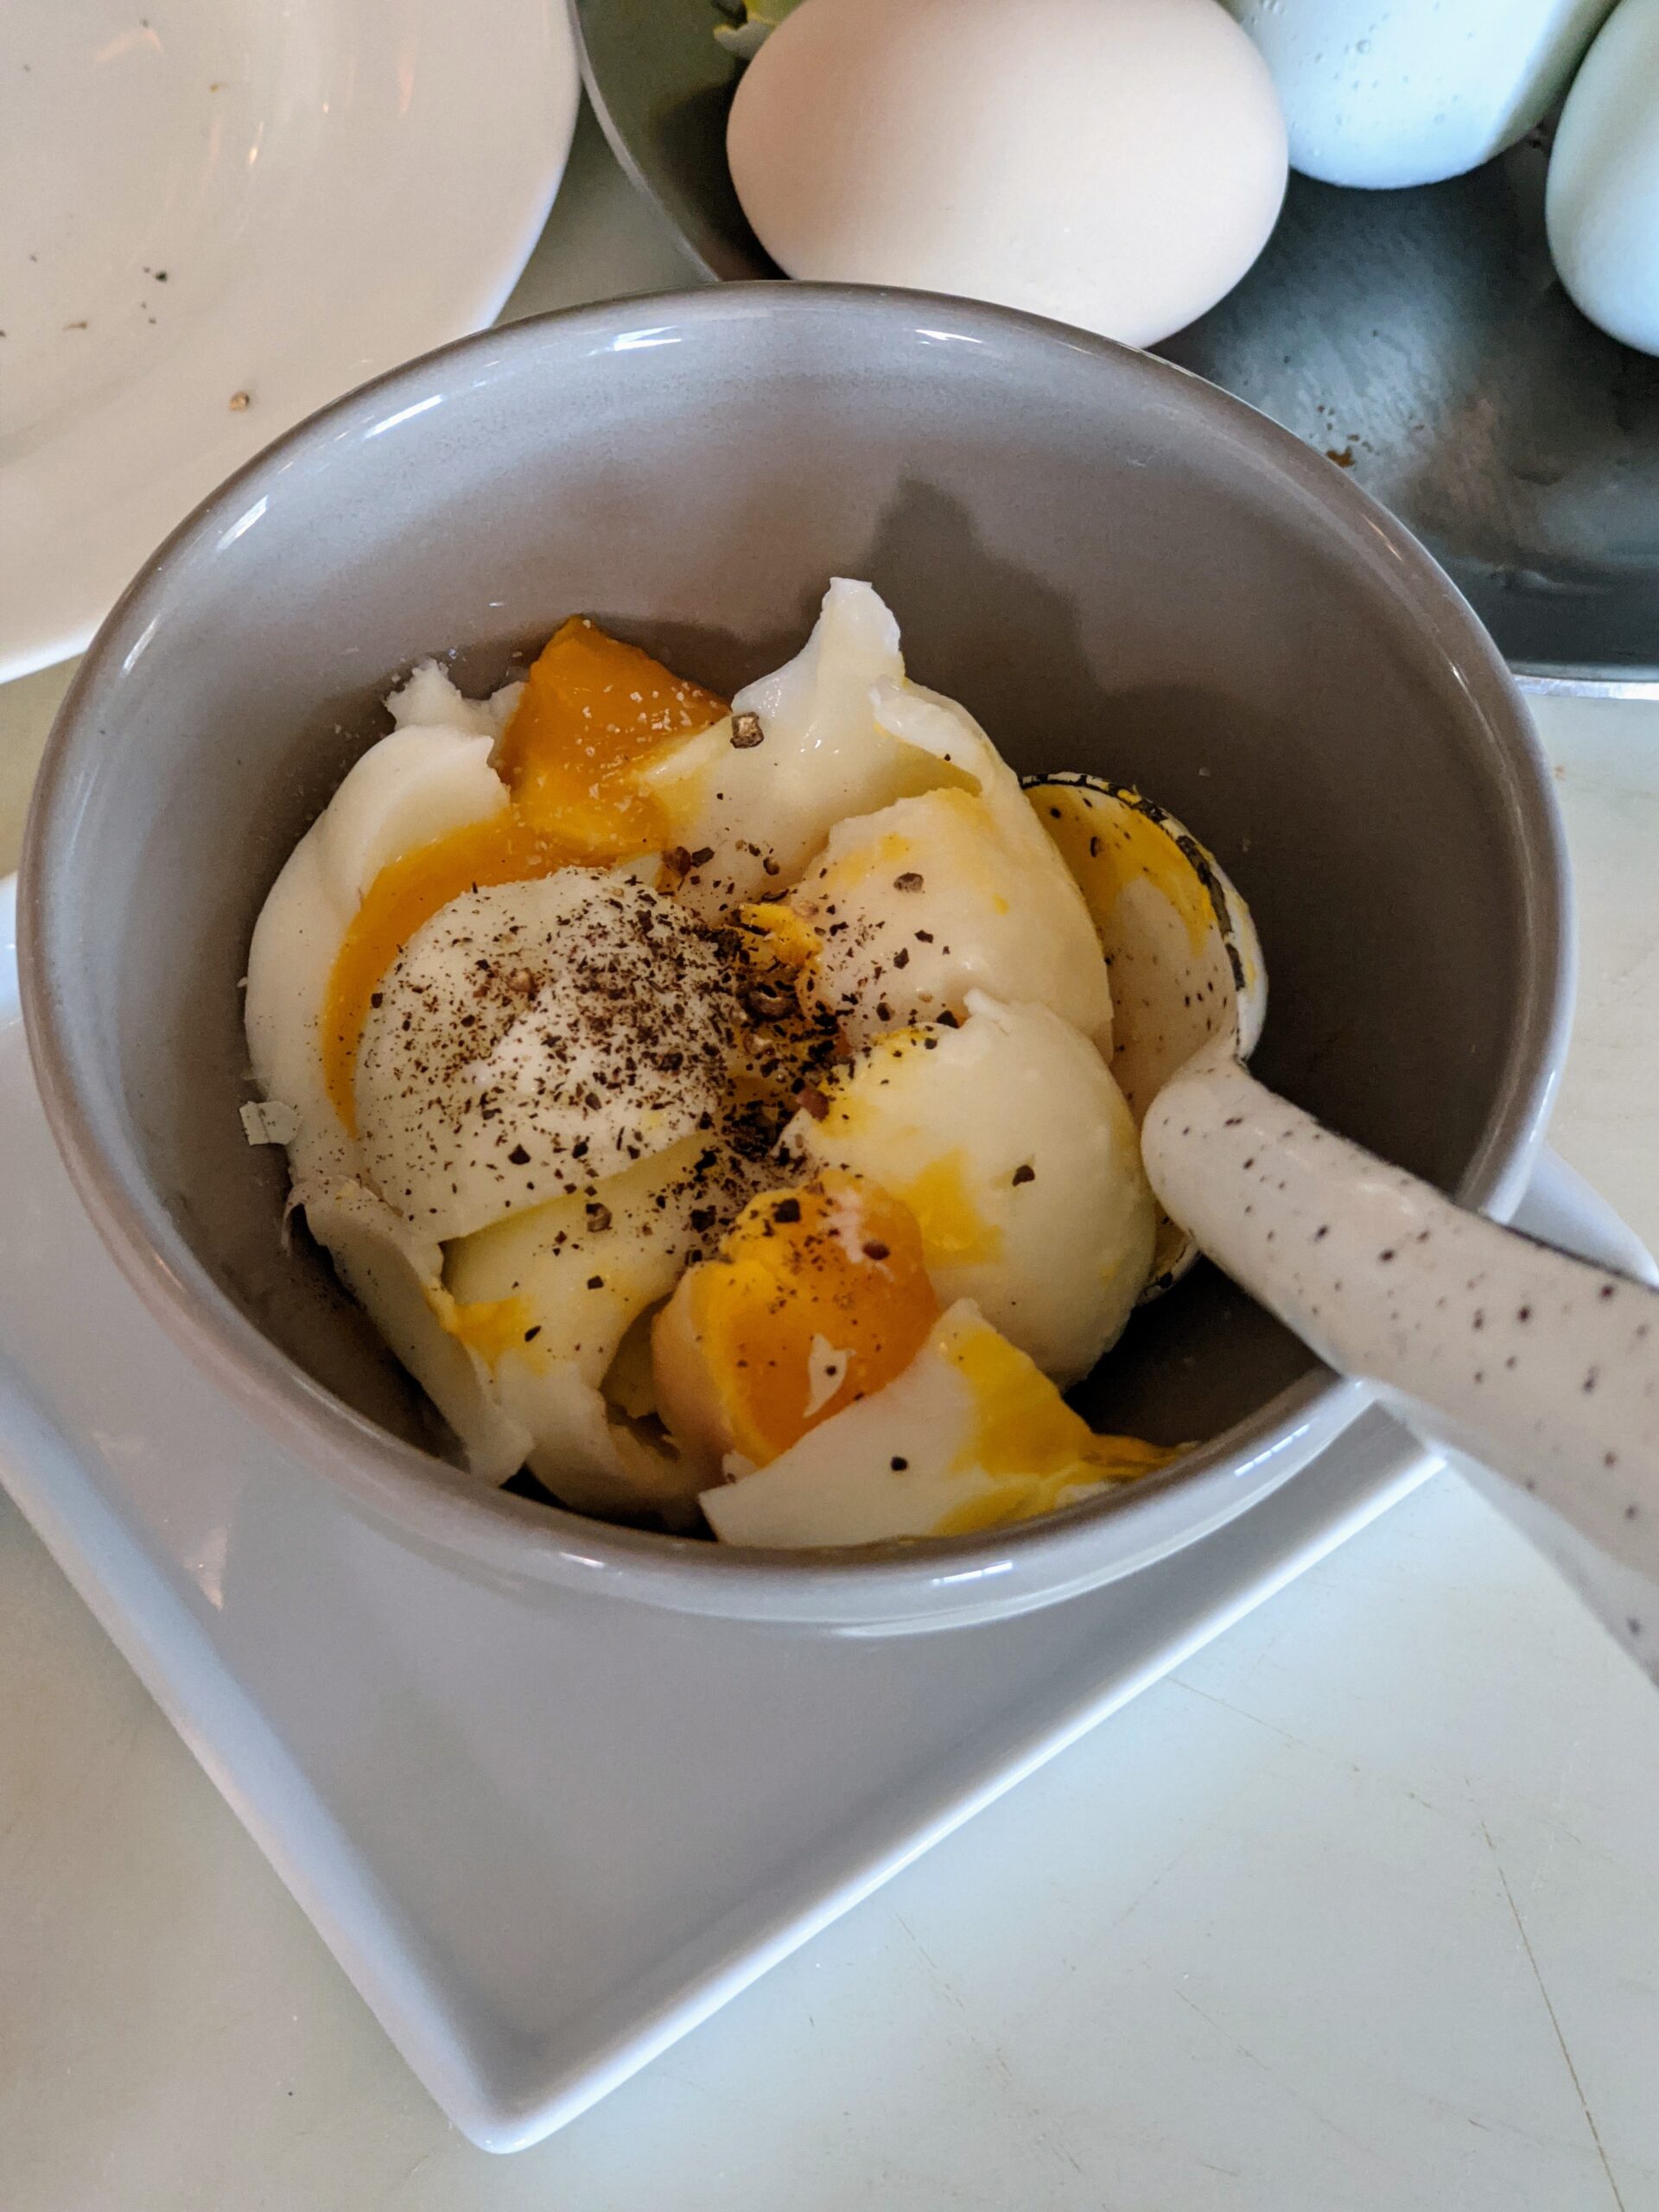
Add a little salt and pepper and it’s ready to eat.
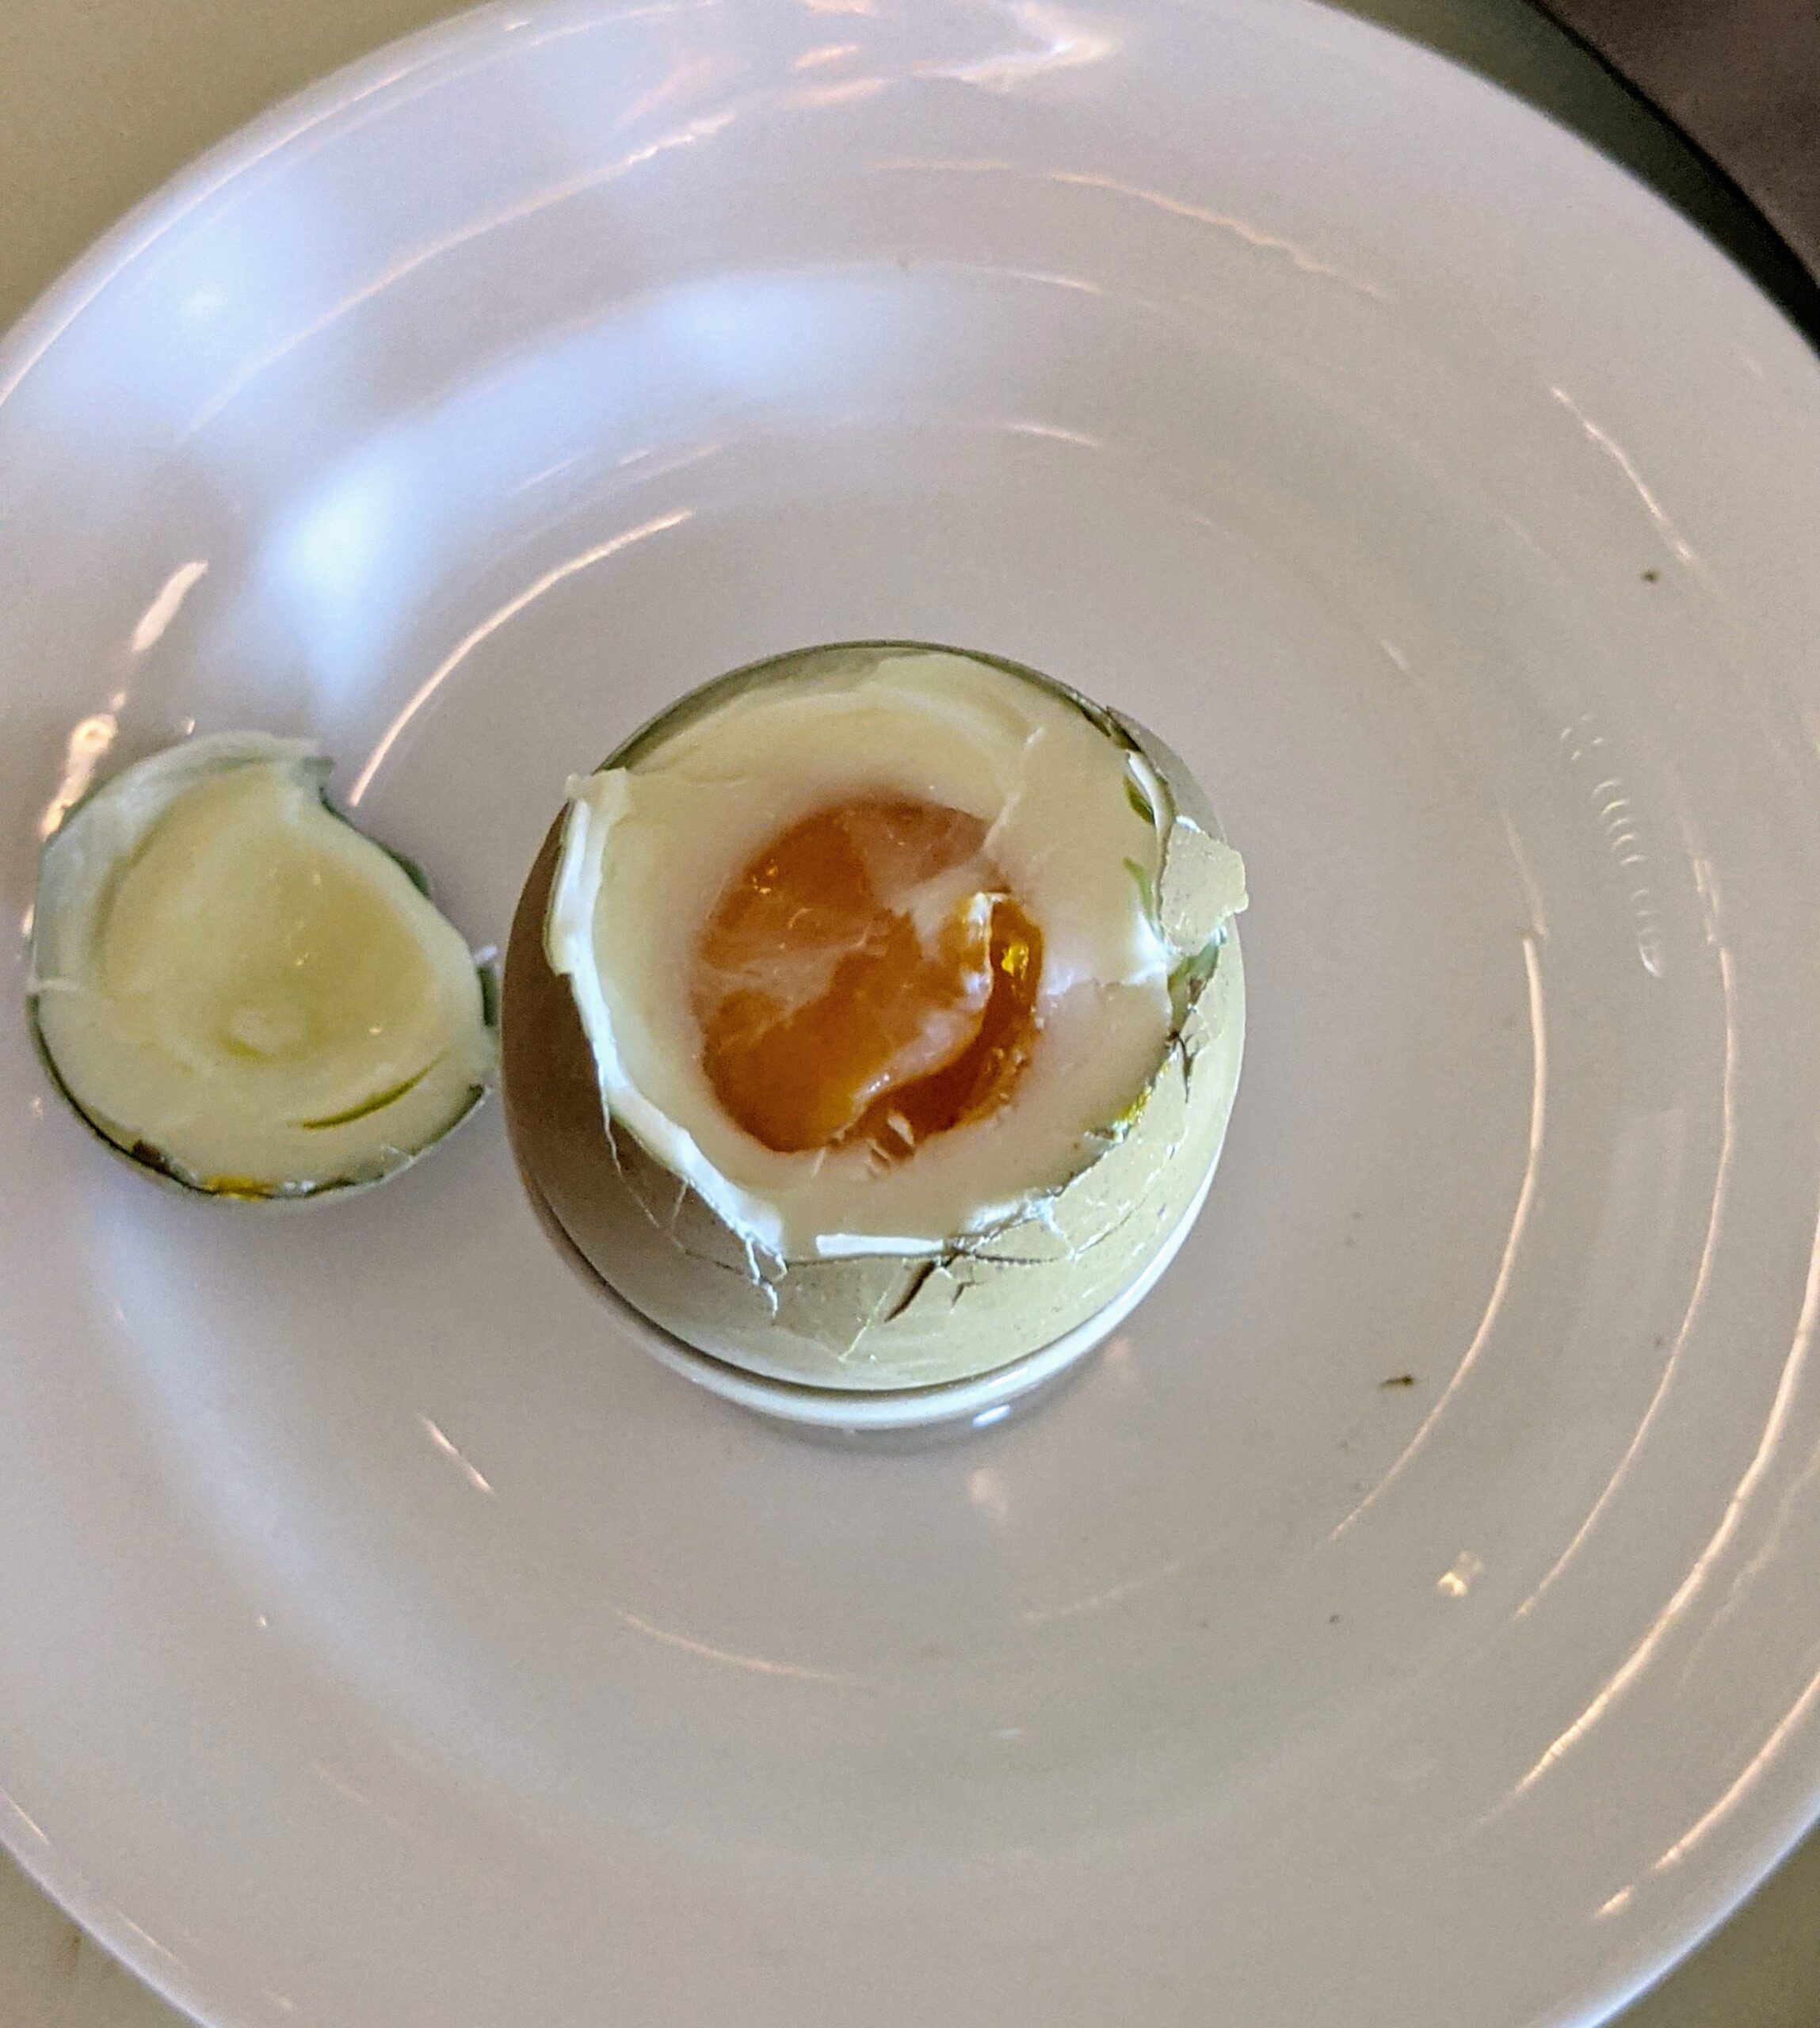
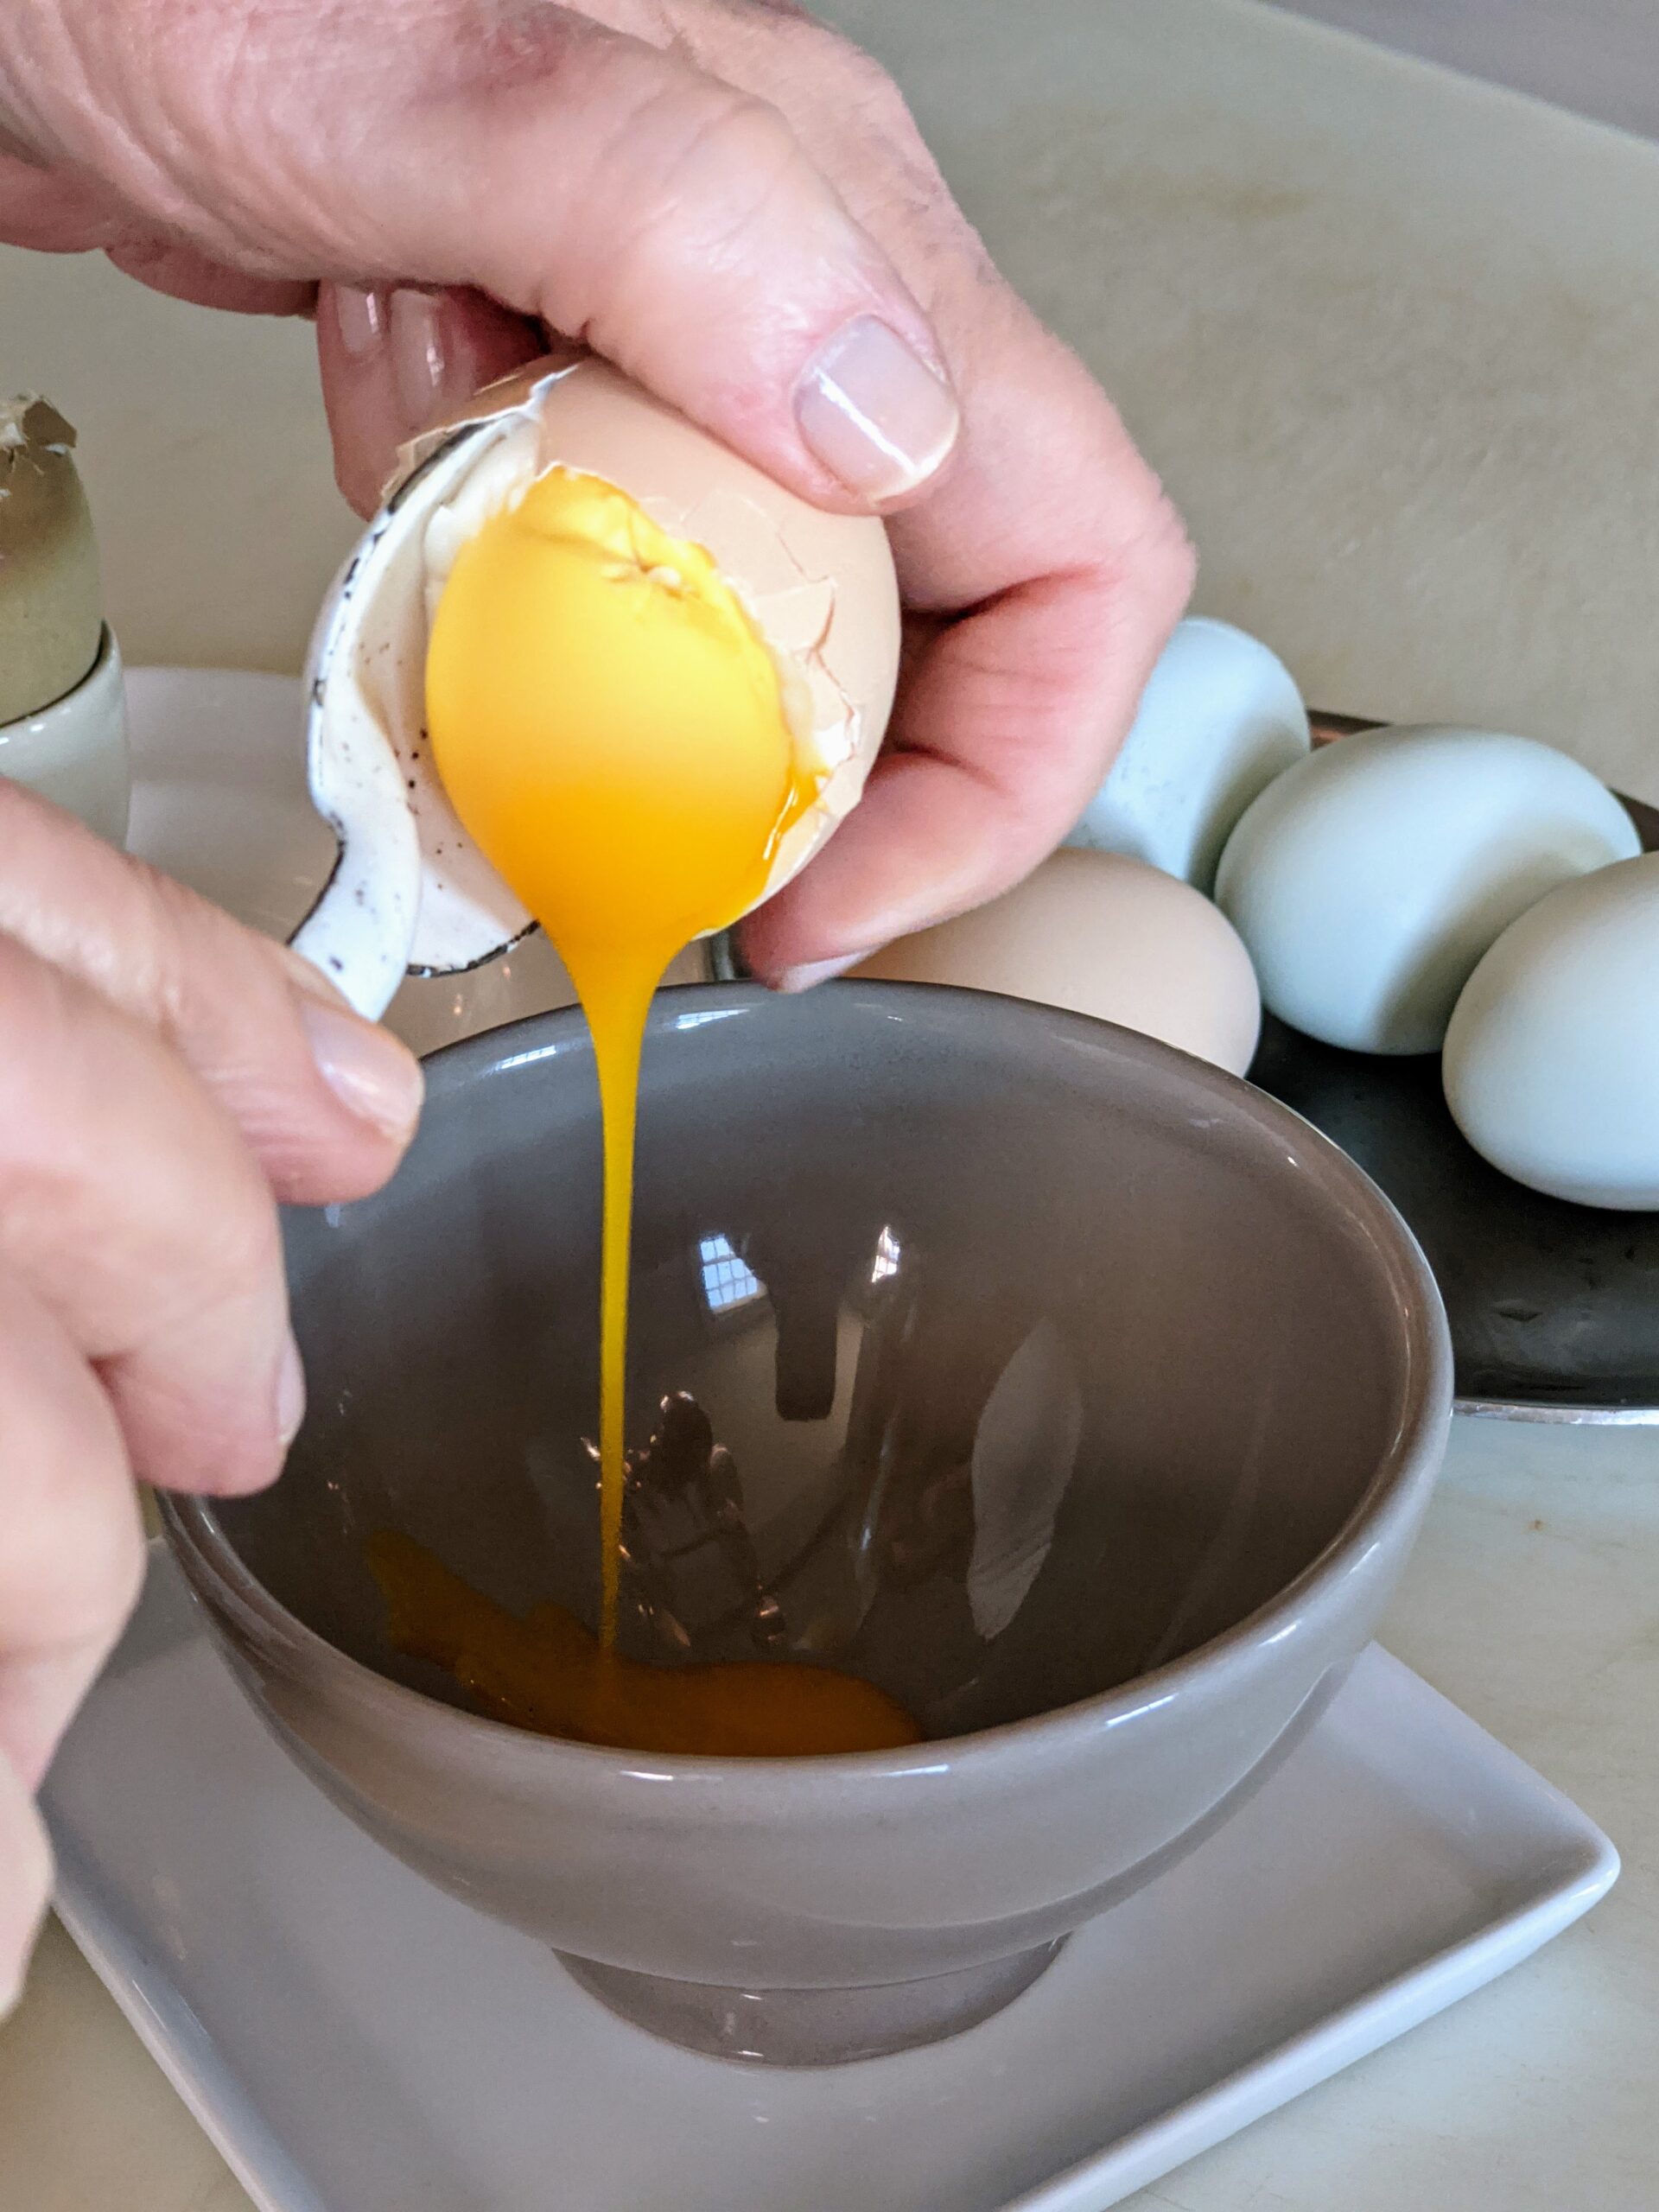
To serve out of the shell, hold the egg over a small bowl, tap around center with a knife, gently pull the shell apart, and then scoop out the egg with a small spoon.
Here’s another egg with its creamy egg yolk pouring out into the bowl – made to perfection. Minutes really make a difference, but after doing this a few times, one will find their perfectly cooked egg.
Here are the two eggs in the bowl. Again, I added just a little salt and pepper to taste.
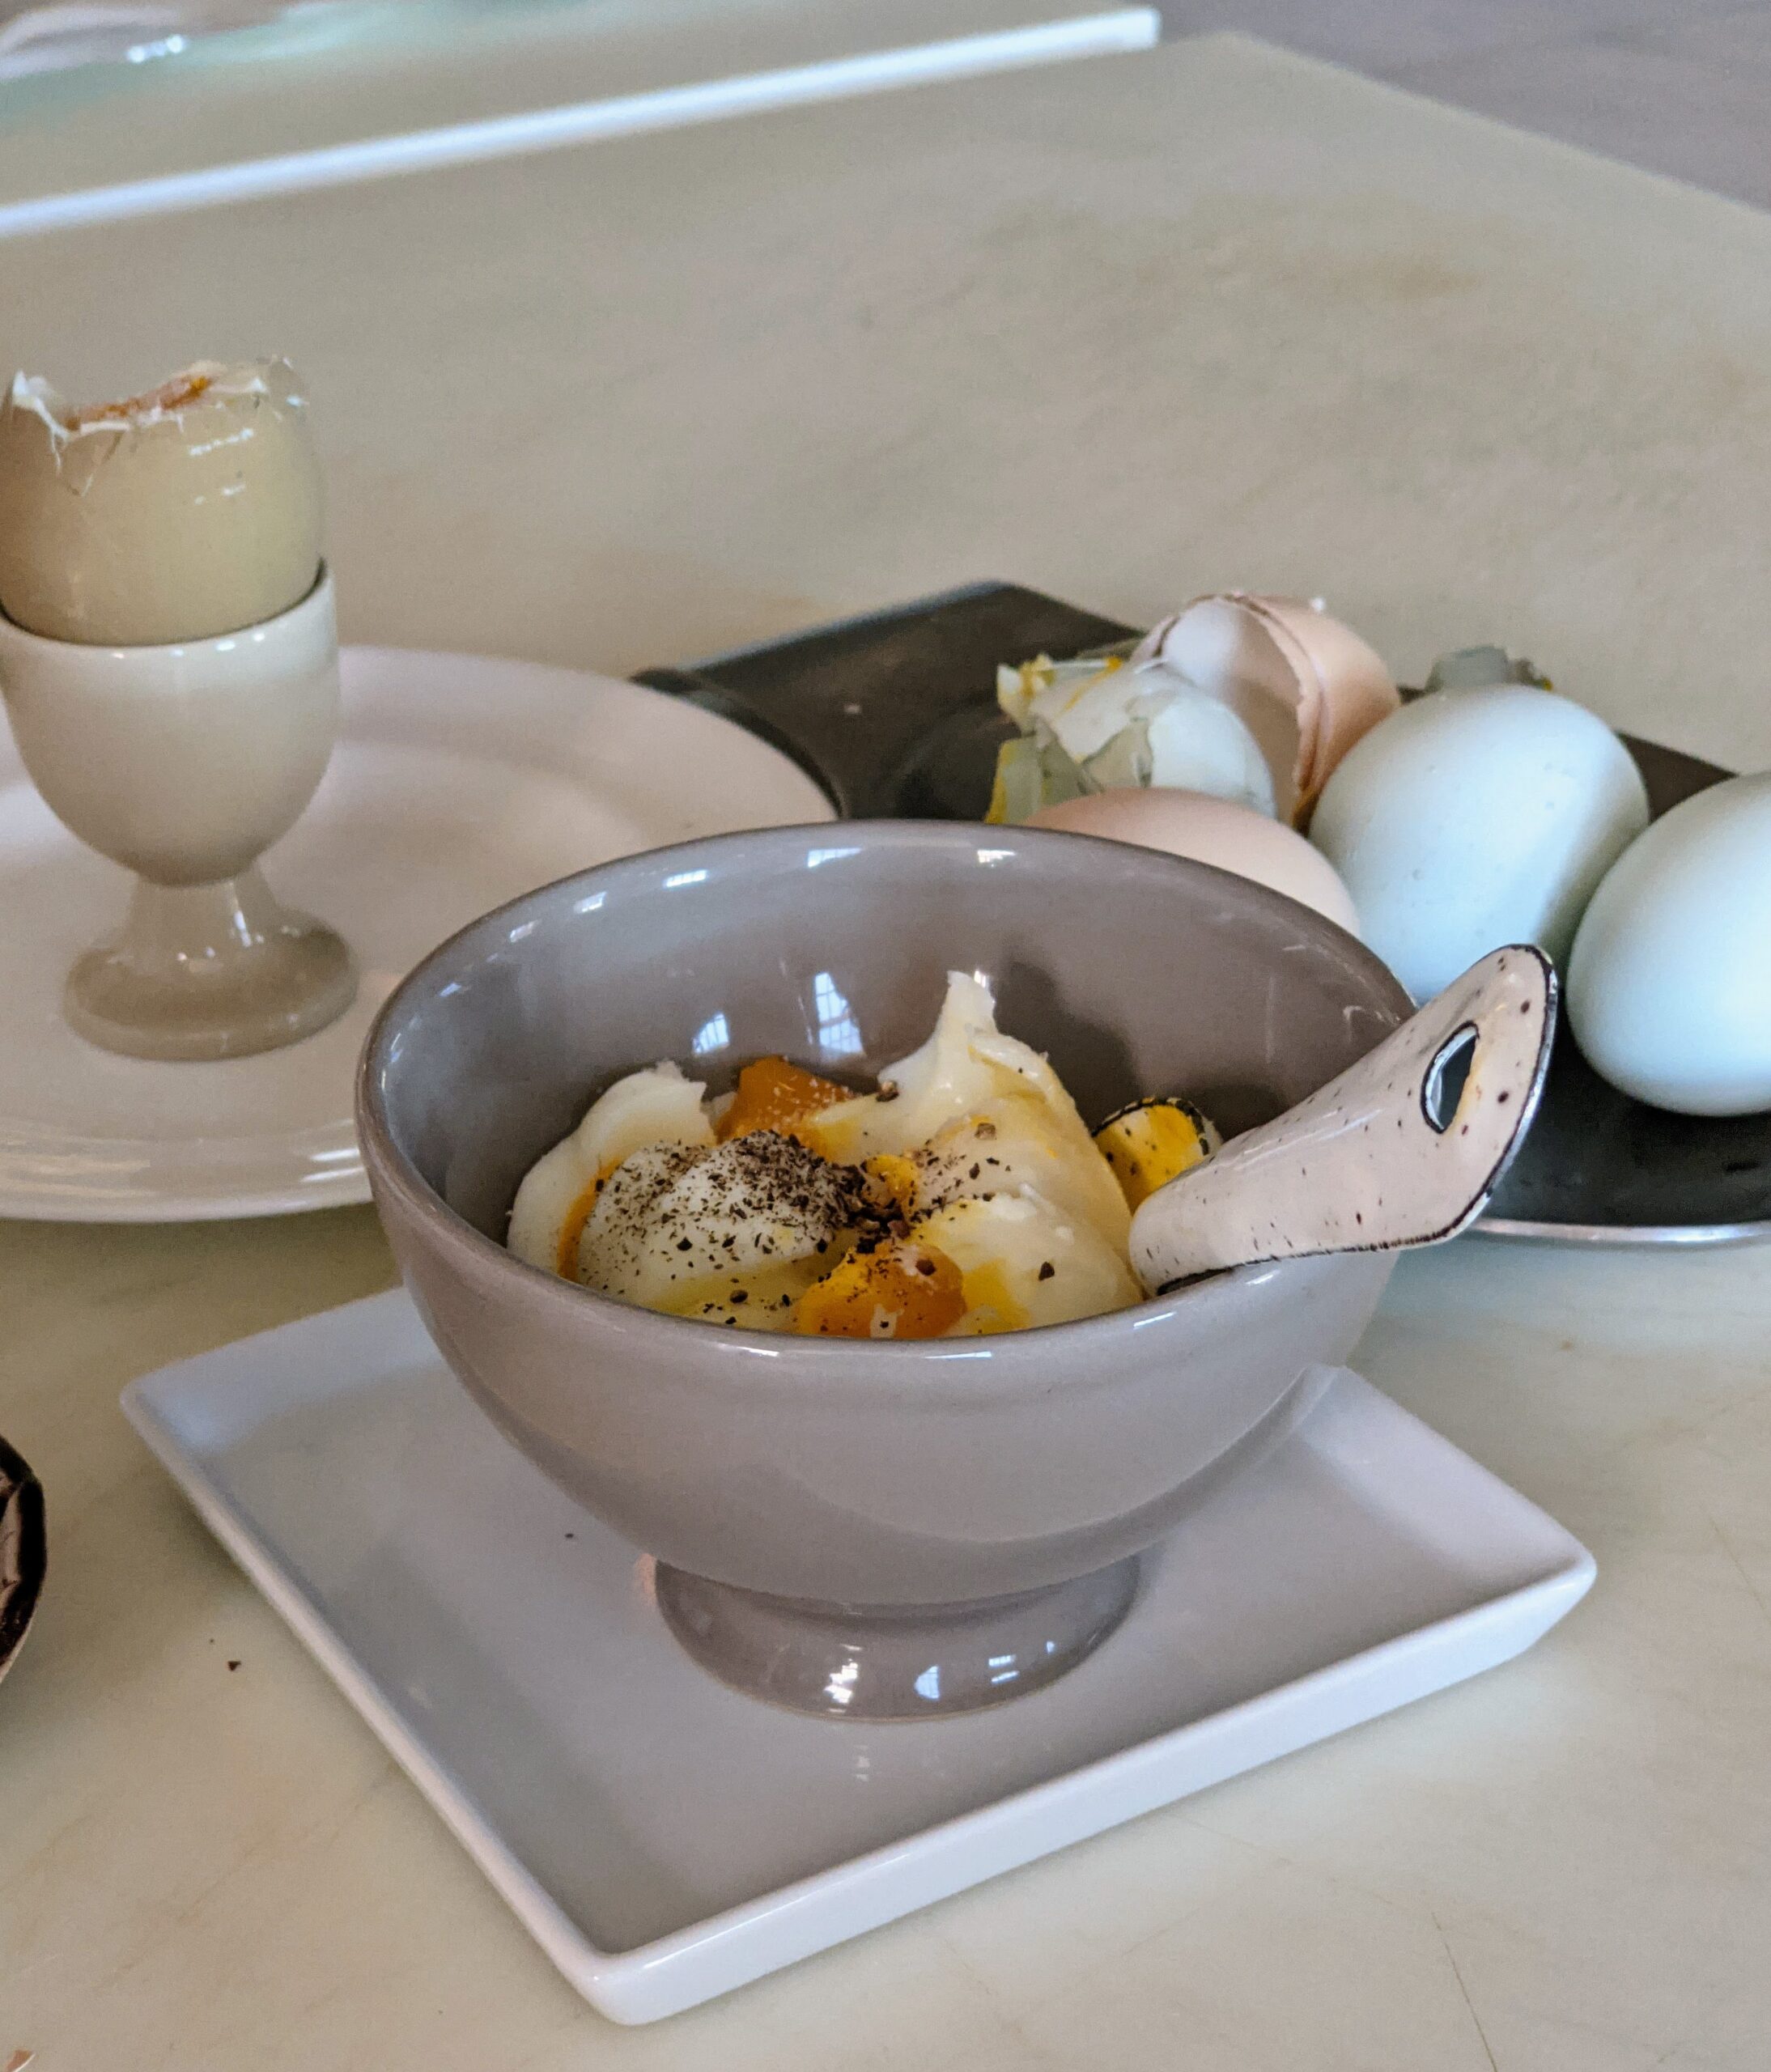
Steamed eggs for breakfast – so easy to make and so flavorful and healthy too. Don’t you just one one now? Enjoy.