What does one do with thousands of spring-blooming bulbs late in the planting season? Hurry to get them all in the ground at the first sign of a brief winter warm up and thaw.
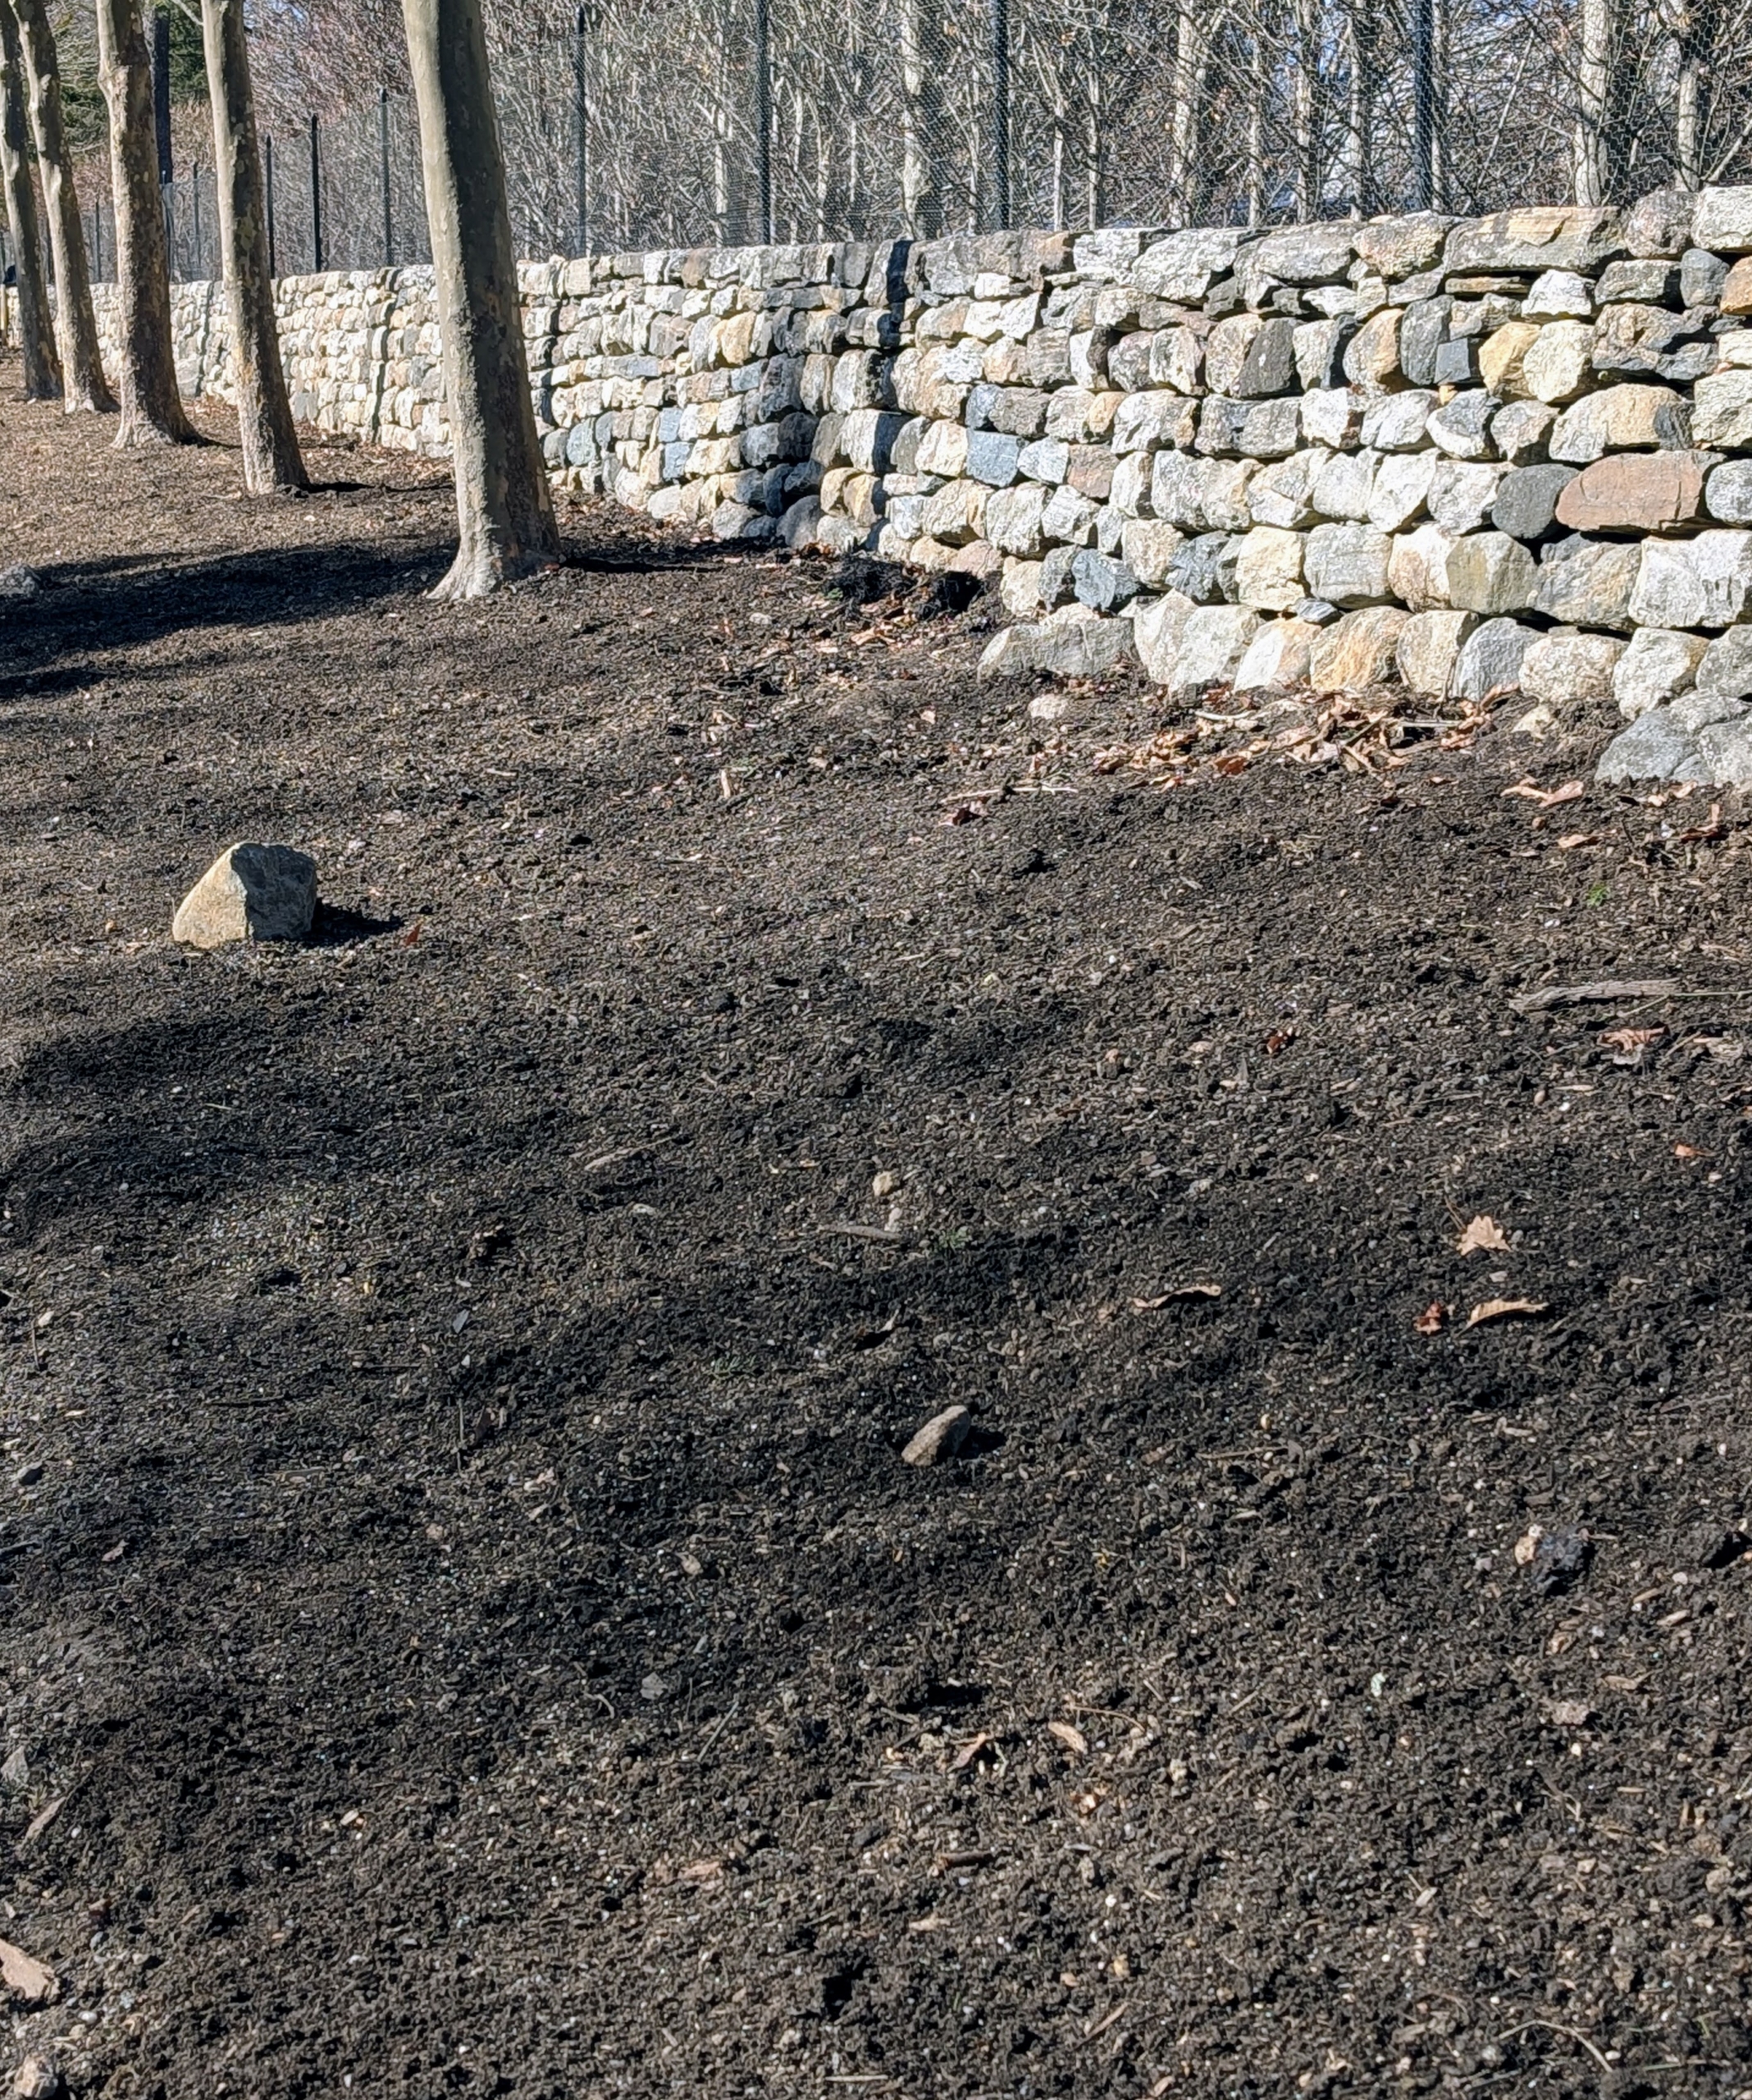
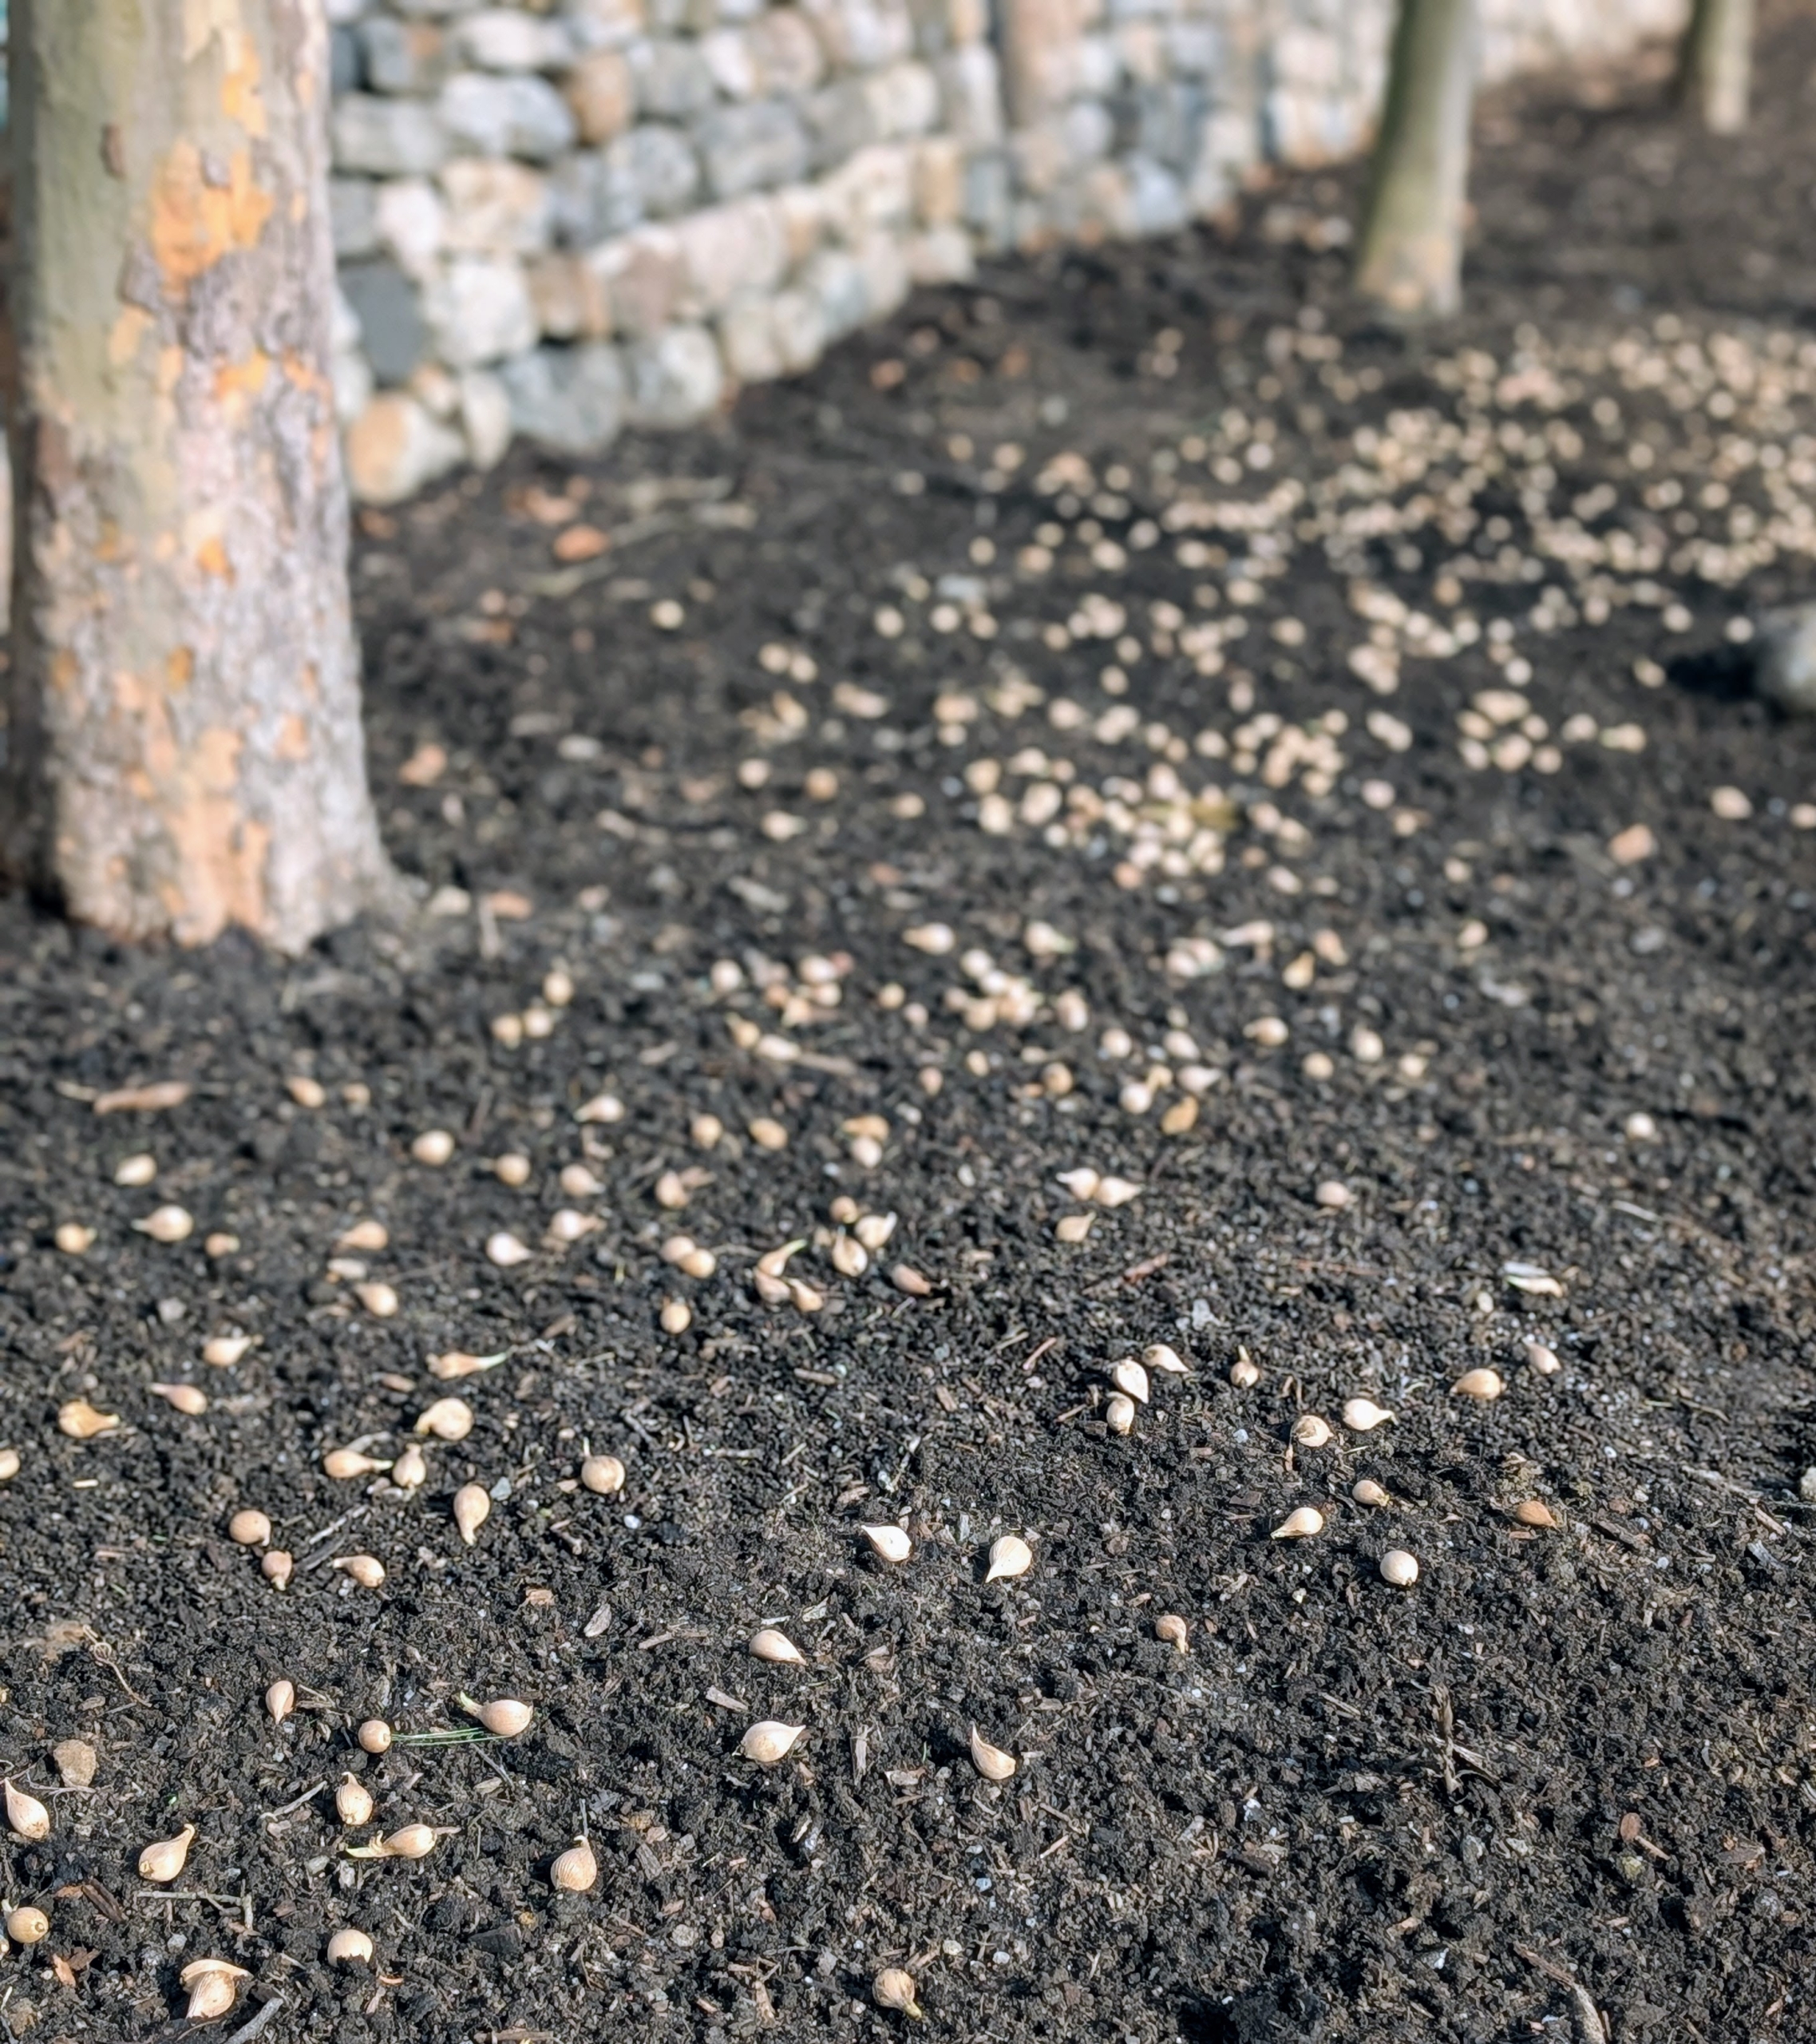
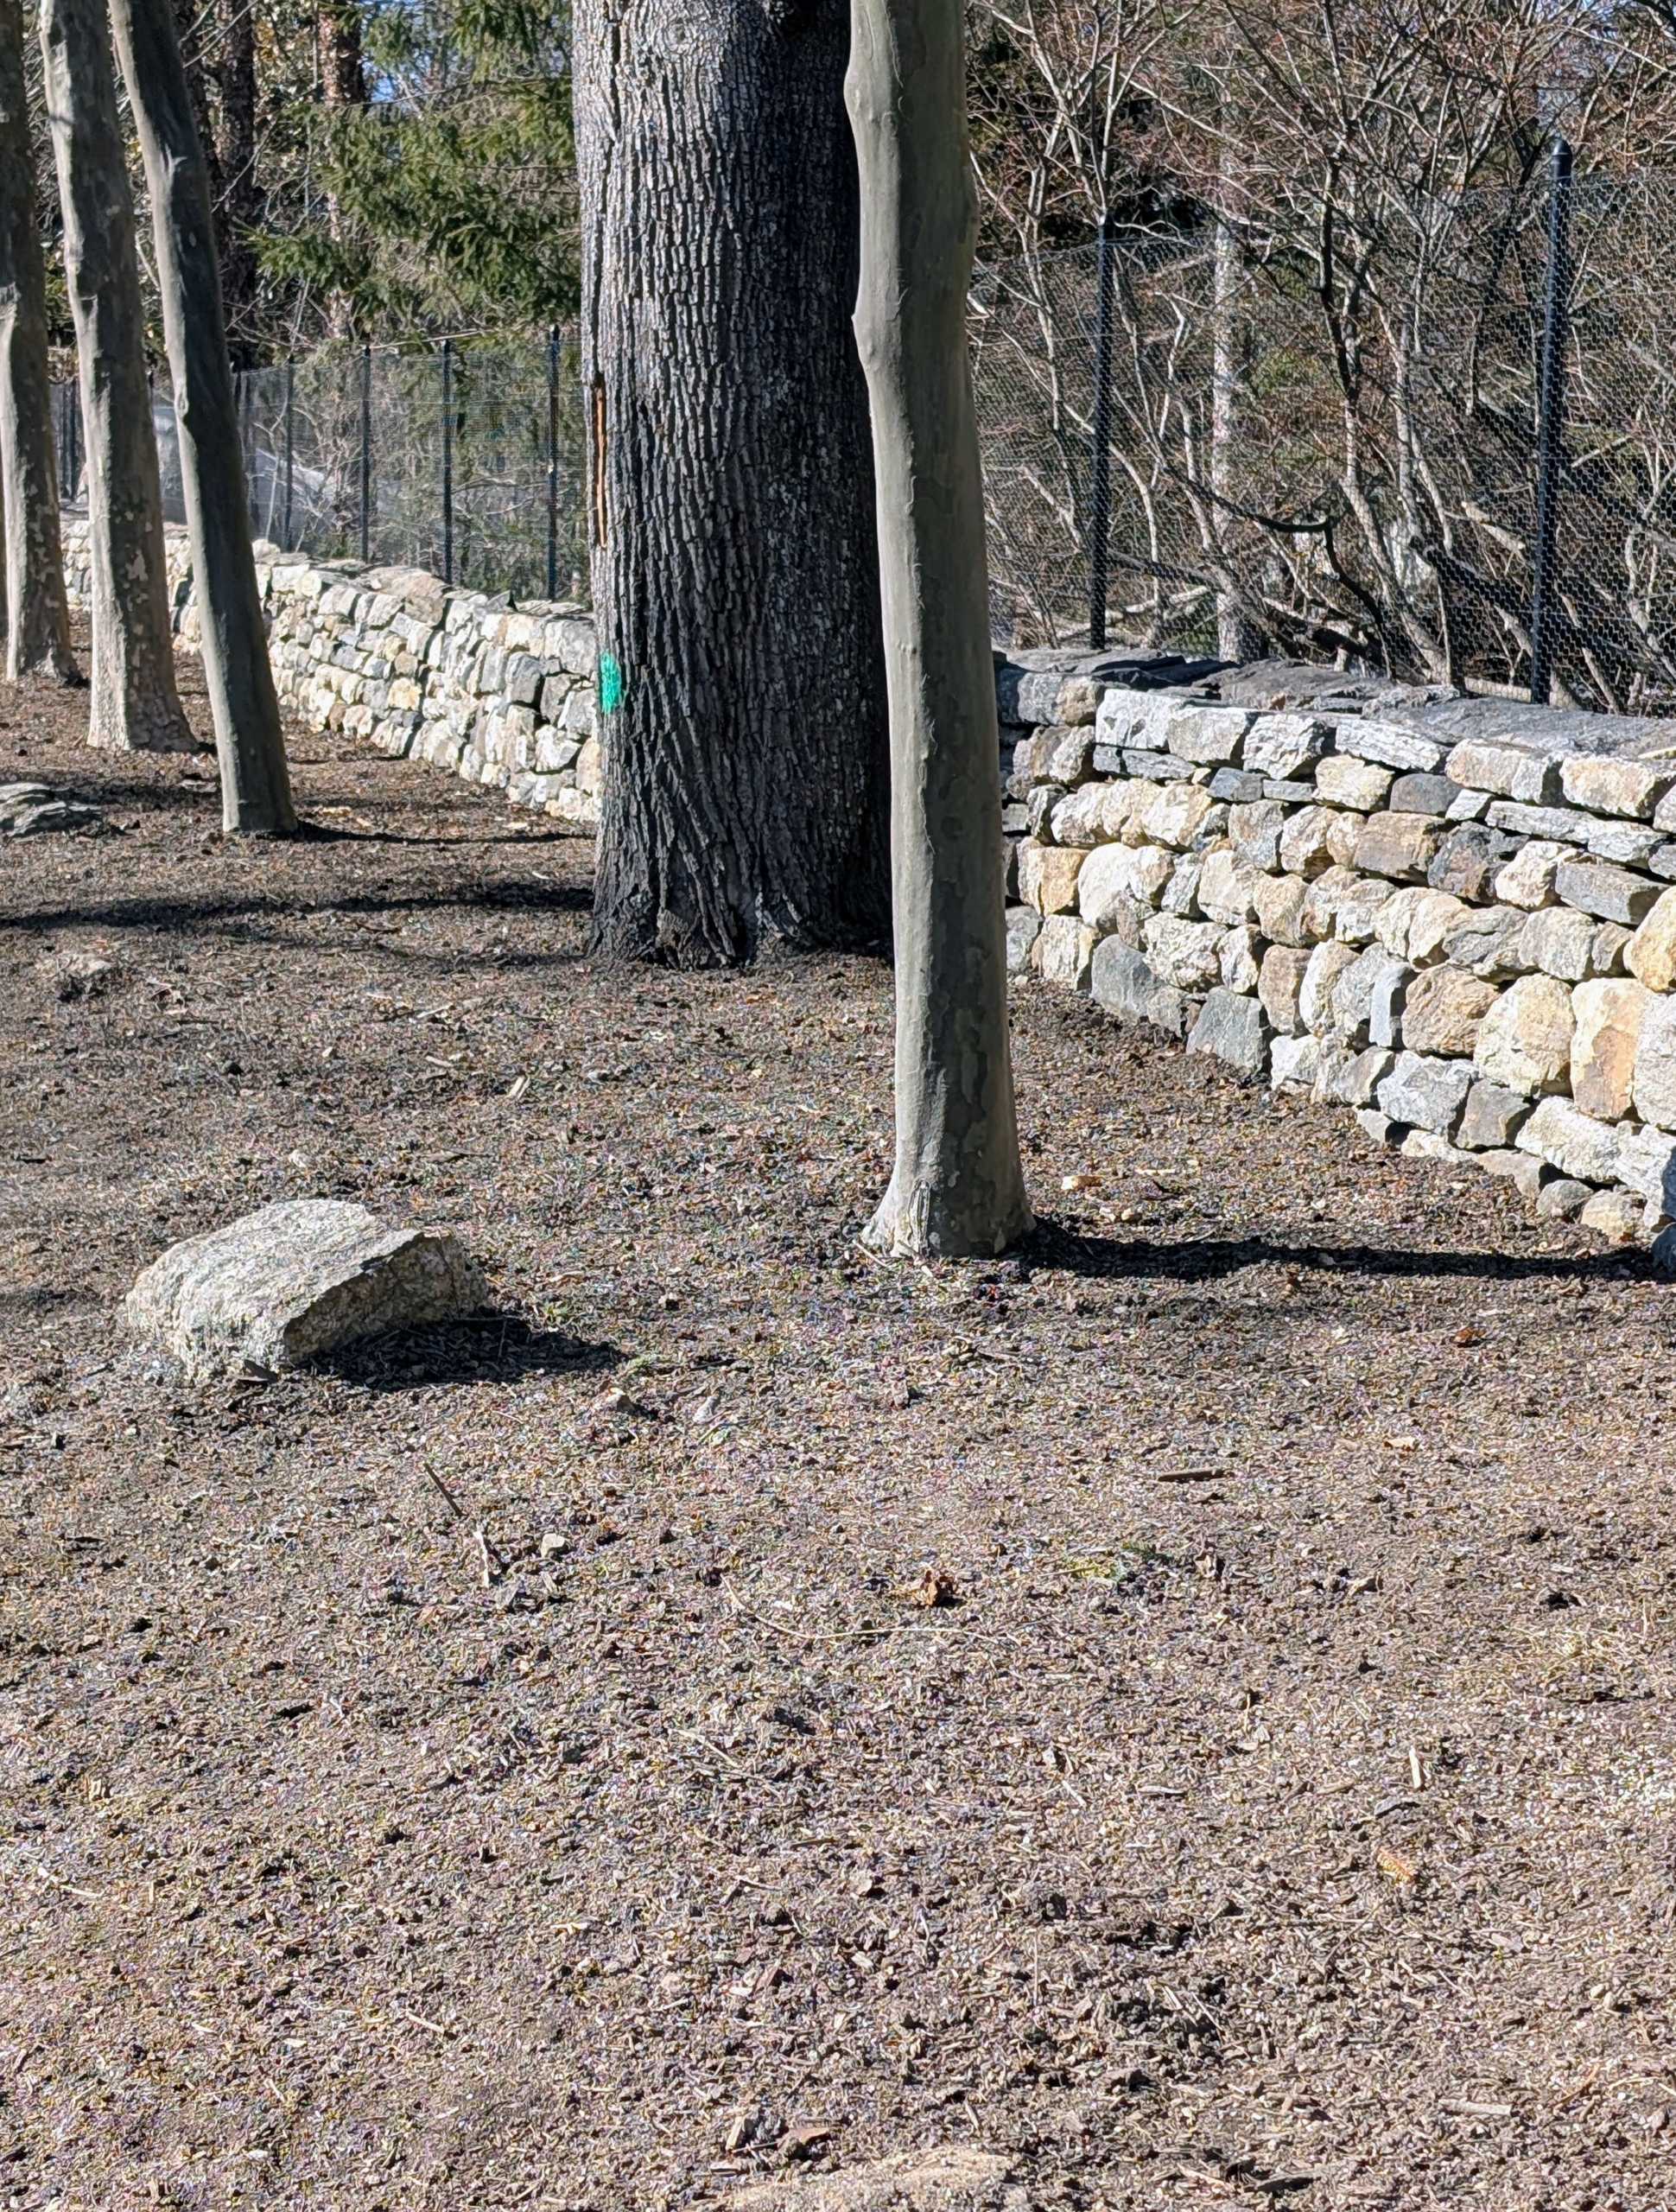
Every year, I plant thousands of spring-flowering bulbs here at my farm - under my long and winding pergola, behind my Tenant House, in my Summer House sunken garden, in the gardens around my Winter House, and under various allées of trees. This year, I decided to also plant an abundance of bulbs along my stone walls - camassia, crocus, iris, squill, and muscari. Low temperatures and snow cover kept the beds frozen for weeks until just recently when the weather warmed up enough for my gardeners and outdoor grounds crew to get out their dibbers and plant.
Enjoy these photos.
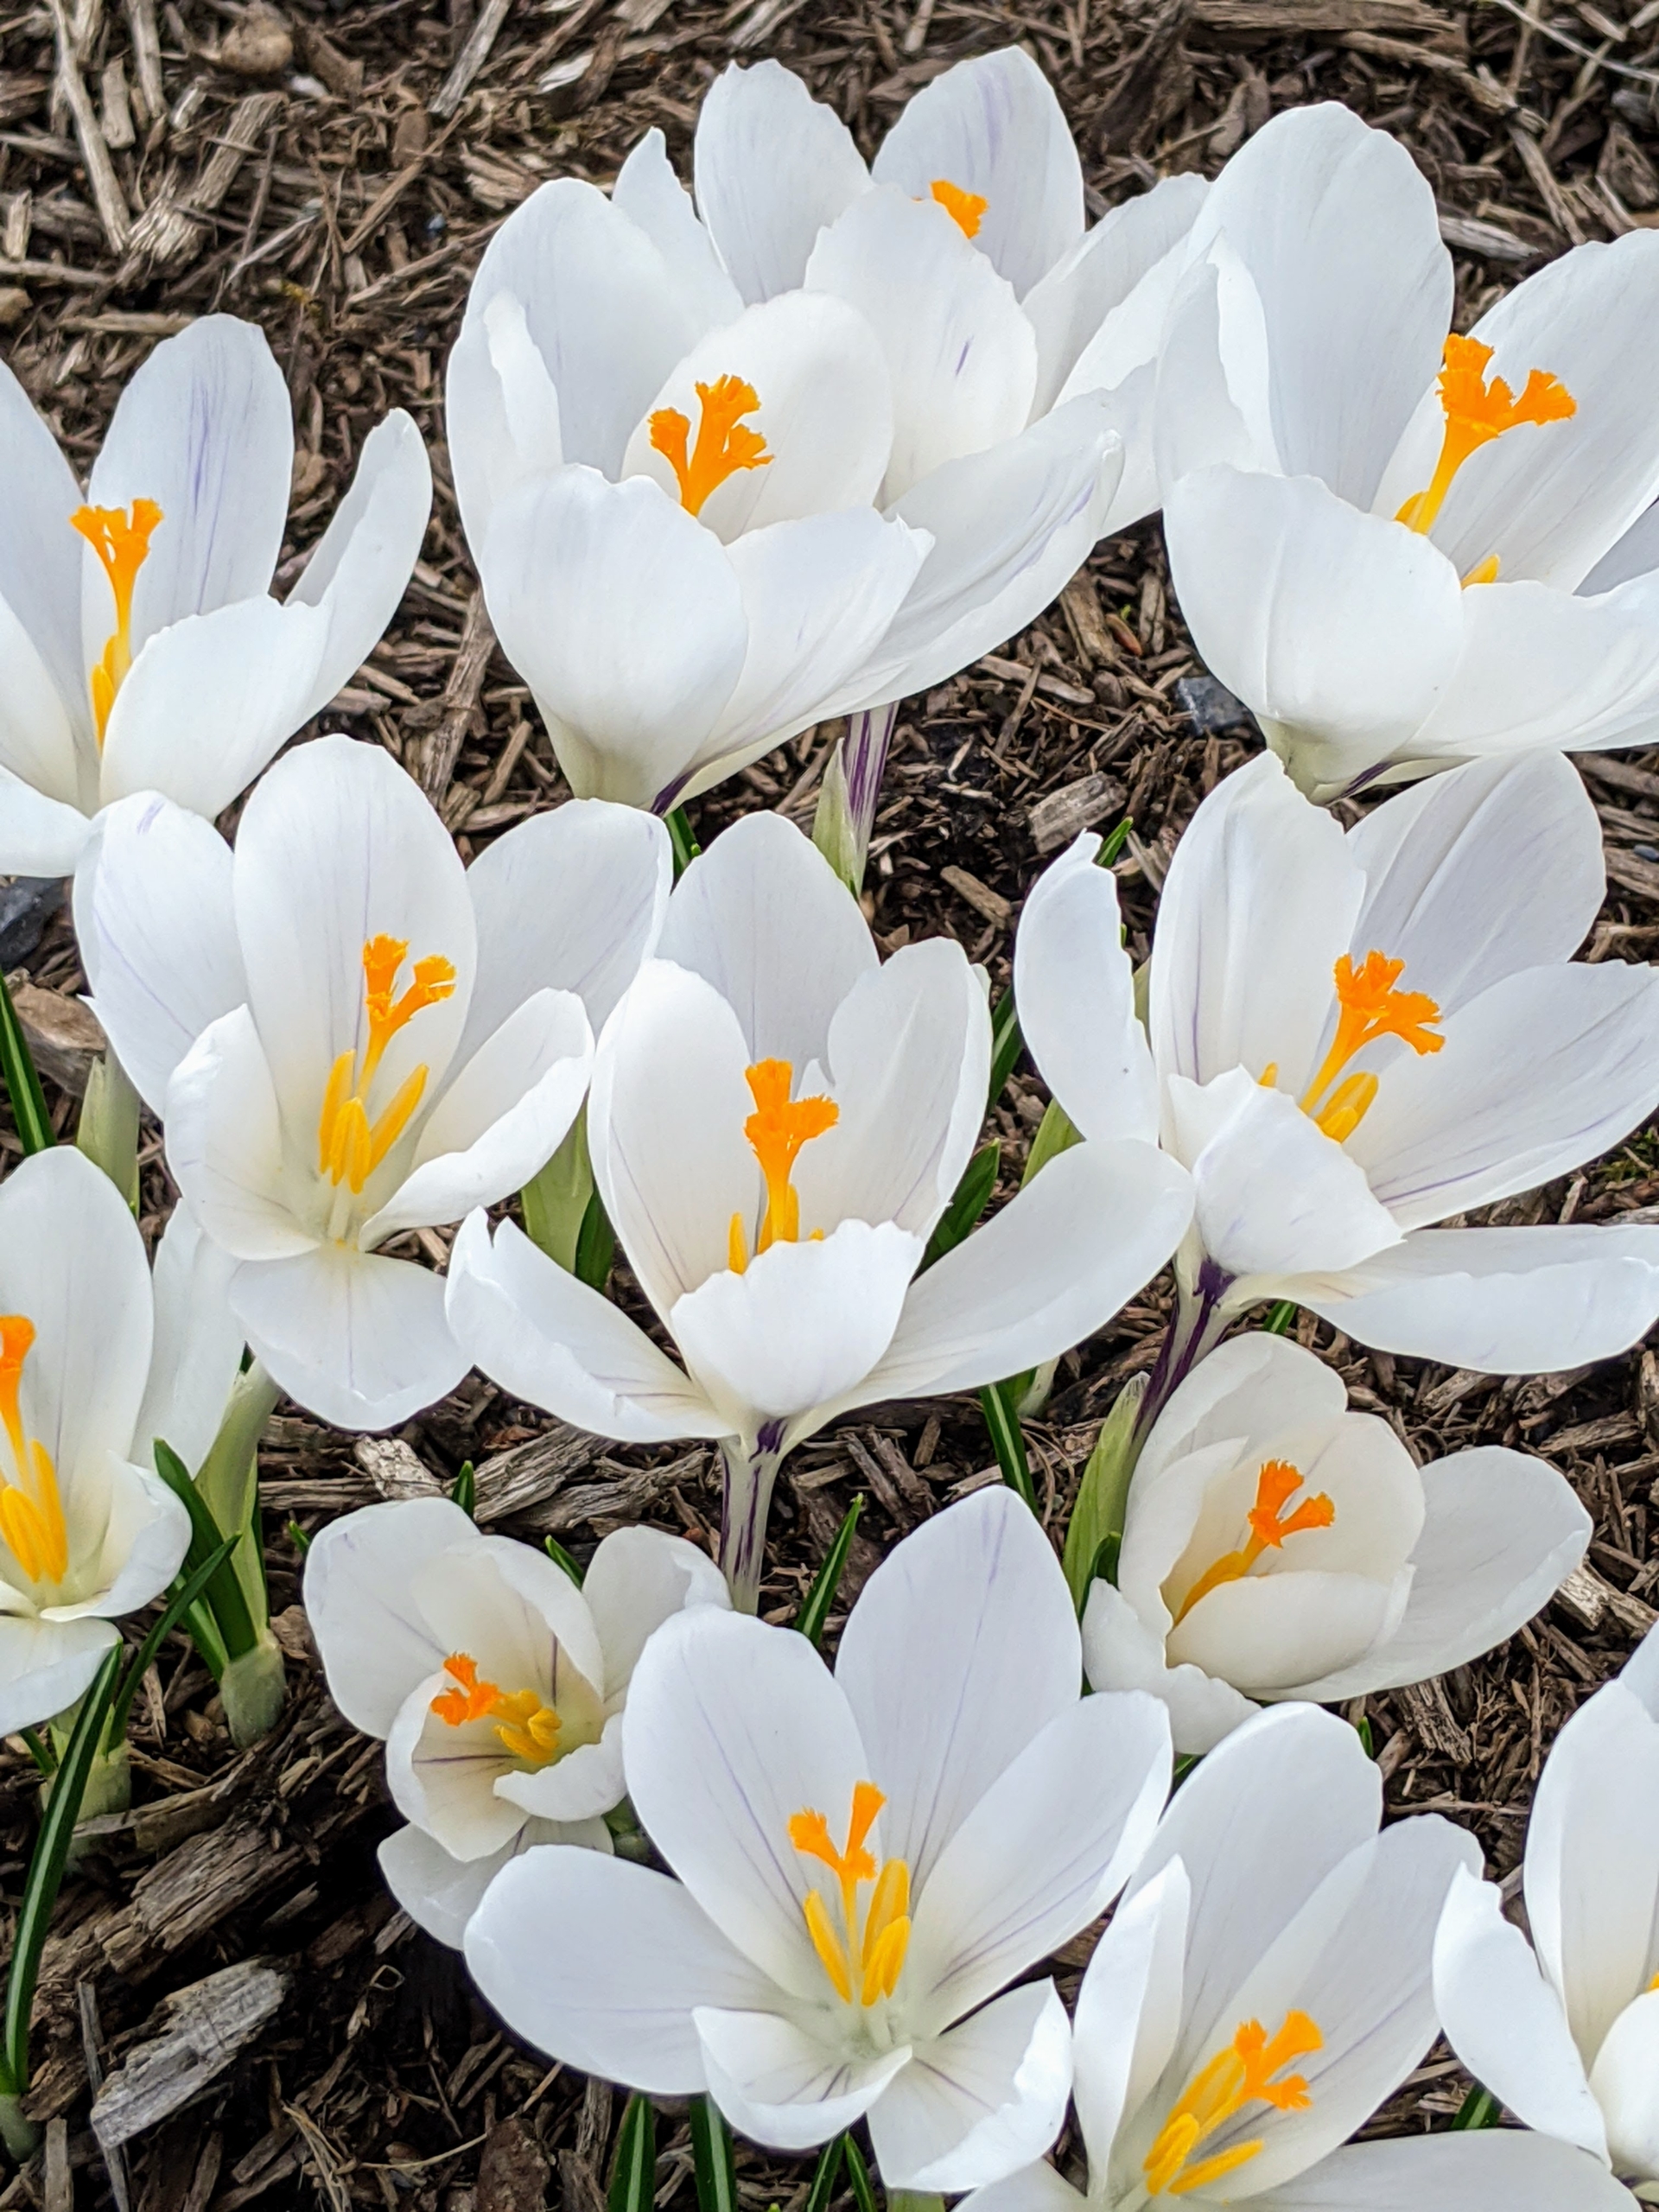
There is always renewed excitement every spring when the flowers emerge around the farm. Crocus is an early season flower that pops up usually in shades of white, yellow, and purple.
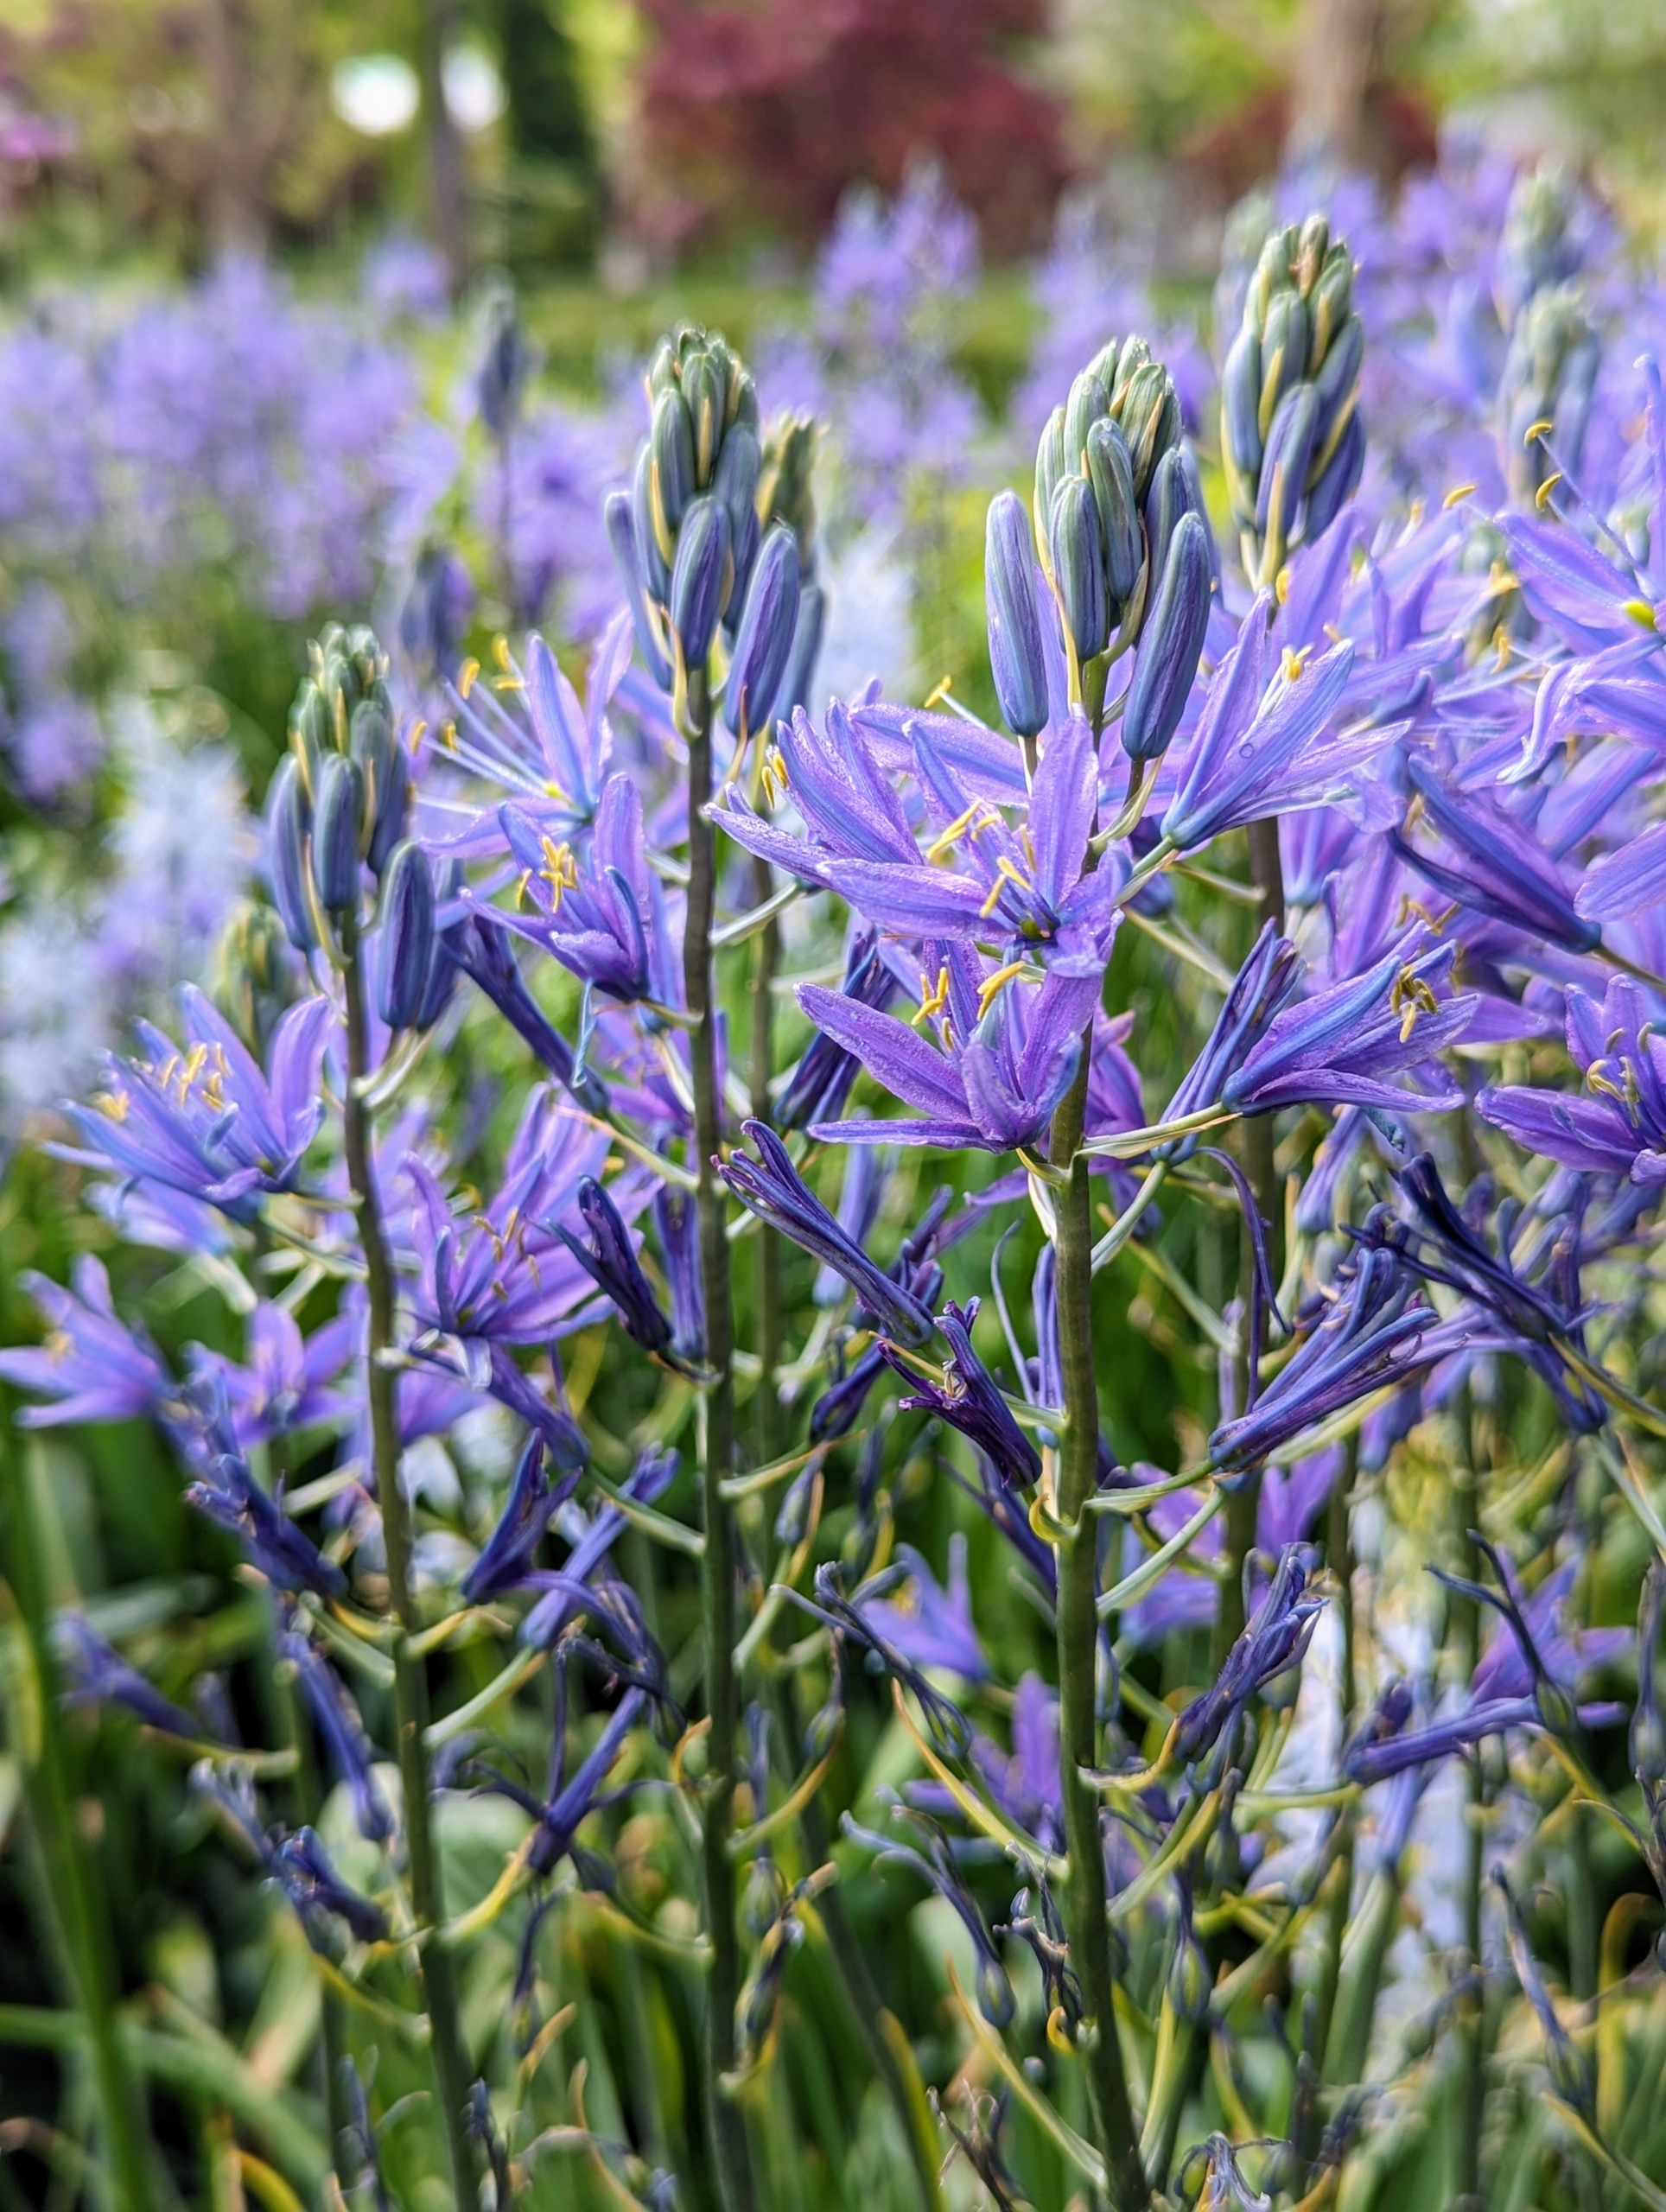
This is camassia. Camassia is a genus of plants in the asparagus family native to Canada and the United States. Common names include camas, quamash, Indian hyacinth, camash, and wild hyacinth. They grow to a height of 12 to 50 inches and vary in color from pale lilac or white to deep purple or blue-violet.
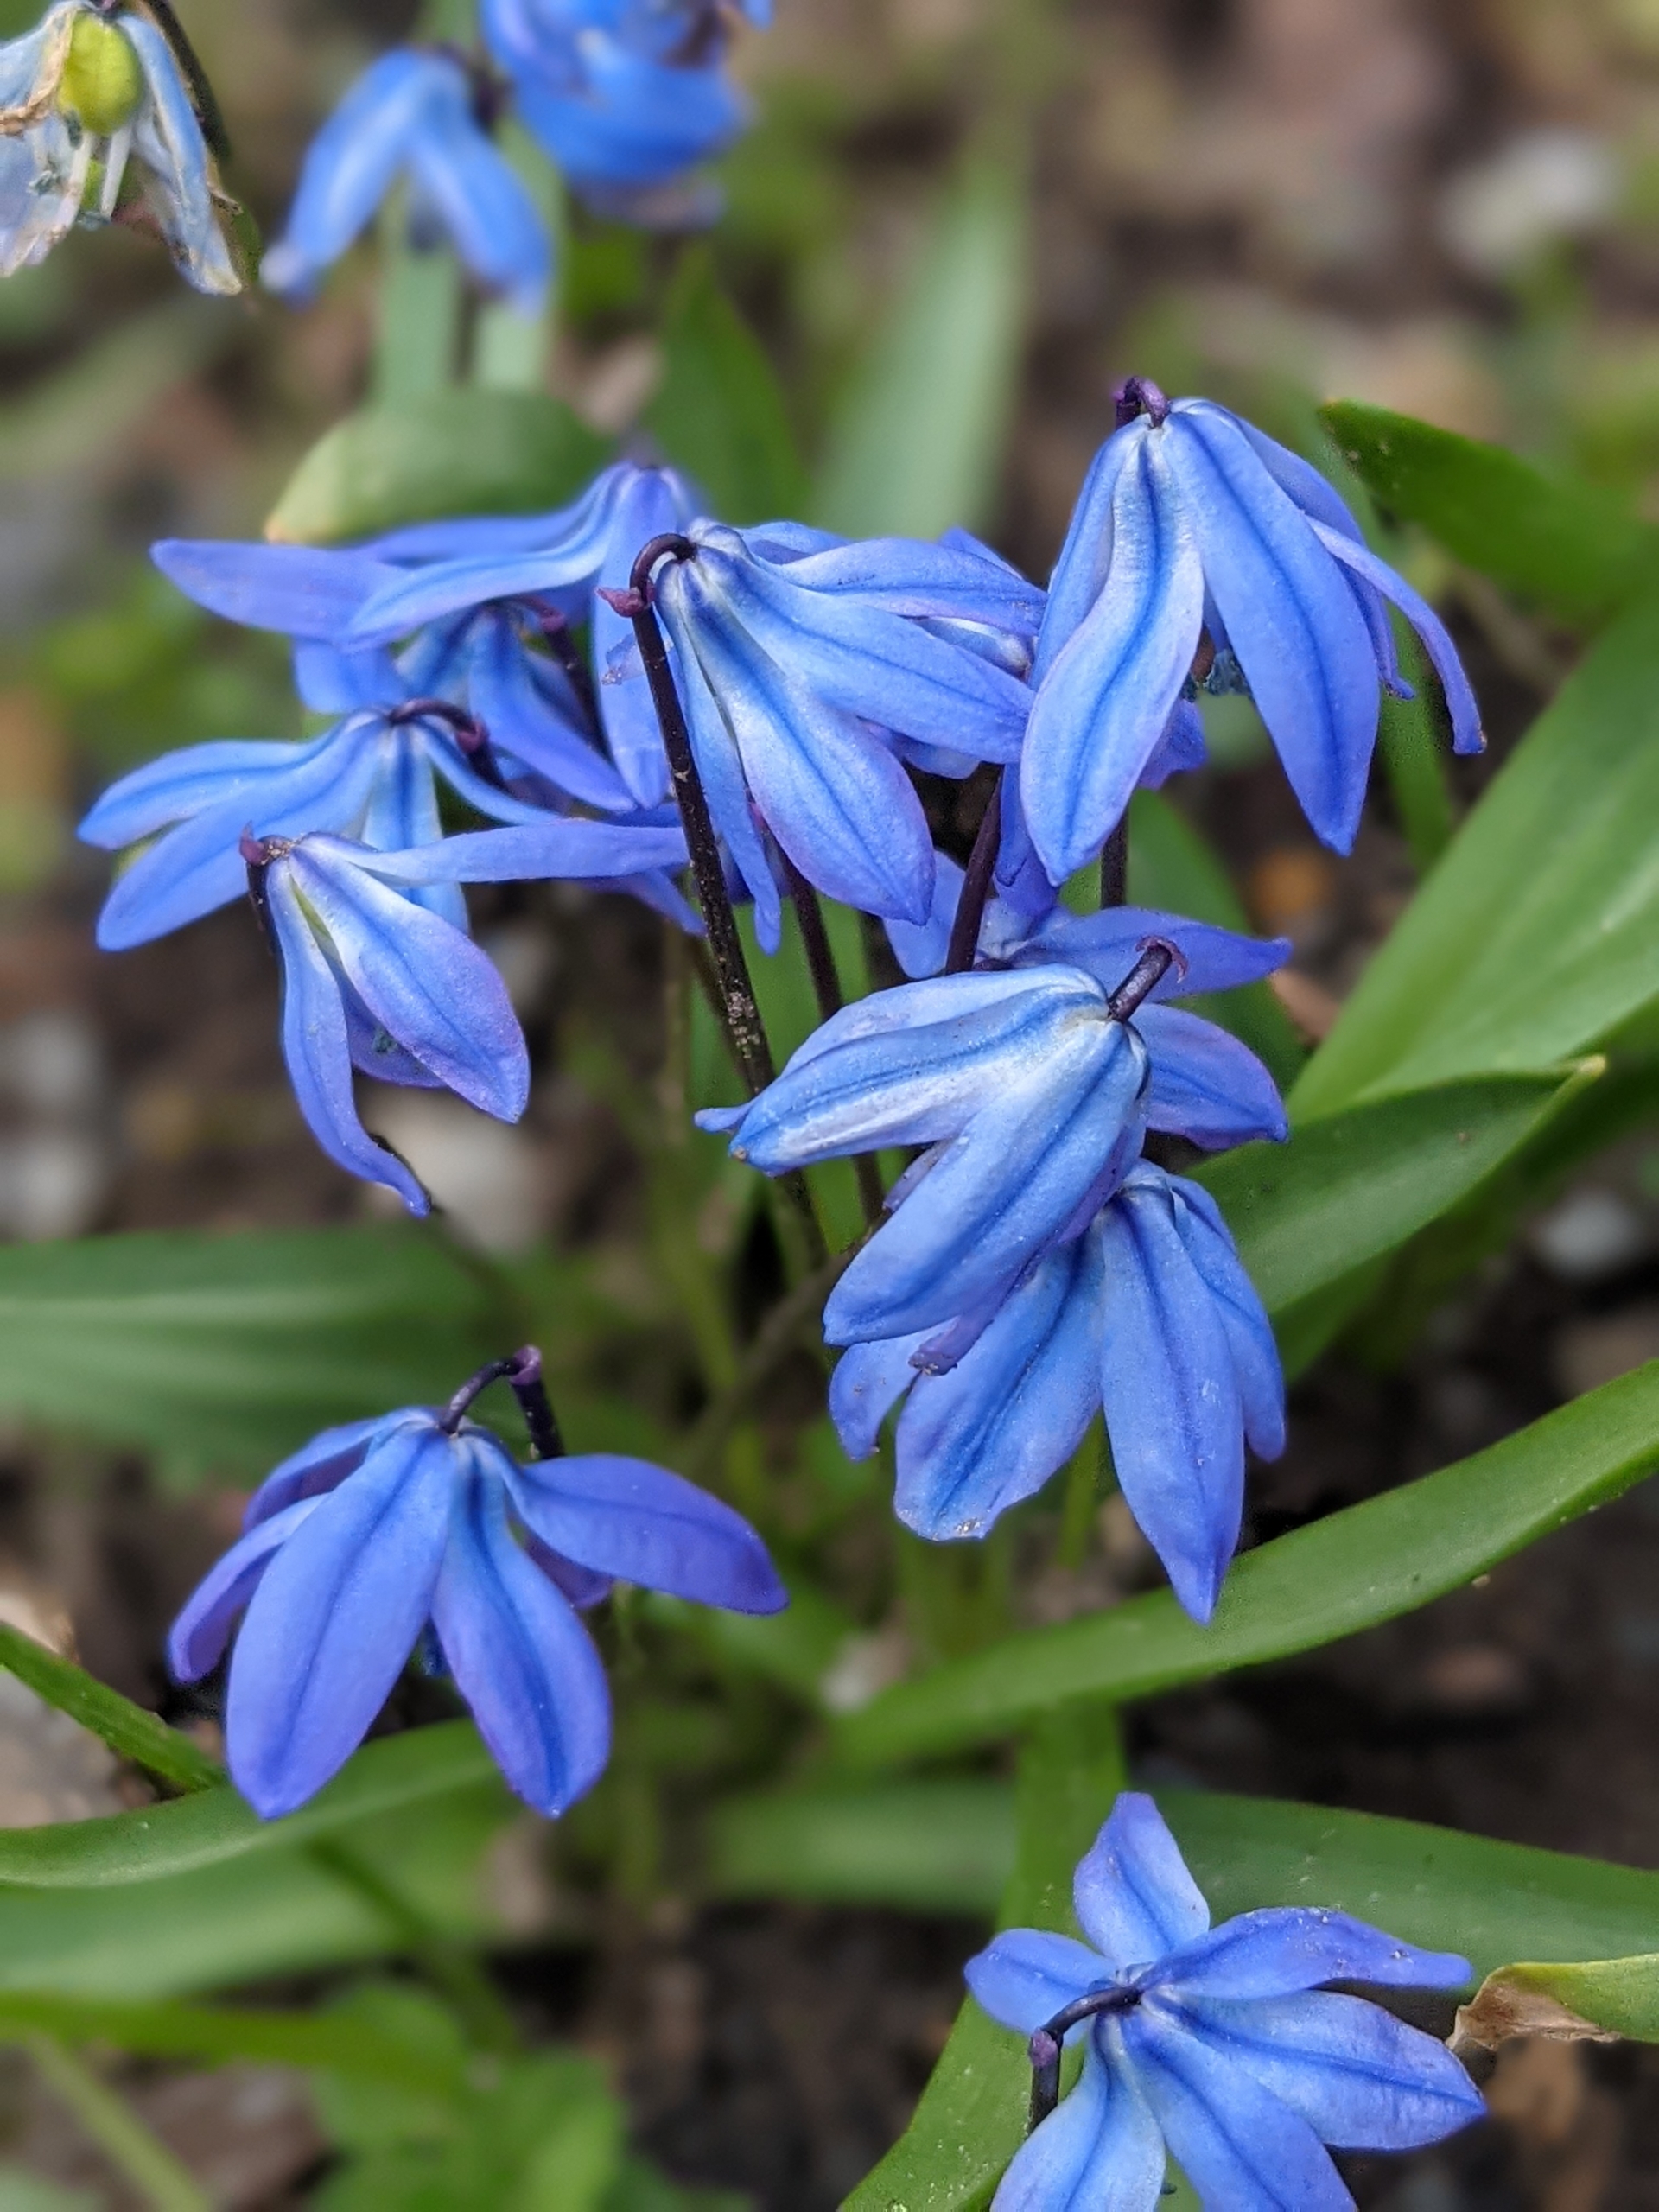
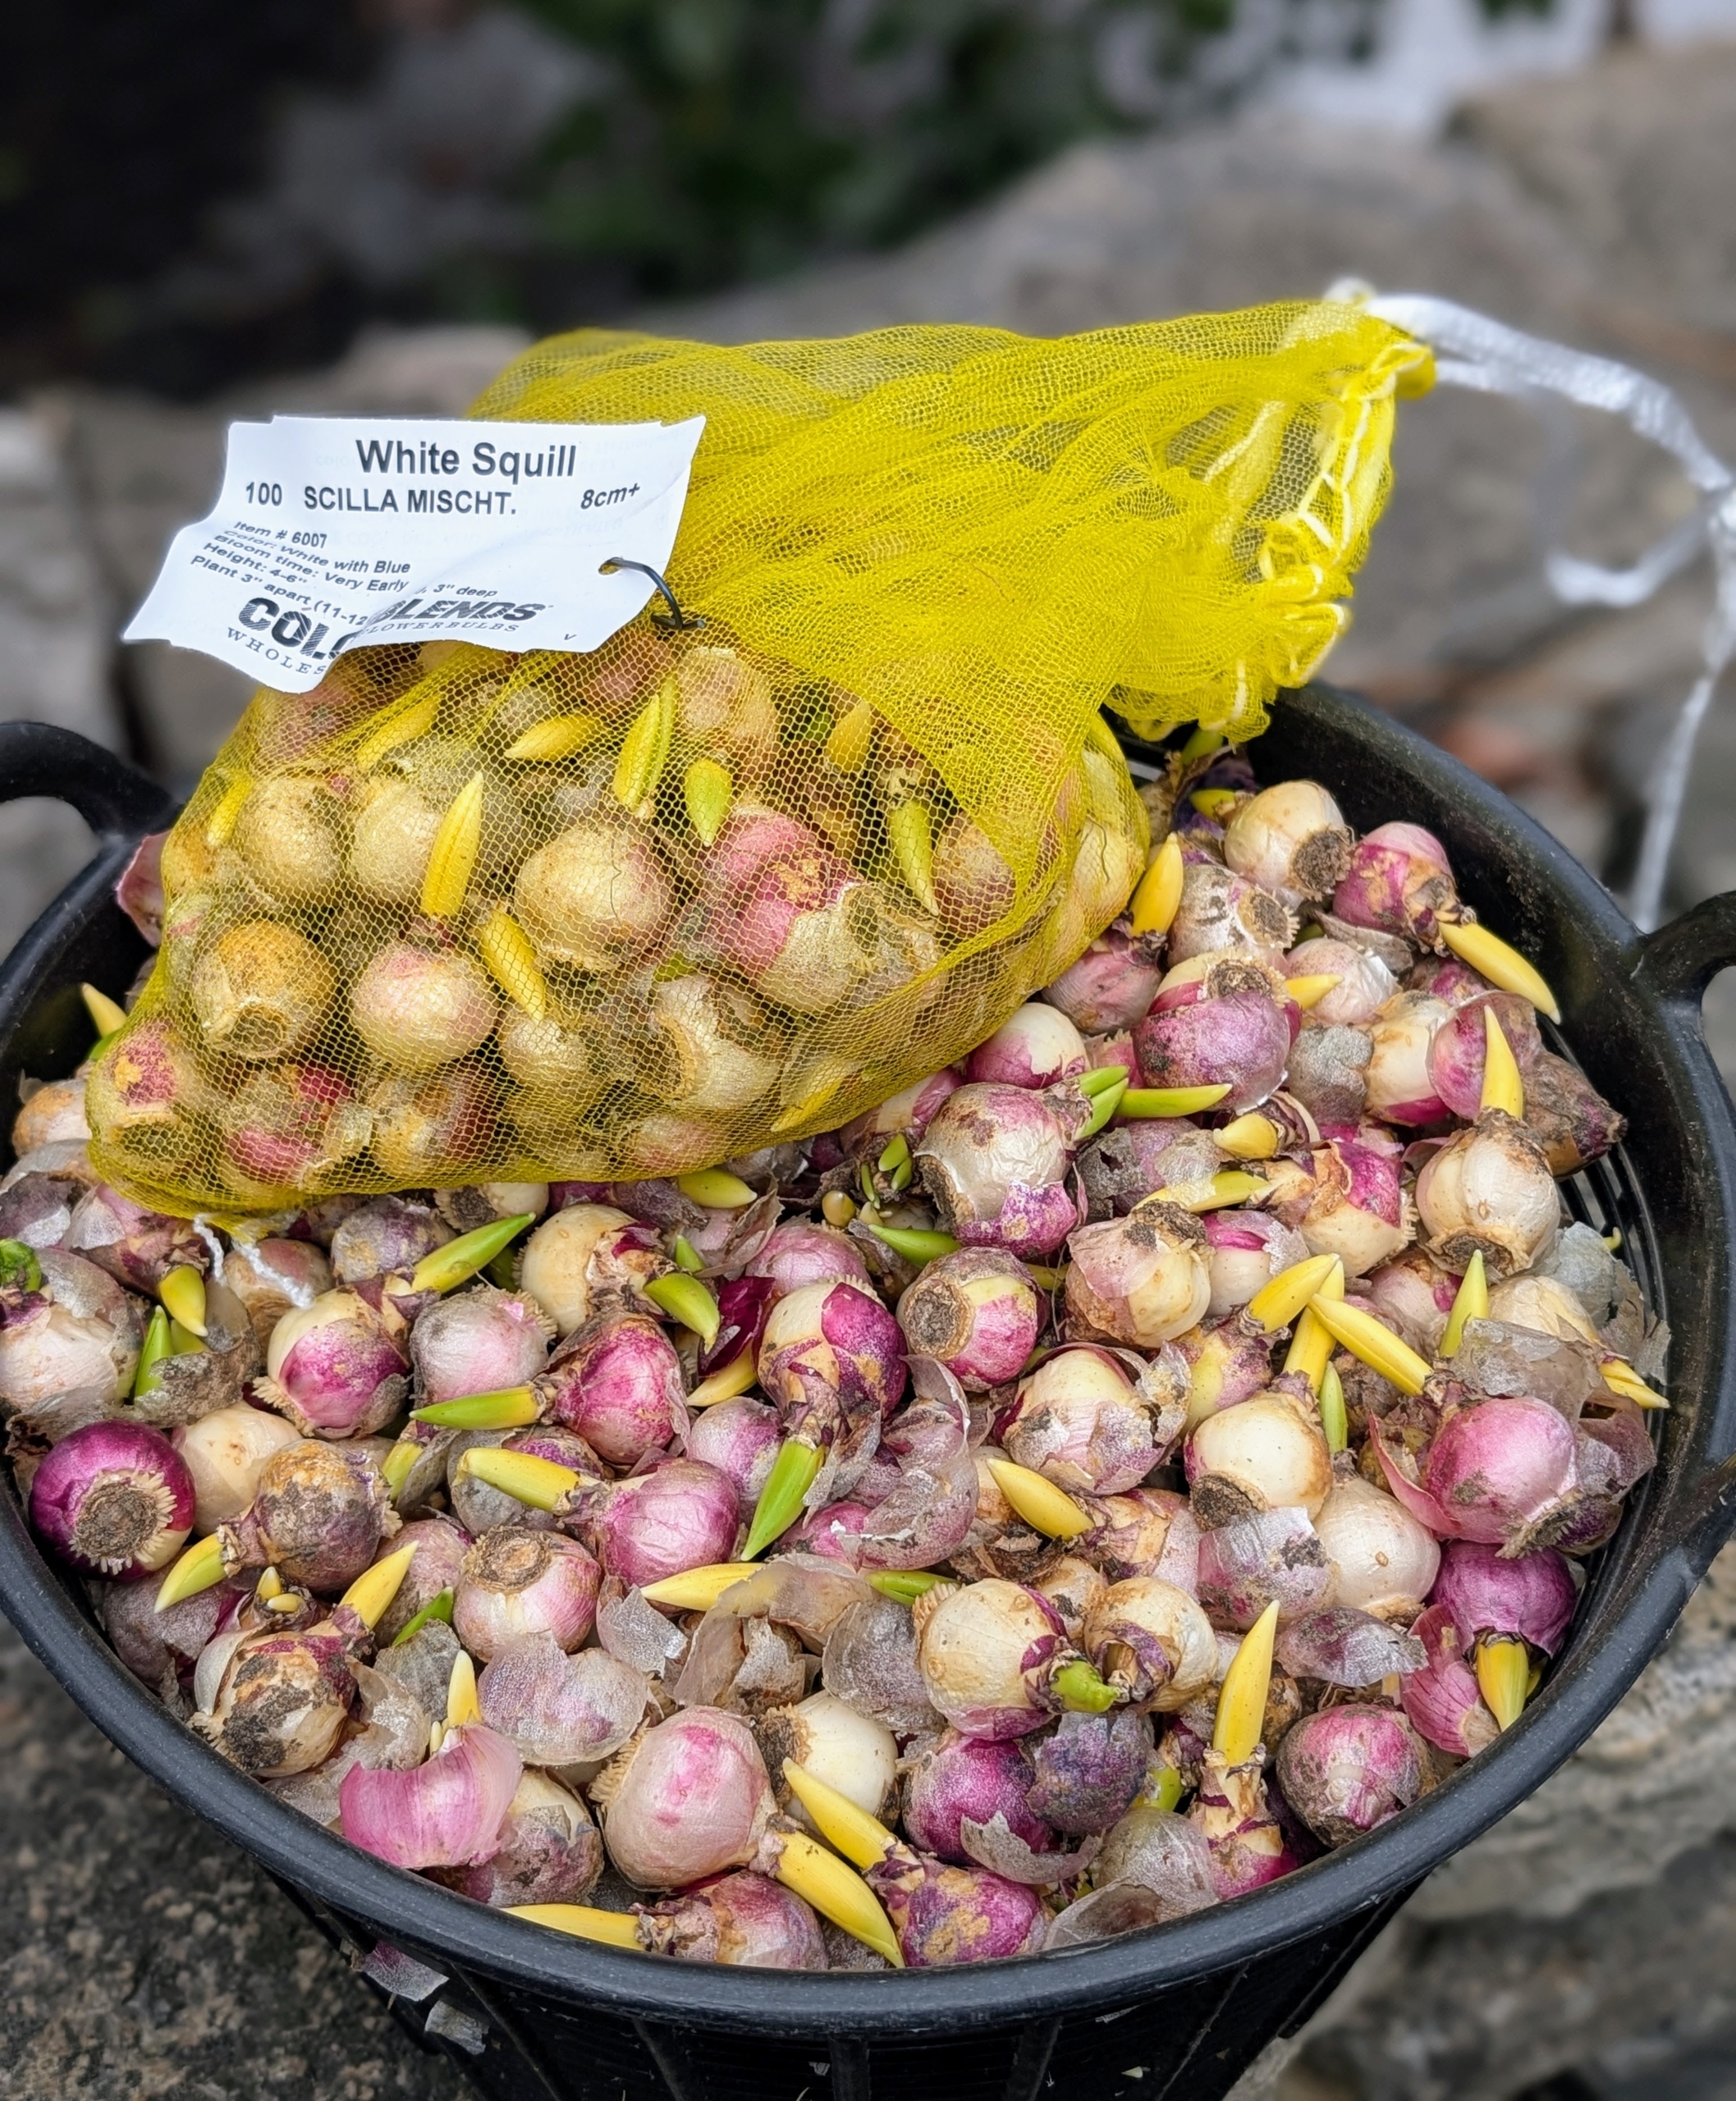
Squill or Siberian squill, is also known widely by its botanical name, Scilla. It is a spring bulb with green grass-like foliage and arching flower stalks that support one to three nodding blue or white flowers.
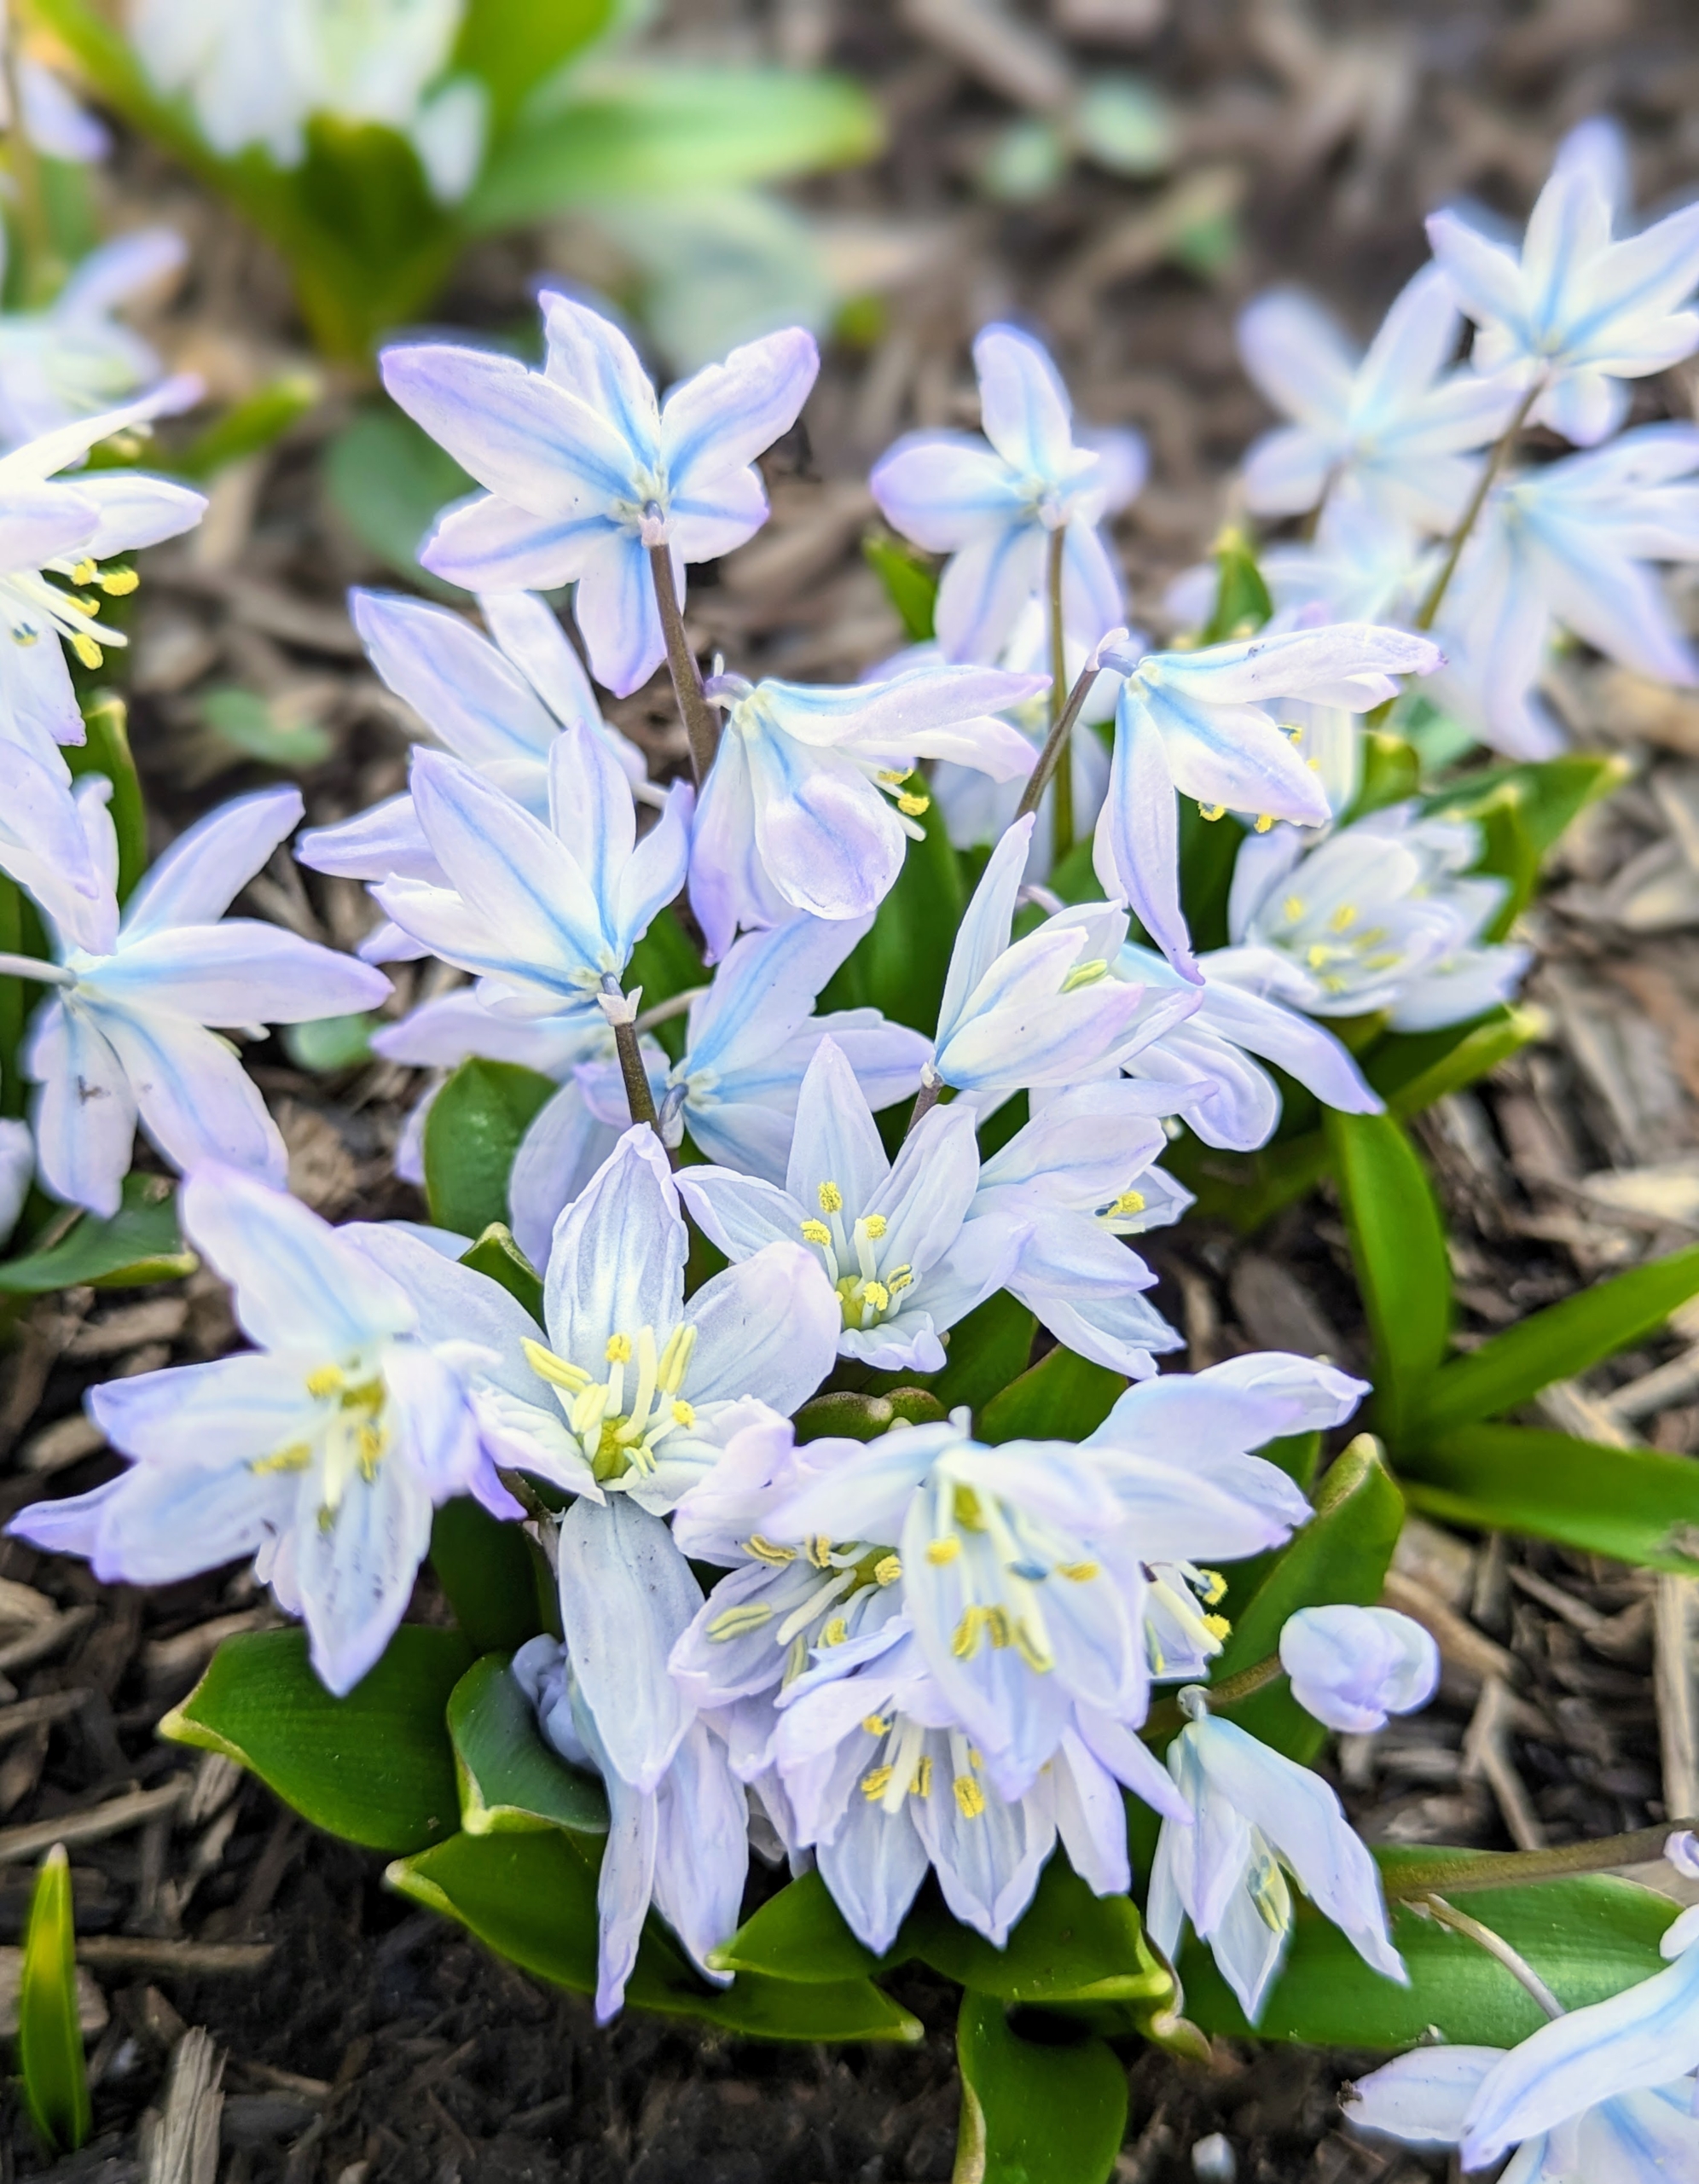
Striped squill is also known as puschkinia. Puschkinia is a genus of three known species of bulbous perennials in the family Asparagaceae. It is native to the Caucasus and the Middle East. Puschkinia shows off short flowers with six petals that are white with a blue stripe down the middle, which can be seen in the front, the back, and the sides of the blooms.
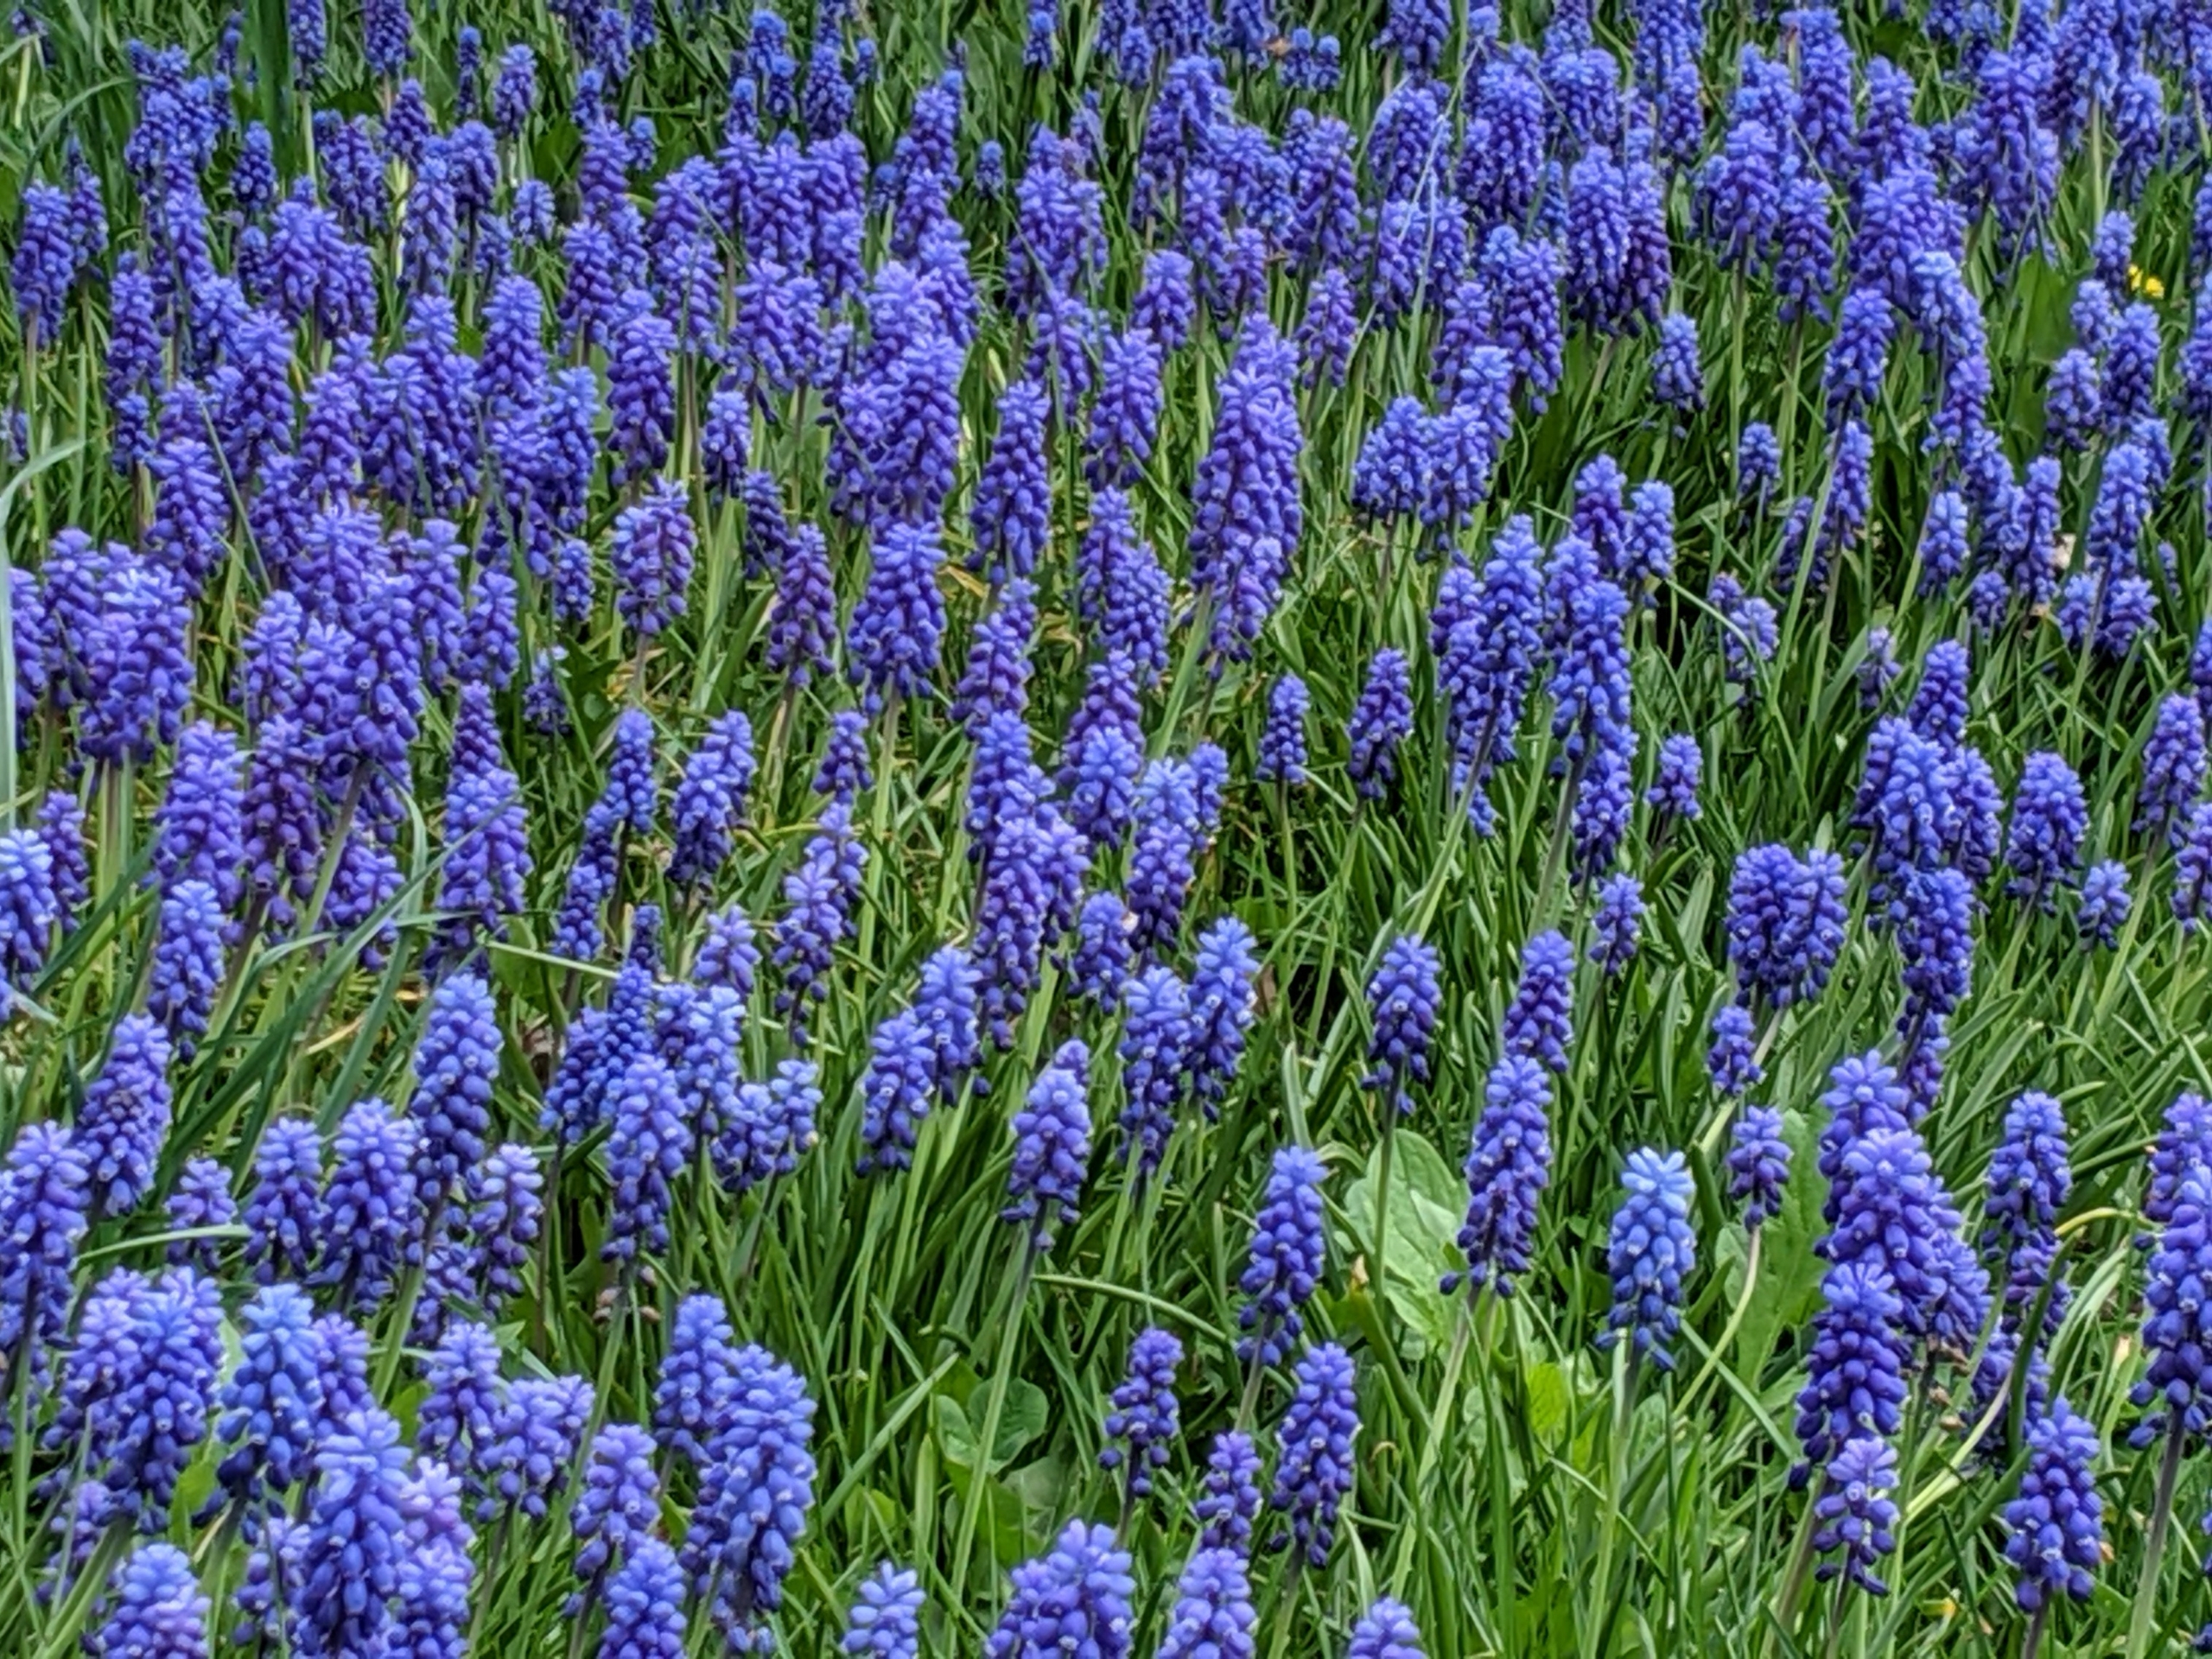
And I grow masses of beautiful muscari. Muscari is a genus of perennial bulbous plants native to Eurasia that produce spikes of dense, most commonly blue, urn-shaped flowers that look like bunches of grapes in spring.
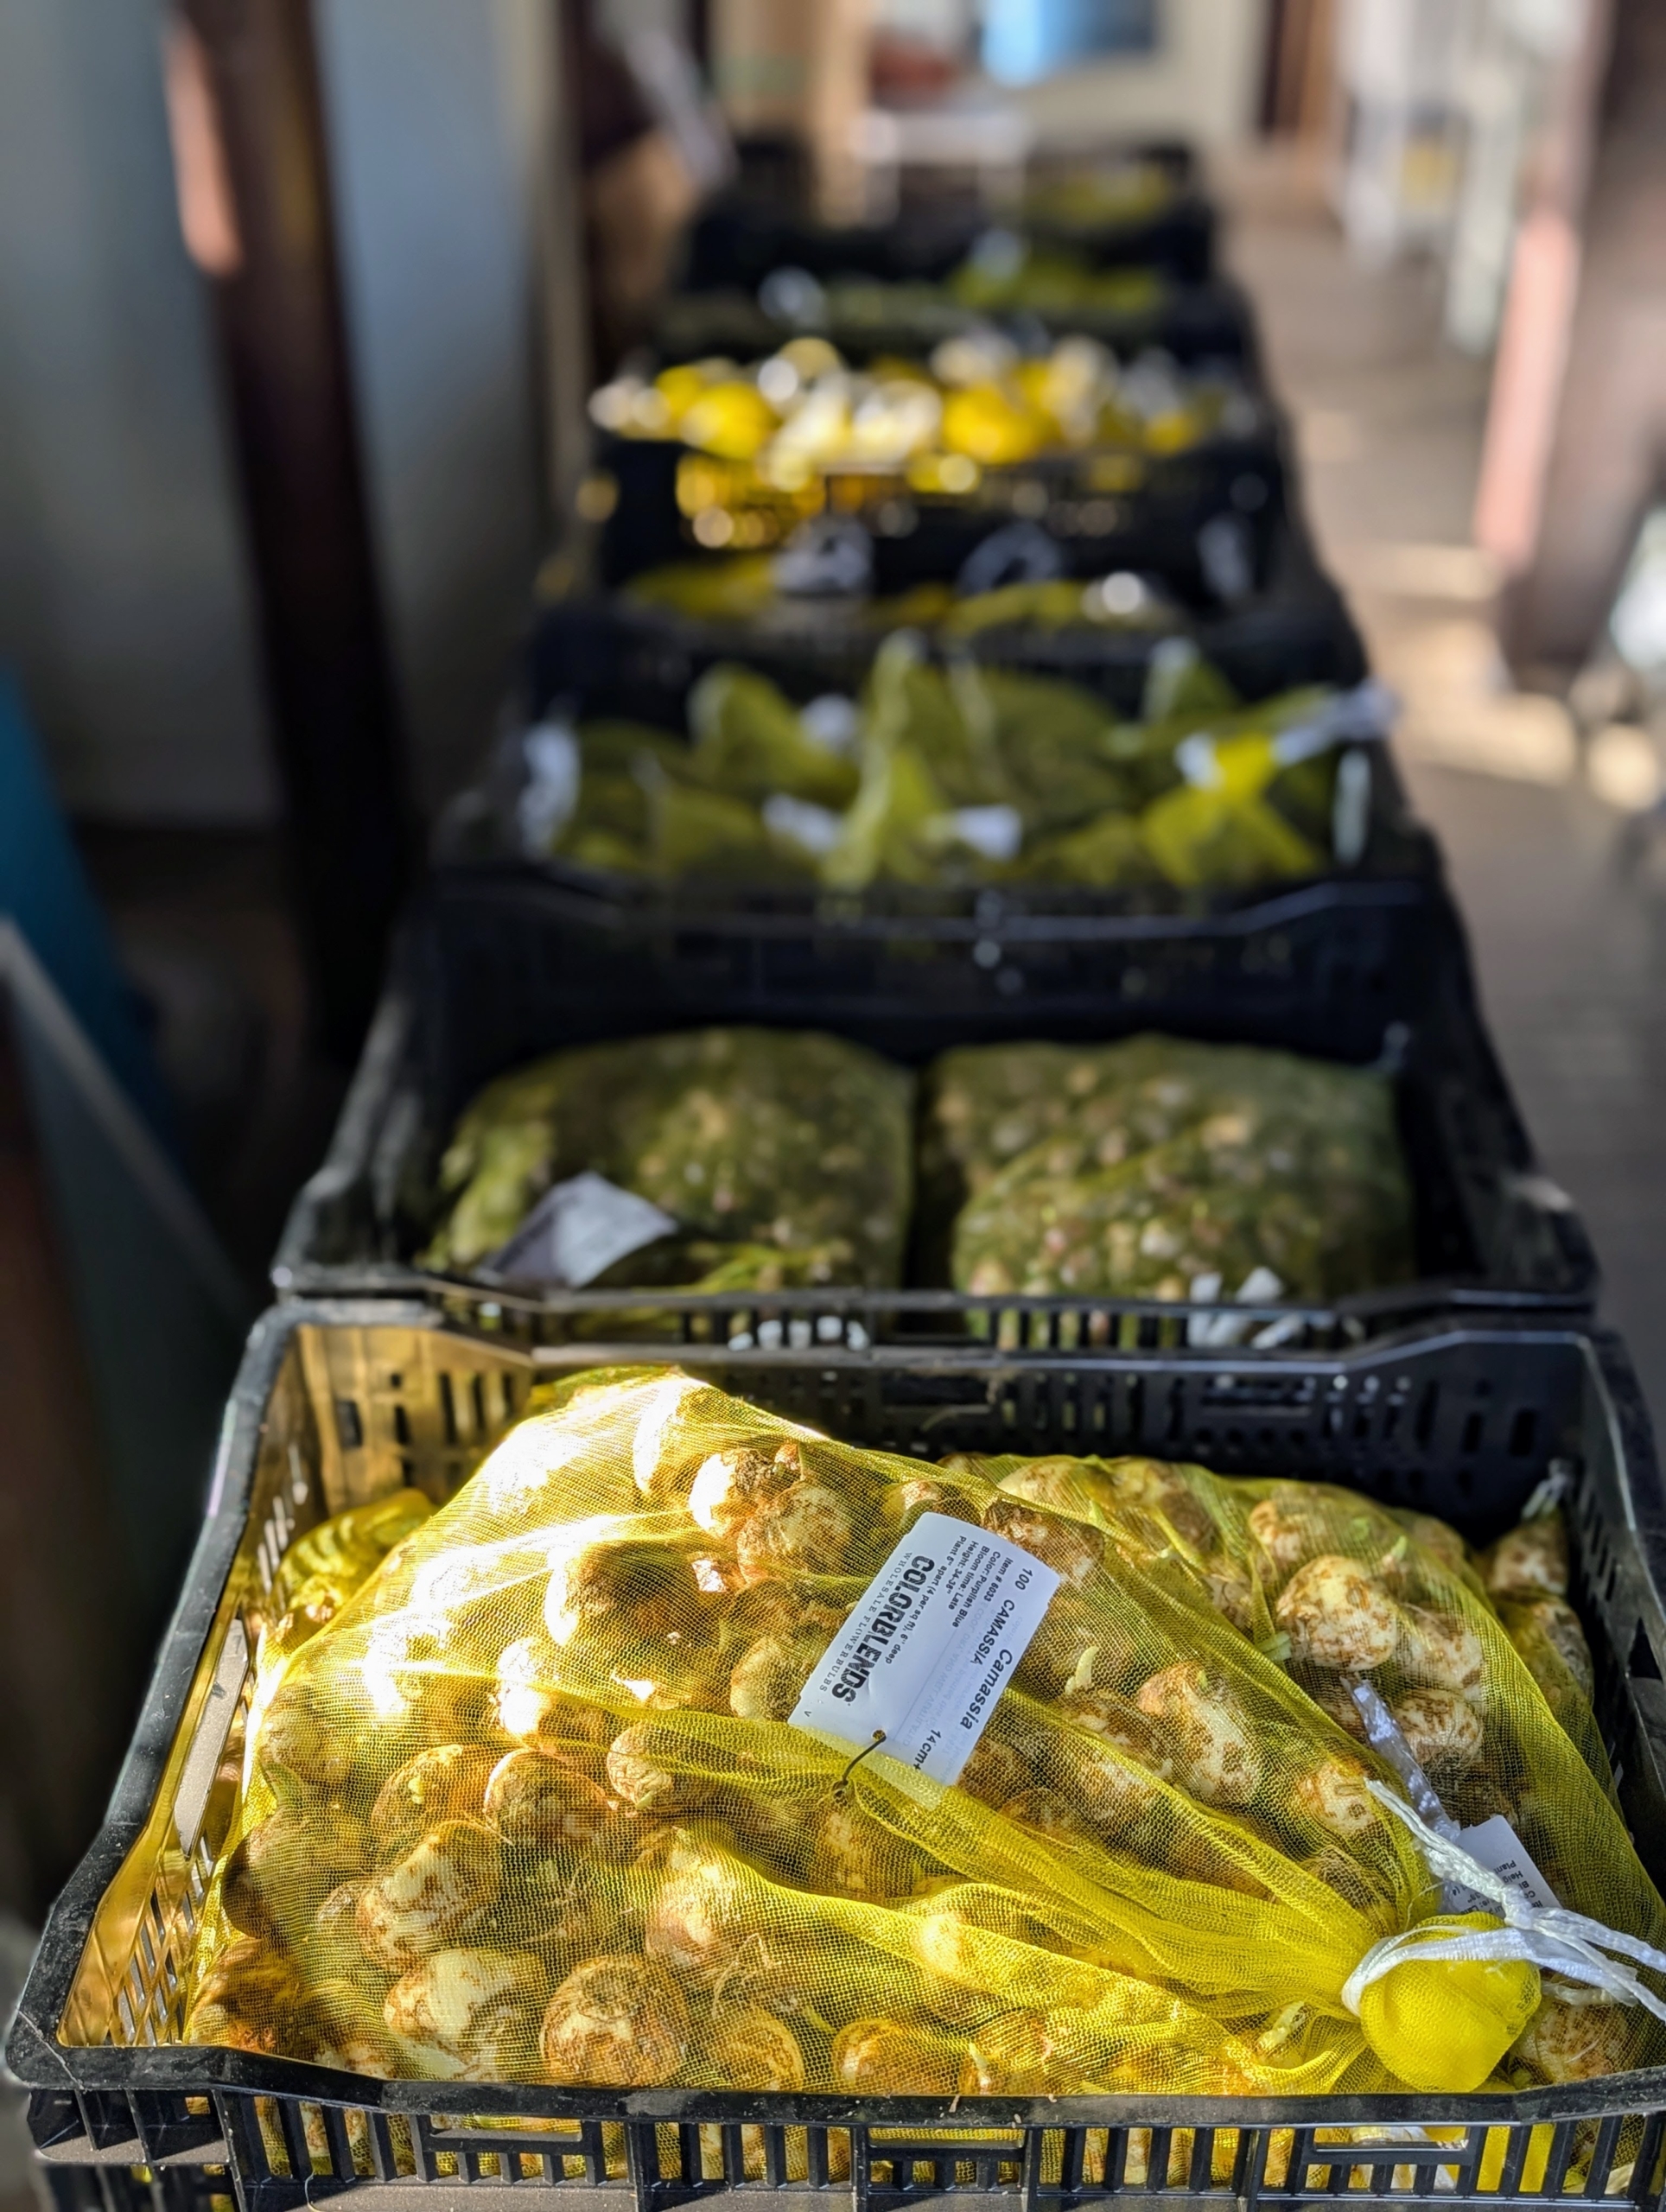
Many of my bulbs are from Colorblends Wholesale Flowerbulbs – a third generation flower merchant in nearby Bridgeport, Connecticut. Late in planting season, Colorblends had a surplus of bulbs available. I was excited to purchase bags of small flowering bulbs I love.
Bulbs are packaged in batches of 50, 100, 500, and a thousand. They come in these breathable sacks and crates. They are also packed in paper bags, boxes, and plastic pouches depending on the bulbs’ humidity needs. They must be kept moist without being wet.
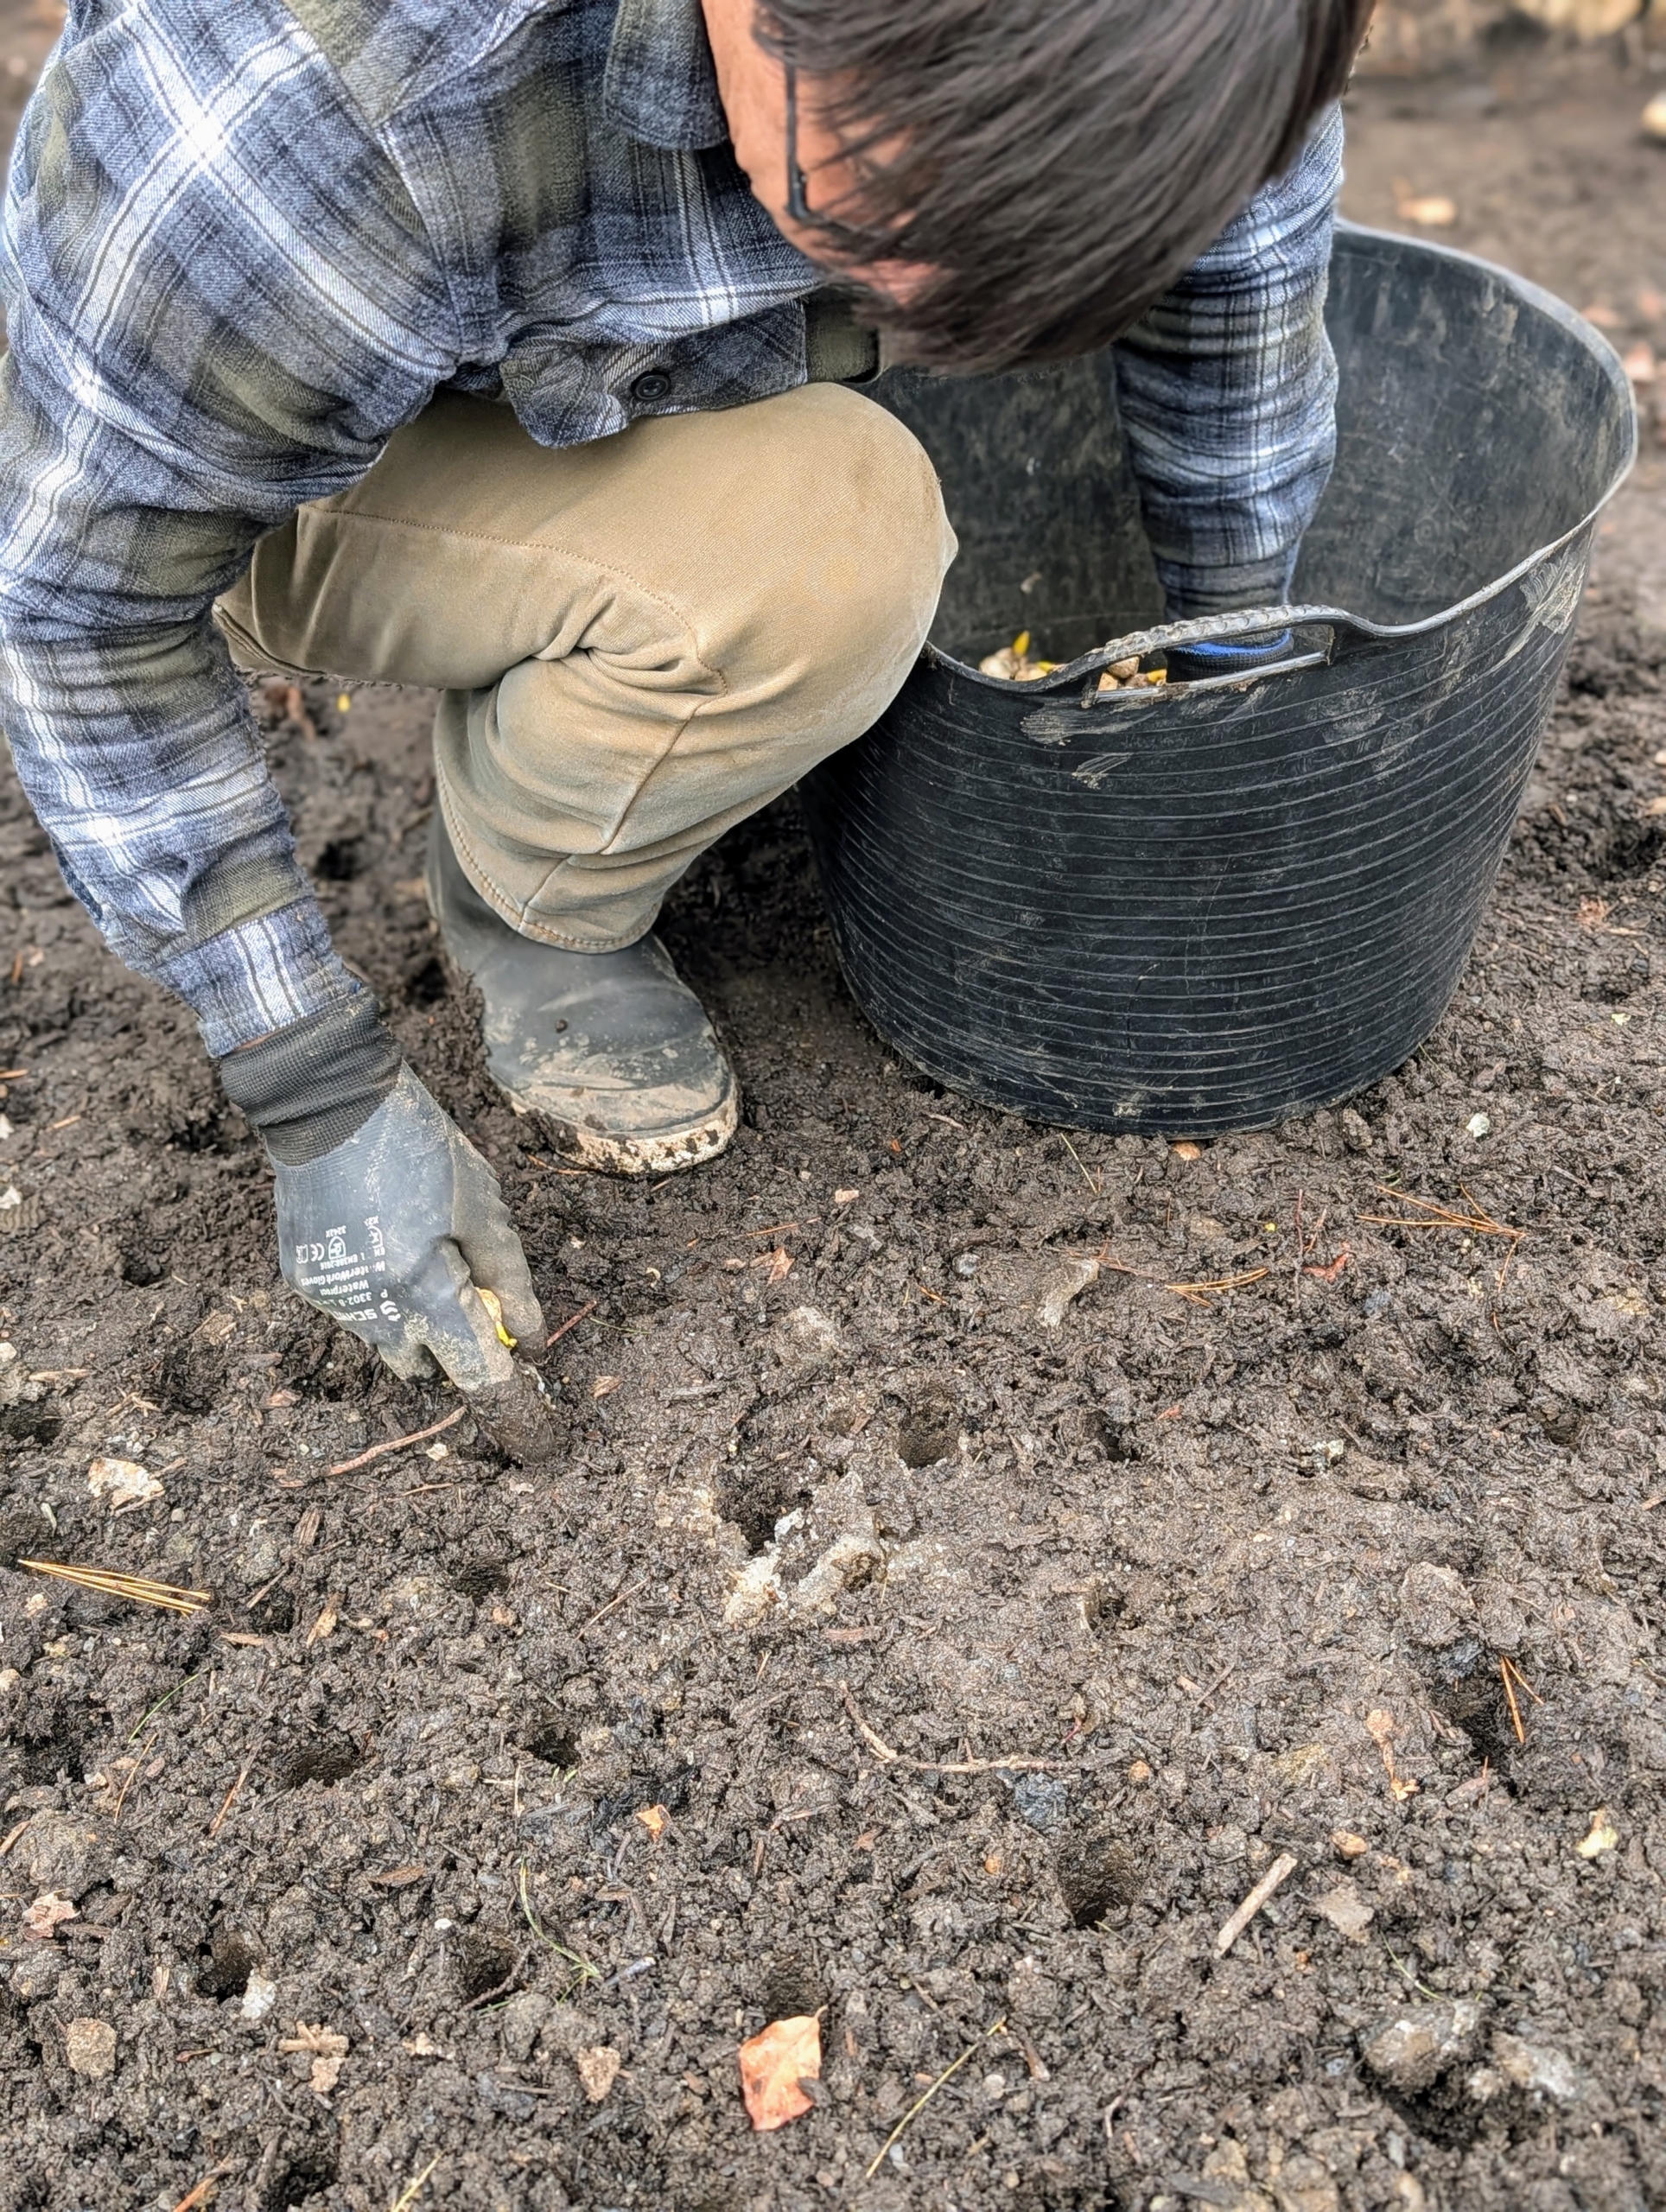
I was thrilled to have enough to plant along some of the stone walls of my farm. The first step is to rake the beds, so they are clear of any debris.
Then my head-gardener, Ryan McCallister, throws batches of bulbs down on the ground. He does this randomly across the bed to create a more natural appearance when they grow.
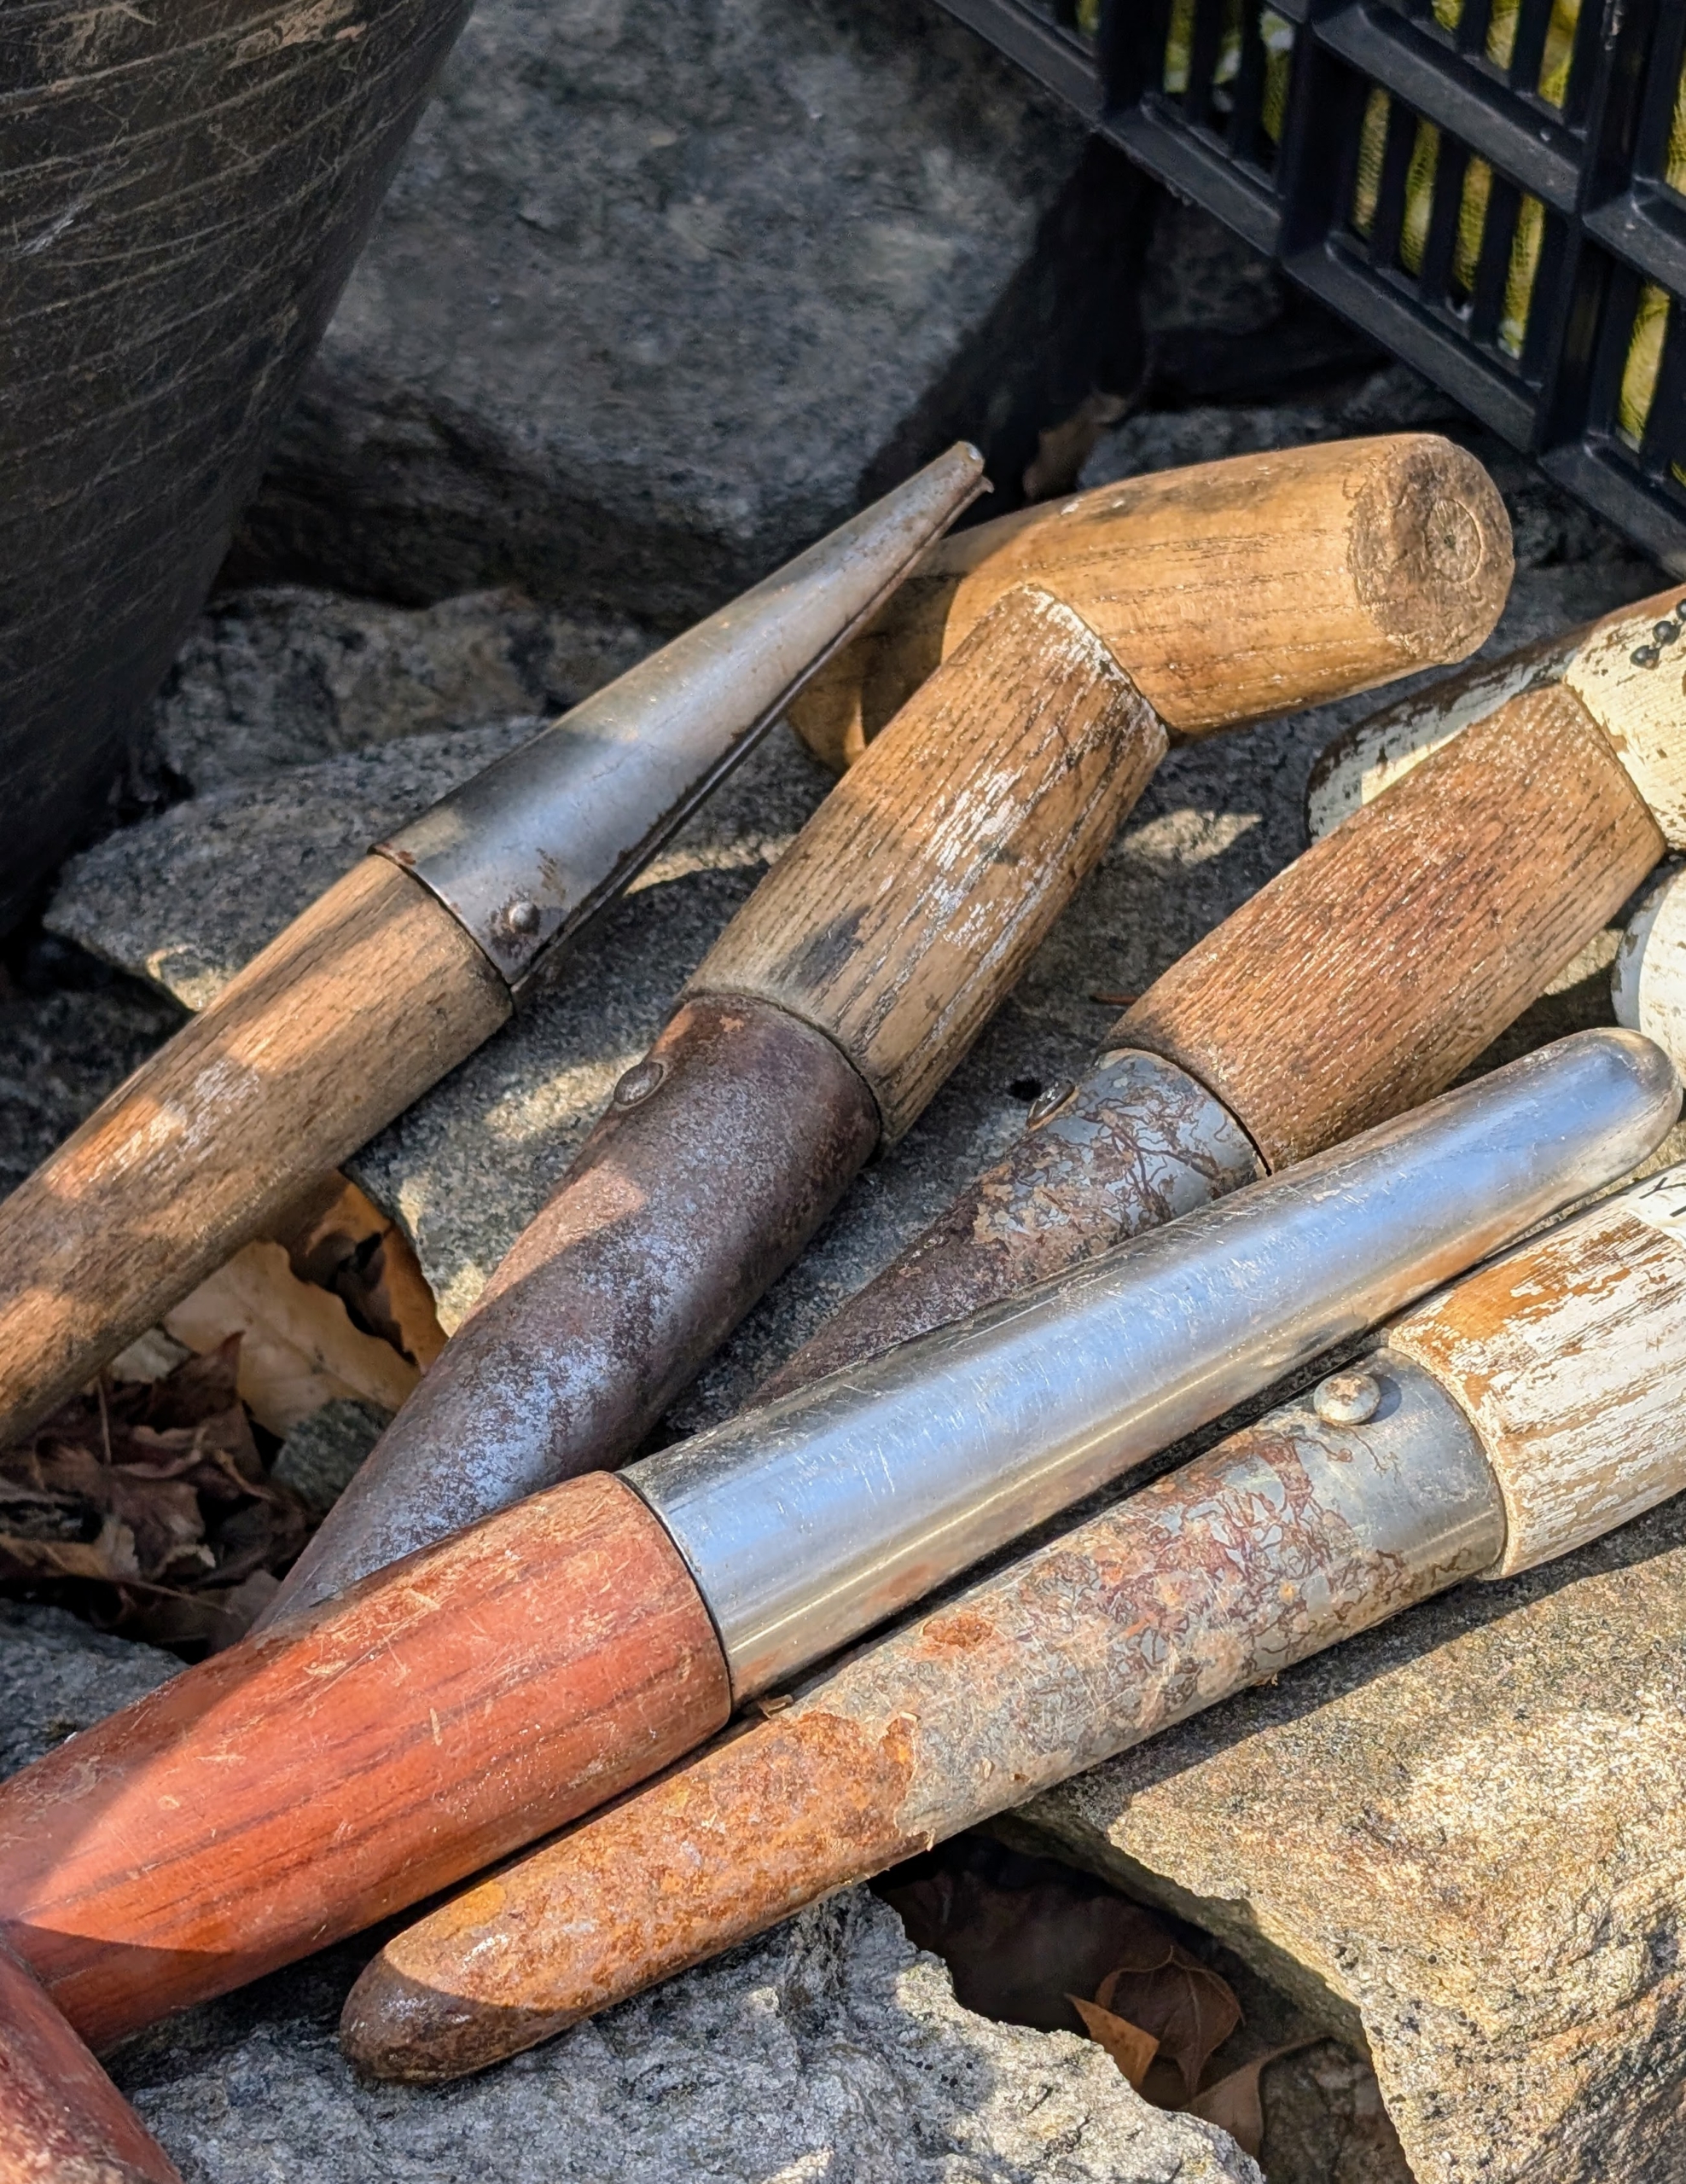
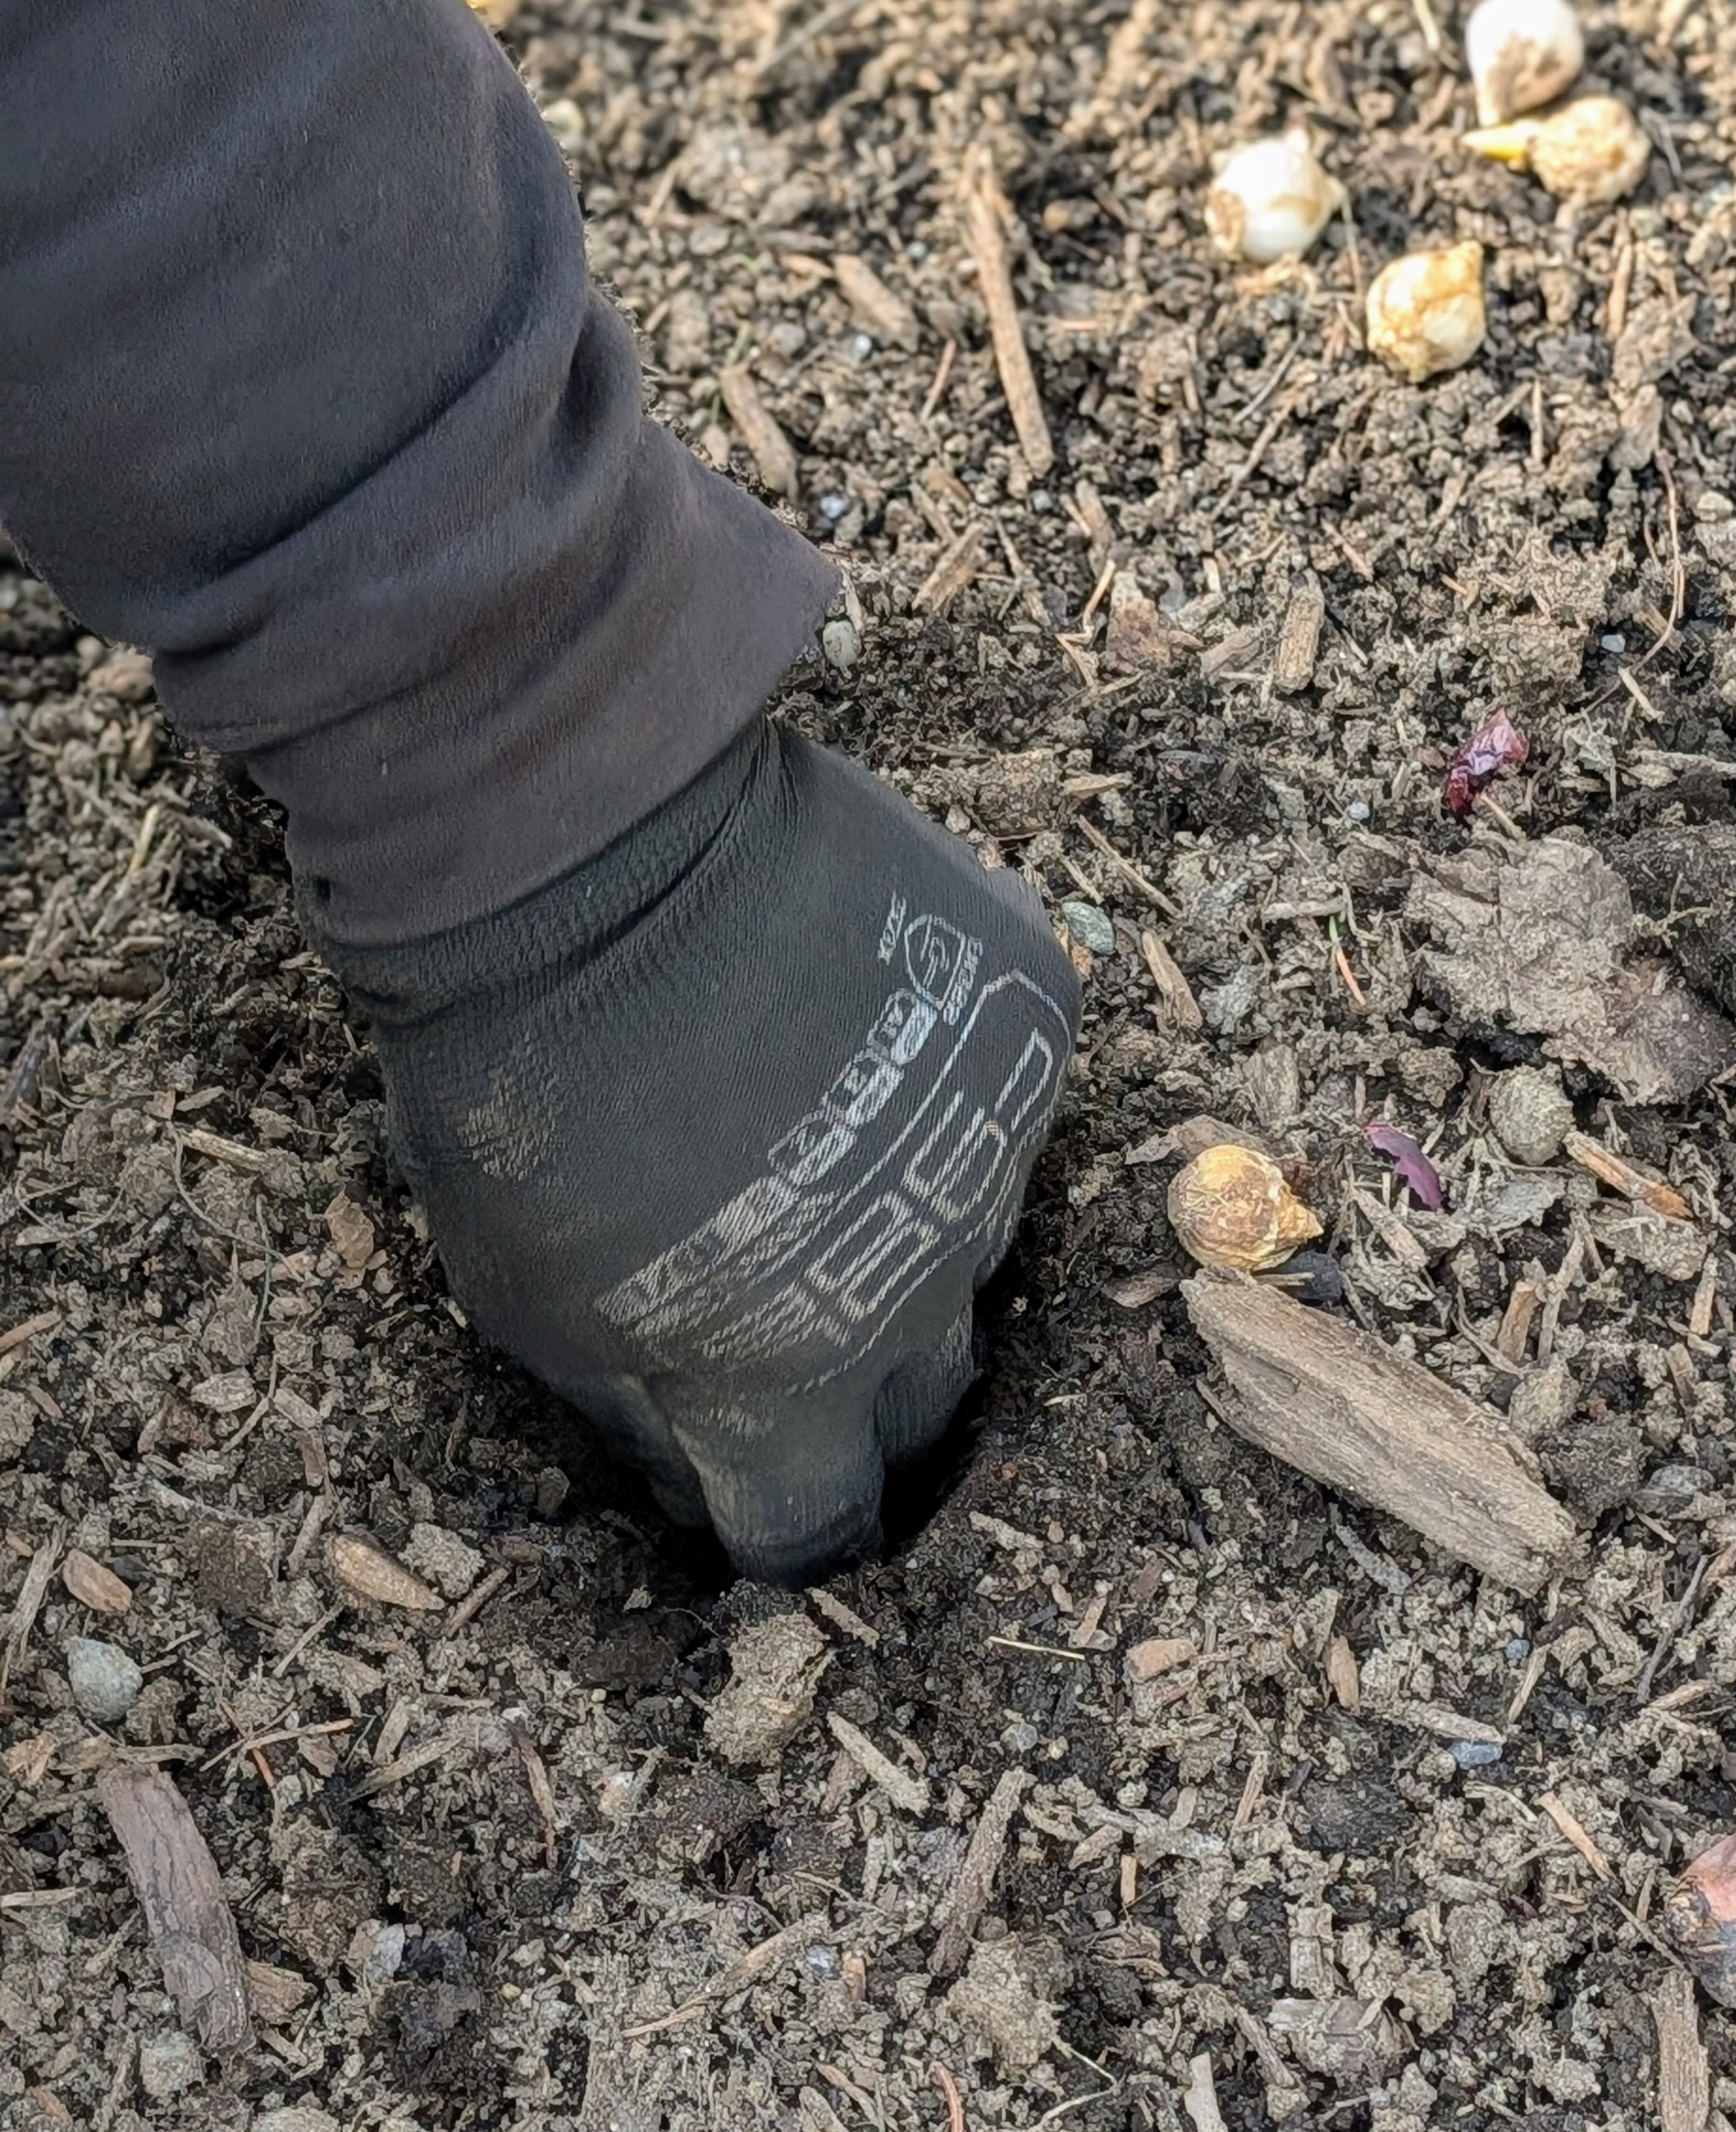
For planting smaller bulbs, my gardeners use T-handled dibbers, which are pressed into the soil to make narrow holes.
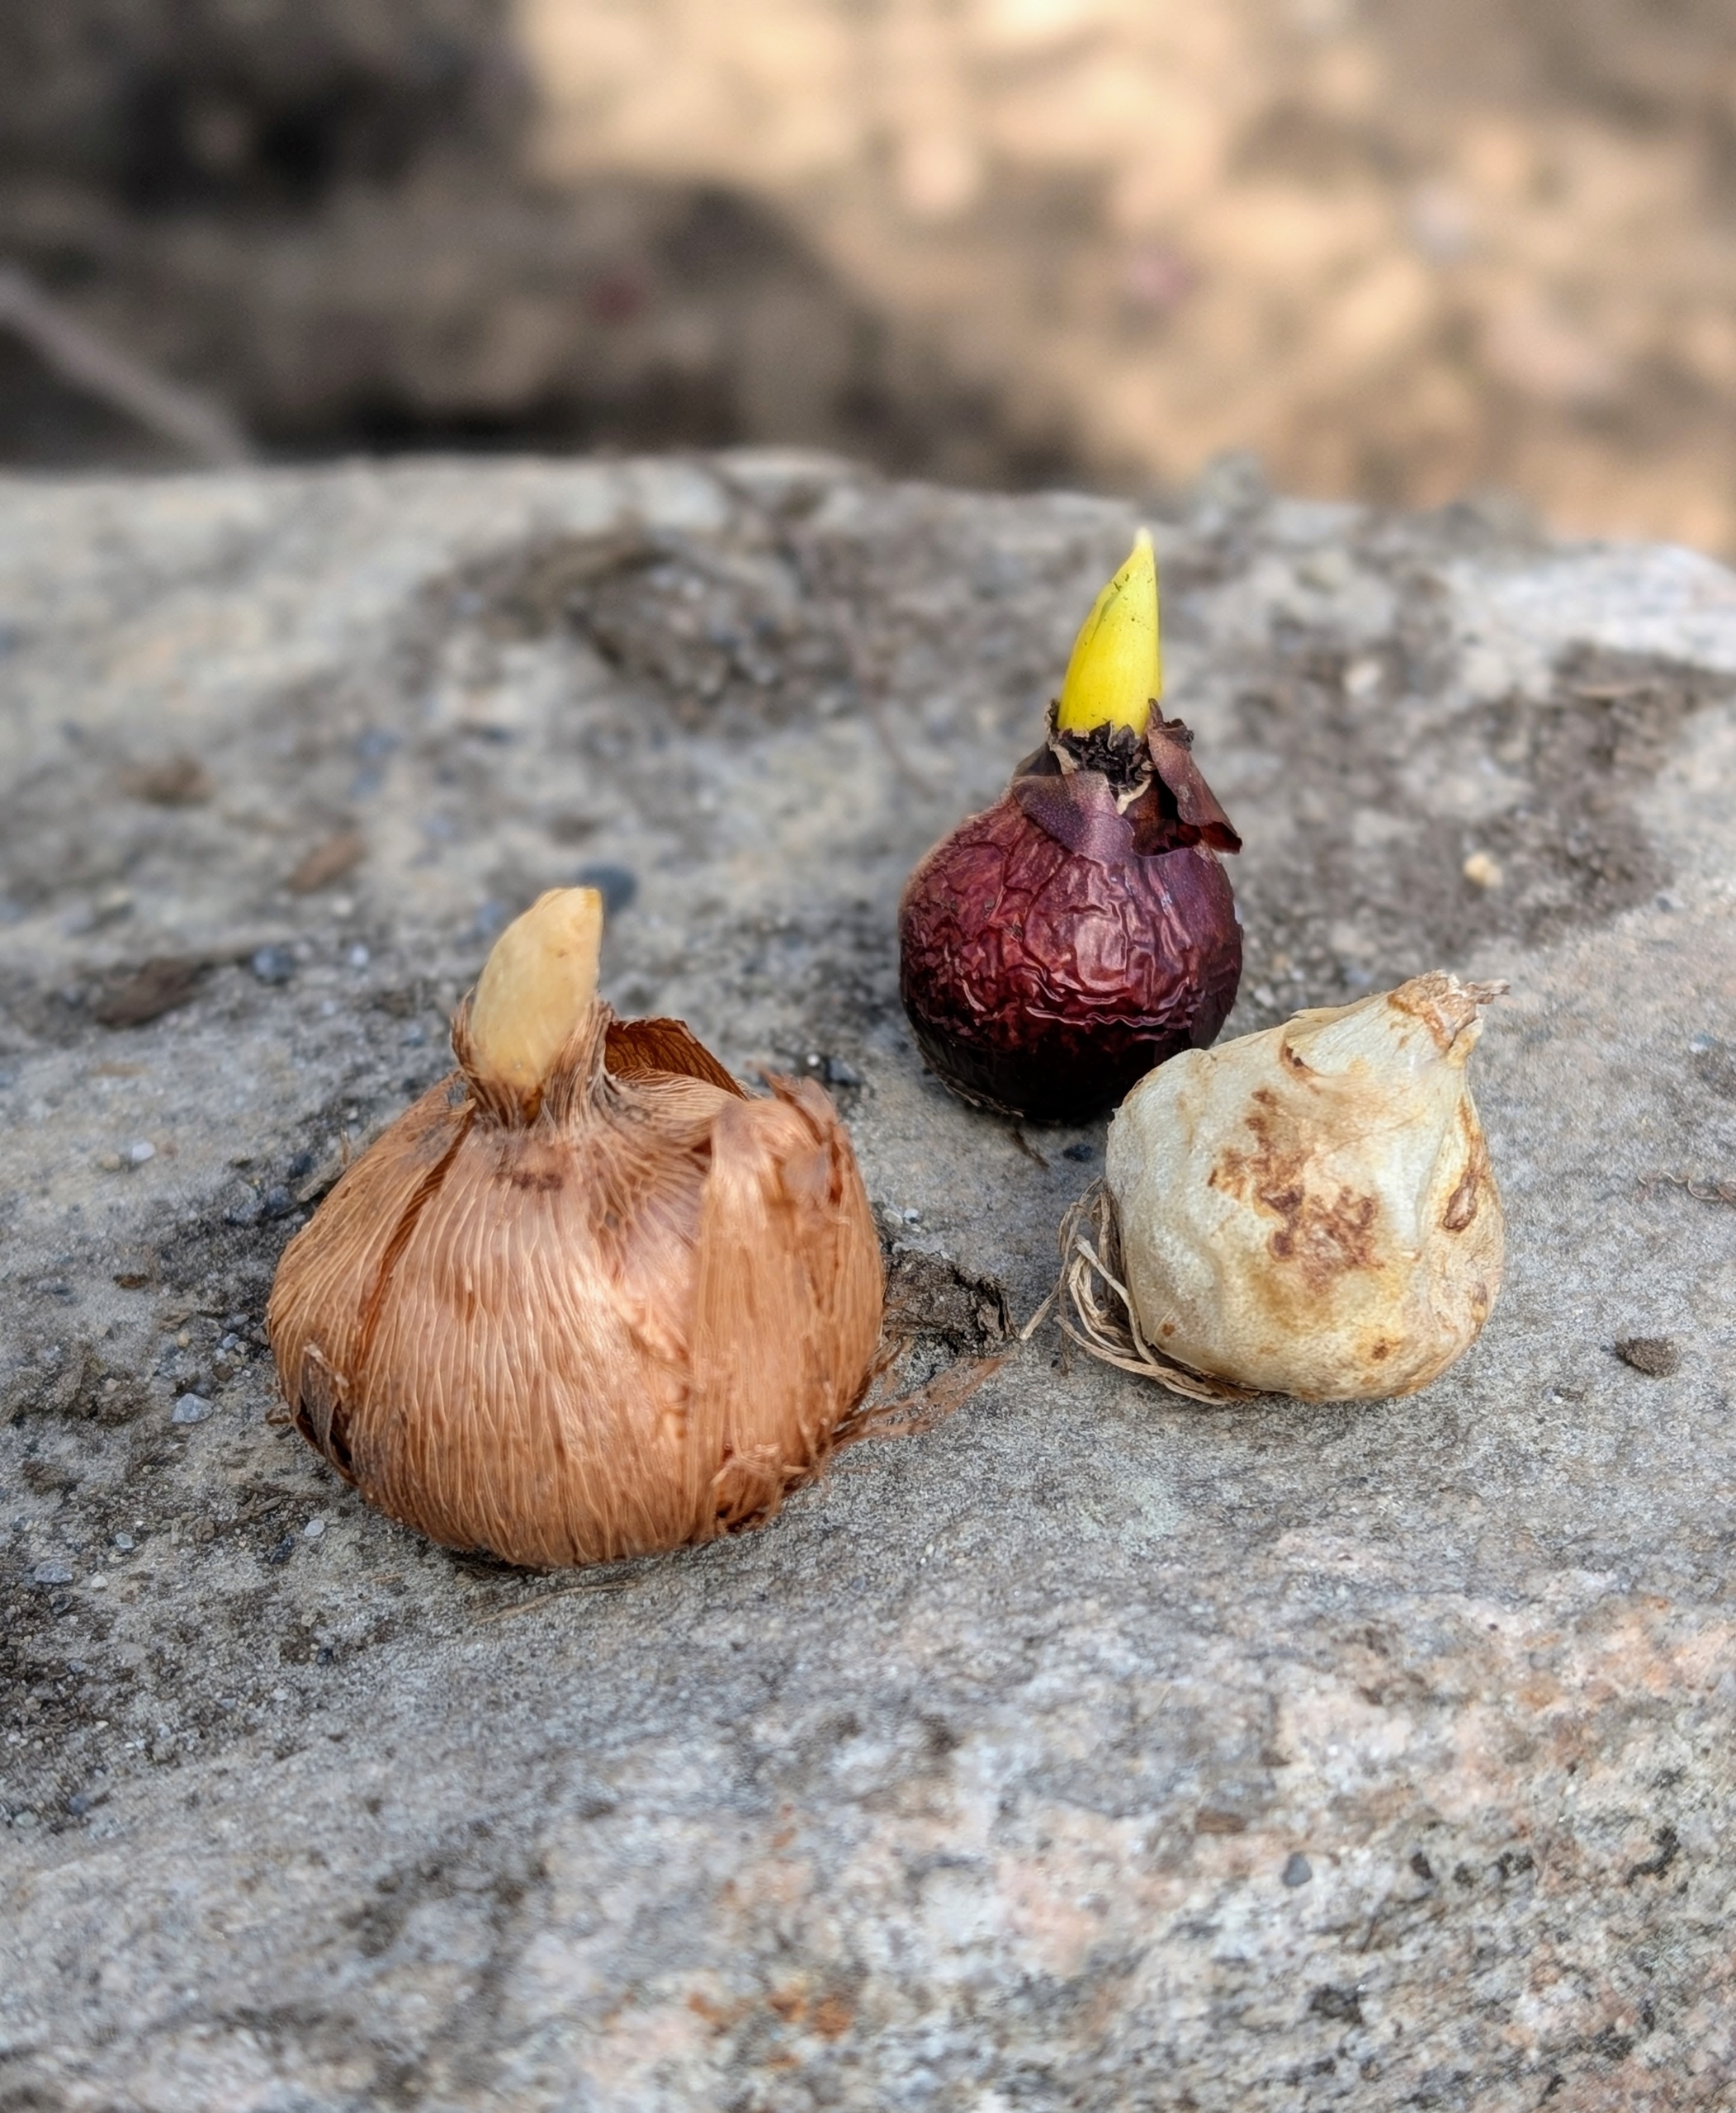
Bulbs come in different sizes and forms. Shown here is a crocus bulb, a squill bulb and a muscari bulb. True bulbs can be either tunicate, with a papery covering or non-tunicate without the covering. On many bulbs, it is also easy to see which end is the top and which end is the bottom.
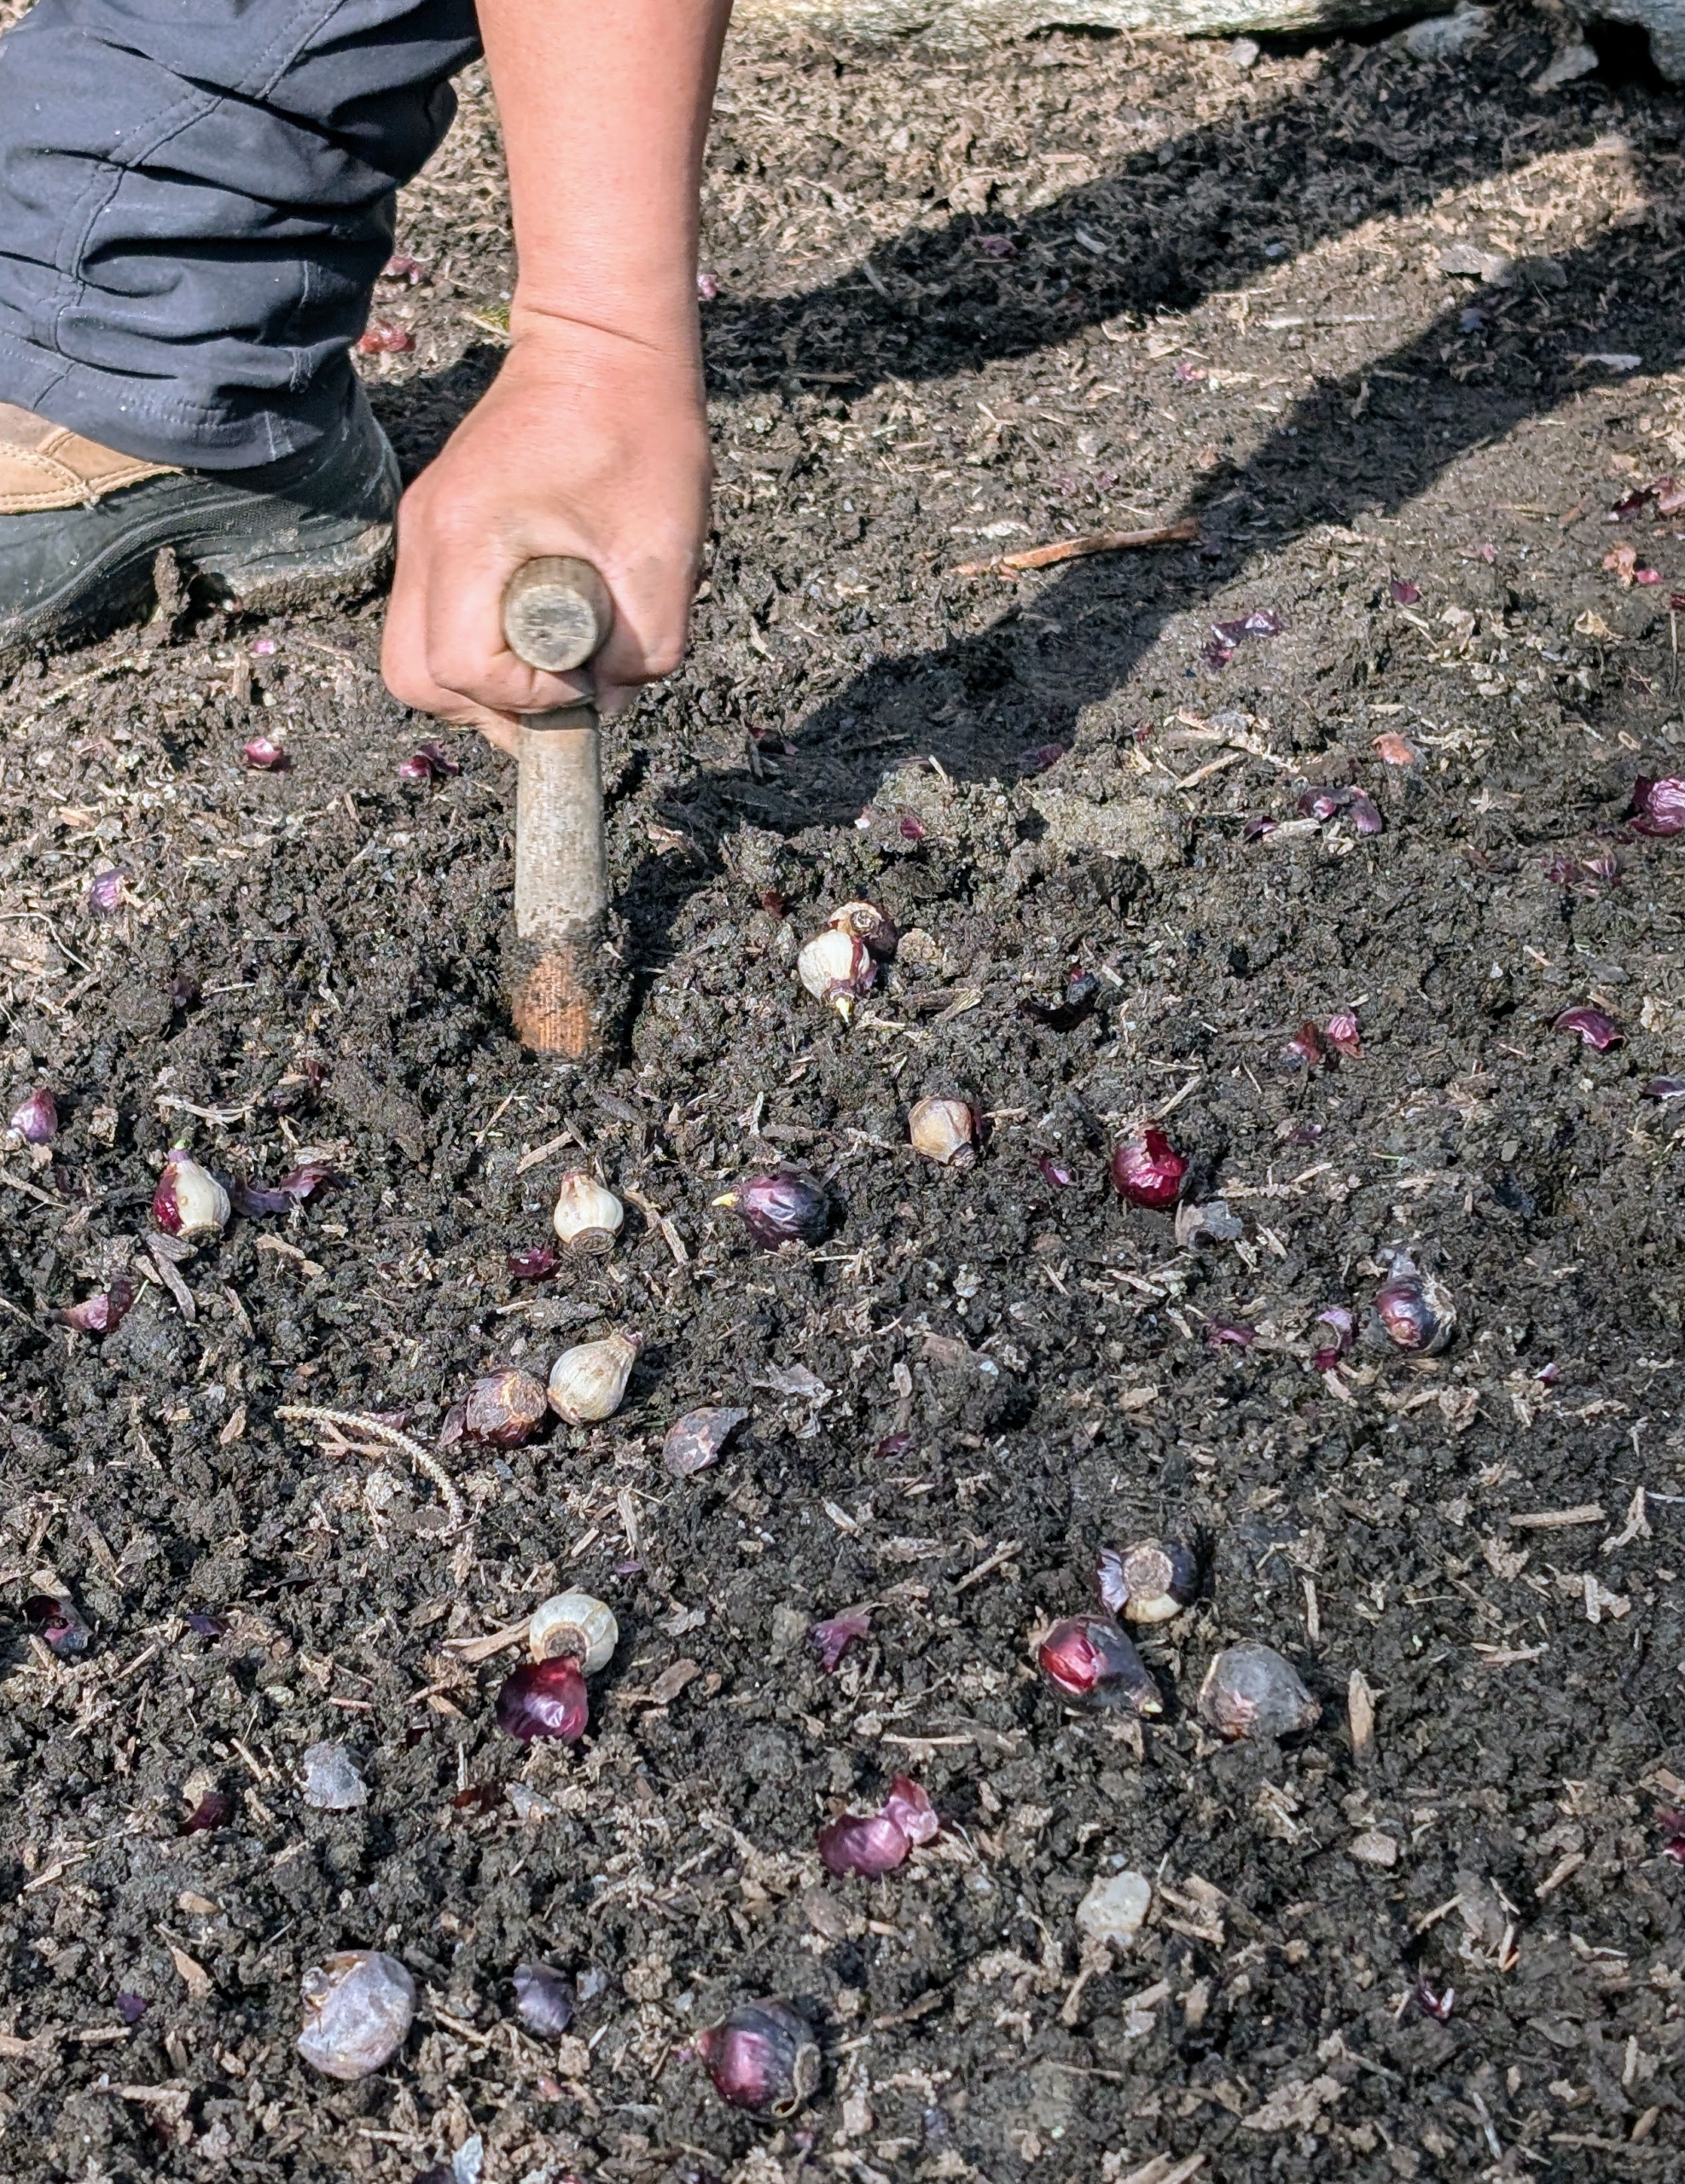
Each bulb is placed in a hole about three to five inches deep. The dibber is perfect for planting these bulbs.
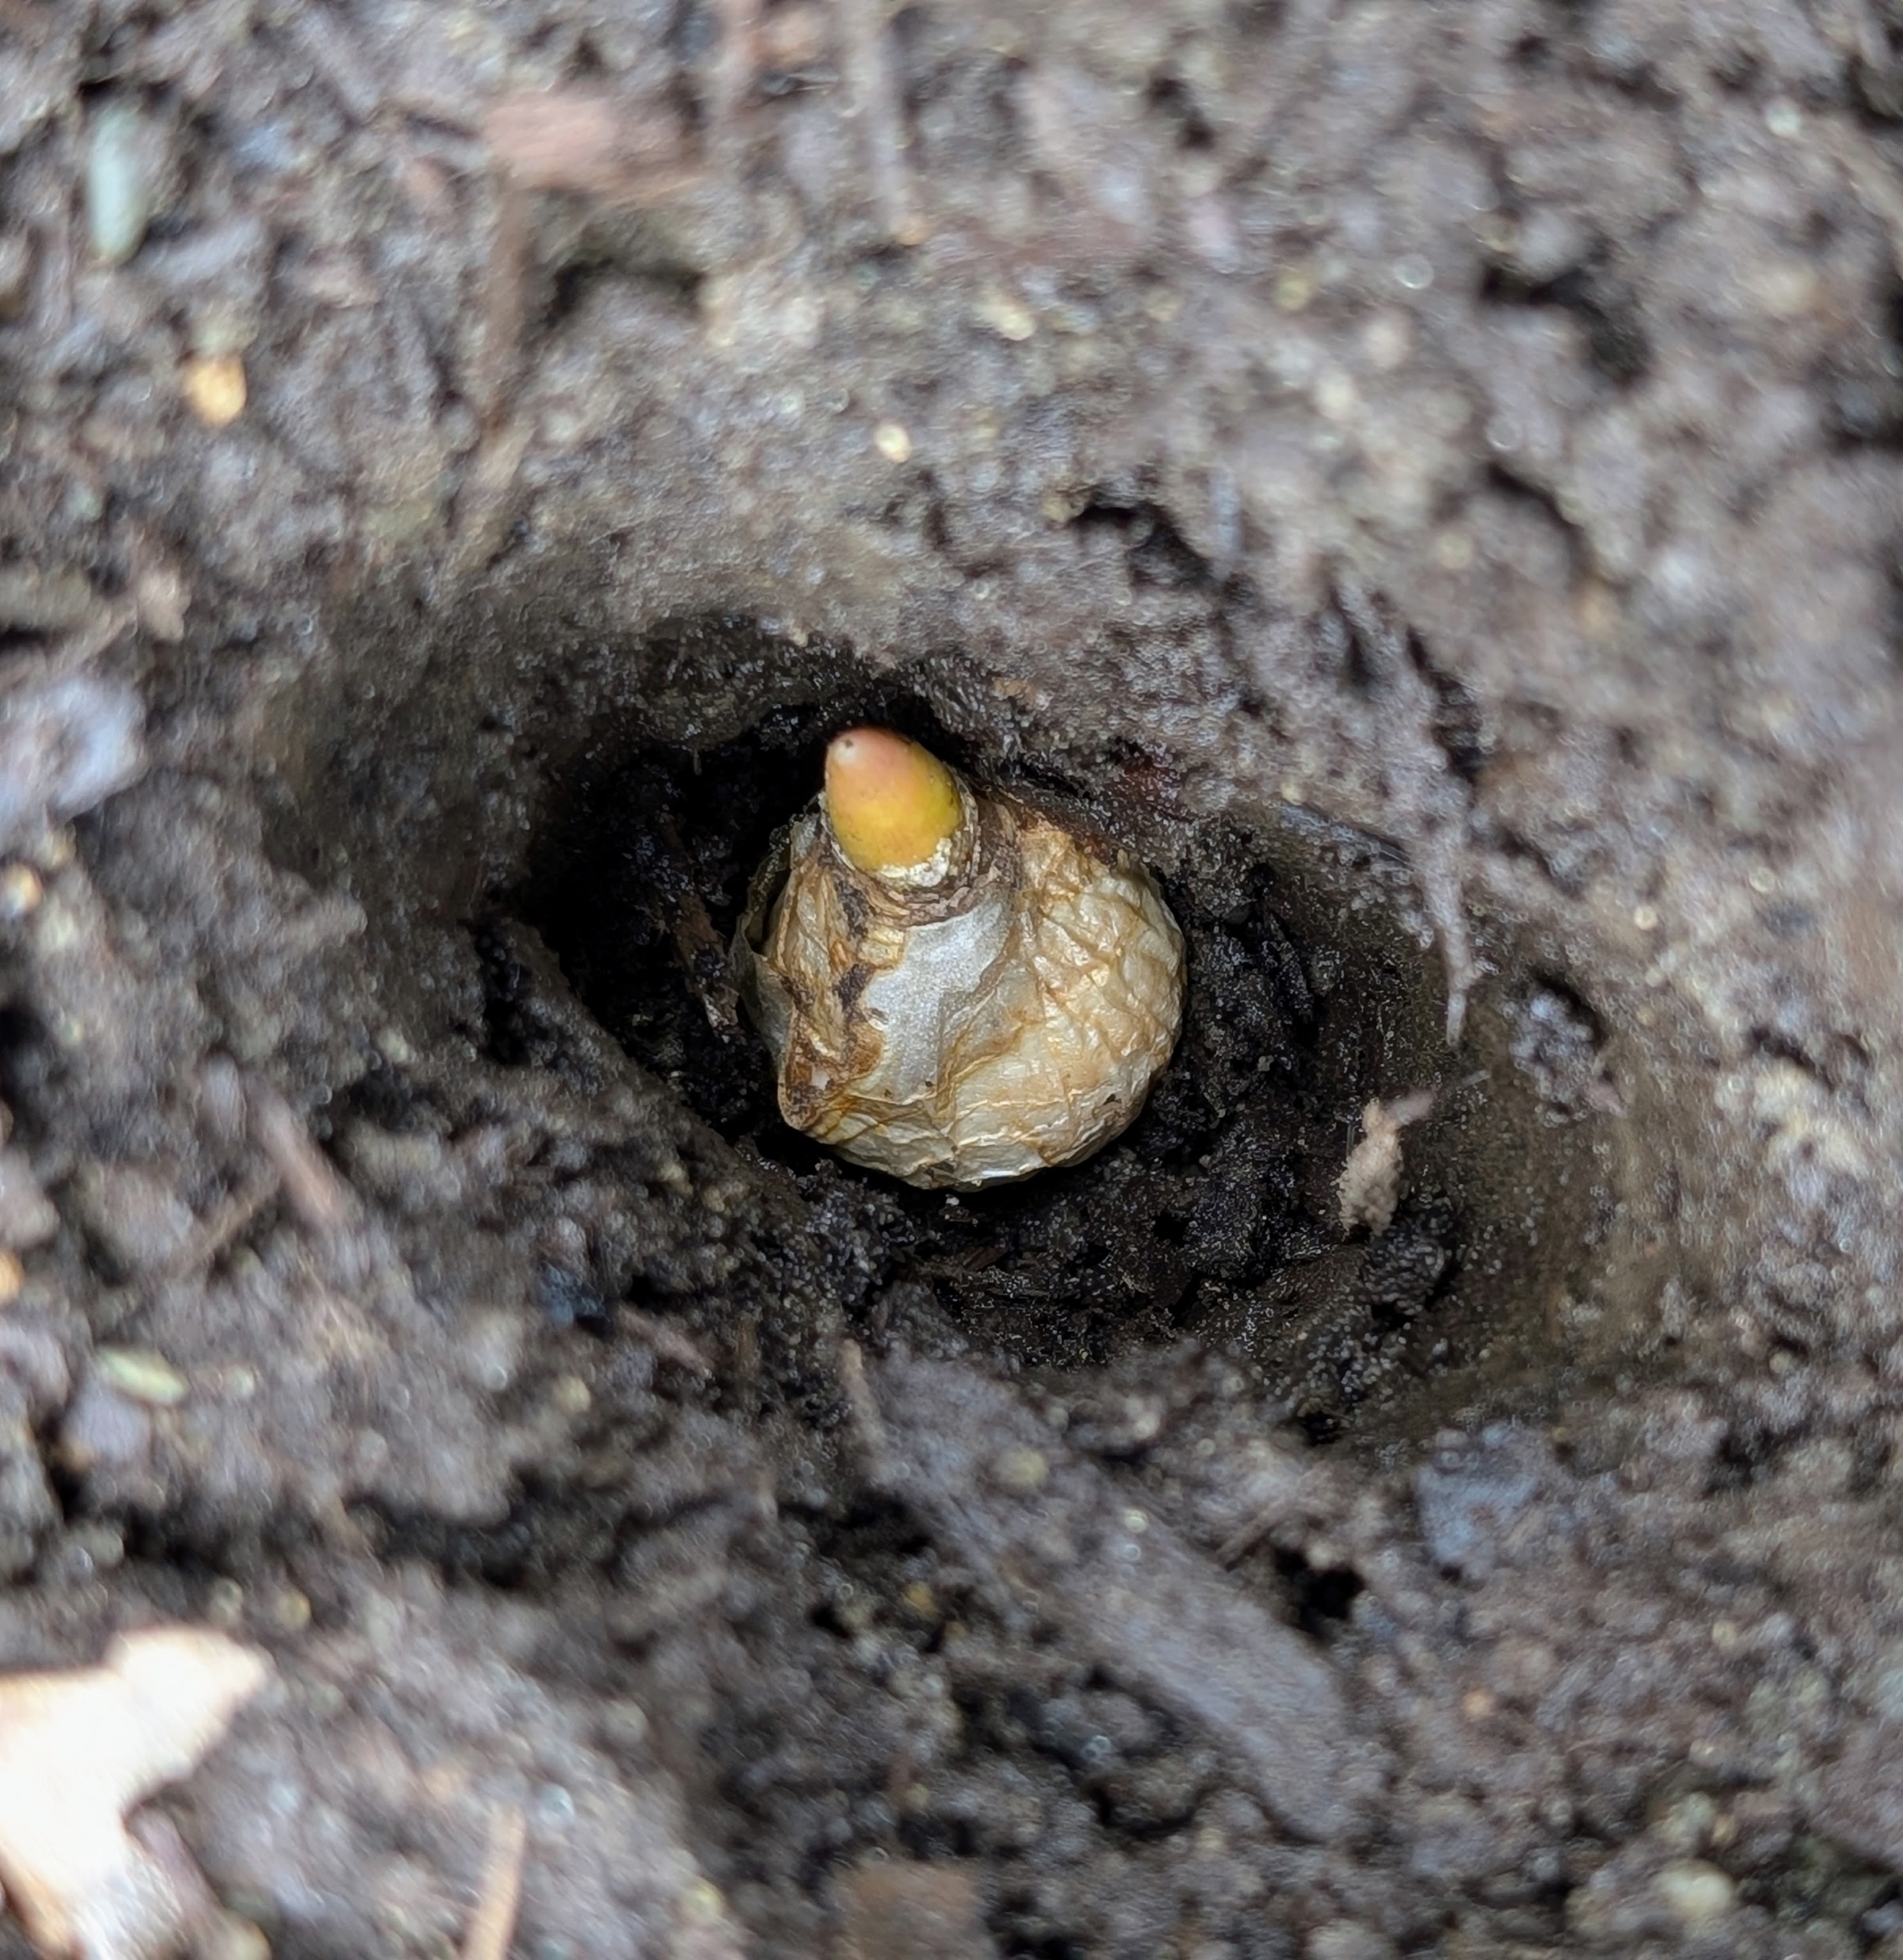
Here is a bulb getting placed gently into its hole.
Bulbs are always positioned with the pointed end faced up, or root end faced down. This is very important, so the plant grows properly from the bulb. Here is a bulb inside the hole – at least several inches deep.
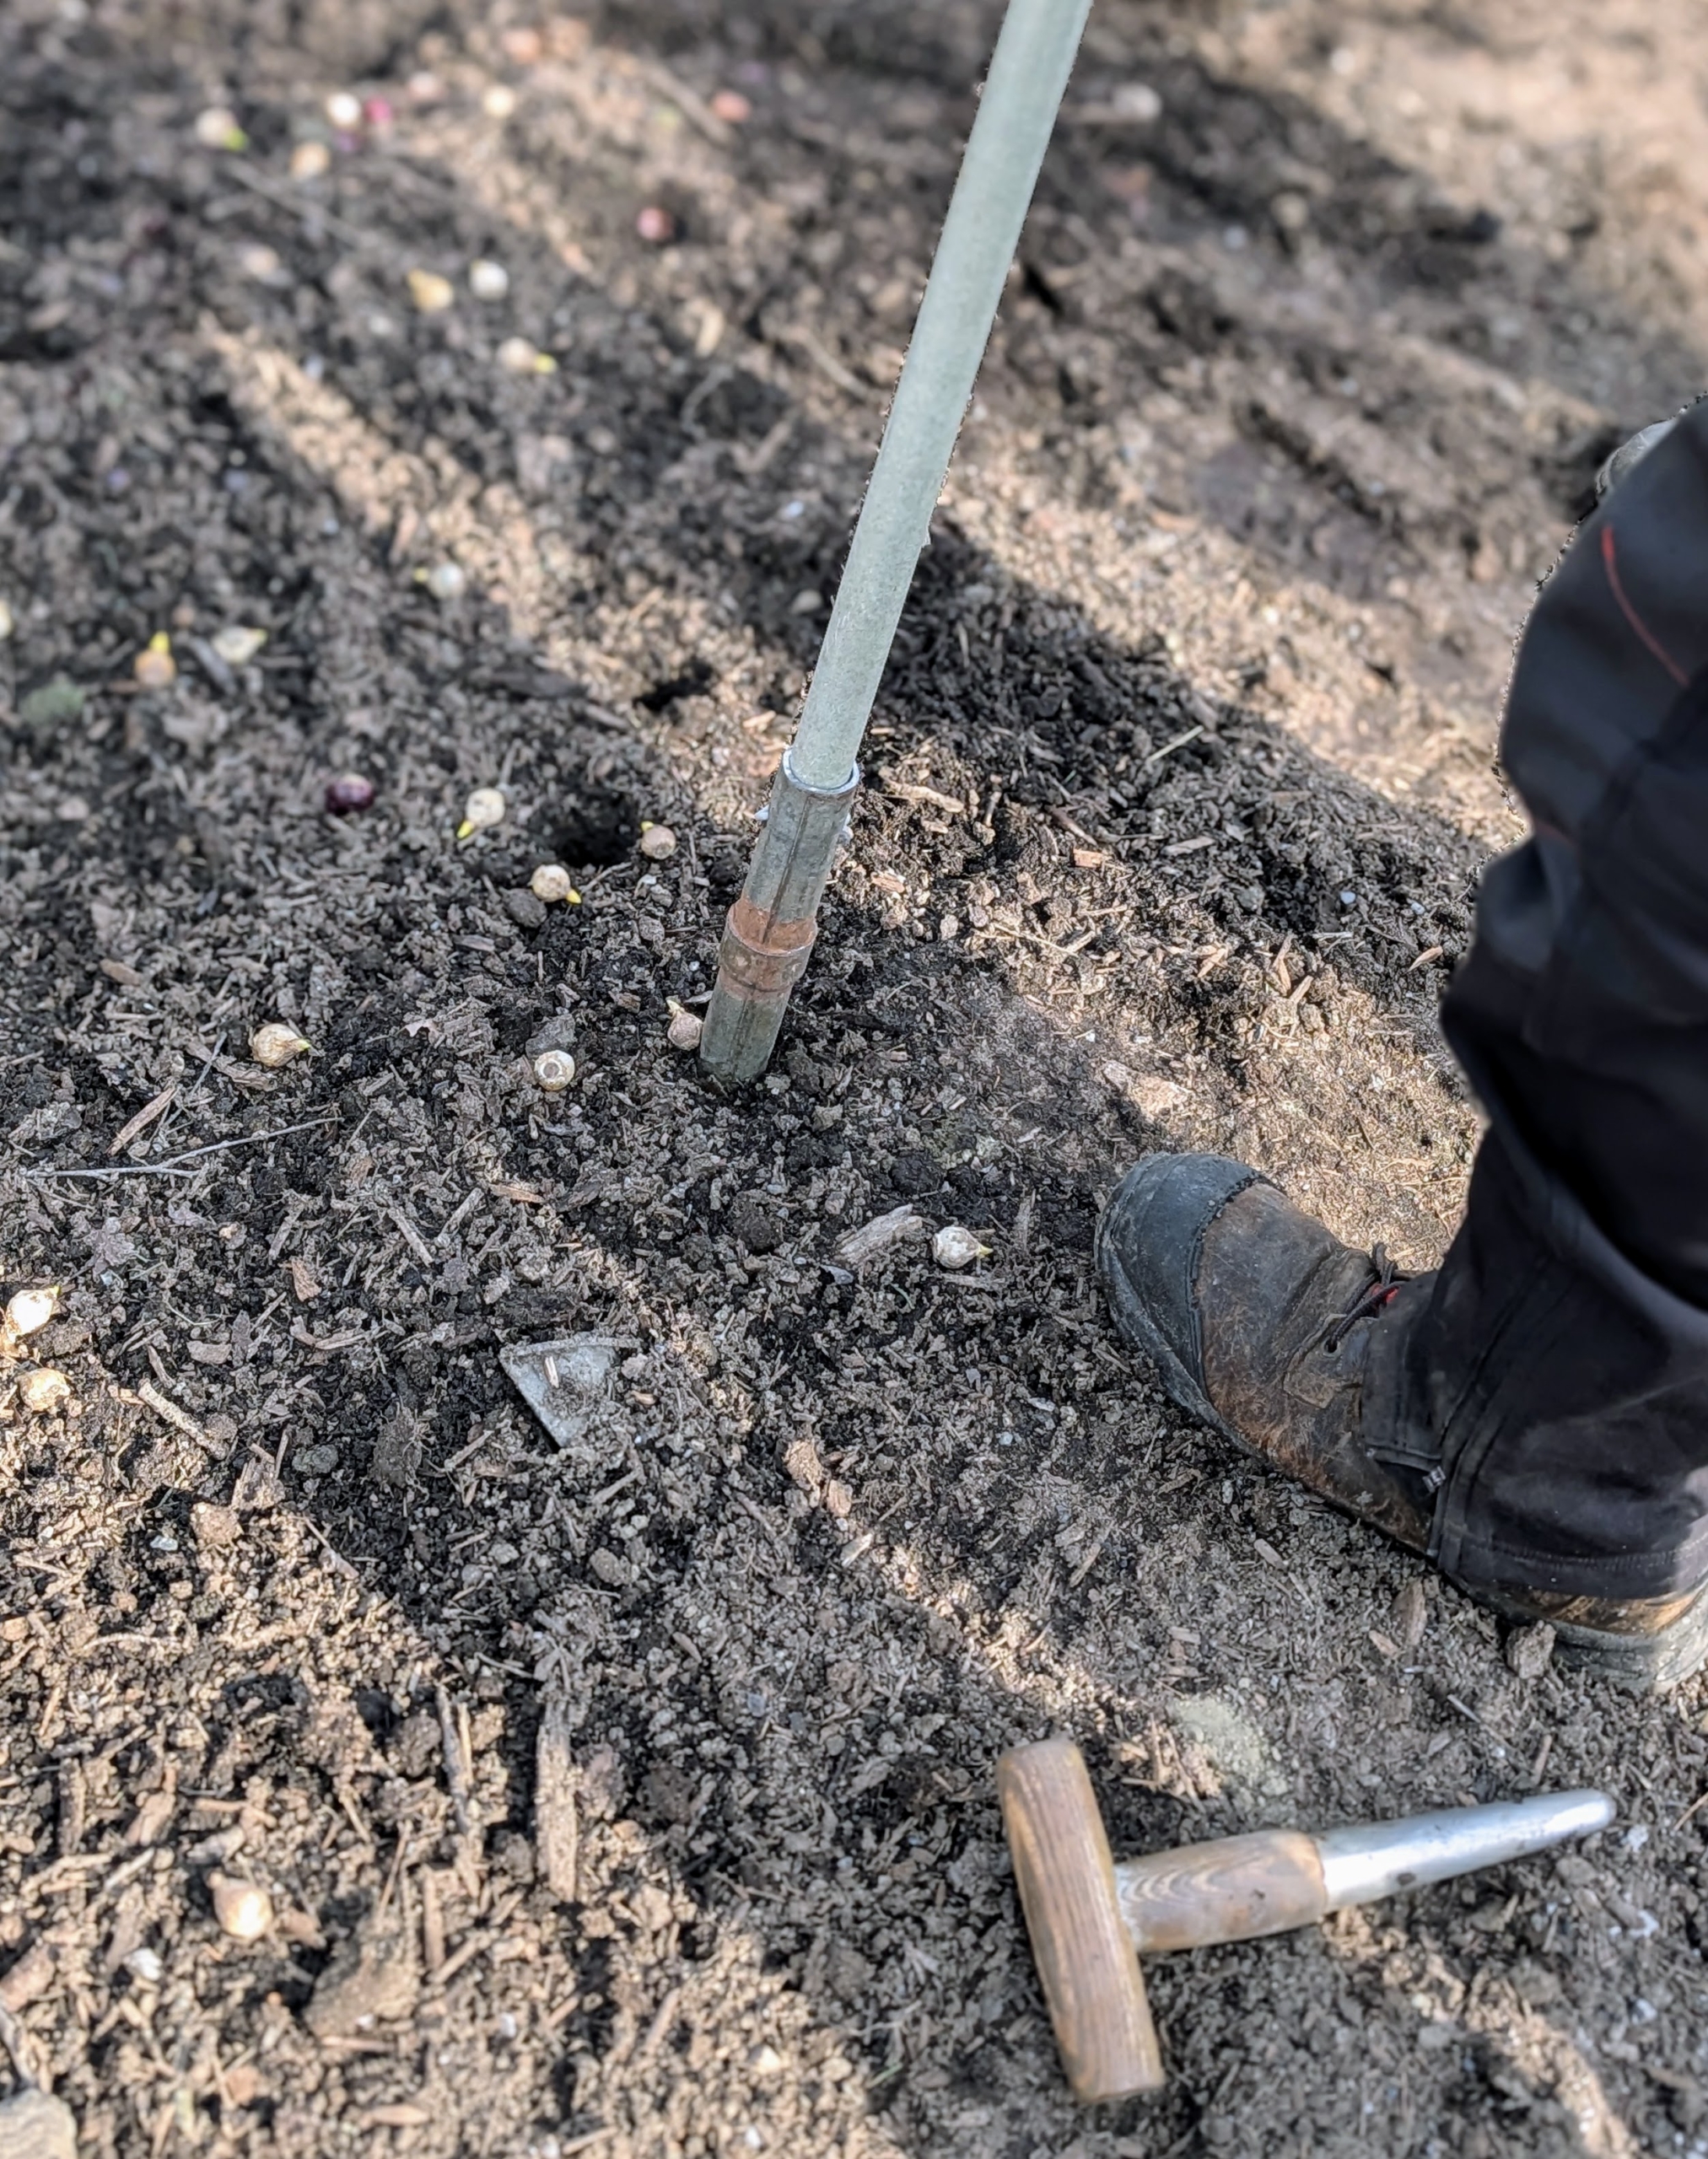
My foreman, Chhiring Sherpa, also made a long handled dibber from timeworn pieces that had been saved.
These long handled dibbers are a big hit – allowing the crew to remain standing and make a series of holes more quickly.
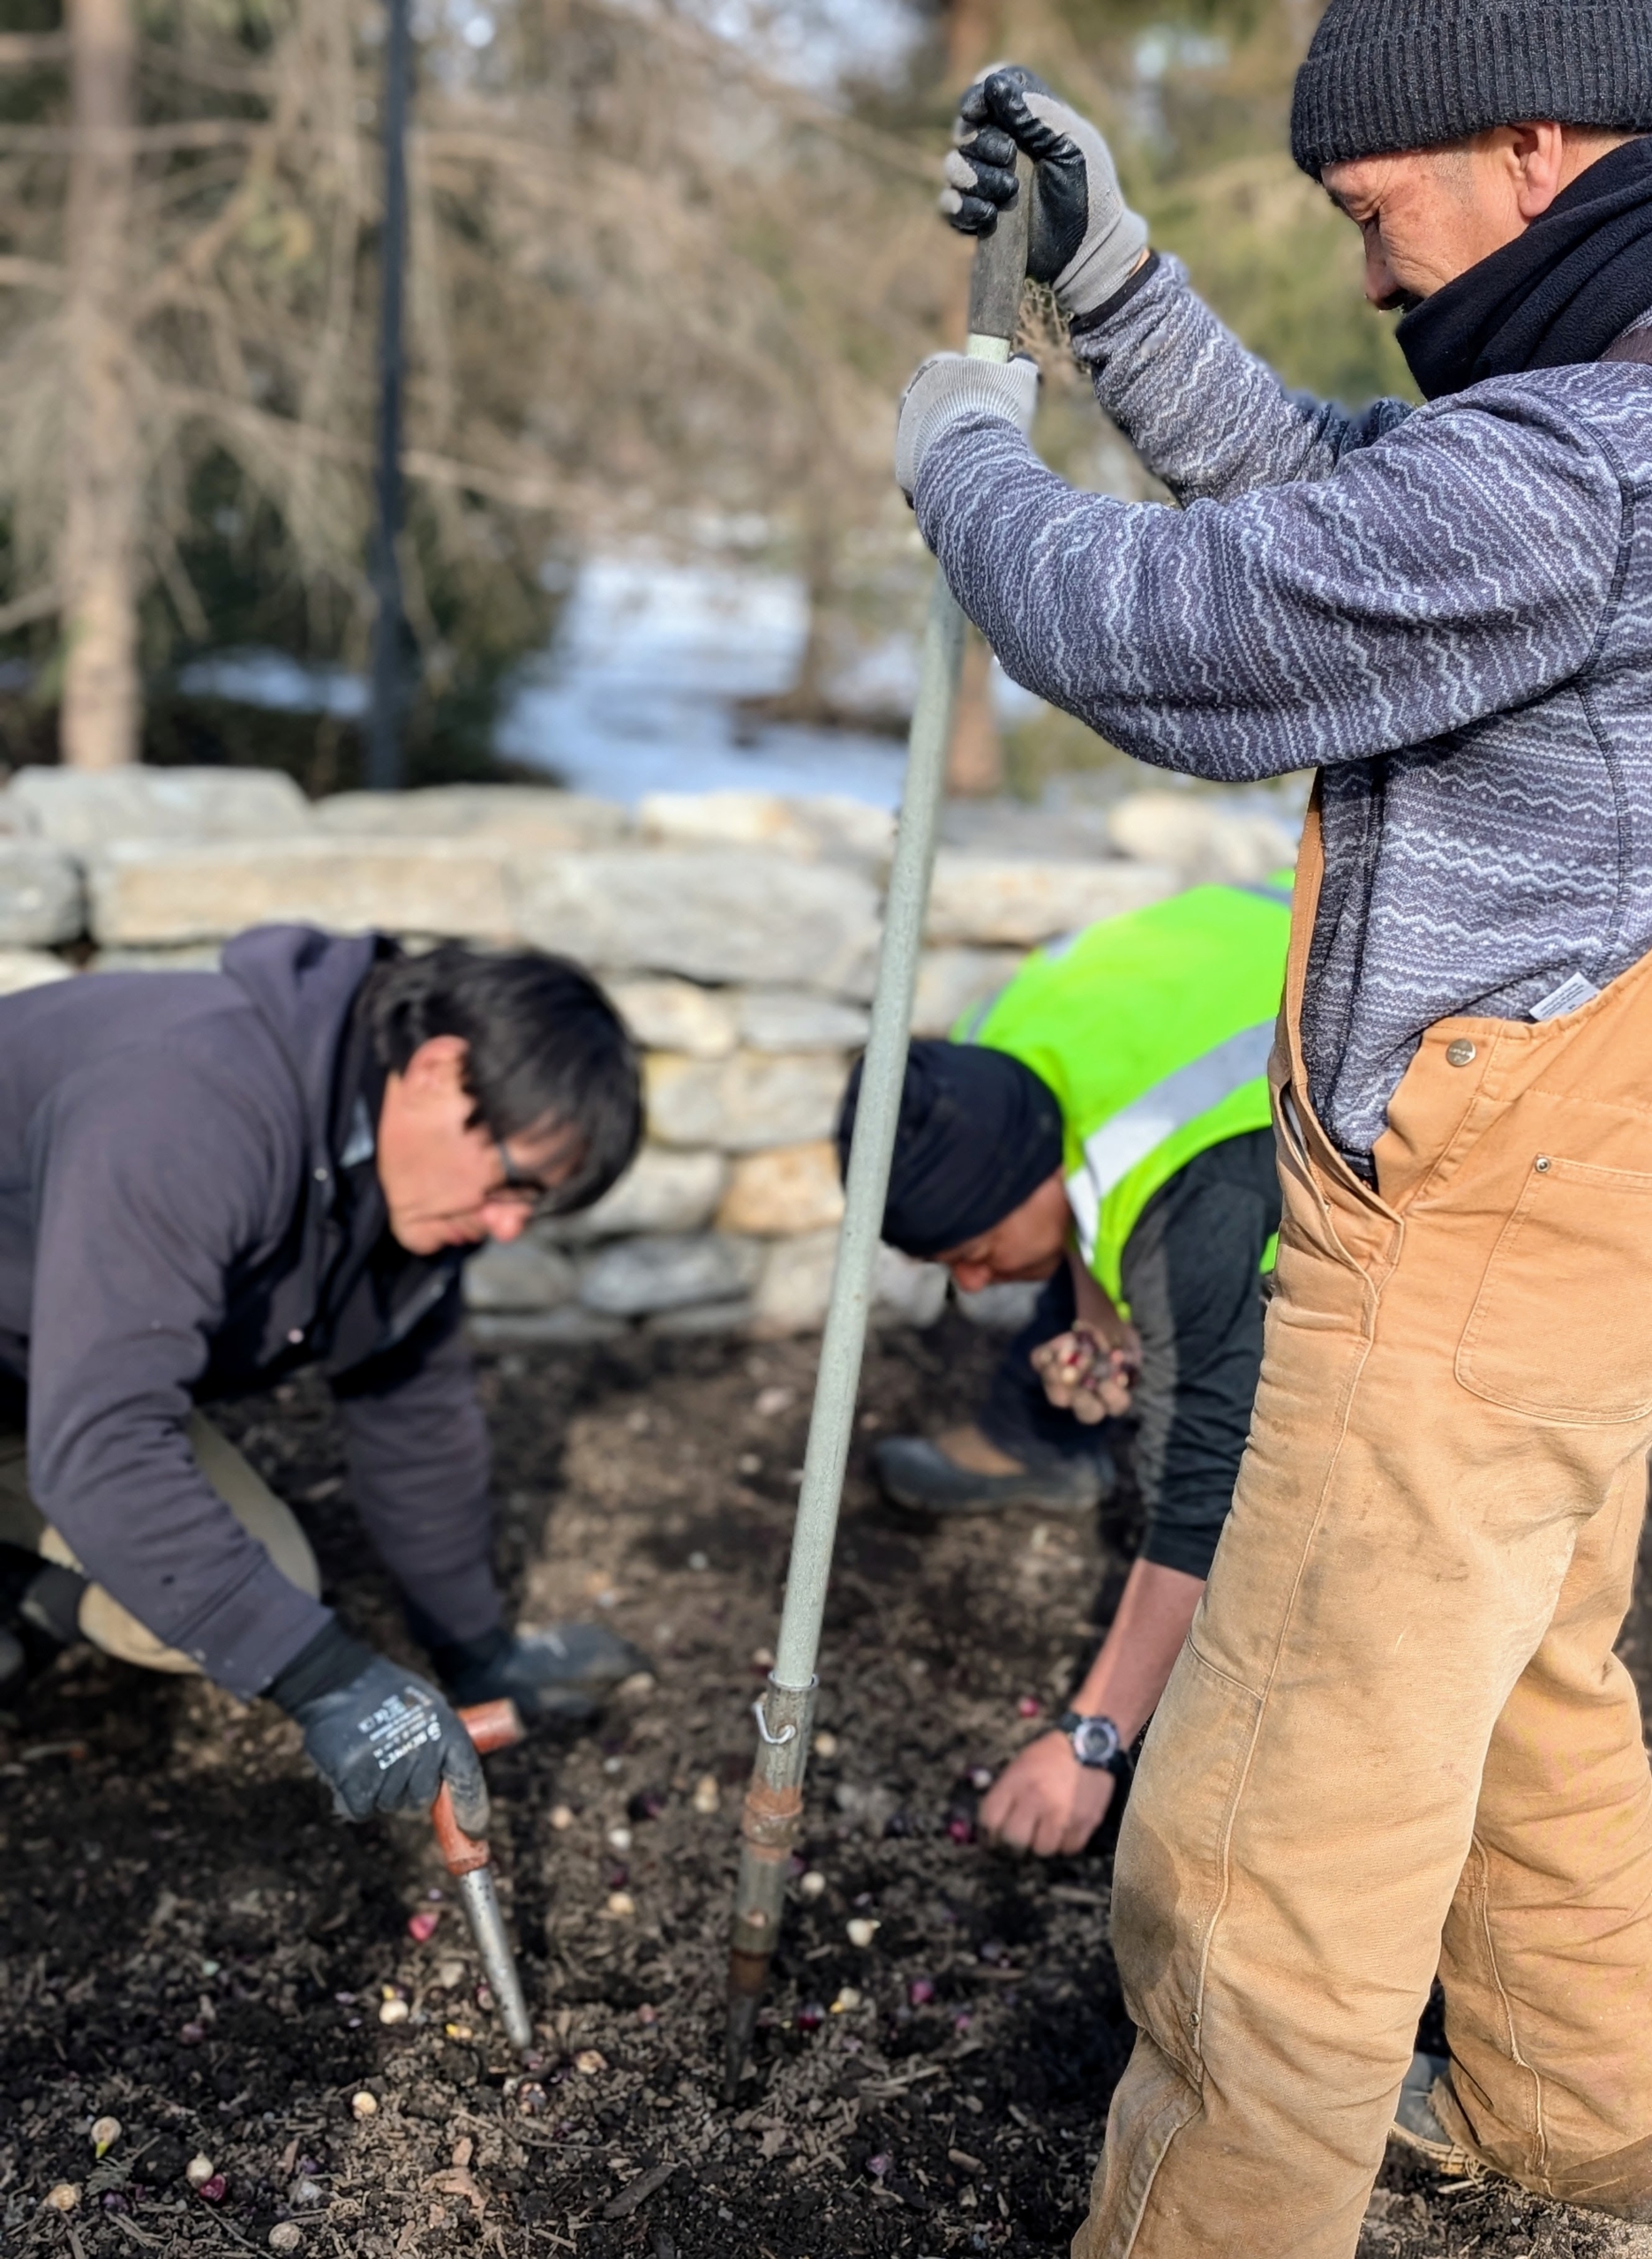
While one or two works low to the ground, others work upright, getting lots of holes made for the bulbs.
The crew took turns with each function – it was a very efficient assembly line process.
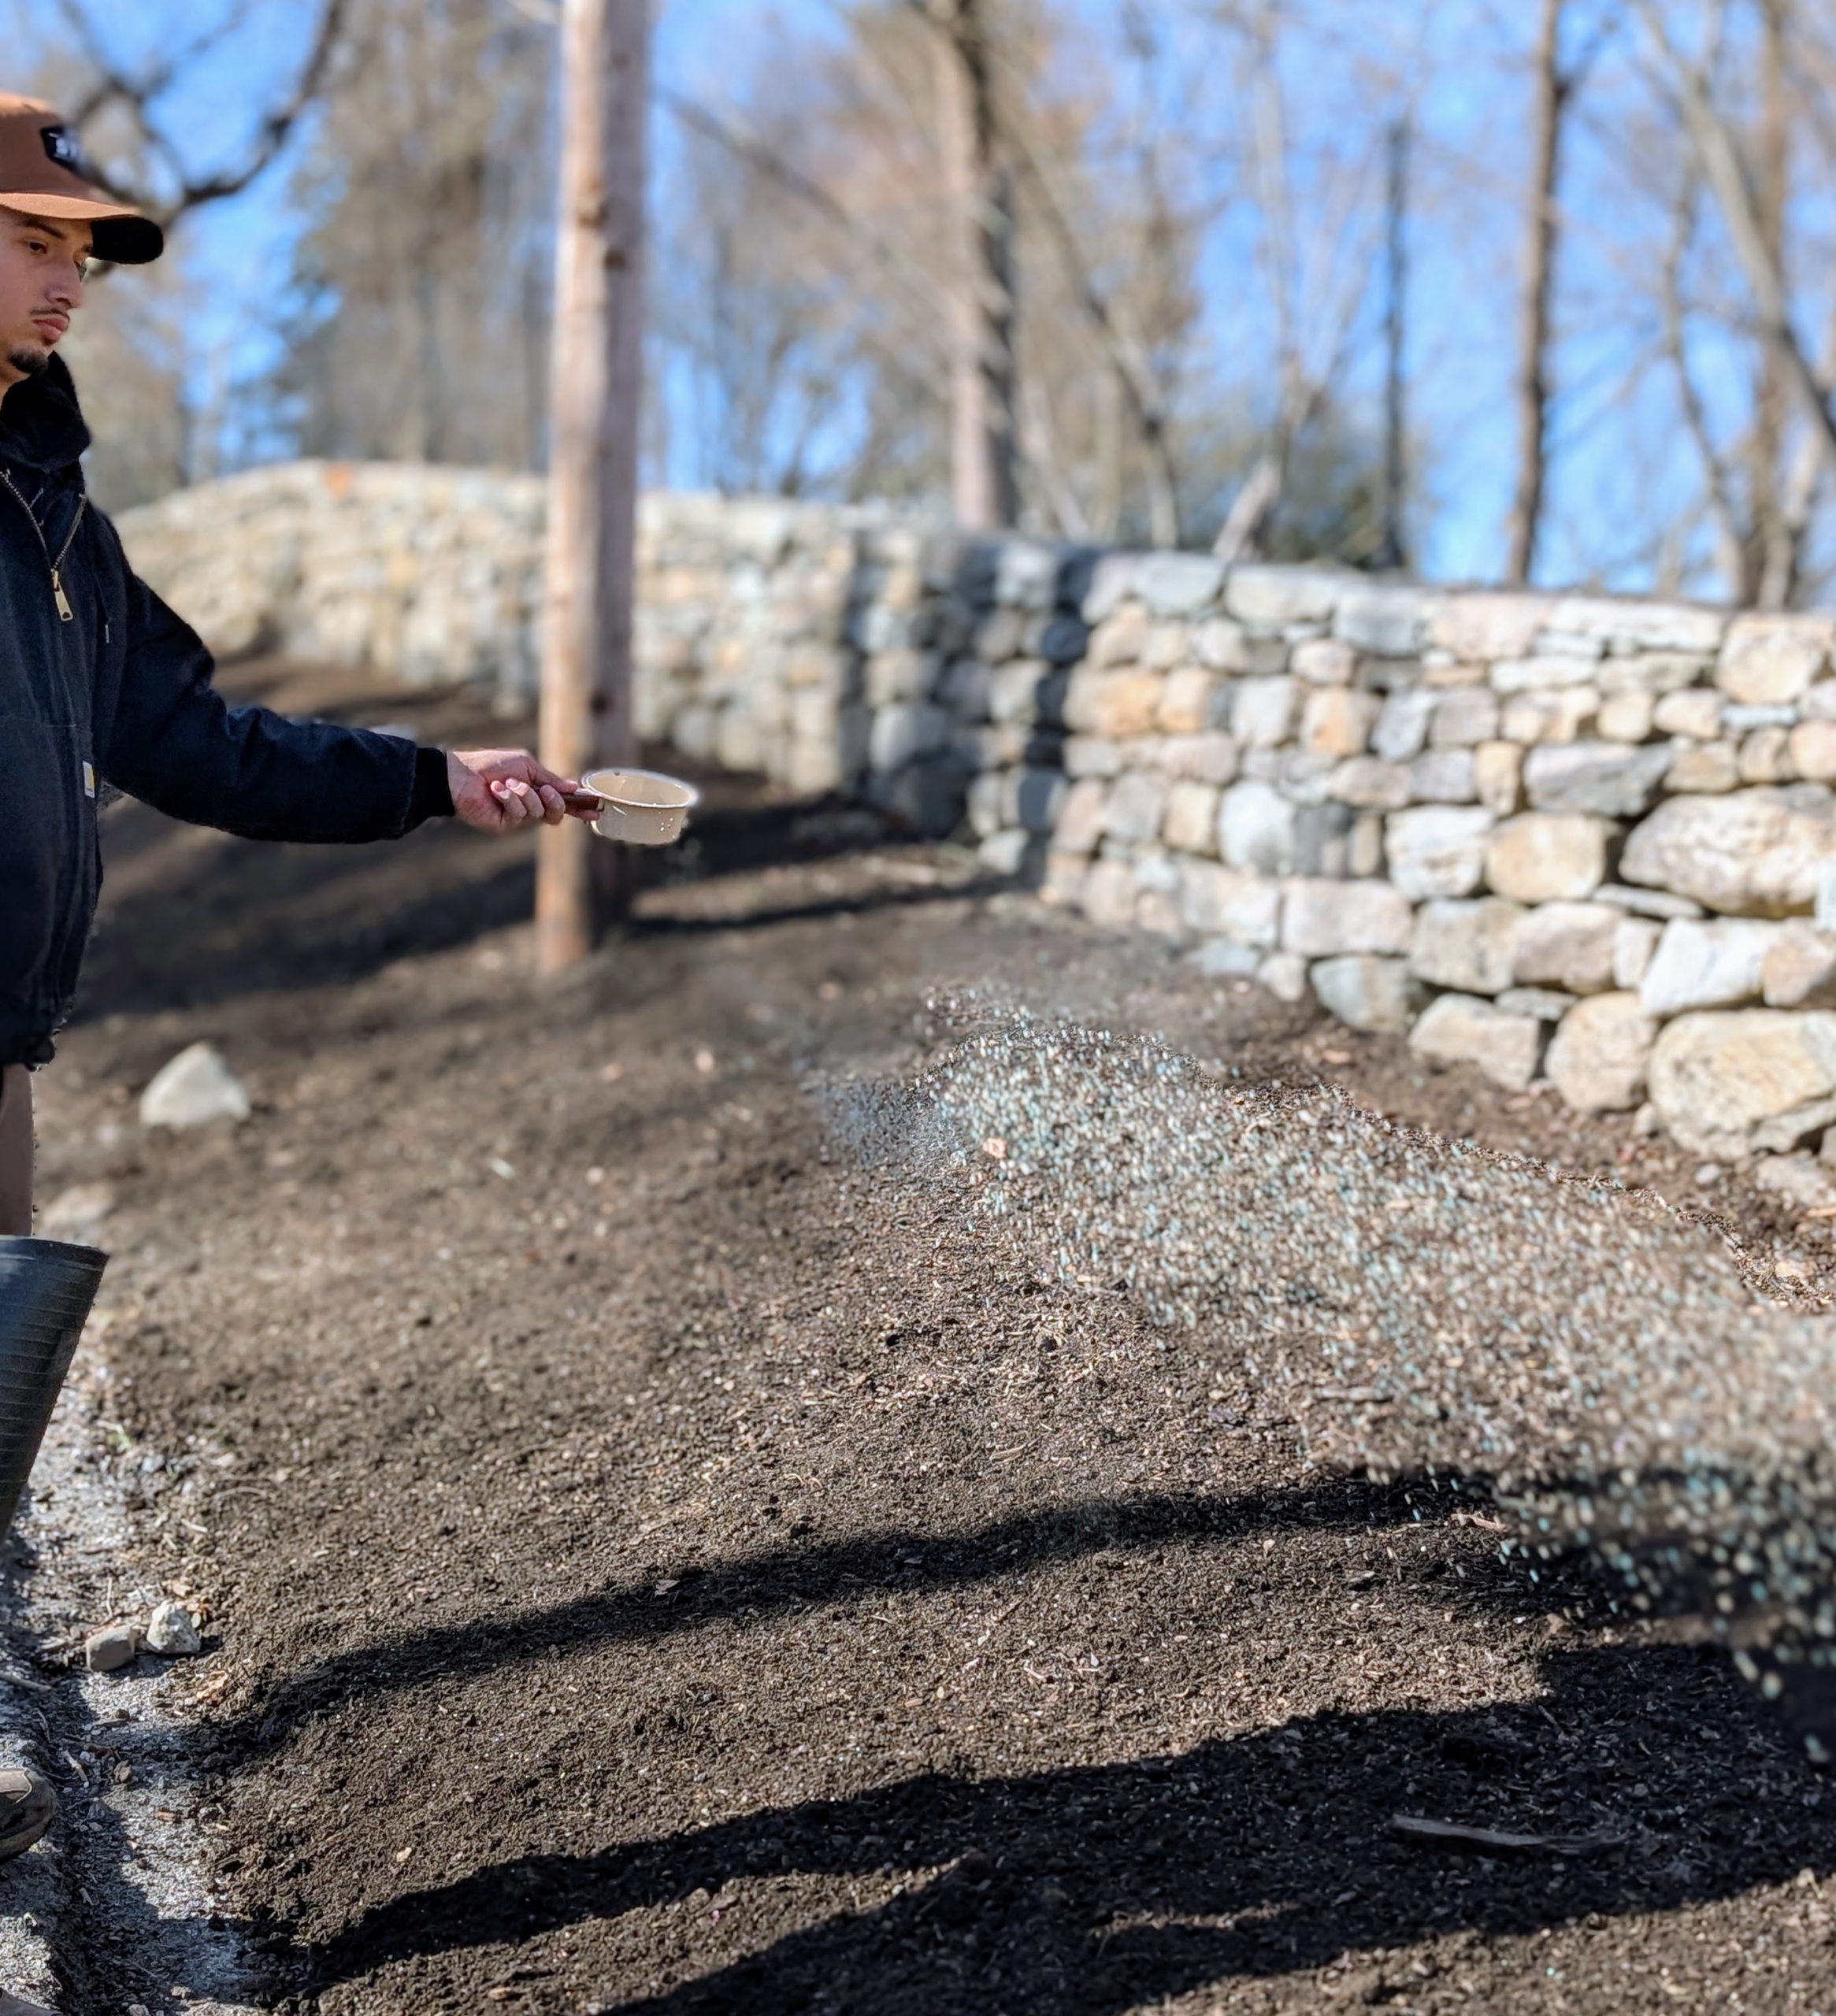
Once a section is planted, Matt sprinkles fertilizer.
Always be sure to add the proper food to the bed. It should be a balanced fertilizer. Fertilizing spring-blooming bulbs also helps them fight off diseases and pests. I use Miracle-Gro Shake ‘n Feed All Purpose Plant Food.
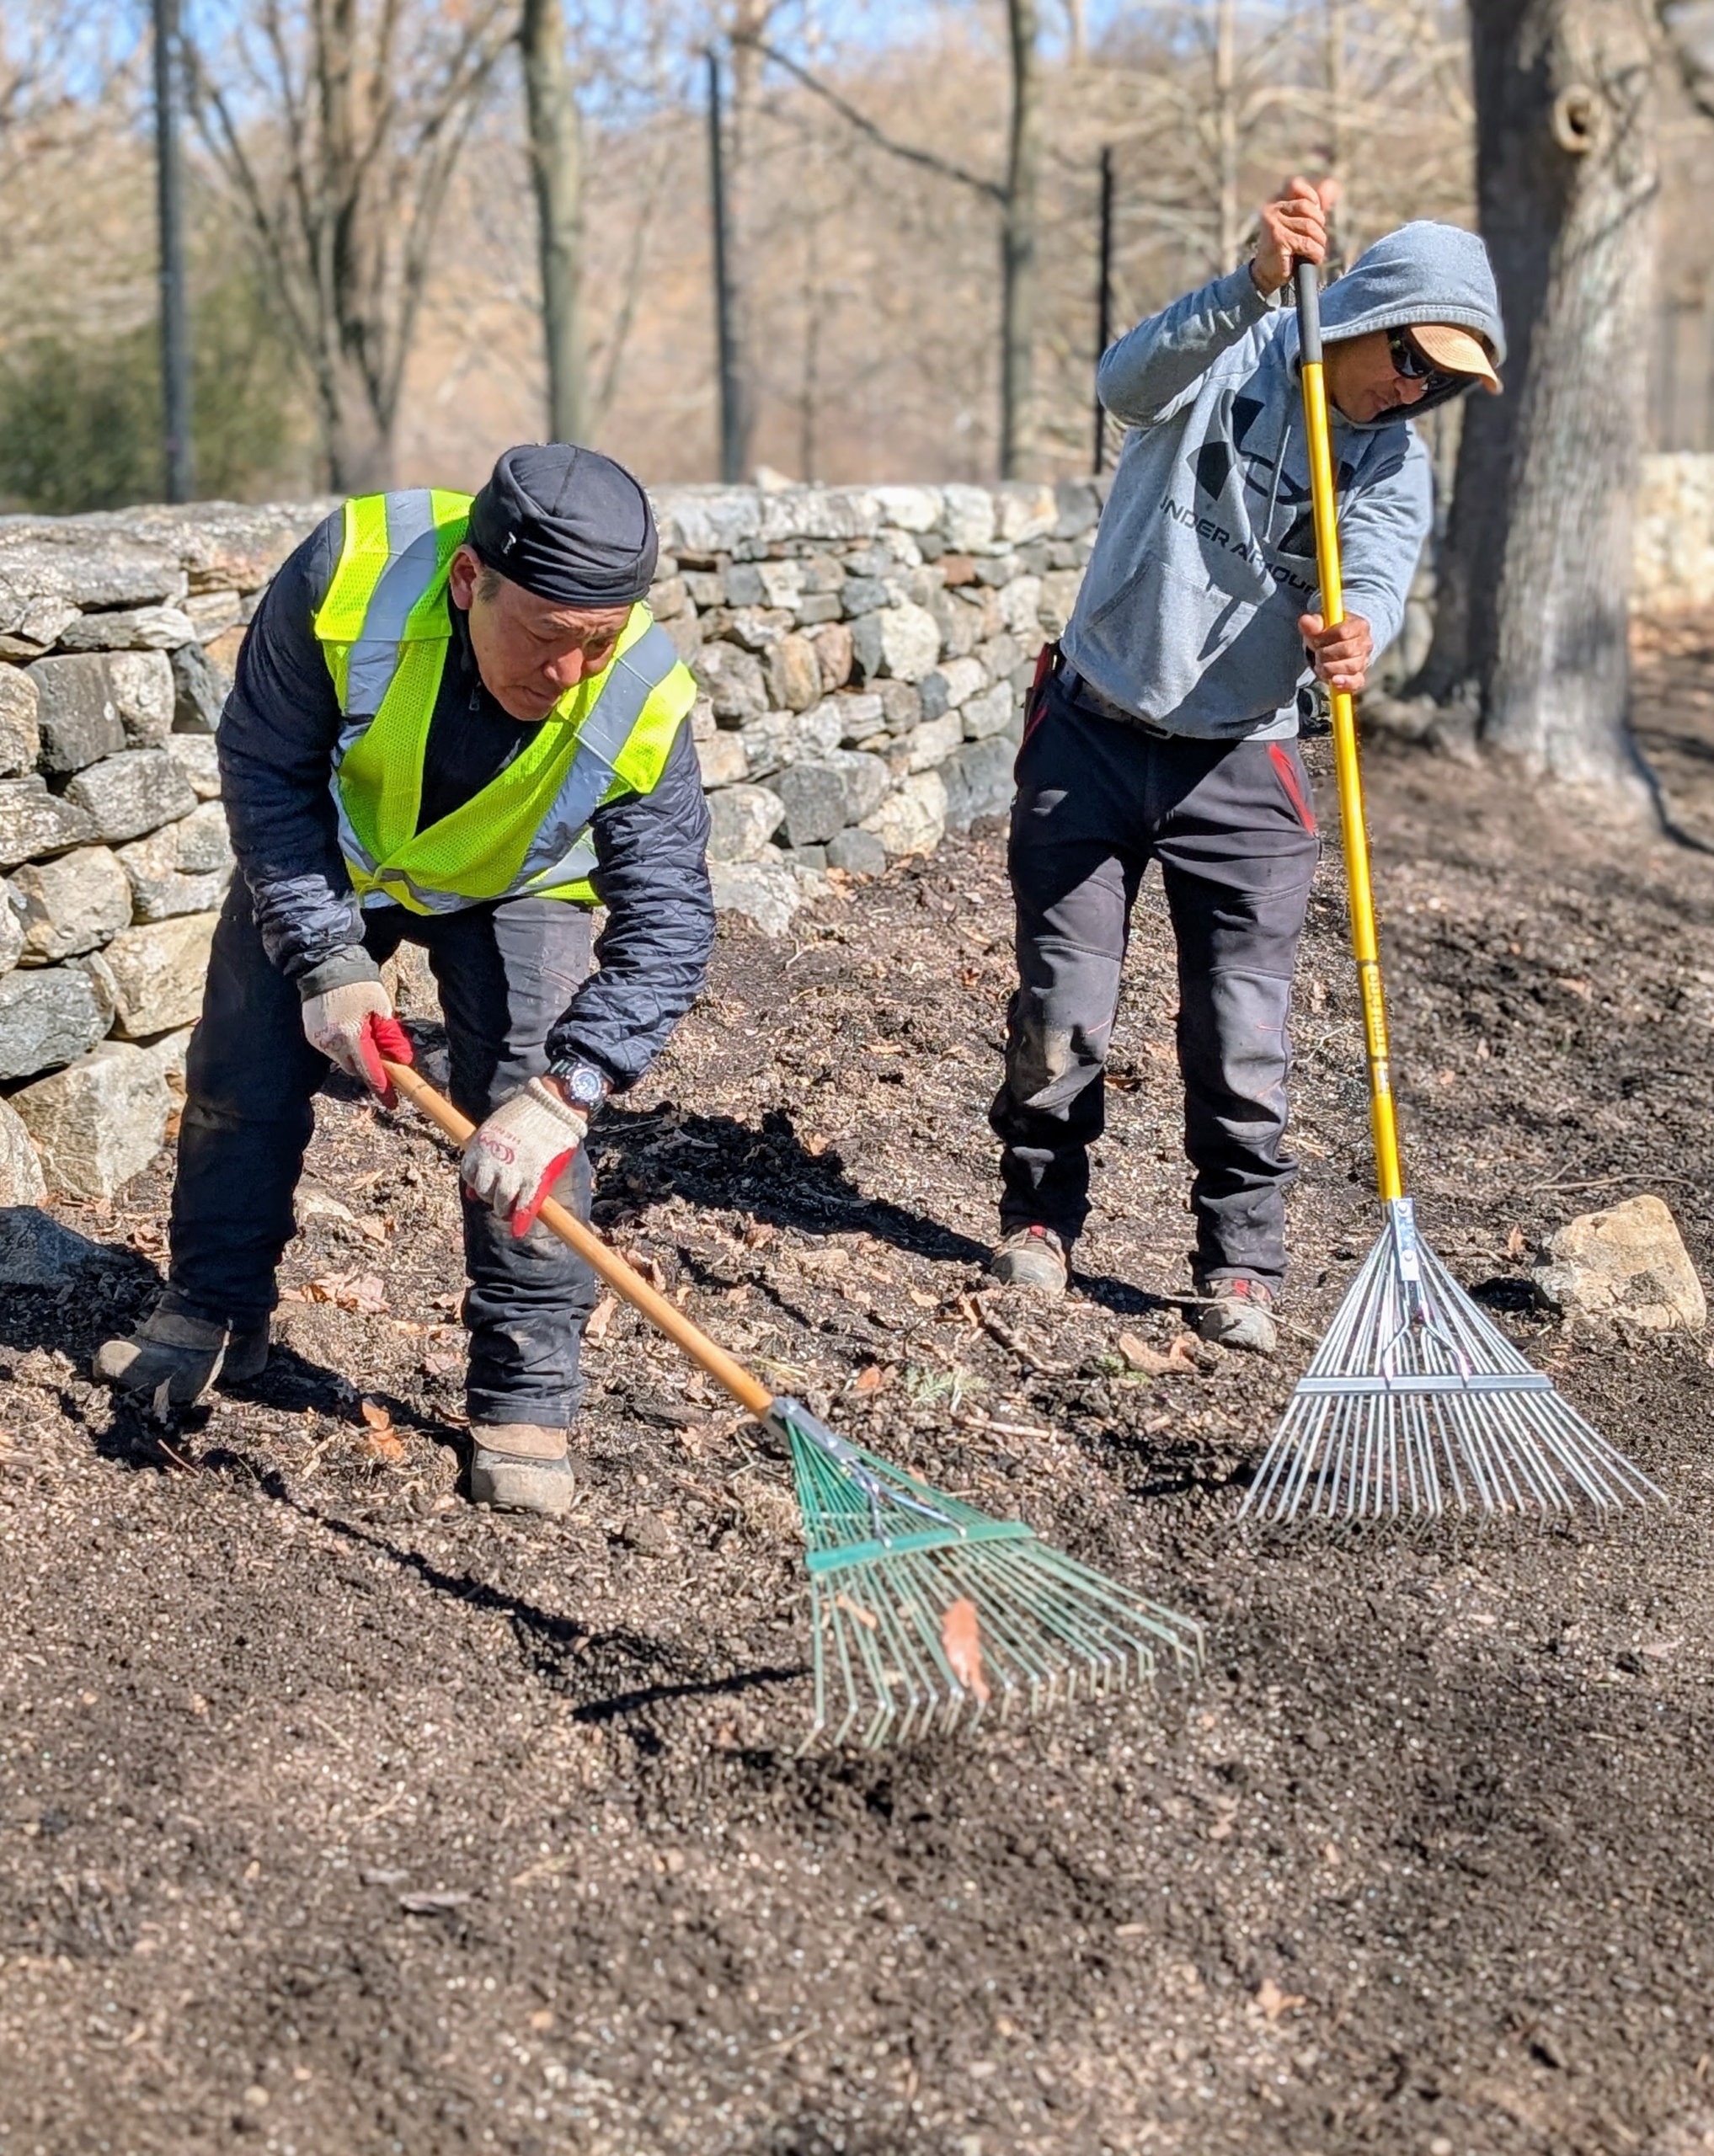
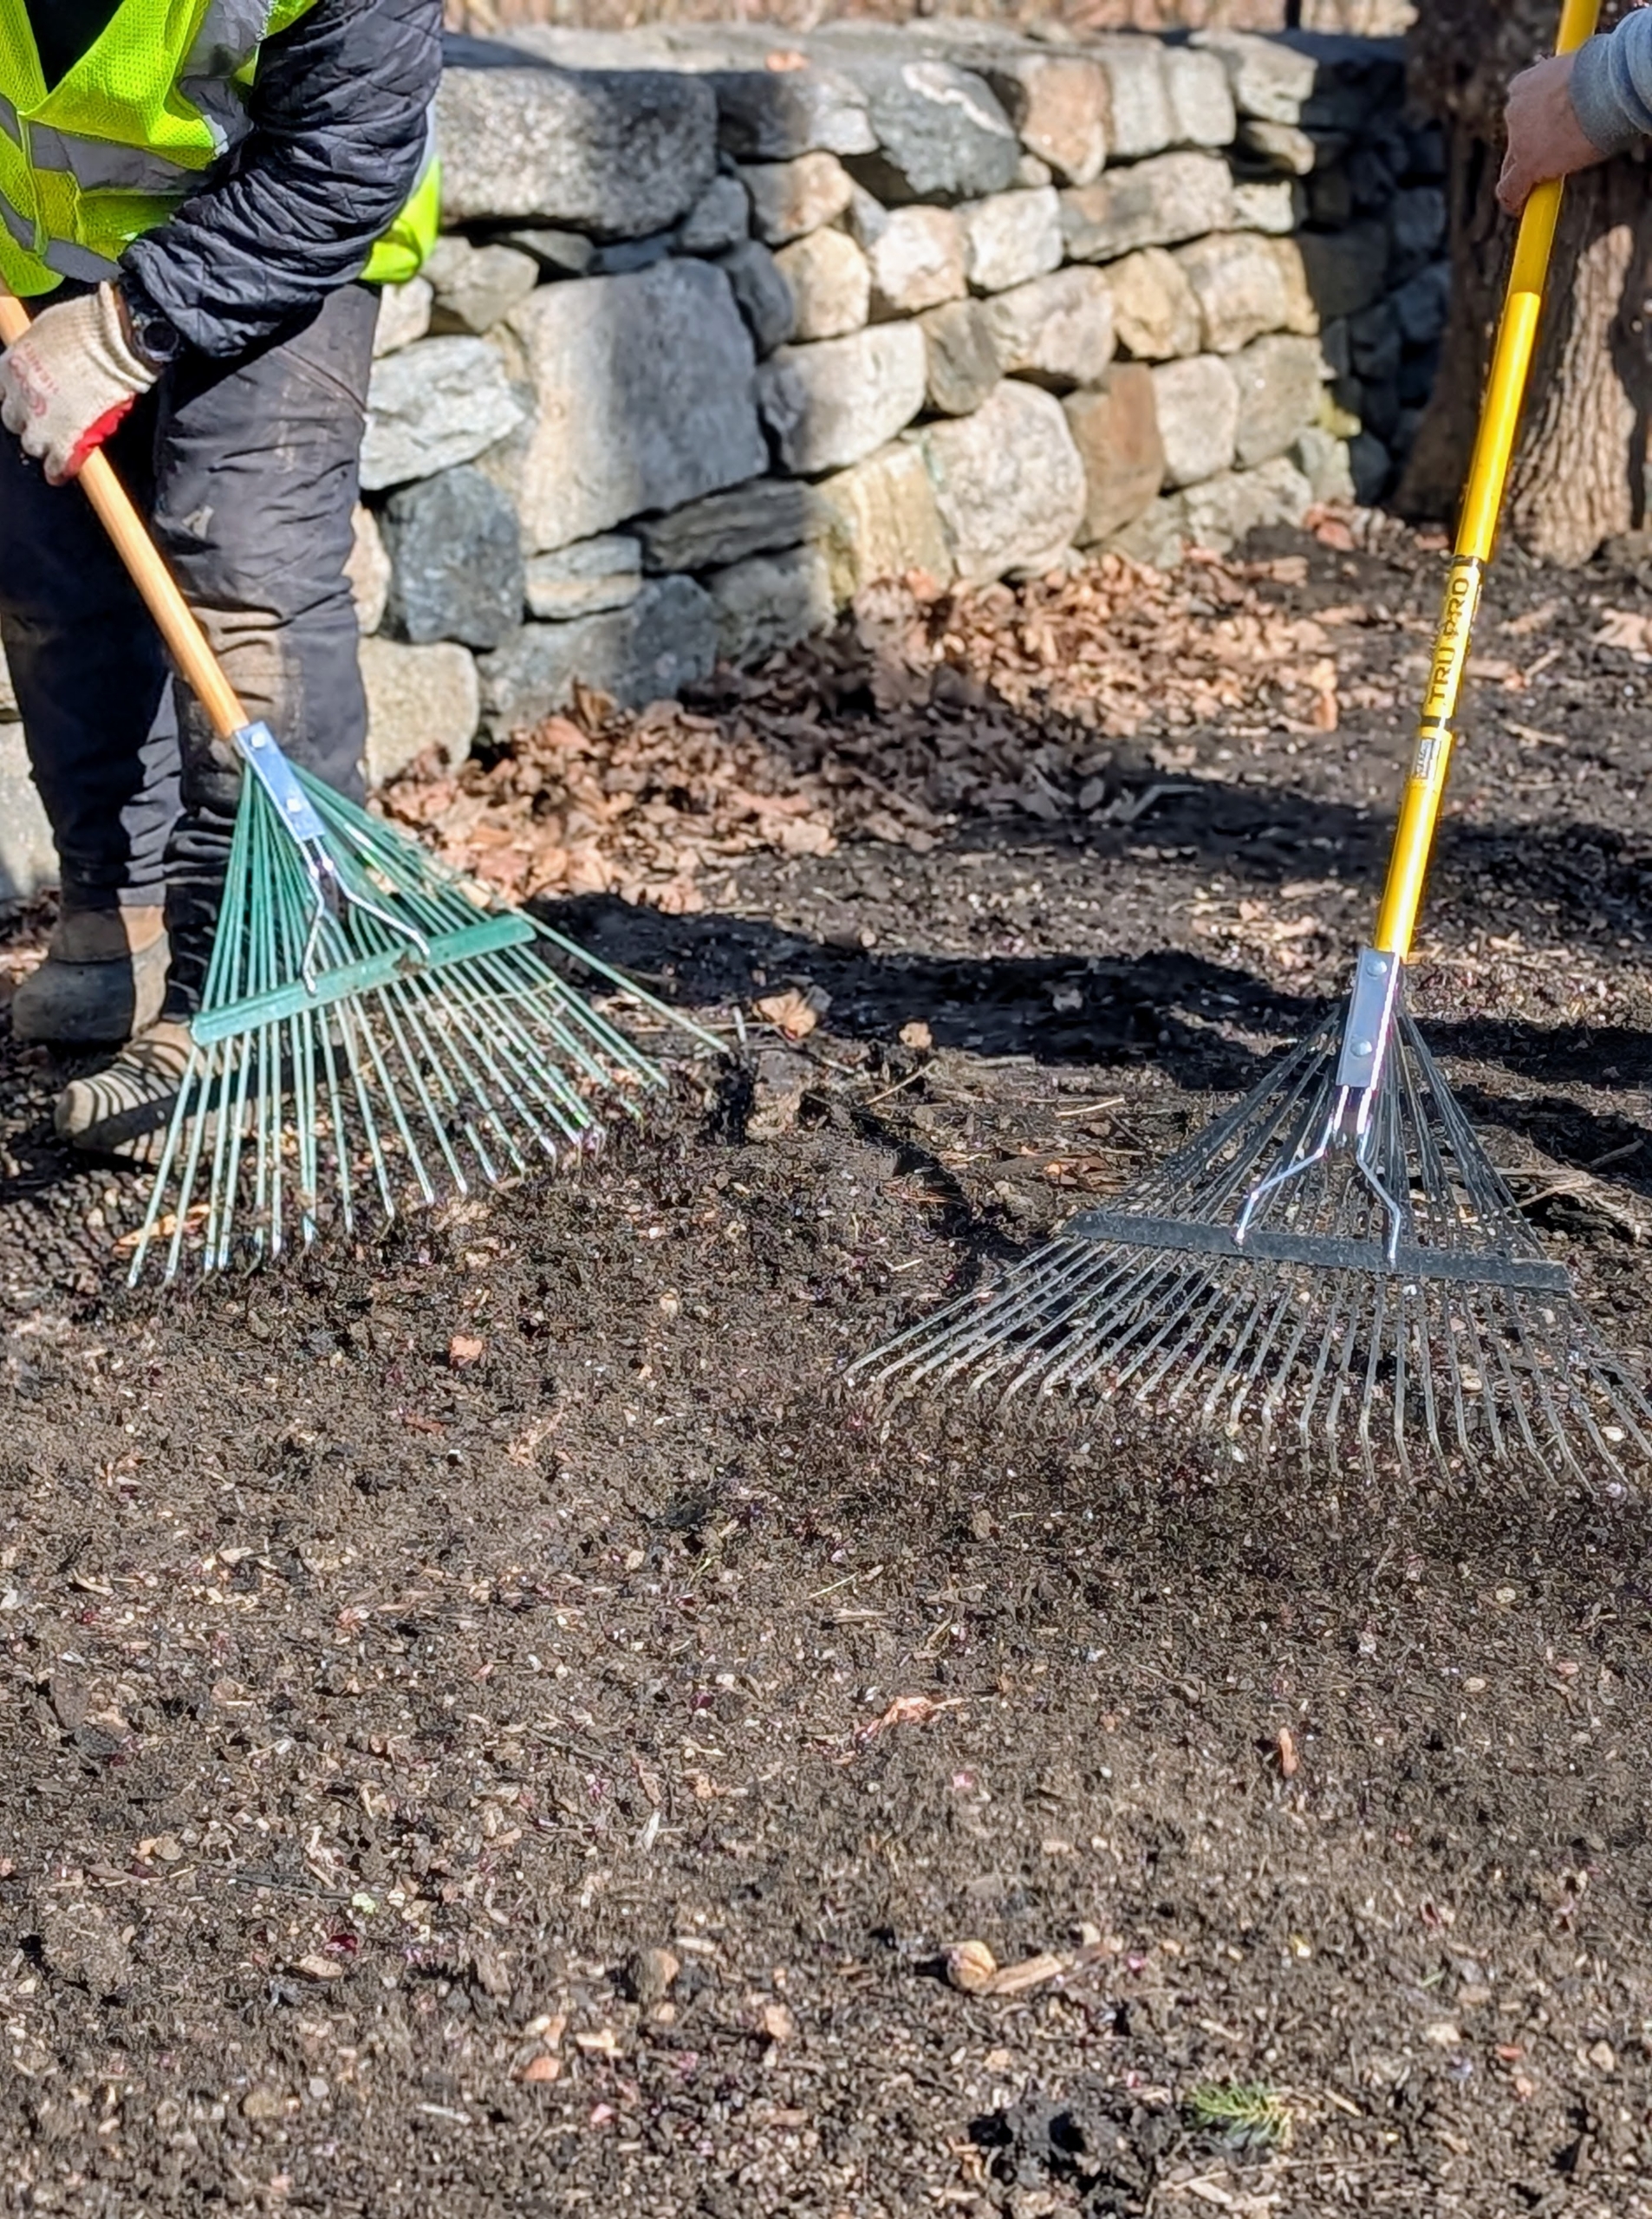
And after all the bulbs are planted and fed, the areas are raked, so it looks neat and tidy.
Raking closely also helps to make sure every bulb is covered. I don’t want any missed.
And here is an area all done. I can’t wait to see all these bulbs erupt with gorgeous color come spring.
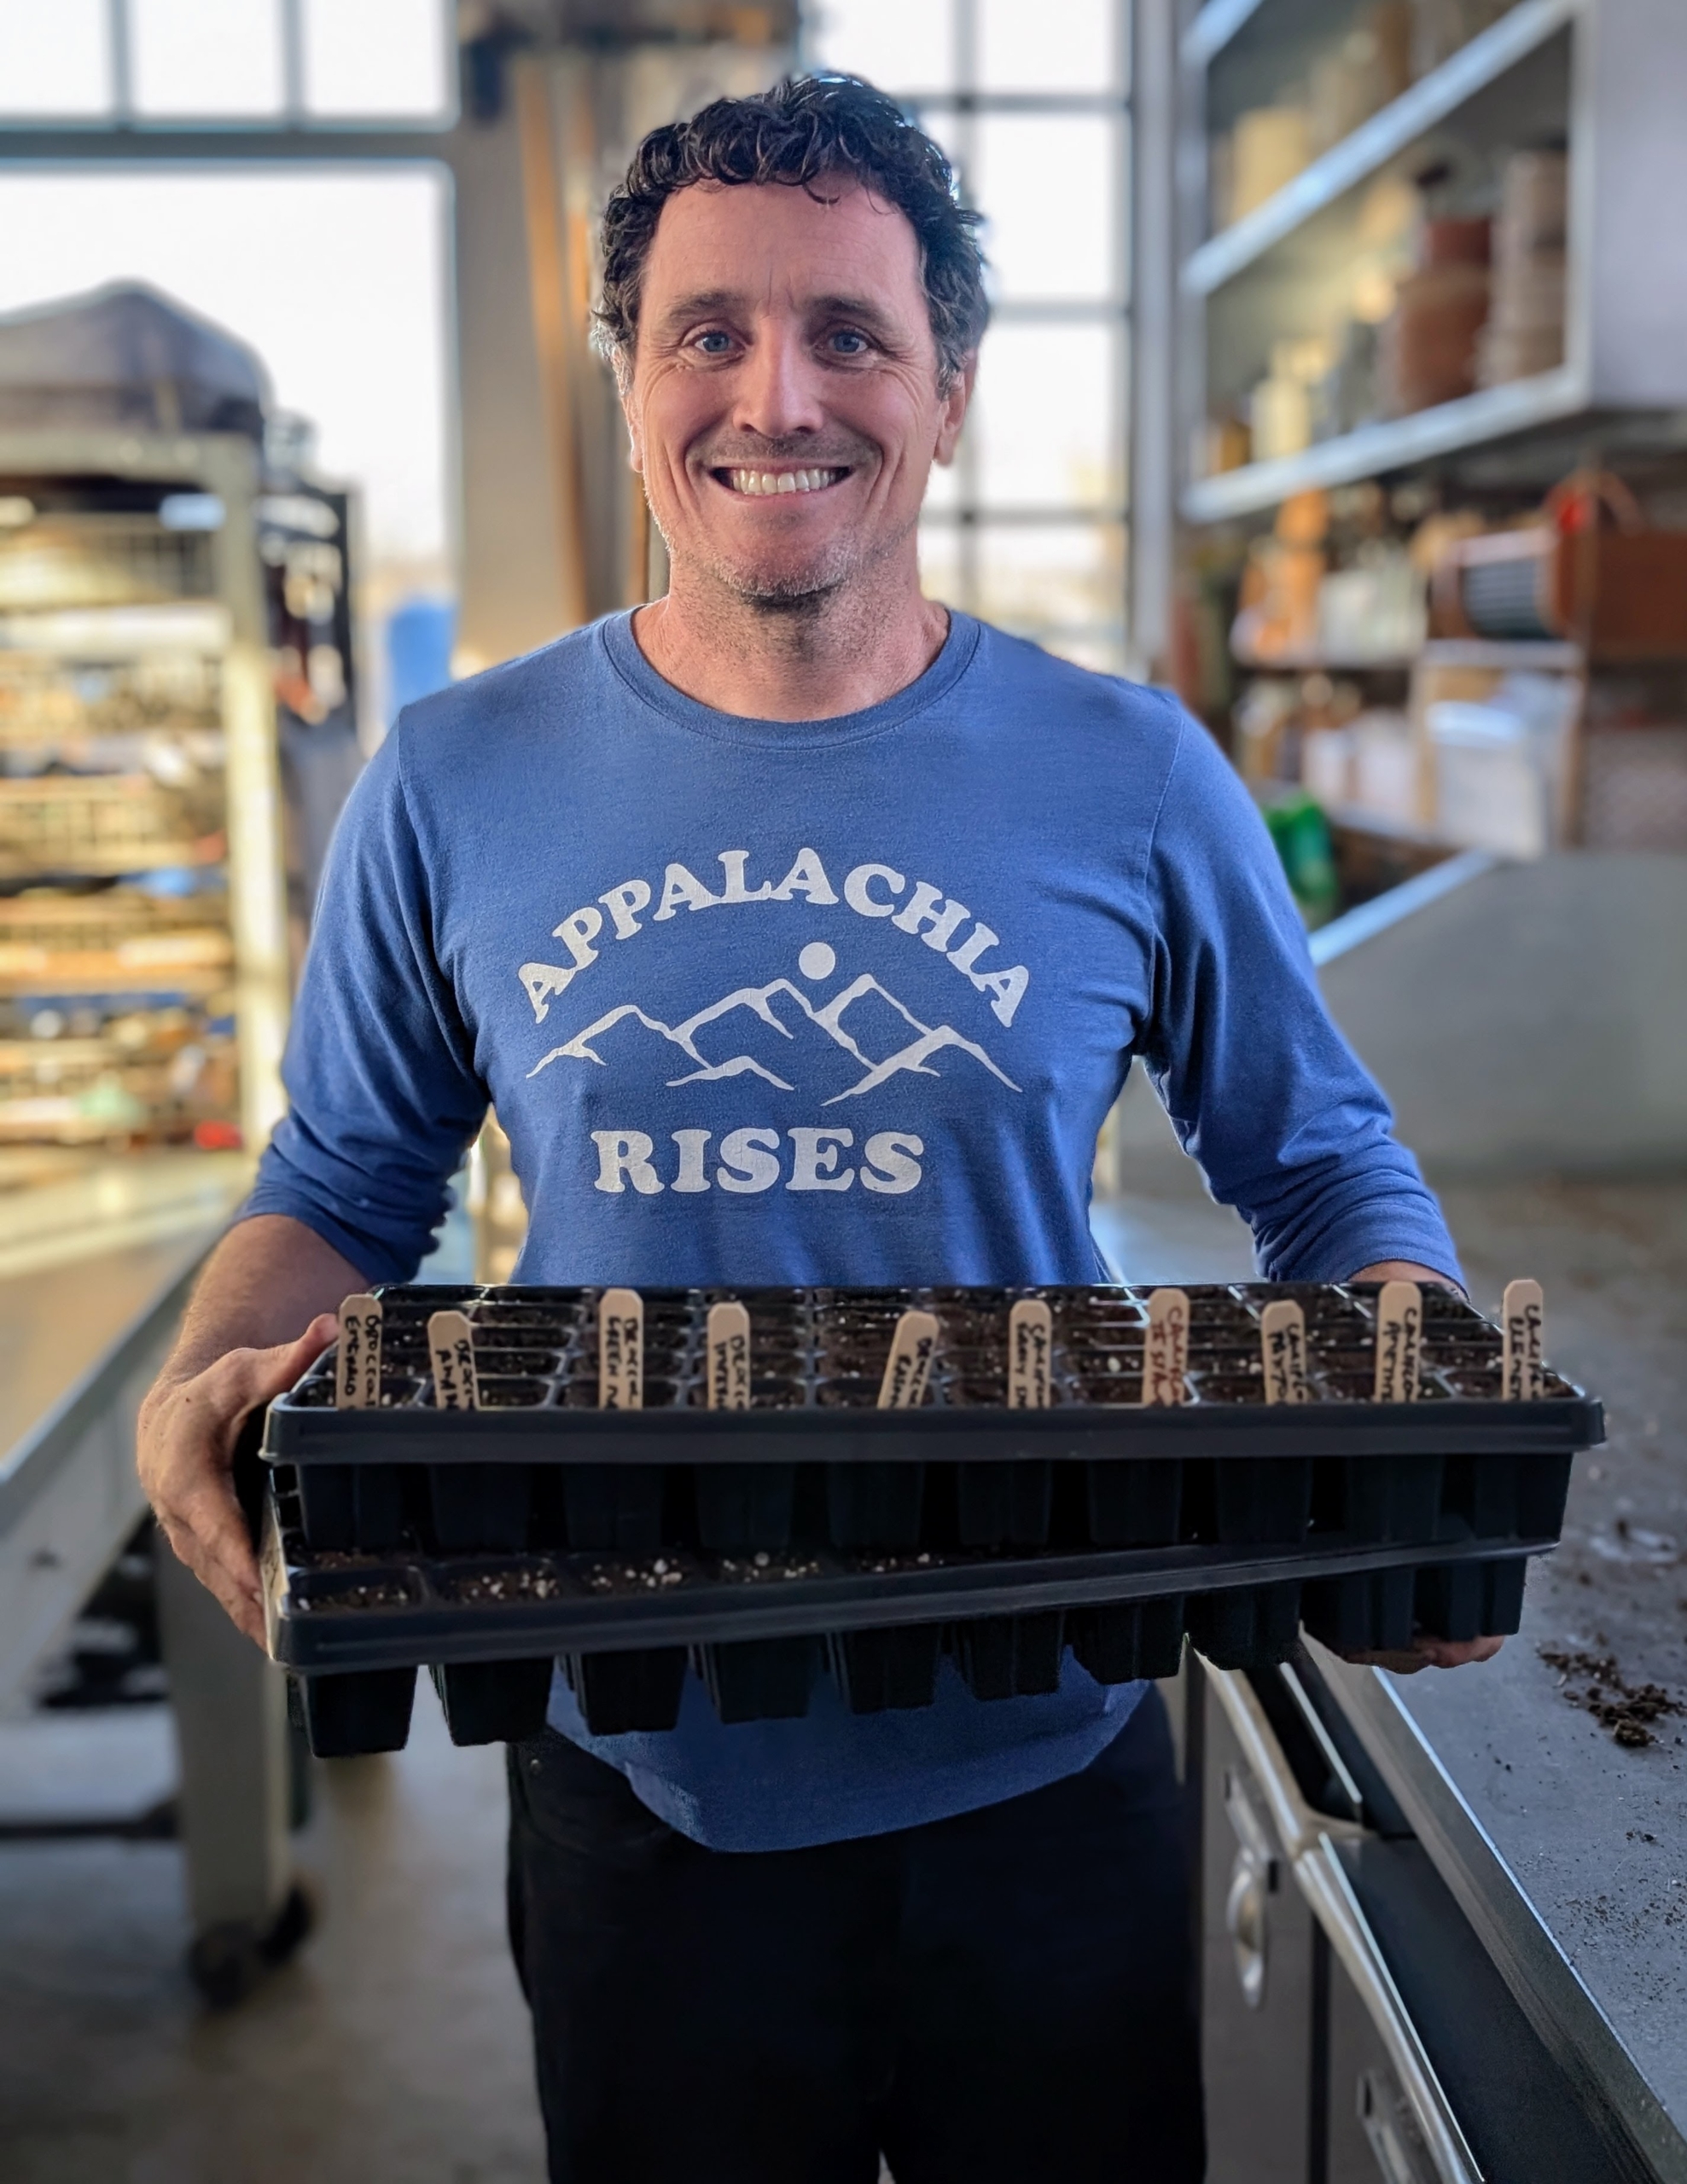
Gardeners, it's time to start those brassicas from seed.
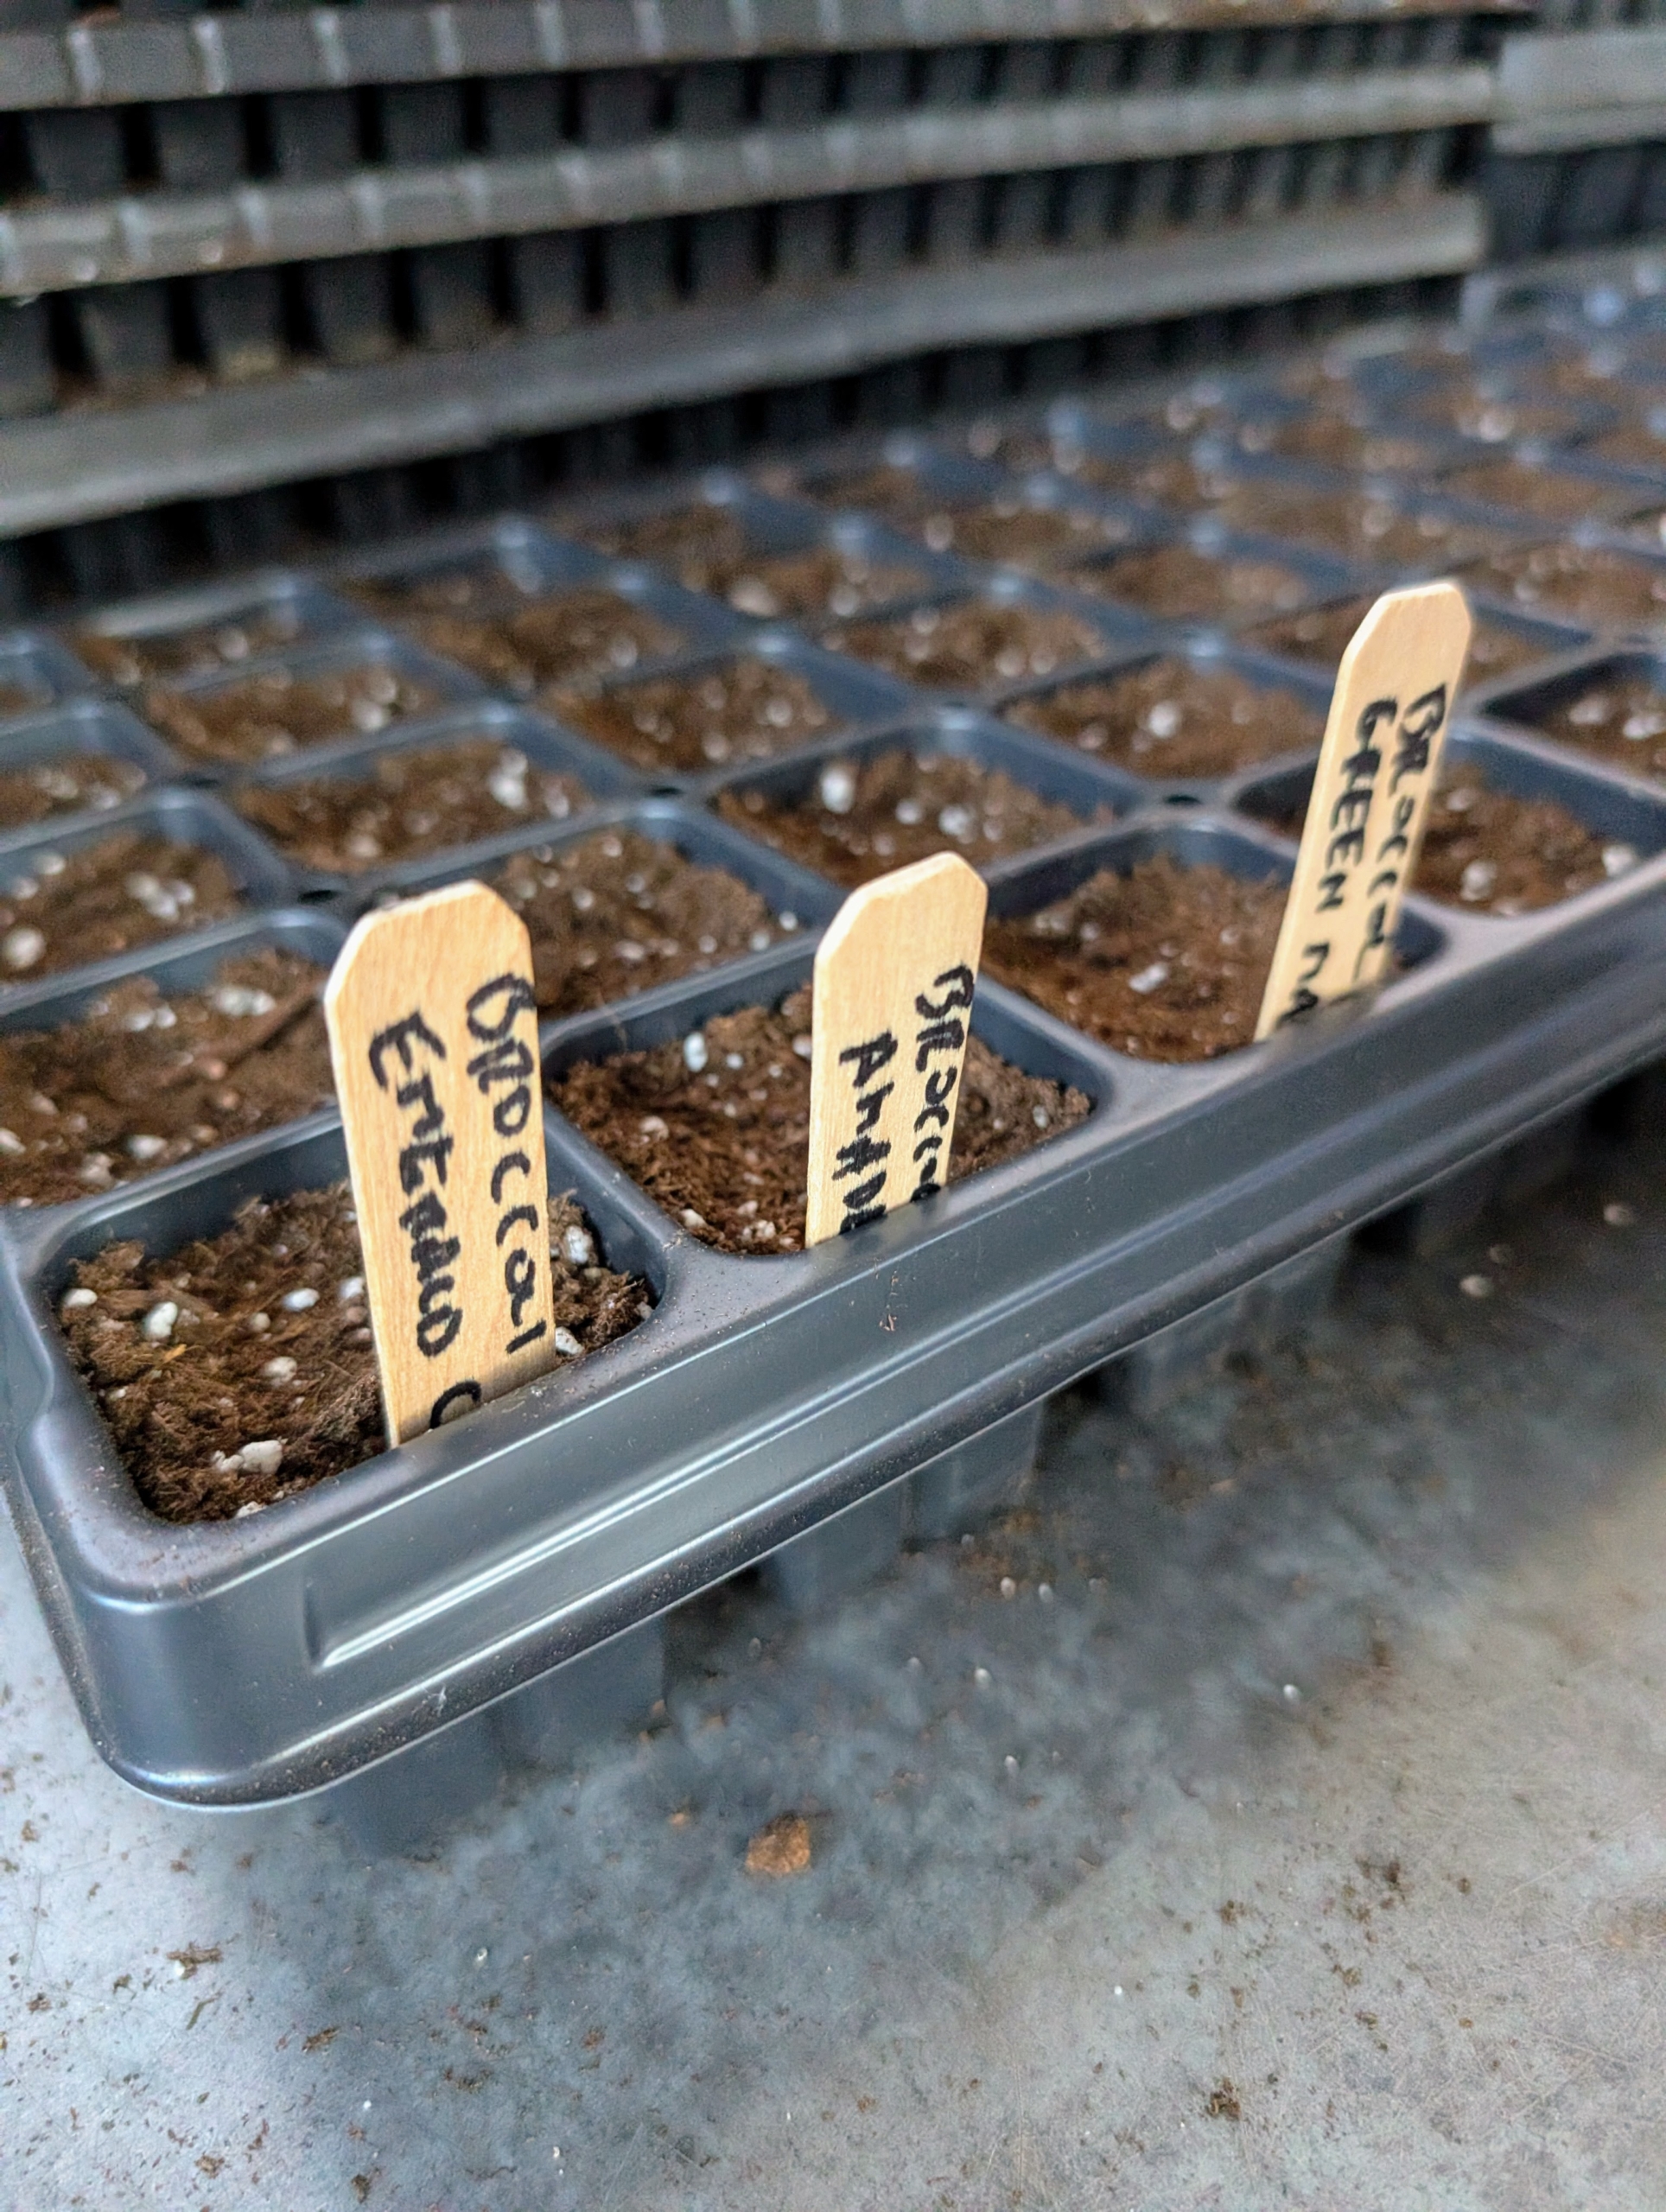
Here at my farm, I always start the year off planting seeds indoors for the next growing season. Earlier this week, my head gardener Ryan McCallister started seed trays of broccoli, cauliflower, and cabbage - all considered brassicas, or cole crops - a genus of plants in the mustard family whose members are informally referred to as cruciferous vegetables. The seedlings will be nurtured in the greenhouse until they’re mature enough to be moved to my vegetable garden.
Here are some photos, enjoy.
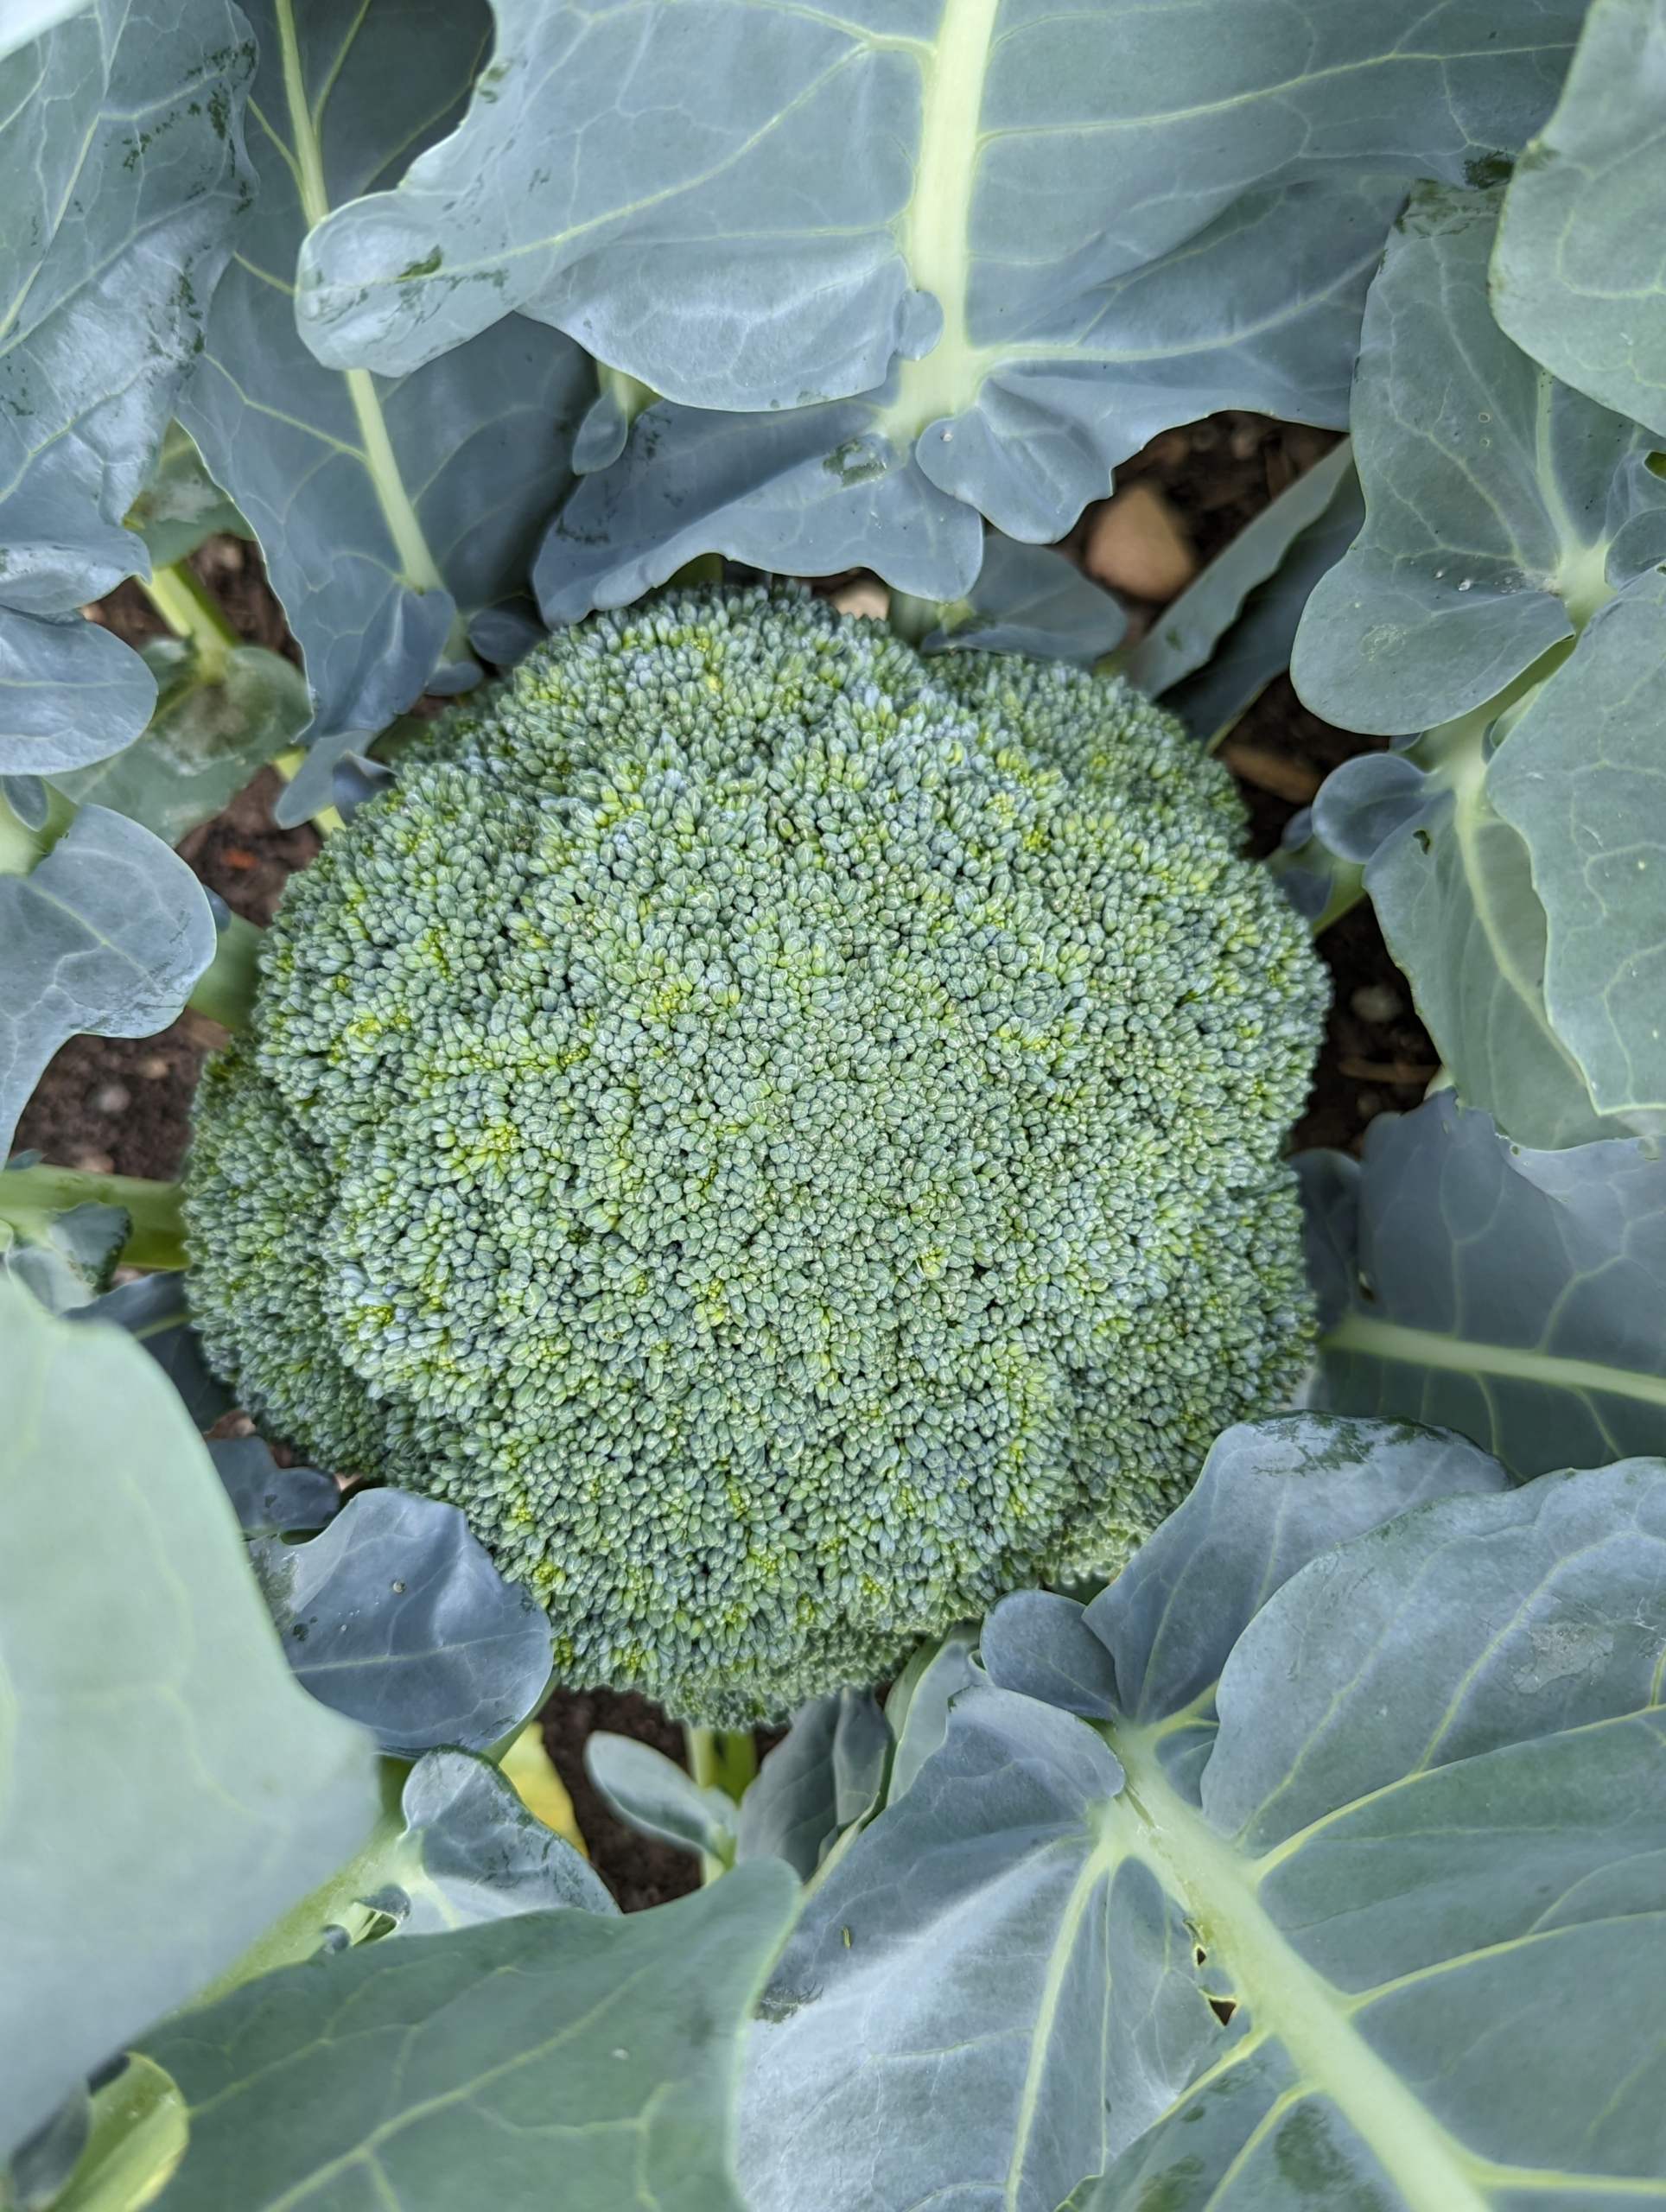
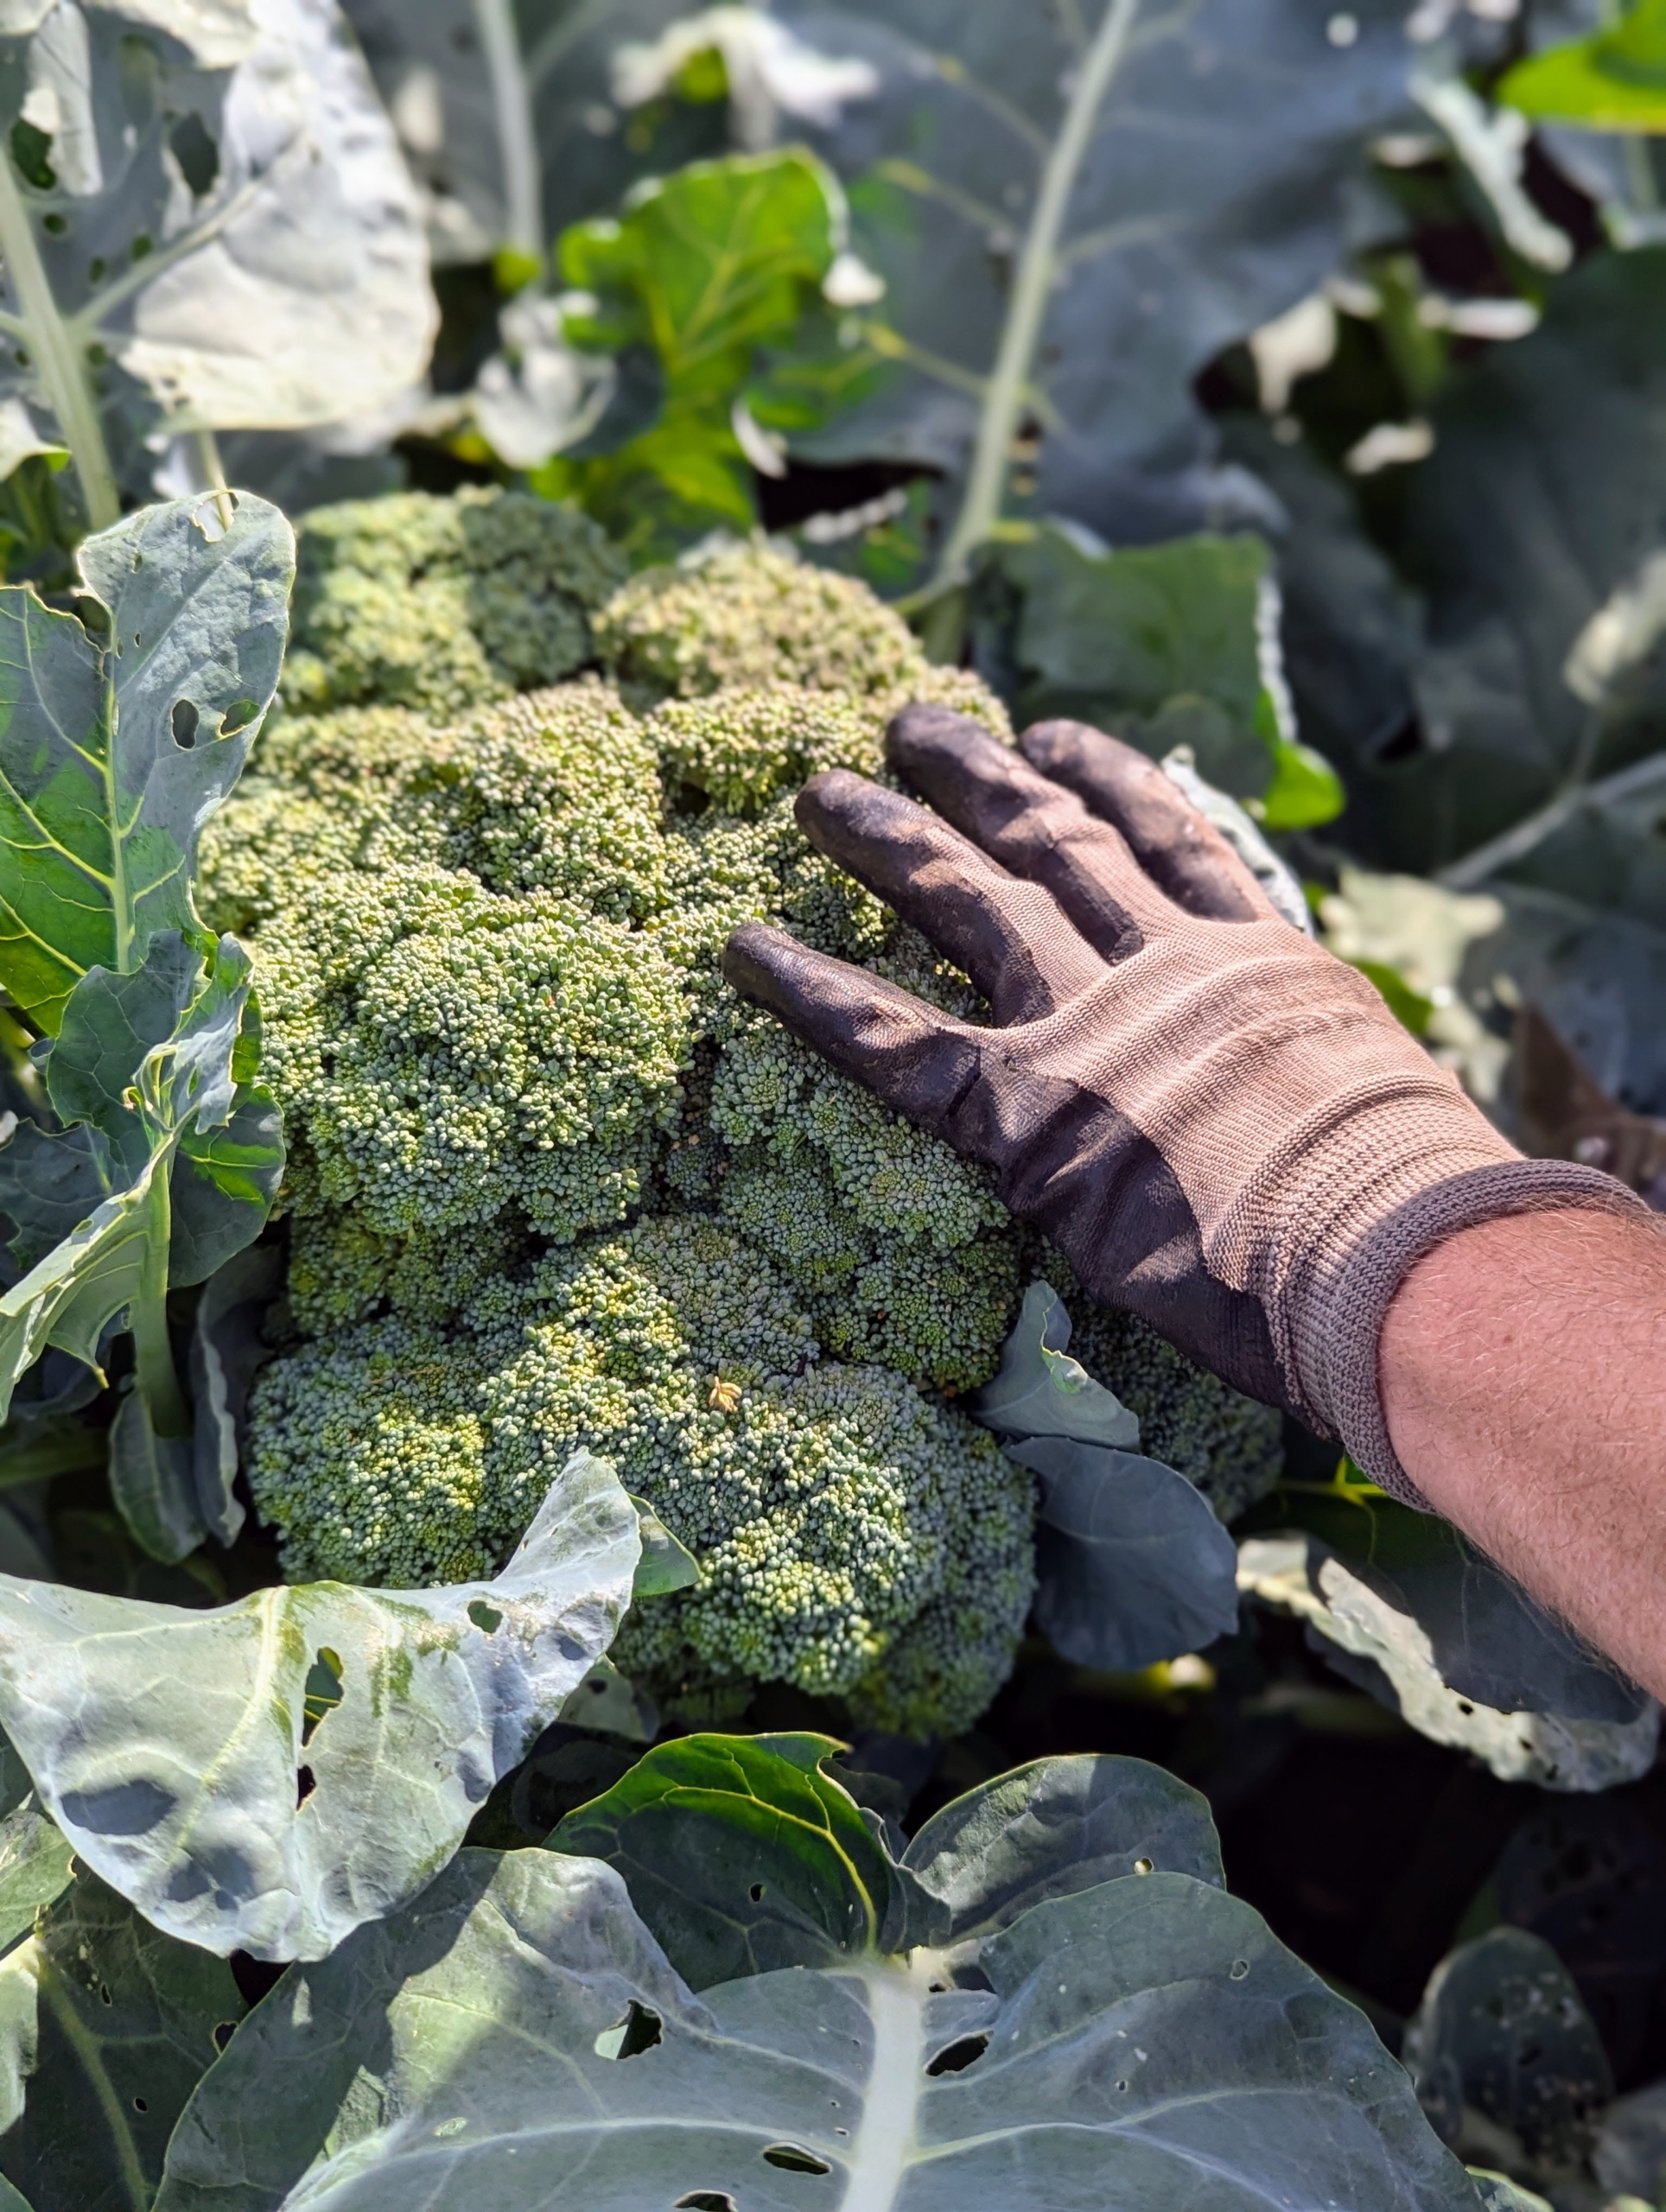
I grew lots of broccoli every year – perfect heads of delicious and nutritious broccoli.
Fully mature, some heads are bigger than Ryan’s hand. And all are so flavorful.
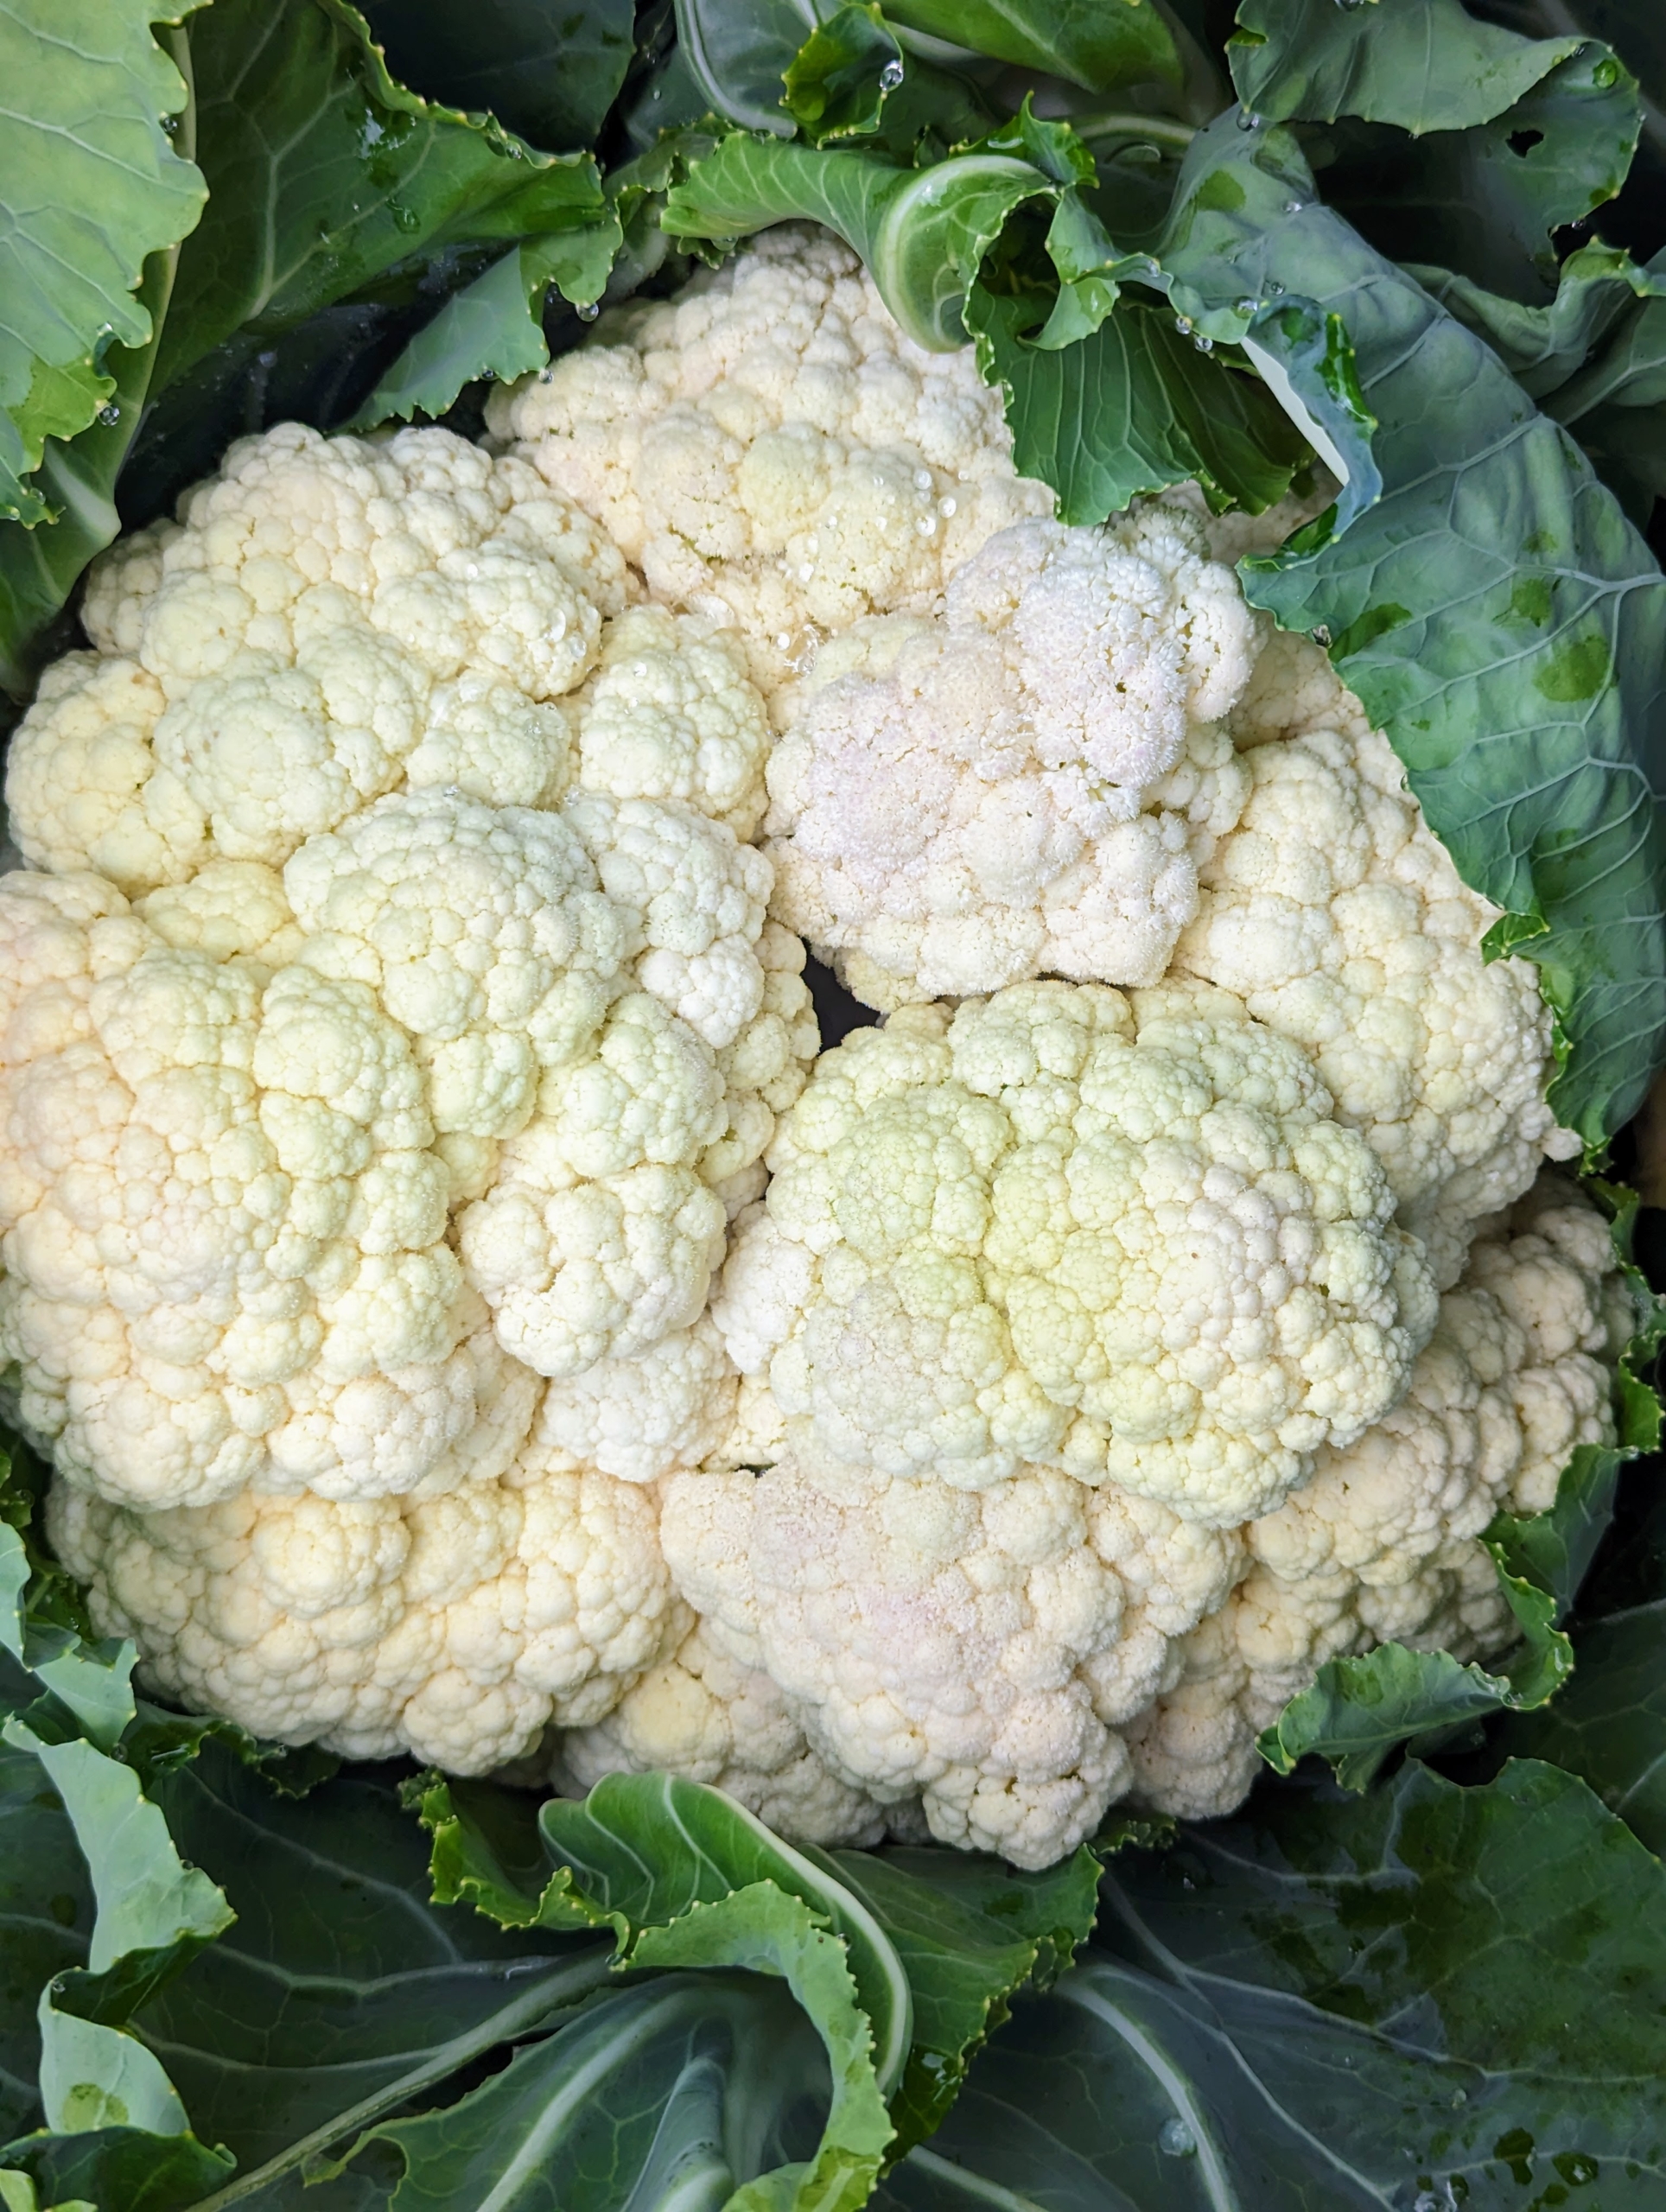
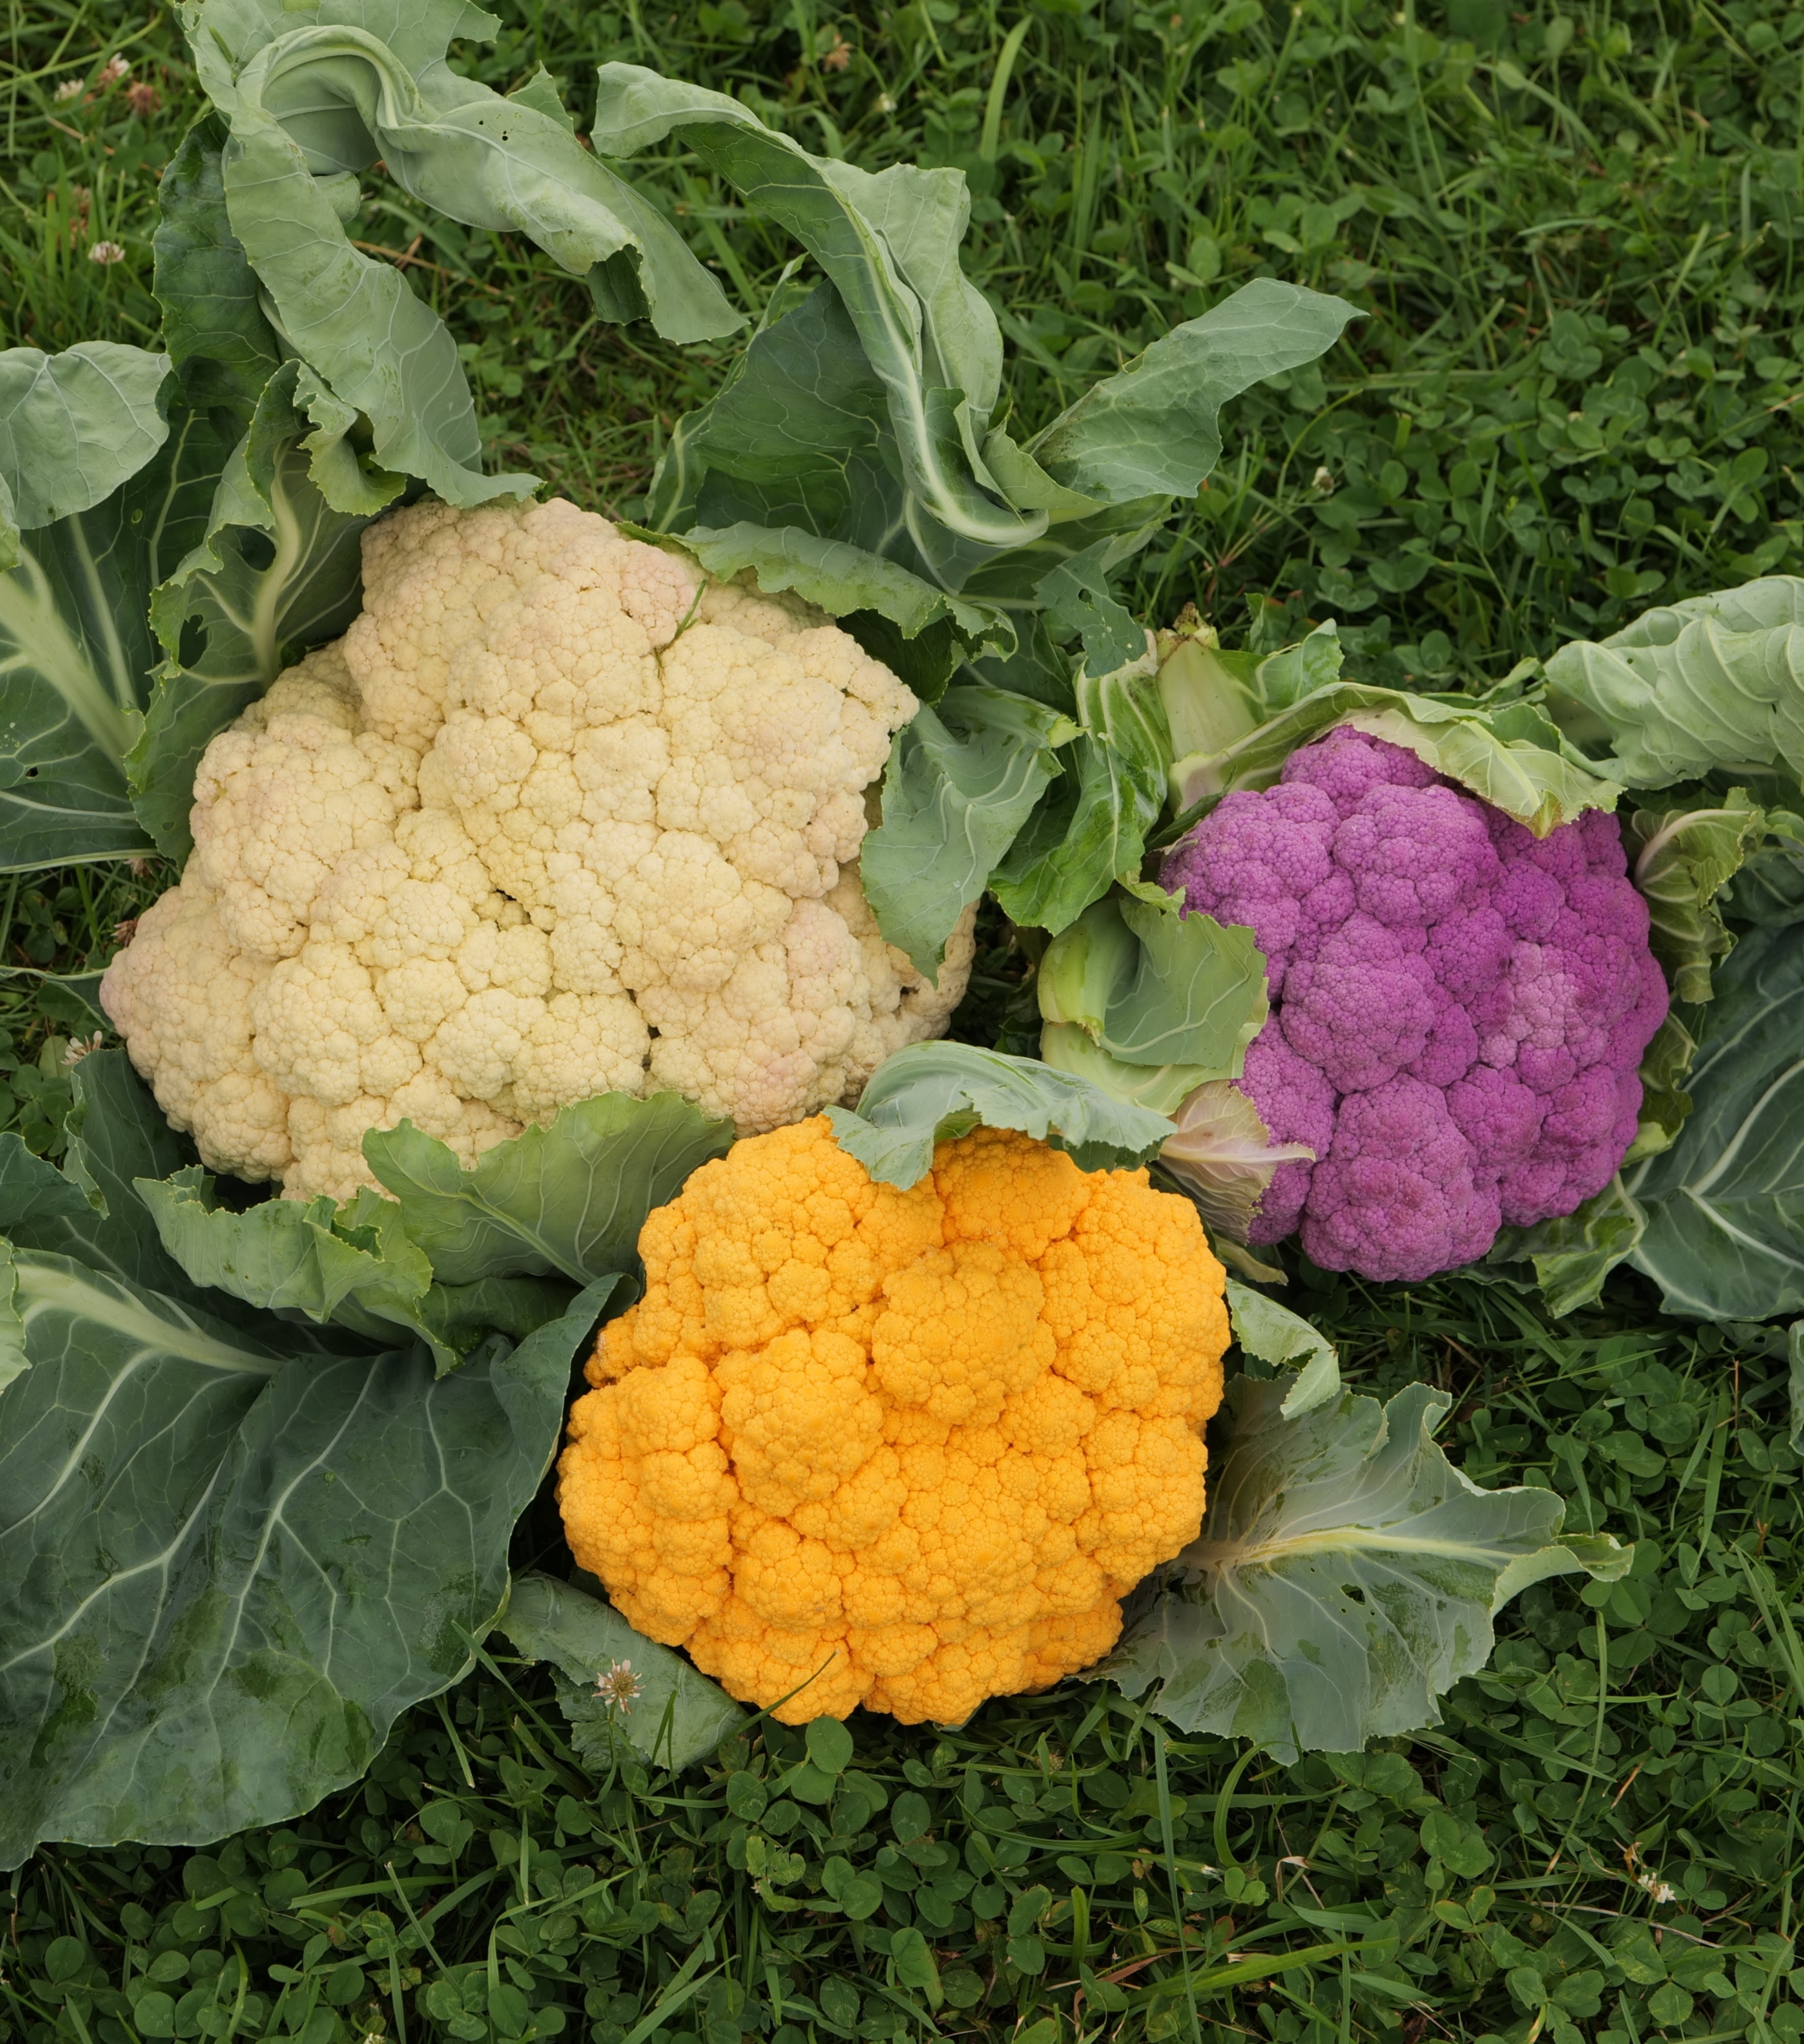
Here is a perfect head of cauliflower. The word “cauliflower” is Latin, meaning “flowers of cabbage” and the low-growing plant looks very similar to cabbage until the large leaves open up and reveal the “curd,” the most commonly consumed part of the vegetable.
Most are familiar with the white varieties, but cauliflower also grows in yellow-orange, purple, and even green.
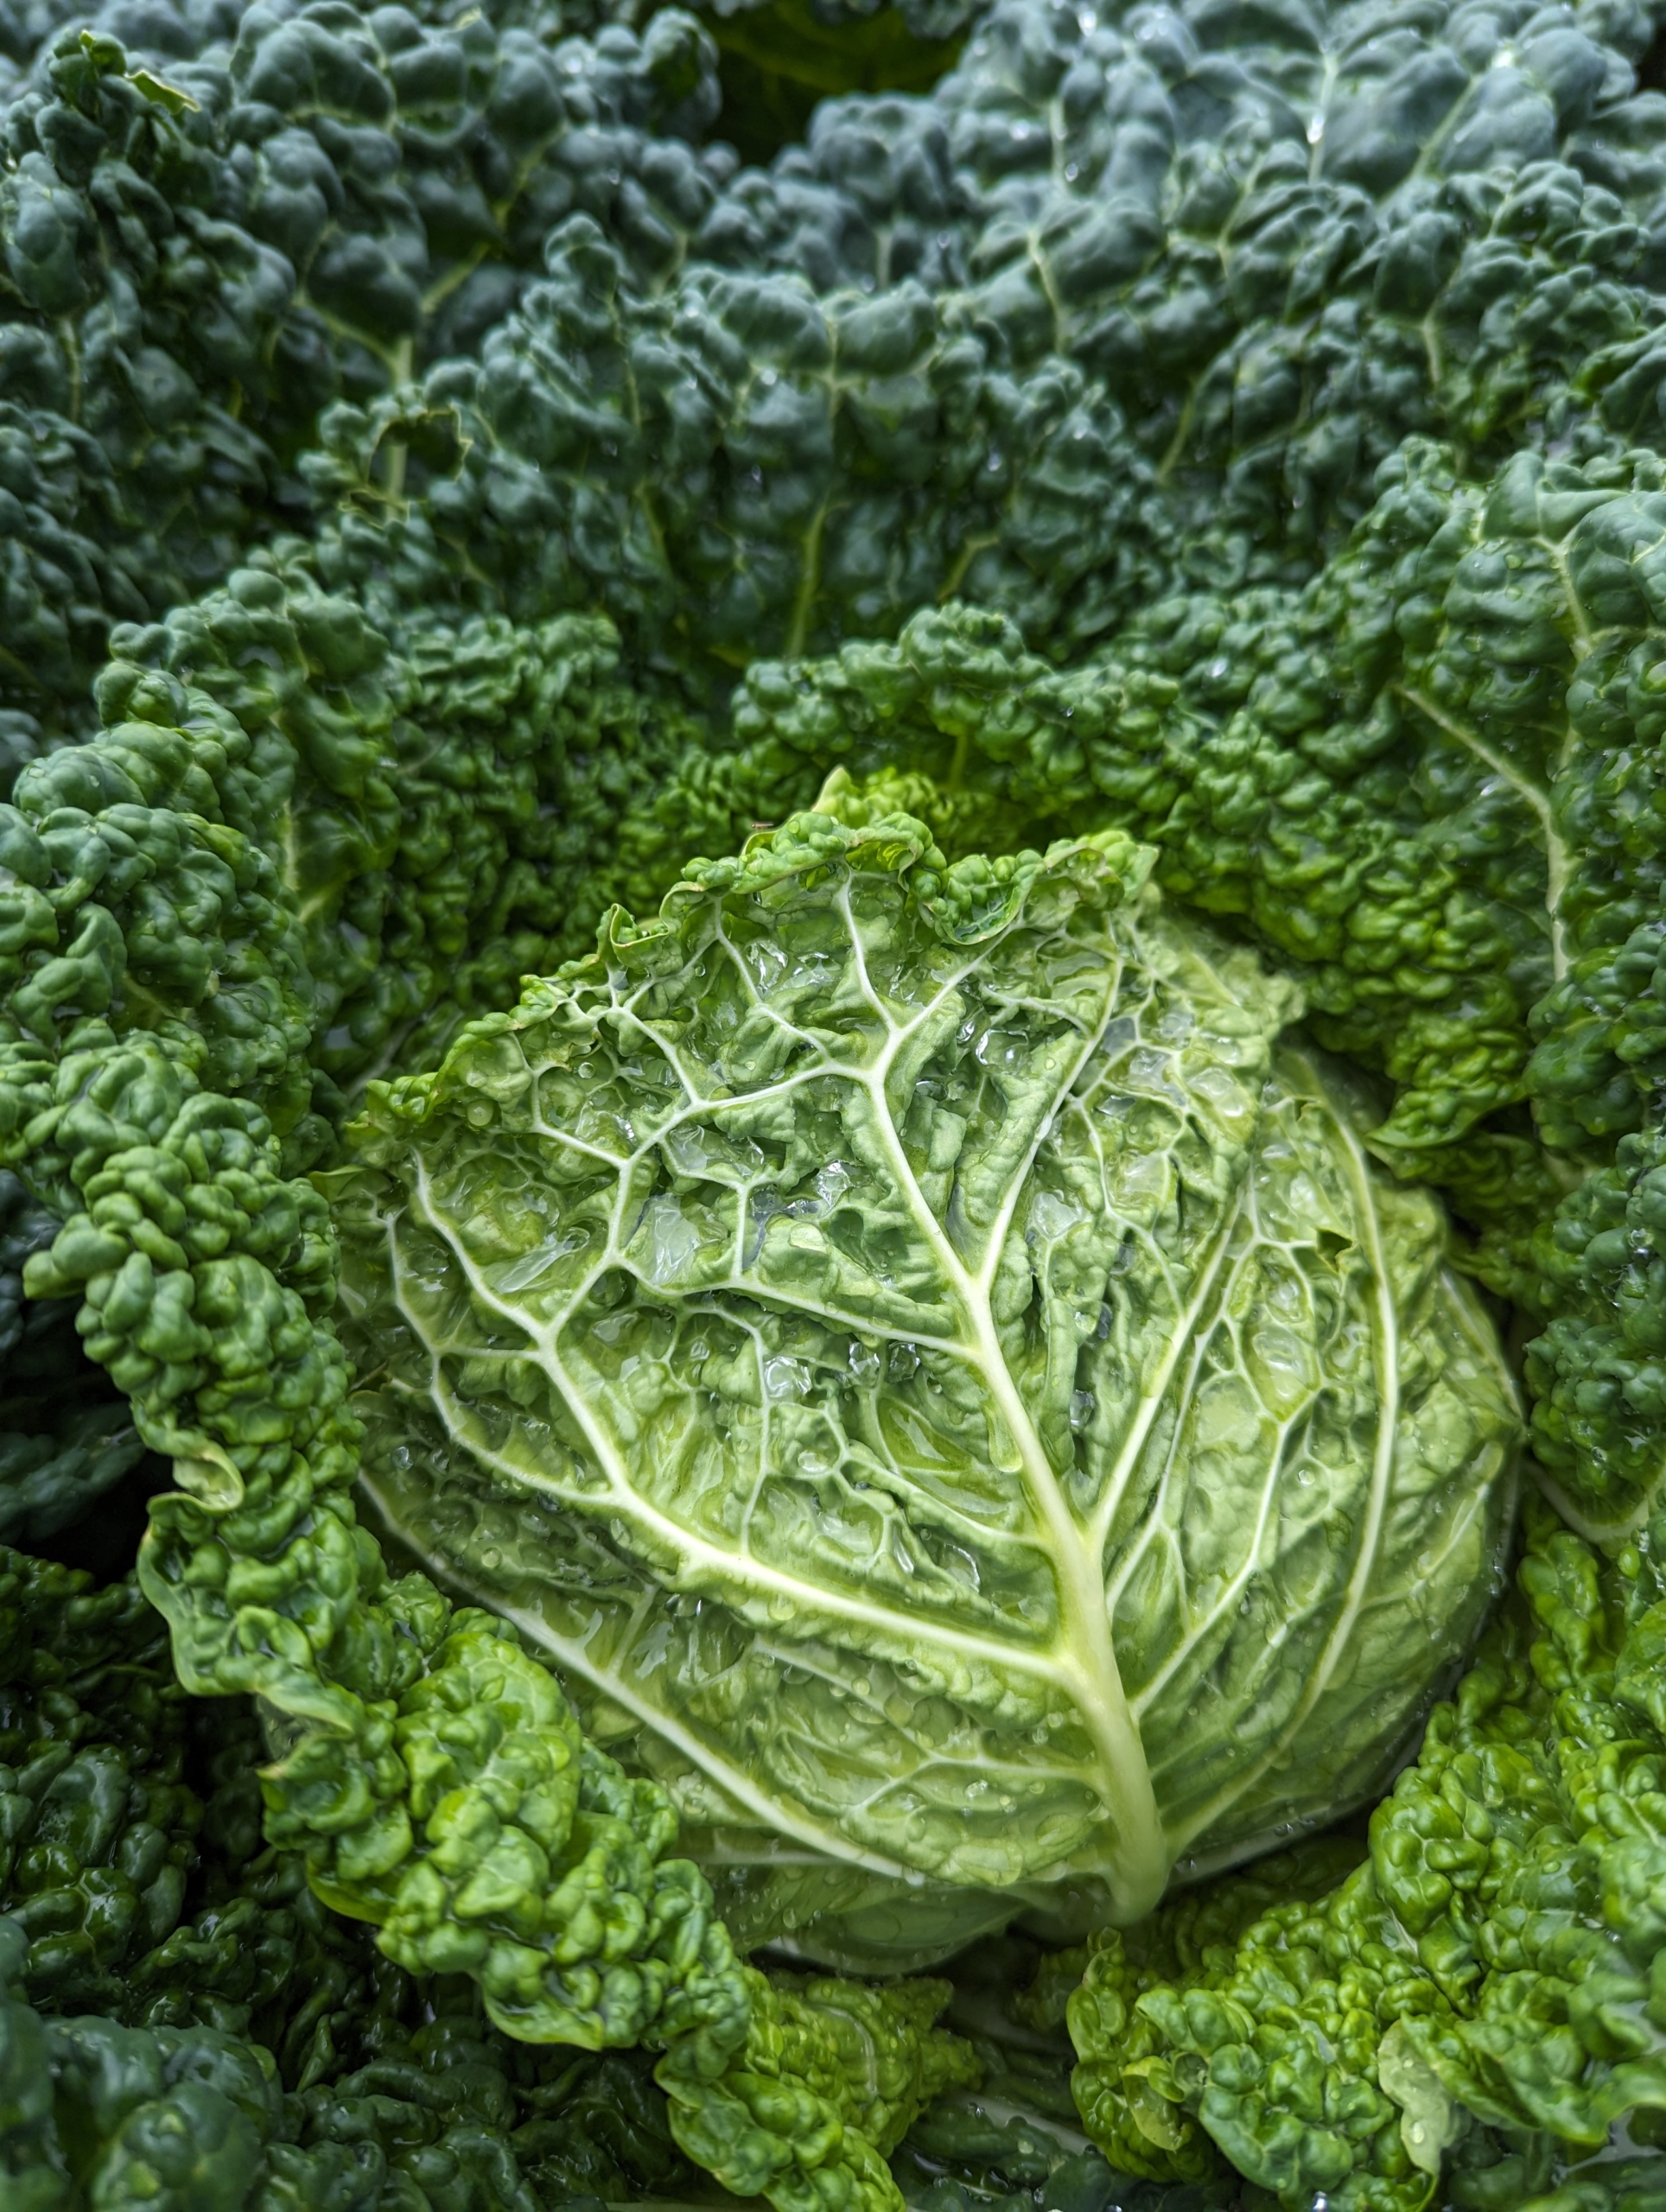
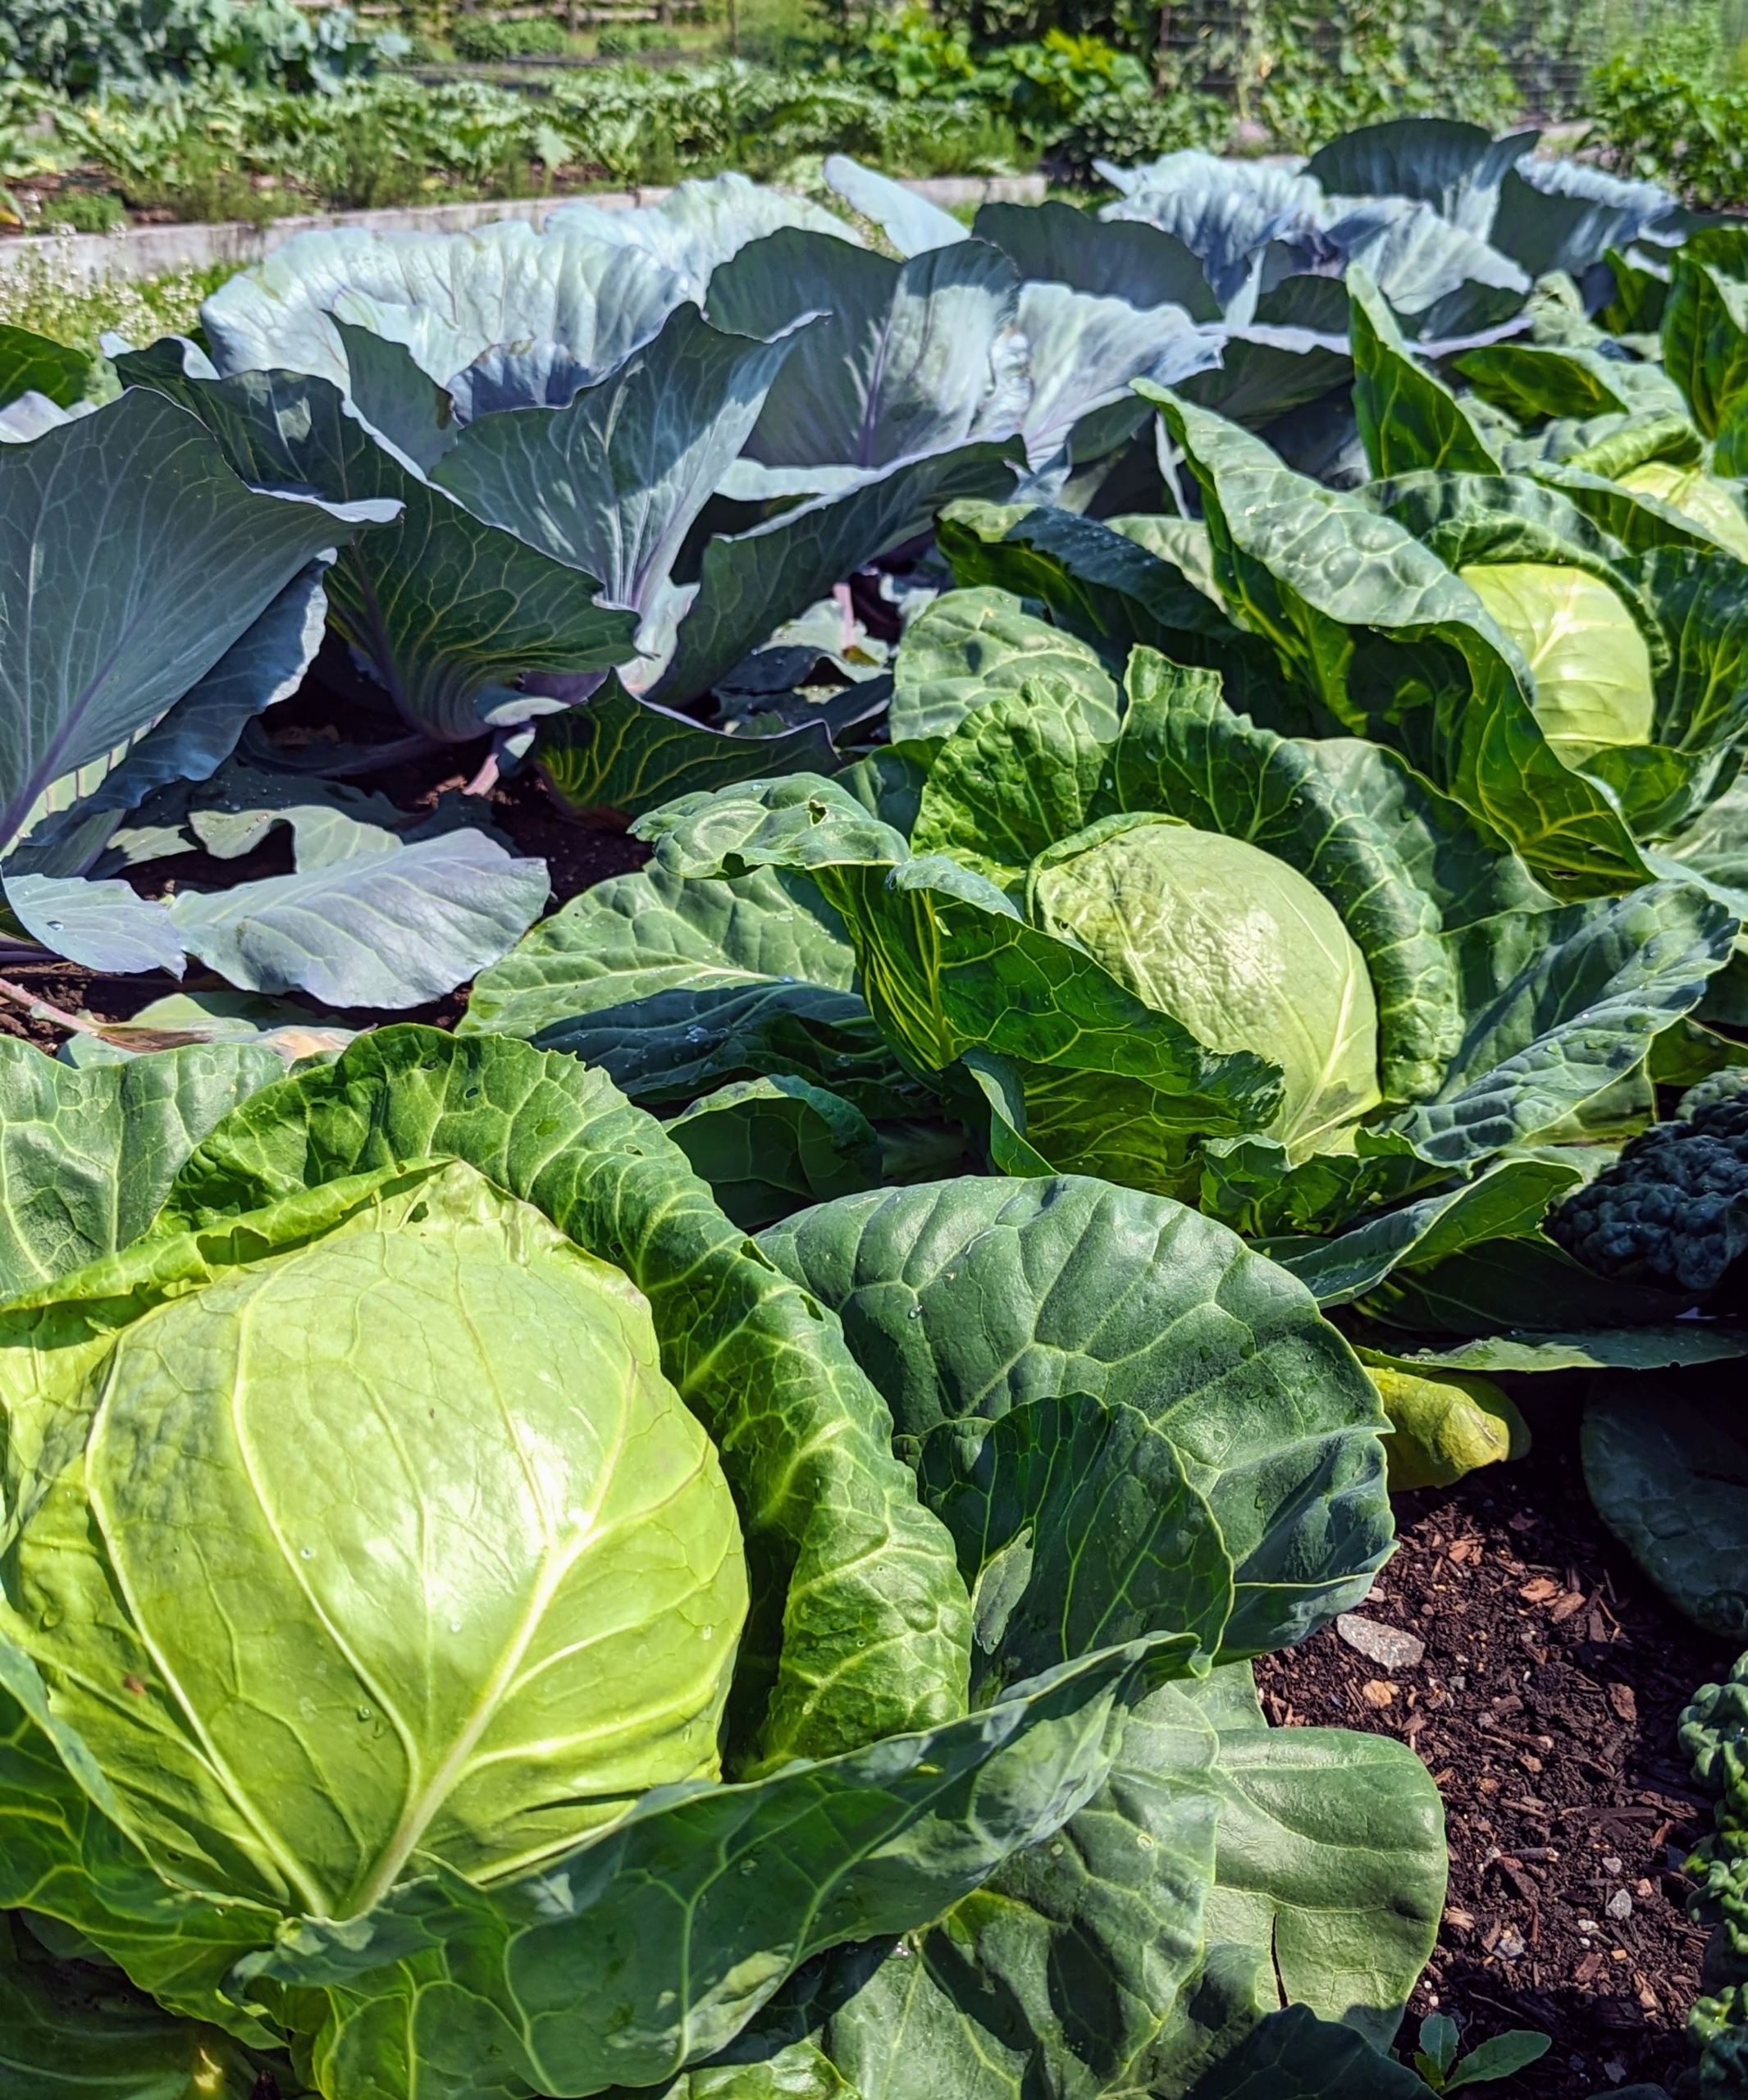
And here is one of my heads of cabbage – I grow Savoy cabbage, green cabbage, red cabbage, Napa cabbage, etc.
Here is one of my brassica beds in summer. I grow lots of brassicas and save them all for me and my family.
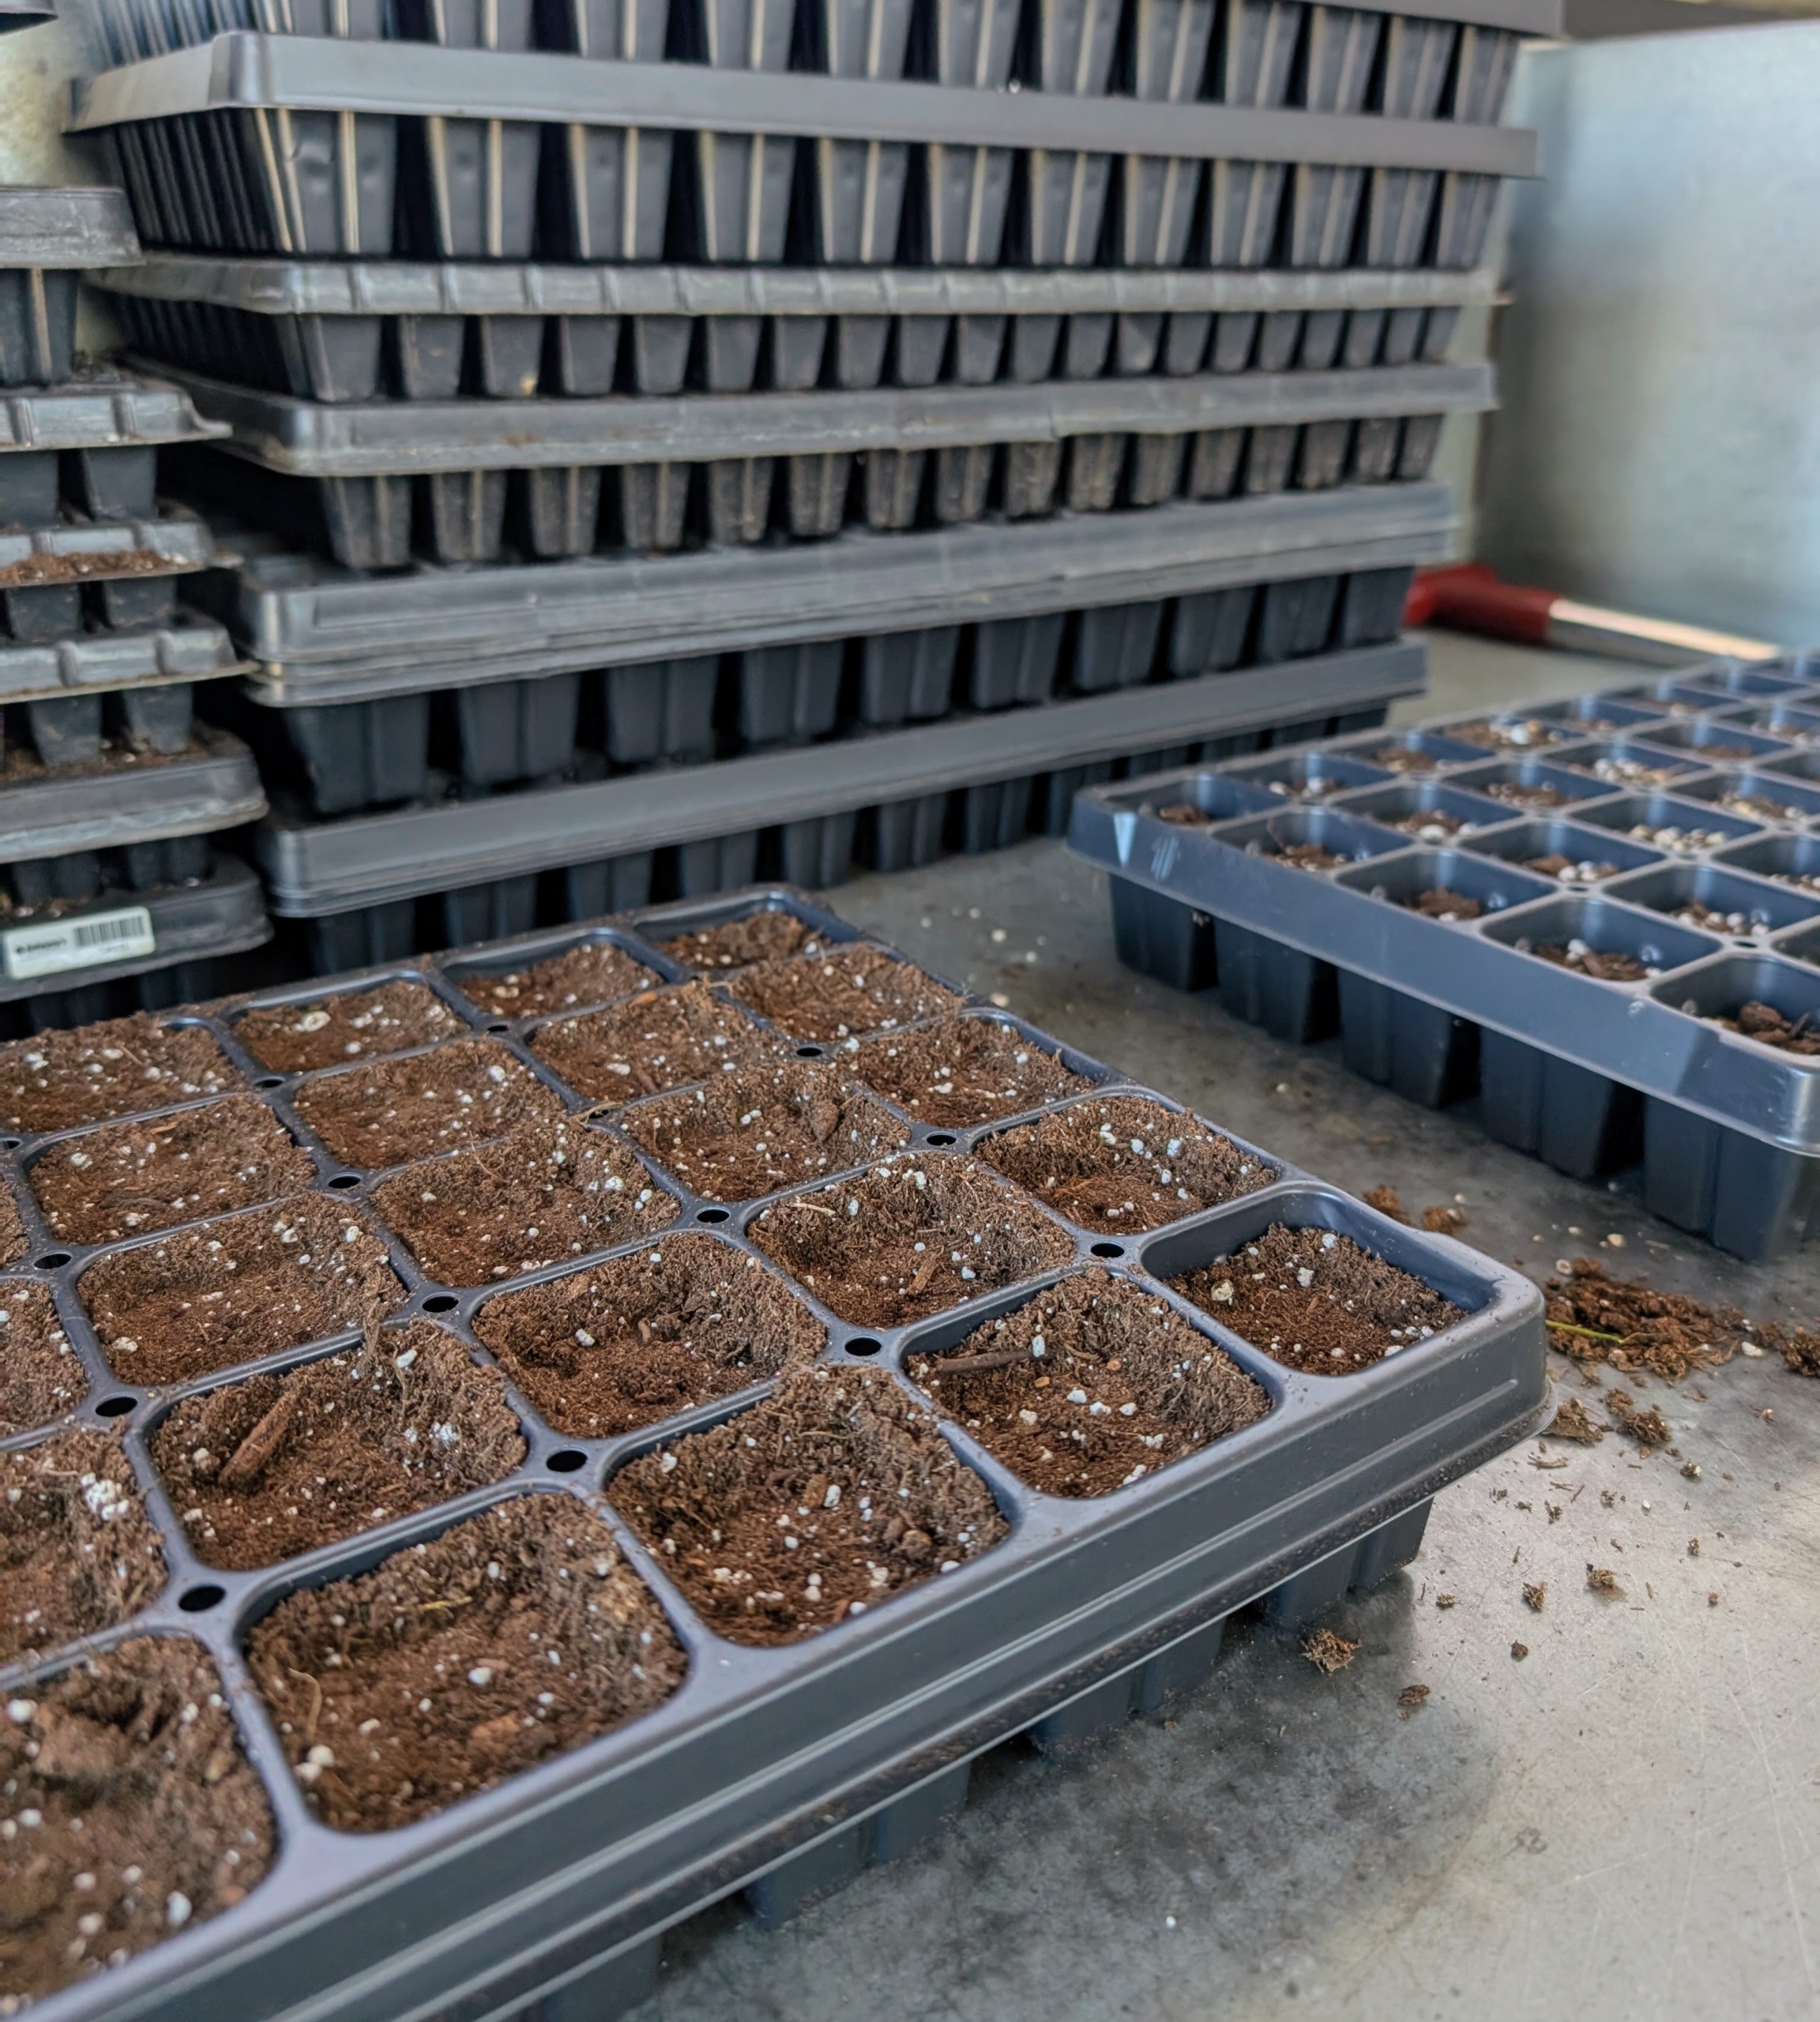
And all the beautiful vegetables start out here, in my head house, seeded in trays.
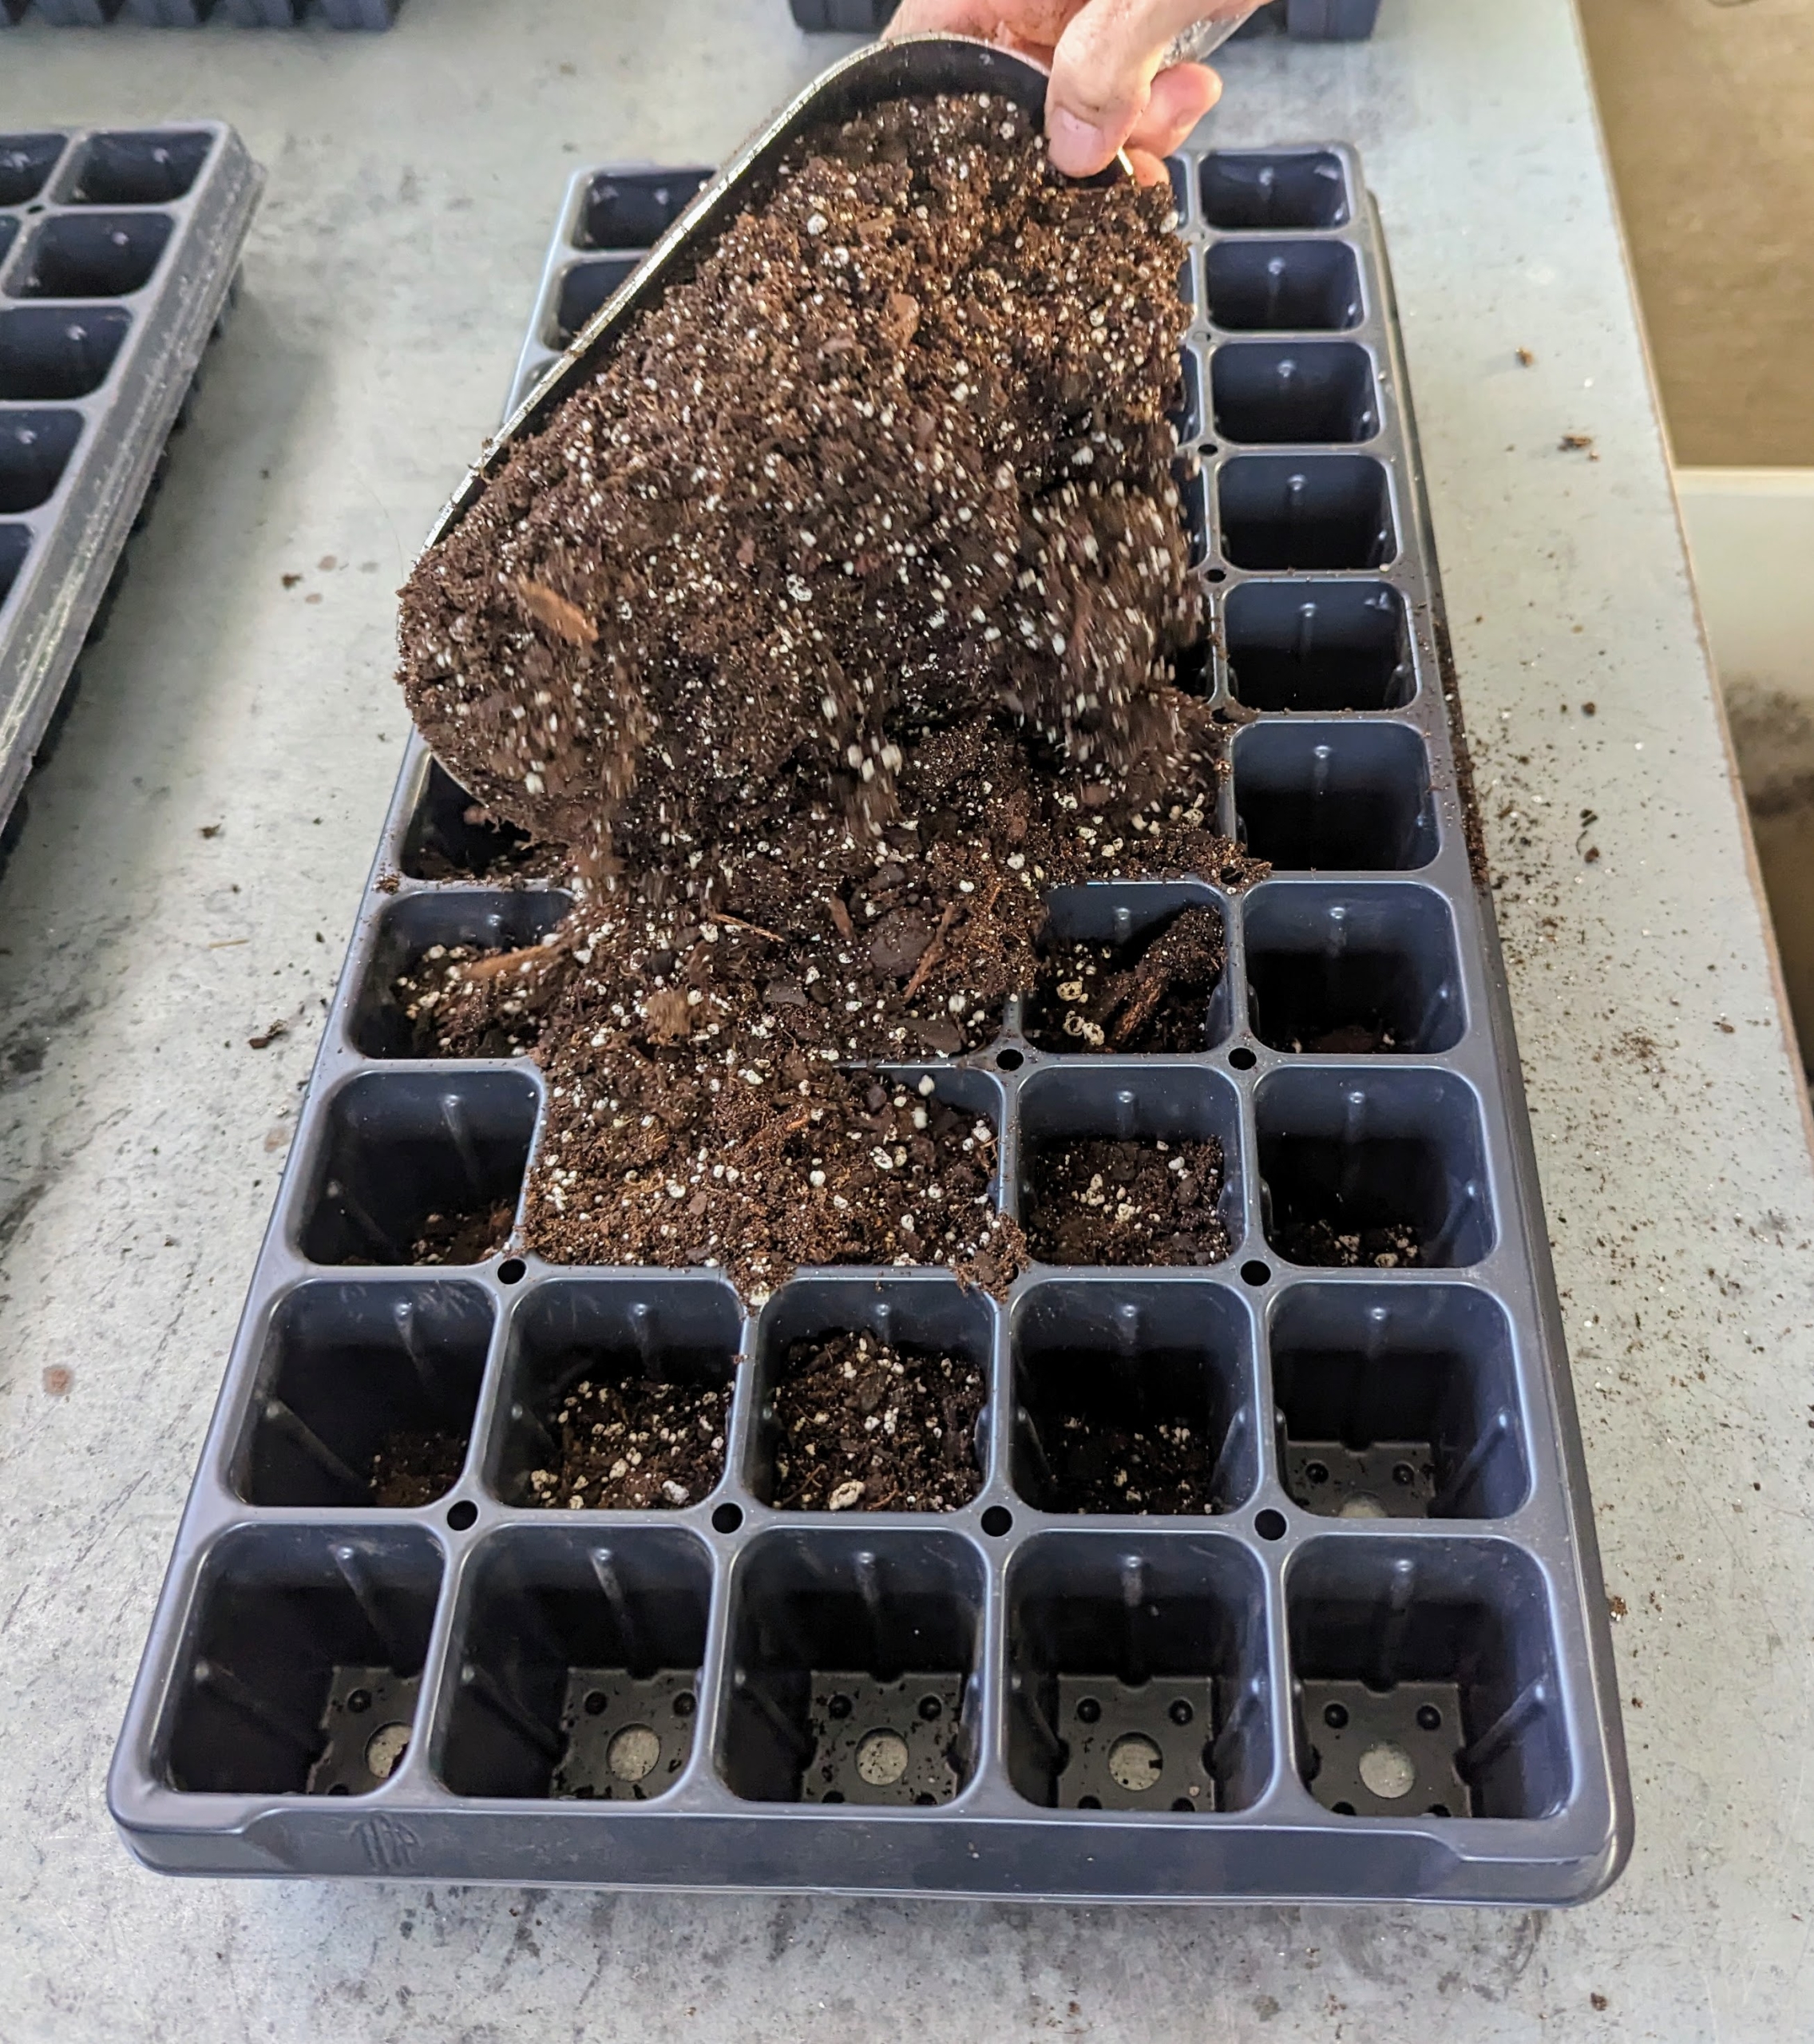
Ryan prepares the trays. It’s best to use a pre-made seed starting mix that contains the proper amounts of vermiculite, perlite and peat moss. Seed starting mixes are available at garden supply stores. I use Miracle-Gro Seed Starting Potting Mix.
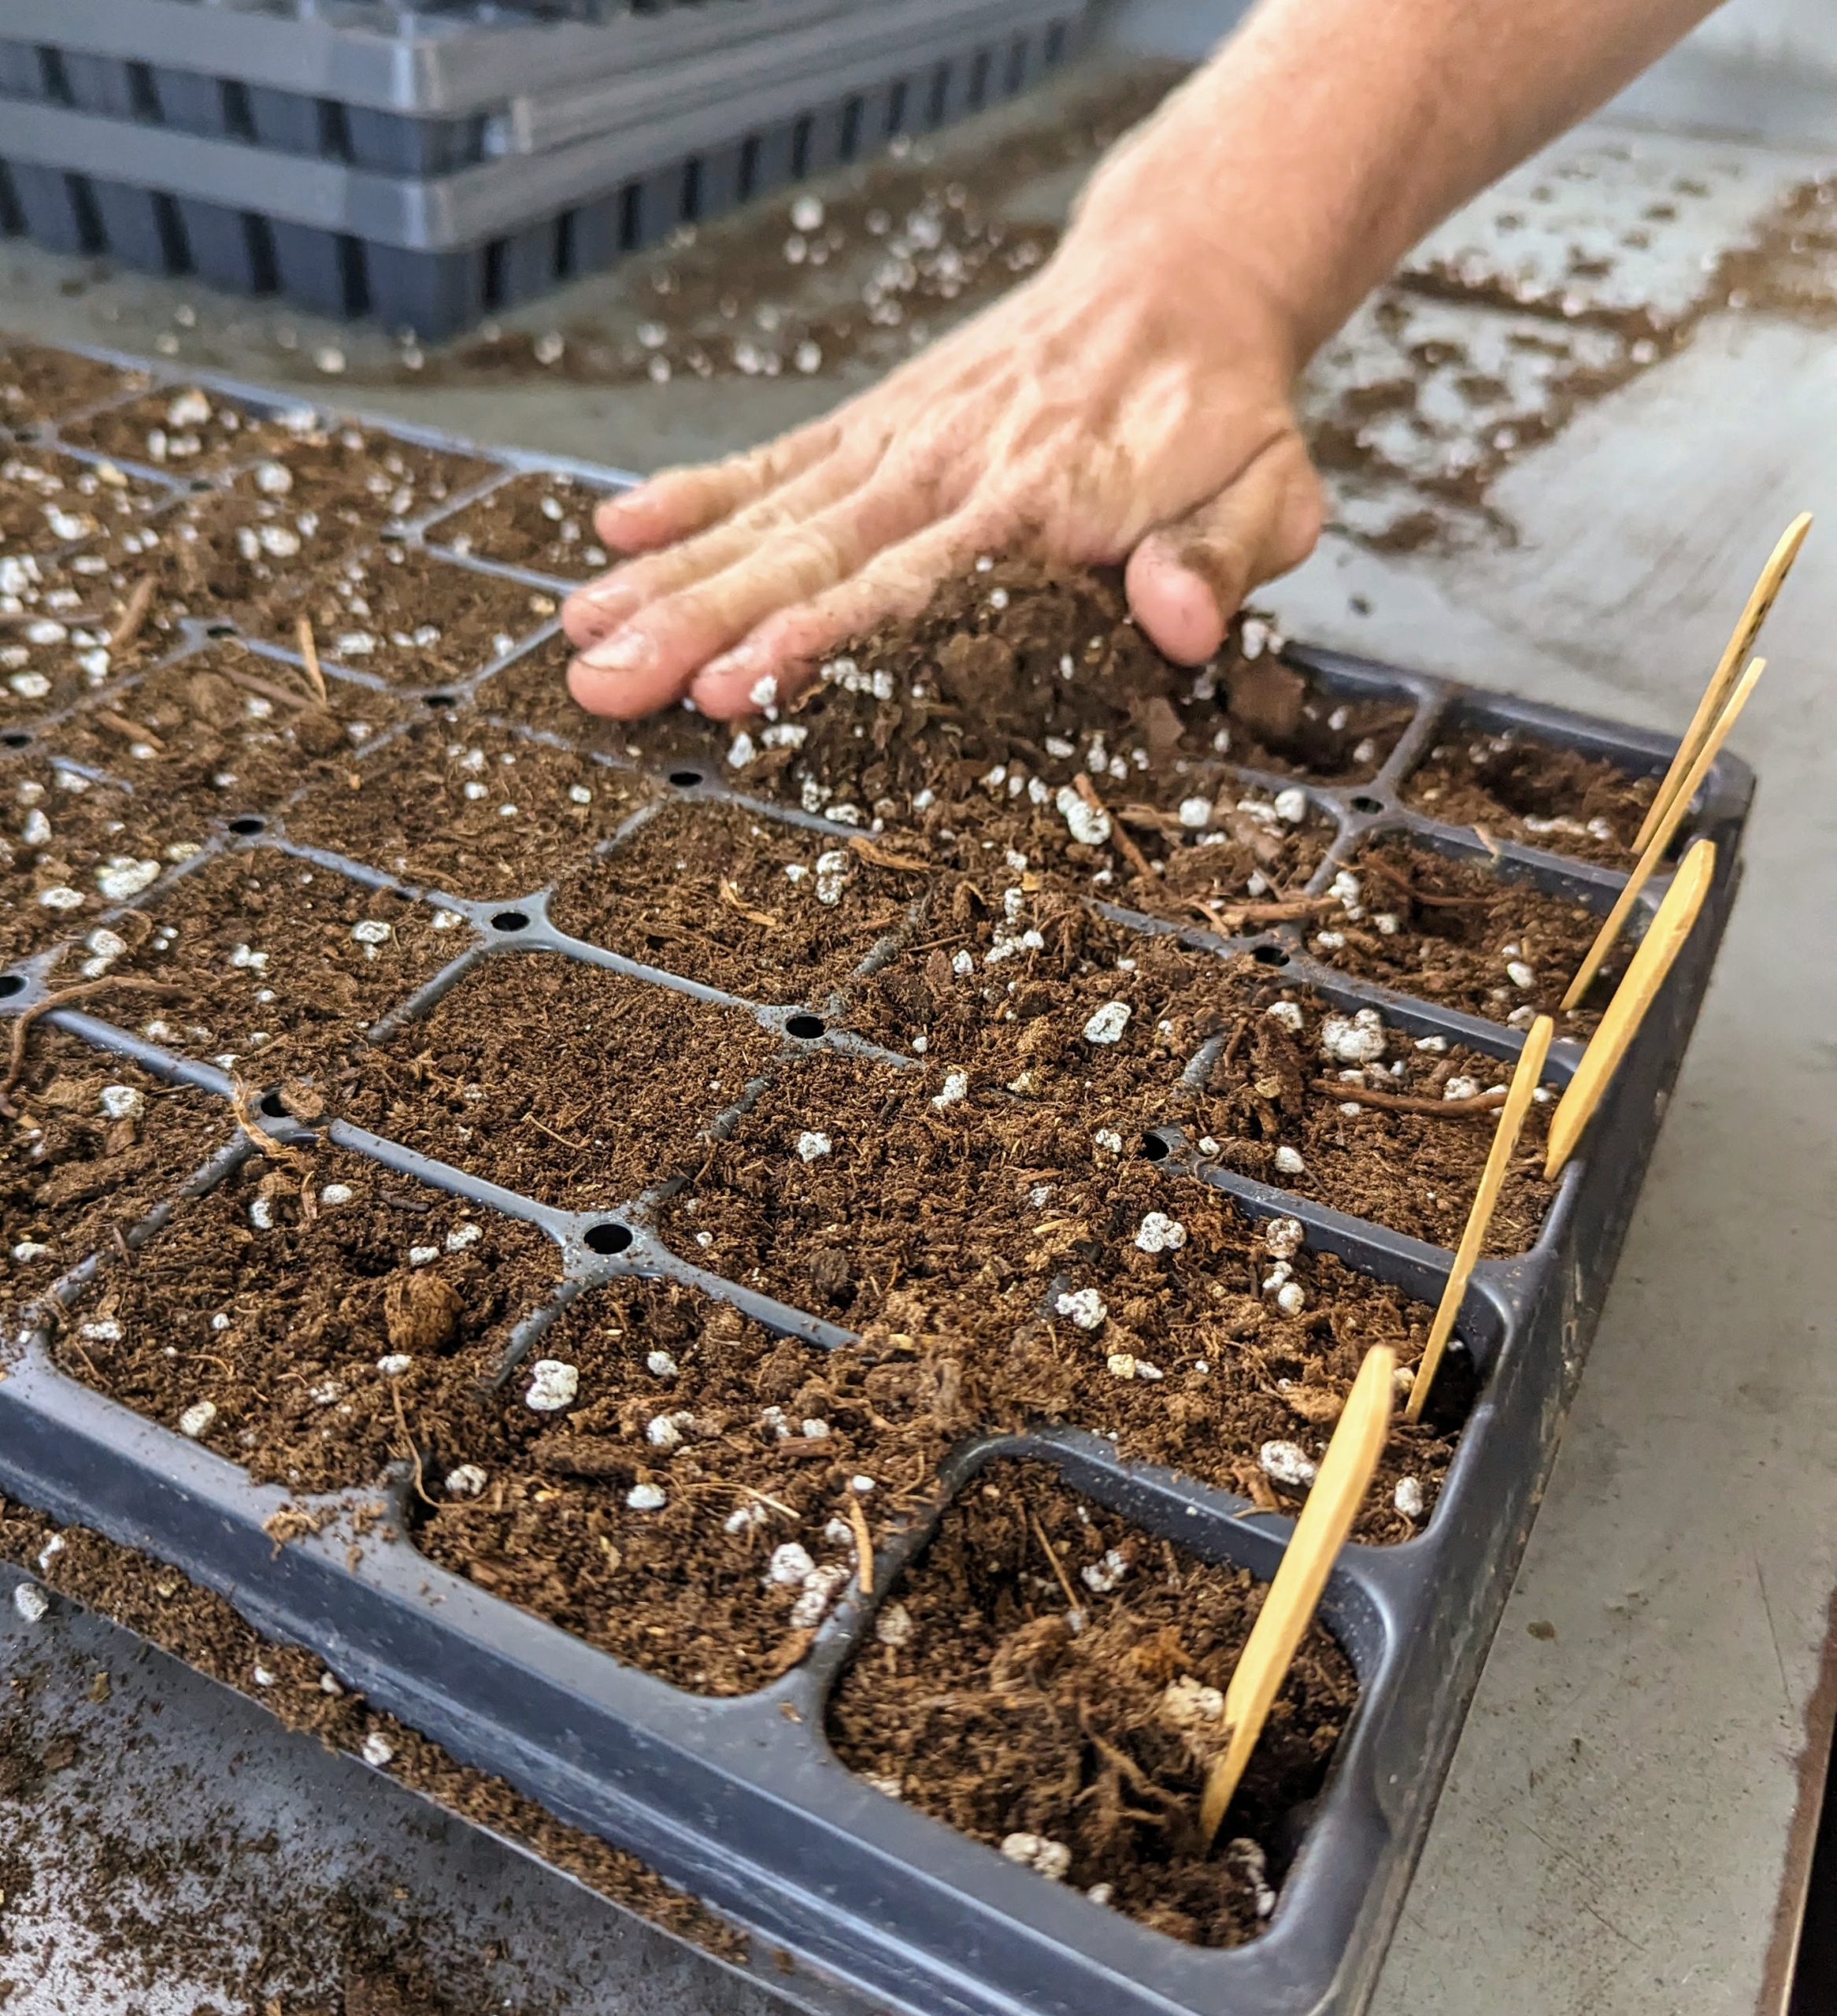
Ryan spreads the soil mix across the seed trays completely and evenly, filling all the cells of each tray. When possible, prepare several trays in an assembly-line fashion, and then drop all the seeds. Doing this saves time and simplifies the process.
This time of year my head house tables are often filled with seeds ready to be planted in trays. Johnny’s Selected Seeds is a privately held, employee-owned organic seed producer. Johnny’s offers hundreds of varieties of organic vegetable, herb, flower, fruit and farm seeds that are known to be strong, dependable growers.
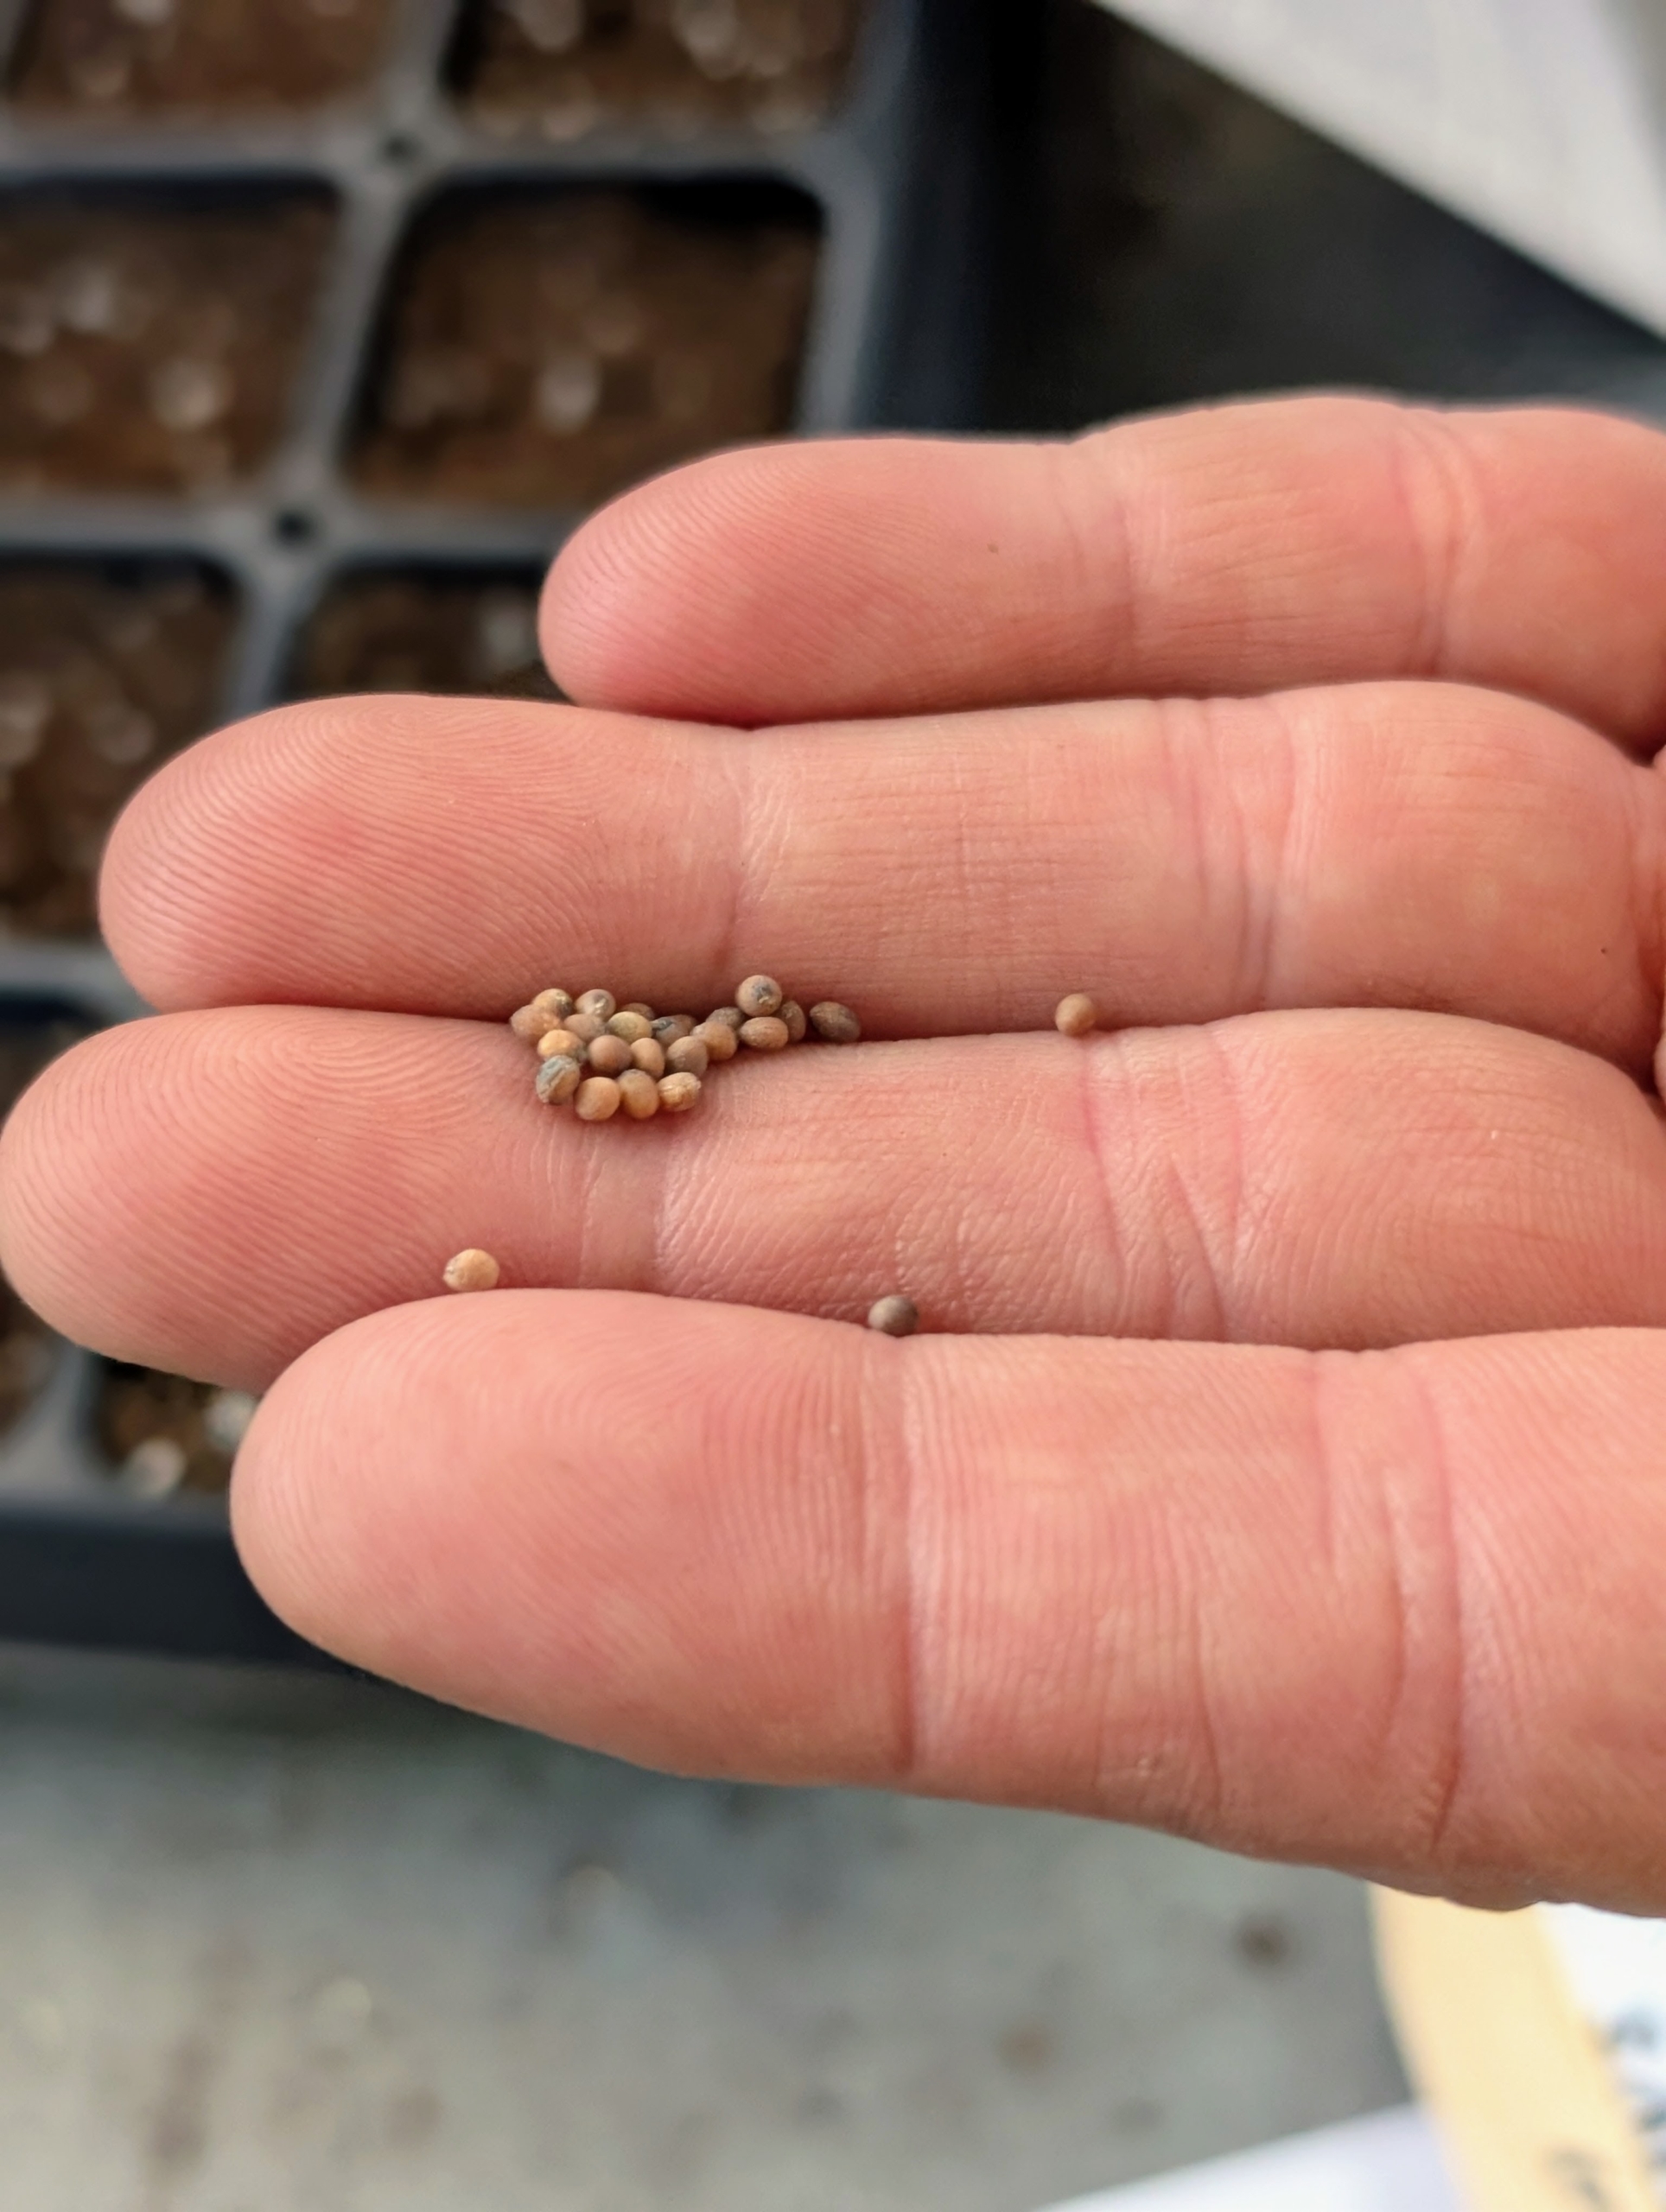
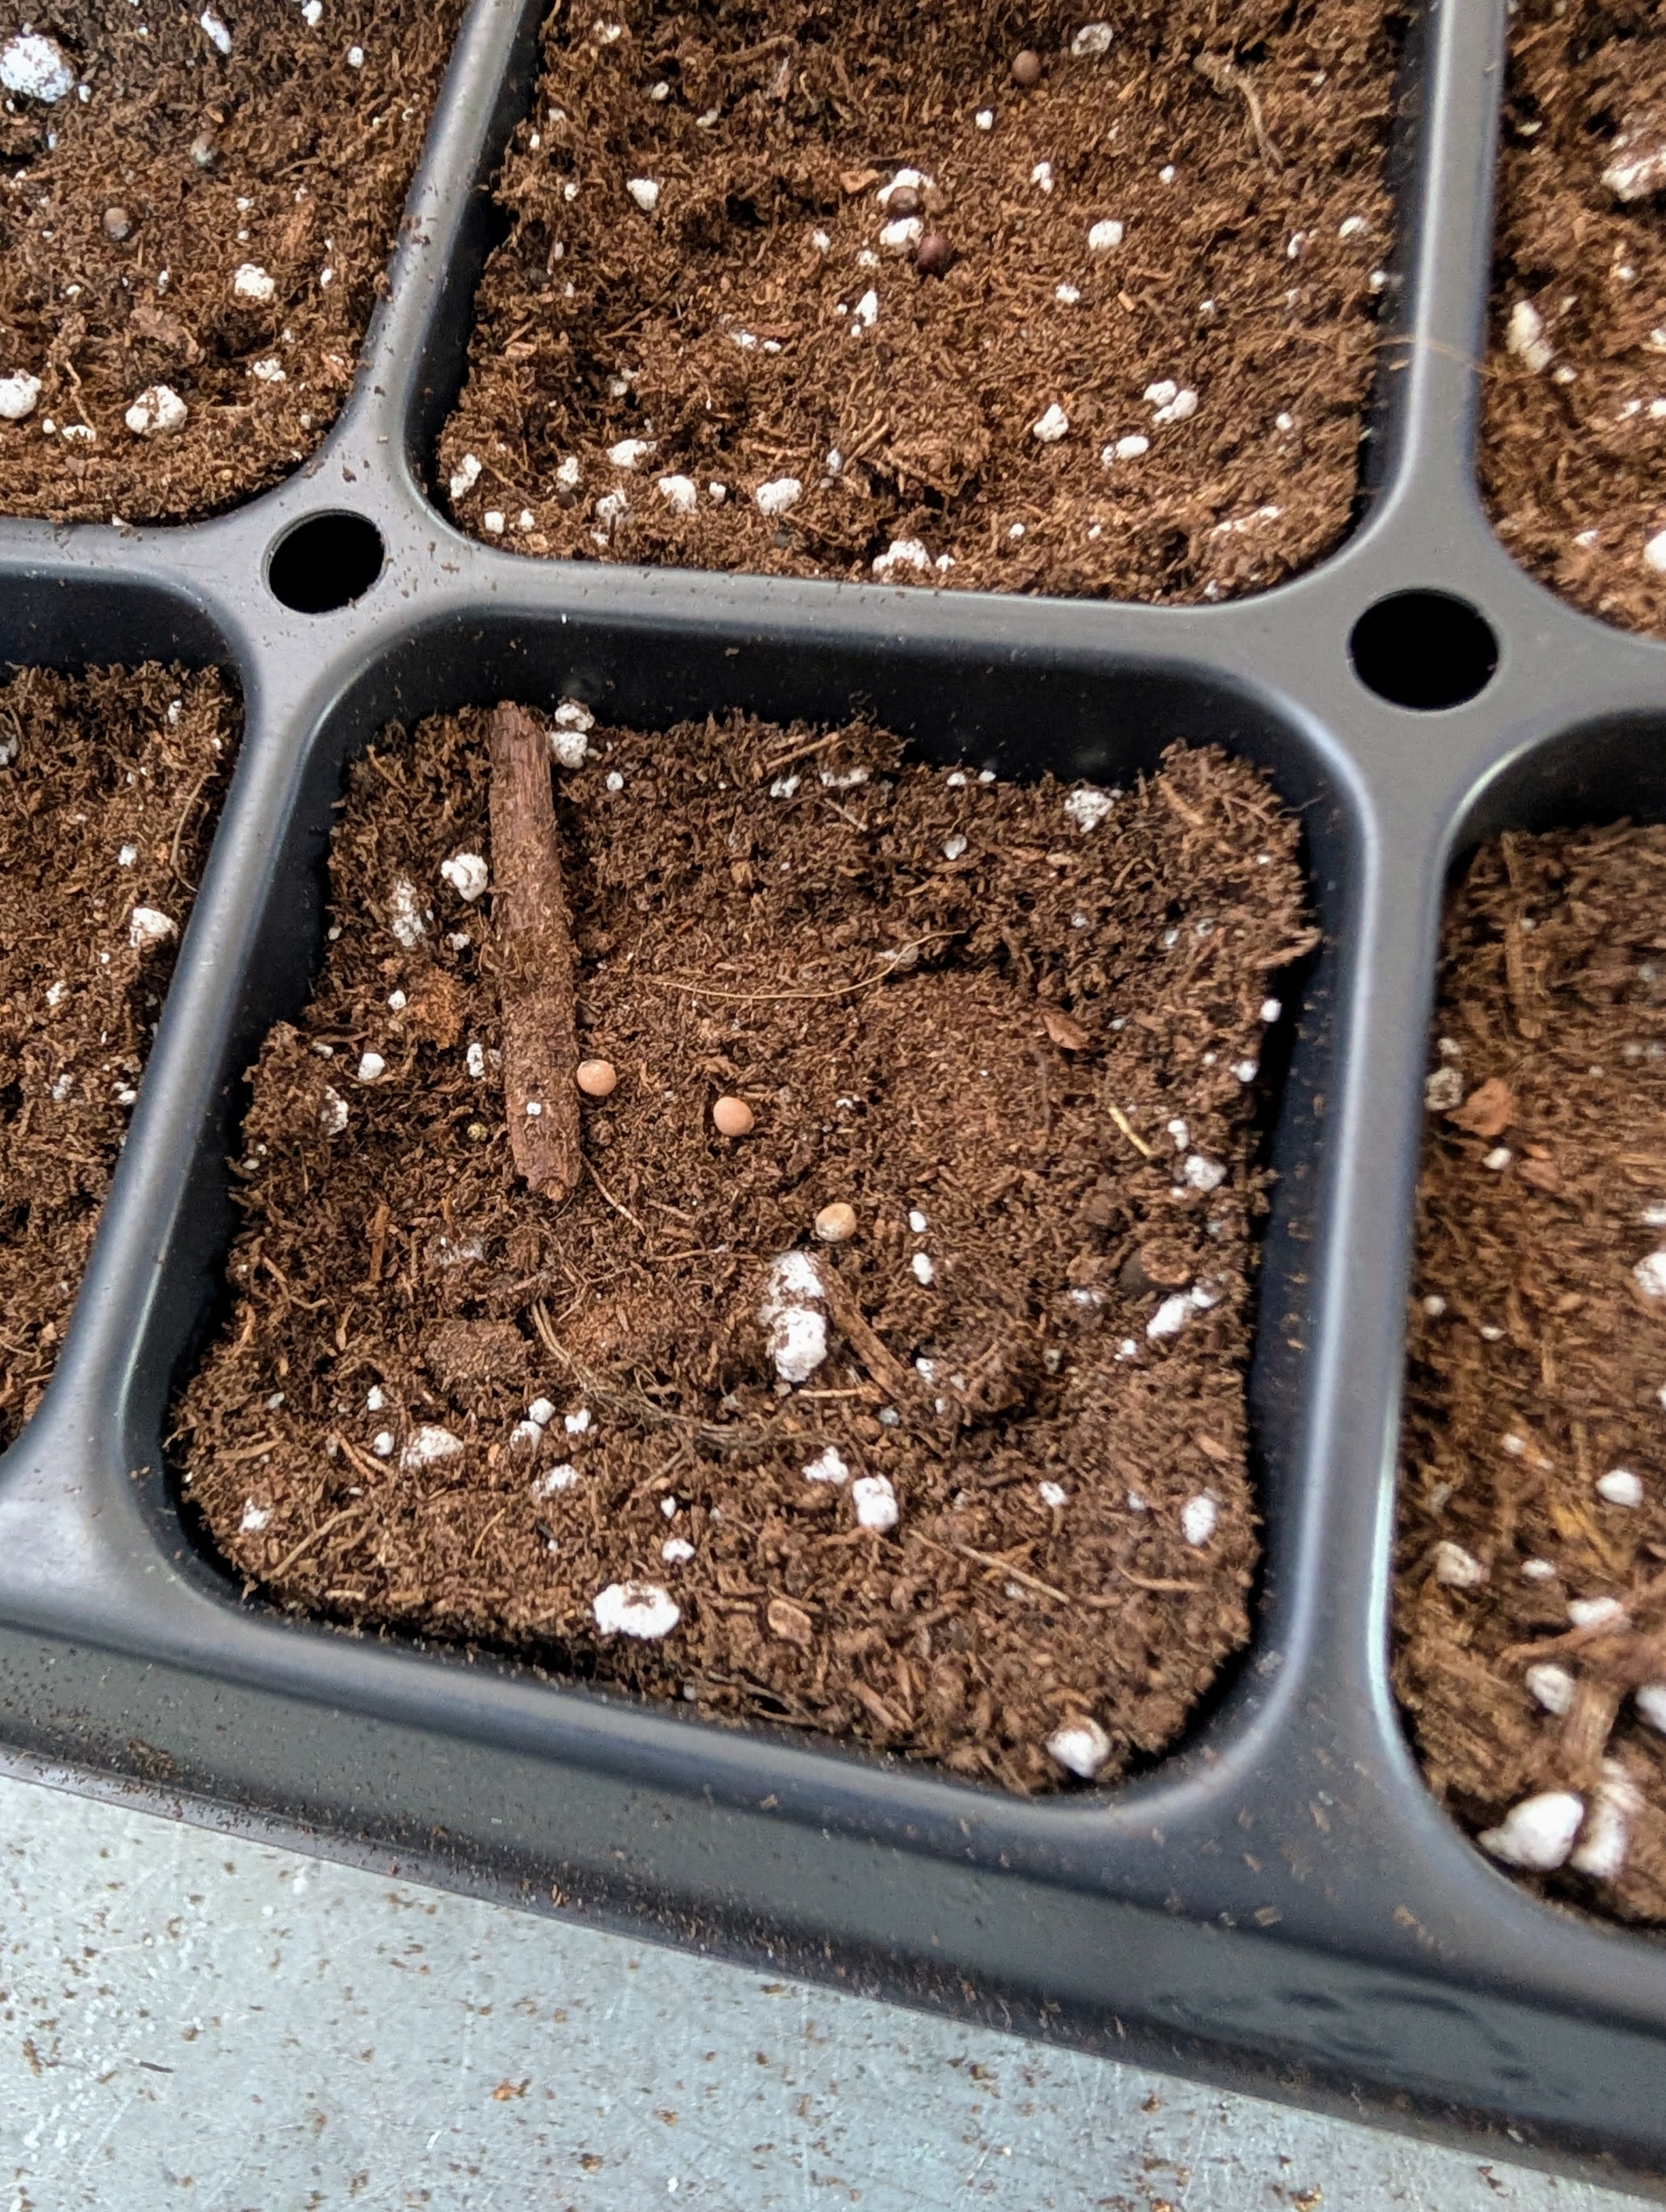
Seeds are planted at different times depending on their maturity durations. These are the small seeds of broccoli.
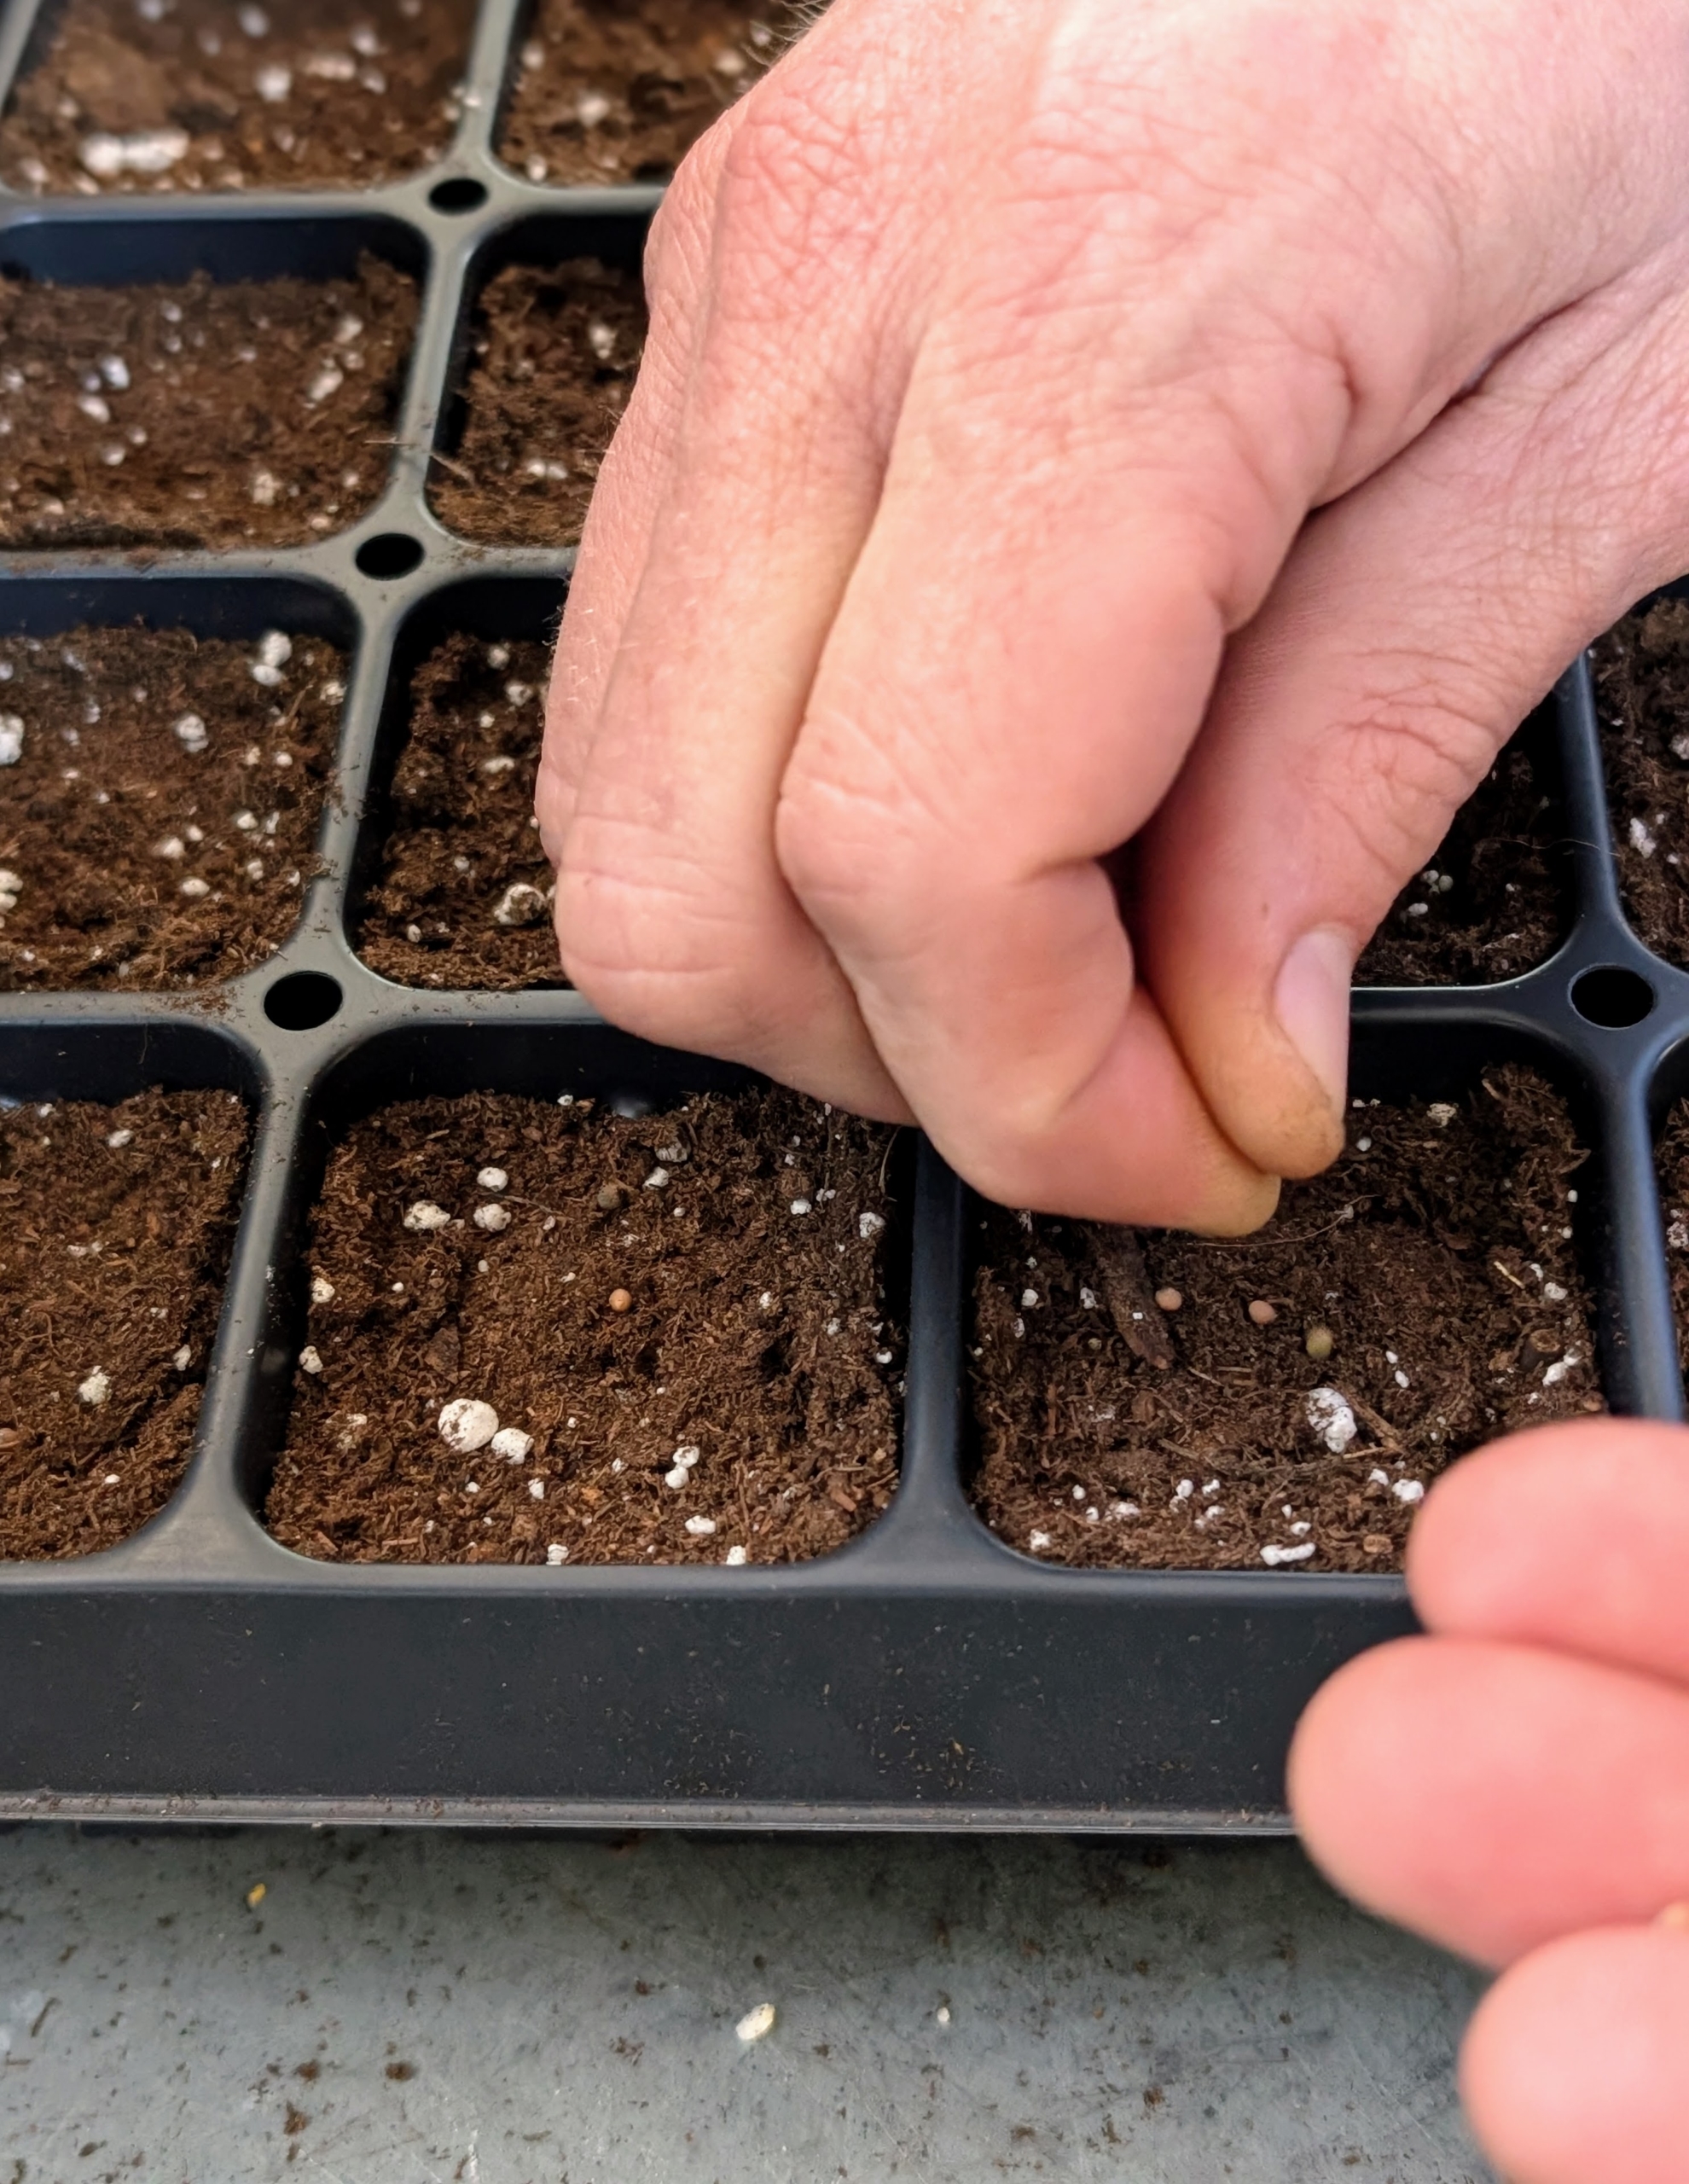
Ryan drops one to three seeds in each cell. Any weak seedlings will be thinned out later. When buying or ordering seeds, be sure to read the hardiness of the plant. And know your hardiness zone, so you can select the right seeds for your area. Here in Bedford, we are zone-6b. It is easy to look it up online.
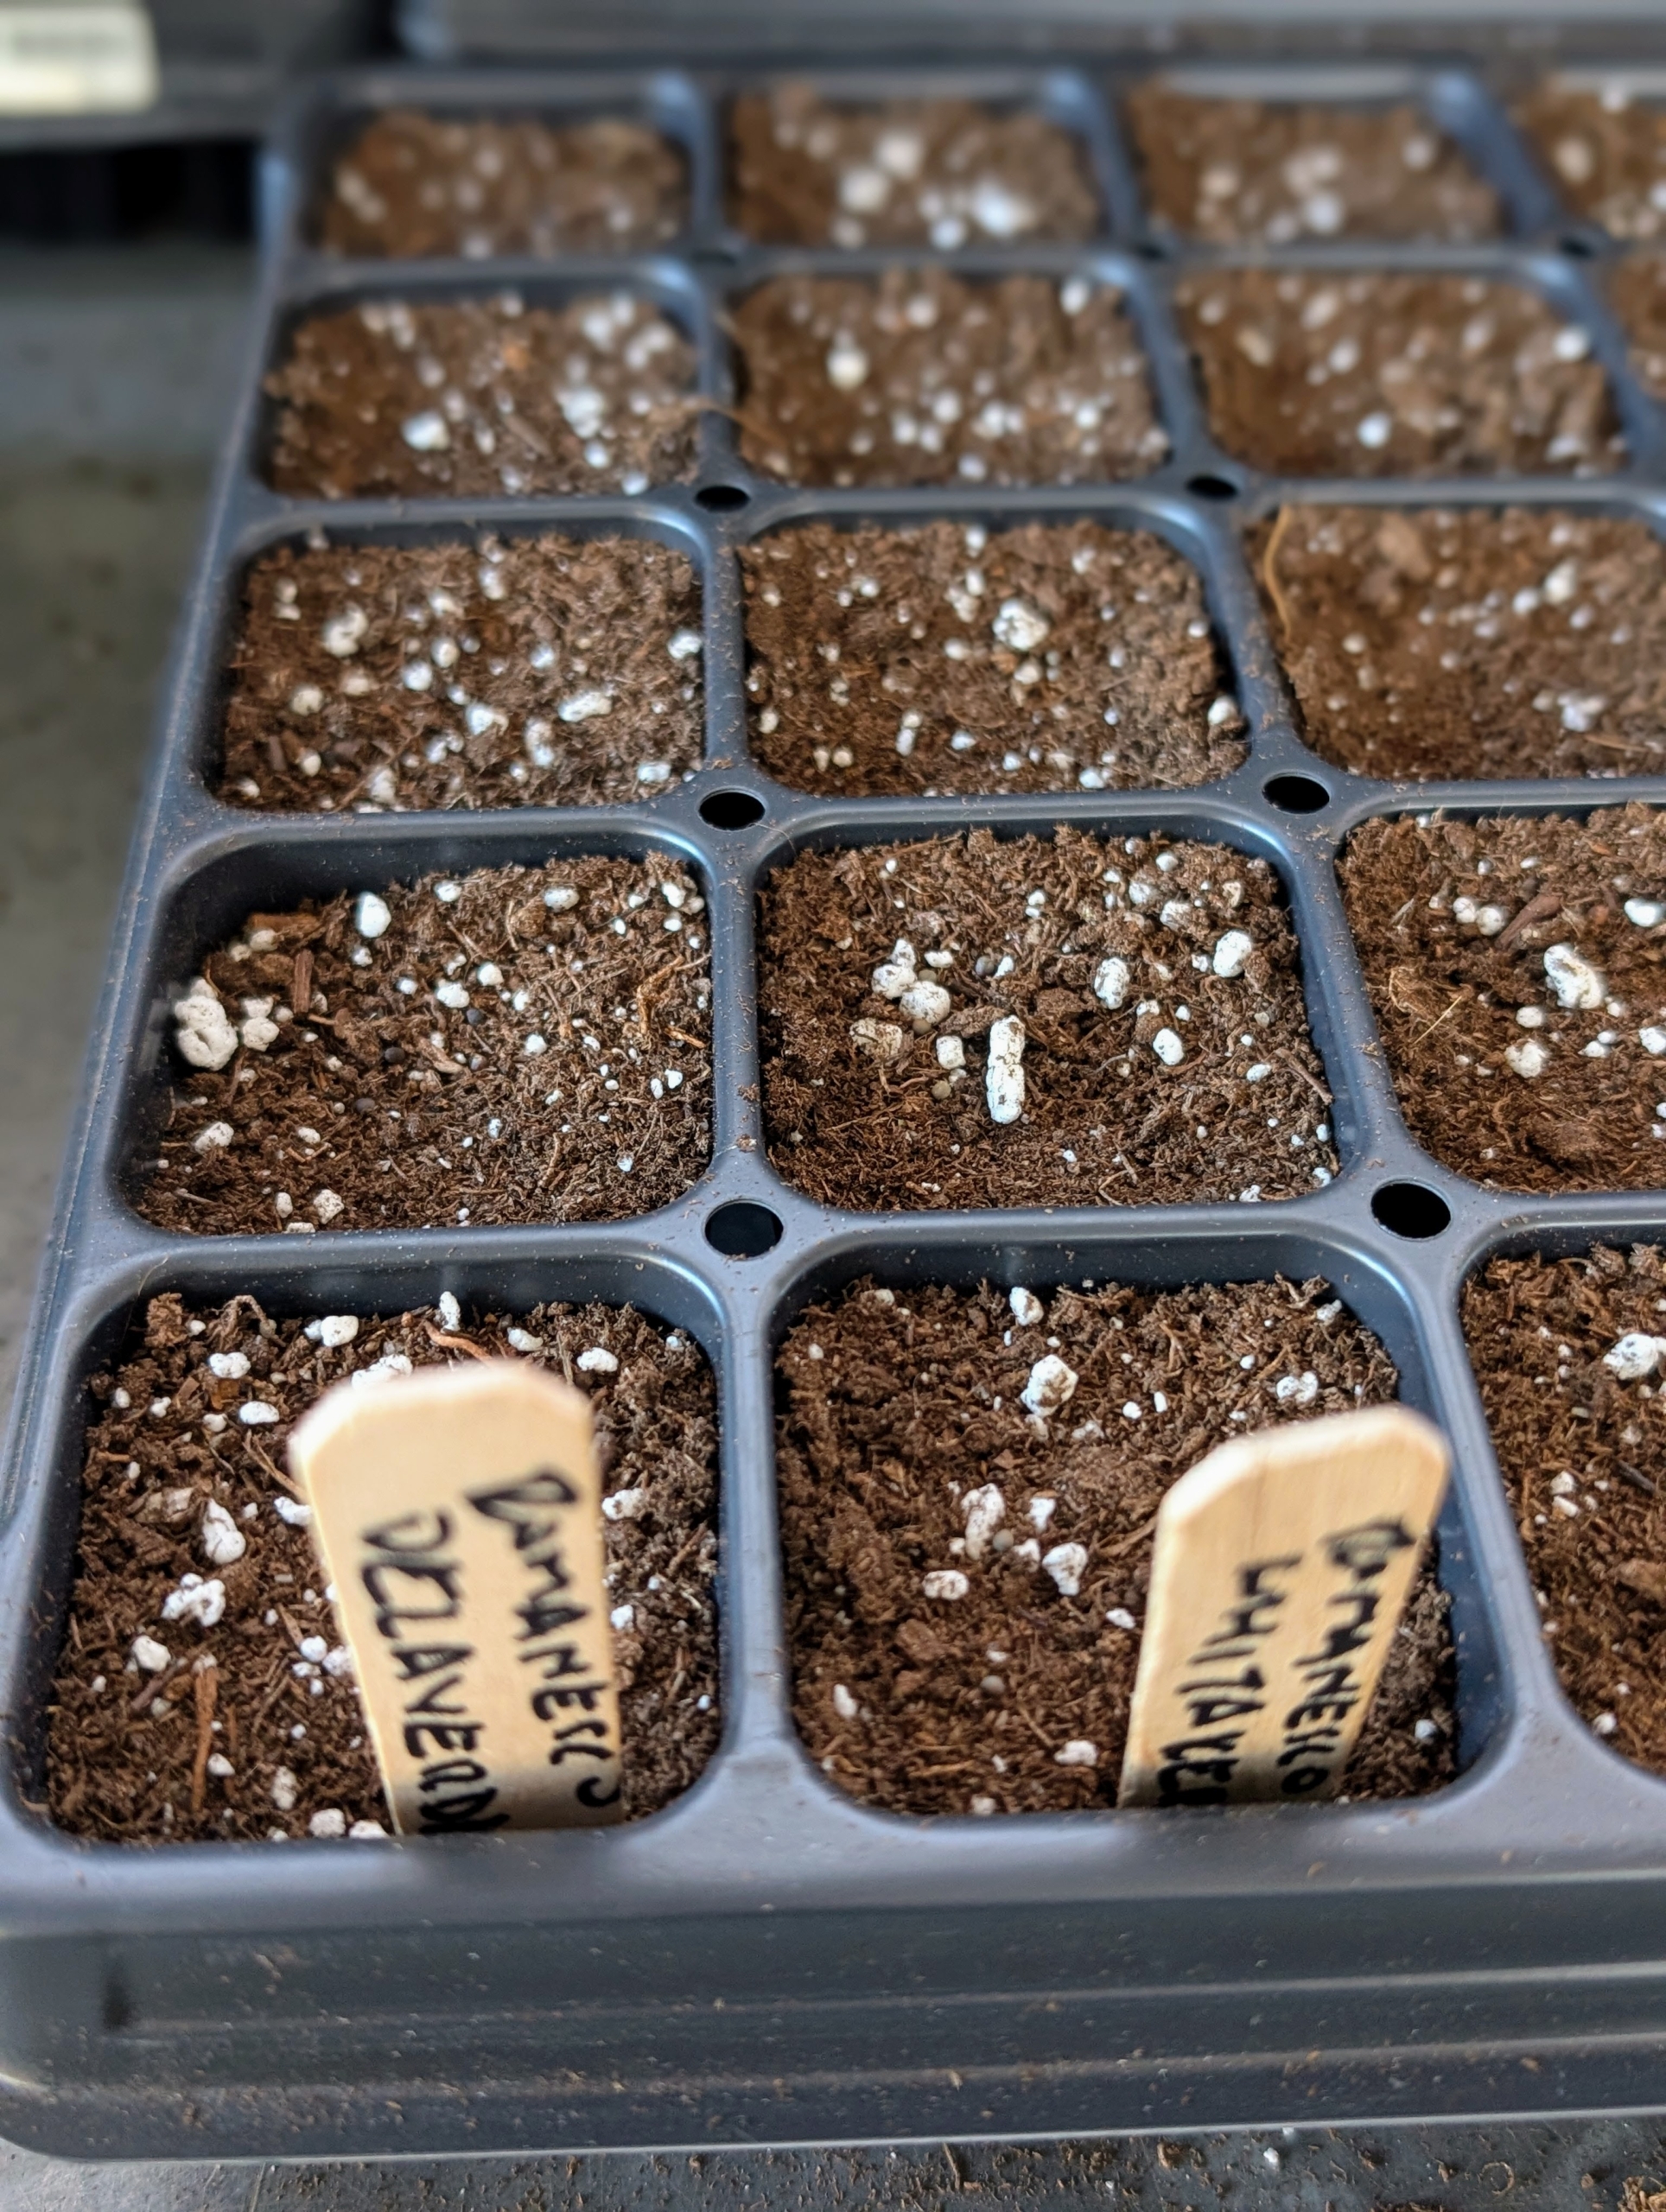
Ryan places markers in the tray to identify the varieties.
Look closely to see the seeds. Seeds will germinate in seven to 10 days in optimal temperature and lighting environments, which is 50 to 85 degrees Fahrenheit under bright light.
The Johnny’s Selected Seeds Catalog provides tables that indicate which varieties should be planted when as well as notes on growing and how resistant the plants are to certain pests or diseases.
Ryan also starts a couple rows of romanesco, another brassica. Romanesco goes by various names including Romanesco broccoli, fractal broccoli, or Roman cauliflower. It is considered a hybrid between cauliflower and broccoli and grows in a chartreuse color with spire-like florets.
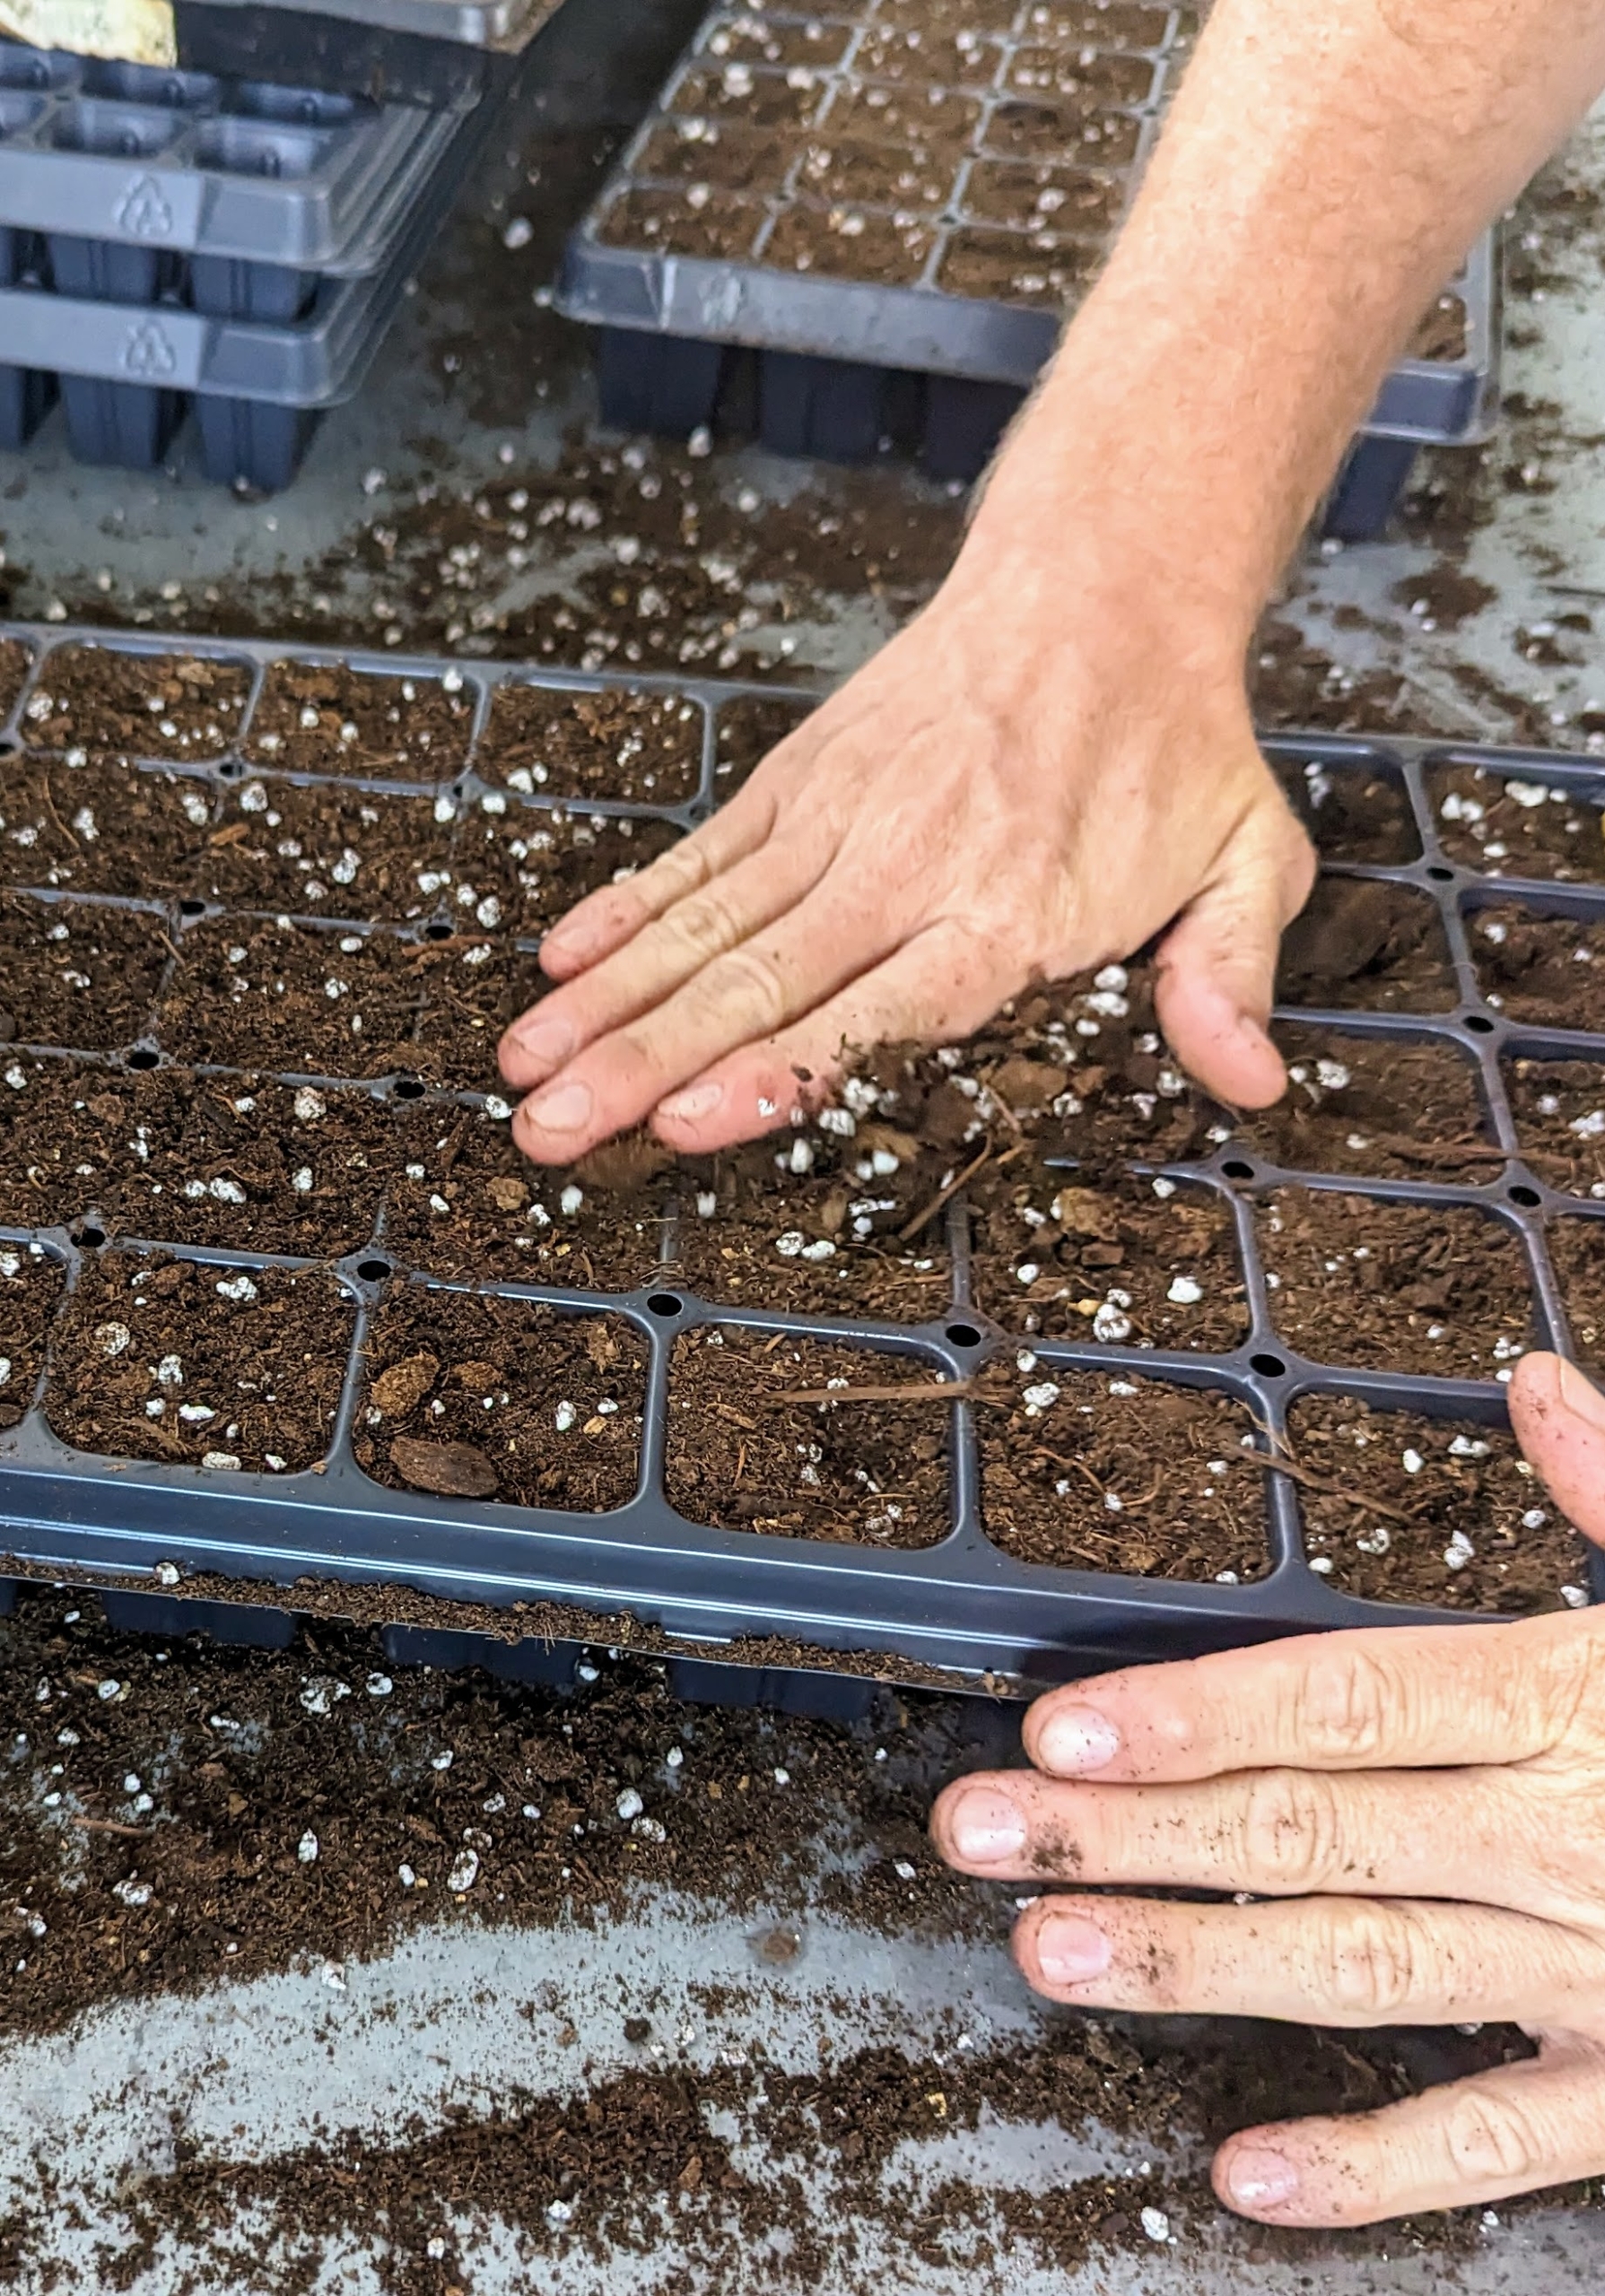
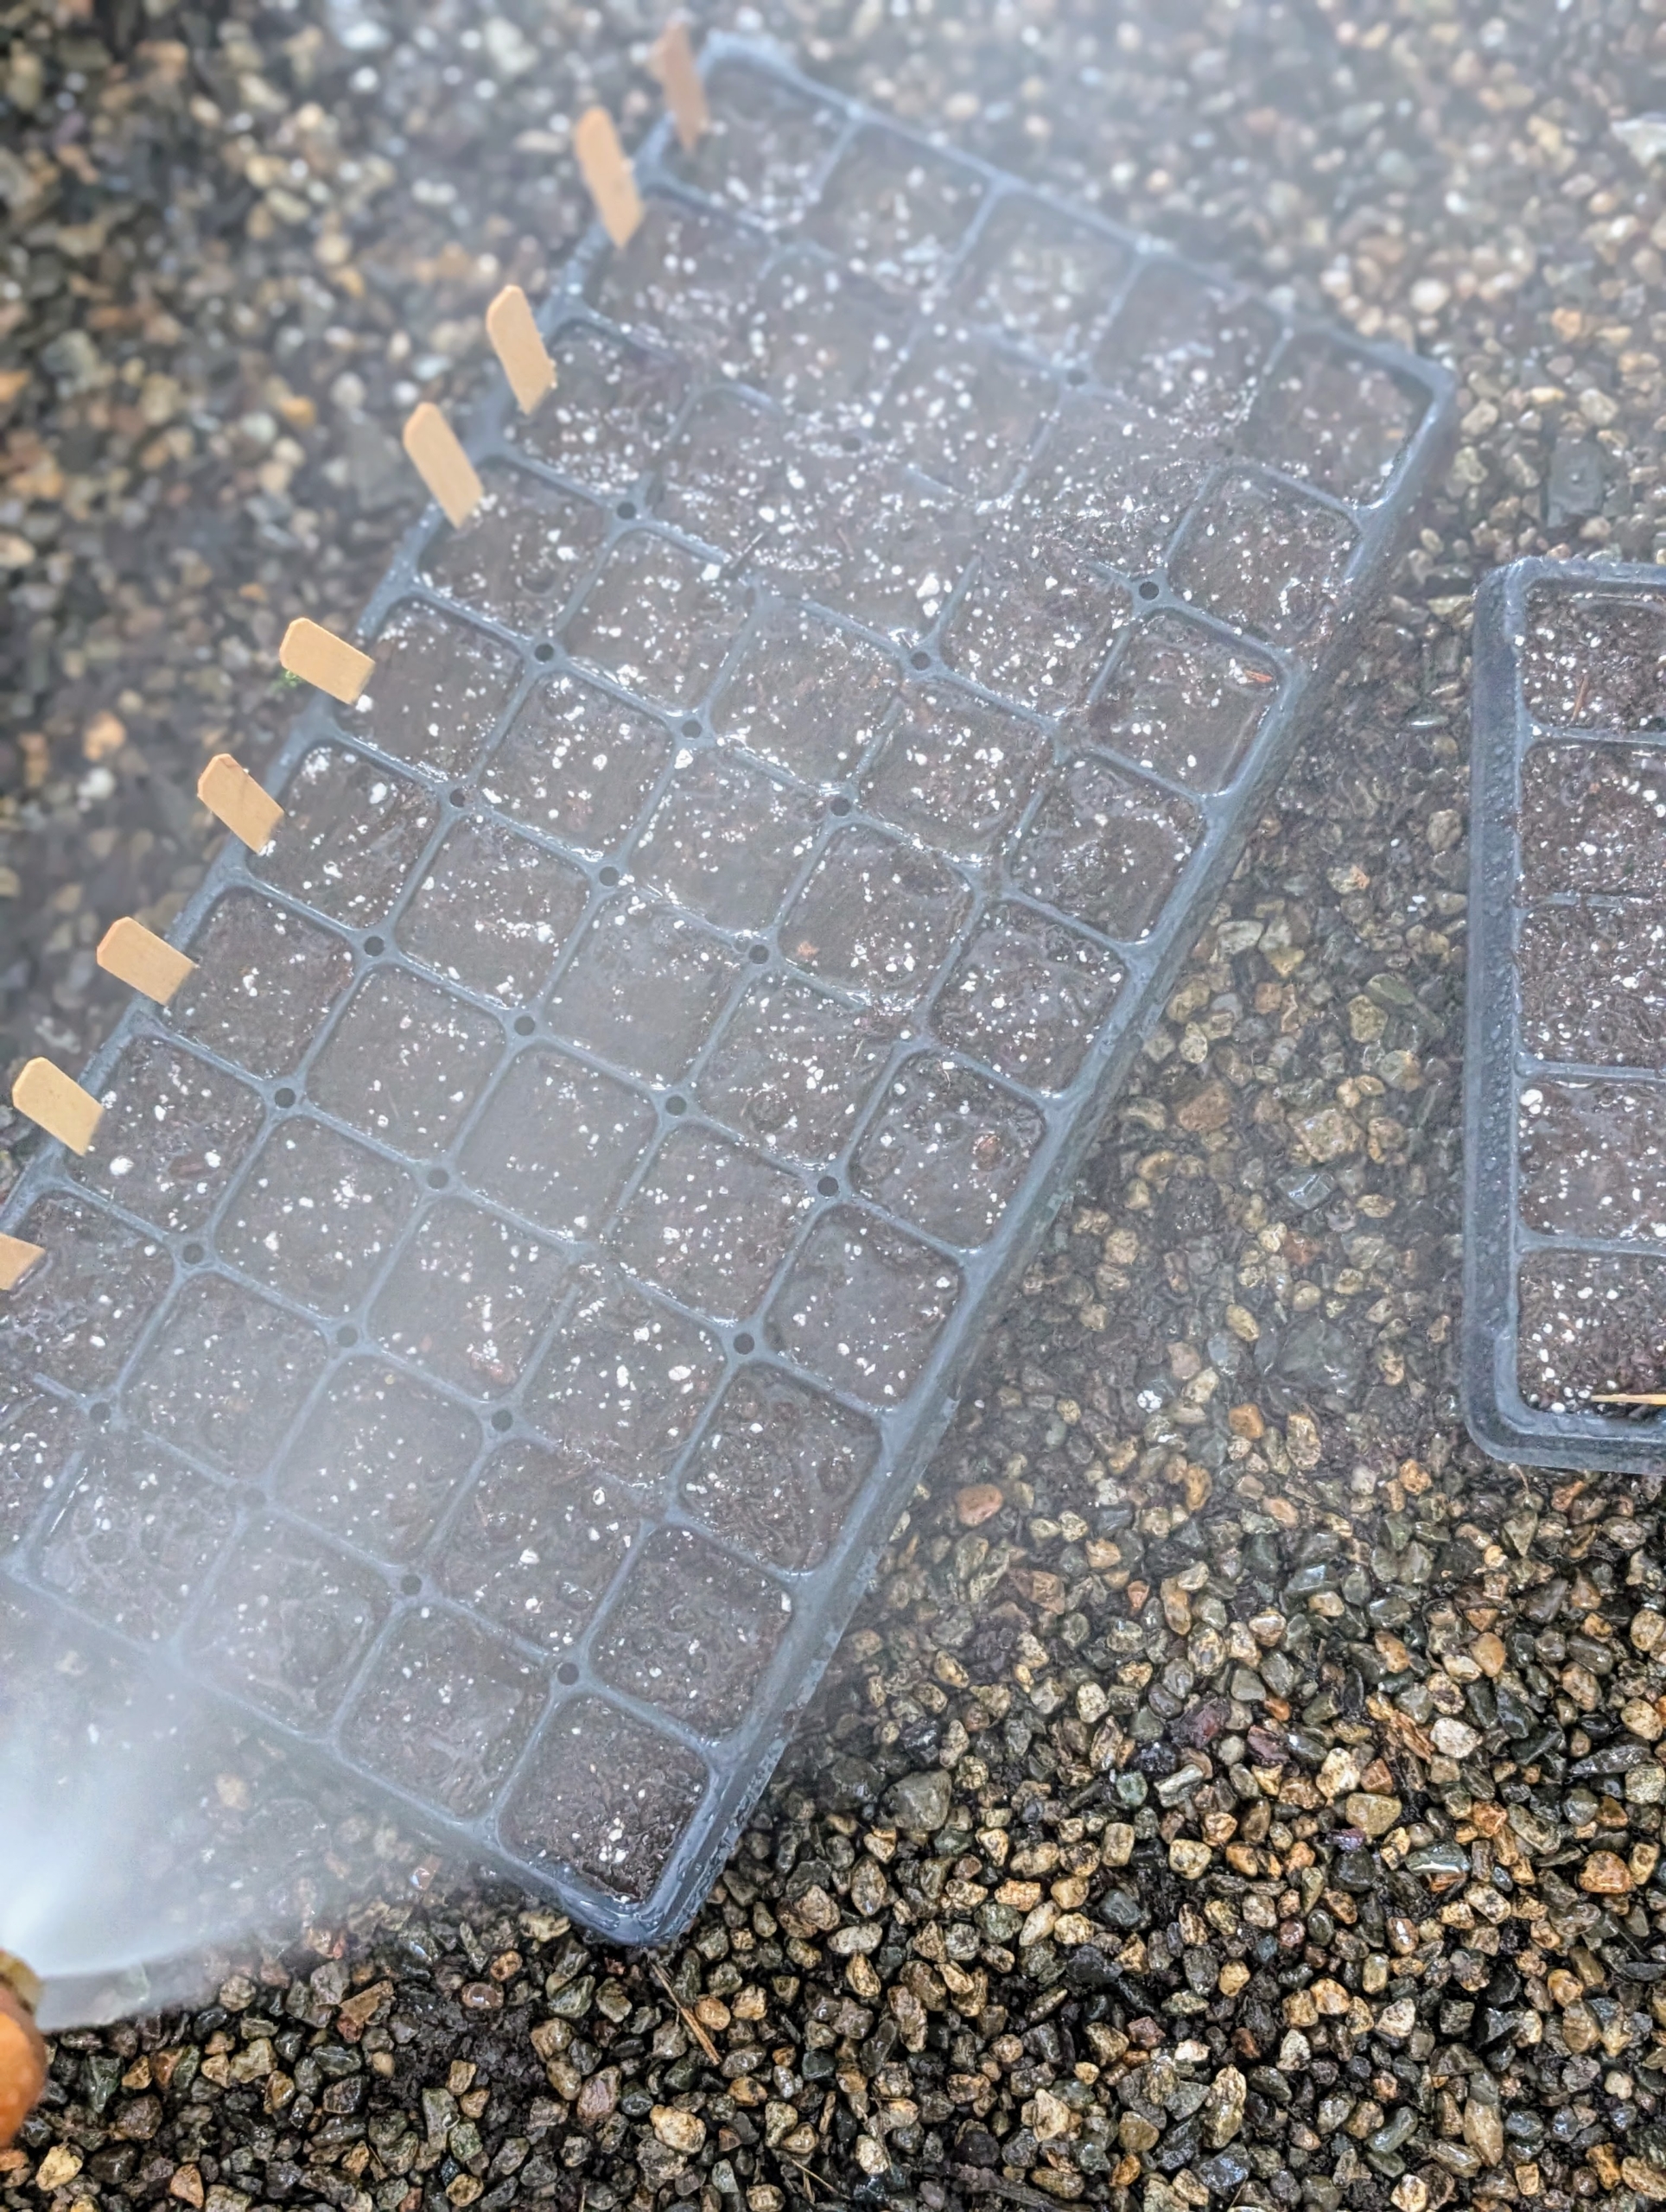
Once trays are seeded, the cells are covered up with another layer of soil mix.
And that’s it. Ryan fills several trays a day inside the head house.
The trays are then properly watered with a misting attachment nozzle that doesn’t hurt or move the delicate seeds. These are also available at Johnny’s Selected Seeds.
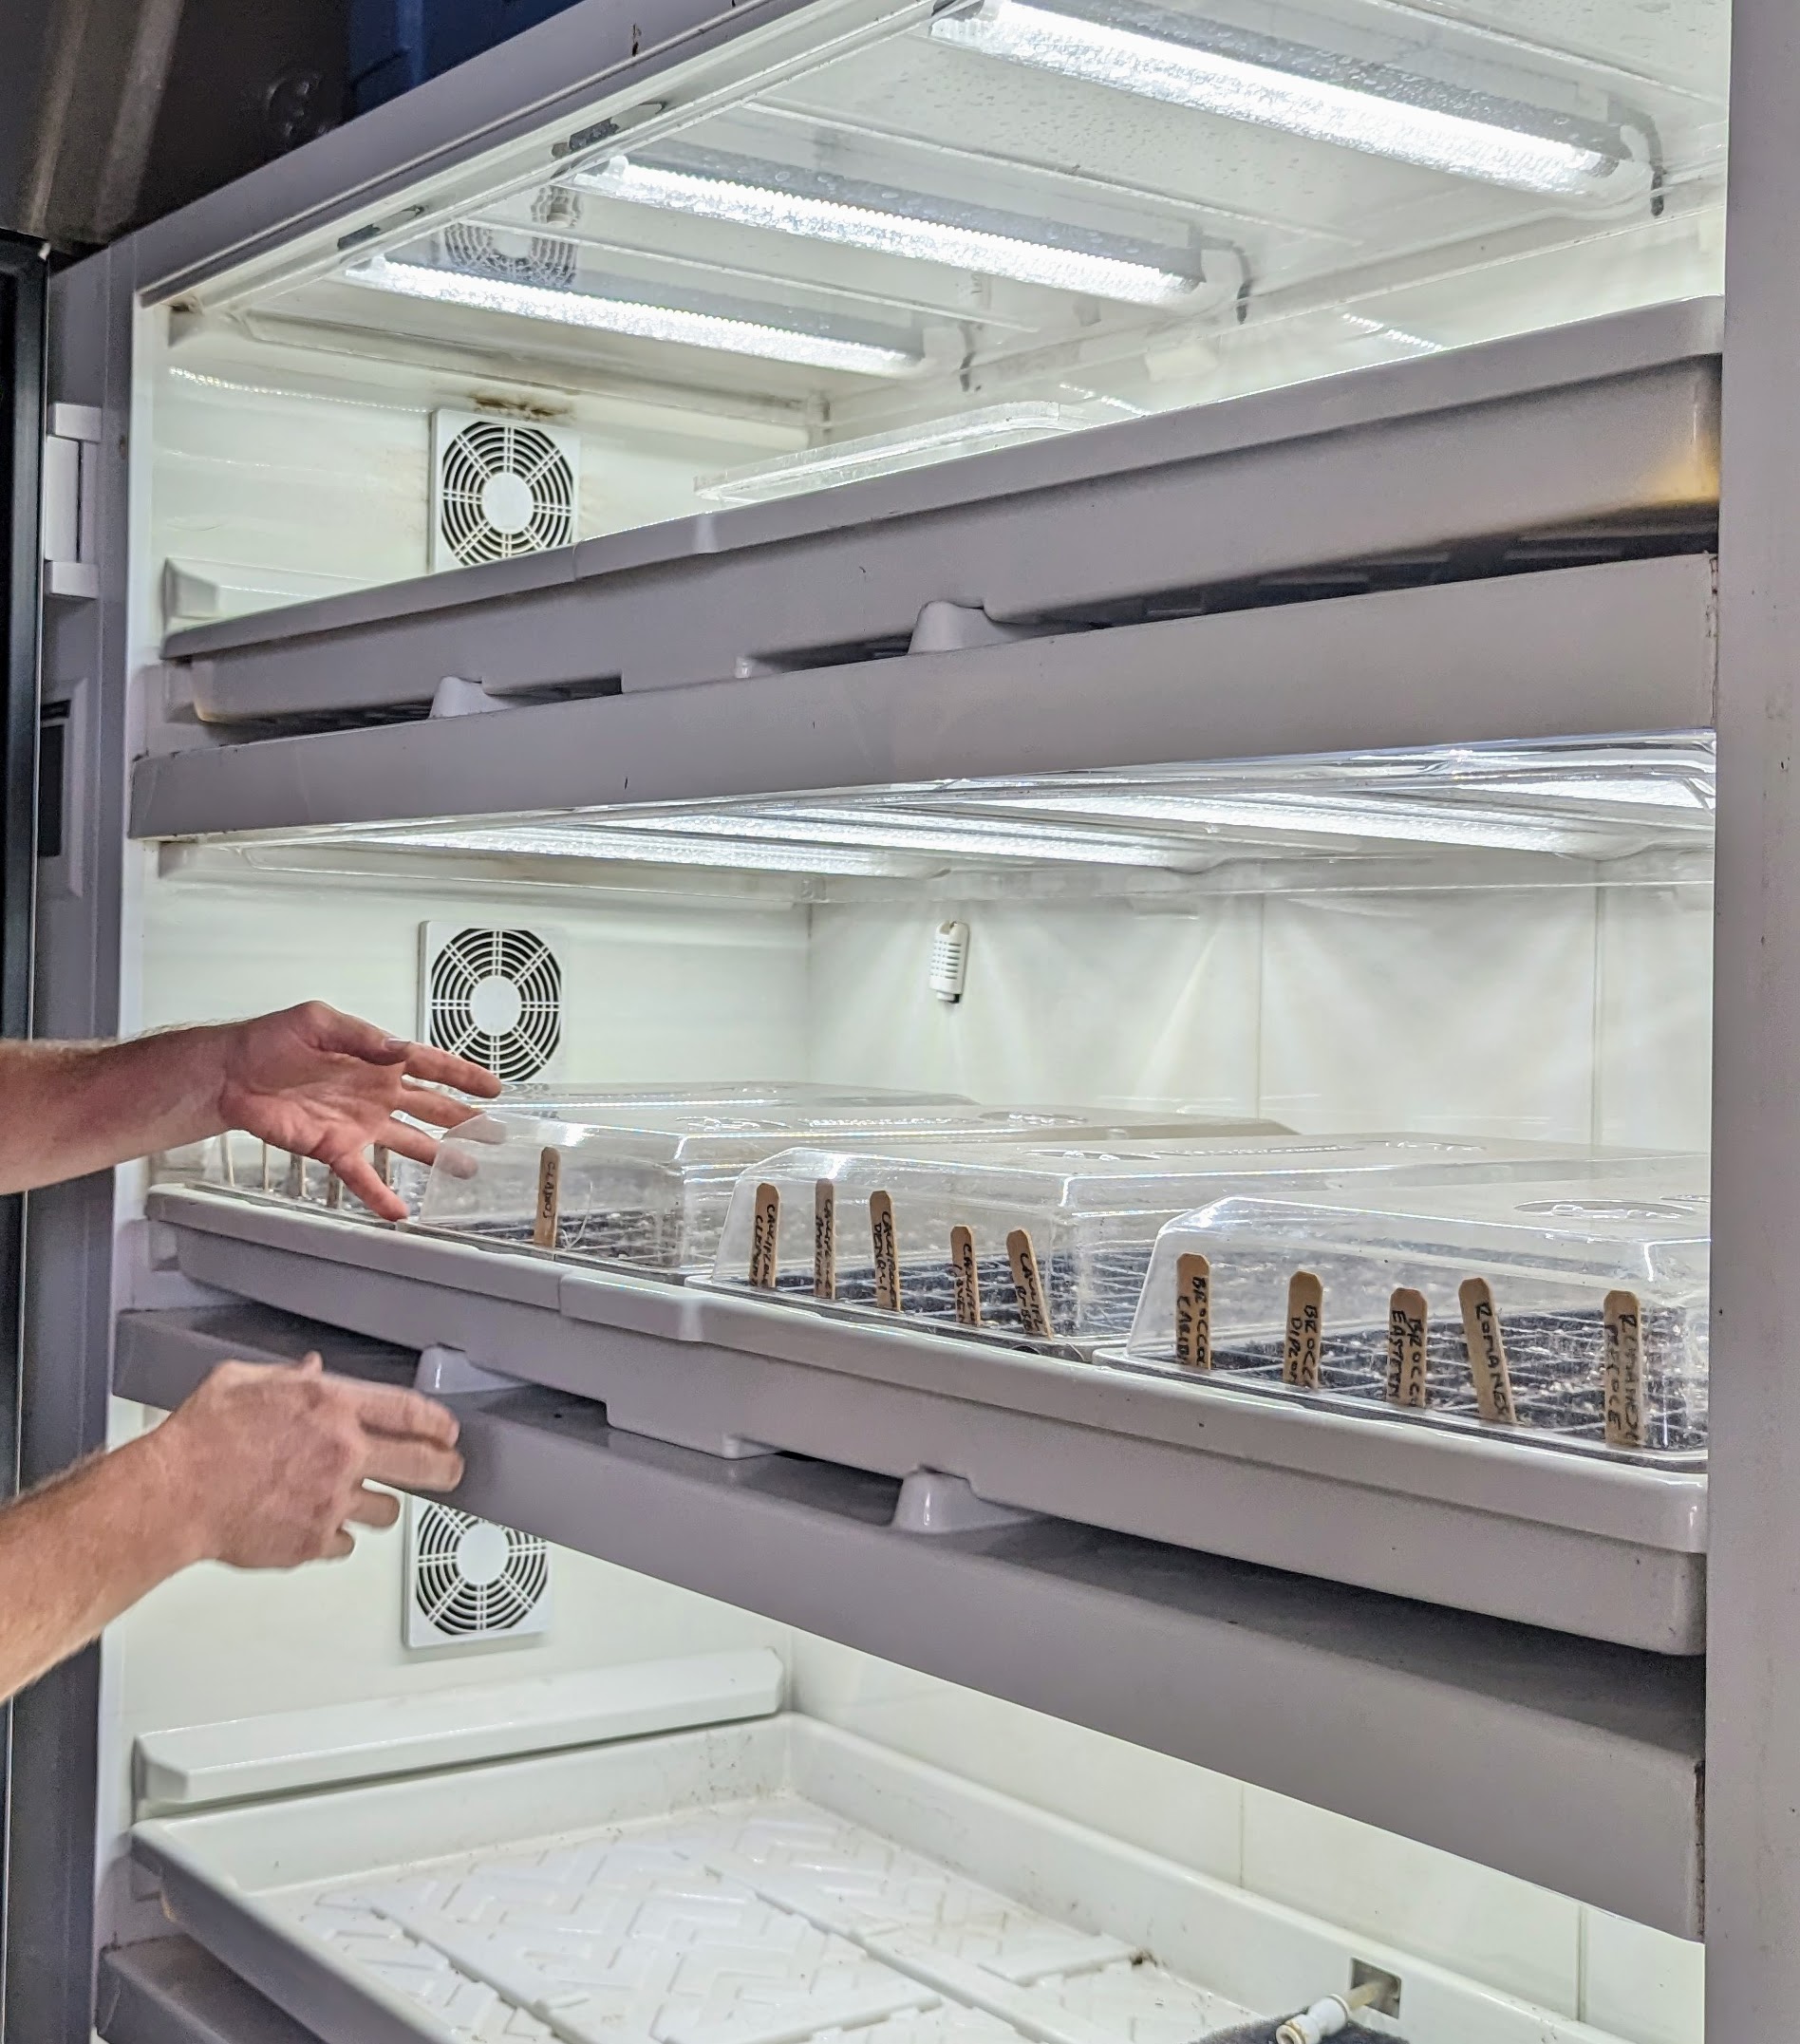
And then the trays are placed in our Urban Cultivator growing system – it has water, temperature and humidity all set-up in a refrigerator like unit. Let the growing season begin – I’m ready!
If you grow fruit trees, the best time to prune them is now - in winter - or in very early spring before any new growth begins.
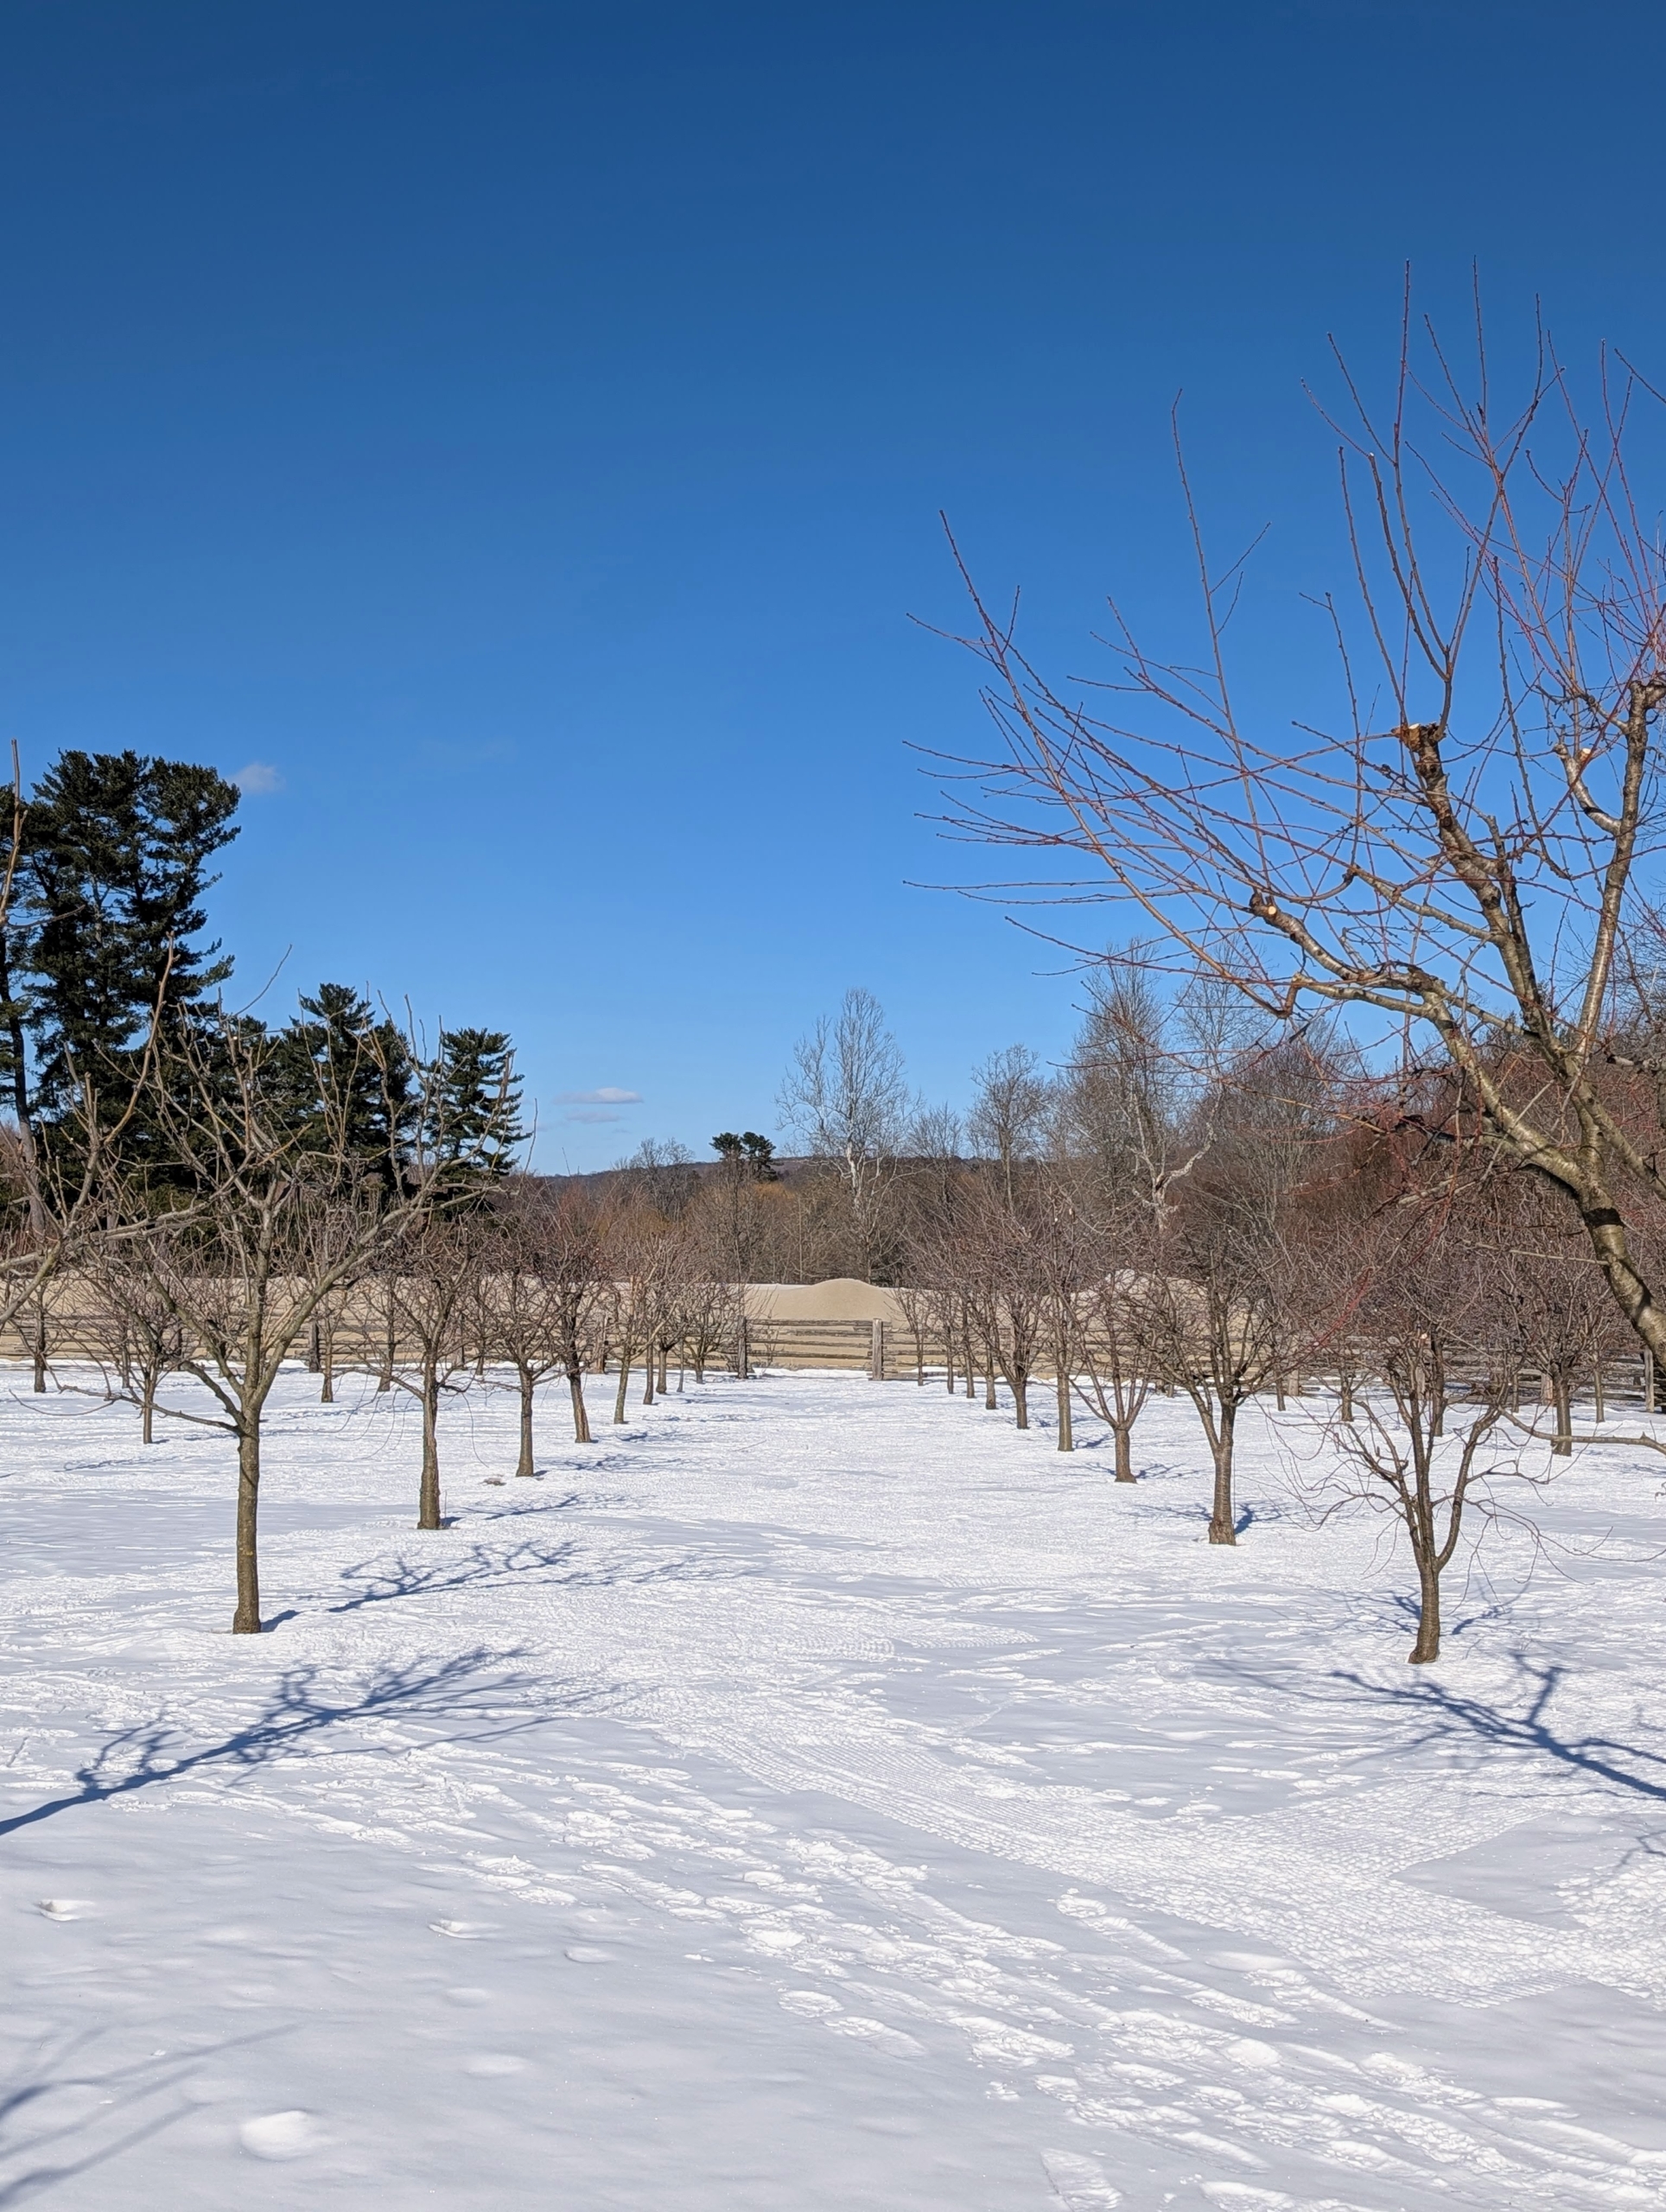
Pruning not only helps develop proper shape and form, but also encourages new growth, promotes high fruit yield, and maintains good tree health. My outdoor grounds crew recently pruned many of the apple trees around my farm. Soon after, they also tackled my orchard, where I grow more than 200 fruit trees - more apples, but also all kinds of pears, peaches, cherries, medlars, and quince. It makes me so happy to care for these trees. In return, they produce bounties of delicious fruits for me and my family.
Enjoy these photos.
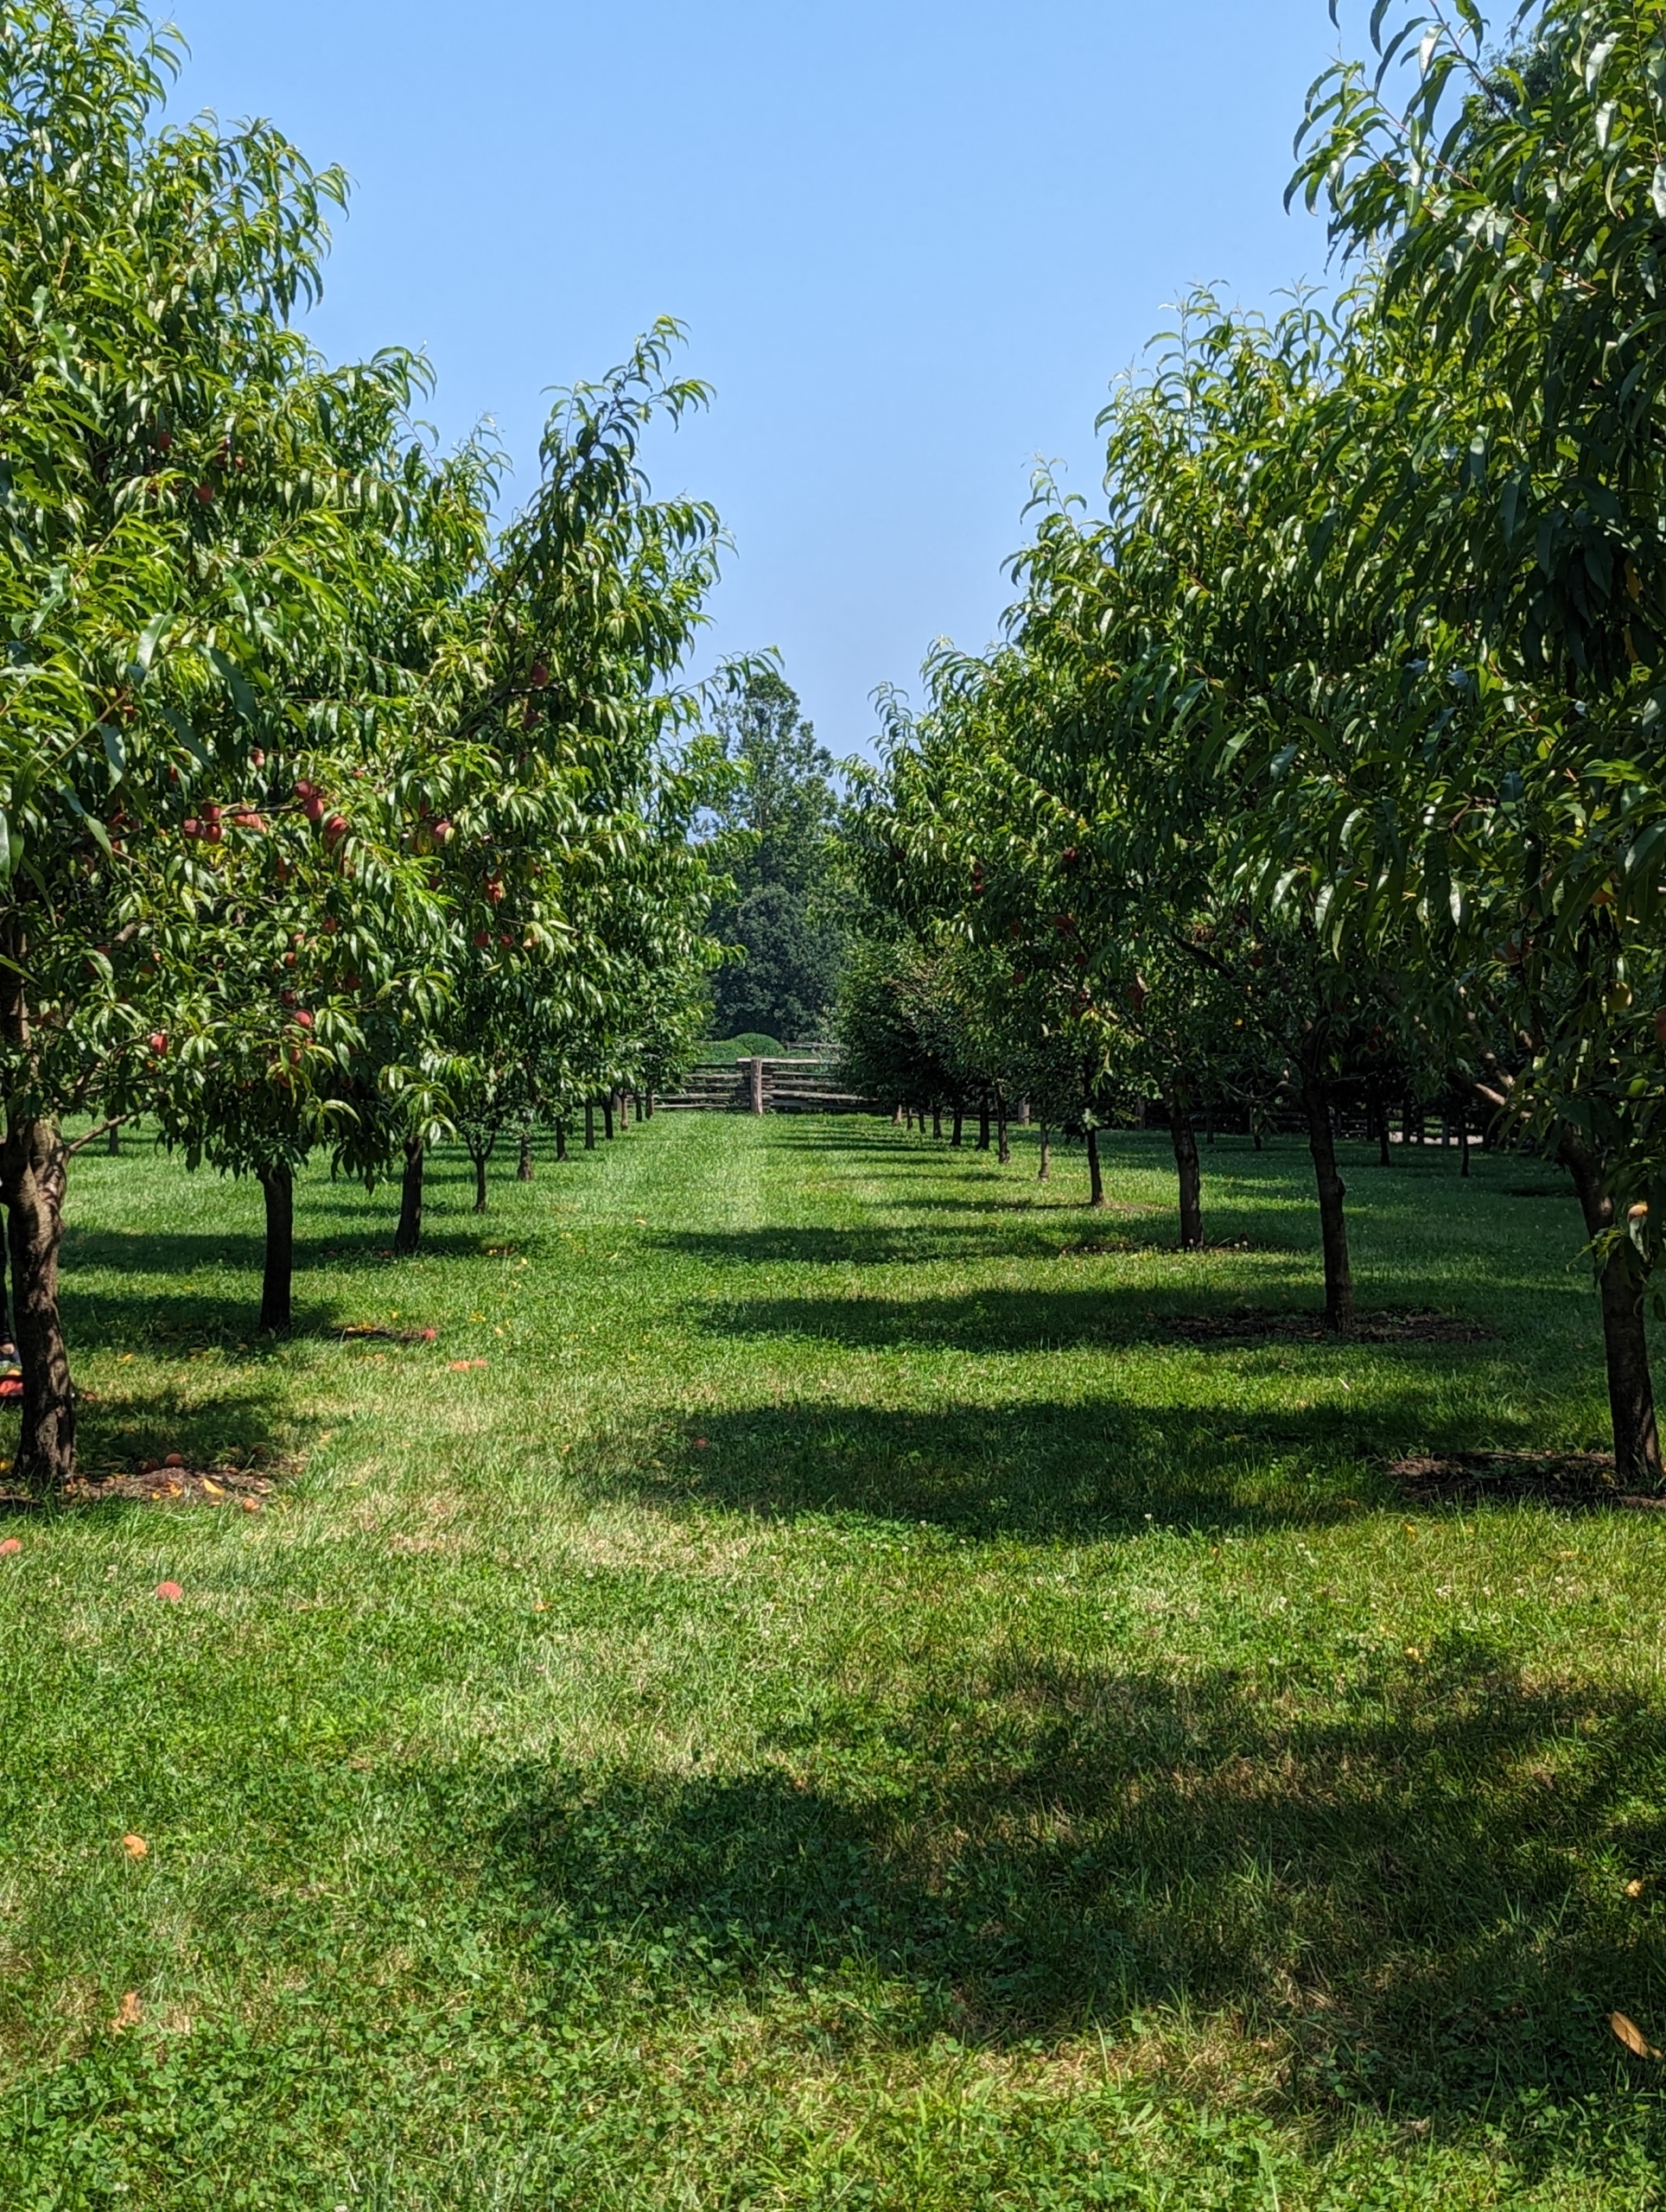
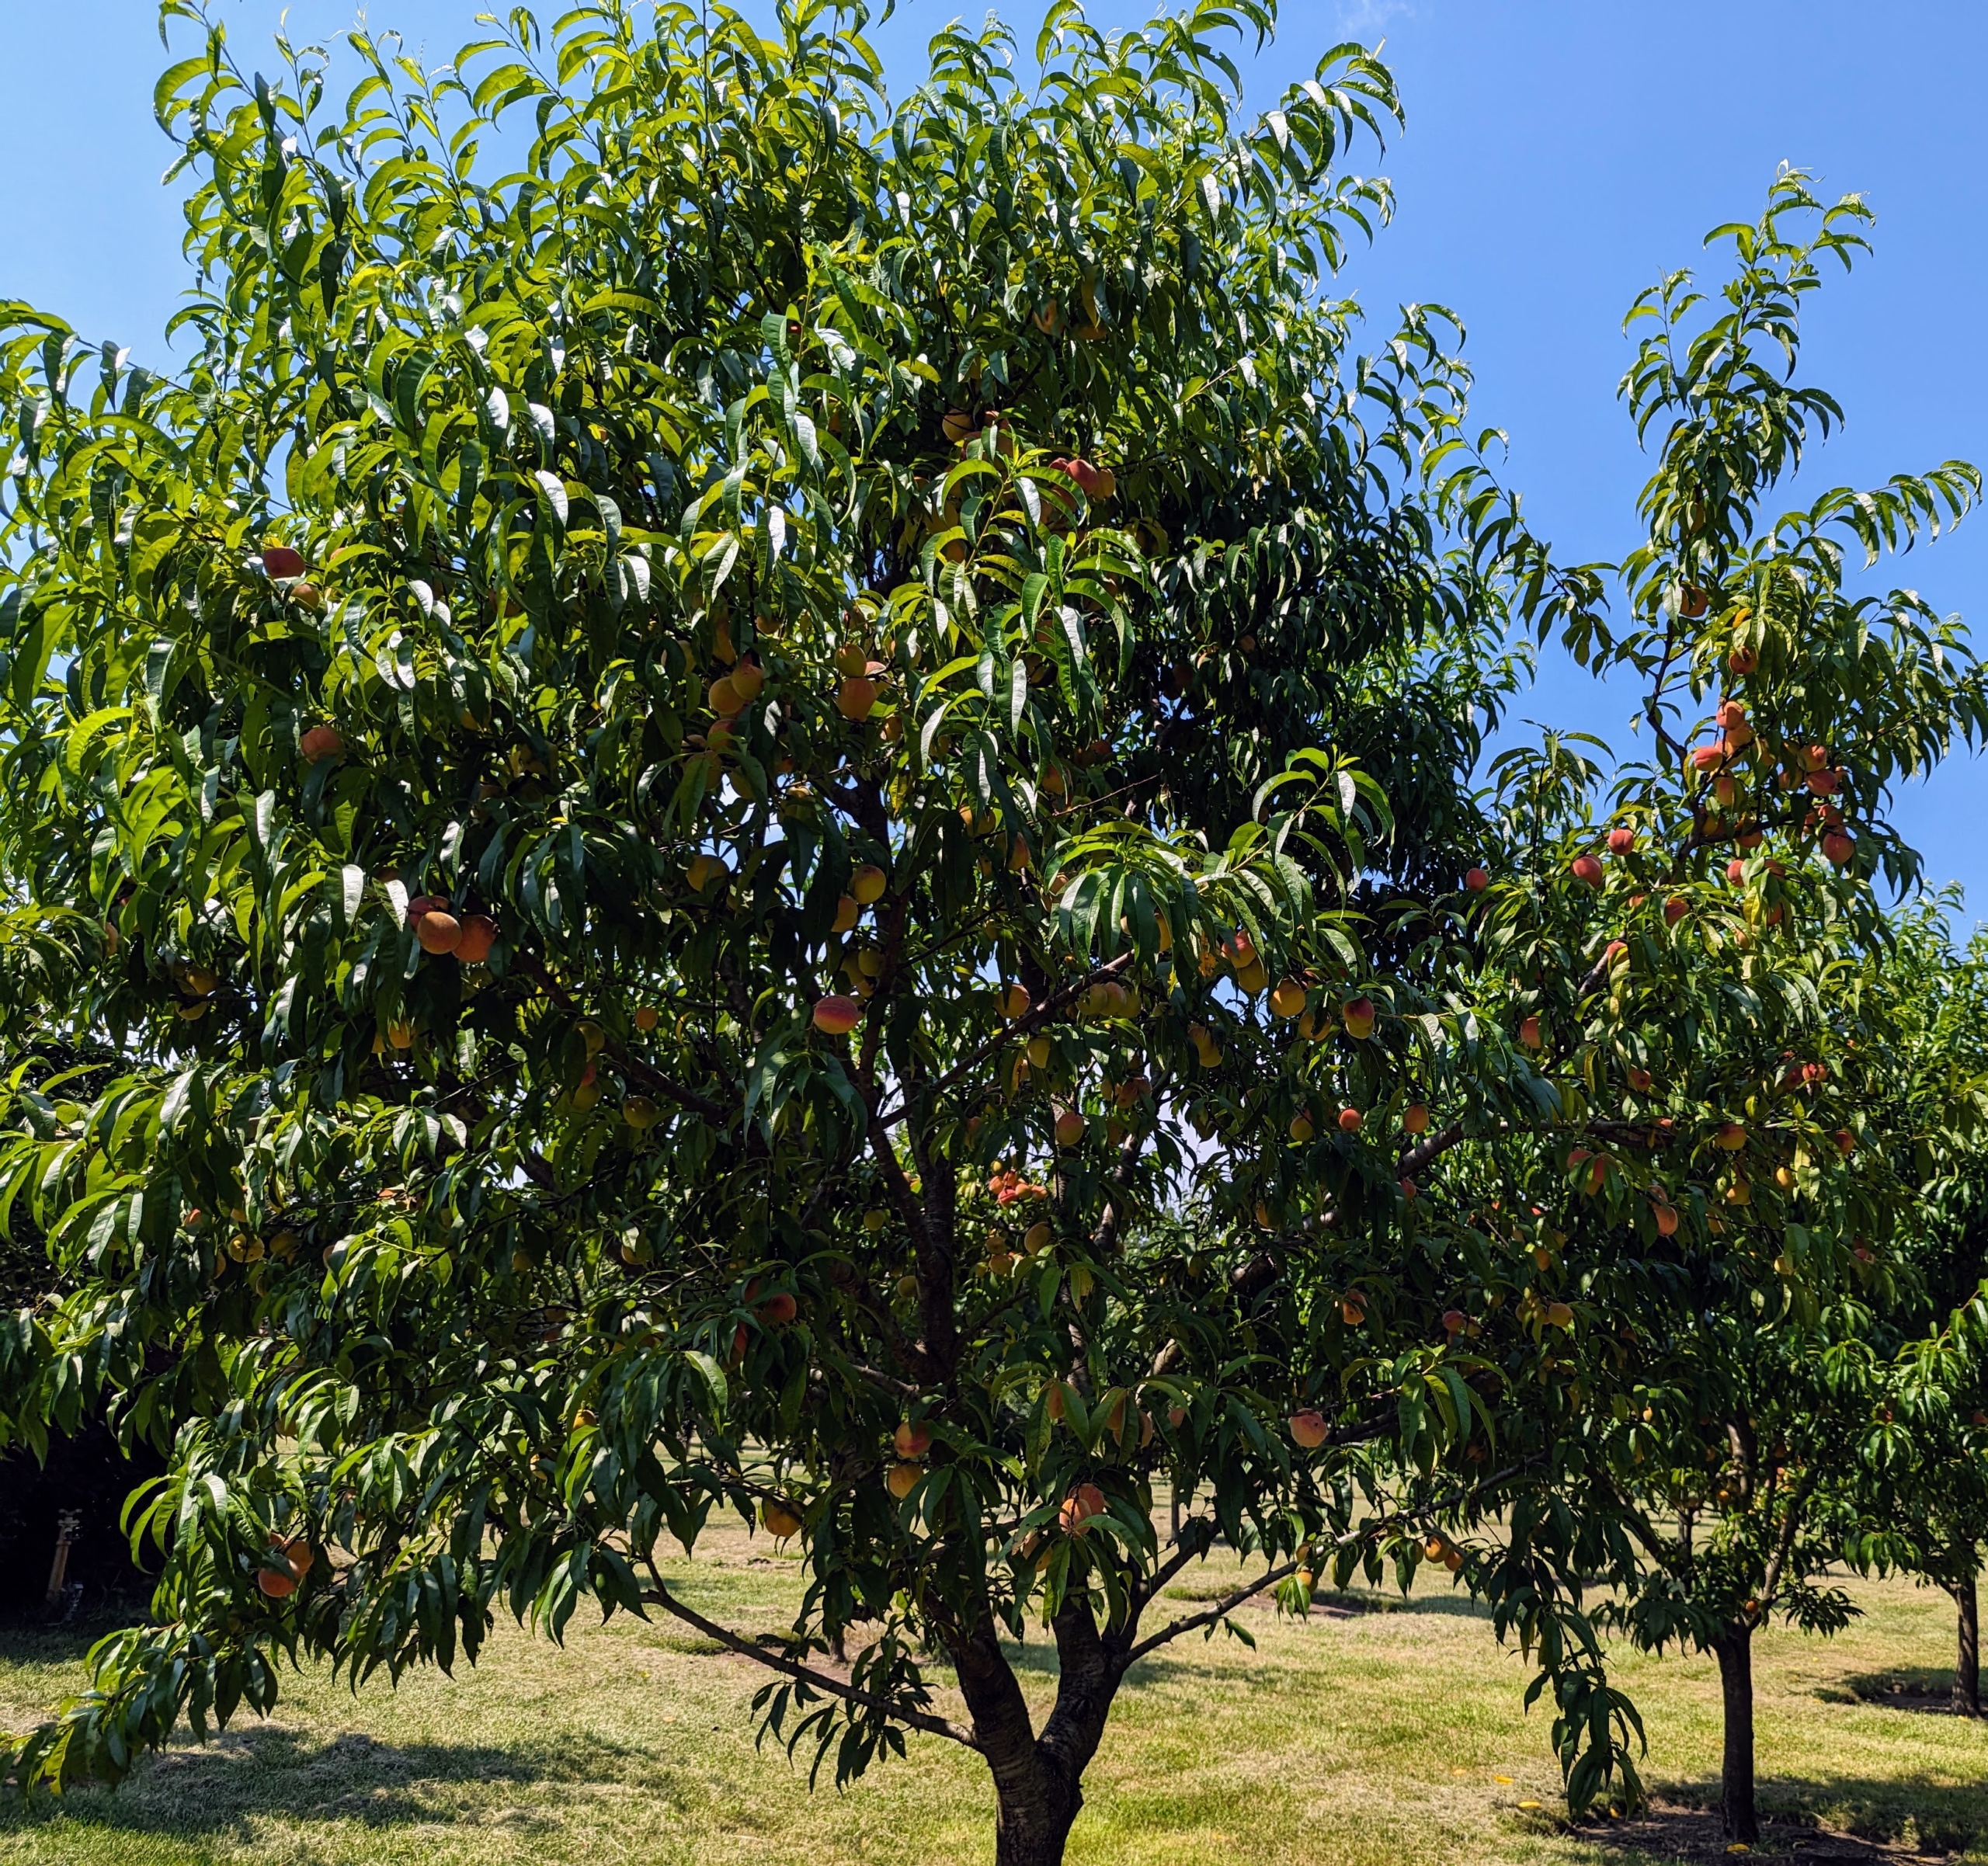
Fresh fruit is one of nature’s most delicious products. I have an orchard around my pool filled with more than 200 different fruit trees. This is what it looks like in summer.
While I have many fruit trees around the farm, my orchard contains an organized selection of peach trees, apple trees, plum trees, cherry trees, pear, medlar, and quince trees. Many were bare-root cuttings when they arrived and now they’re beautiful mature specimens.
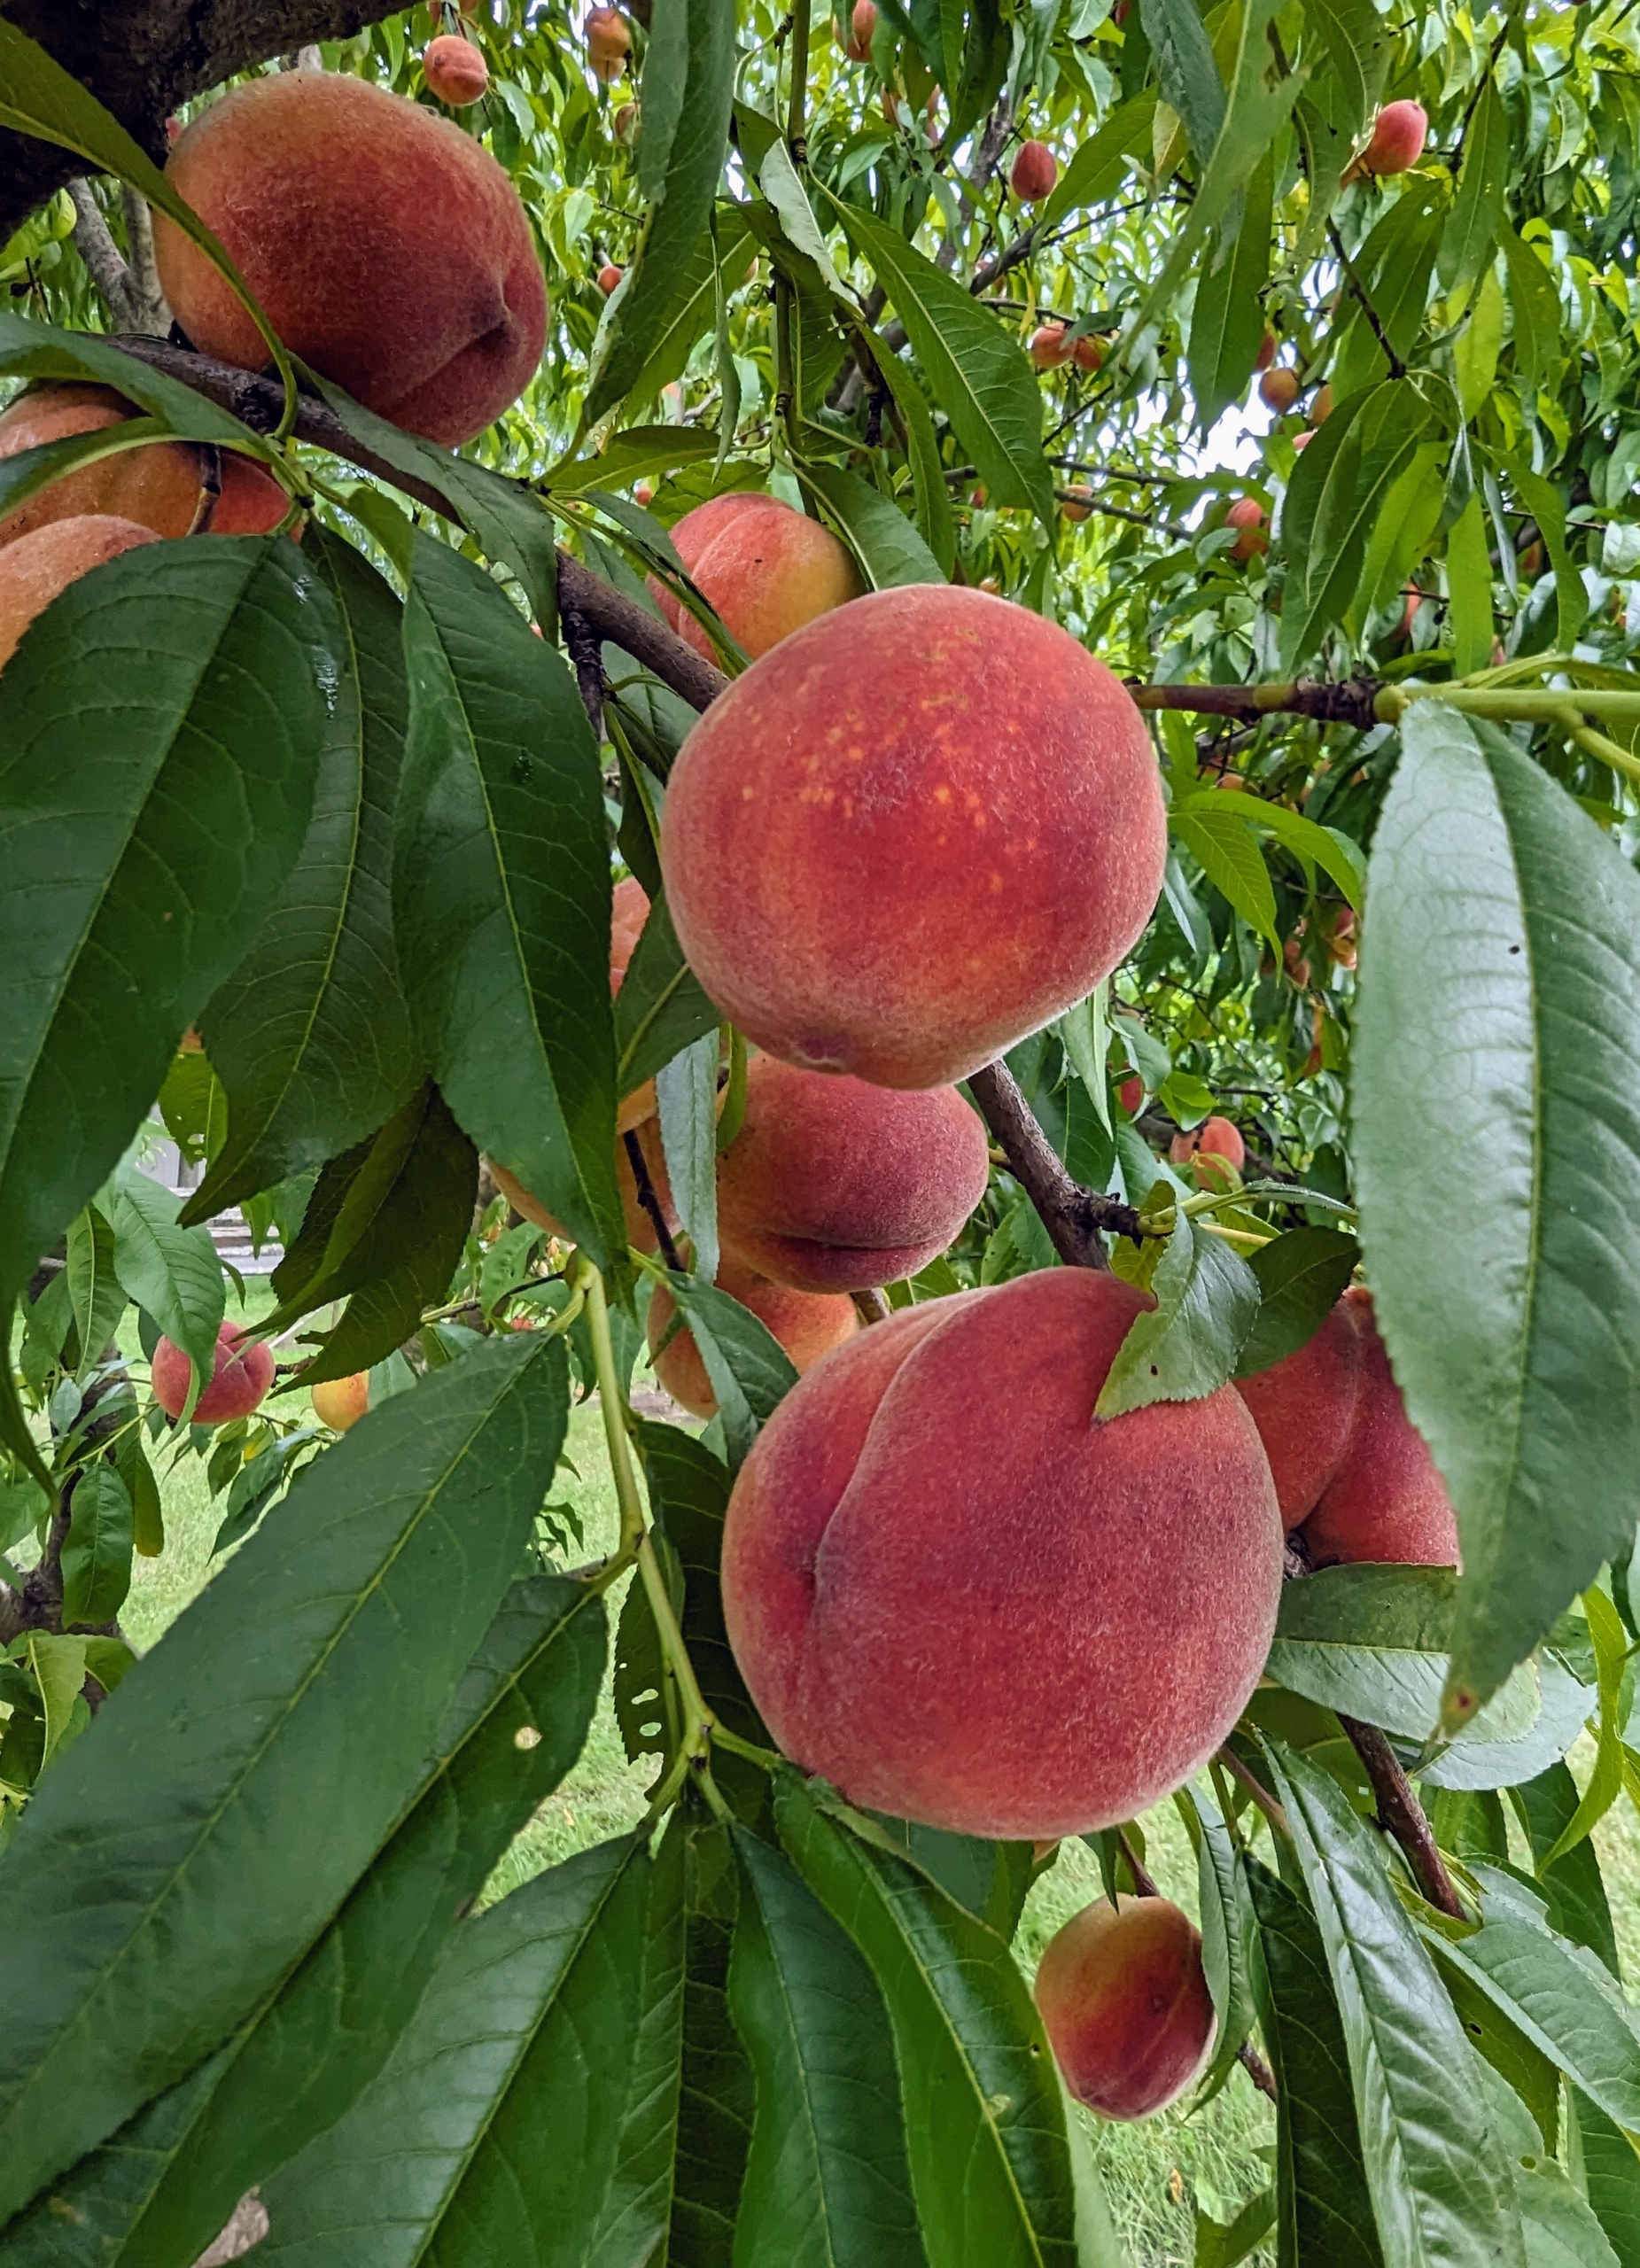
These last few years have brought an abundance of fruit. I’ve had bounties of peaches to share with my family.
I also grow plenty of pears – Bartlett, Columbia, D’Amalis, Ginnybrook, McLaughlin, Nova, Patten, Seckel, Stacyville, and Washington State.
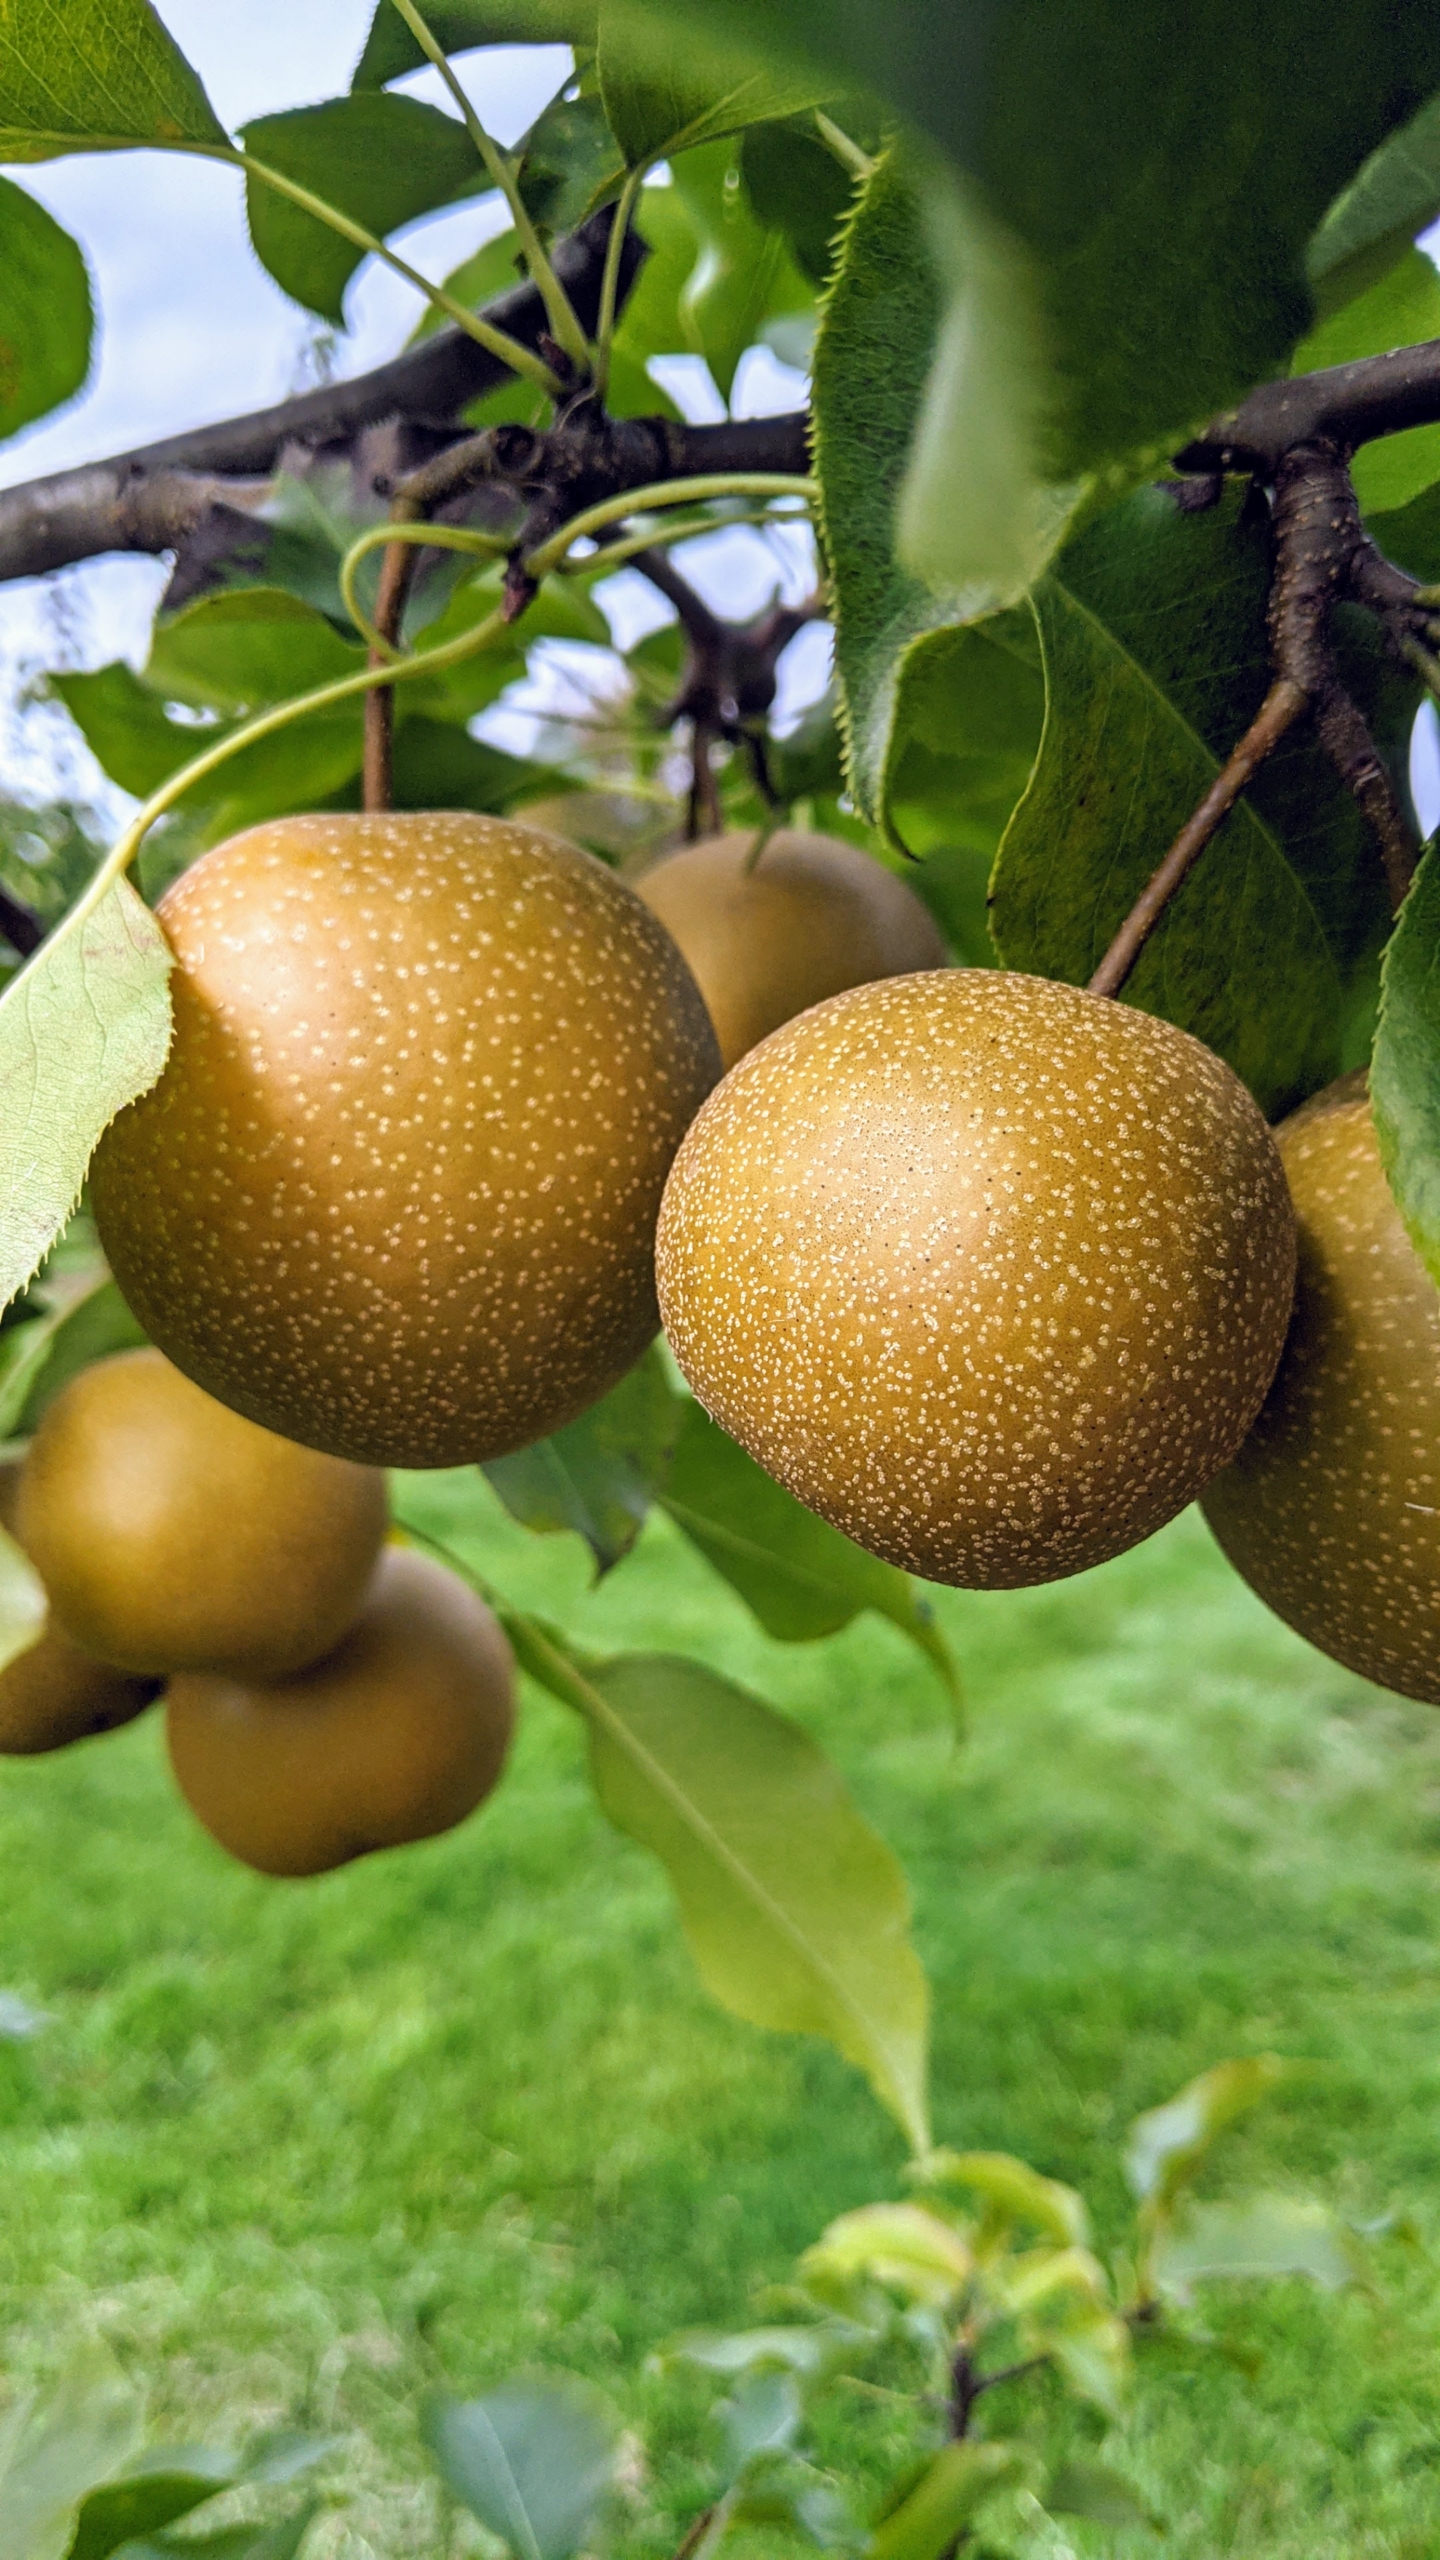
Asian pears are usually smaller than regular pears and have a sweeter flavor. Asian pears are also a bit more crisp.
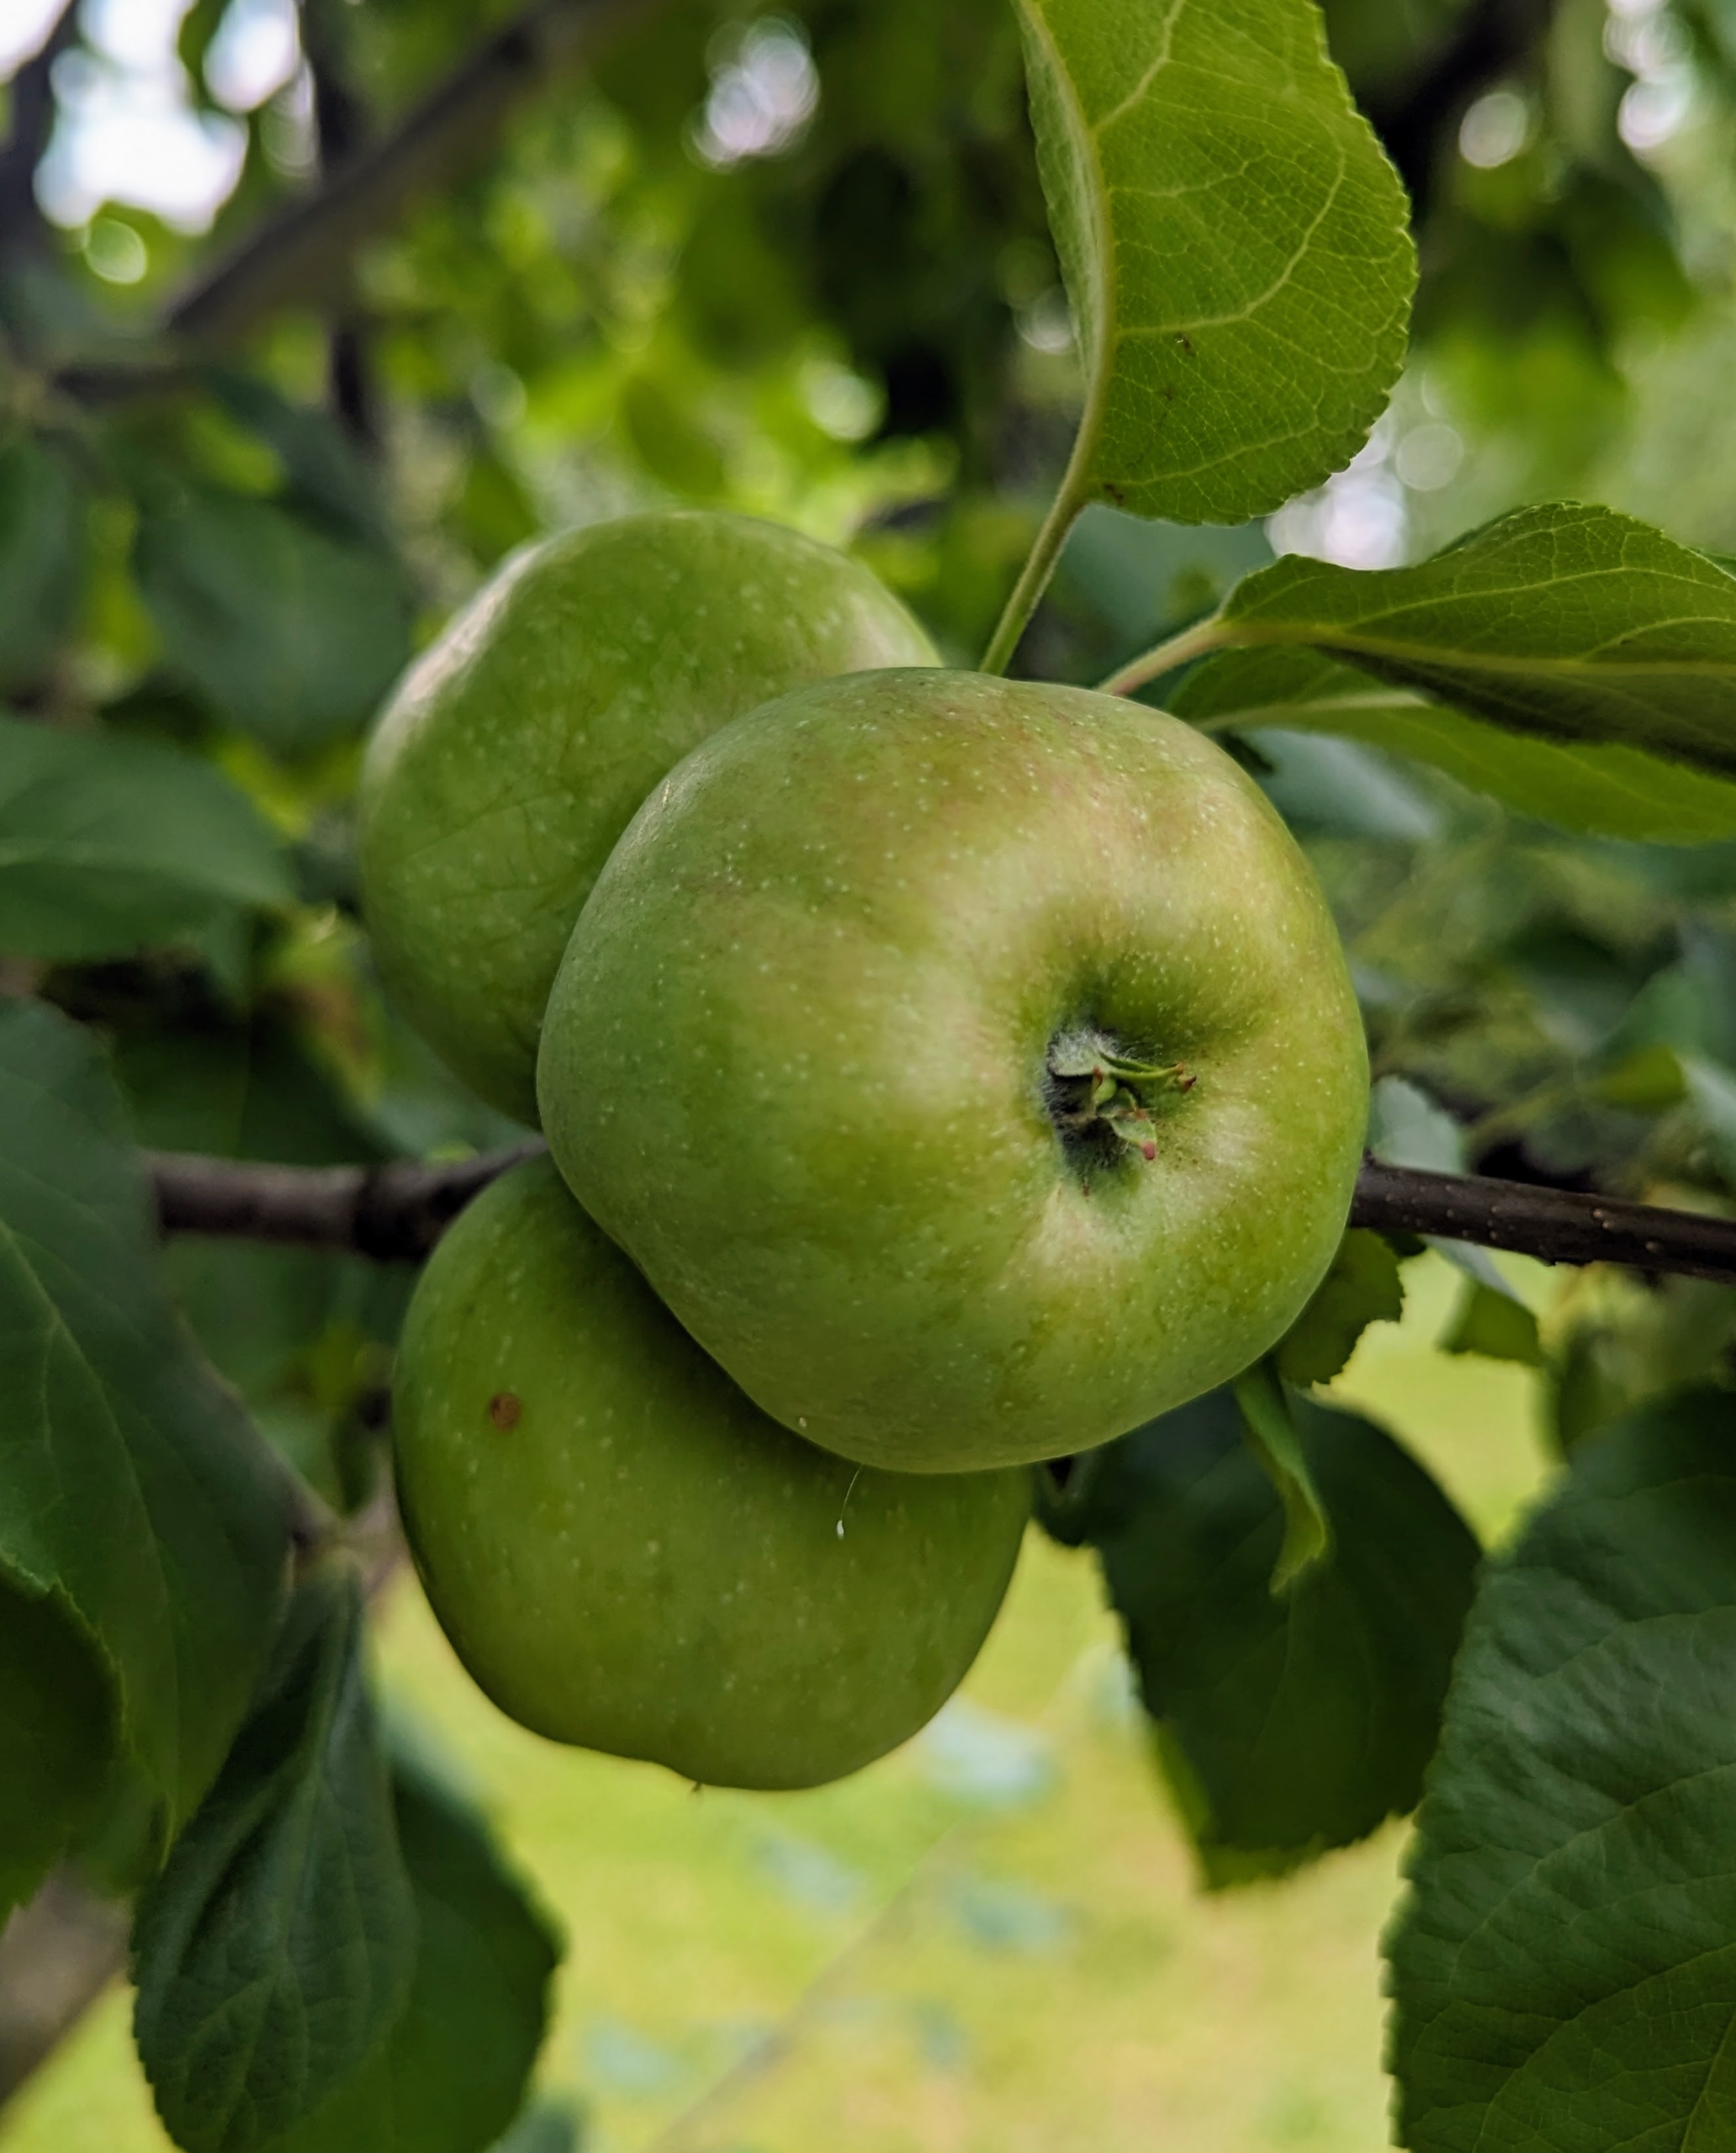
And of course, many more apples. These orchard apple trees include Baldwin, Black Oxford, Cortland, Cox’s Orange Pippin, Esopus Spitzenburg, Fuji, Golden Russet, Grimes Golden, Honeycrisp, Liberty, Redfield, Roxbury Russet, Windham Russet, and more.
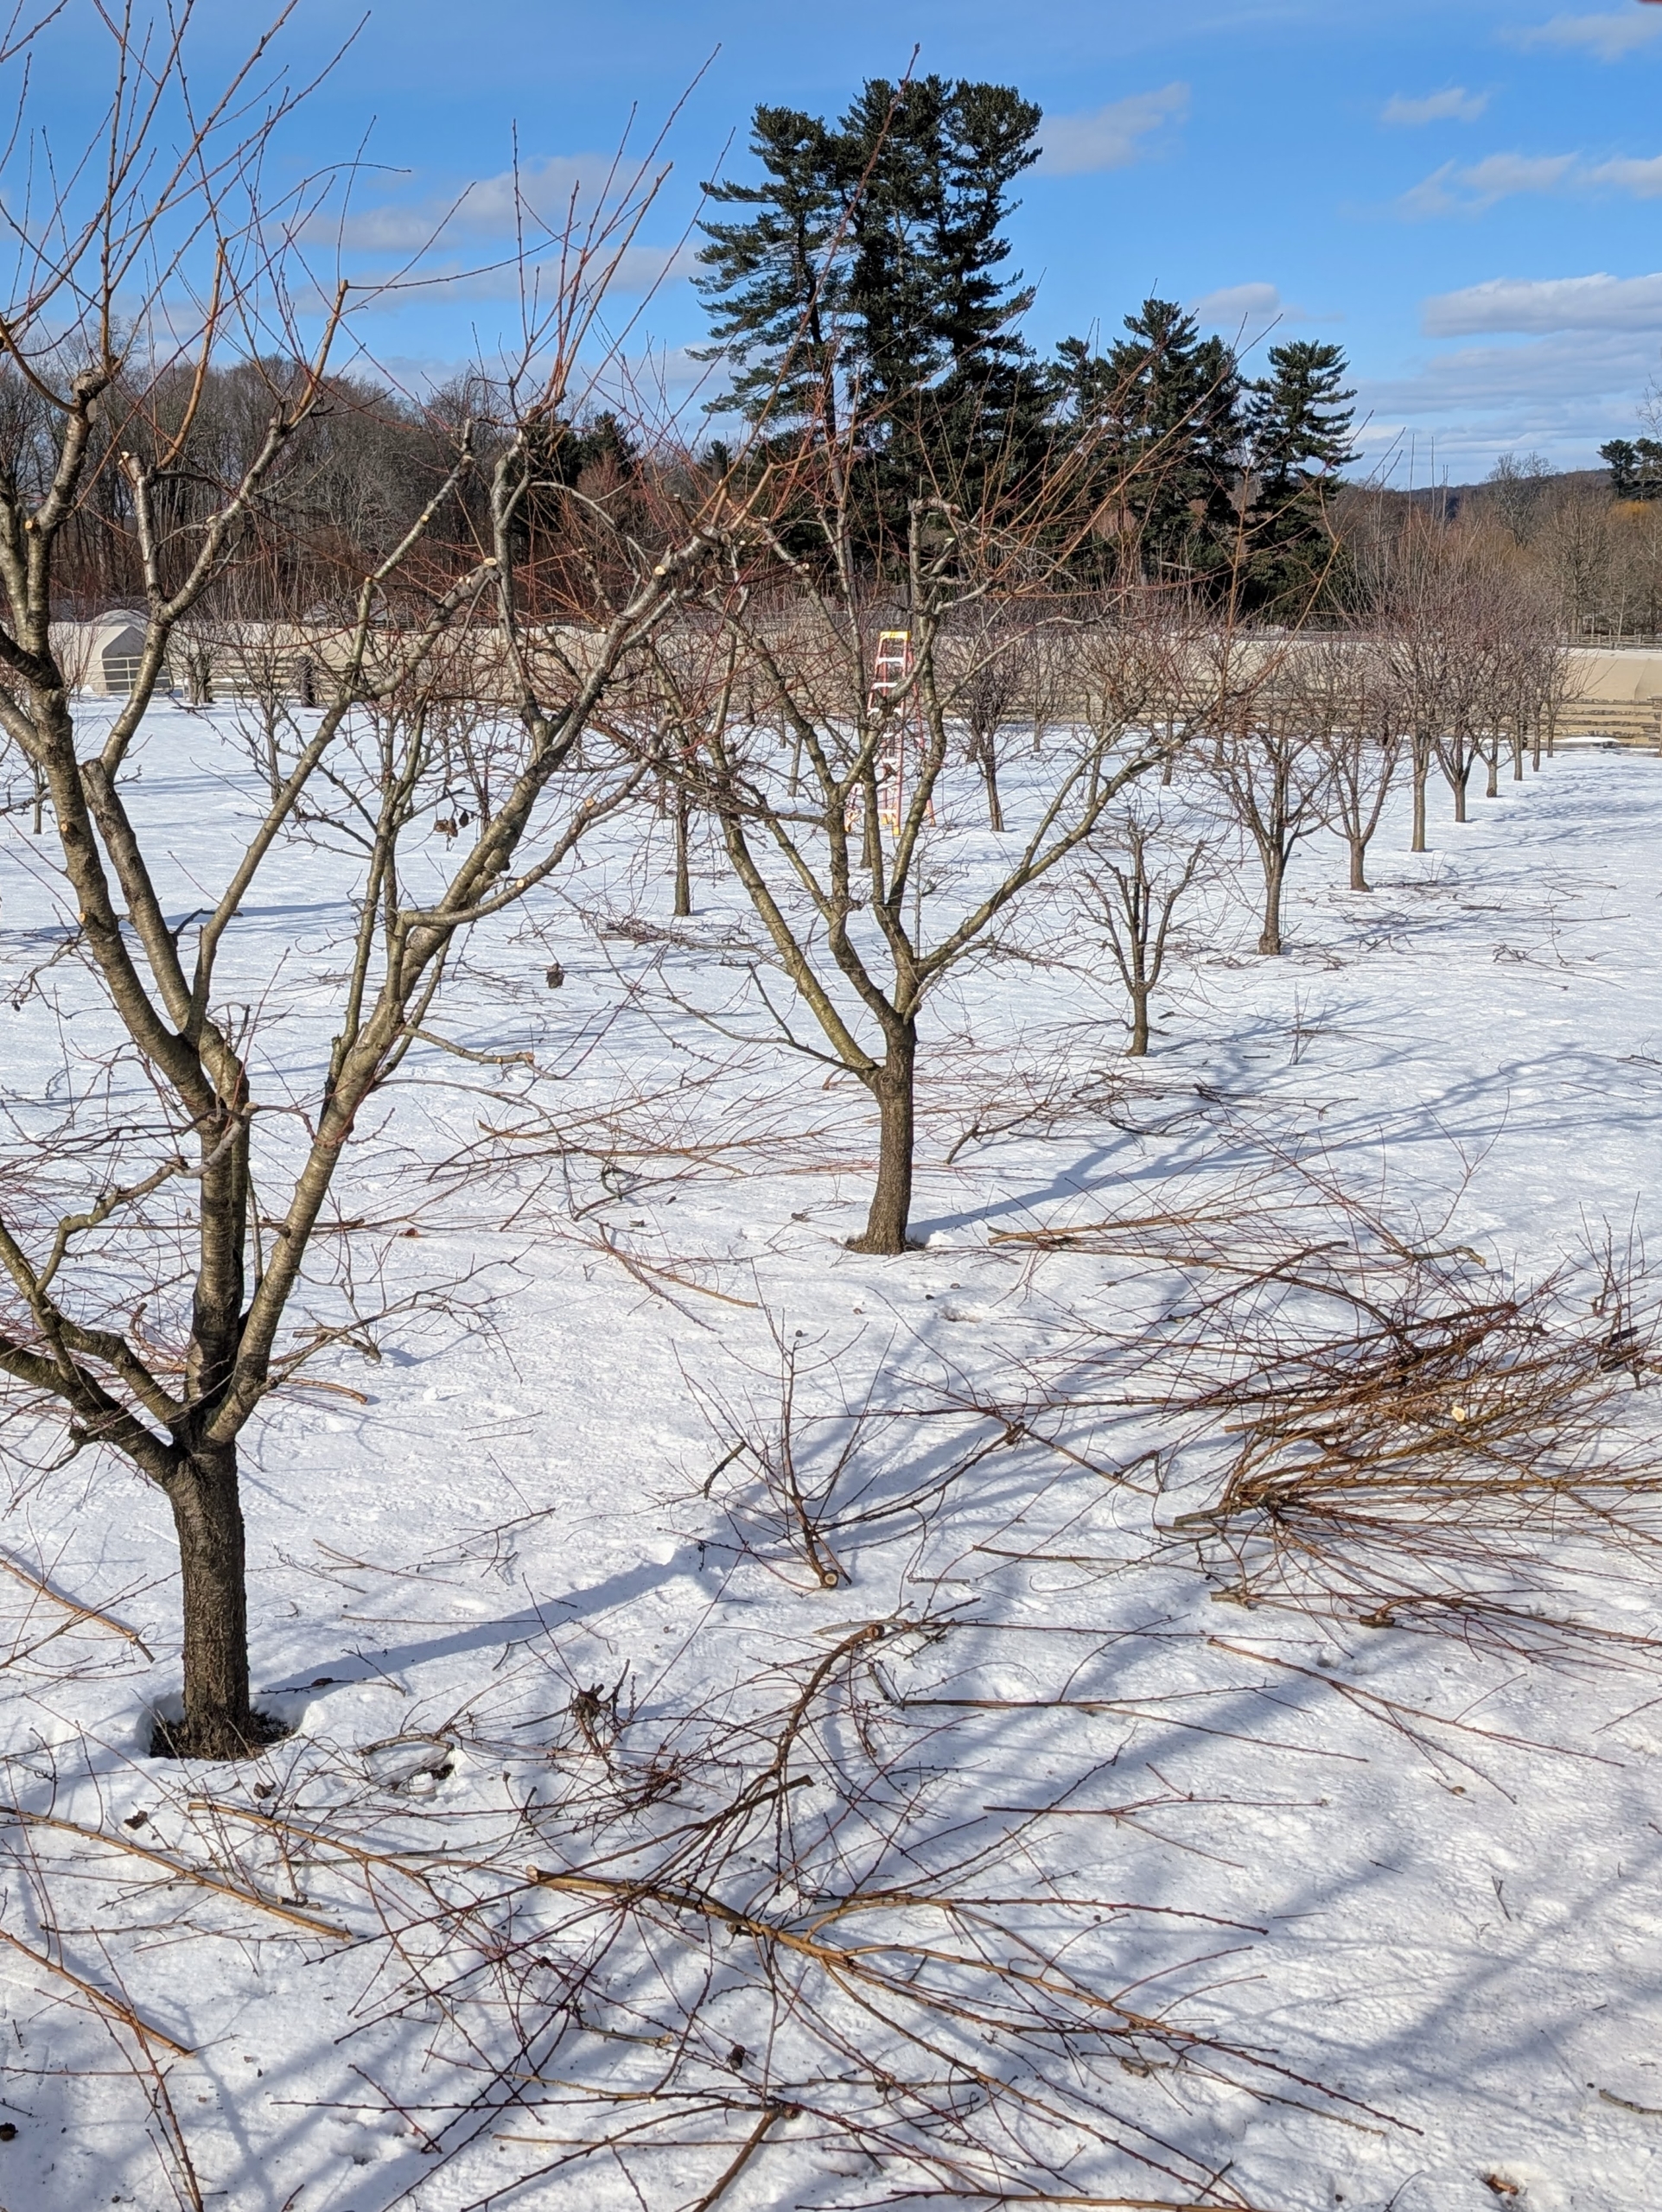
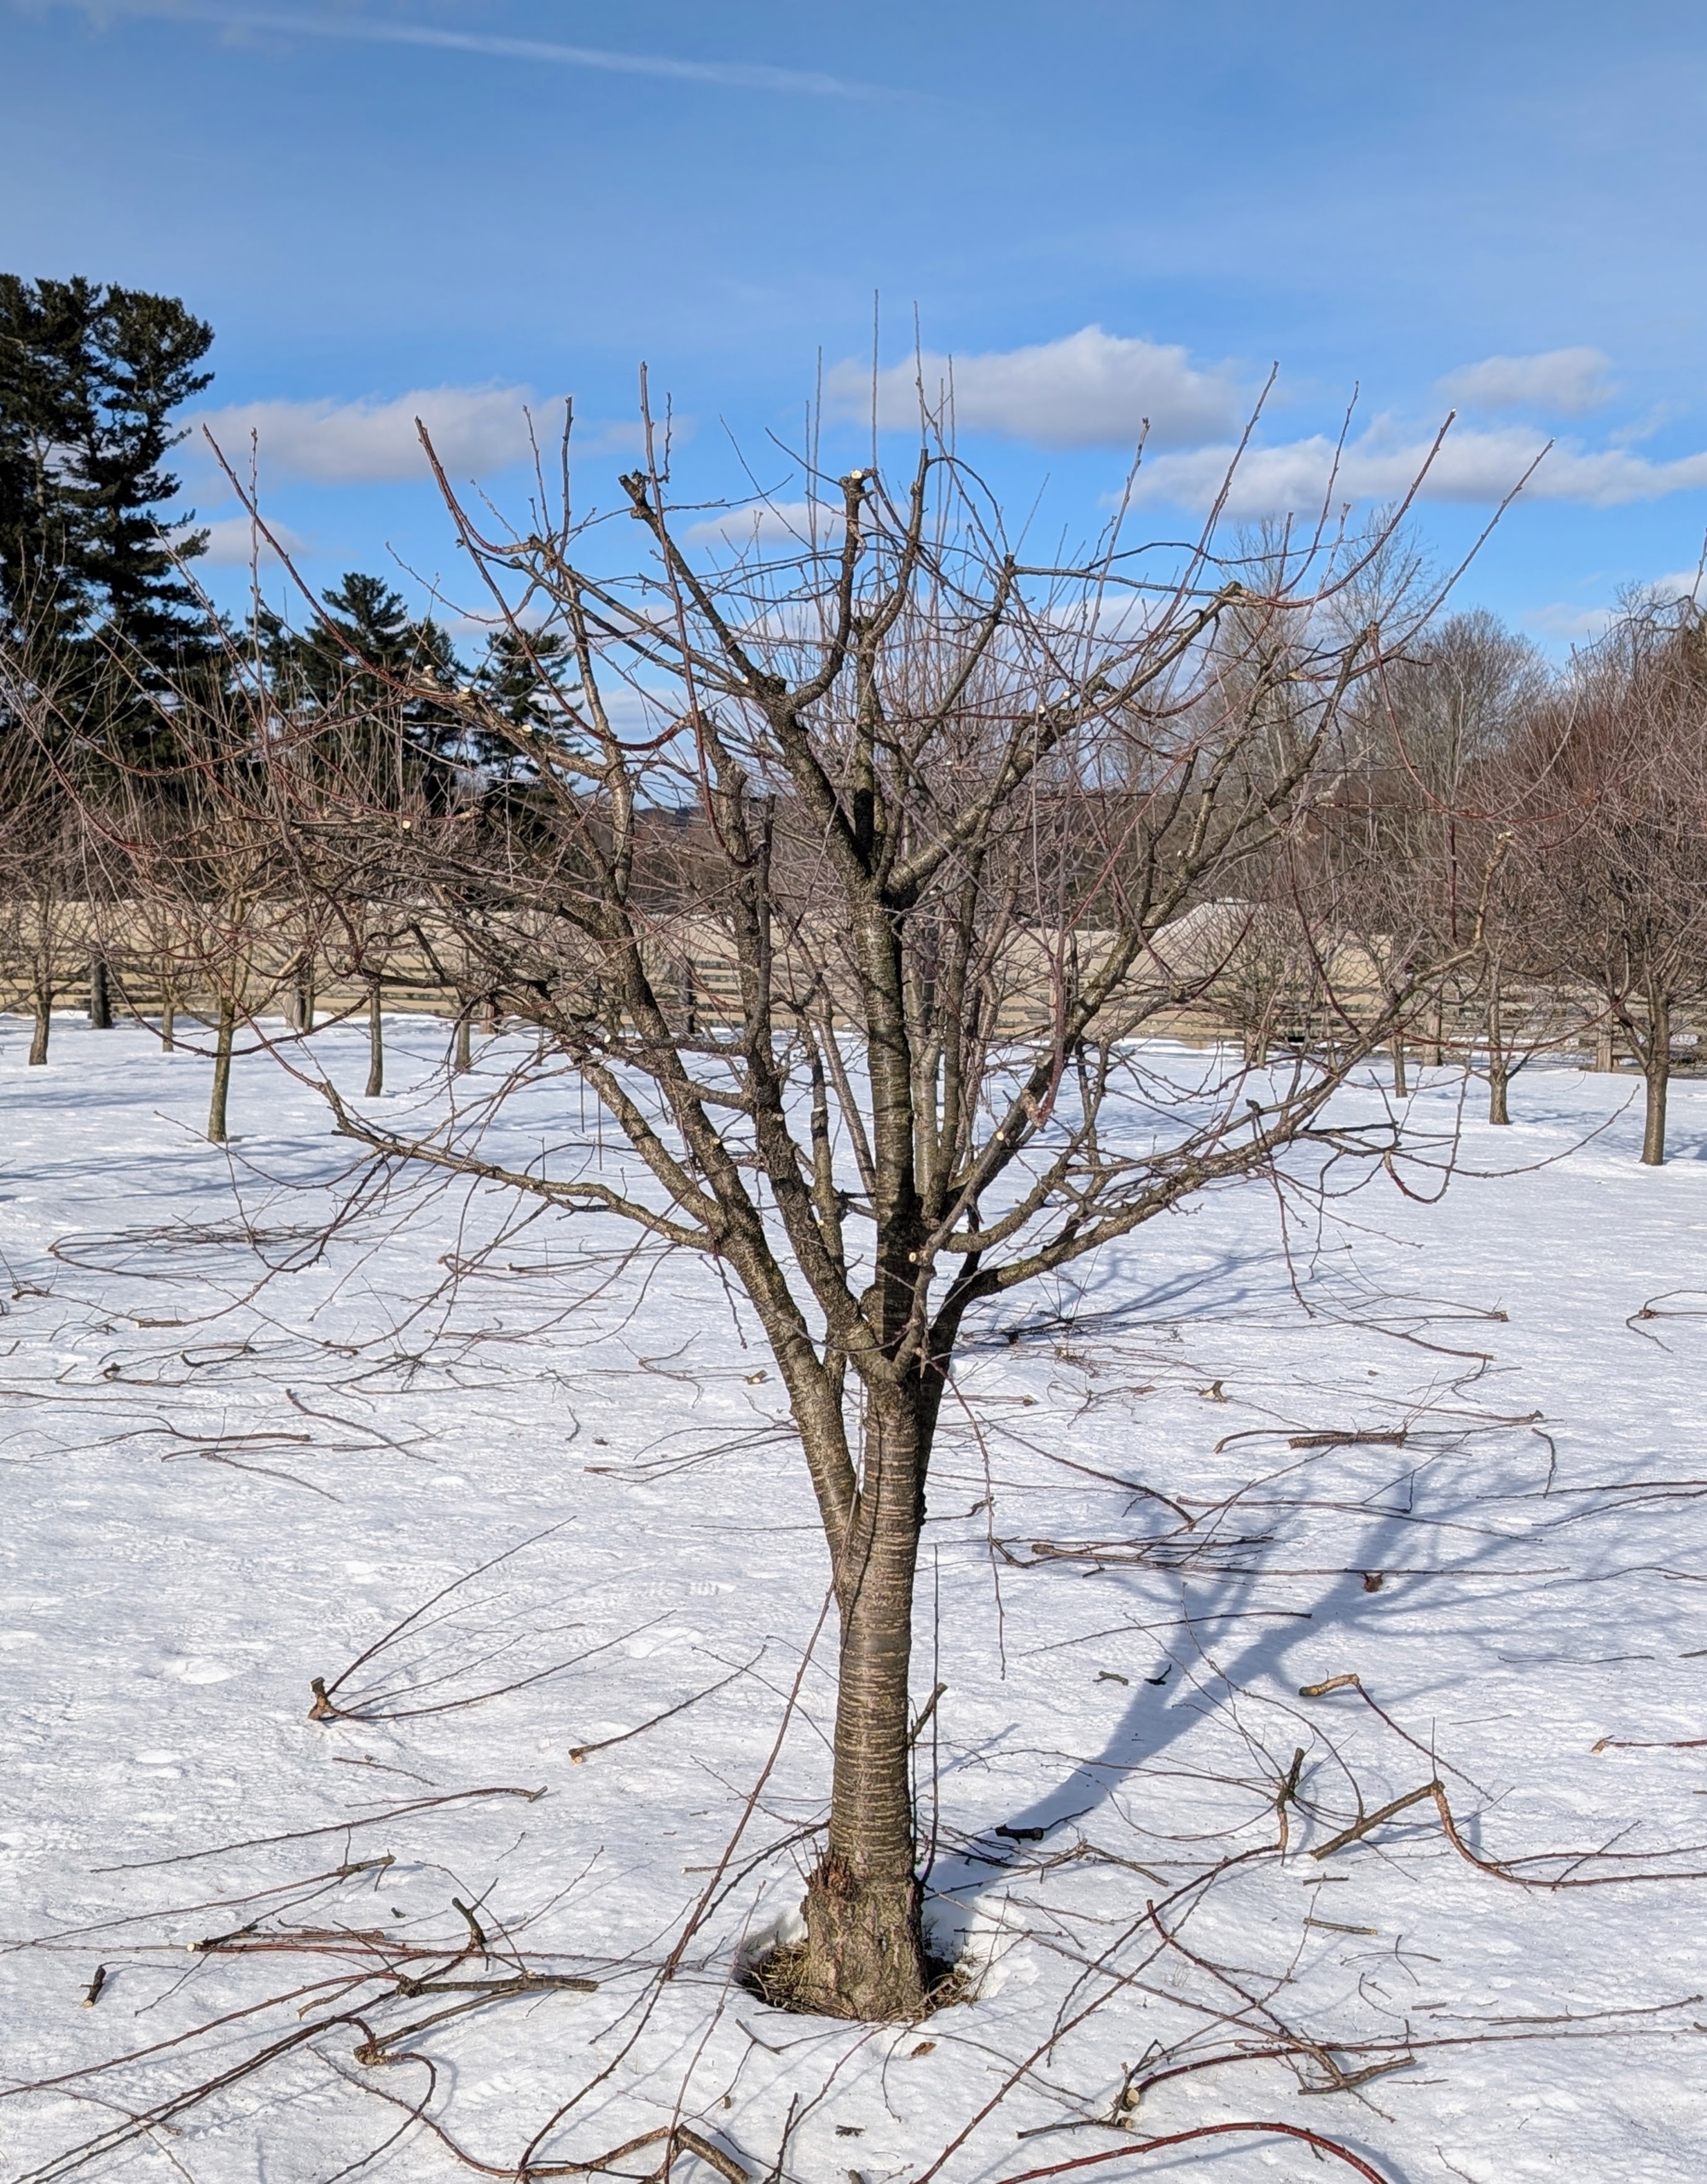
And this is the orchard now. The fruit trees are extremely healthy, in part because of all the care and maintenance that is done to keep them doing well. Here is a section of trees before they are pruned.
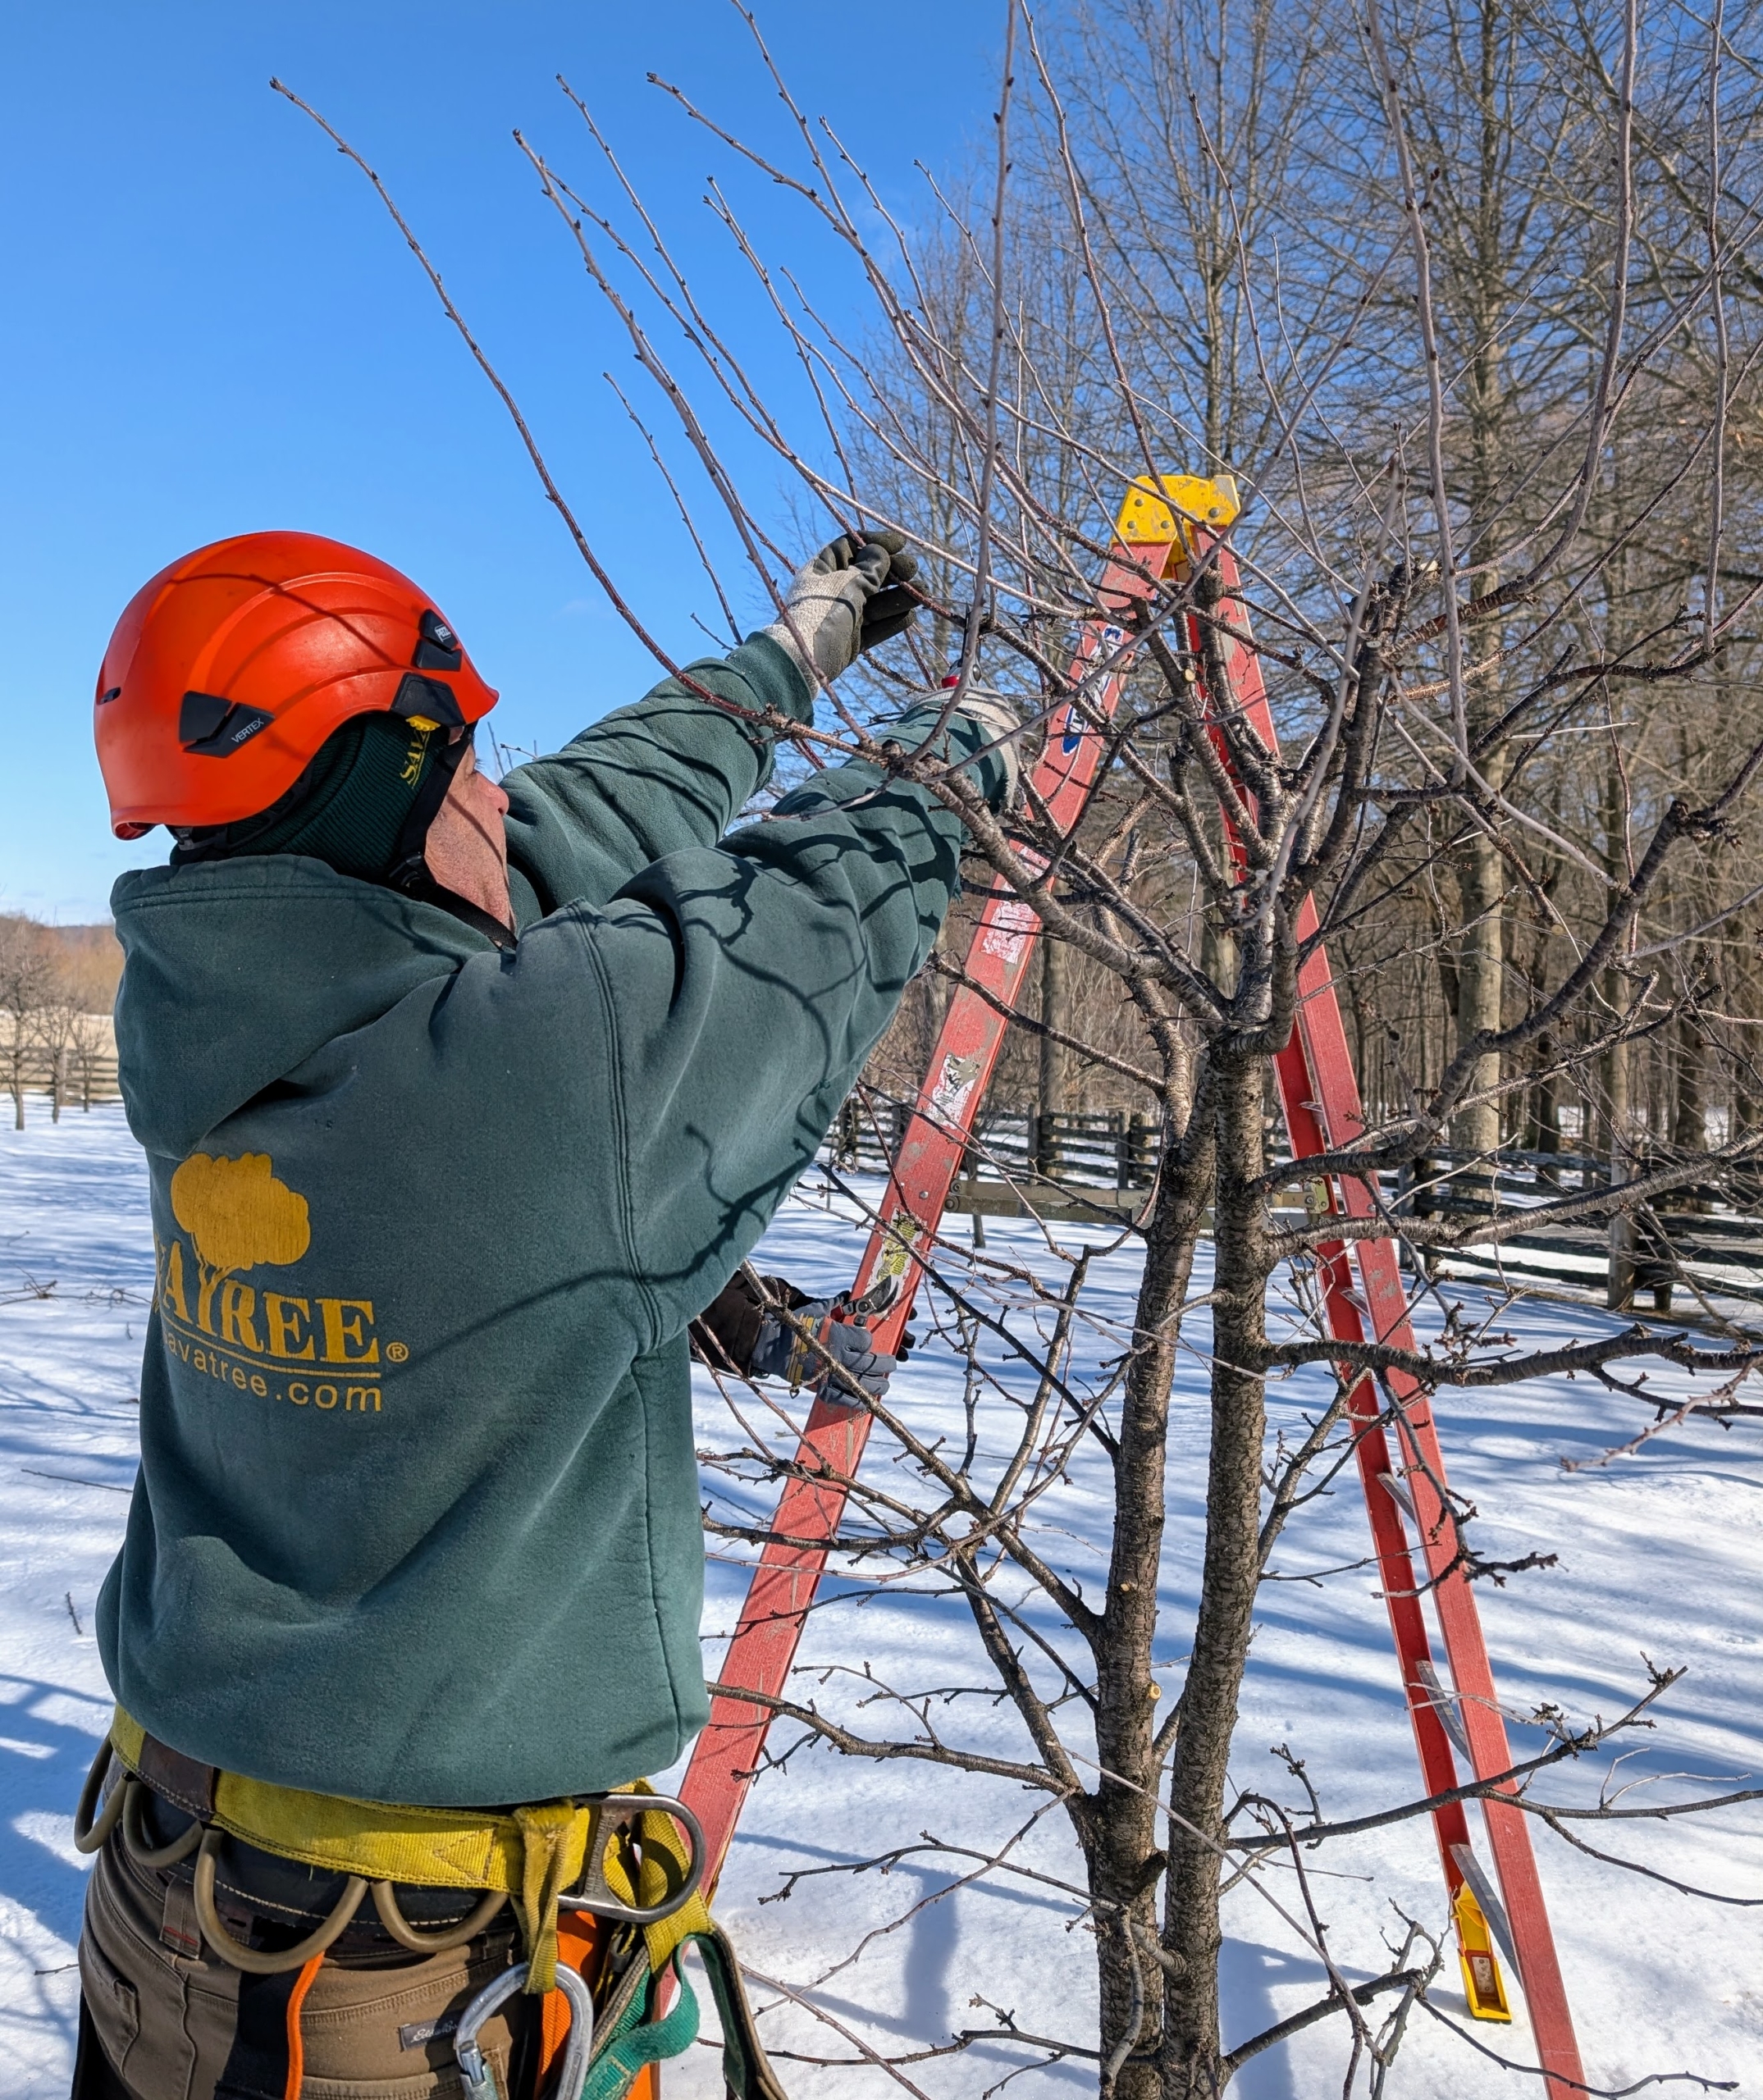
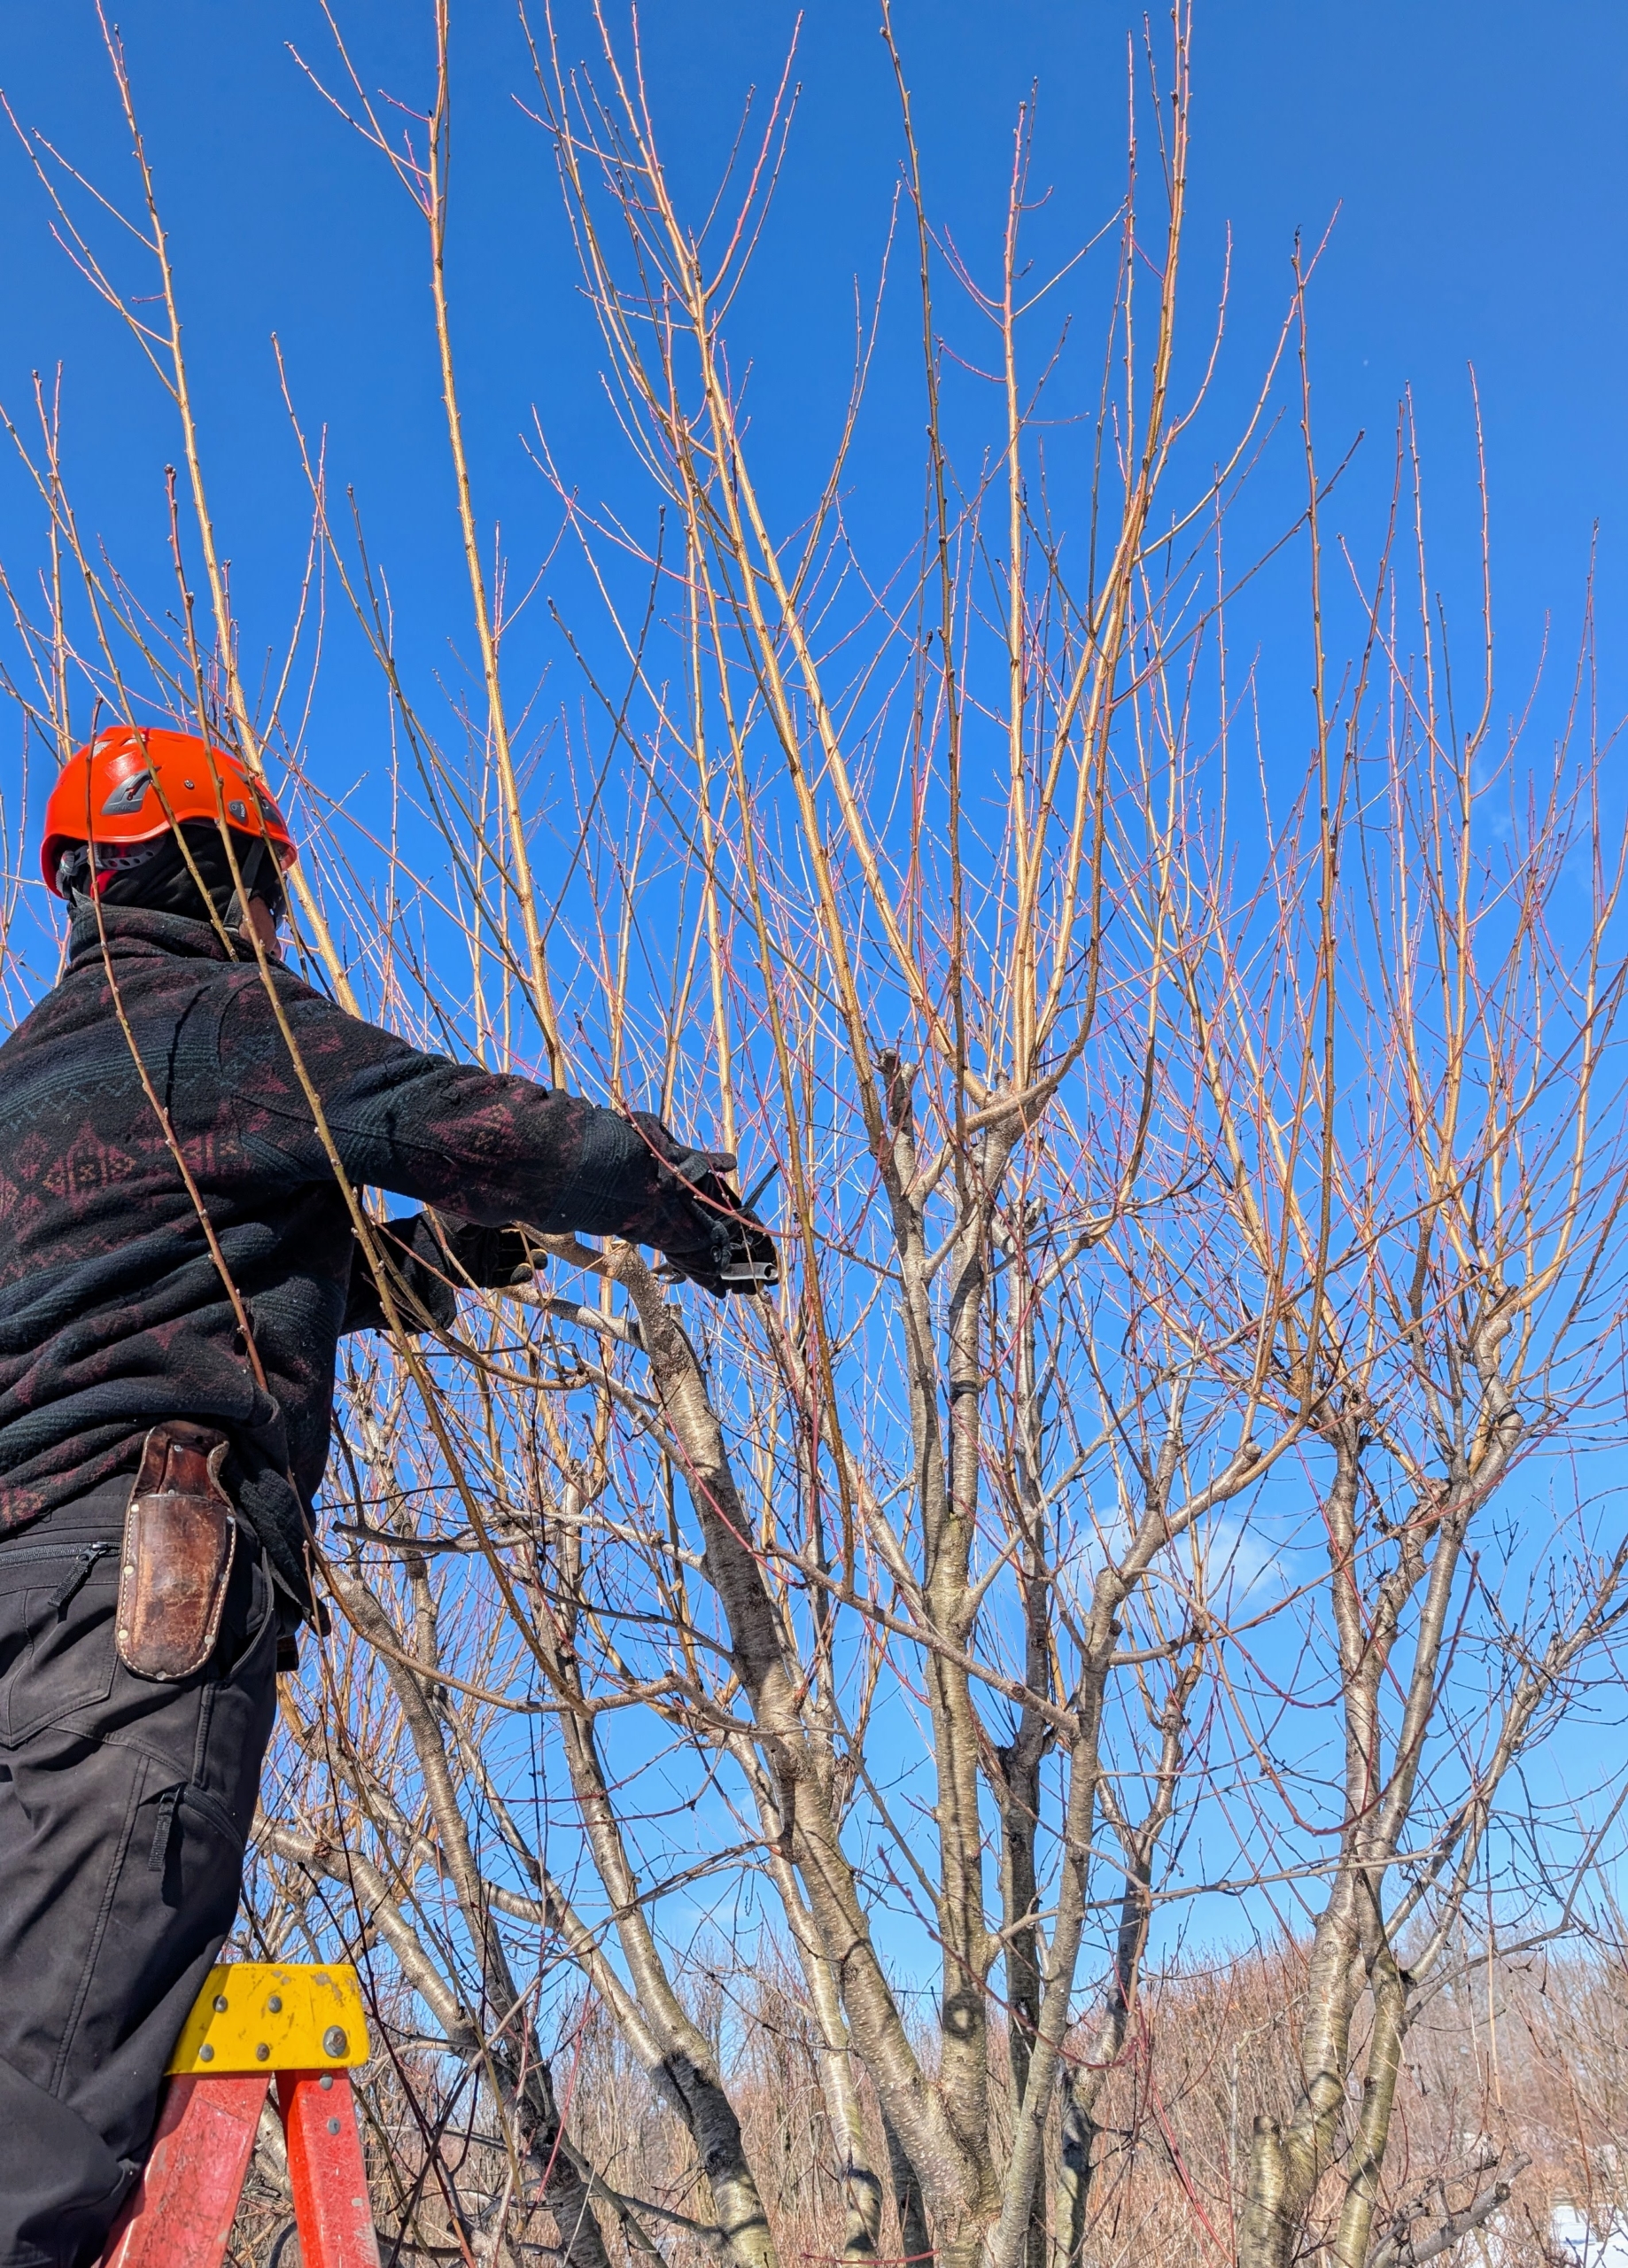
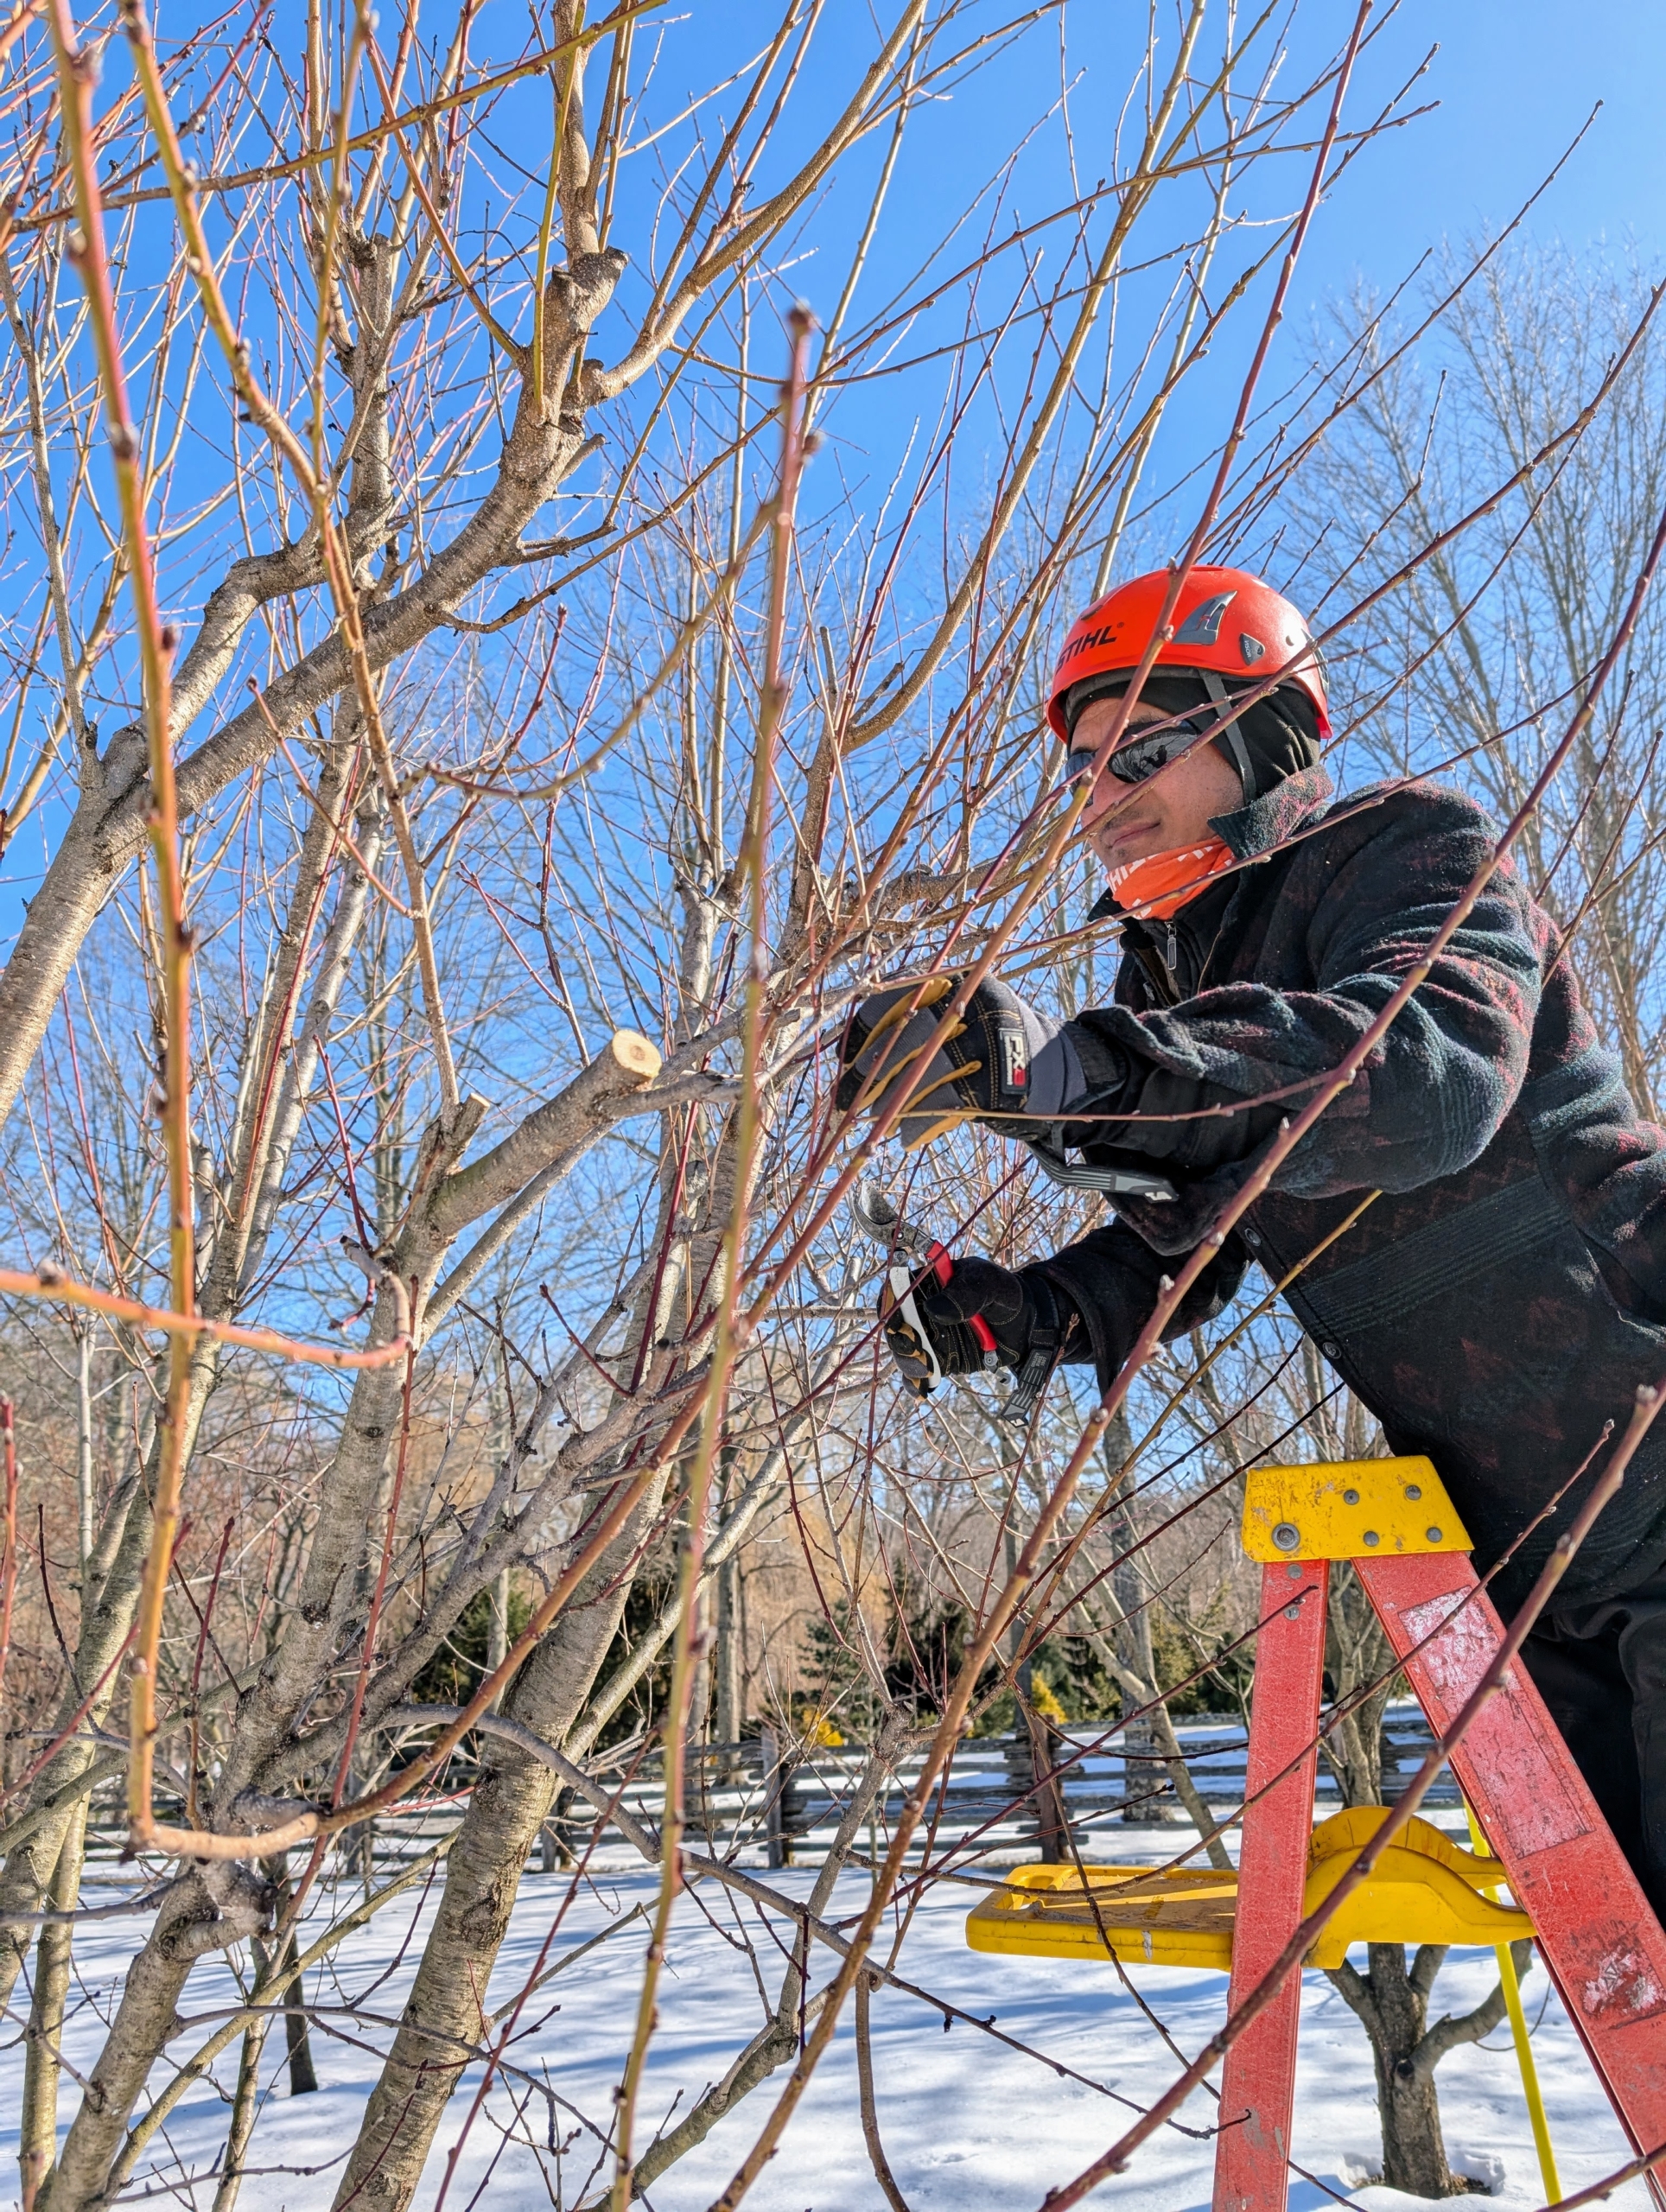
This year, I asked my longtime arborists from SavATree to spend a day at my farm offering tips to my crew – a refresher course for using the best pruning methods. I’ve been using SavATree for many years and they’ve helped keep all my trees in excellent condition.
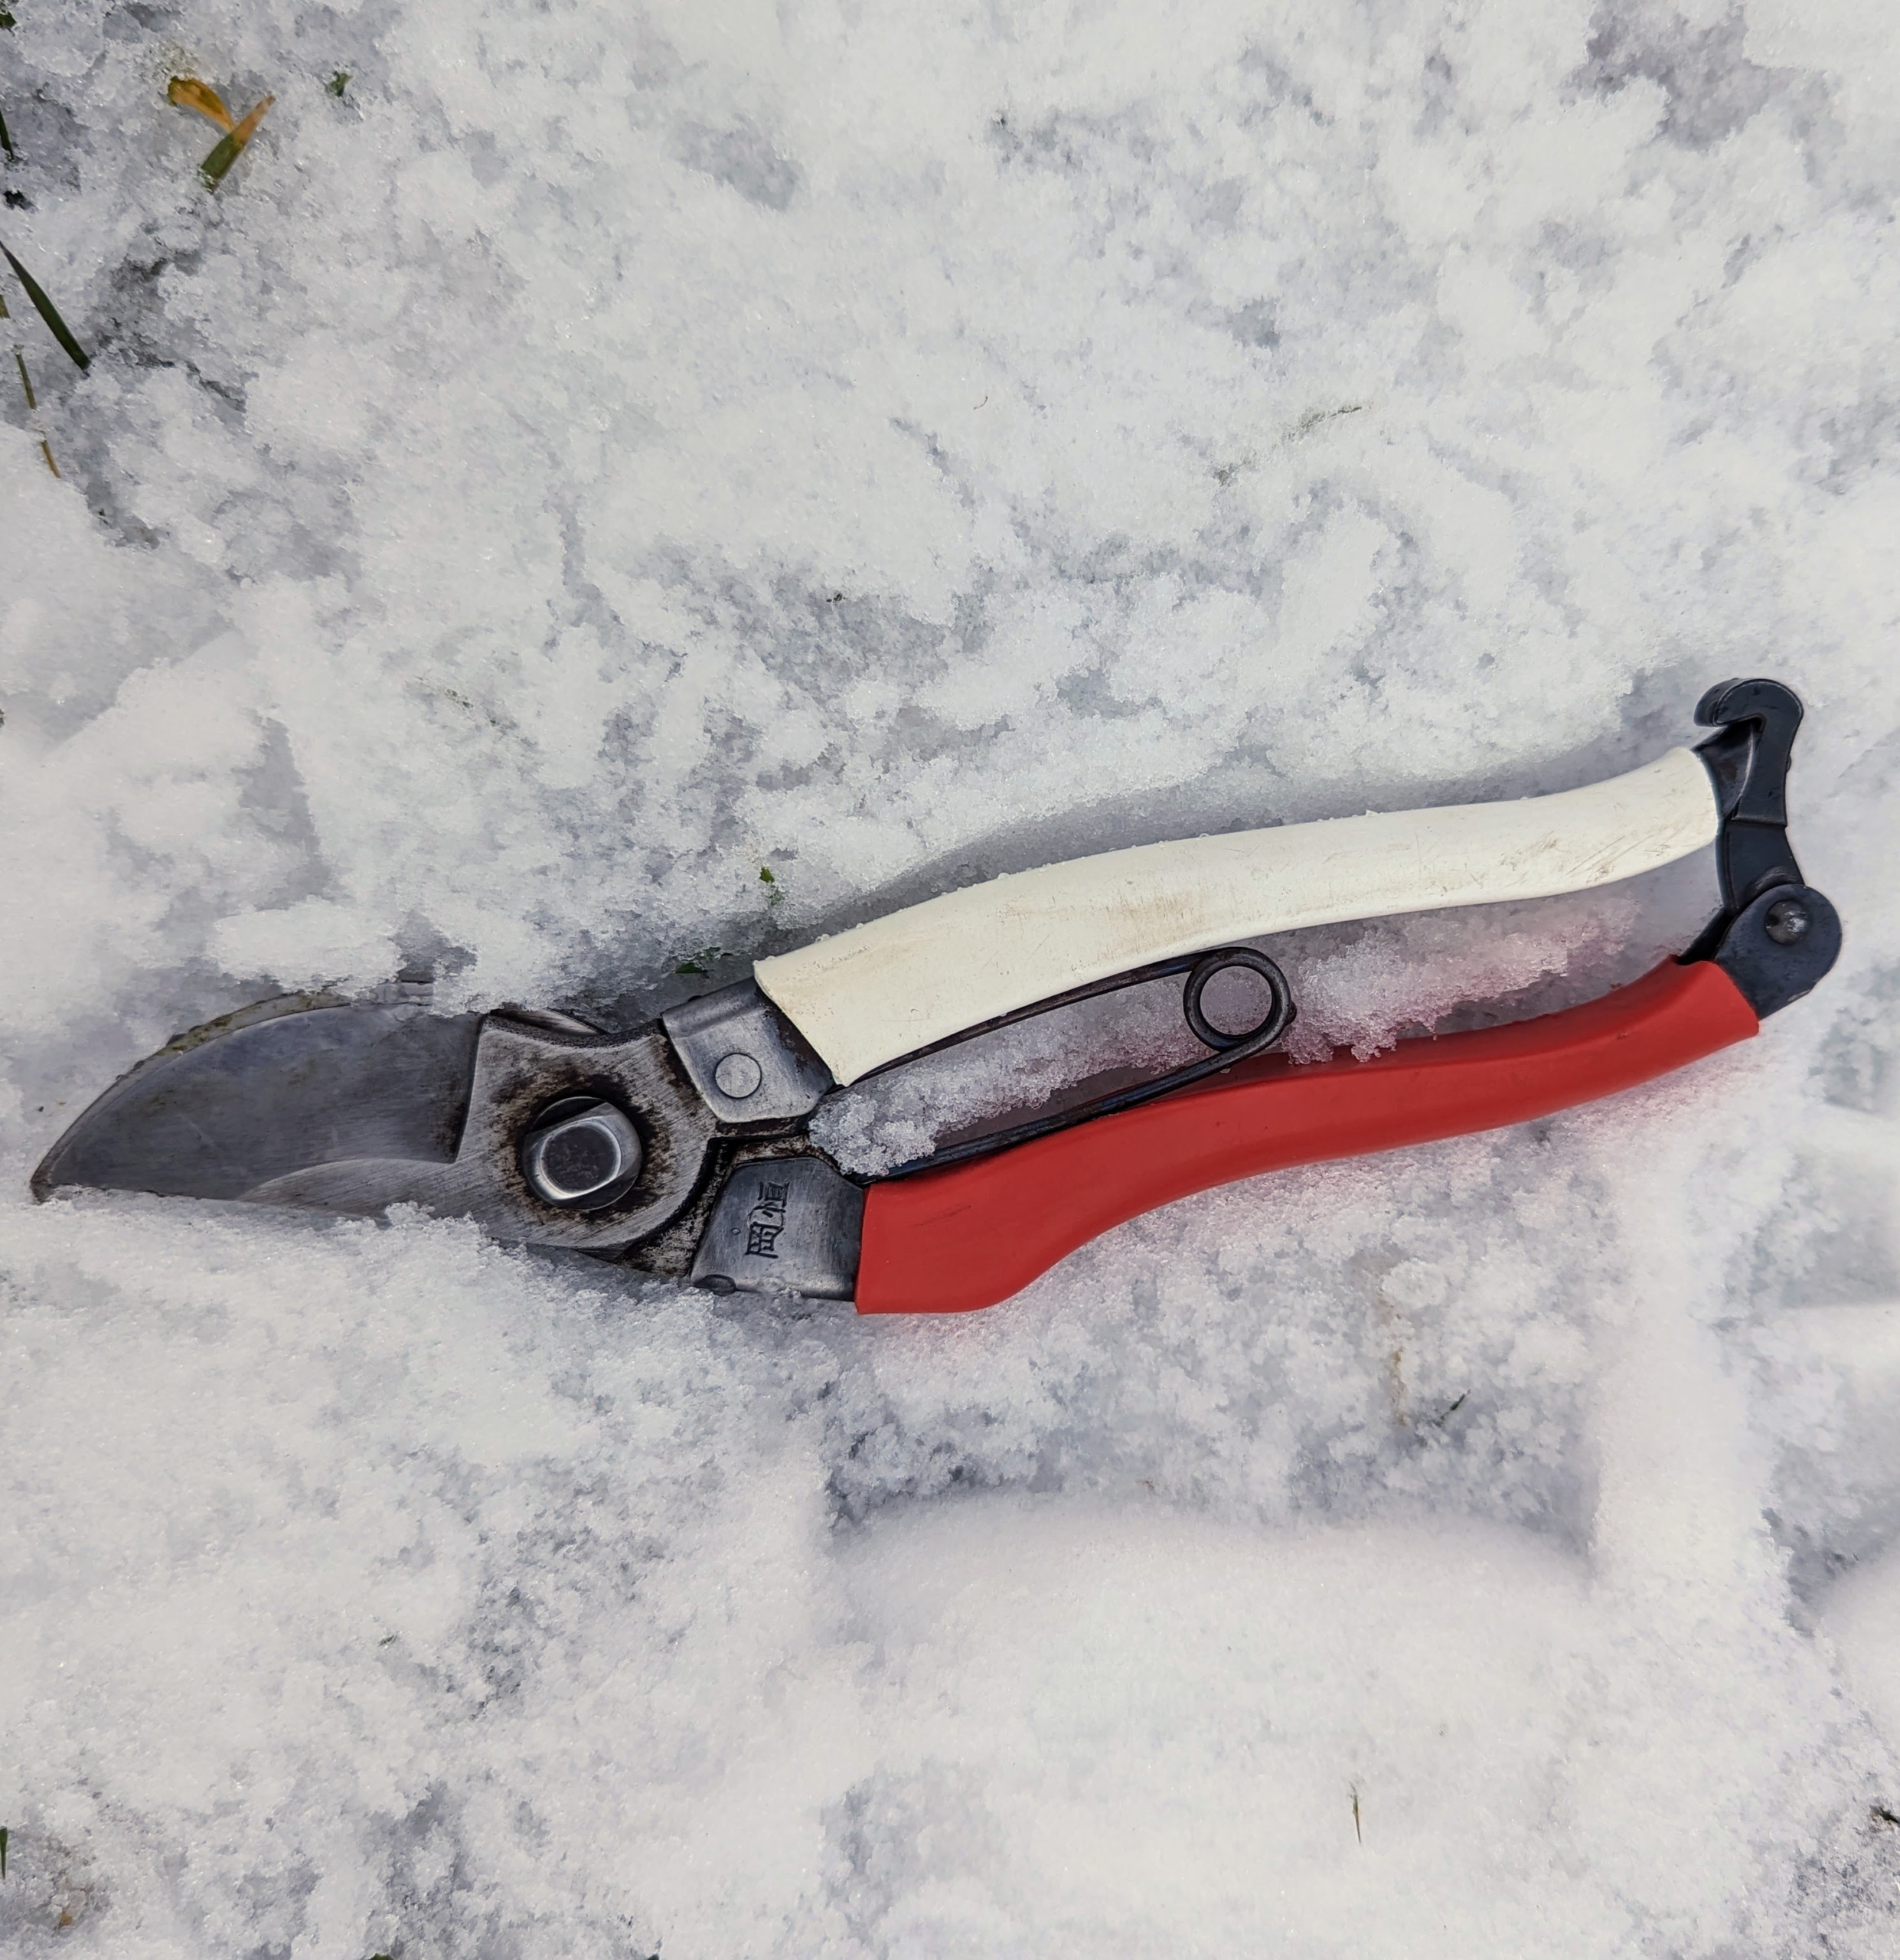
The proper tools for this job include these trusted pruners. These Okatsune bypass pruners are very helpful in cutting water sprouts and small, thin branches.
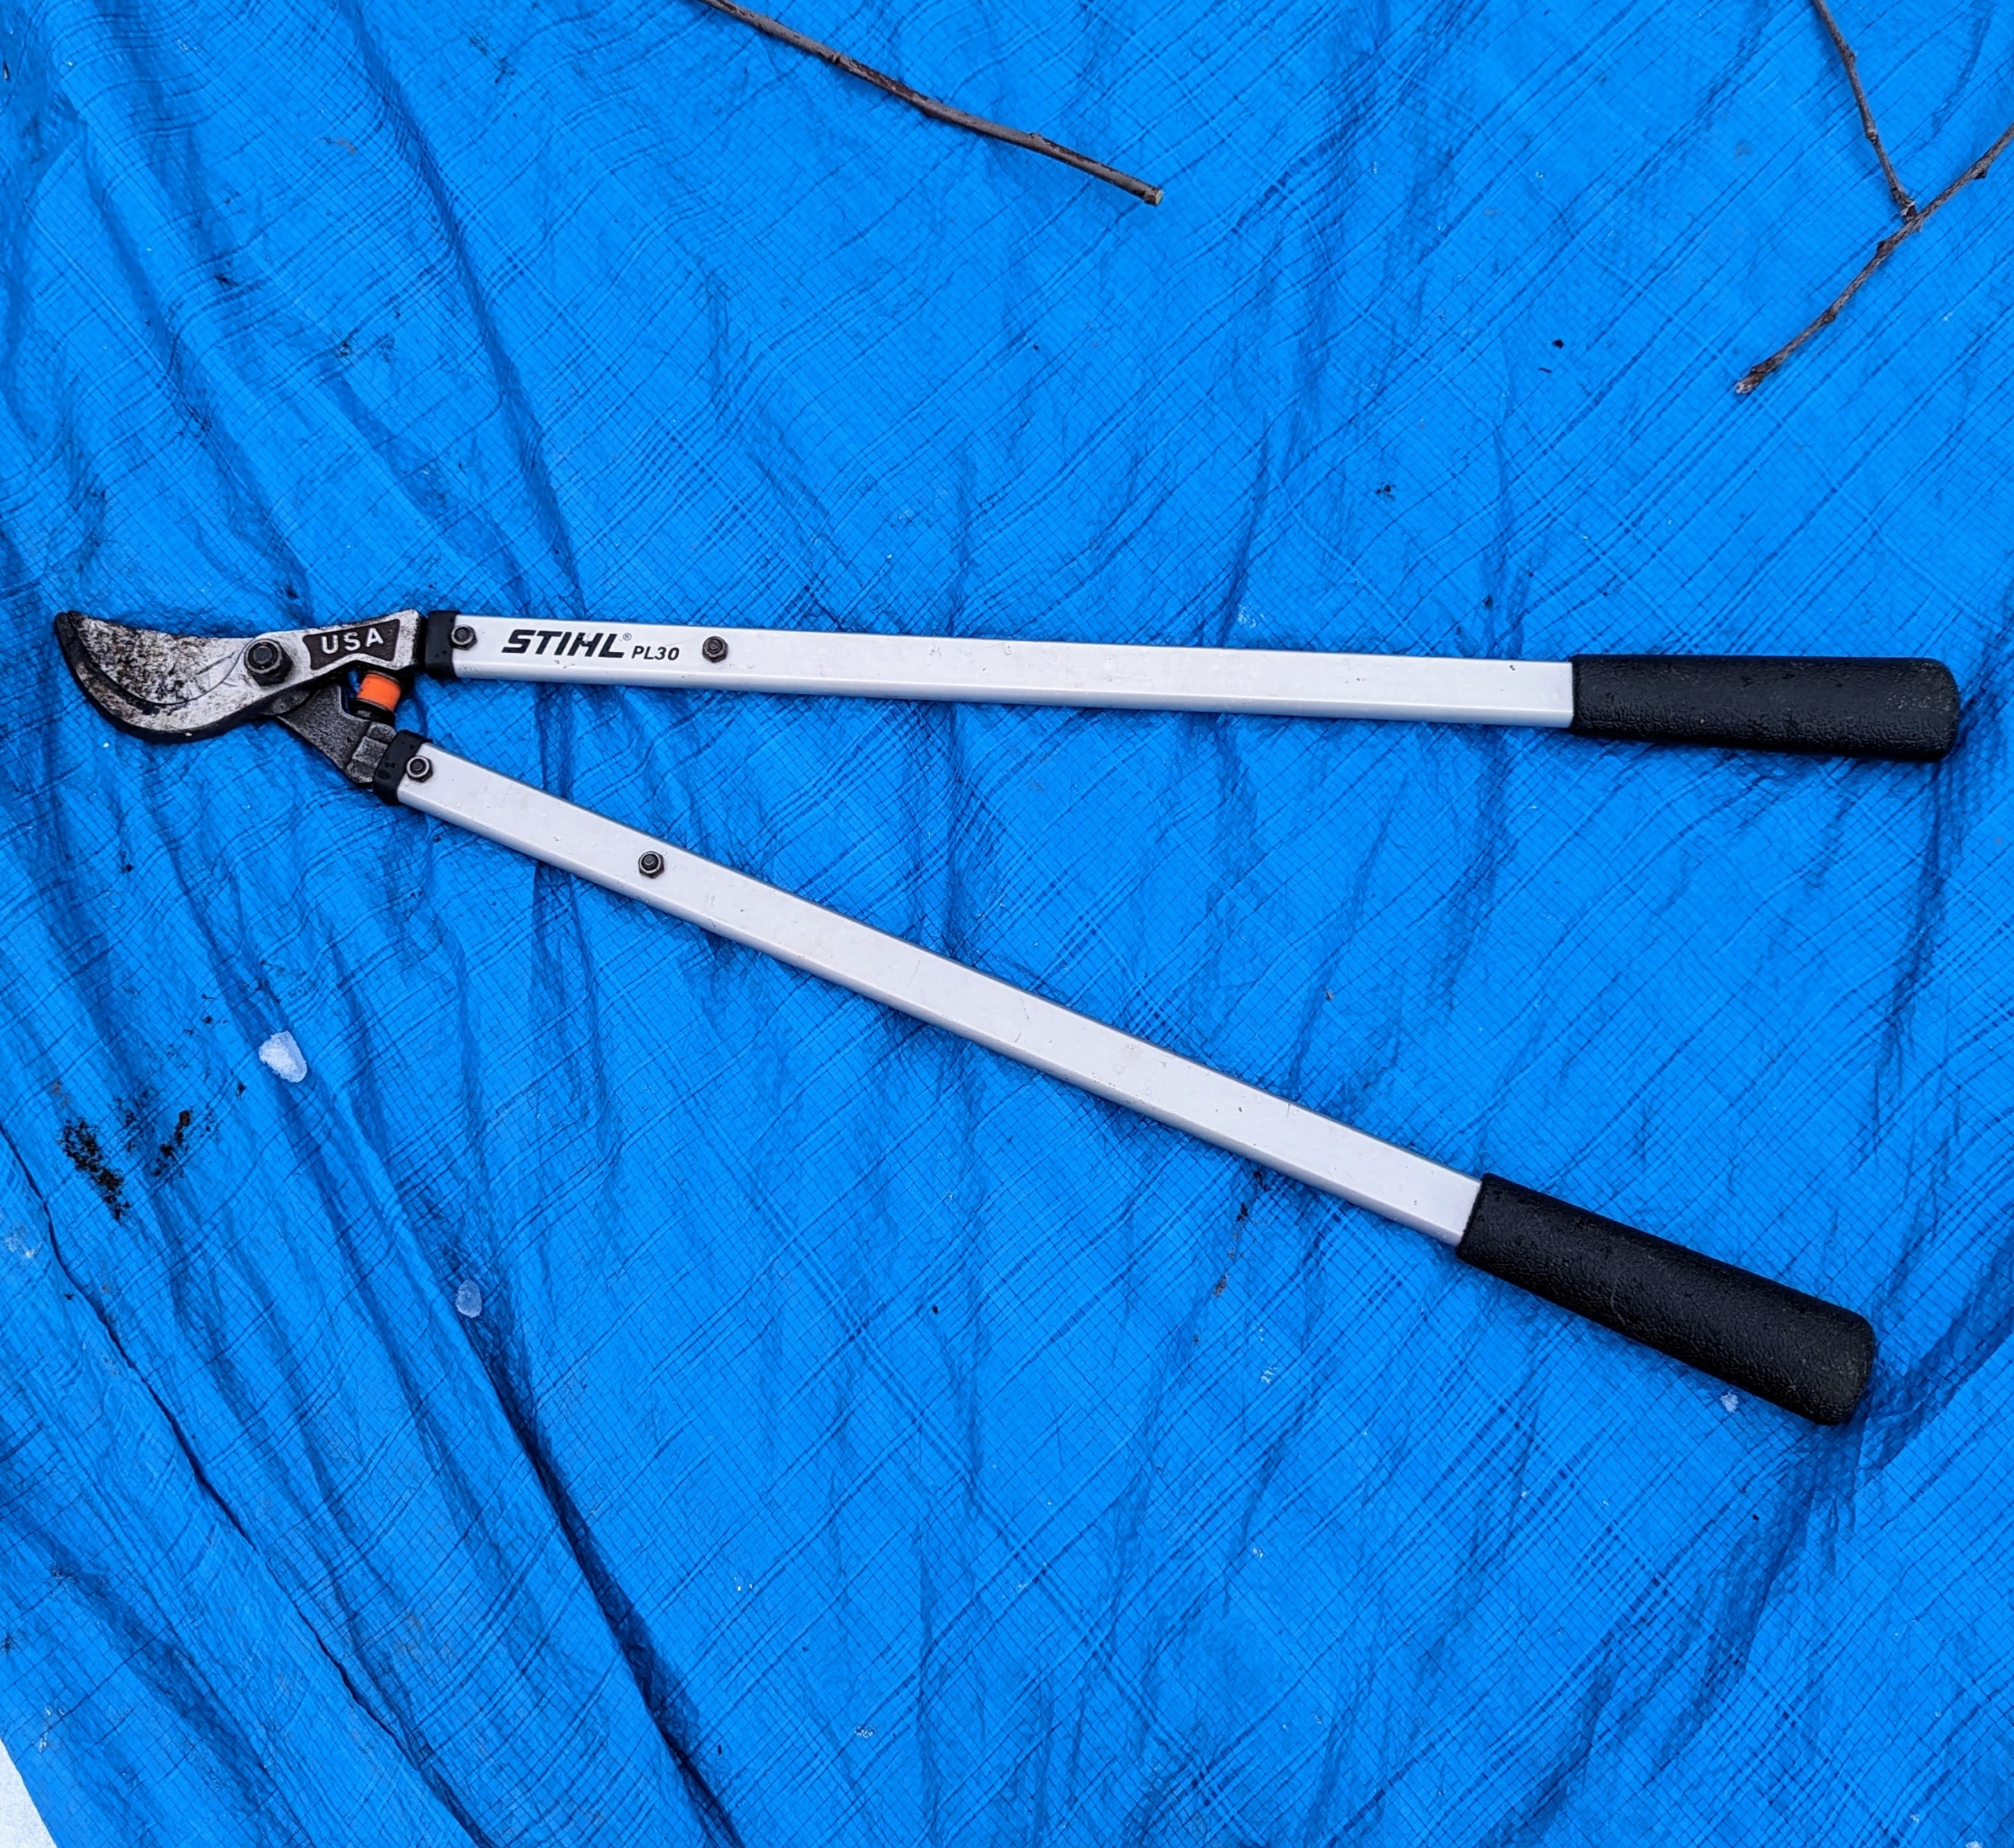
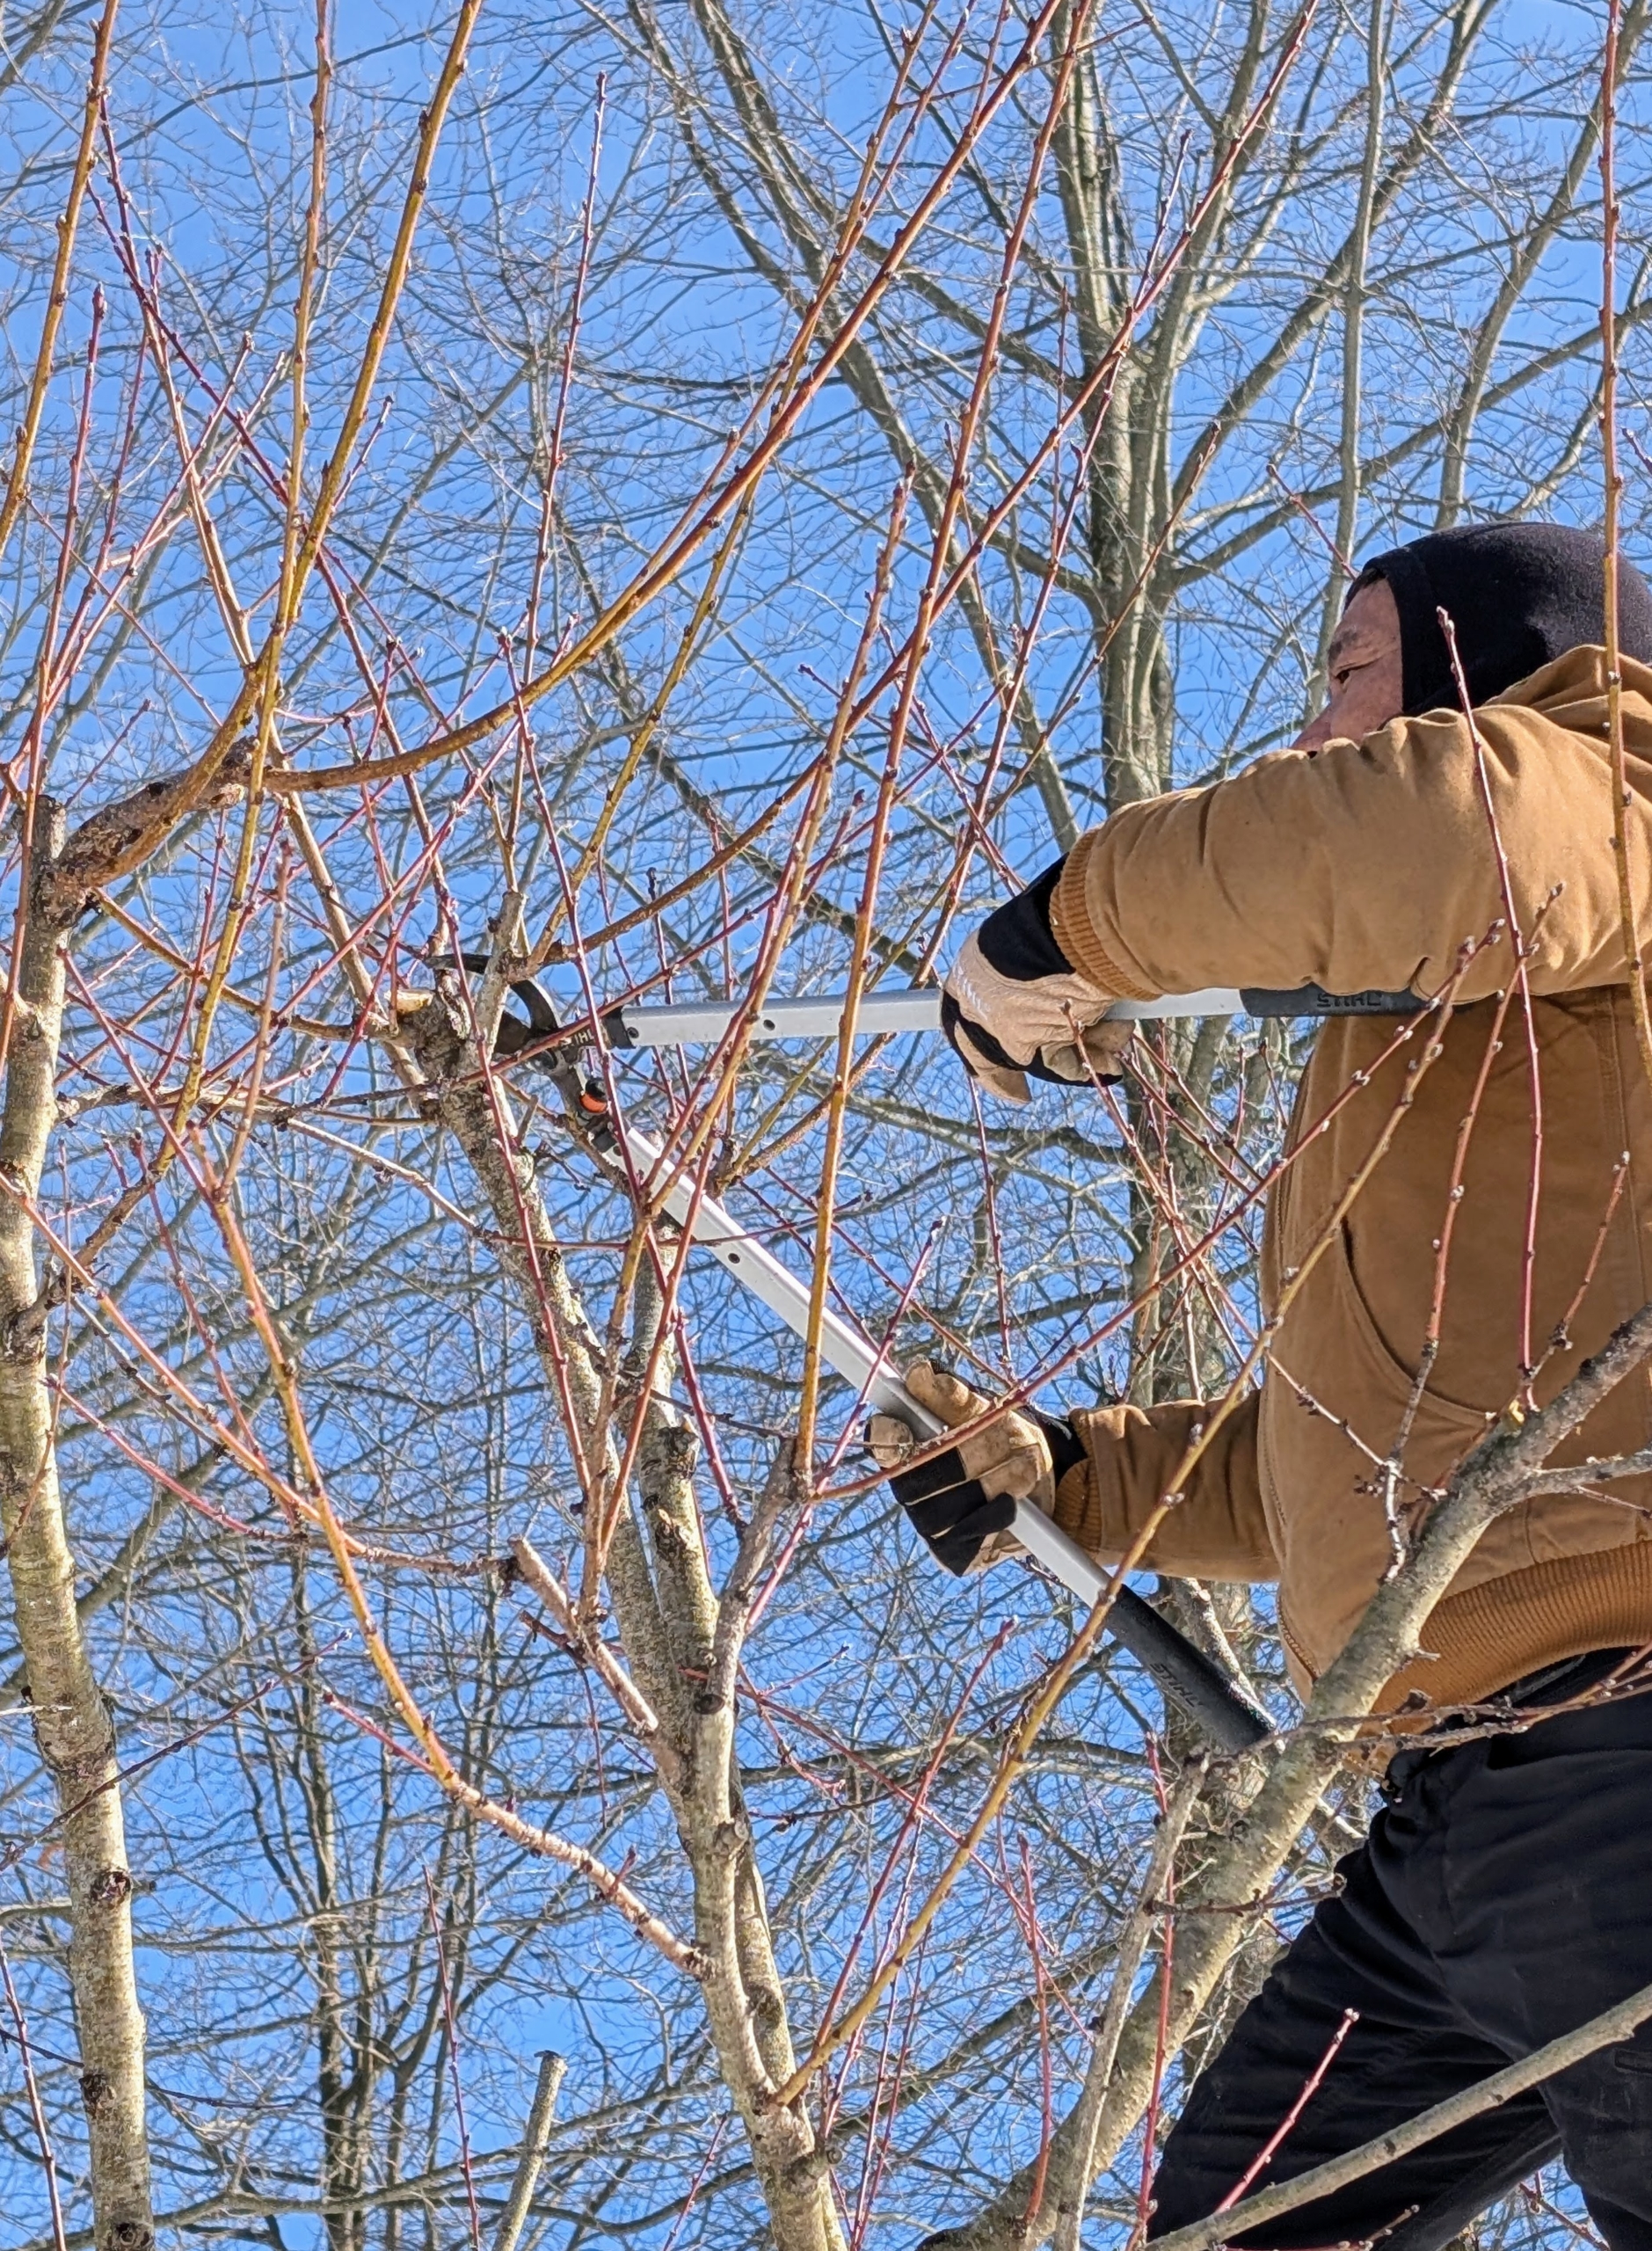
For slightly larger branches up to two-inches in diameter, my crew uses the STIHL bypass loppers.
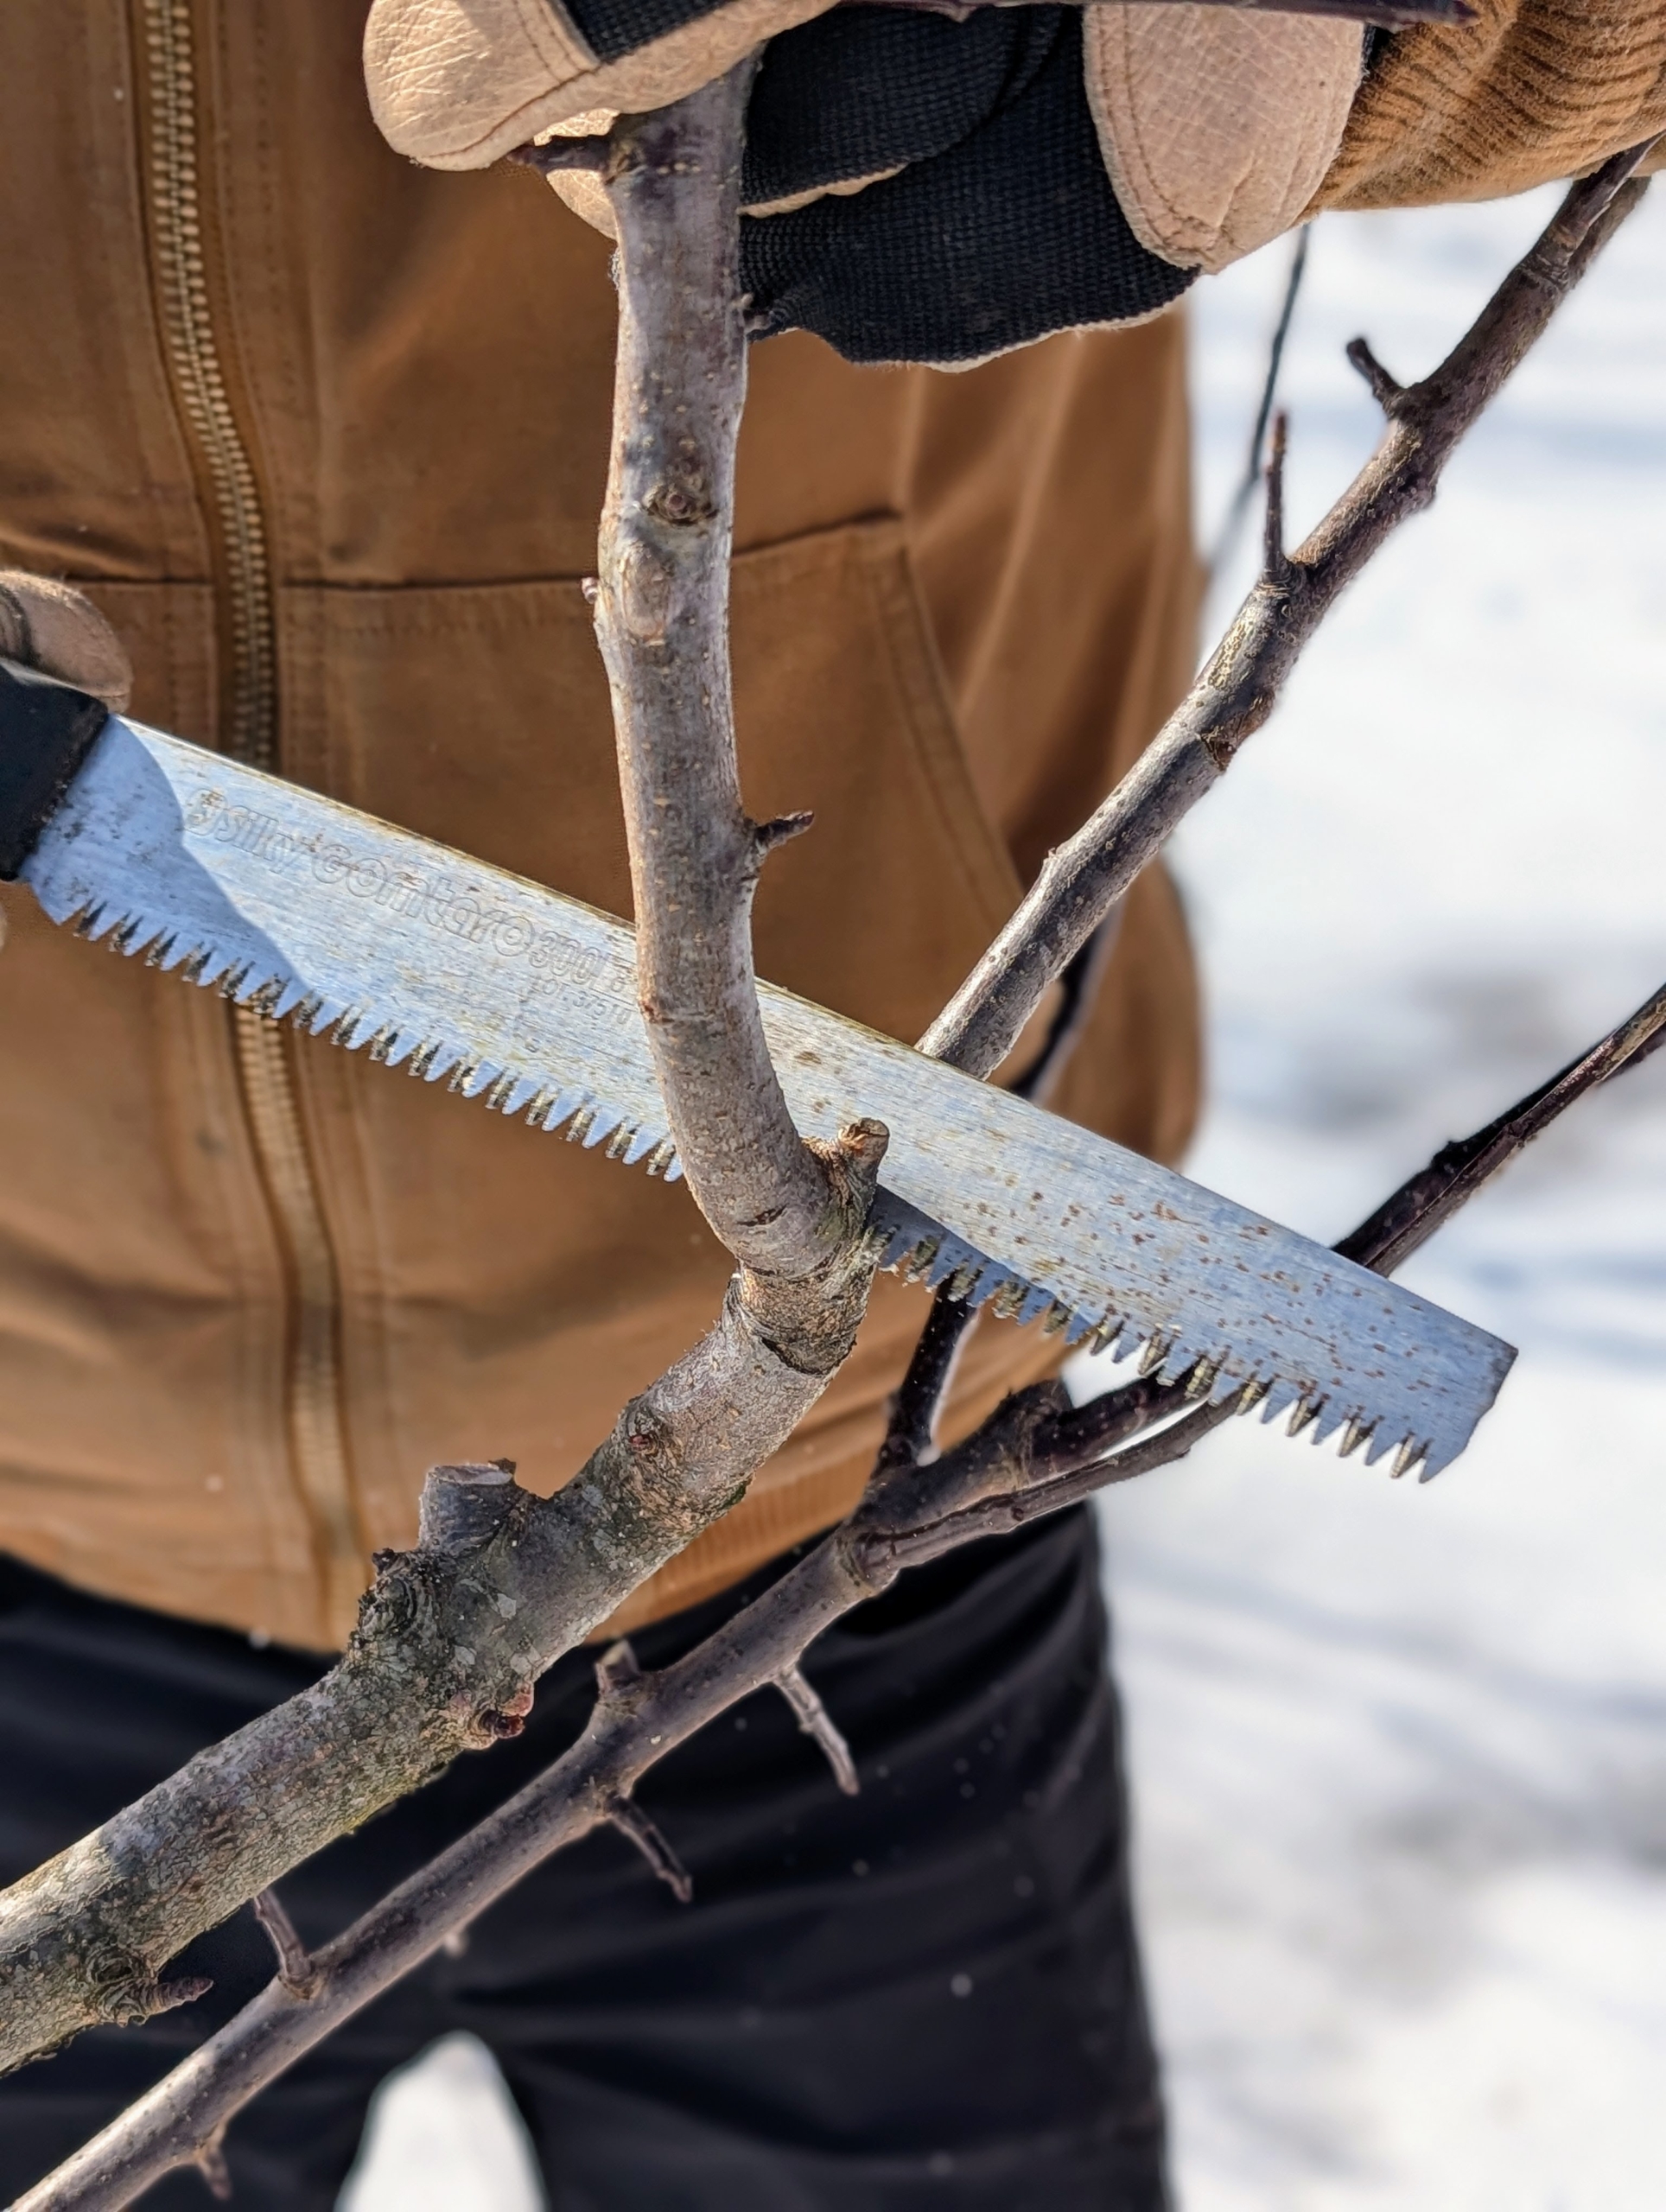
And a pruning saw like this one cuts on both the fore stroke and back stroke and is designed for cutting thicker branches.
I prefer much of the work be done by hand. Cutting by hand gives my trees a more natural appearance and shape.
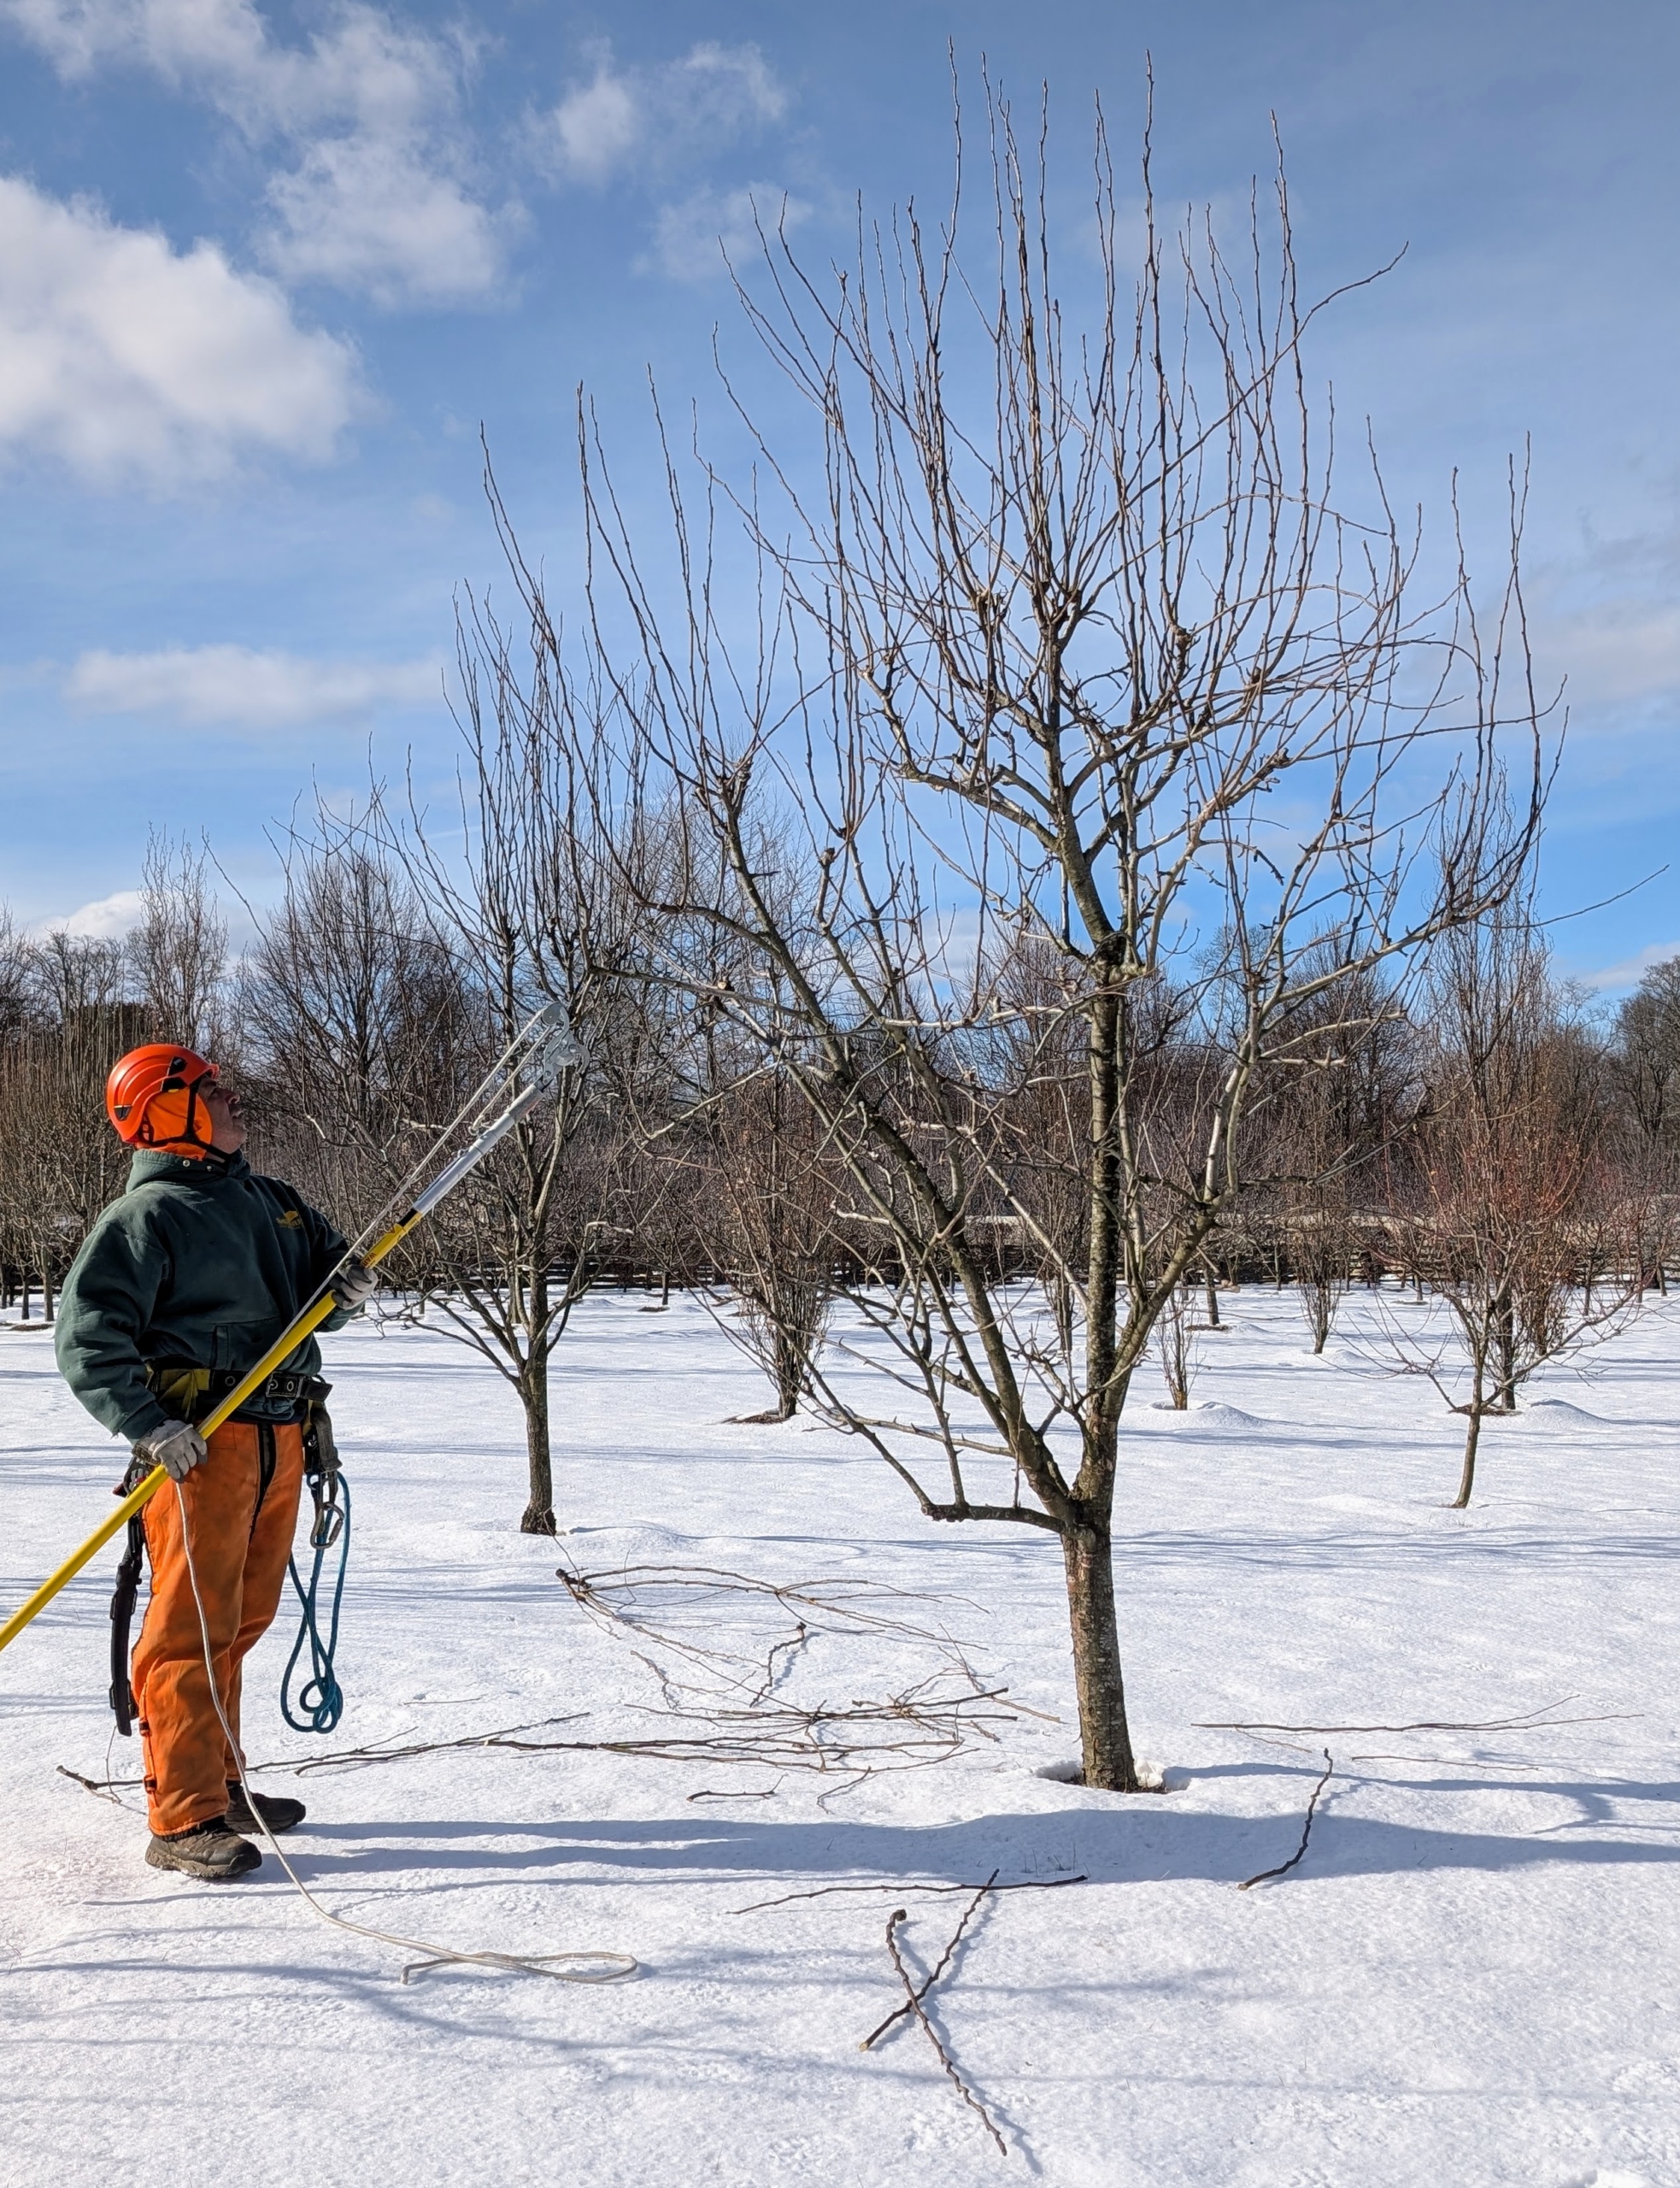
Here, a long handled pole pruner is used to remove harder to reach water sprouts. Water sprouts are thin branches which normally grow straight up from lateral branches and do not bear fruit.
Dead branches, or those without any signs of new growth, are also cut, so the energy is directed to the branches with fruiting buds.
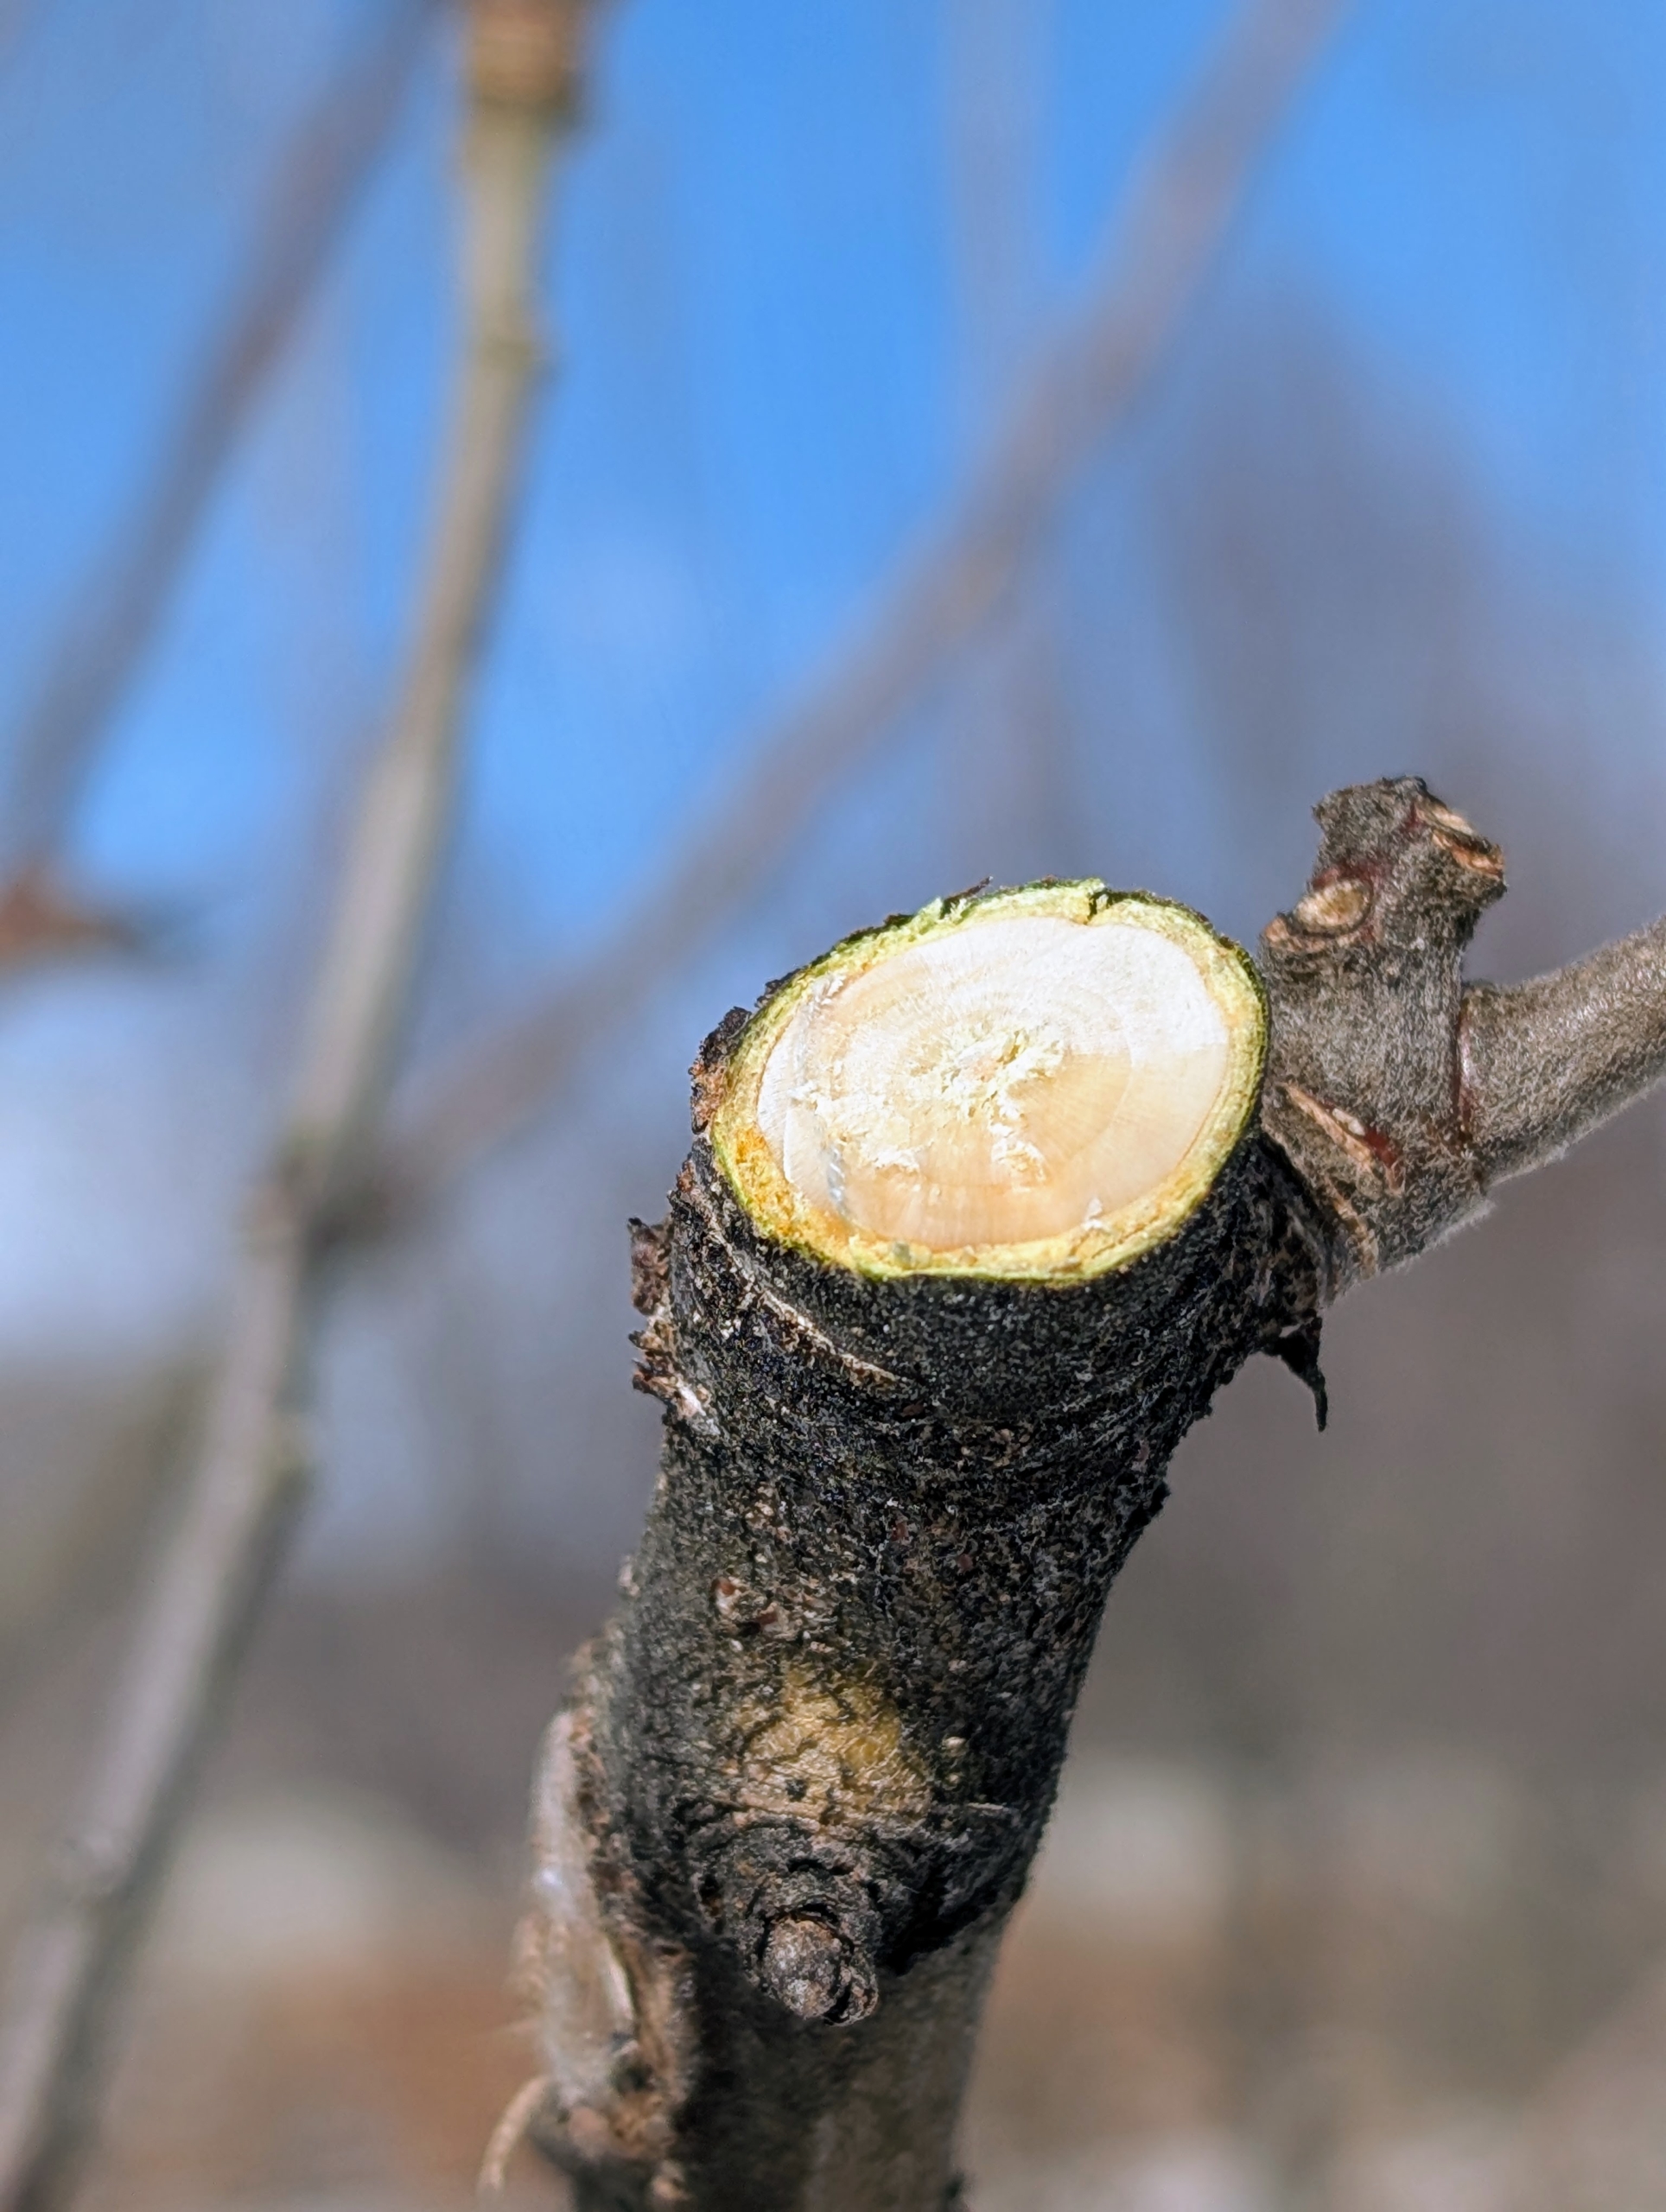
Pruning cuts should be made fairly flush to the branch from which it grew. The idea is to leave very slight stubs close to the collar. In time, this cut will heal over properly.
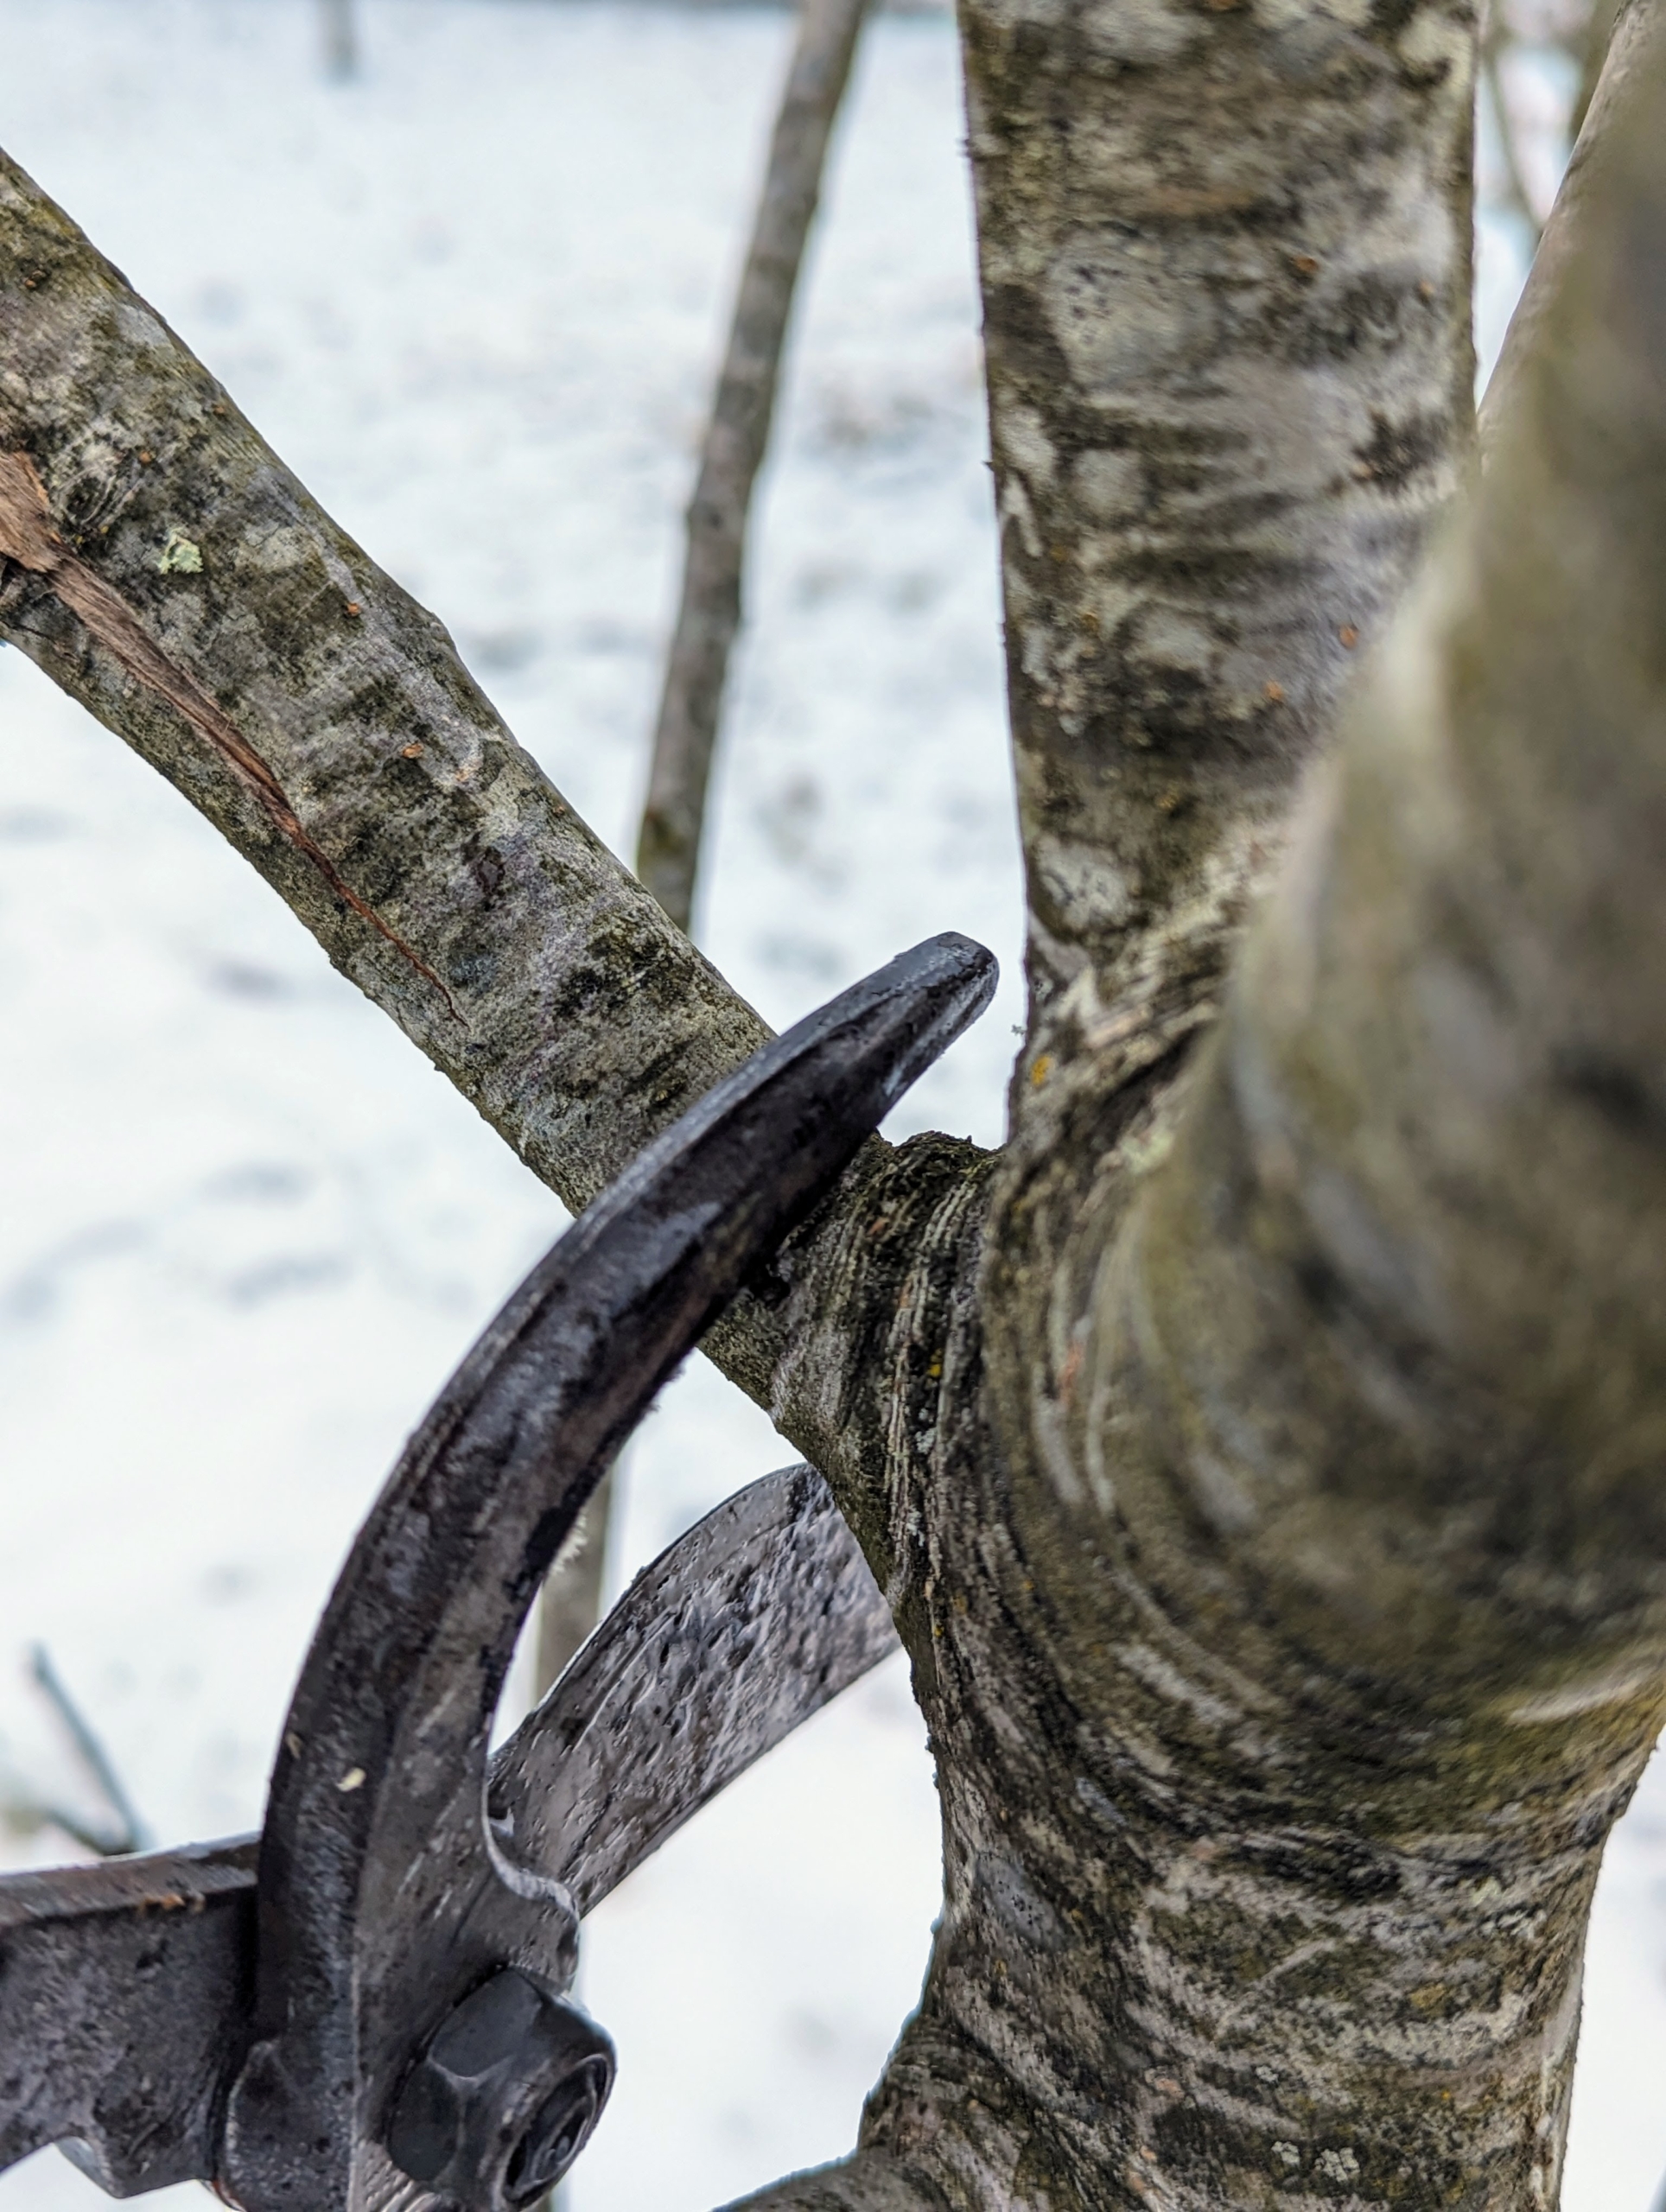
Phurba cuts branches that are rubbing or crisscrossing each other, preventing any healthy new growth. Basically, the goal is to create a tree with well spaced lateral branches. Any branches which interfere with the tree’s shape or create a dense framework should be removed.
And every so often he steps back to assess his work. A well pruned tree should have a balanced shape. I instruct the crew to cut about a third of the new growth.
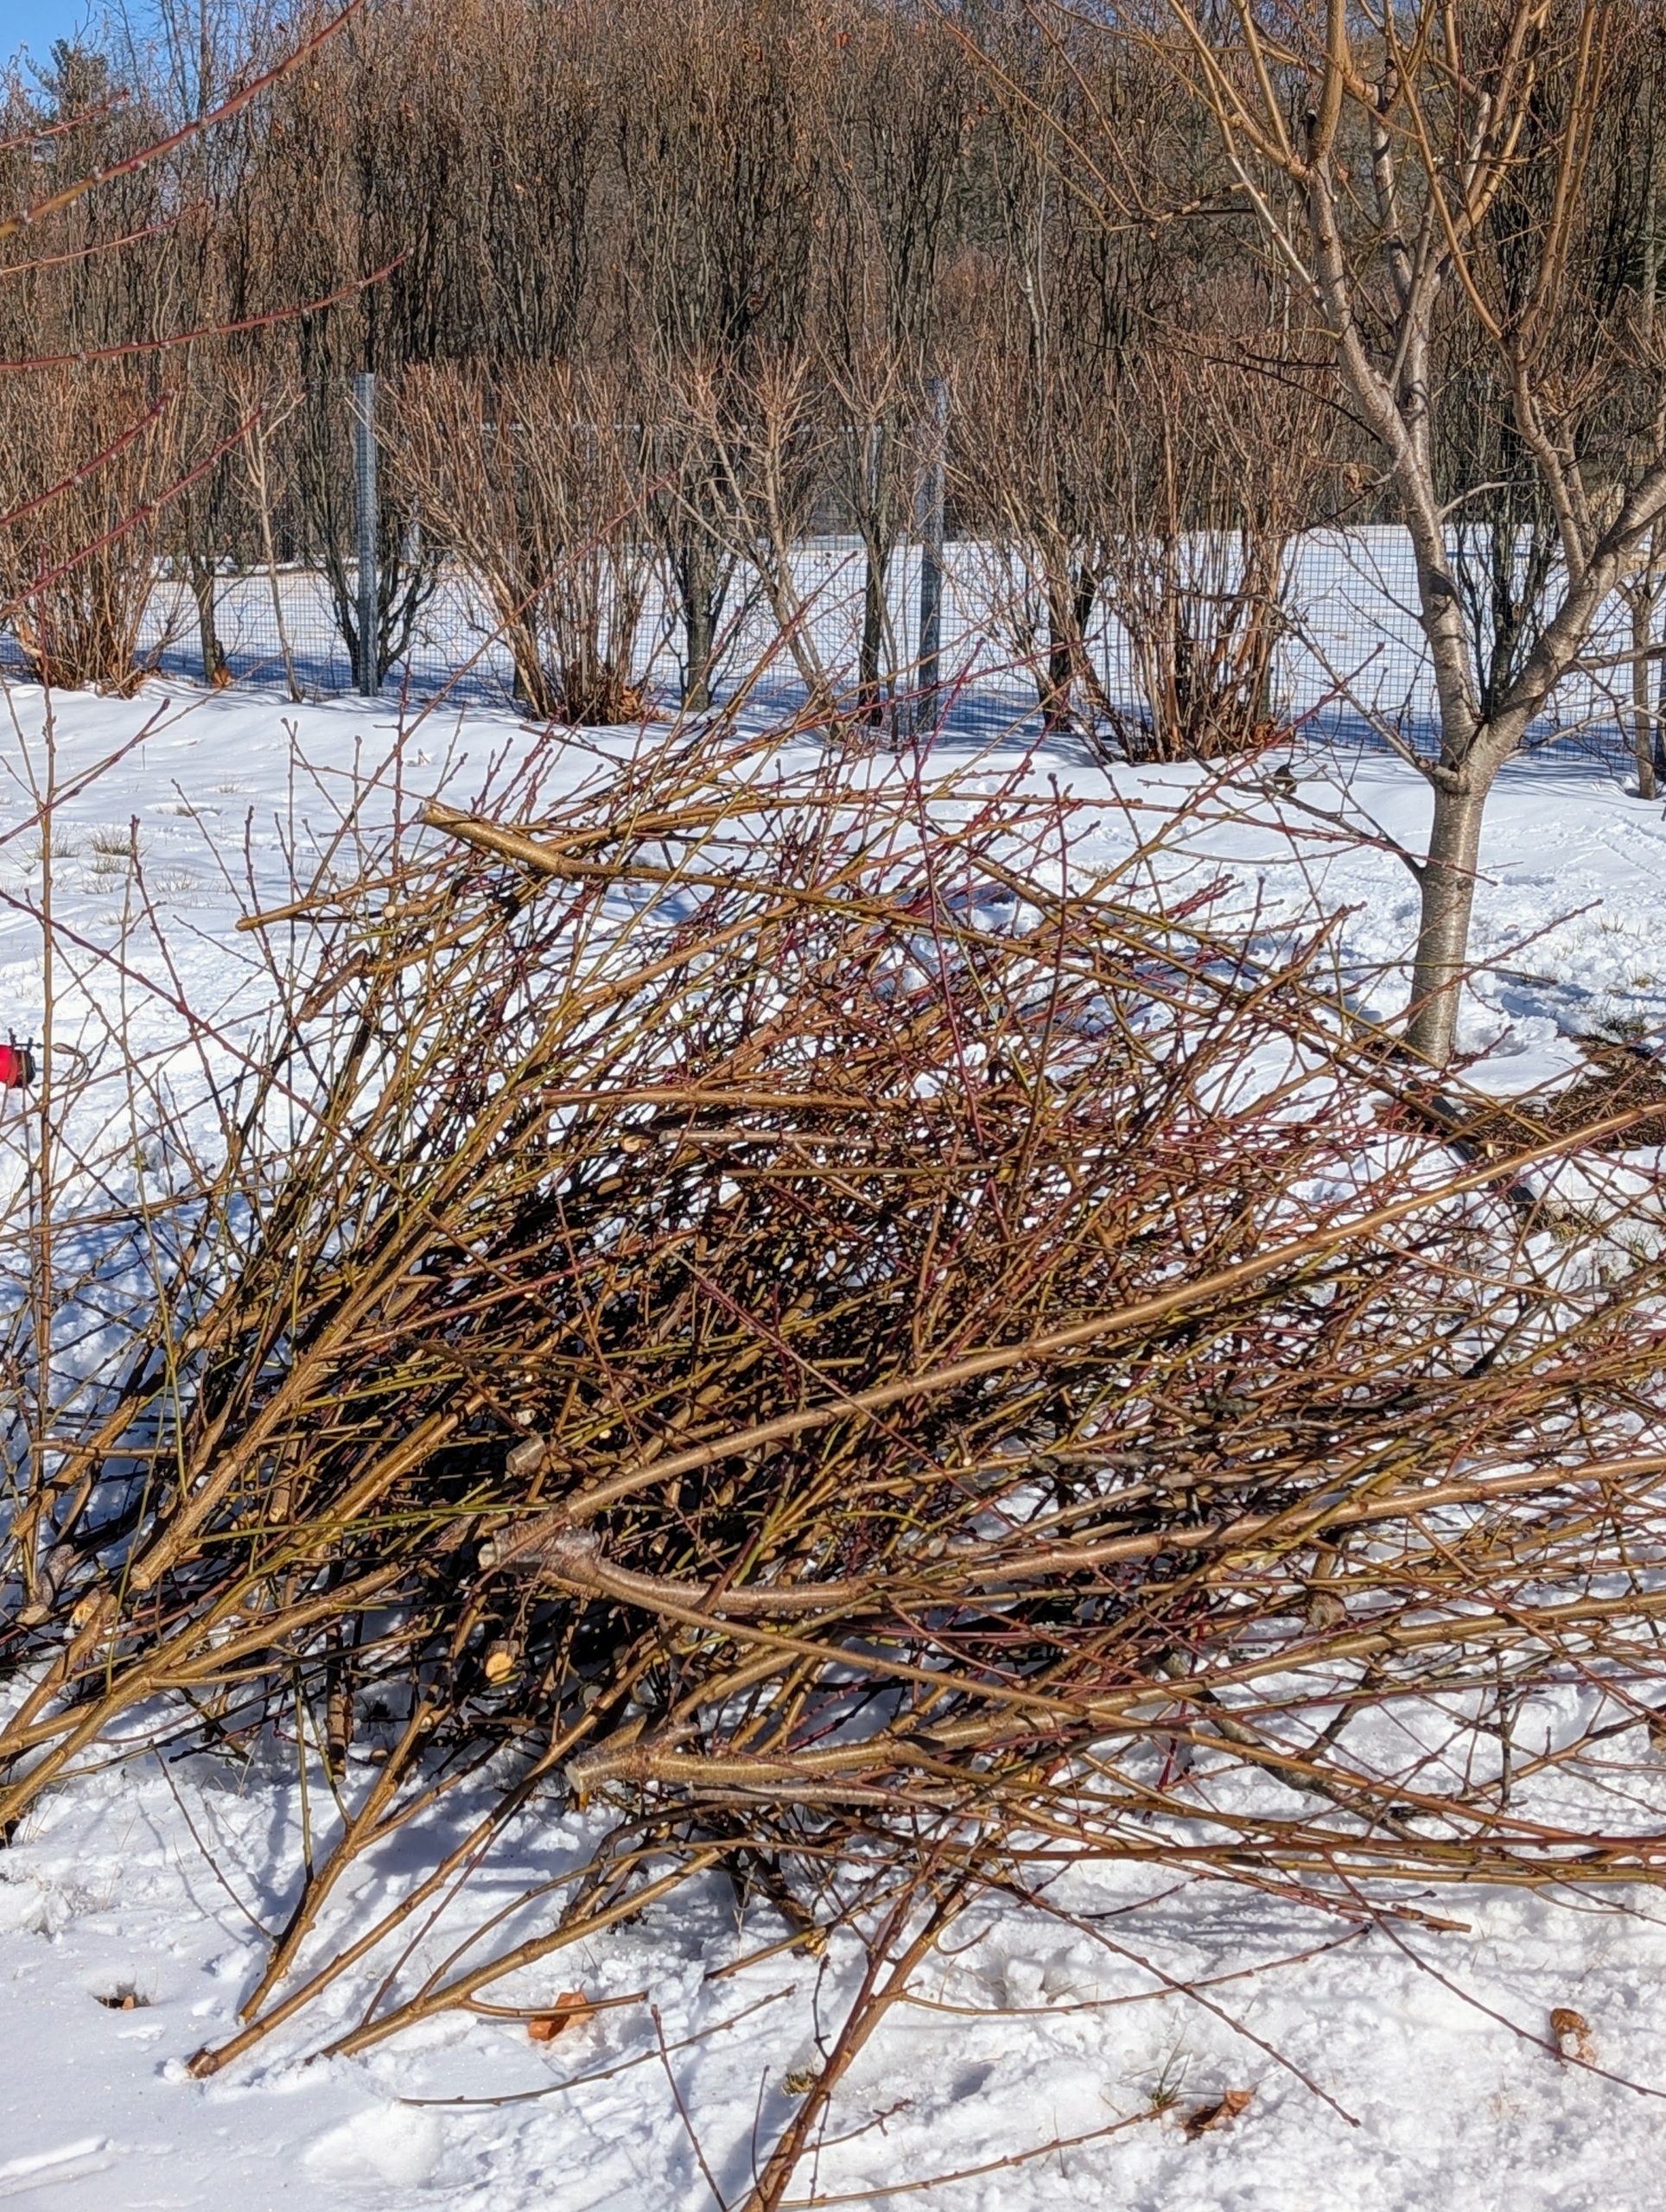
After the branches are cut, they are gathered, neatly piled, and then either saved for kindling or processed through a wood chipper to make mulch.
Pasang removes crowded branches to help let in light and promote good air circulation. Pasang is also mindful of the leader. A leader is the dominant trunk of a tree. He defines which one it is and creates a good shape around it.
It looks like a lot of branches are removed, but good pruning actually improves productivity and promotes more fruiting.
This tree looks great after pruning. Its size is well maintained and it has a good and balanced shape.
I am looking forward to many lustrous green trees heavy with fruit come summer.