This time of year is always fun at my farm because there’s so much to harvest in the vegetable garden.
It's important to check the garden frequently - one never knows what will be ready for picking. Our most recent harvest included carrots, peppers, lettuce, beans, cabbage, and trays of delicious, juicy, ripe tomatoes. Tomatoes have a long growing season - 60 days to more than 100 days to harvest. And finally they're ready!
Enjoy these photos.
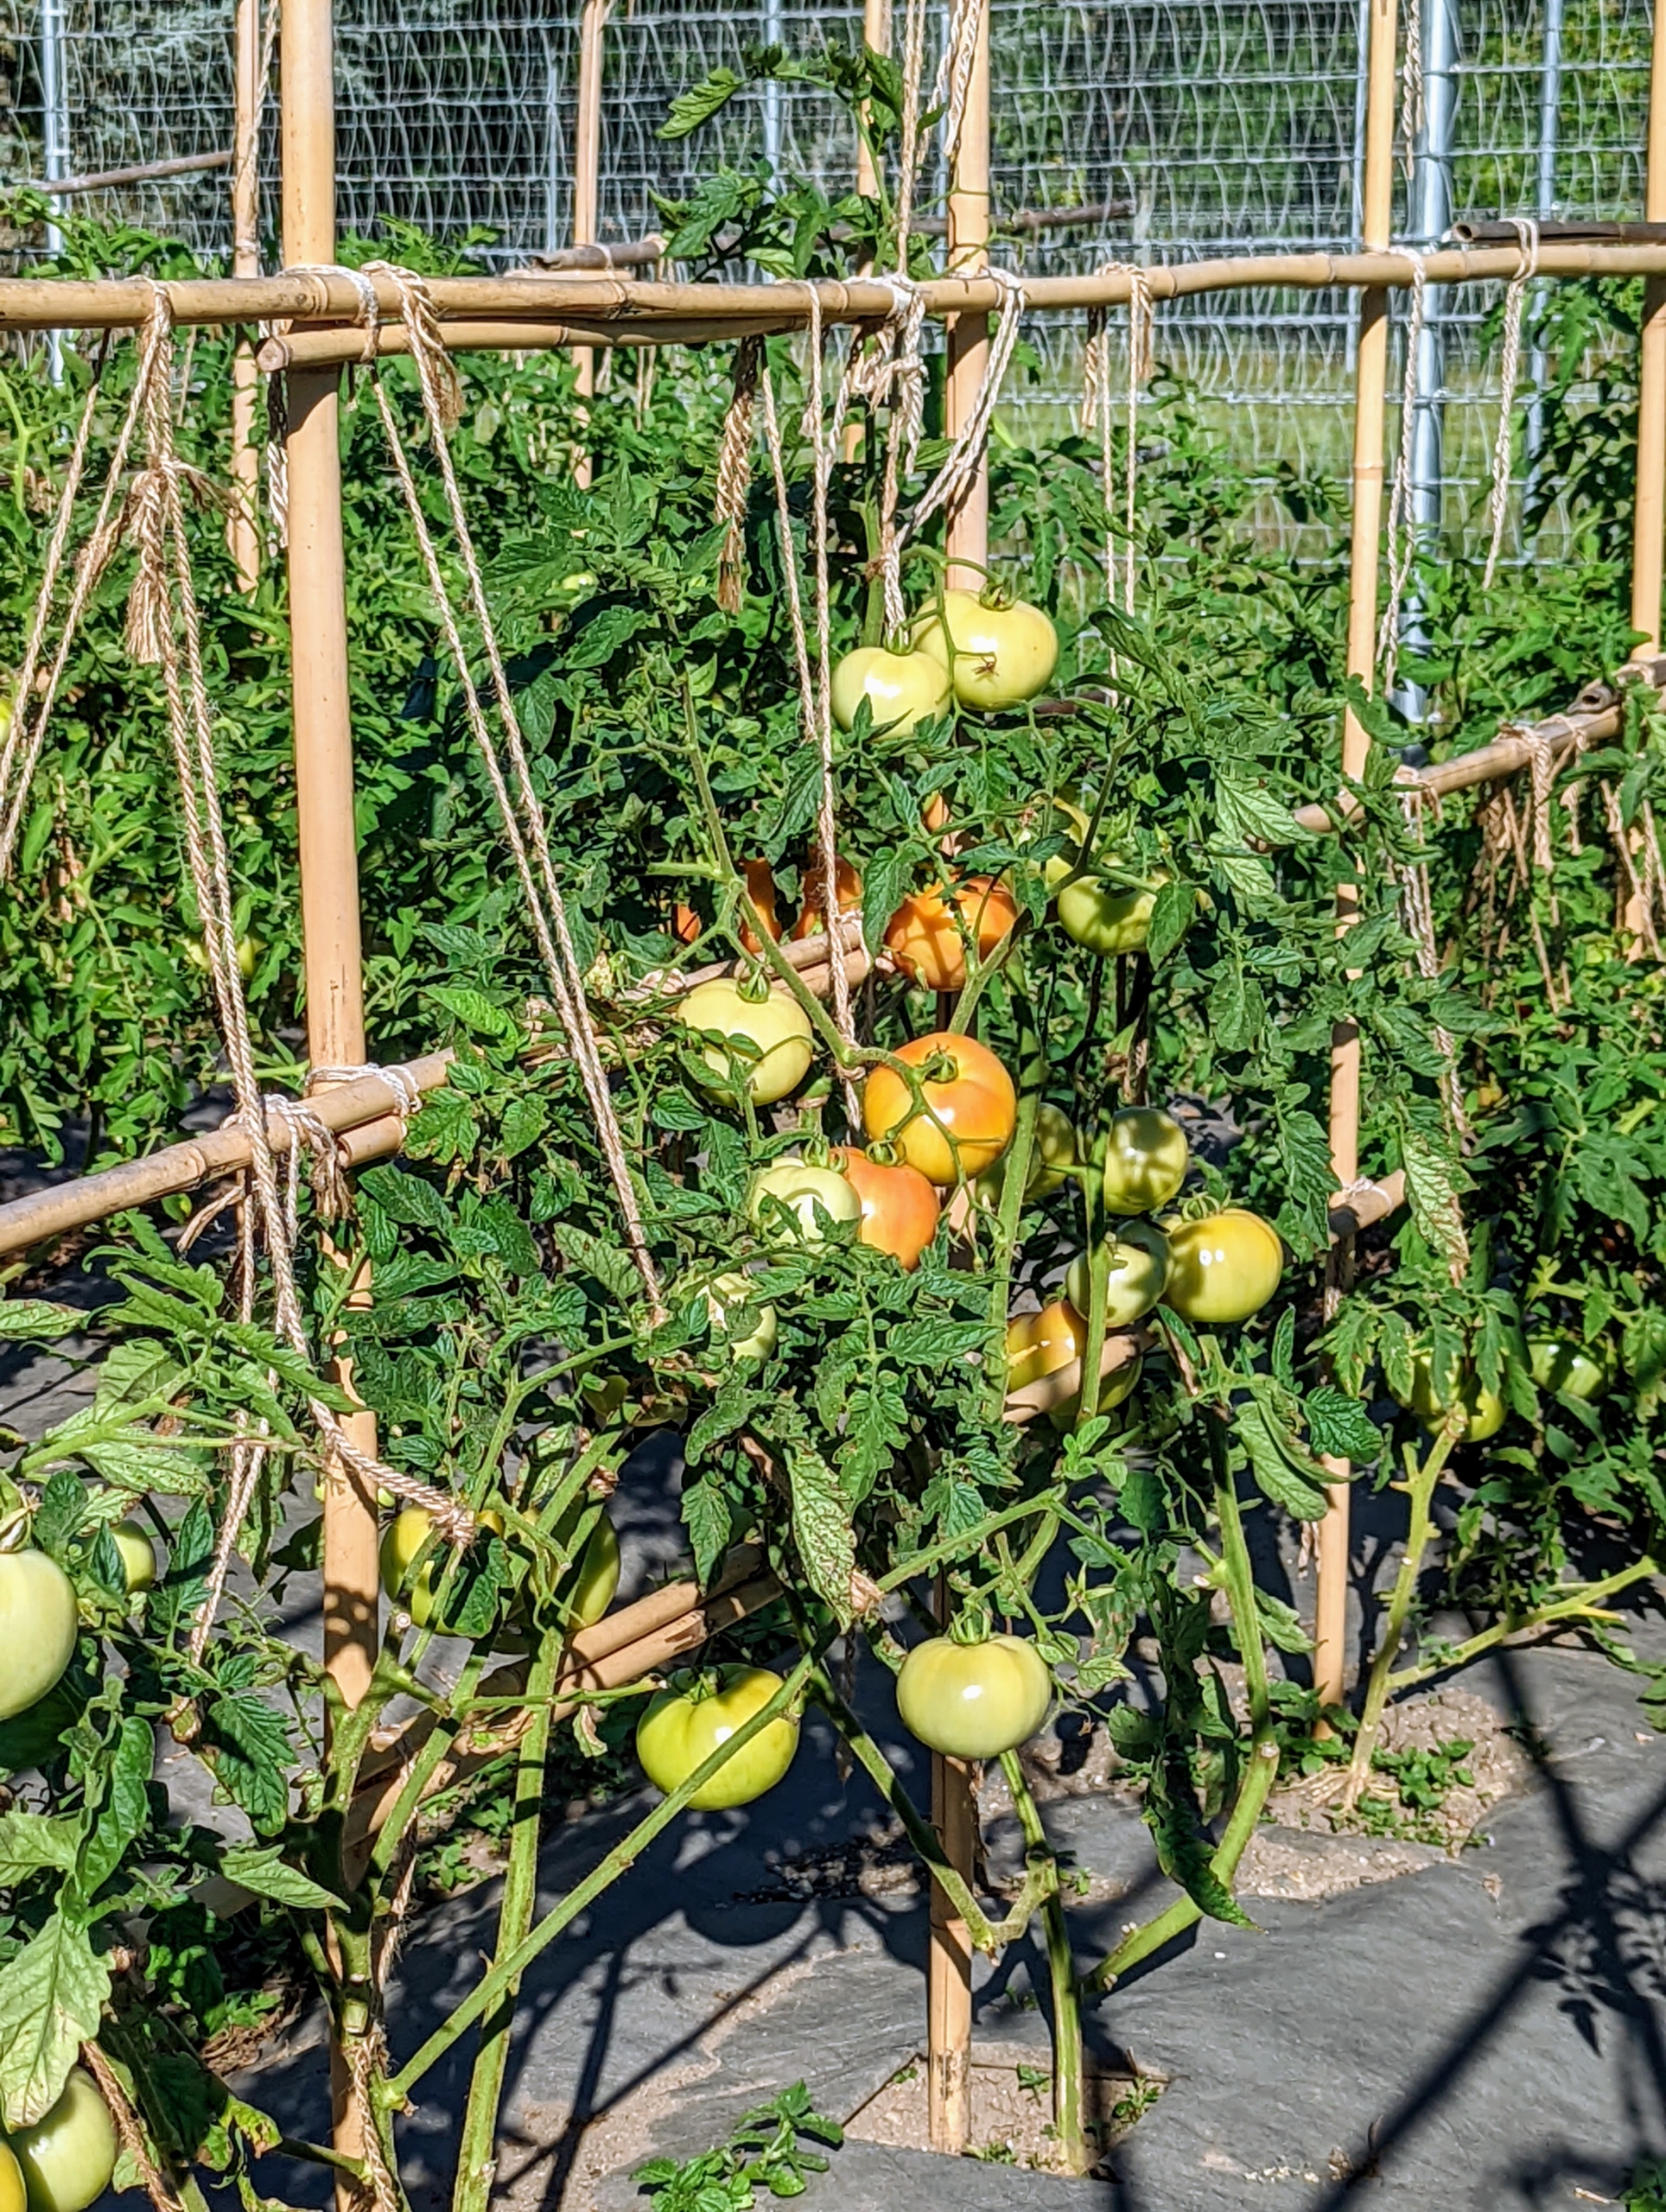
At long last, our tomatoes are ripe for picking. We grow about 100 tomato plants every year.
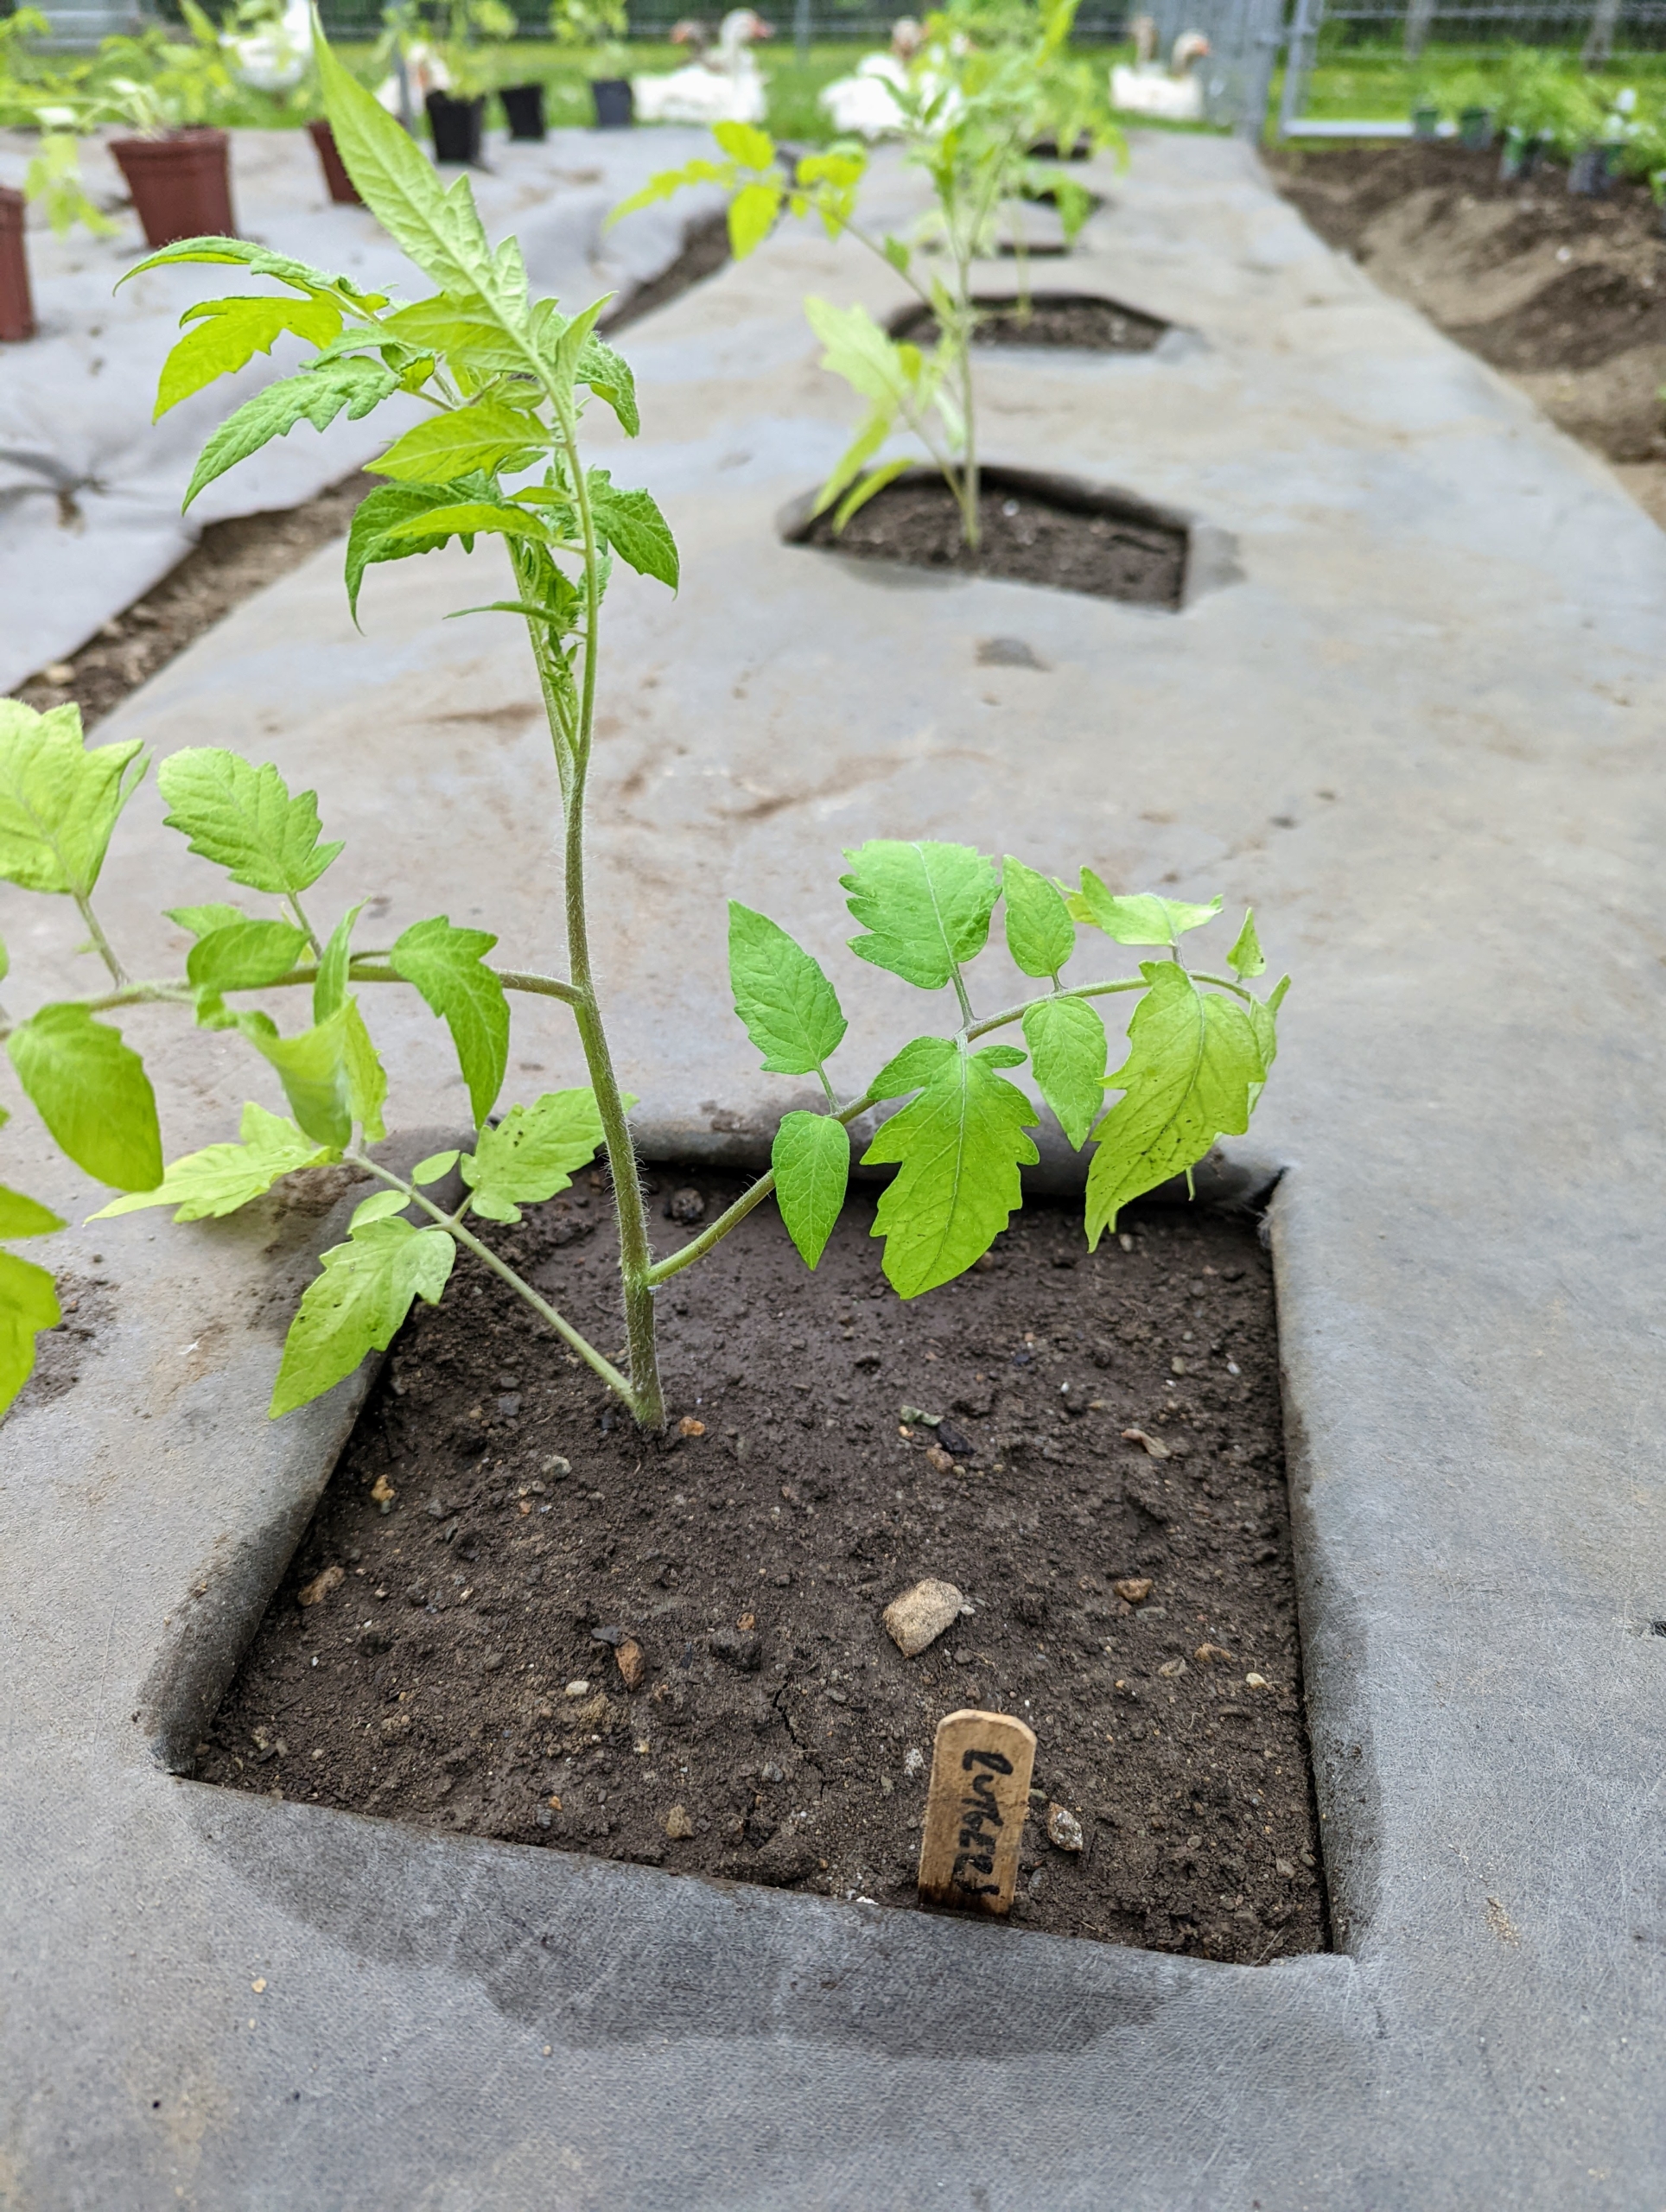
We start preparing the garden for planting in late May. For tomatoes, we first roll out thick weed cloth over the designated raised beds. We do this to make them neat, tidy, and free from weeds. Tomatoes should be planted in an area with full sun and well-drained soil.
All our tomato plants are started from seed in my greenhouse and then transplanted into the ground when they are several inches to a foot tall.
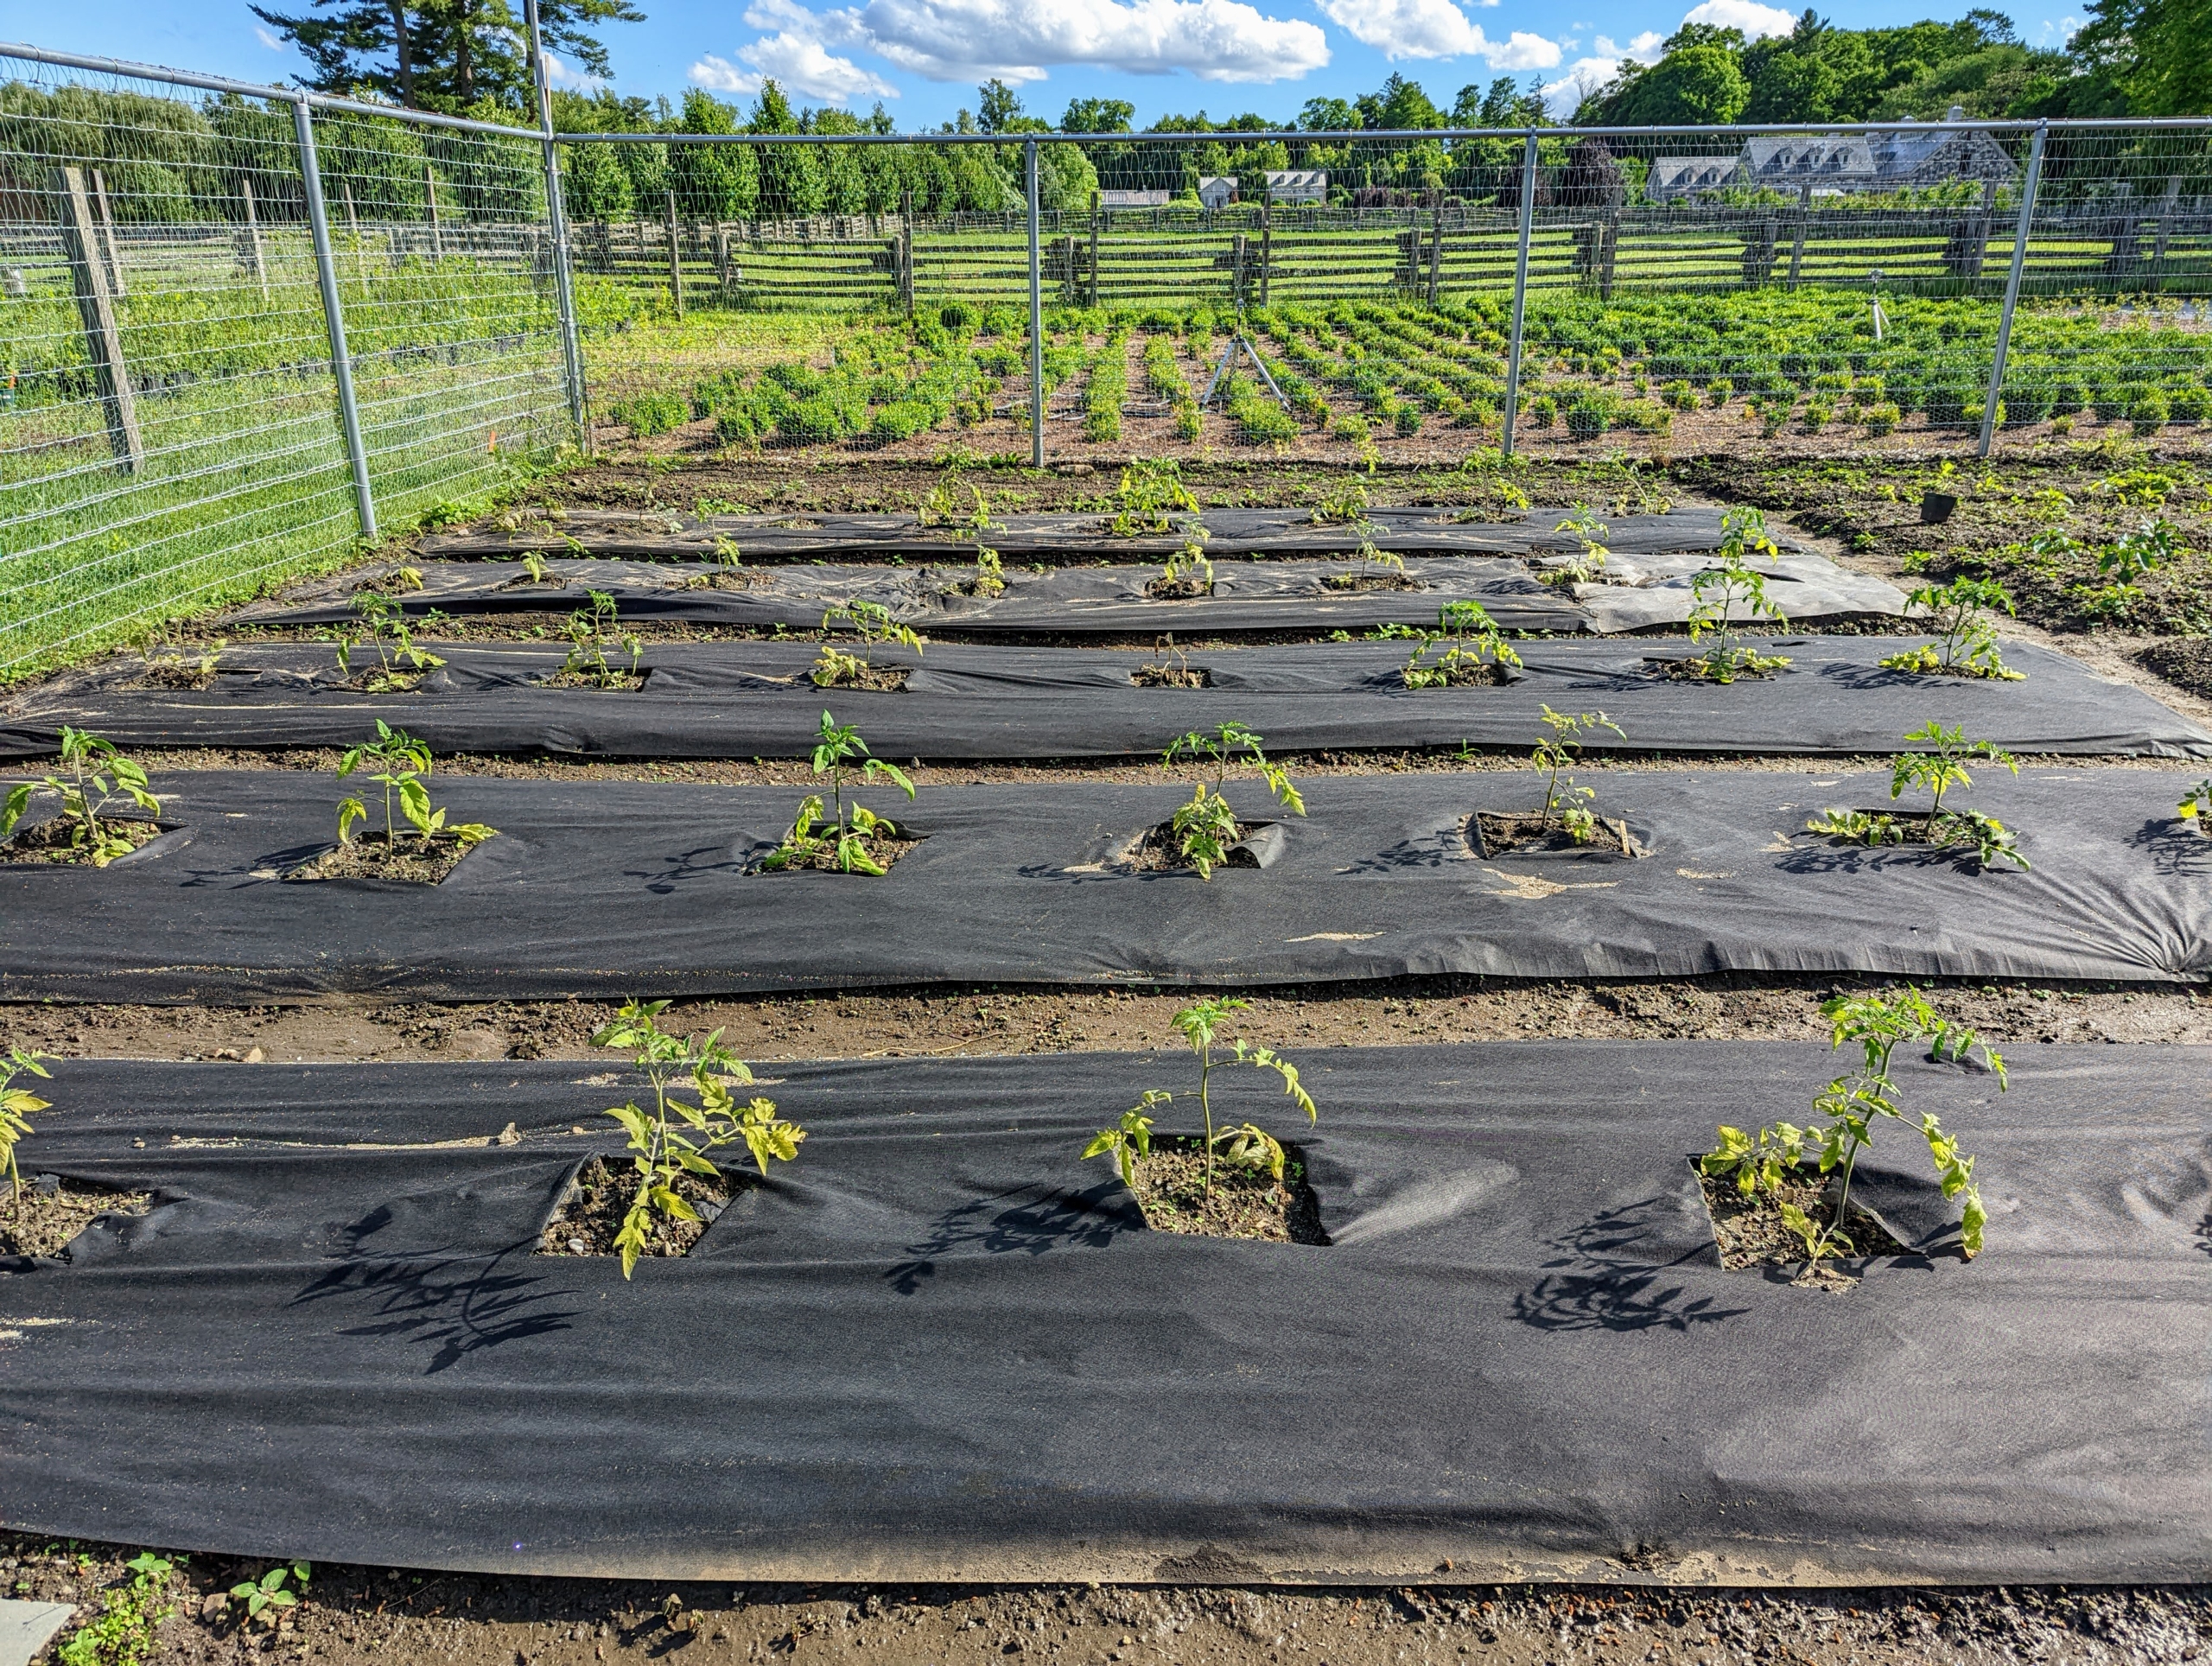
By the end of May, all the tomatoes are planted. Most tomato plant varieties need about 100-days to mature, but there are some that only need 50-60 days. And it’s a good idea to always practice crop rotation – planting vegetables in a different location each growing season to help prevent soil diseases, insect pests, weeds, and to reduce reliance on one set of nutrients.
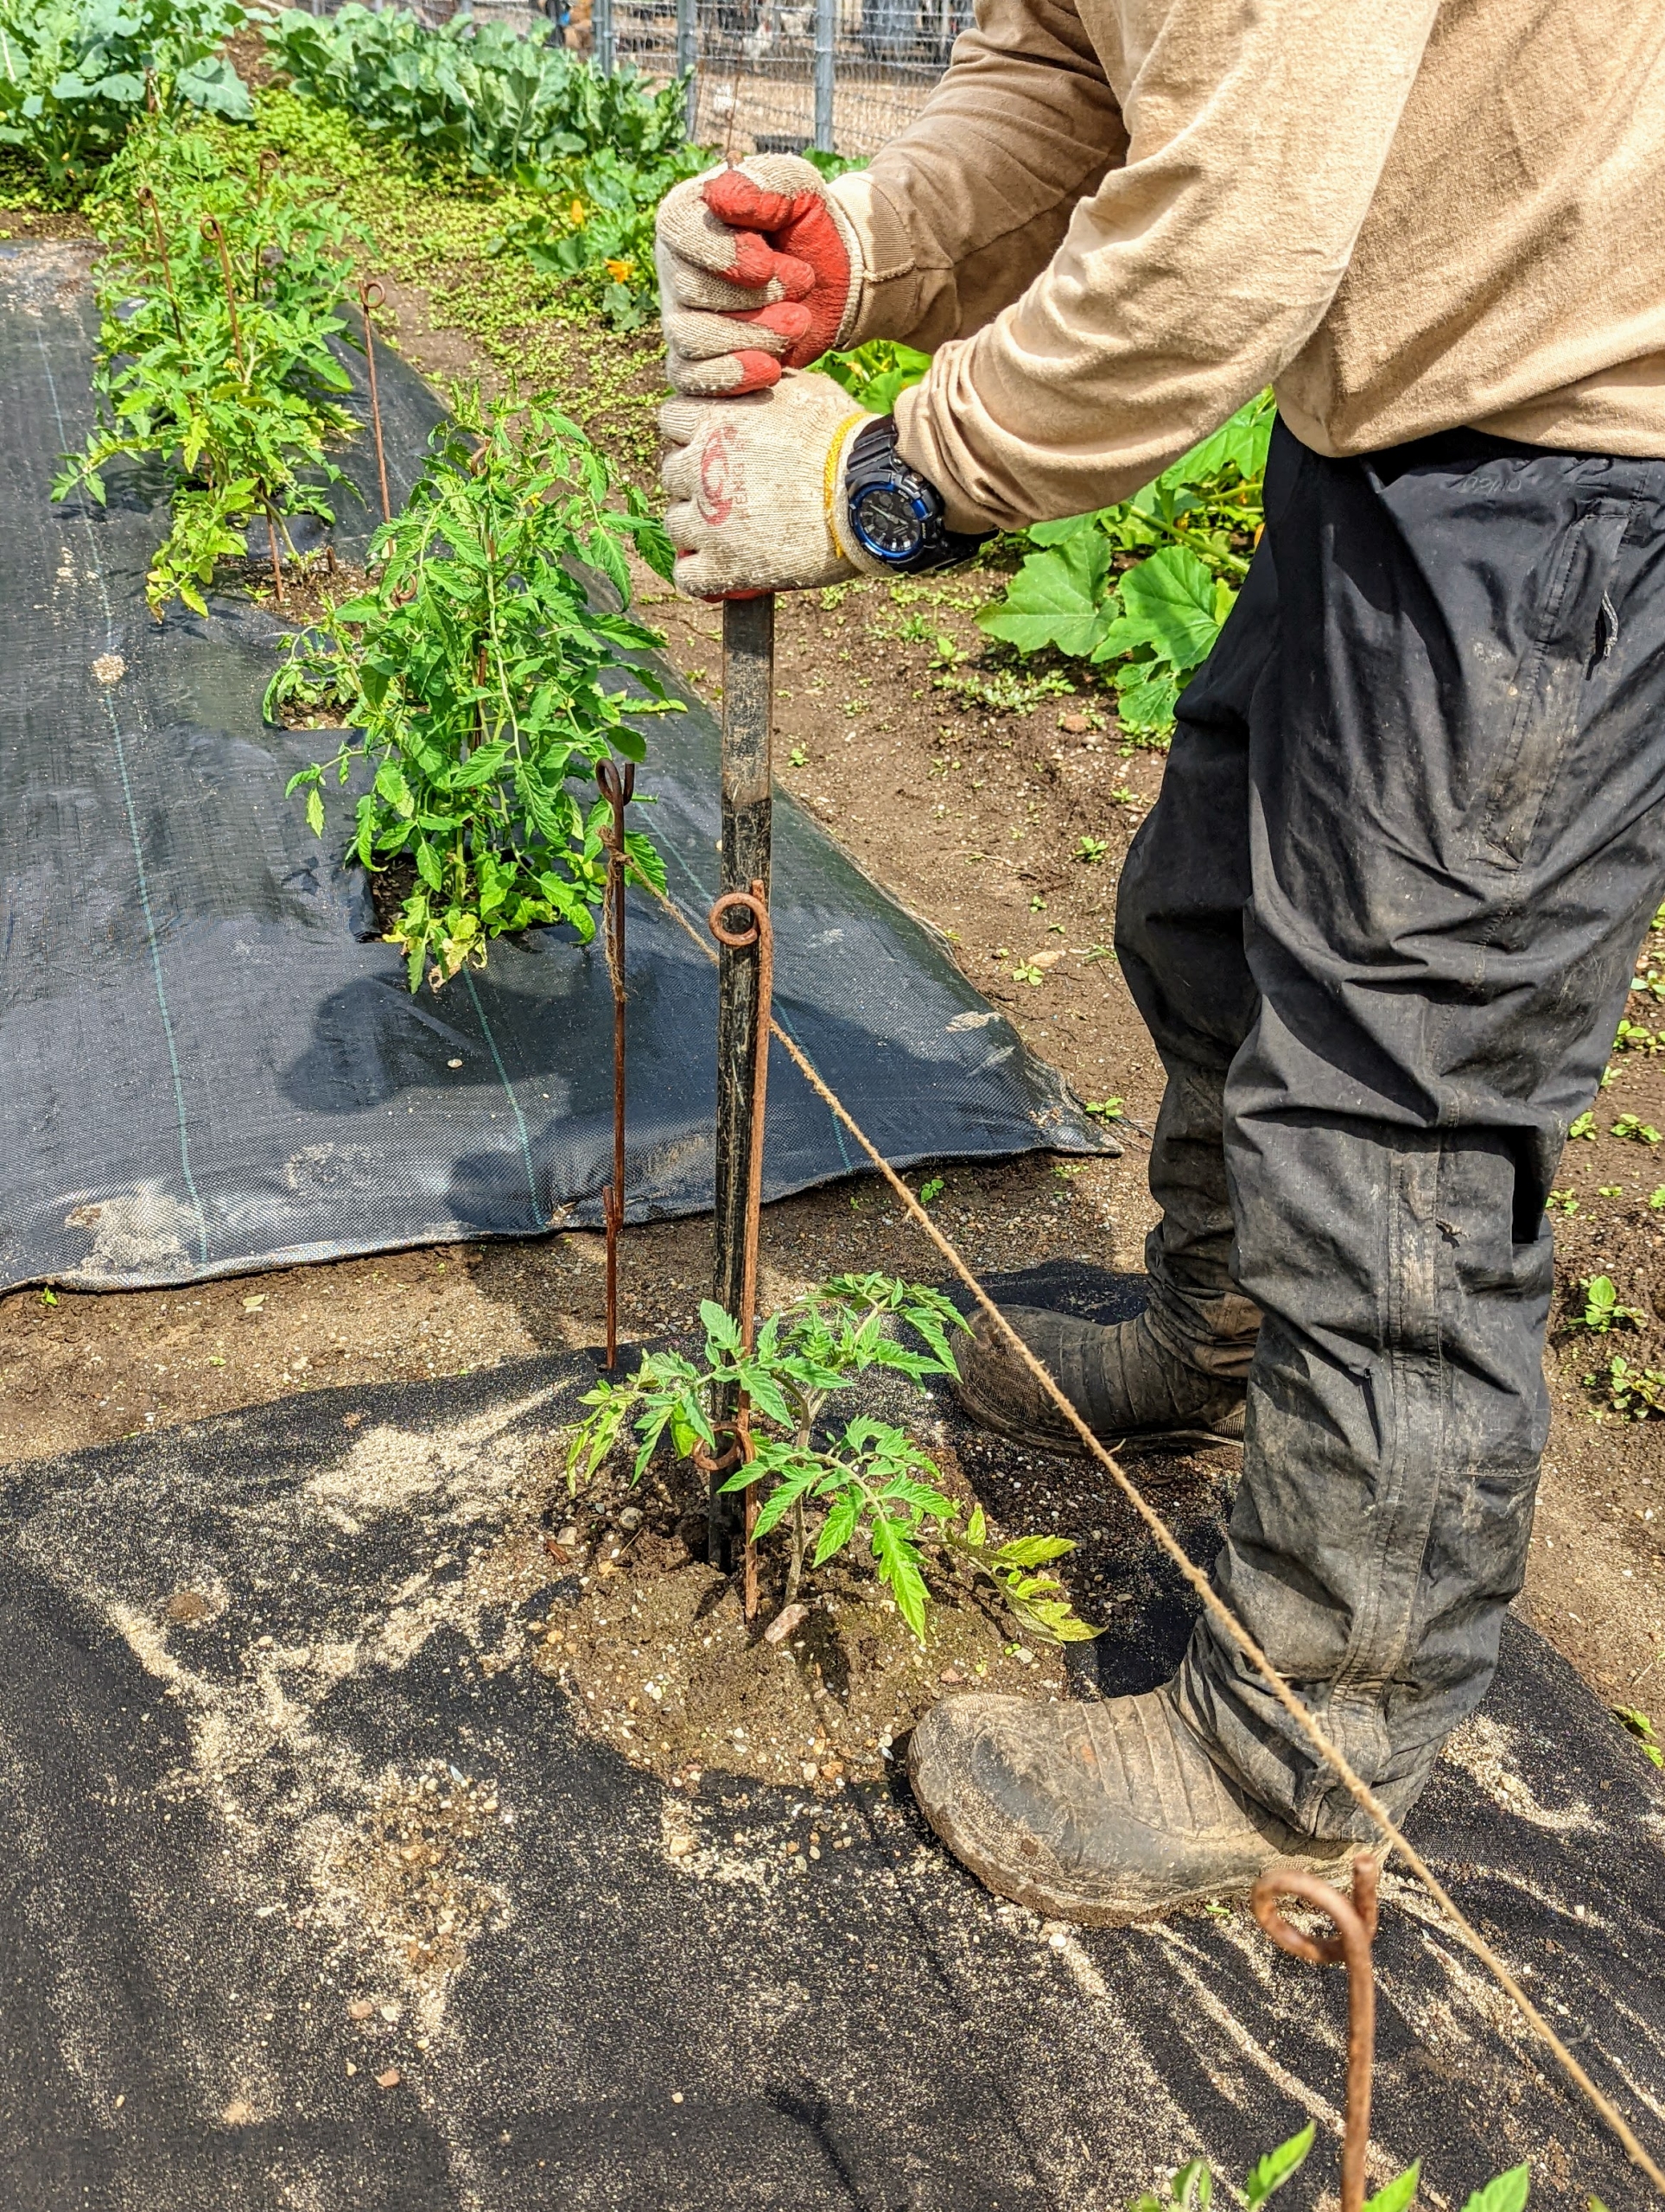
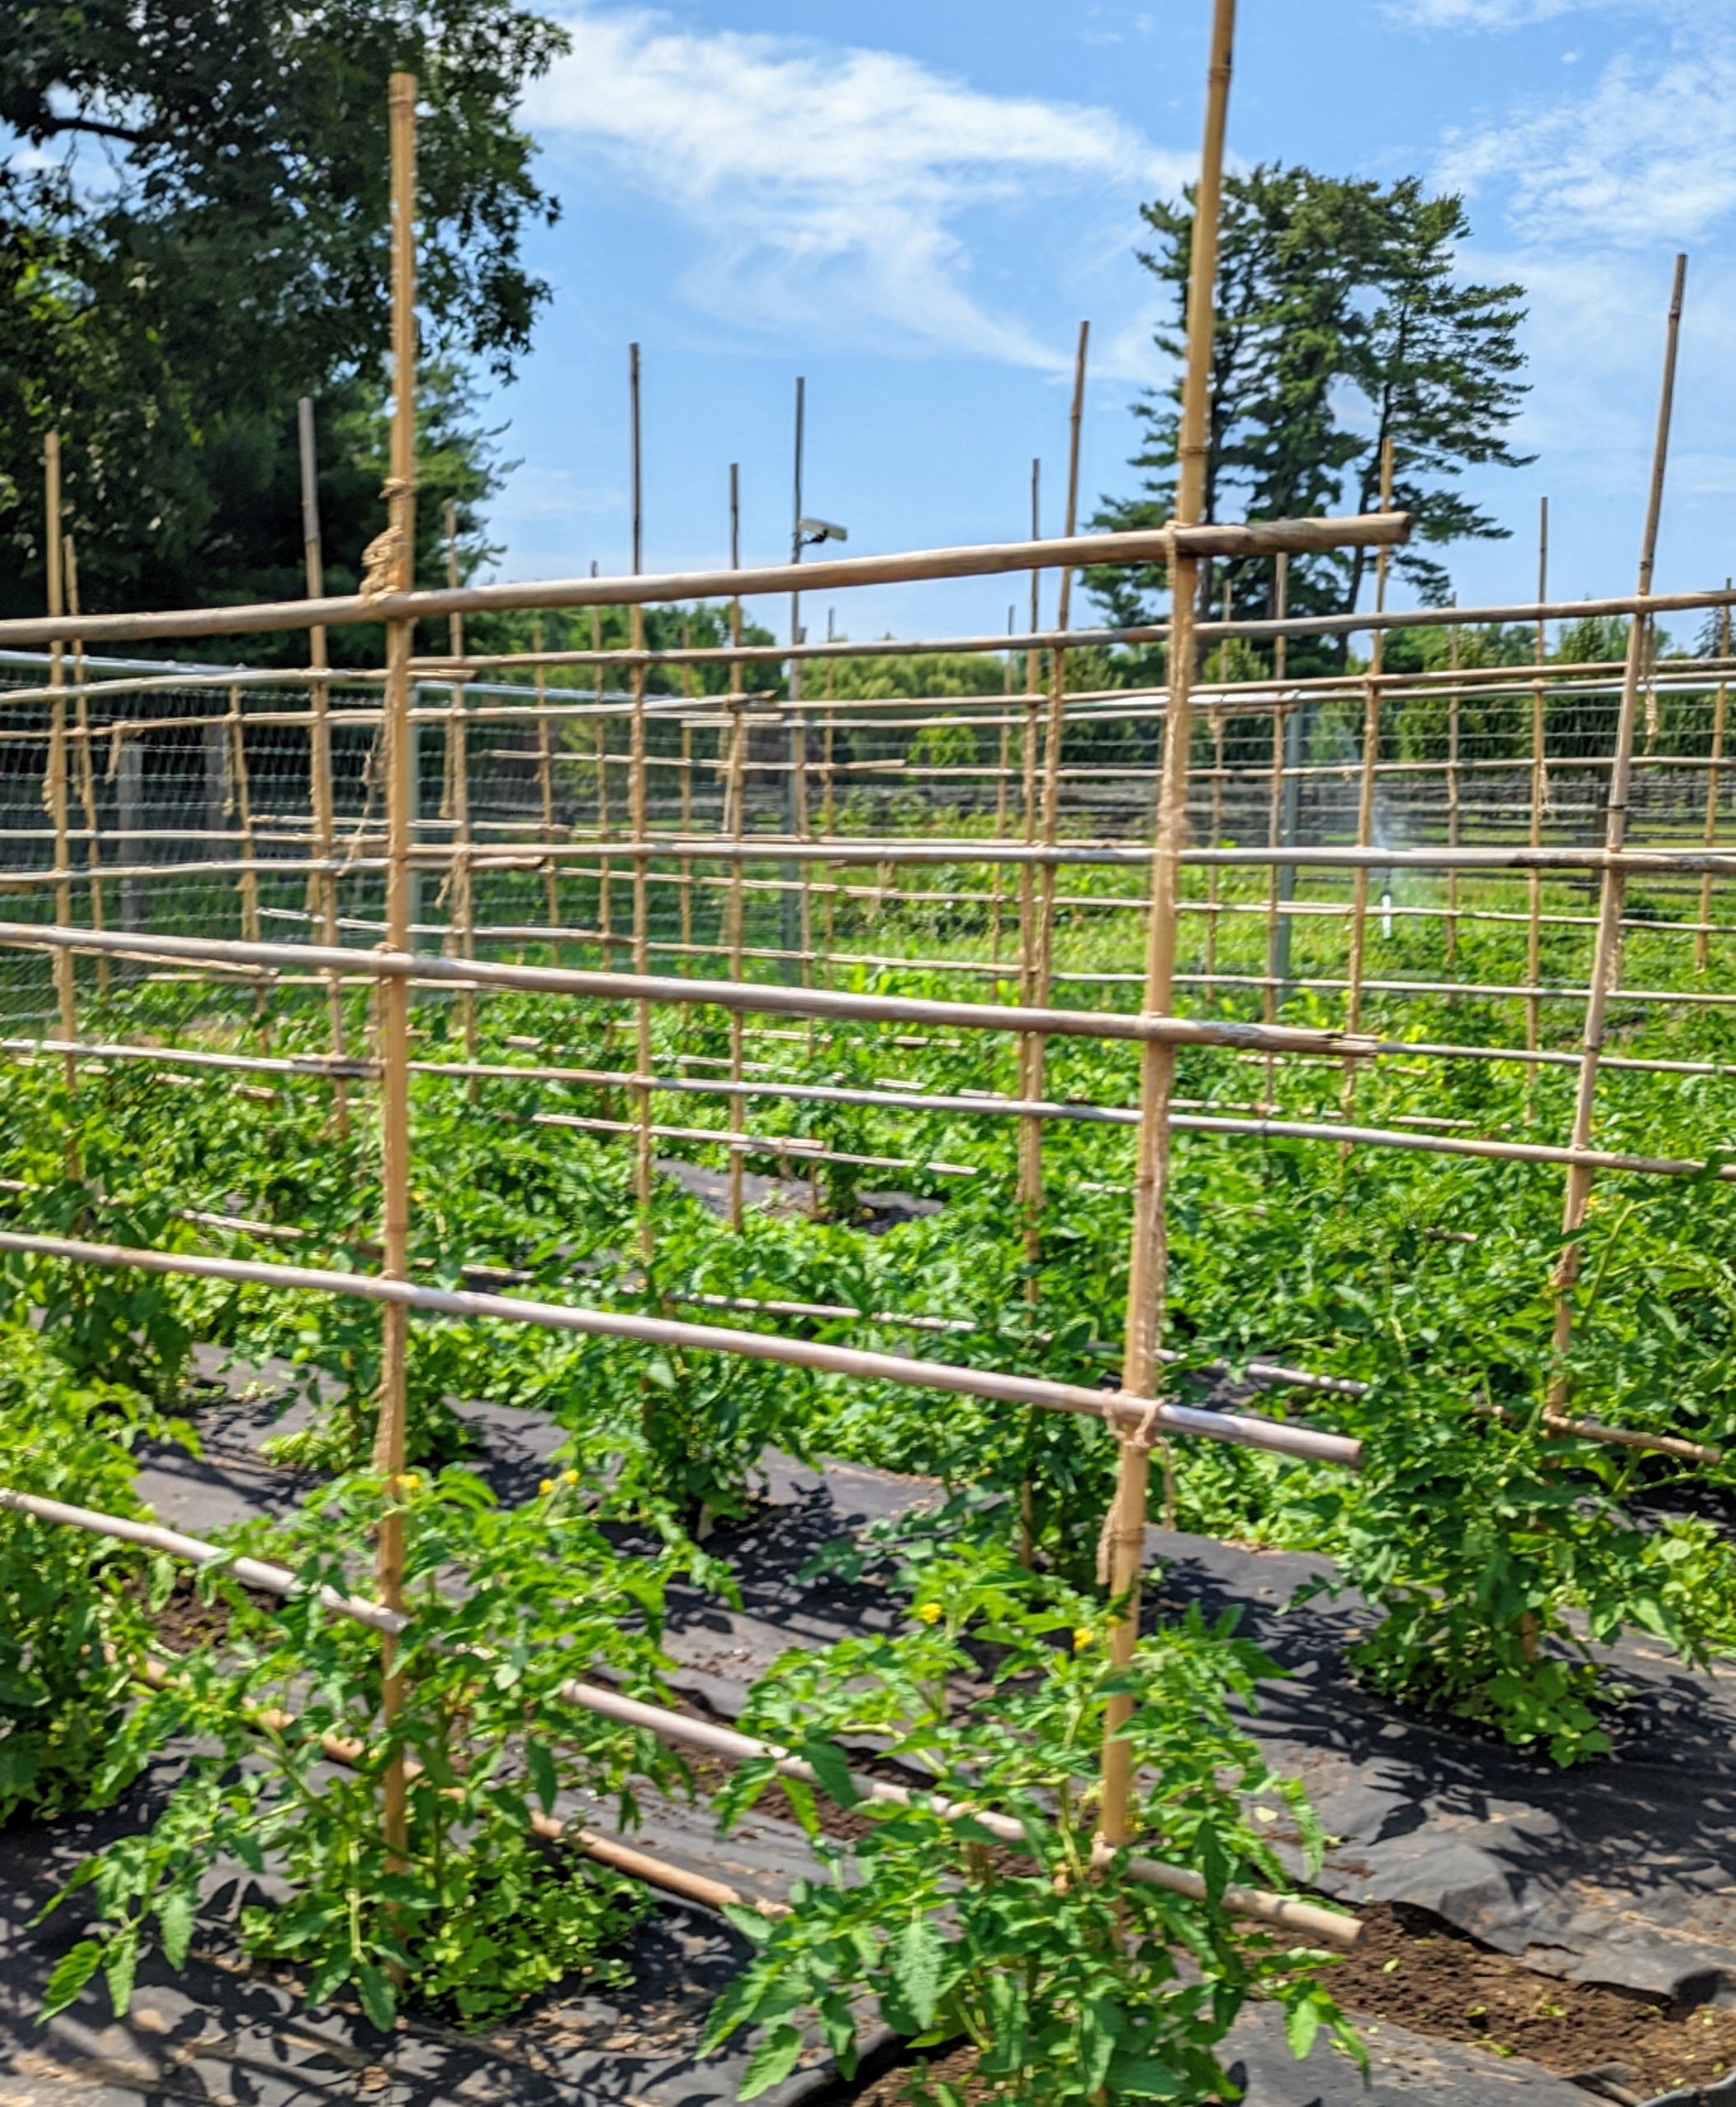
By the middle of June, smaller two to three foot stakes are replaced with taller bamboo poles to help support the growing tomato plants.
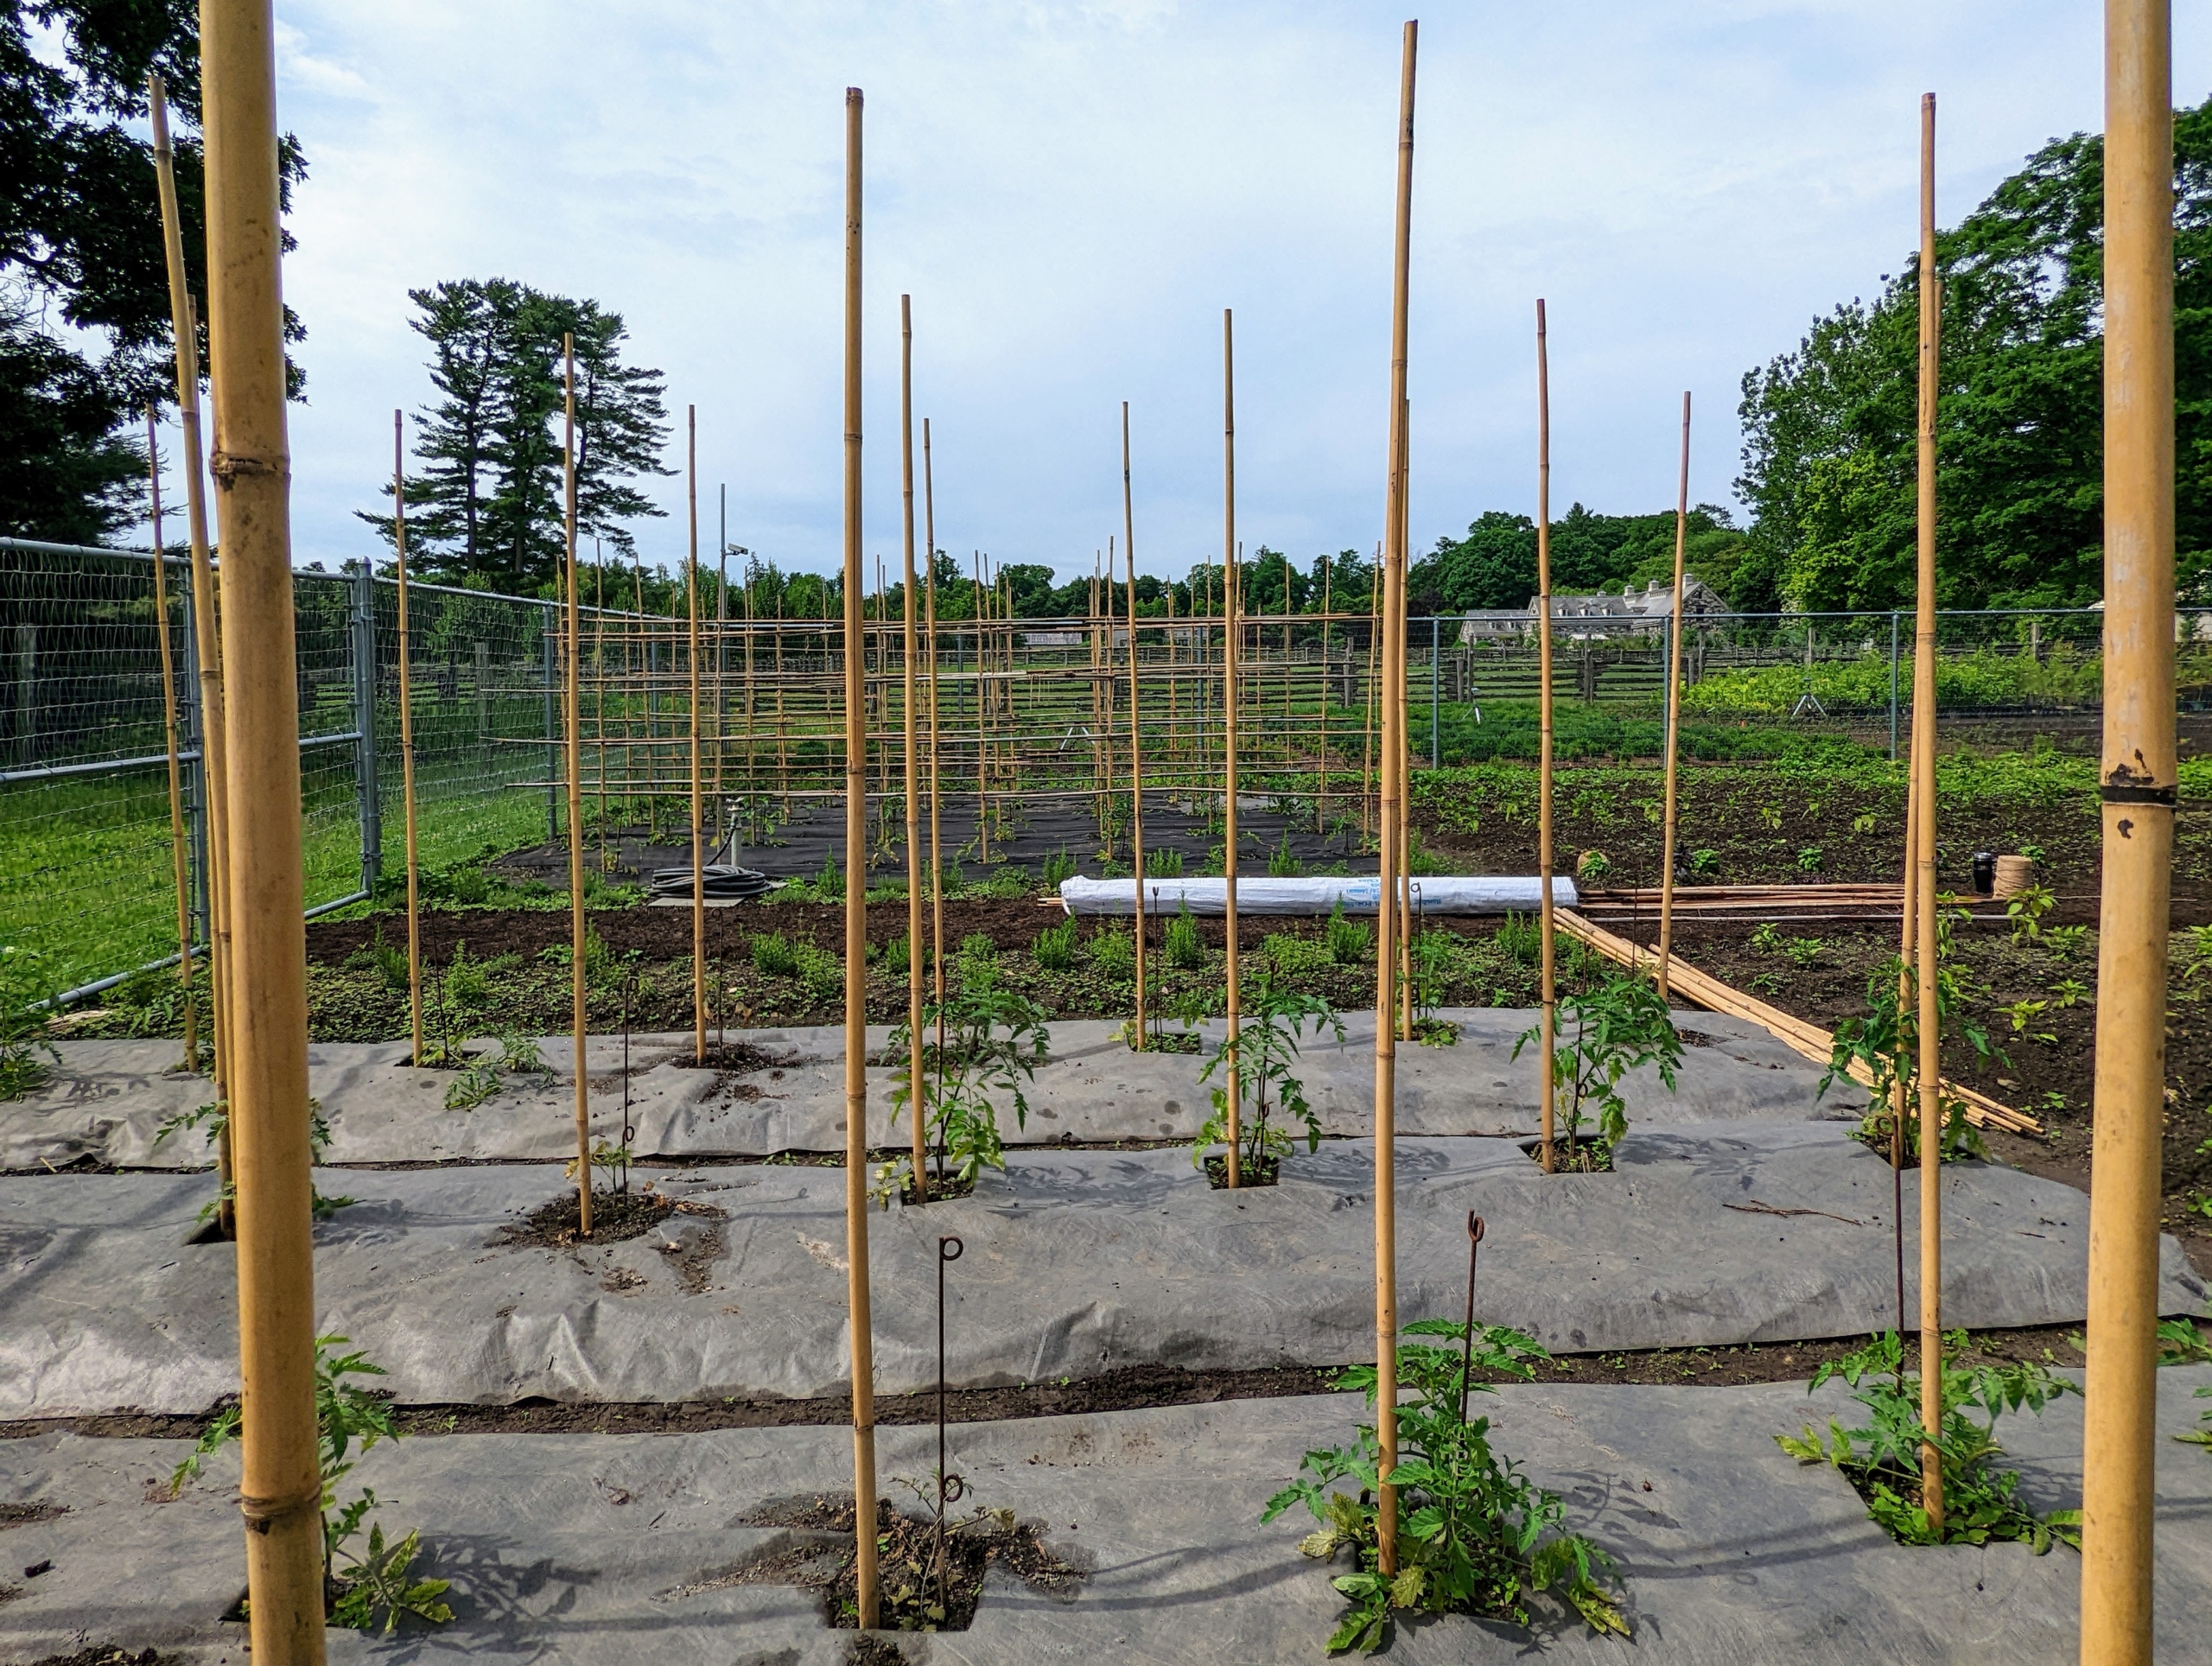
The plants are still pretty small, but the time goes quickly. I am always trying new methods for staking our tomato plants. Every year we try something new and better. I like using bamboo canes. They are easy to buy in bulk, and can be found in a variety of sizes. These canes are about eight to nine feet tall. This year, I came up with the idea to make straight supports down each aisle – with no netting, just bamboo.
Horizontal bamboo pieces are secured across all the bamboo stakes – four rows about a foot apart going up the bamboo. All of the canes are secured with natural jute twine.
Here are the plants in early July – taller than knee high.
Tomato leaves have serrated, or wavy and pointed, edging along the entire perimeter. Tomato leaves are compound with multiple leaflets growing along a common stem, called a rachis. These leaves are also slightly fuzzy to the touch, which is caused by the trichomes, or multi-cellular hairs, on the plant. Never use chemically treated wood or other material for staking climbers, as the chemicals would likely run off and go into the soil.
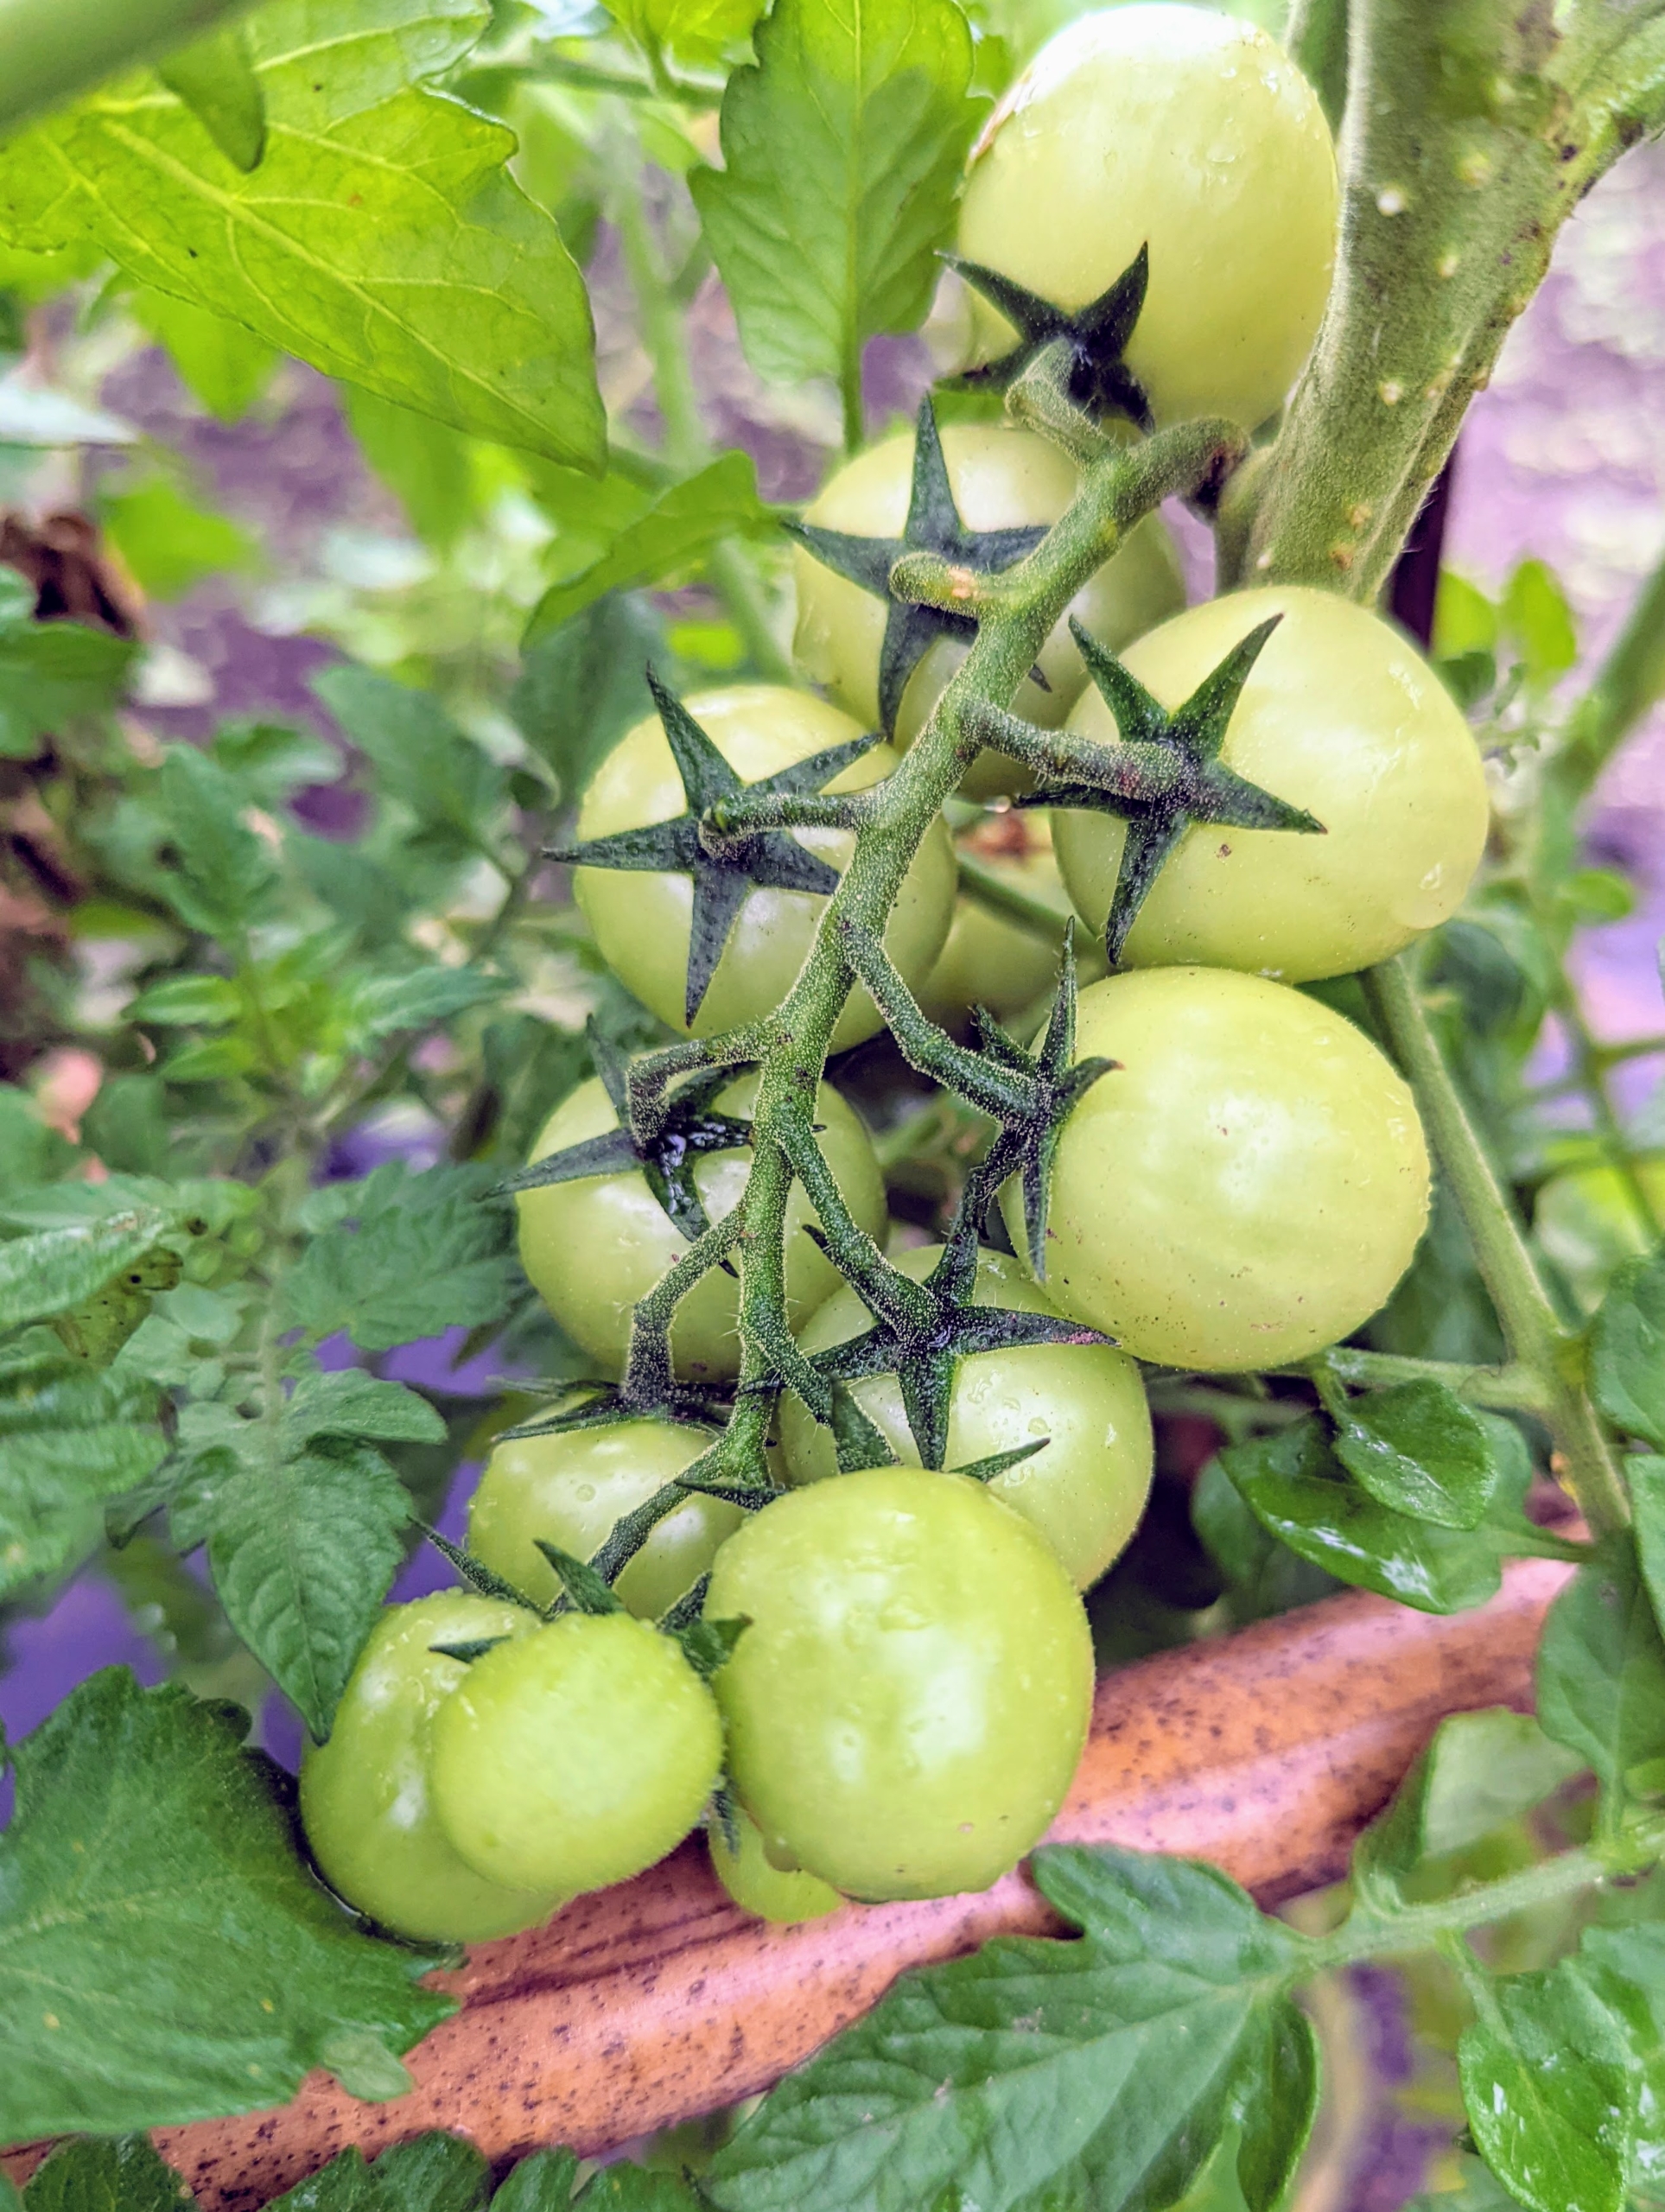
Remember, it’s the yellow flowers produced by tomato plants that must be fertilized before fruit can form. Once fertilized, the flowers develop into tomatoes – small green globes that become visible at the base of the blossoms and then eventually become mature fruits.
By the third week of July, many fruits are already growing so well. Tomatoes grow best when the daytime temperature is between 65 and 85 degrees Fahrenheit. This summer has been particularly warm and dry with many days in the 90s, which slows down development.
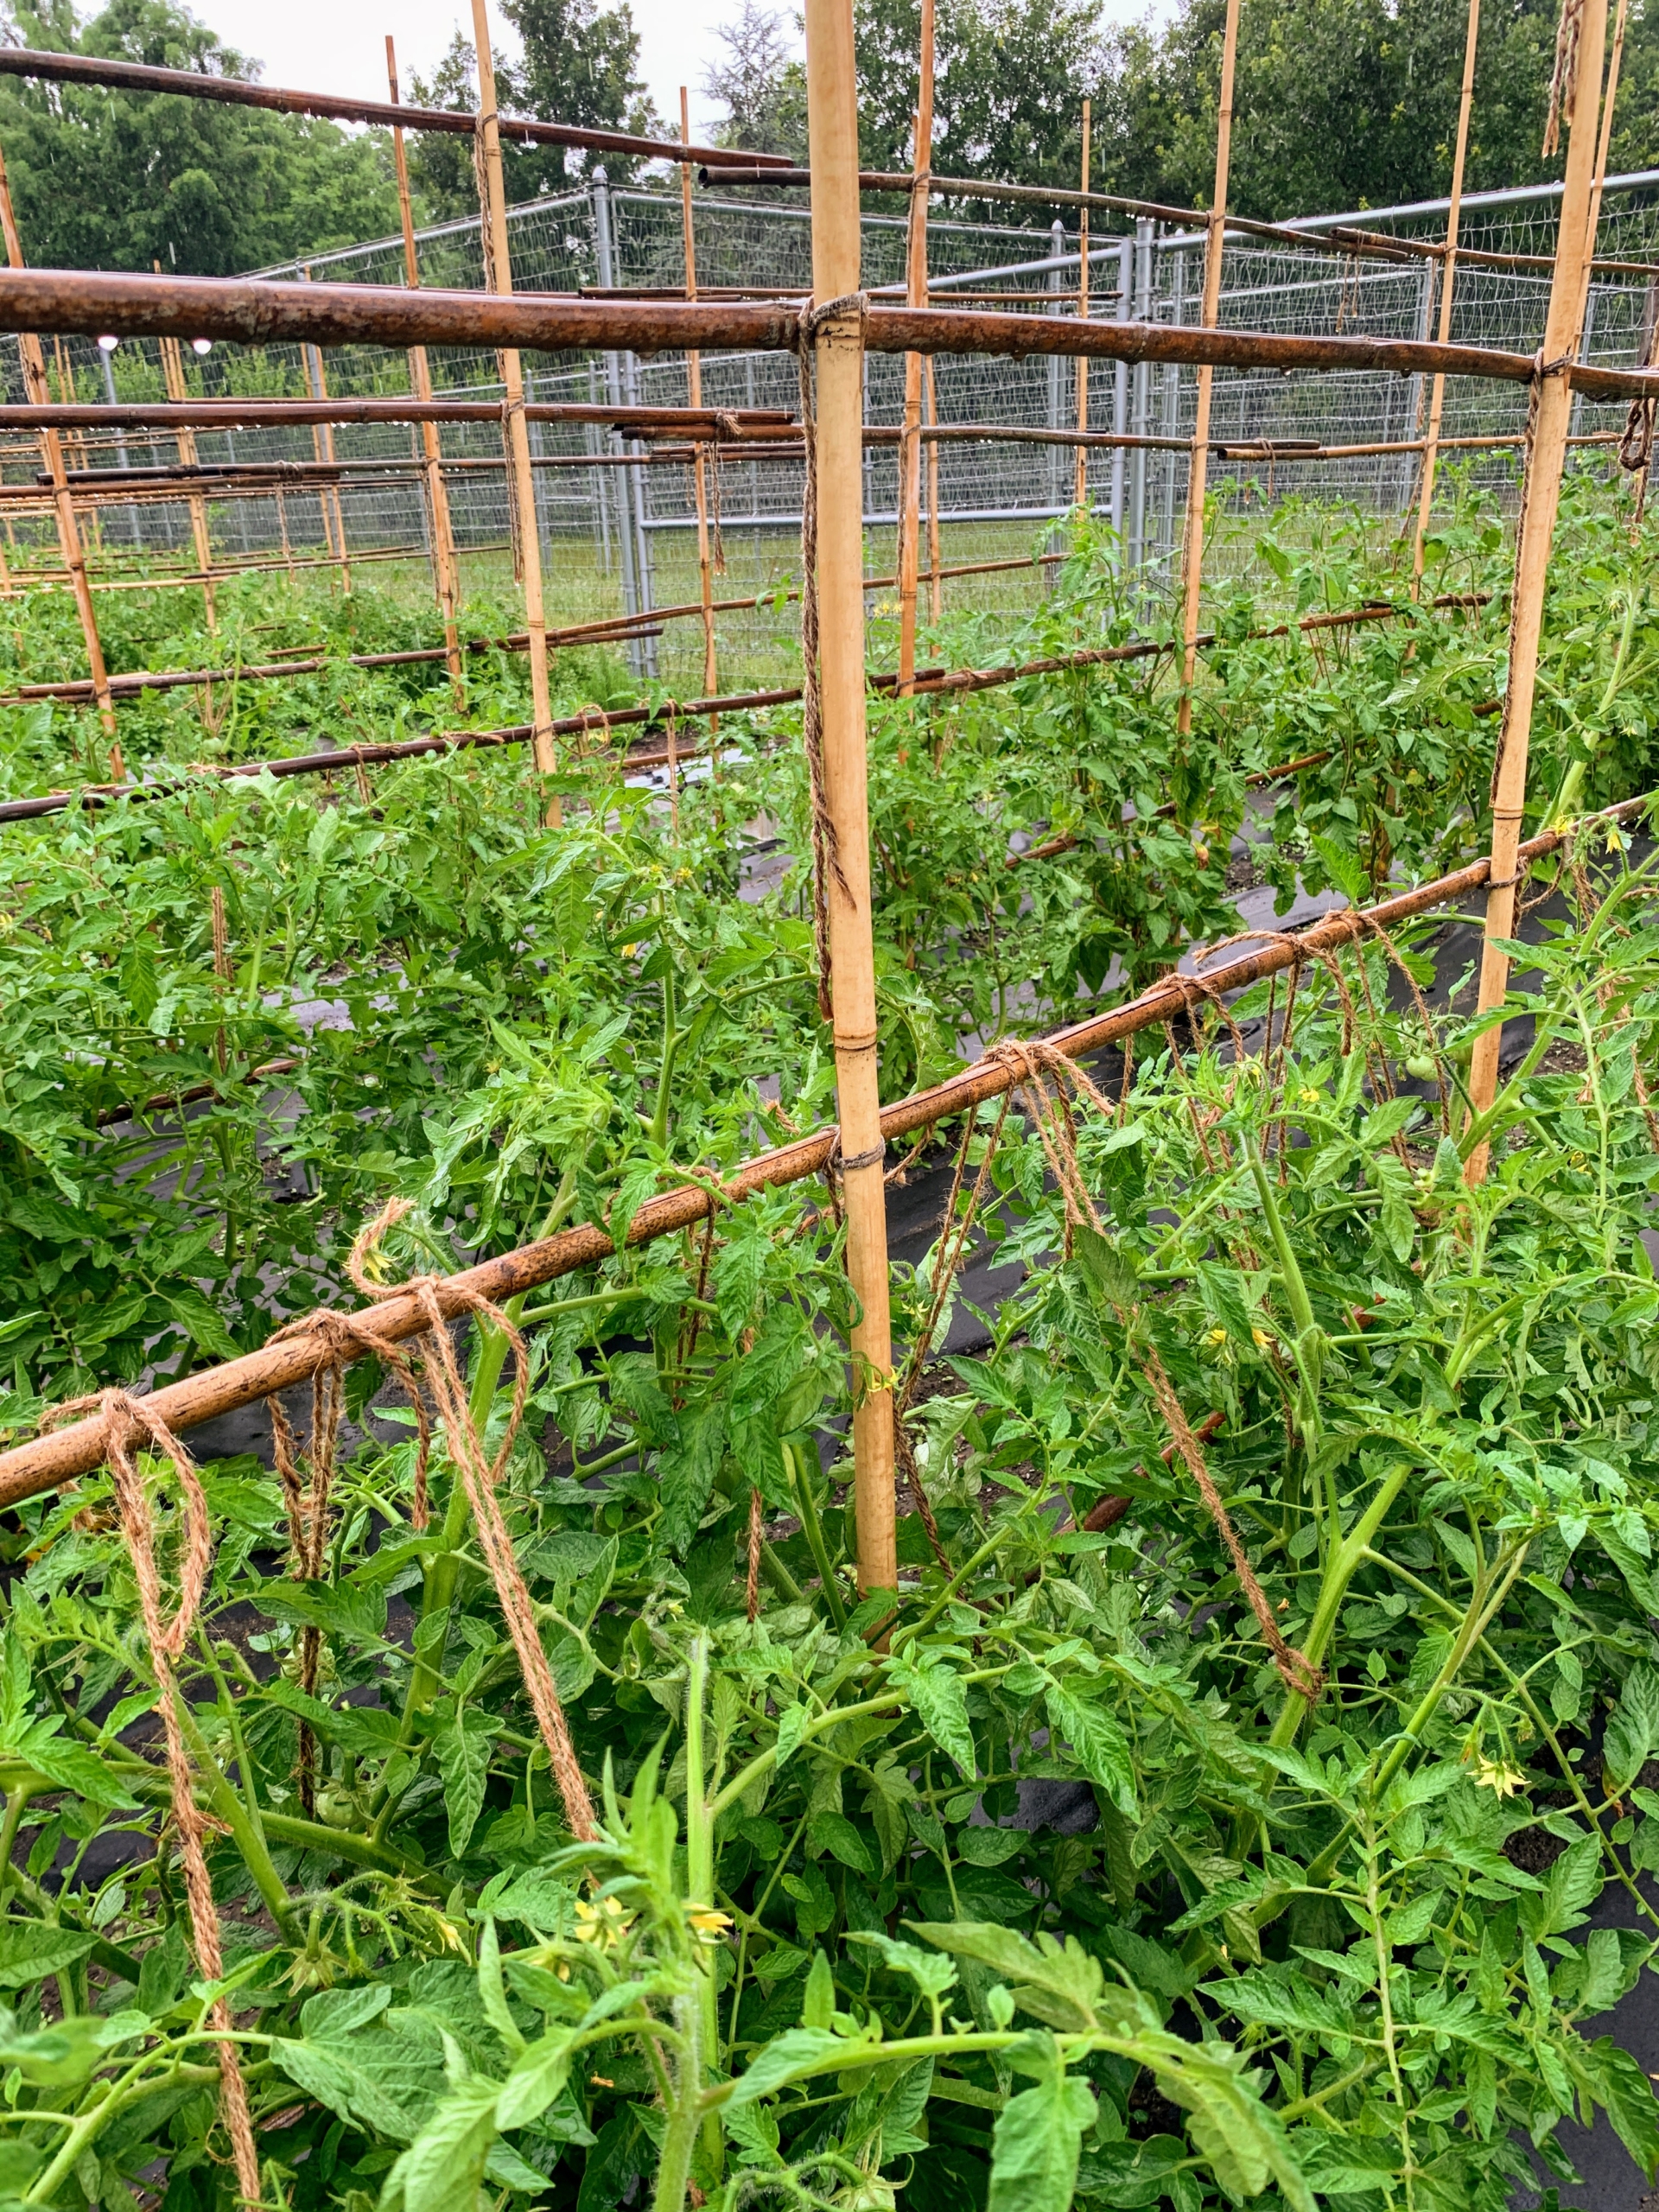
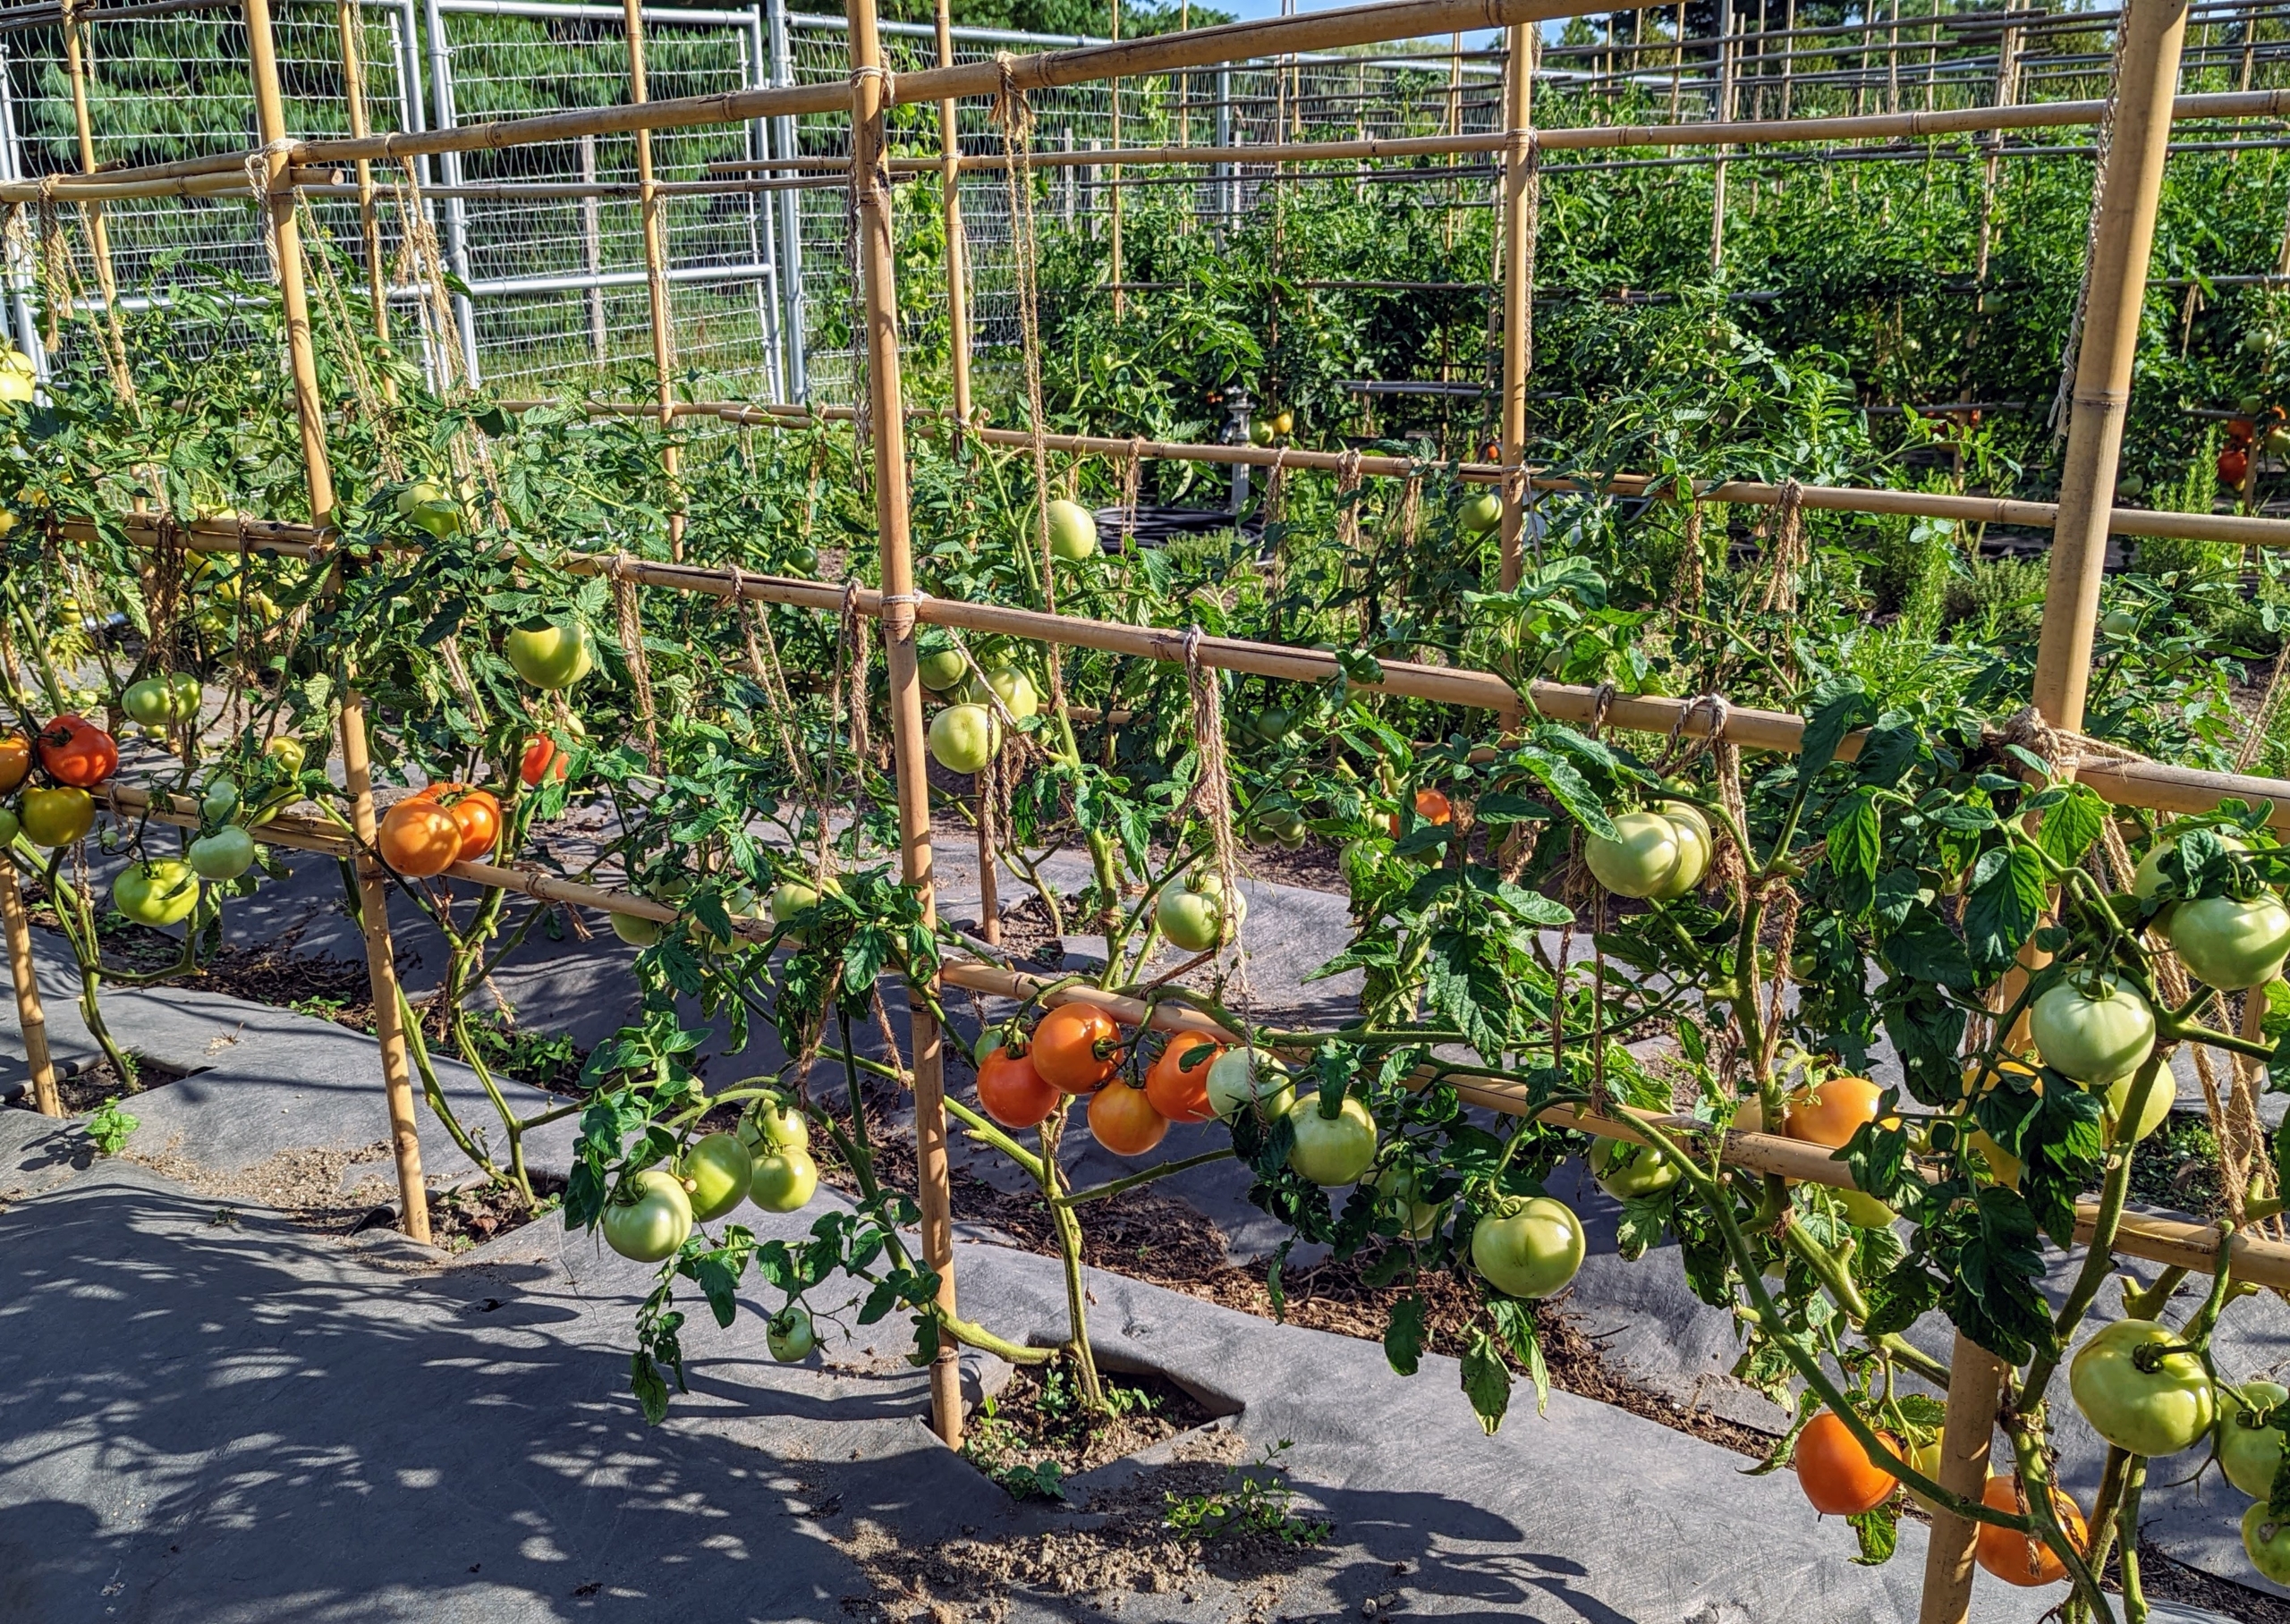
These plants are drooping because of the weight of the vines.
When the vines are weighed down, it is important to support them, so they do not hit the ground. Here, the twine is looped gently around the vine.
And then tied to the crossbars. With the crossbars, there is plenty of space to tie and support every tomato vine. This is the best method we have used yet.
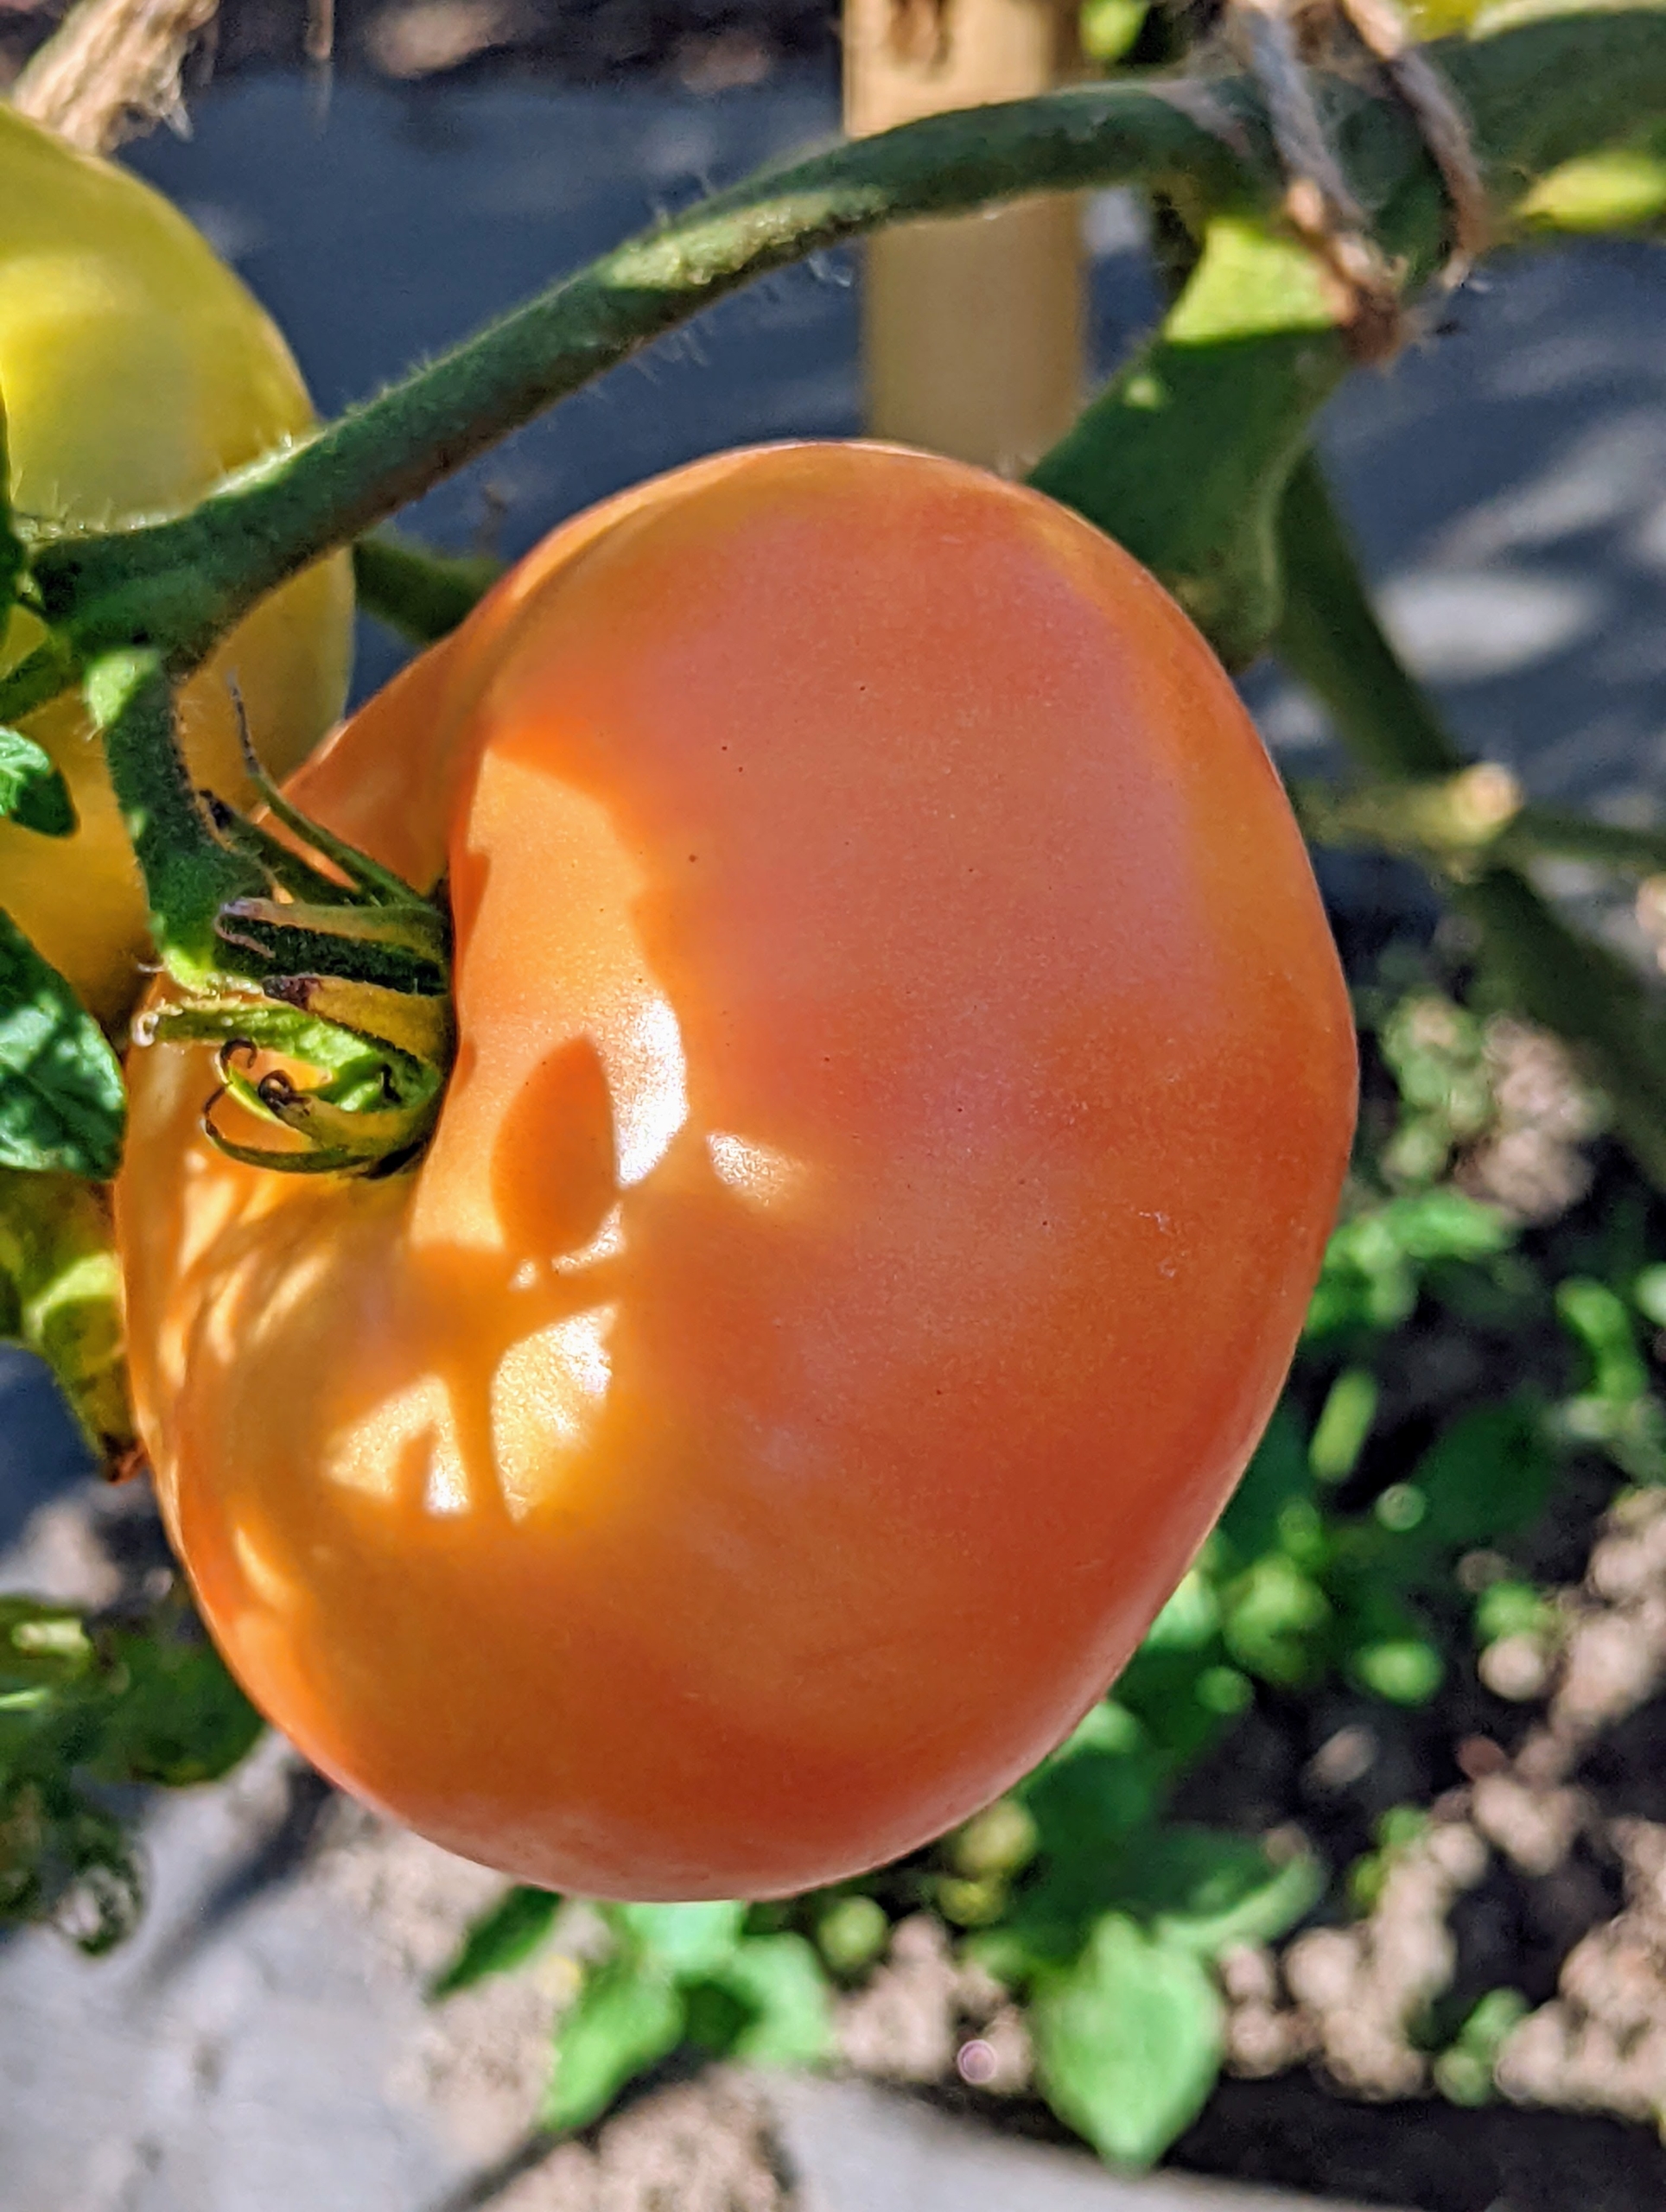
A couple weeks later, some of the tomatoes are already beautiful and red. It’s a good idea to grow several varieties, including at least one or two disease-resistant types, since, of all veggies, tomatoes tend to be the most susceptible to disease.
There are several types of tomatoes available, including globe tomatoes used in processing, and for fresh eating. Beefsteak are large, often used for sandwiches. Oxheart tomatoes vary in size and are shaped like large strawberries. Plum tomatoes are usually oblong, and used in tomato sauces. Campari tomatoes are sweet and juicy and of small to medium size. And cherries – which are so good eaten whole and fresh off the vine. Many of our tomatoes are from Johnny’s Selected Seeds – a source I’ve been using for many years for both seeds and supplies.
Planting can also be staggered to produce early, mid, and late-season tomato harvests.
These plants look so much better when kept upright and neat. The tomato plants have a lot of room to climb, keeping delicious fruits looking their best.
Just a few rows down, the kale is still looking so great this year.
And so is the lettuce. We have lots of lettuce heads for our summer salads and sandwiches.
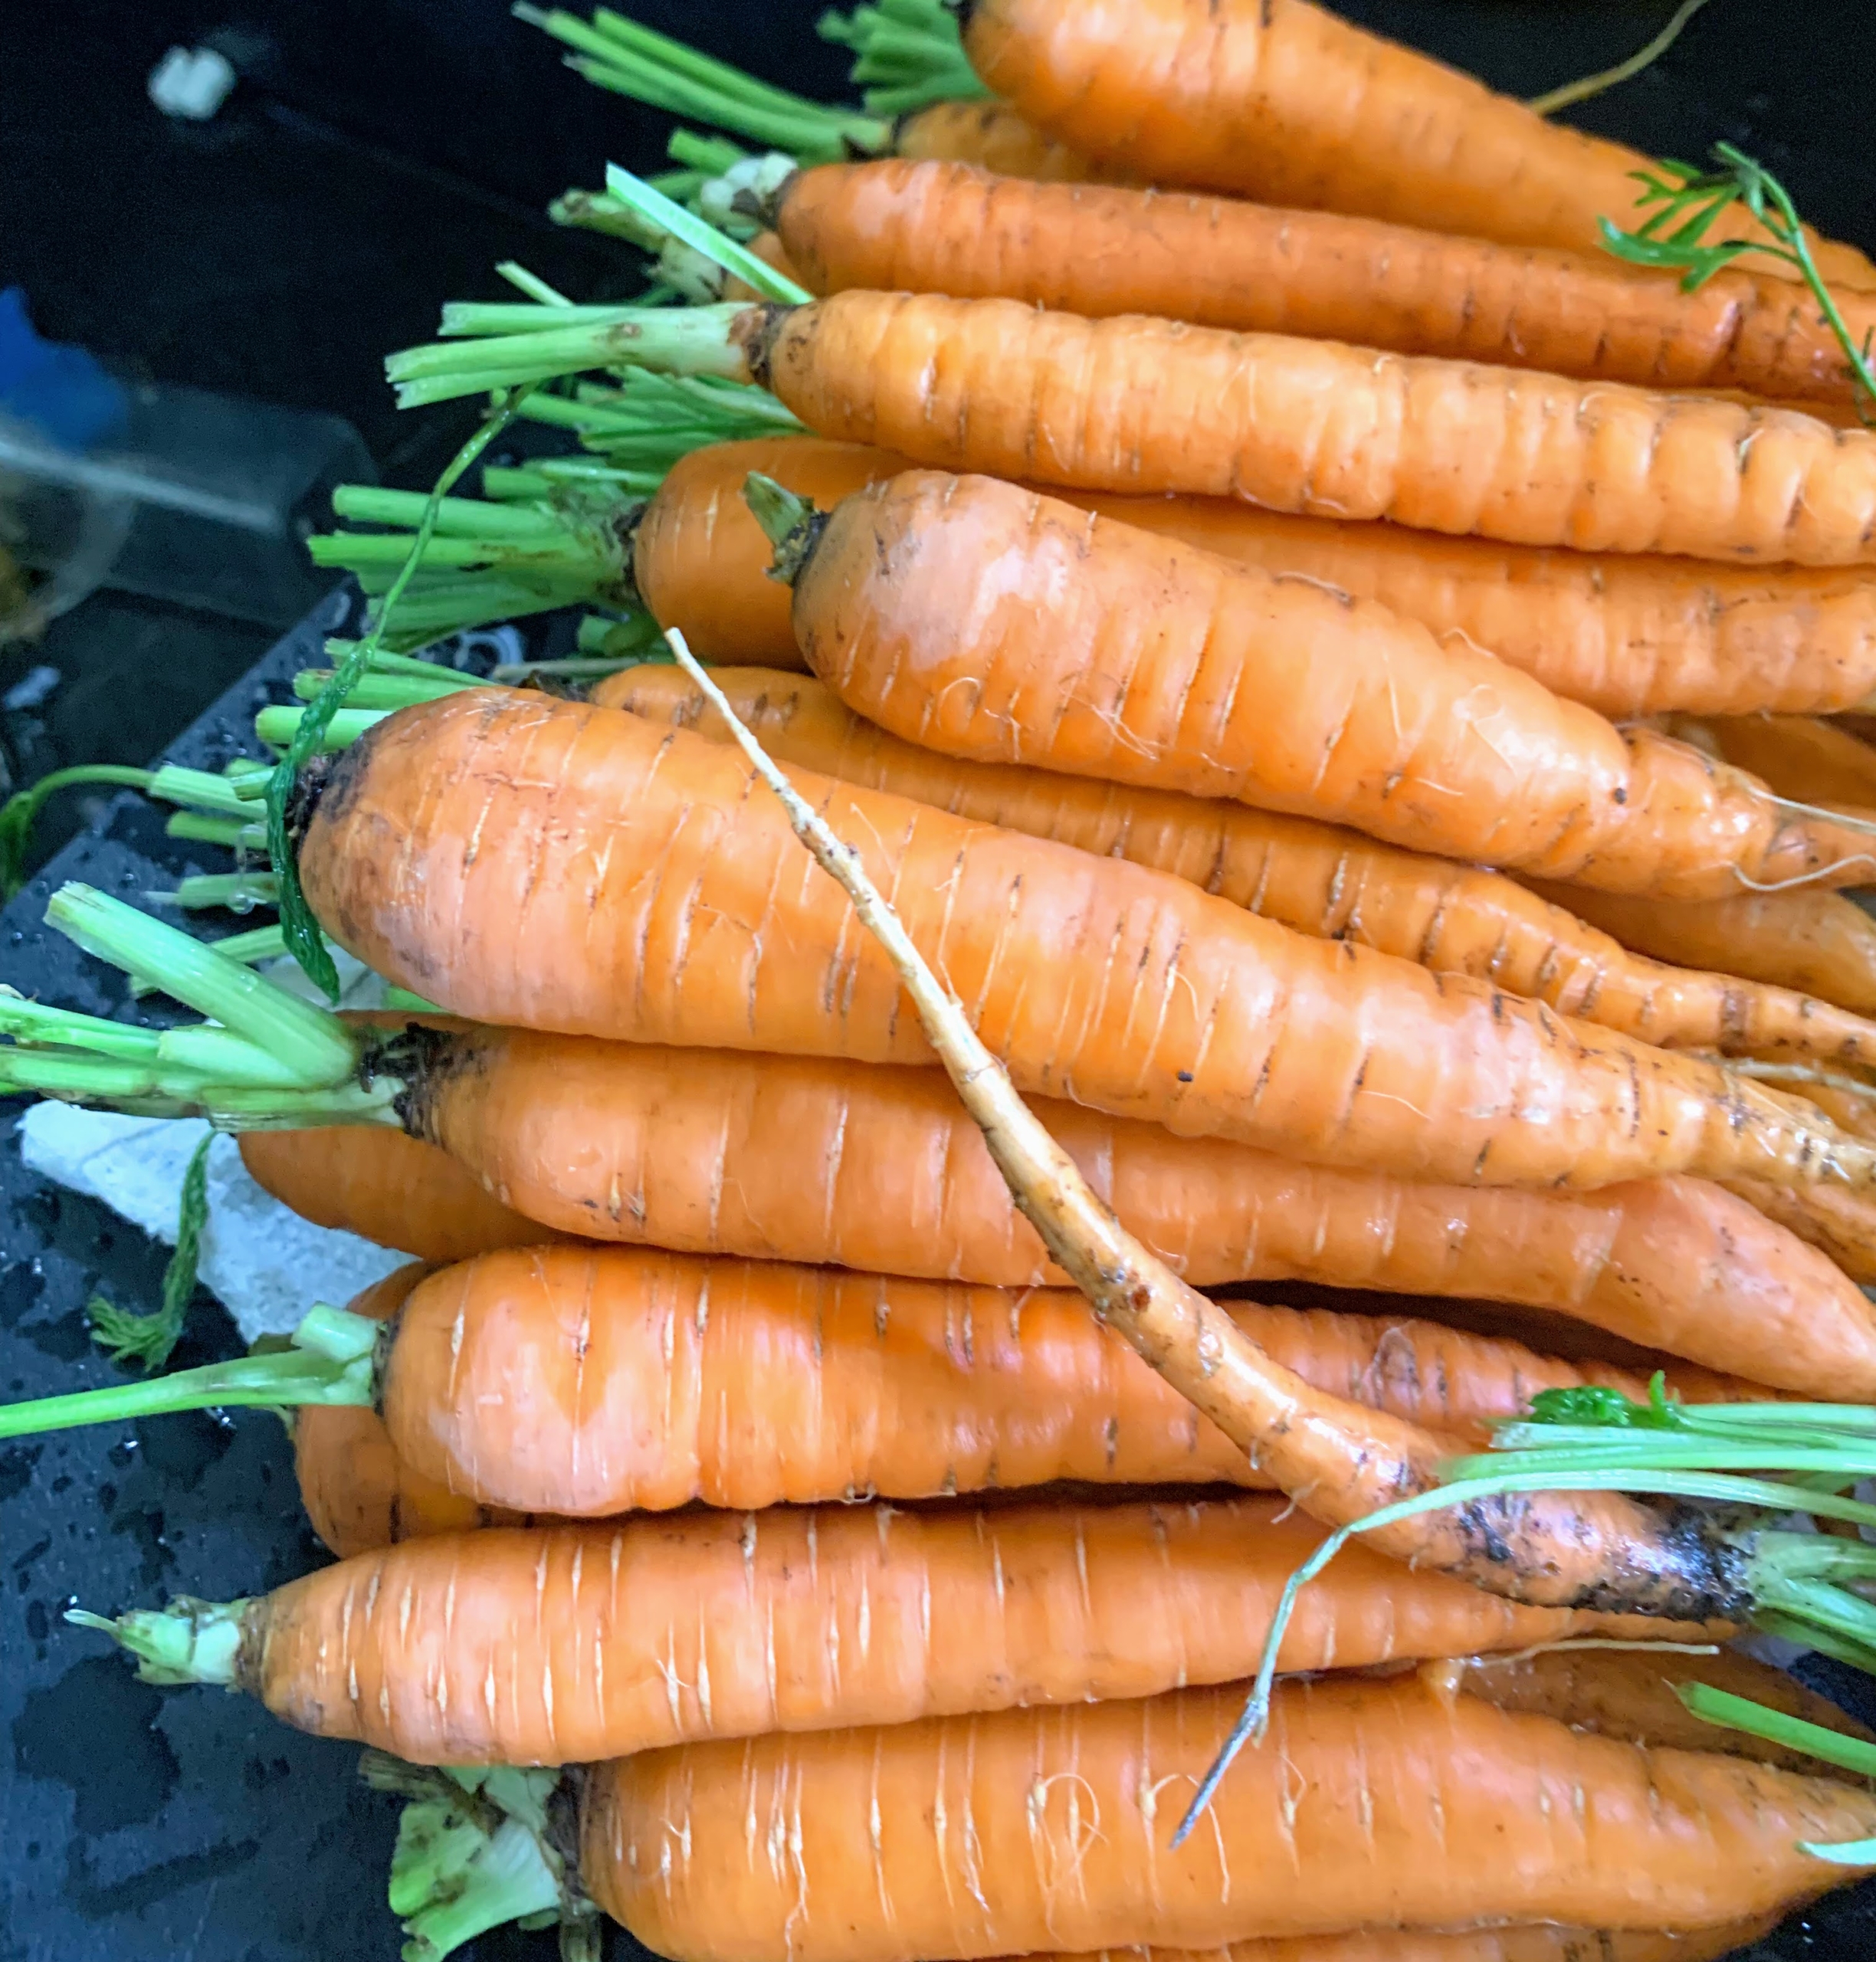
This past weekend, we harvested many bright orange carrots.
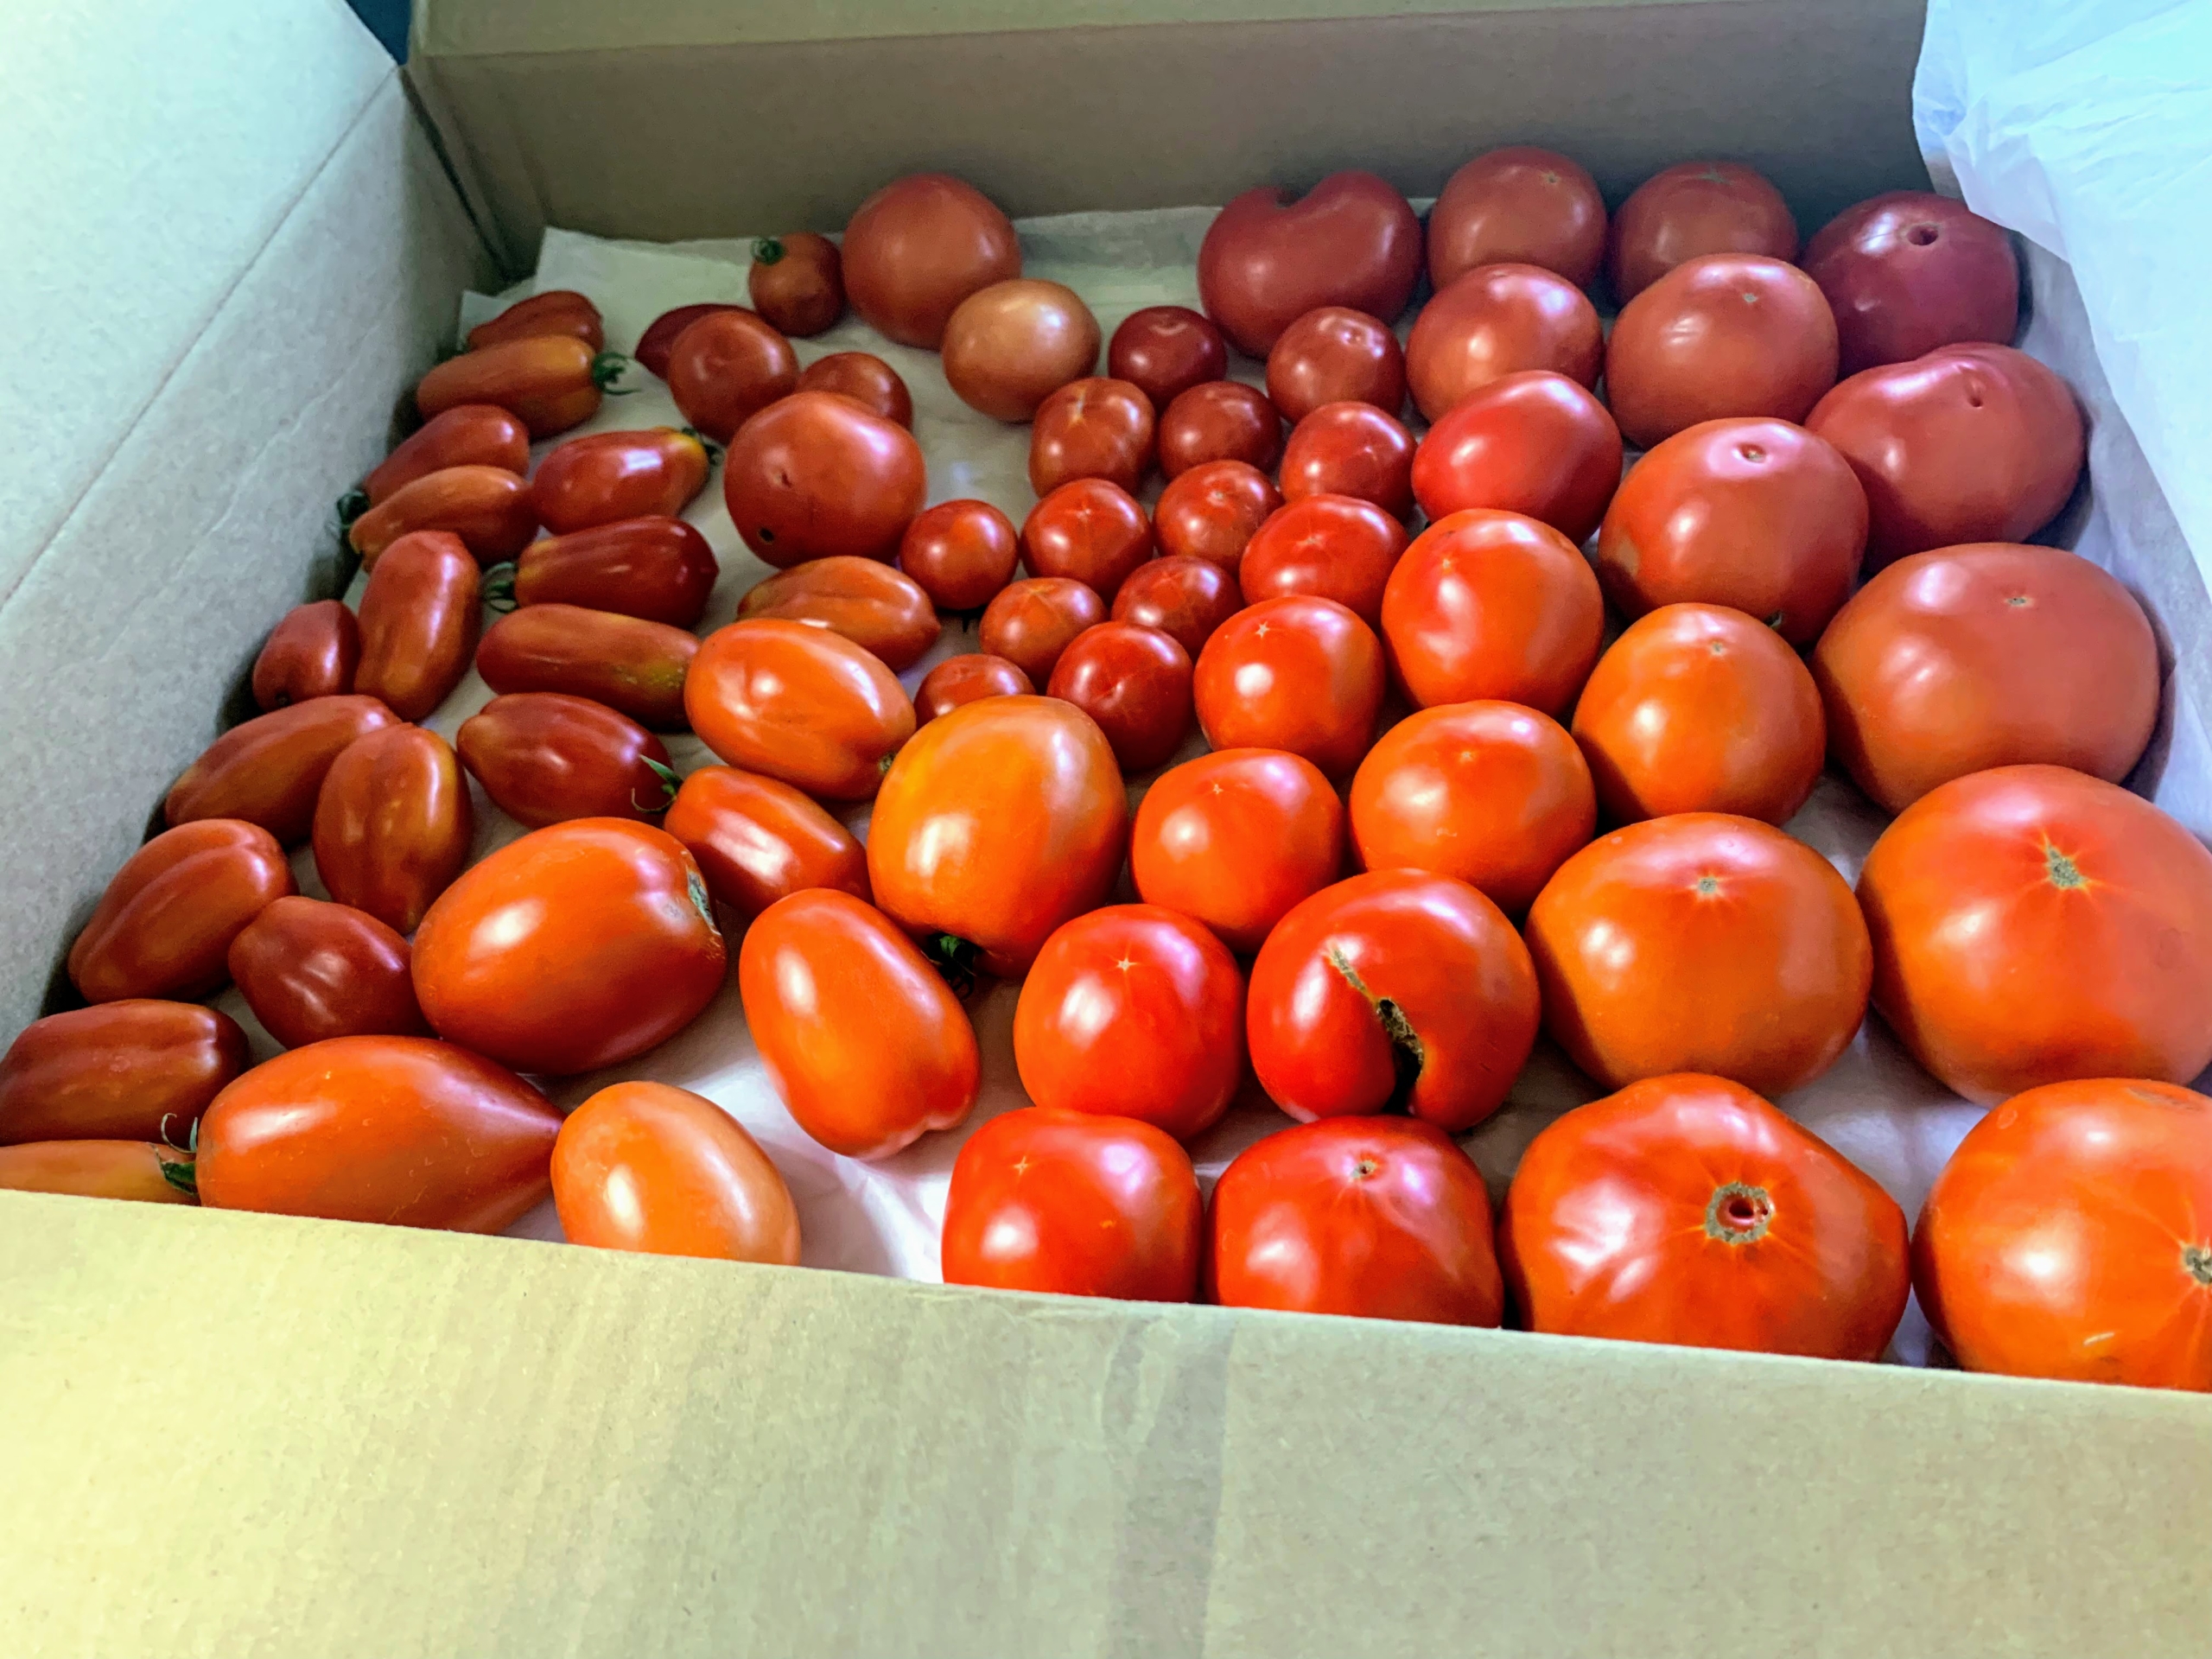
And more than three boxes of our beautiful, ripe red tomatoes. This was our first picking. We’ll be harvesting tomatoes for a couple of weeks – a little bit every few days.
There are many, many more! Many of the tomatoes are eaten fresh, but every summer, I also save lots of tomatoes to make homemade juice and sauce. Not only are they delicious and nutritious, but they can be stored in containers in the freezer for any time the craving hits. How did your tomatoes do this year?
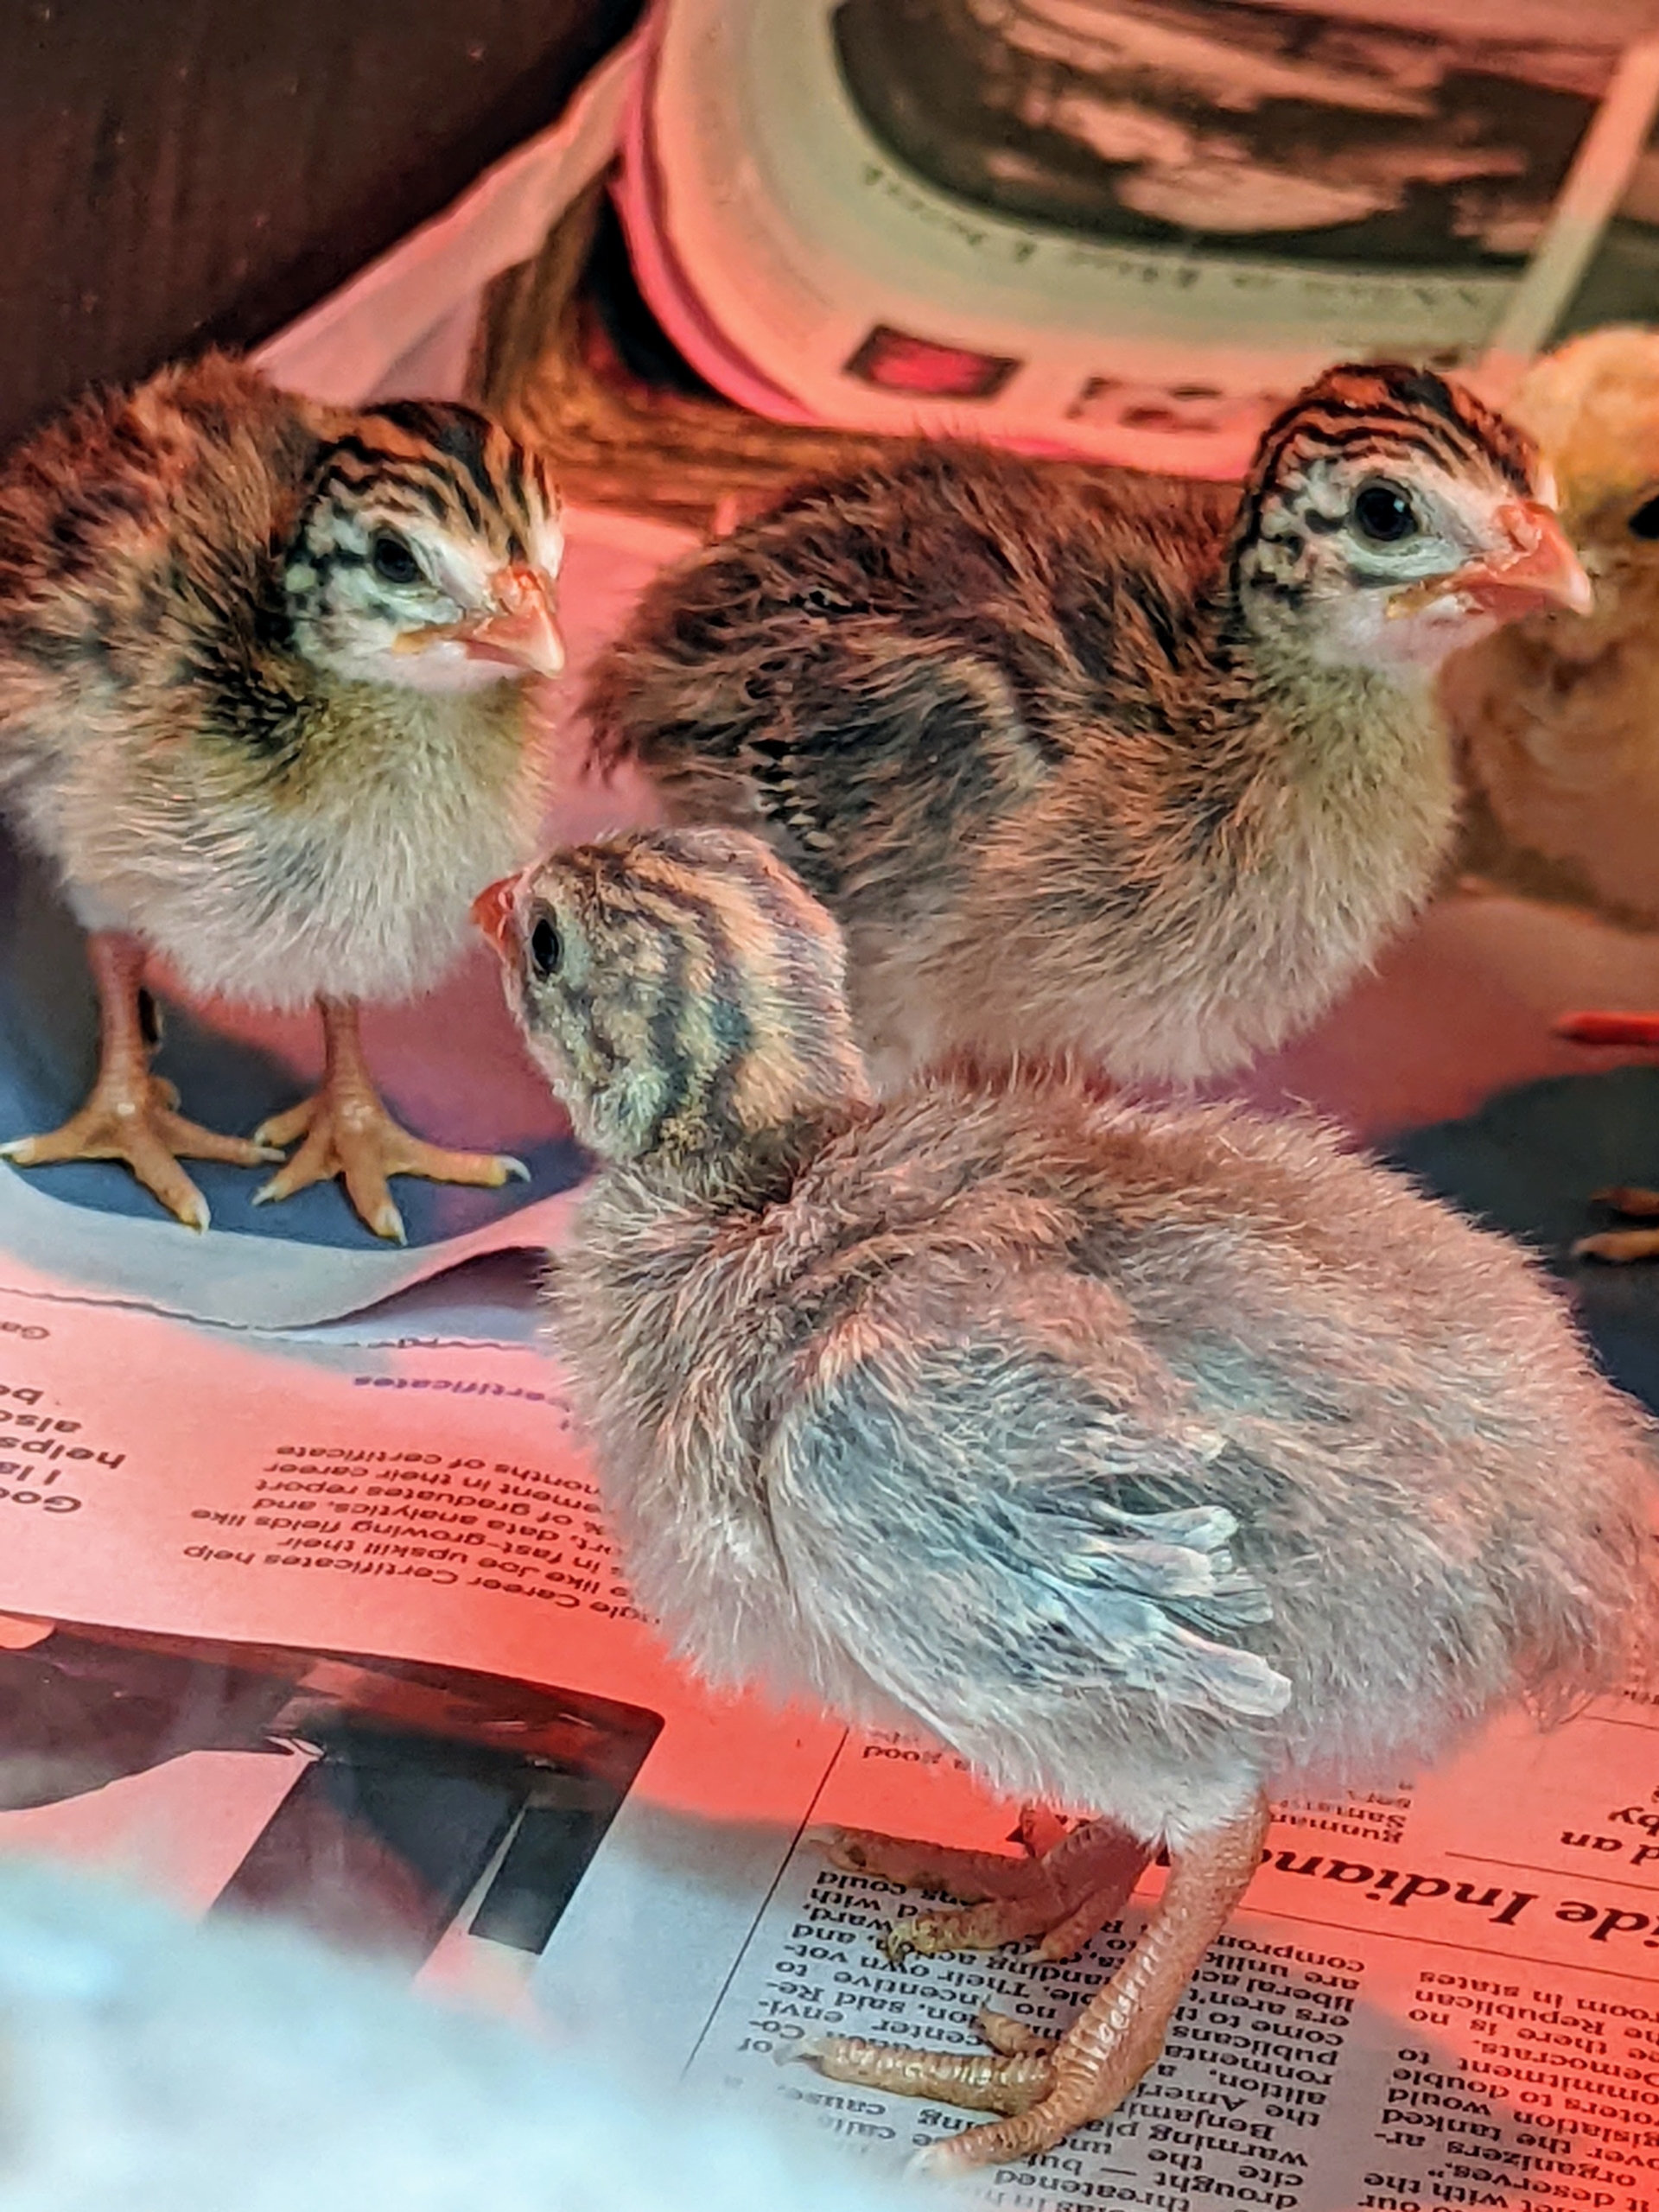
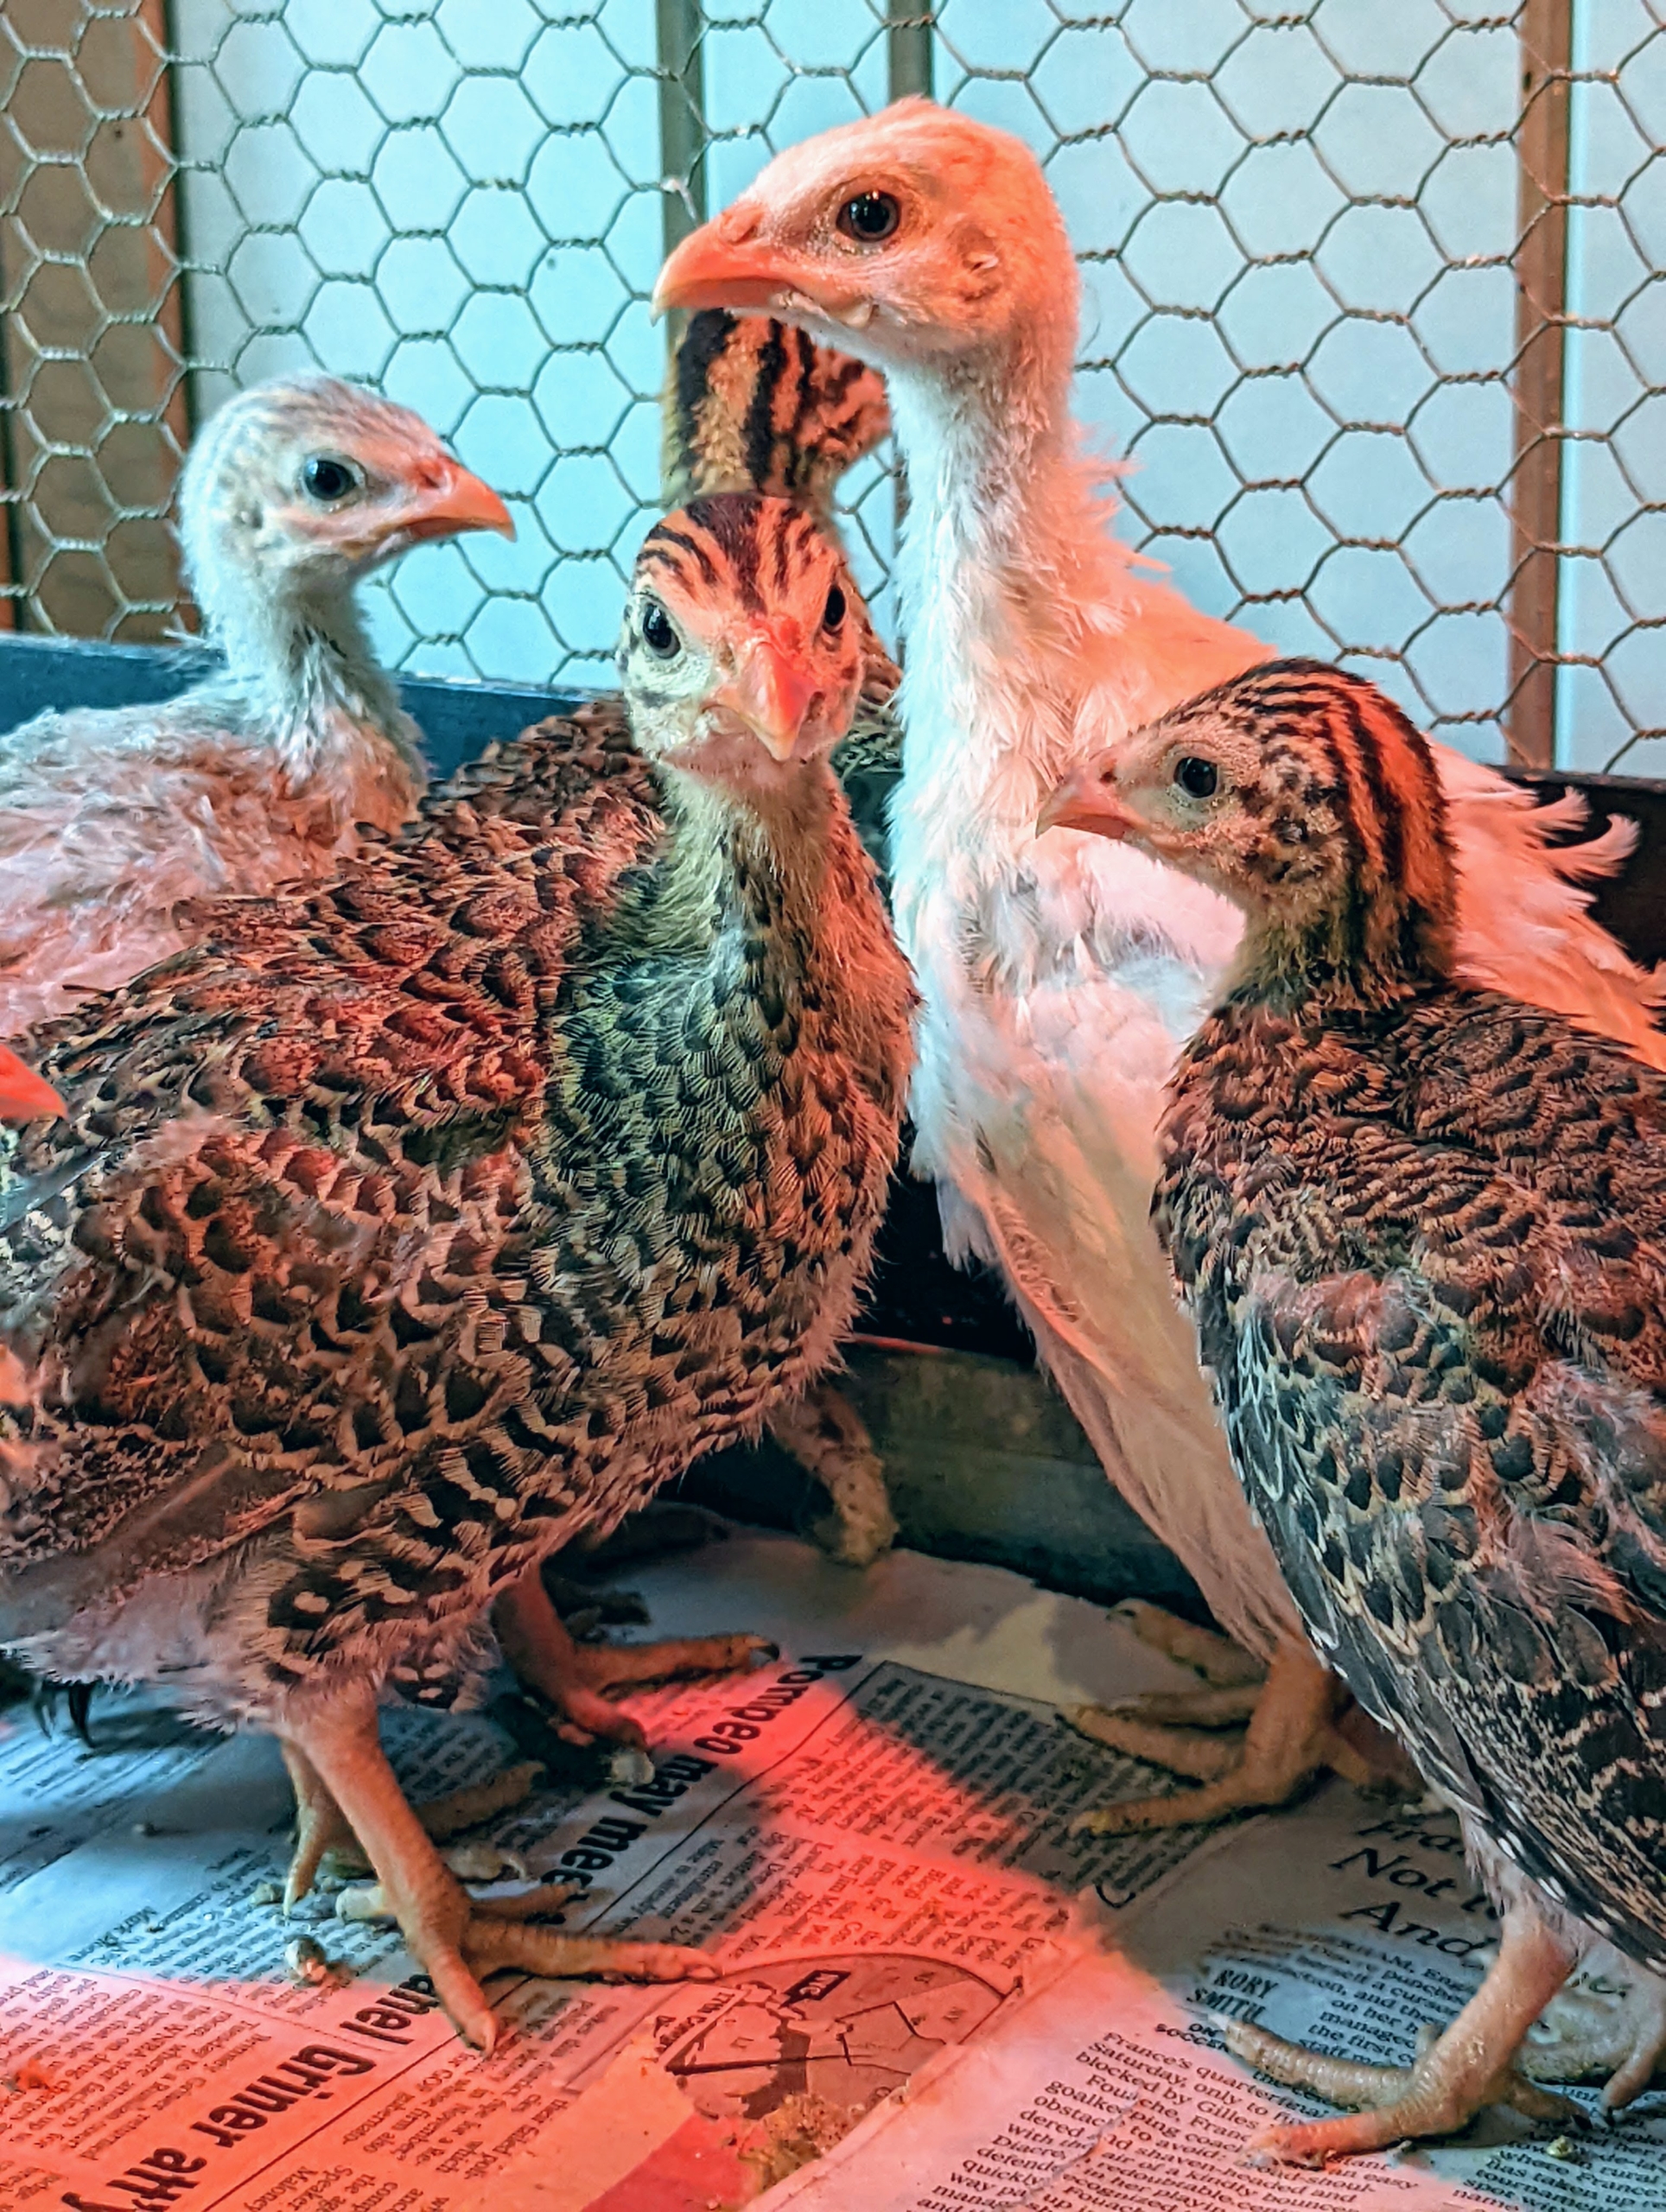
So many of you love the updates on the babies at the farm - currently, the youngest are five young Guinea fowl and a peachick incubated and hatched right here. They’re doing very well eating, drinking, and enjoying all the sights and sounds of their surroundings.
If you're not familiar with Guinea fowl, they are members of the Numididae family. These birds originated in Africa, but are now found all over the world. I’ve raised Guinea fowl for years. They are ground-nesting, seed- and-insect-eating birds that love ticks, locusts, flies, maggots, snails, and other pesky bugs. They are also wonderful at patrolling the chicken yard - sounding off loud alarms whenever something unusual enters the enclosure.
Here are some photos, enjoy.
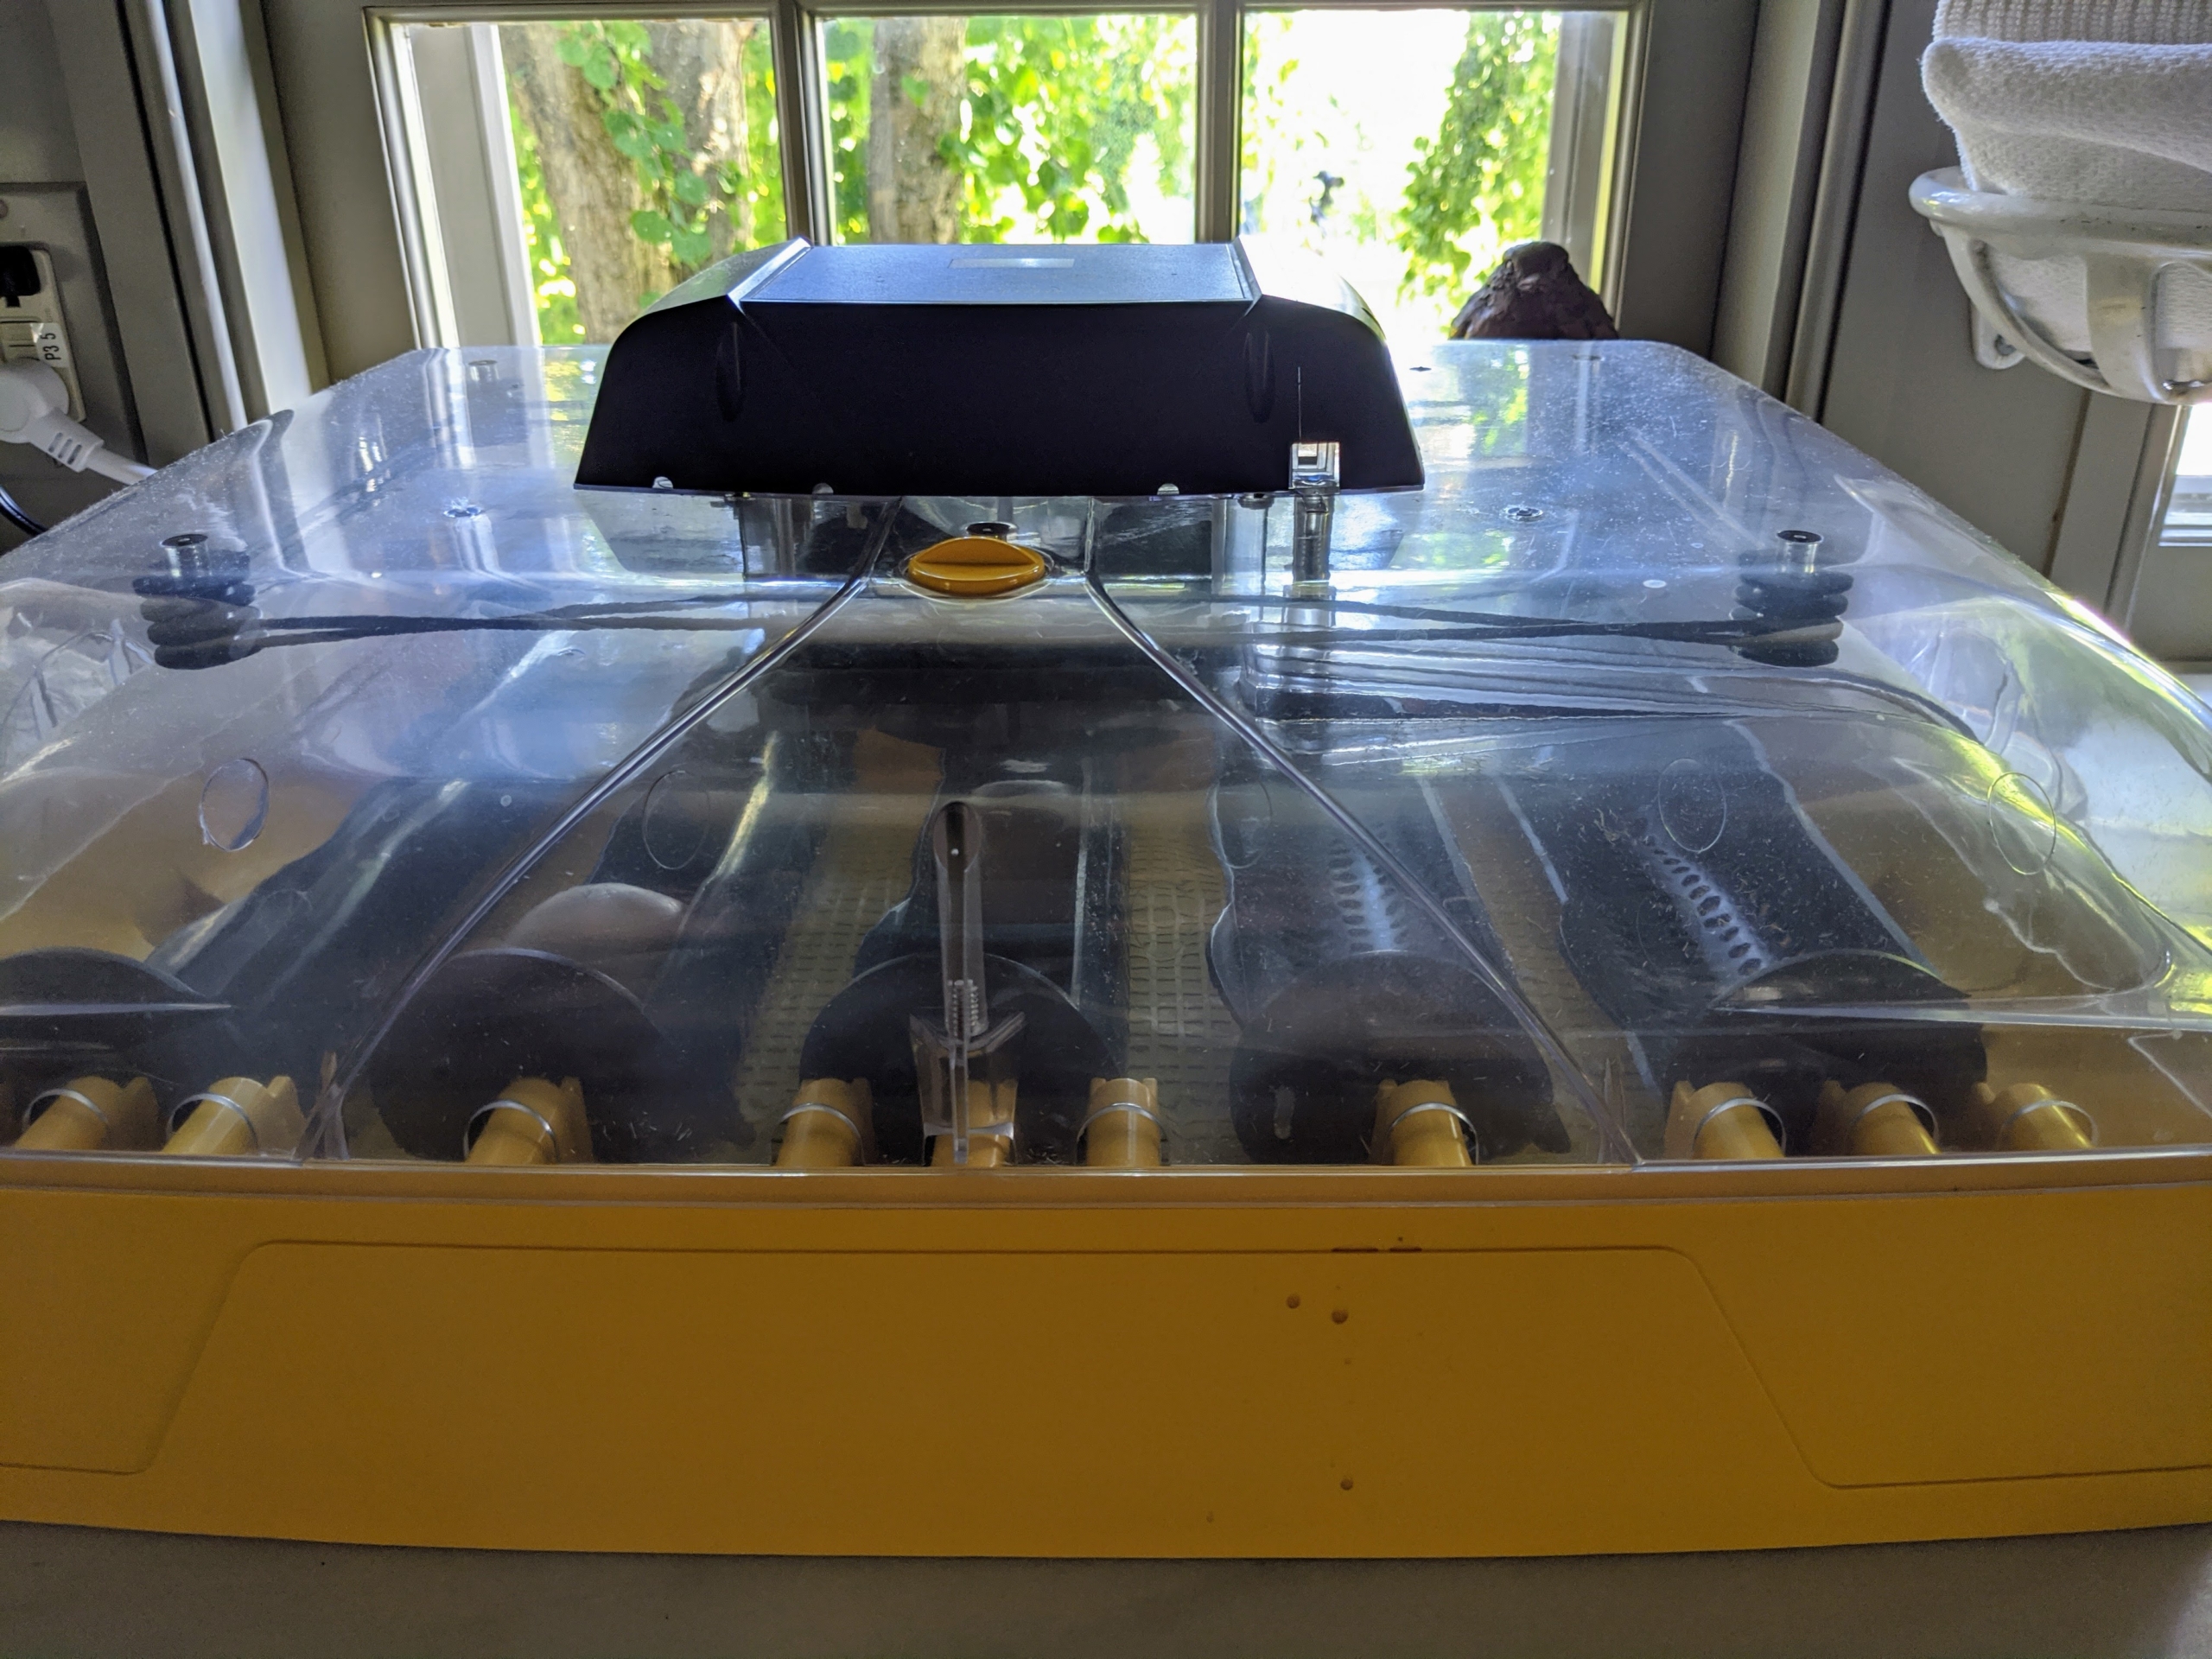
I am so happy I am able to properly incubate and hatch healthy fowl right here at the farm. The eggs are kept in optimal hatching temperatures and are safe from any pecking hens in the coop. Here is my incubator in my kitchen. The incubation period for Guinea eggs is 26 to 28 days, similar to the incubation period for turkeys.
Last month, we hatched five beautiful baby Guinea fowl or keets and a peachick. Once hatched, they are kept in a bin, also in my kitchen, for about a week.
Then they’re brought down to our bird “nursery” which is located in the feed room of my stable.
We house them in one of my large indoor bird cages. As each one is put in, it is introduced to the waterer and feeder, so it knows exactly where to eat and drink. They are all familiar with waterers and feeders, but it is still a good practice to show them. They have a suspended feeder filled with medicated turkey starter or wild game bird starter. At six weeks of age, they are switched to turkey or game bird grower.
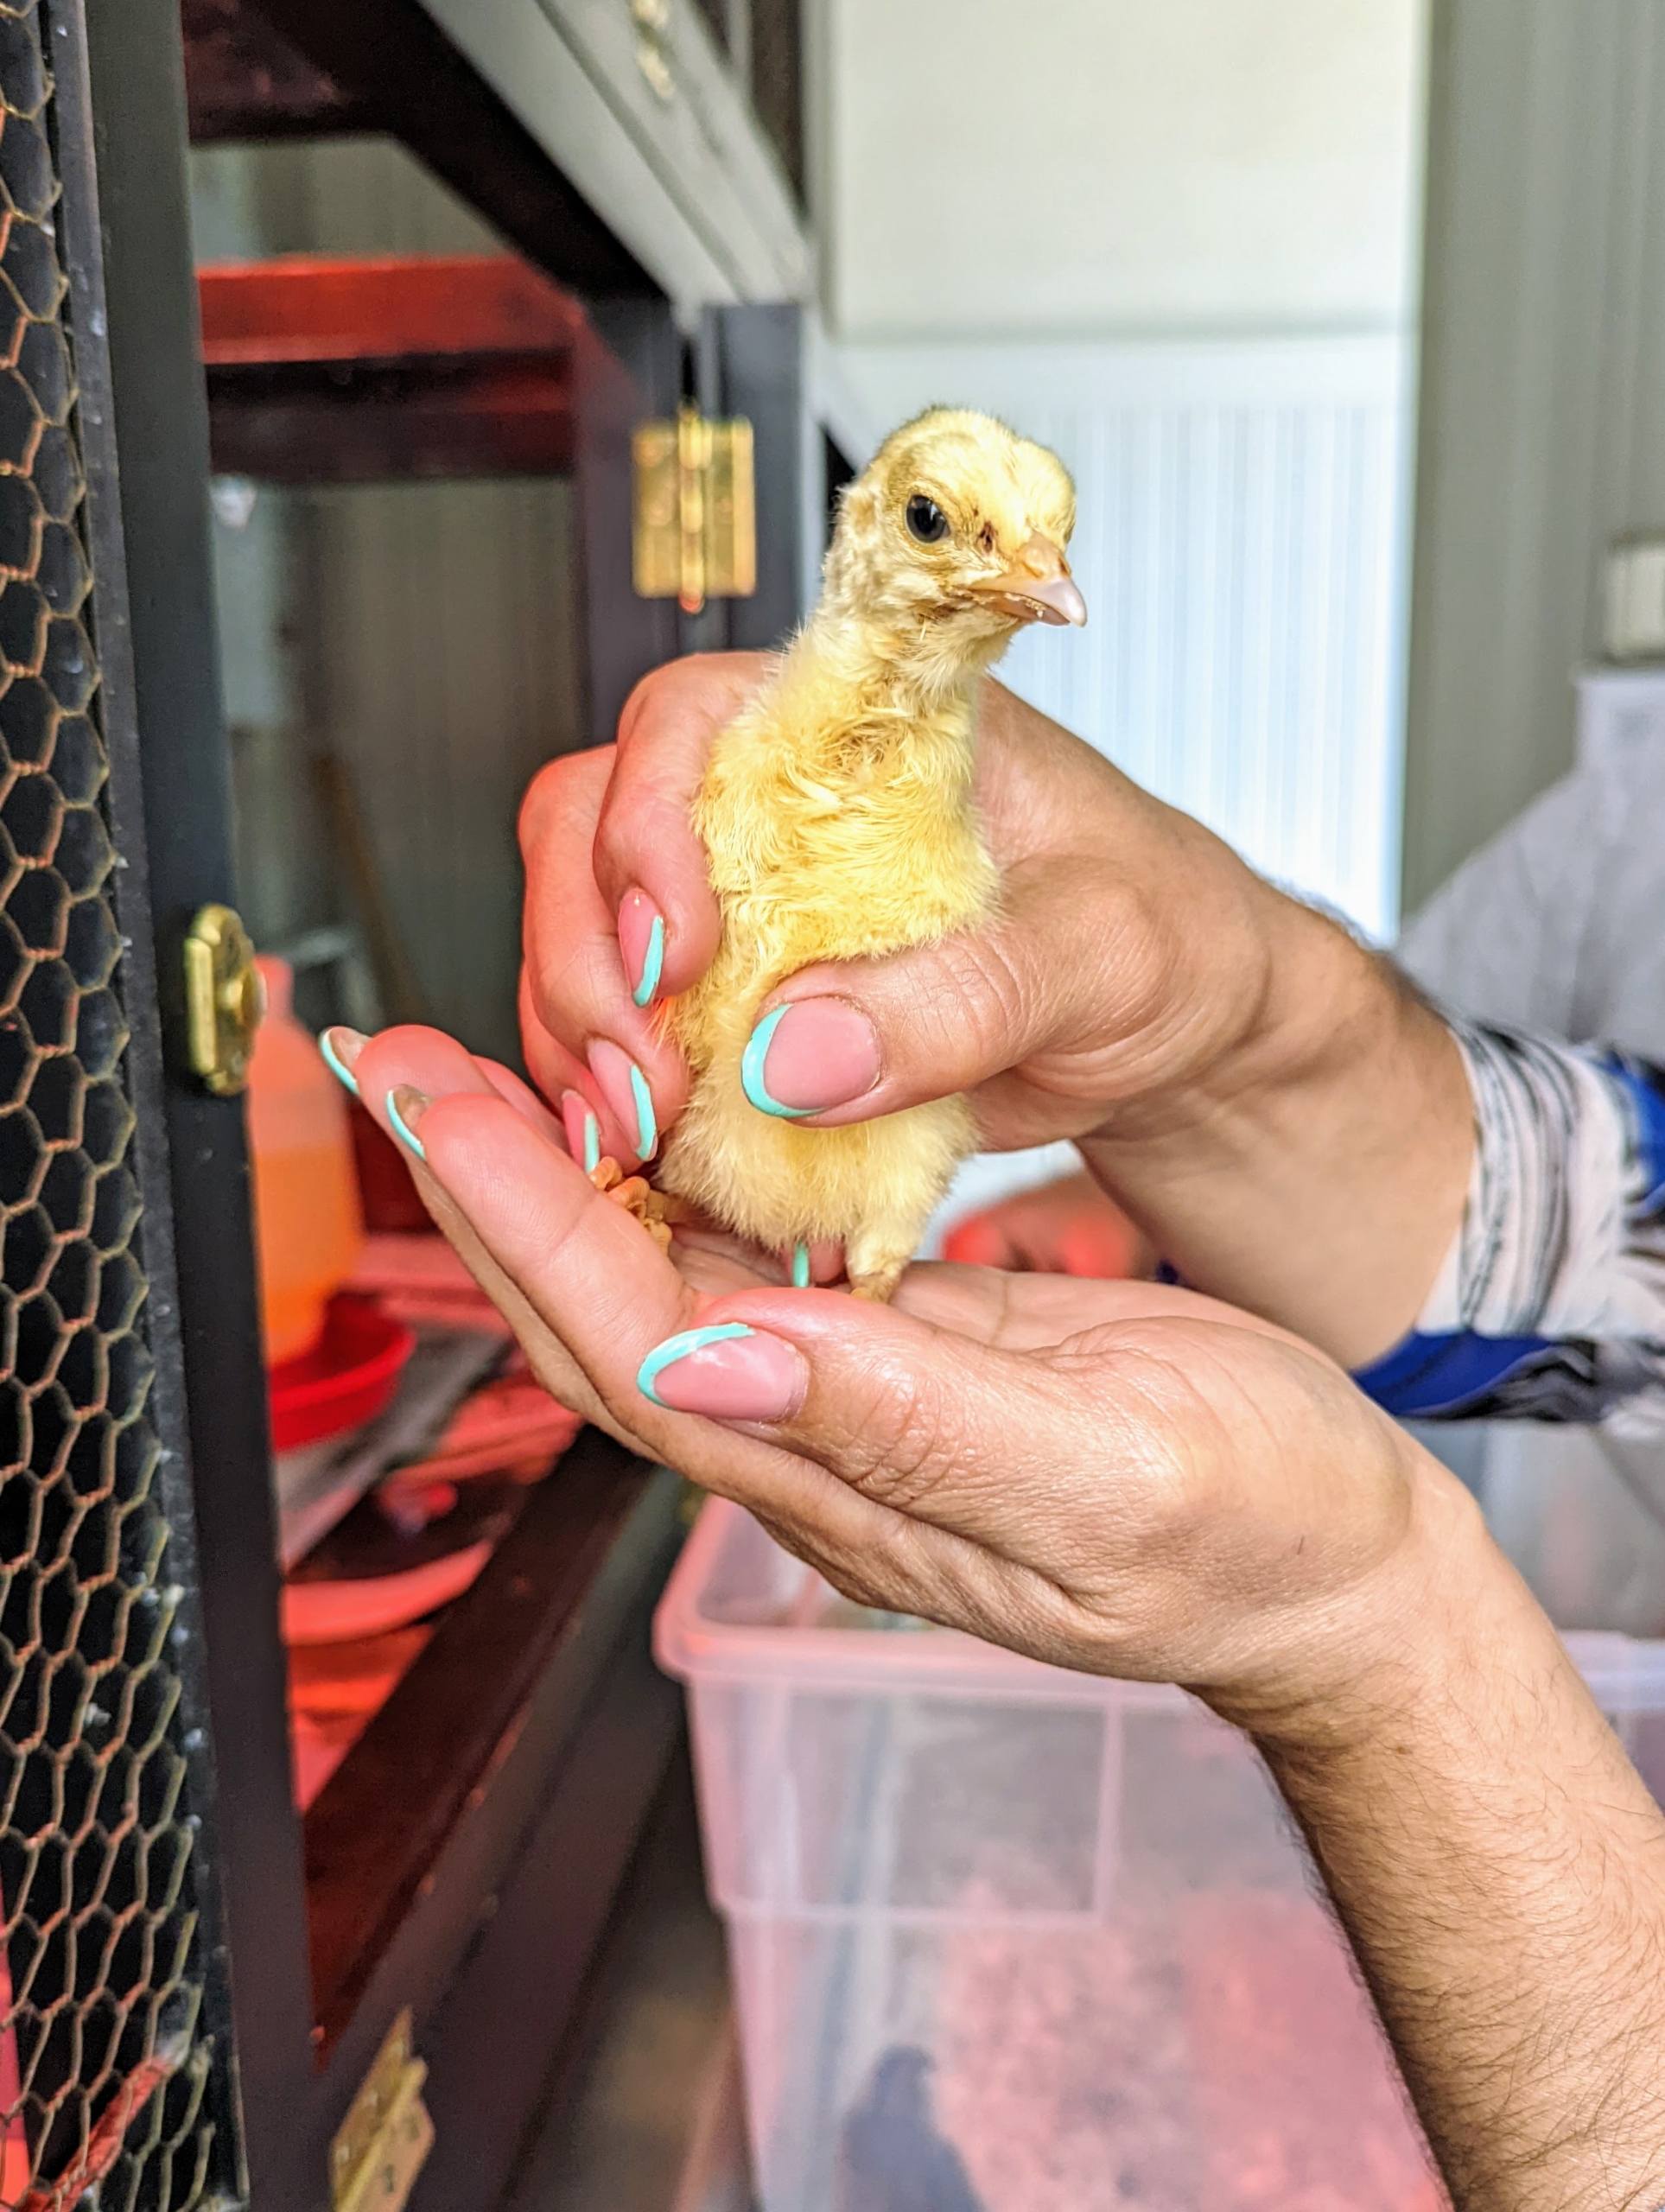
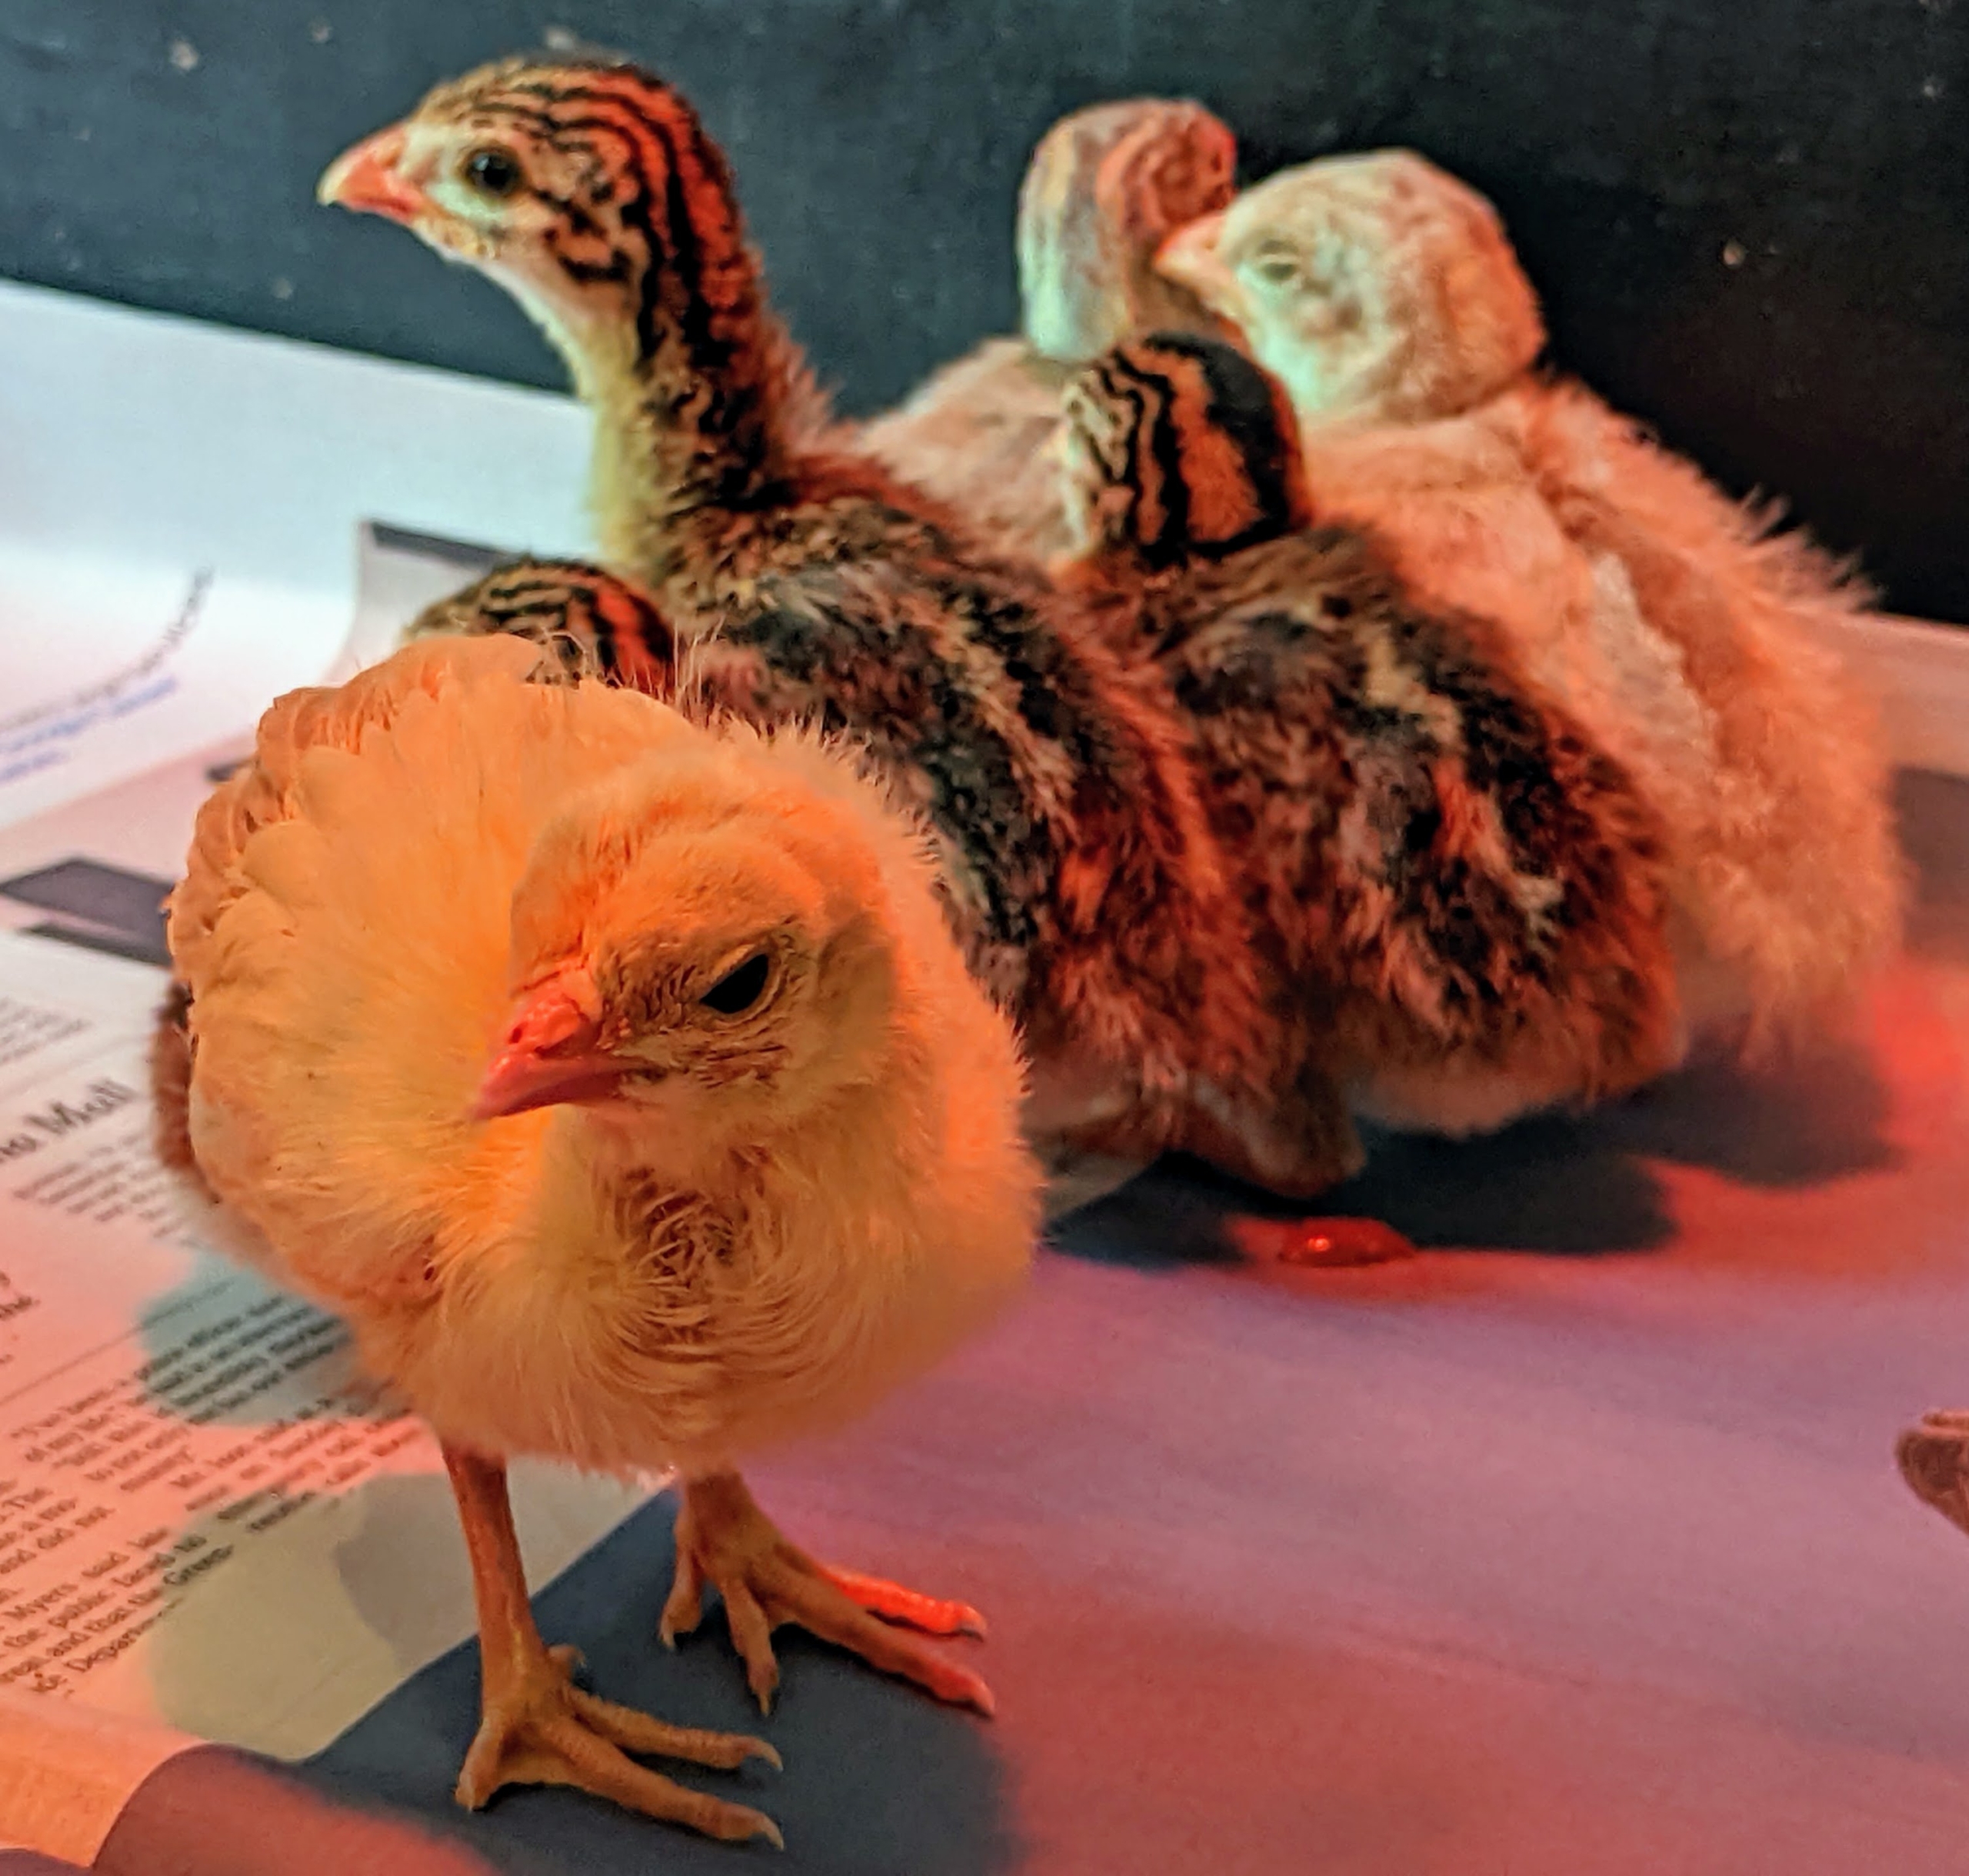
Here is the peachick. We are not yet sure if it is a male or a female, but it is very healthy and doesn’t mind being the only peachick in the group of Guinea keets.
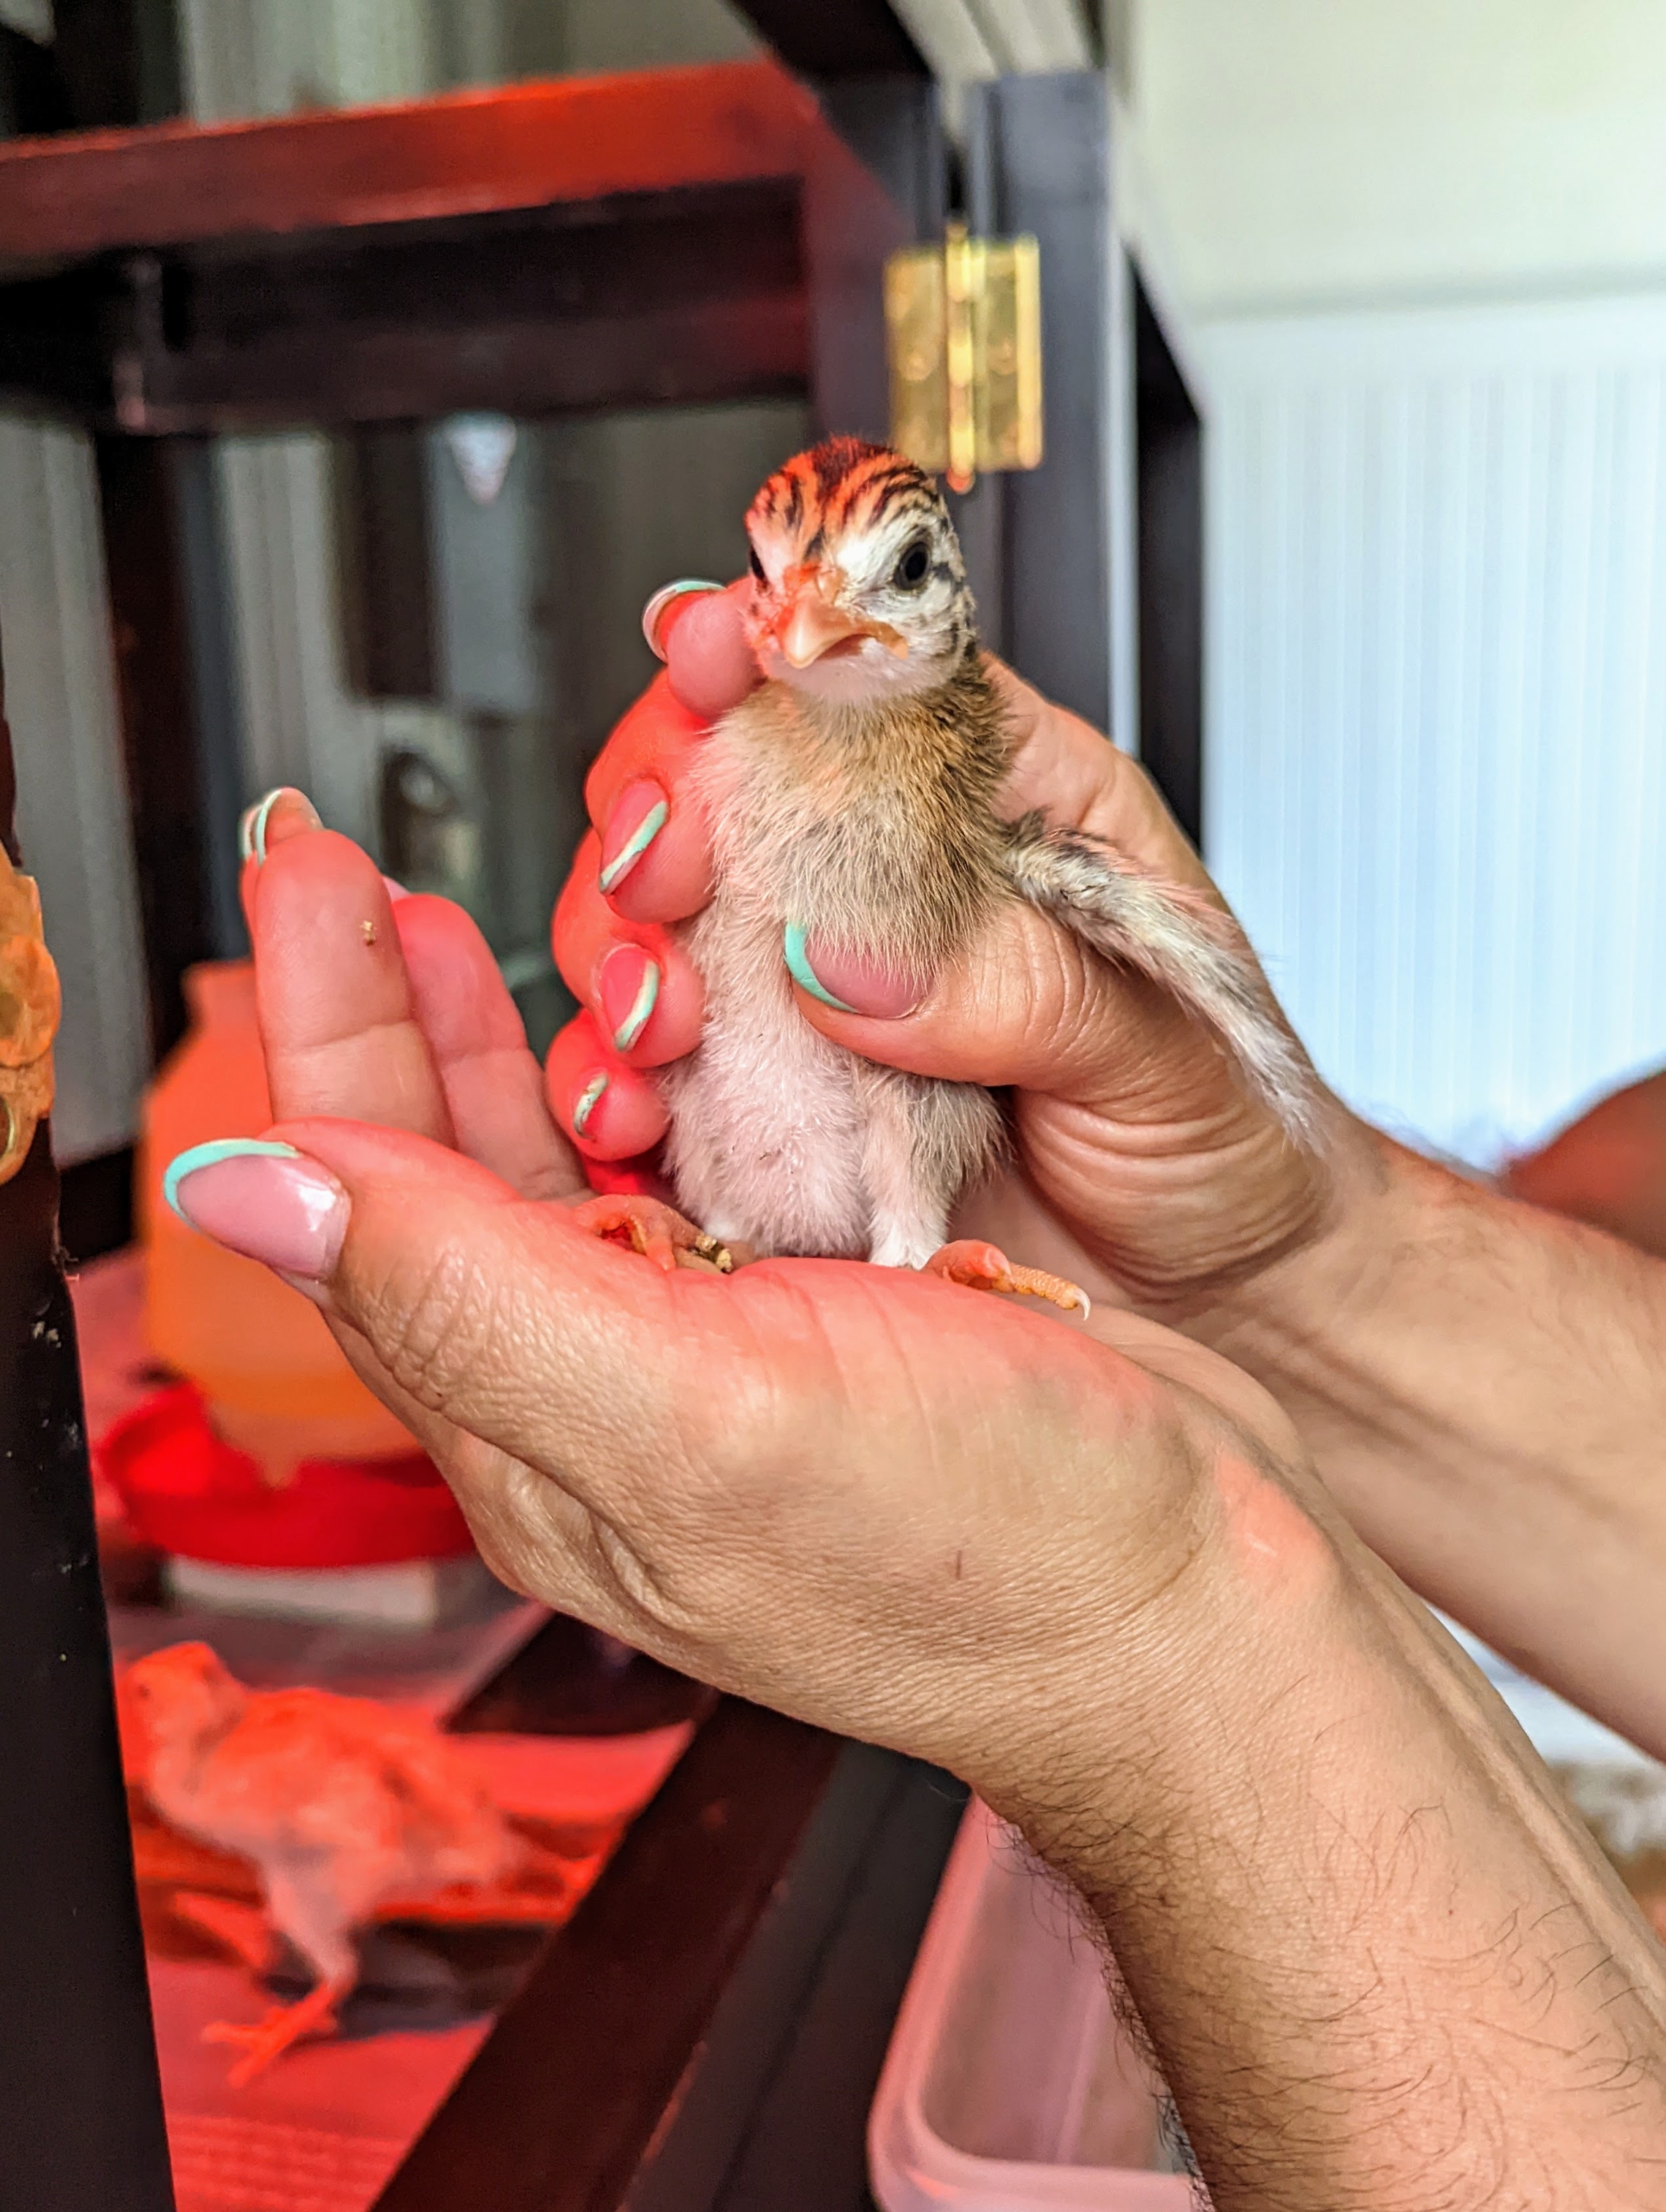
And here is one of the Guinea keets being put in the cage. This youngster is very alert and curious.
Keets are Guinea fowl offspring that are younger than 12 weeks old.
Guinea fowl are native to Africa, and as such, are very susceptible to dampness during the first two weeks after hatching. After the initial two weeks, Guinea keets are widely considered the hardiest of all domestic fowl.
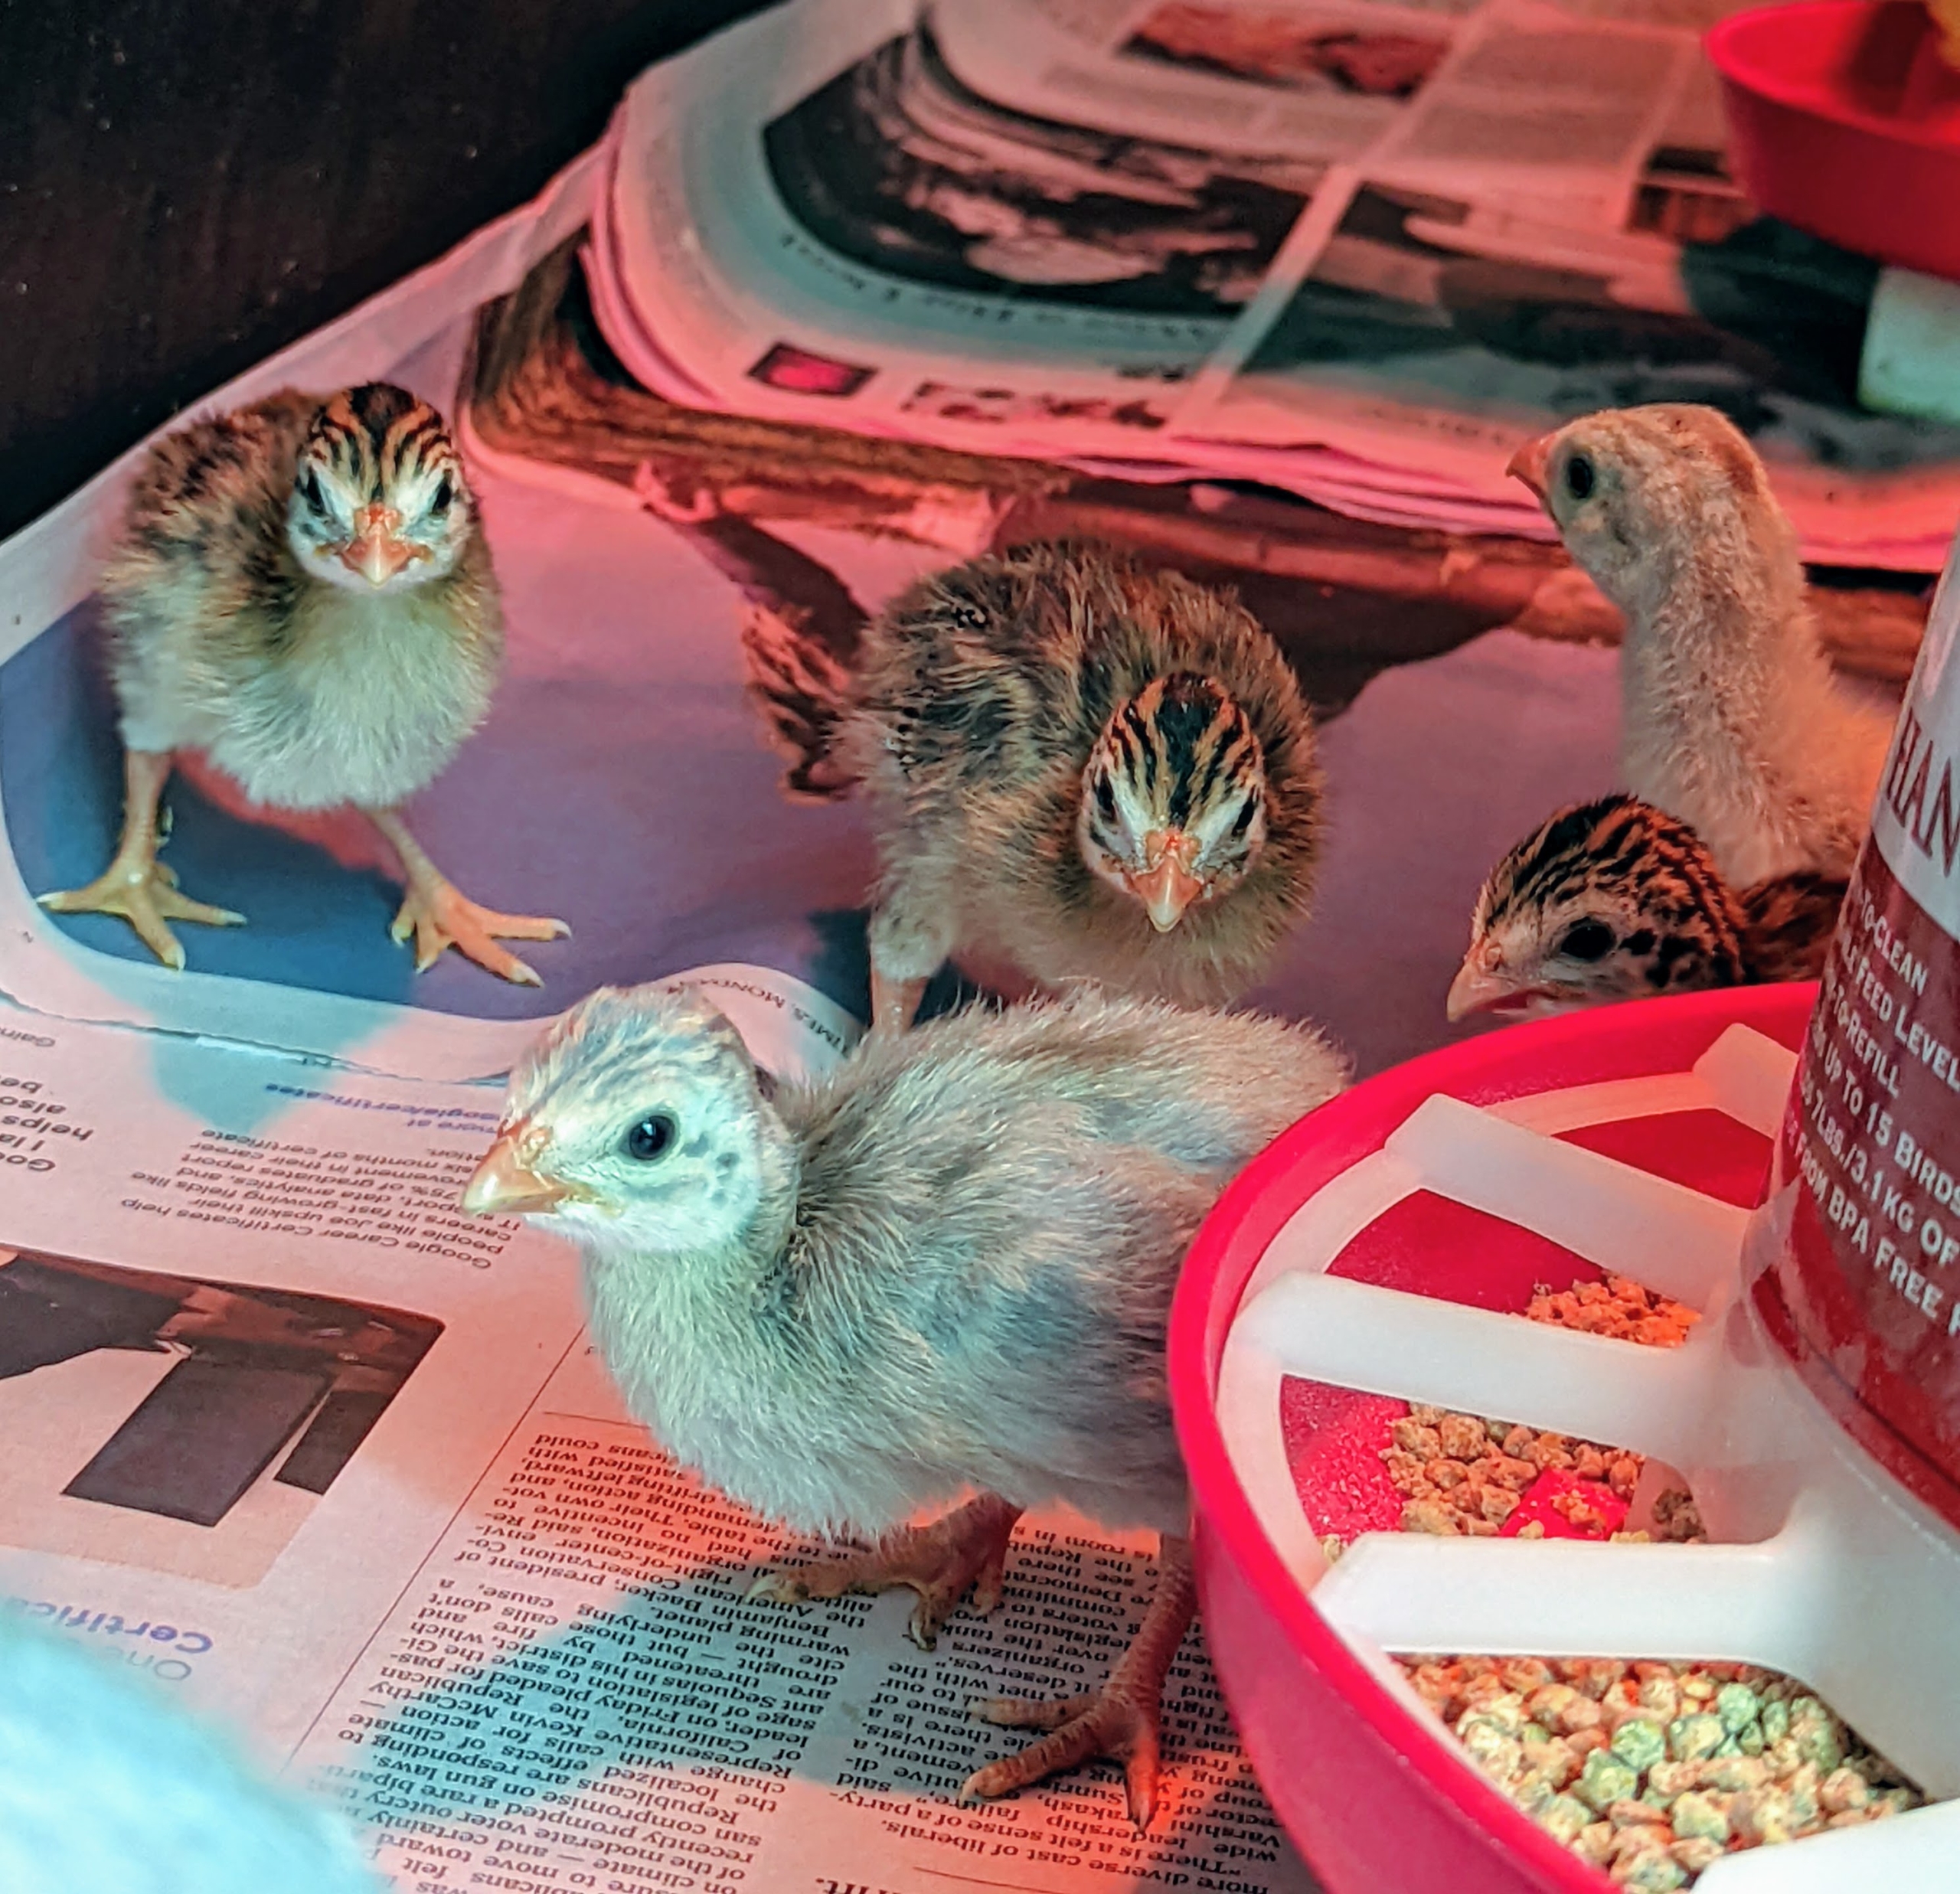
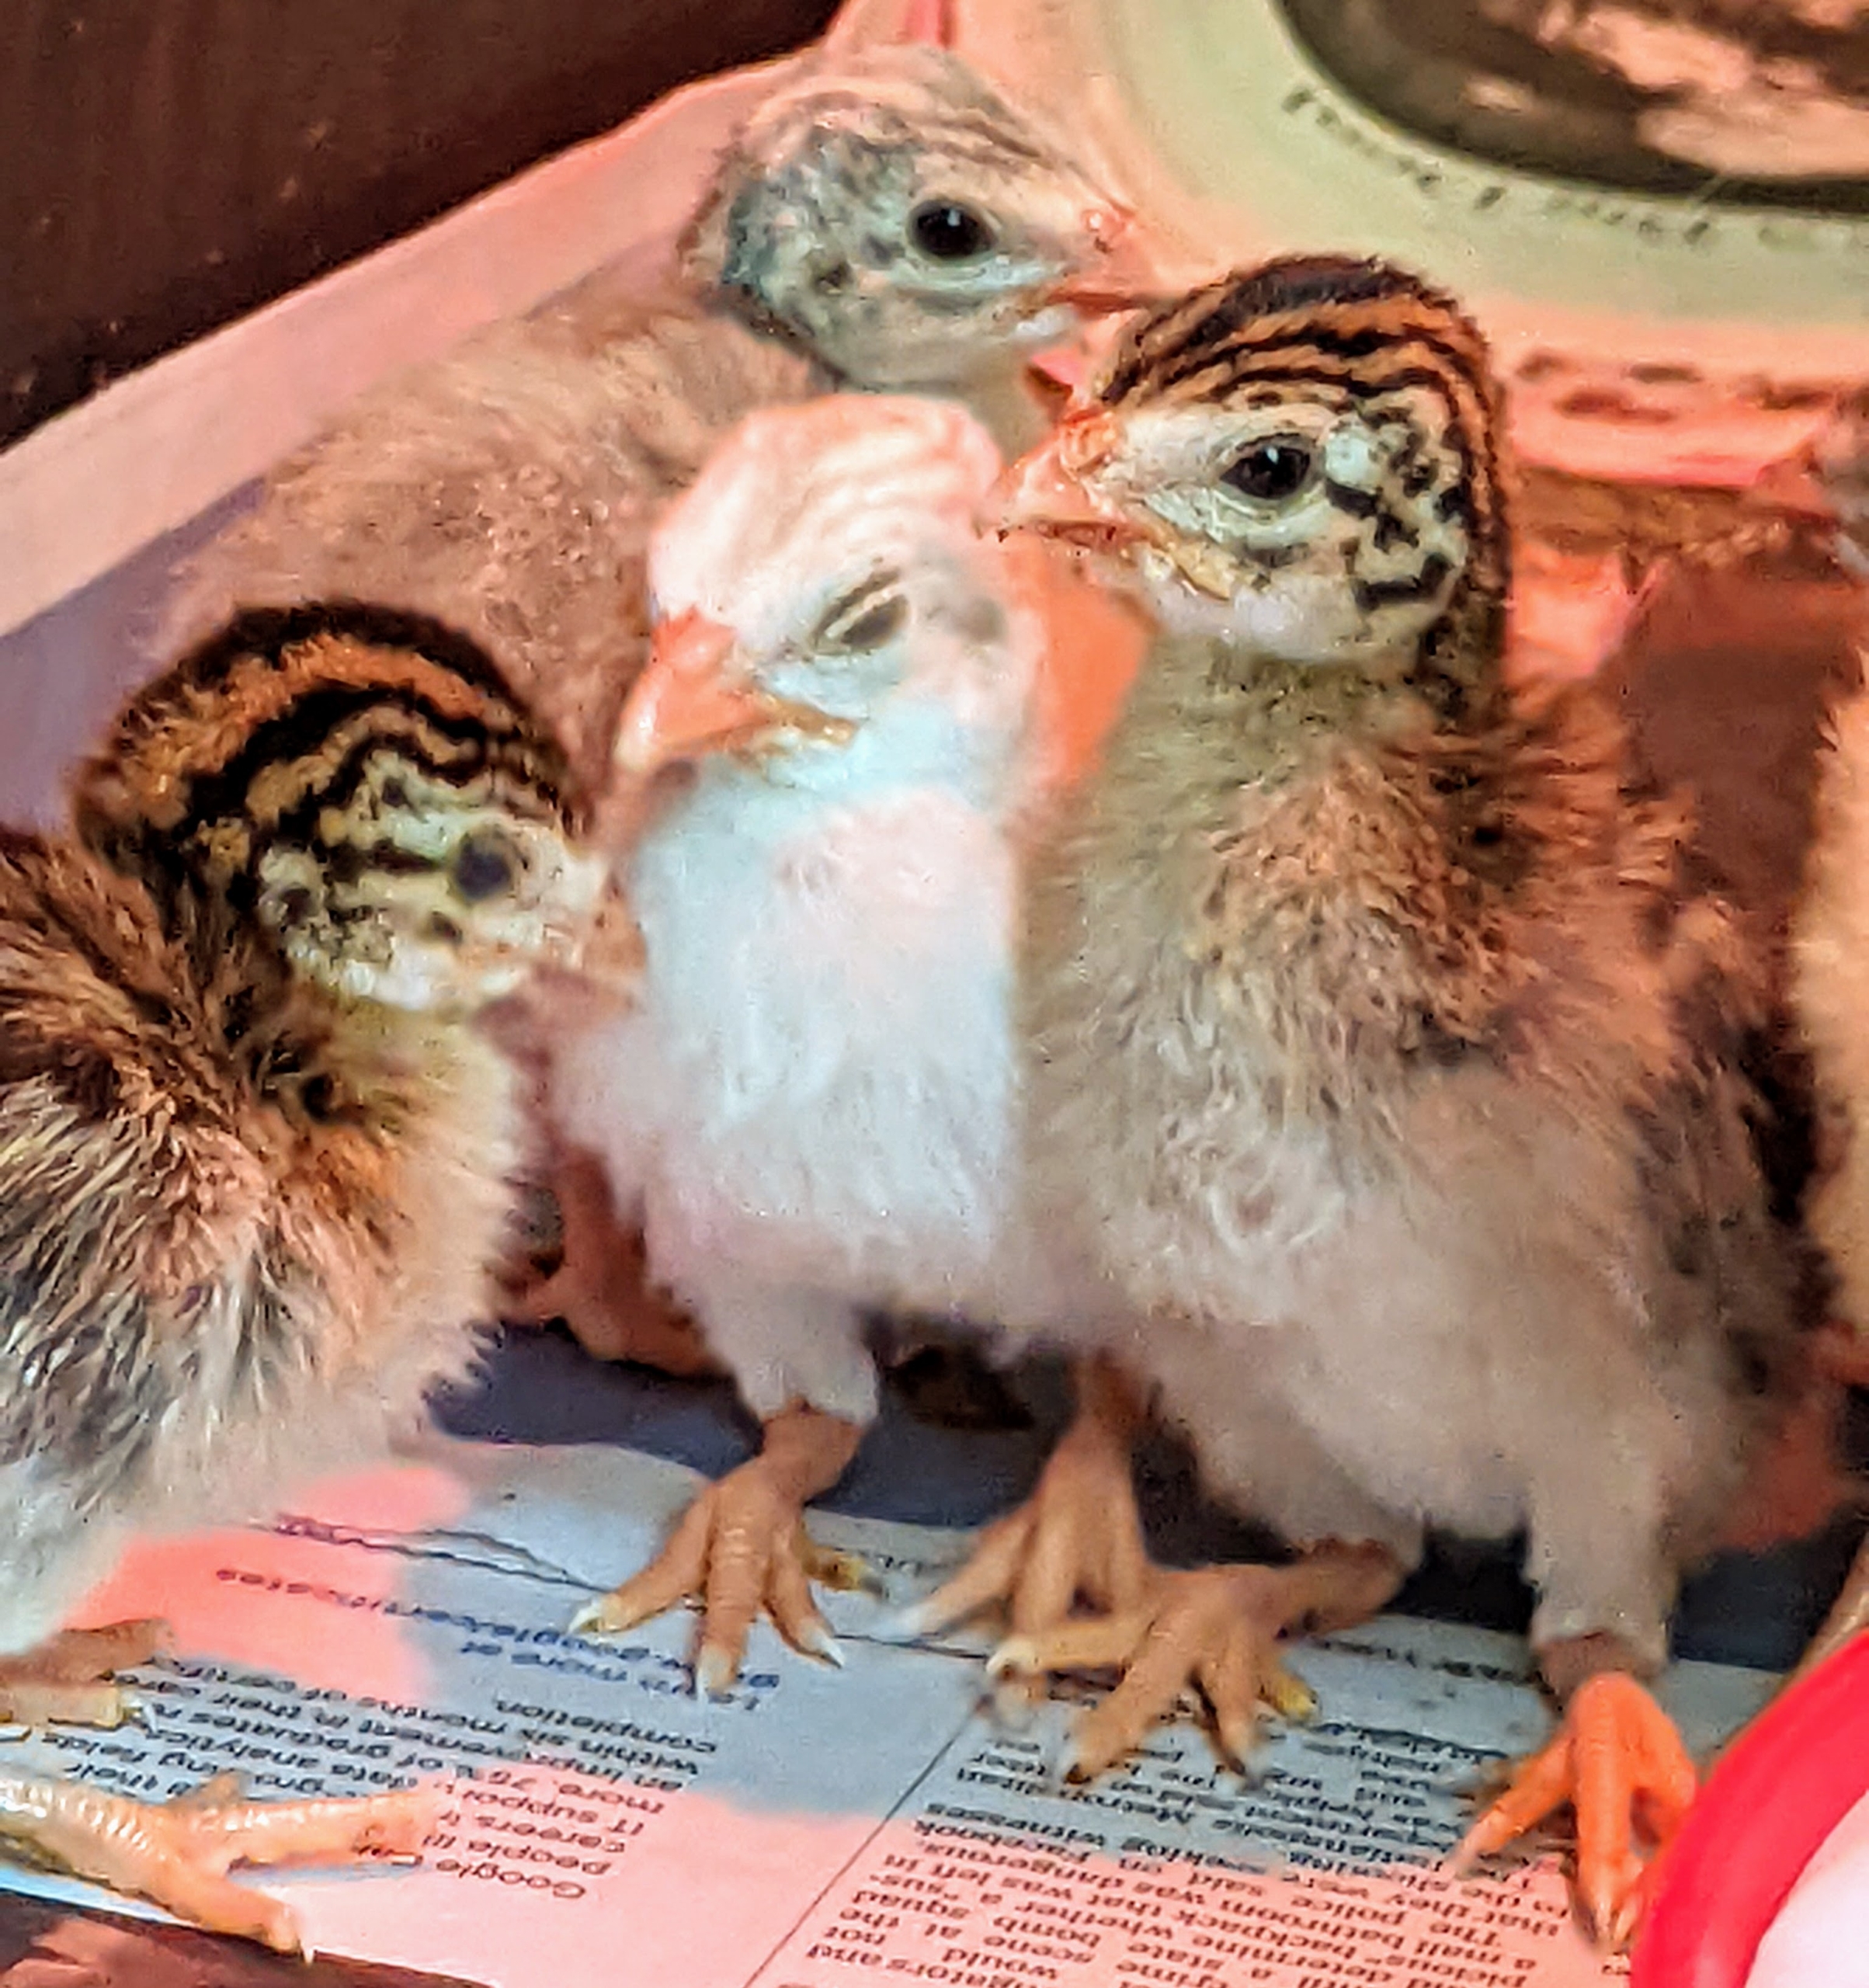
Here is the peachick in front of the keets. Keets are mostly brown with black stripes and markings with tan underbellies. The head has a wide black stripe down the center with two narrow black stripes on each side, with narrow orange stripes between the black. The beak, legs, and feet are a light orange.
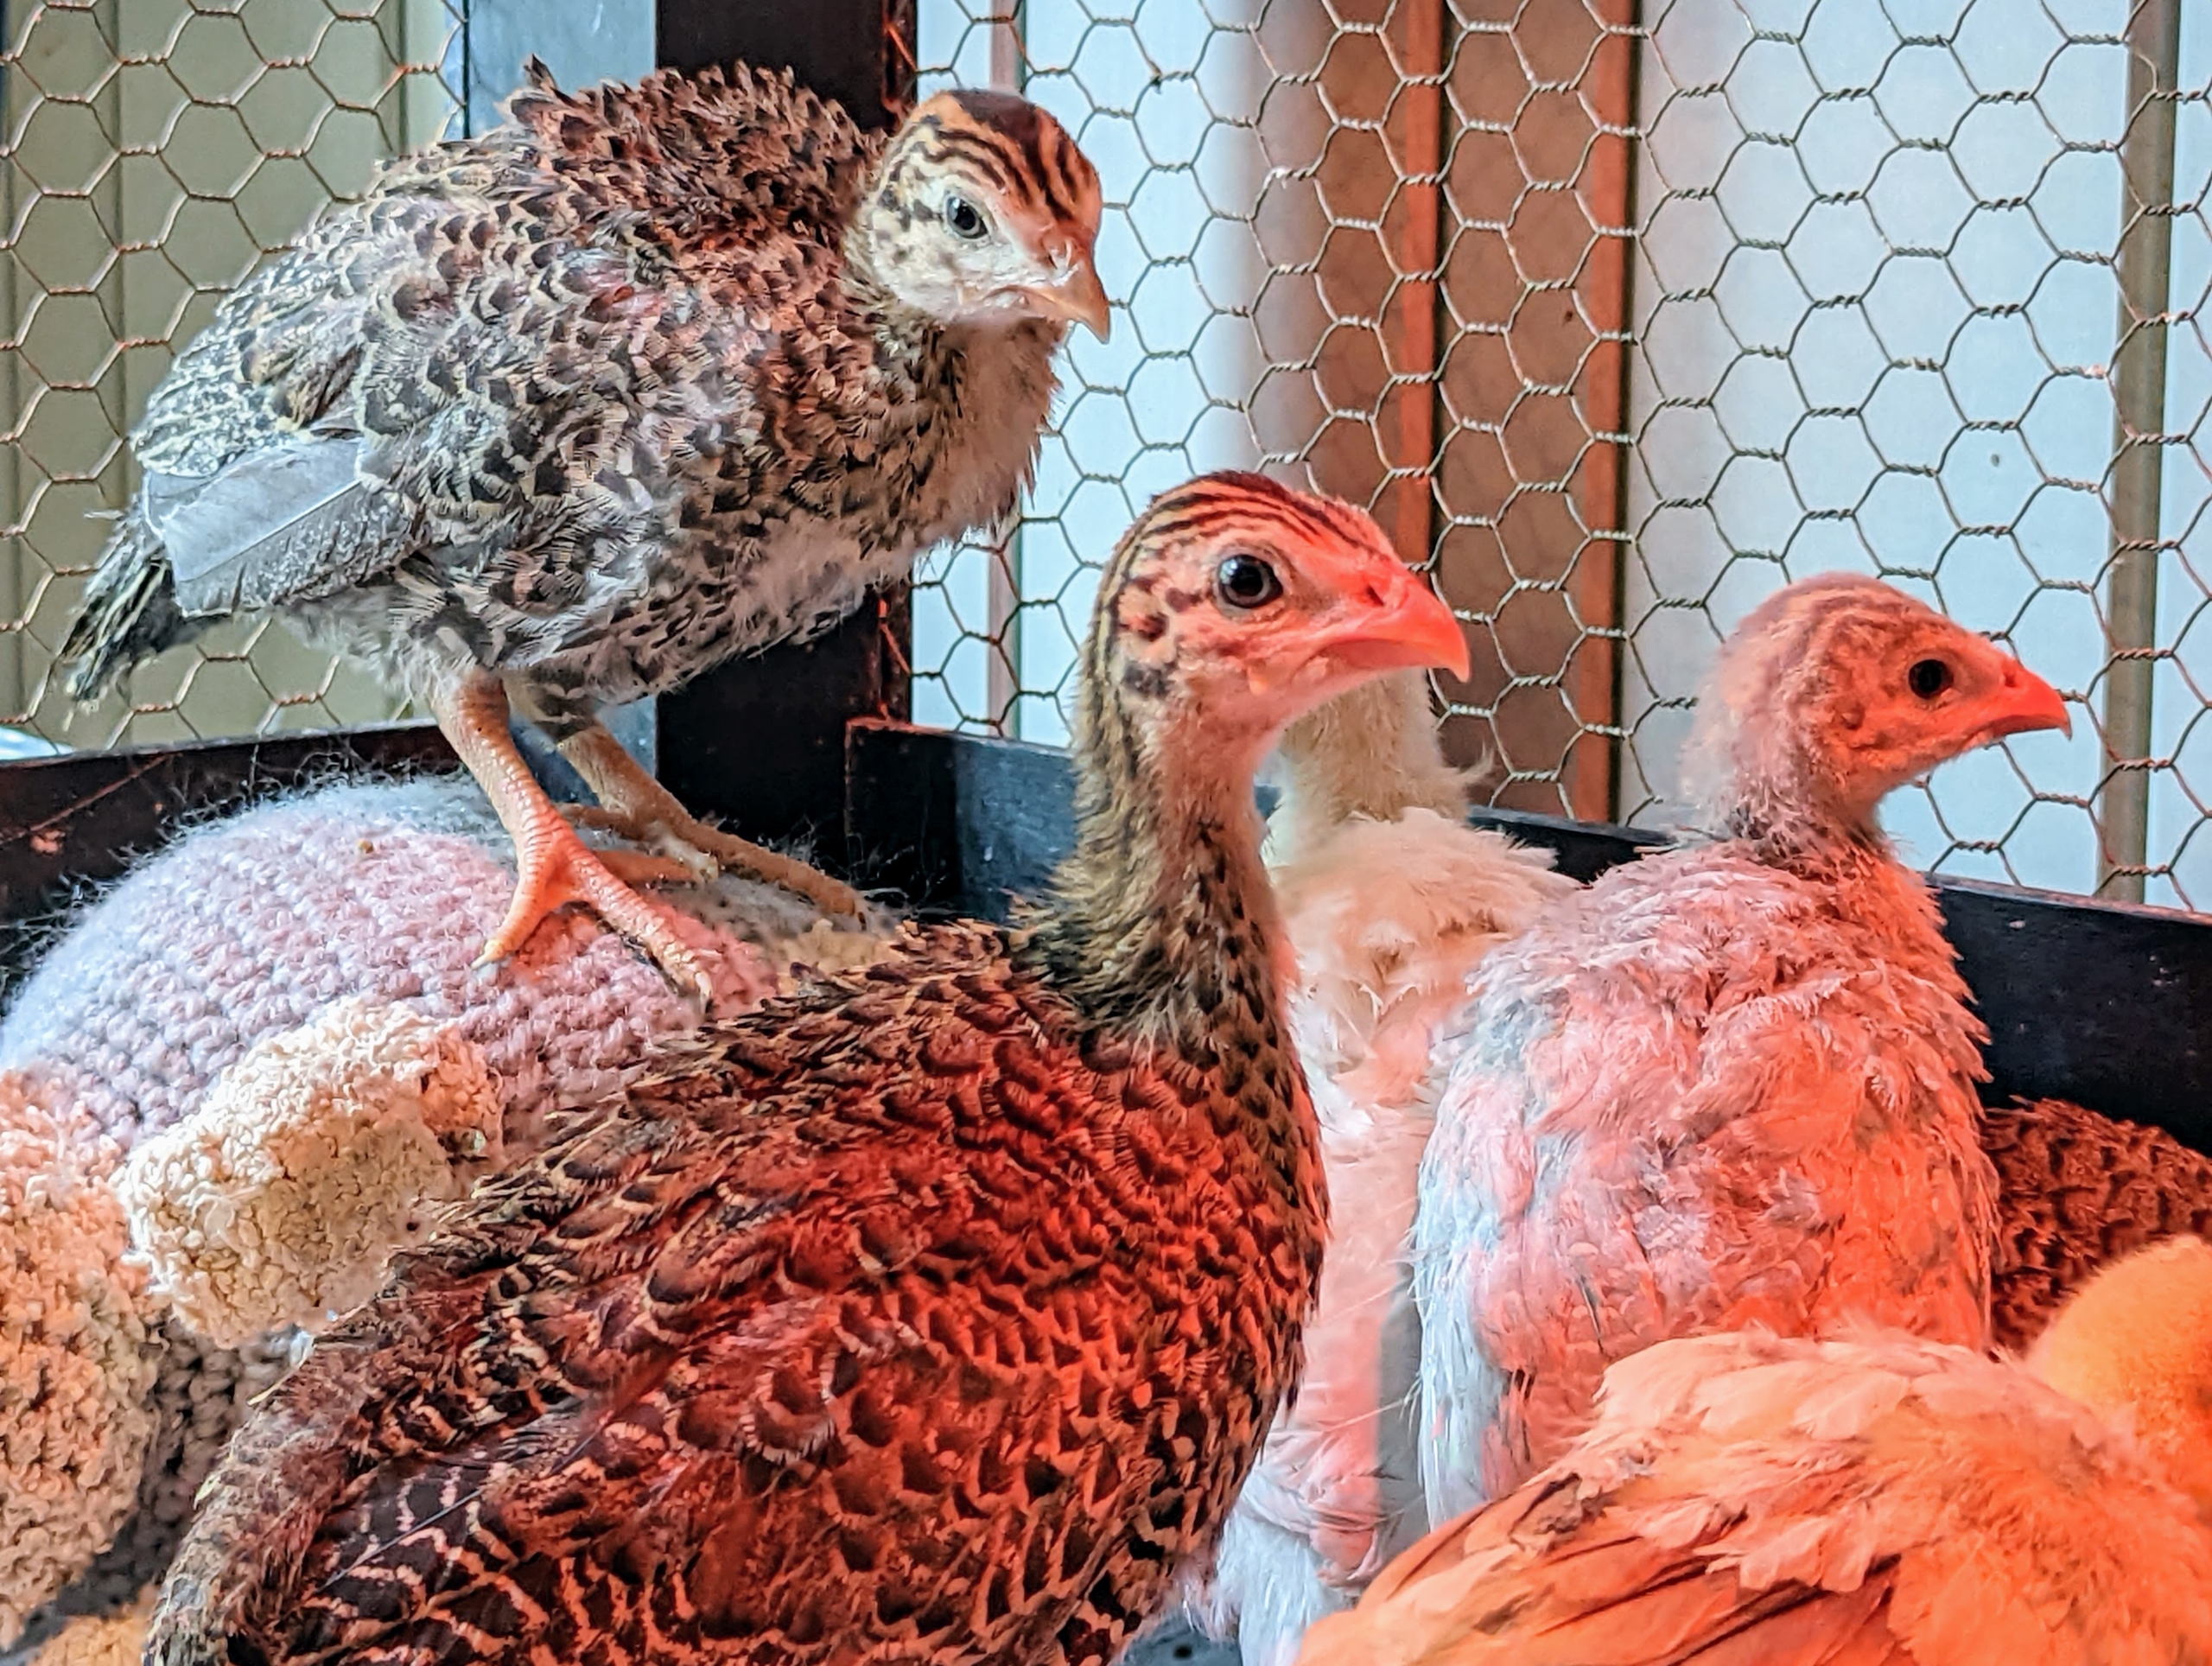
Mature Guinea fowl colors are mostly shades of blue, brown, and white or combinations thereof. In this group we have three traditional colored Guinea fowl and two lighter ones.
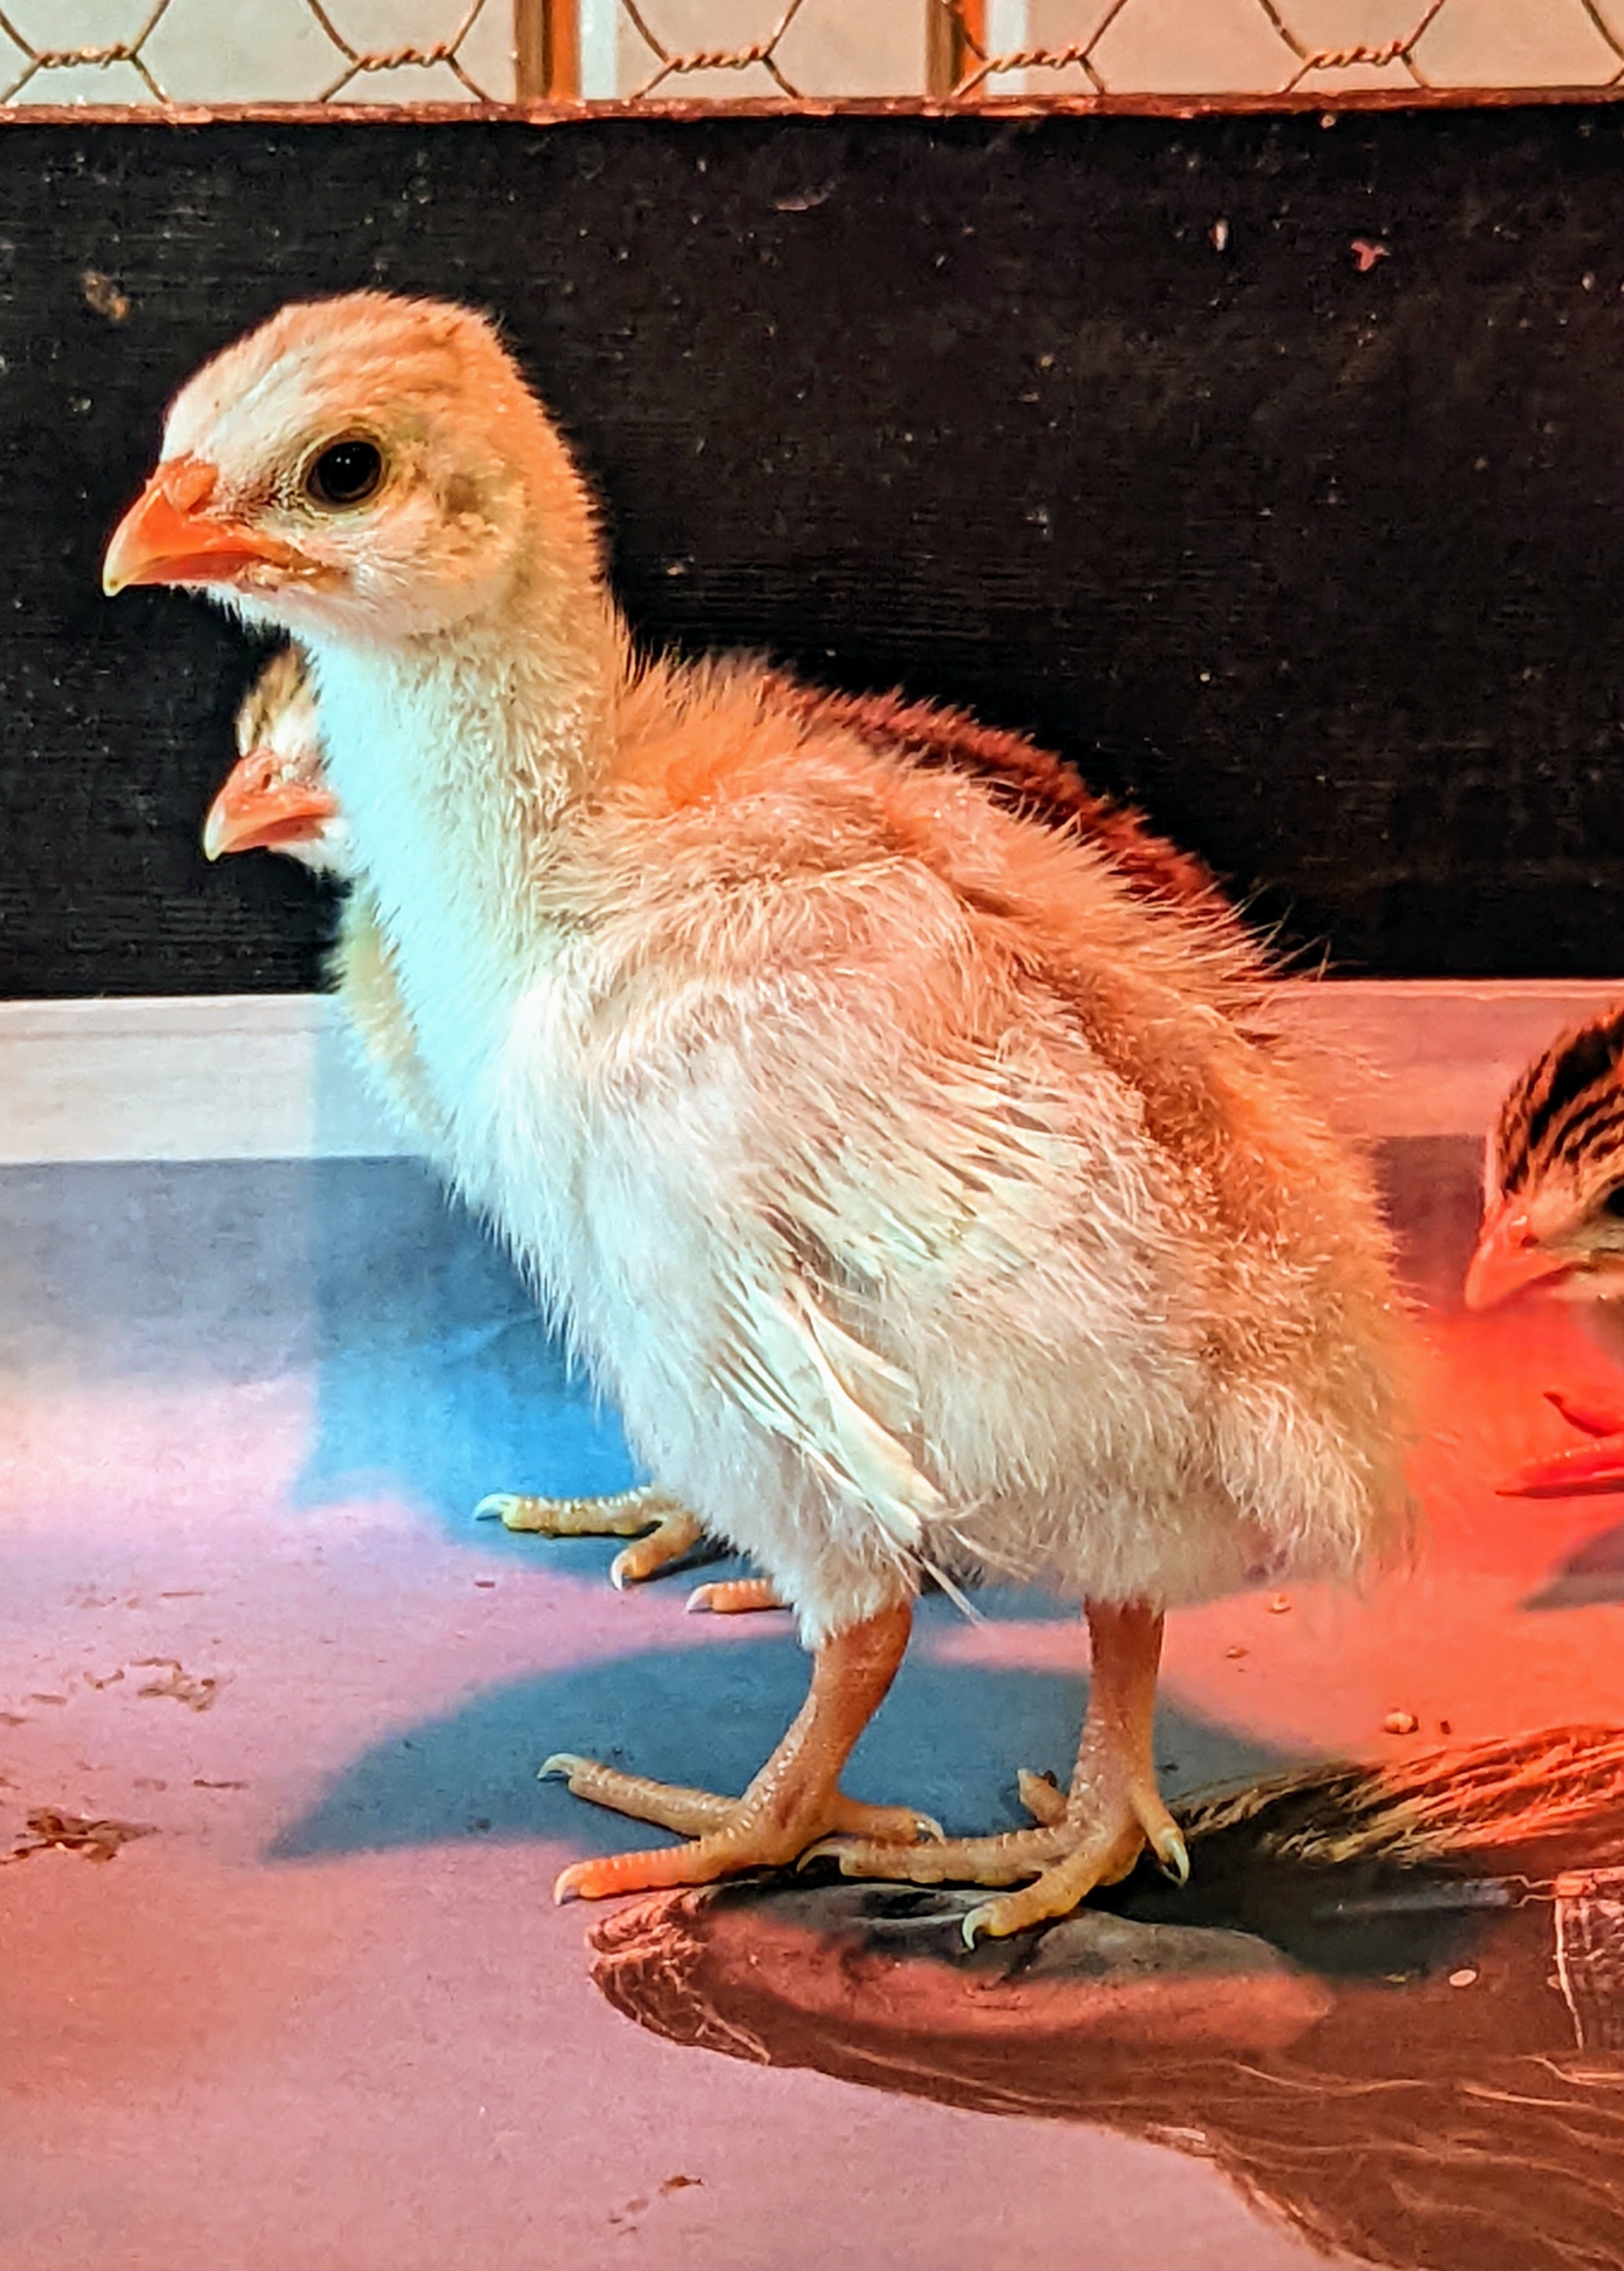
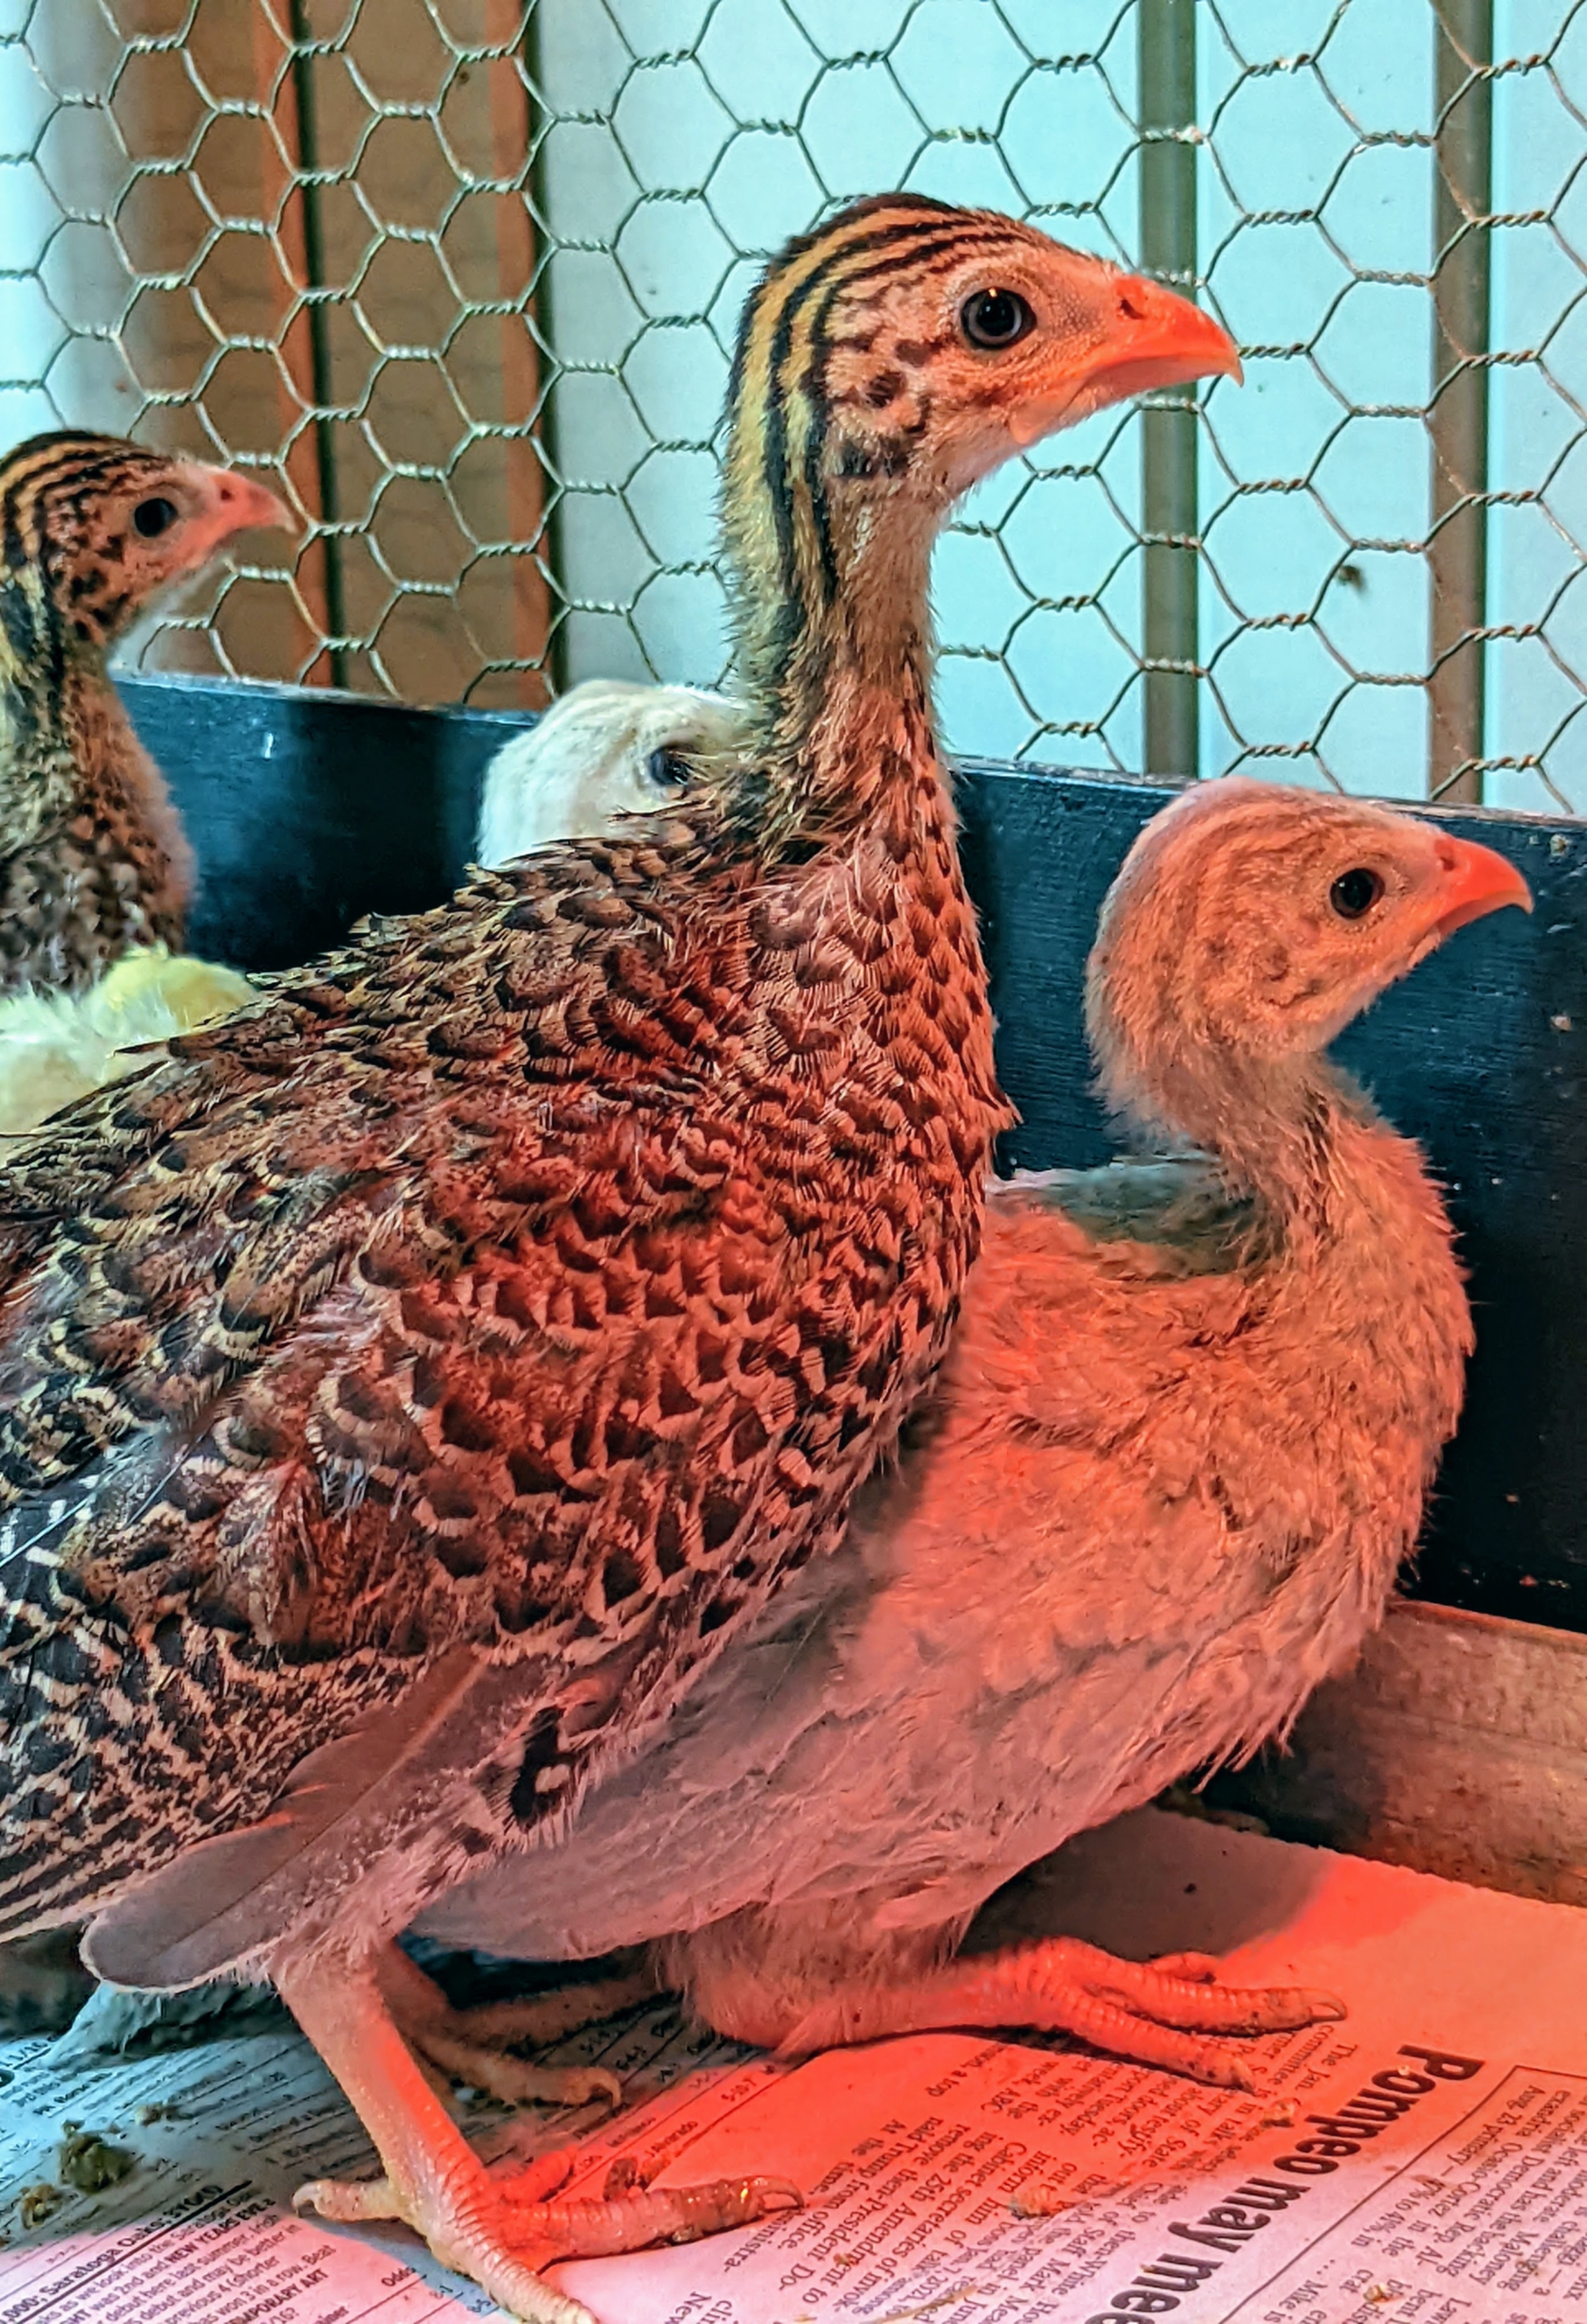
These keets have a lot of growing to do – just look how big their feet are.
Here is a lighter colored keet with some tan and dark brown markings.
Here, the same keets are about five weeks of age. The peachick in the lower left may even think it’s also a keet right now. Guinea fowl enjoy being with their own kind and will always maintain their own social groups even when integrated into the coop with the chickens.
And if well cared for, these babies can live up to 15-years.
With all this energy, these keets are already starting to perch and spread their wings. The The one in the back is perched on a stuffed toy we placed into the cage.
It is very difficult to sex Guinea fowl. The best way to tell males from females is by their cry. When they’re older, the female Guineas will make a two-syllable call that sounds something like “buckwheat, buckwheat”. Males can only make a one-syllable sound similar to “kickkkkk kickkkkk”. The males also have larger gills or wattles. And do you know what a group of Guinea fowl is called? The collective noun for guinea fowl is “confusion” or “rasp.”
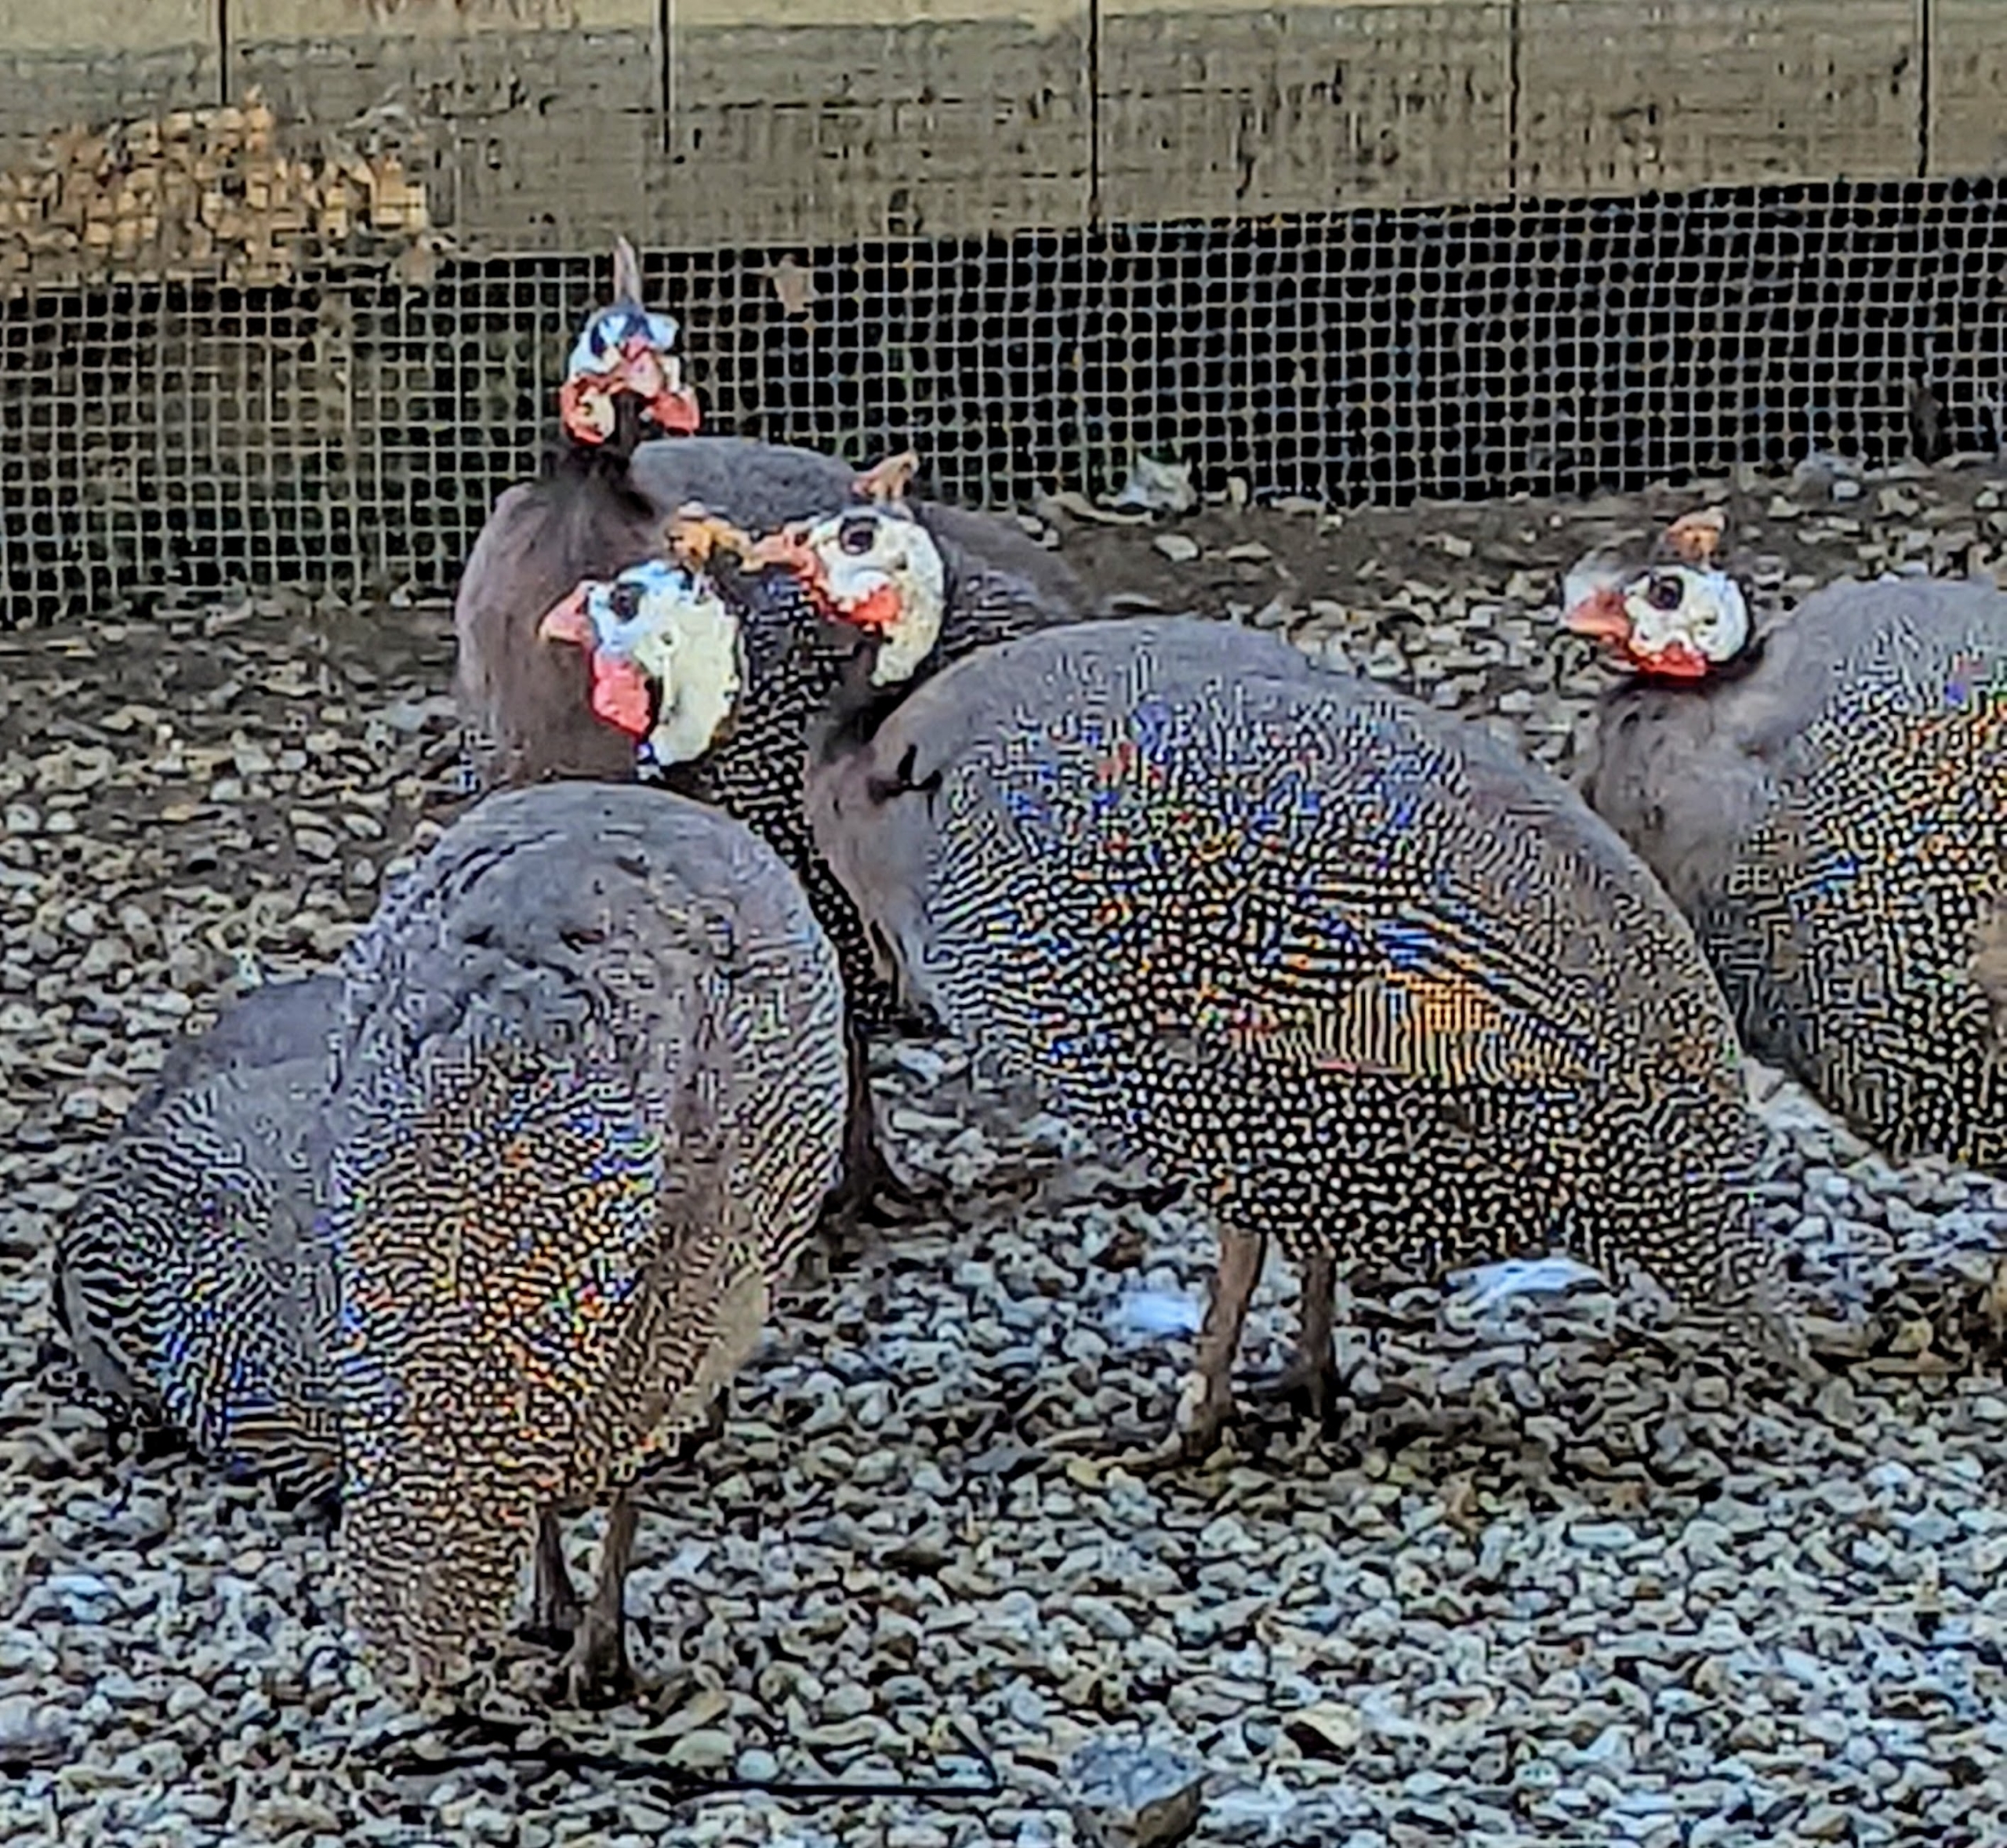
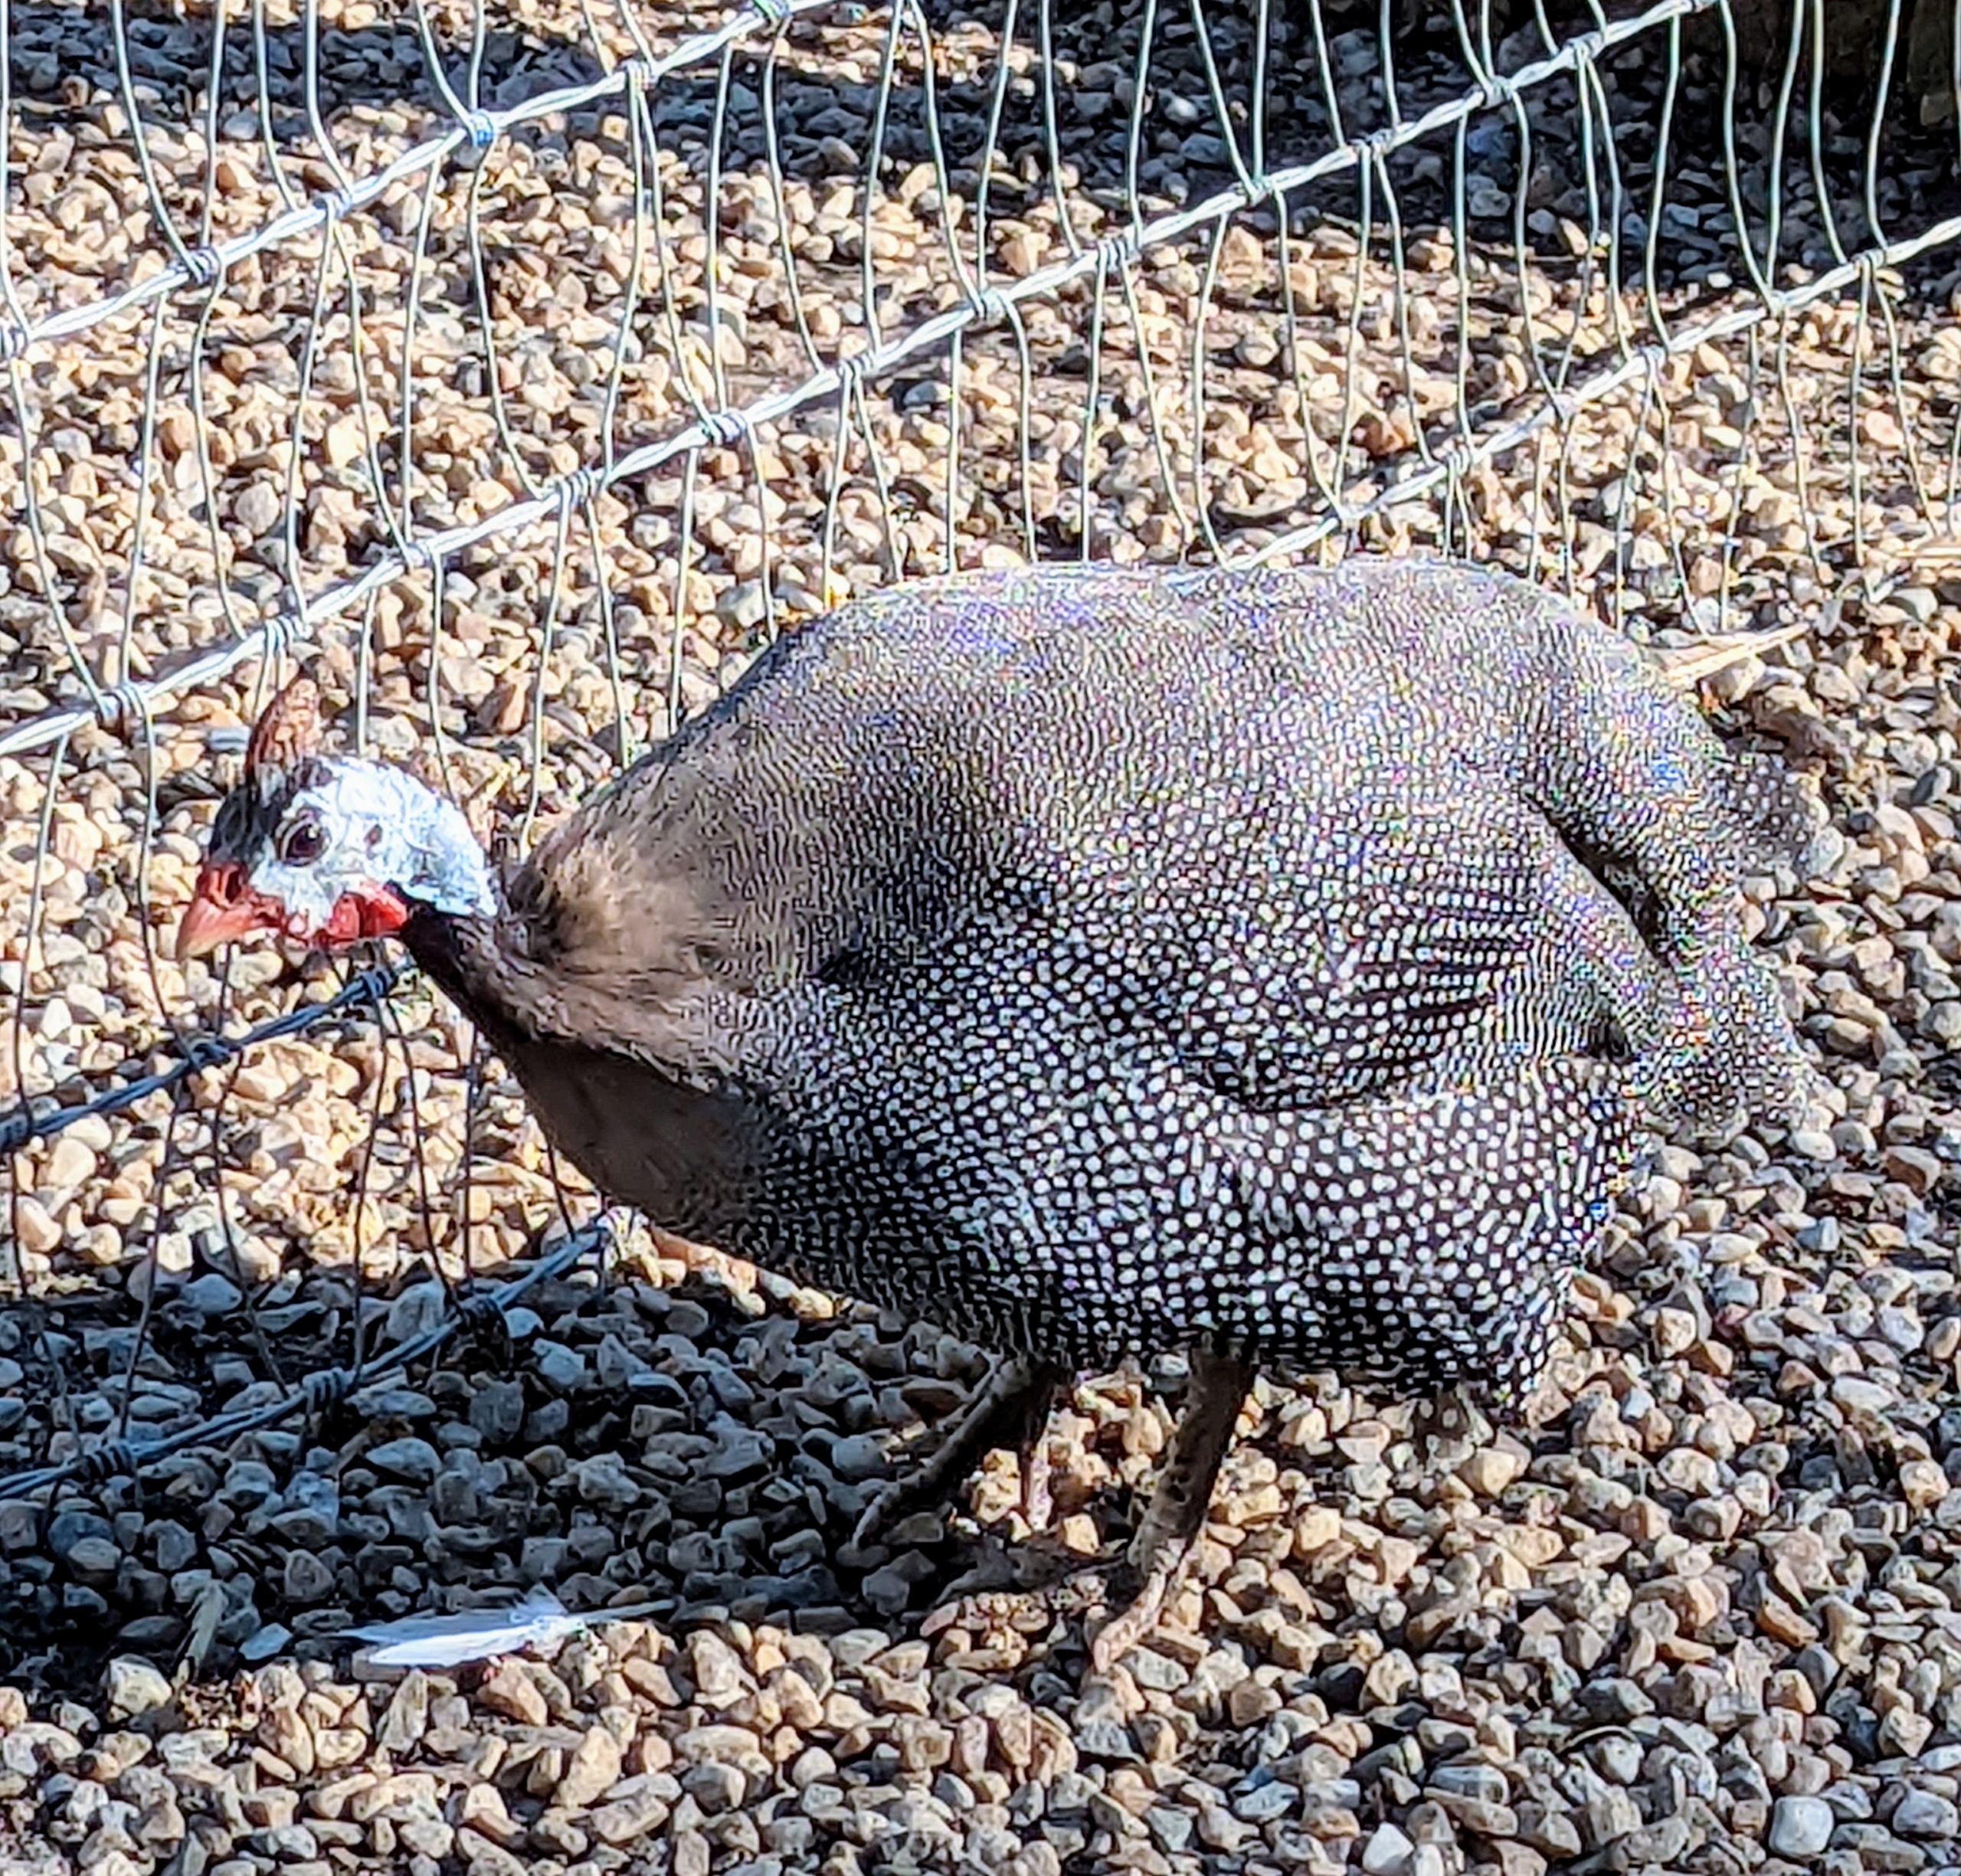
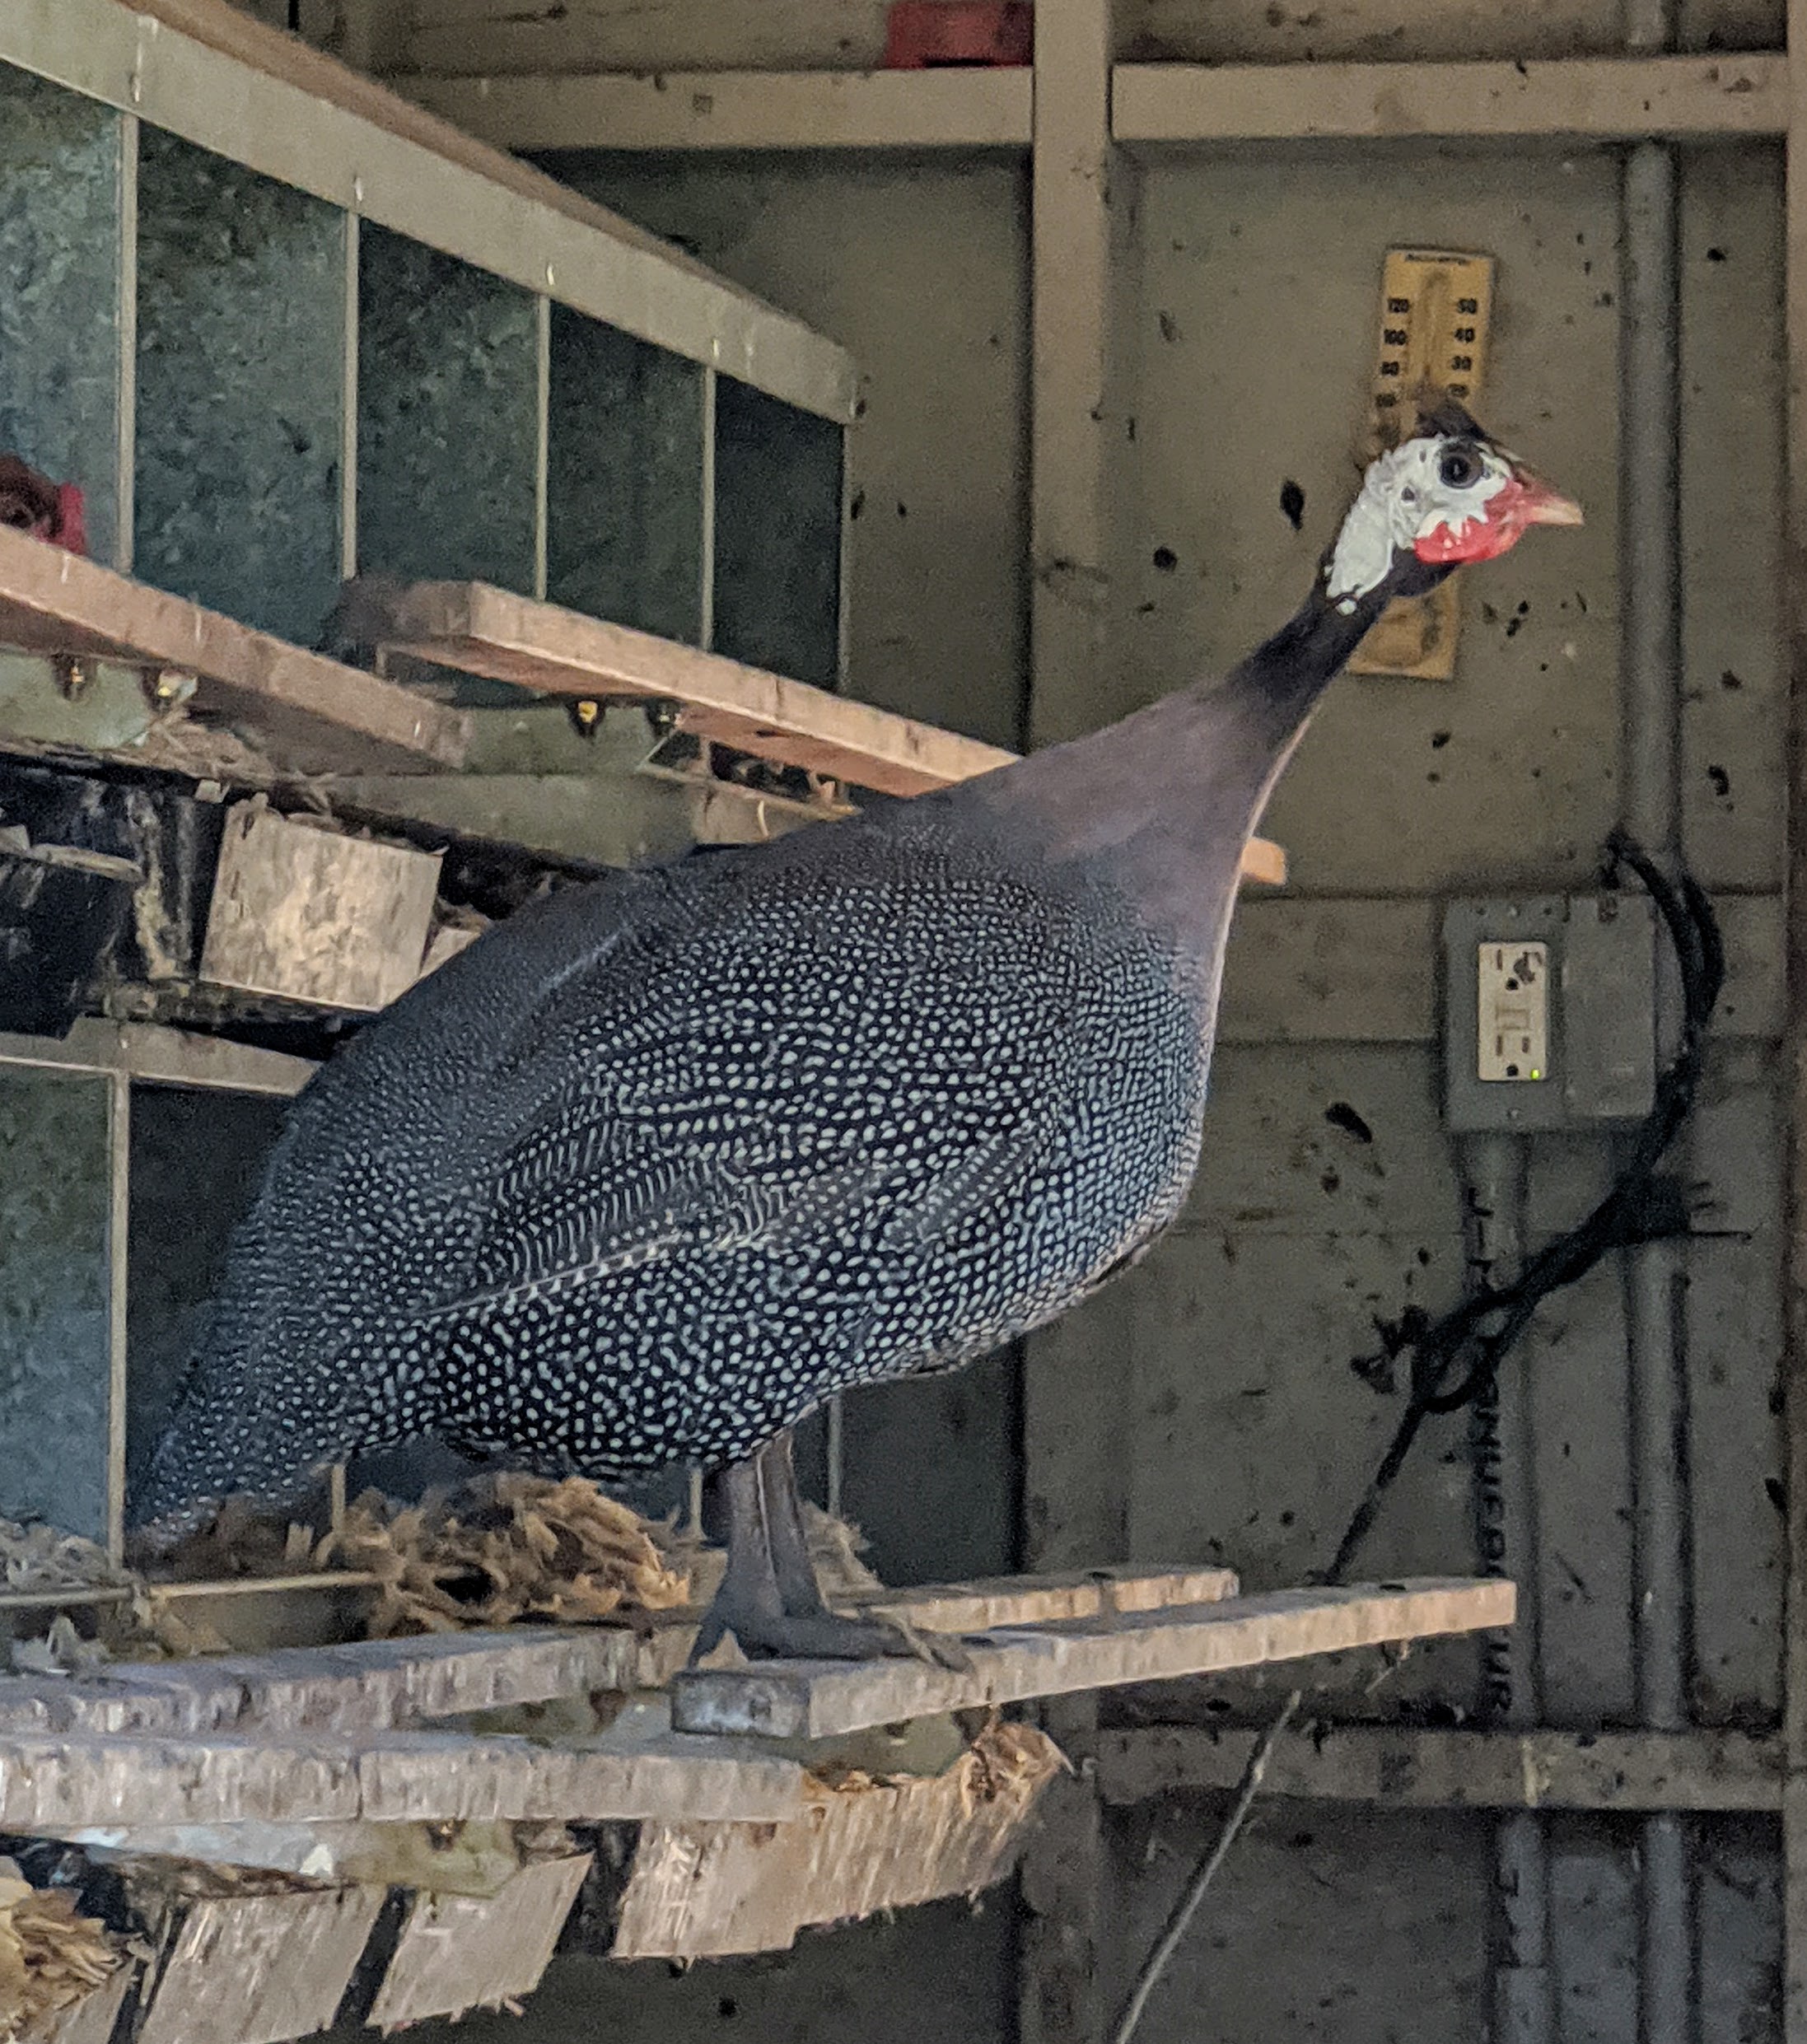
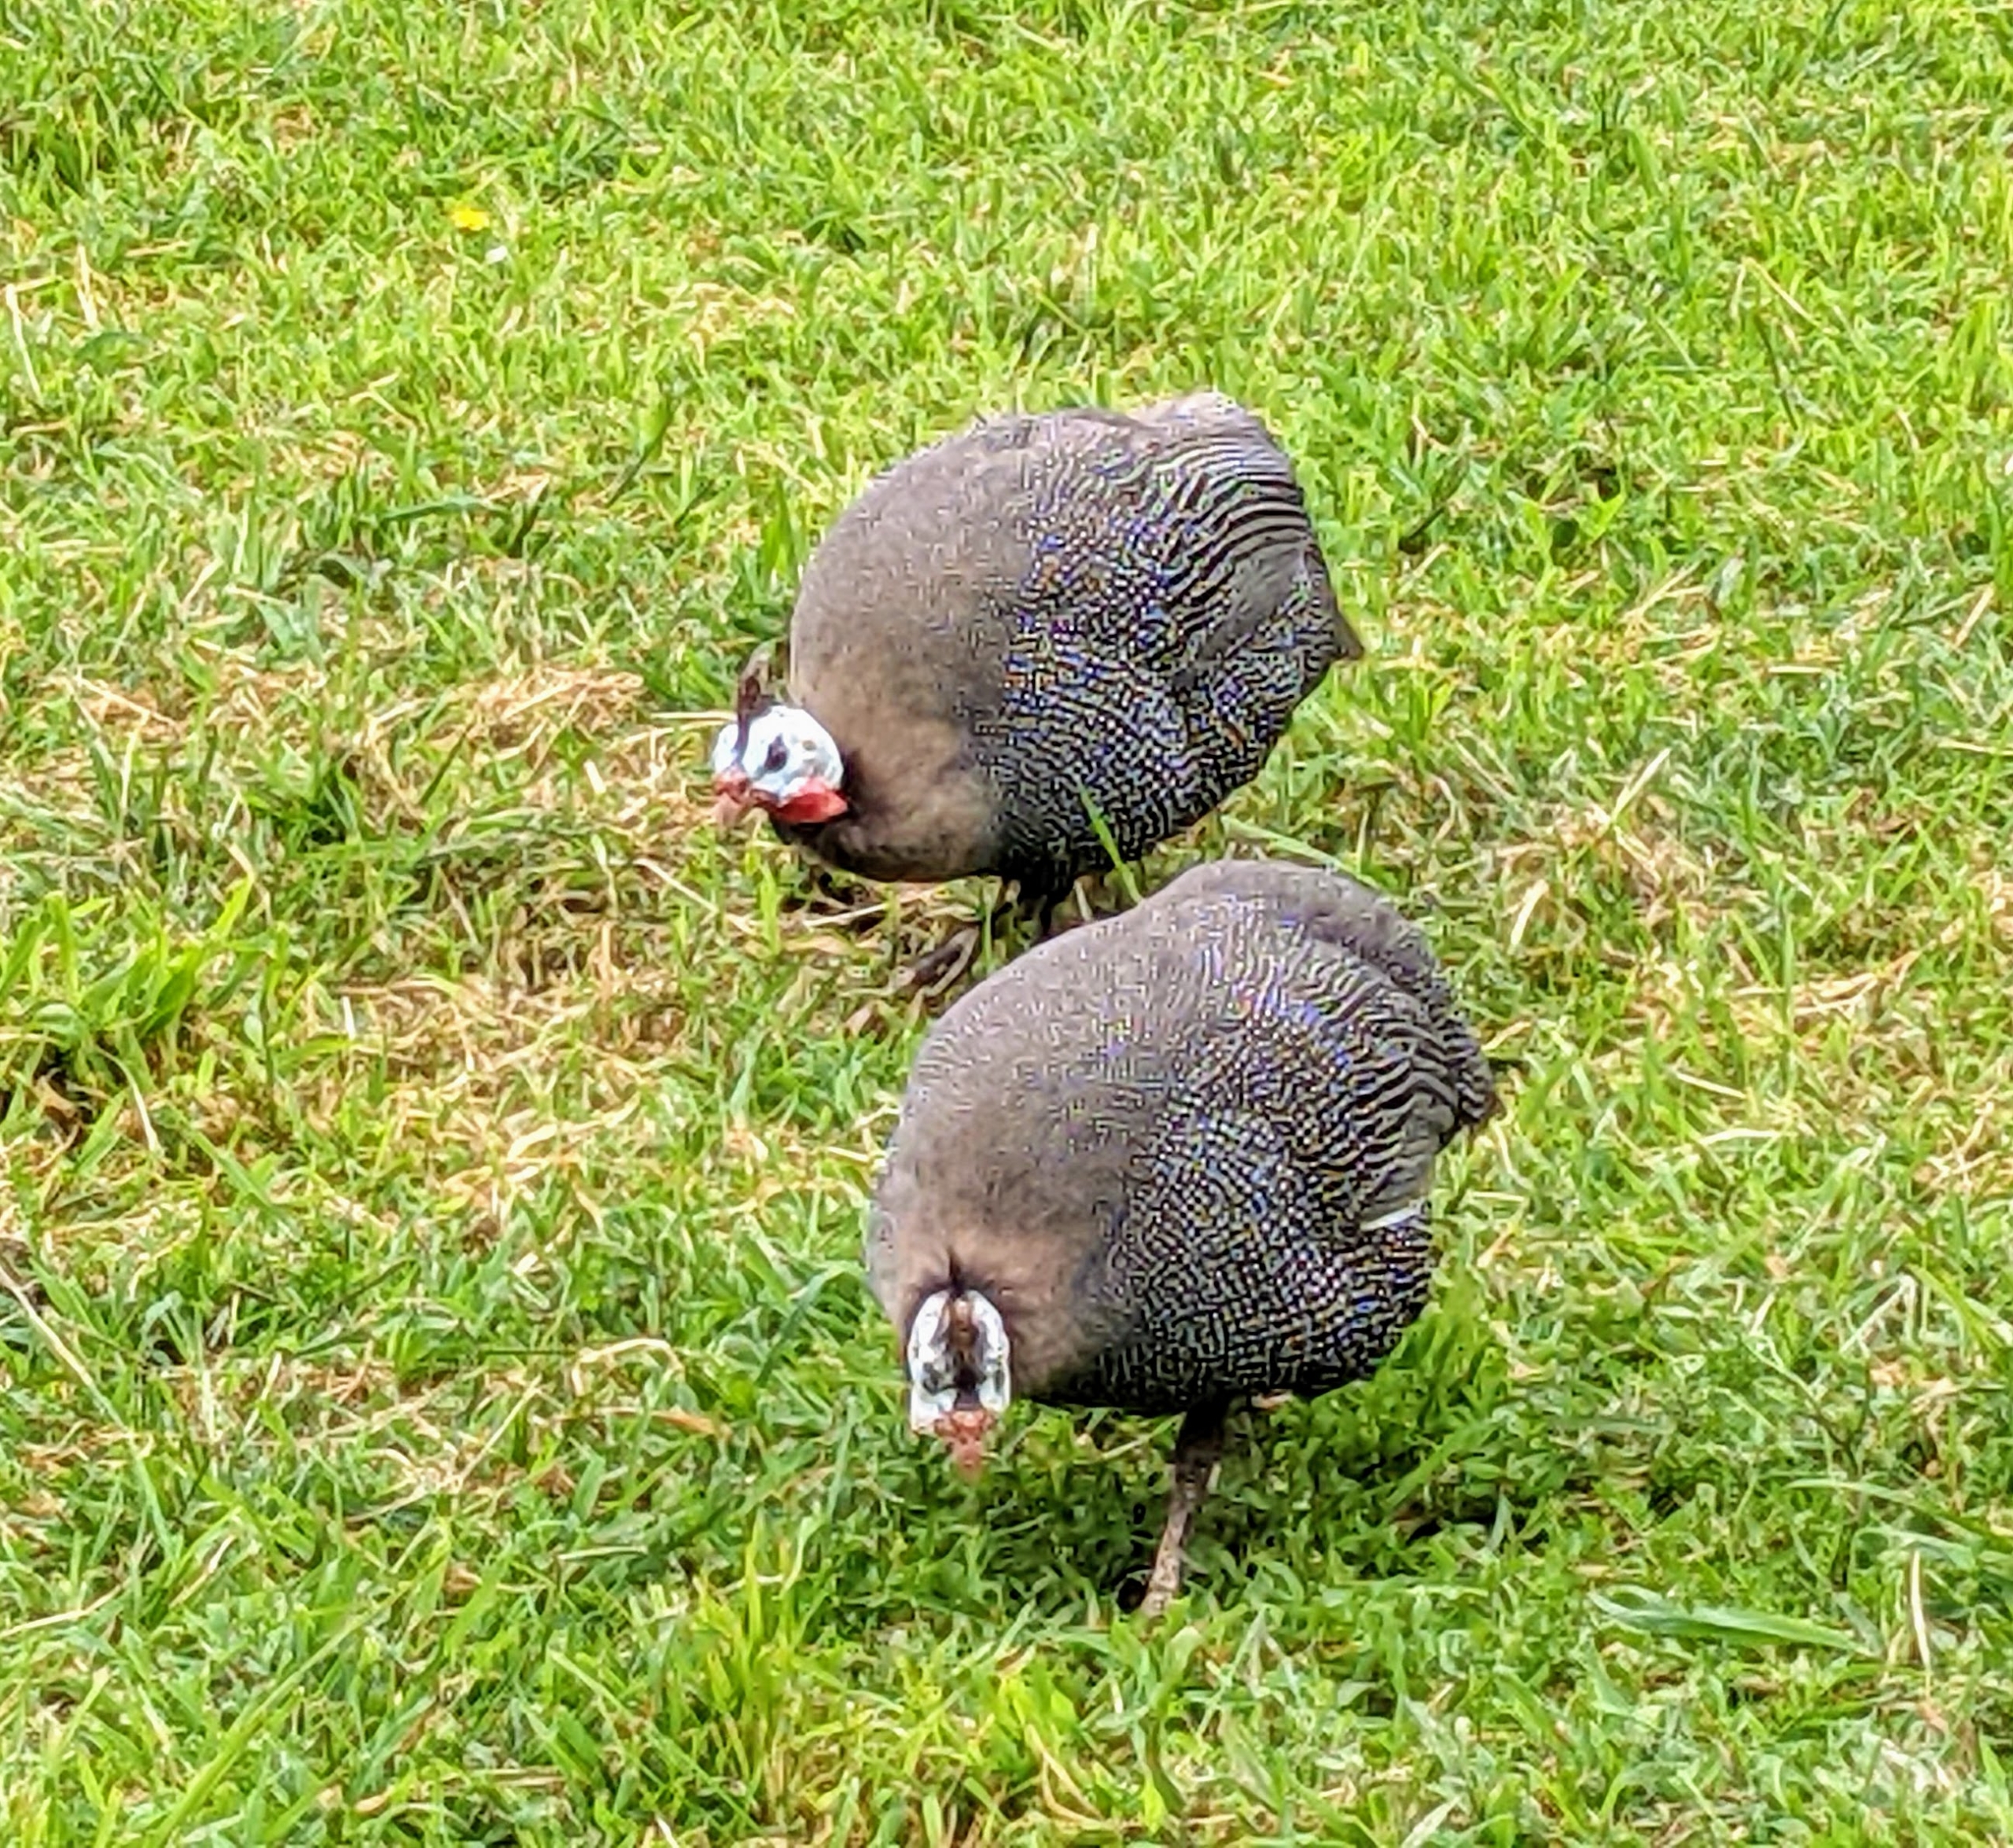
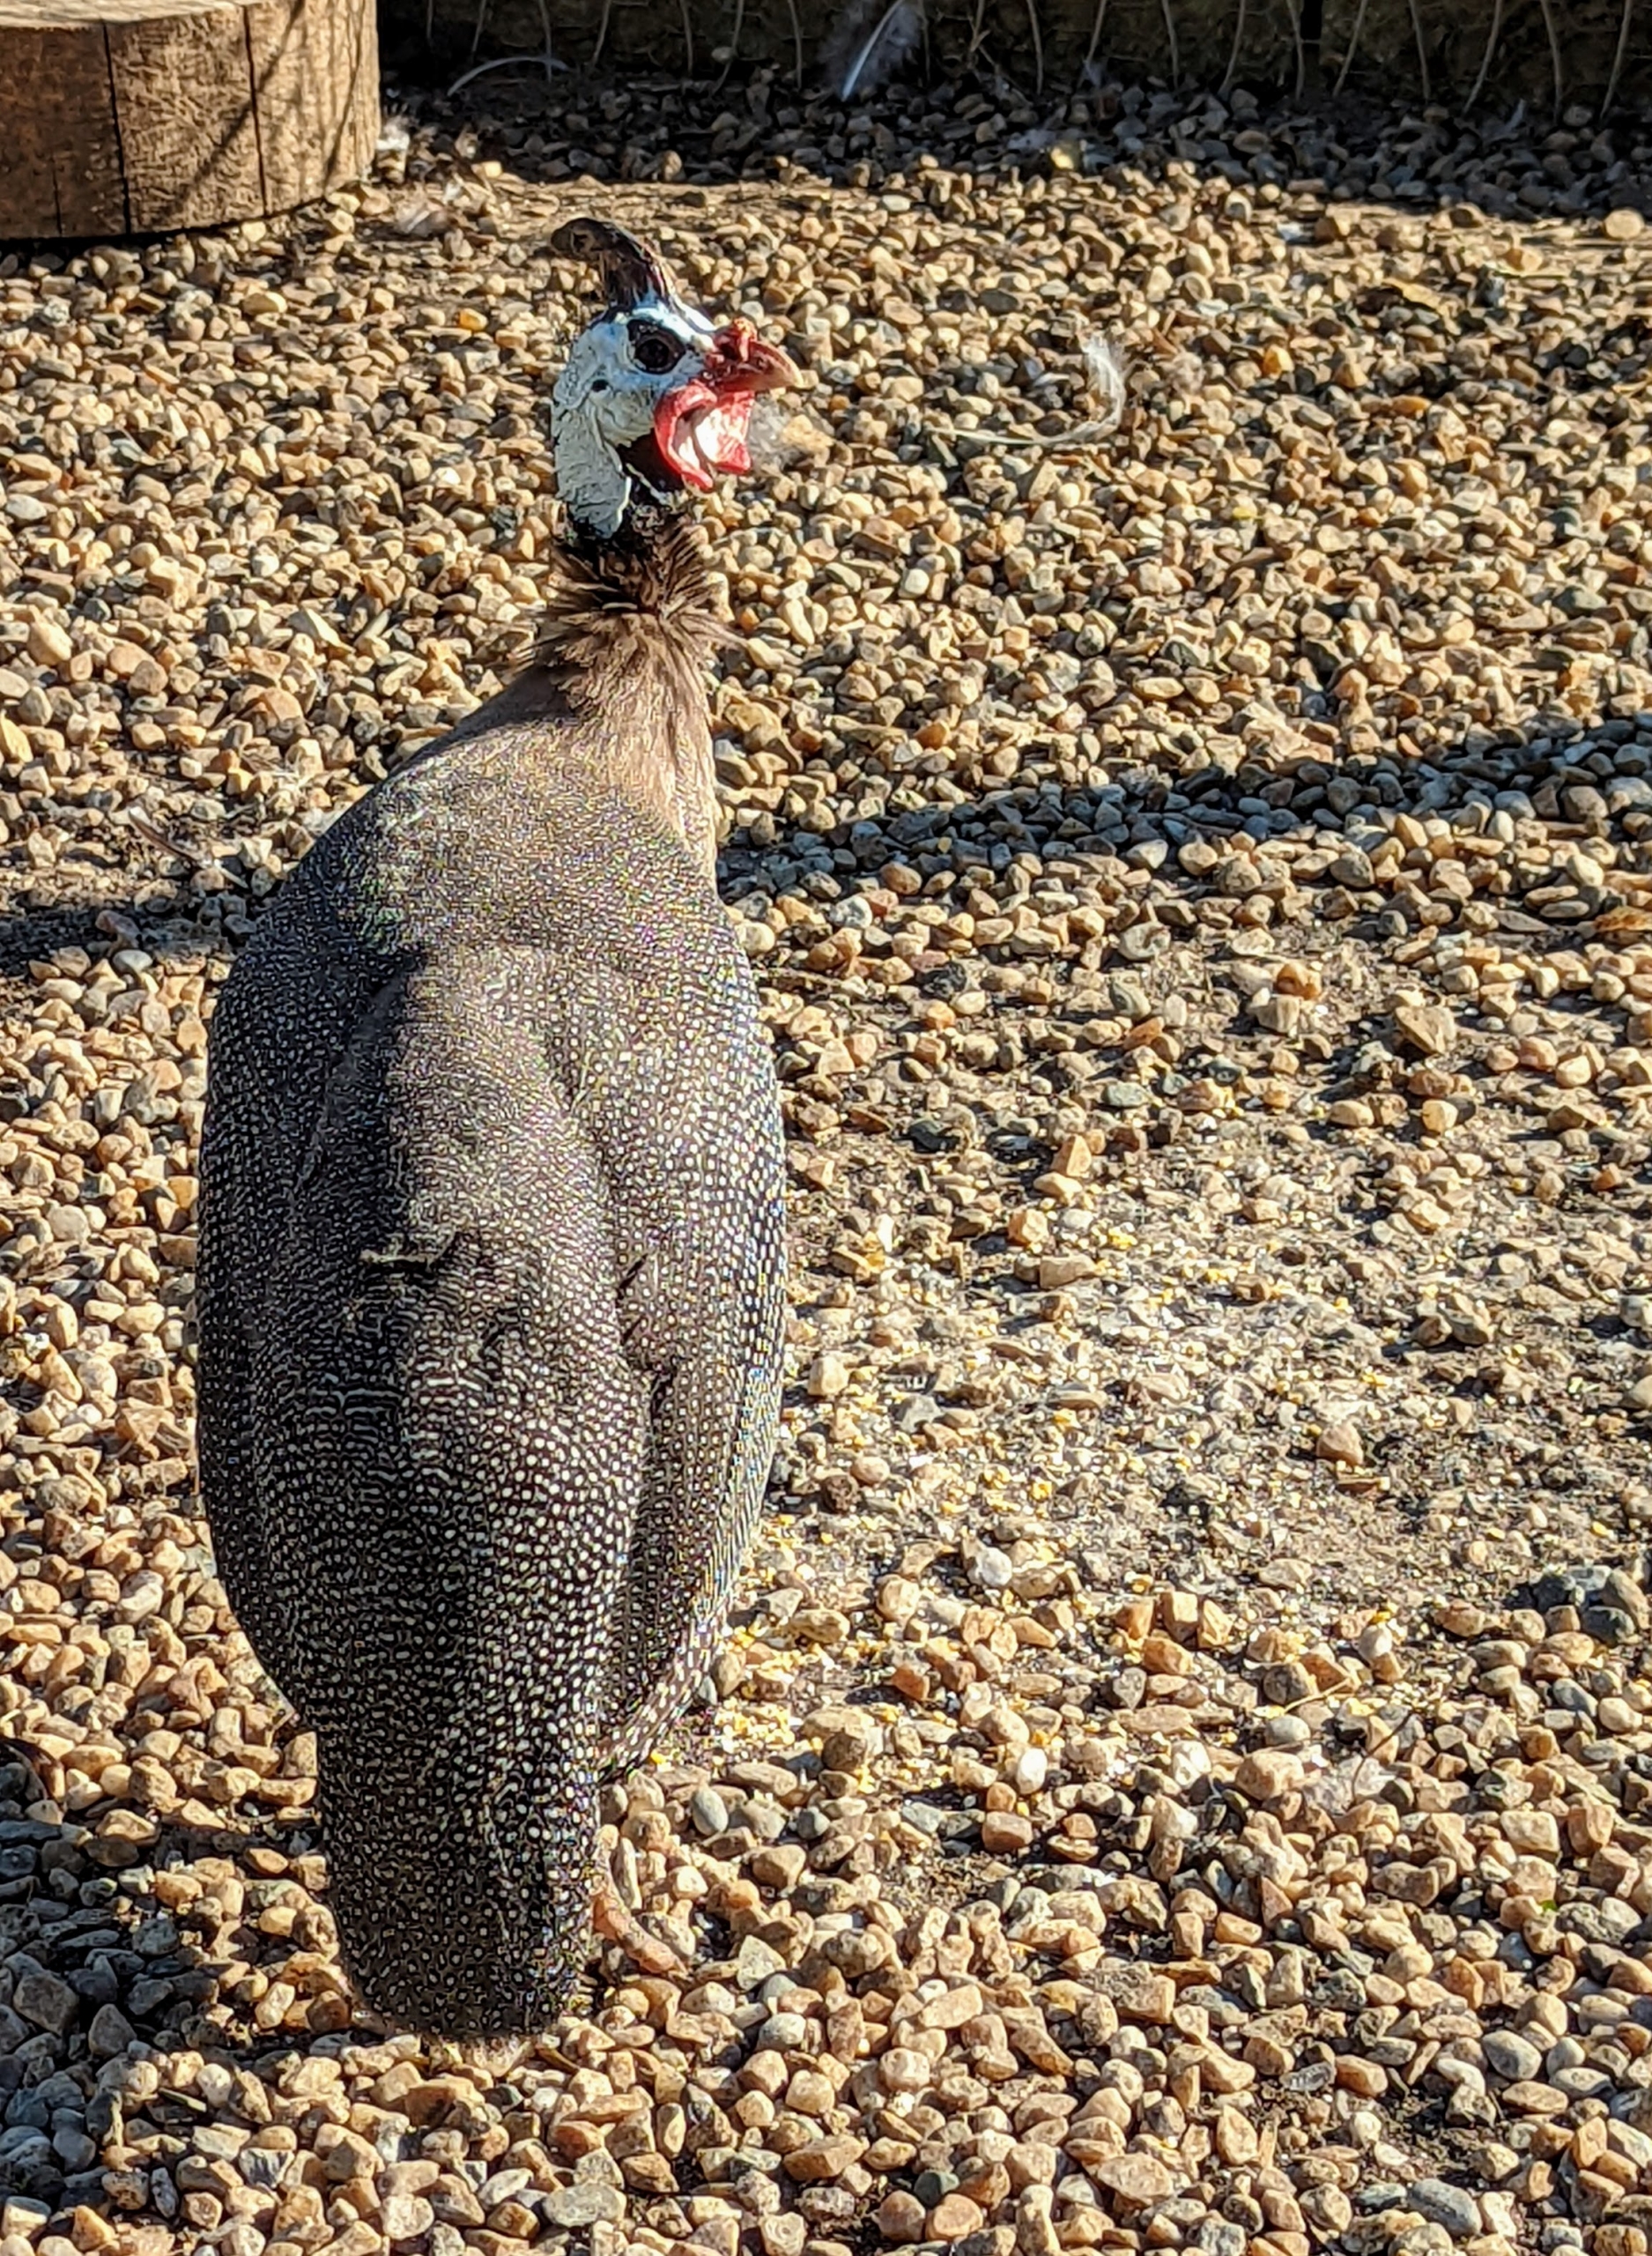
When they are adults, they look like these Guinea fowl in my chicken yard. One Guinea fowl is the size of a large chicken and weighs about four-pounds fully grown.
Notice, the head and neck area of a Guinea is bare, which helps to regulate temperature. These birds are not too fond of the cold weather, but they are very hardy and can live well in nearly every climate.
With short, rounded wings and short tails, these birds look oval-shaped. Their beaks are short but curved and very stout.
Where one goes, they all go. If one gets lost it will call out until the flock comes to find it. And Guinea fowl are very noisy. I can often hear them all the way from my Winter House.
These birds keep my chickens safe – sounding alarms whenever intruders are near. I am so glad they thrive here at Cantitoe Corners.
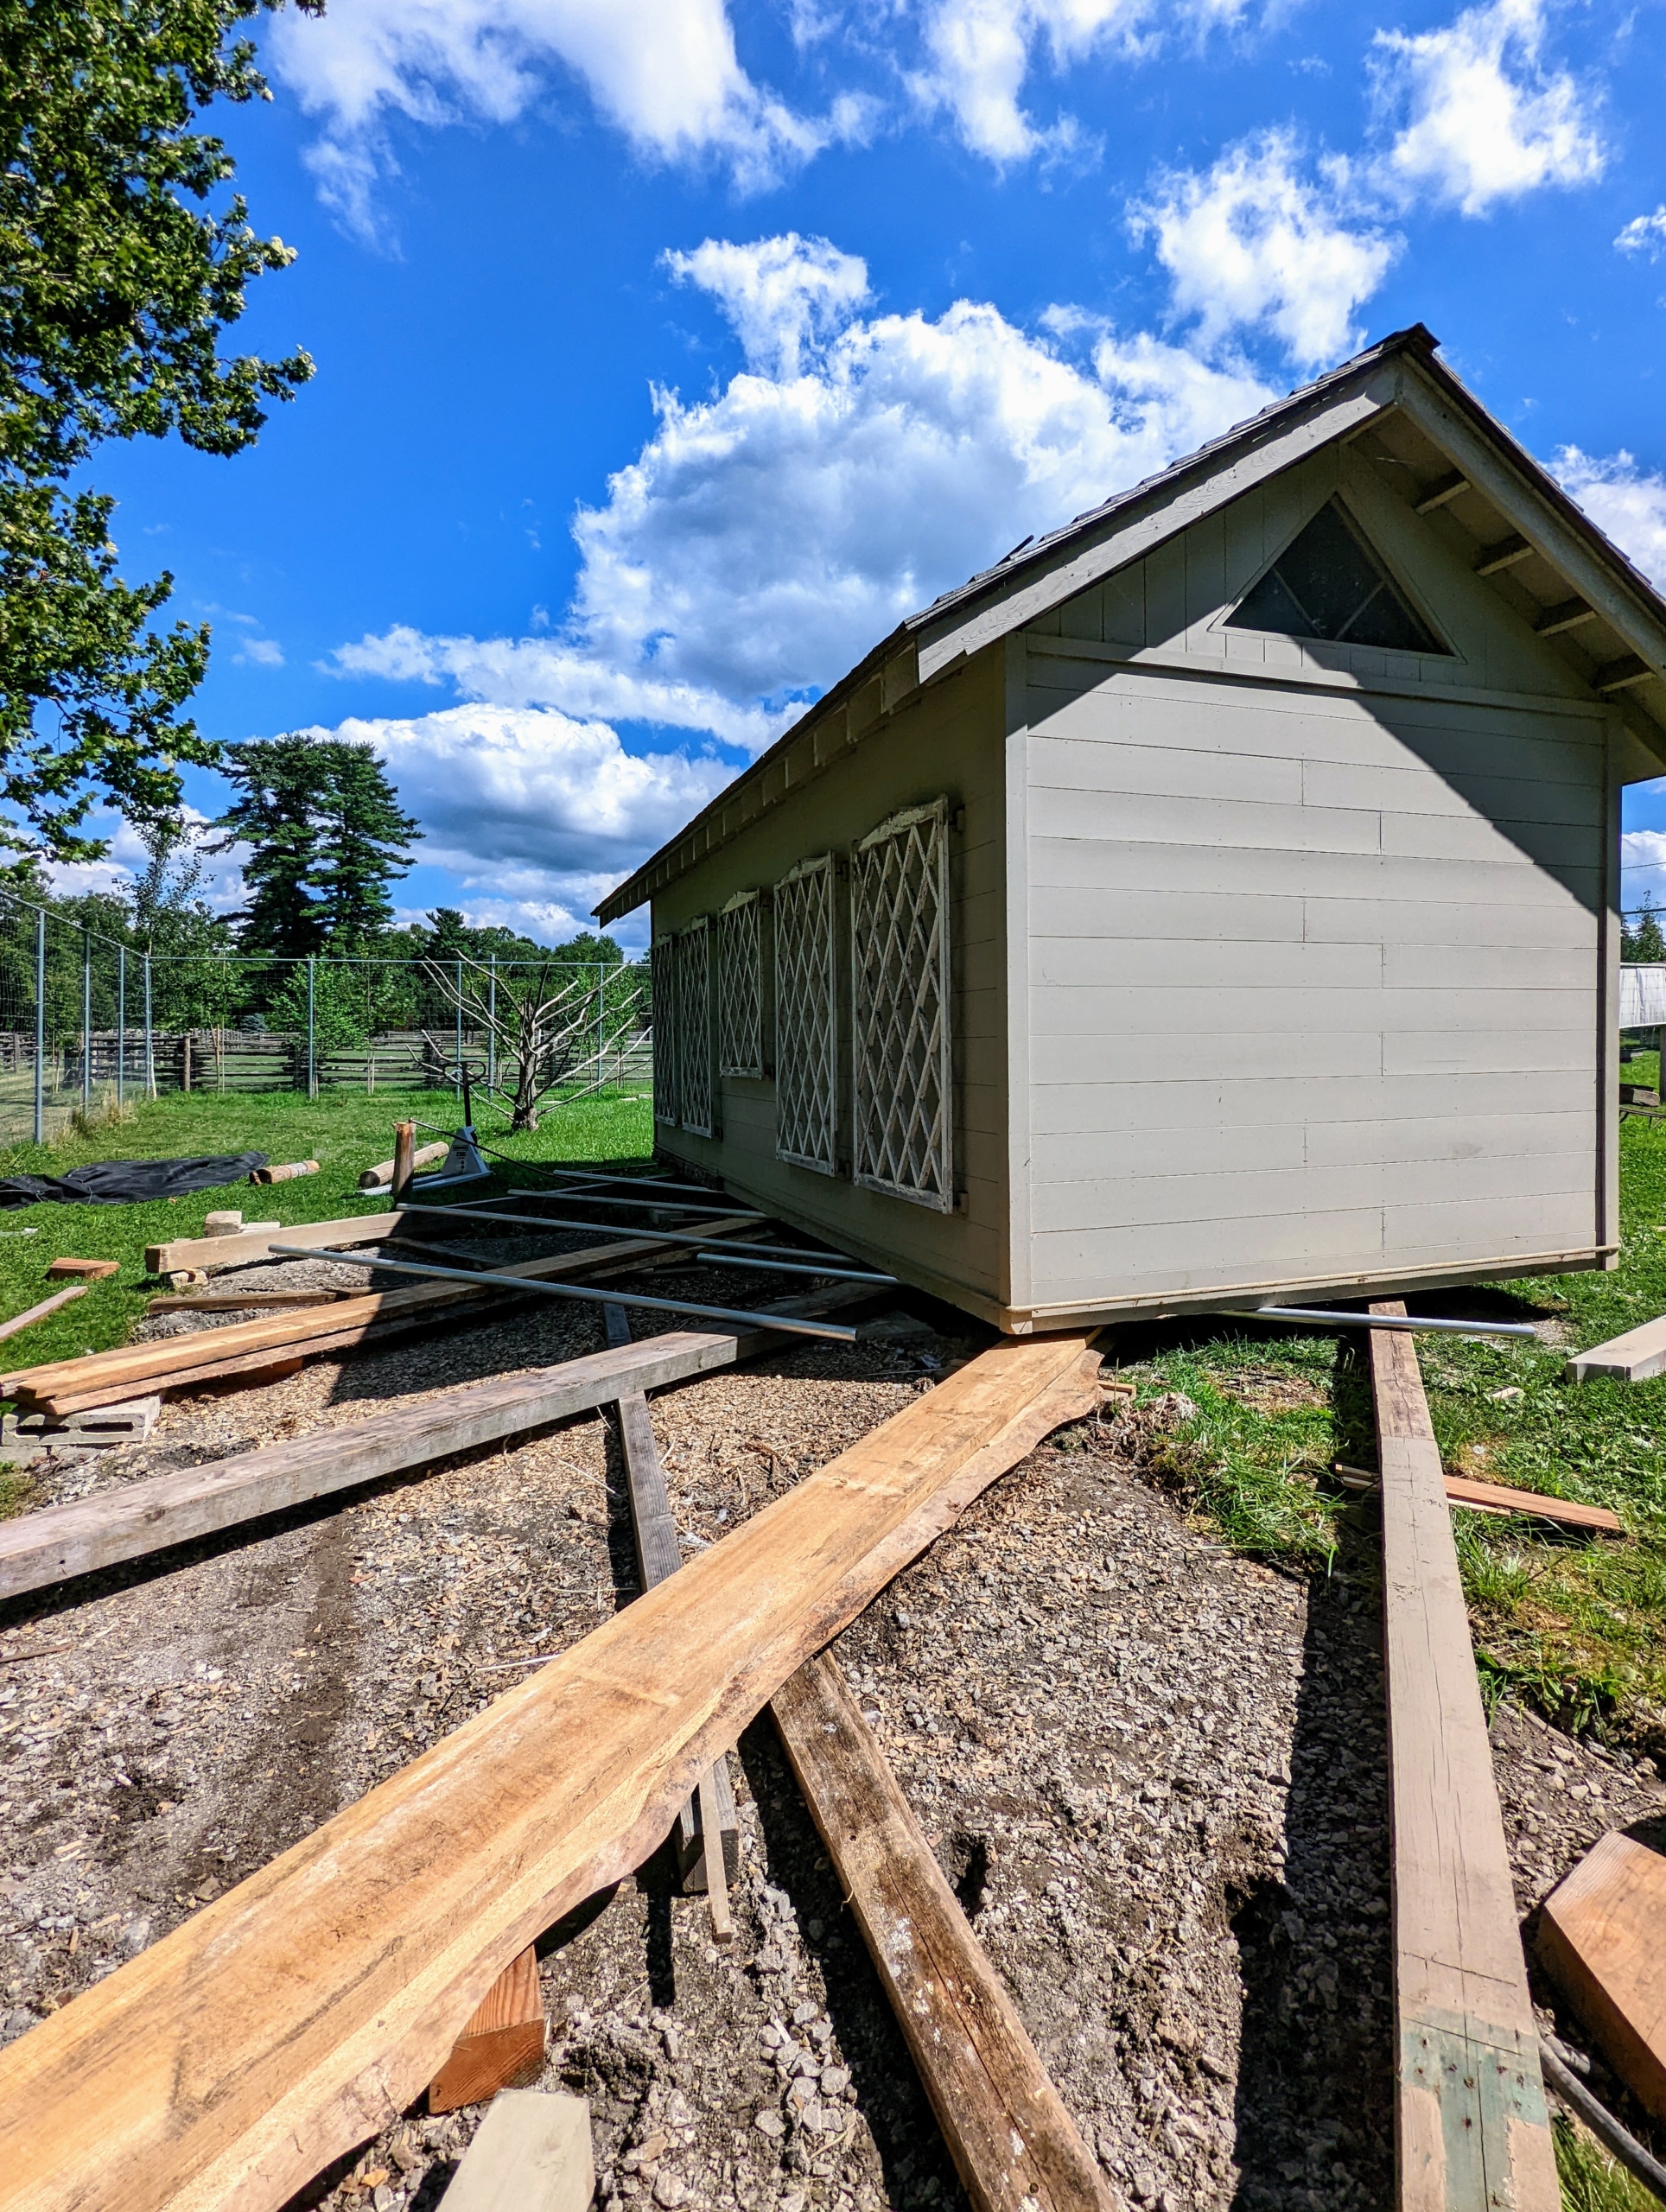
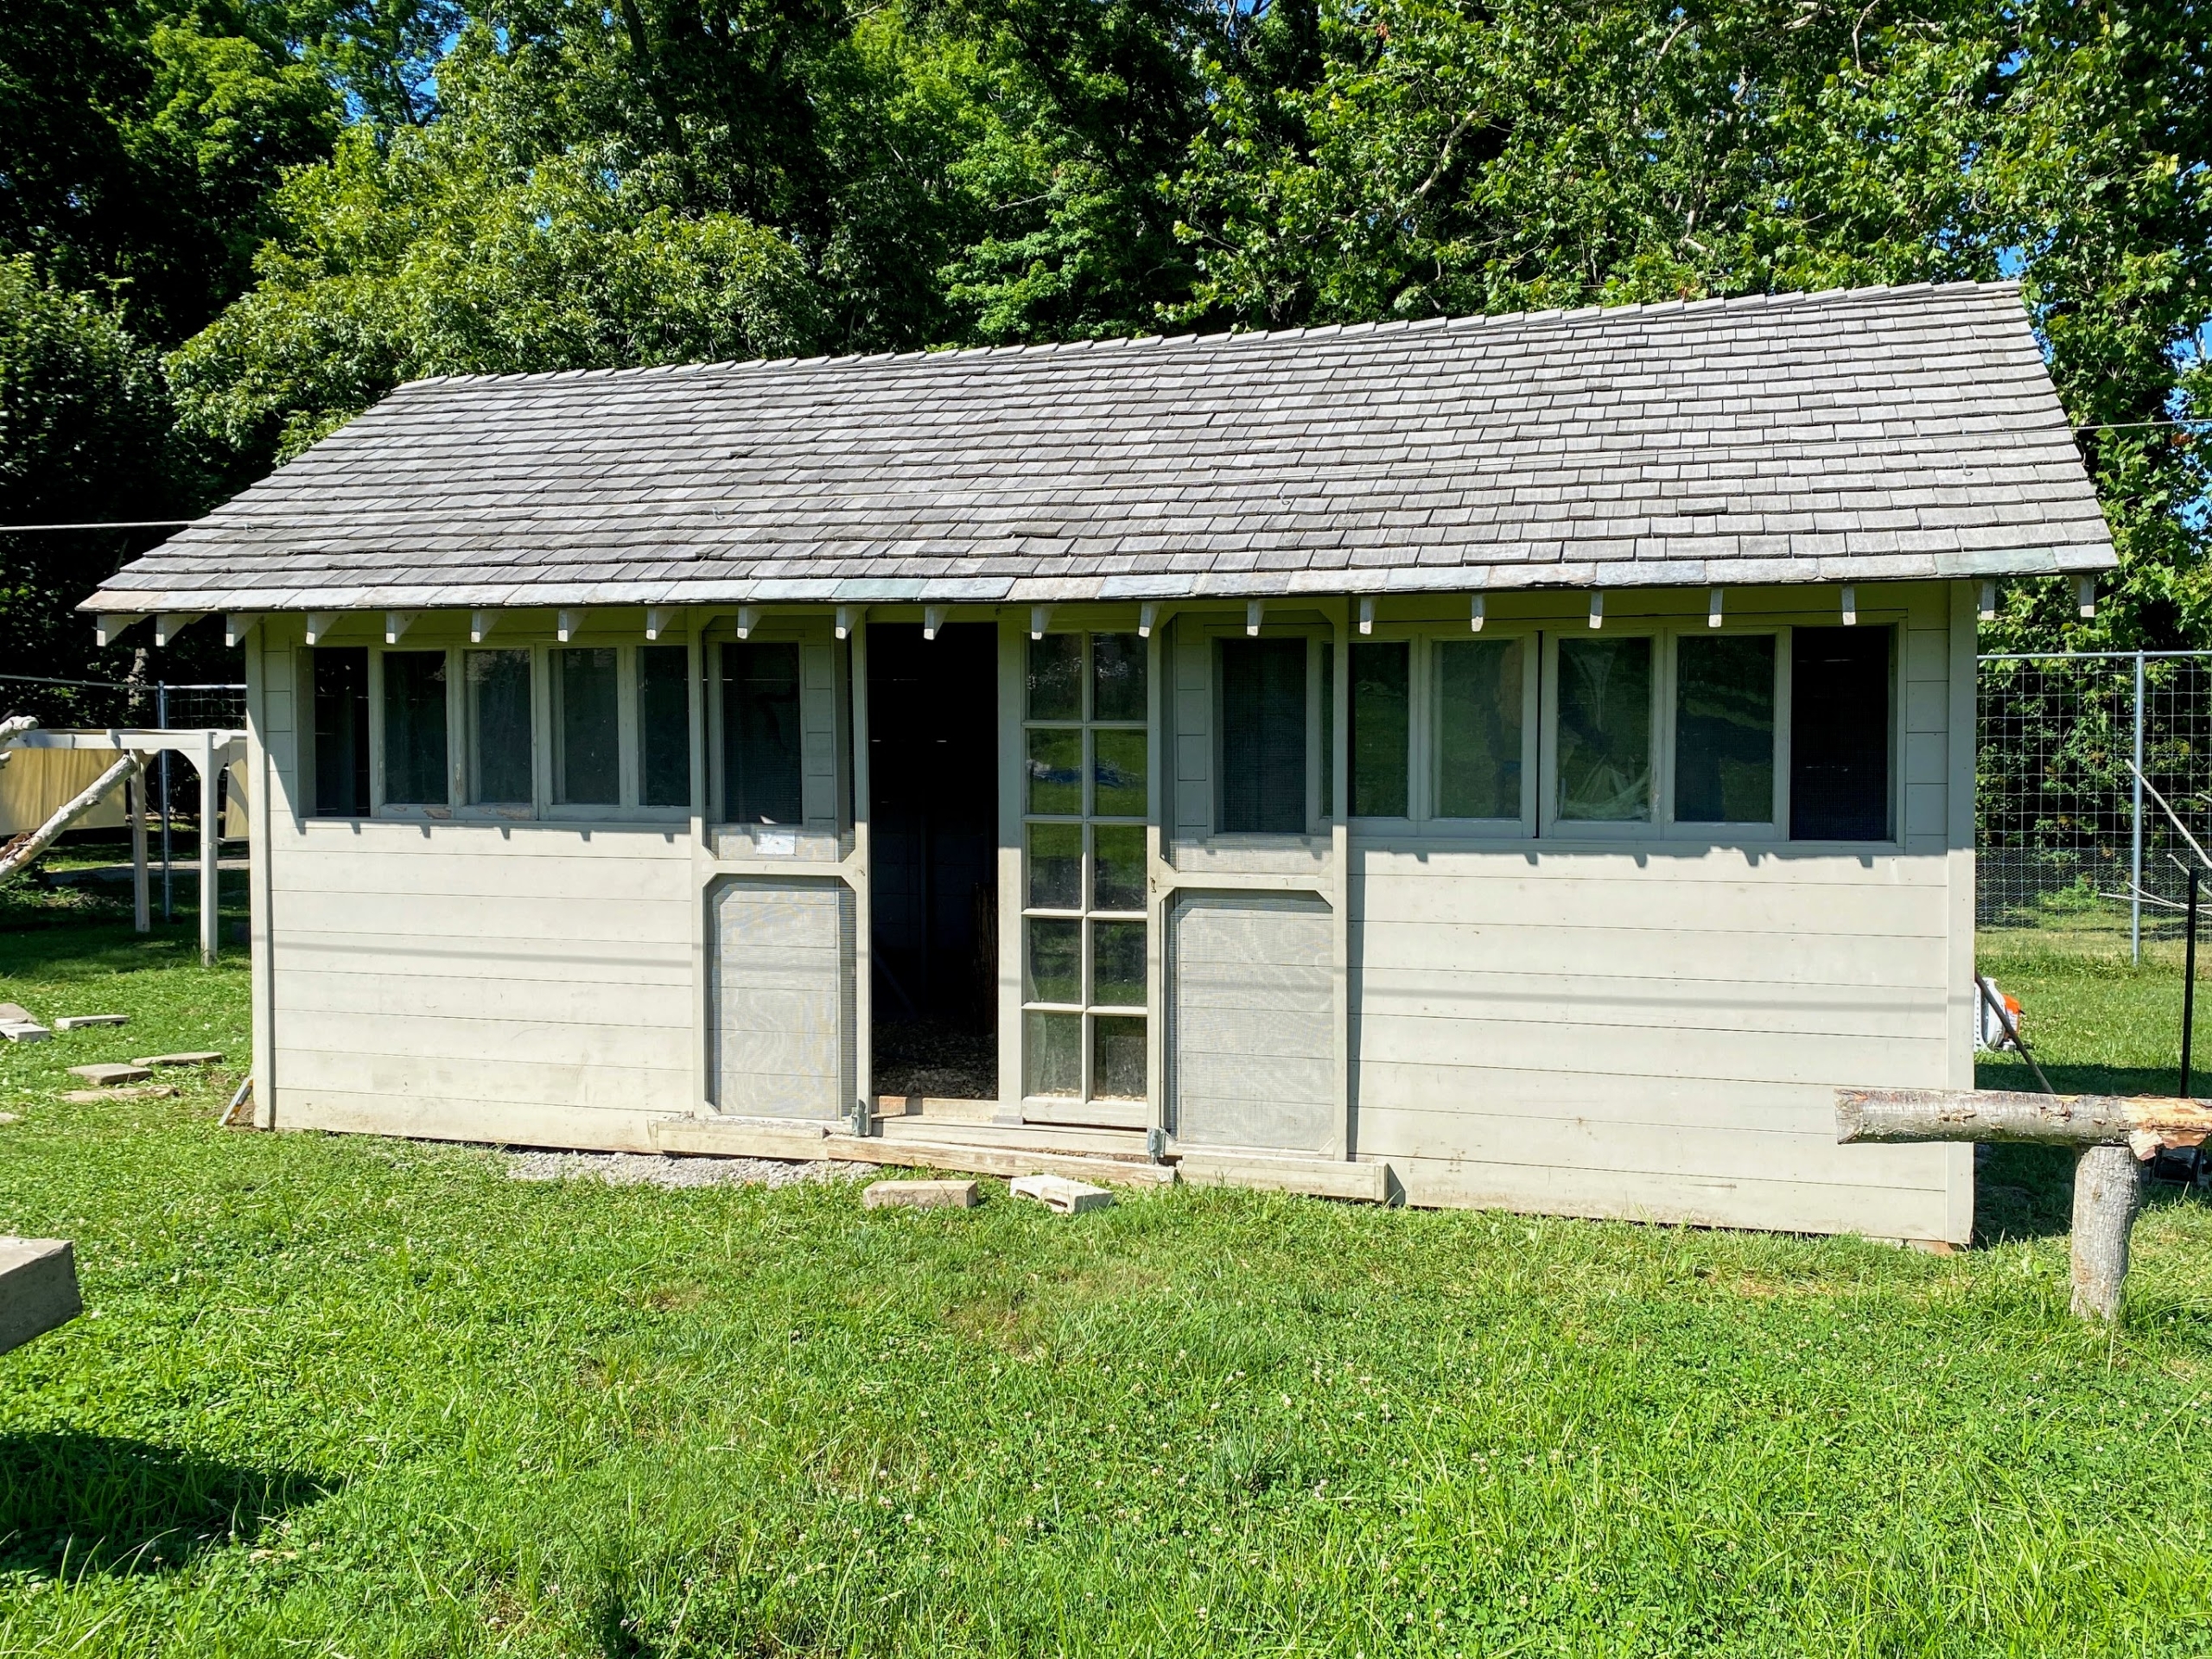
We have many summer projects going on at my Bedford, New York farm - among them, moving my peafowl coop, so it can support new fencing above the enclosure to keep my birds safe from wild predators.
I have grown quite fond of peafowl and have my own ostentation that includes several peacocks and peahens that I hatched right here in a specially made incubator. My peafowl live in a spacious yard adjacent to my allée of lindens not far from my stable. They also have a sizable coop. Last week, my property manager, Doug, along with Pete and Fernando from my outdoor grounds crew, carefully moved the coop 25-feet toward the center of the pen. And they did it "the old fashioned way" - by using aluminum pipes to roll the structure forward.
Here are some photos and a short video from the move, enjoy.
Moving a heavy structure like this coop must be done correctly to prevent it from getting damaged.
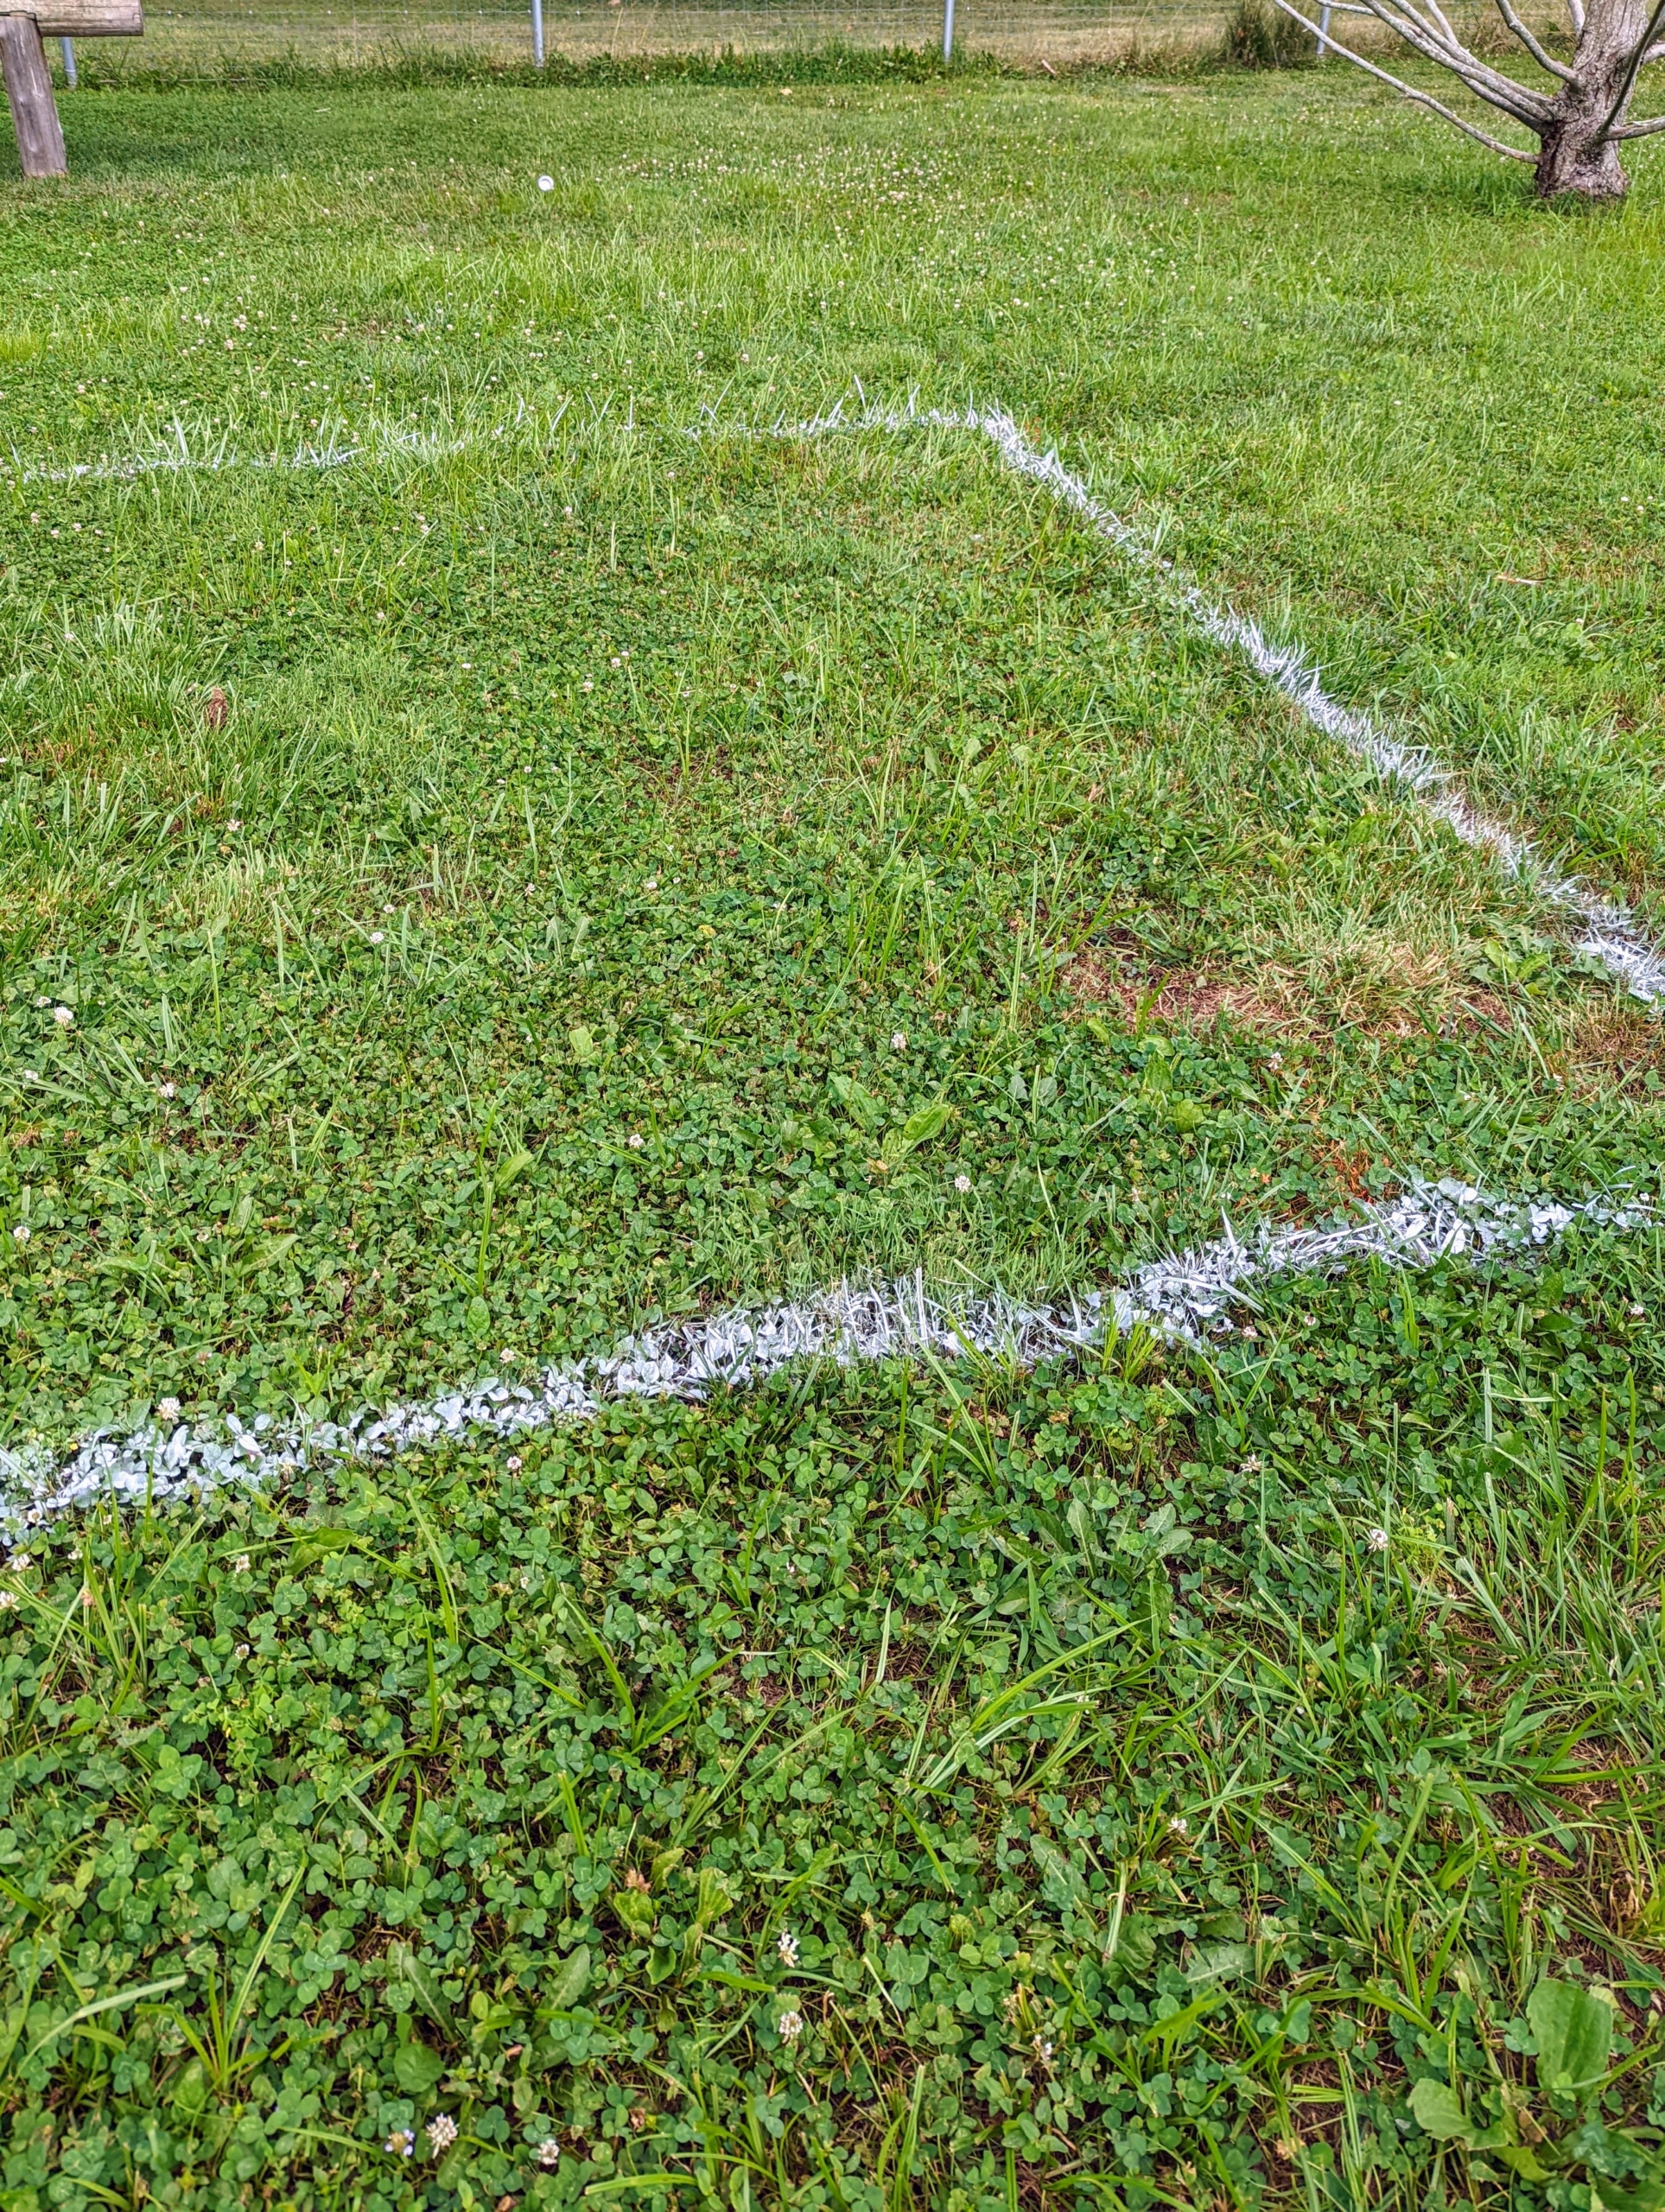
The first step is to outline where the coop would go. Doug spray-painted the new footprint. This coop is rectangular in shape measuring 26-feet long by 10-feet wide.
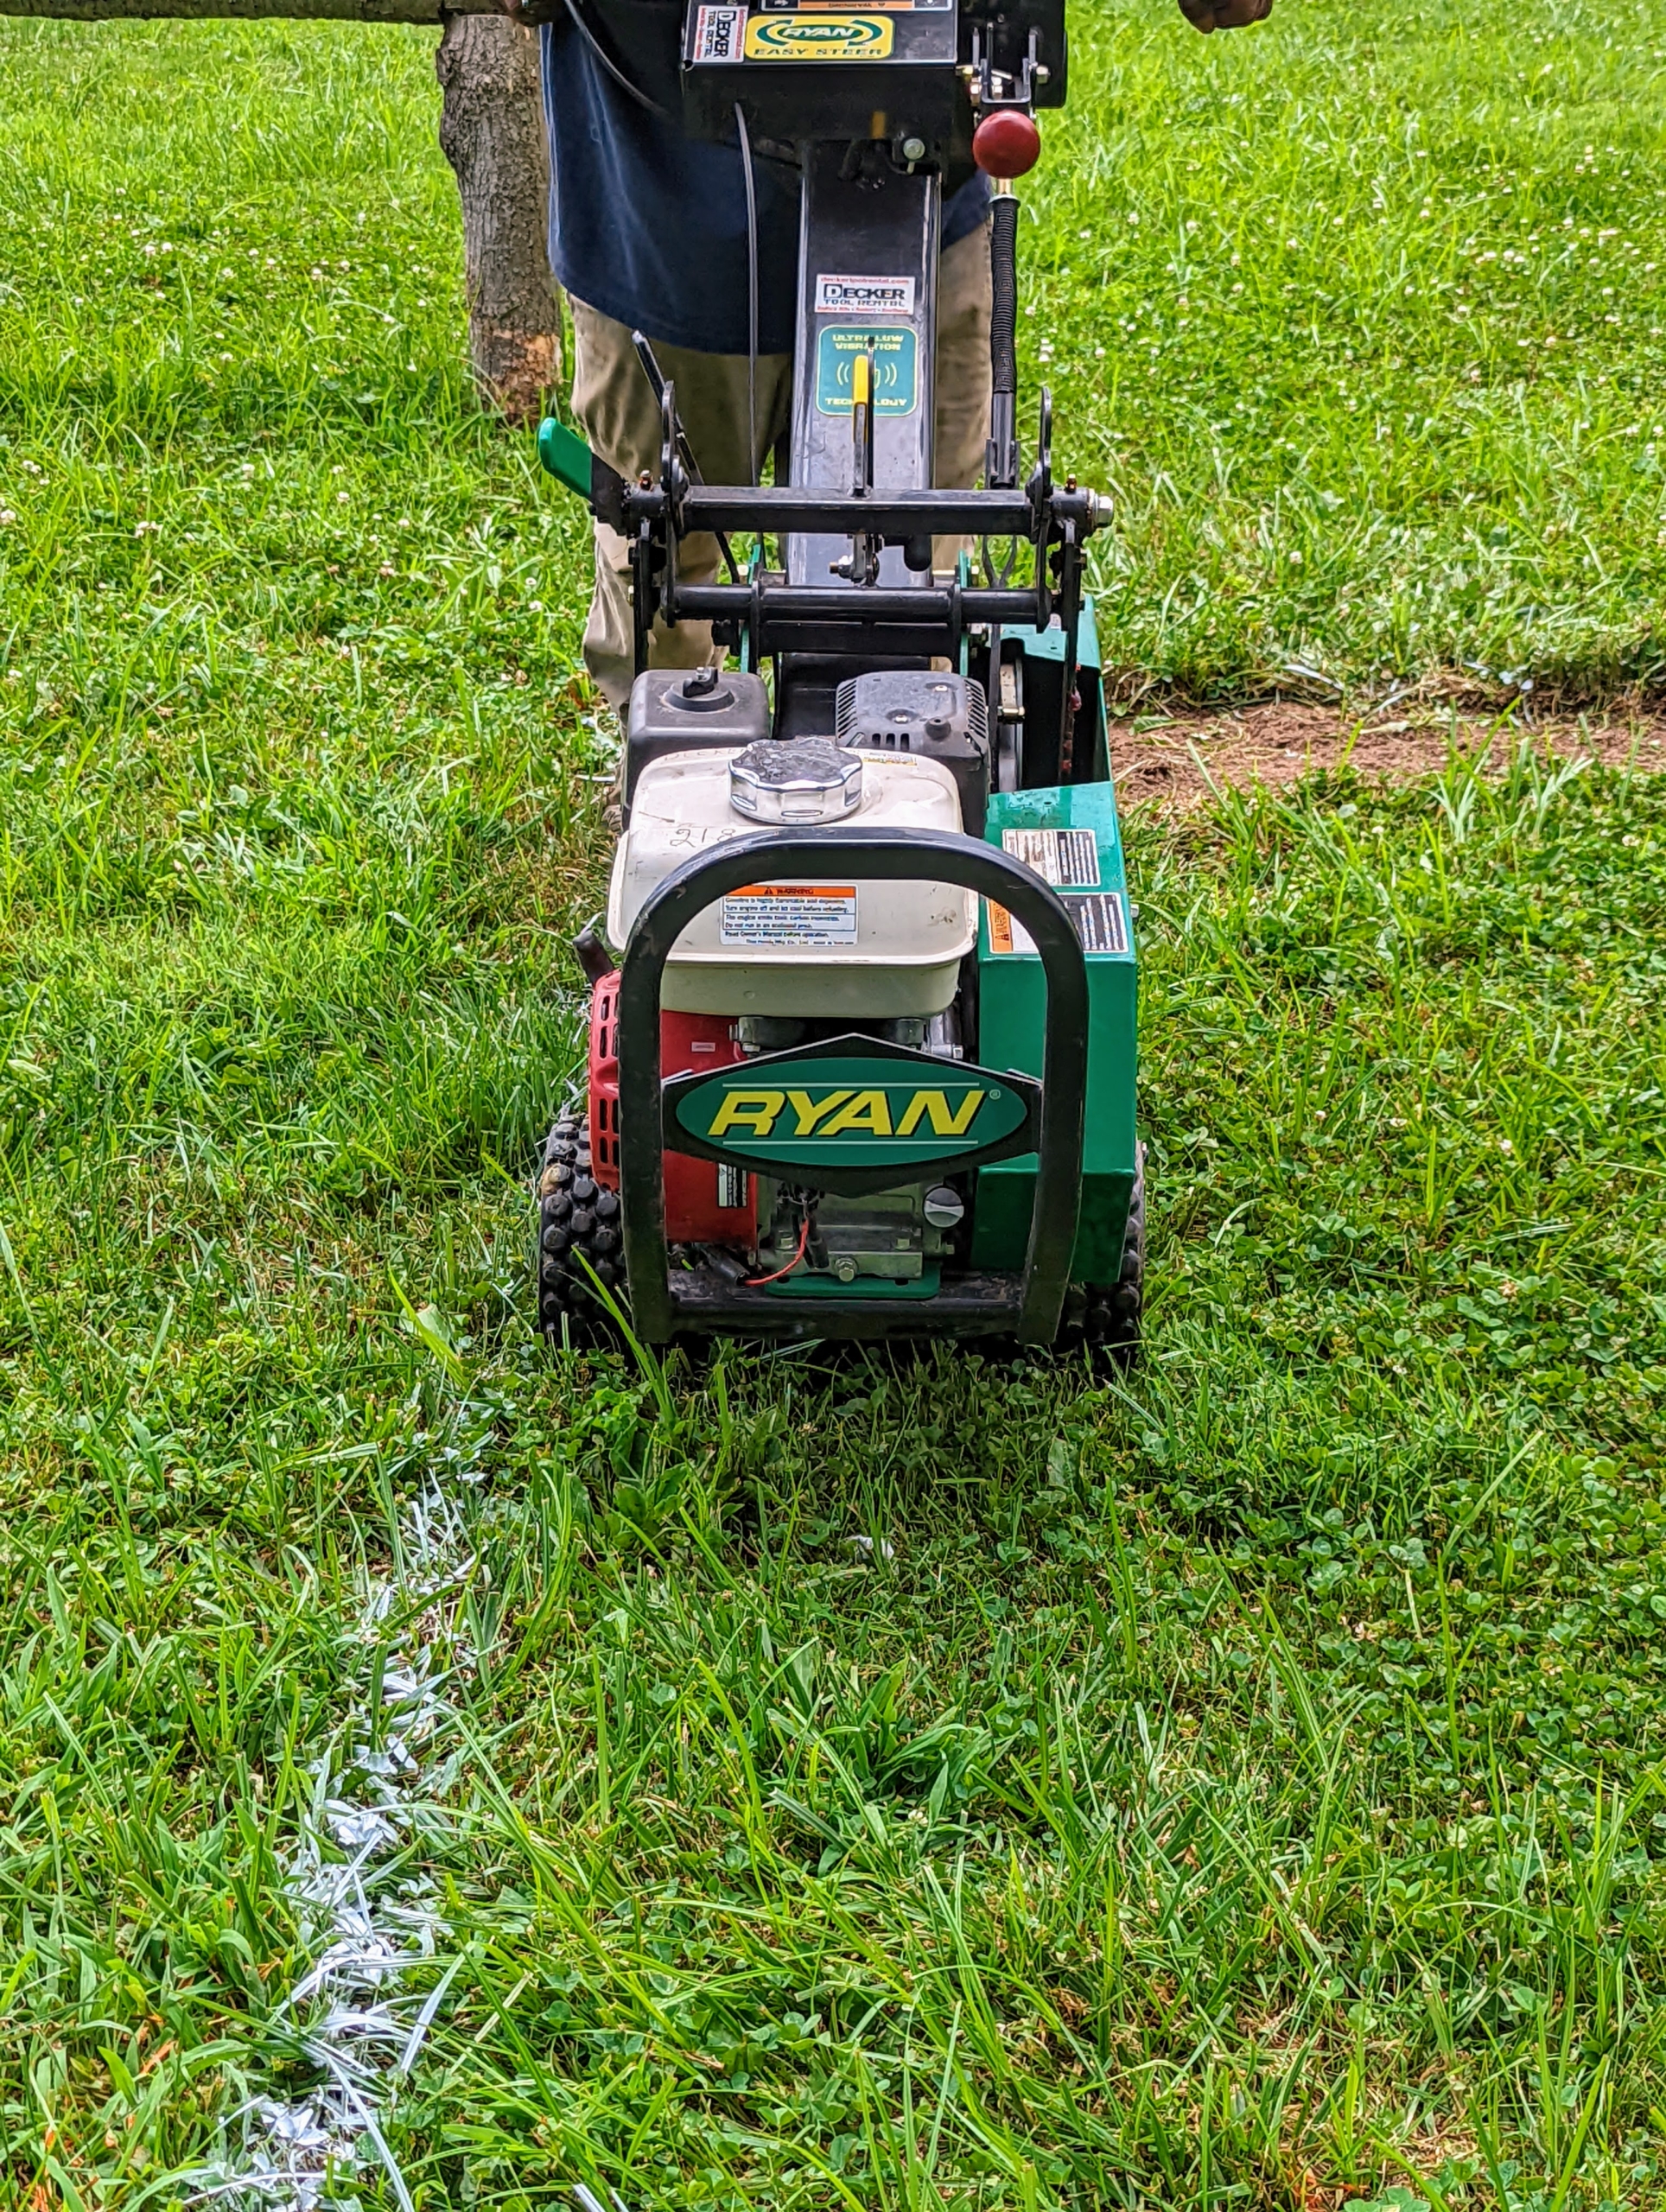
We rented a Ryan sod cutter for the day. The Ryan Company has been designing and selling turf care equipment for more than 60-years. Their sod cutter was actually created after the business partnered with a commercial landscaper named Art Ryan. There are different types of sod cutters, but they all essentially cut grass at the roots so entire sections of sod can be removed to expose the bare ground underneath it. It cuts 12-inch widths of sod and can cut more than 100-feet per minute.
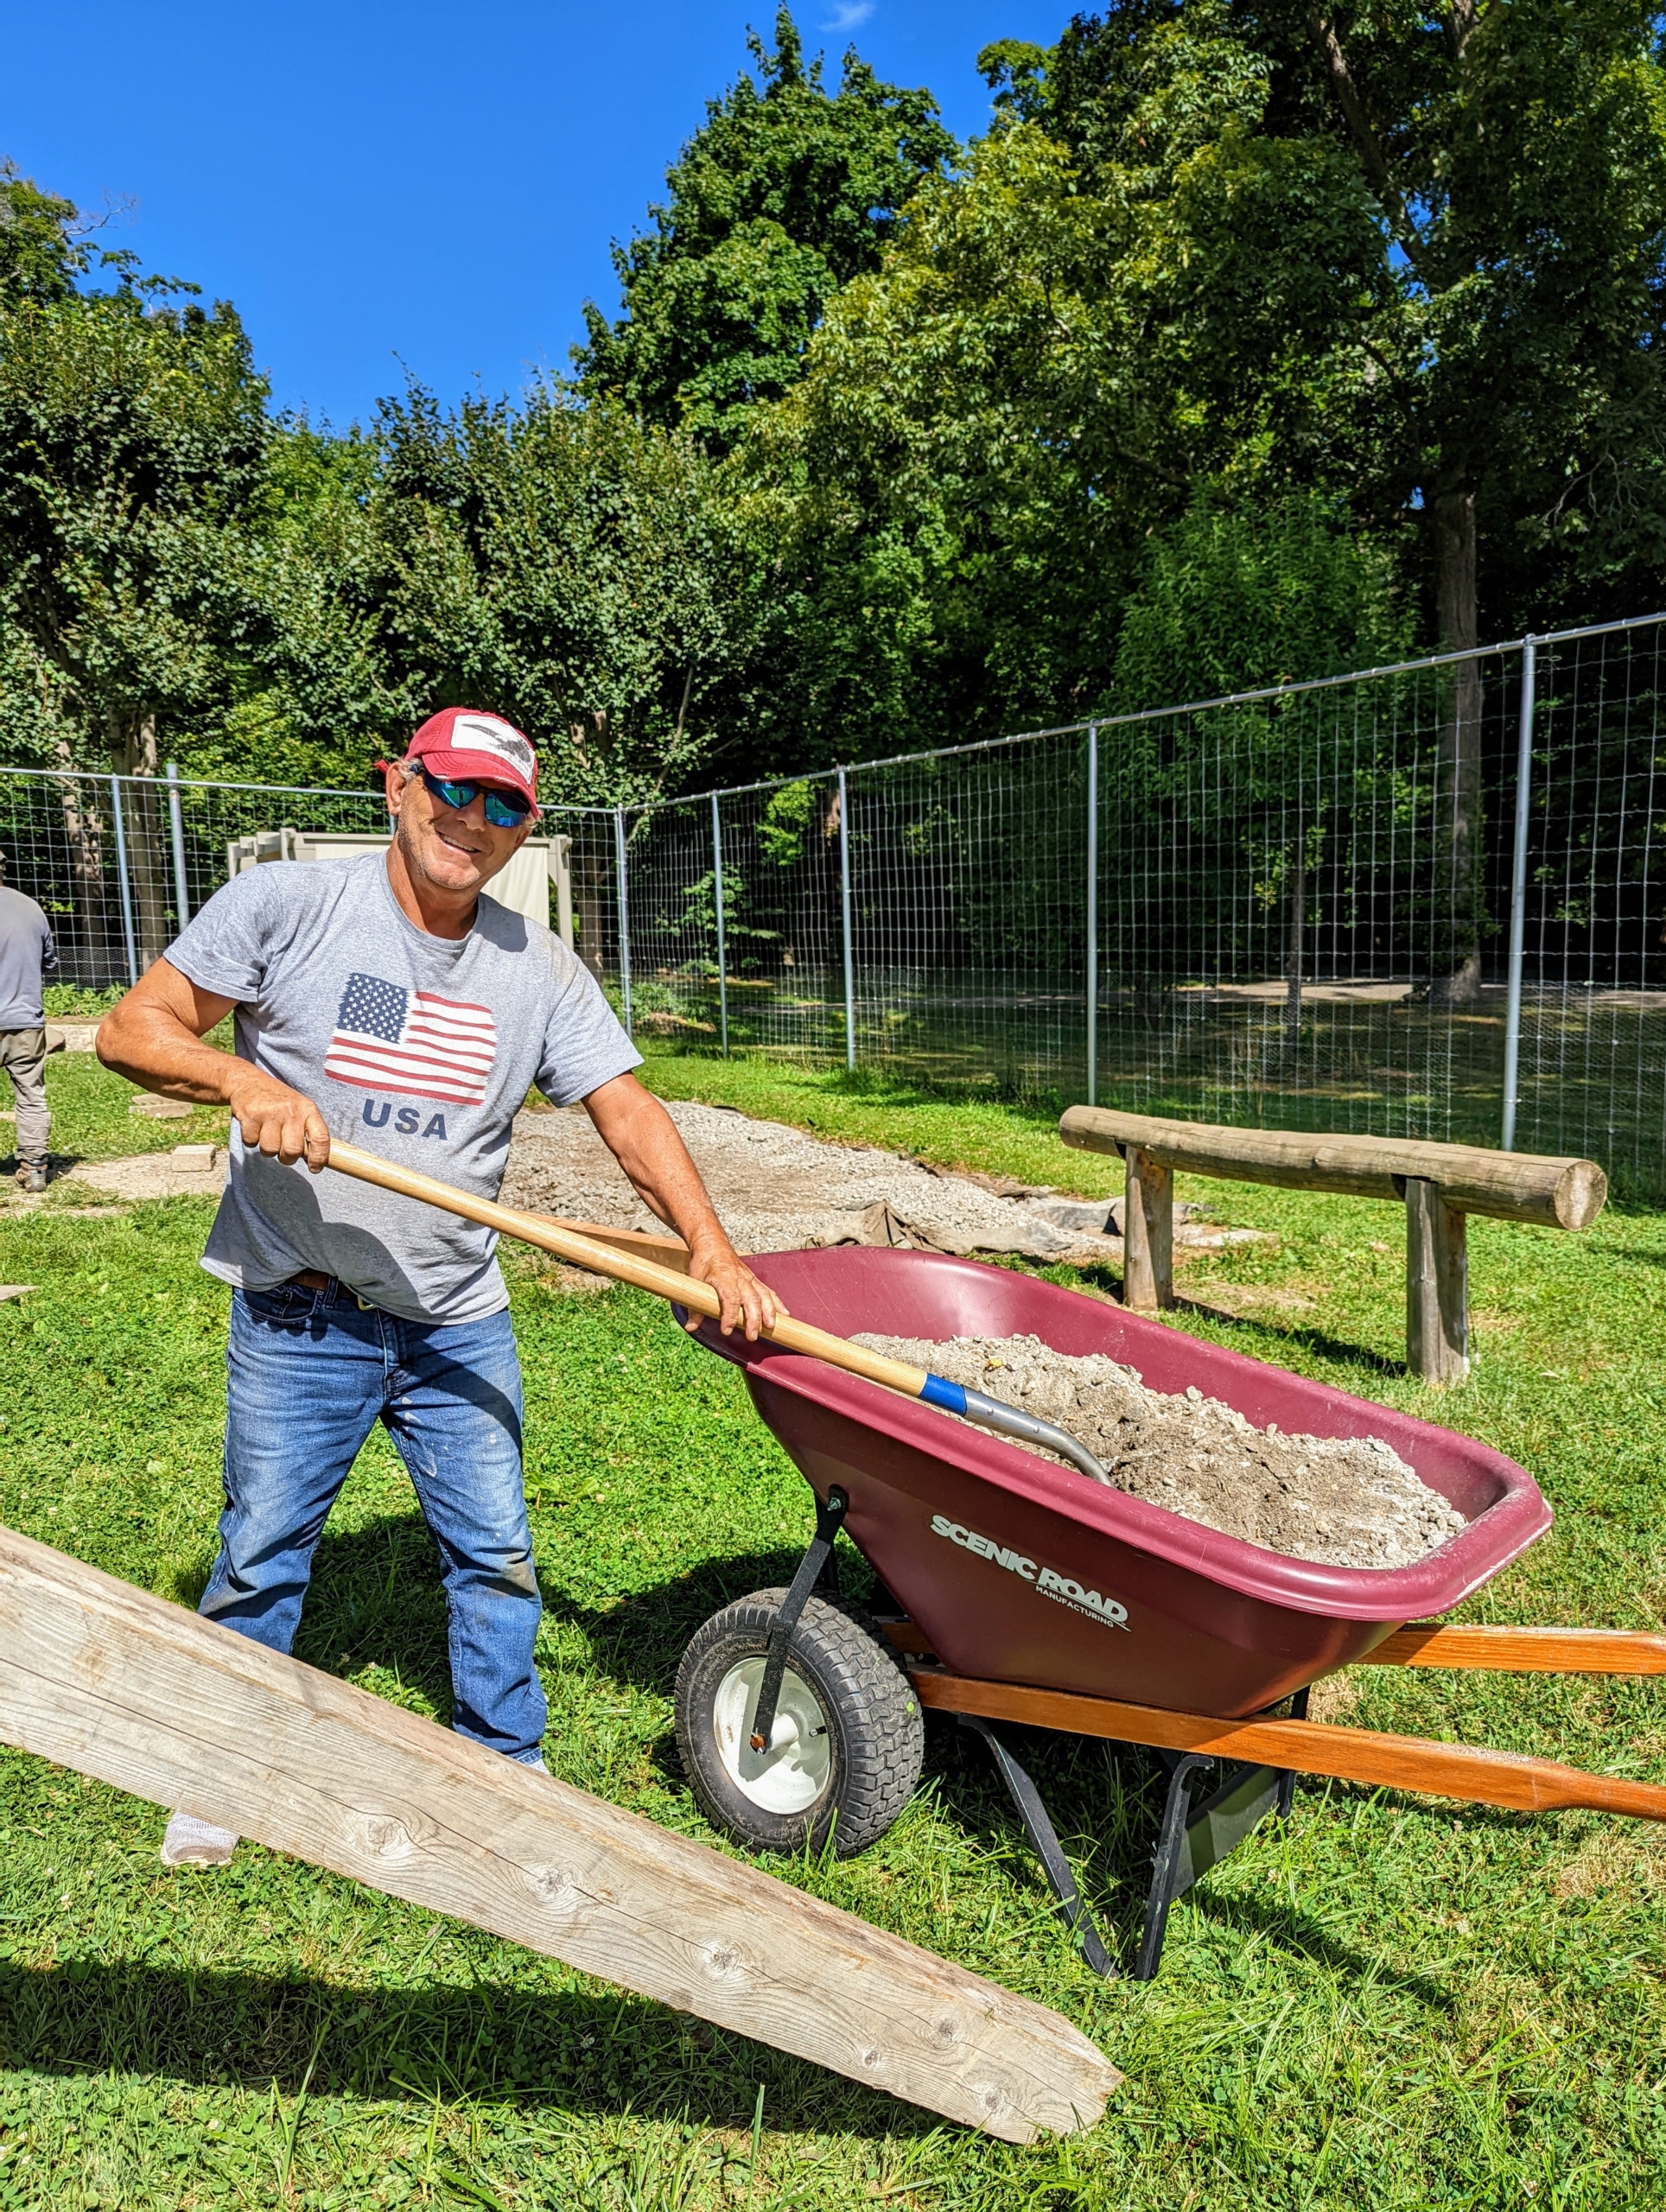
Pete starts cutting the sod from the outside first. Here is the new location after the sod cutter’s first pass.
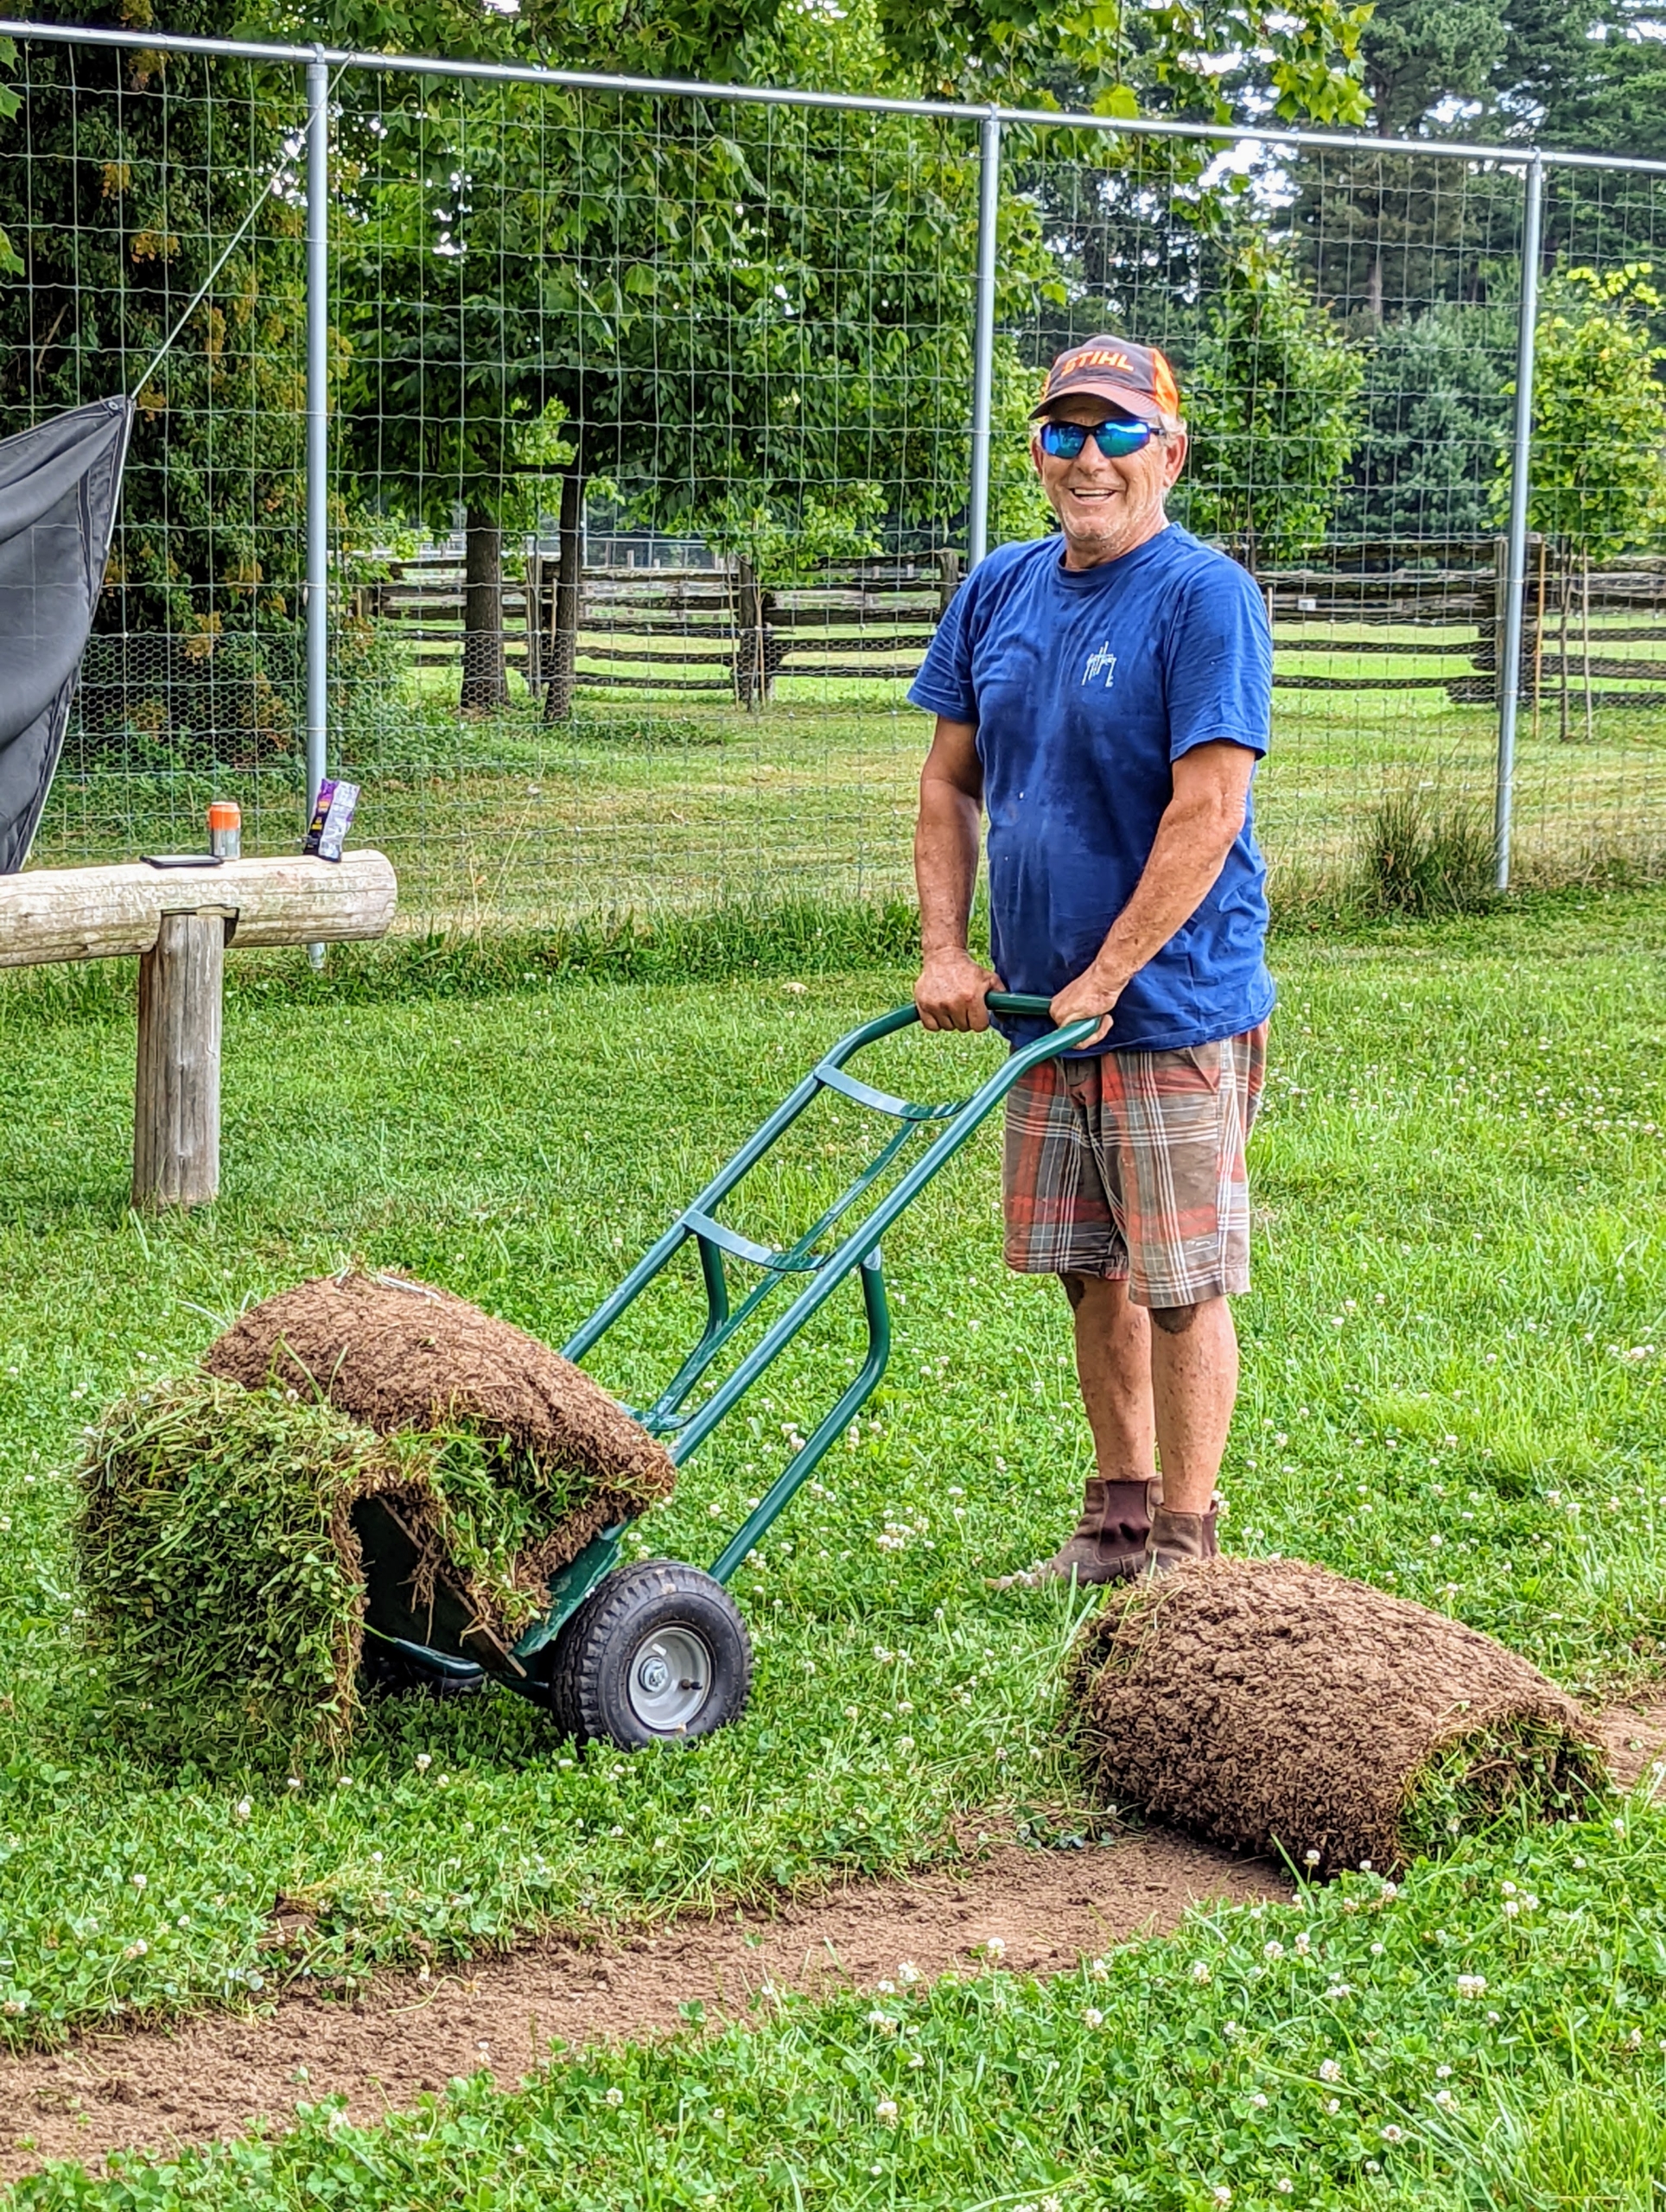
Fernando follows by rolling up the strips behind Pete. Doing this makes it easier to see where the sod has already been cut.
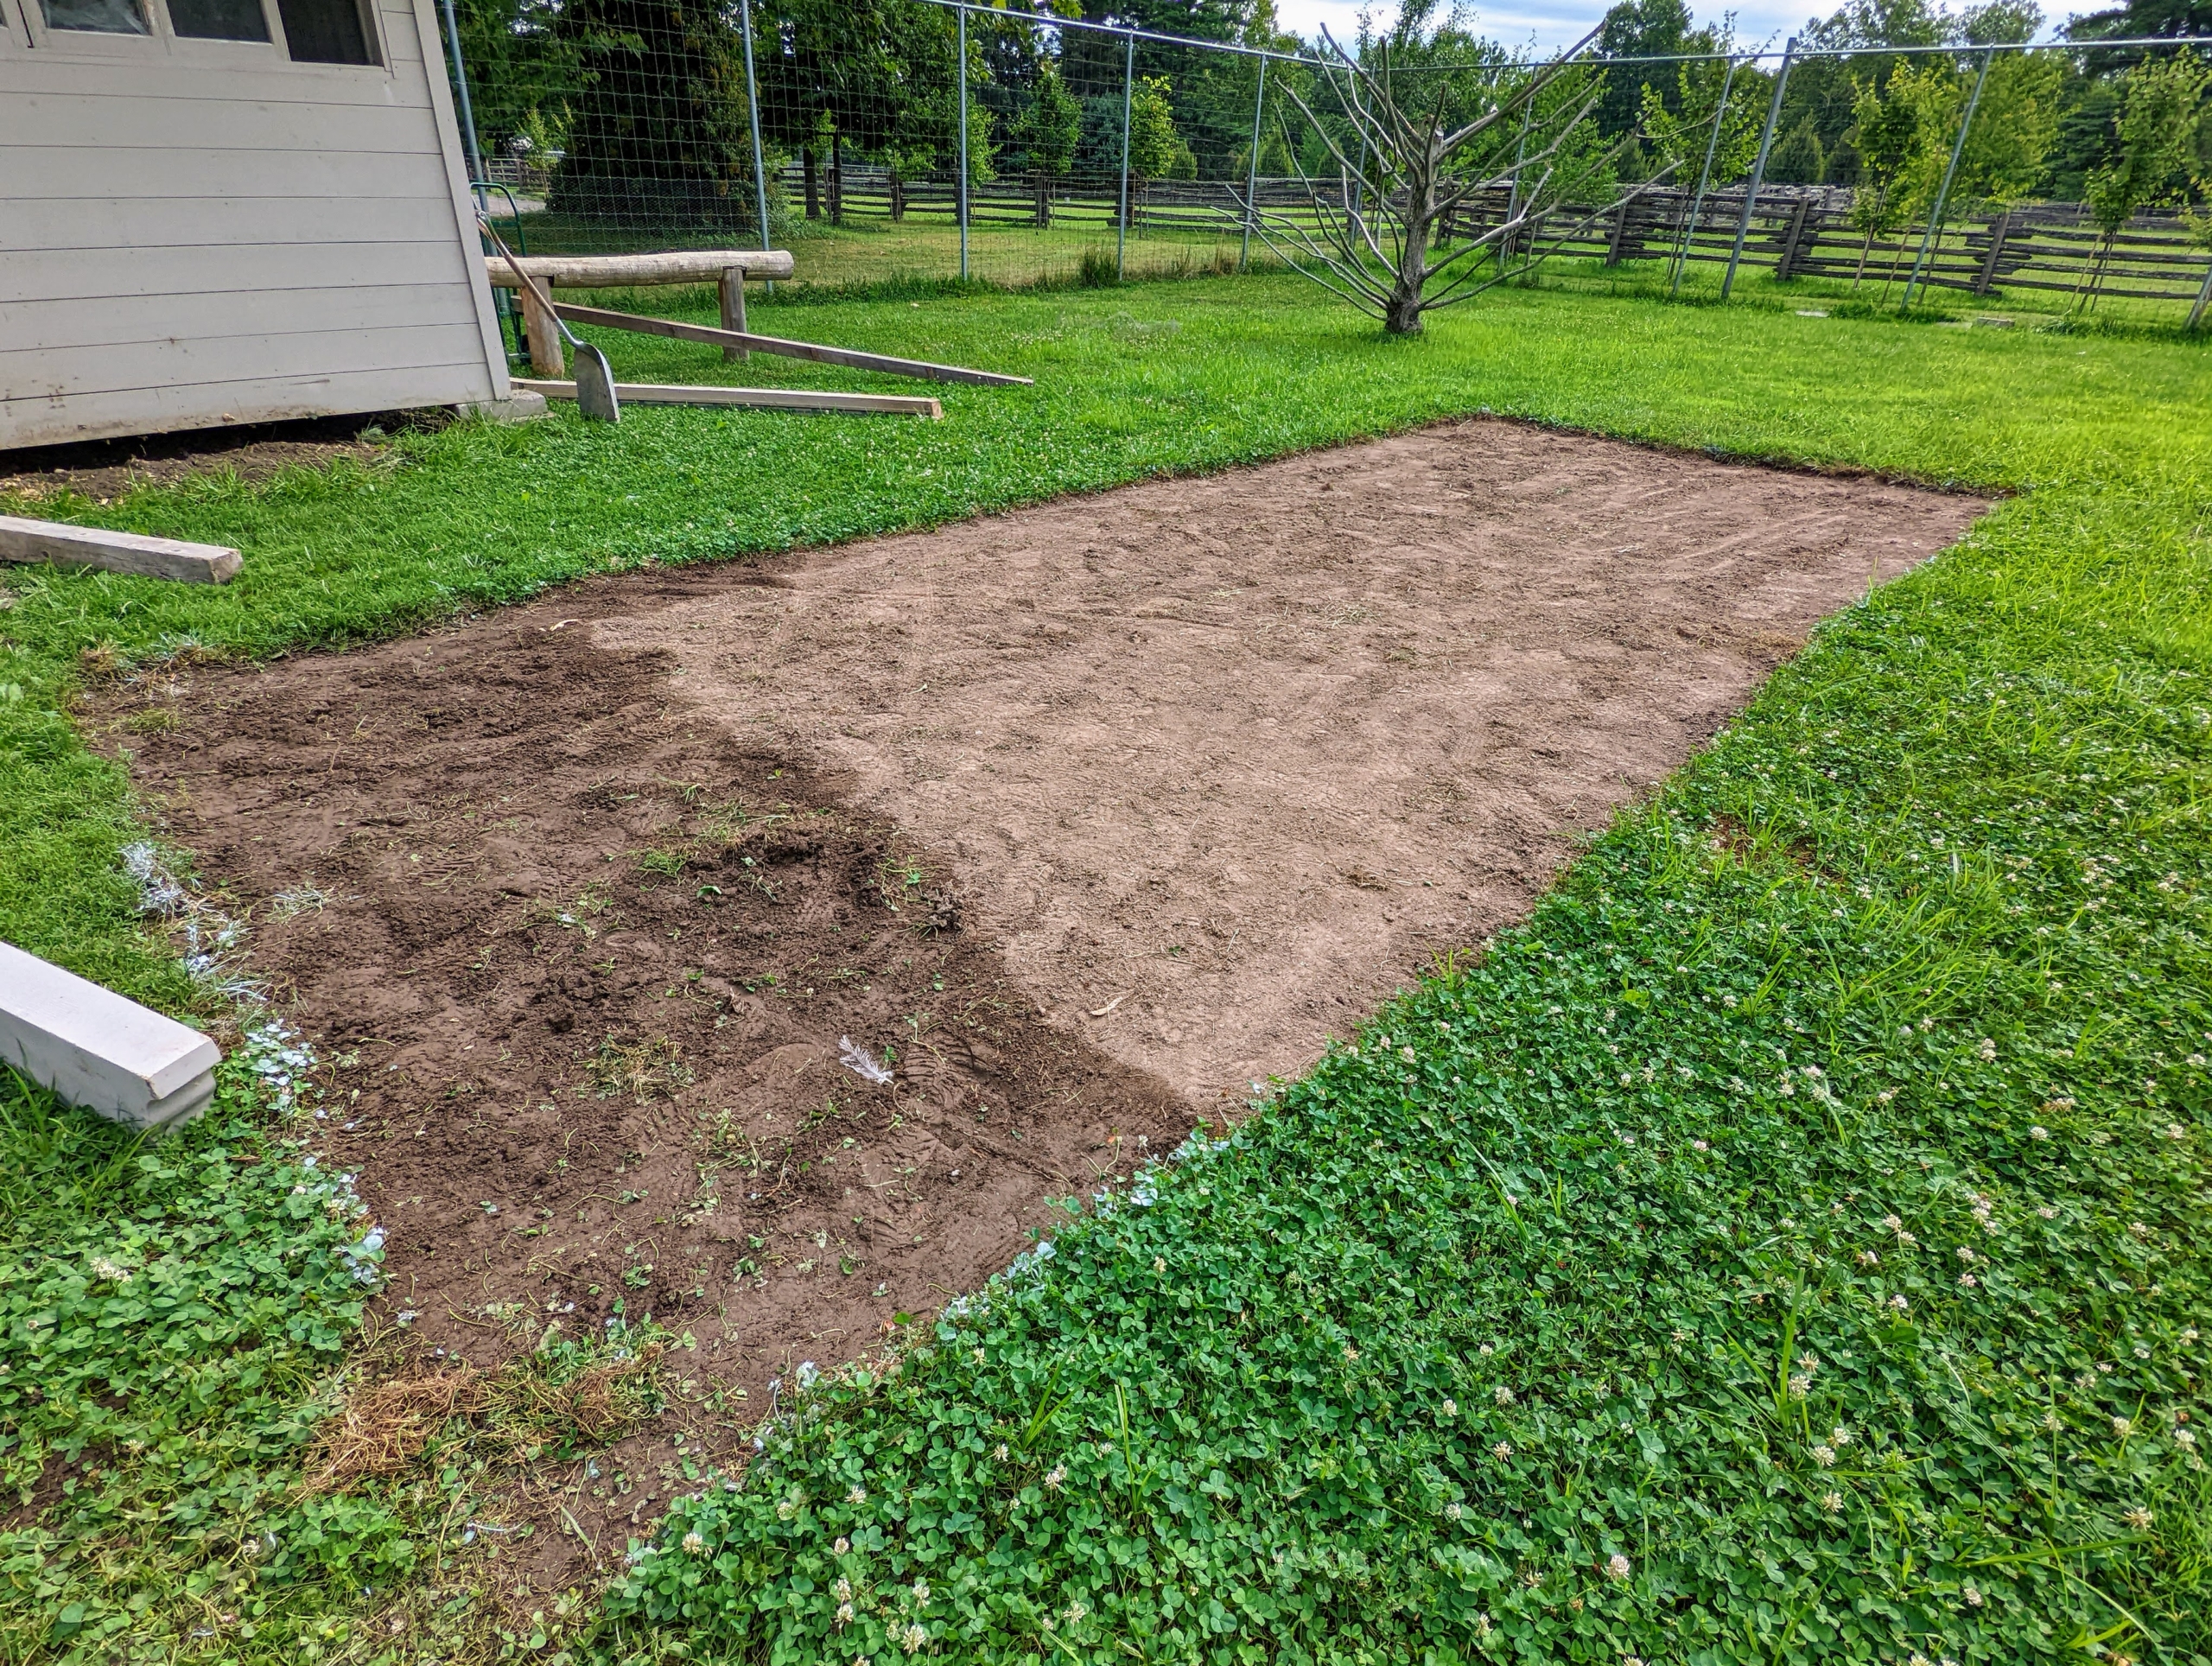
Once all the sod is removed from the designated area, any stray pieces of grass are raked away and the area is prepared for the next phase of our project.
Meanwhile, the heavy stone step is also moved away from the coop along with any other smaller stone pavers.
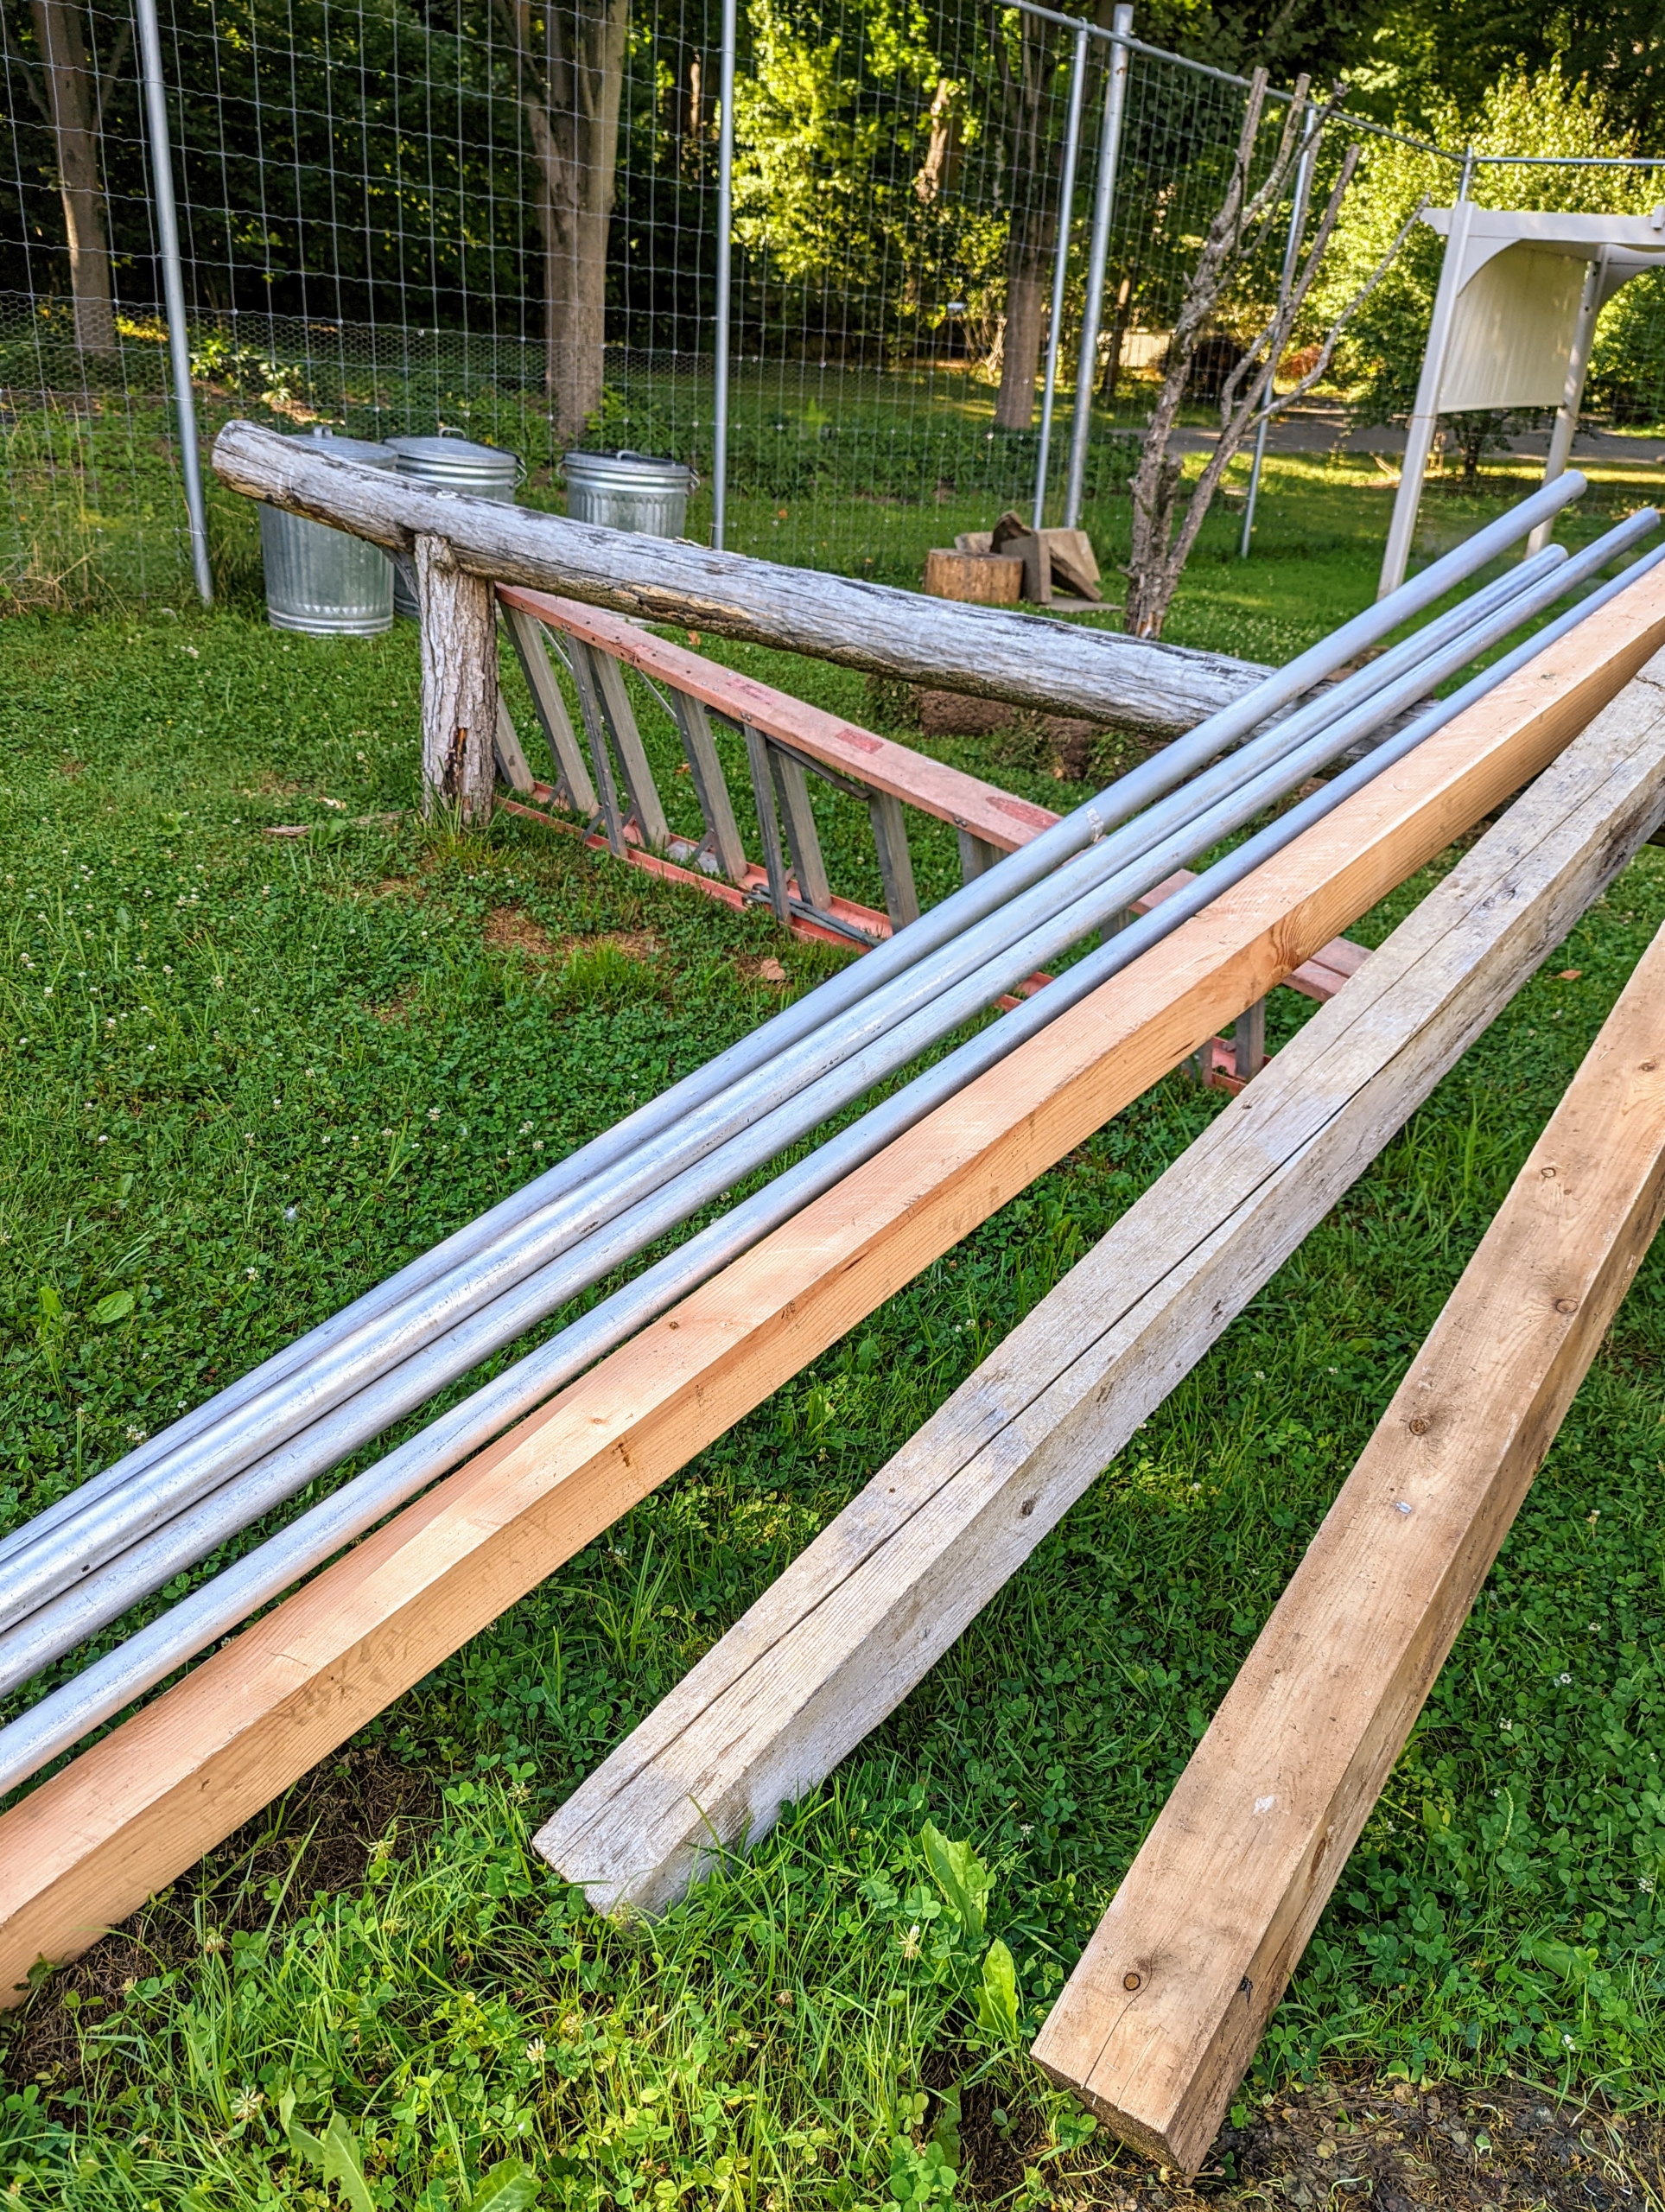
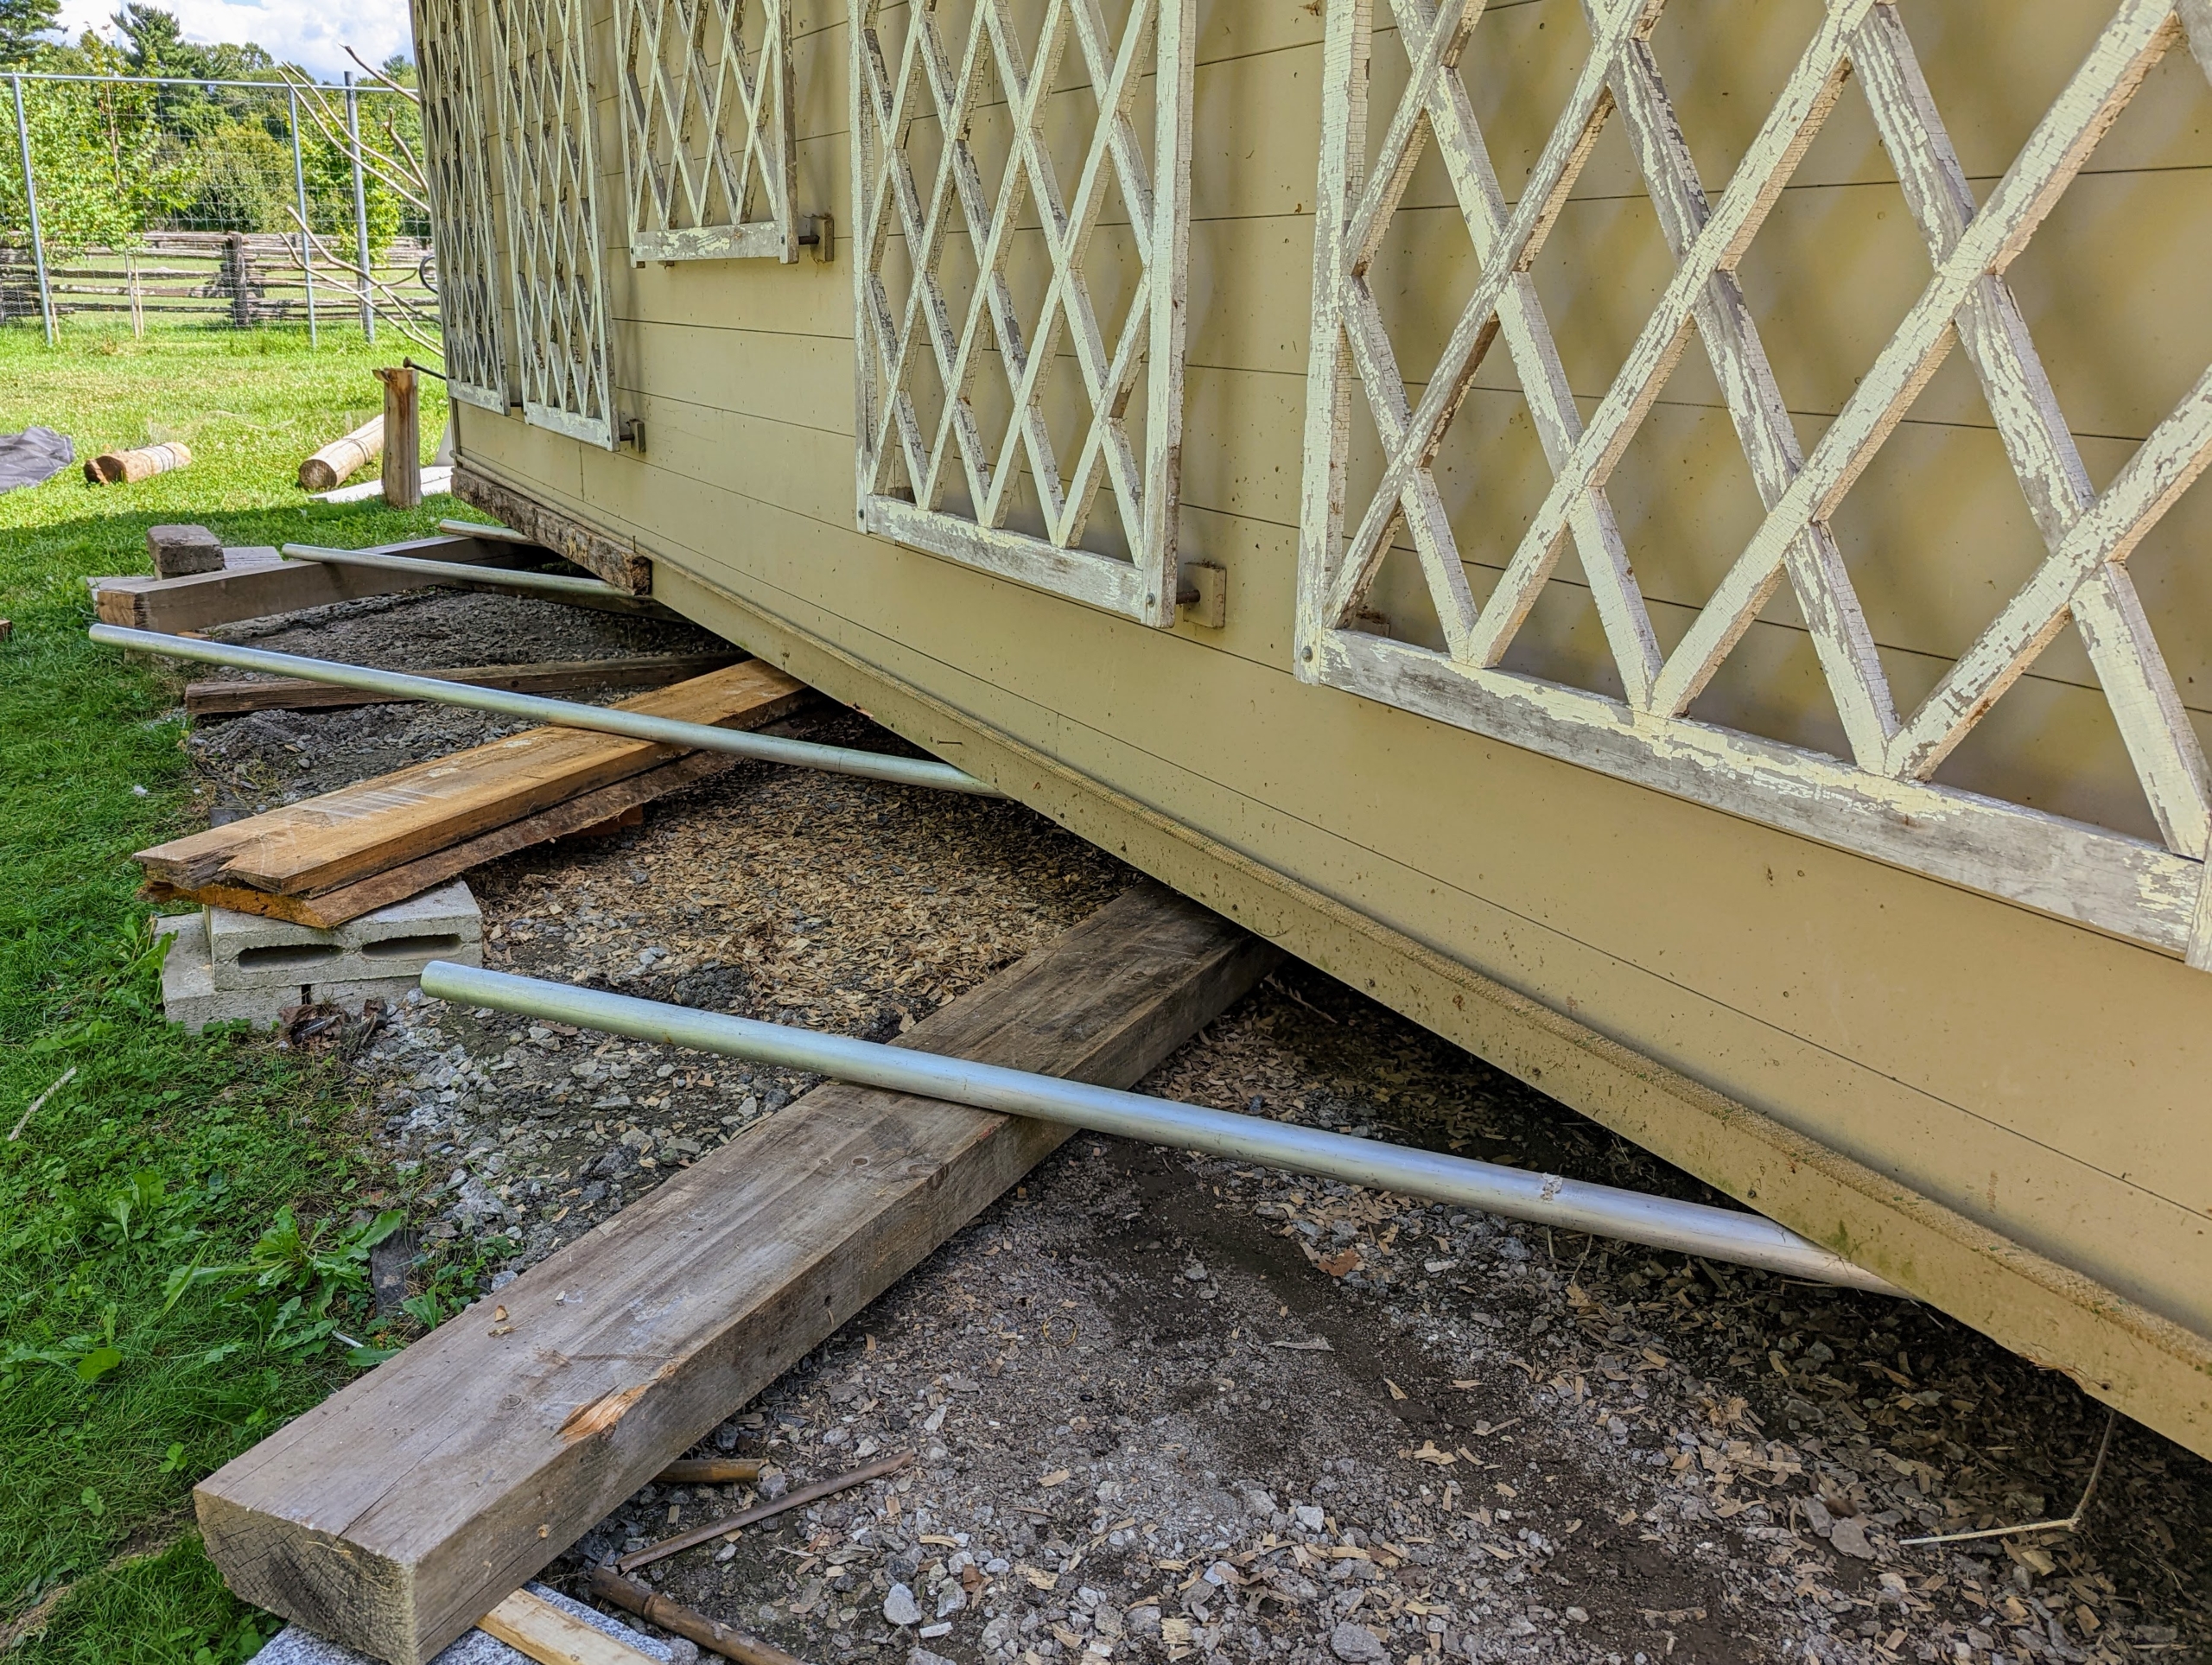
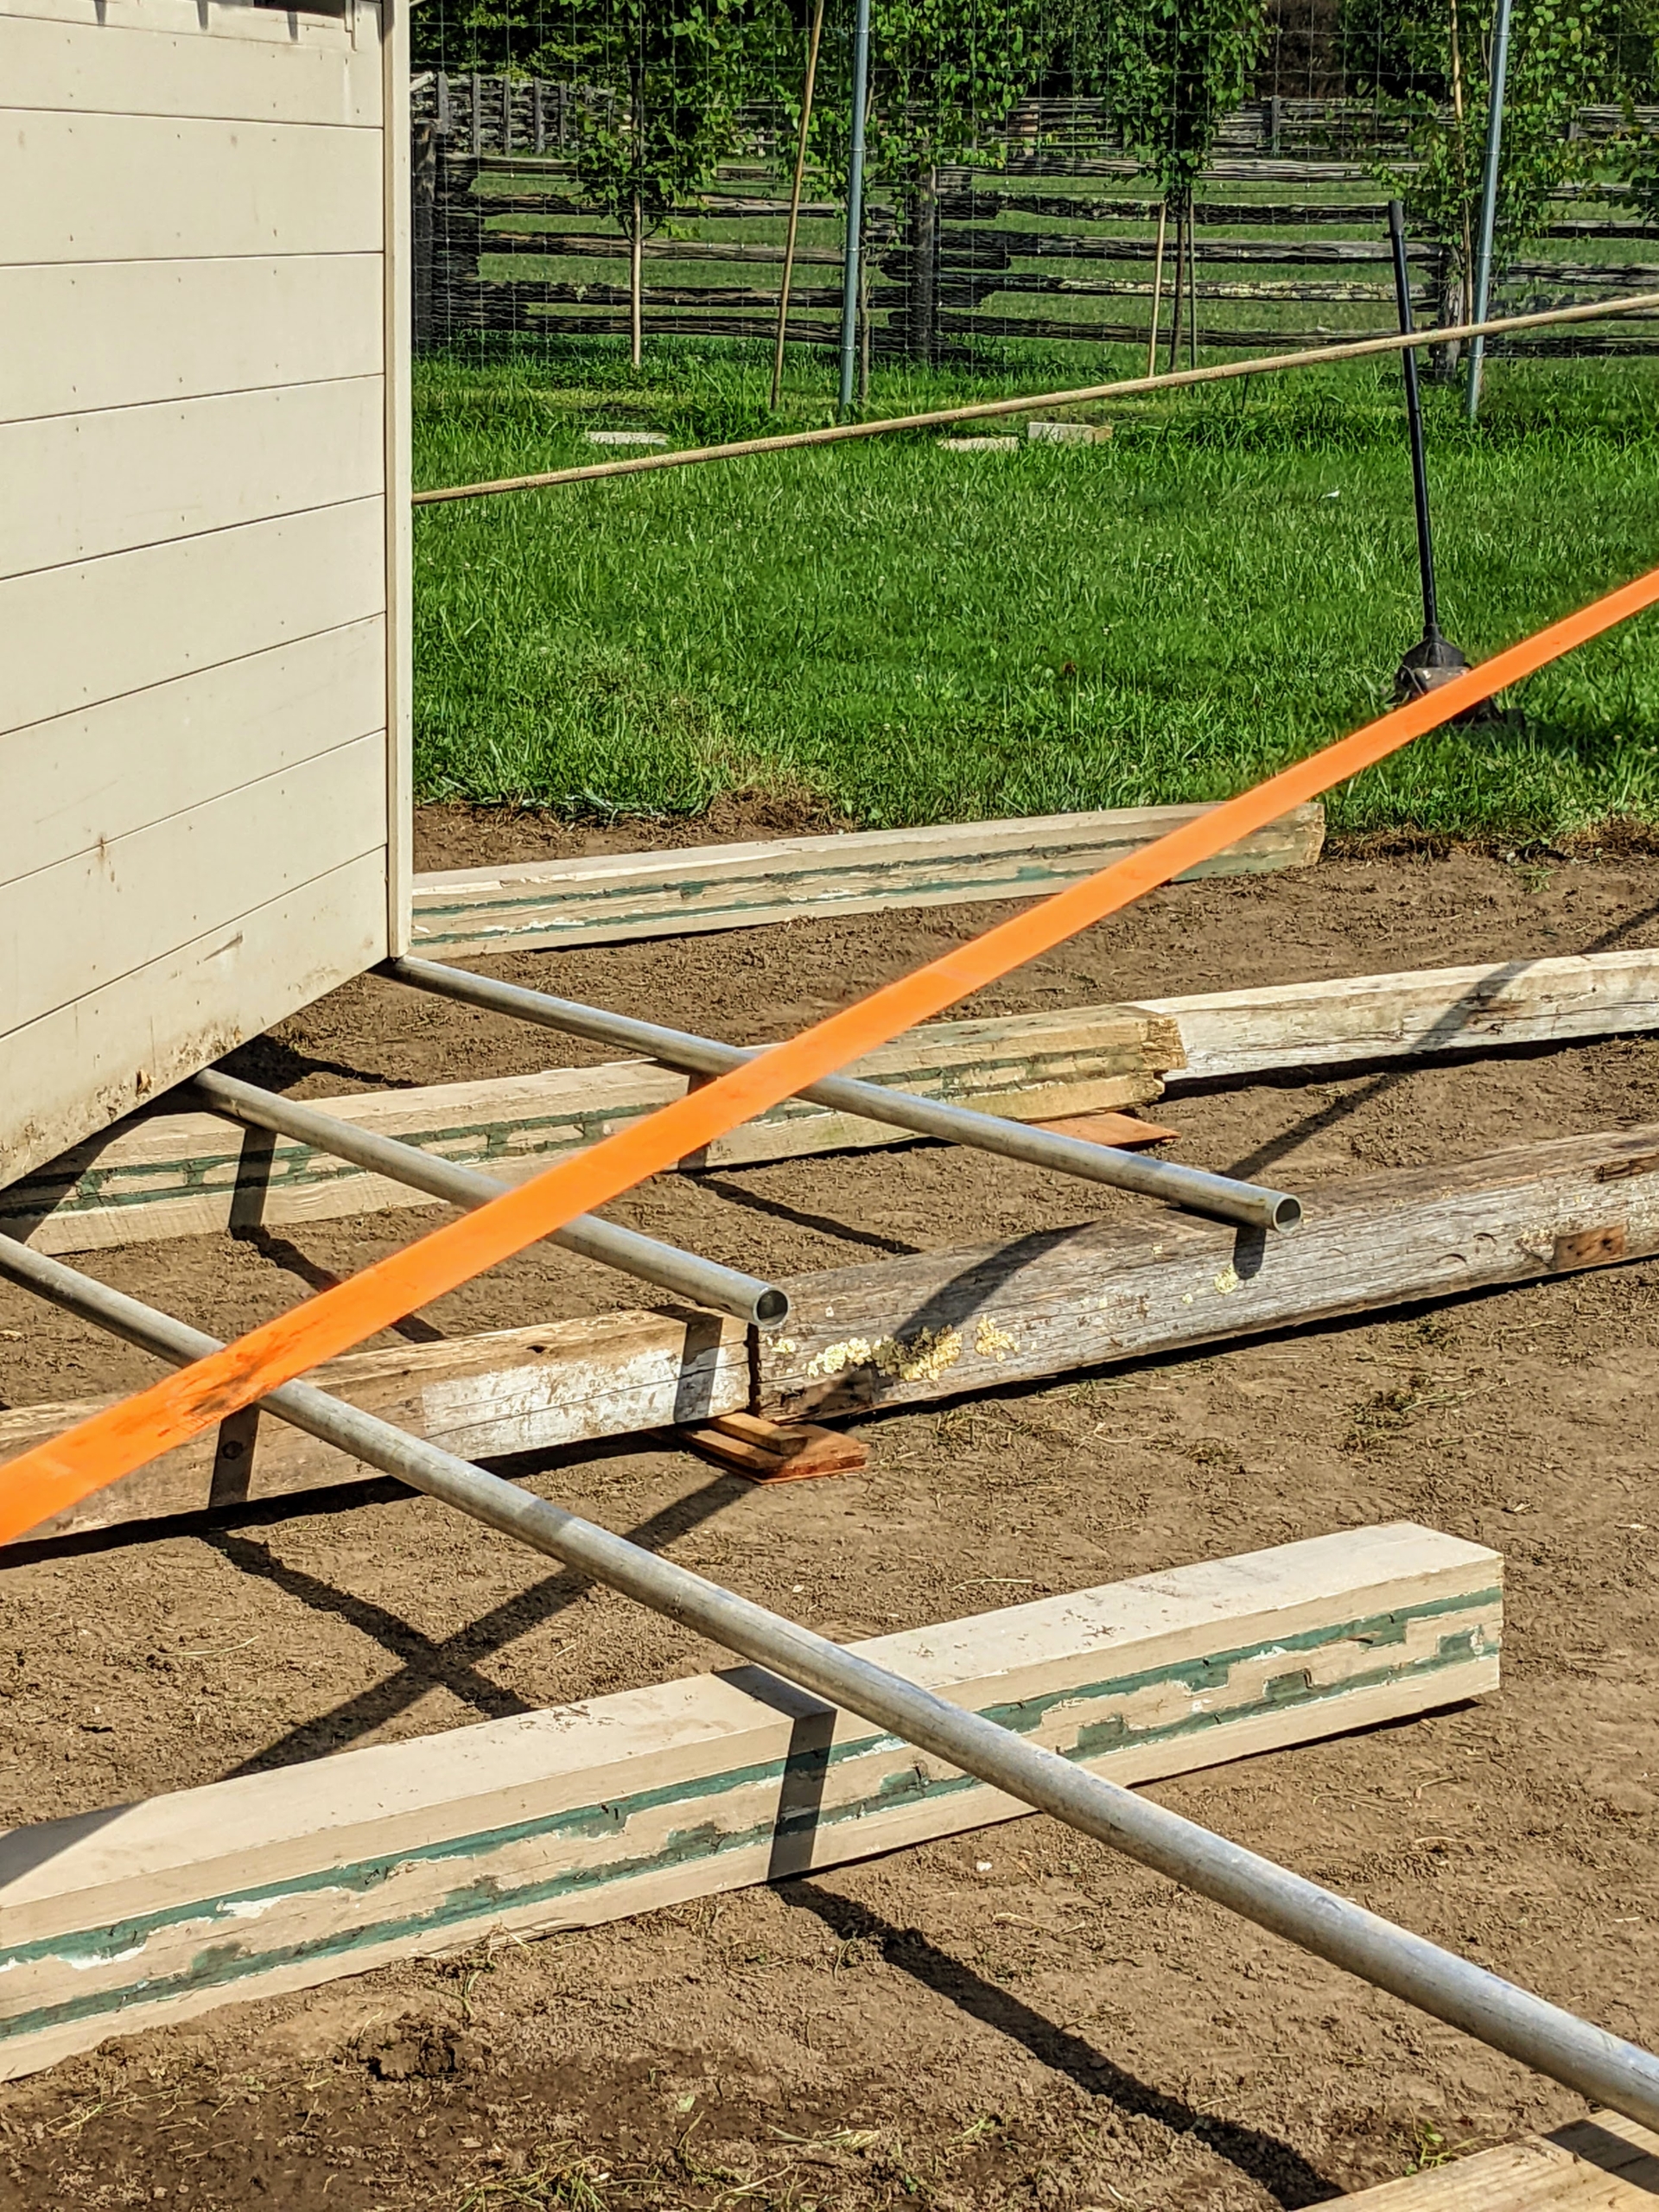
For this project, the crew needs several aluminum pipes and long pieces of timber. All of these were already here at the farm. We save as much material as we can for projects like this.
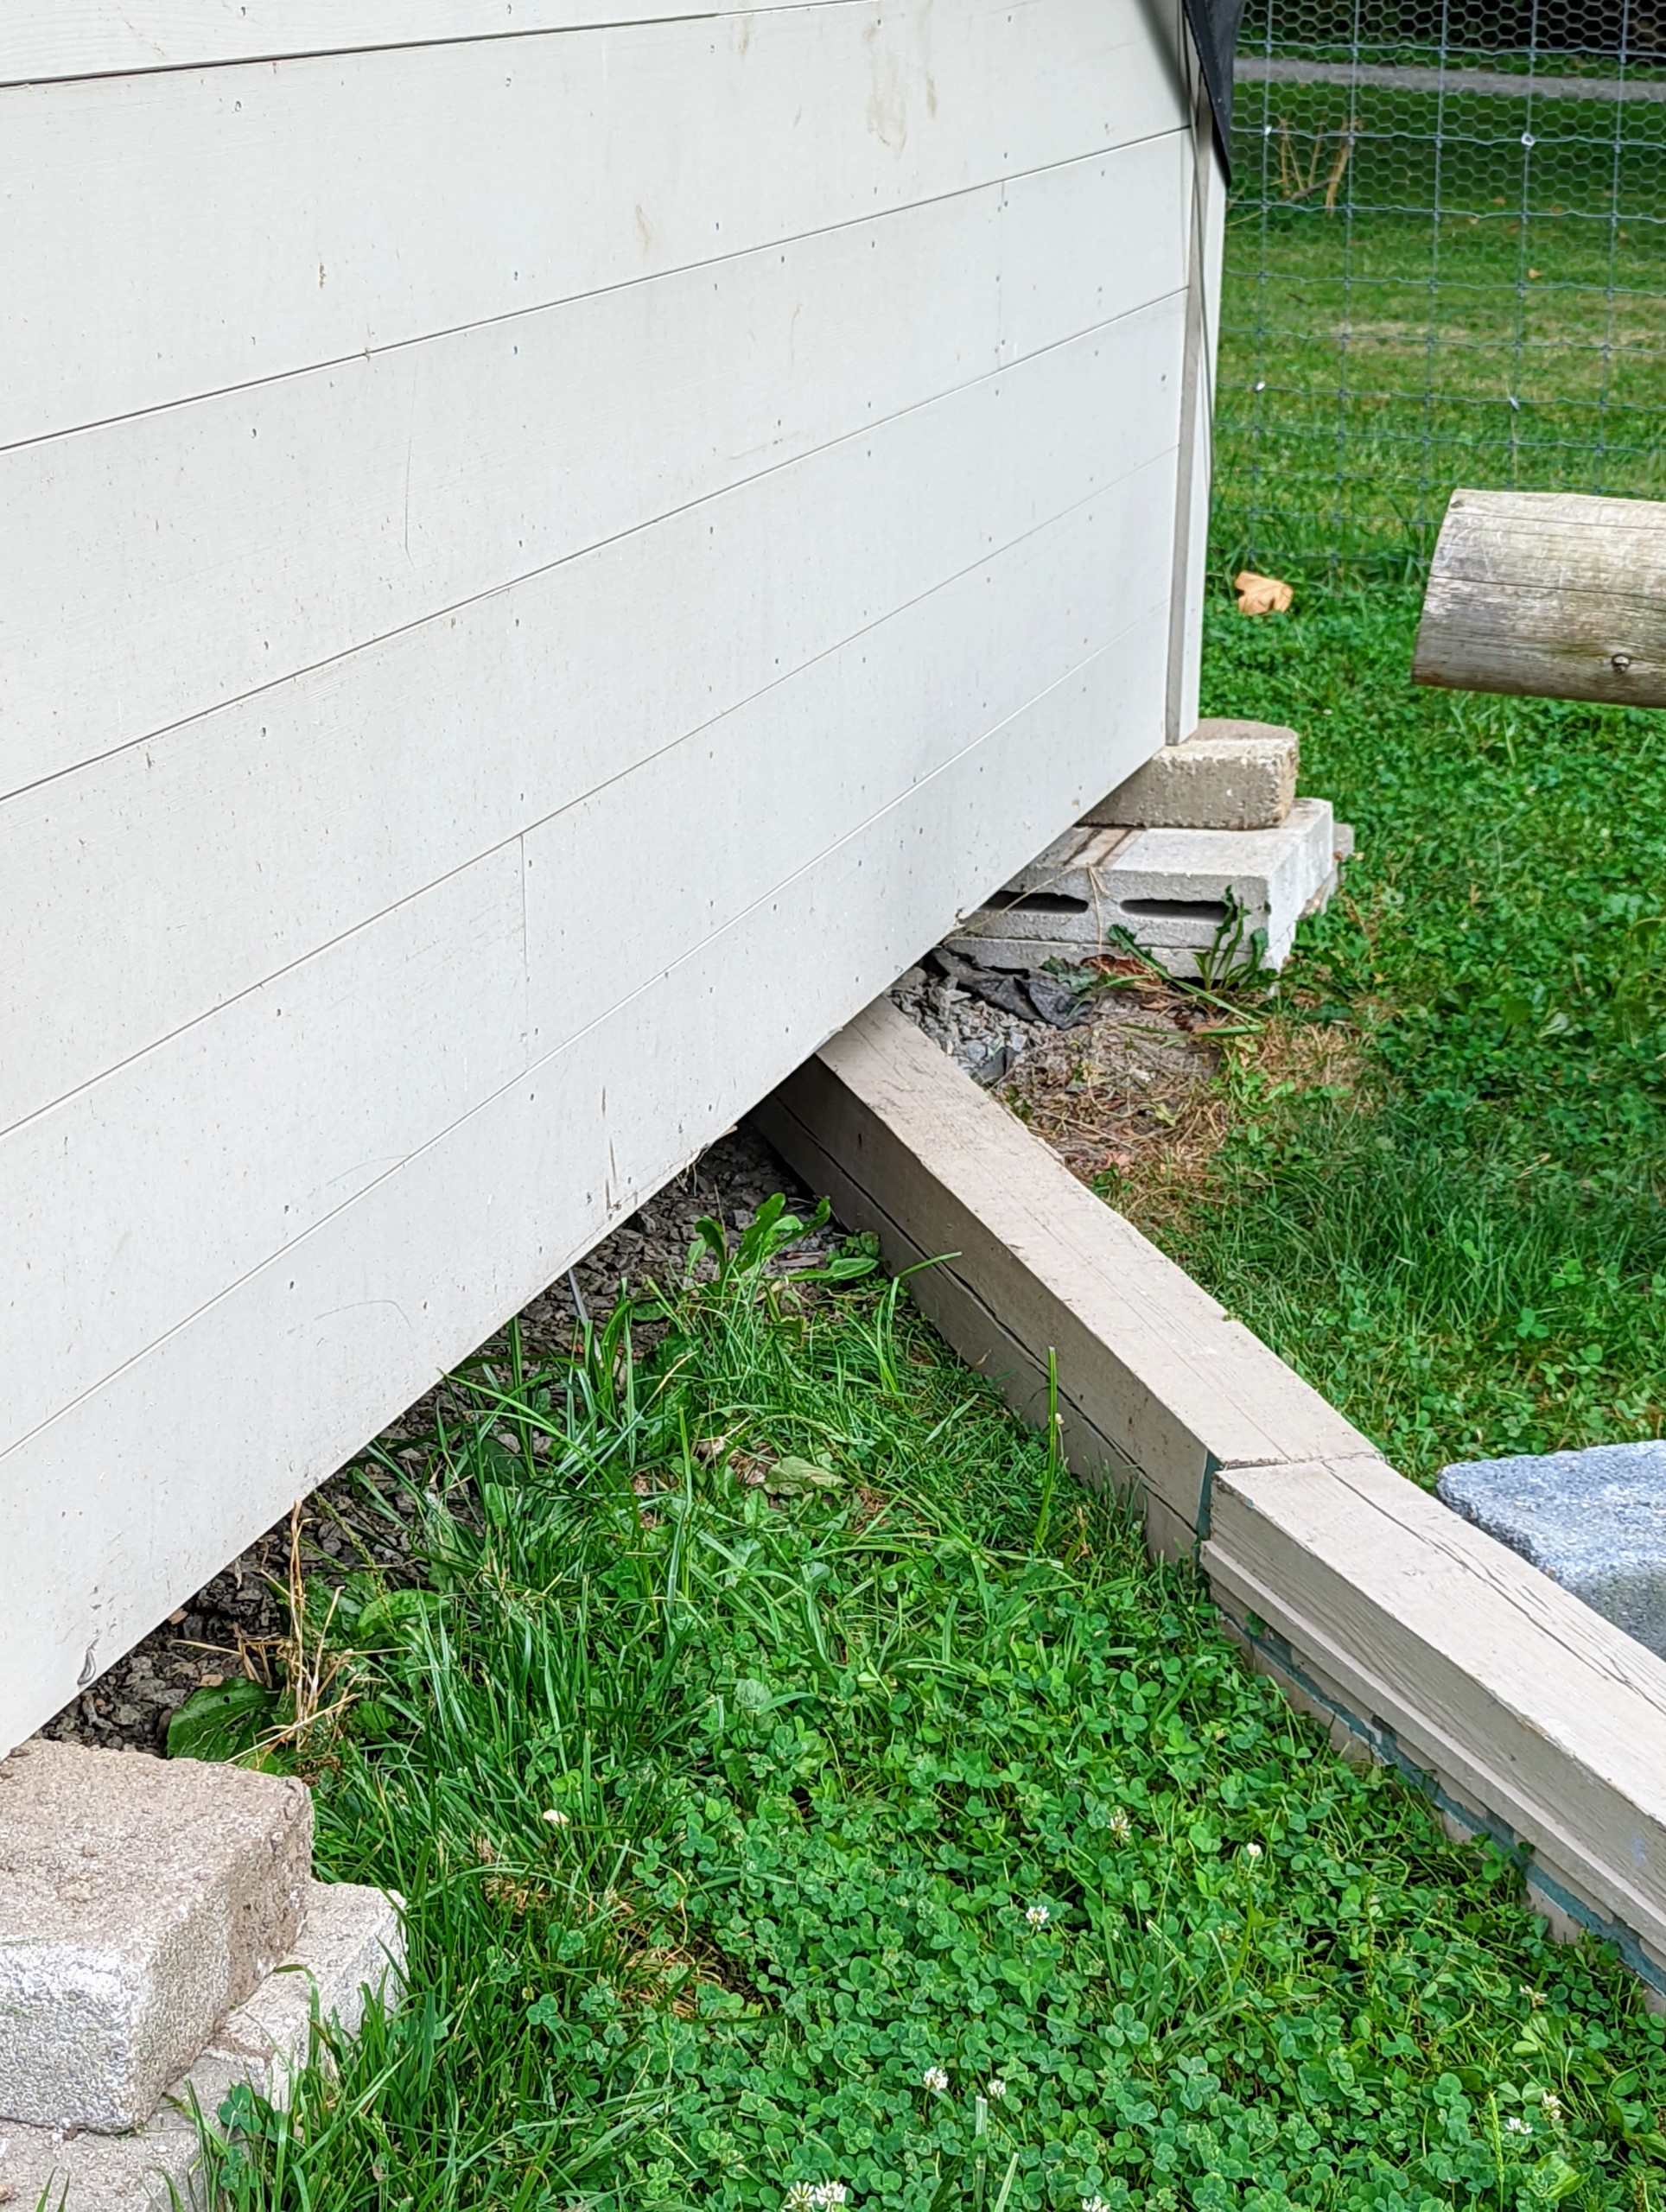
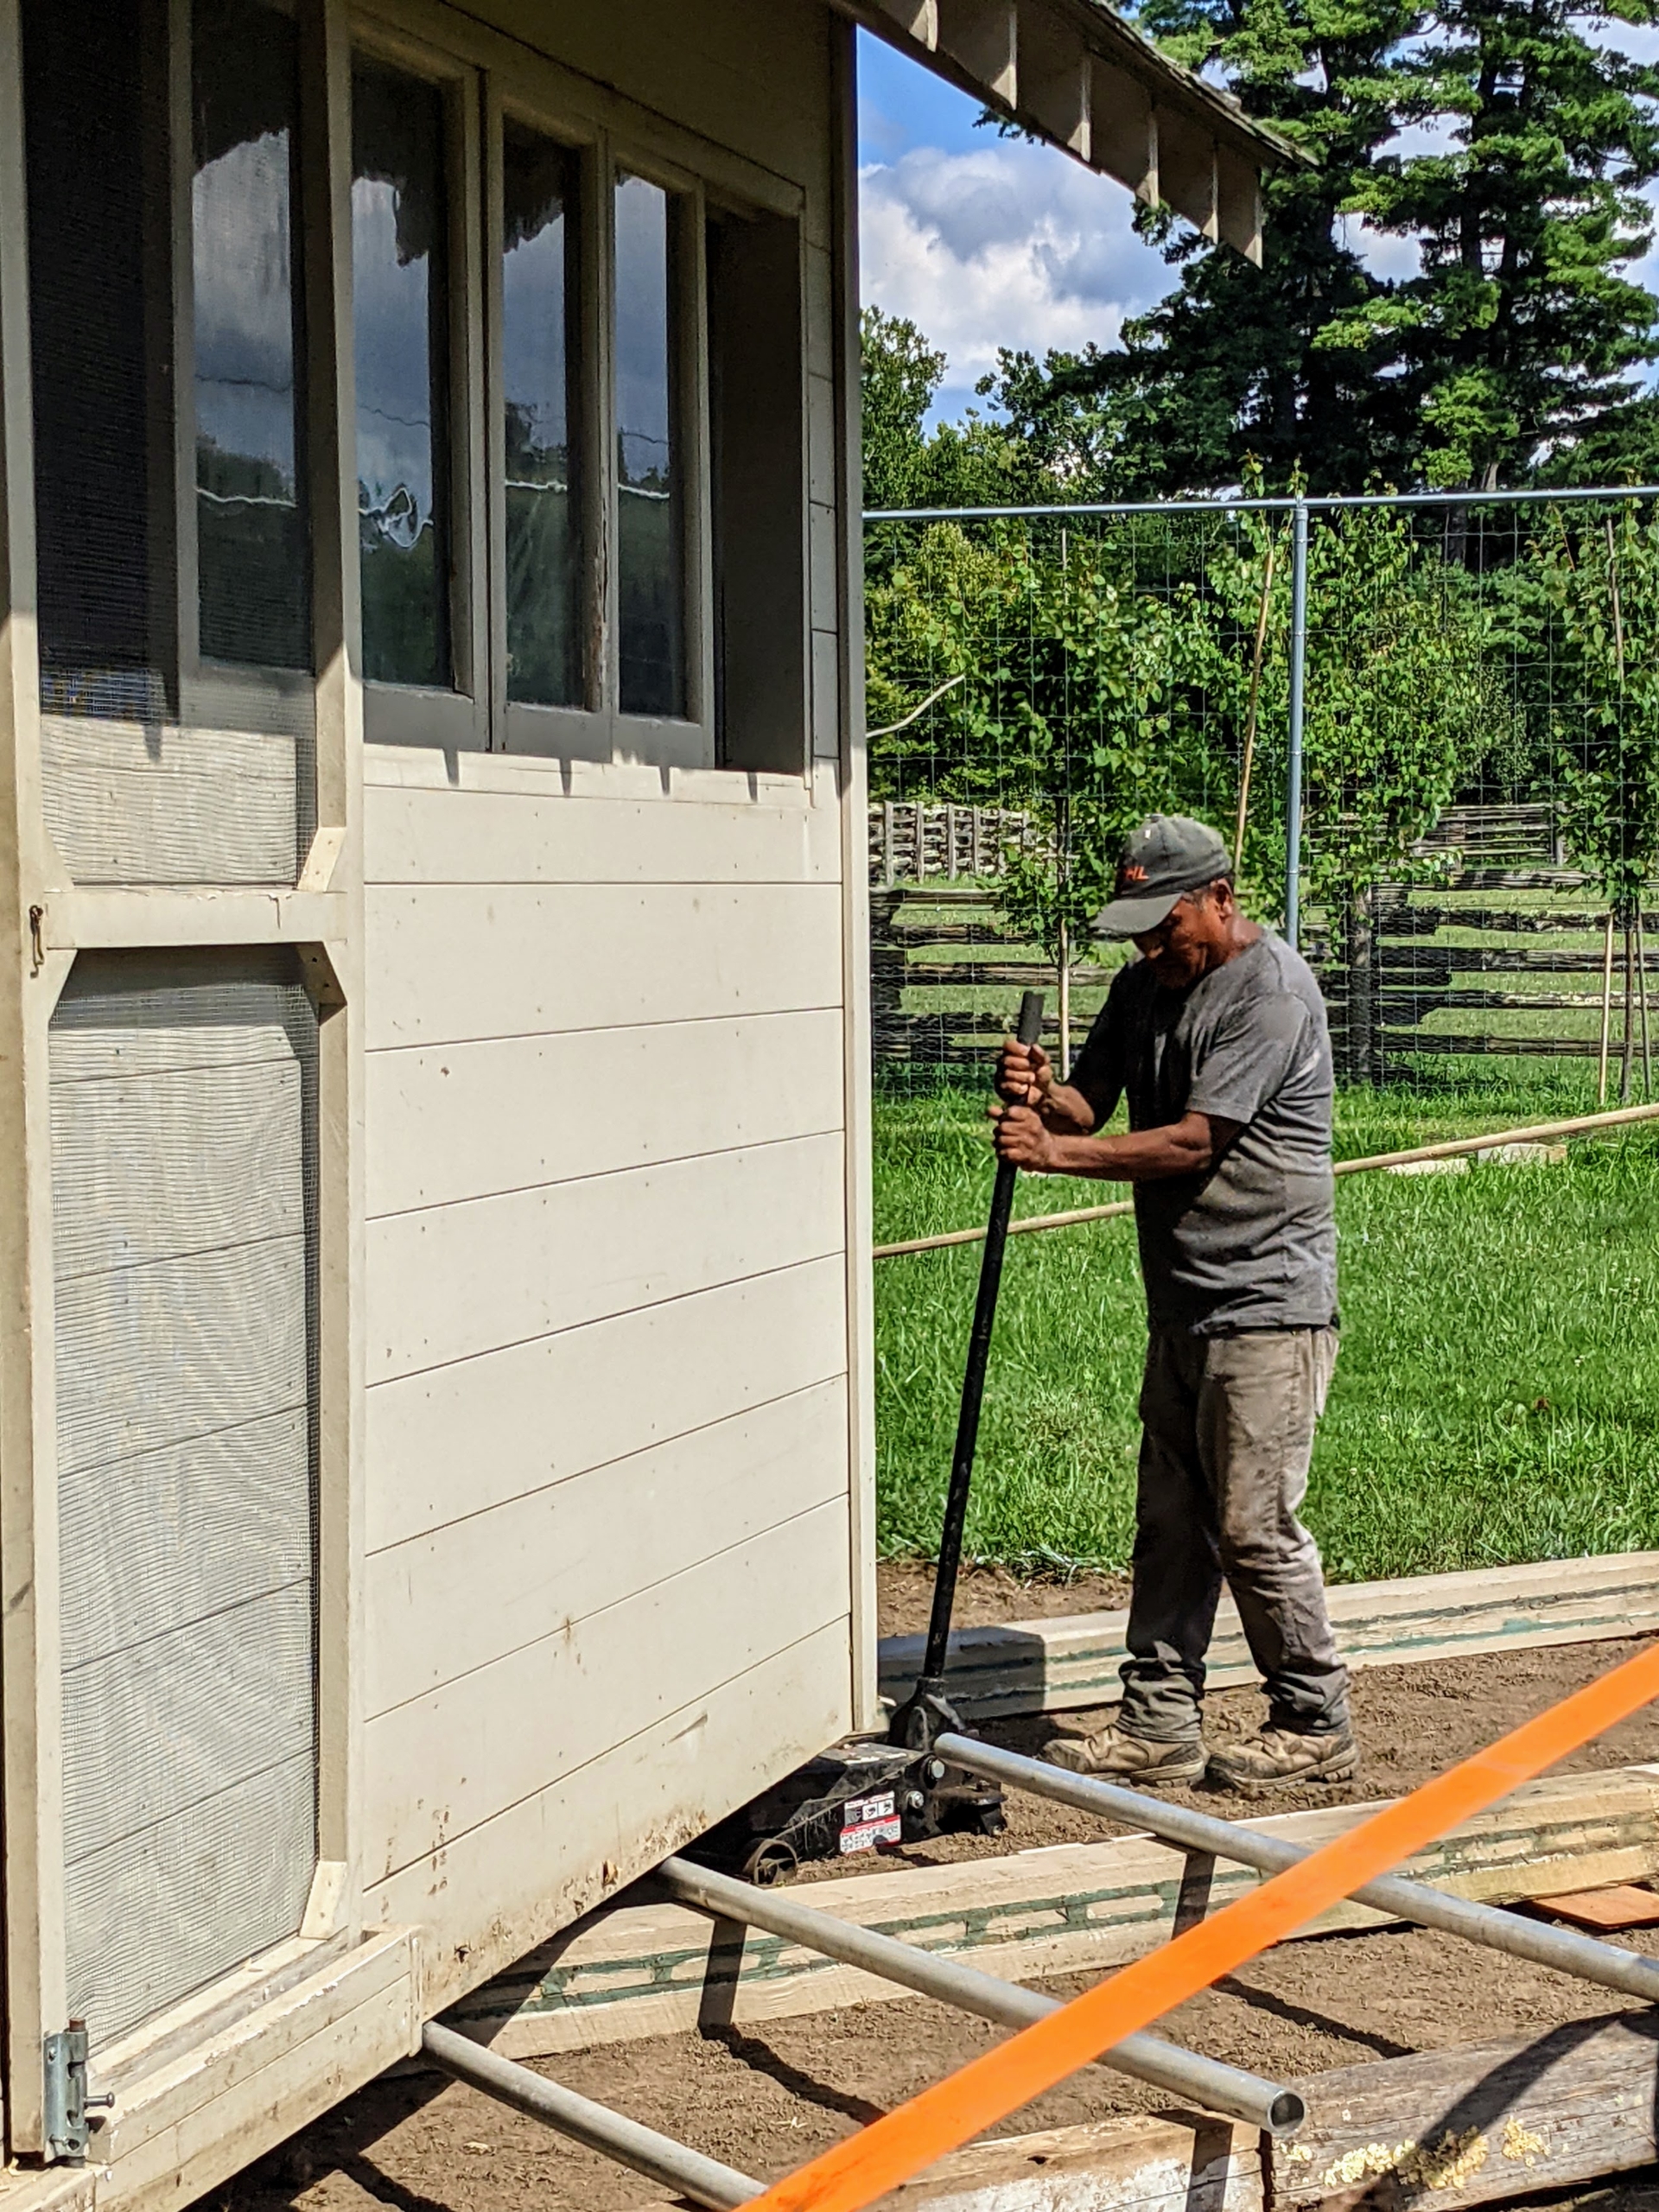
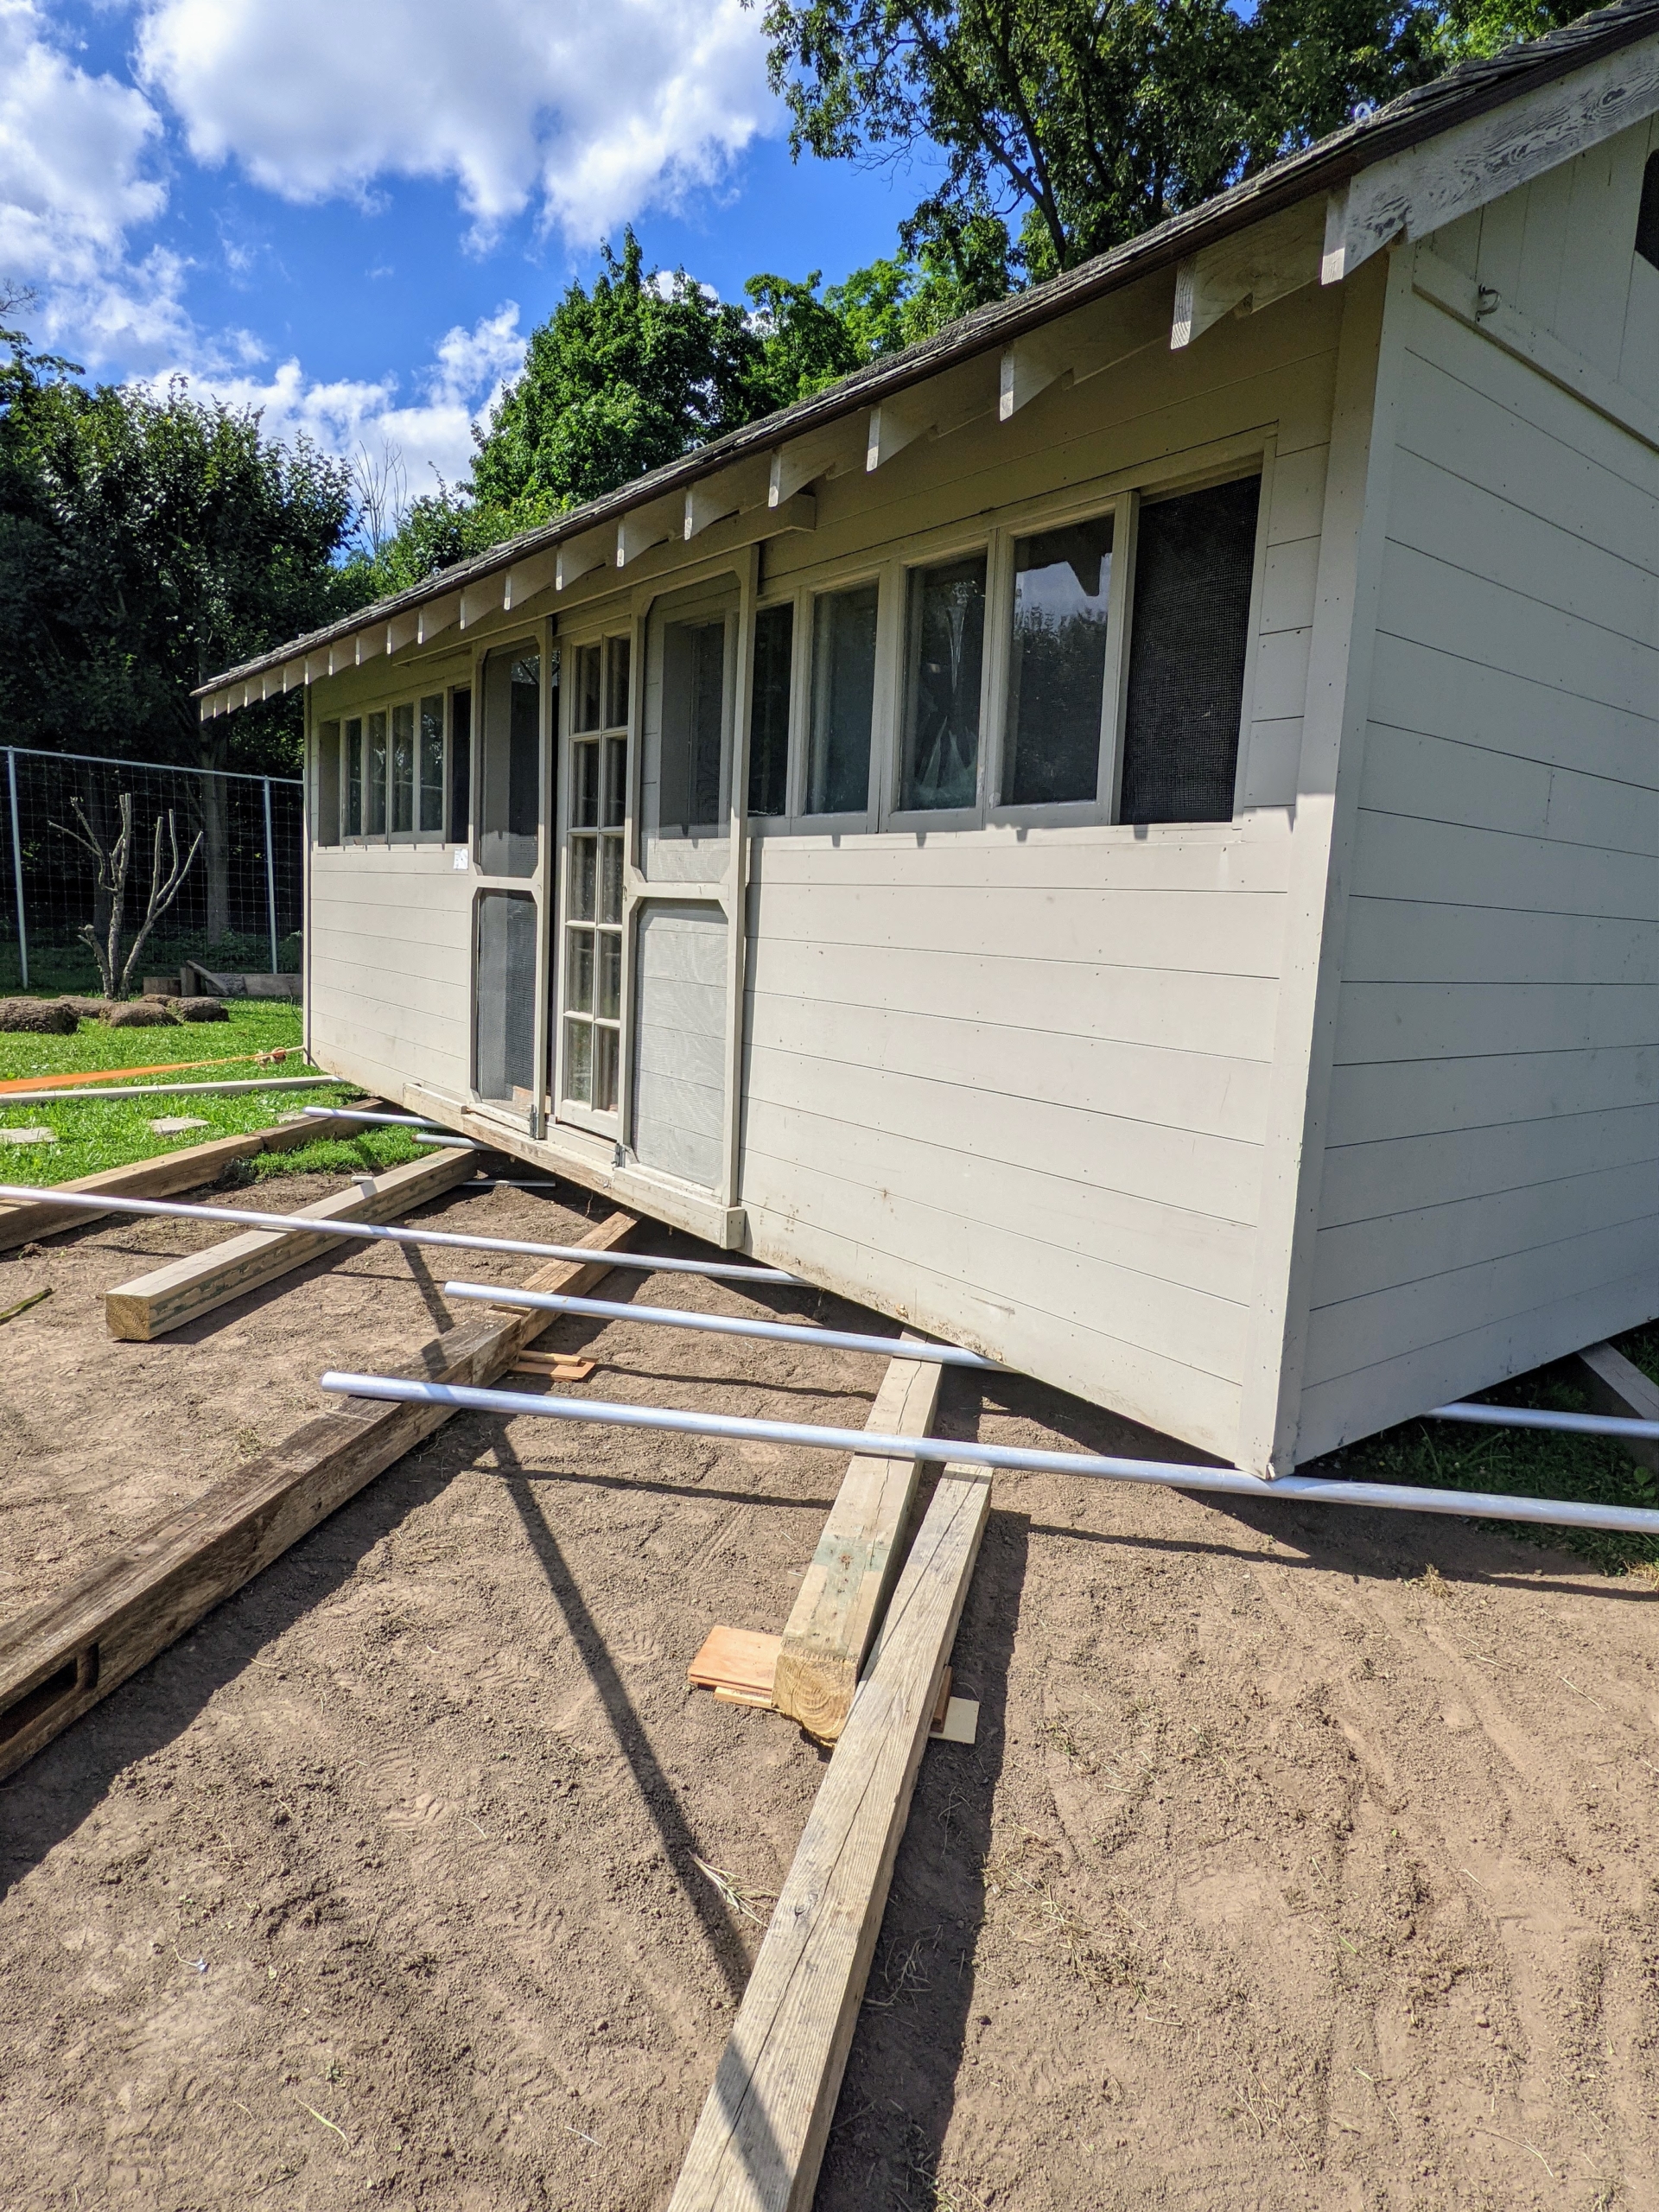
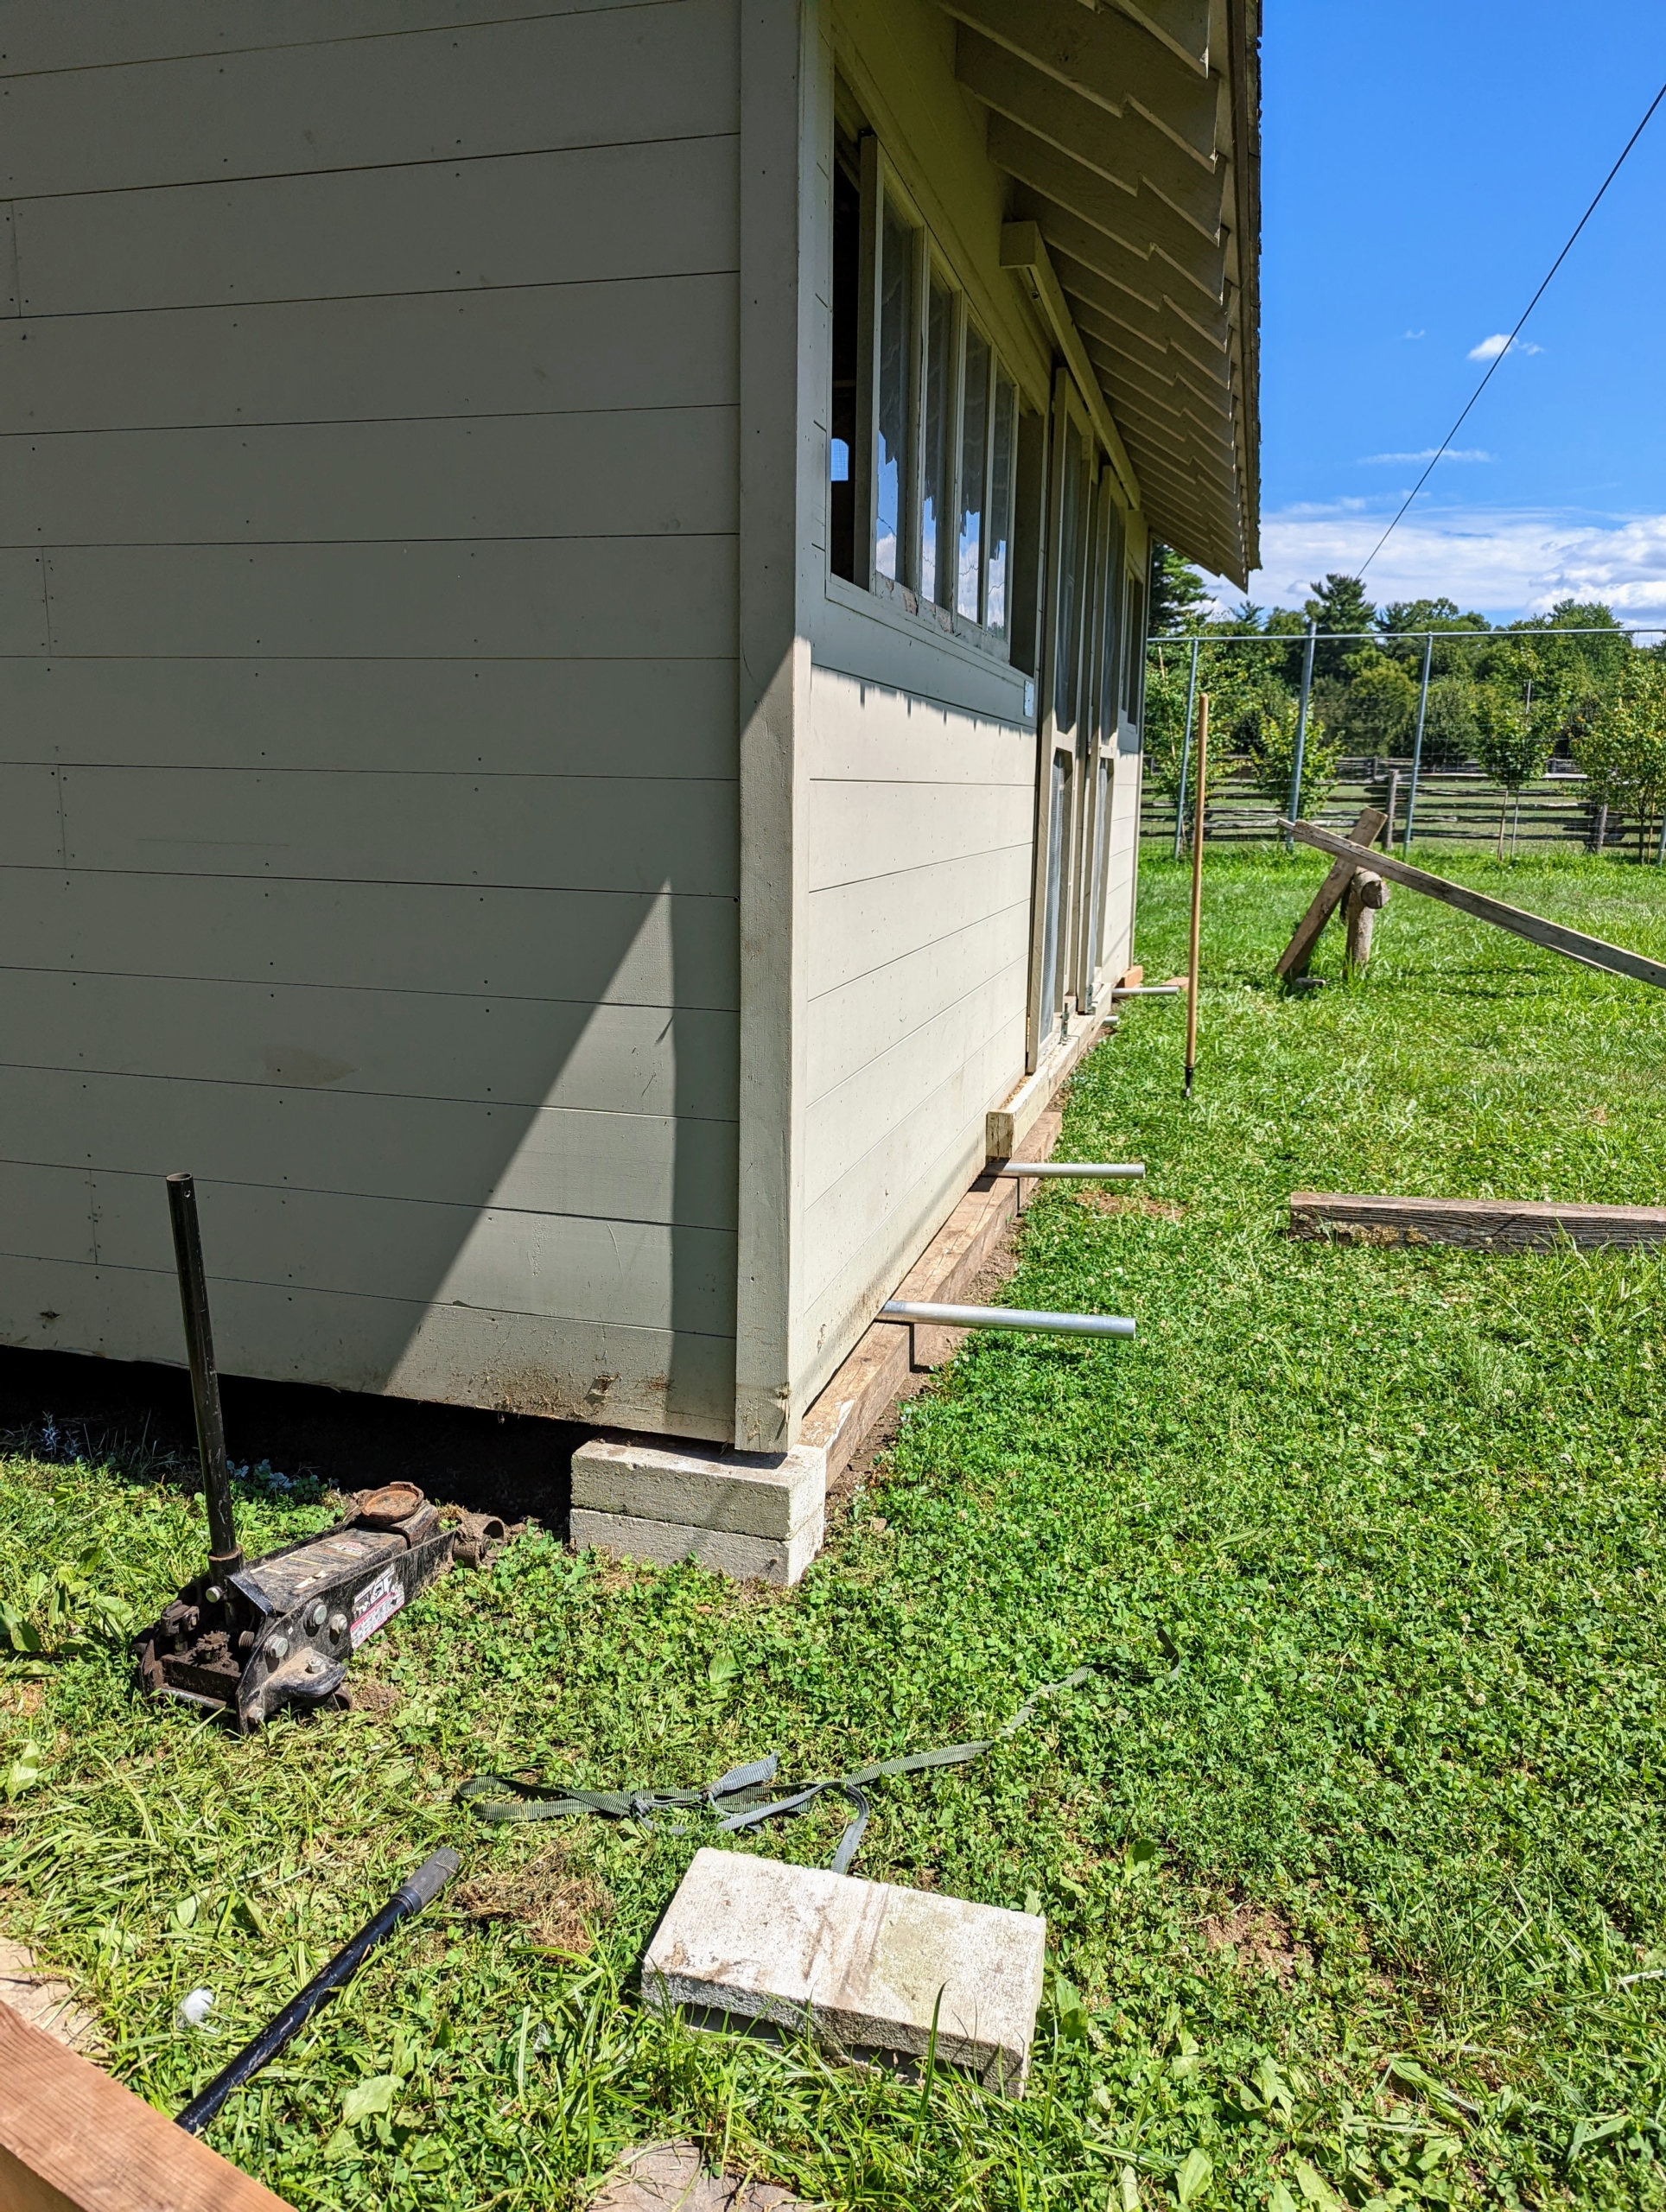
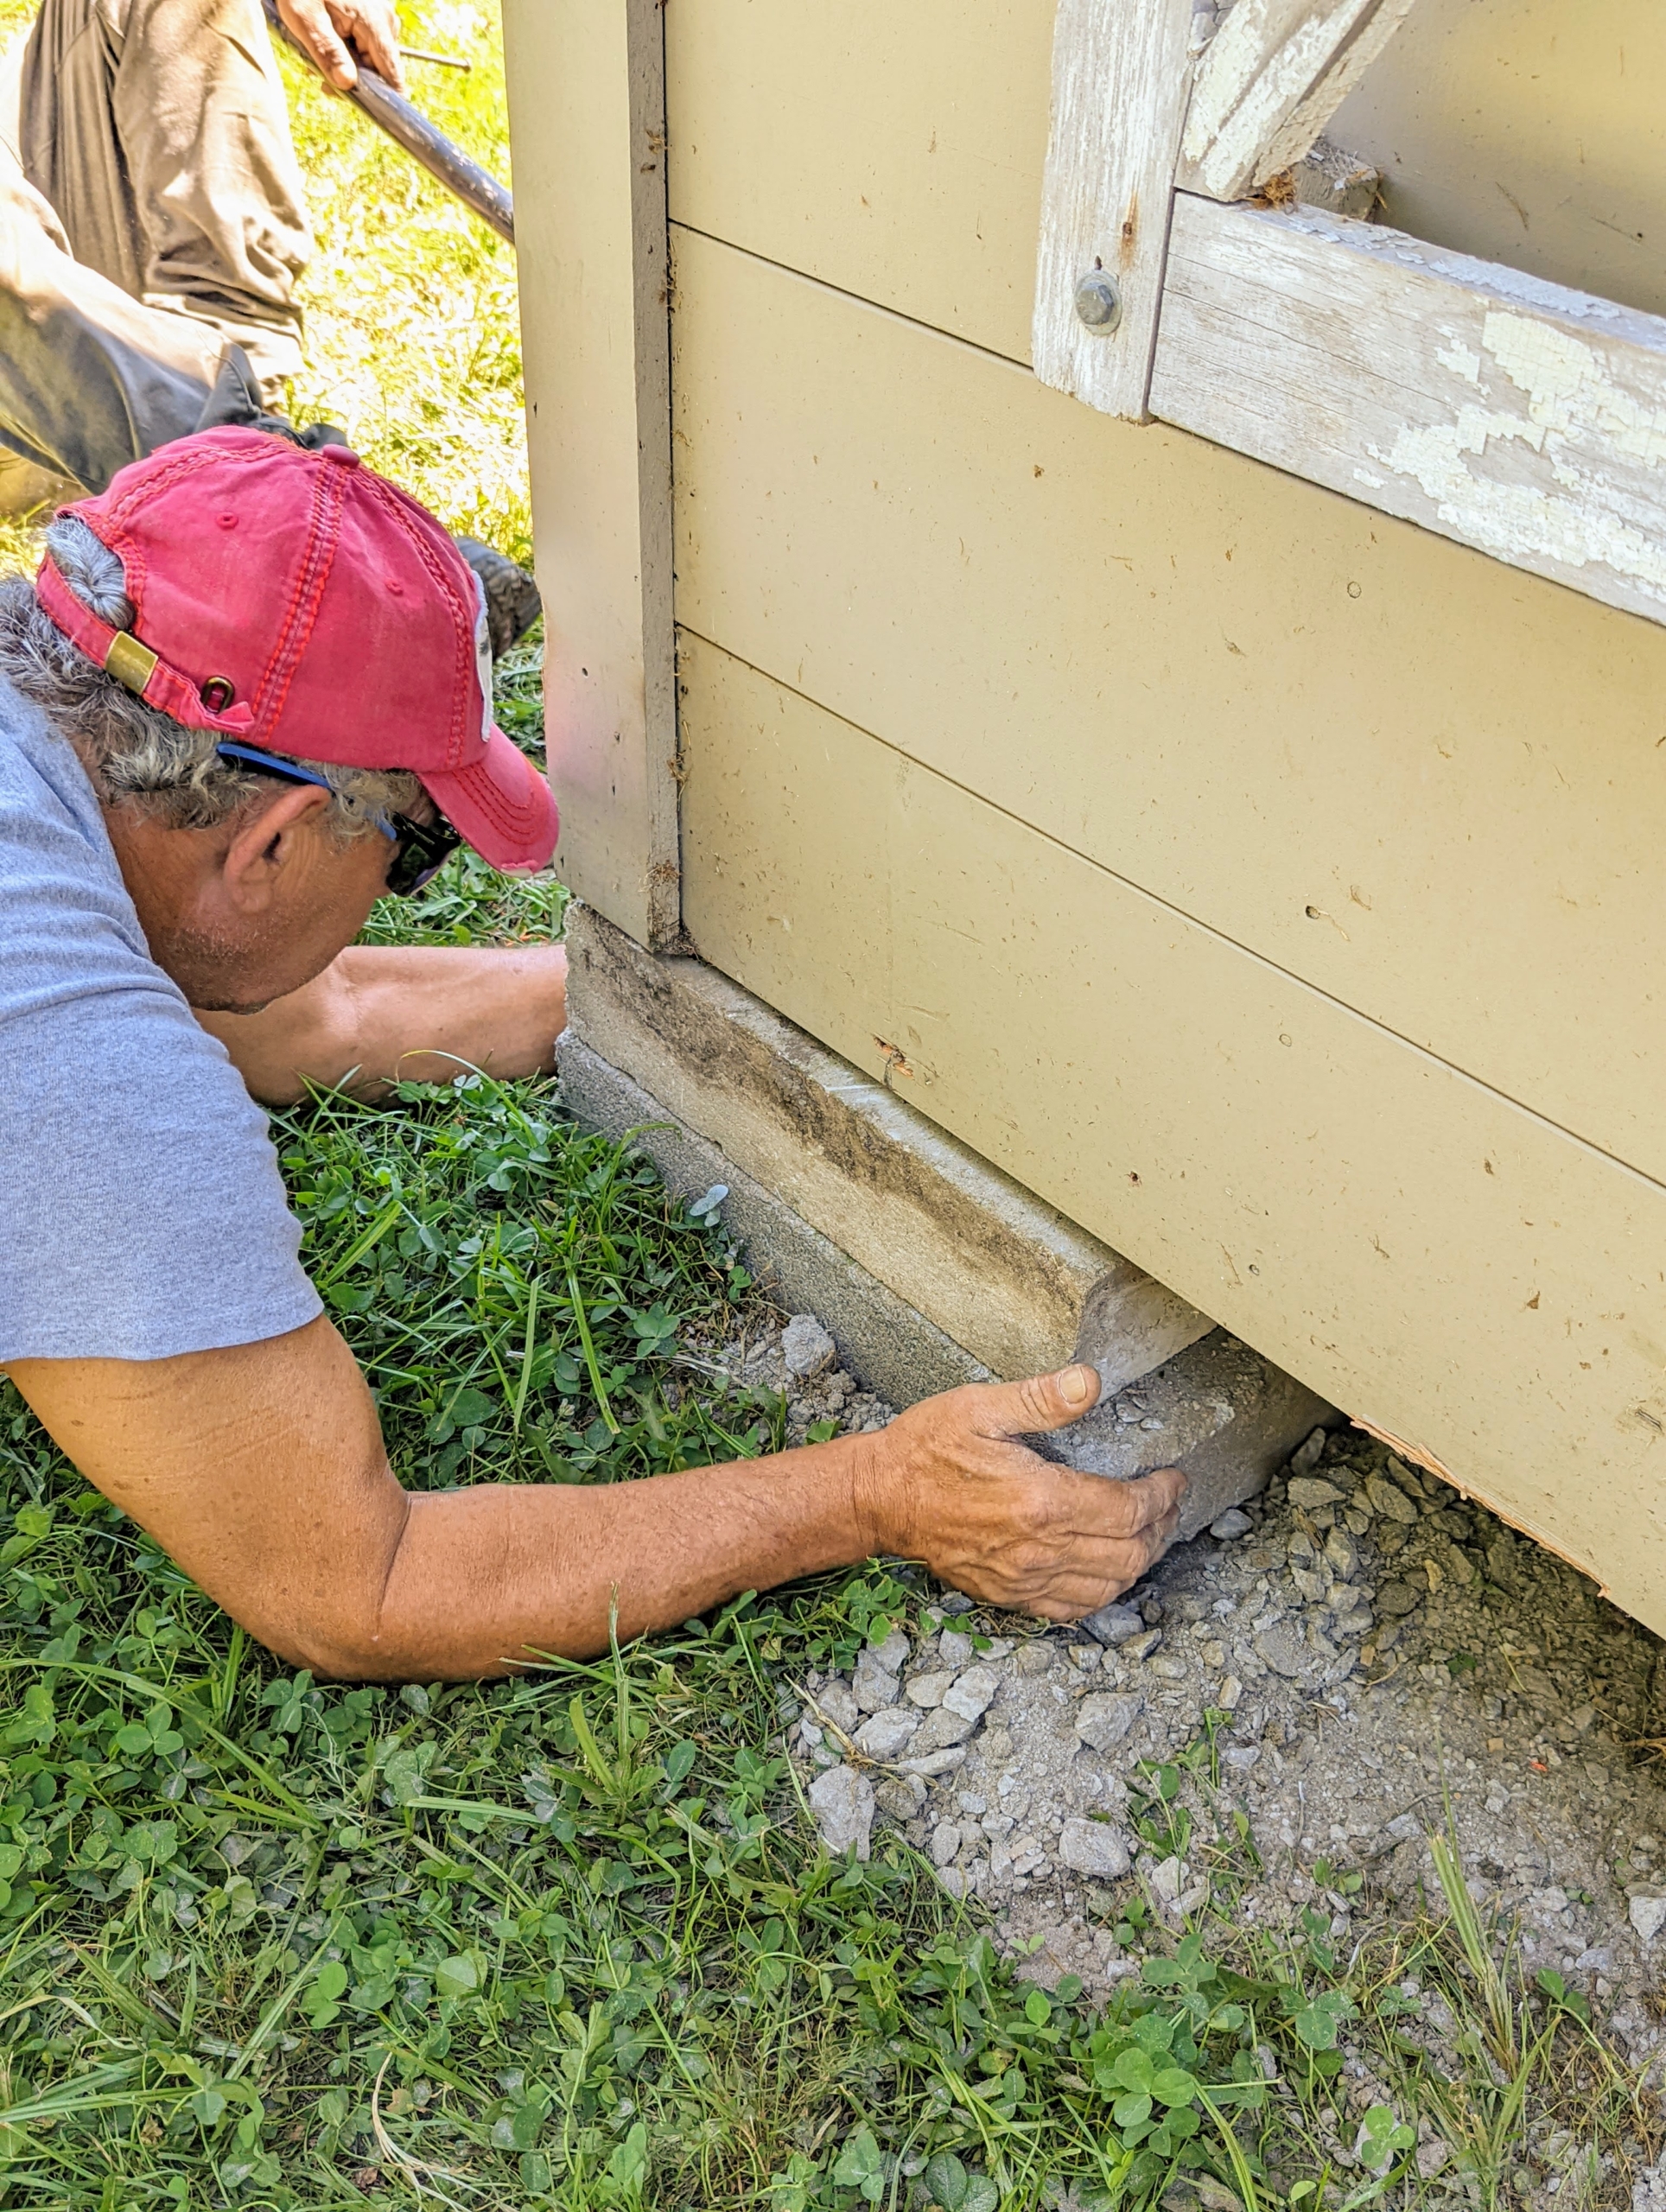
The coop is already built on a proper foundation set on concrete blocks. Using a heavy duty hydraulic jack to hoist the coop up a little more, the crew carefully places the wood under the structure.
The wood is placed on the diagonal in the direction the coop will move.
Here is Pete using the jack again to position the pipes. Each side is done slowly, adding one piece at a time in order to keep the structure level as it is being done.
Here is the front of the coop with the pipes underneath and ready to go.
Here is a view from the back.
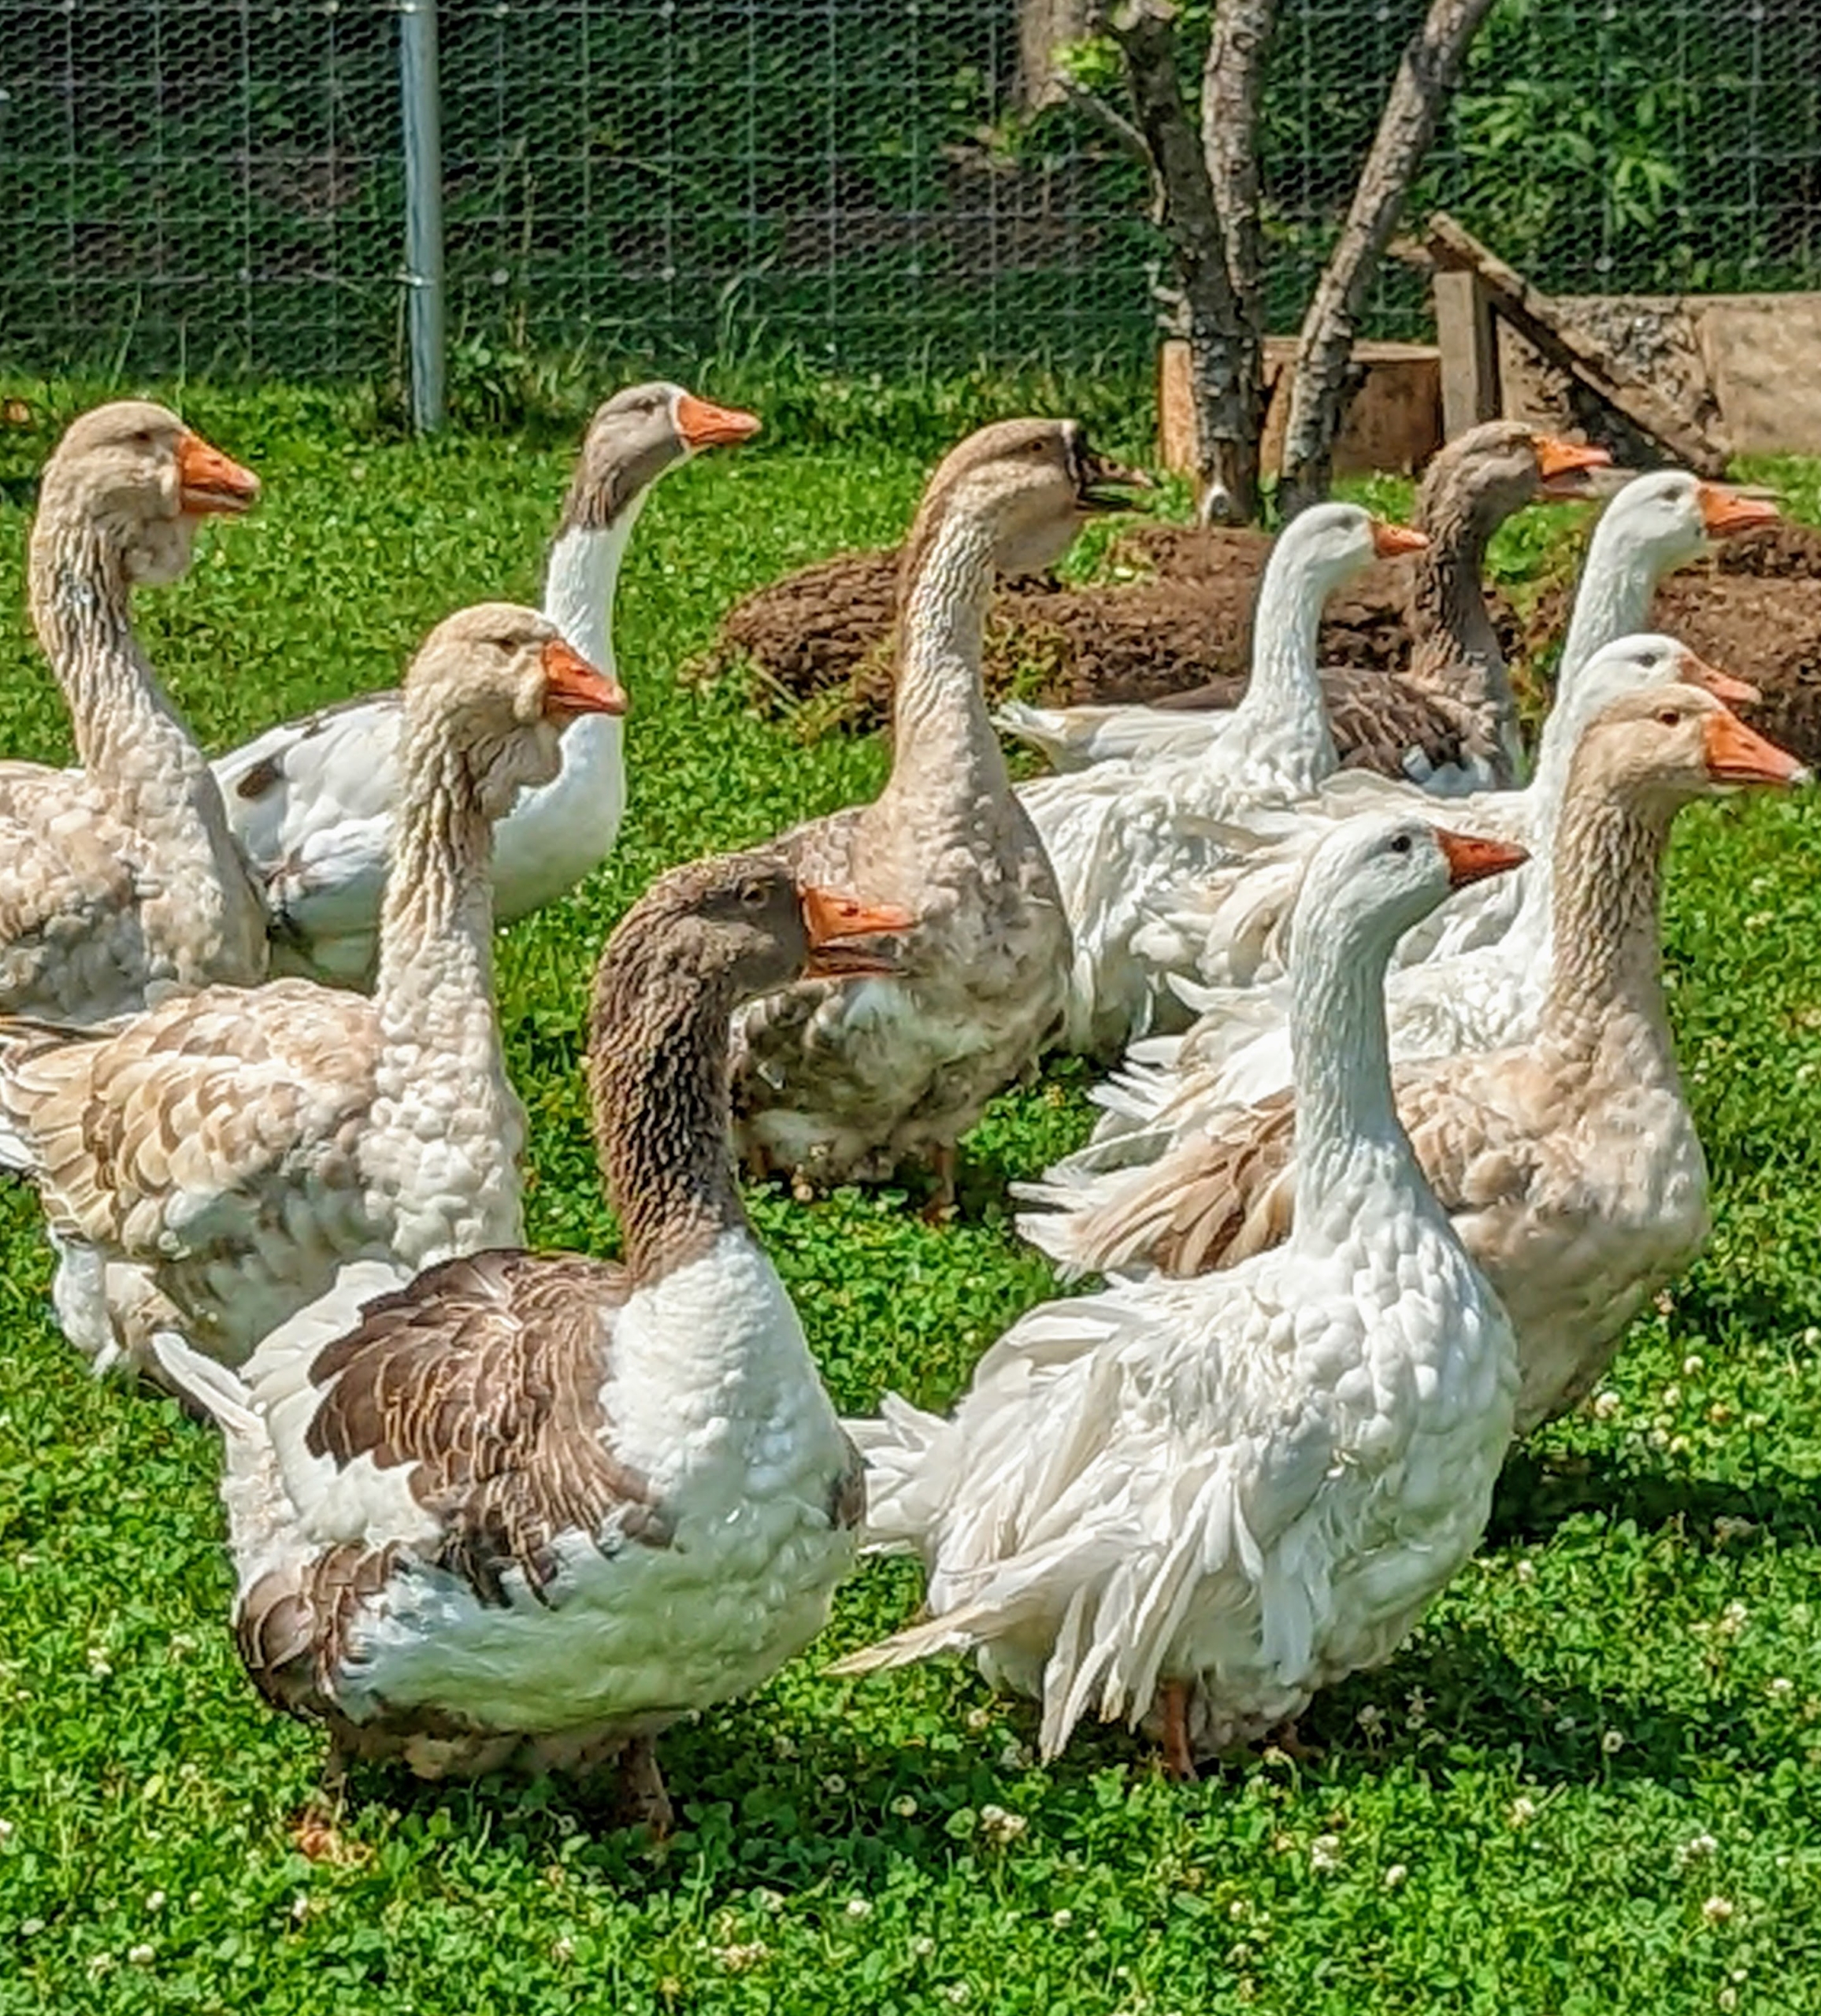
During this move, the peafowl are safe in another enclosure, but look who is curious about the entire process – my flock of geese. From their own pen, they walk closer to the fence to watch all the activity.
The next step is to position our trusted Hi-Lo in the adjacent paddock where there is room to maneuver it and pull the coop into place.
Giant straps and rope are used to secure the coop to the Hi-Lo.
Here is a view from a few feet away. Here, one can see how far the coop has to move.
Slowly the Hi-Lo pulls the coop. Here, the coop was rolled several feet. It is now over a section of its new footprint.
Here, it is moved a little more – almost there.
Here is a view from the back and the space it once occupied.
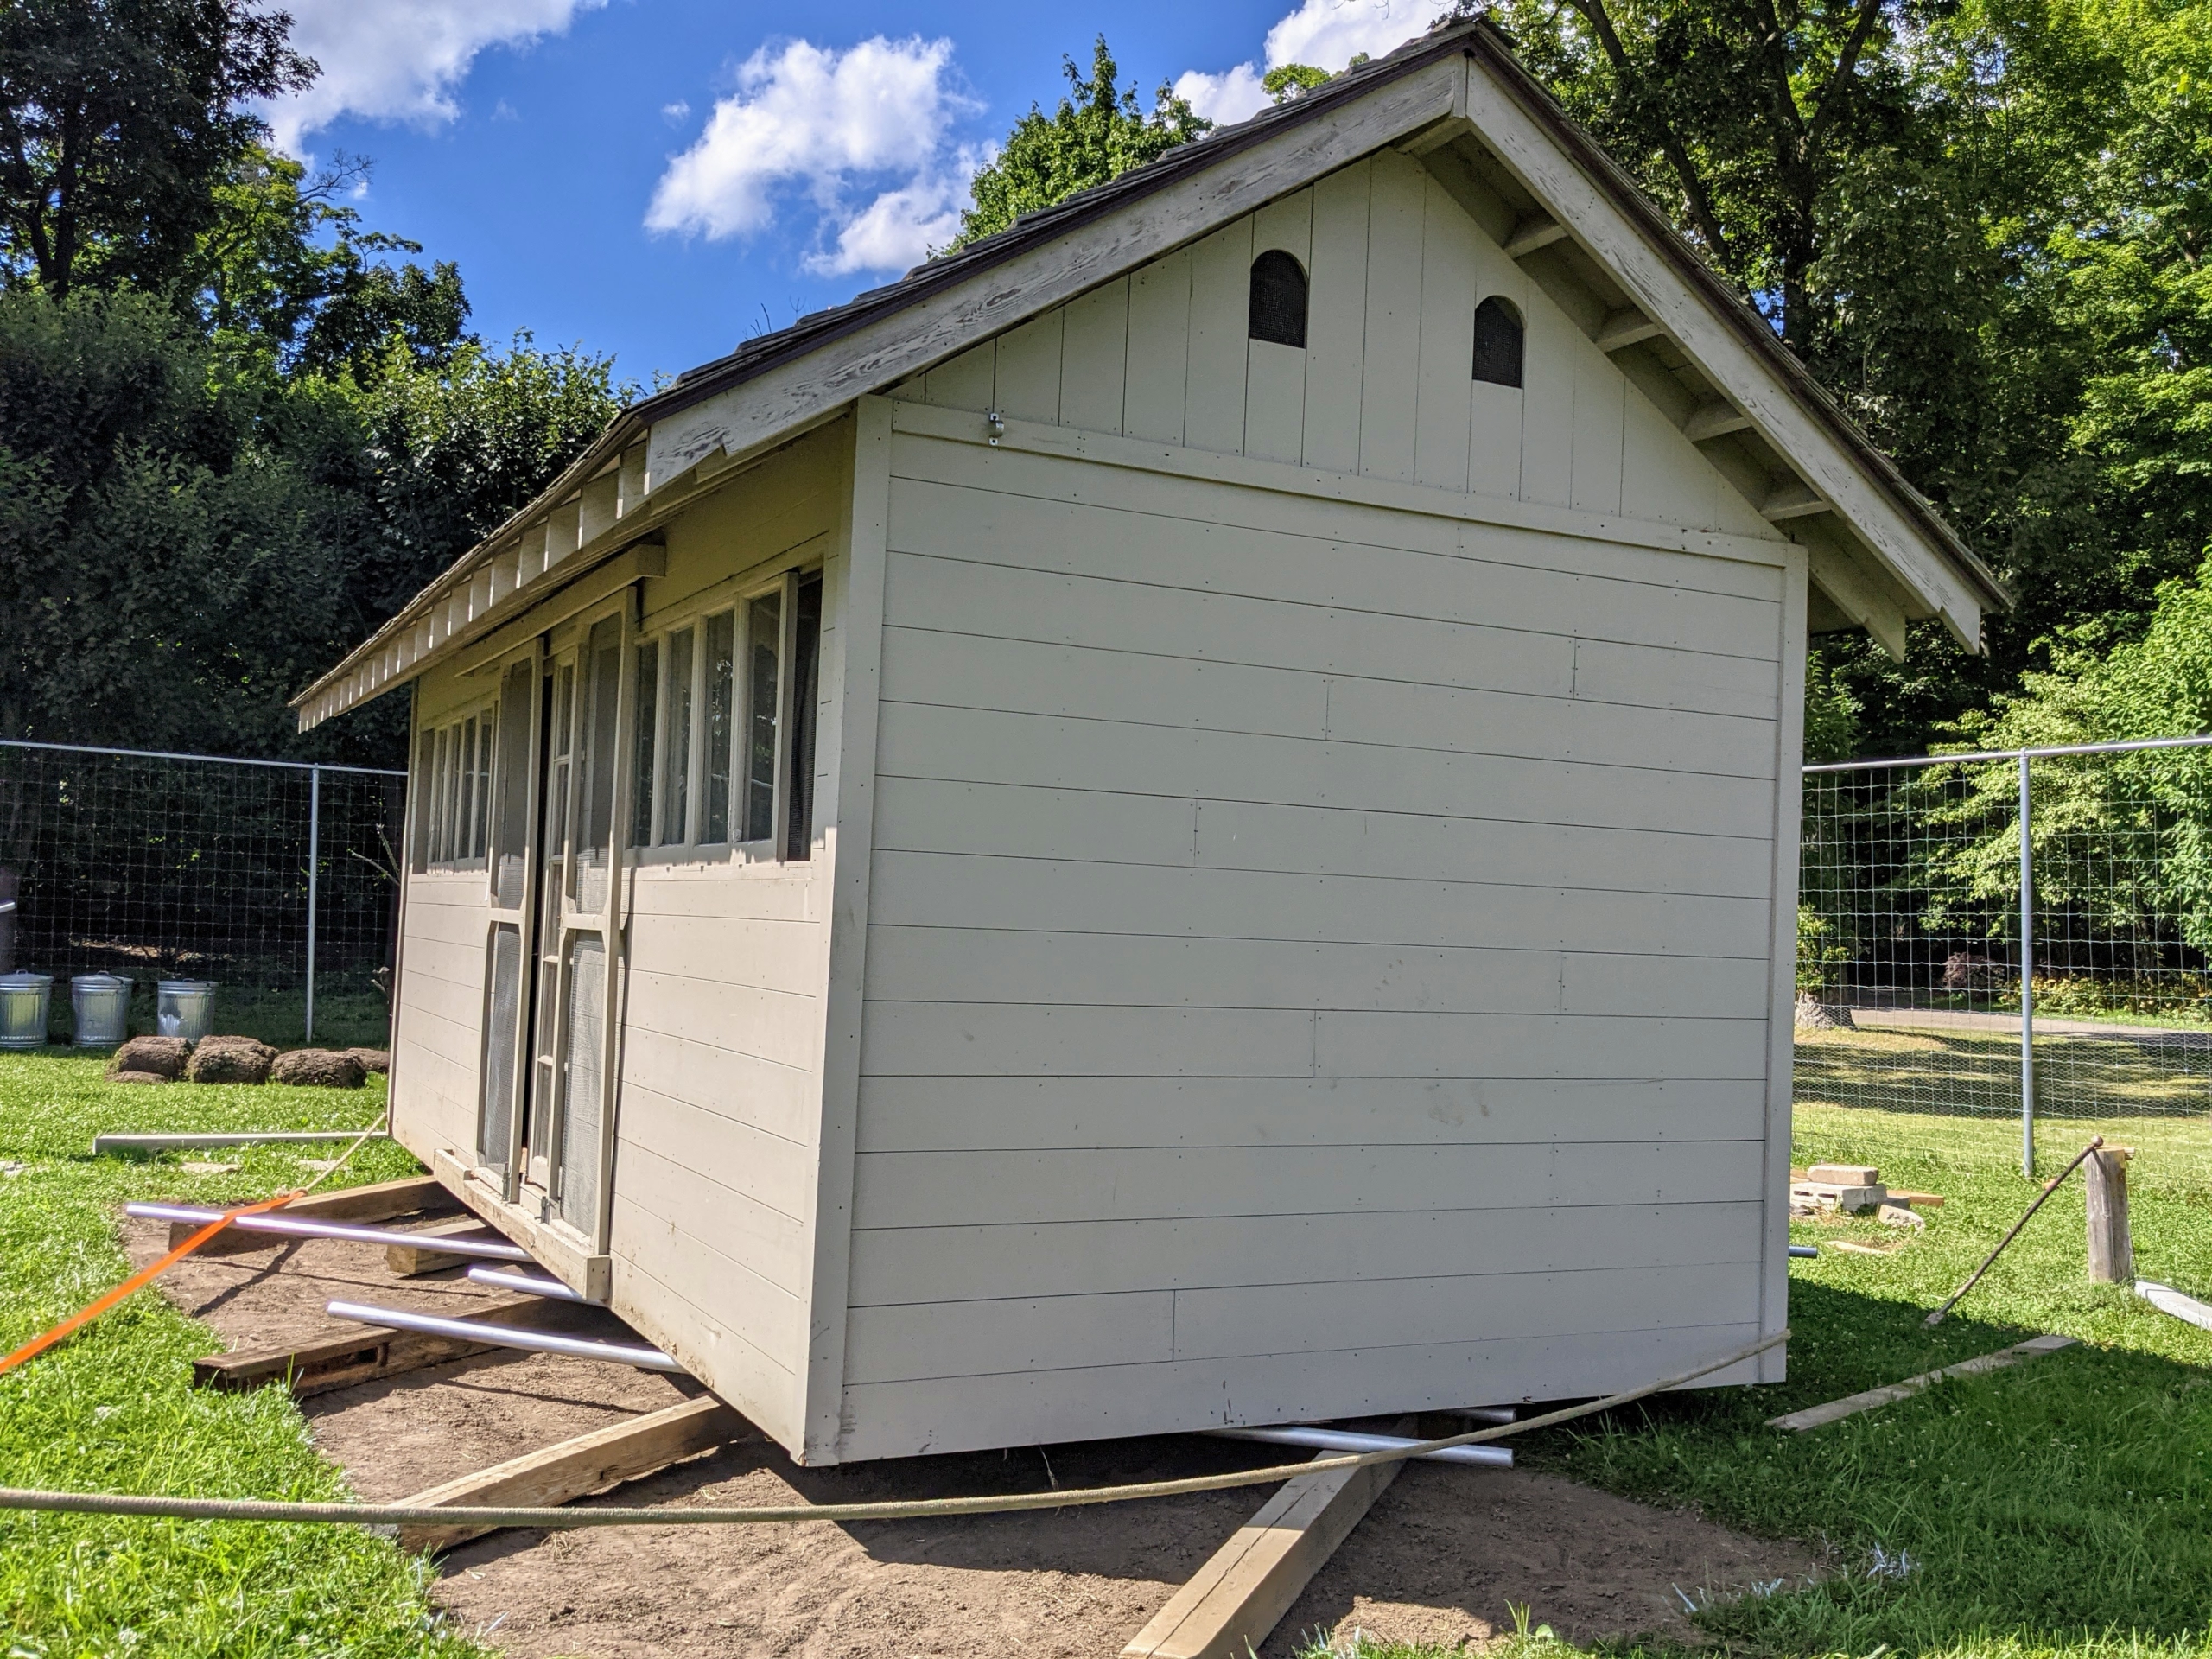
The Hi-Lo pulls it as close to its mark as possible. The last few inches will be finished by hand – slowly pushing the structure into position.
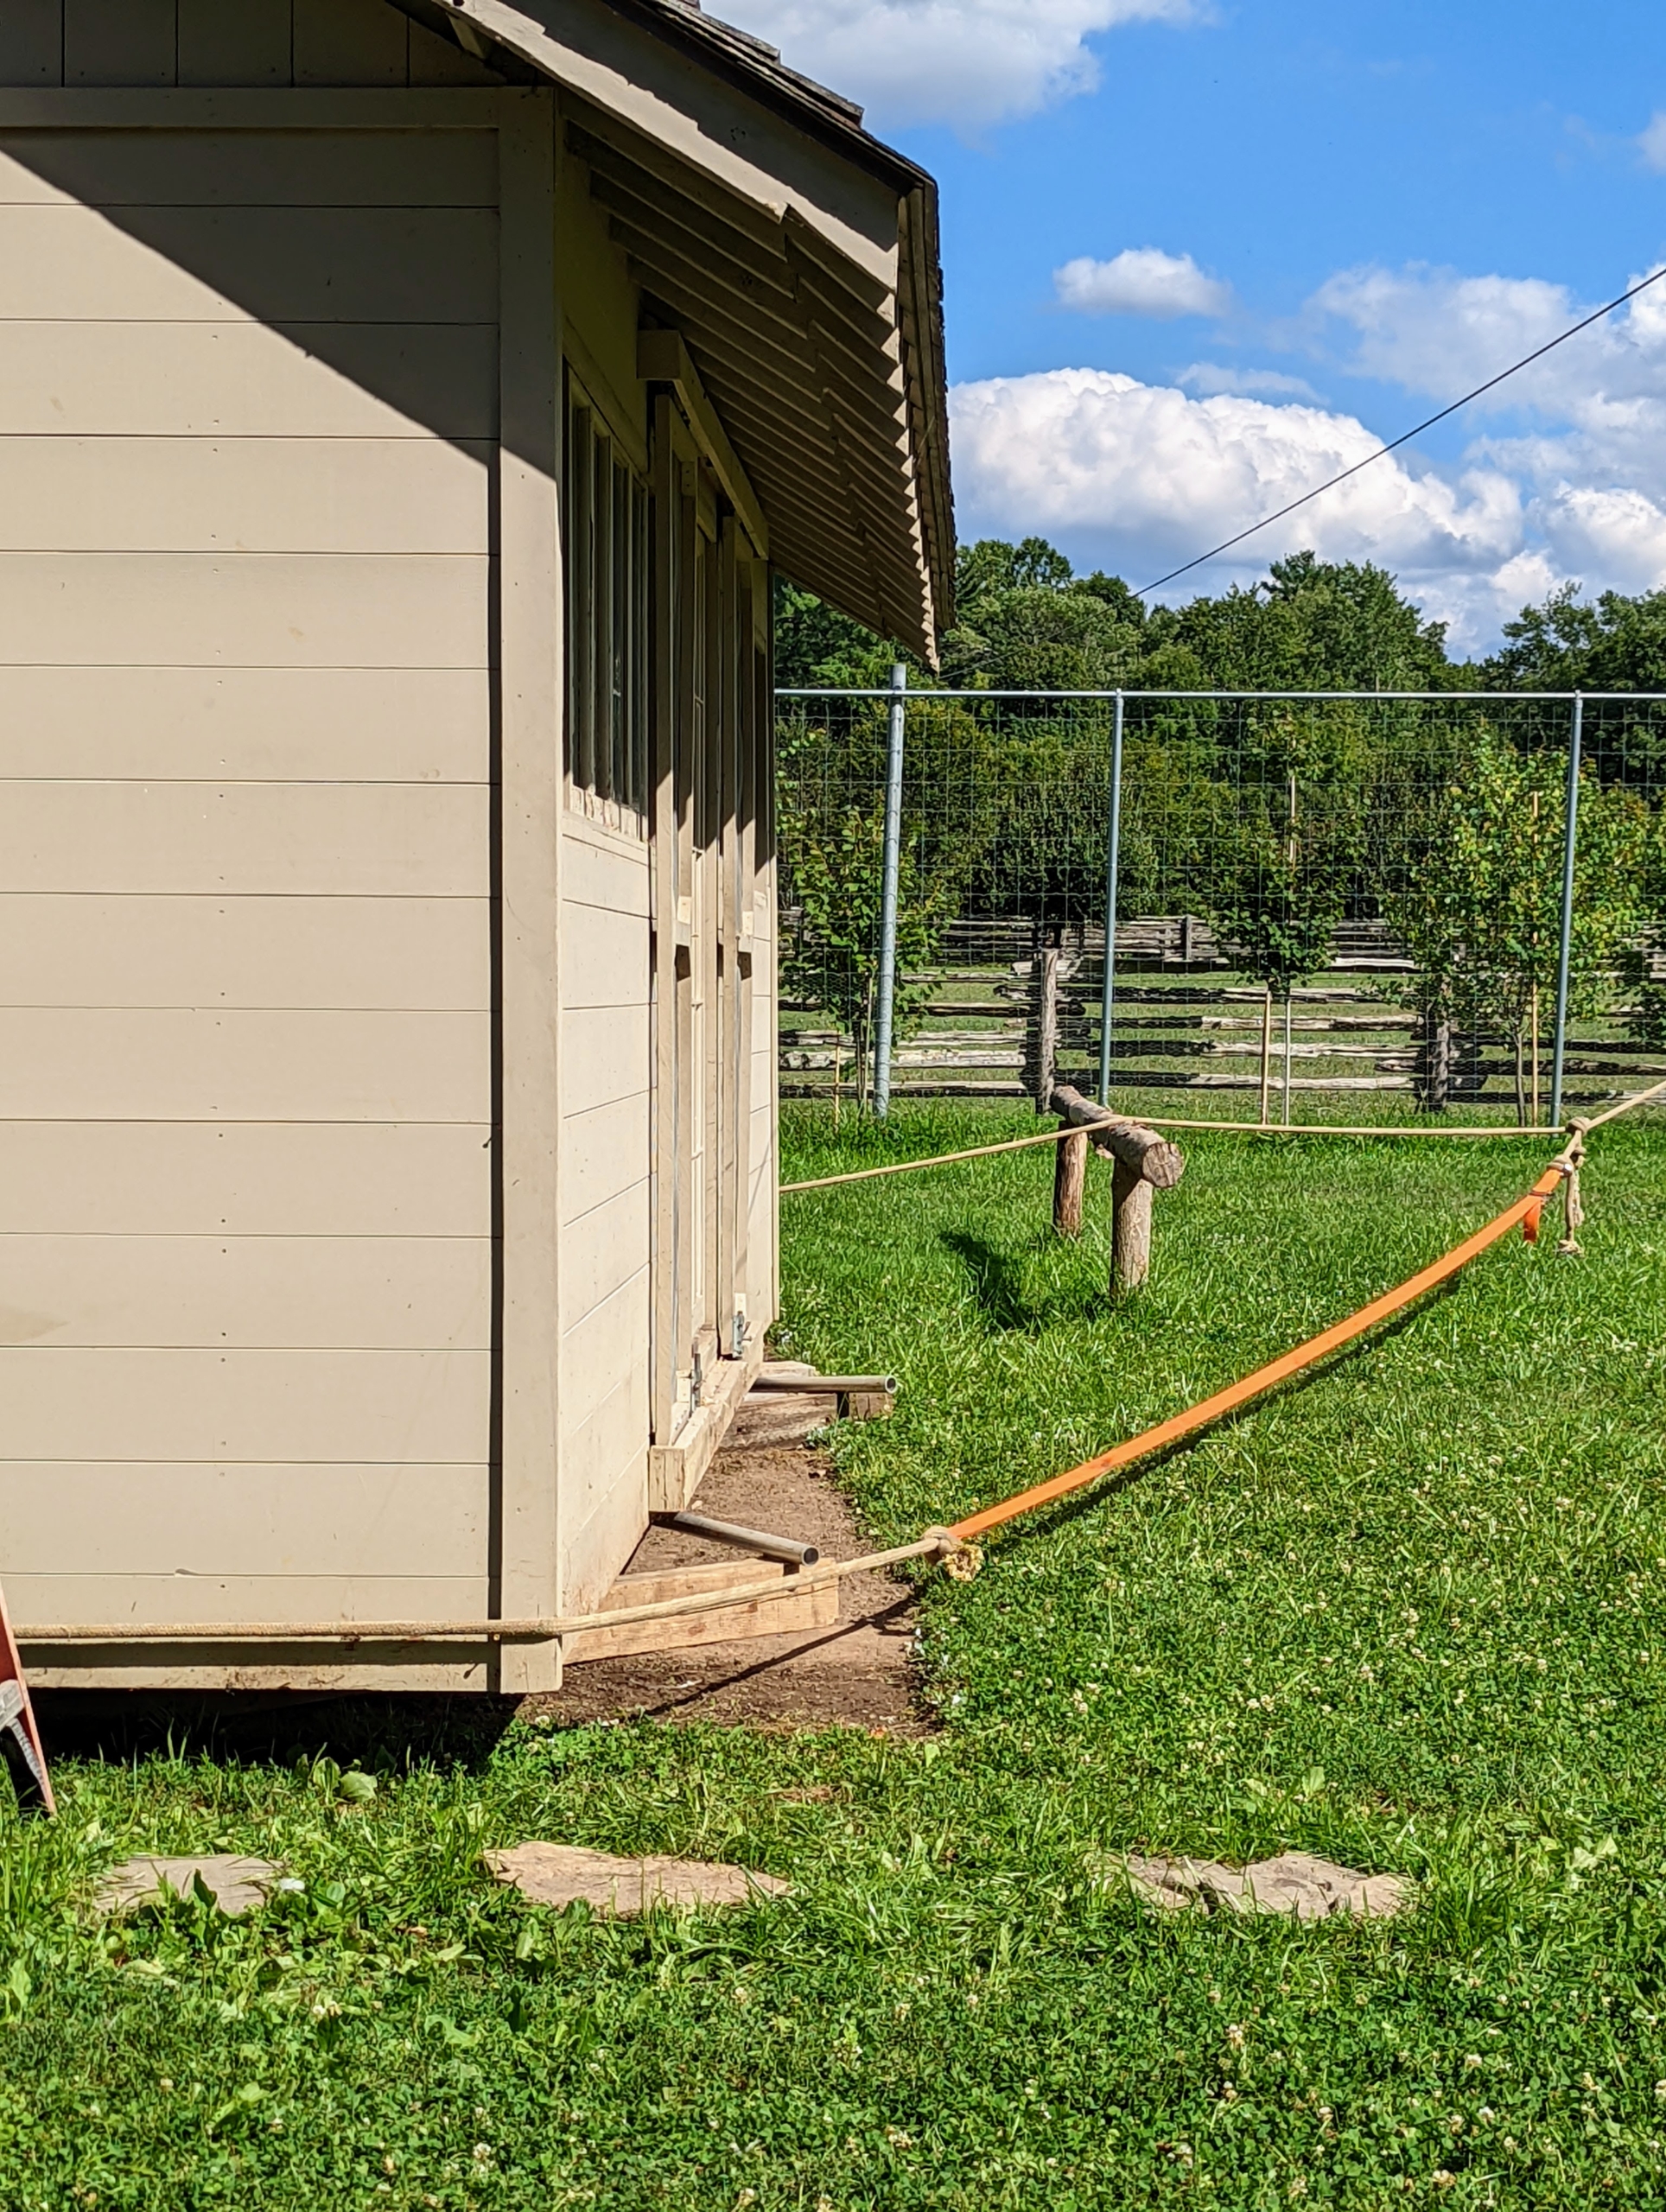
And here it is in its new home – perfectly in place.
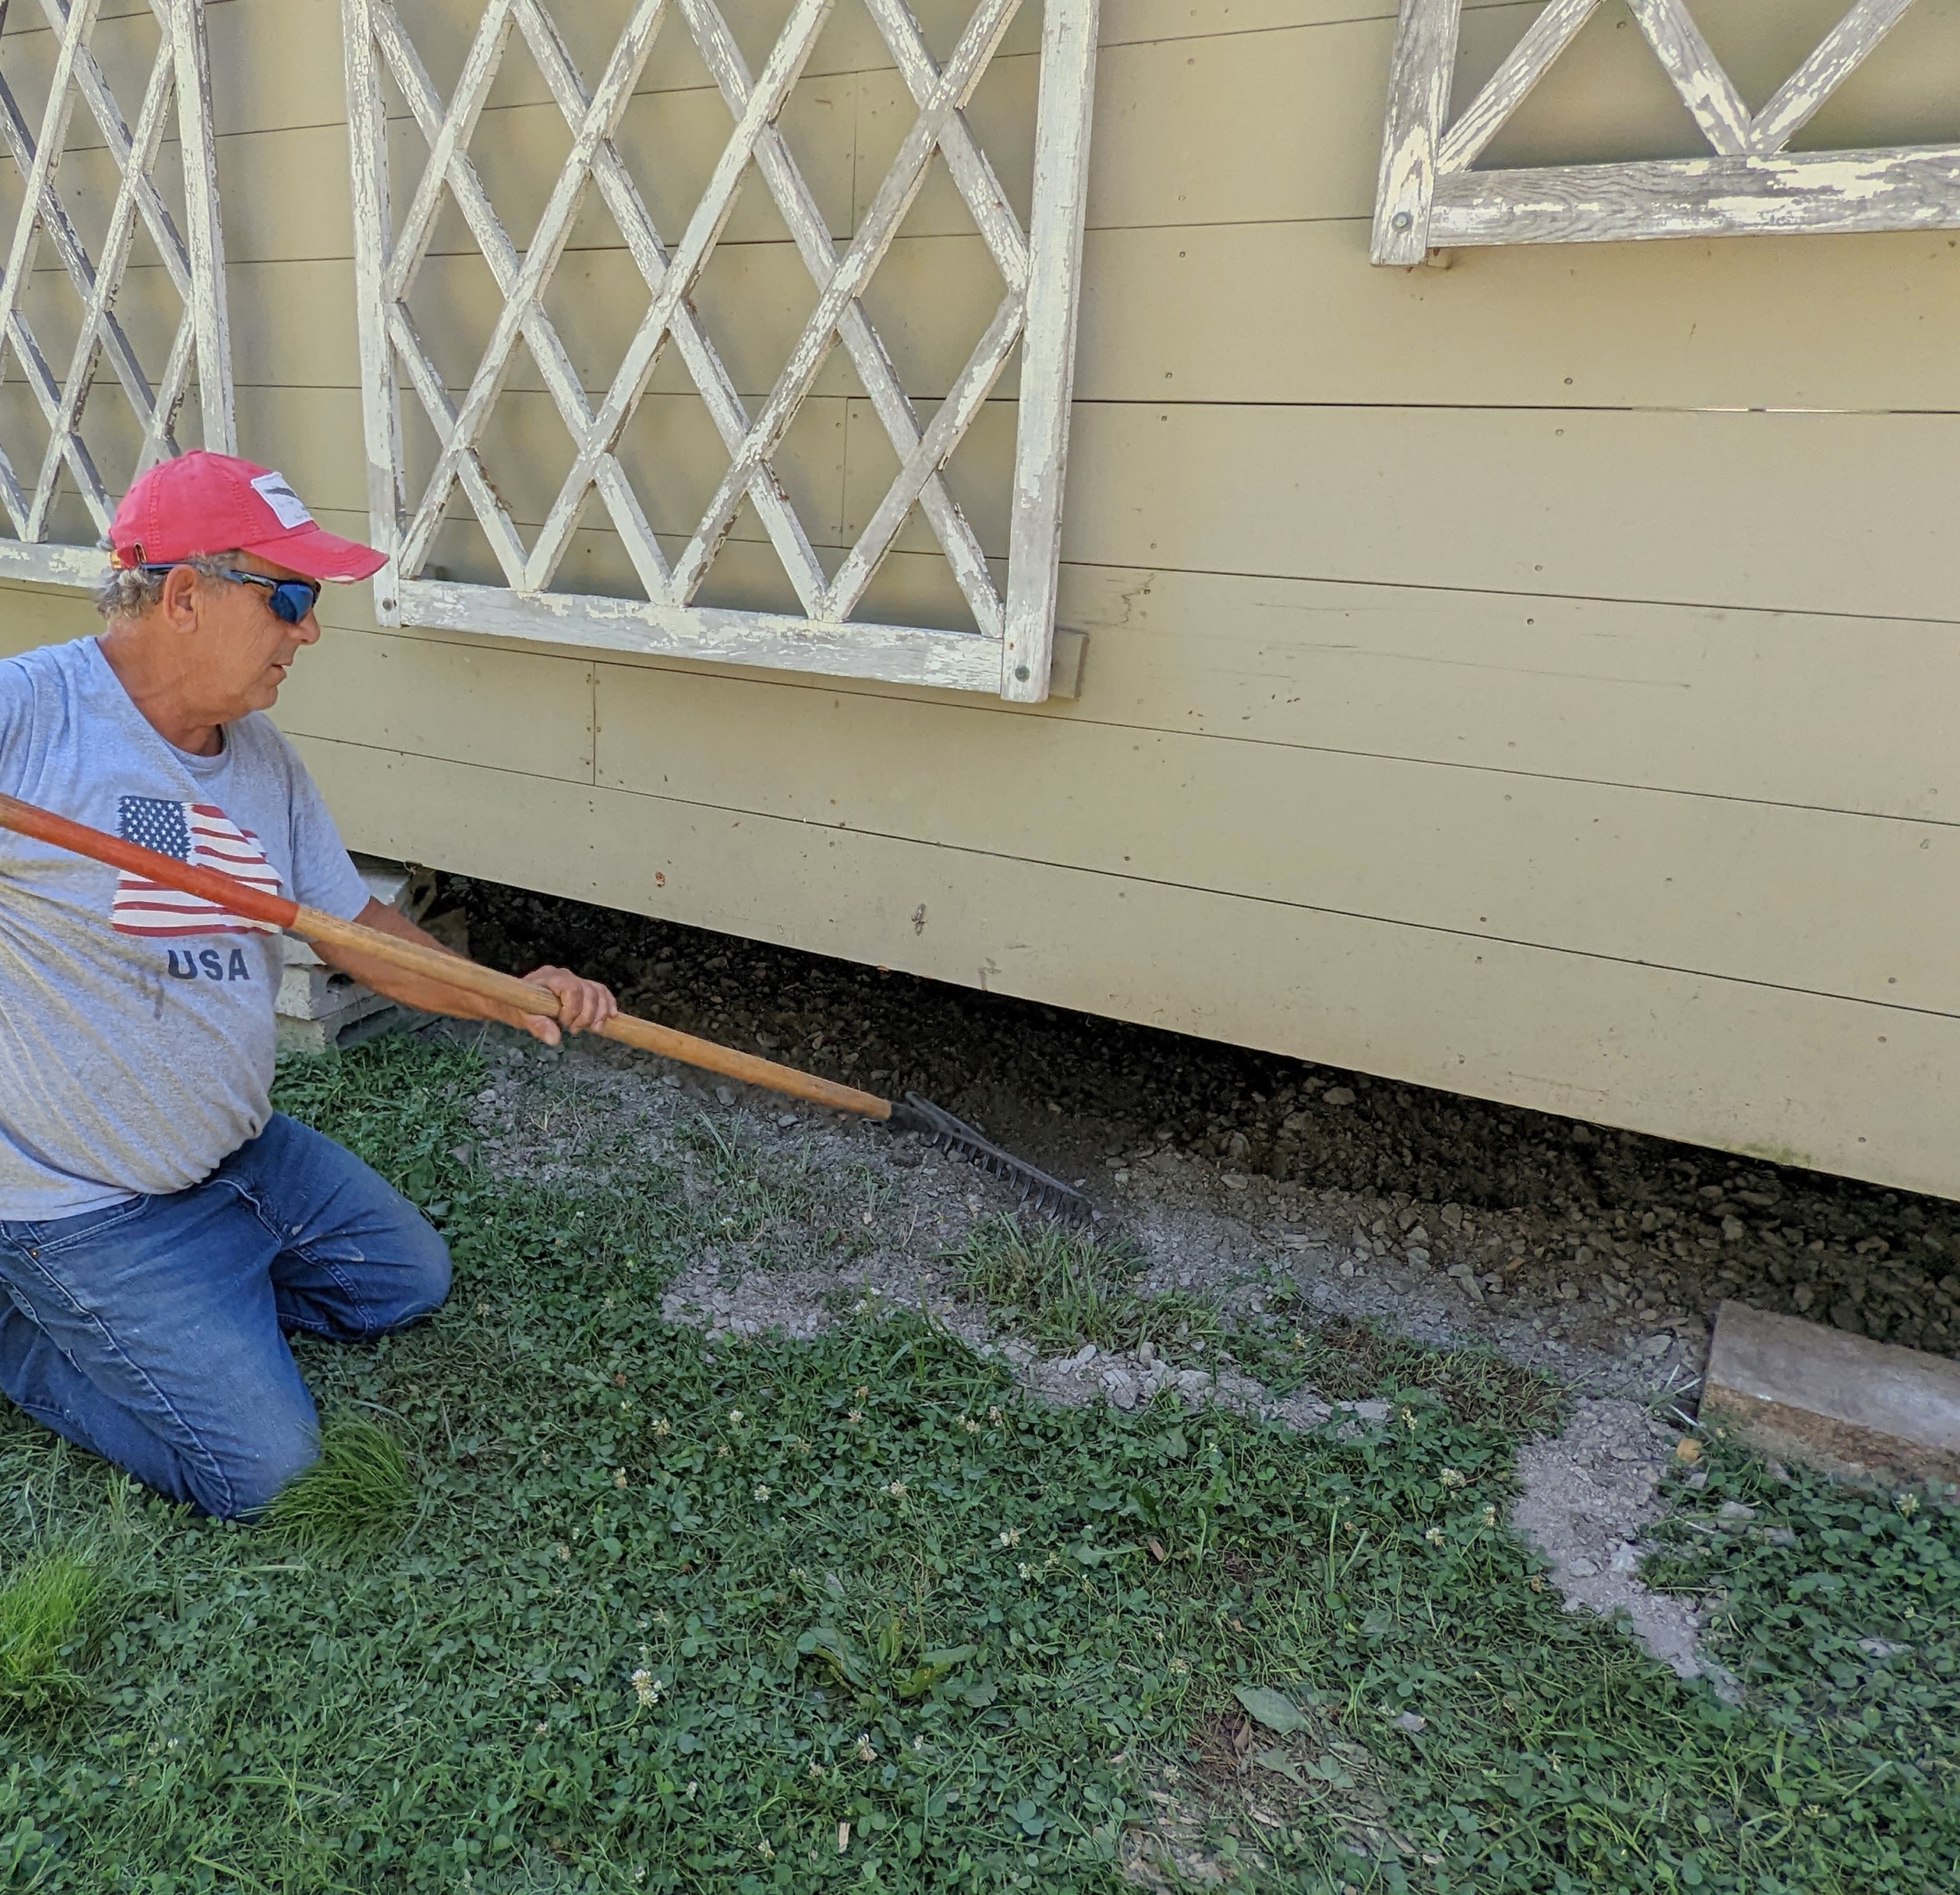
Before the wood and aluminum rollers are removed, Fernando returns the gravel underneath the coop from the old location. When this coop was built, galvanized wire mesh was also used to line the entire top of the floor to prevent unwelcome critters from getting inside.
Here, Fernando levels the gravel under the coop.
Once all the gravel is moved, the jack is used to take out all the piping and timbers.
And the concrete blocks are adjusted perfectly into place once again.
The peafowl coop is now settled in its new spot. The stone step will be returned and protective wire will also be placed around the bottom sides of the coop. In a future blog, I will share photos of the new protective fencing that will cover the top of the enclosure to keep my peafowl residents safe from harm.
Here's a short clip showing the coop moving into place.