It's the day before Thanksgiving, and here at my Bedford, New York farm, everyone is busy getting ready.
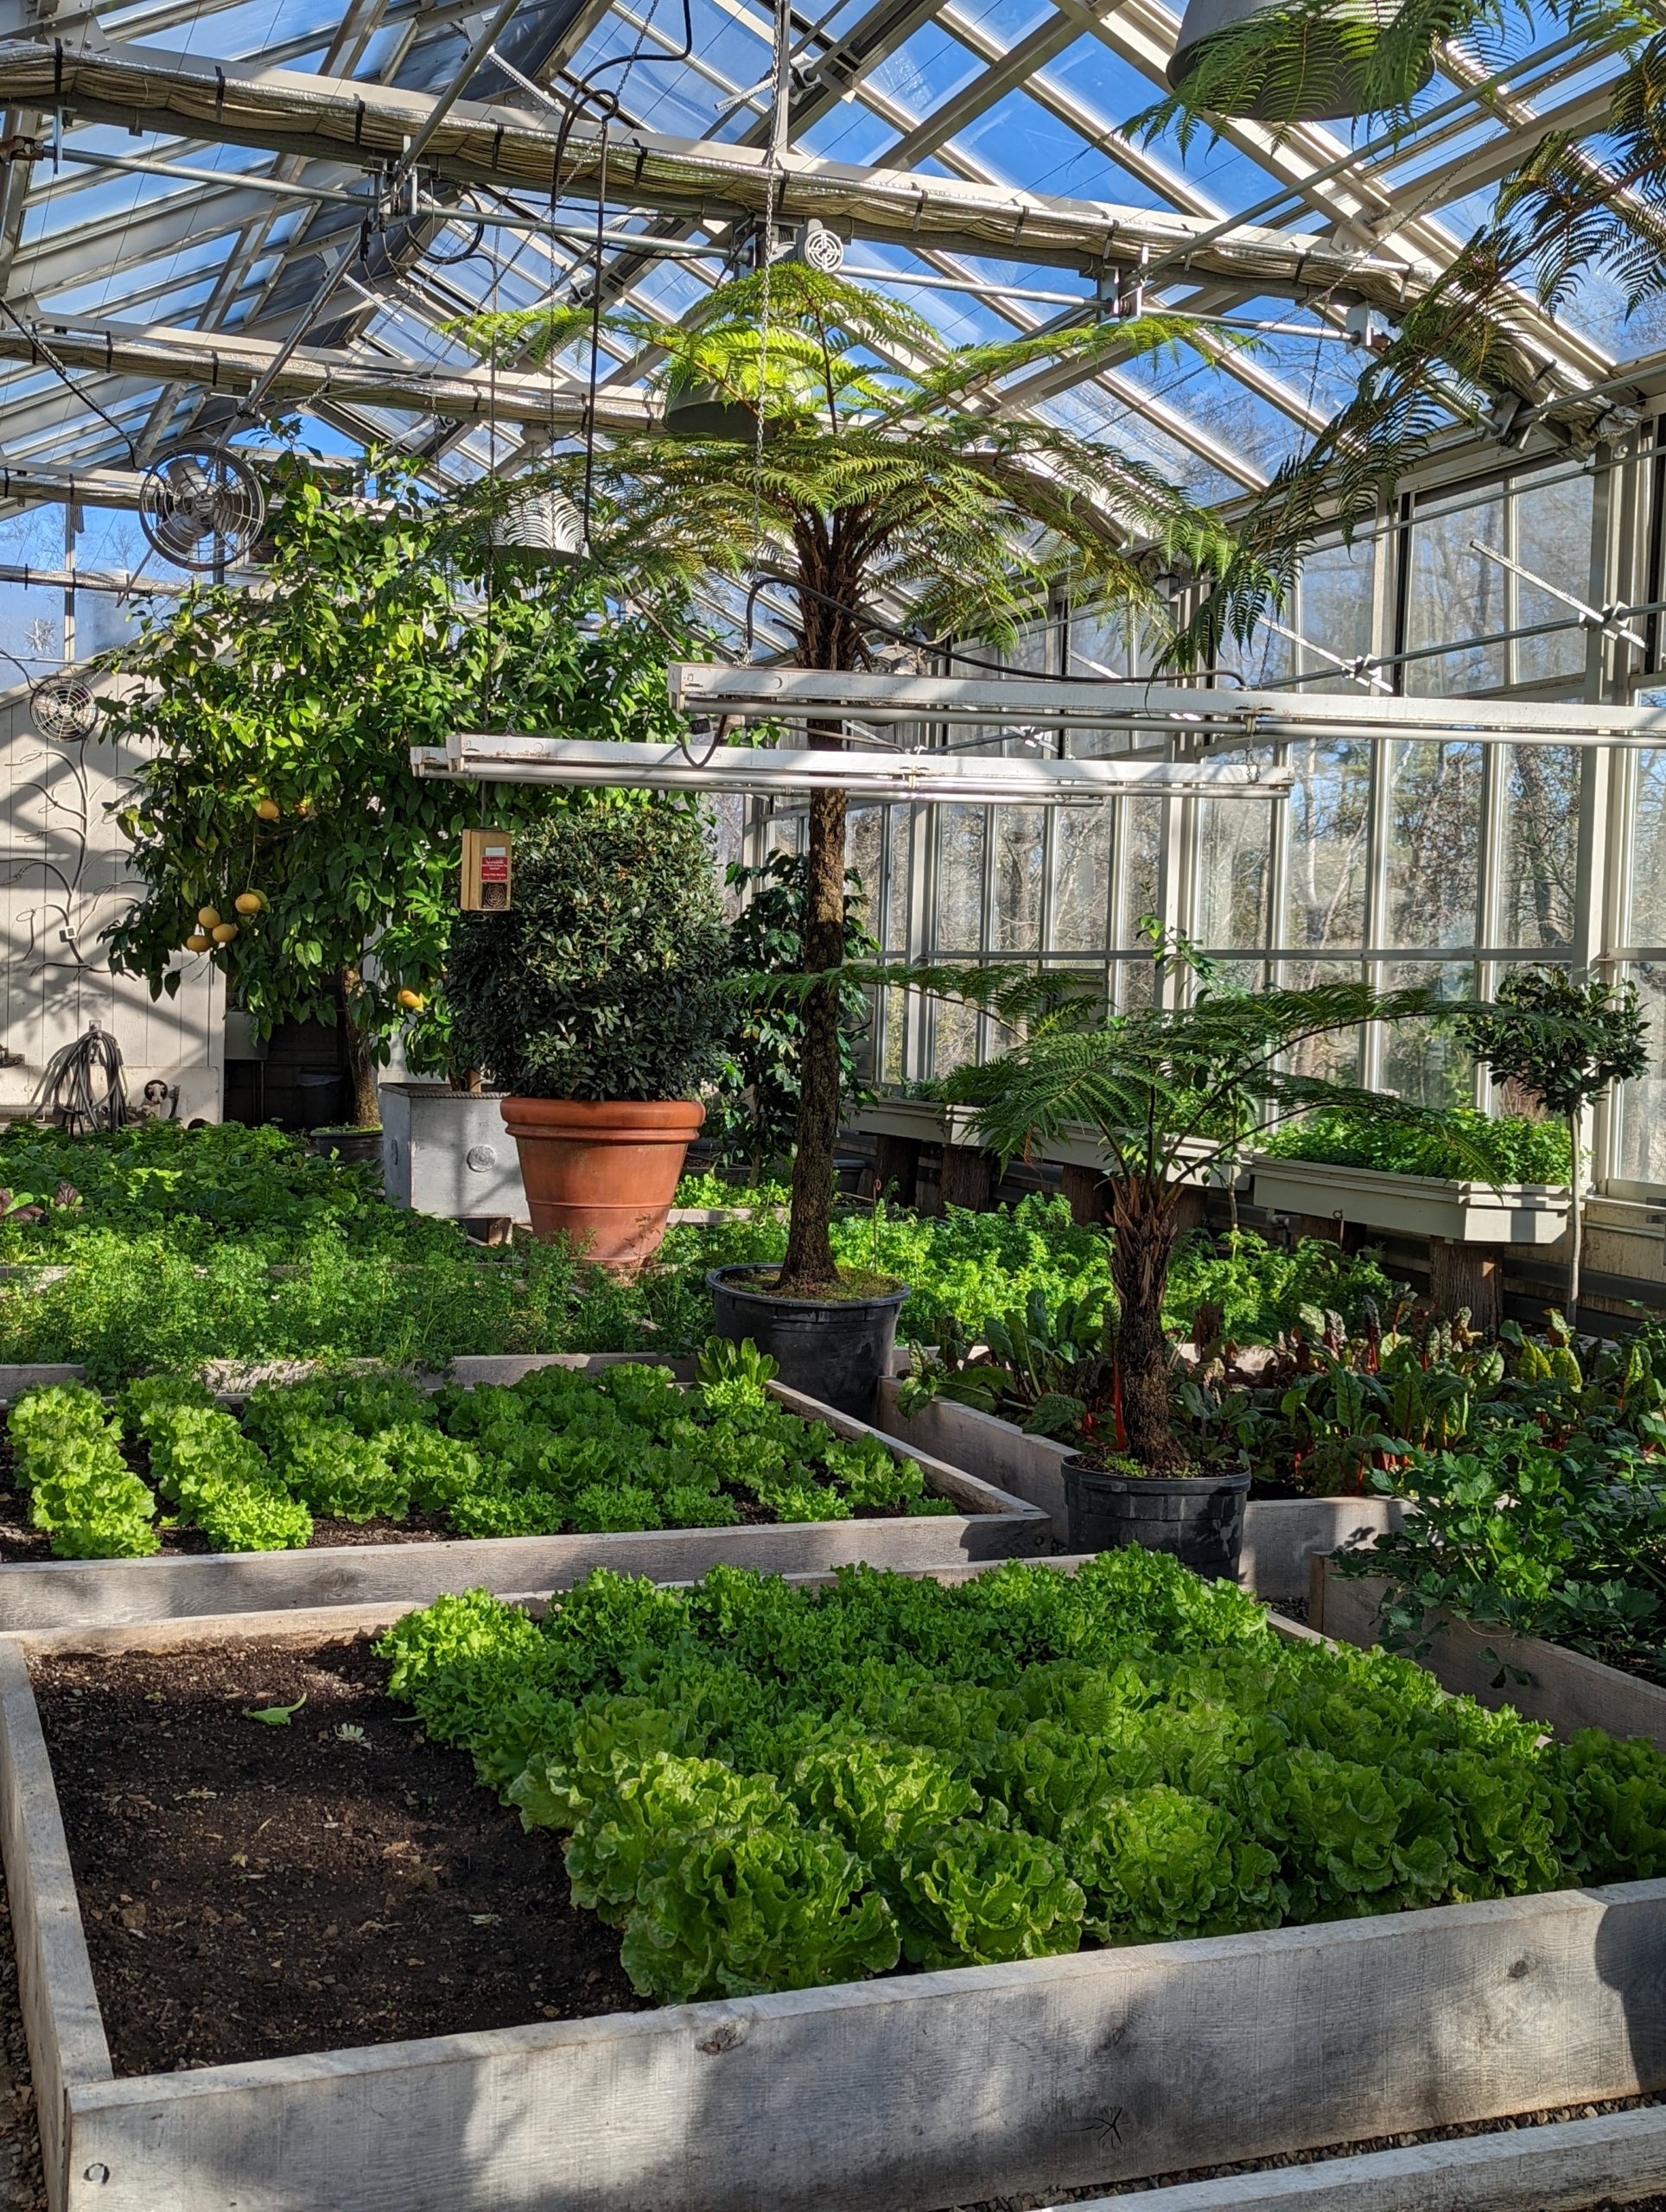
Yesterday, we began gathering all the ingredients for my holiday feast, including harvesting vegetables from my indoor greenhouse - a special structure I created several years ago that was inspired by Eliot Coleman, an expert in four-season farming. My gardeners, Ryan and Brian, began planting in my vegetable greenhouse earlier this fall, and over the last few weeks, we’ve seen wonderful crops of beautiful organic produce emerge.
Enjoy these photos.
This greenhouse has 16 wooden garden boxes to fit the entire length and width of the space, so we are able to plant many crops. Raised bed gardening allows good drainage, prevents soil compaction, and provides protection for those plants that may otherwise get trampled. I am so happy to have this greenhouse where I can grow fresh, delicious vegetables during the cold months.
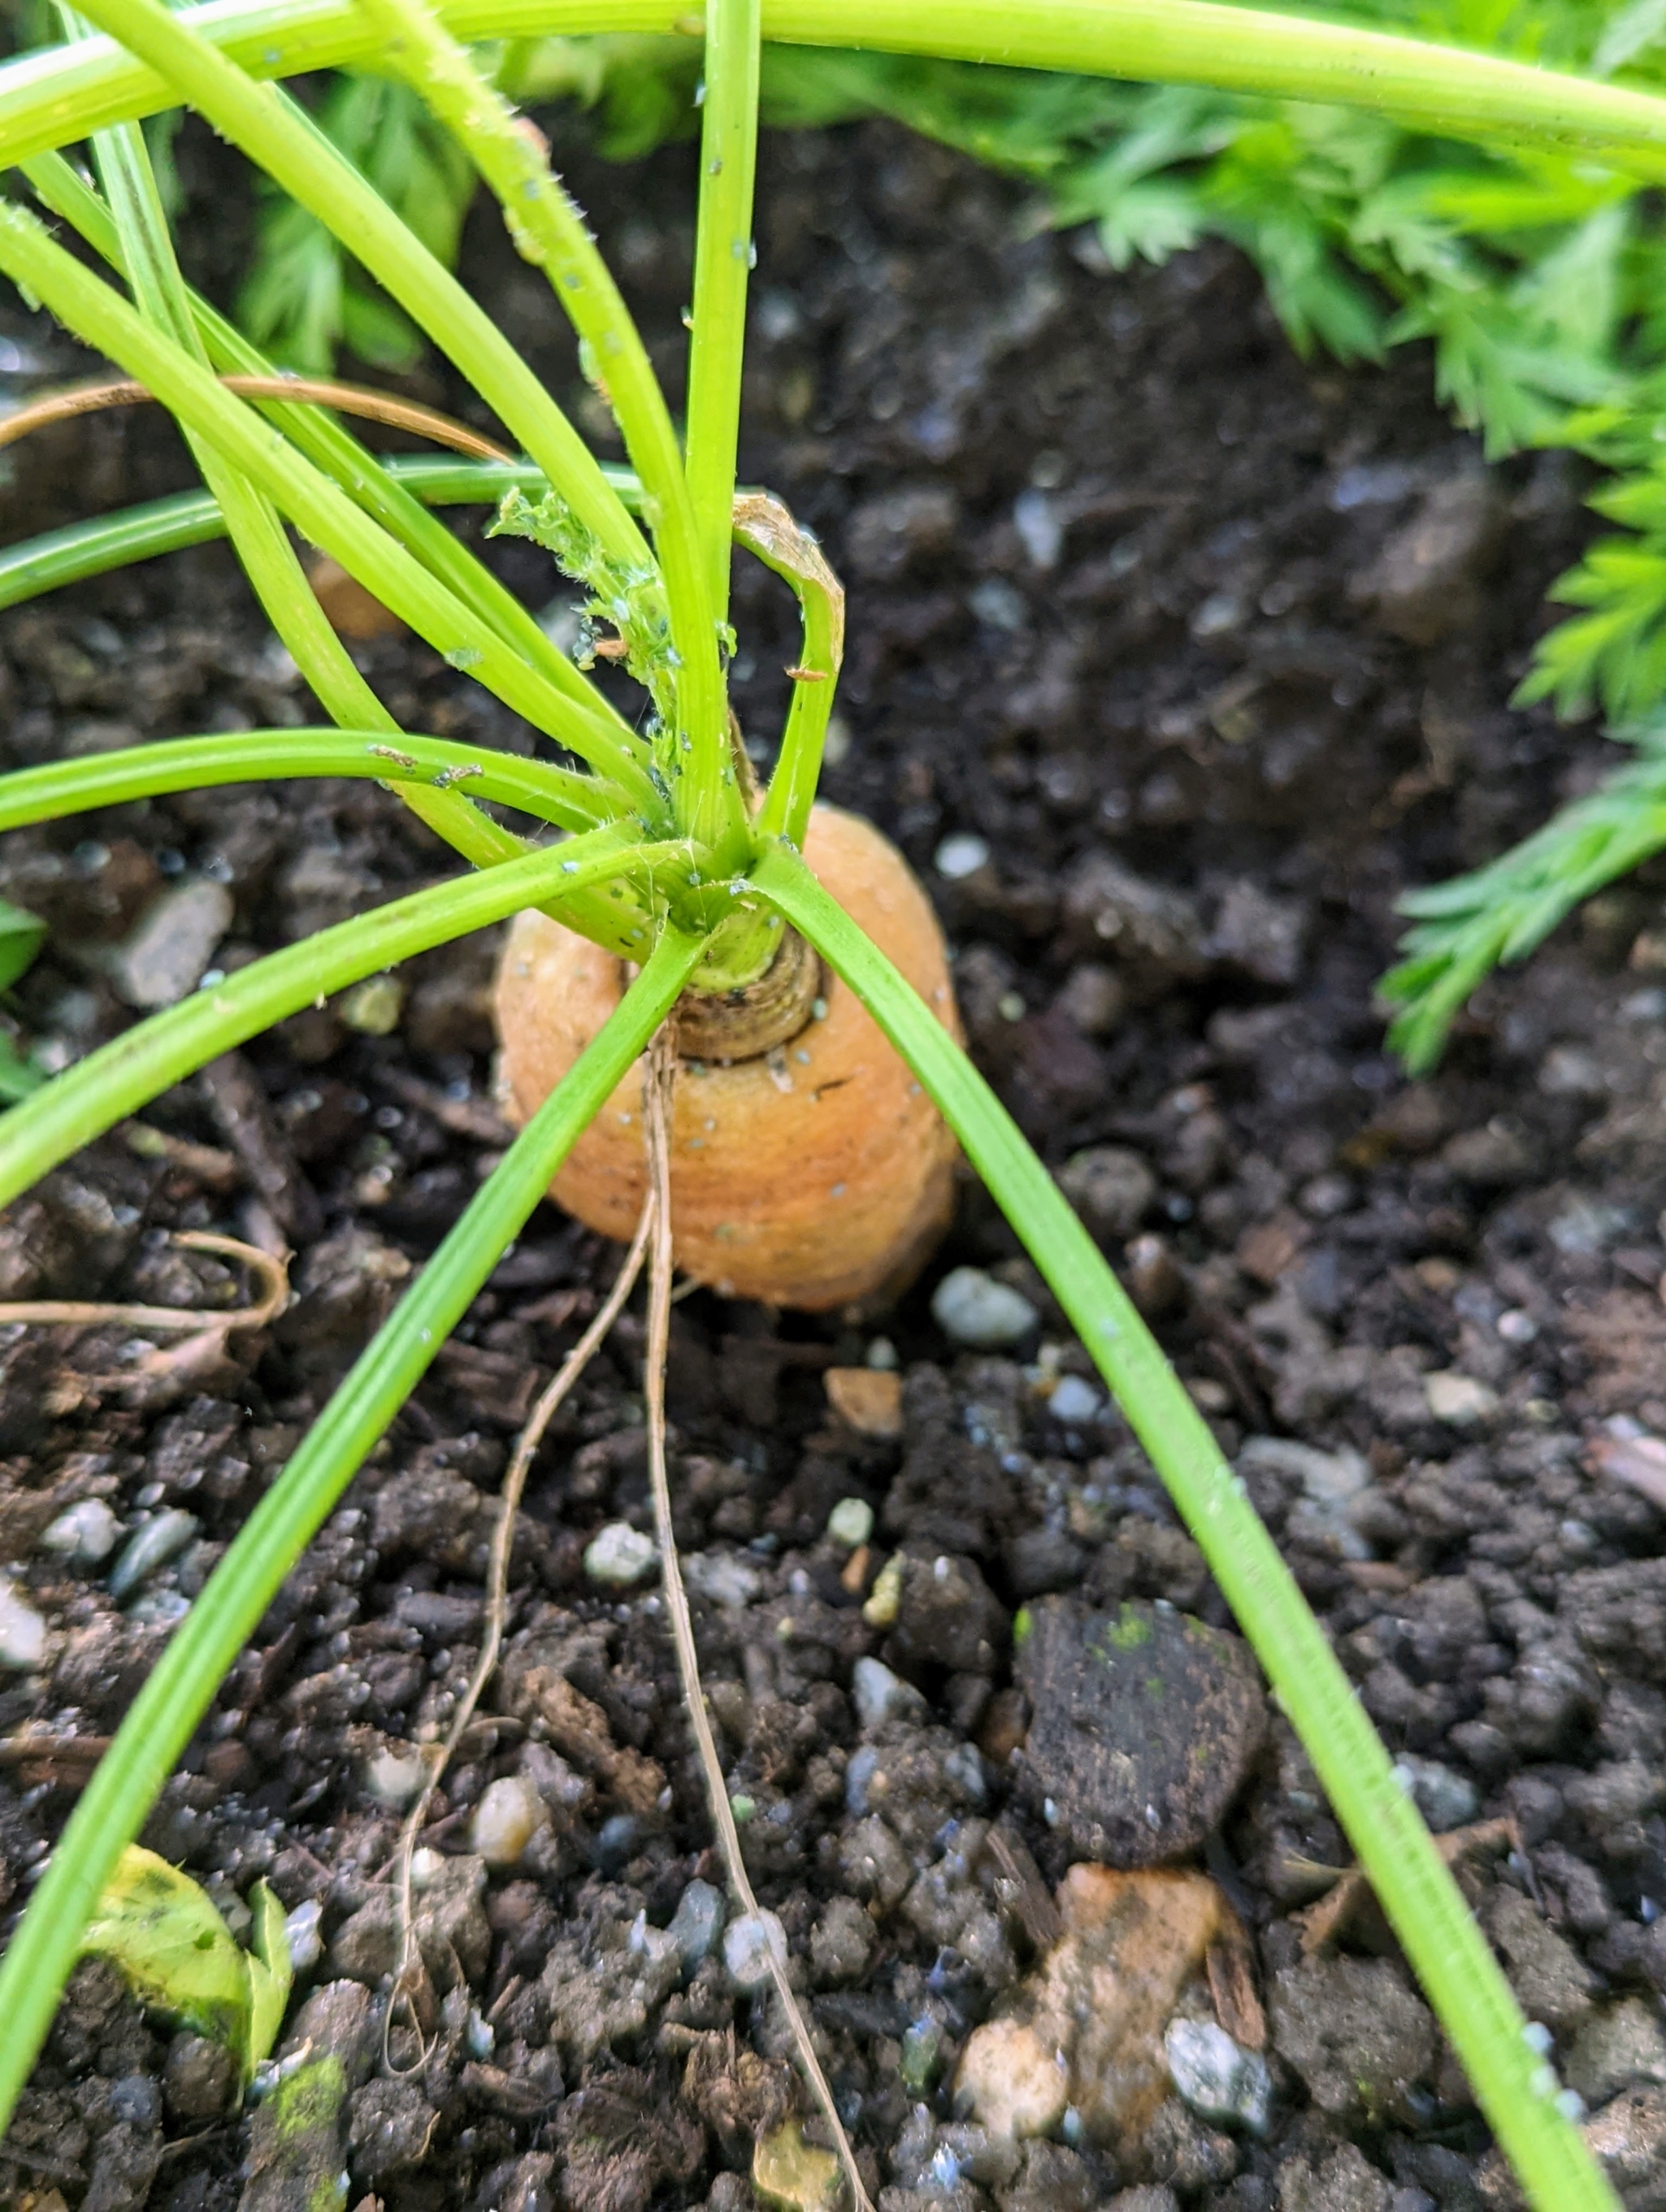
I asked Elvira to pick lots of beautiful carrots from the garden for our Thanksgiving feast. We planted two boxes filled with carrots.
Here is one ready to harvest. When picking carrots always be gentle. With some harder soils, it helps to loosen it first with a garden fork before pulling the carrots up. The beds in this greenhouse are constantly being tended, so the soil is soft and the carrots slide out pretty easily.
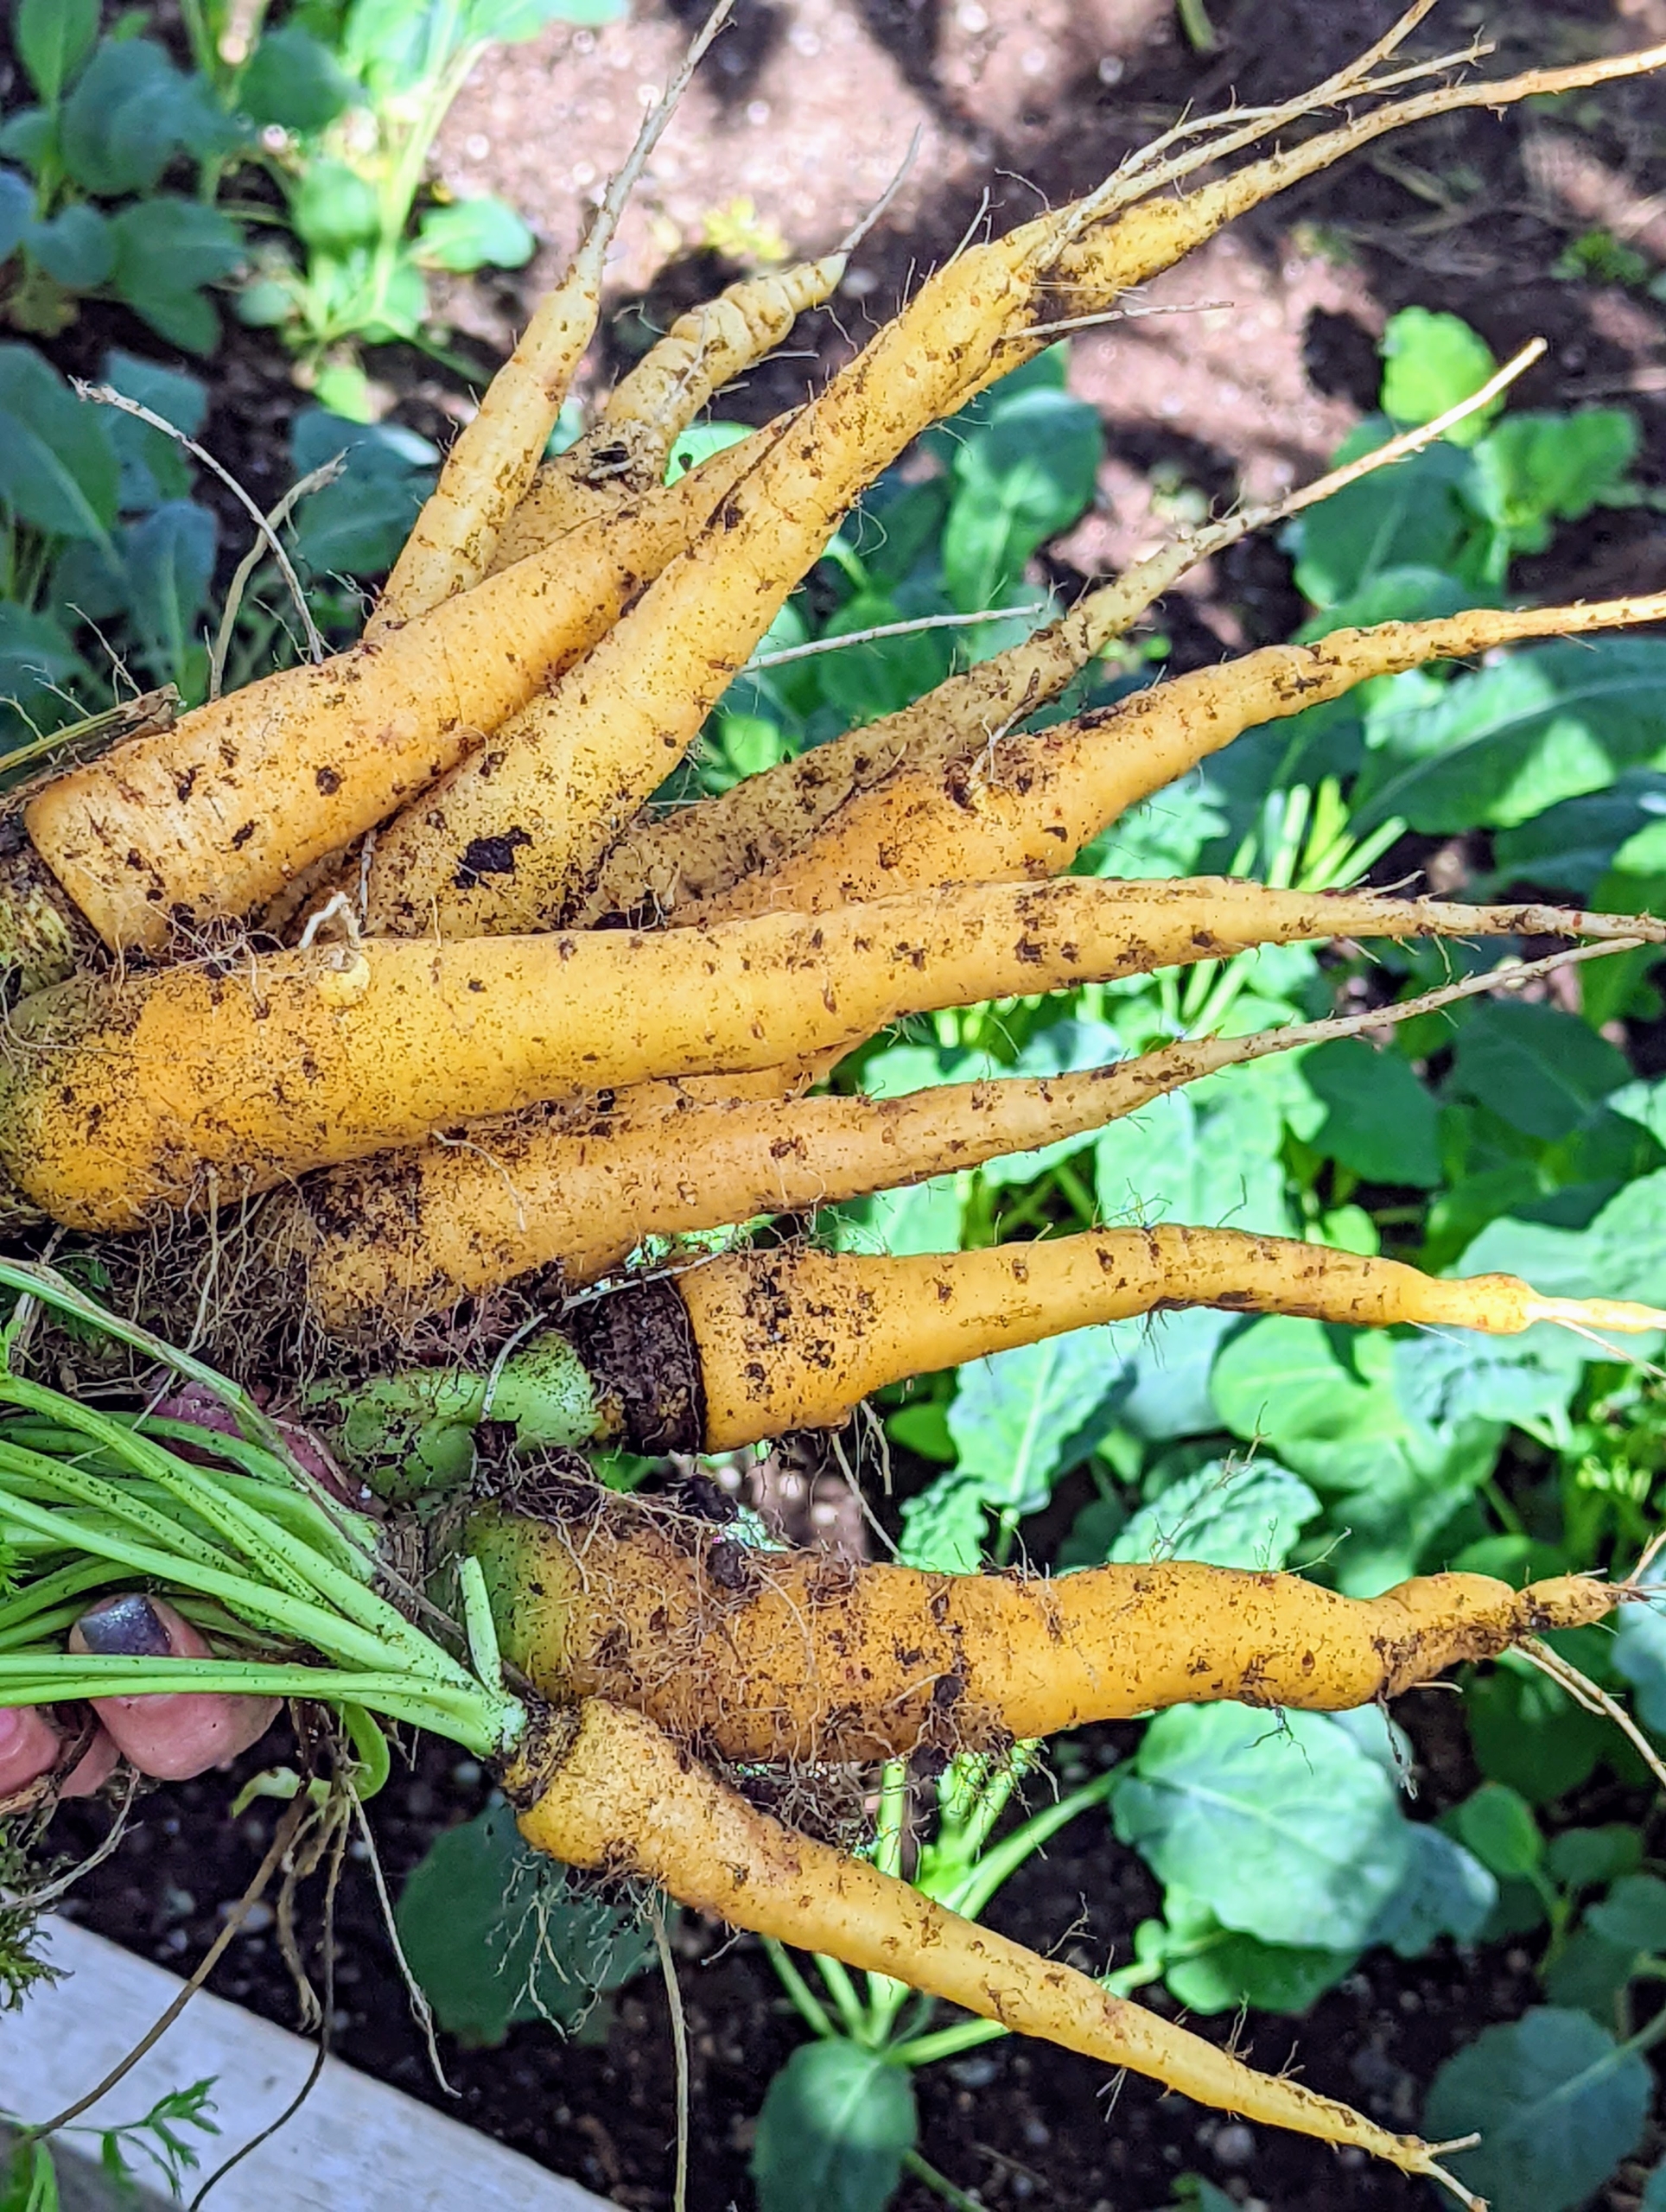
In just a few minutes, Elvira picked all these carrots. She picked both orange and yellow carrots – carrots also come in red, purple and white varieties.
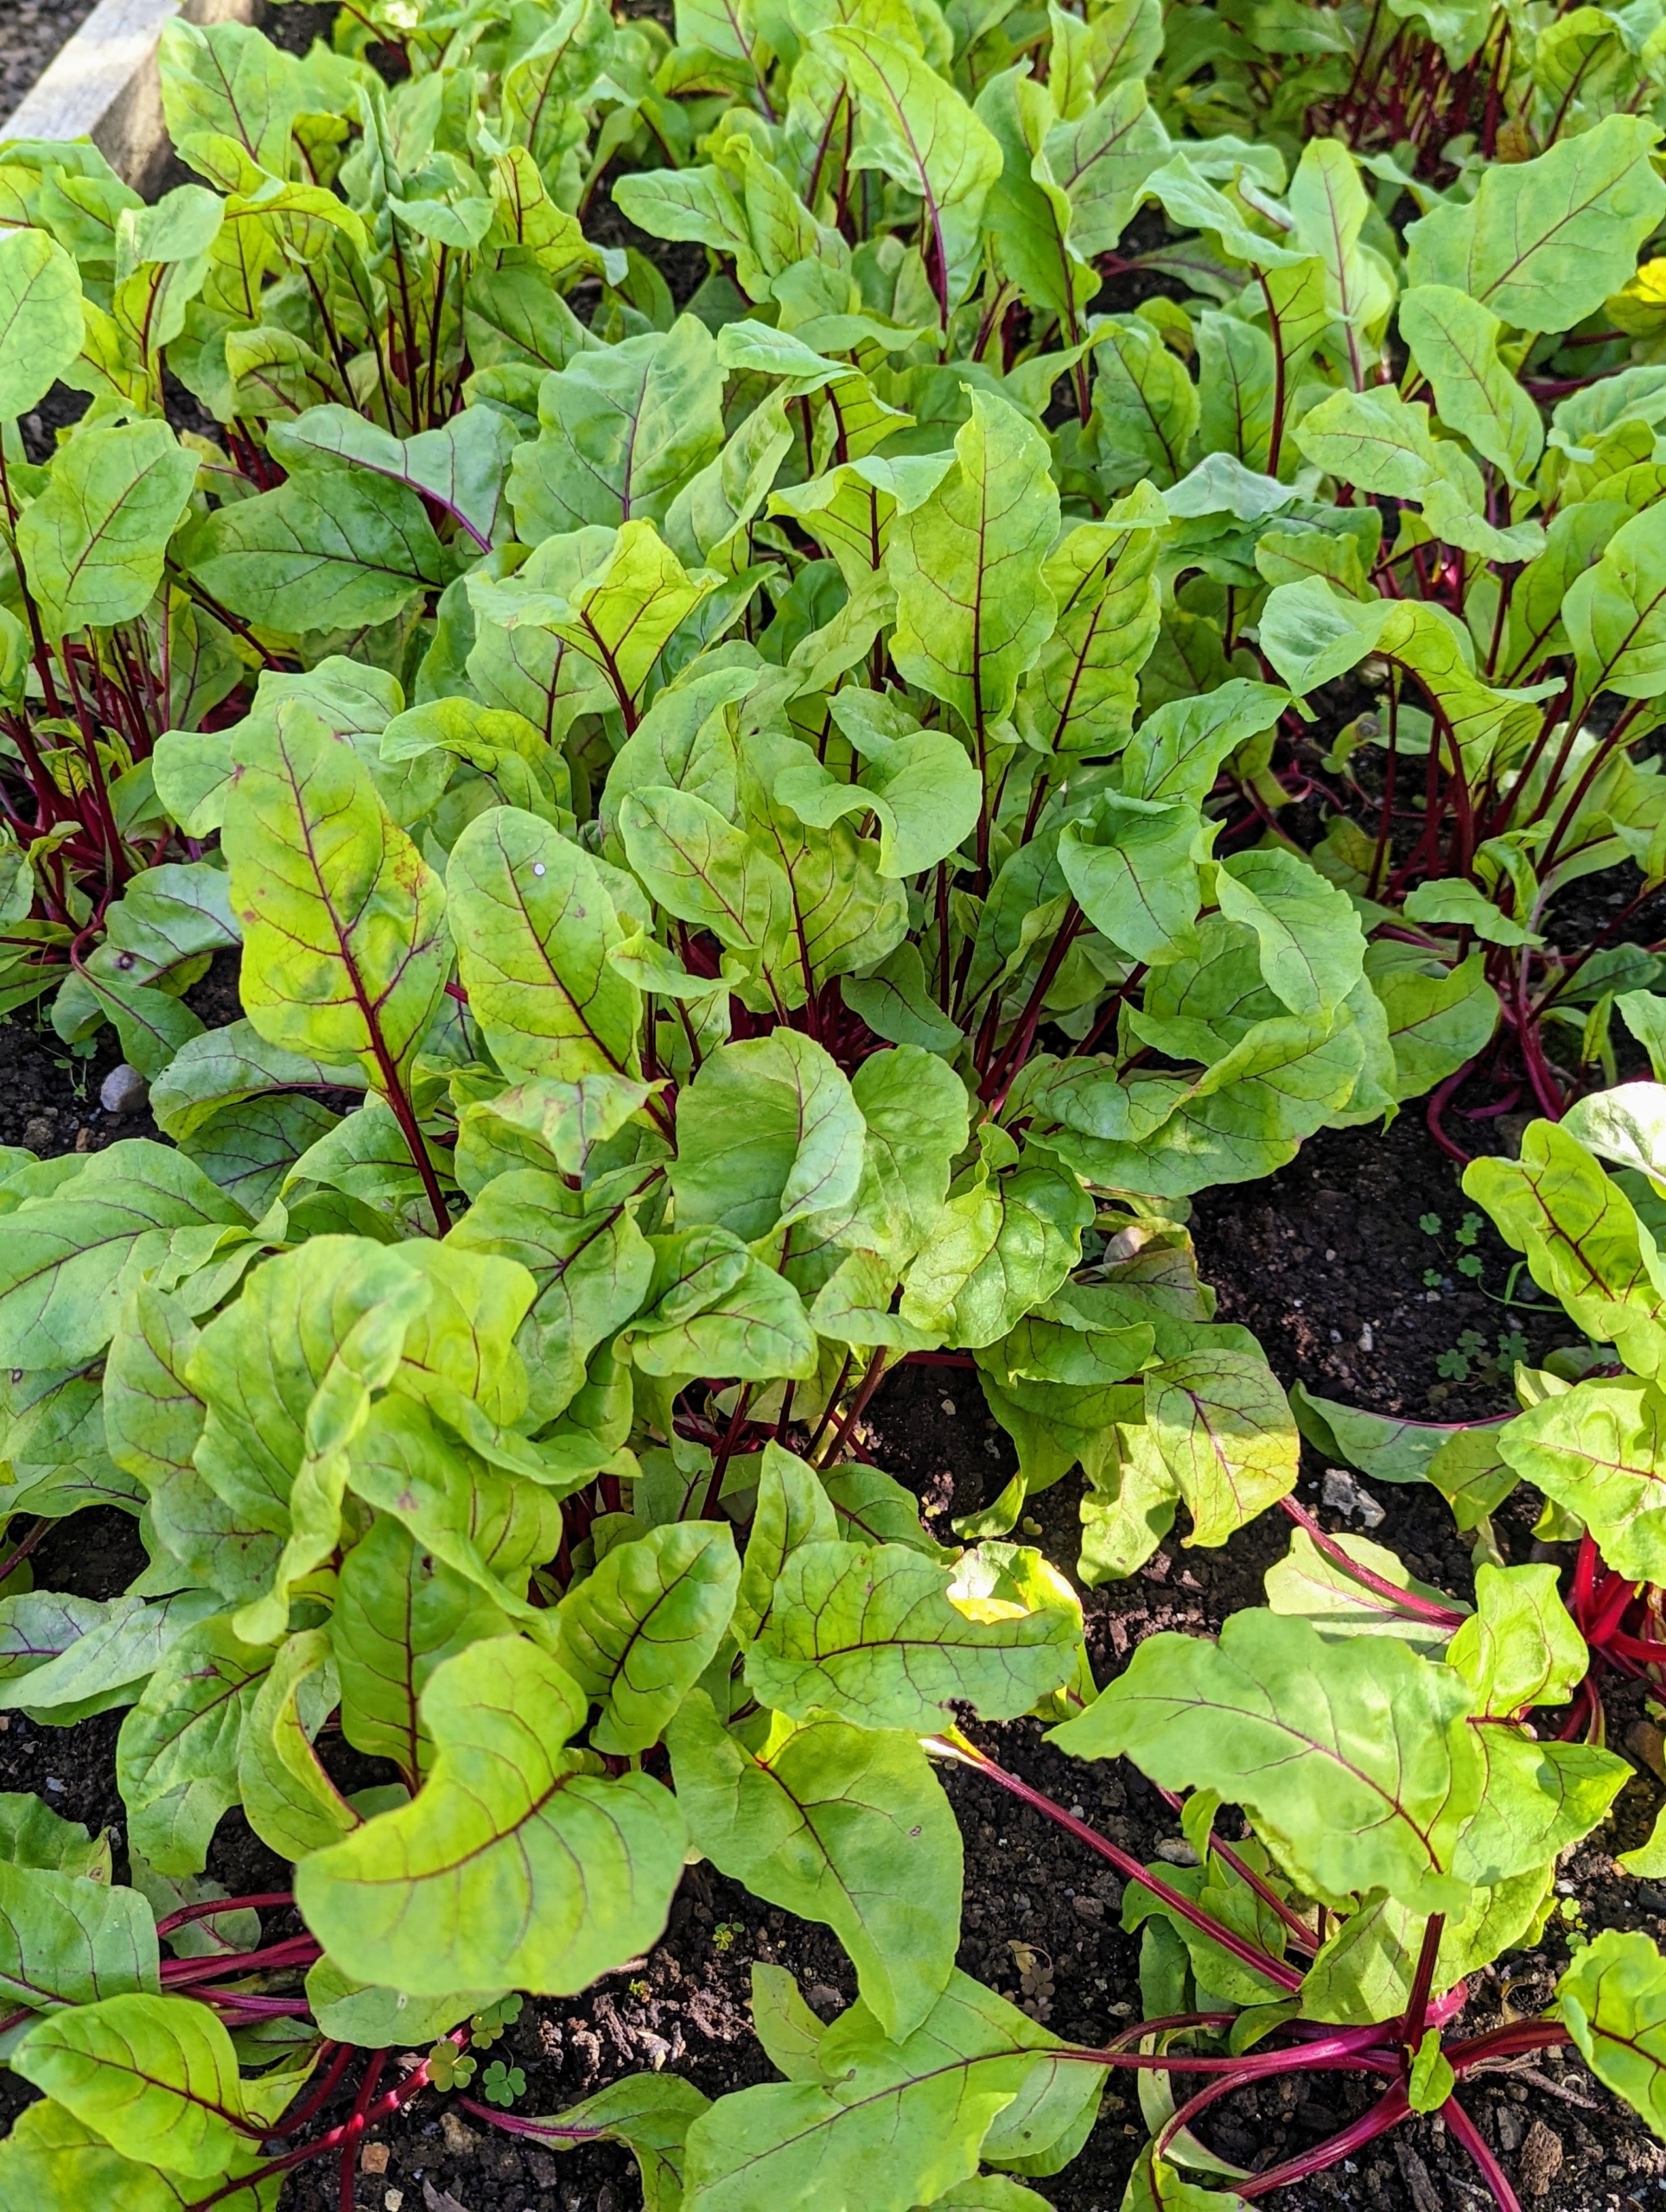
Nearby is our bed of growing beets. These are the leaves of the beets. Beets are sweet and tender – and one of the healthiest foods. Beets contain a unique source of phytonutrients called betalains, which provide antioxidant, anti-inflammatory and detoxification support.
This is curly parsley. This comes from the same family as flat-leaf parsley, but curly parsley leaves are thicker and ruffled. Some also say its flavor is a bit stronger in curly parsley than in the flat-leaf varieties.
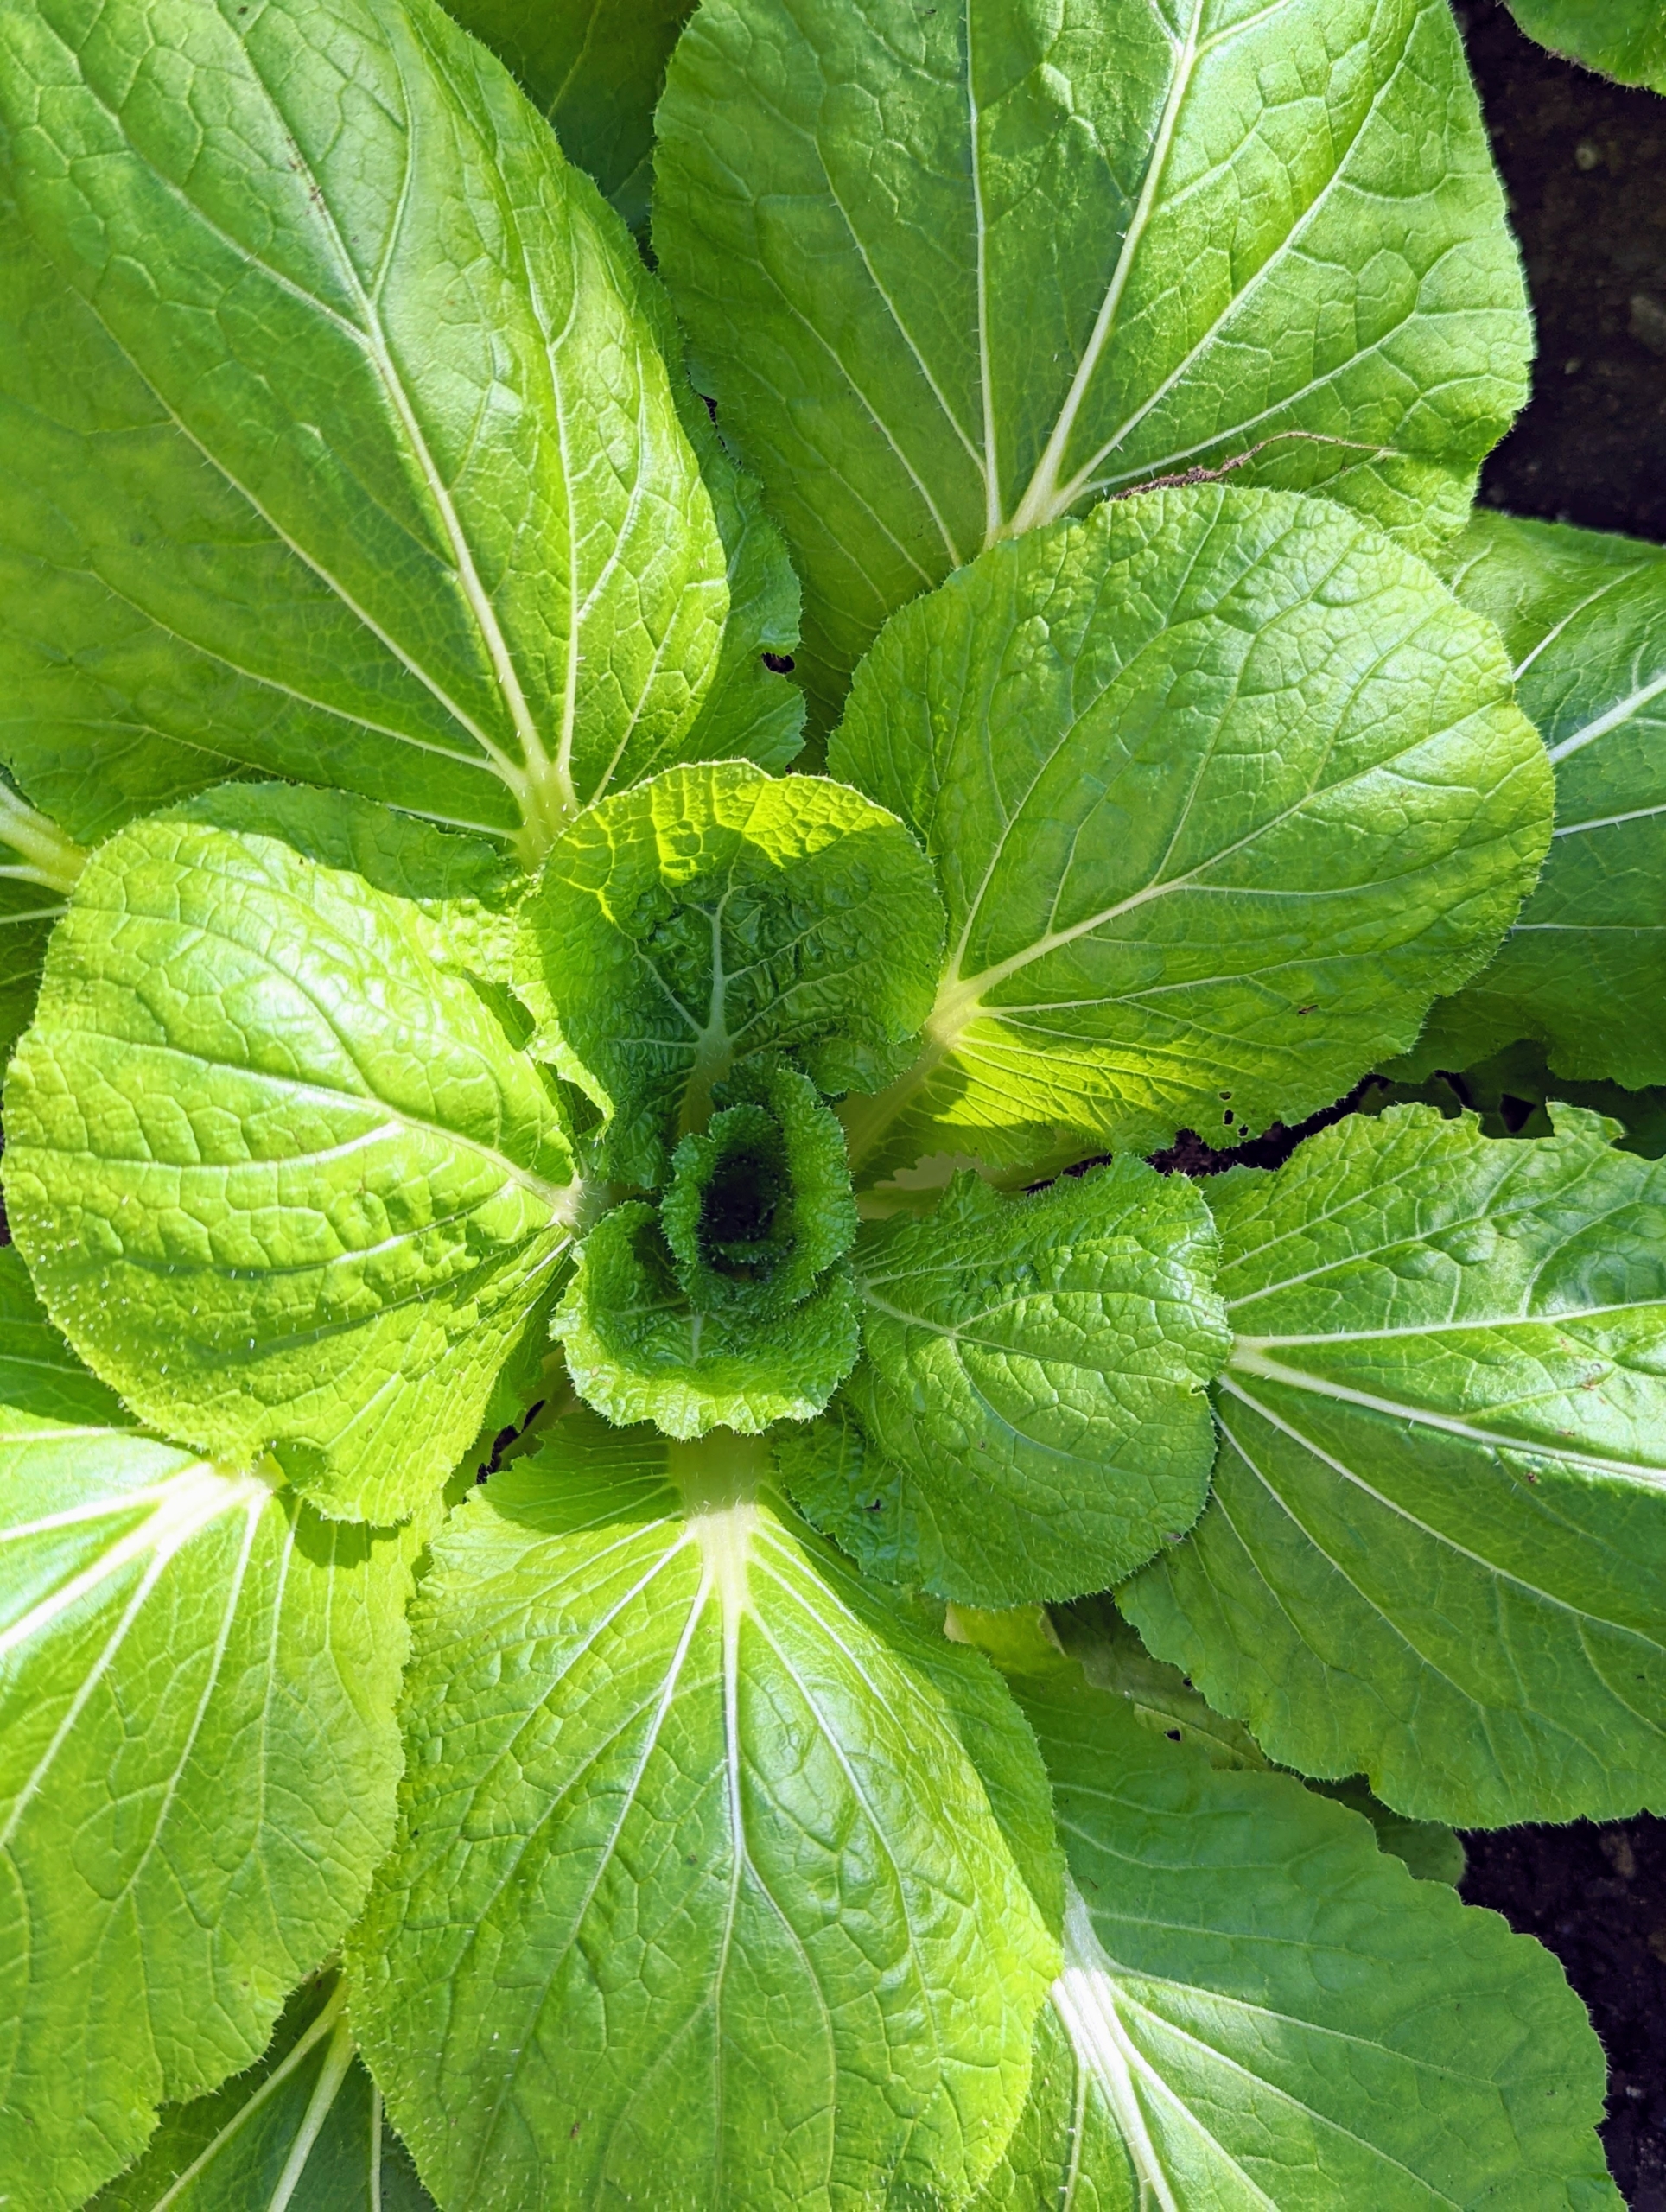
I also grow bok choy, one of the popular Asian greens. Asian greens include bok choy, mizuna and the mustards. Bok choy, pak choi or pok choi is a type of Chinese cabbage. Chinensis varieties do not form heads and have leaf blades with lighter bulbous bottoms. These grow so well inside the greenhouse. They come in bright green…
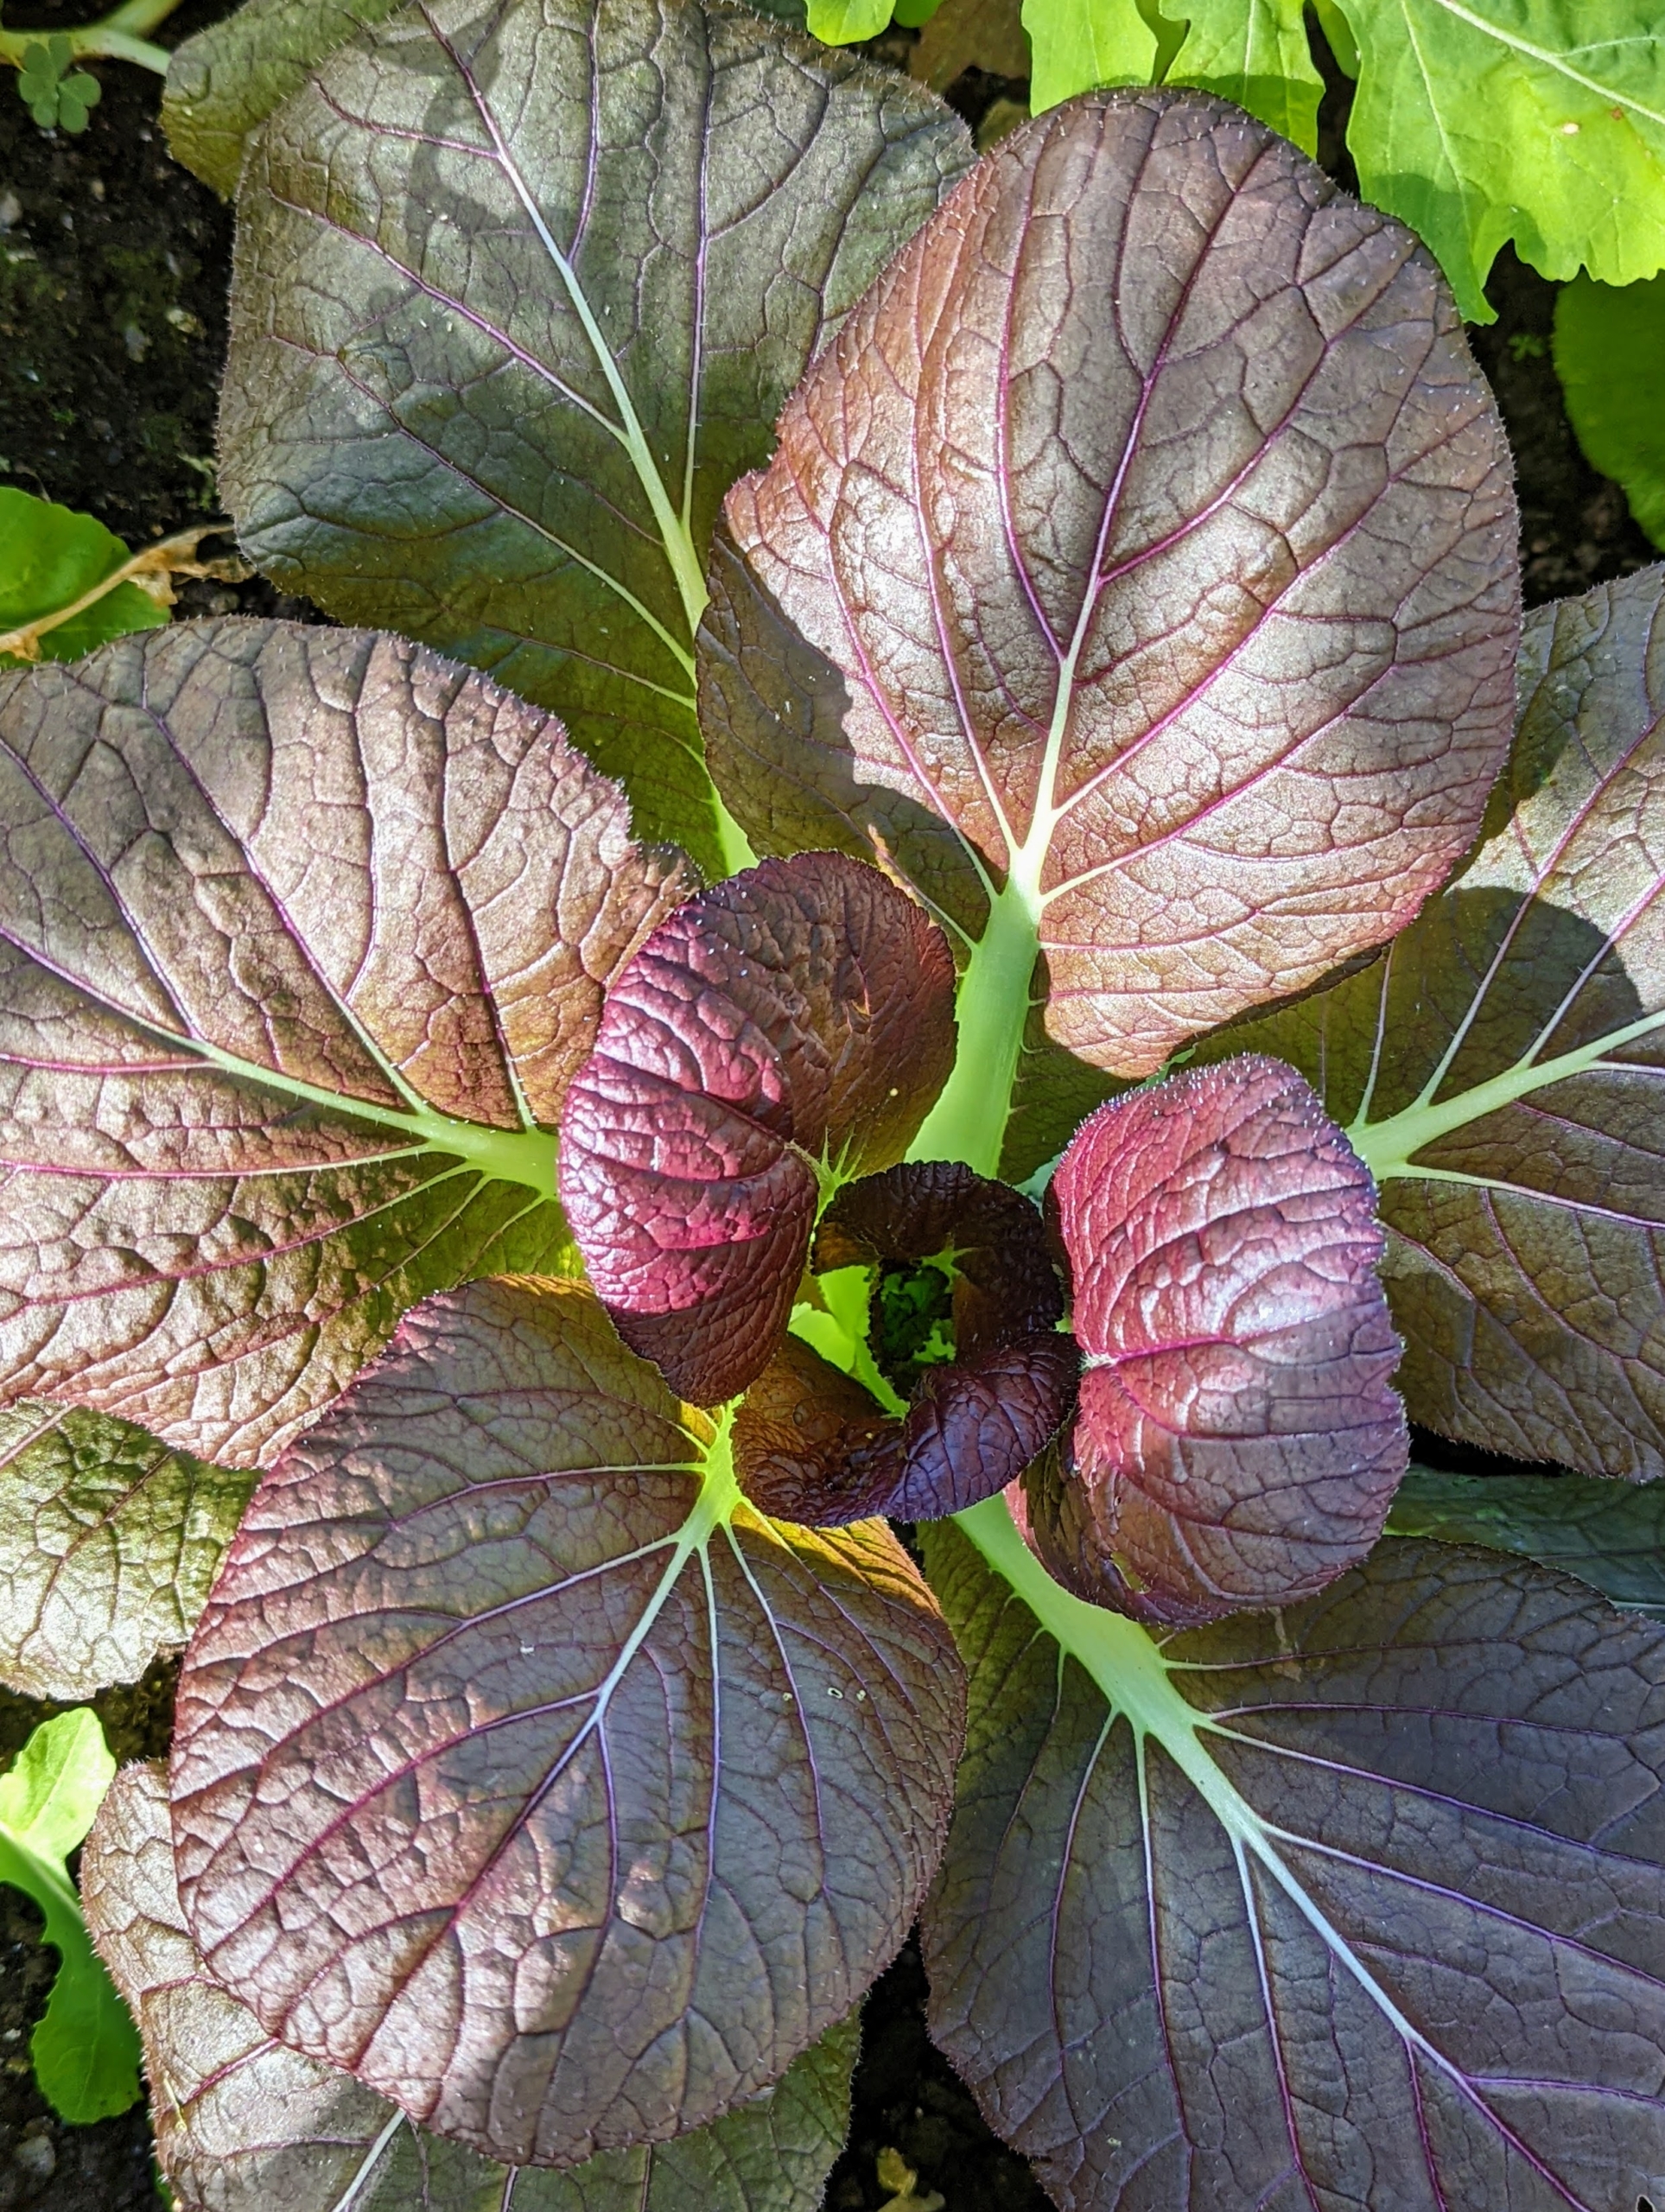
… And this red. This special variety has dark red leaves with green undersides.
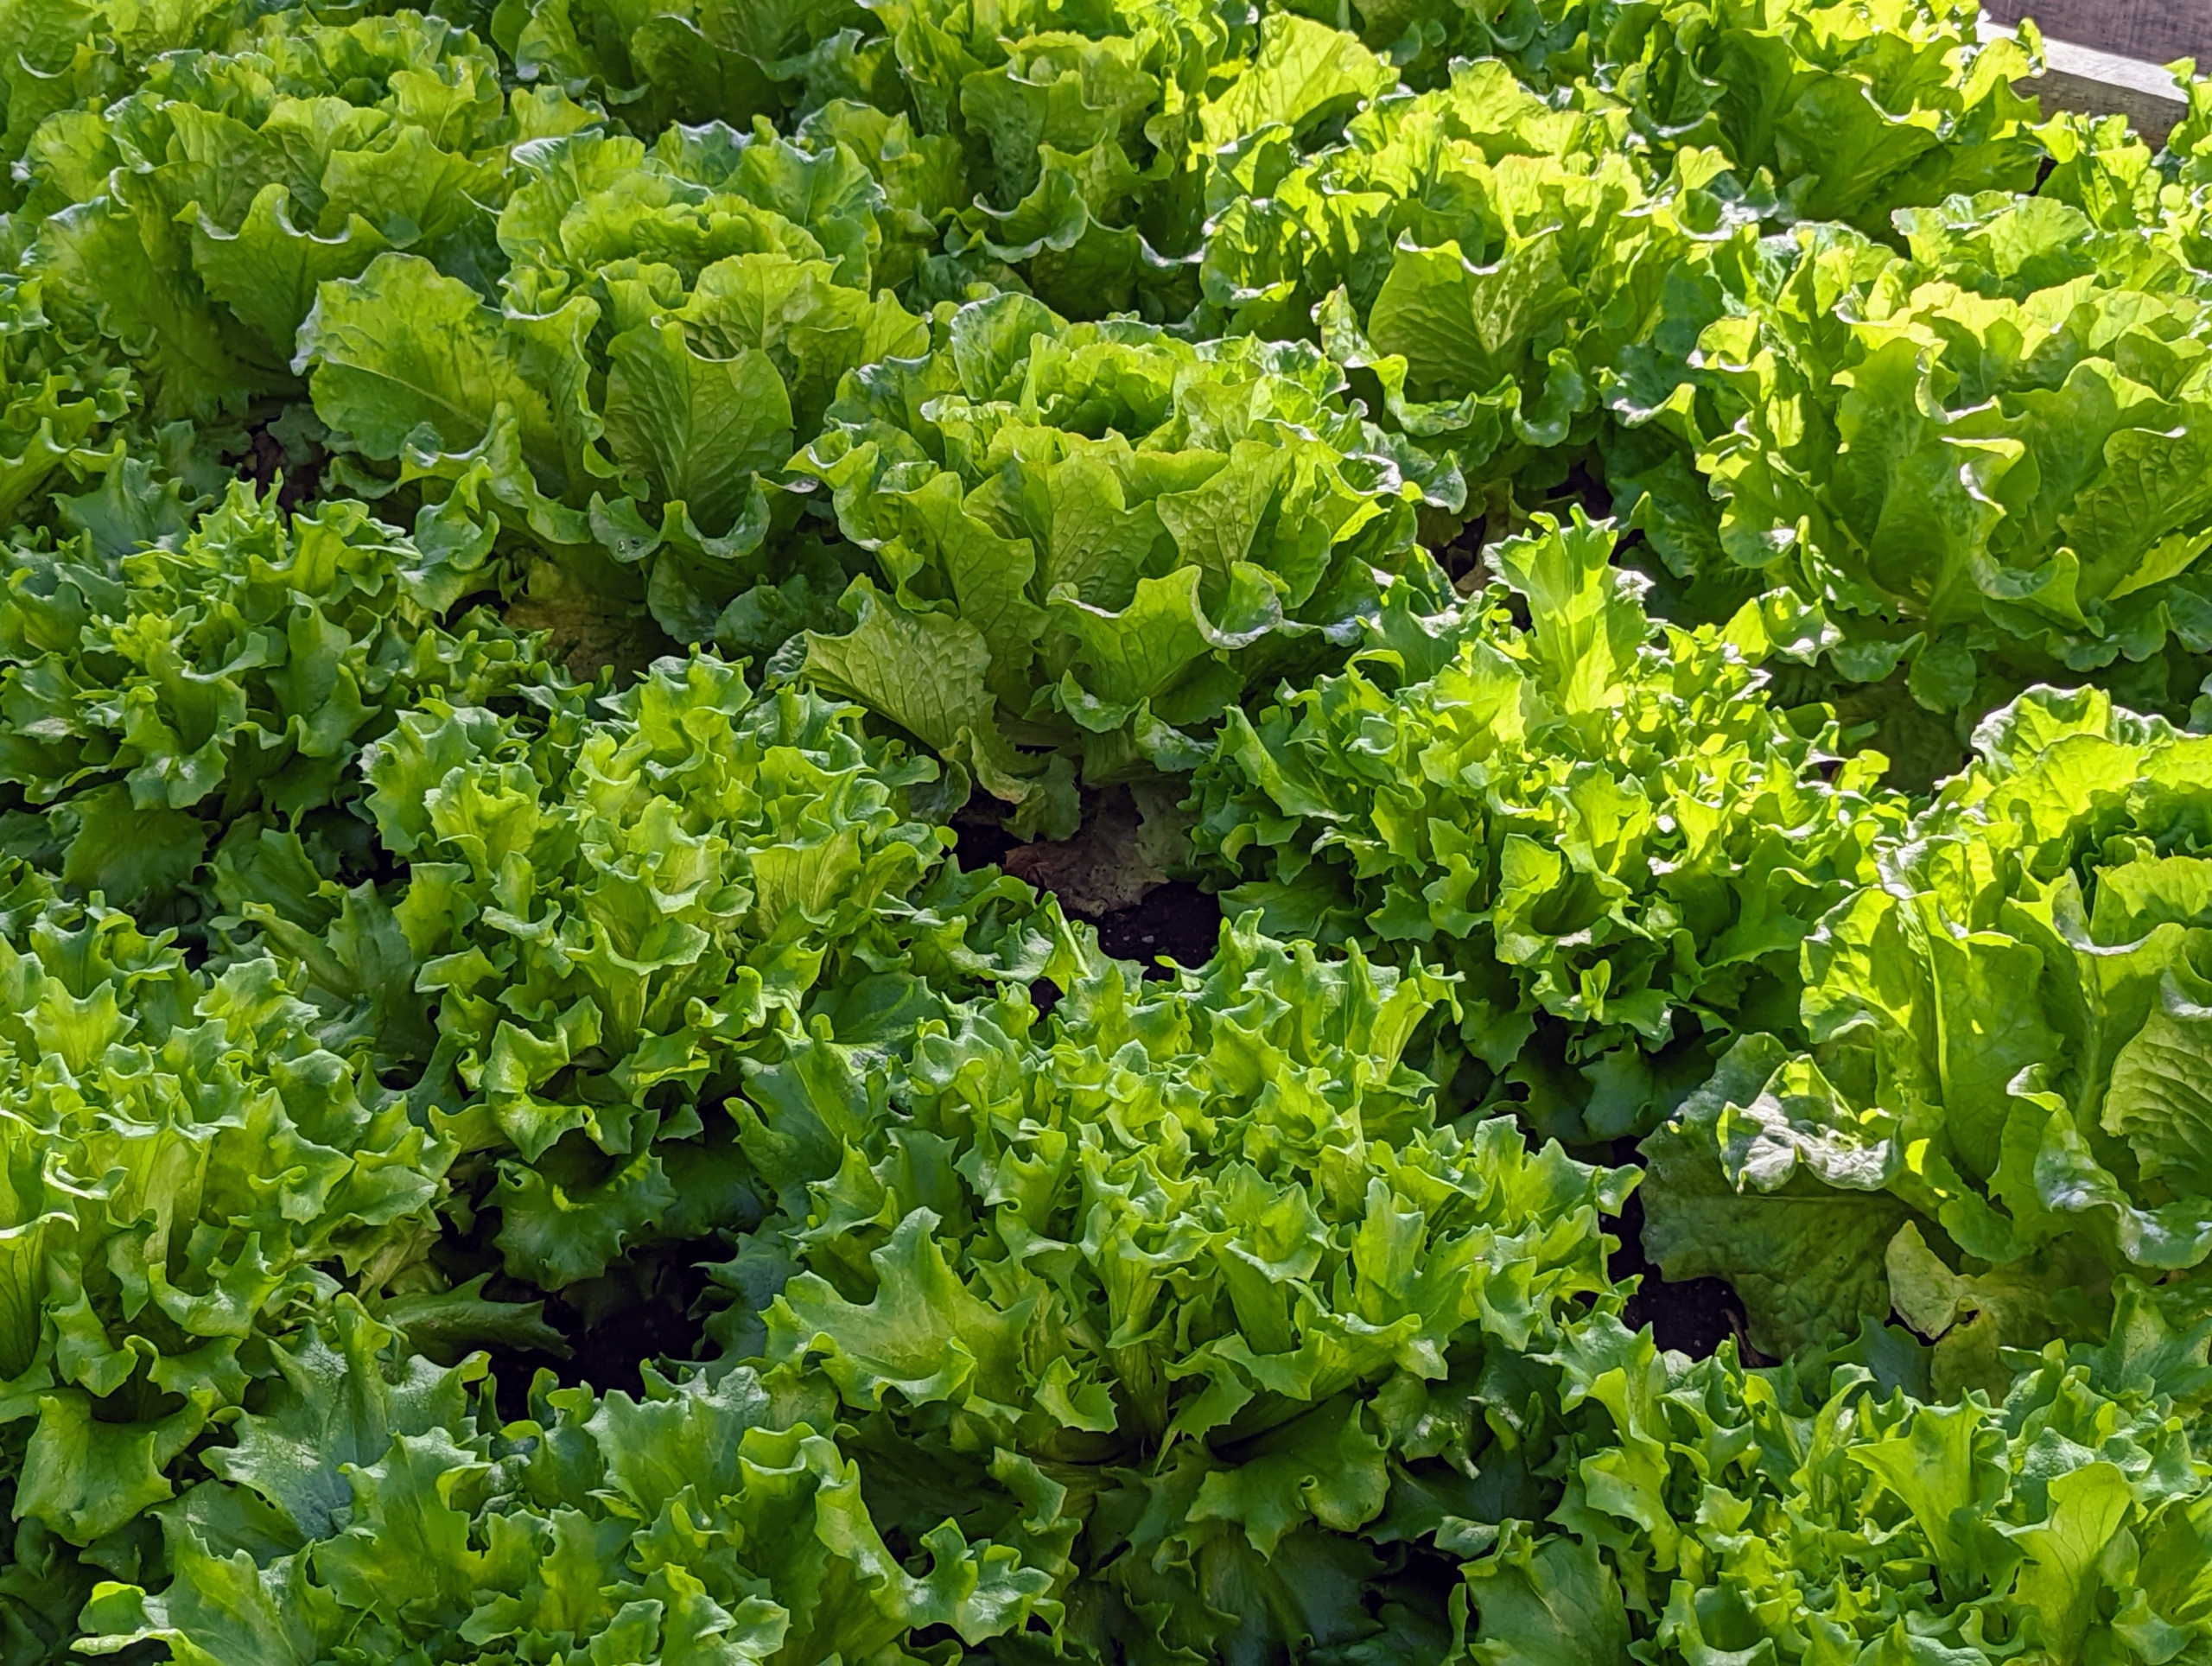
And look at these beautiful lettuce heads. I have several boxes filled with just lettuce.
These lettuces are slightly more mature. We always plant in succession. Succession planting is a practice of seeding crops at intervals of seven to 21 days in order to maintain a consistent supply of harvestable produce throughout the season. This dramatically increases a garden’s yield, while also improving produce quality.
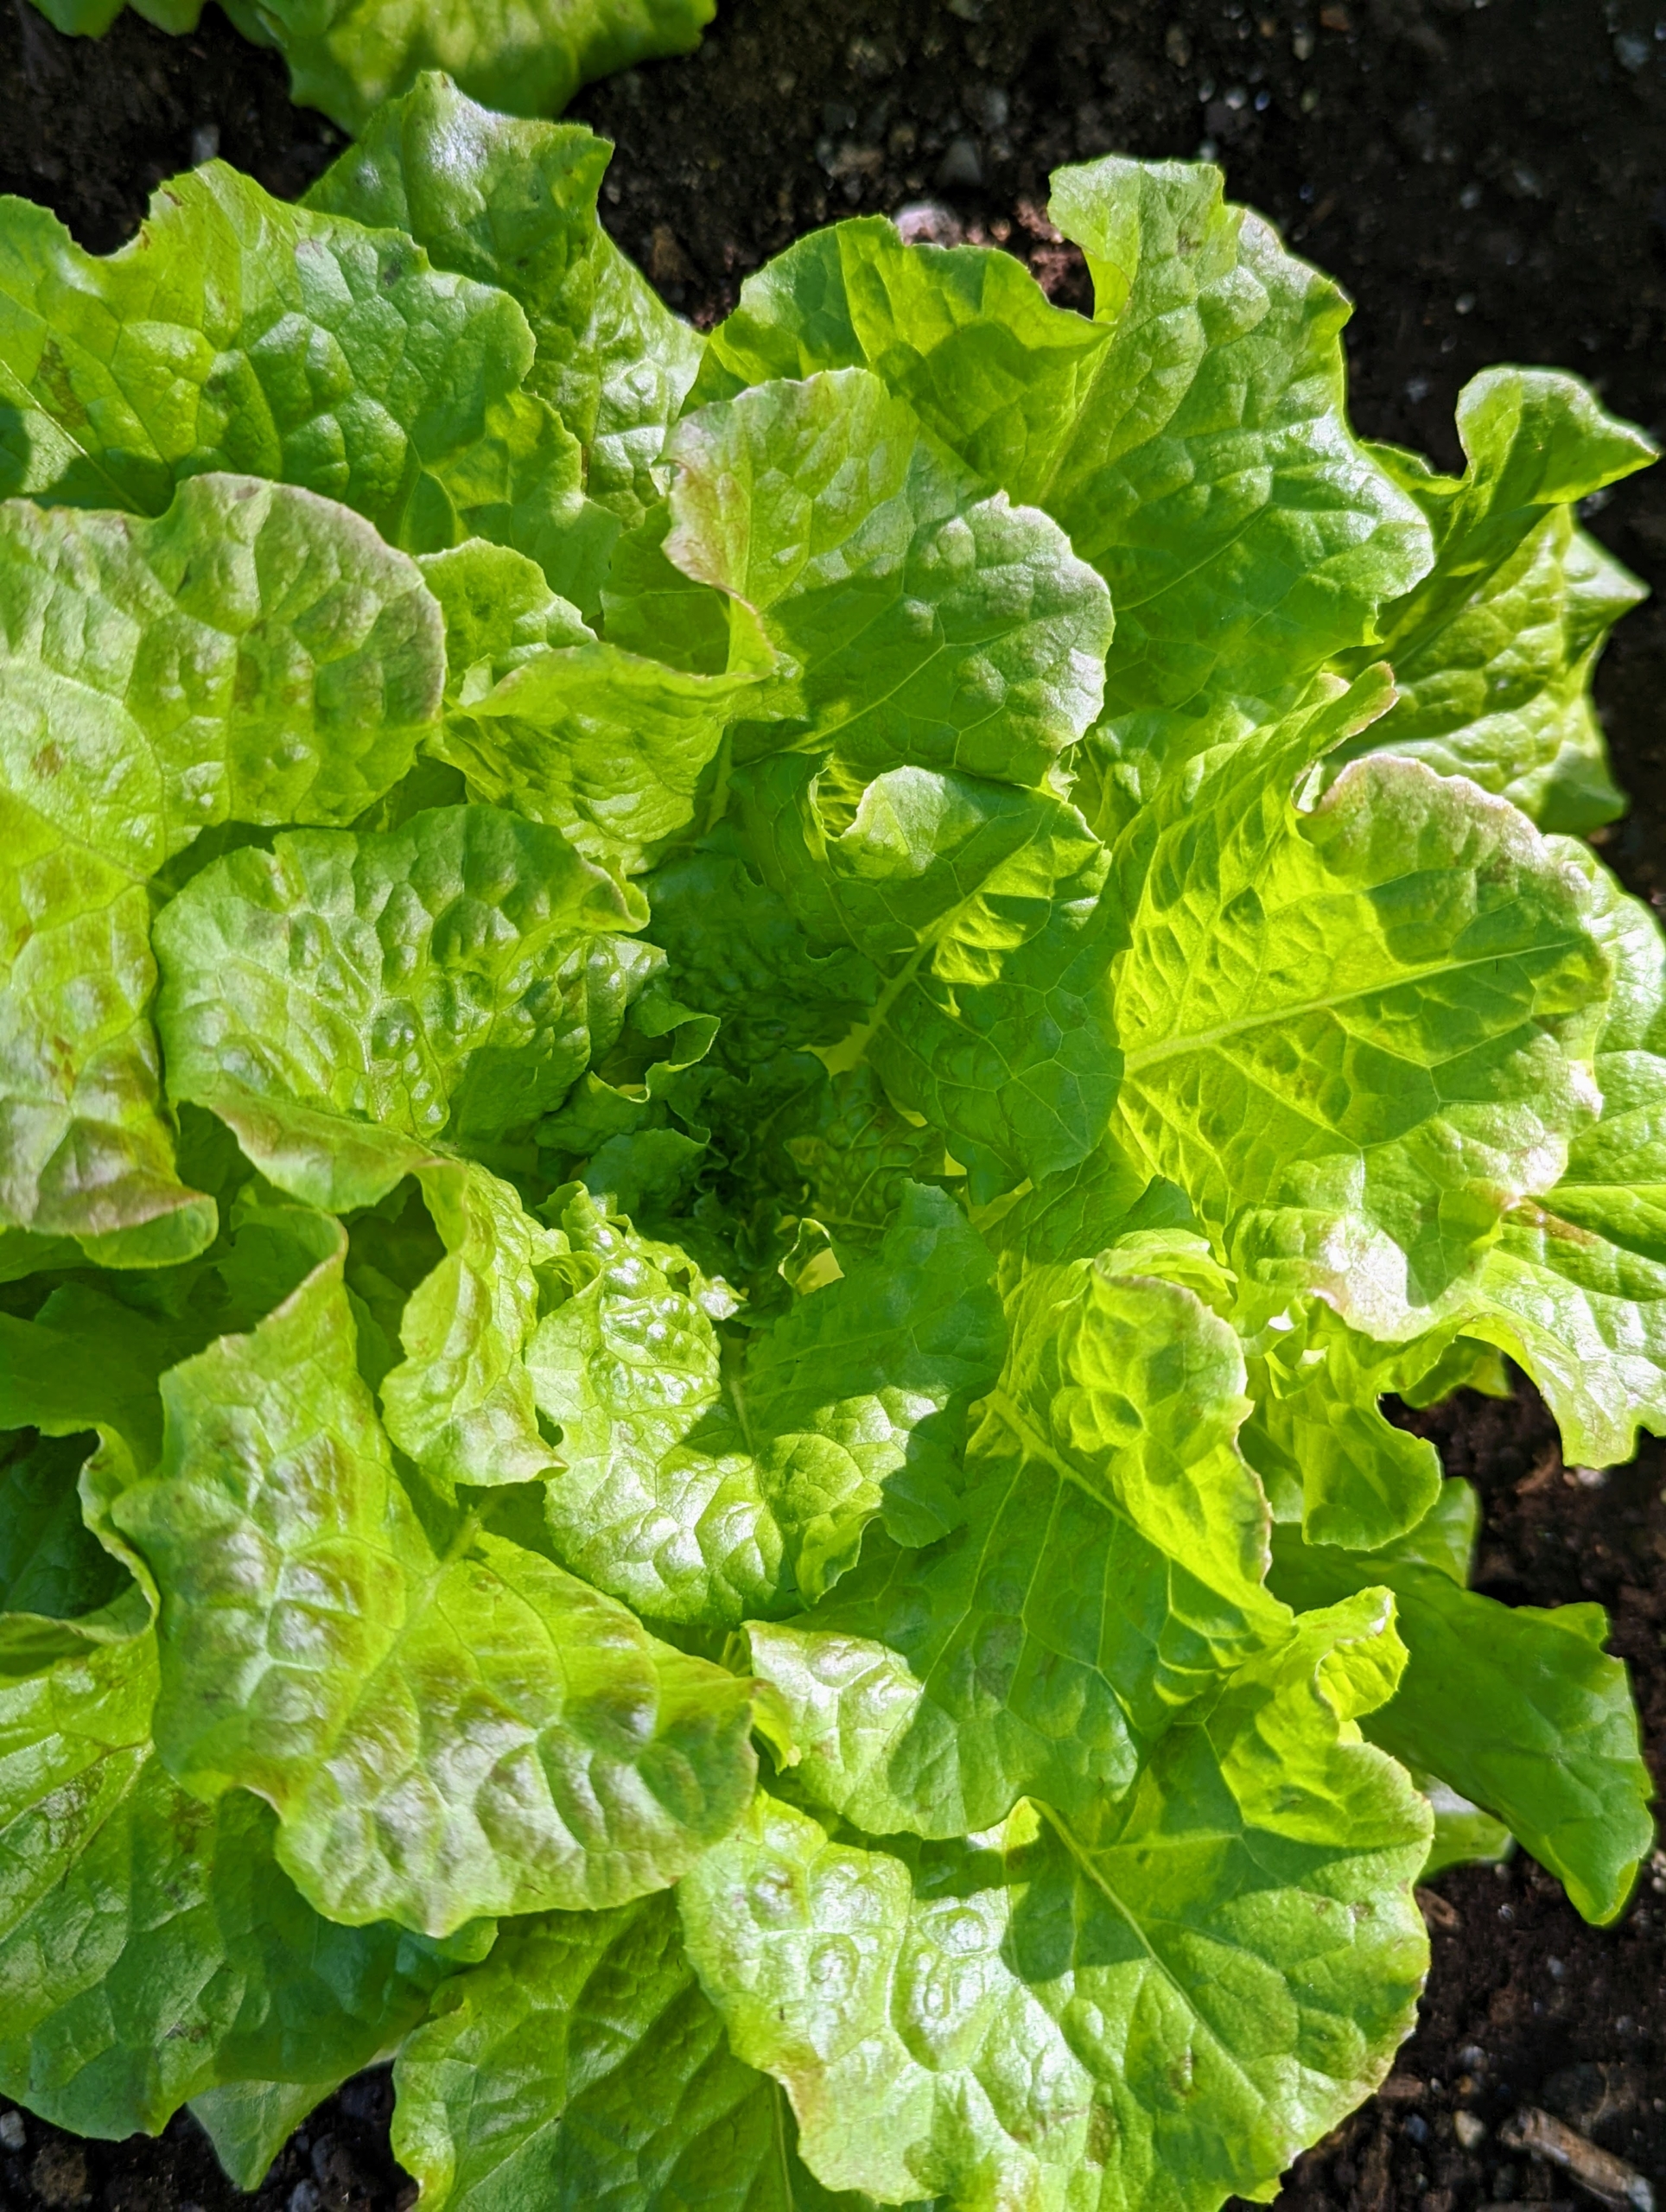
It’s a real treat to have lettuce like this all year long. I am often asked why I grow so many vegetables. My daughter and her children are vegetarian, so I grow lots of greens for them, but I also share them with friends, use them for television and photography shoots, and of course serve them when entertaining.
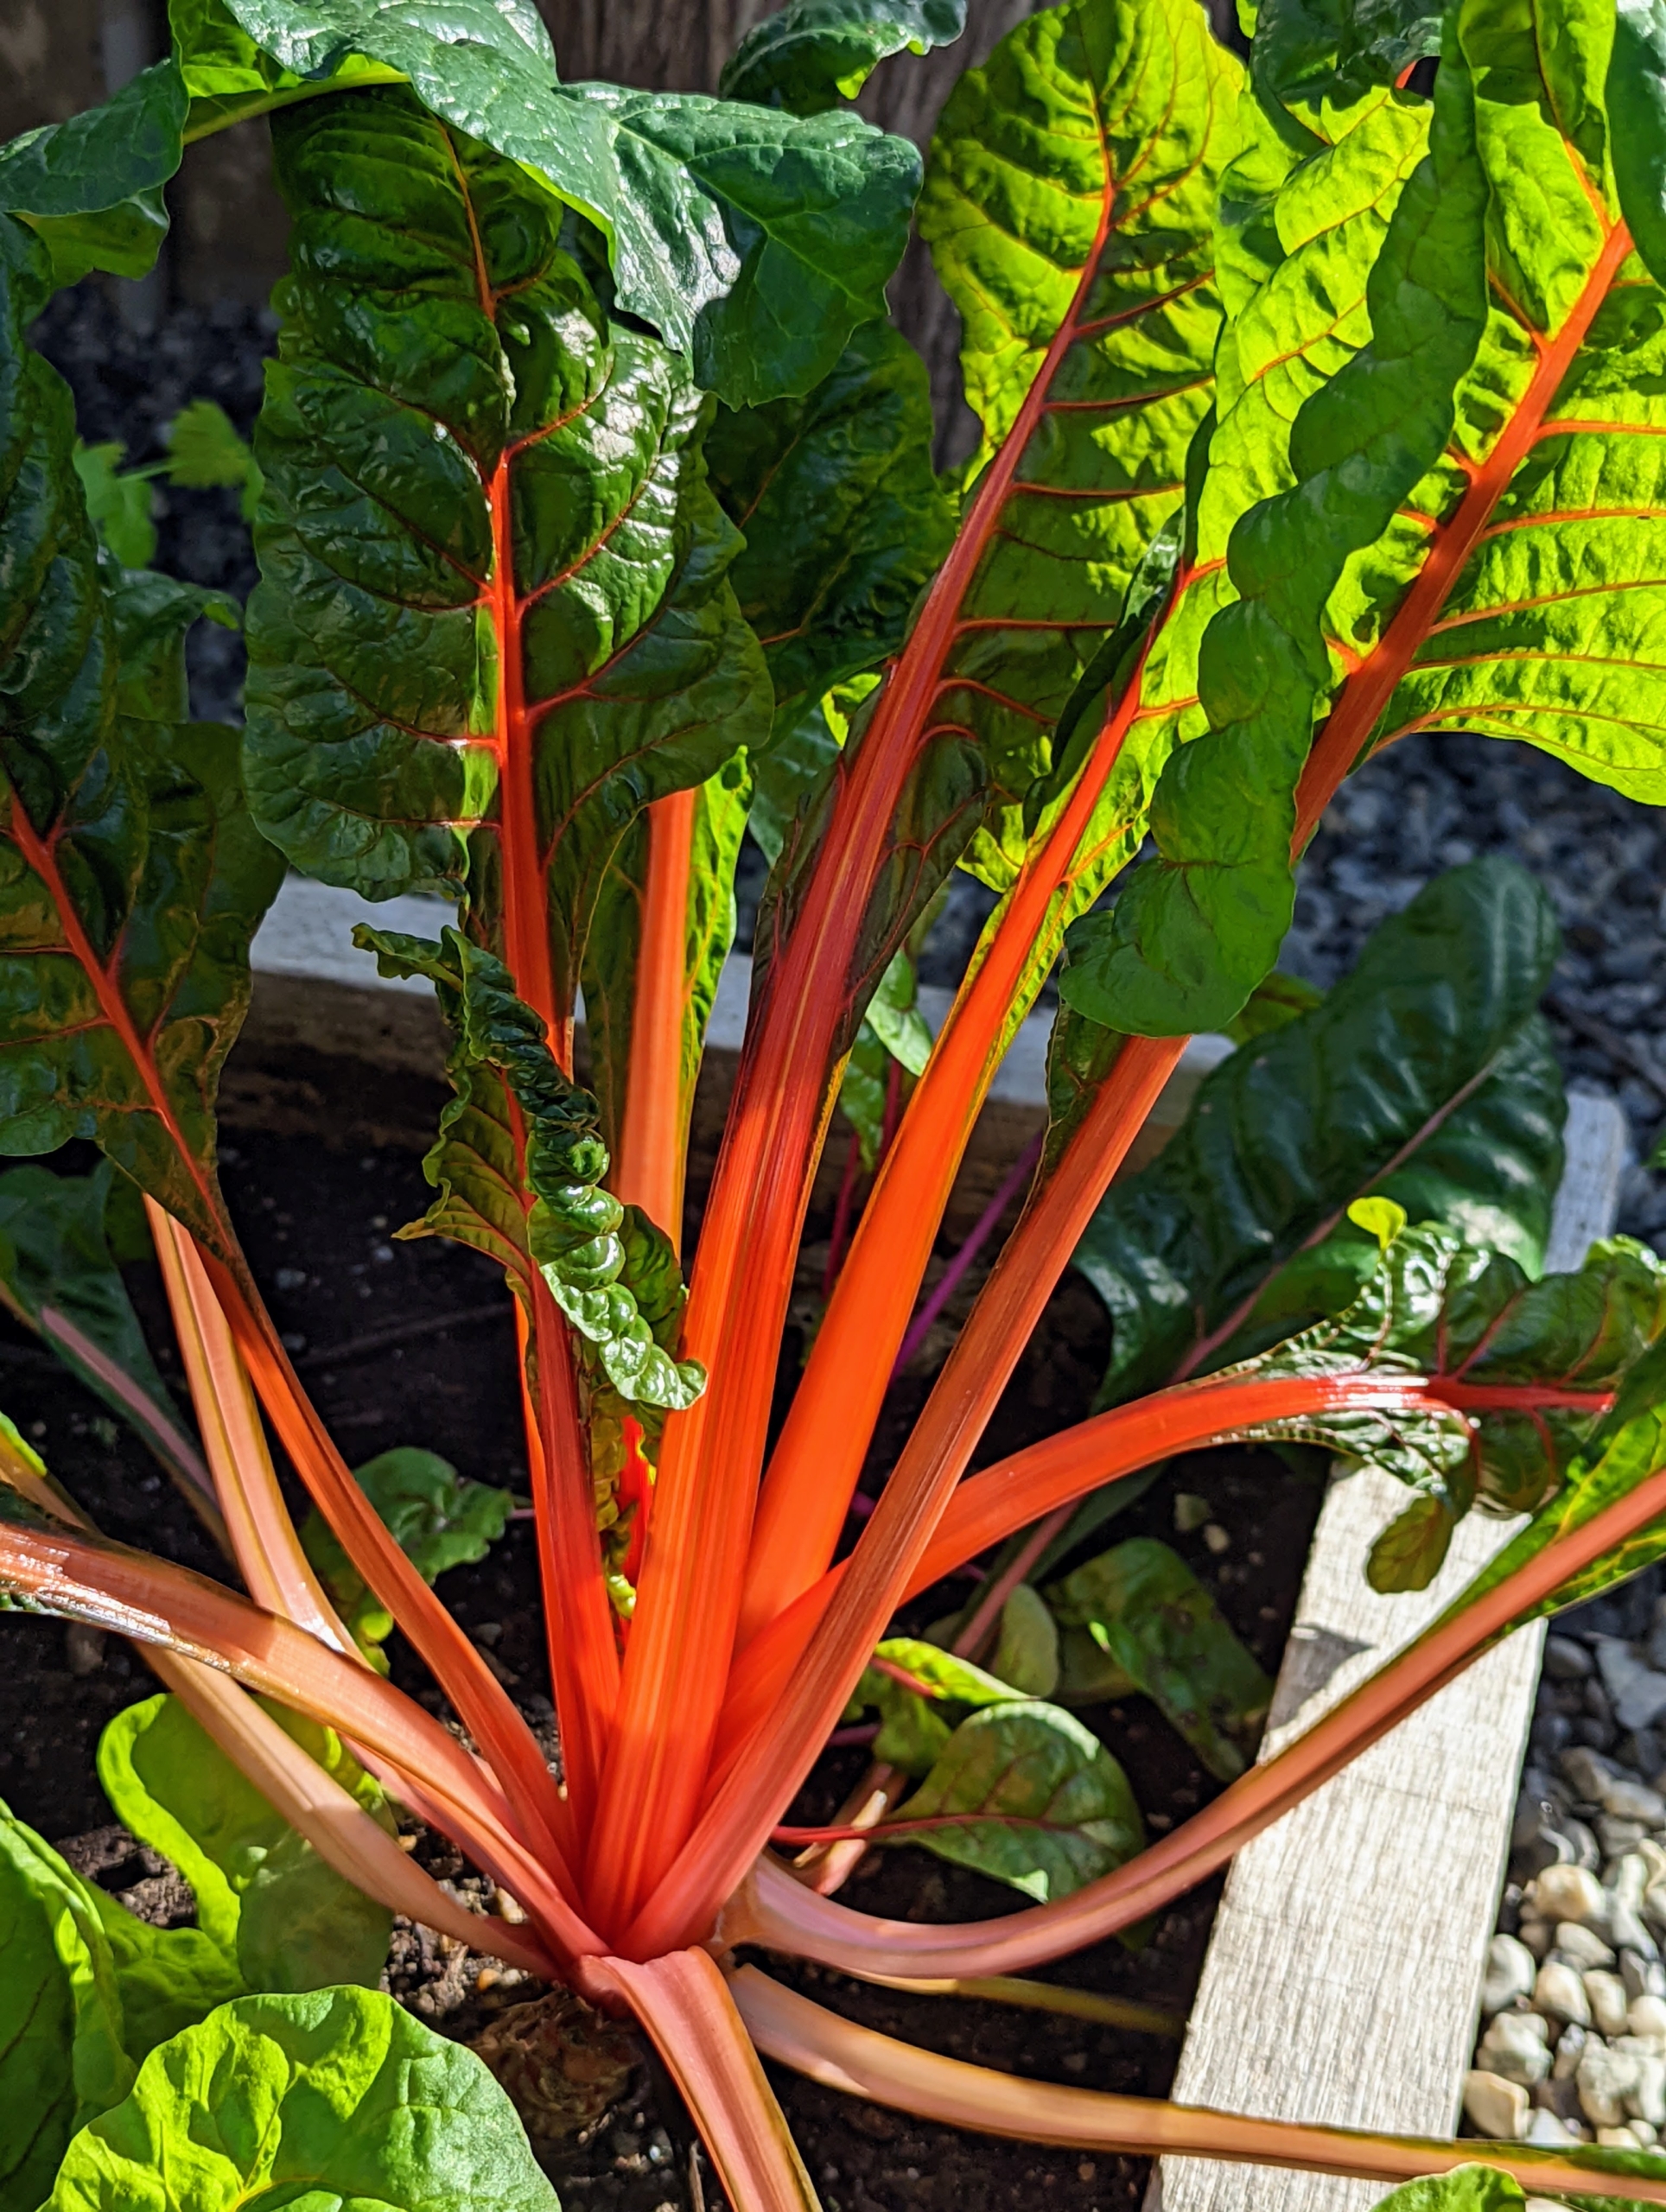
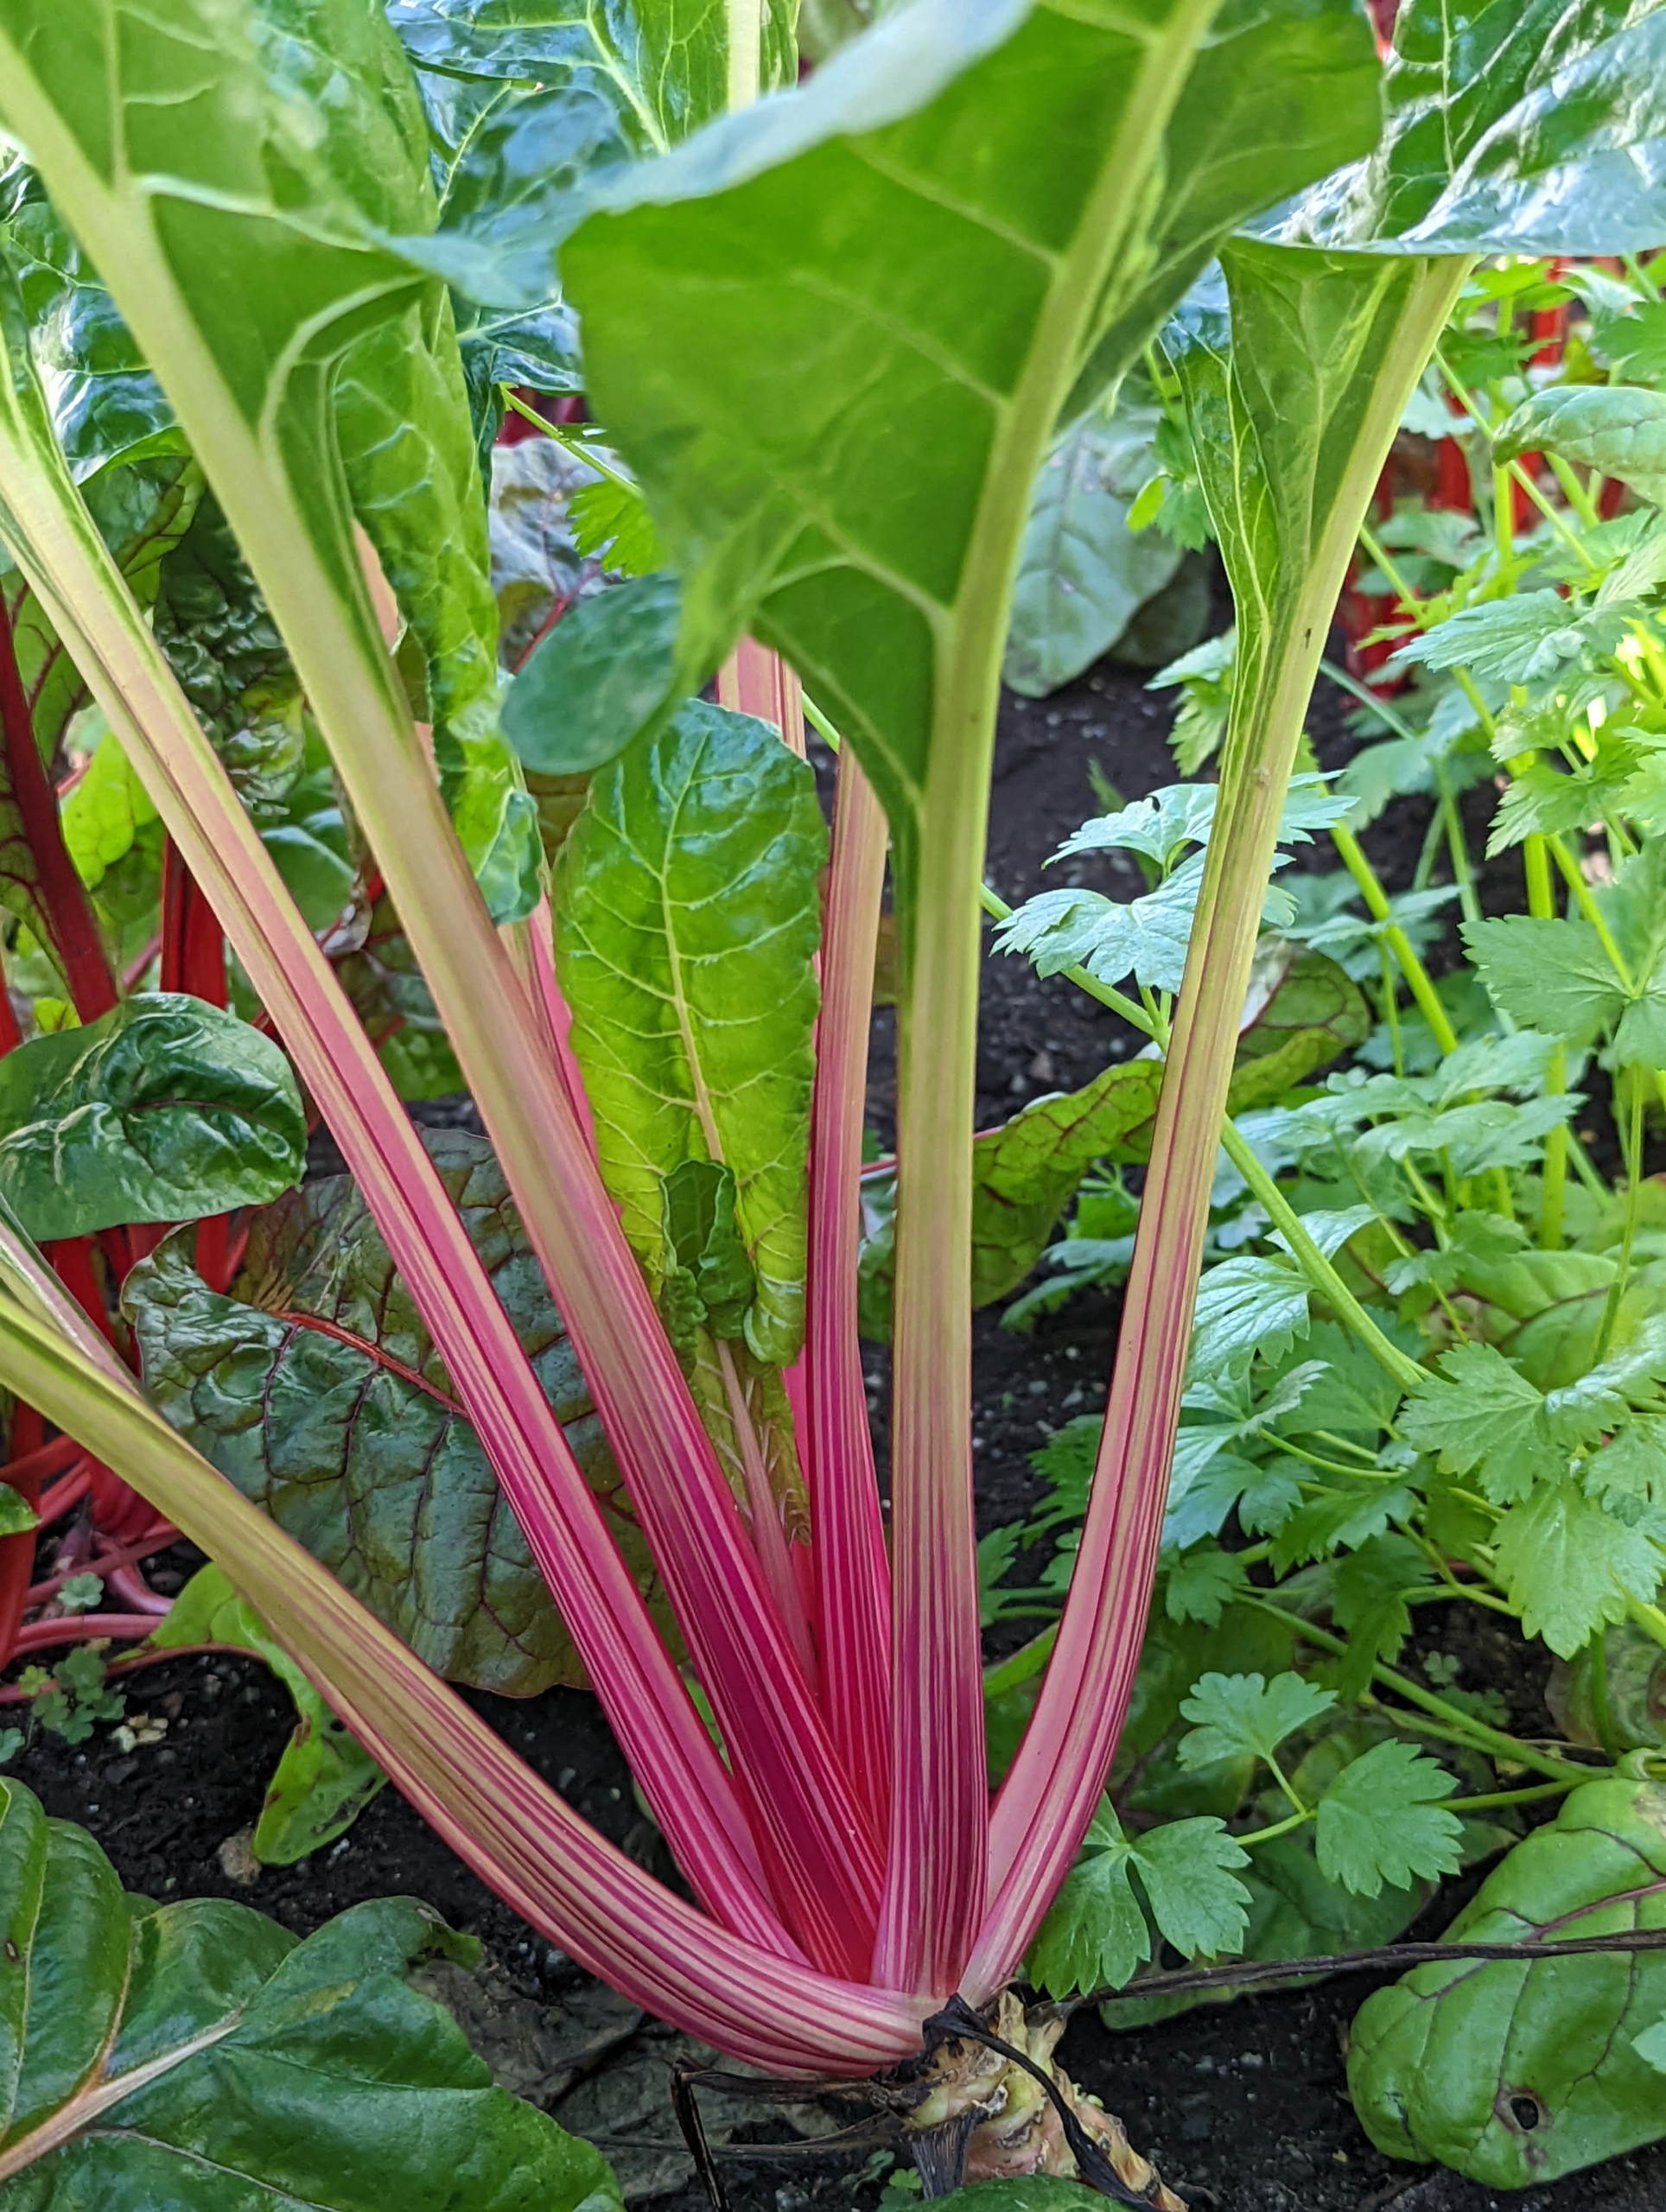
The gorgeous Swiss chard stalk colors can be seen from across the greenhouse. They are so vibrant with stems of red, pink, yellow, and white. Chard has very nutritious leaves making it a popular addition to healthful diets.
This Swiss Chard has more pinkish stalks. The most common method for picking is to cut off the outer leaves about two inches above the ground while they are young, tender, and about eight to 12 inches long.
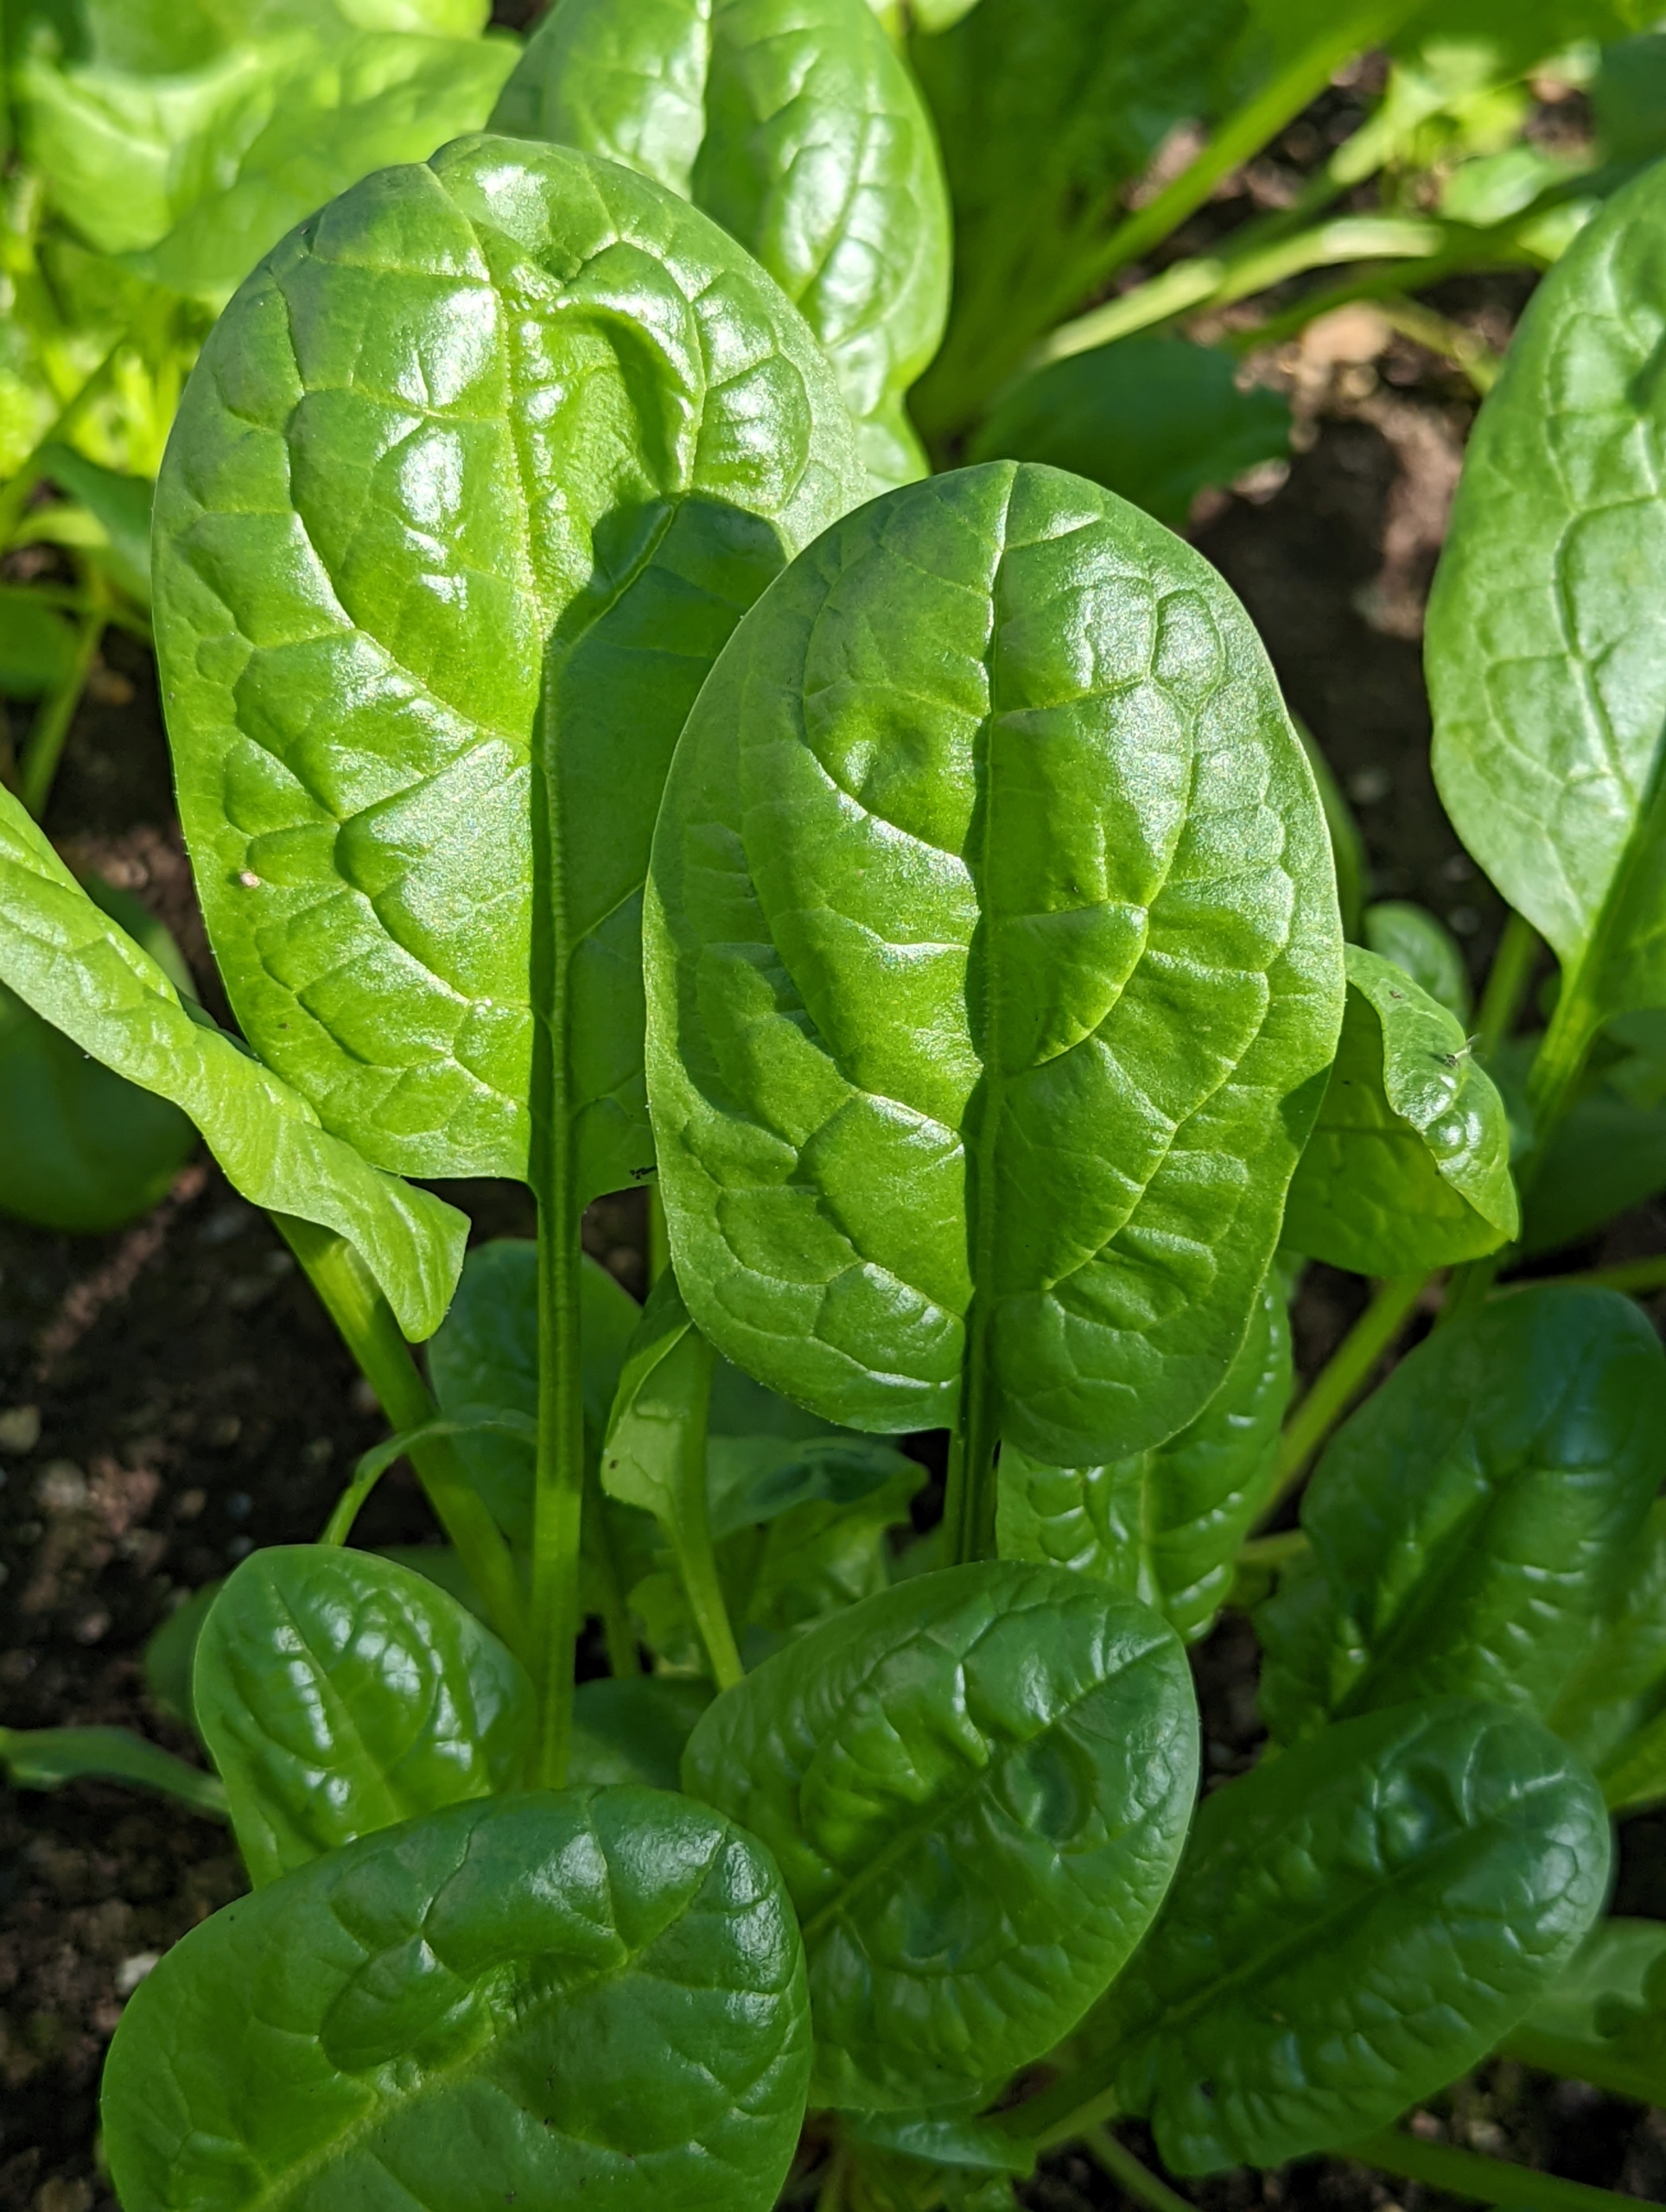
I also grow a lot of spinach. Spinach is an excellent source of vitamin K, vitamin A, vitamin C, folate, and a good source of manganese, magnesium, iron and vitamin B2. We use a lot of spinach at the farm for my green juice – a must-have every morning of the year.
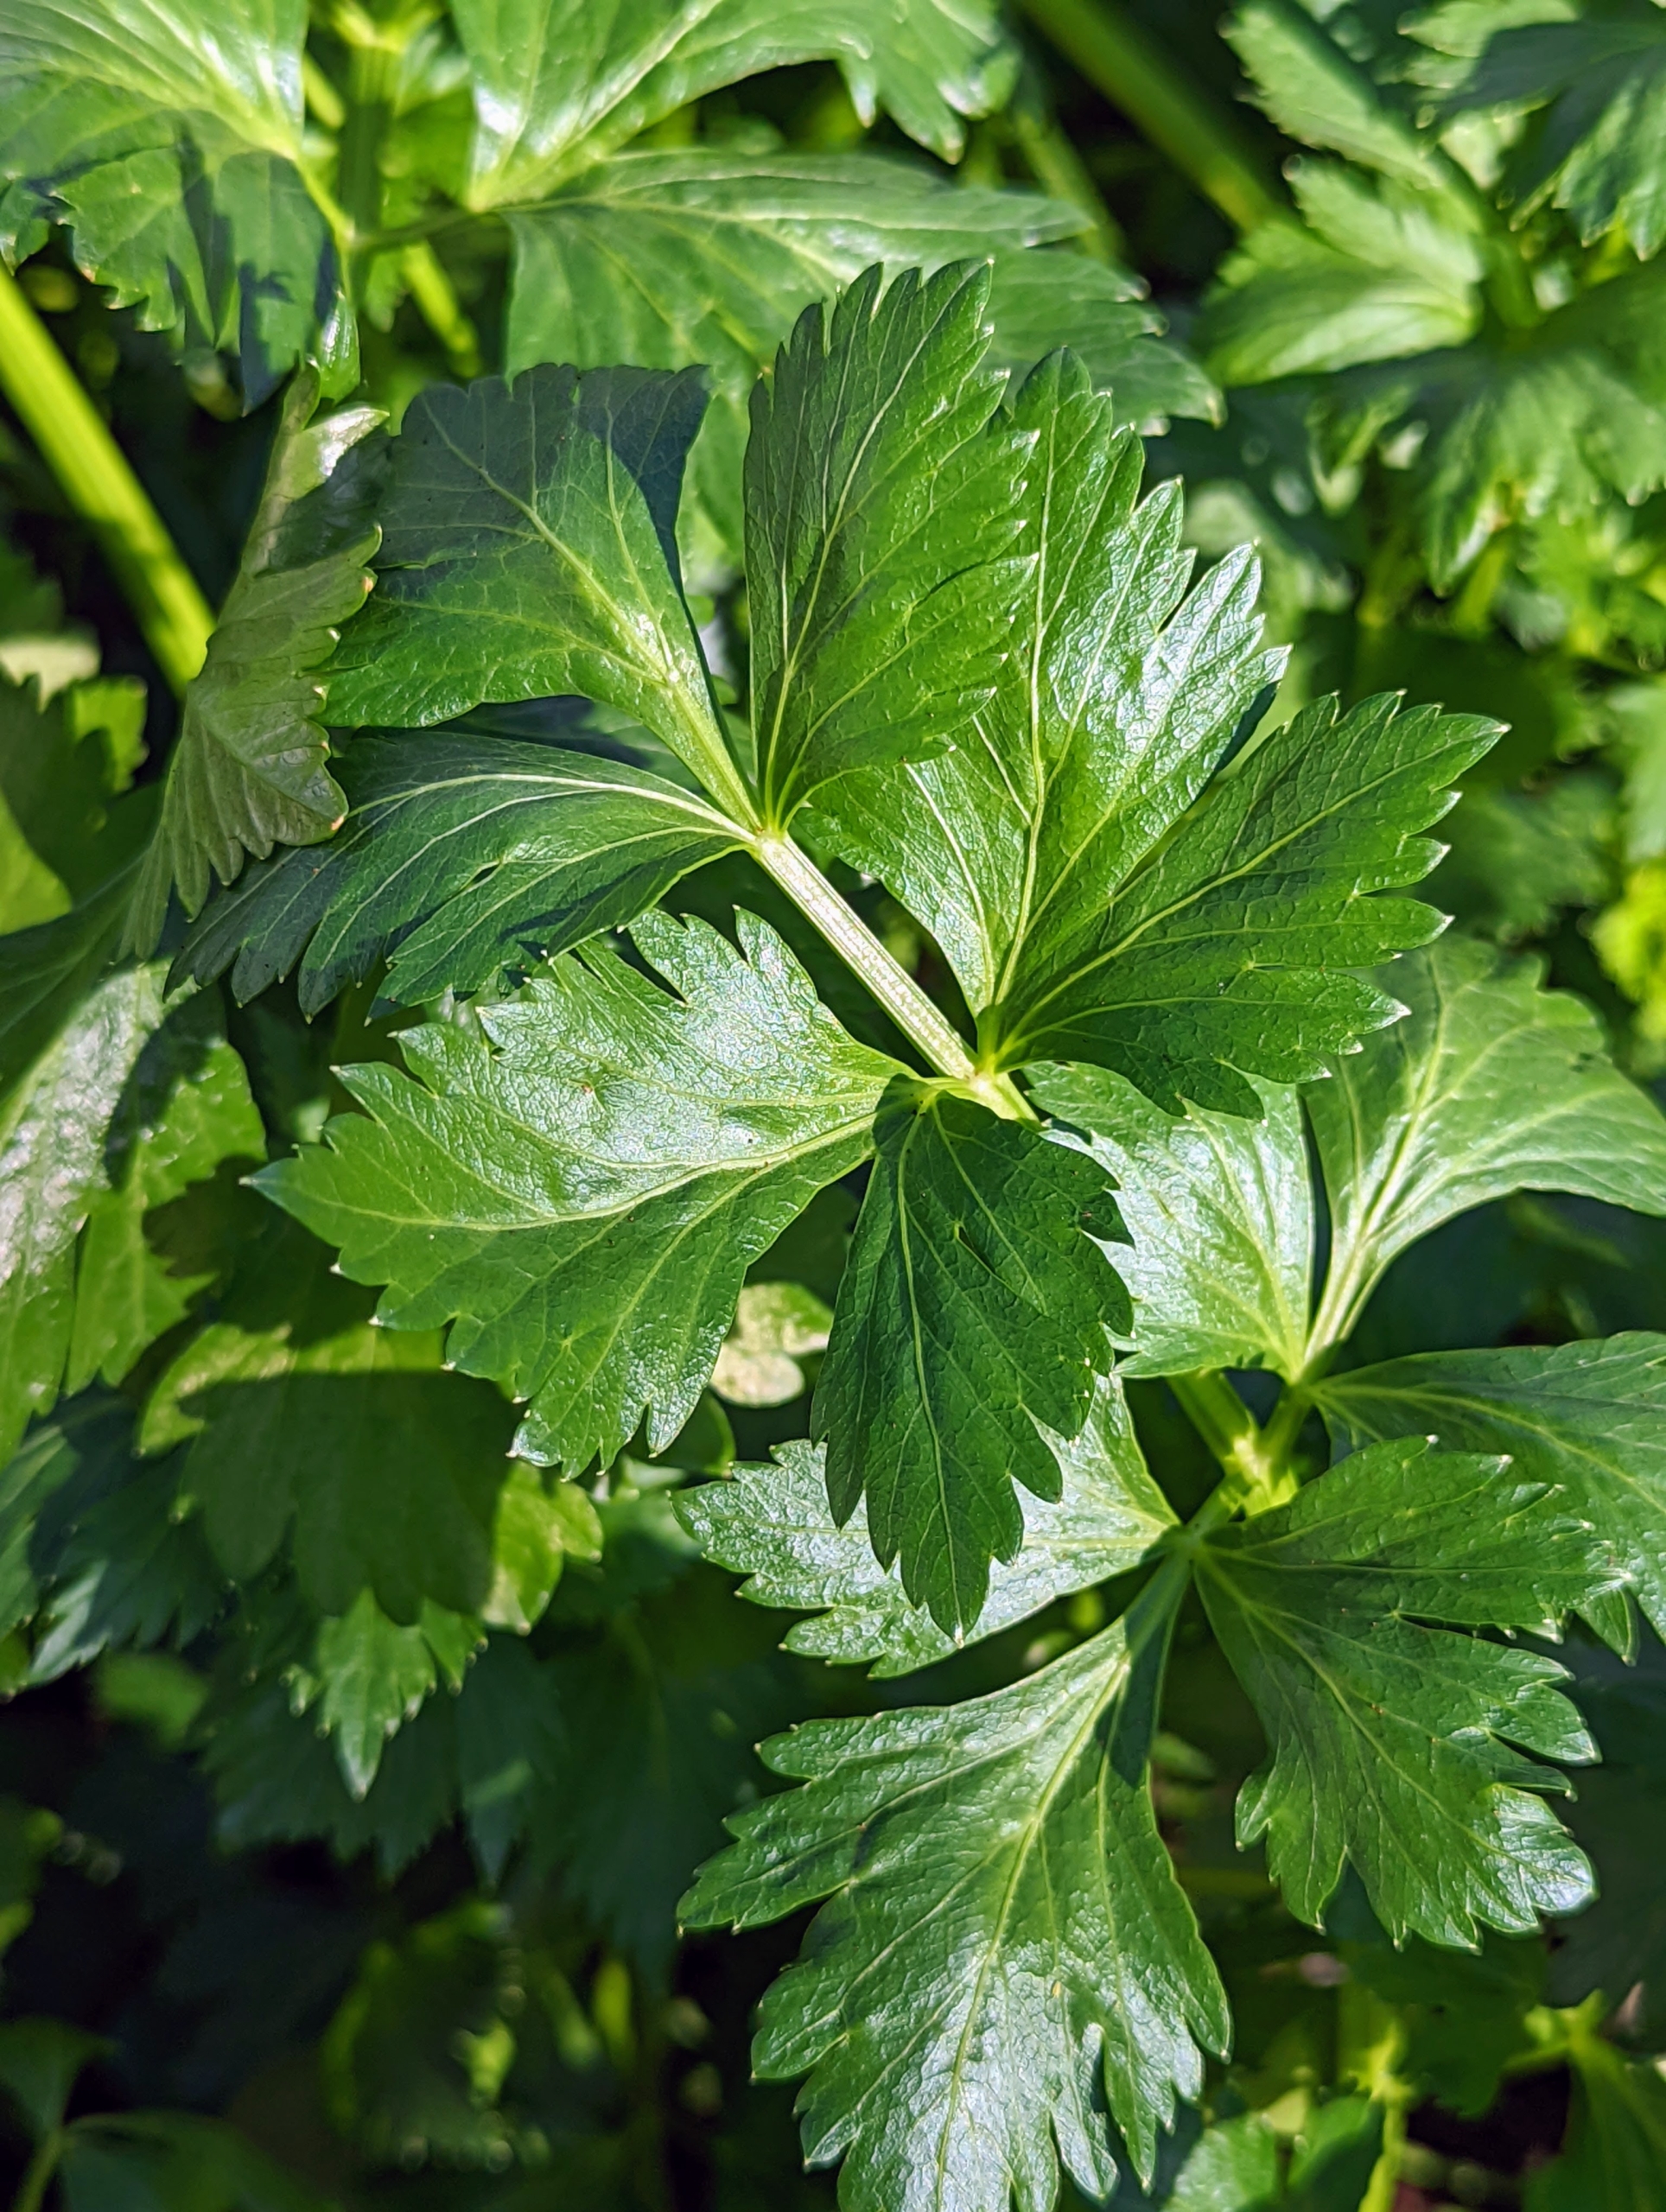
These are broccoli leaves. We just started growing broccoli indoors this year. They are all developing so beautifully. To grow broccoli successfully indoors, it must get at least six hours of direct sunlight per day or grow lights timed to provide the same amount of direct exposure. And they need room – each broccoli plant should be allowed at least a couple feet of overall space and six to 12 inches of soil depth.
Celery is part of the Apiaceae family, which includes carrots, parsnips, parsley, and celeriac. Its crunchy stalks make the vegetable a popular low-calorie snack with a range of health benefits.
The radish is an edible root vegetable of the Brassicaceae family. Radishes are grown and consumed throughout the world, and mostly eaten raw as a crunchy salad vegetable. Long scarlet radishes like these have a straight, tapered shape, similar in appearance to a carrot with curved shoulders and a distinct point.
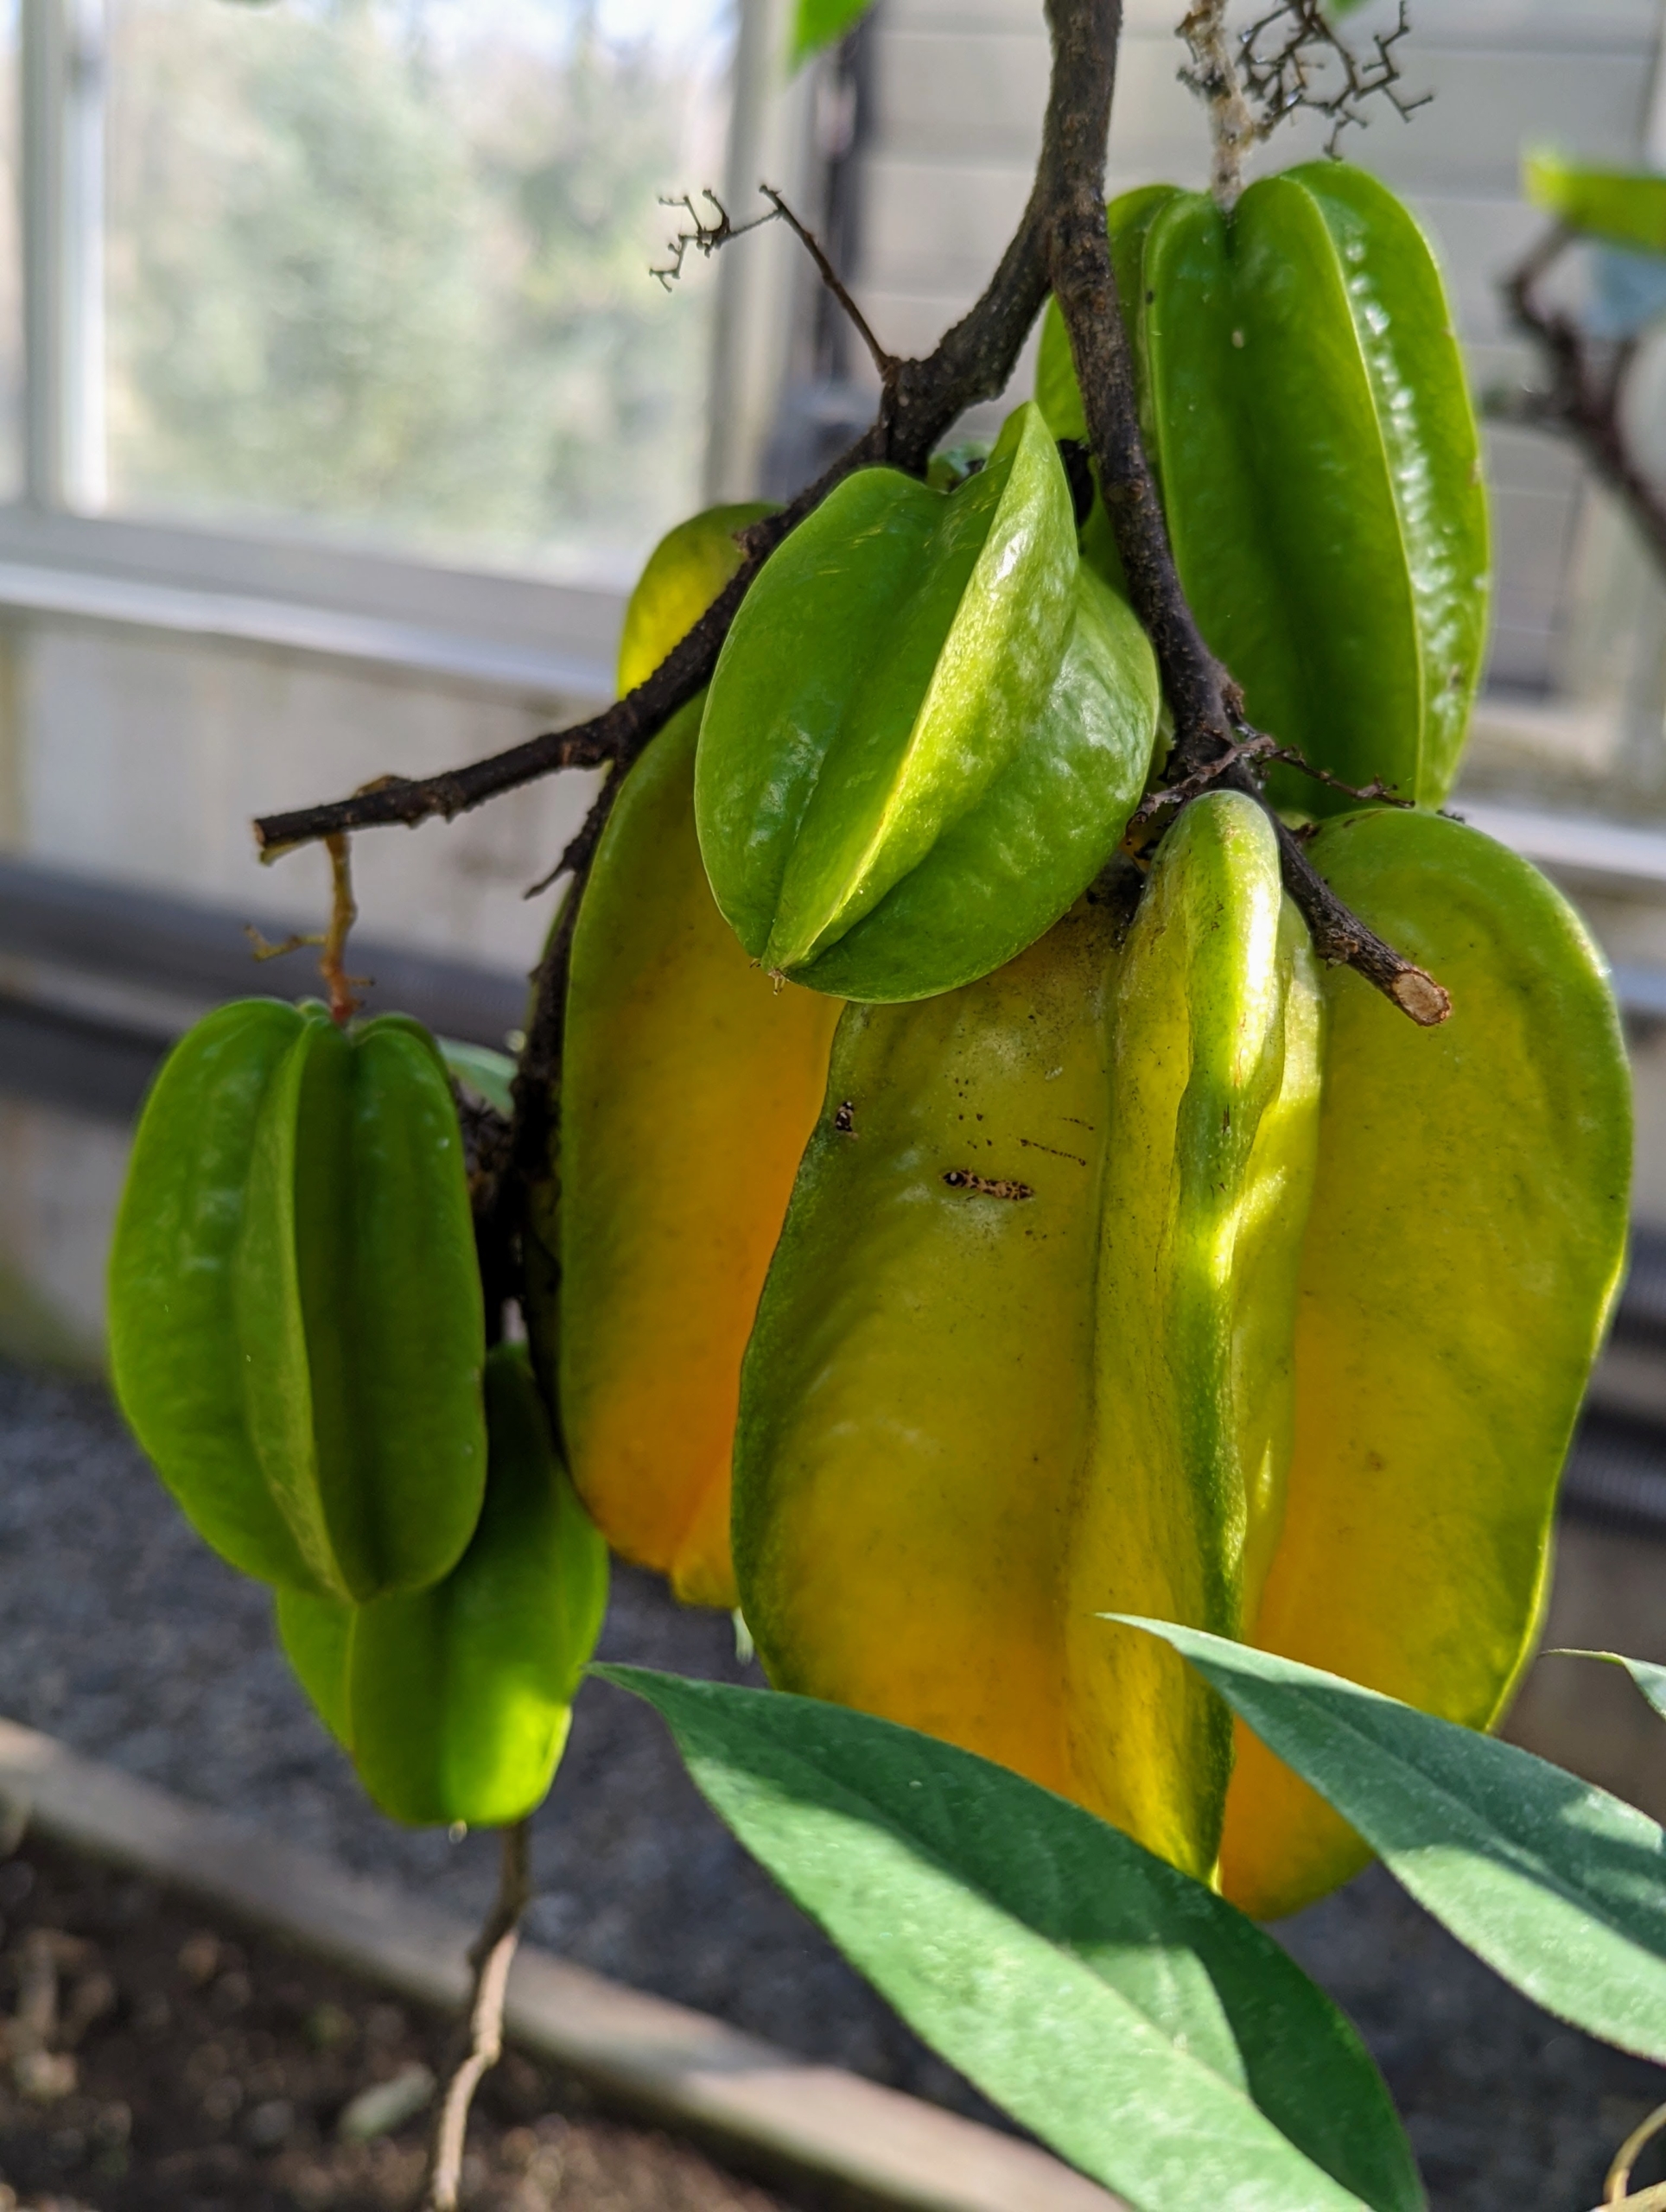
Also stored in this greenhouse is this grapefruit tree, which finally bore fruit!
Not far is a Star Fruit tree. Star Fruit is juicy with a delicious tart flavor. The yellow fruit is three to four inches long with a waxy skin and five prominent ridges. Star Fruit is low in calories and low in sugar. When it’s grown in the tropics, one Star Fruit tree can provide fruit for up to three families because of its prolific fruiting habit.
I am looking forward to a season filled with bountiful harvests from my vegetable greenhouse – there’s nothing quite like the taste of fresh organic vegetables from one’s own garden. Now — on to all the Thanksgiving feast cooking!
It’s always busy at my Bedford, New York farm. My outdoor grounds crew is working hard to complete our long list of autumn tasks - including planting our next crop of garlic.
Although garlic can be planted in the spring as soon as the ground can be worked, fall planting is recommended for most gardeners. This allows extra time for the bulbs to grow and become more flavorful for the summer harvest. Every year, we plant a big crop of garlic from Keene Organics, a family owned farm in Wisconsin that sells certified organic and naturally grown gourmet bulbs for both eating and planting. Garlic is great for cooking and very good for your health. It is well known to lower blood pressure and cholesterol, and carries many antioxidant properties. Knowing that I also grow the garlic myself makes it even more special.
Enjoy these photos.
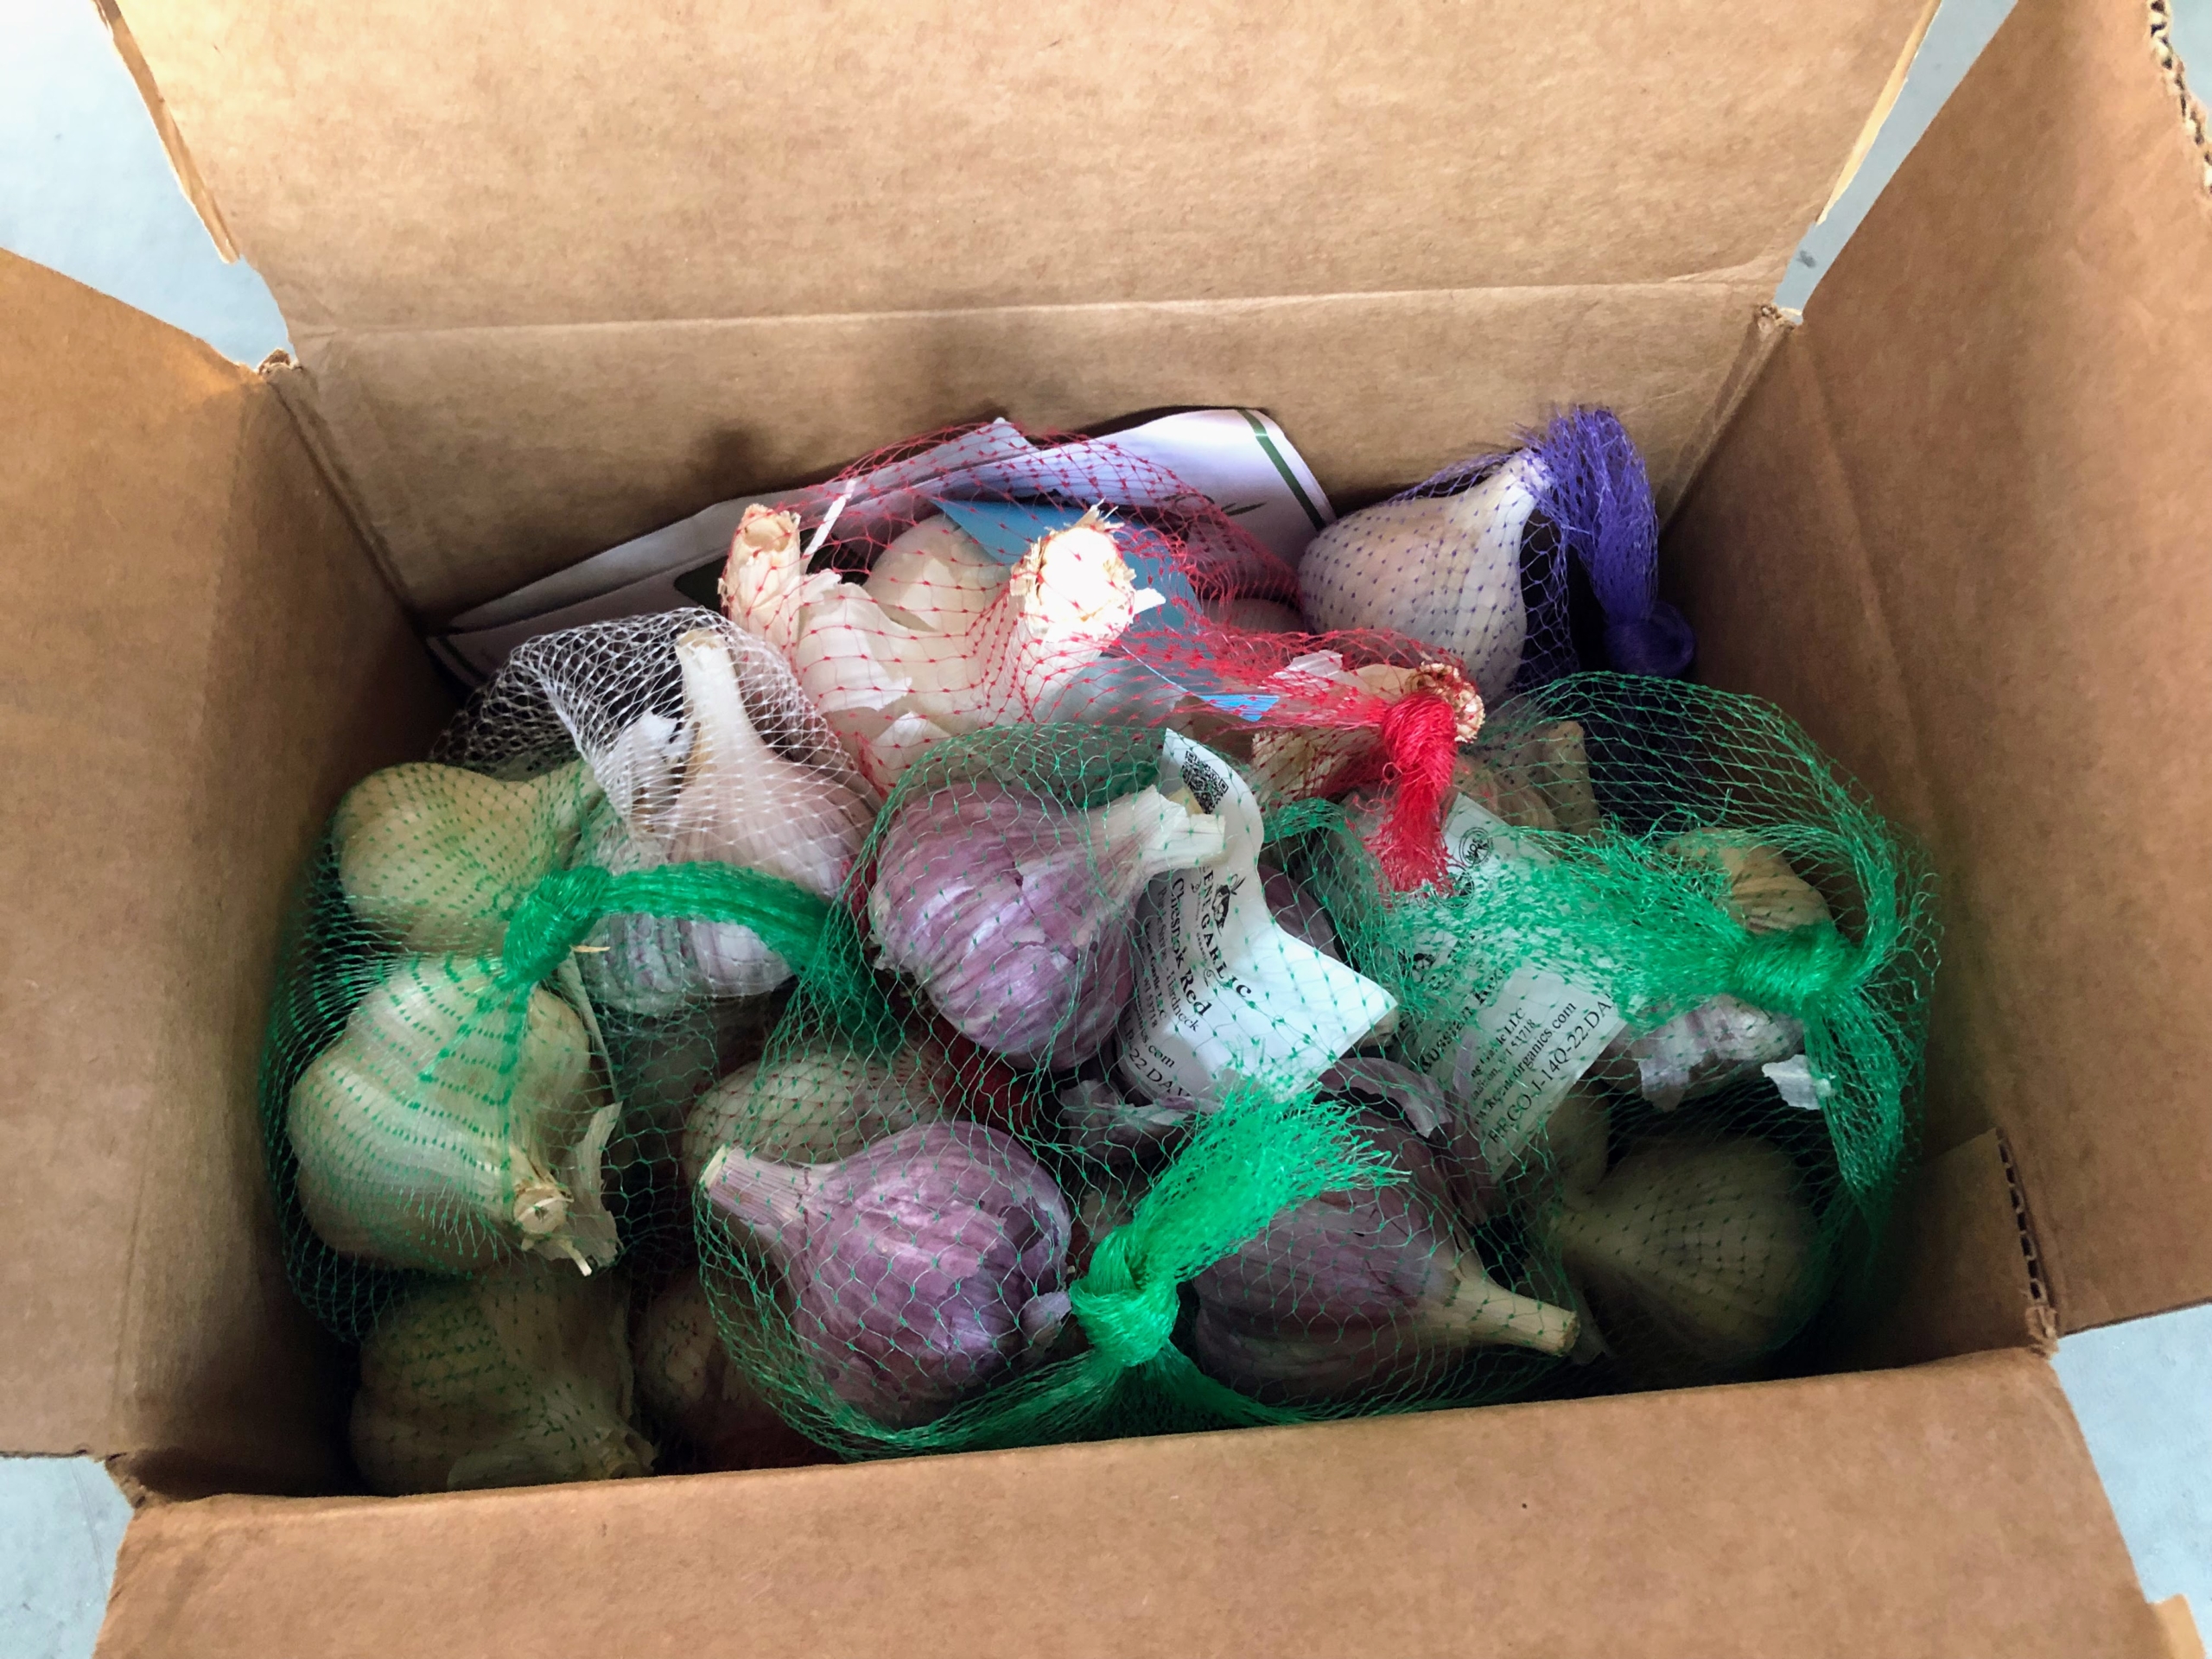
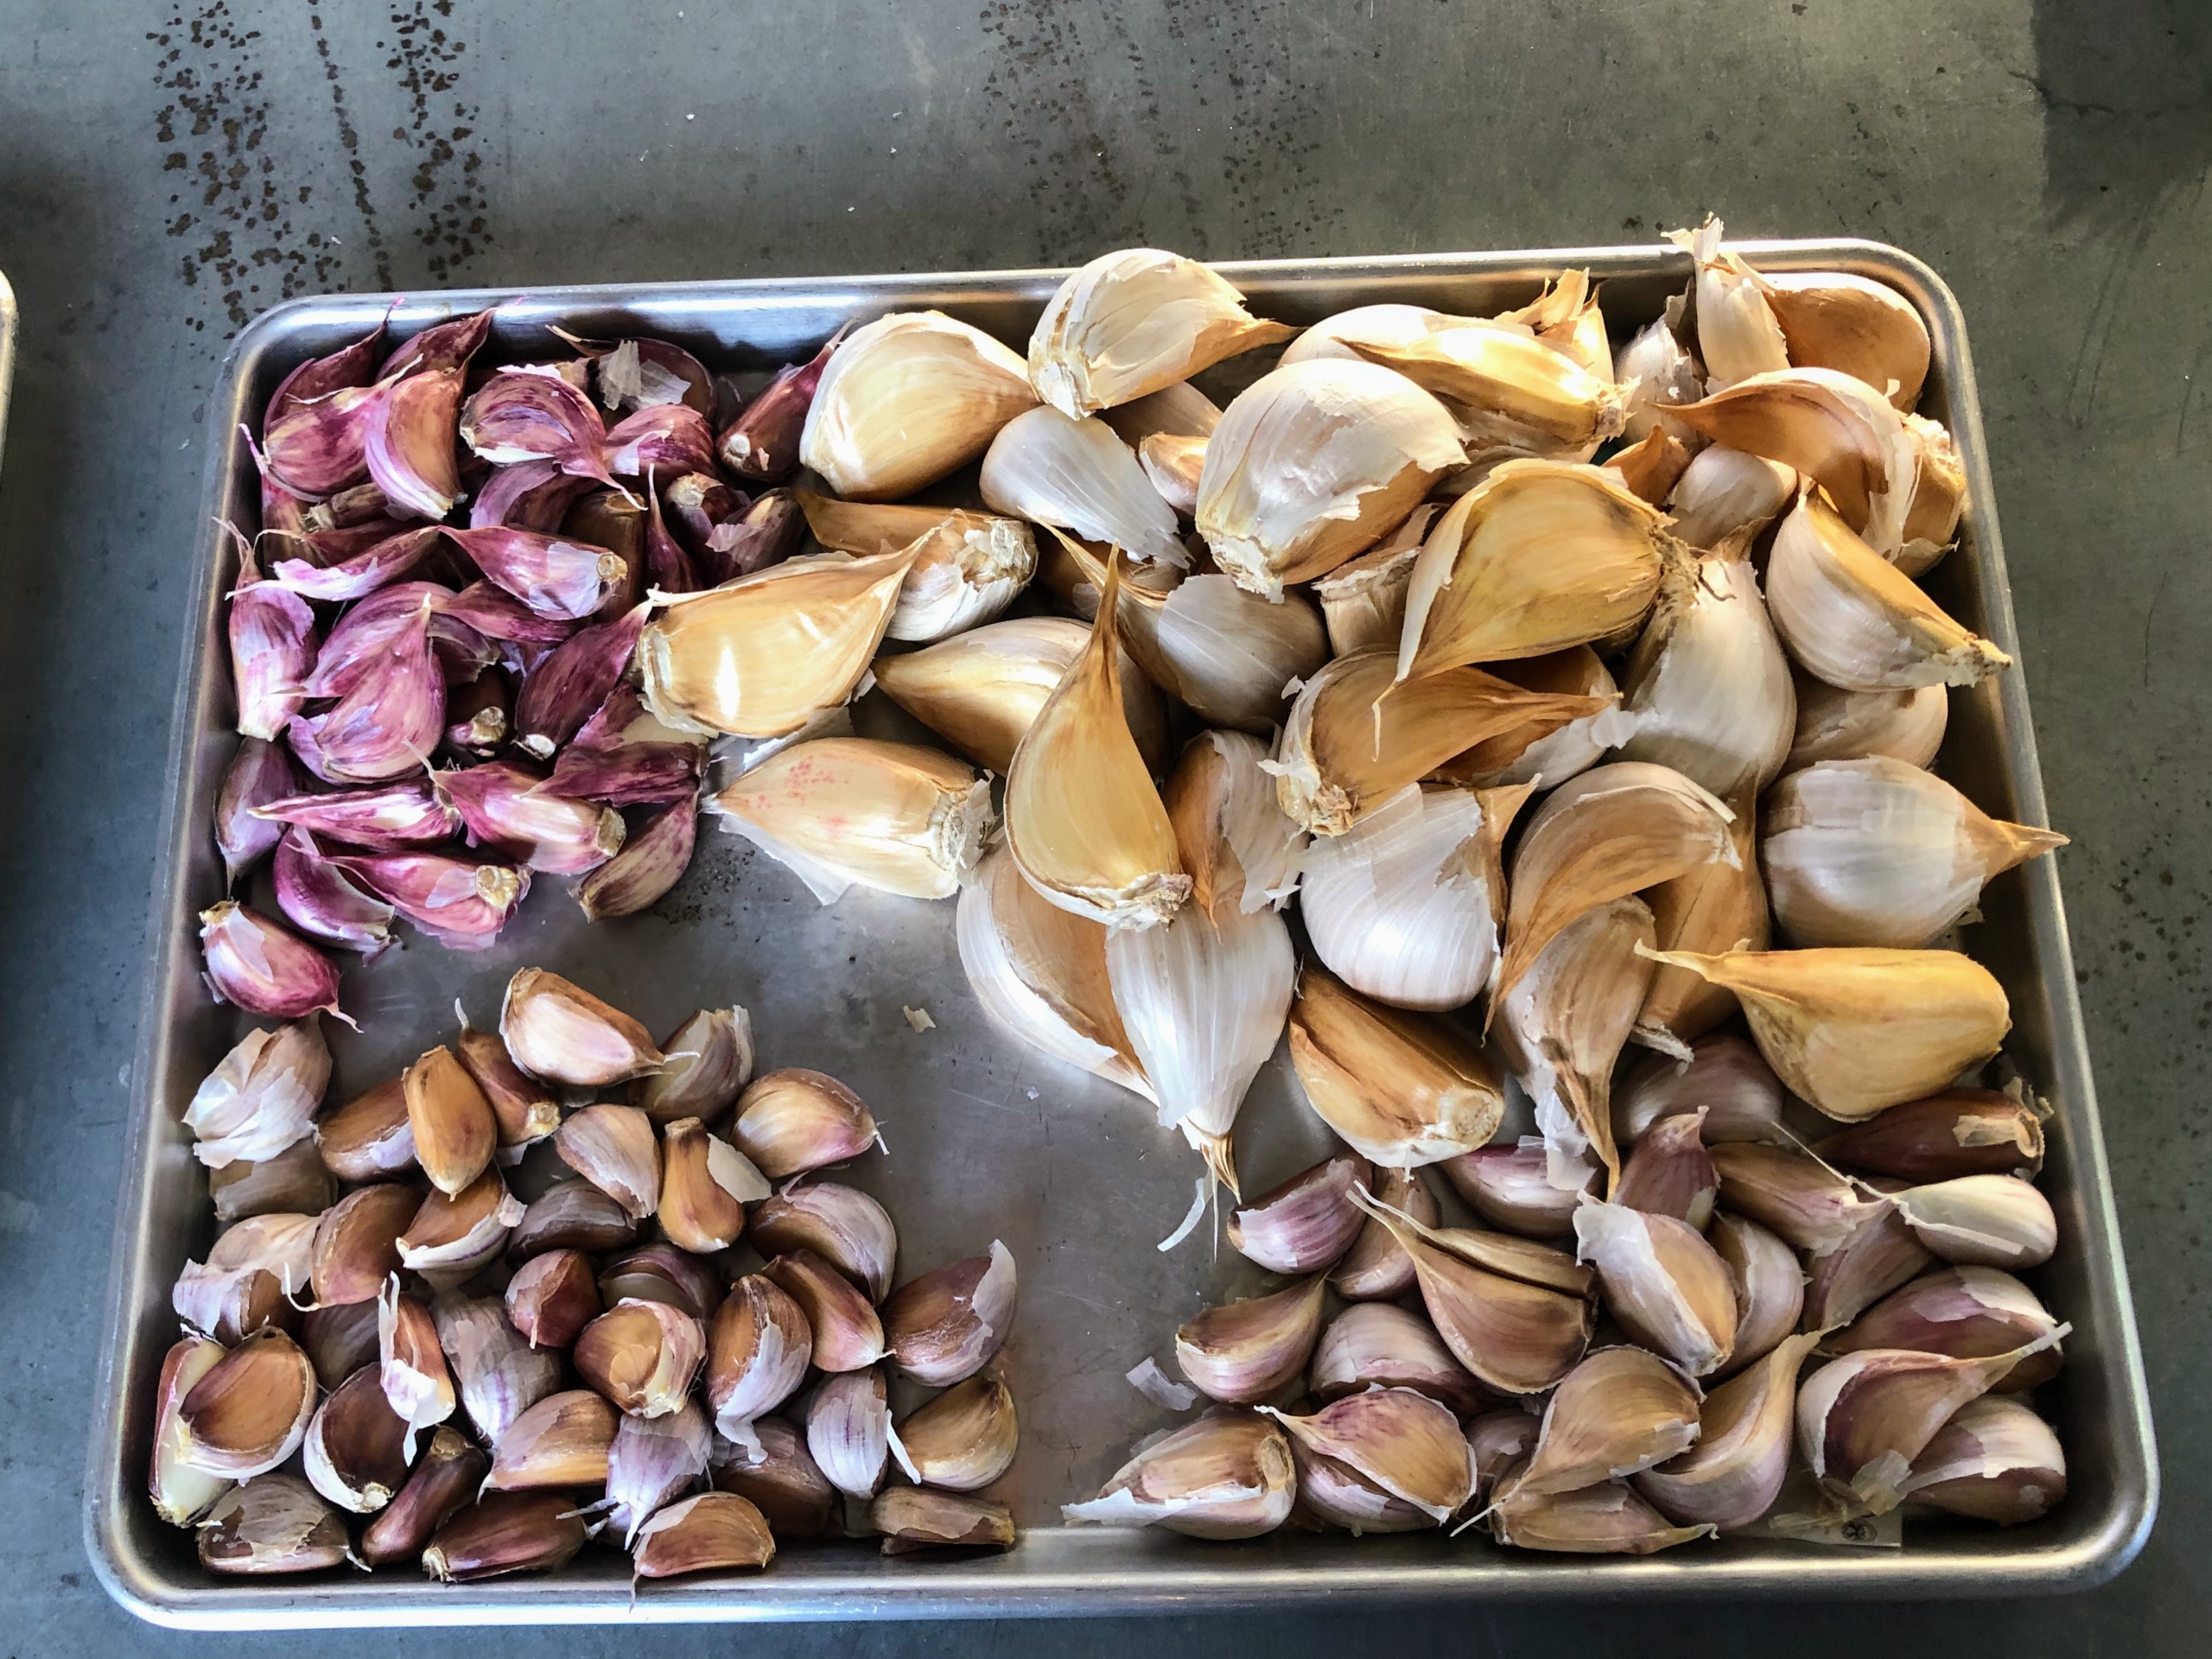
It’s always exciting to get a delivery from Keene Organics filled with a variety of garlic bulbs for my garden. I’ve been planting Keene Organics garlic for several years, and am always so pleased with their growth and taste. The garlic is one of the last crops we plant before winter. Some of the varieties we are planting include Chesnok Red, Russian Red, Romanian Red, Armenian, Georgian Fire, Leningrad, the big Elephant garlic, and many of the seed garlic types from this year’s crop.
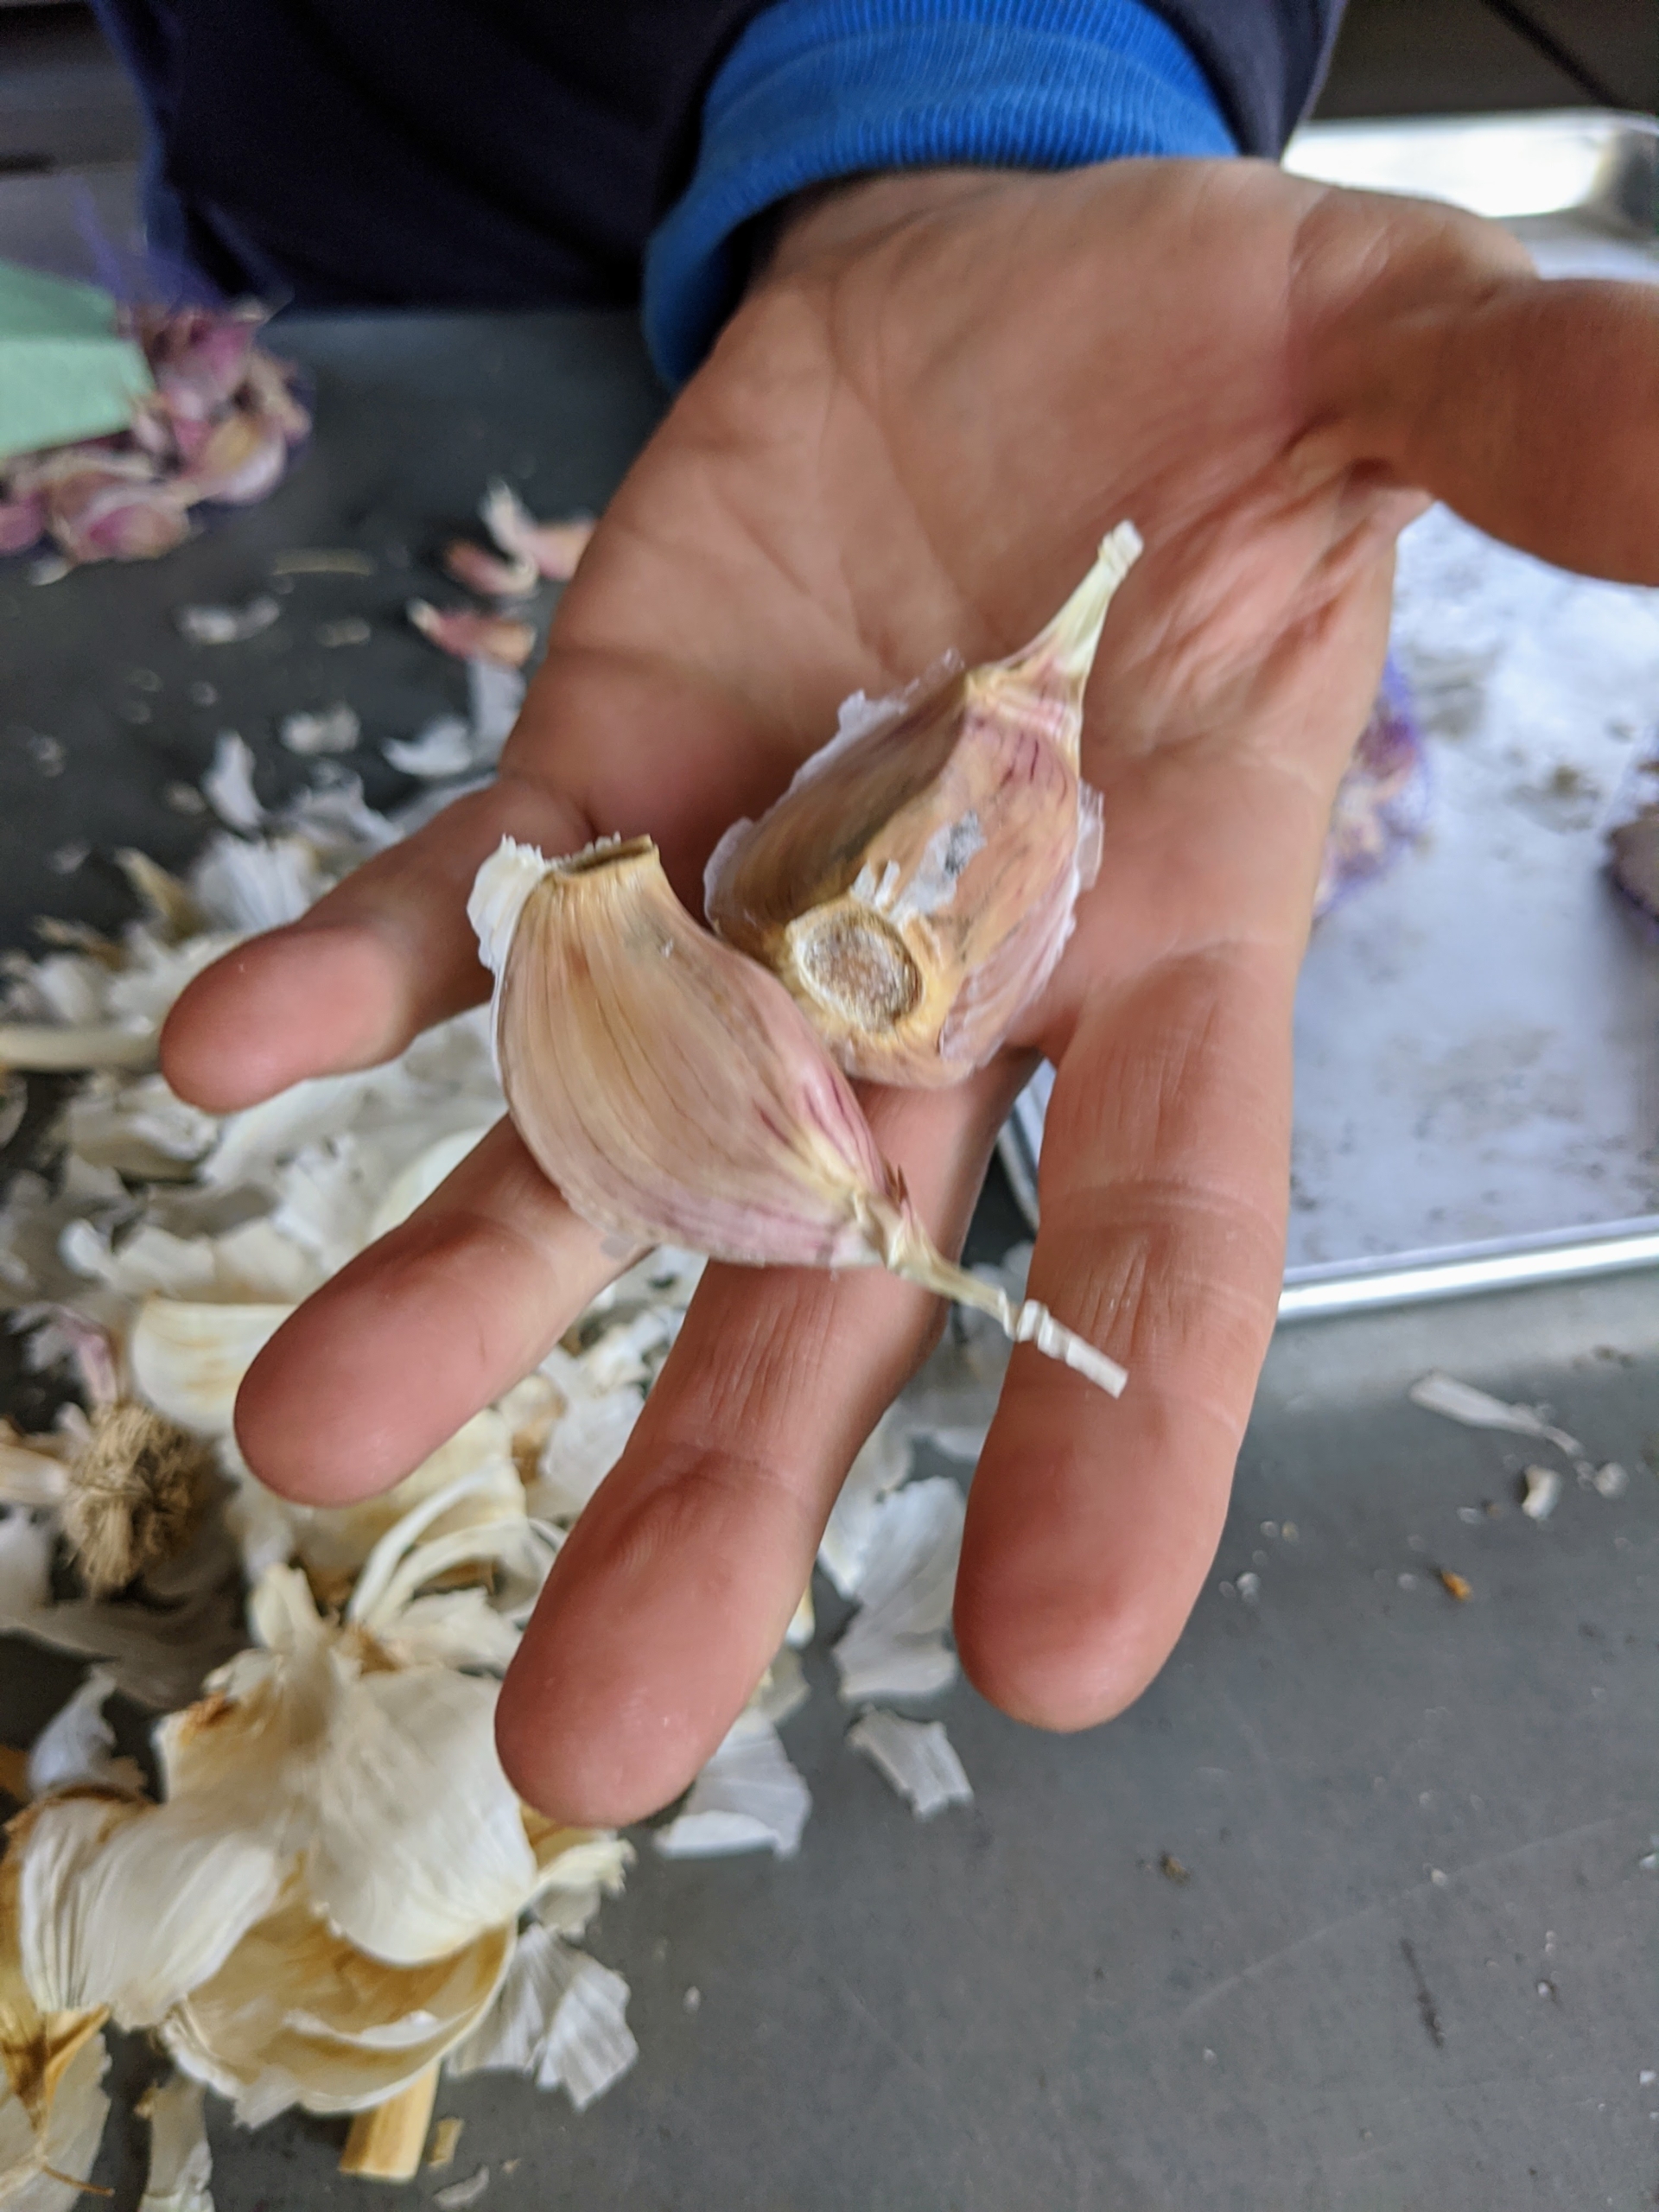
When planting garlic, look for the largest most robust bulbs. The entire garlic is called a “head” or “knob.” And each small, individual segment of a garlic head is the garlic clove. Each head is carefully broken to separate all the cloves. For the best results, plant the largest cloves from each bulb and save the smaller ones for eating. These are two good cloves to plant.
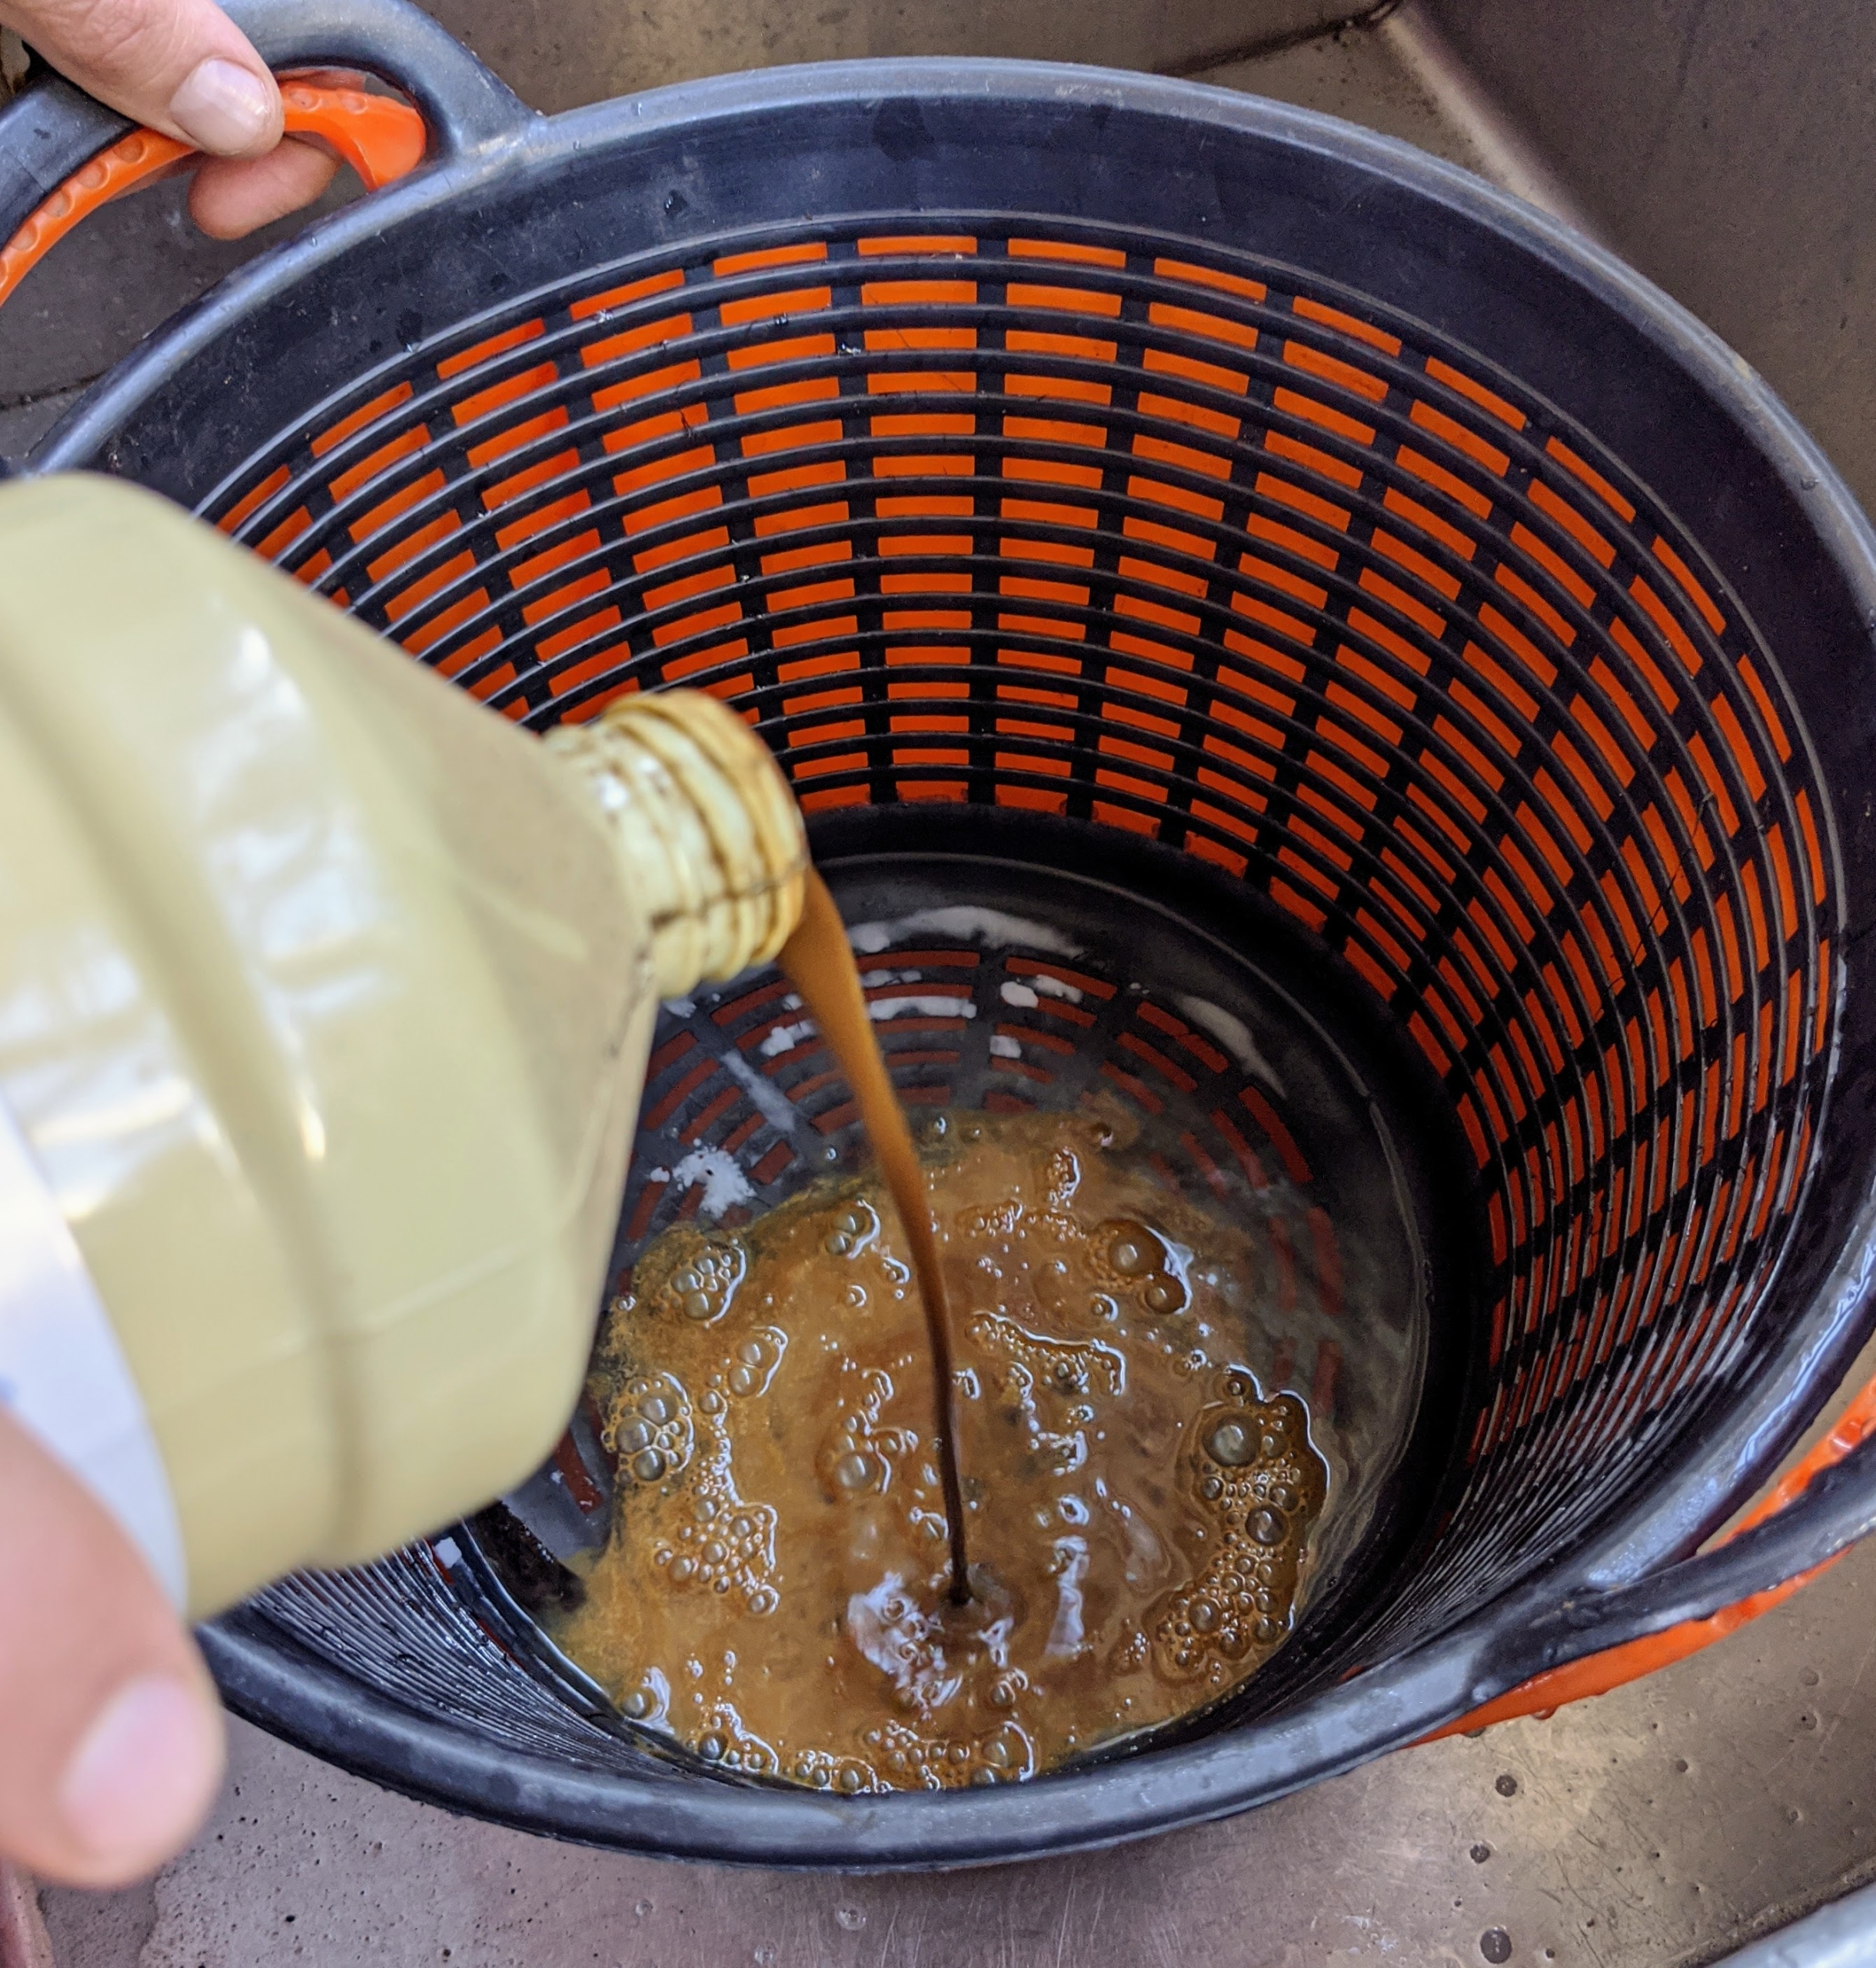
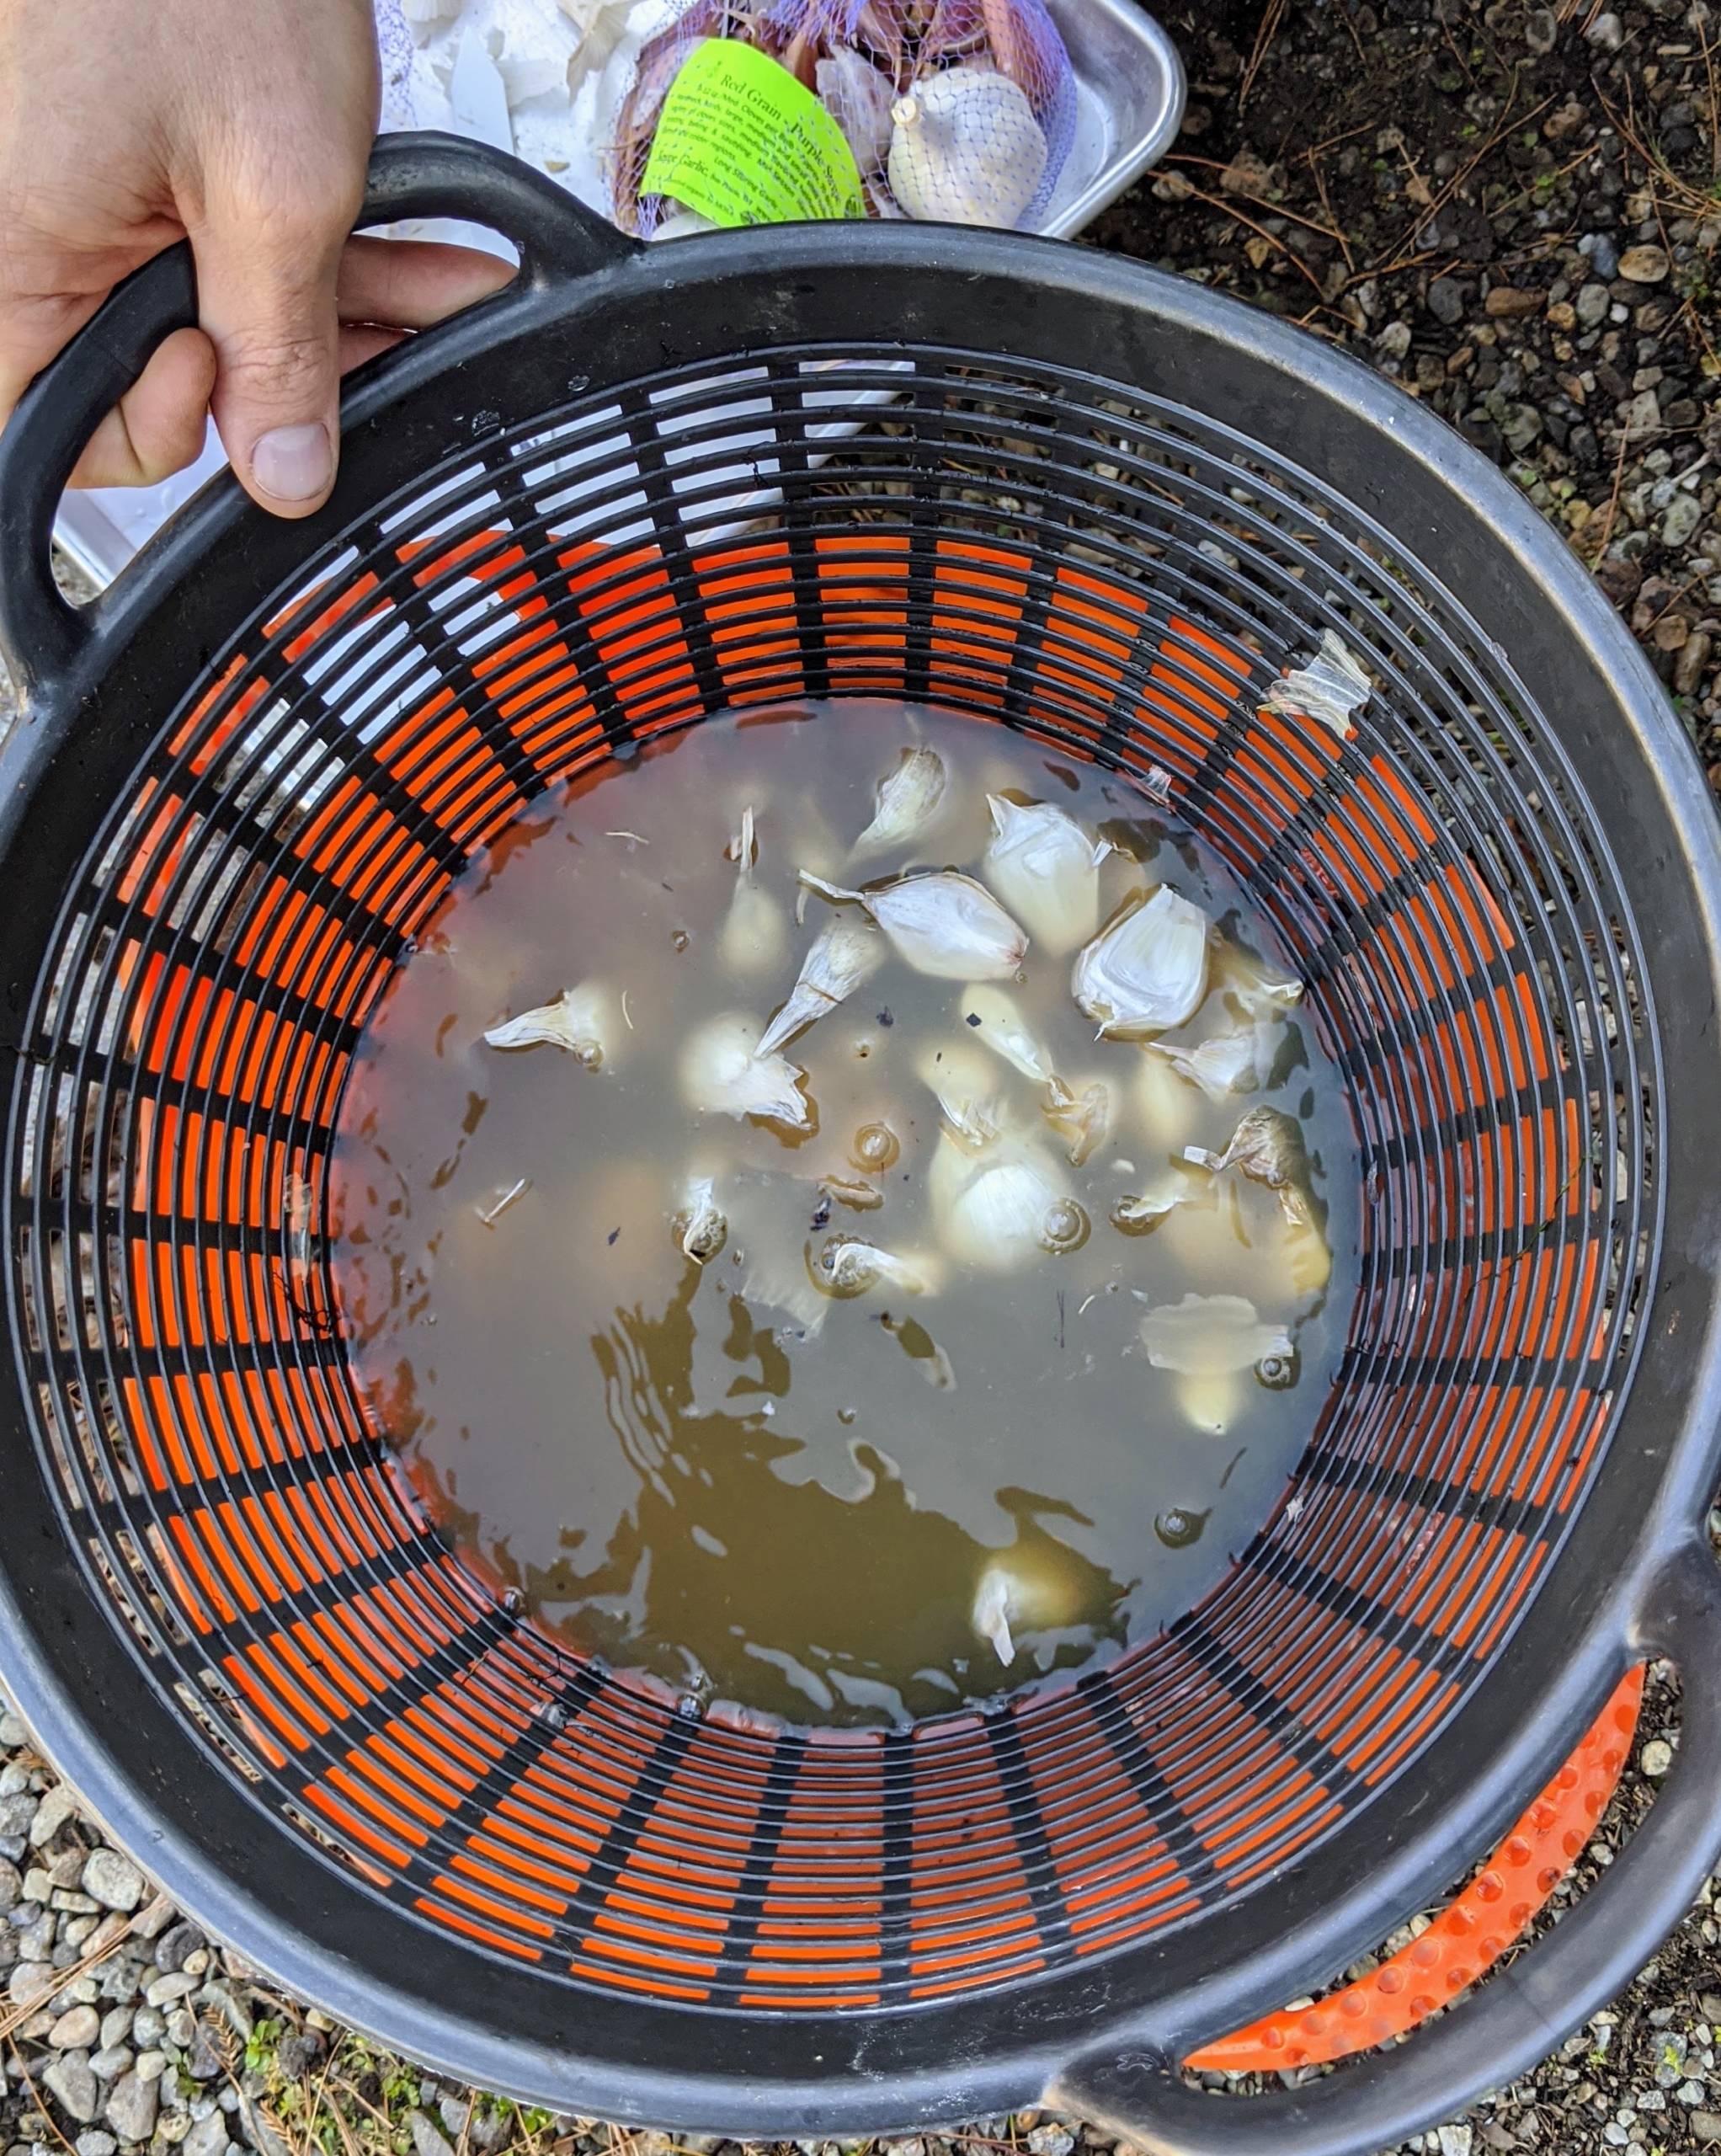
Before planting, all the cloves are treated with a solution. To prepare it, Ryan first drops a scoop of baking soda into a bucket with a strainer.
This is fish emulsion, which is available at garden supply shops. The garlic cloves can be soaked in fish emulsion to give them a fertilizer boost and rid them of possible diseases, which could have been carried by the garlic.
Ryan adds the fish emulsion into the same container as the baking soda.
Next, Ryan adds water until the container is filled.
The cloves are dropped into the solution and kept submerged until they have absorbed enough of the mix.
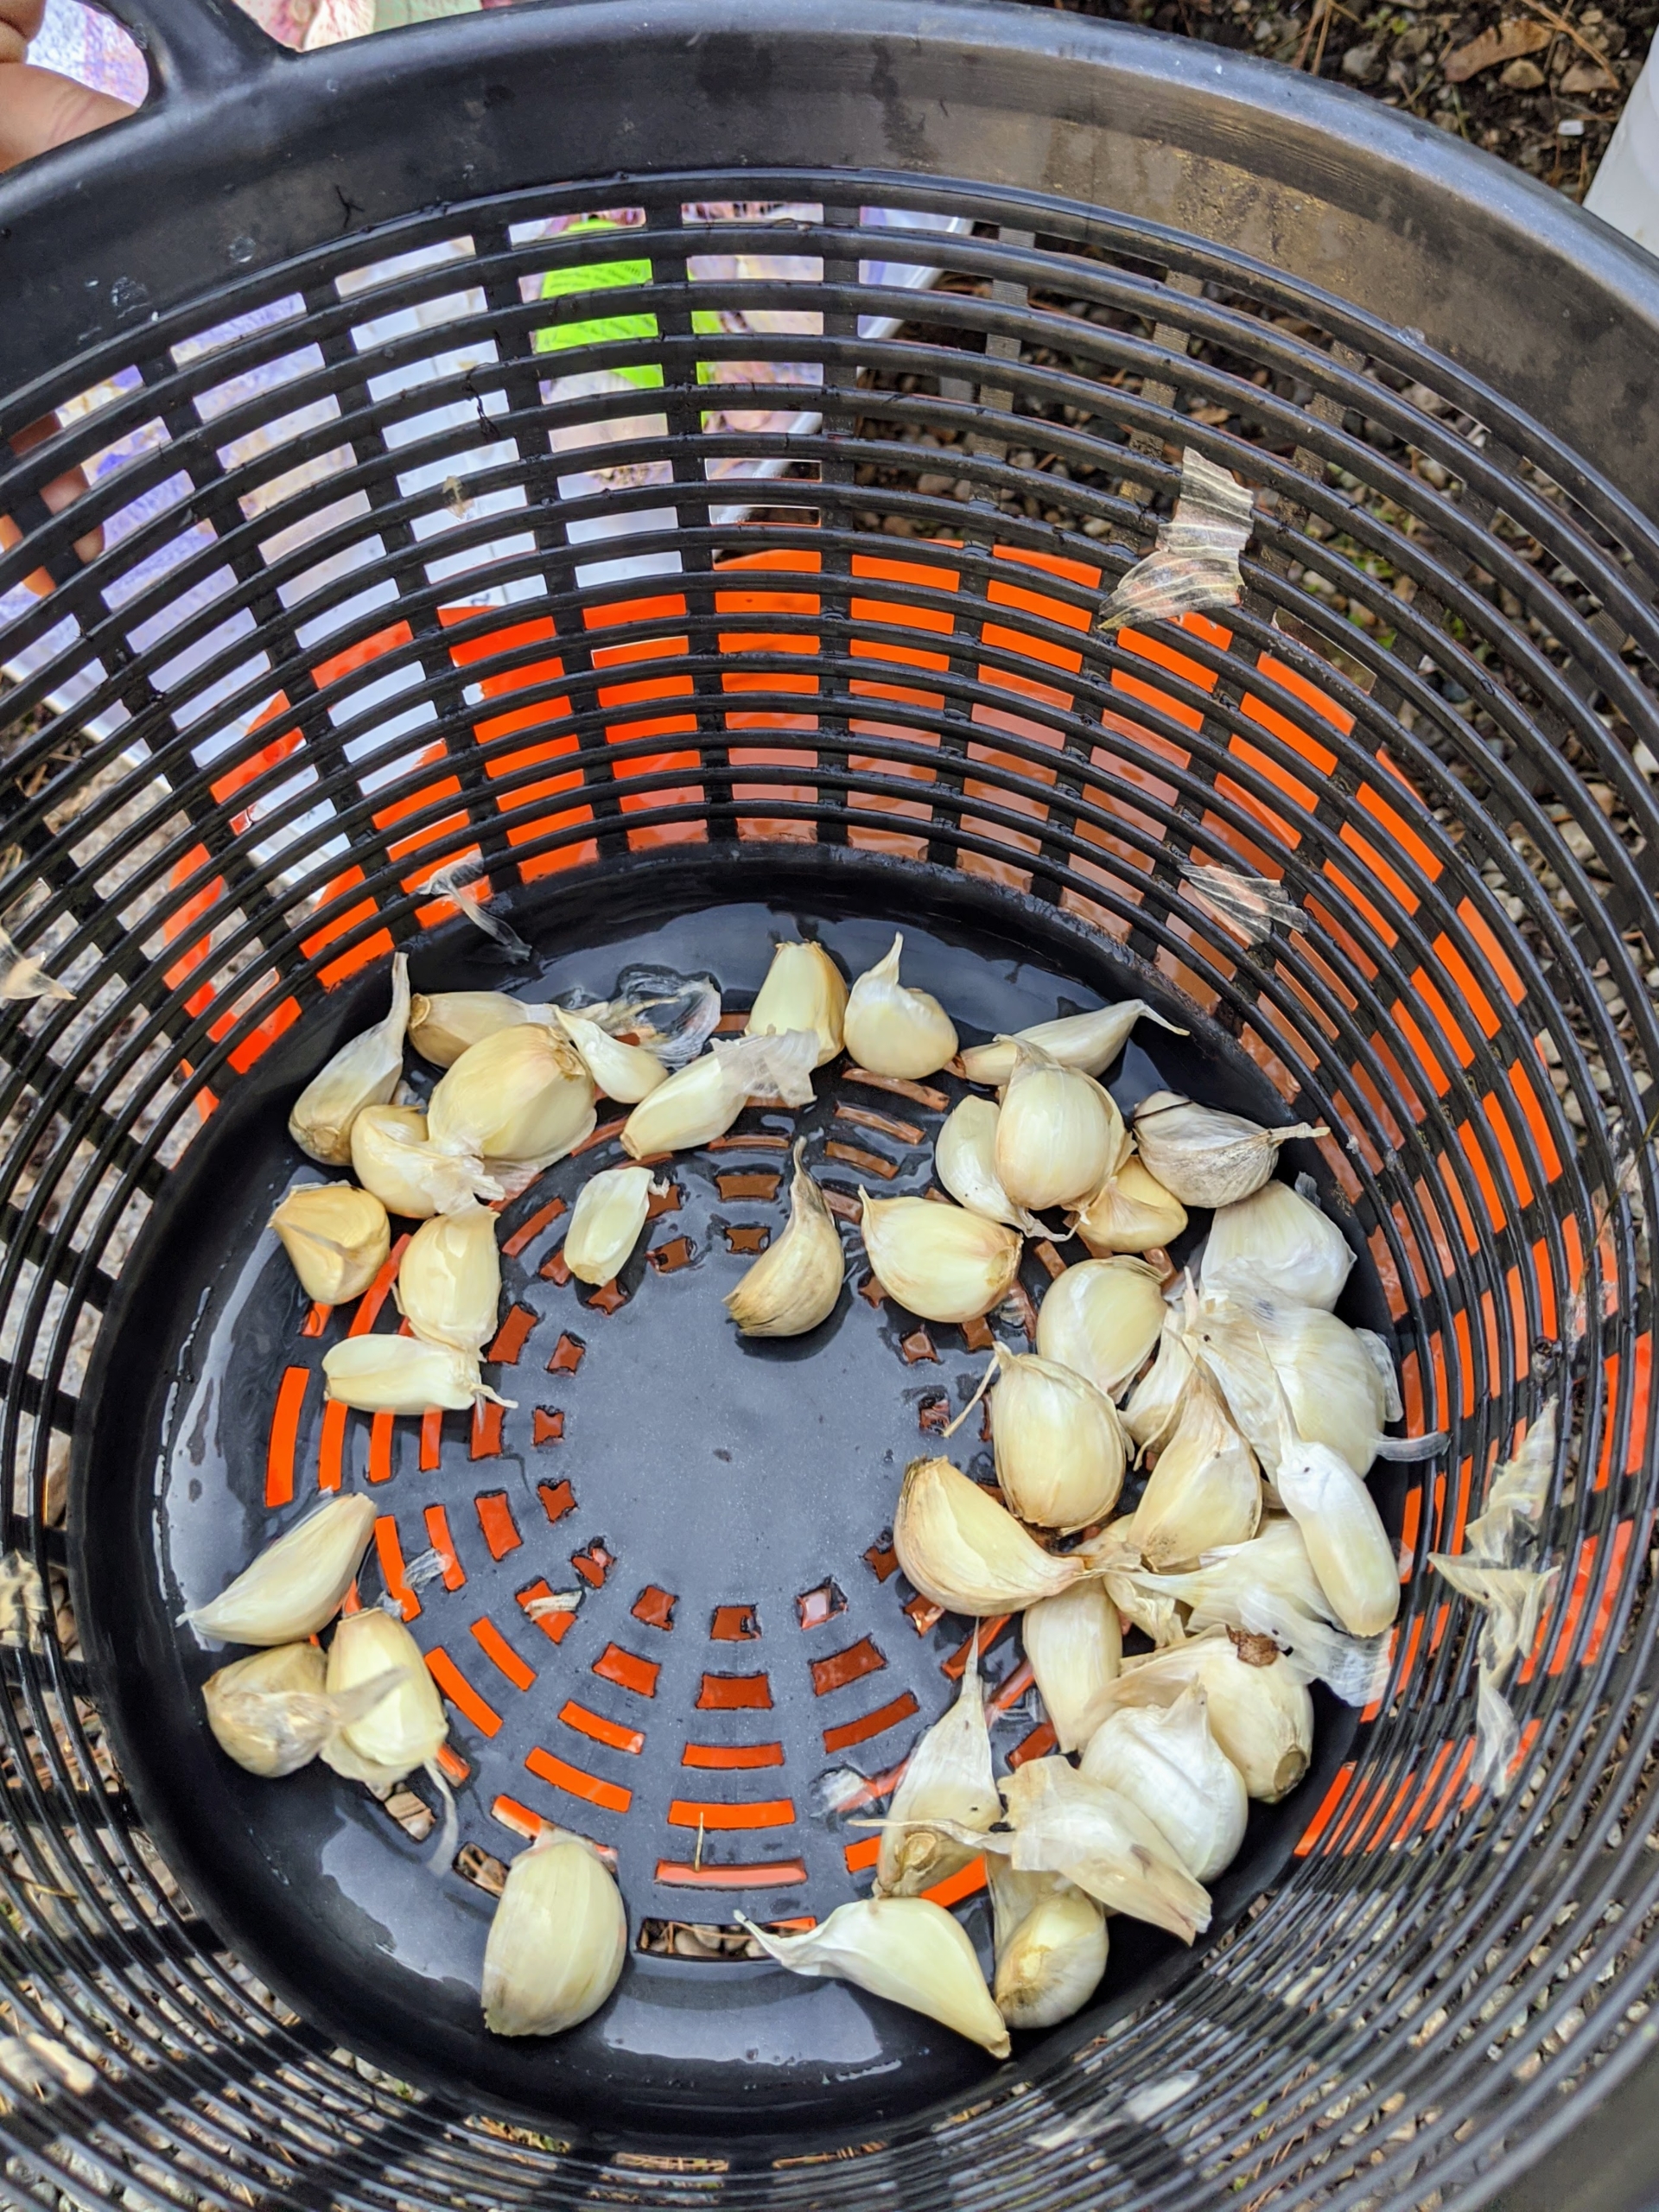
And then the garlic is strained and left to dry for a few minutes.
Lastly, they are all sprayed with isopropyl or rubbing alcohol. This helps to sterilize the cloves. If you don’t have alcohol, you can also use hydrogen peroxide or vodka.
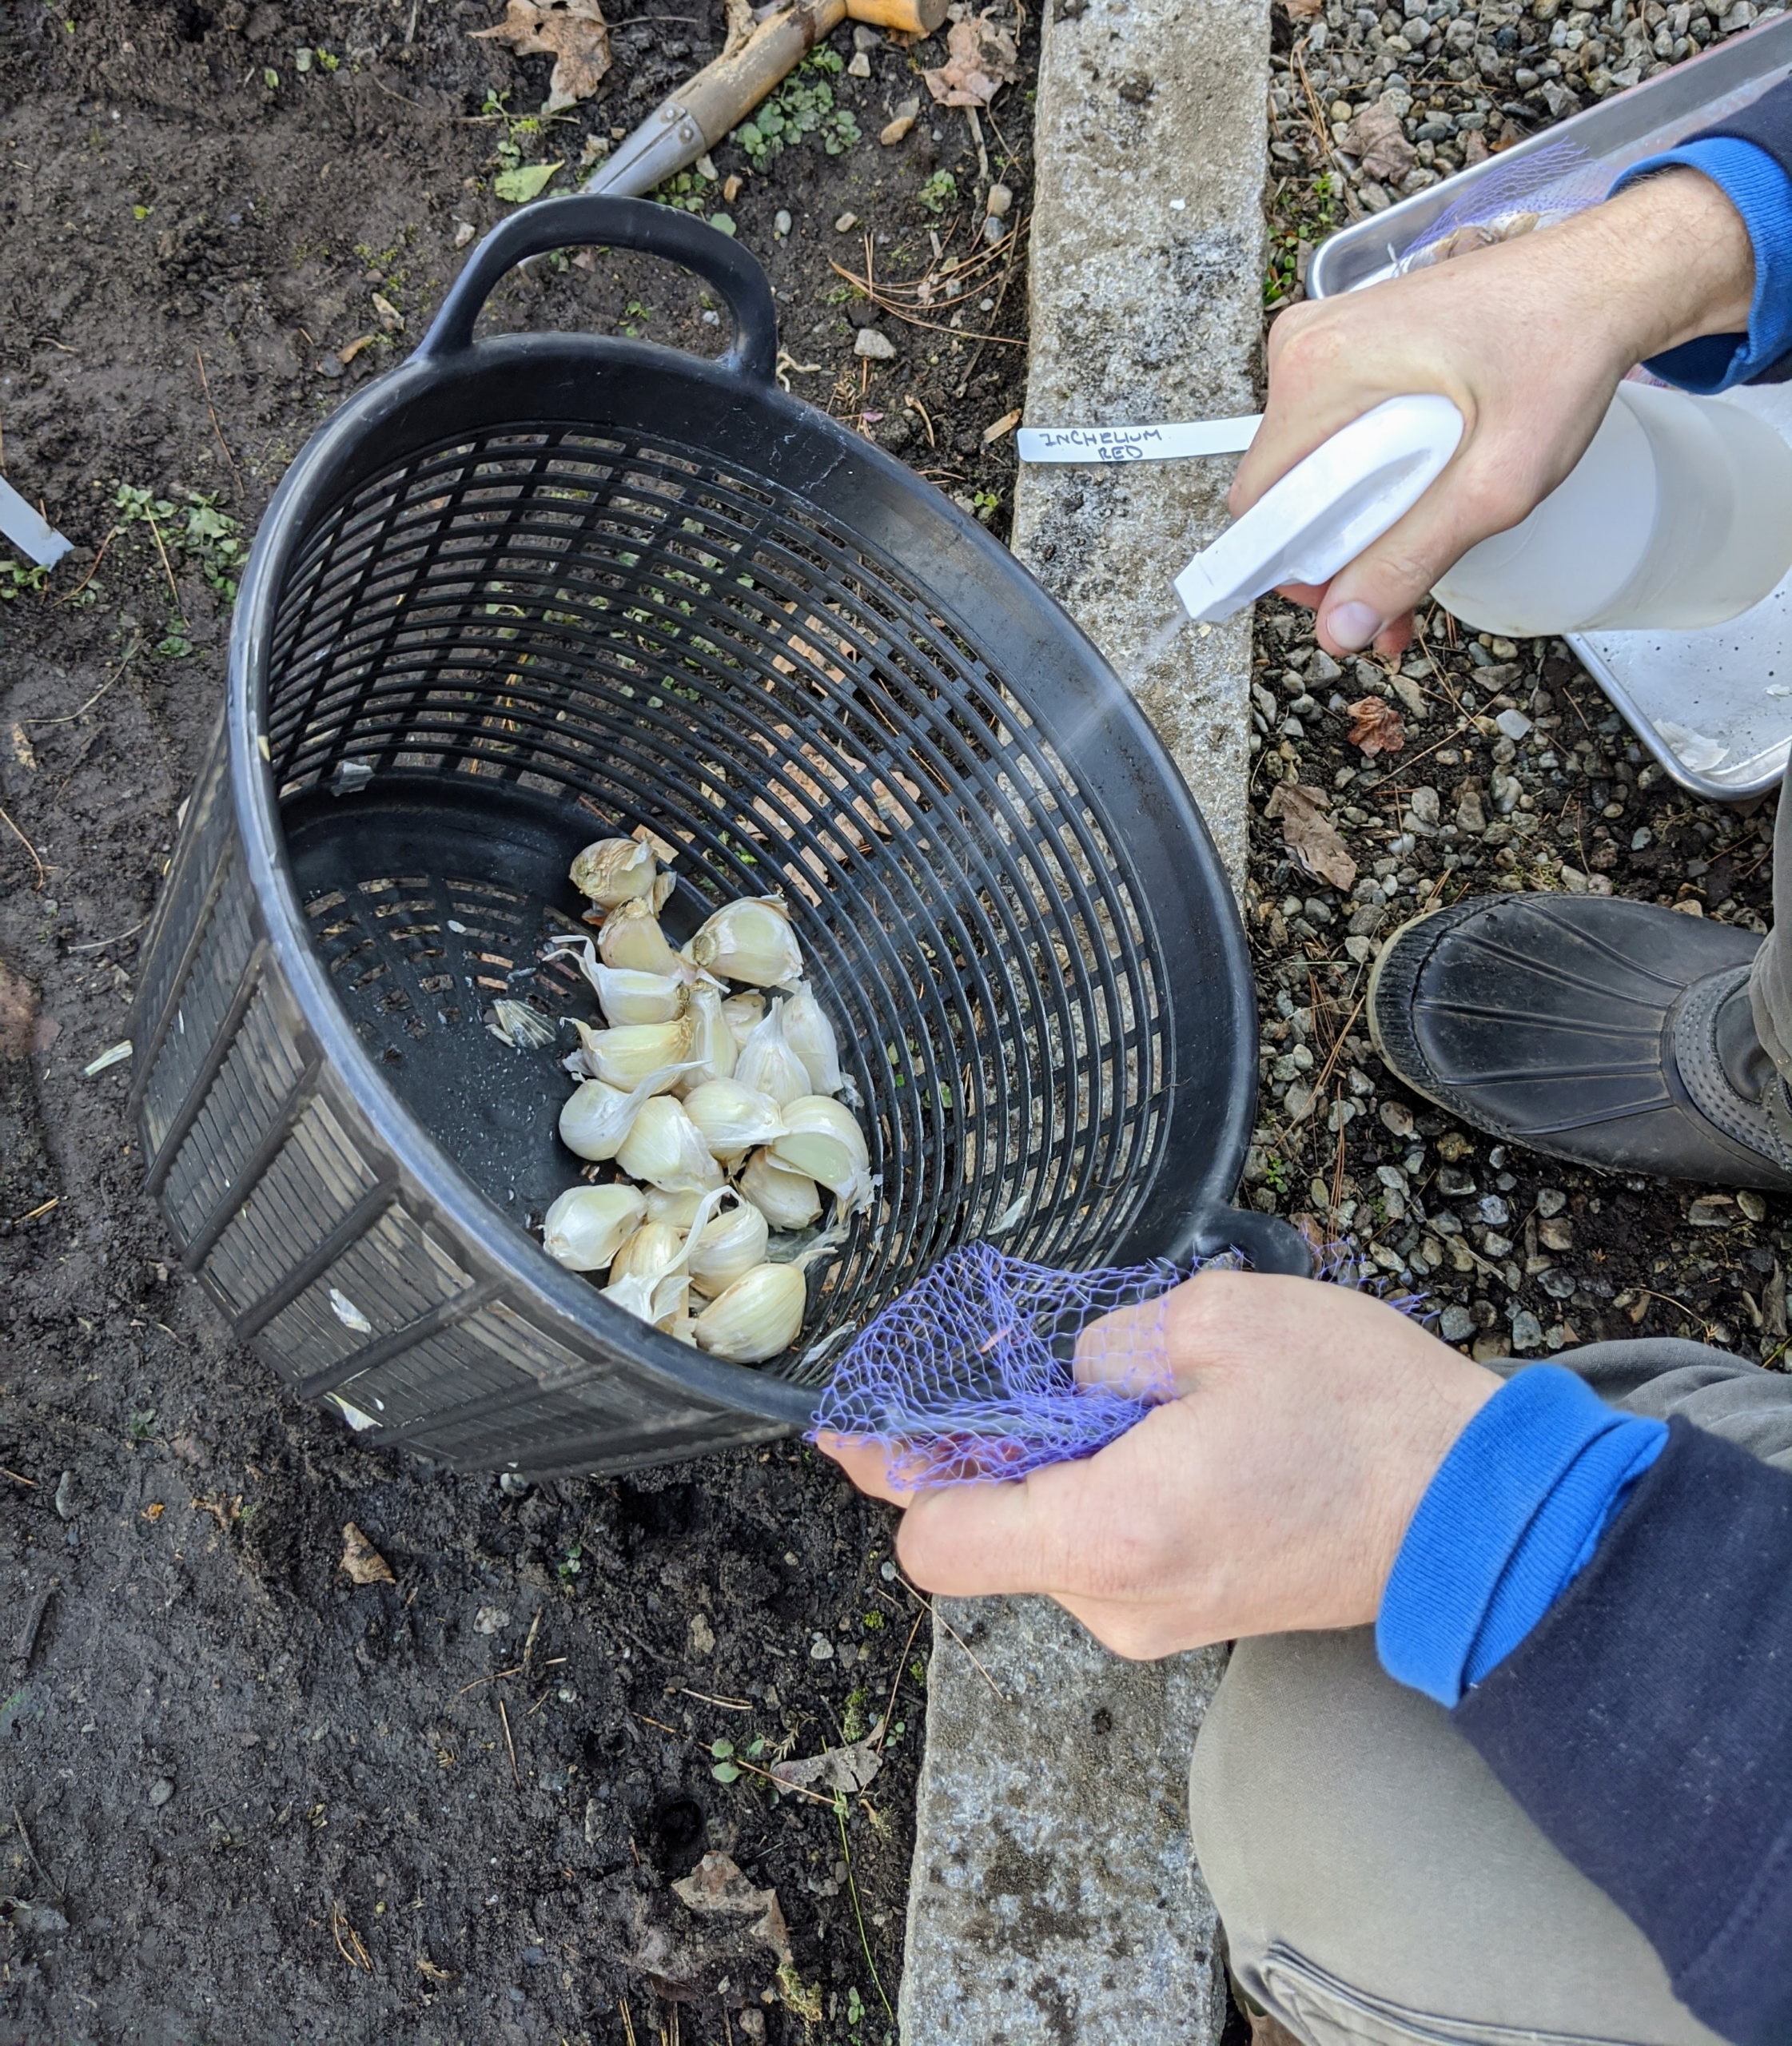
Once treated and dried, the cloves are all placed on baking sheets and carried out to the garden.
Garlic comes in various sizes. The Elephant Garlic is in the middle – the largest of these garlic varieties. Elephant garlic is actually a leek that resembles garlic in growing and in appearance. It has a very mild flavor. It is most commonly found in grocery stores.
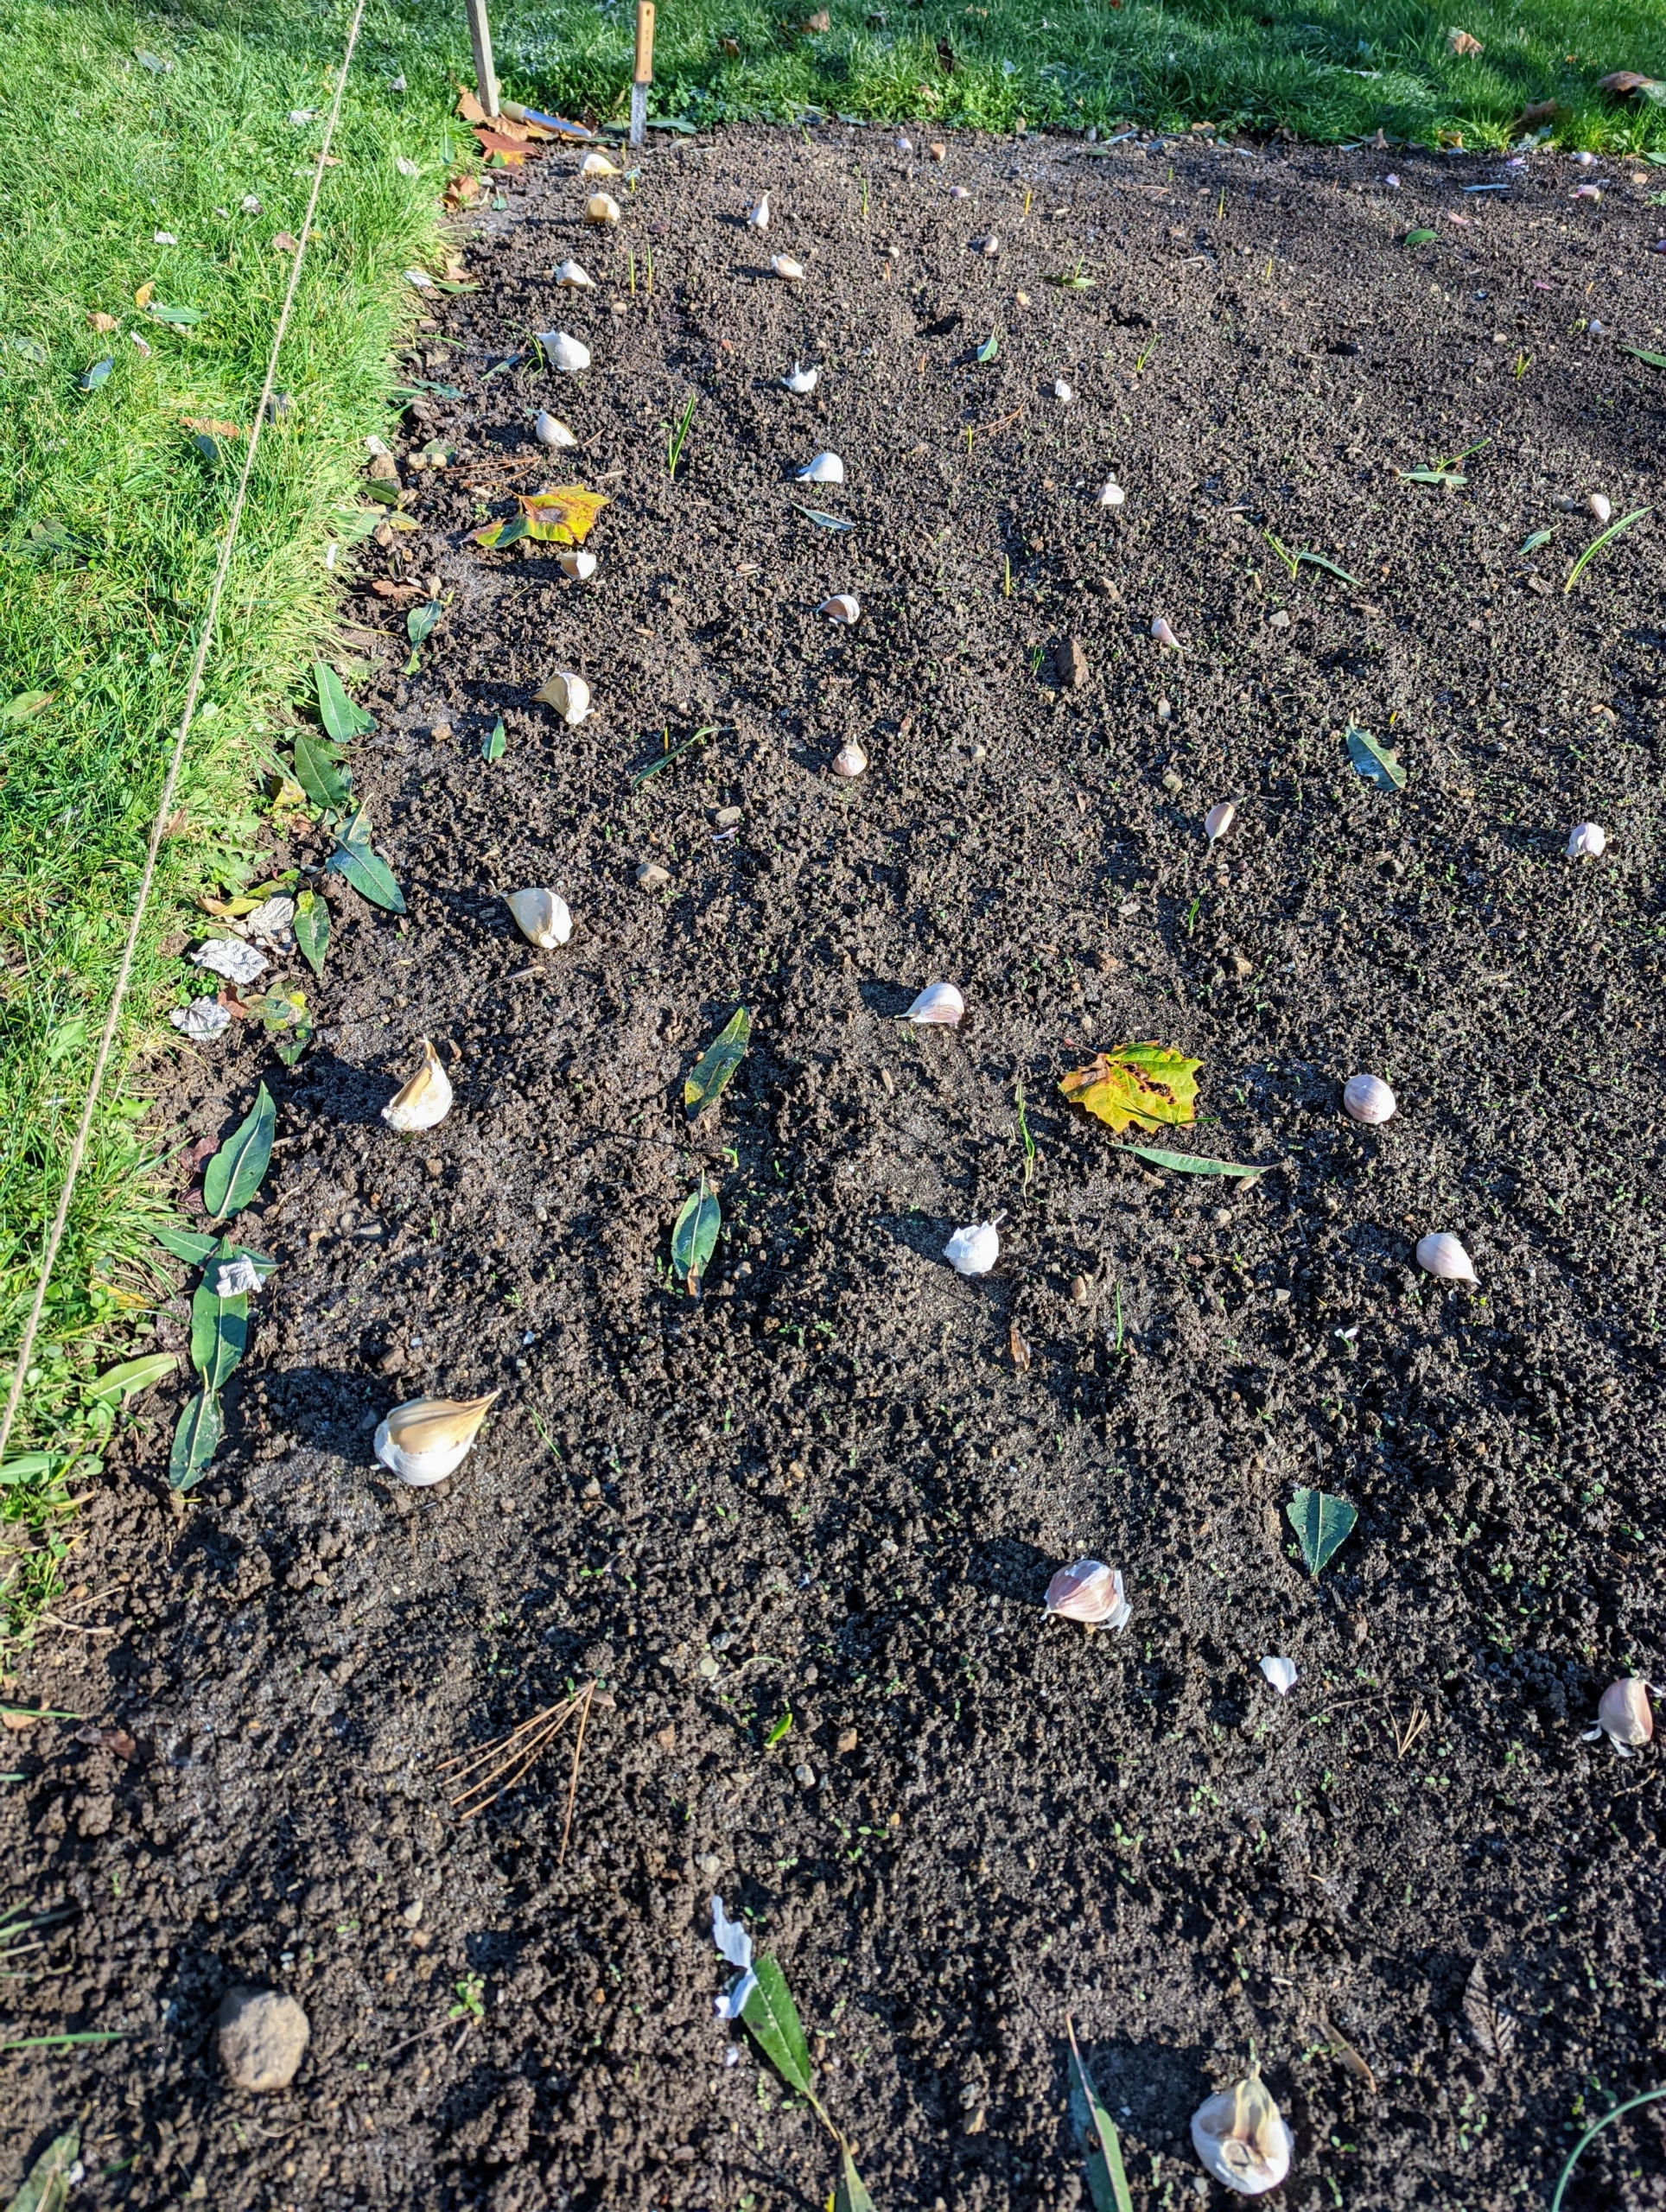
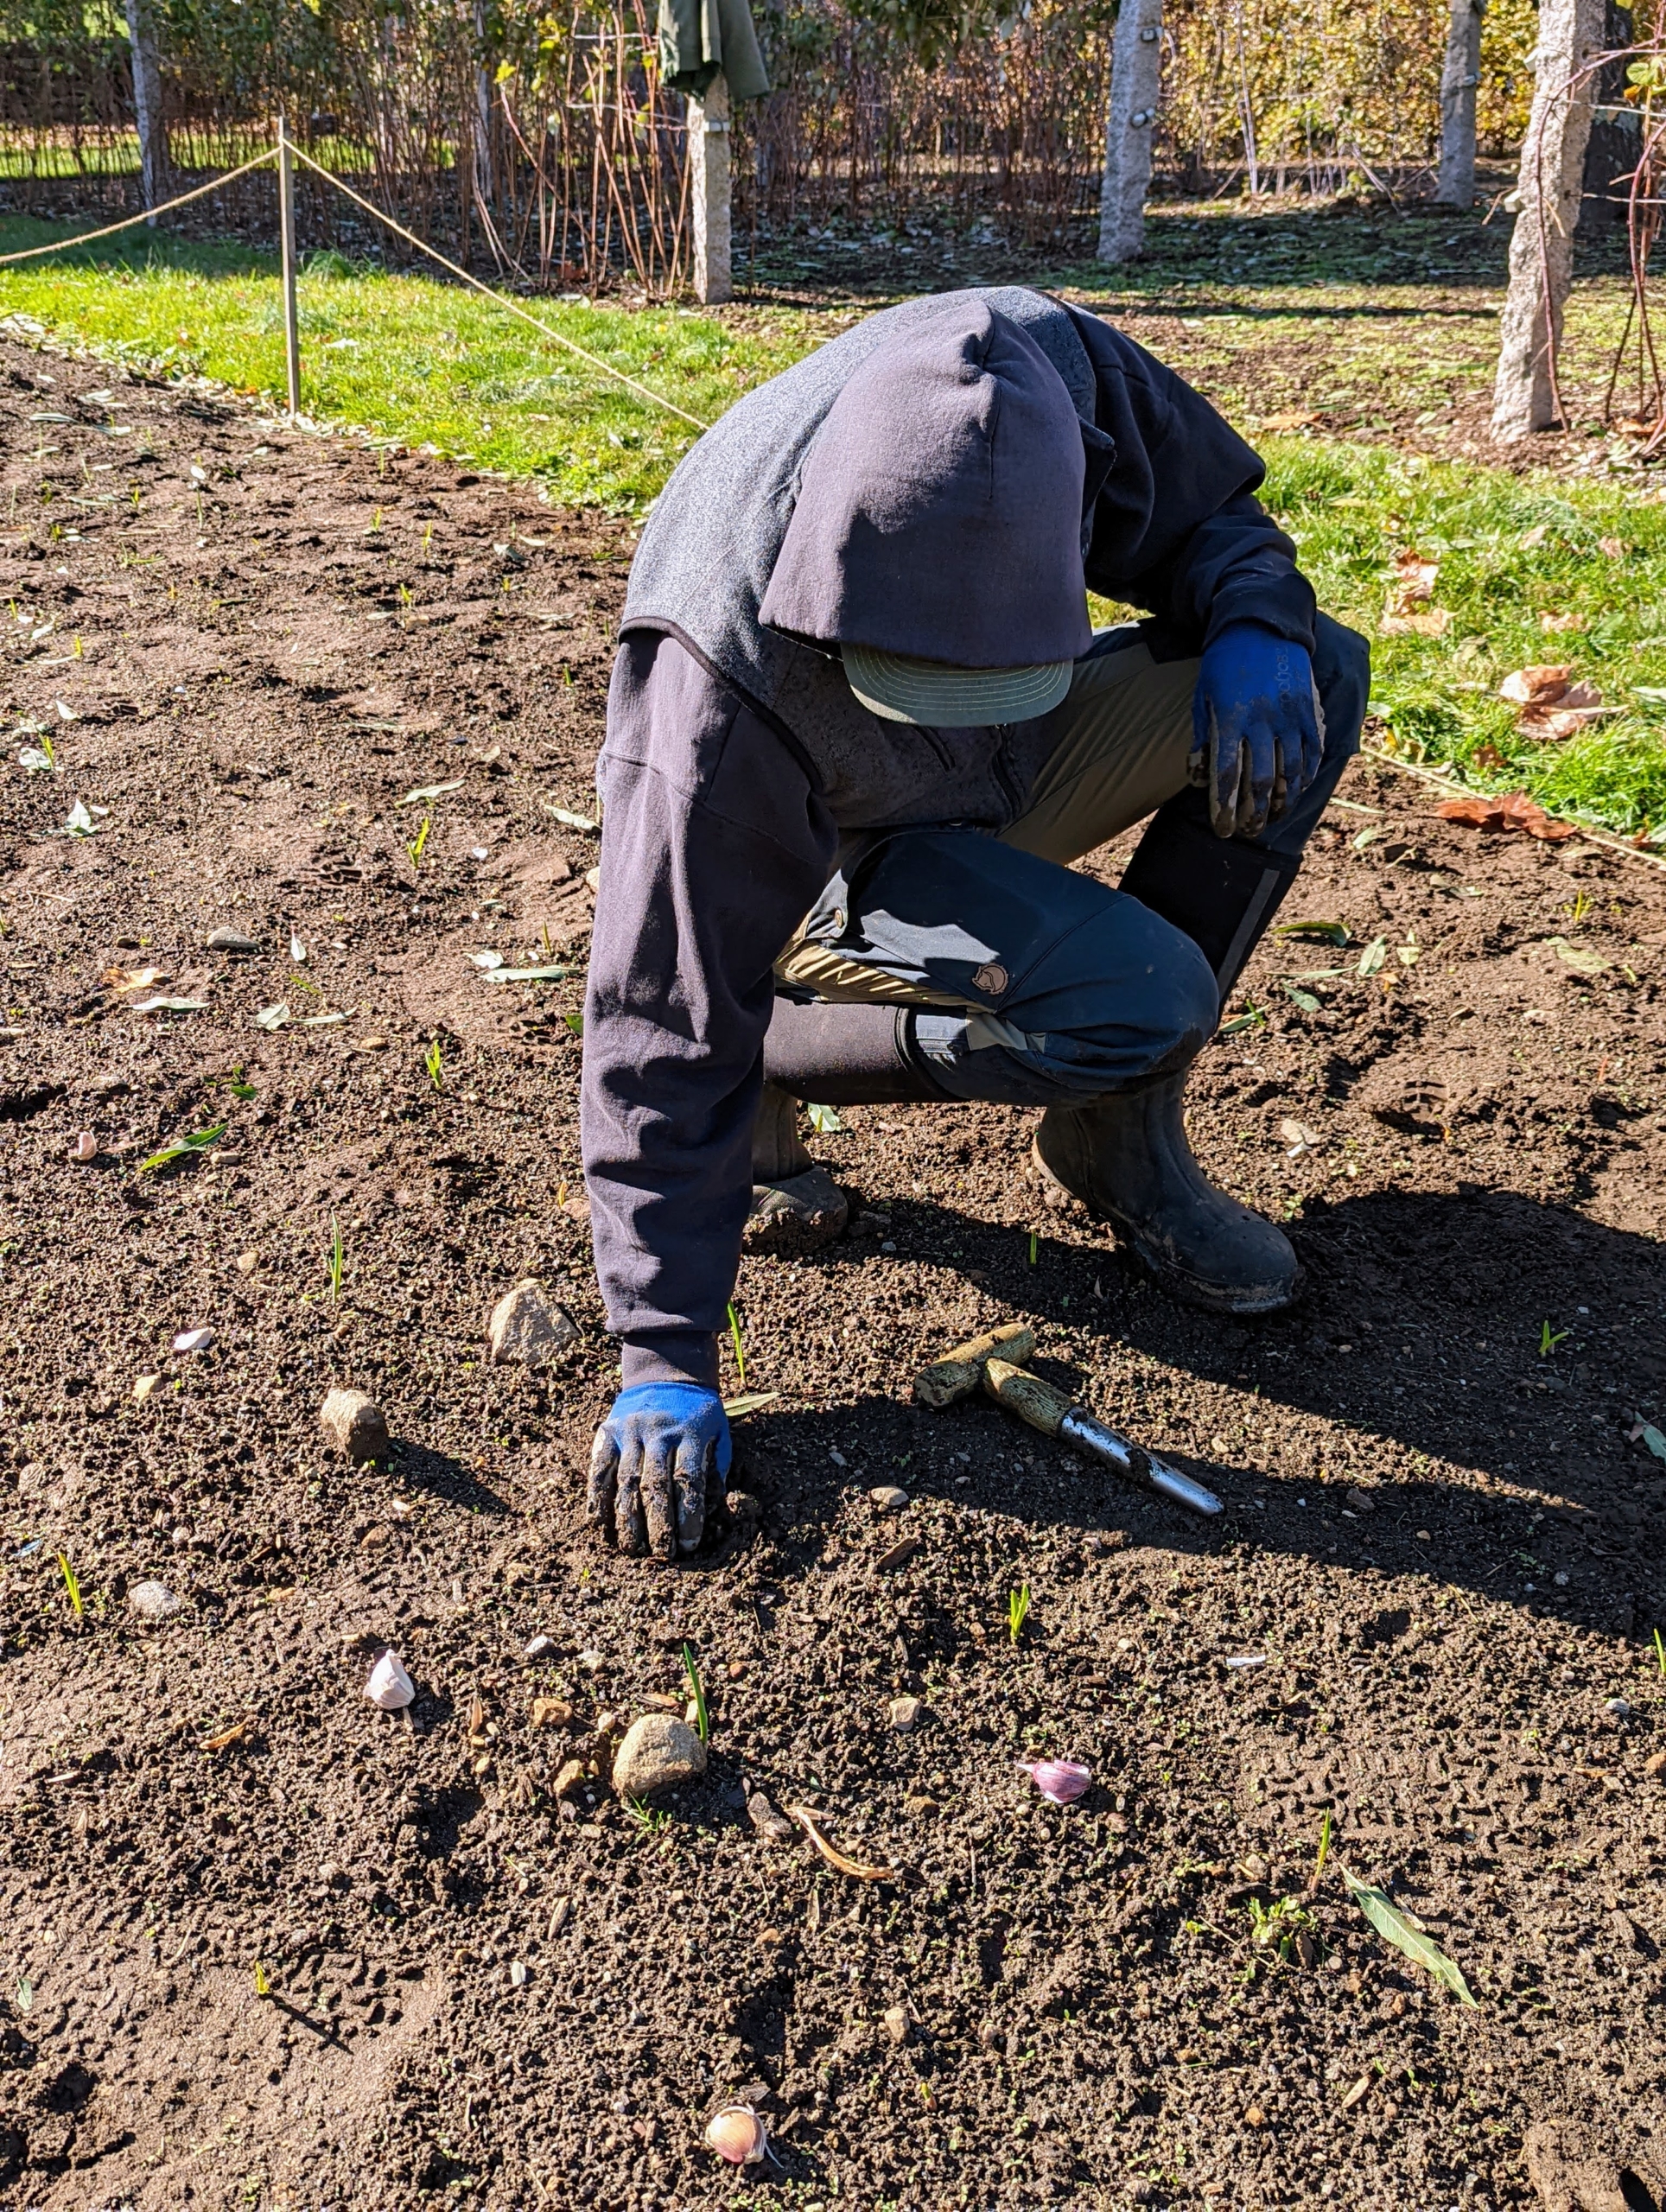
We plant the garlic in a bed behind my main greenhouse. This bed has been cultivated and fertilized. Brian also placed each clove where it will be planted.
Doing this first creates straight, pretty rows, but it is also important to give each clove enough room to grow and develop. When planting multiple rows of garlic, be sure the rows are at least one-foot apart.
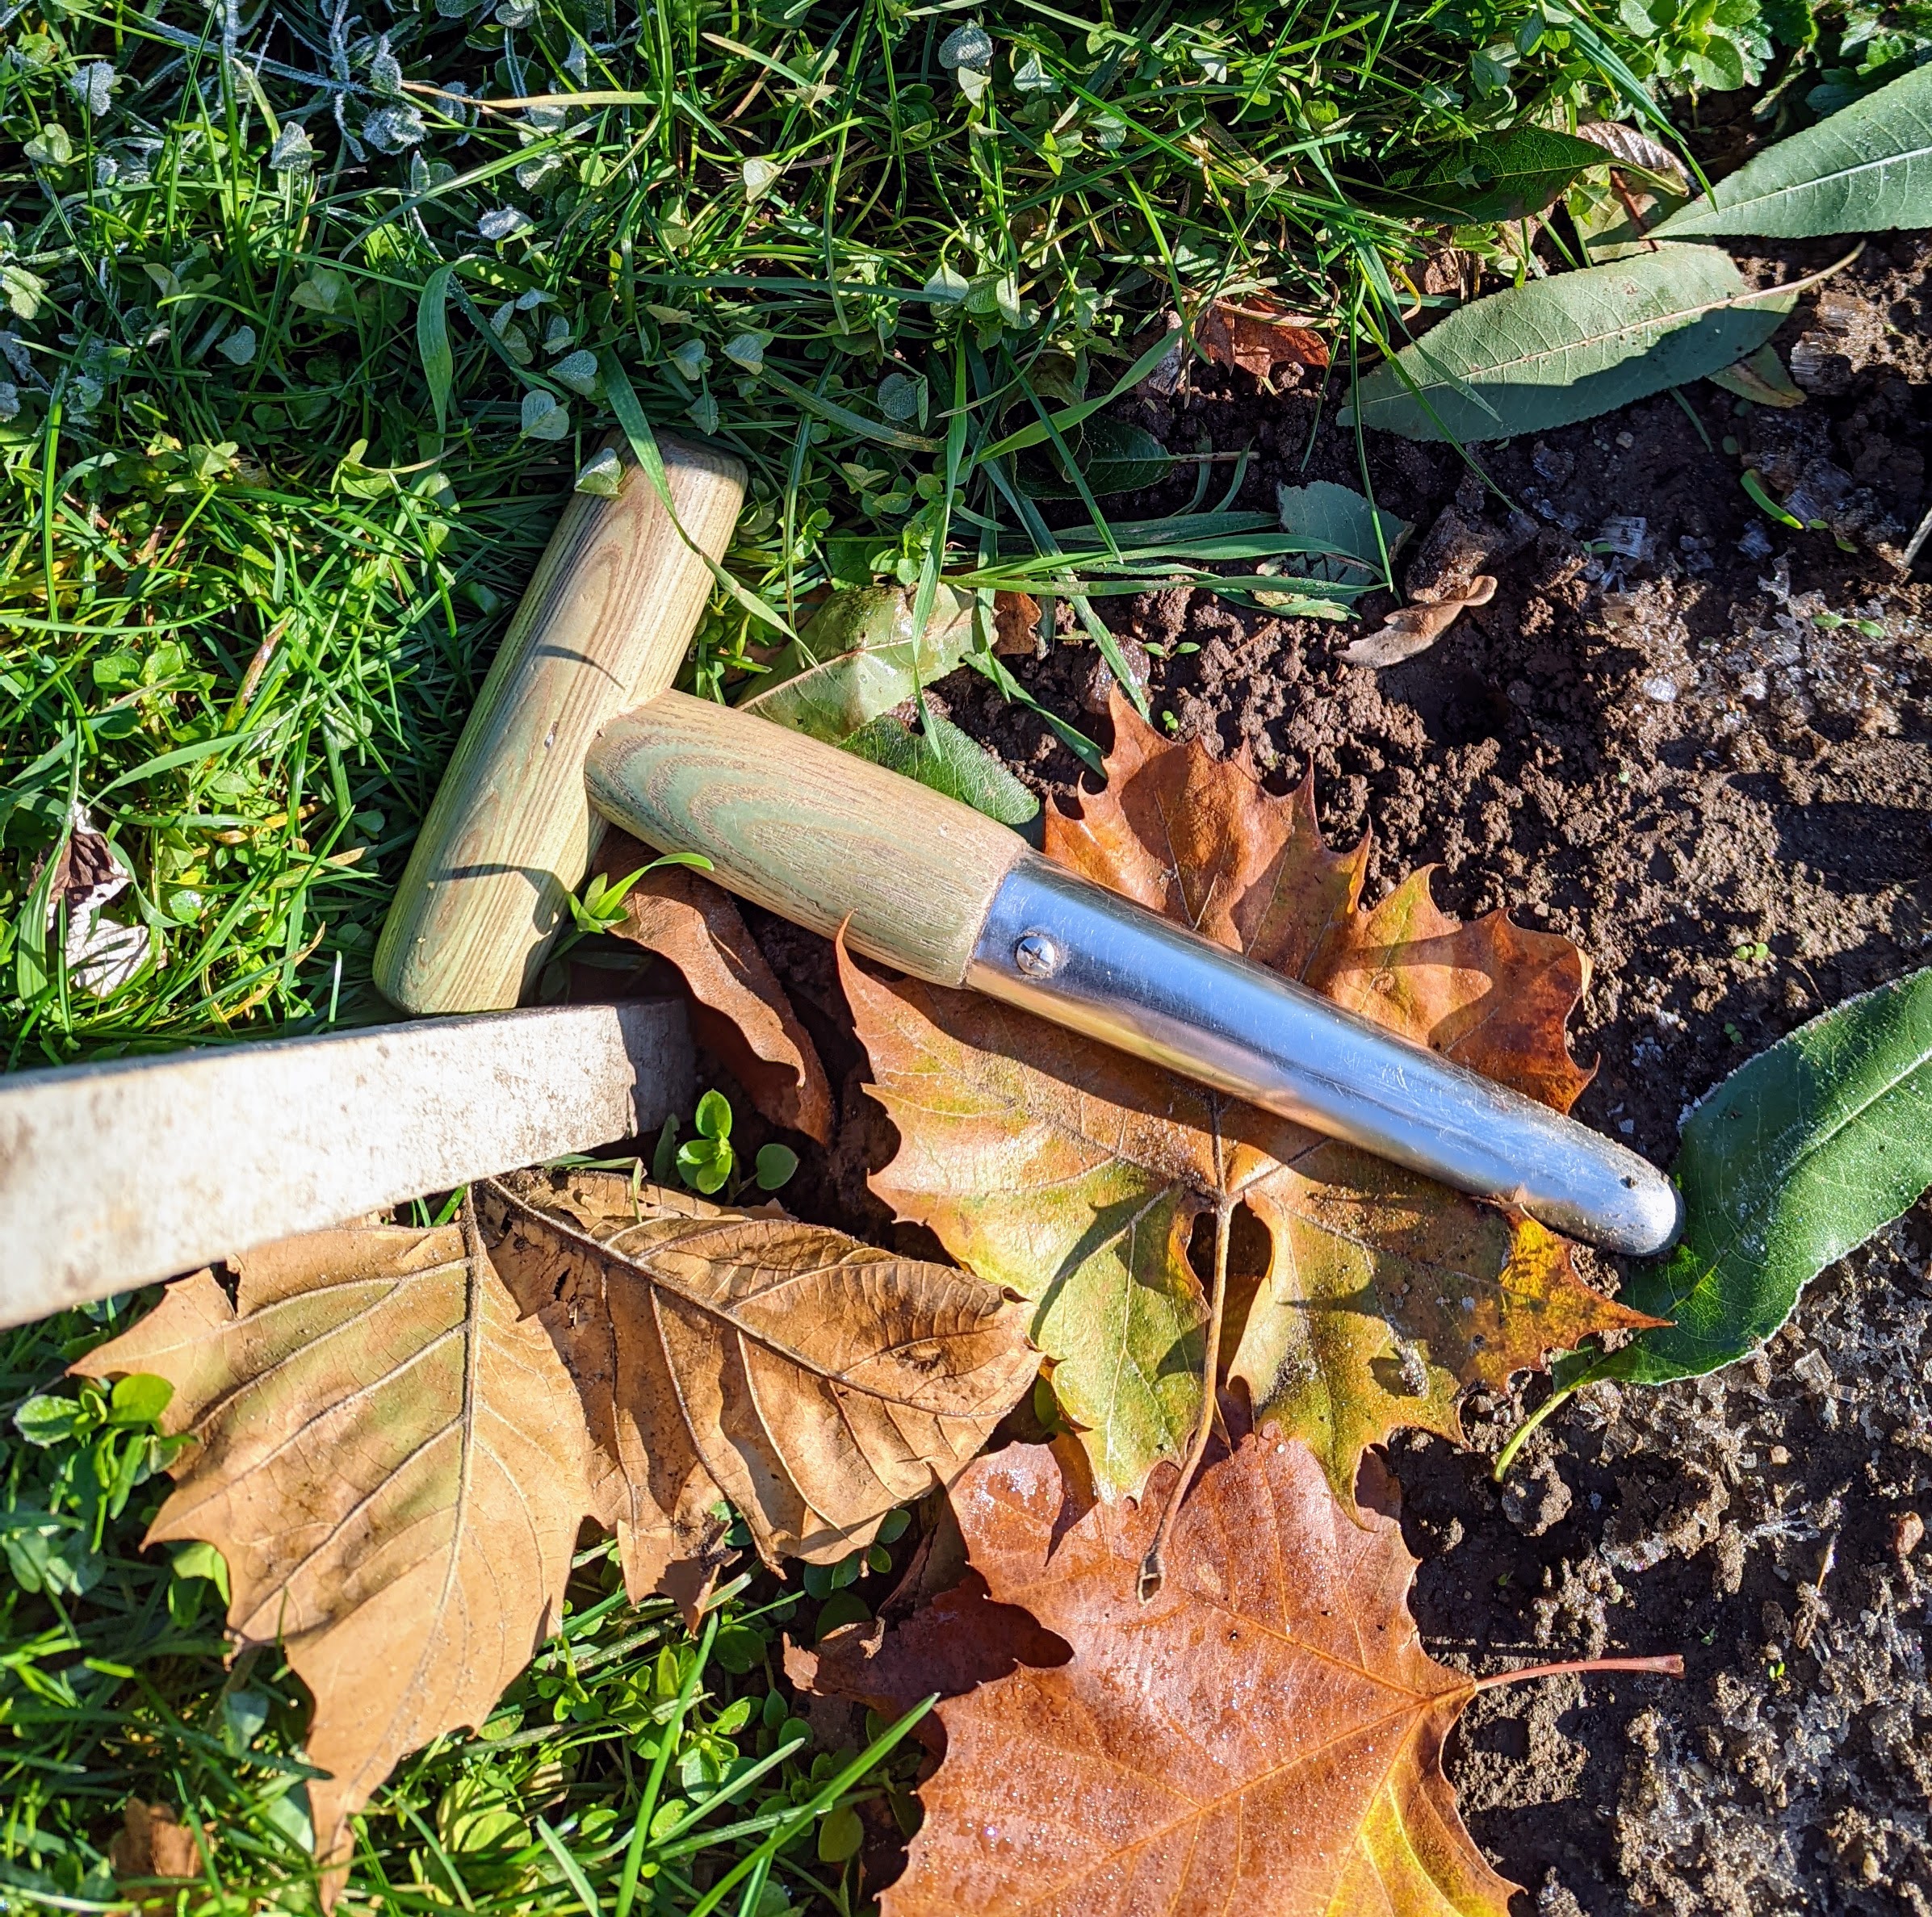
This is a dibber. The T-grip on the dibber allows the planter to apply enough pressure to create a consistent depth for each hole.
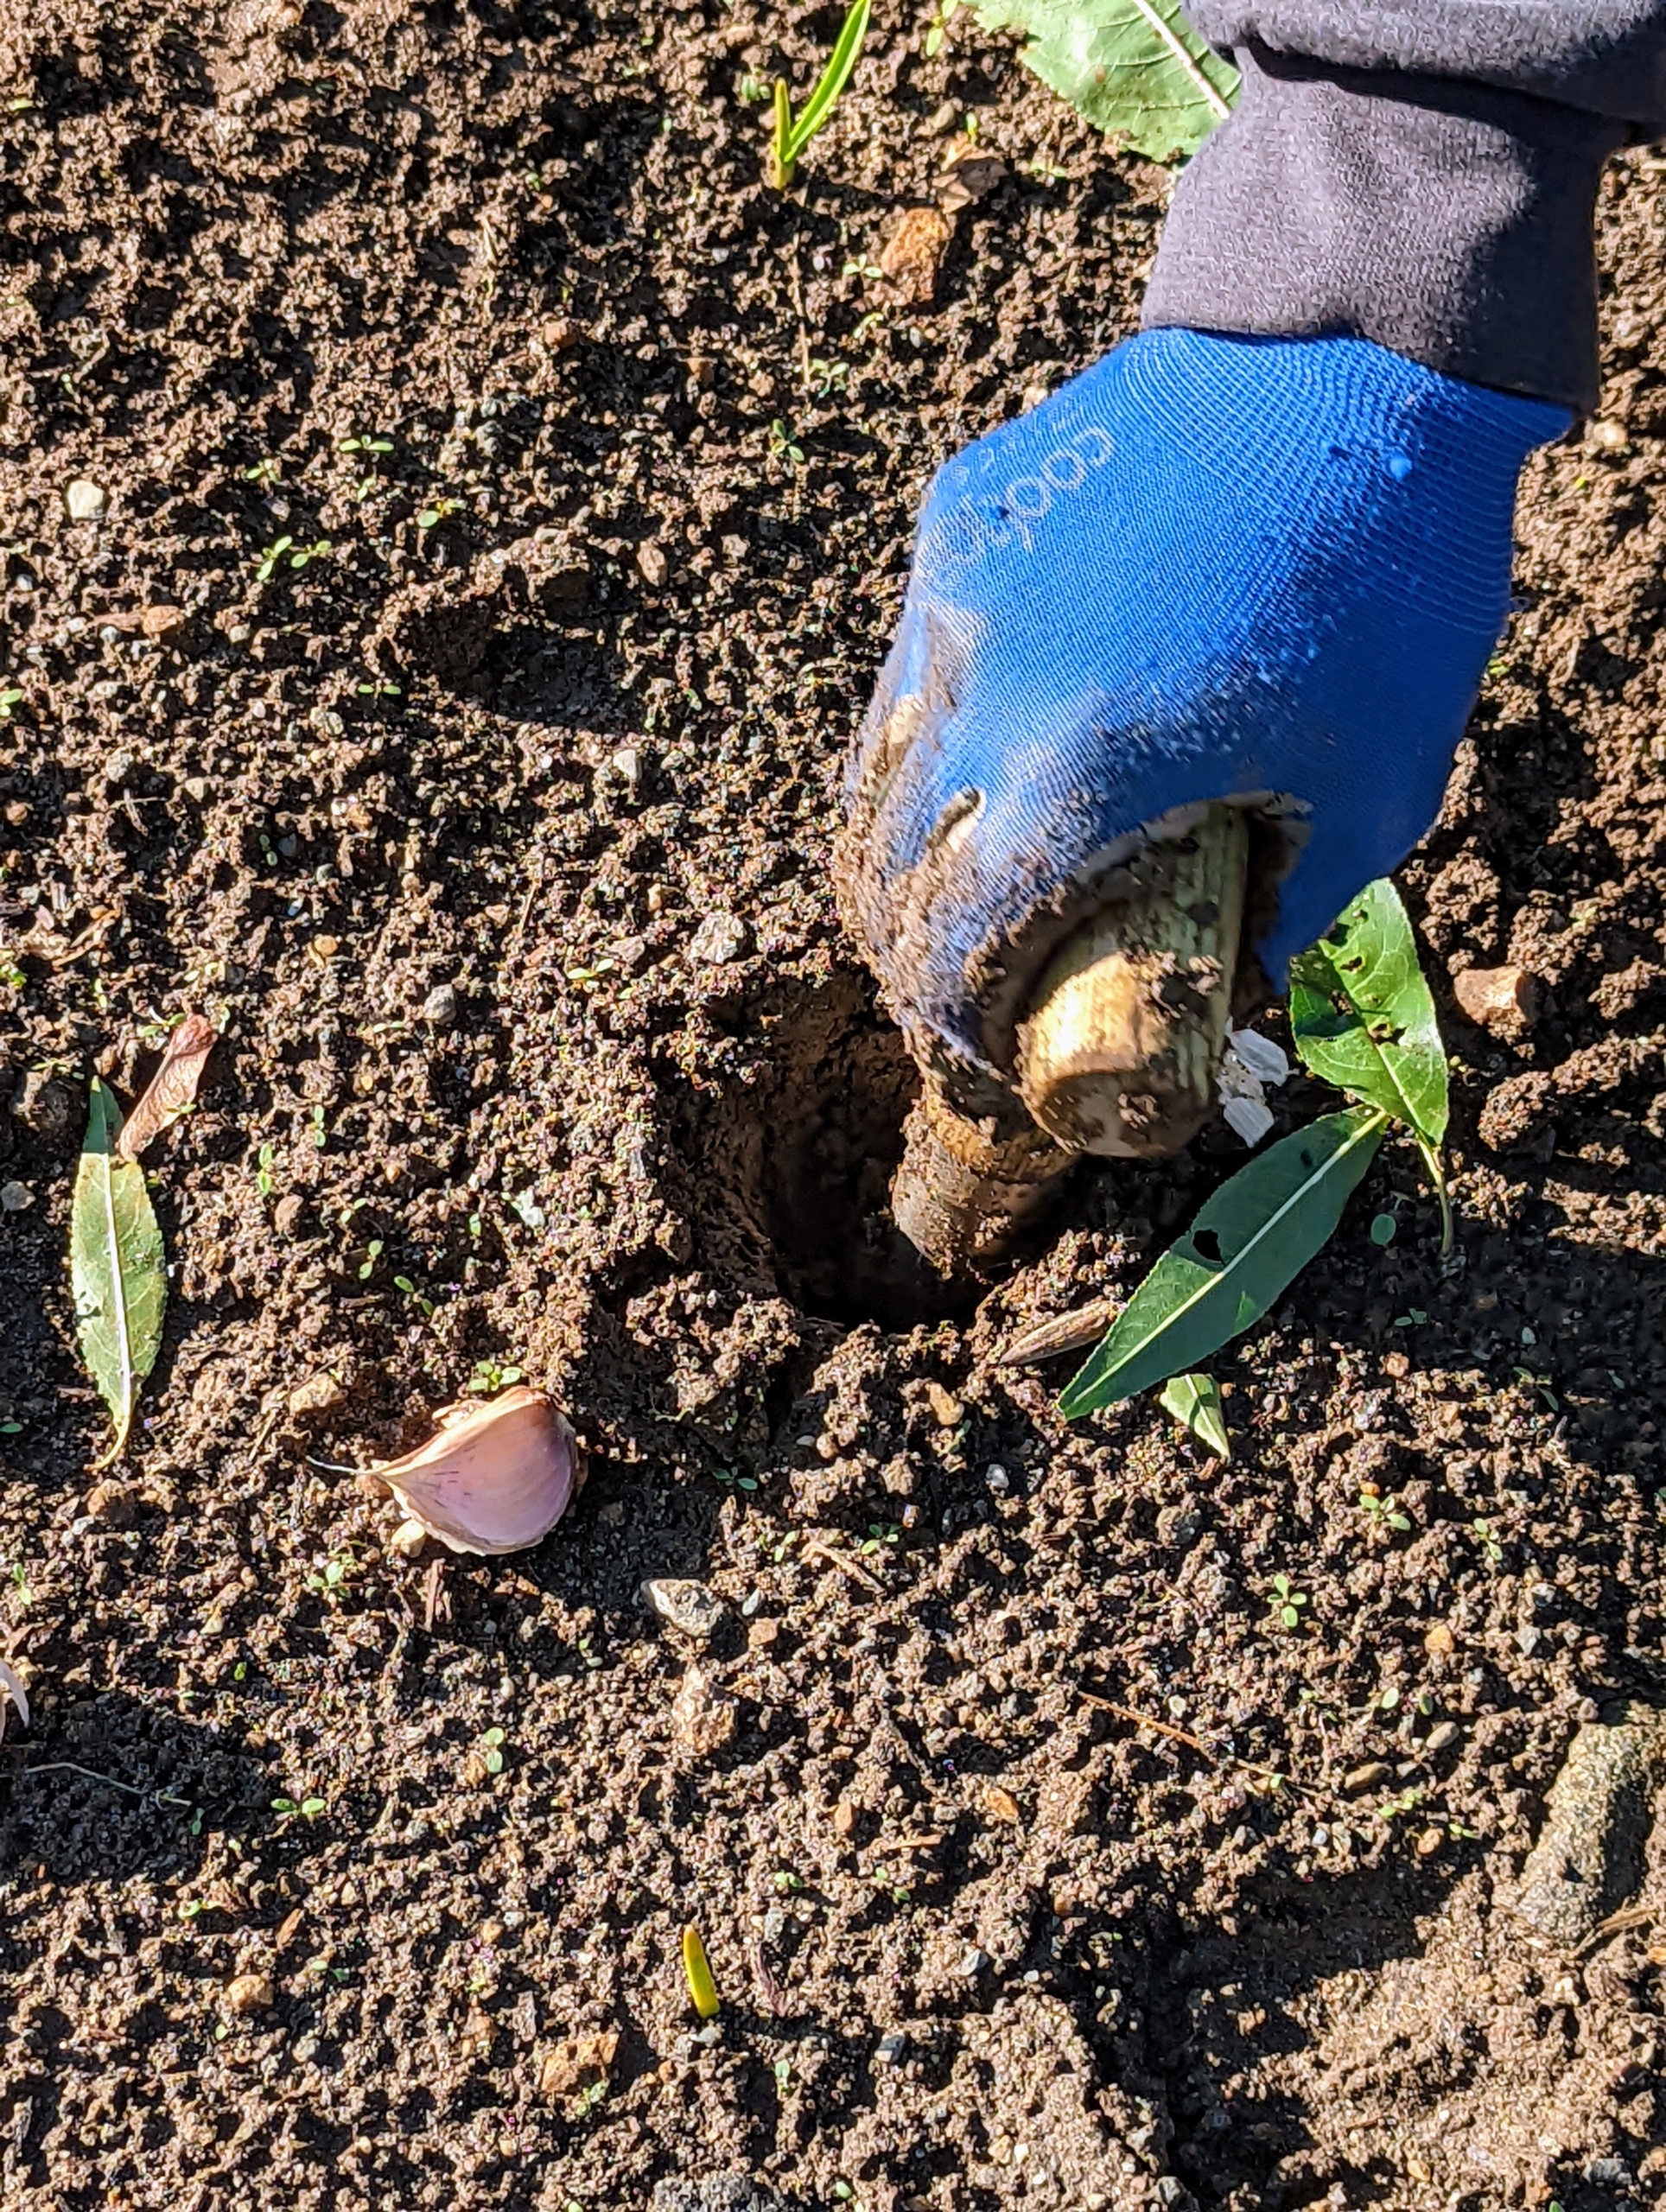
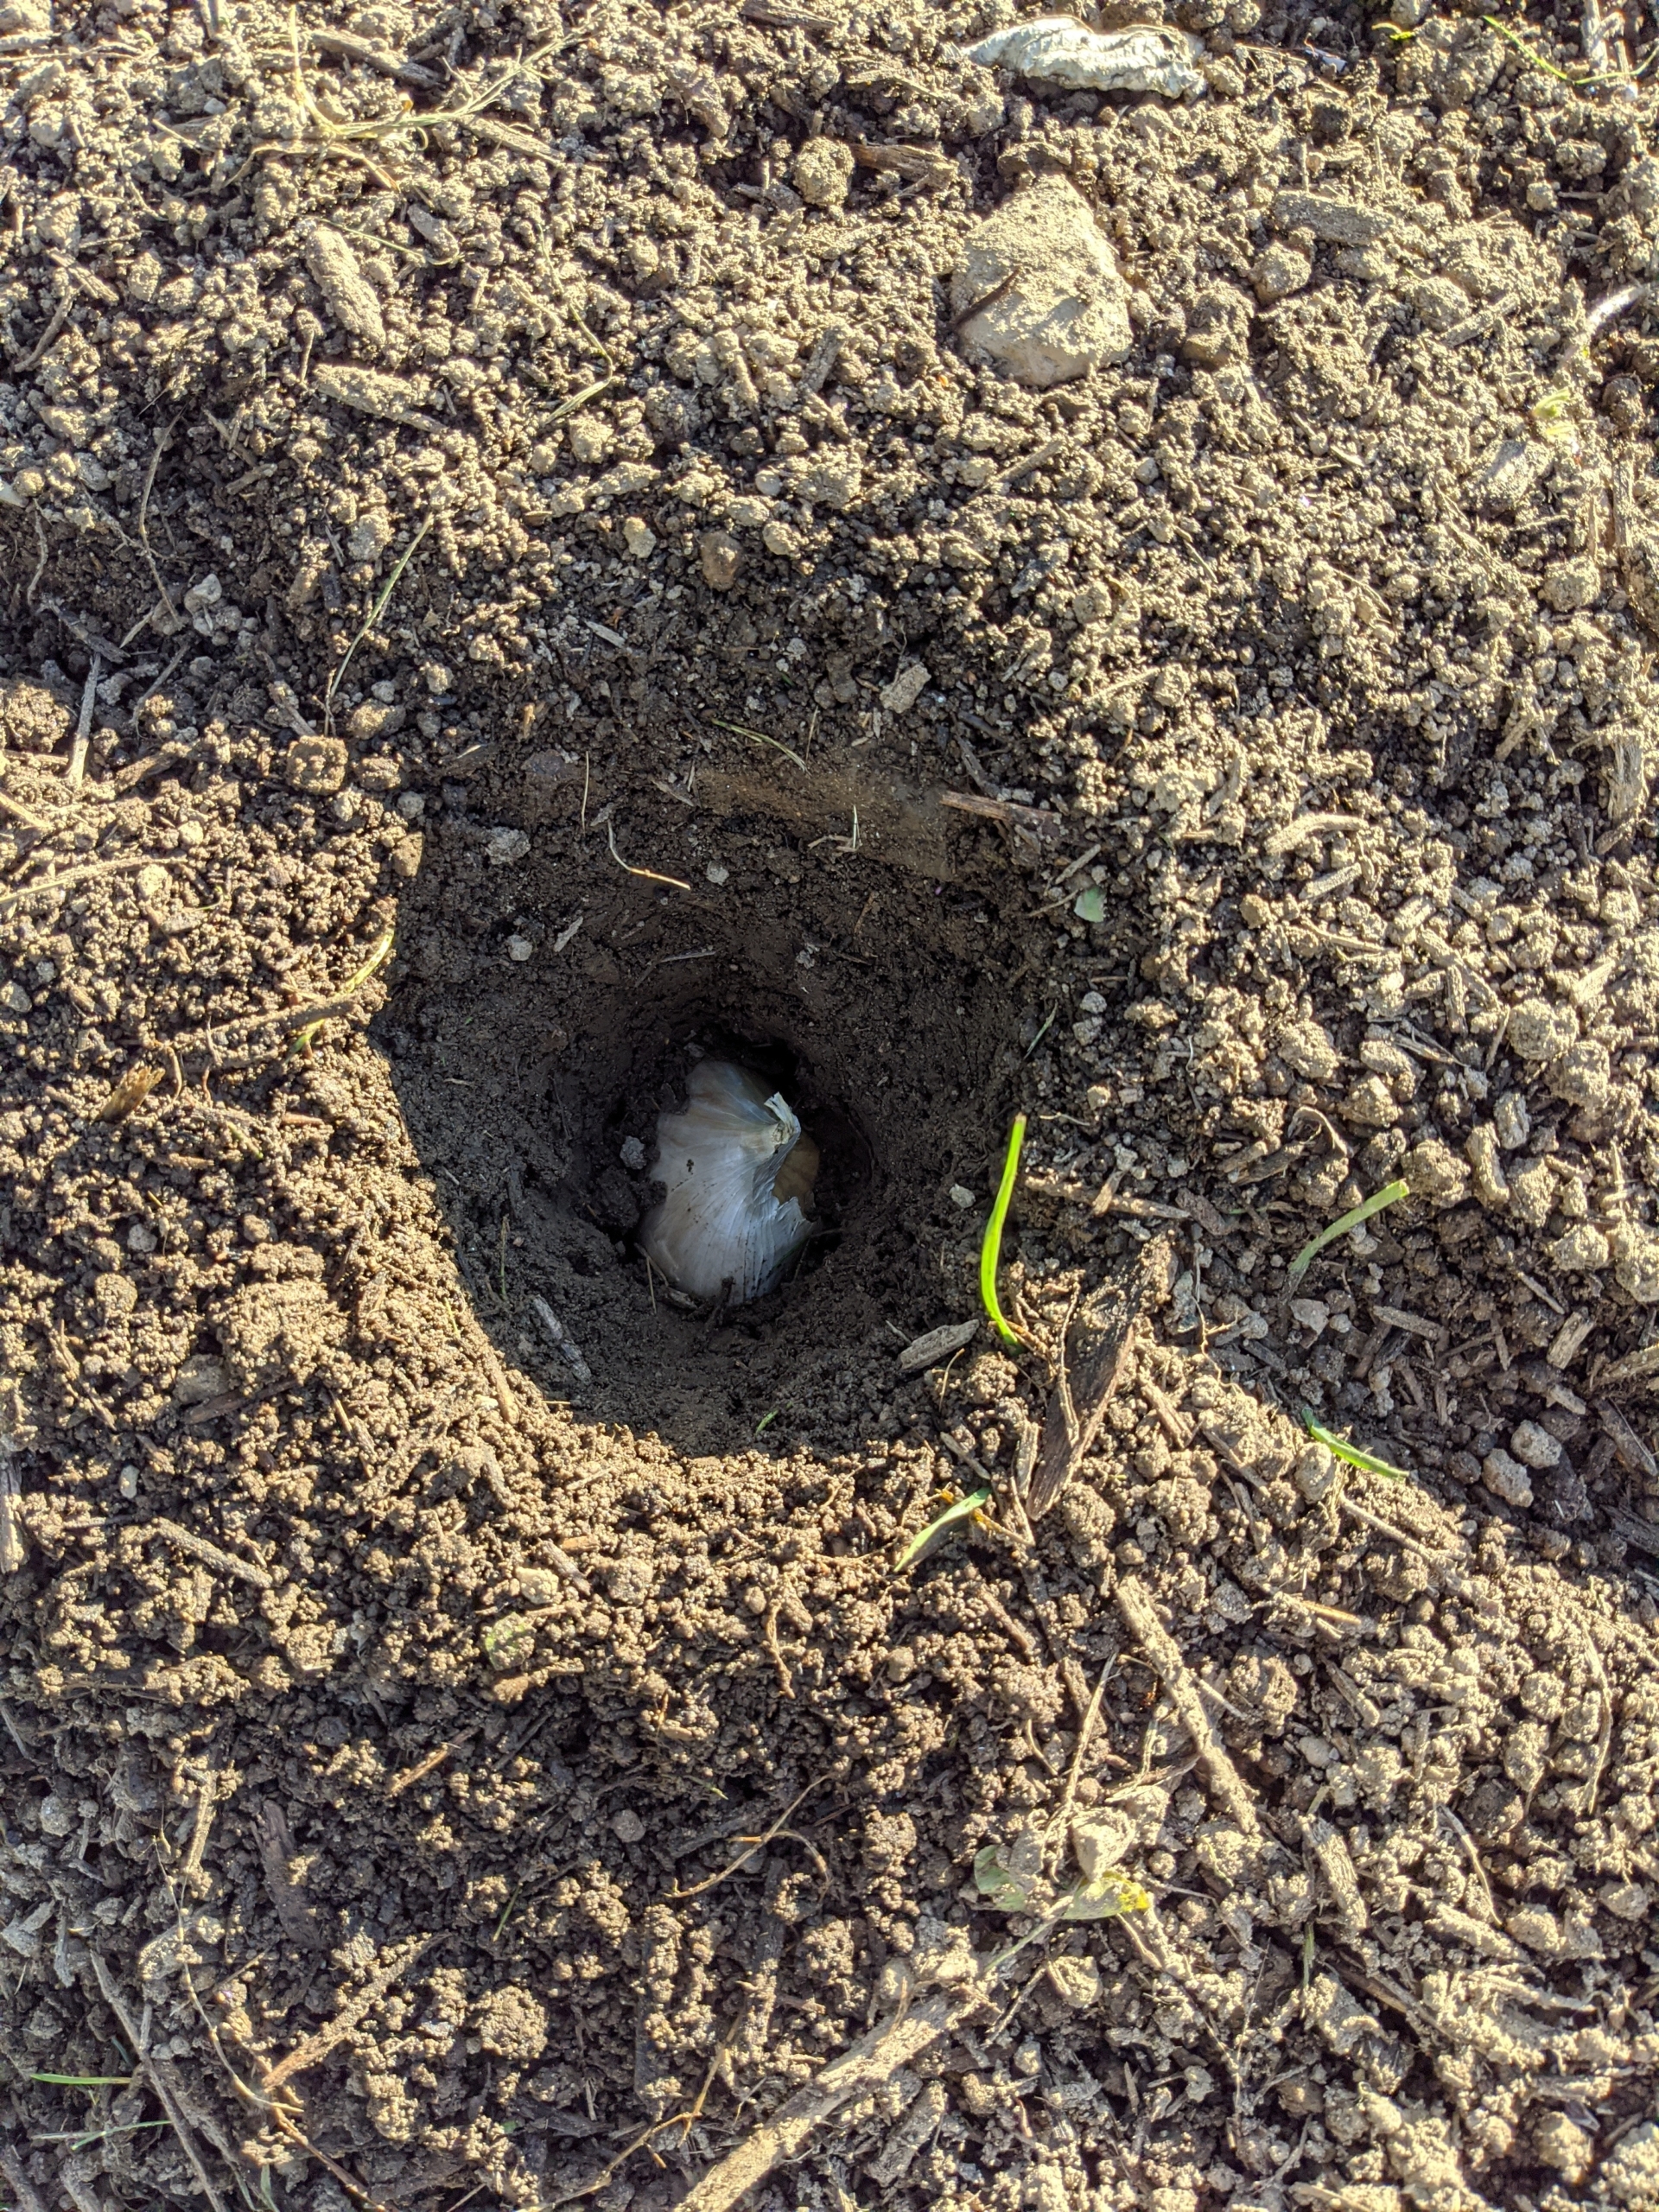
Using the dibber, Brian makes holes in each row – six inches apart.
Each hole is also about four inches deep.
Here is a single seed garlic. It is clear which end is the pointed end.
Brian plants each clove – each one pointed end faced up, and the root side faced down.
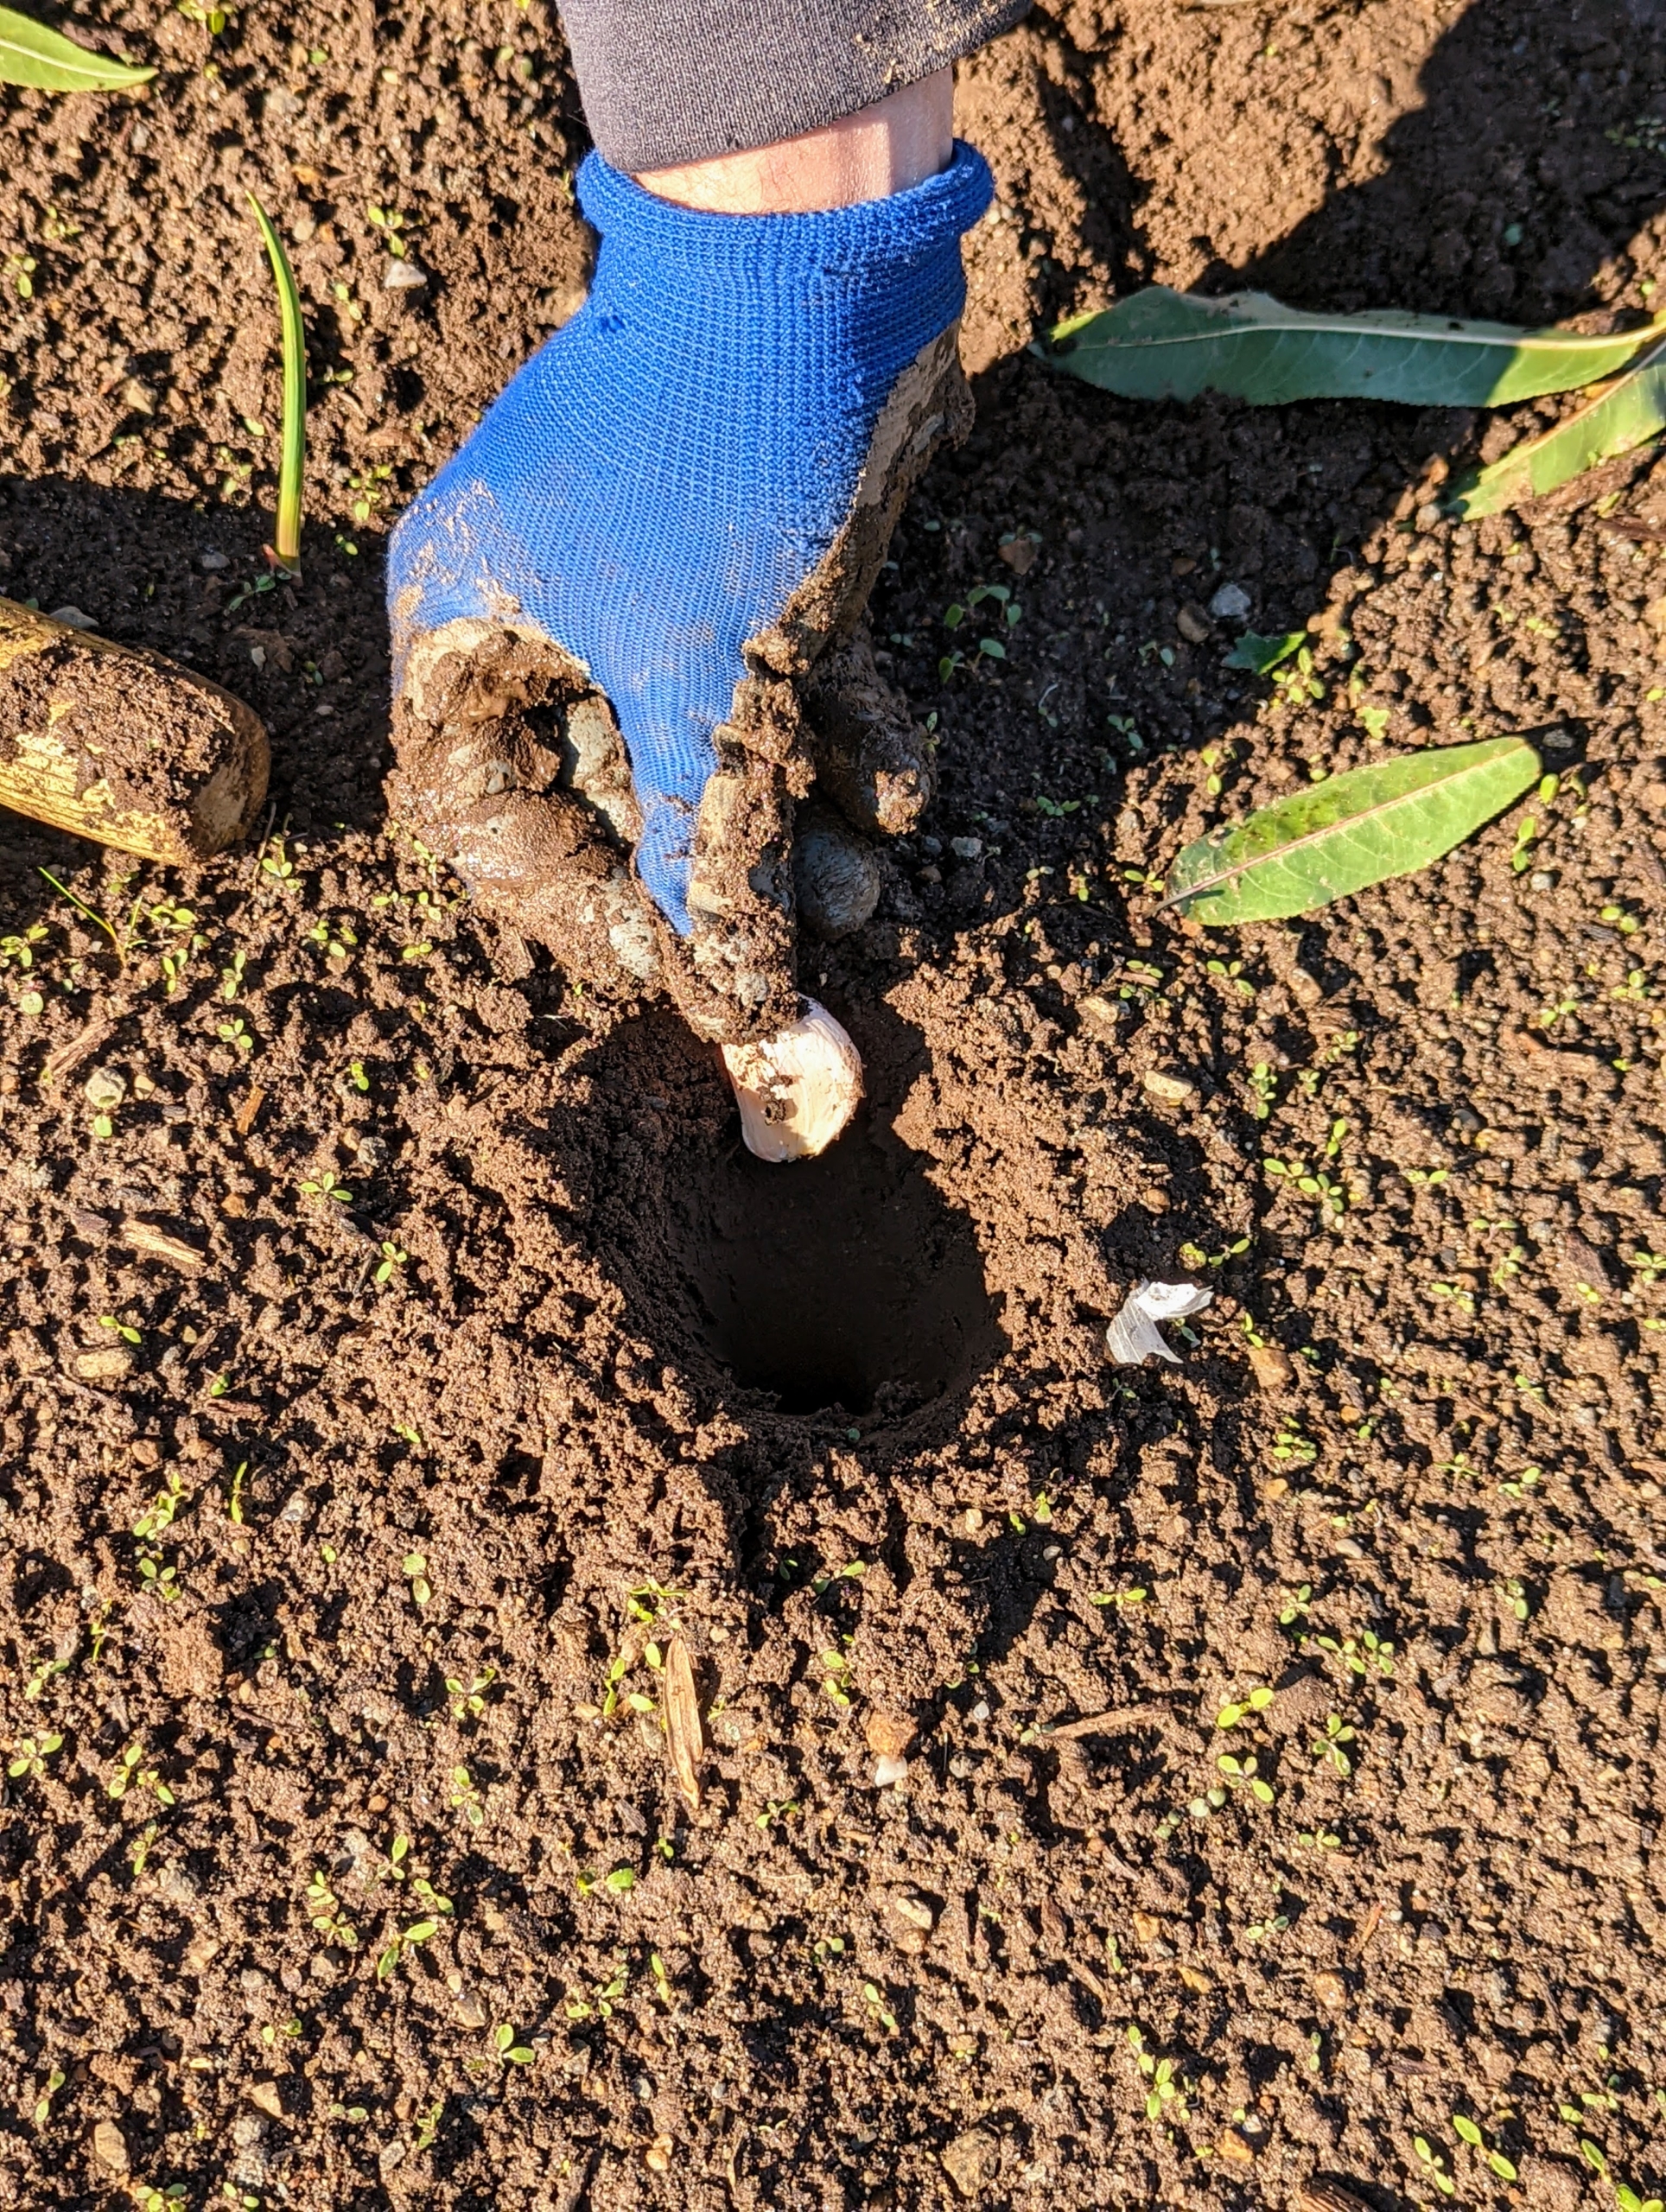
He gently pushes the clove to the bottom of the hole.
And then backfills with soil.
If the soil in the bed is well cultivated, this should be a fast and easy process. It took Brian less than an hour to plant all our garlic.
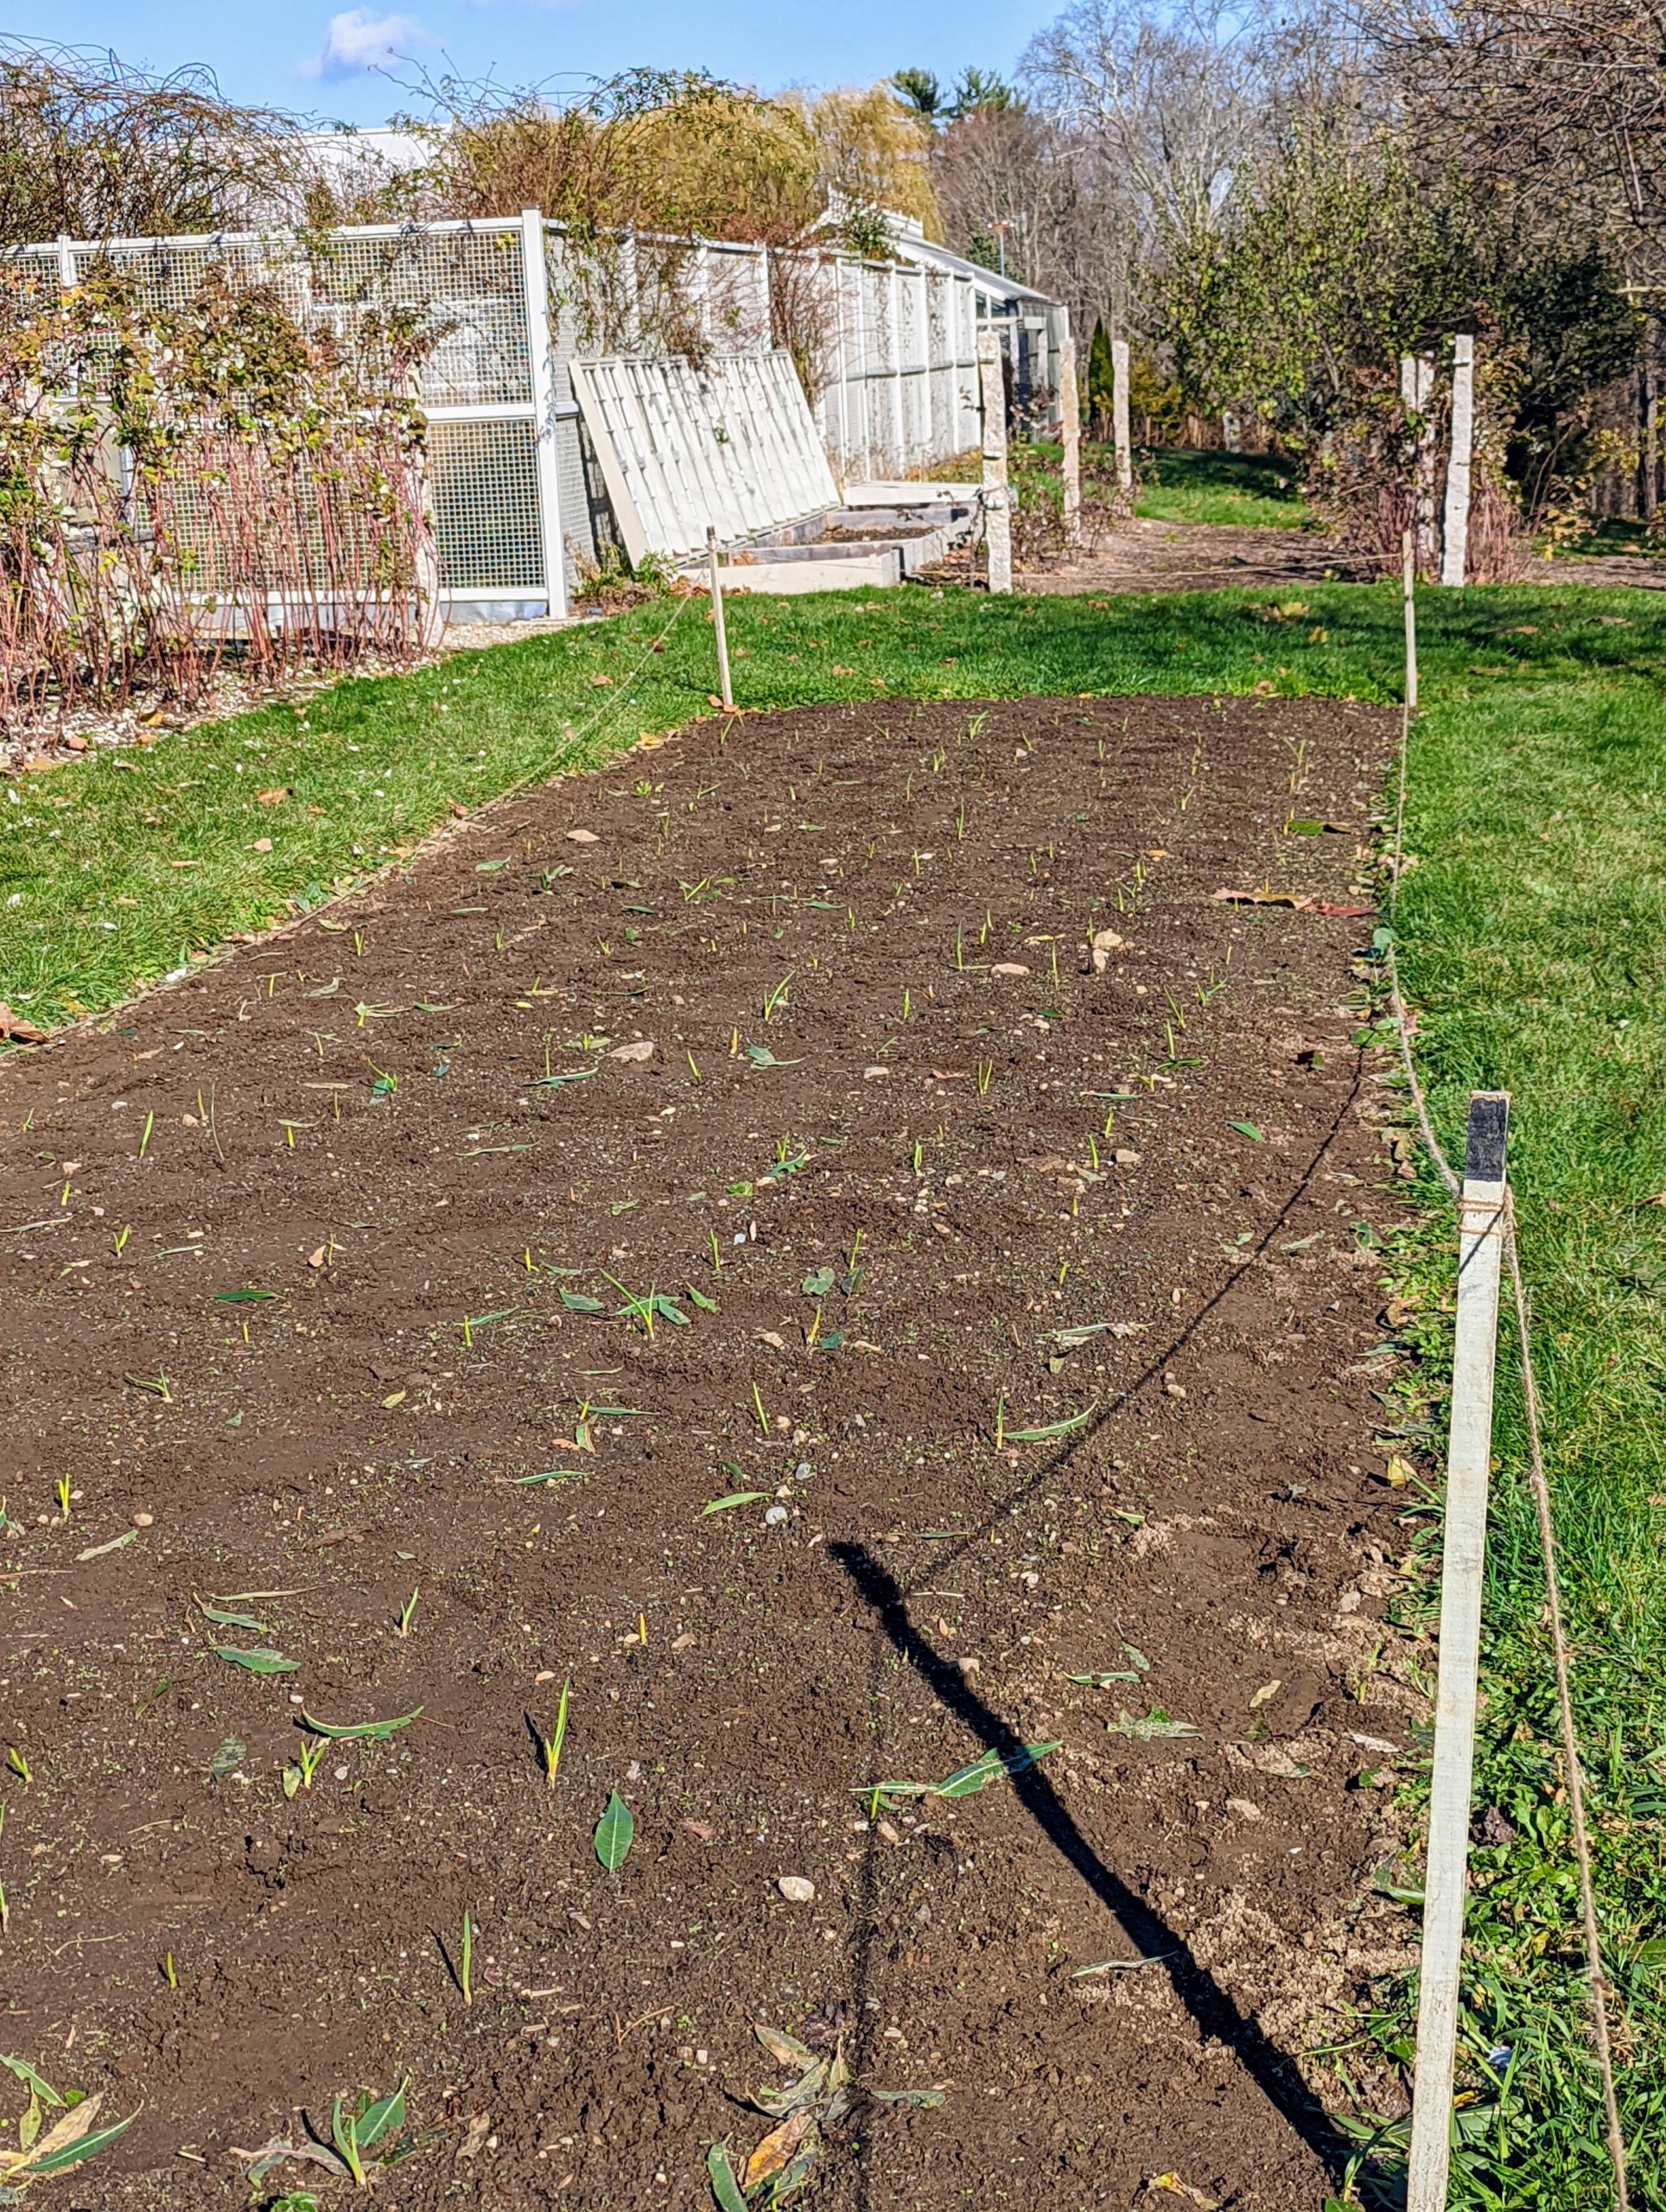
The stakes surround the area and remind passers-by that the bed is now planted – and no walking. The visible sprouts are from garlic that was planted a couple of weeks ago – the warm weather confused them and they started to grow through the soil. The garlic will tolerate some shade but prefers full sun. This crop will be ready to harvest mid-July to August. I can’t wait.
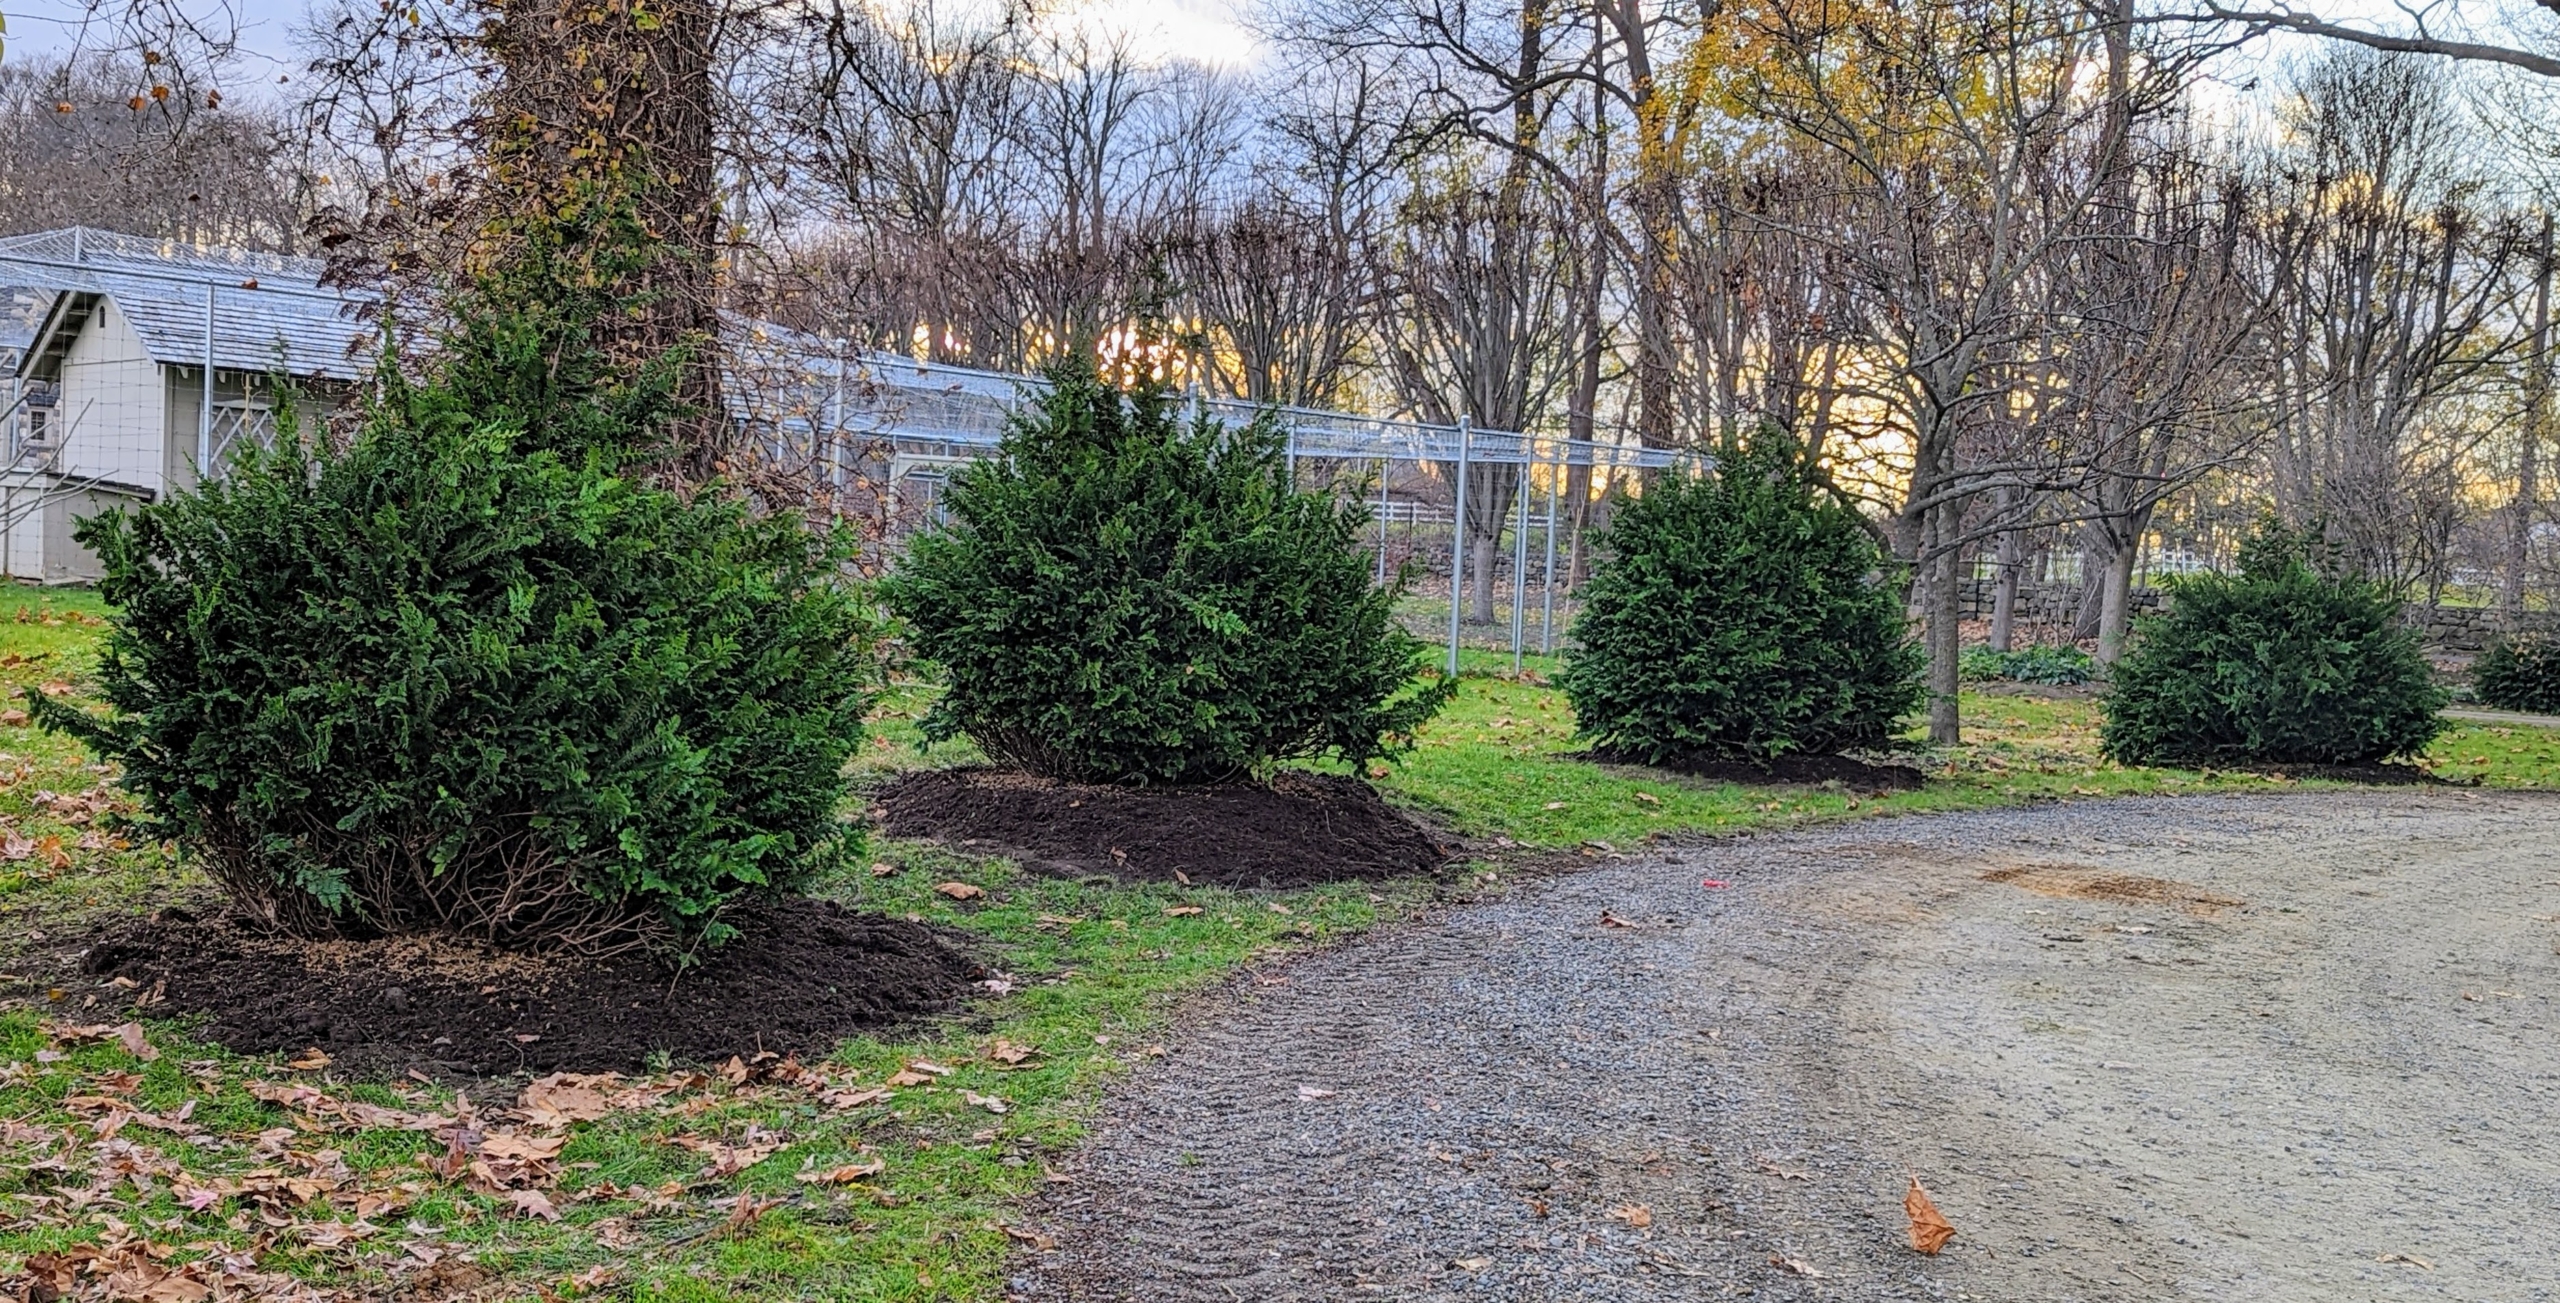
The landscaped areas around my Bedford, New York farm continue to evolve.
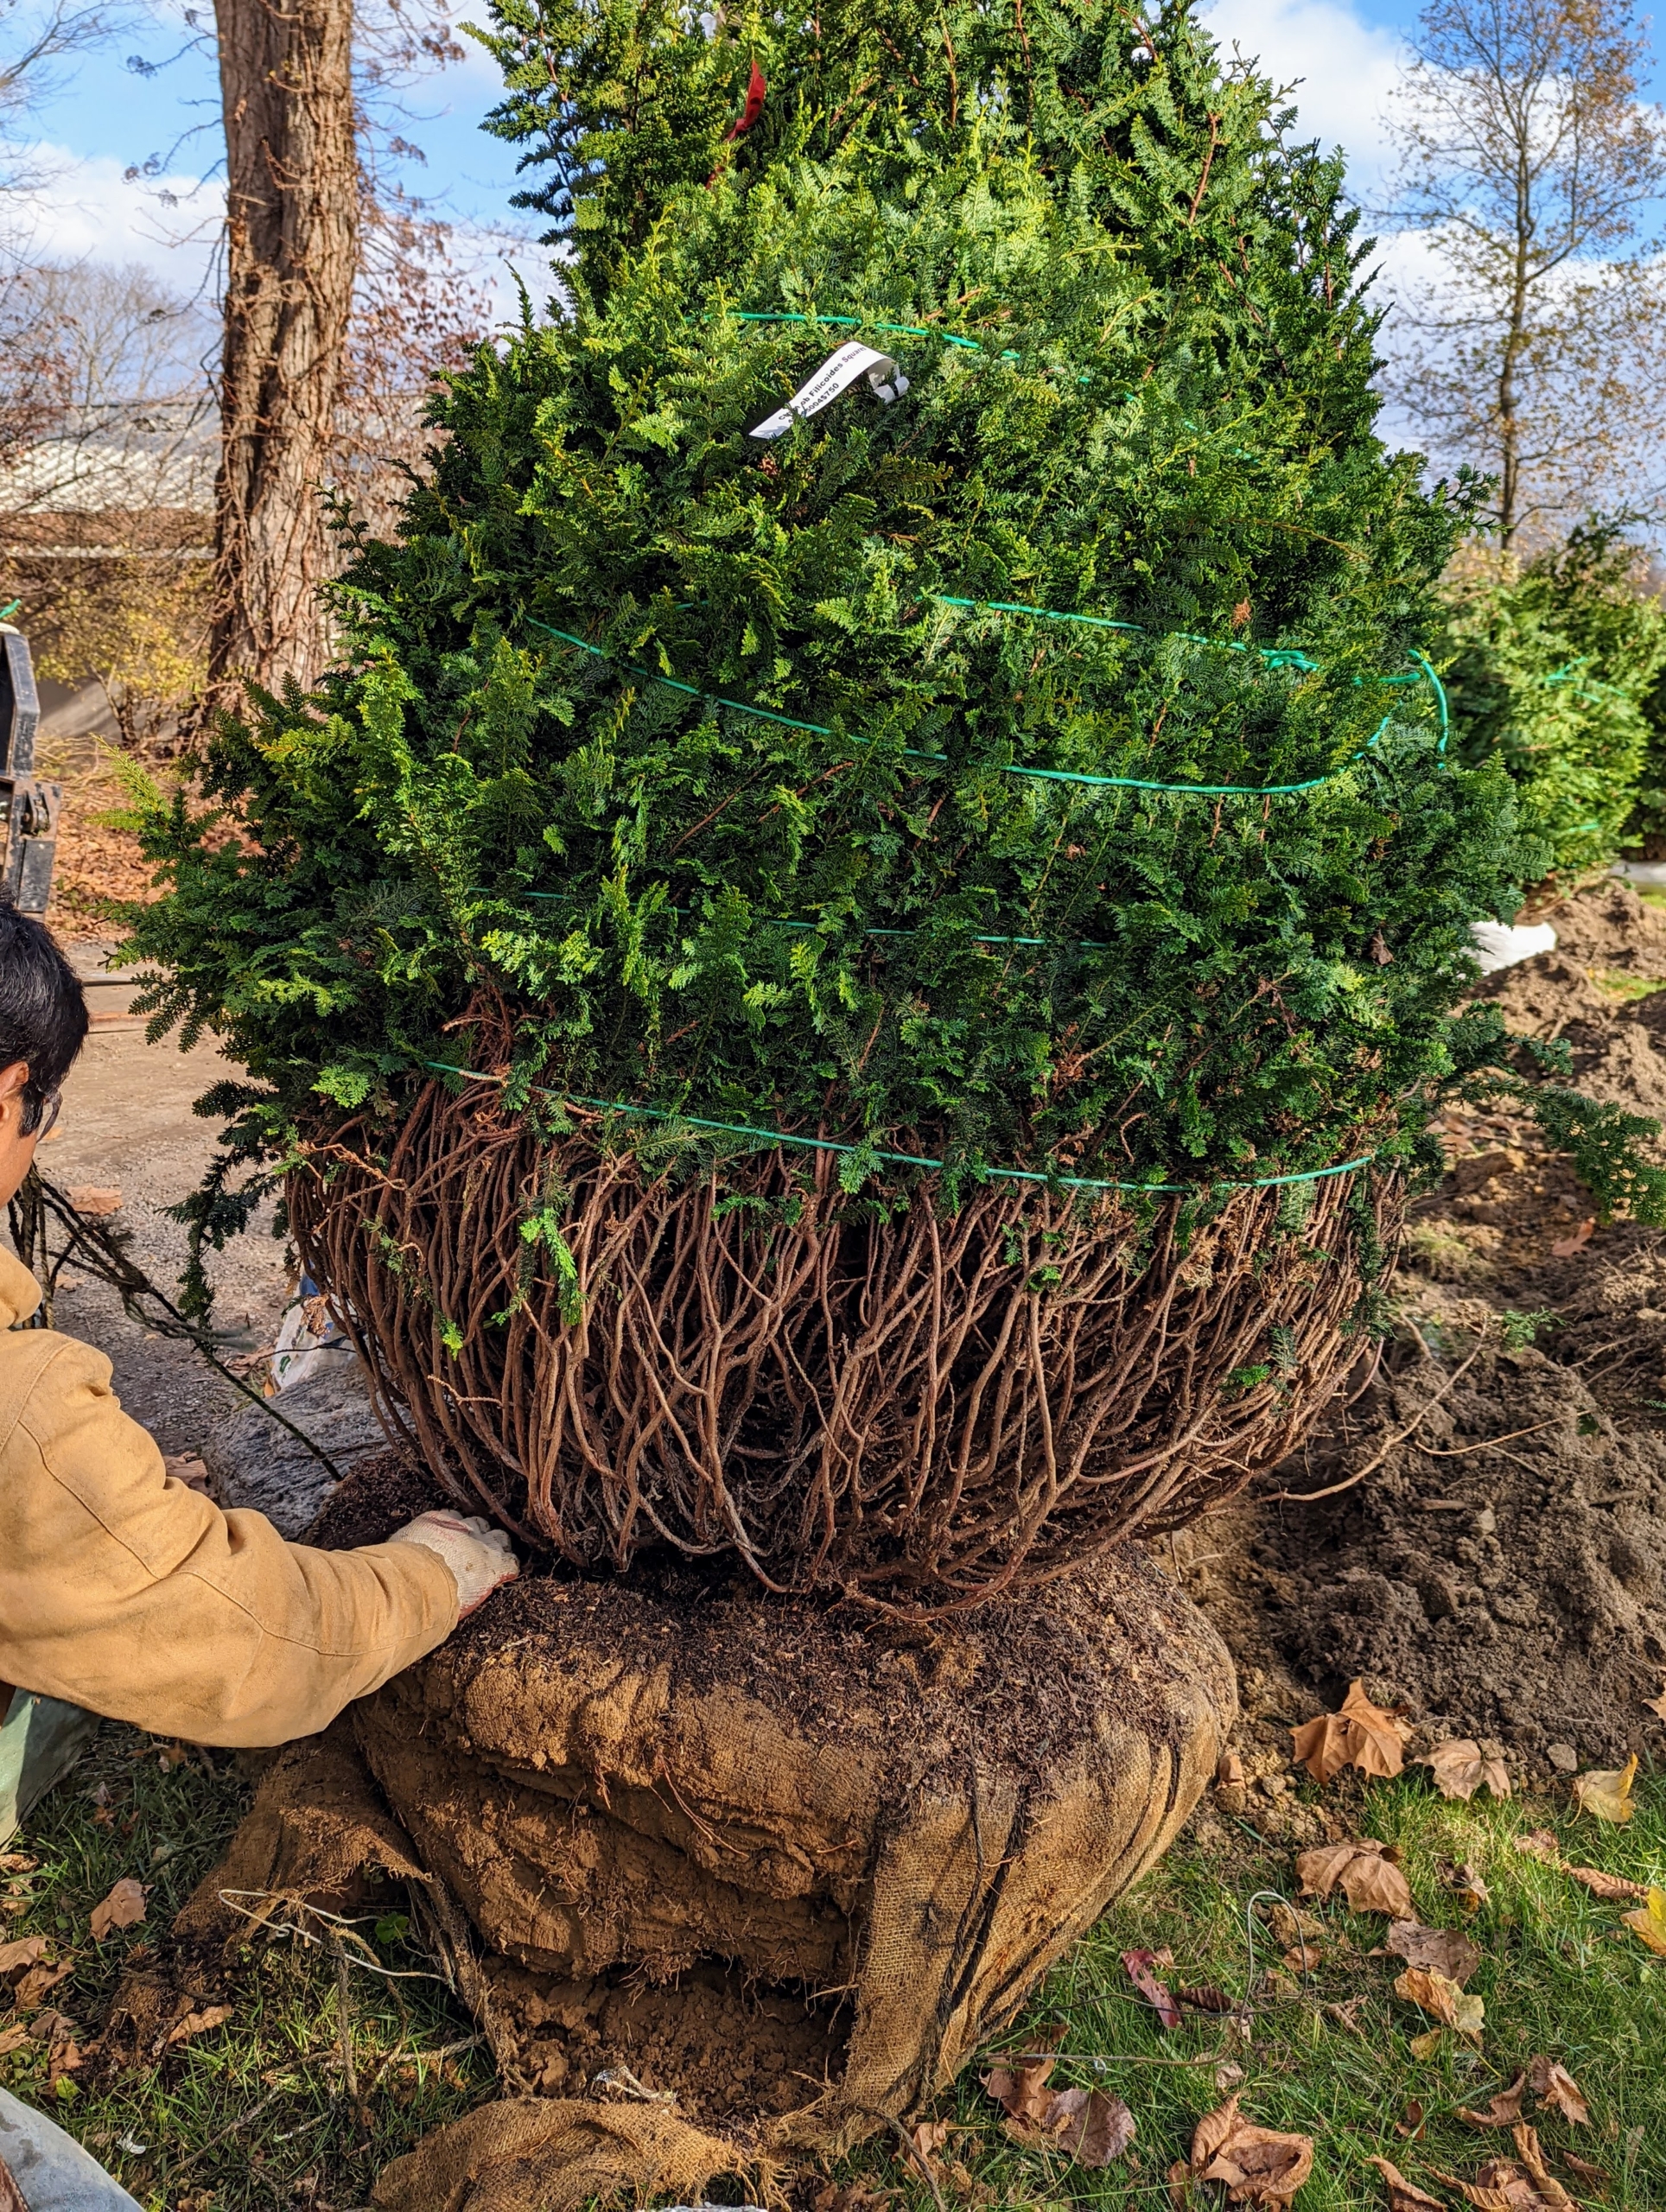
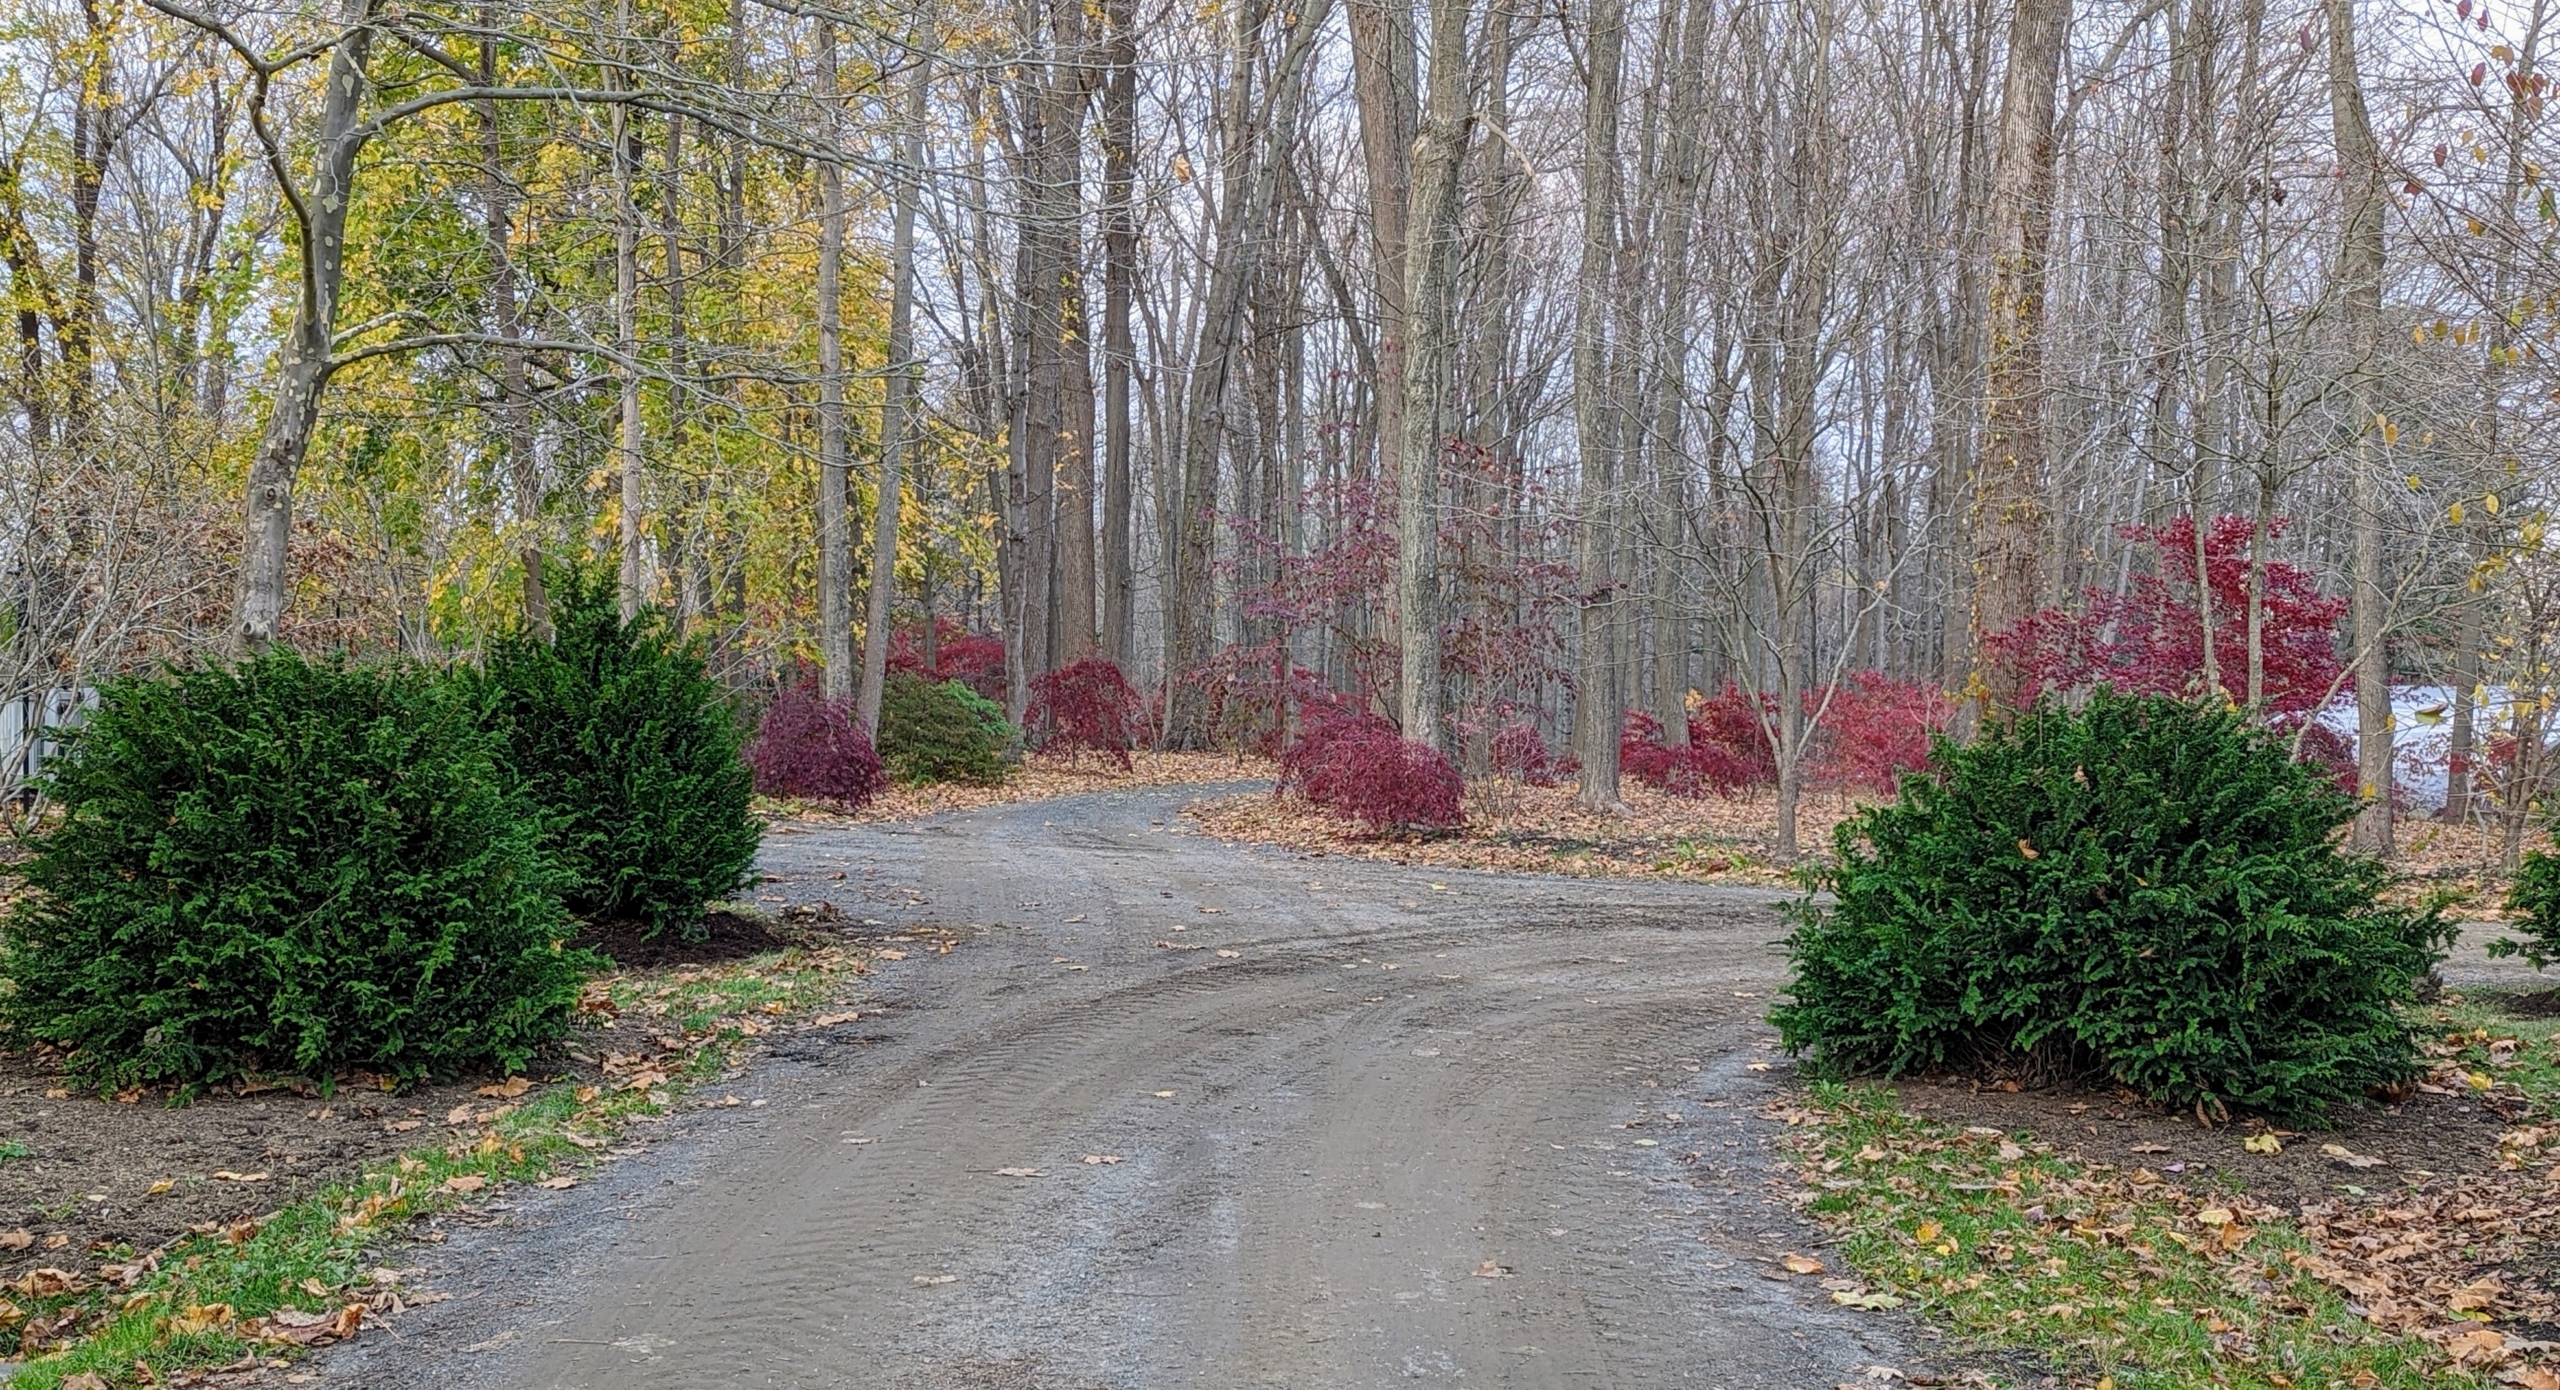
I love planting interesting and beautiful specimens that add texture, growth and beauty at different times throughout the year. I also enjoy arranging large groups of certain plantings to create borders and appealing displays. Last week, we planted a group of large Chamaecyparis obtusa 'Filicoides' or Fernspray Hinoki cypress bushes along the carriage road just past my allée of lindens near the entrance to my Japanese Maple Woodland. I thought the space would look even prettier planted with these upright, bushy conifers - and it does.
Here are some photos, enjoy.
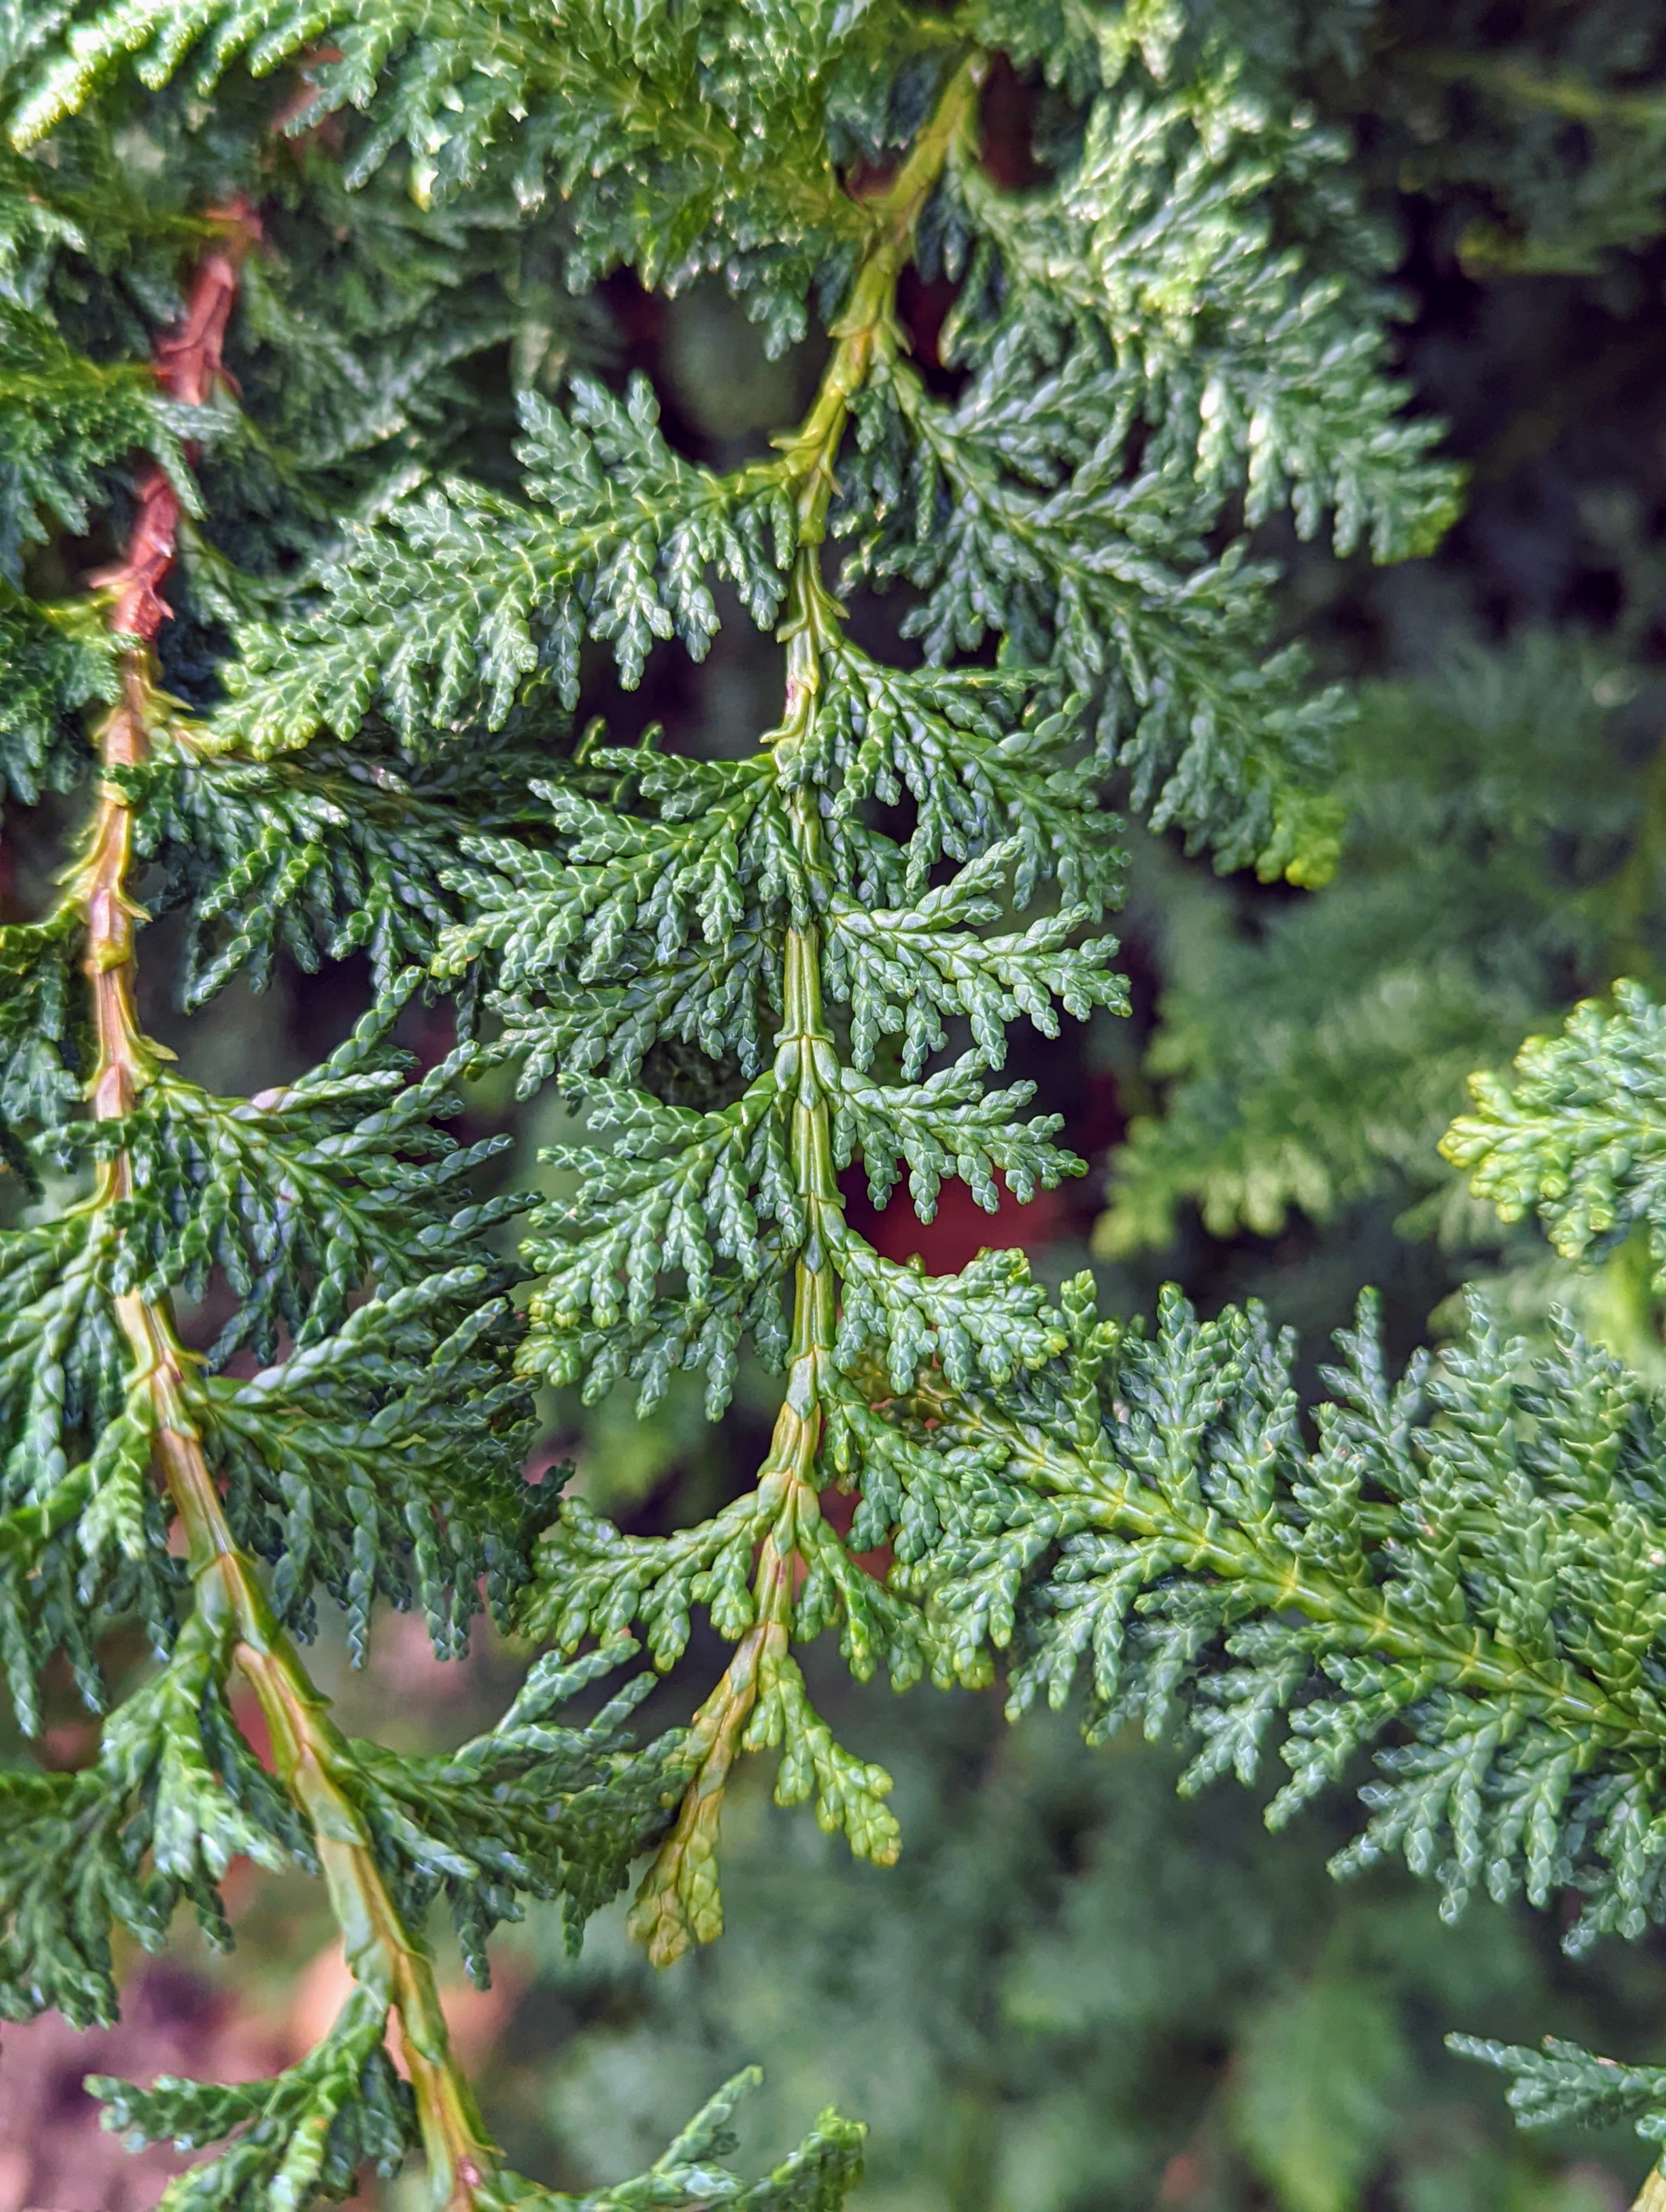
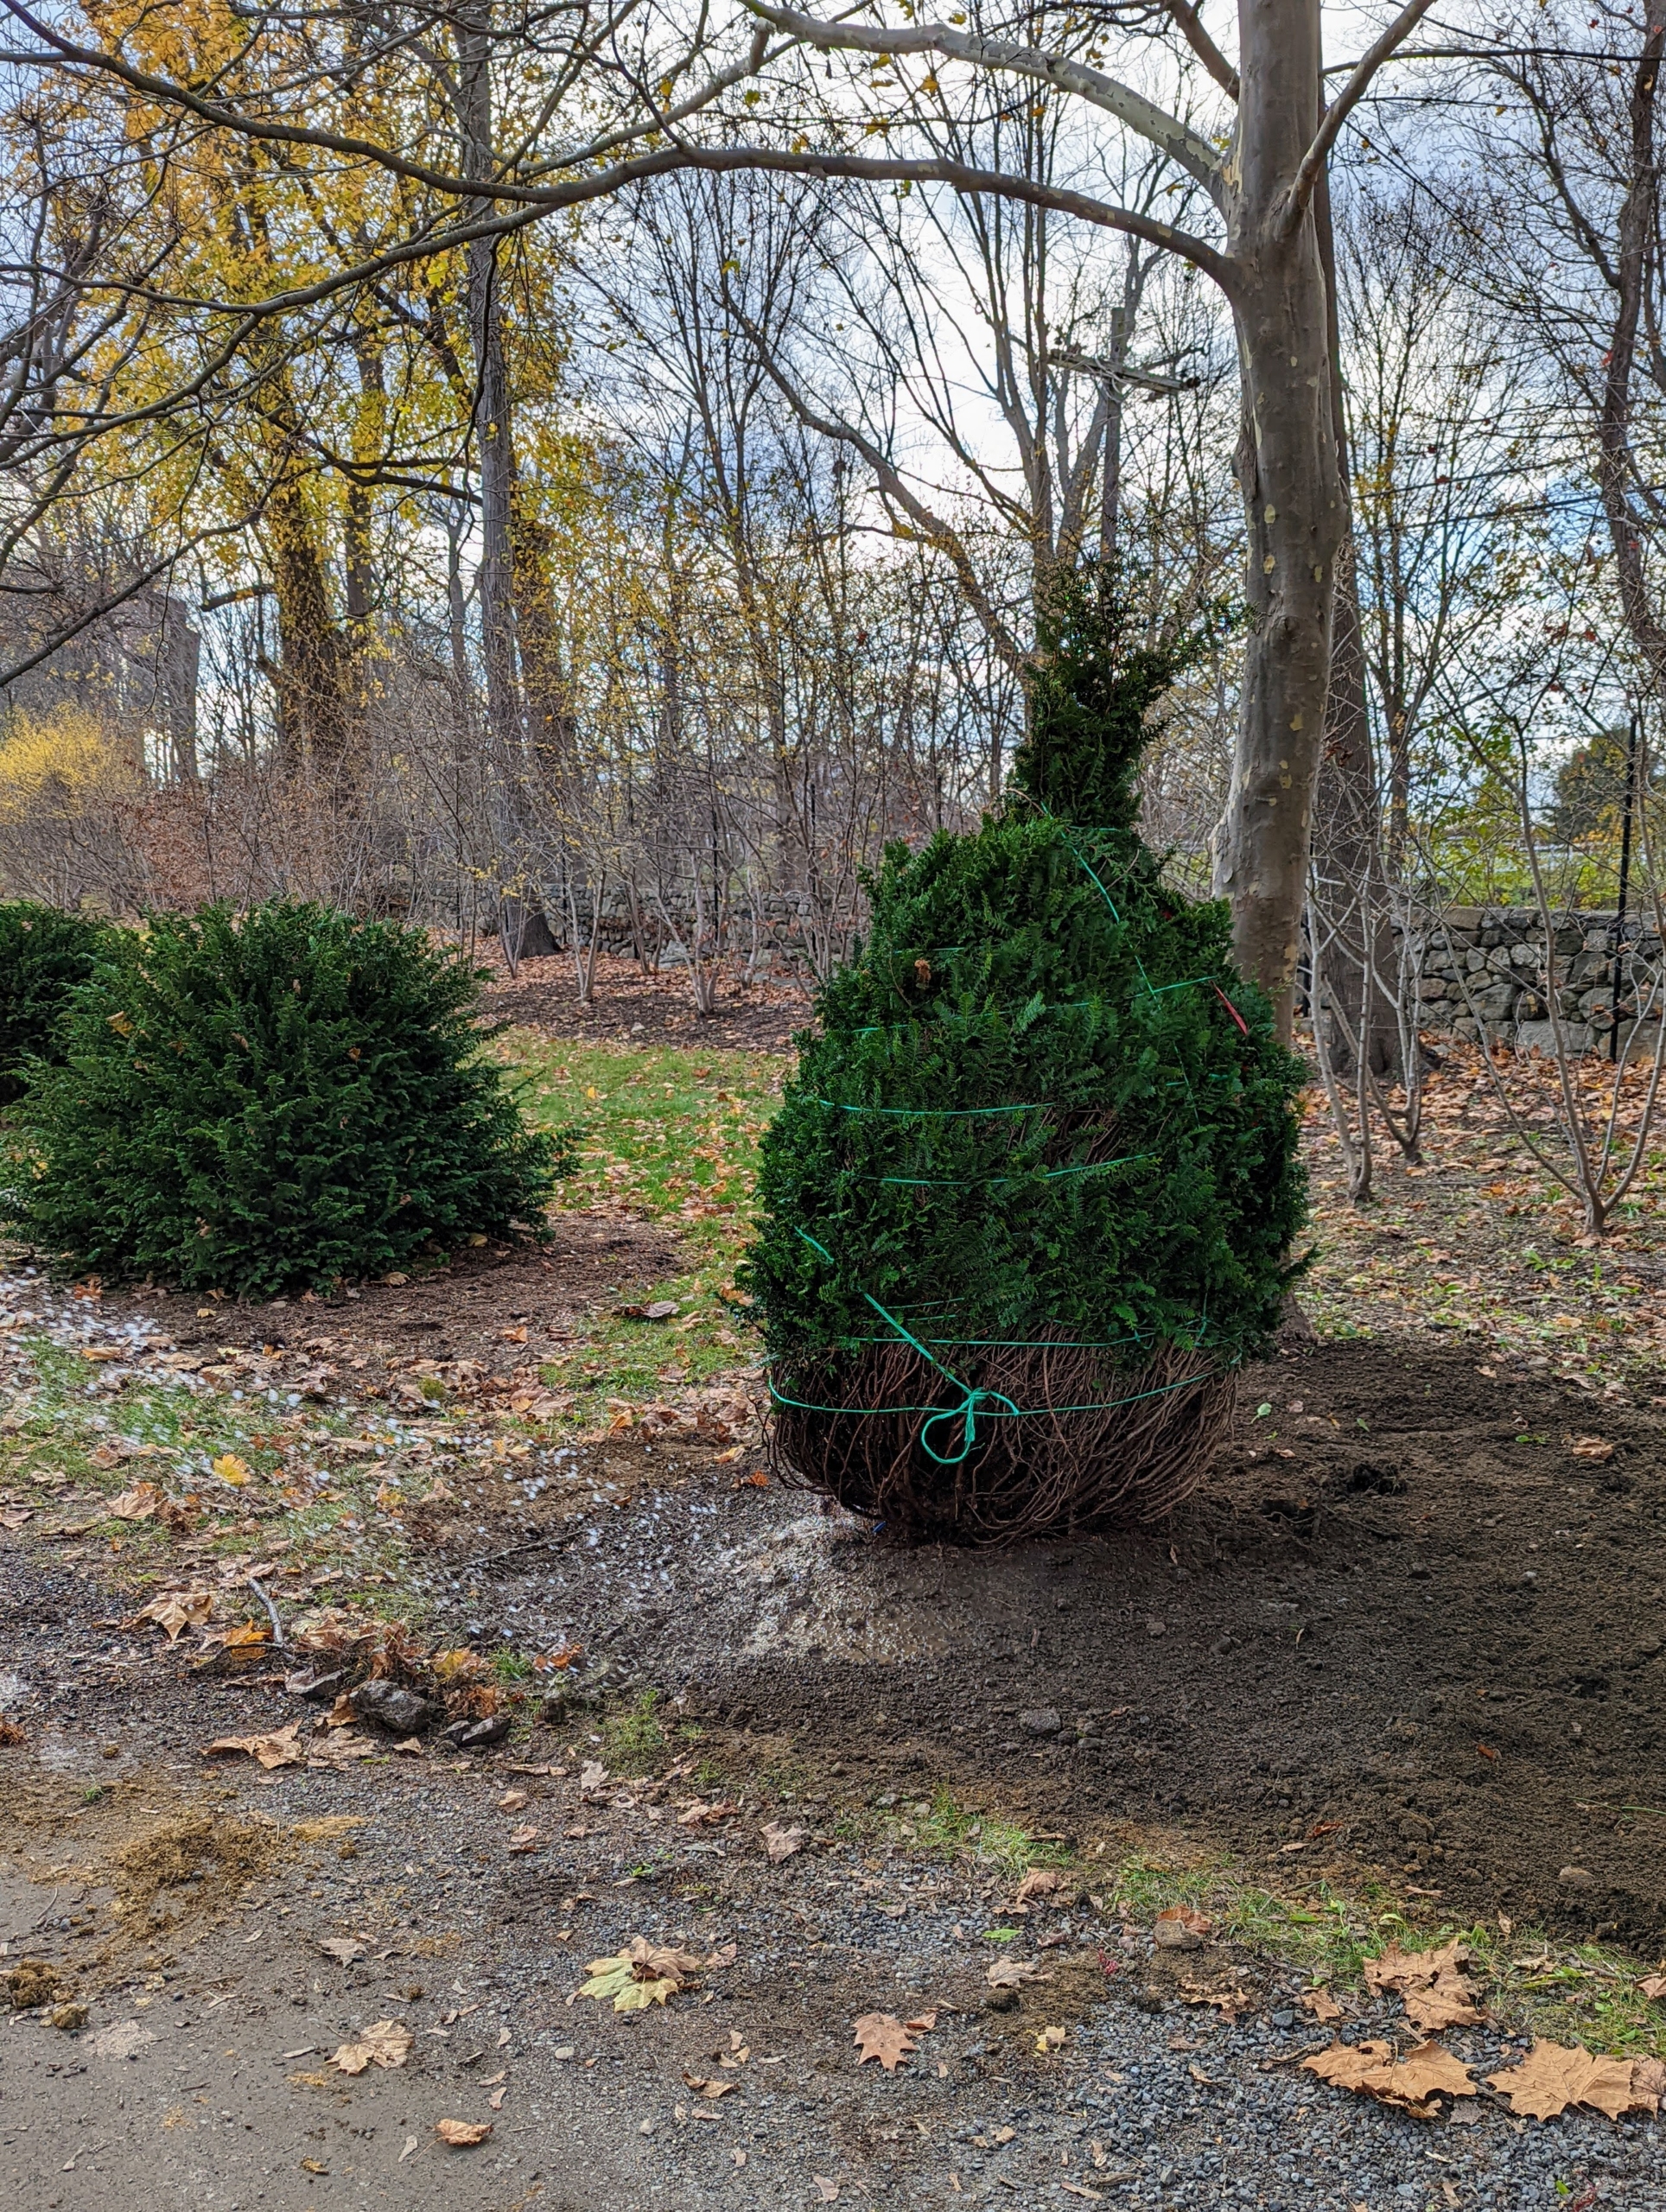
Chamaecyparis obtusa ‘Filicoides’, the Fernspray Hinoki cypress is a large-growing, upright, bush, with long, ascending branches. I knew several would be perfect at one end of the Linden Allée leading to my vegetable garden.
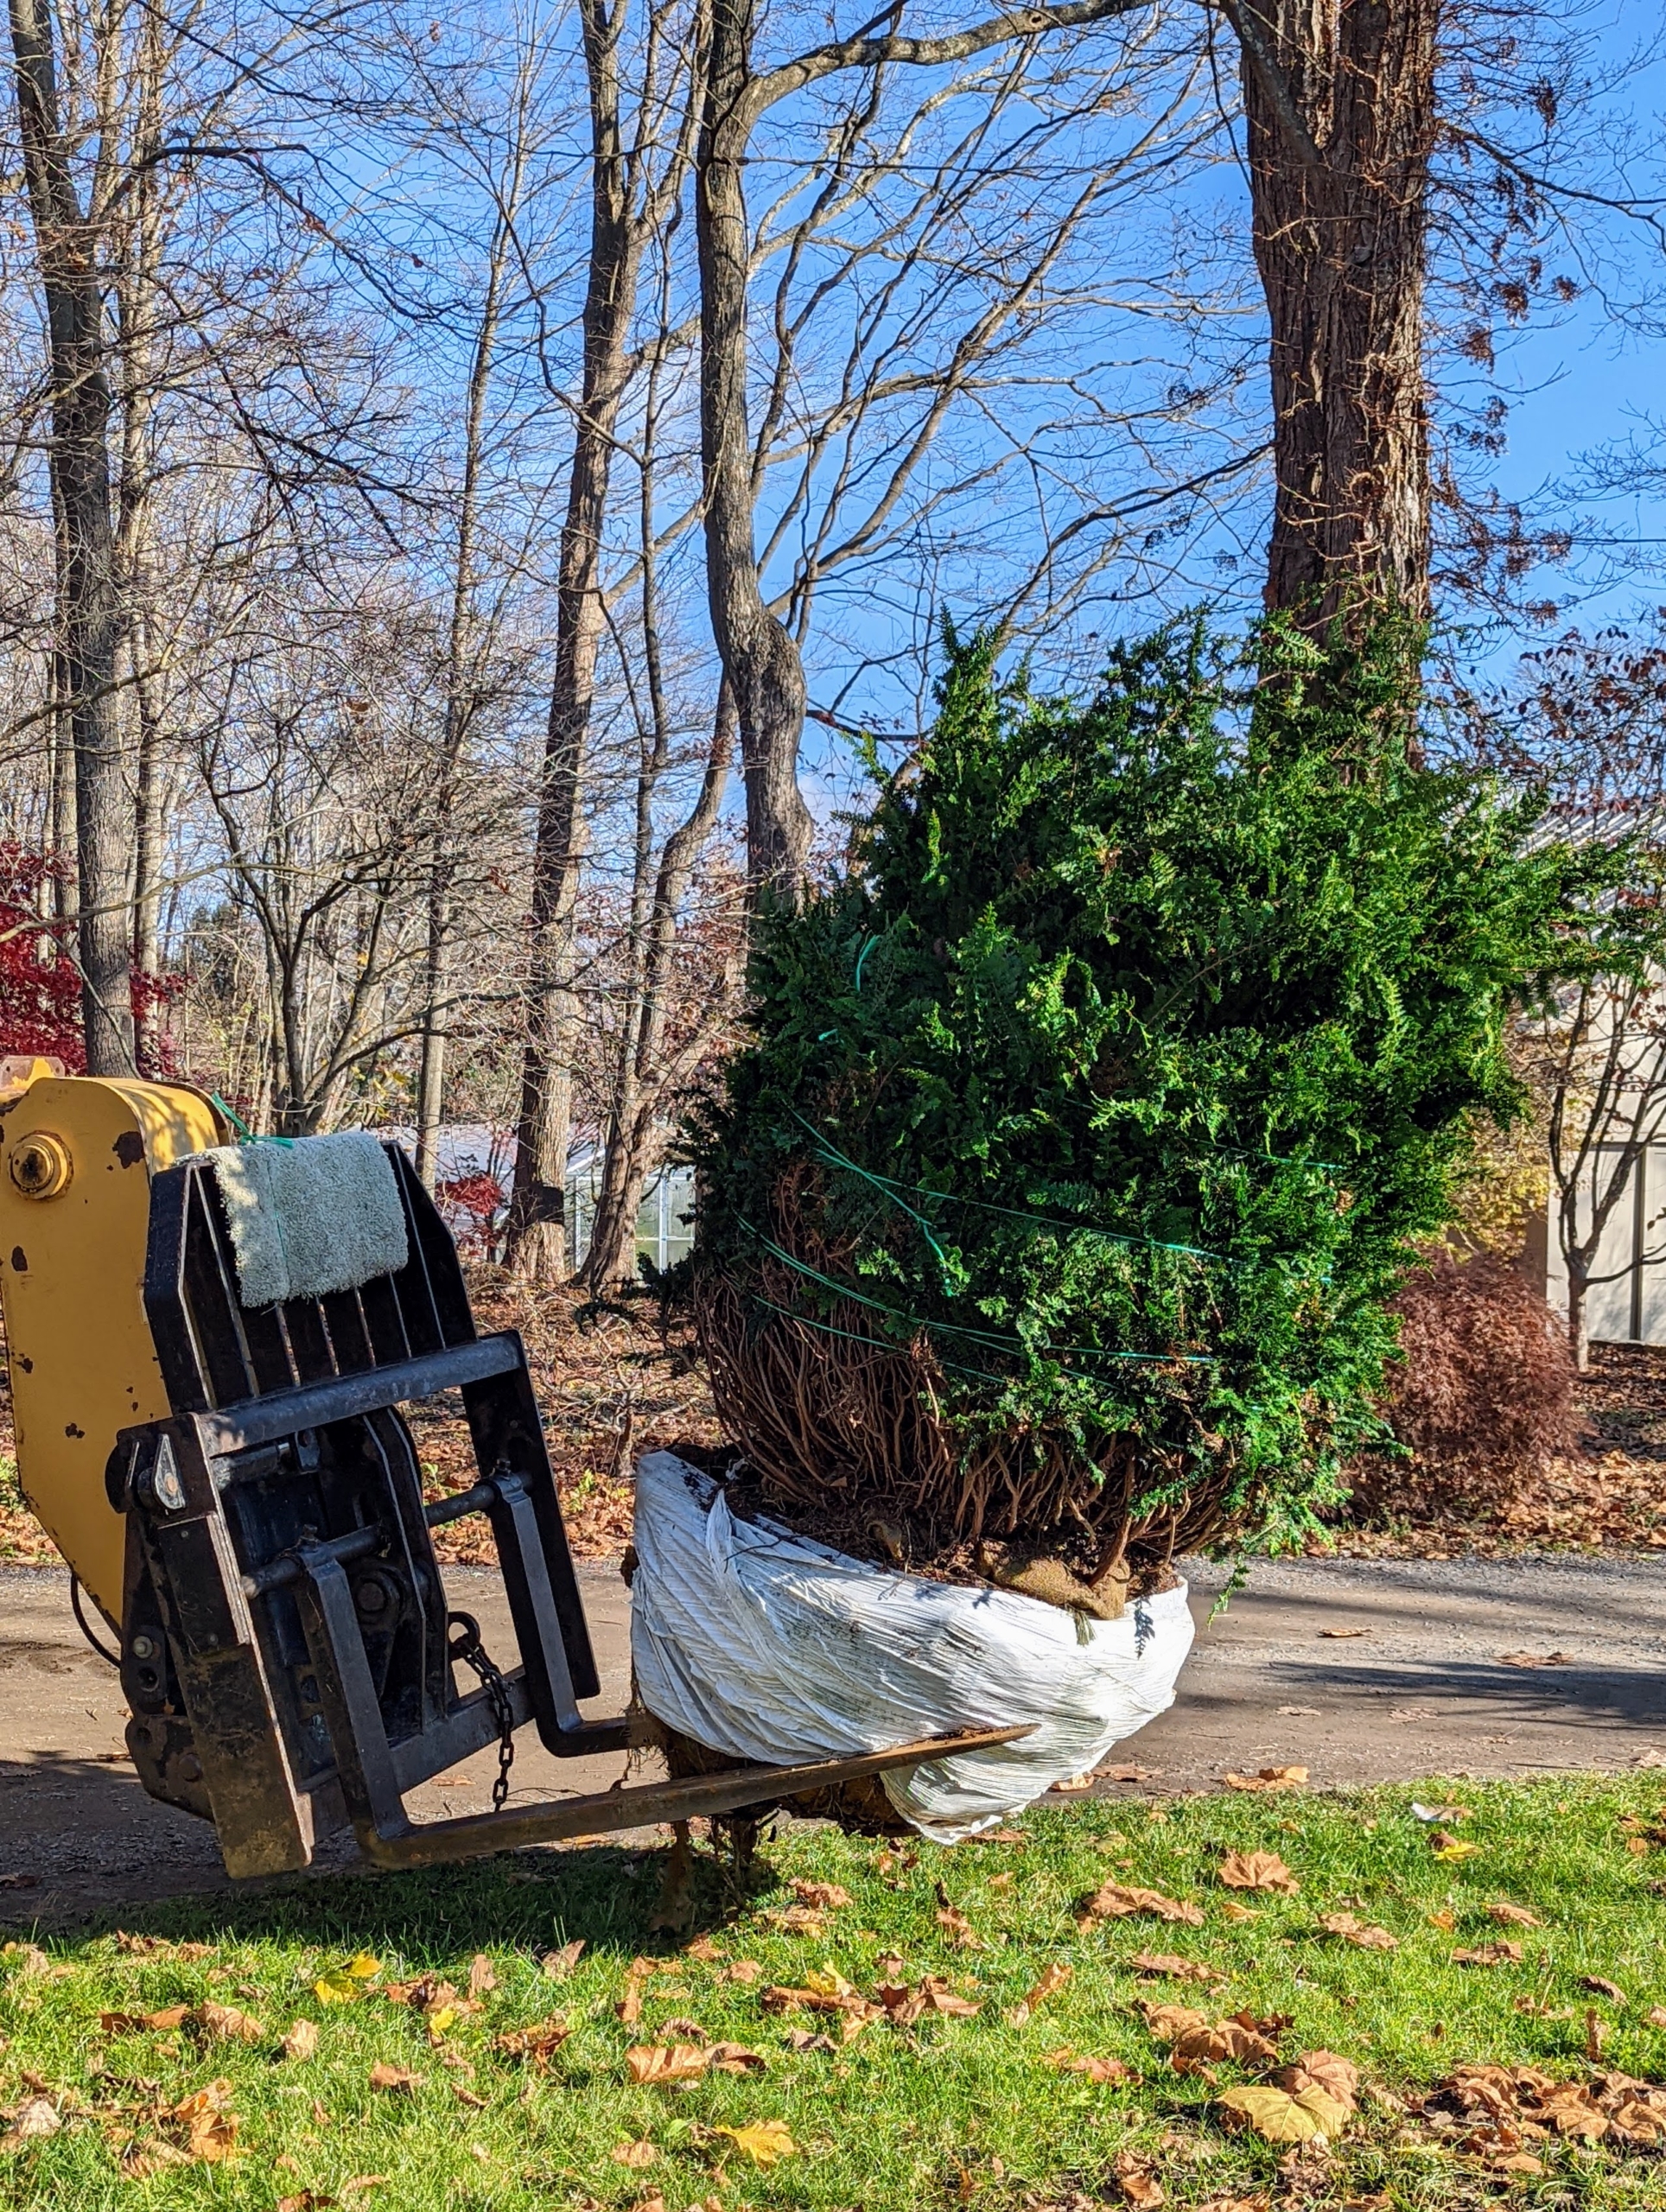
Once they are delivered, each bush is placed carefully where it will be planted. Each grows about six to eight inches per year.
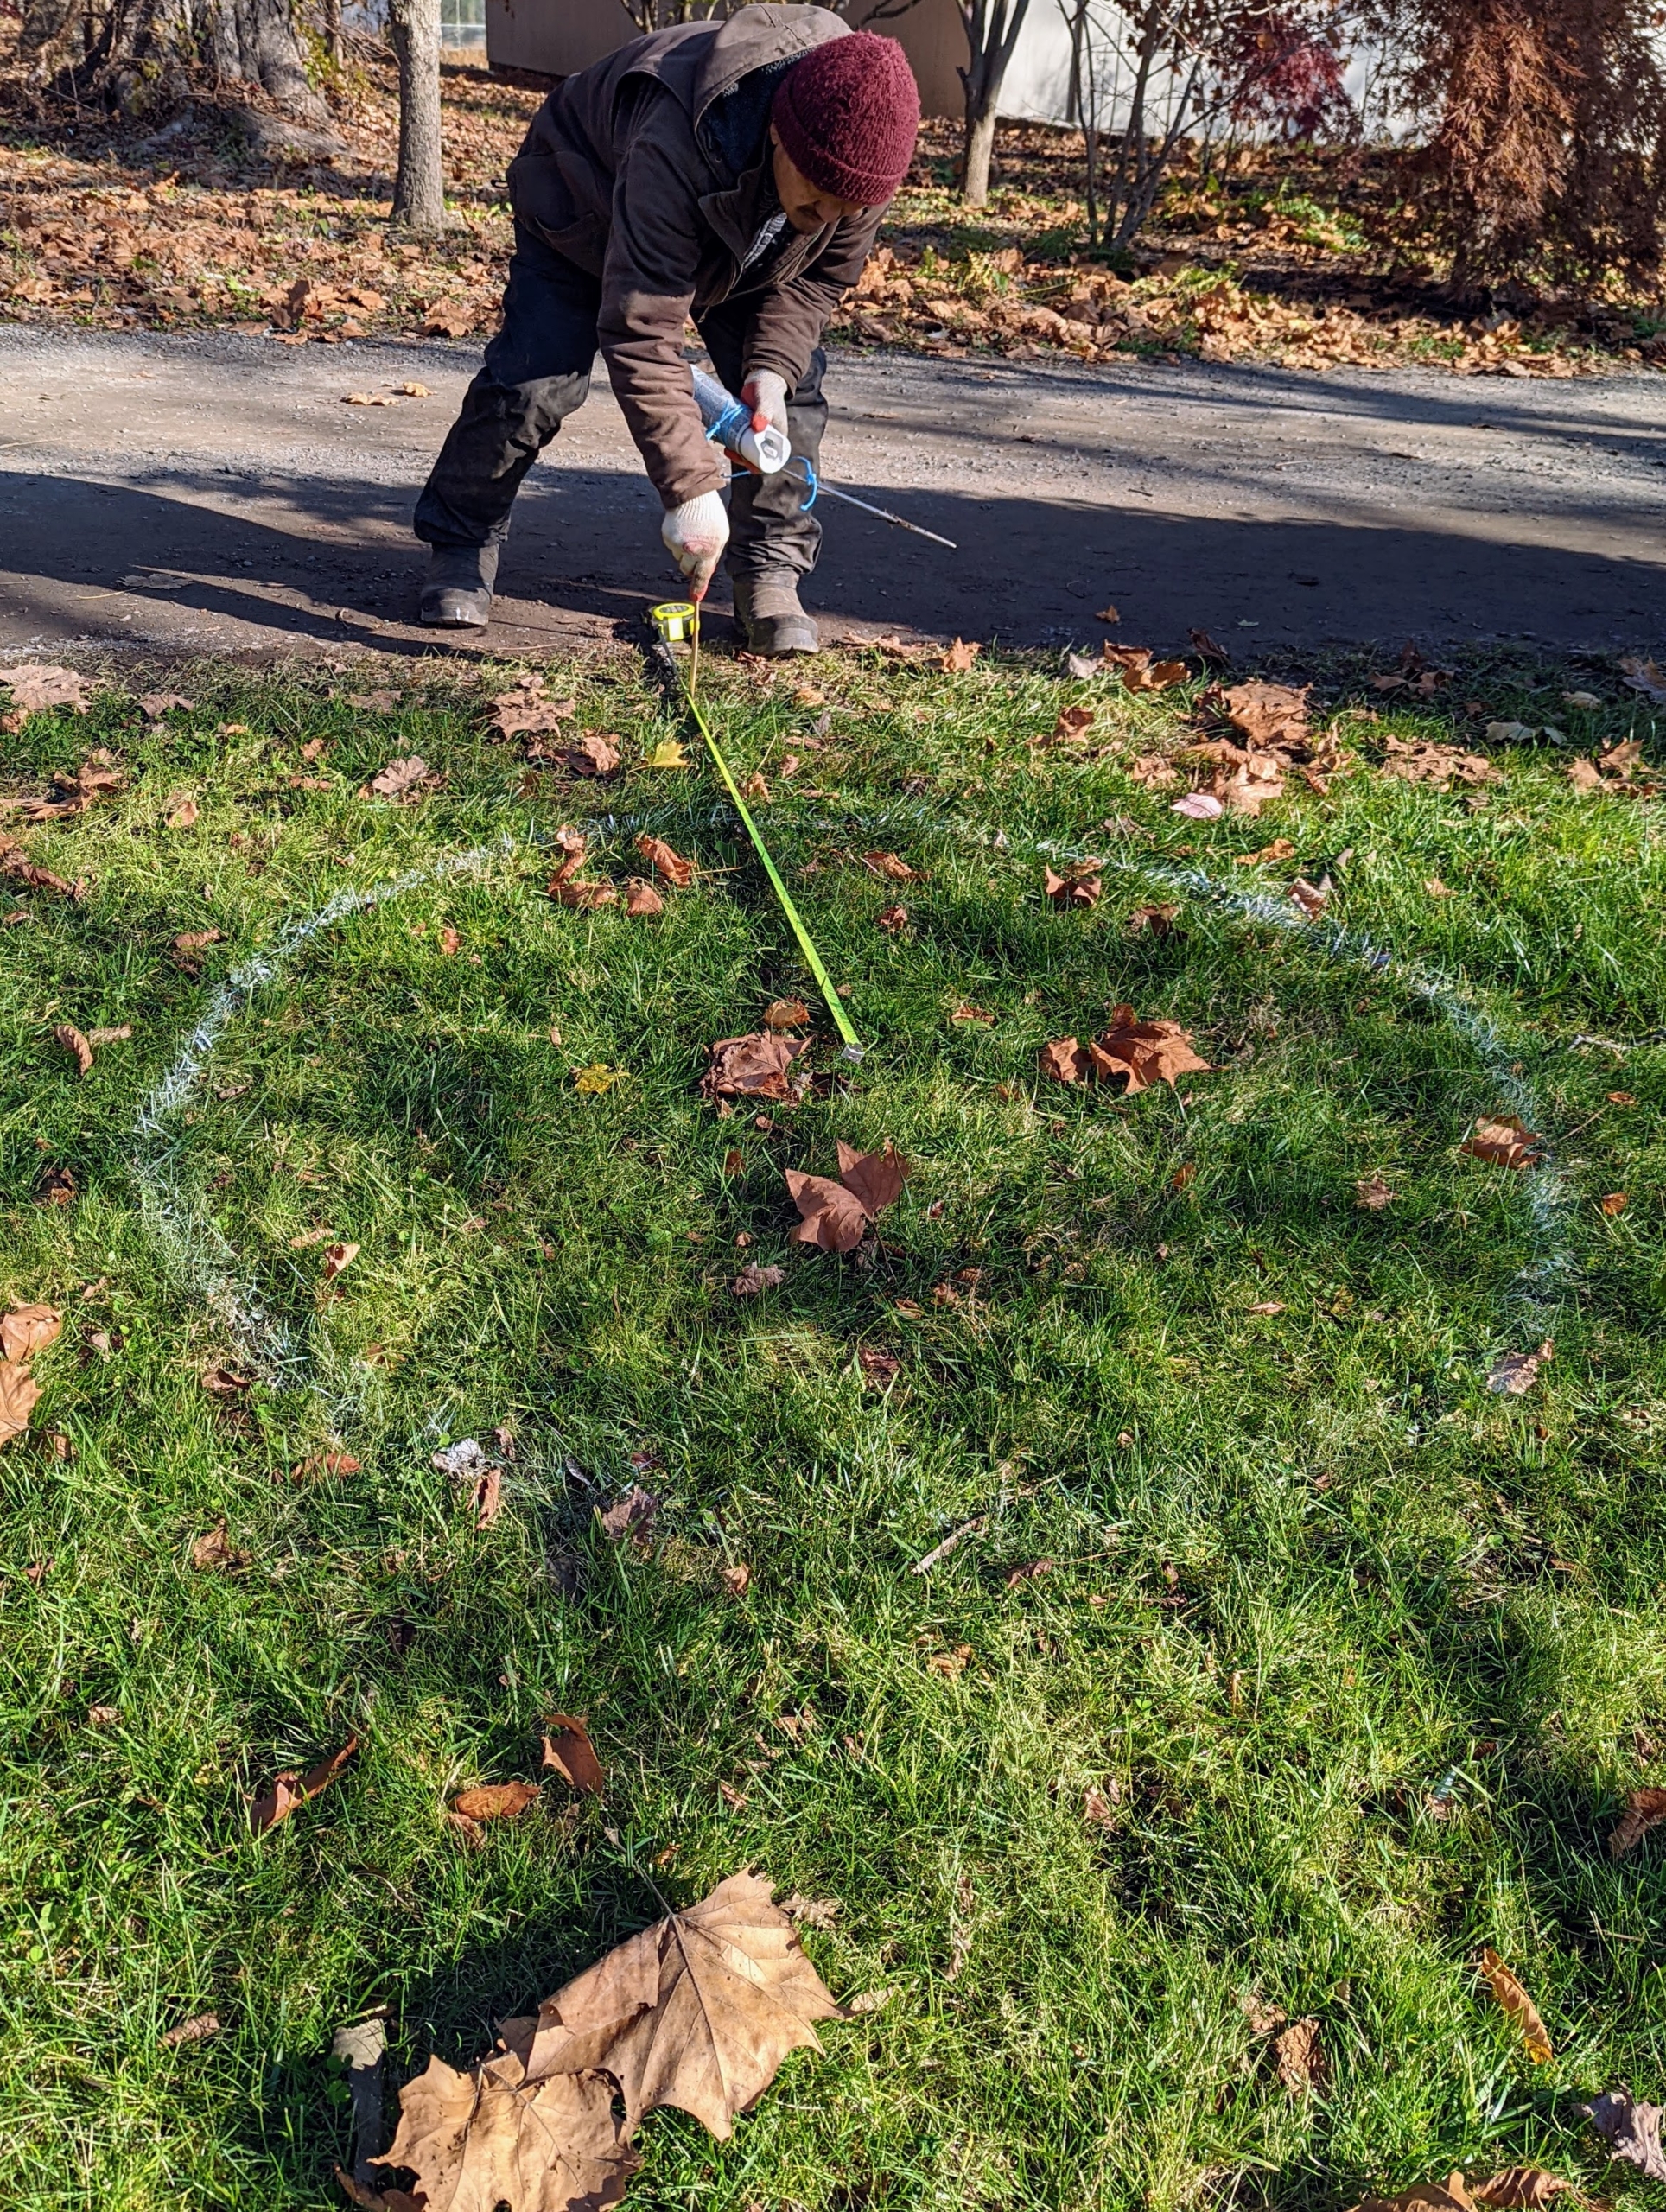
Chhiring measures and marks exactly where the hole will be dug.
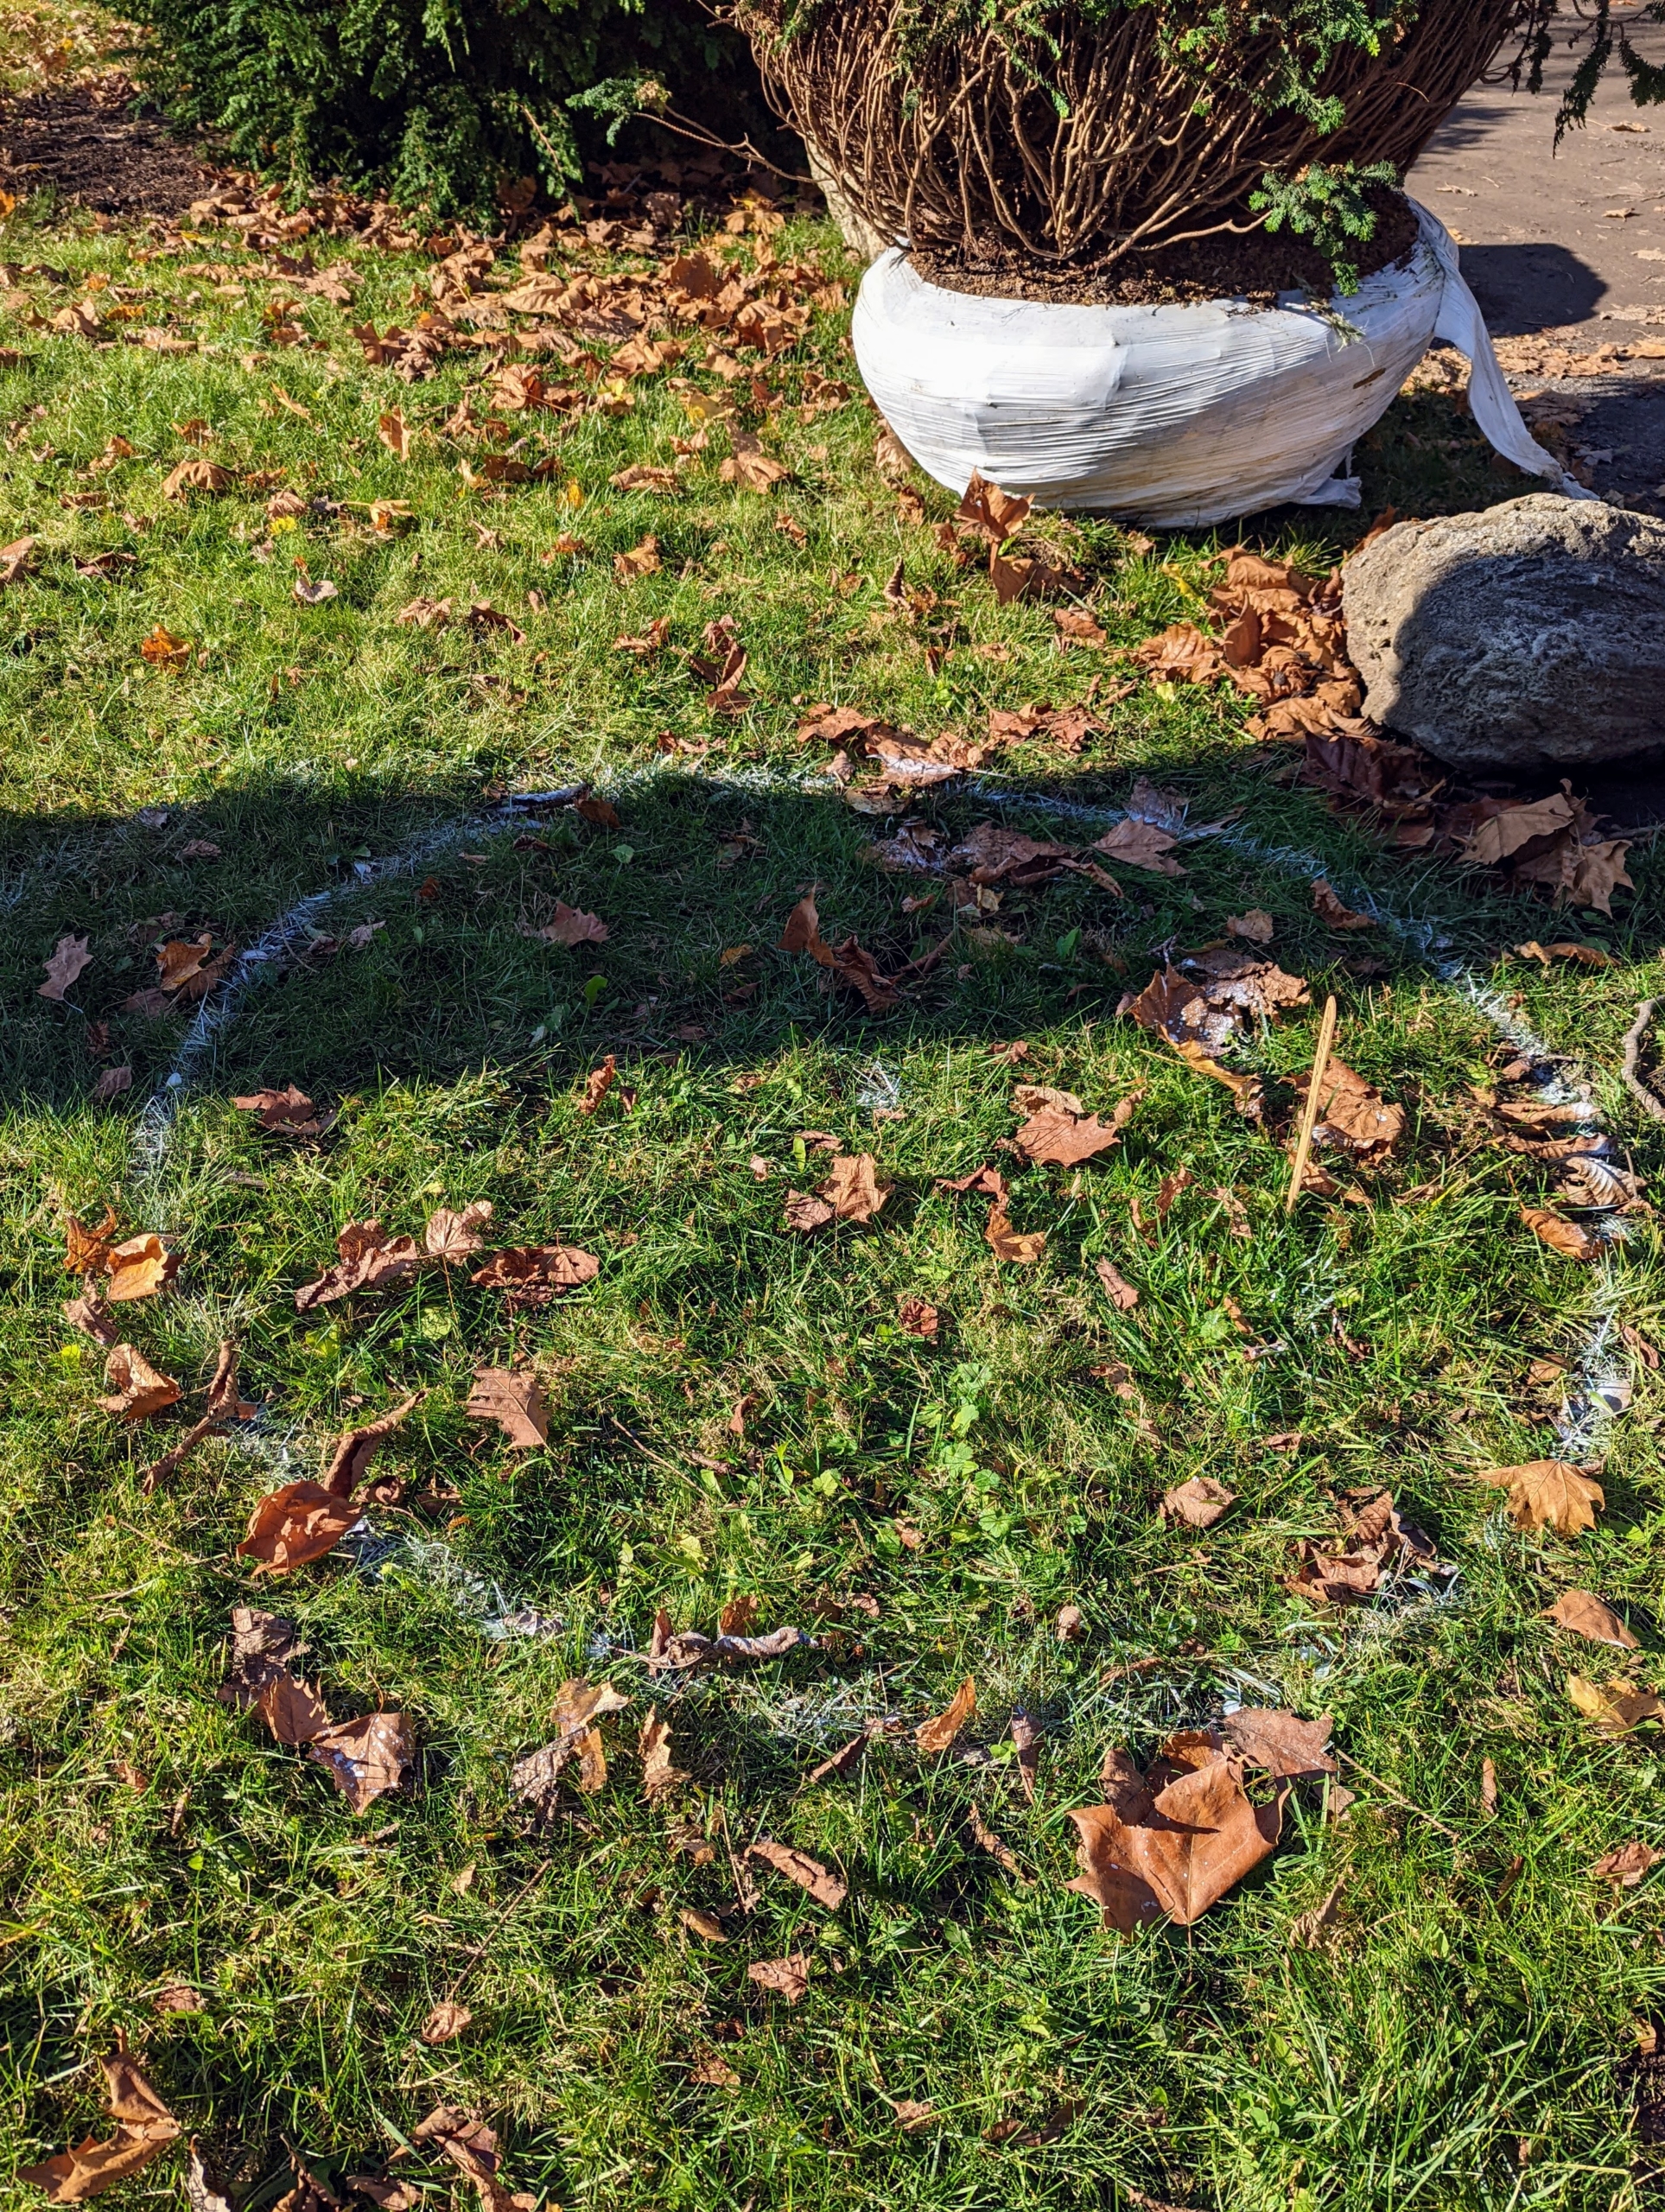
Chhiring uses white landscape paint to make a circle where the bush will be planted. These specimens should have at least four feet of space between them.
Fernspray Hinoki cypress ‘Filicoides’ do best with medium moisture, in well-drained soils. They also prefer full sun to part shade and some shelter from high winds. These bushes are placed in an area surrounded by other trees and a barn – I think they’ll do wonderfully.
Here is a closer look at the foliage which is bold, emerald-green in color with various brown highlights.
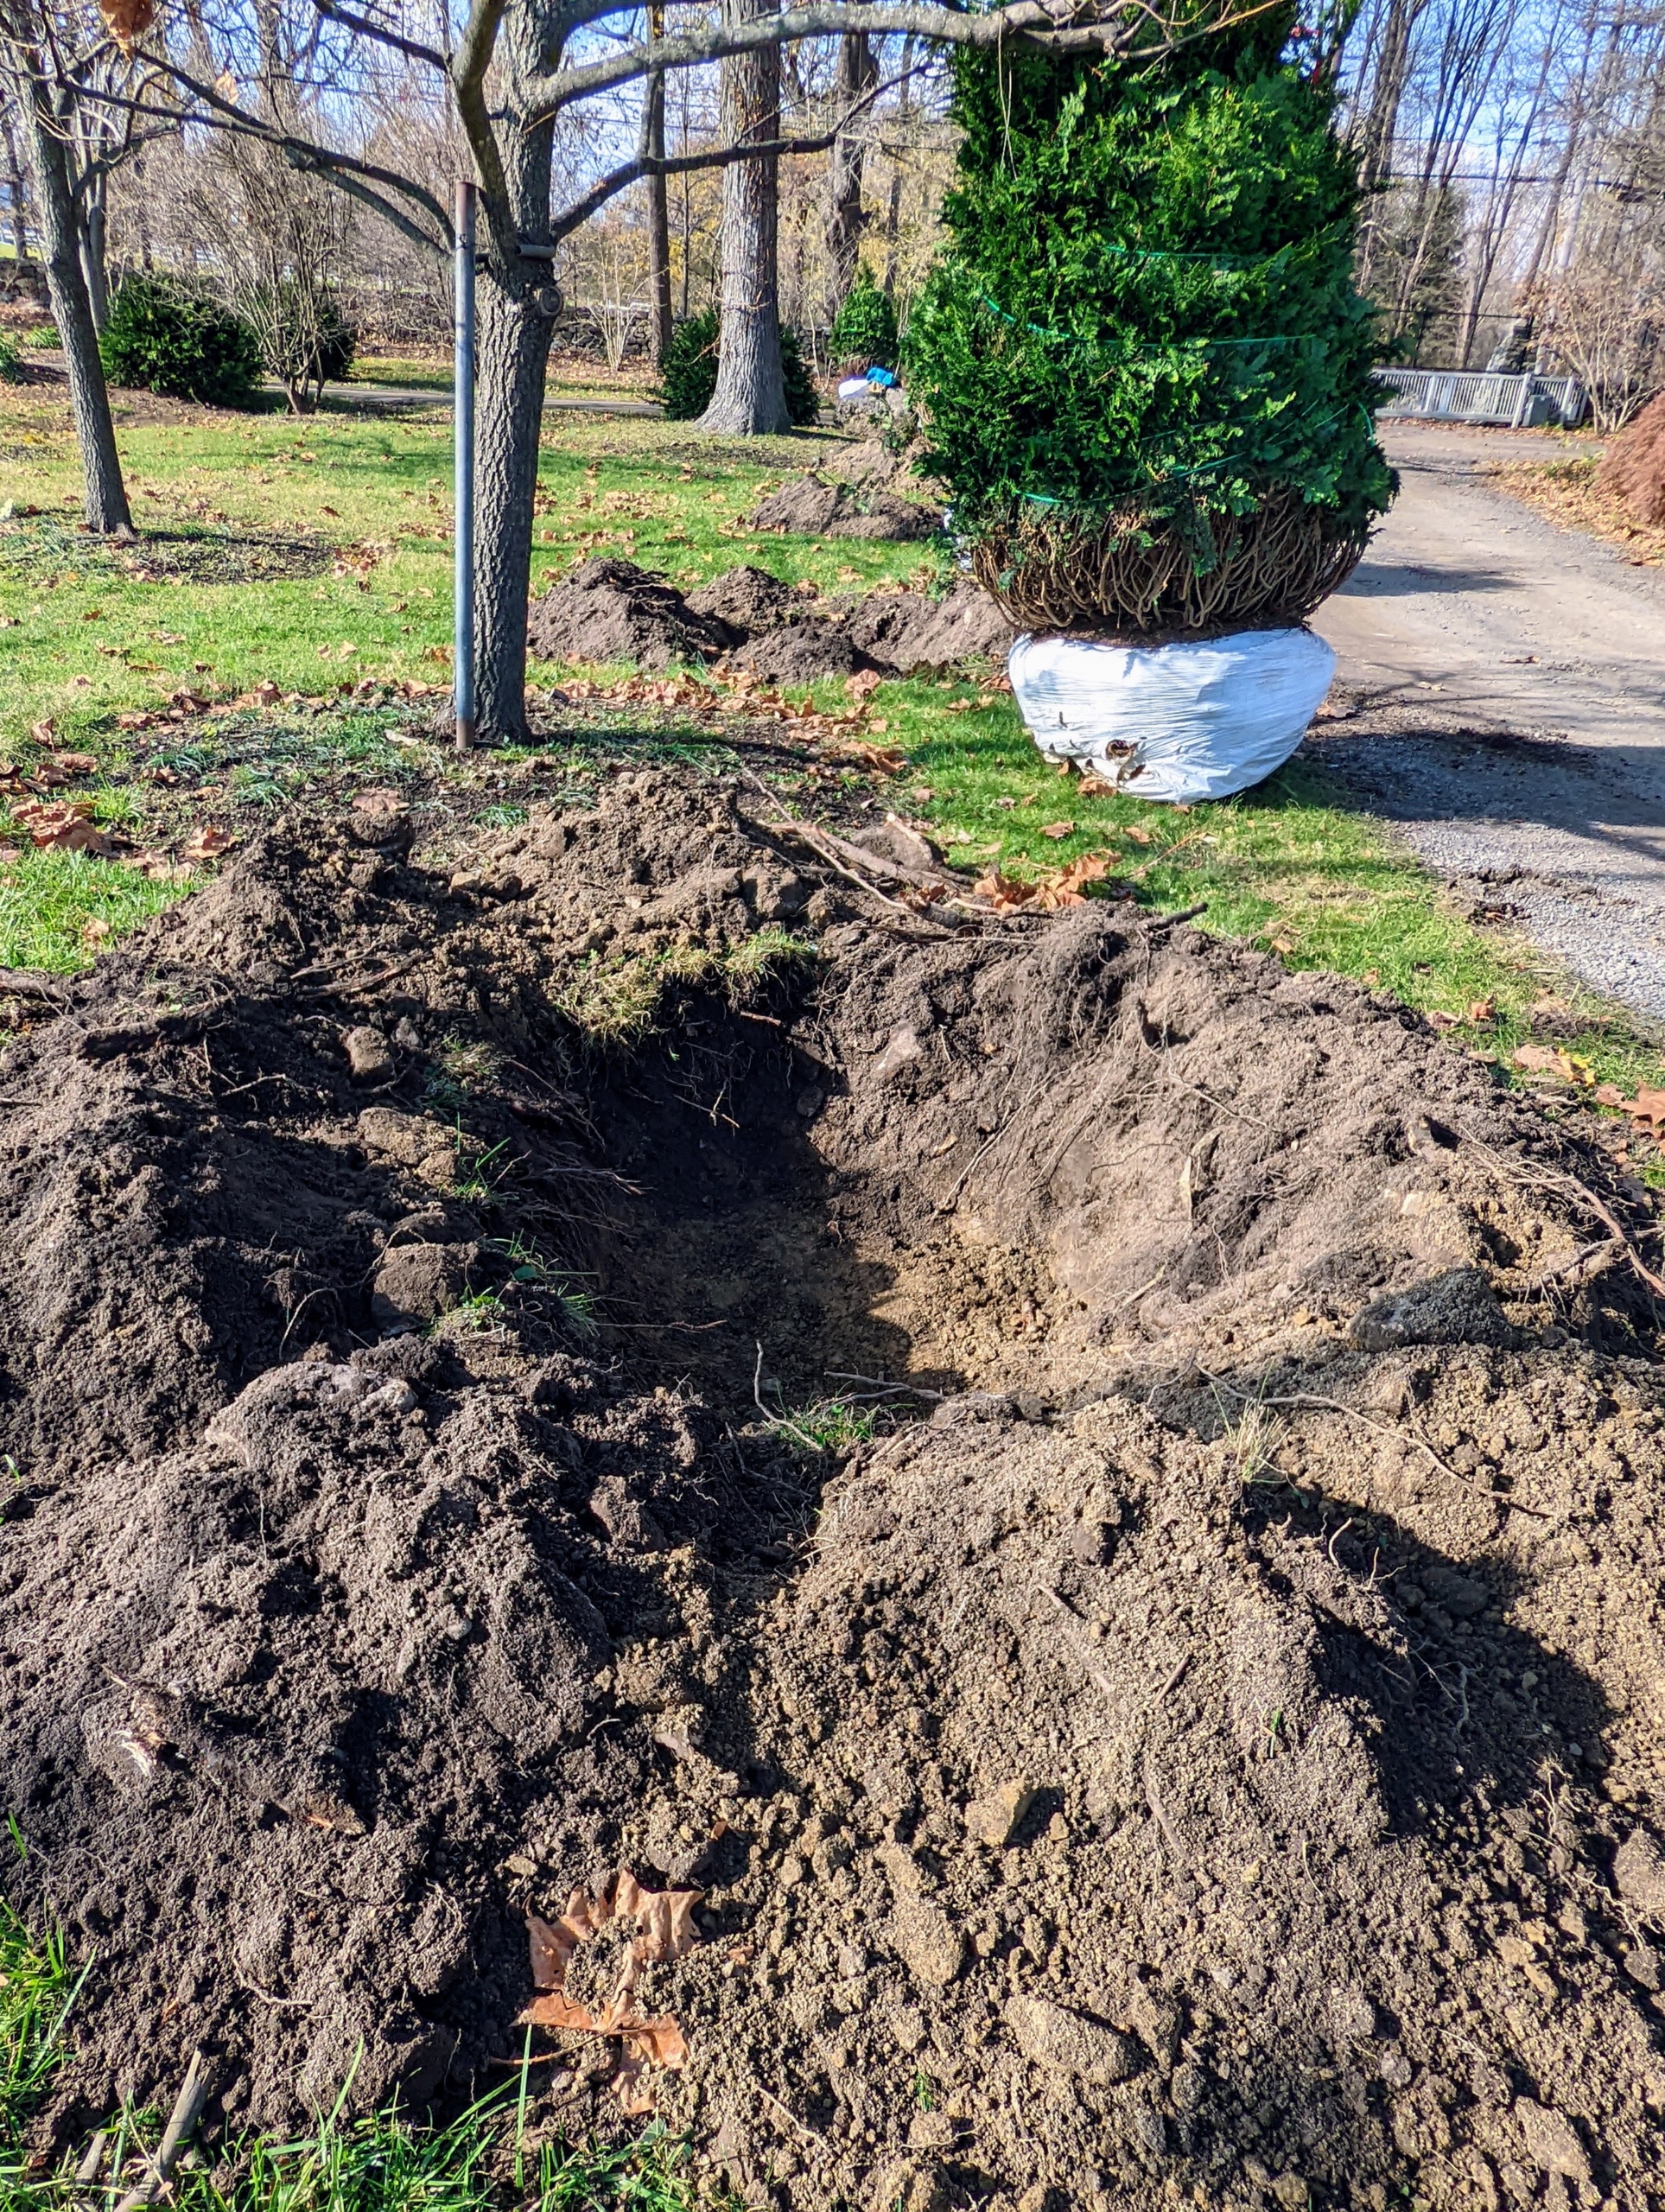
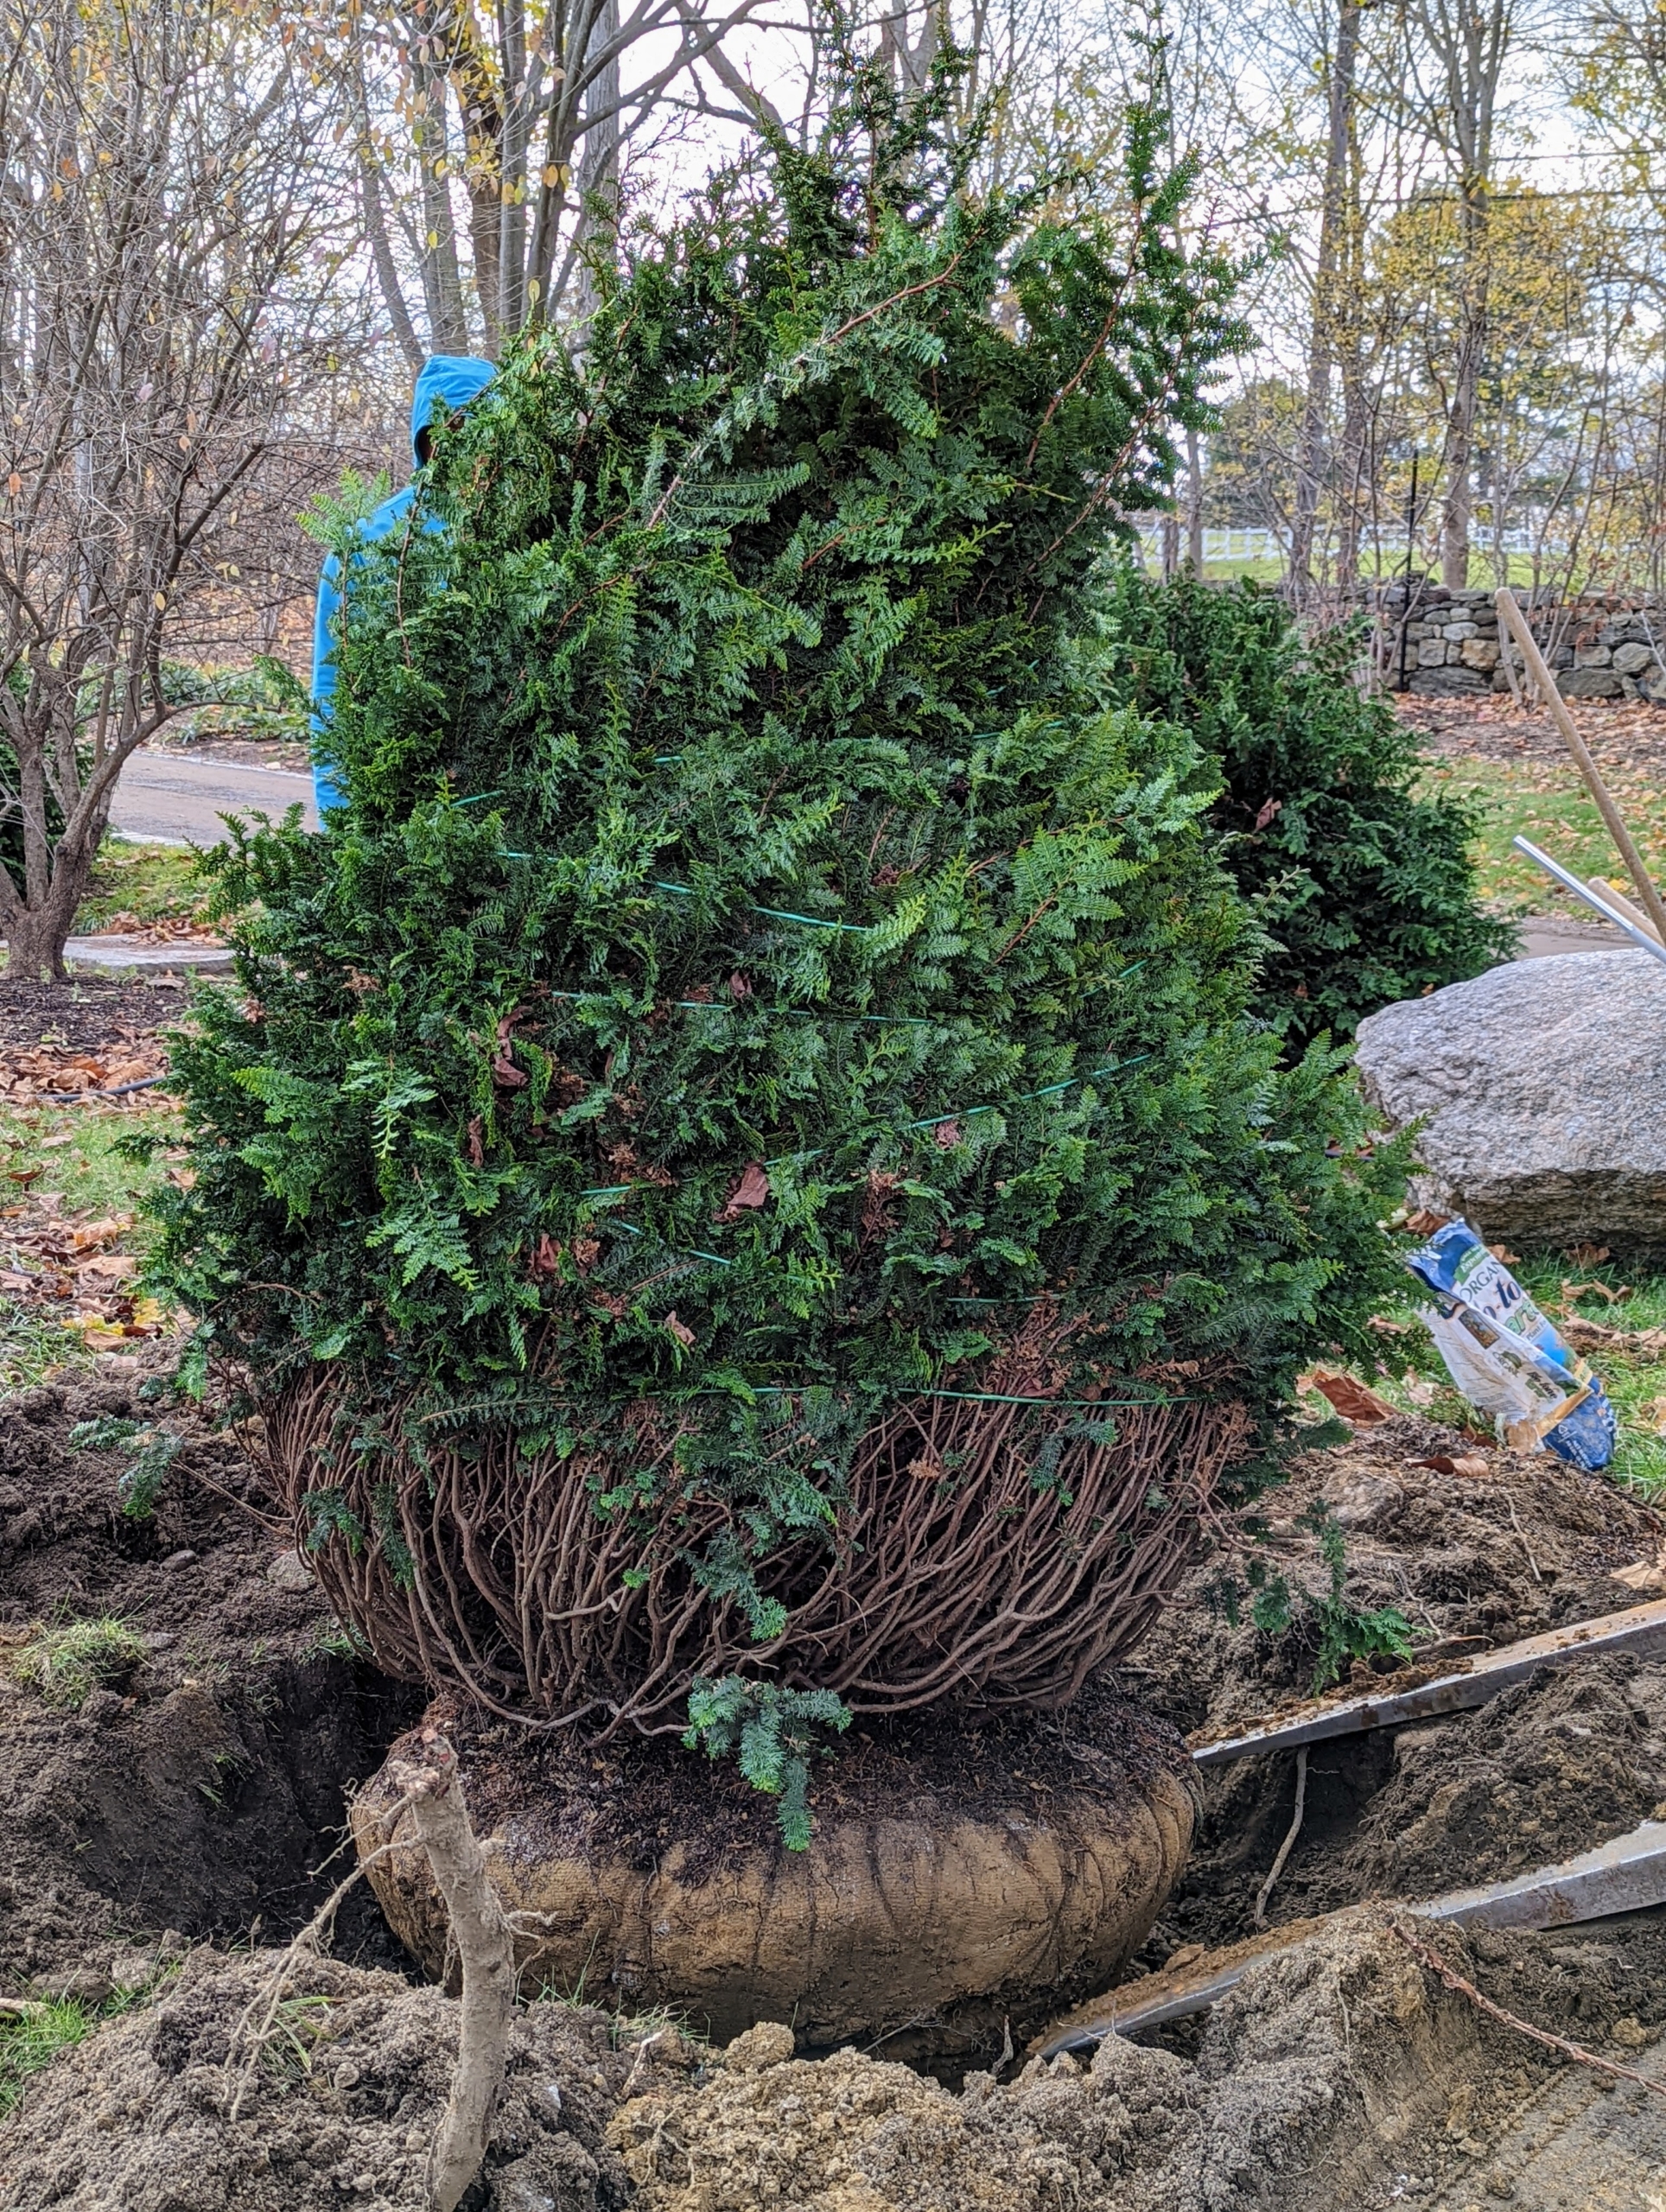
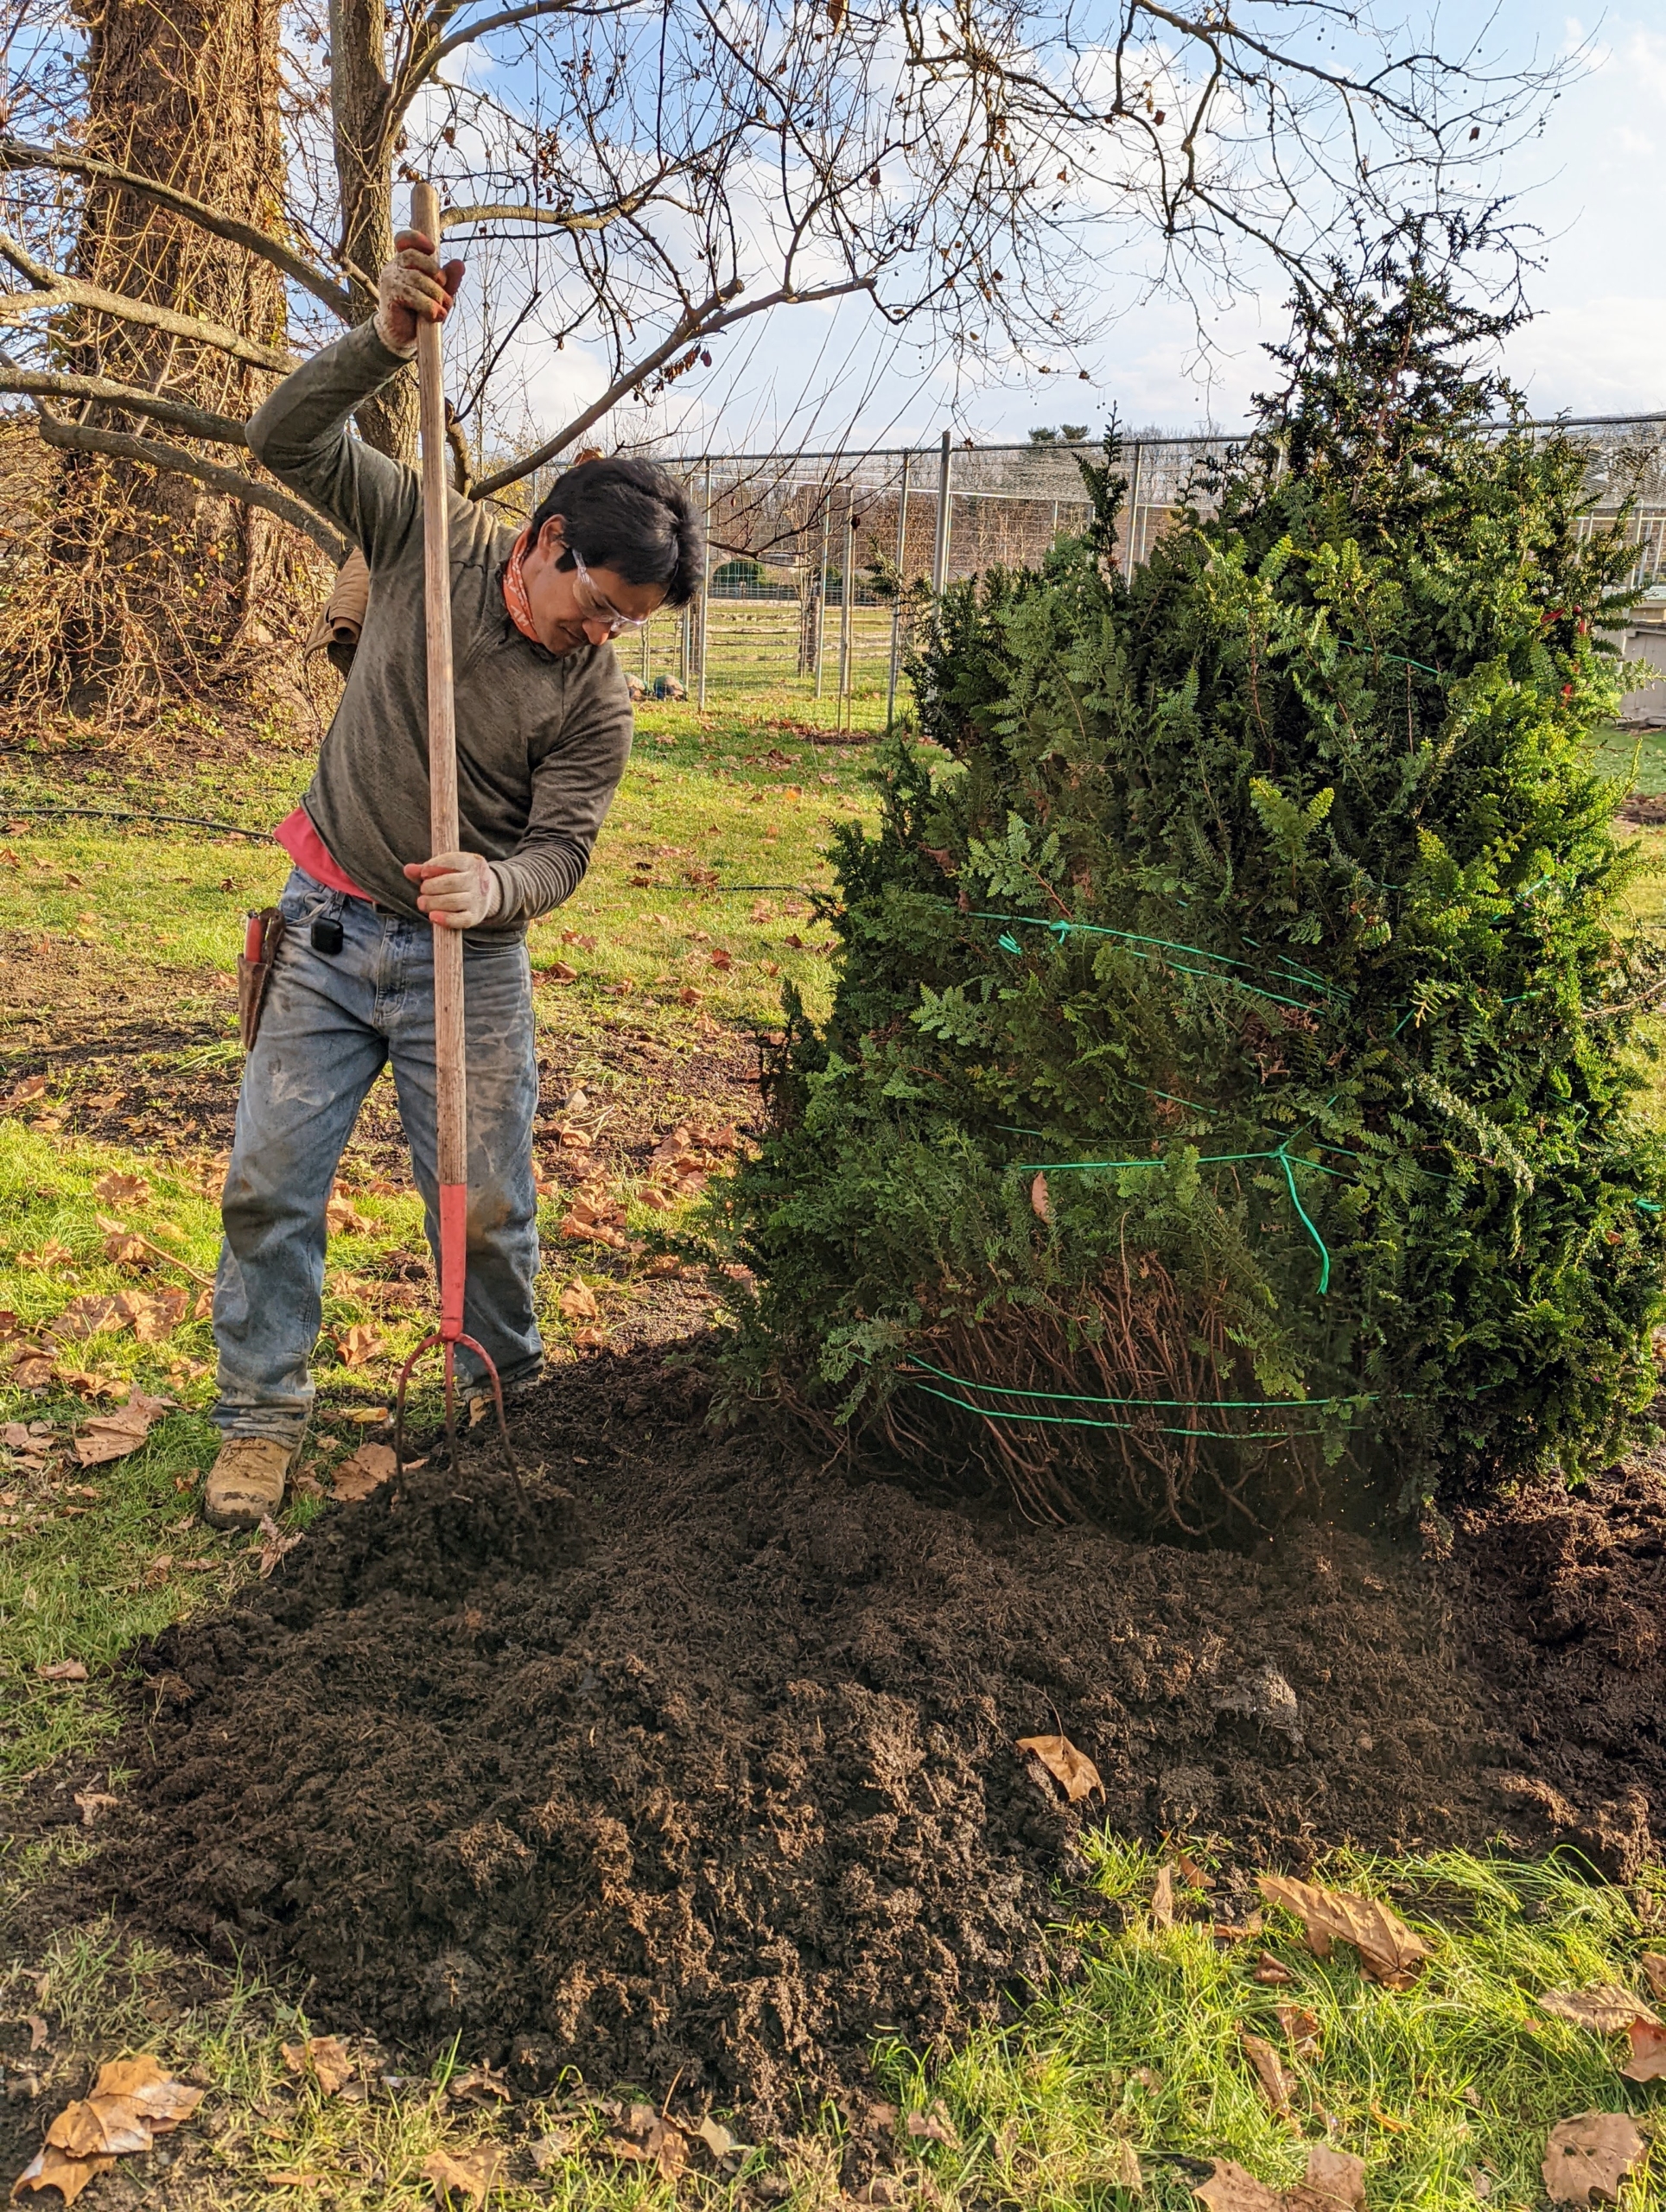
The team begins digging. The holes must be pretty wide – each one should be at least two to five times as wide as the root ball, but no deeper than the root ball. Once in the hole, the top of the root ball should just be slightly higher than the soil surface, much like it was planted at the nursery. The hole sides should also be slanted. Digging a proper hole helps to provide the best opportunity for roots to expand into its new growing environment.
Here, Pasang removes all the plastic and burlap wrapping. These wrappings help to support the root ball during loading, shipping, and transplanting.
Here, Pasang shows all the material that was removed from around the root ball. Some leave them in the ground, but I prefer to remove them completely, so there is nothing blocking the growing roots.
When moving heavy specimens, only hold it by the root ball and the base of the planting – never by its branches, which could easily break. Because these bushes are being planted along the carriage road, Chhiring is able to maneuver the Hi-Lo and position the bush in its hole. Doing it this way instead of by hand saves a lot of time. Once the cypress is in its hole it is turned so it is straight and its best side is facing the road.
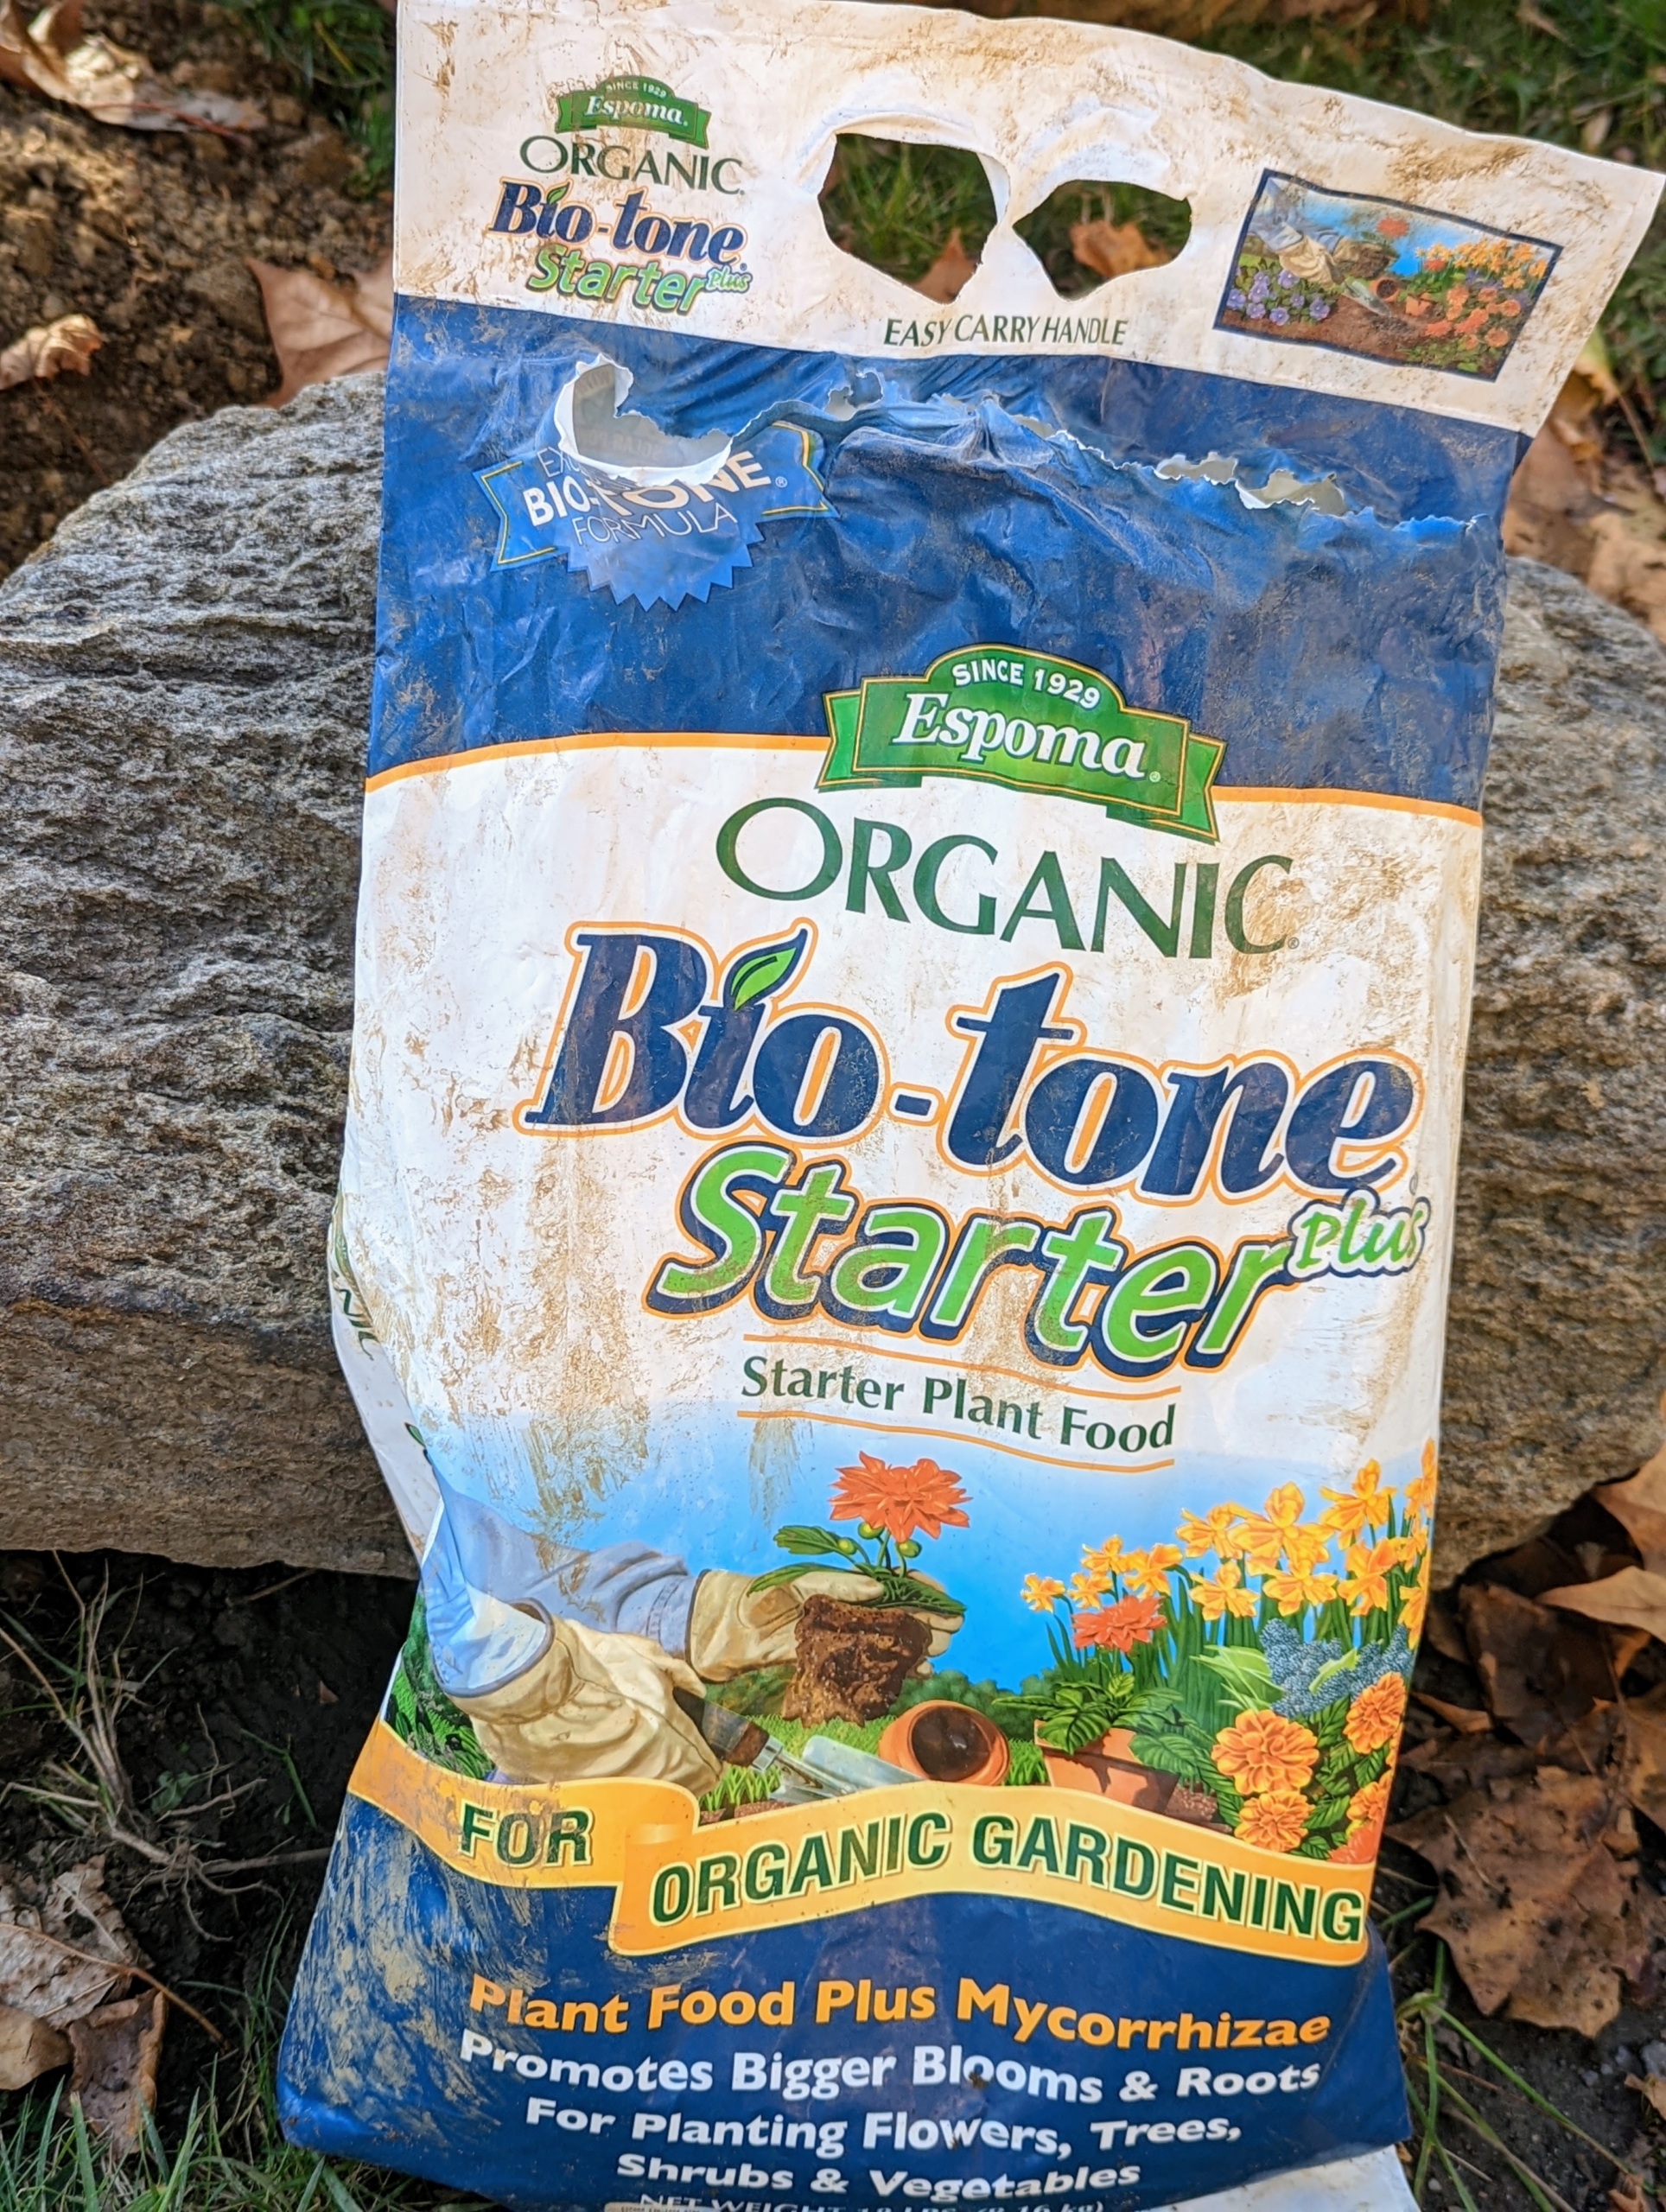
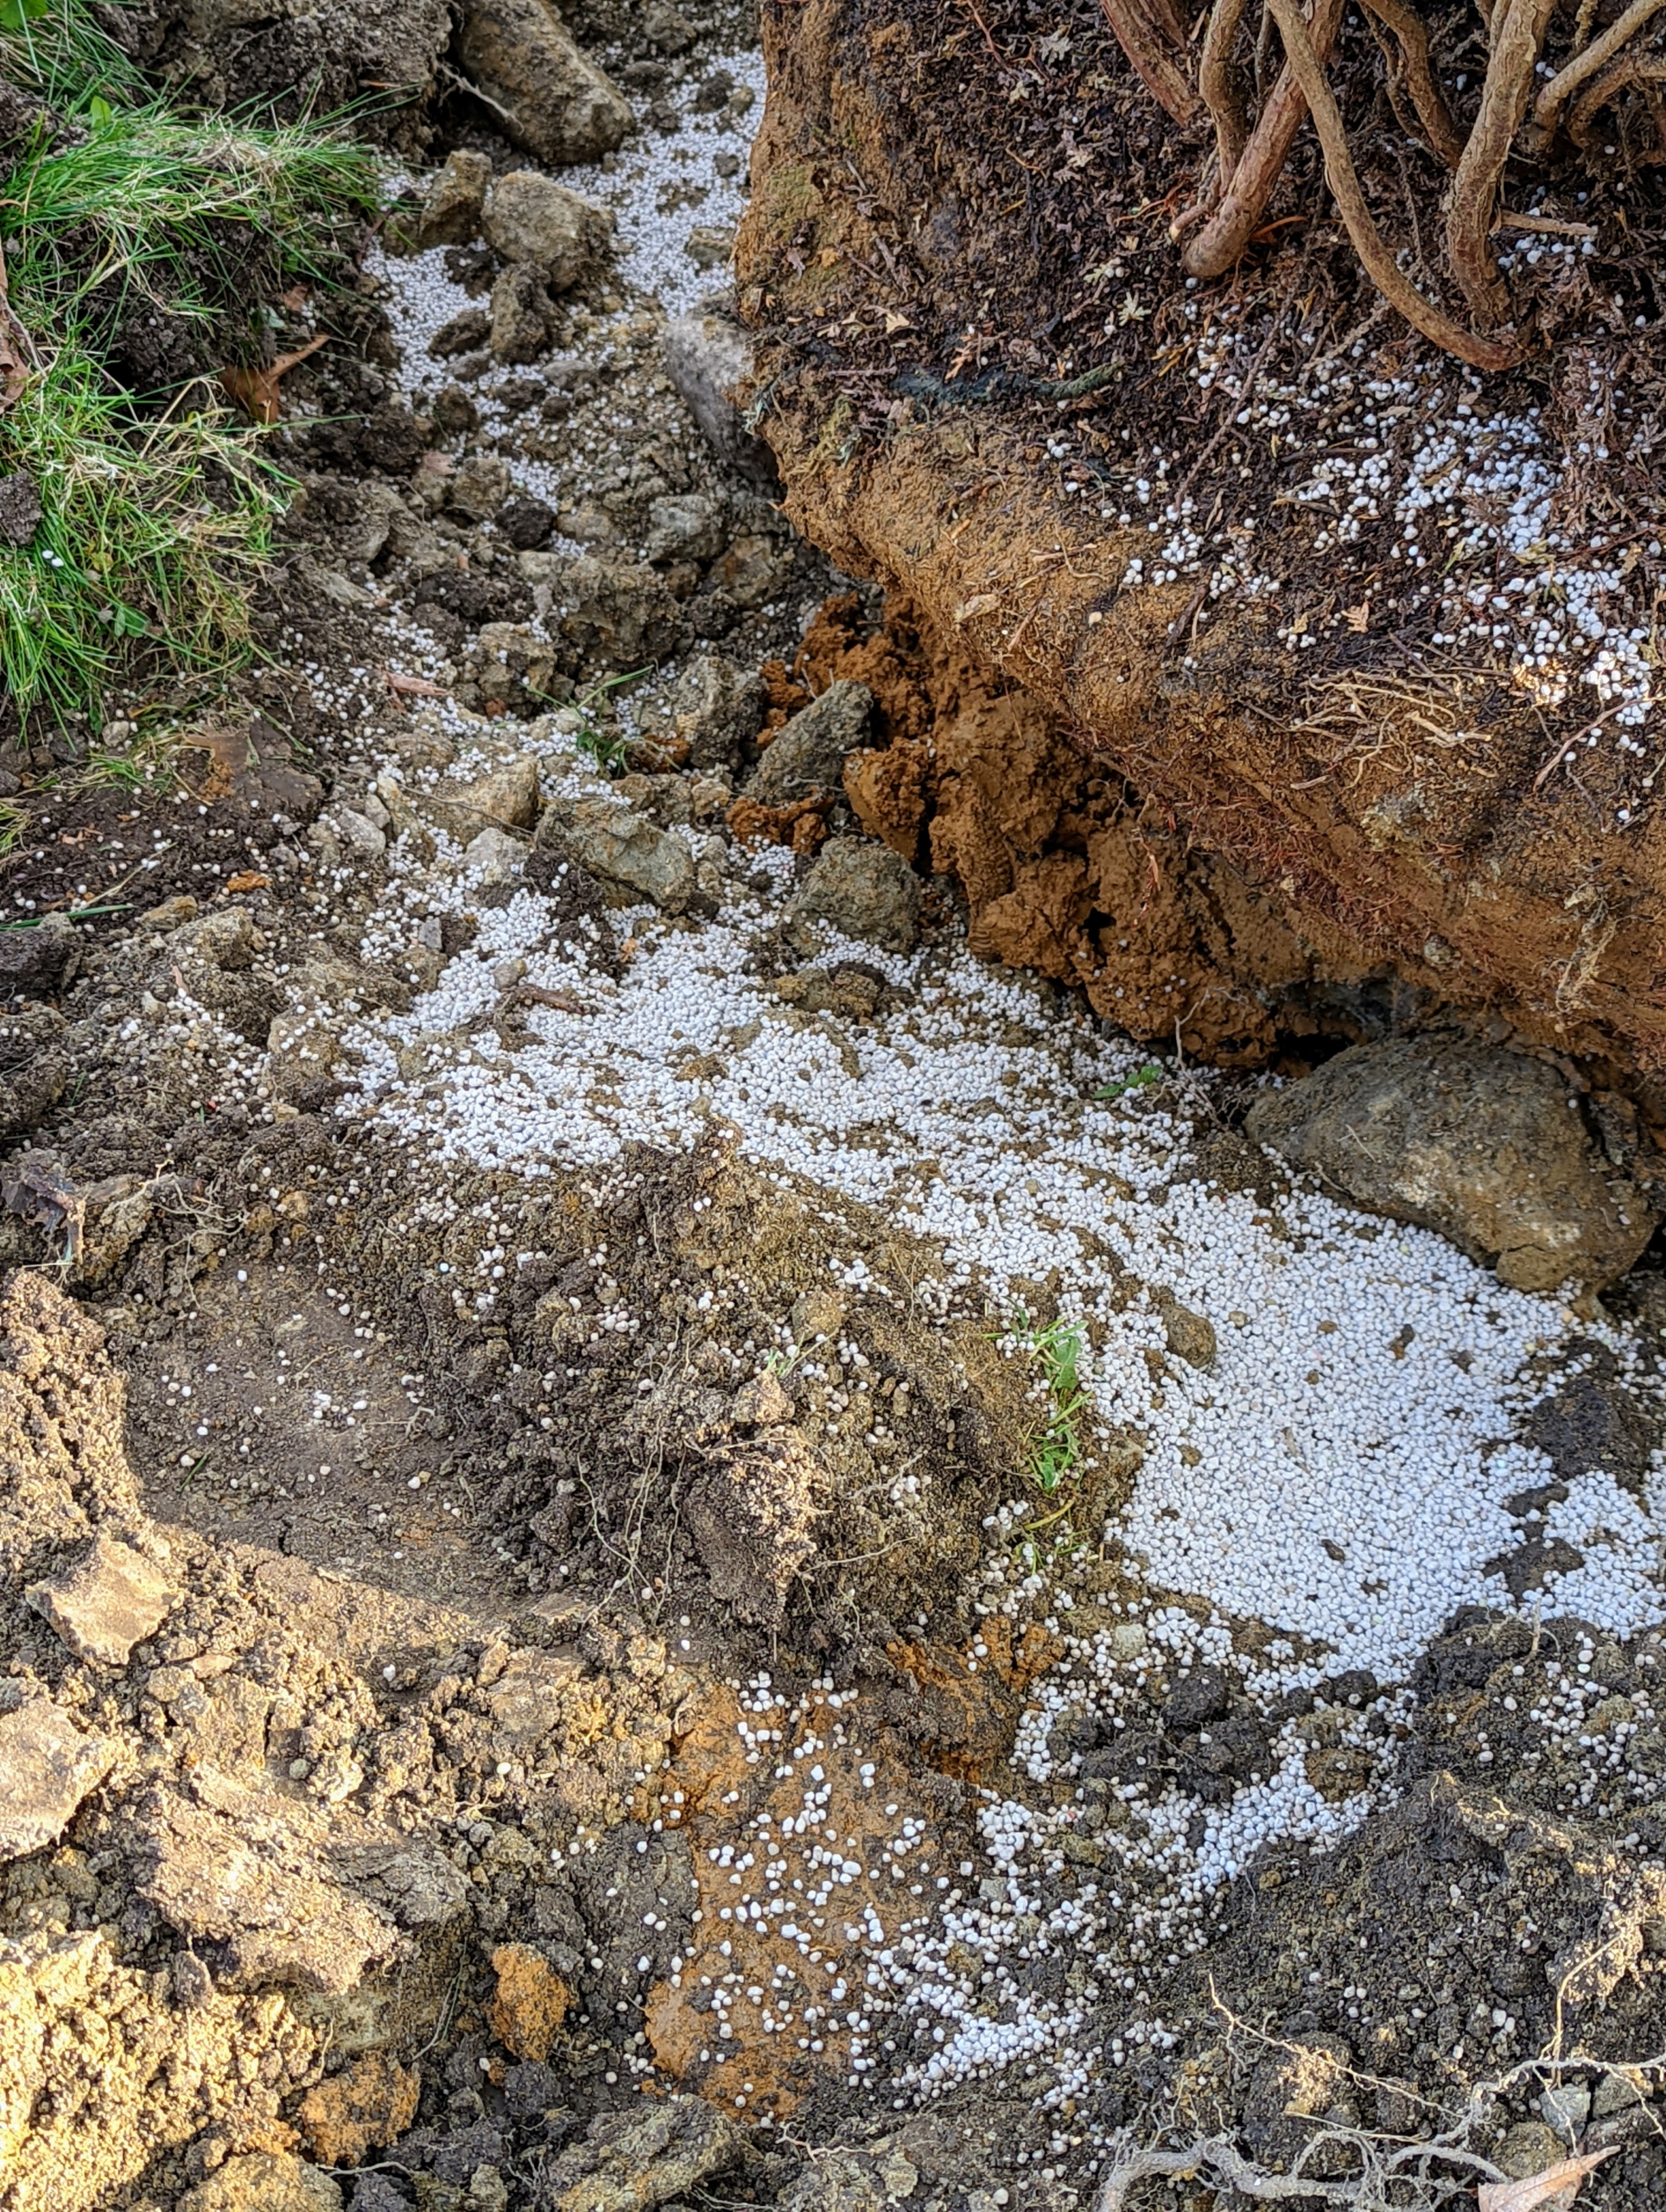
A good fertilizer made especially for new transplanted specimens should always be used. This is Organic Bio-tone Starter with mycorrhizal fungi, which helps transplant survival and increases water and nutrient absorption.
A generous amount of fertilizer is mixed in with the nutrient-rich soil.
Finally, the crew backfills the holes until they are properly filled. And remember, don’t plant it too deeply – always leave it “bare to the flare.”
Each specimen is given a good drink of water – we’re not expecting any significant rain for several days.
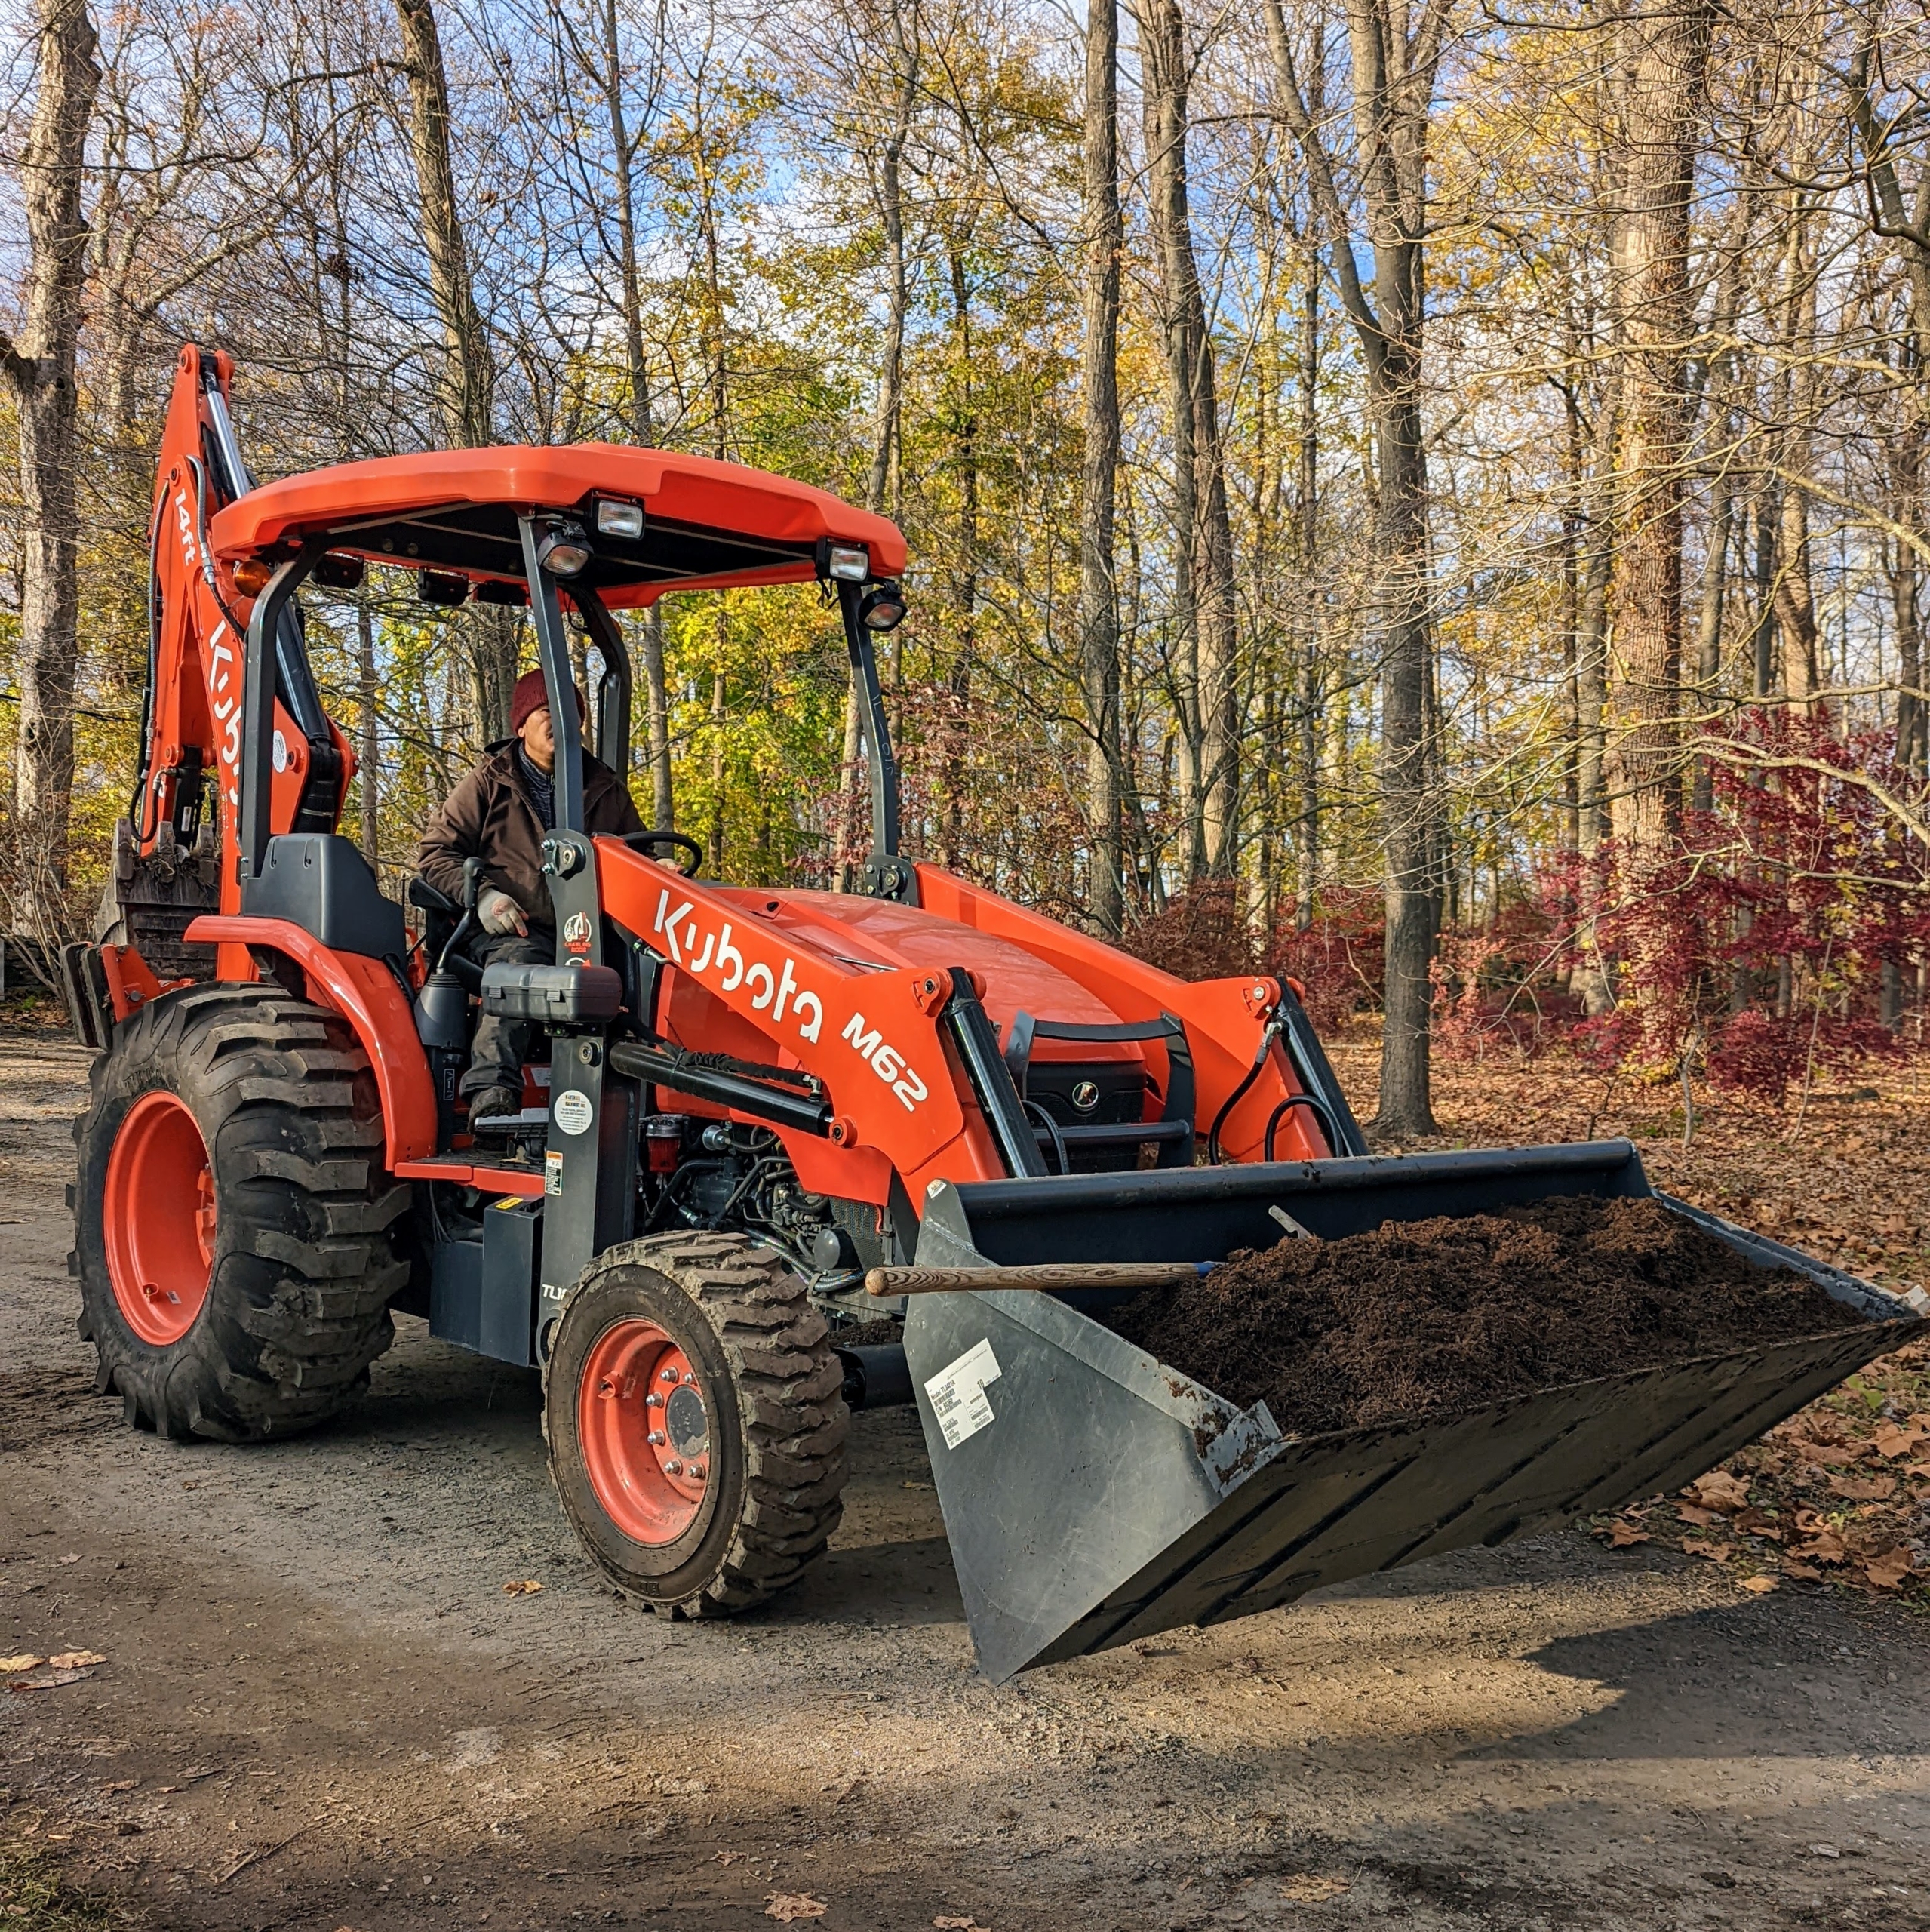
Next, Chhiring brings a bucket filled with compost from our big pile. I am so glad I can make good compost right here at the farm. Chhiring is using our Kubota M62 tractor, which comes equipped with a 63 horsepower diesel engine, a front loader, and a powerful backhoe. It is among the most used pieces of equipment we have here at the farm.
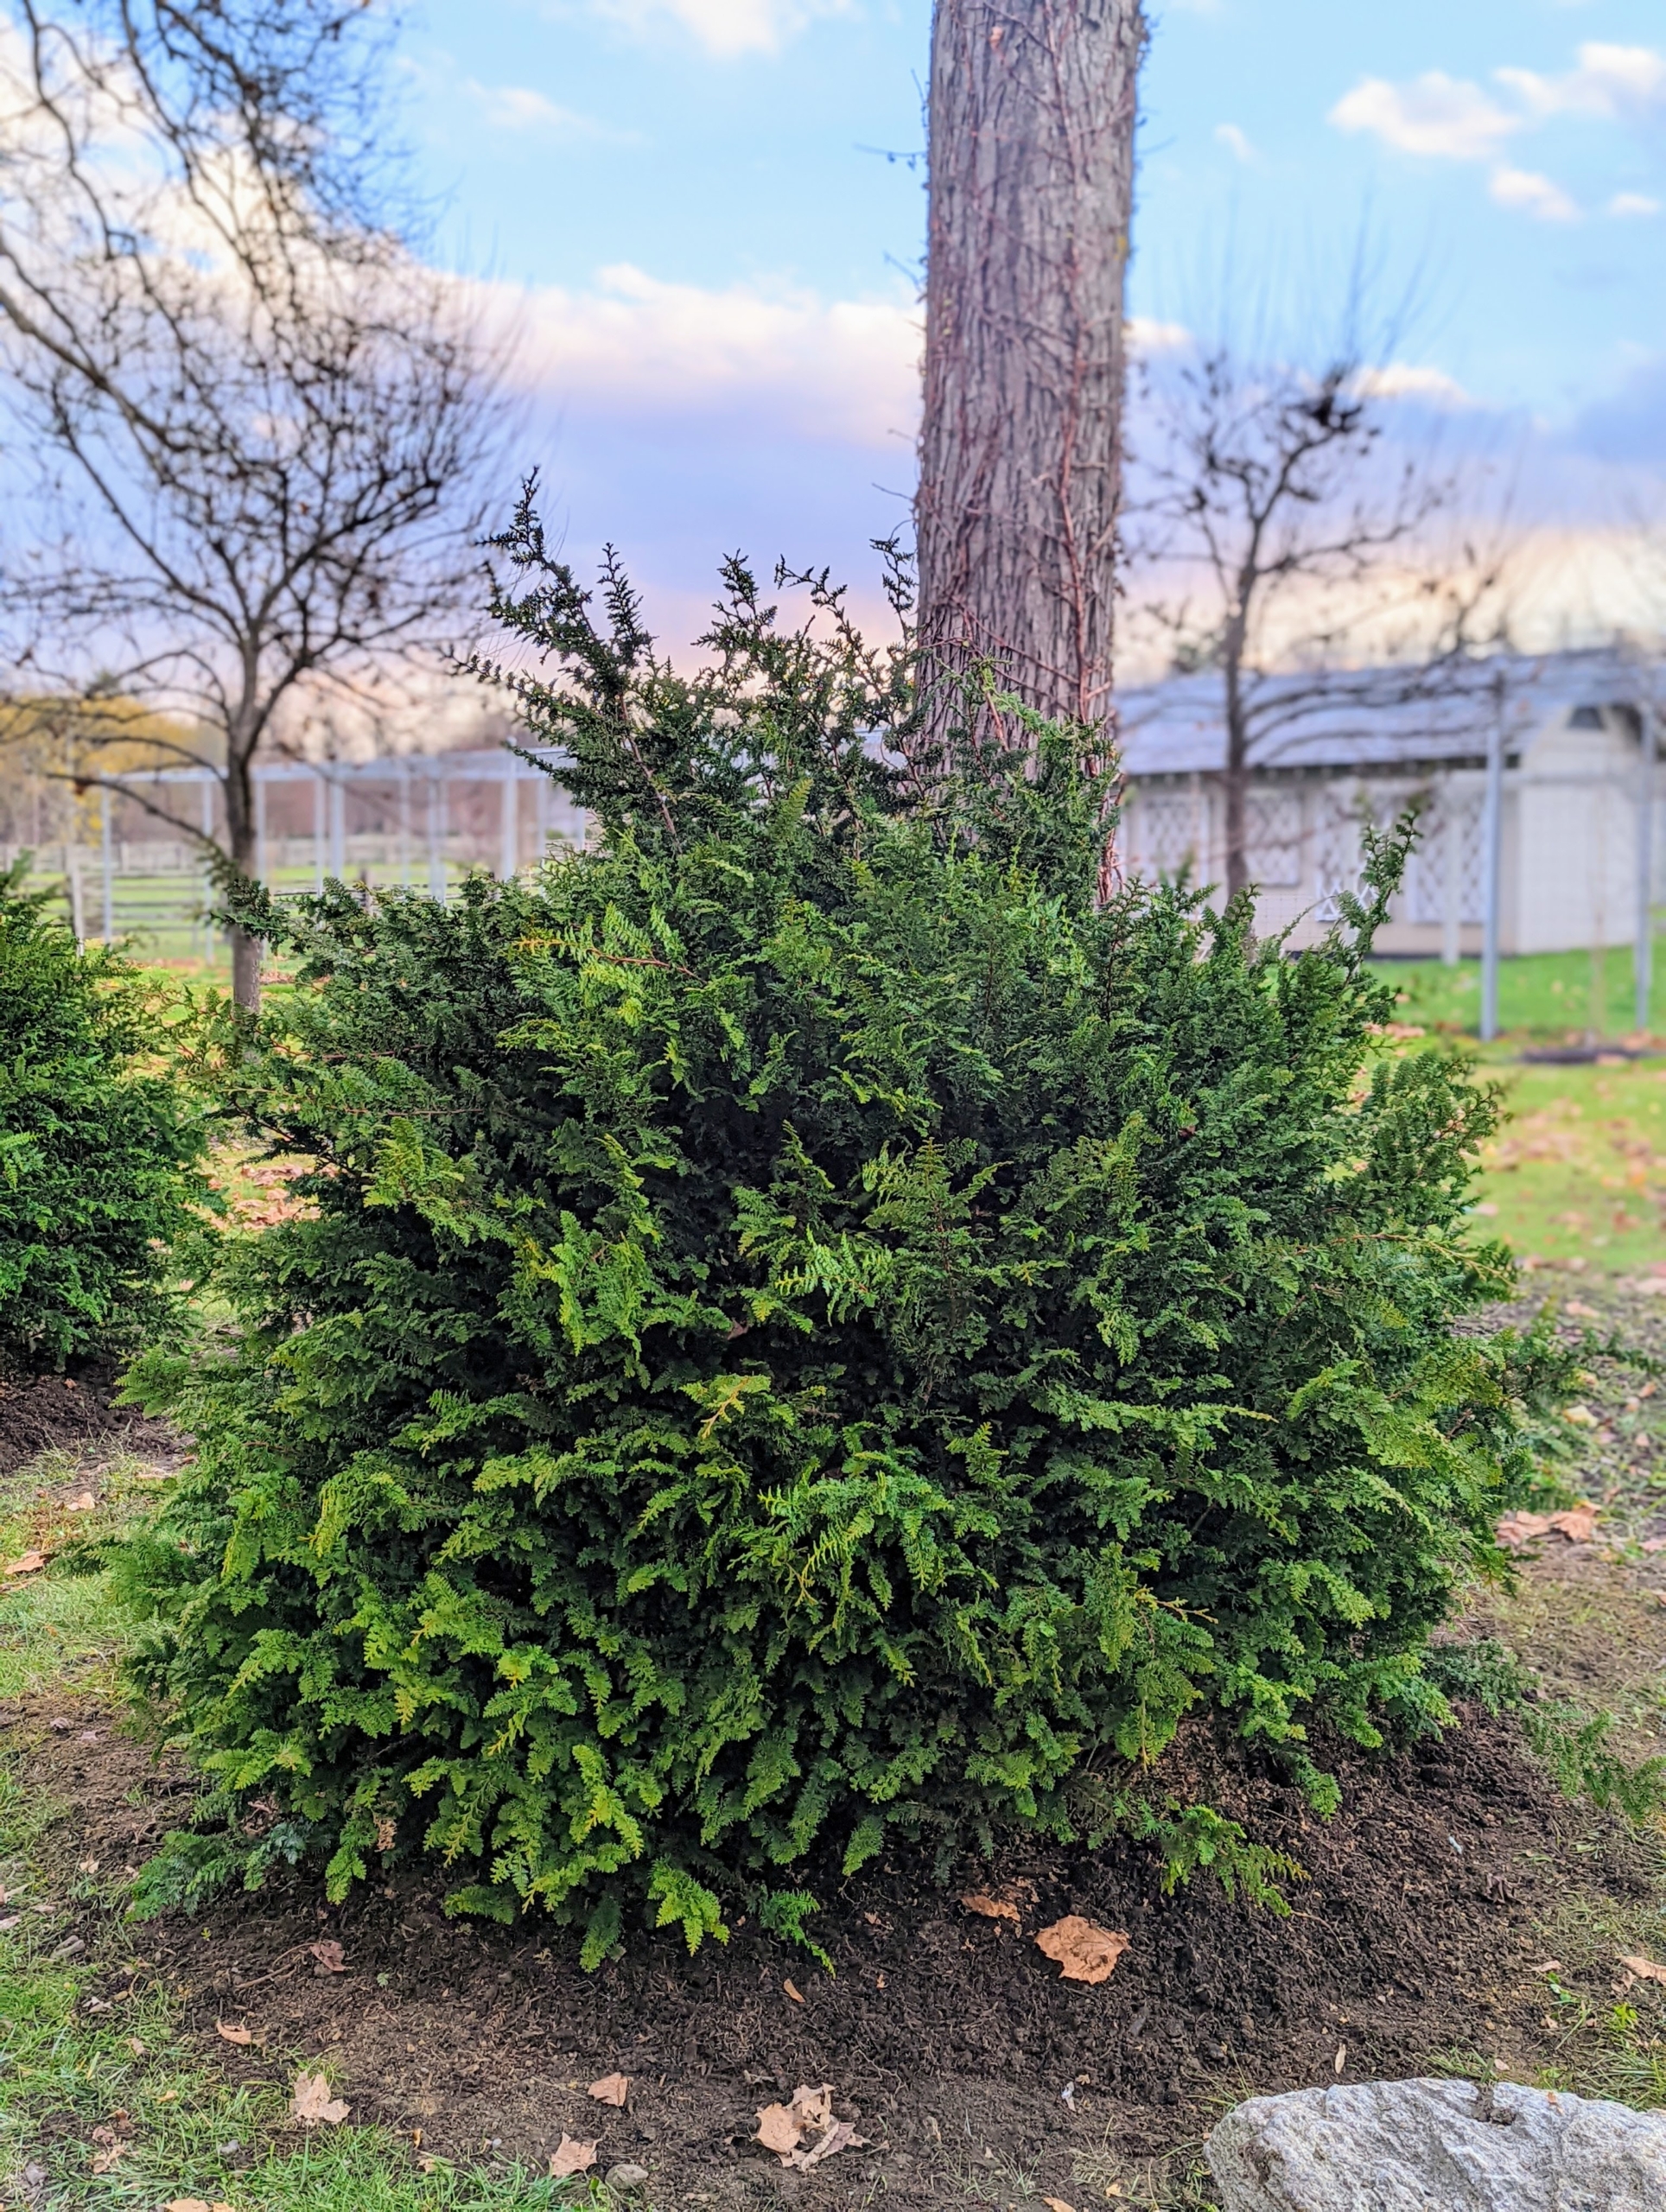
Once a bush is completely planted and watered, Chhiring removes the protective tie.
It looks so beautiful after it is completely unwrapped.
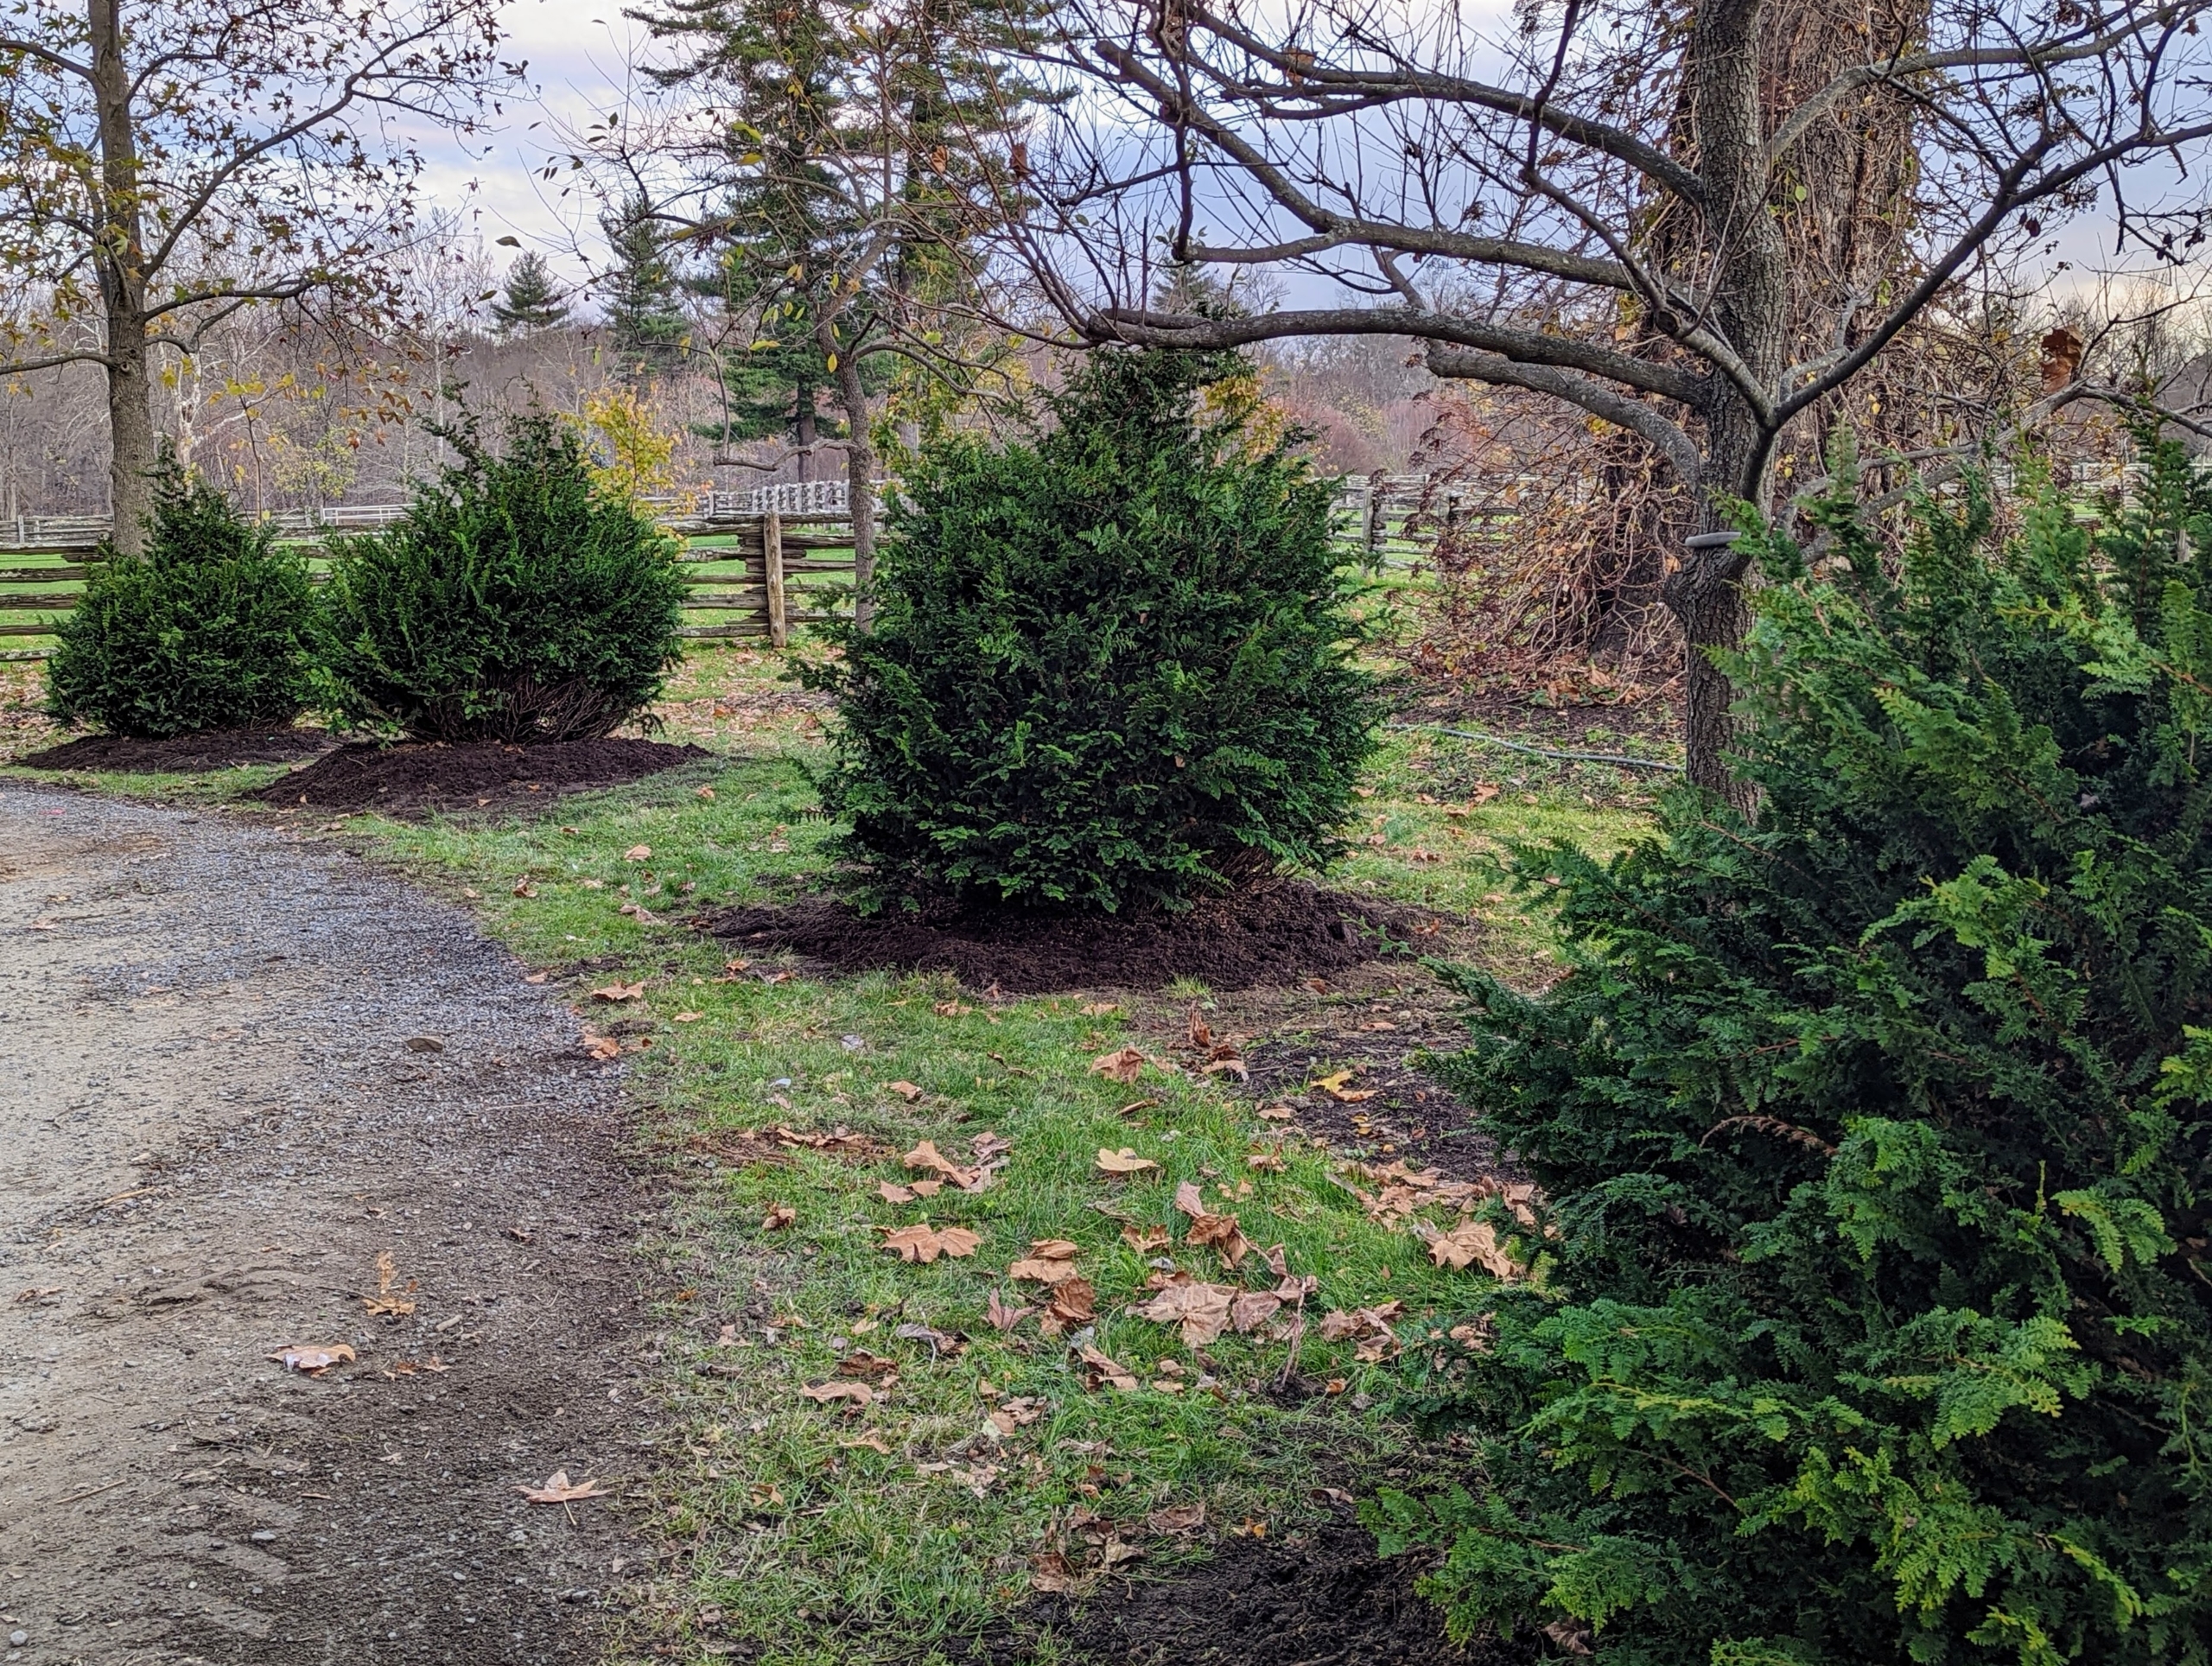
Here is one view of the cypress bushes after they are all planted.
And here is a view looking northeast down the same carriage road.
They look great at the entrance to the Japanese Maple Tree Woodland. I am looking forward to seeing these Chamaecyparis obtusa ‘Filicoides’ bushes thrive here at Cantitoe Corners.