While we're all busy getting ready for Thanksgiving, here's another encore blog you'll enjoy - it was first published in October of 2021.
Here in the Northeast, autumn is a wonderful time to enjoy the changing foliage, but it's also a good opportunity to appreciate the many seeds, berries, and cones that grow on the trees and shrubs.
Many birds and small animals rely on the fall harvest of berries and seeds. They provide calories and crucial nutrients that help them thrive during the colder months when other natural food sources are nonexistent or buried in the snow. They also add beauty to the landscape when most flowers are already gone. Here is a sampling of some of the many seed pods, berries, and cones that are around my Bedford, New York farm.
Enjoy these photos.
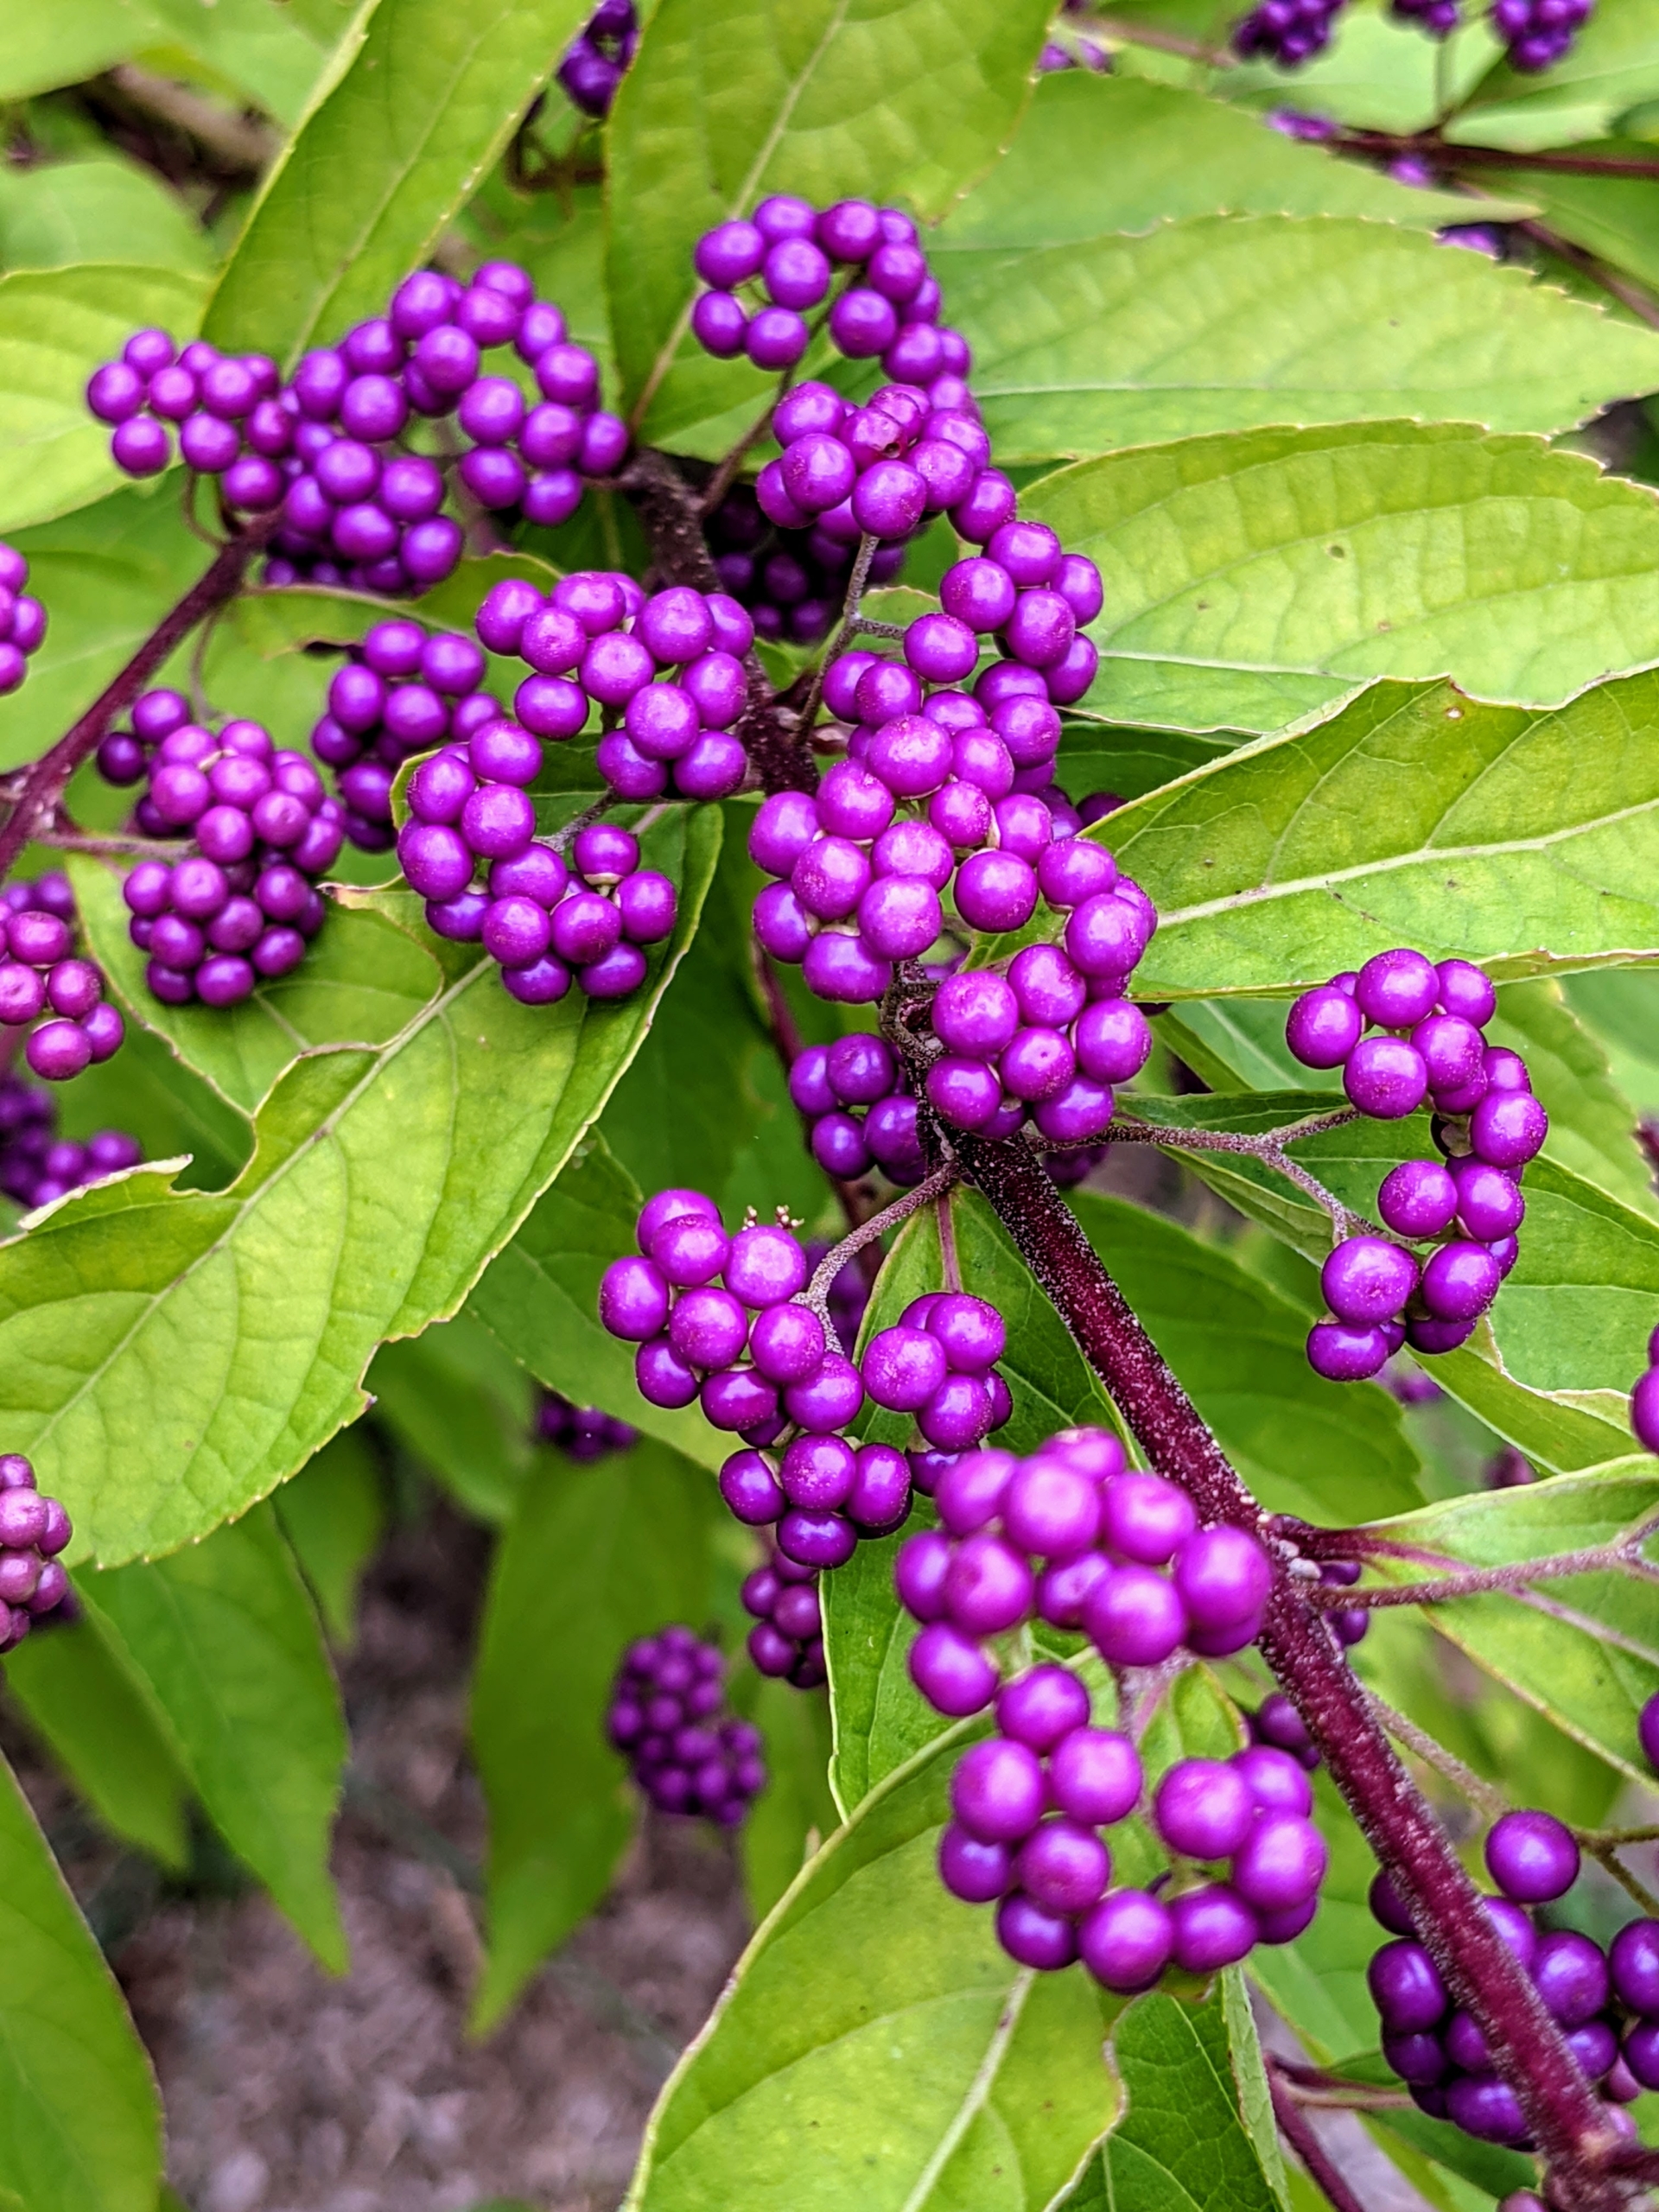
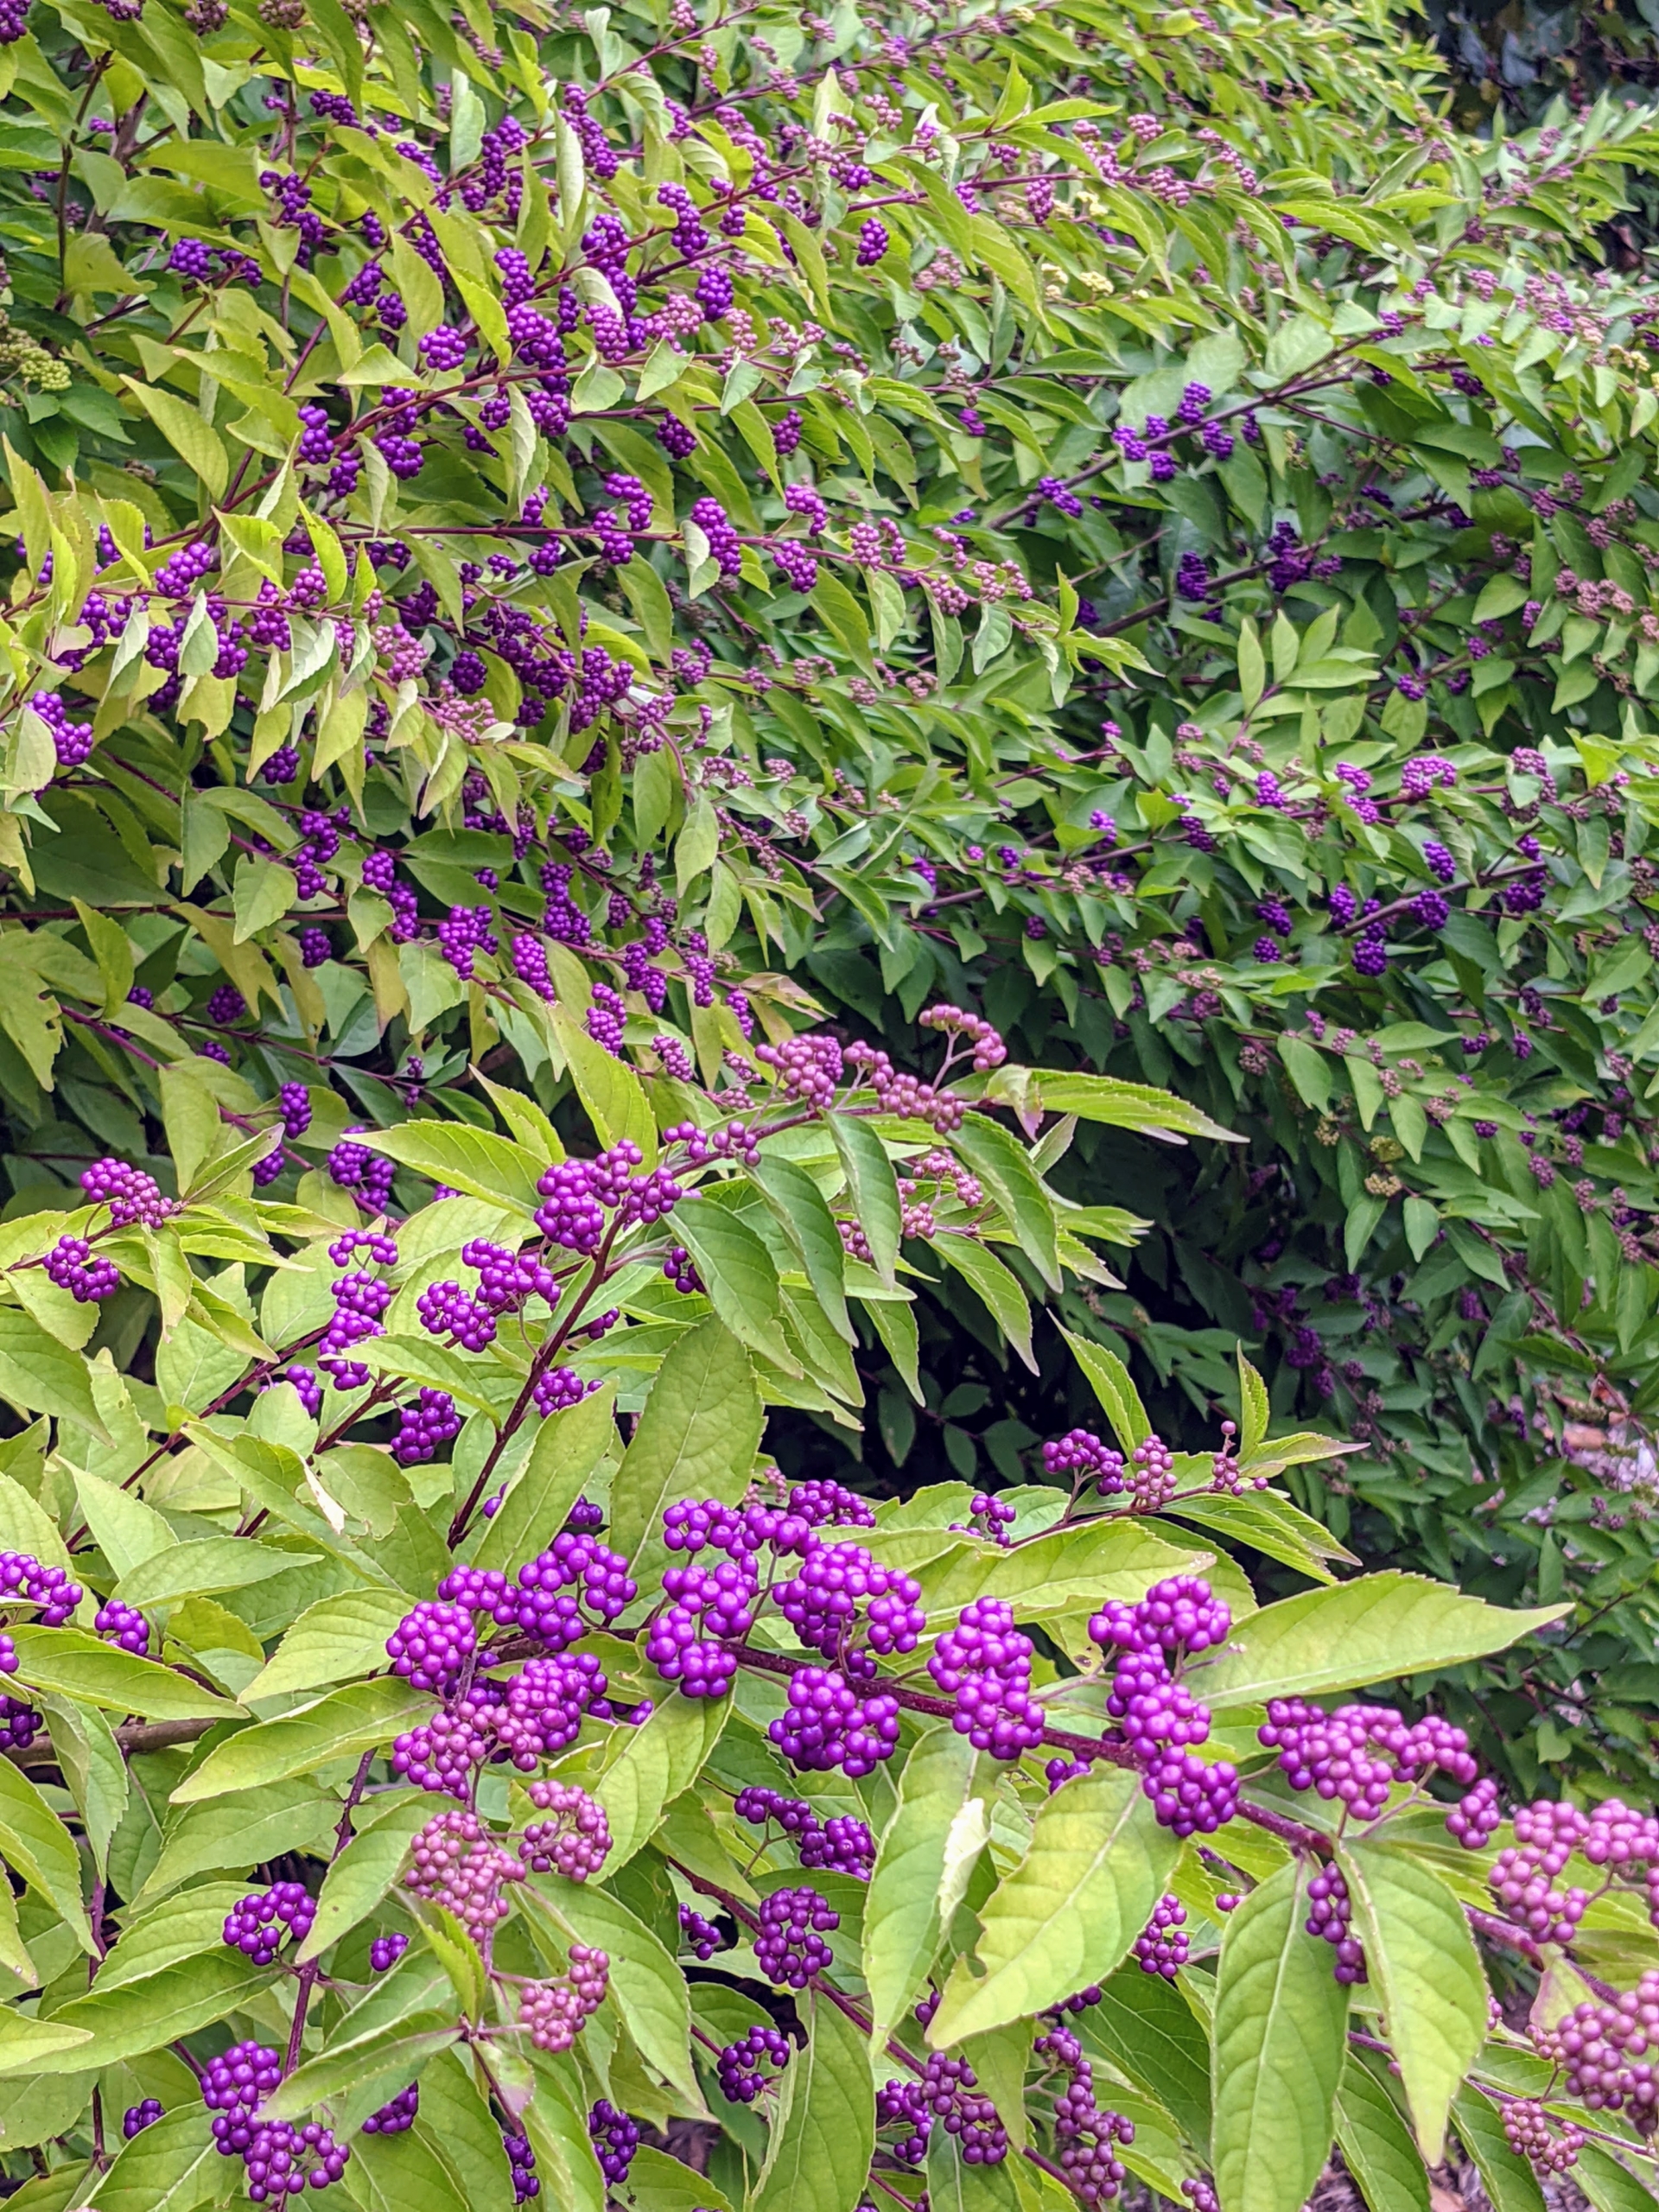
Have you ever heard about the beautyberry, Callicarpa? Tiny spring flowers produce clusters of these magenta colored bird berries that remain on these spreading shrubs after the leaves drop.
These shrubs are outside my guest guest house and show off beautiful color this time of year. The fruits become a good food source for many different birds, including mockingbirds, robins, and brown thrashers.
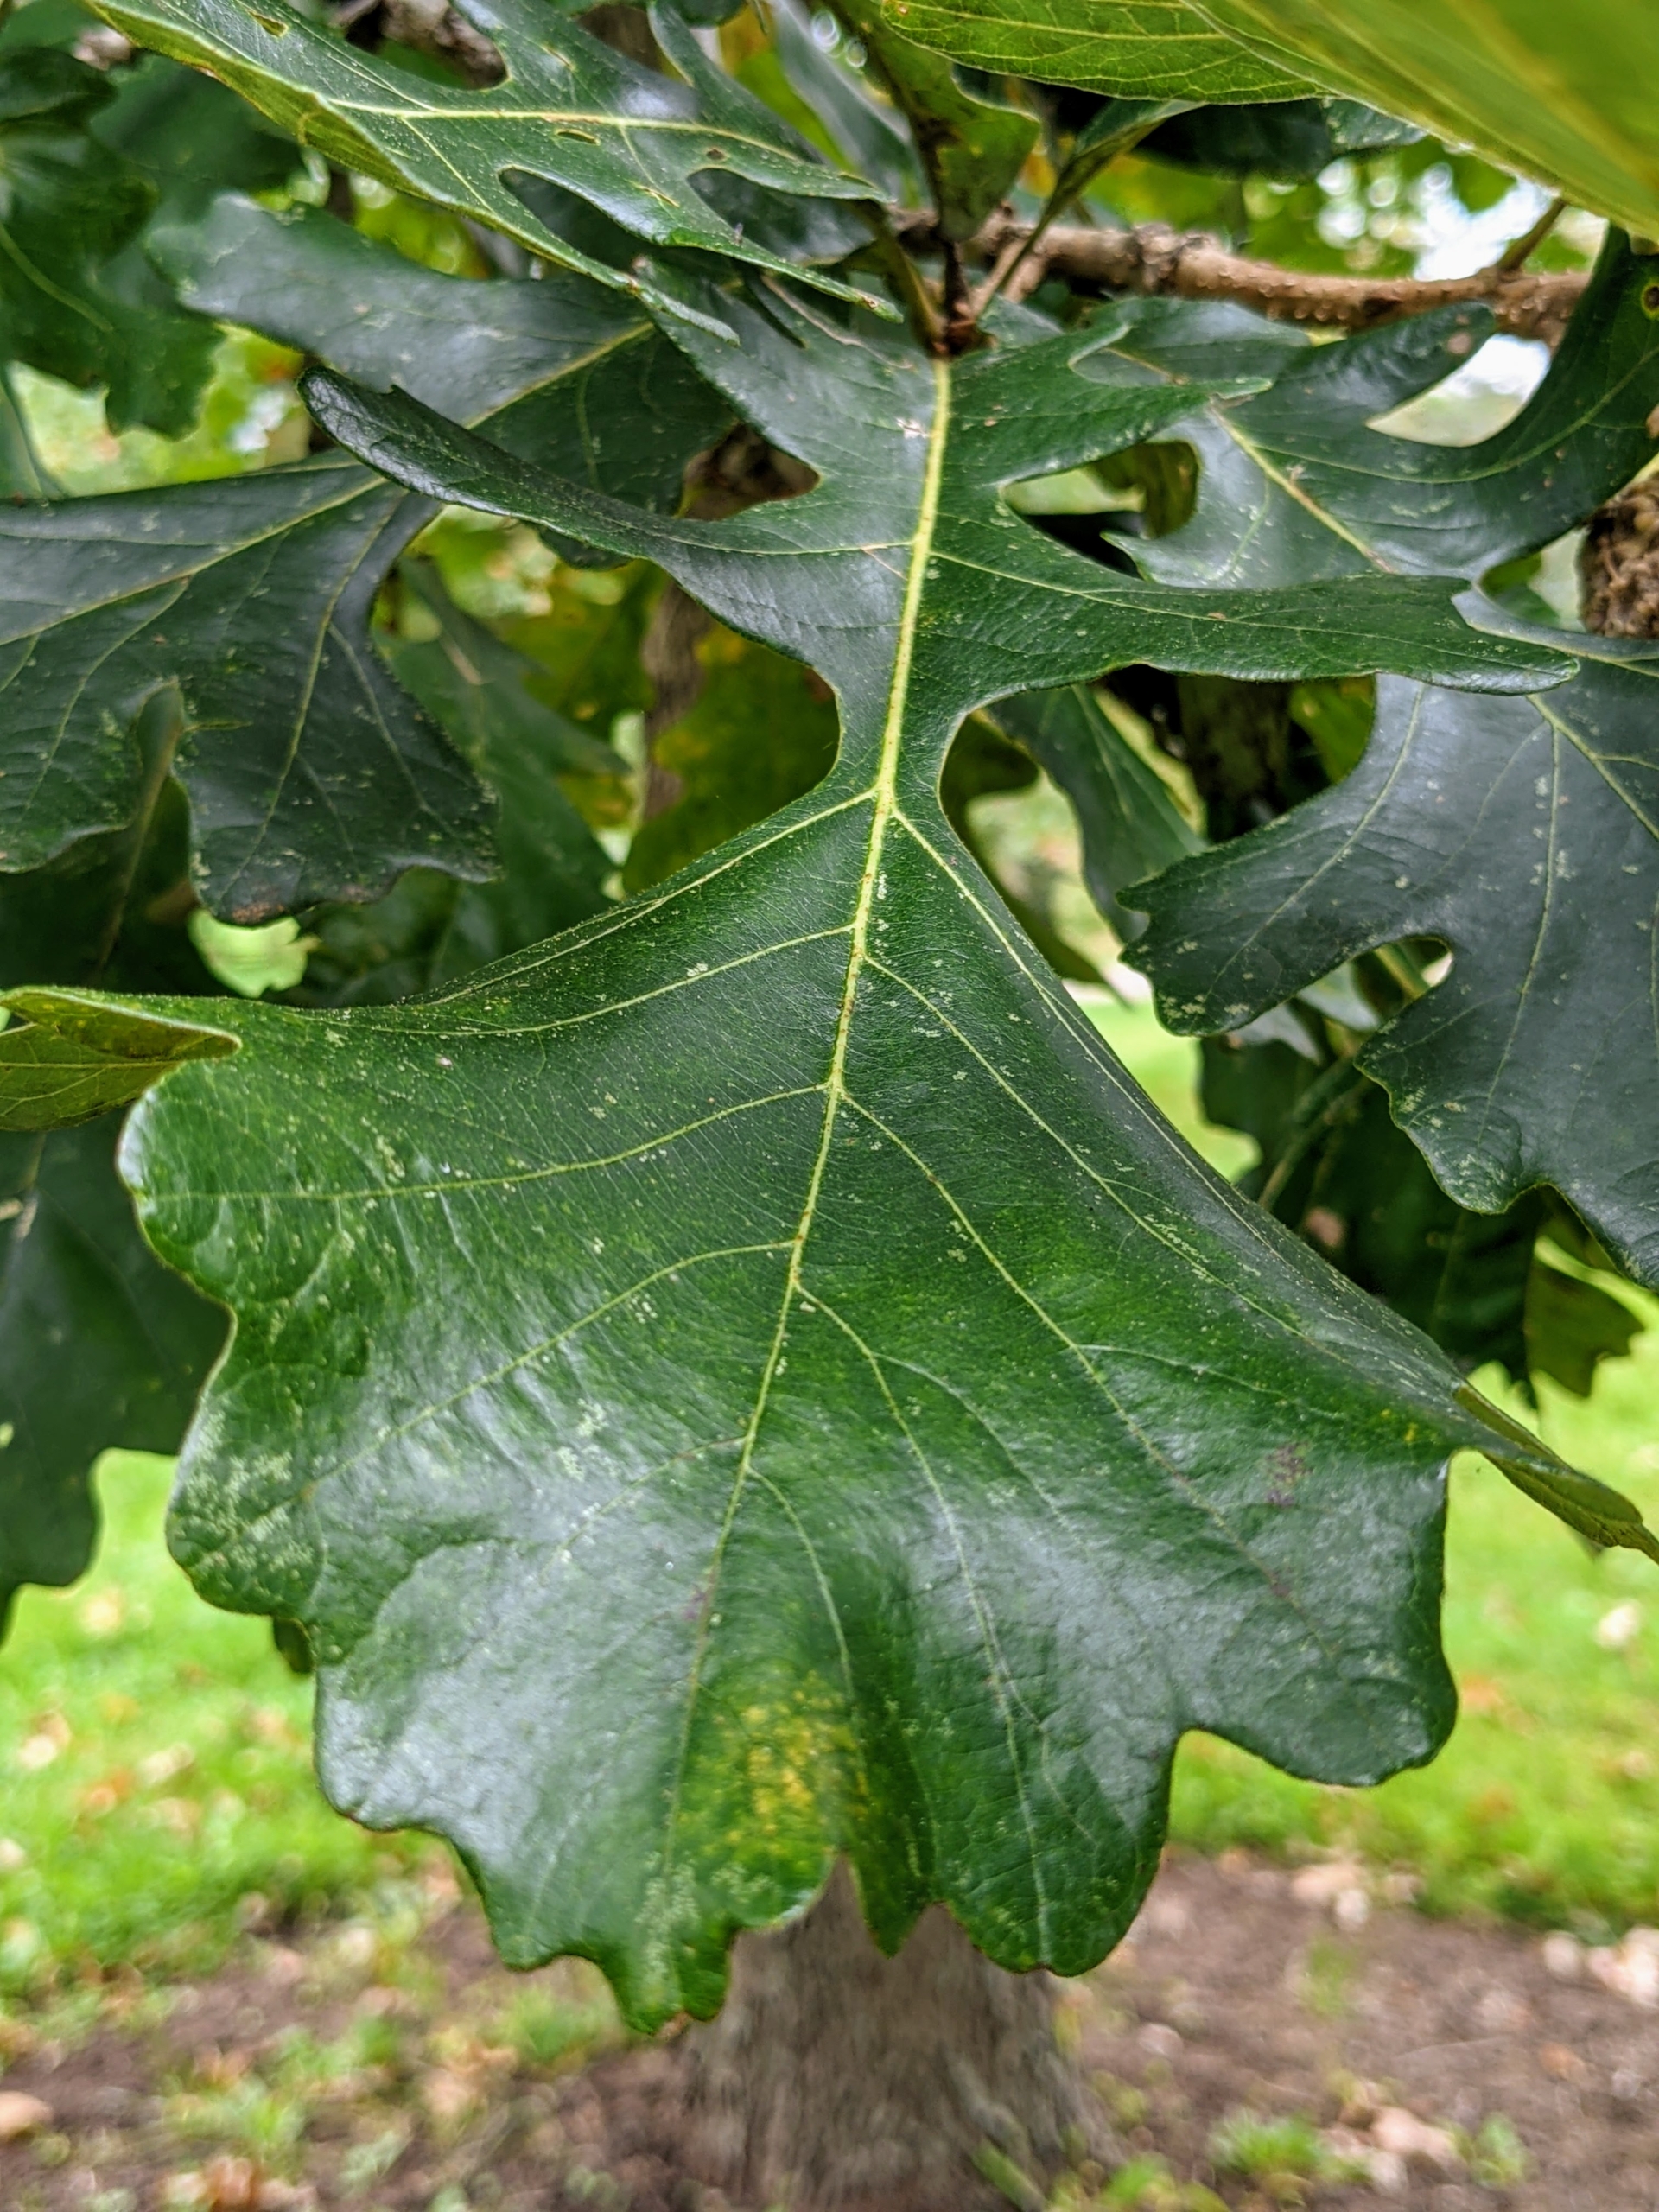
If you follow this blog regularly, you may recall learning about the bur oak, Quercus macrocarpa. We planted two rows along the outsides of the boxwood allee, one on the left and one on the right. The leaves of the bur oak are easy to identify. They are alternate, simple, six to 12 inches long, roughly obovate in shape, with many lobes. When mature, the two middle sinuses nearly reach the midrib dividing the leaf nearly in half.
This is the acorn of the bur oak. The bur oak acorn is very large – macrocarpa is Latin for “big fruit”. The cap of the acorn is called the involuchre and nearly covers the entire nut and is very hairy. As the acorns mature, the cap and seed will turn brownish tan.
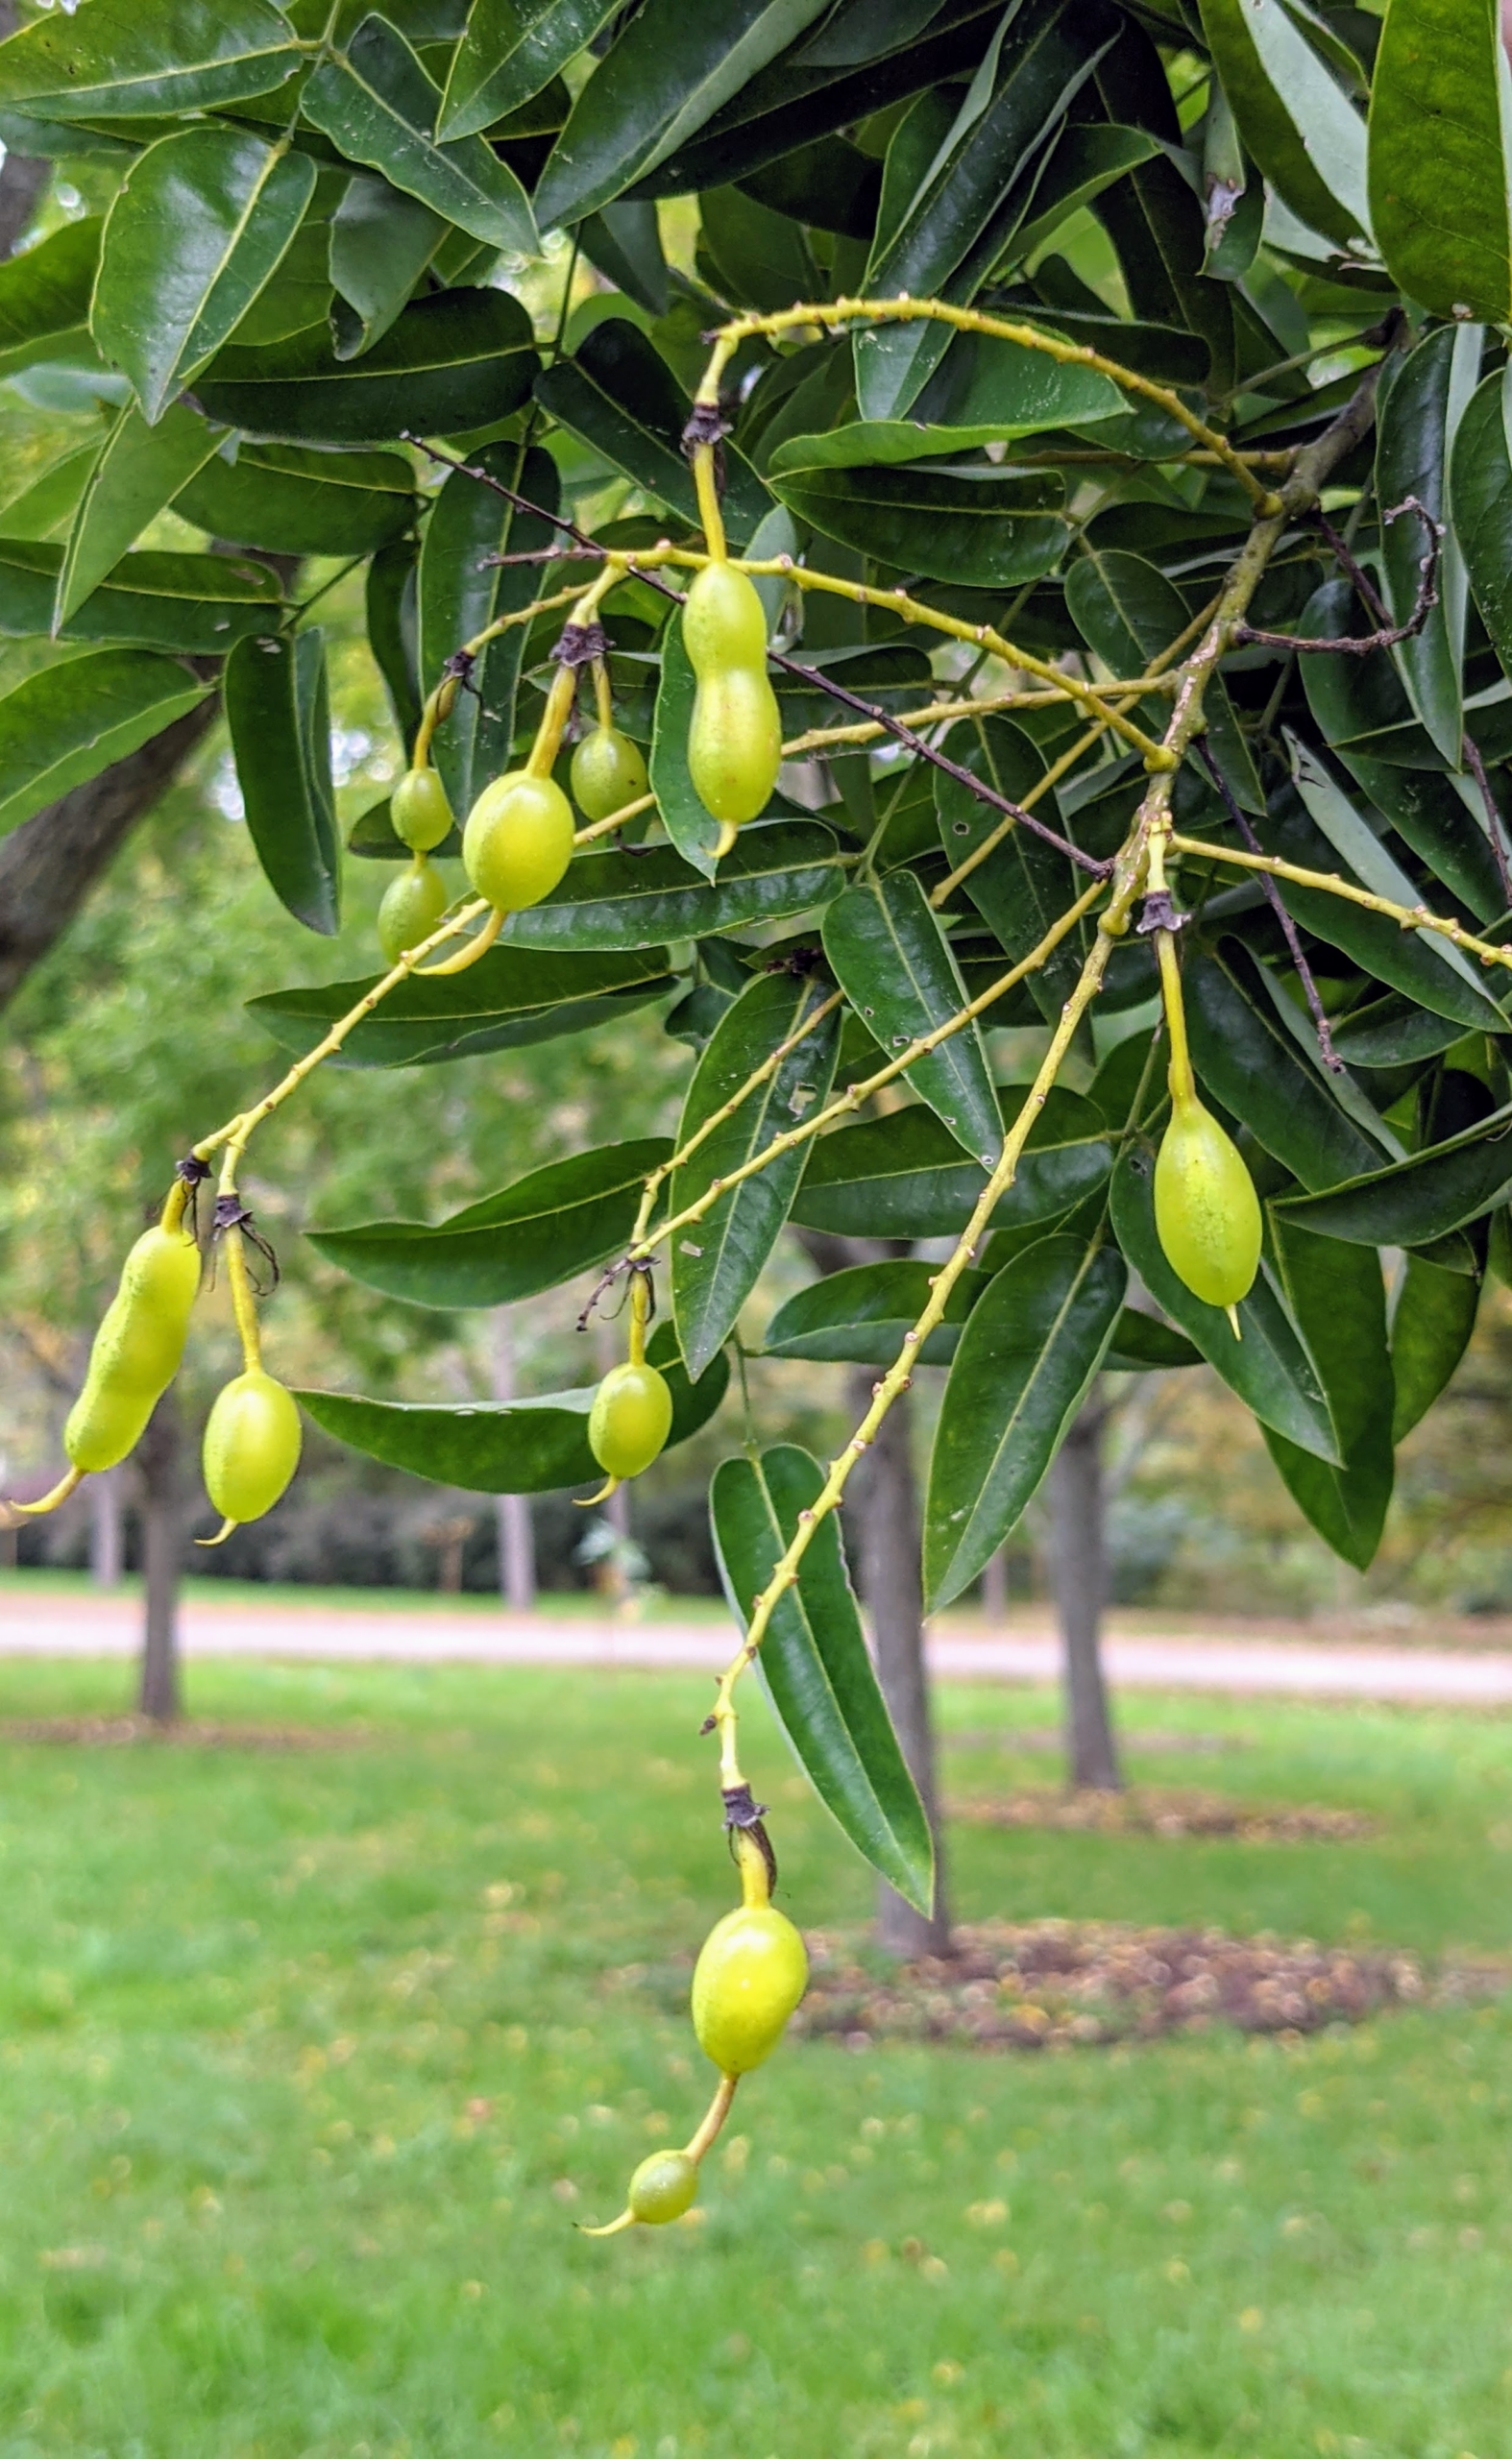
This is called a Chinese Scholar tree. The Scholar tree is a deciduous, round-headed tree growing up to 50 feet or taller with a somewhat open look while young.
It has compound leaves with seven to 17 two-inch-long leaflets.
The pods of Scholar trees appear in the fall and look similar to dangling beads.
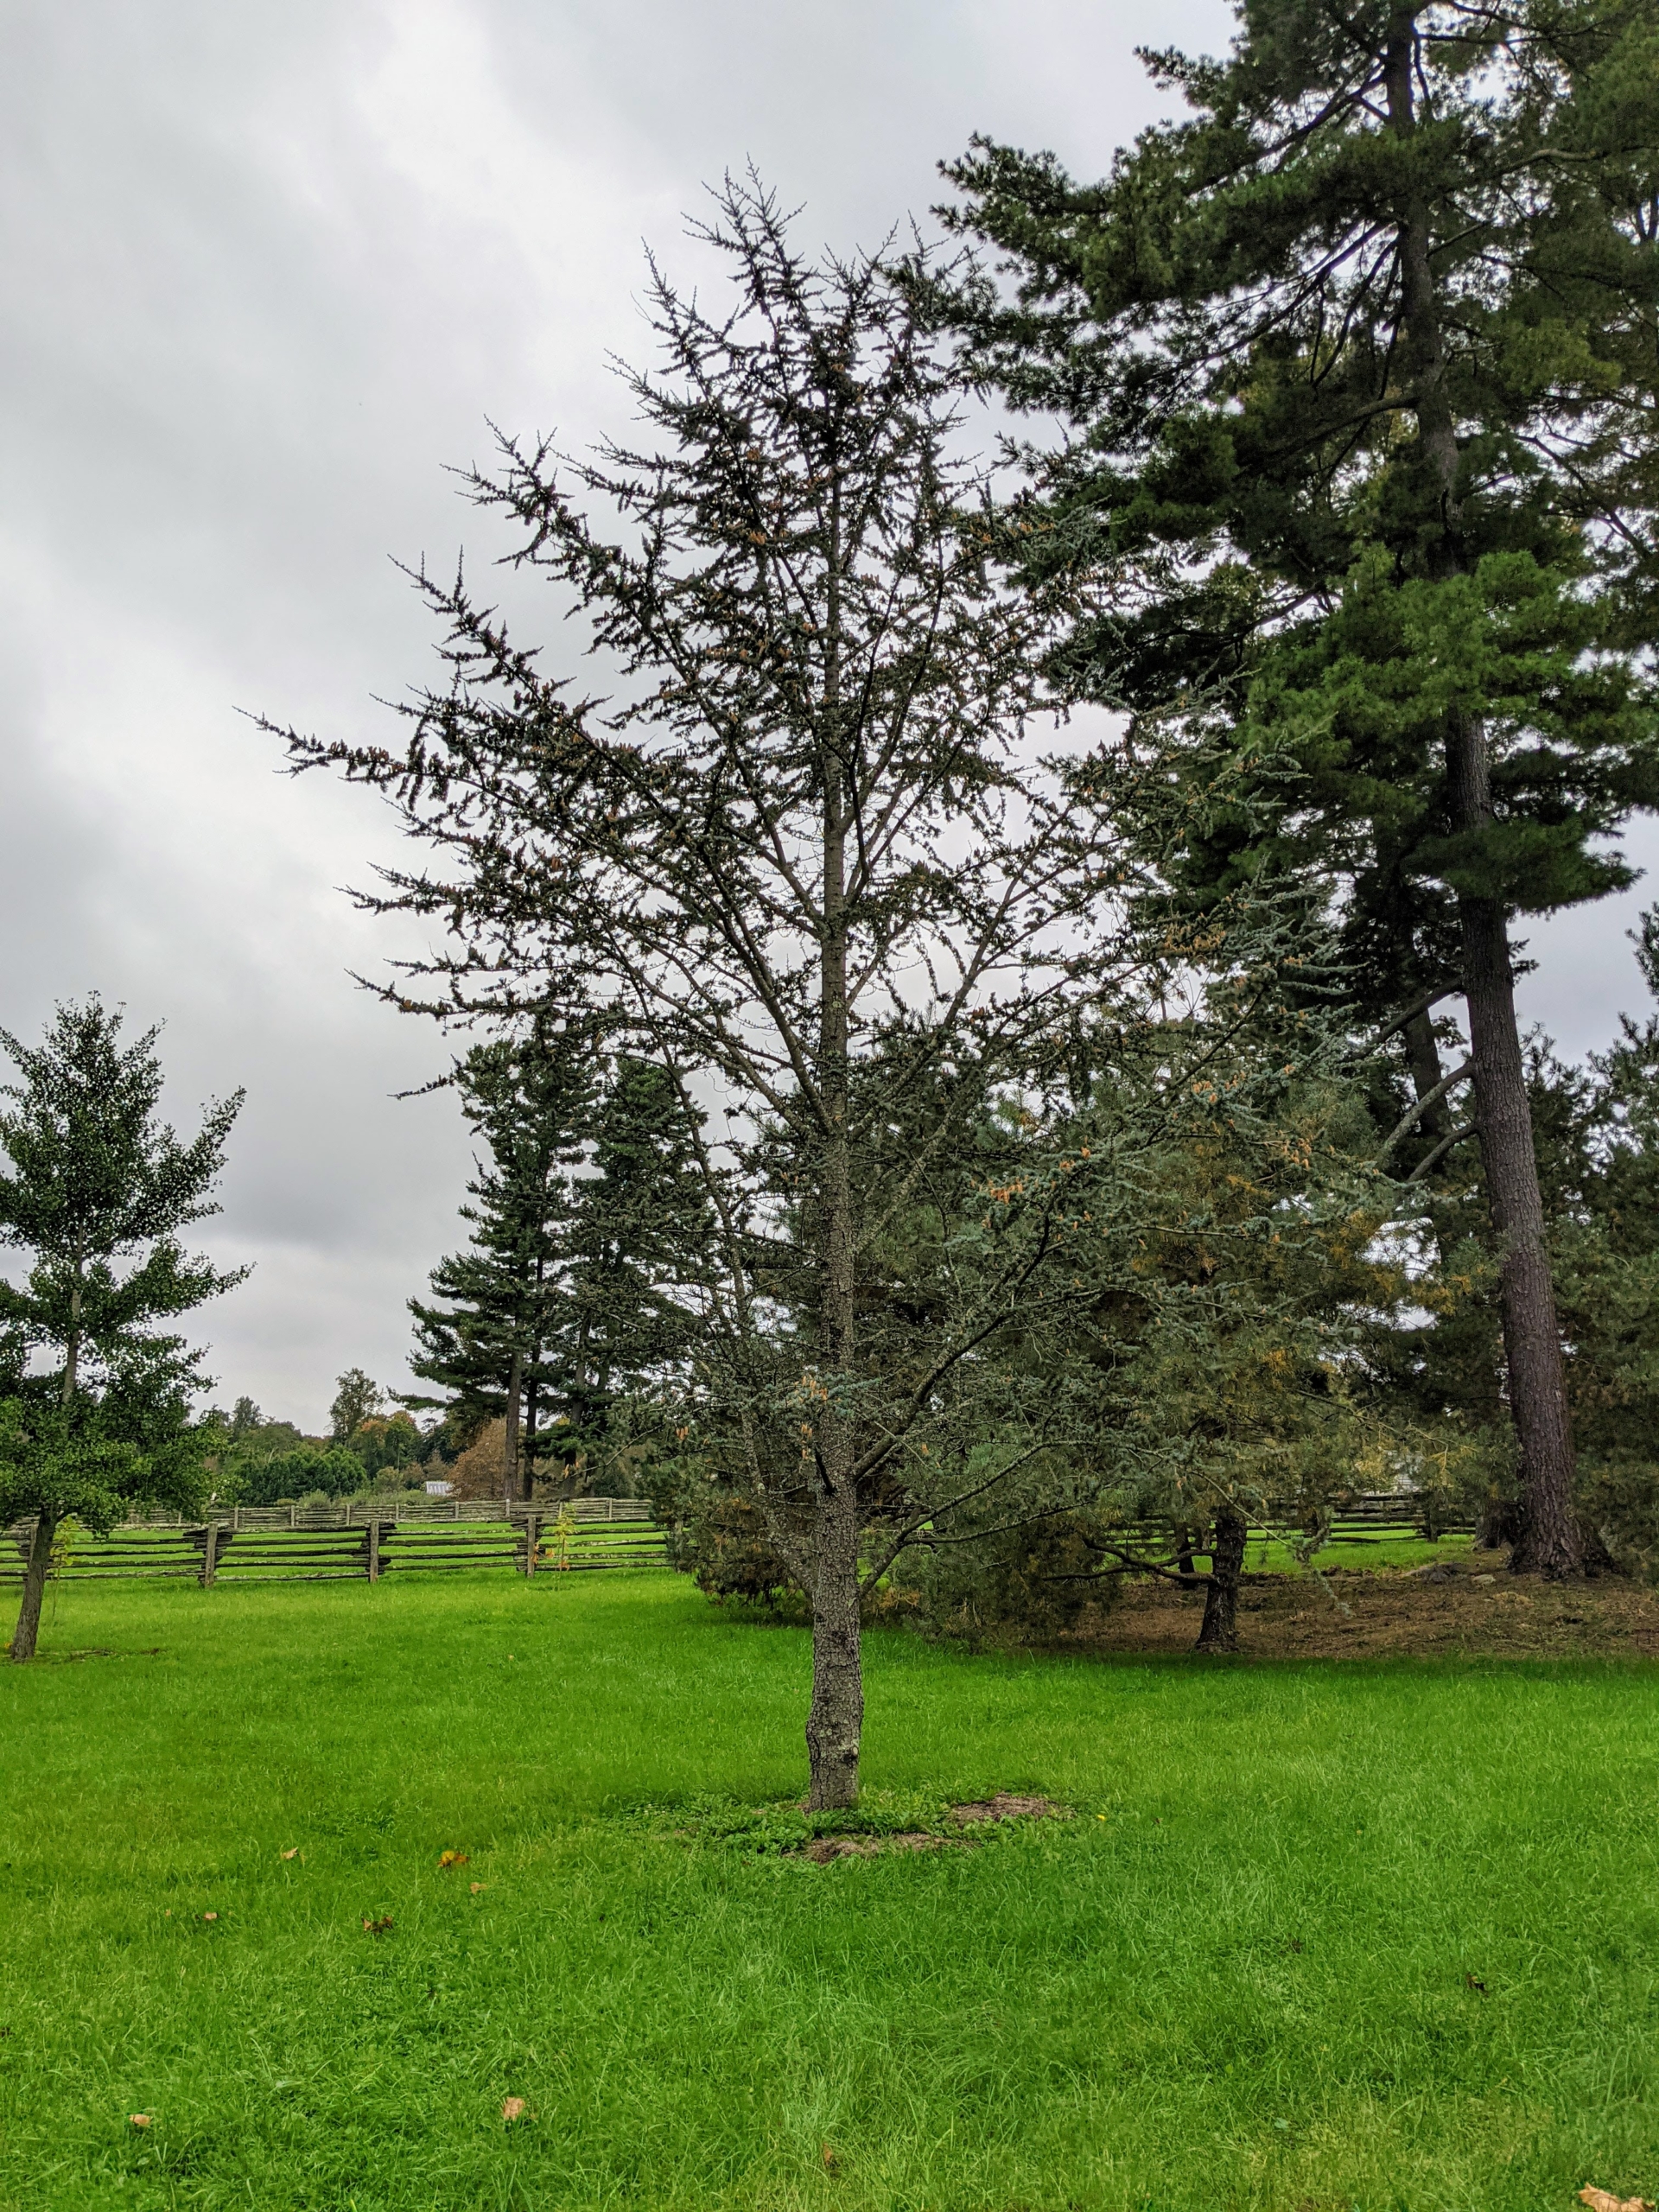
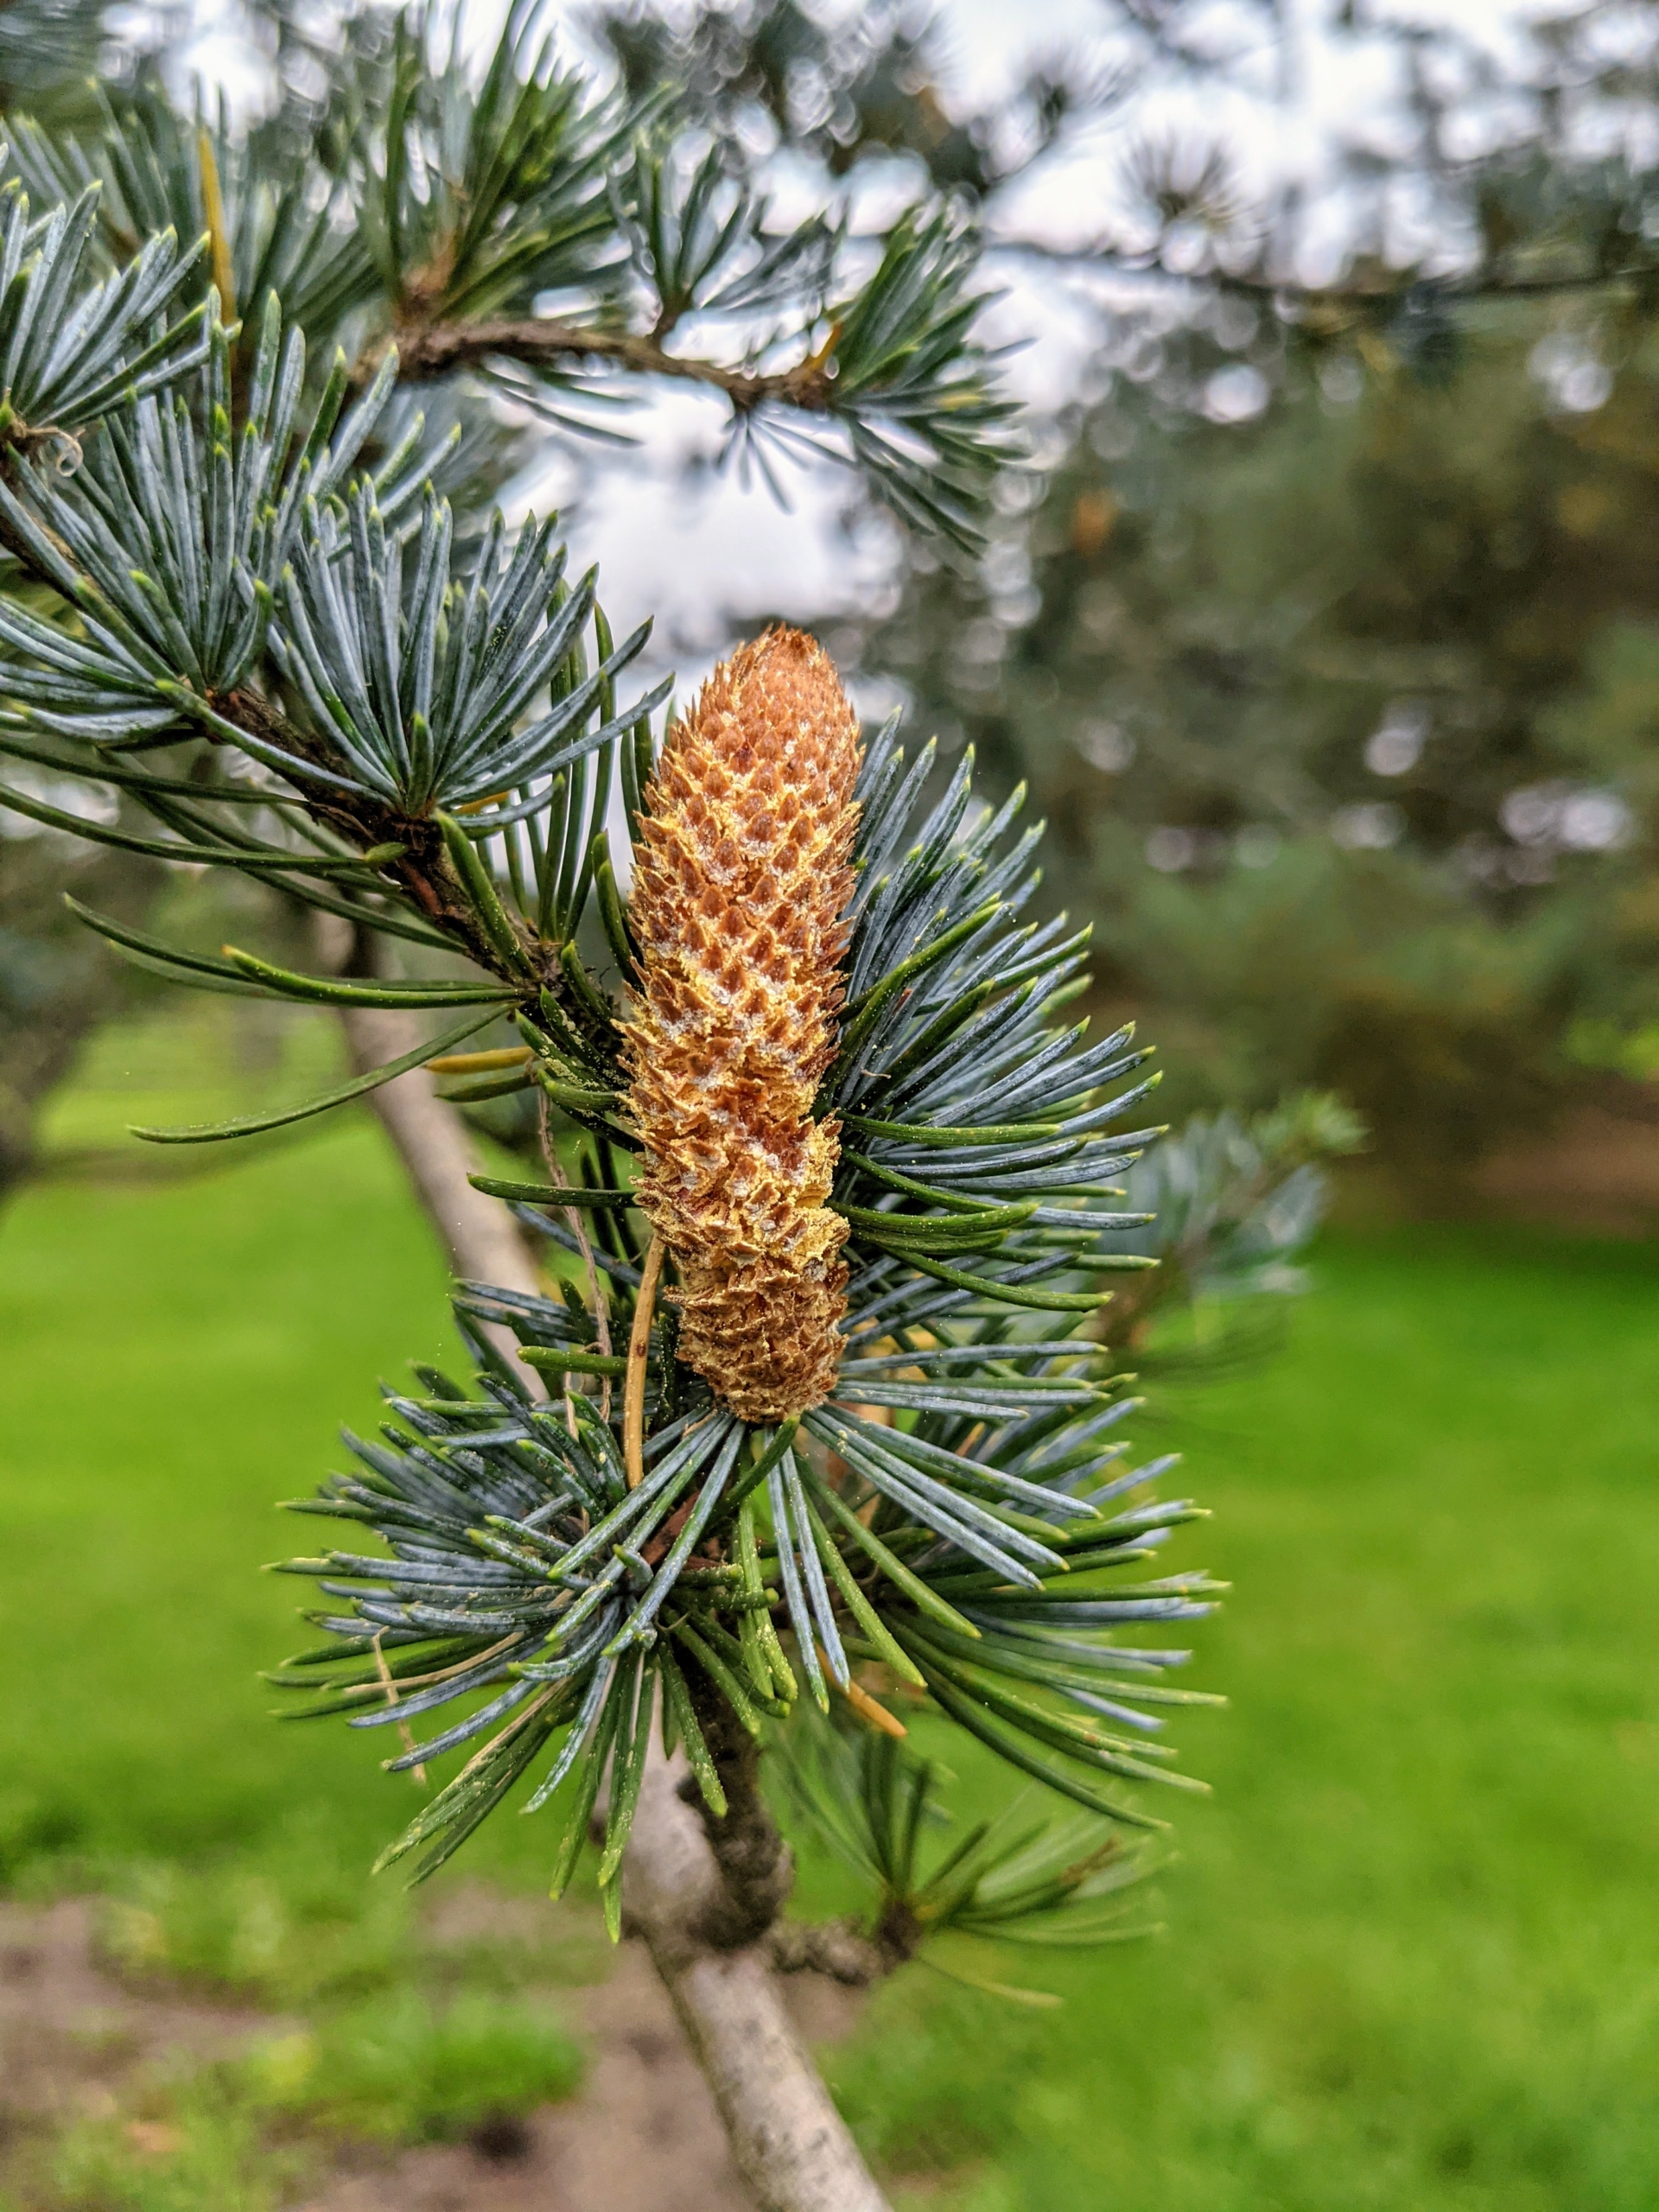
This tree is an Atlas cedar. I have several planted down behind my chicken coops not far from a stand of tall white pines. Cedrus atlantica, the Atlas cedar, is a distinctive evergreen. Its silvery blue to bluish-green needles are eye-catching in any landscape.
All members of the genus Cedrus produce upright, barrel-shaped cones. These are male cones, which are smaller than the female cones and don’t stay on the tree for very long.
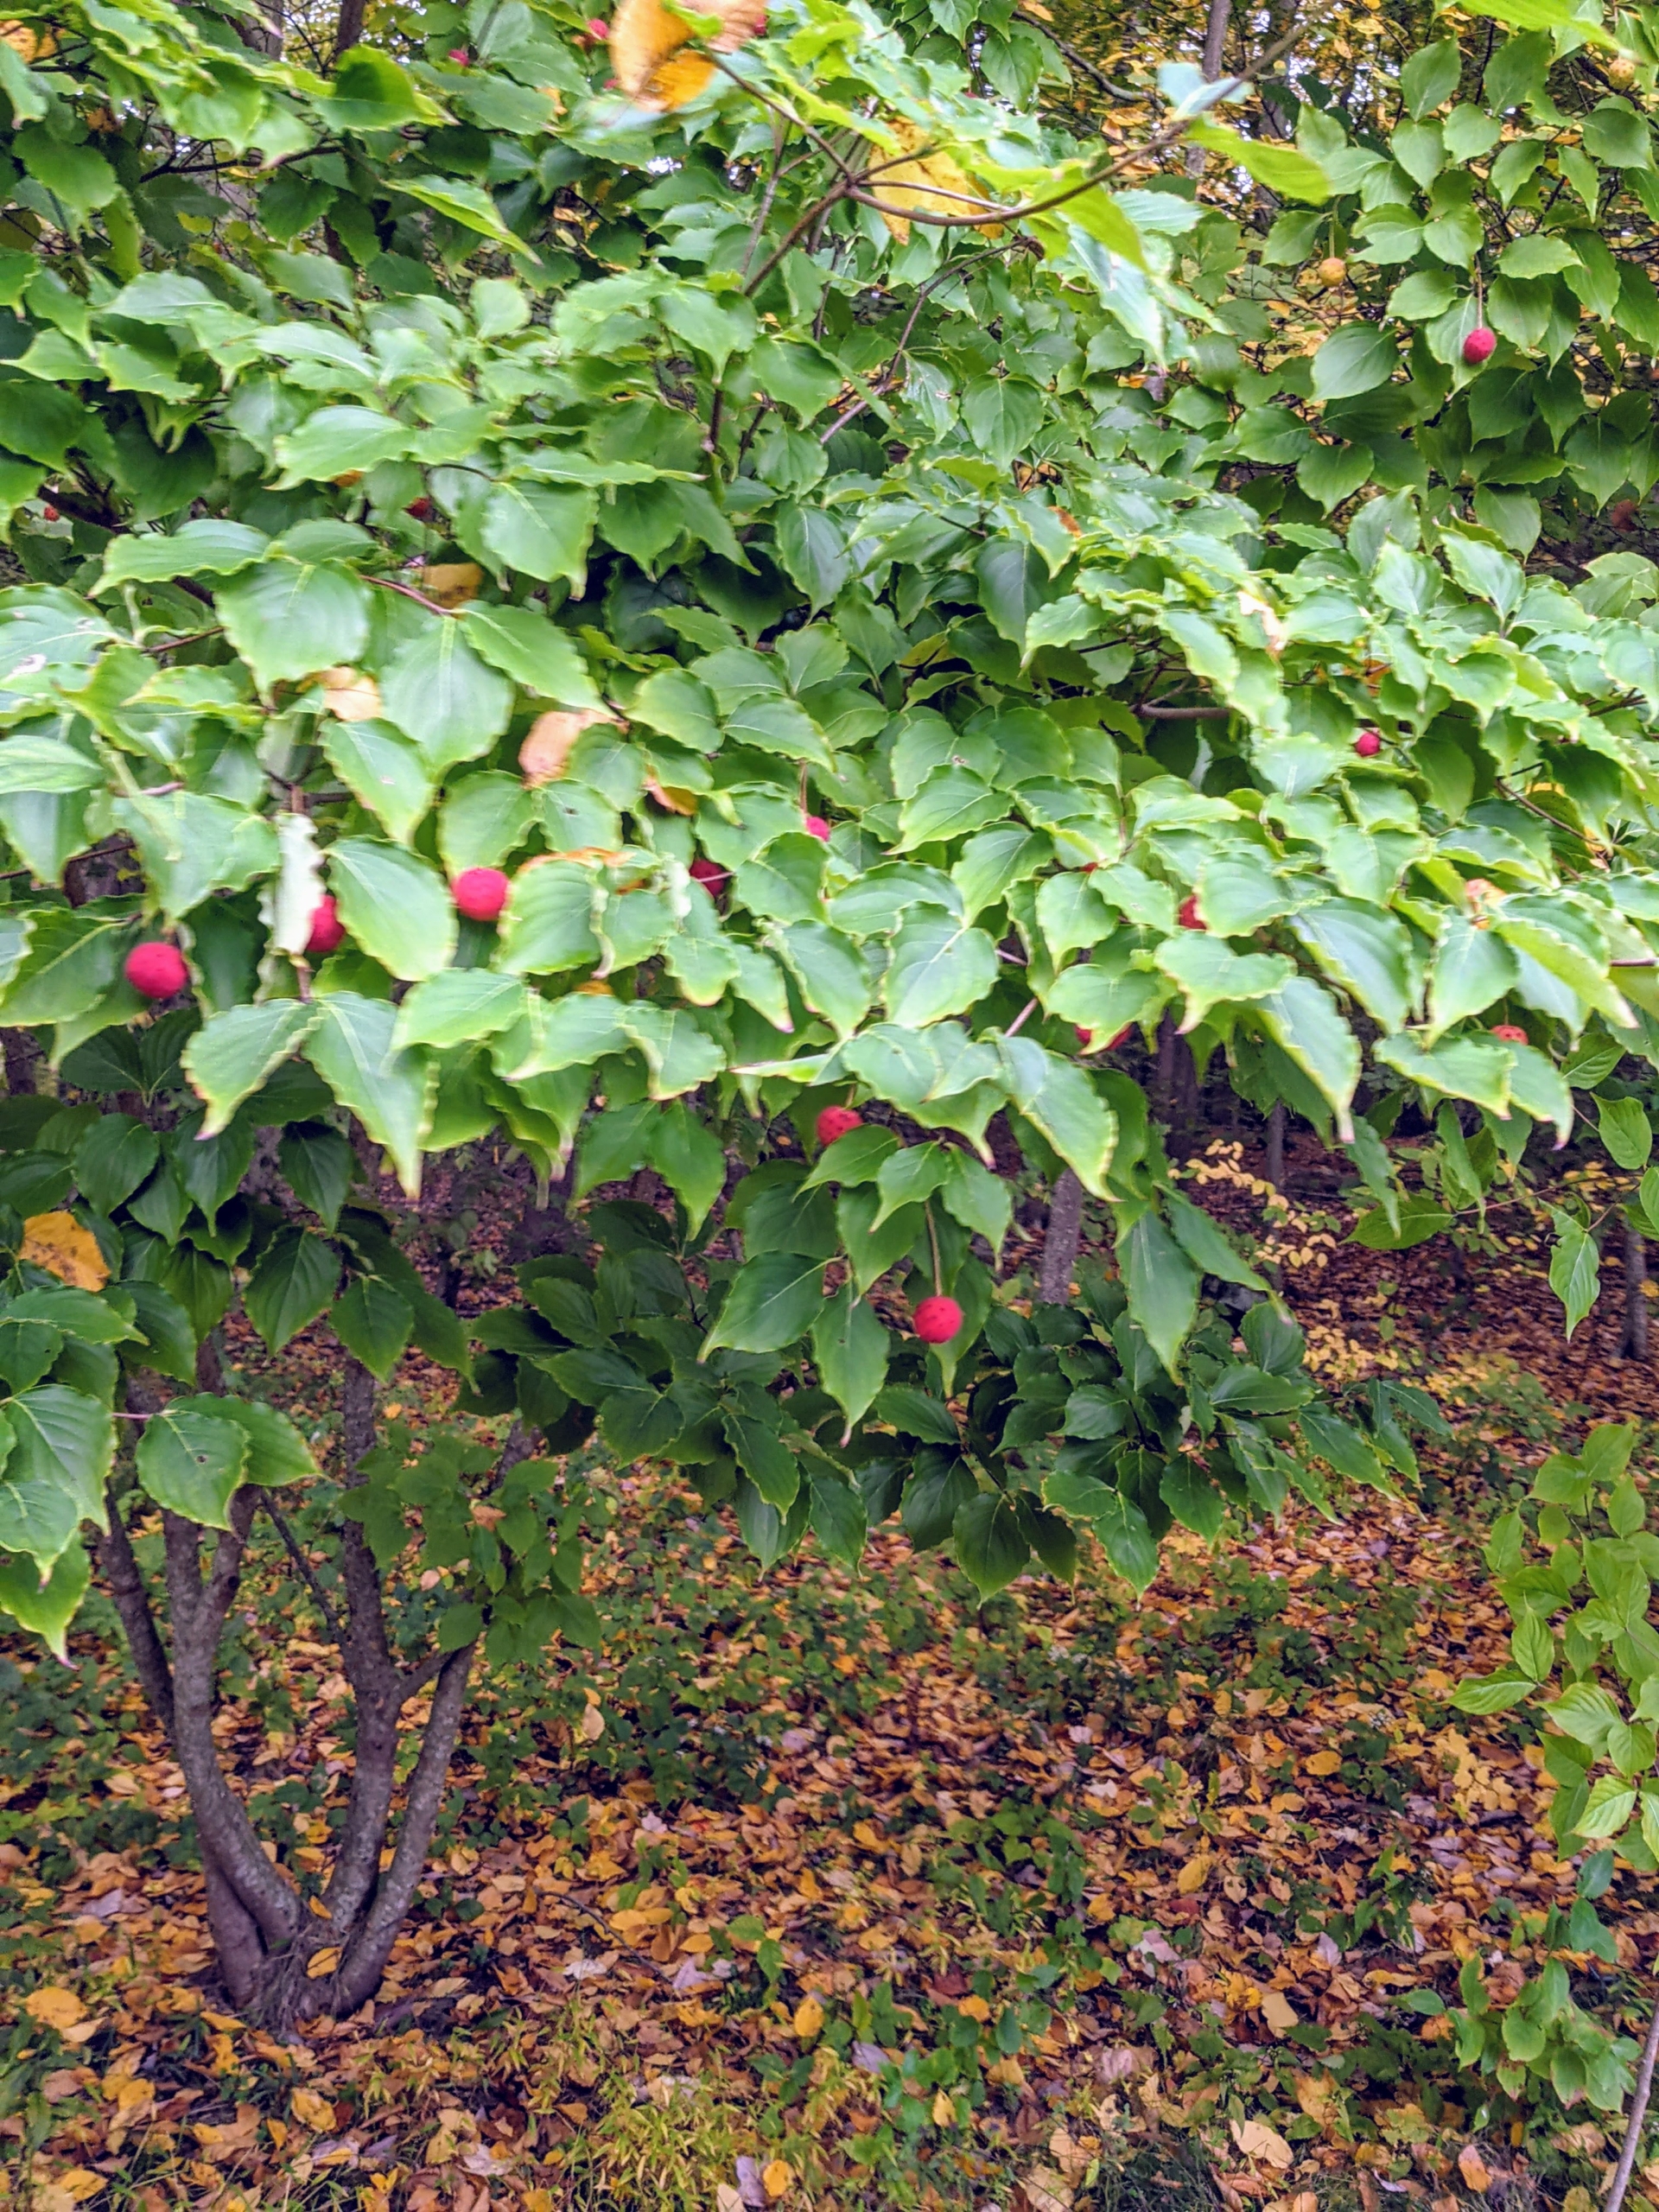
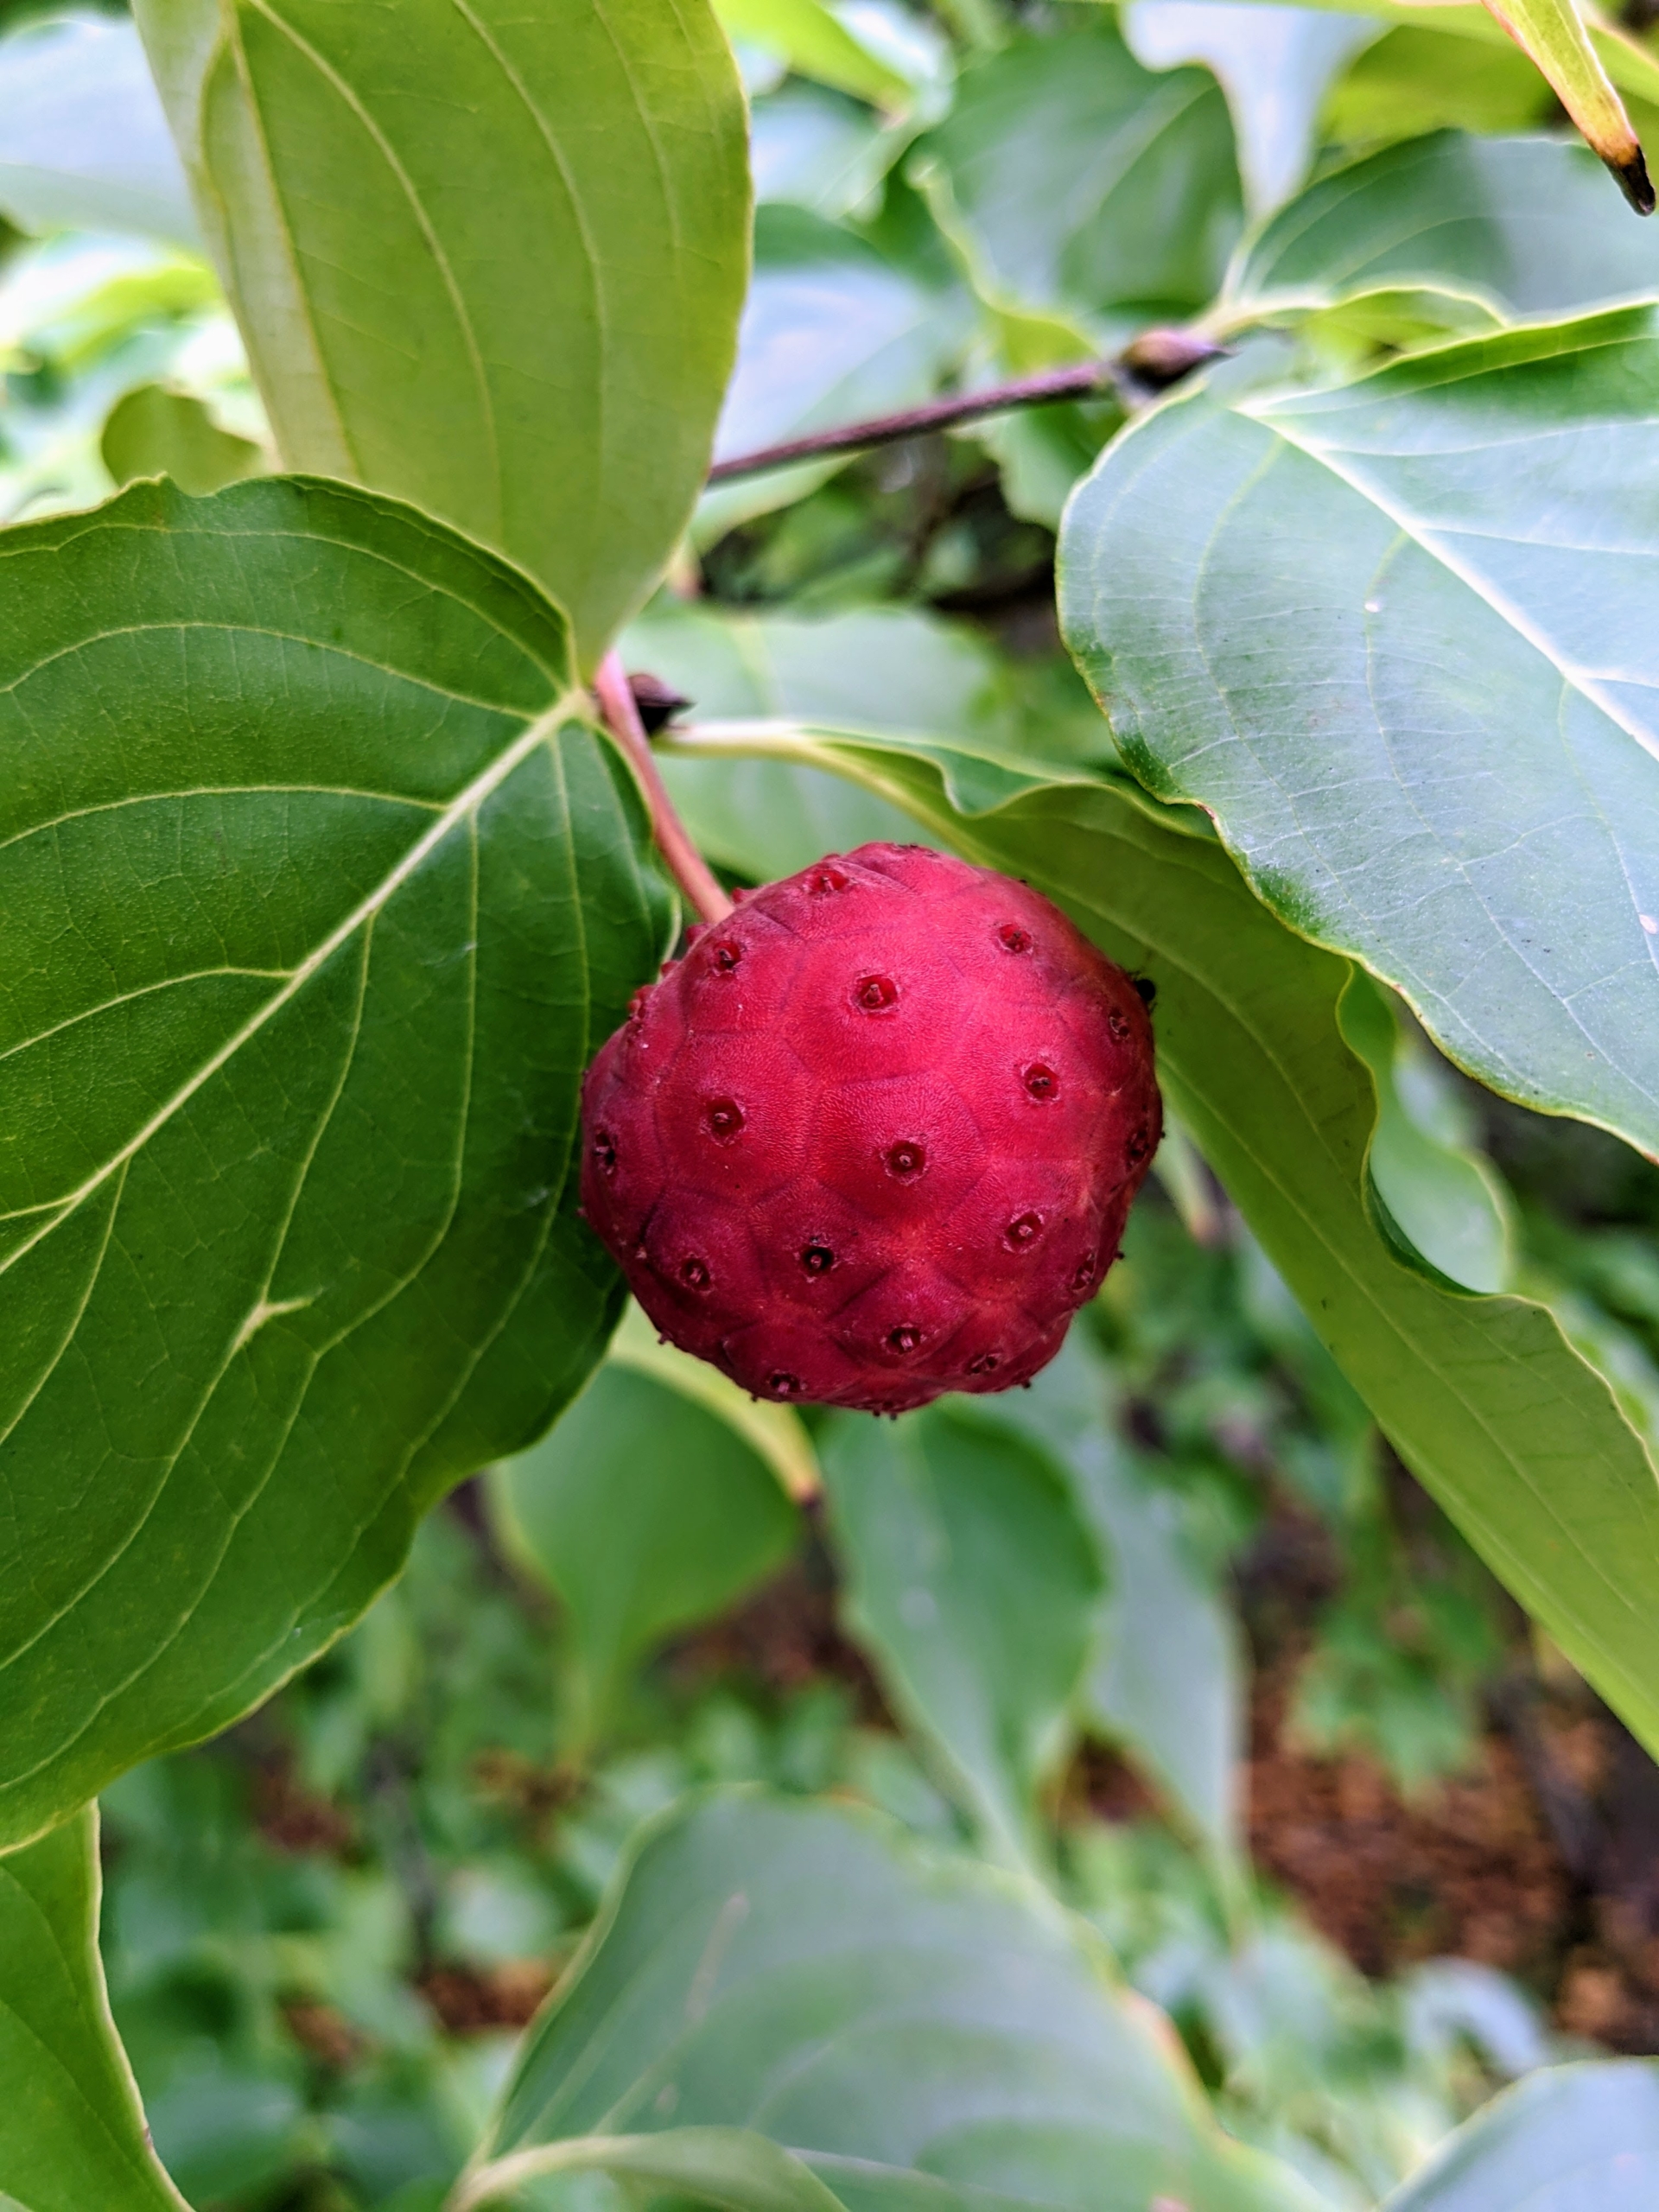
Cornus kousa is a small deciduous tree that can grow up to 40 feet tall. It is in the flowering plant family Cornaceae. Common names include kousa, kousa dogwood, Chinese dogwood, Korean dogwood, and Japanese dogwood. It is native to East Asia including Korea, China and Japan.
This is a fruit of the kousa which is edible. The soft pulp is sweet with a similar flavor to a ripe persimmon but it also has hard seeds inside.
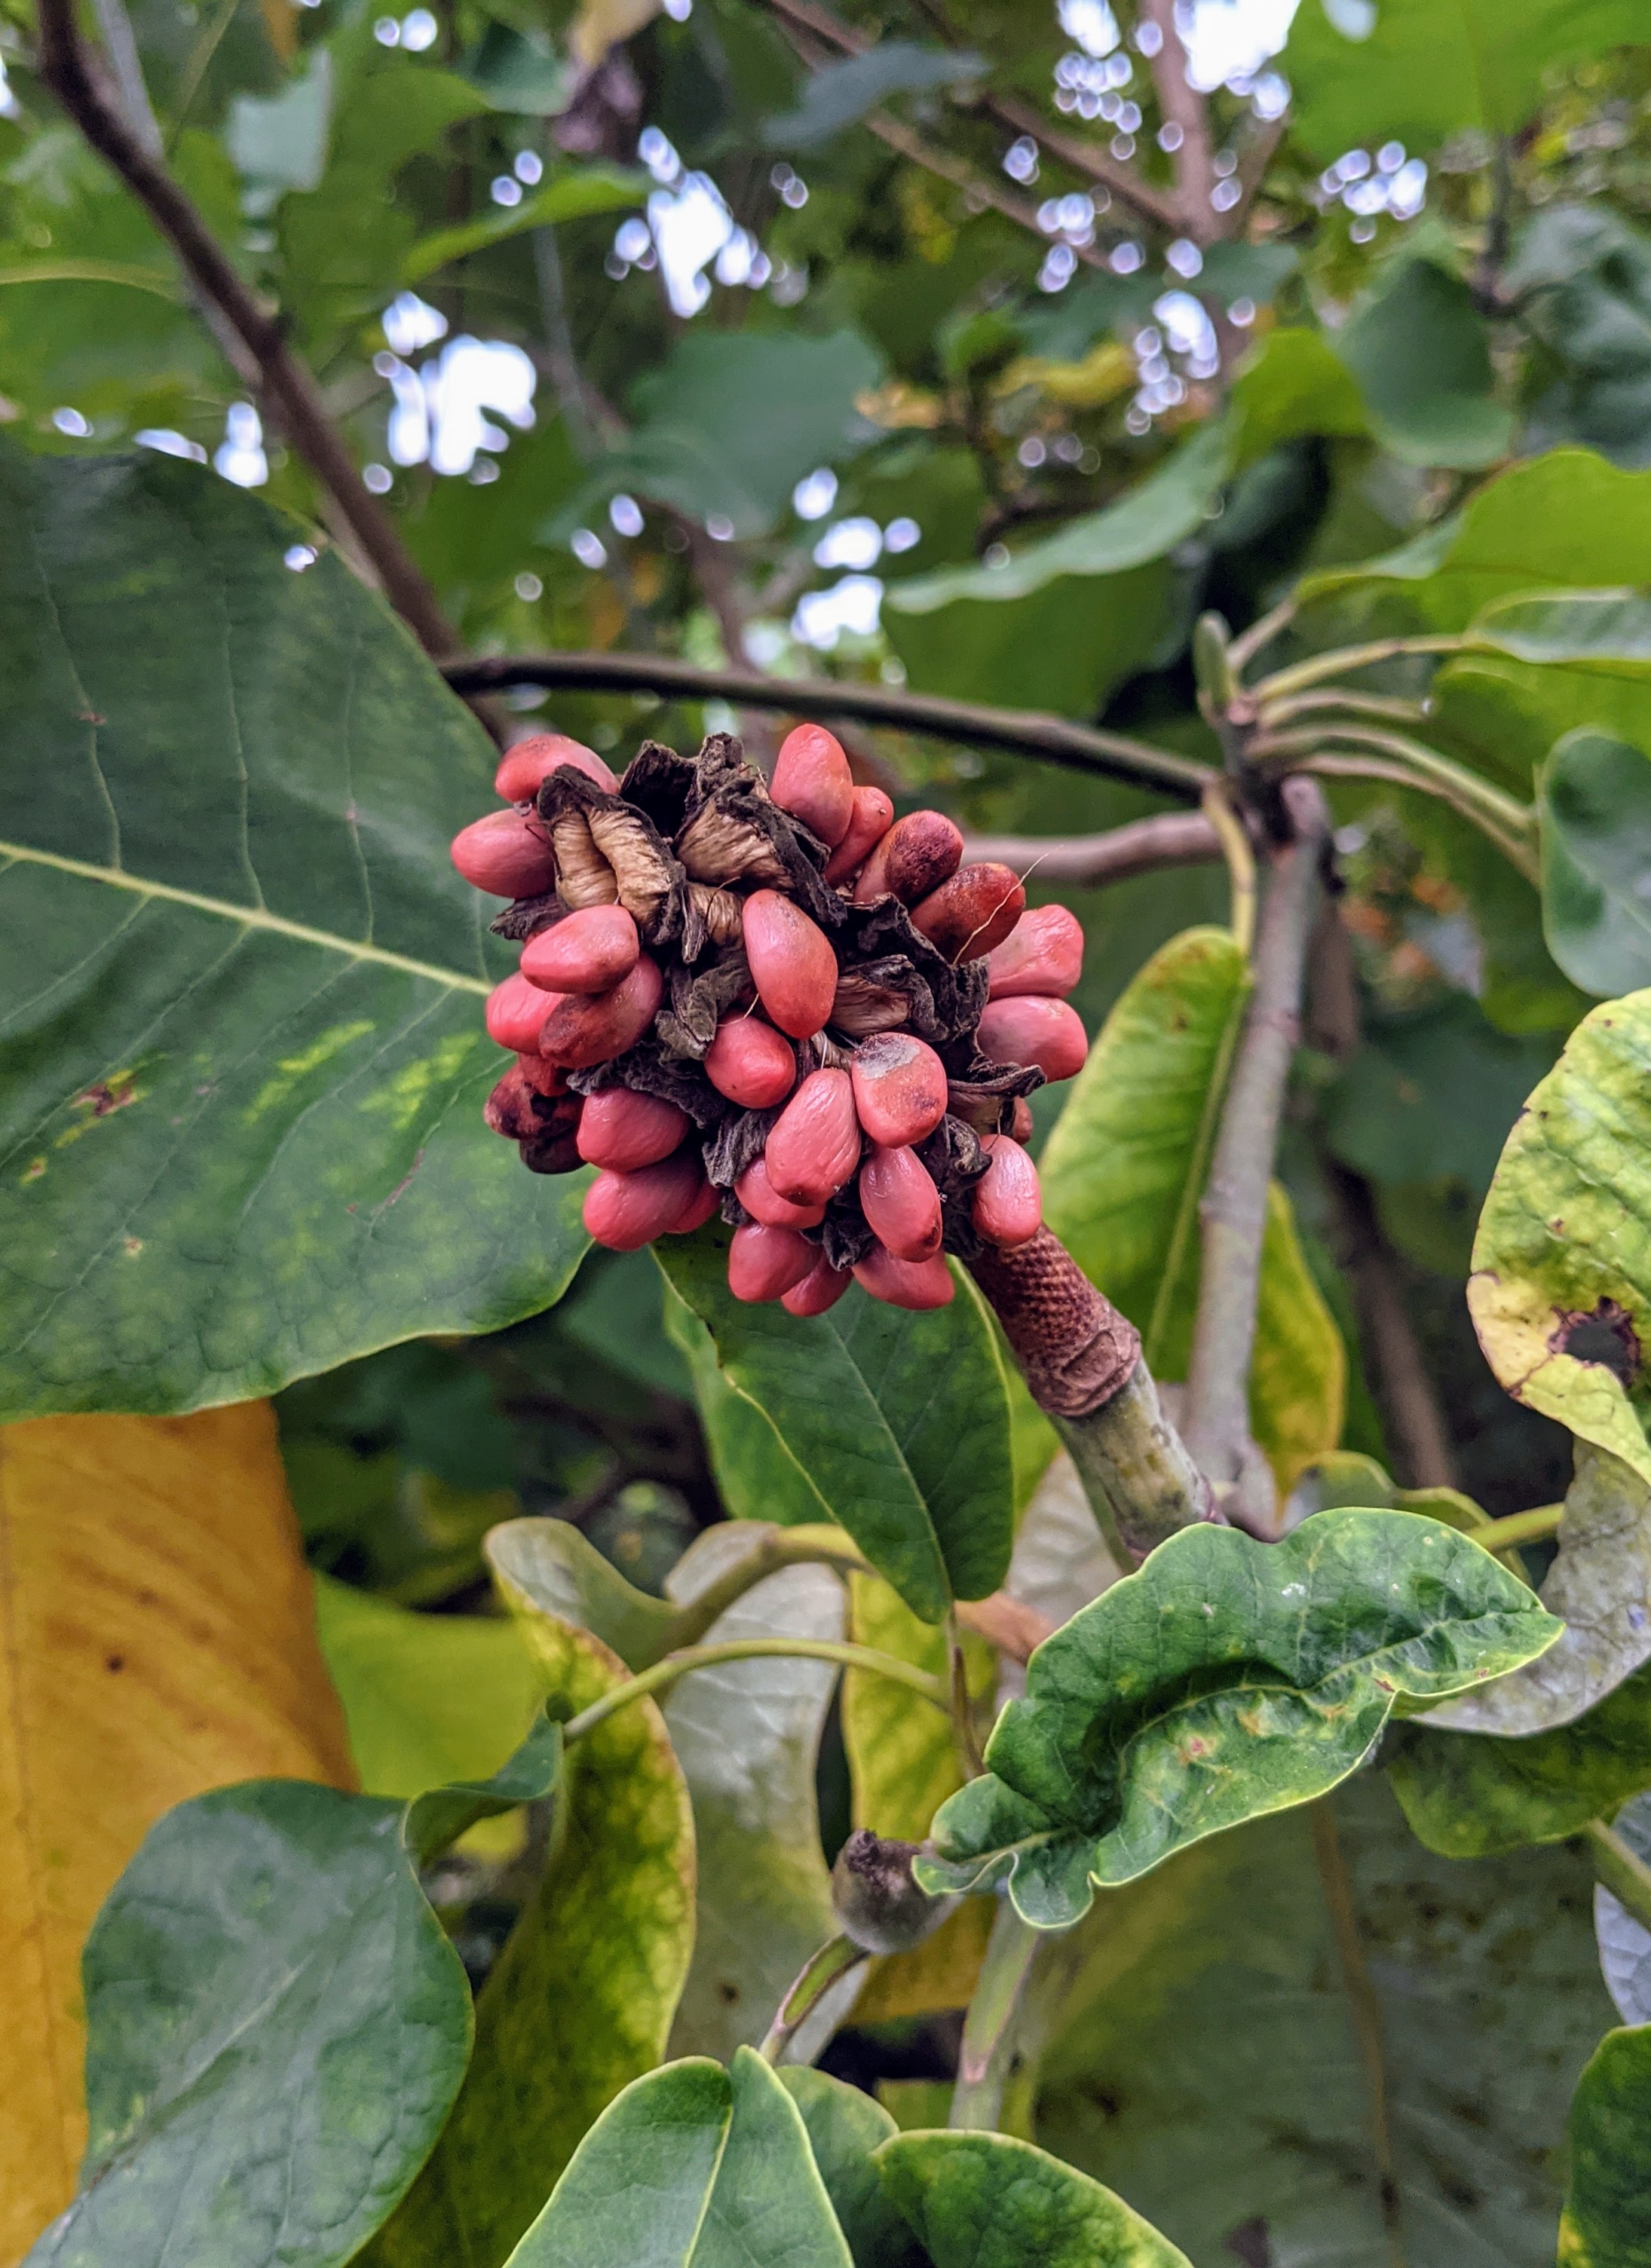
These are the seeds of the magnolia tree. In the fall after the flowers are long gone, Magnolia seed pods, which resemble exotic-looking cones, spread open to reveal bright red berries. Birds, squirrels, and other wildlife love these tasty fruits. Inside the berries are the magnolia seeds.
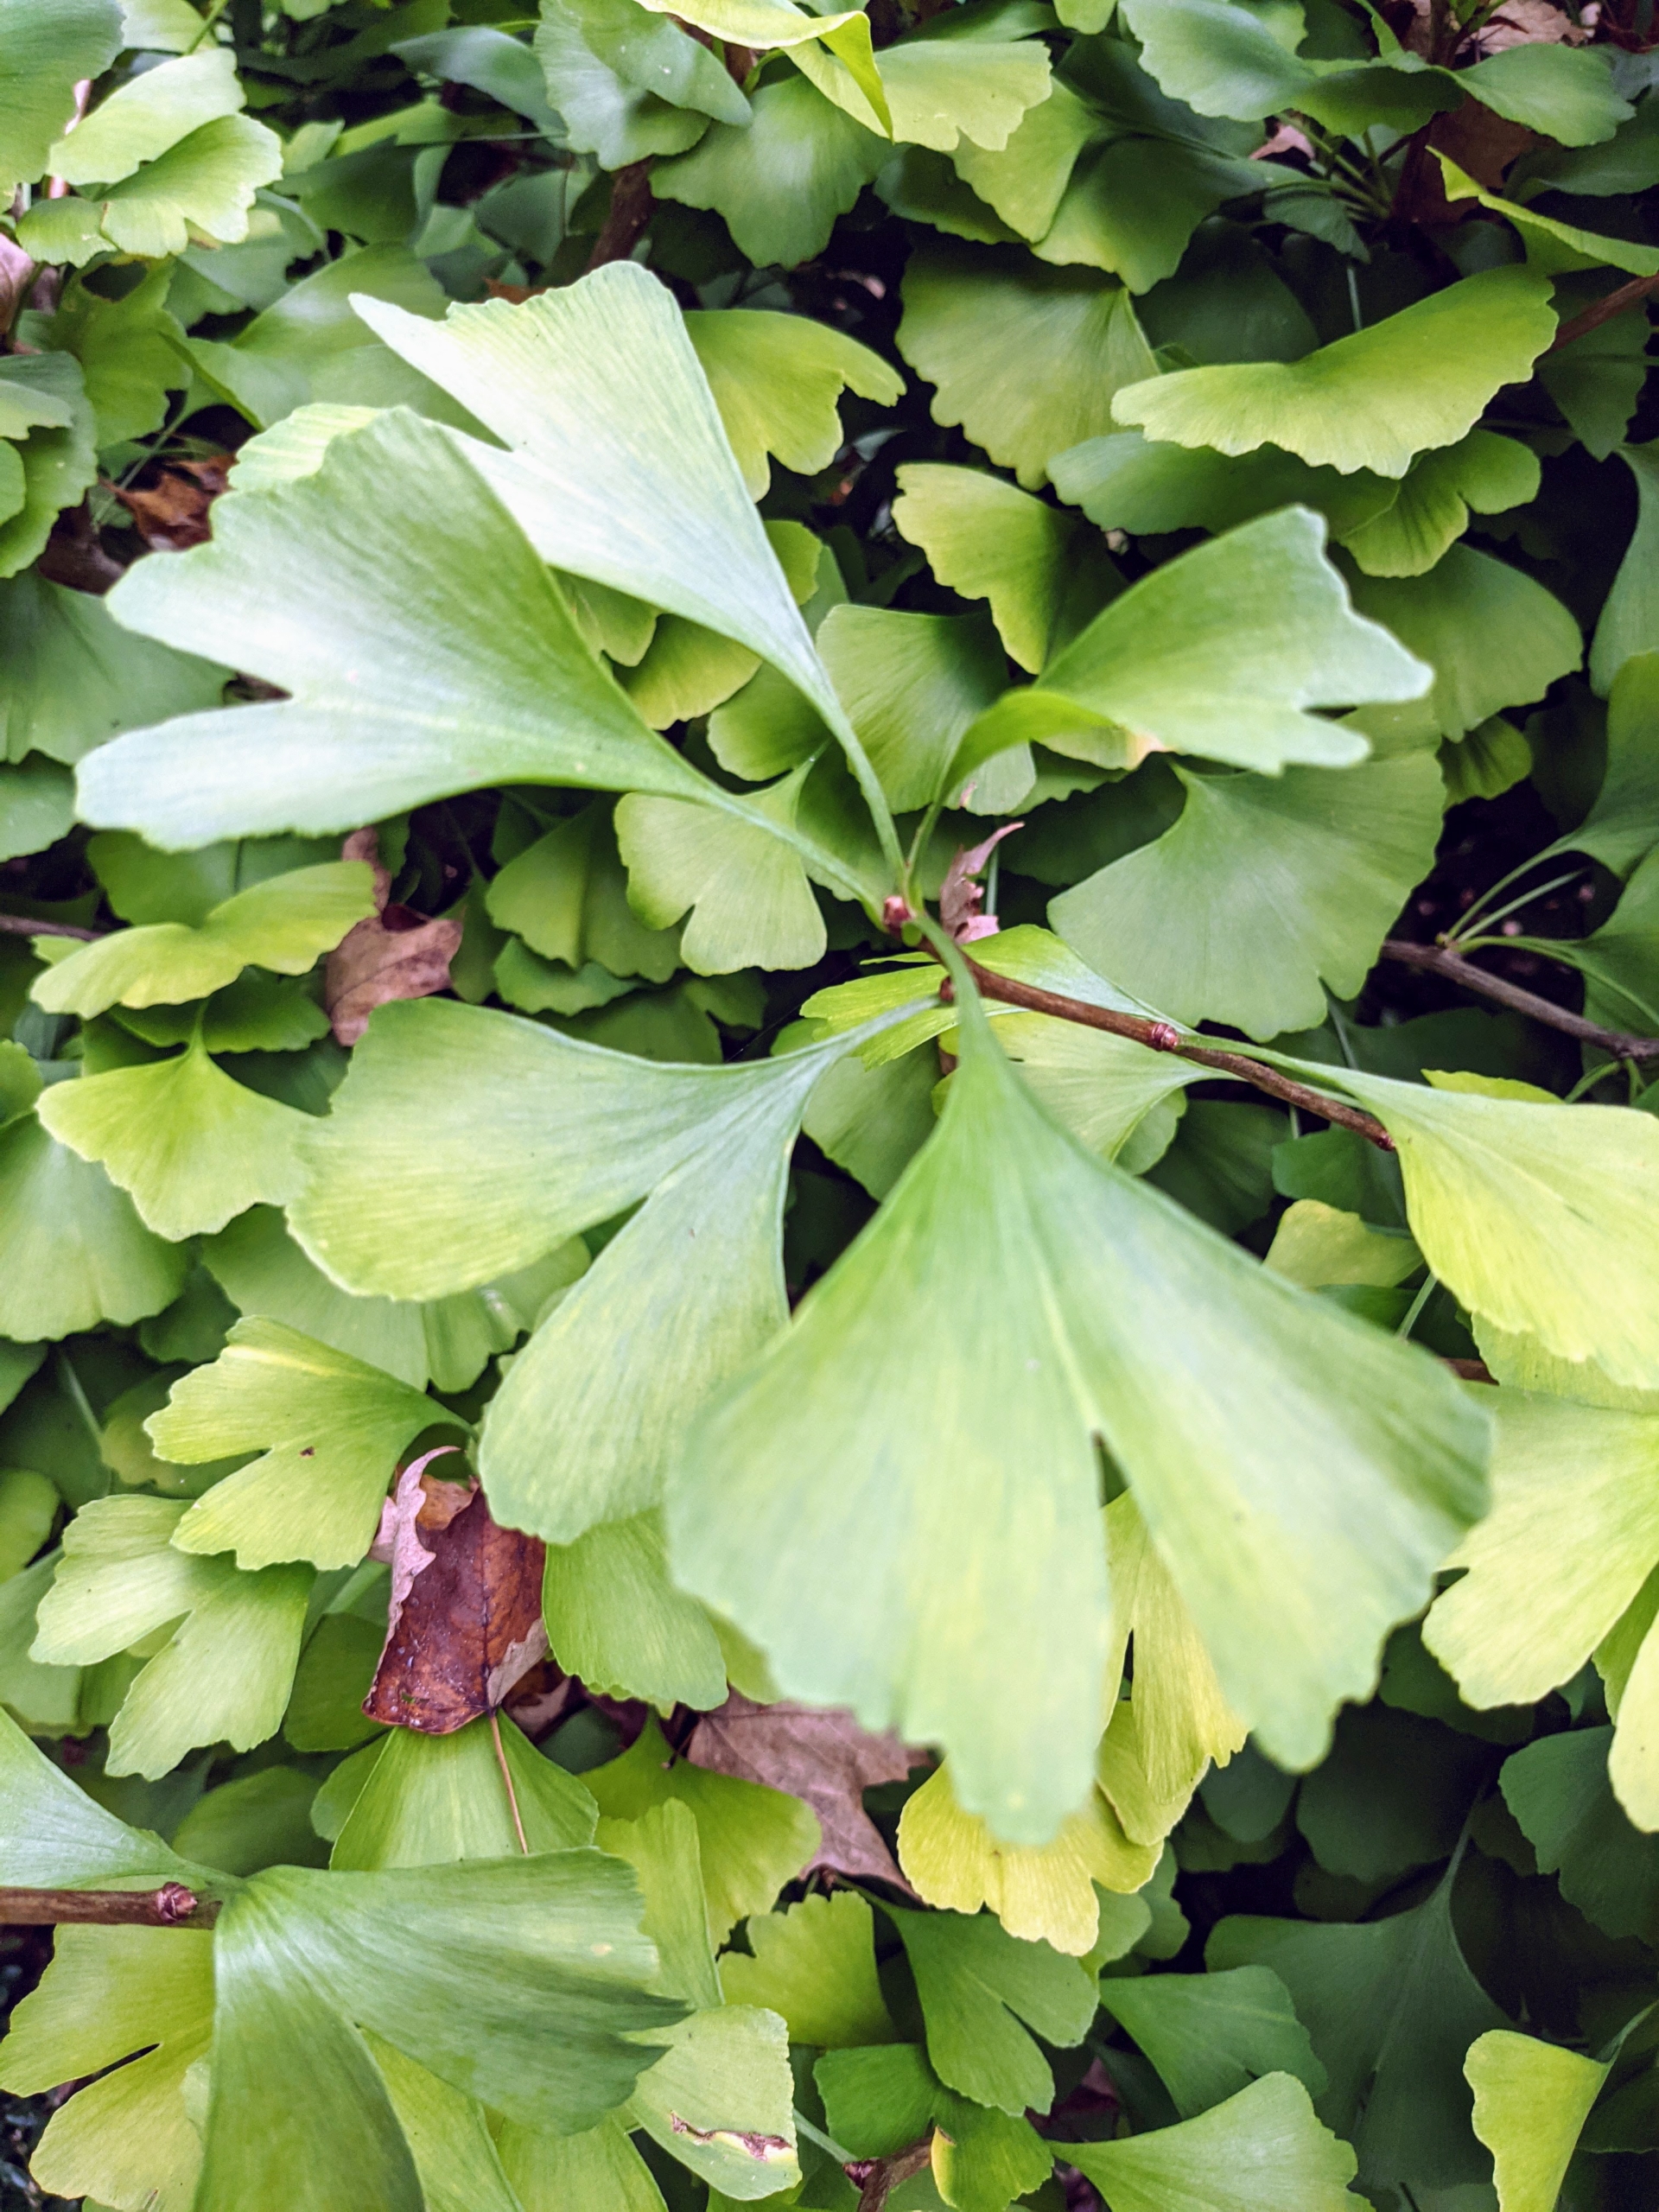
I am sure many of you recognize the leaves of the ginkgo. The leaves are unusually fan-shaped, up to three inches long, with a petiole that is also up to three inches long. This shape and the elongated petiole cause the foliage to flutter in the slightest breeze.
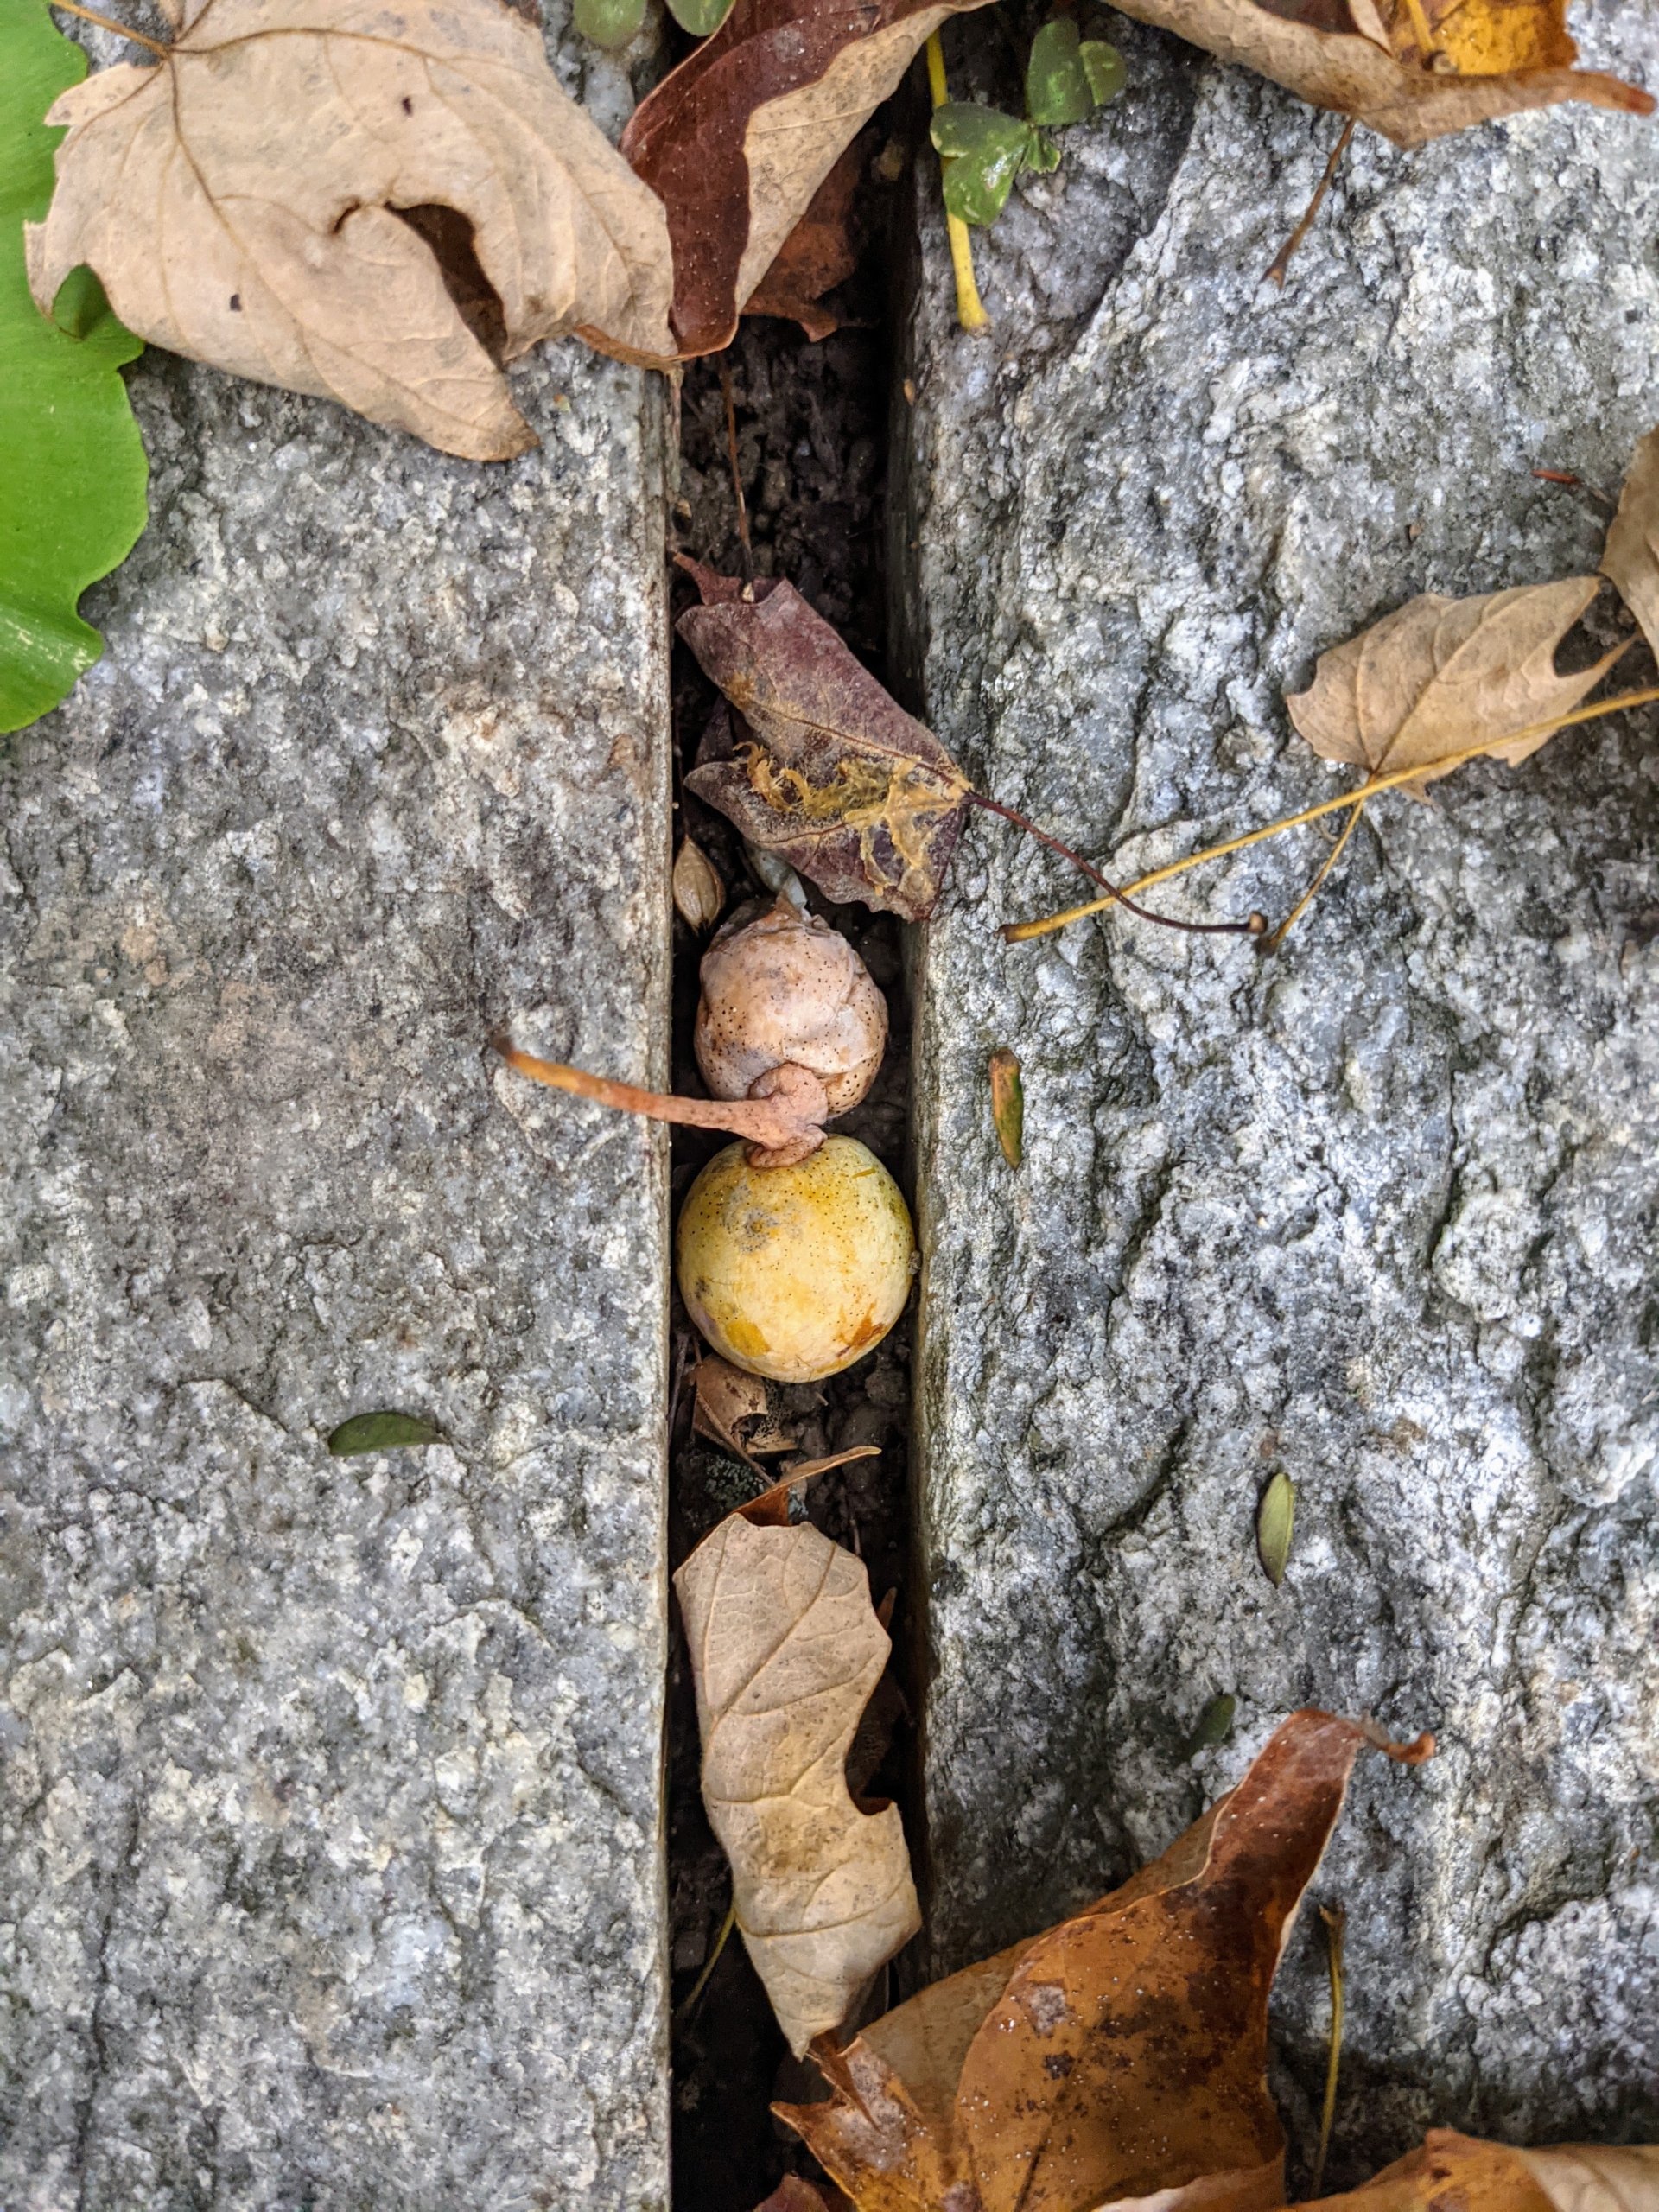
Here are fallen ginkgo tree fruits. The most noticeable thing about these is their smell. Have you ever smelled one? It is hard to miss, and the stench is quite disagreeable. The outer, nasty smelling pulp is known botanically as sarcotesta. The ginkgo seeds inside contain urushiol, which is the same chemical that causes poison oak, ivy, and sumac, so always wear gloves and protect your skin whenever handling the fruit.
Here is one seed separated from its fruity encasement. It is a single hard-shelled seed enclosing an edible kernel. The kernels are often roasted and used in Asian cuisines.
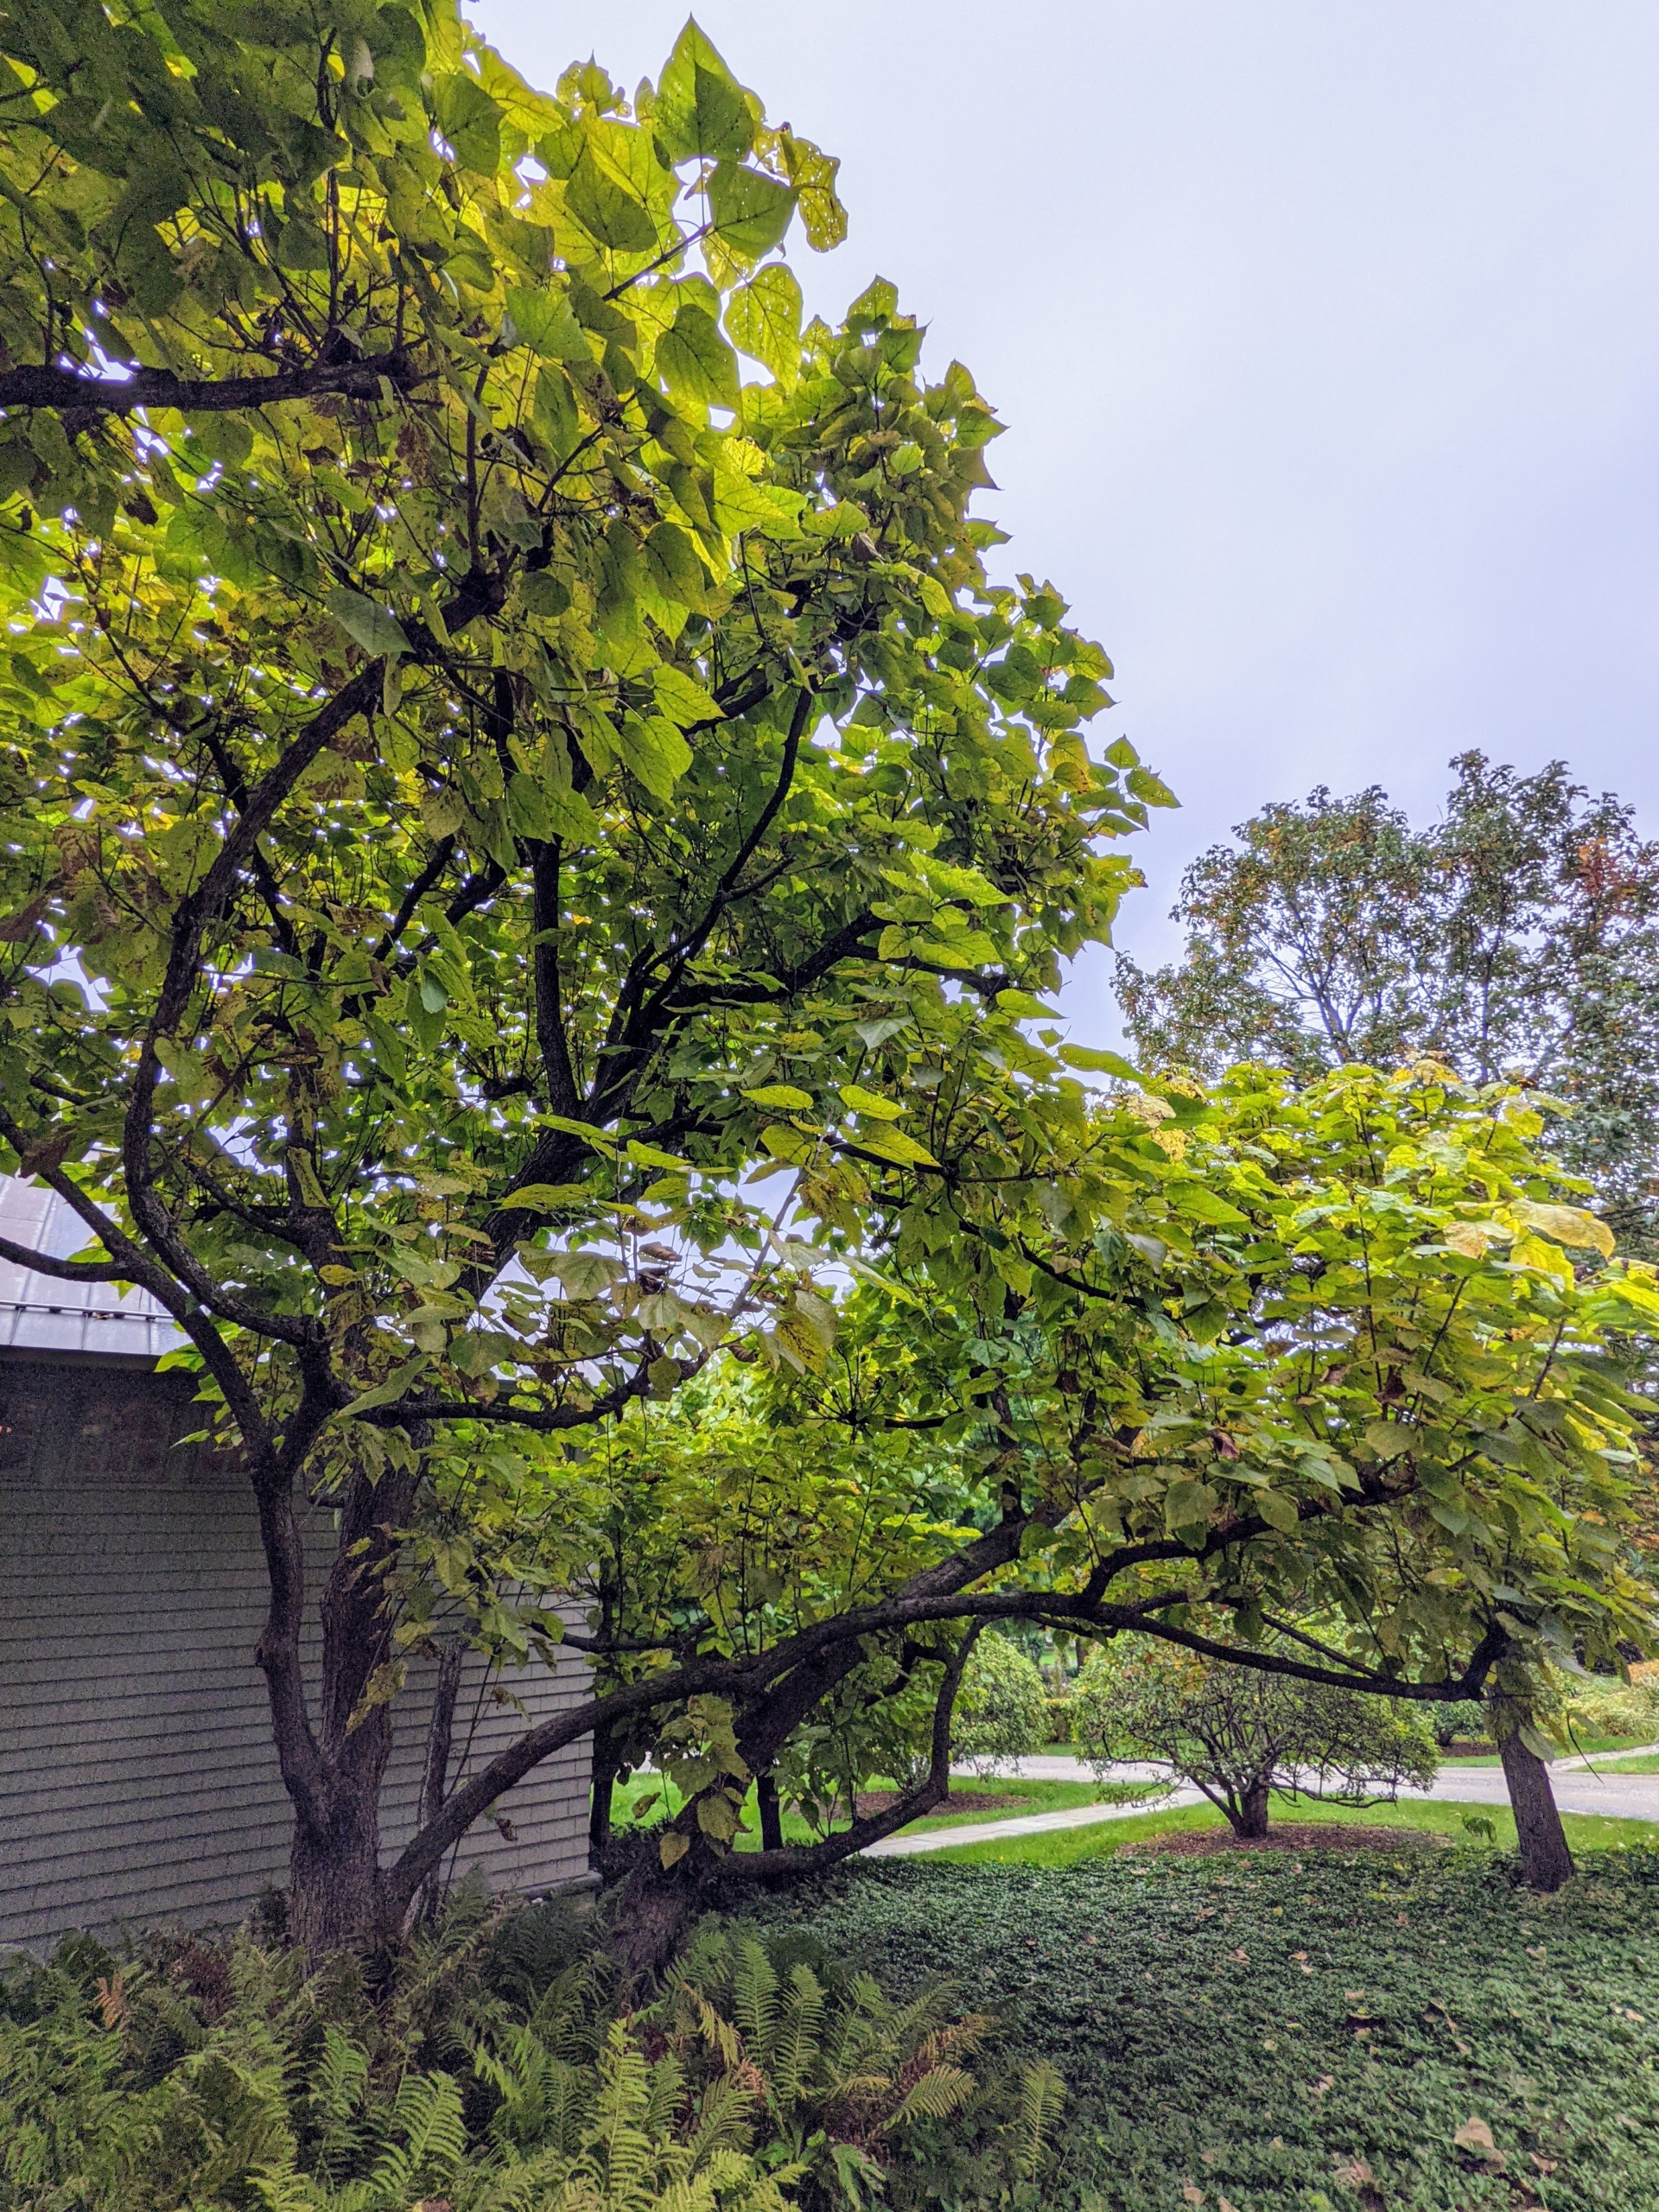
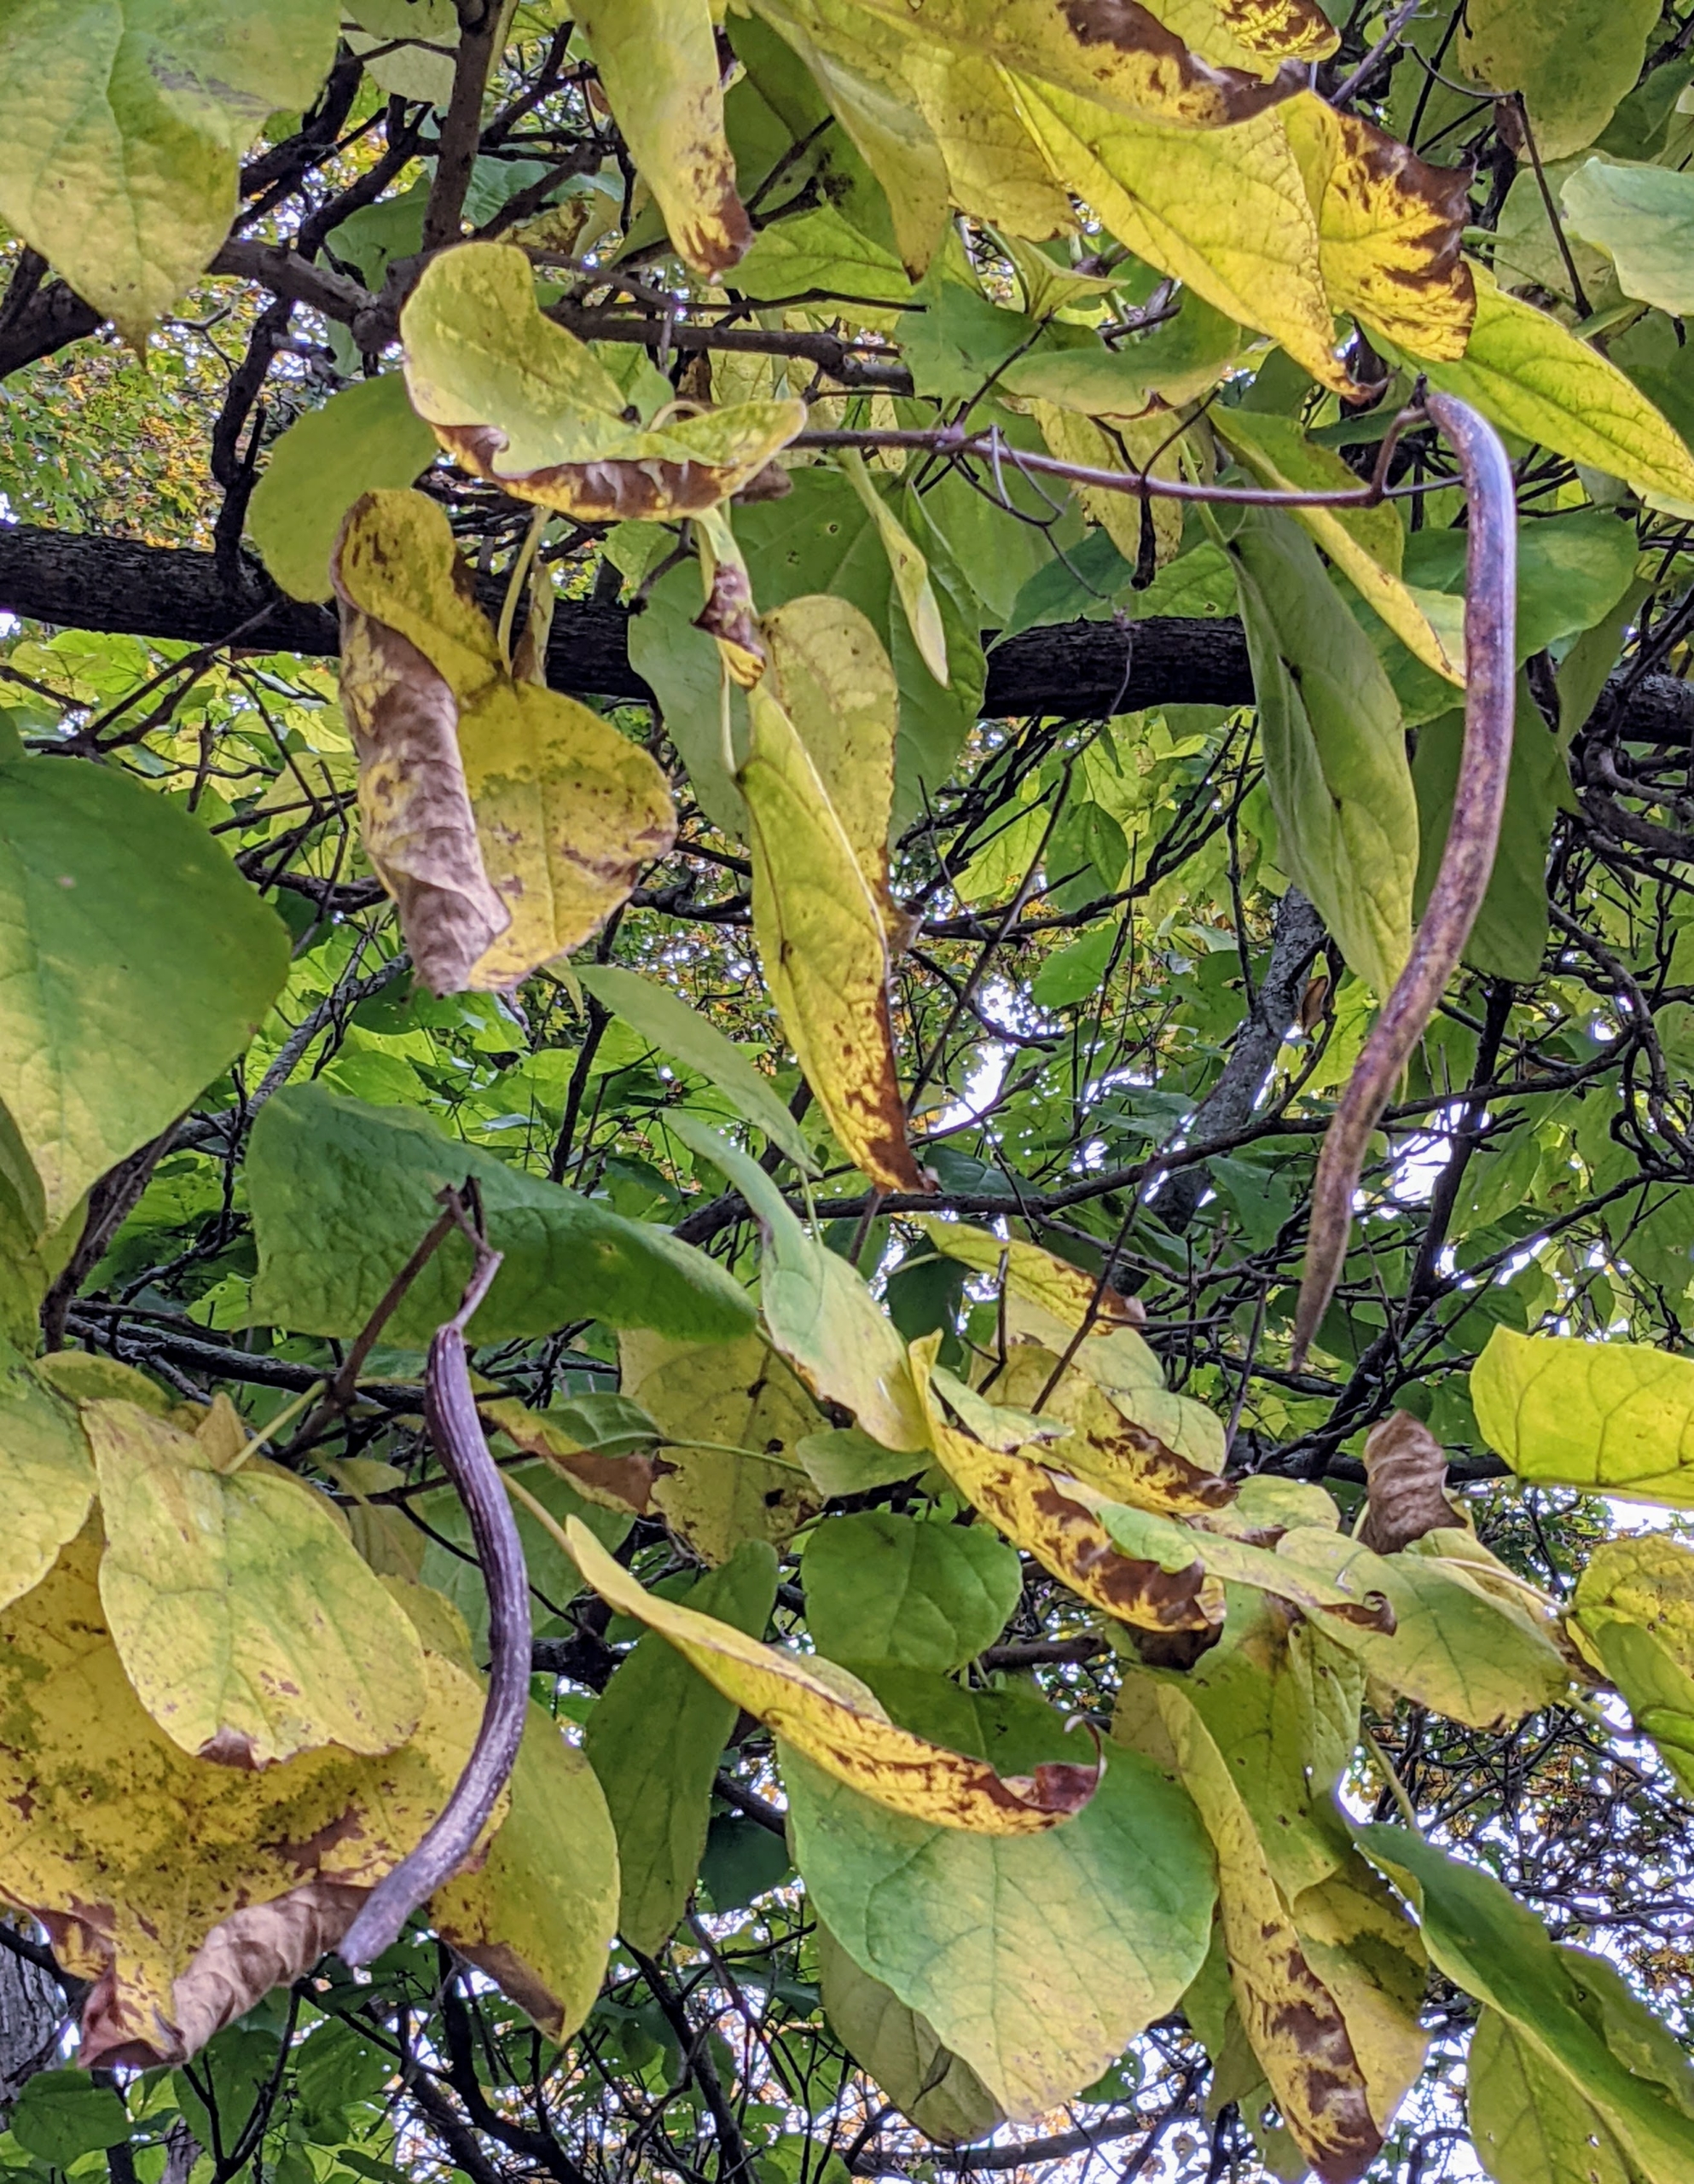
Catalpa, Catalpa speciosa, is another tree I love – this one located just outside my carport. Mature catalpas can reach heights of 50 feet or more. They are very showy with their white orchid-like flowers in June, huge leaves, and cigar-shaped fruit.
In autumn, mature catalpa seed pods turn brown and often hang on the tree through late fall and into winter.
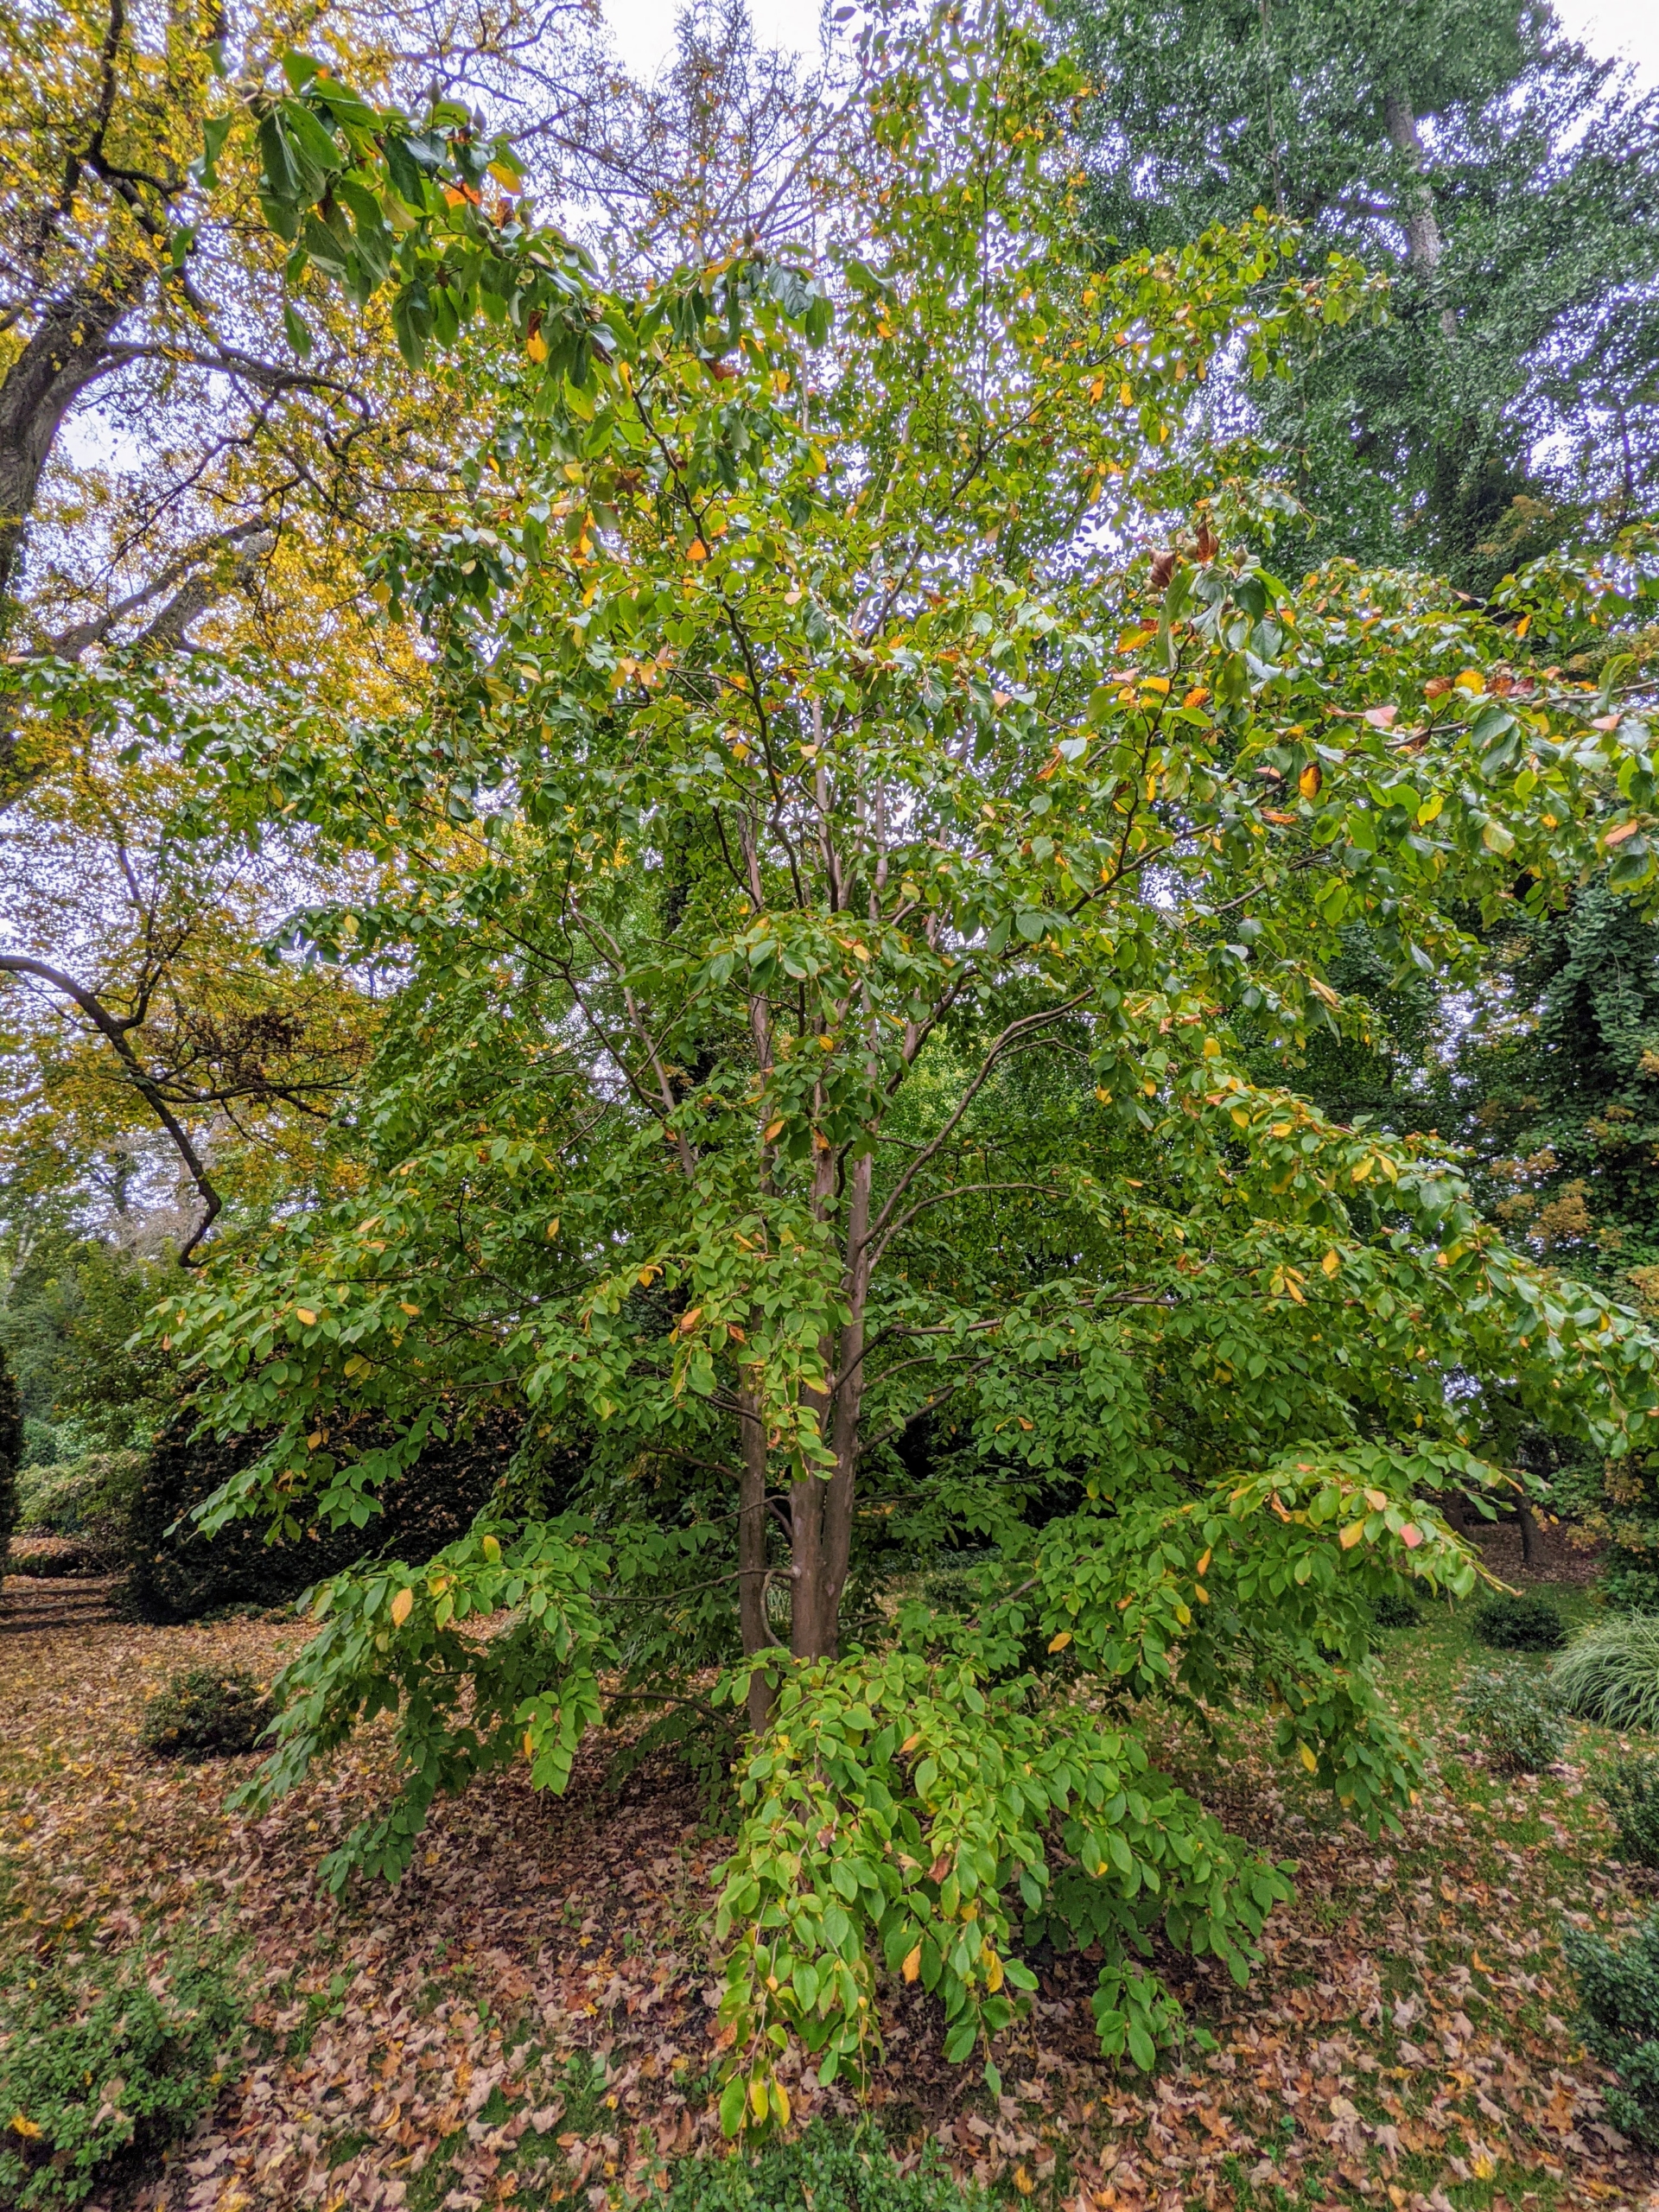
This is one of my many Stewartia trees. Stewartia is a species of flowering plant in the family Theaceae, native to Japan and Korea. All varieties are slow-growing, all-season performers that show off fresh bright green leaves in spring. Do you know why I love Stewartia trees? Well, Stewart is my last name after all. However, there is no relation. “Stewartia” is named for Scottish nobleman and botanist, John Stuart, who had imported the plant to his personal London garden. He later served as British prime minister from 1762 to 1763.
Stewartias feature stunning bark that exfoliates in strips of gray, orange, and reddish brown once the trunk attains a diameter of two to three inches.
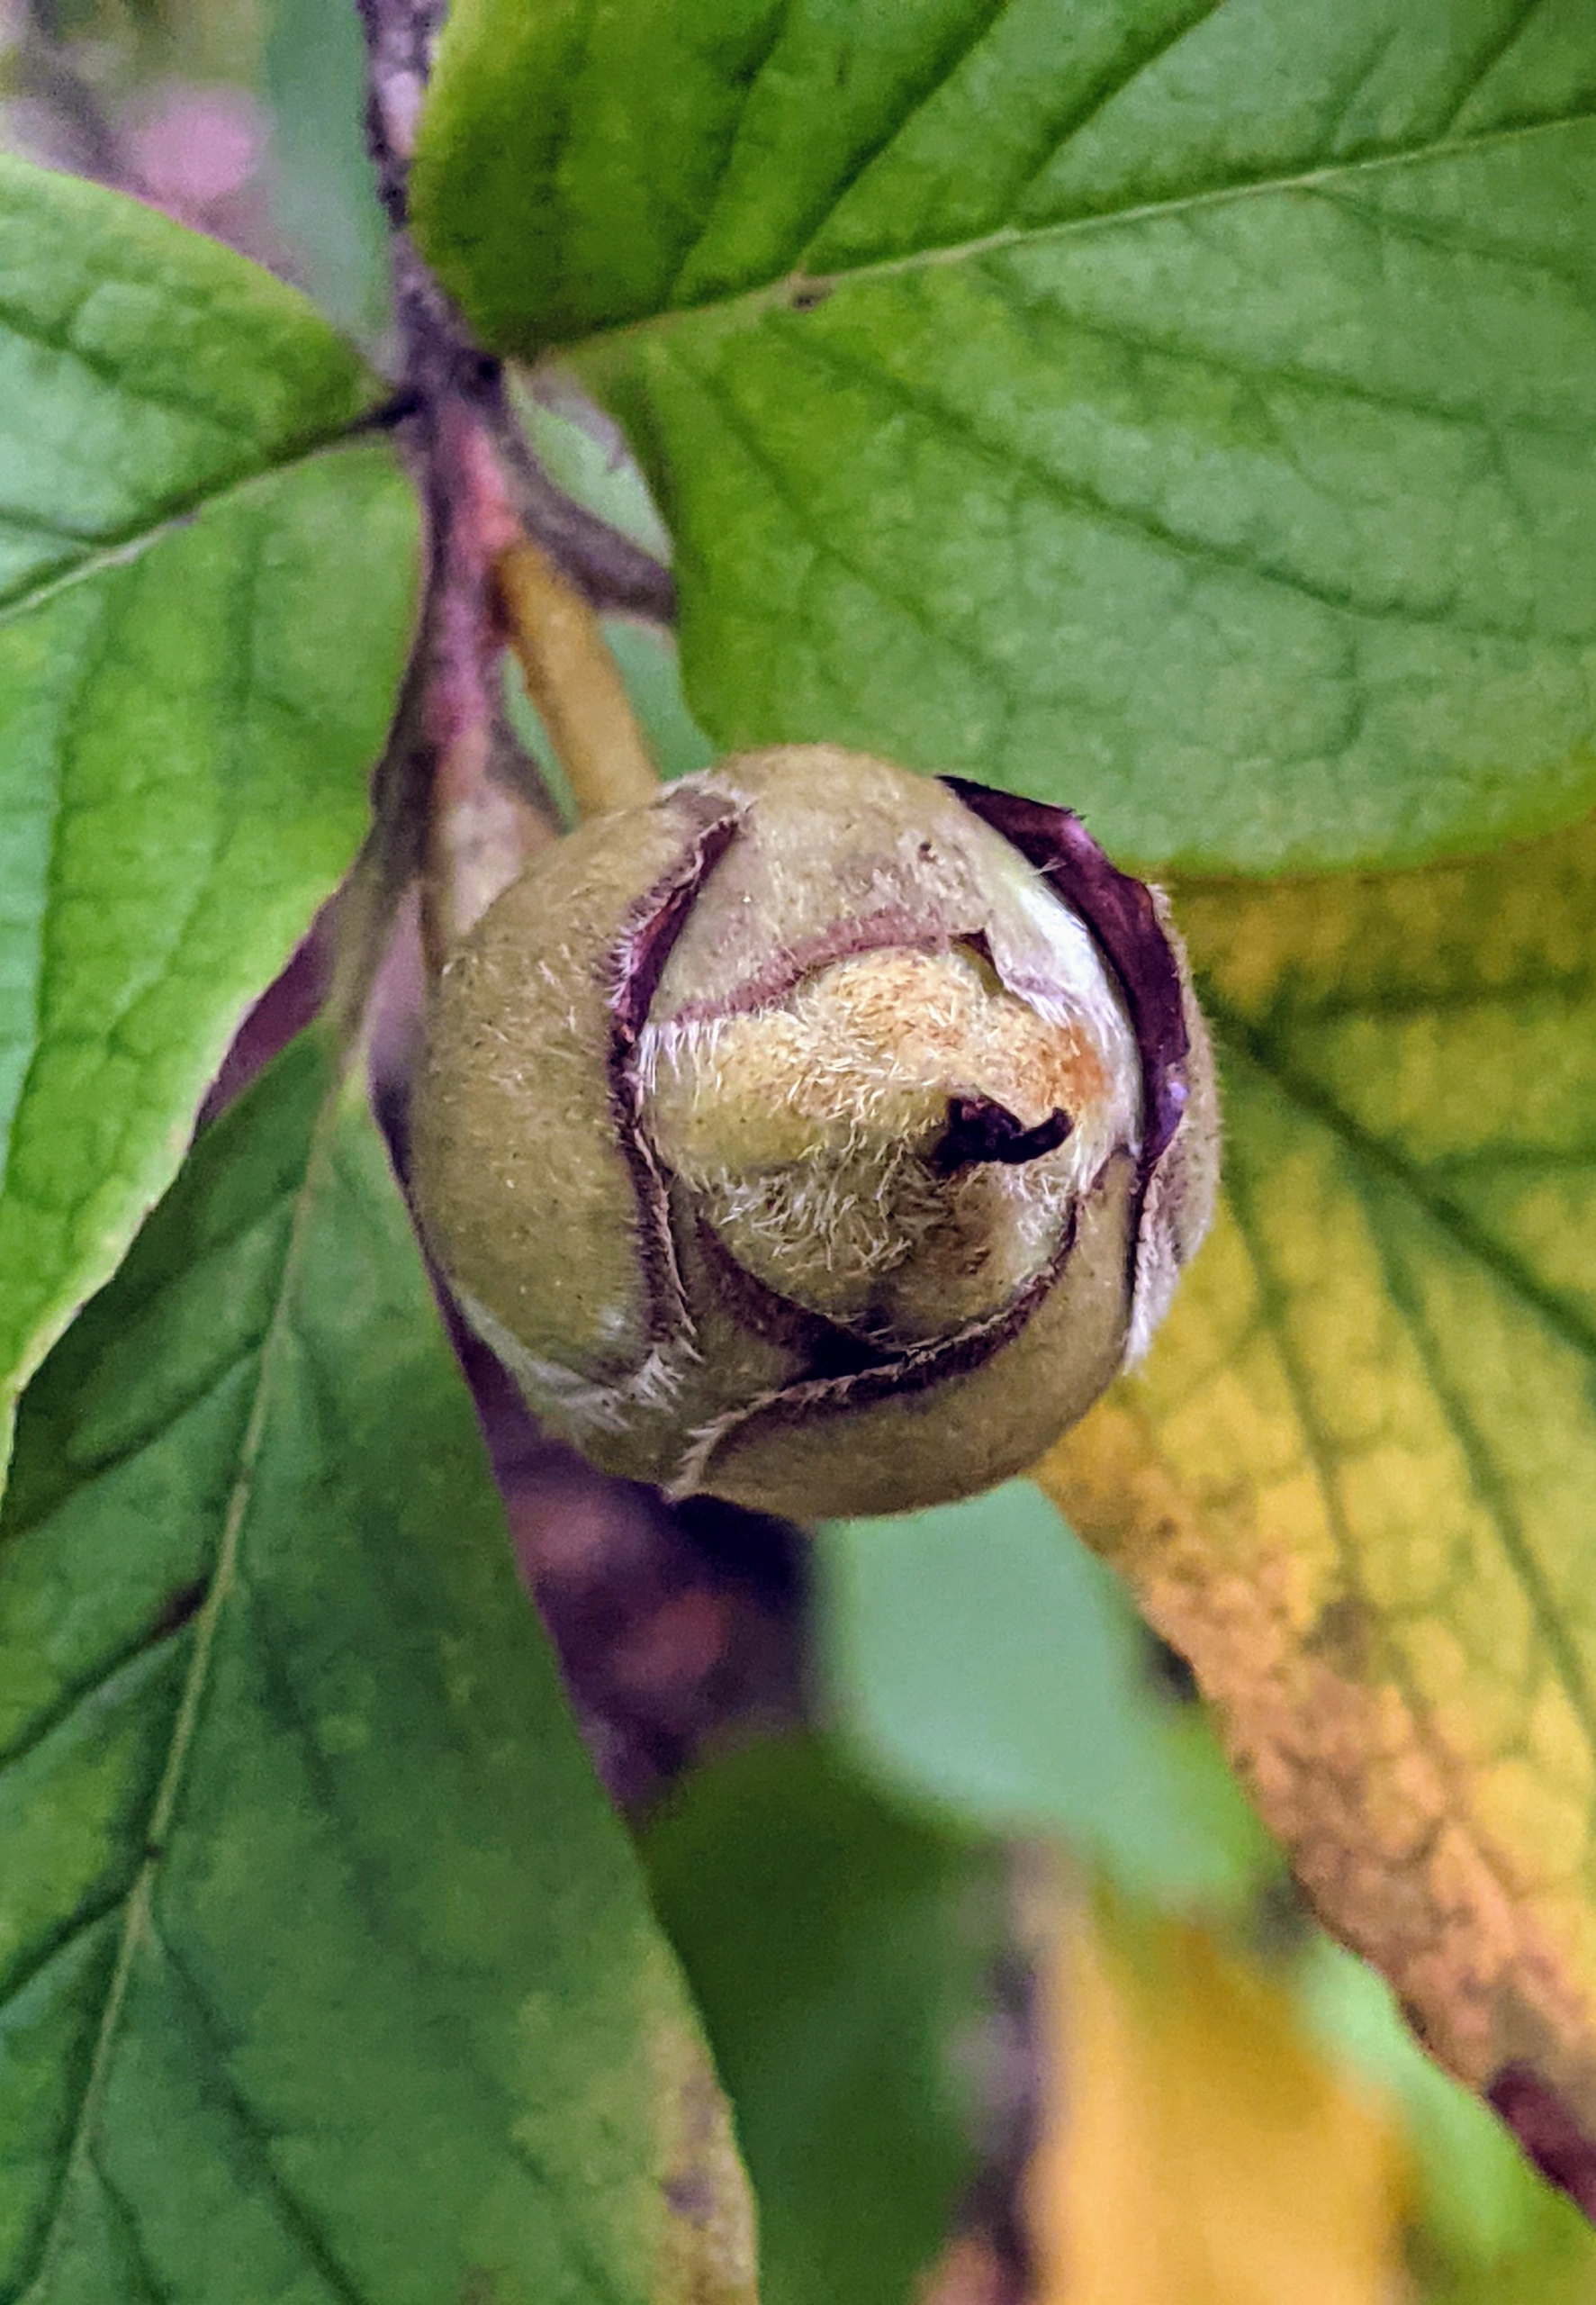
Stewartias produce woody ovoid capsules of seeds each of which has five seed chambers containing up to four seeds.
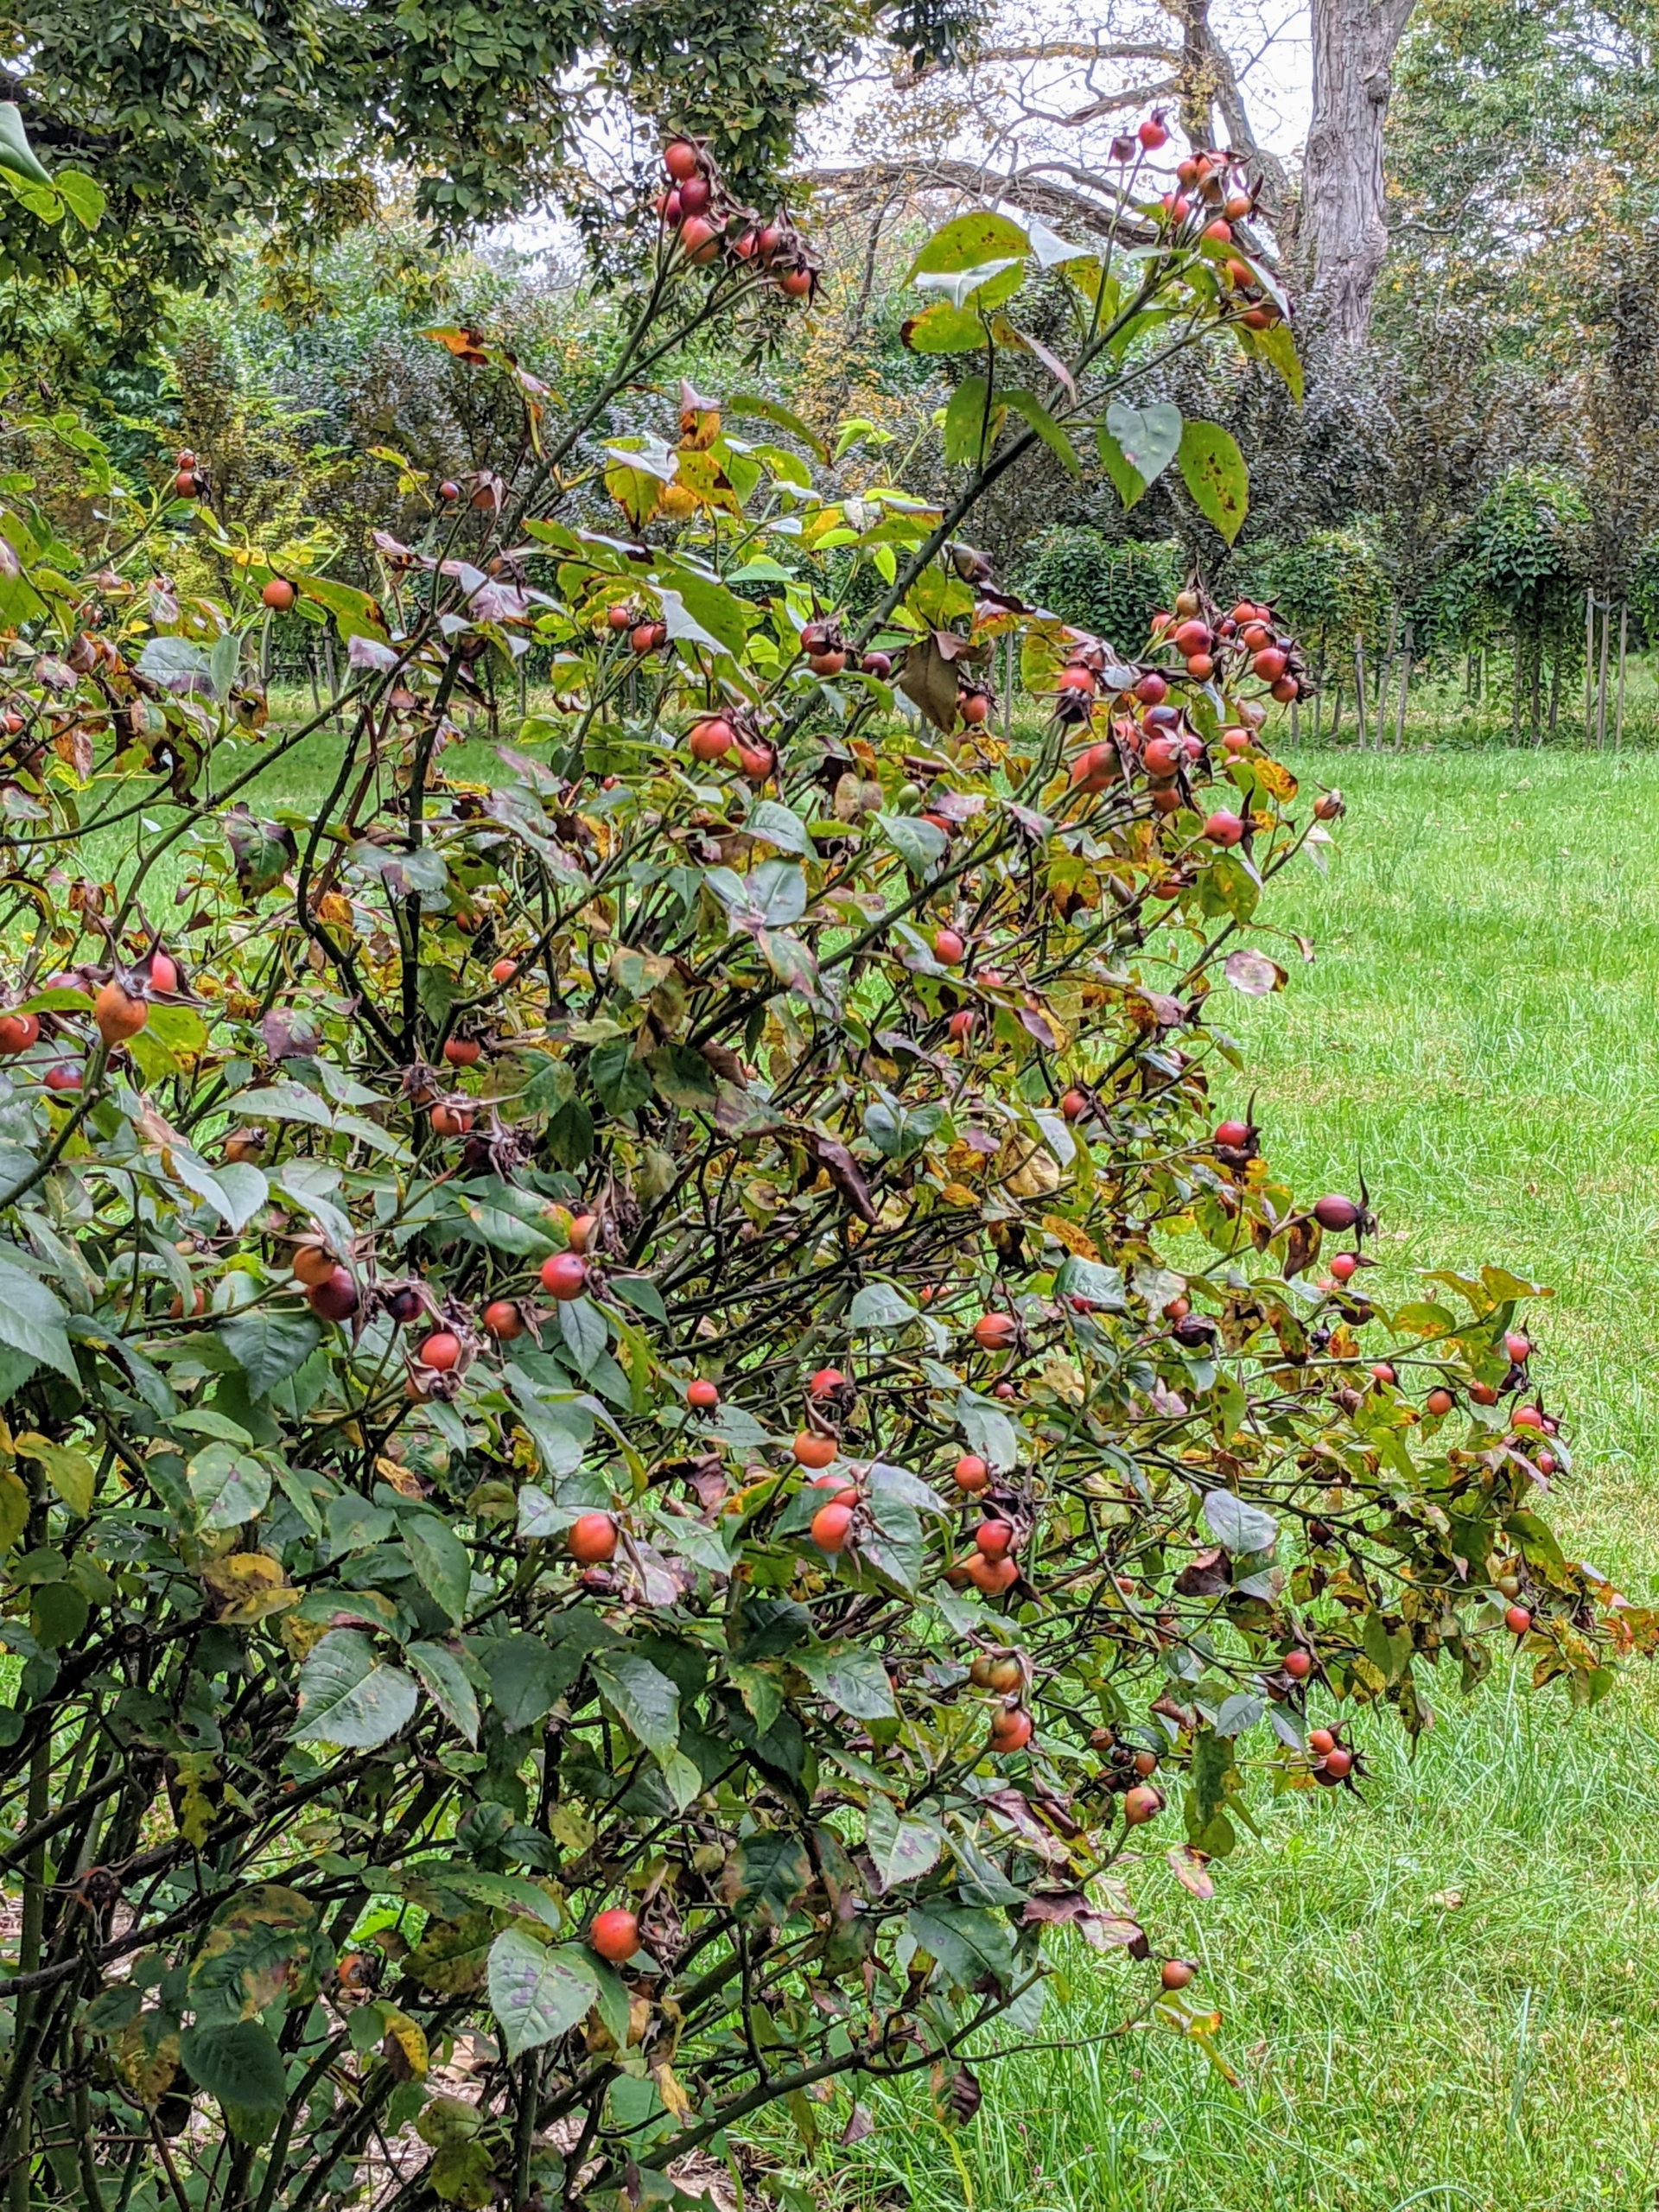
And here is a rose bush laden with hips. The rose hip or rosehip, is also called the rose haw and rose hep.
Rose hips are the seed pods of roses. They look like small crab apples and are typically red to orange, but ranges from dark purple to black in some species. Rose hips remain on the plant long after rose blooms fade. I hope these photos help you appreciate the seeds, berries, and cones of the trees and shrubs in your own backyards. They are all beautiful in their own right and important food sources for our woodland friends.
While my blog team is away for this Thanksgiving Week, I thought I'd share some of our favorite entries. Here's one originally posted last November 20, 2023.
Whether you're preparing a holiday dish or rushing to make a quick weekday meal, fresh herbs make any recipe stand out.
Herbs are one of my favorite things to grow in the garden. Every year, I grow lots of parsley, cilantro, thyme, rosemary, dill, basil, oregano, sage, chervil, and more. They're easy to grow and they're prolific - almost every herb is a cut-and-come-again variety, meaning one can harvest from the same plant more than once. Herbs can also be grown in raised beds or in containers, from seed or by transplanting. And, many herbs last until the first hard frost. Here at my Bedford, New York farm, we were still picking various herbs from the garden just last week.
Here are some photos, enjoy.
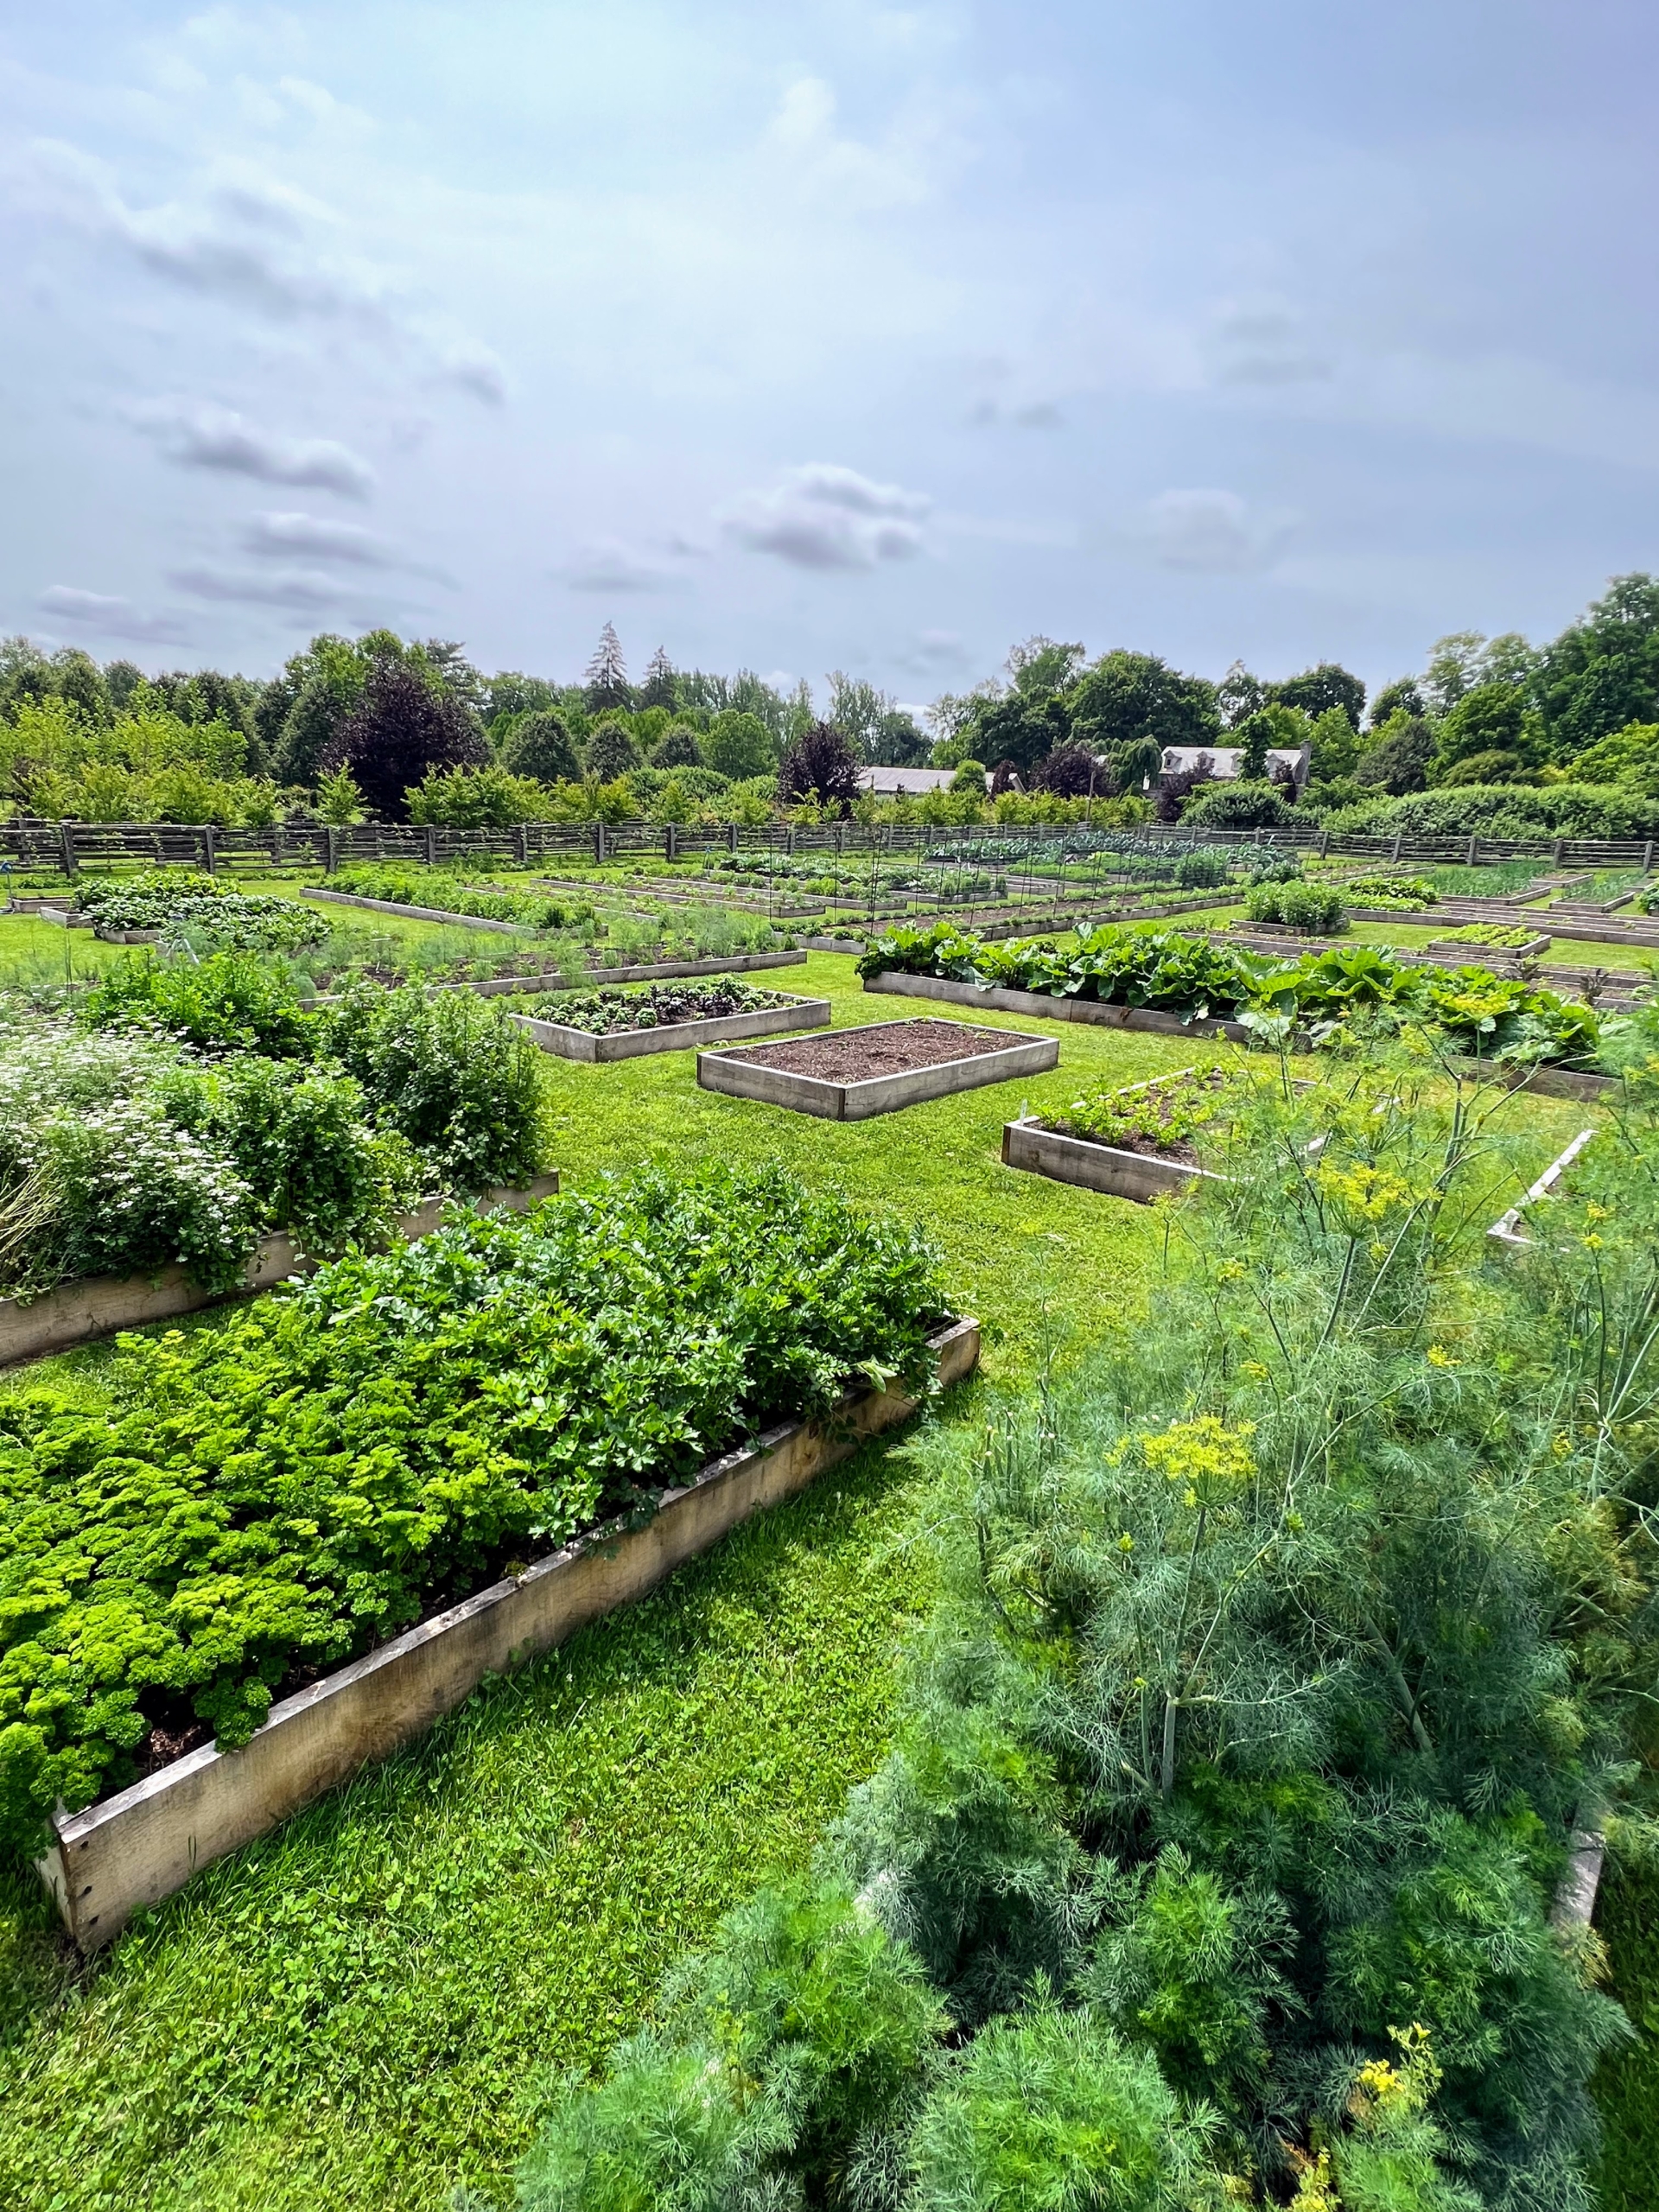
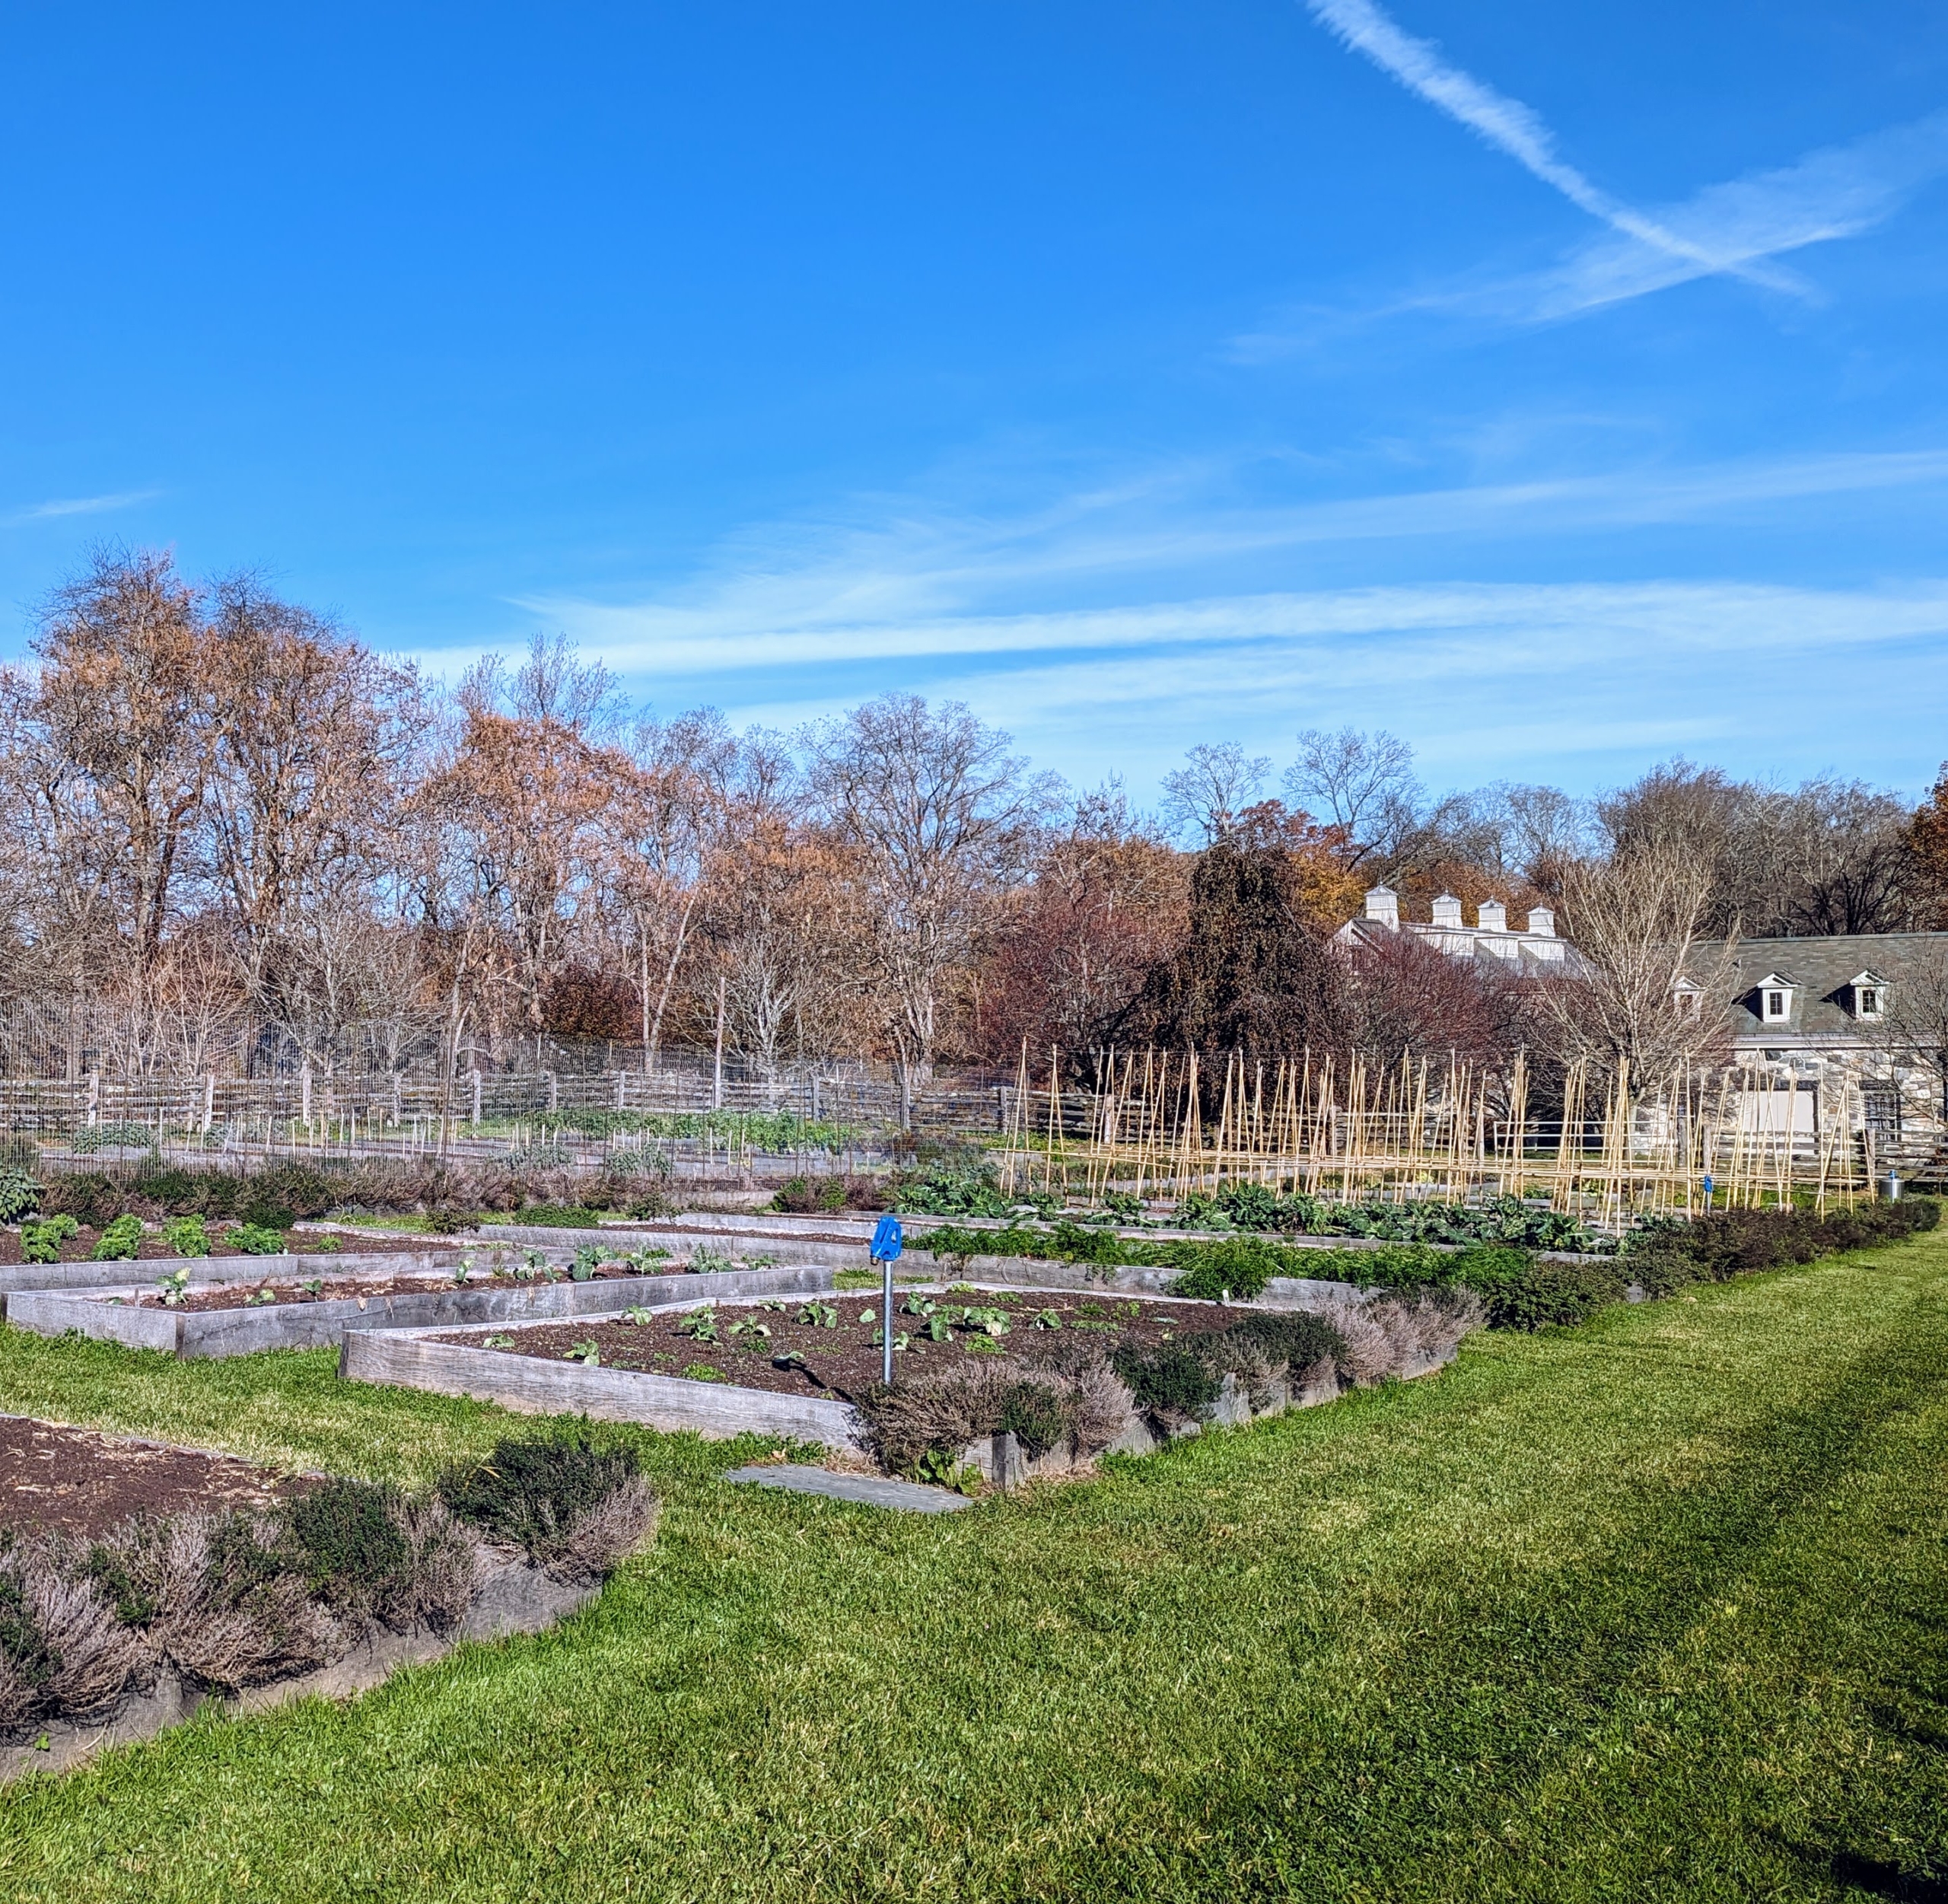
I am so pleased with my new raised bed garden. We had such a wonderful summer – so many delicious and nutritious vegetables and herbs grew here this year.
If you follow my blog regularly, you may have seen how I designed and planned this half-acre garden. It is located closer to my home just south of the stable in a pasture that was once used by my donkeys.
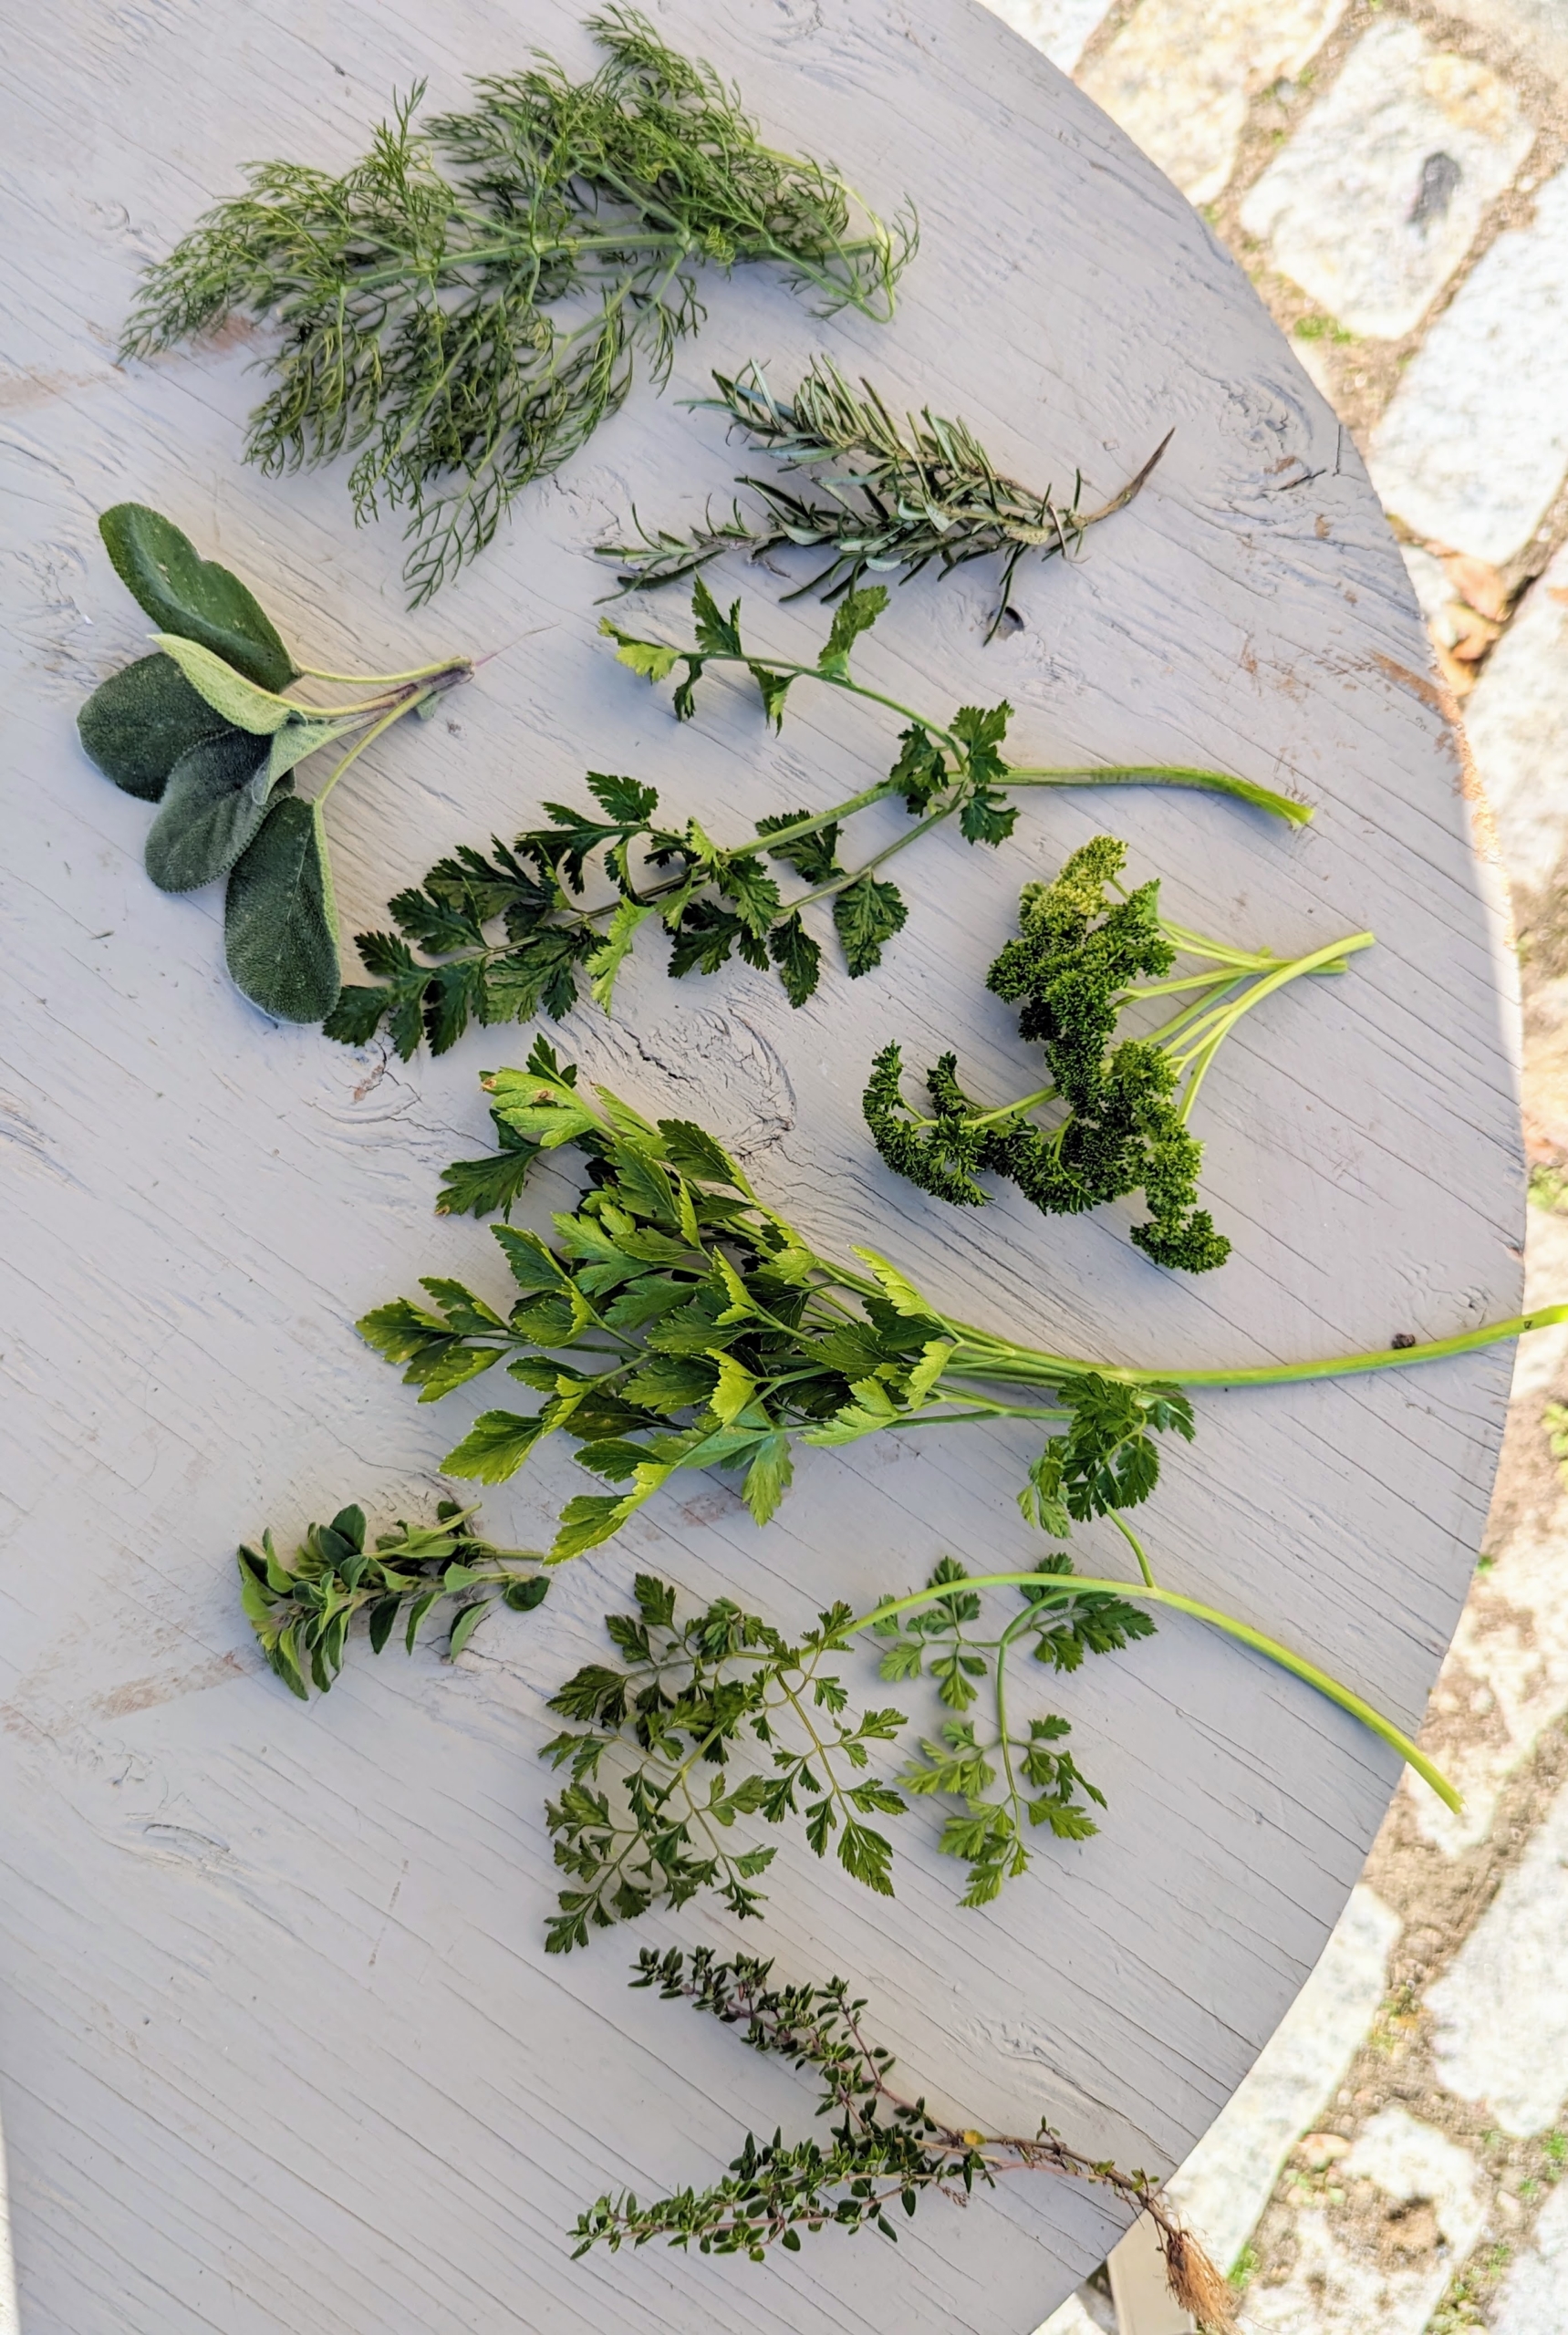
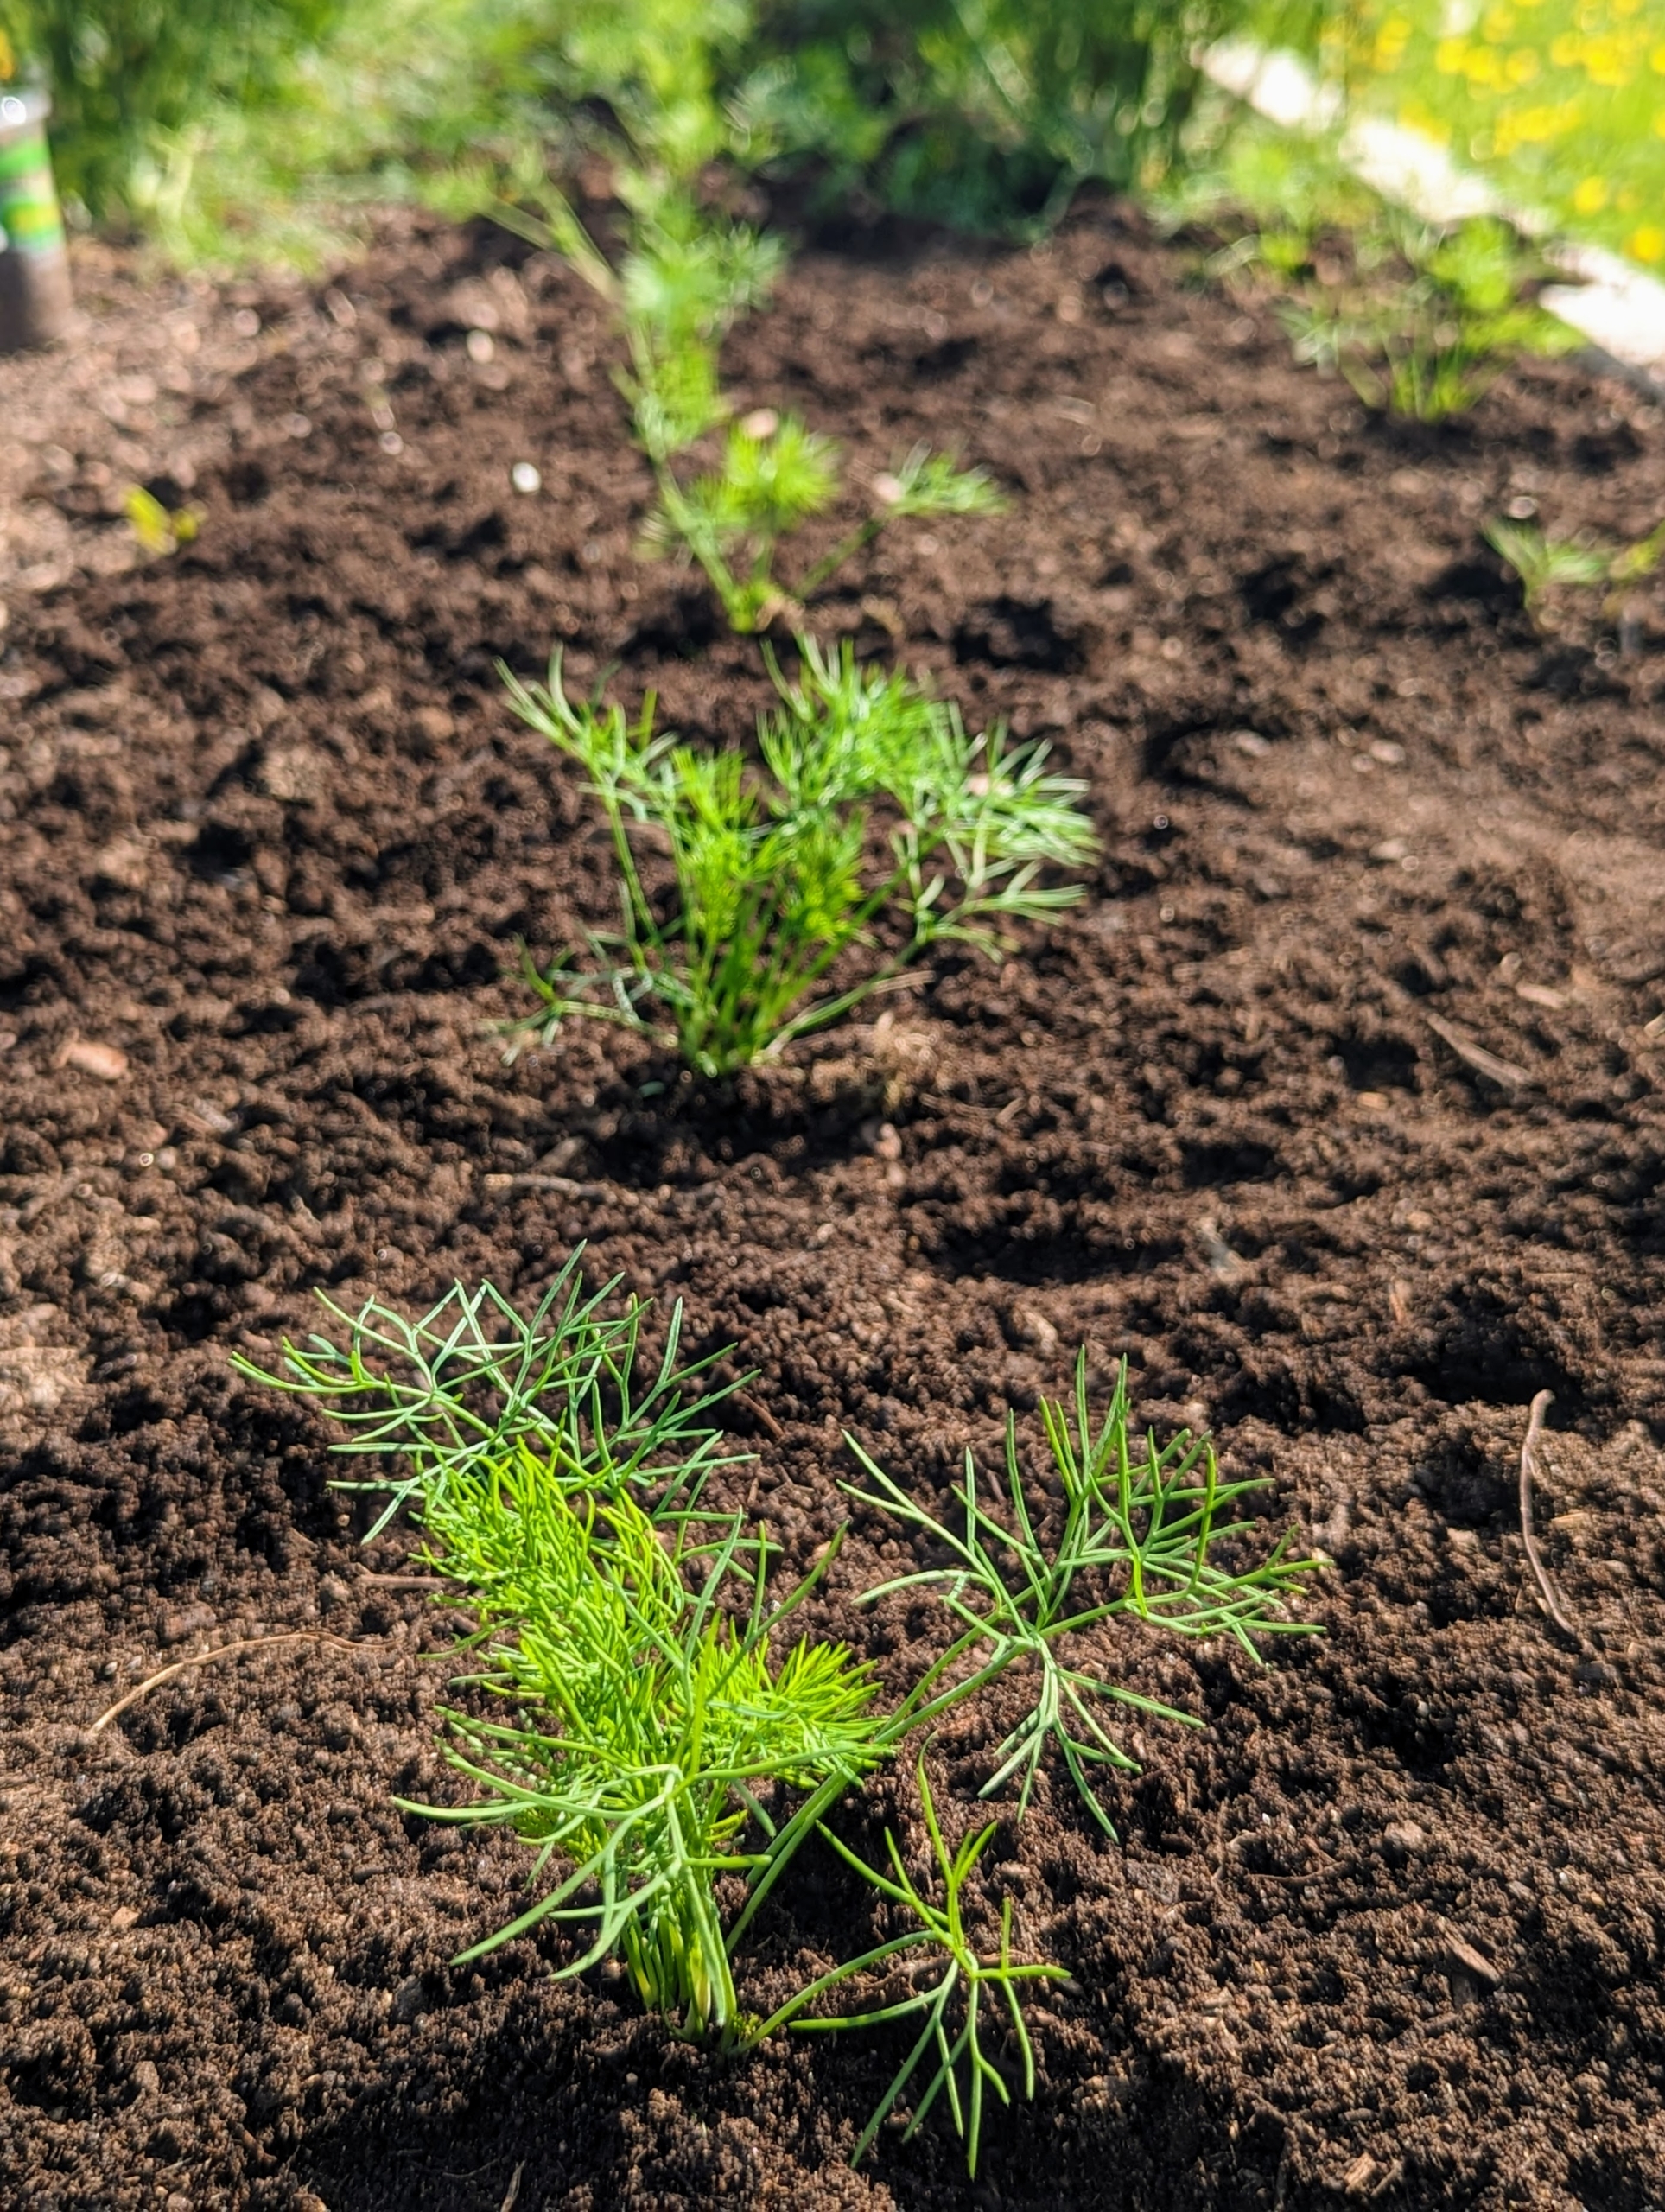
Our summer crops are done, but the weather was still quite mild last week, so many of the herbs were still doing well. These cuttings are parsley, cilantro, sage, chervil, rosemary, oregano, thyme, and fennel.
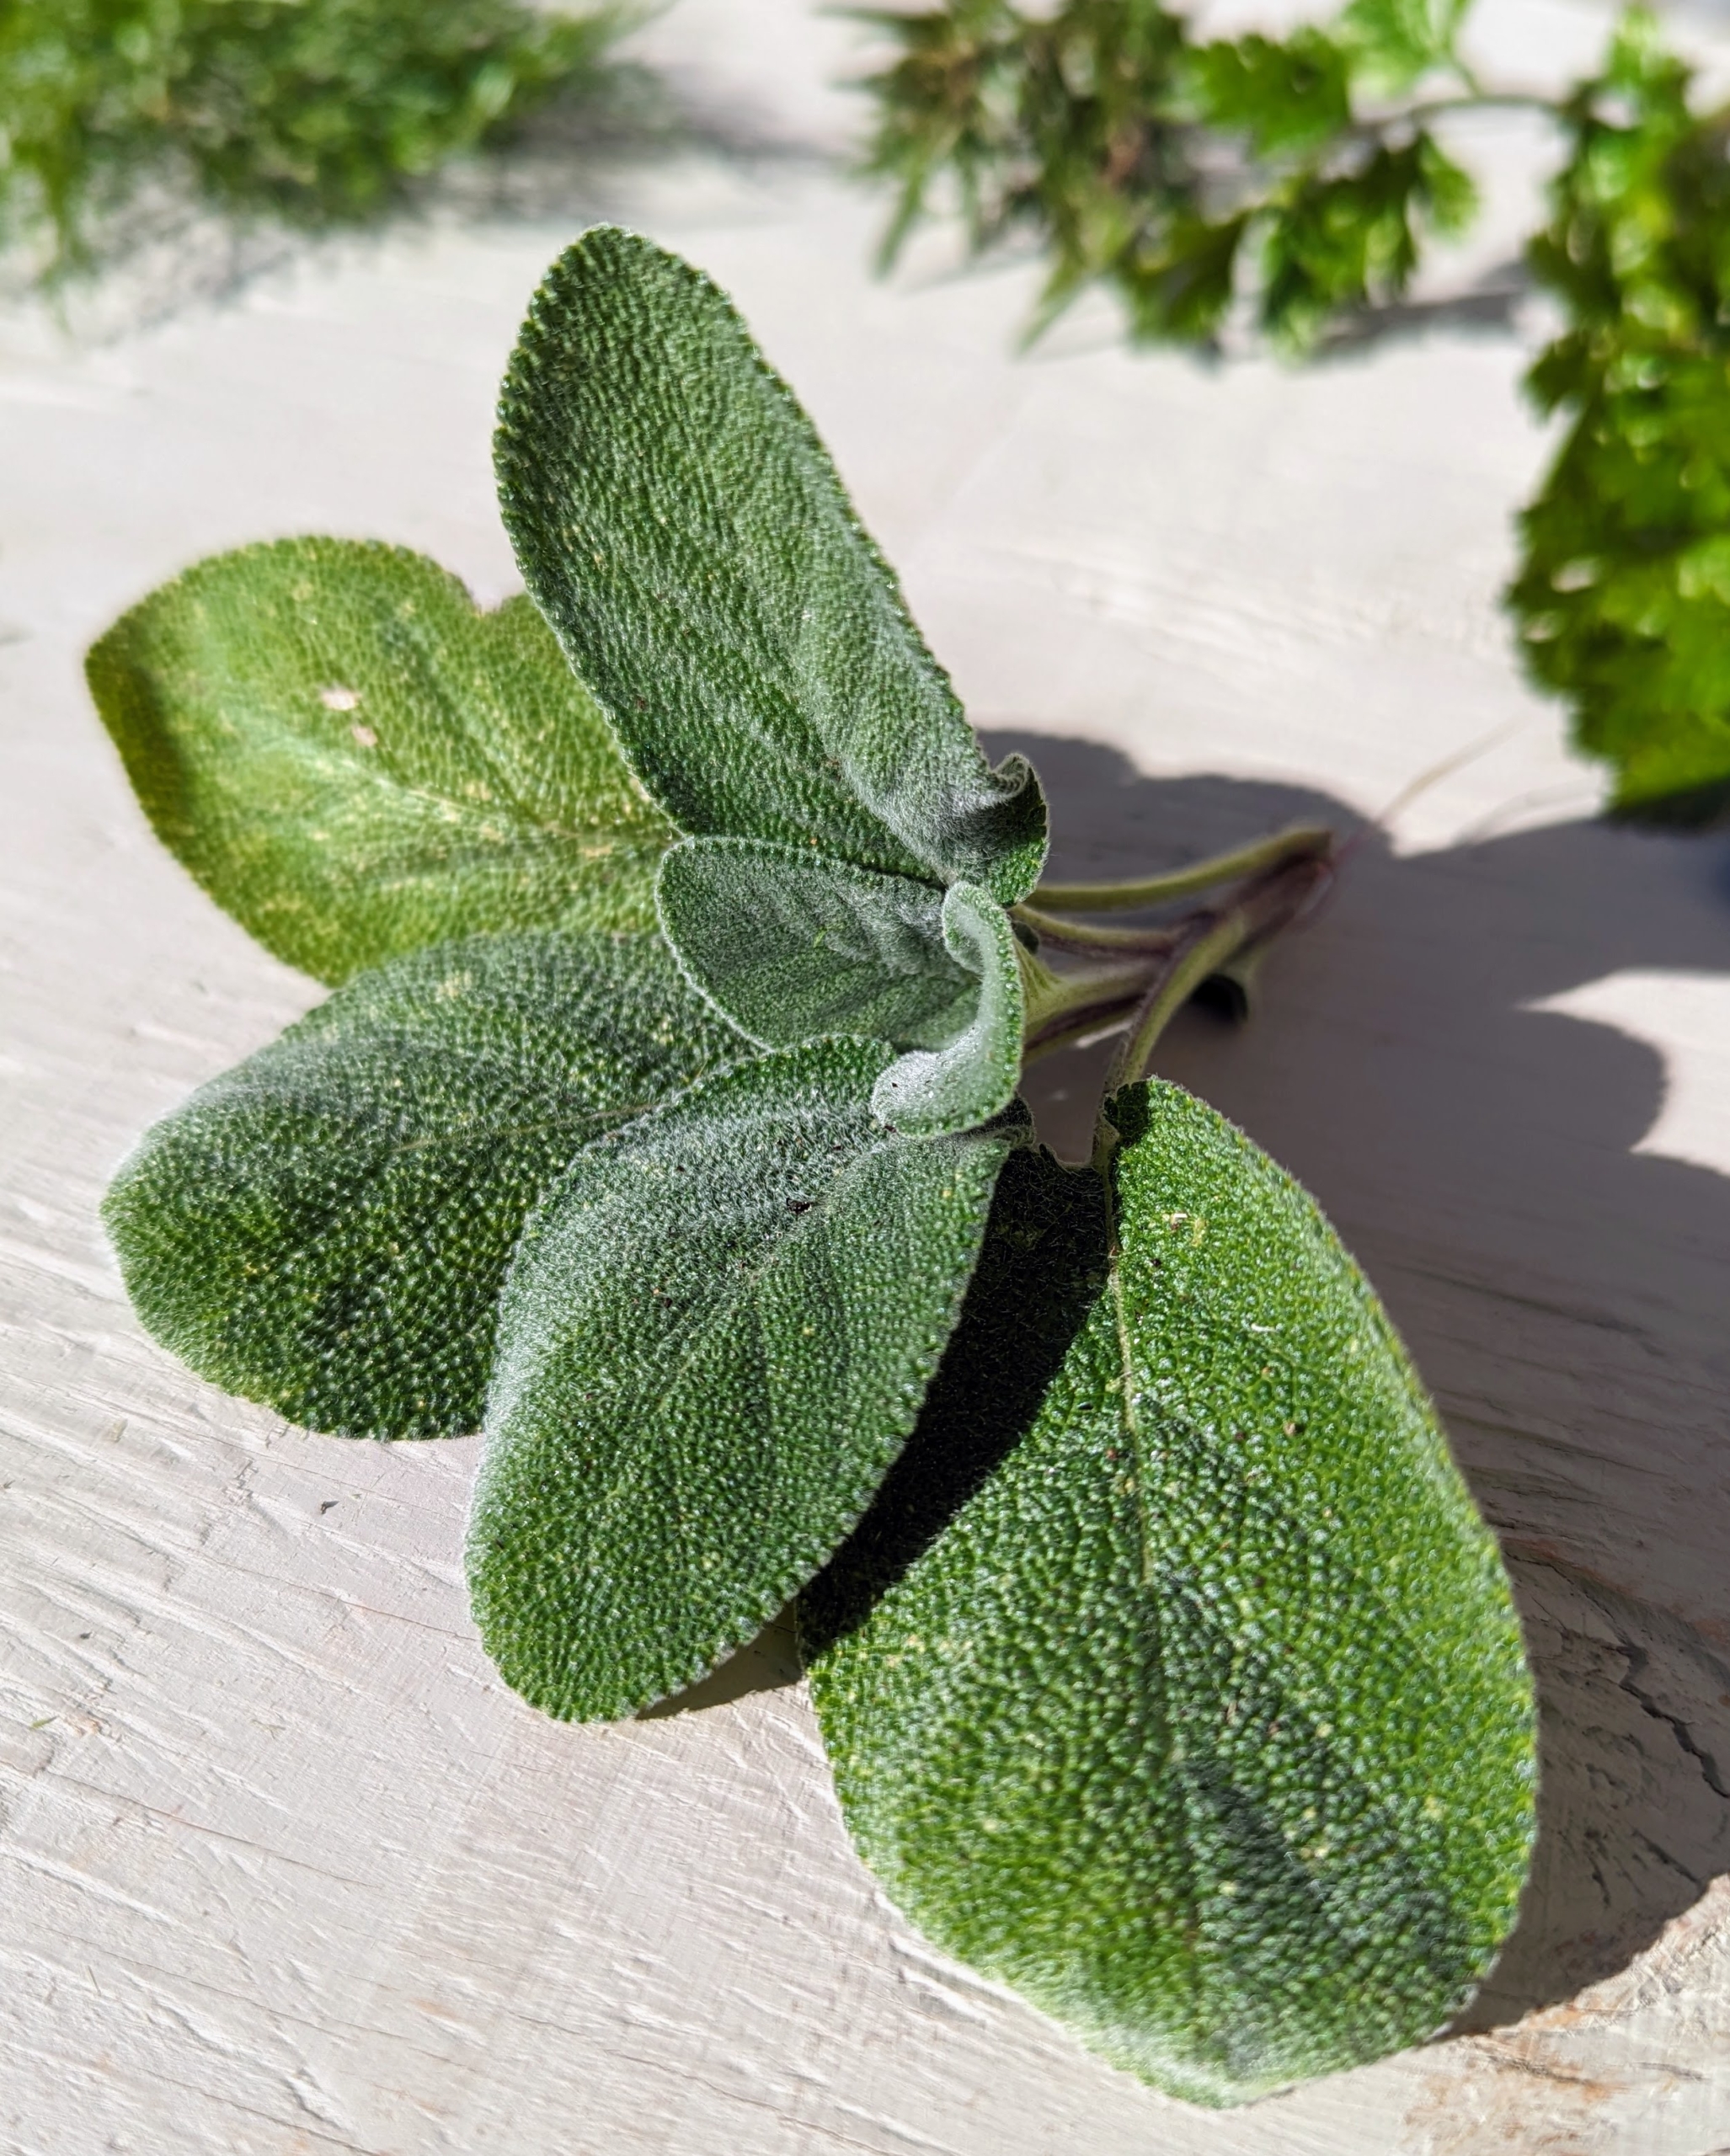
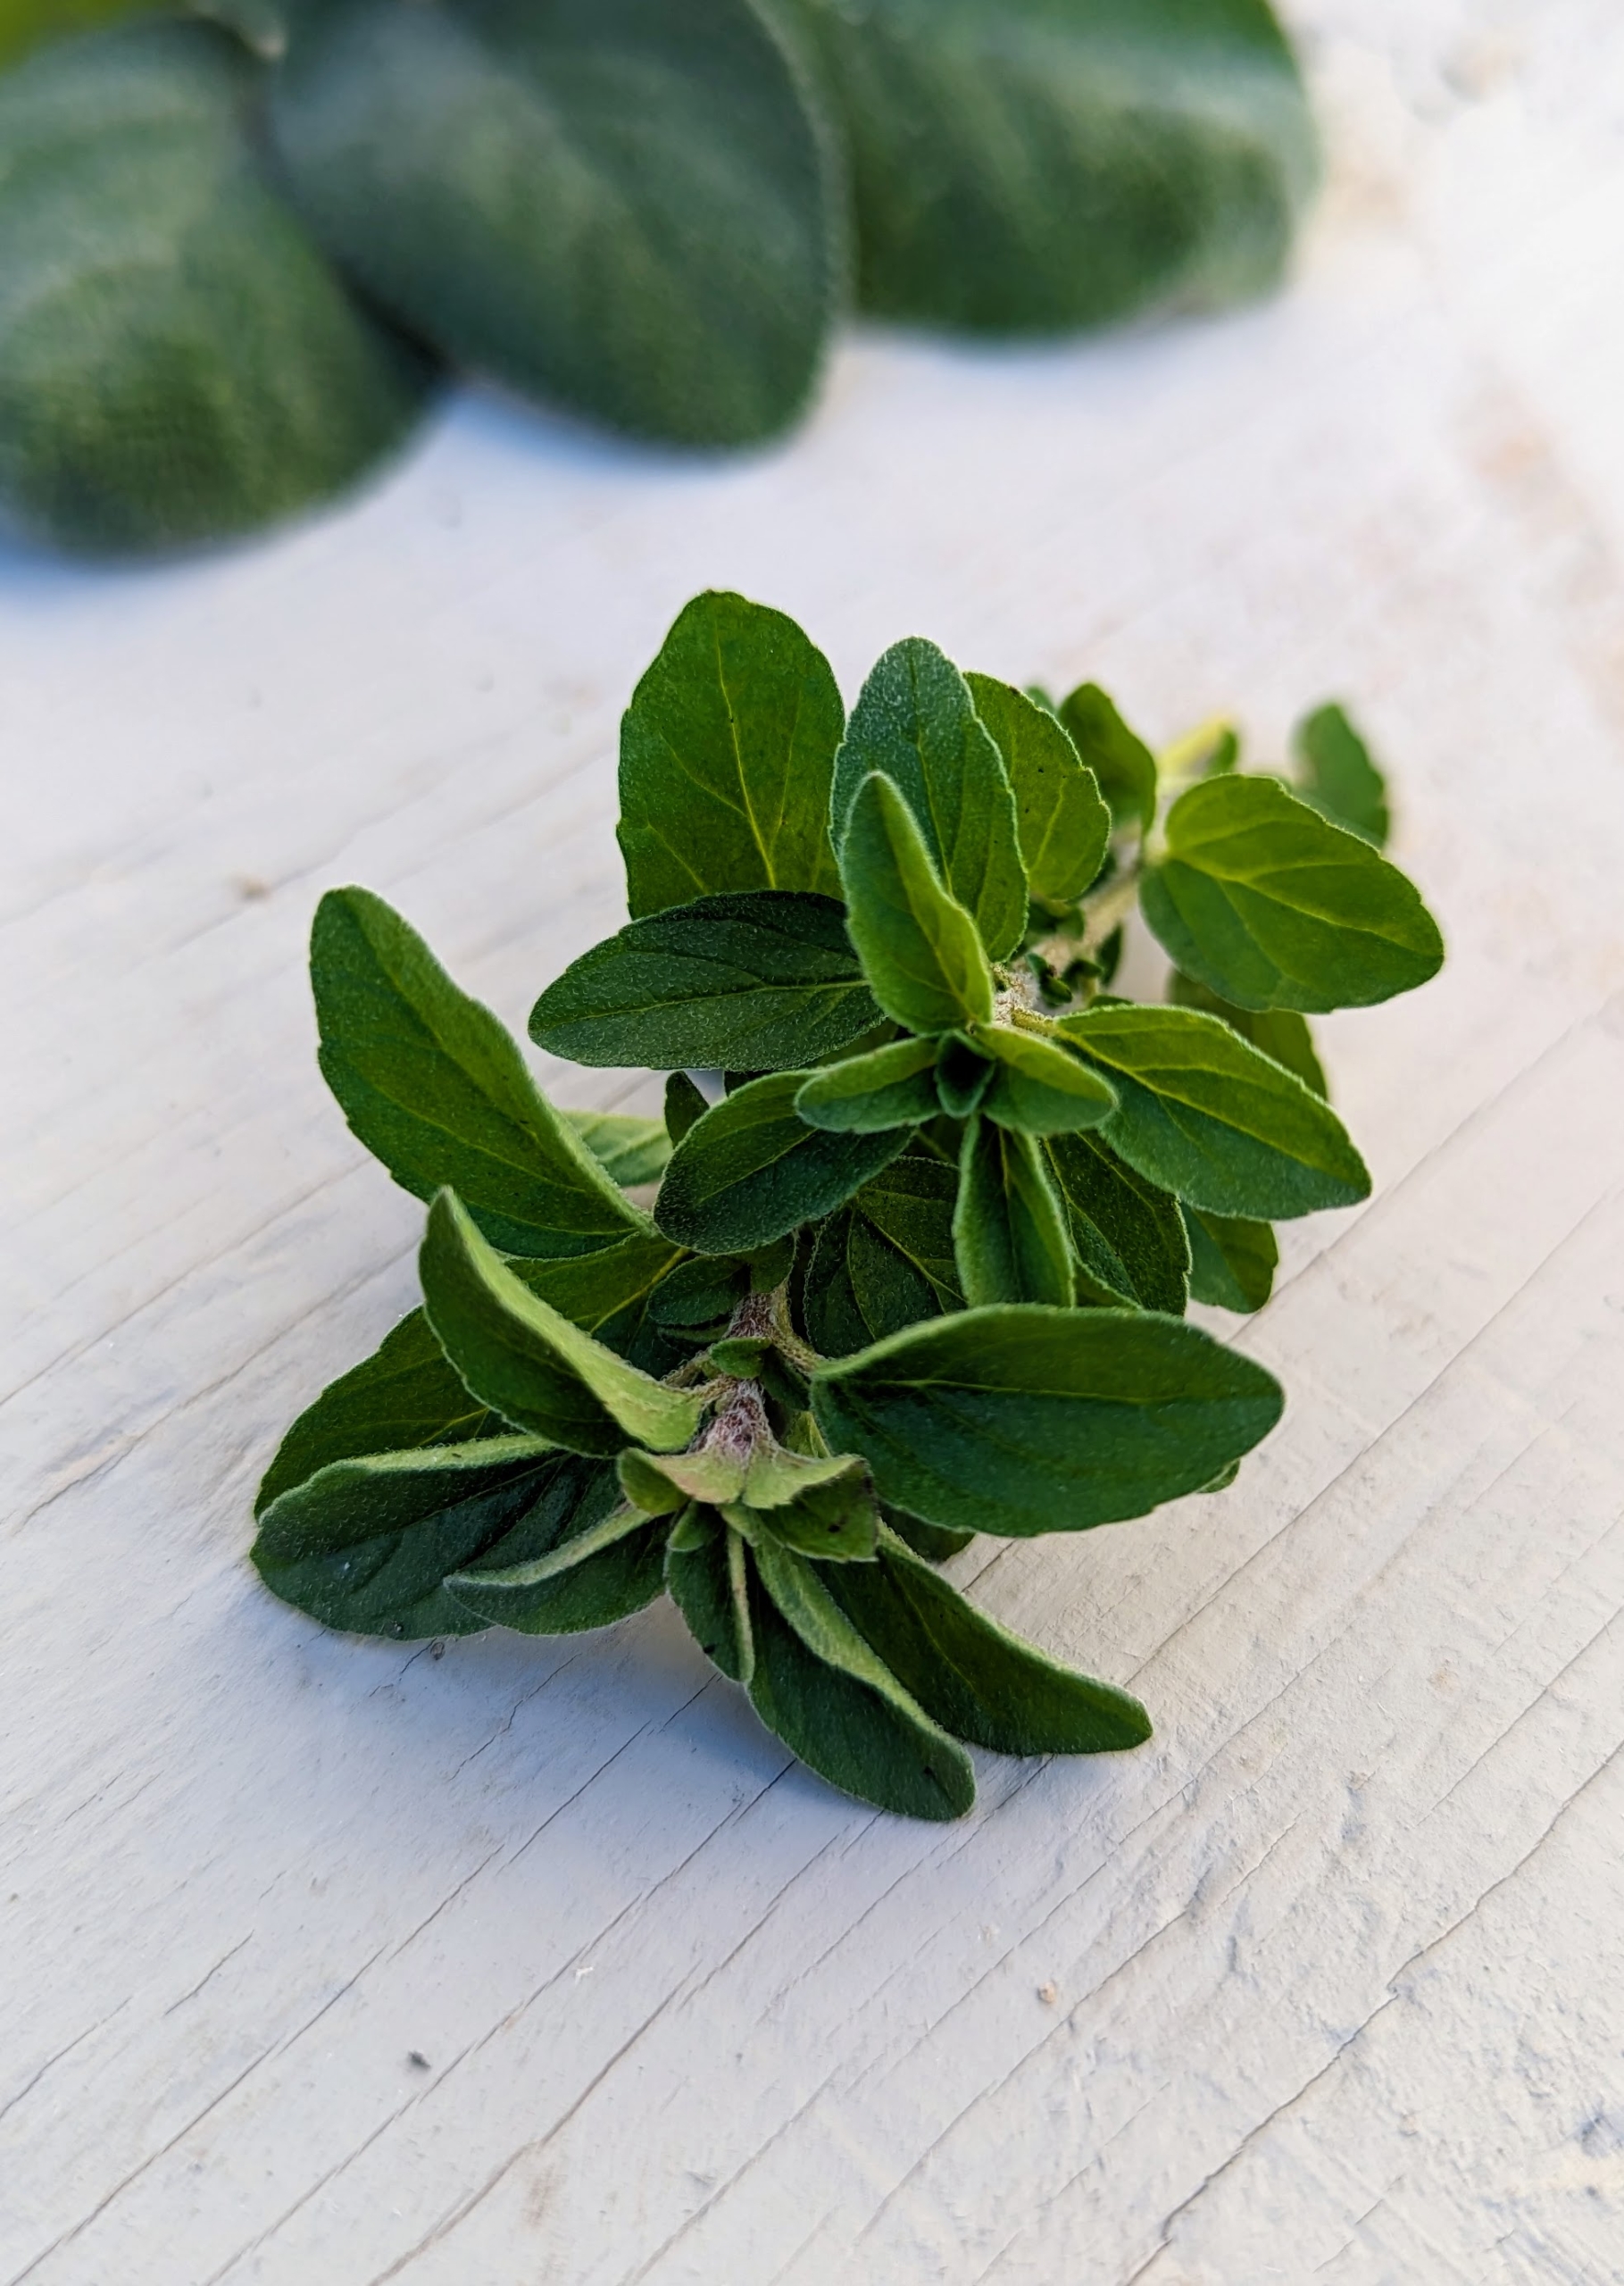
Here is sage. Salvia officinalis, the common sage or sage, is a perennial, evergreen subshrub, with woody stems, grayish leaves, and blue to purplish flowers. It is a member of the mint family Lamiaceae and native to the Mediterranean region. It is popular in fall and winter cooking and baking.
This year, I planted herbs at both ends of each bed in my garden. Here is the sage growing at the end of one of our center beds, where we also grew beans, cucumbers, and sunflowers. Sage should be planted in well-draining soil and in full sun.
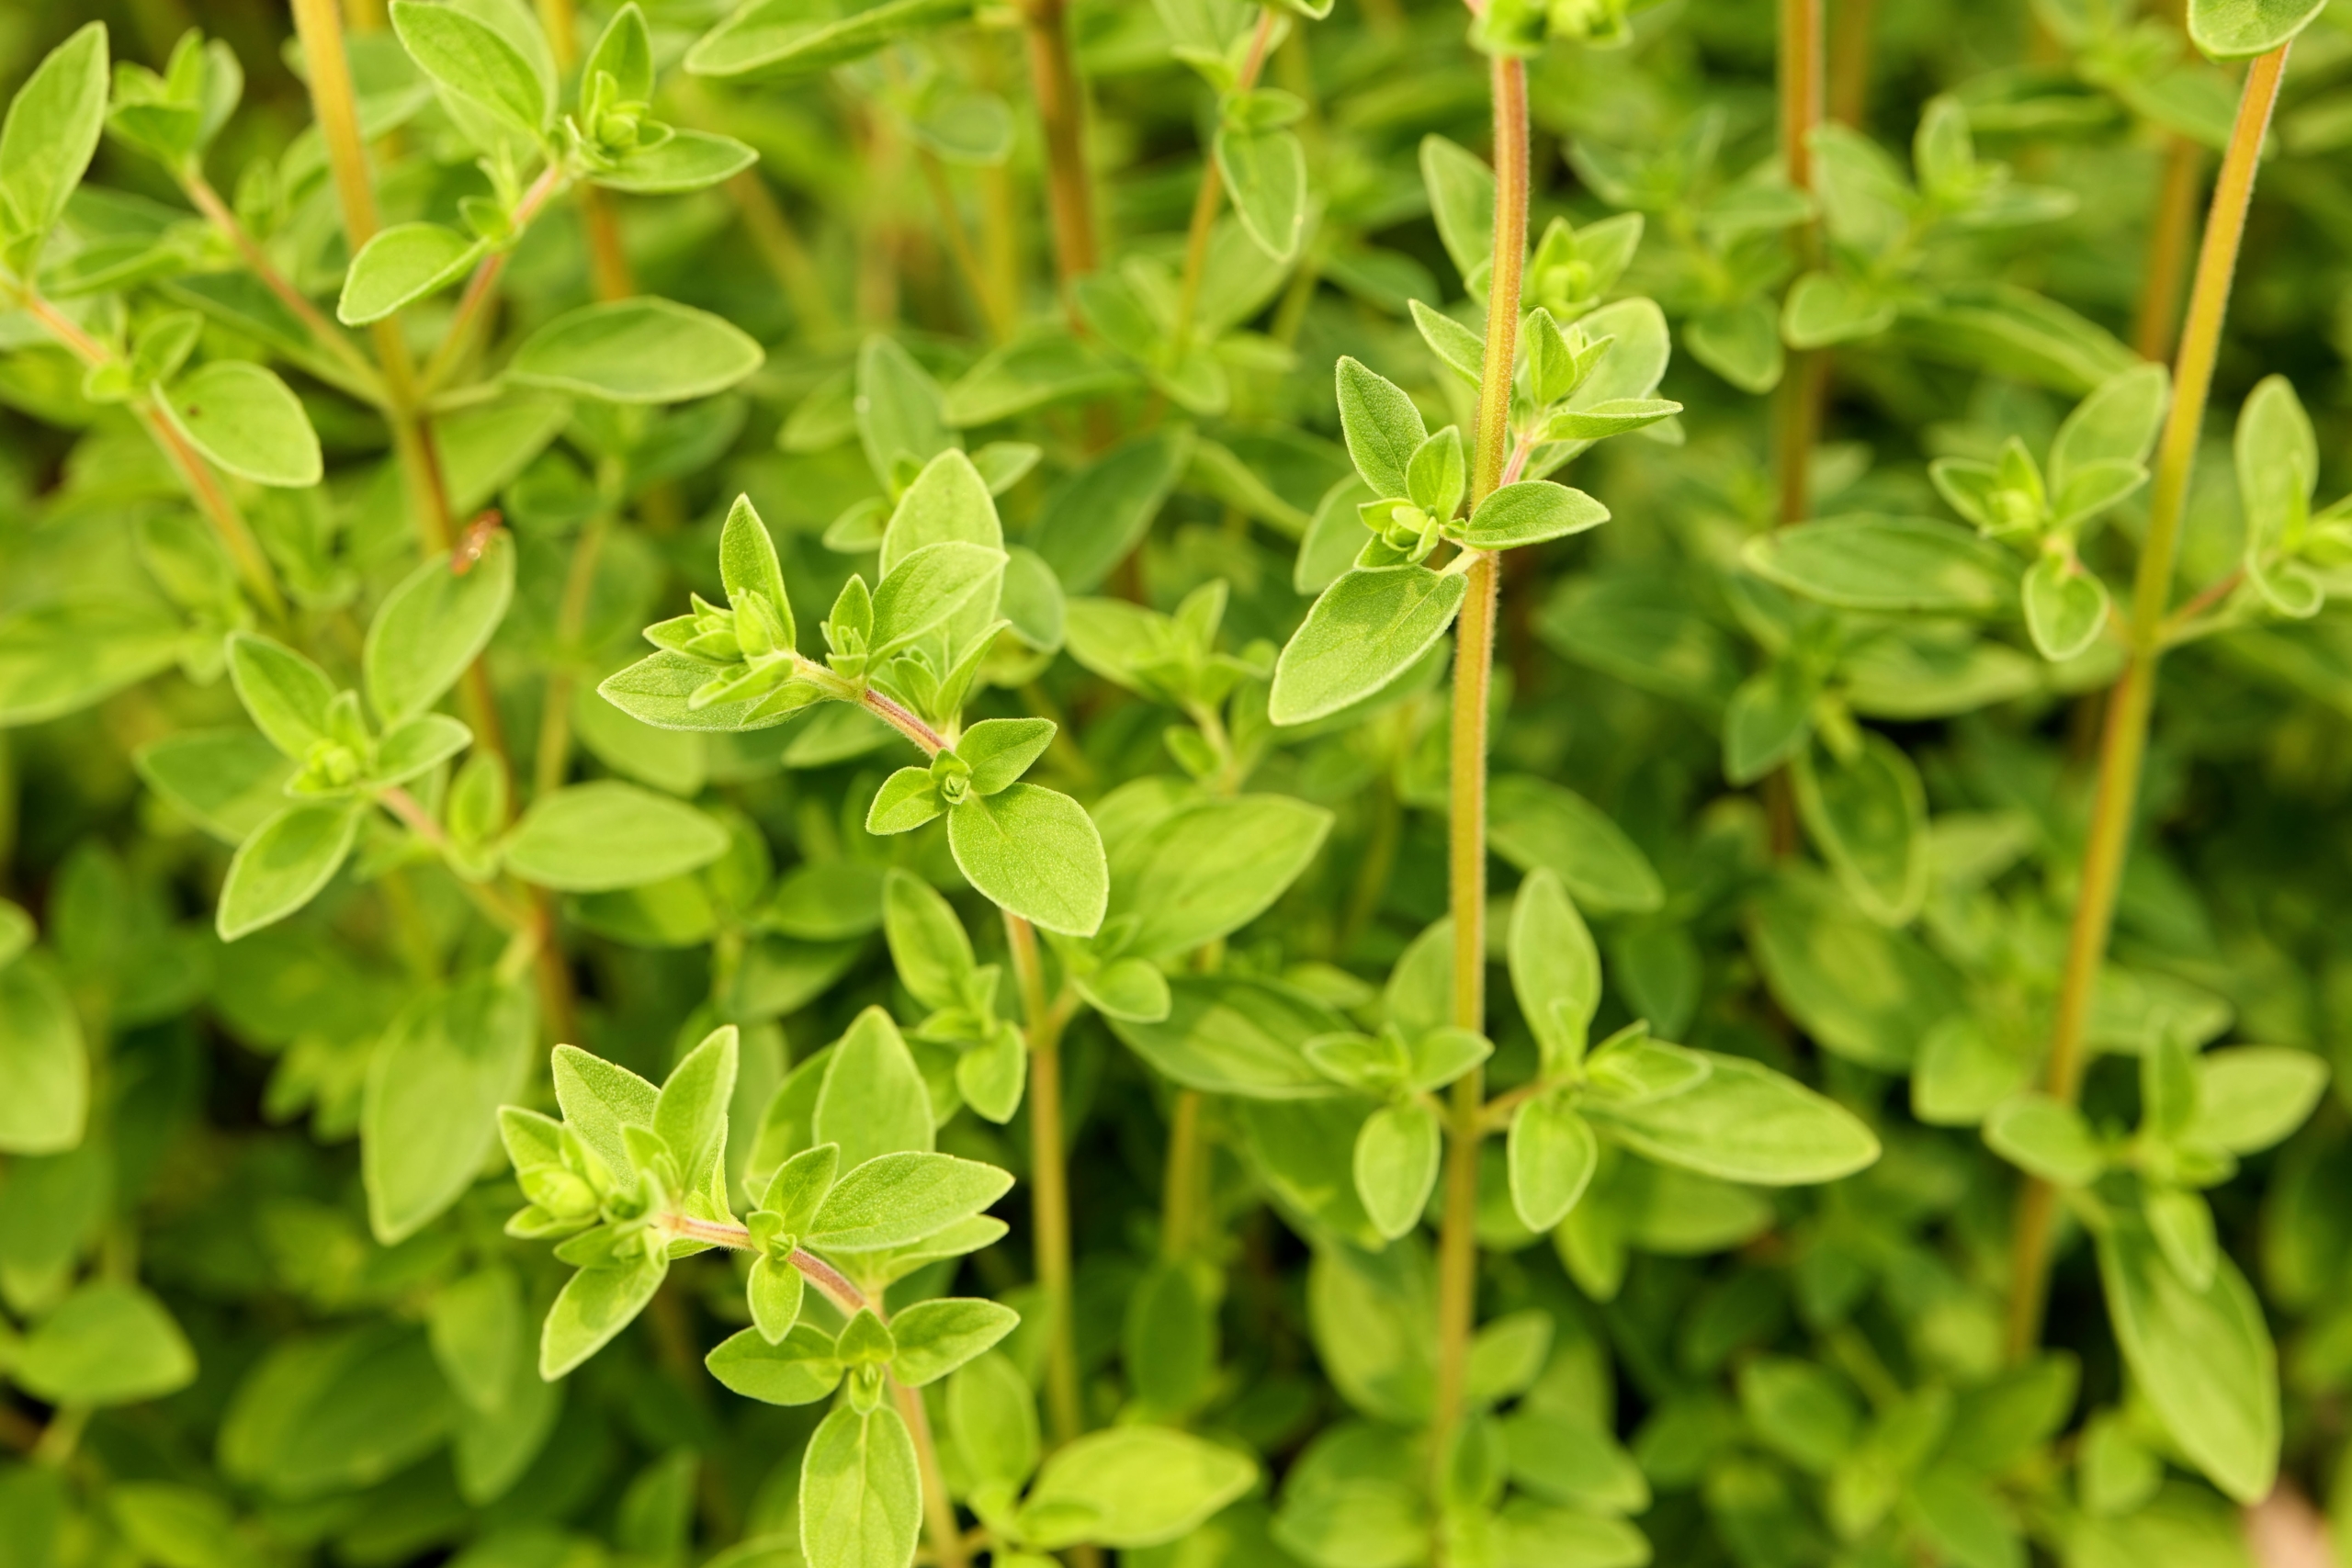
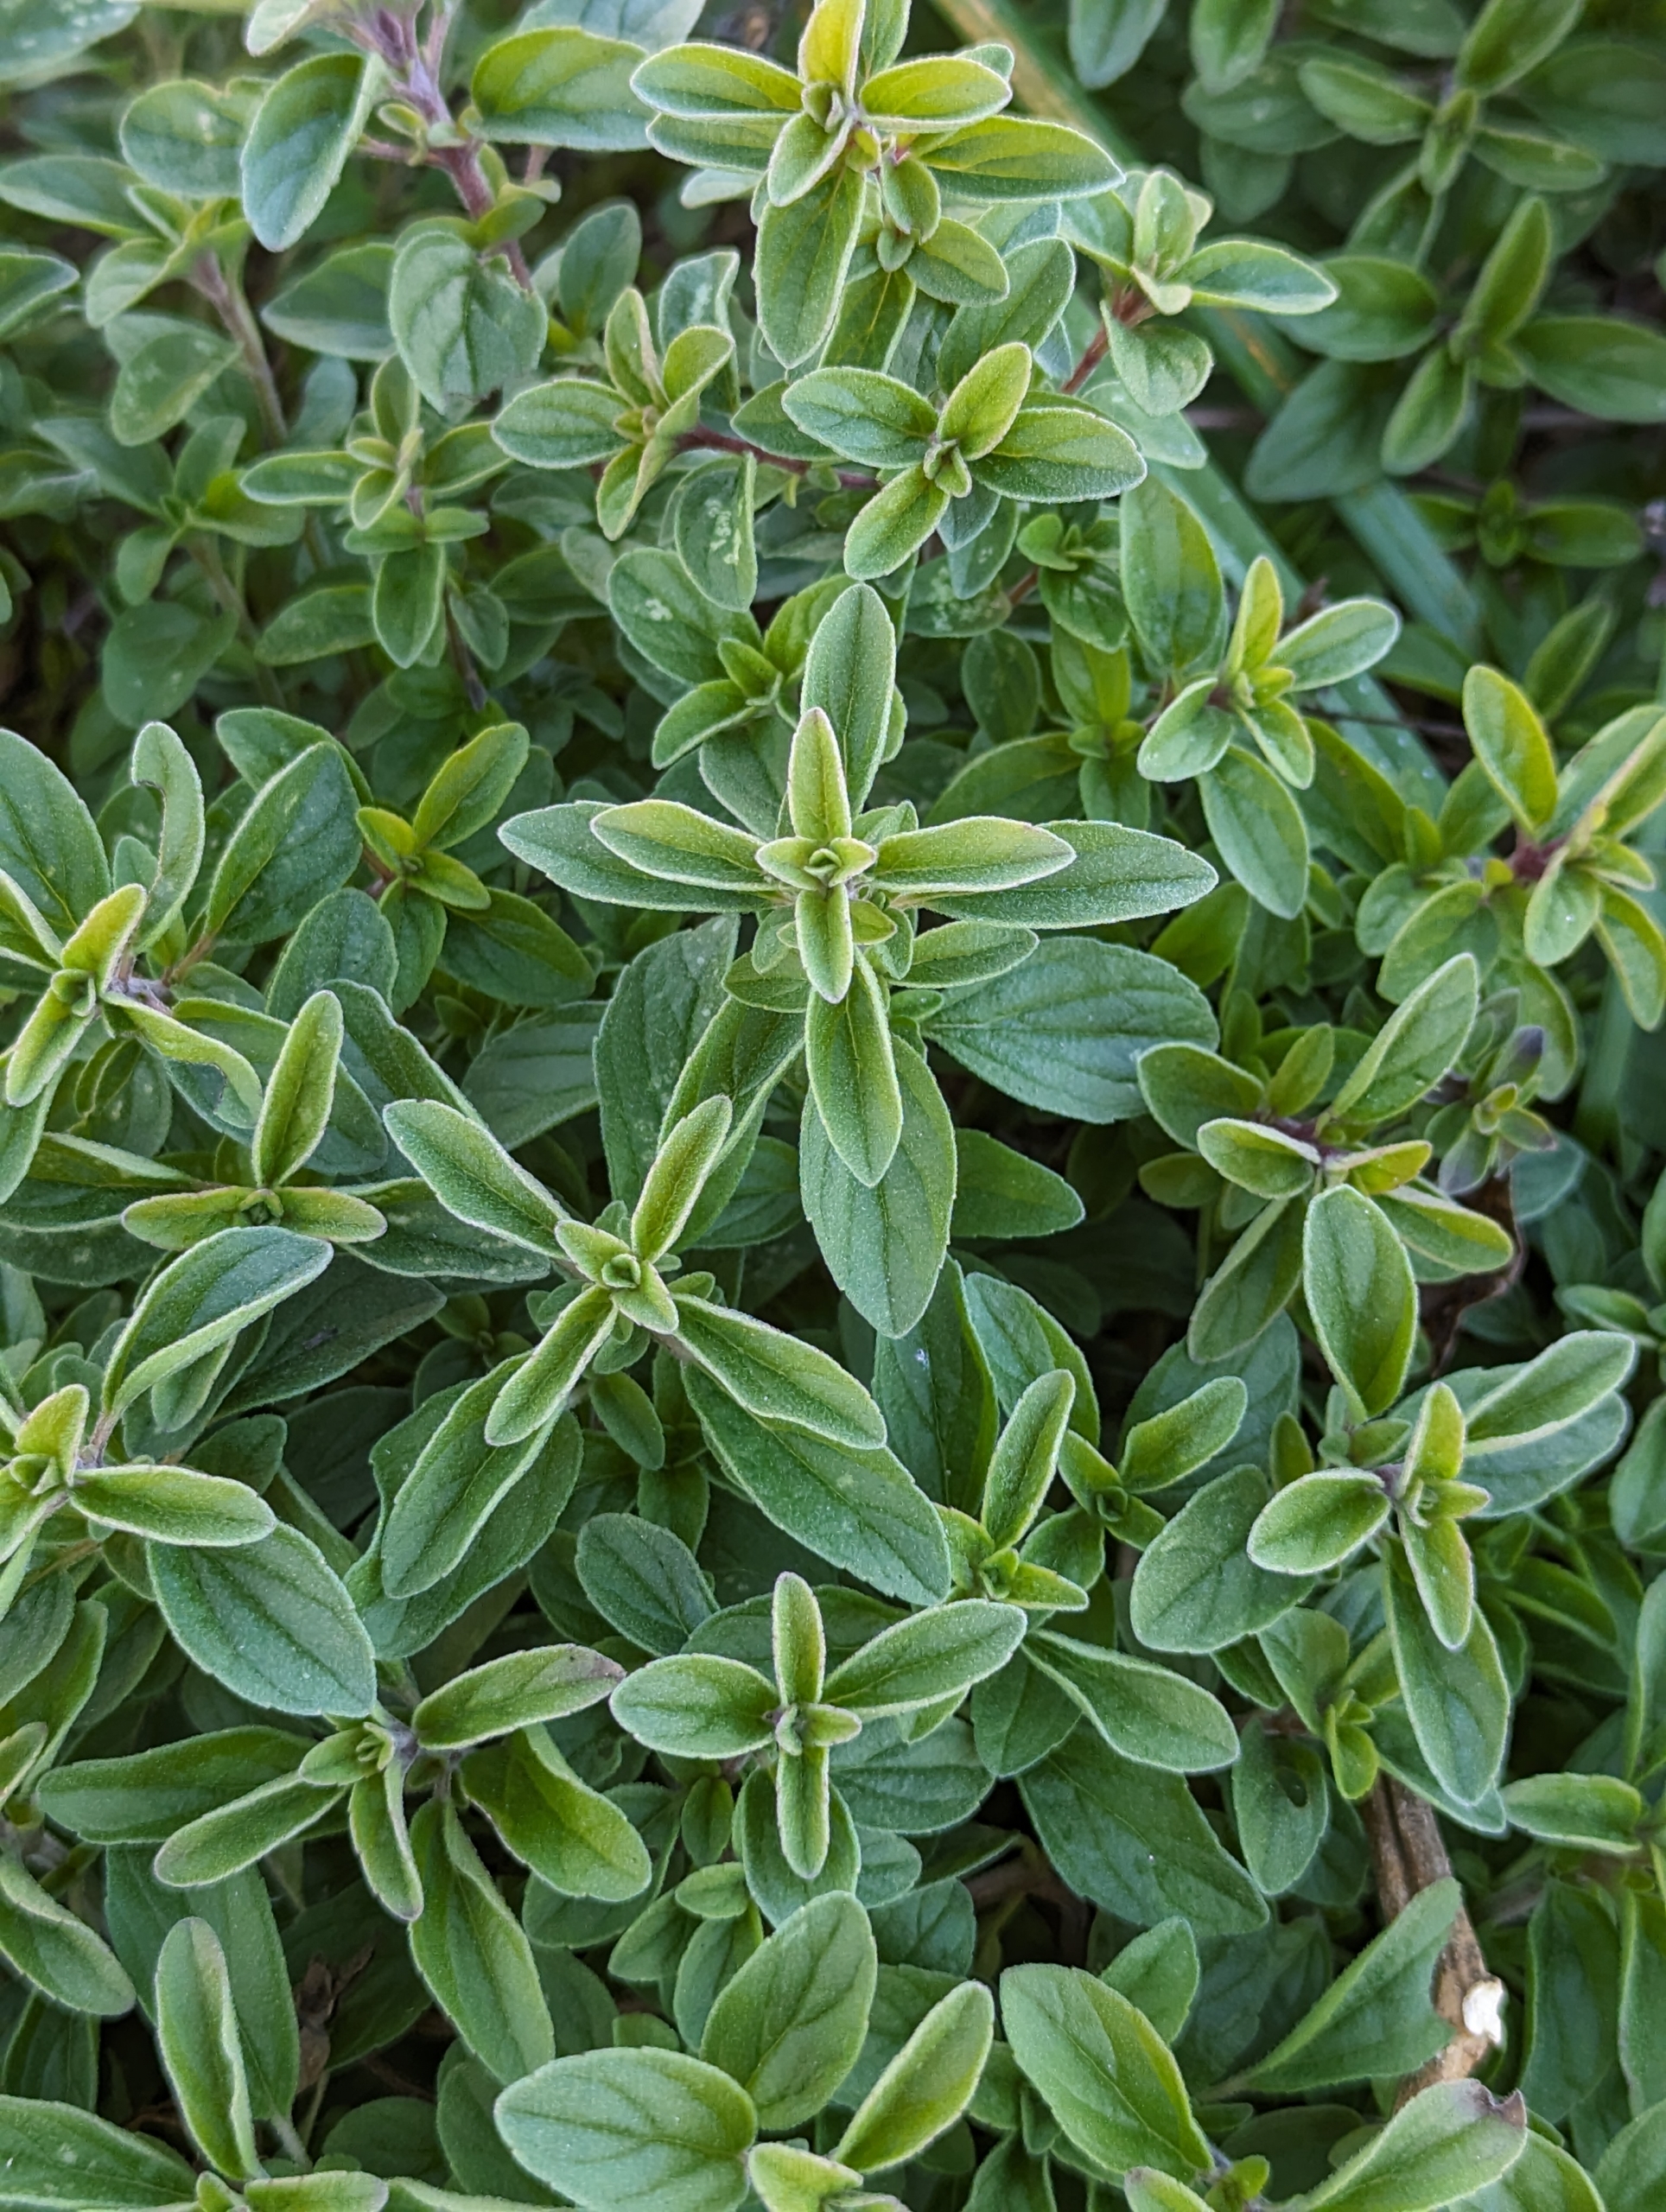
Oregano is also an herb from the mint, or Lamiaceae family. Oregano is strongly aromatic and has a slightly bitter, pungent flavor.
Oregano leaves are generally oval, dark green, and positioned in opposite pairs along the stems. Some varieties have fuzzy leaves.
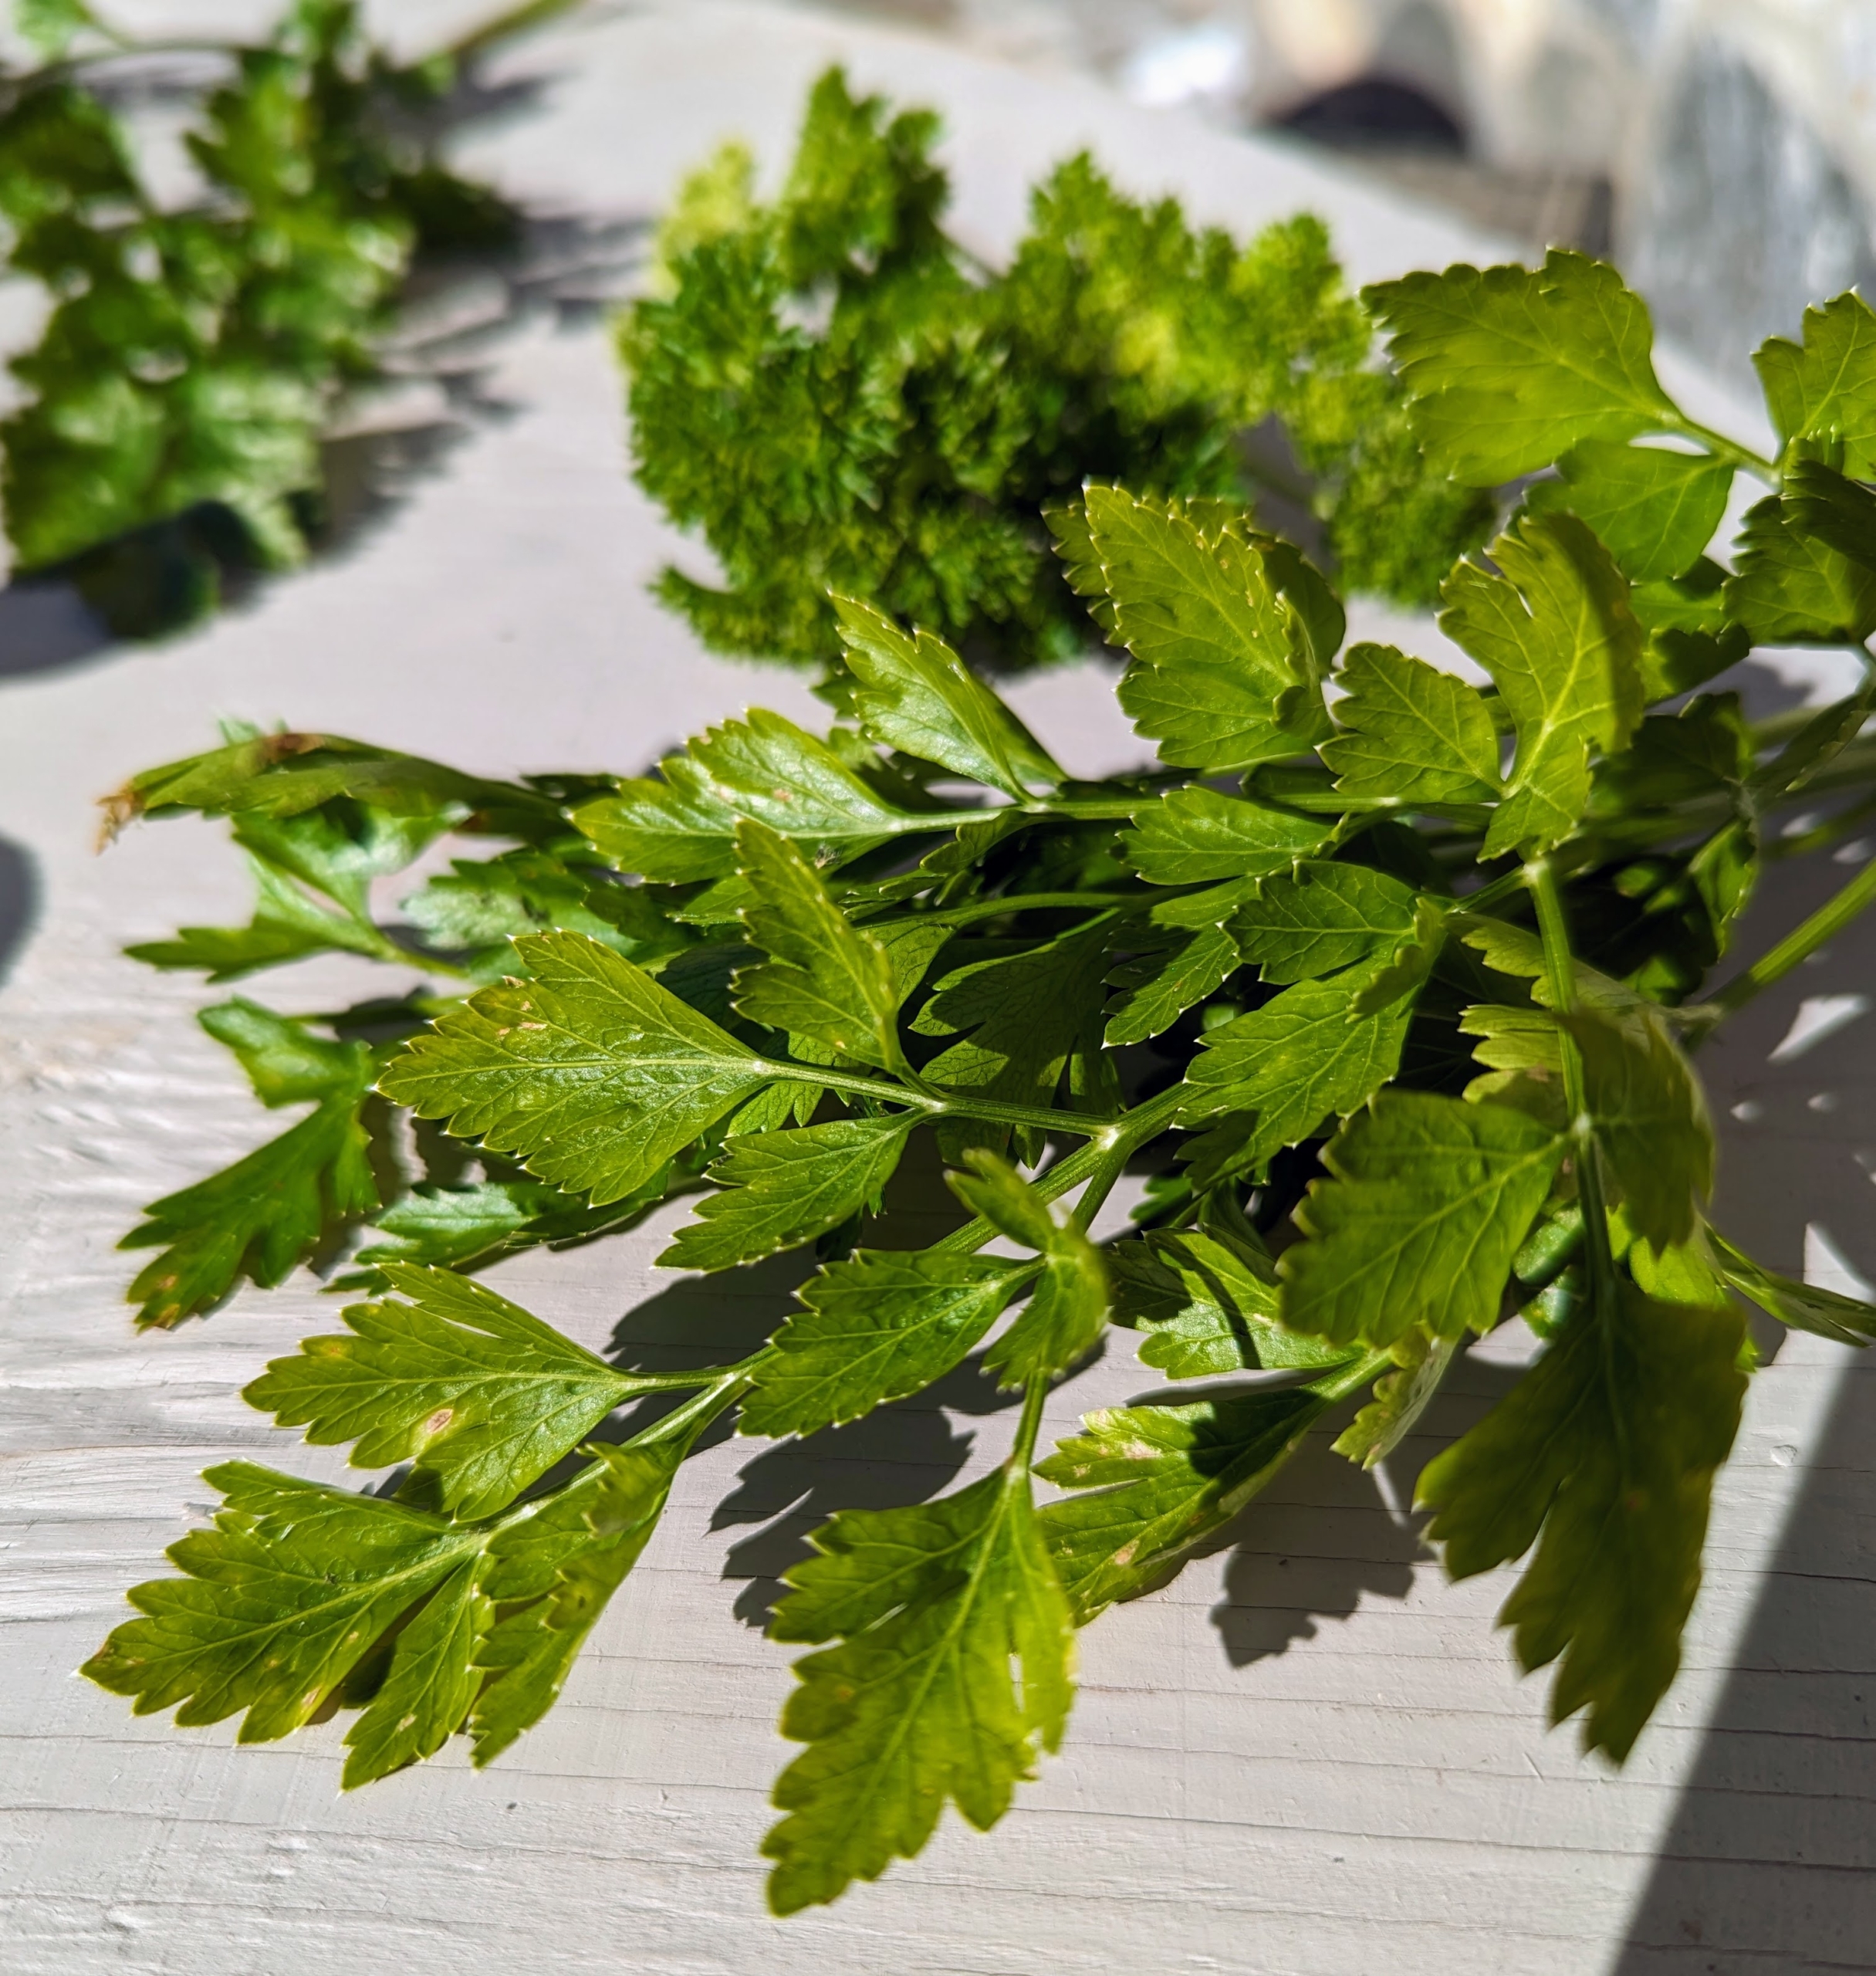
I always grow parsley – I use it in my daily green juice. Parsley, or garden parsley, is a species of flowering plant in the family Apiaceae. It’s great in sauces, soups, and stews. It may be finely minced and rubbed on meats before cooking. It is often added to pesto and salads and it is commonly used as a garnish.
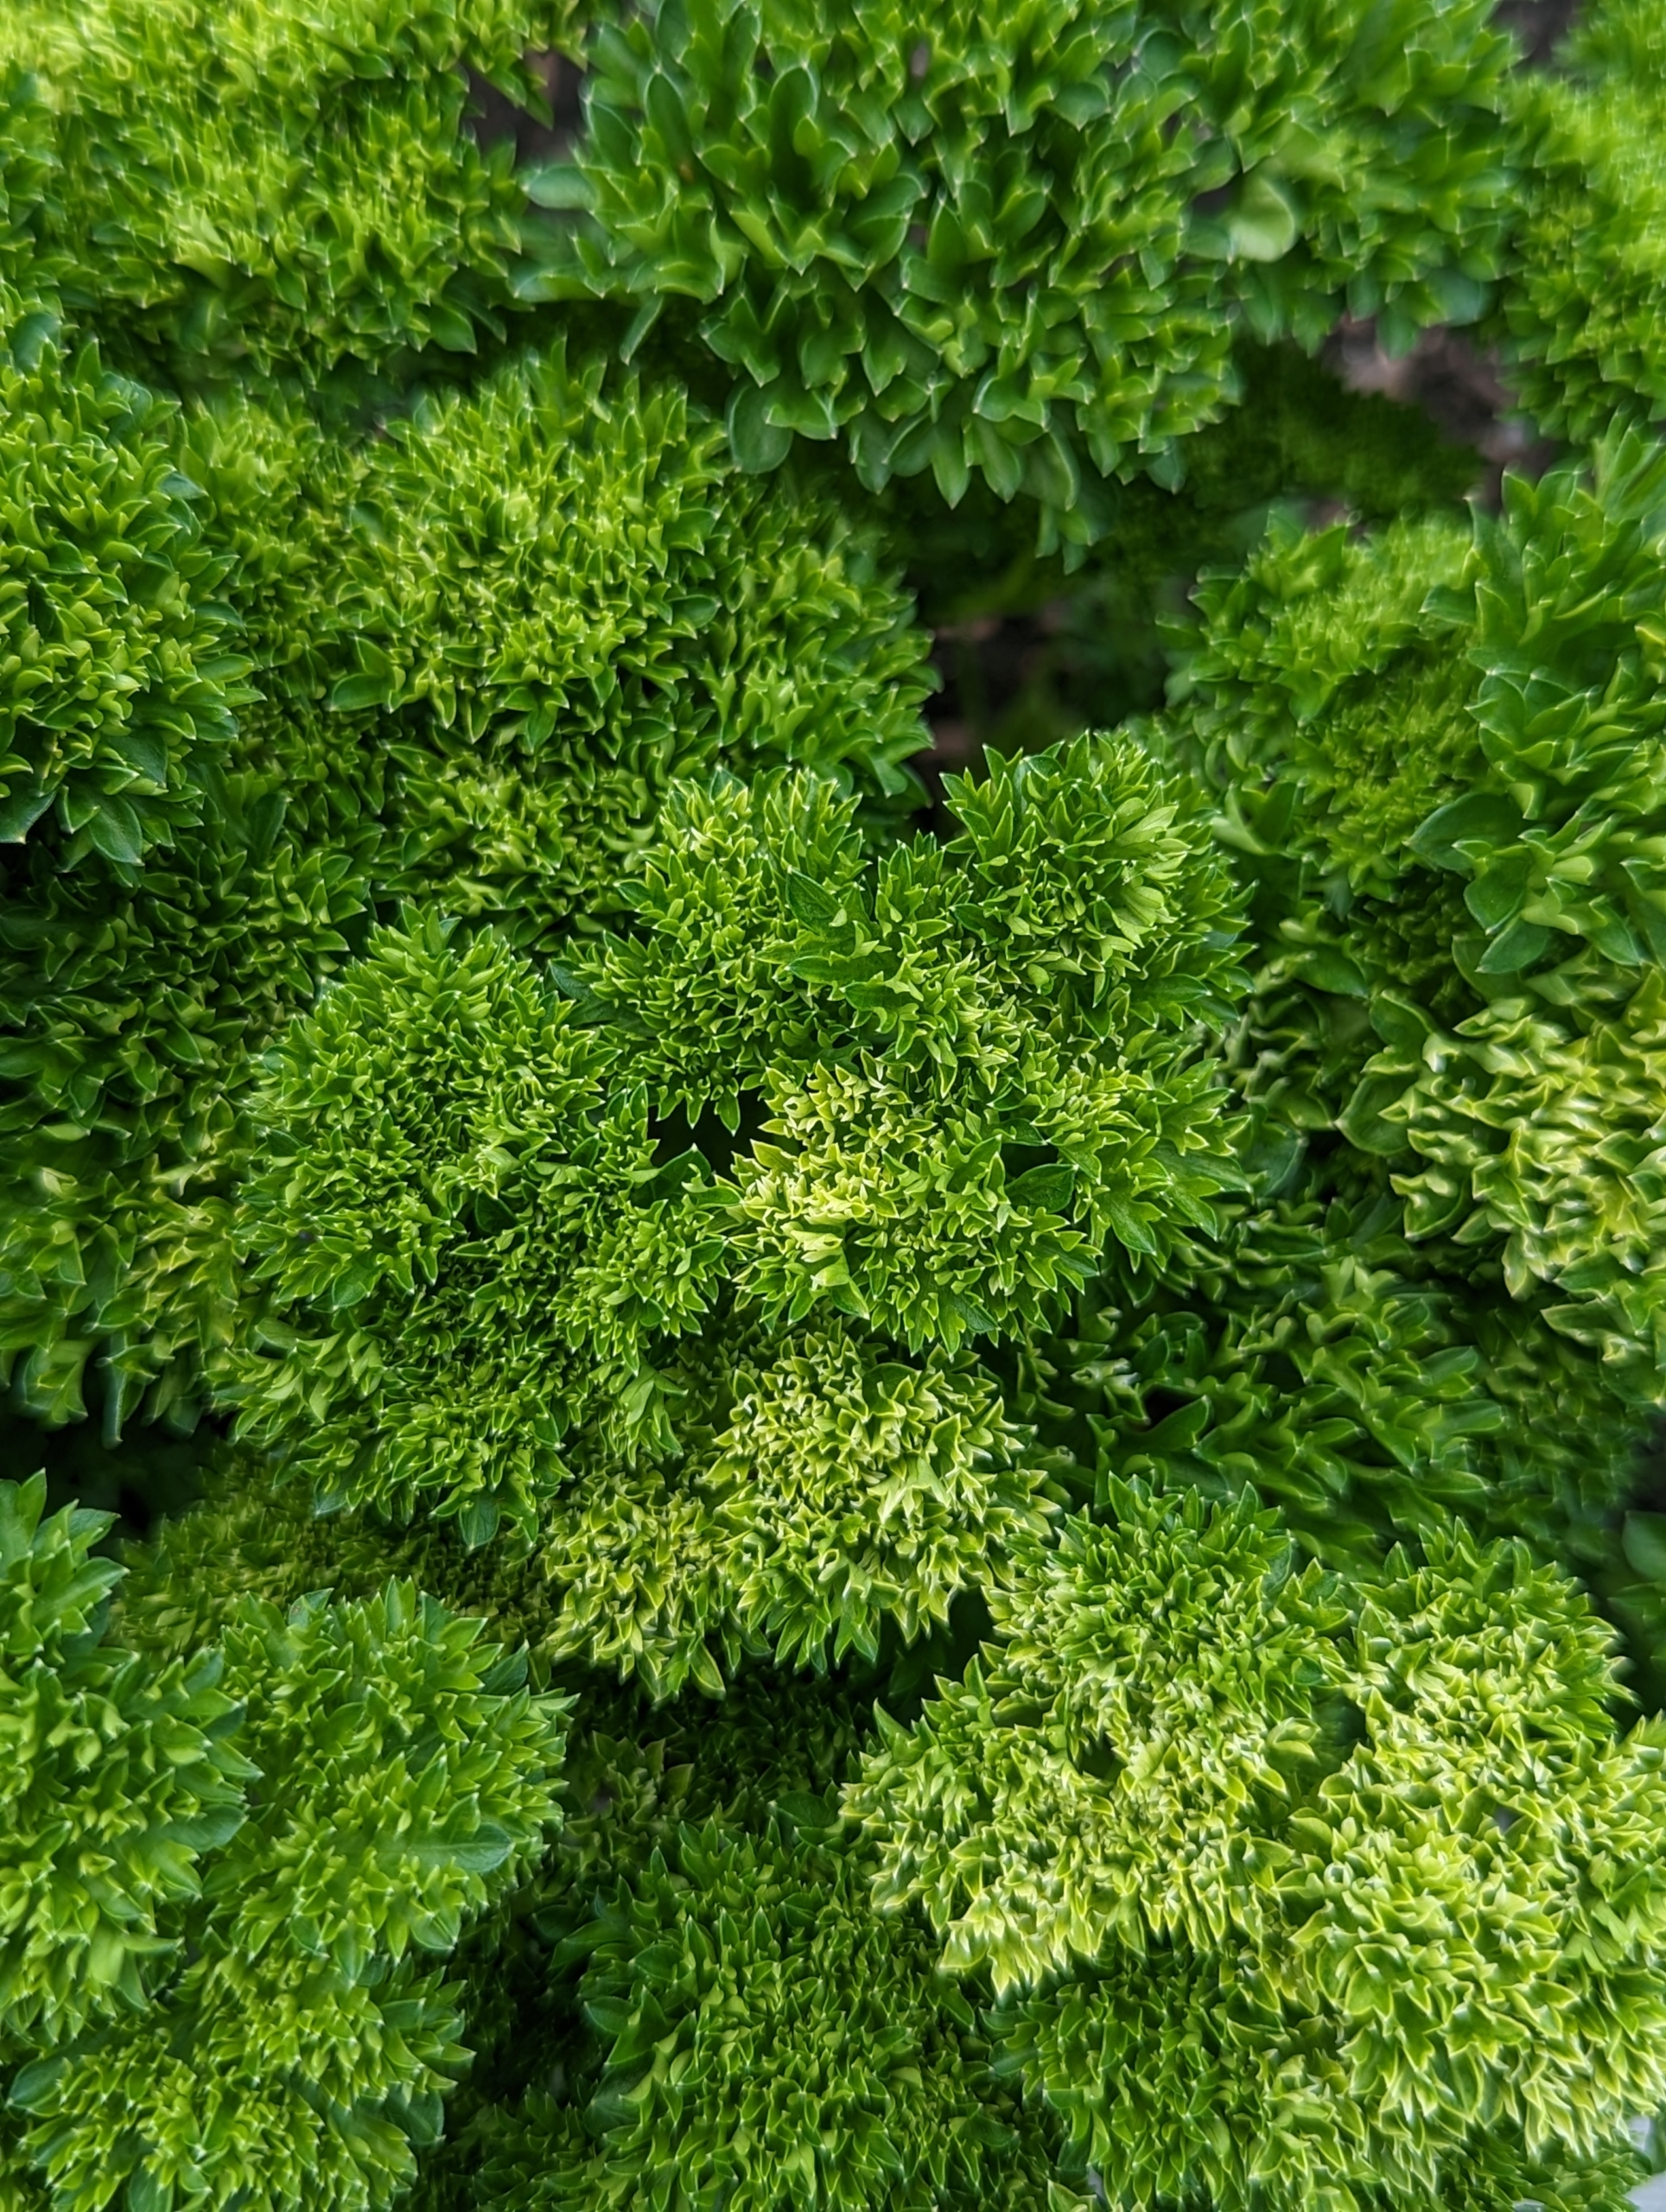
This is curly parsley. It is a bit more bitter than flat parsley, and has a light fragrance.
Over the summer, our curly parsley grew so well. Everyone who visited the gardens admired our crop of curly parsley.
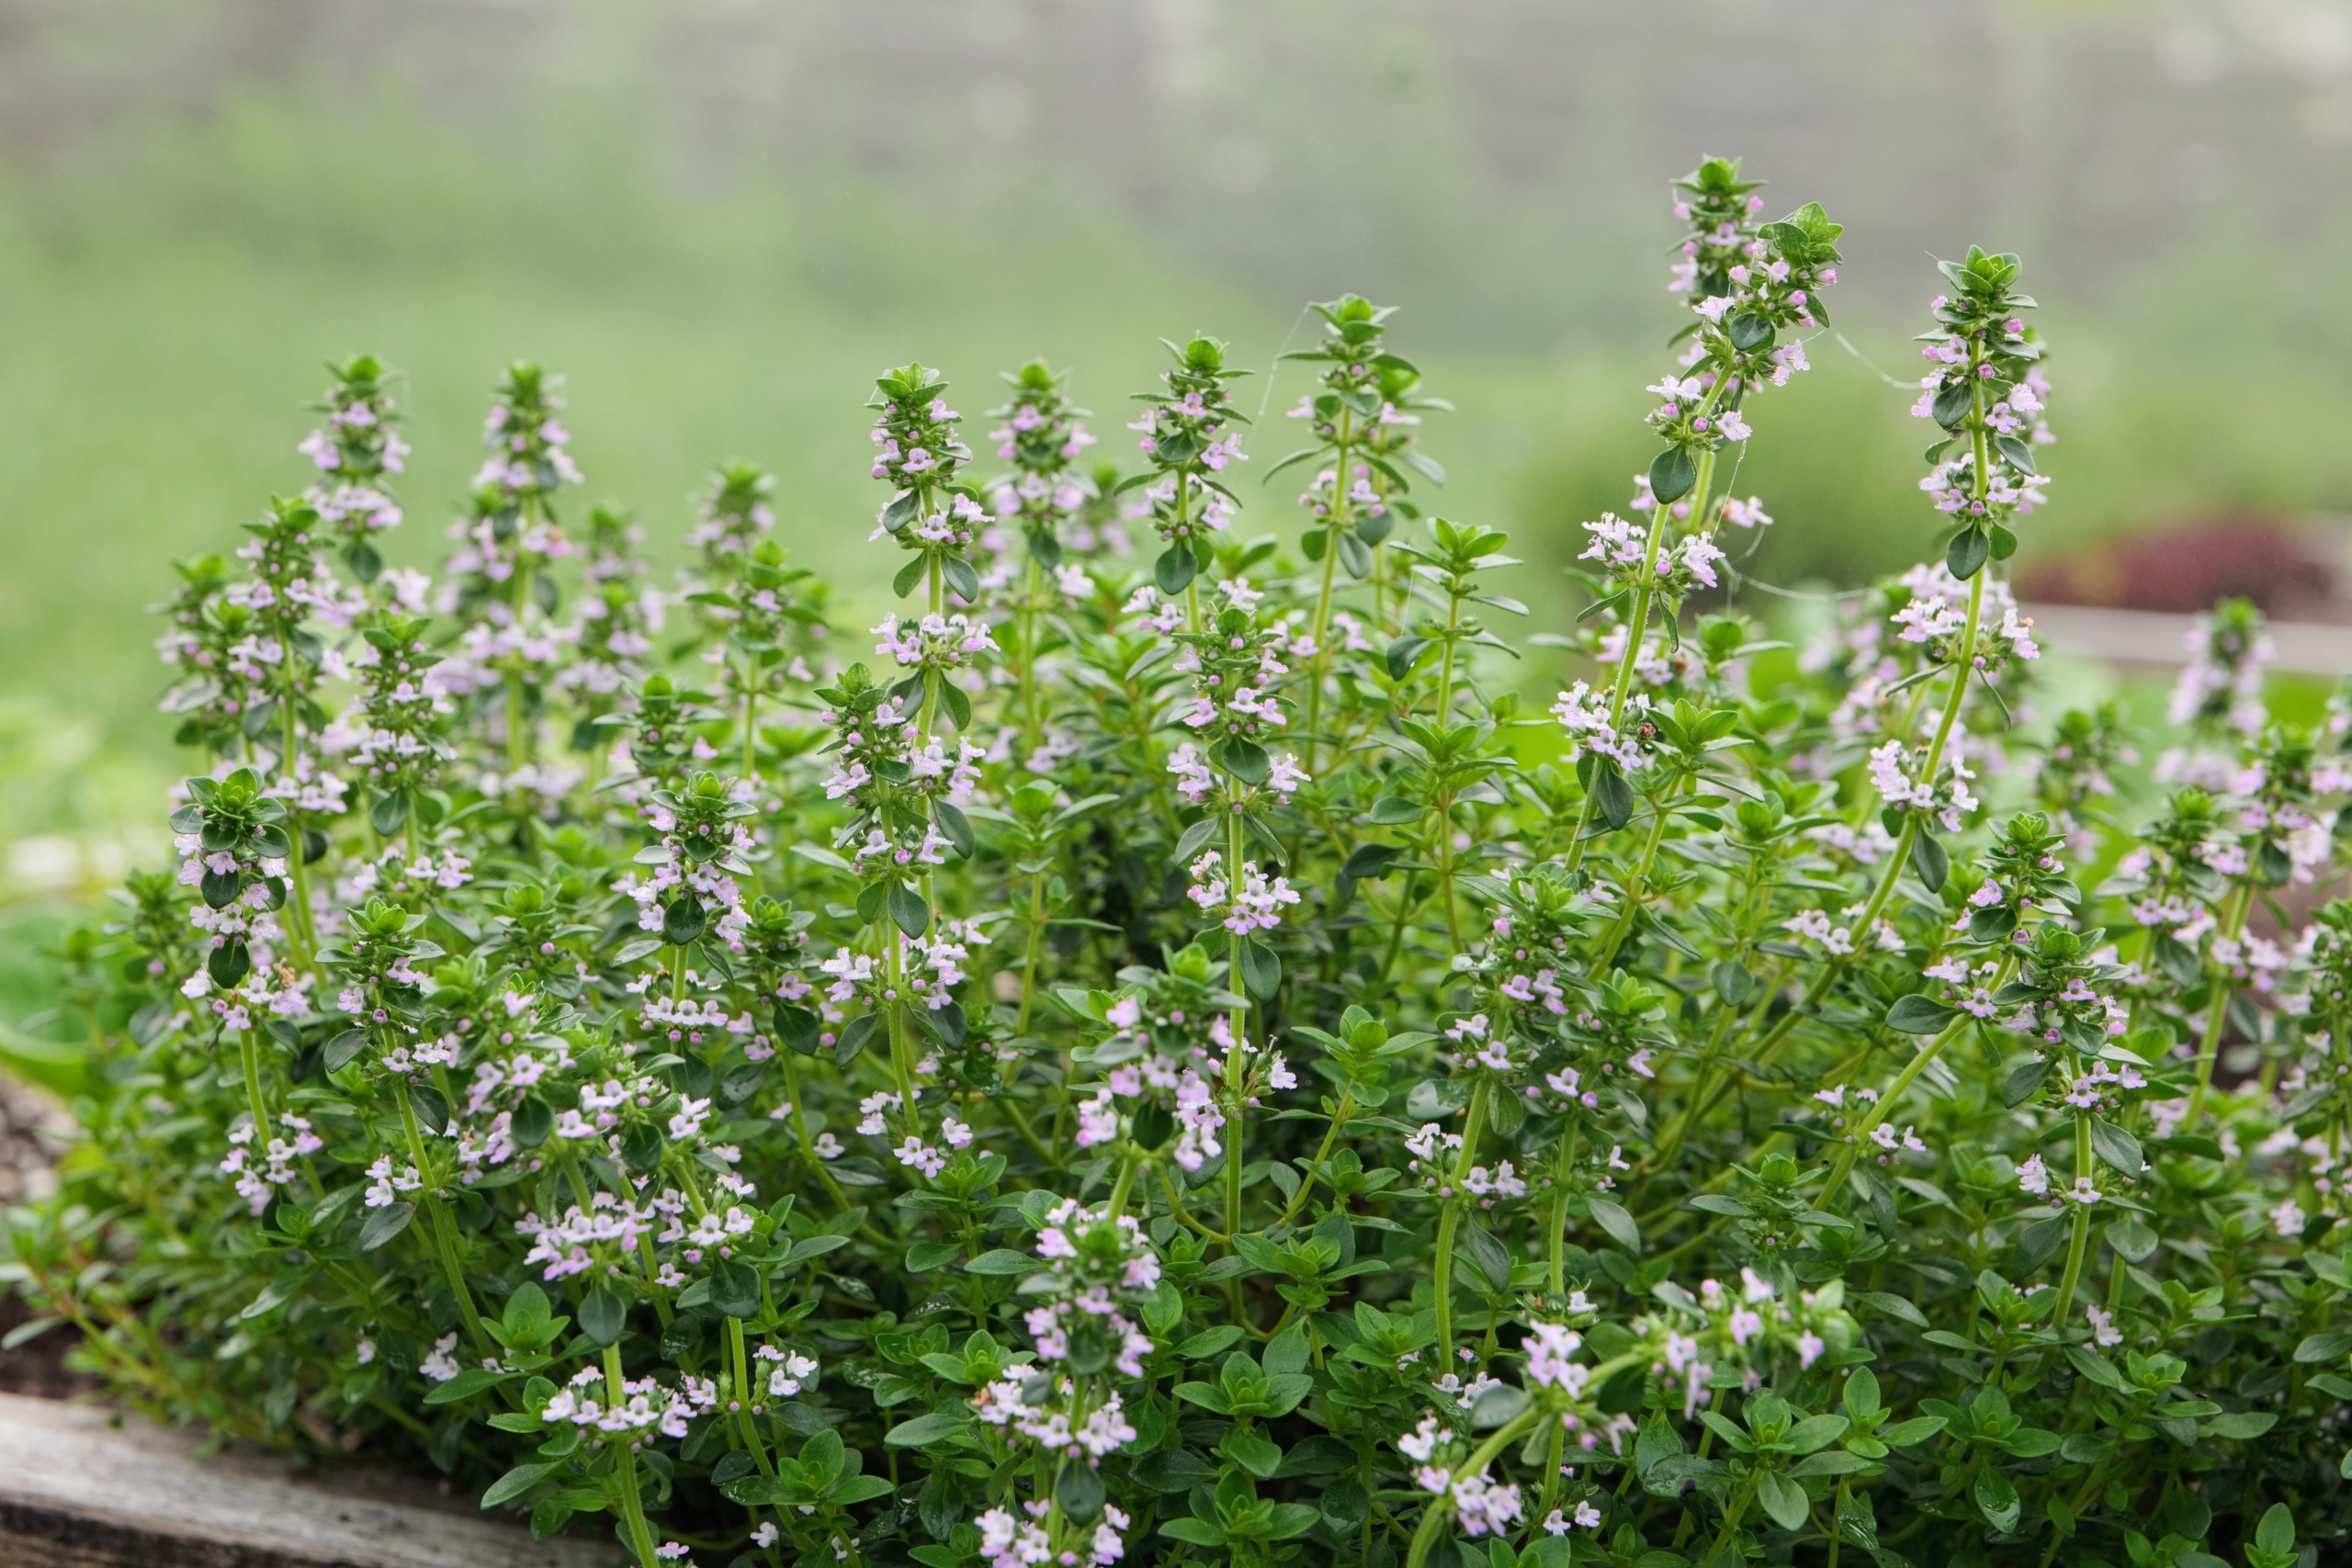
Thyme, Thymus vulgaris, is an herb rich in vitamins A and C. The flowers, leaves, and oil are commonly used to flavor foods.
Here is our thyme growing in the bed. The flowers are tiny, tubular, and colors vary from white, pink, and purple. The flowers of thyme are rich in nectar and attractive to bees and butterflies.
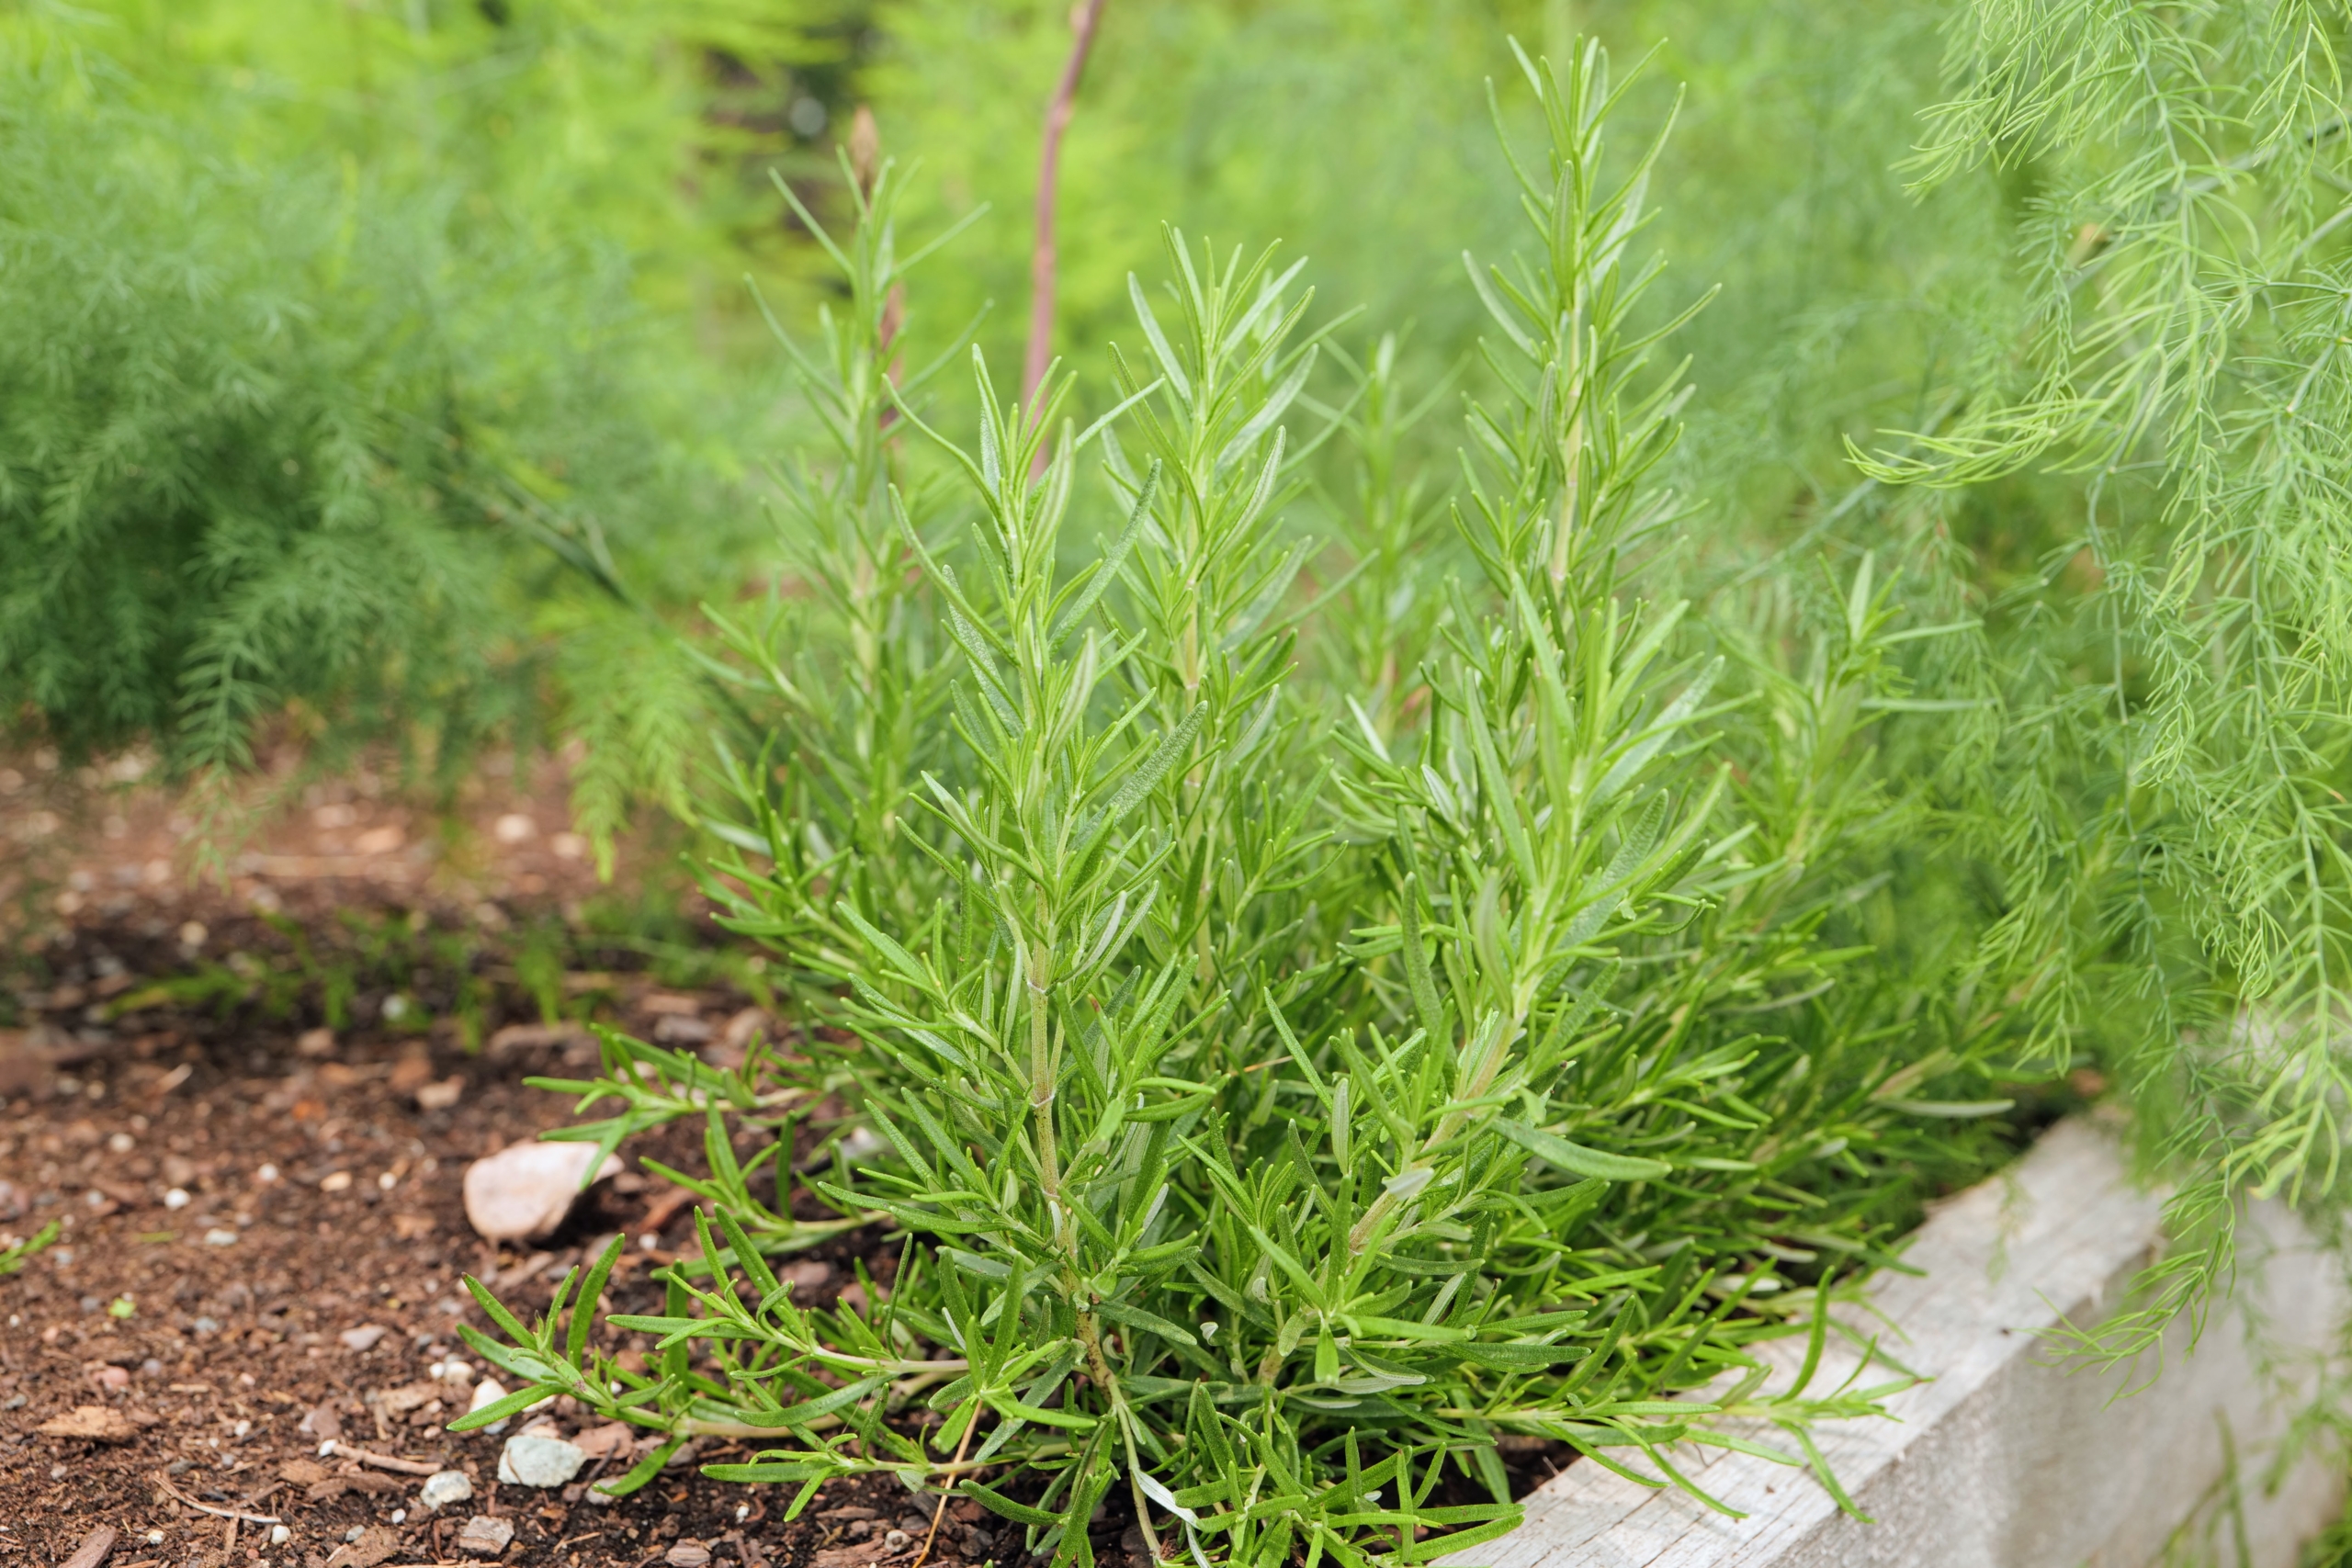
Rosemary, Rosmarinus officinalis L. is an evergreen bushy shrub which grows along the Mediterranean Sea, and sub-Himalayan areas. It is widely used as a spice when cooking, especially in Mediterranean dishes.
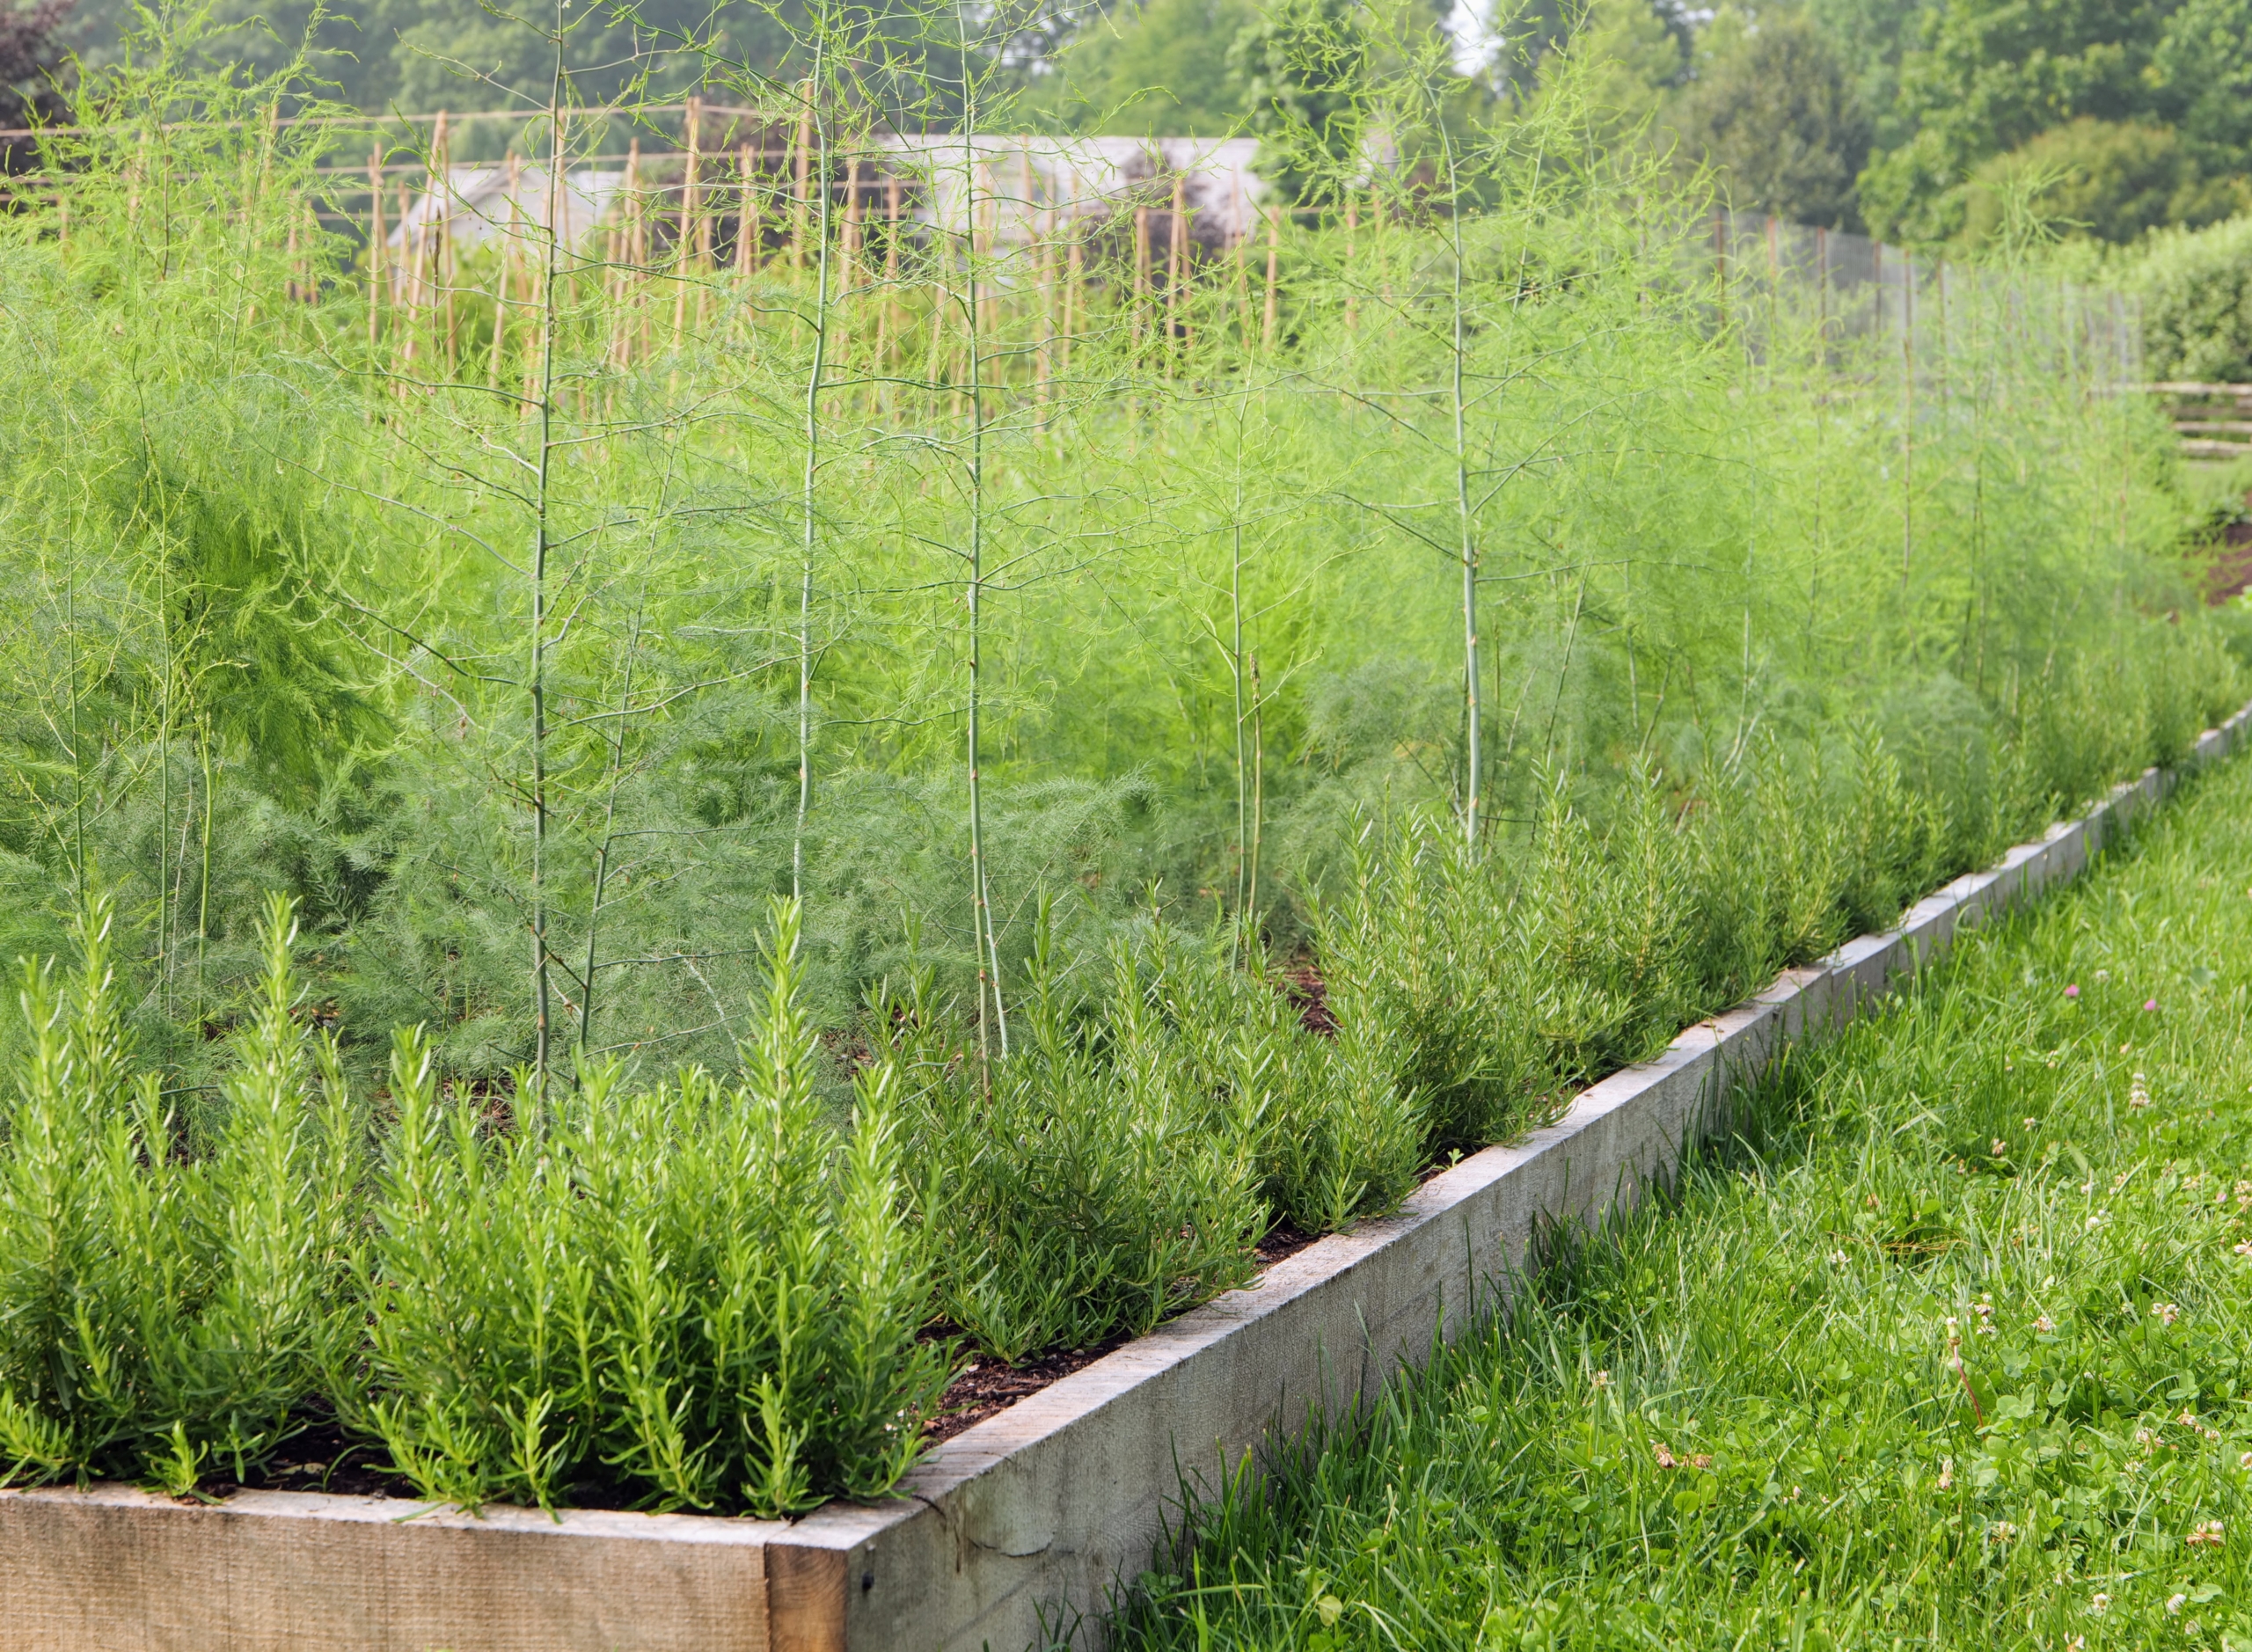
Here is our rosemary planted around the asparagus bed. Everything was so prolific.
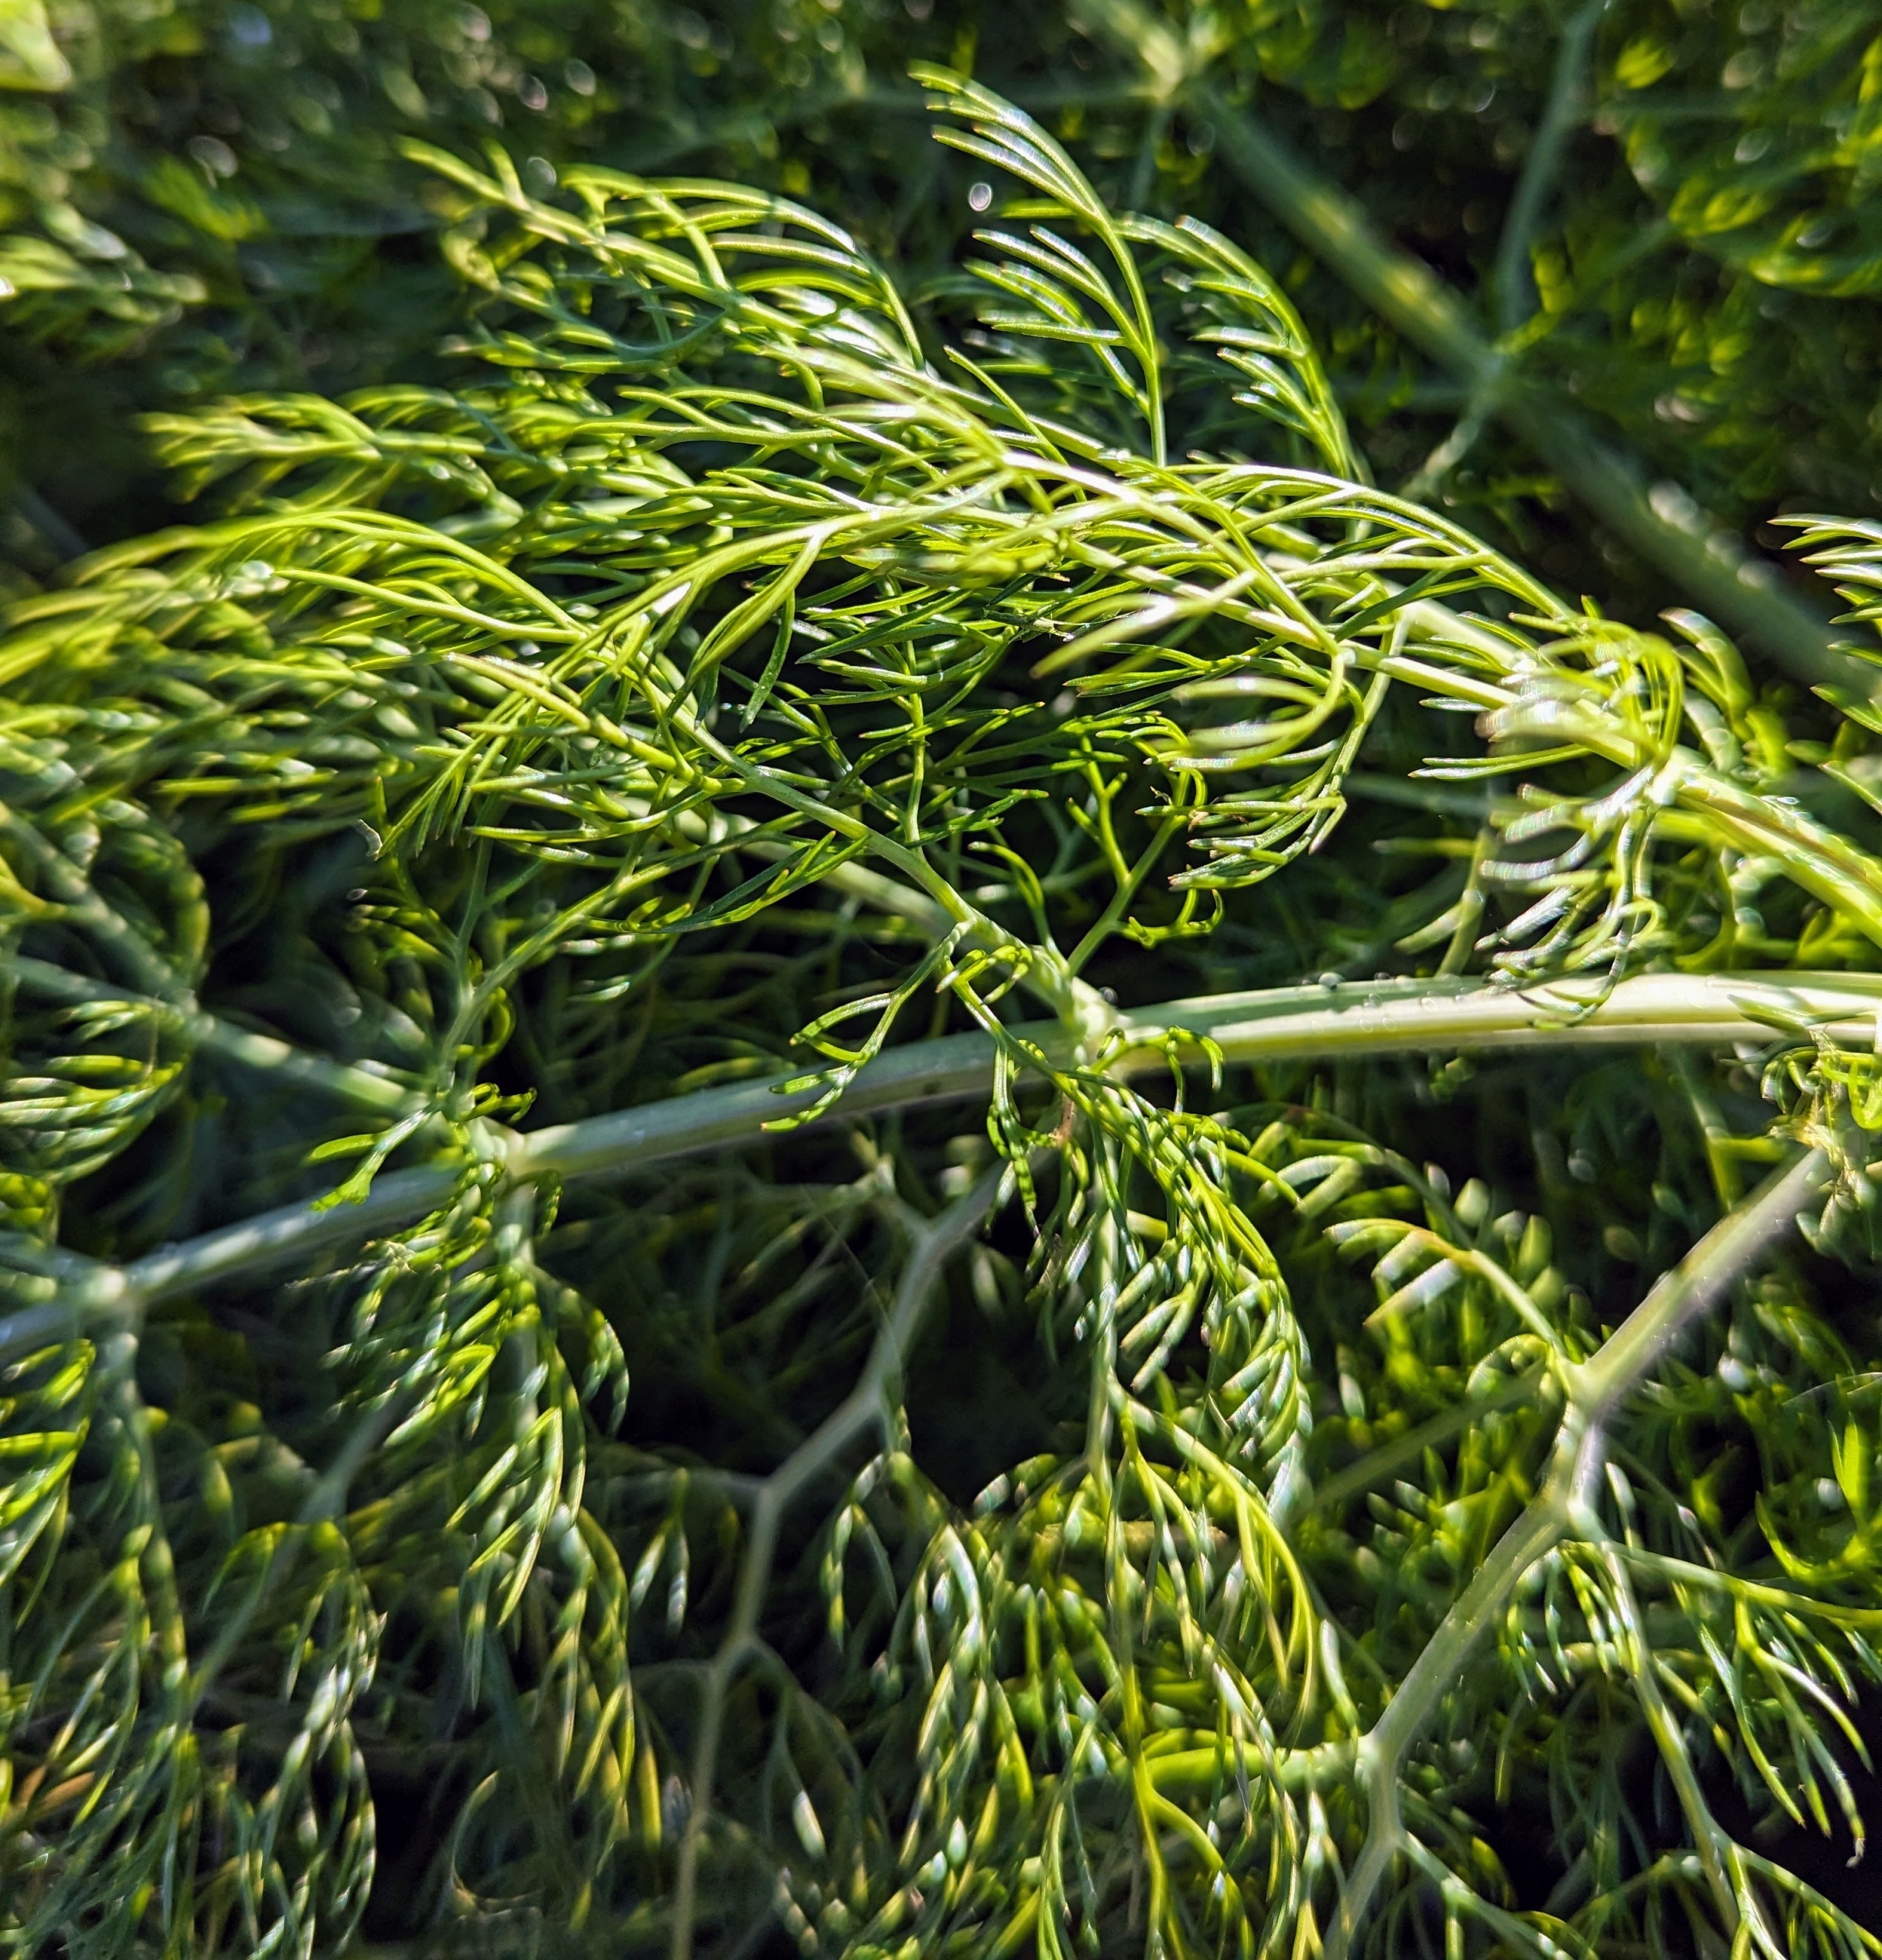
We also grew dill. Dill, Anethum graveolens, is an annual herb in the celery family Apiaceae. It is native to North Africa, Iran, and the Arabian Peninsula. Dill has a distinctive taste which is likened to fennel and celery. Closely related to parsley, its fresh aroma is popularly used with fish and seafood dishes.
The leaves of fennel are almost identical to those of dill. Fennel plants, which are native to the Mediterranean basin, have a bulbous base that can be eaten like a vegetable, feathery fronds that are used as an herb, and seeds that can be dried for a spice.
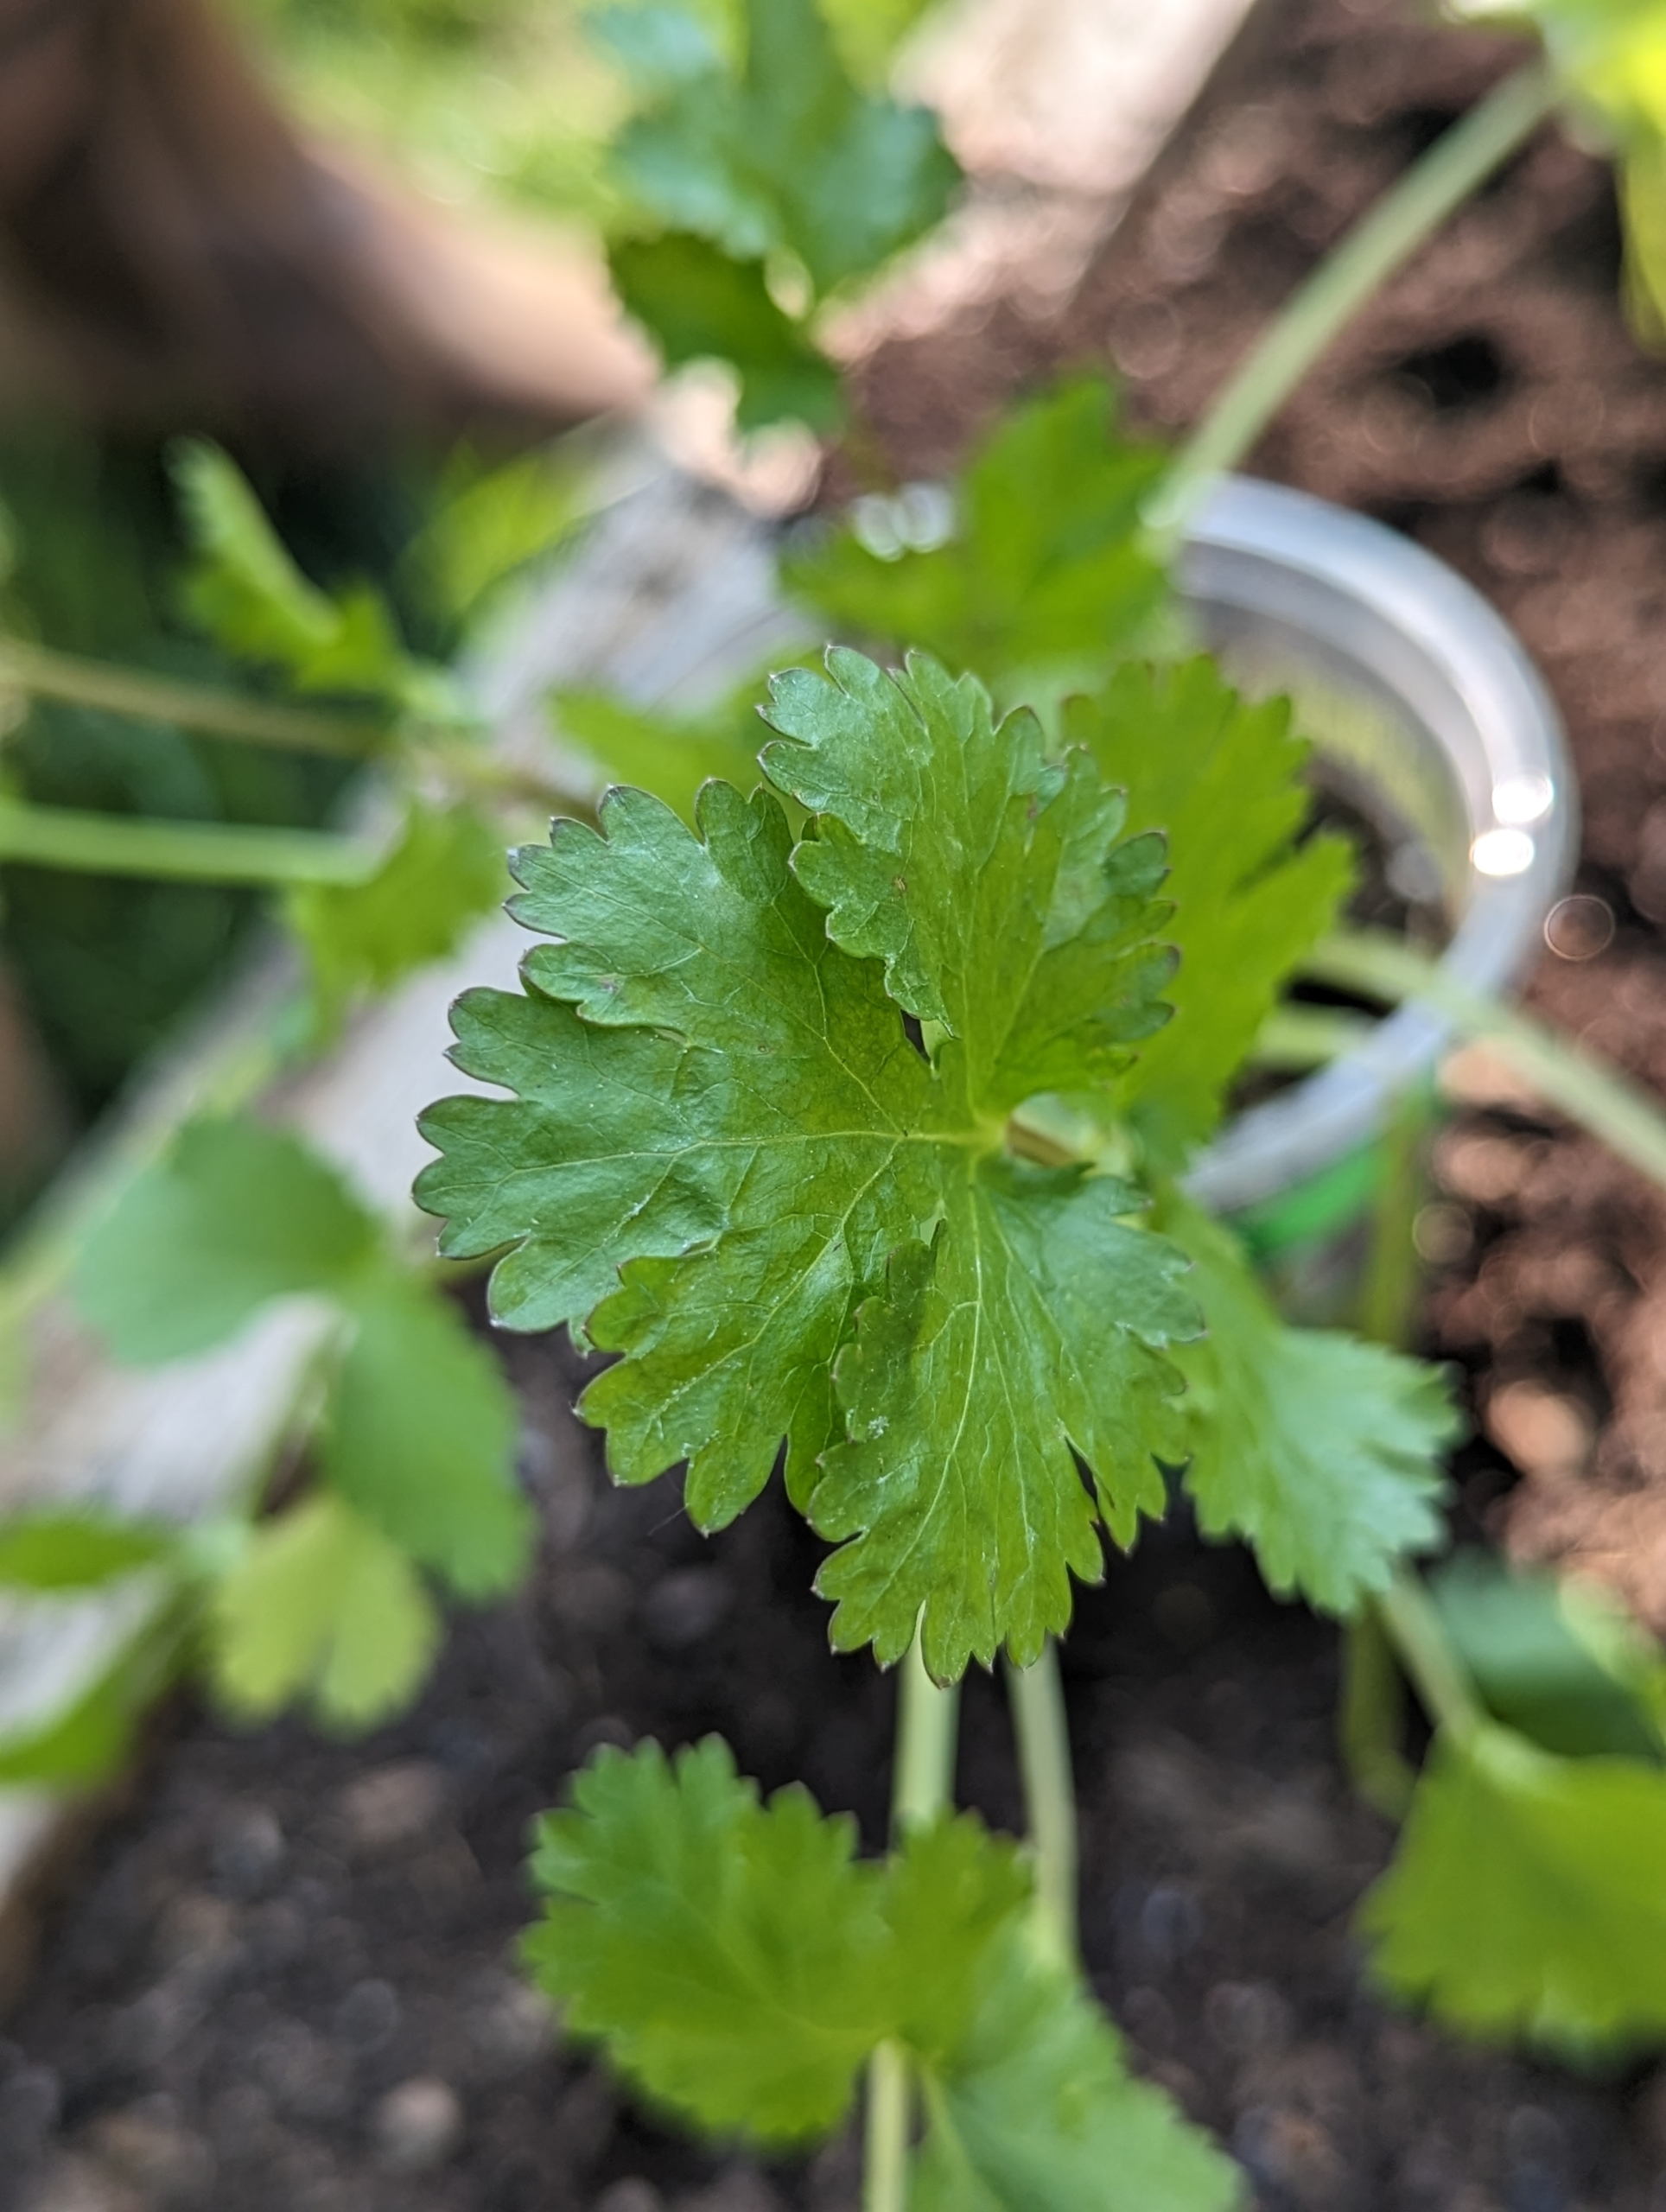
And then there is cilantro. Some love it and some hate it. Of course some of this dislike may be preference, but for those whom the plant tastes like soap, the issue is genetic. Some individuals have a variation in a group of olfactory-receptor genes that allows them to strongly perceive the soapy-flavored aldehydes in cilantro leaves. I love cilantro and often call it coriander. Cilantro is the name for the leaves and stems of the coriander plant. When the plant flowers and turns to seed, the seeds are called coriander.
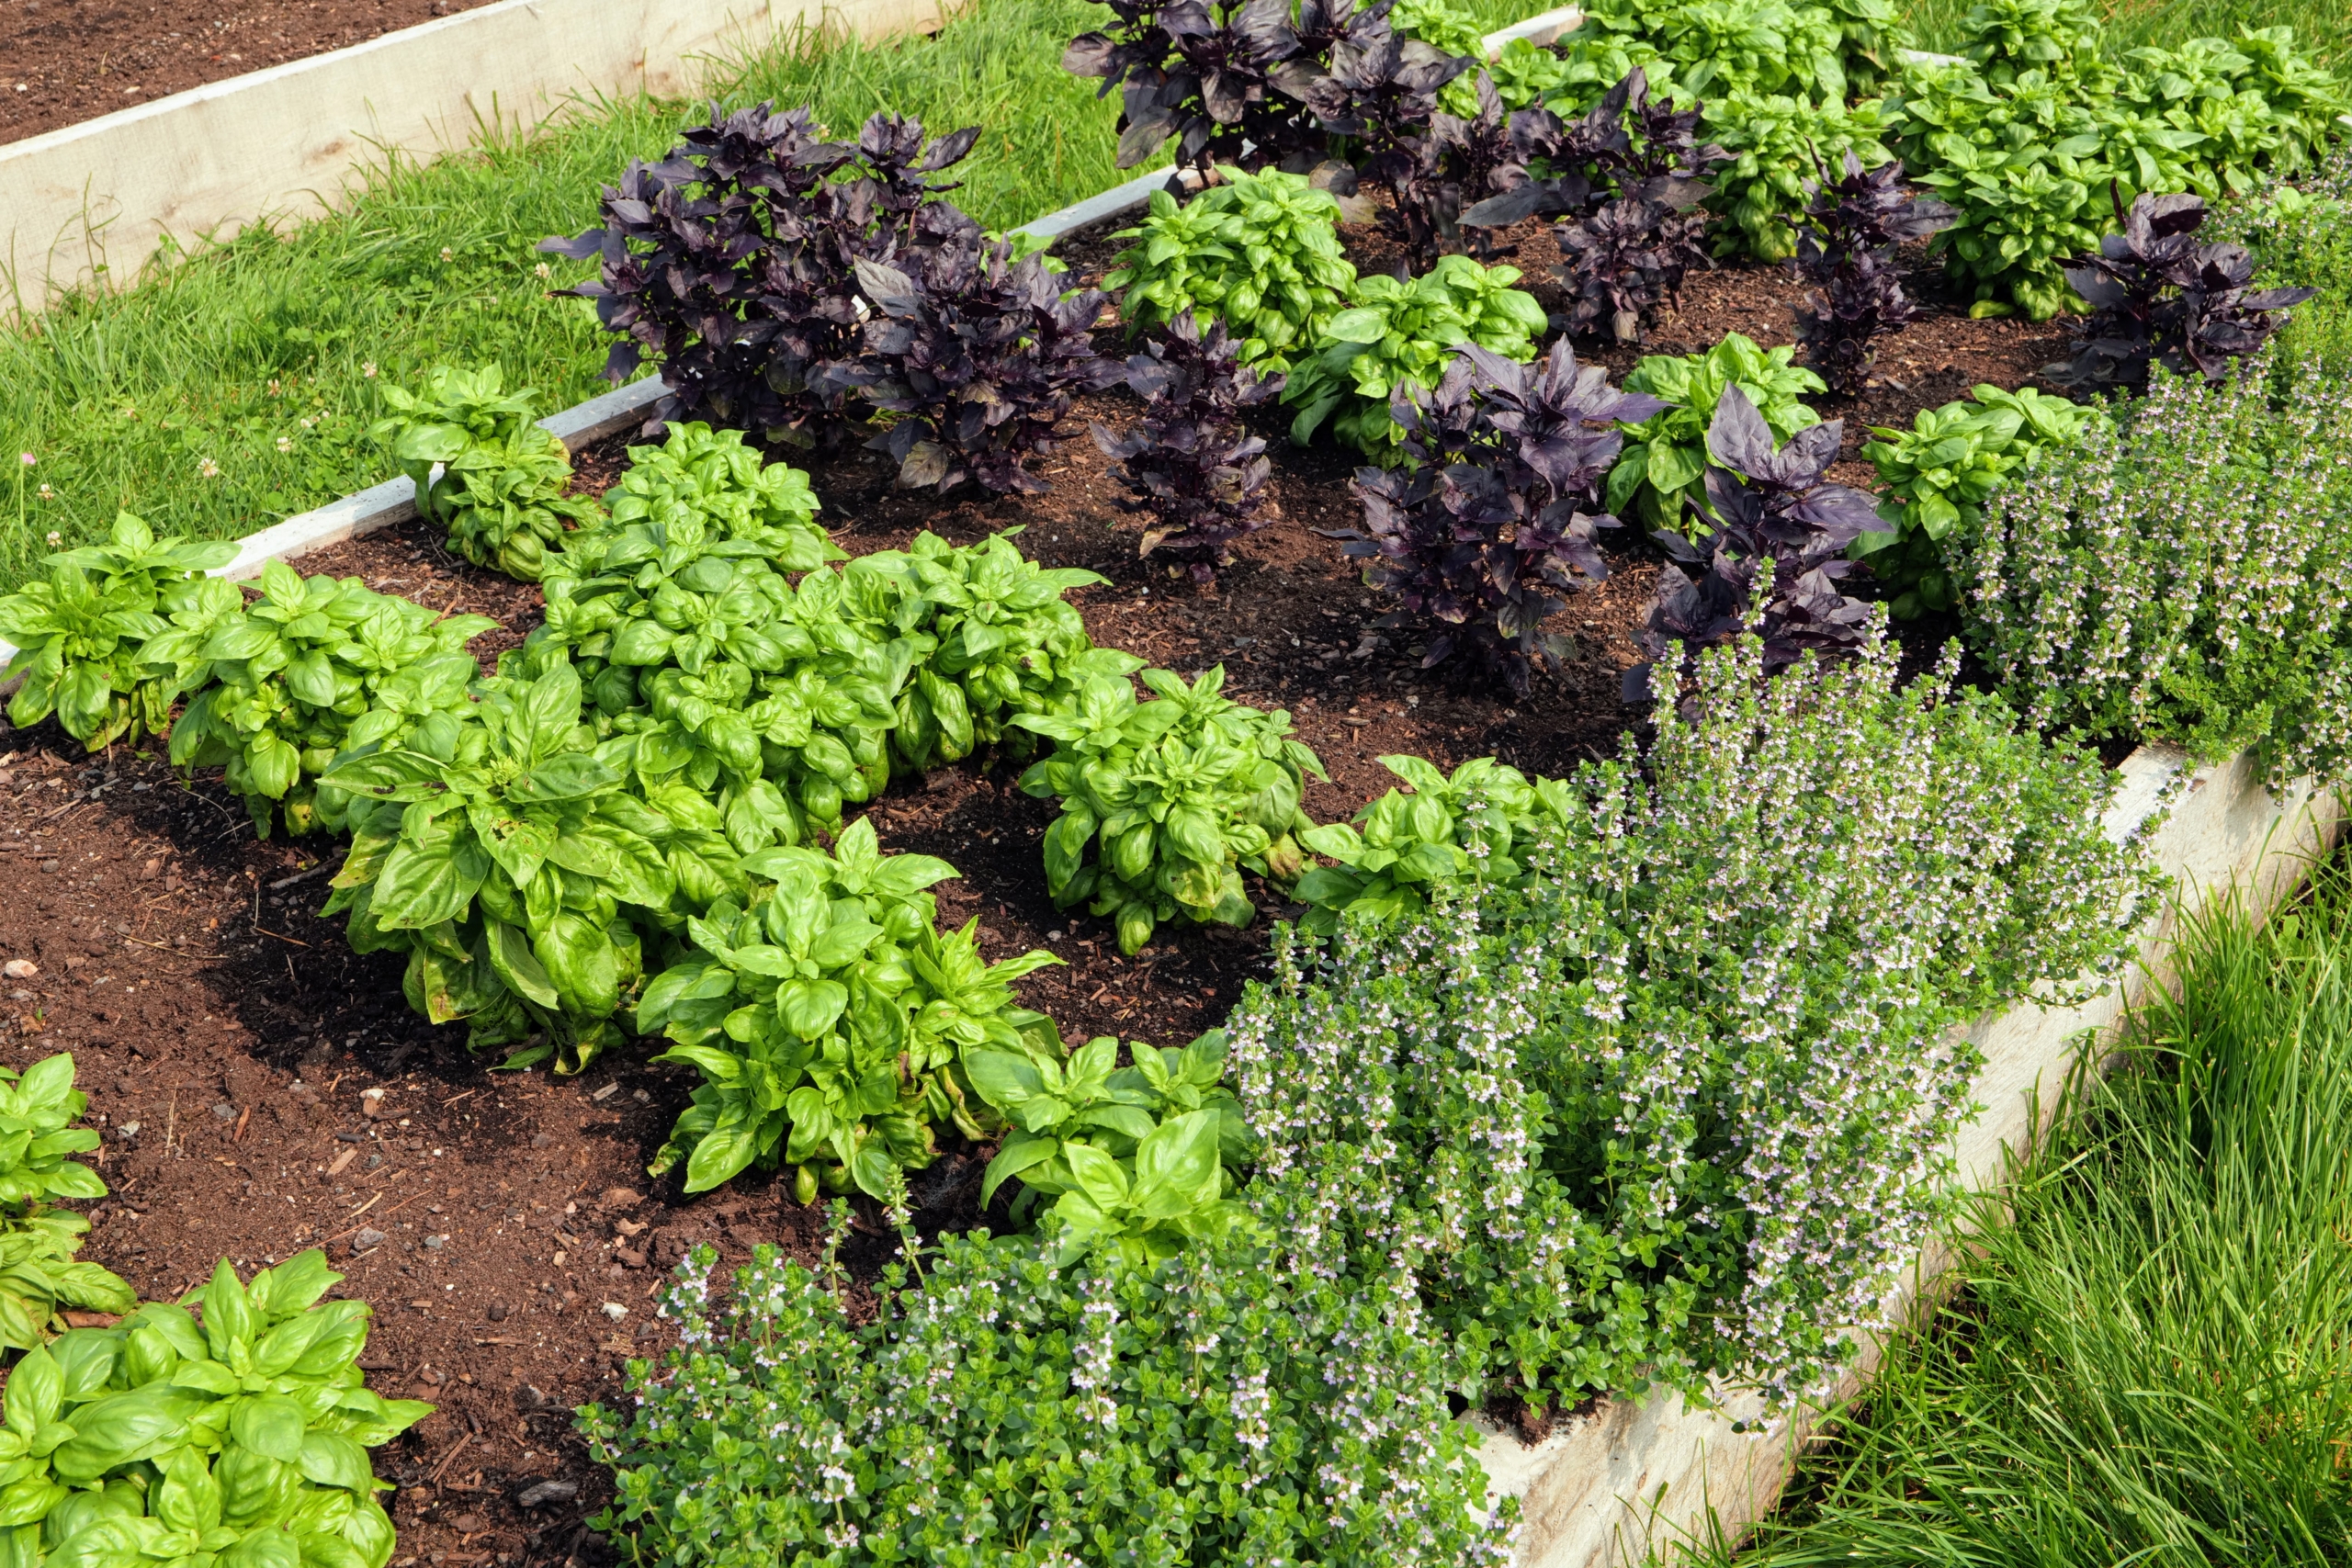
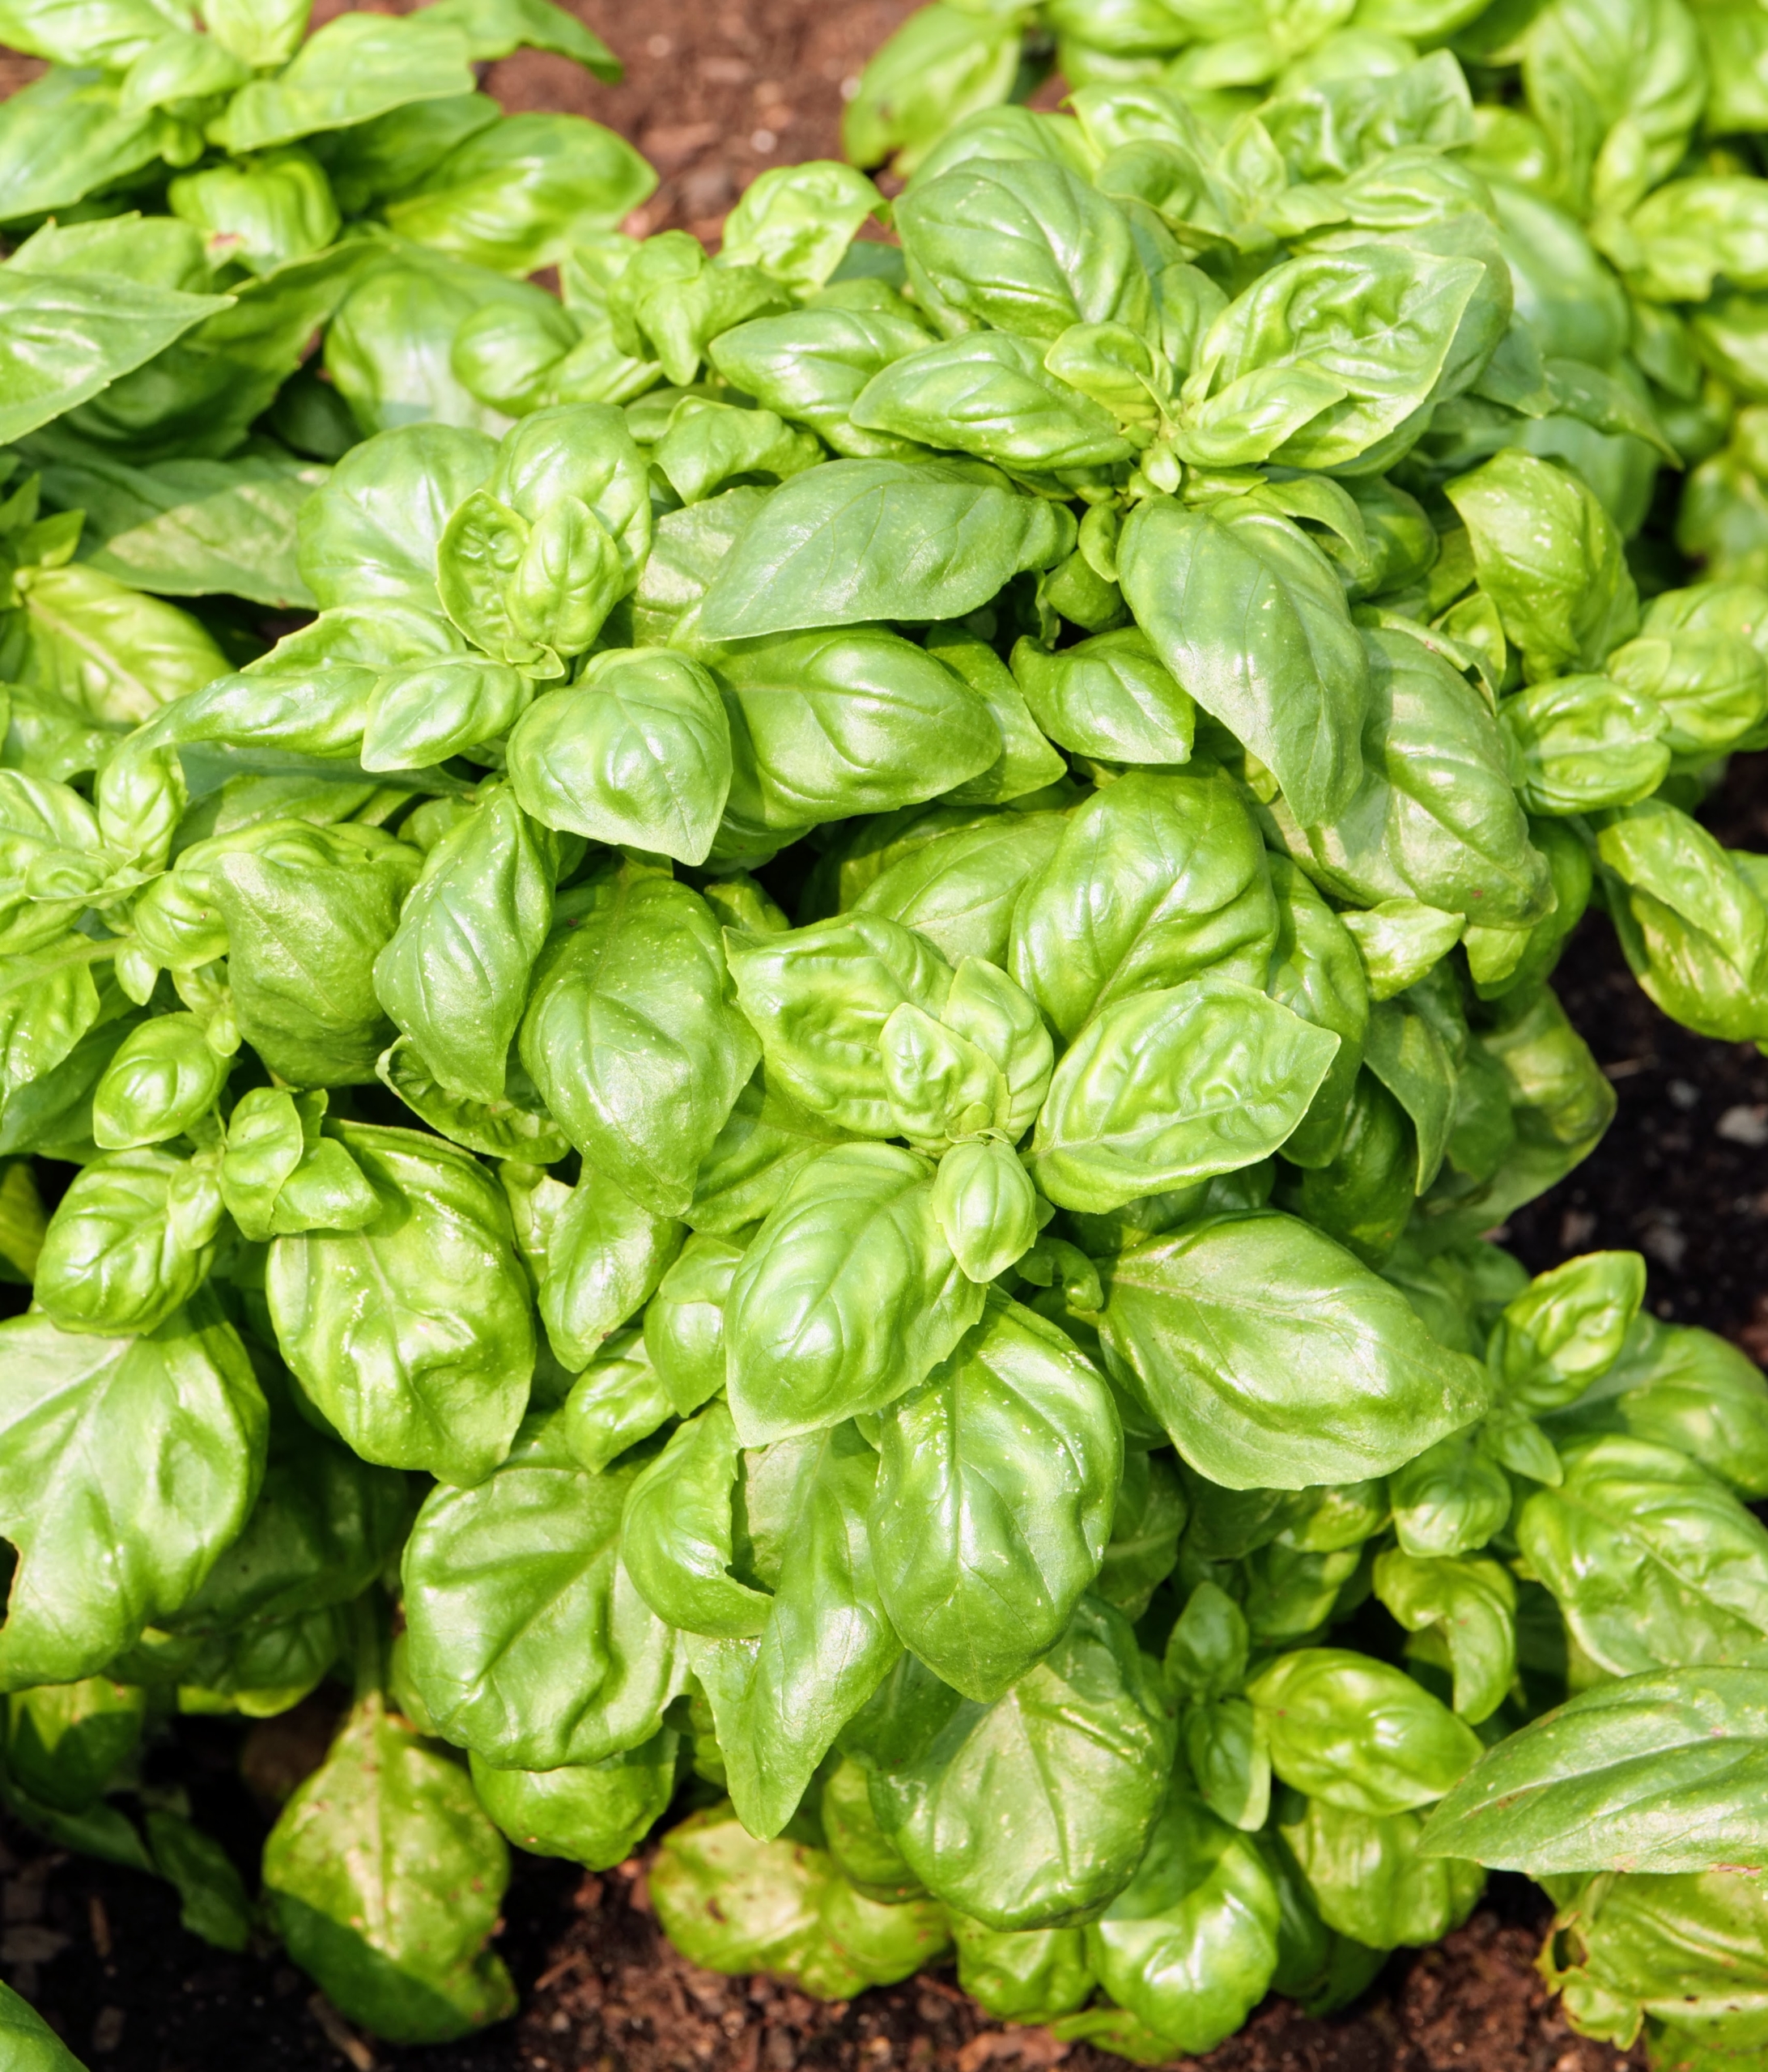
Another popular herb in my garden is basil. Basil is an herb in the mint family that is in season primarily June through September. It adds flavor to meals, and its nutrients are said to have some health benefits, such as reducing stress and supporting the cardiovascular system. Sweet basil plays a role in many Mediterranean, and particularly Italian, cuisines.
Basil is a tender plant that can be sown outdoors once temperatures warm up in early summer.
Now, the garden is nearly all cleaned up for the season. We’ve already started planting our crops in the vegetable greenhouse. But come spring, we’ll be out here again, tending the beds for another year of delicious, natural foods.
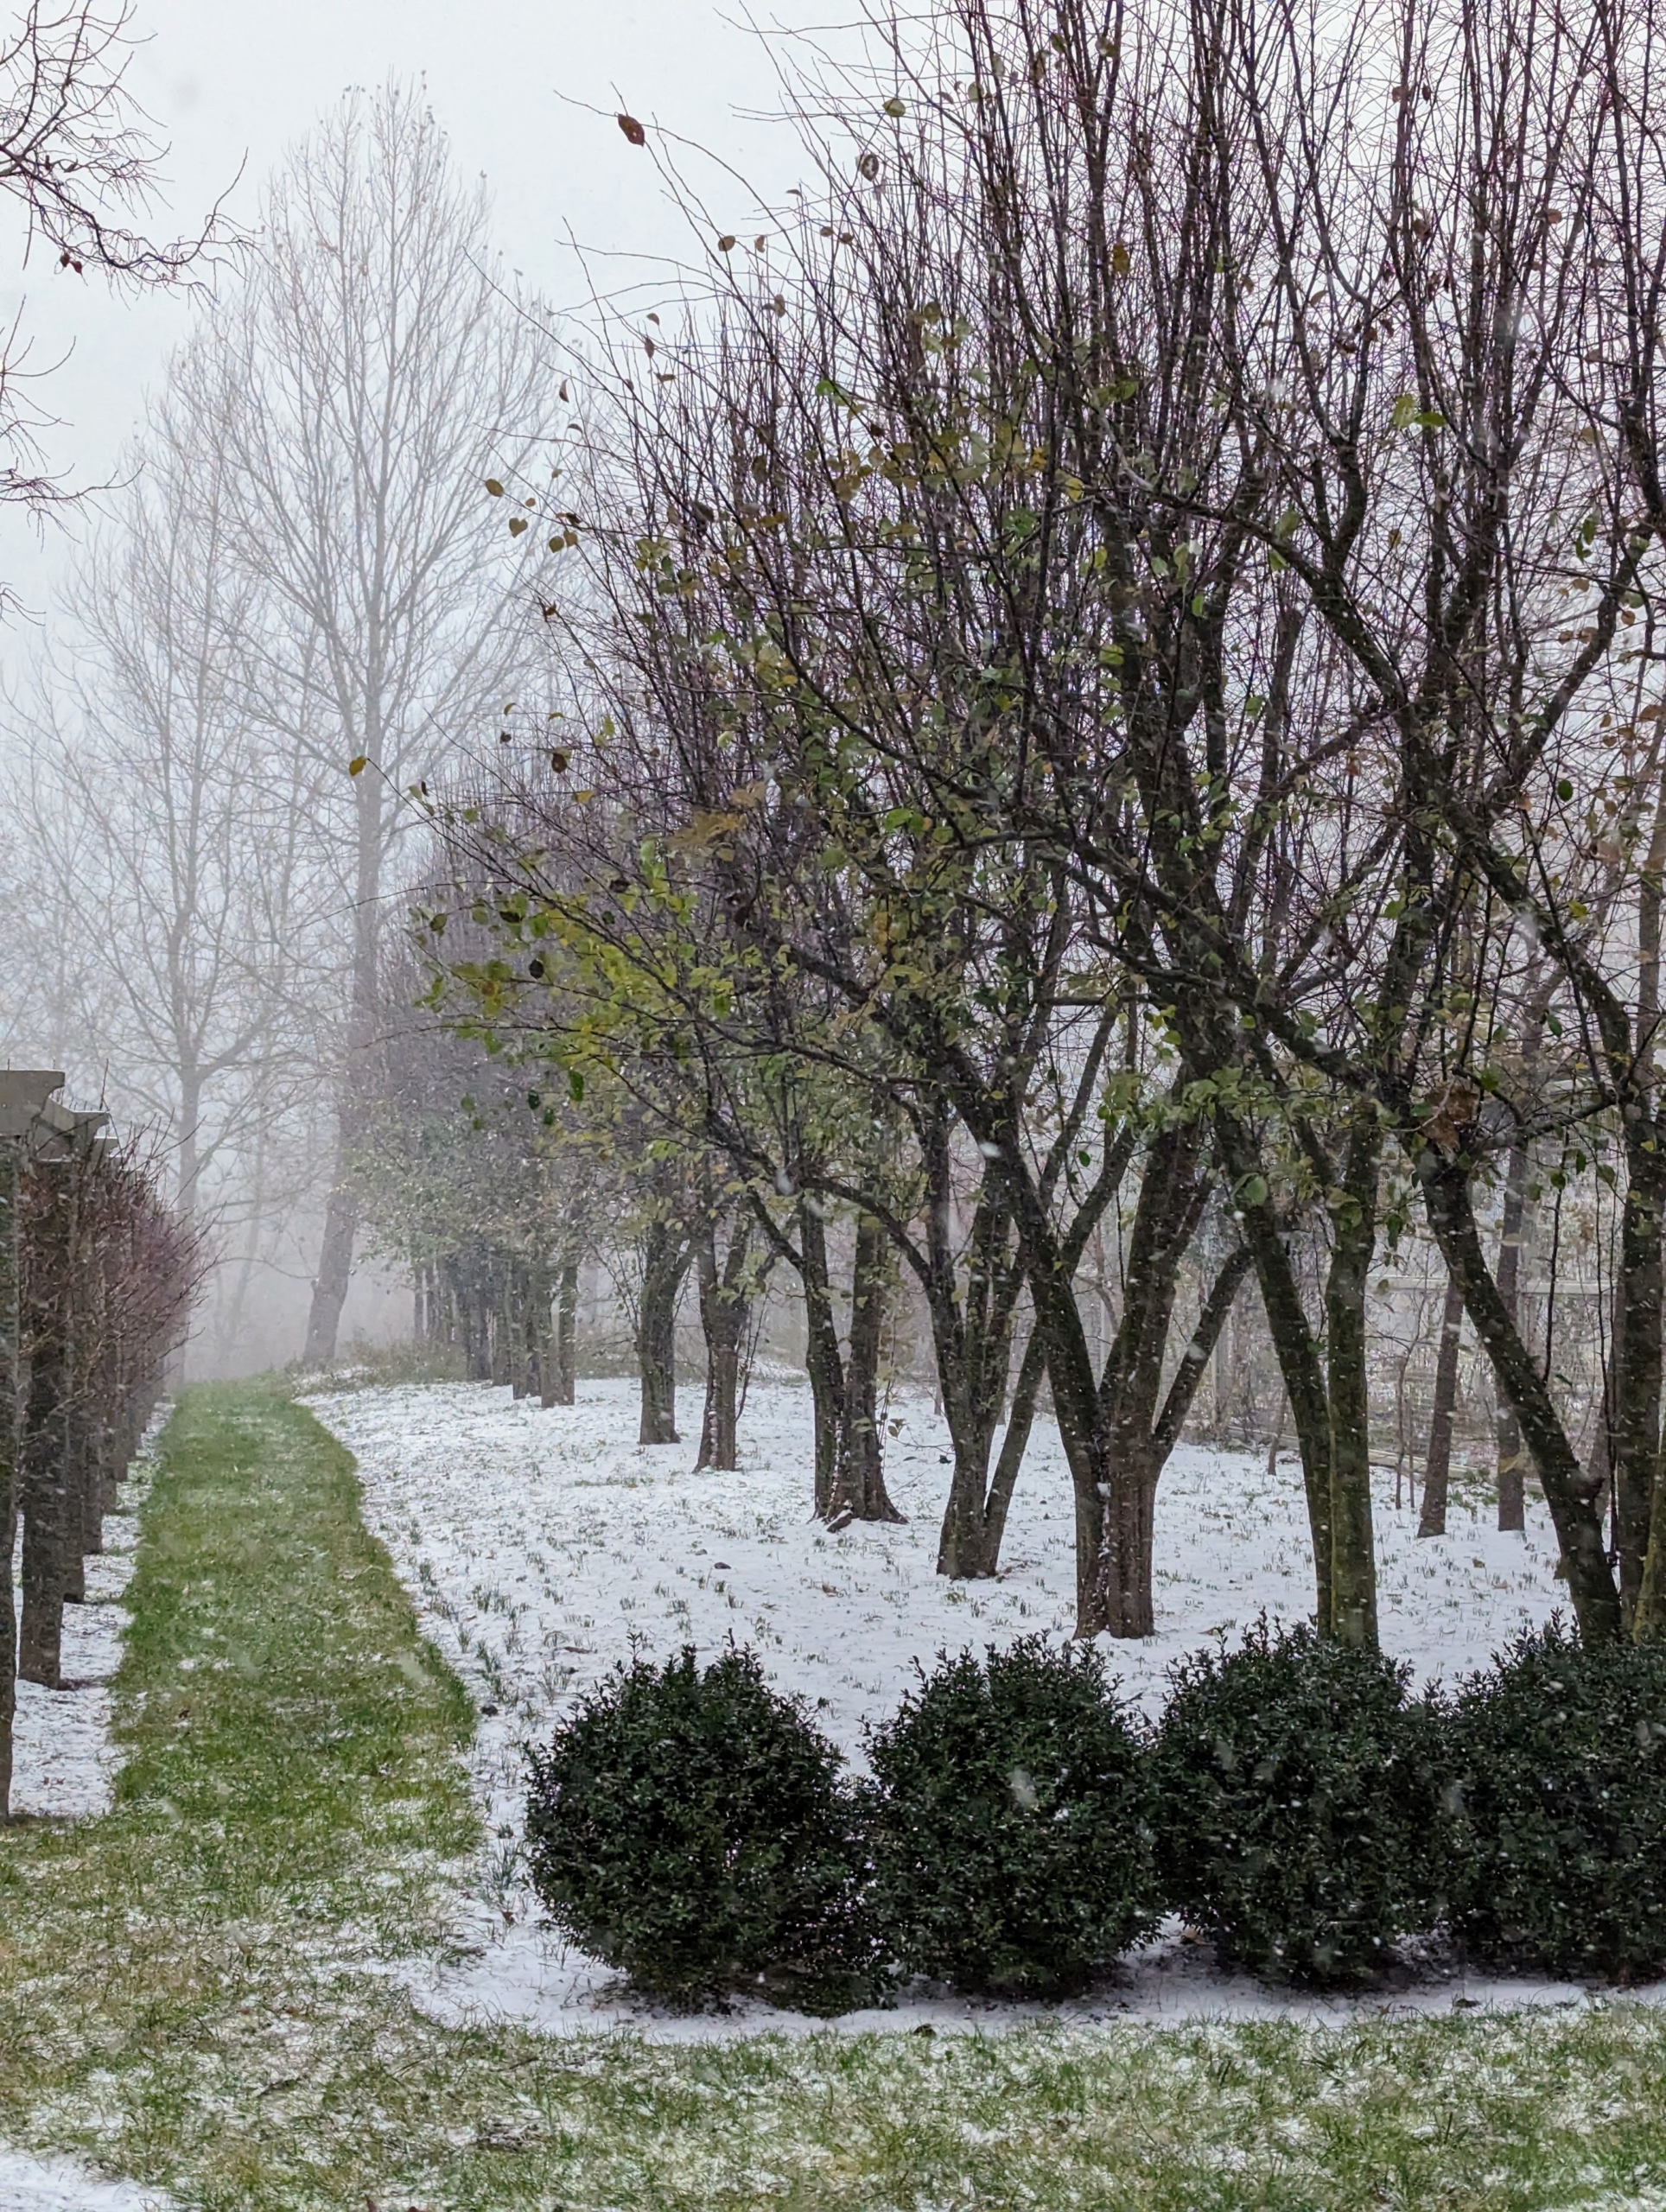
It started off as a day of much needed rain, which then developed into snow - the first of the season.
Until now, it's been unusually dry and warm here at my farm, but yesterday we got a couple inches of wet snow - enough to cover much of the landscape in white. Fortunately, all the plants are tucked away in temperature-controlled greenhouses and hoop houses, but we are still in the process of preparing for the winter season ahead. Soon all the shrubs, hedges, and cold-sensitive garden containers will be covered in burlap.
Here are a few photos, enjoy.
Even if one is not a big fan of cold weather, there is always a bit of excitement with the first snow of the season. On this early morning, my stable manager, Helen Peparo, captured some photos of the newly fallen snow from inside and outside the stable.
We got enough snow just to cover the ground and the tops of the boxwood. My allée is still due to be covered in protective burlap, but this snow will be brushed off all the boxwood around the farm by hand… and broom.
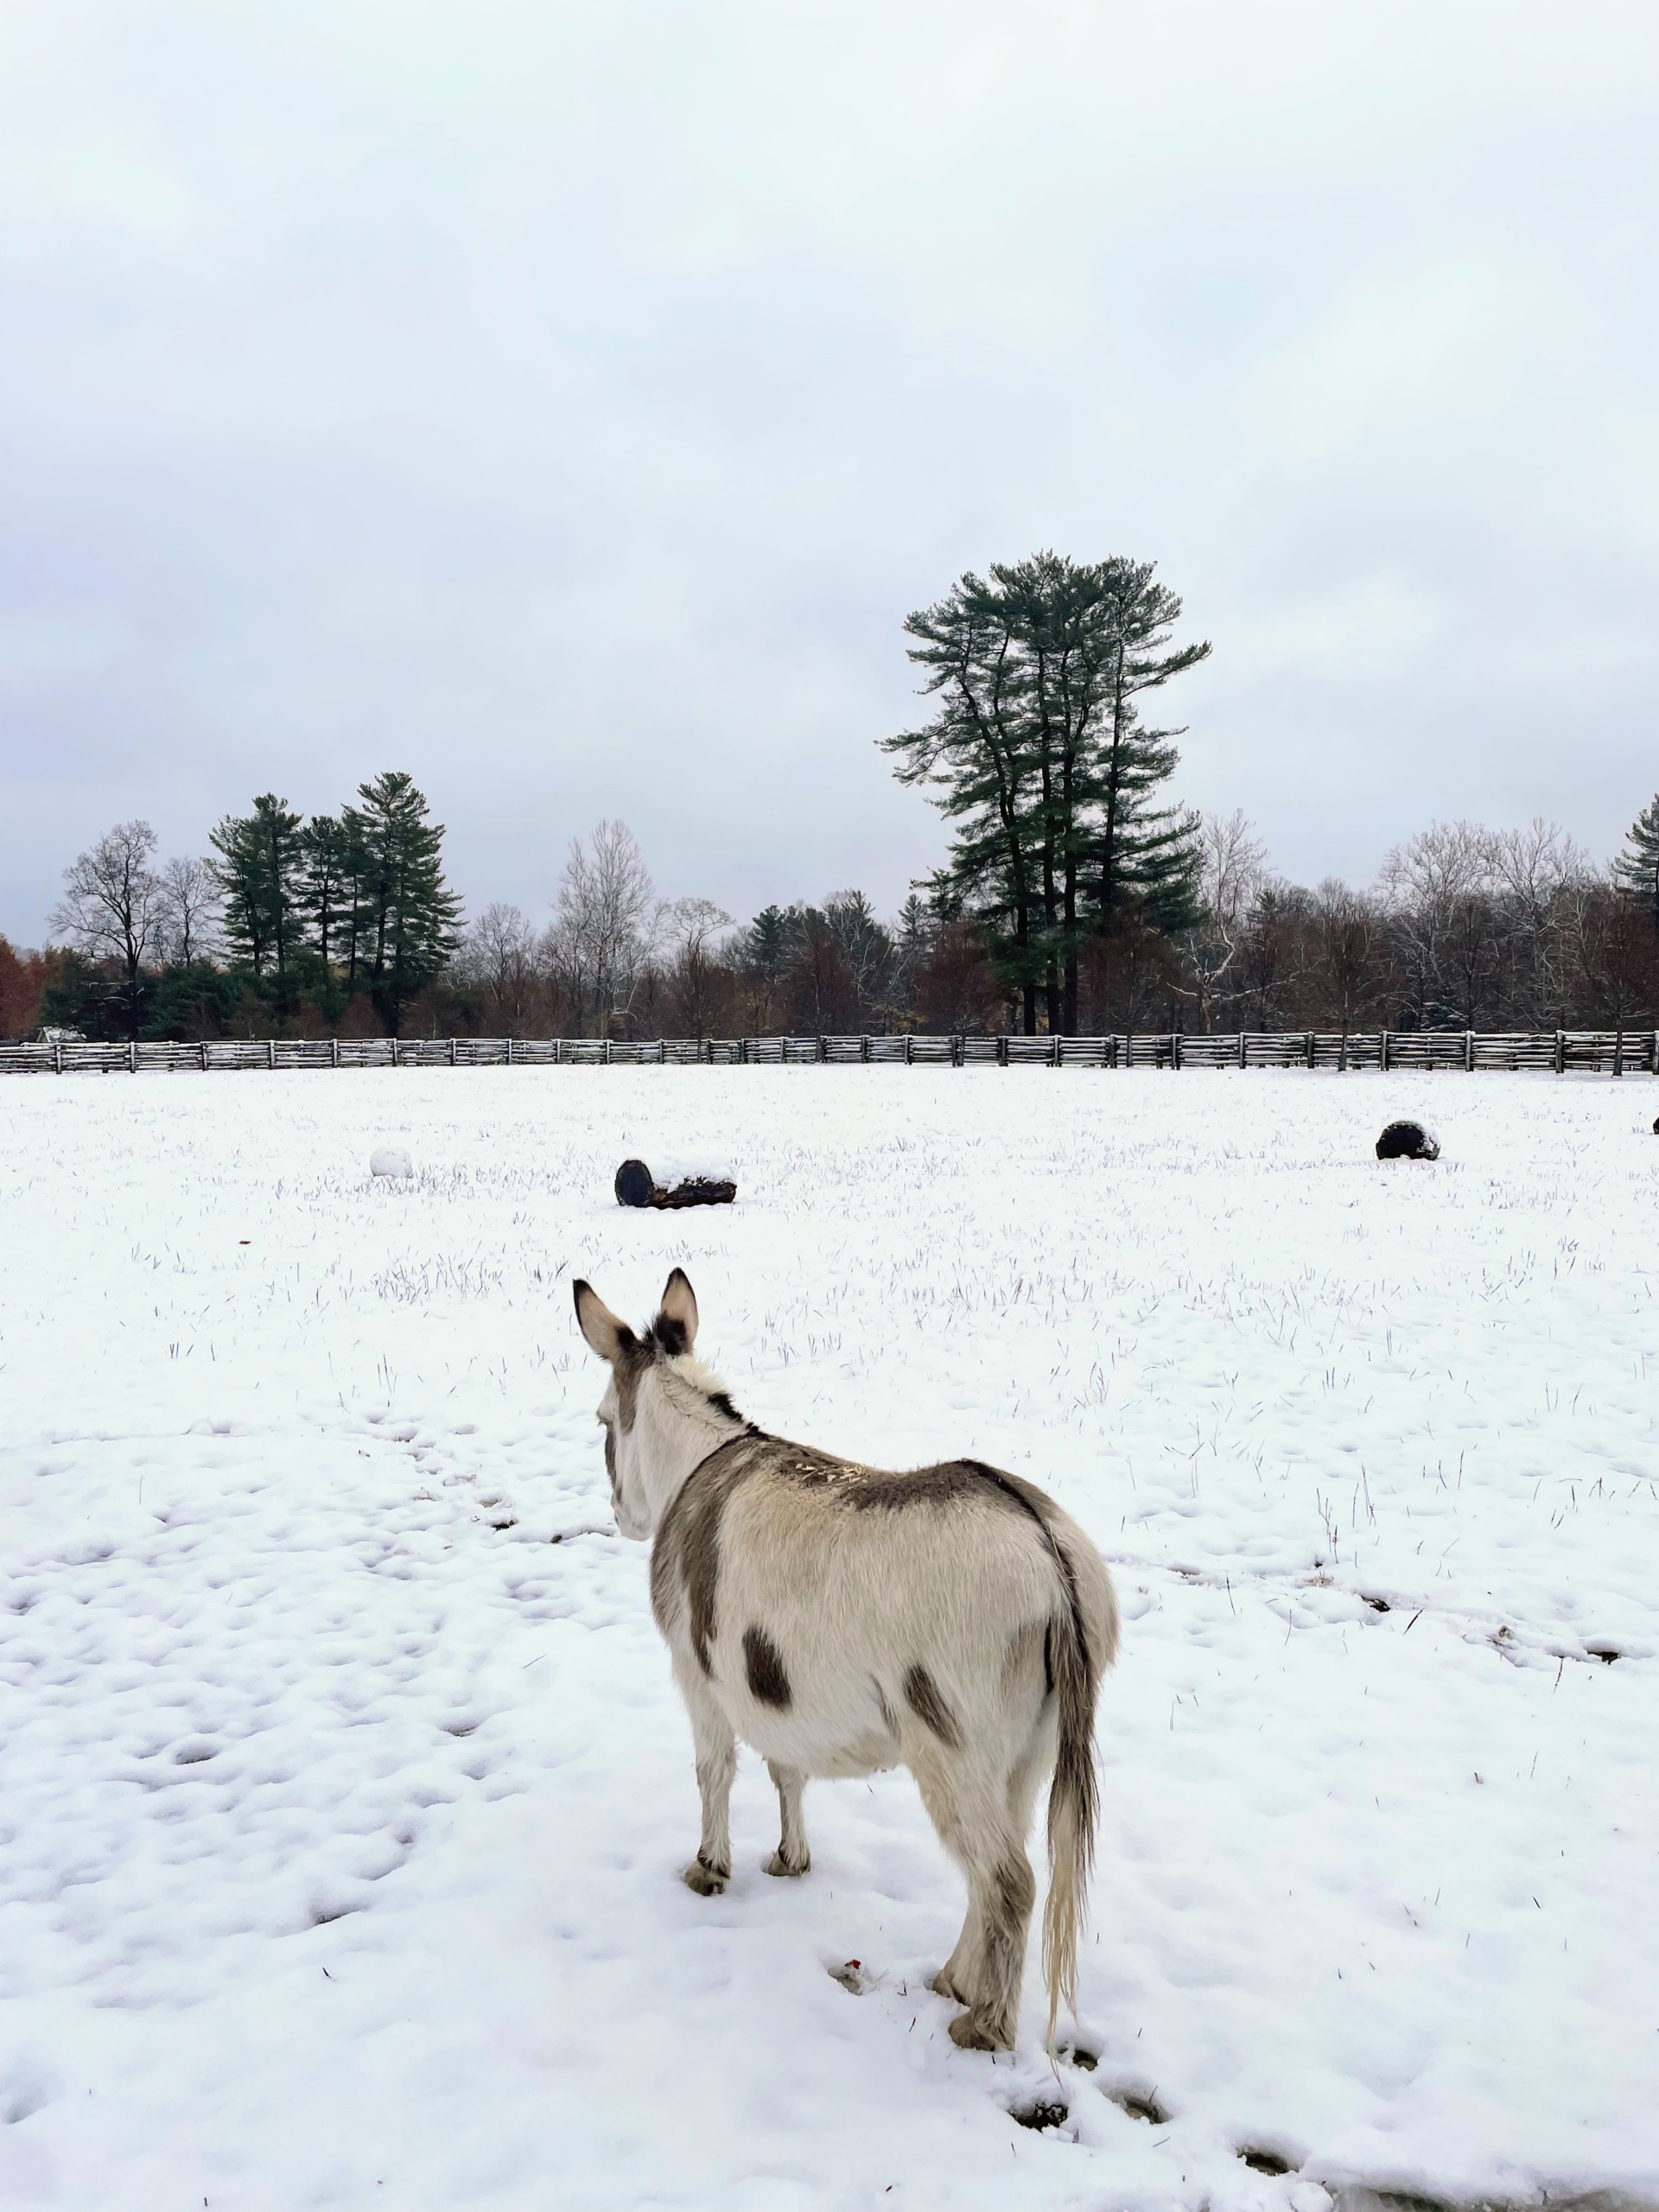
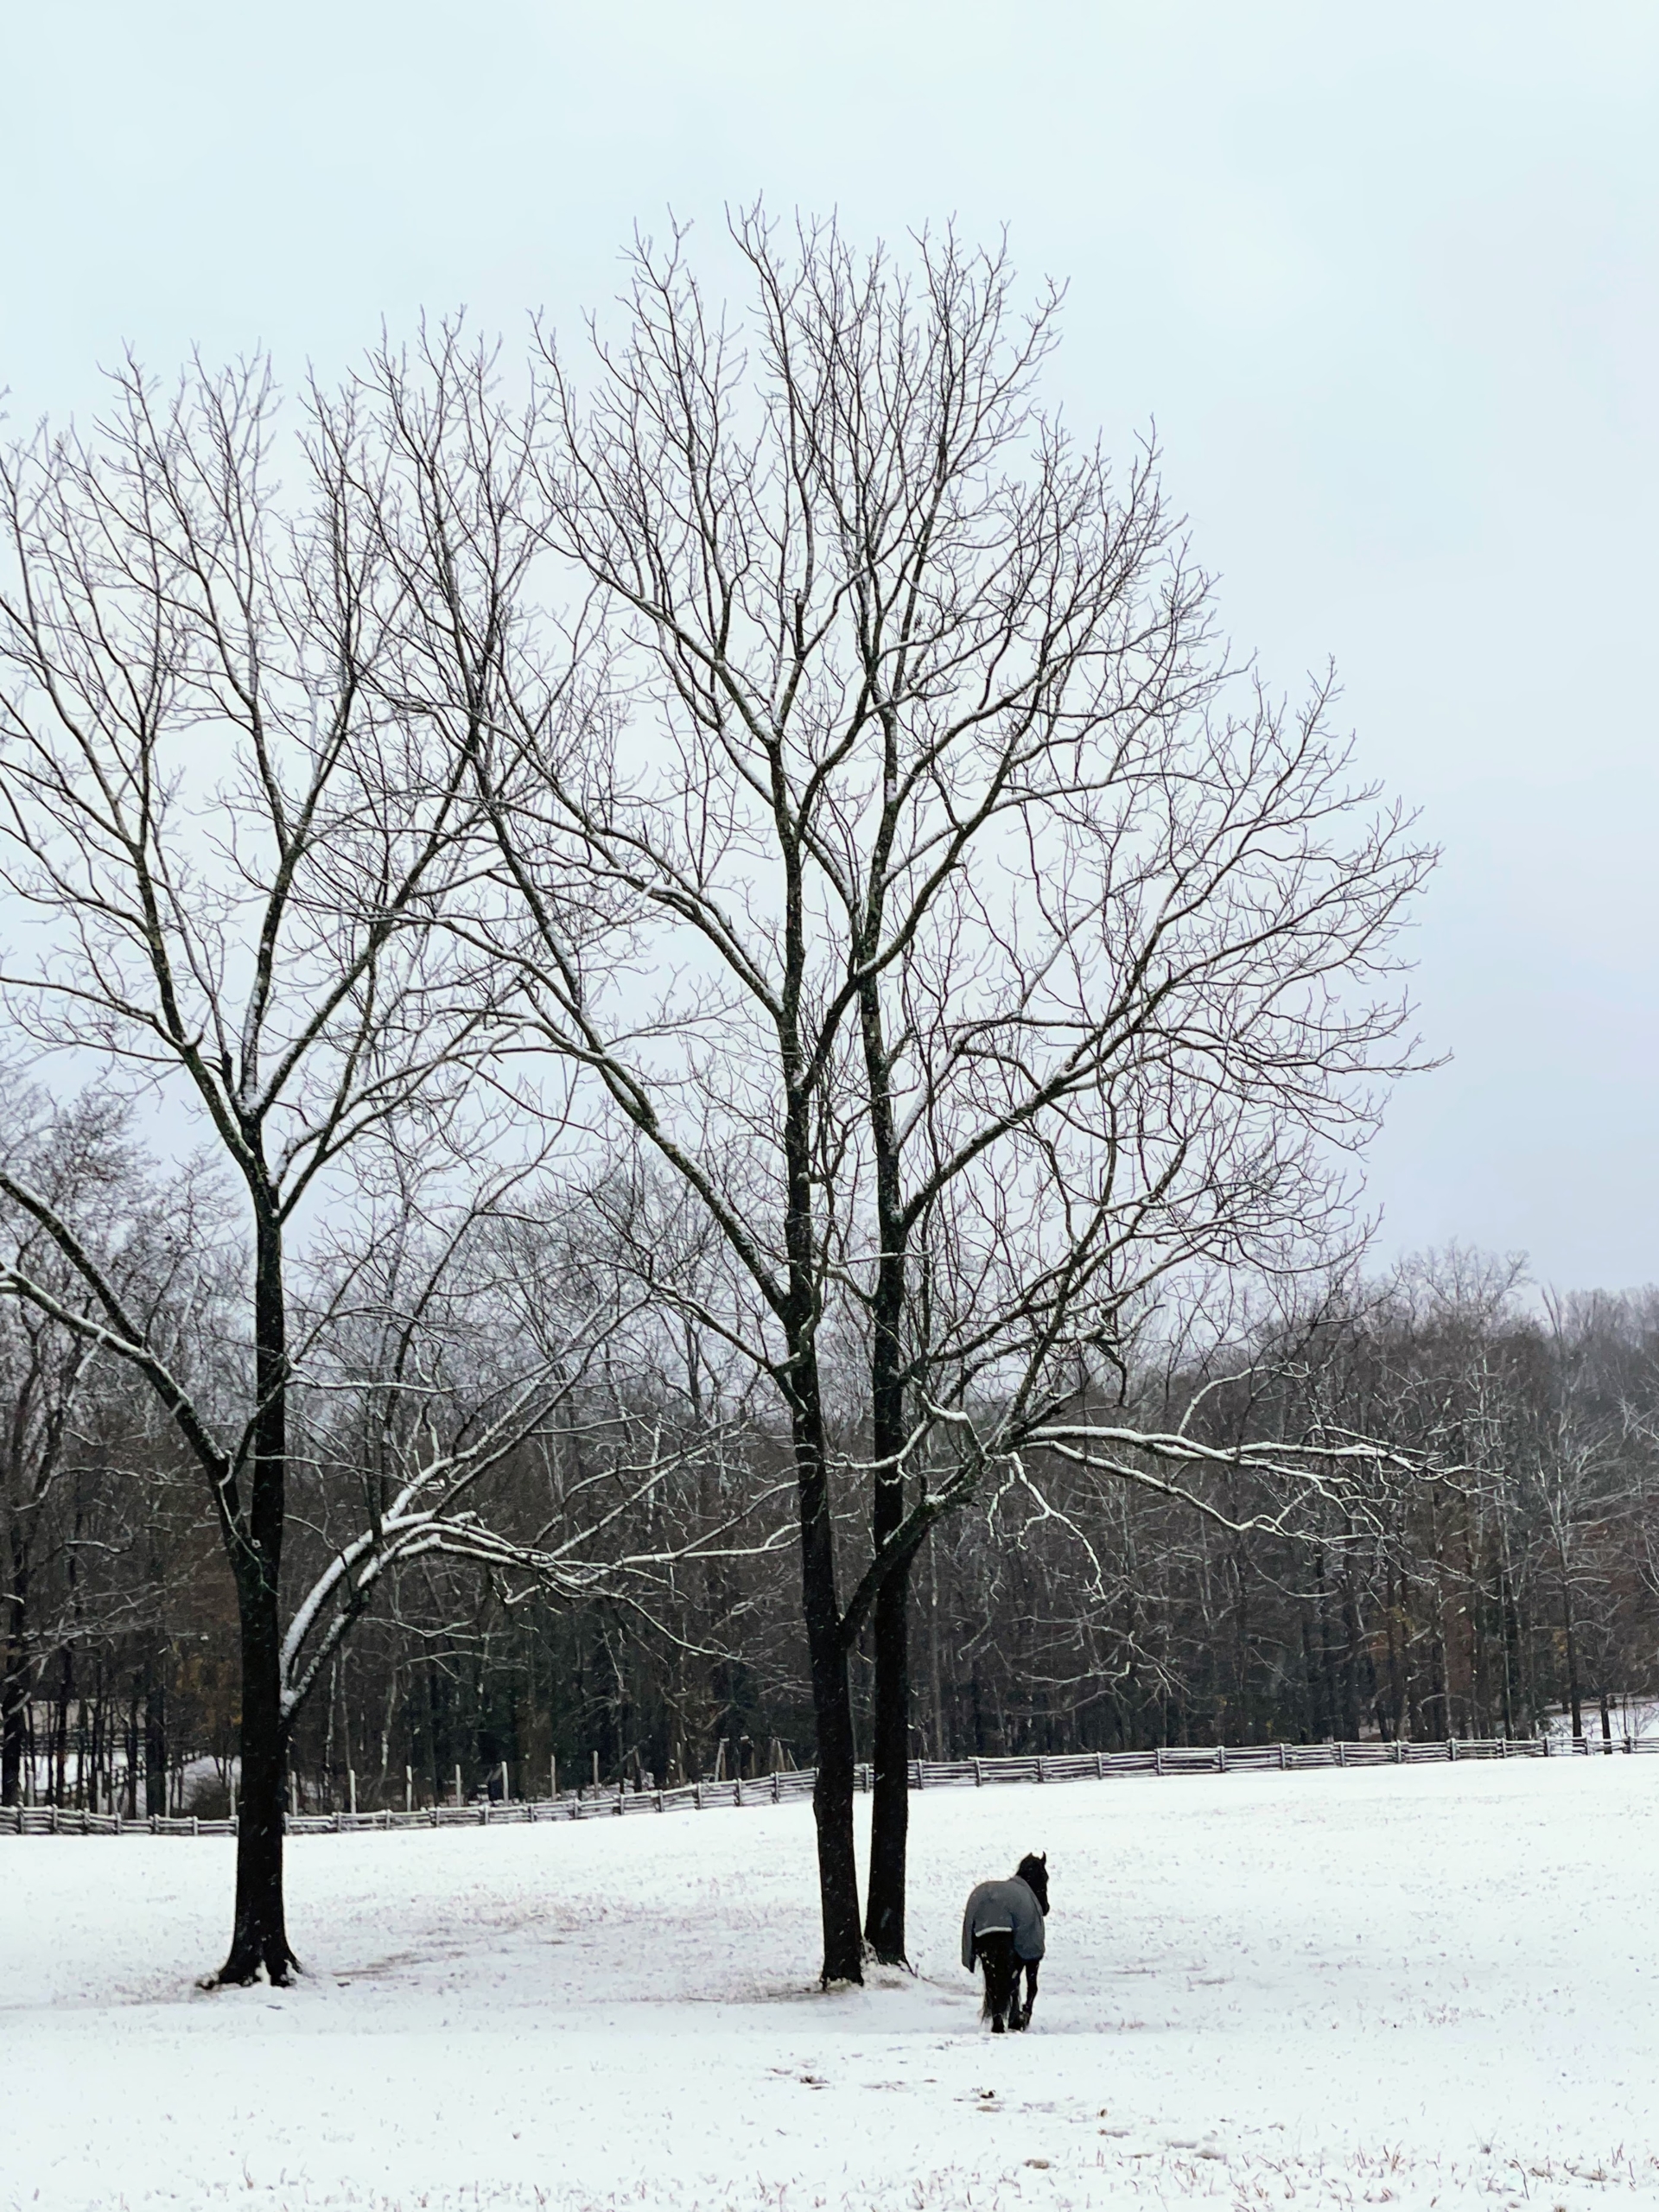
Jude “JJ” Junior, one of my five donkeys, is looking out onto the snow covered pasture. Donkeys are not as adaptable to the cold weather as horses, but my donkeys don’t seem to mind the chill in the air or the snow under their hooves.
Meanwhile, my Friesian horses and Fell pony enjoy the cooler temperatures. They stayed inside overnight while the storm passed through, but were then let out into my run-in paddock first thing in the morning.
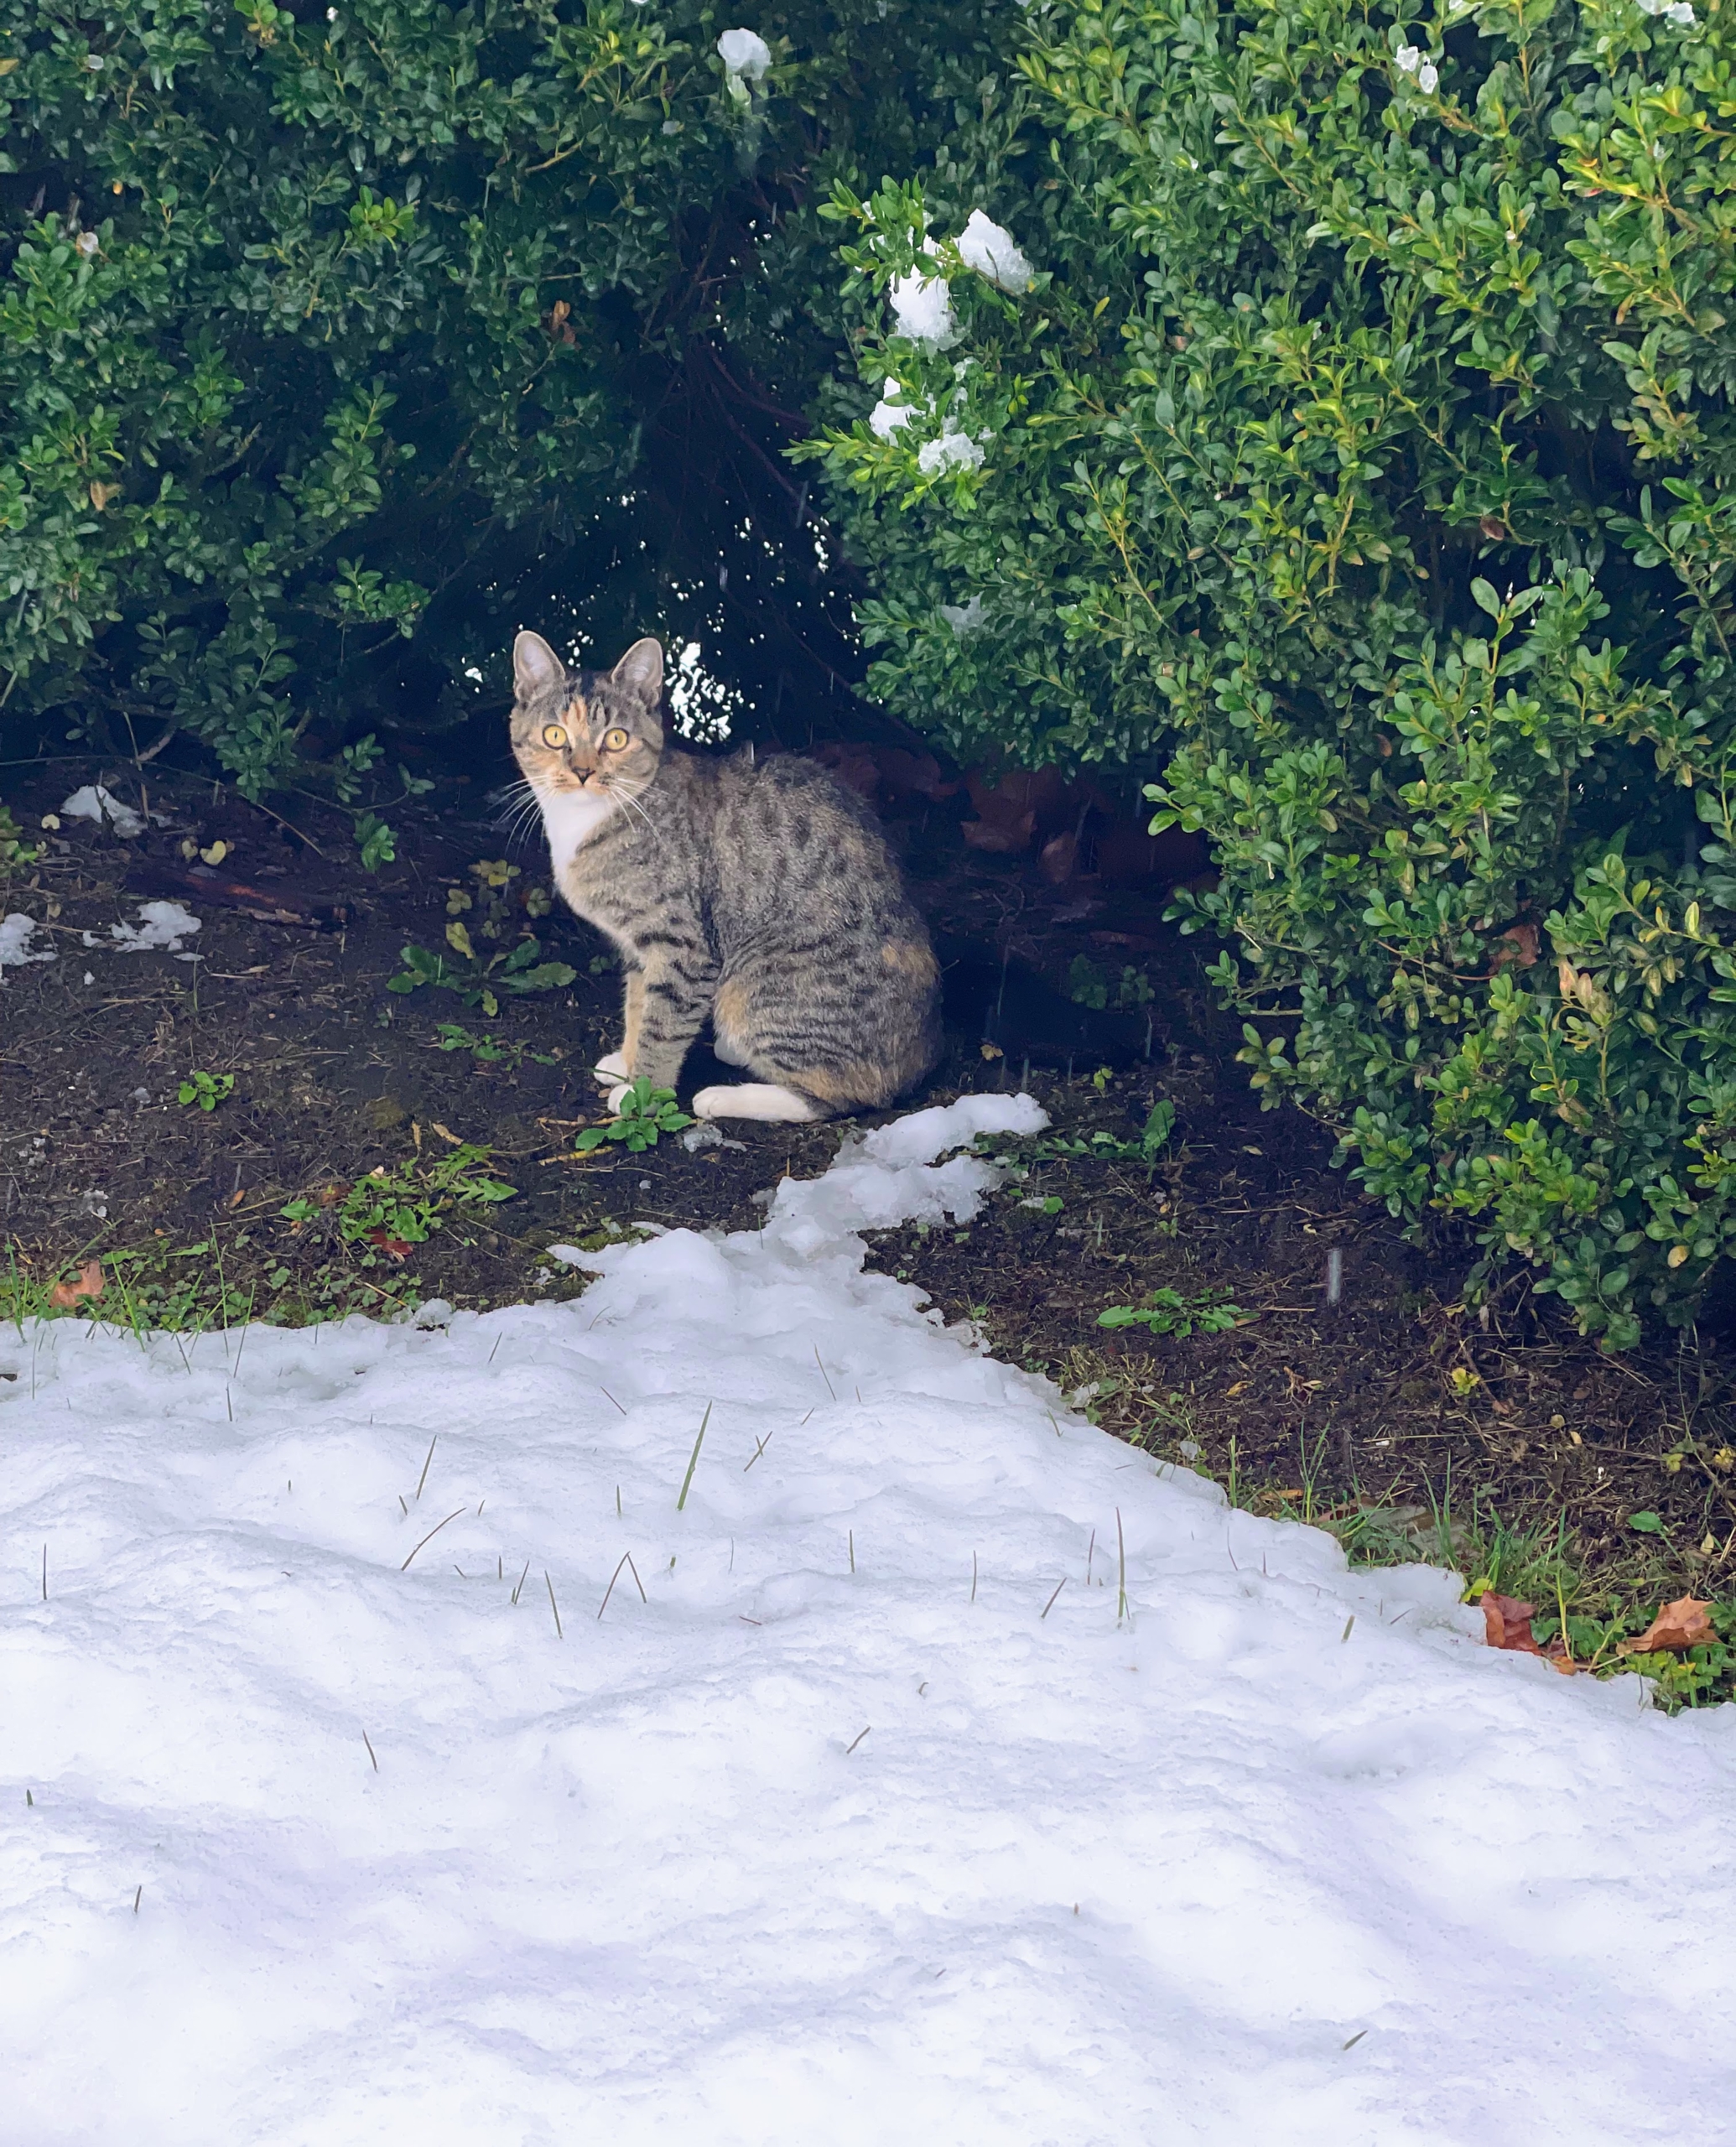
This is Mayo, also known as “May-May’ – one of my two stable kittens. This is the first snow for the feline sisters, and while May May appears to be hiding under the boxwood here, it didn’t take long before she was out exploring her winter wonderland.
This photo shows the gray skies. Gray skies are caused by a phenomenon called a temperature inversion, where cold air near the ground is trapped by a layer of warmer air above, leading to the formation of thick, flat stratus clouds that block sunlight and leave only gray.
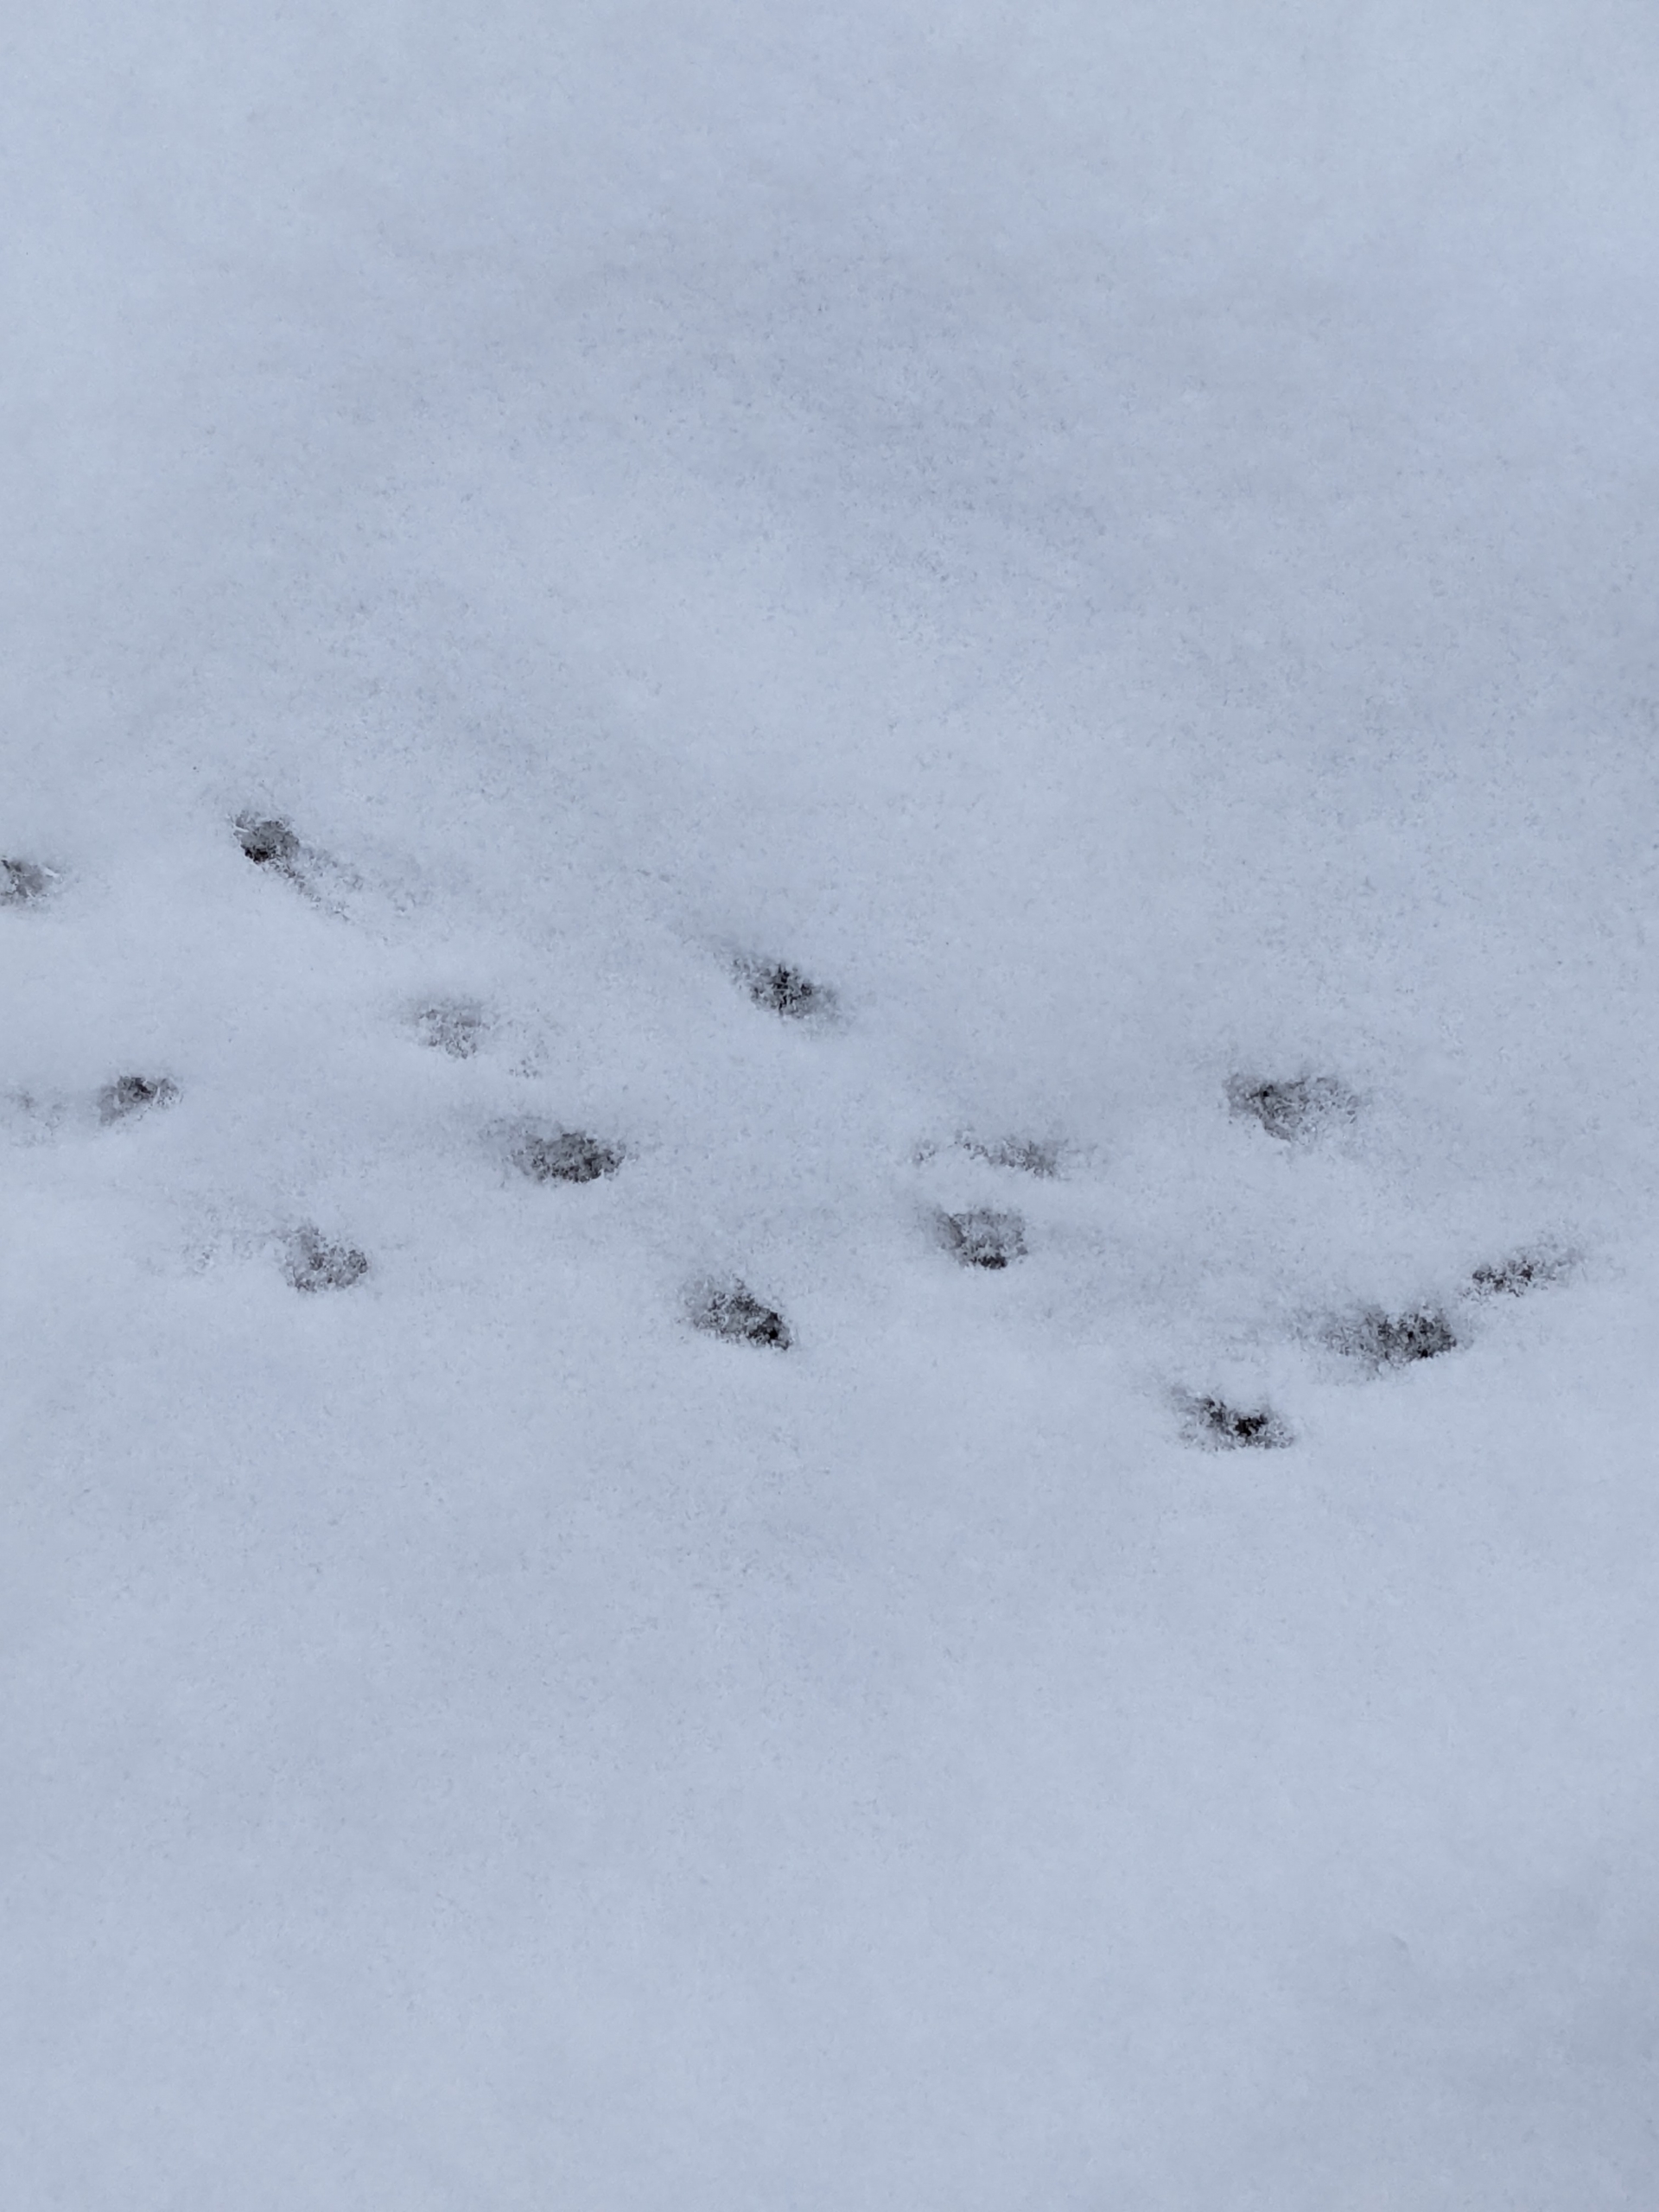
Footprints in the snow… I wonder what little creature left them.
While the morning skies were gray, some patches of color were still visible down below. Here, one can see the reddish tint of the blueberry bushes and the green in the lawn and boxwood.
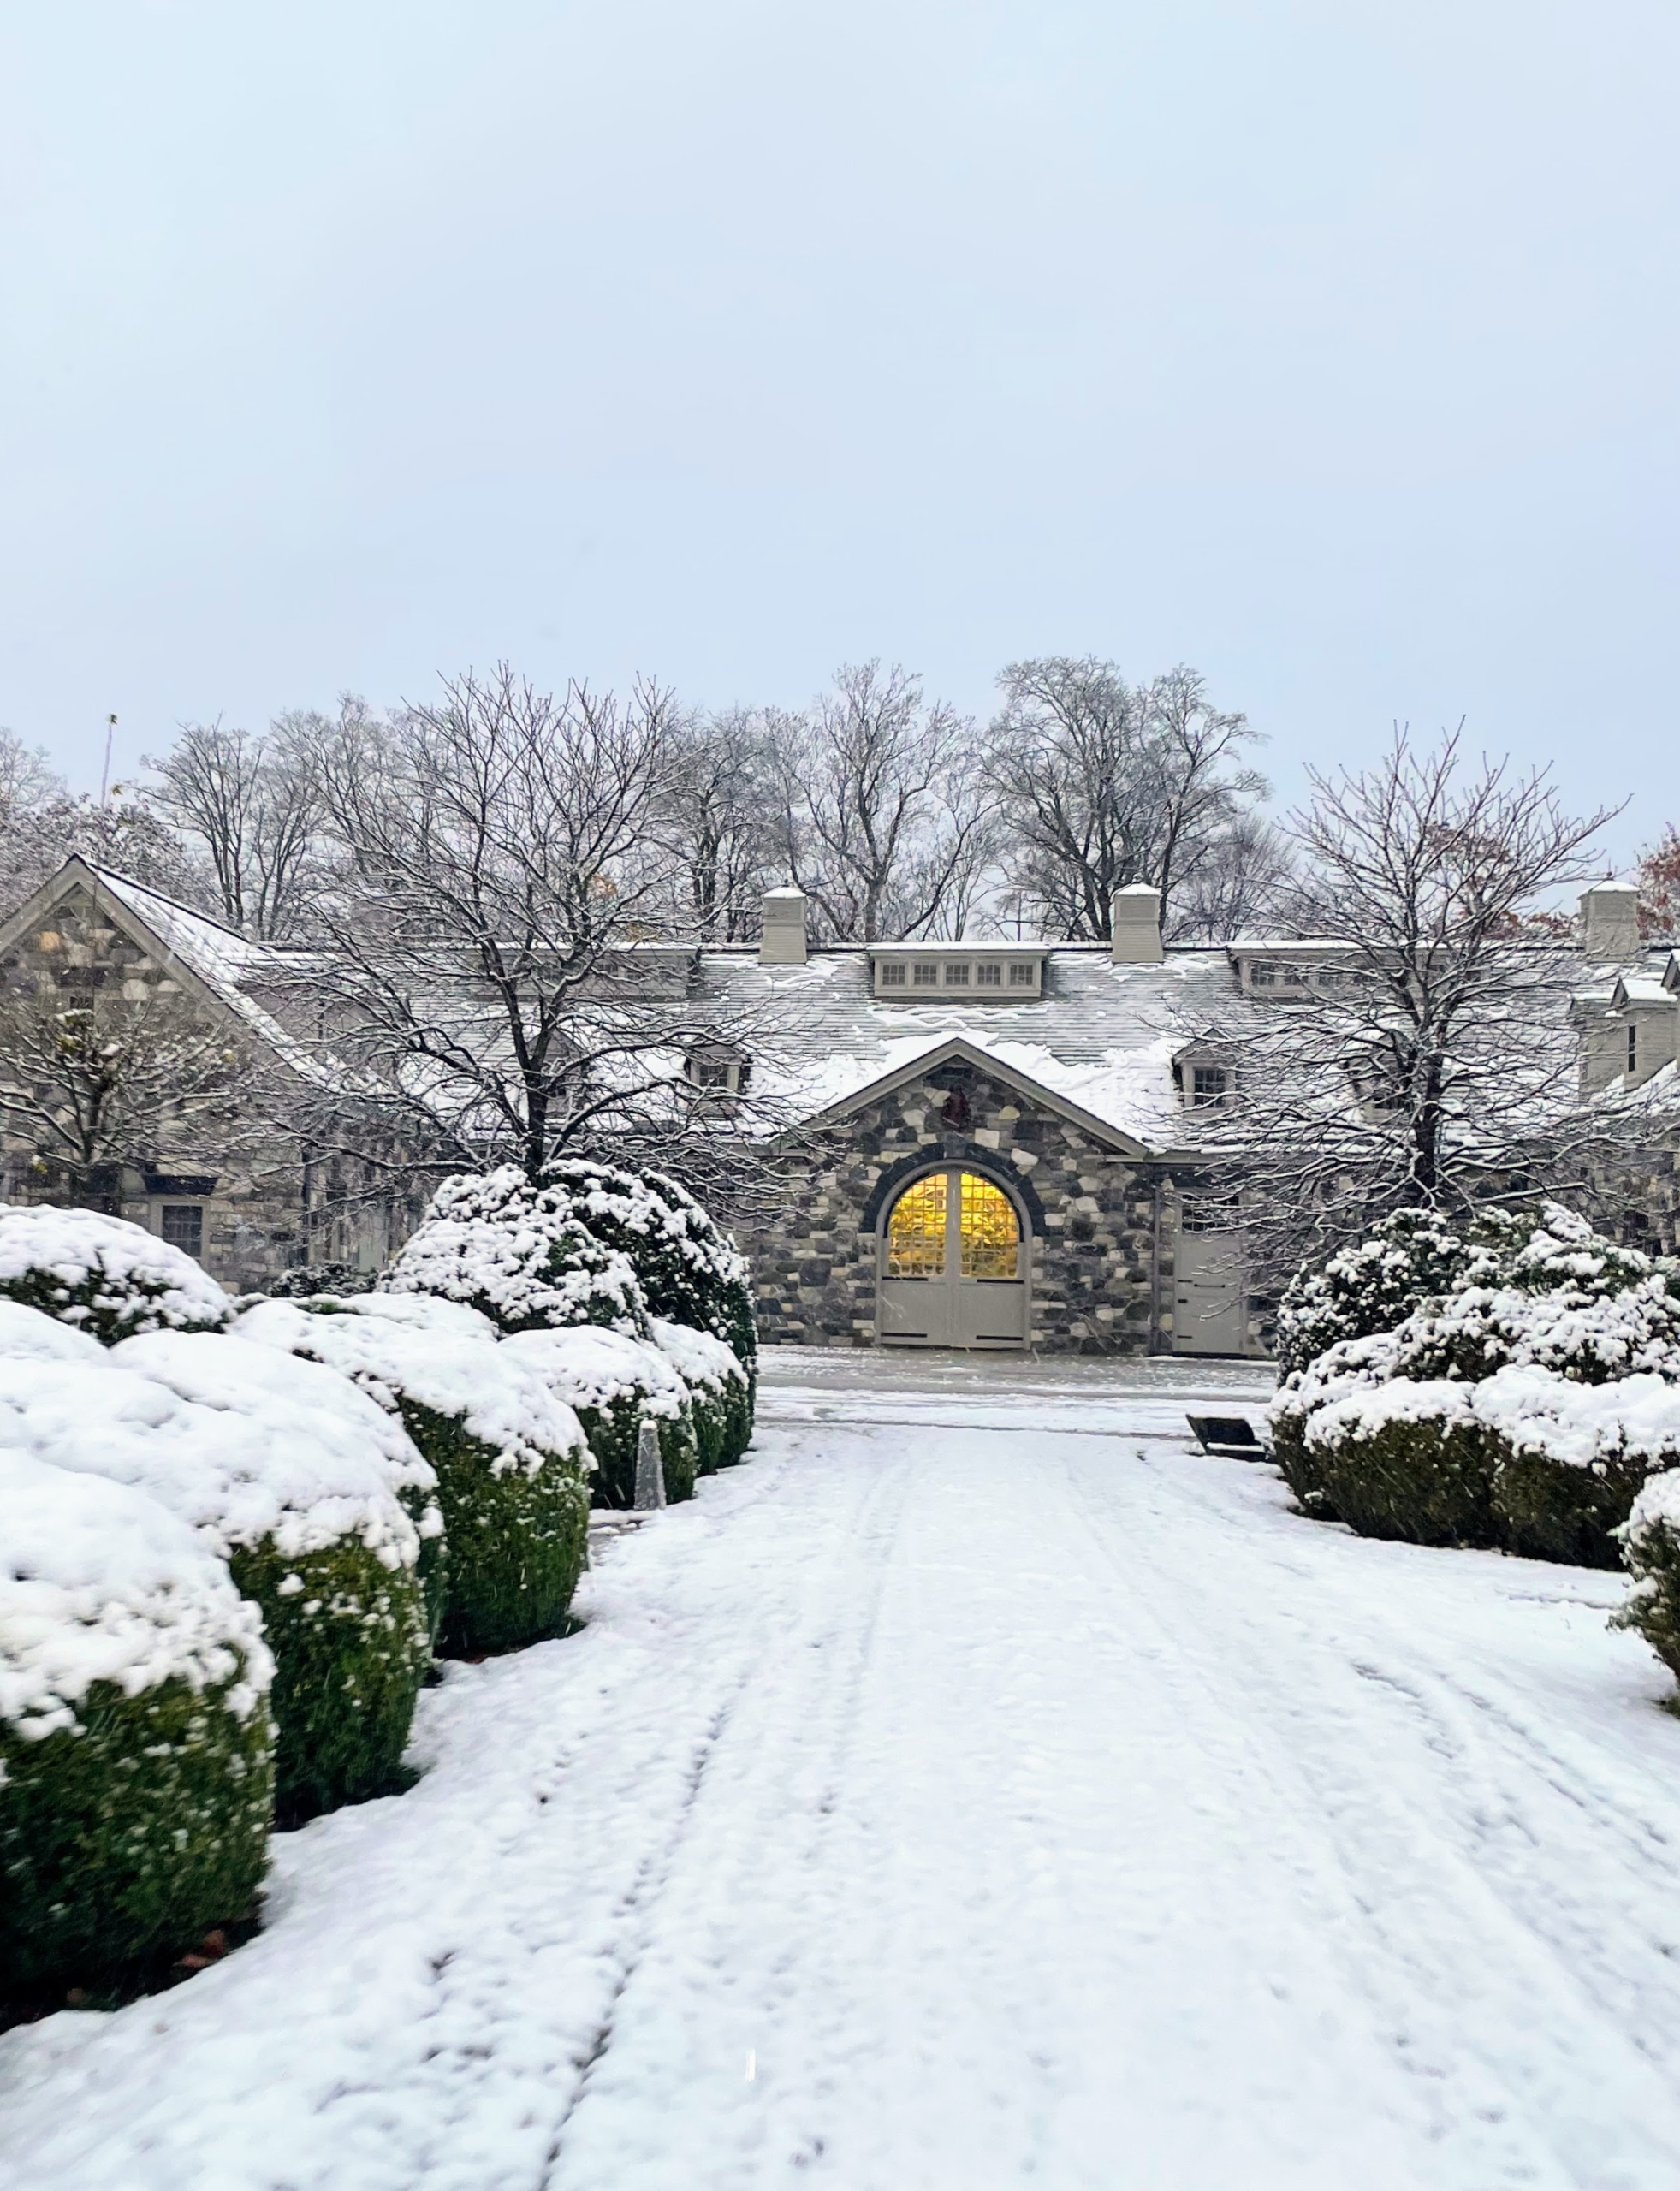
These are the stone pavers outside my Tenant House – outlined in snow. The Old Farmer’s Almanac predicts this winter will be wet and cold. We certainly need more precipitation, so we’ll see.
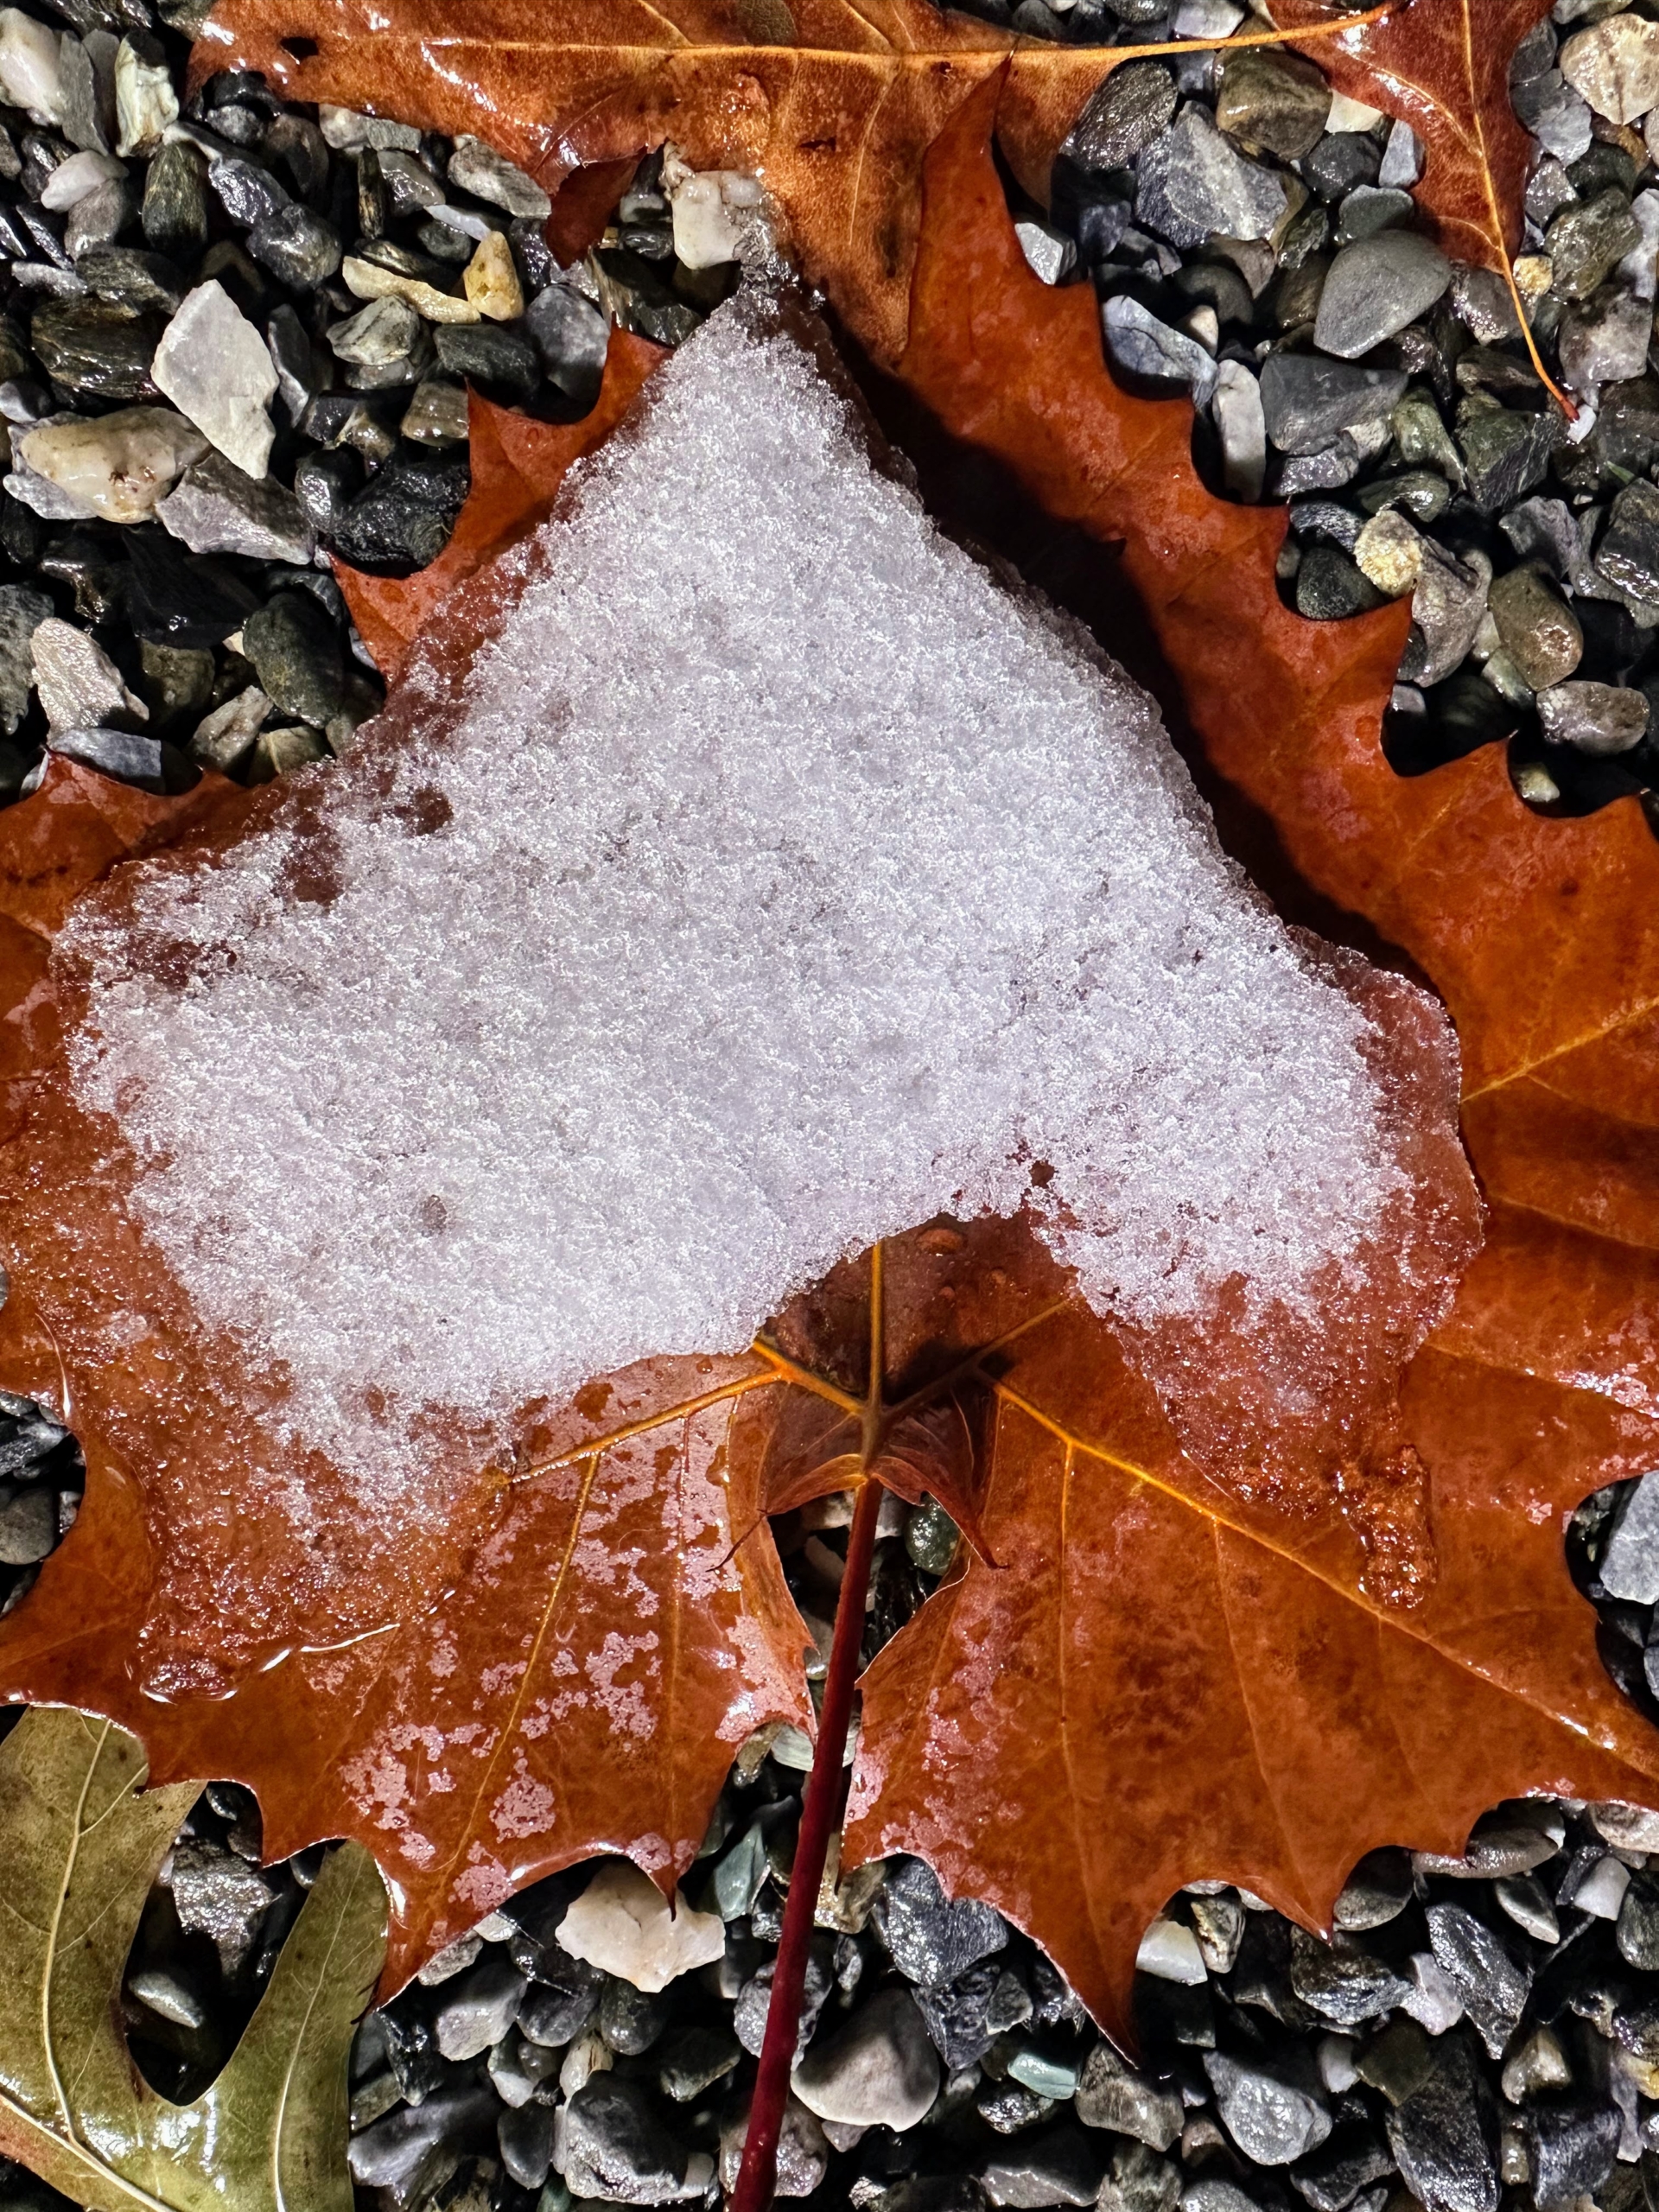
My operations manager, Matt Krack, took this closeup of the snow melting on fallen leaf later in the day. Snow forms when the temperature is at or below 32-degrees Fahrenheit. At this temperature, water vapor in the atmosphere condenses directly into ice crystals. The day warmed quickly to the mid 40s.
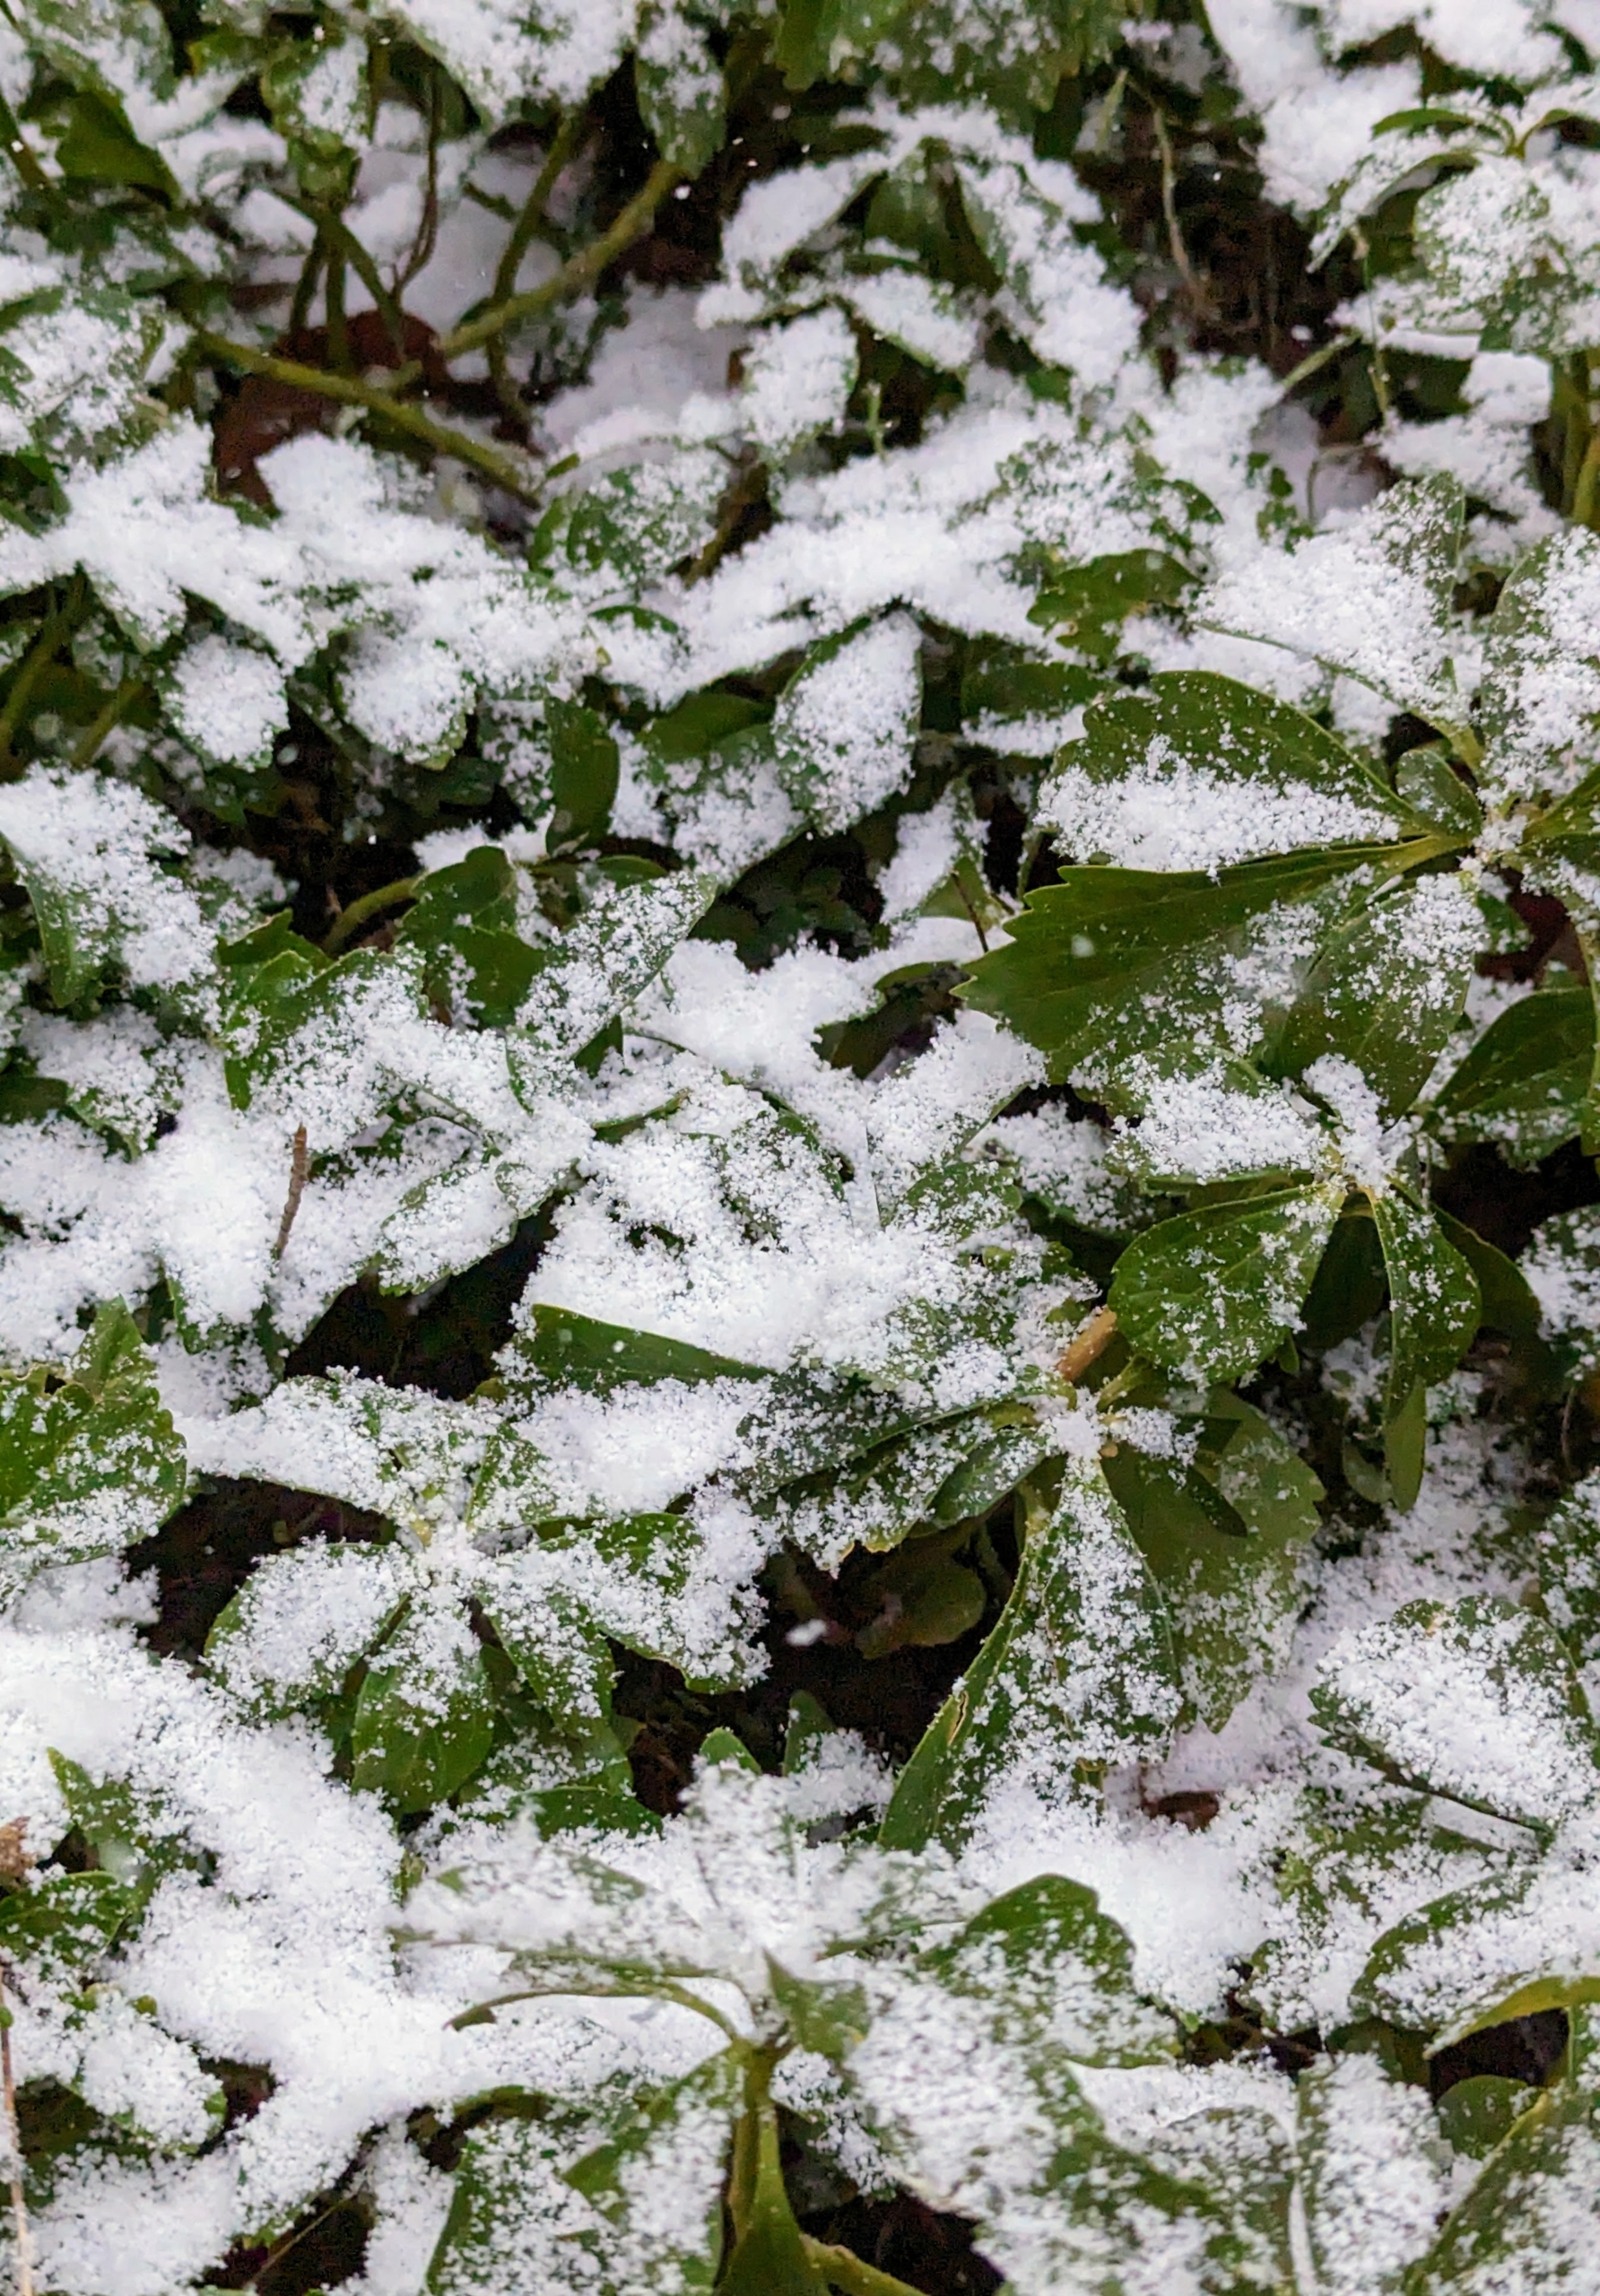
The pachysandra in front of my Winter House was nearly all covered in snow…
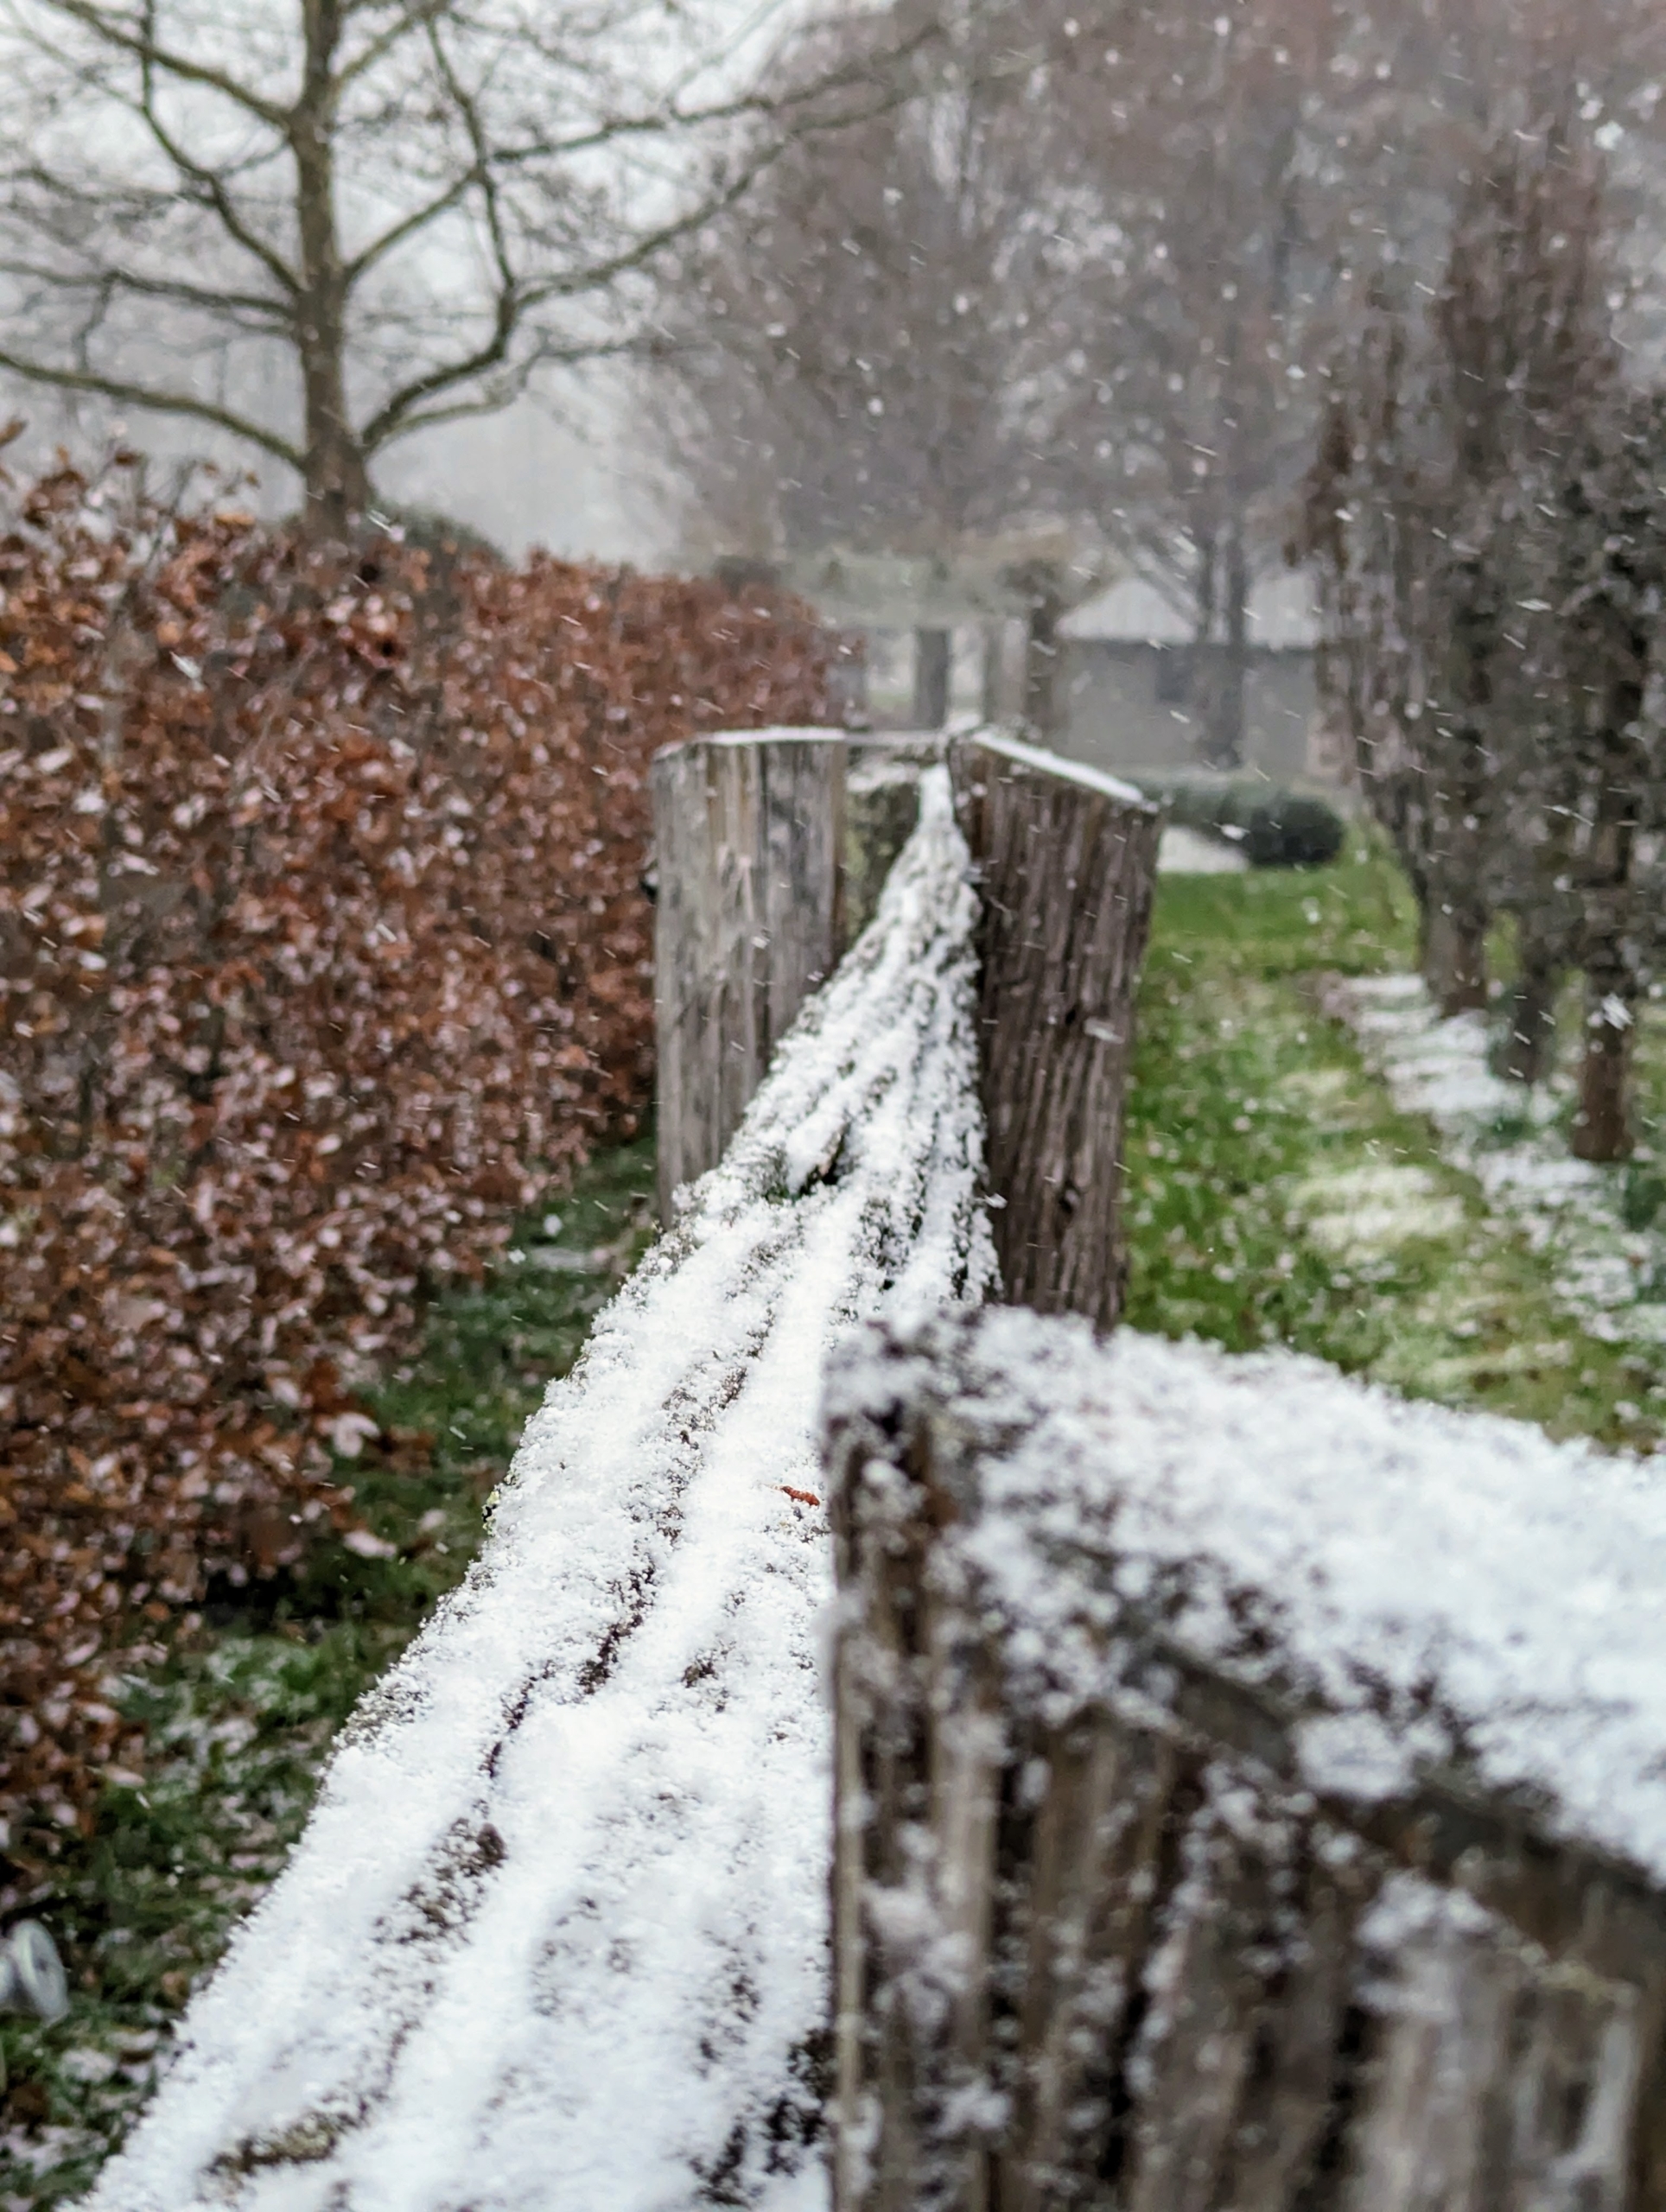
… And so were the horizontal tops of the antique fence rails.
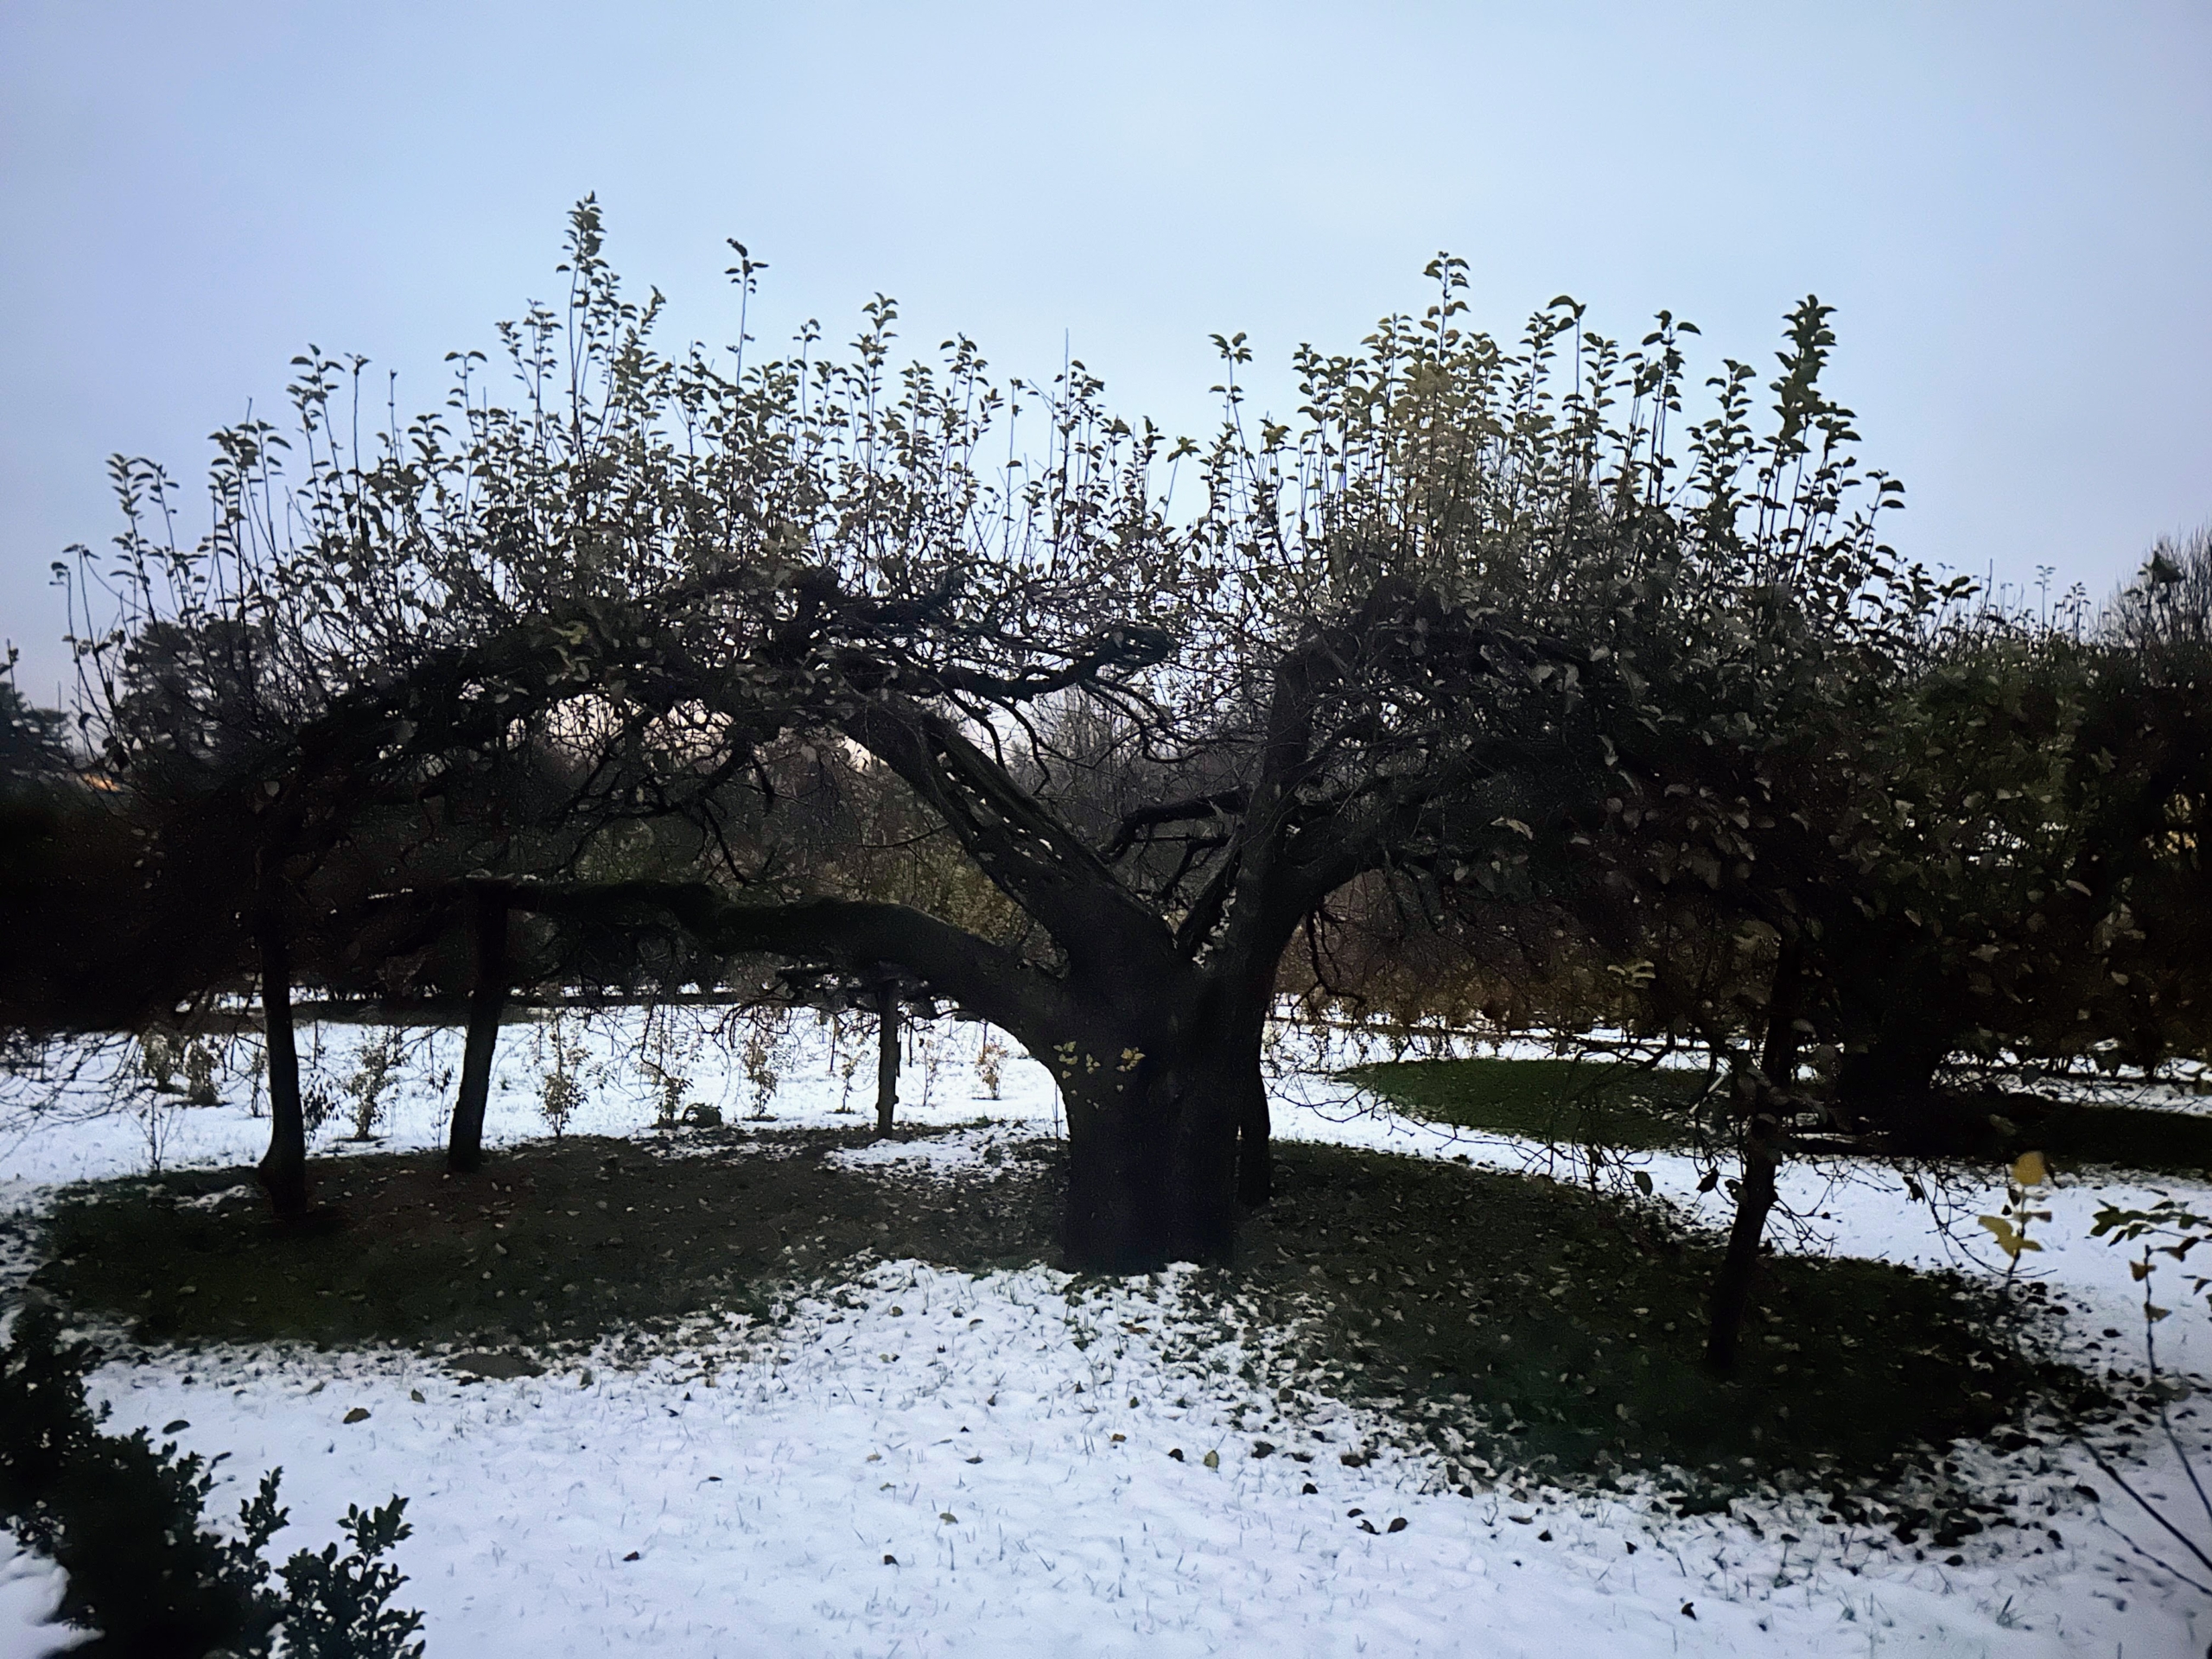
Snow fell around the apple trees, leaving patches of earth still exposed.
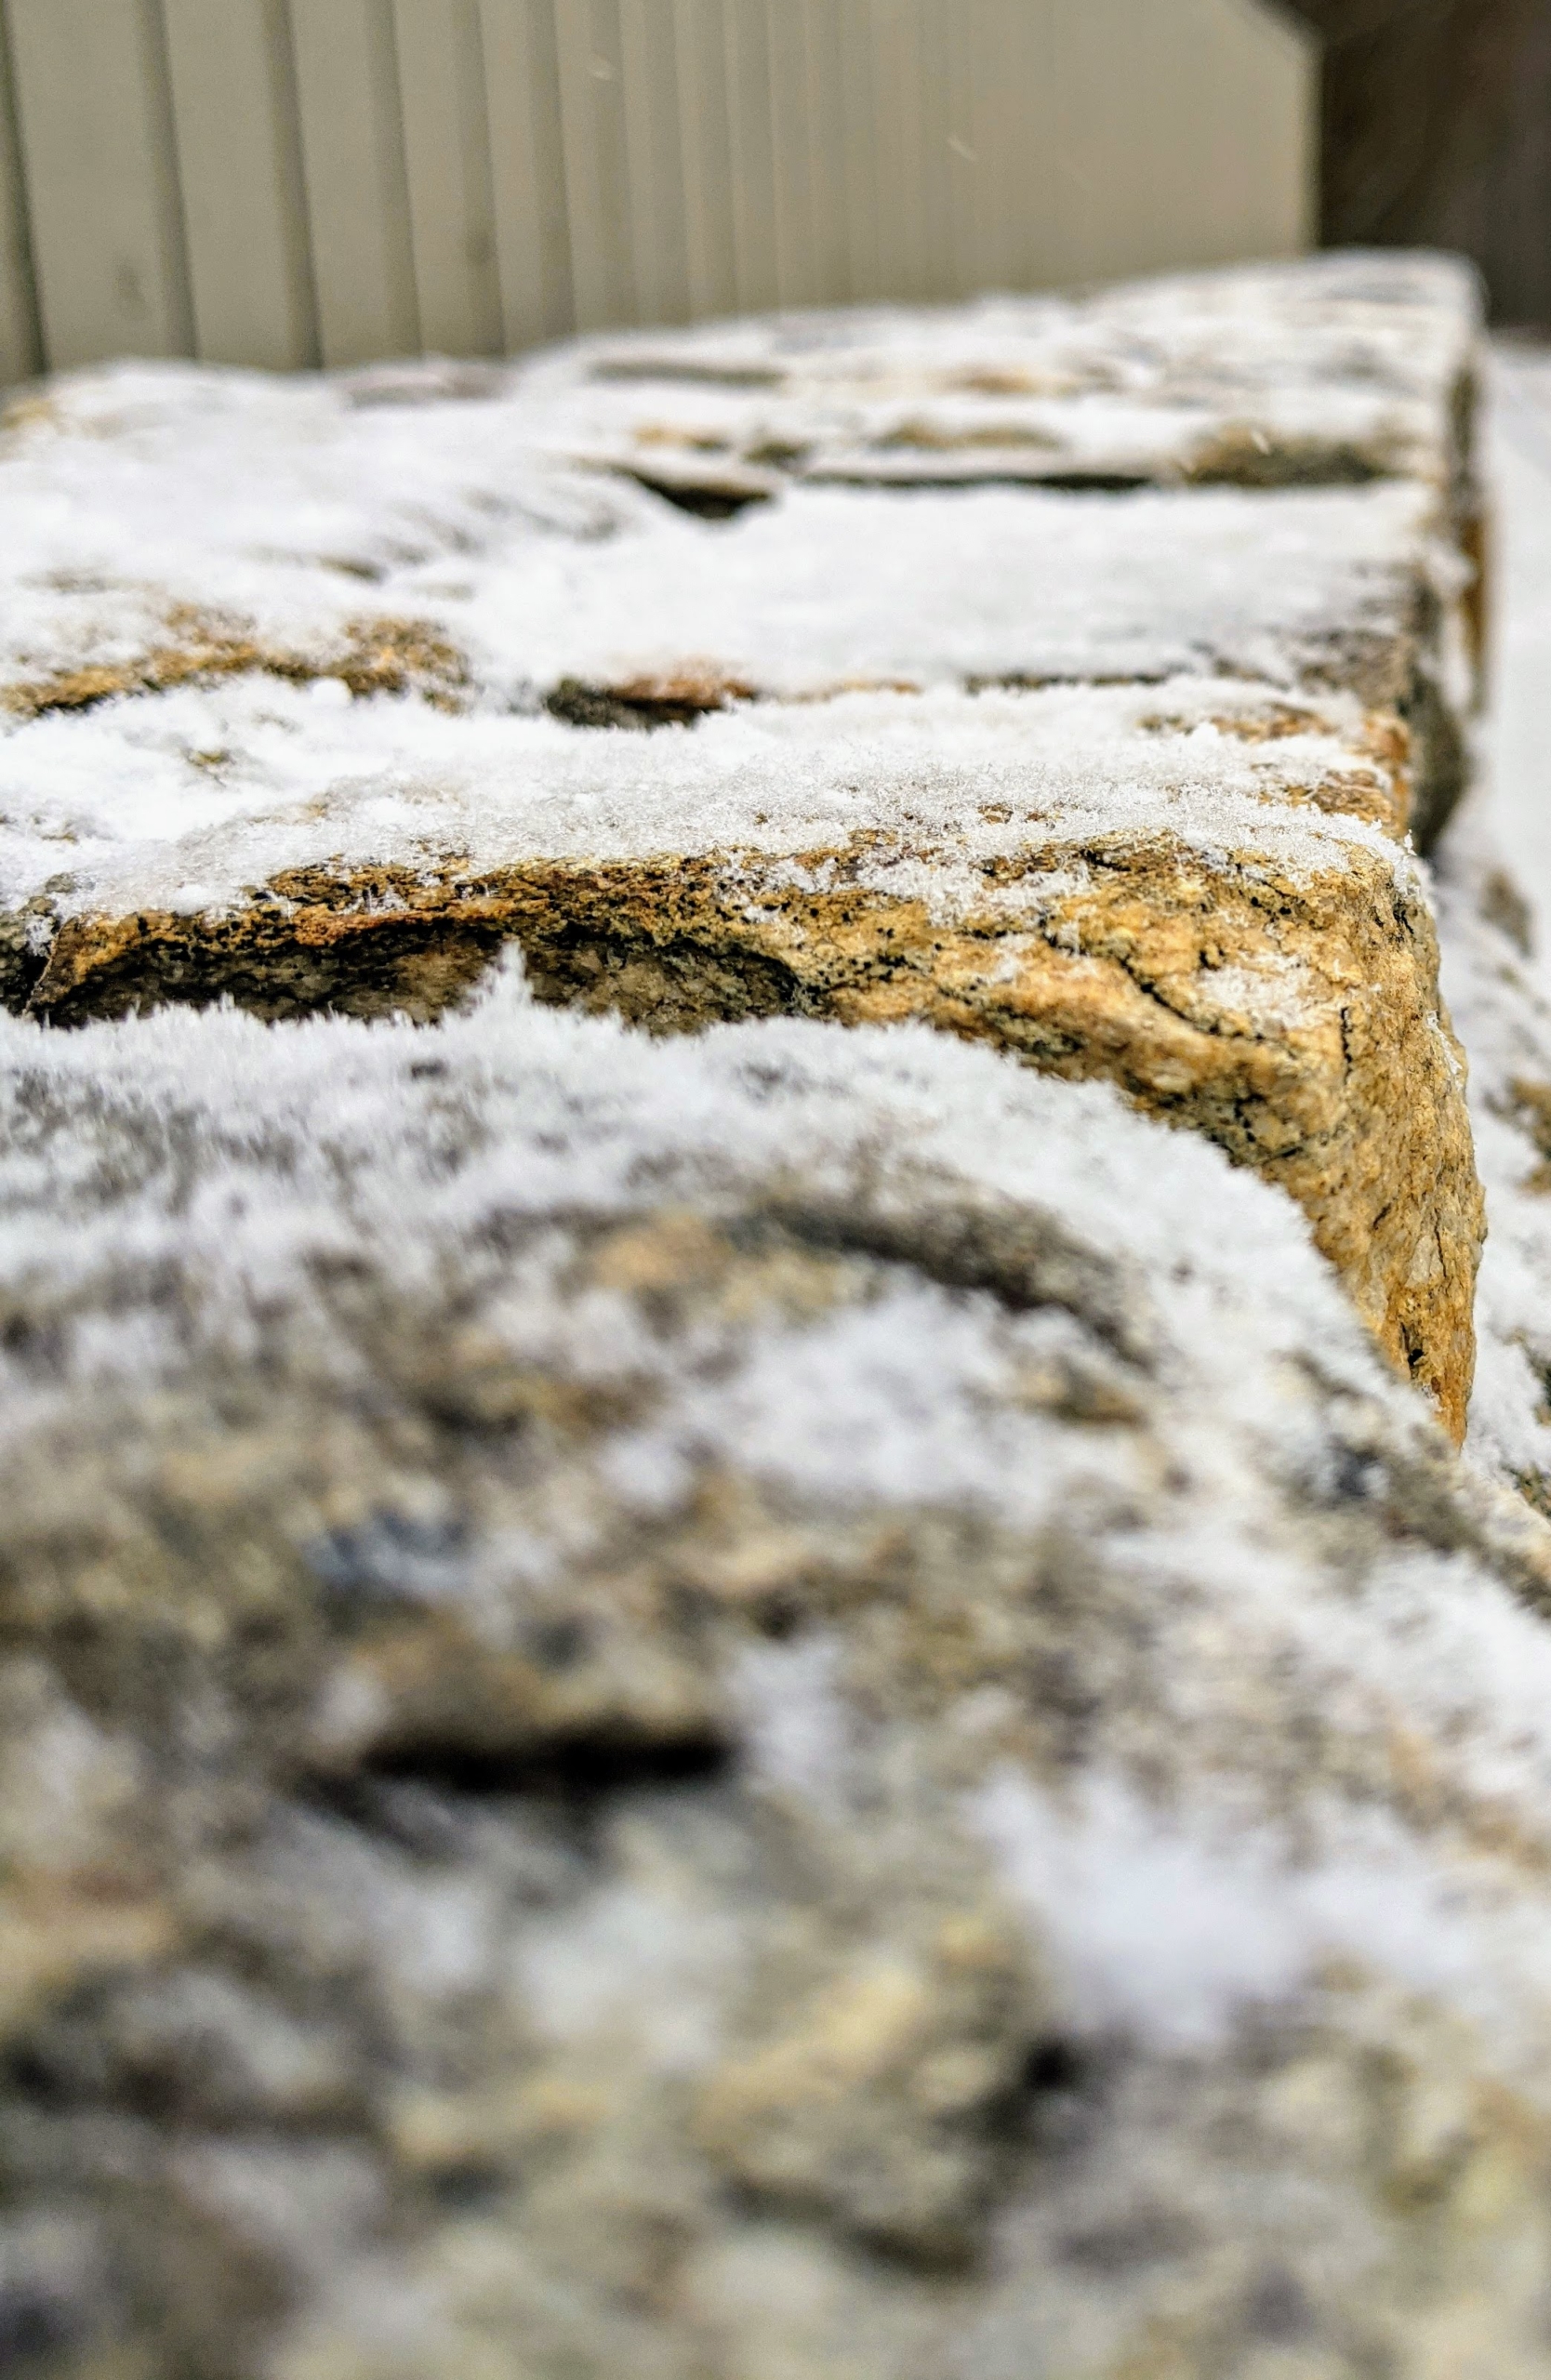
But it did stick to the stone walls.
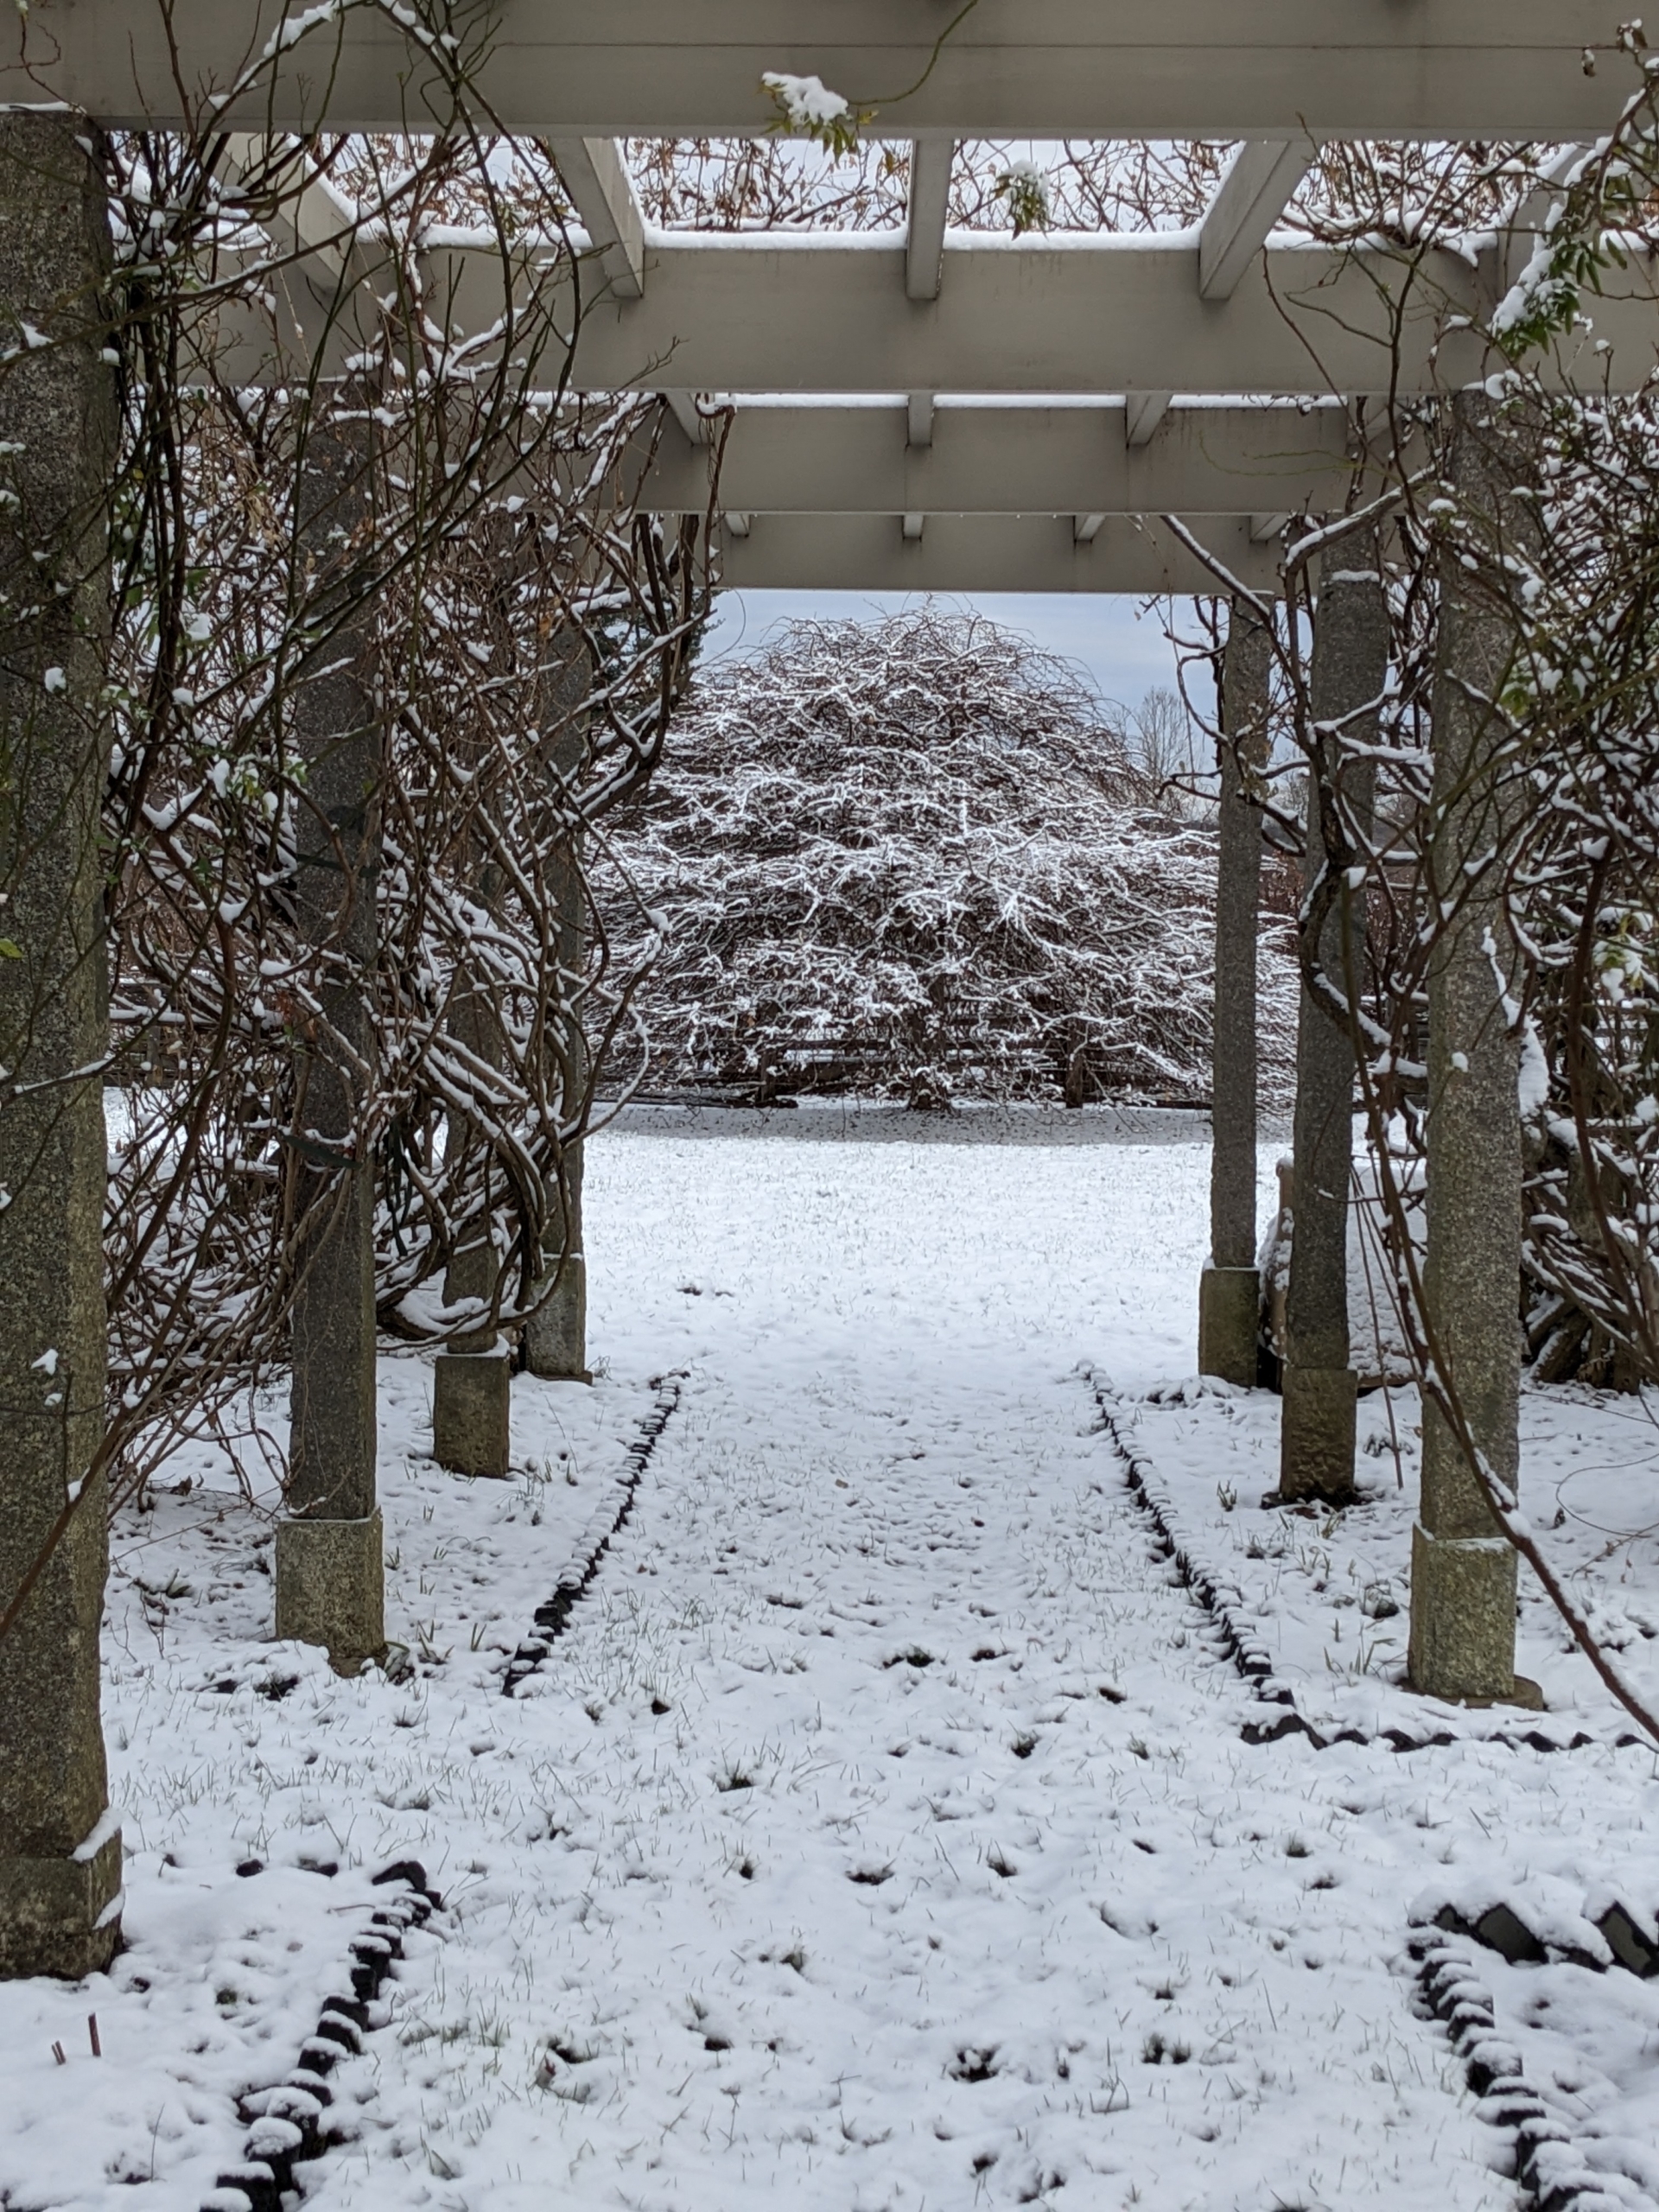
This is the snow covered ground through the mid section of my long pergola. The uprights for this pergola are antique granite posts from China – originally used as grape supports. They’re perfect as posts because they don’t rot over time like the wood overhead.
And the cobblestones in the courtyard outside my stable are also coated with snow.
And by late afternoon, the sun was back out and the skies were blue. Today’s weather is expected to be mostly sunny with partly cloudy skies and temperatures in the high 40s. And the next chance of rain… maybe Tuesday.