Planting continues in front of my Winter House carport - this time, with four bird's nest ferns.
A couple of years ago, my friend and owner of Luppino Landscaping and Masonry LLC, Carmine Luppino, gifted me with four beautiful antique ornamental urns. They look so beautiful on the stone wall outside my carport. This week my head gardener, Ryan McCallister, potted them up with bird's nest ferns, Asplenium nidus - those interesting plants with long, erect, spoon-shaped, bright green fronds that rise from a central rosette. I try to vary the plantings in my outdoor containers every year - these ferns were just perfect for the vessels.
Here are some photos, enjoy.
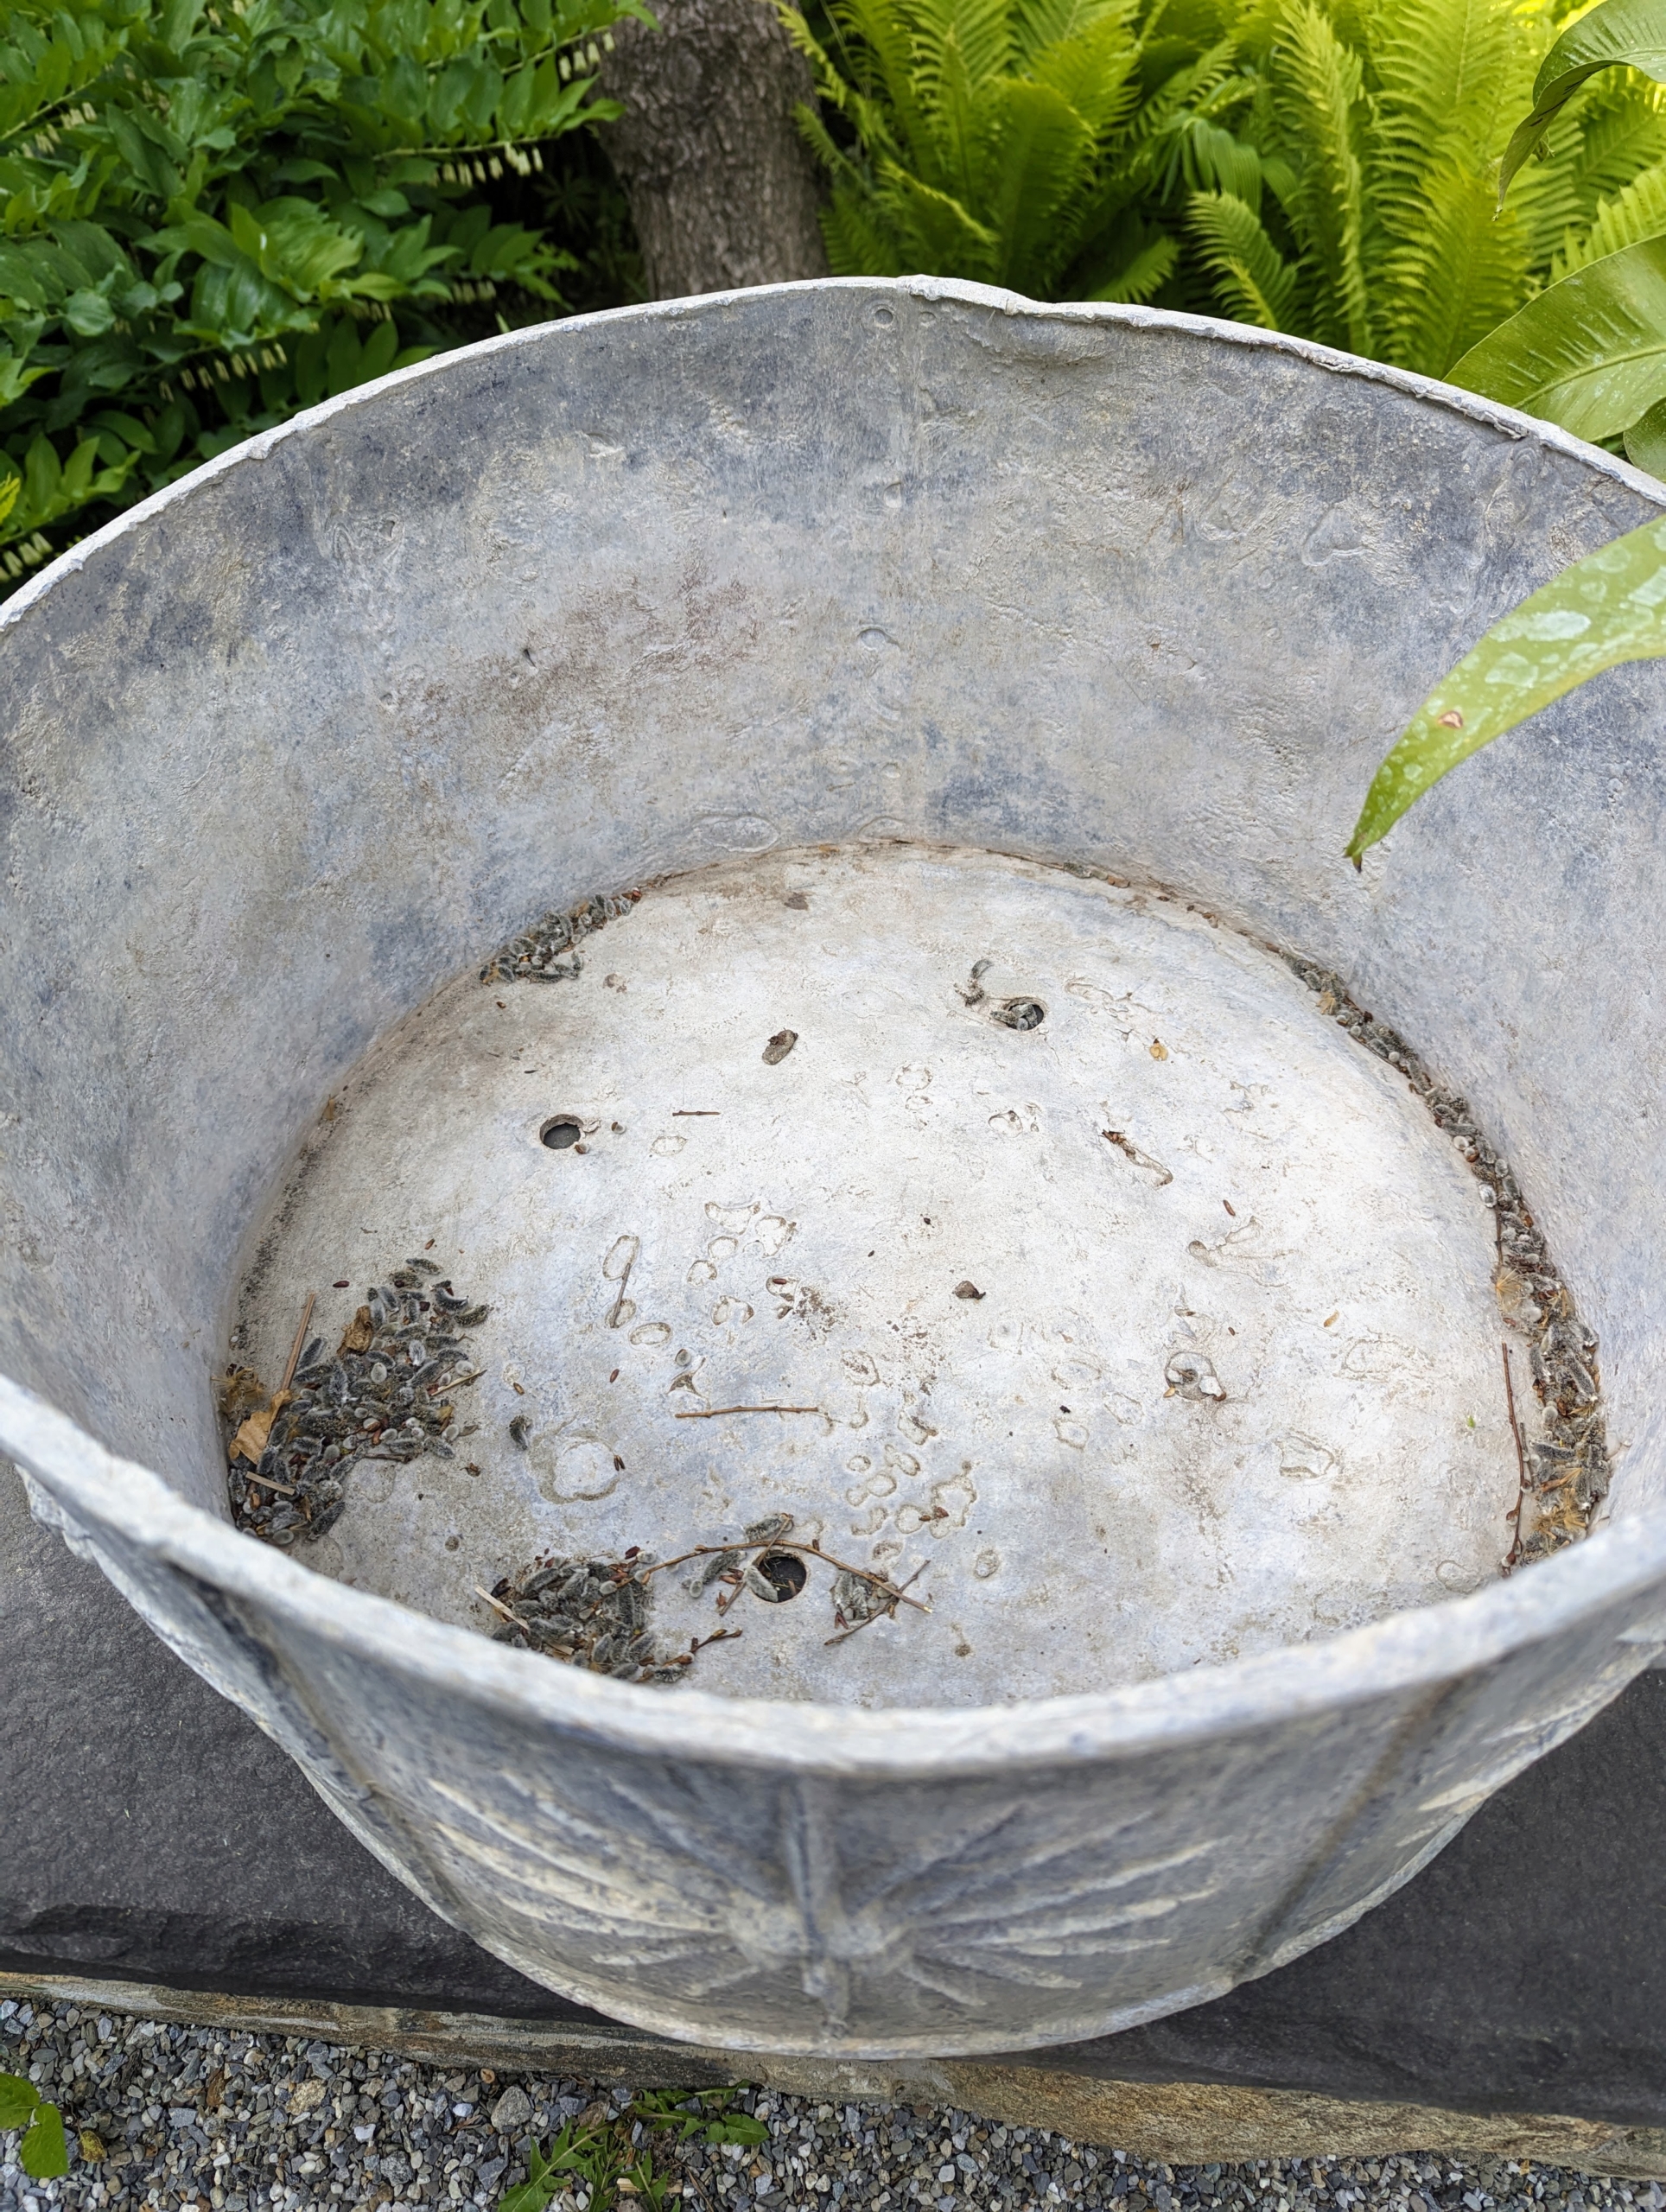
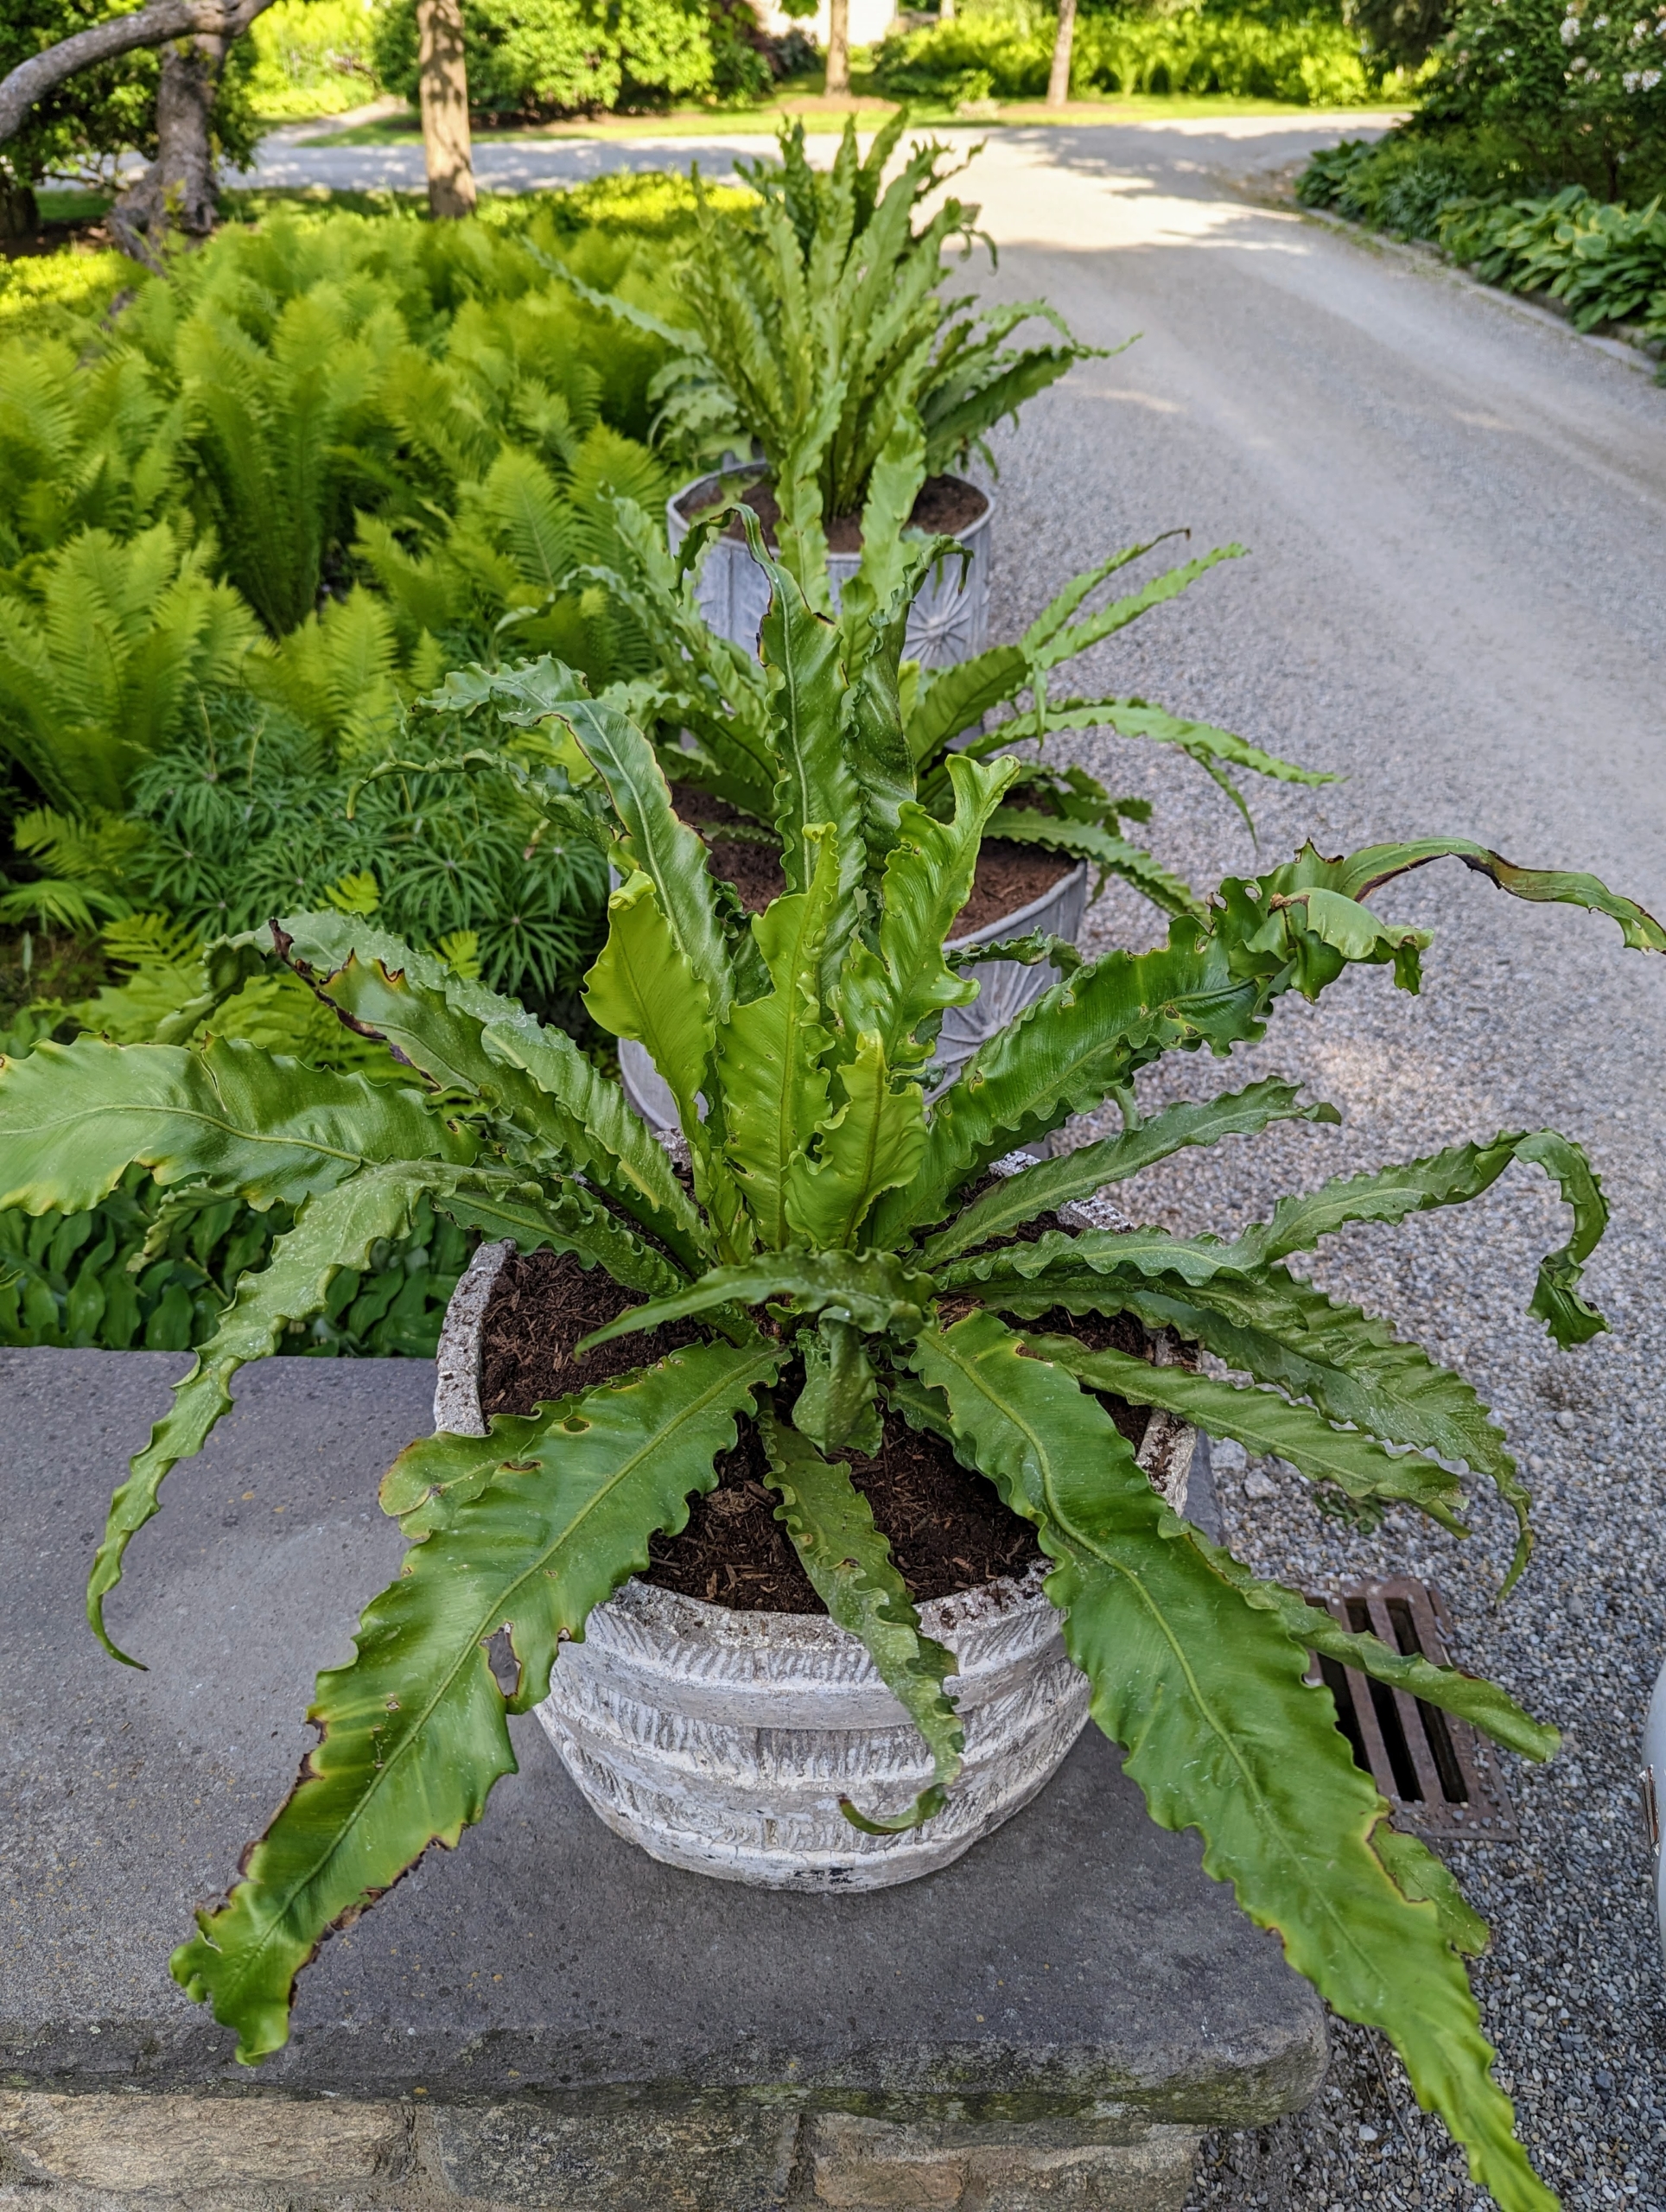
These containers look great sitting on this low stone wall leading up to my carport. Each of the four round lead antique planters is decorated with cheerful repeating sunbursts. The sunburst is actually an ancient pagan symbol. It is mostly seen as an ornamental motif, carved, painted or inlaid, with straight or jagged rays radiating from the center.
Each container is about two feet in diameter and about 18 to 20 inches high. Each vessel also has drainage holes at the bottom.
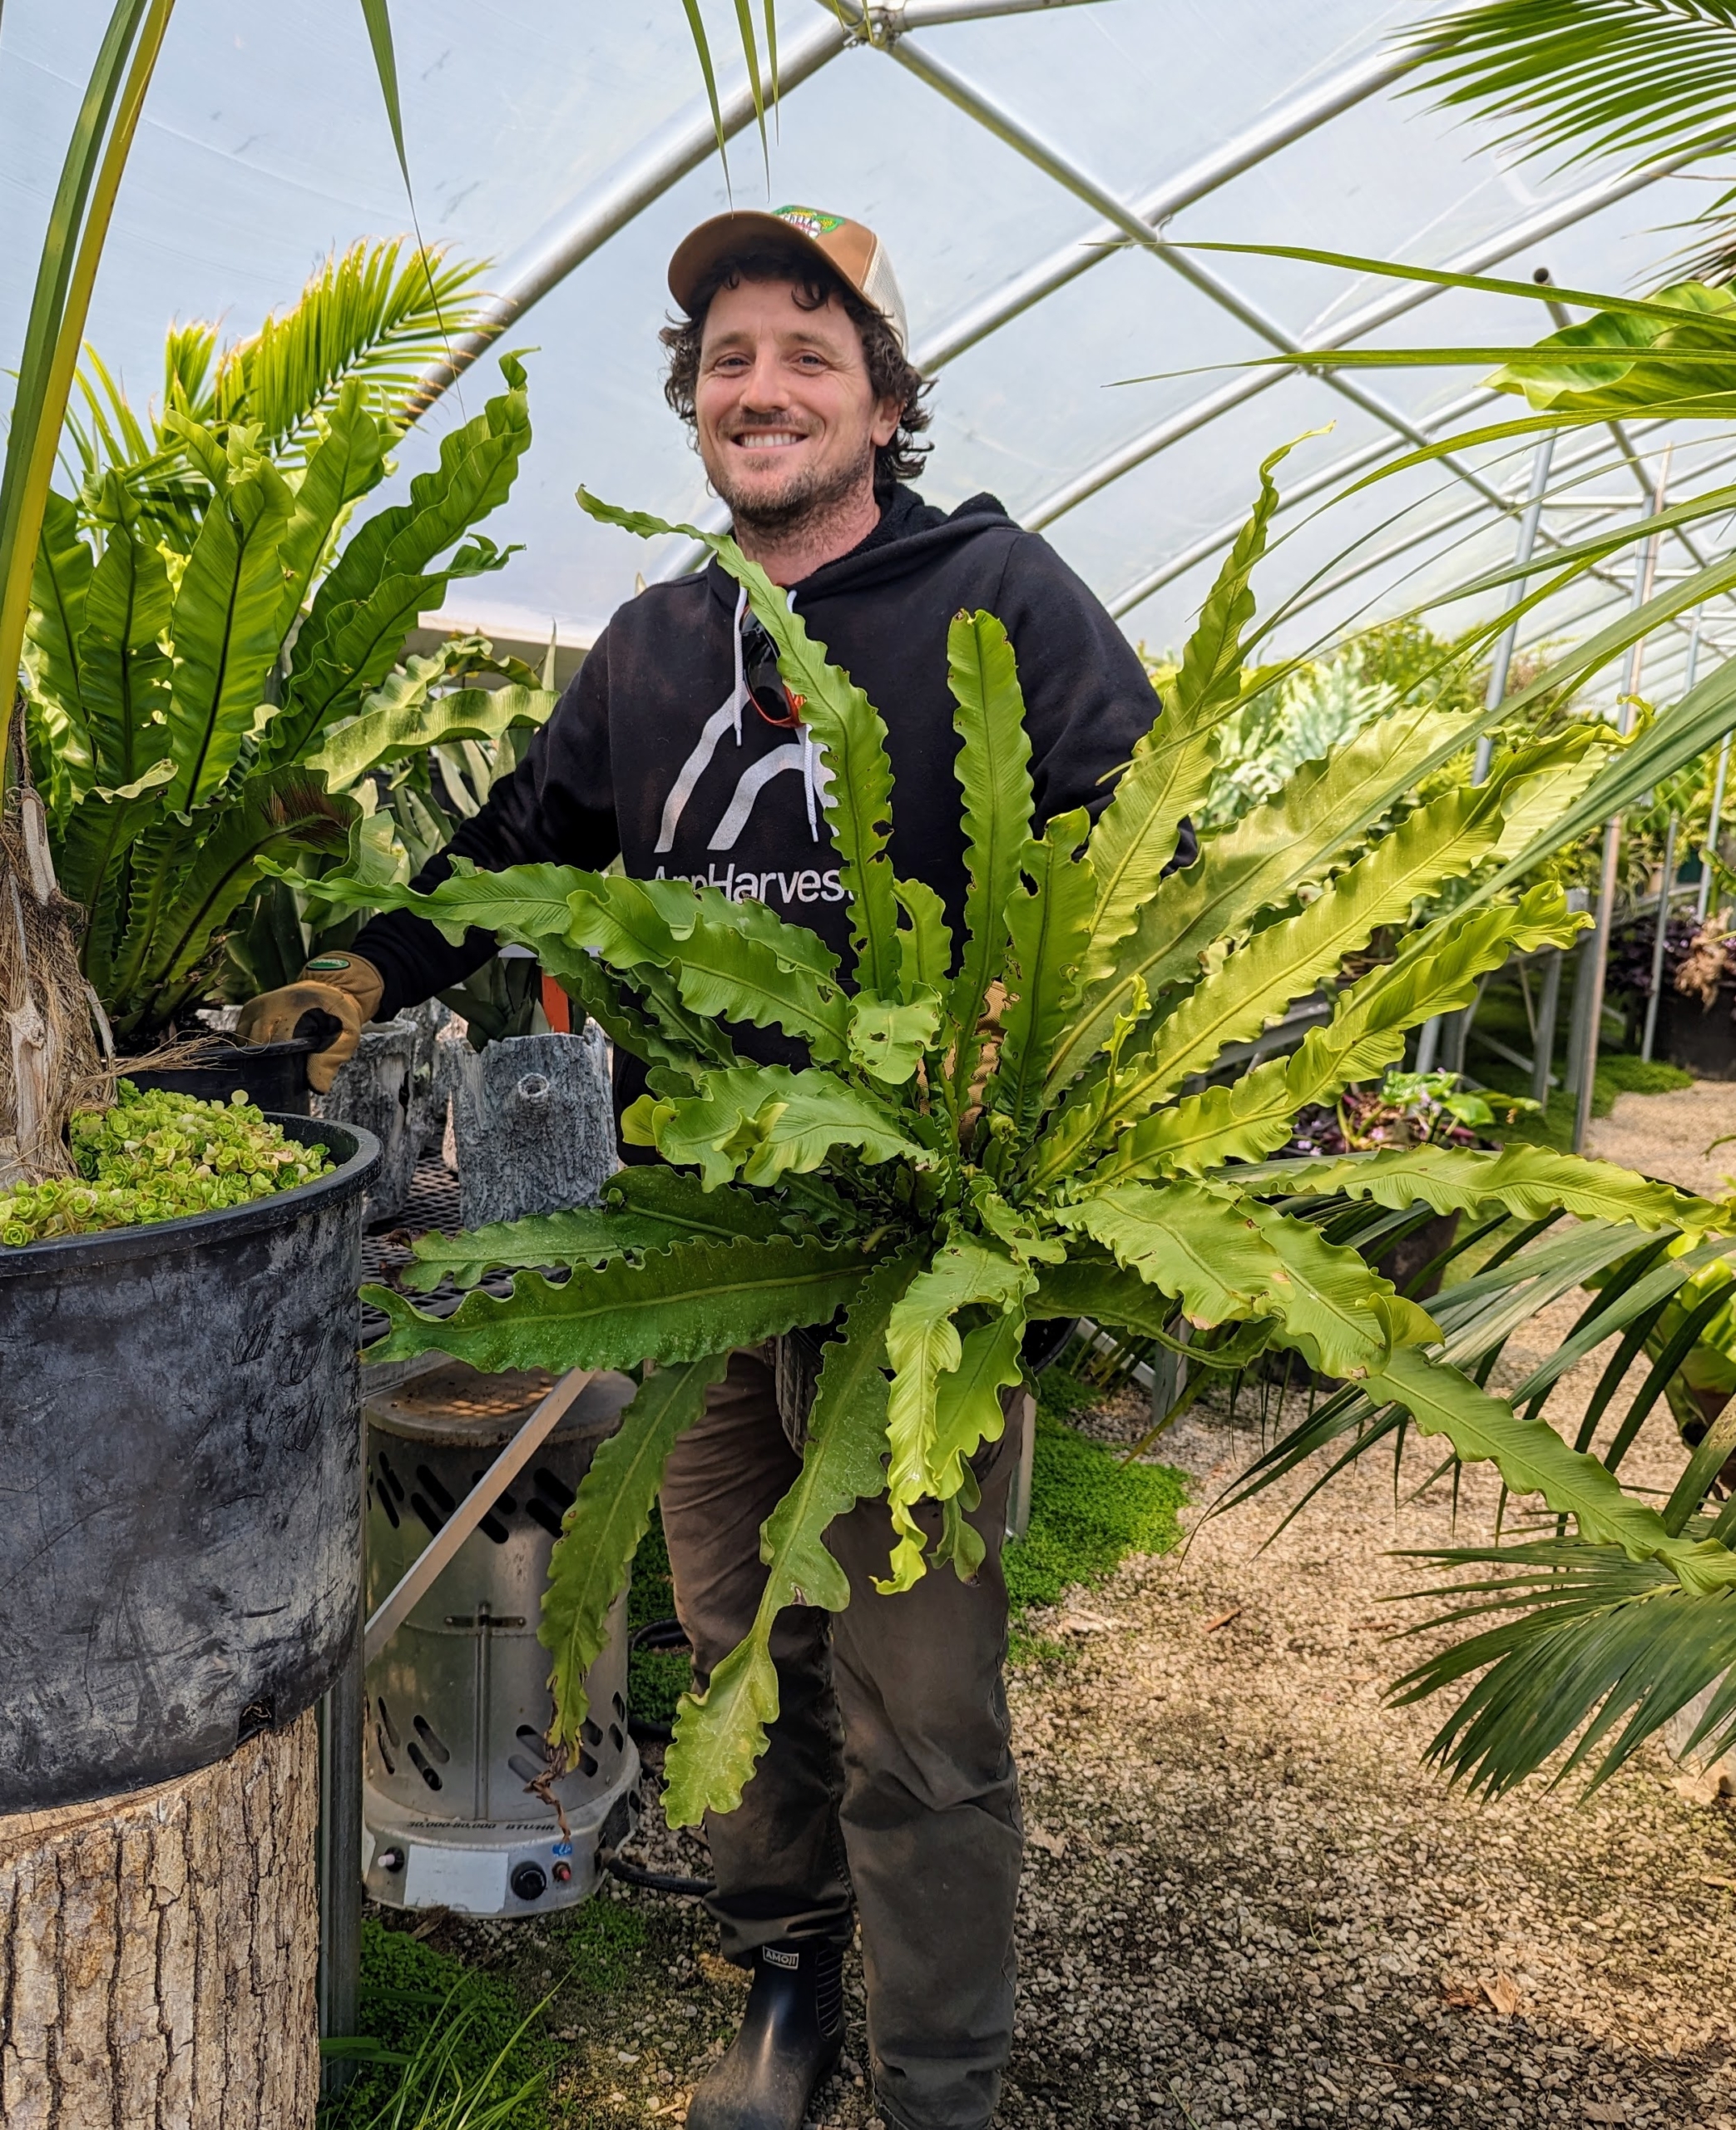
Ryan went down to one of my tropical hoop houses to select the bird’s nest ferns that would work best in the planters. They had to fit the containers and be pretty similar in size.
The bird’s nest fern is so named because the center of the plant resembles a bird’s nest. It is also occasionally called a crow’s nest fern. Here, one can see the new fronds growing from the center rosette.
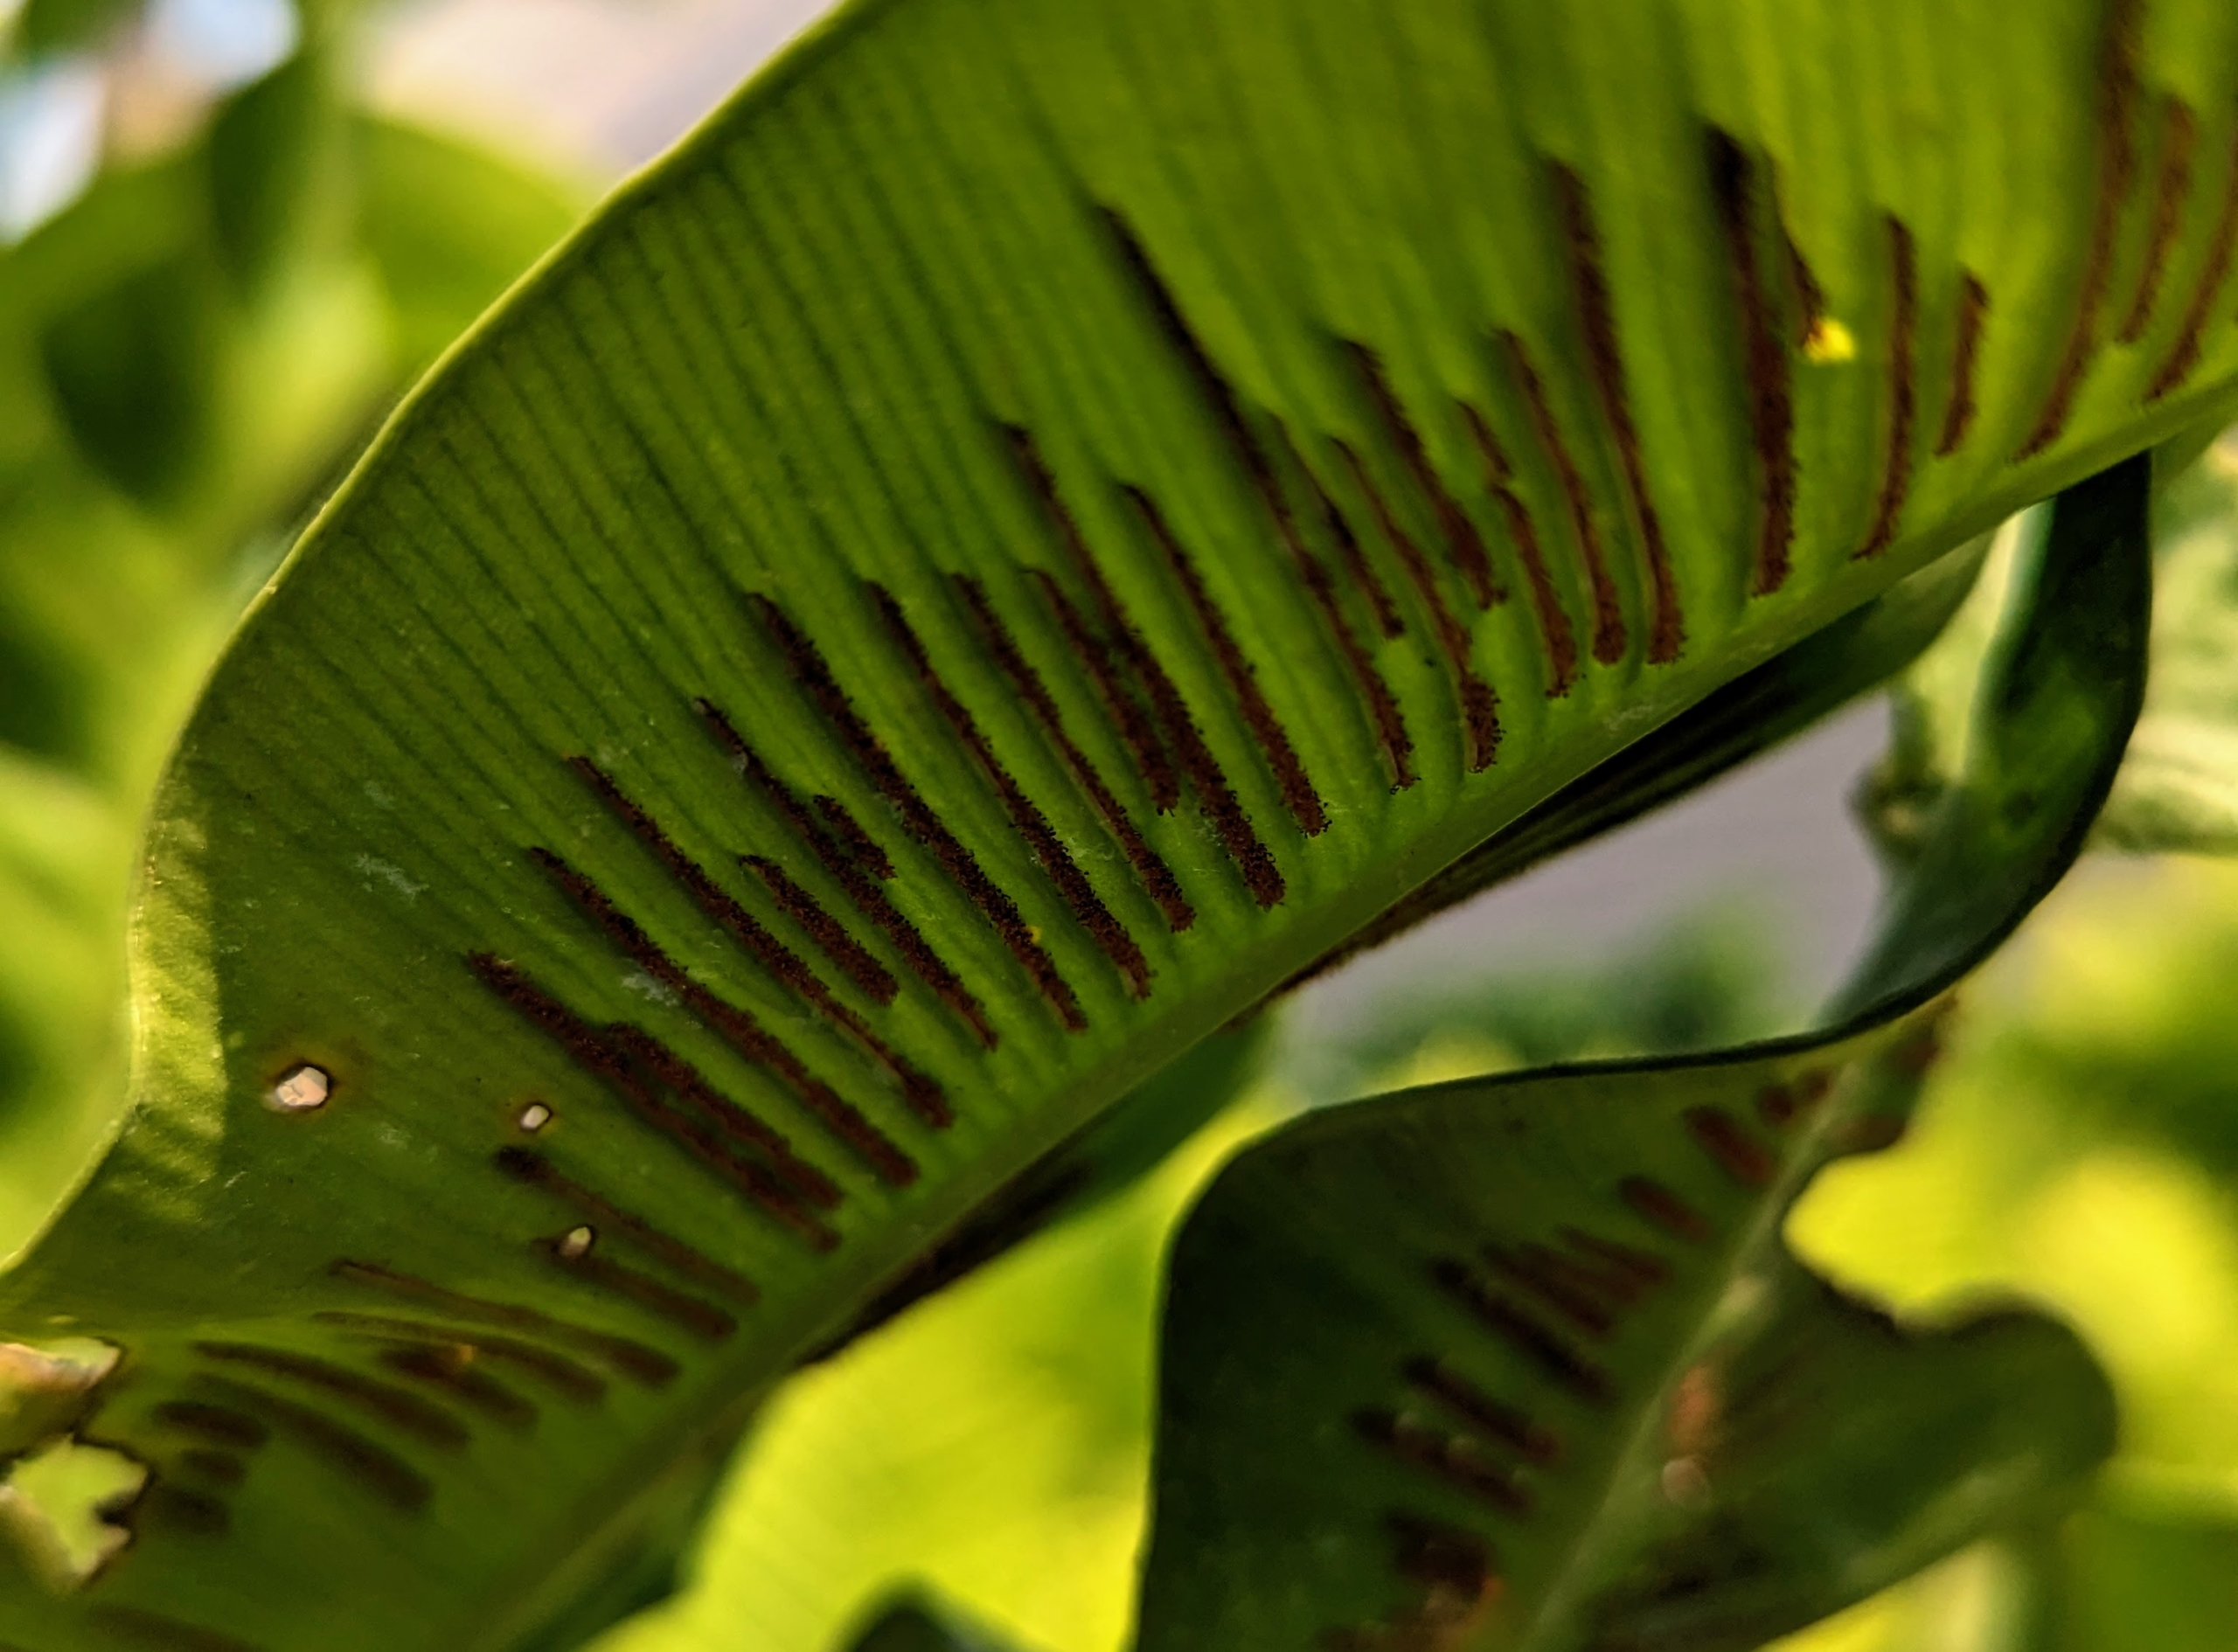
On the undersides of mature bird’s nest fern fronds are these brown lines. These are harvest spores.
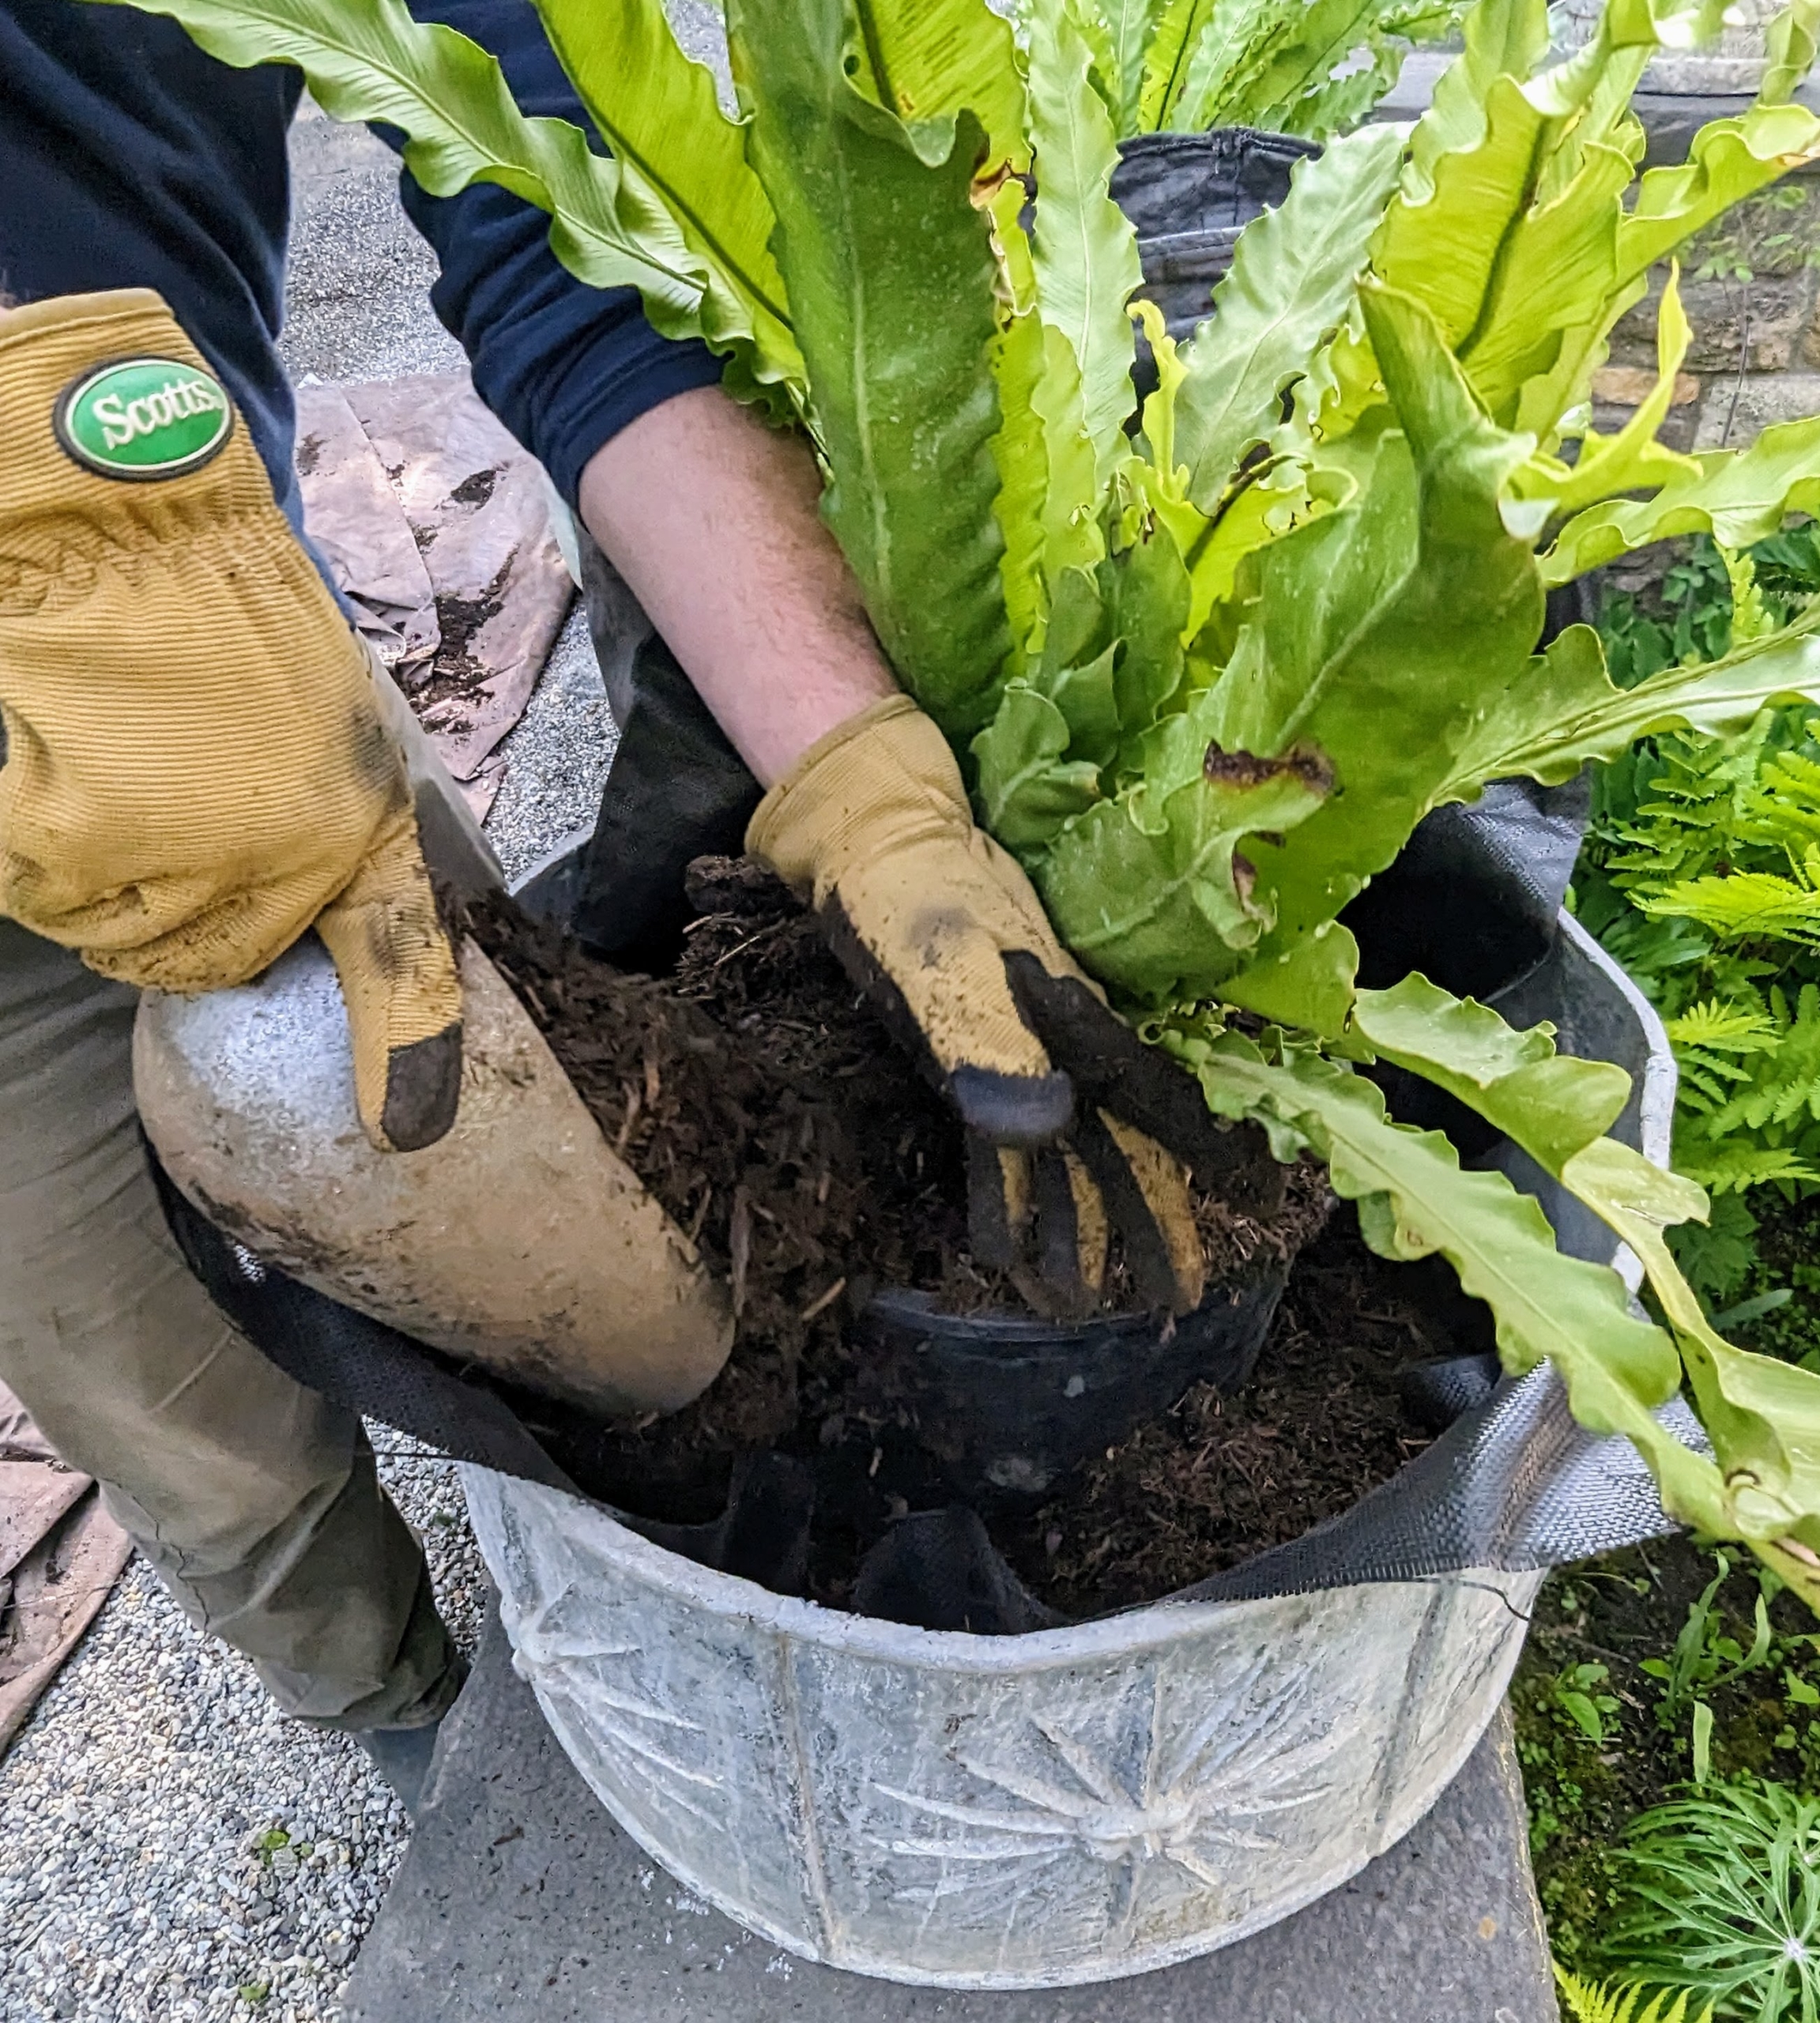
Back at the carport, Ryan places the ferns in the pots for planting. He also turns them, so the best side of each plant faces the carriage road.
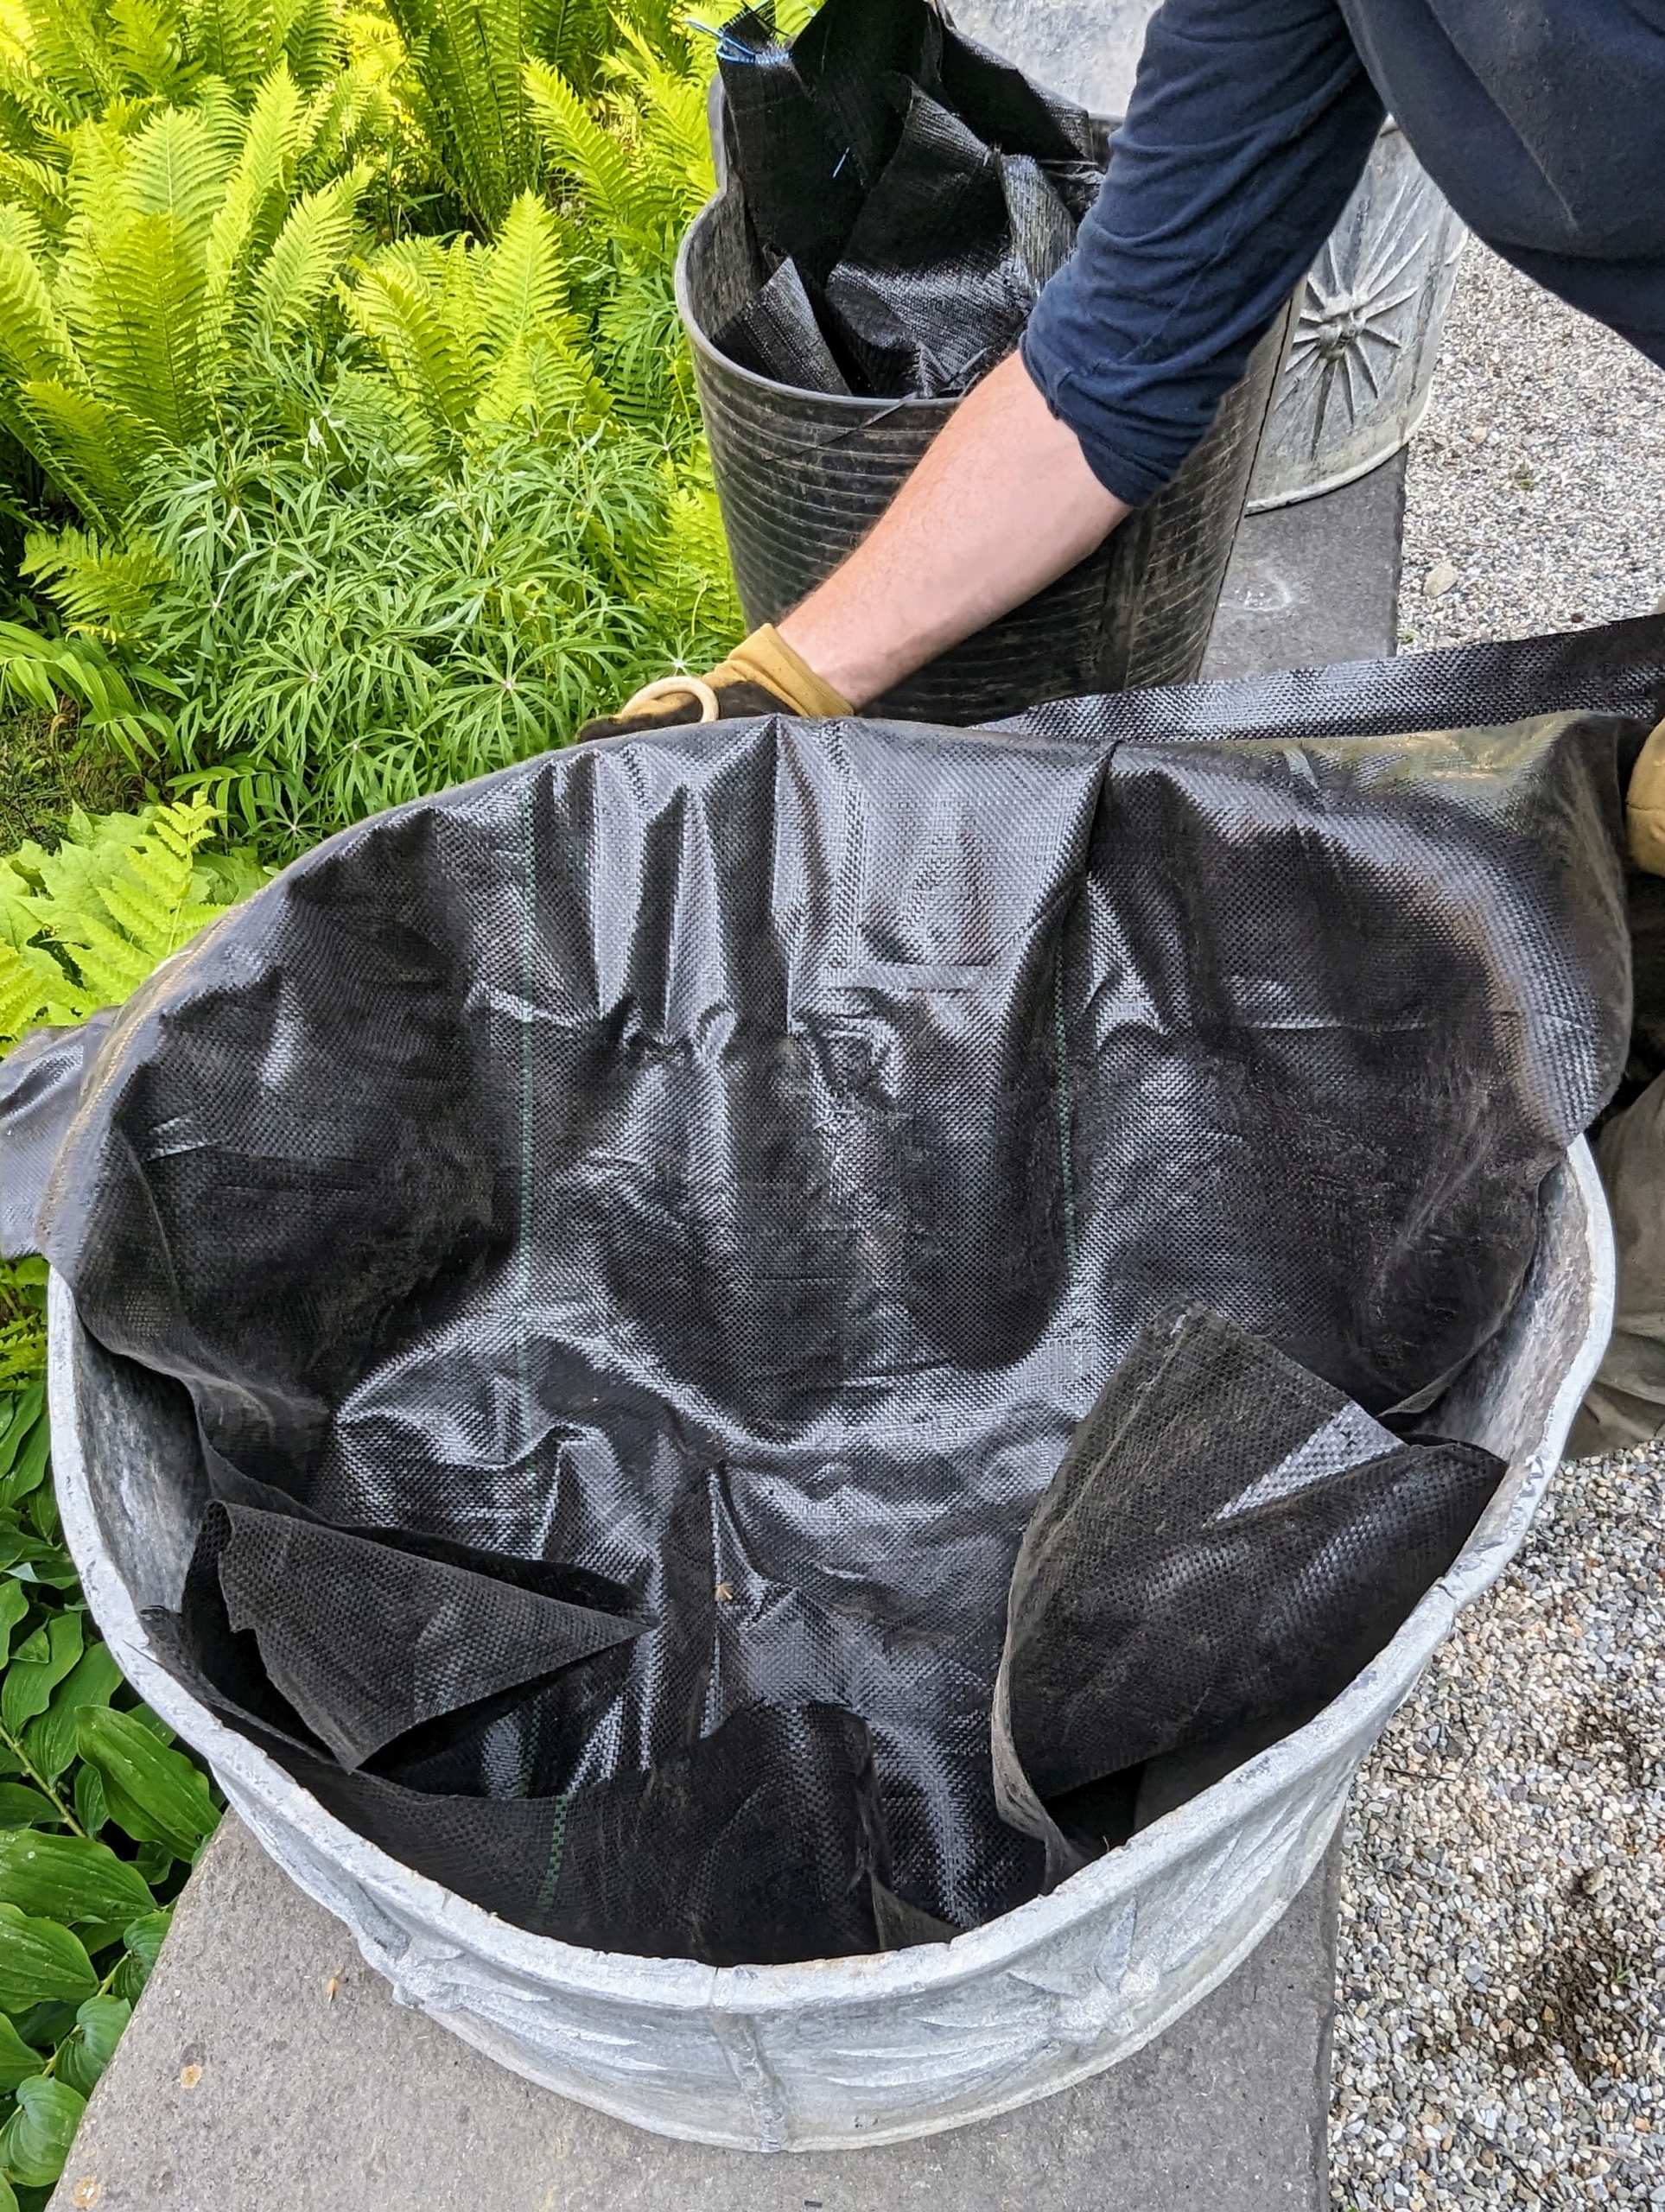
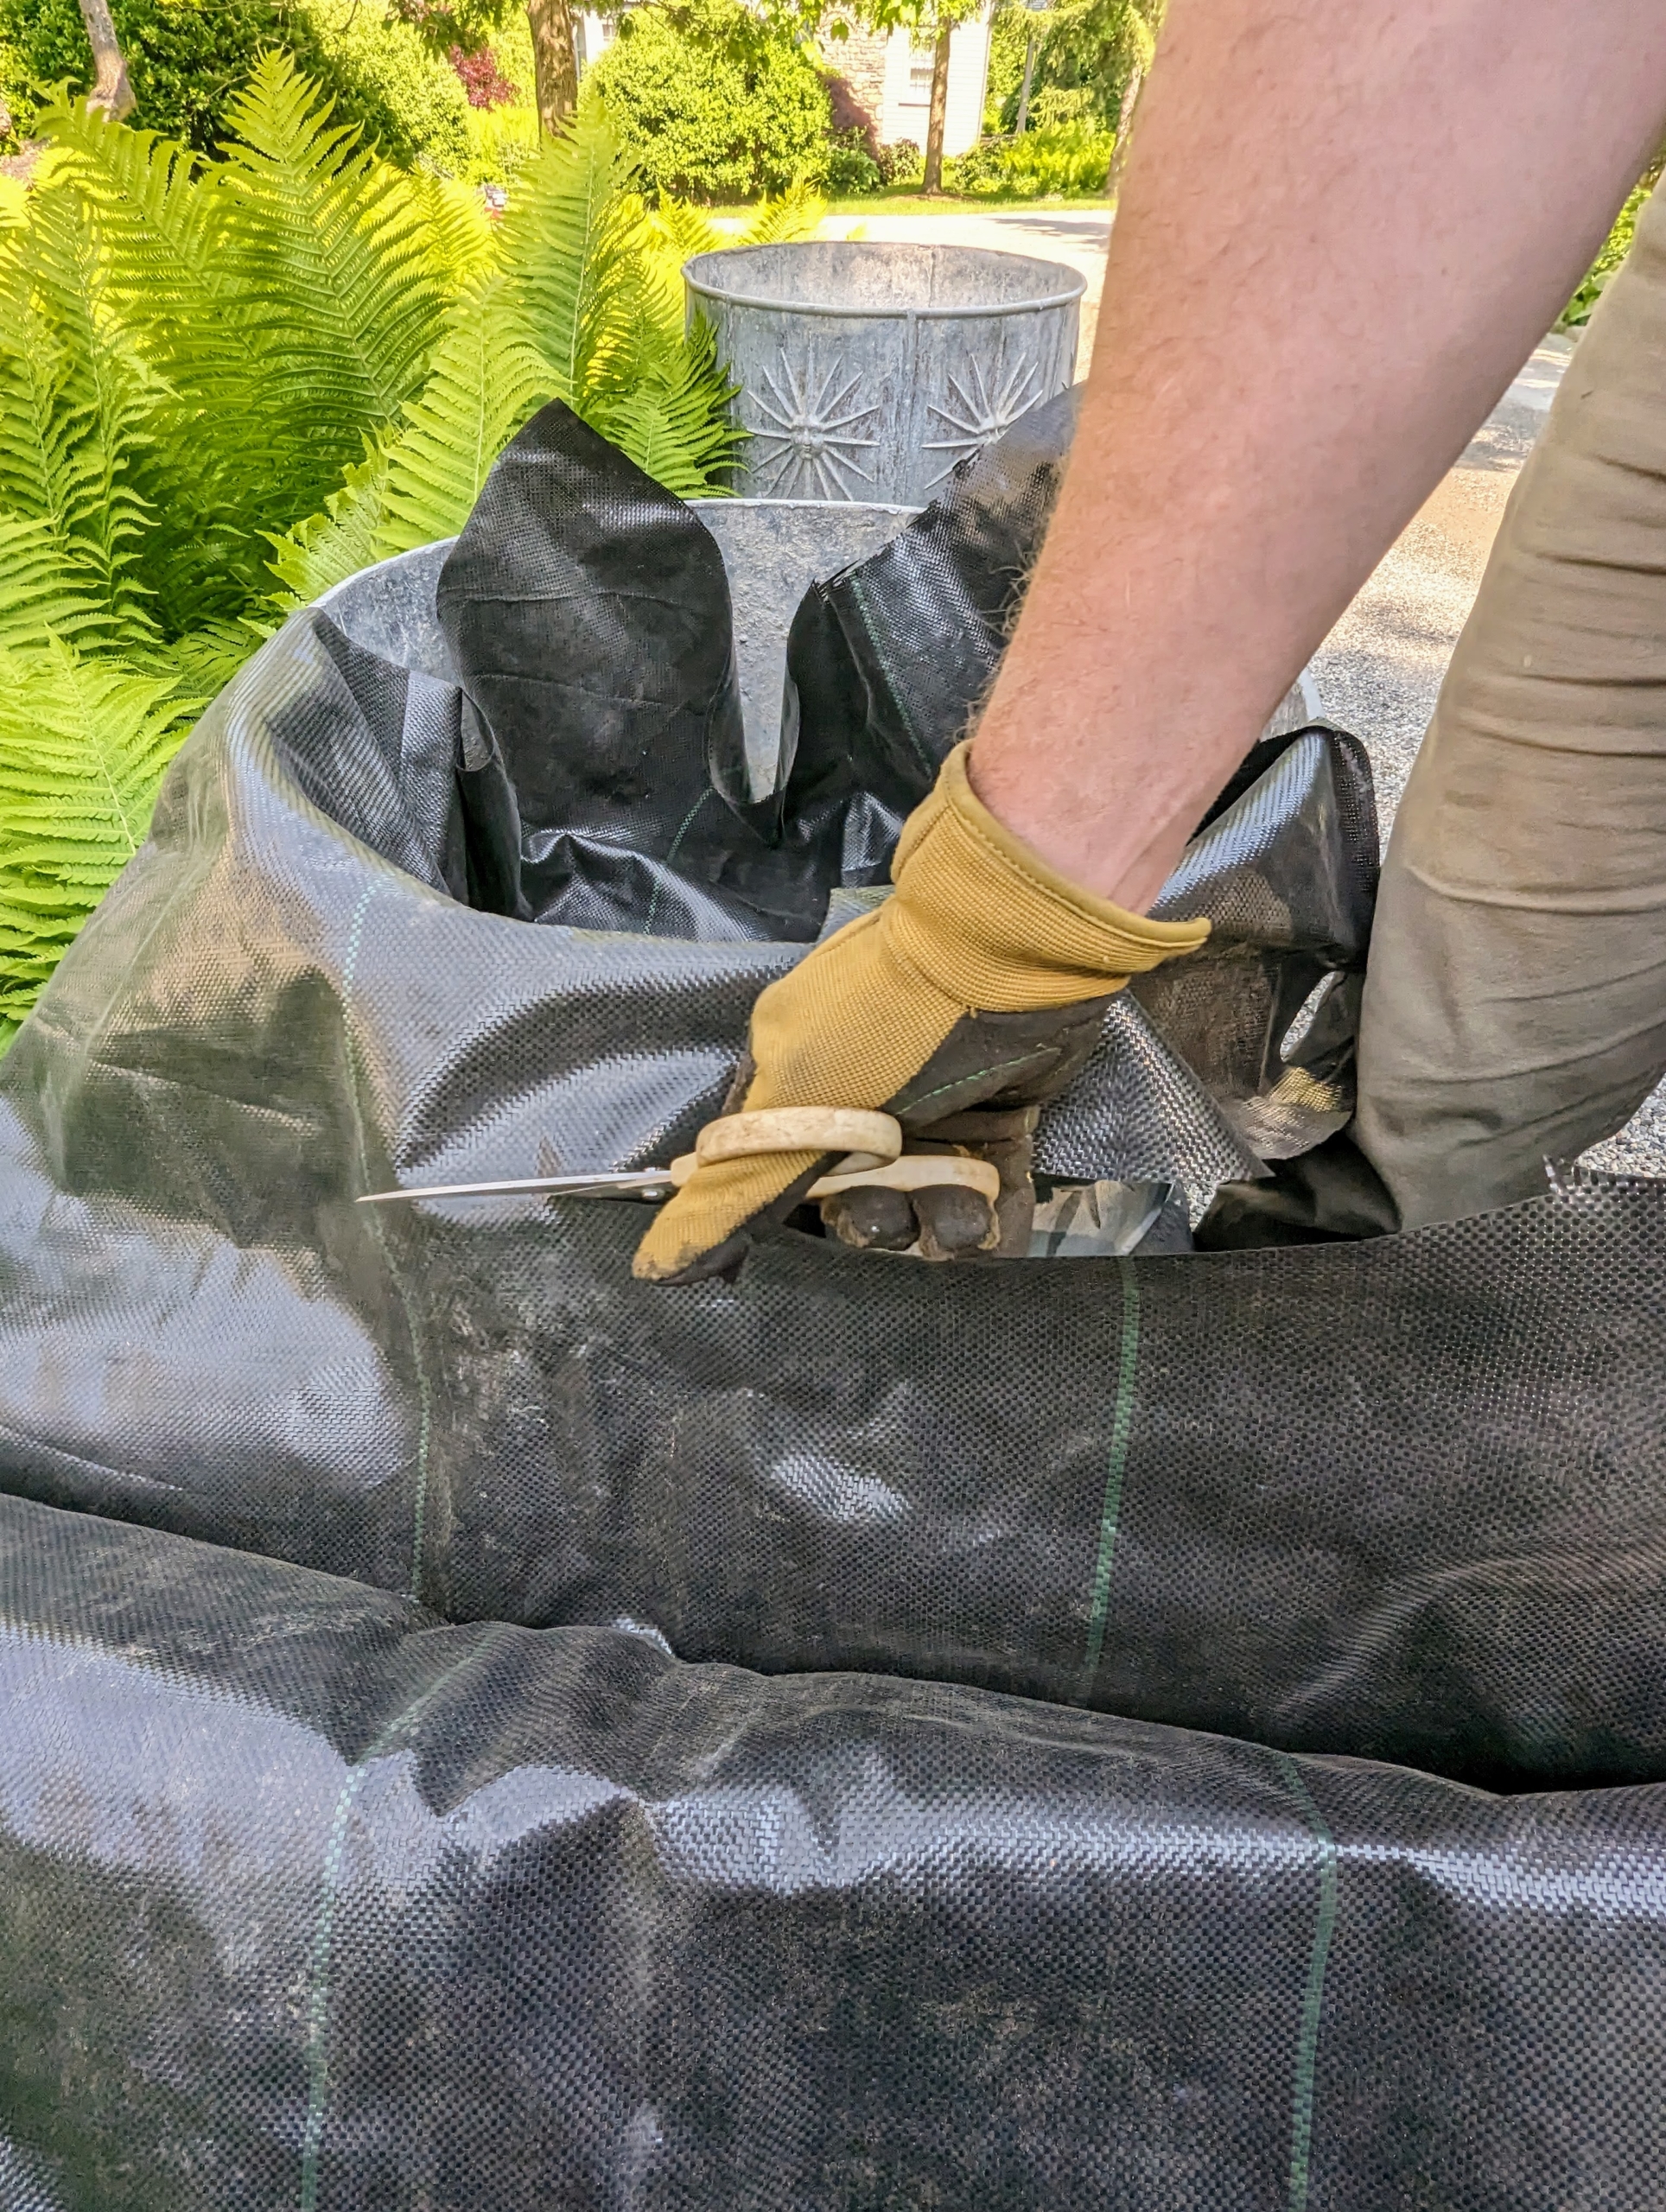
To protect the fragile pots, I like to line them with black weed cloth or black garbage bags. Ryan places a big sheet of the plastic into the pot…
… and then cuts it to size. This plastic will later be tucked into the pot, so it is not visible.
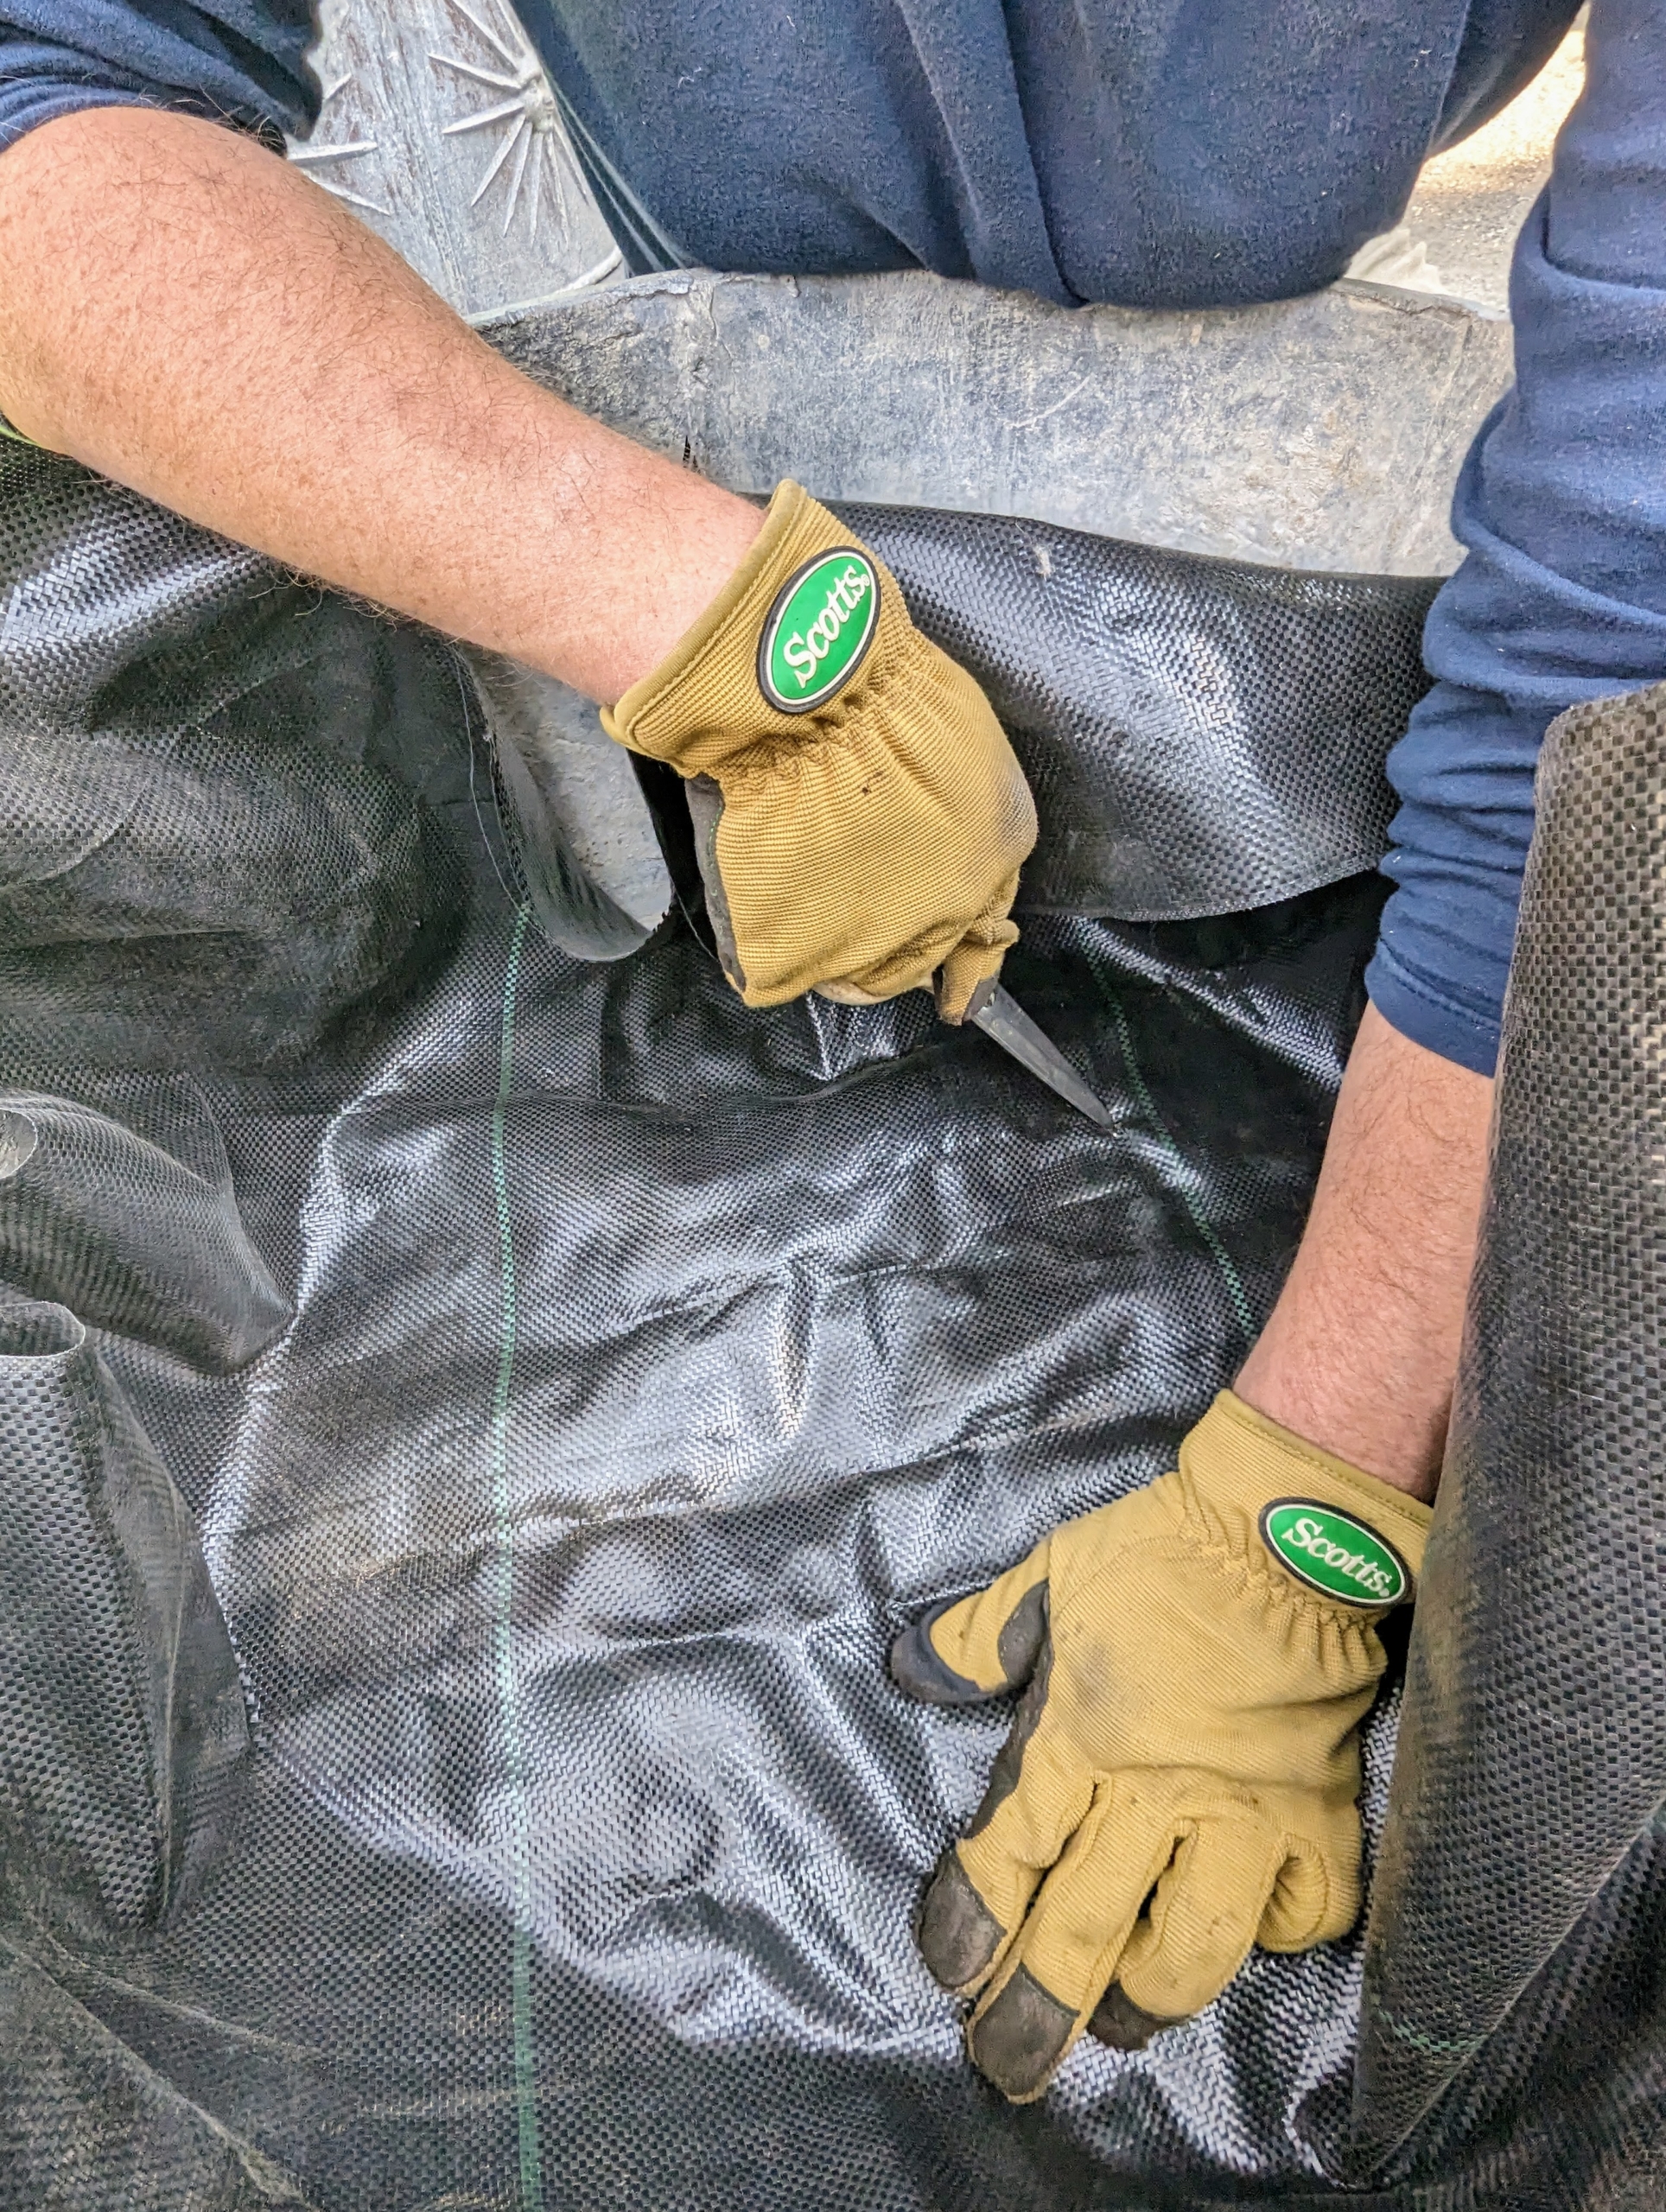
Ryan pokes holes in the plastic over the holes in the container for good drainage.
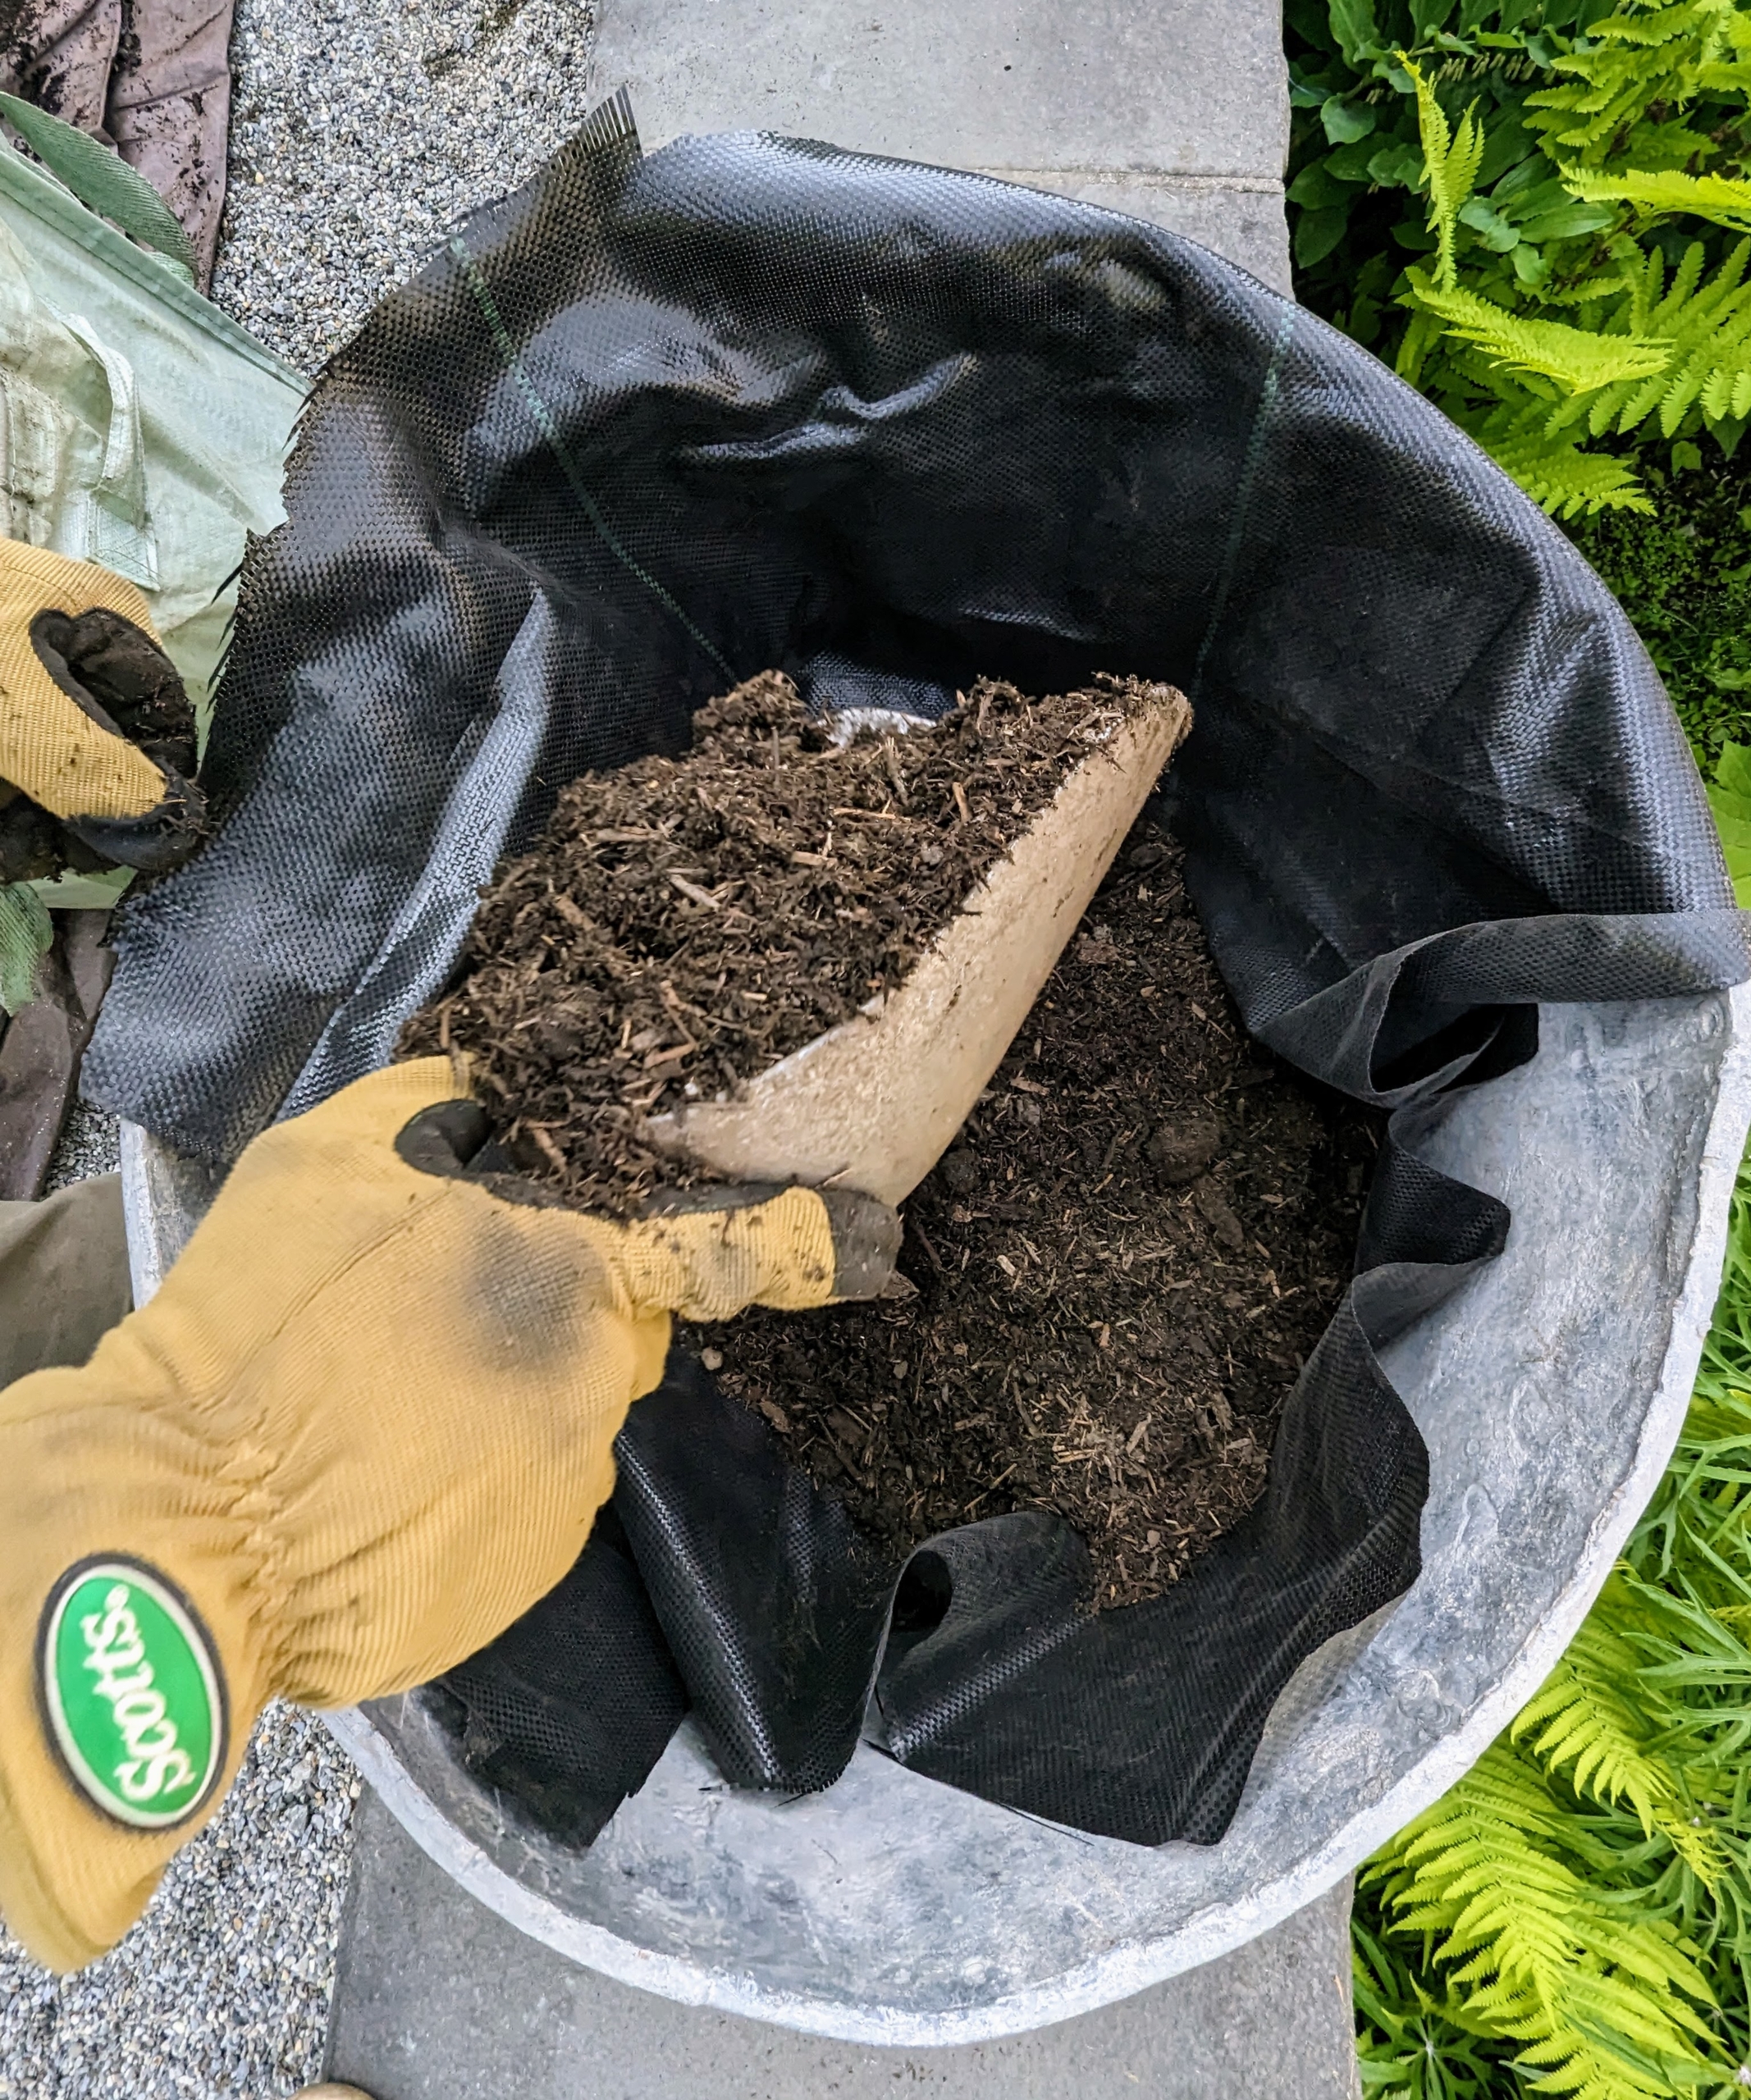
Next he fills the bottom of the planter with soil mix. We’re using nutrient-rich compost made right here at the farm.
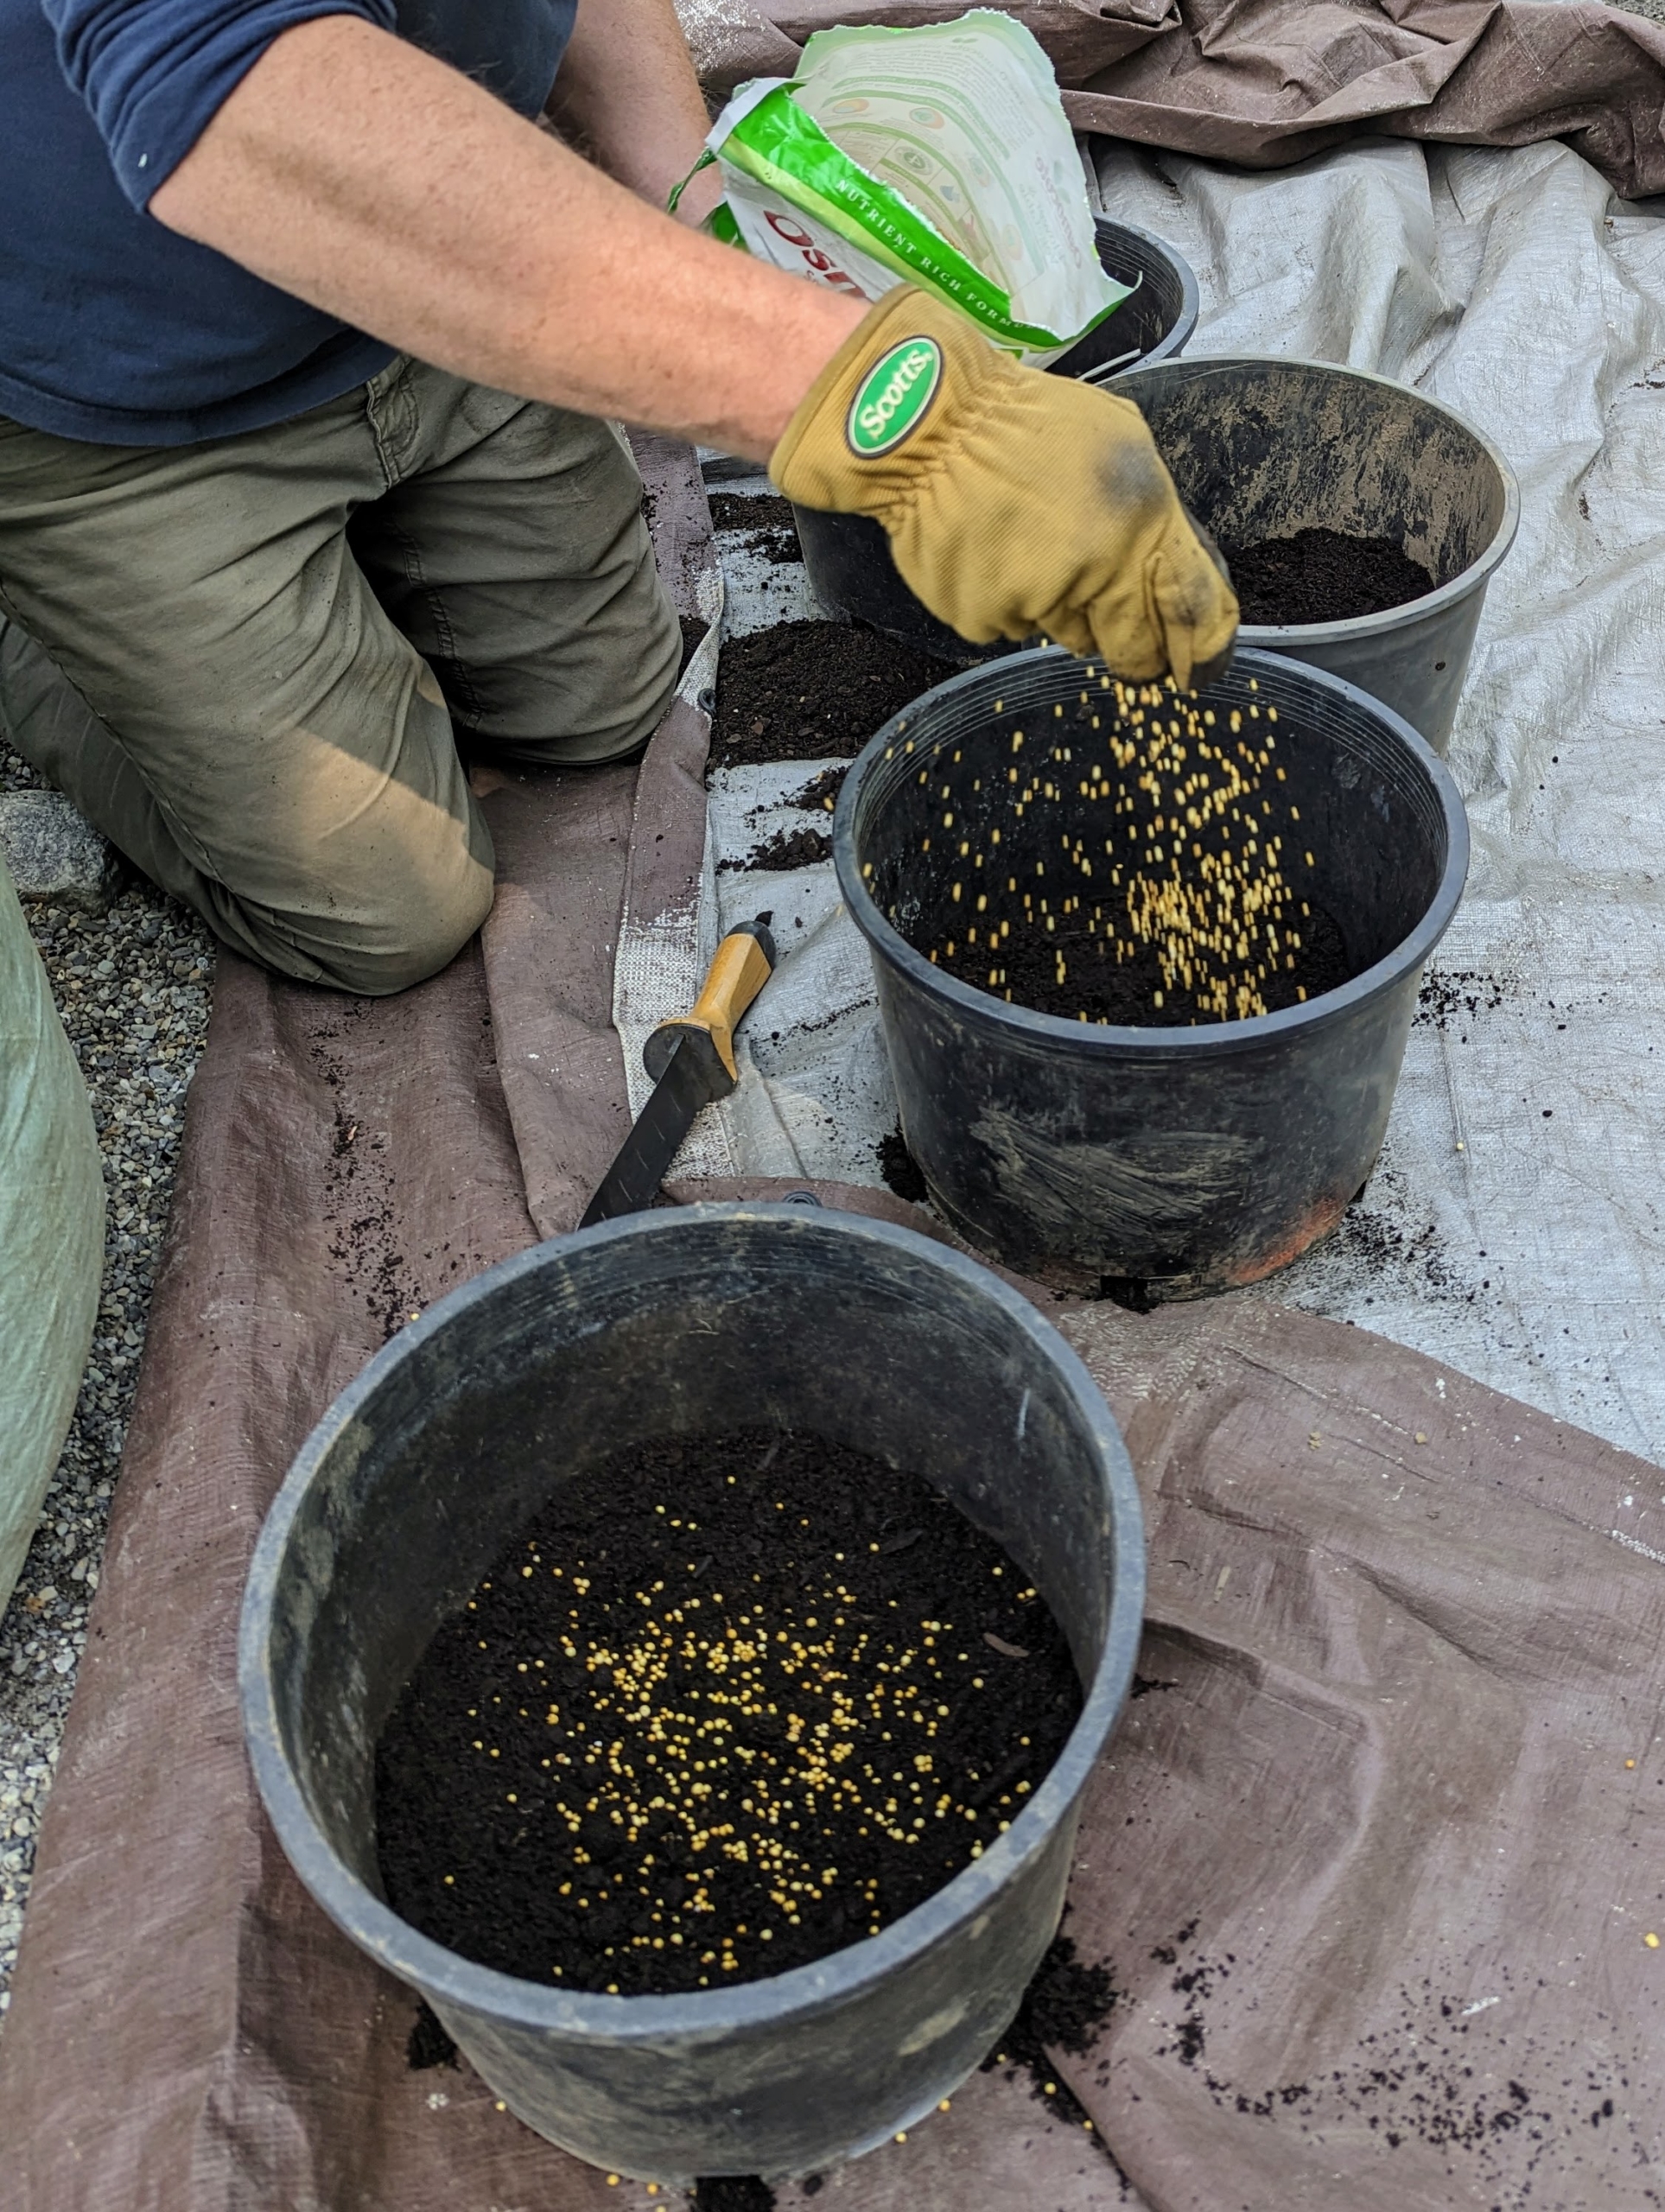
Meanwhile, these ferns are ready for slightly larger containers, so Ryan puts soil into these plastic pots. He sprinkles a generous amount of Osmocote fertilizer and mixes it well. The prills coat a core of nitrogen, phosphorus and potassium. The resin-coating is made from linseed oil and as the plant’s root system takes-up nutrition from the soil, it also takes up the needed nutrients from the Osmocote.
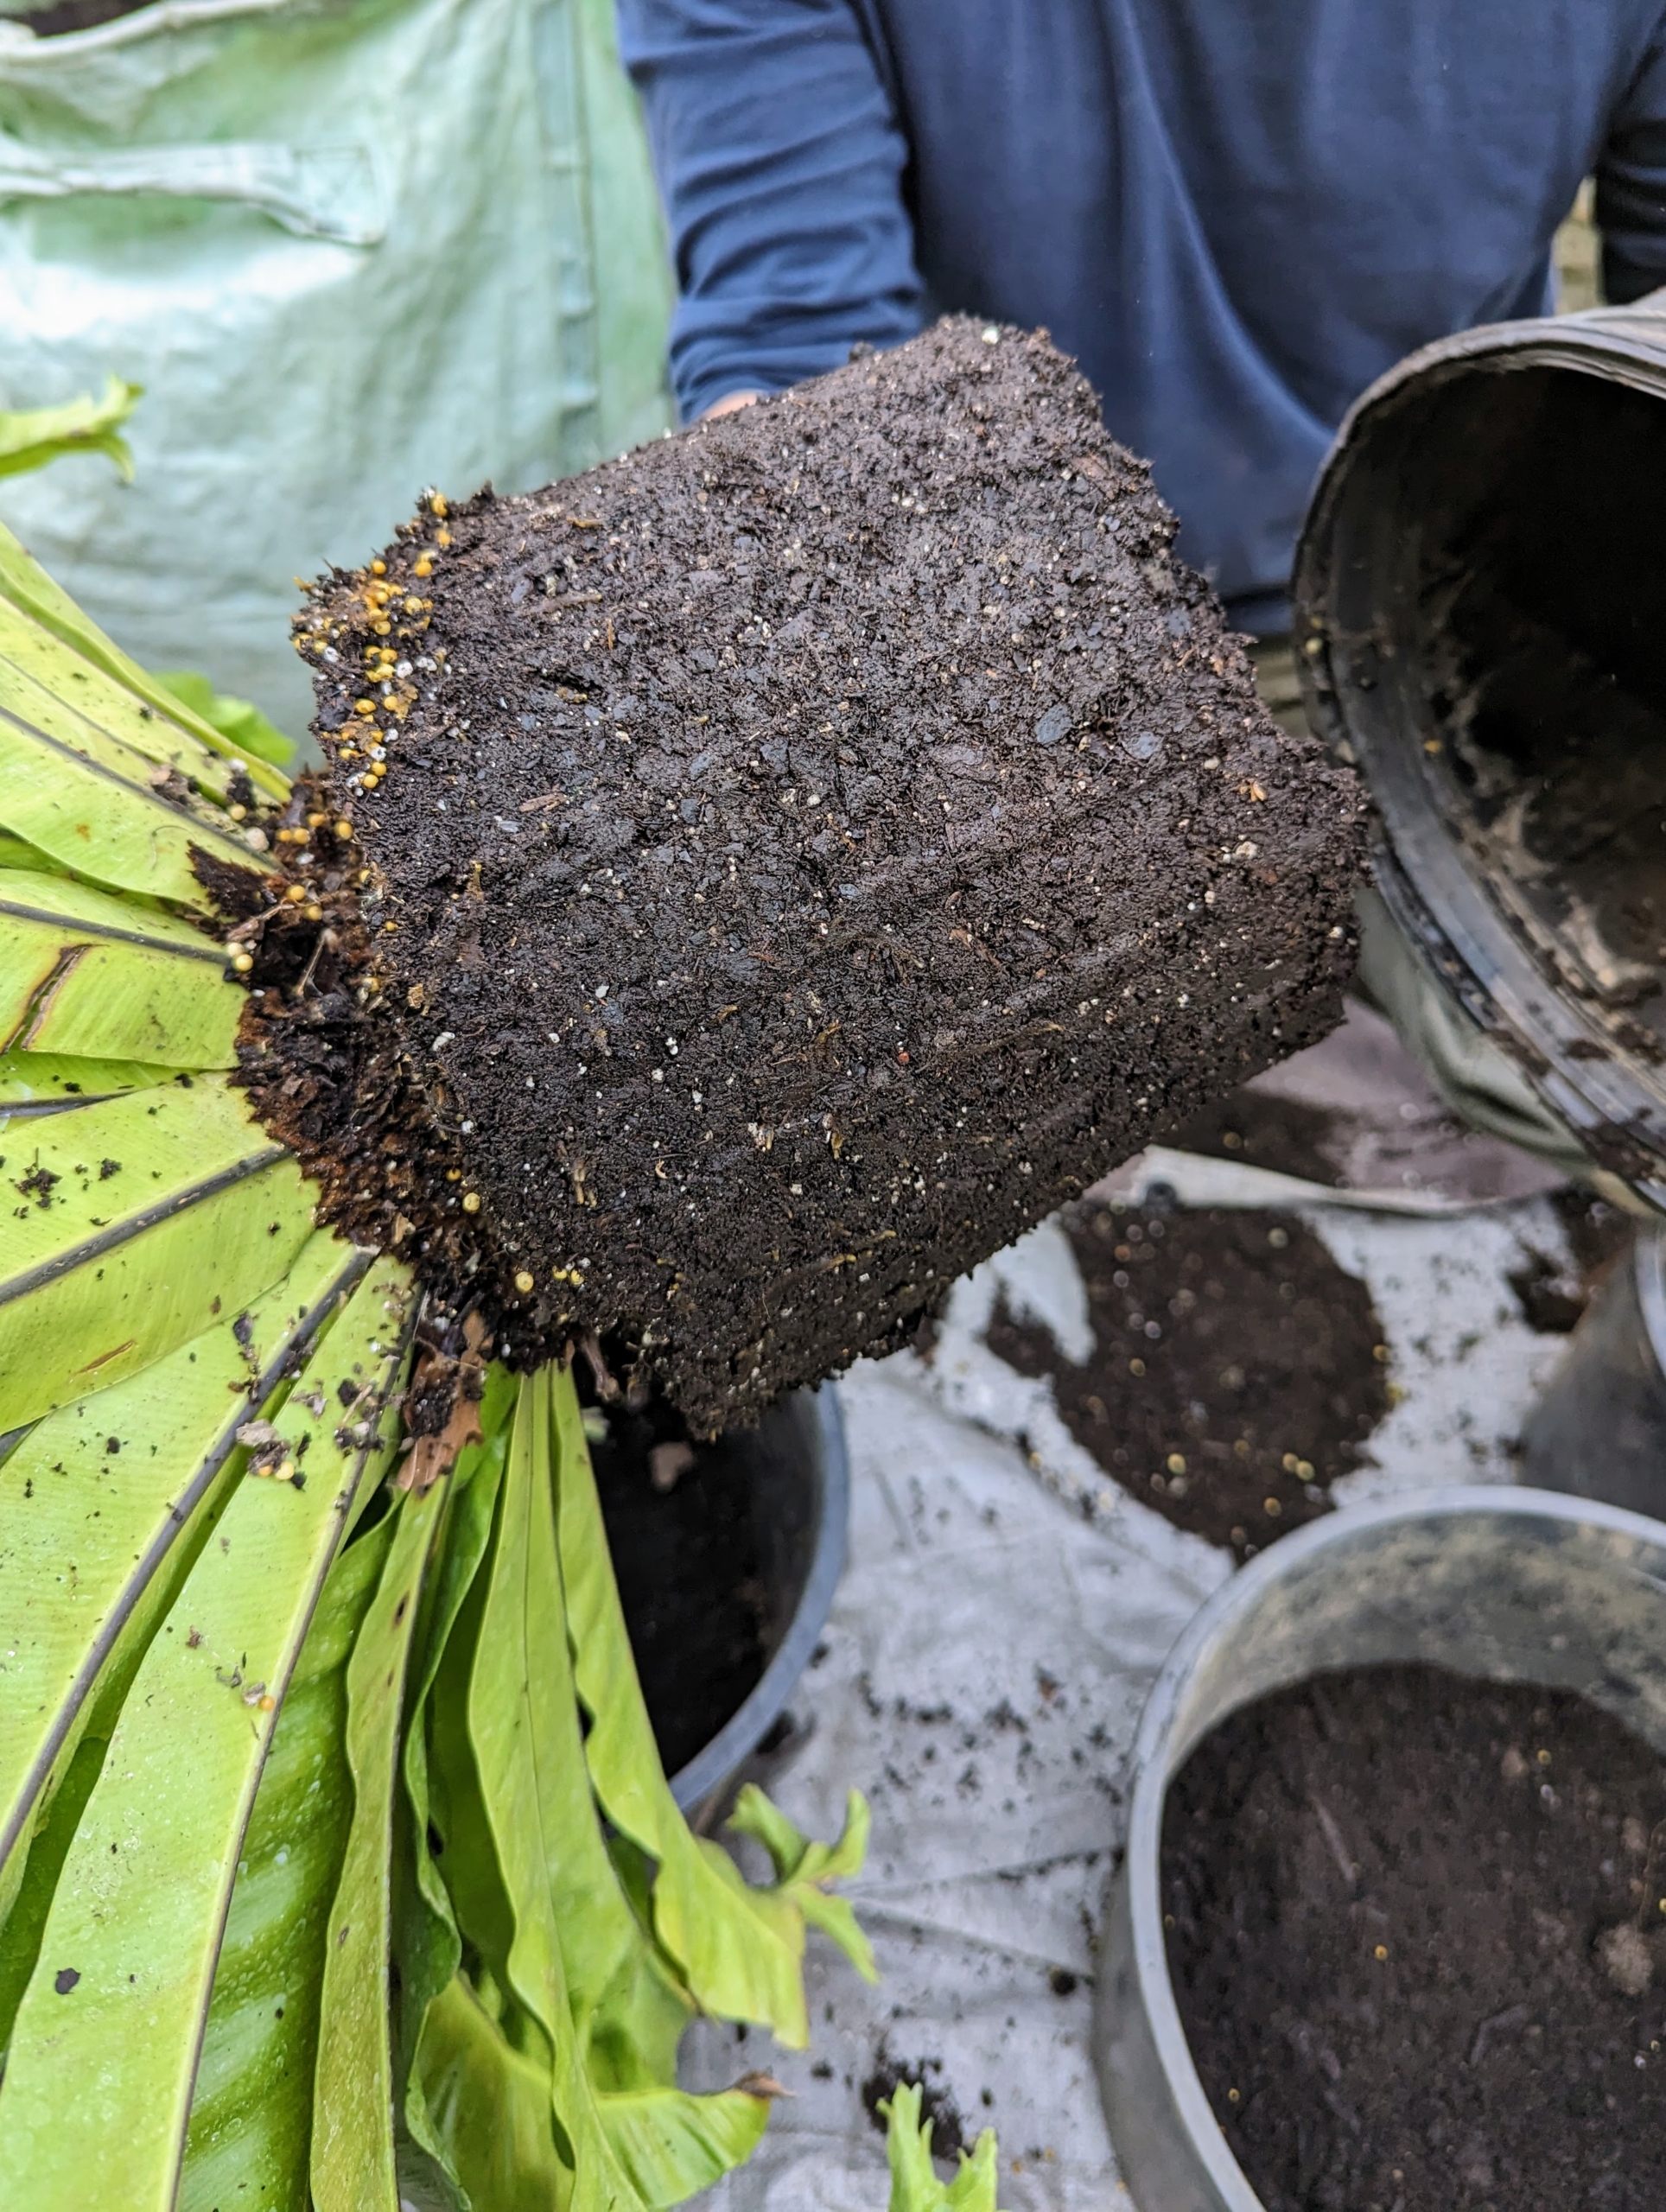
Ryan then removes the fern from its old plastic pot and gives it a quick inspection. The root ball is quite moist – it is a sign of good maintenance and watering.
Repotting is a good time to check any plant for damaged, unwanted or rotting leaves or pests that may be hiding in the soil. Ryan scarifies the root ball just a bit to encourage new growth and places it into its new container.
Next, Ryan backfills with more soil. Bird’s nest ferns do well with watering about once a week. To be sure, one should feel the top few inches of soil. If the top two-inches are dry then the plant needs water. Below the top few inches should remain moist, but not soggy. And it should never dry out thoroughly between waterings.
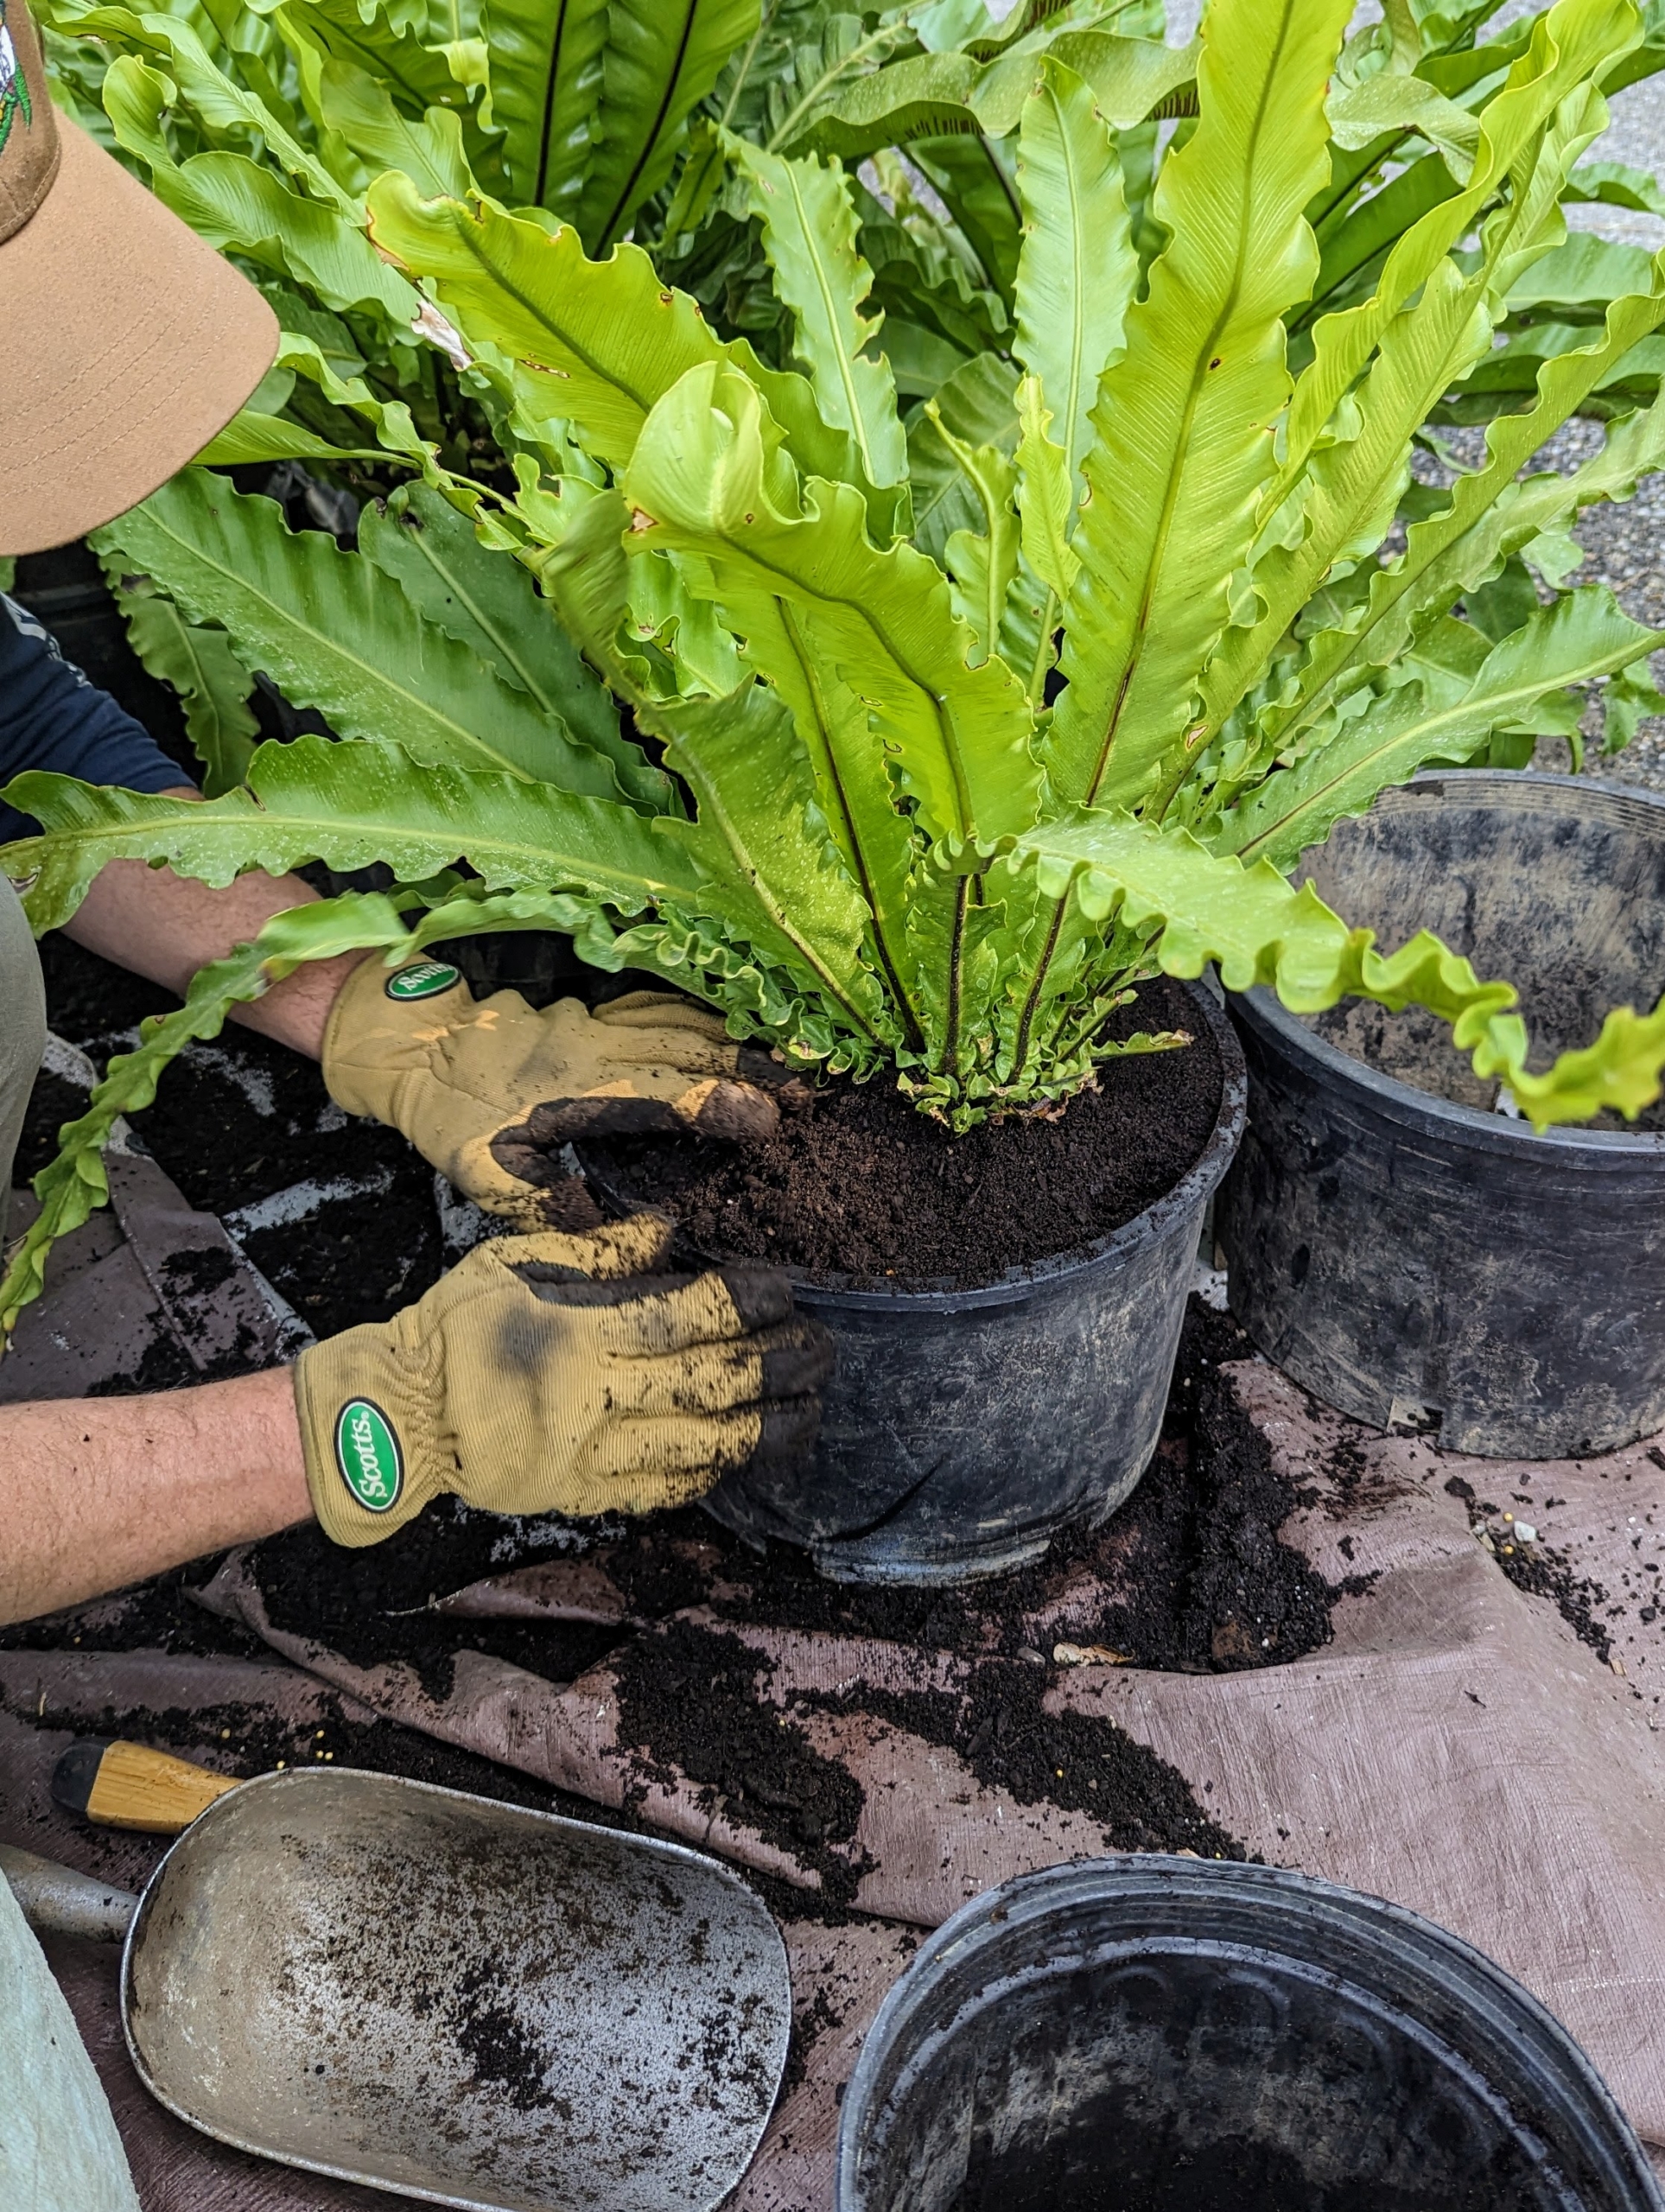
Once a plant is in its new plastic pot, Ryan places the pot into the container to ensure it is at the proper height – it should be positioned at the same height it was in its original pot. Planting the pot inside the container makes it easier come fall – the pot can just be removed with the plant intact.
He backfills the ornamental planter up to just under the rim, so when it is watered, it does not overflow with soil falling out.
Lastly, Ryan top dresses the pot with some mulch and taps down of the soil lightly to ensure there is good contact with the plant.
Even when grown in optimal conditions bird’s nest ferns grow slowly, only about two to six inches per year. Fronds eventually reach a maximum size of about three feet long, with plant diameter maxing out at about three feet wide.
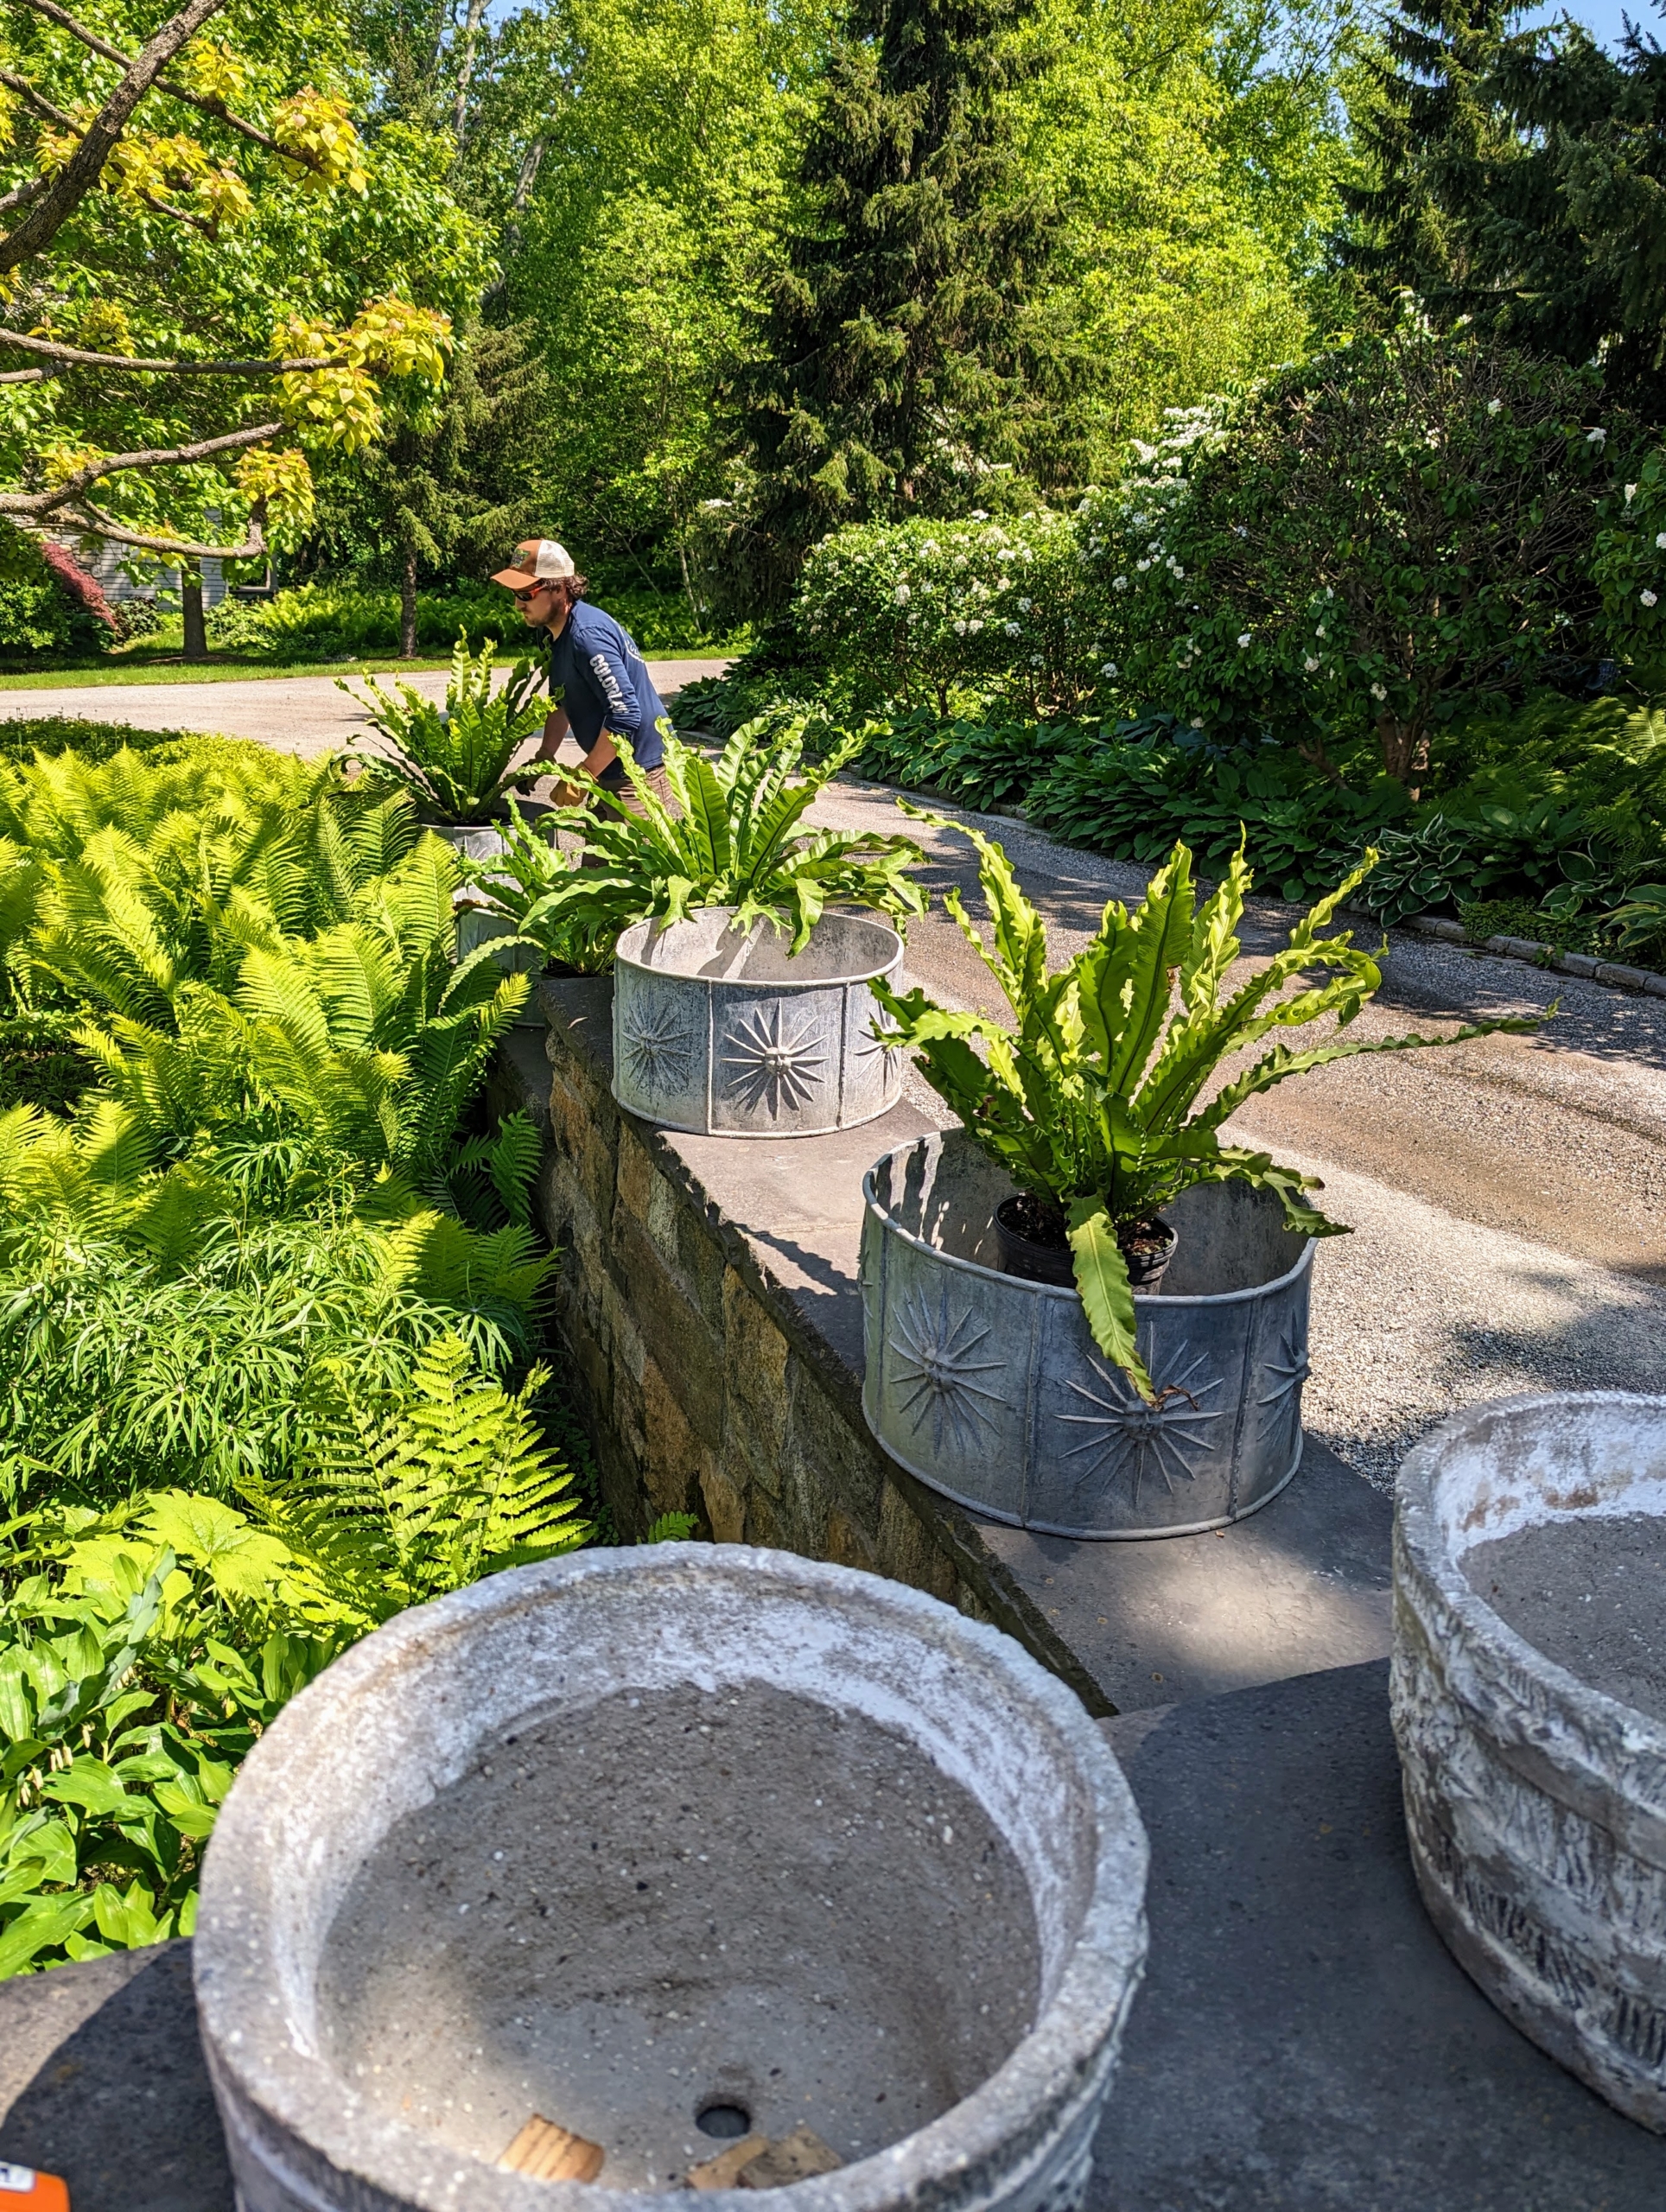
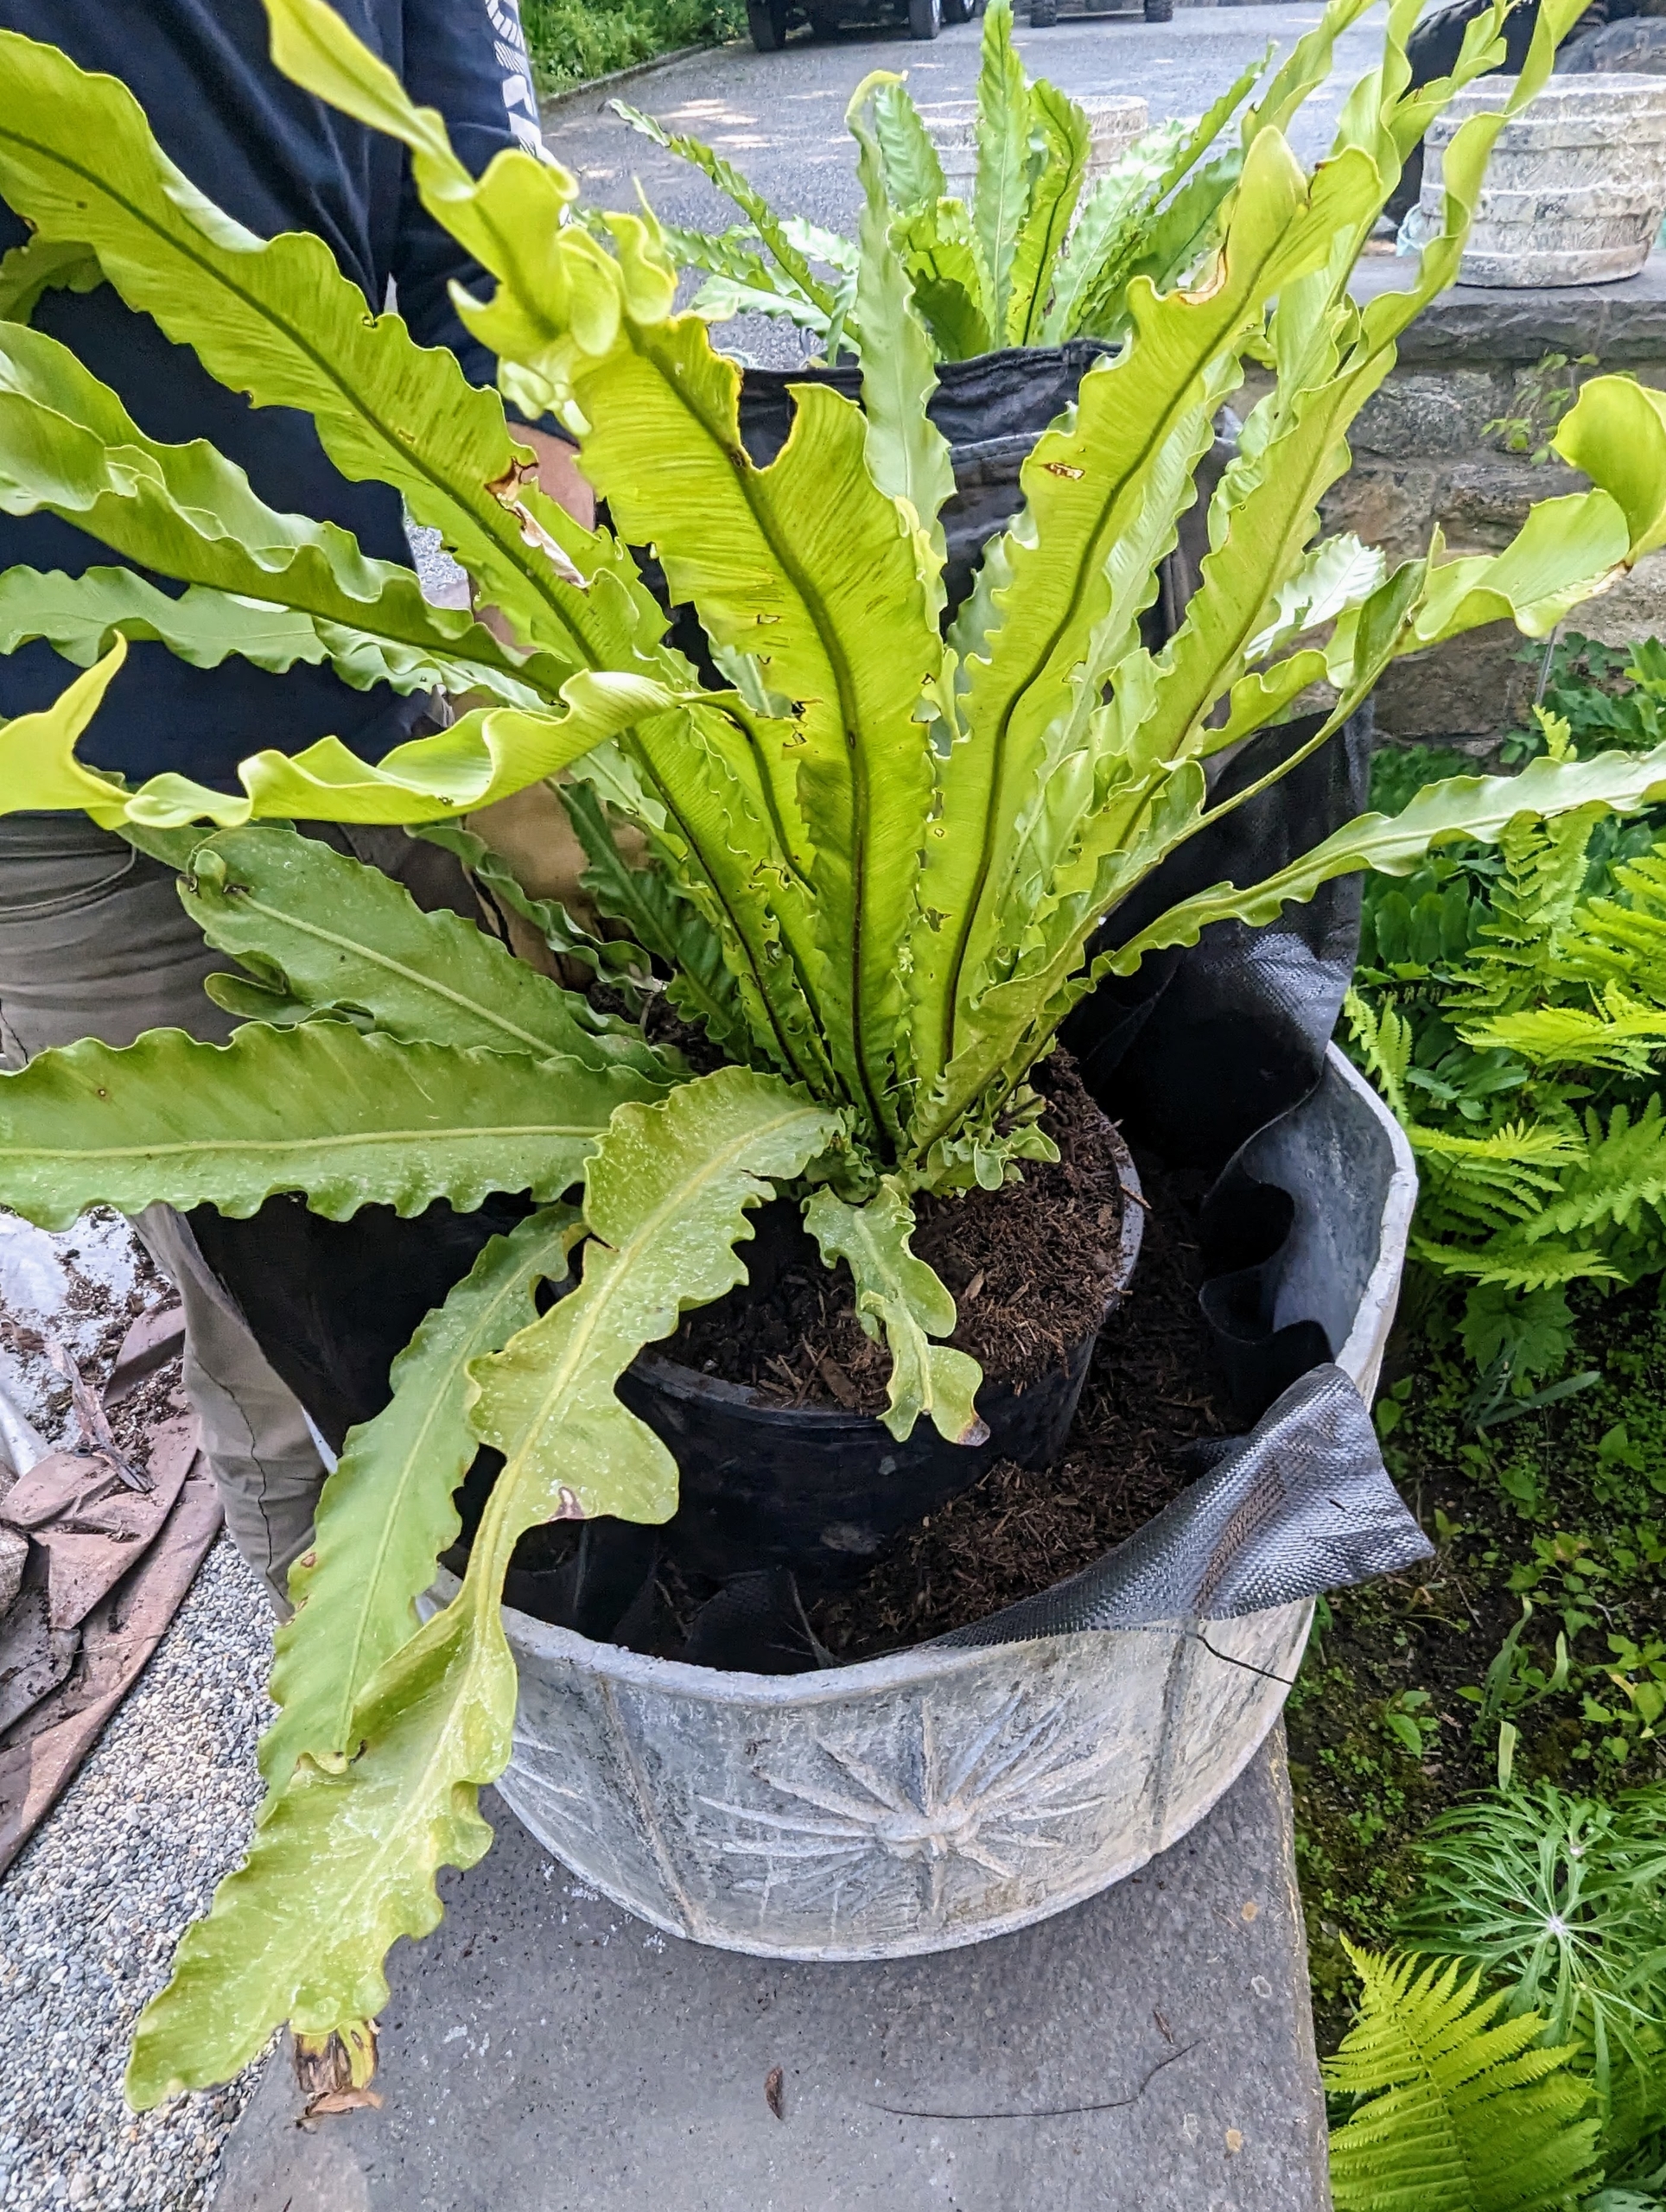
Here is a top view of the four potted bird’s nest ferns – these will receive medium to bright indirect light. These plants do not do too well in direct light as it will burn its fronds.
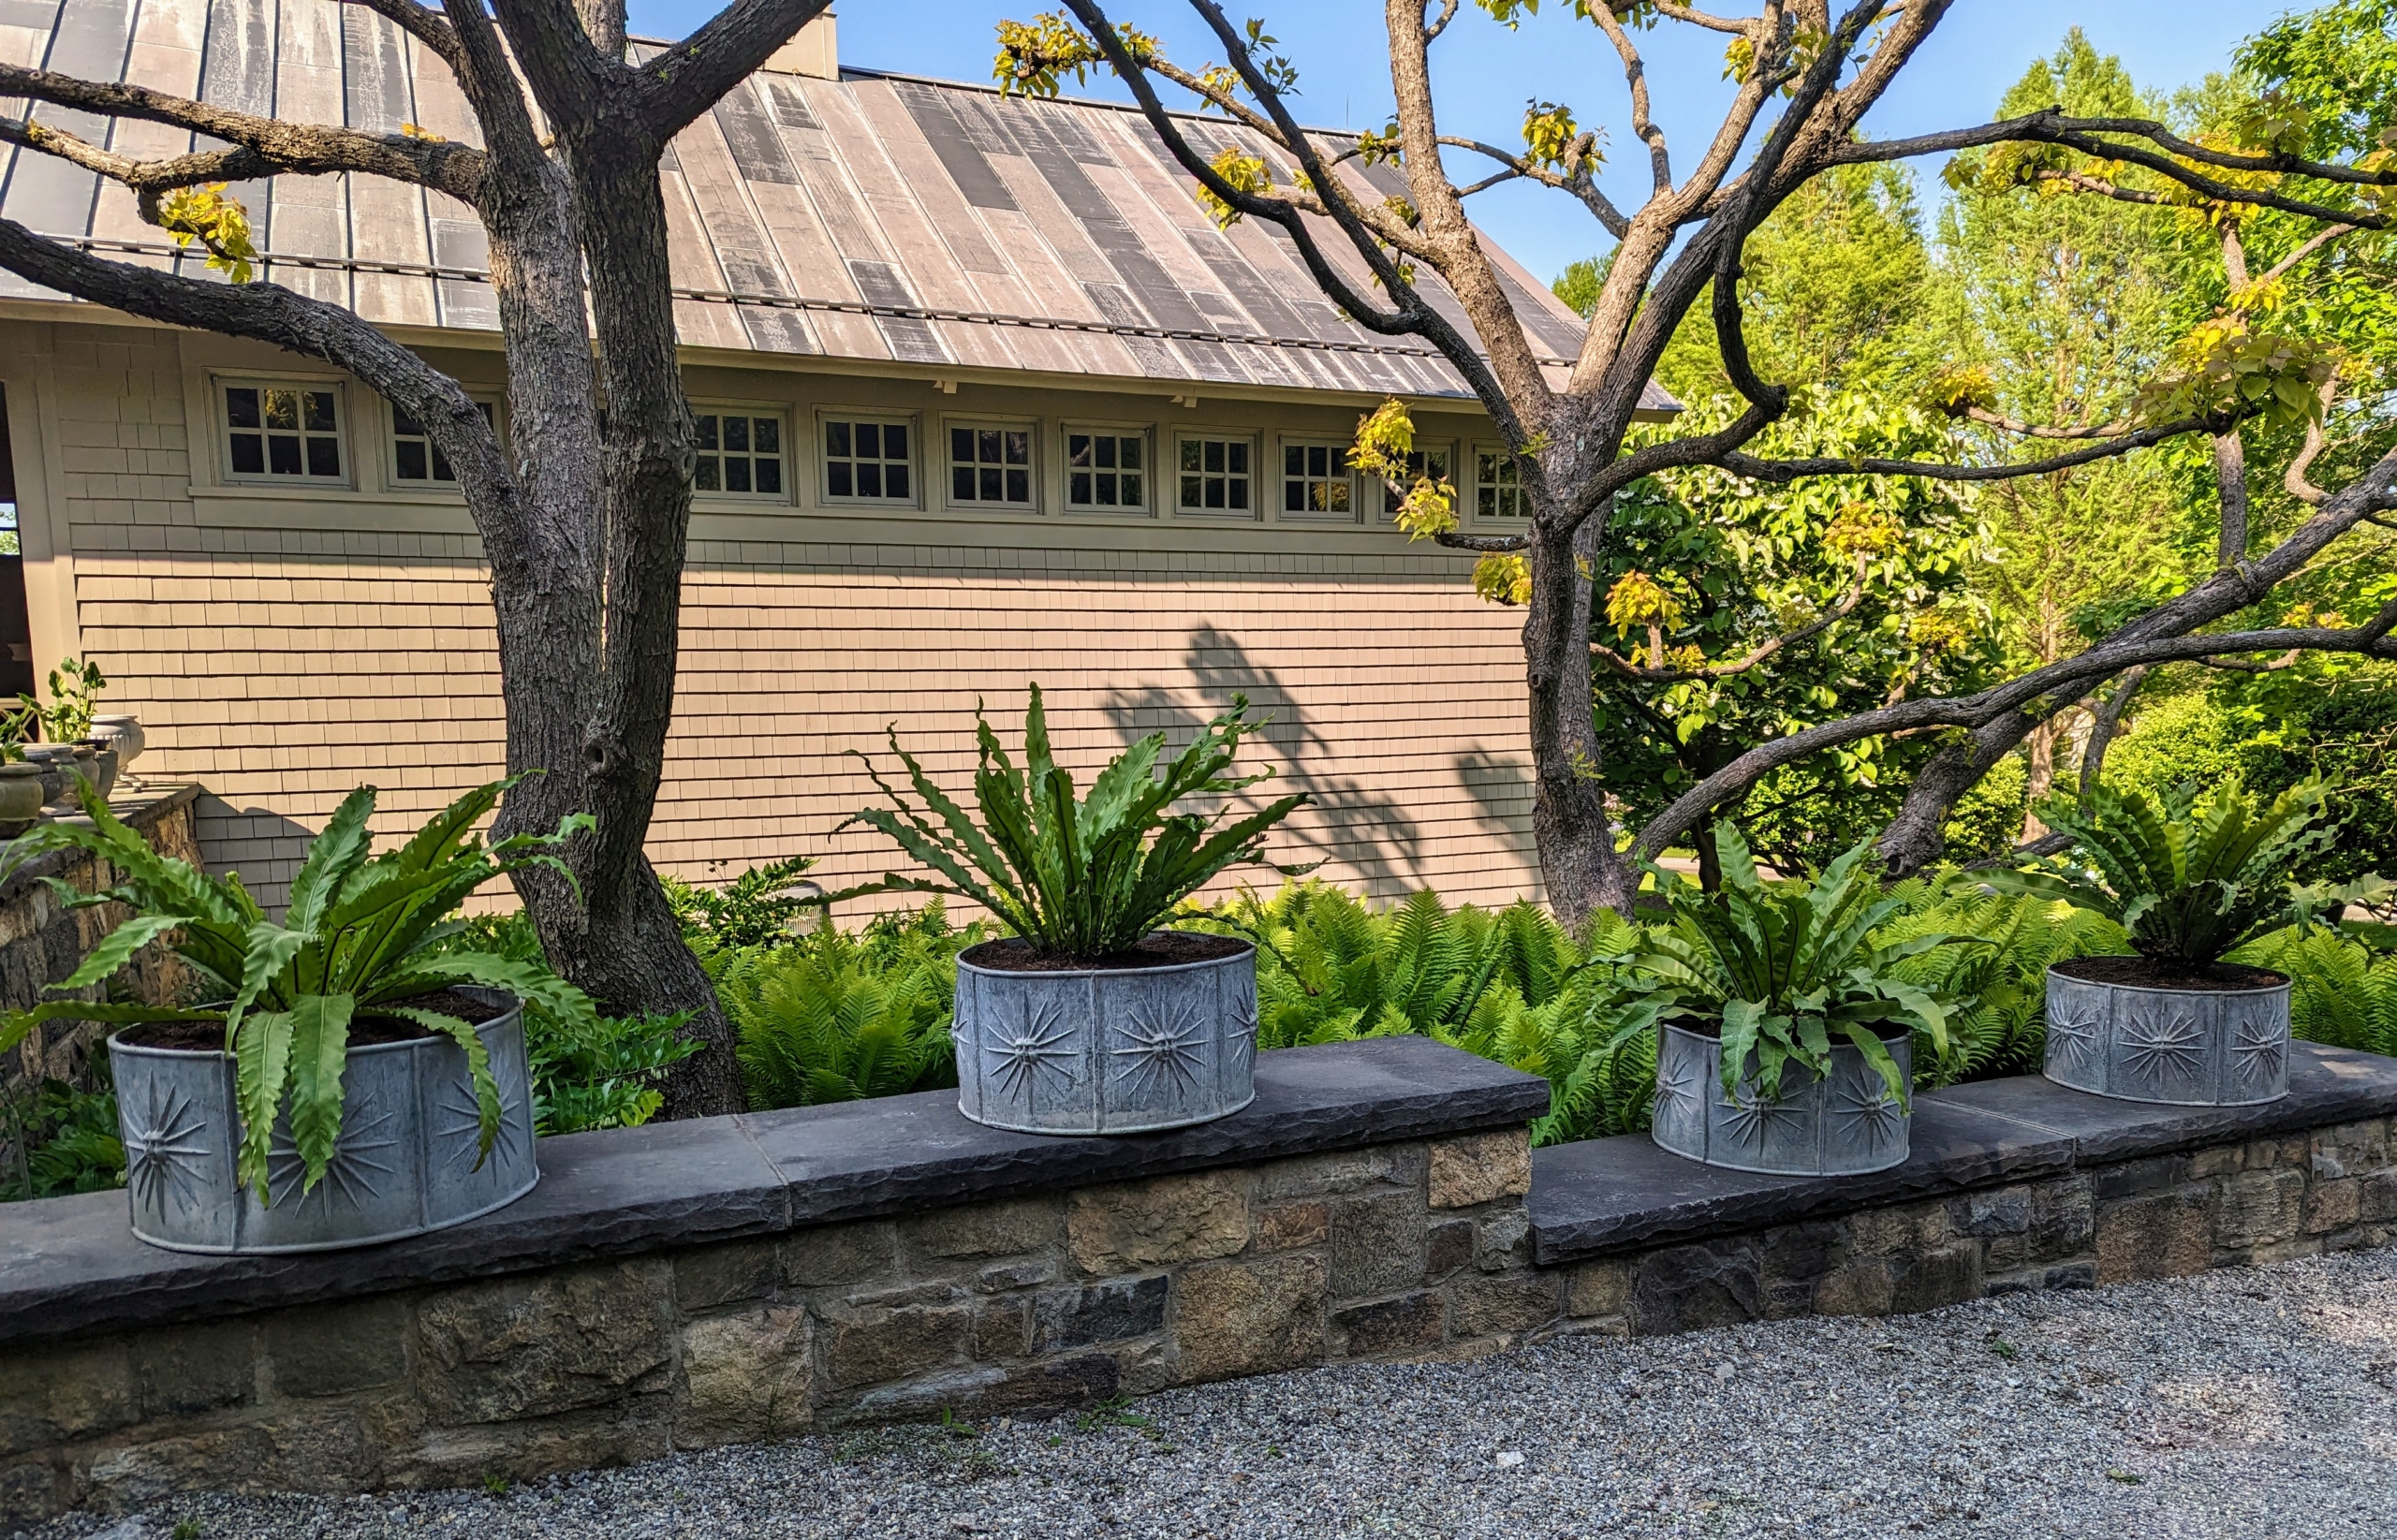
These ferns sit under the light shade of my catalpa trees, or cigar trees, Catalpa speciosa, named because of its long cigar-like seed pods. The ferns will do wonderfully here until they are removed from the pots and returned to their designated greenhouses for the next cold season.
It's always a joy to see beautiful potted plants displayed around the farm during the warm season.
Every year, I take out many of my outdoor ornamental urns and fill them with plants. They do so well outside in the summer months and look great arranged around my home. This week, my head gardener, Ryan McCallister, planted the troughs in front of my carport with various hens and chicks - those charming mat-forming succulents with fleshy pointed leaves arranged in rosettes. These plants are among the first I see when I walk out of the house and some of the last I see when I return.
Here are some photos, enjoy.
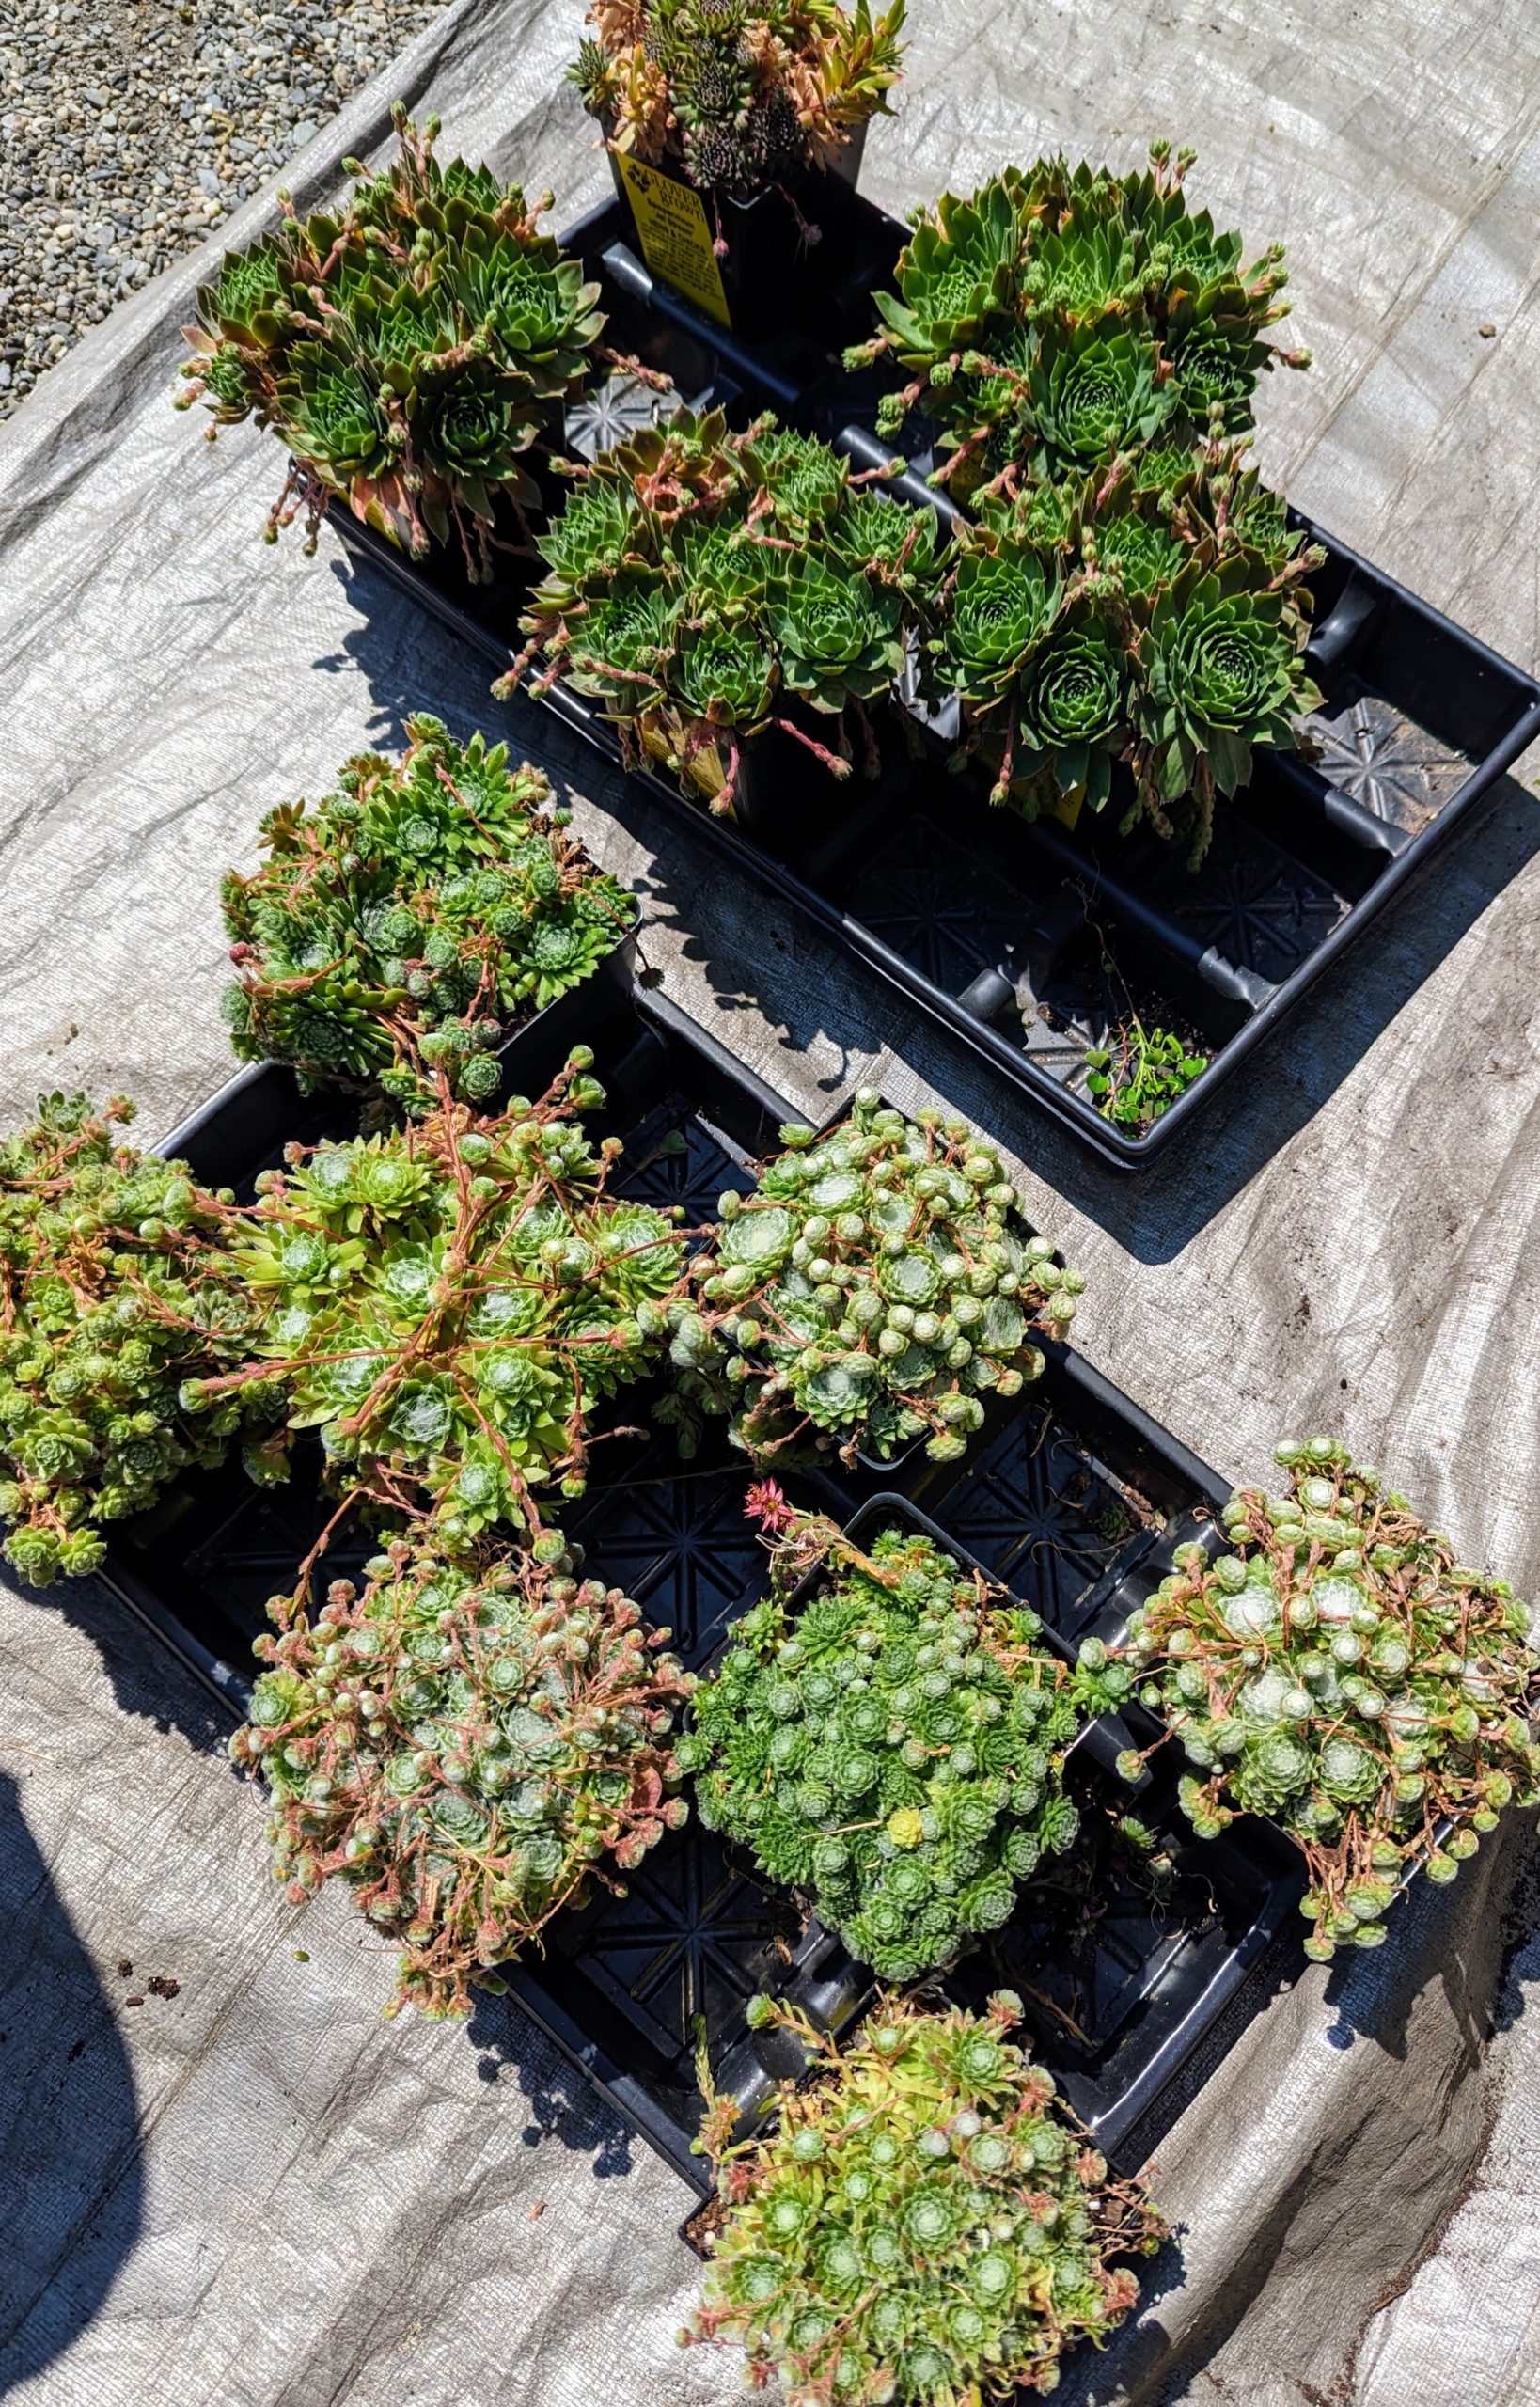
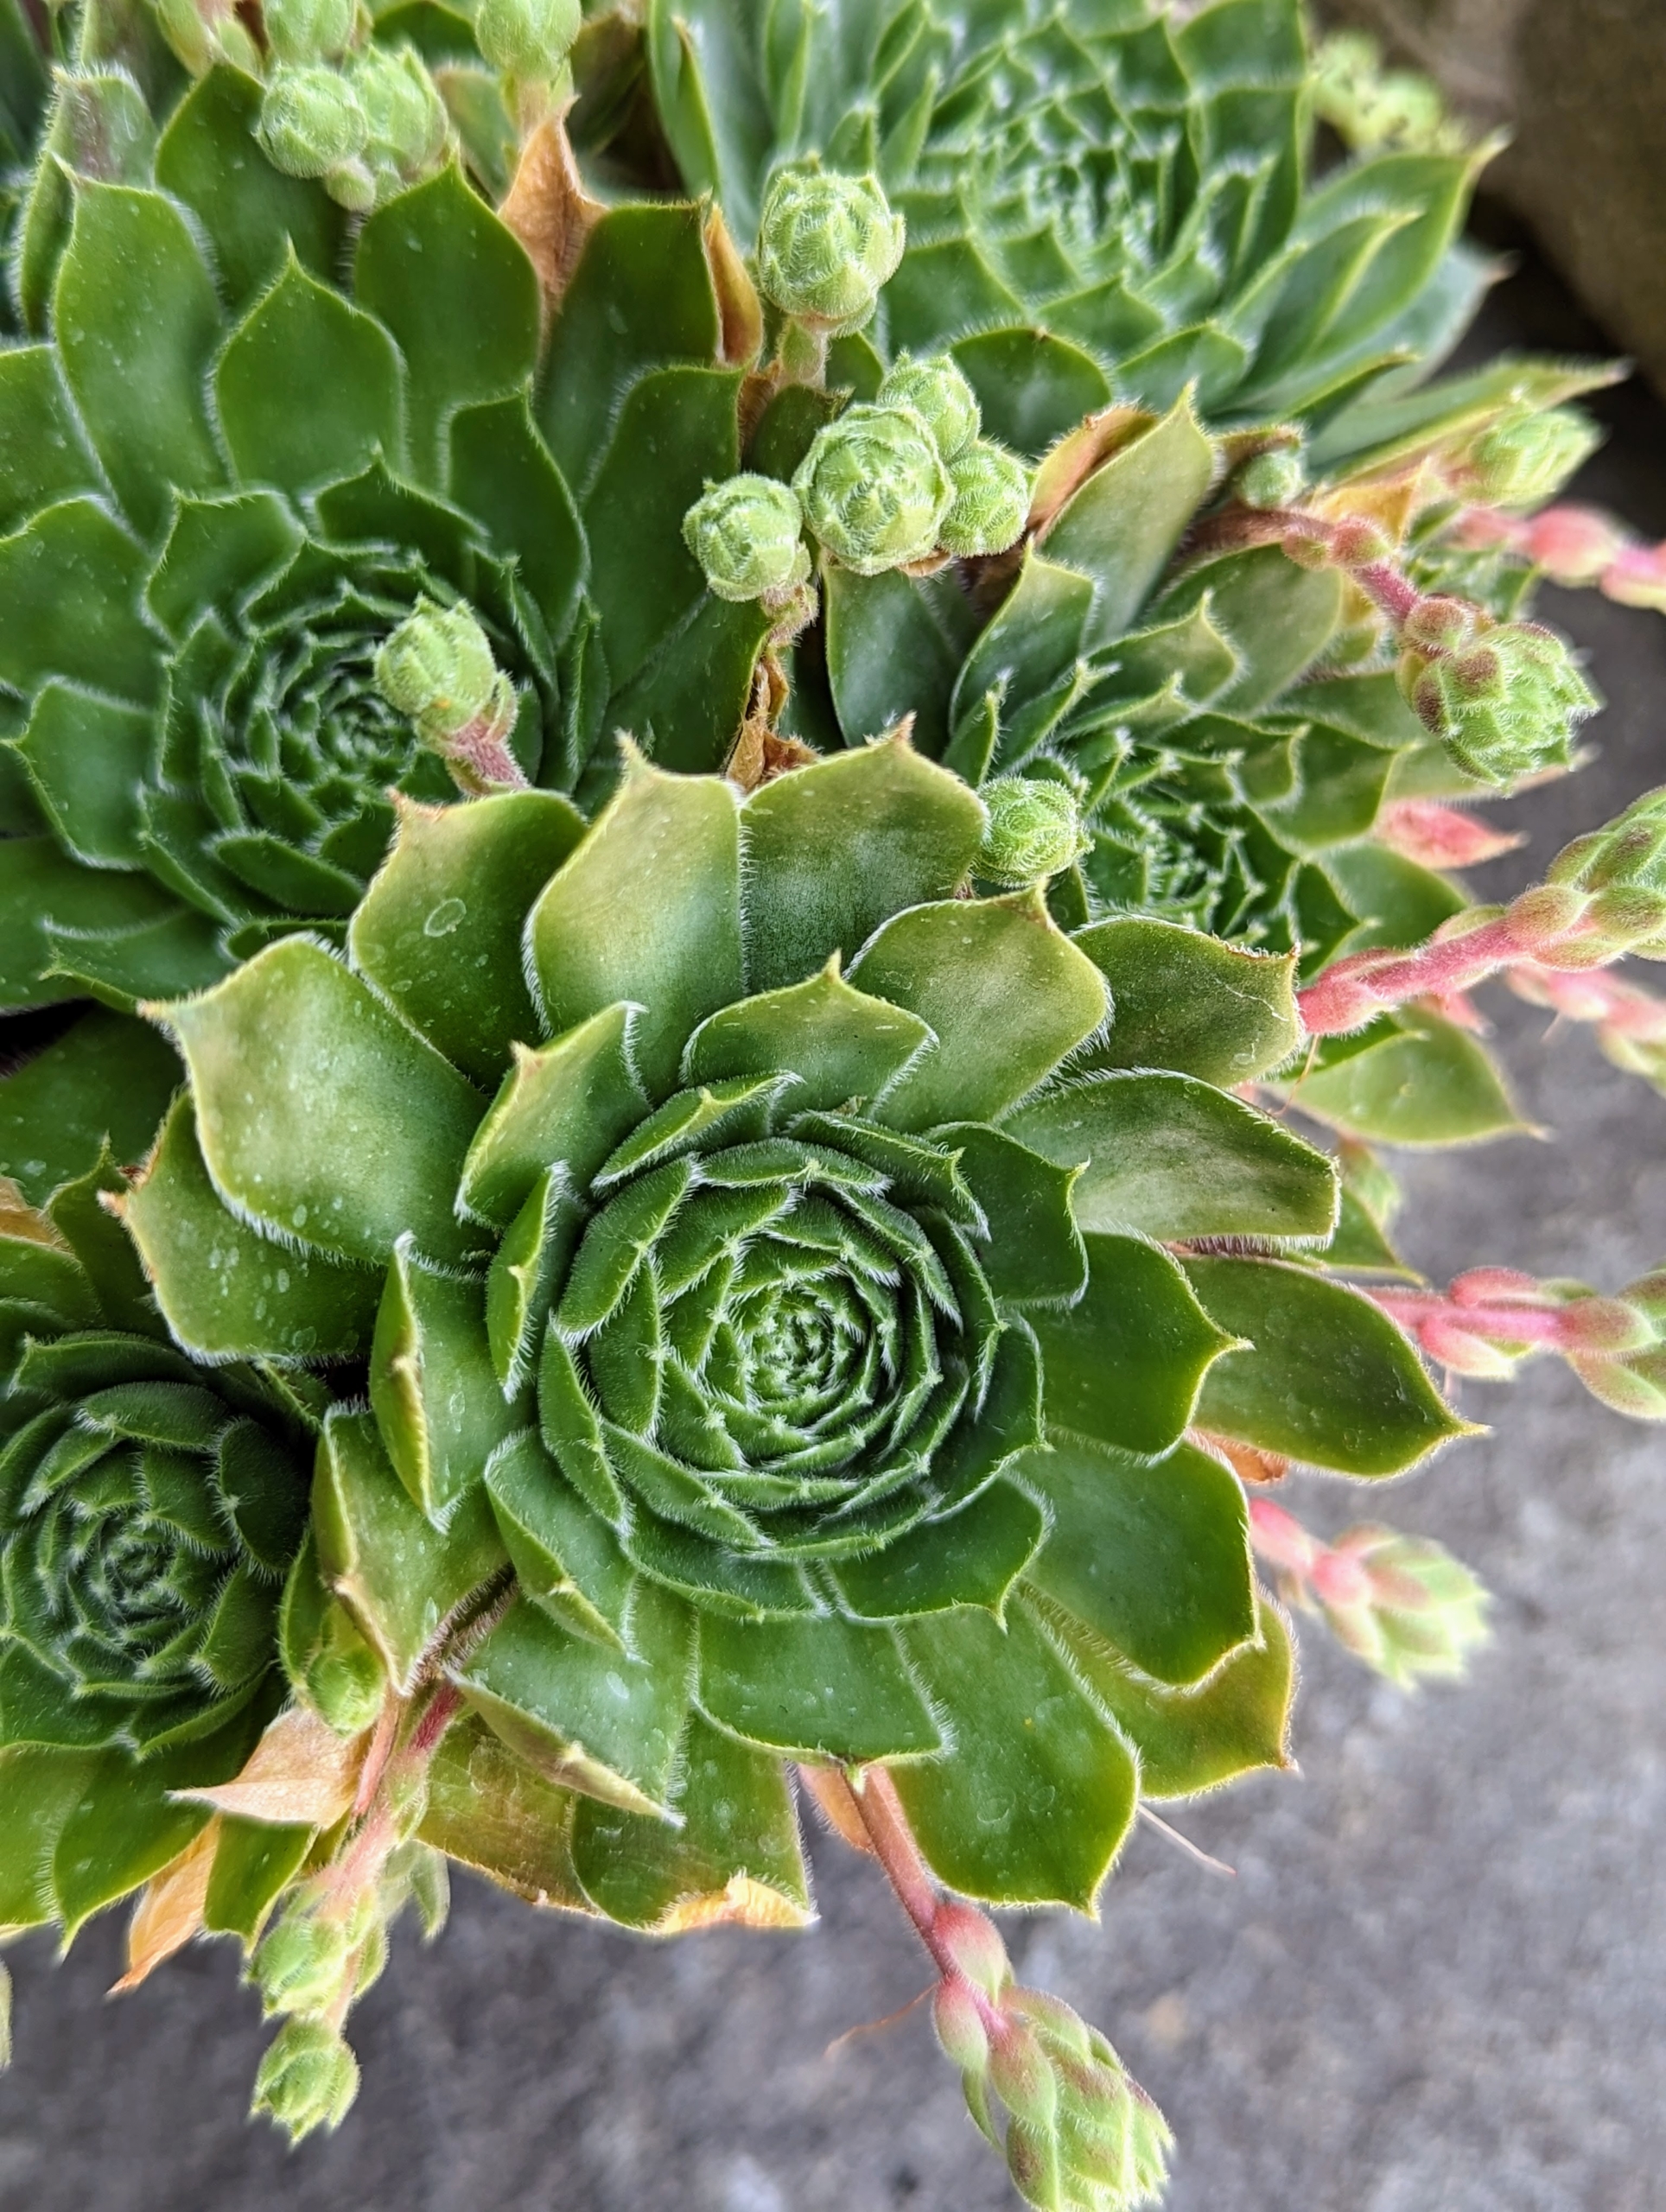
Hens and chicks are members of the Sempervivum group of succulent plants. They are also known as houseleeks. Hens and chicks are so called because of the rosette shape and habit of the plant to produce numerous babies.
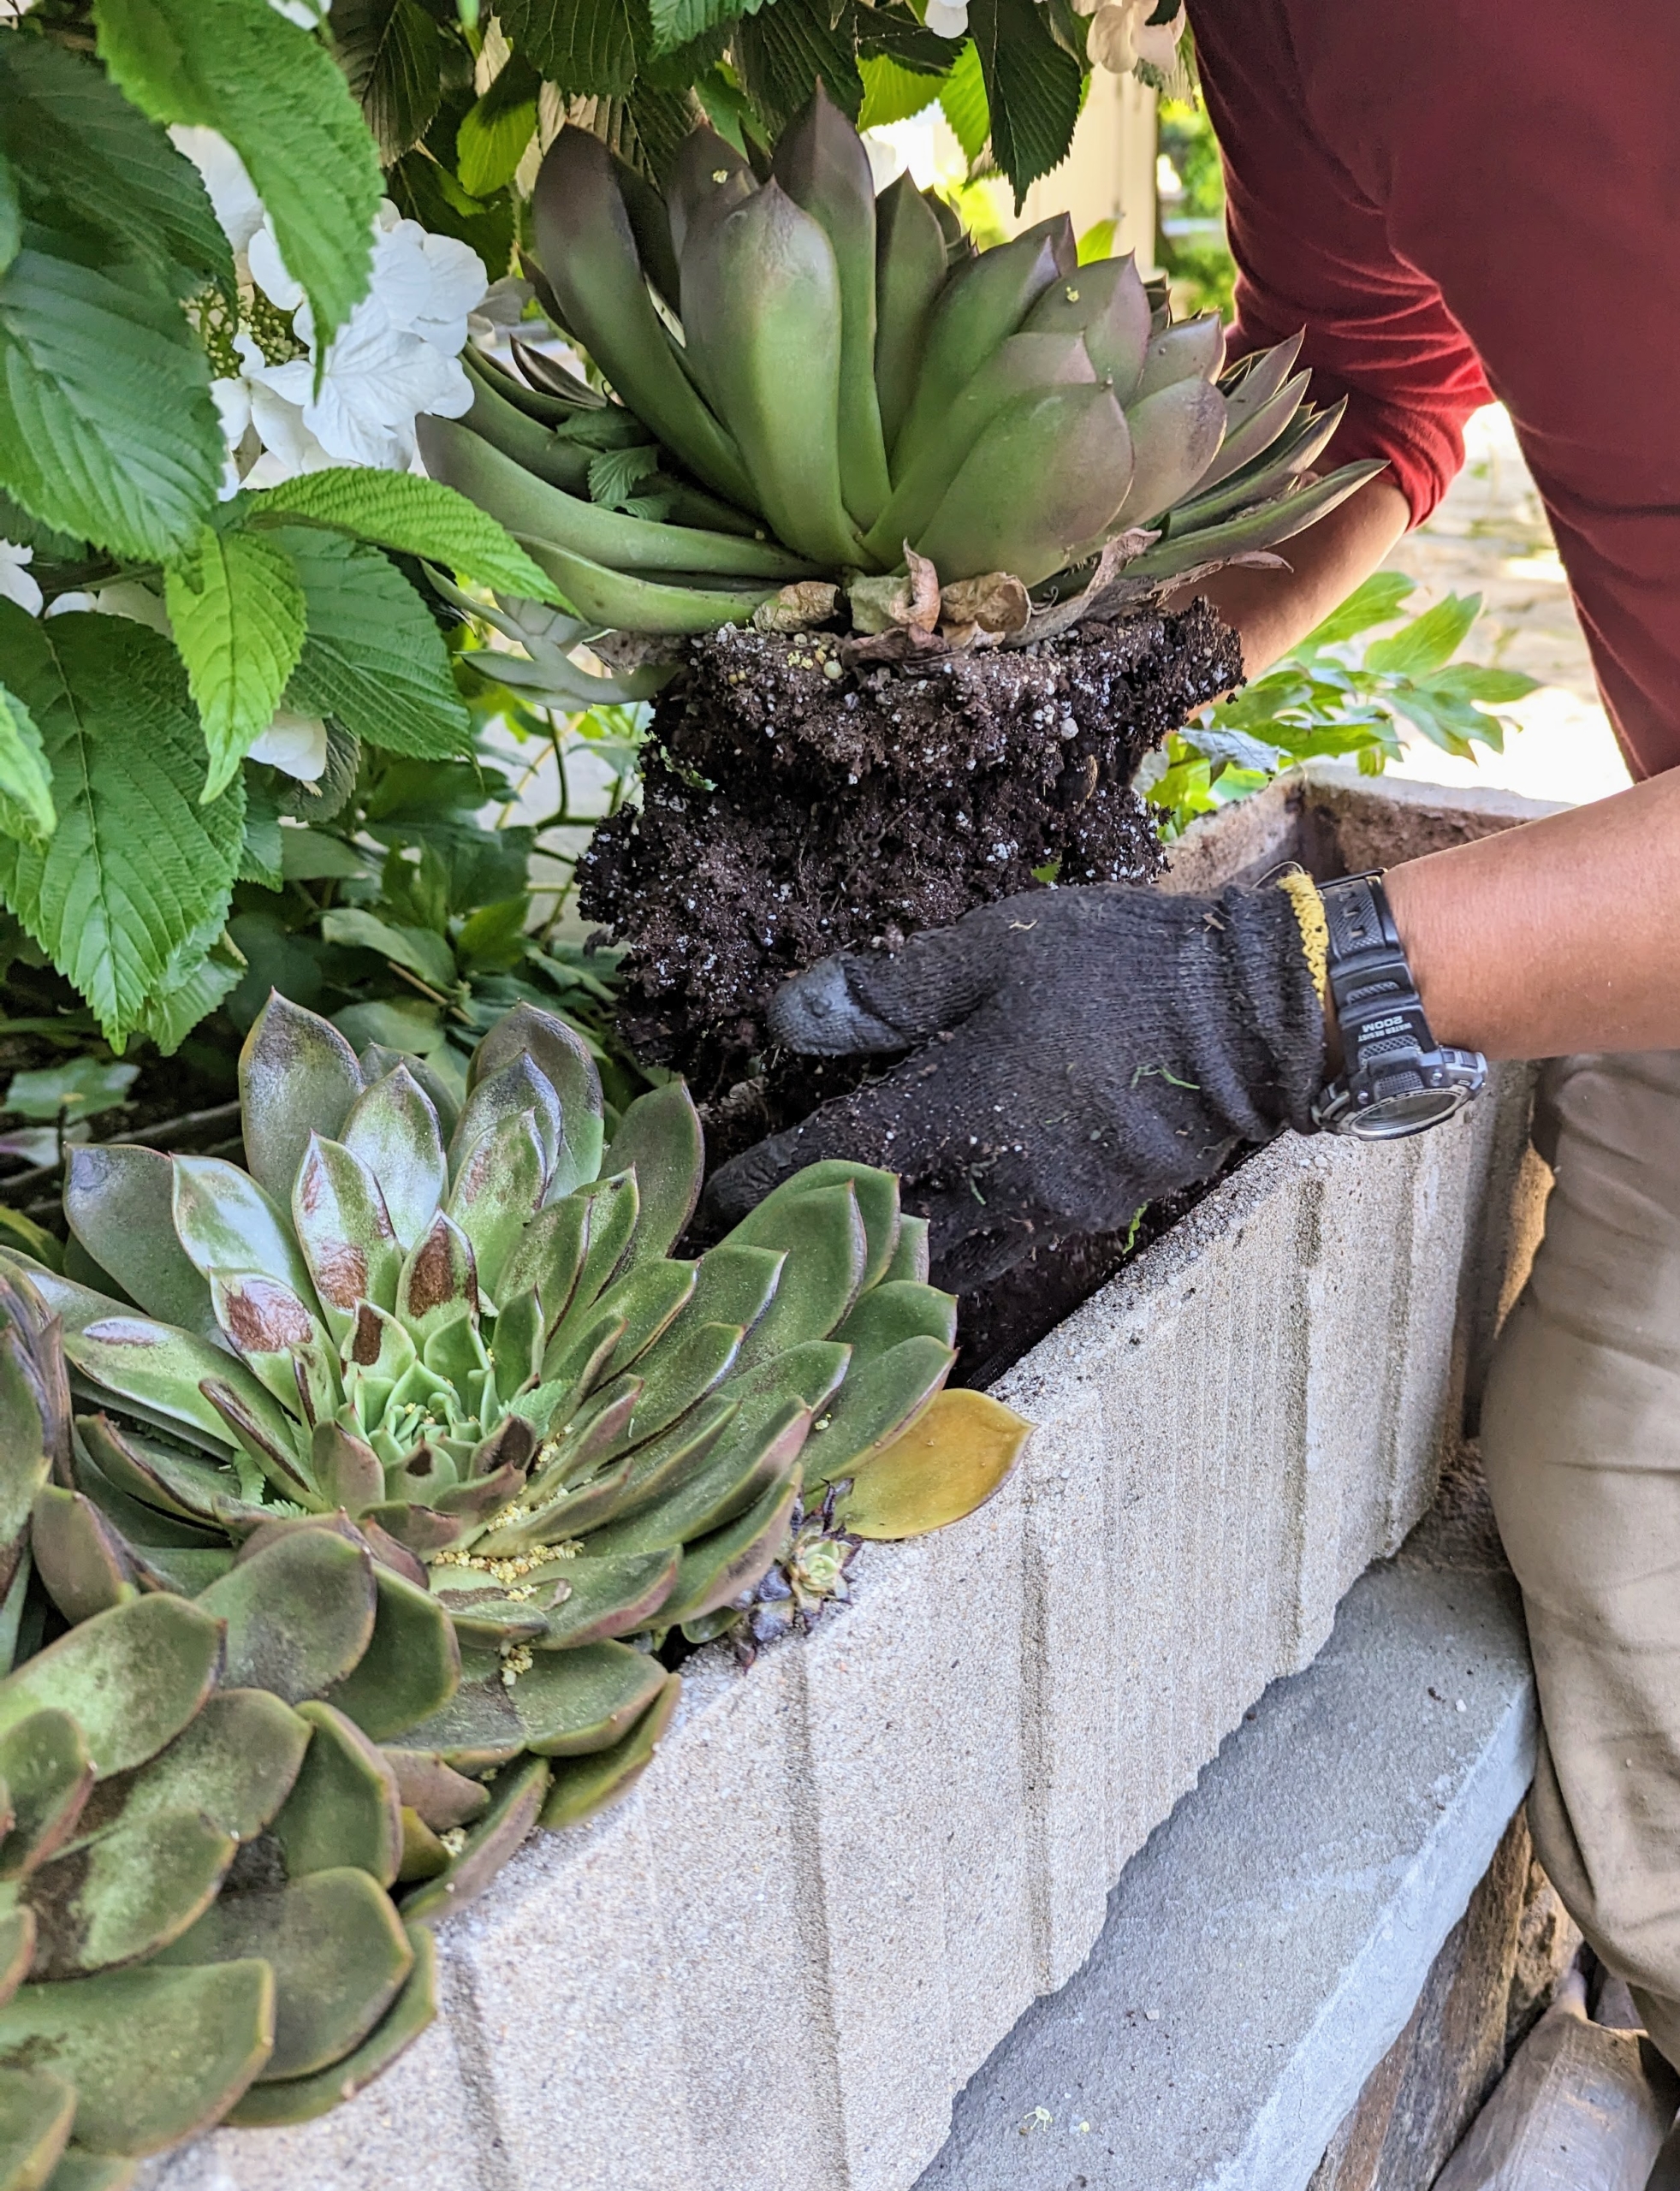
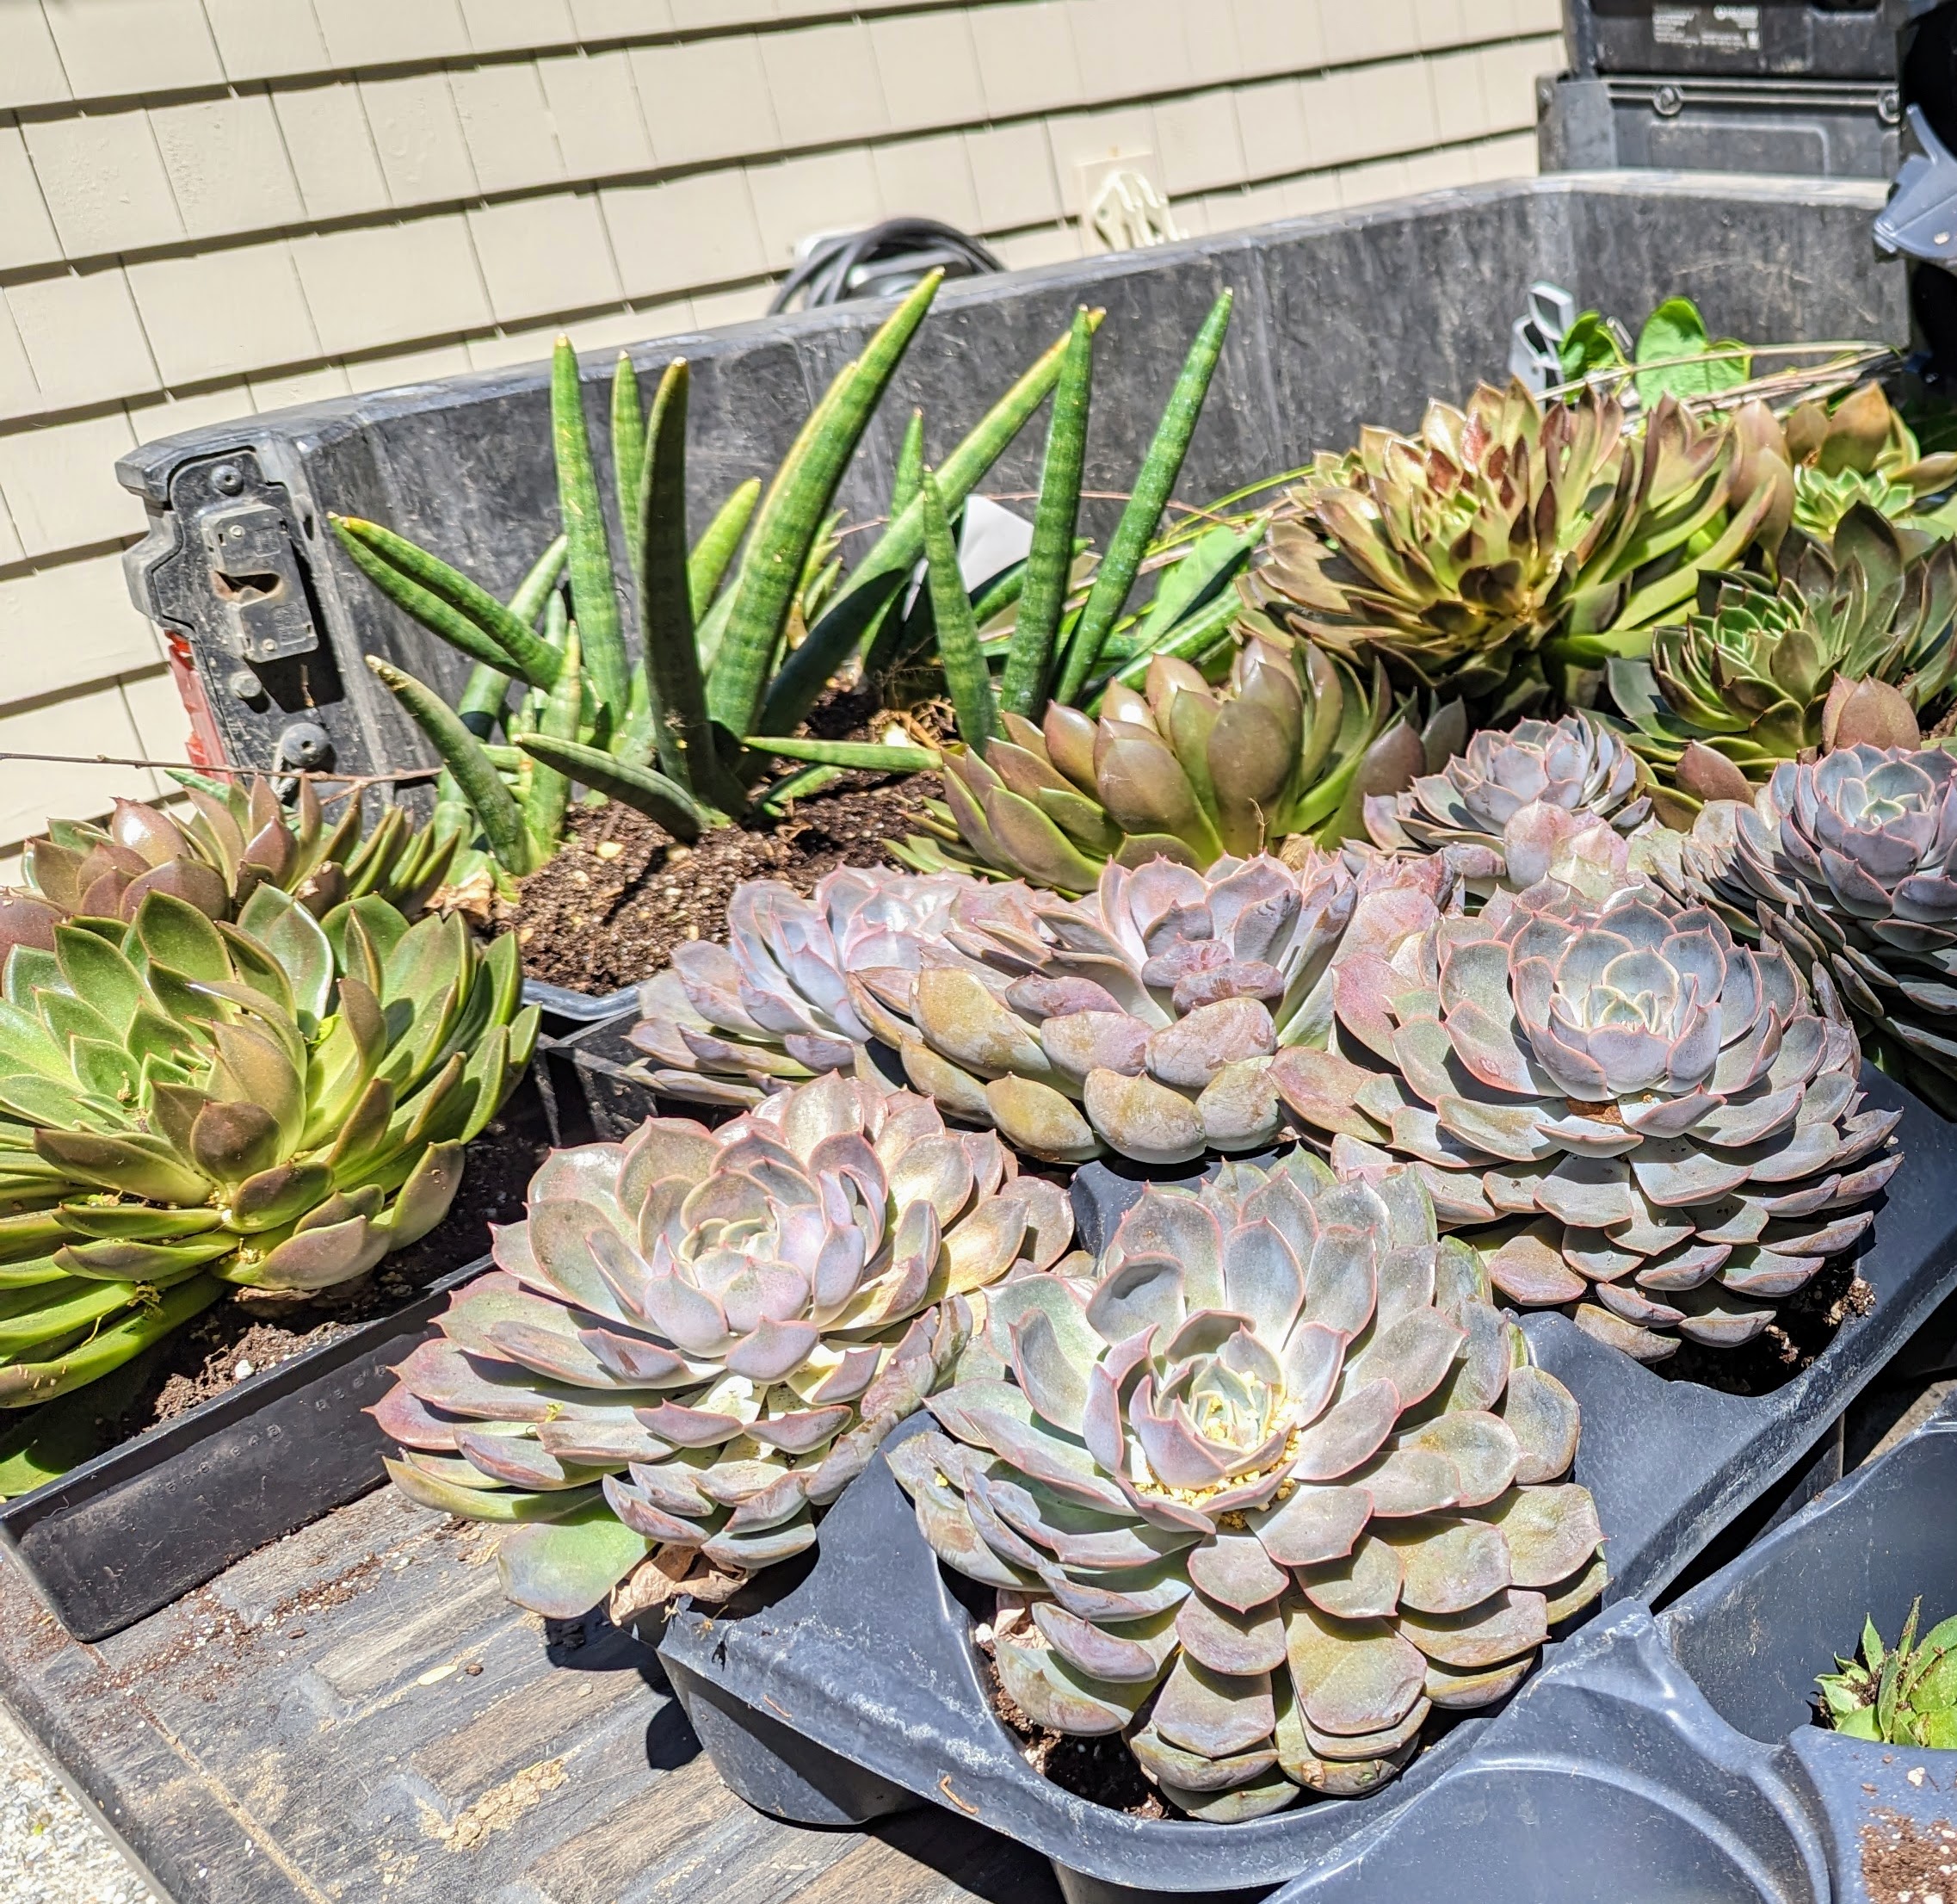
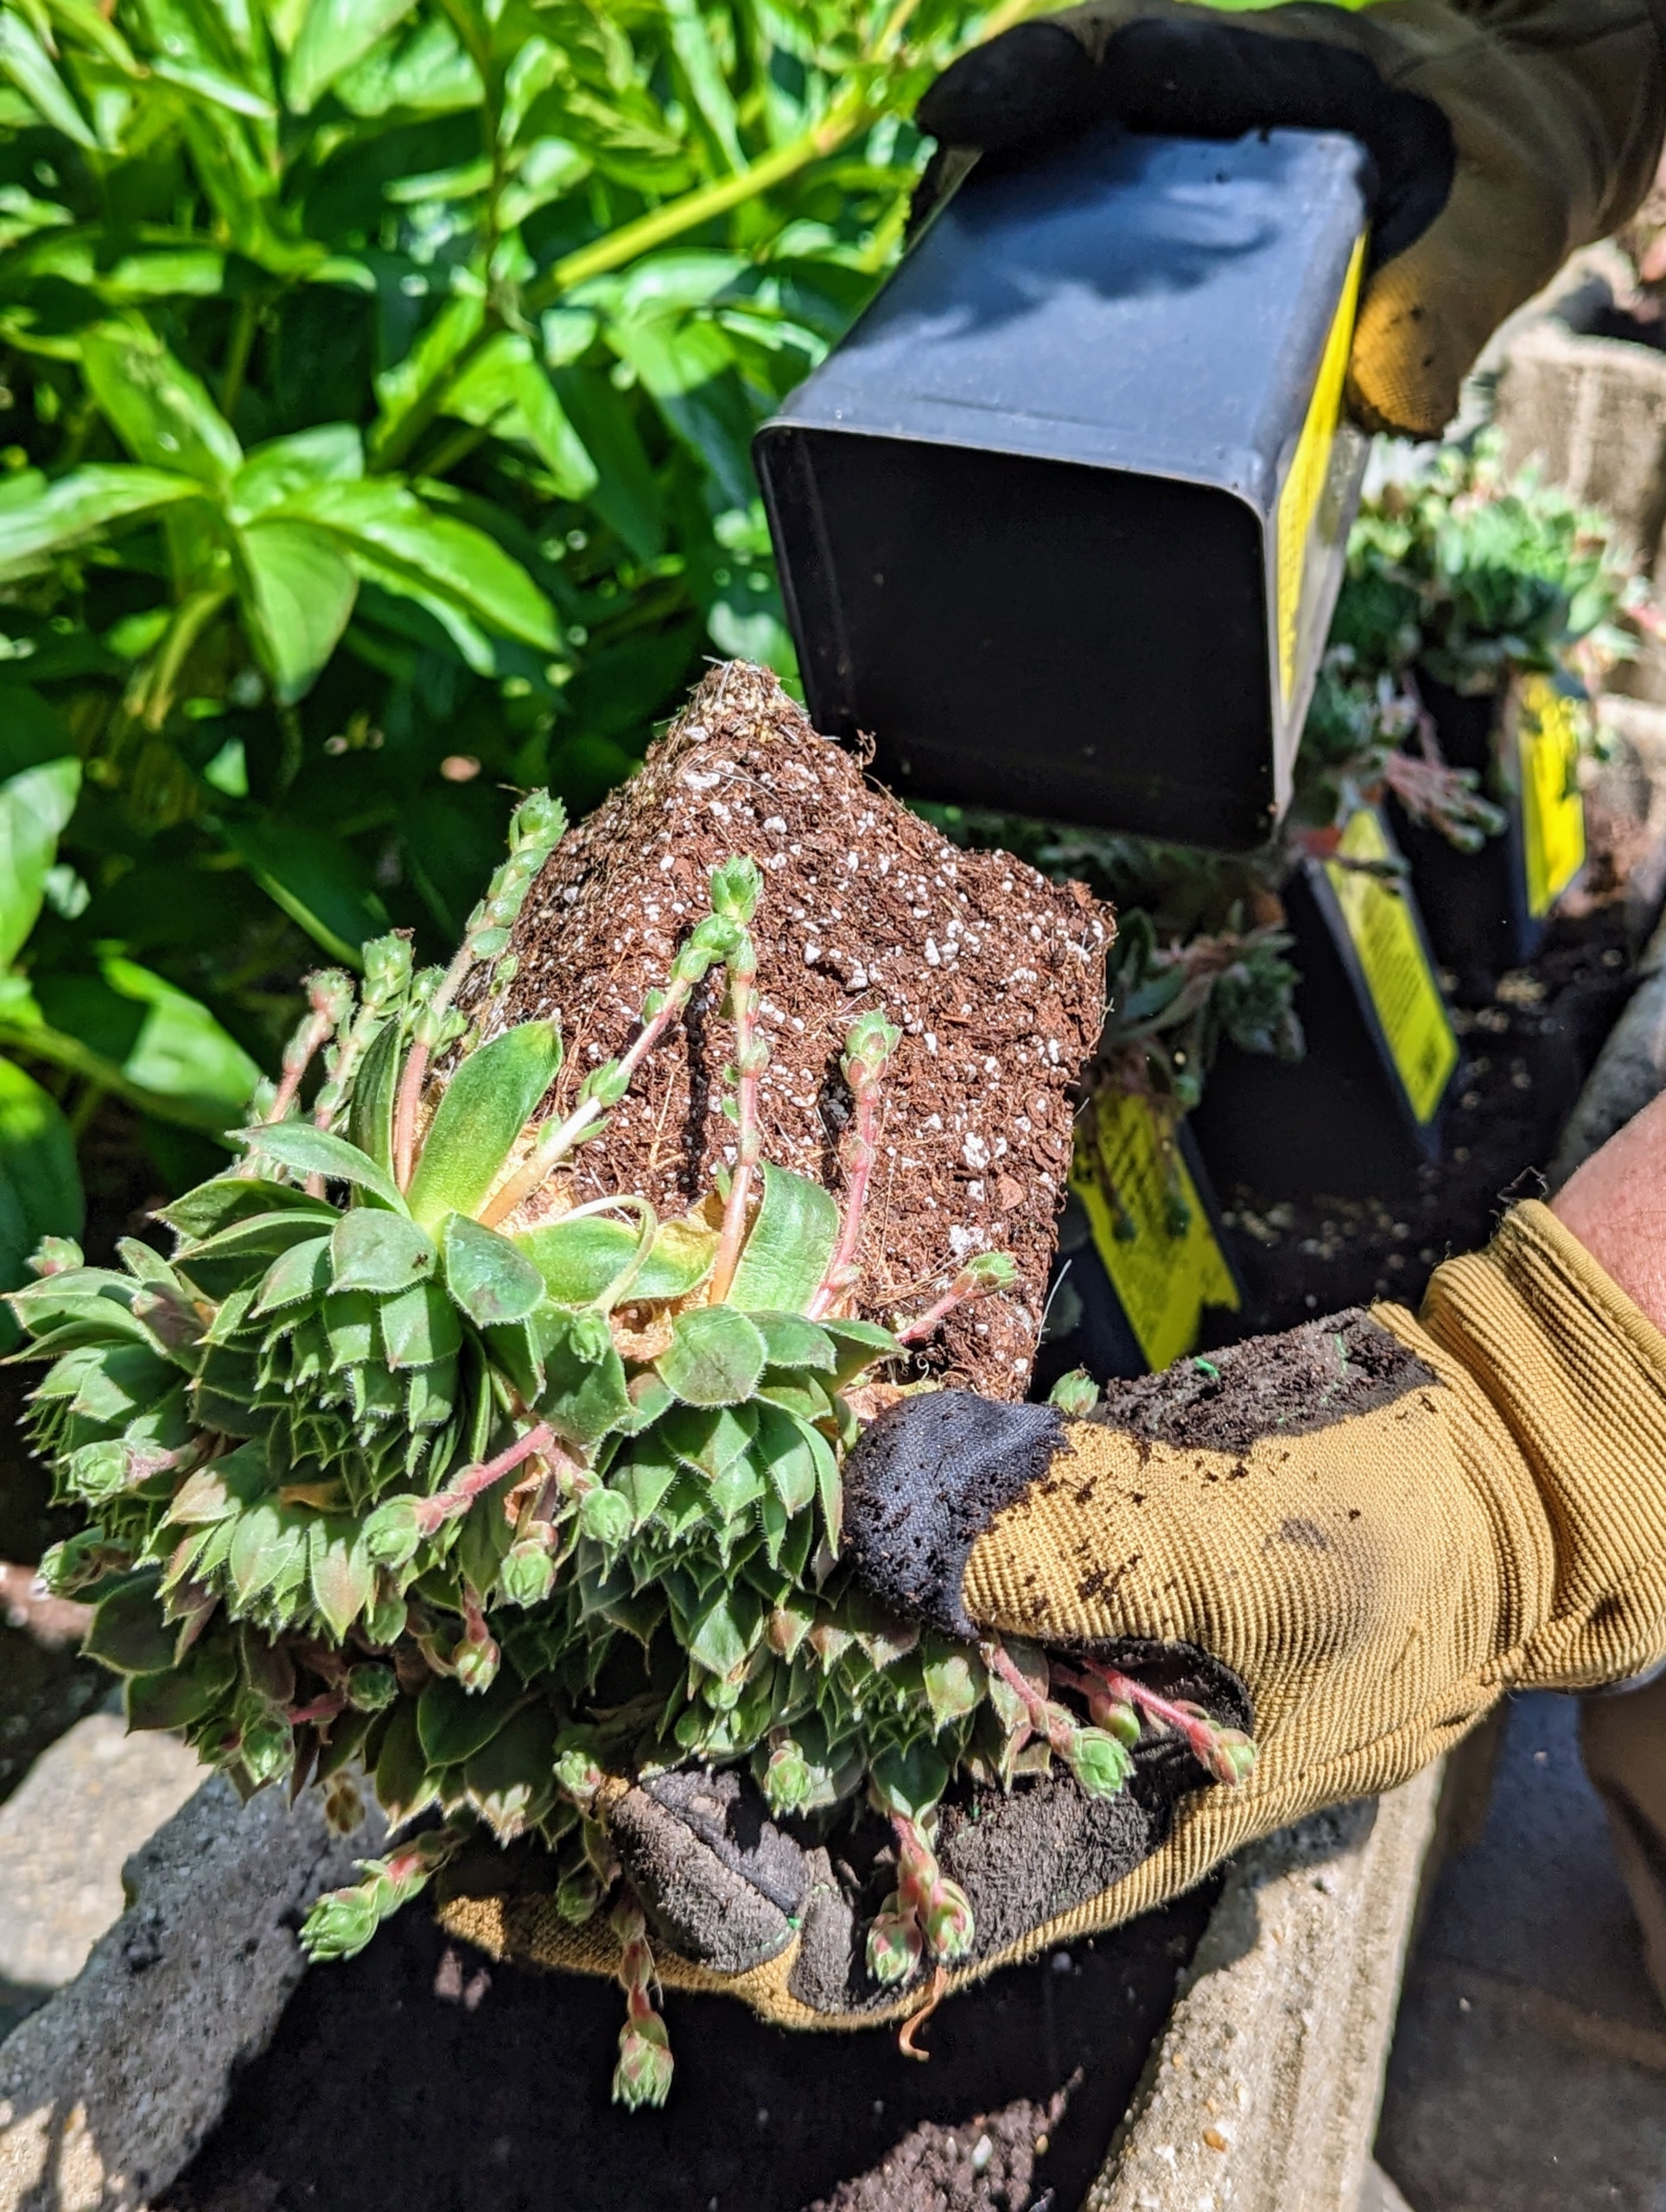
Before planting, Phurba and Ryan carefully remove the existing plants from the troughs. These similar succulents have been in these planters for some time and were due to be changed.
Most of these plants are varieties of Echeveria and Sansevieria. They are loaded into the back of our Polaris vehicle and will be taken to my main greenhouse for repotting.
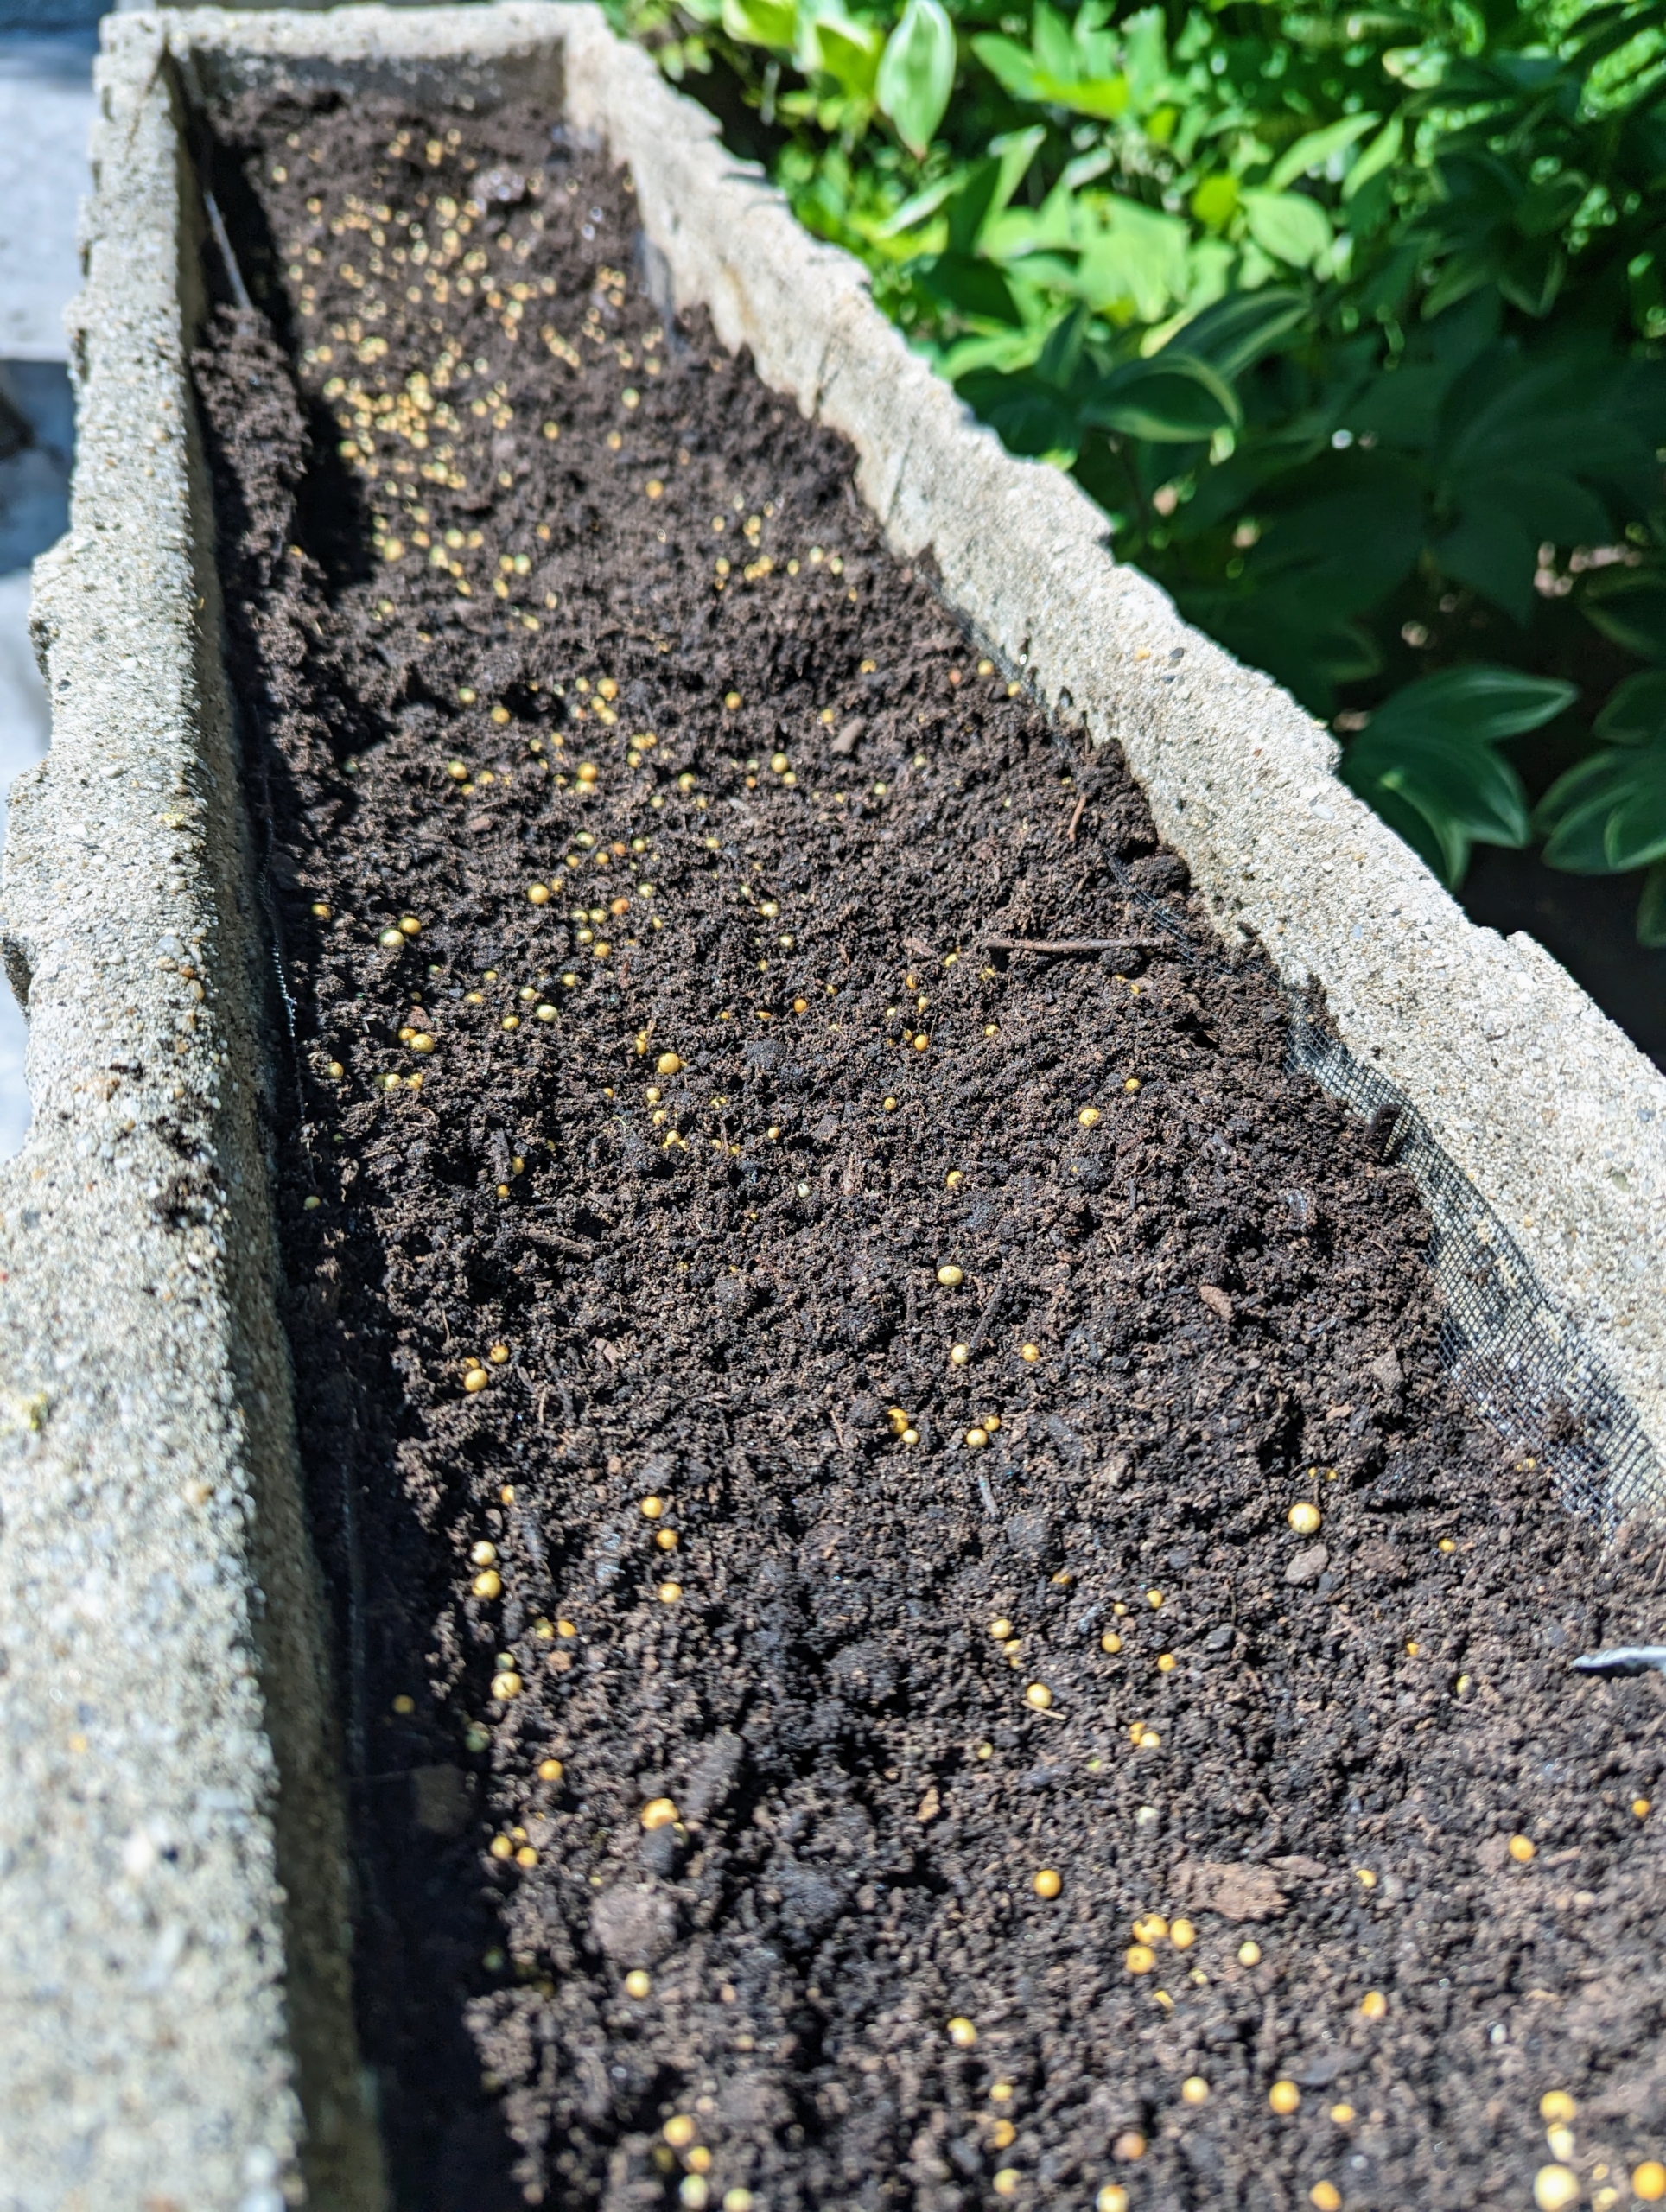
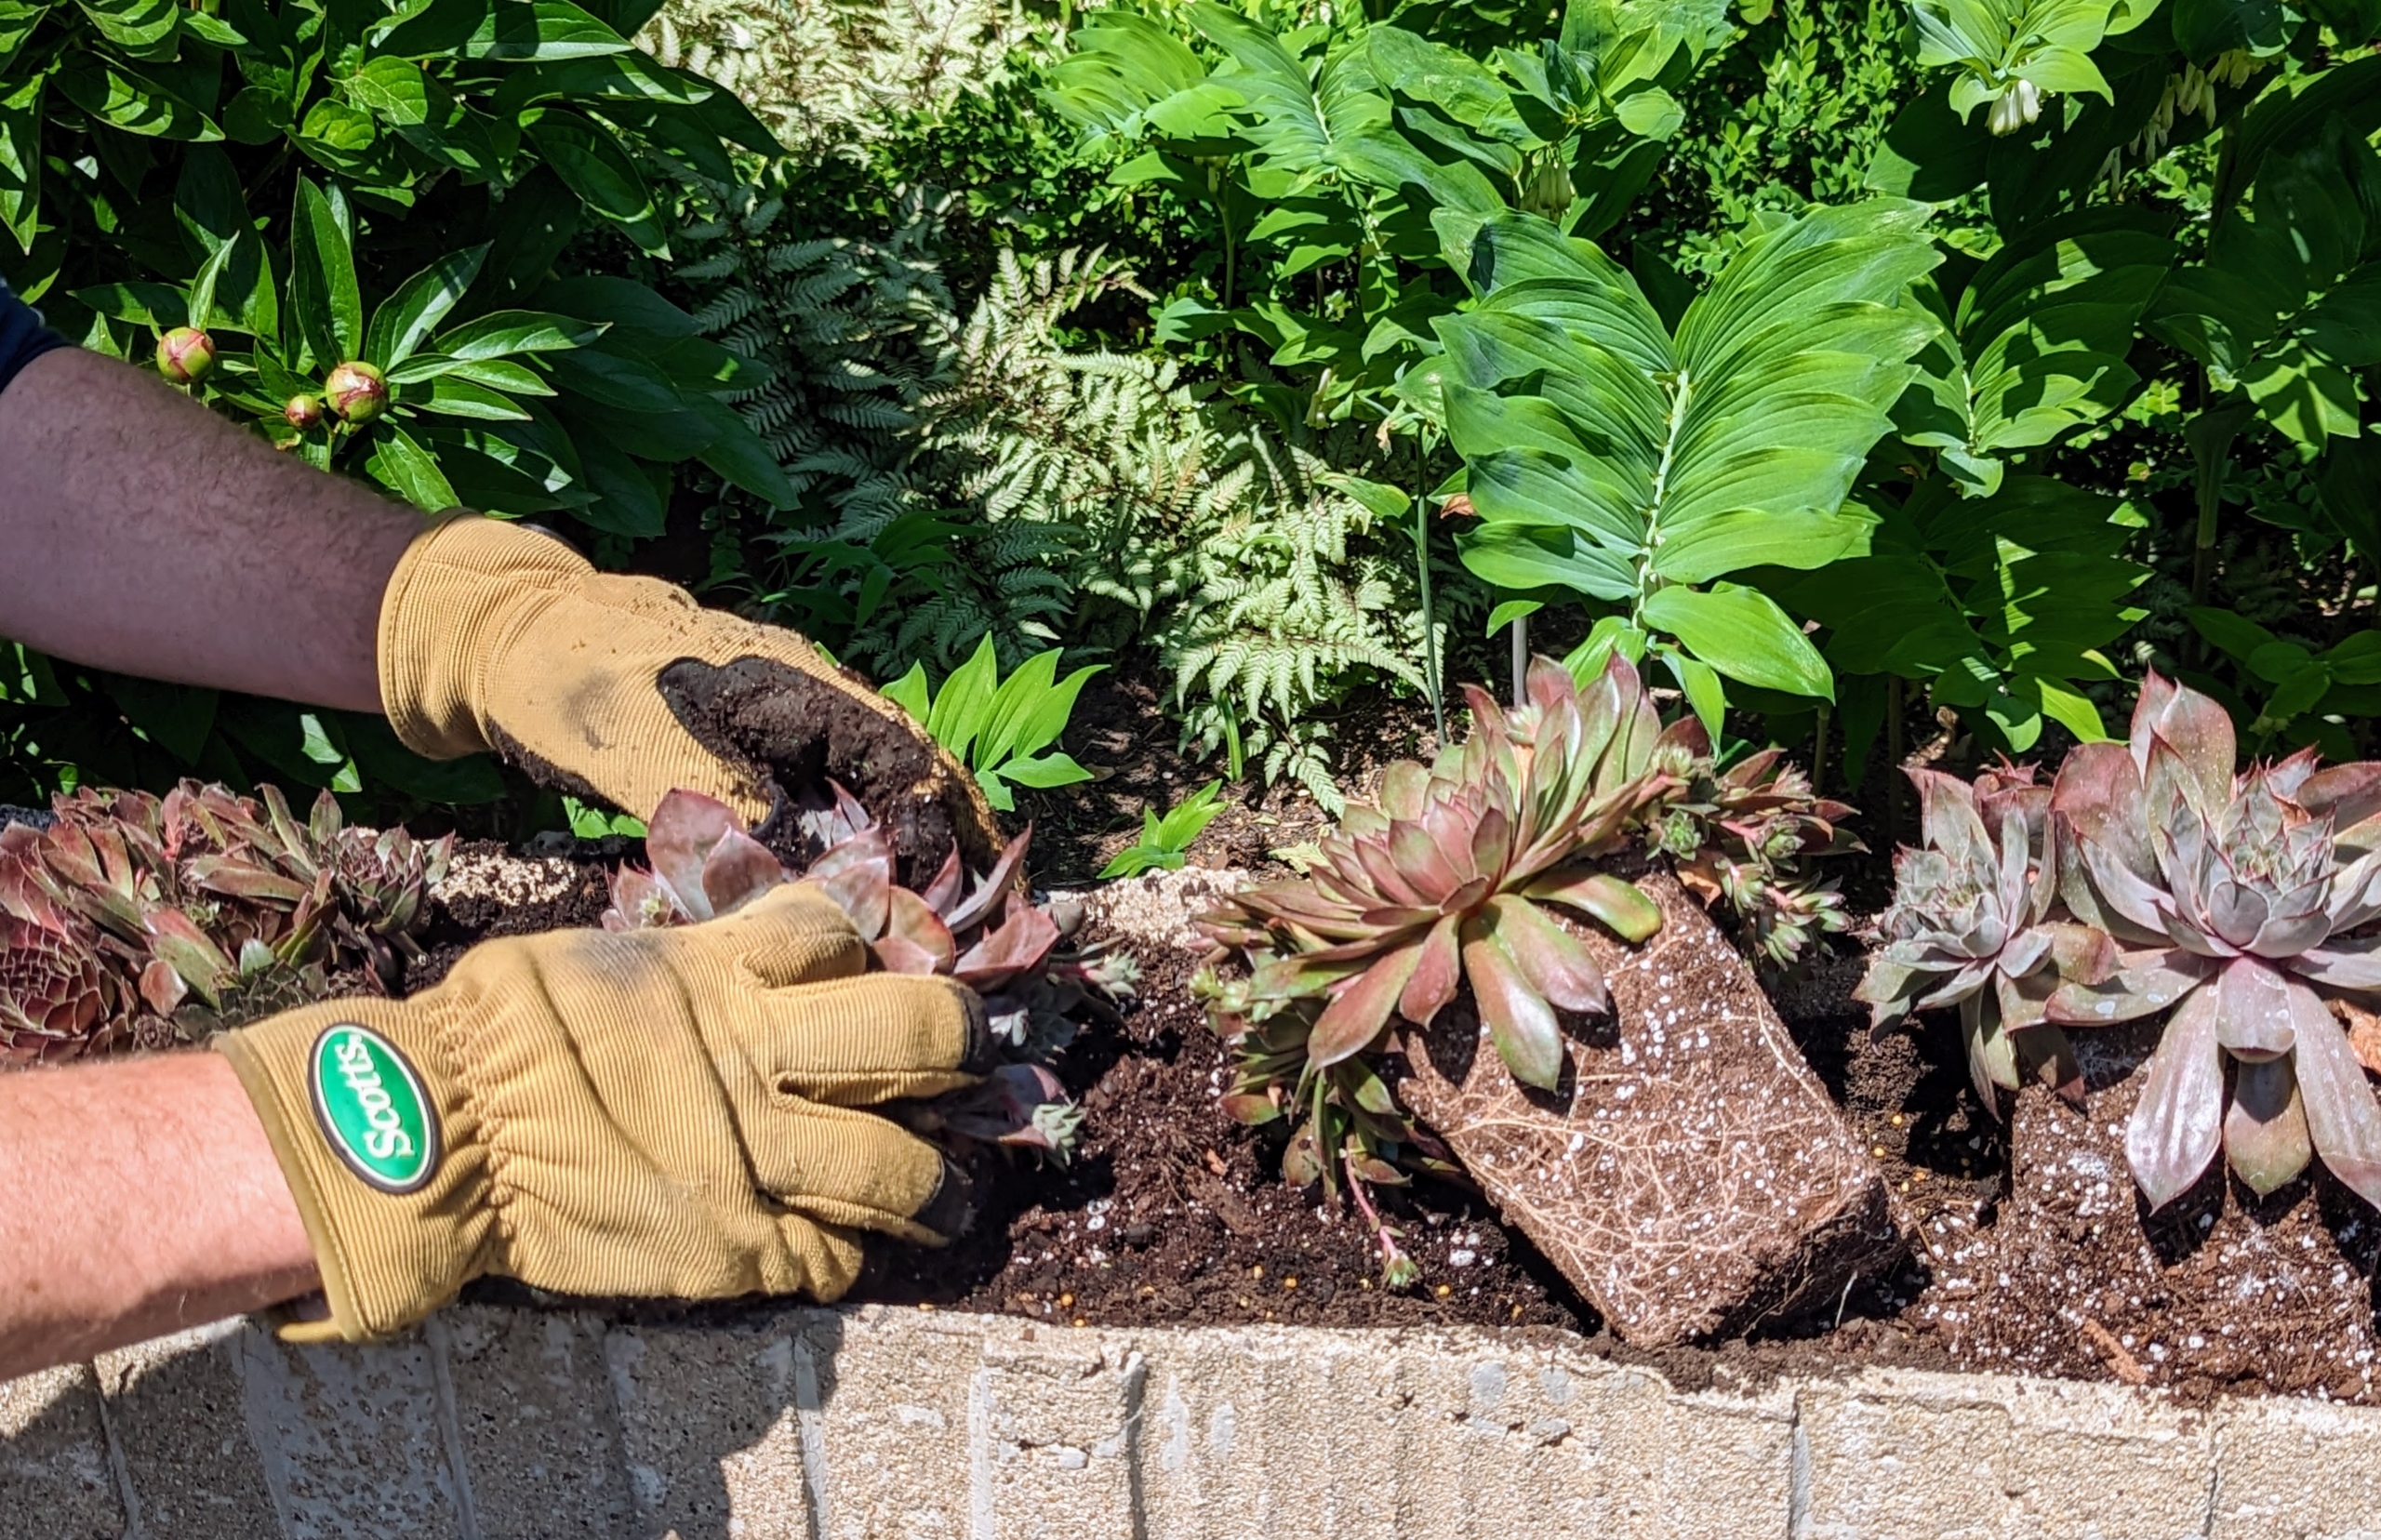
The trough is filled with a good quality potting soil. Using a proper soil mix will help to promote faster root growth and give quick anchorage to young roots. Fertilizer is also added to the soil.
Osmocote prills contain a core of nutrients including nitrogen, phosphorus and potassium. As the plant’s root system takes-up nutrition from the soil, it also takes up the needed nutrients from the Osmocote.
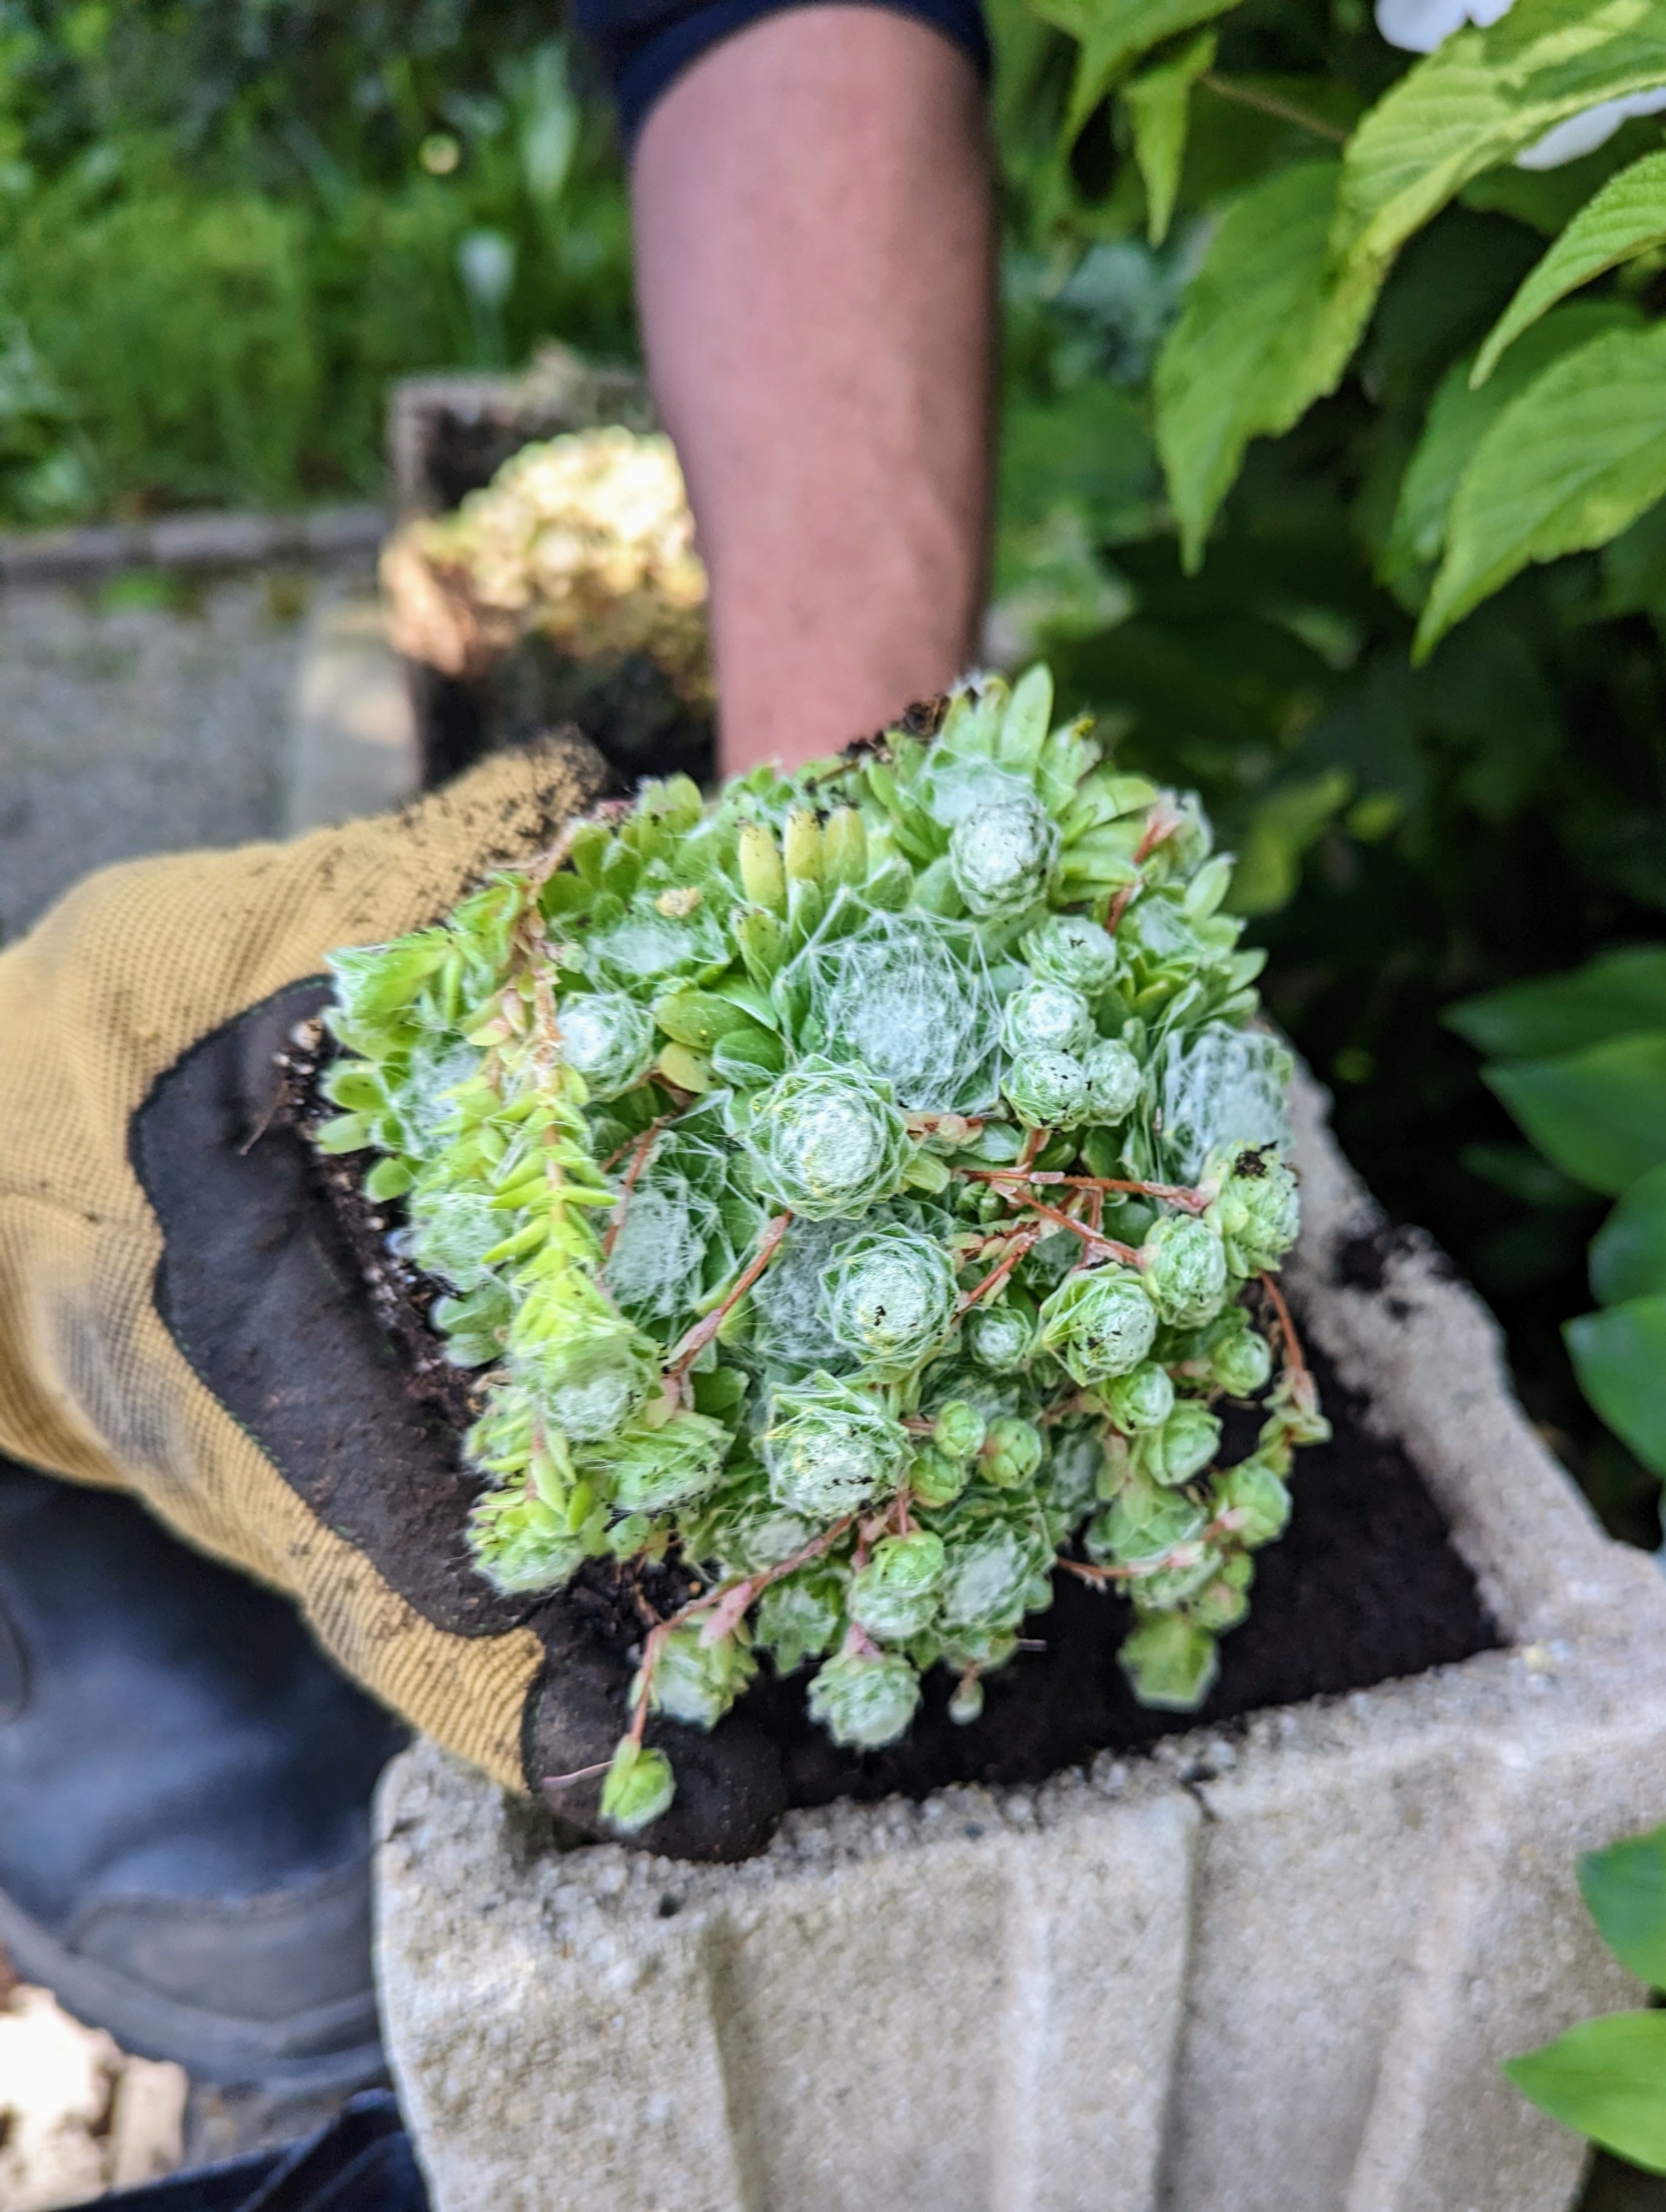
Ryan sorts the hens and chicks by variety, so they can be planted in like groupings.
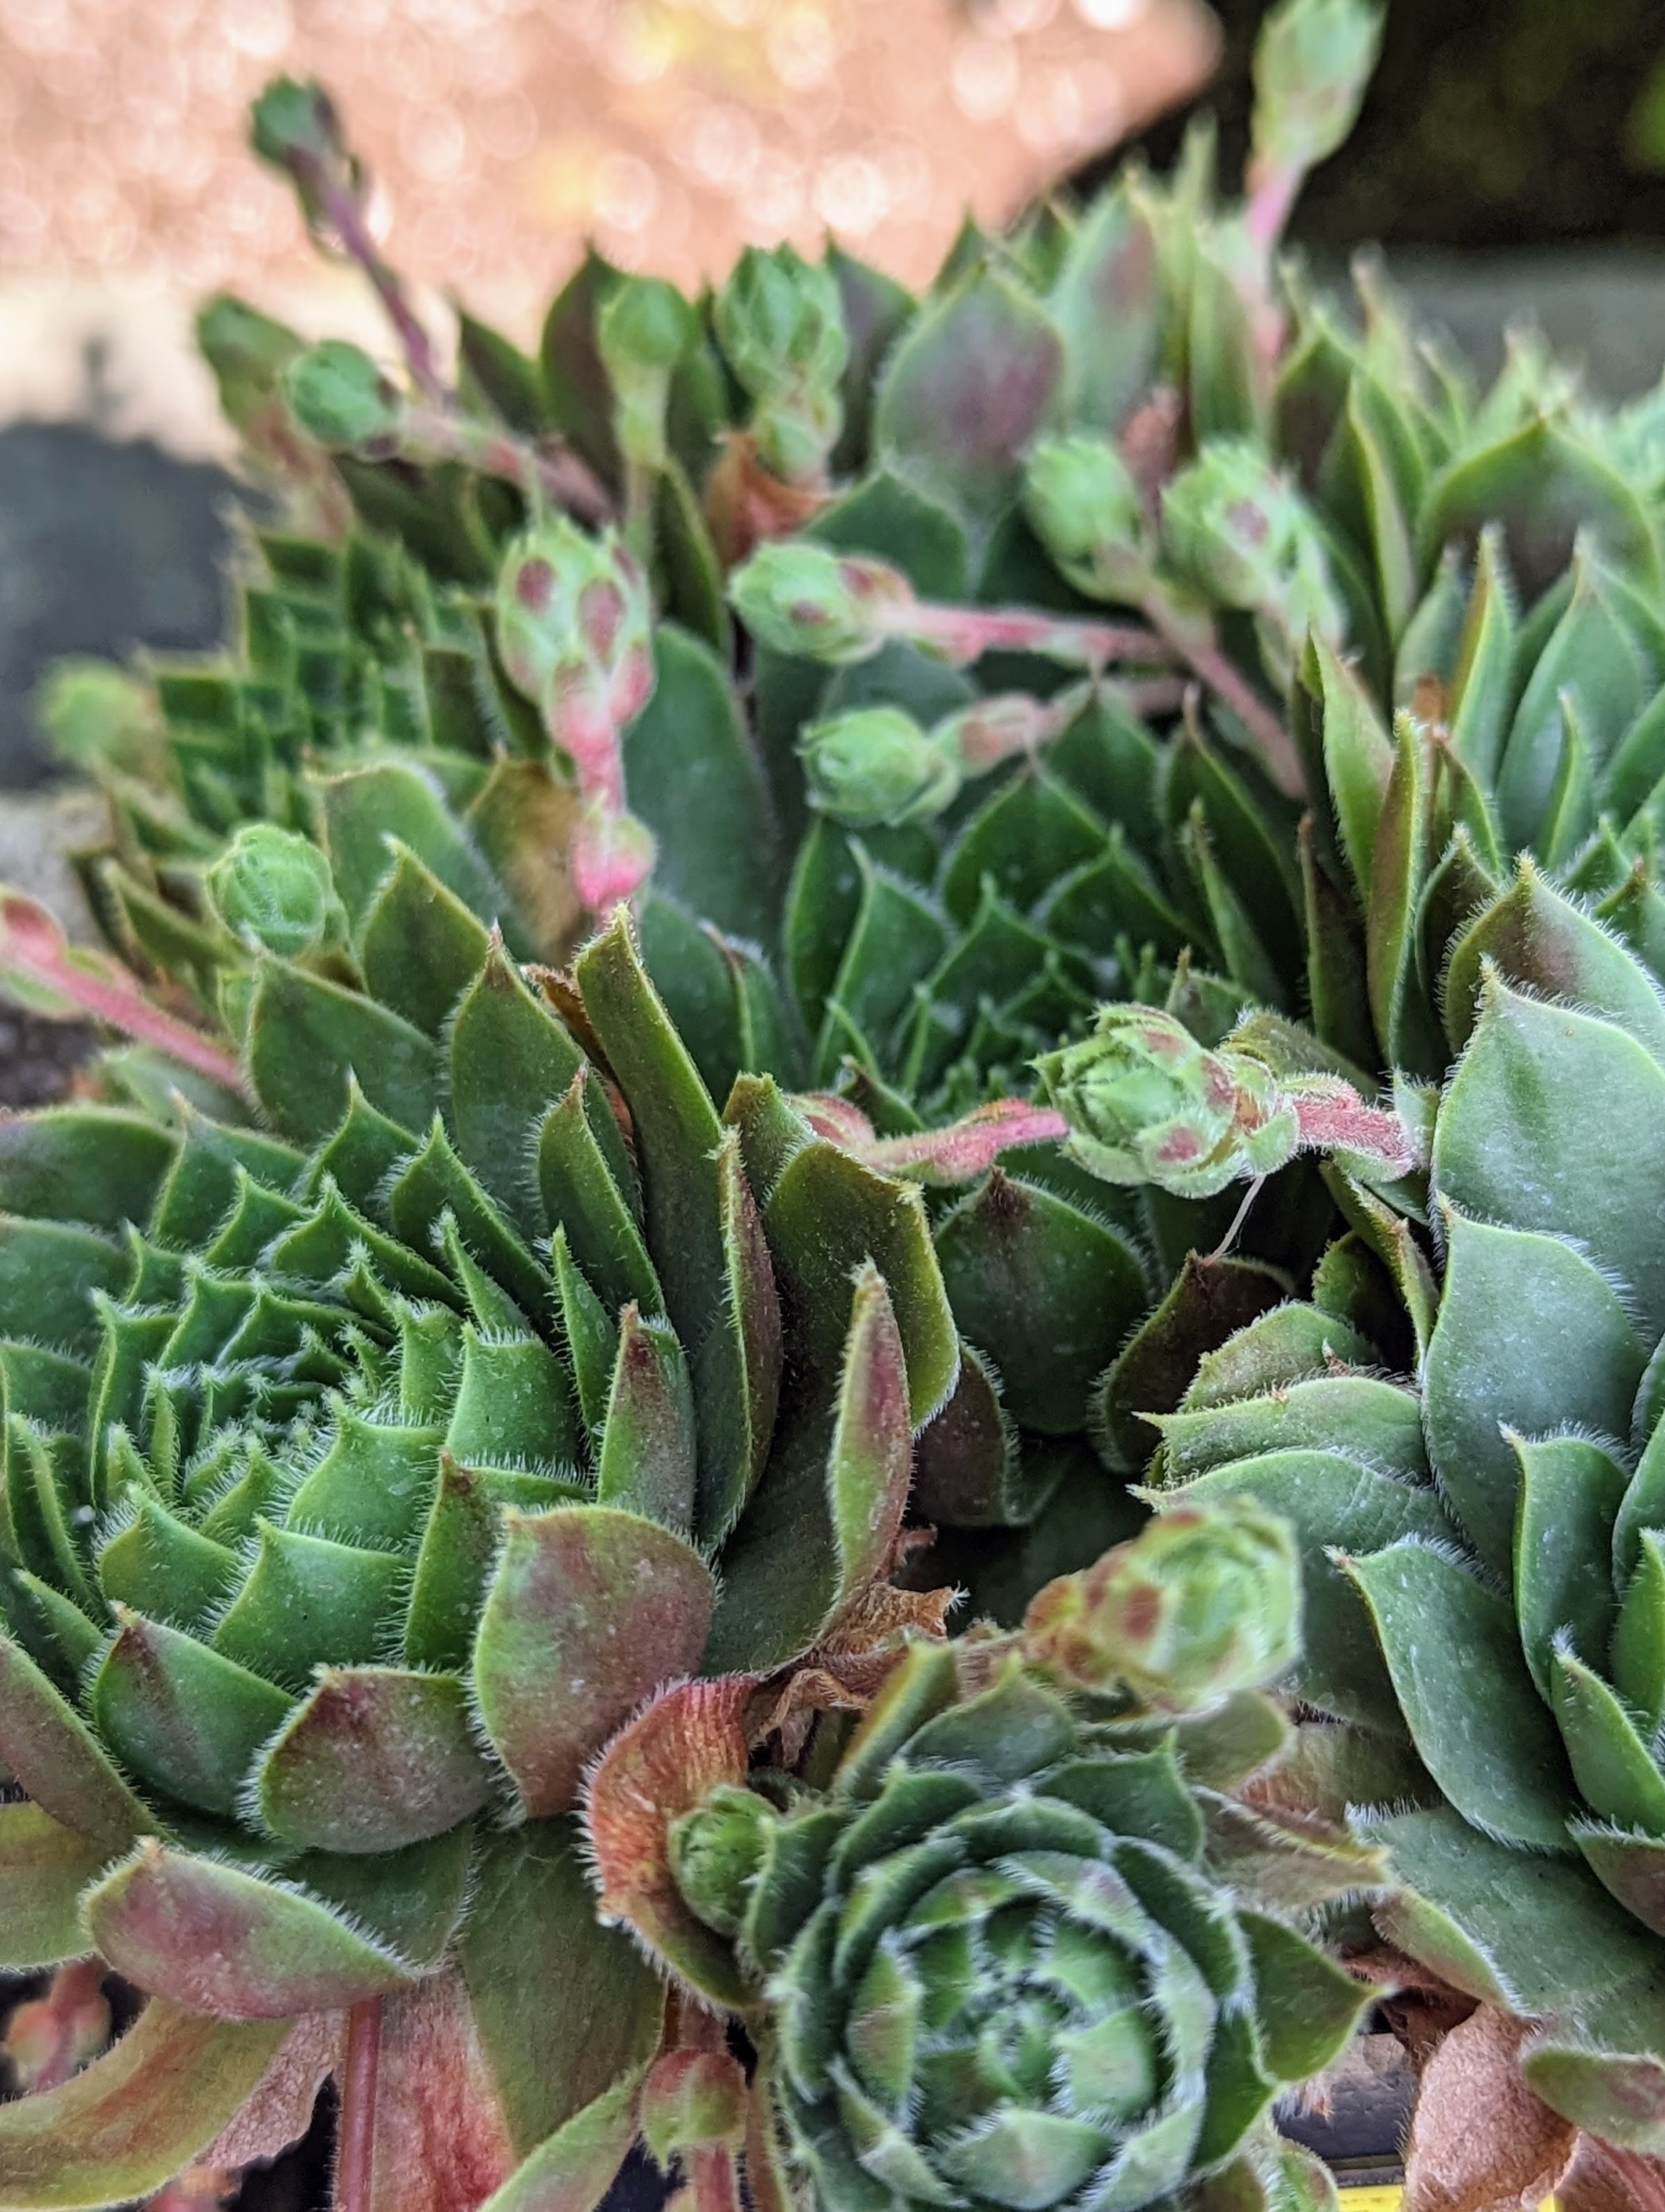
This is Semervivum ‘Twilight Blues.’ This variety features silvery, olive-green leaves shaded in pale lavender and purple tips. Hens and chicks need lots of outdoor sunlight to show their best colors and maintain their rosette forms.
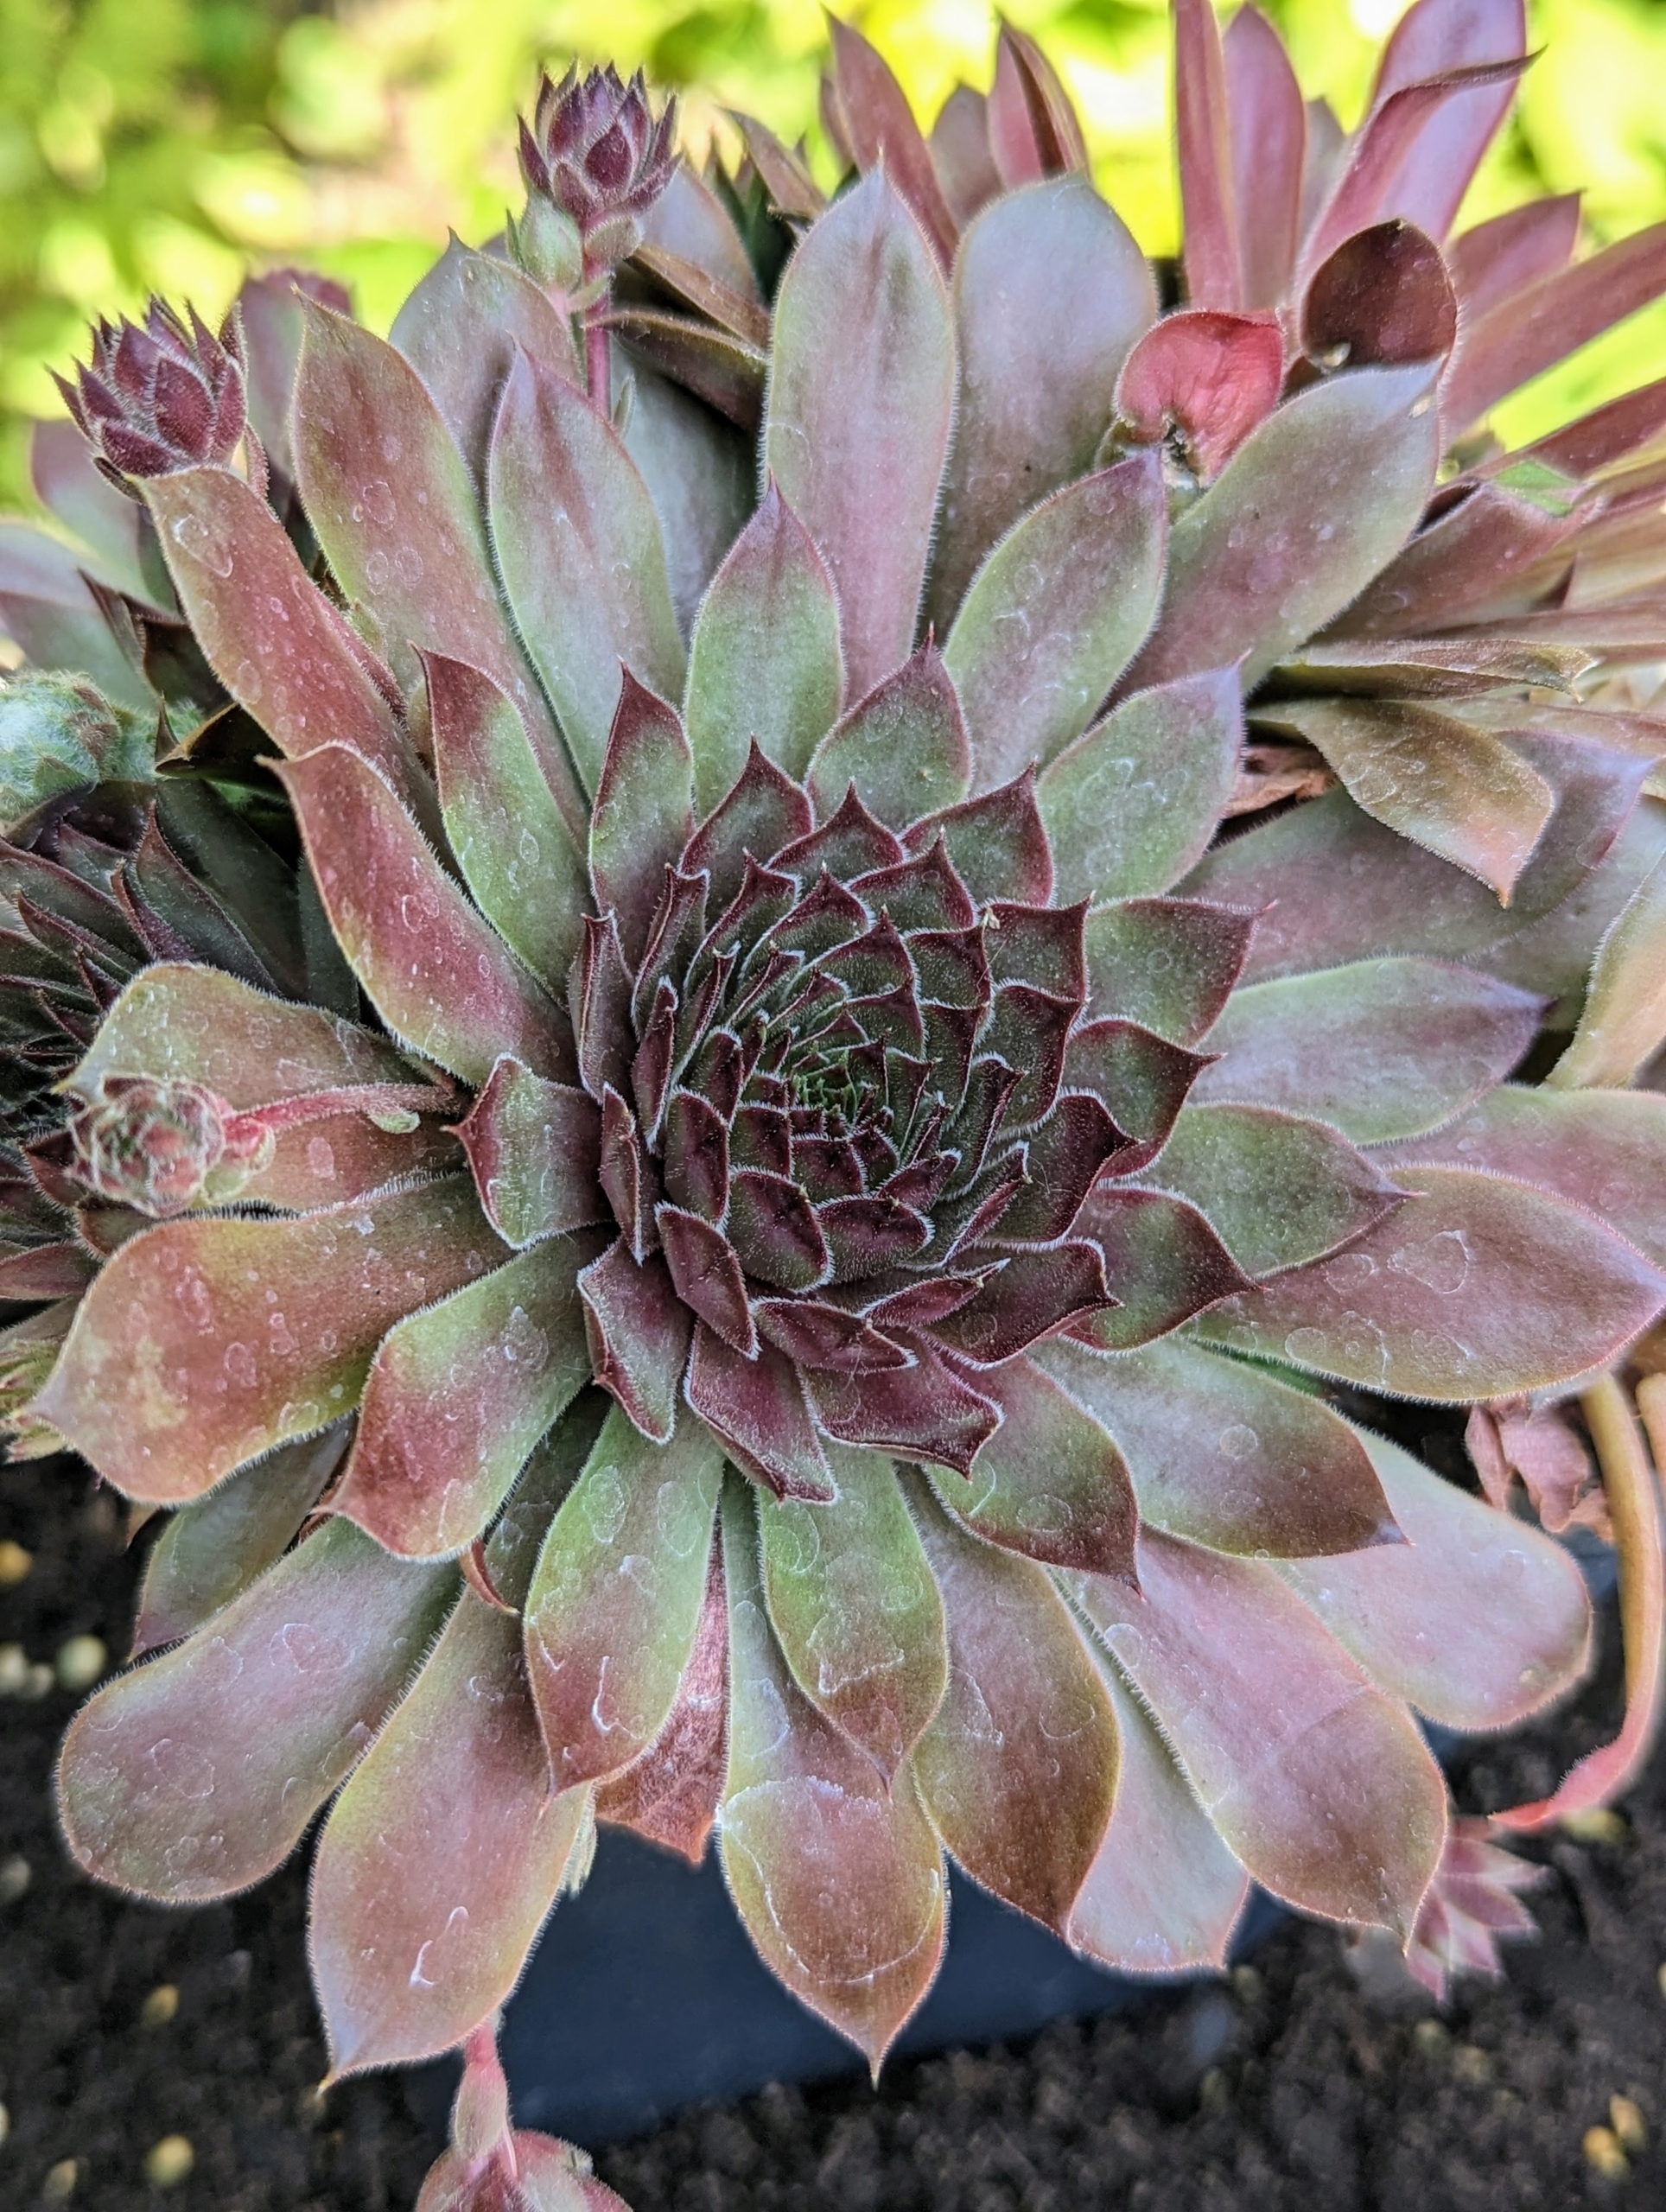
This is called Sempervivum ‘Grammens’ – a pretty pink to orange shade with dark plum tips. ‘Grammens’ is a giant rosette which turns a deep purple in winter.
Sempervivum ‘Larissa’ has smooth, waxy leaves of light green rosettes that open to a light coral color. Here, one can see the parent rosette, or the “hen” and the smaller baby rosettes which are the “chicks.”
And this is Sempervivum ‘Mount Usher’ – a cultivar that shifts between silver-green, pink, and purple through the seasons. Hens and chicks belong to the flowering plant family Crassulaceae, native to southern Europe and northern Africa. They are low-growing perennials that stay close to the ground to self-propagate.
Ryan carefully removes the plant from its pot and places it into the planter soil at the same depth it was in its original container.
All the plants are spaced evenly in the trough. This planter is long enough to accommodate five plants each.
These drought-tolerant plants need very little water once they’re mature and can go weeks without watering. Once established, water them only when the surrounding soil dries out.
Once planted, Ryan lightly tamps on the surrounding soil to establish good contact.
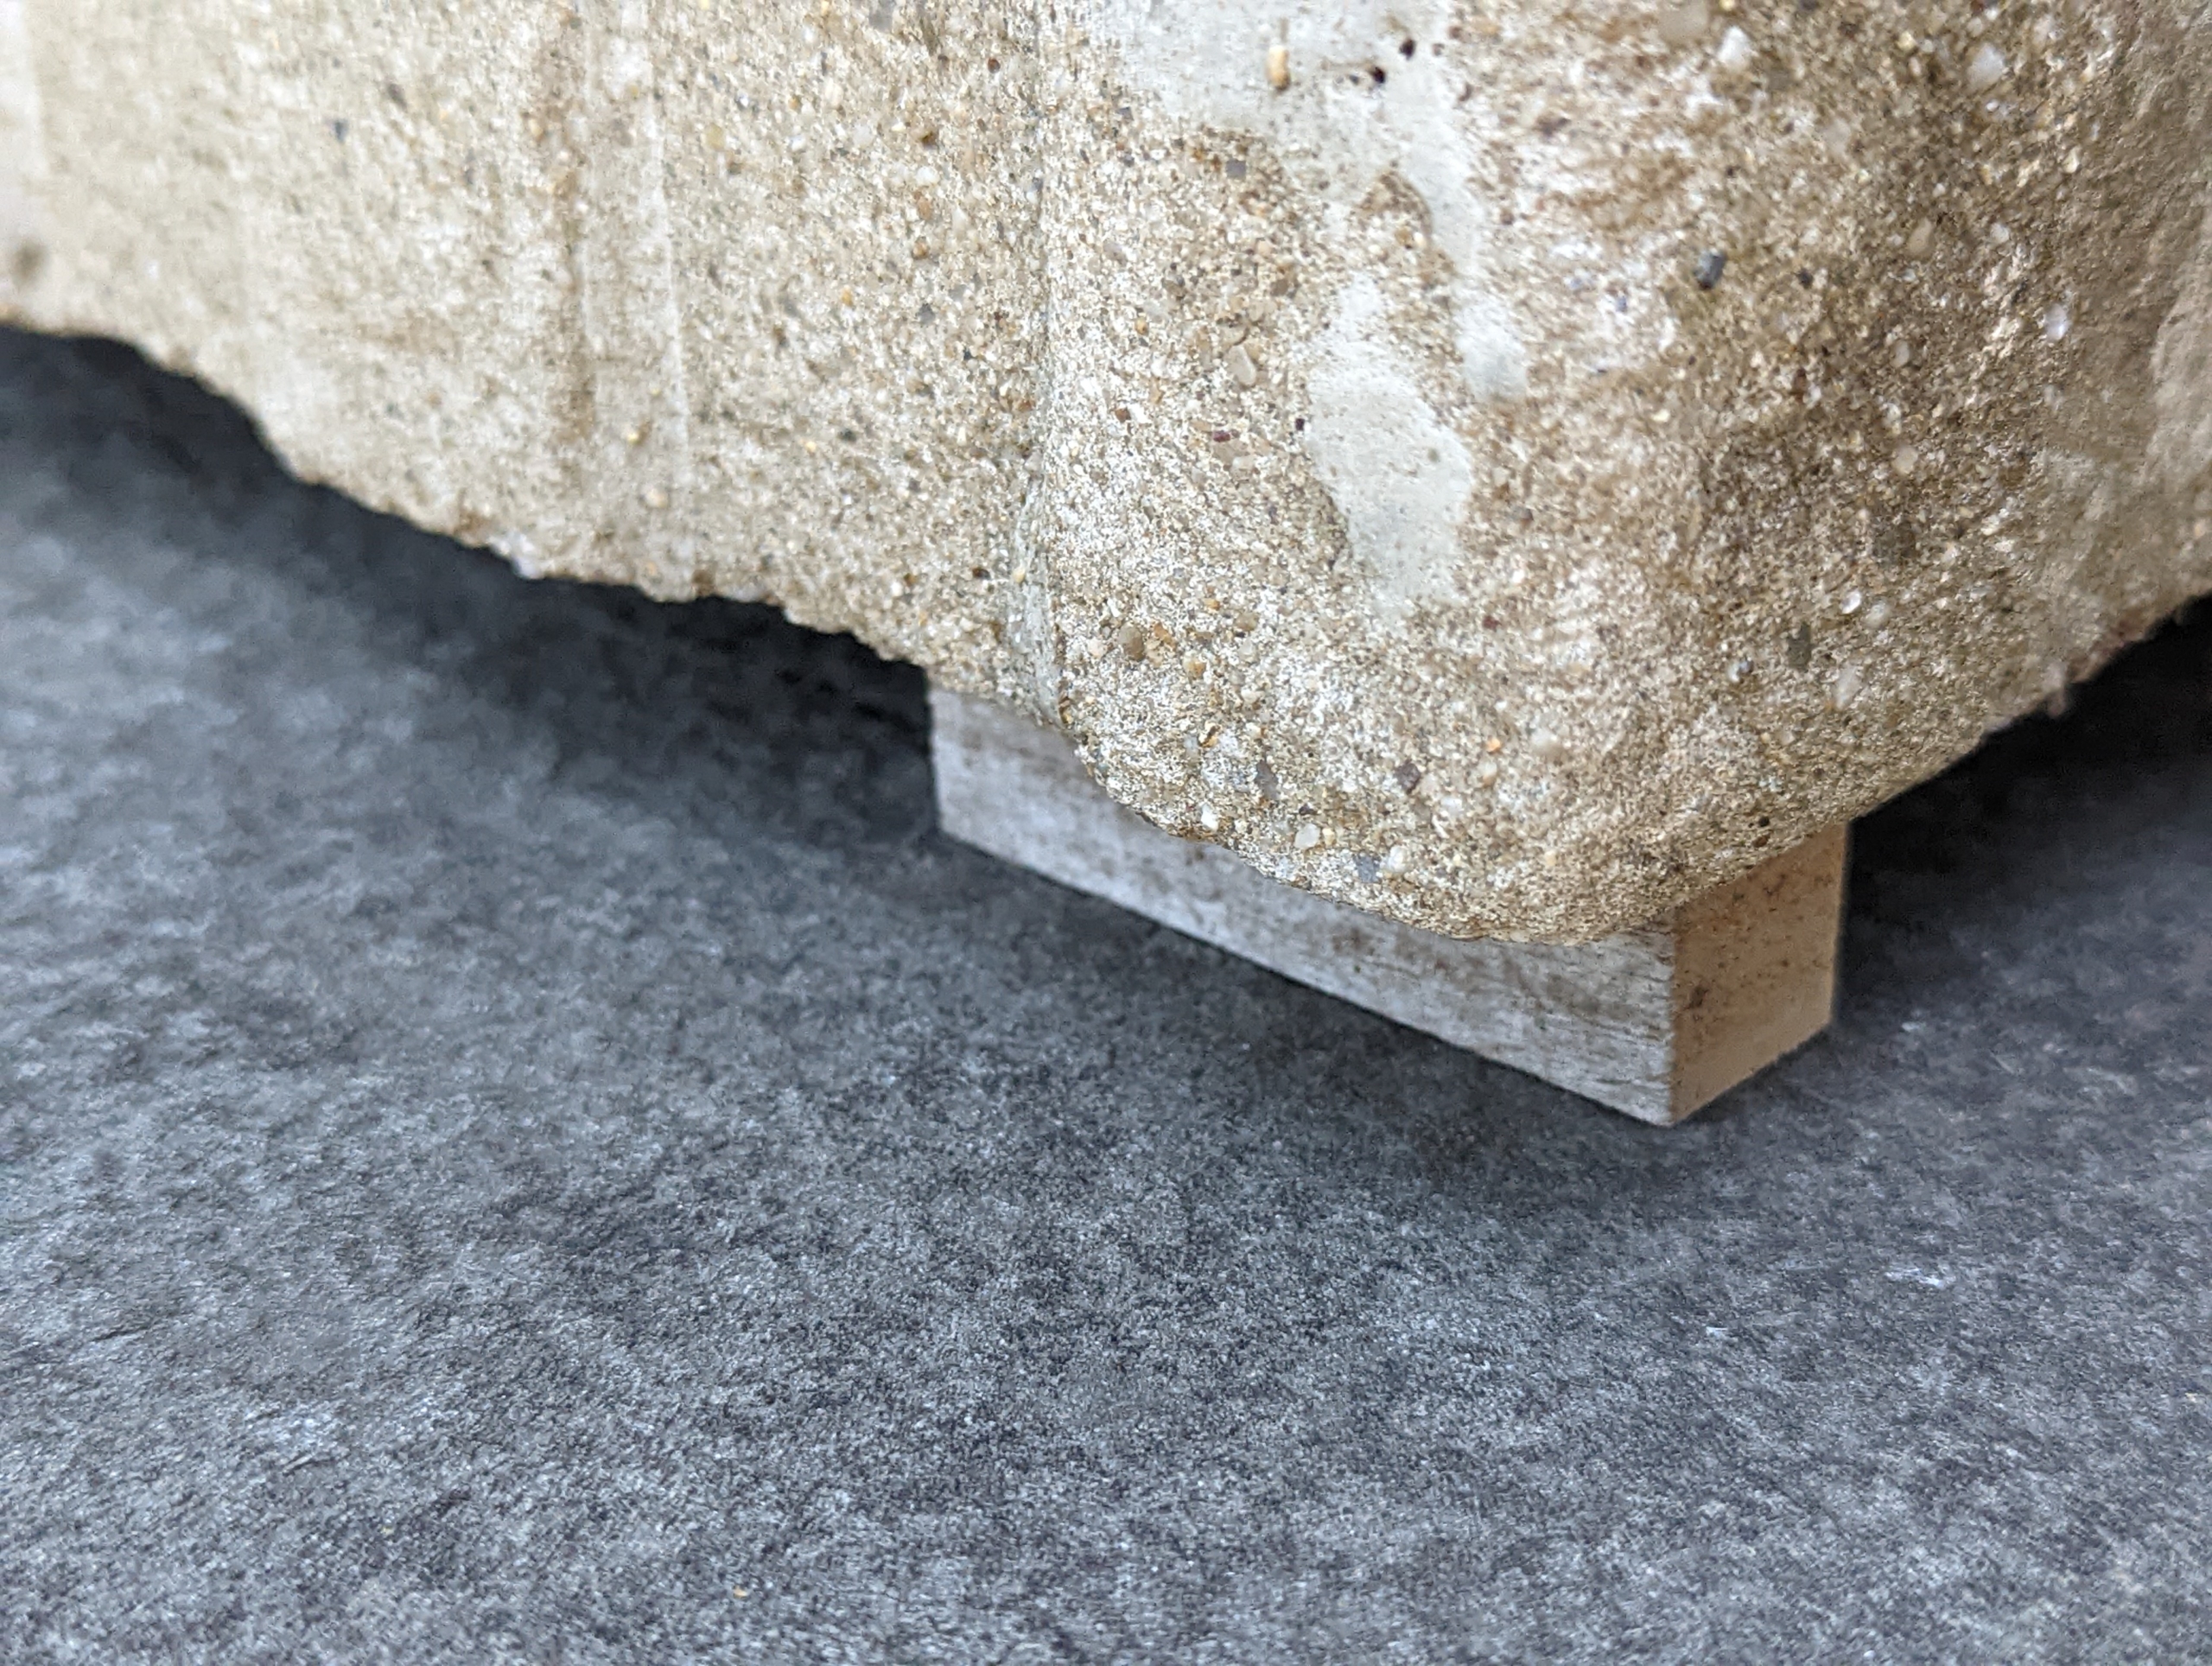
Small wooden shims are used to lift all the planters off the ledge. This is very important for good drainage. All the pots around the farm are always raised. We save any usable pieces of wood from year to year for this purpose.
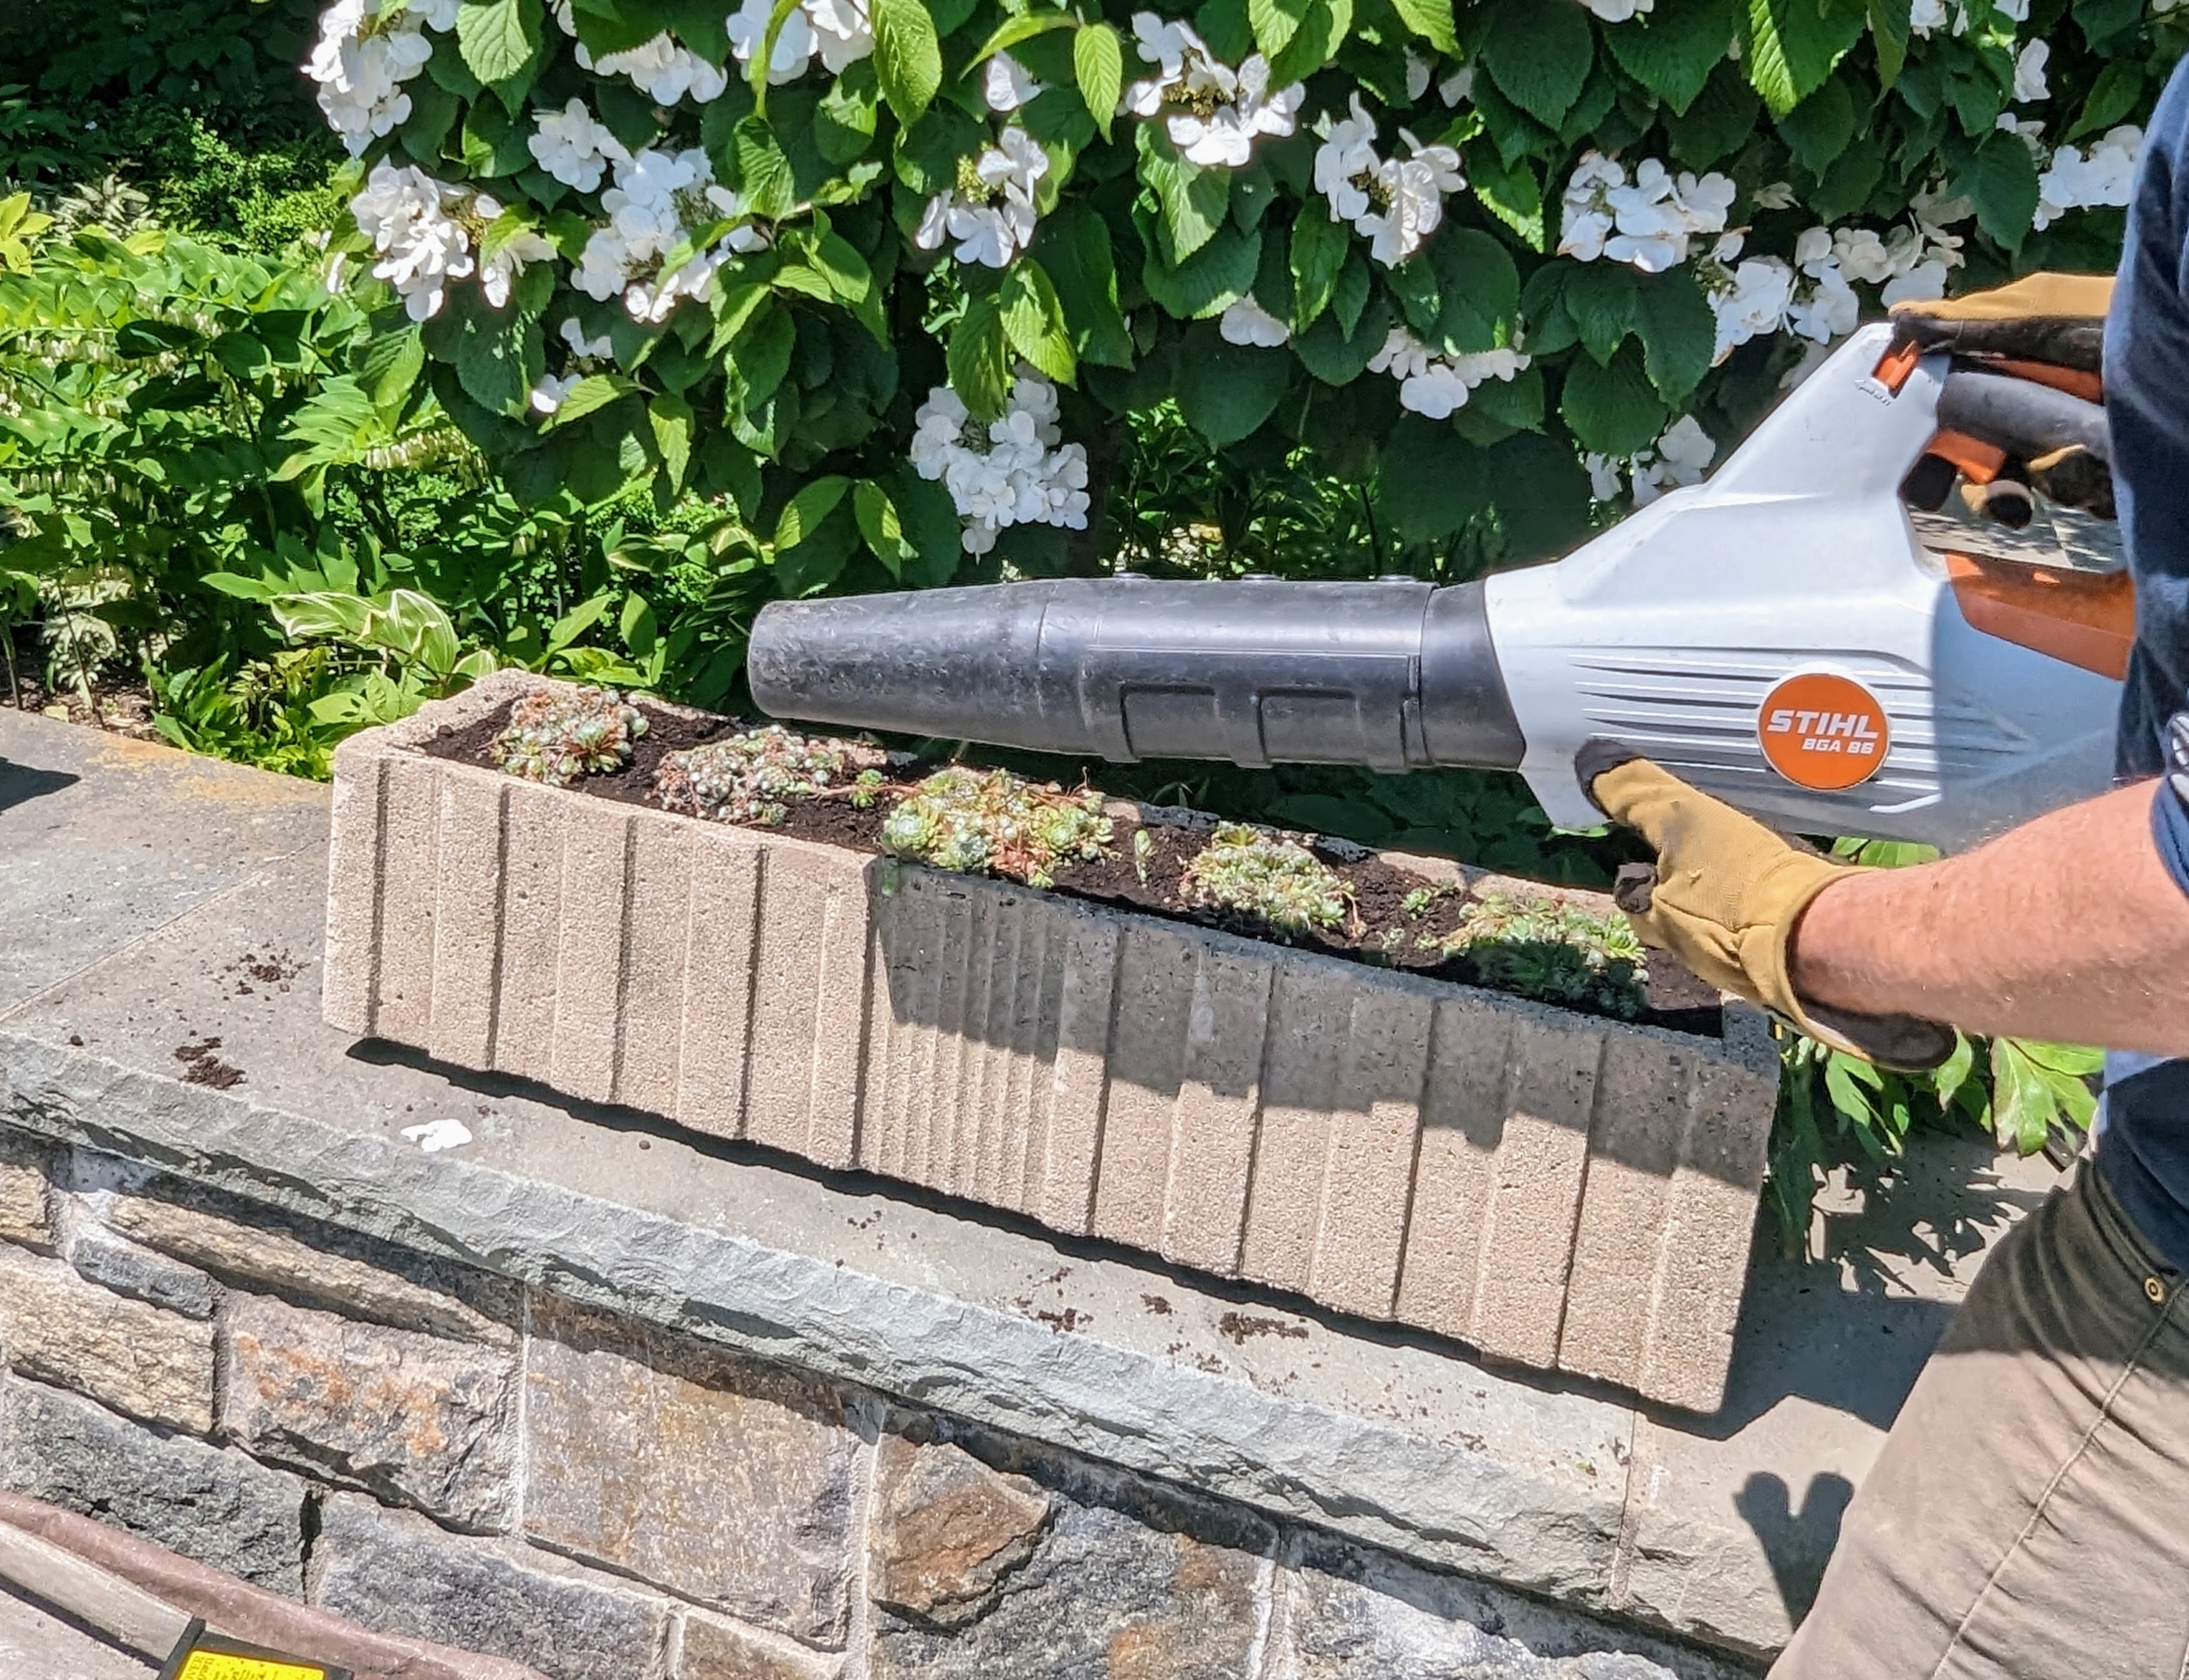
Next, Ryan uses this battery powered handheld blower from STIHL to clean the ledge of any dirt and soil. This blower is less noisy and perfect for around my Winter House.
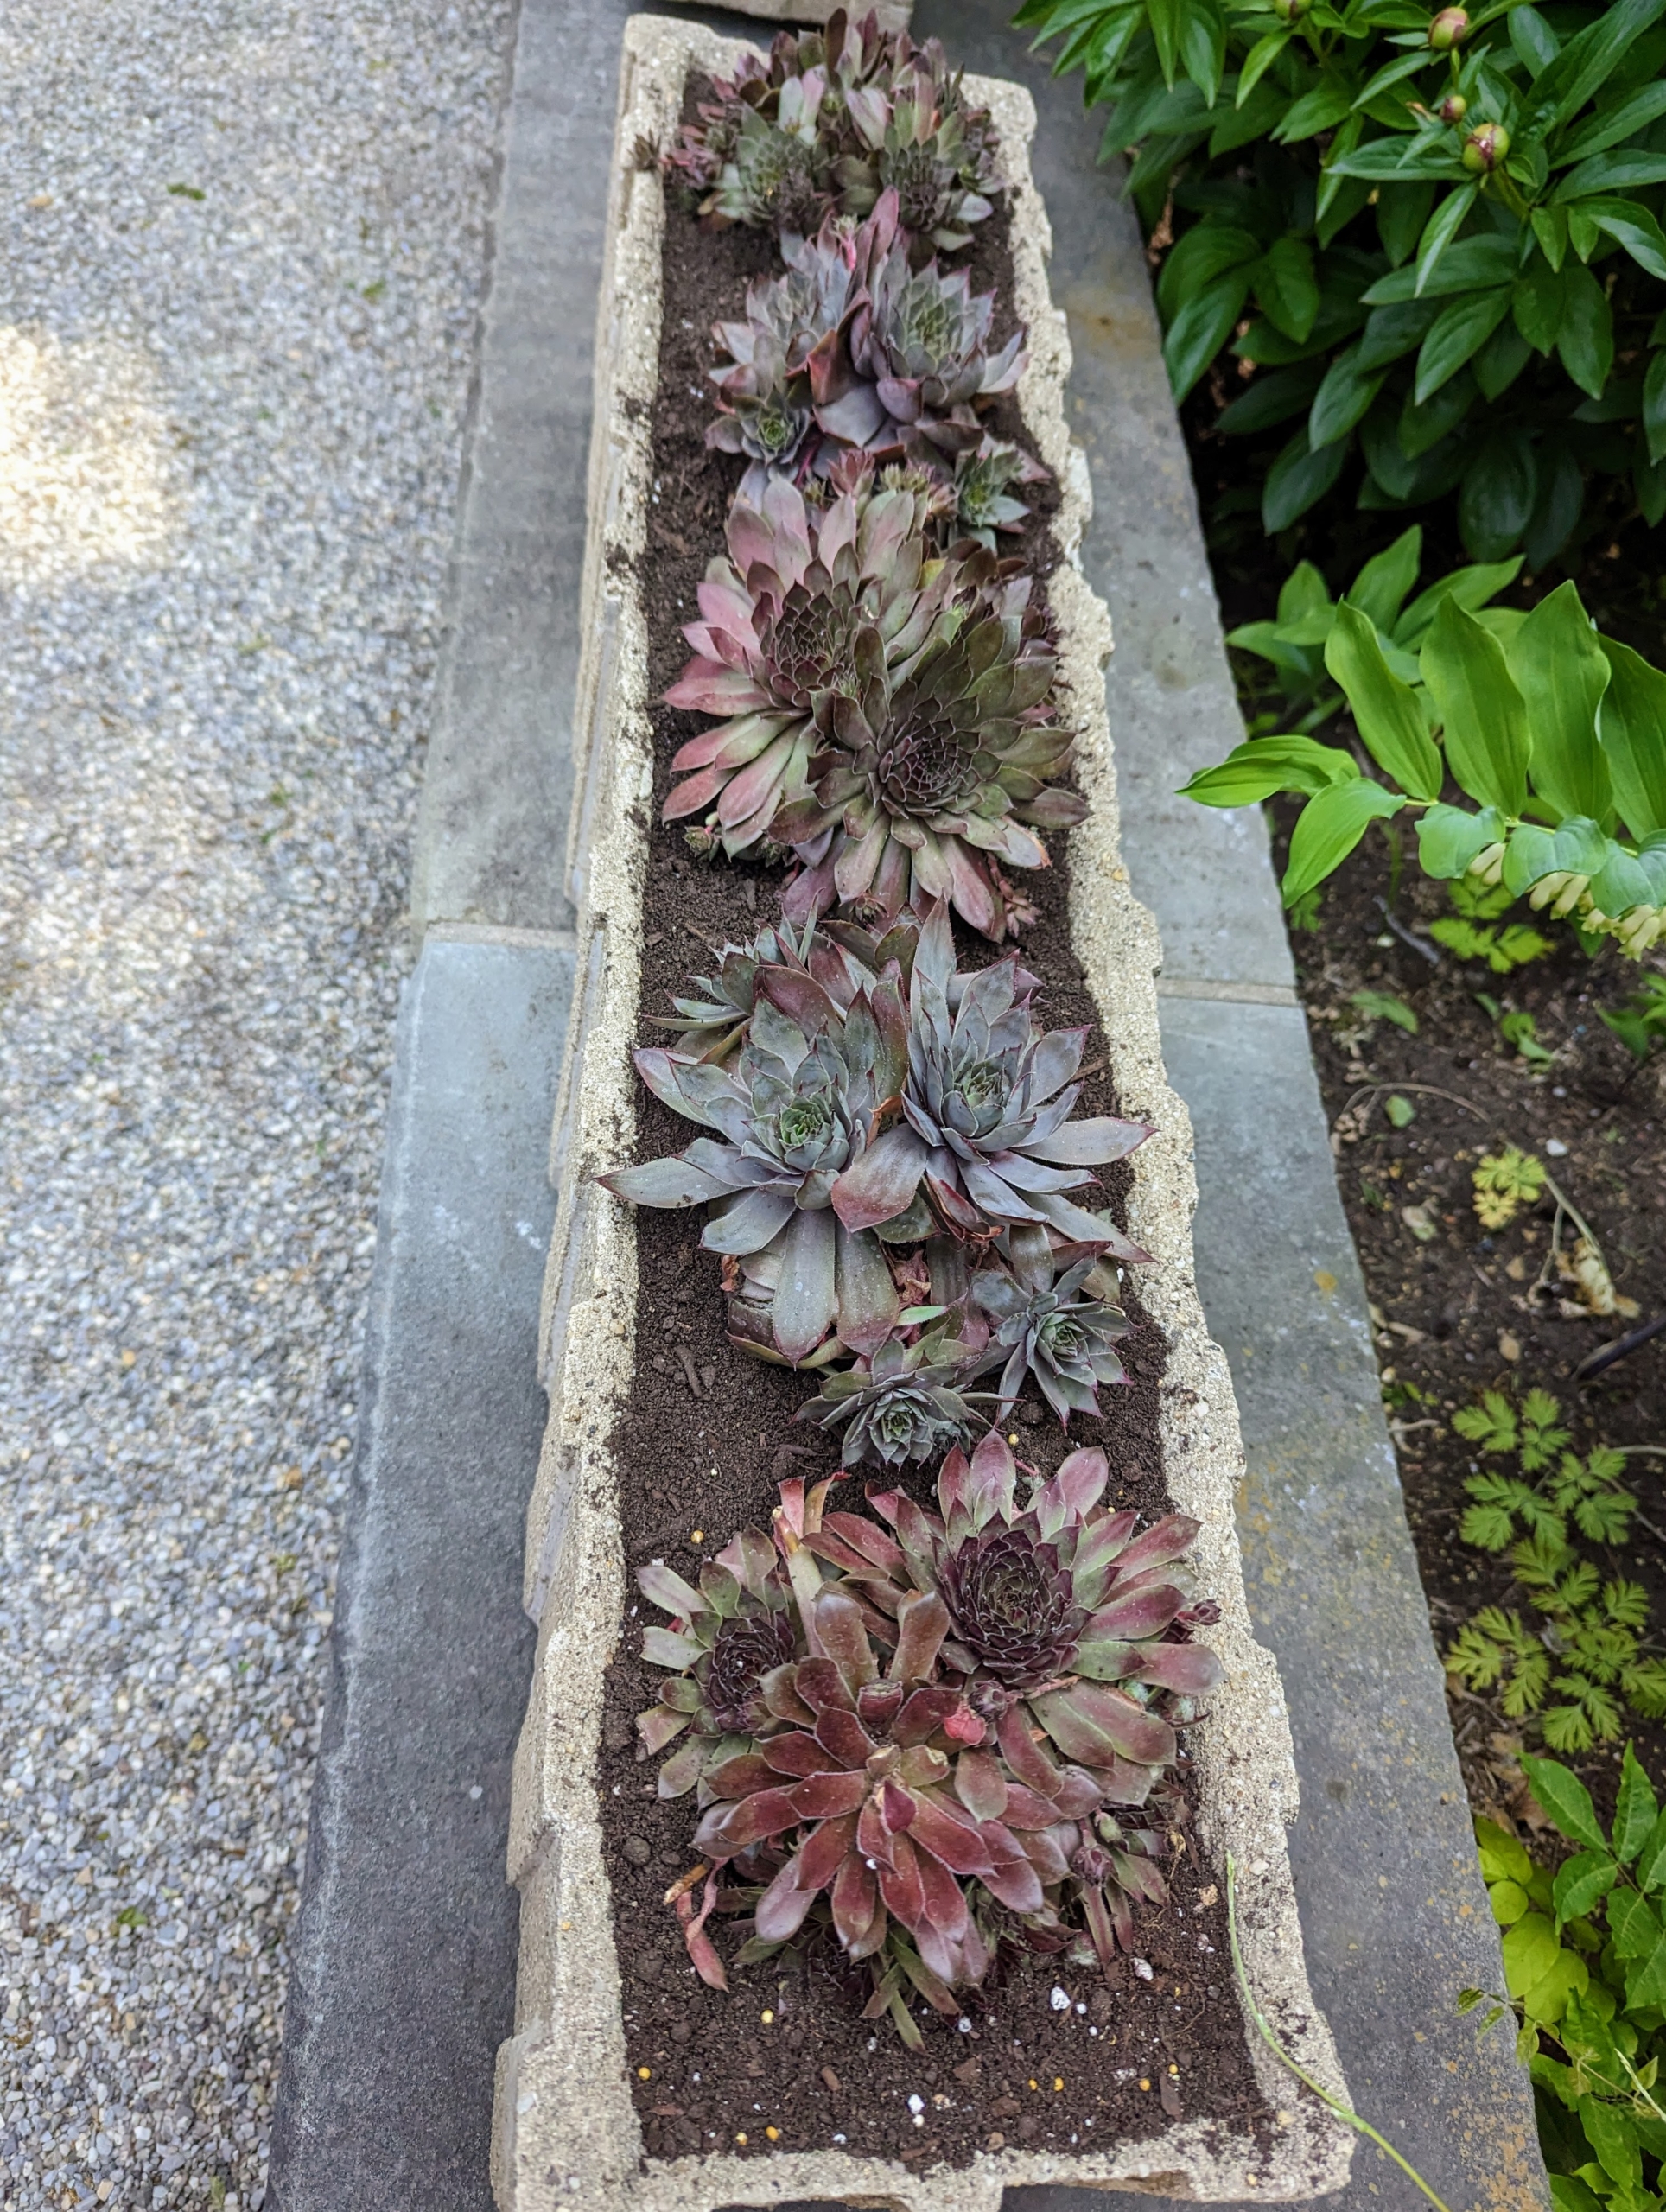
The troughs are now filled with these charming hens and chicks succulents. They will stay here through the gardening season.
Once a hen plant produces a chick, that chick will begin producing its own babies after only one season.
Do you remember this planter of hens and chicks? I planted it several weeks ago on the Today Show. The plants filled out nicely in this container.
My trough planters sit on the stone ledge in front of my beautiful white garden. These plants will thrive here all season long where they will get ample sun and light shade. Everything is looking so lush and green this spring.
It's a bit cooler here this week at my Bedford, New York farm - temperatures overnight dipped into the high 30s - but we're still carrying on with our spring gardening tasks.
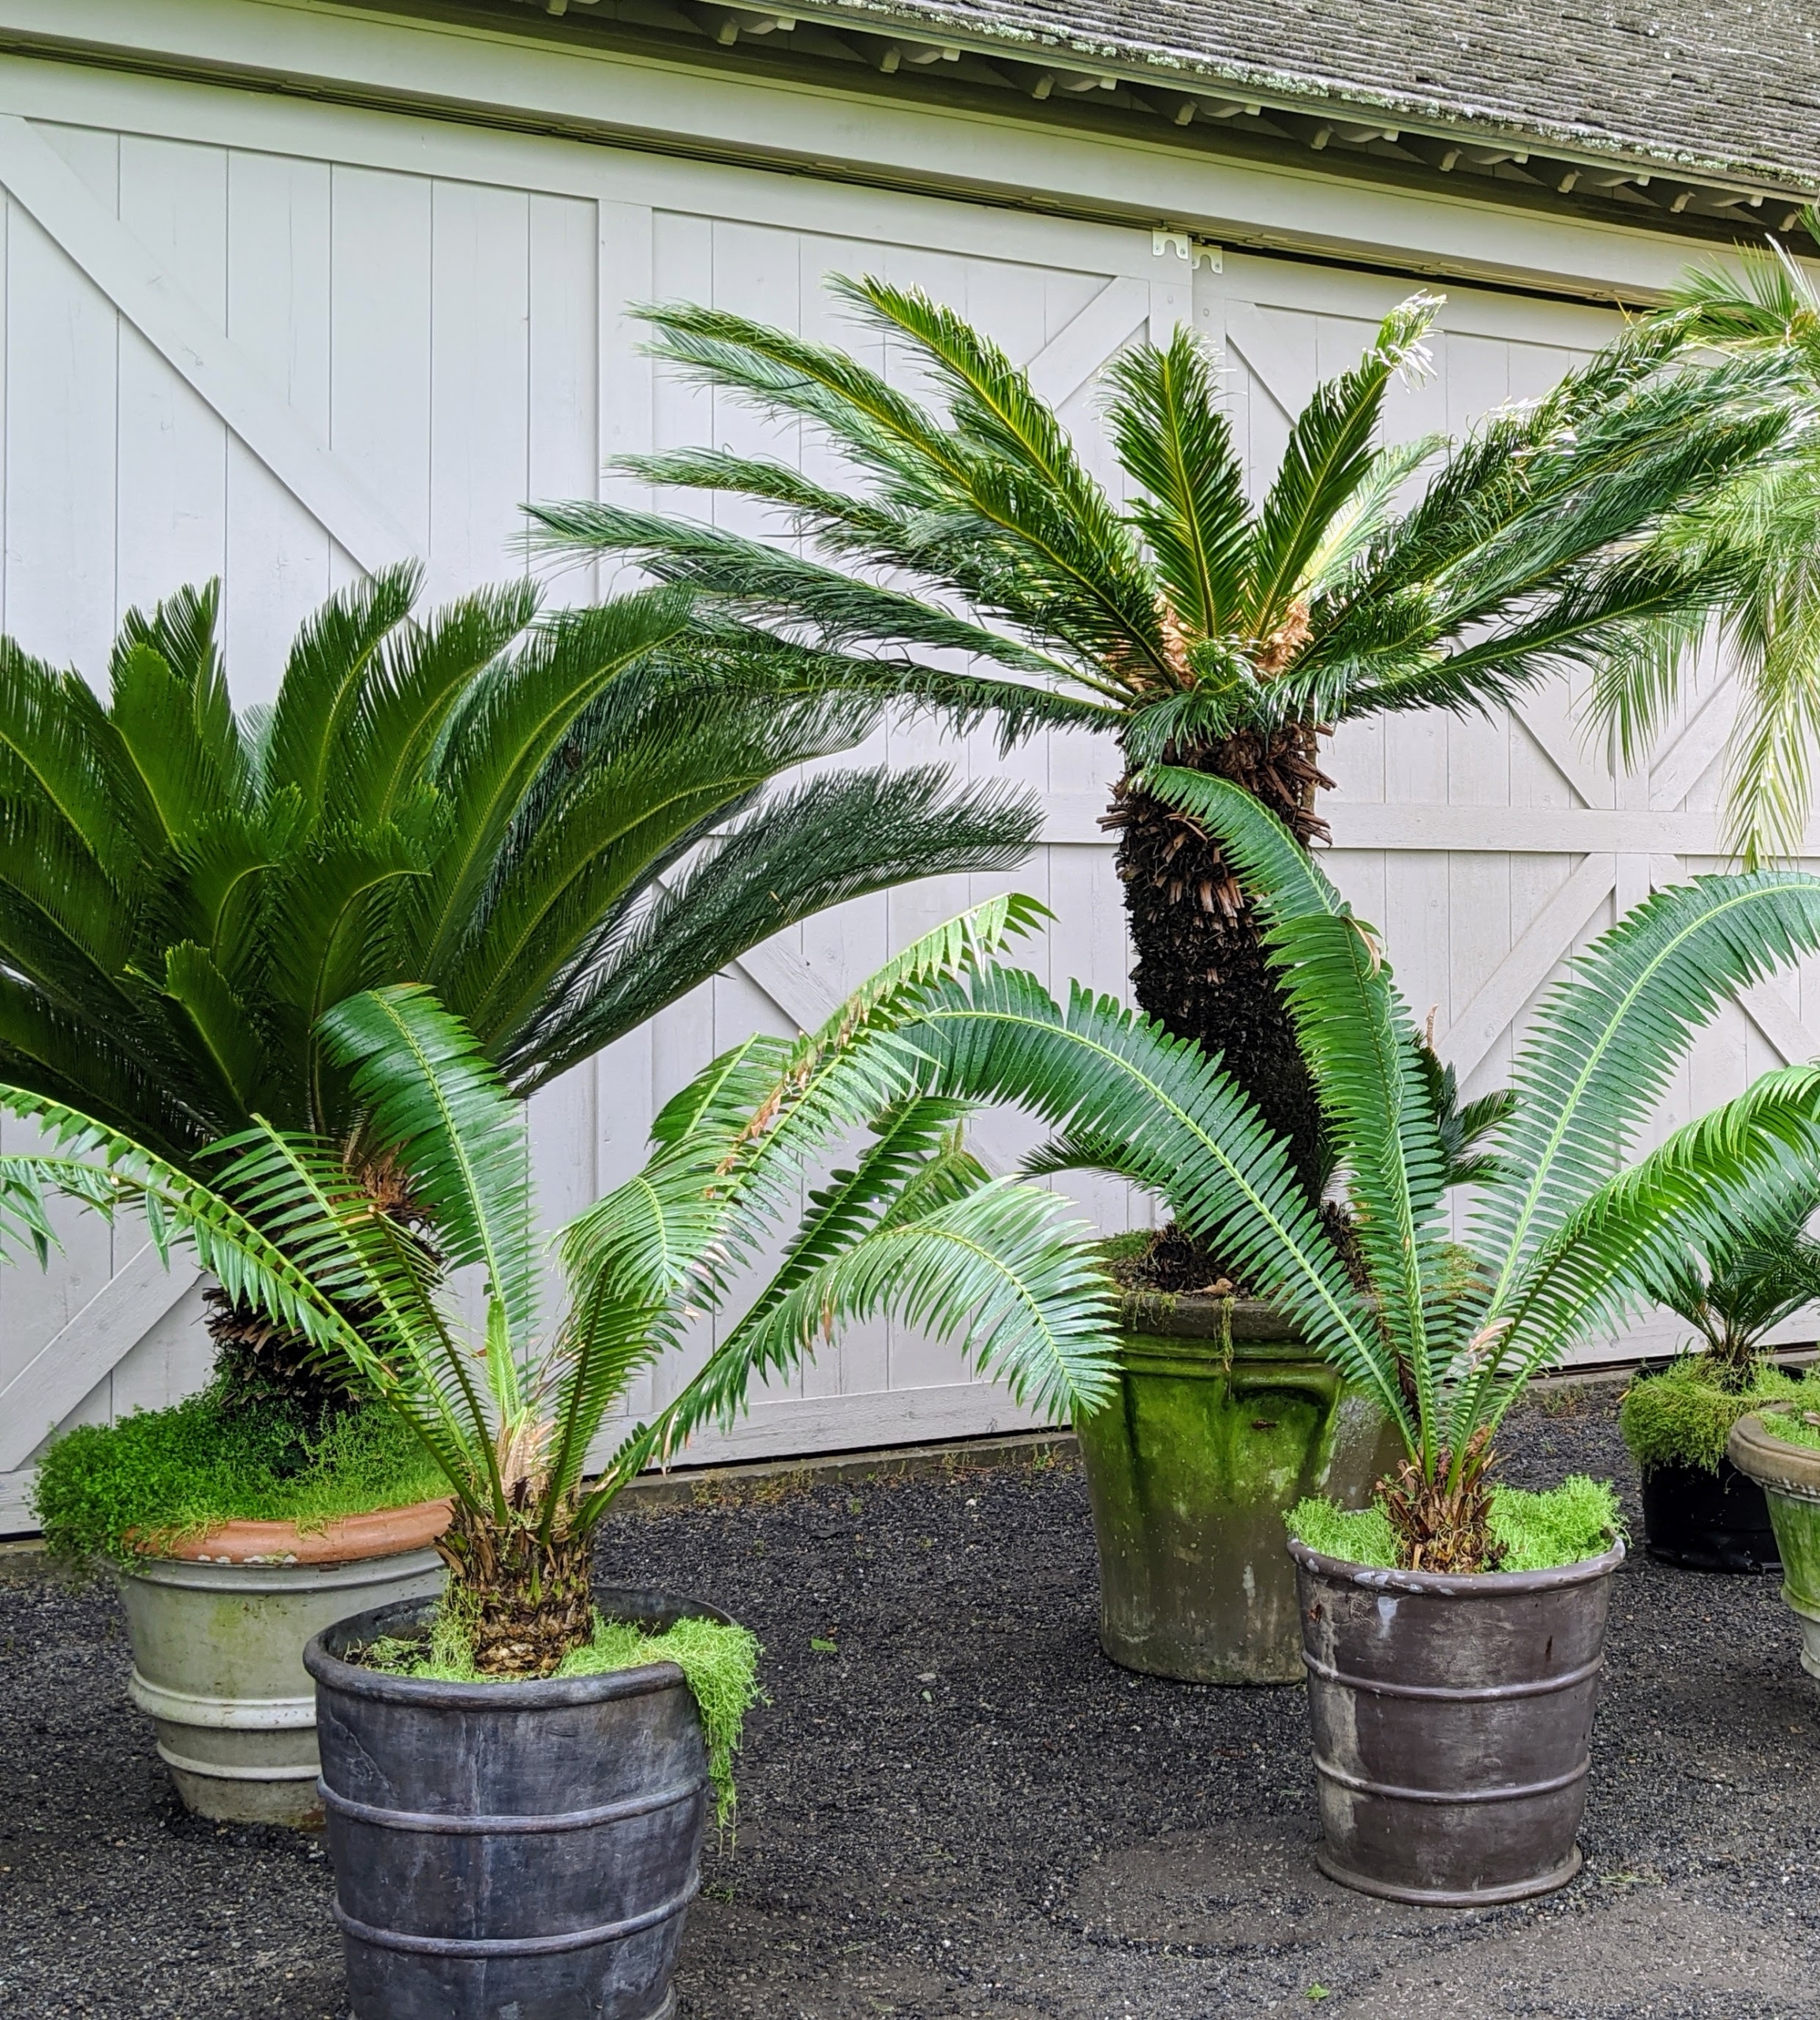
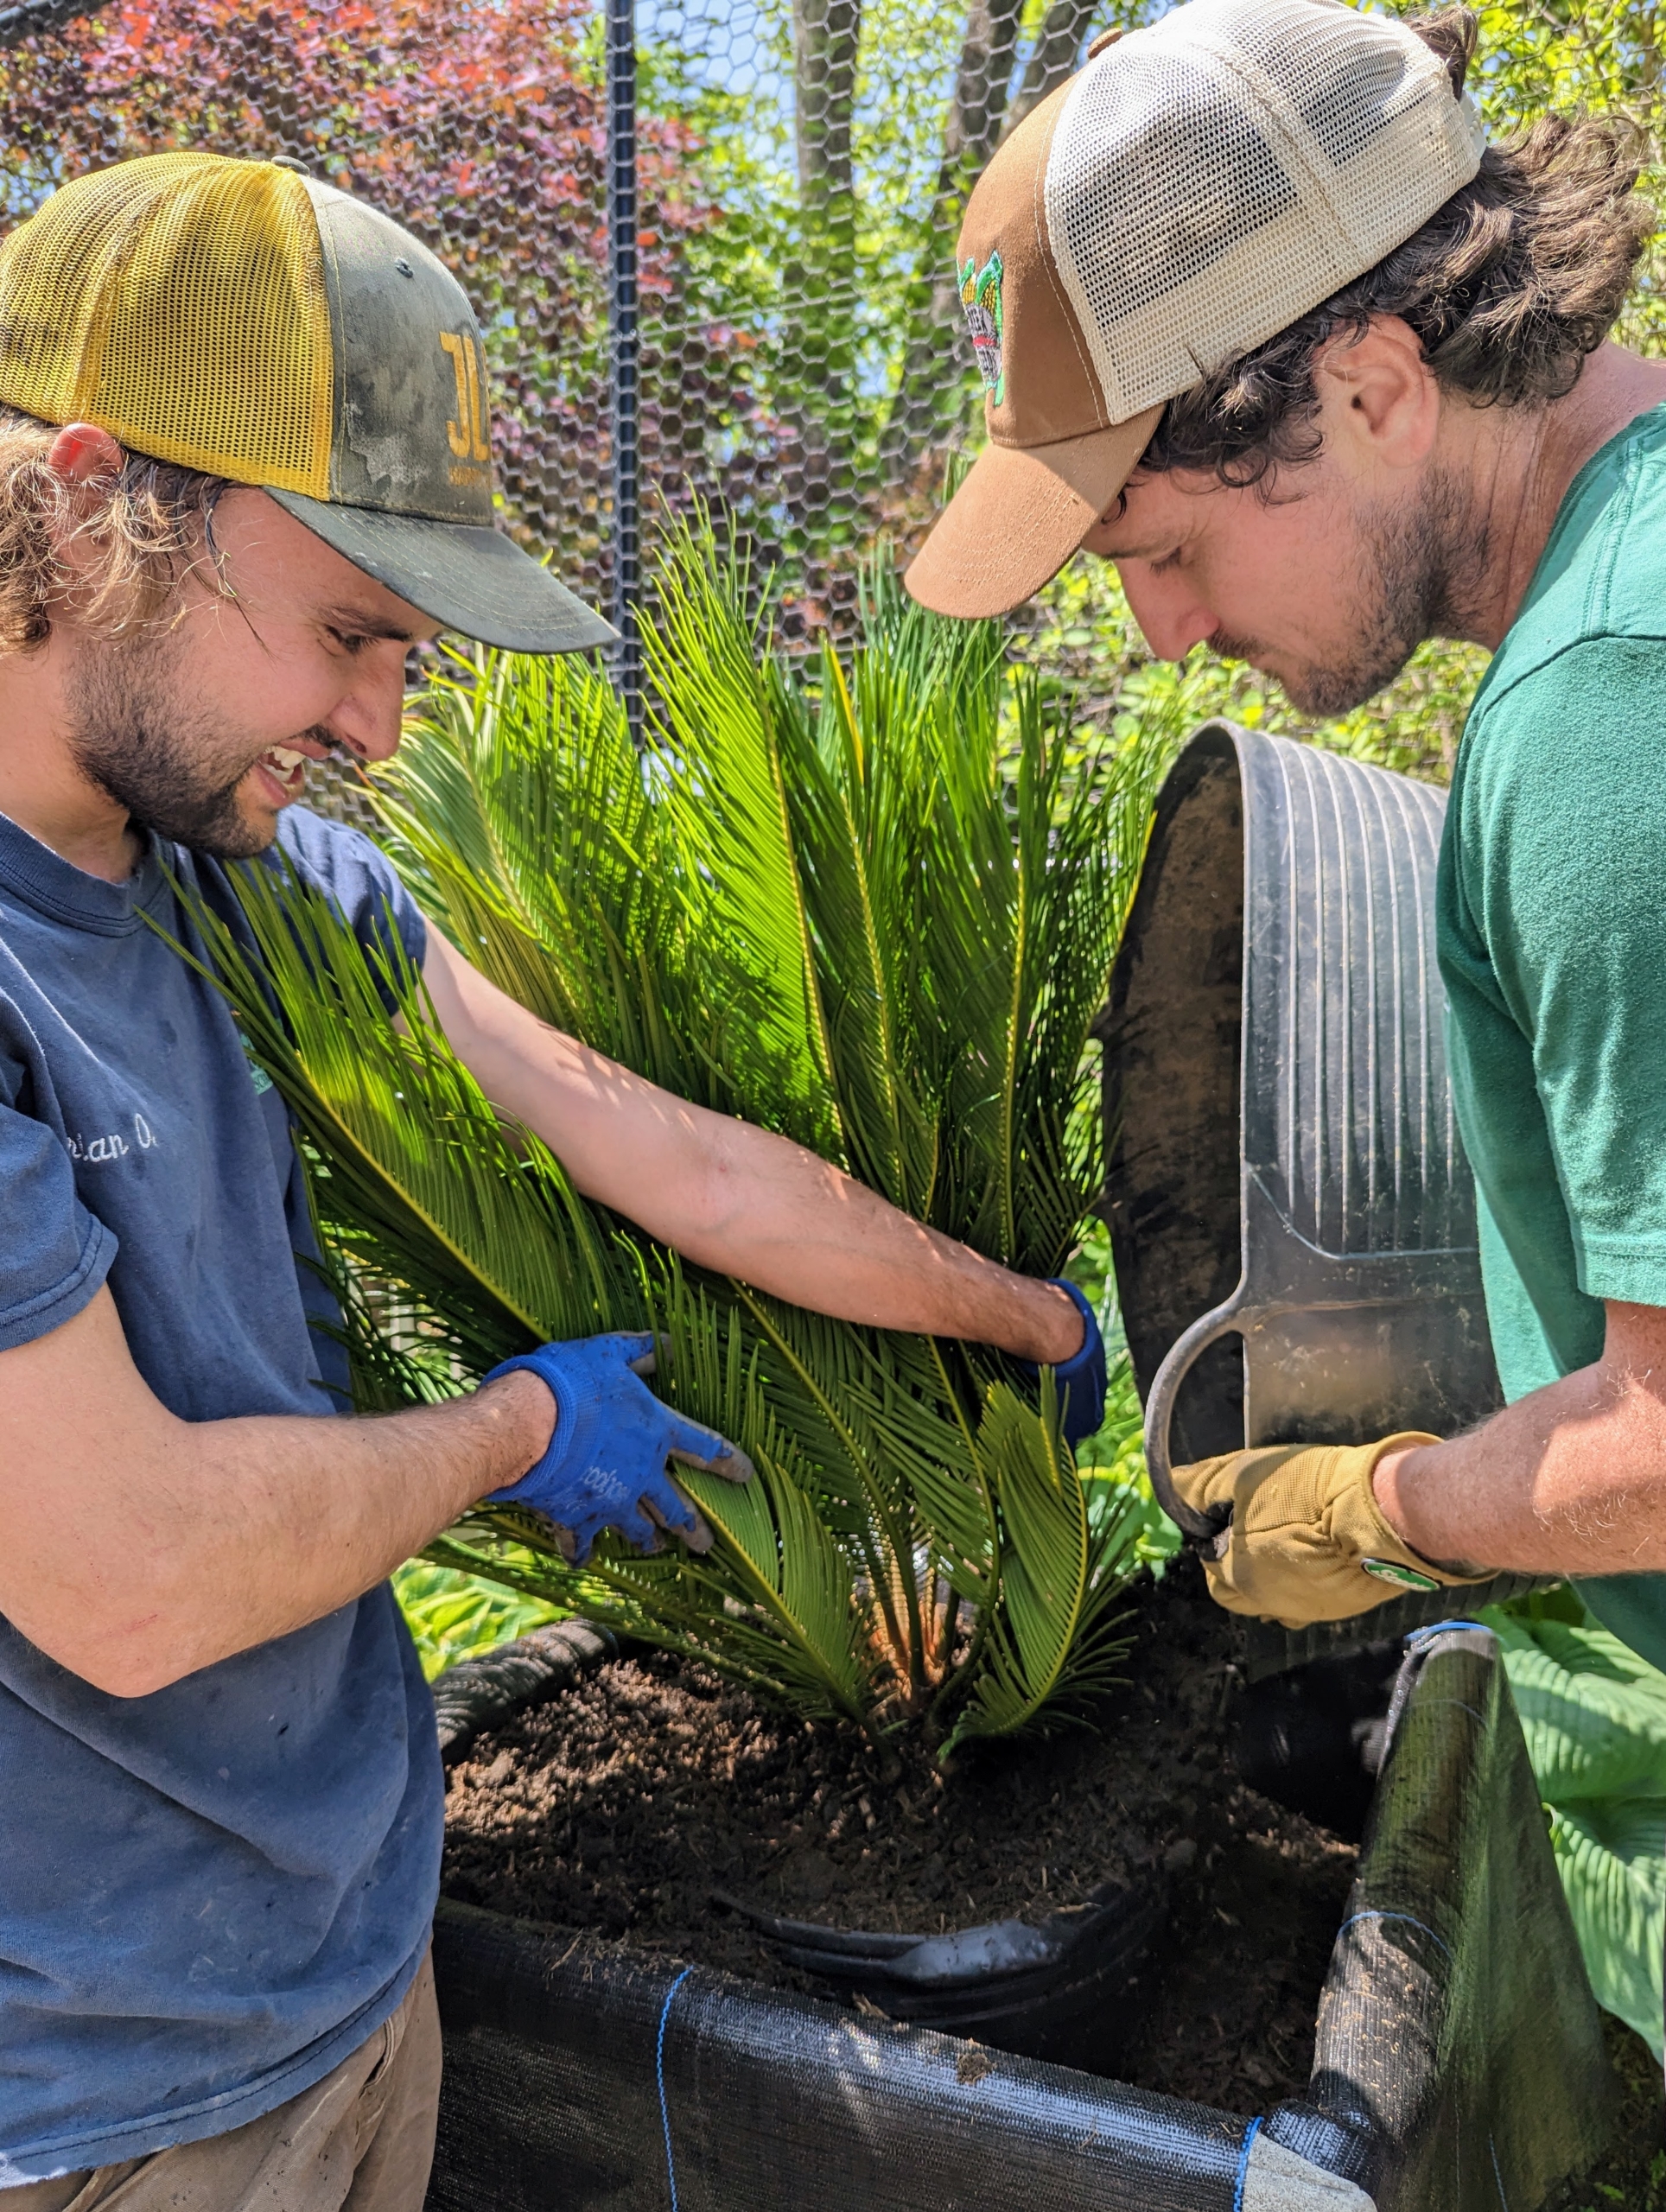
My gardeners have been busy potting up some of our outdoor containers. I have a rather sizable collection of tropical specimens. During the winter, they are stored in special greenhouses. Once the warm weather arrives, they are all brought out for display around the farm. Ryan and Brian just potted up six sago palms, or cycads, which were cut as pups from a mother sago some time ago. They are displayed in six beautiful new pots I purchased from Michael's Garden Gate in nearby Mt. Kisco.
Here are some photos, enjoy.
I have many, many cycads. The sago palm, Cycas revoluta, is a popular houseplant known for its feathery foliage and ease of care. Native to the southern islands of Japan, the sago palm goes by several common names, including Japanese palm, funeral palm, king sago or just plain sago palm.
In warmer weather, I display these and other tropical plants around the farm. This photo taken a couple years back shows large sago palms in my Winter House courtyard.
I also like to cut the pups, or the “babies,” from larger sago palms and nurture them. This photo shows a group of young sago palms which were cut right here at the farm several years ago.
Recently, I bought six large containers to use around the property. This week, I asked my gardeners to pot them all up with sago palms.
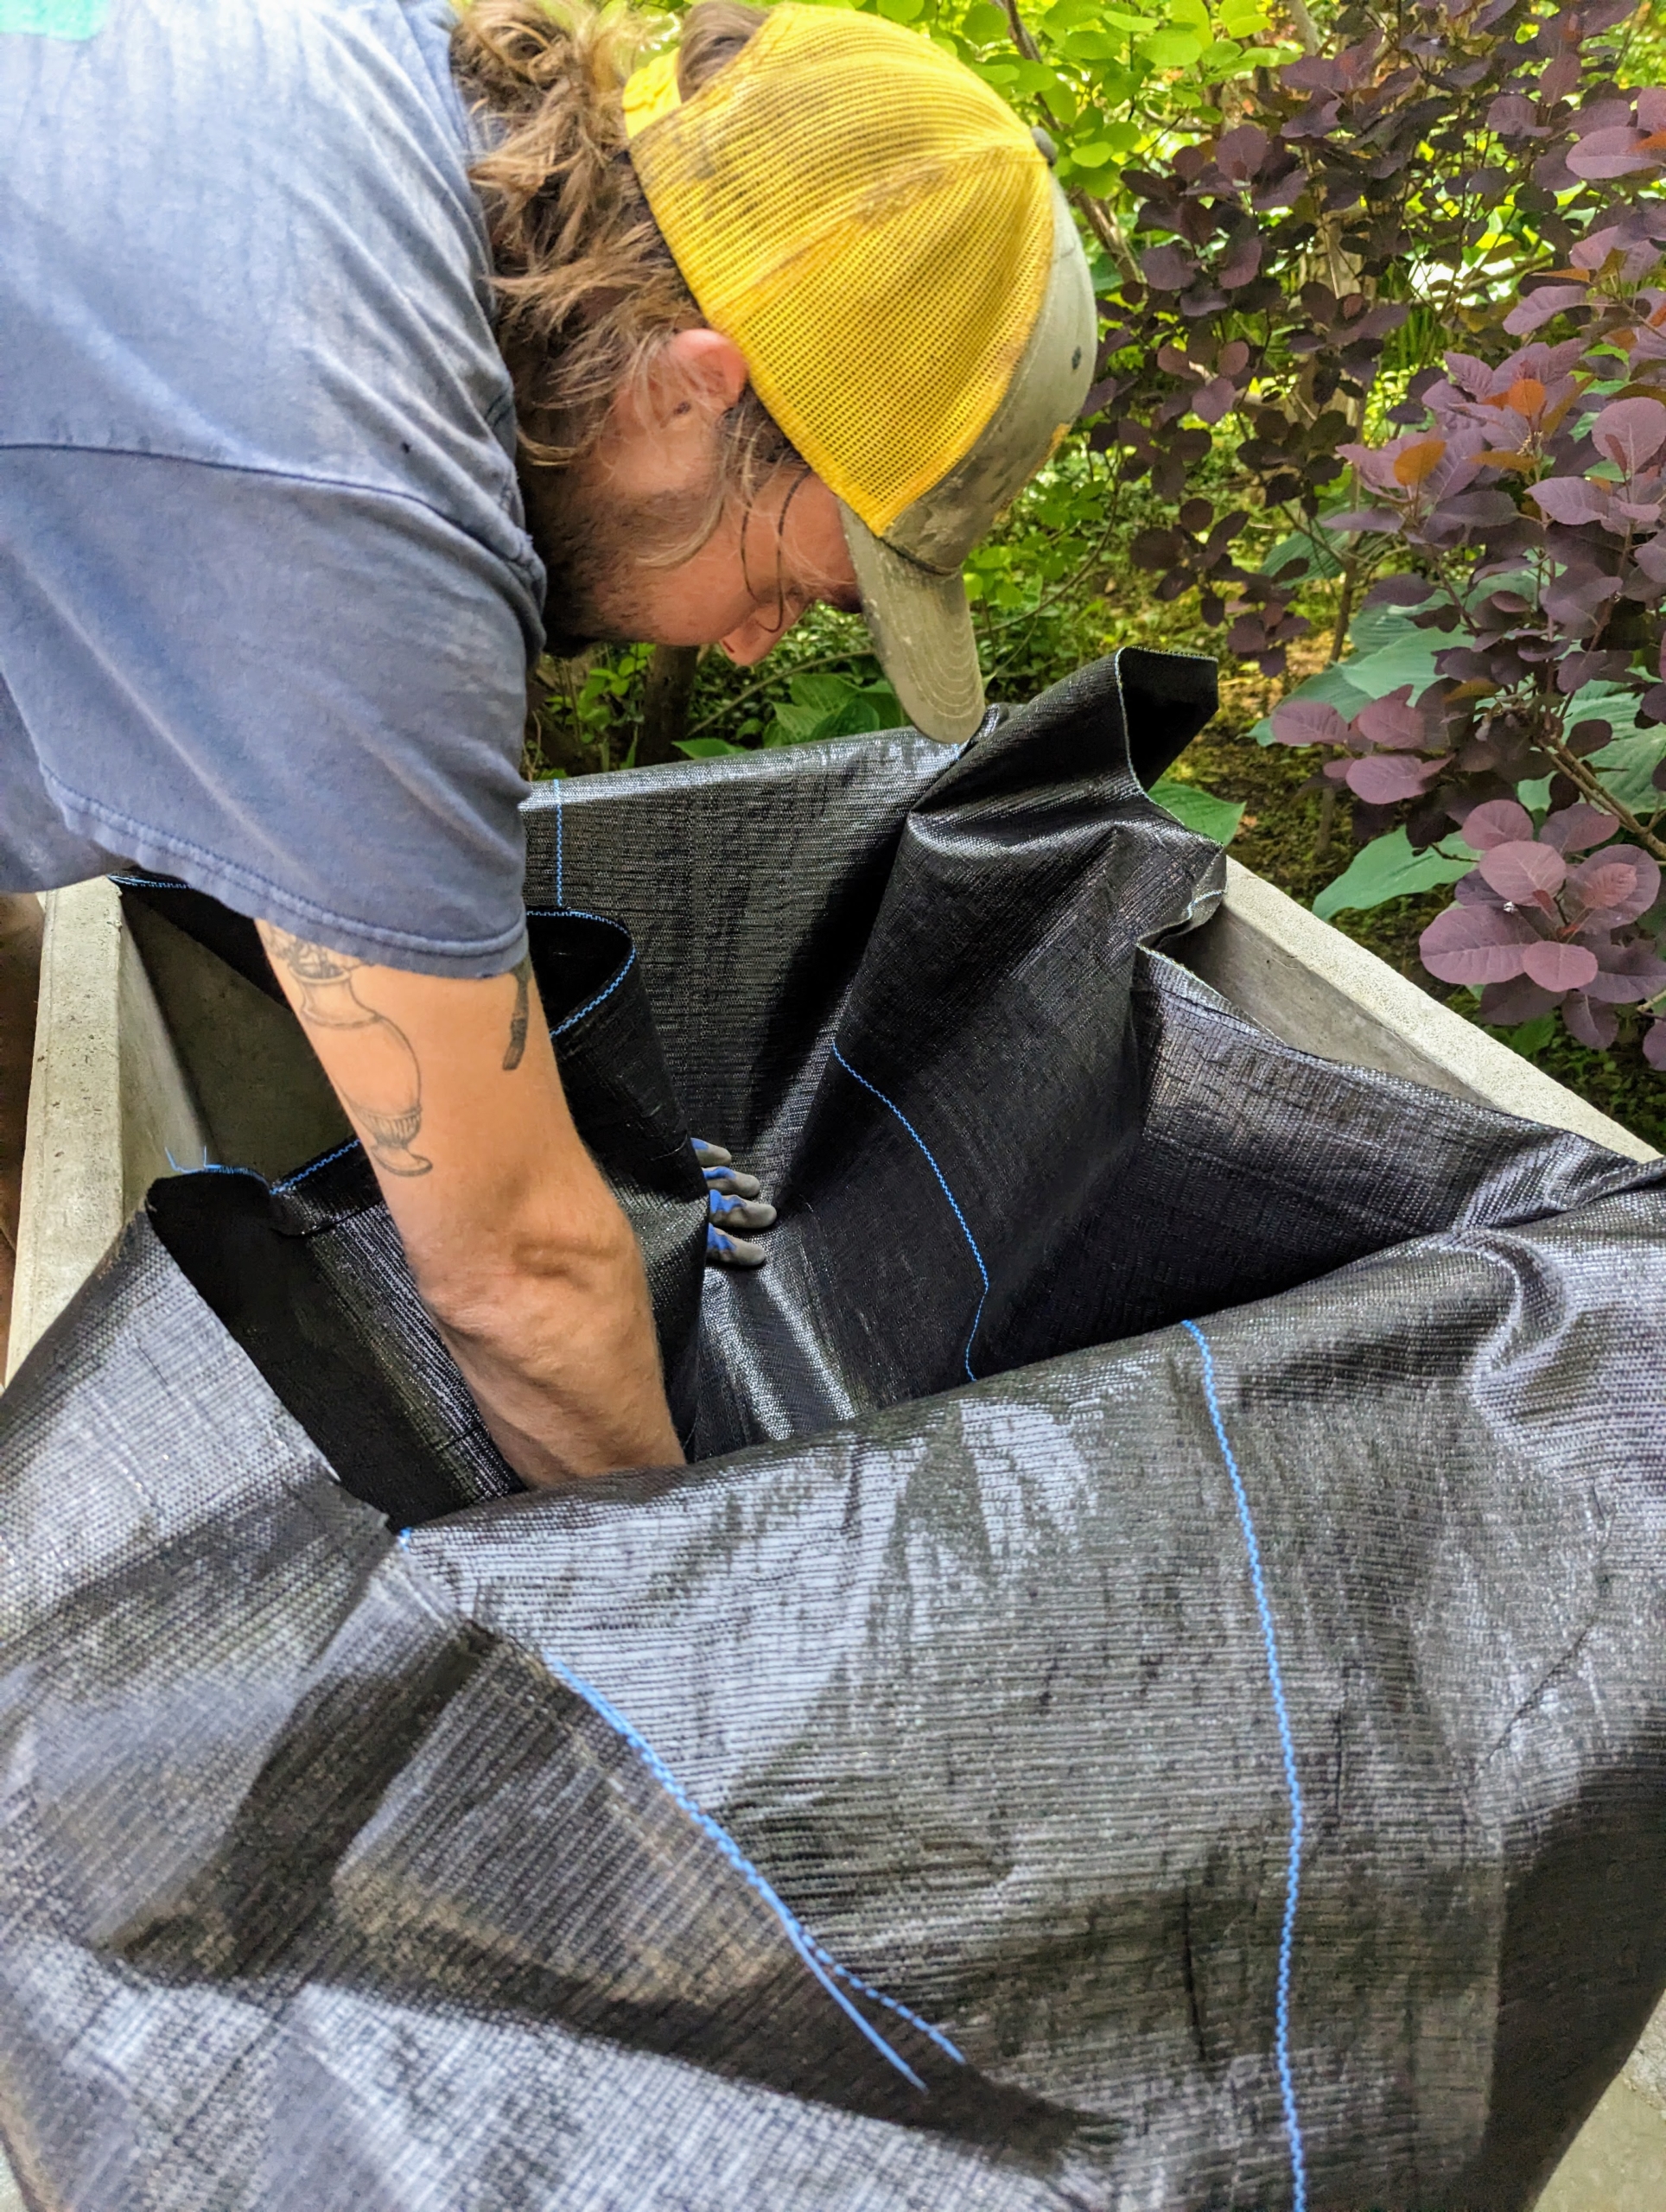
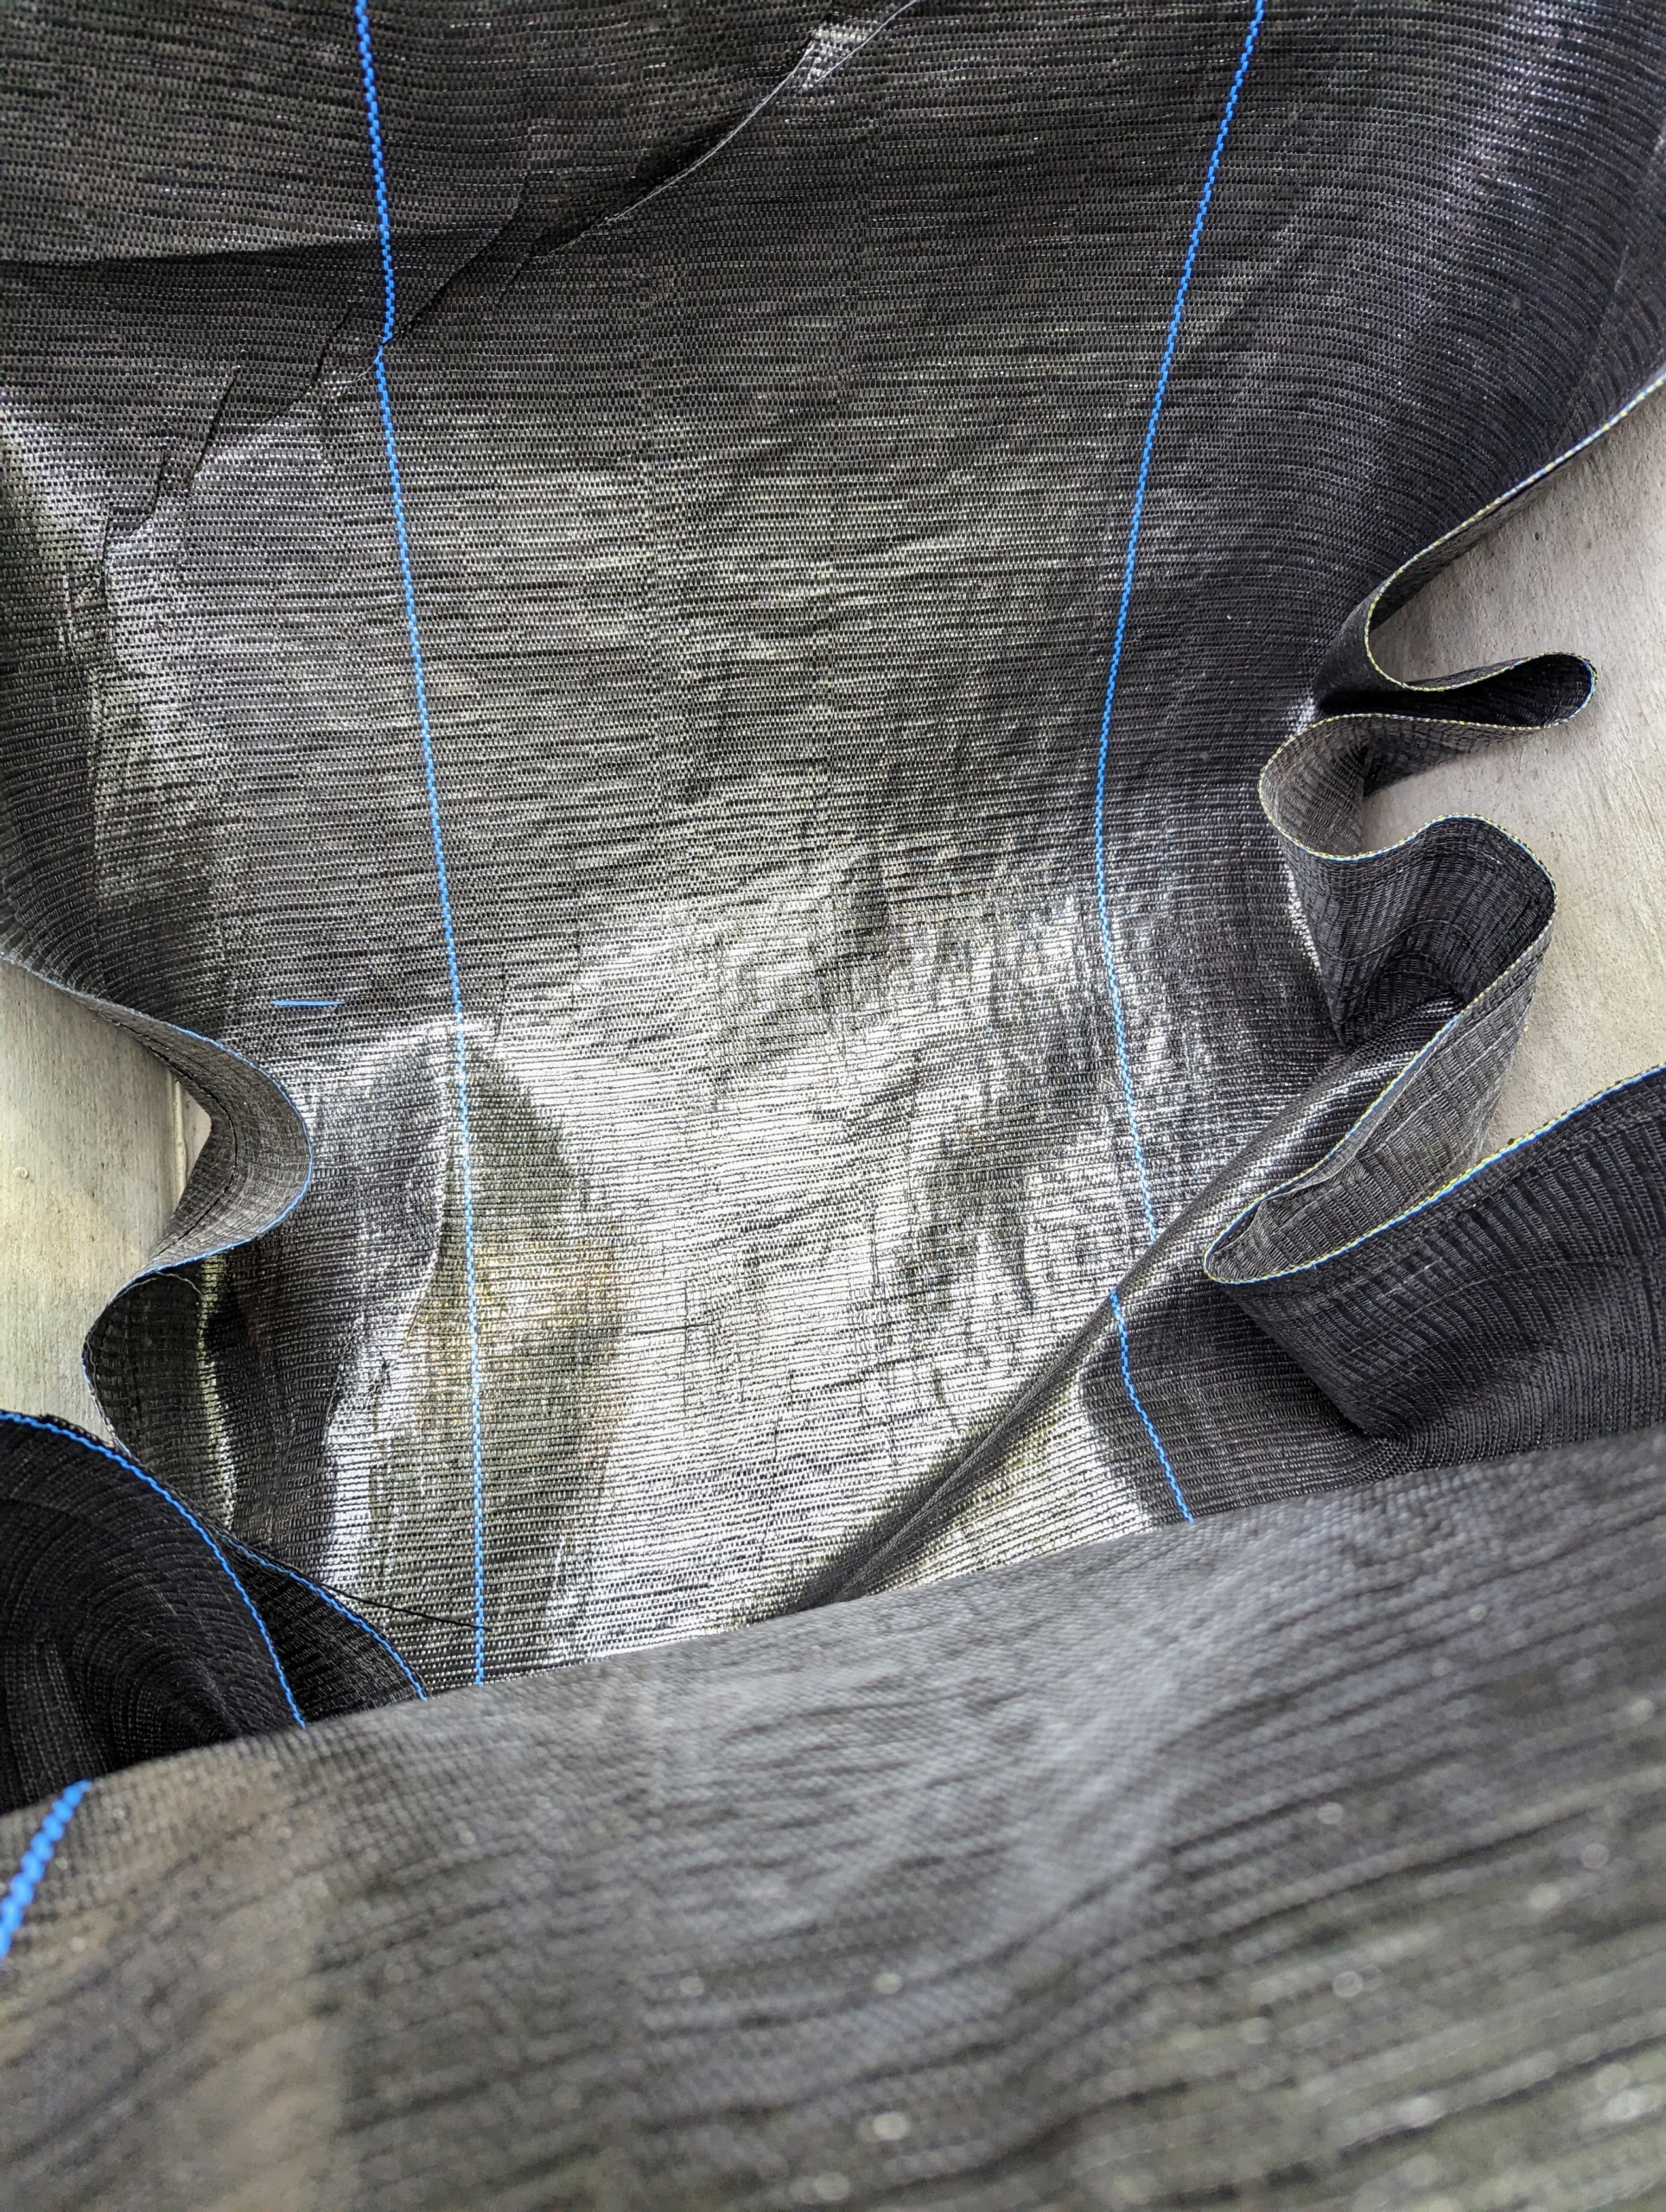
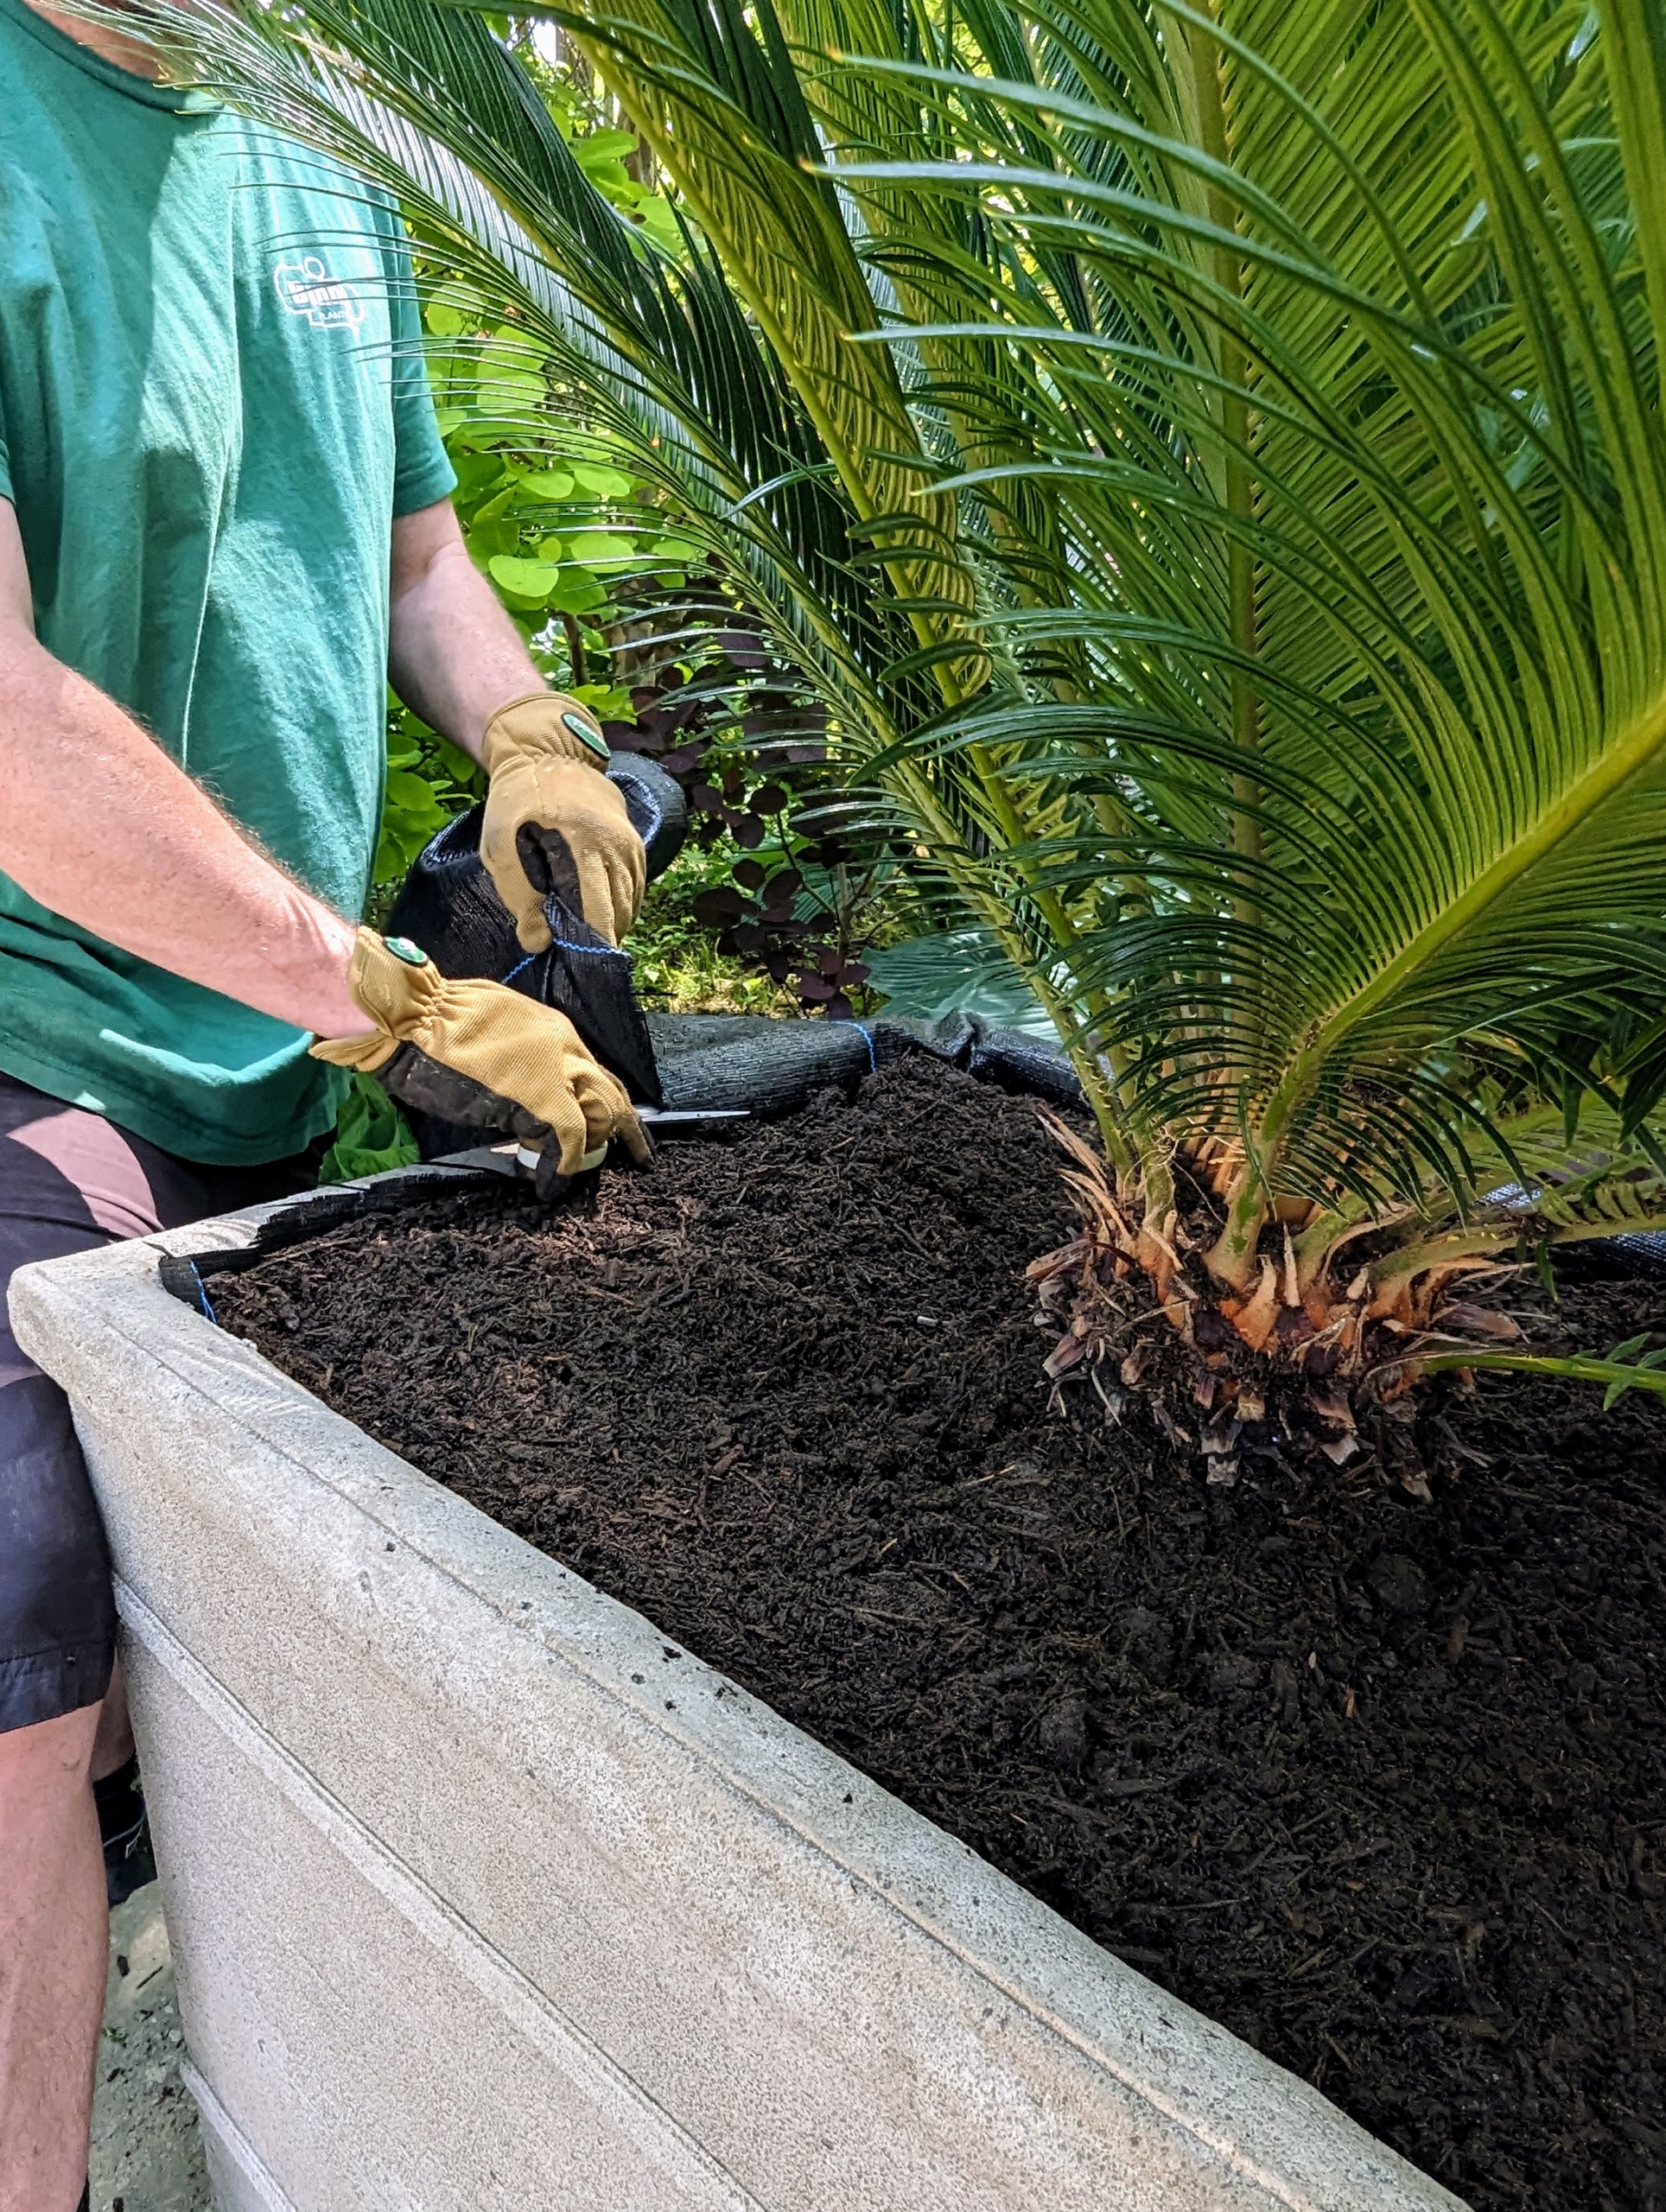
The first step is to line the inside of the vessel with some industrial weed cloth.
The cloth is placed into the vessel to protect its interior. This also makes it a lot easier come fall when the plants are removed from these pots and returned to their designated greenhouse where they live during the colder months.
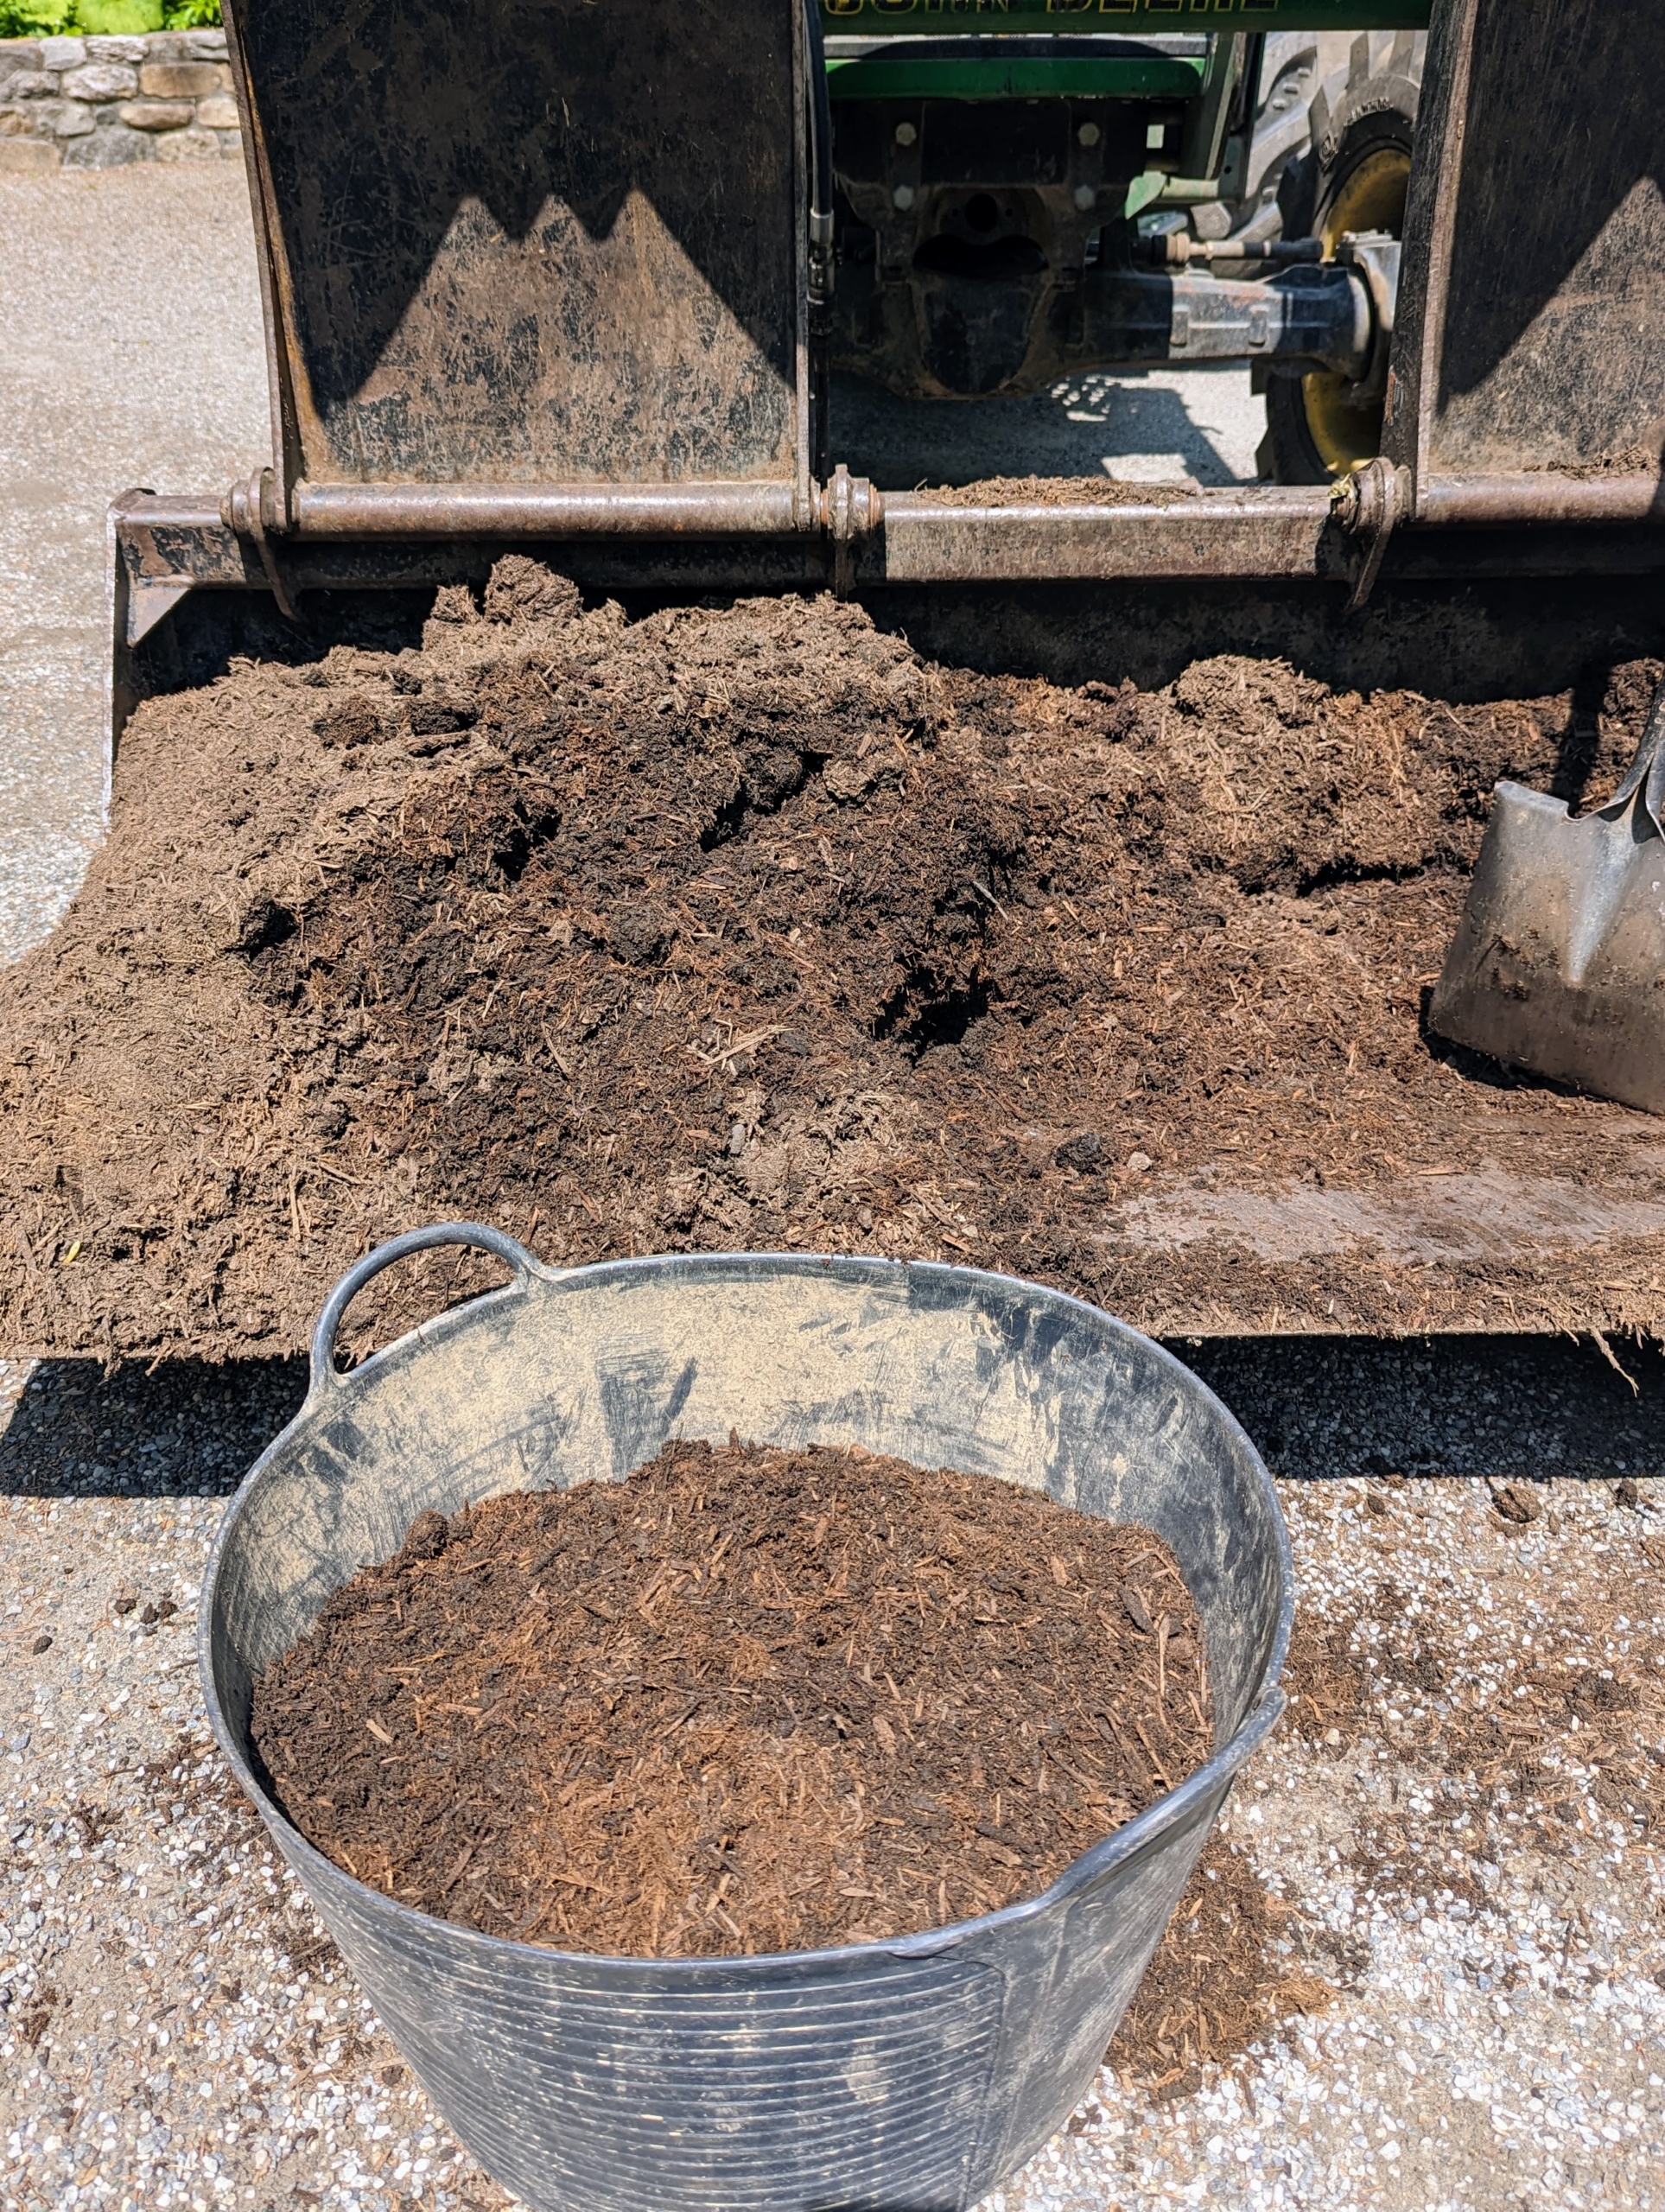
Then we fill about a third of the pot with compost. This nutrient-rich compost is made right here at the farm.
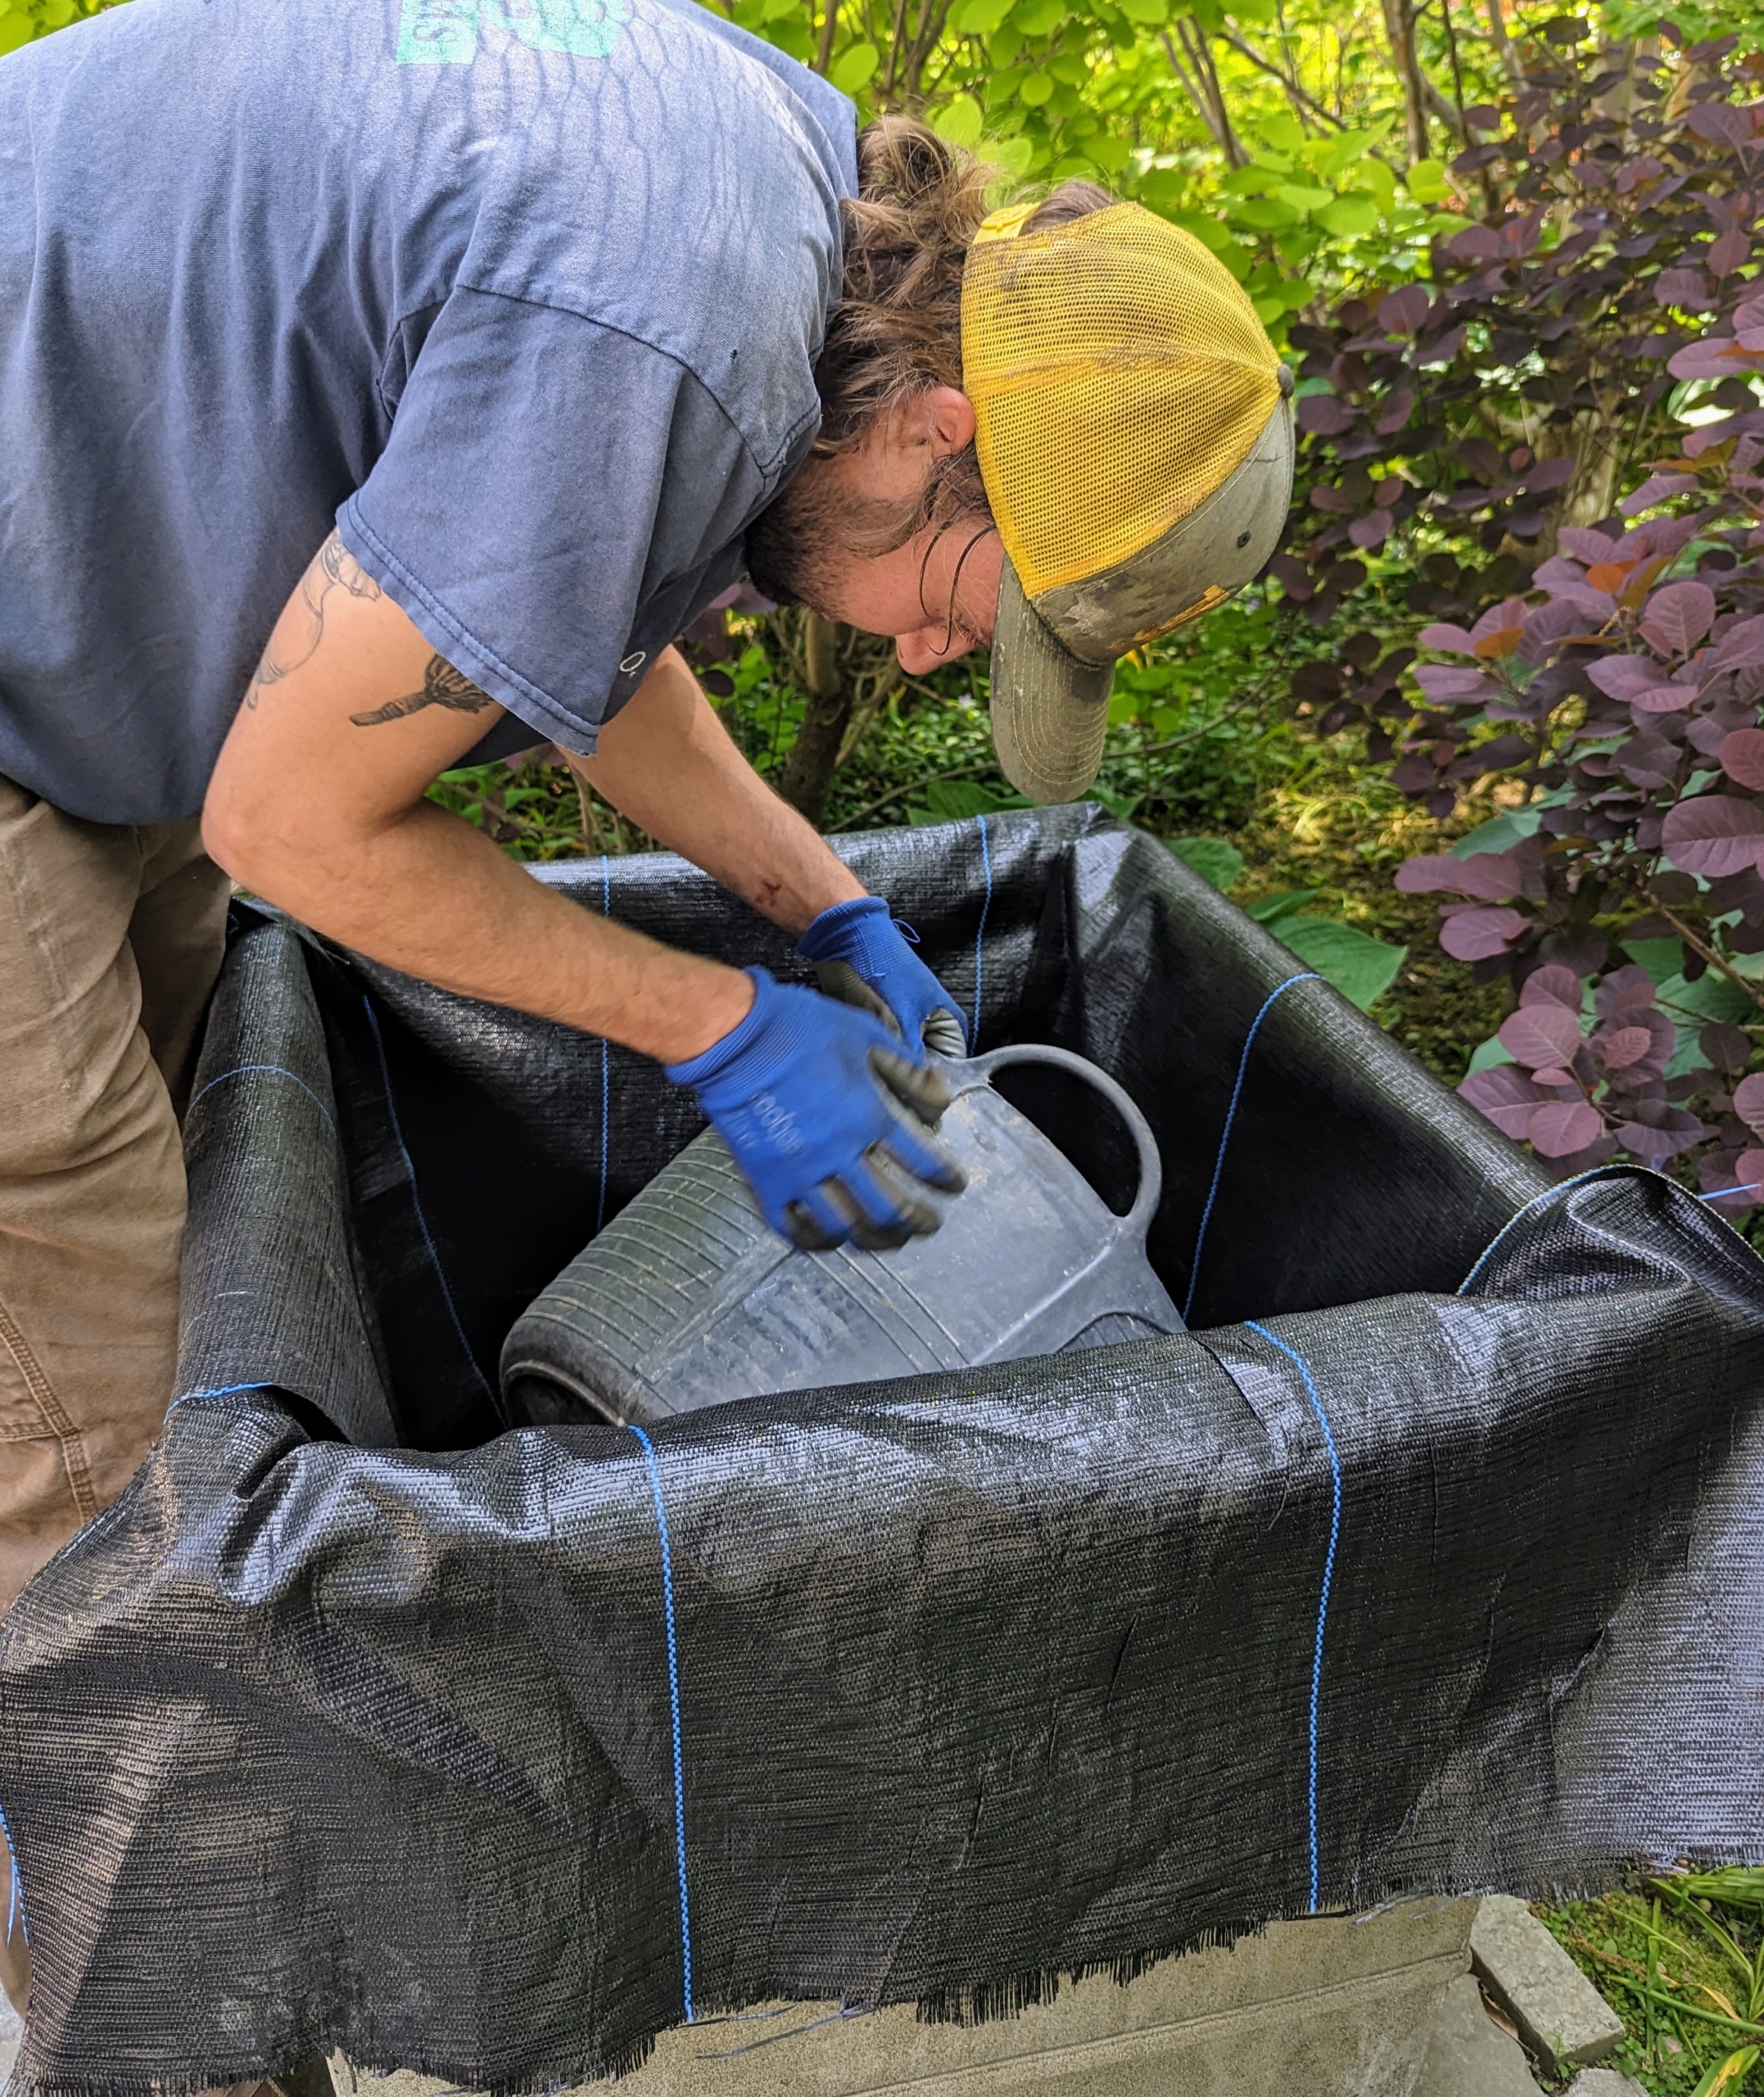
Here is Brian pouring some of the compost to the bottom of the pot, weighing the cloth down in place.
This will provide level ground for the plant and keep it at its proper height inside the pot. It will also allow for good drainage.
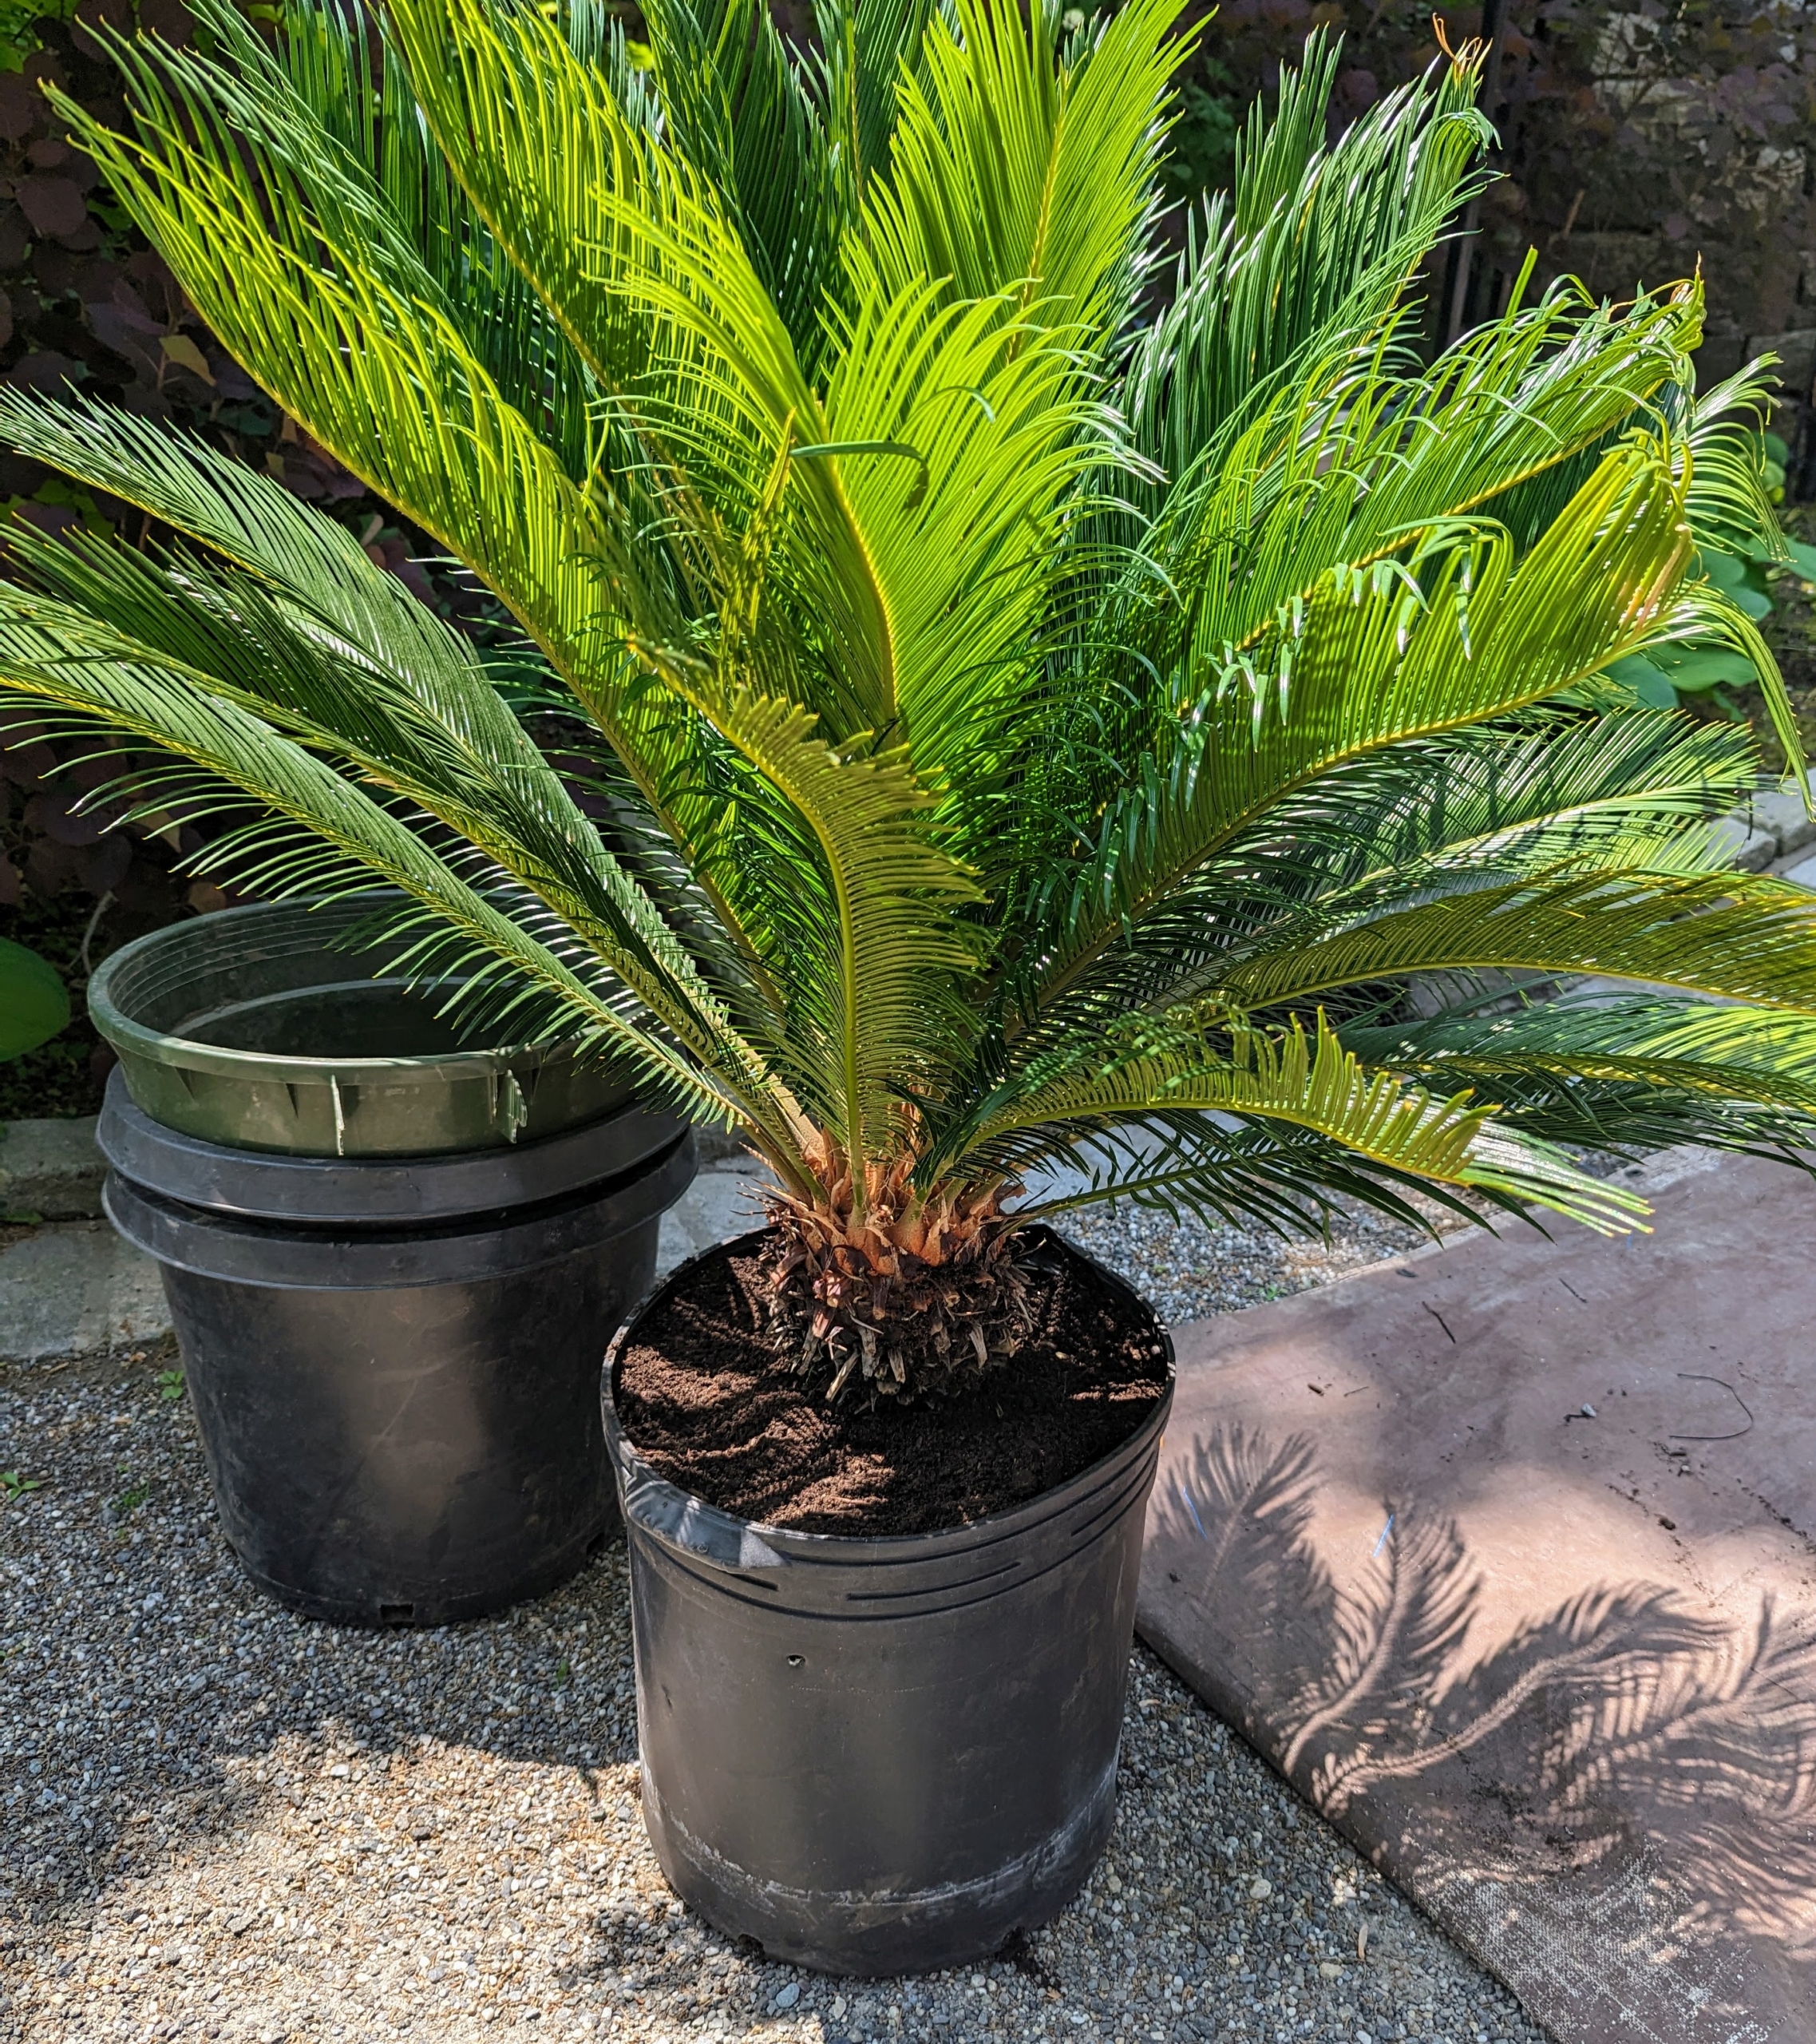
This is actually one of those smaller sago palm pups now. Although sago palms are slow growing, this has grown quite a bit in the last five to six years.
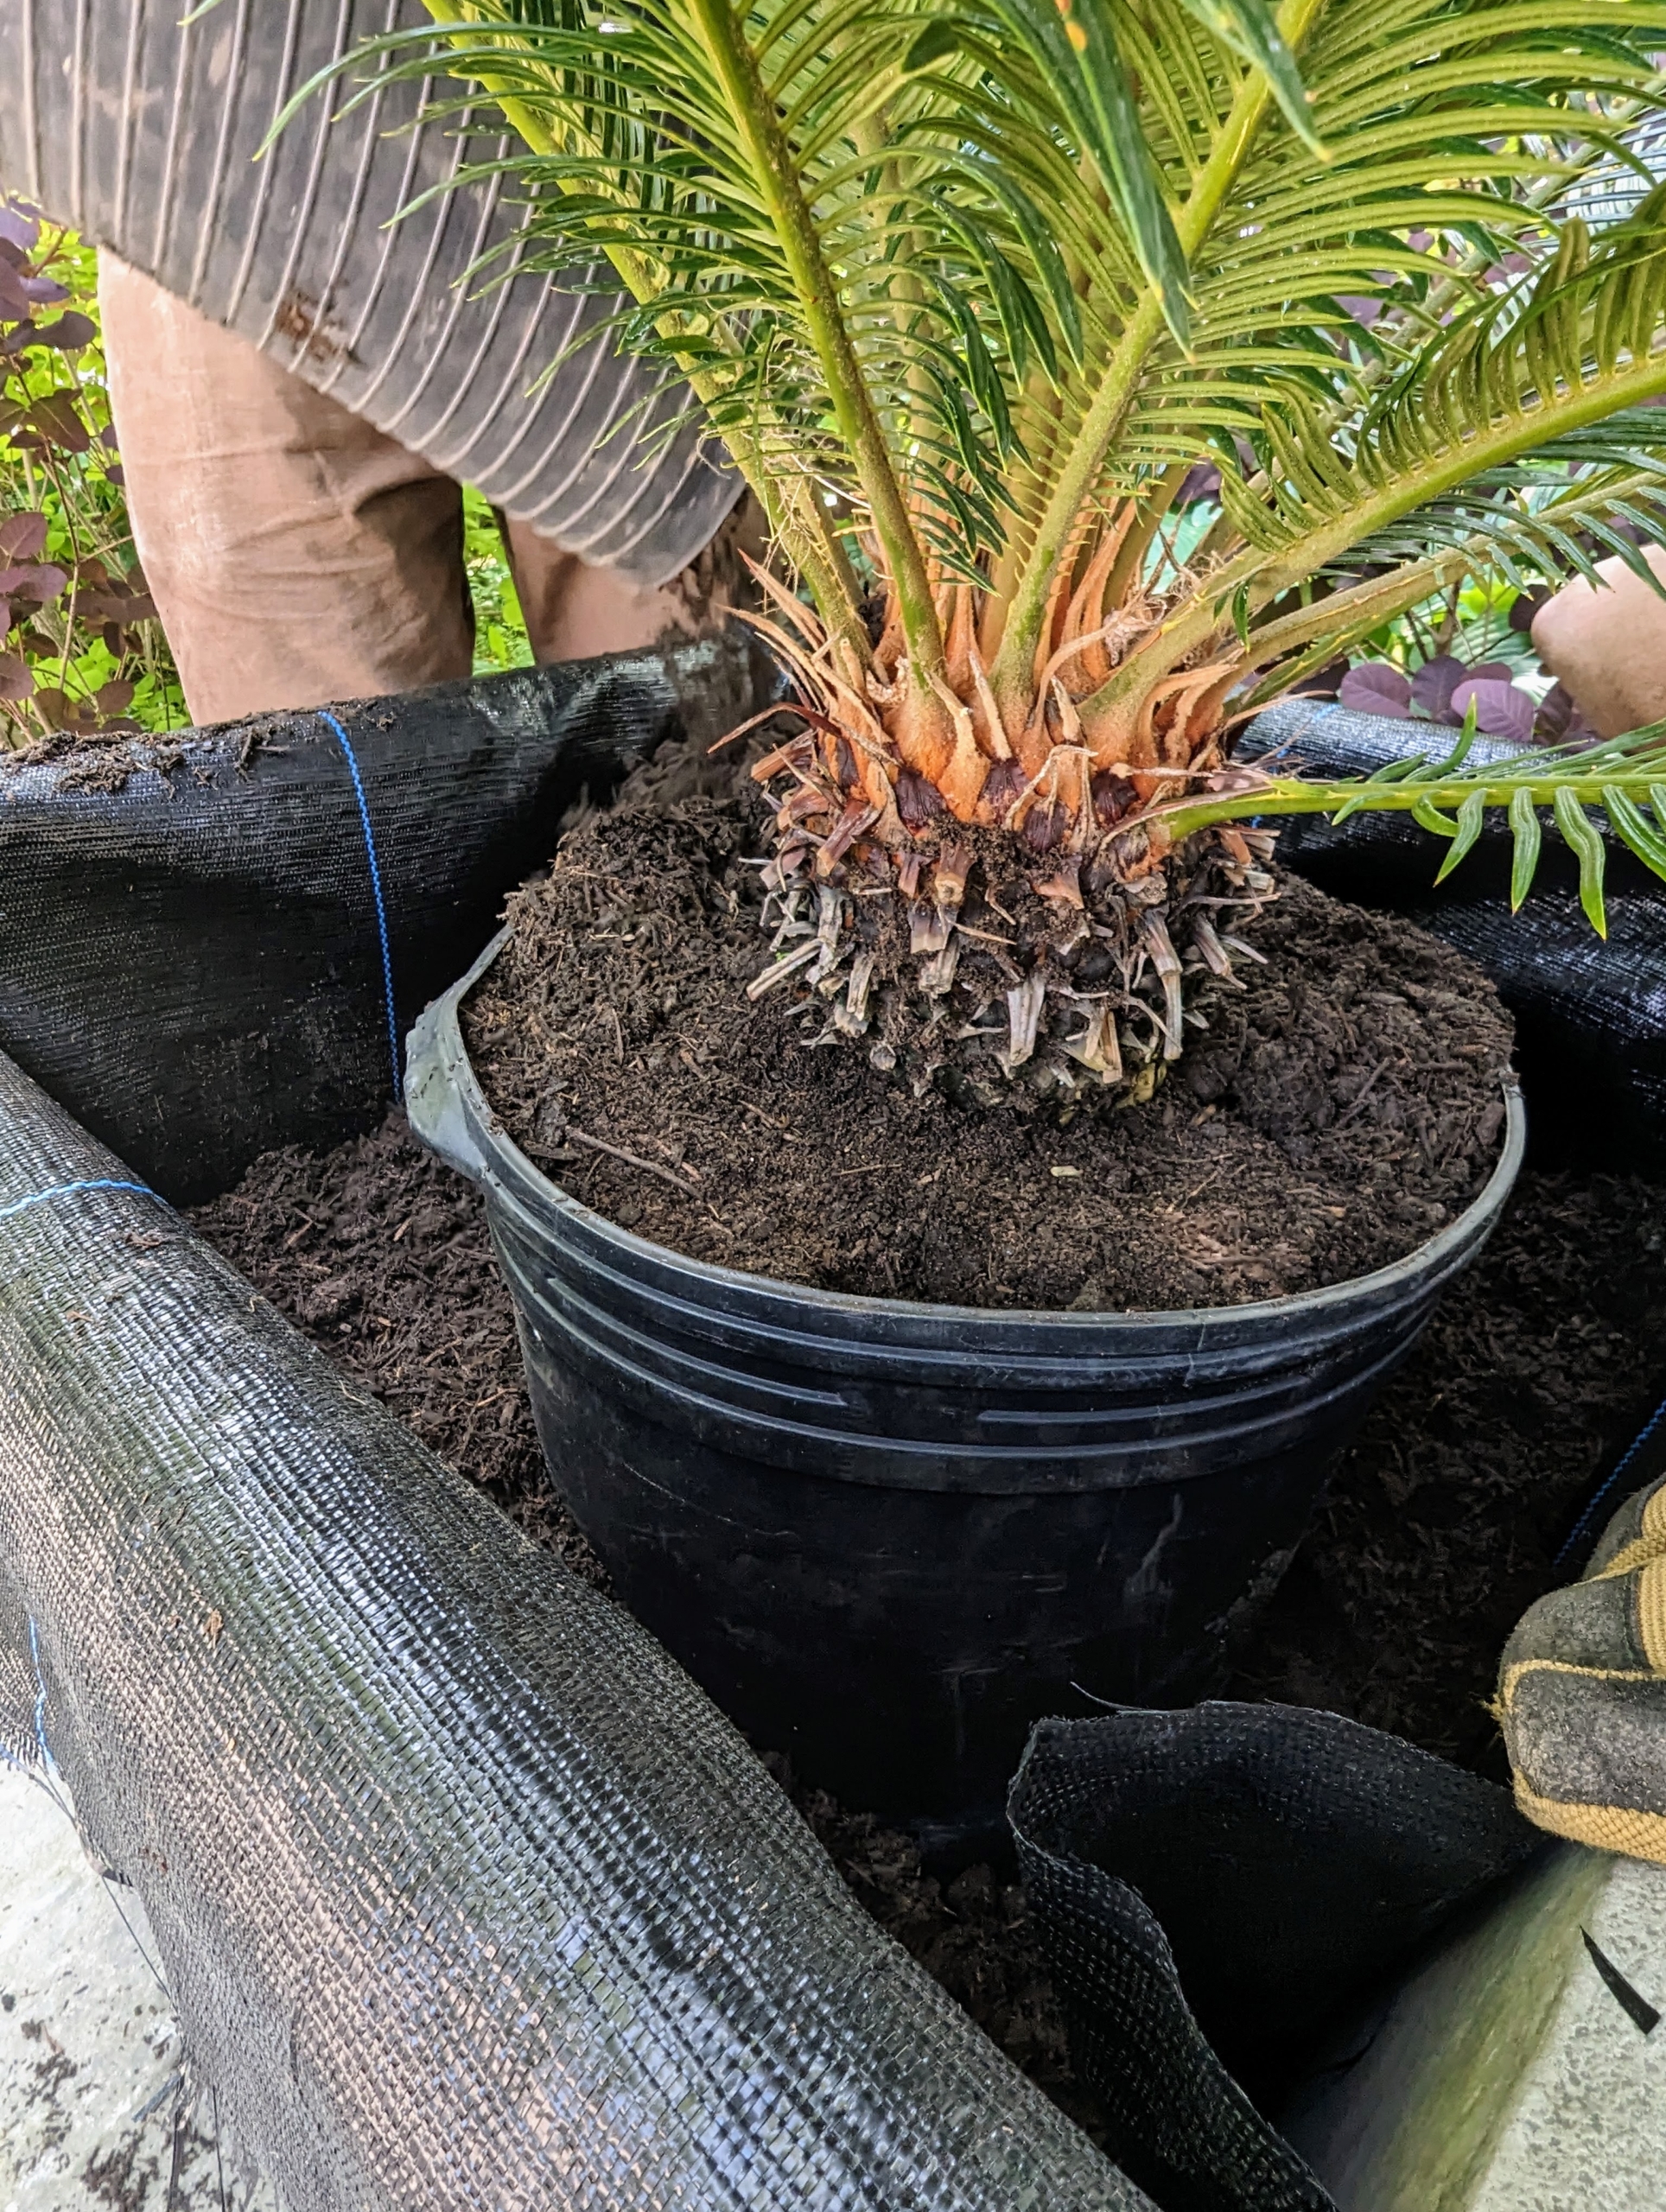
Also to save some effort later, Ryan and Brian insert the potted plant into the larger container. The black plastic pot is also the perfect size for this sago palm. These plants prefer to be slightly root-bound, so it’s best to choose a somewhat snug pot for growing them.
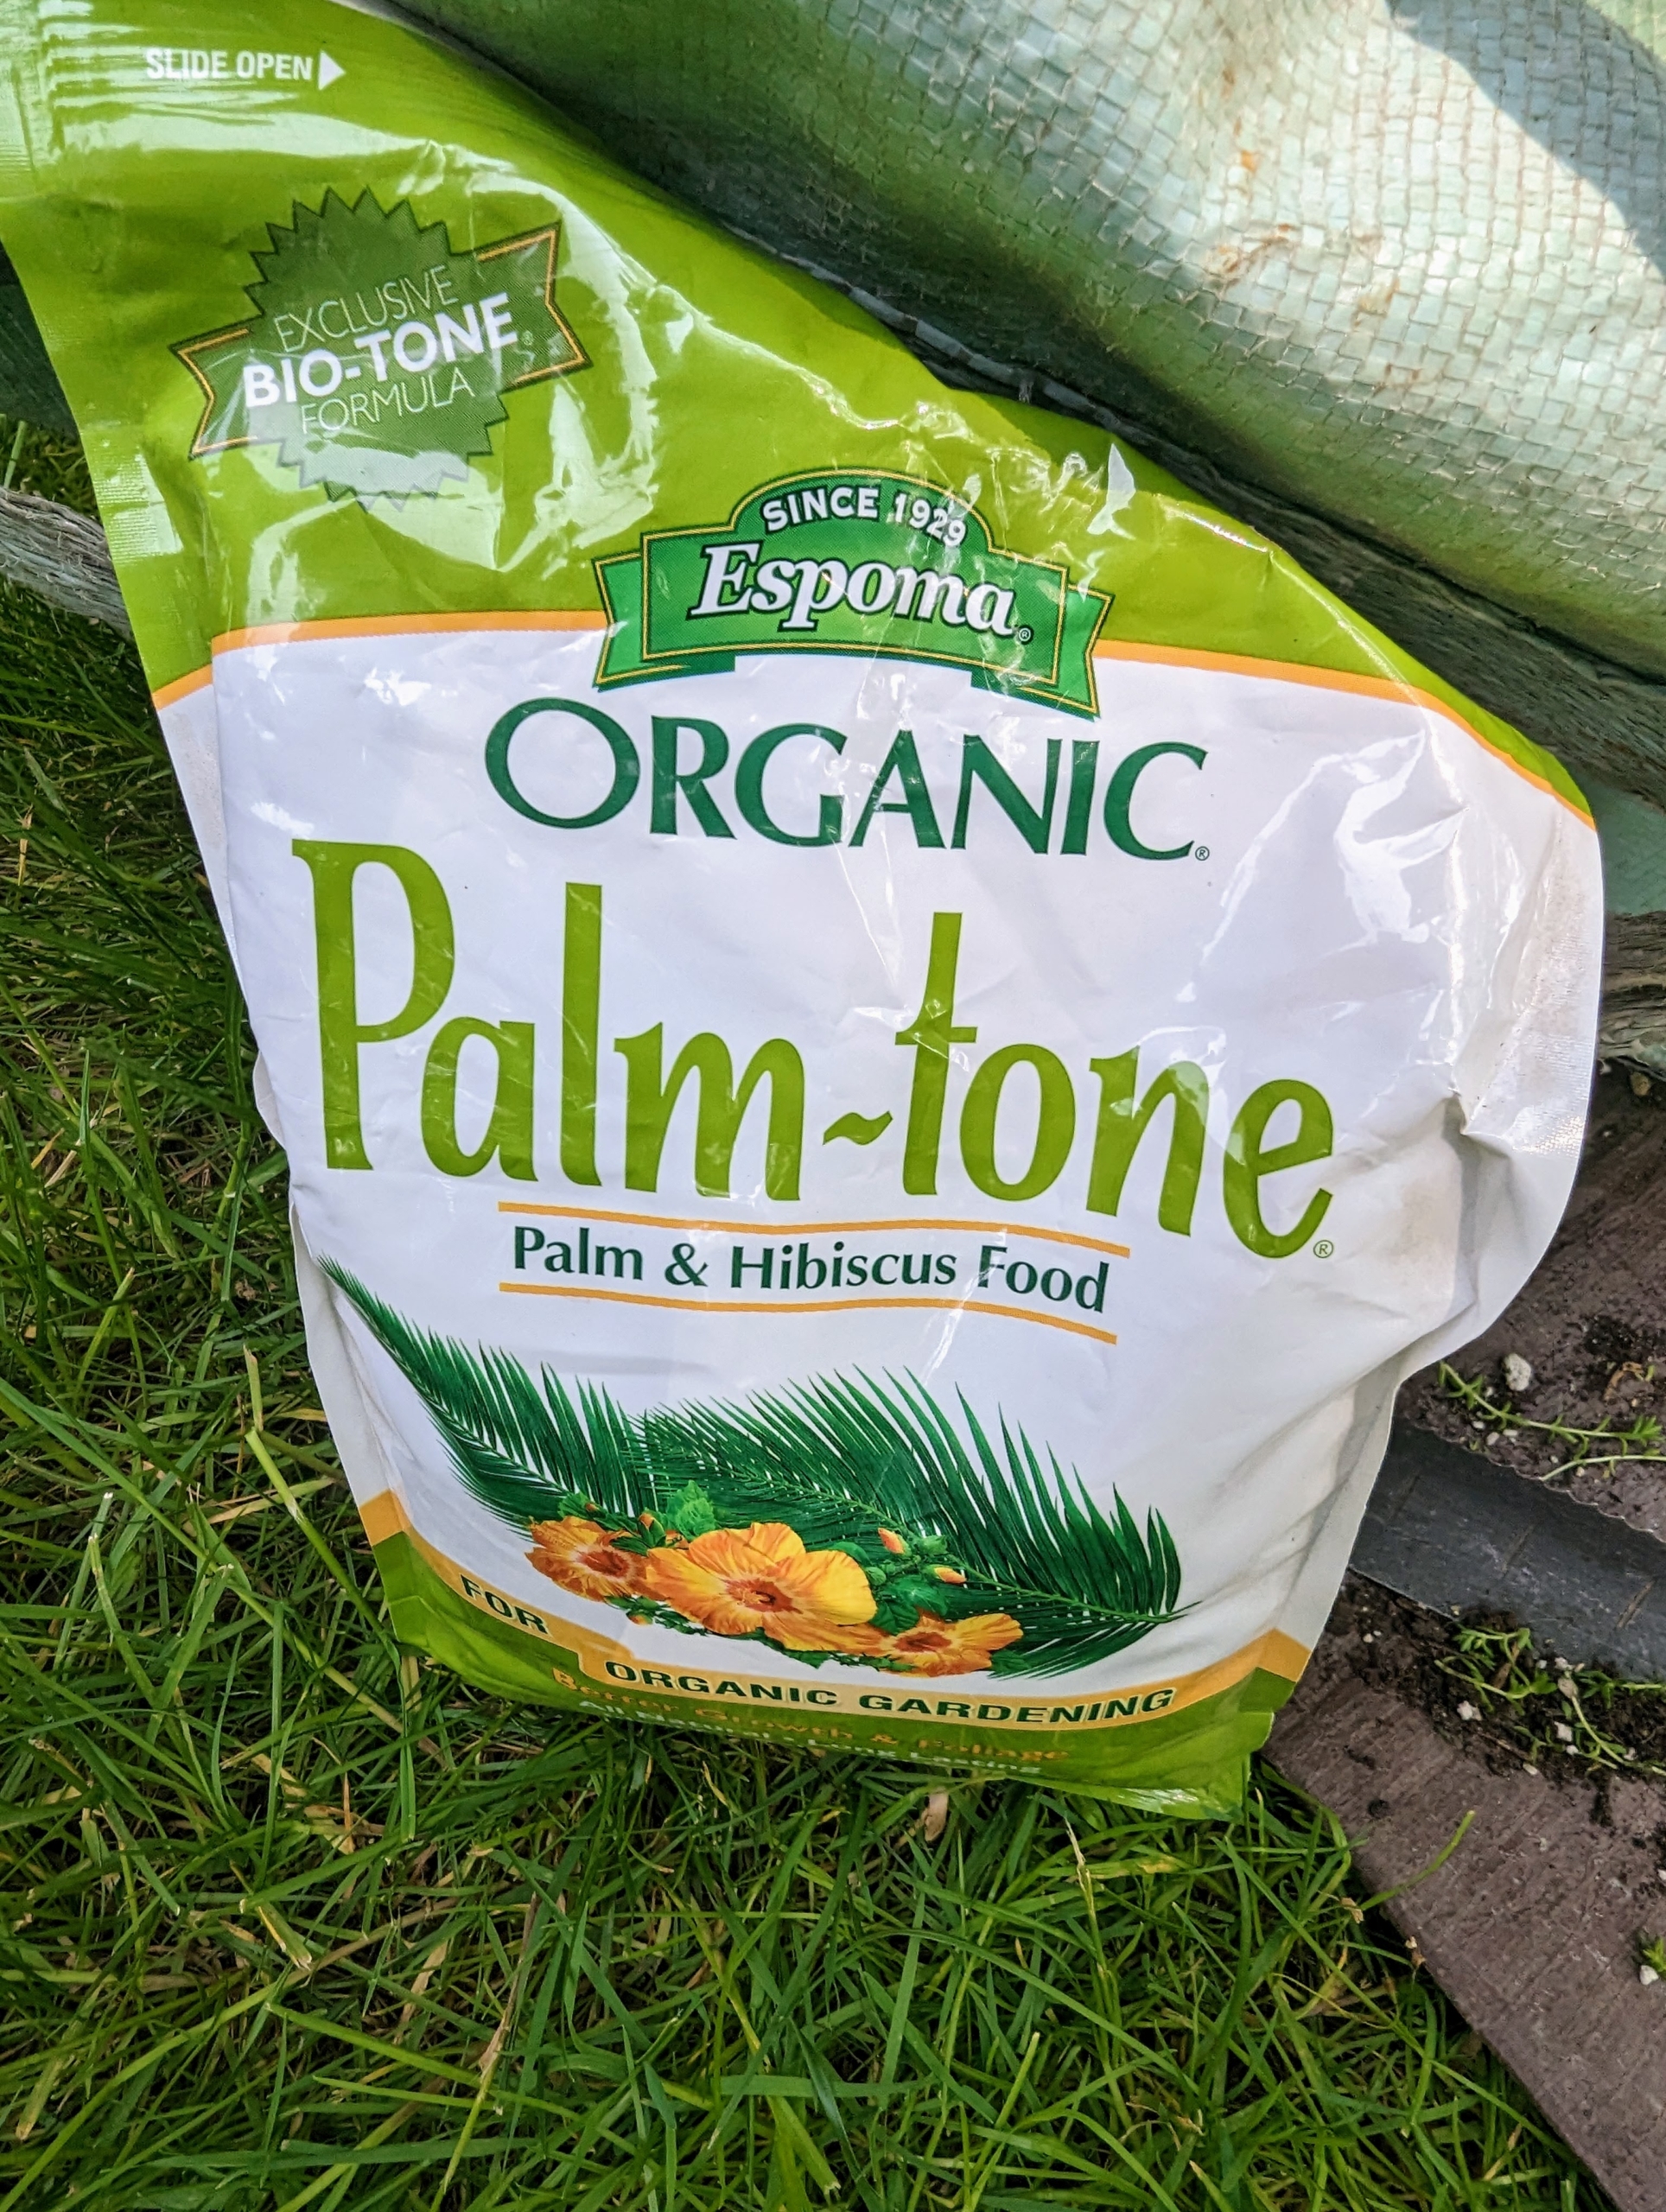
And of course don’t forget the food. We use Organic Palm-Tone which is long lasting and provides slow-release feeding with special microbes.
Here, Brian and Ryan fill the rest of the pot with soil to cover.
Ryan cuts the excess weed cloth hanging over the side of the container and then tucks the ends into the soil.
He also tamps down on the soil to ensure good contact with the plant. And he looks to see that the plant is straight from all sides and makes adjustments where needed.
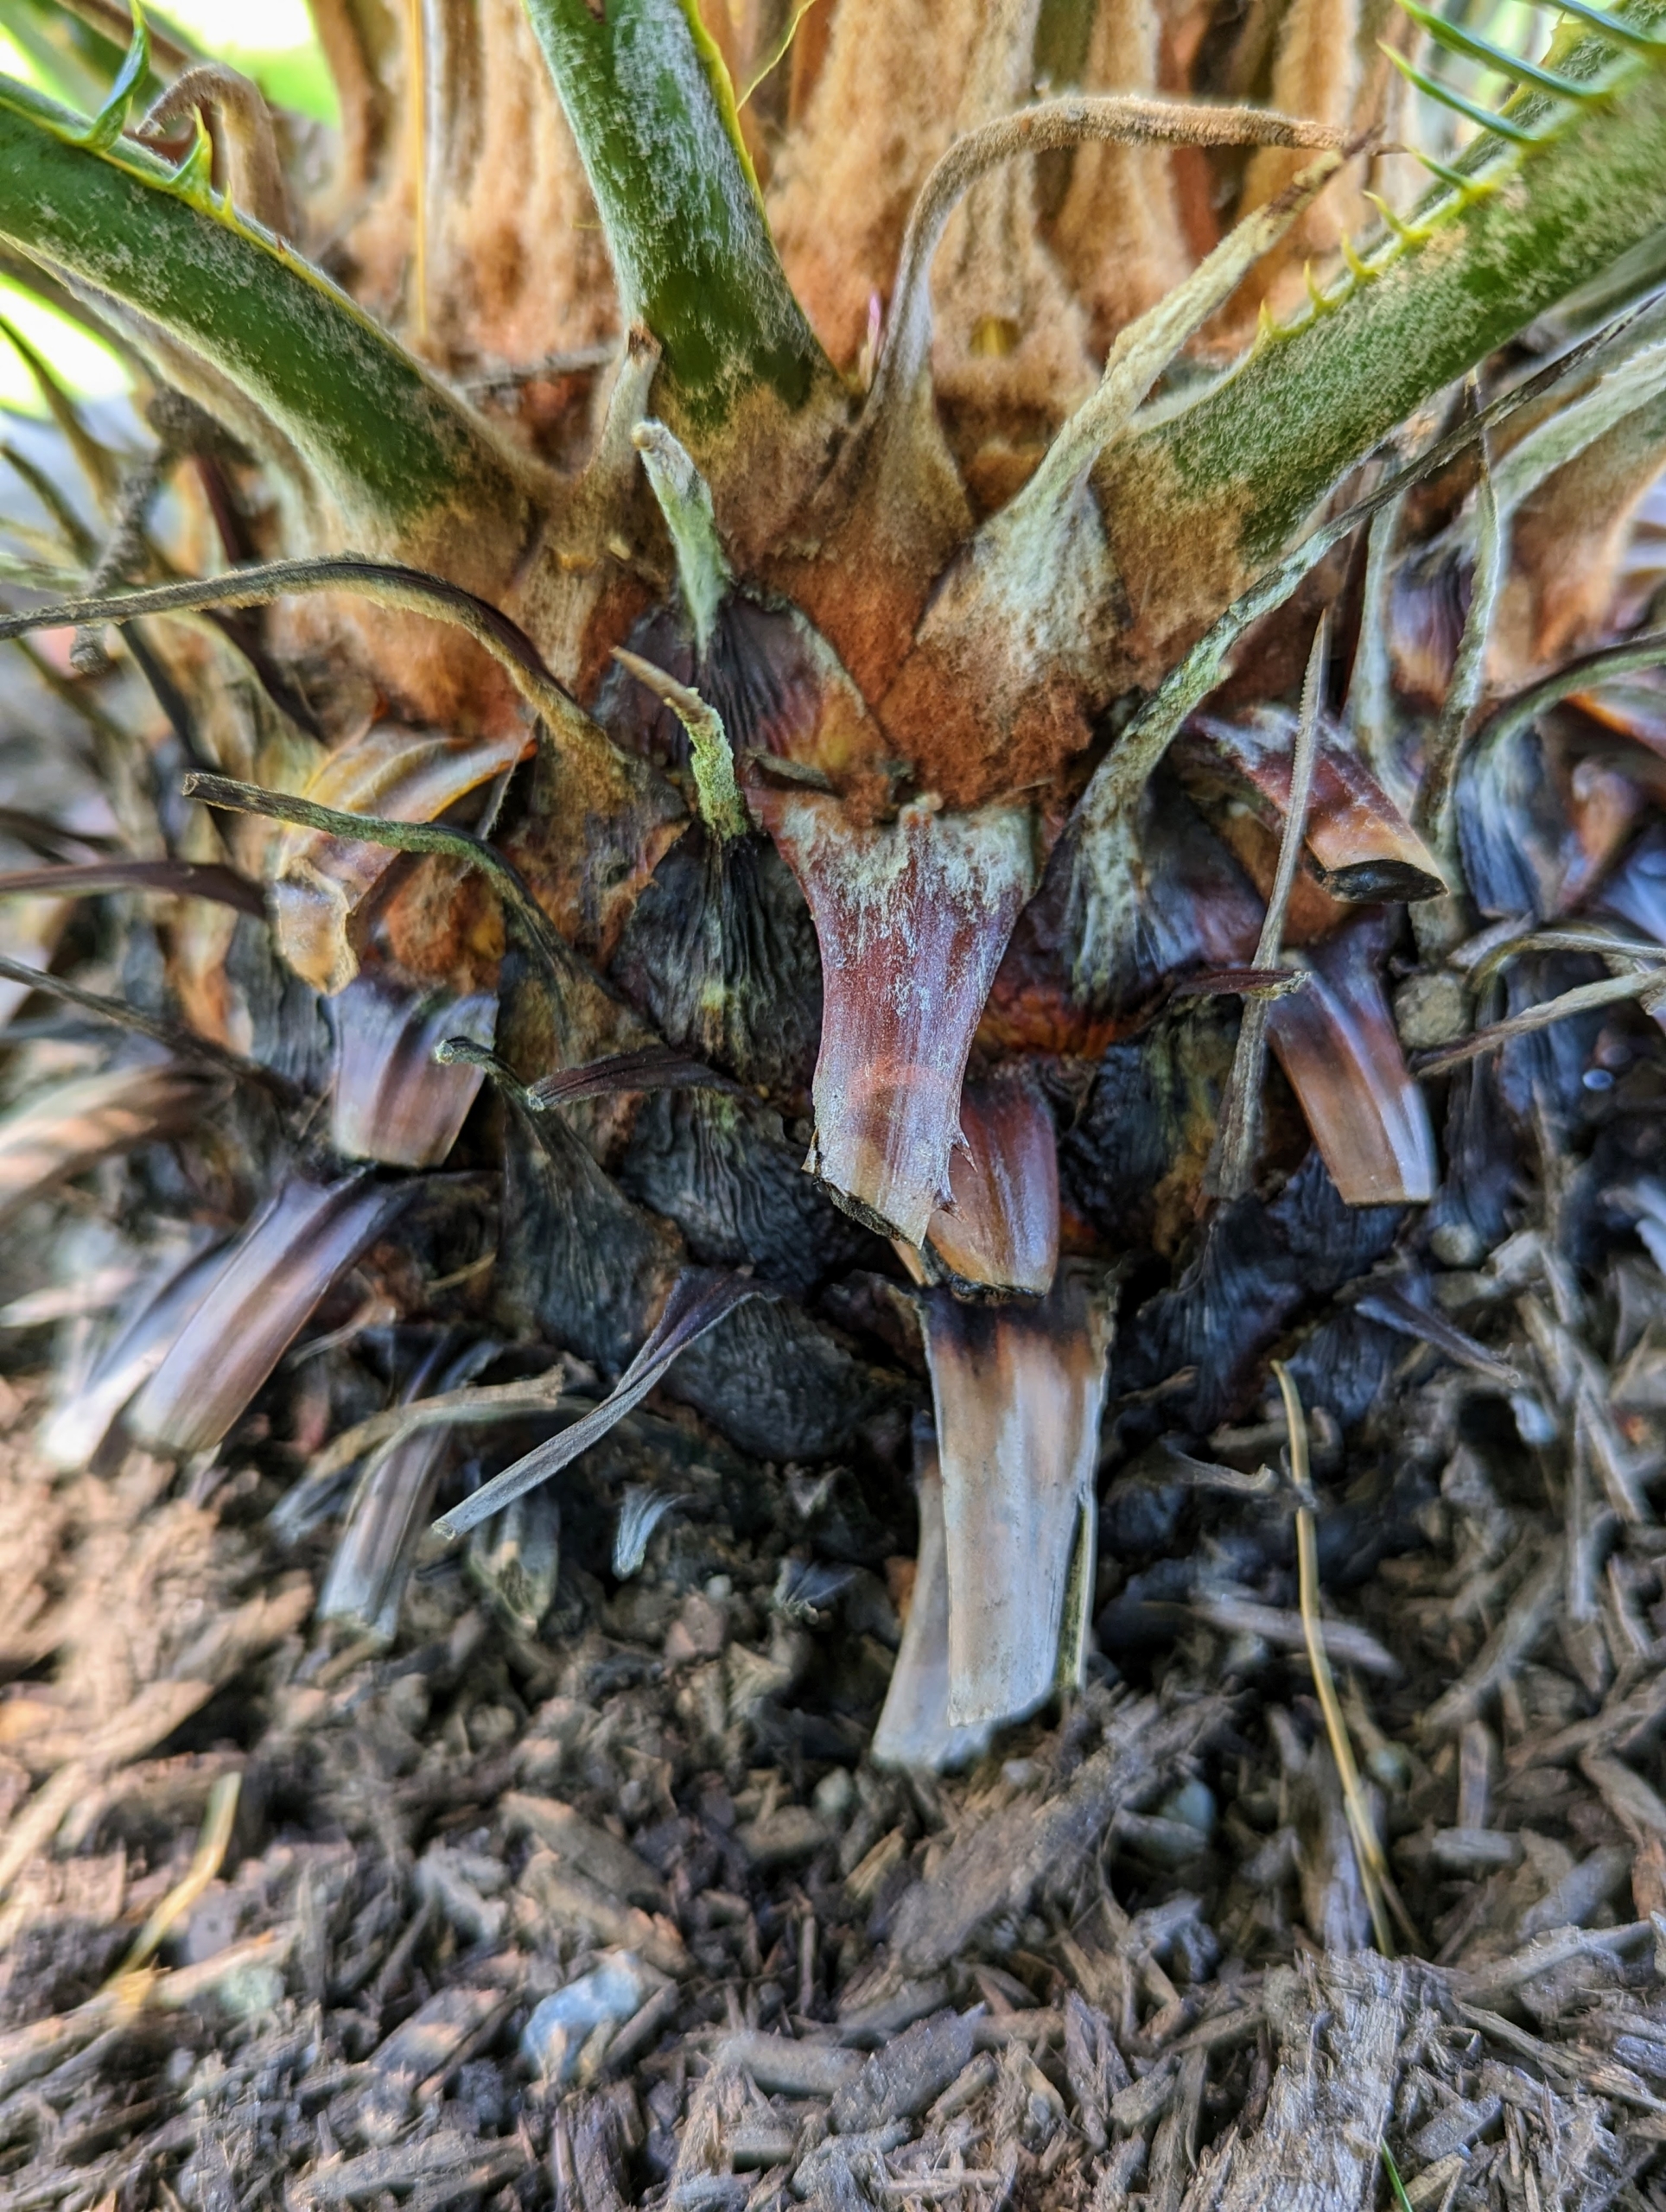
Notice the sago palm’s trunk. It is a rough, symmetrical trunk which becomes leafless as it ages and gives way to its evergreen crown of upward pointing fronds. When pruning, only cut off the old and dying leaves, especially towards the base of the tree where they are oldest. And cut them off as close to the trunk as possible.
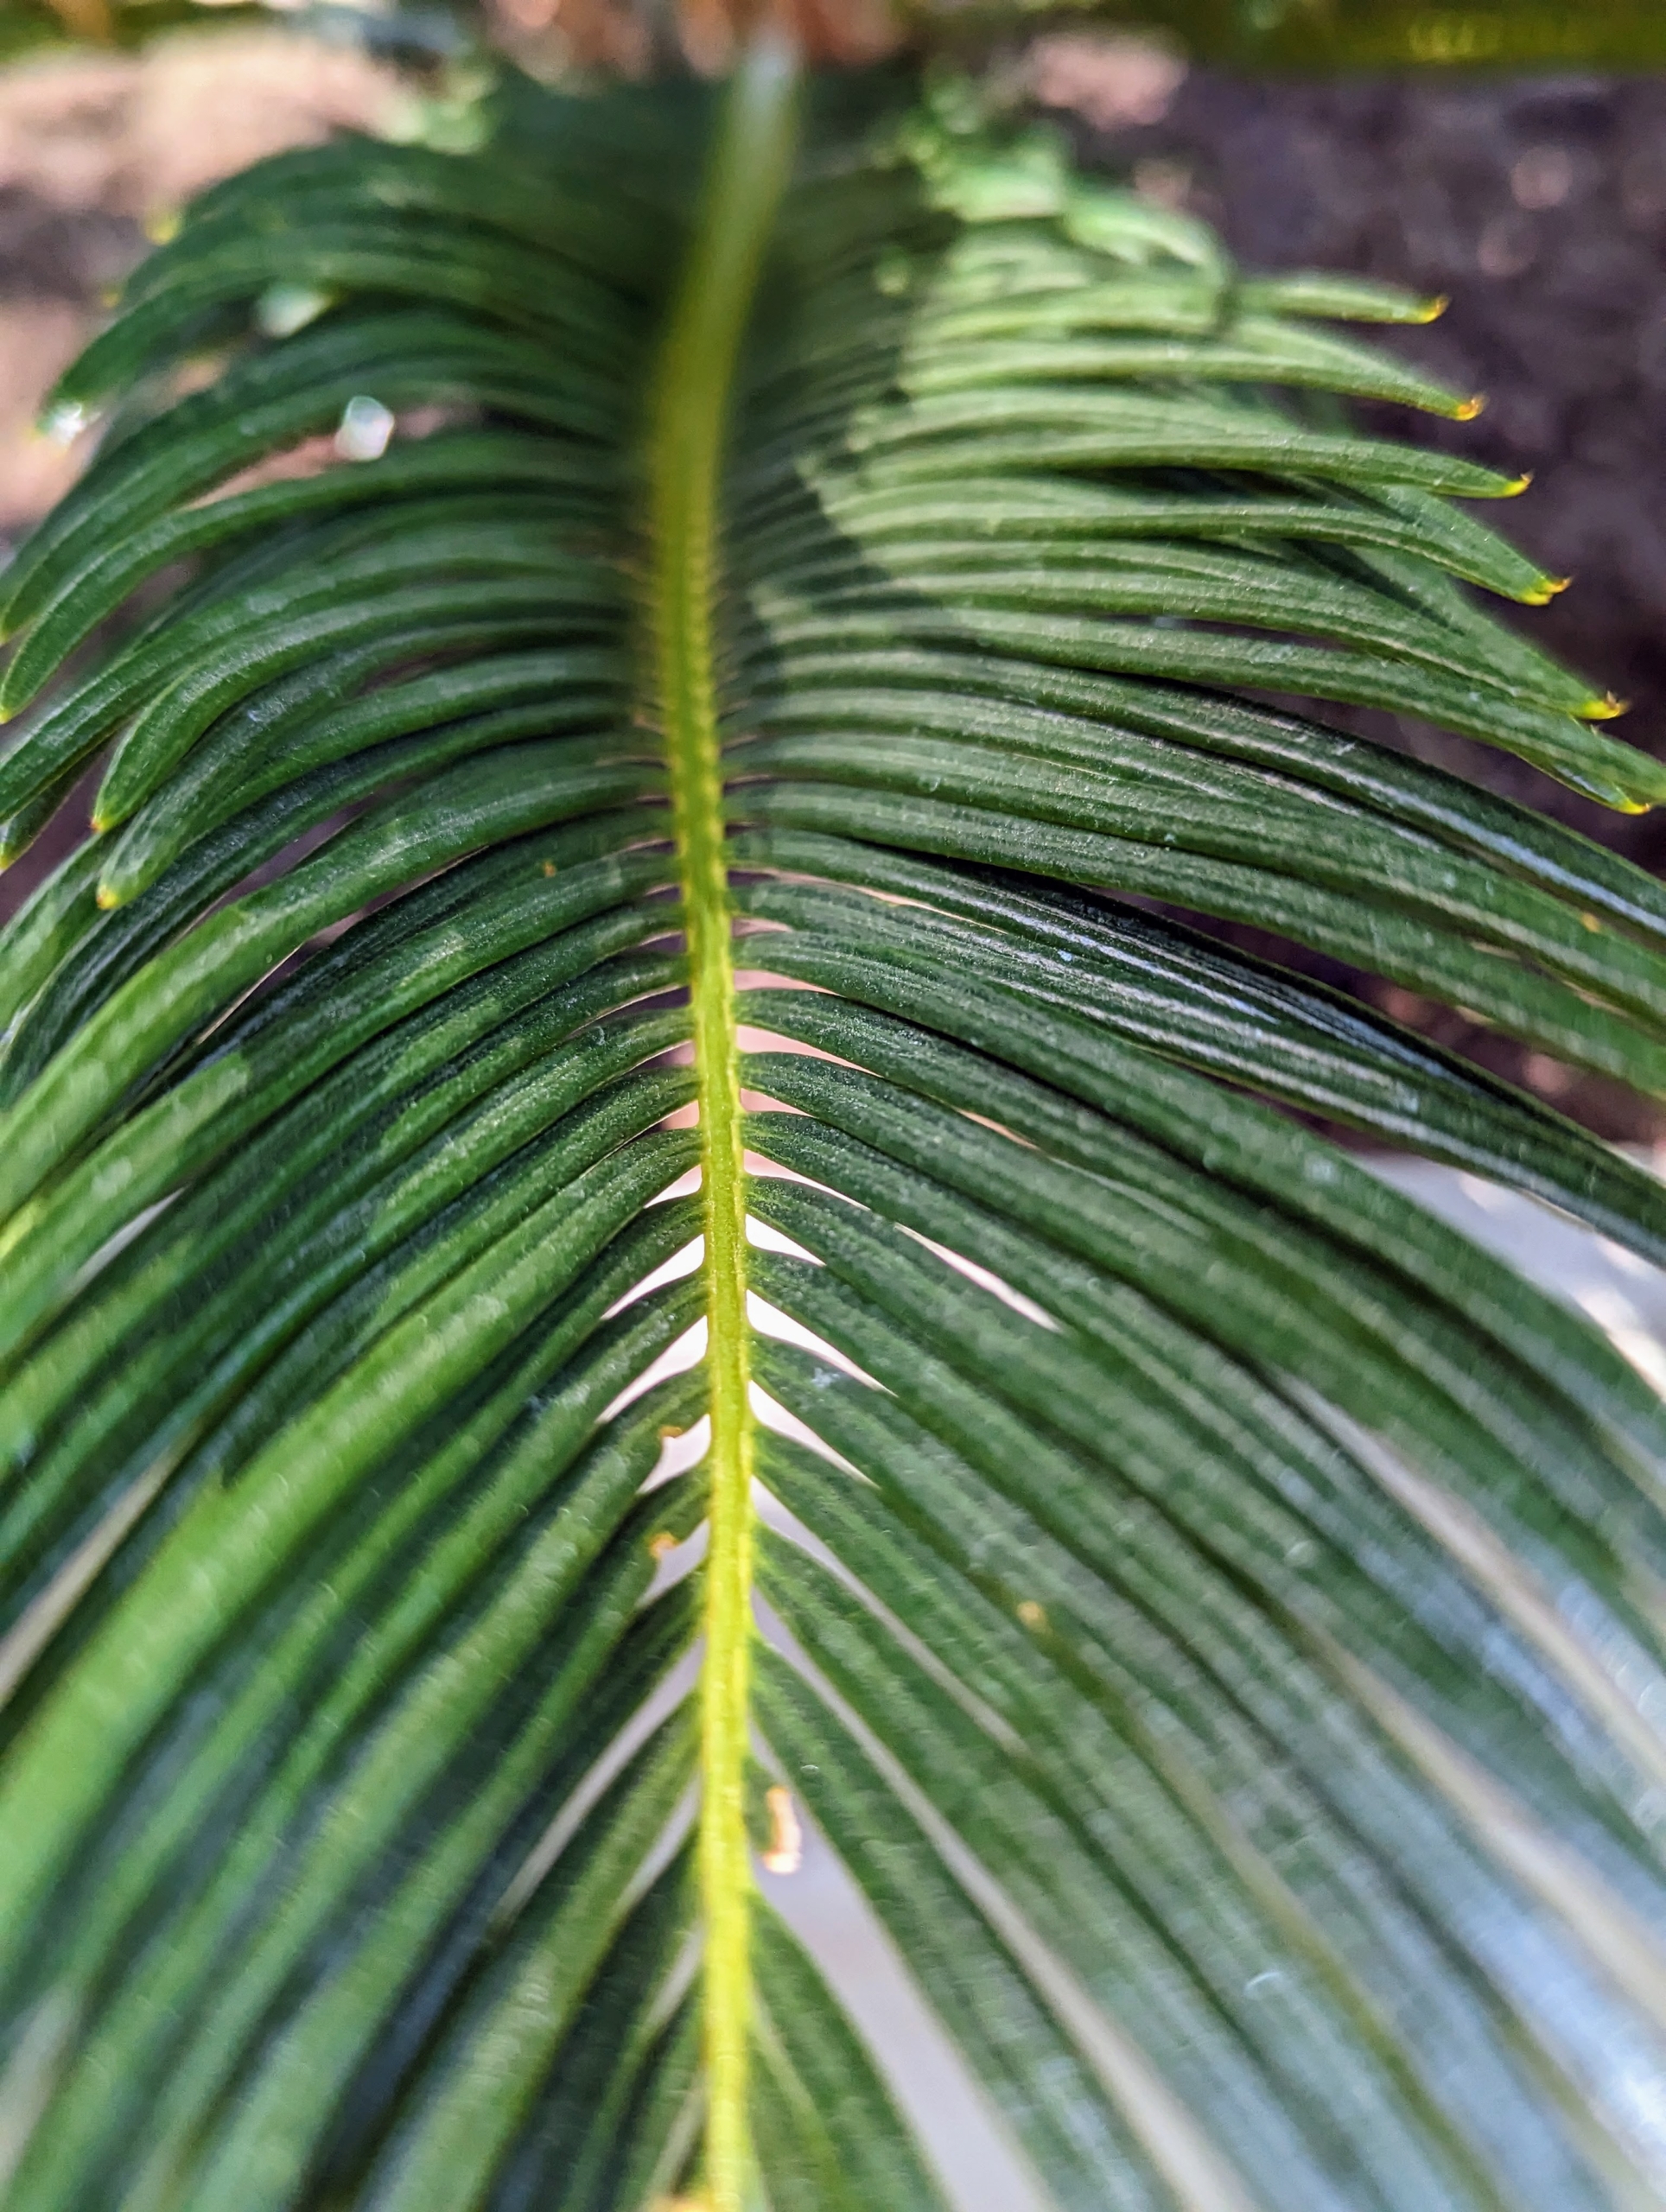
Sago palm fronds resemble those of palm trees The glossy, pinnate leaves are typically about four to five feet long at maturity, and up to nine-inches wide.
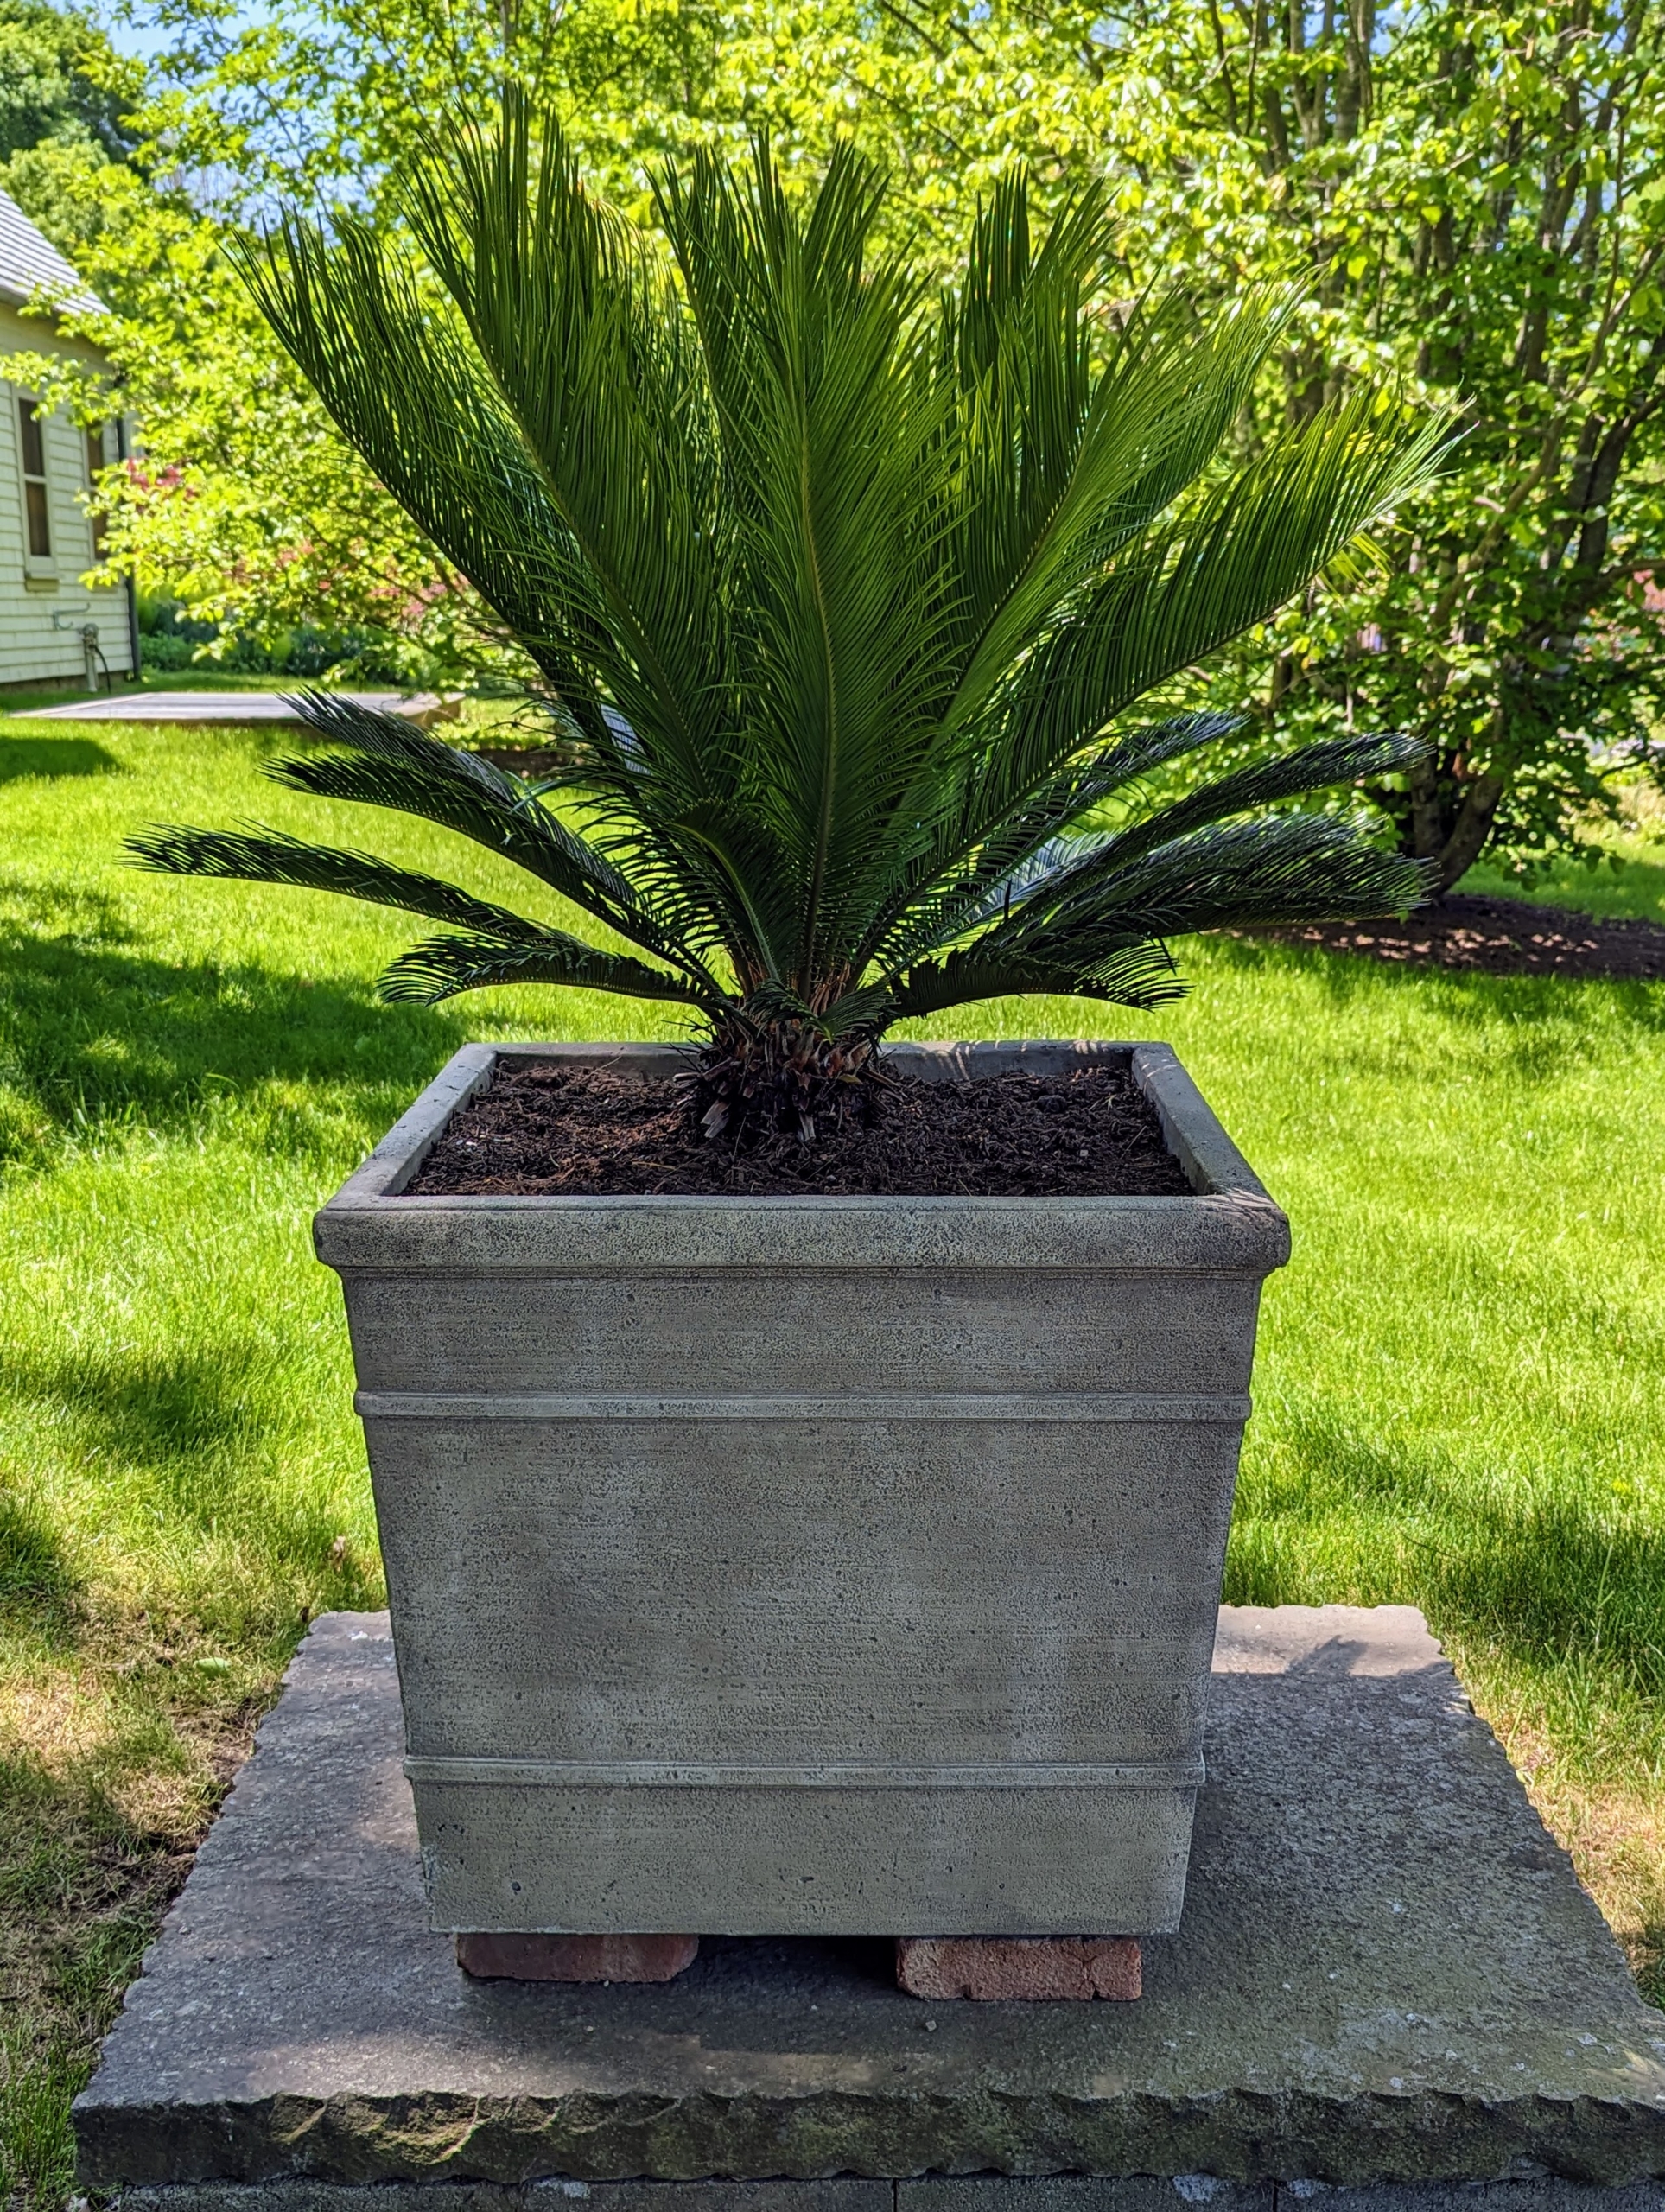
Here is one all potted up outside my gym building. I think it looks so handsome in this new pot. The frond tips are quite pointy and sharp, so it’s best to plant it away from lots of foot traffic.
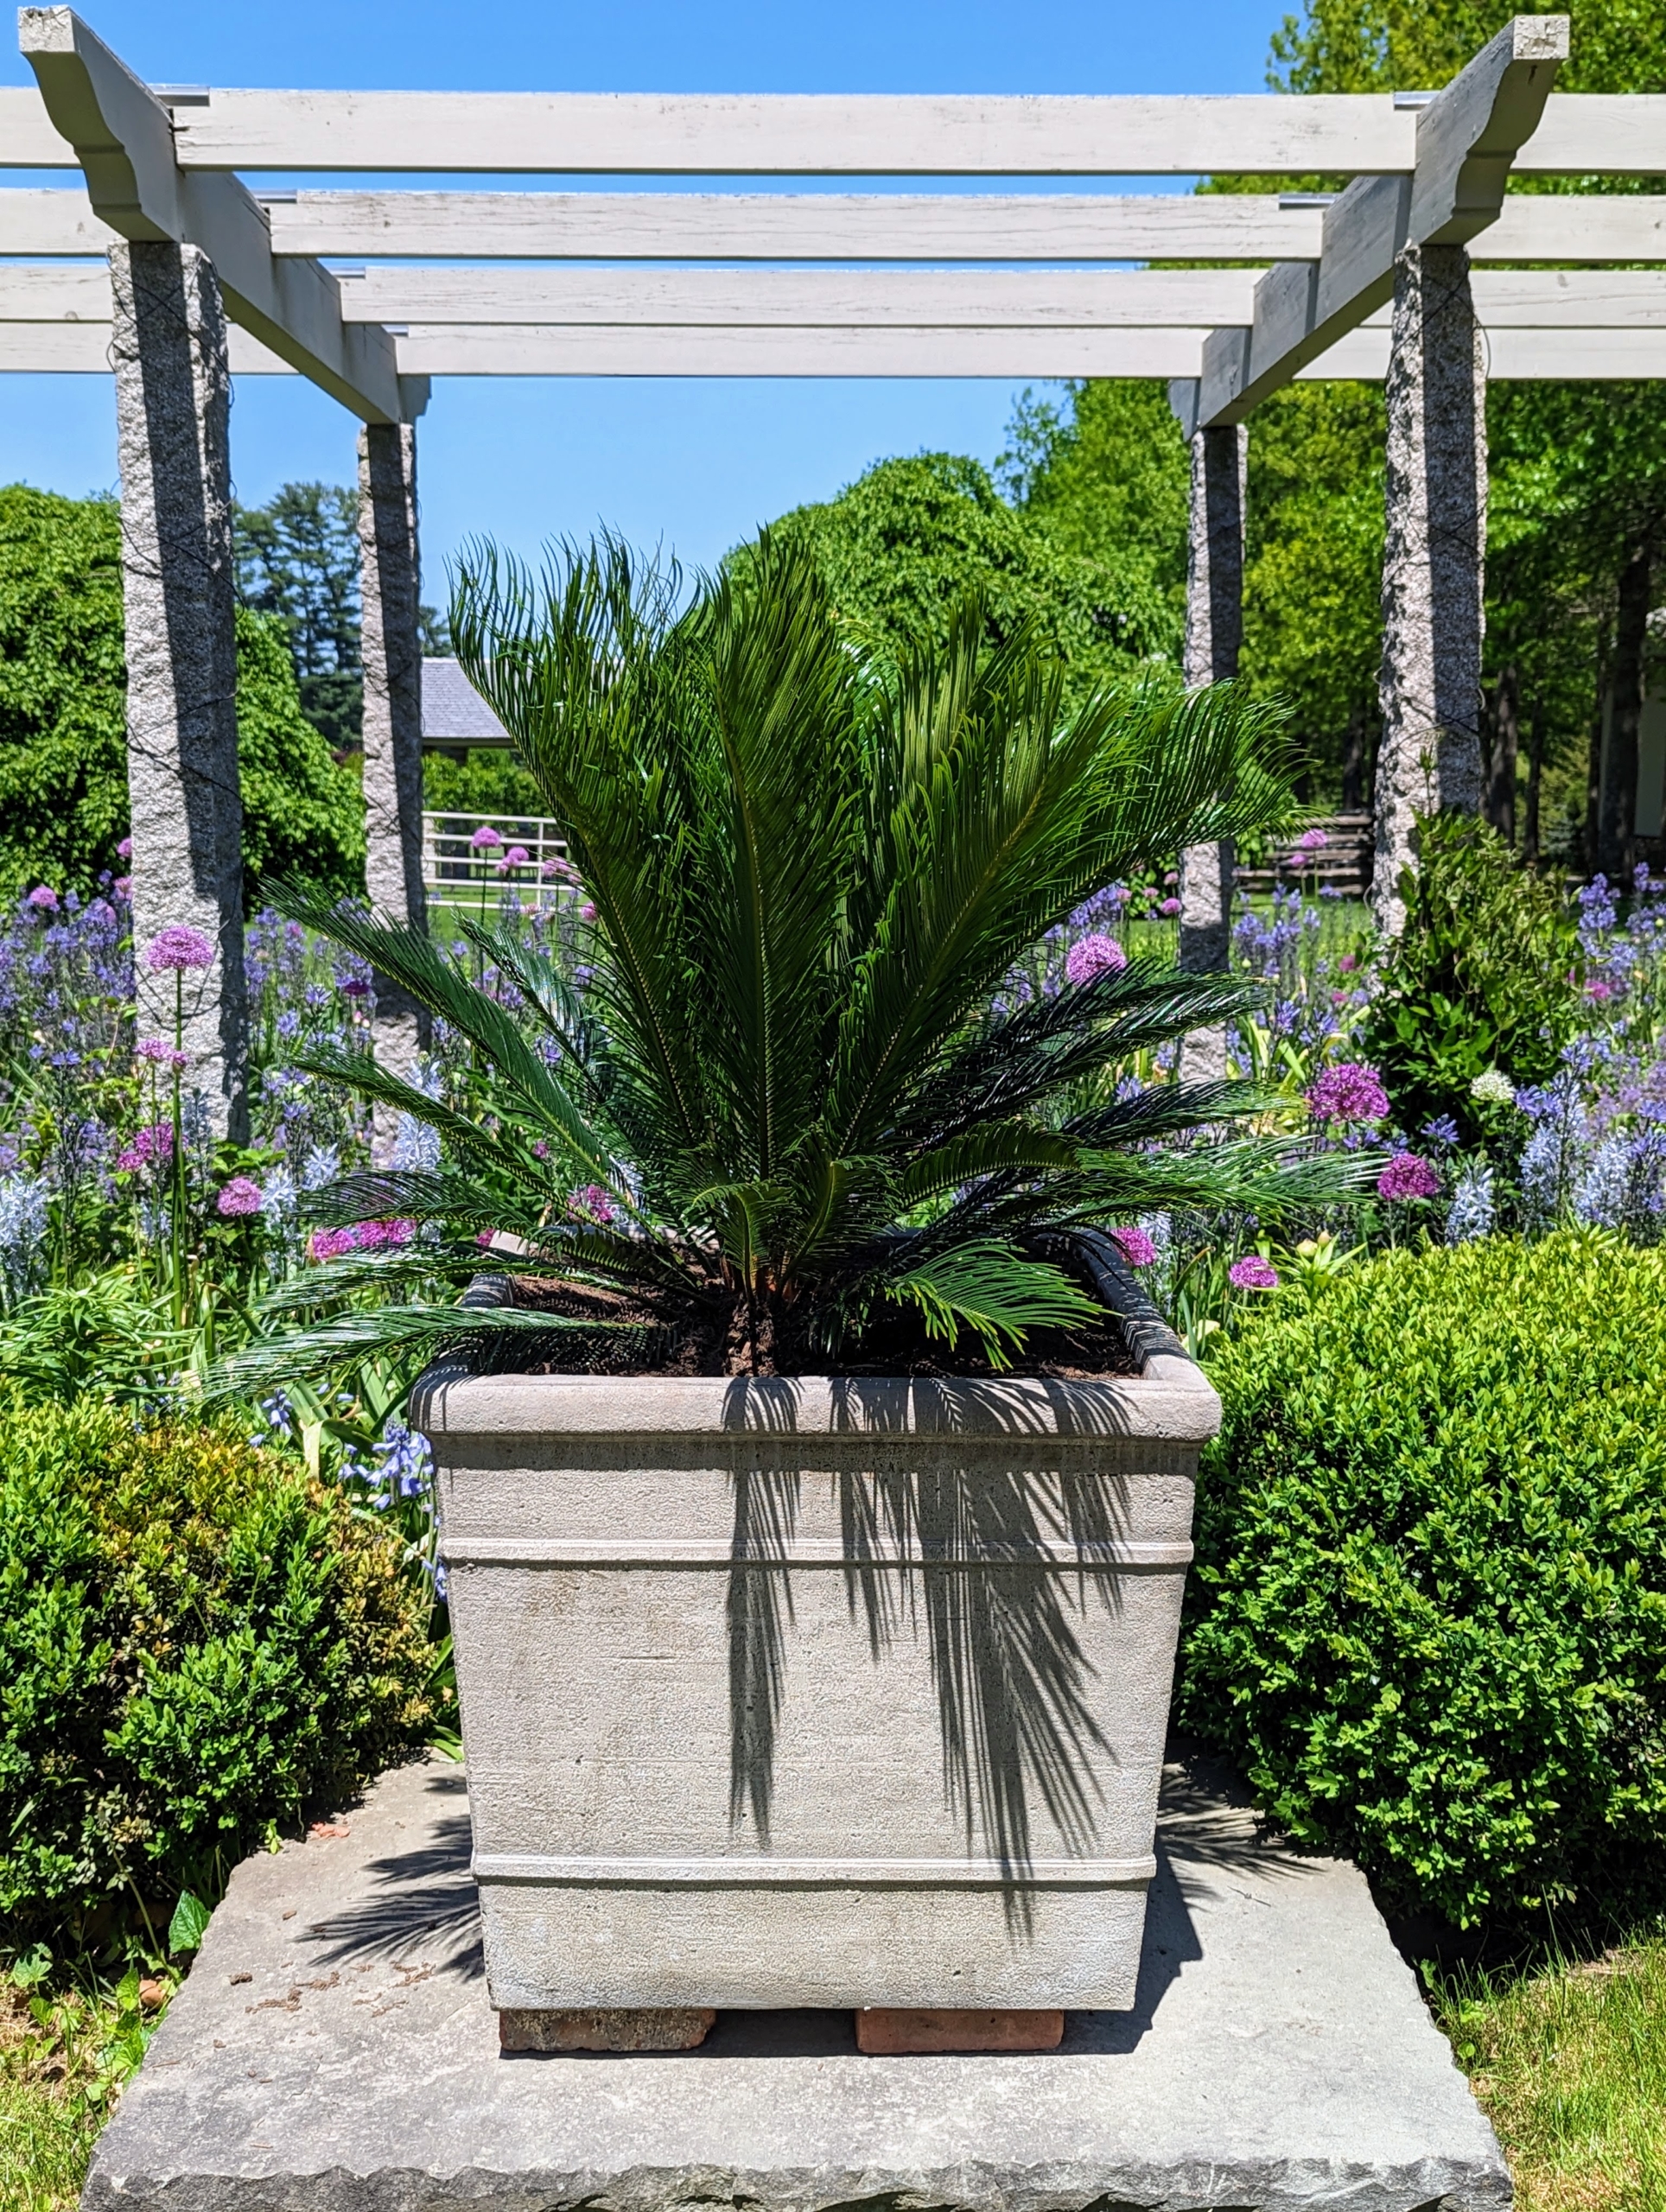
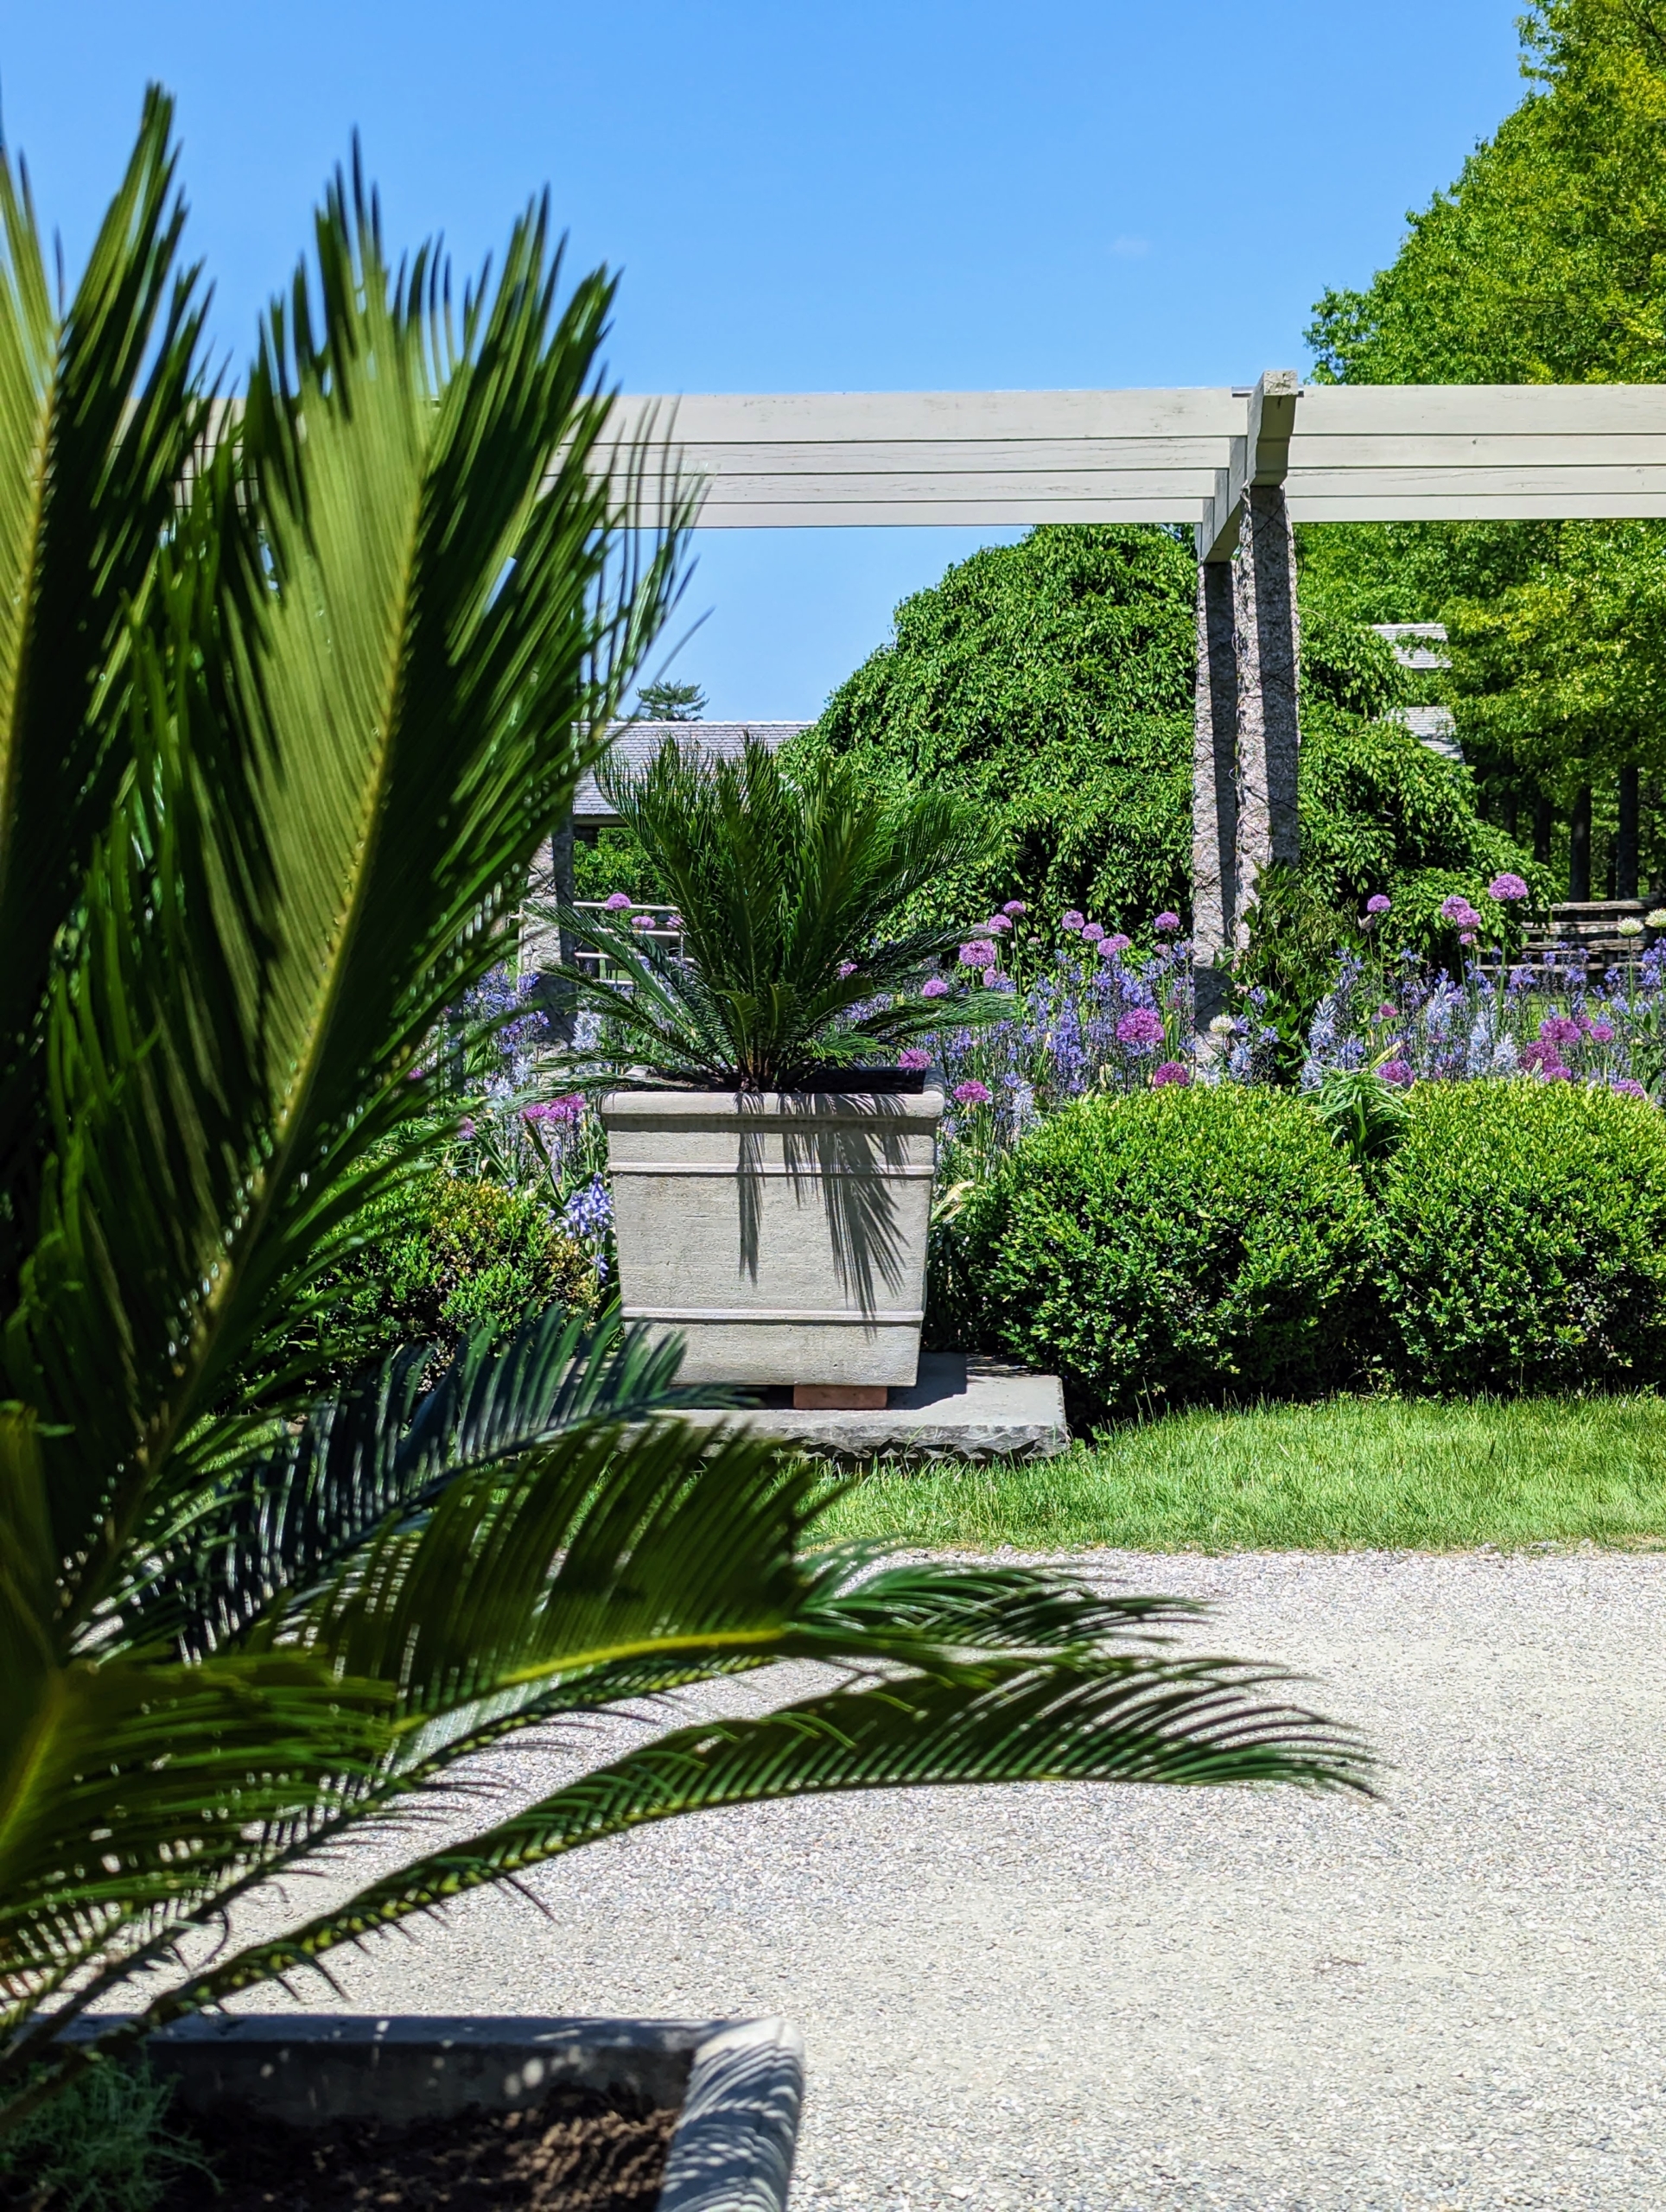
Here’s another near my long and winding pergola. Although they’re tropicals that can take full sun, sago palms need part shade to prevent their leaves from burning.
It sits across another sago on the other side of the carriage road. When watering, water so the top inch of soil is moist (check it with your fingertip if you need to) and let it dry out between waterings about once a week.
And here is a view of the same pair – I think they look great here and will thrive through the warm months in this location.