Antique Japanese screens now hang in place of two giant gilded mirrors in my Summer House - and they're so beautiful.
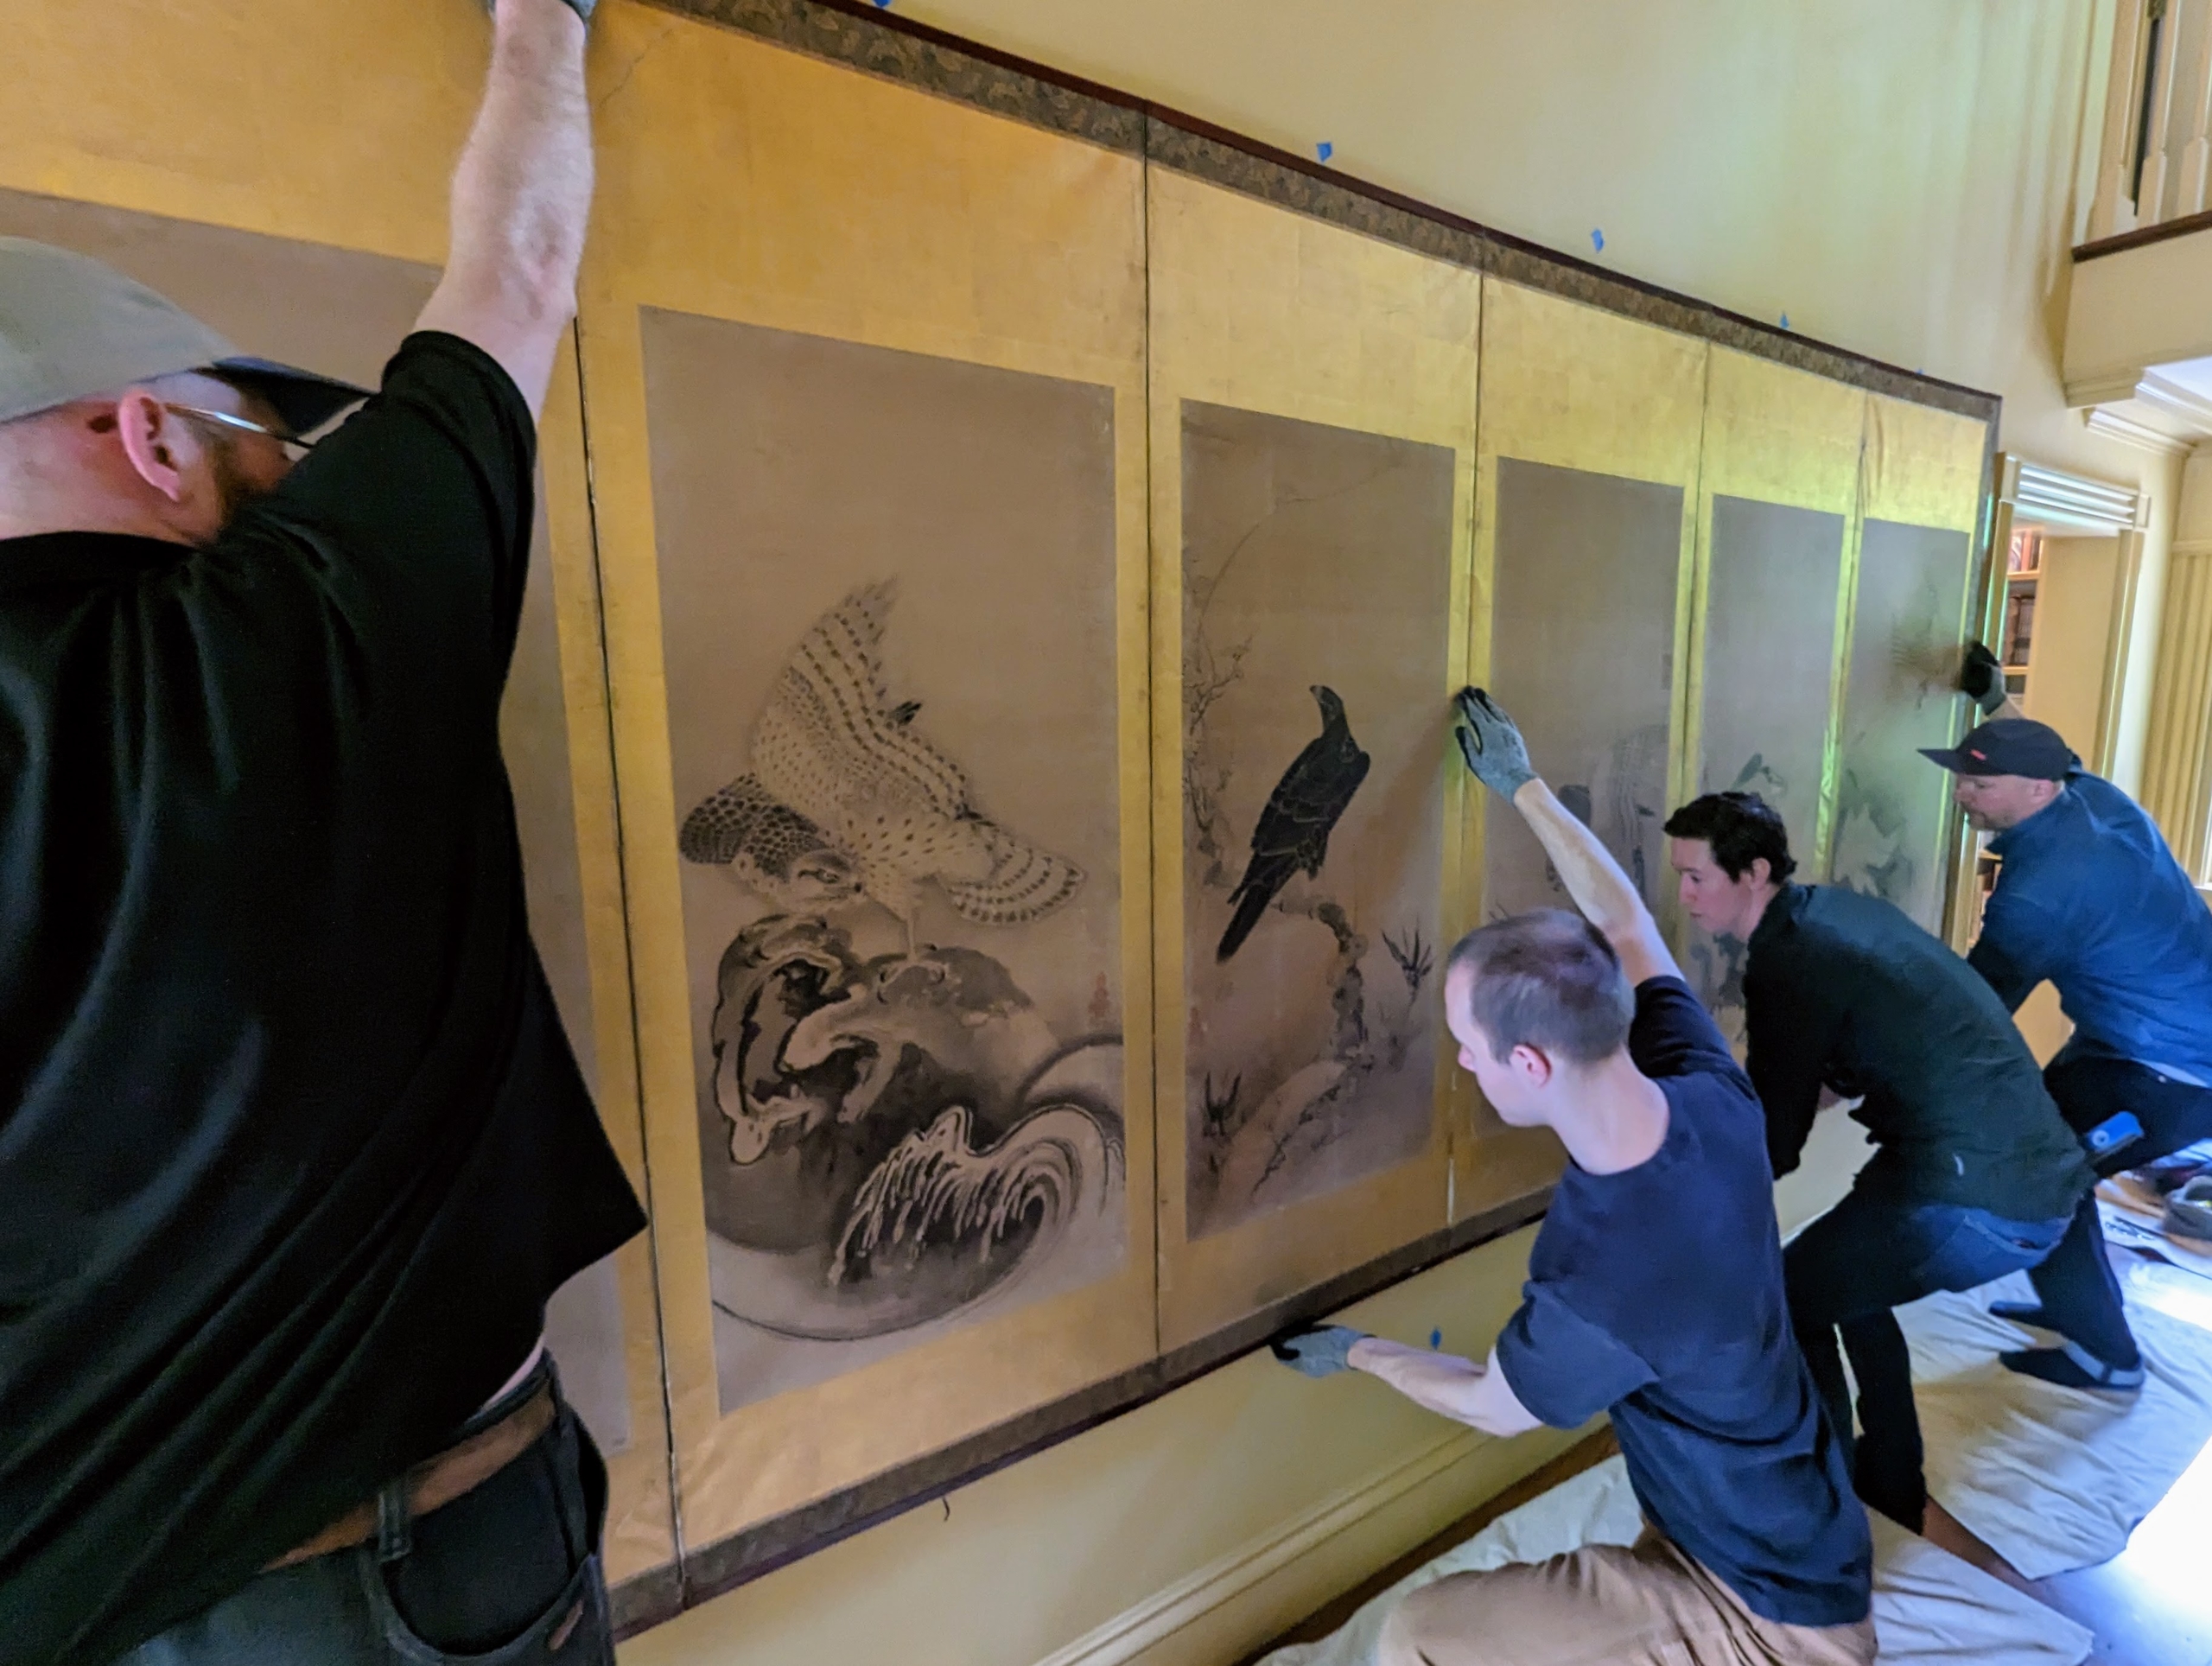
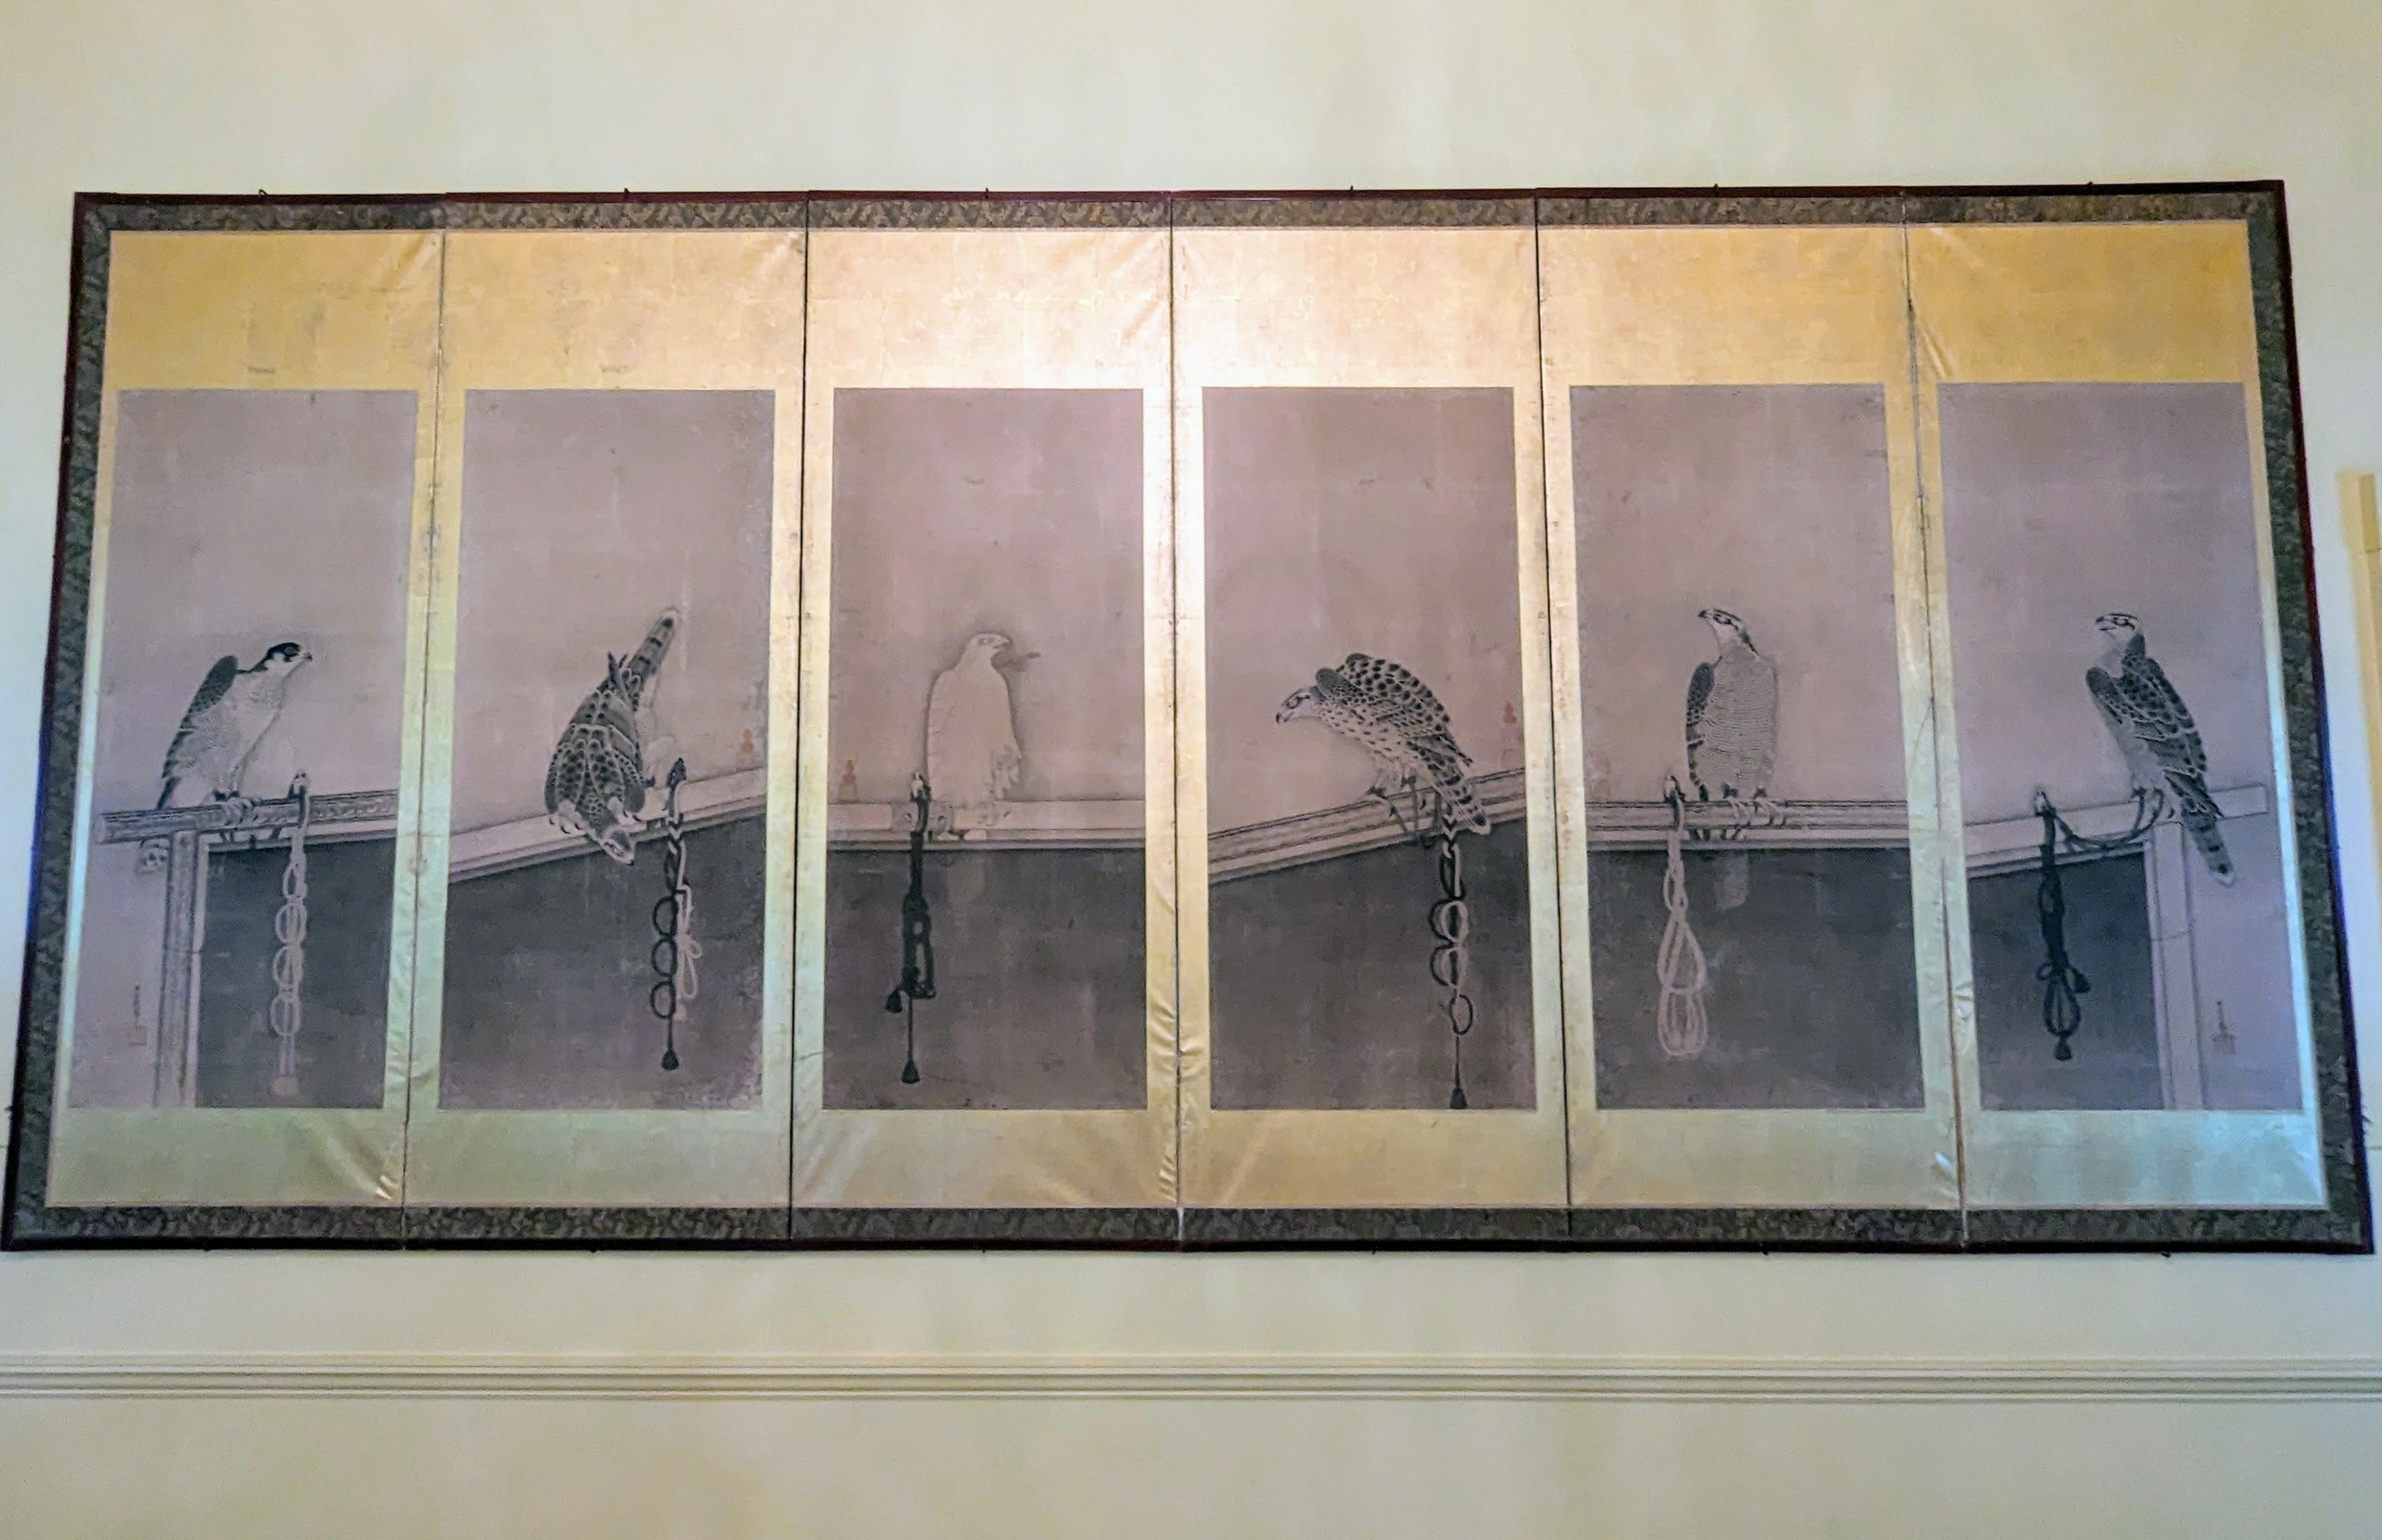
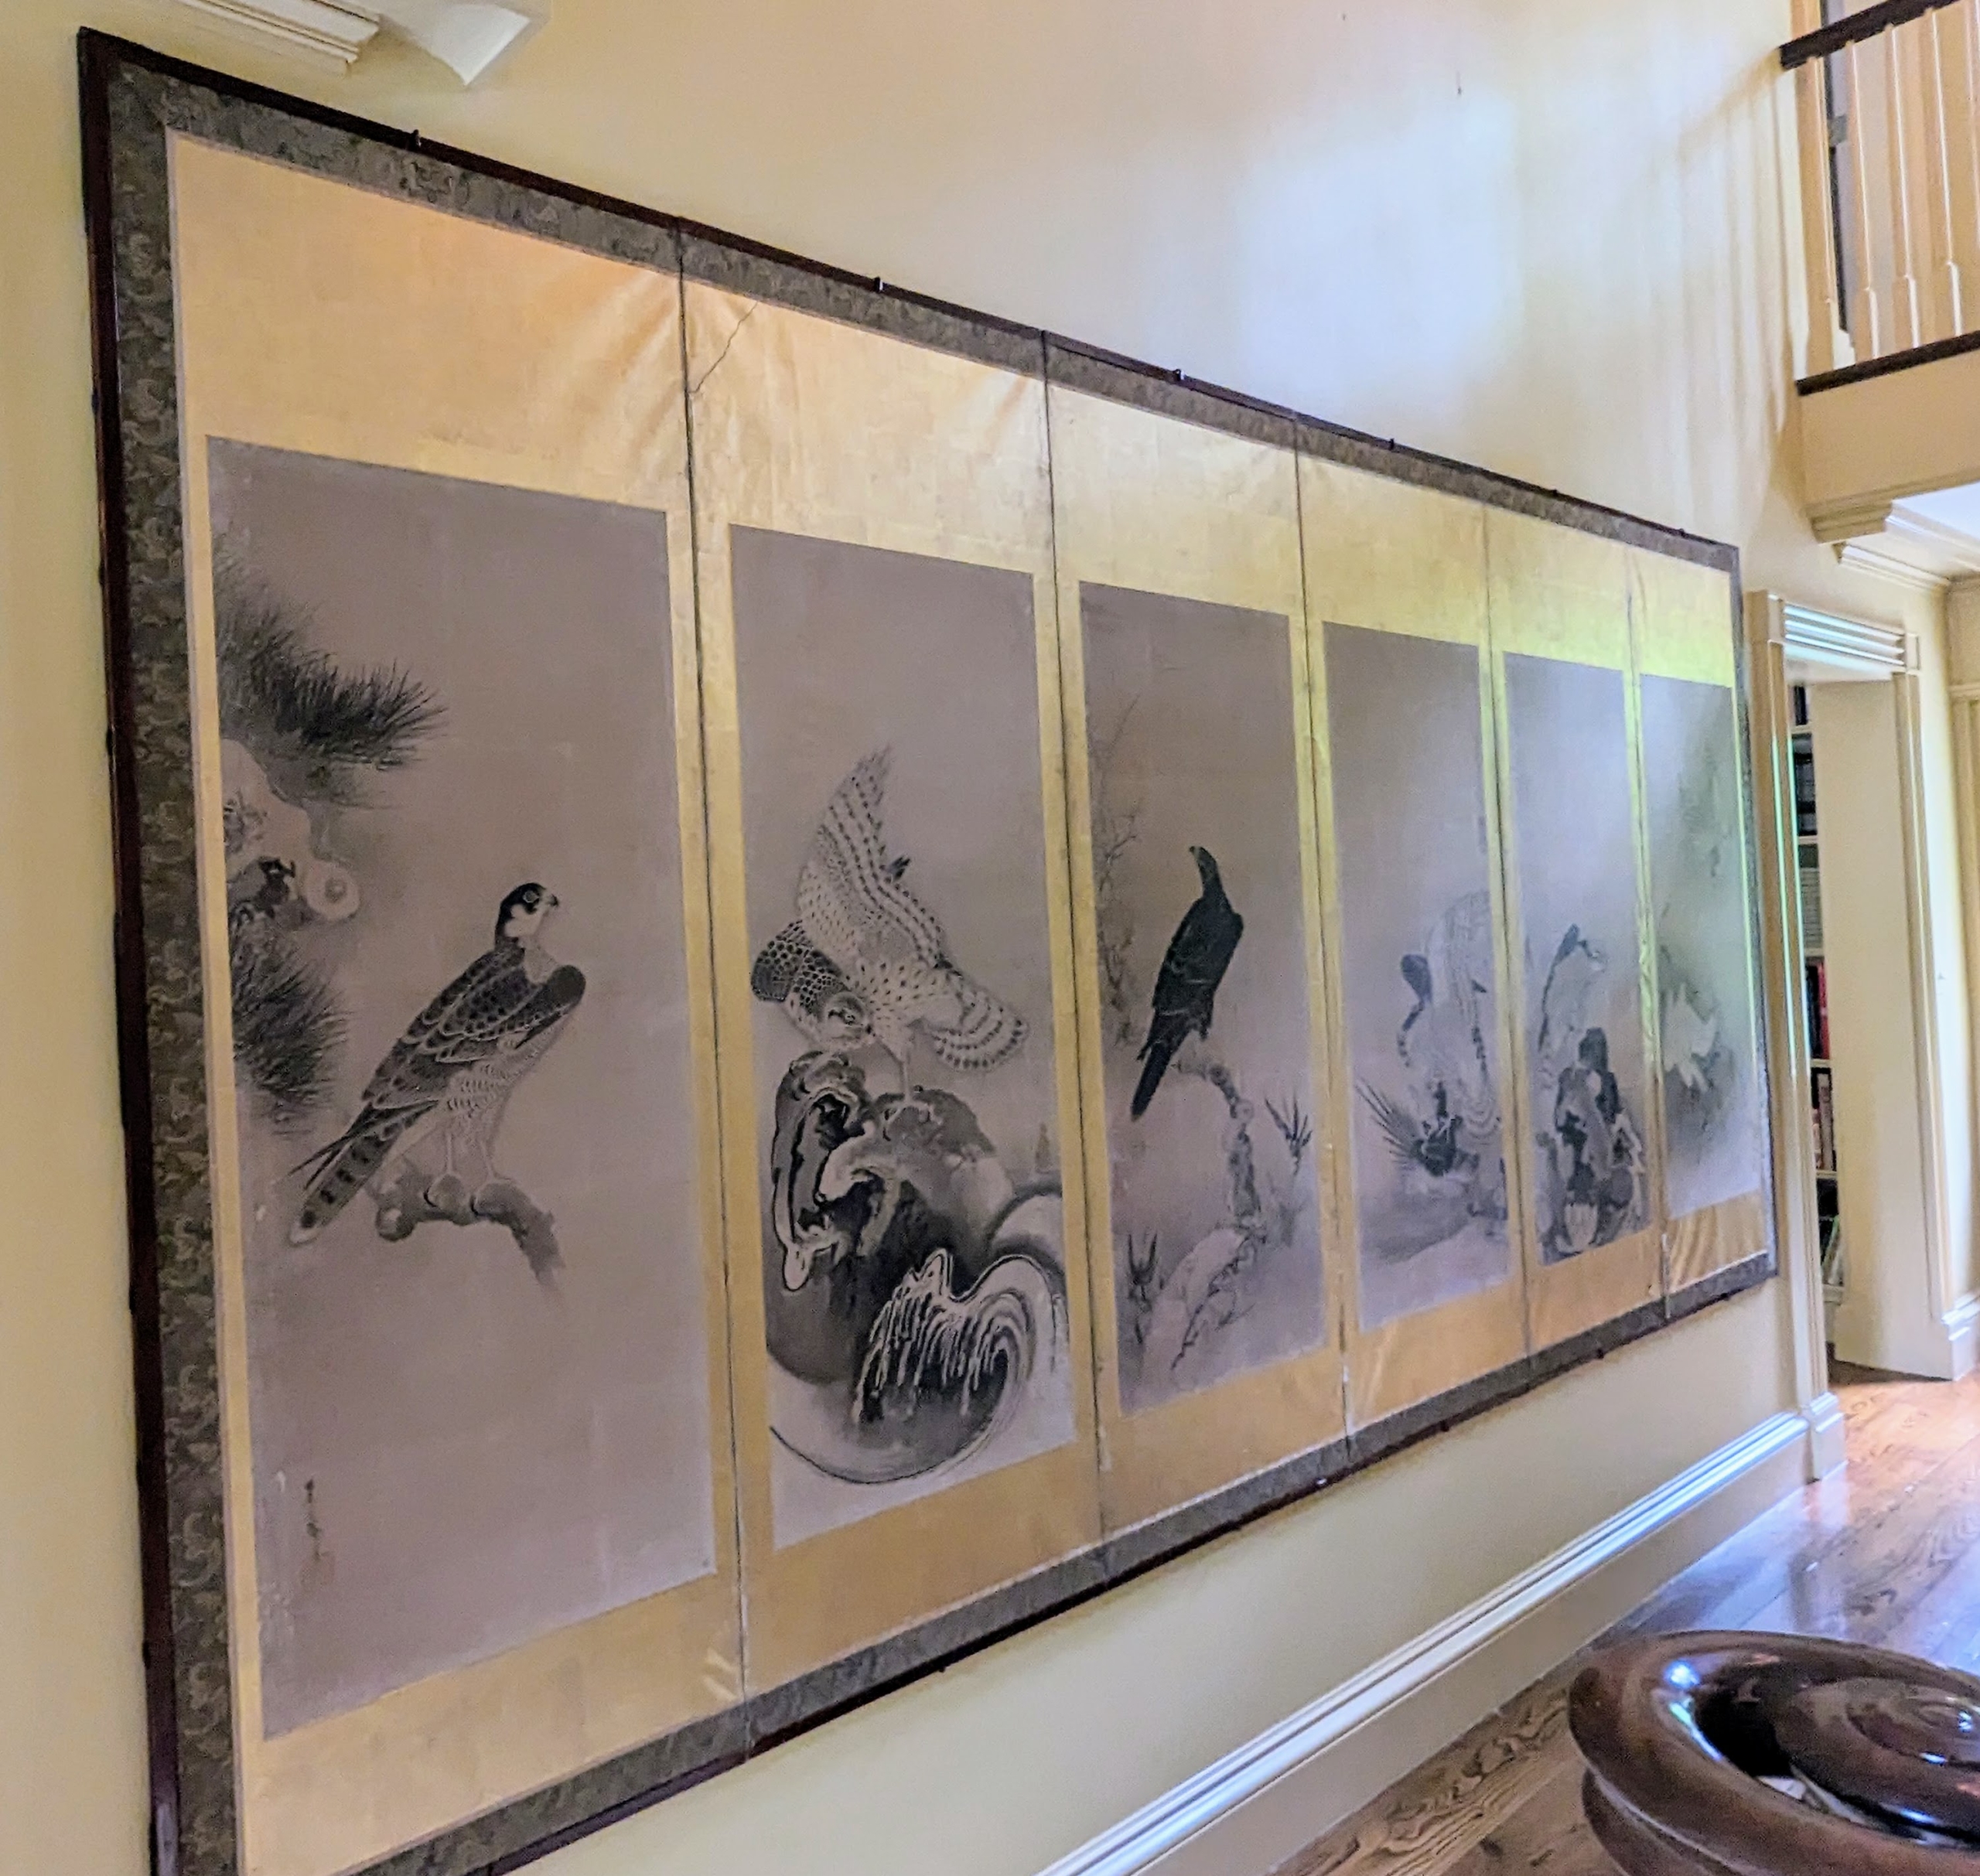
Earlier this year, I purchased two sets of antique Japanese screens by Soga Nichokuan, a highly respected and talented Japanese artist of the 17th century. The two screens show 12 birds of prey, each bird painted and then mounted on individual panels. I knew they would look perfect in my Summer House, but because these large screens needed precise positioning, I needed some expert help. I called on the team from ILevel Art Placement + Installation, the leading company in New York City that specializes exclusively on arranging and securely installing and hanging all types of art - paintings, prints, mirrors, family photo collections, etc. I've worked with ILevel for years. They've done projects for our magazine, "Living" and they've also hung pieces for my daughter, Alexis. A few years ago, they were here at my farm hanging dozens of decorative plates and paintings around my home. And now they're back to install these gorgeous antique screens.
Here are some photos, enjoy.
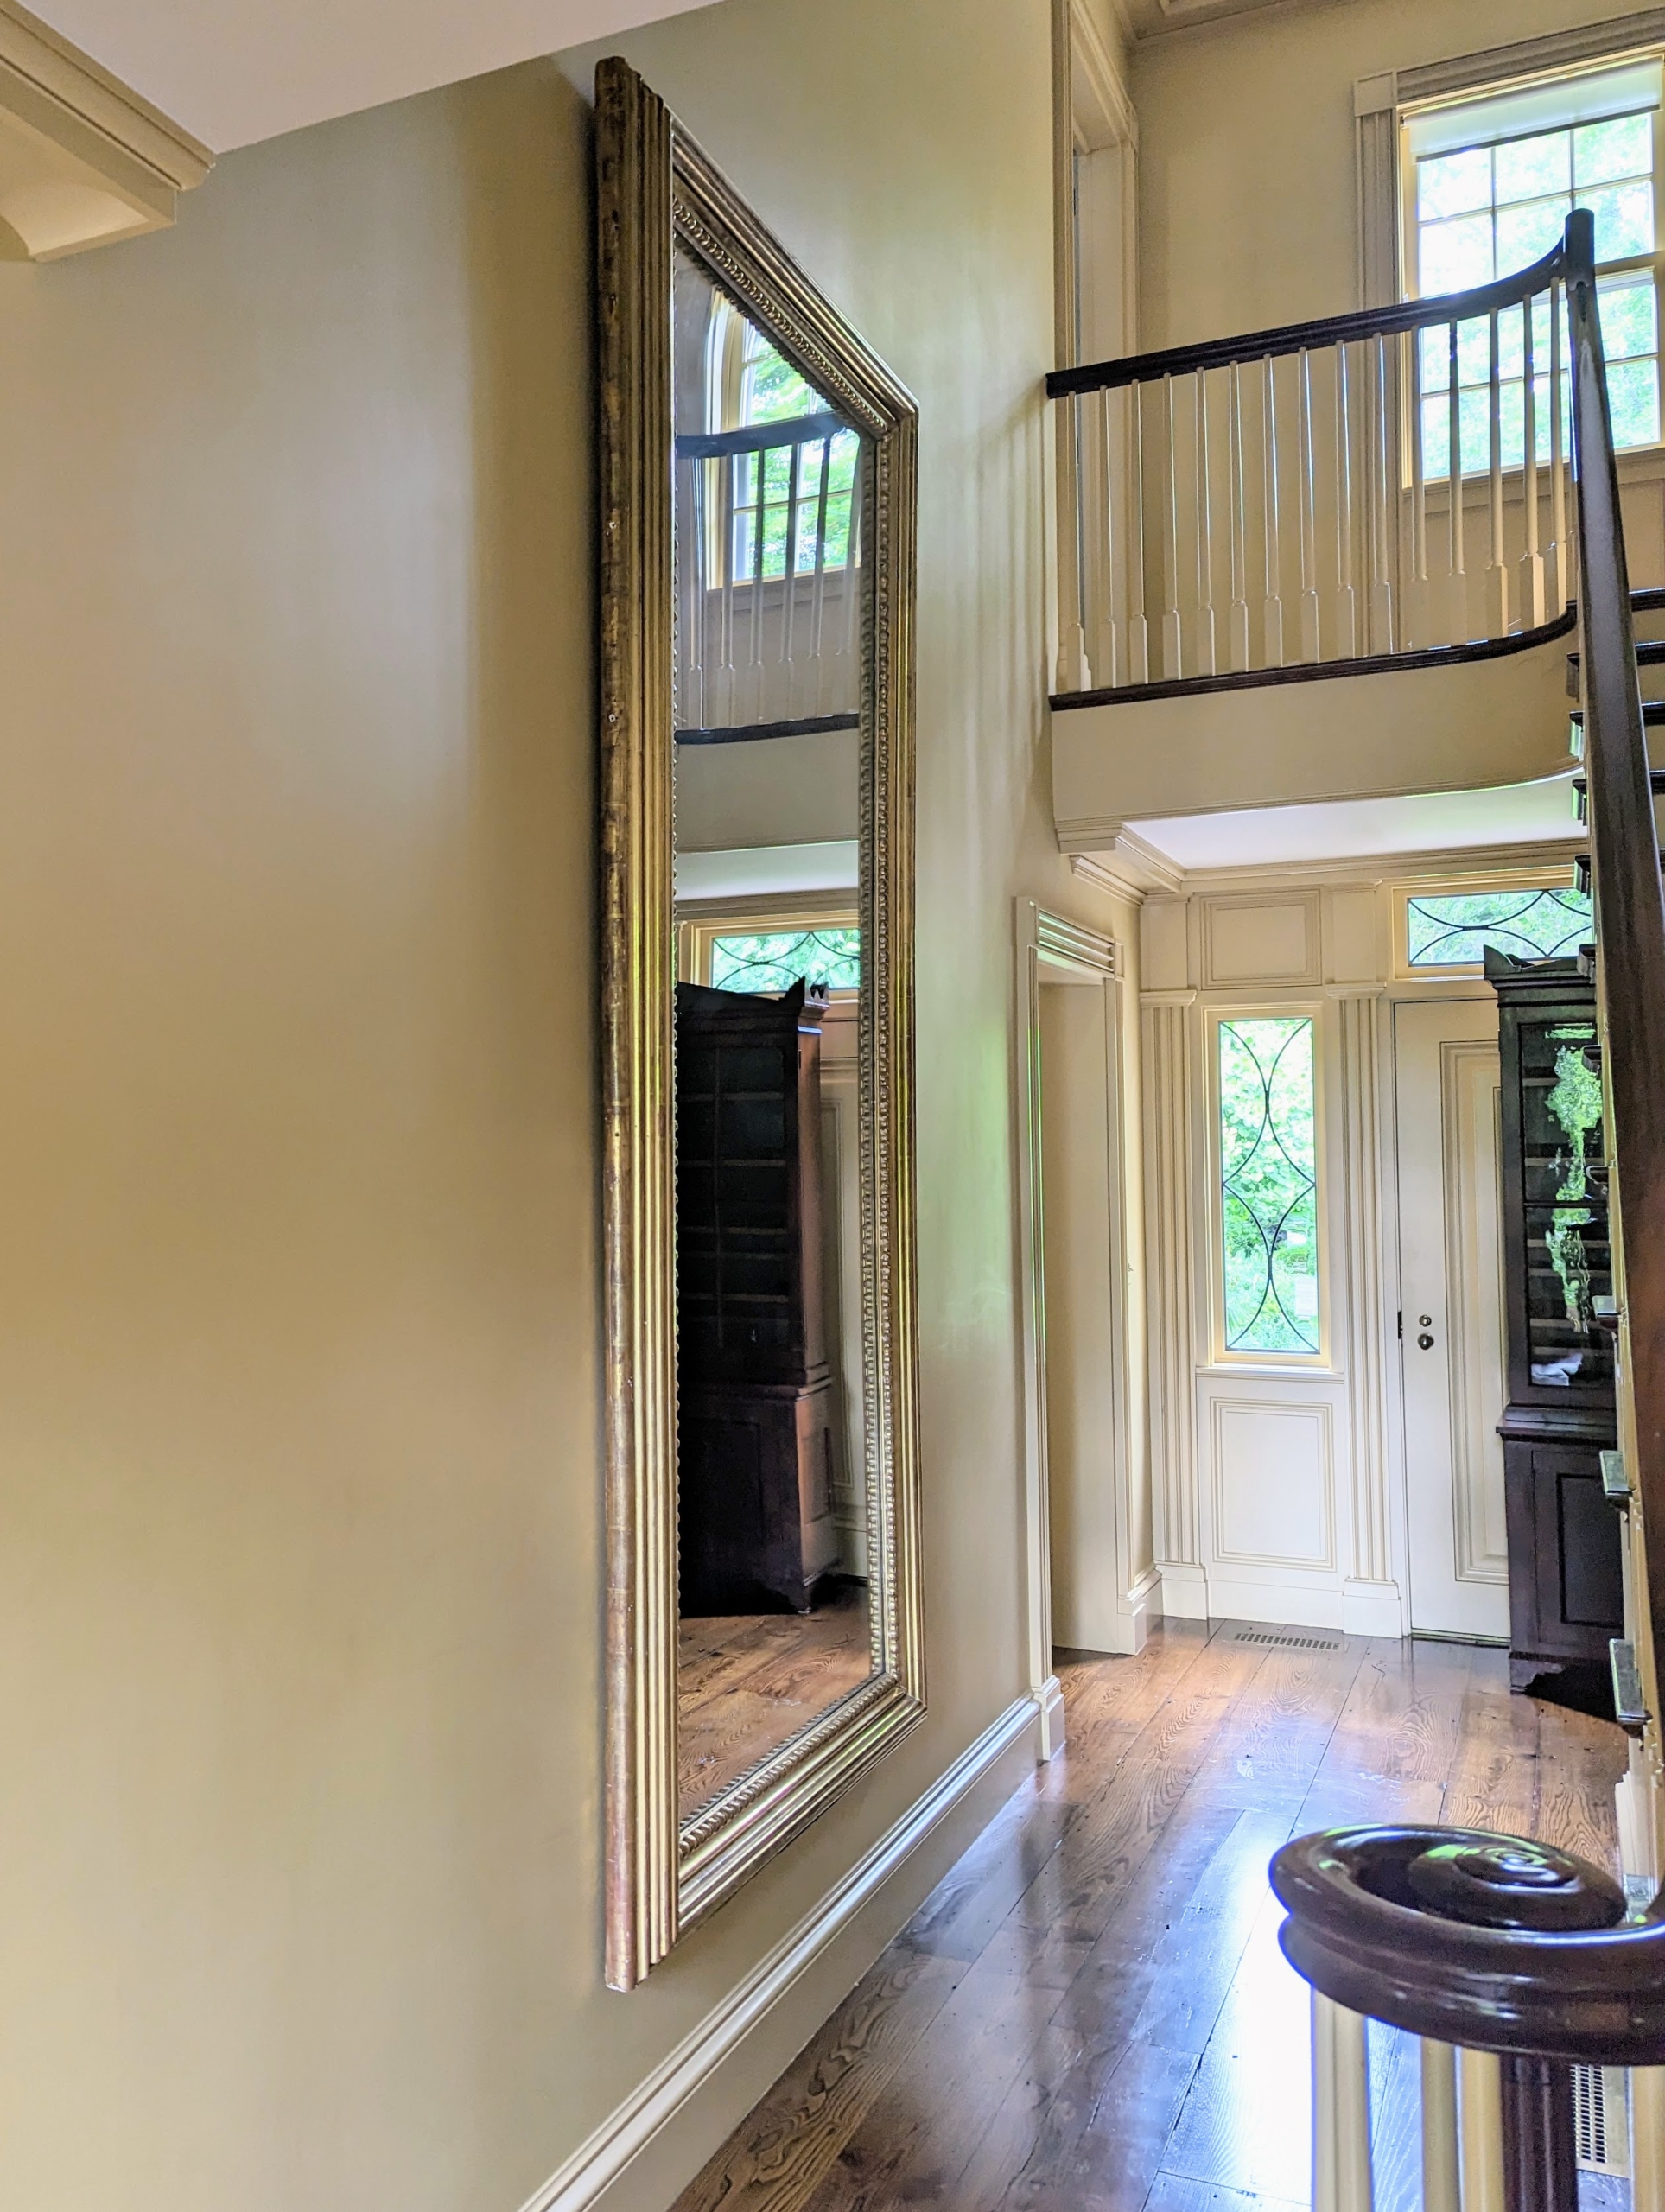
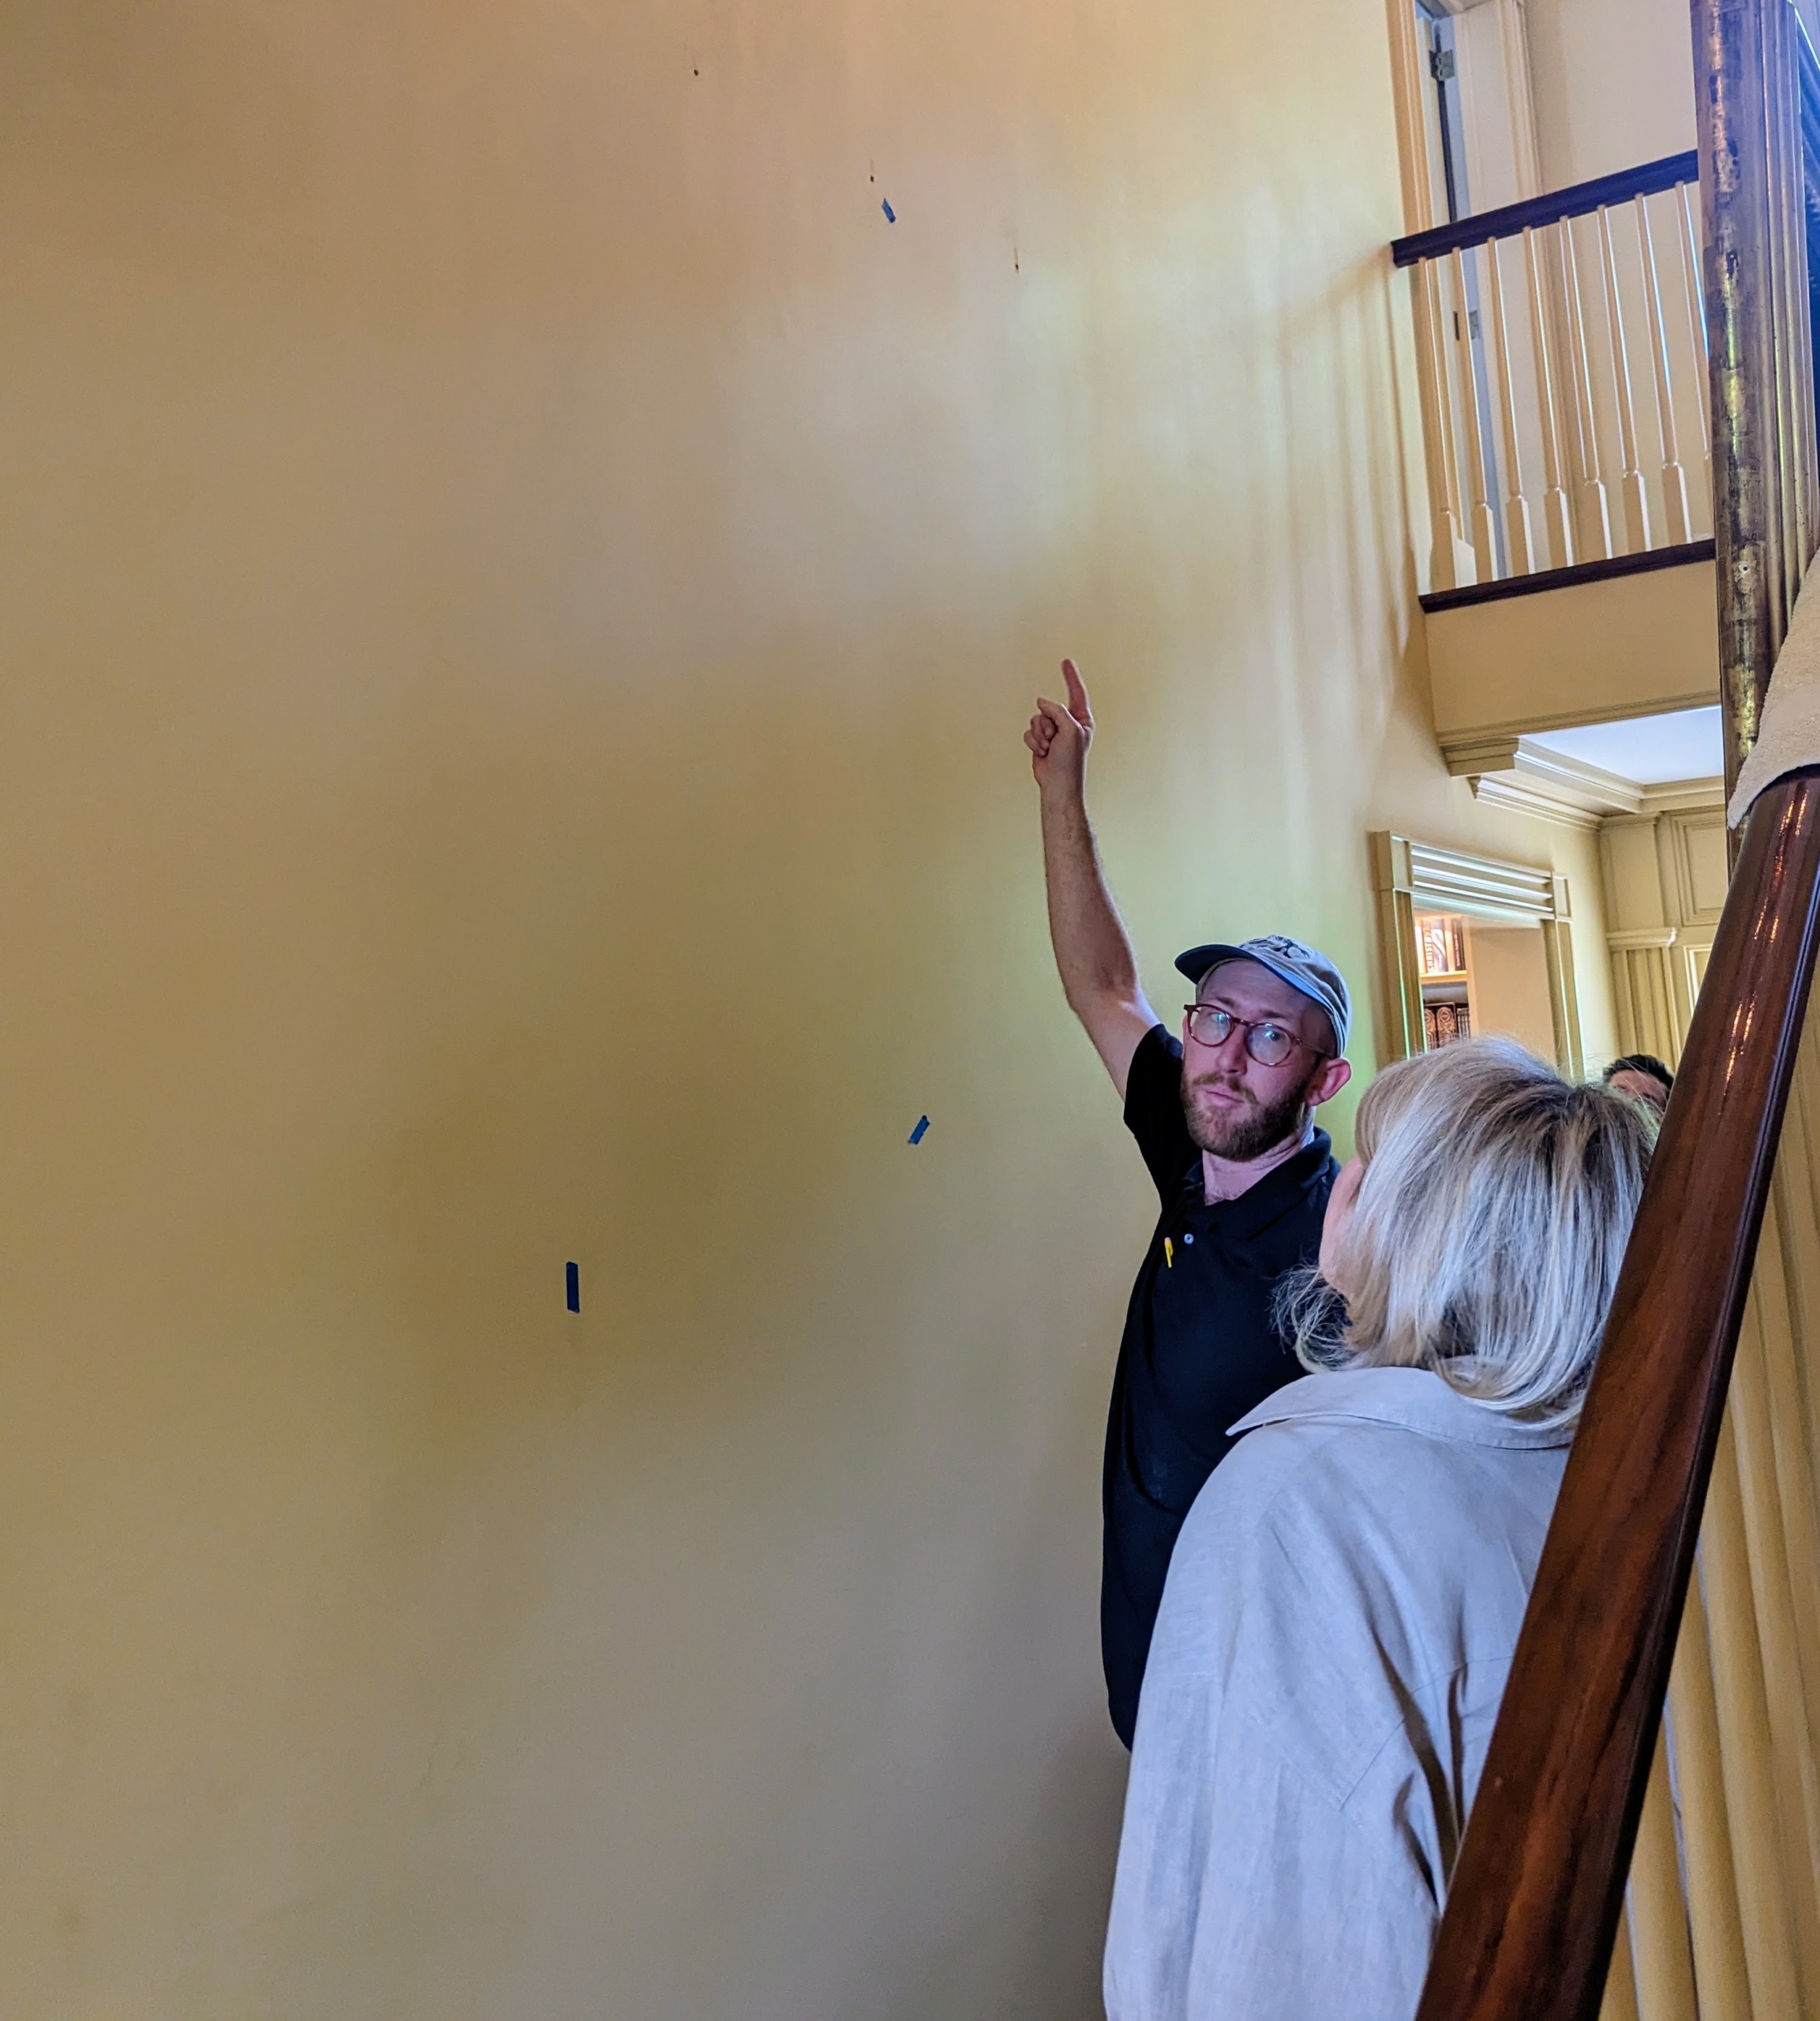
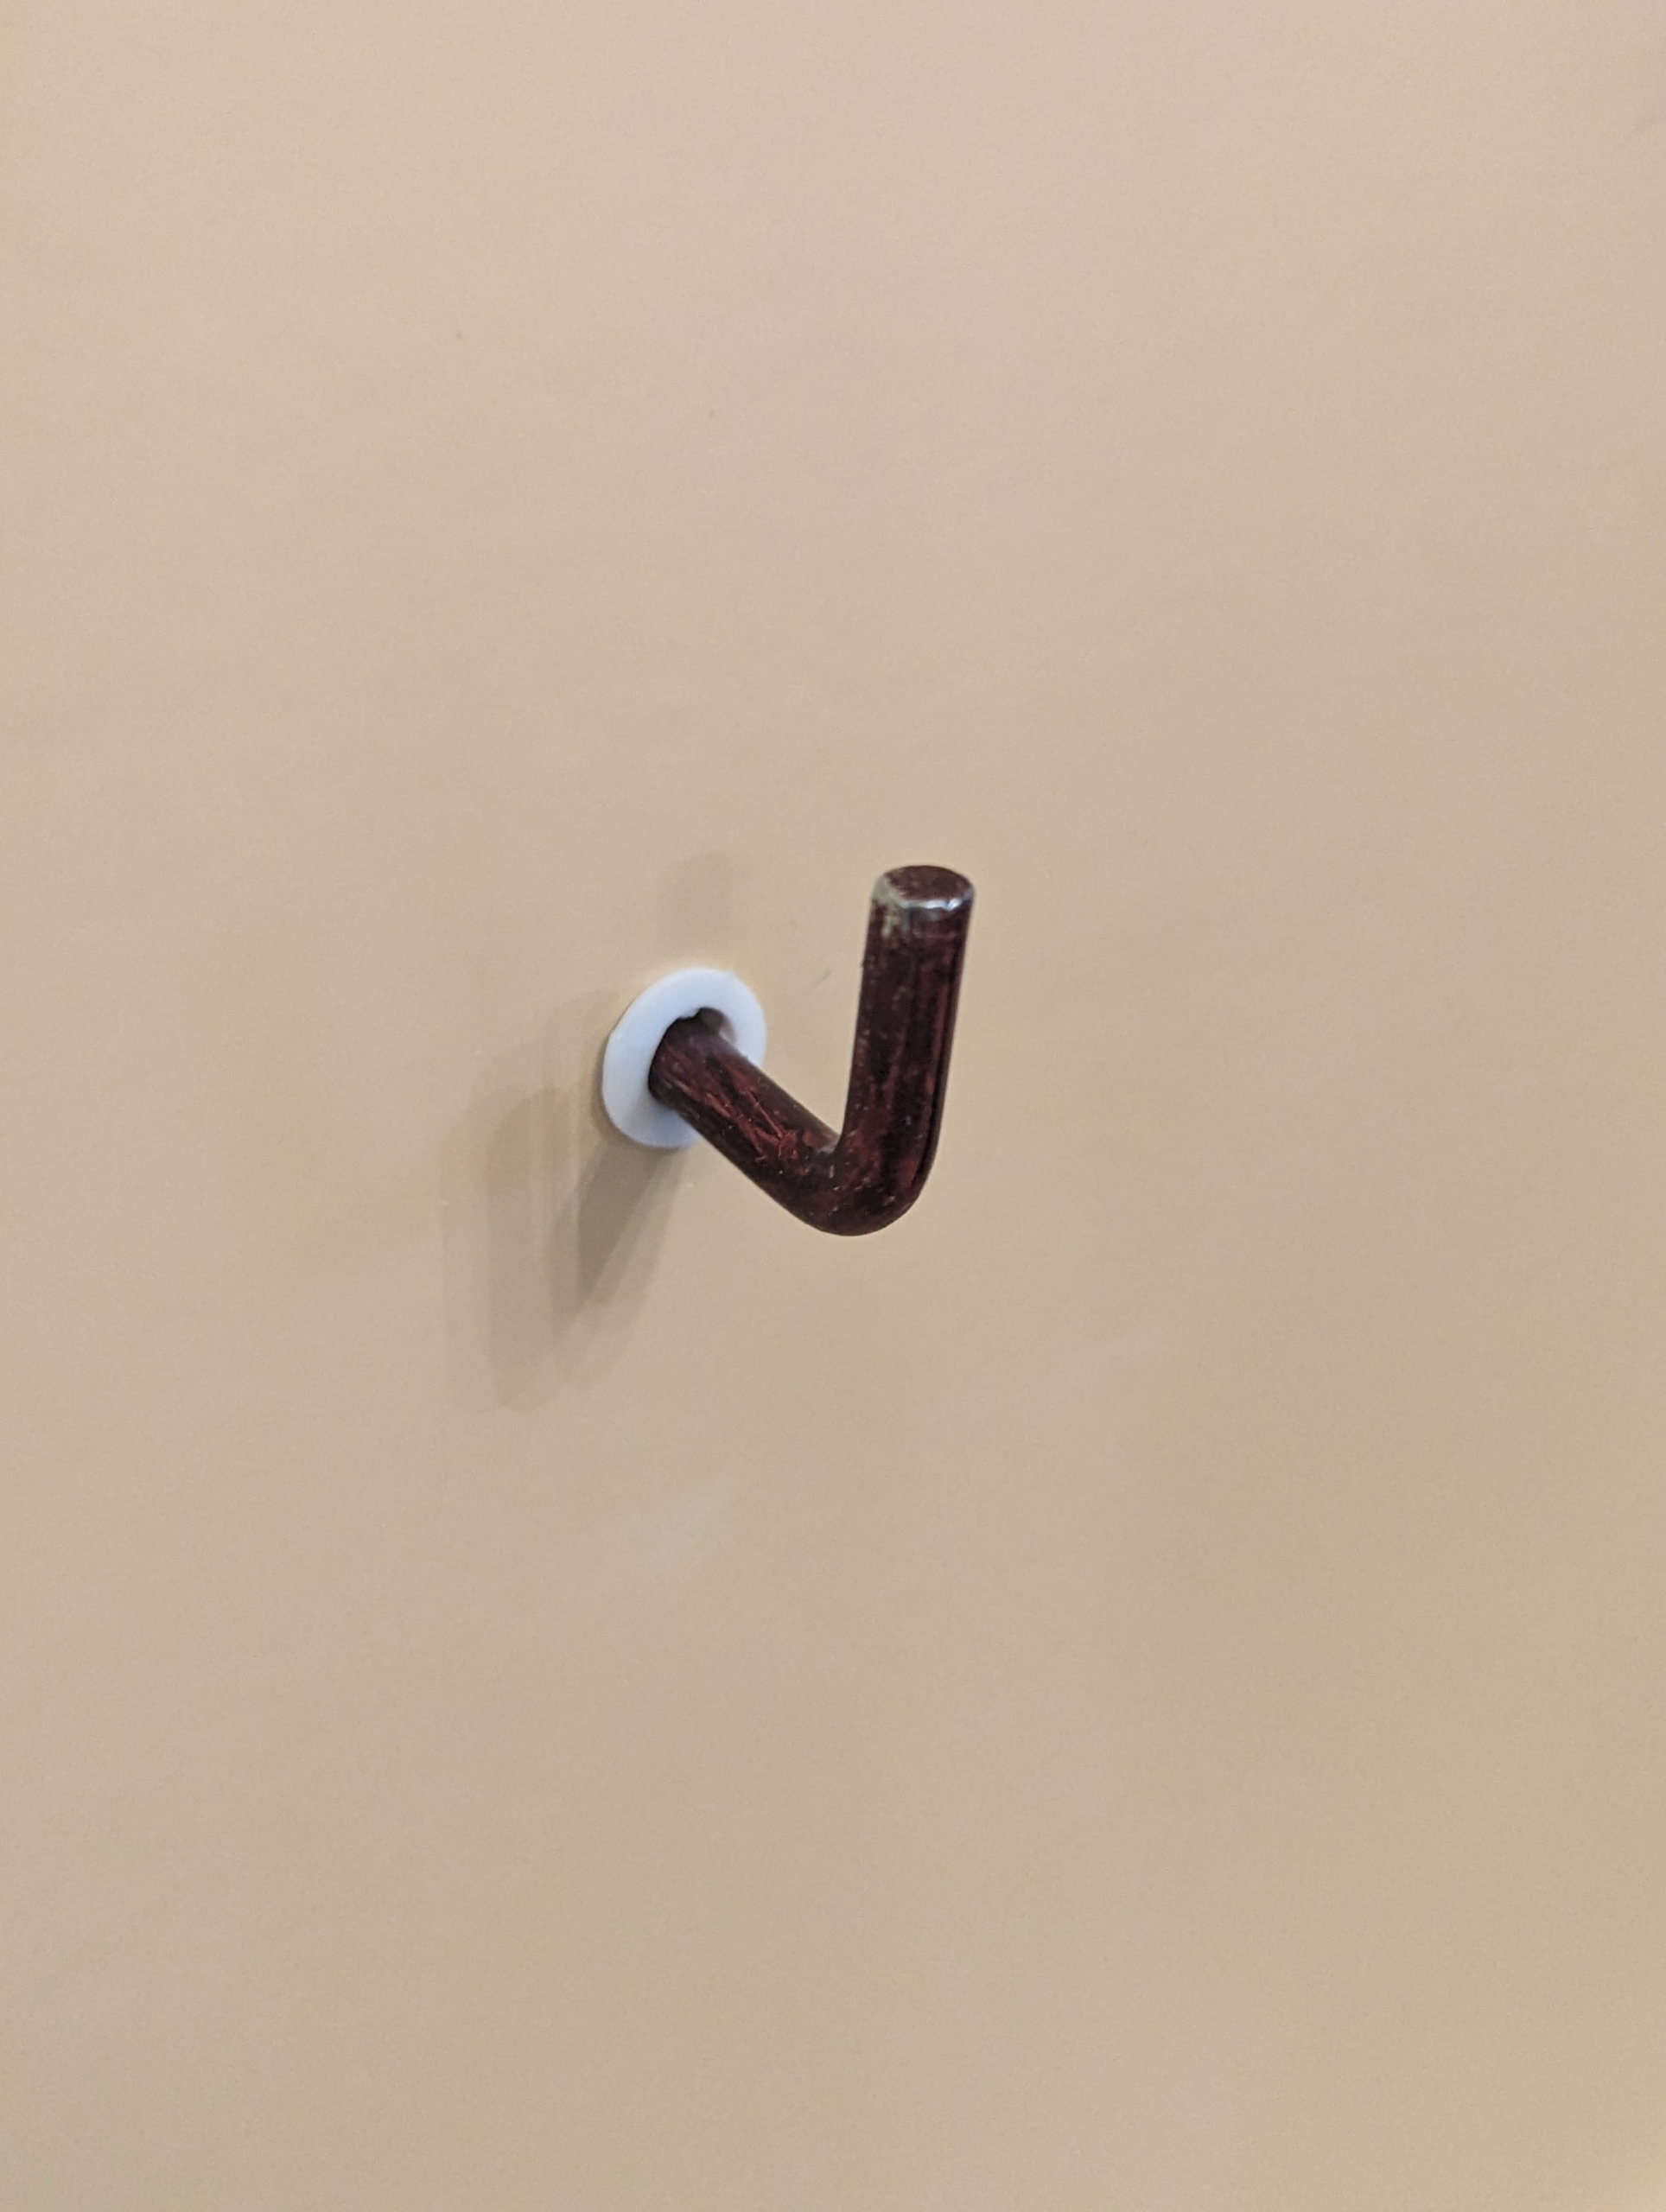
This is the entrance hall of my Summer House, which I often use for entertaining during the holidays. I decided one of the screens would be perfect on this wall in place of this giant gilded mirror.
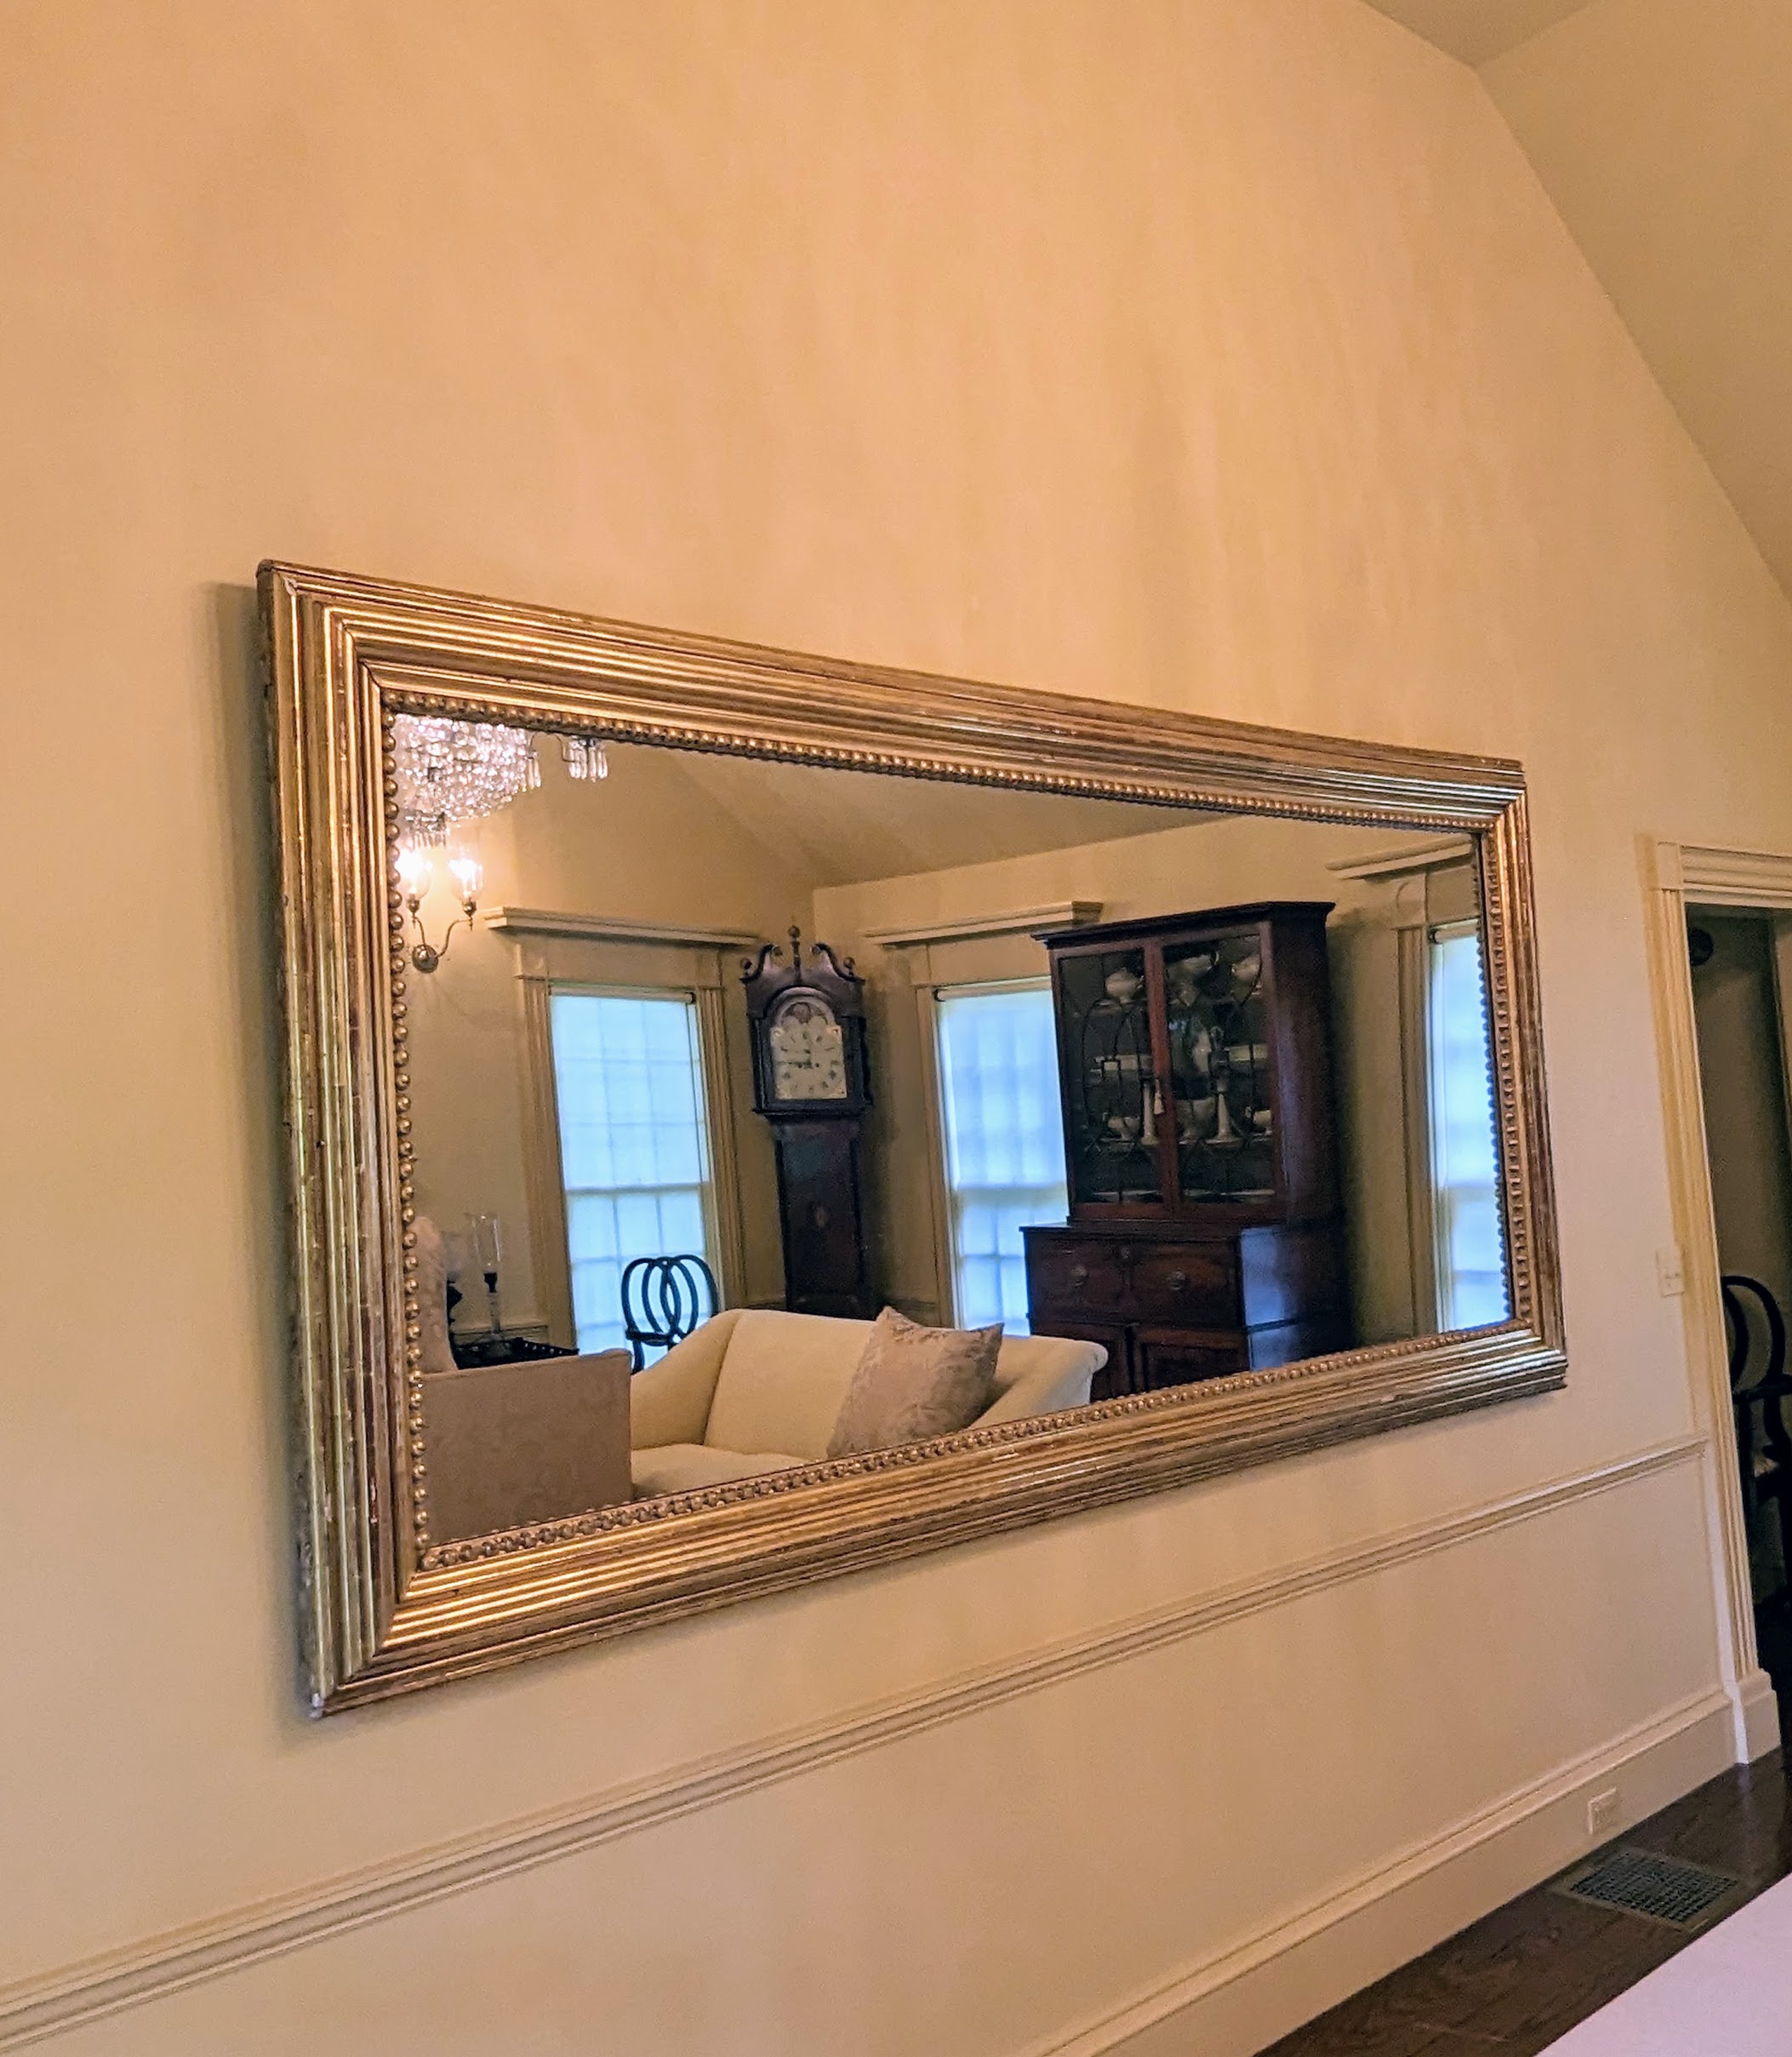
I have another mirror on a large wall in this parlor. The second screen would look great here. The colors are just perfect – wait until you see…
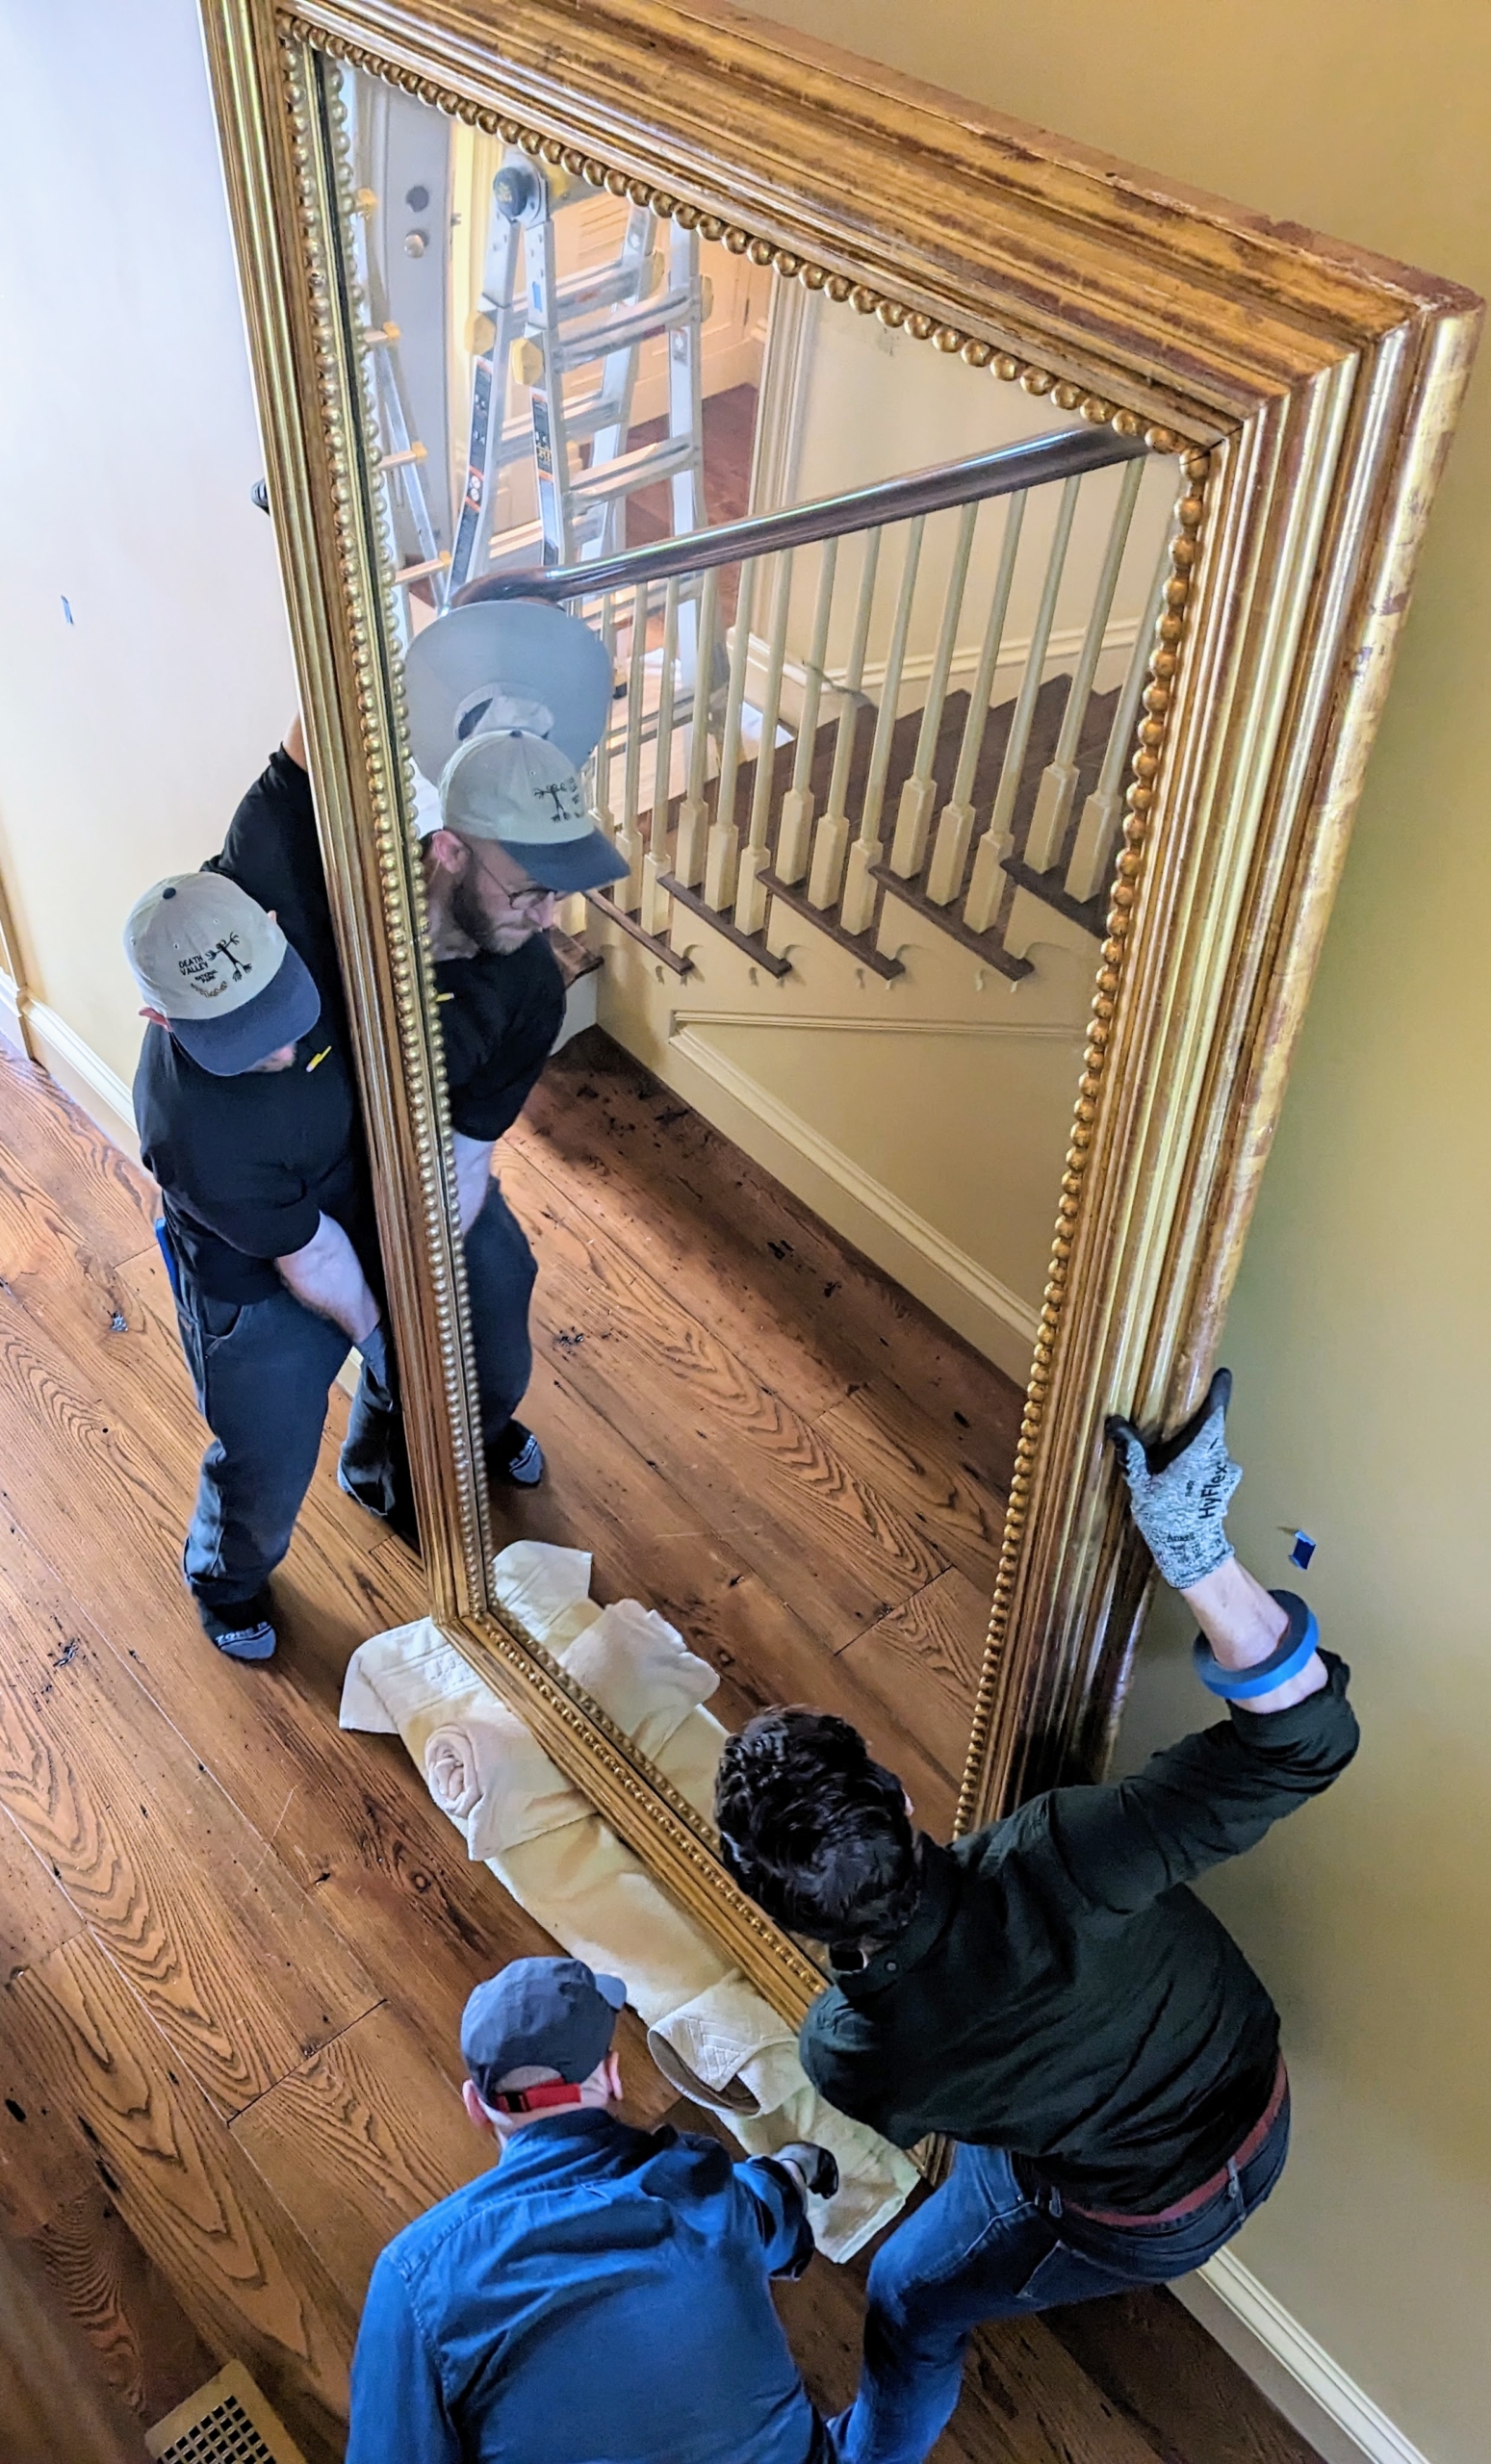
The first step is to carefully remove the existing mirrors from the walls. They will be hung somewhere else. Whenever leaning heavy artwork against a wall, always place towels underneath and behind the edges so nothing gets damaged. Art and photos should always be hung after other decorations have been decided. The height and width of pieces will always affect the hanging of any print or painting.
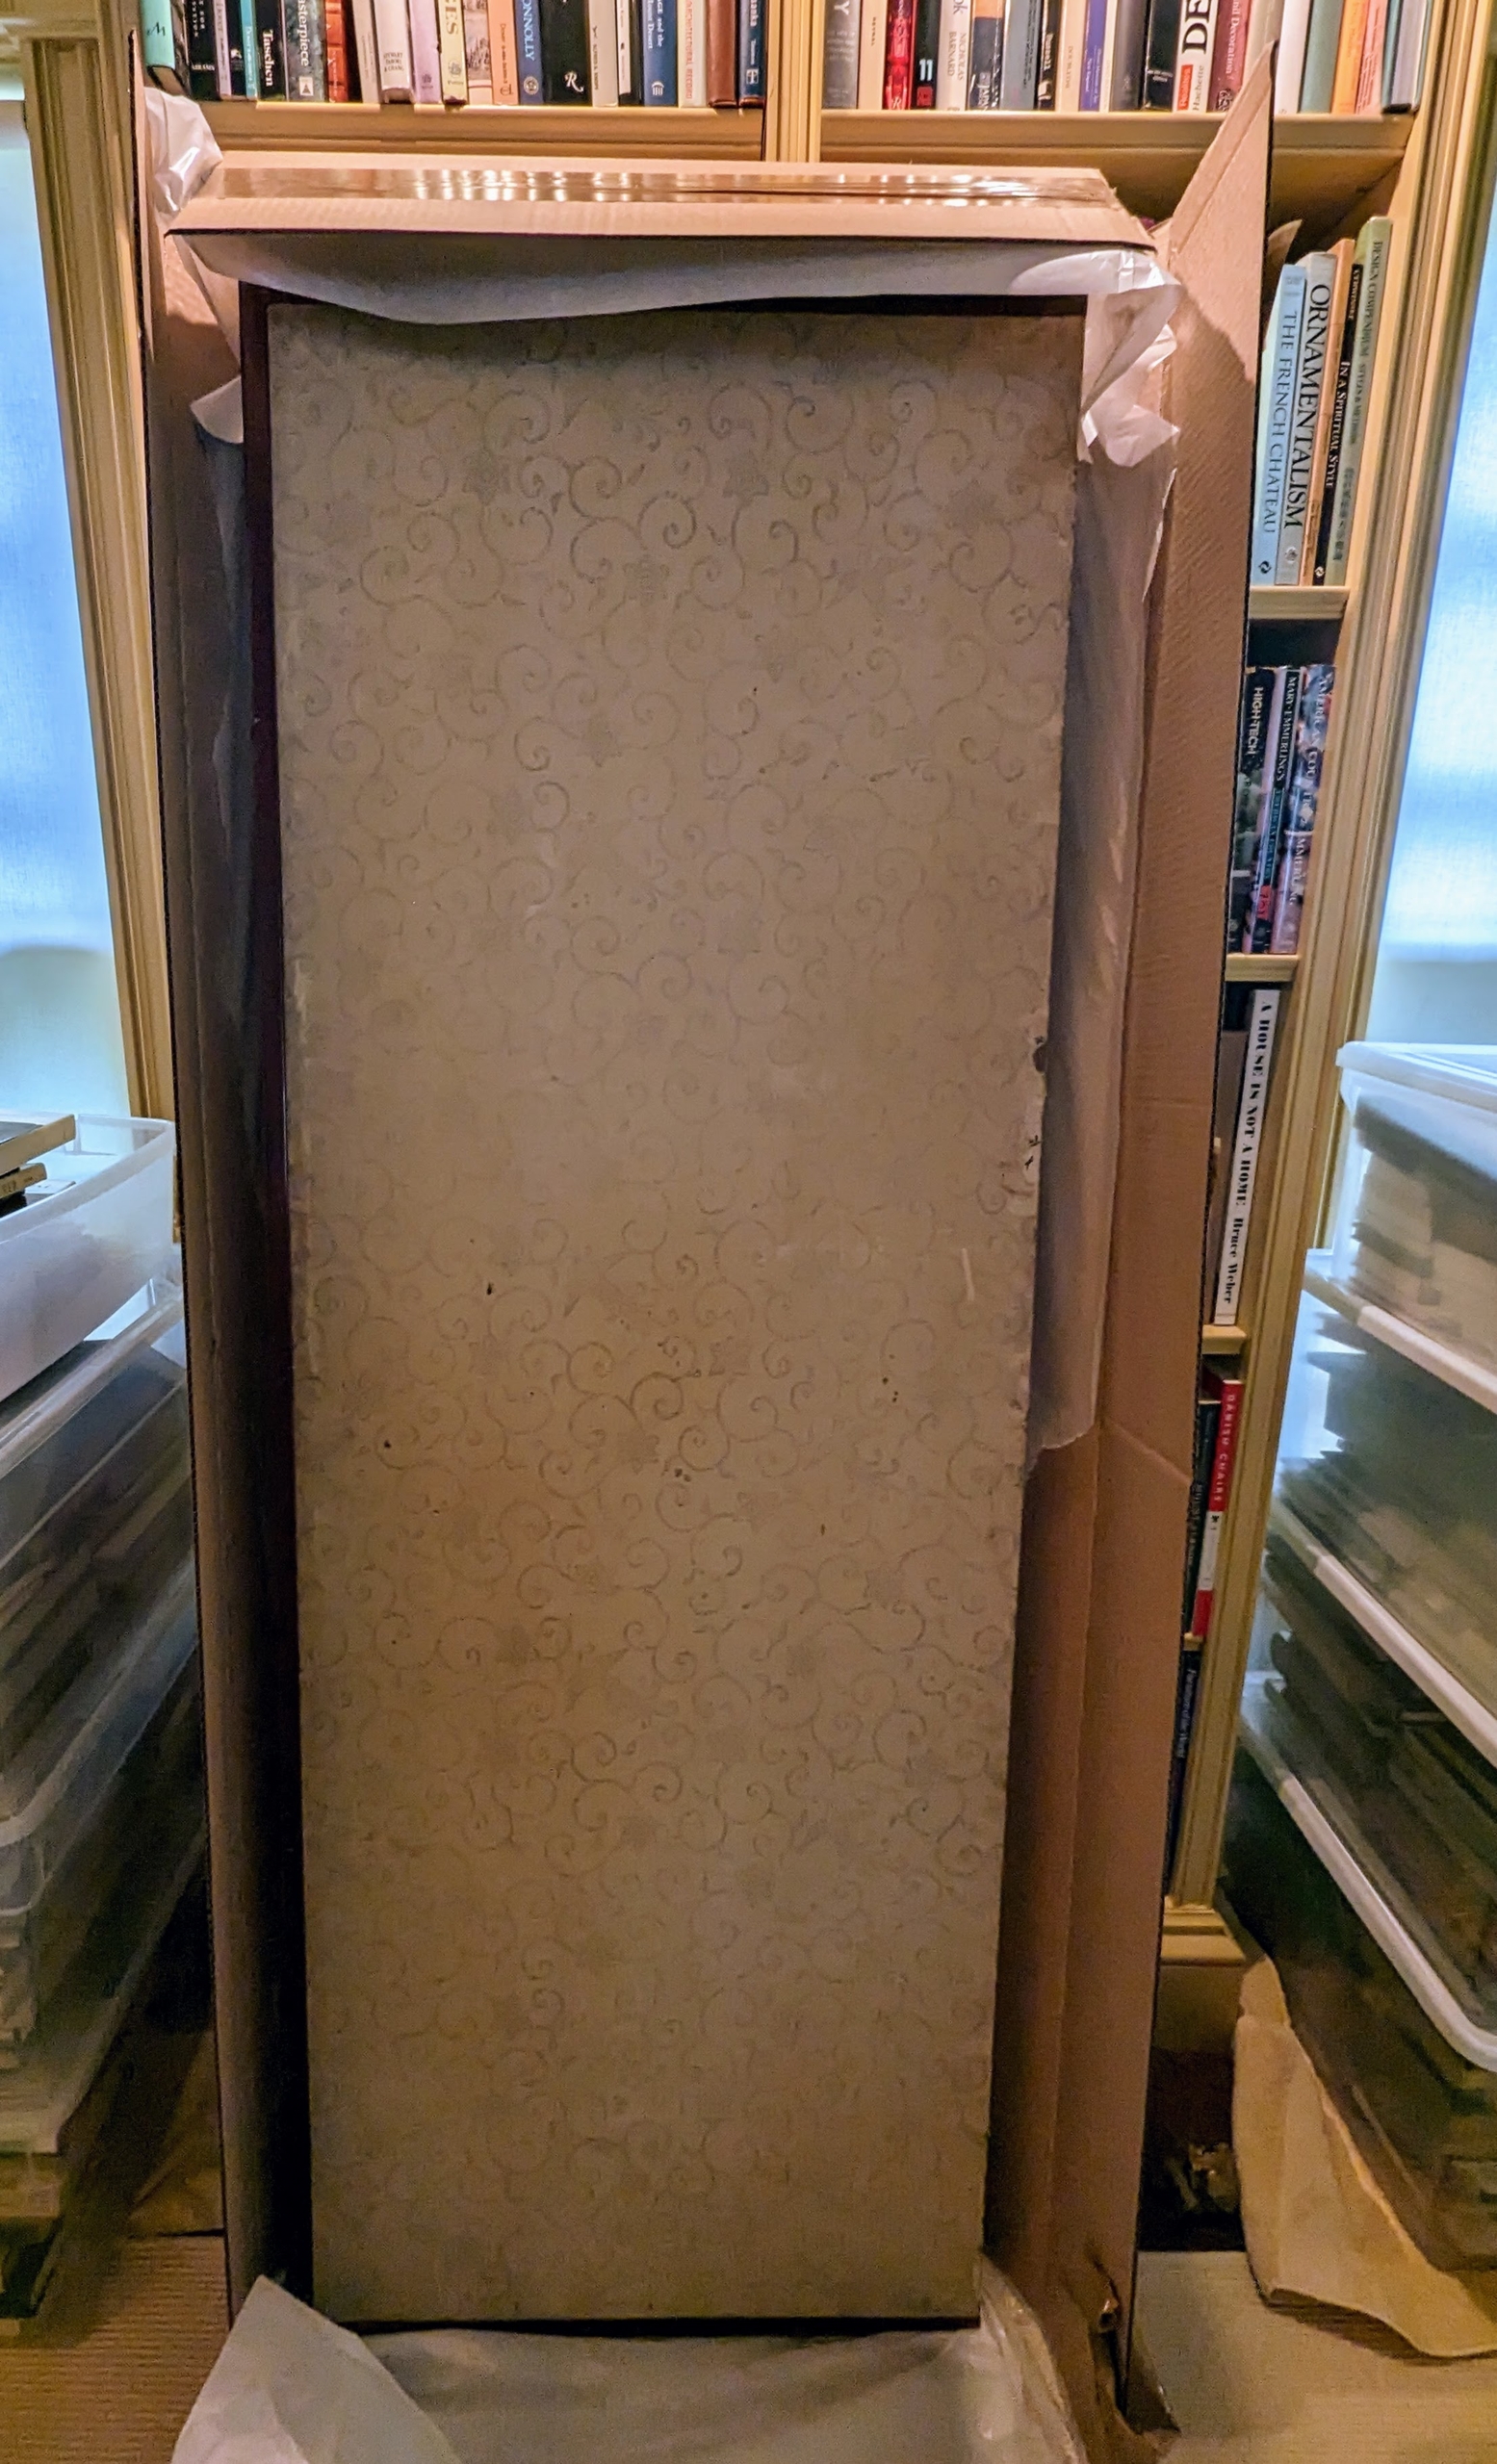
The screens were carefully packaged in boxes, so the team gently removes each screen, so I could decide the exact places where they would be hung.
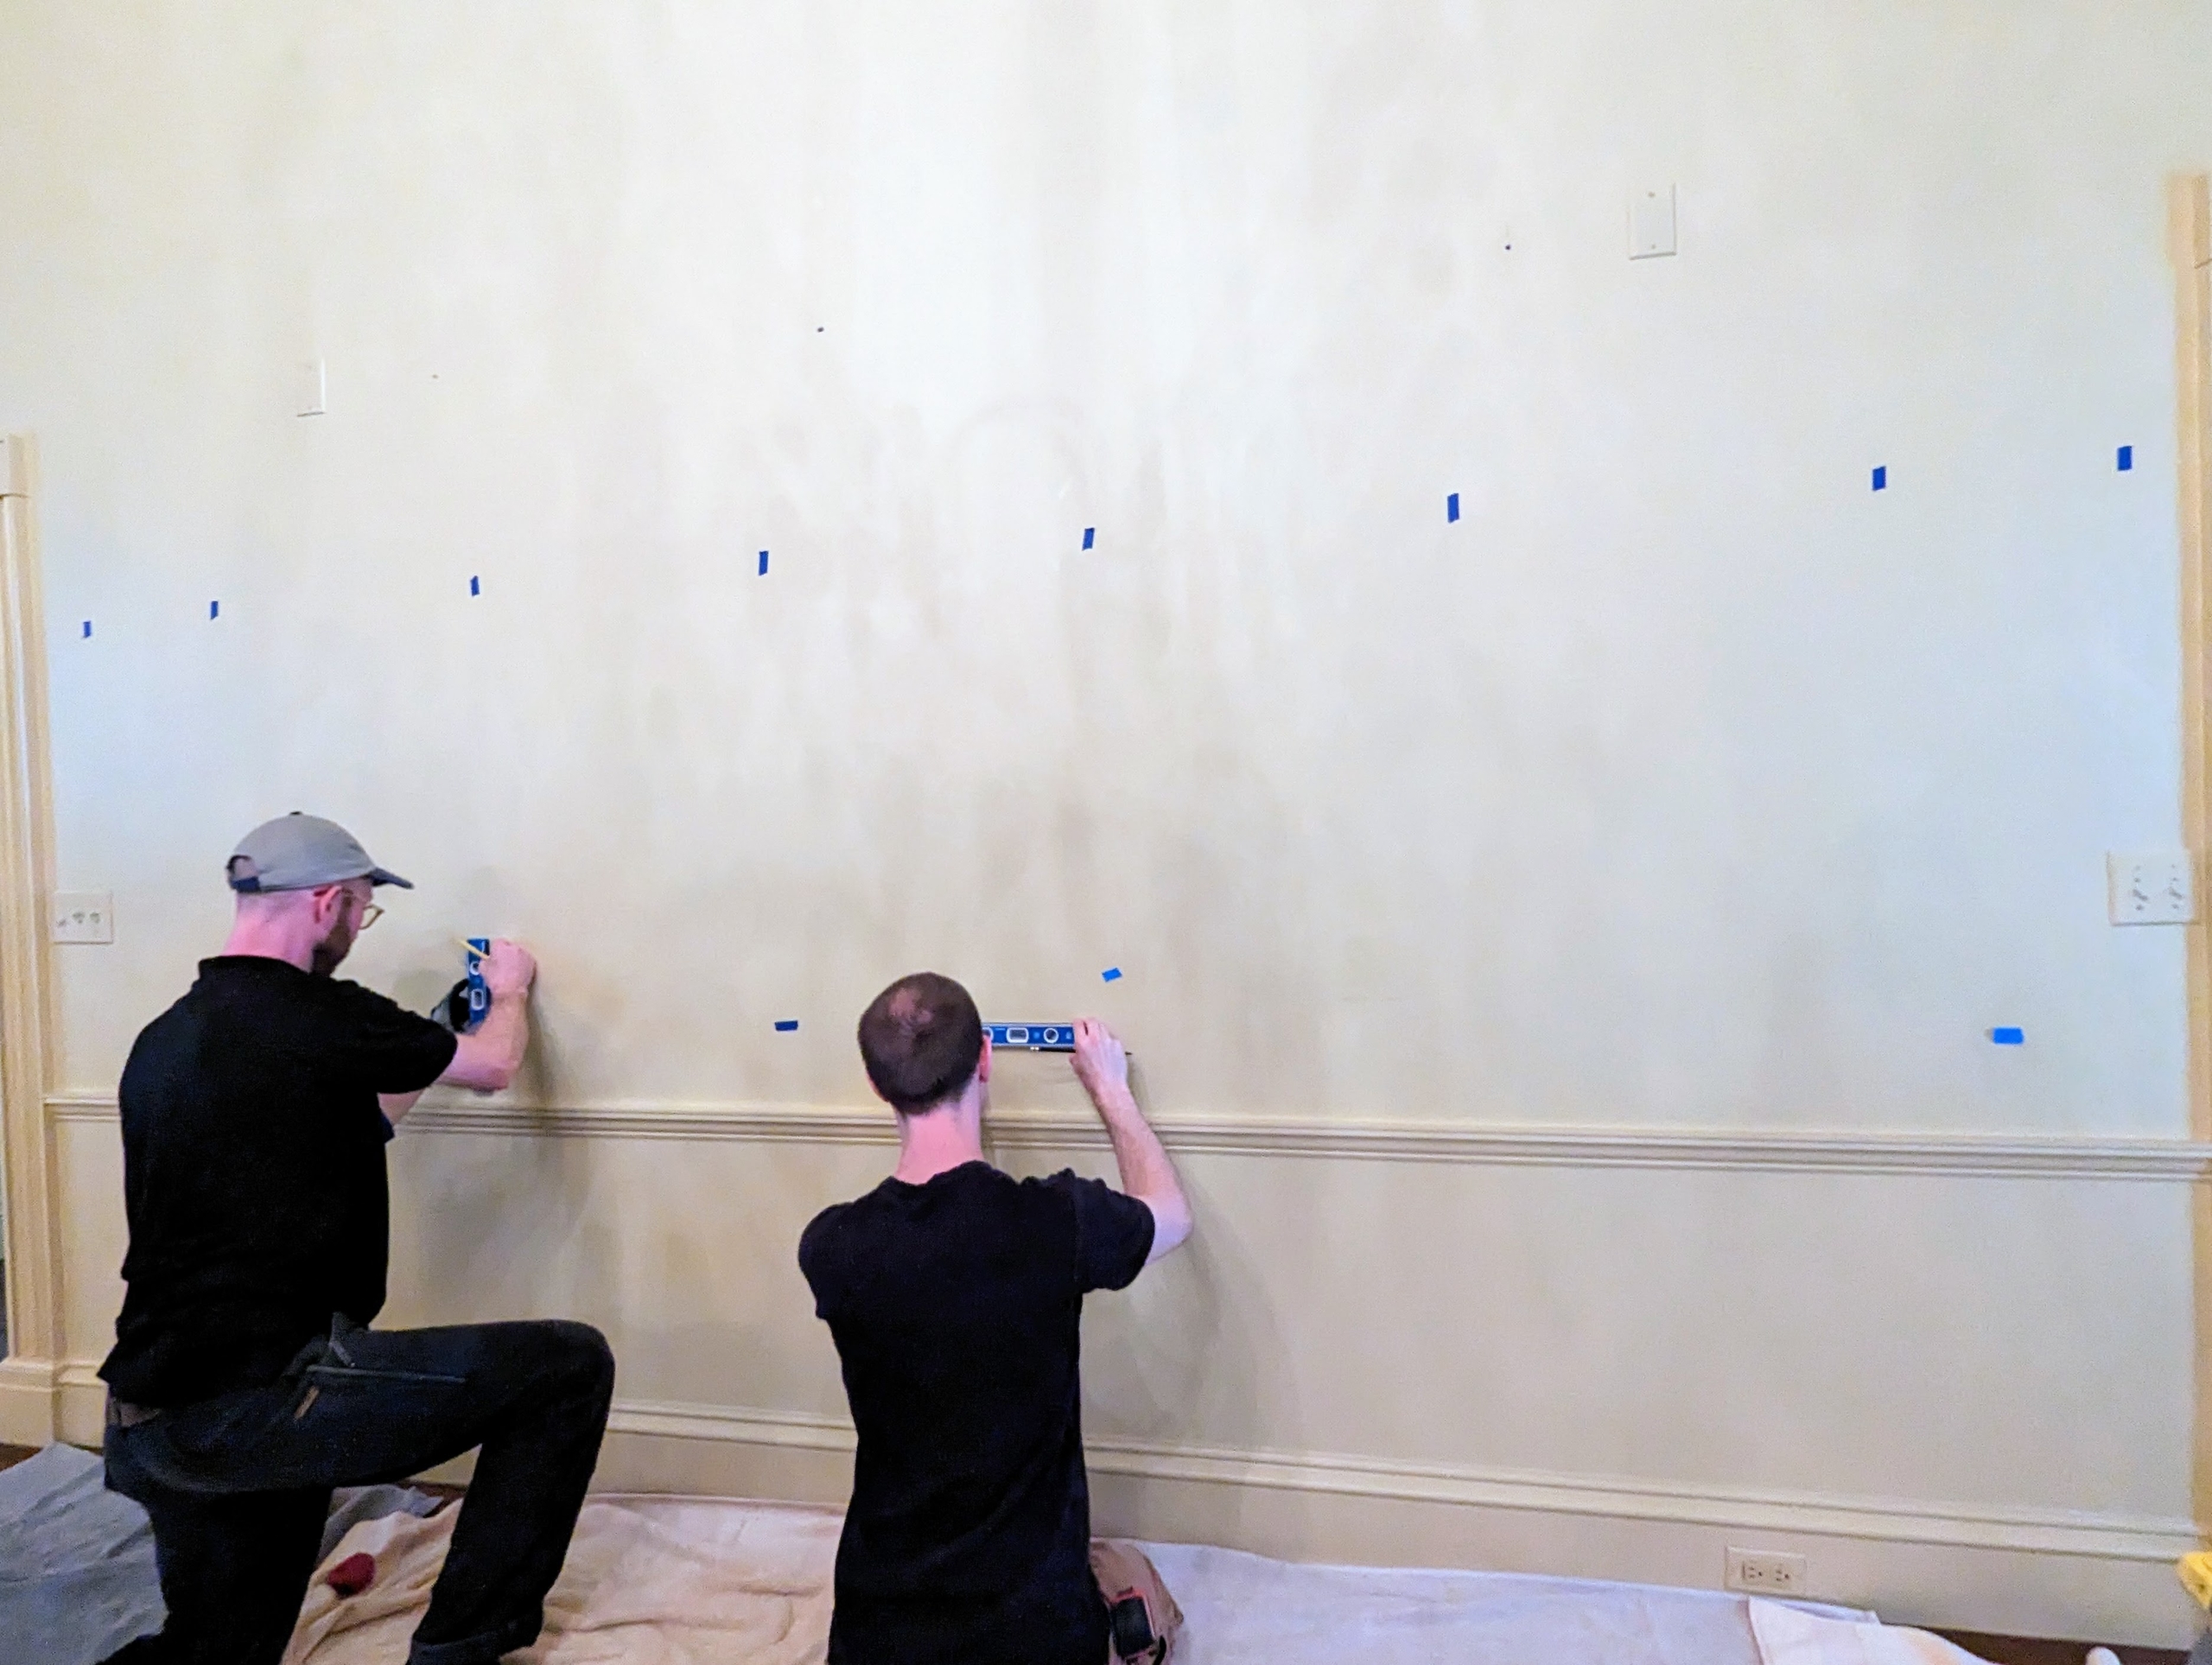
Here I am talking to Alex about the precise positioning of one screen, which includes six panels. We consider height, width, and placement next to any moldings.
As the screens are unboxed, they are measured.
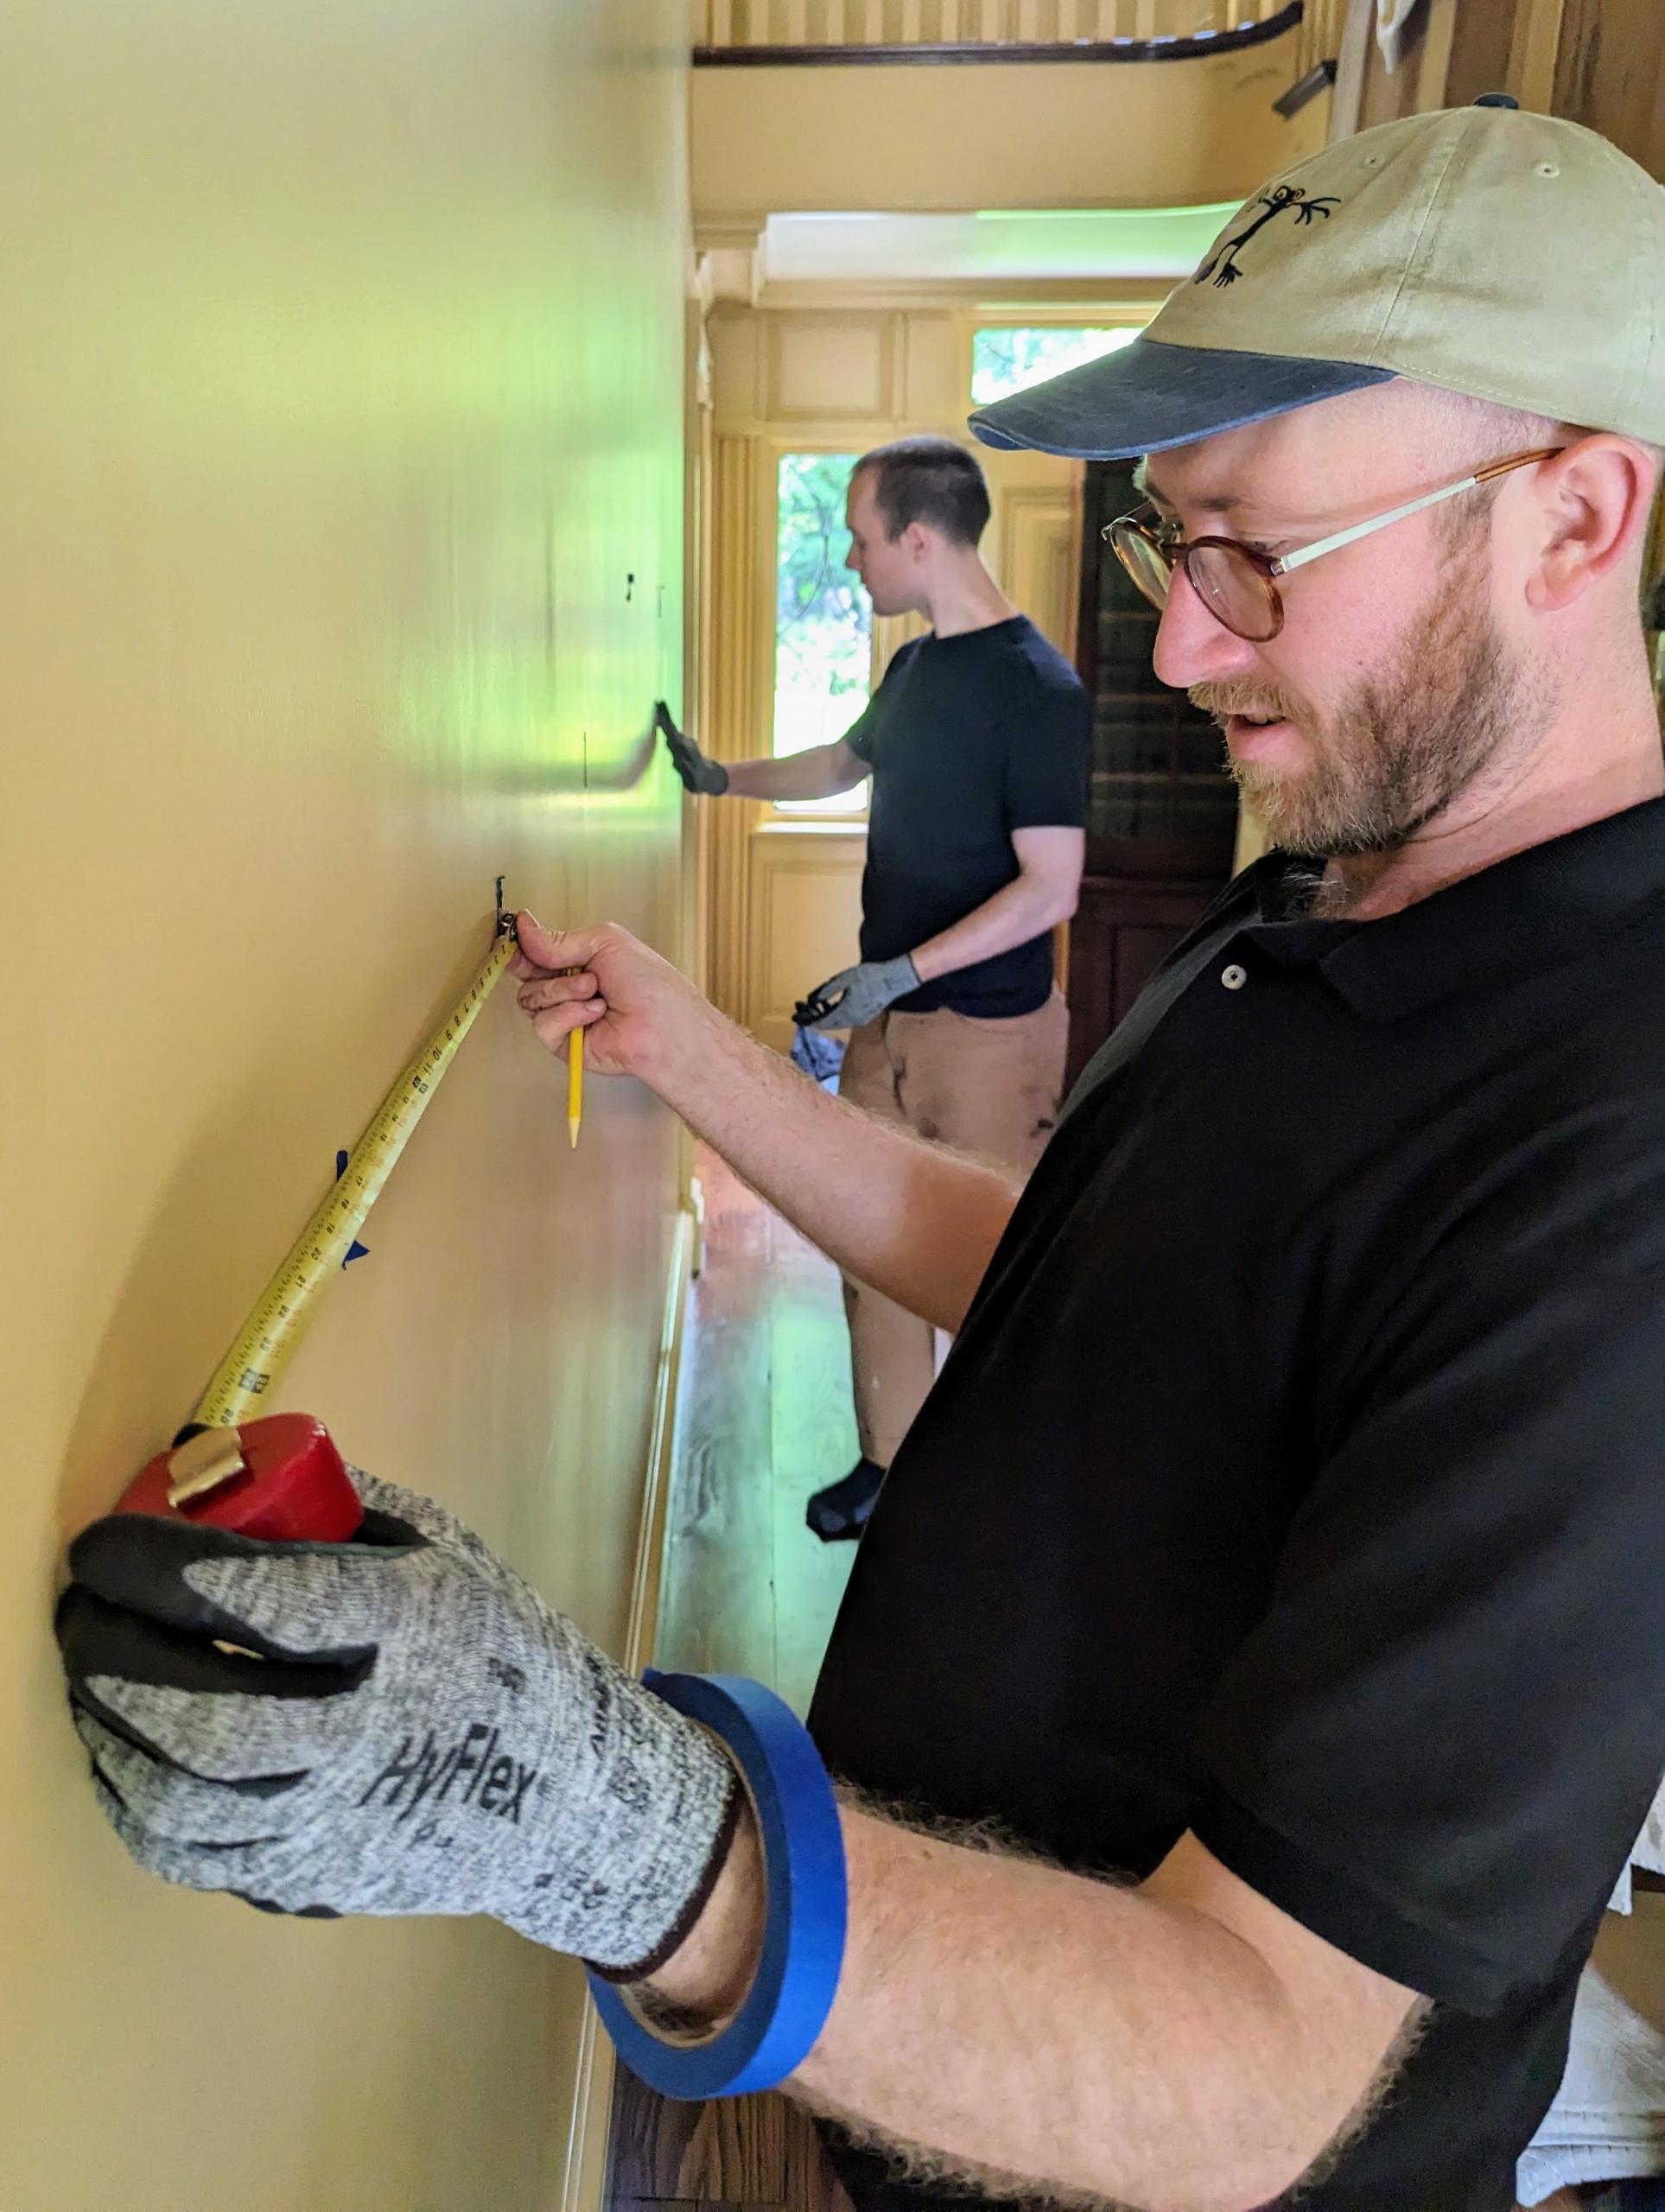
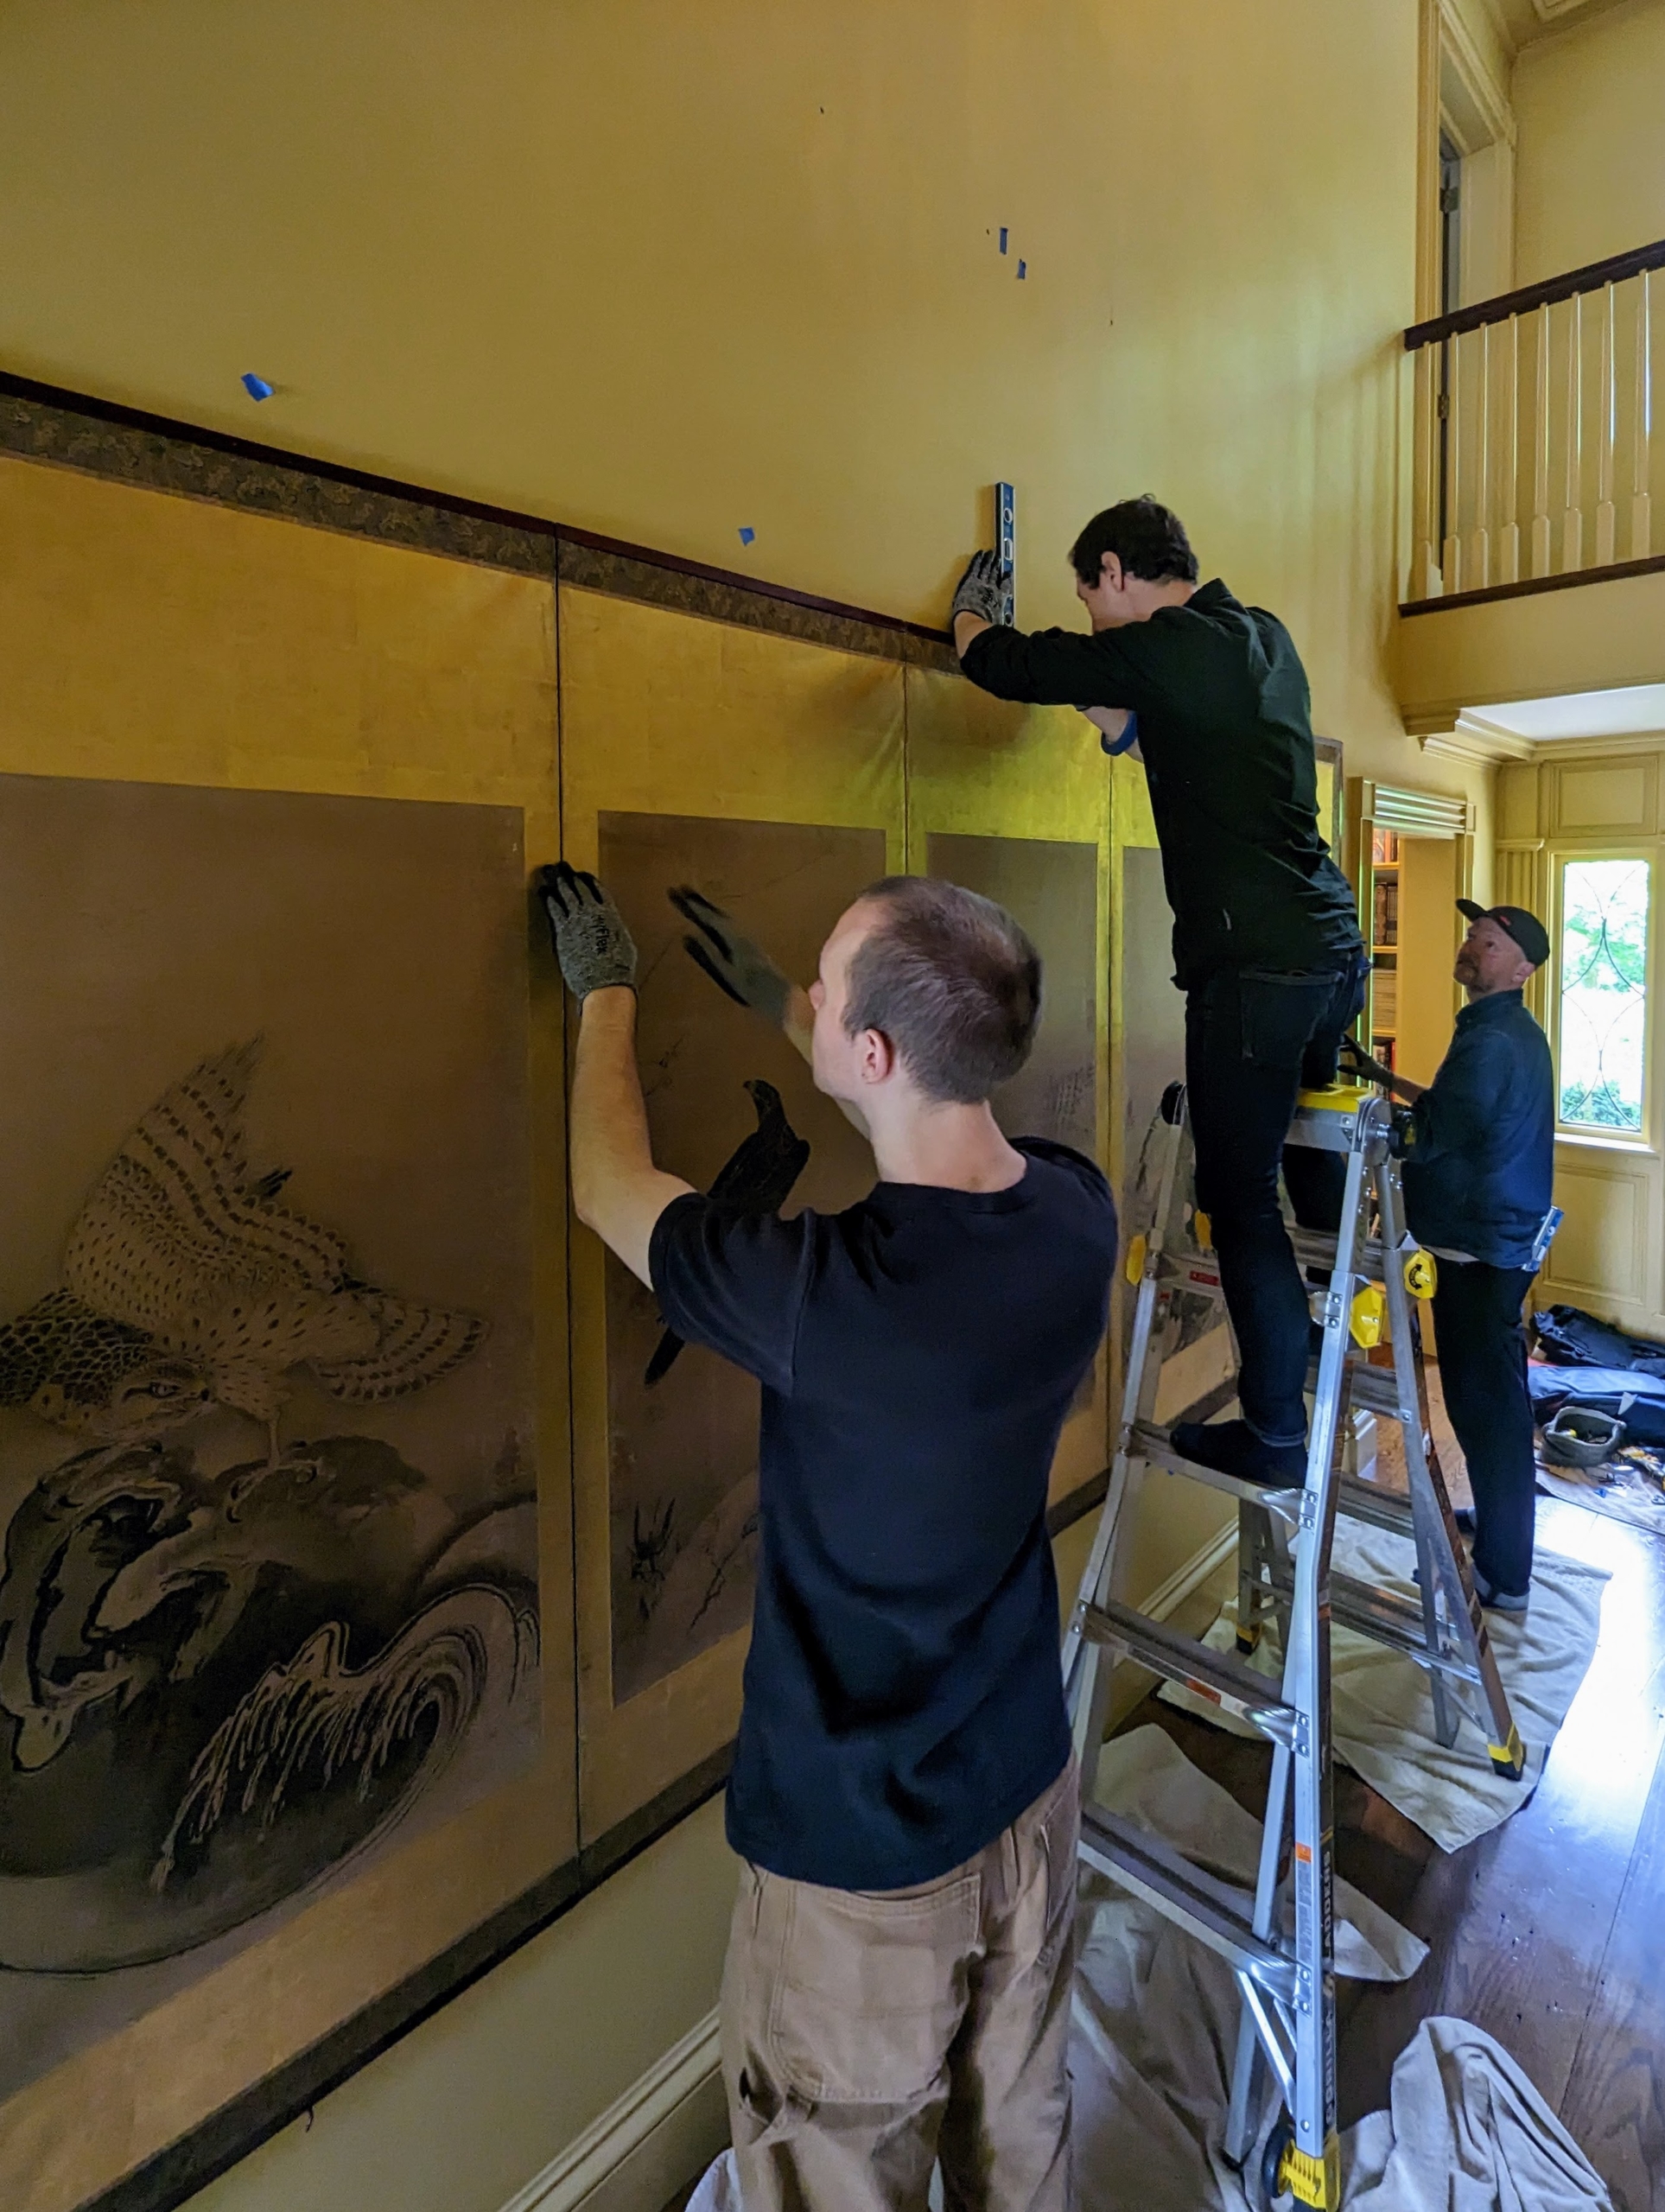
Once we decided where the screens would be hung, the team begins the important task of measuring and planning where appropriate screws would be positioned.
Here, Alex measures and places level marks on the wall. These marks will ensure the piece is hung completely straight.
Then he double checks the measurement at each point. The team uses blue painter’s tape that has a very light adhesive.
The team tests the screen in the parlor to make sure it fits precisely. In this space, I was concerned the screen would be too wide and block the light switch plate, but fortunately there was just enough clearance.
Alex and Soren work together in measuring and leveling, so it is done as precisely as possible.
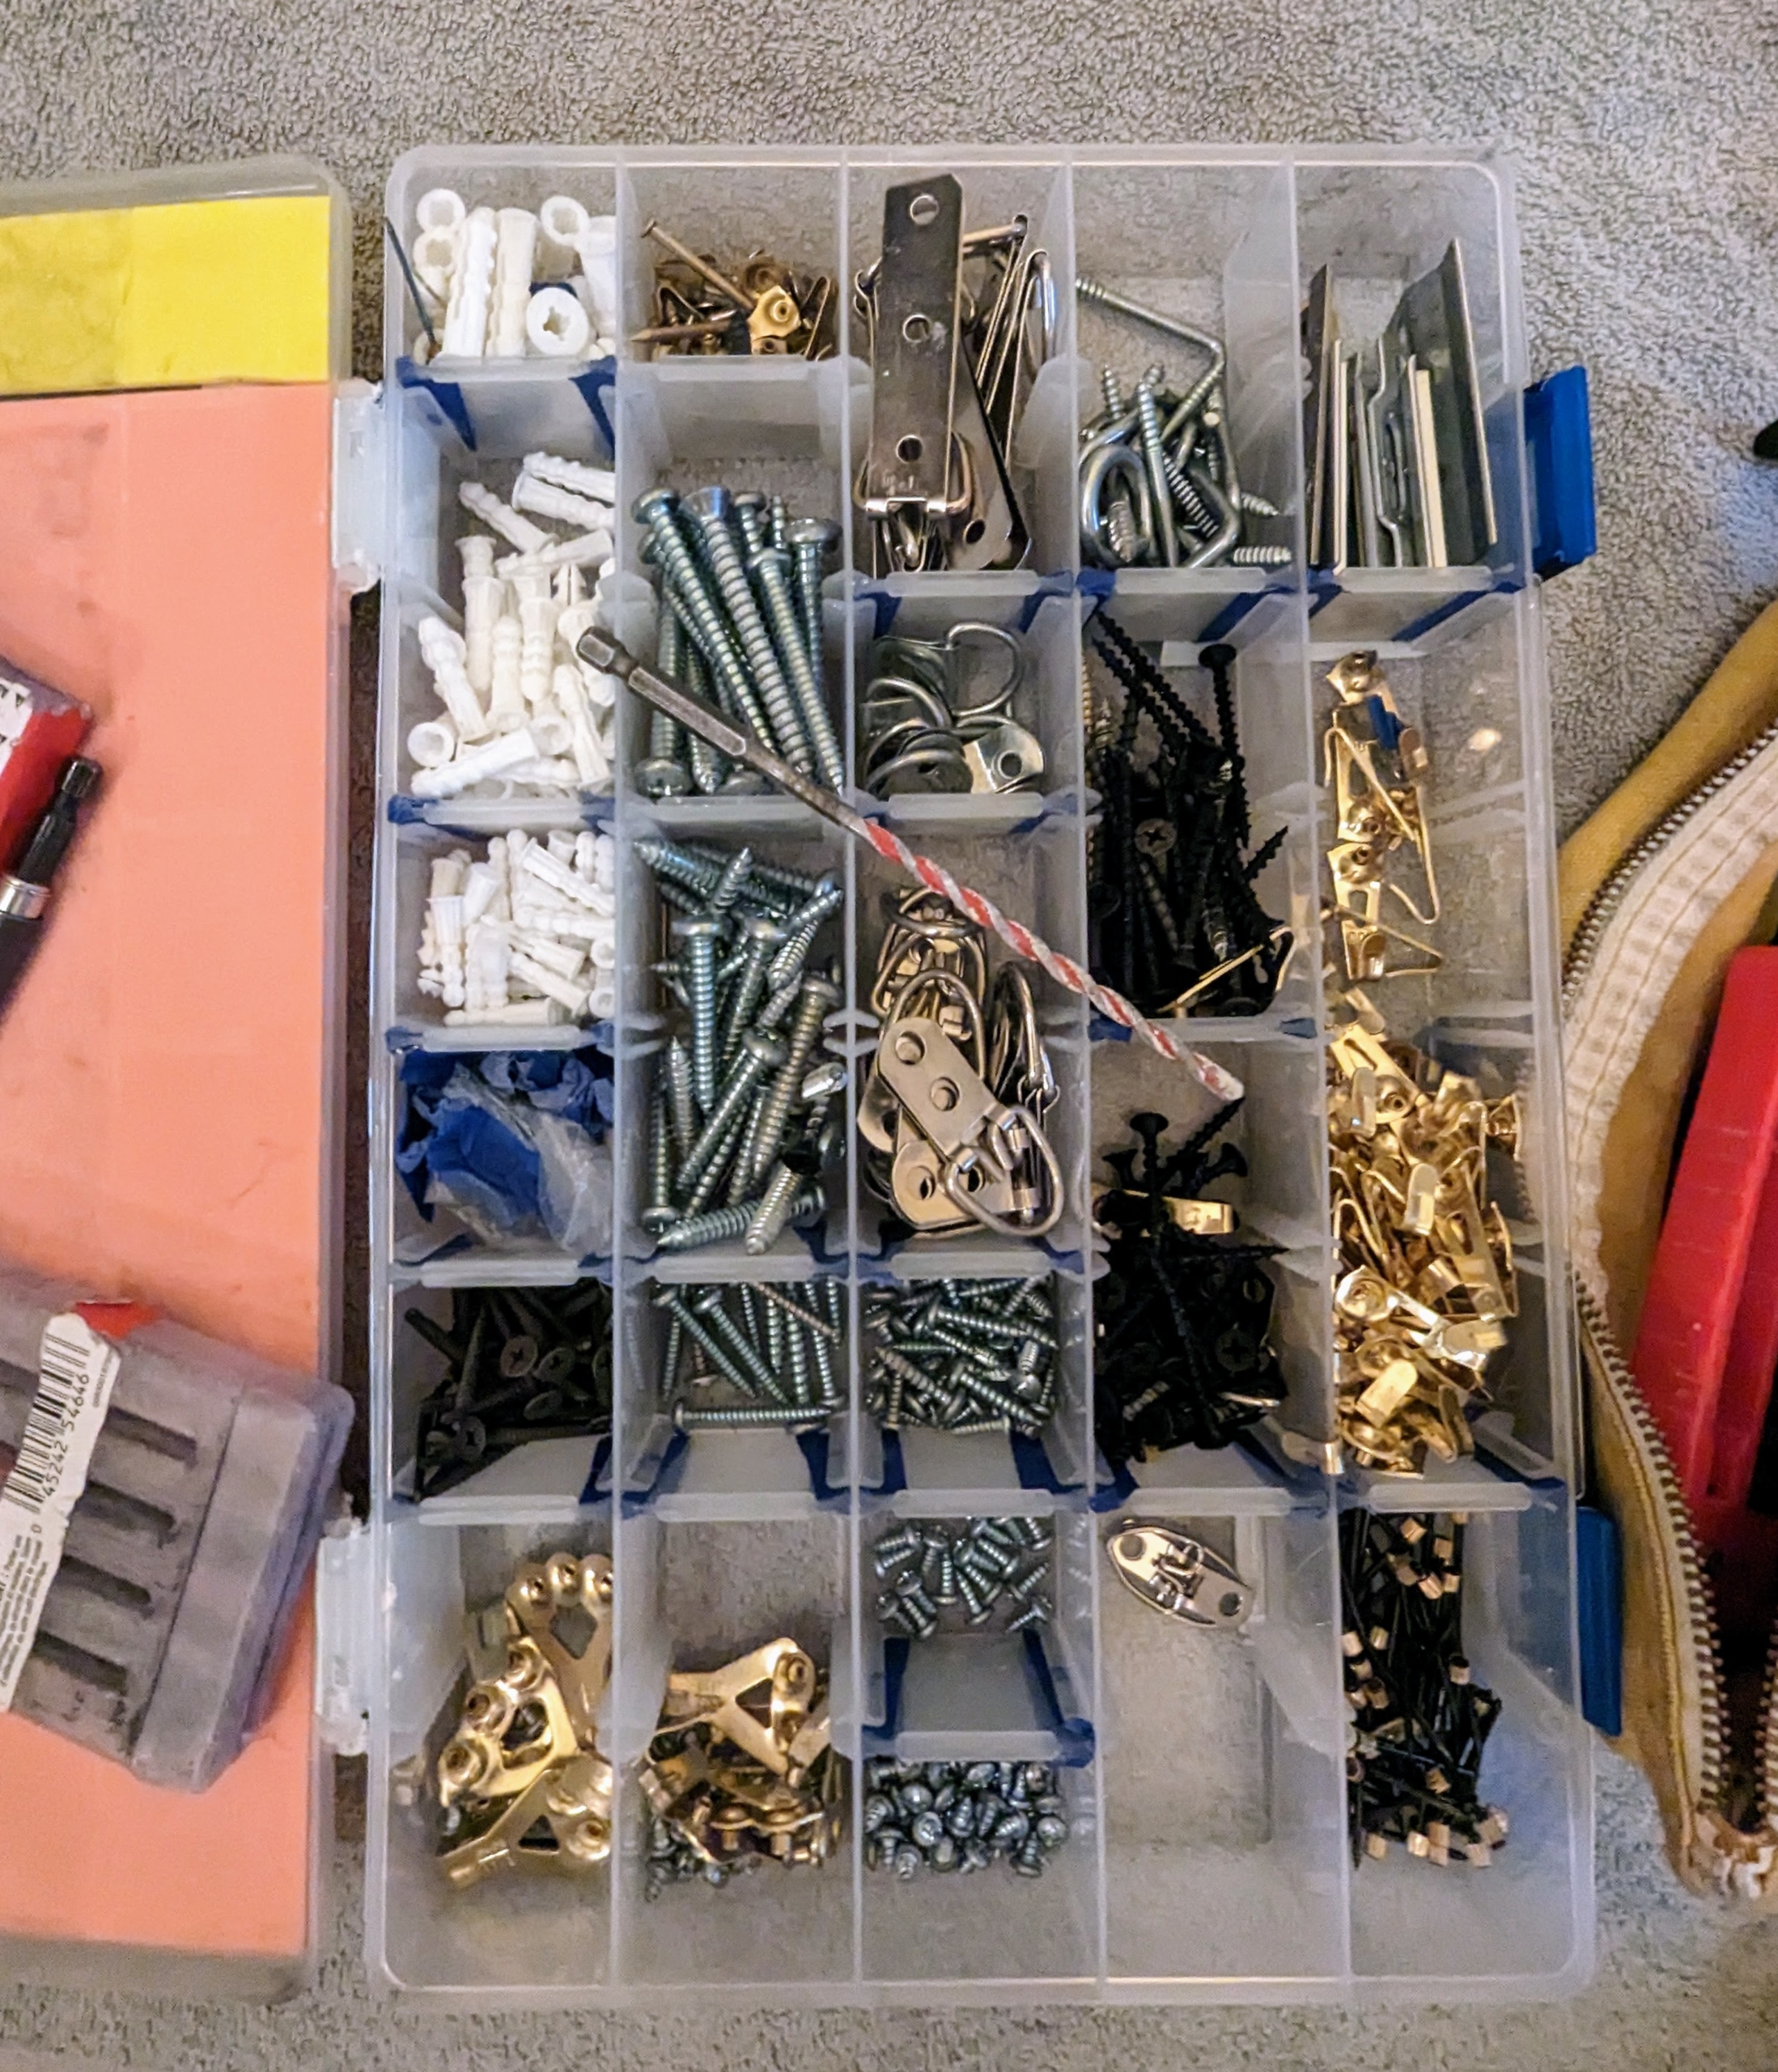
The team brings a case filled with all the necessary nails, screws, wall anchors, and hooks.
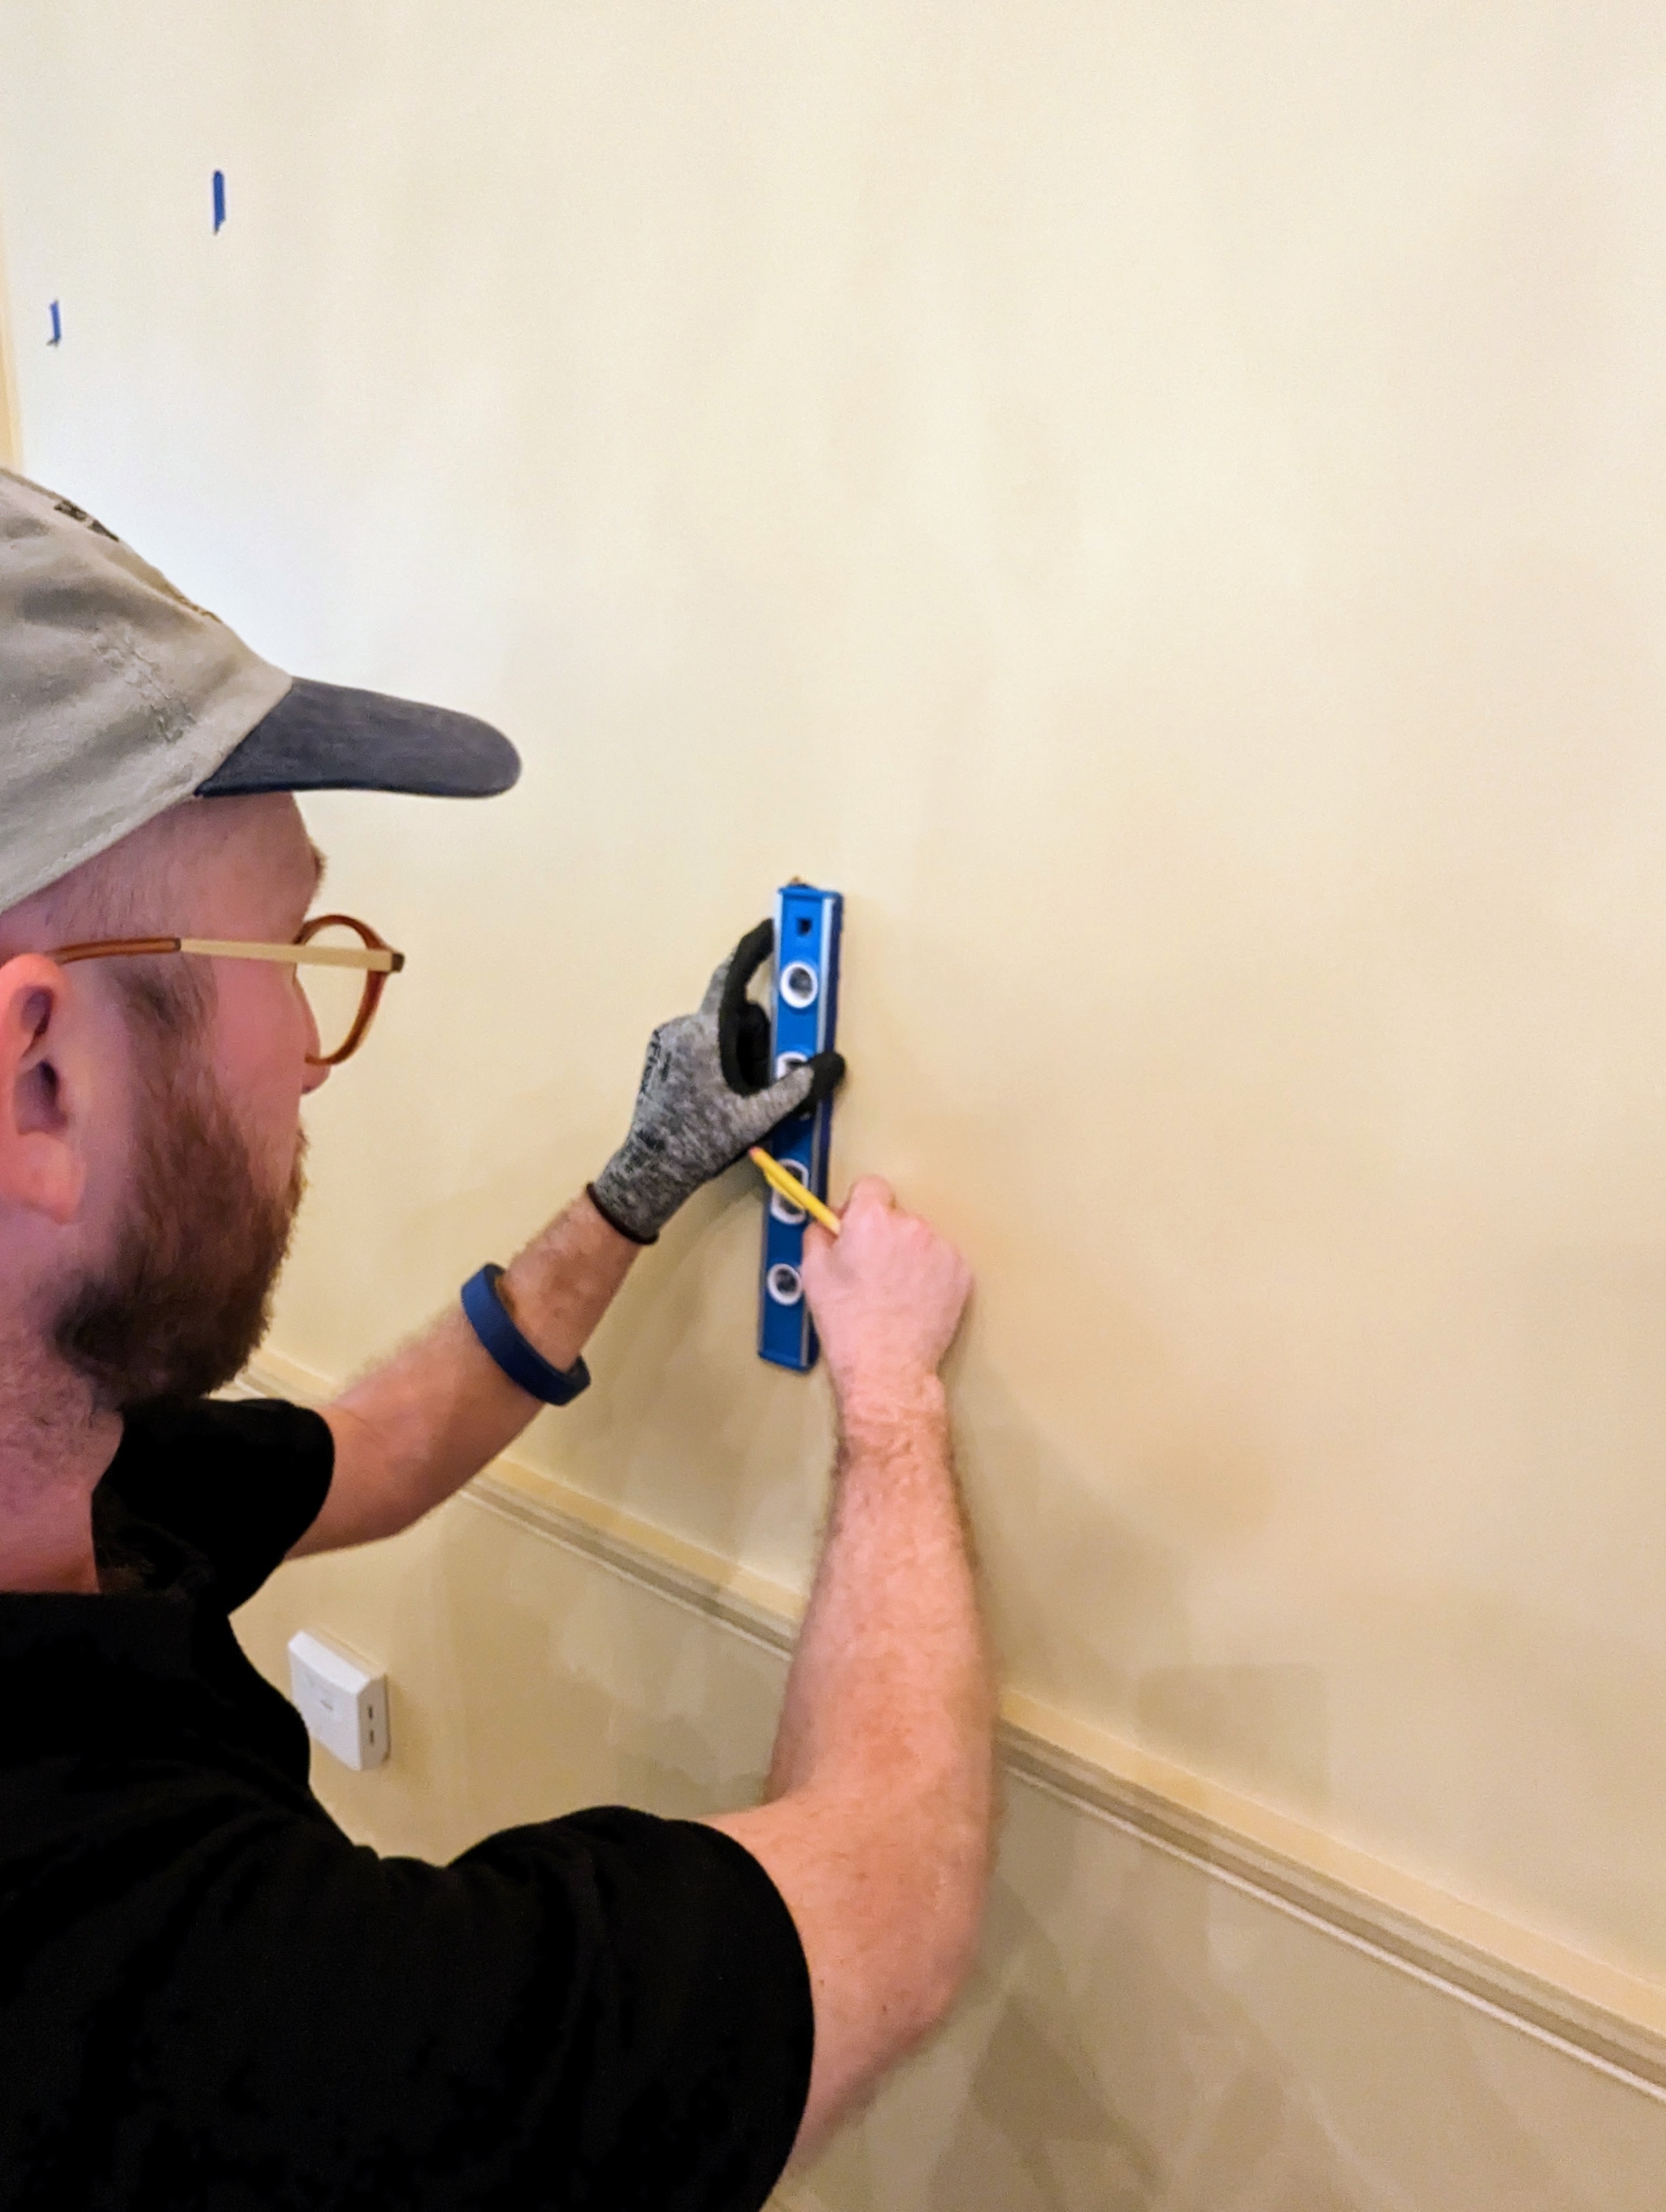
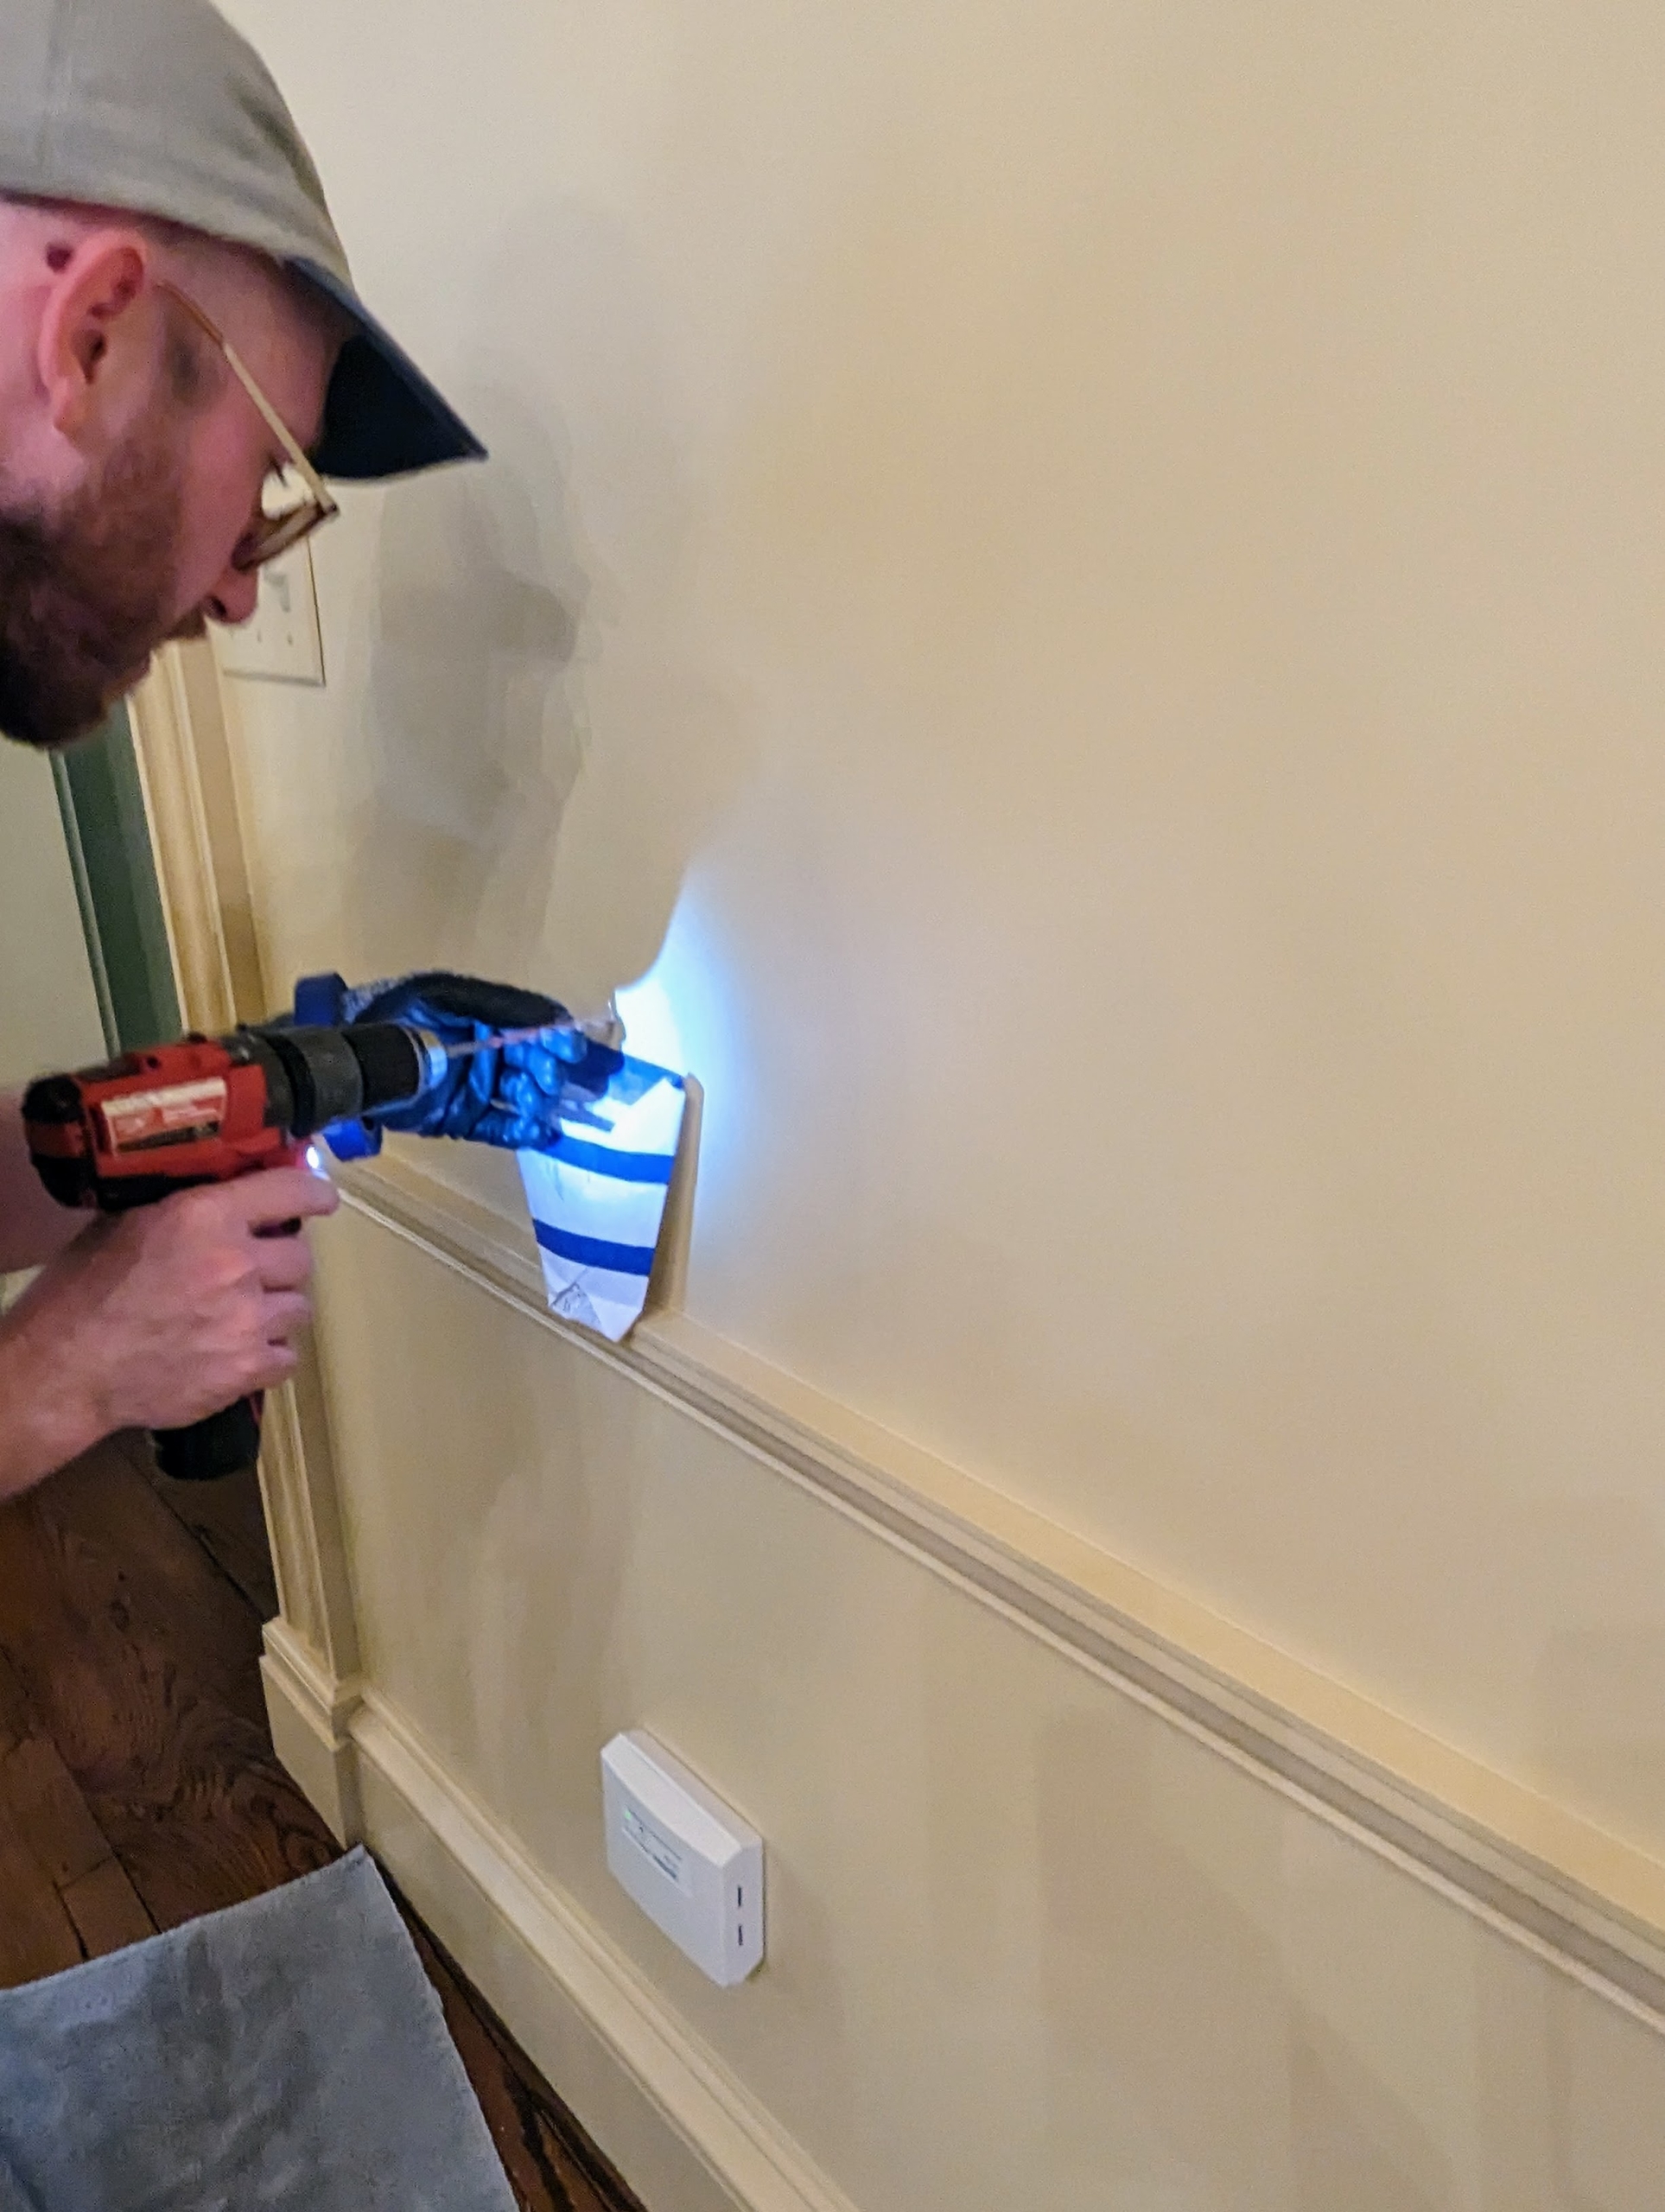
Using some paper and tape, Alex creates an envelope to catch all the dust from where he is drilling. This saves time and keeps the areas clean.
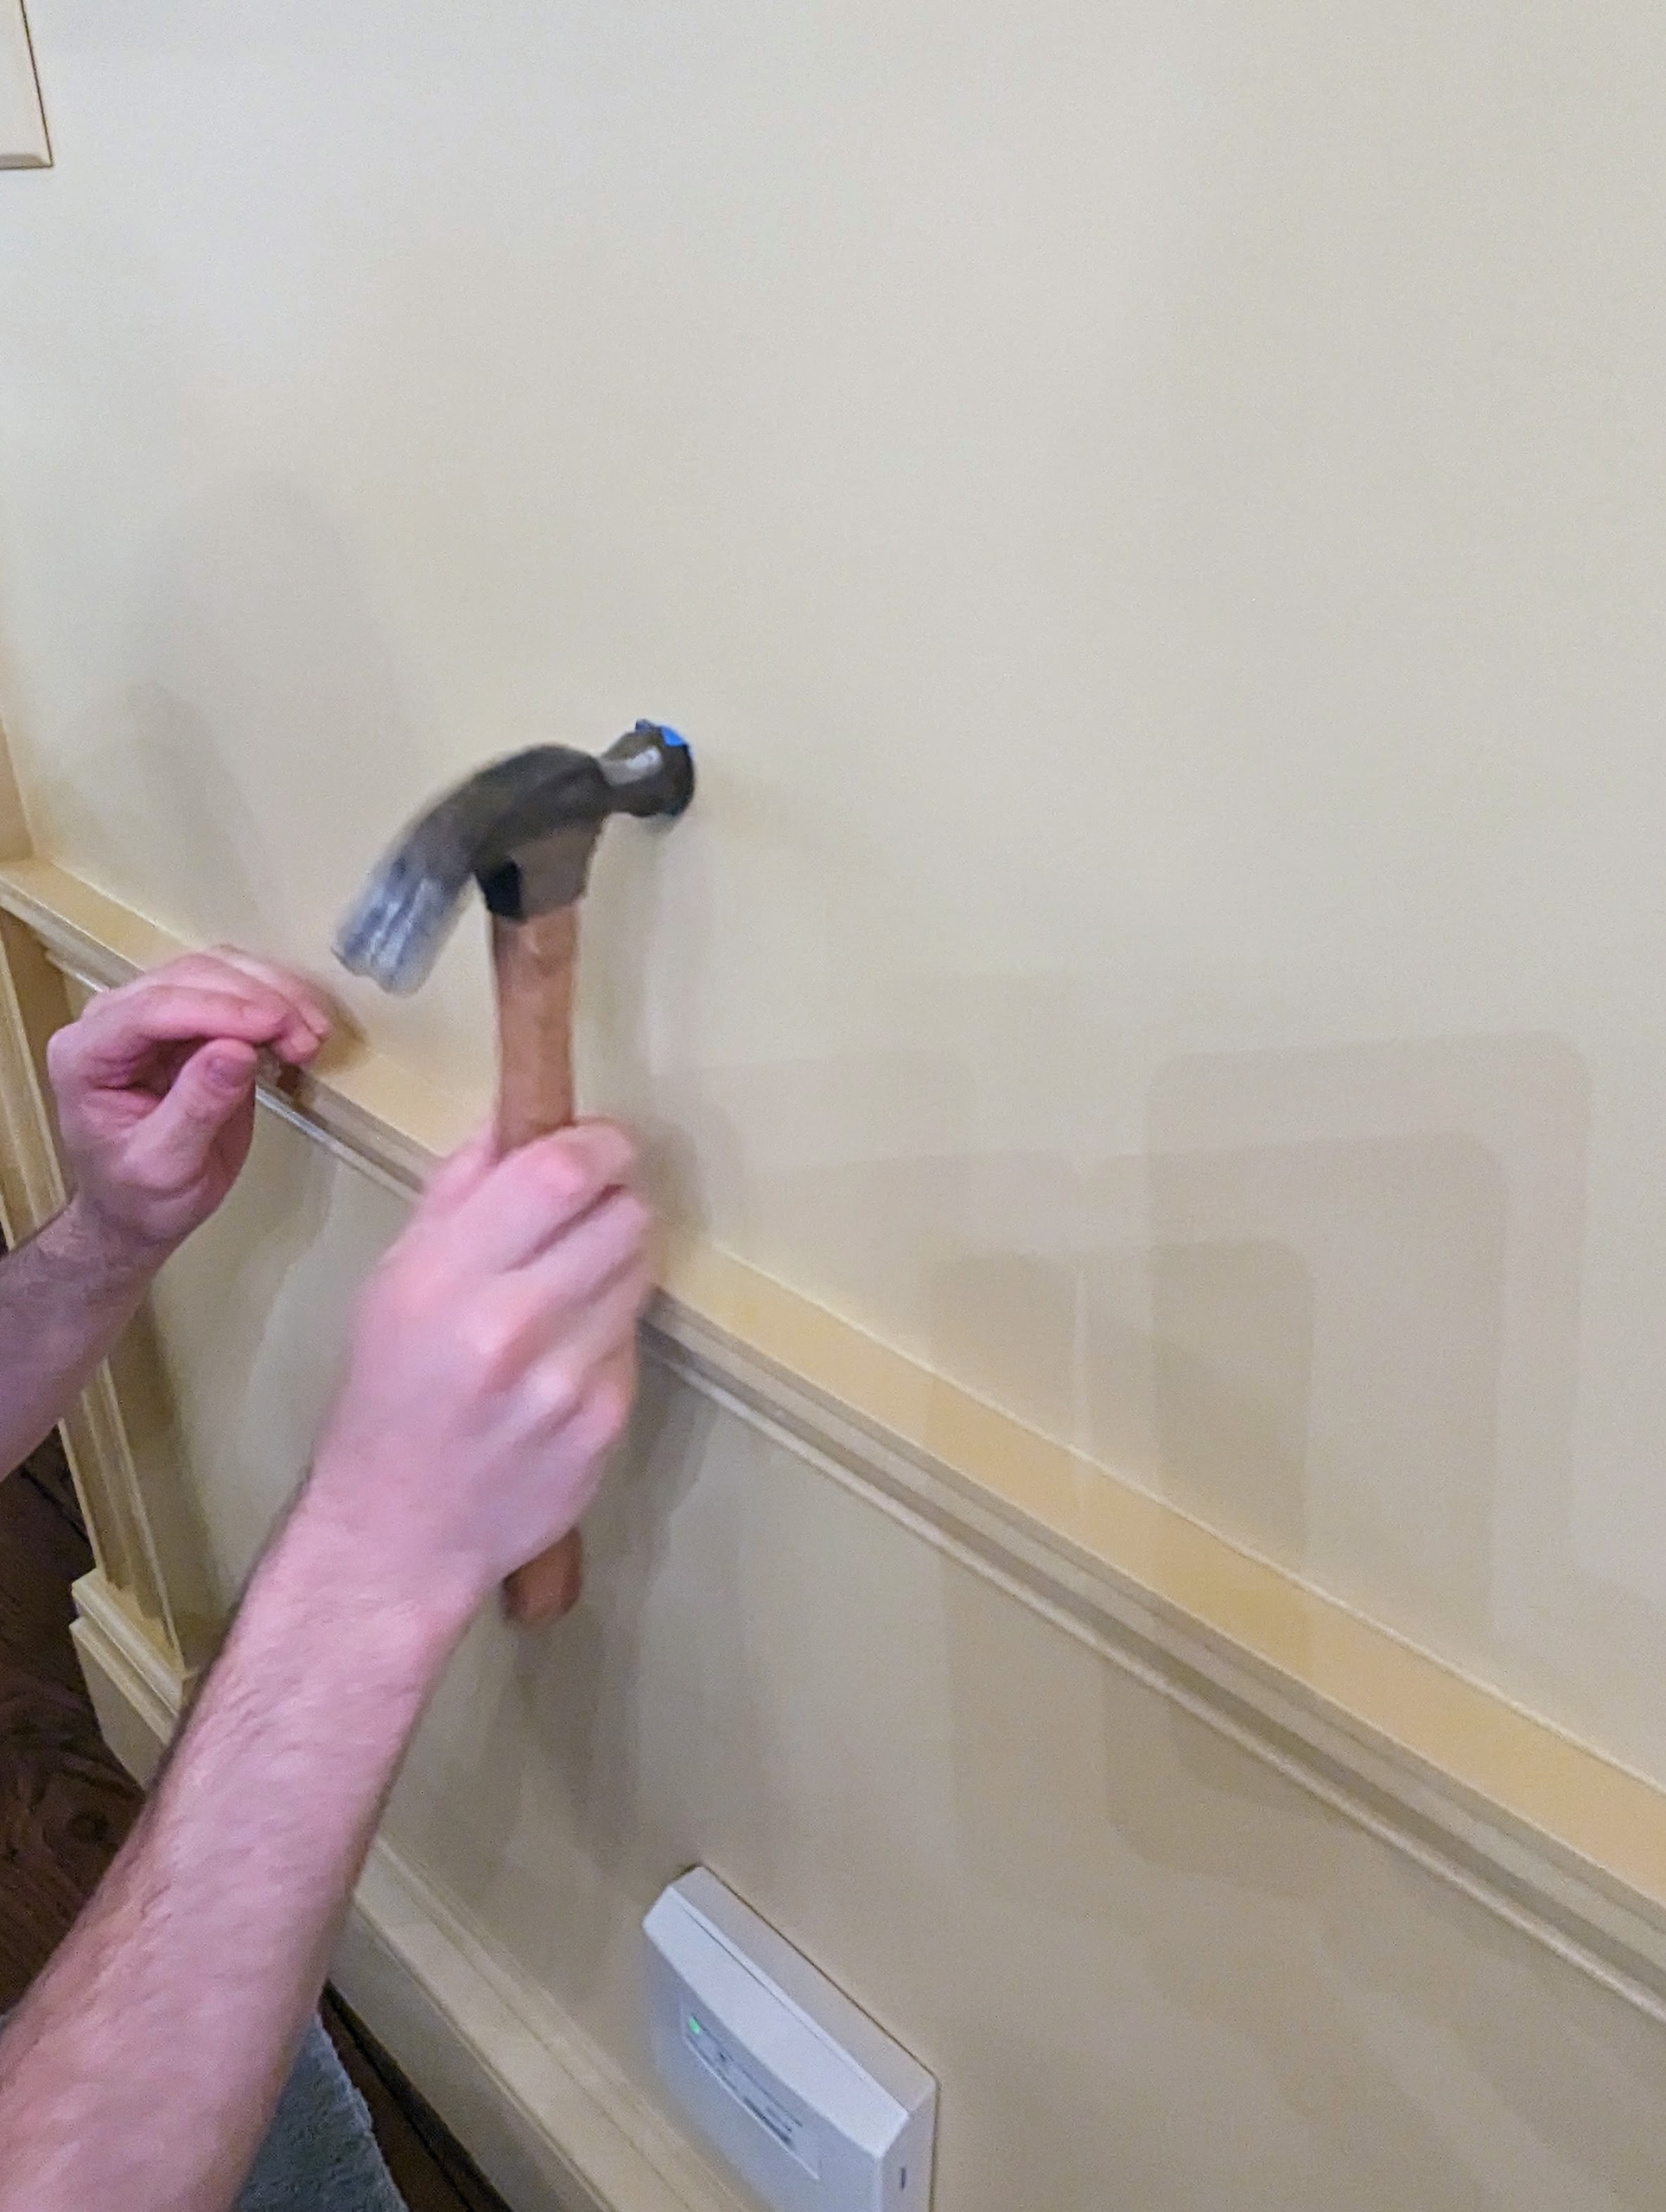
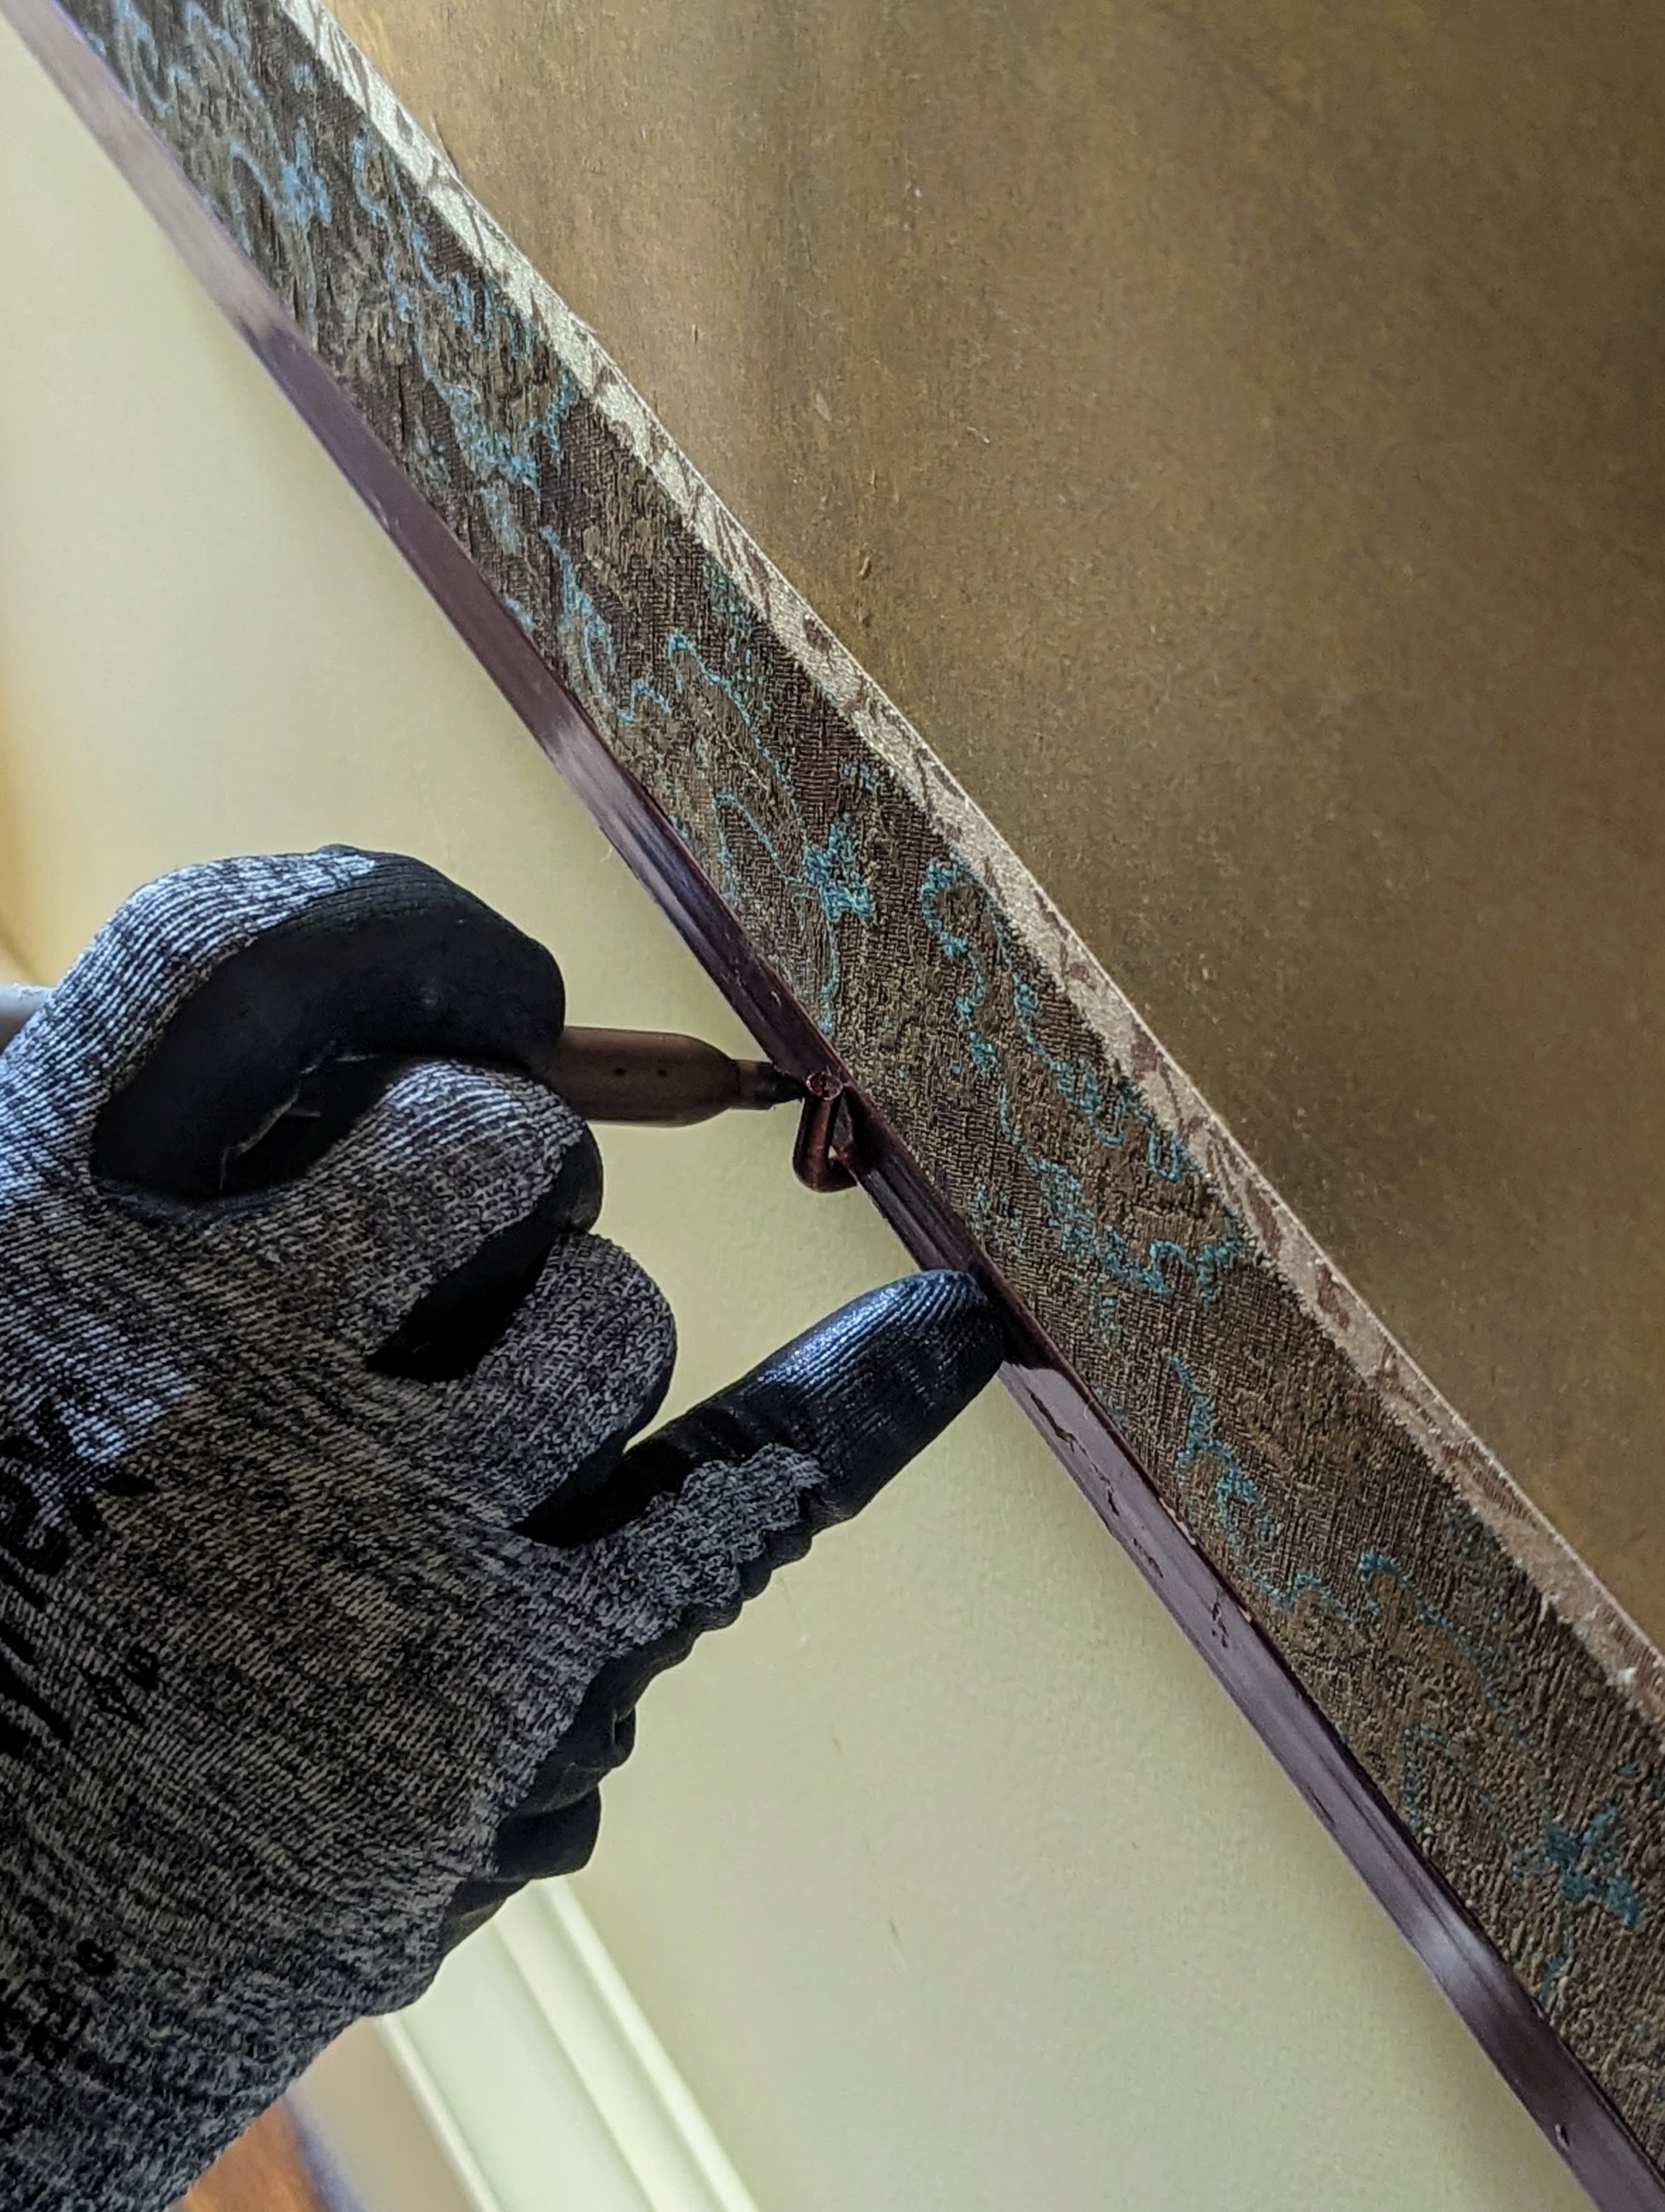
Then he hammers in a plastic nail anchor. Blue painter’s tape is also placed on the head of the hammer to prevent any marking on the wall.
Next, L-screws are installed – one under each panel to keep it up. Another row above the panels will keep them from tipping forward.
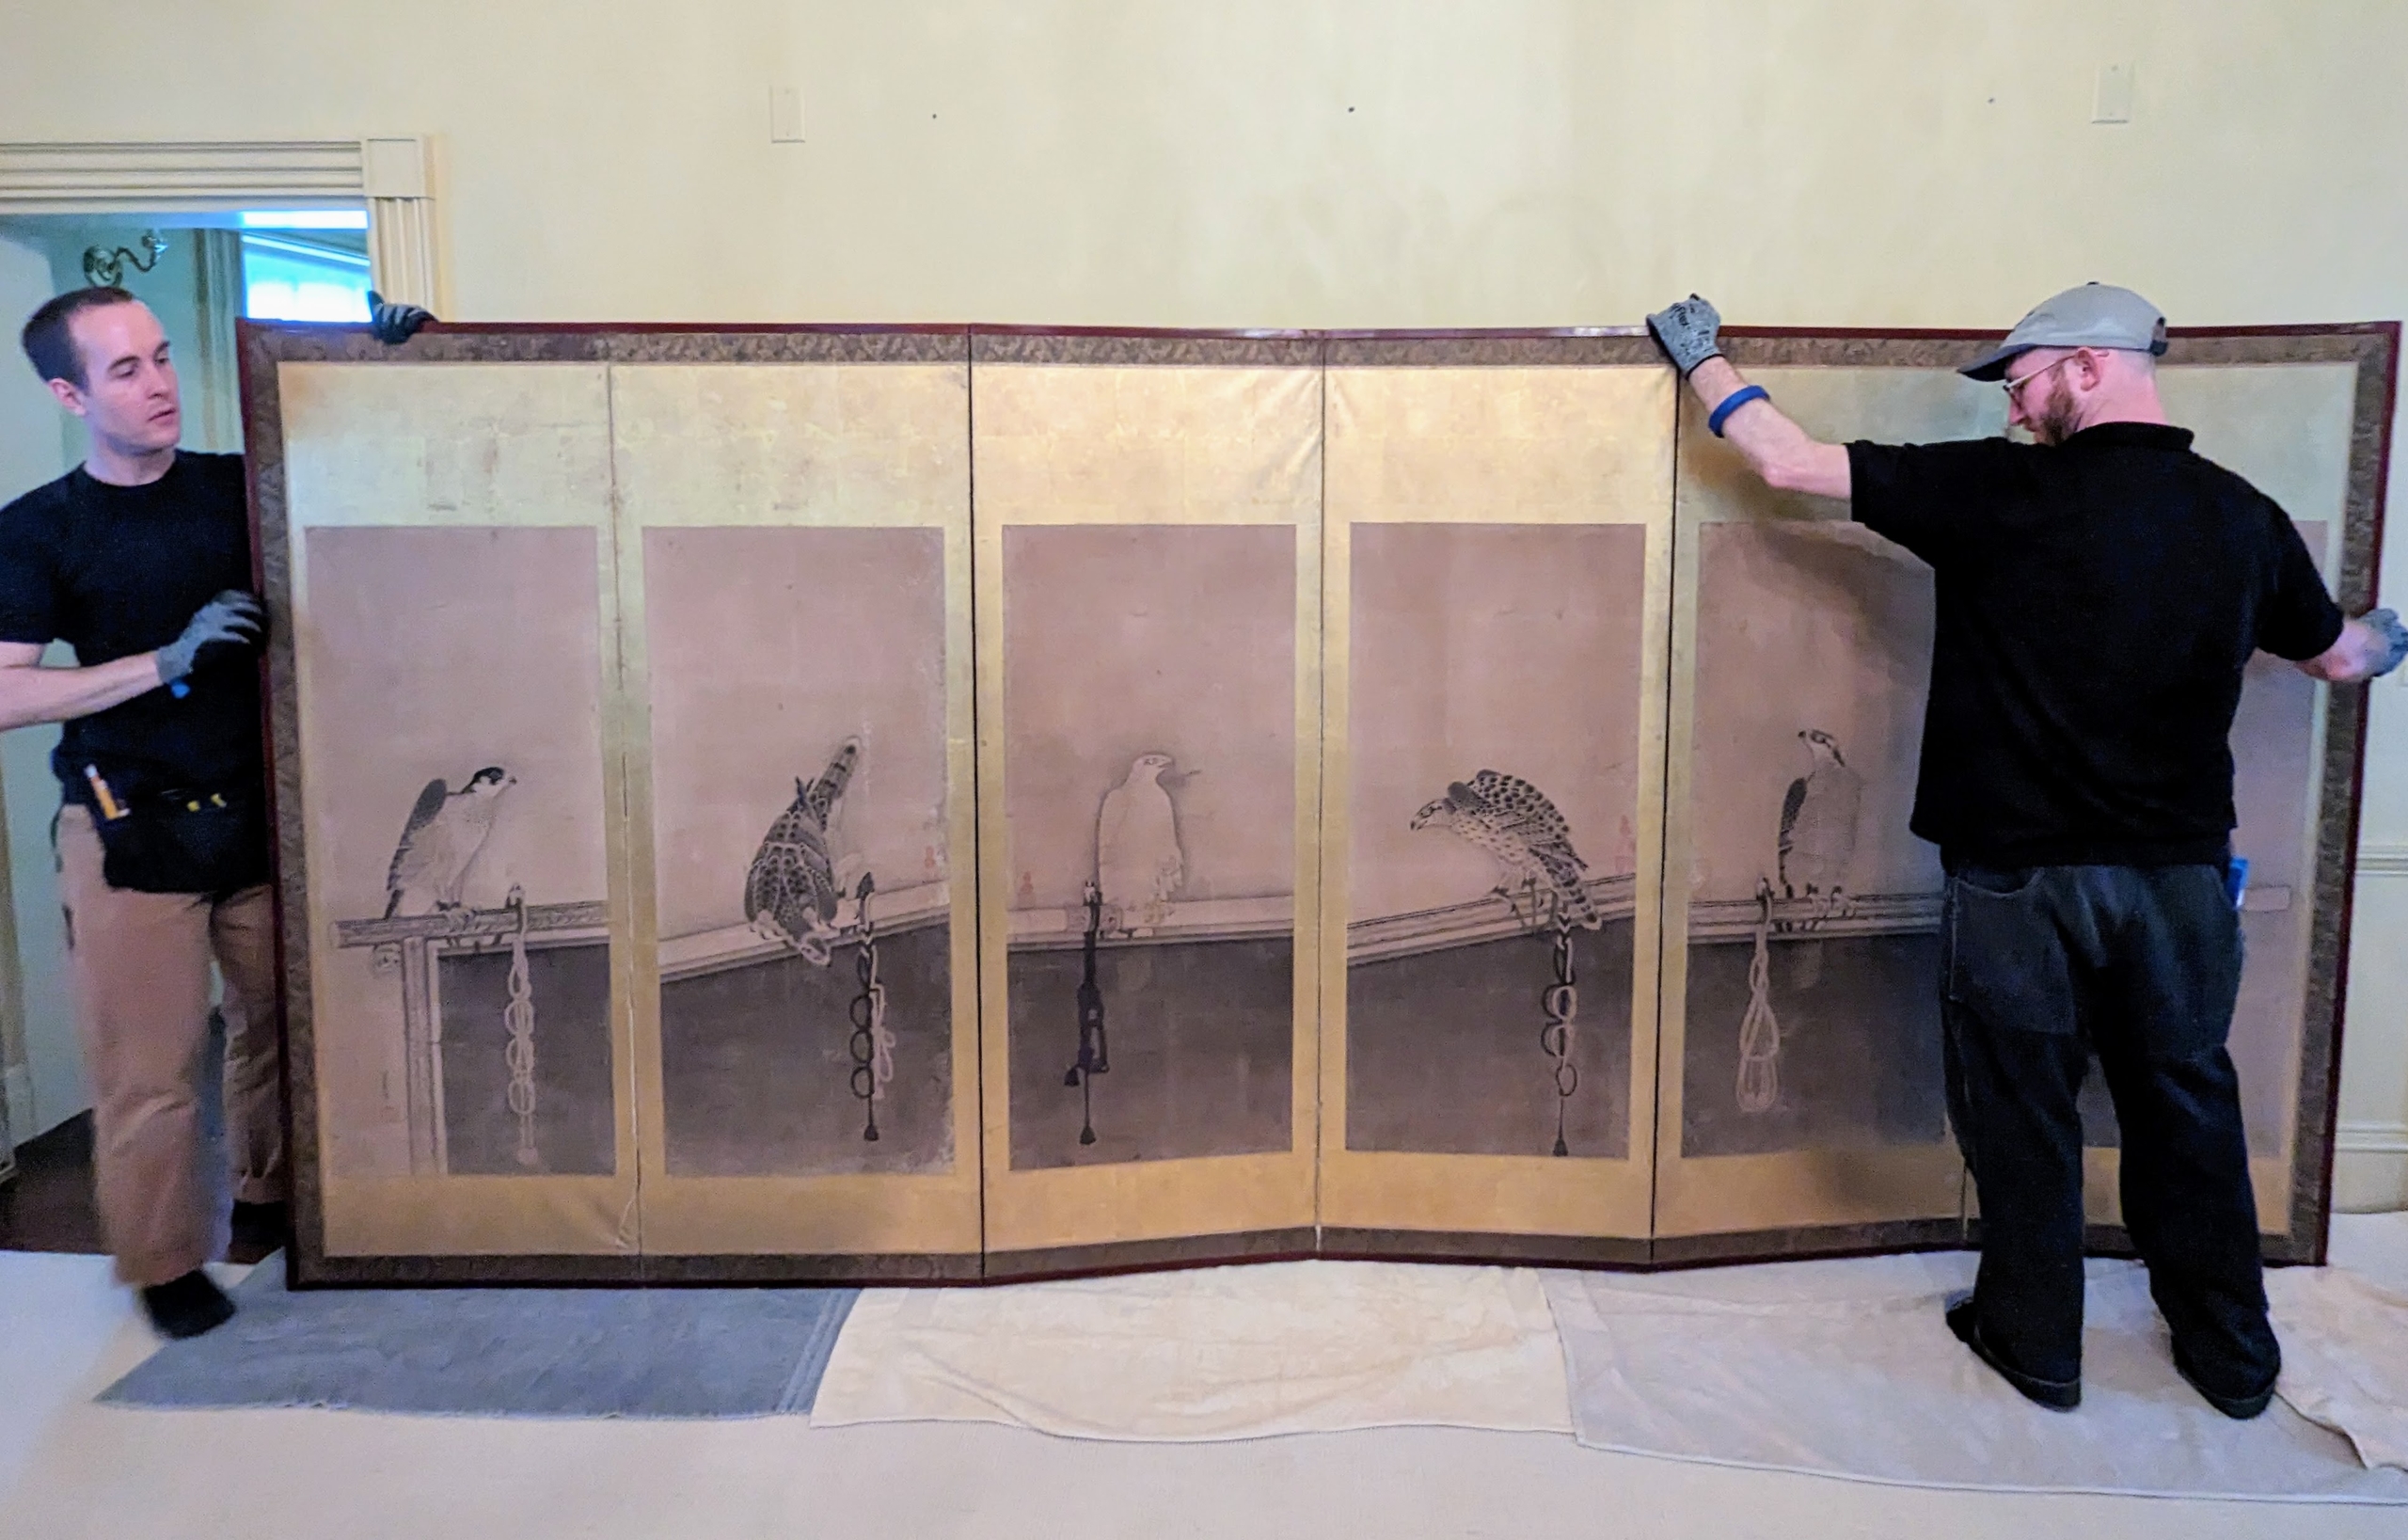
The first one to go up is this screen in the foyer. All four gently pick it up and put it in place. The team always wears gloves while handling precious art work, so there are no finger prints left behind.
Once the screen is up, the team makes sure it is flush against the wall and perfectly level.
Here is the other screen also up on the wall. The team then checks it for level – everything is always checked and double-checked for straightness.
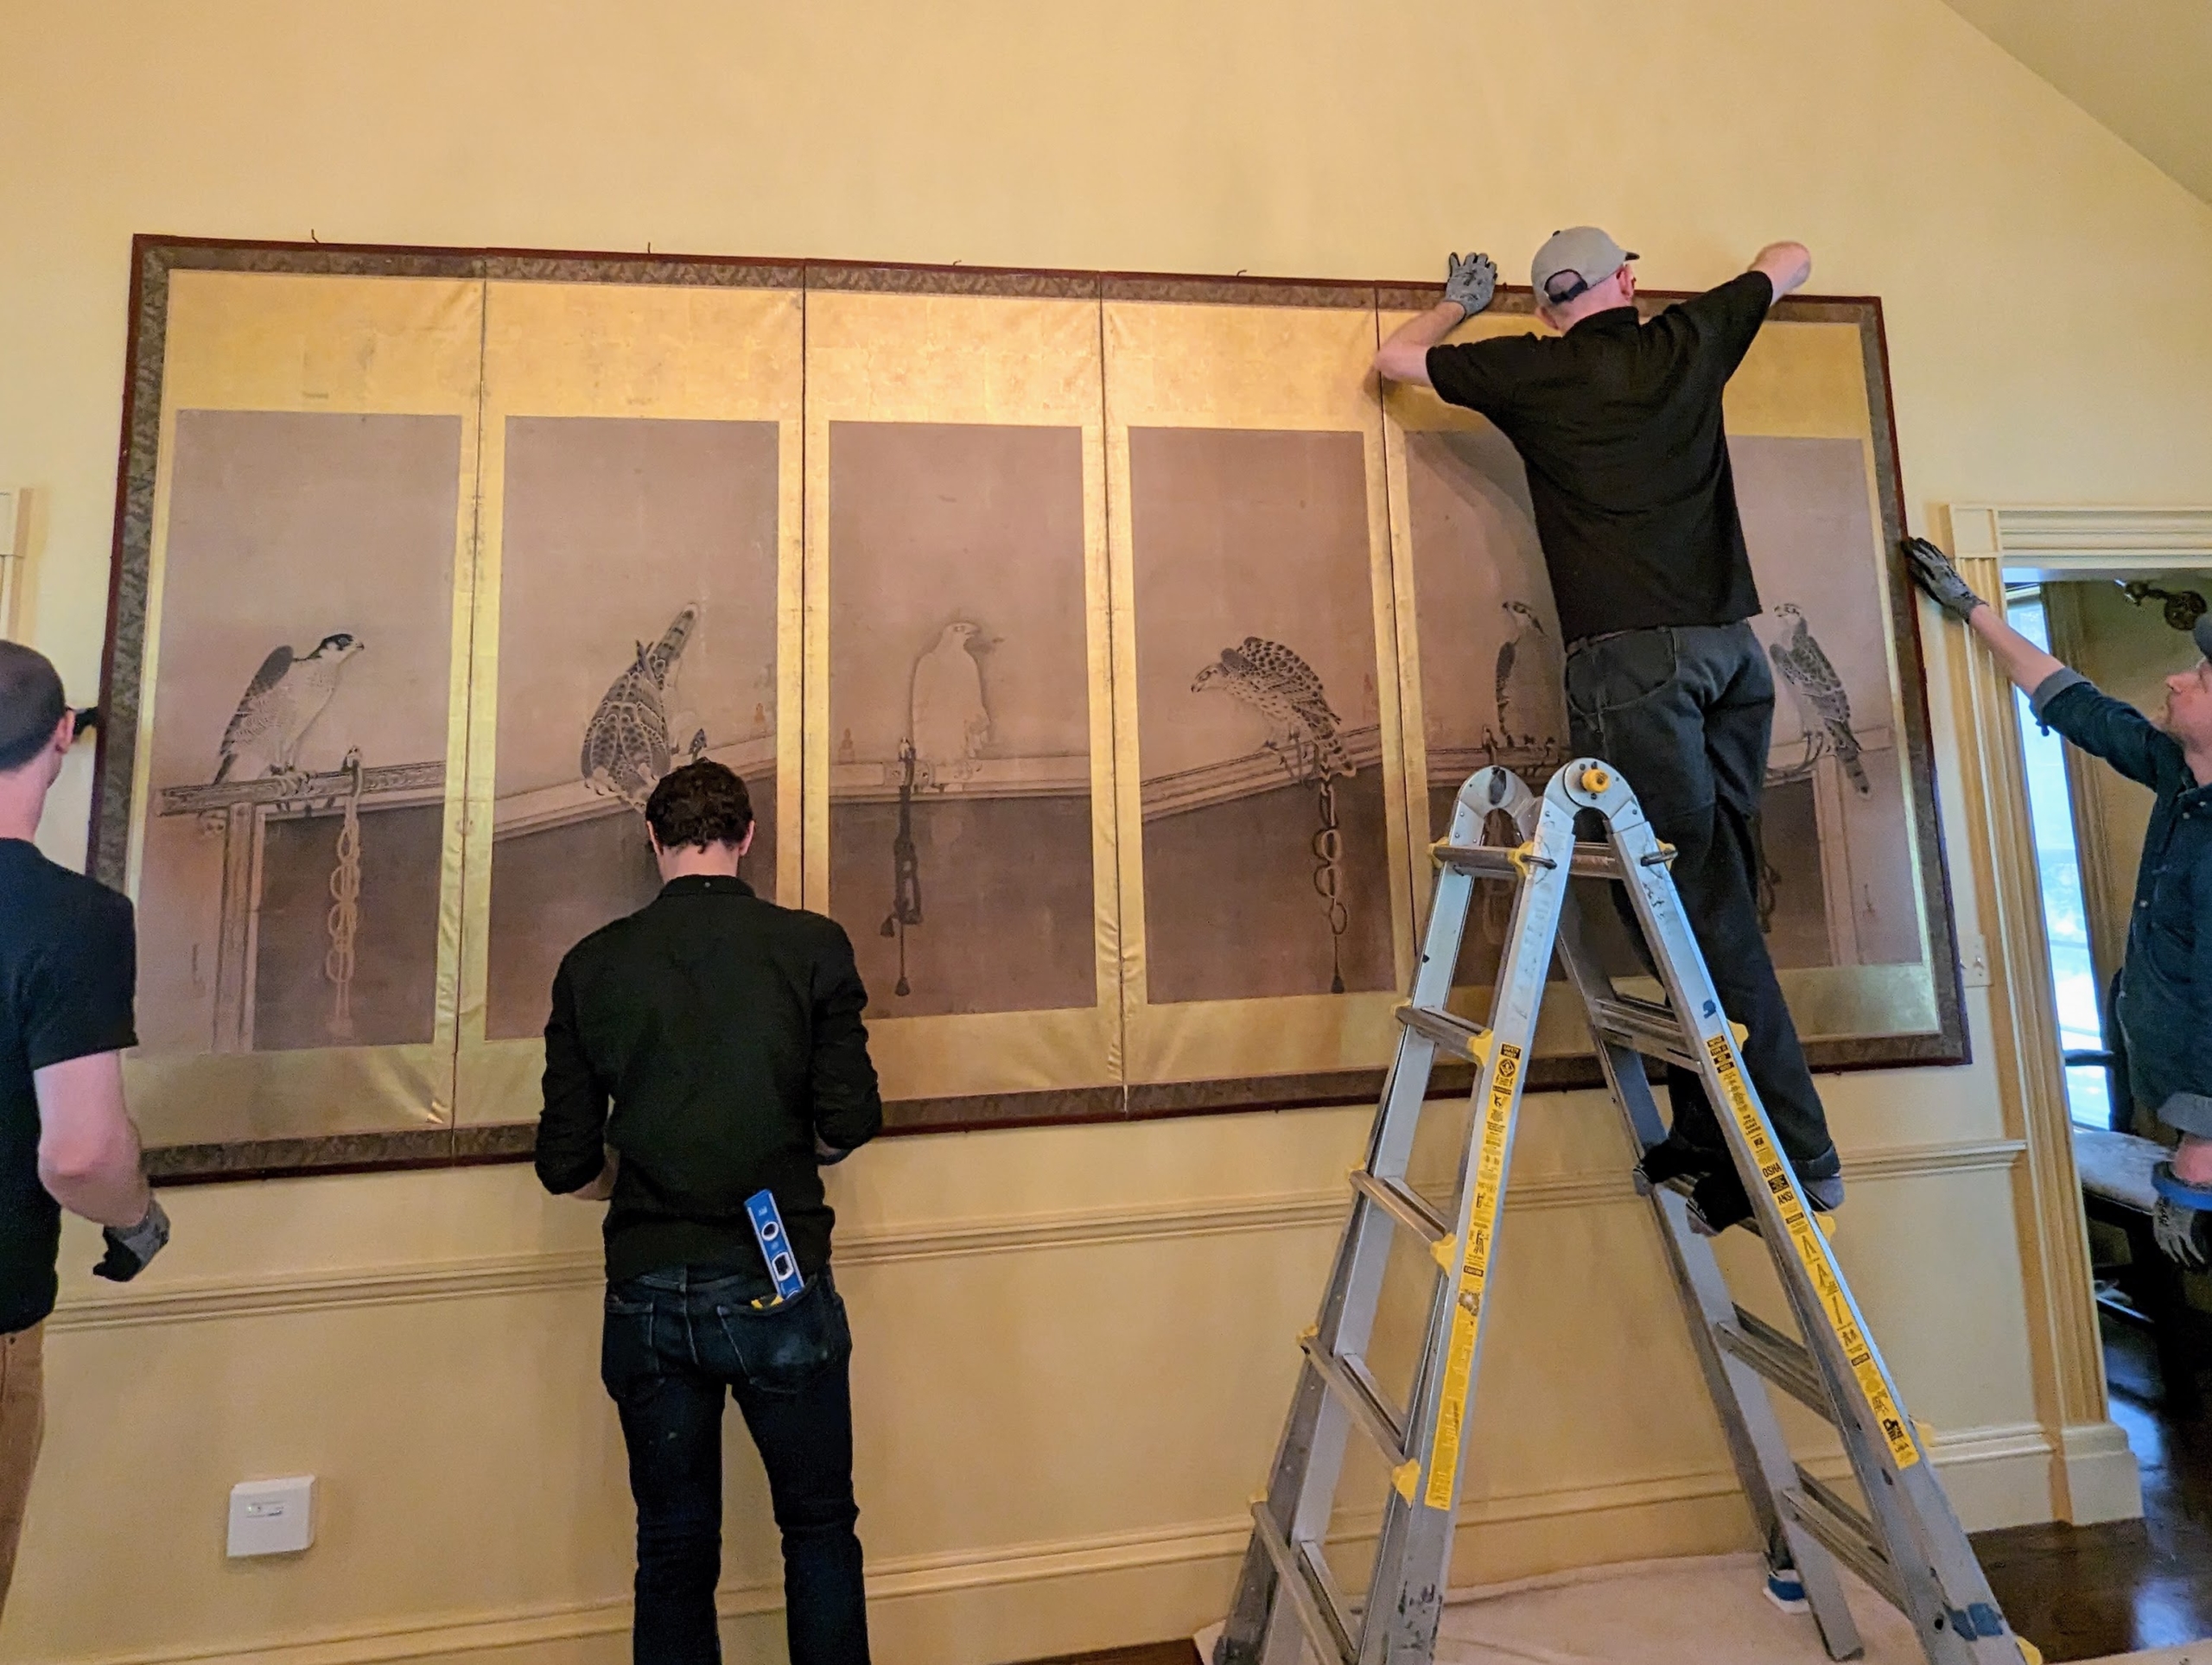
Adam uses a marker to disguise the L-screws. They match perfectly with the frame.
Here is the screen in my parlor. These birds are tethered to perches. The artist, Soga Nichokuan, specialized in avian subjects, particularly birds of prey. His father, Soga Chokuan, was also a talented painter.
Such representations painted on large screens or panels made impressive backdrops in homes and temples. These screens were made in the first half of the 17th century. The gold looks so perfect against the walls.
I am so pleased with how great they look in both my entrance hall and in this room. Thanks Dave, Alex, Adam, and Soren from ILevel. You are true experts in your field.
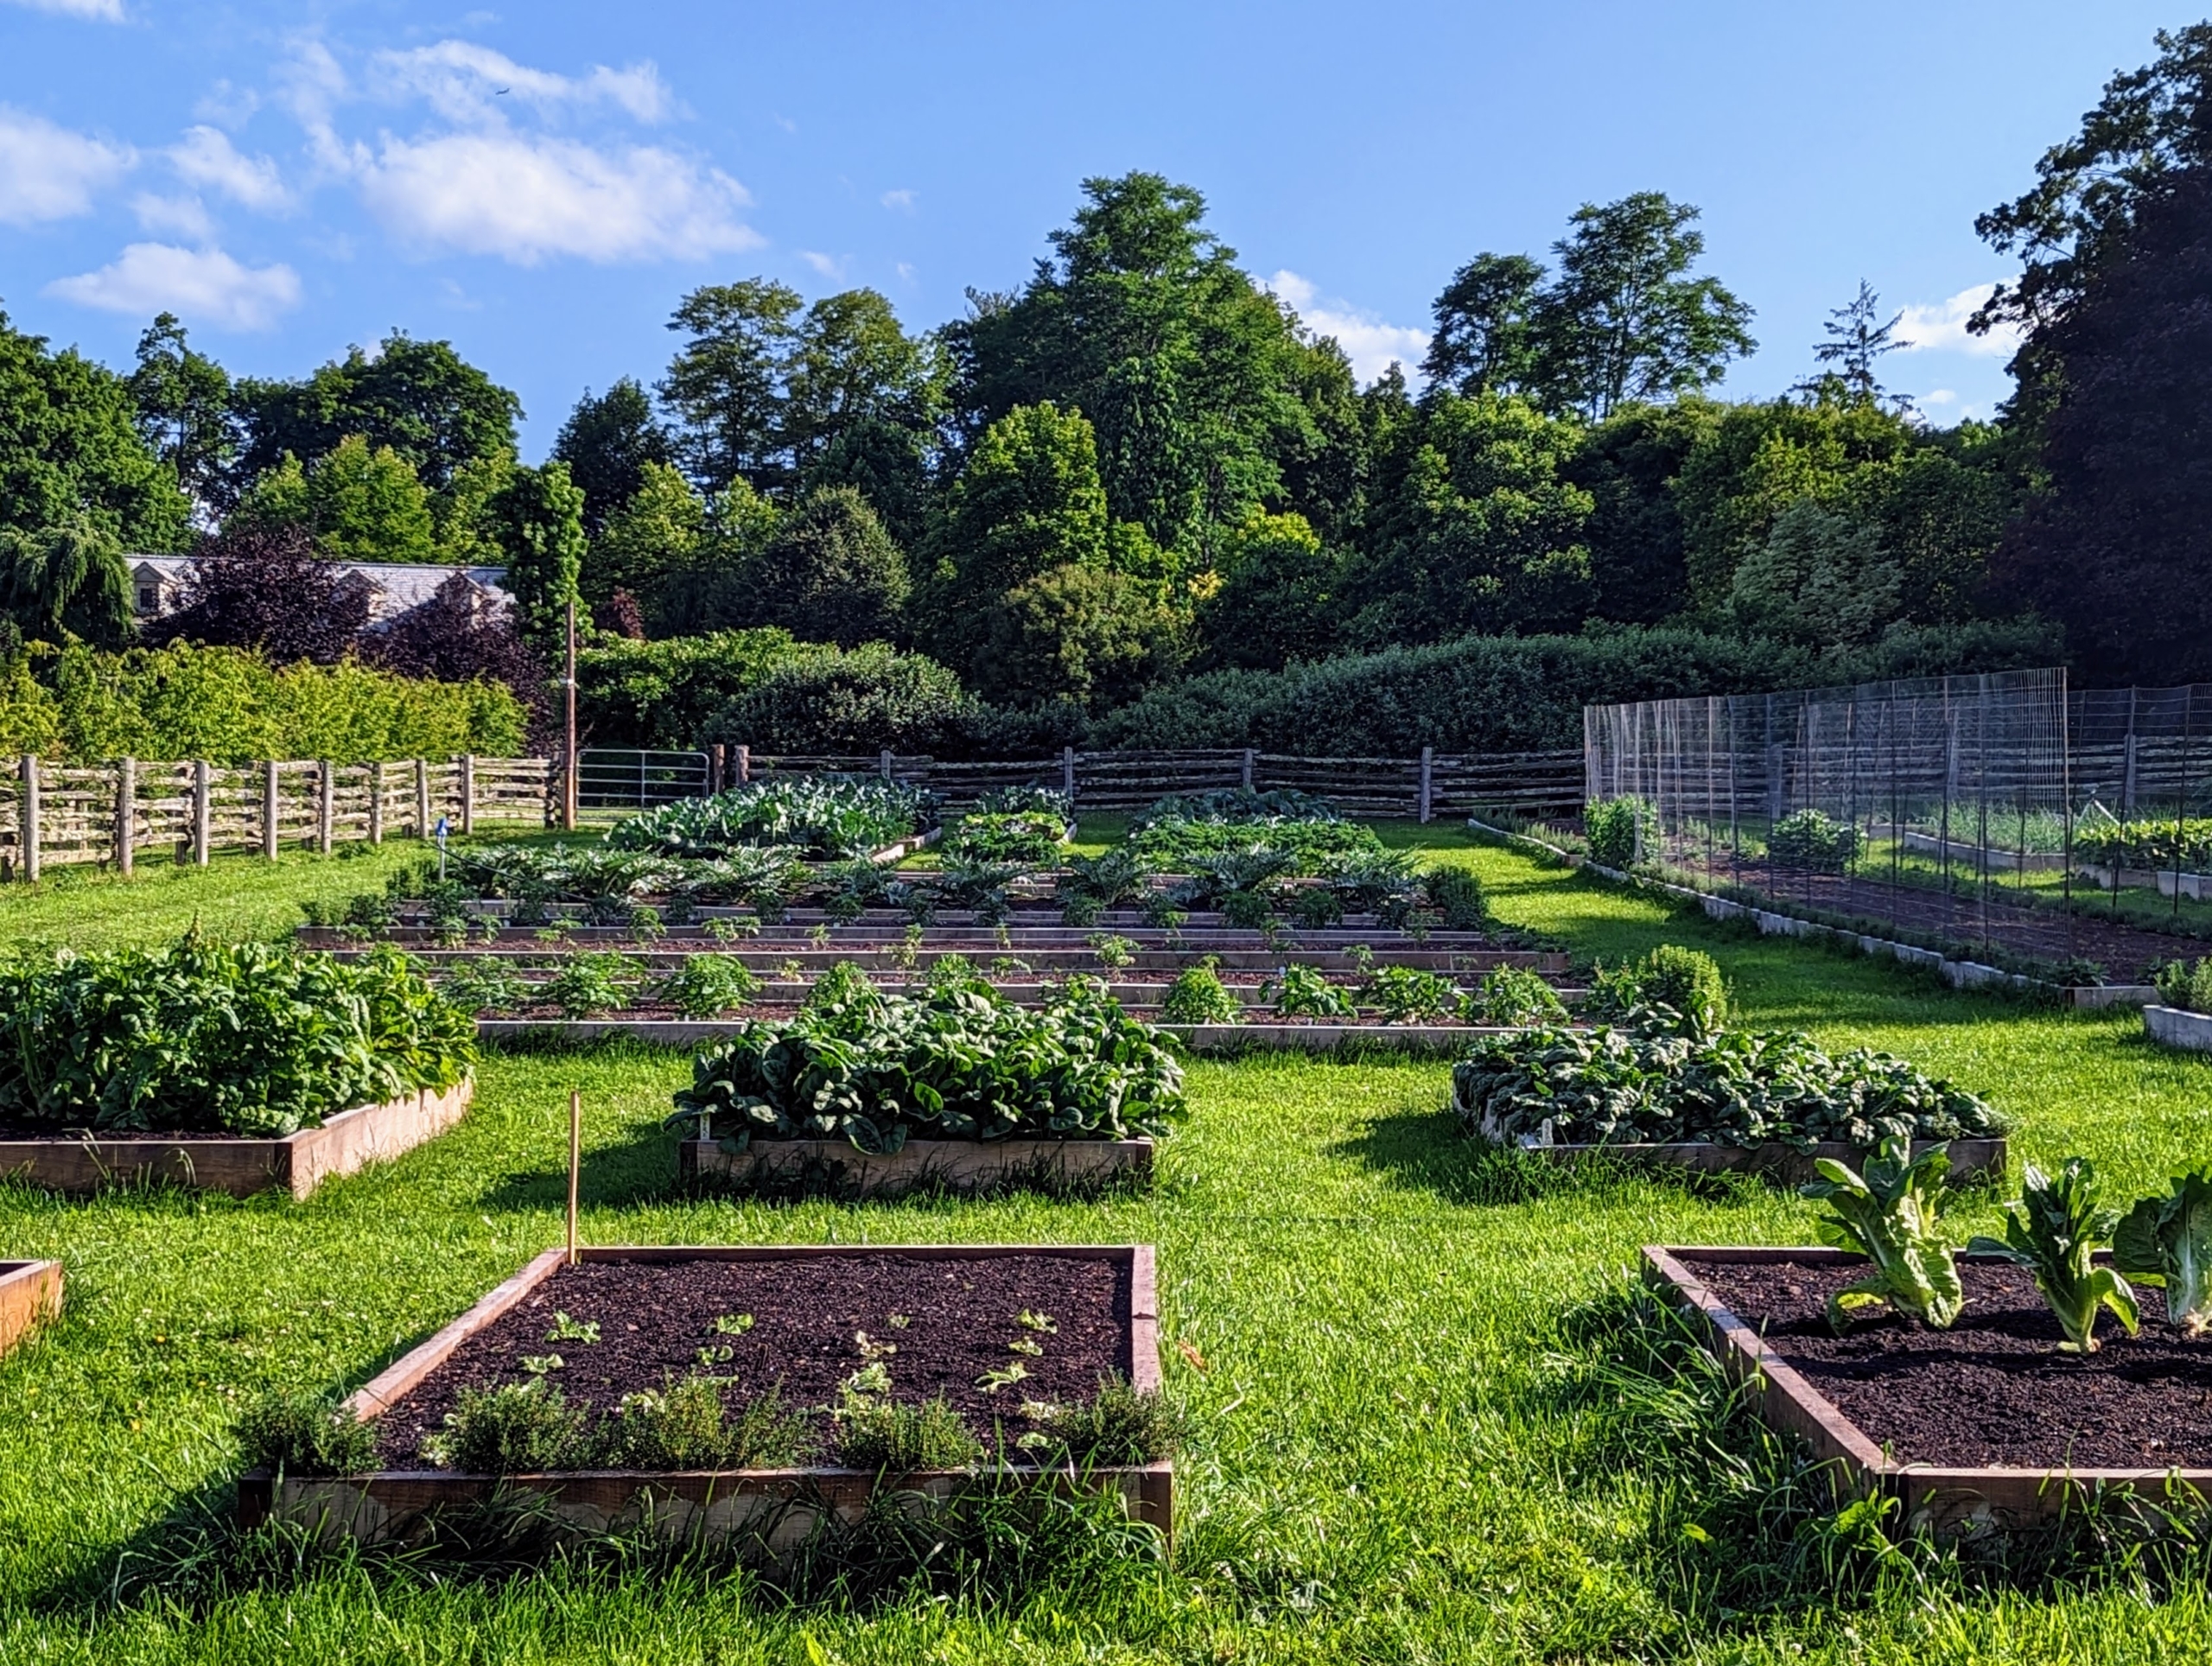
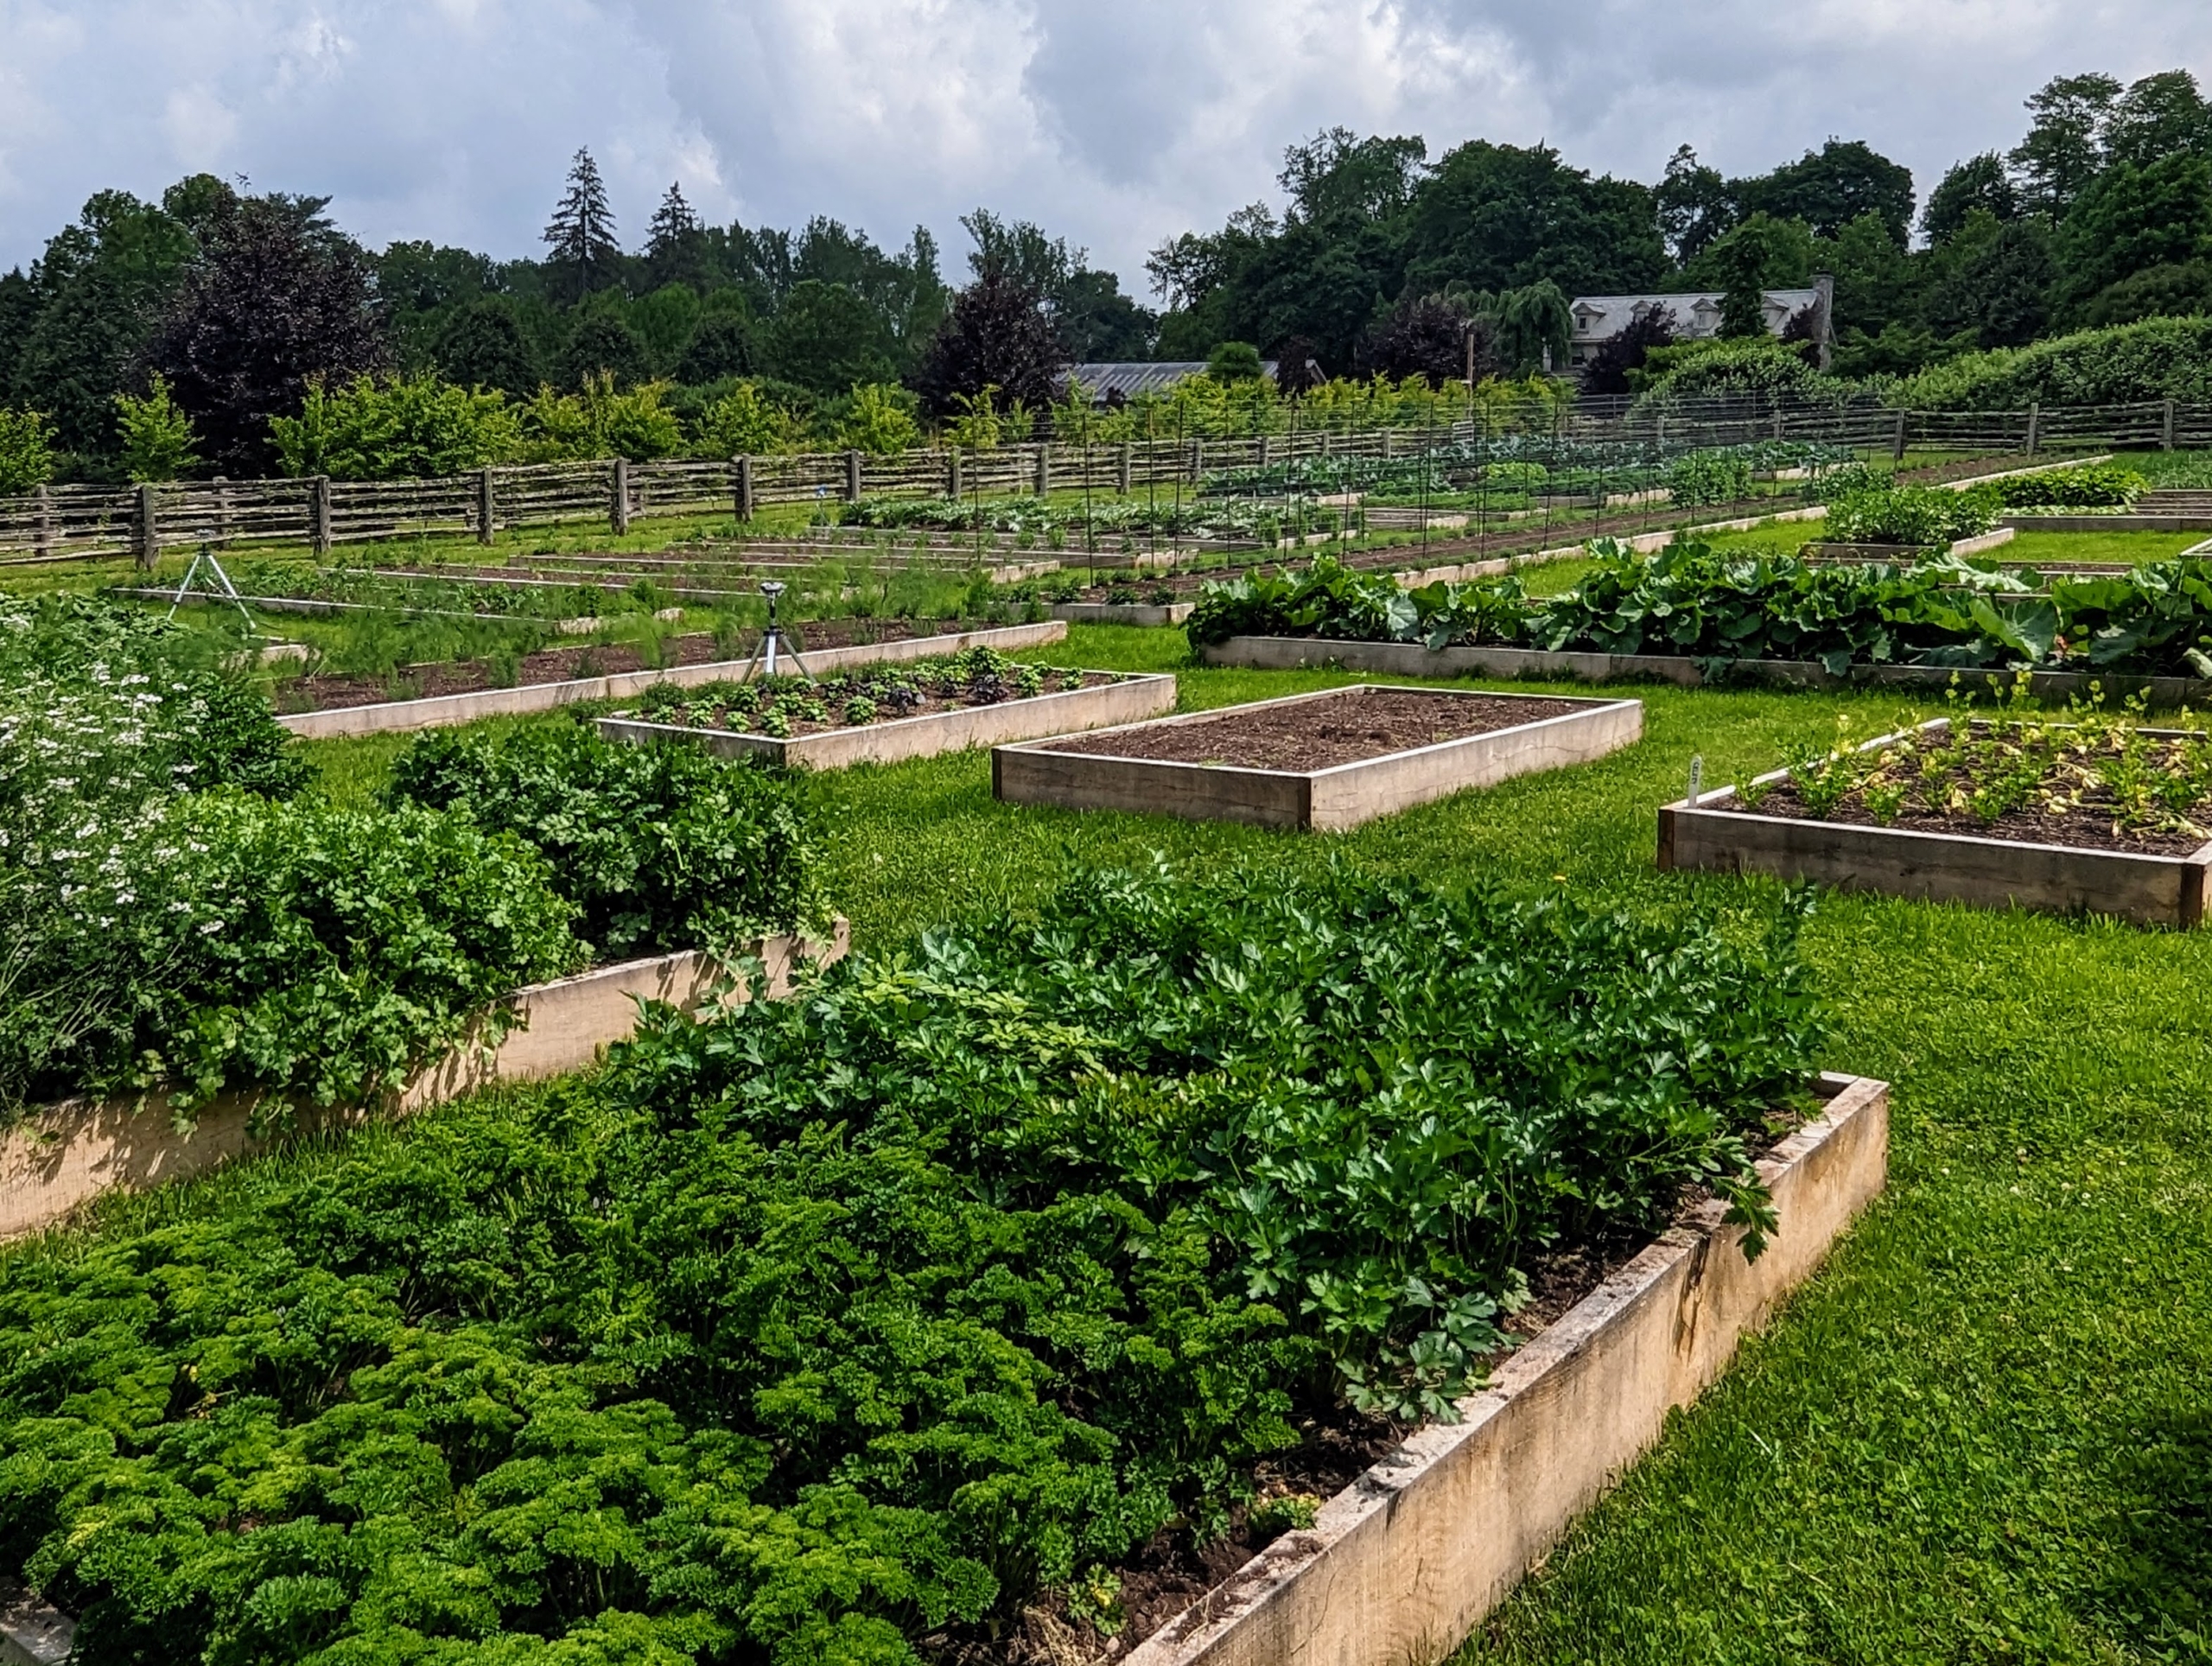
My large new vegetable garden is so much fun to visit right now because of all the growing produce - there’s something new popping up every day.
This garden, which we started planting in April, is filled with so many wonderful crops - tomatoes, spinach, brassicas, carrots, beets, Swiss chard, sweet and hot peppers, onions, leeks, shallots, potatoes, artichokes, asparagus, all sorts of herbs, and more. I've already picked a few lettuces and cabbages, and every one has been delicious. We always plant in succession, meaning we seed crops at intervals of seven to 21 days in order to maintain a consistent supply of harvestable produce throughout the season. I can't wait for our first big bounty.
Enjoy these photos.
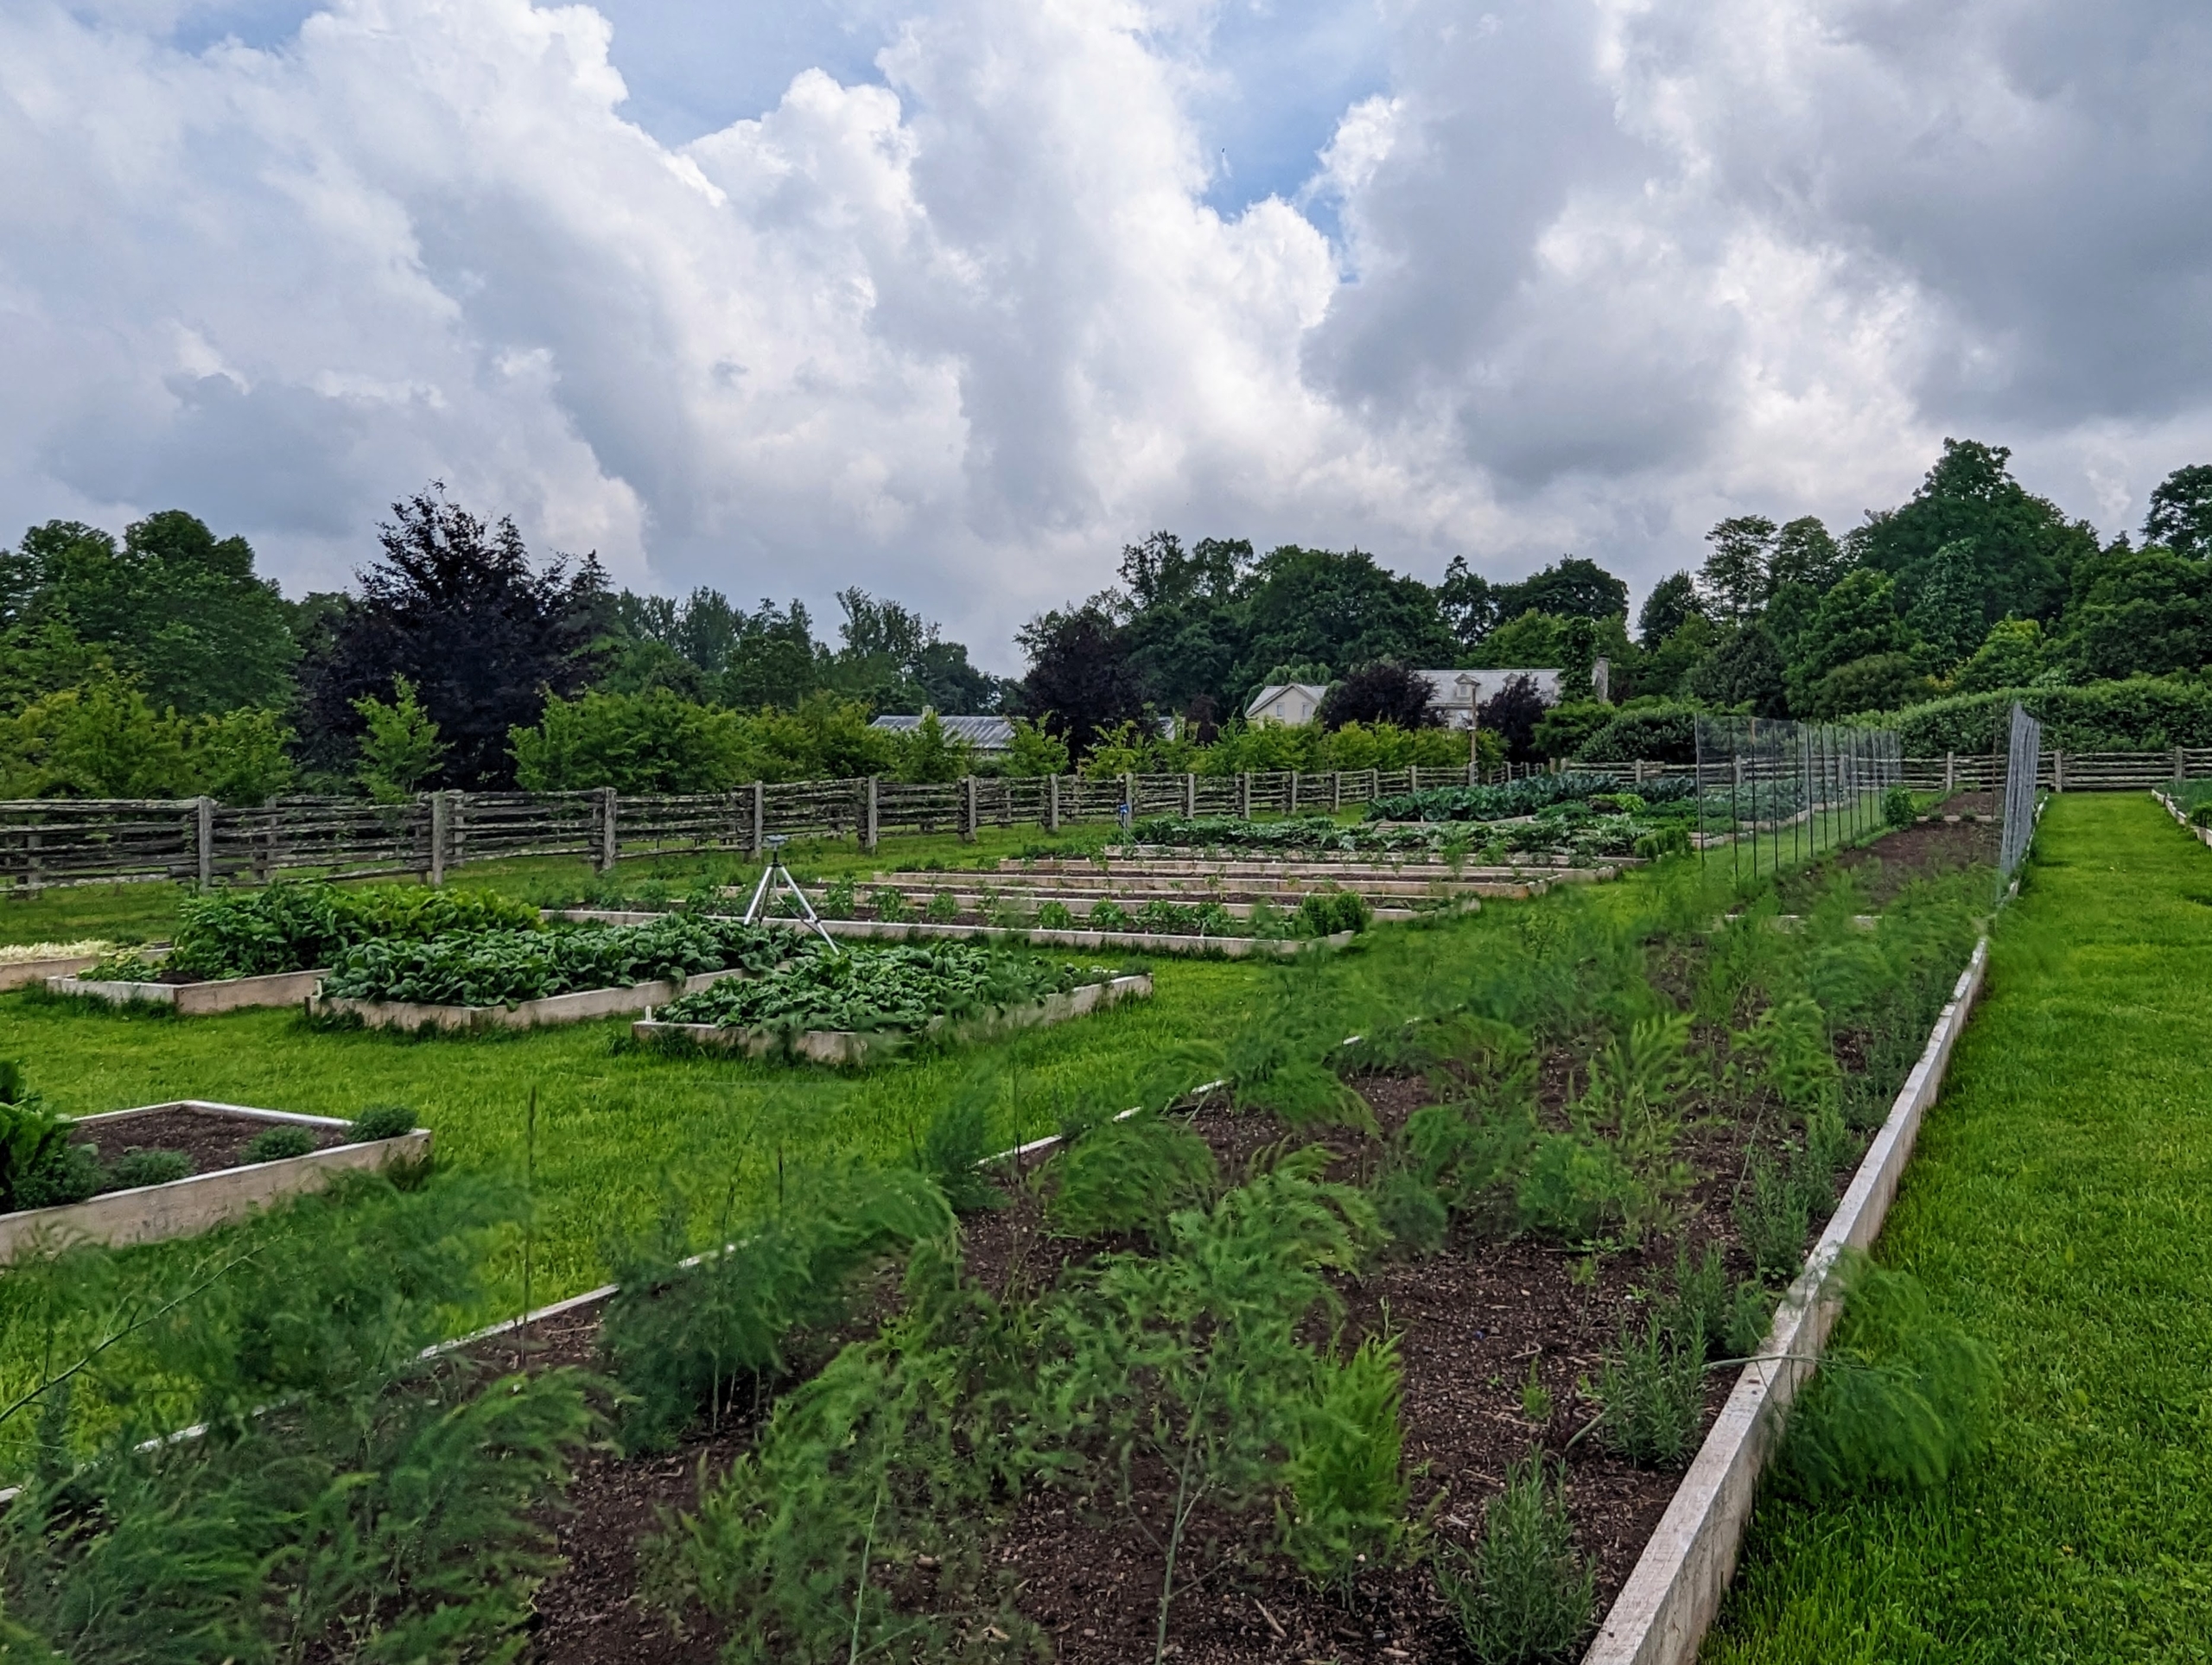
What a difference a couple of months make. This garden is looking so beautiful. And I love that it is so close to my Winter House. It’s nice to be able to see all the crops we’ve planted over the last several weeks – they are all thriving.
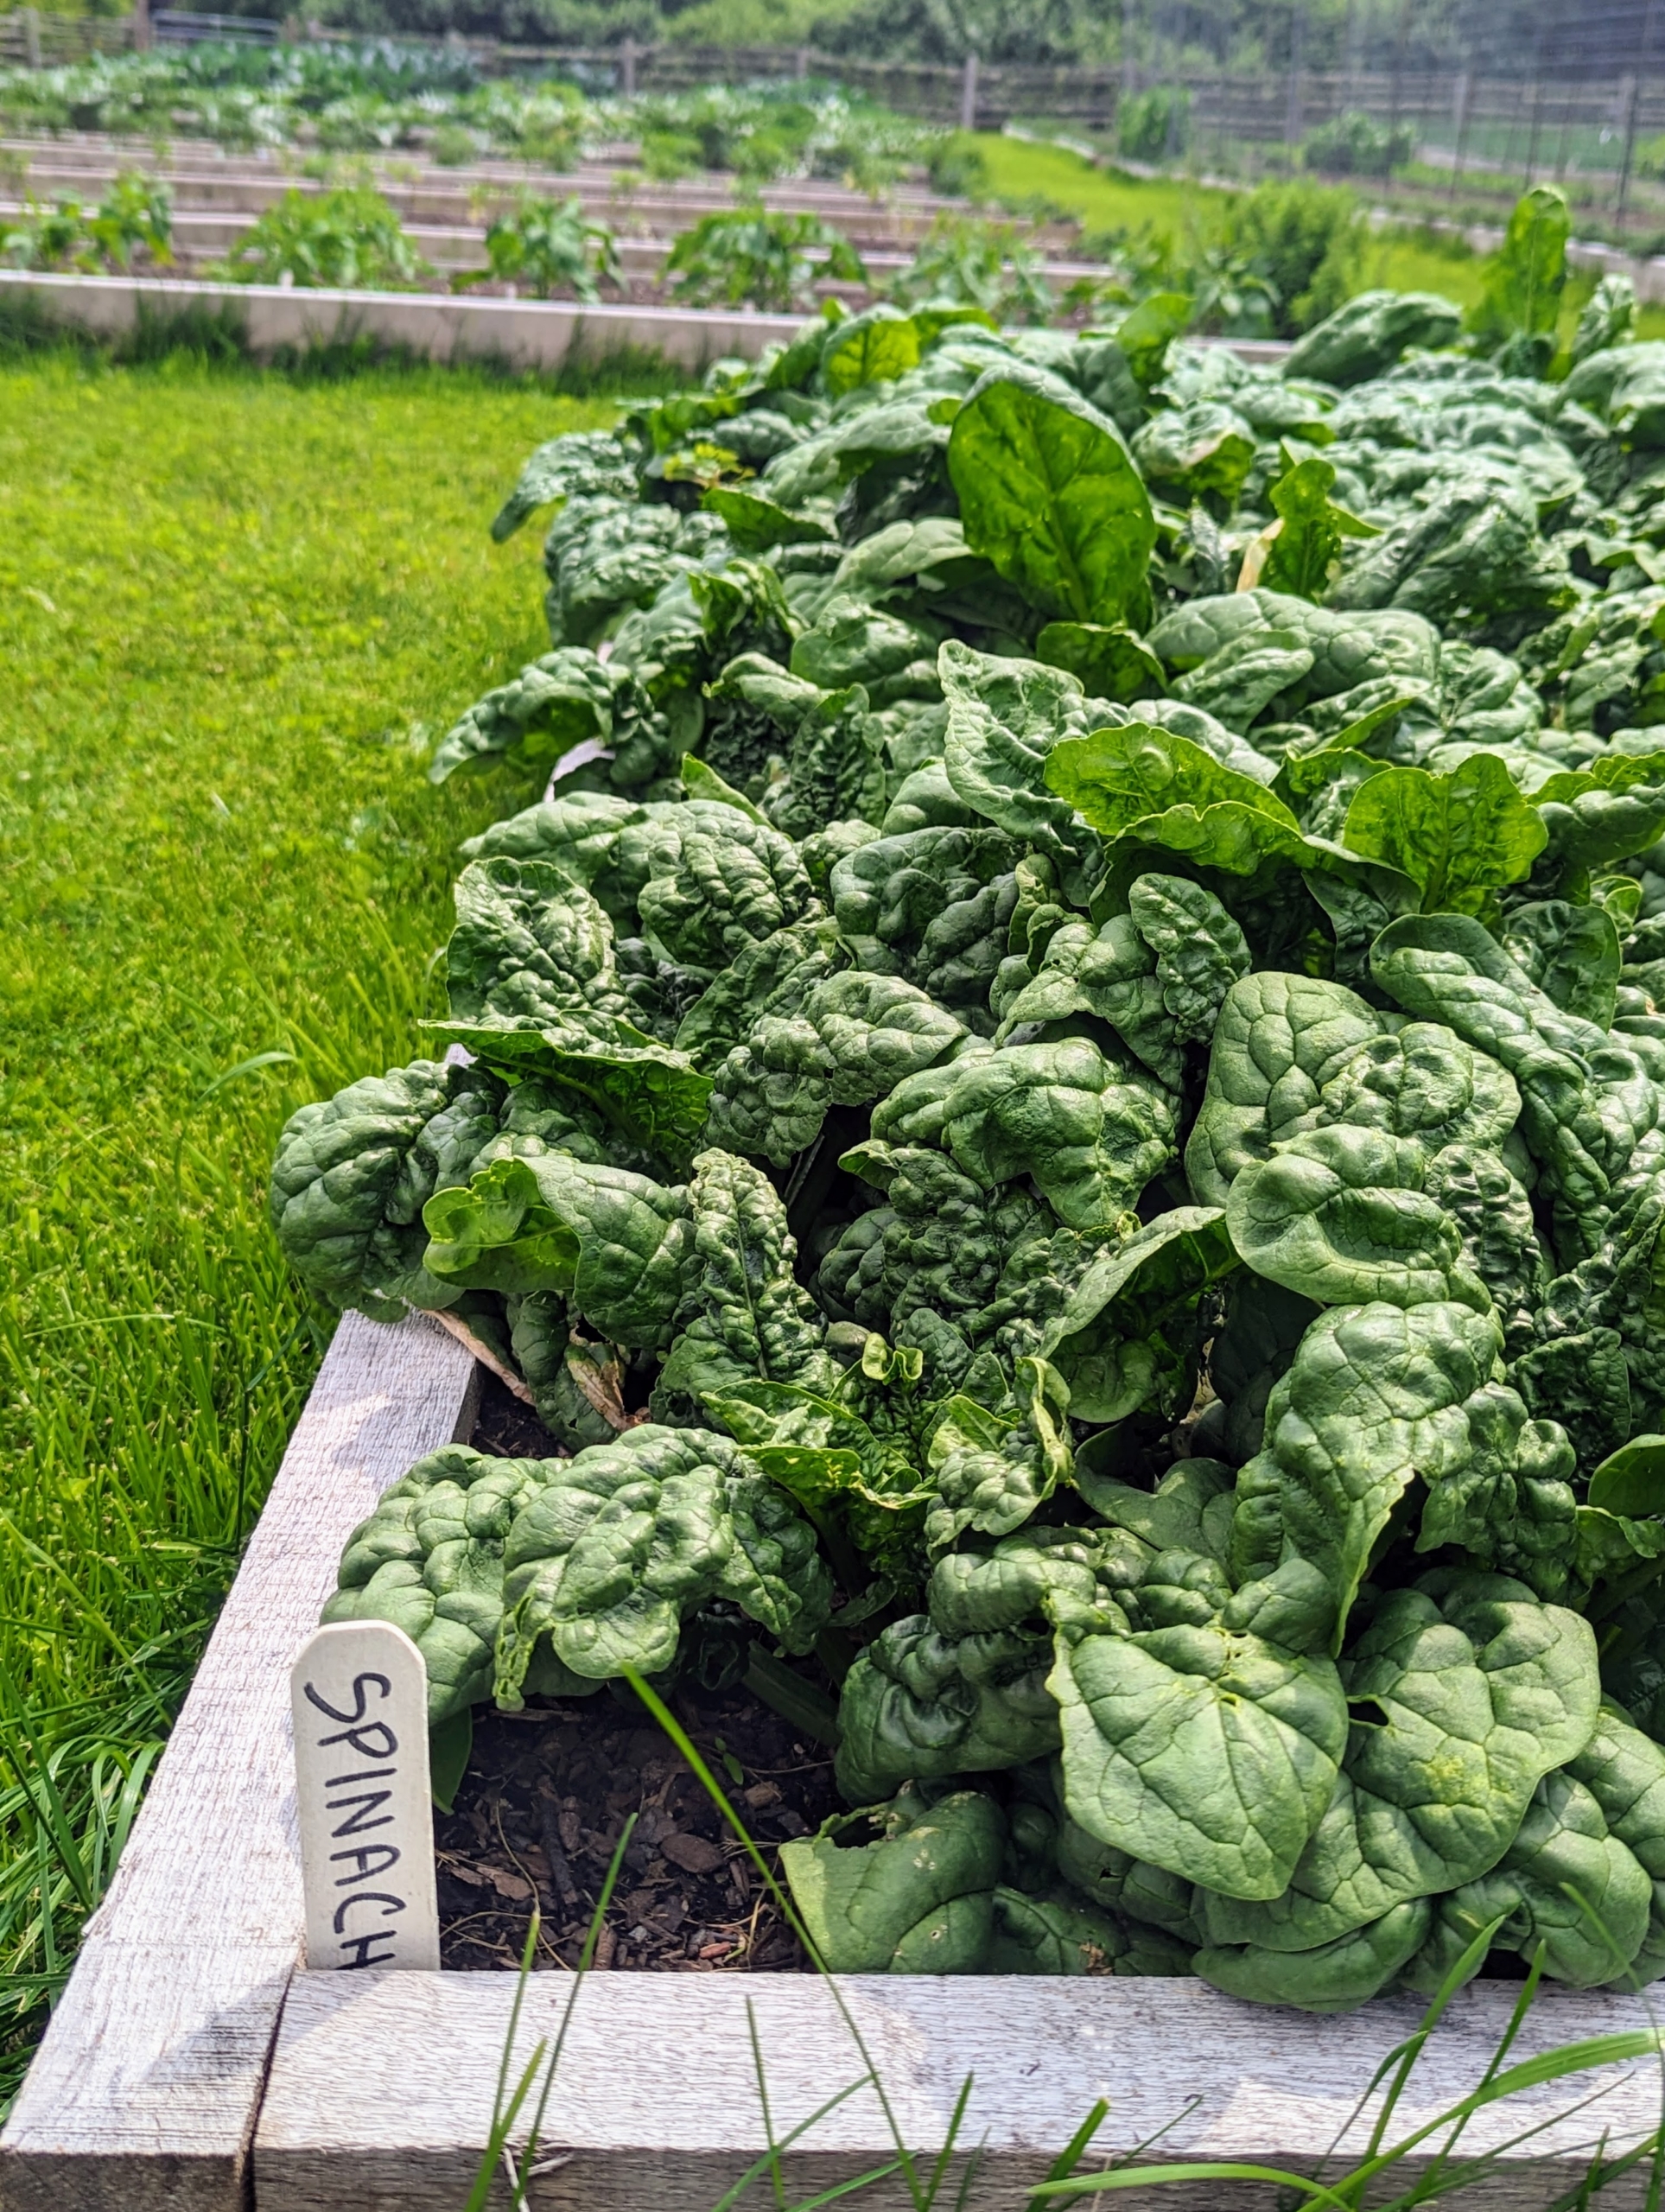
In one of the first beds is our spinach. Look at all the spinach we’re growing this year. The leaves are so beautiful and so very tender and tasty. So great for my morning green juice.
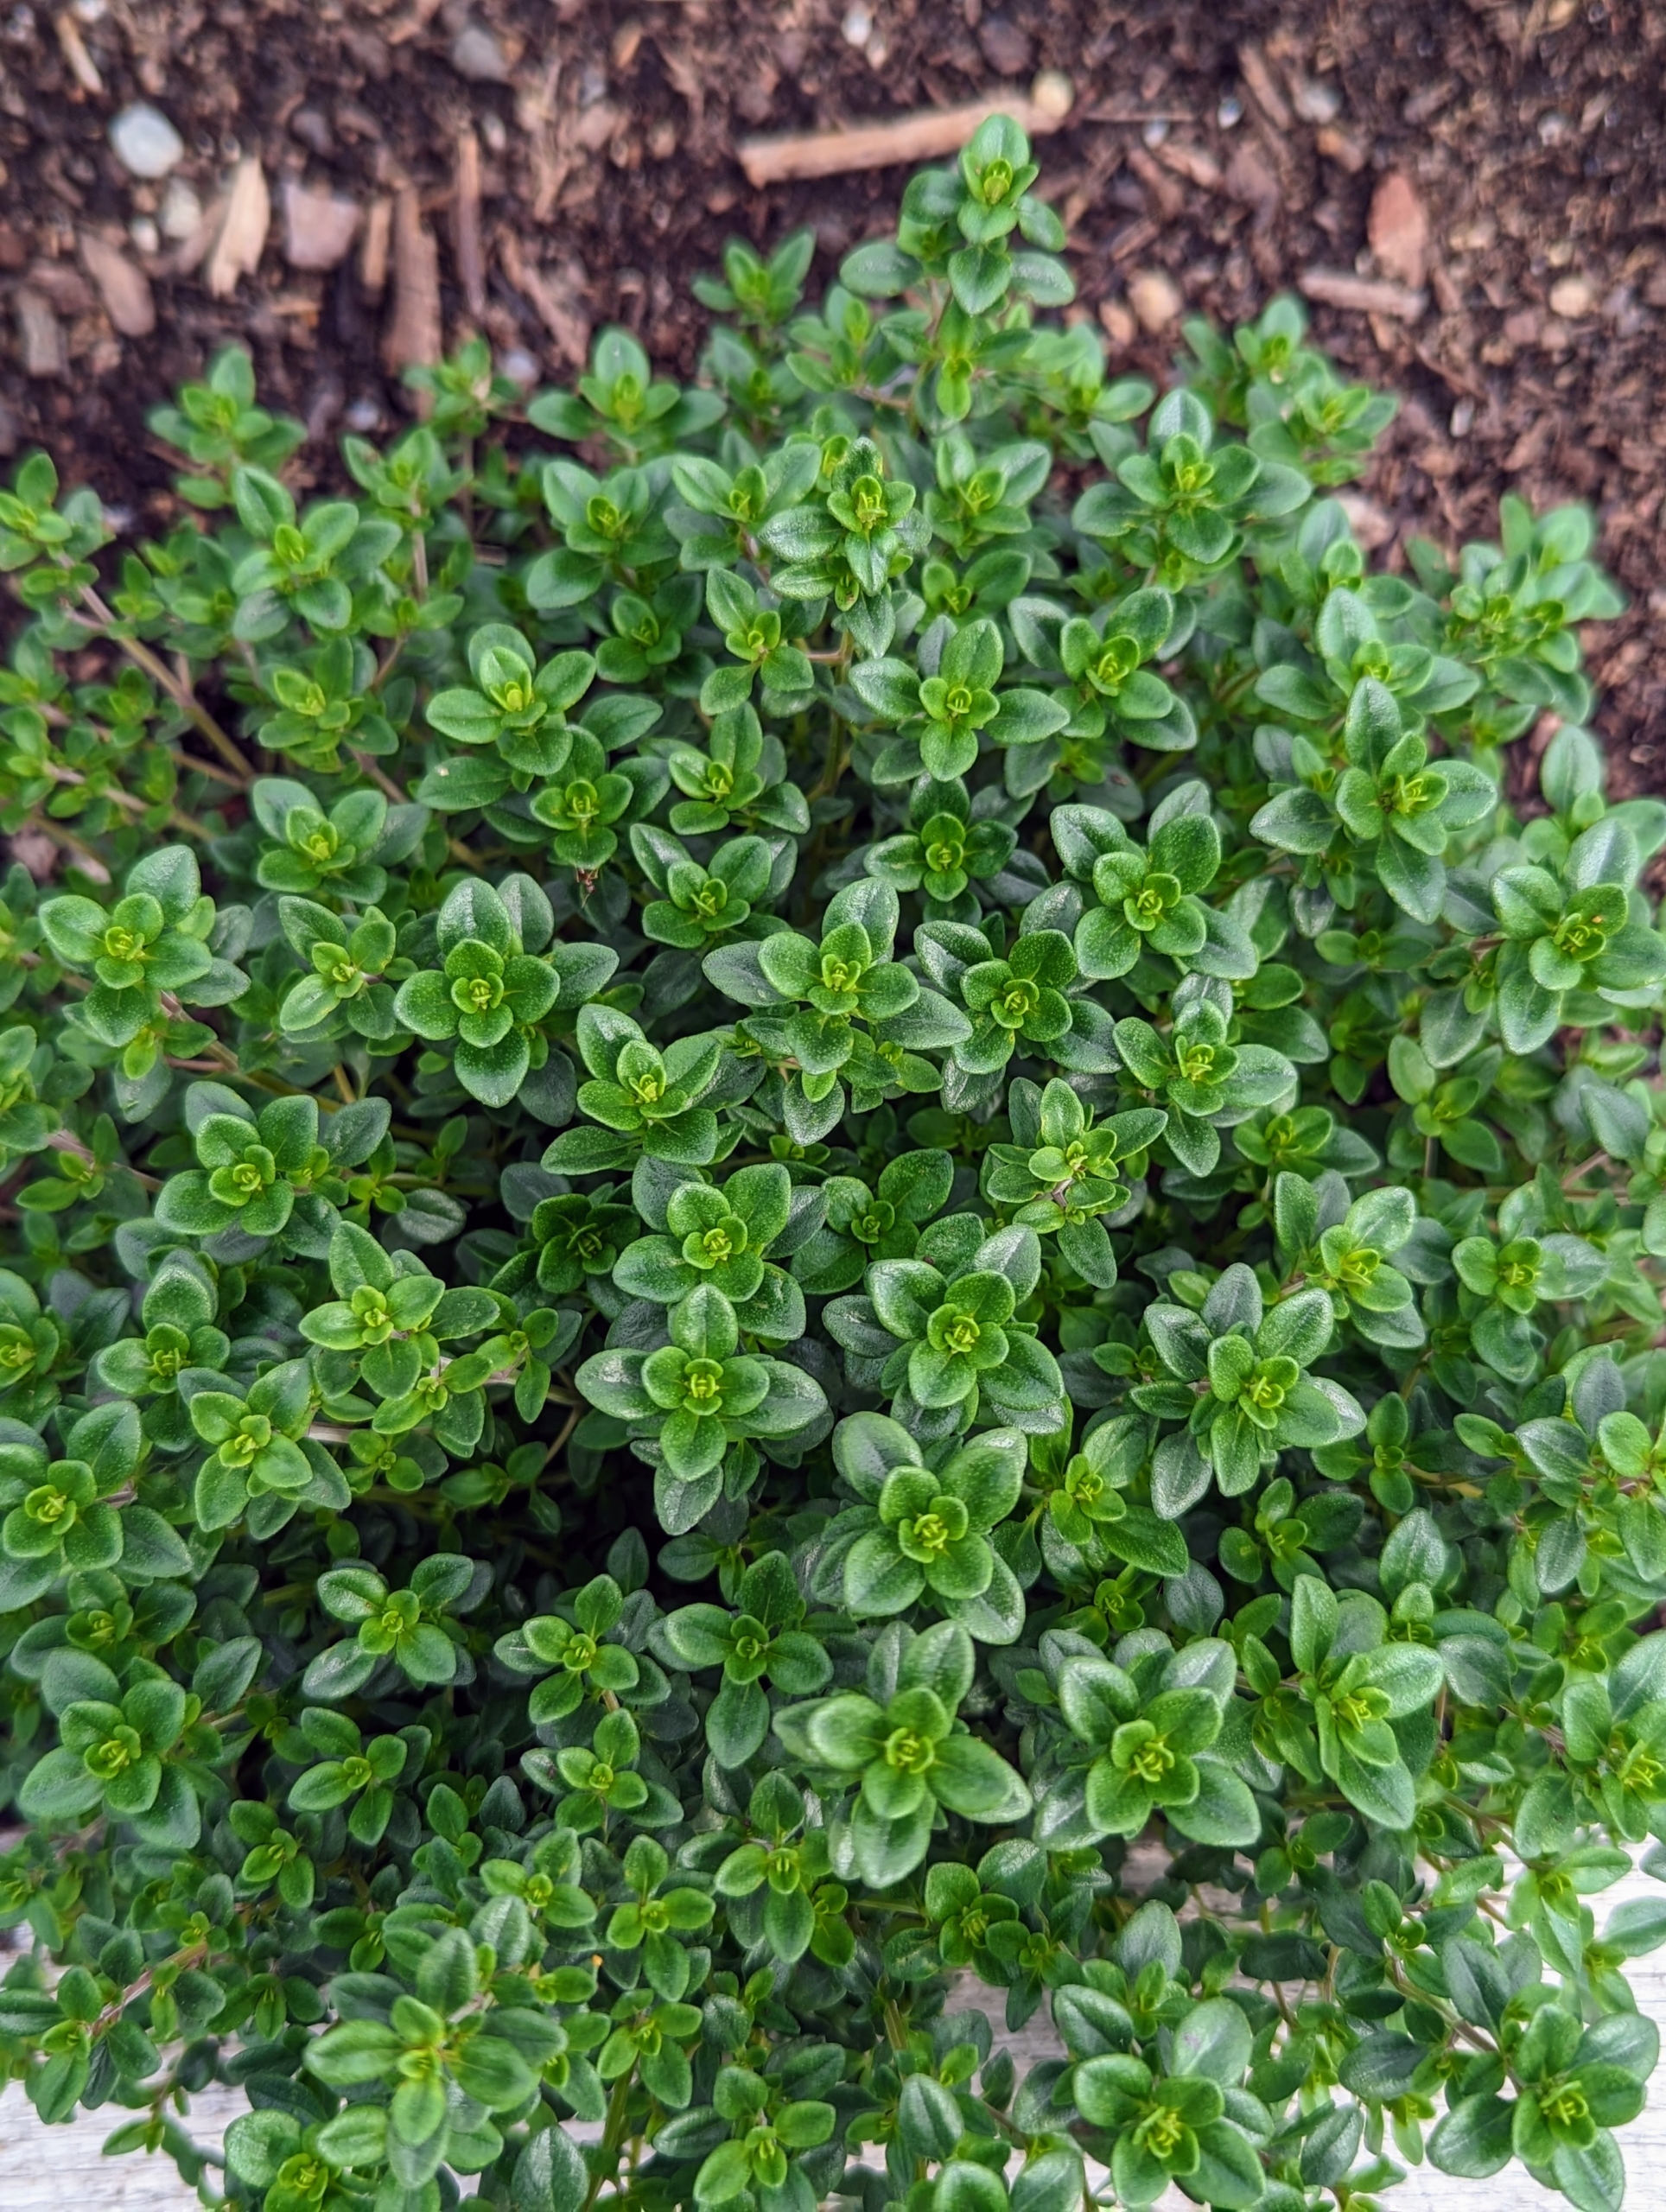
At the edge of all the beds, we planted herbs. This is thyme. Thyme is an herb whose small leaves grow on clusters of thin stems. It is a Mediterranean herb with dietary, medicinal, and ornamental uses. It is delicious with fish or poultry and imparts a lemony flavor.
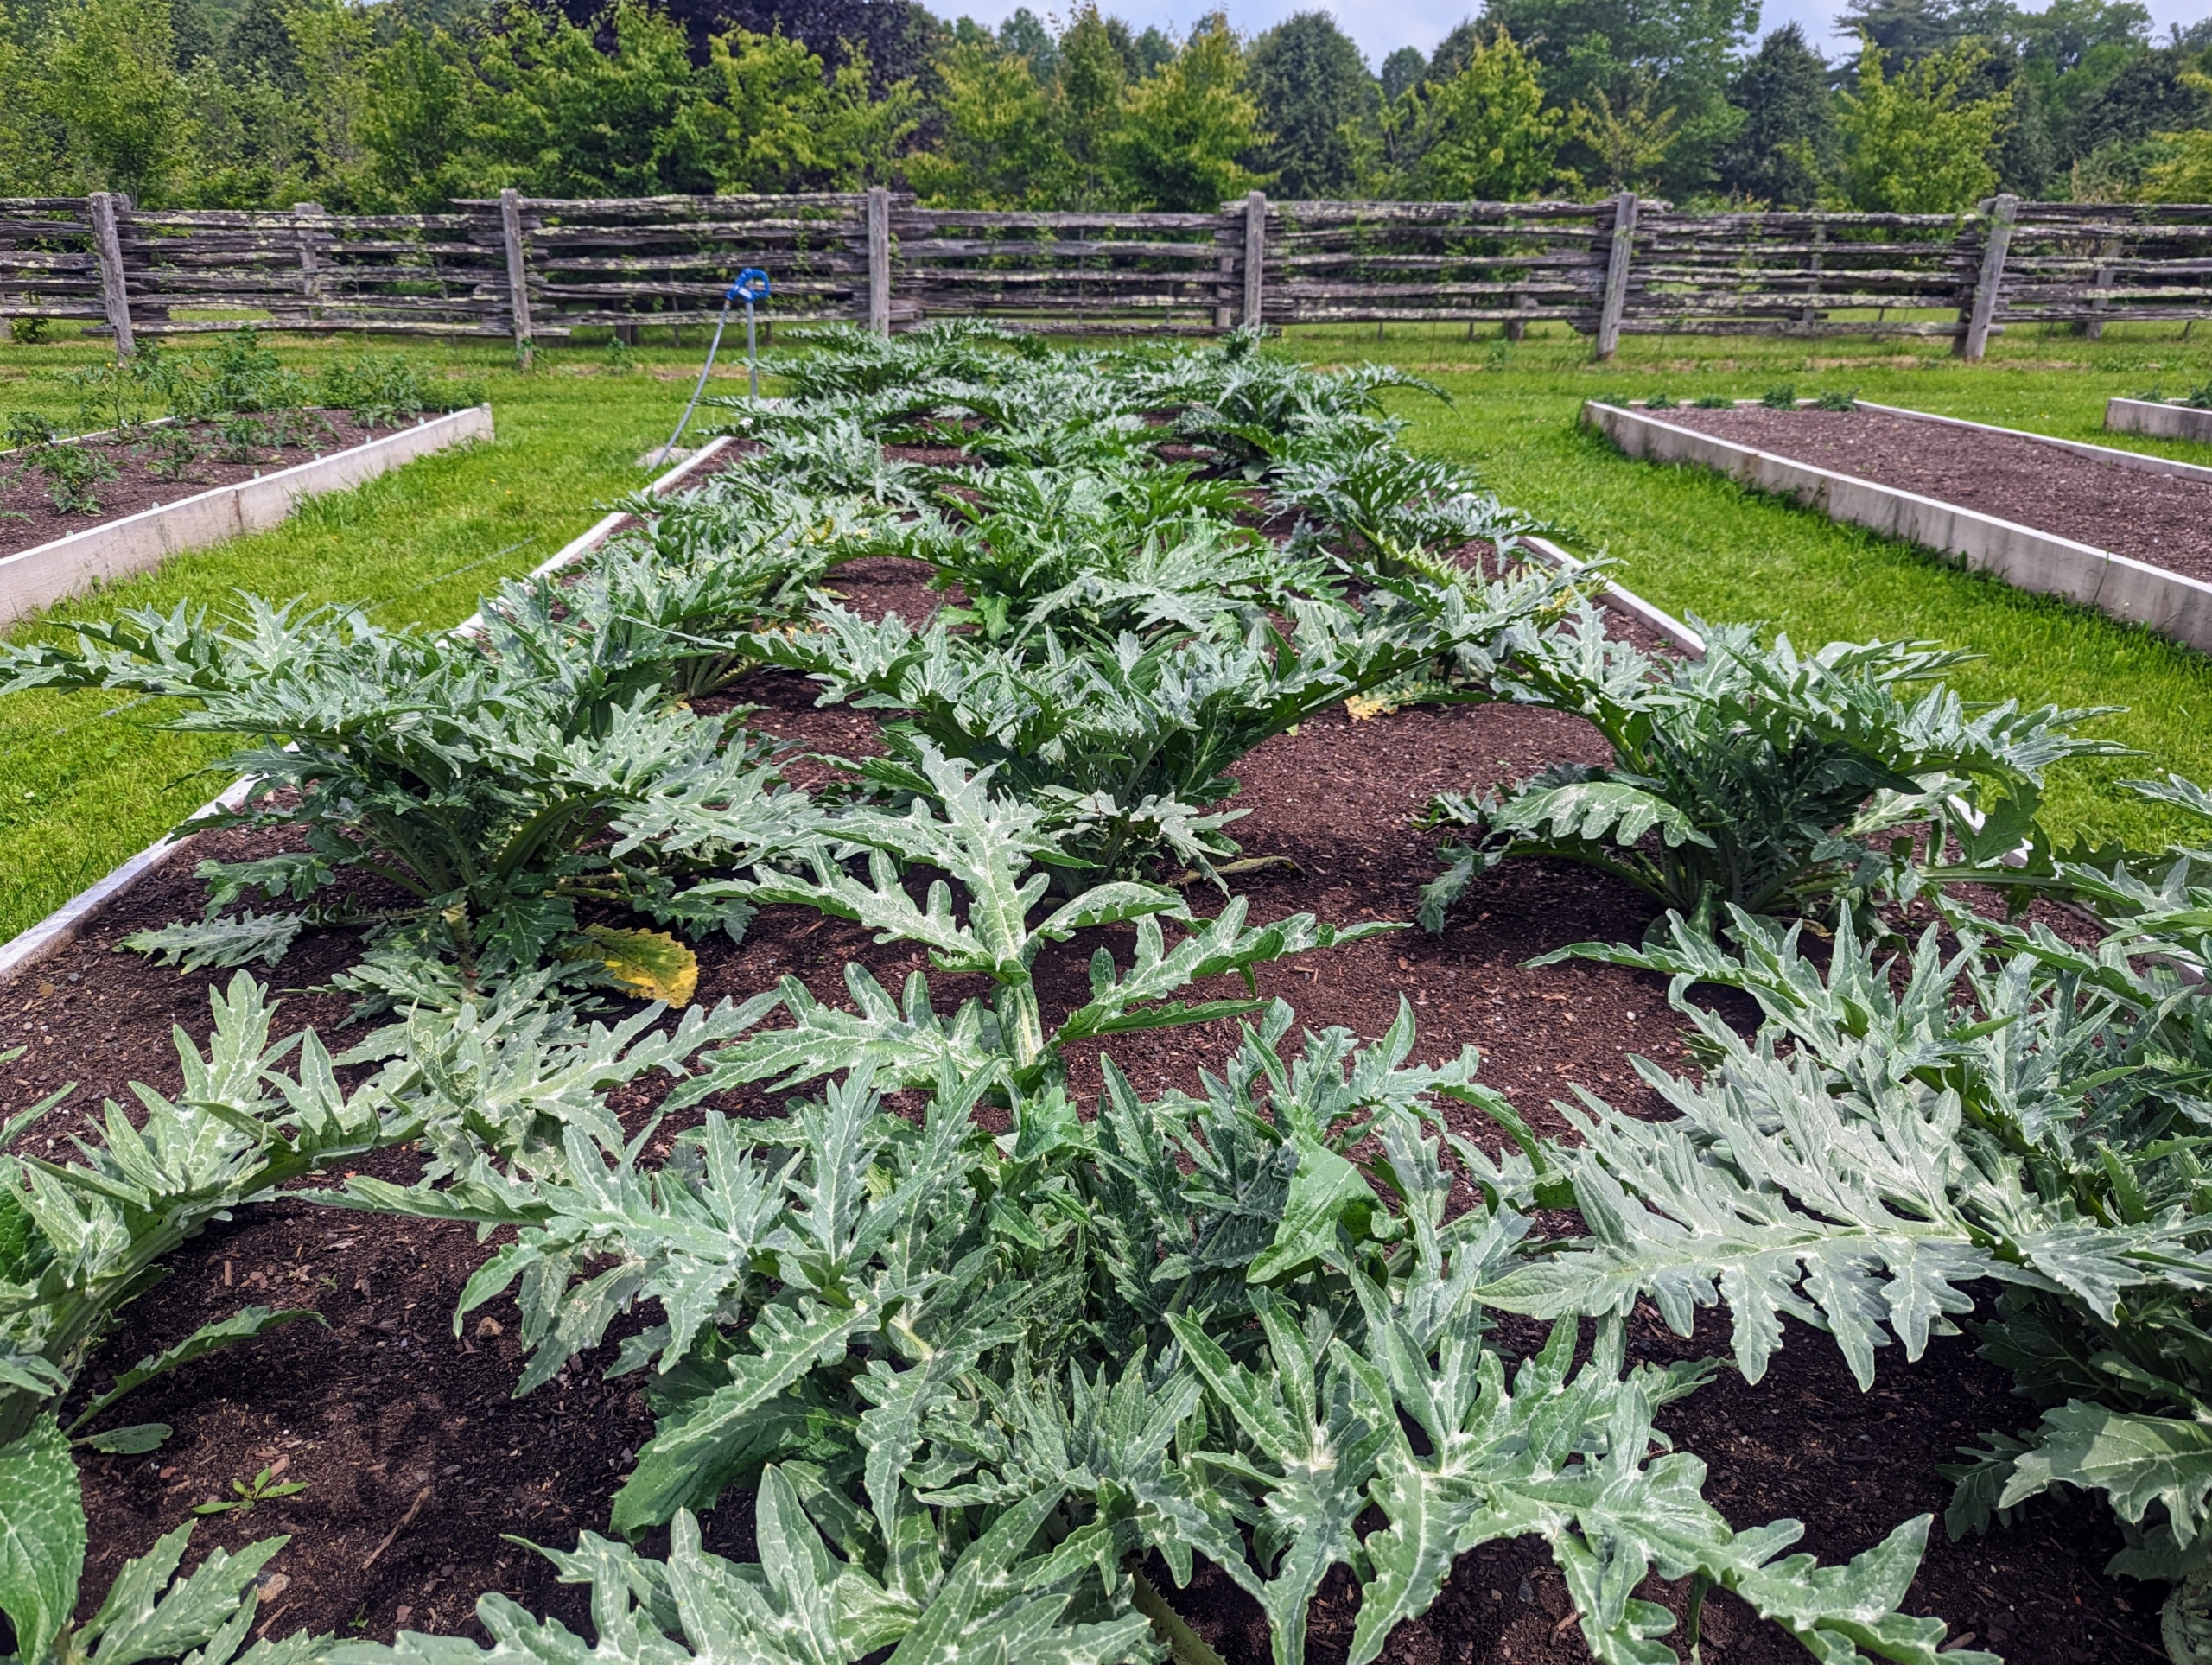
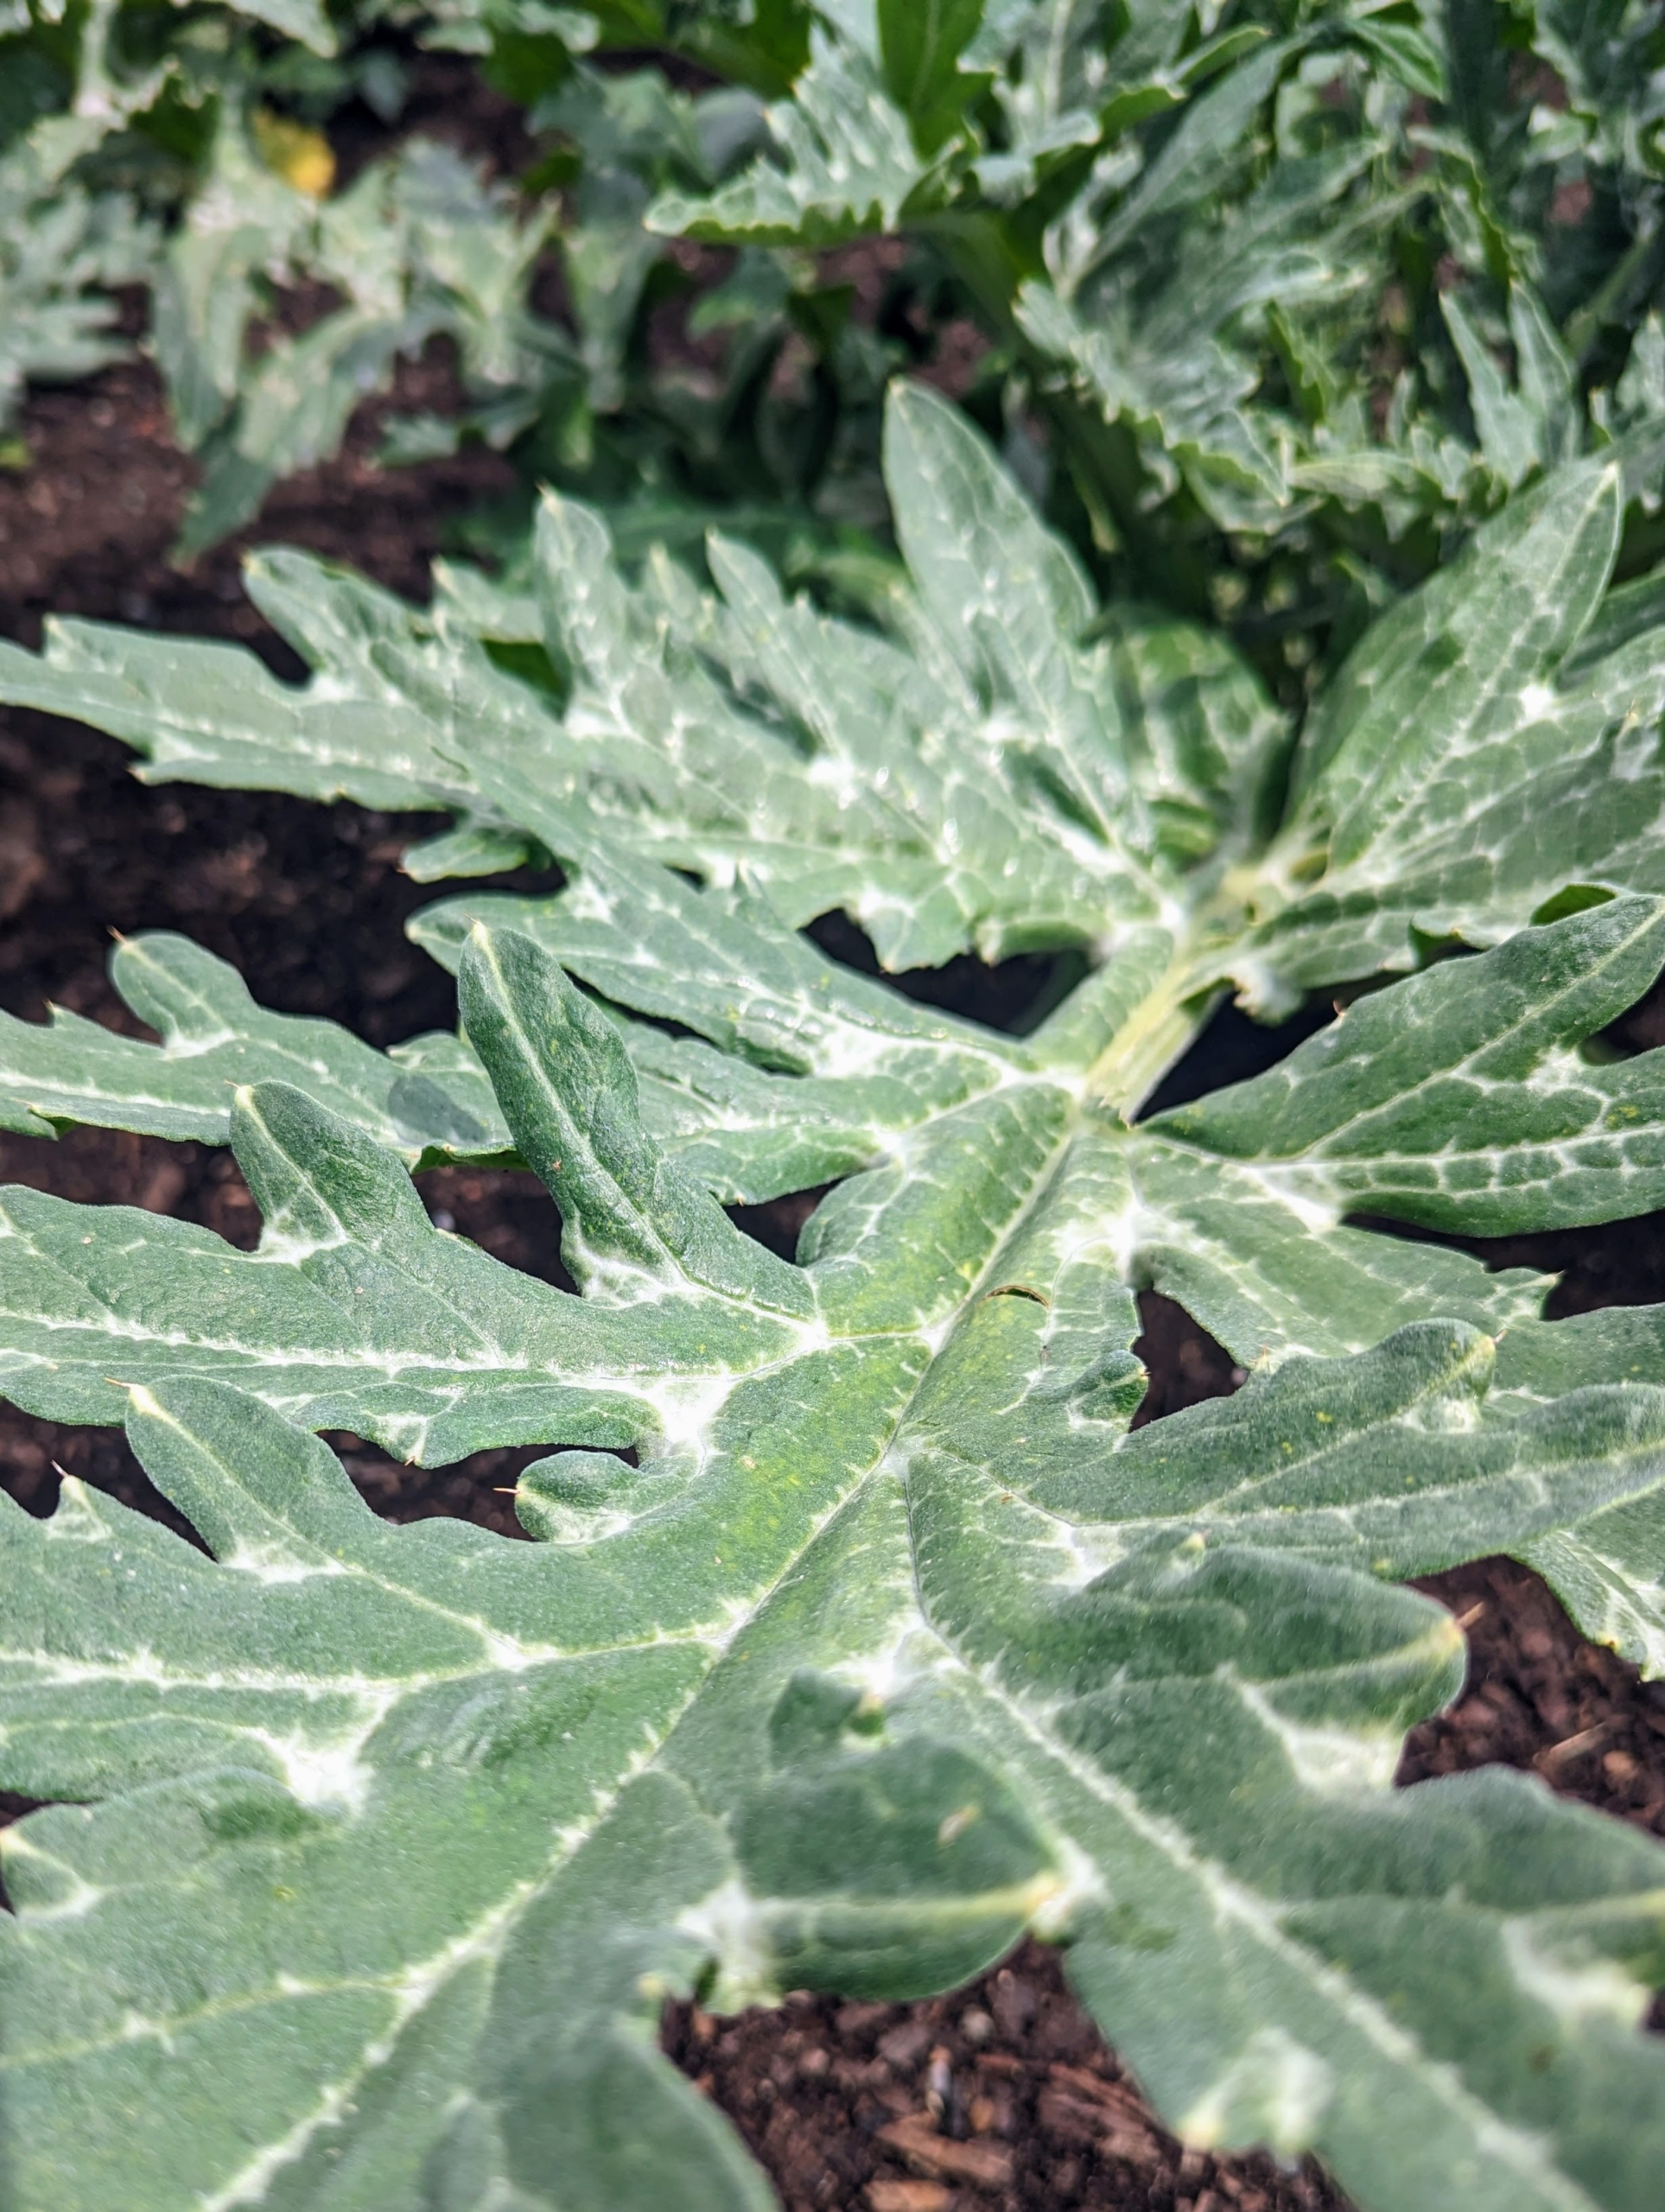
These are the leaves of our artichokes. Globe artichokes, Cynara scolymus, are popular in both Europe and the United States. Artichokes are actually the flower buds, which will emerge from the center of the plants.
Artichoke plant leaves are silvery-green in color with long, arching shapes. The plant stems are thick and fleshy.
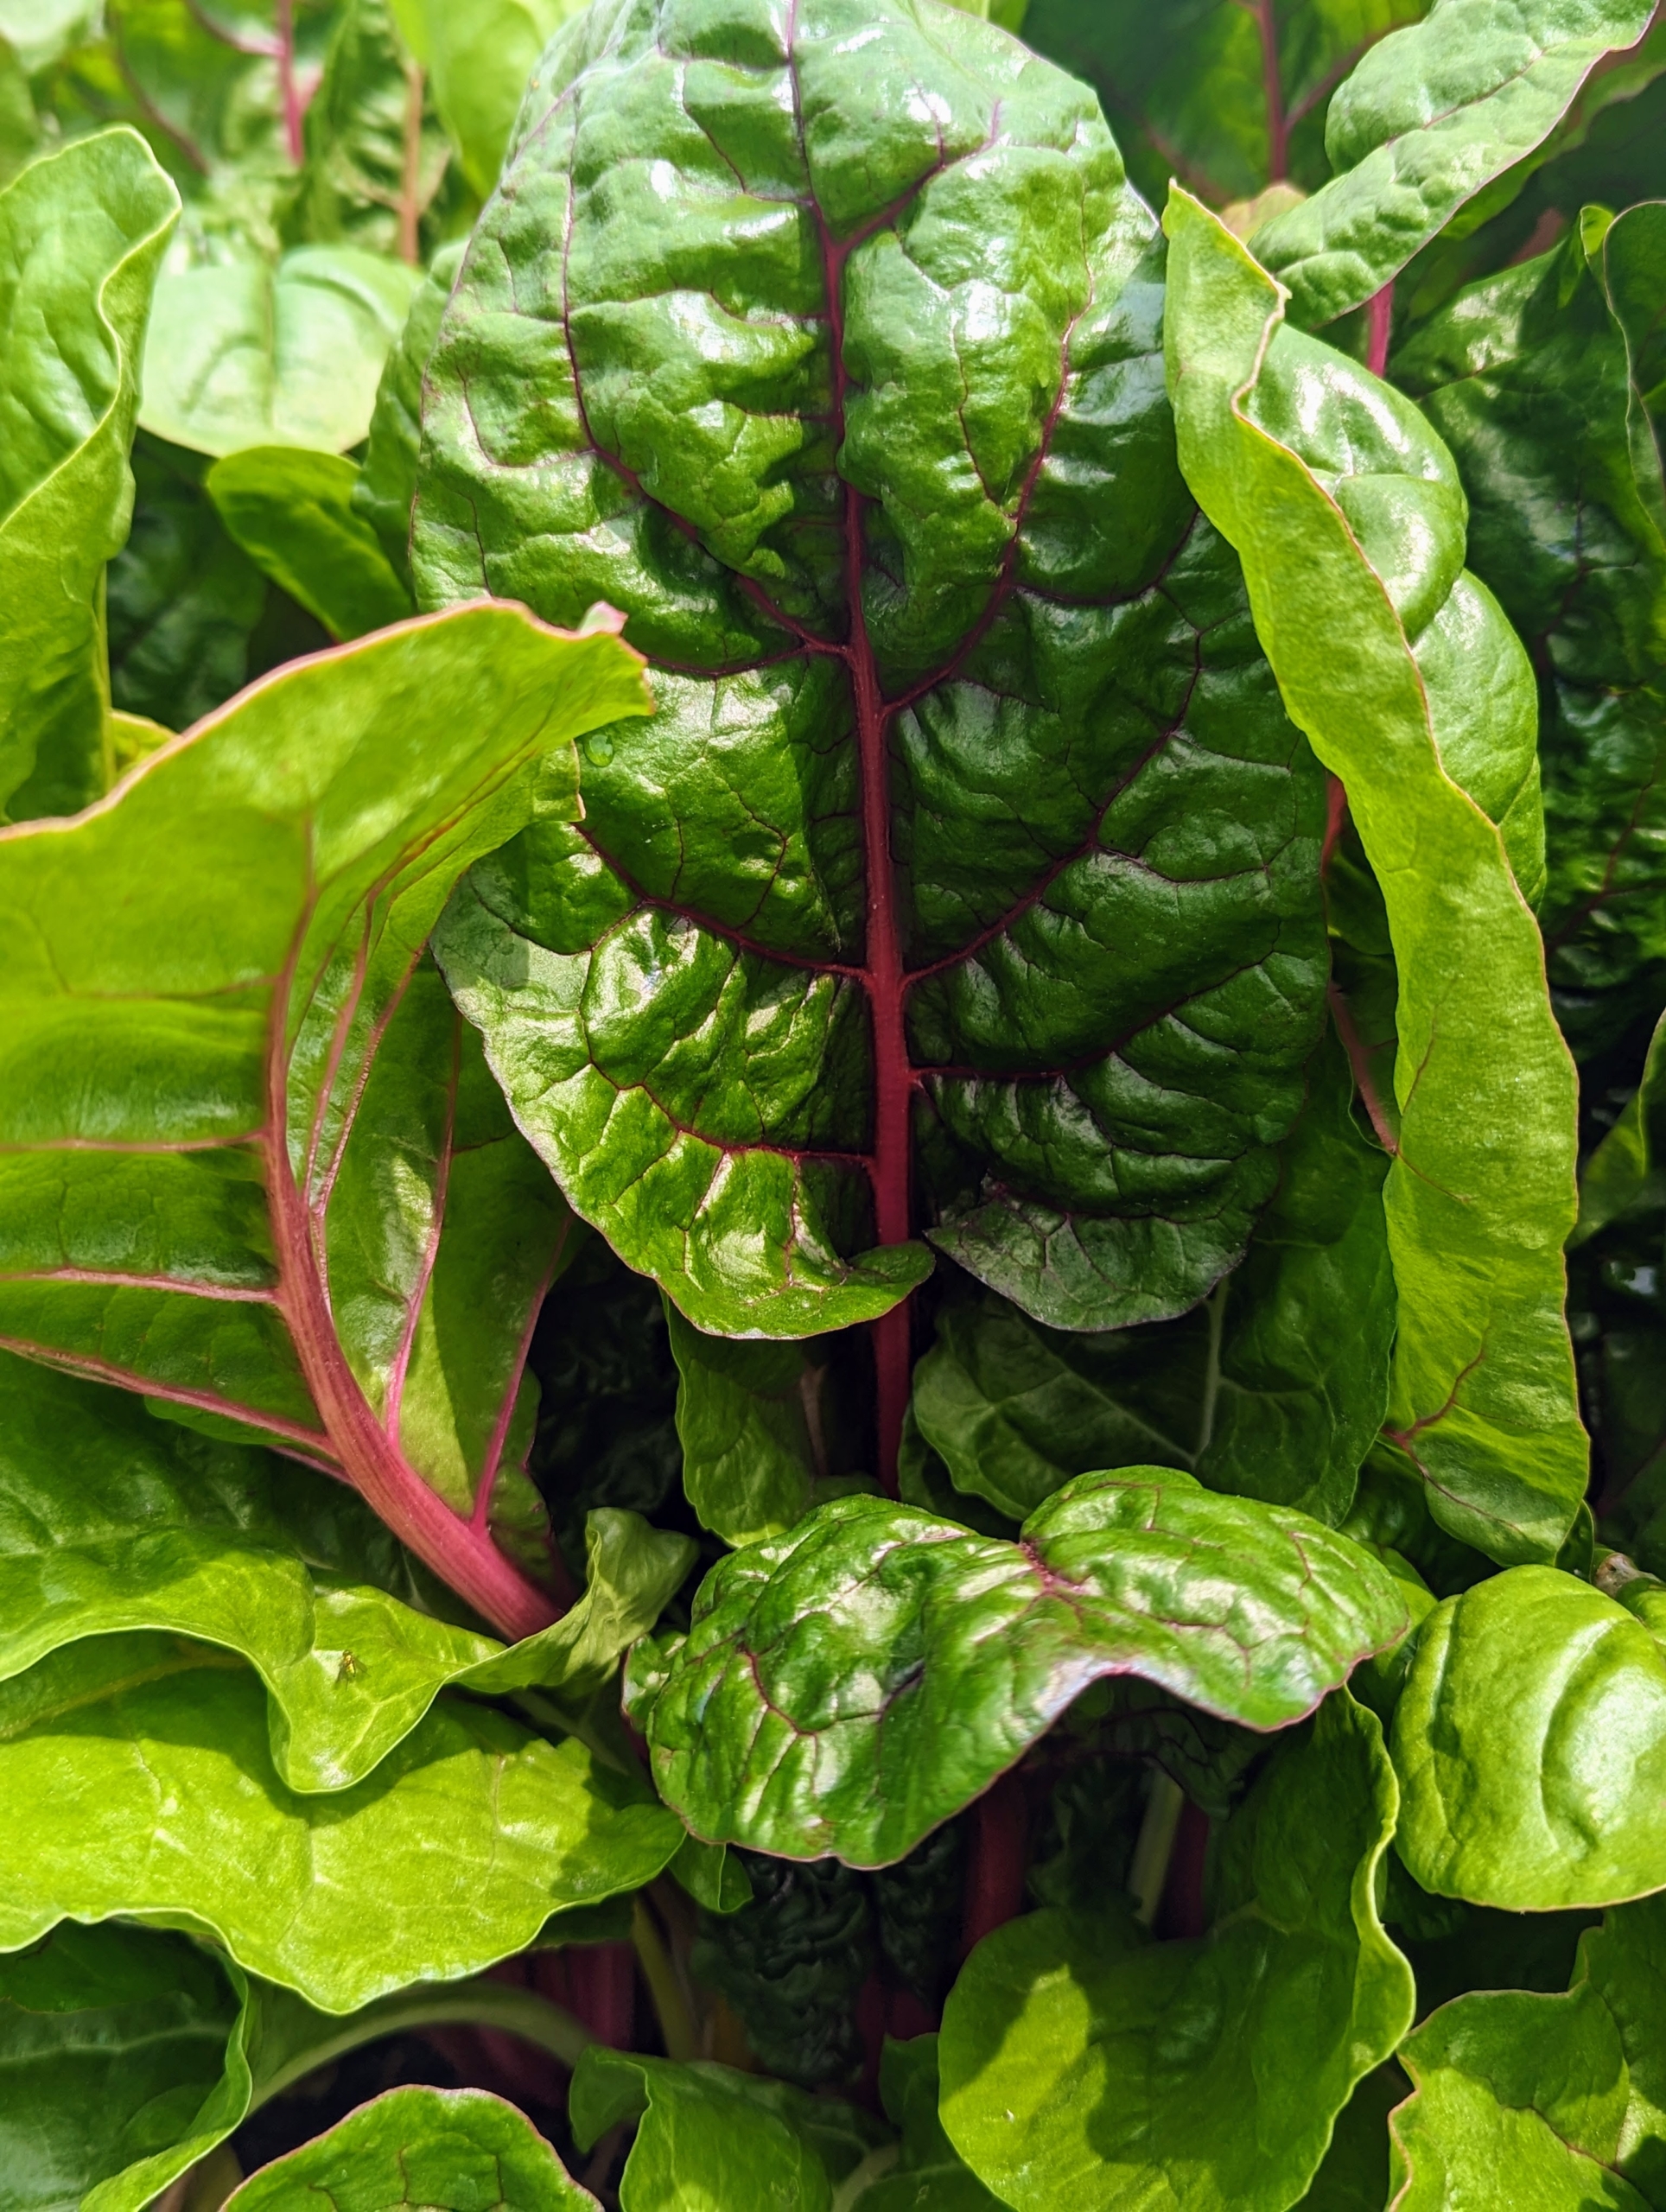
Swiss chard is a leafy green vegetable often used in Mediterranean cooking. The leaf stalks are large and vary in color, usually white, yellow, or red. The leaf blade can be green or reddish in color.
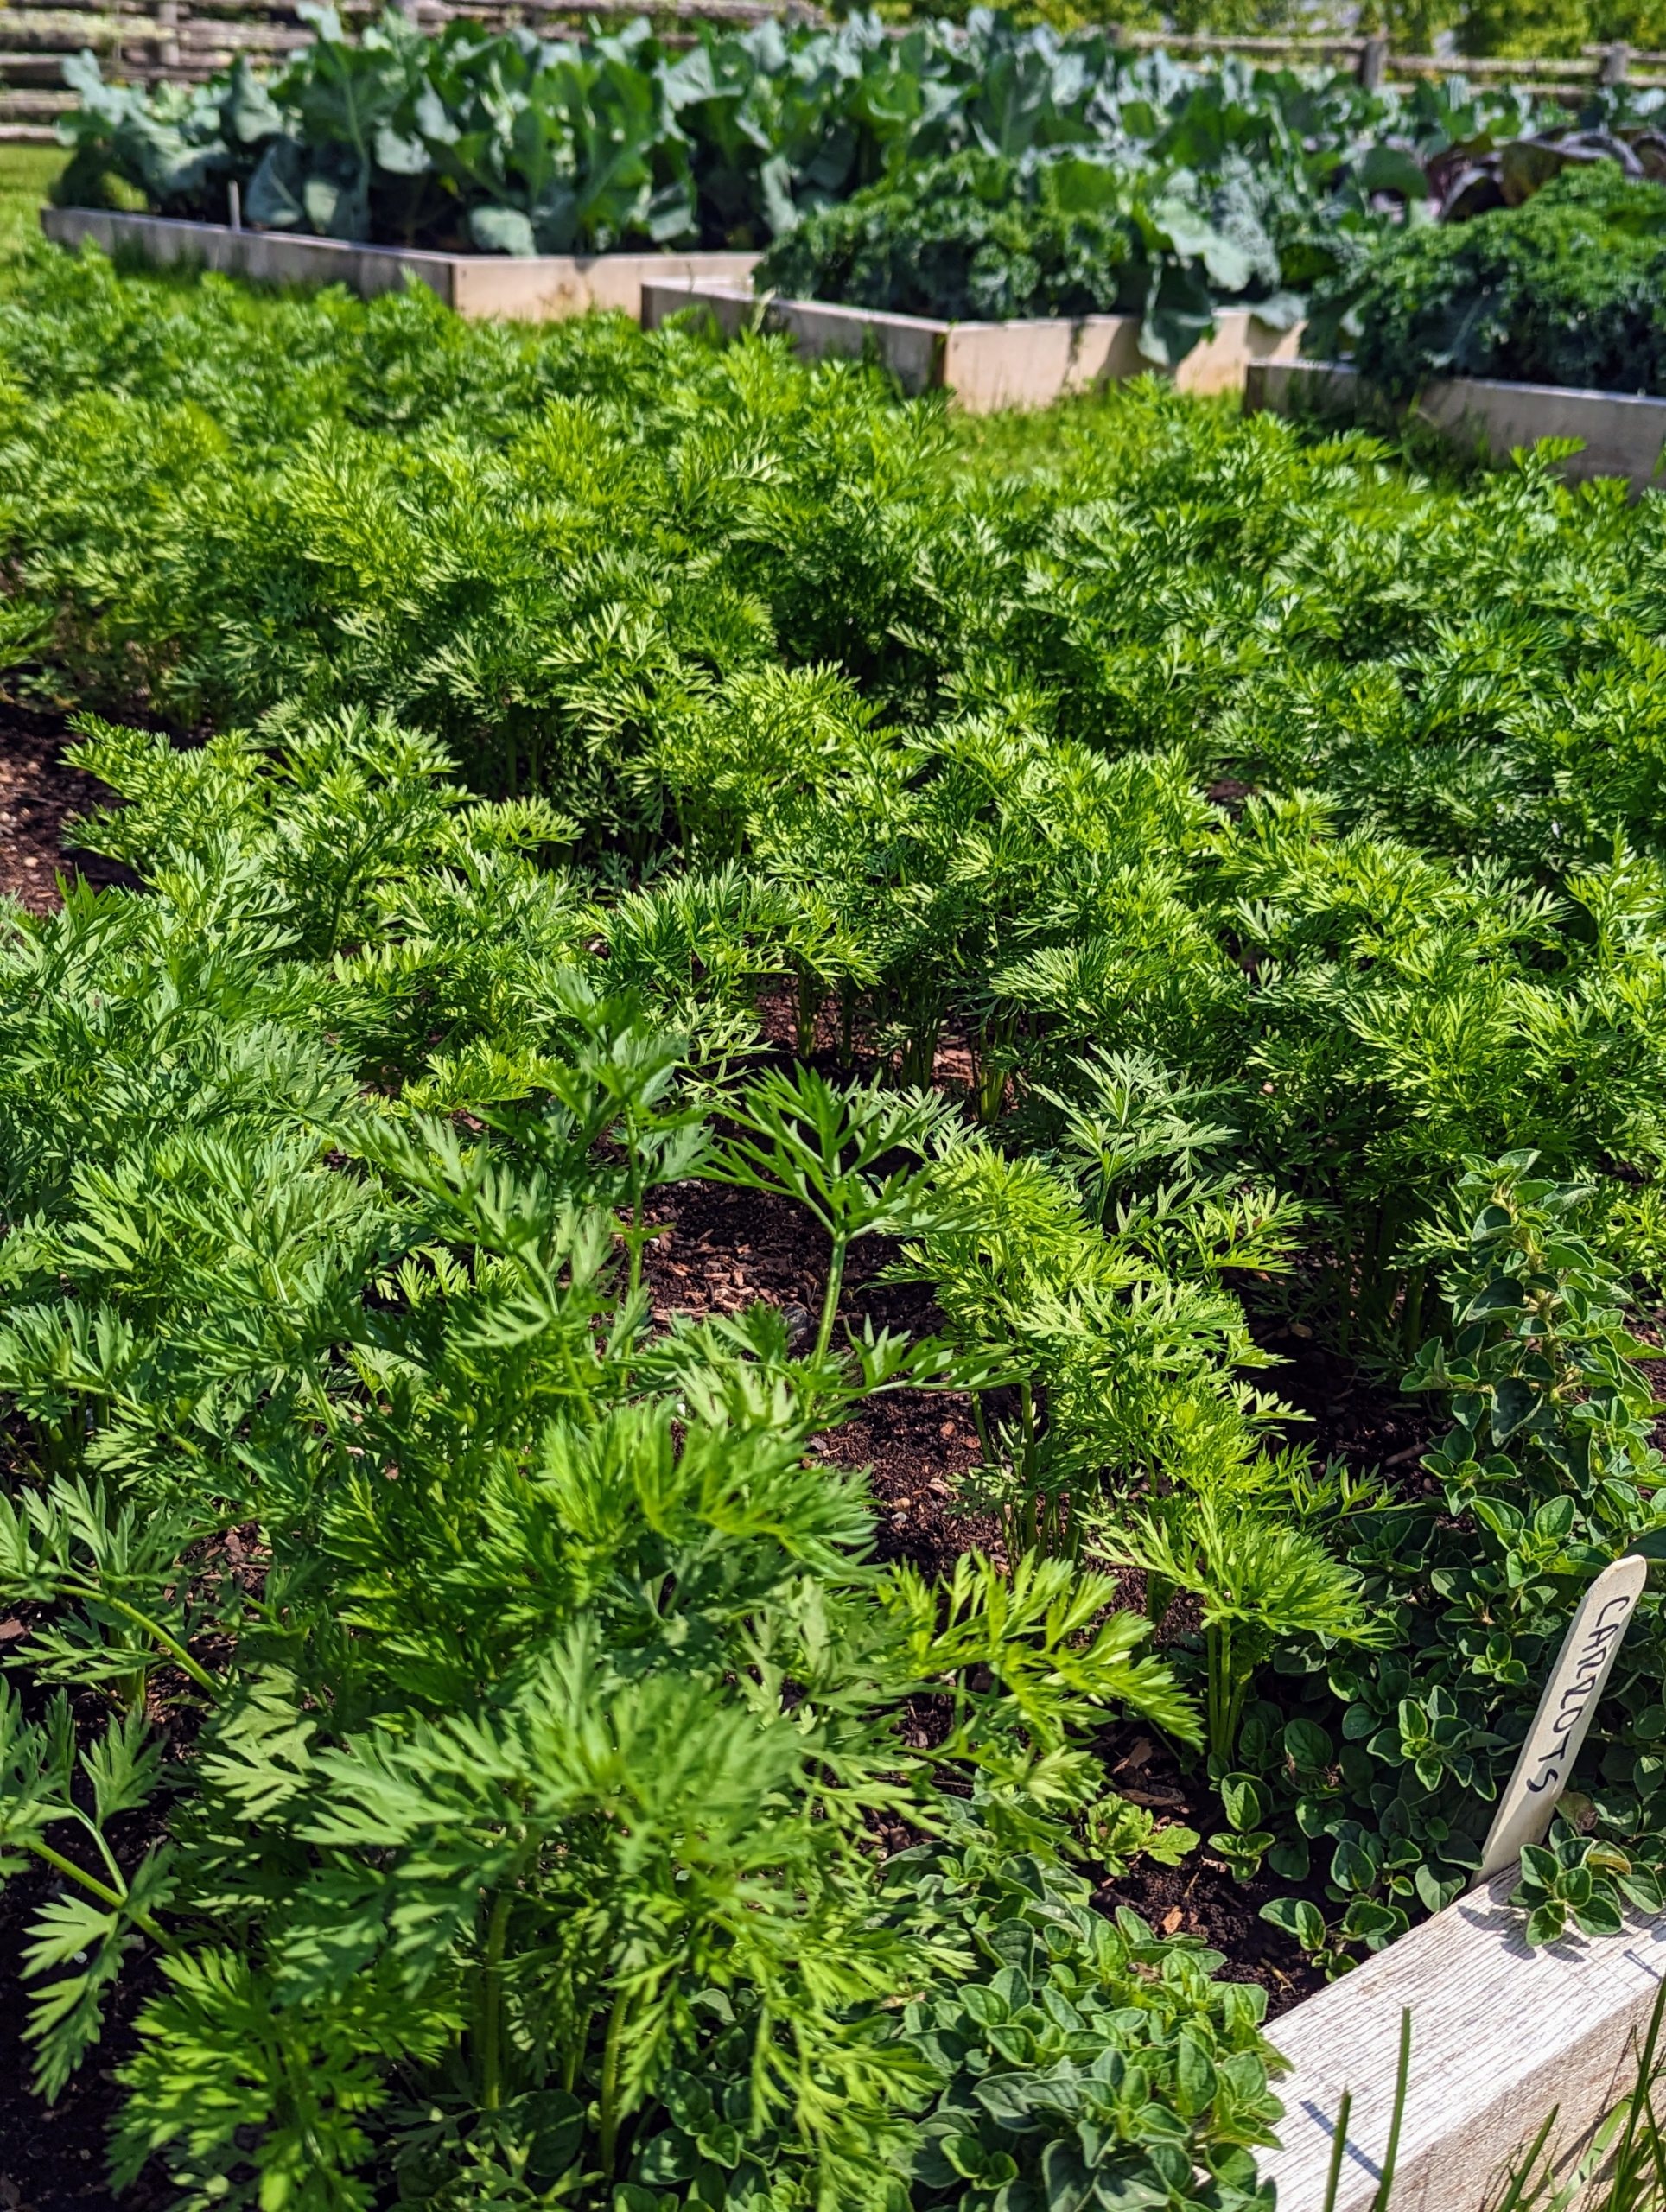
We always plant a variety of carrots in all the different colors – red, yellow, white, purple, black, and orange. They’re not ready yet, but the tops are lush and green. And, do you know… the first carrots were white, purple and yellow – not orange. The Dutch developed orange carrots in the 1500s. All modern-day orange carrots are directly descended from these Dutch-bred carrots.
In the first long center bed we planted asparagus. We won’t be harvesting these for at least three years as asparagus needs all that time to develop, but after that they will produce an abundant crop of spears spring after spring.
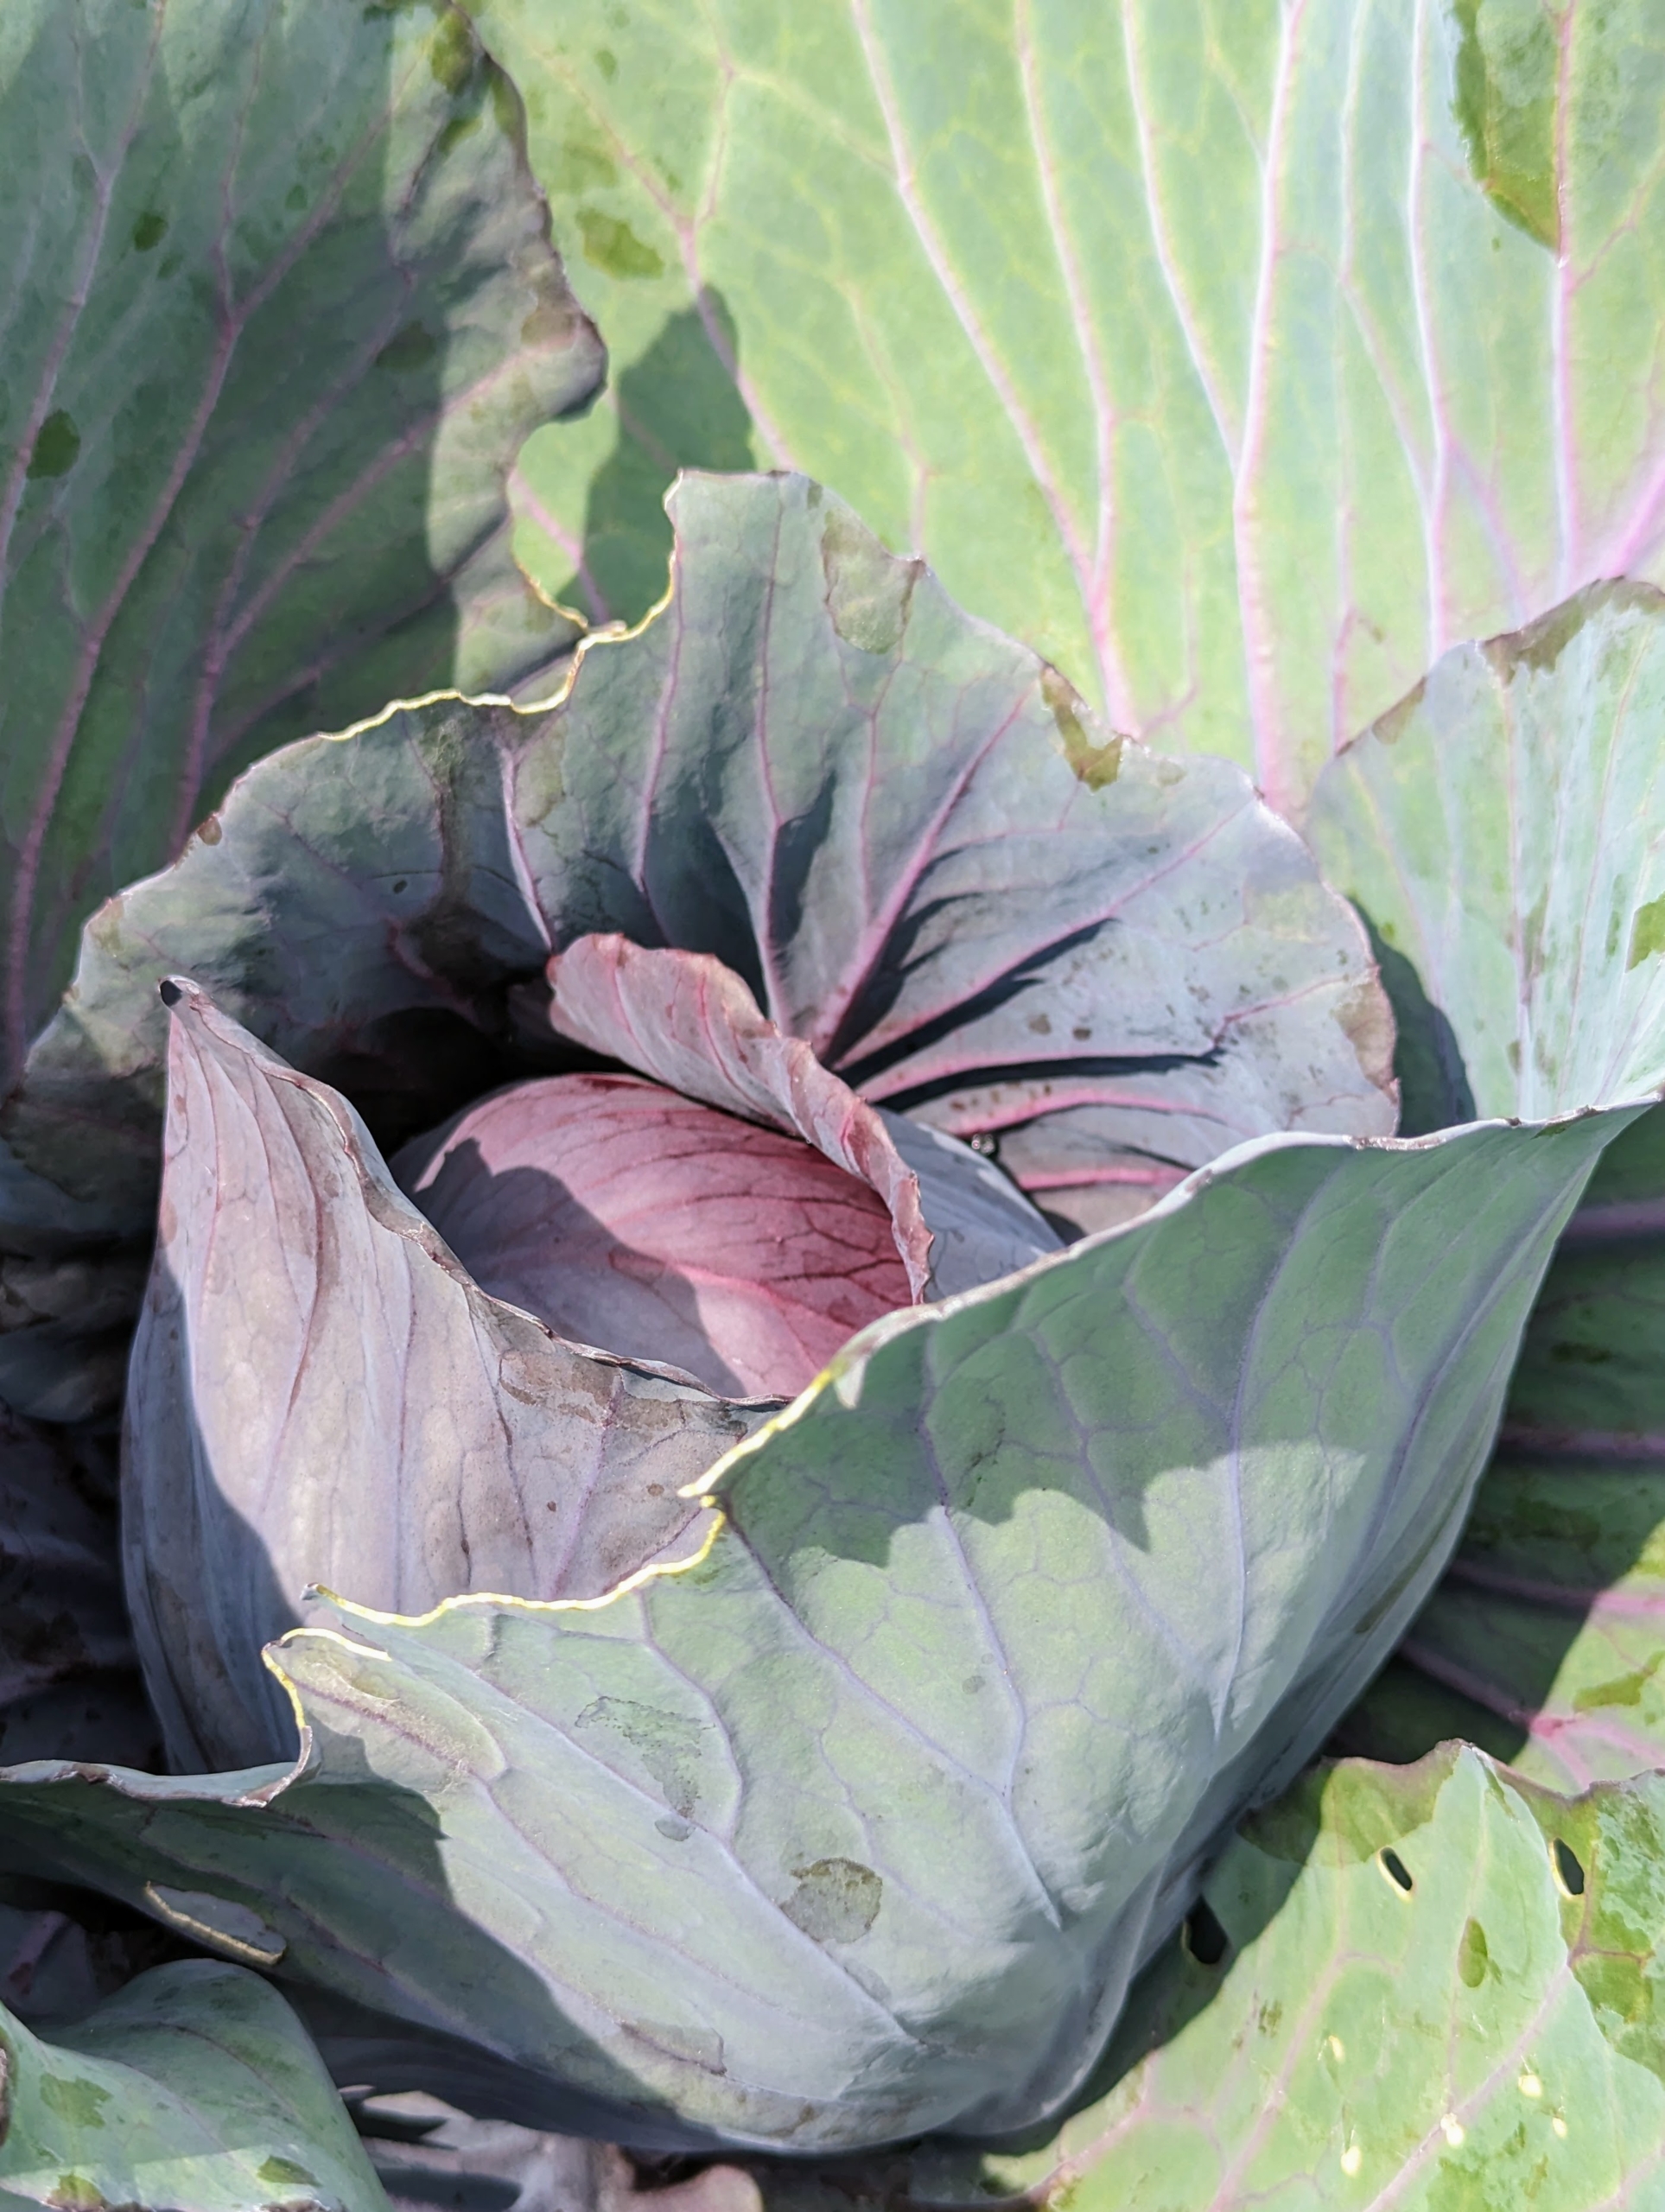
Our cabbages are also growing nicely. To get the best health benefits from cabbage, it’s good to include all three varieties into the diet – Savoy, red, and green. Savoy cabbage leaves are ruffled and a bit yellowish in color.
Red, or purple, cabbage is often used raw for salads and coleslaw. It contains 10-times more vitamin-A and twice as much iron as green cabbage.
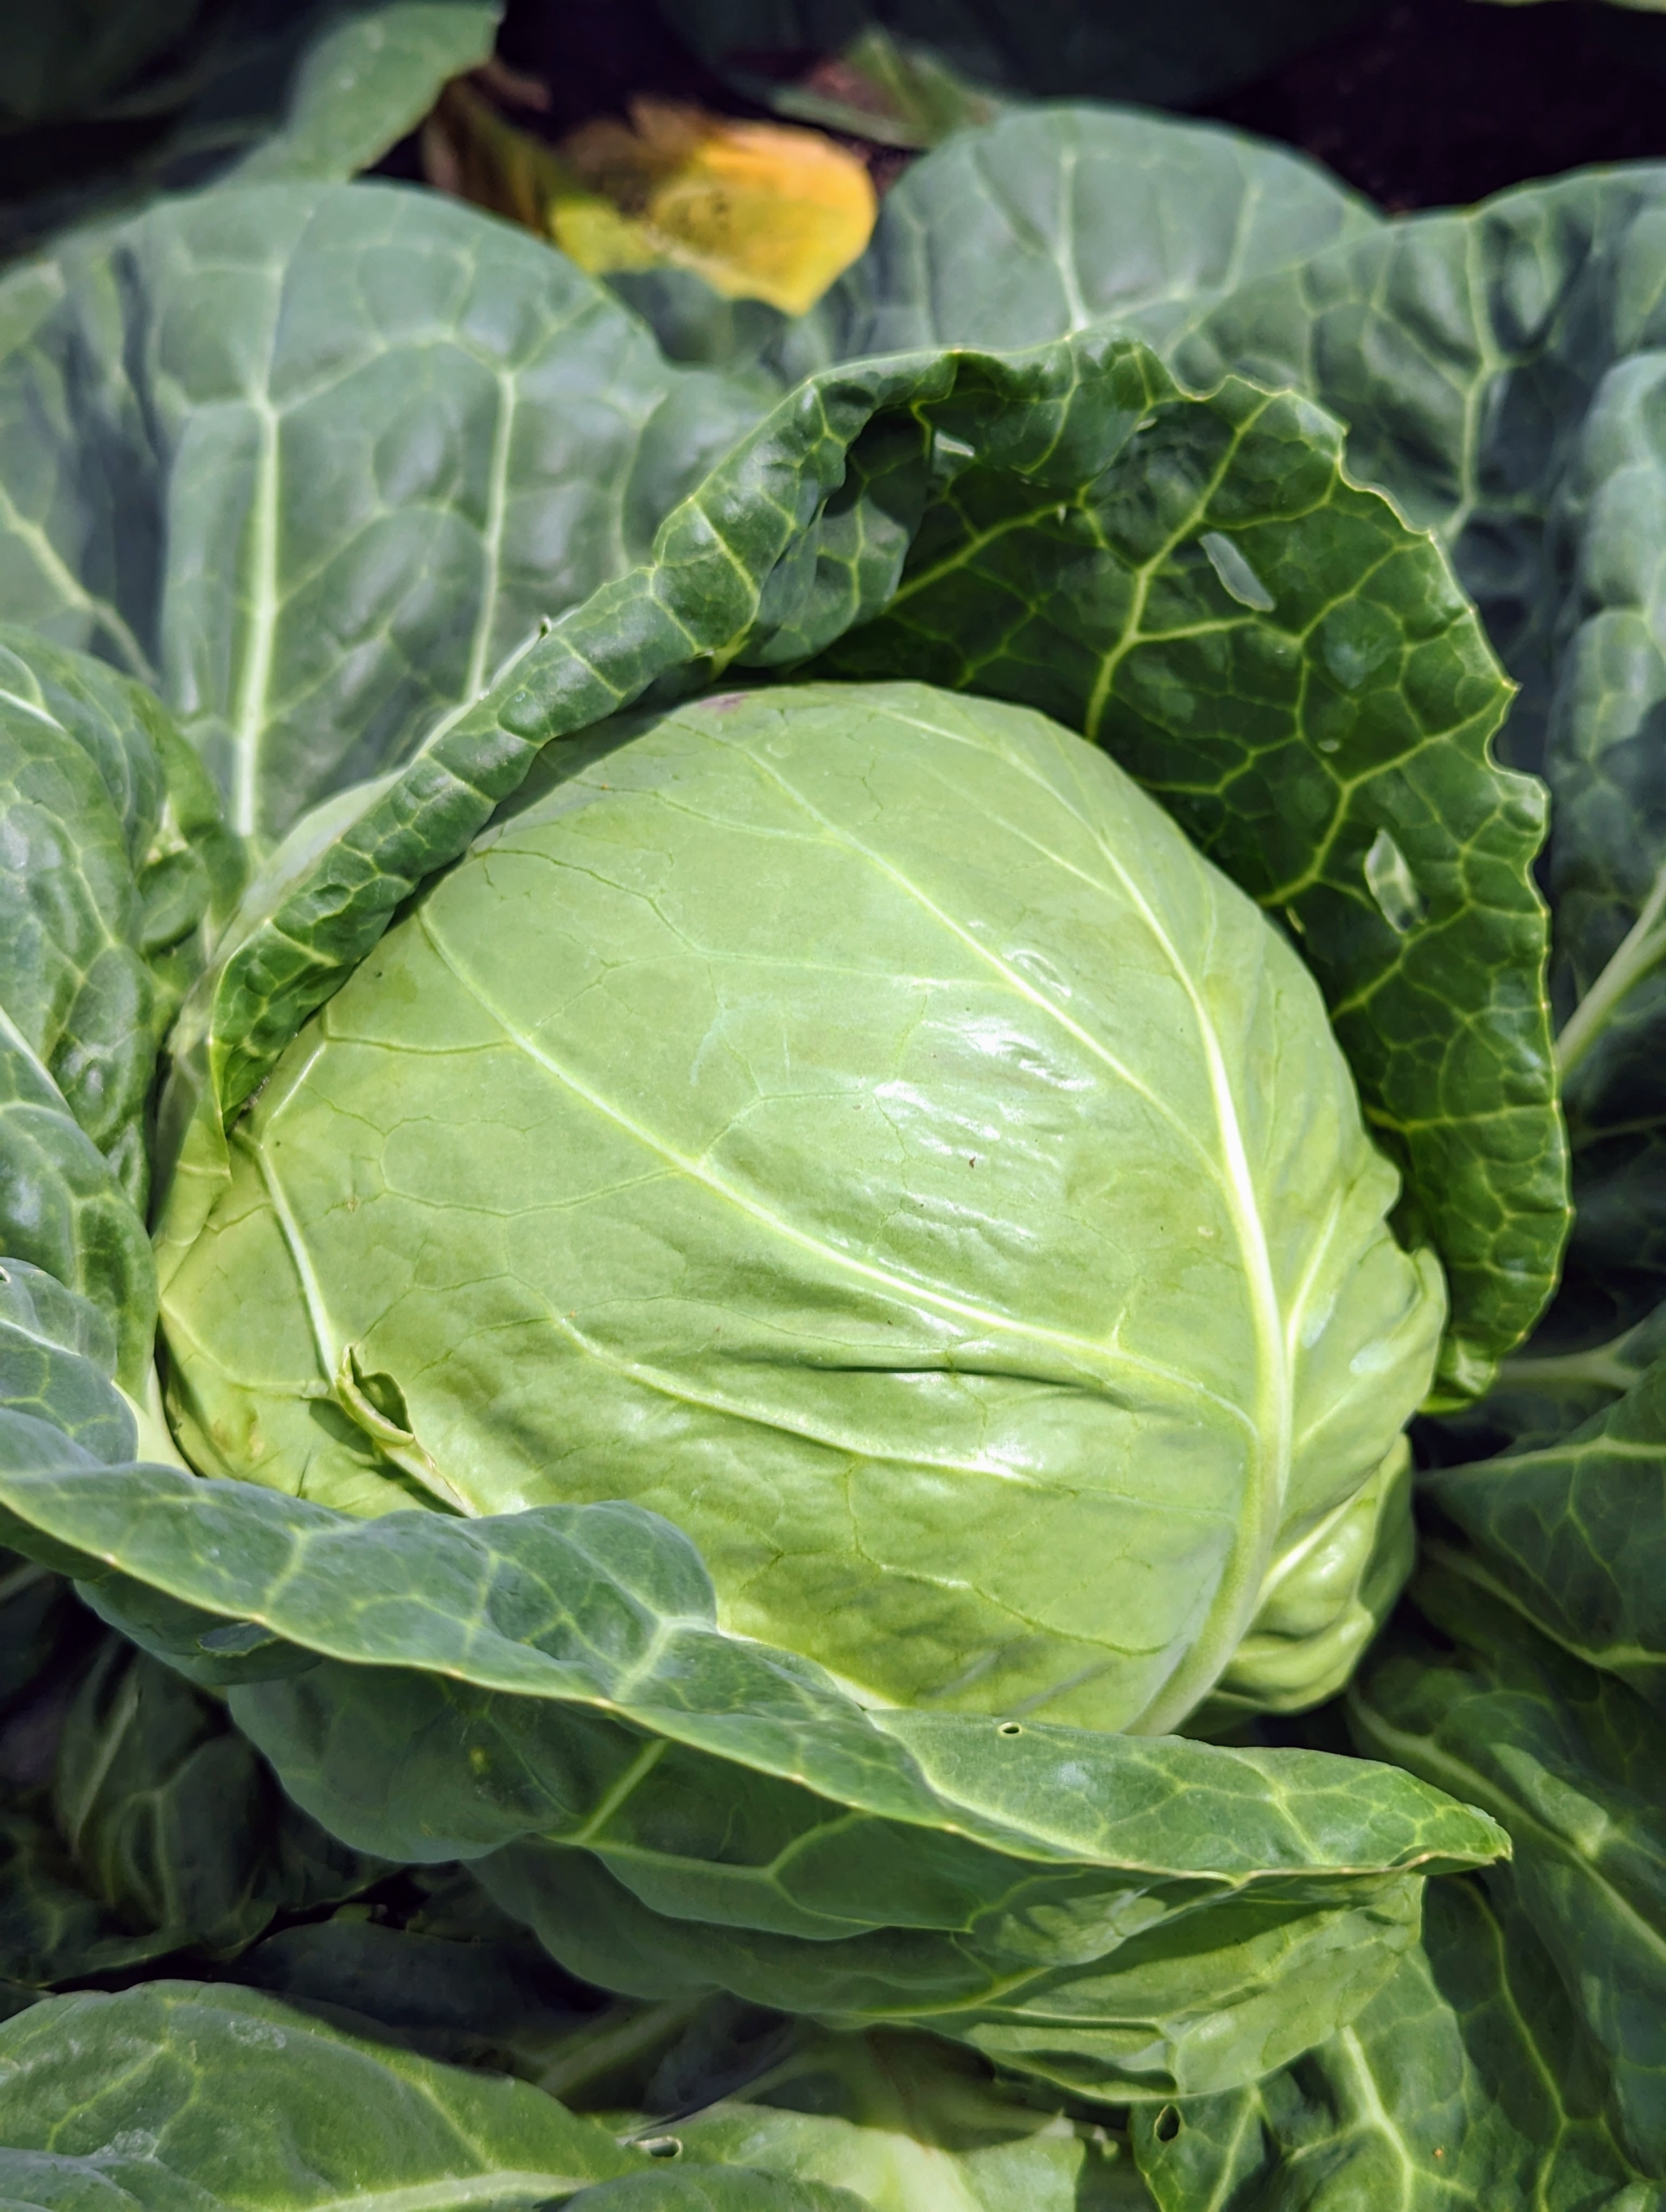
And here is one of our green cabbages – so perfect.
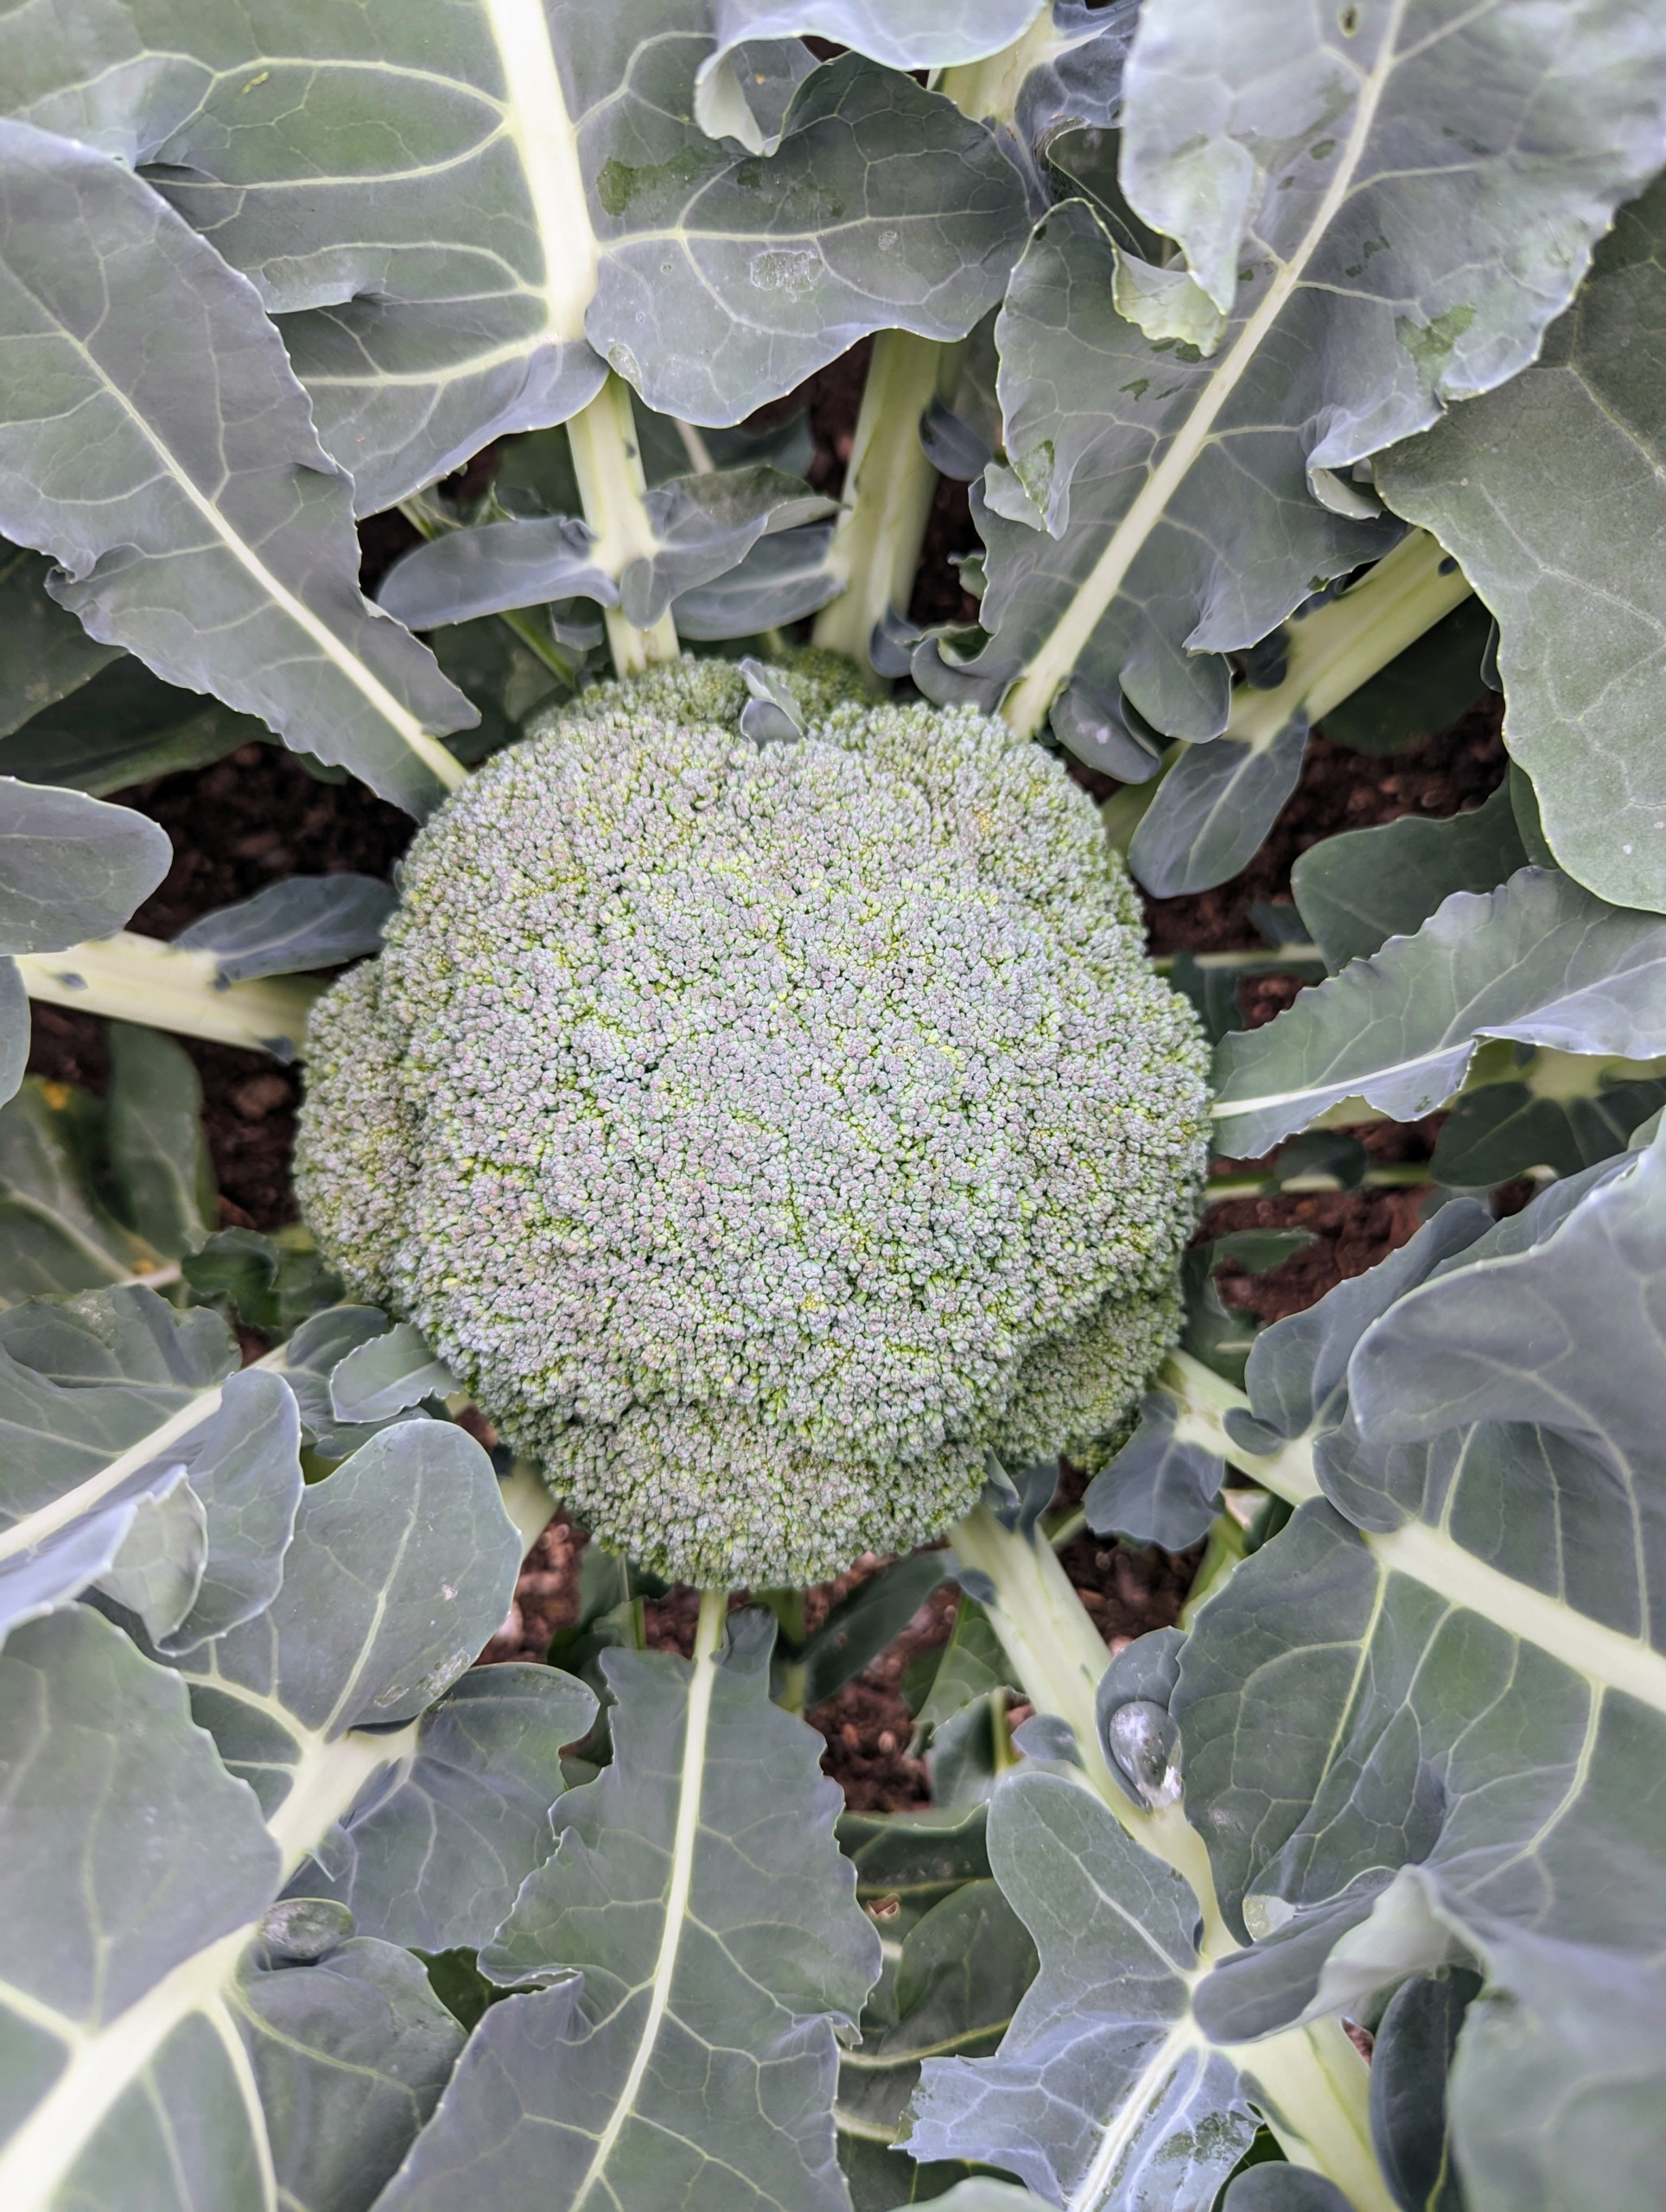
Broccoli is a hardy vegetable of the cabbage family that is high in vitamins A and D. And, according to the National Agricultural Statistics Service, USDA, the average American eats more than four-pounds of broccoli a year.
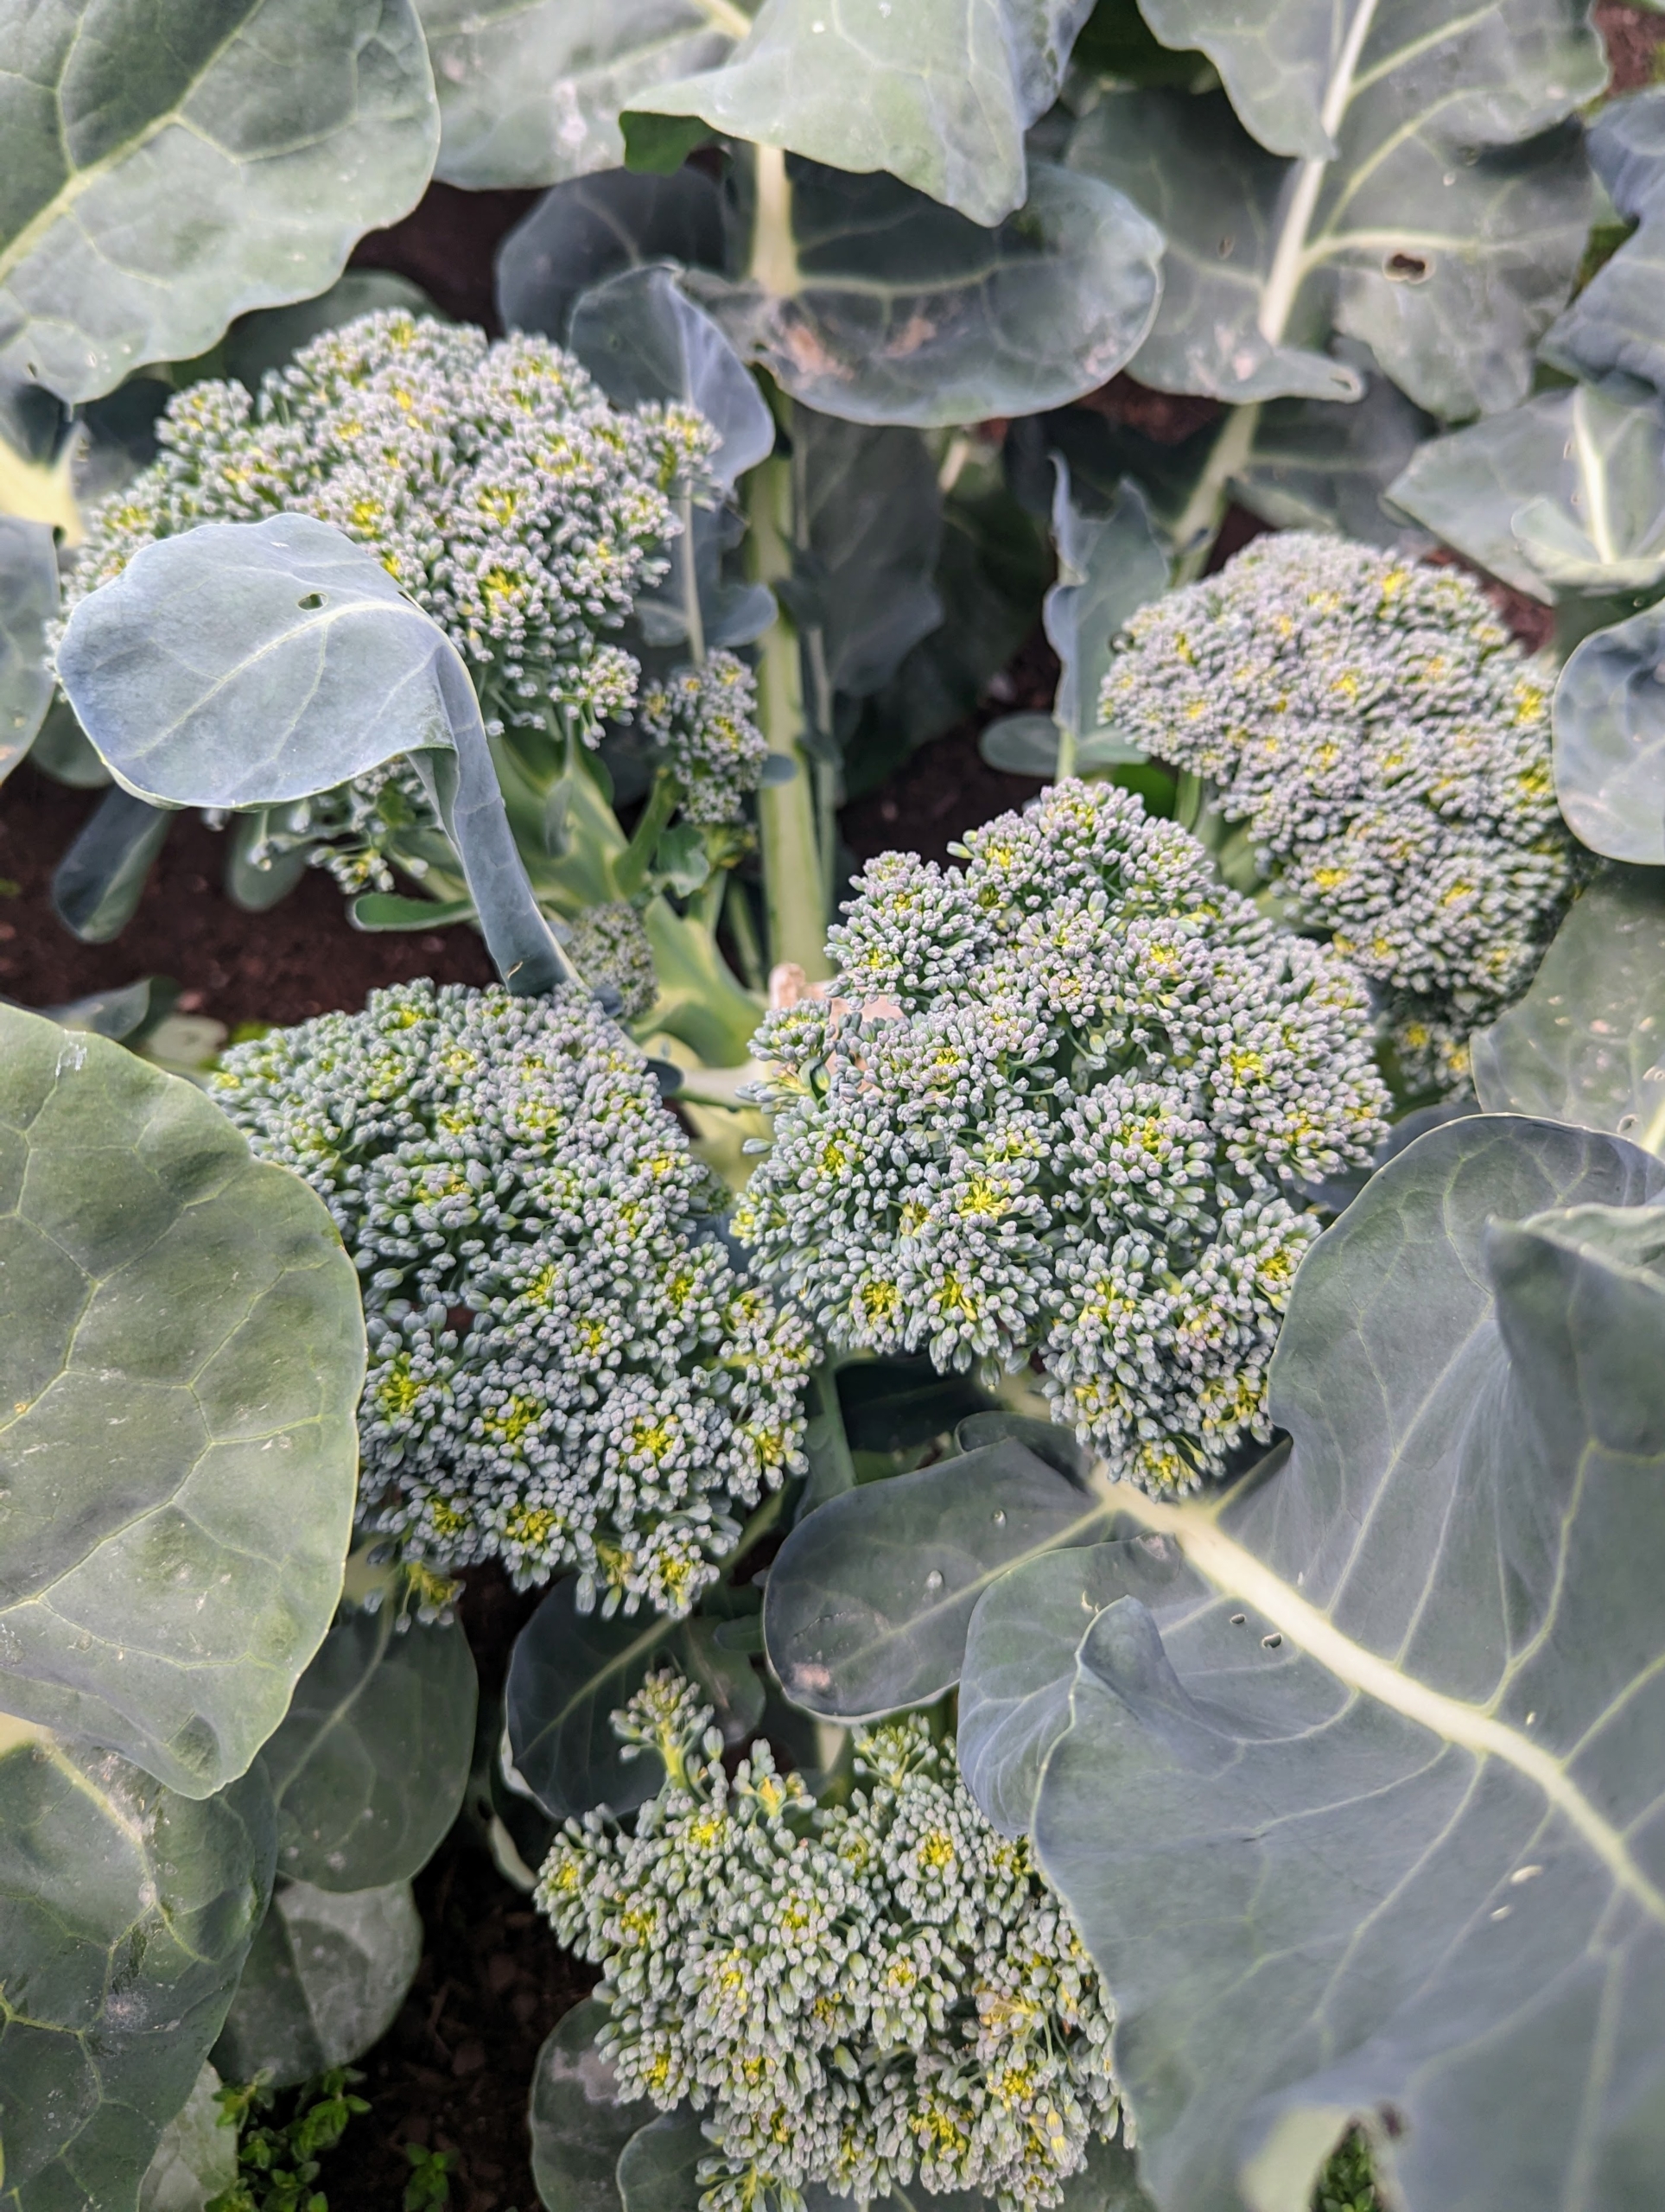
Here, we picked the center head of broccoli. These are the smaller side shoots that are already growing so beautifully.
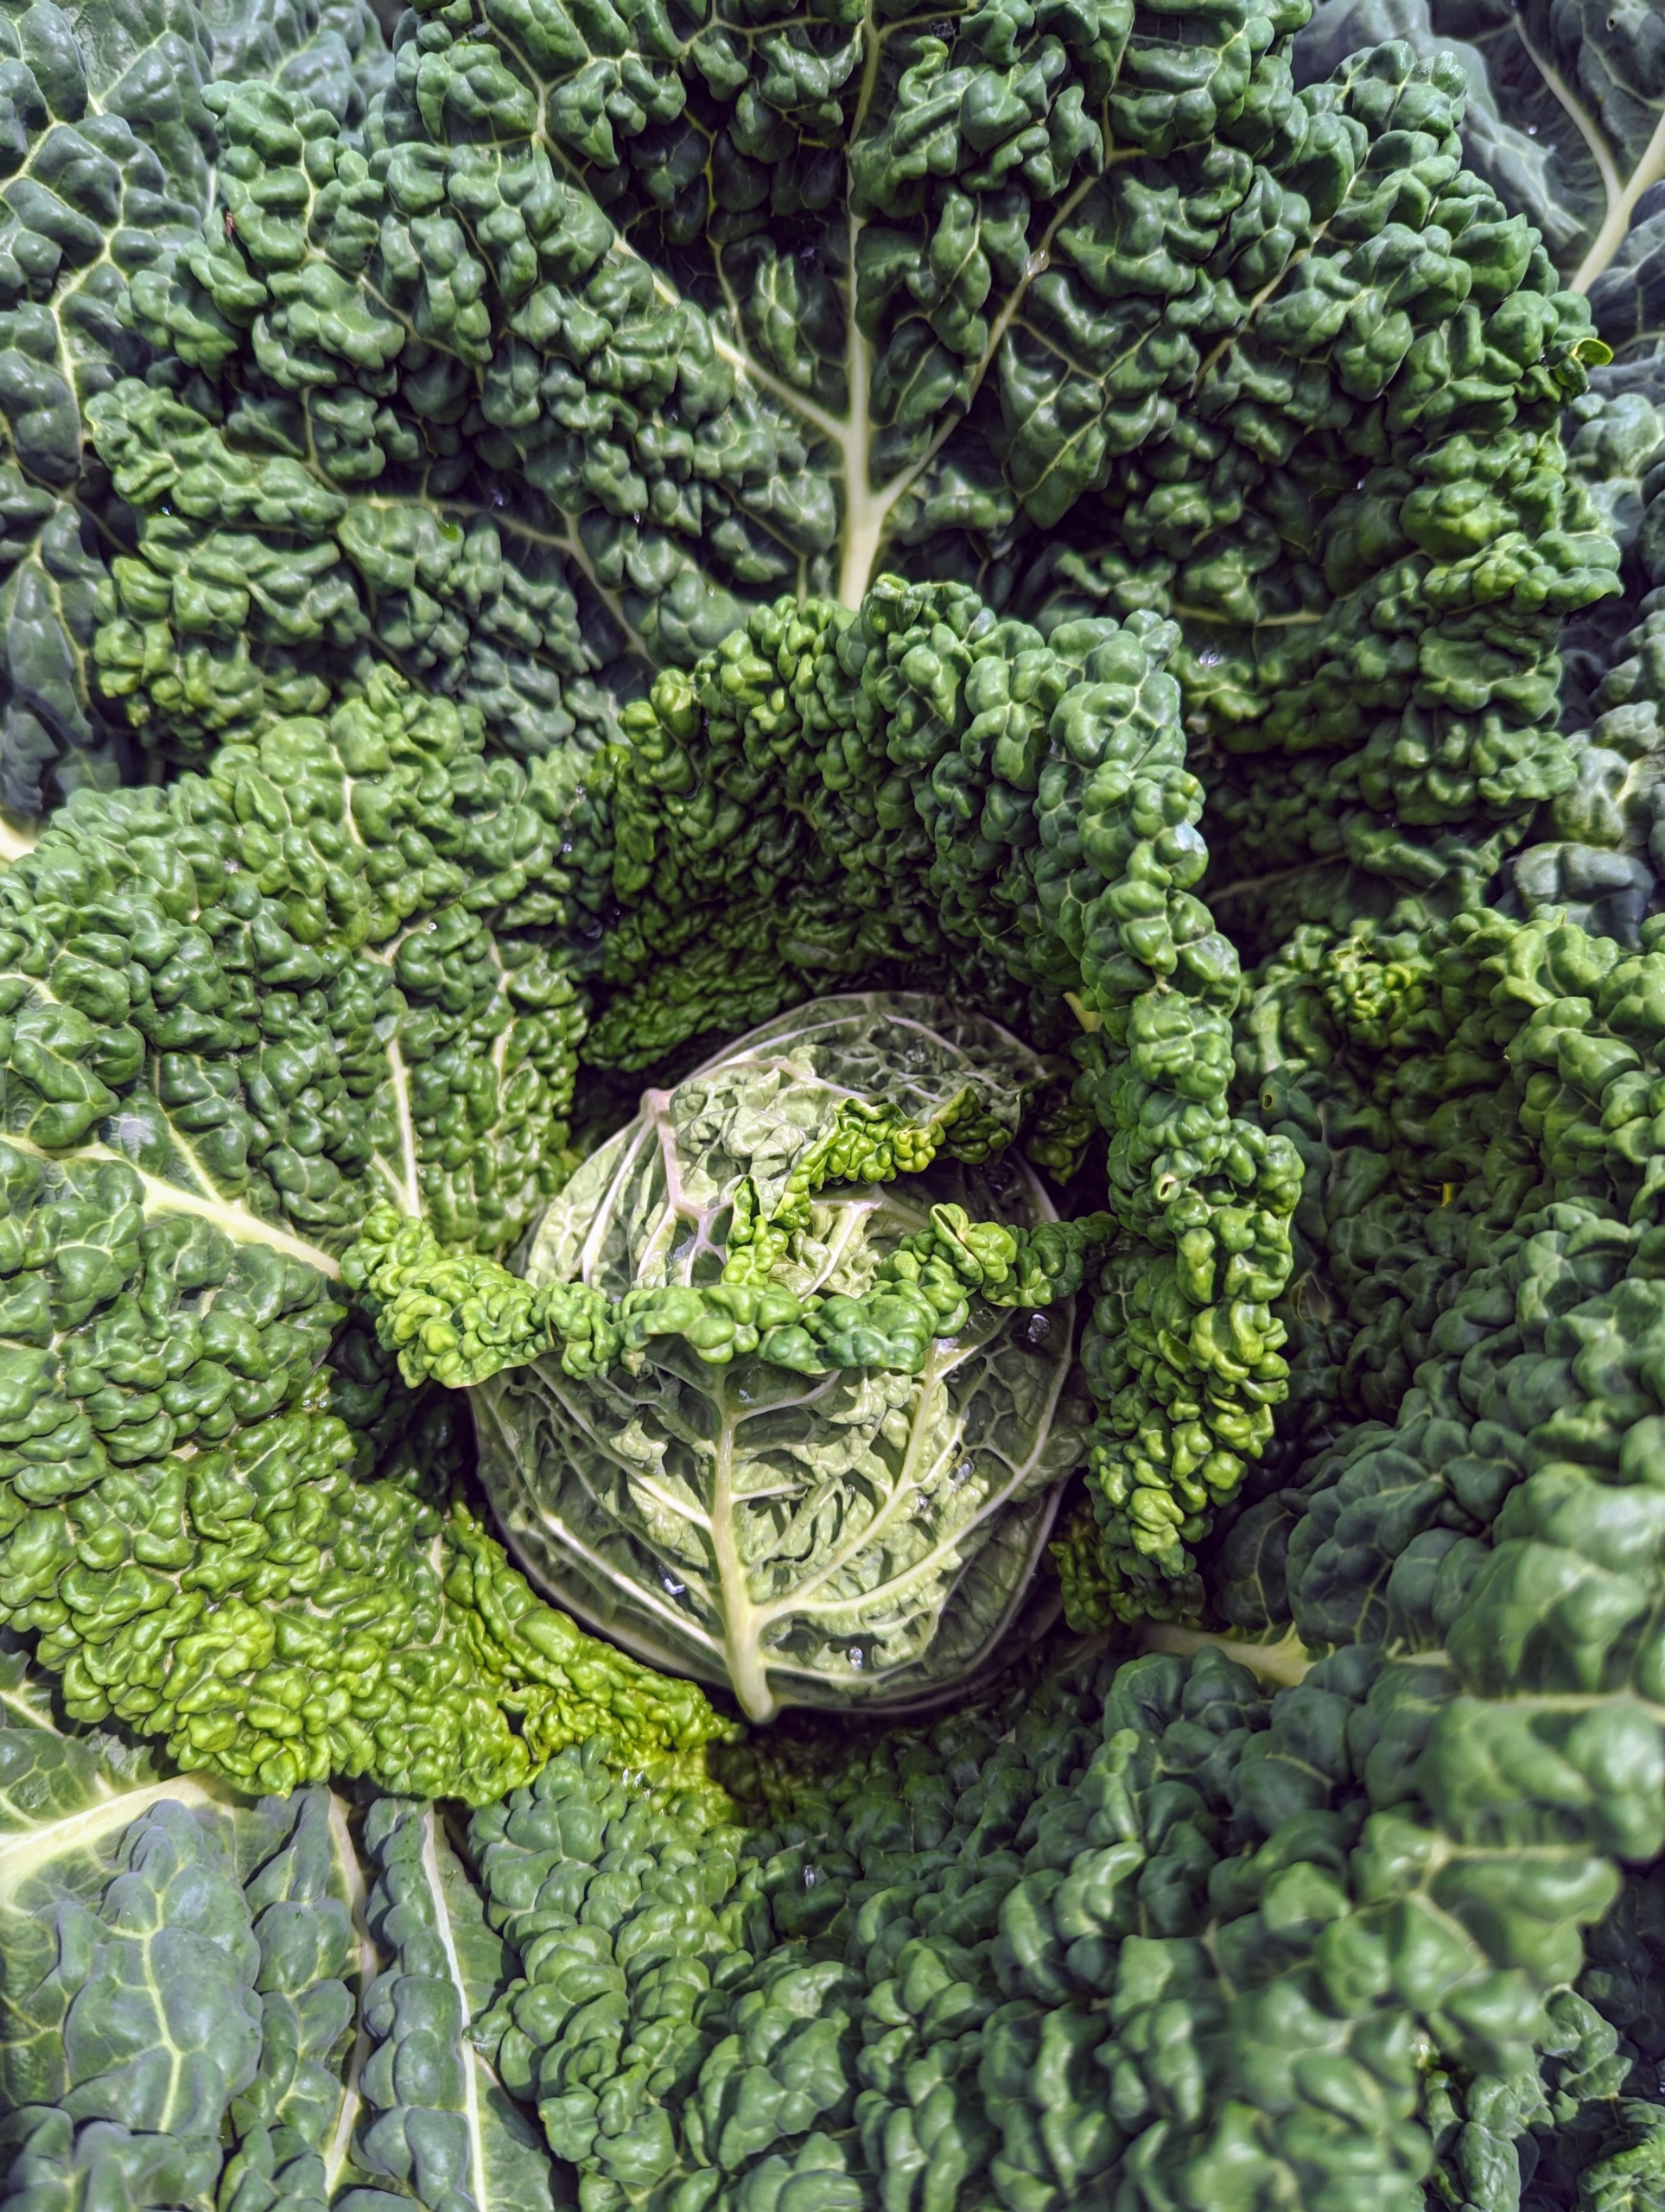
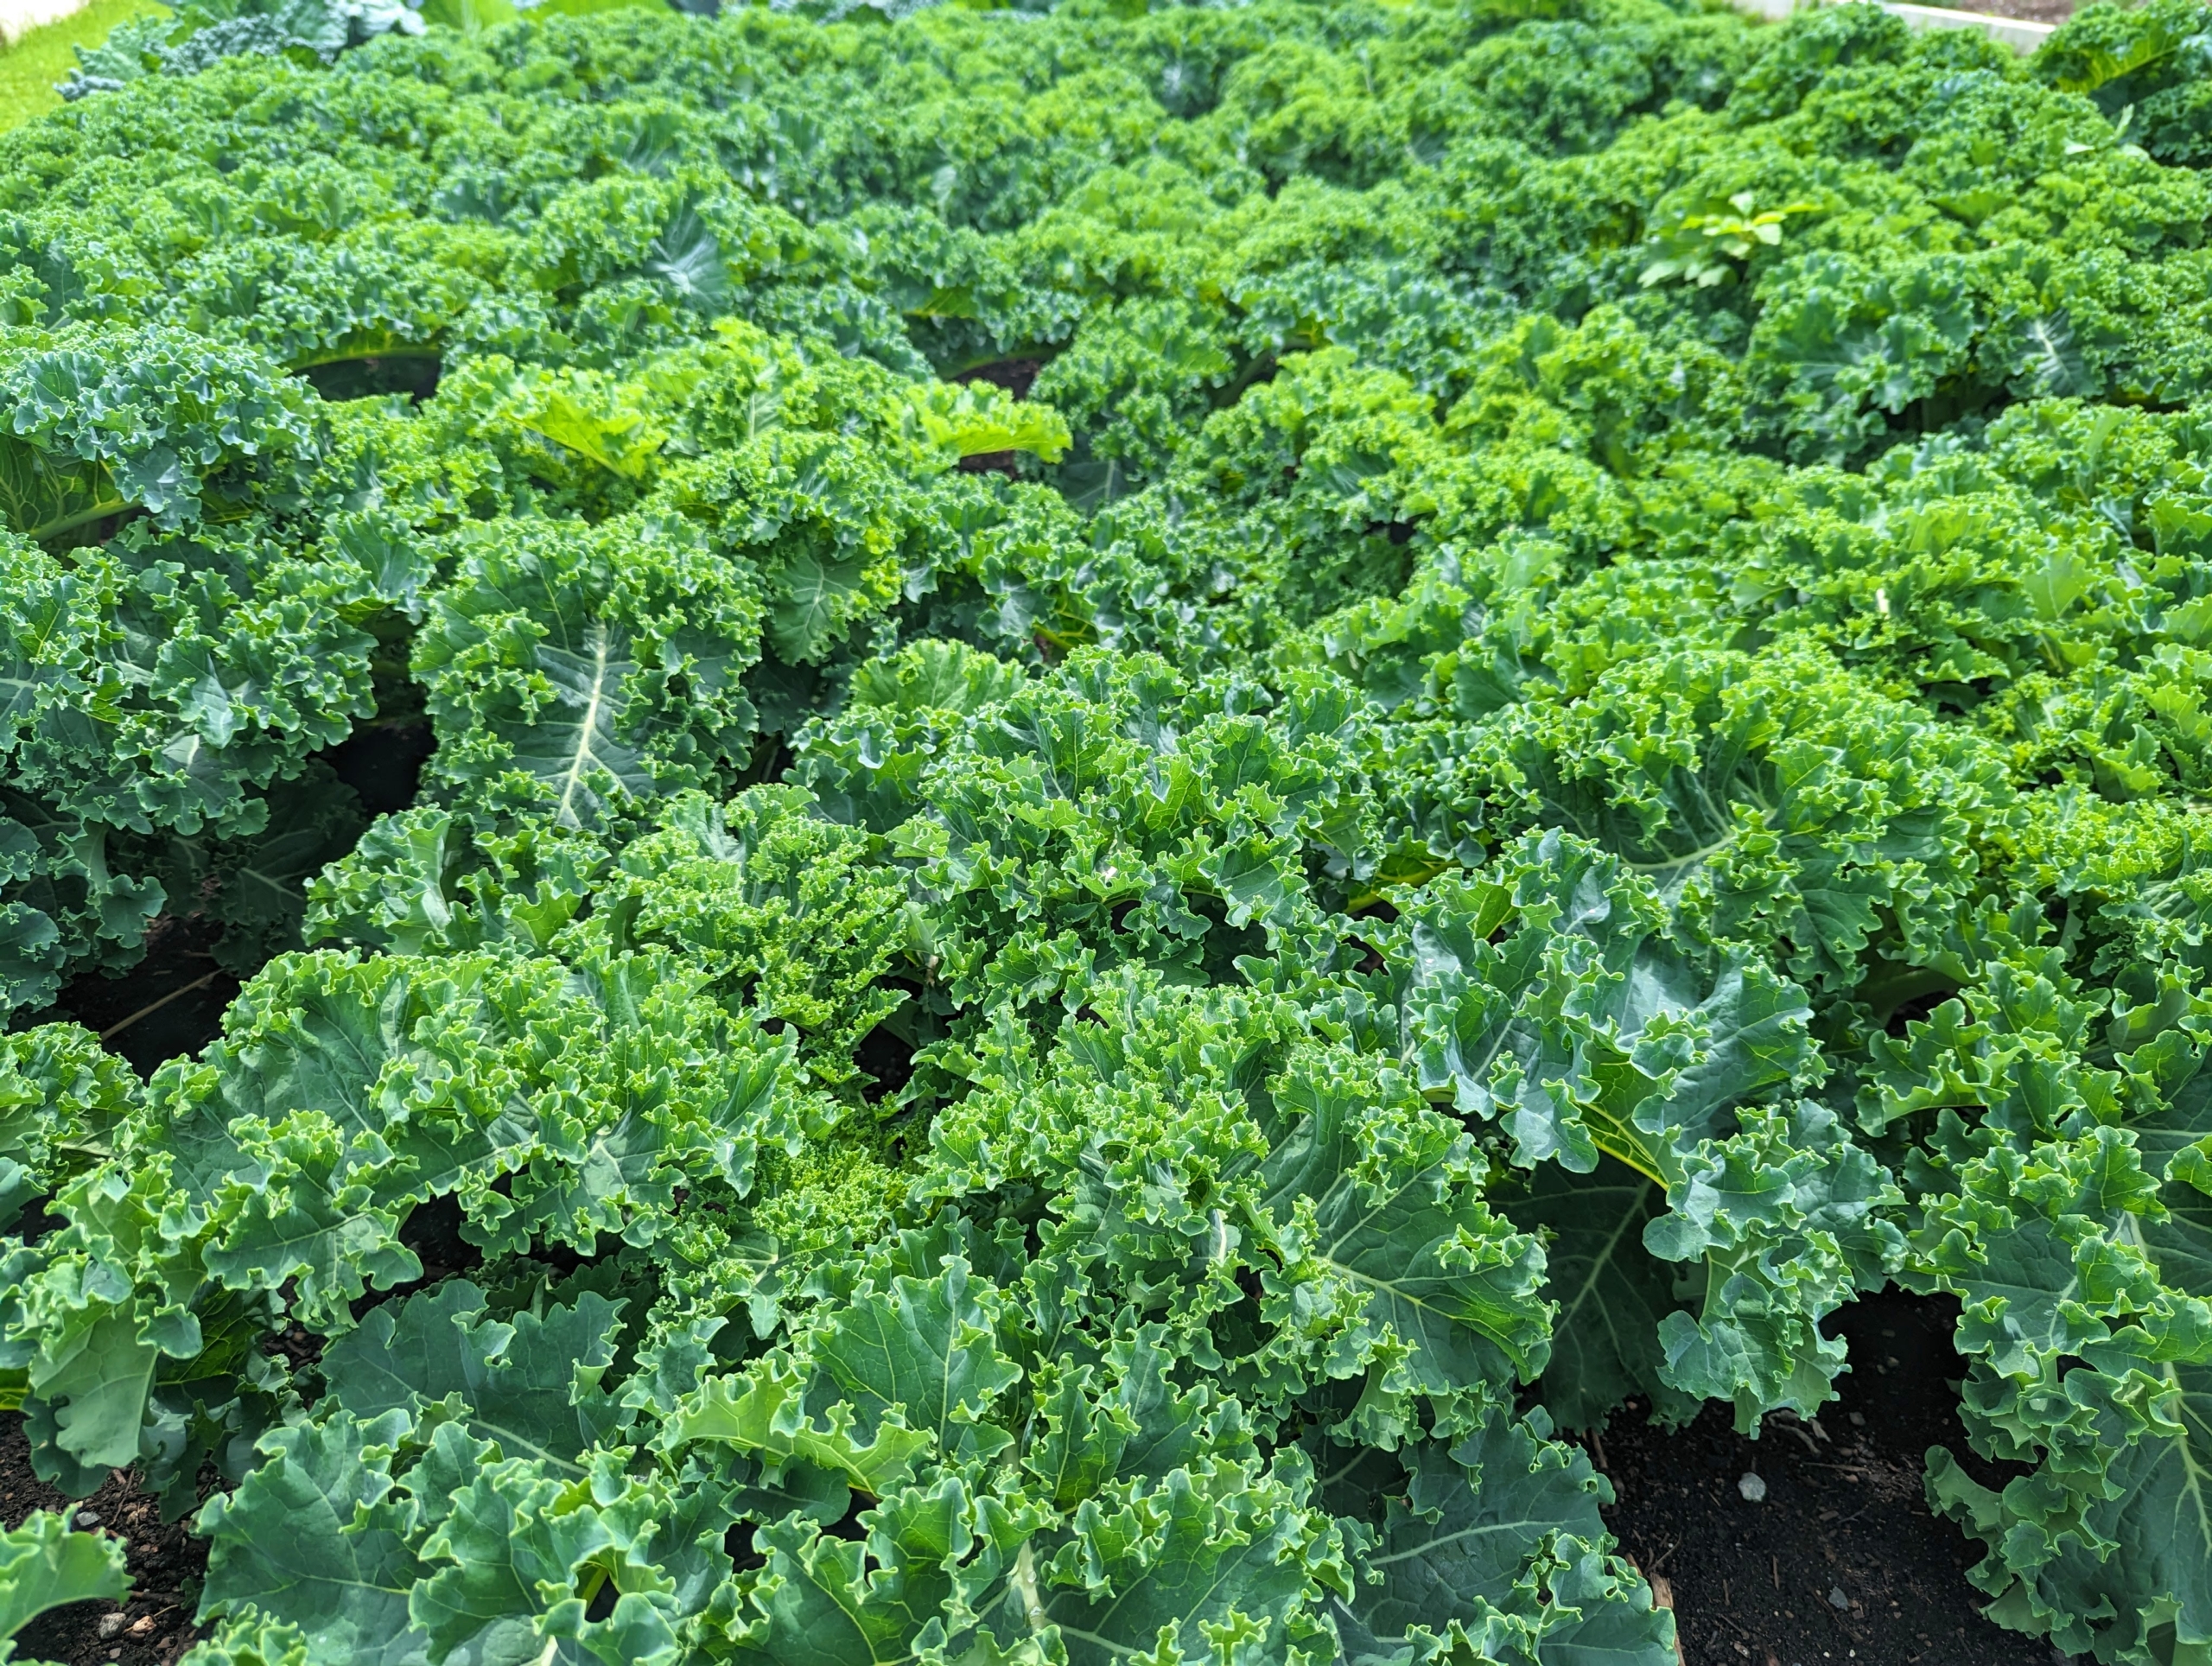
Kale or leaf cabbage is a group of vegetable cultivars within the plant species Brassica oleracea. They have purple or green leaves, in which the central leaves do not form a head.
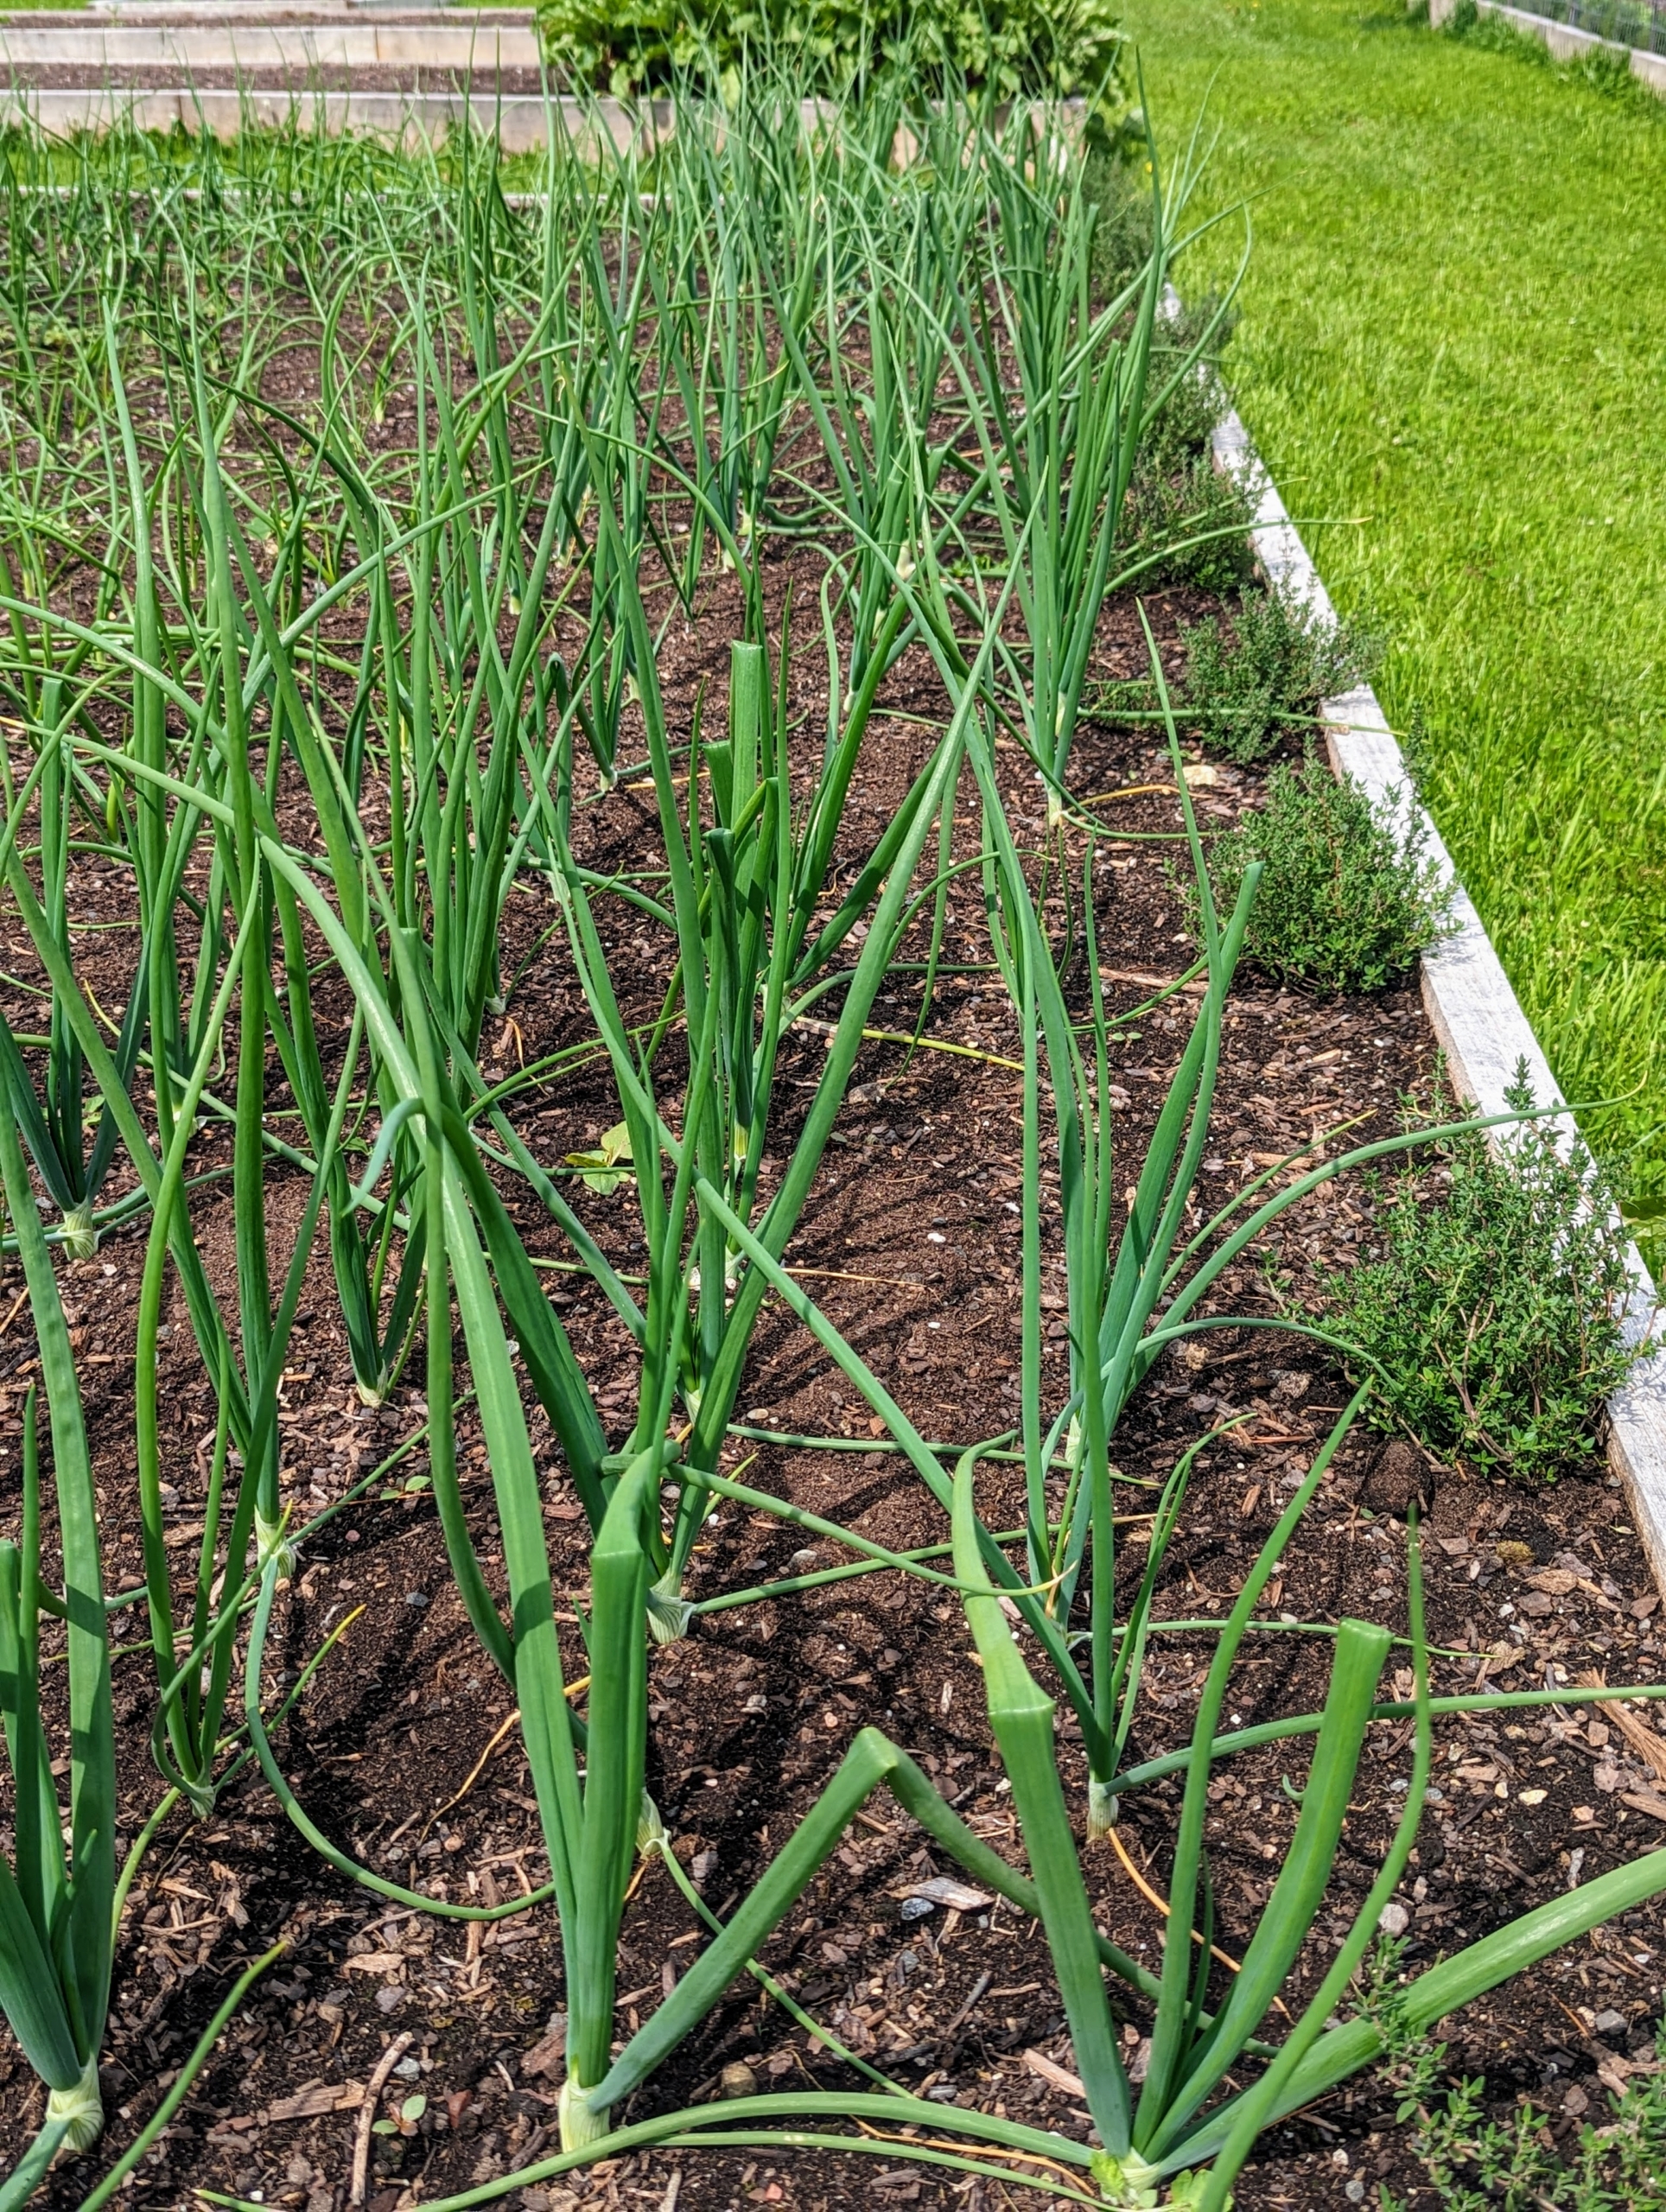
We planted leeks, shallots and onions back in late April – look how much these leeks have grown. The leek is a cultivar of Allium ampeloprasum, the broadleaf wild leek. The edible part of the plant is a bundle of leaf sheaths that is sometimes erroneously called a stem or stalk. Leeks have a mildly sweet flavor similar to onions, shallots, garlic, and chives.
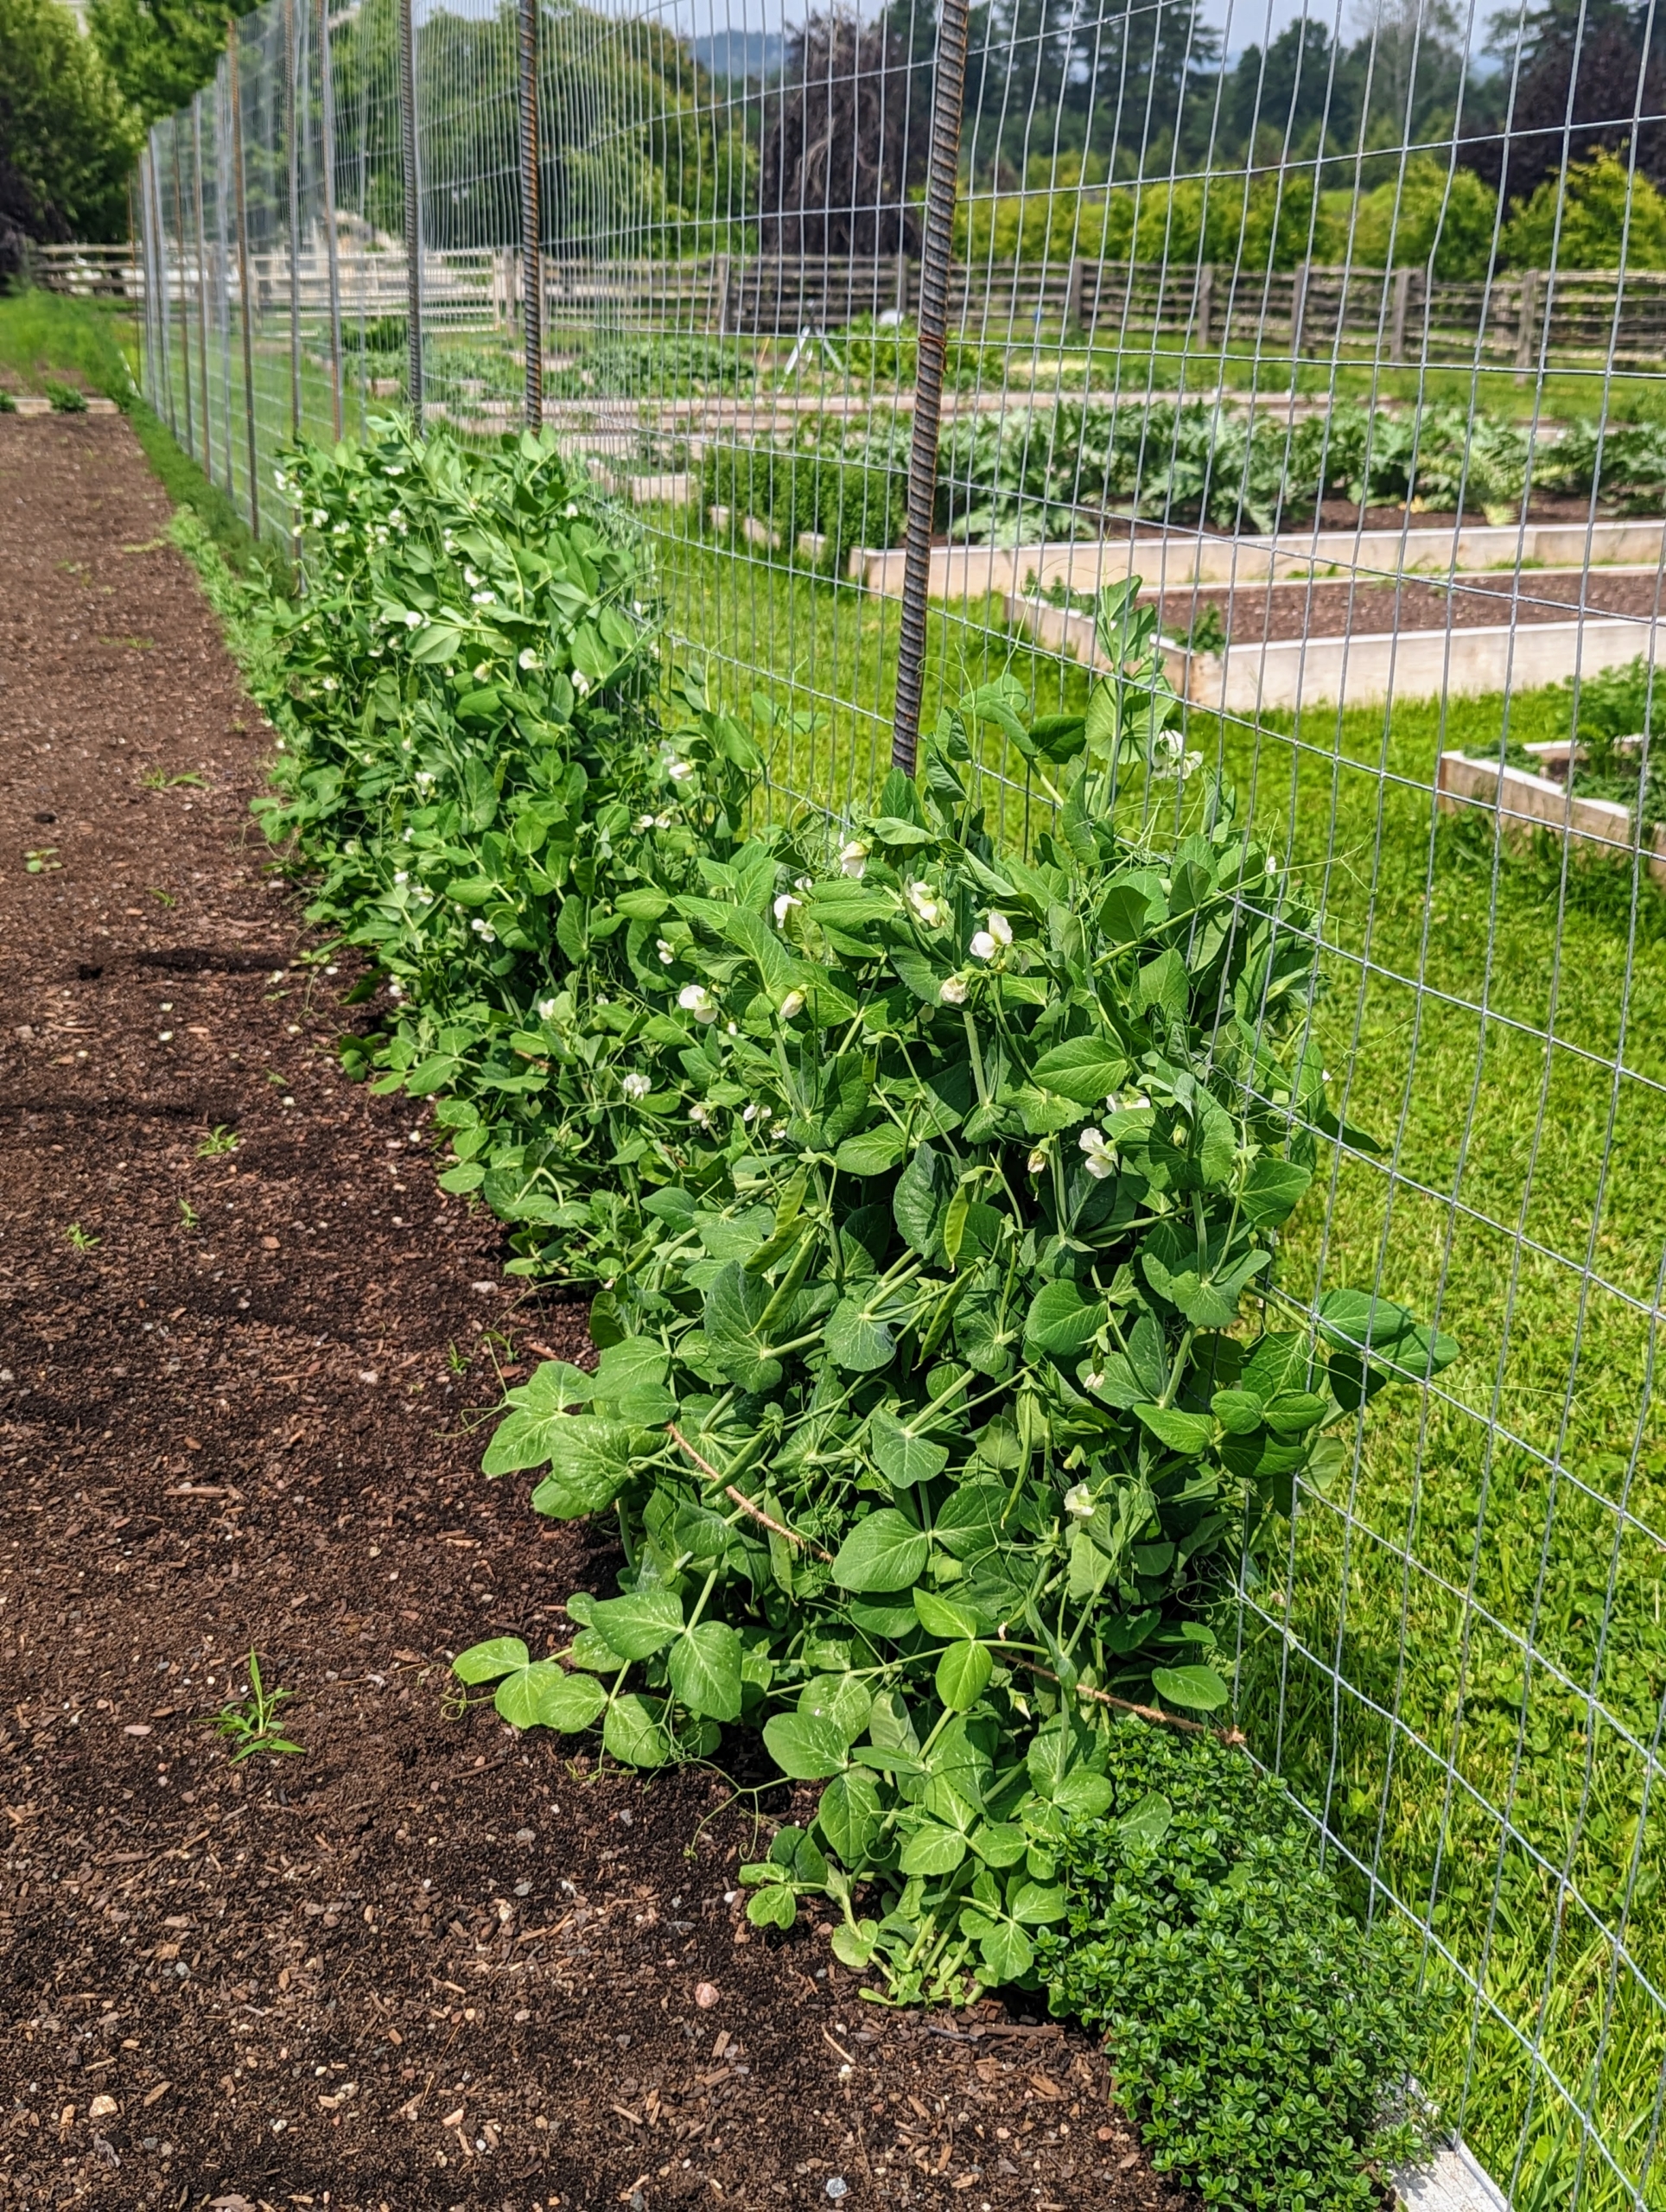
In another center bed, along this trellis we put up, are lots of peas – one section for shelling peas, which need to be removed from their pods before eating, and another for edible pods, which can be eaten whole, such as our snap peas. They are best grown on supports to keep them off the ground and away from pests and diseases.
Pea plants produce white flowers with a slight pink hue.
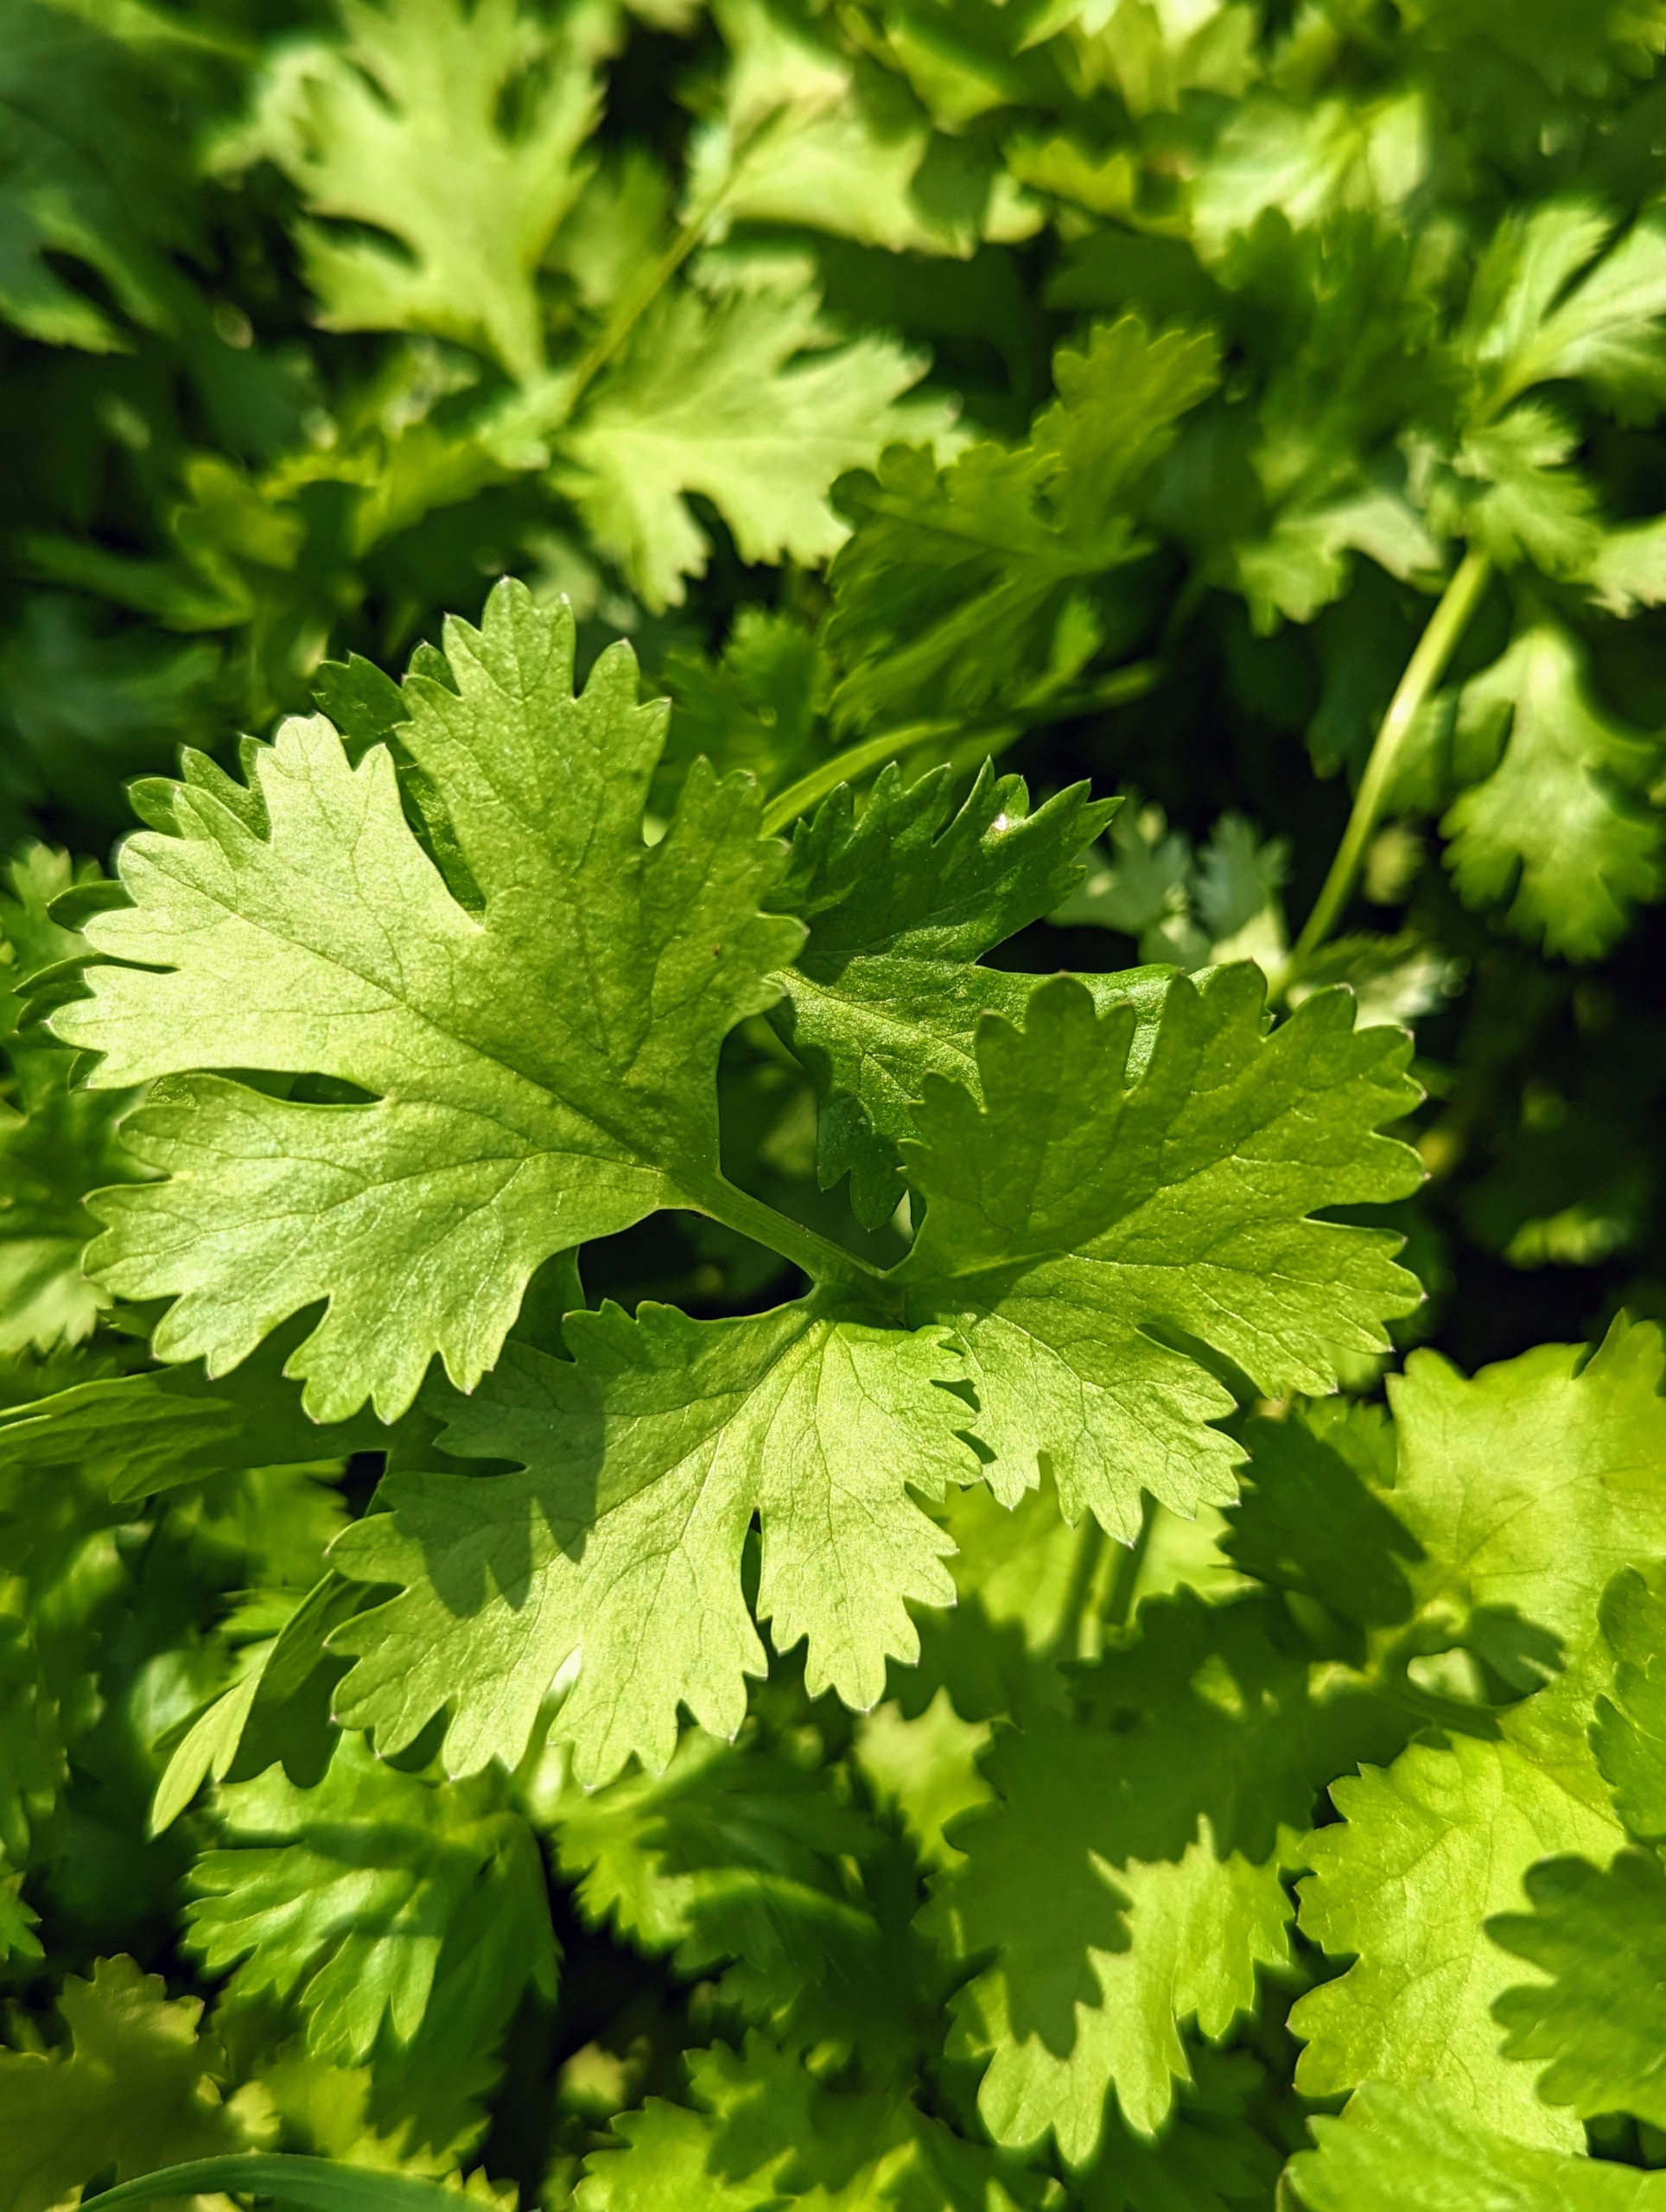
There is also a lot of fresh and fragrant cilantro. Often known in the United Kingdom as coriander, cilantro comes from the plant Coriandrum sativum. In the United States, the leaves of the plant are referred to as cilantro and the seeds are called coriander. Cilantro is also commonly known as Chinese parsley. And those who care for it and those who don’t are split – and it’s actually genetic. Some possess a gene that makes them super-sensitive to the aldehyde component found in cilantro. Do you love cilantro, or hate it?
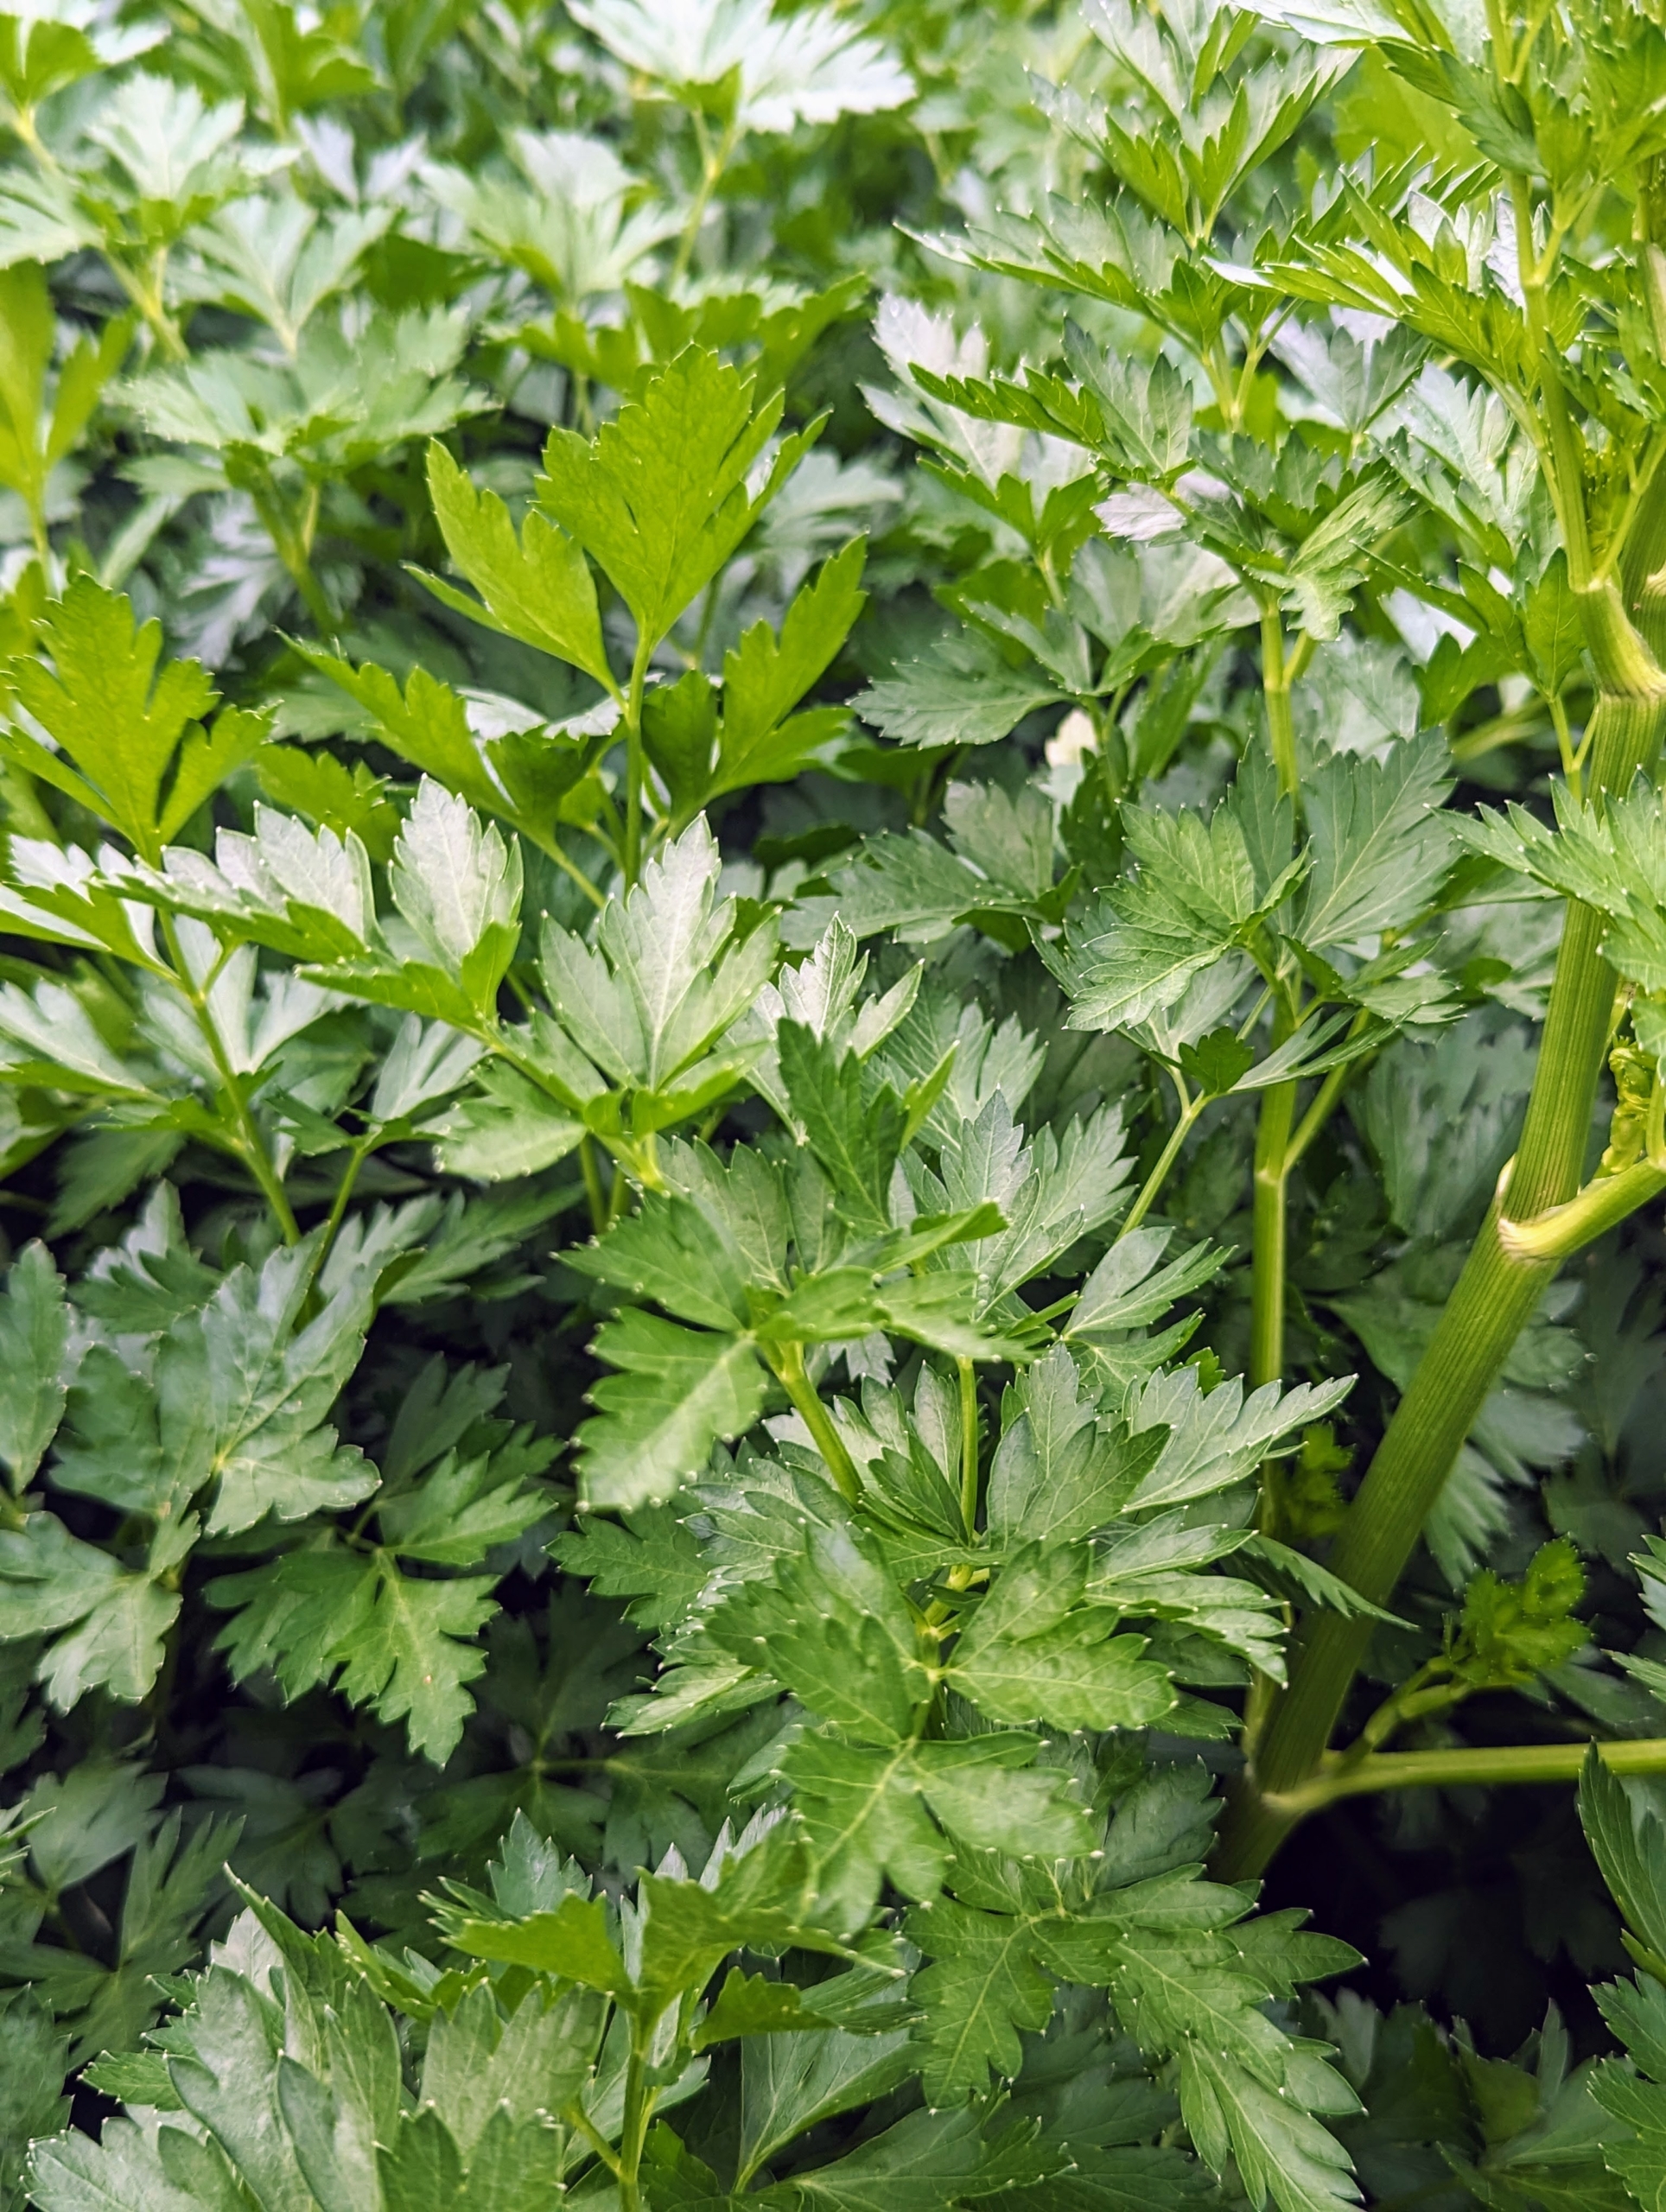
Also always growing here at the farm is parsley. This will find its way into my morning green juice. Parsley is rich in vitamins K, C, and other antioxidants. It has a bright, herbaceous, and slightly bitter taste.
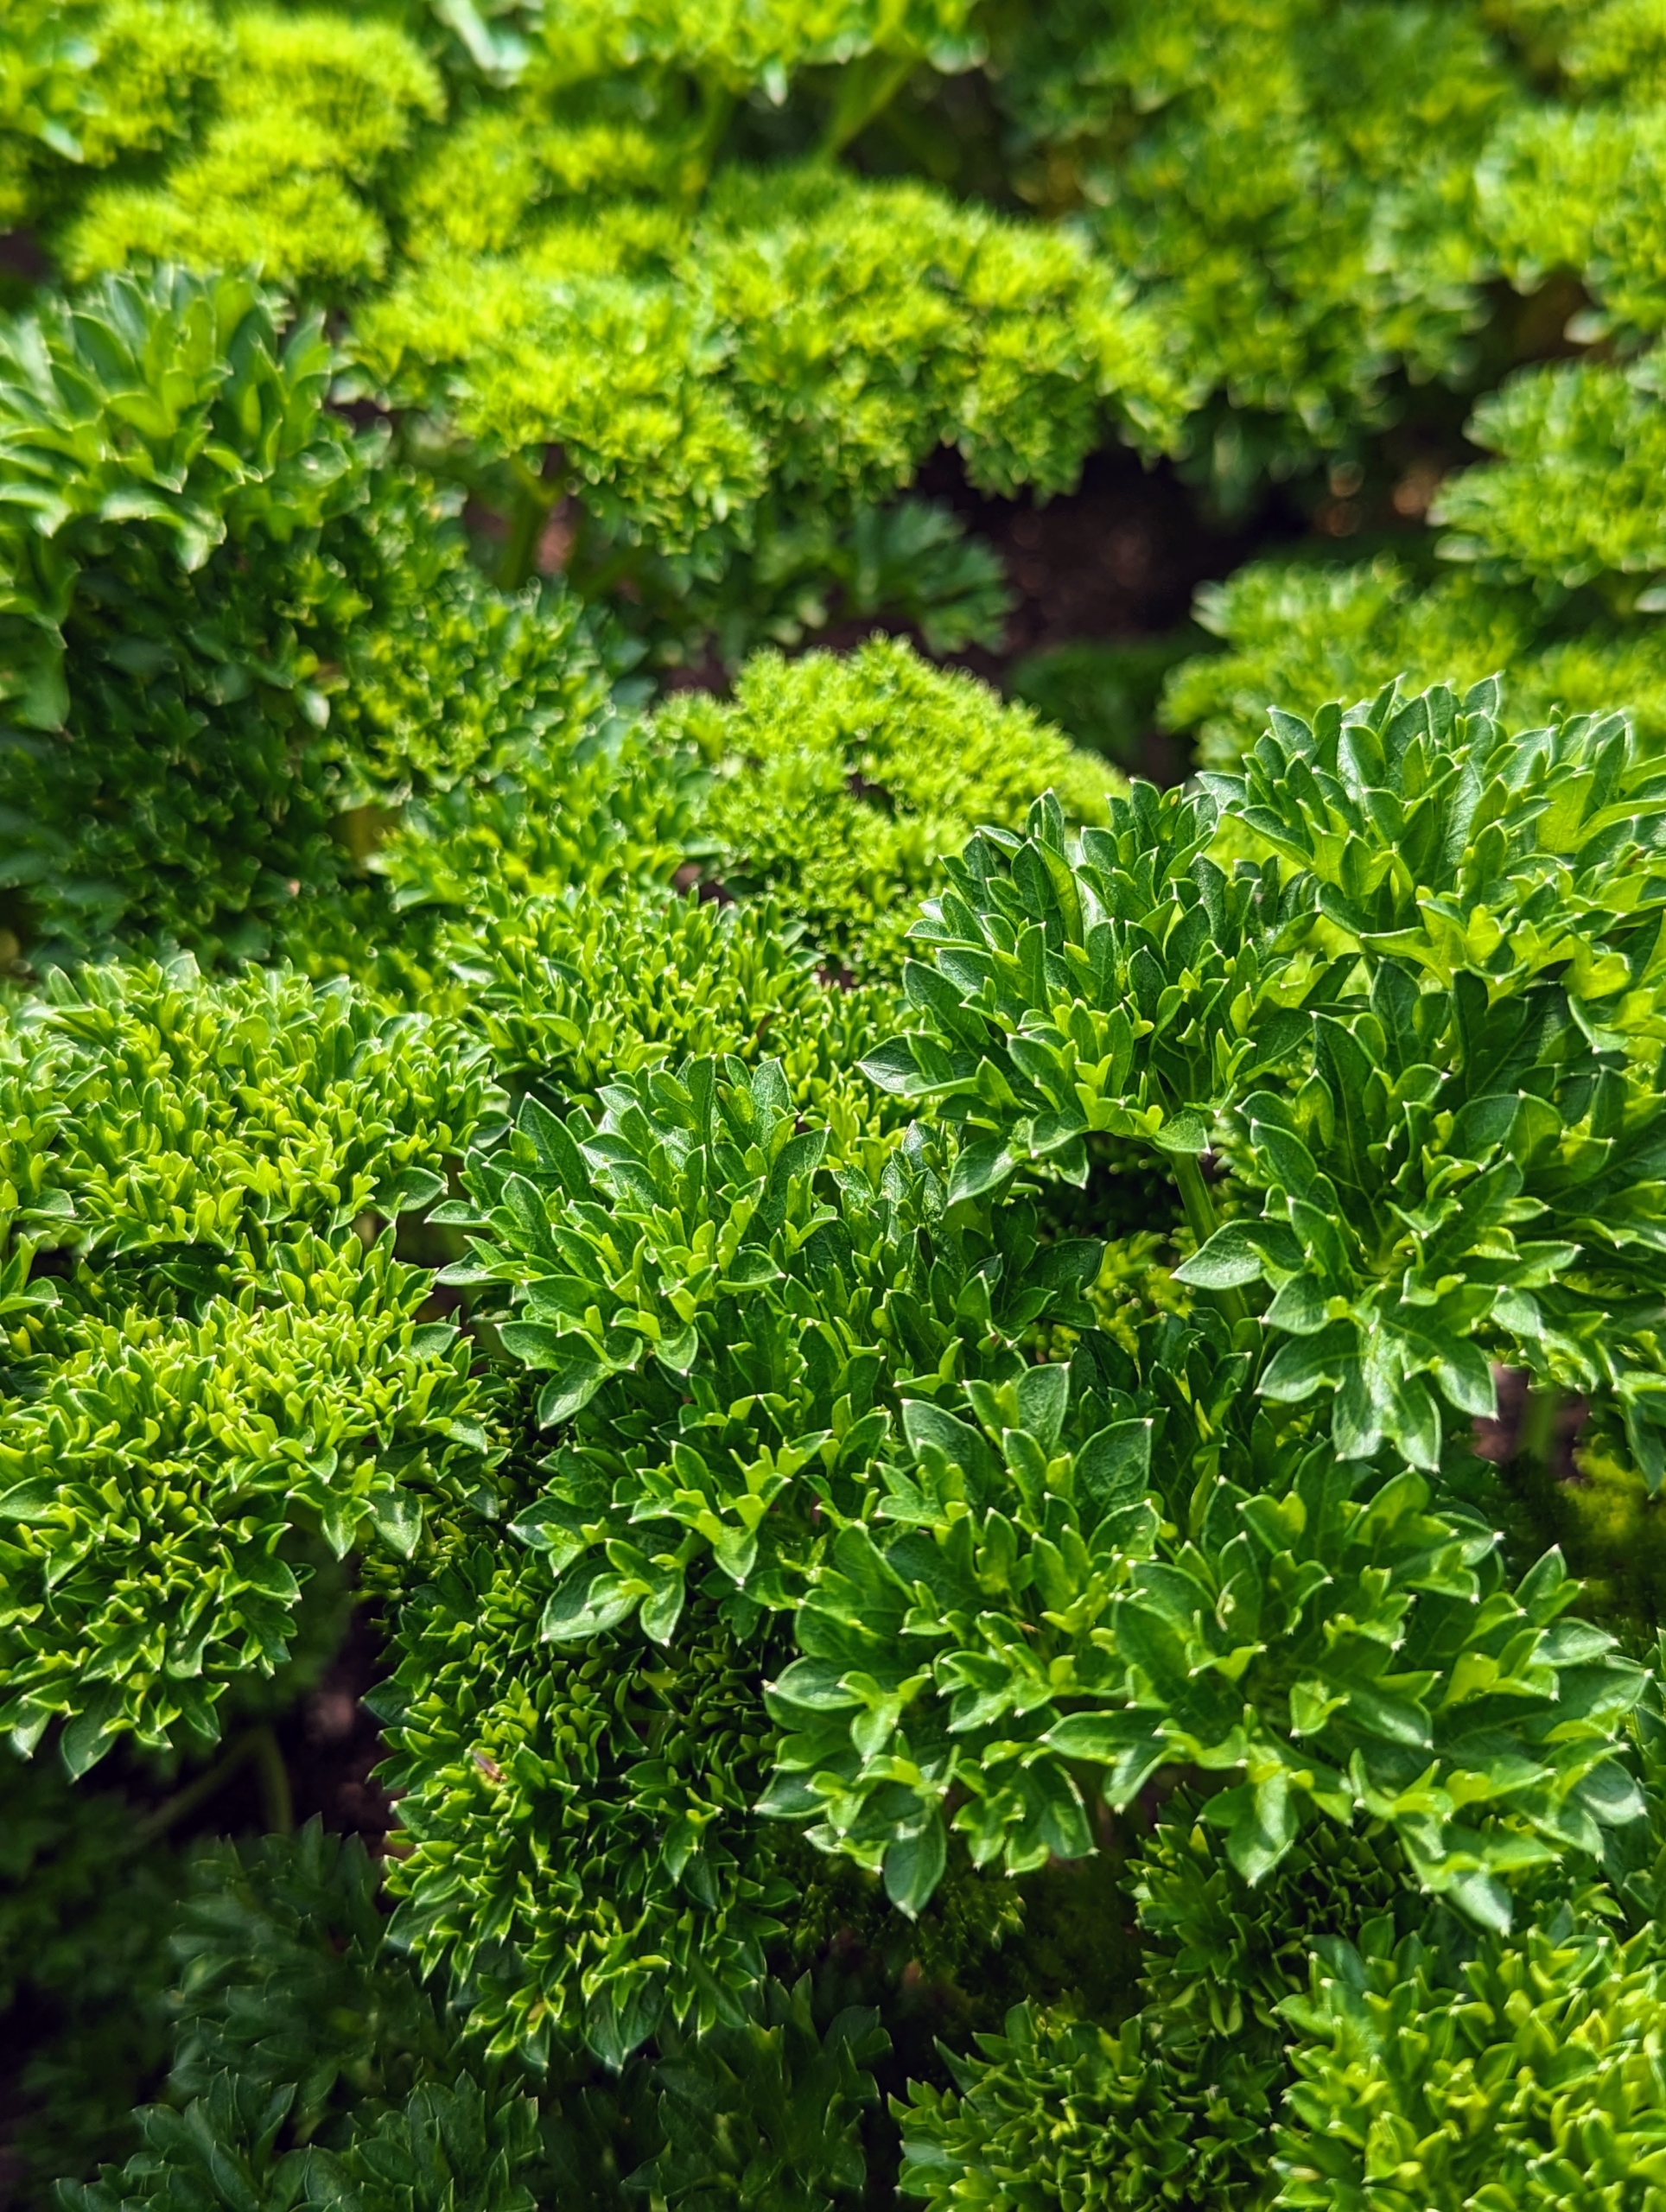
This is curly parsley. This comes from the same family, but curly parsley leaves are thicker and ruffled. Some also say its flavor is a bit stronger in curly parsley than in the flat-leaf varieties.
Everyone always asks what I do with all the vegetables I grow. I share them with my family, but I also love sharing the bounties with friends, colleagues, and my hardworking crew here at the farm. I also provide fruits, vegetables, and eggs for photography and video shoots. And, of course, all my birds get vegetables too. I hope your gardens are doing well this season.
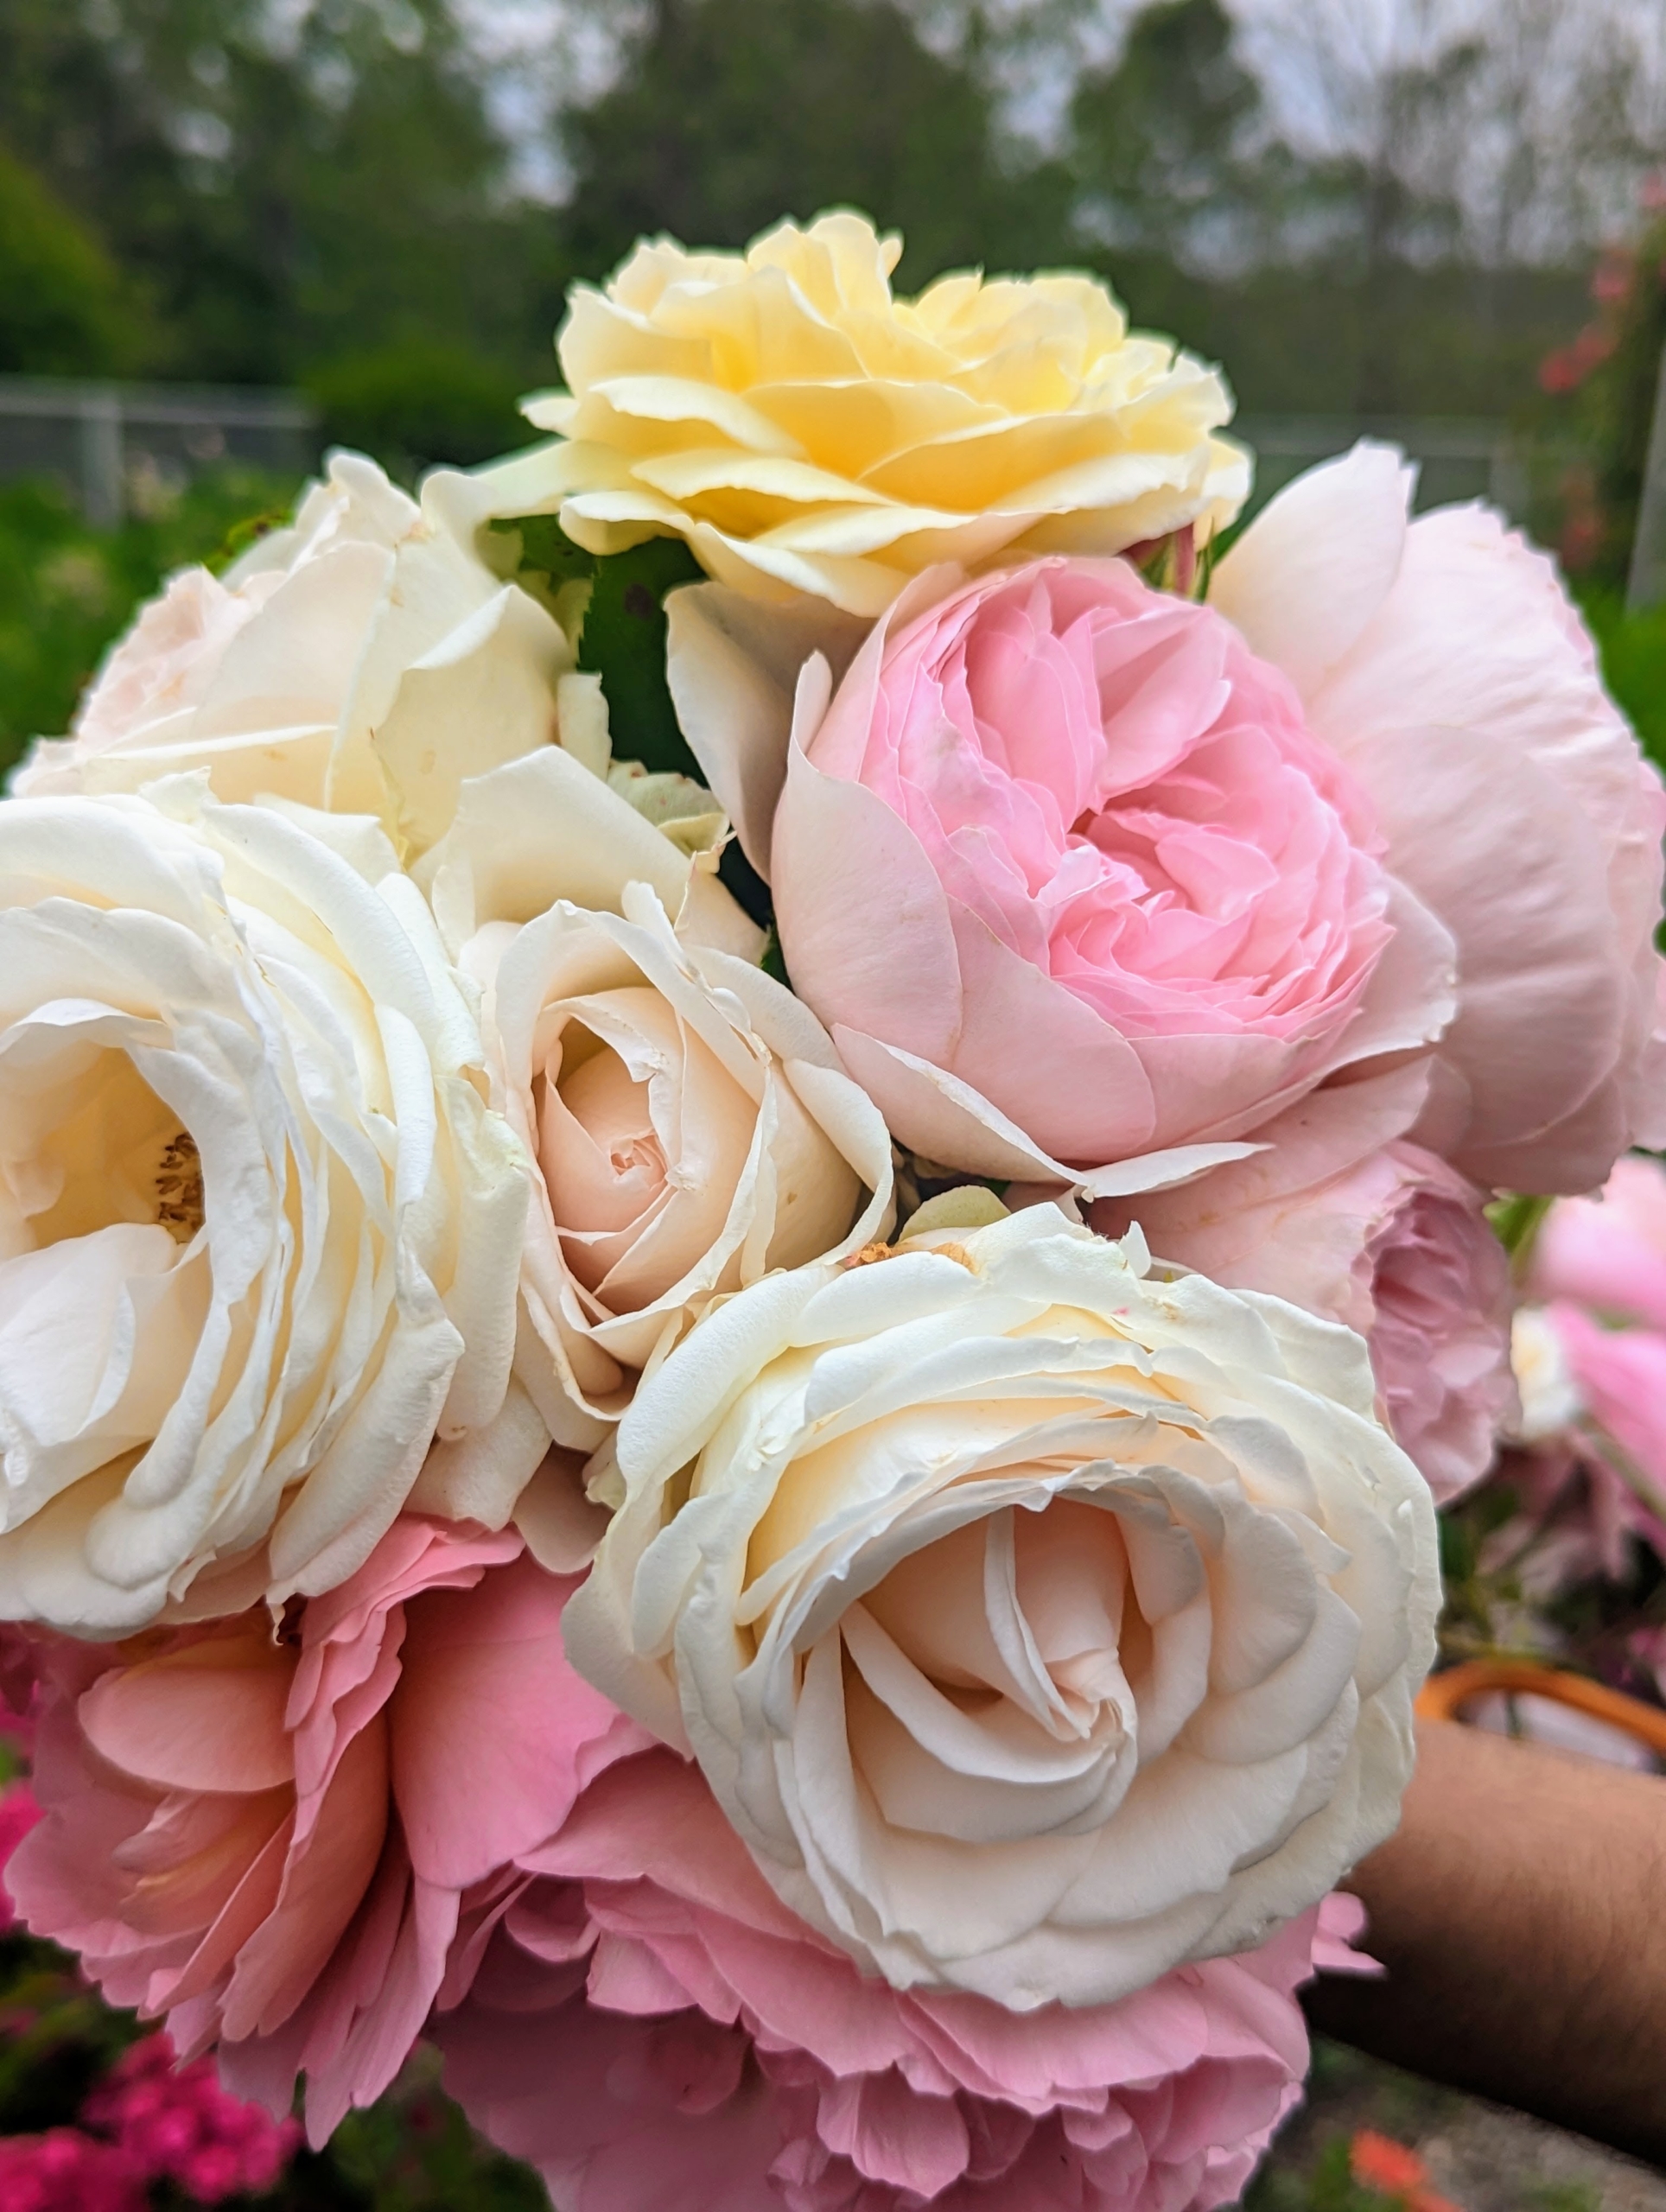
This time of year, my home is always decorated with gorgeous colorful blooms from my gardens. Right now, fragrant roses.
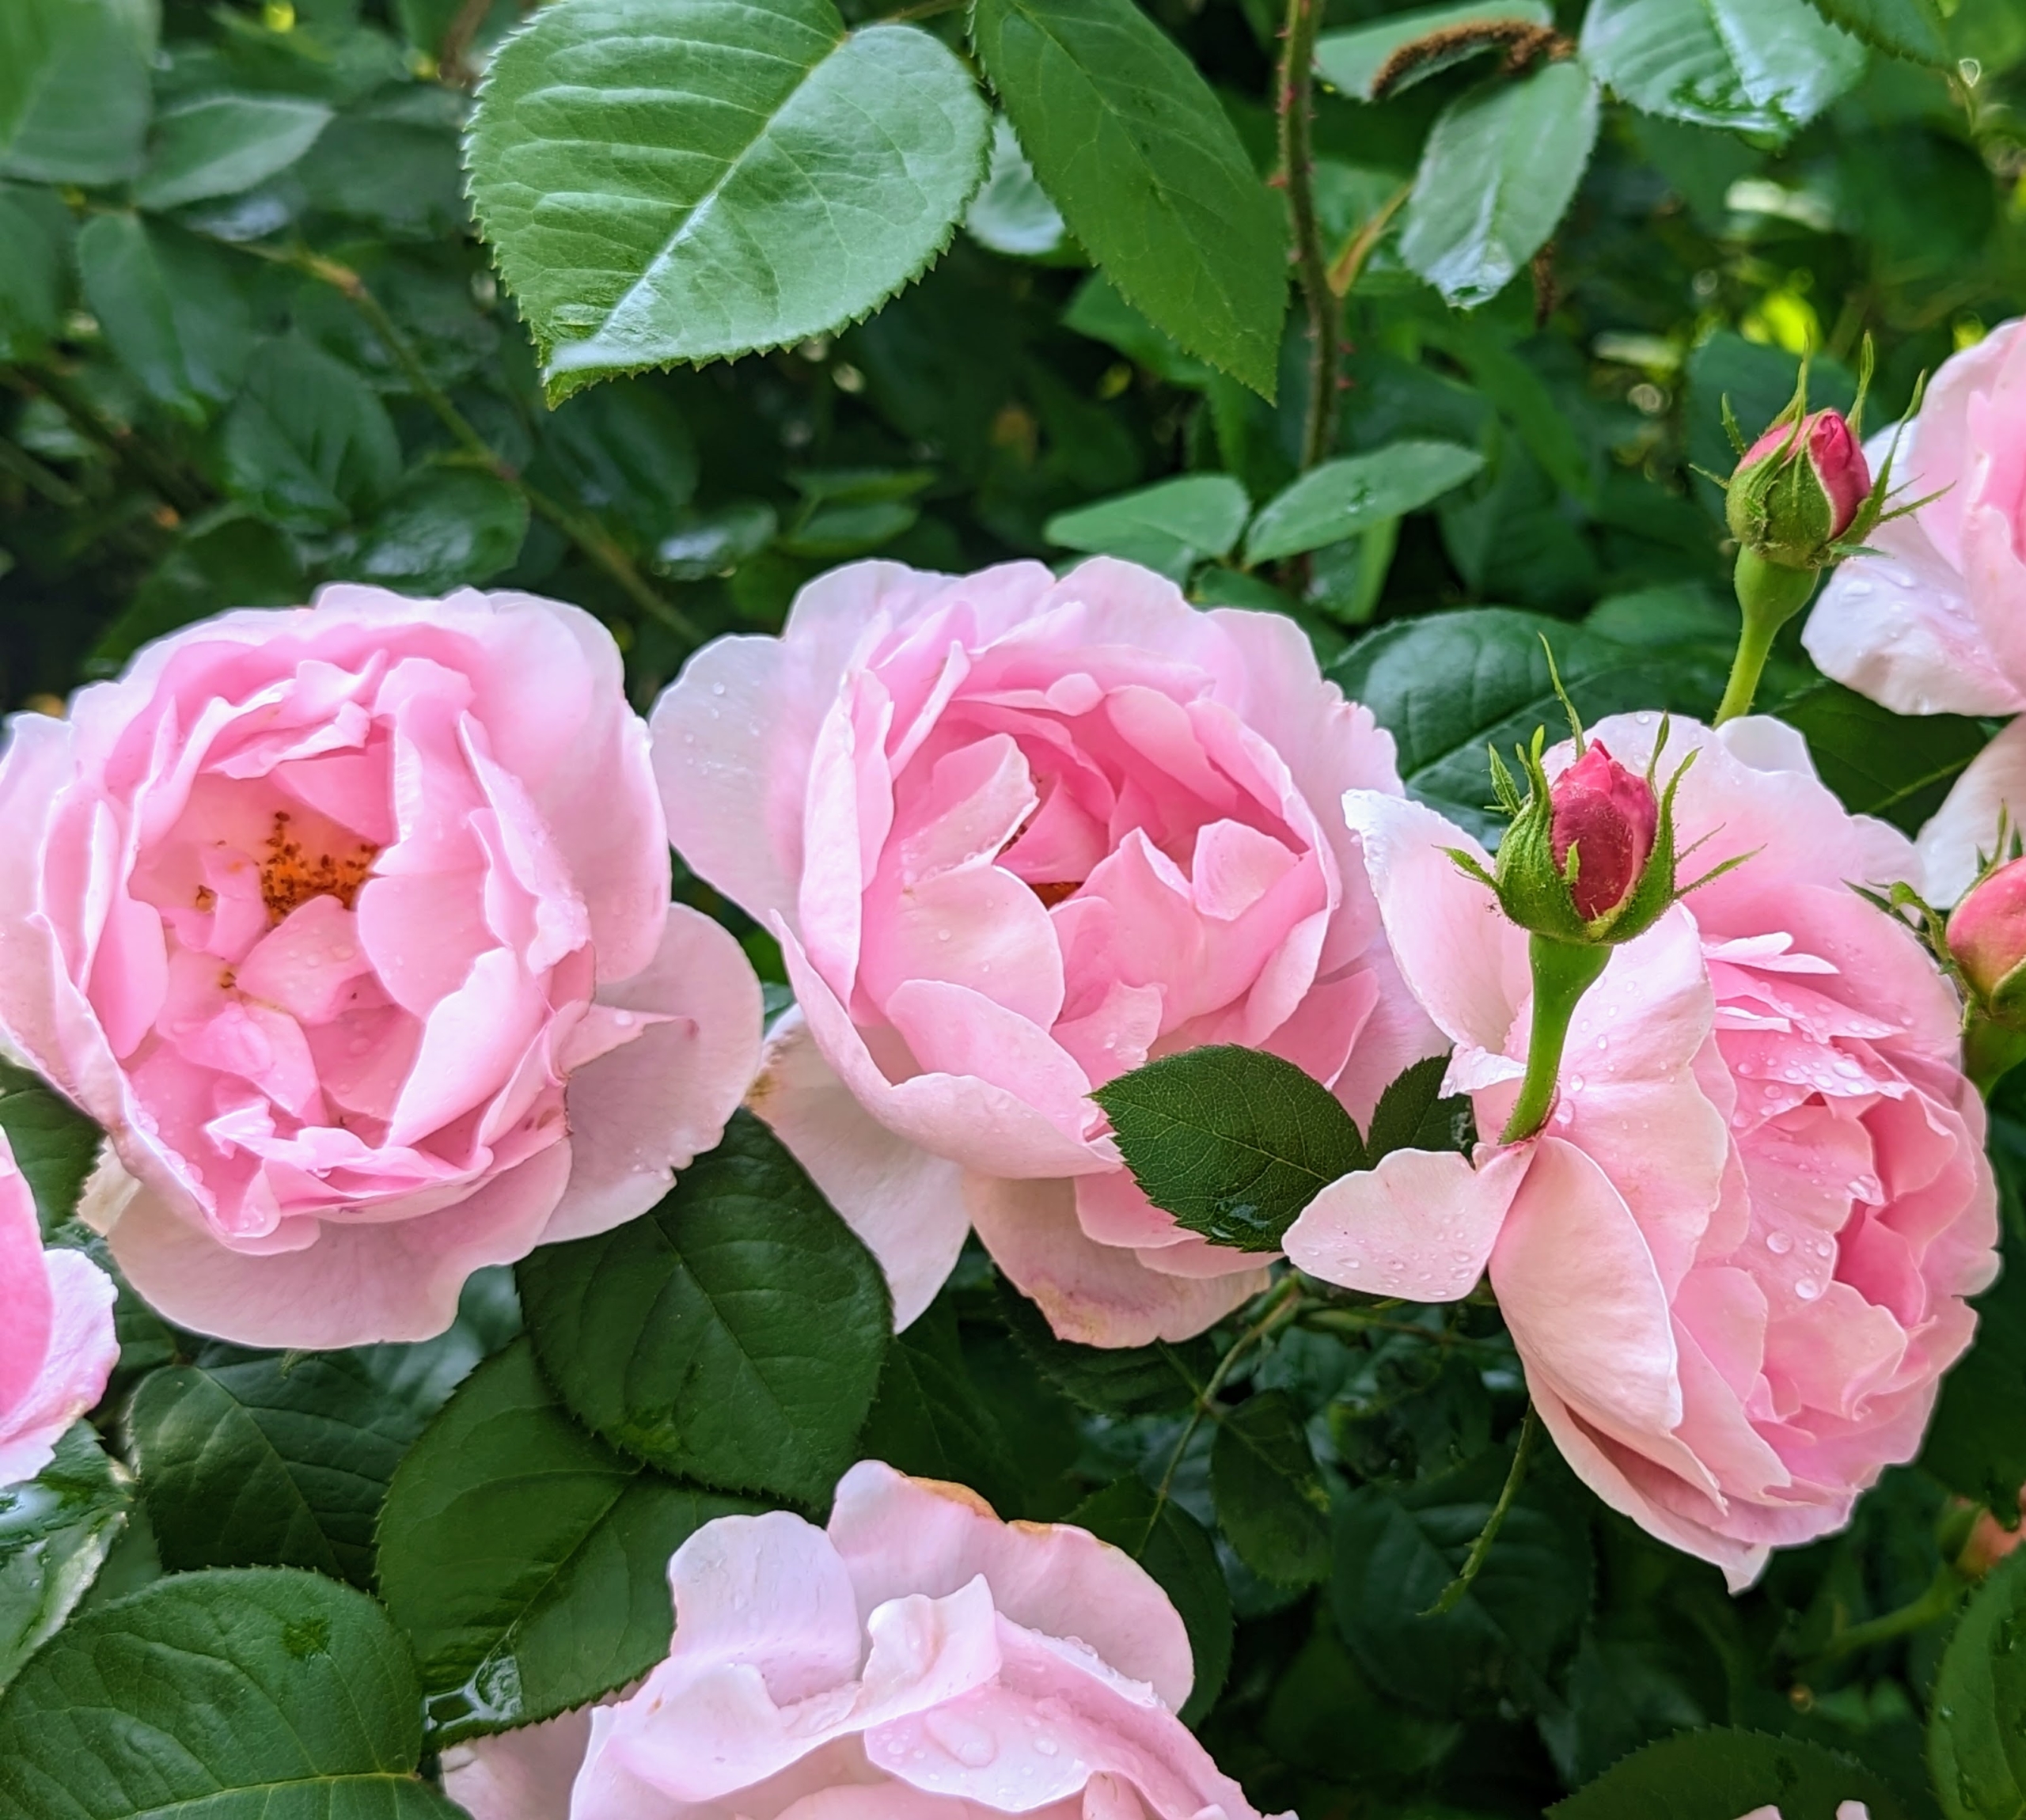
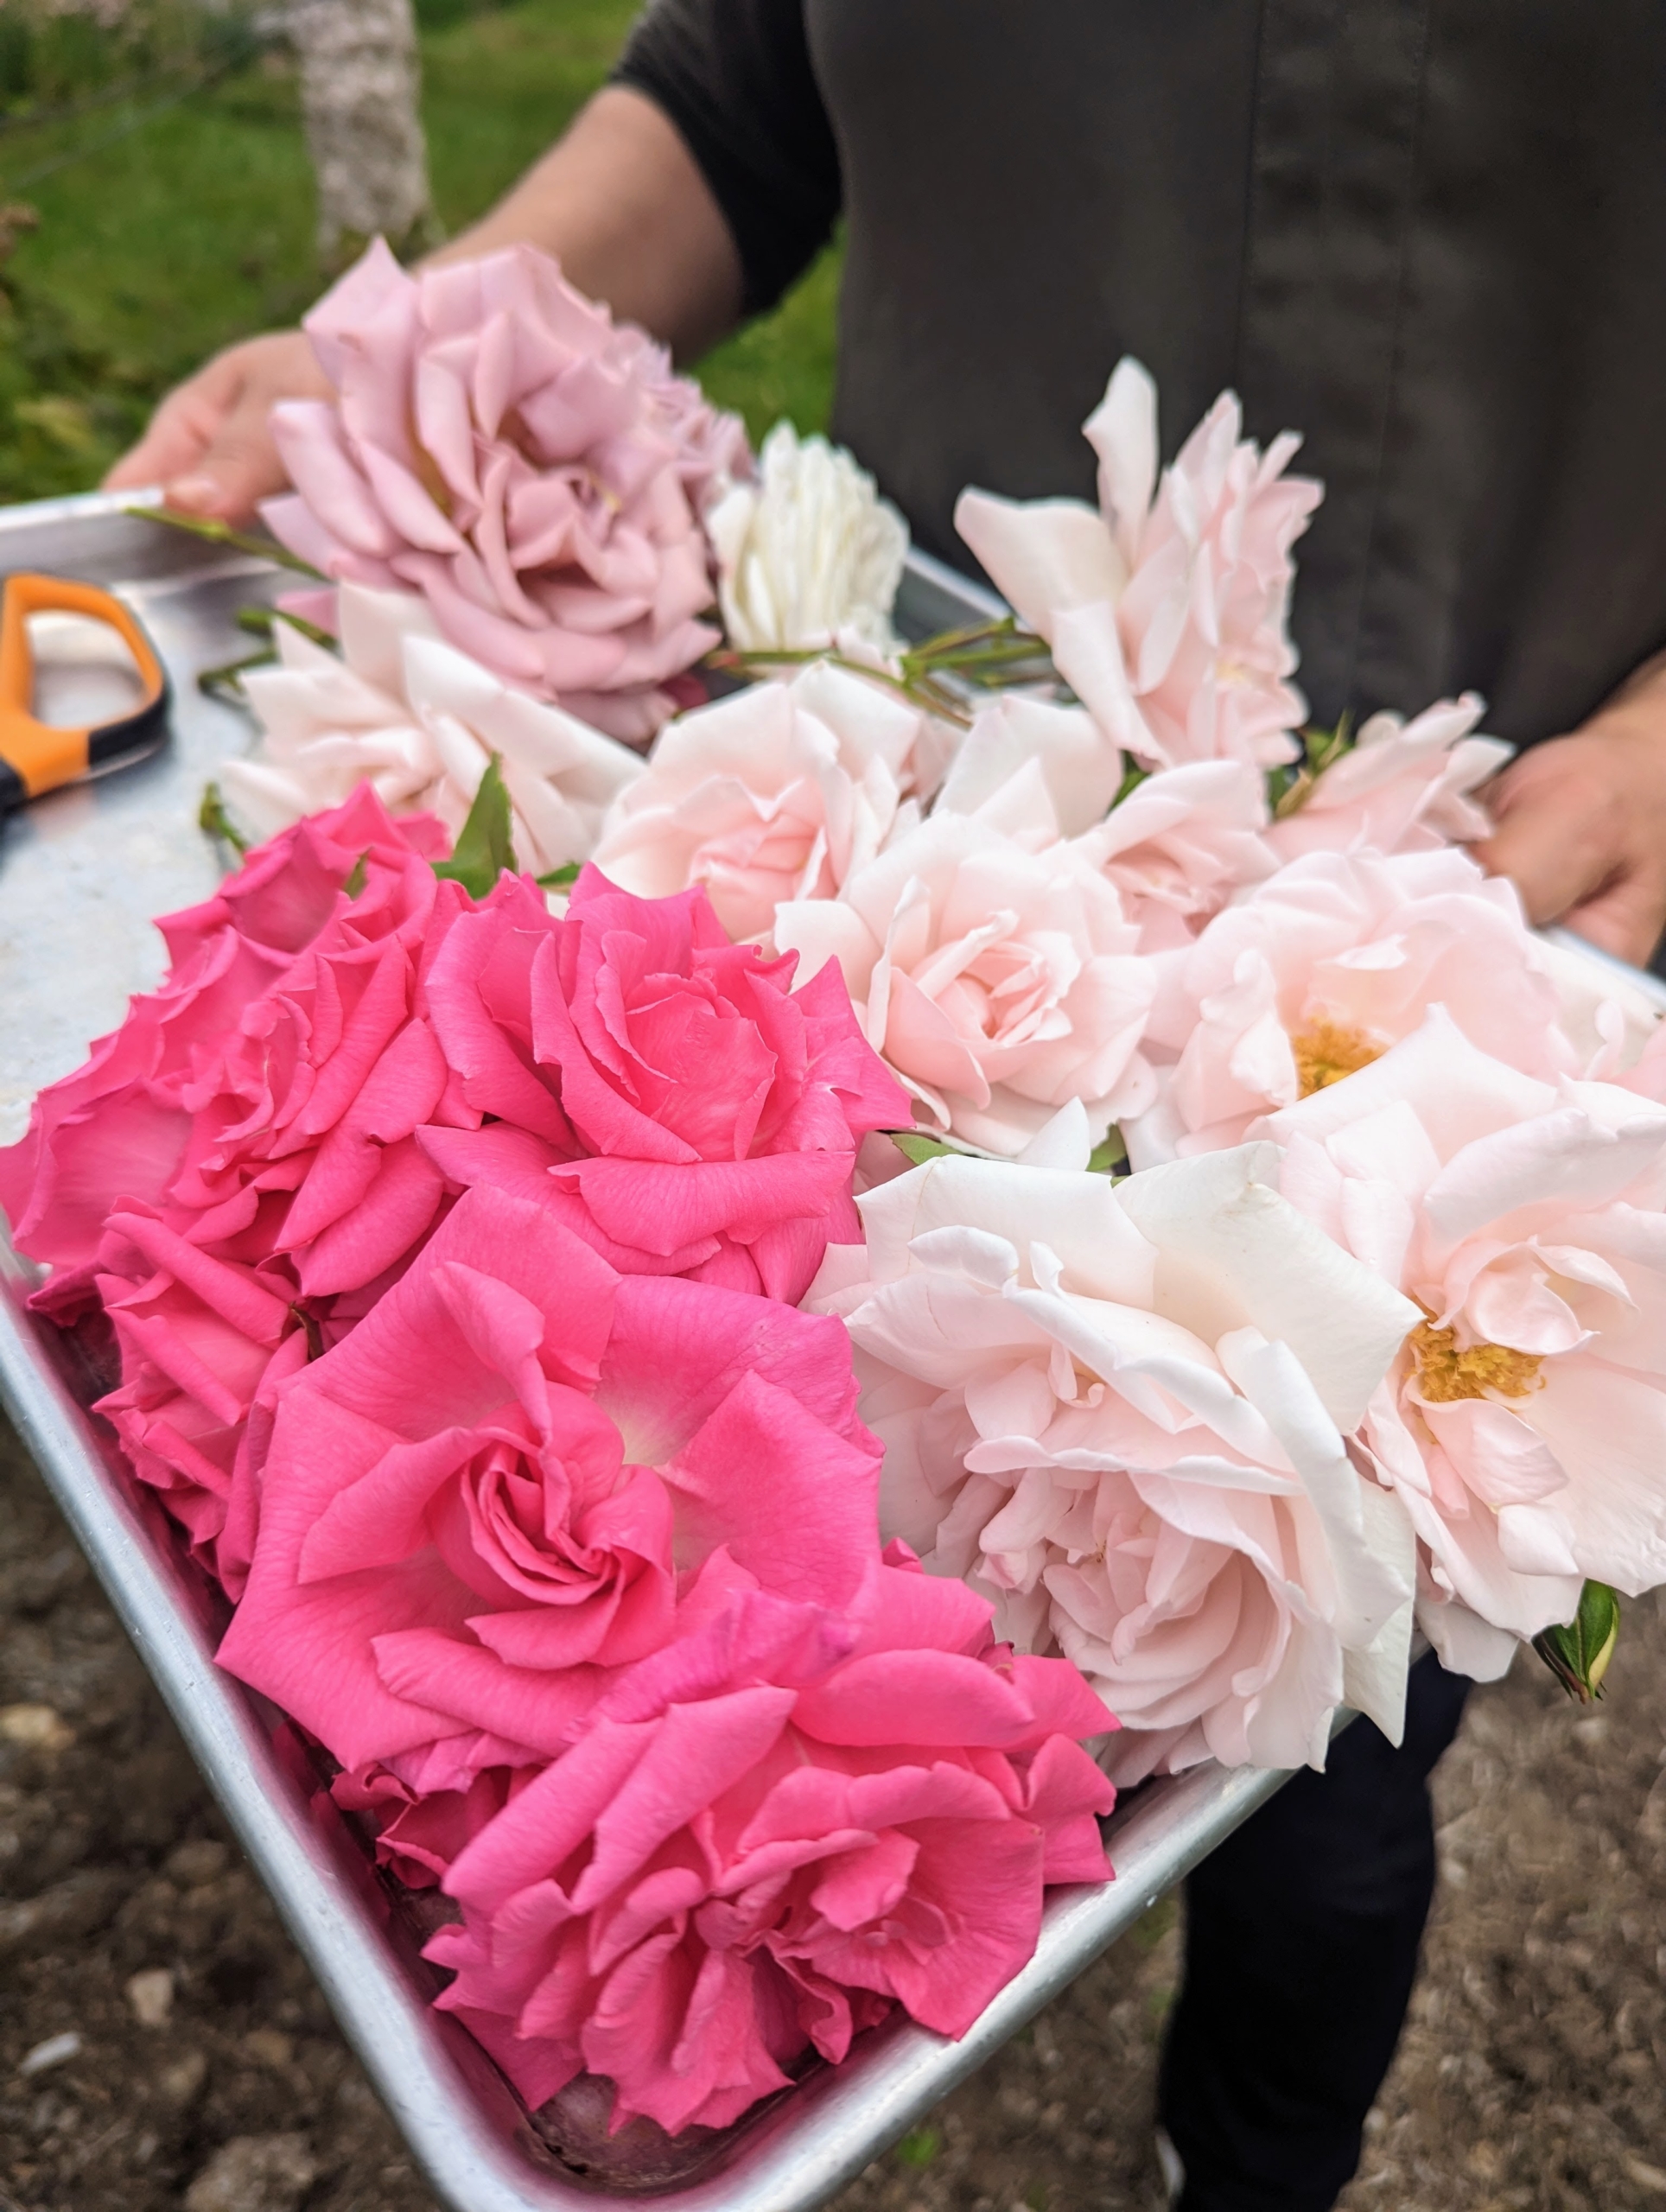
I love roses and have enjoyed growing them for many years. Here at my farm, there are so many roses blooming, we're able to enjoy them both inside and out. When cutting roses, do so early in the morning and select those that have just opened. And always use a pair of shears or scissors with sharp blades - the sharper the blades, the cleaner the cuts and the longer the roses will last. Earlier this week, my housekeepers, Enma and Elvira, picked some beautiful flowers to display in my Winter House.
Enjoy these photos.
I love decorating my homes with fresh, colorful and fragrant blooms. Here at my Bedford, New York farm, I have a large cutting garden located just outside my main greenhouse. Right now, it’s filled with stunning flowers – baptisia, dianthus, poppies, and of course, roses. And with so many roses flowering, it’s nice to cut my own to enjoy indoors.
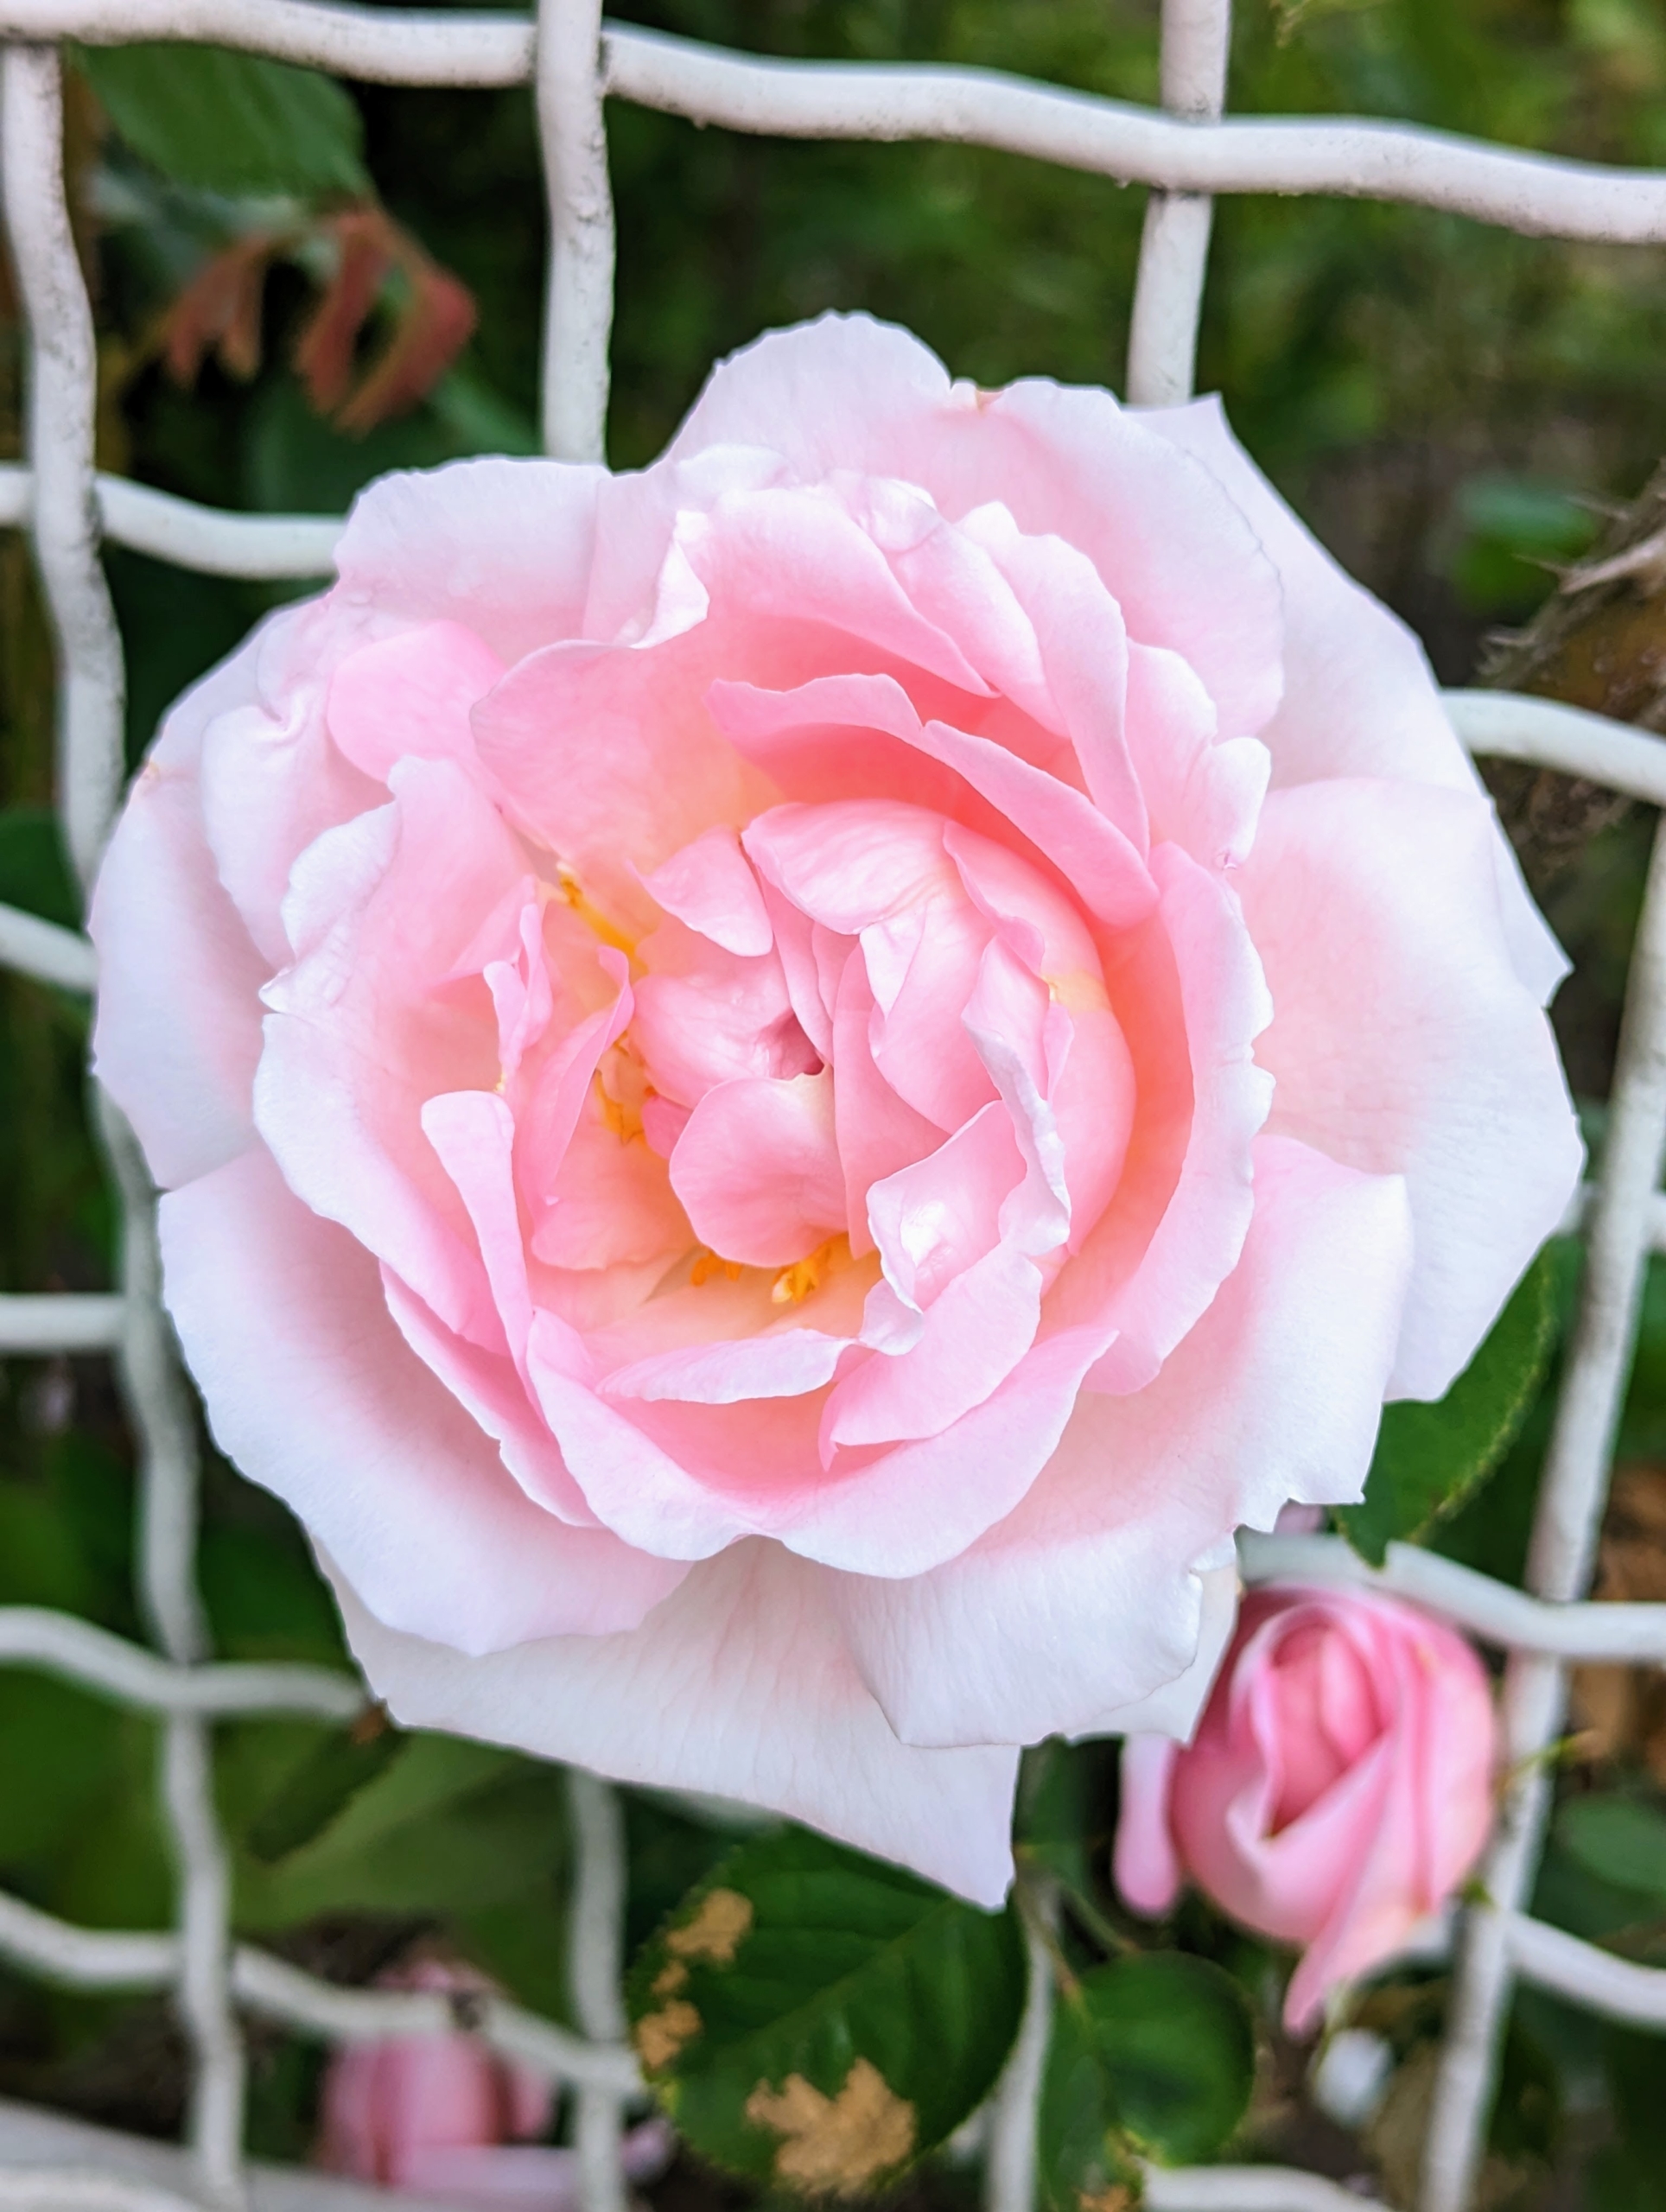
Most are climbing on all four of the garden fence sides, while some varieties fill obelisk trellises, or tuteurs, in the center. This pink rose is sticking through the fence at the entrance to the garden – so perfectly perfect.
A rose is a woody perennial flowering plant of the genus Rosa, in the family Rosaceae. There are more than a hundred species and thousands of cultivars.
Many of my roses are old fashioned antique varieties. I have small English tea roses as well as big David Austin types.
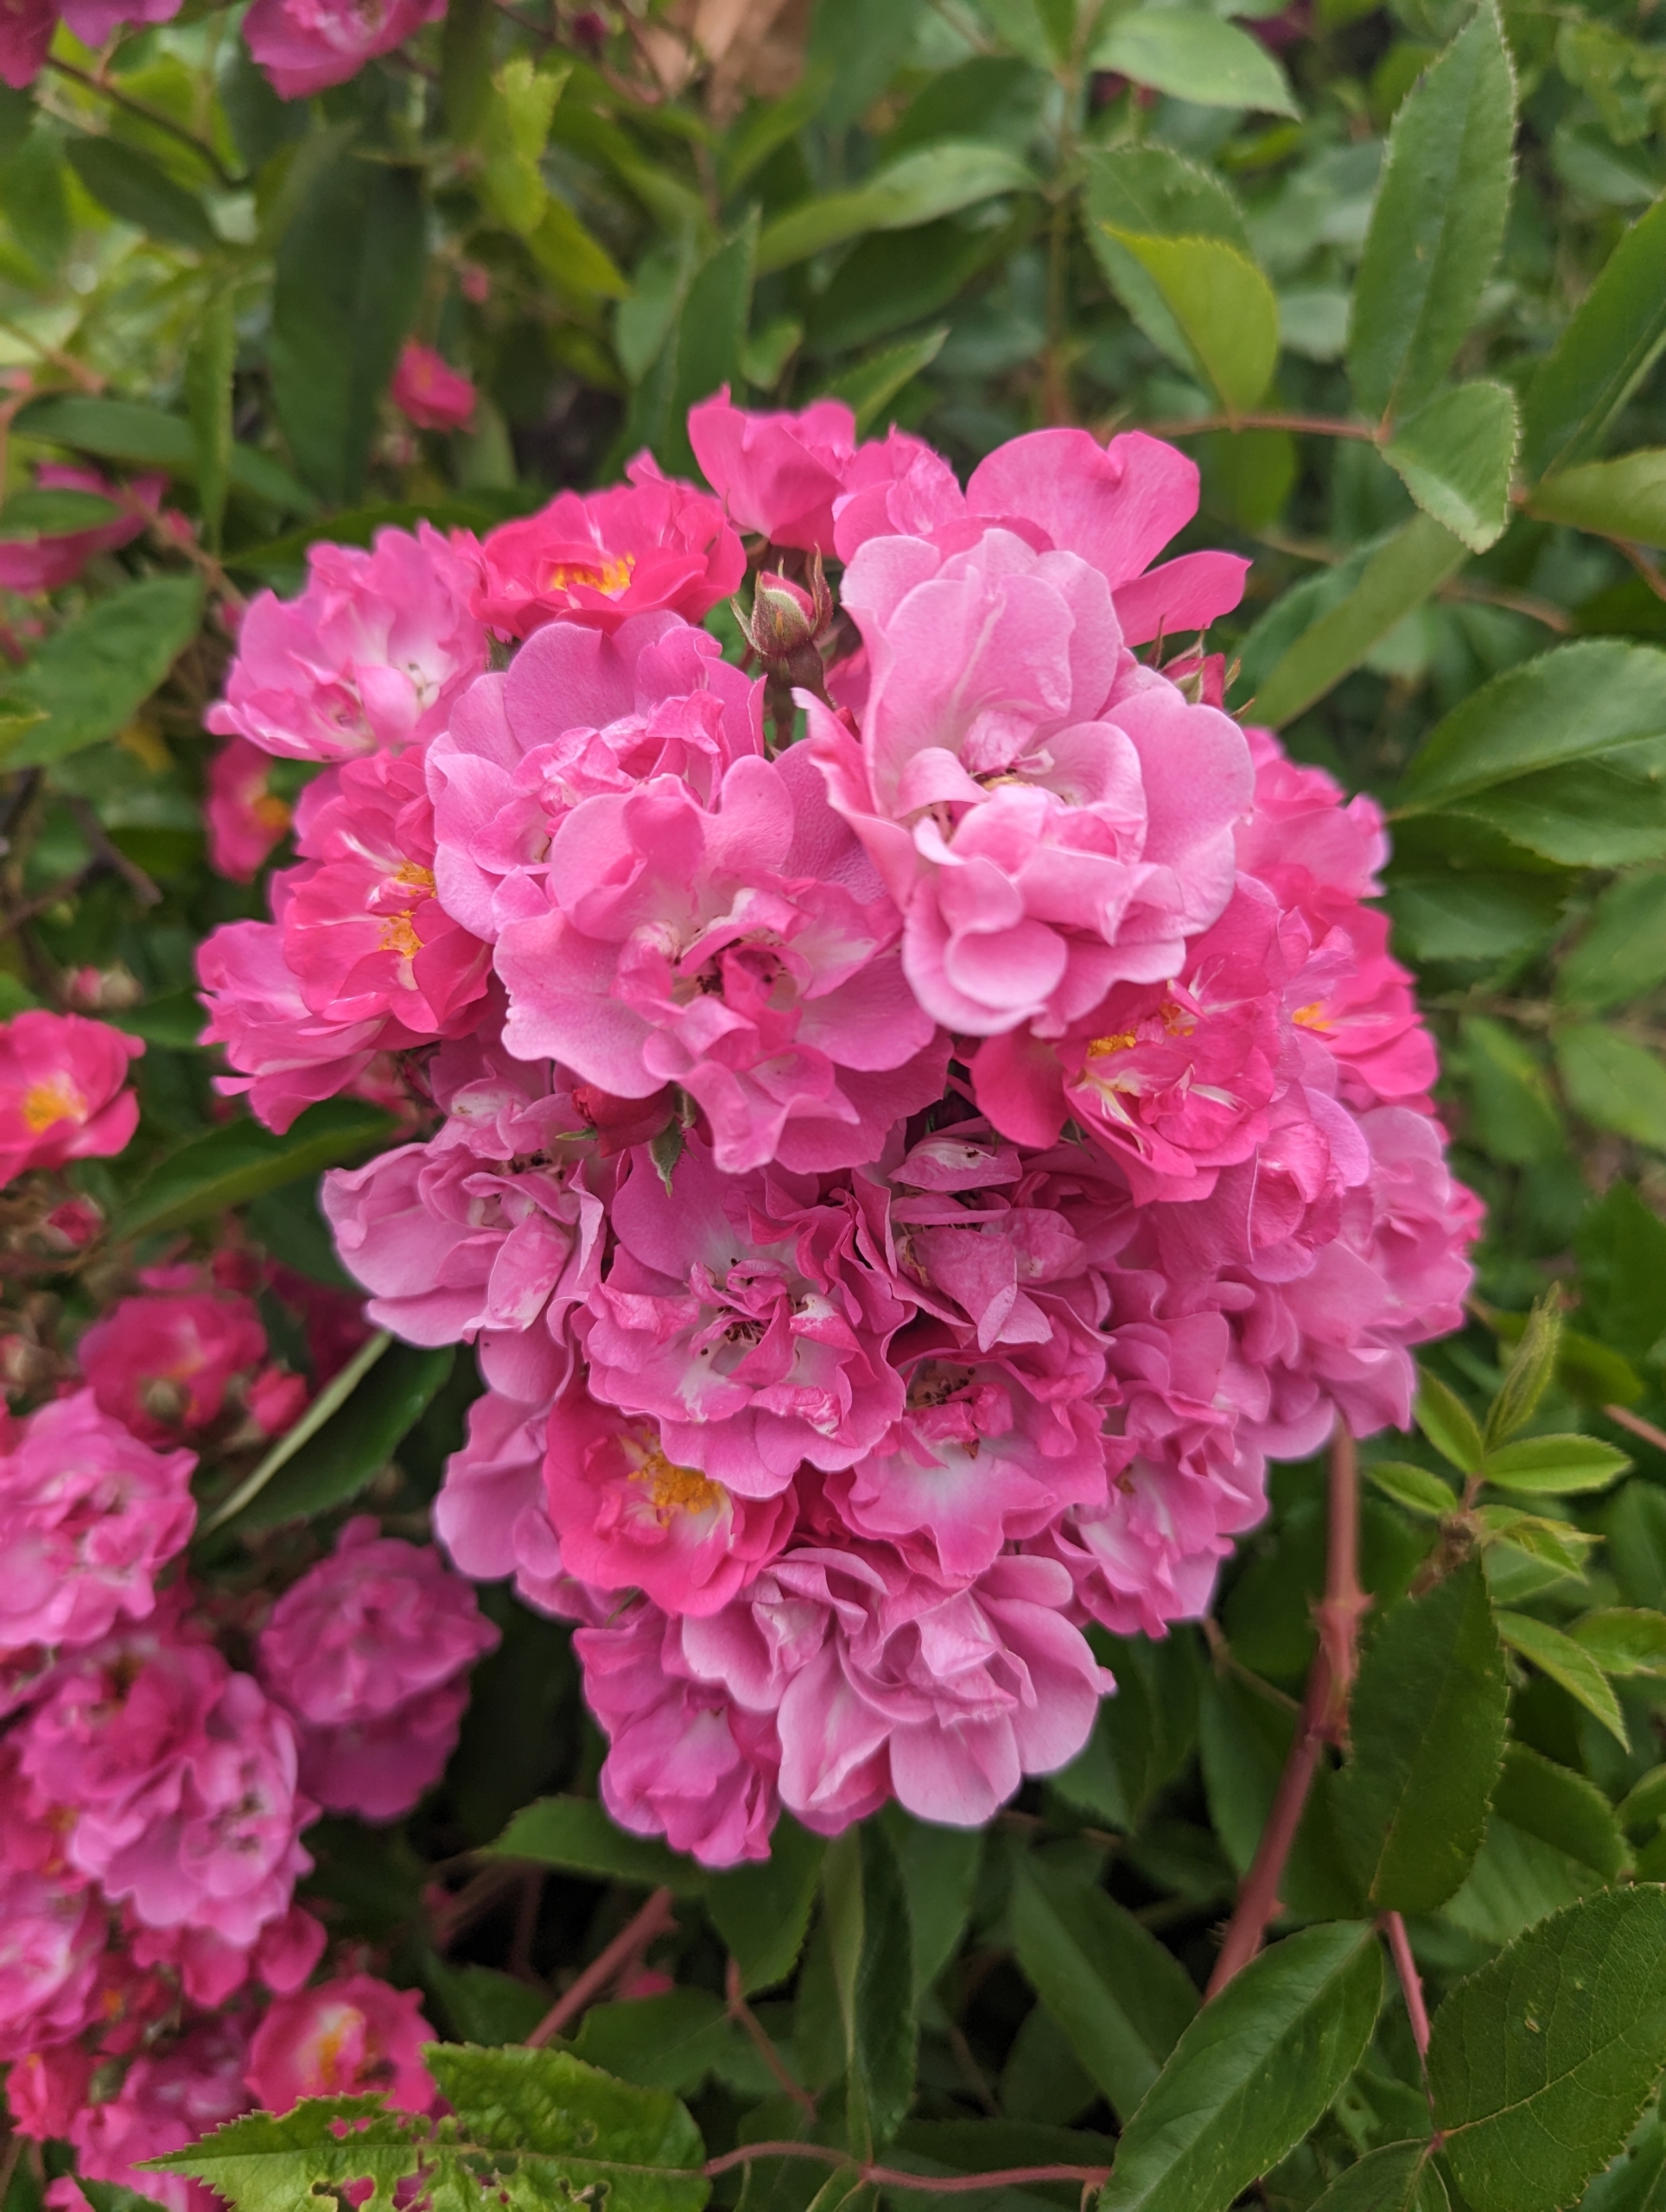
Roses come in many different colors, such as pink, peach, white, red, magenta, yellow, copper, vermilion, purple, and apricot.
Rose plants range in size from compact, miniature roses to climbers that can reach several feet in height.
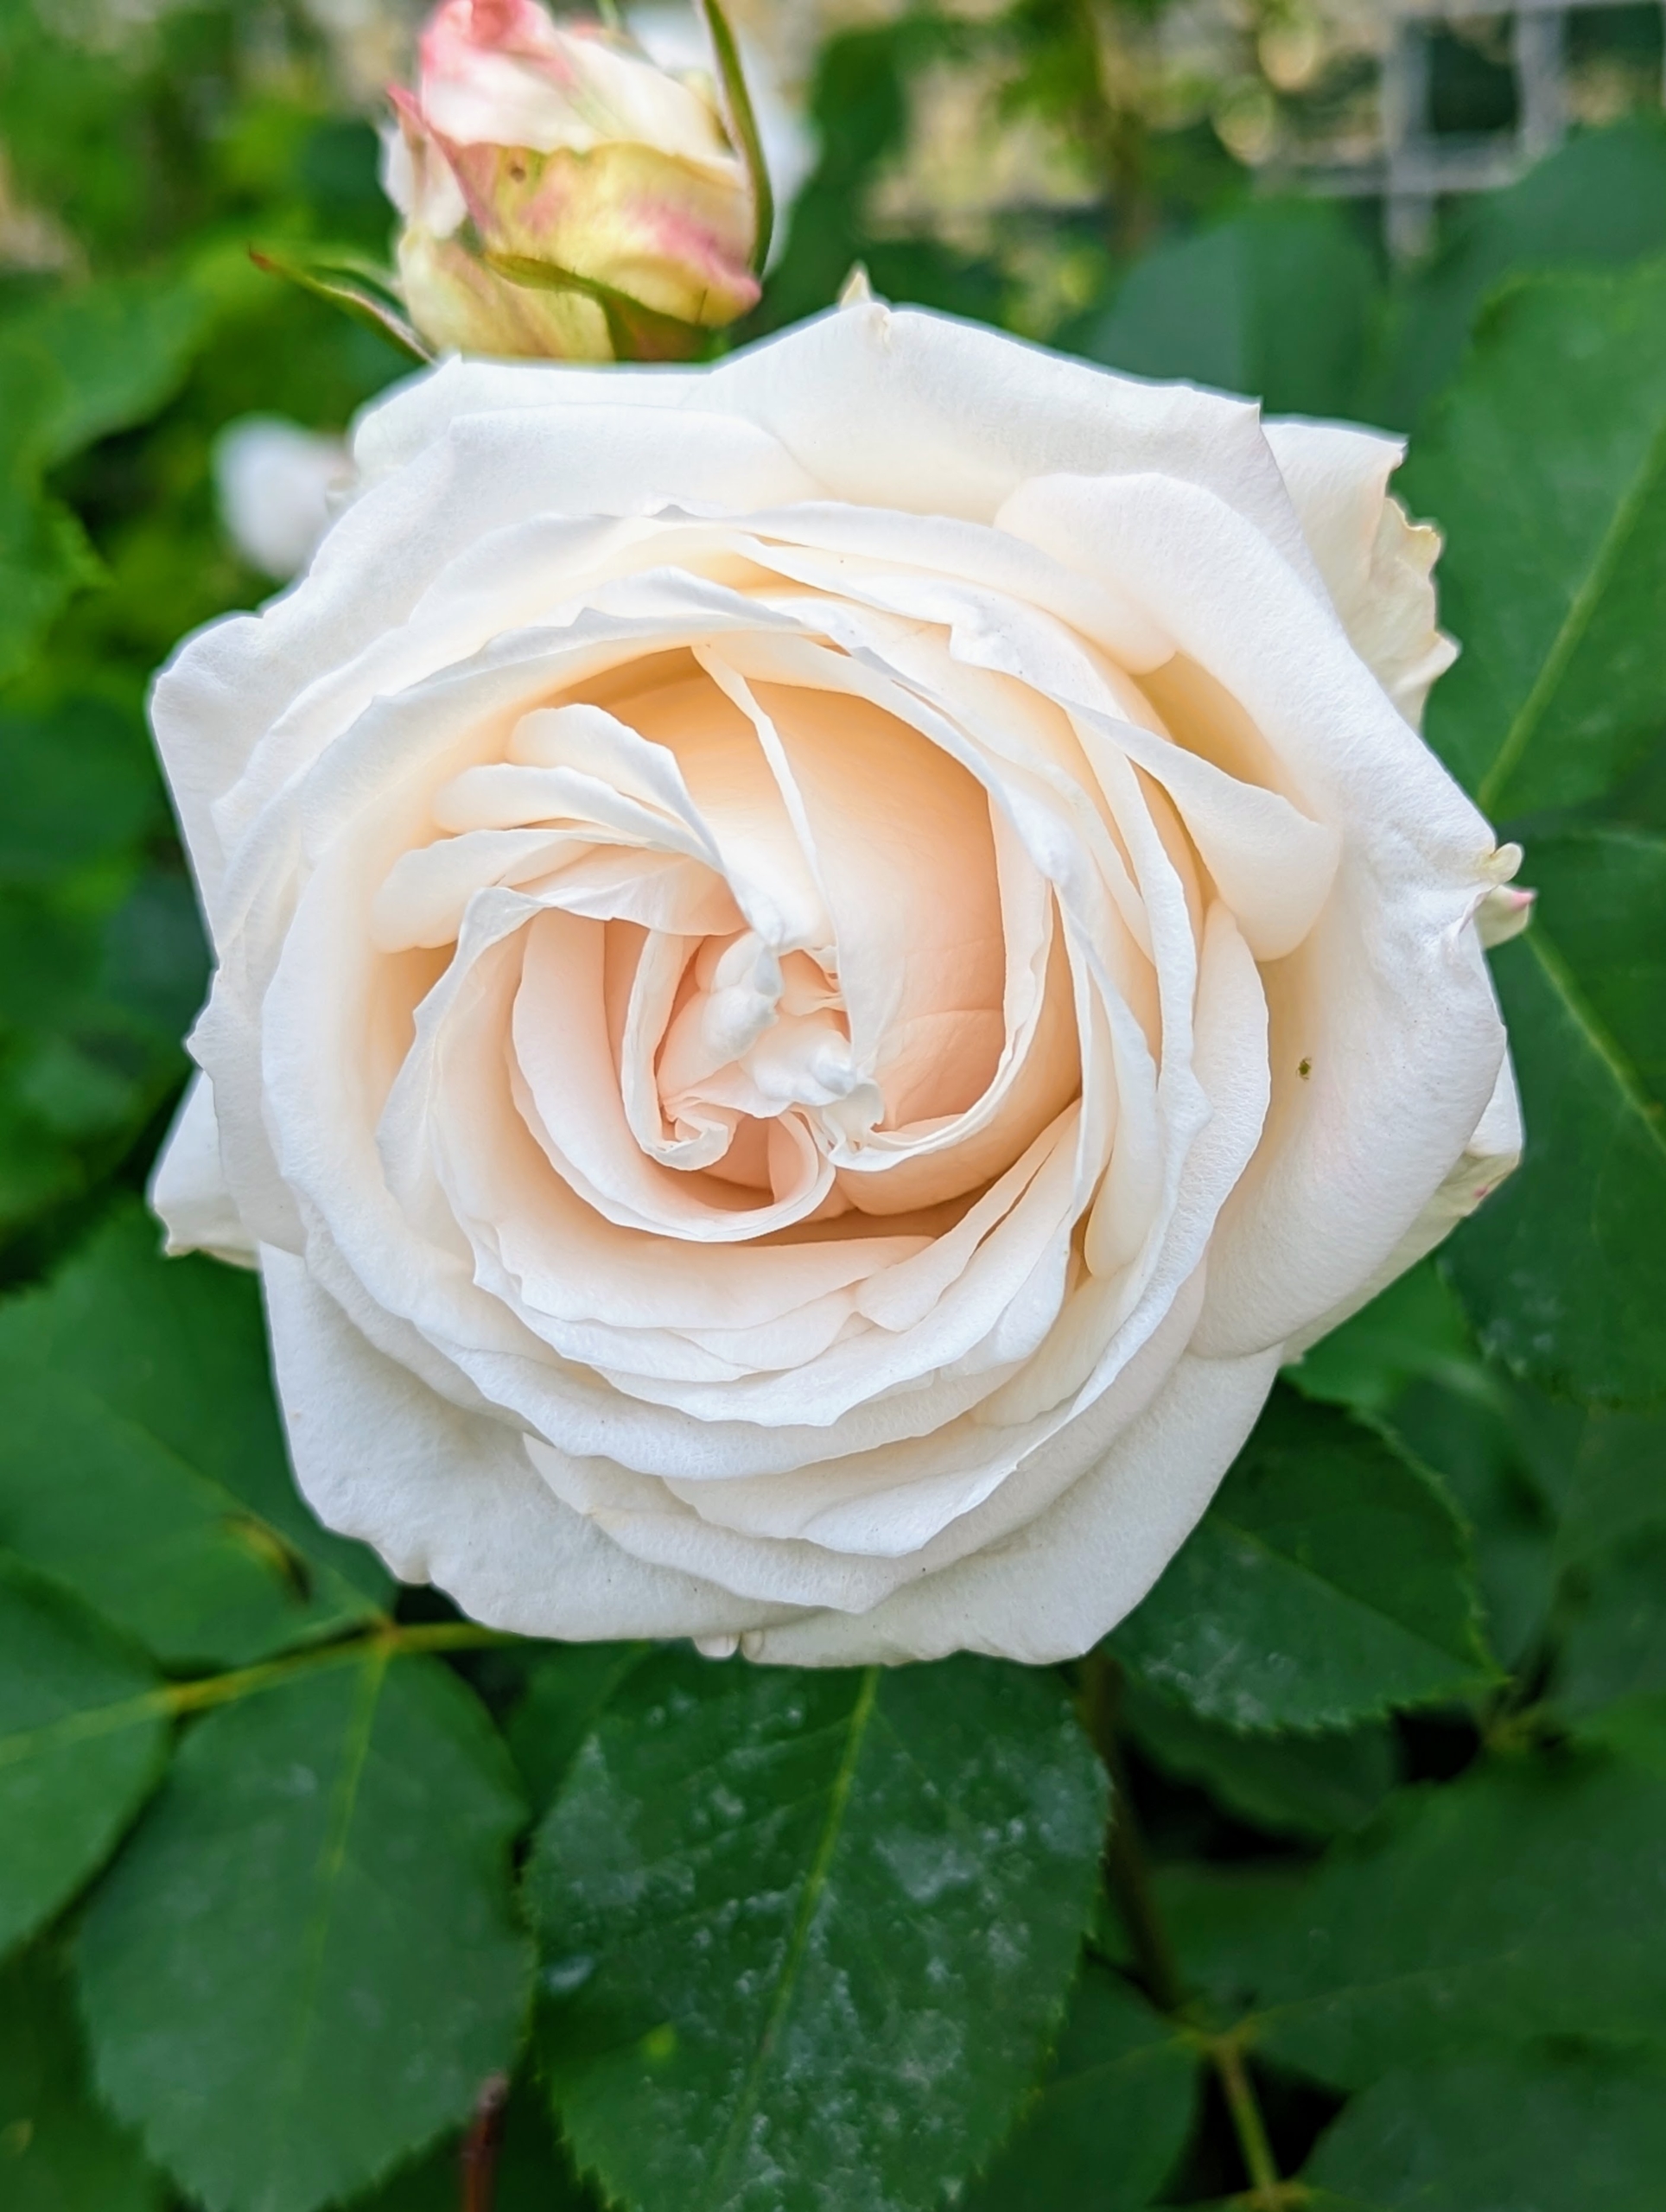
Here is a creamy white rose just opening – it’s just right for cutting.
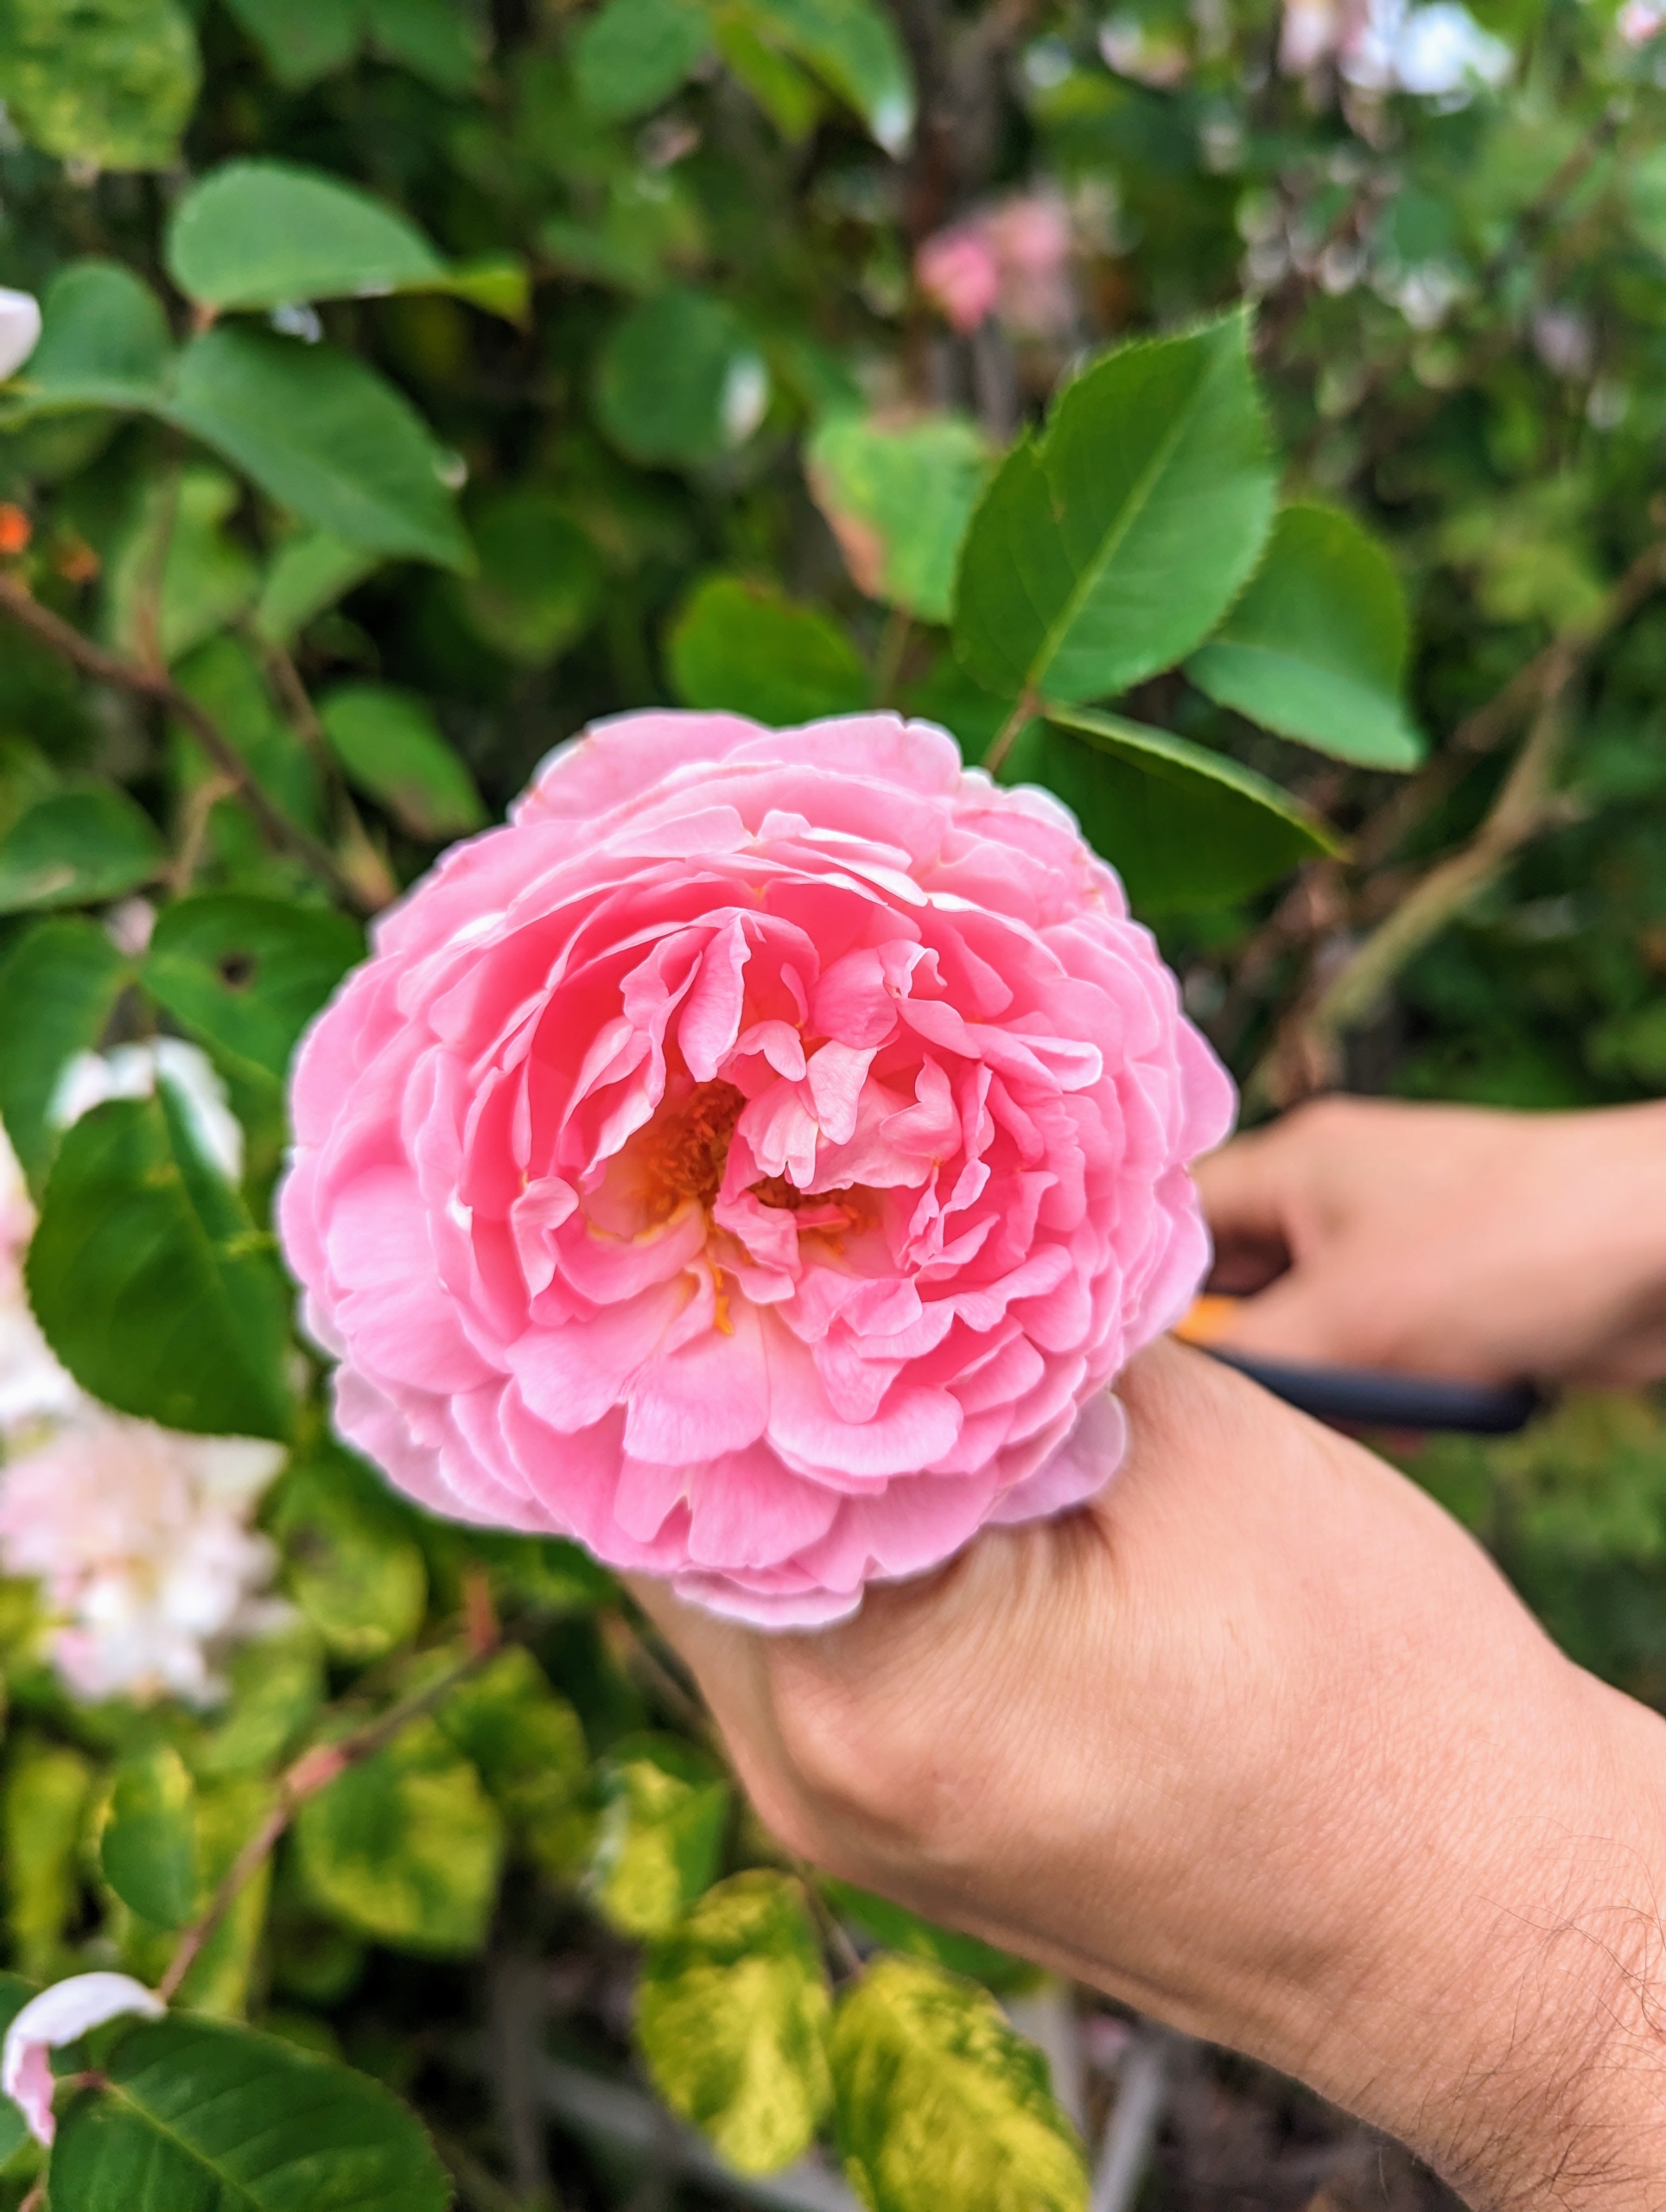
Early in the morning, before the sun hits the blooms, is the best time to cut roses and other flowers. This is when they are the most hydrated. With more water, the stems should feel firm and strong.
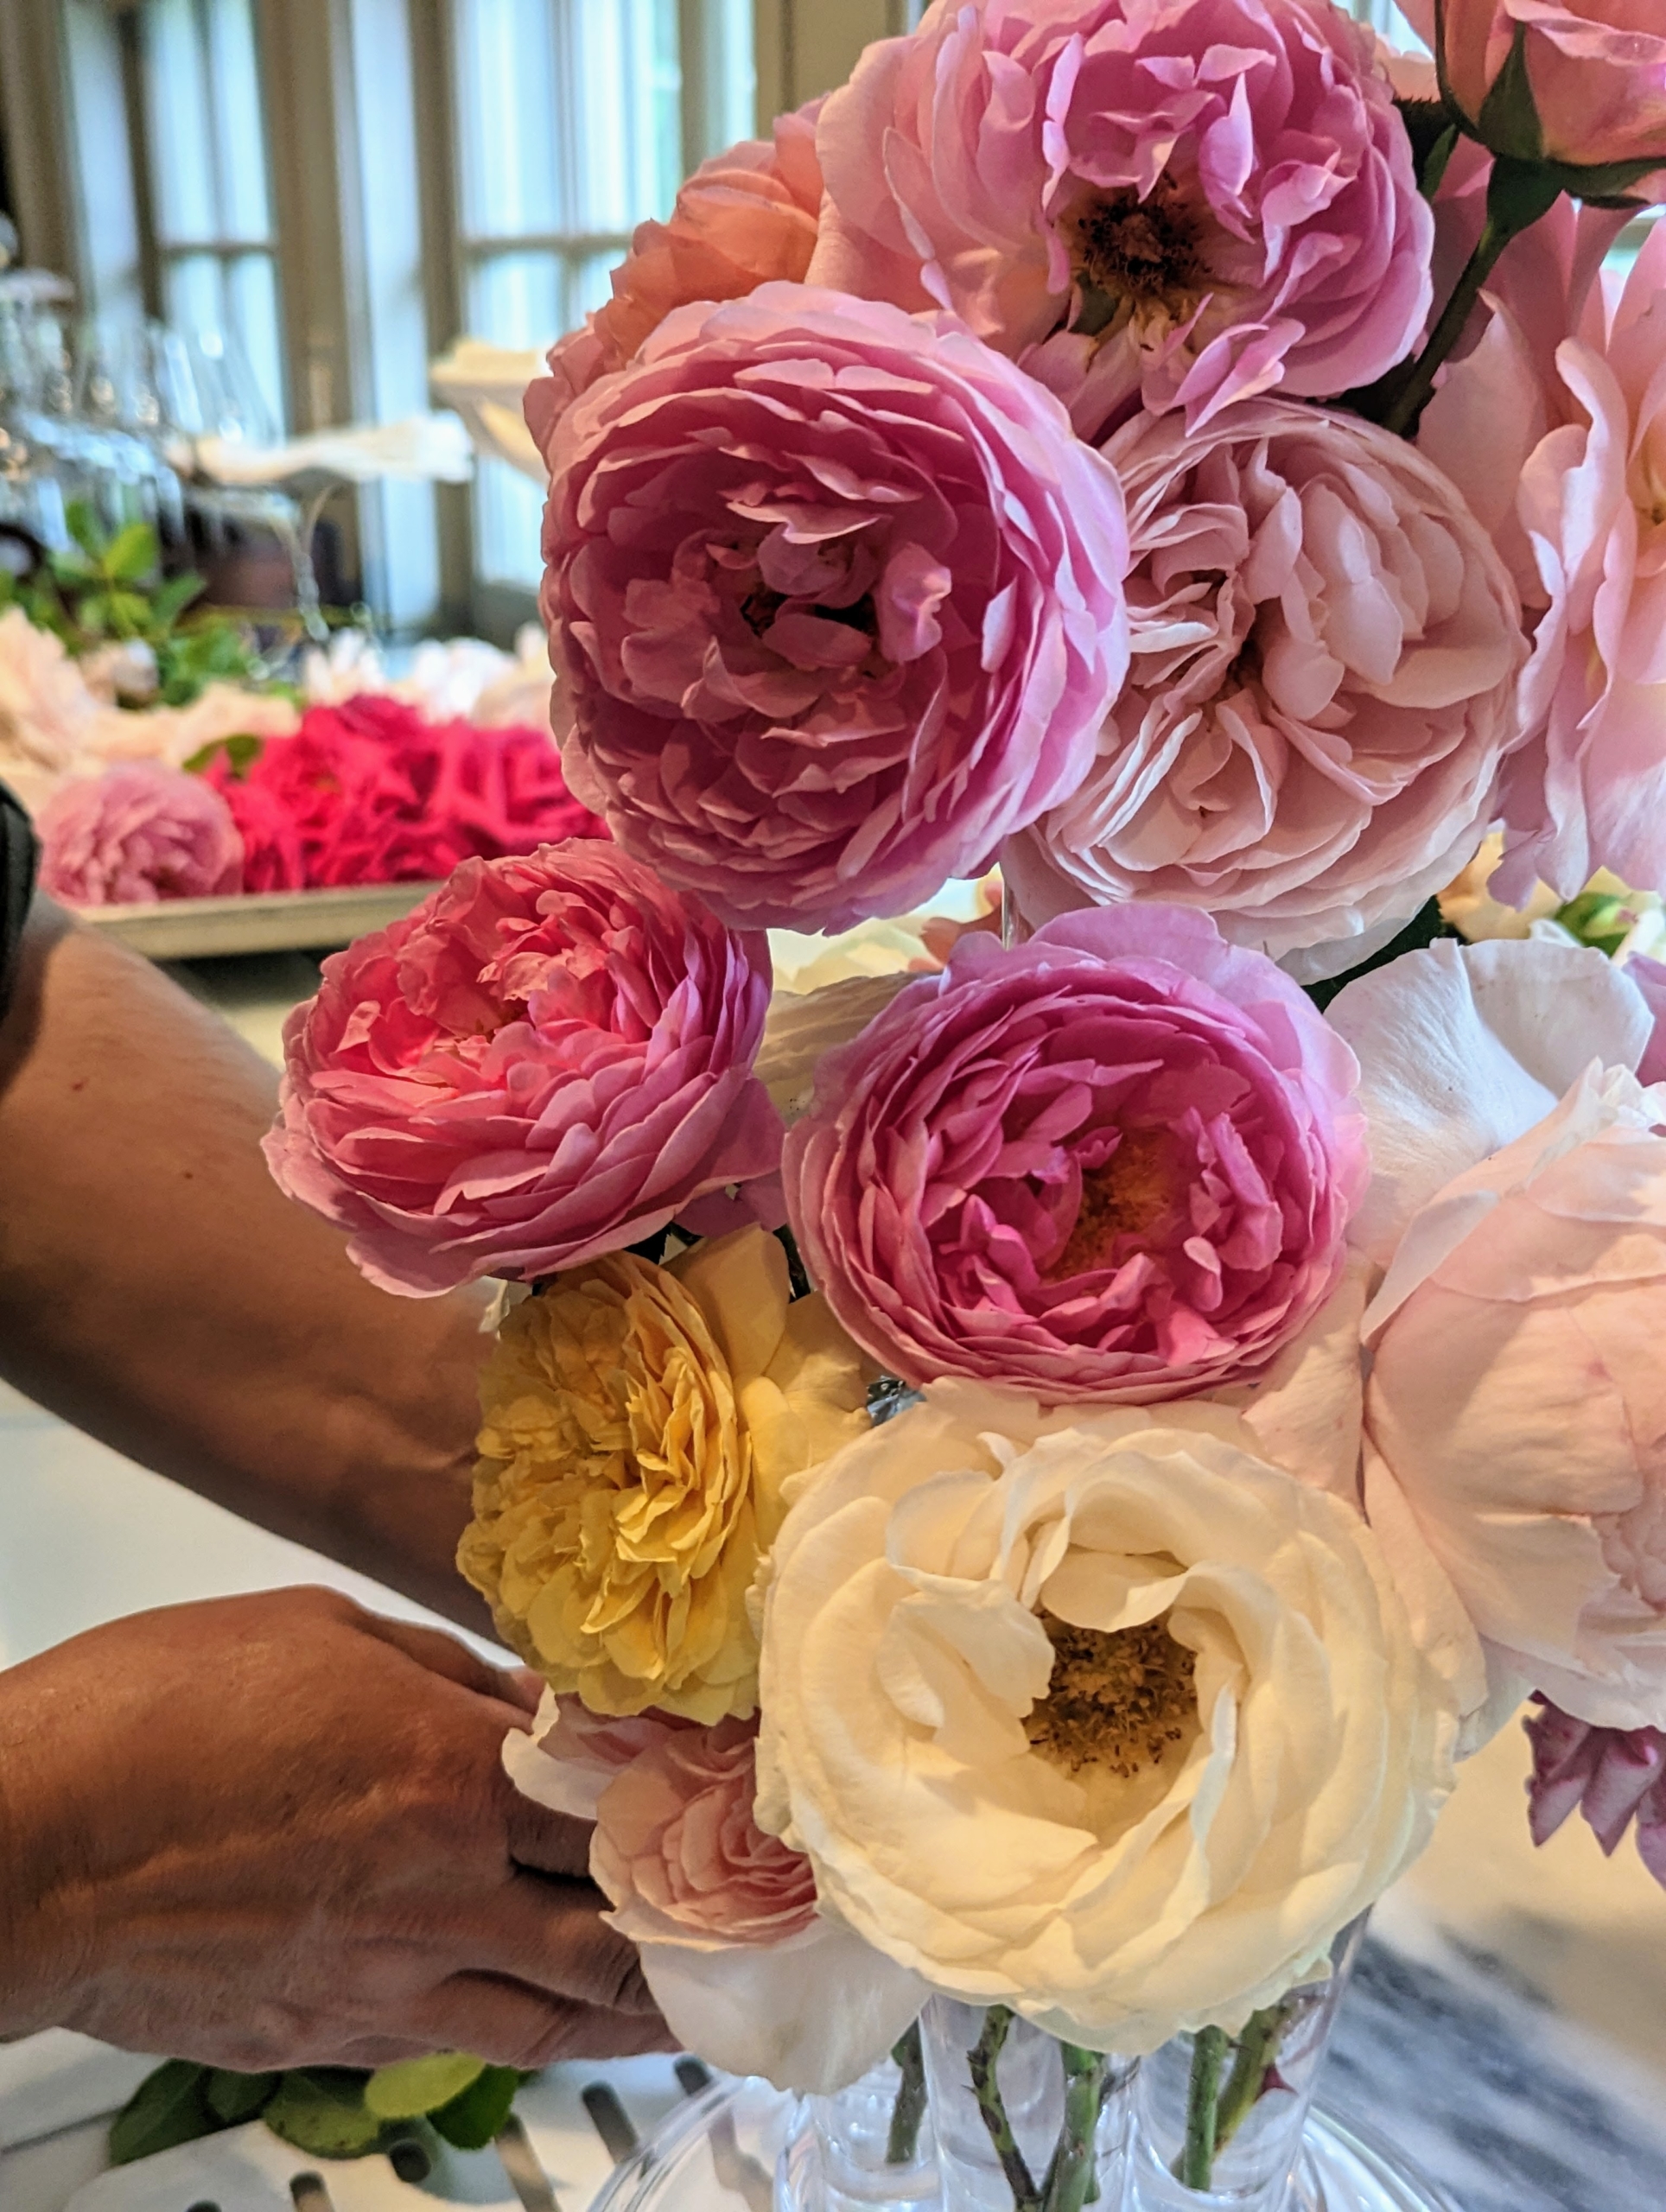
Here, Enma cuts the flowers that are newly opened and fresh looking. She cuts the stem at a 45 degree angle so there is more surface area for water uptake.
Fortunately, the flower garden is not far from my Winter House, so they are brought back quickly after cutting. Always try to get cut flowers into water as soon as possible.
Elvira fills the vase with fresh water.
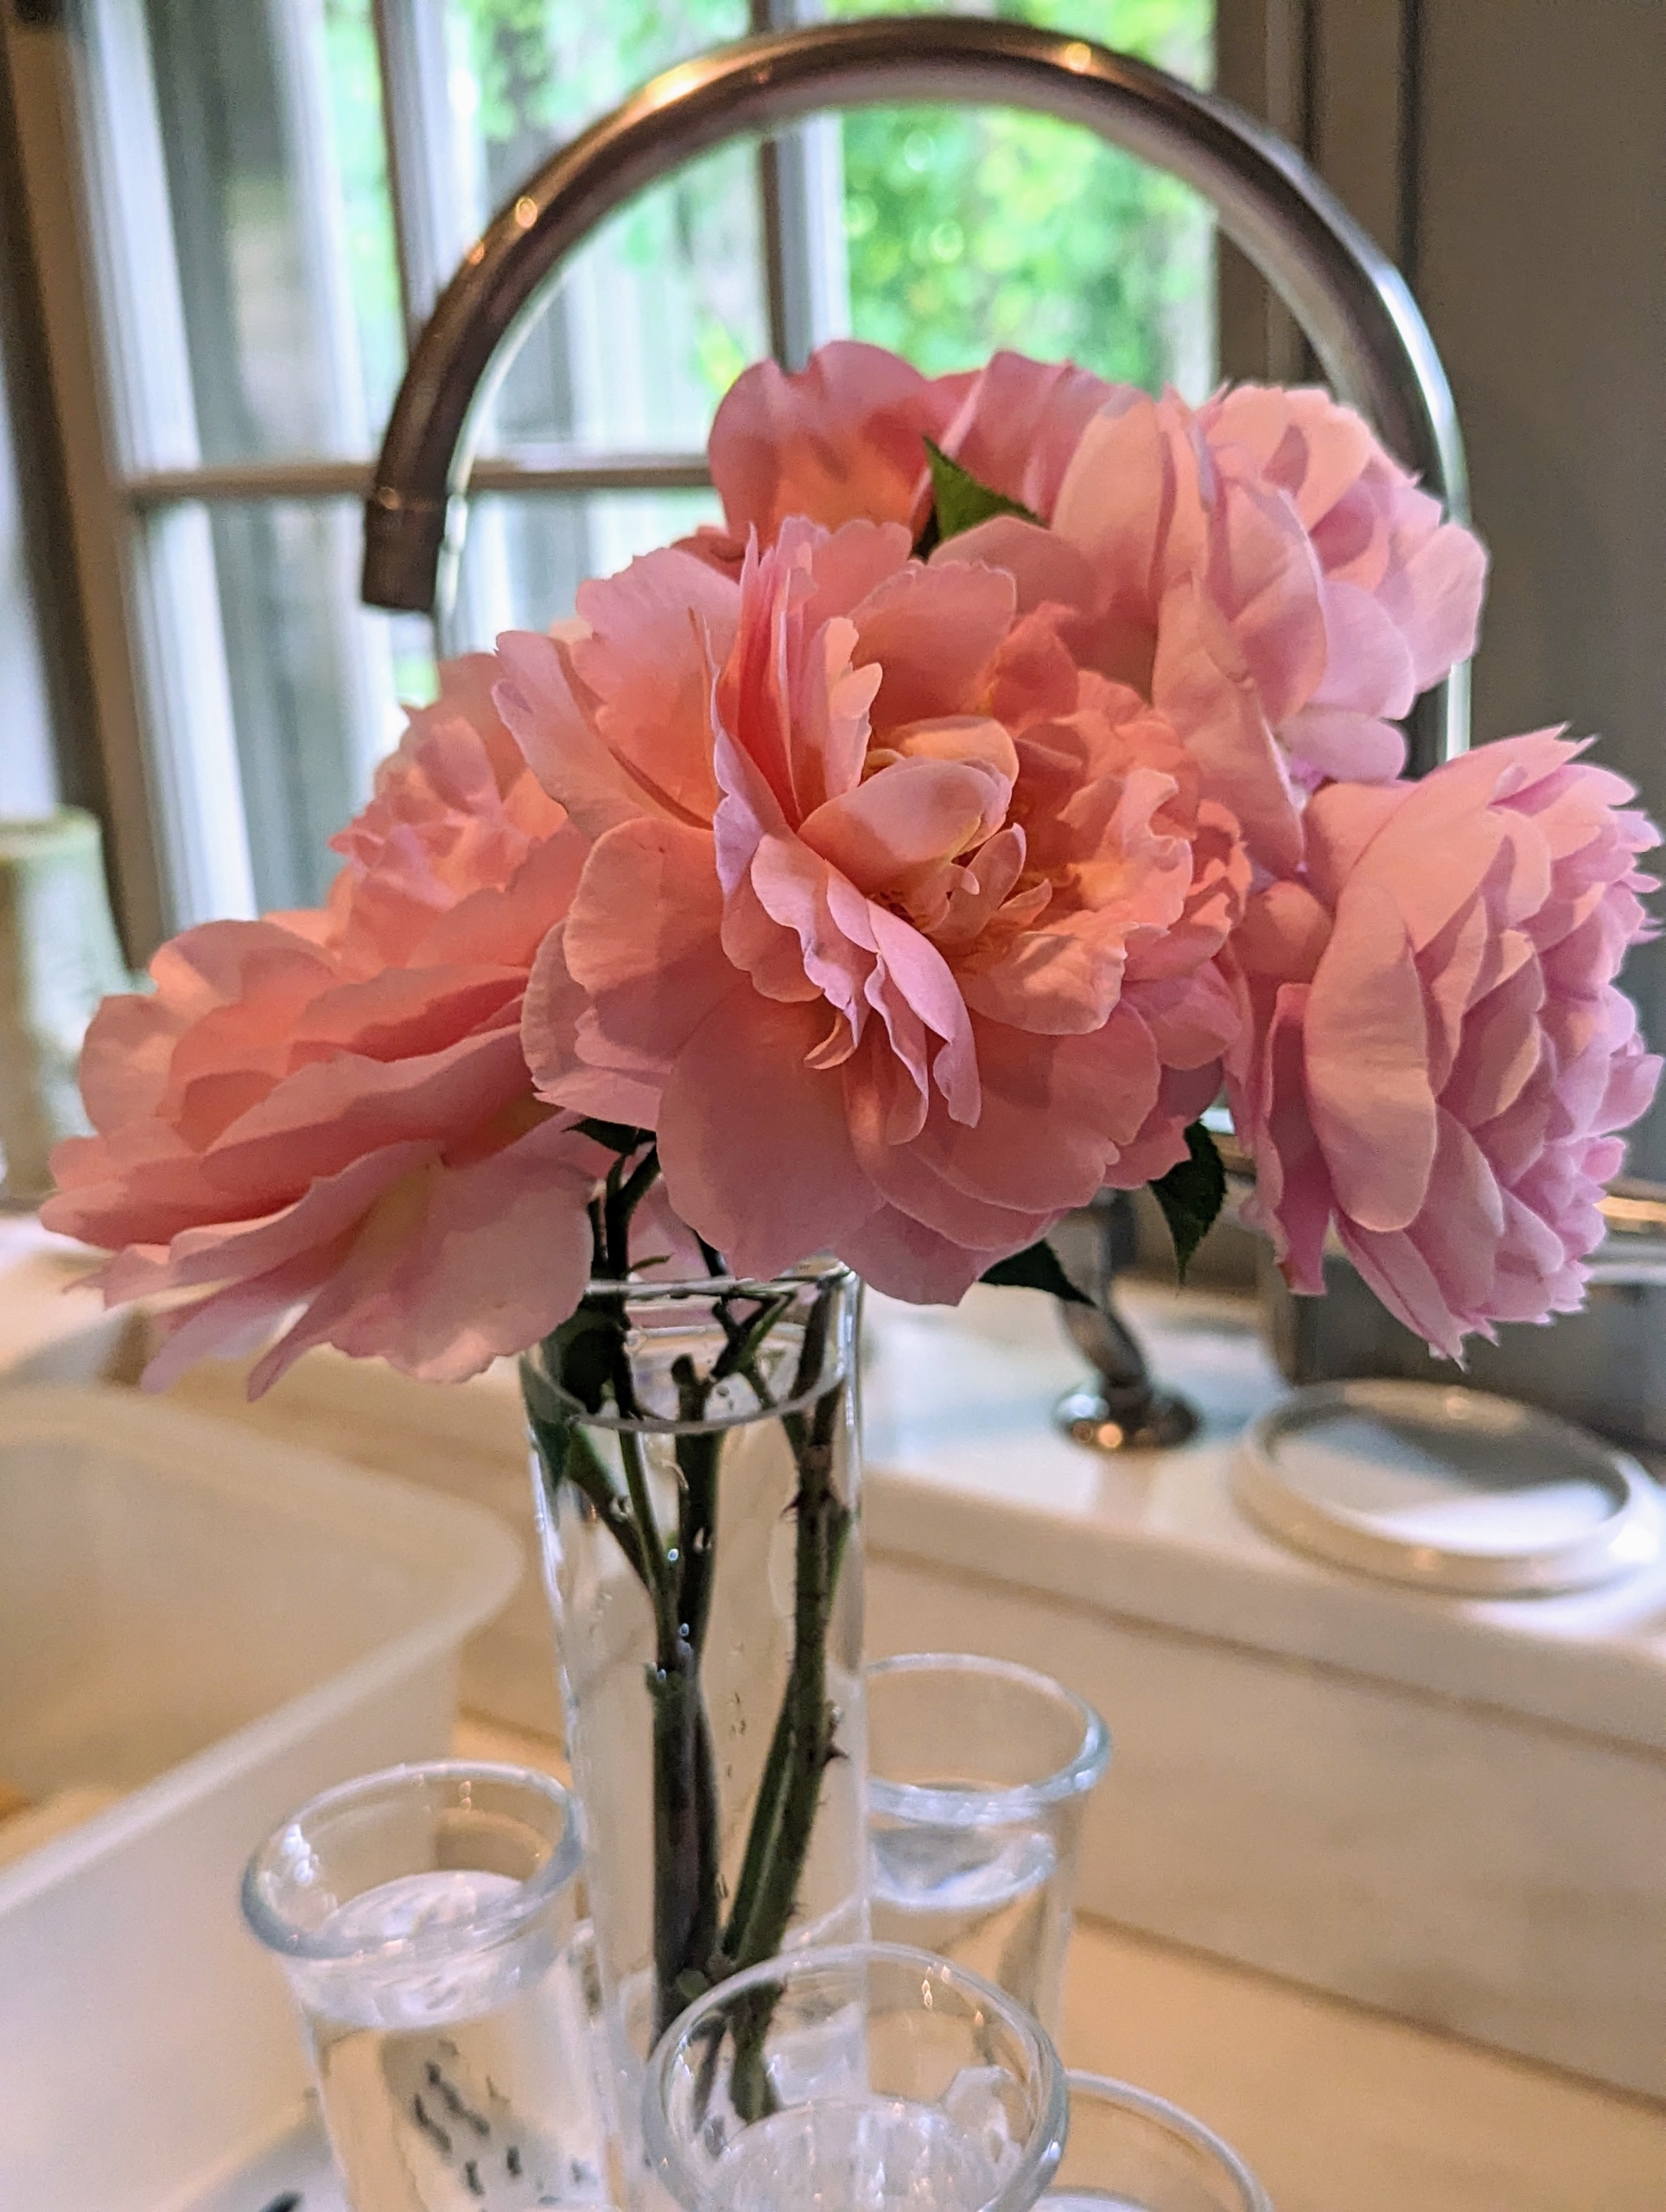
I love these vessels – they fit lots of stems and can be arranged to look very full.
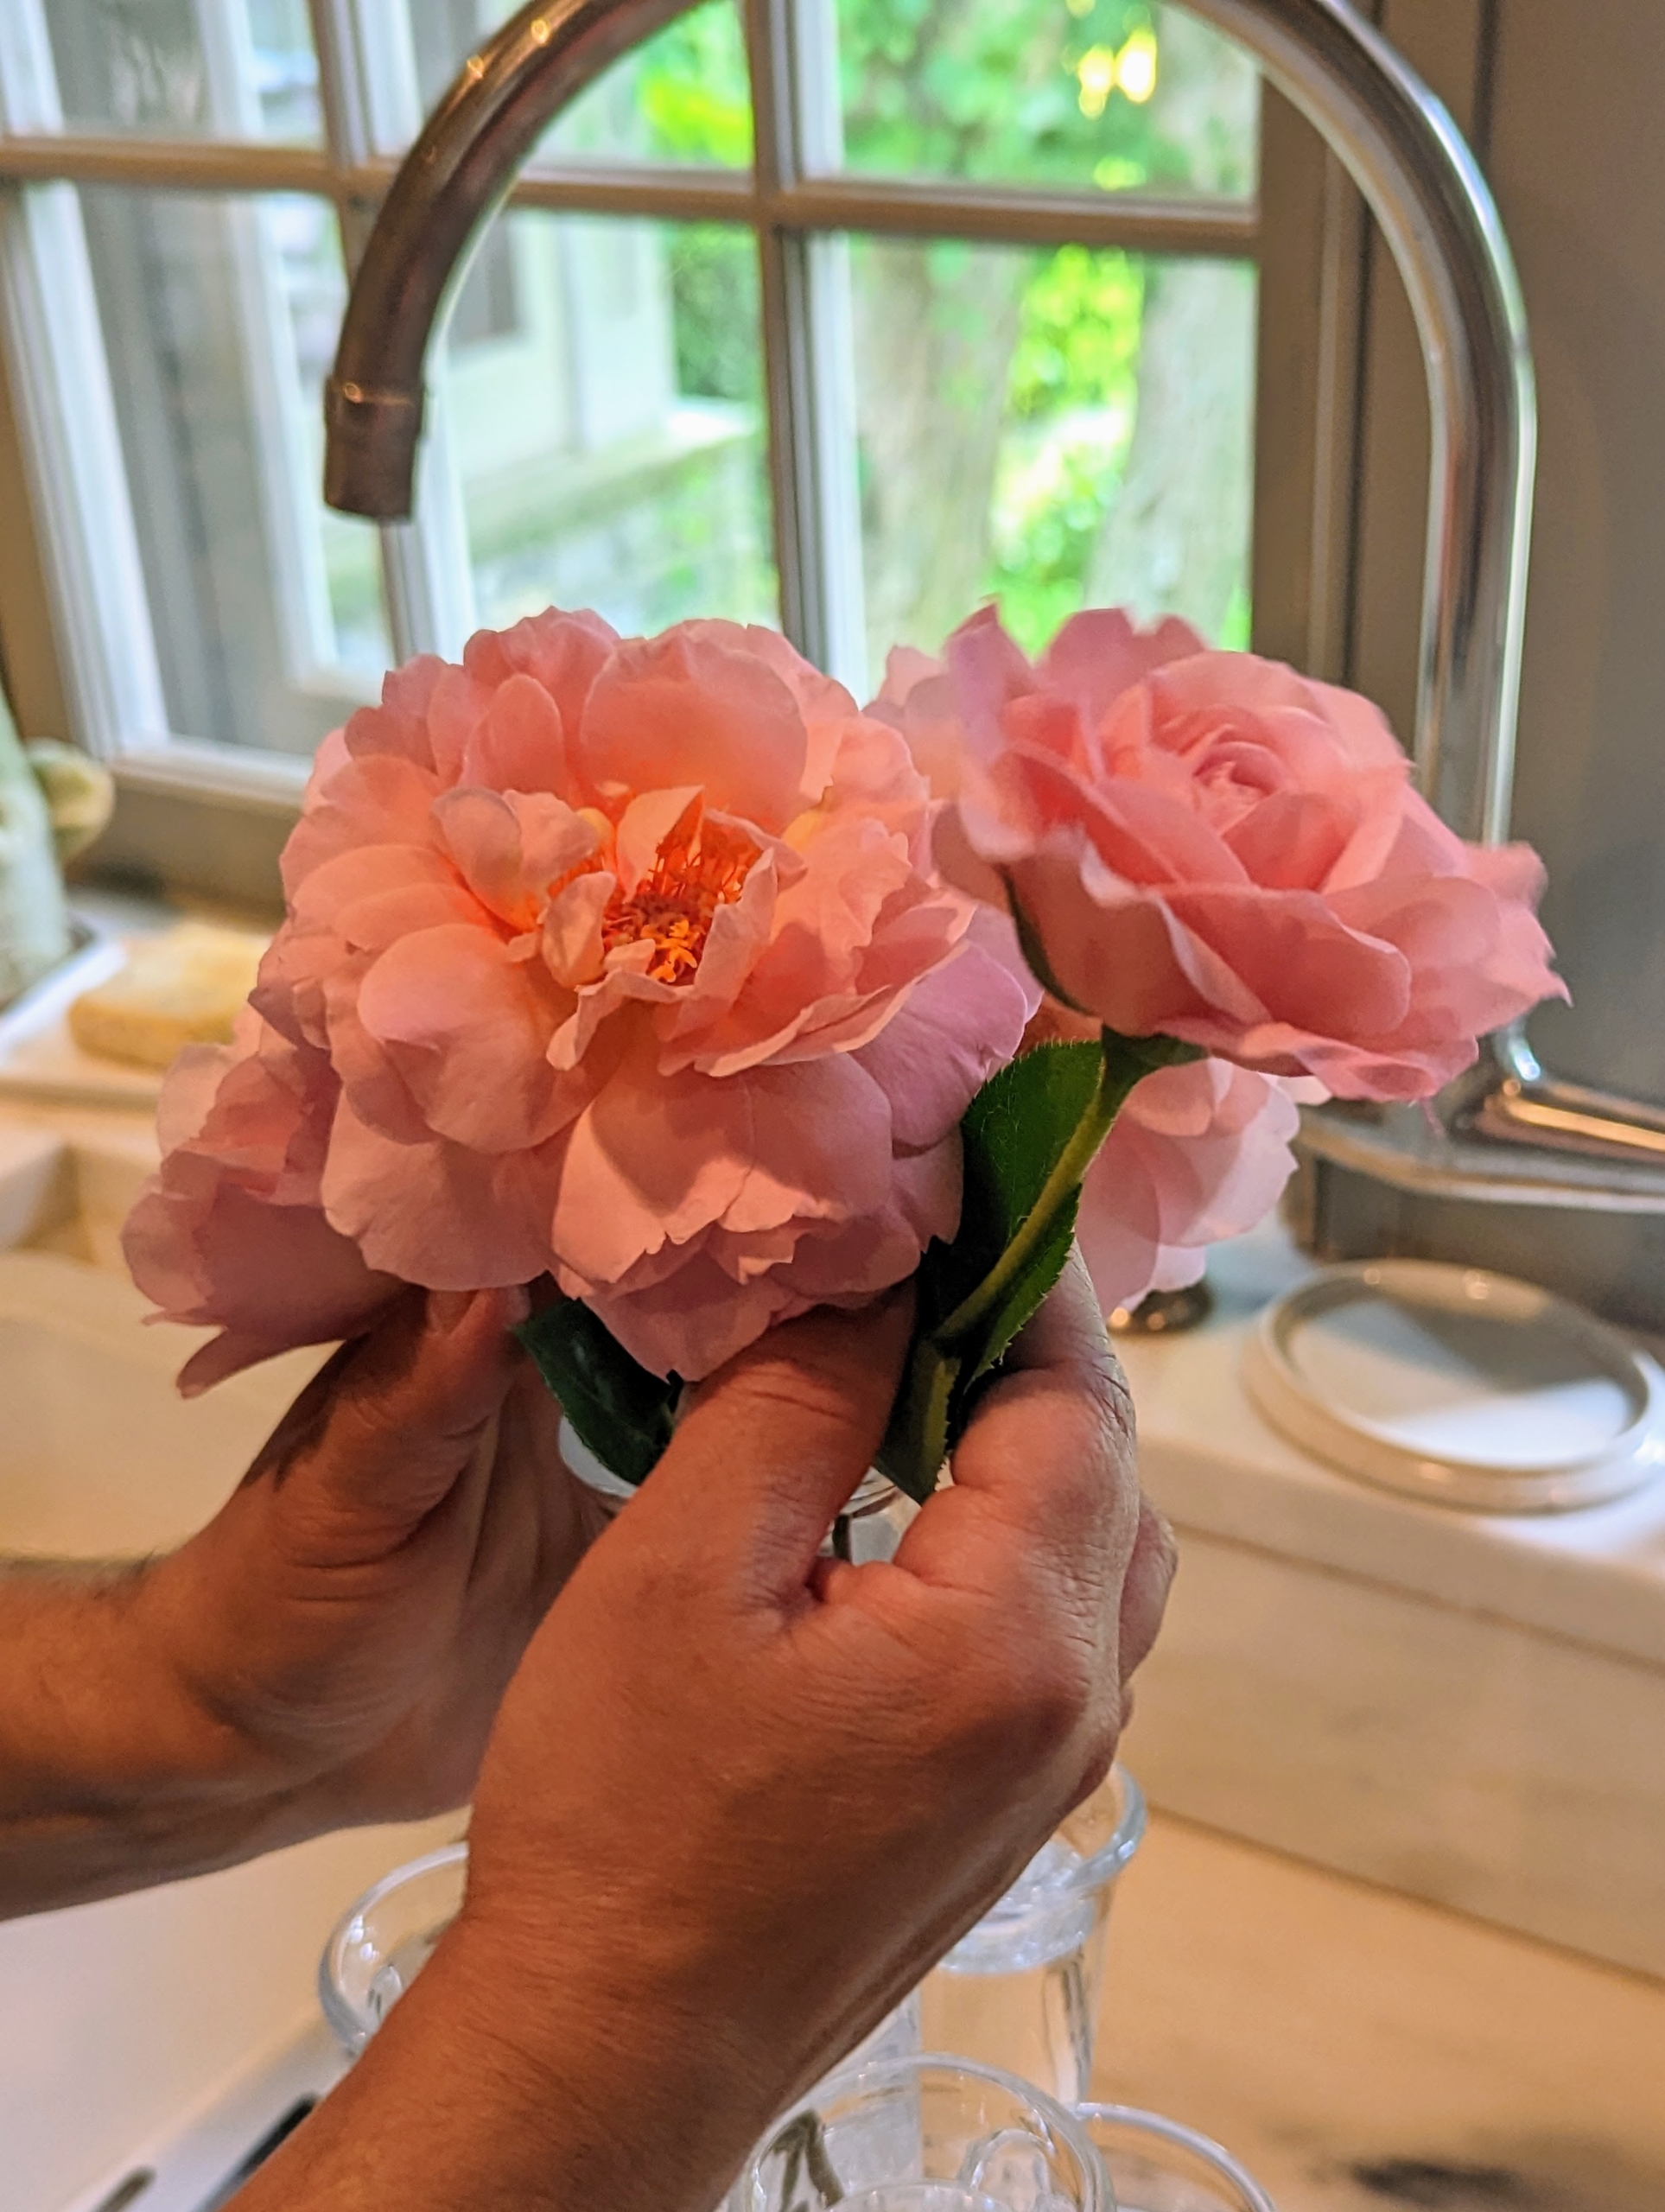
Enma removes any leaves from the stem that sit below the water line in the vase. This makes the arrangement look clean and also keeps the water clean.
She keeps a few of the upper green leaves as is and gives each stem a fresh cut before placing it into the vessel.
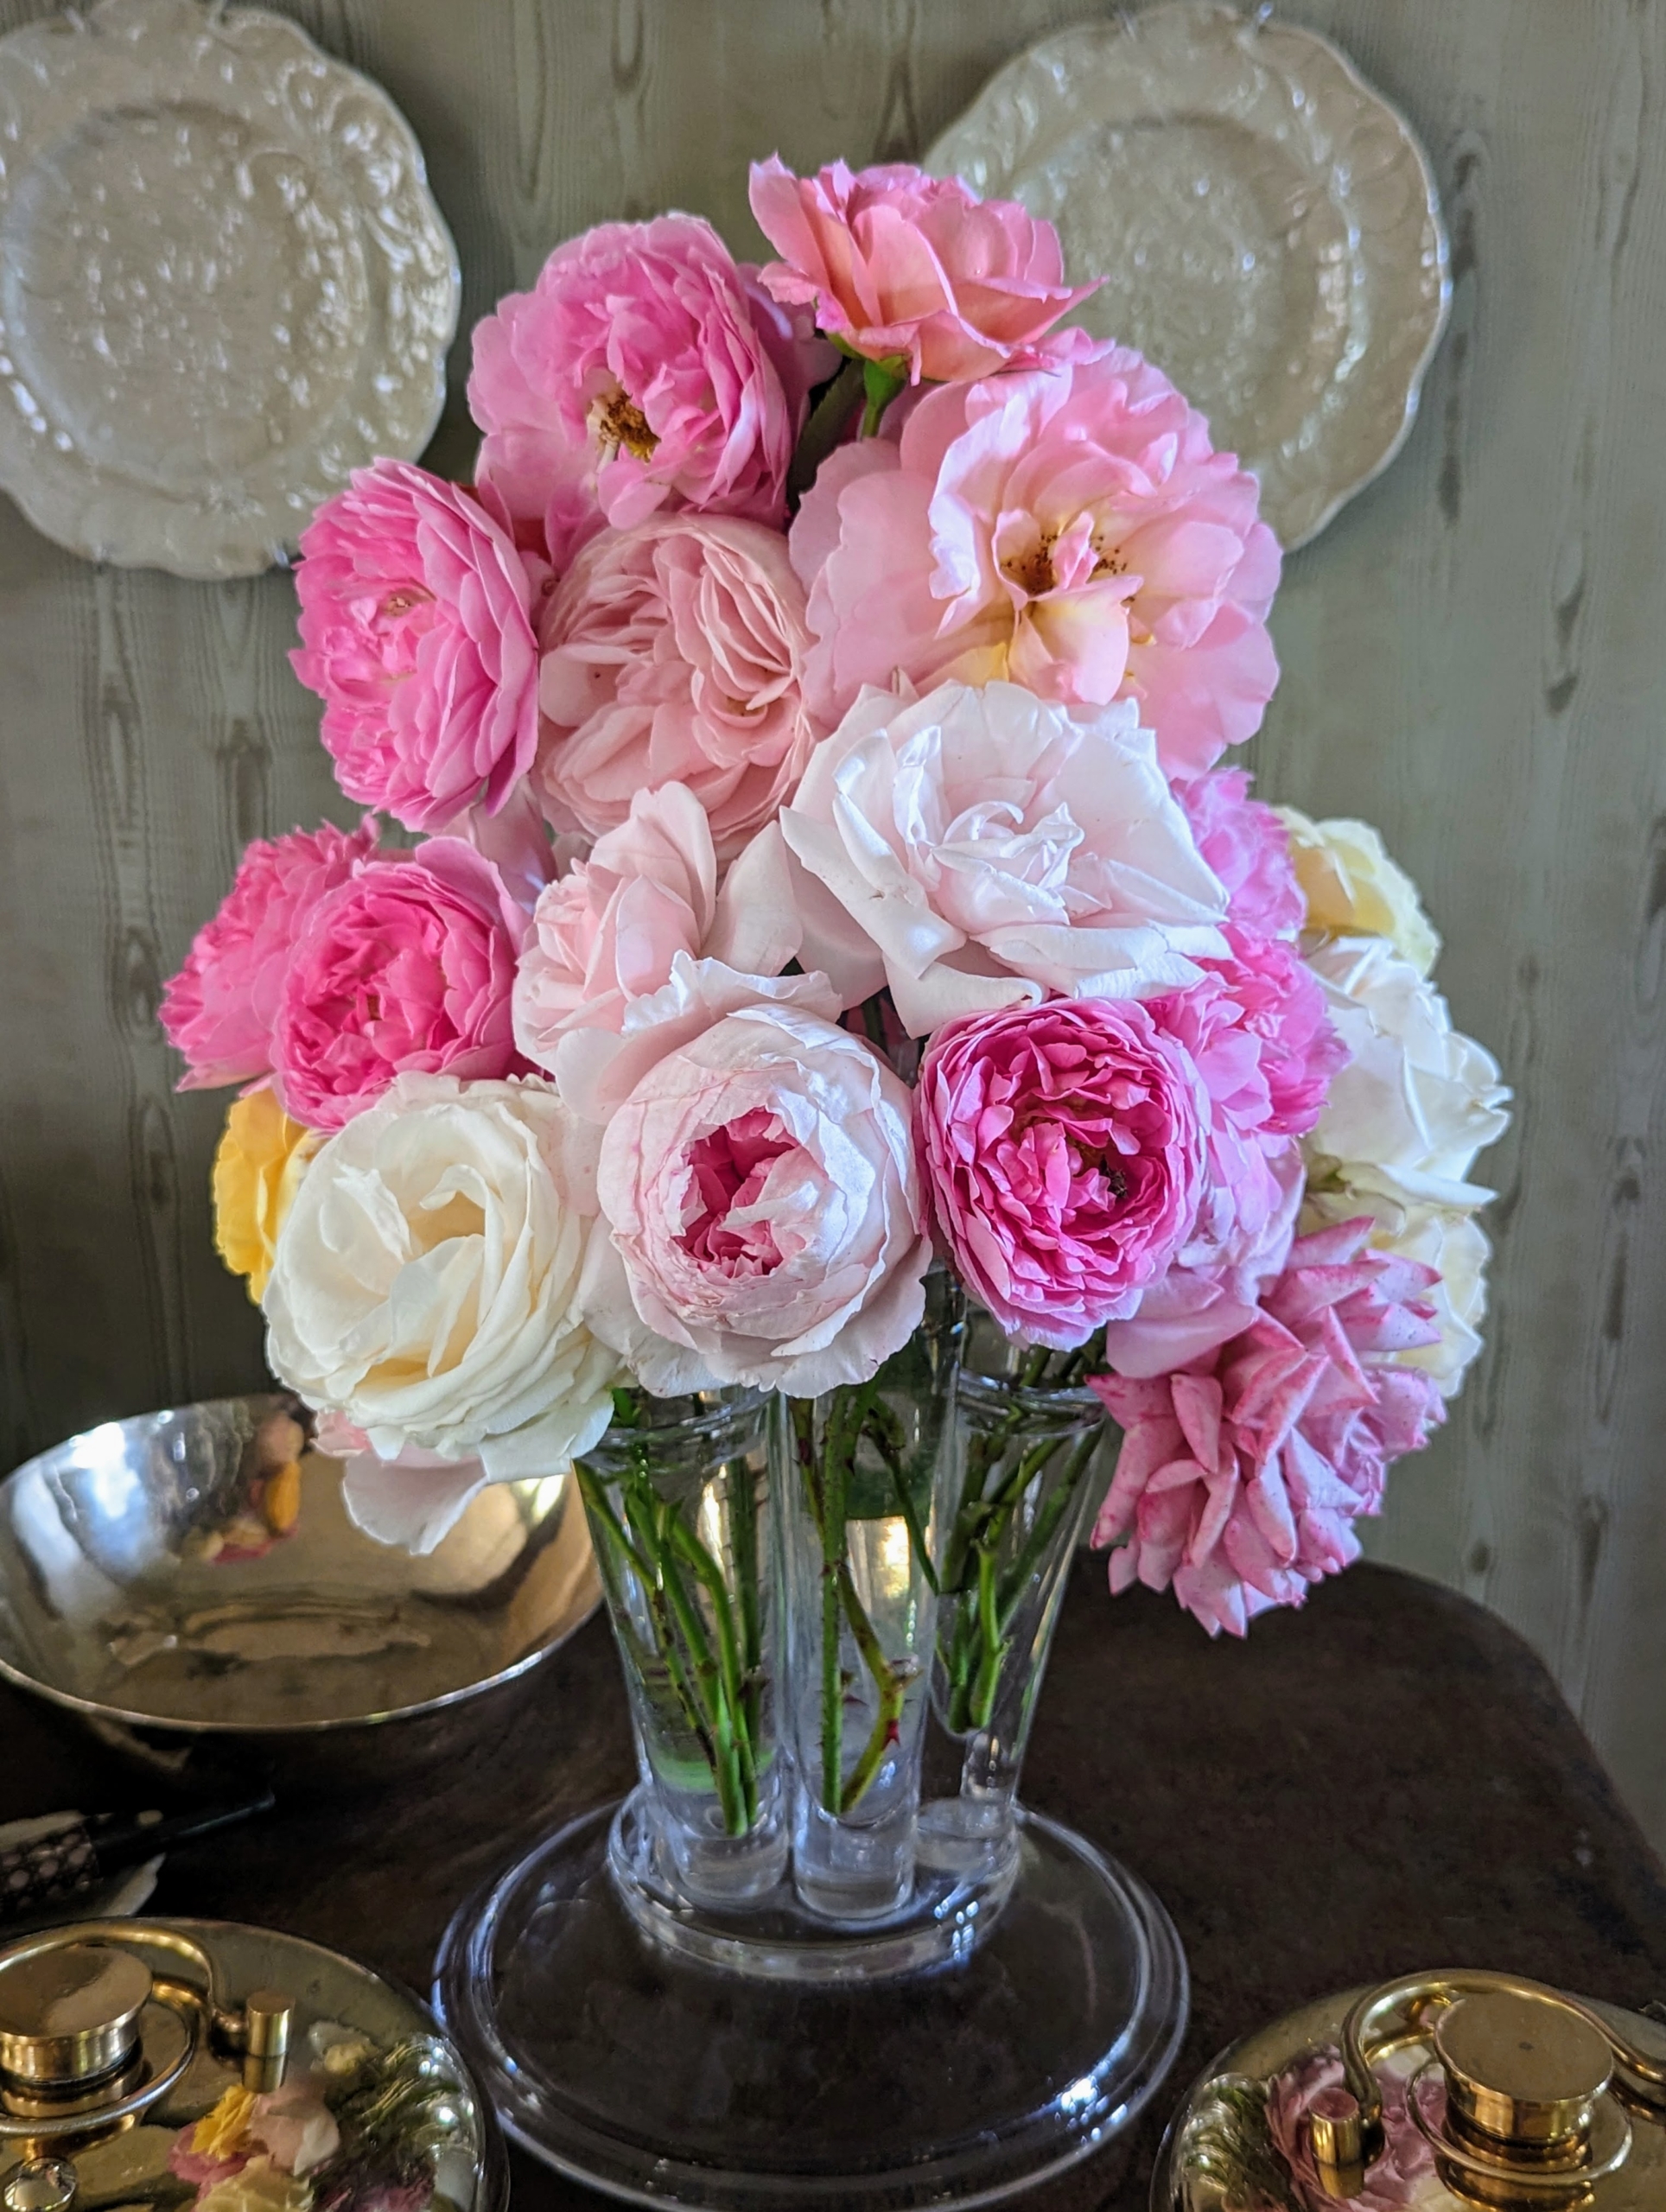
I like arrangements to be done by color – this arrangement includes many of the light colored roses.
Here is a light yellow rose. When arranging, be sure not to overcrowd the flowers. Too many can prevent some flowers from getting adequate water.
Here is one vase almost done. Most freshly cut roses should last up to one week if properly tended.
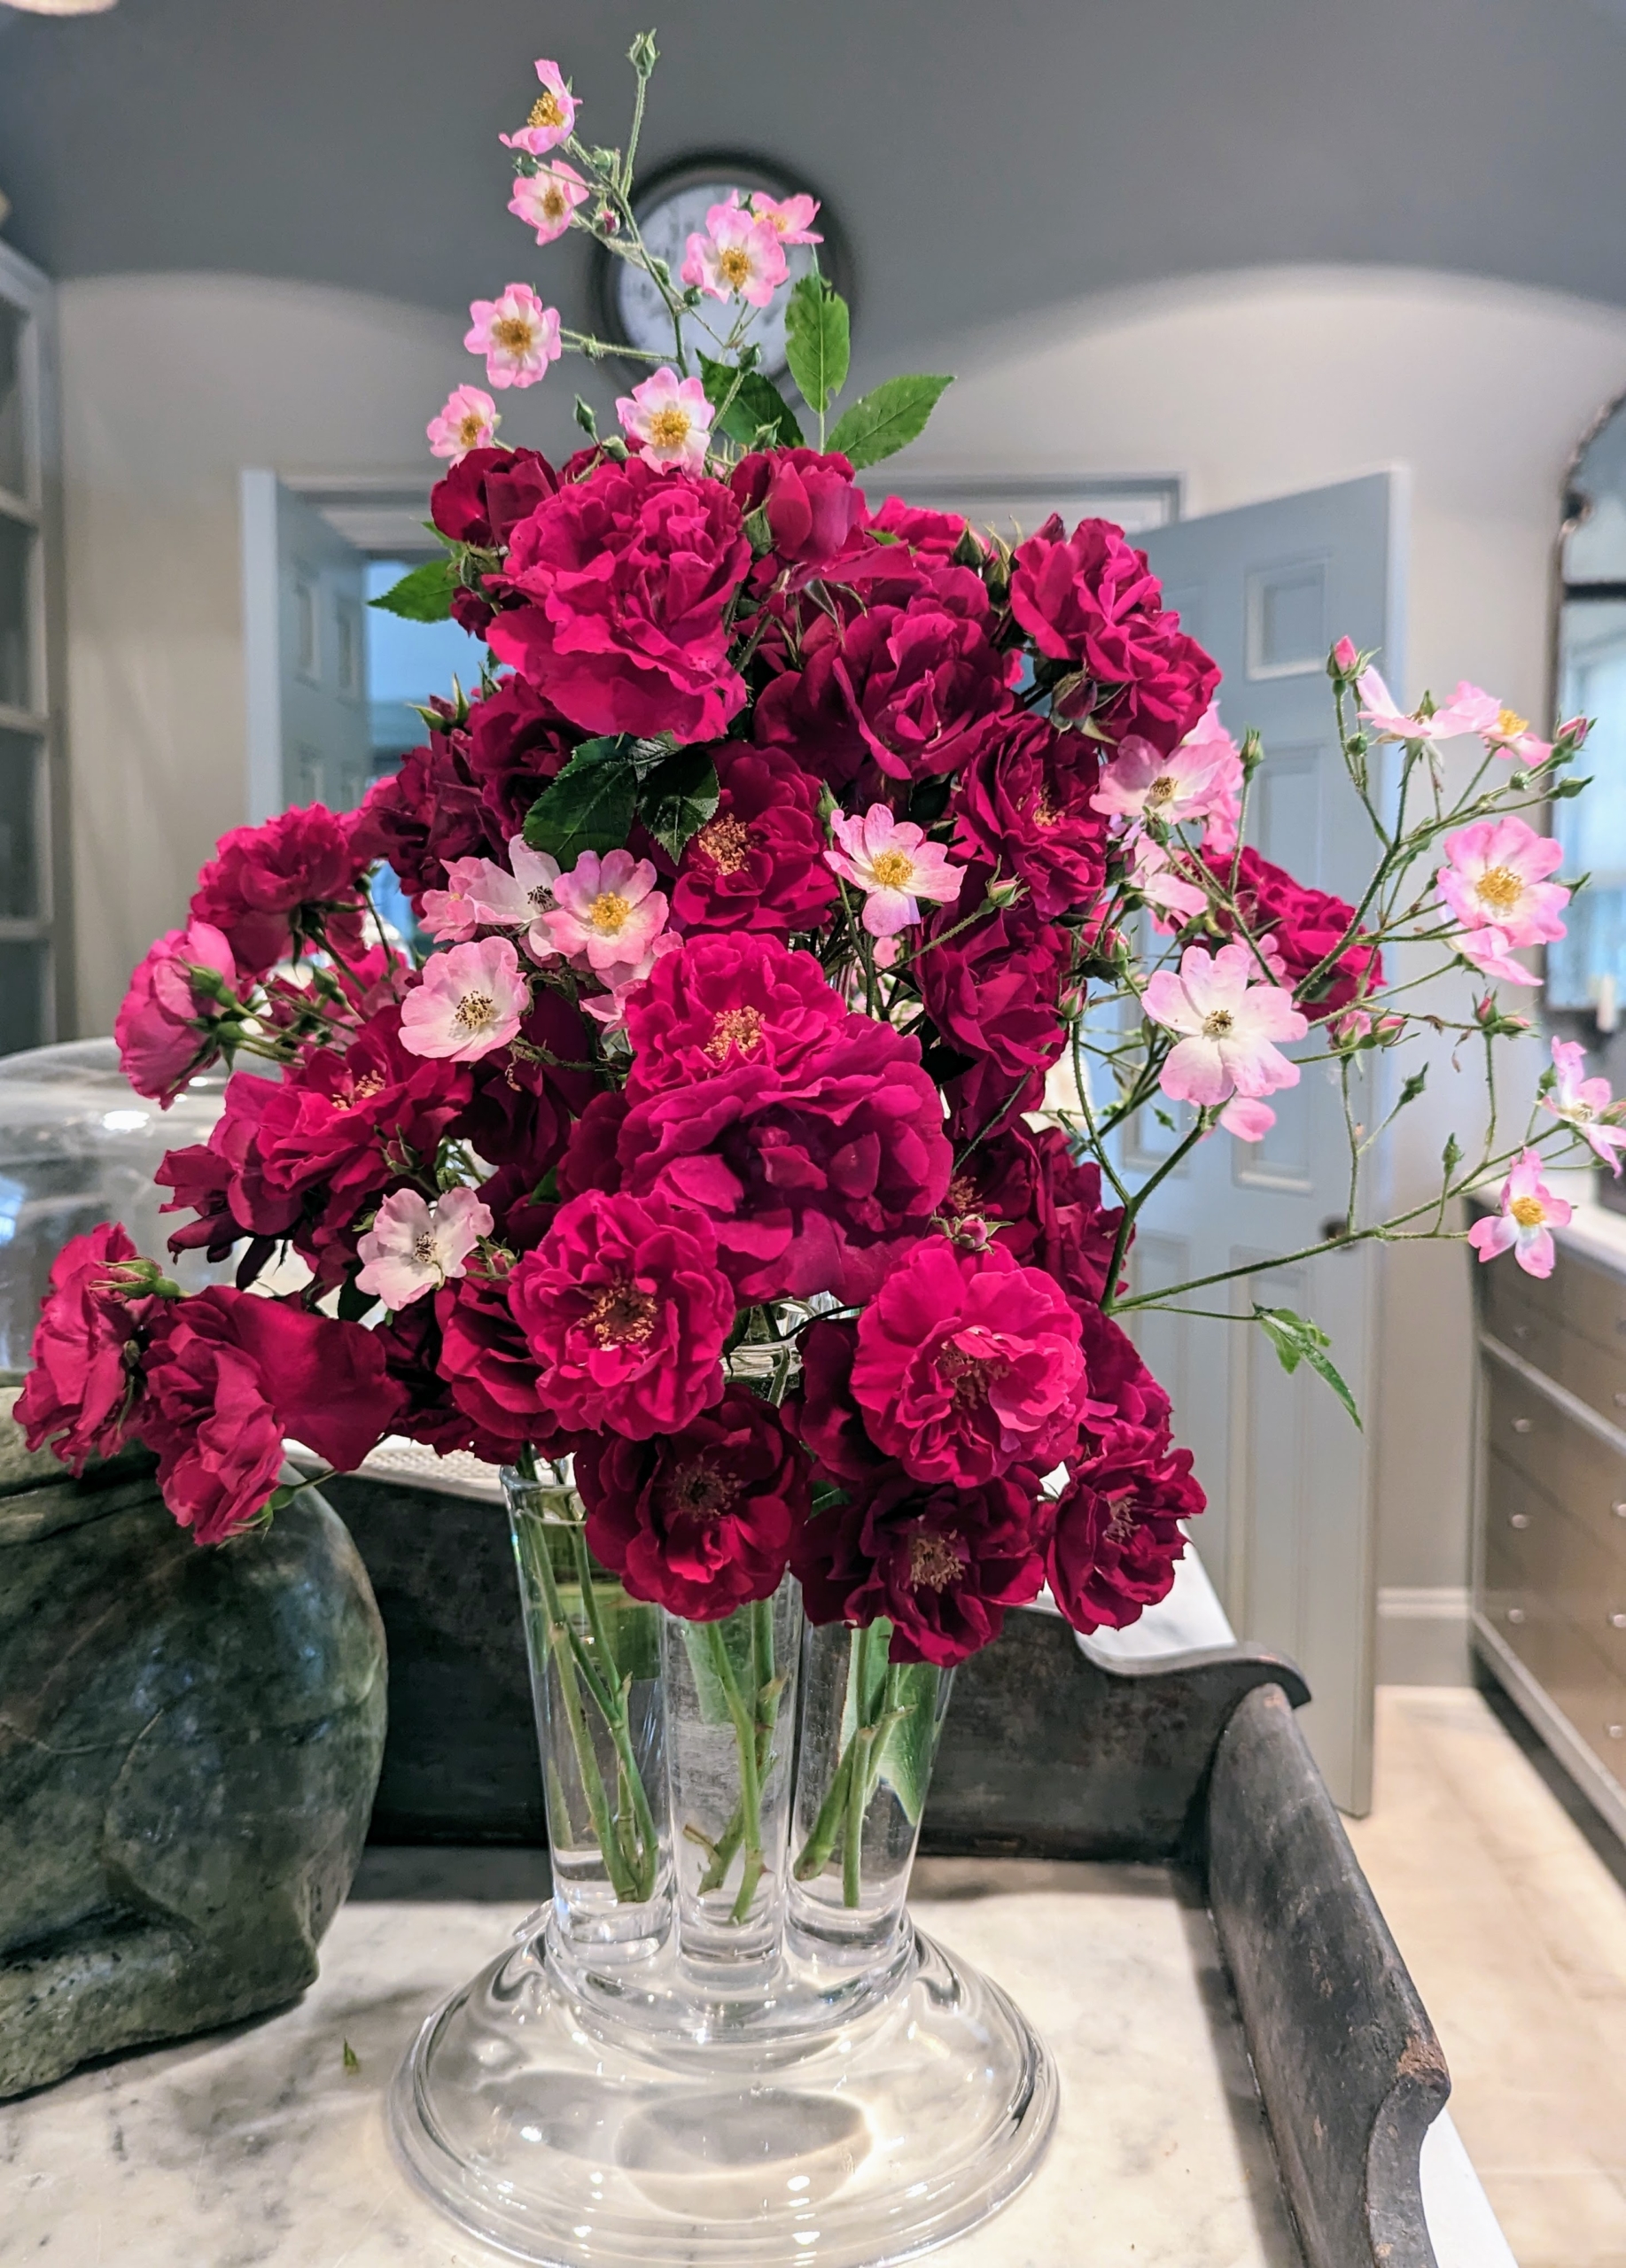
In this vase, Elvira mixes deep red roses with a few cream to light pink colored blooms. When displaying roses, be sure to keep them away from heat and bright light, which will shorten vase life.
This vase of roses is in my sitting room, where I can see them every morning on my way to the kitchen. With cut flowers, it is also a good idea to change the water every two to three days to keep them fresh longer. And check on them. Keeping the vase full ensures the flowers do not dry out and wilt.
This arrangement of red and pink roses is on the center island of my servery, another nice spot where gorgeous arrangements can be seen and enjoyed. If you grow roses, I hope this inspires you to go out and cut a selection of flowers, so you can enjoy their beauty and fragrance inside.