Our big hay baling project continues at my Bedford, New York farm.
Hay is a harvested plant that’s dried and cured after being cut in the field. In most cases, hay is cut during the late bud or early bloom stage to maximize its nutritional value. When I moved here, I designated three separate areas as hayfields, so I could grow lots and lots of delicious, nutritious hay for my horses and donkeys. Last week, my outdoor grounds crew worked hard to cut, fluff, rake, and then bale the hay in all three areas. We're all so excited about this first cut. In all, we got 1557 bales of hay, our biggest amount yet!
Here are some photos.
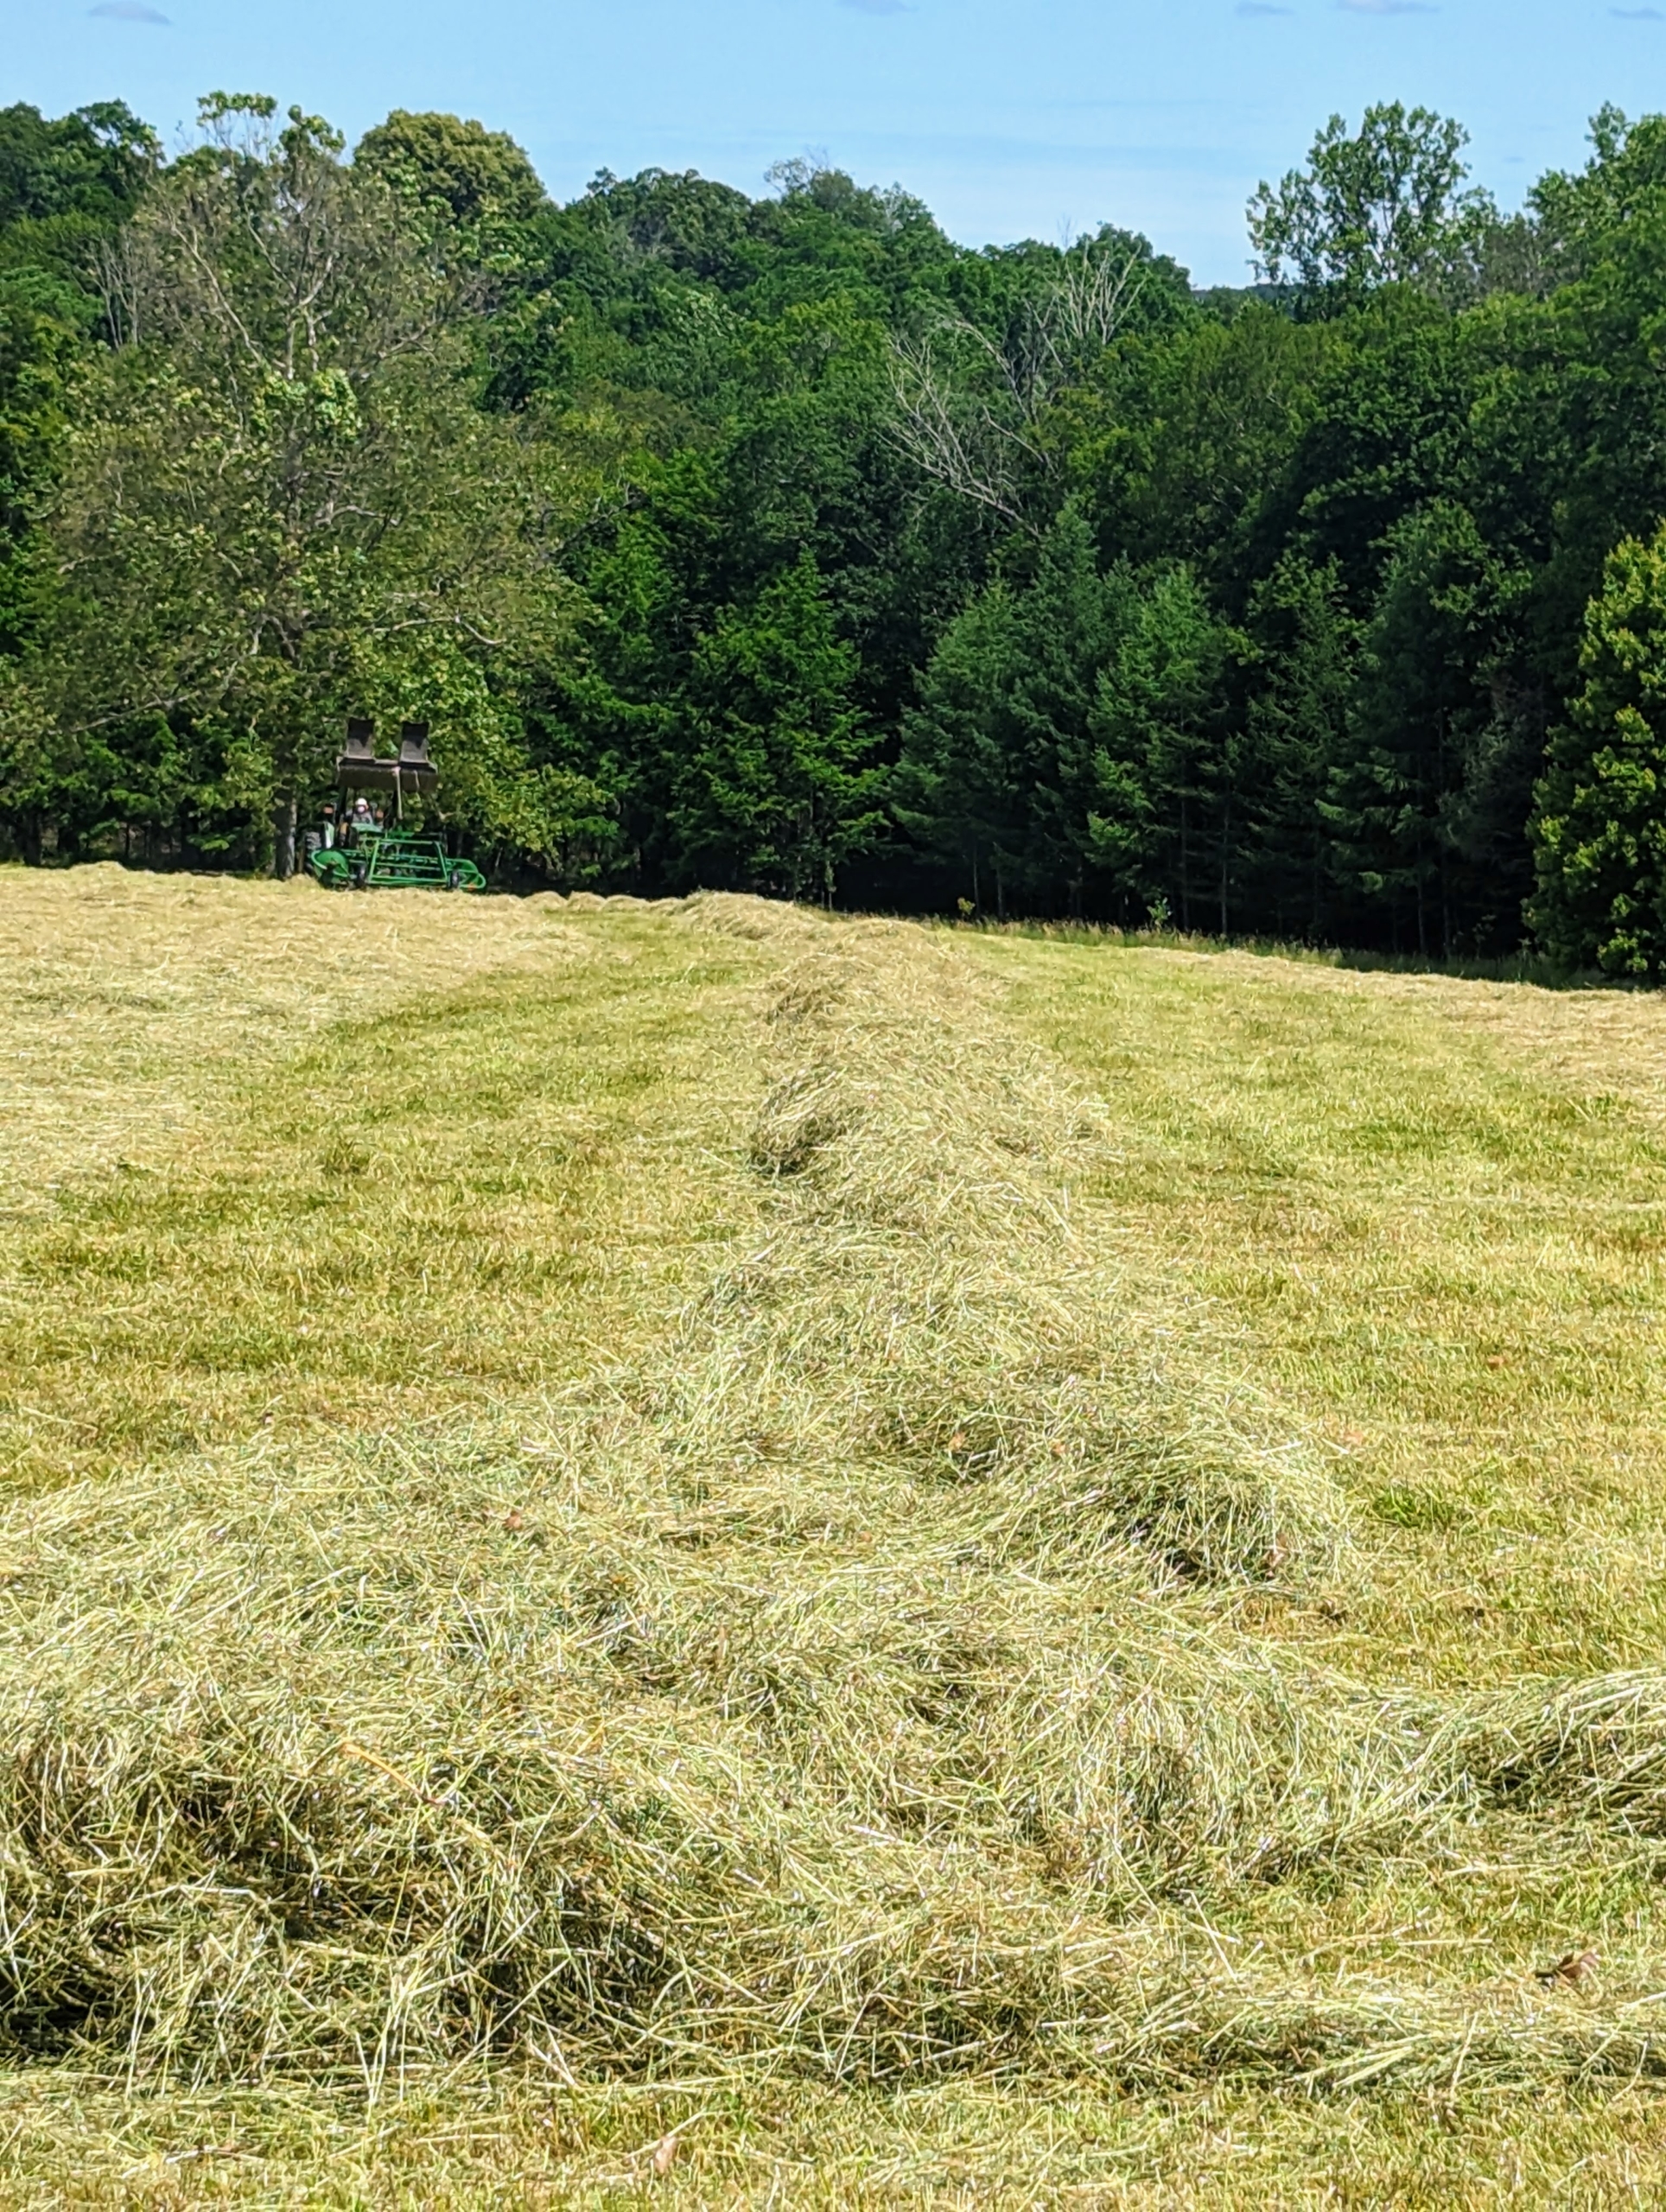
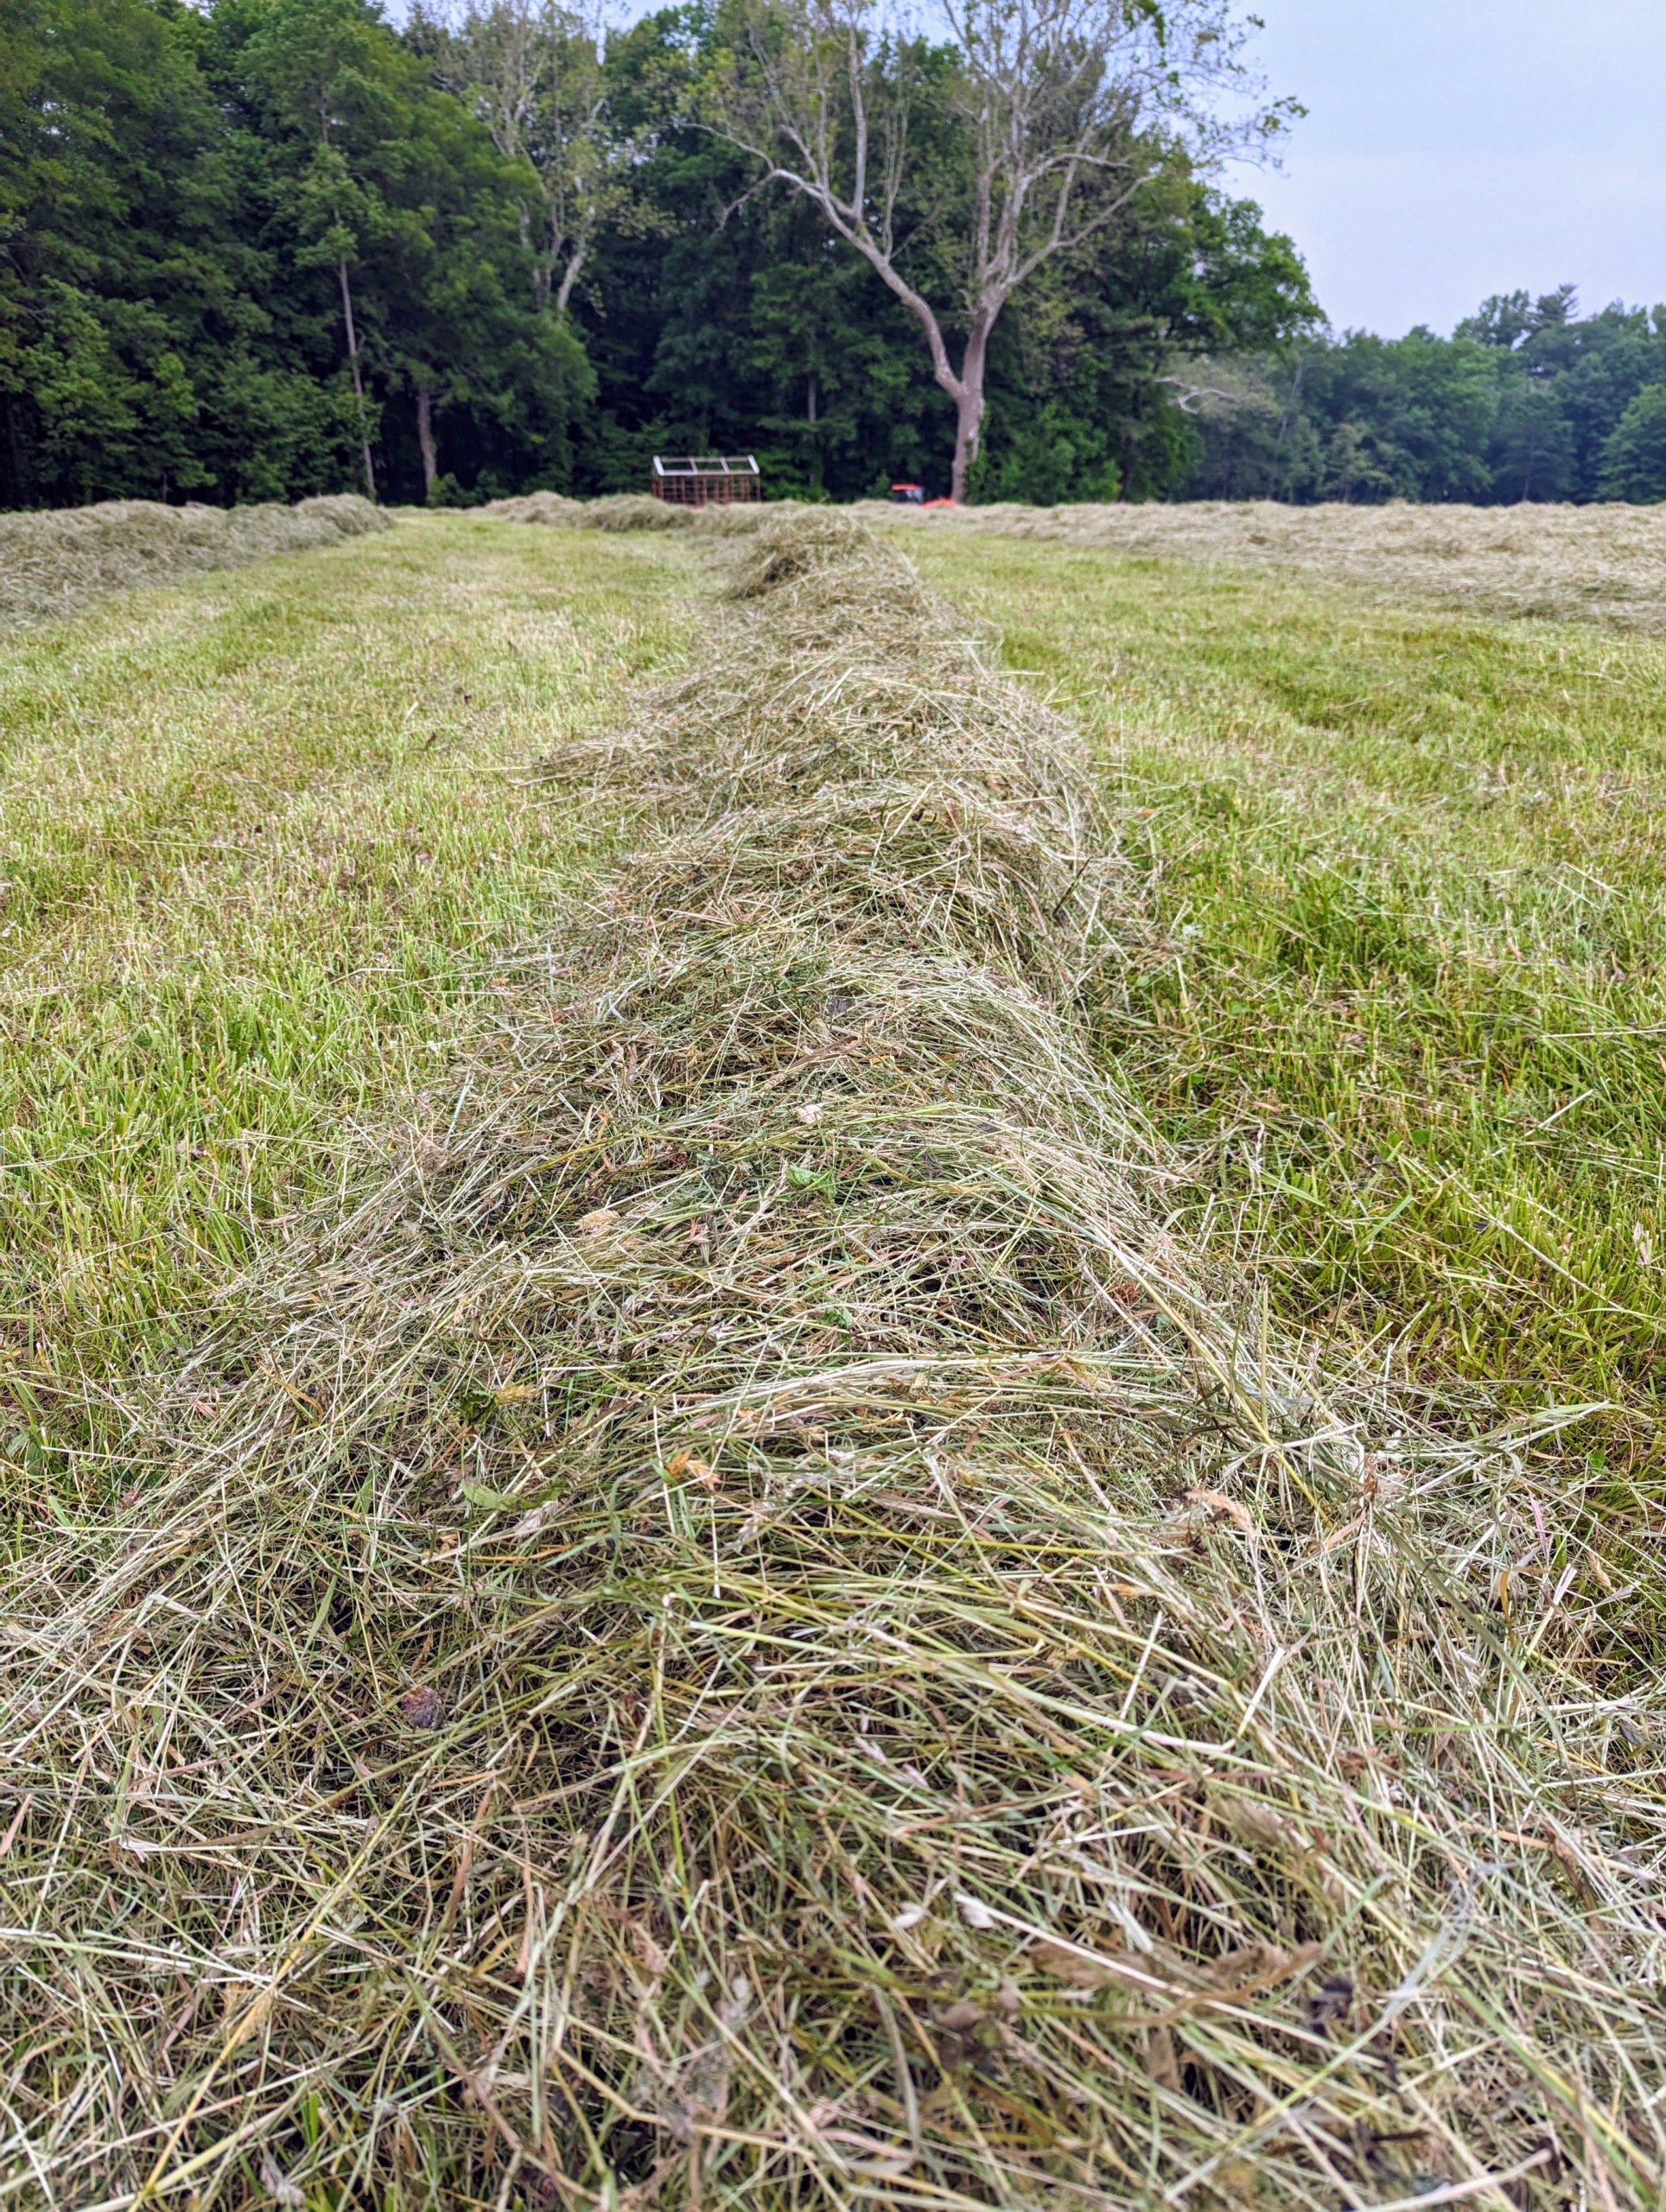
The windrows of cut, tedded, and raked hay are ready to bale. All my hayfields are planted with a custom mixture of orchard grass, tall fescue, and timothy seeds – all great for producing good quality hay. This day was dry and perfect for baling.
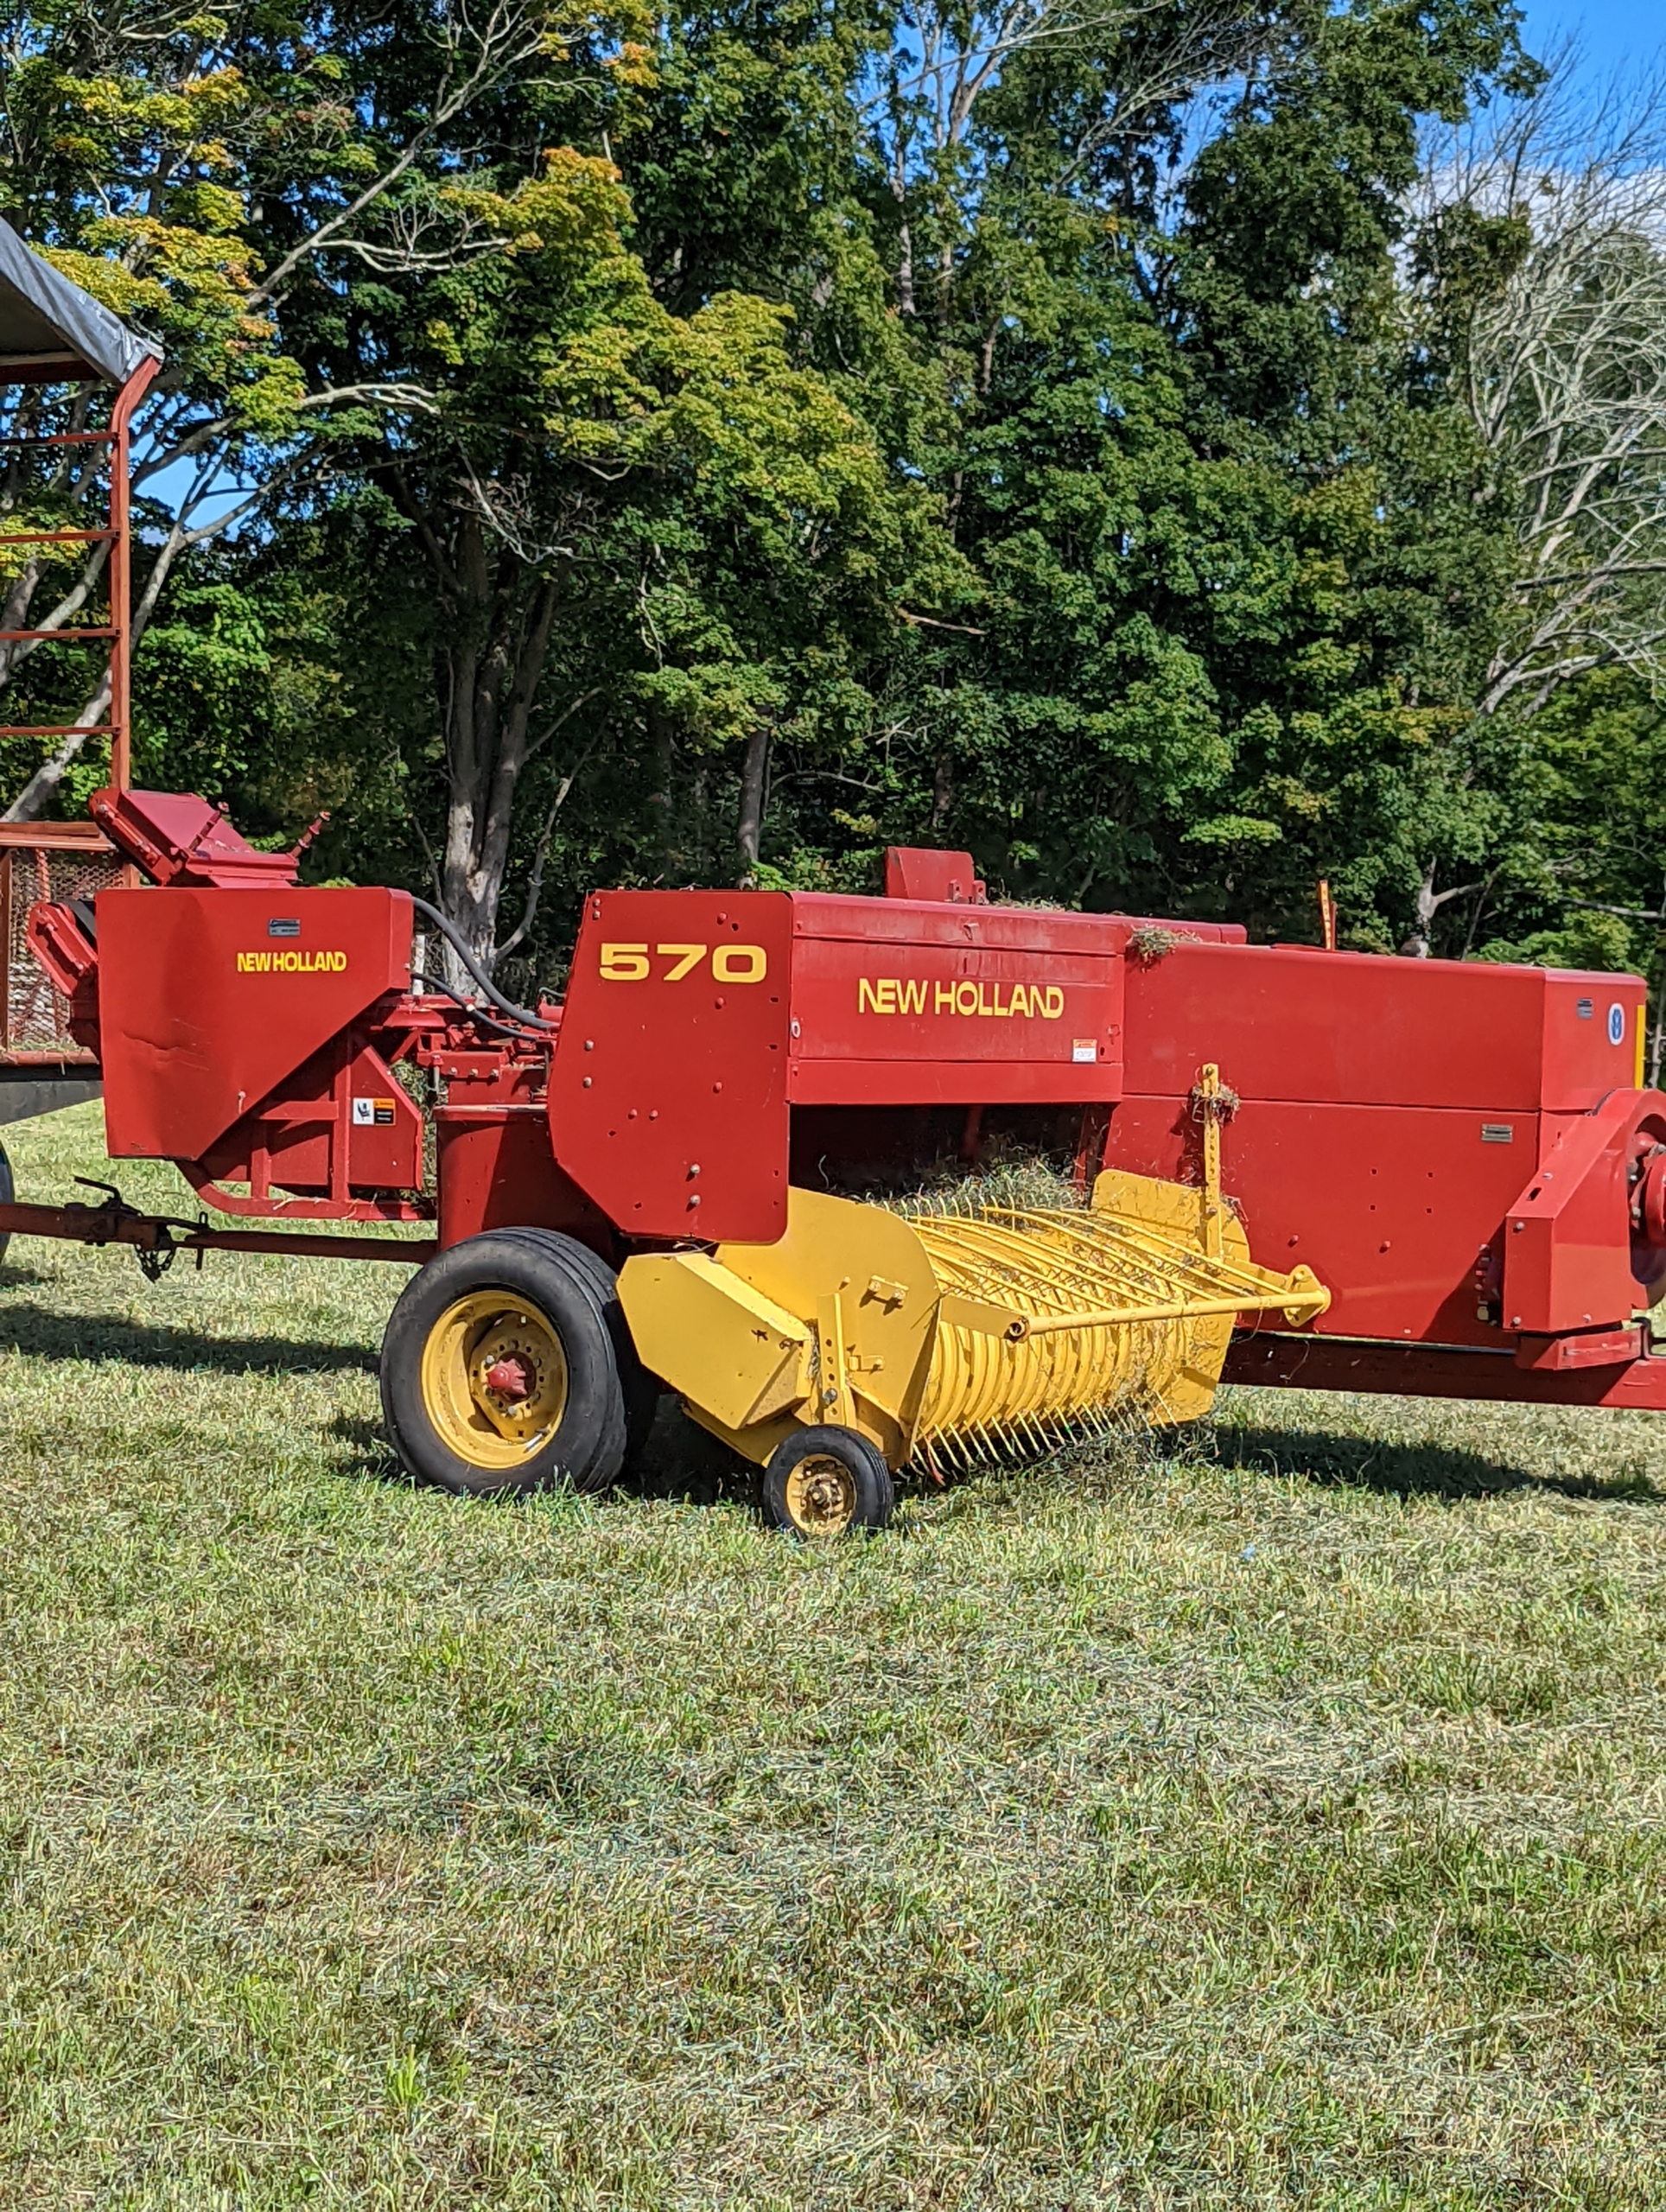
A hay baler is a piece of farm machinery used to compress a cut and raked crop into compact bales that are easy to handle, transport, and store. I am fortunate to have all the necessary equipment to process the hay in my fields.
Inside a box behind the baler is where large rolls of twine are positioned and tied to each other, so they can feed into the baler and secure the hay just before it shoots out into the trailer.
Here is the motor that helps to move and propel the bales into the wagon.
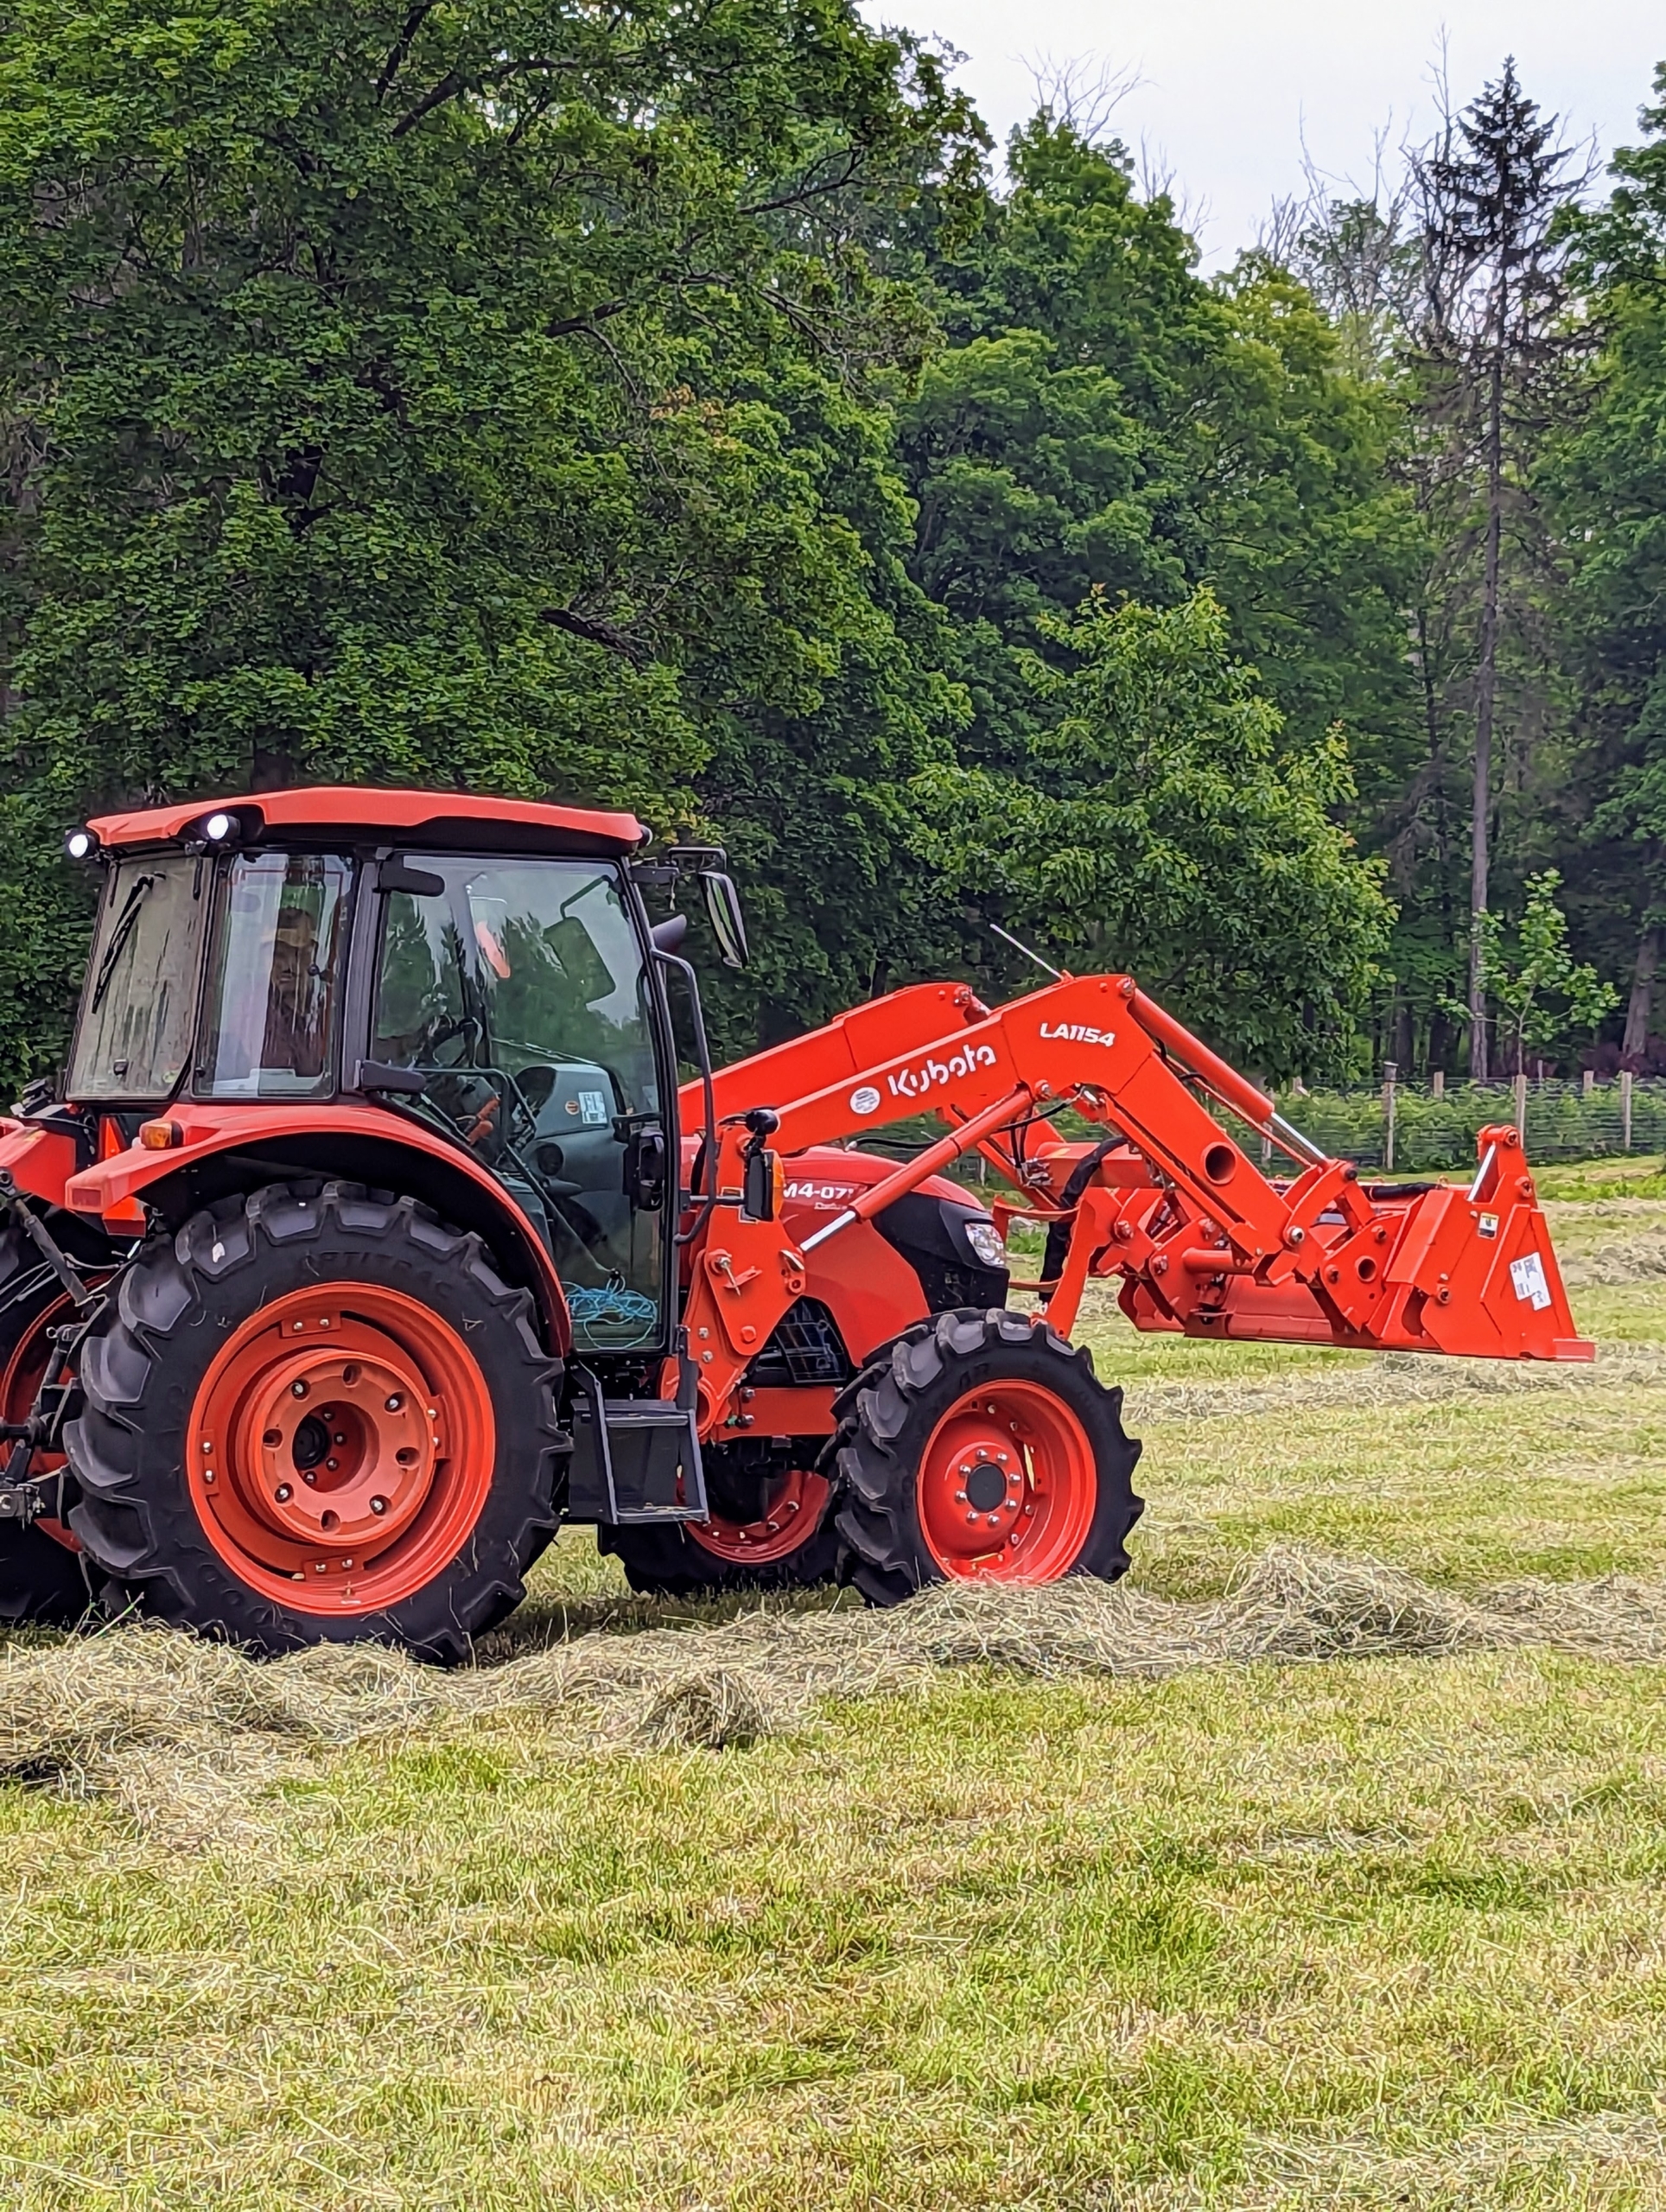
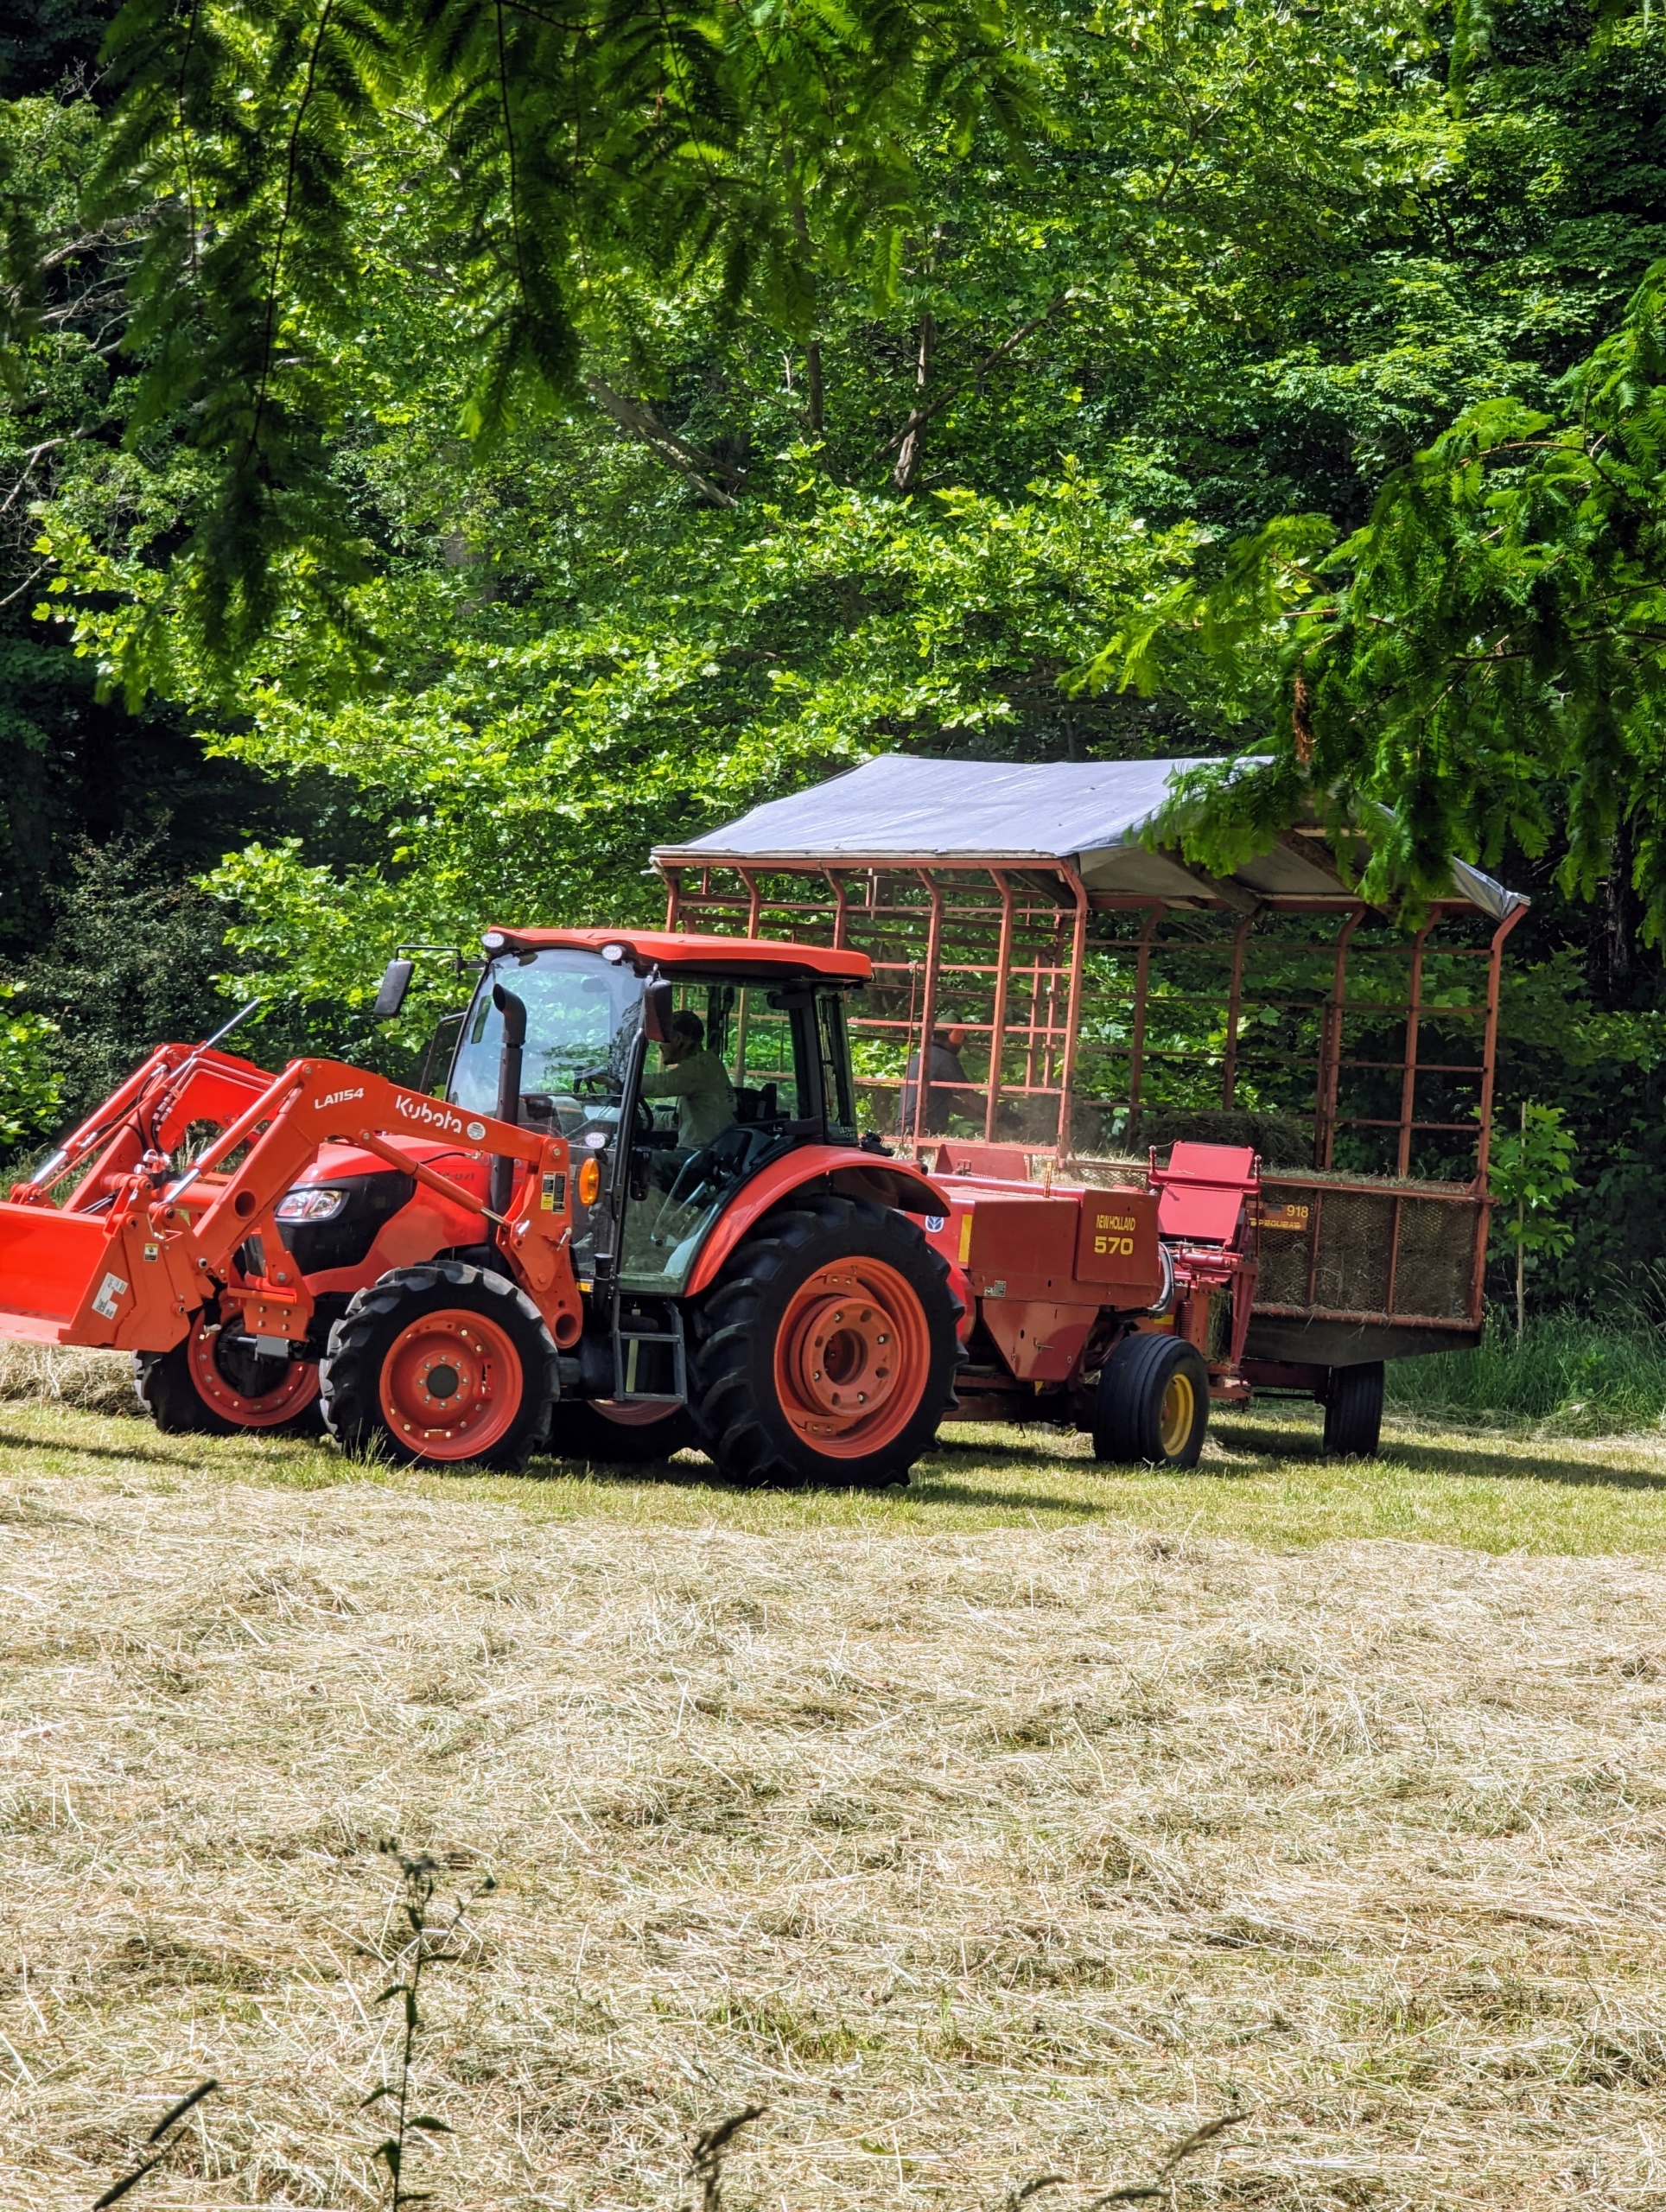
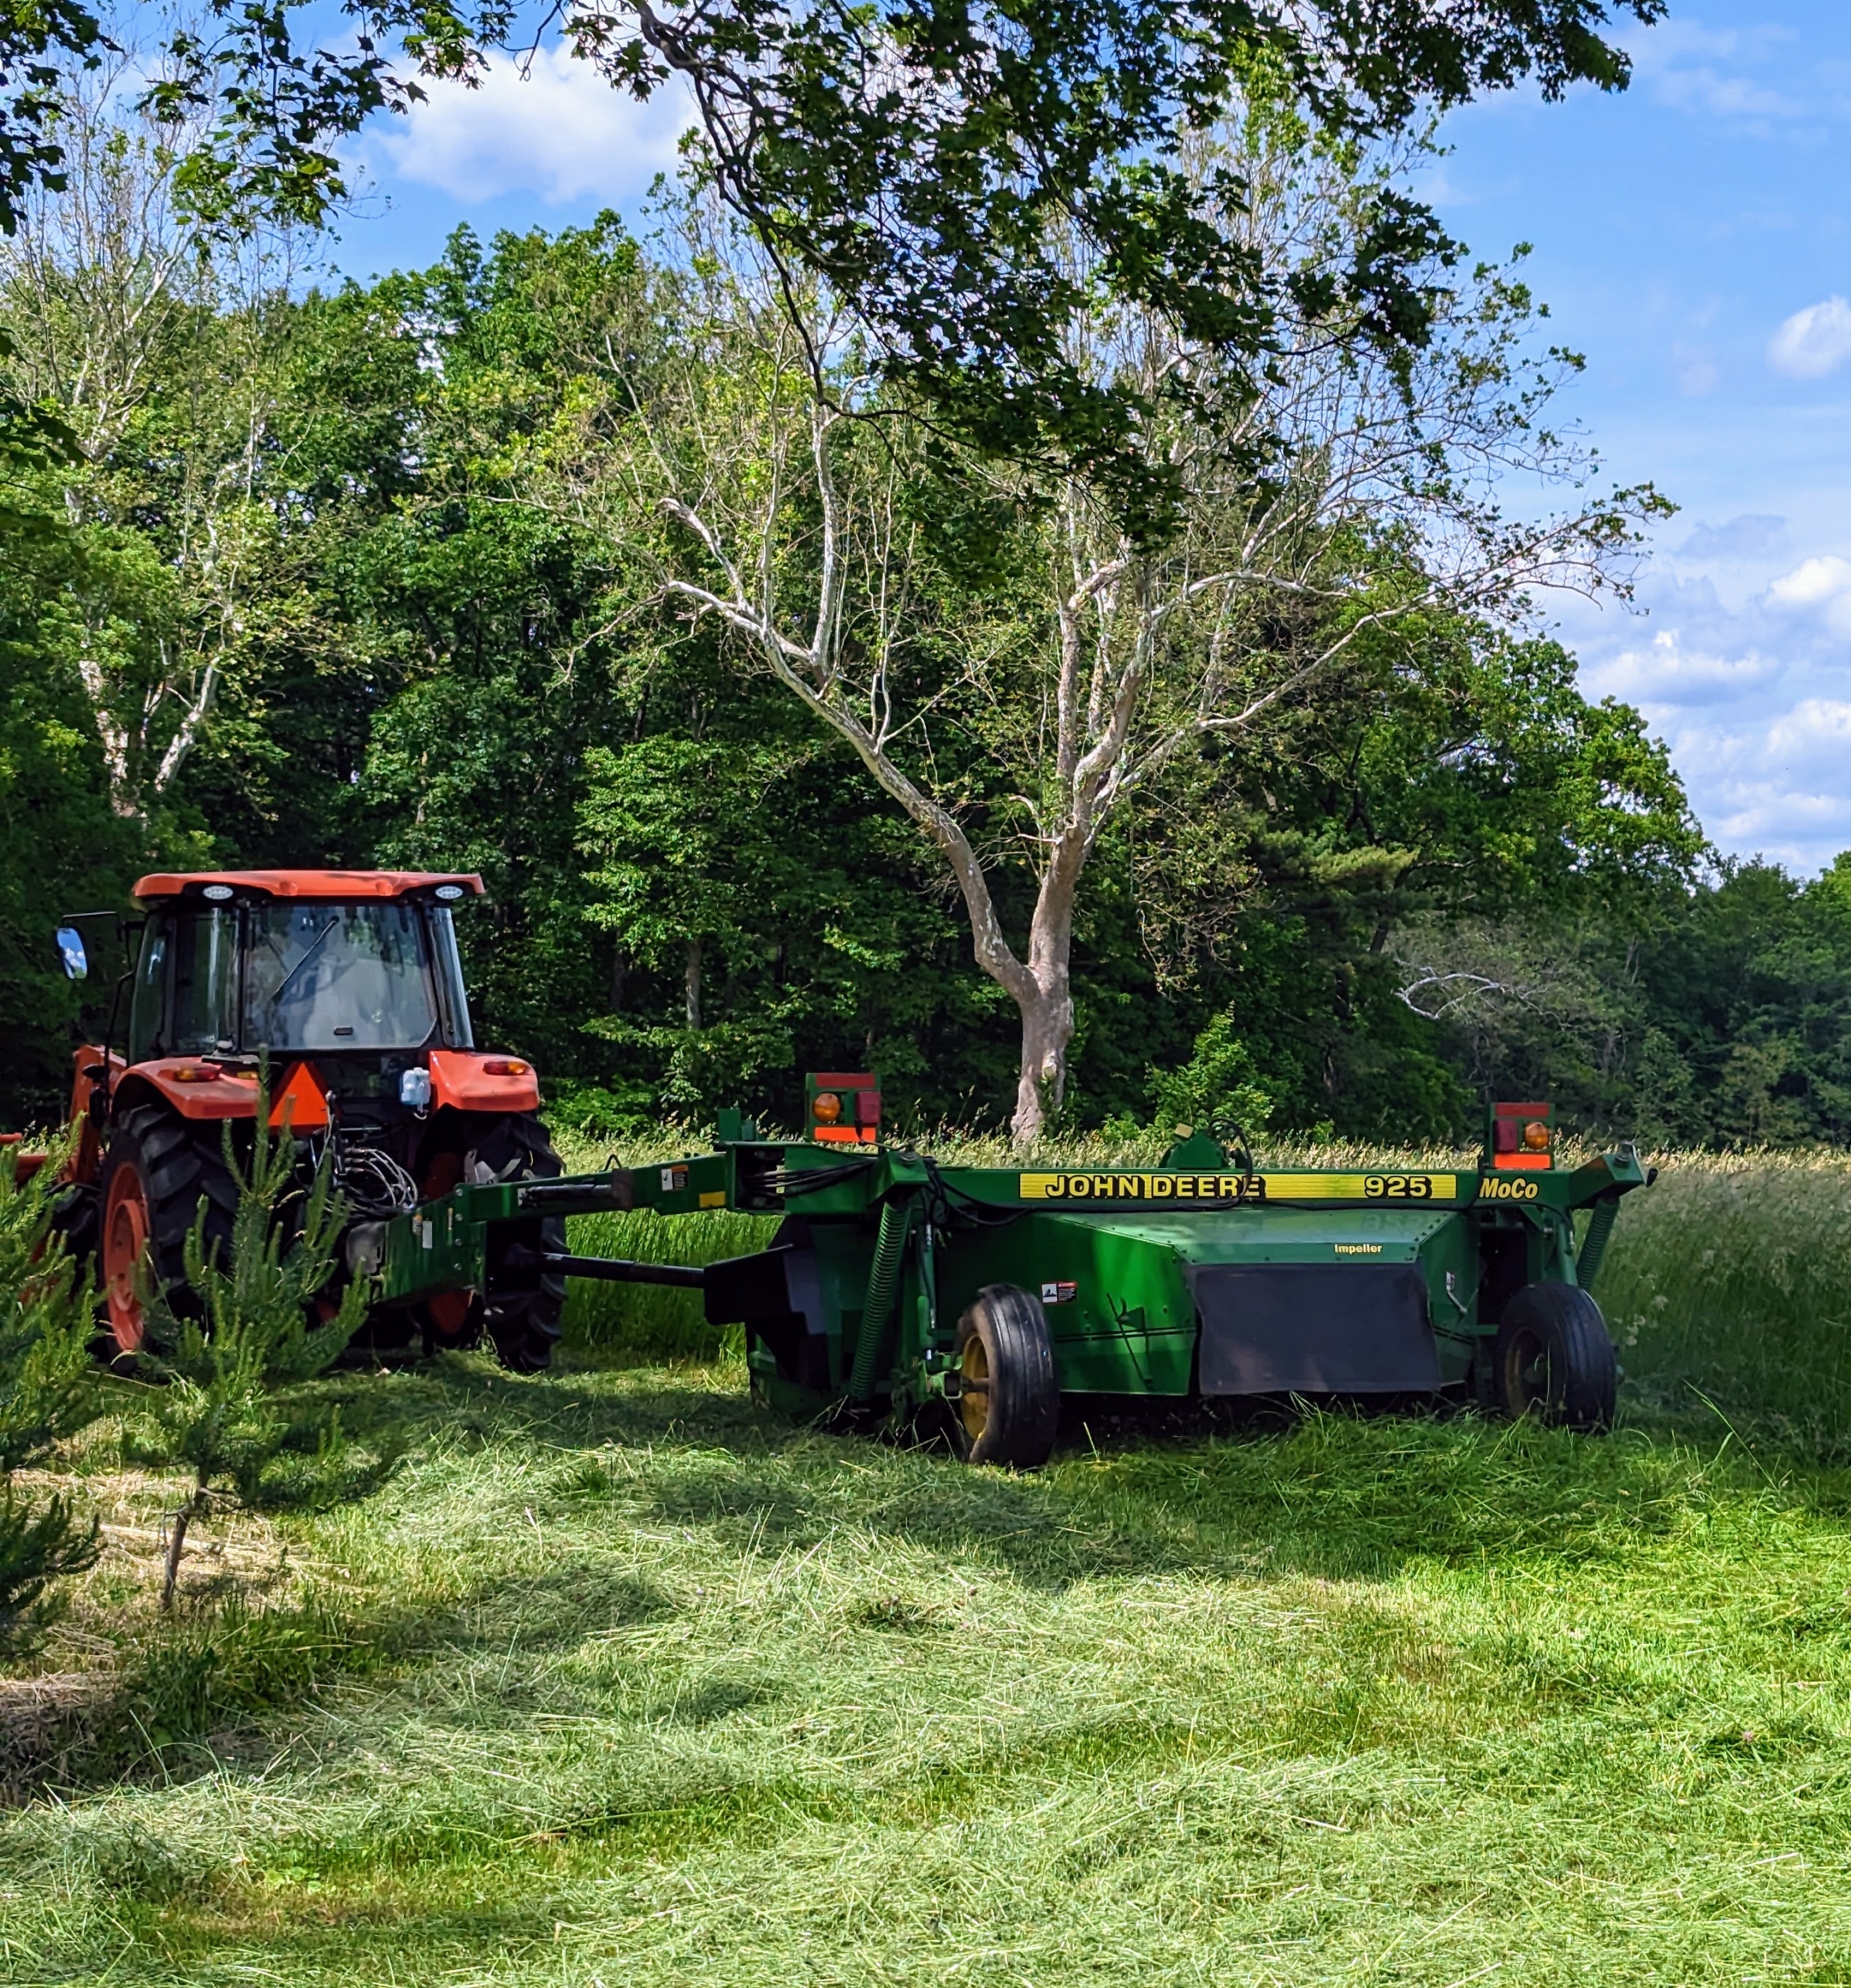
Chhiring pulls the baler with our trusted Kubota M4-071 tractor – a vehicle that is used every day here at the farm to do a multitude of tasks.
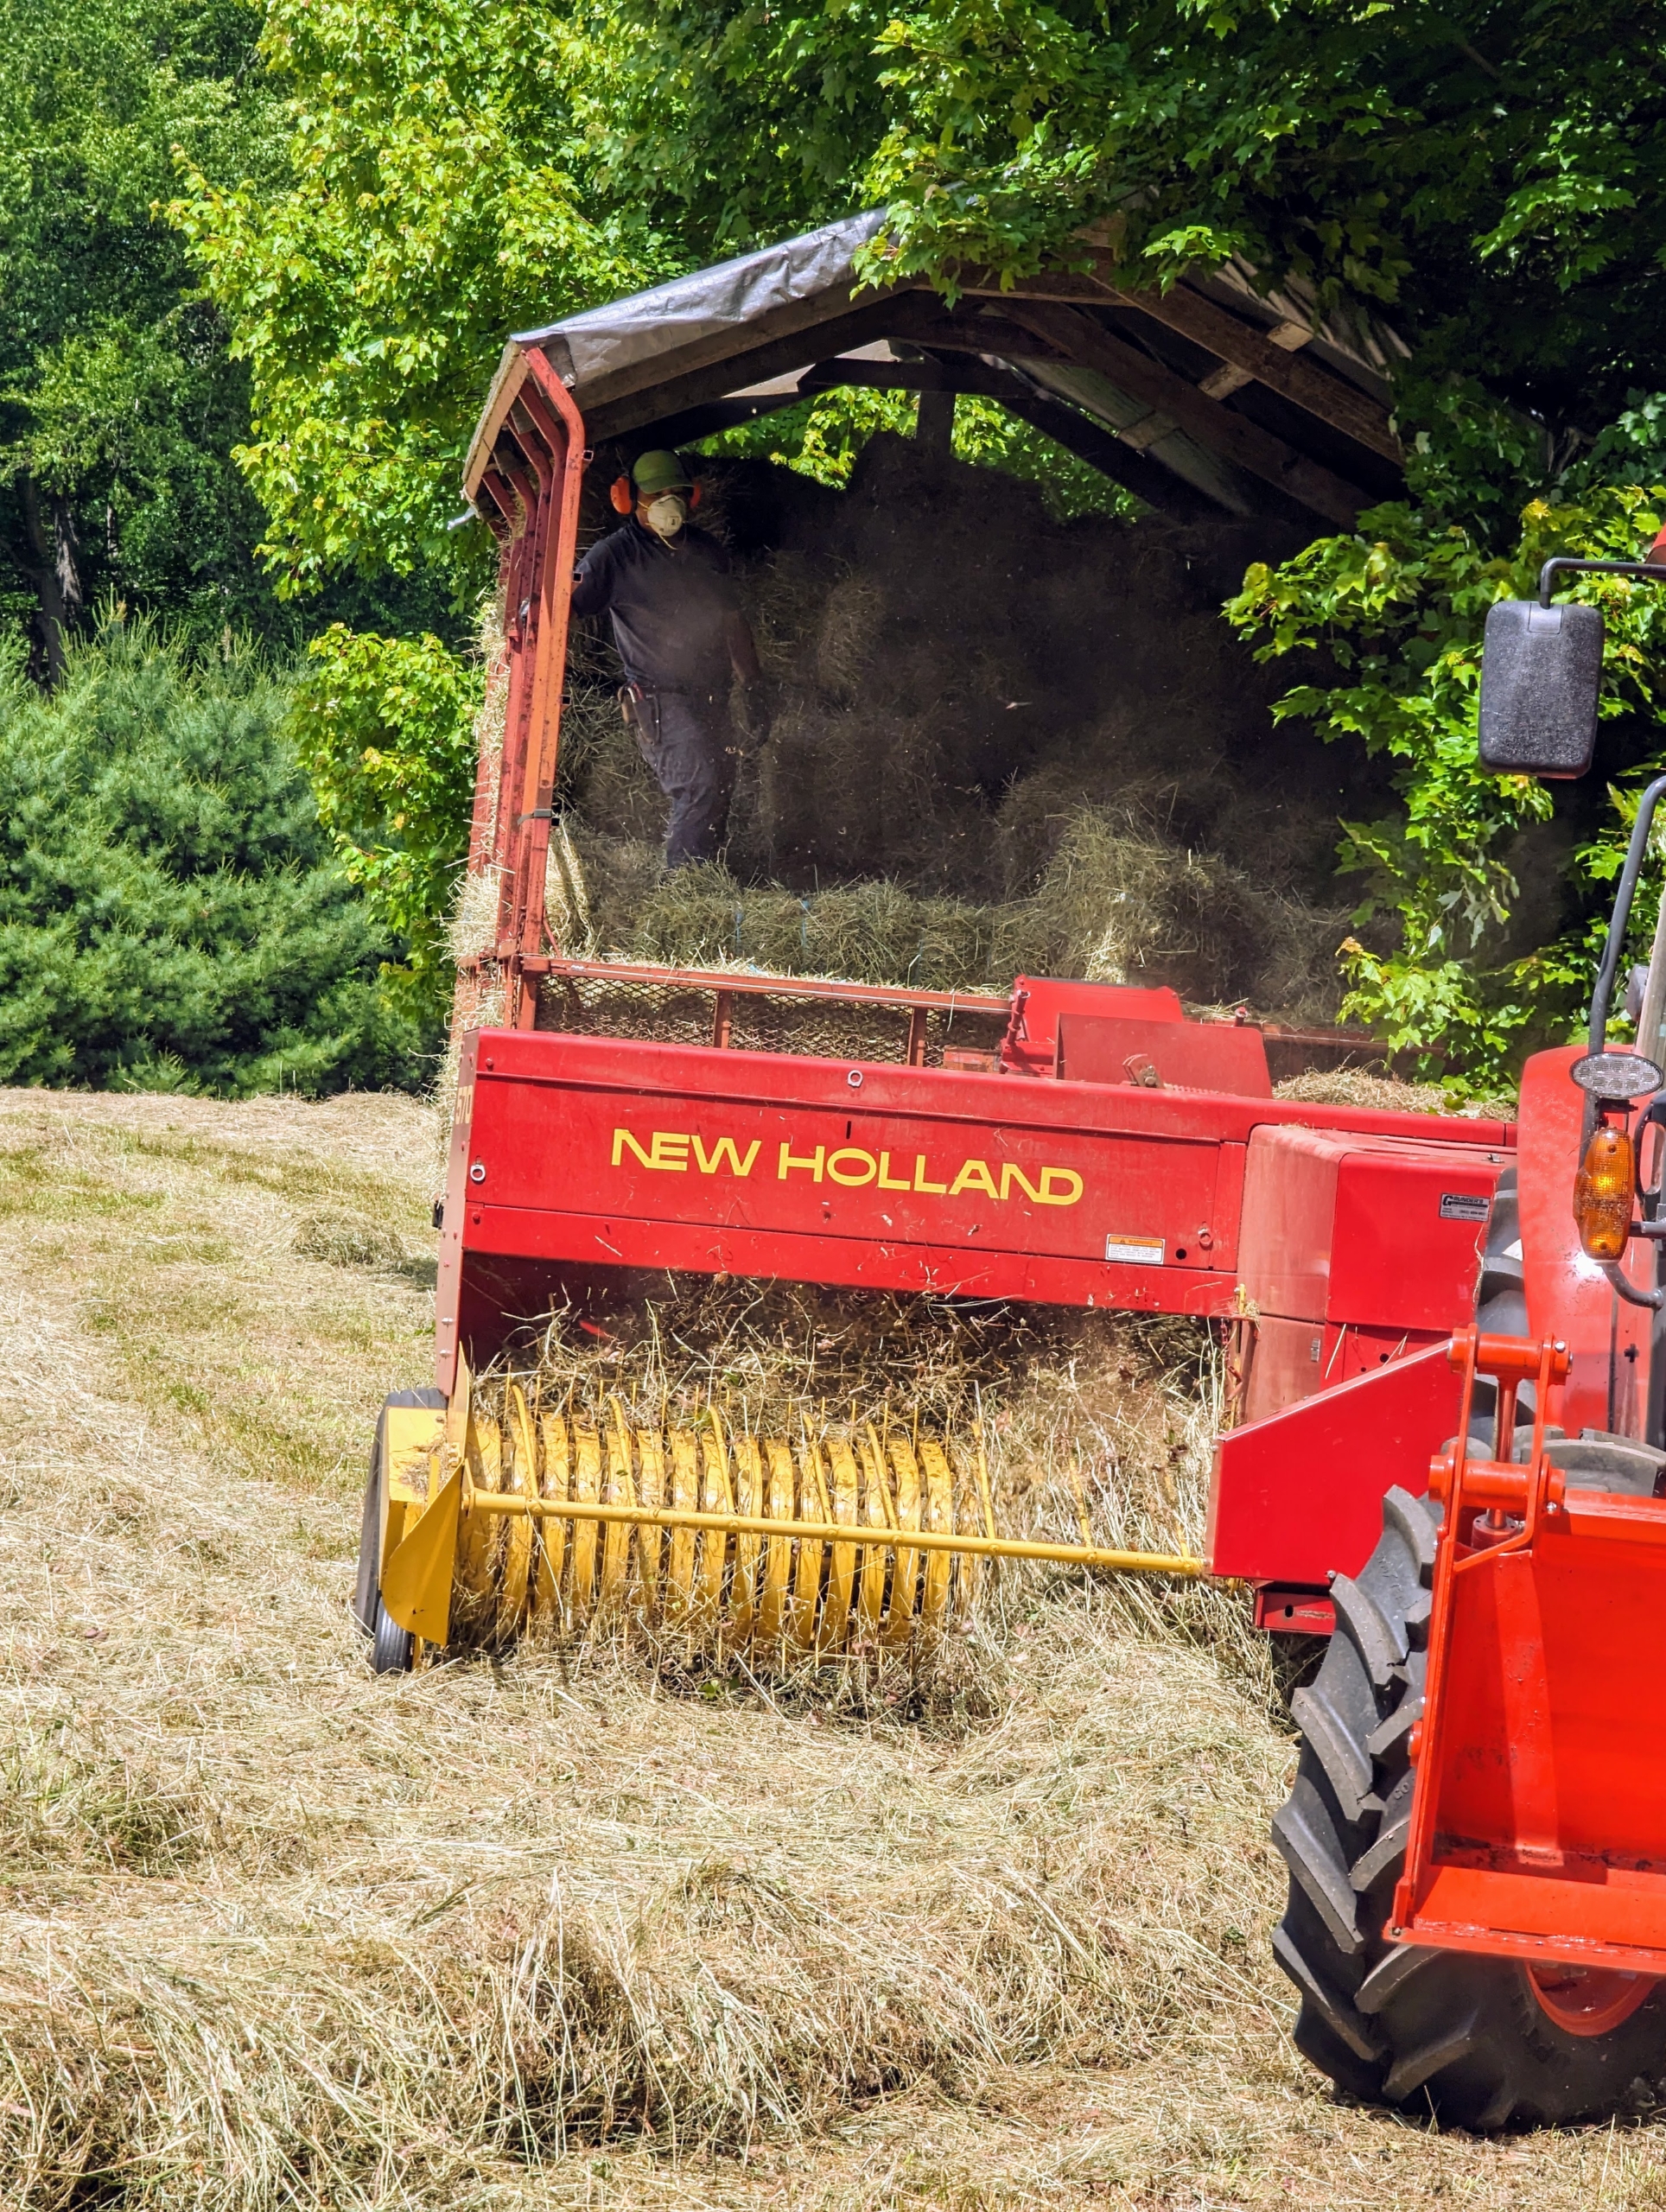
Chhiring starts the process midday when there is the least amount of moisture. The trailer fills up pretty quickly. Luckily, I have two hay trailers. Each one can hold about 150-bales. Chhiring drives up and down the windrows of all the hayfields which takes a good portion of the day.
The tractor rides to one side of the windrow while the baler passes directly over it to collect the hay. All the hay is dry and passing through the machine smoothly. If the hay is properly dried, the baler will work continuously down each row. Hay that is too damp tends to clog up the baler.
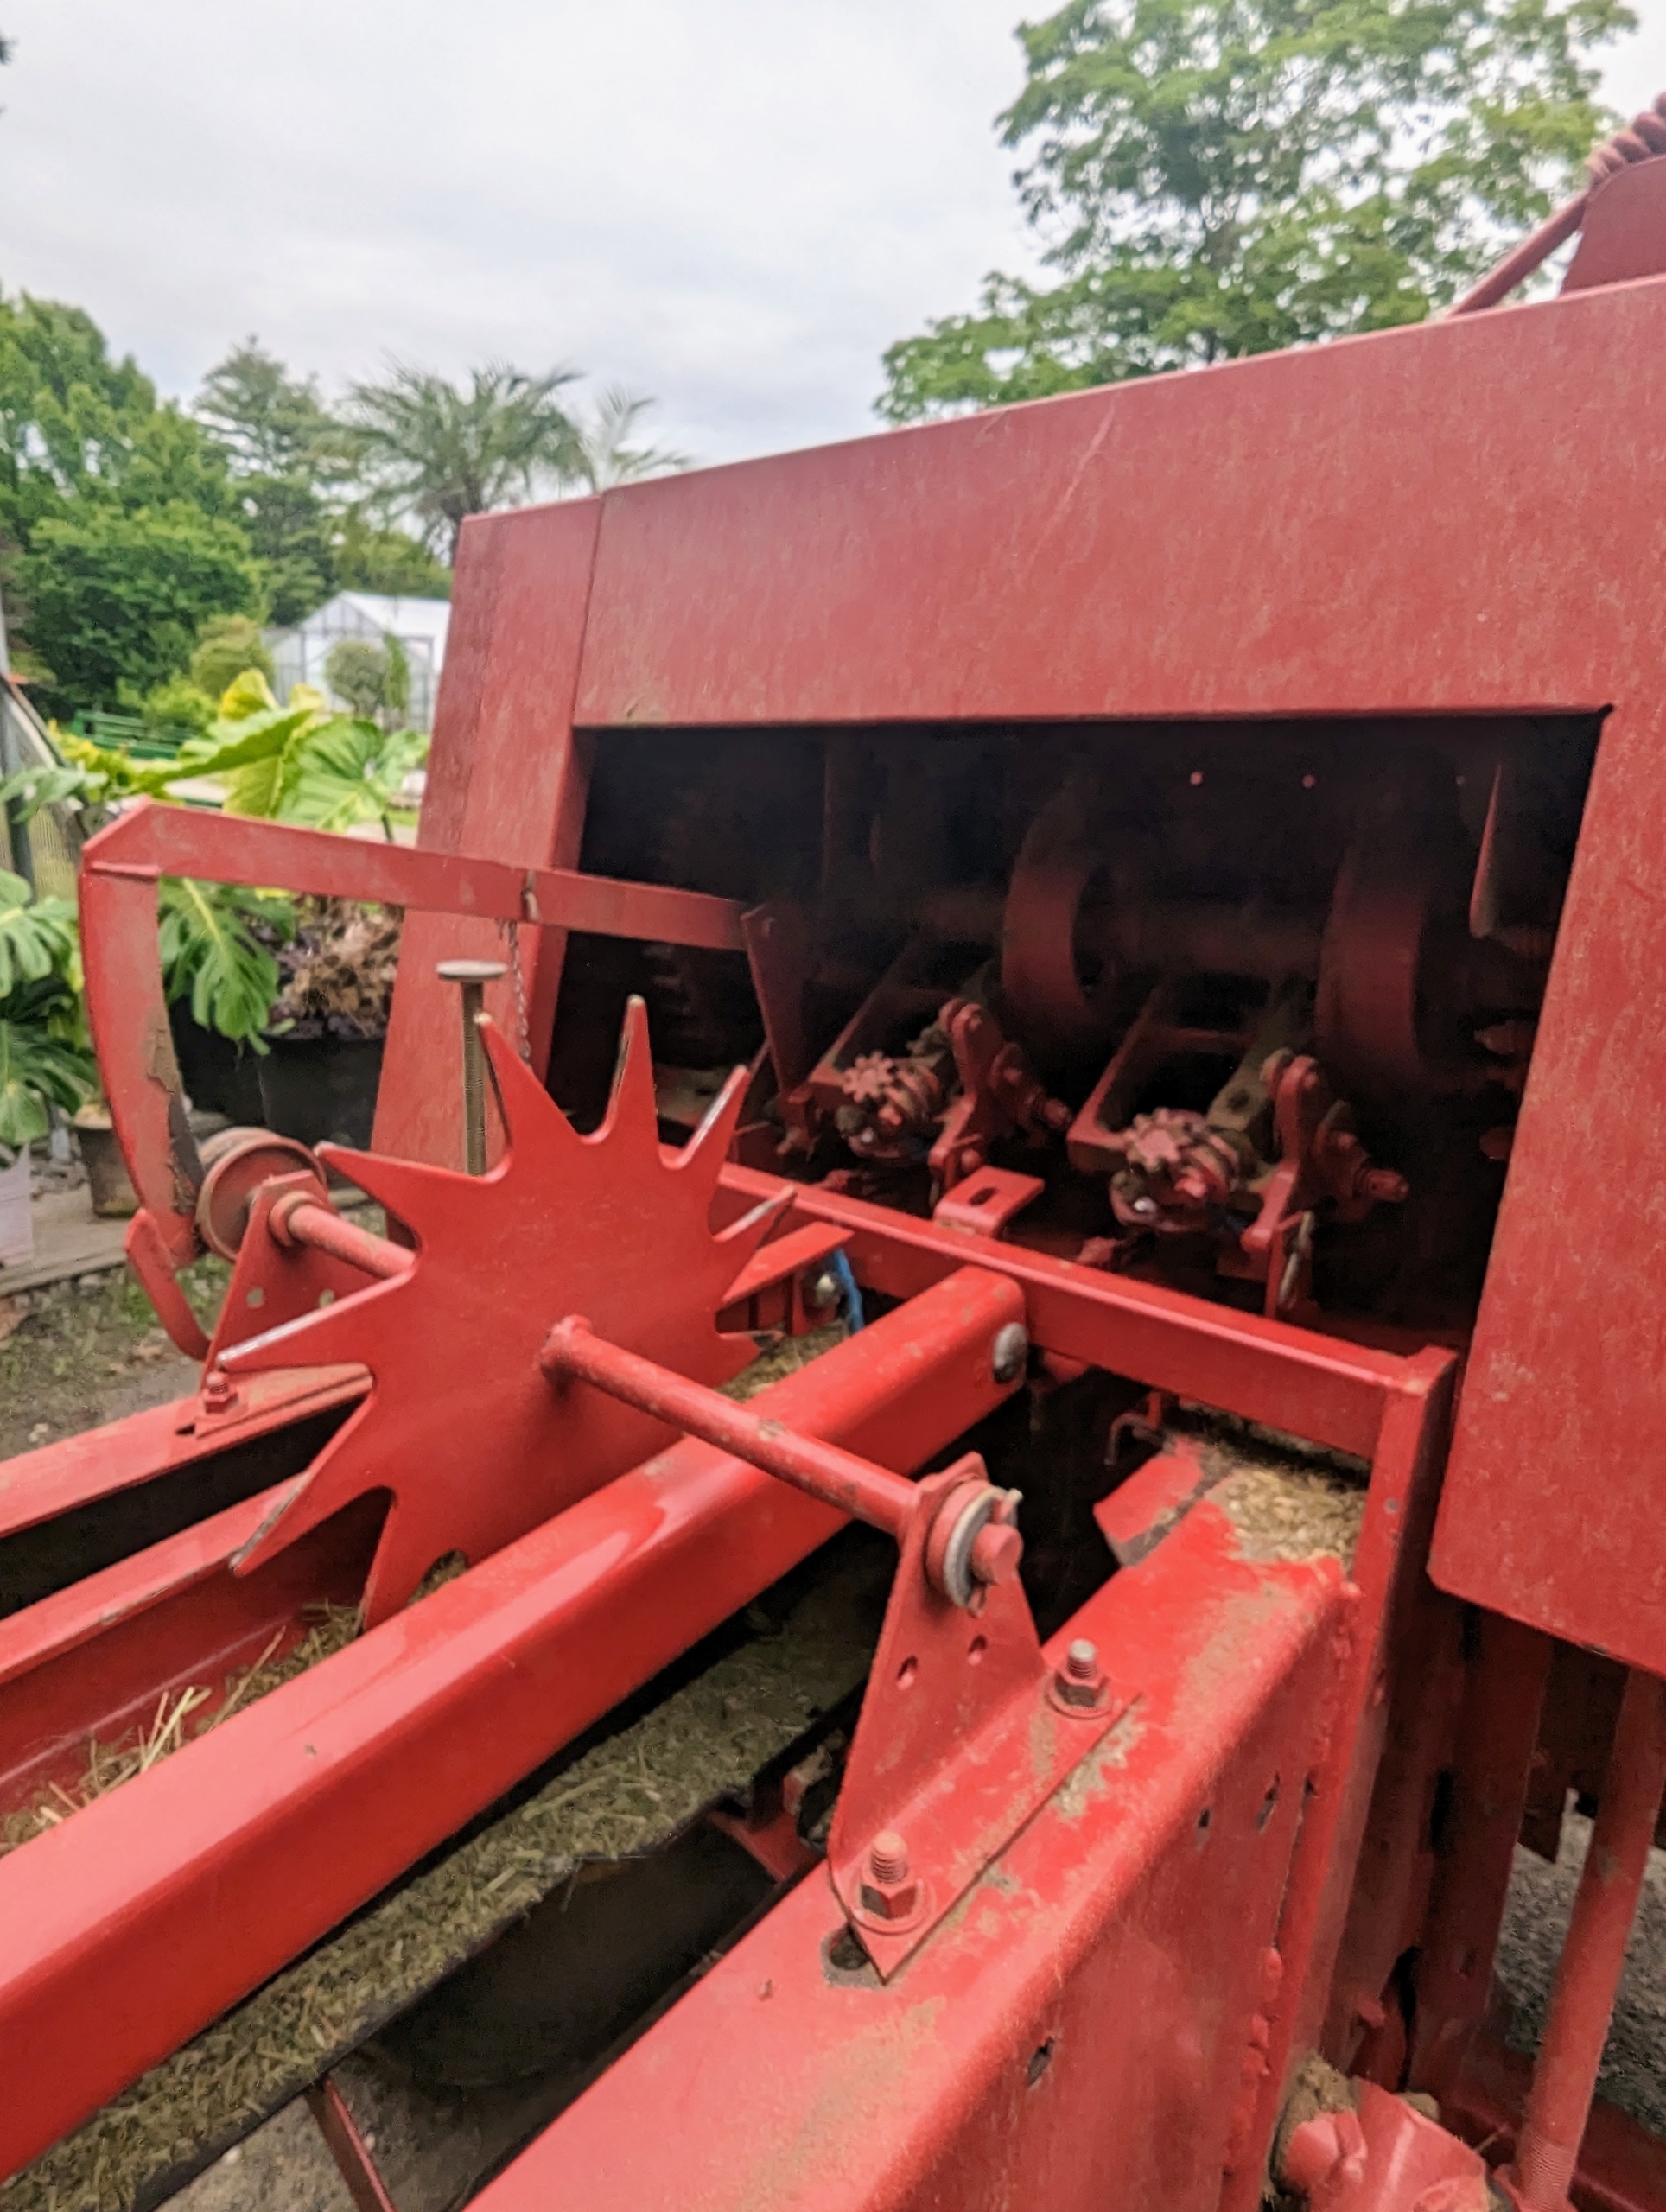
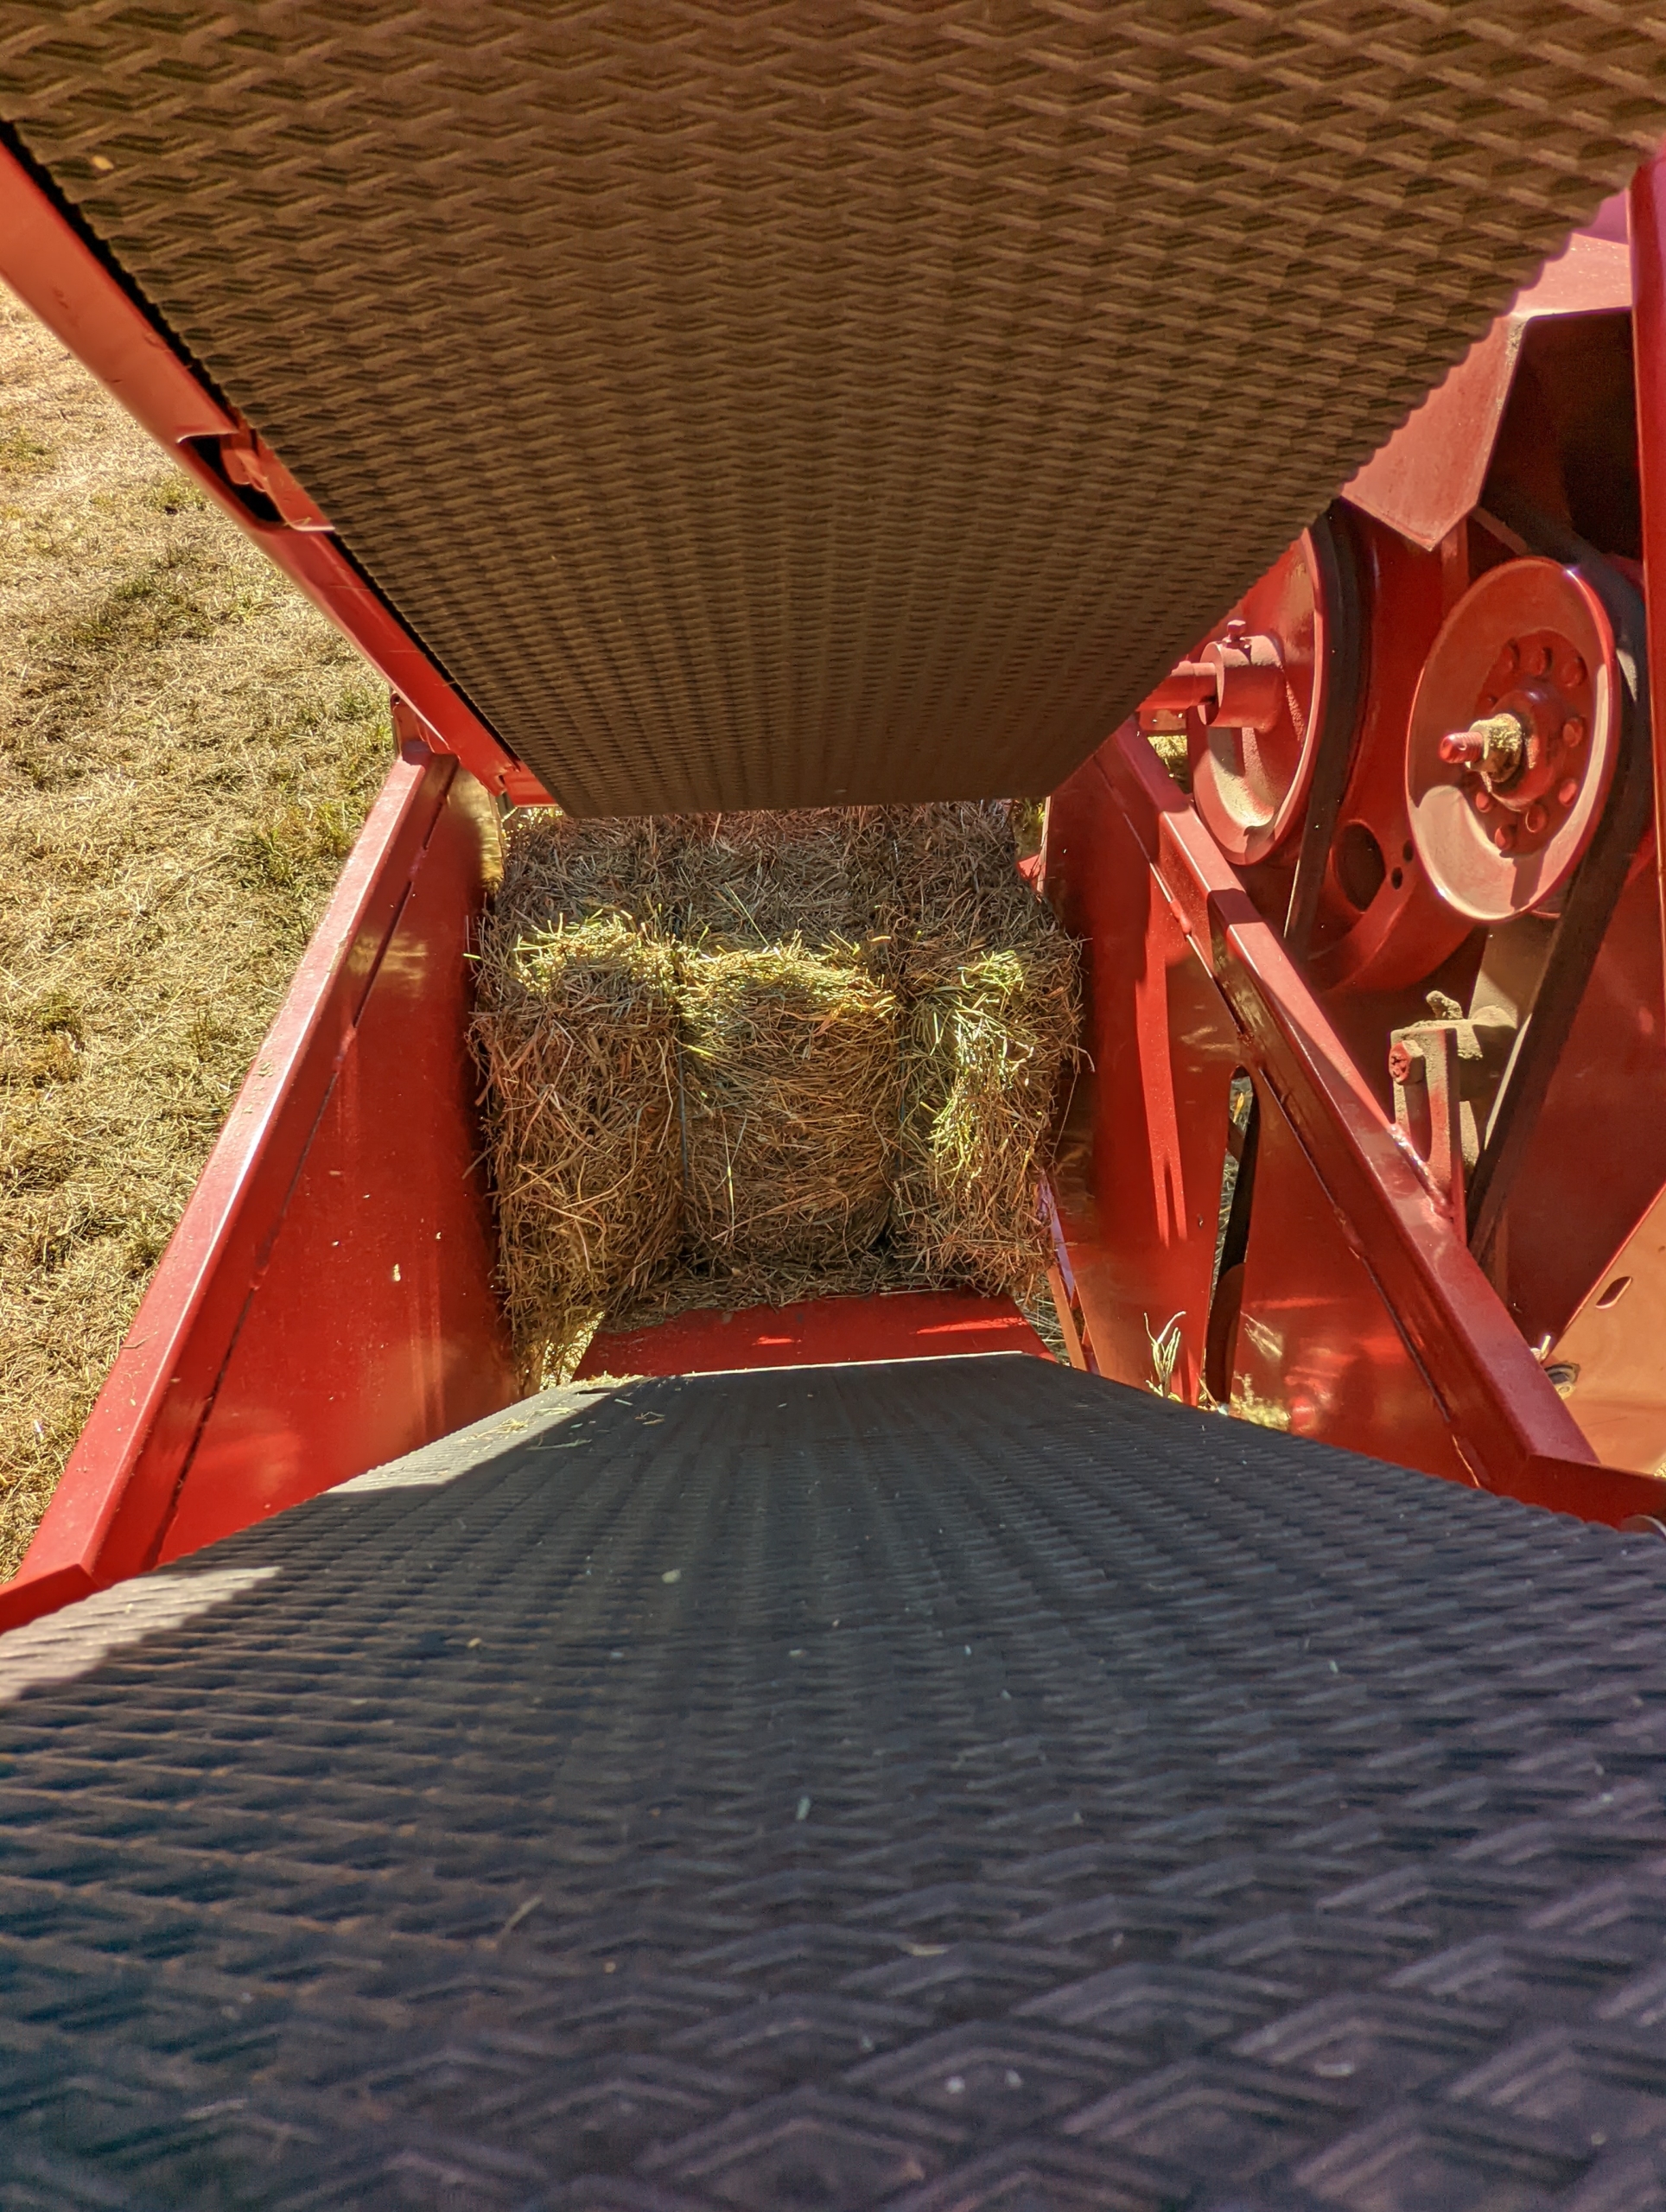
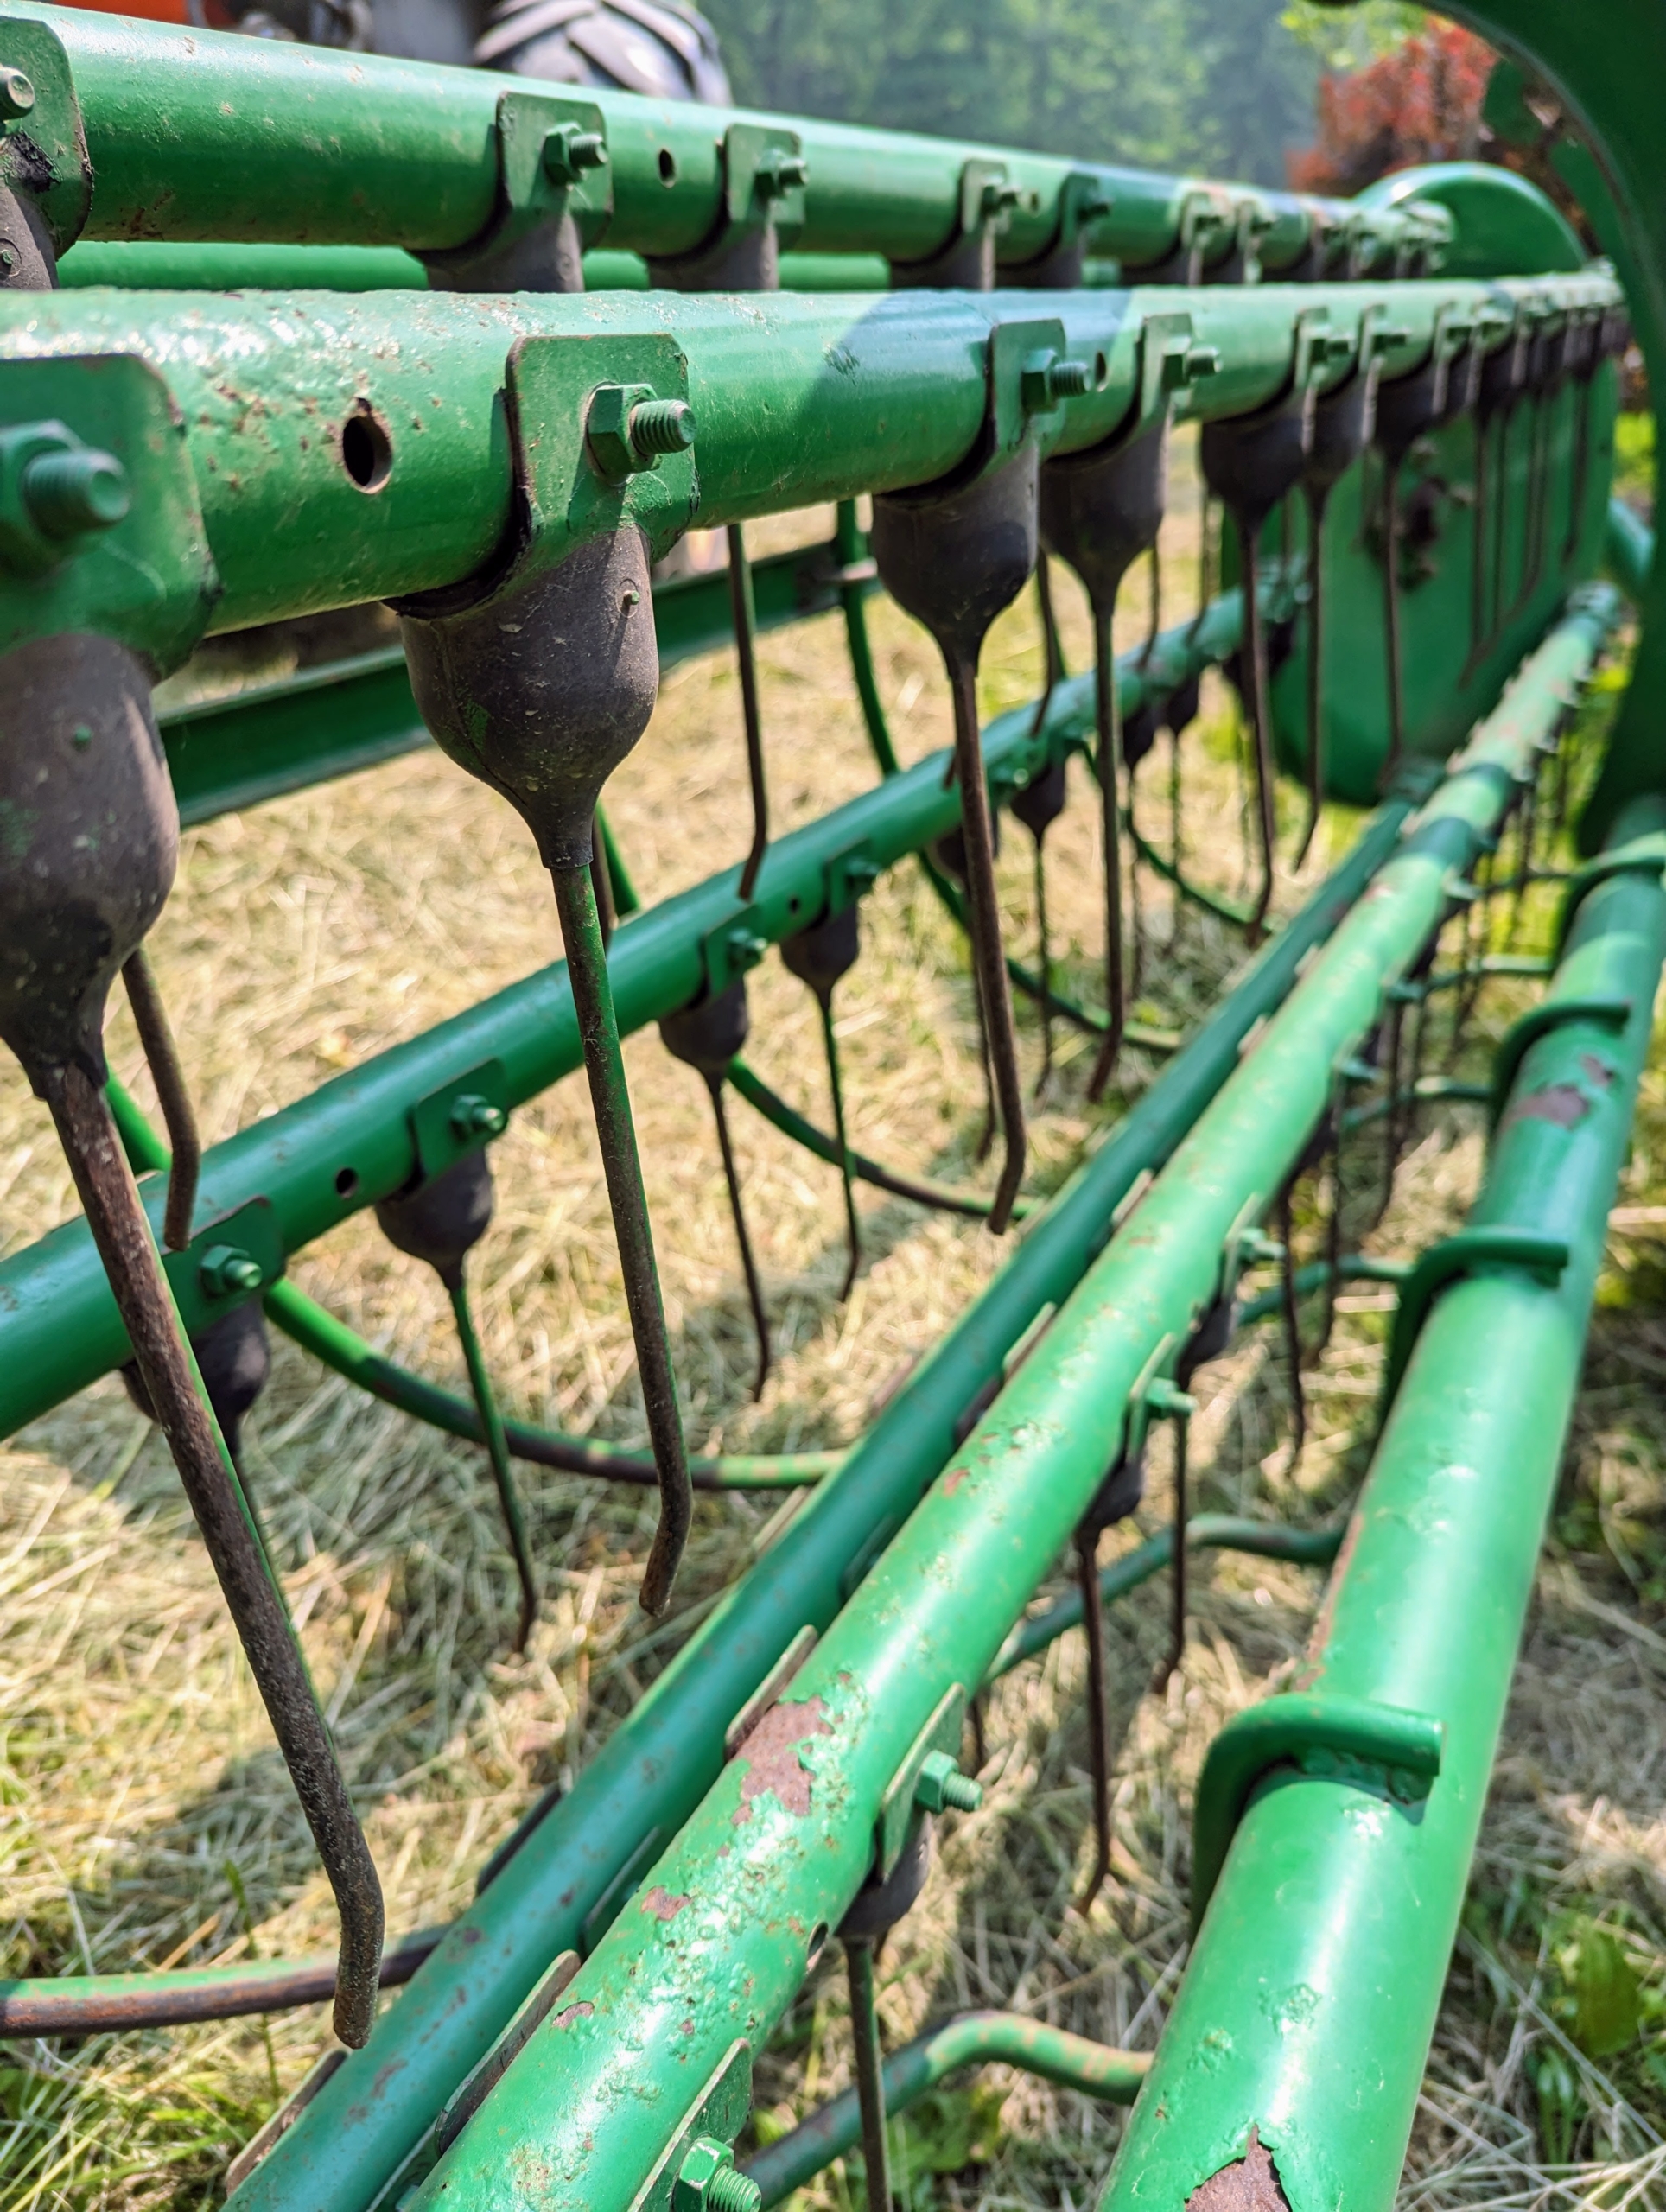
The hay is lifted by tines in the baler’s reel and then propelled into the wagon by a mechanical arm called a thrower or a kicker. The bales are manageable for one person to handle, about 45 to 60 pounds each.
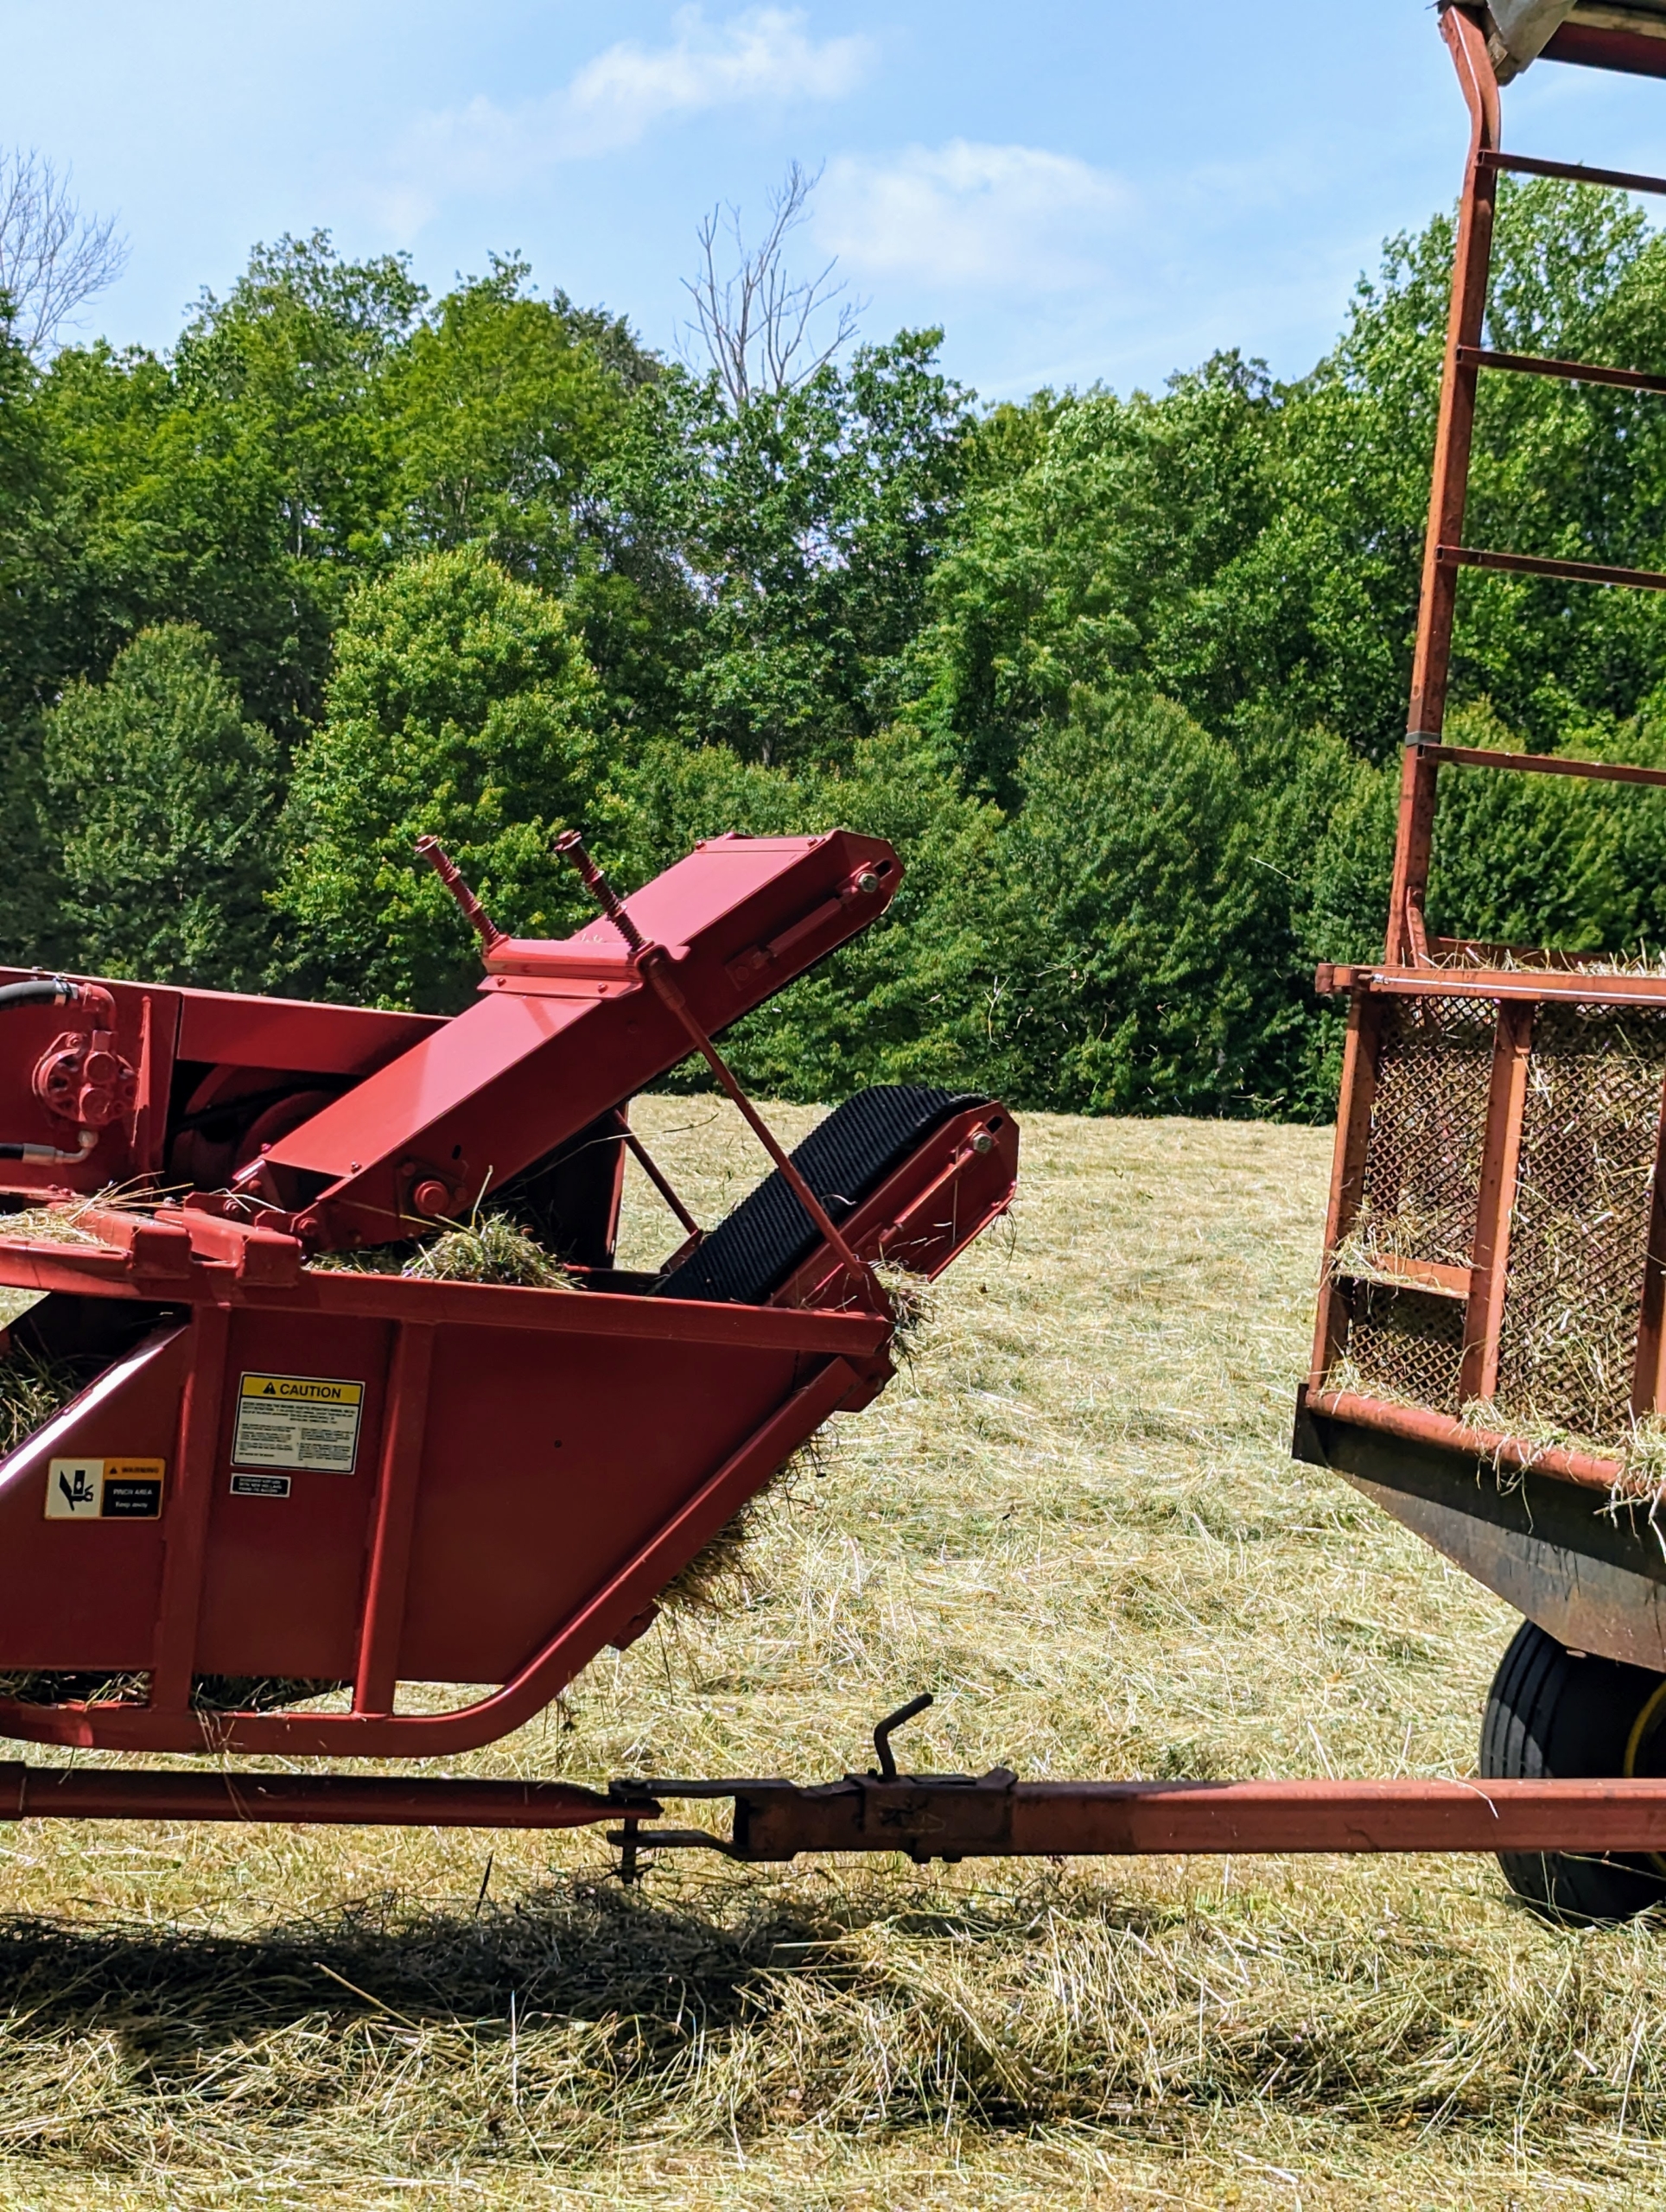
A baled “square” is seen traveling up the conveyor belt. A measuring device—normally a spiked wheel that is turned by the emerging bales—measures the amount of material that is being compressed and then knotters wrap the twine around the bale and tie it off.
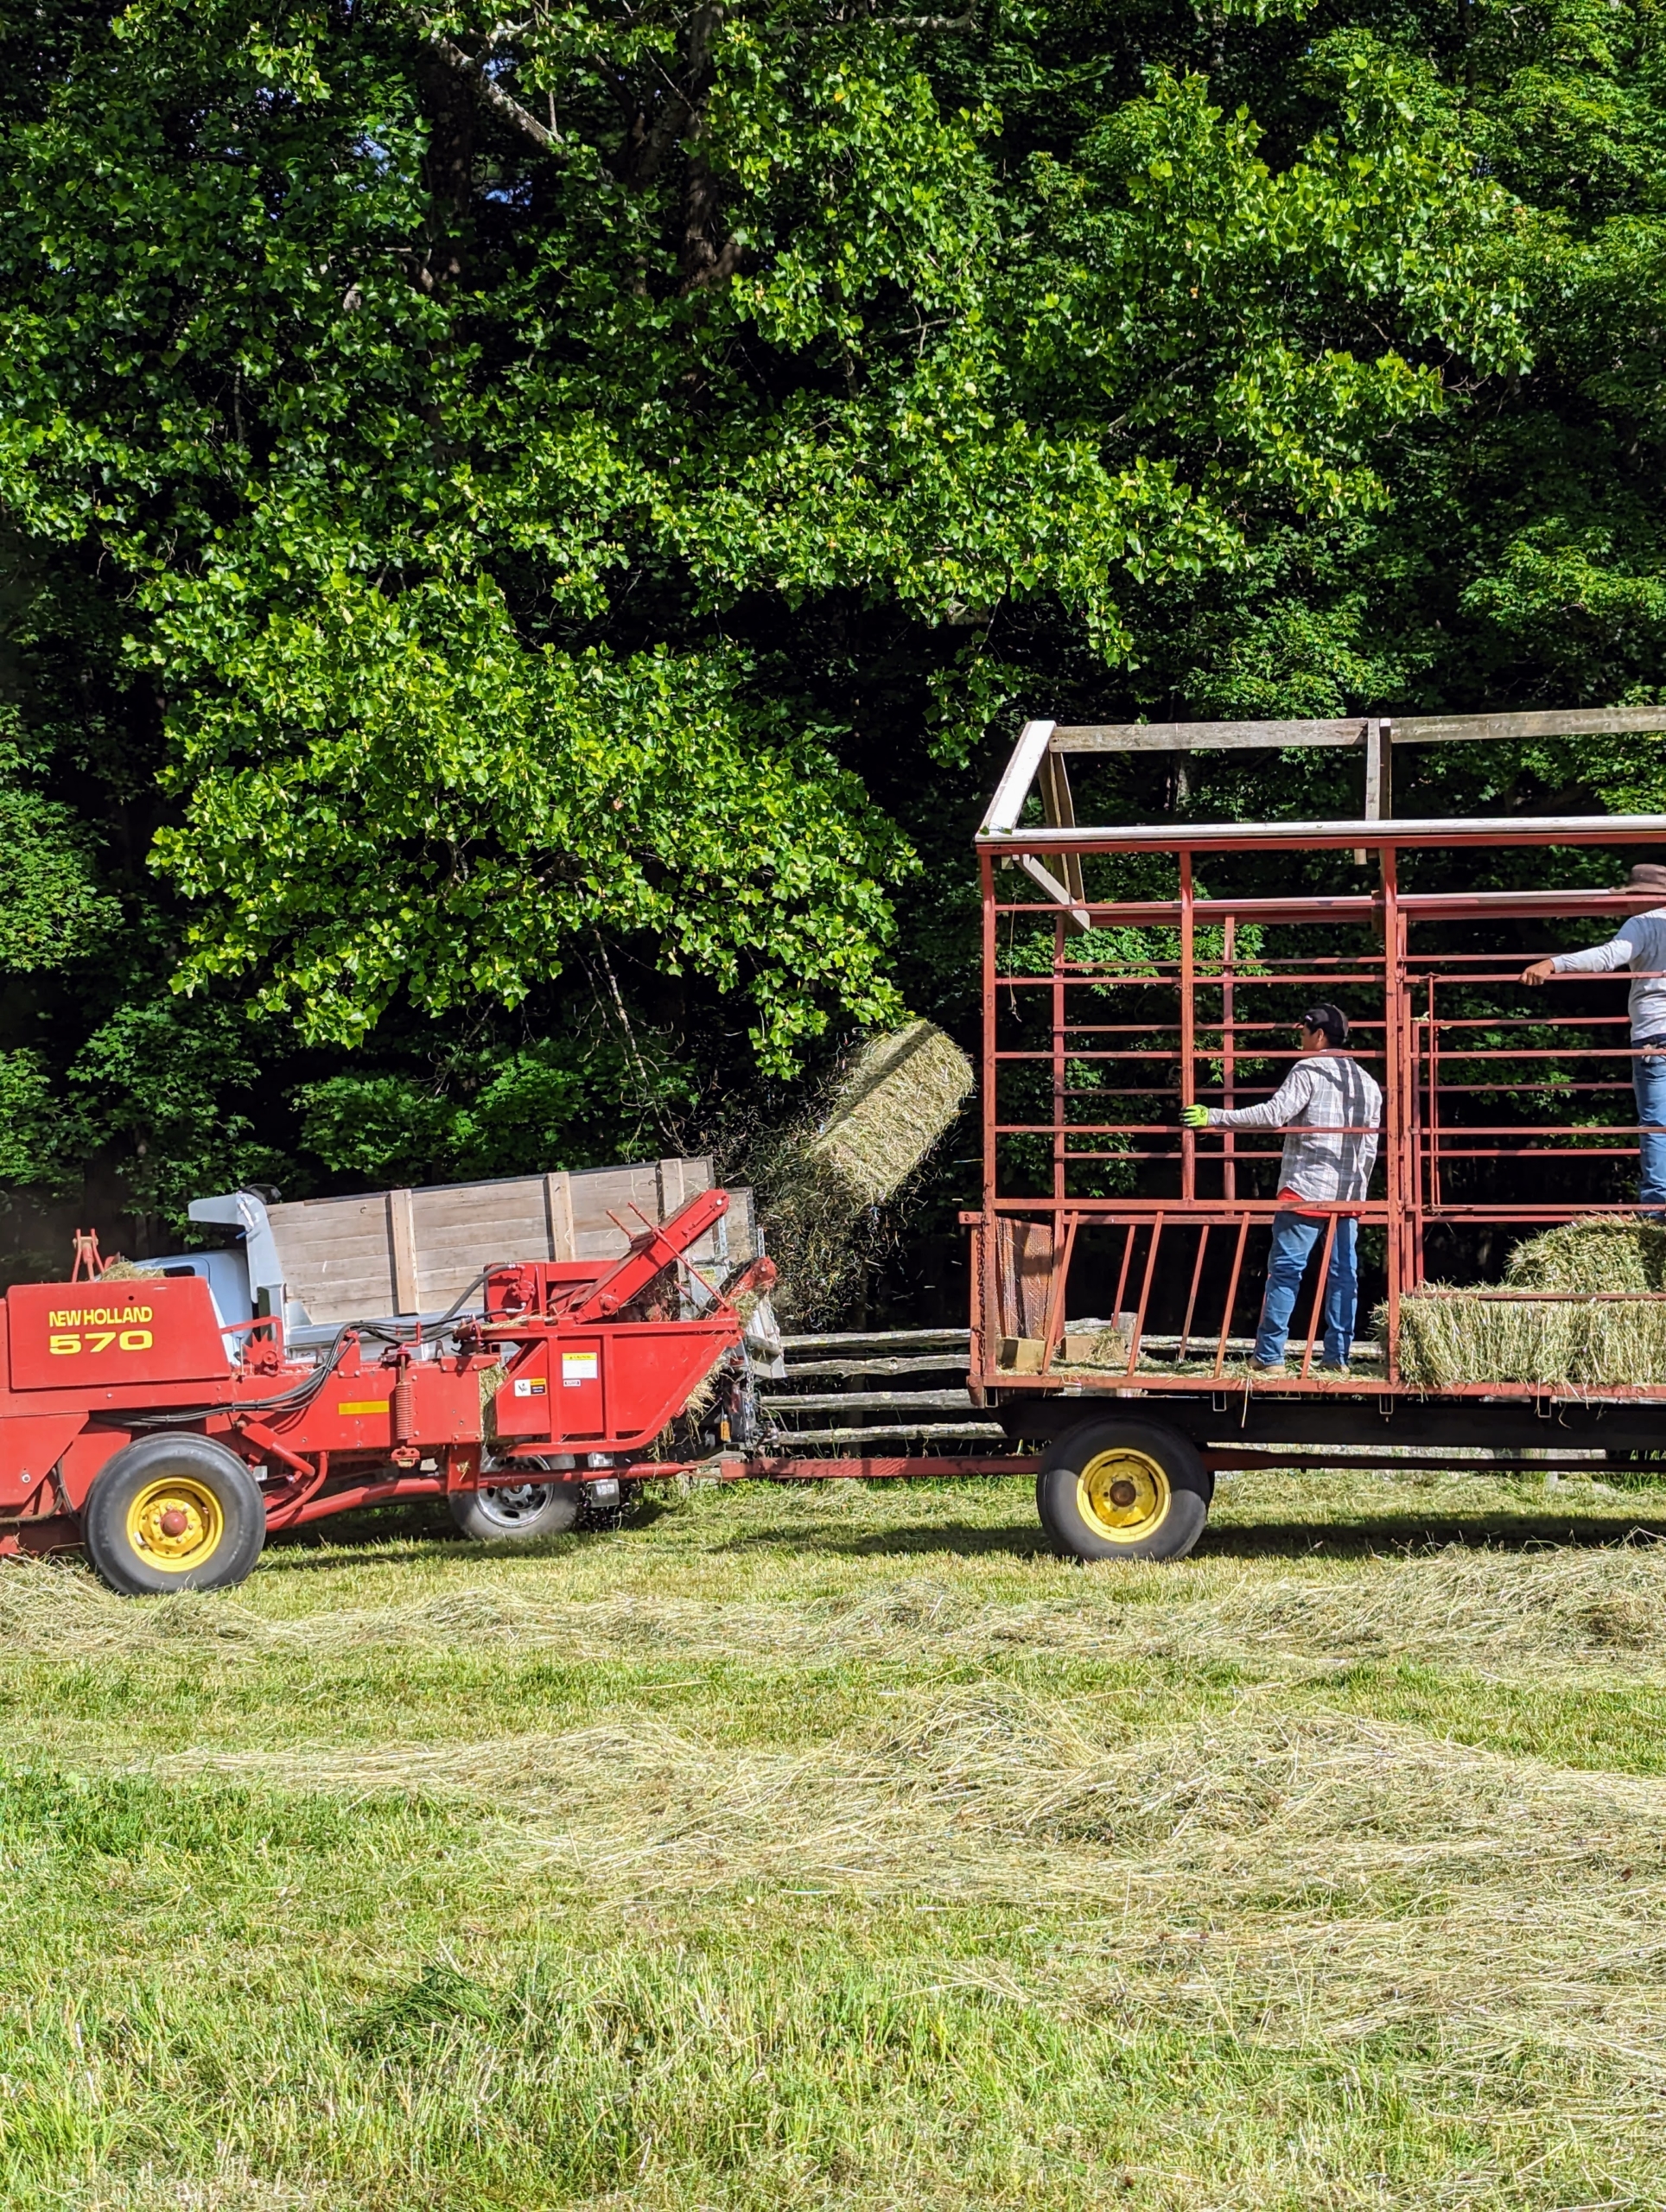
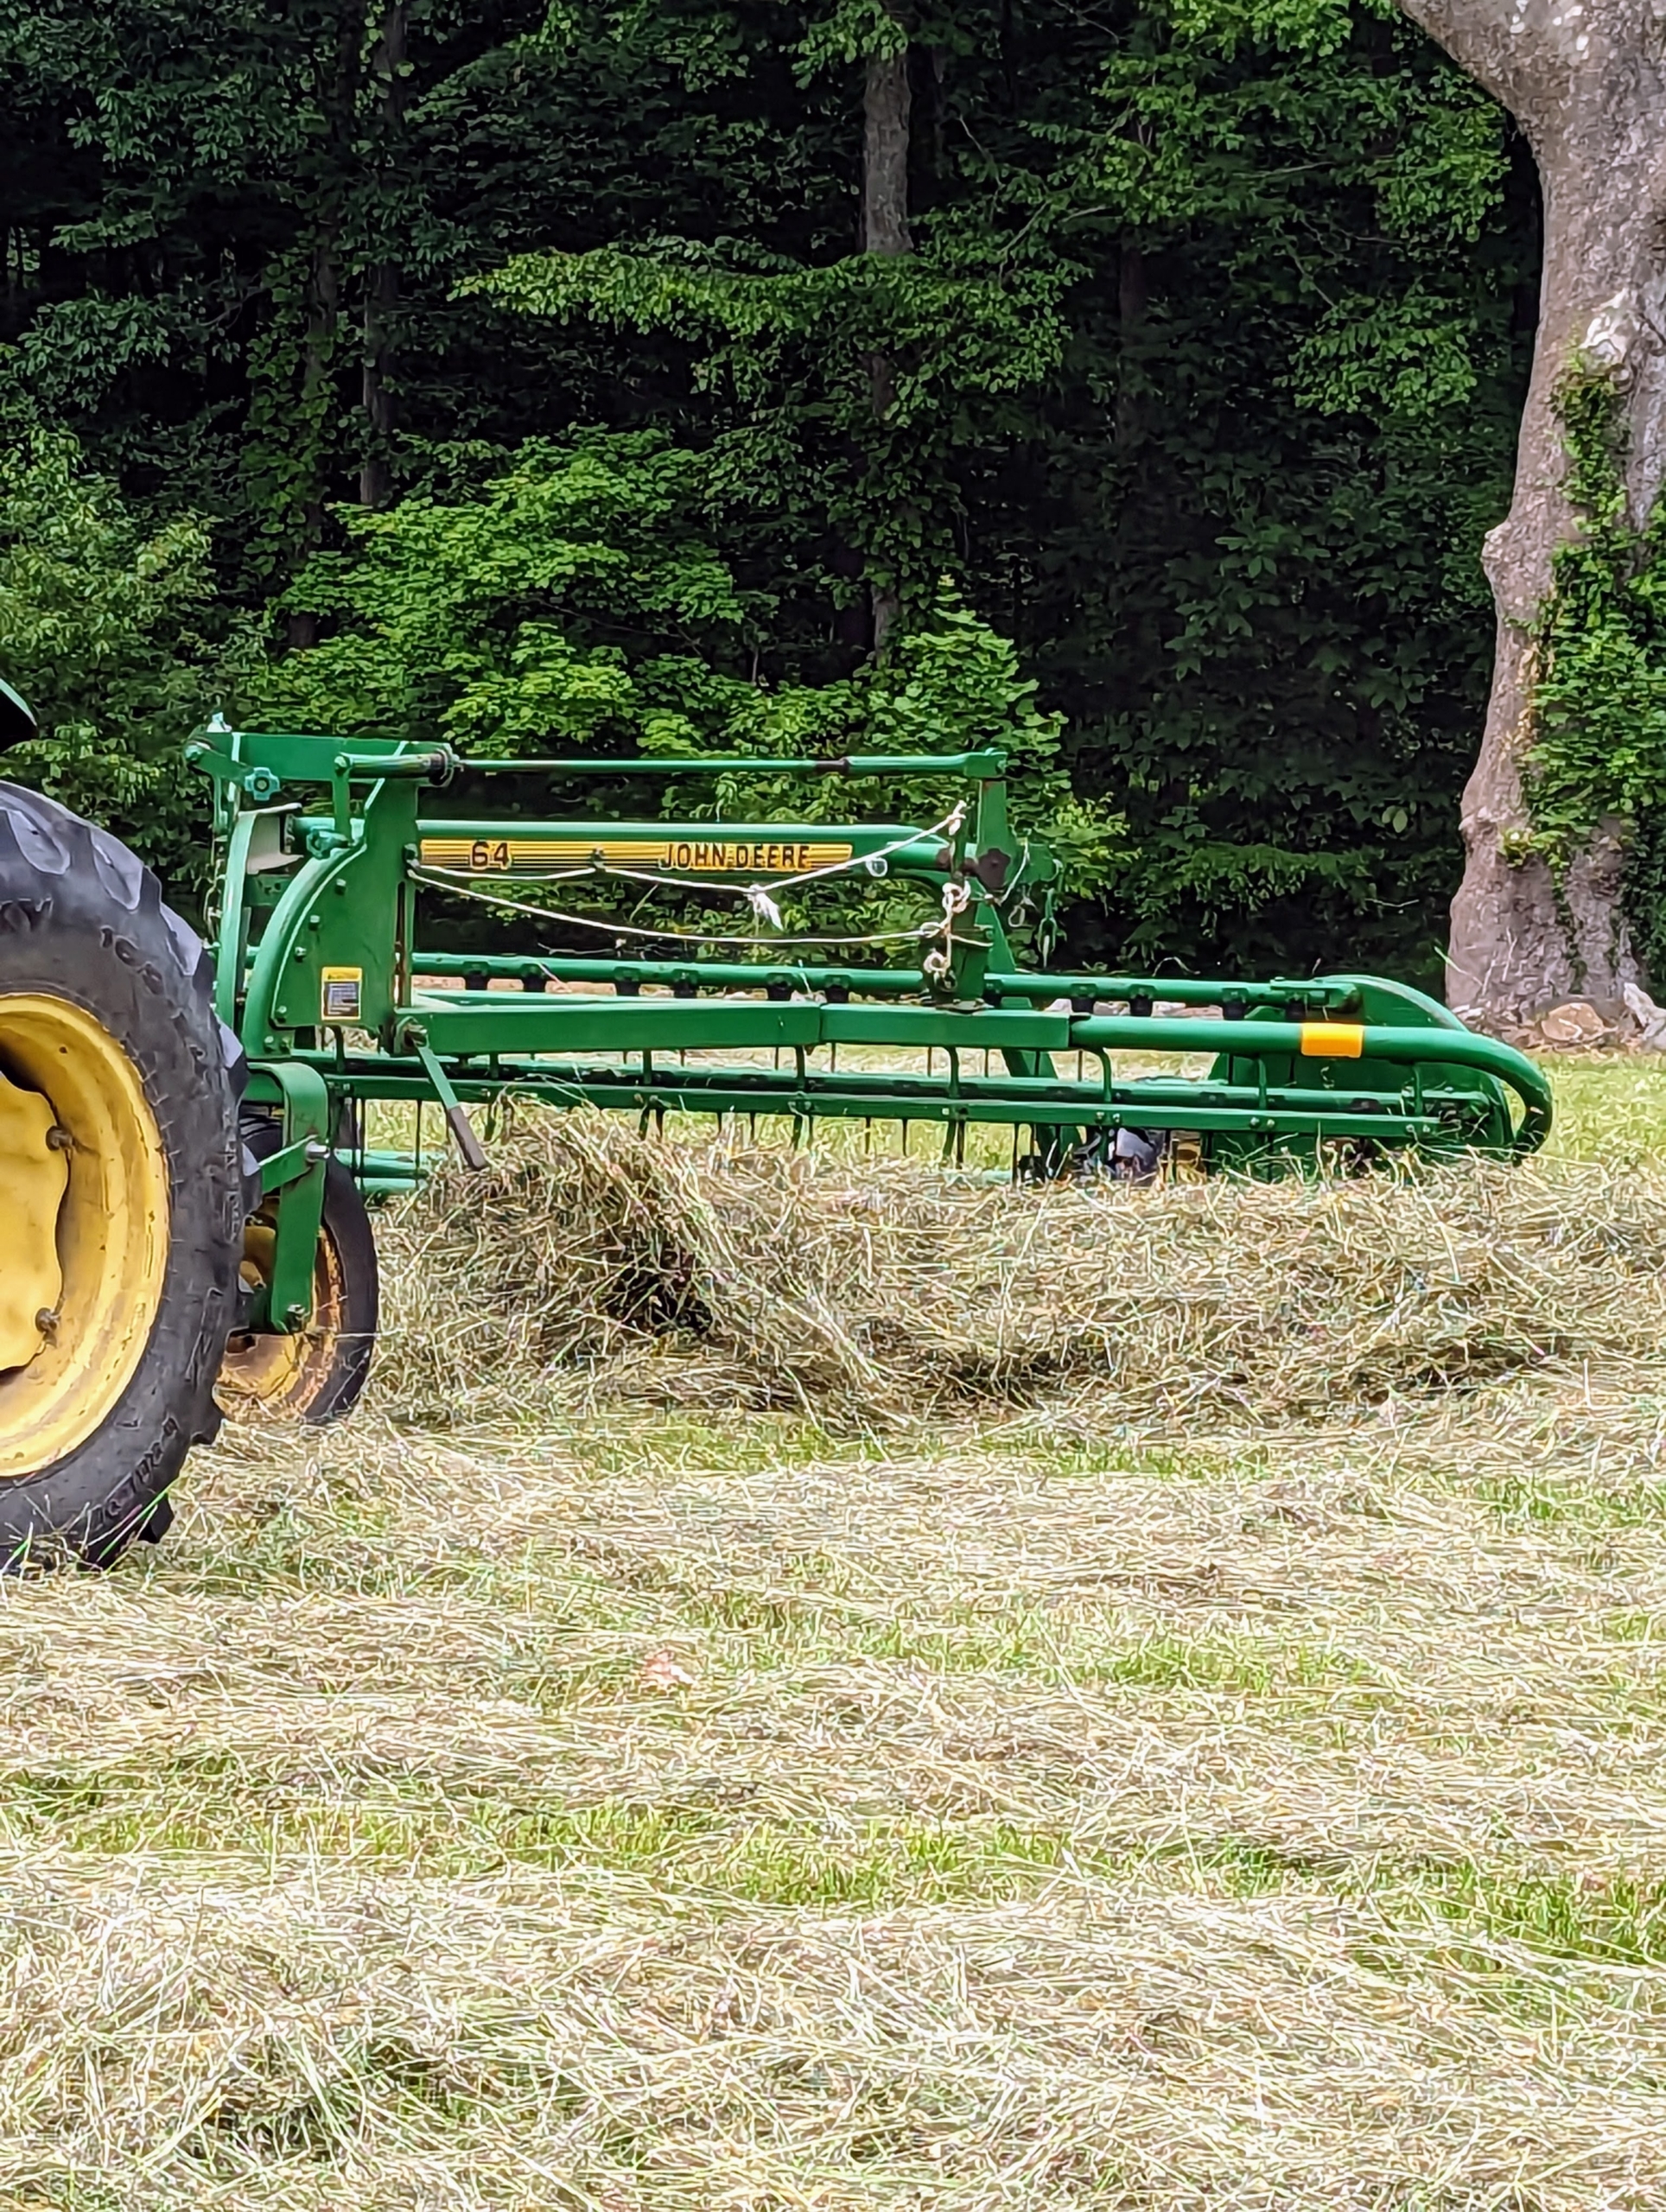
Chhiring goes evenly and slowly over every row of cut, tedded hay. Behind the baler is the hay trailer or wagon, which is used to catch the bales once they are formed and tied.
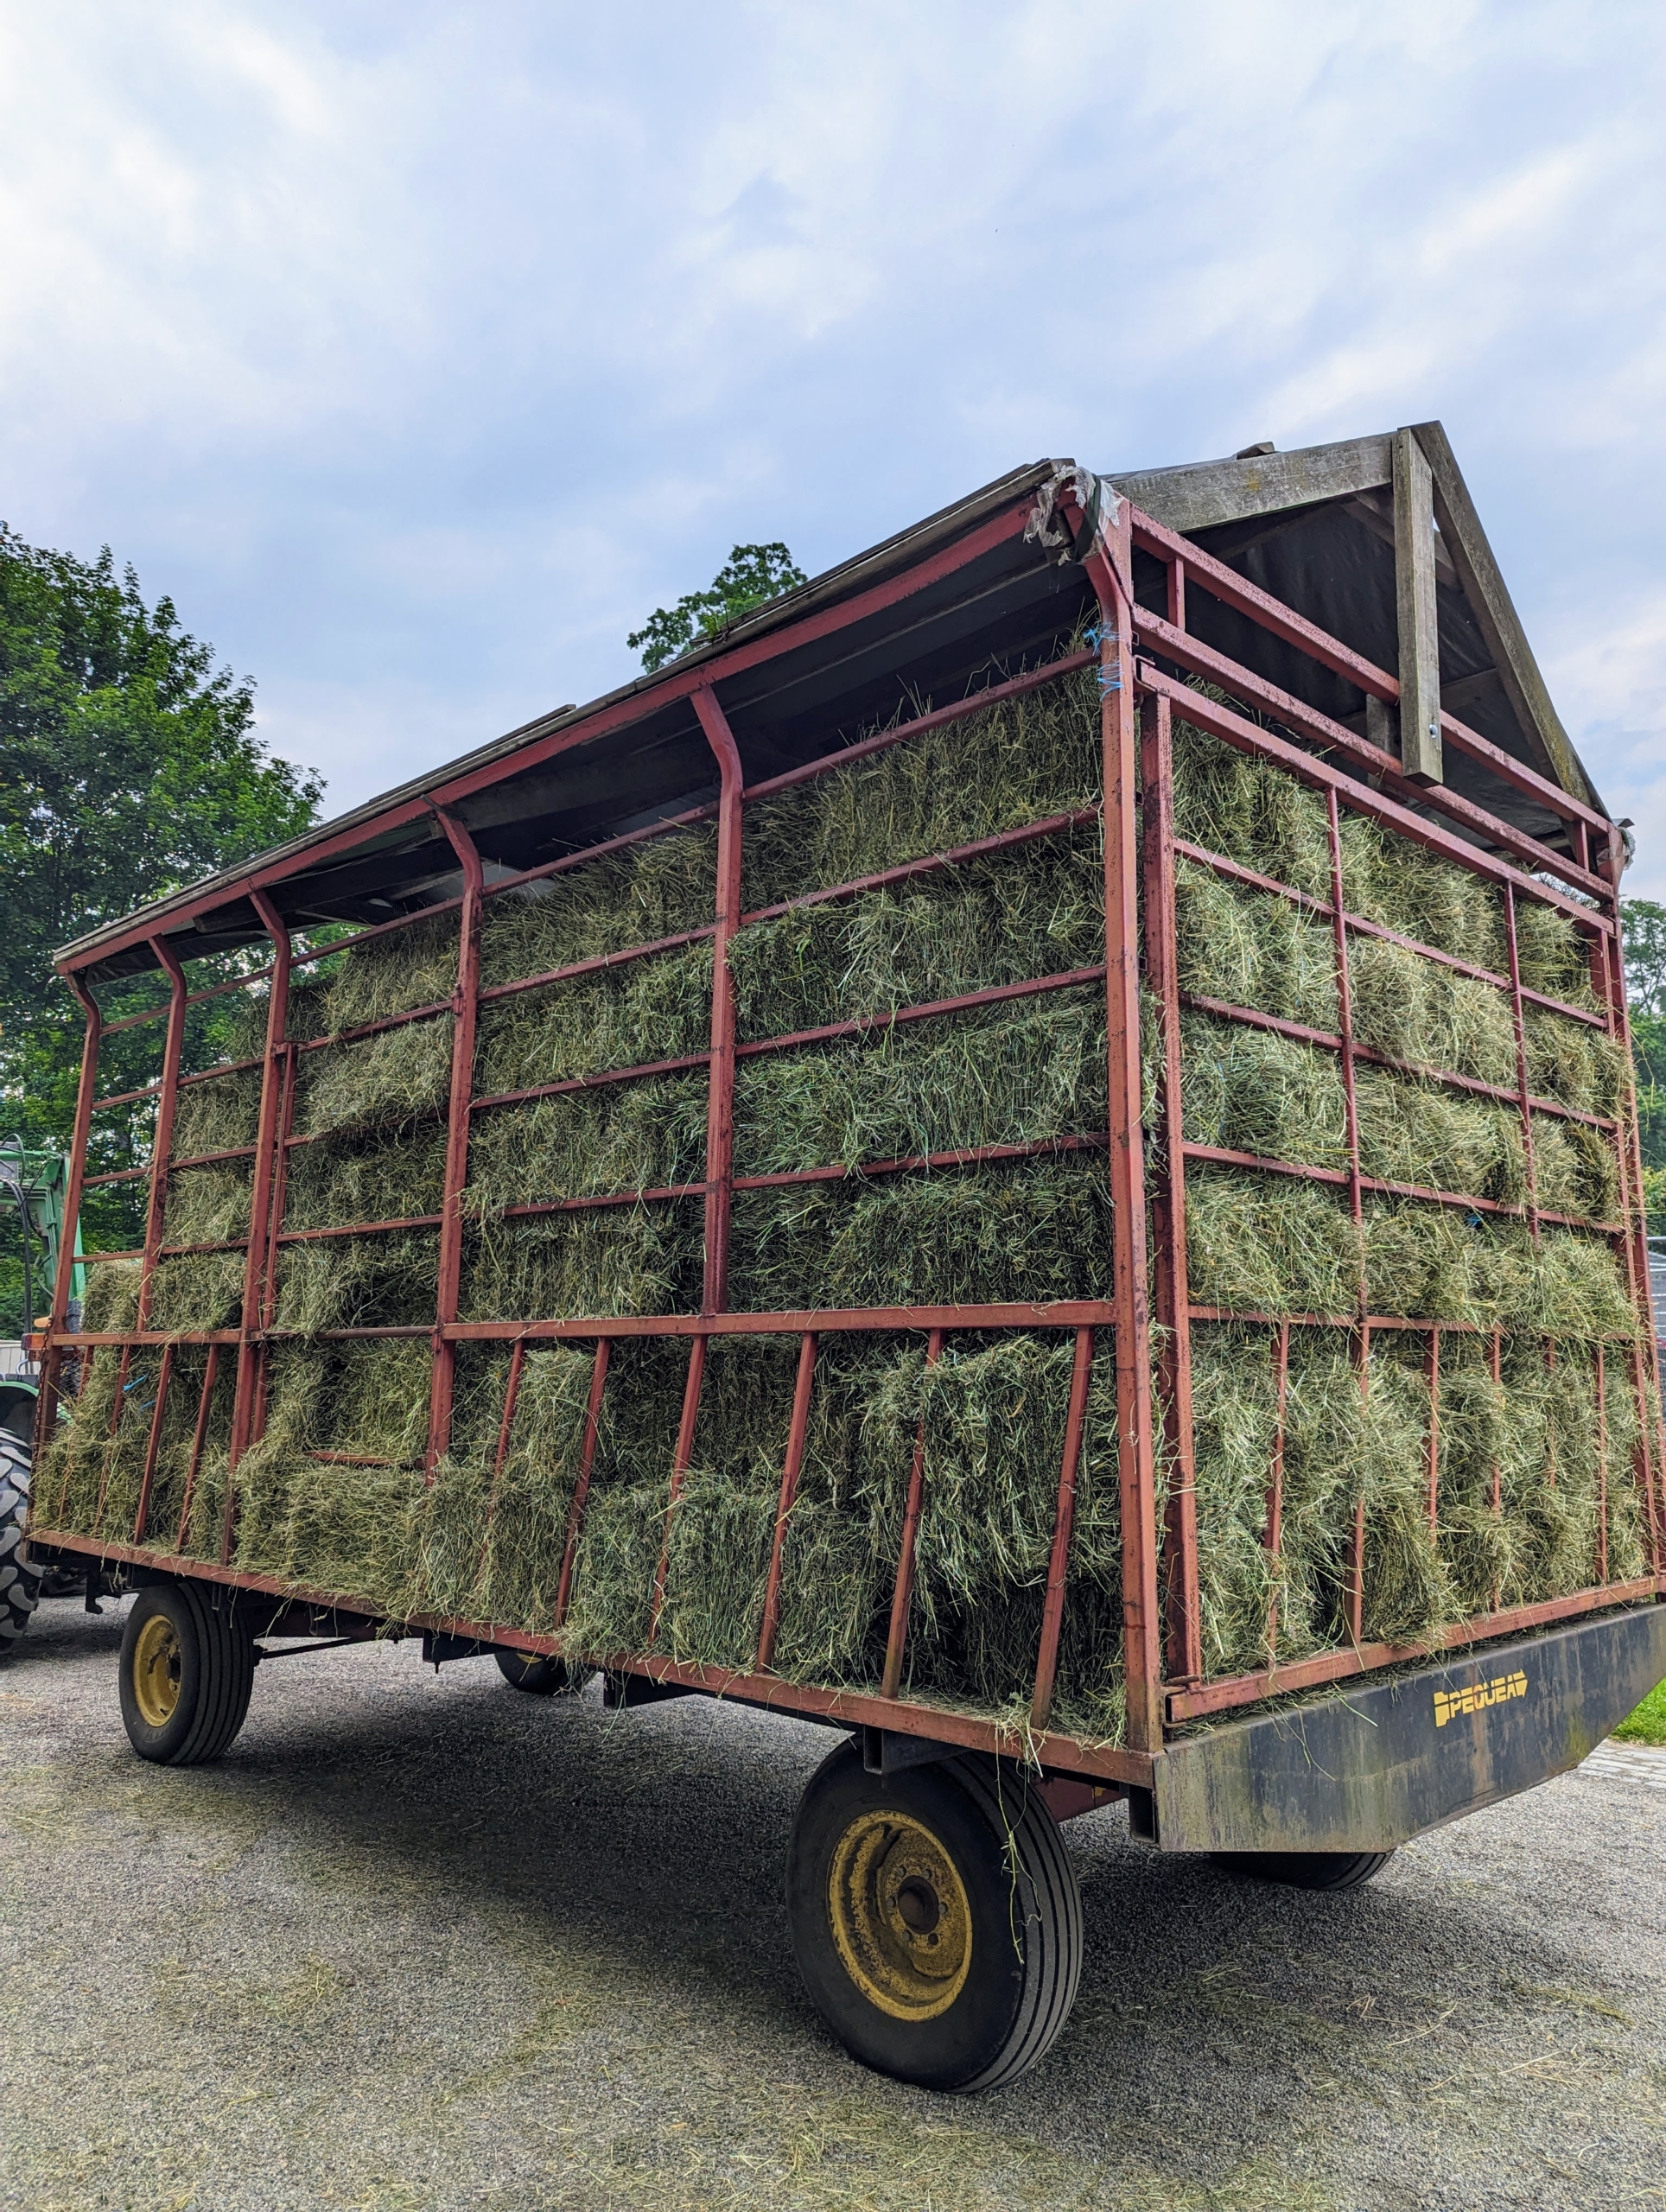
The hay trailer has high walls on the left, right, and back sides, and a short wall on the front side to contain the bales which are stacked neatly from back to front. Once a trailer is full, it is driven to the hayloft above my stable.
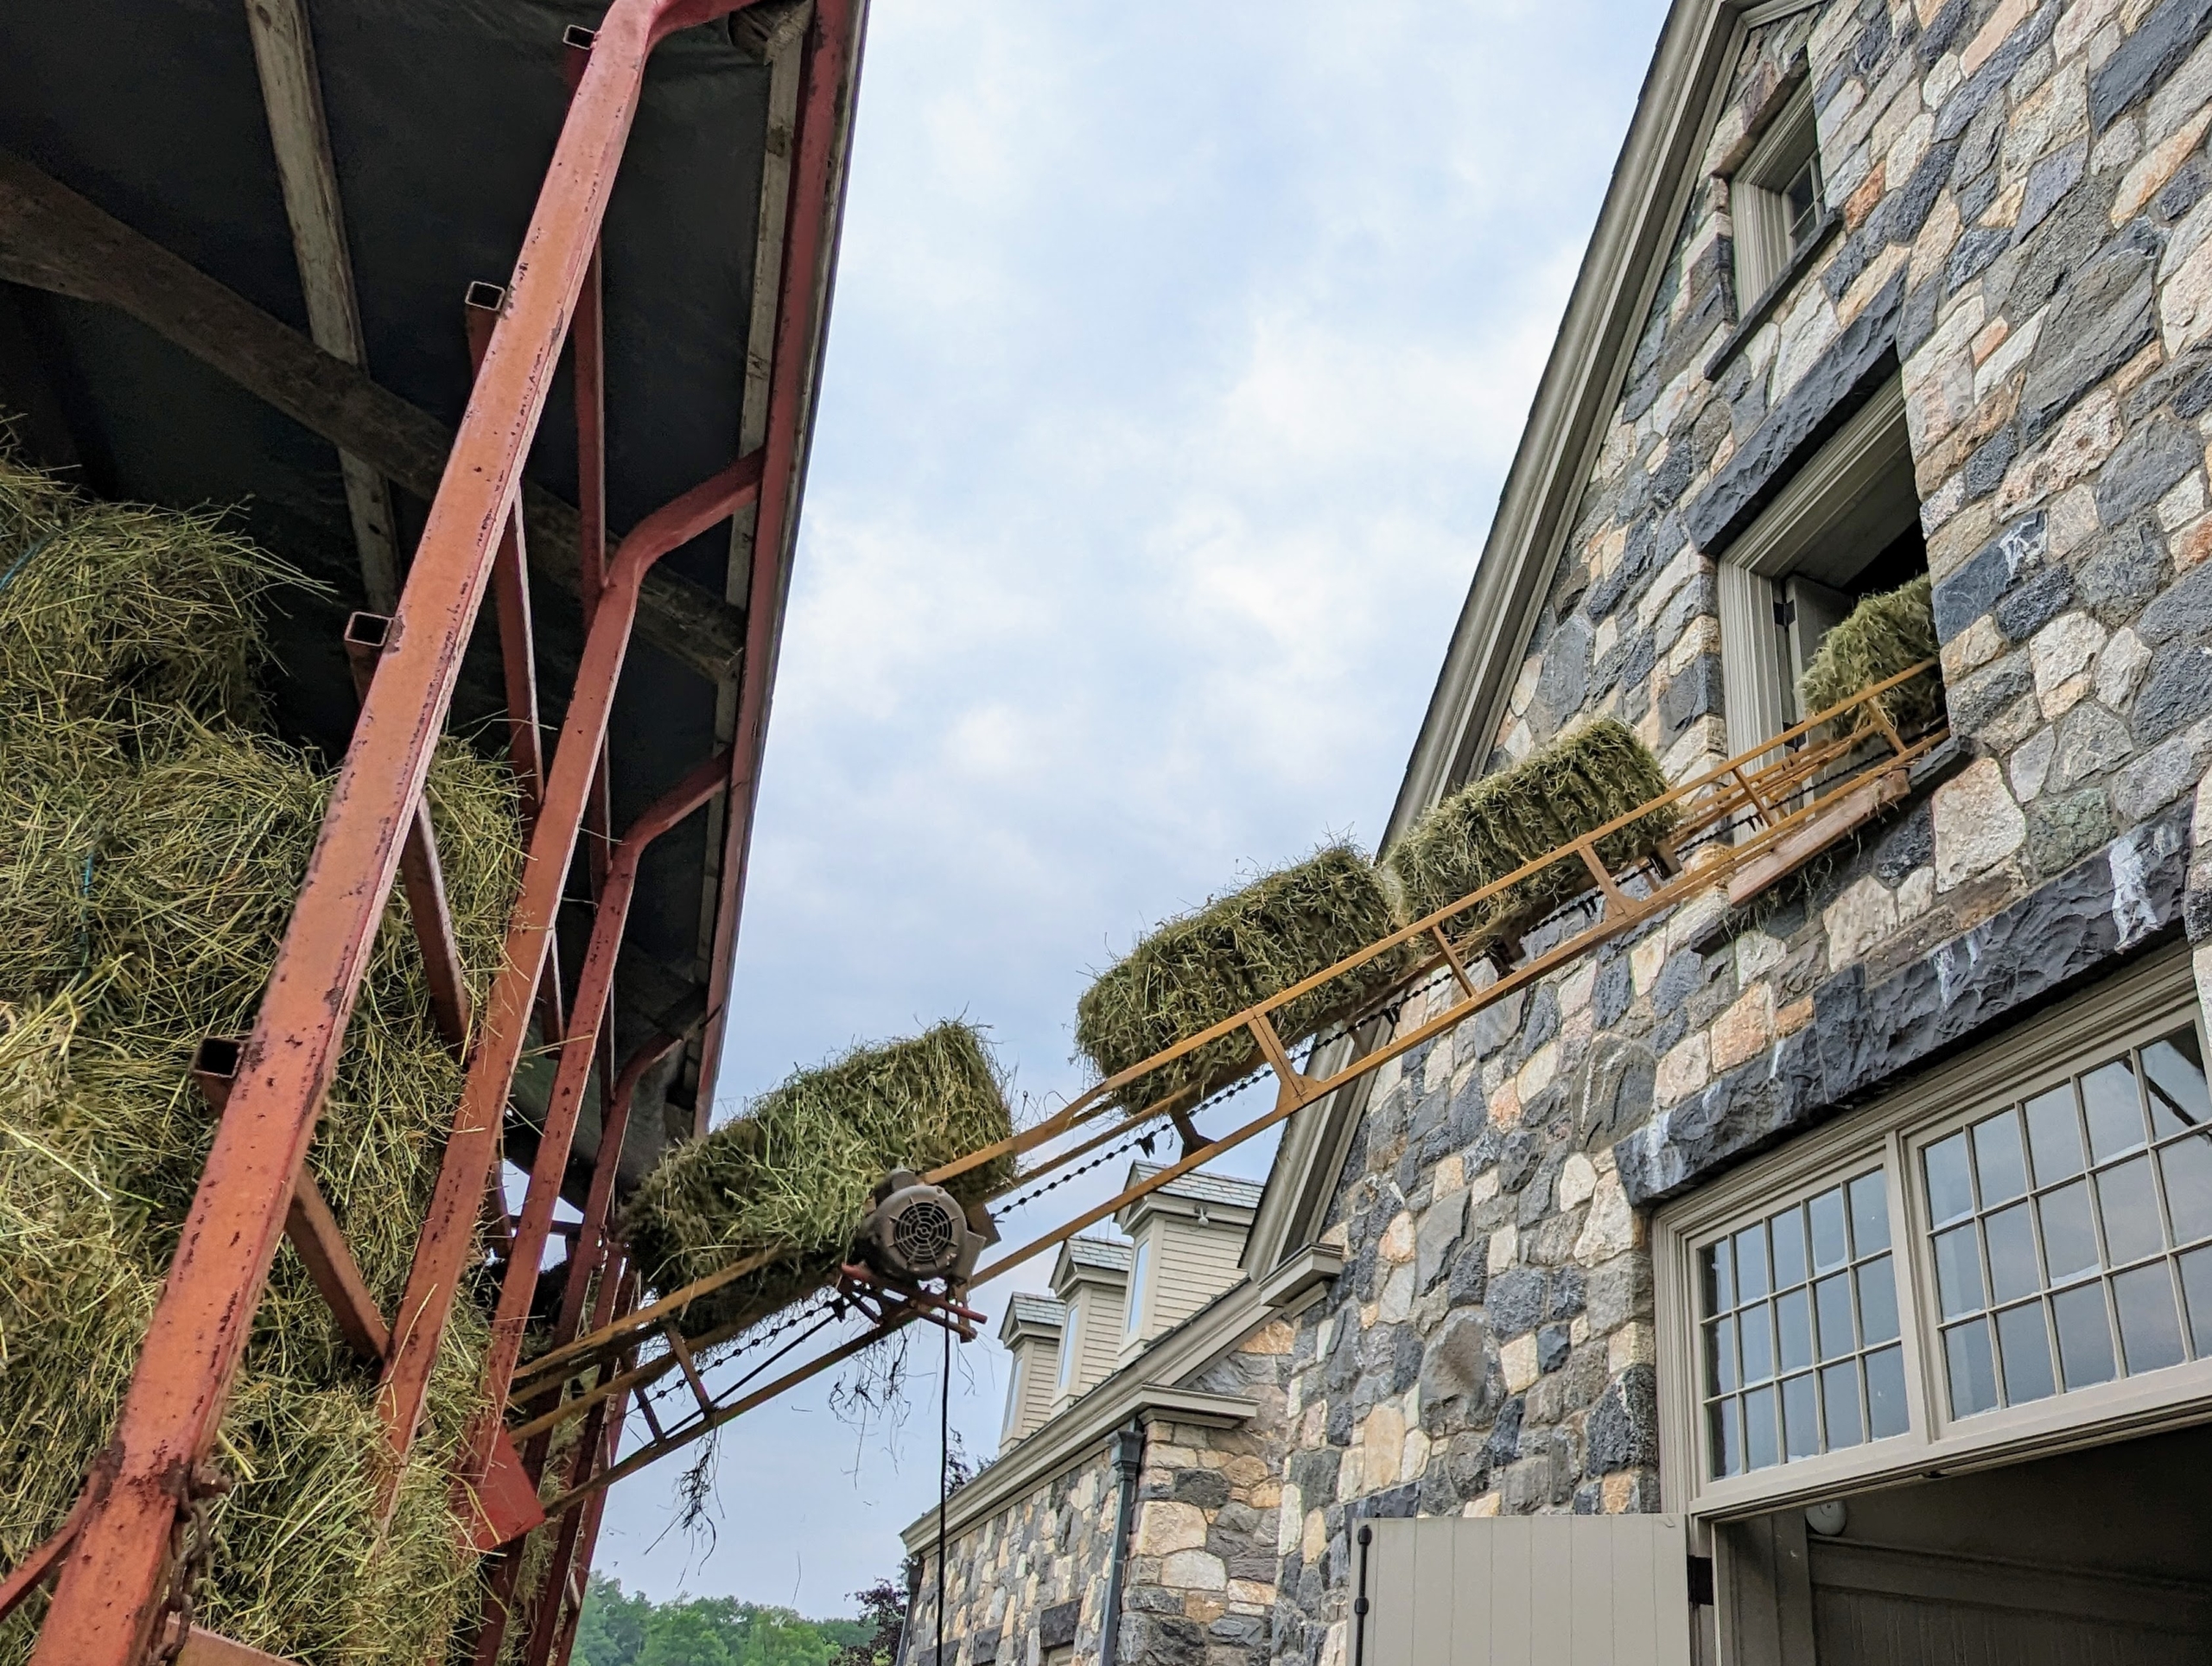
Then each bale is placed on a hay elevator which sends it up to waiting hands in the hayloft. Baling hay is a team effort. Each bale is about 15 by 18 by 40 inches large. The number of flakes in the bale is determined by a setting in the baler. Many balers are set for 10 to 12 flakes per bale.
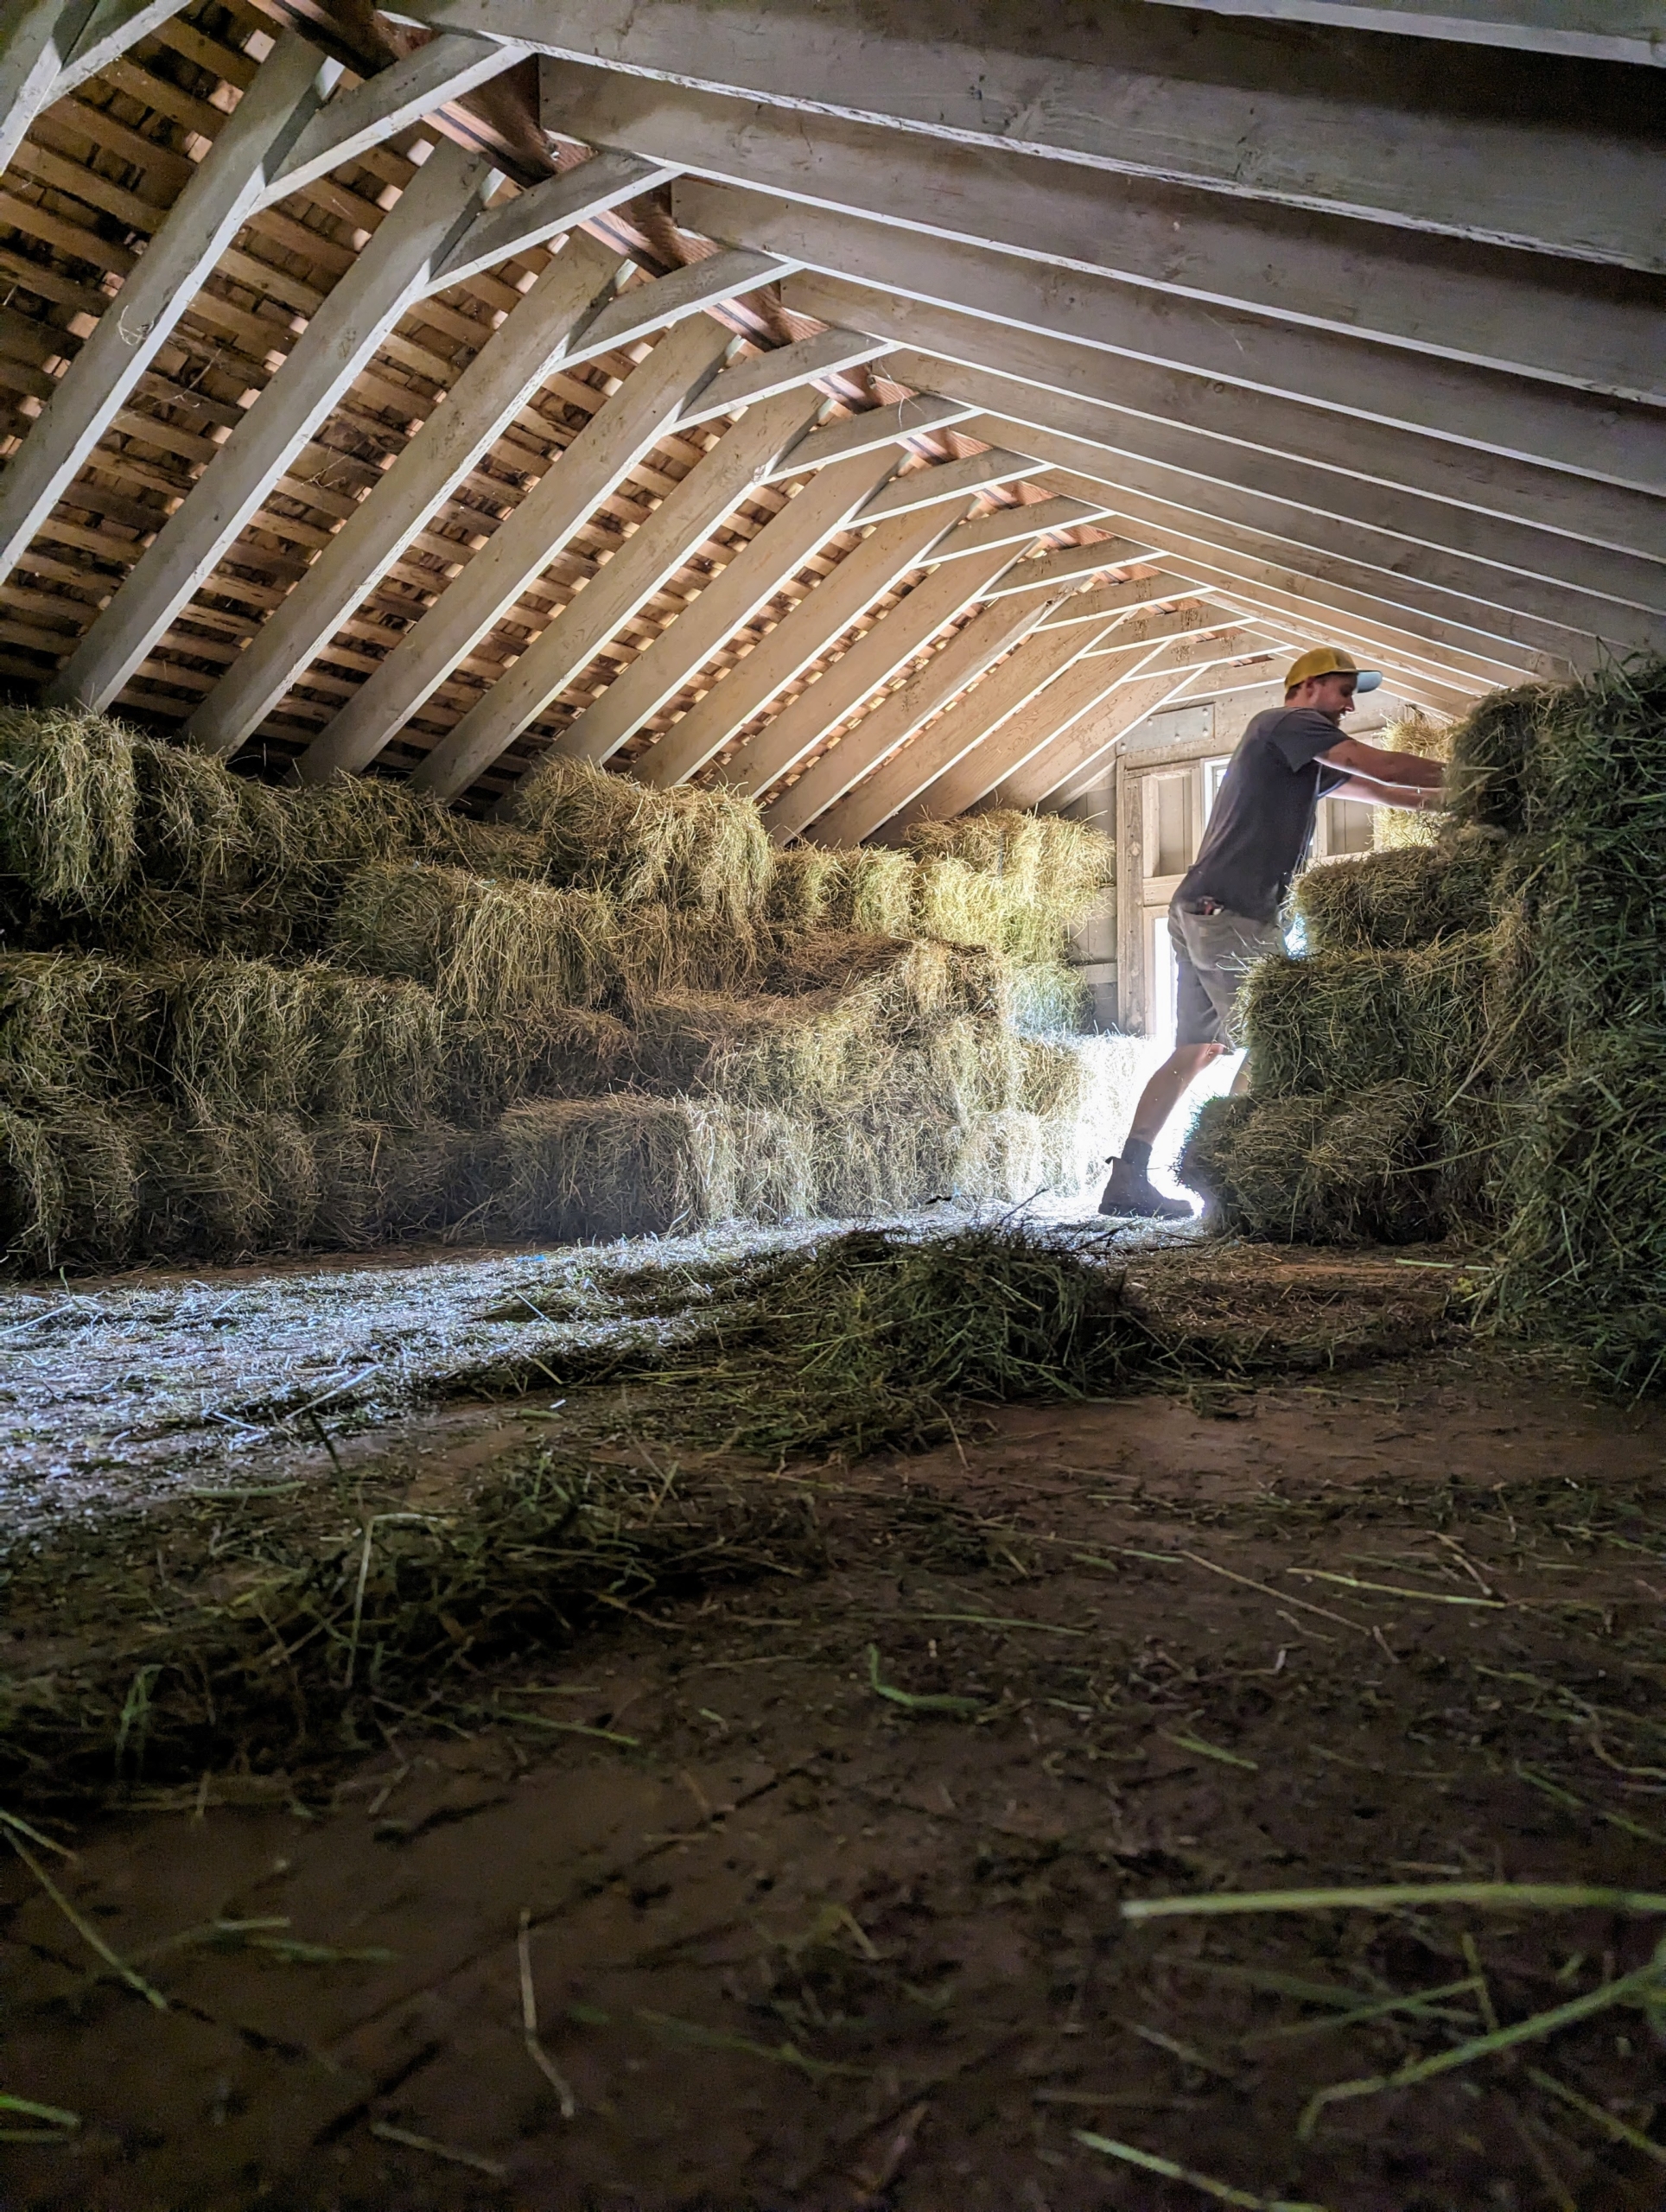
Here, Juan is in the hayloft stacking the bales as they come up the hay elevator.
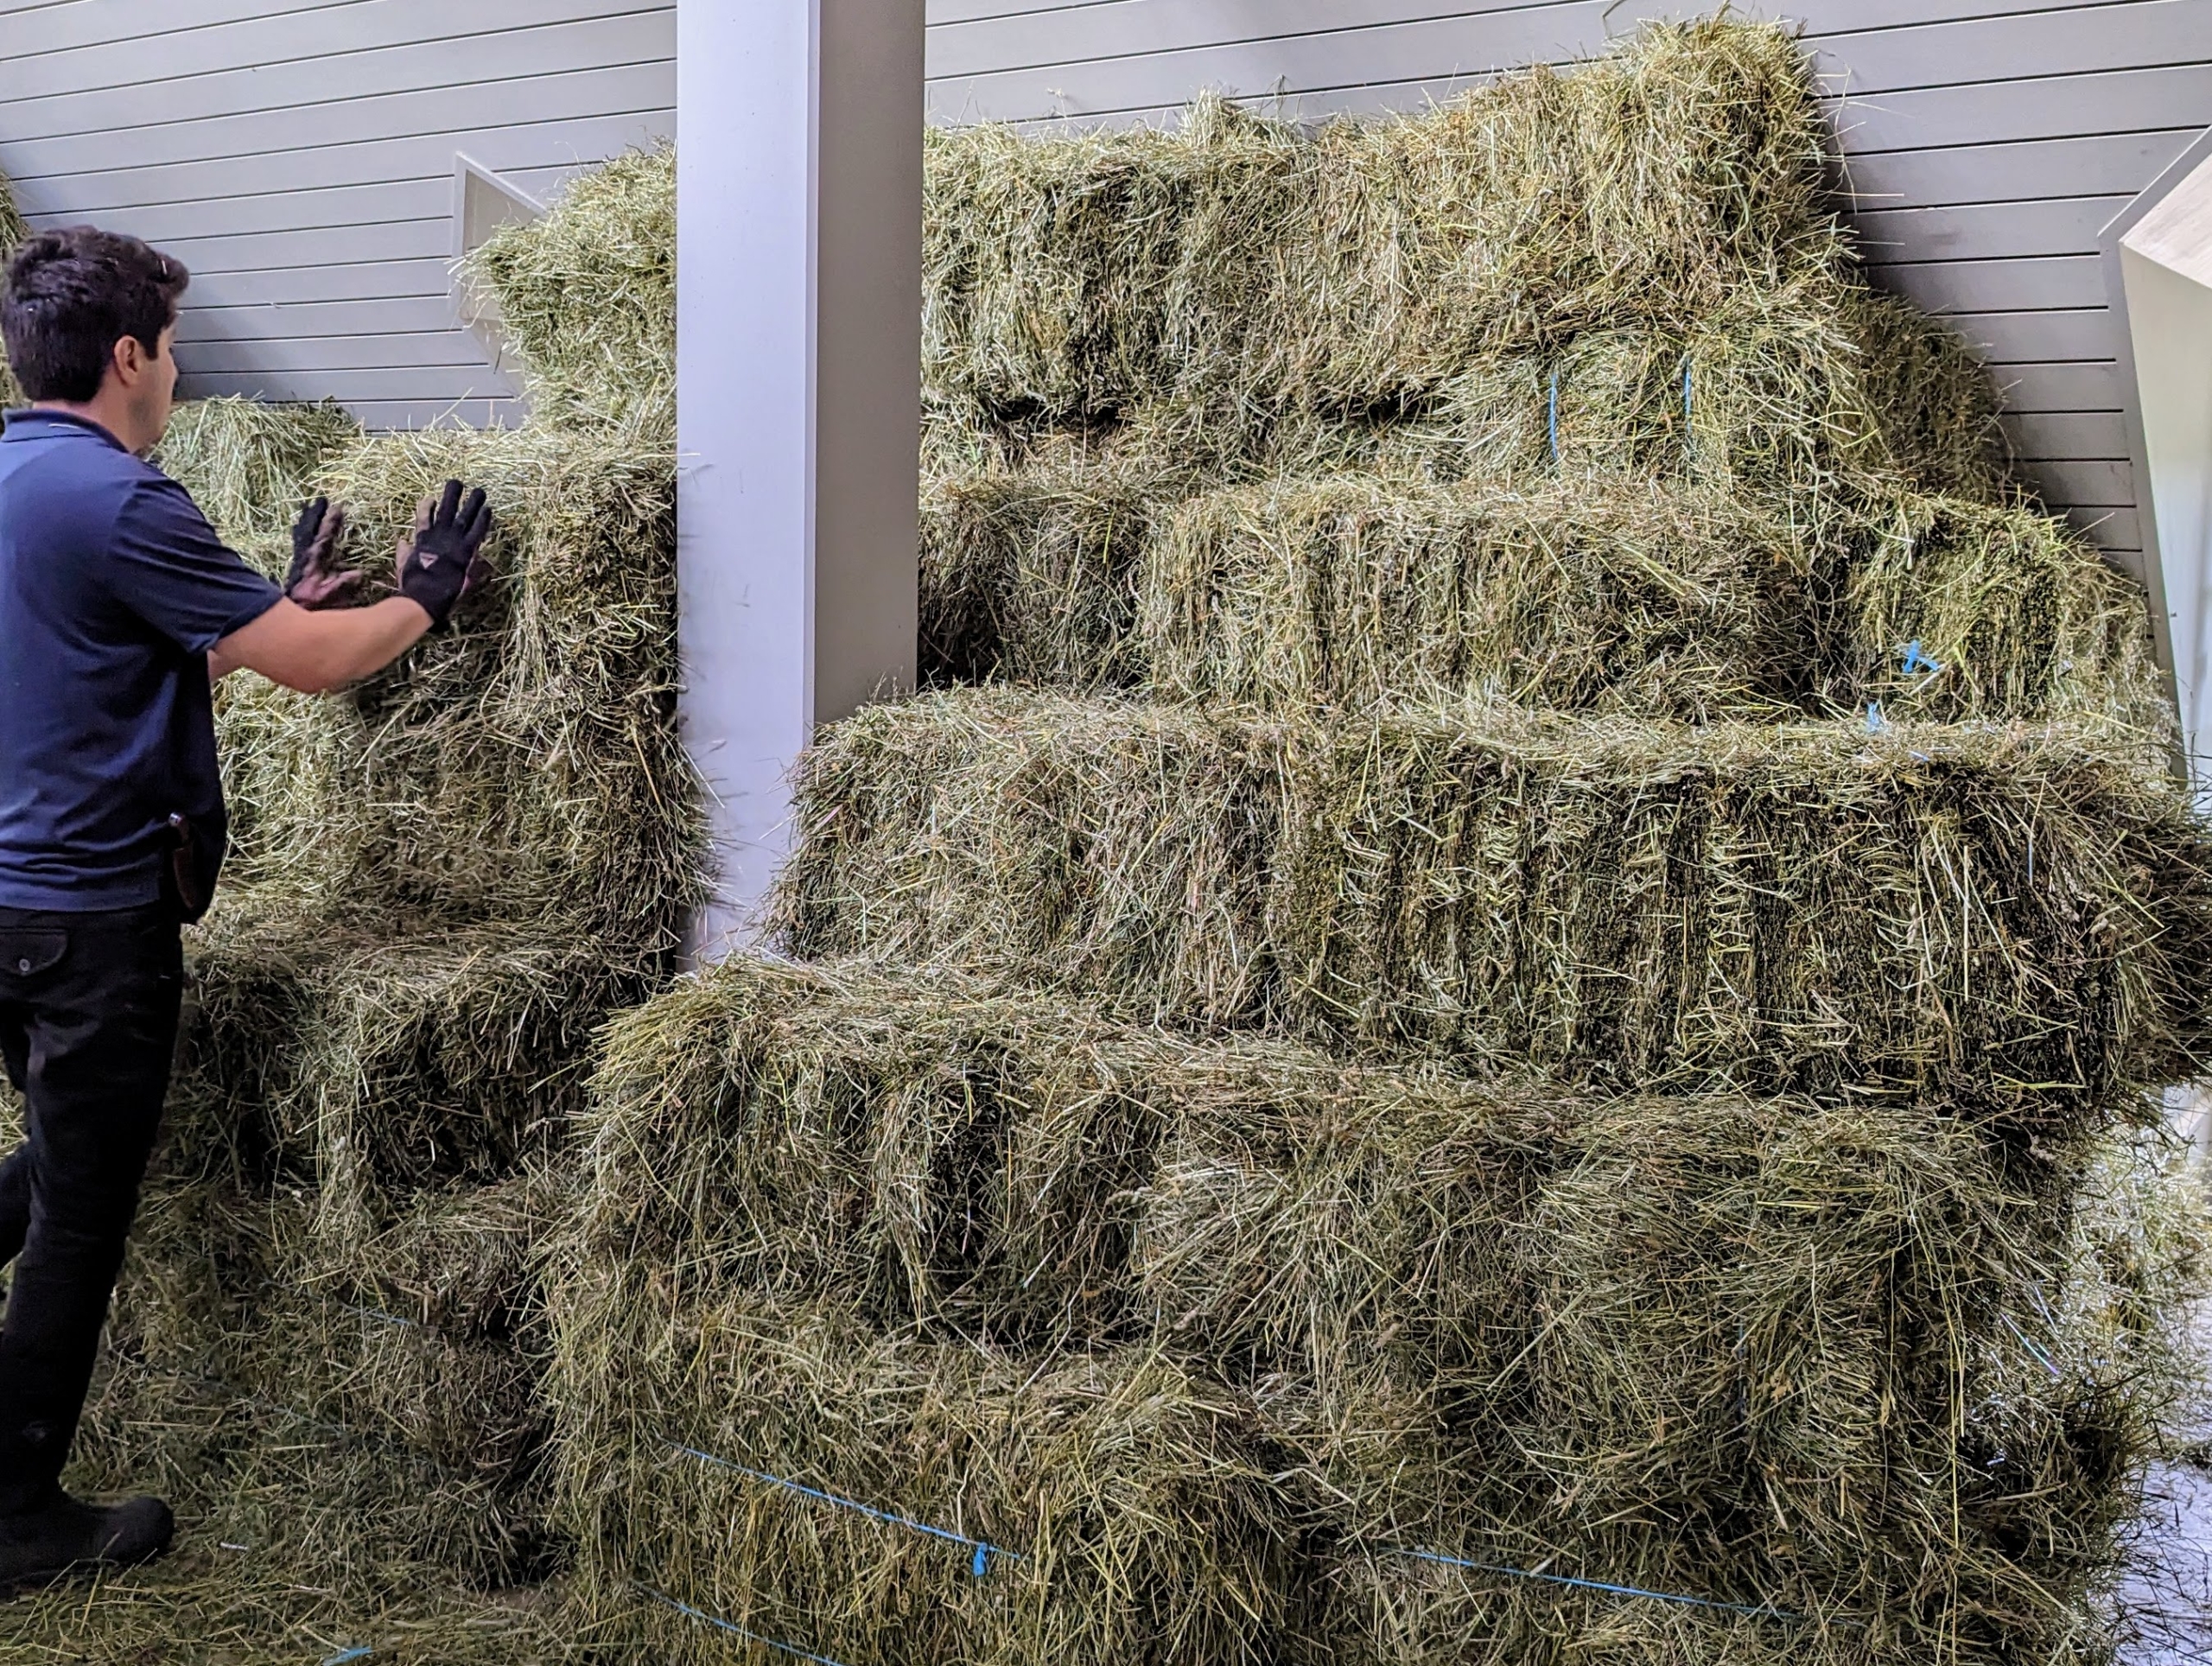
We collected so many bales, the overflow was brought to the run-in barn hayloft.
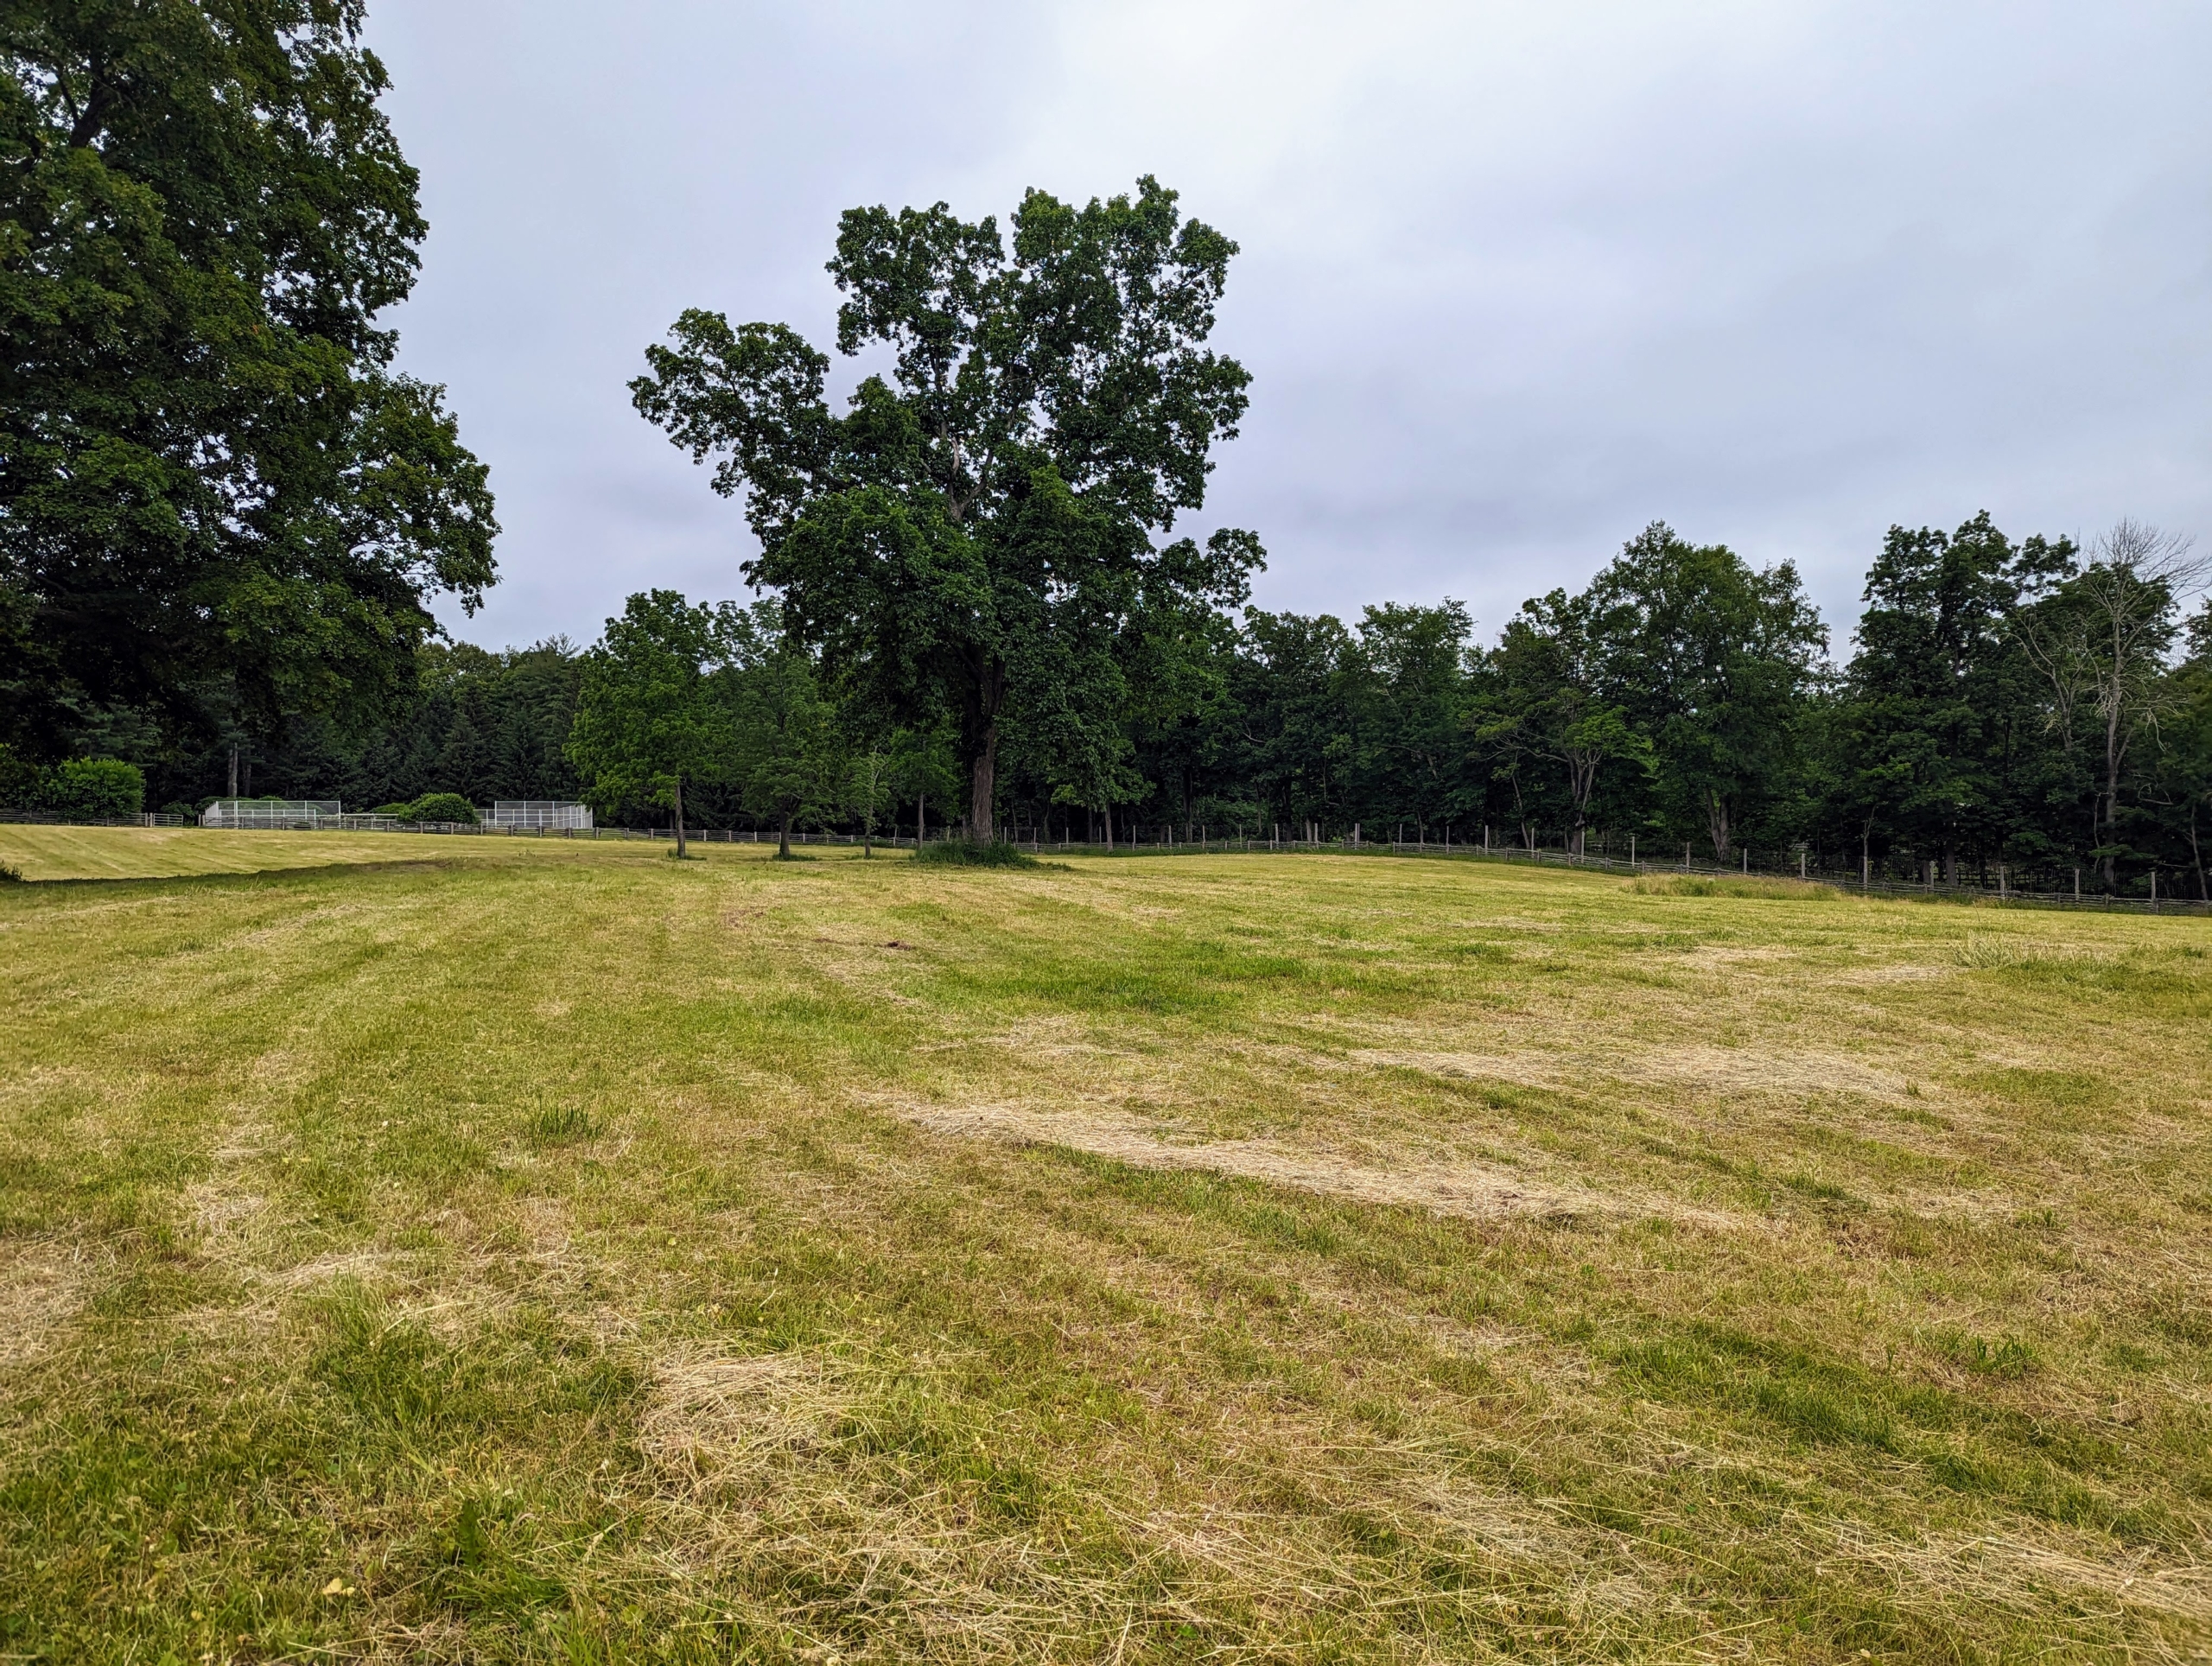
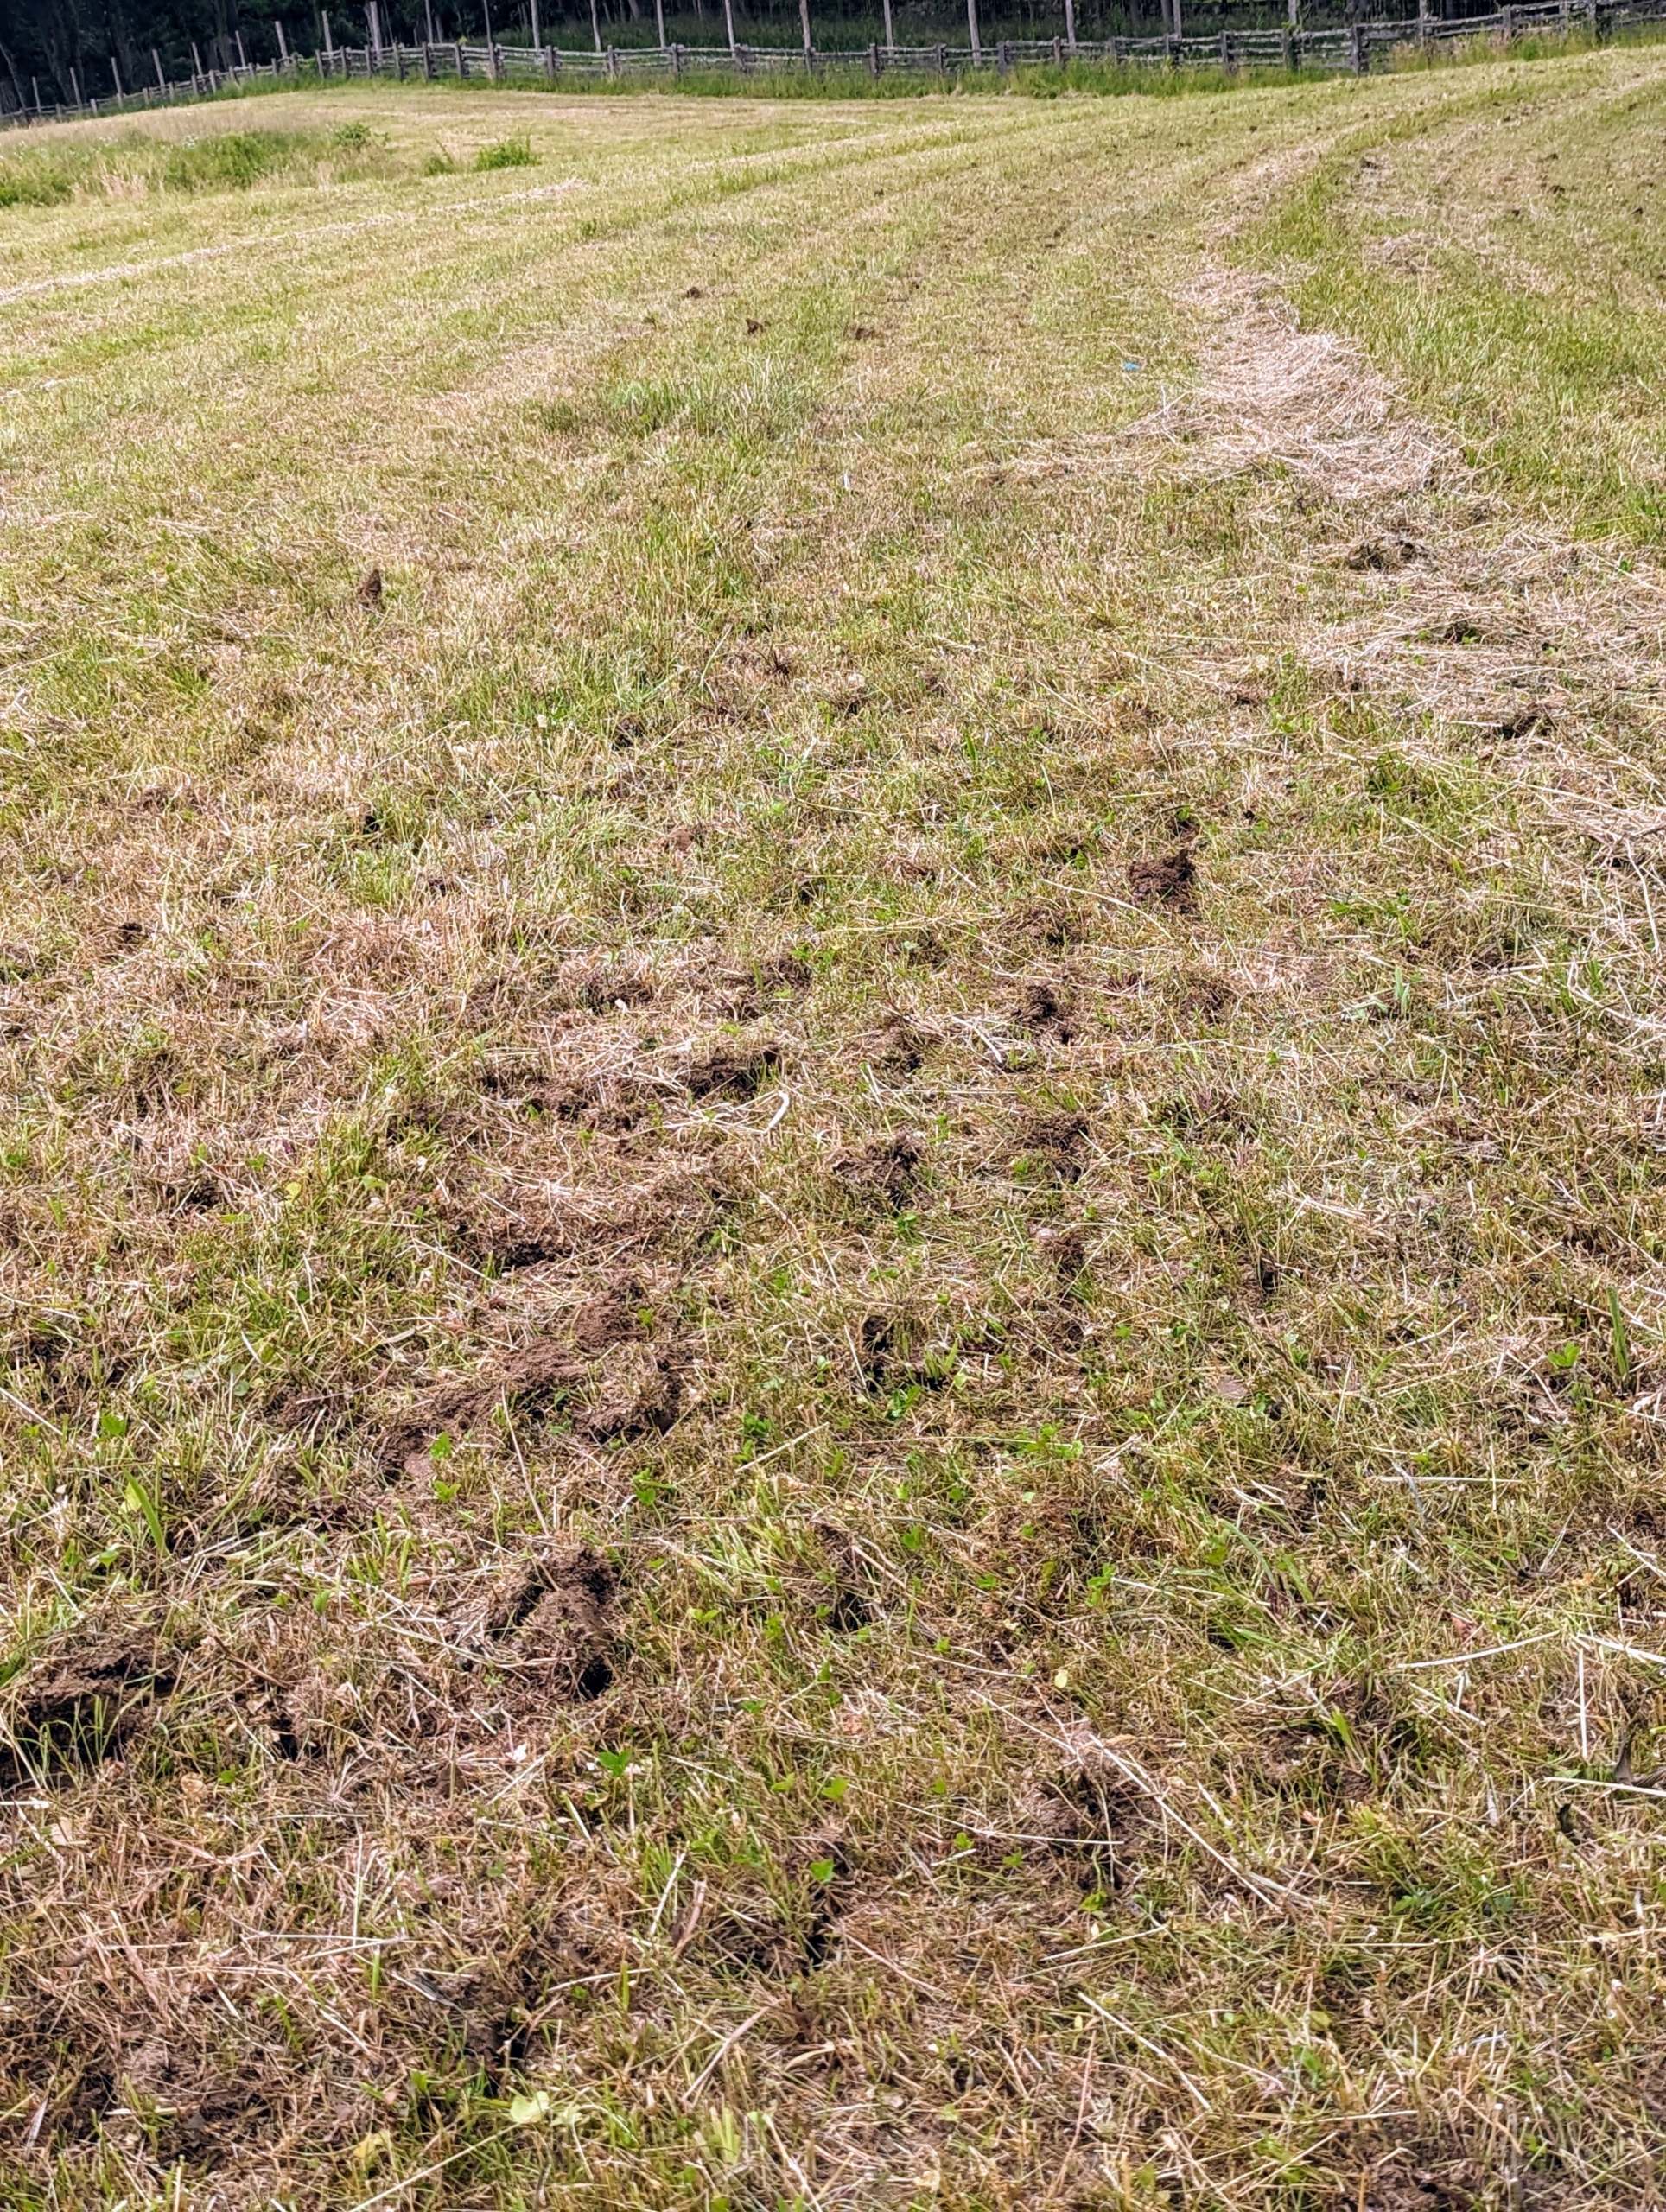
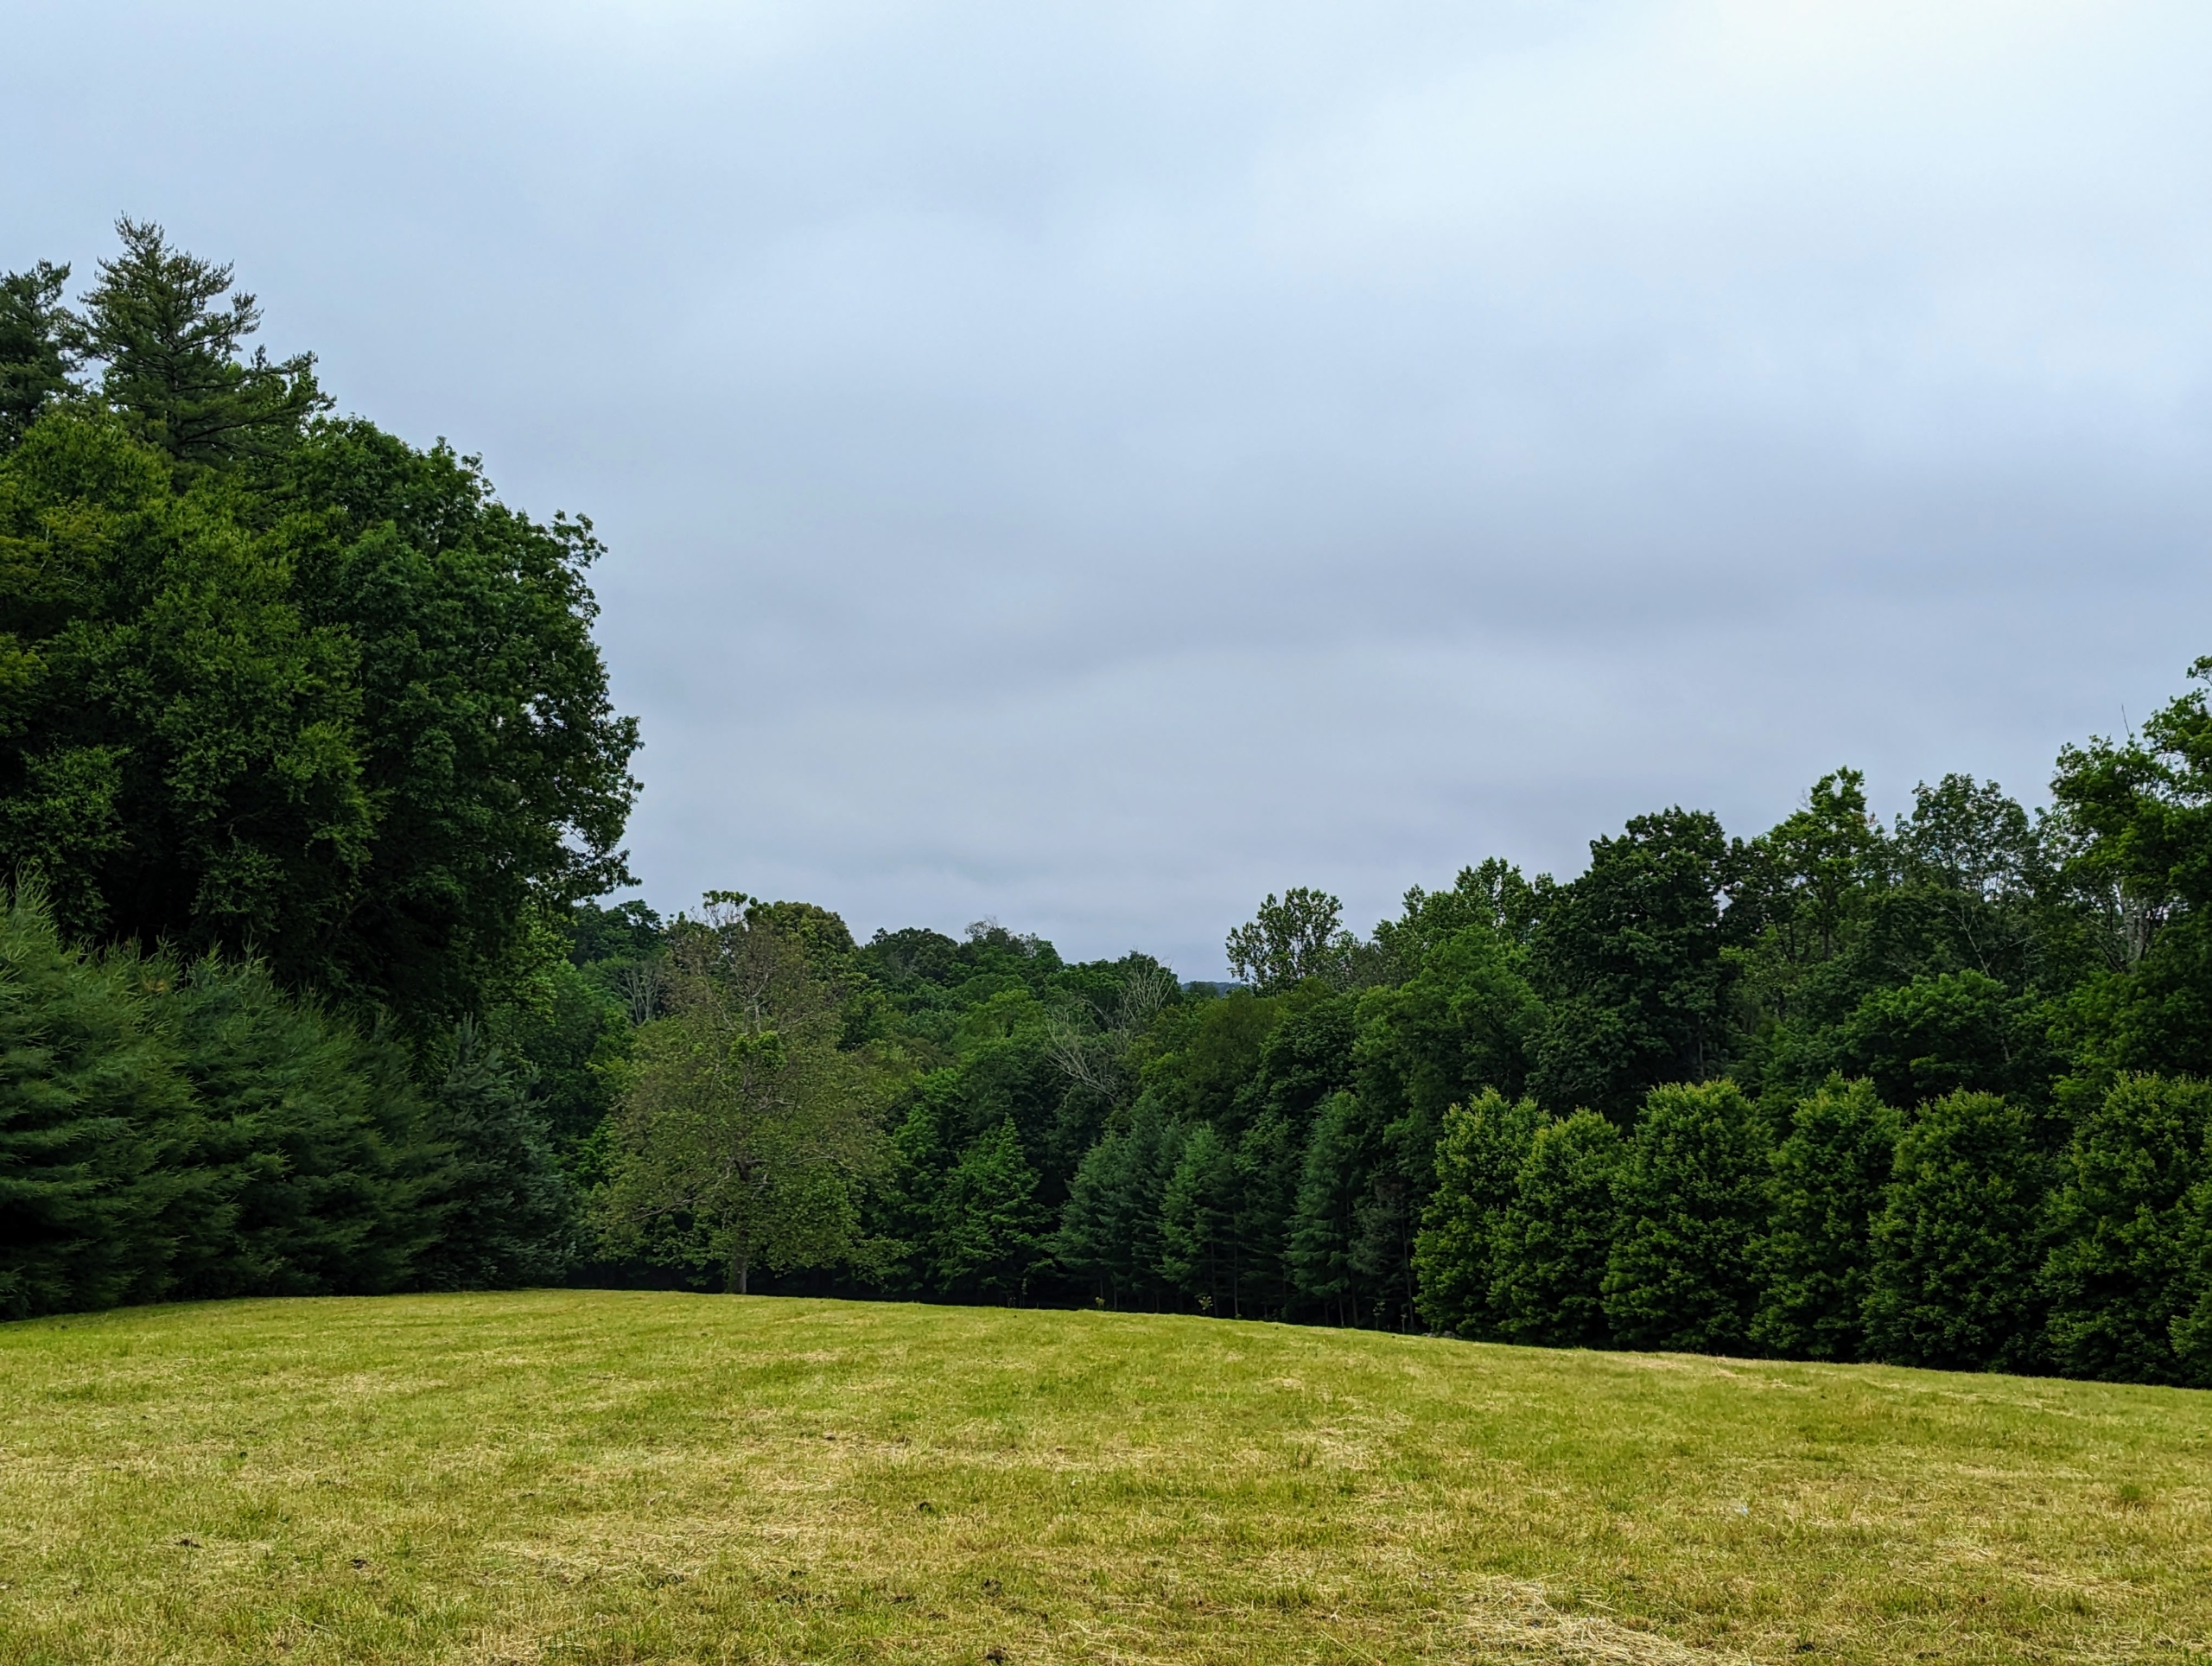
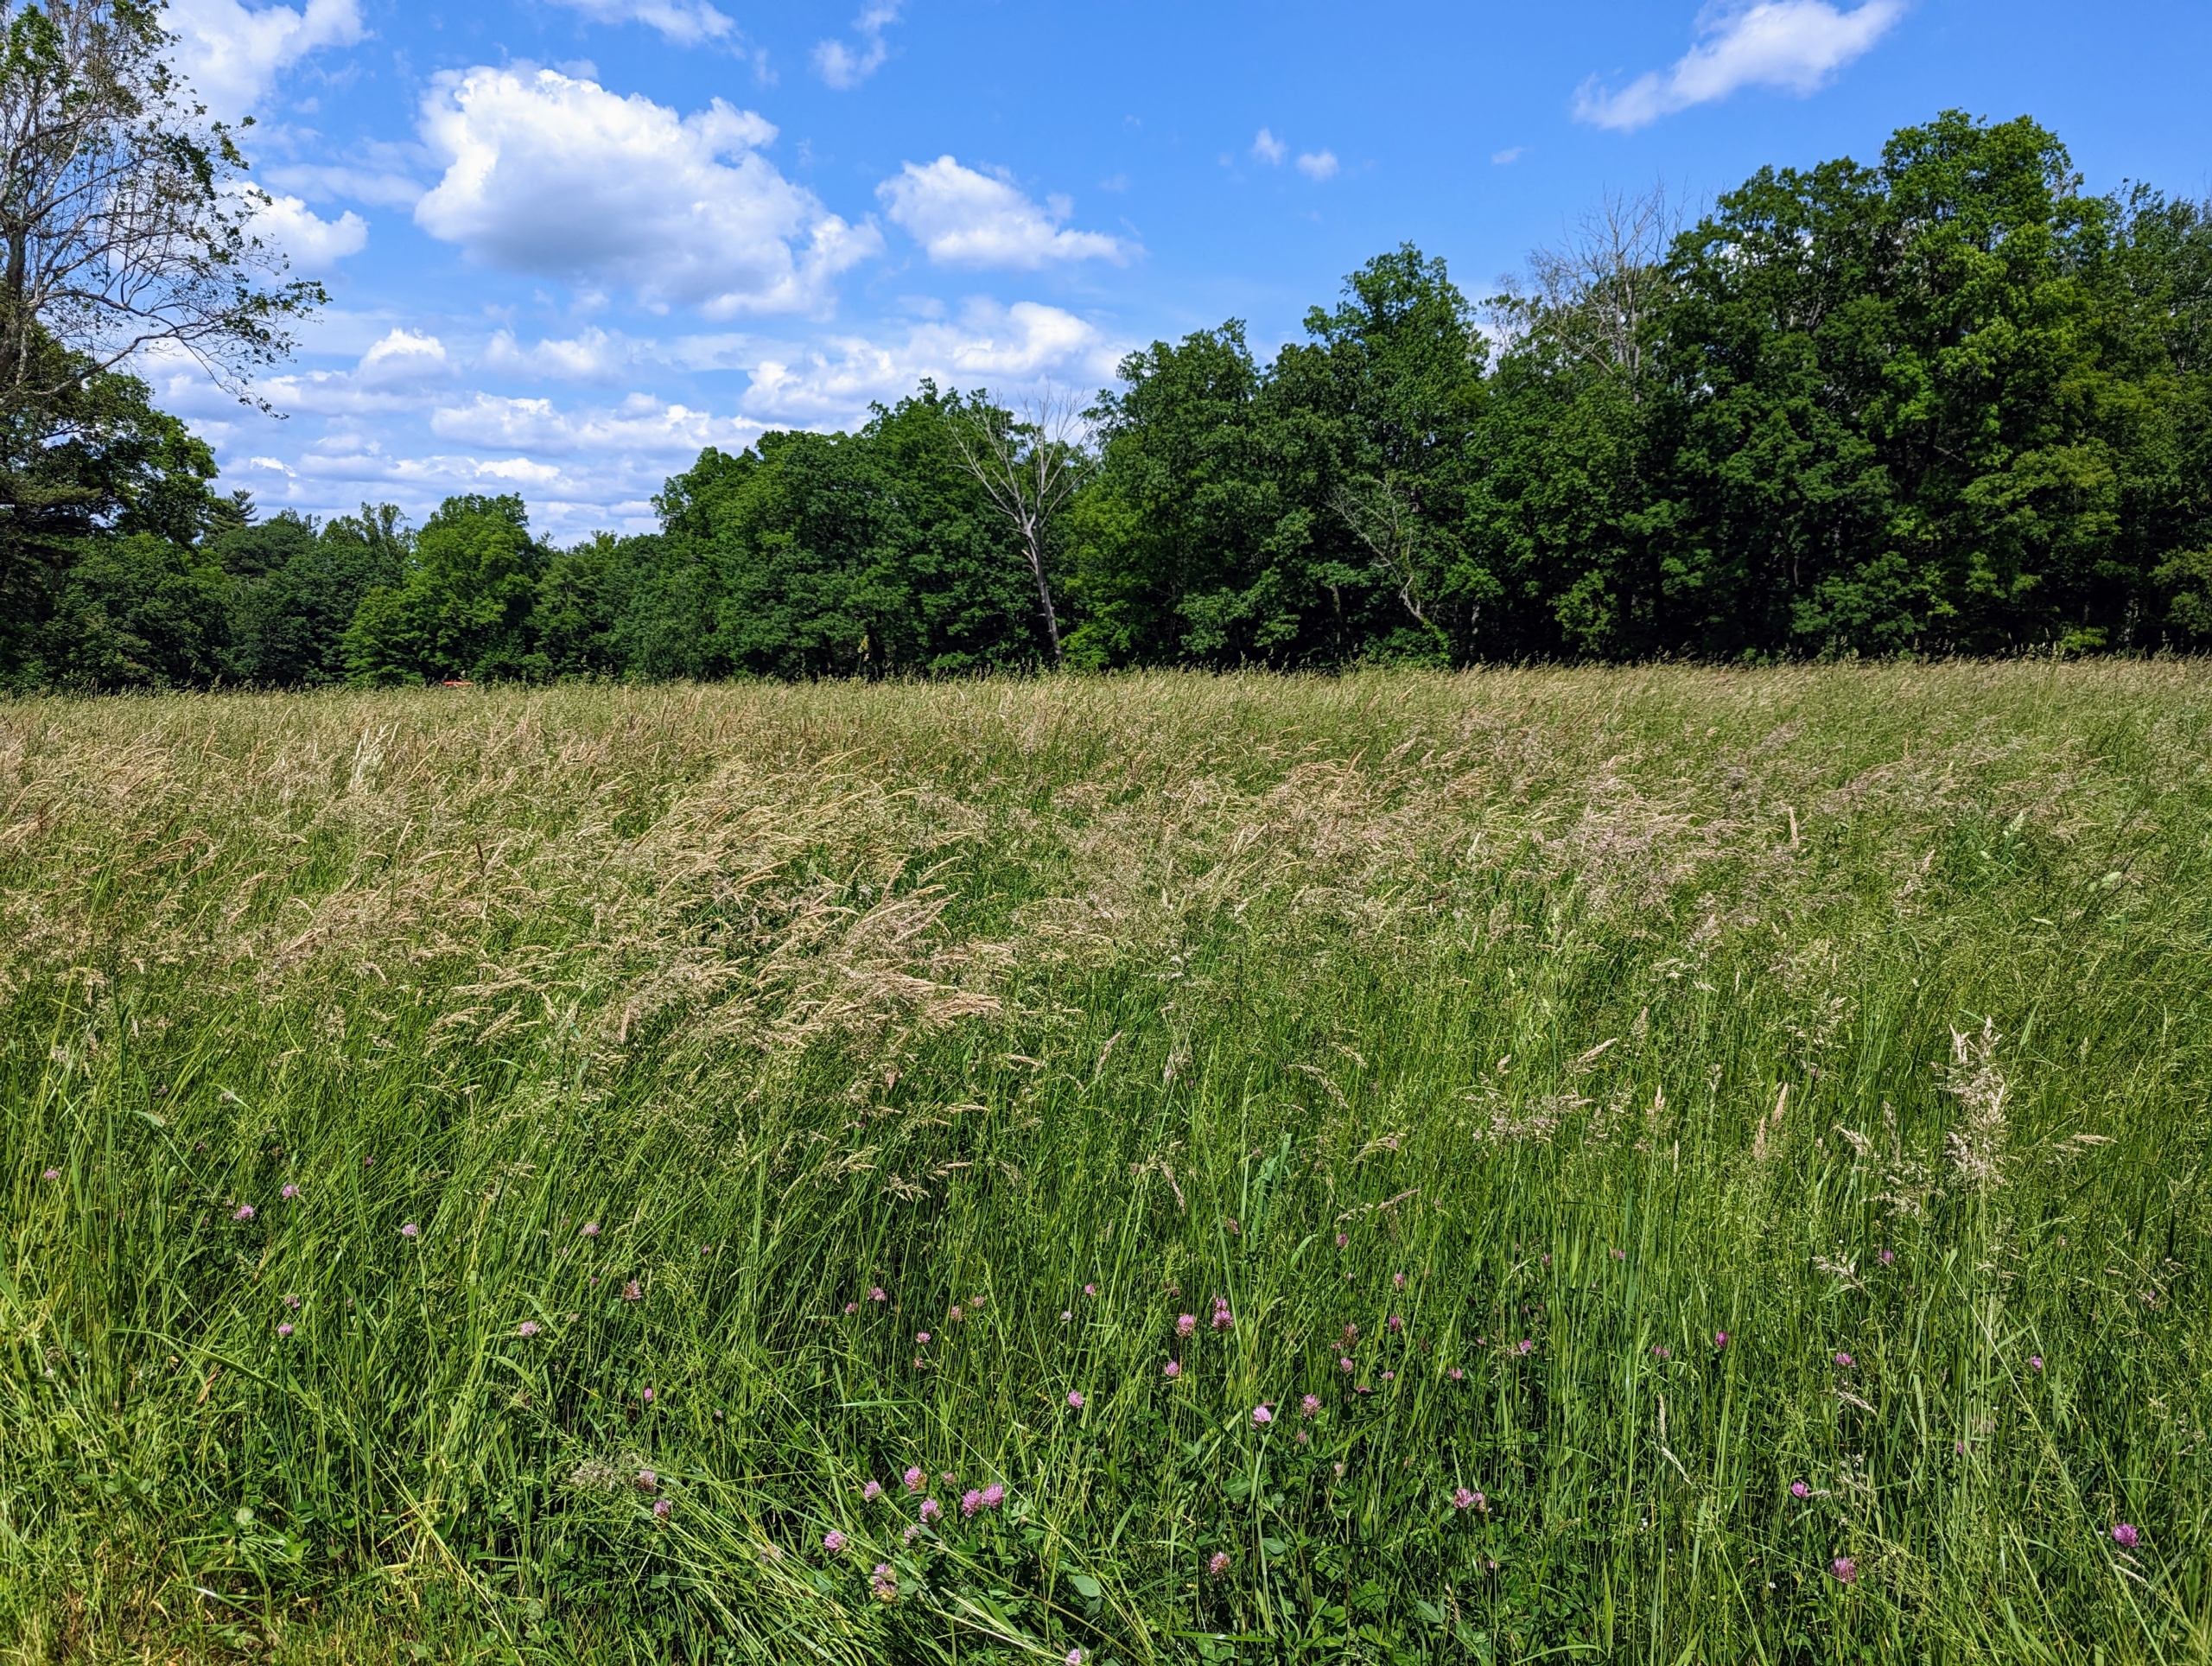
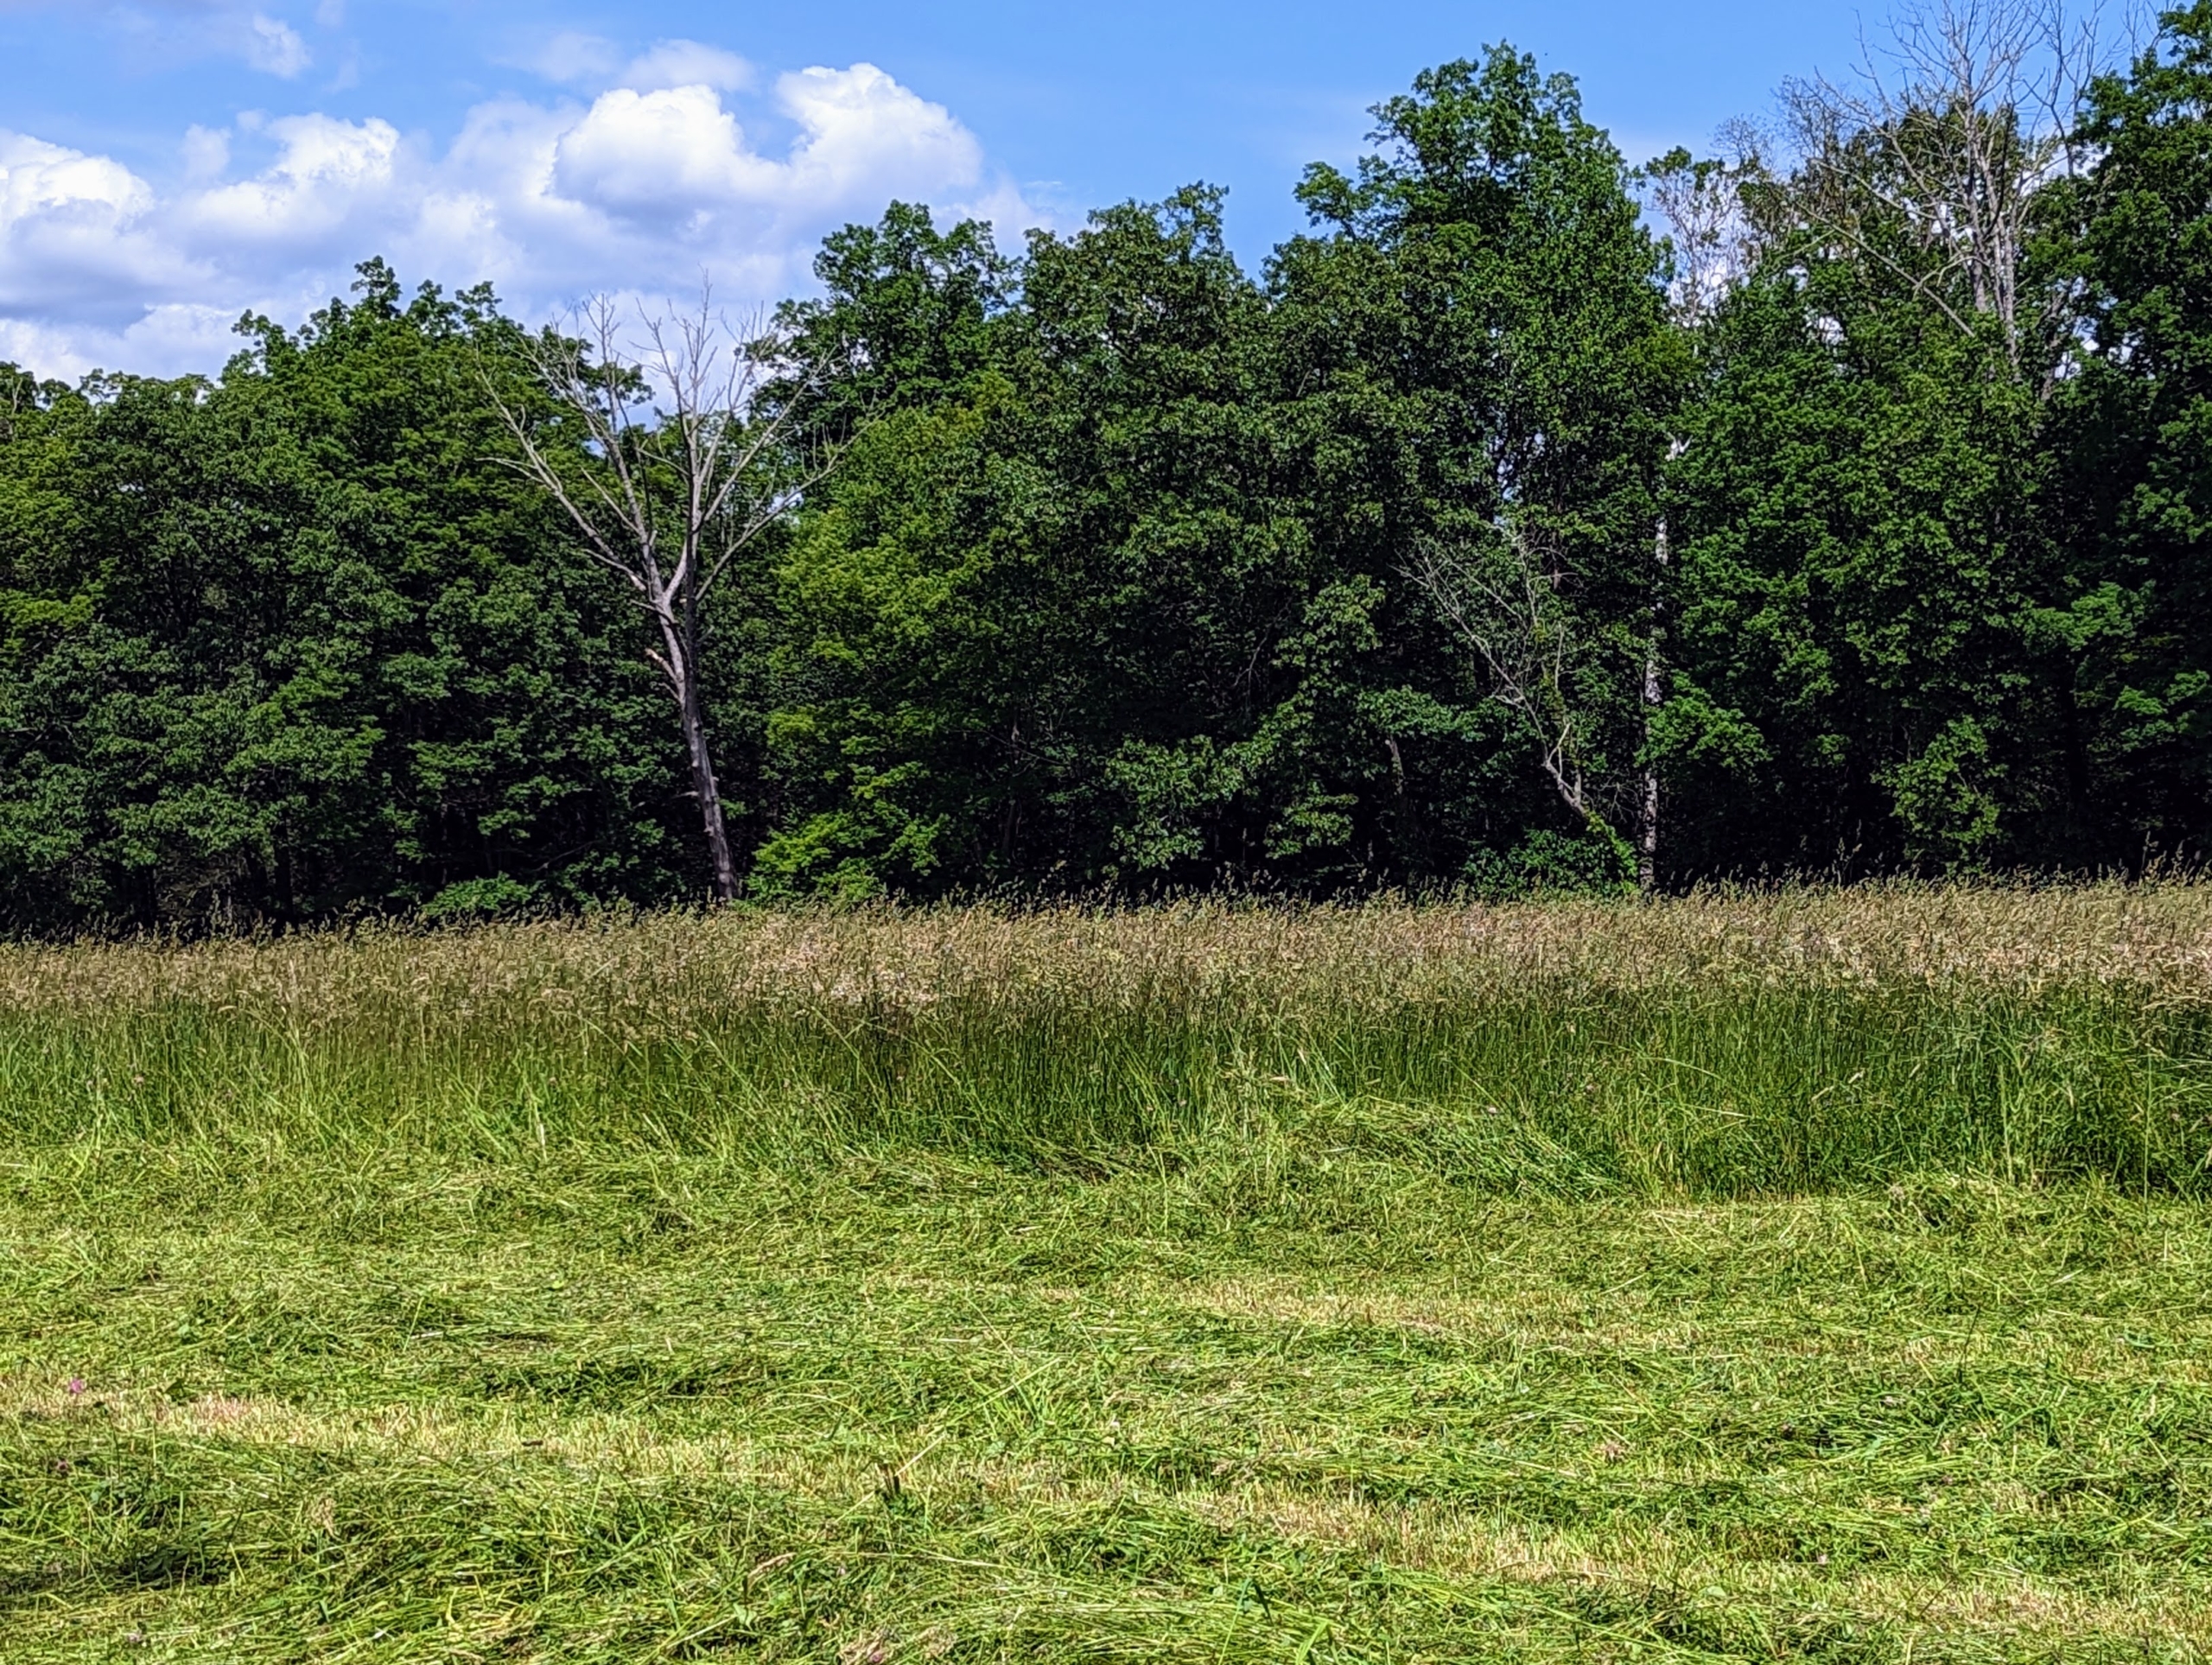
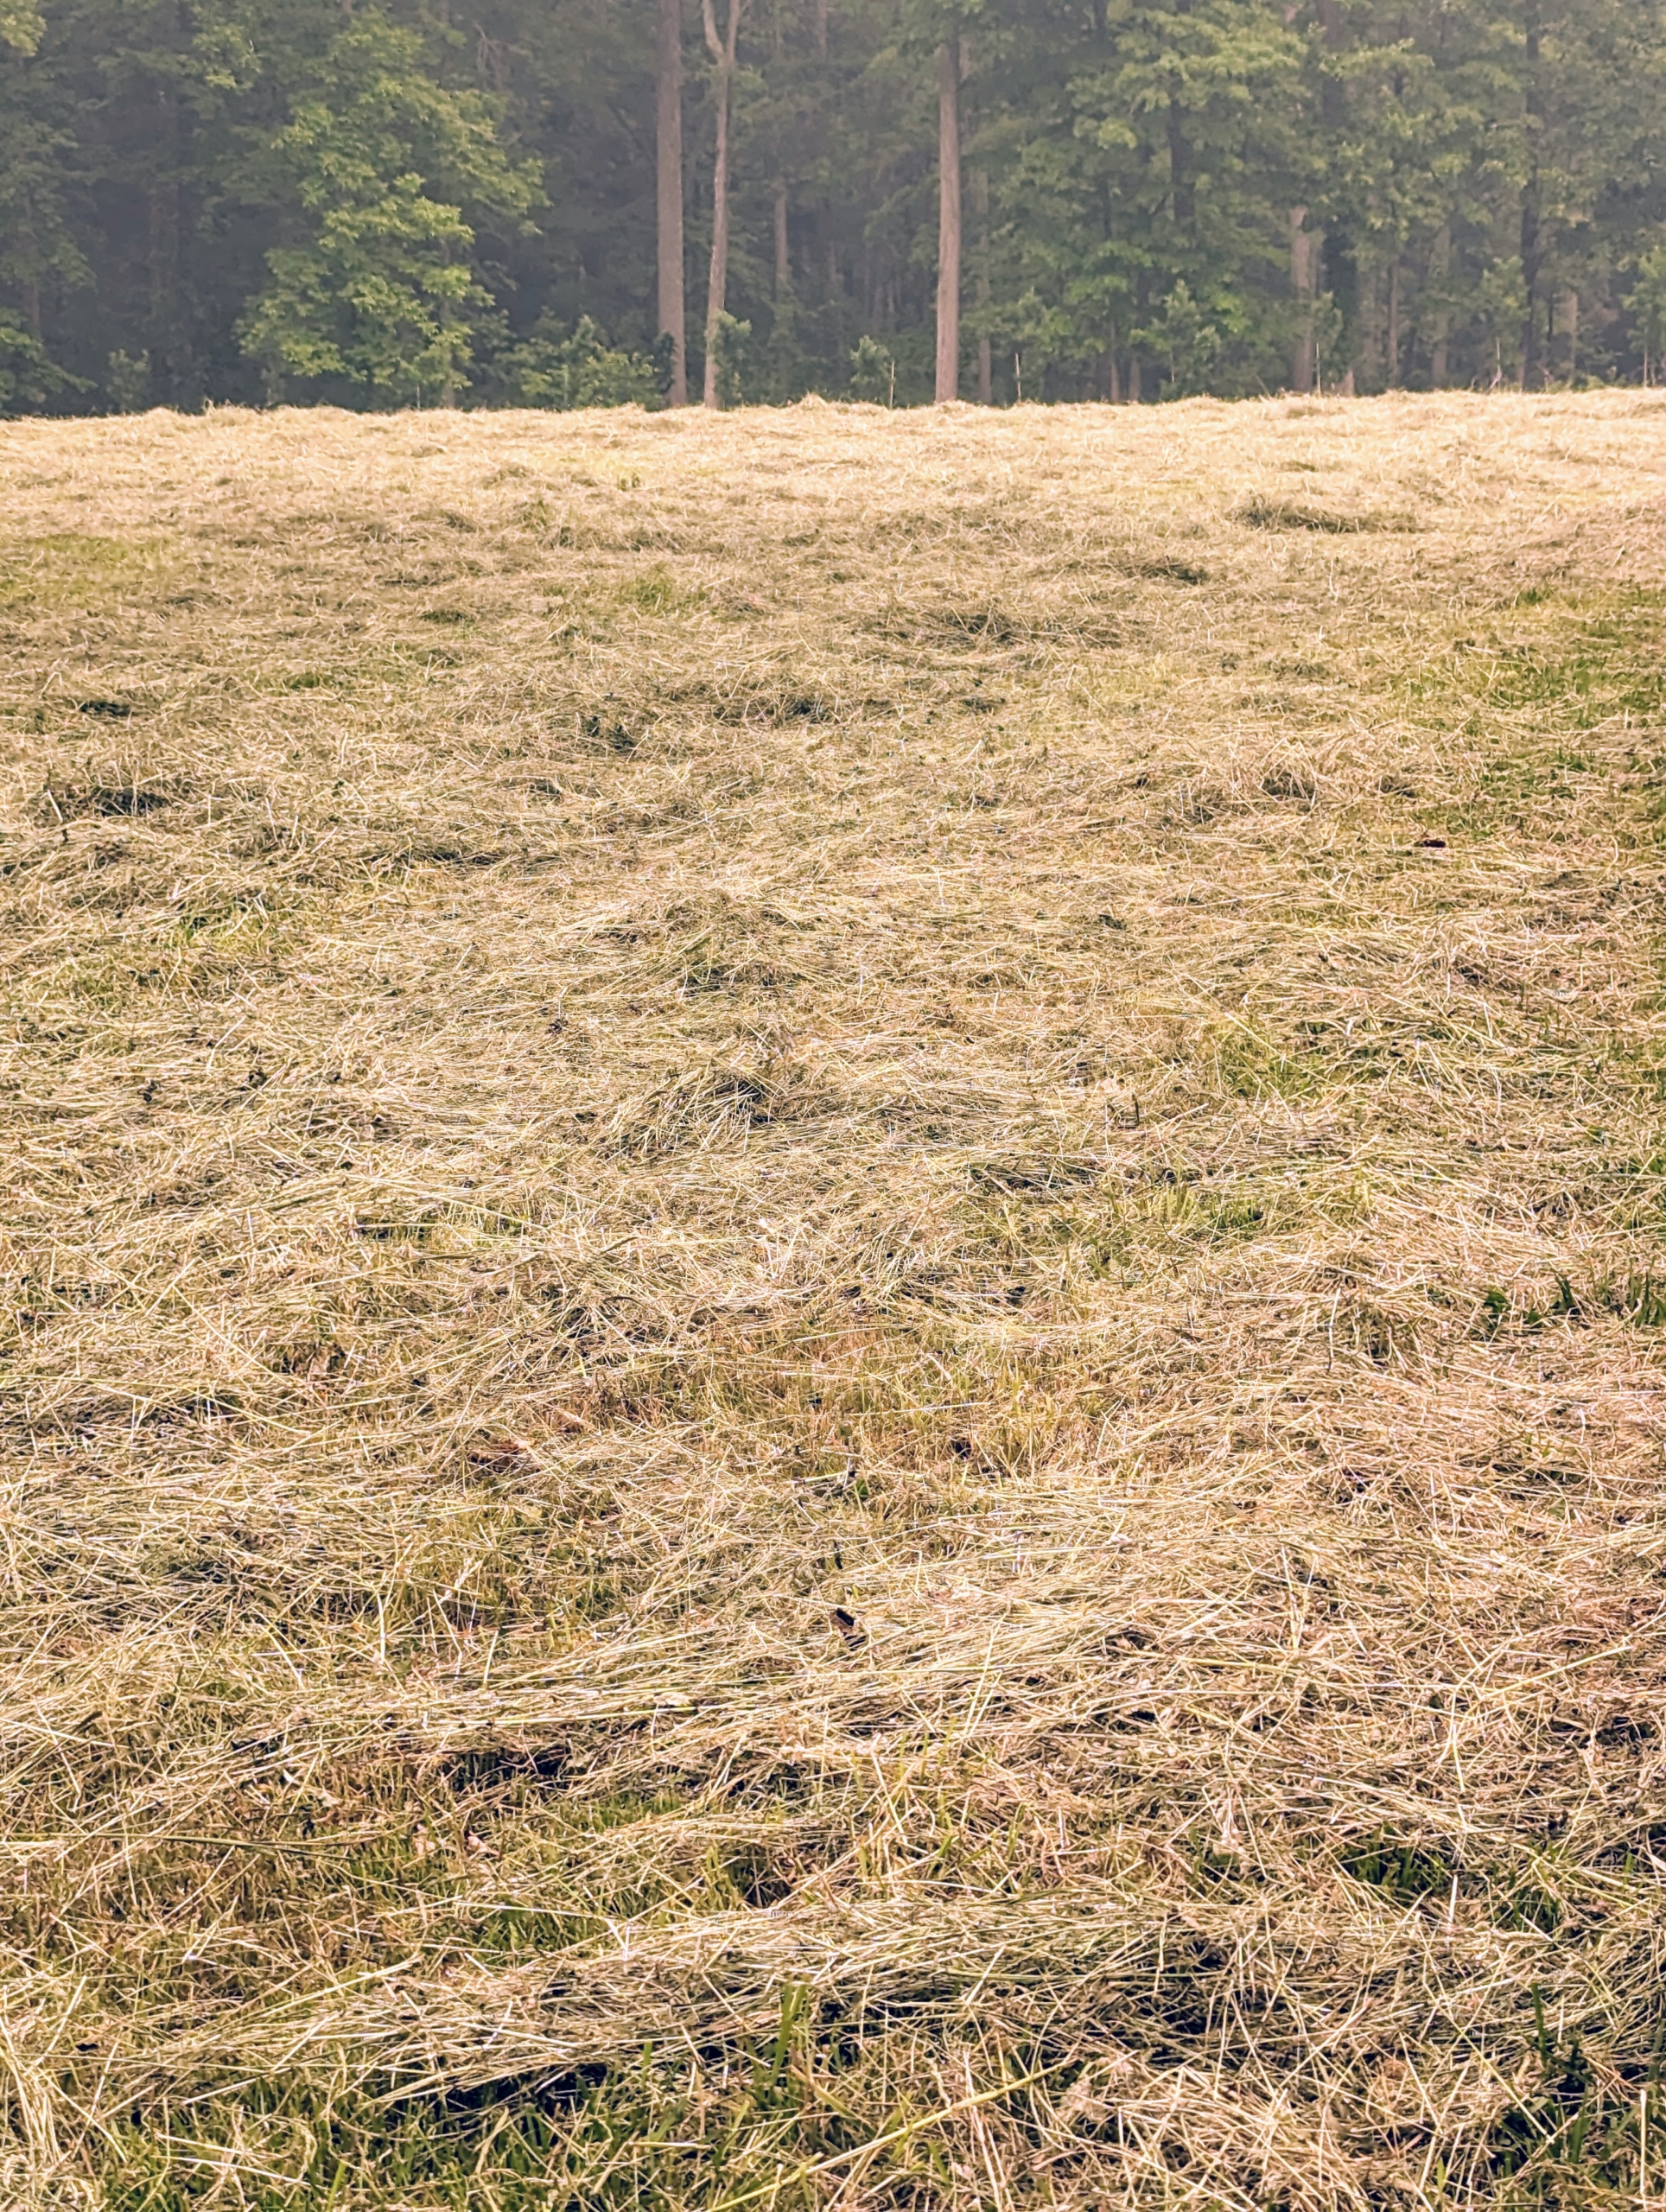
Now the fields are bare once again and ready to be aerated and seeded.
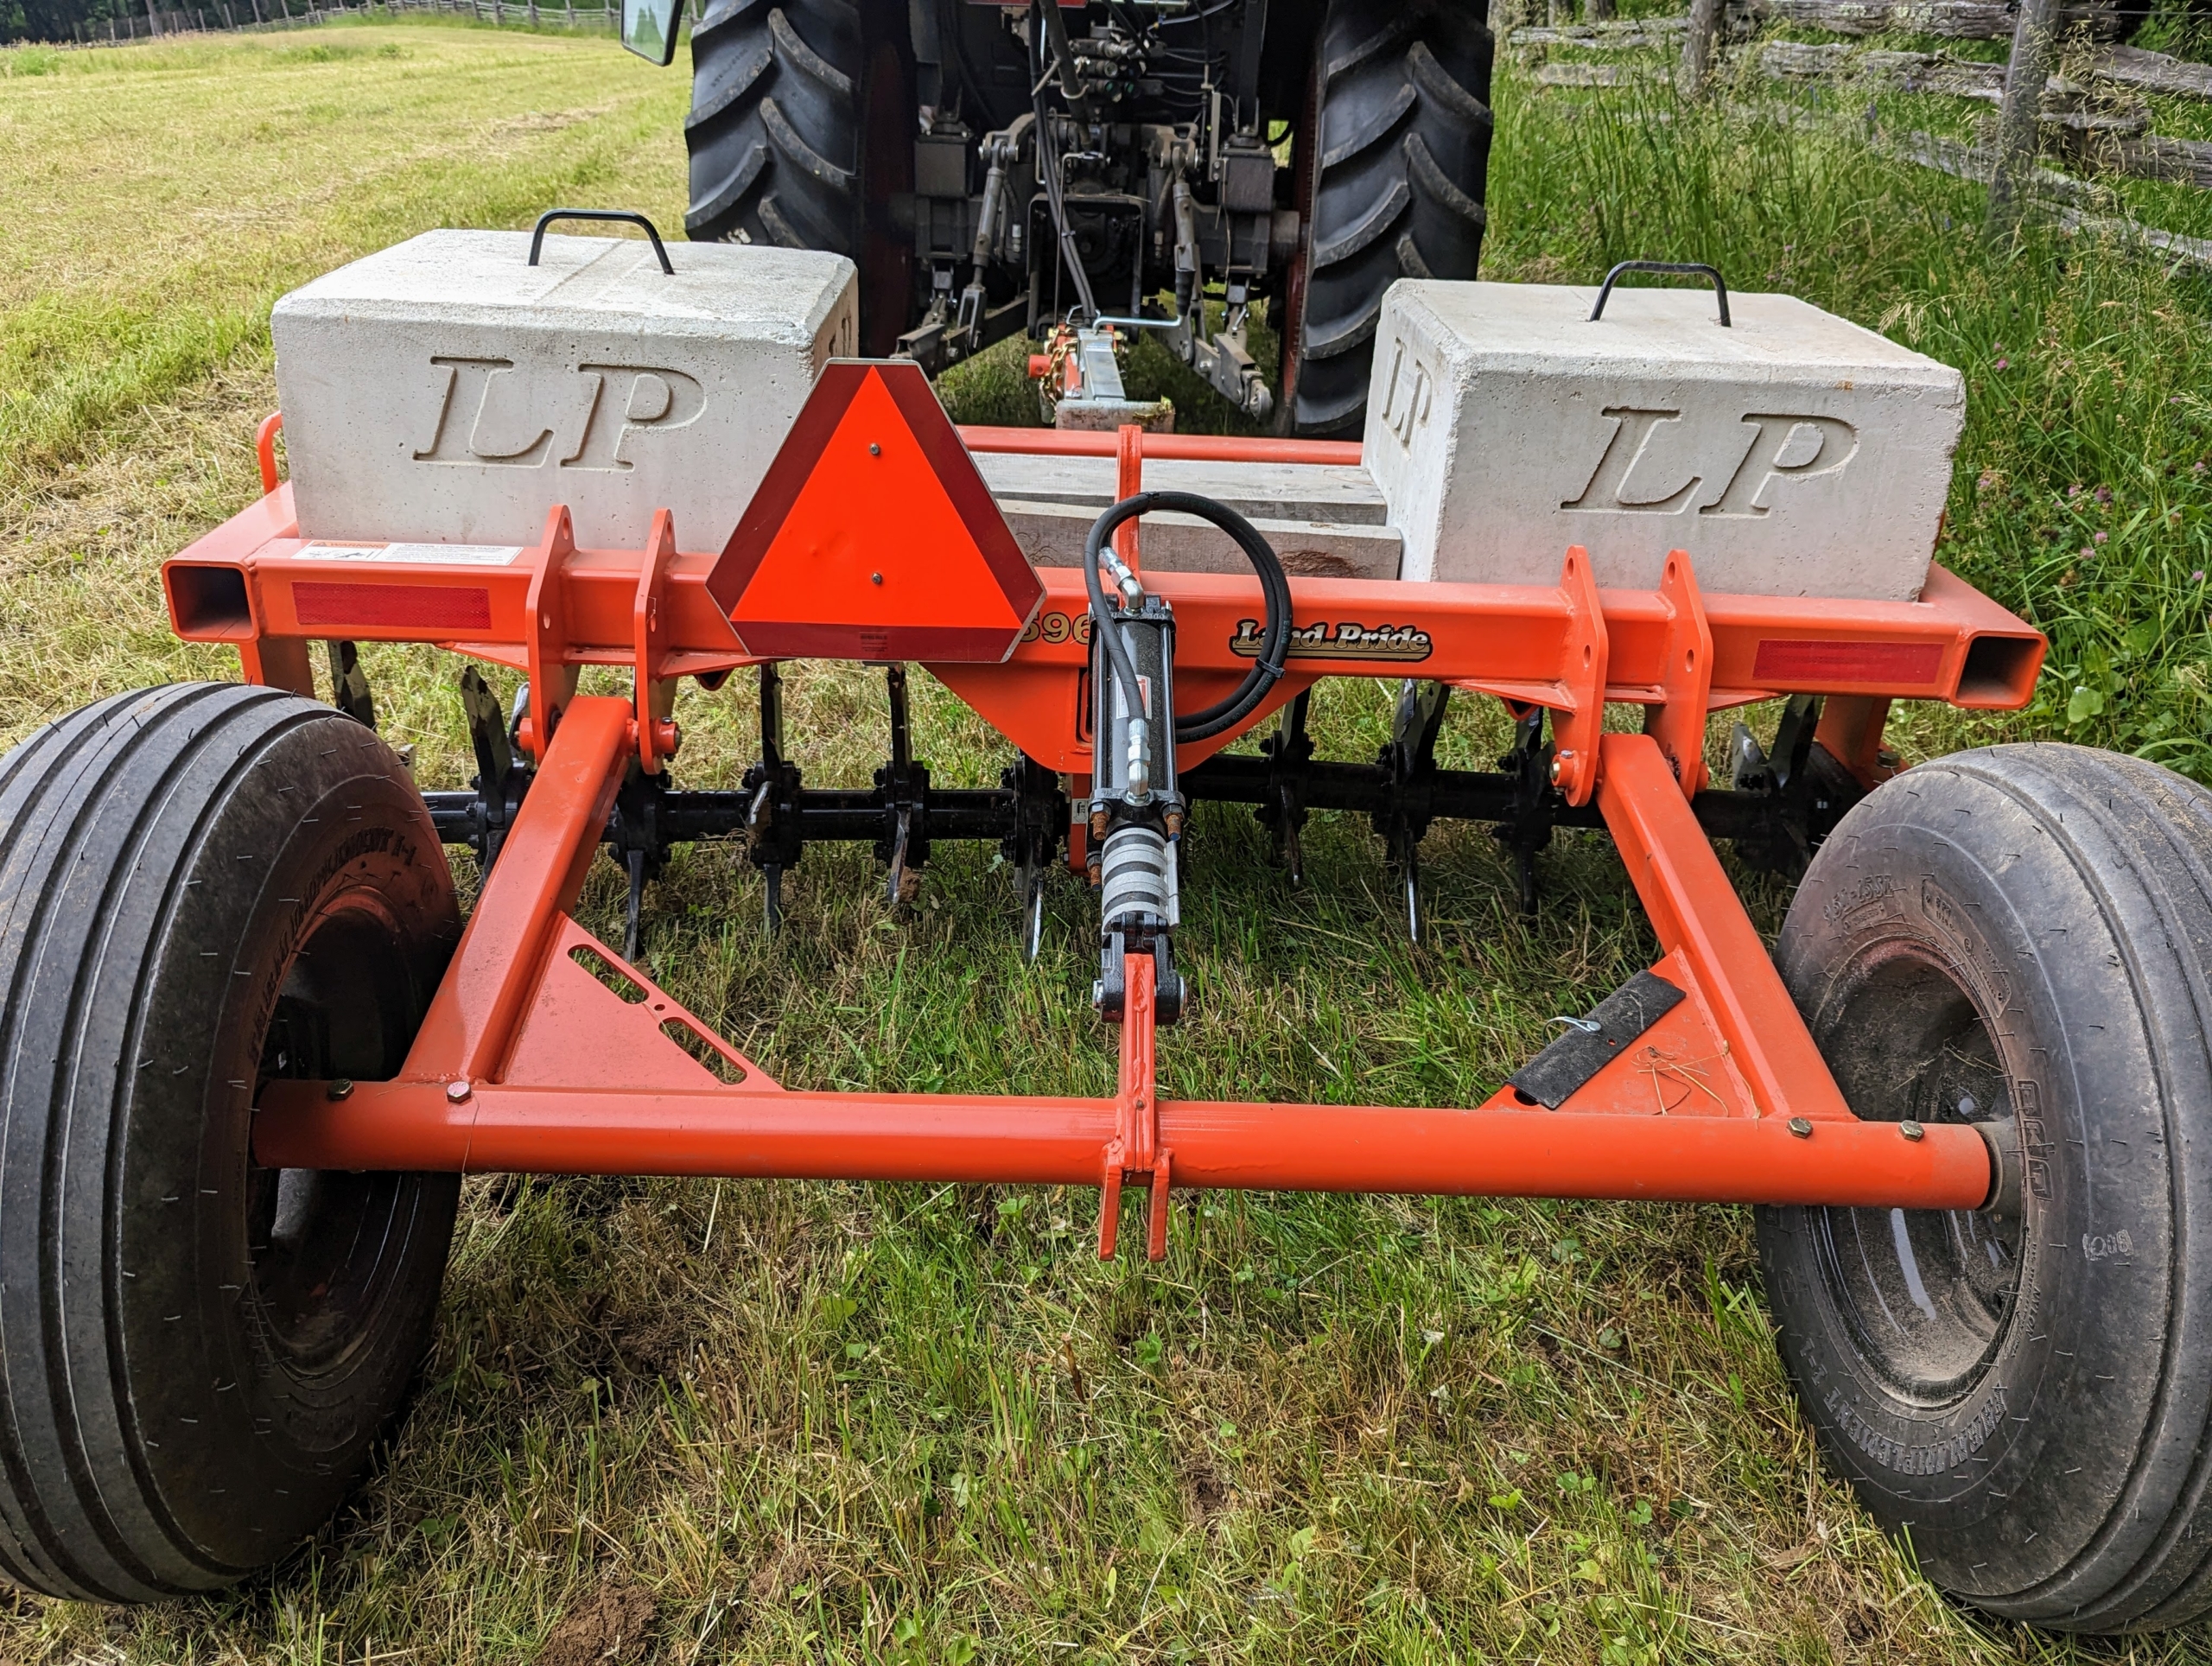
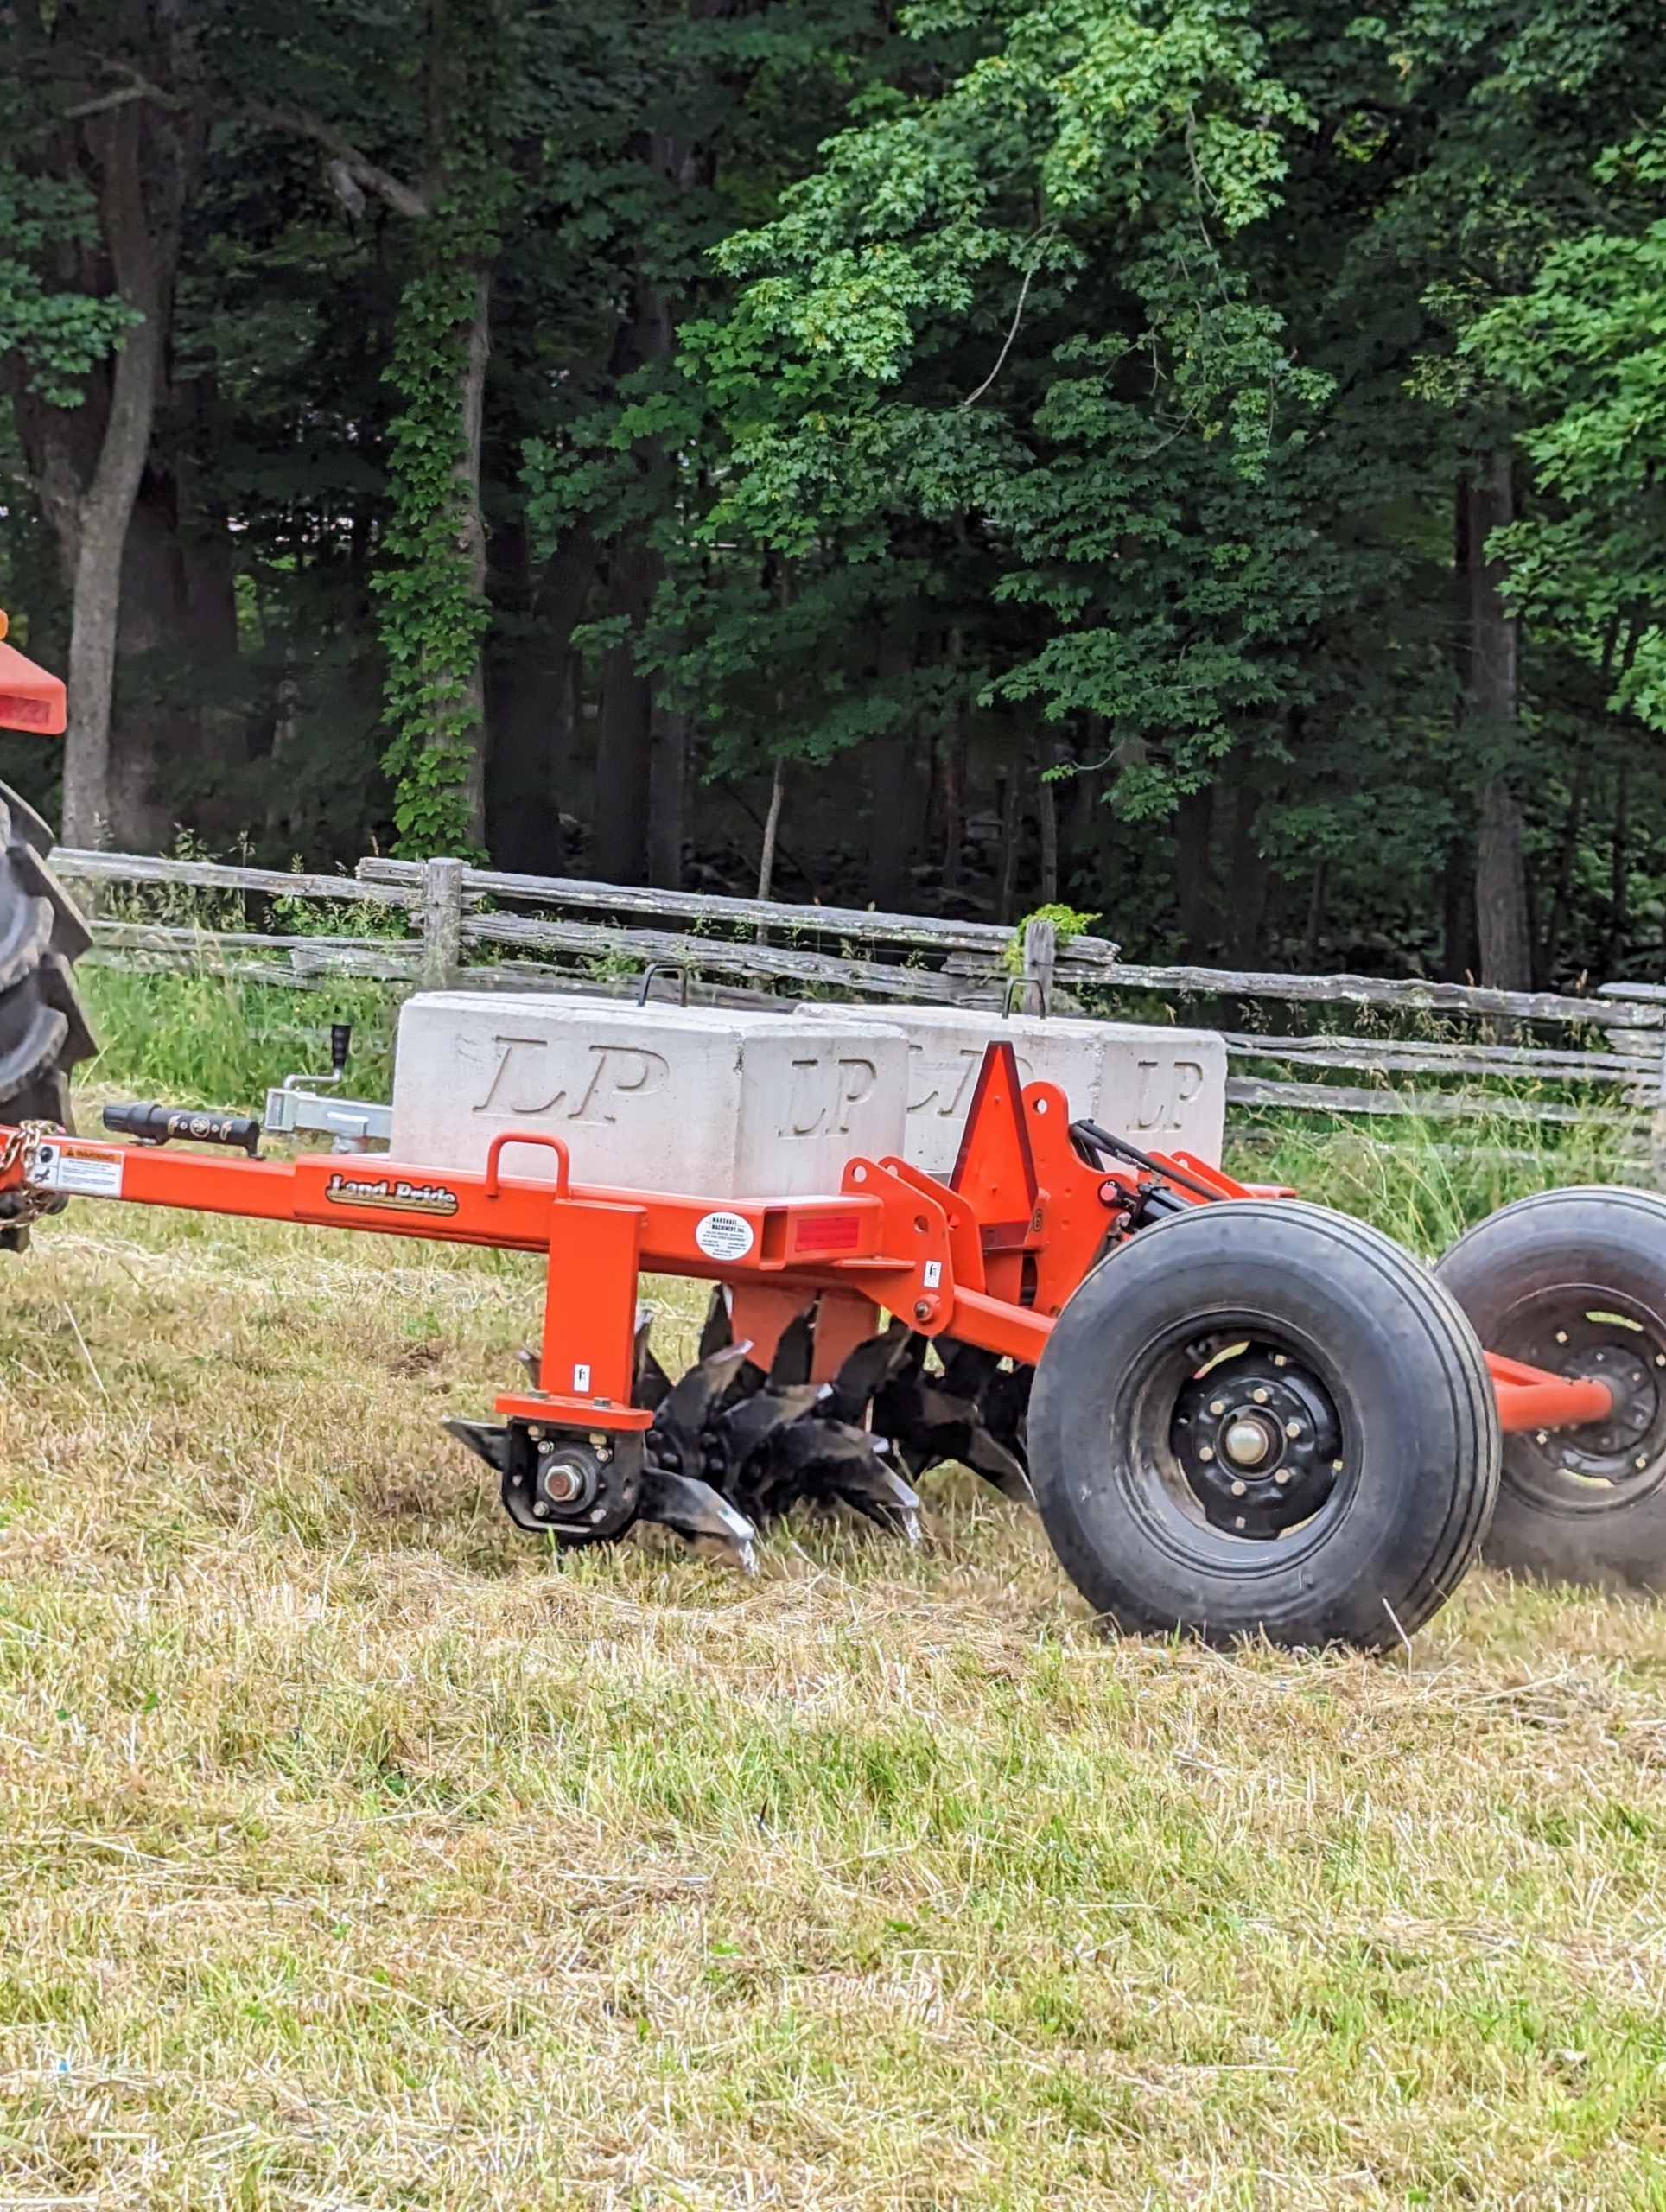
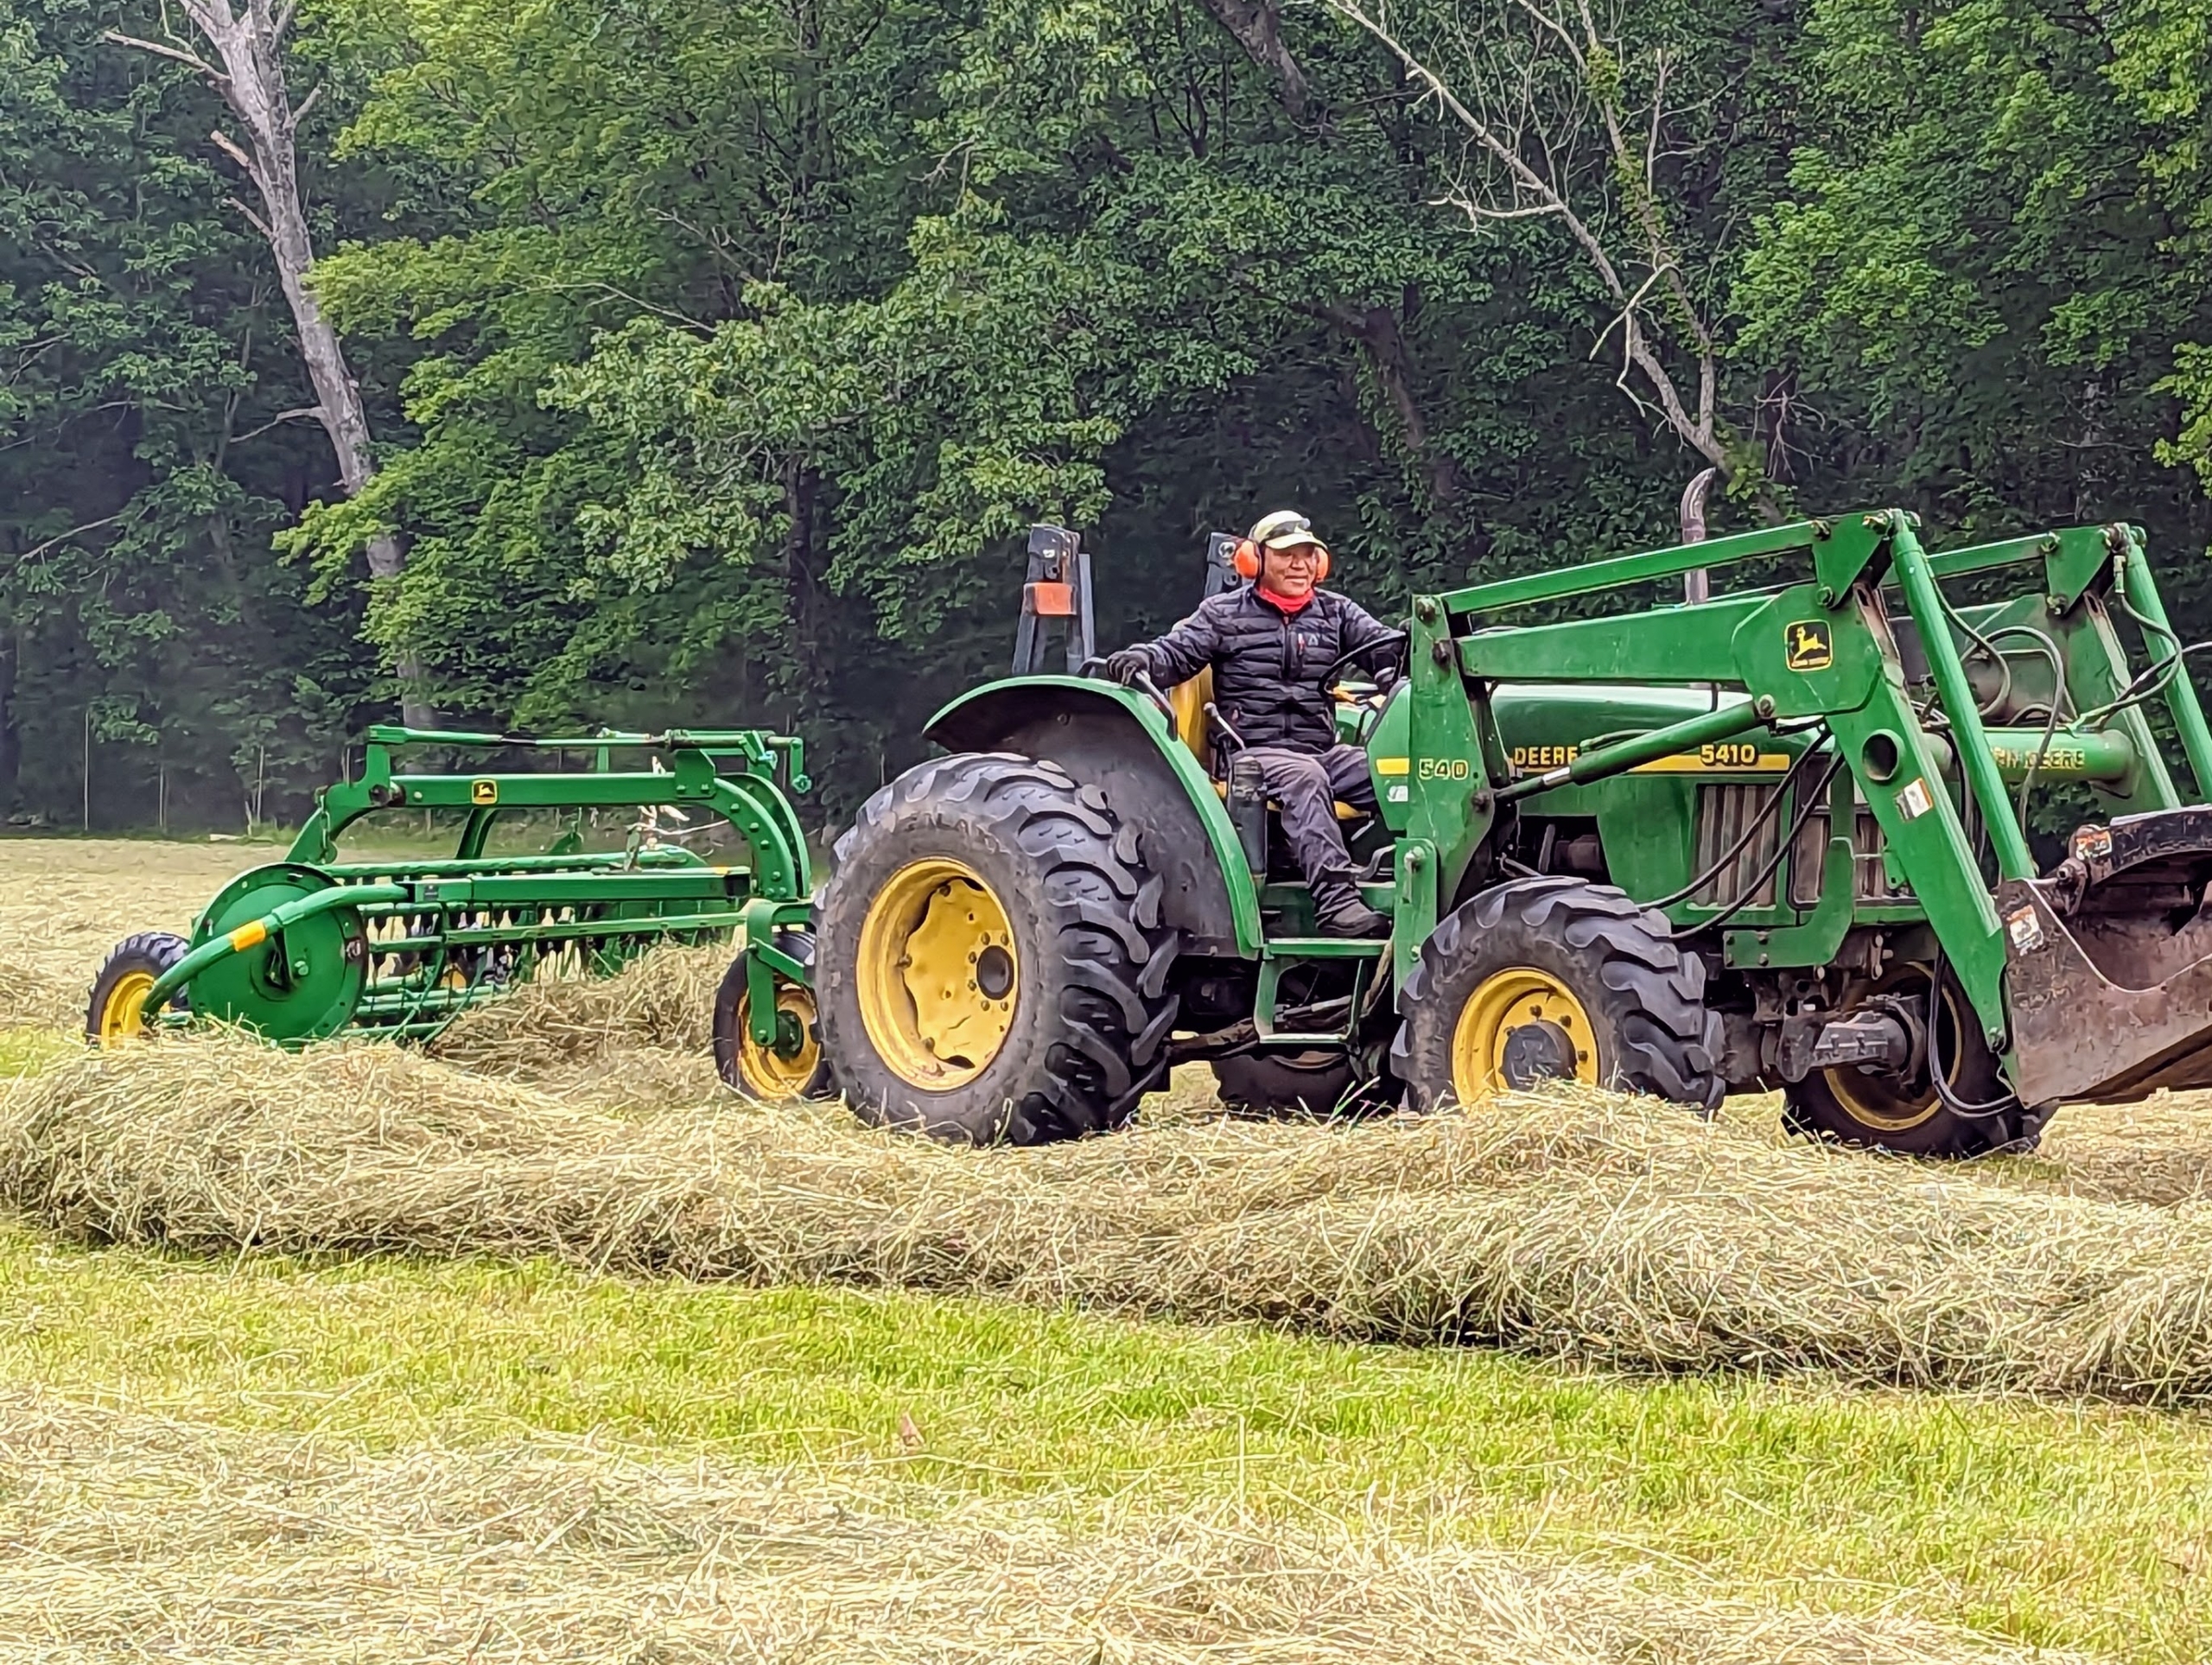
This is our Kubota Land Pride tow-behind spike aerator. We always aerate any field, pasture, or lawn space before seeding. The main reason for any aerating is to alleviate soil compaction. Compacted soils have too many solid particles in a certain volume or space, which prevents proper circulation of air, water, and nutrients. Aerating also improves drainage.
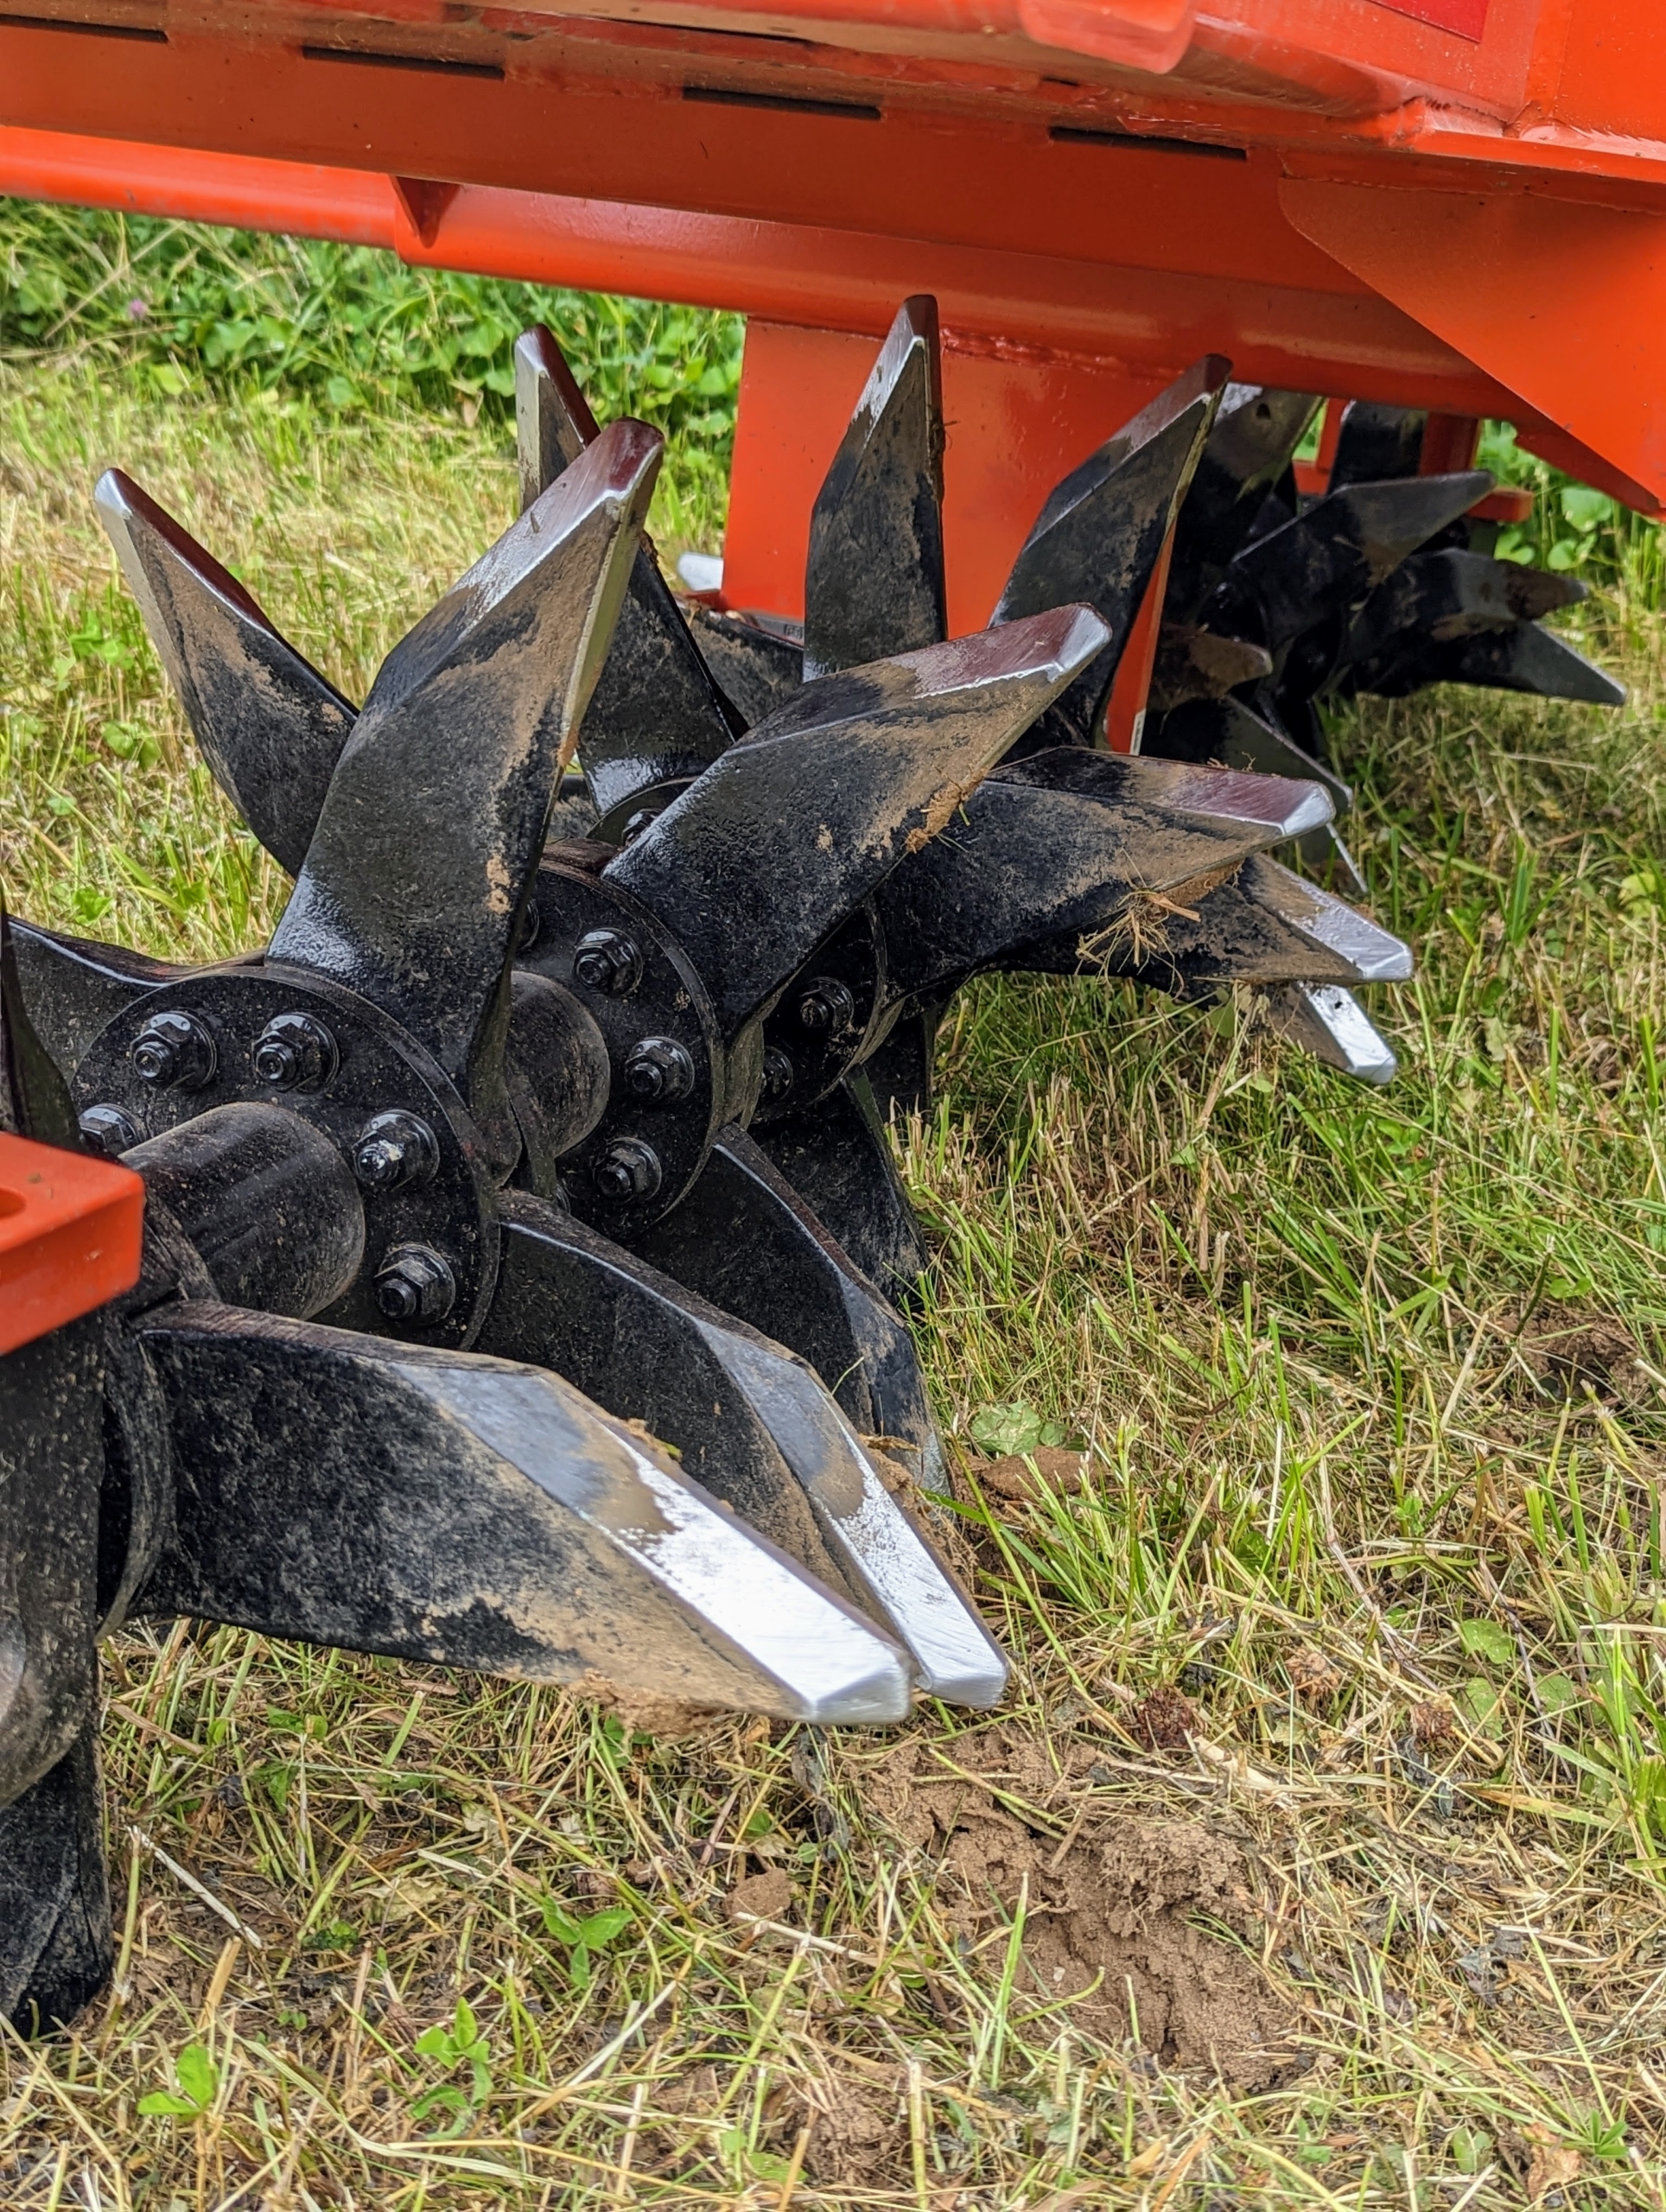
Here’s a closer look at the spikes of the aerator. These spikes perforate the soil at an adjustable depth as it moves through the field.
Heavy concrete weights are placed on the aerator weight tray for stabilization and maximum penetration in the soil.
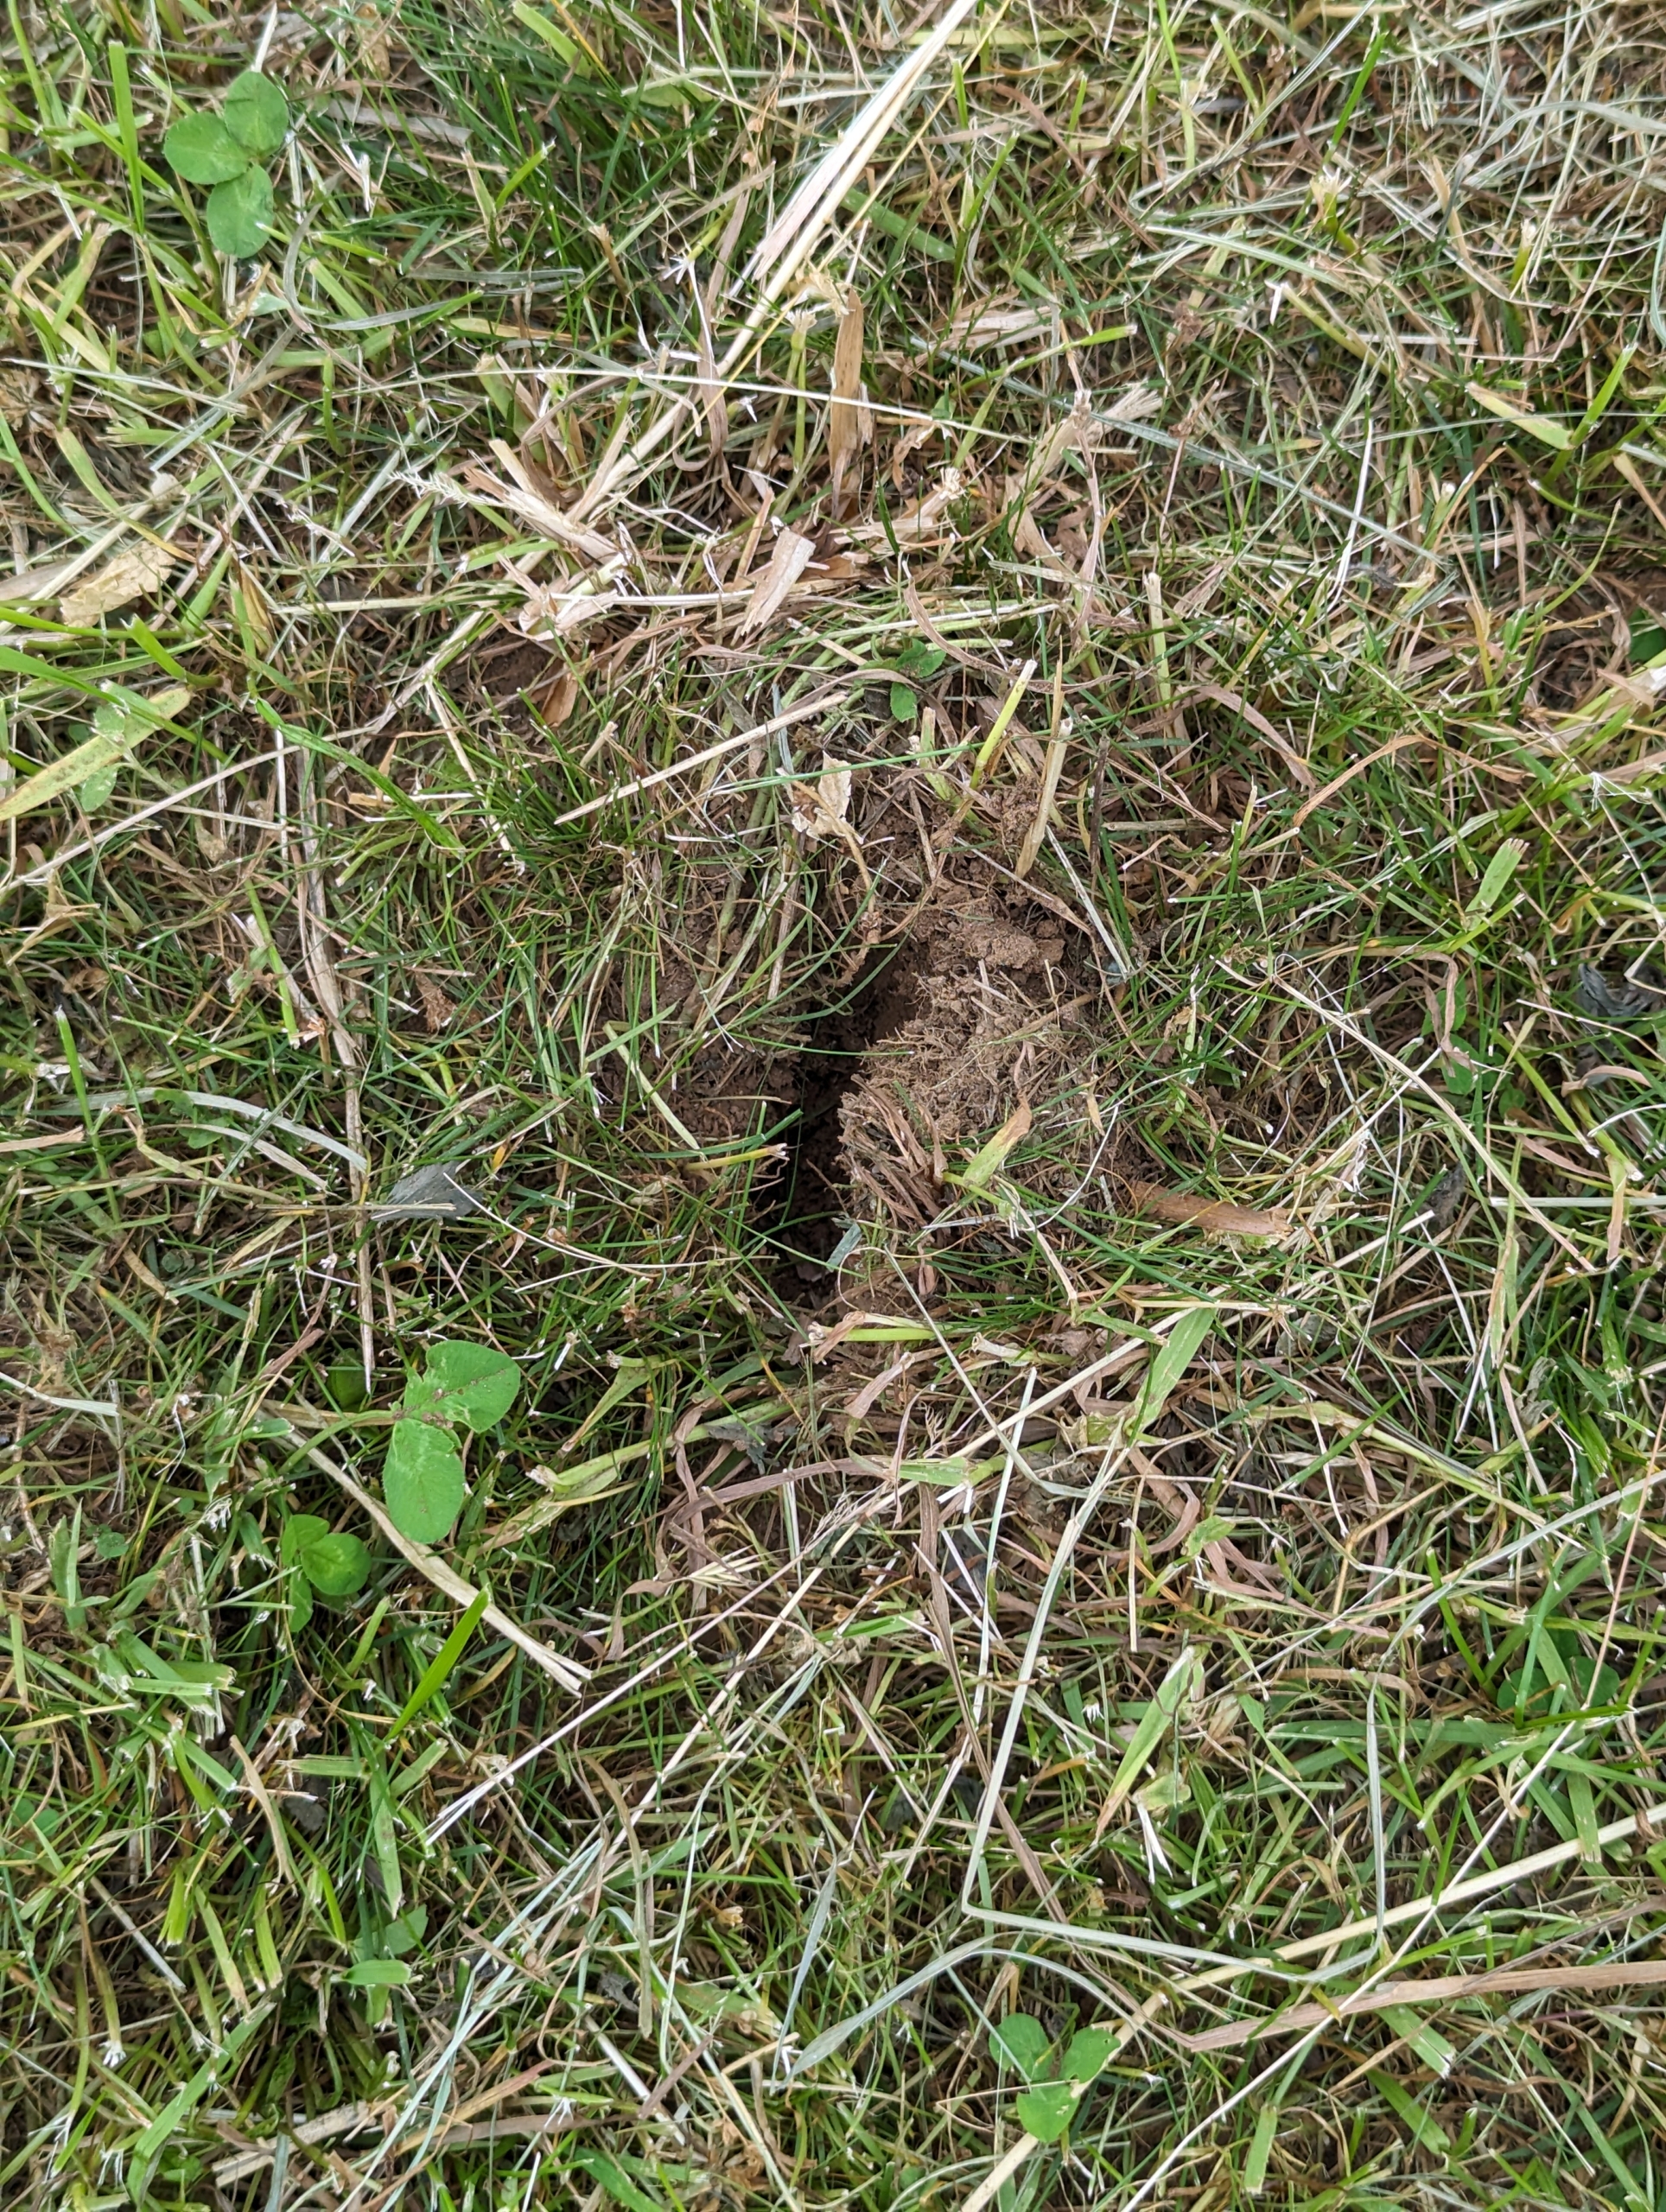
Here, one can see the holes left behind by the aerating spikes.
This aerator makes slits in the ground as opposed to core plugs. Spike aerators punch holes in compacted soil, while plug aerators have hollow tines that penetrate into the compacted soil to collect plugs and remove them.
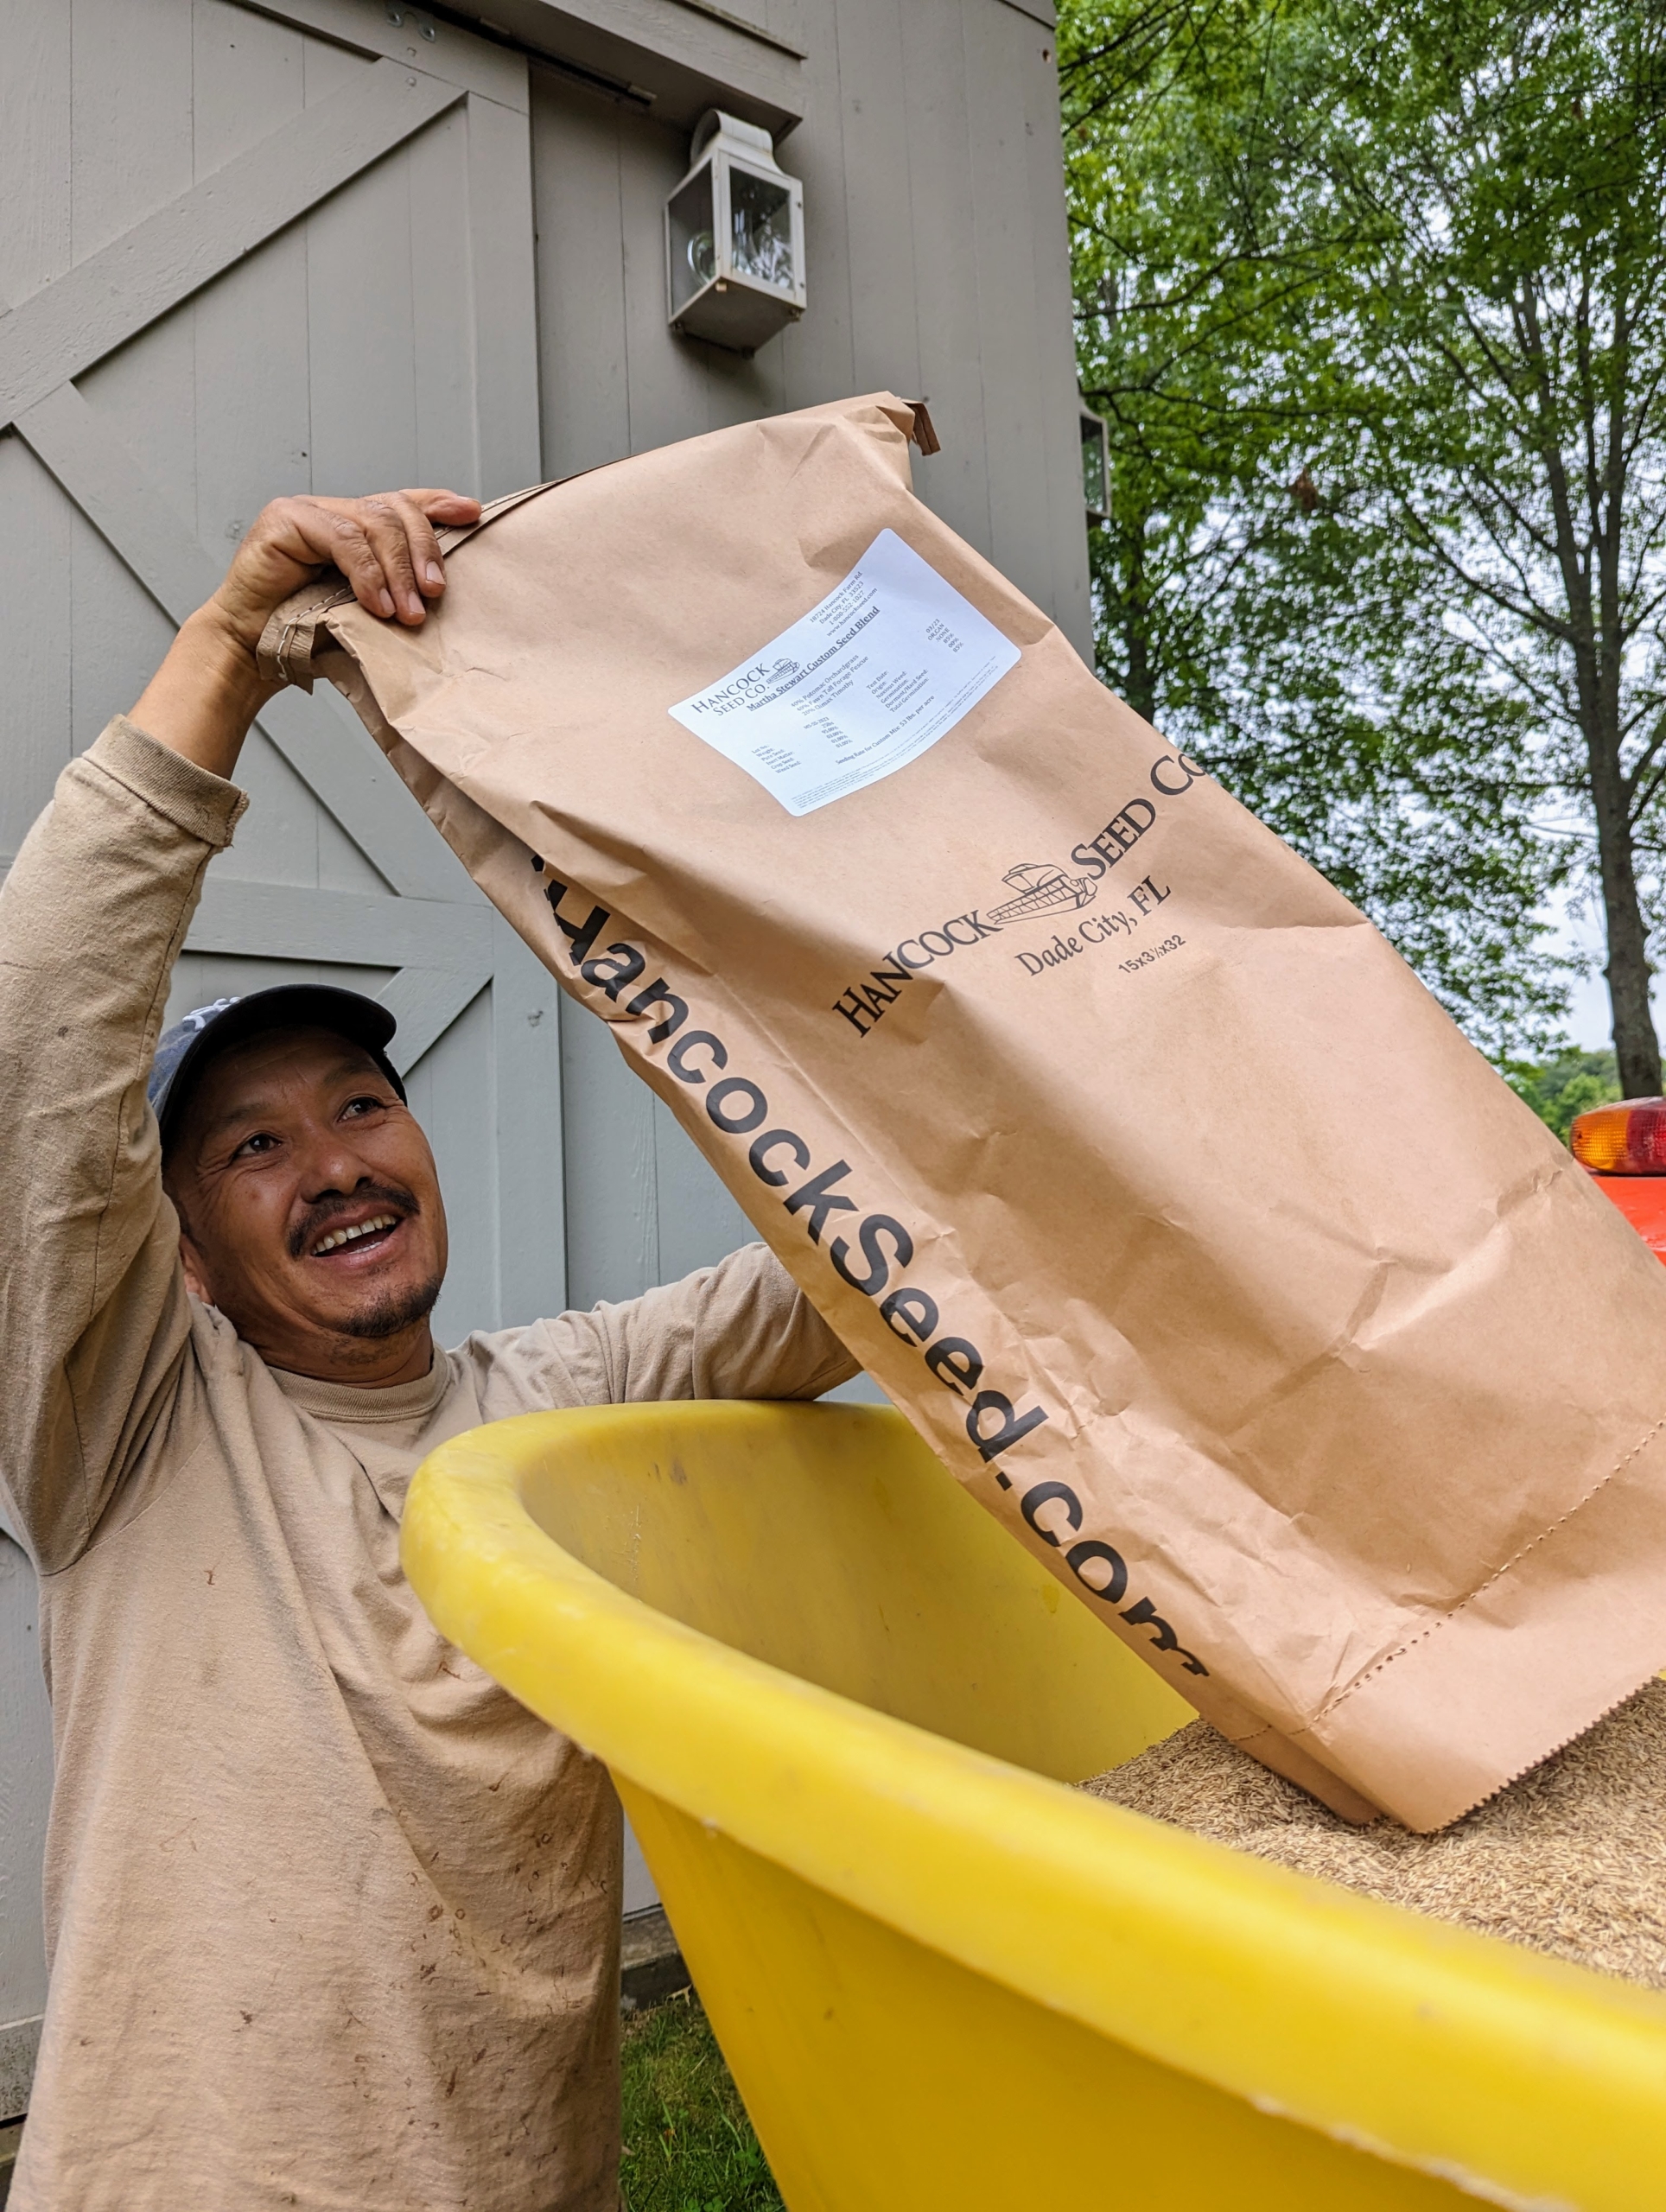
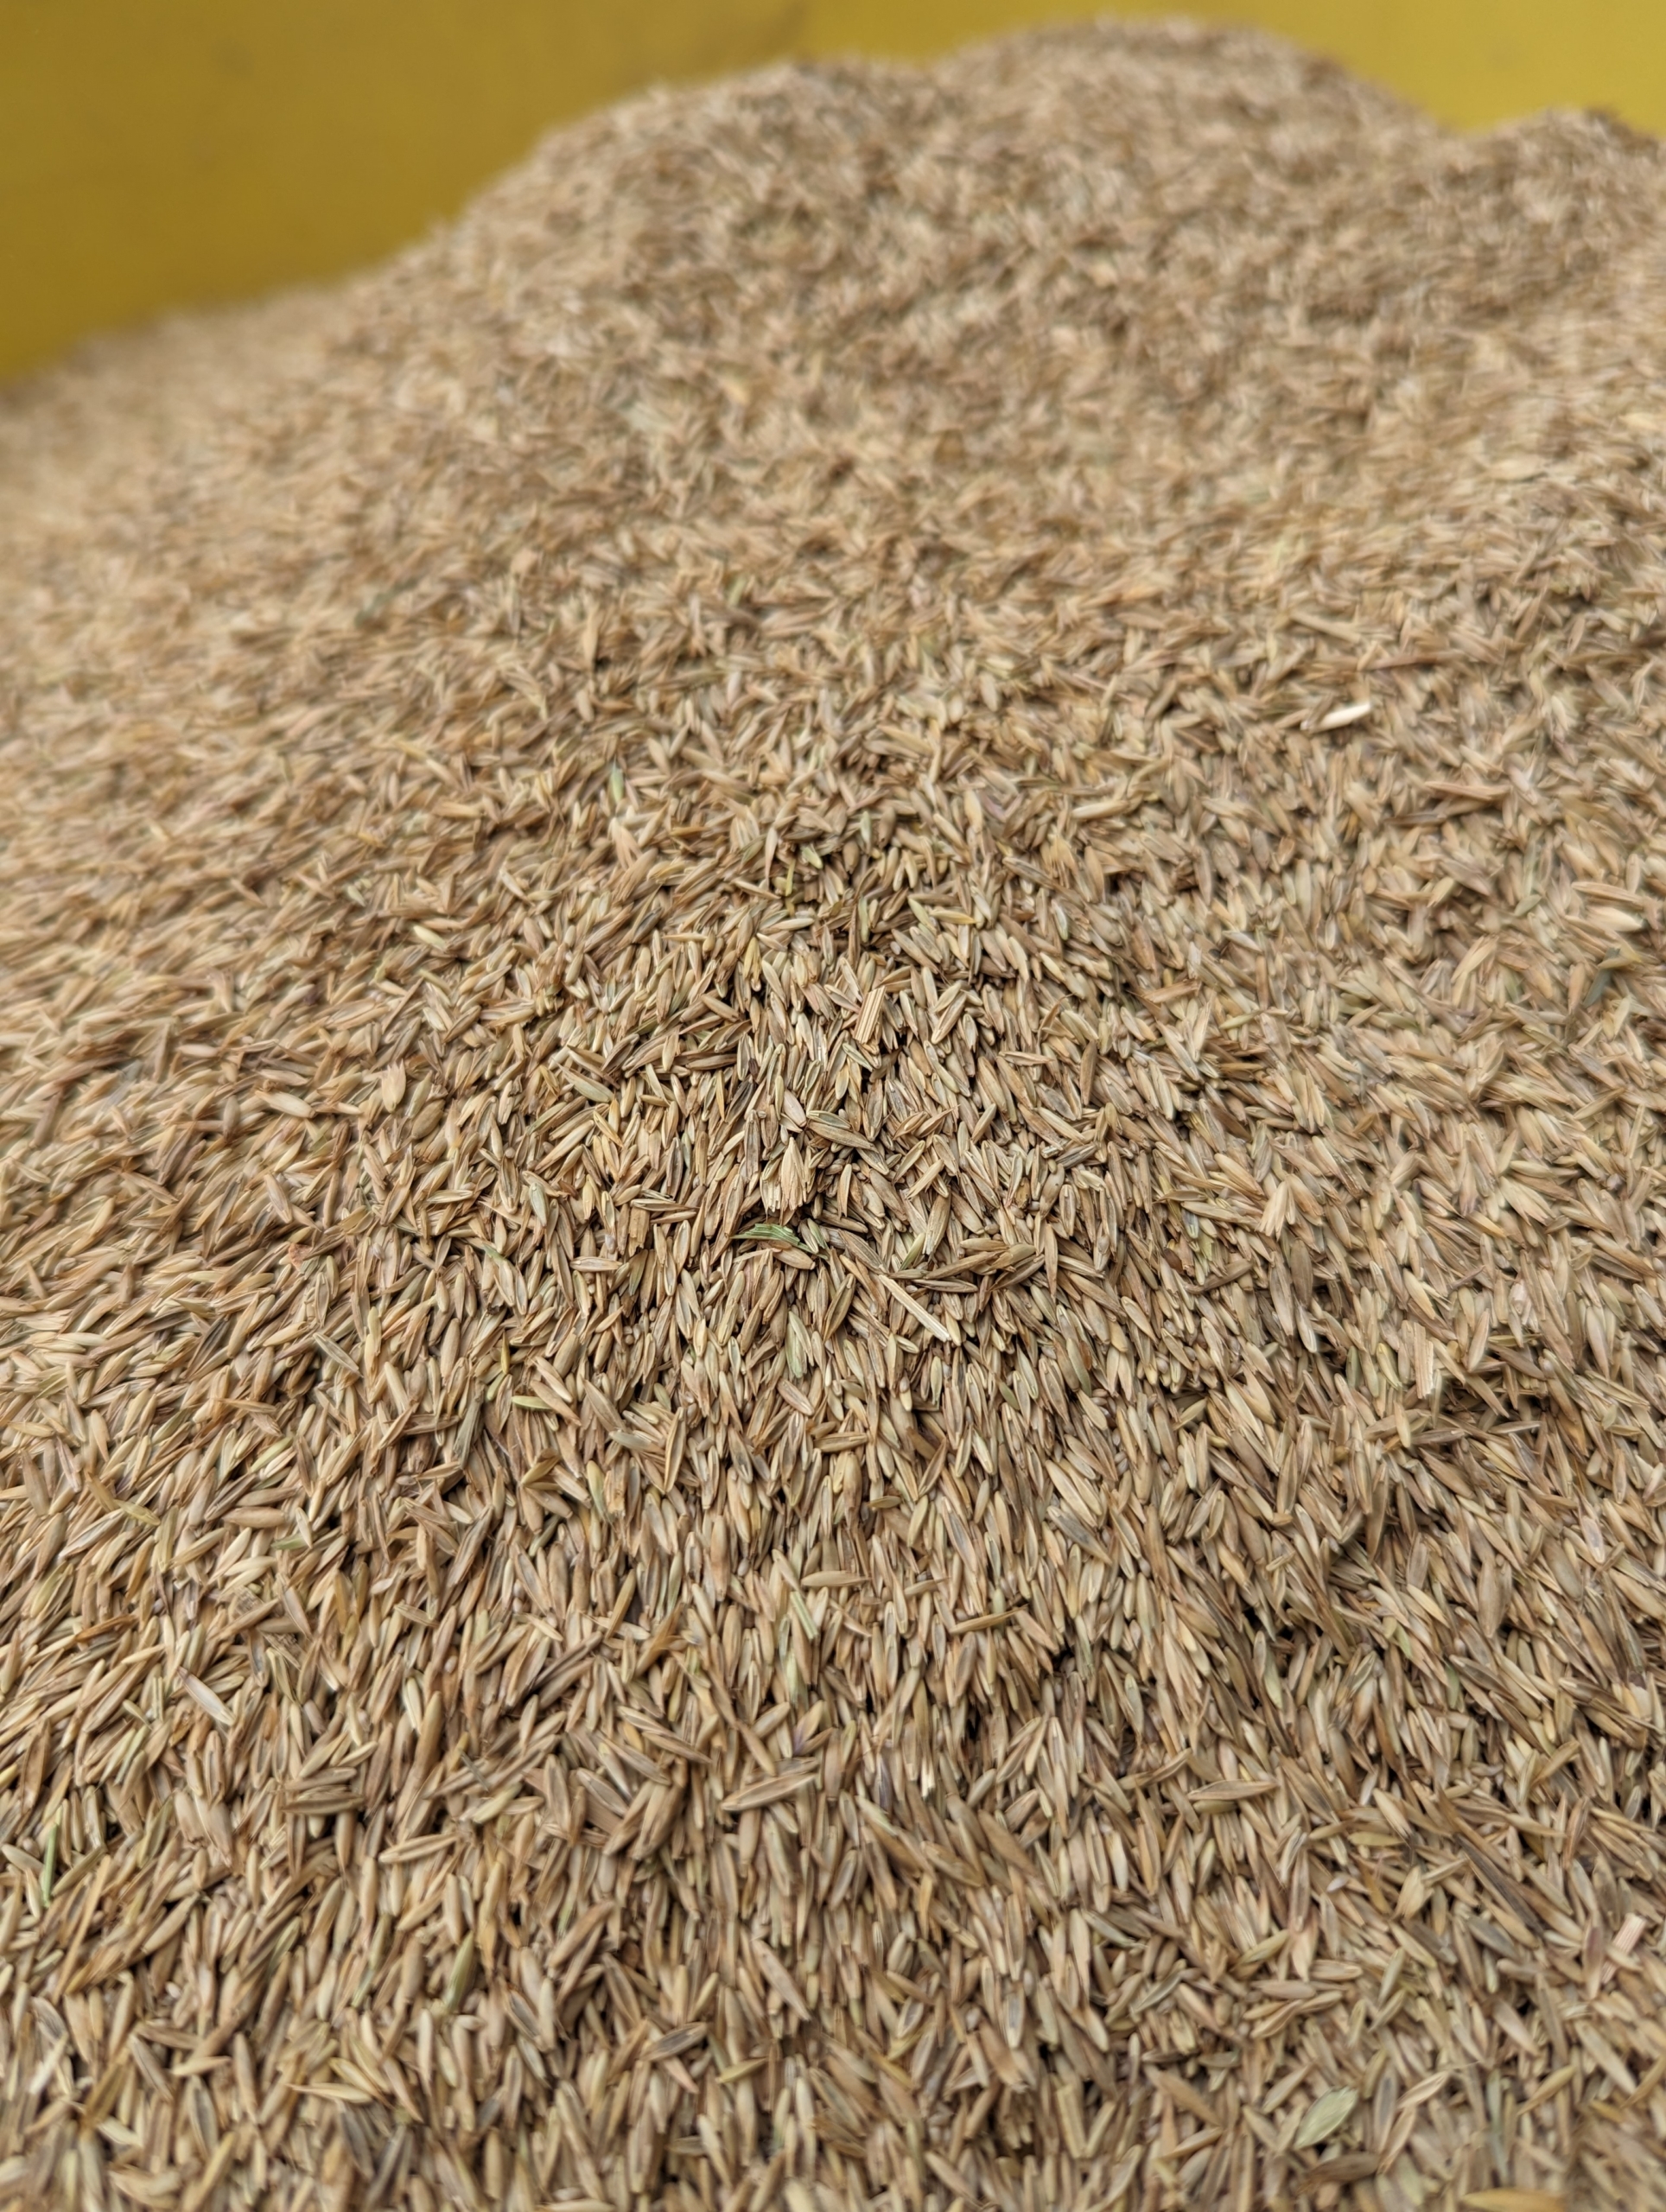
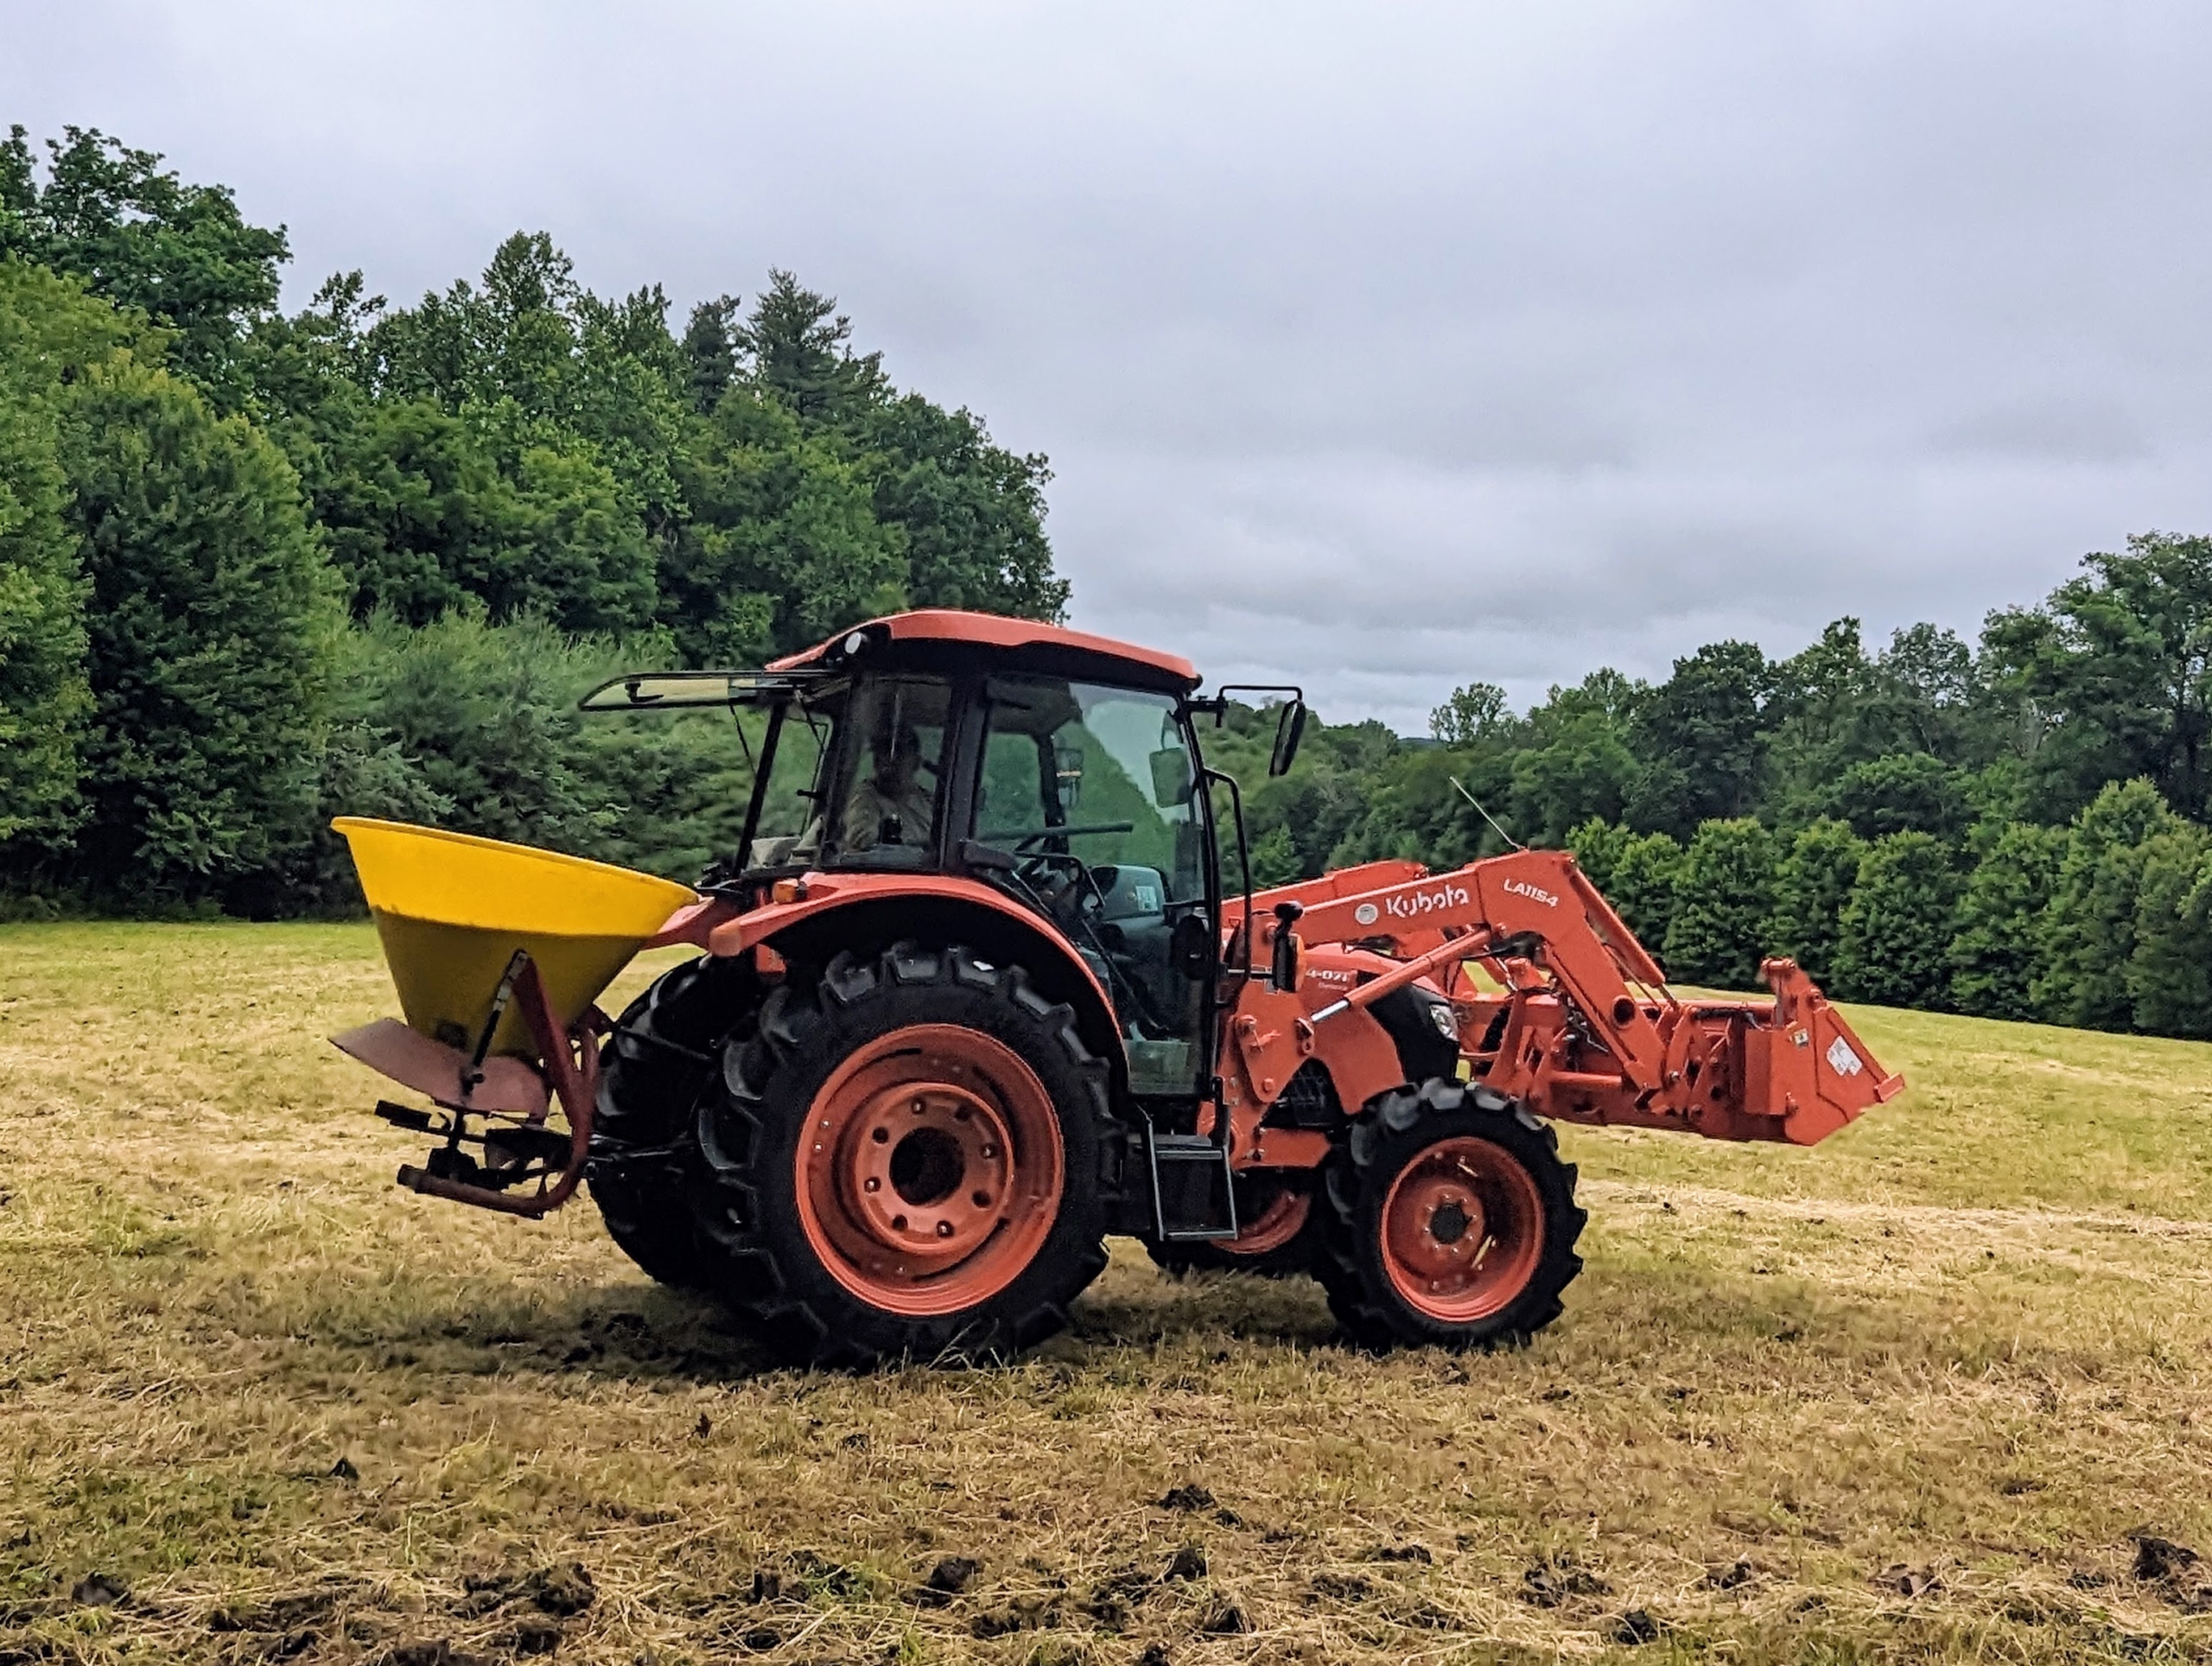
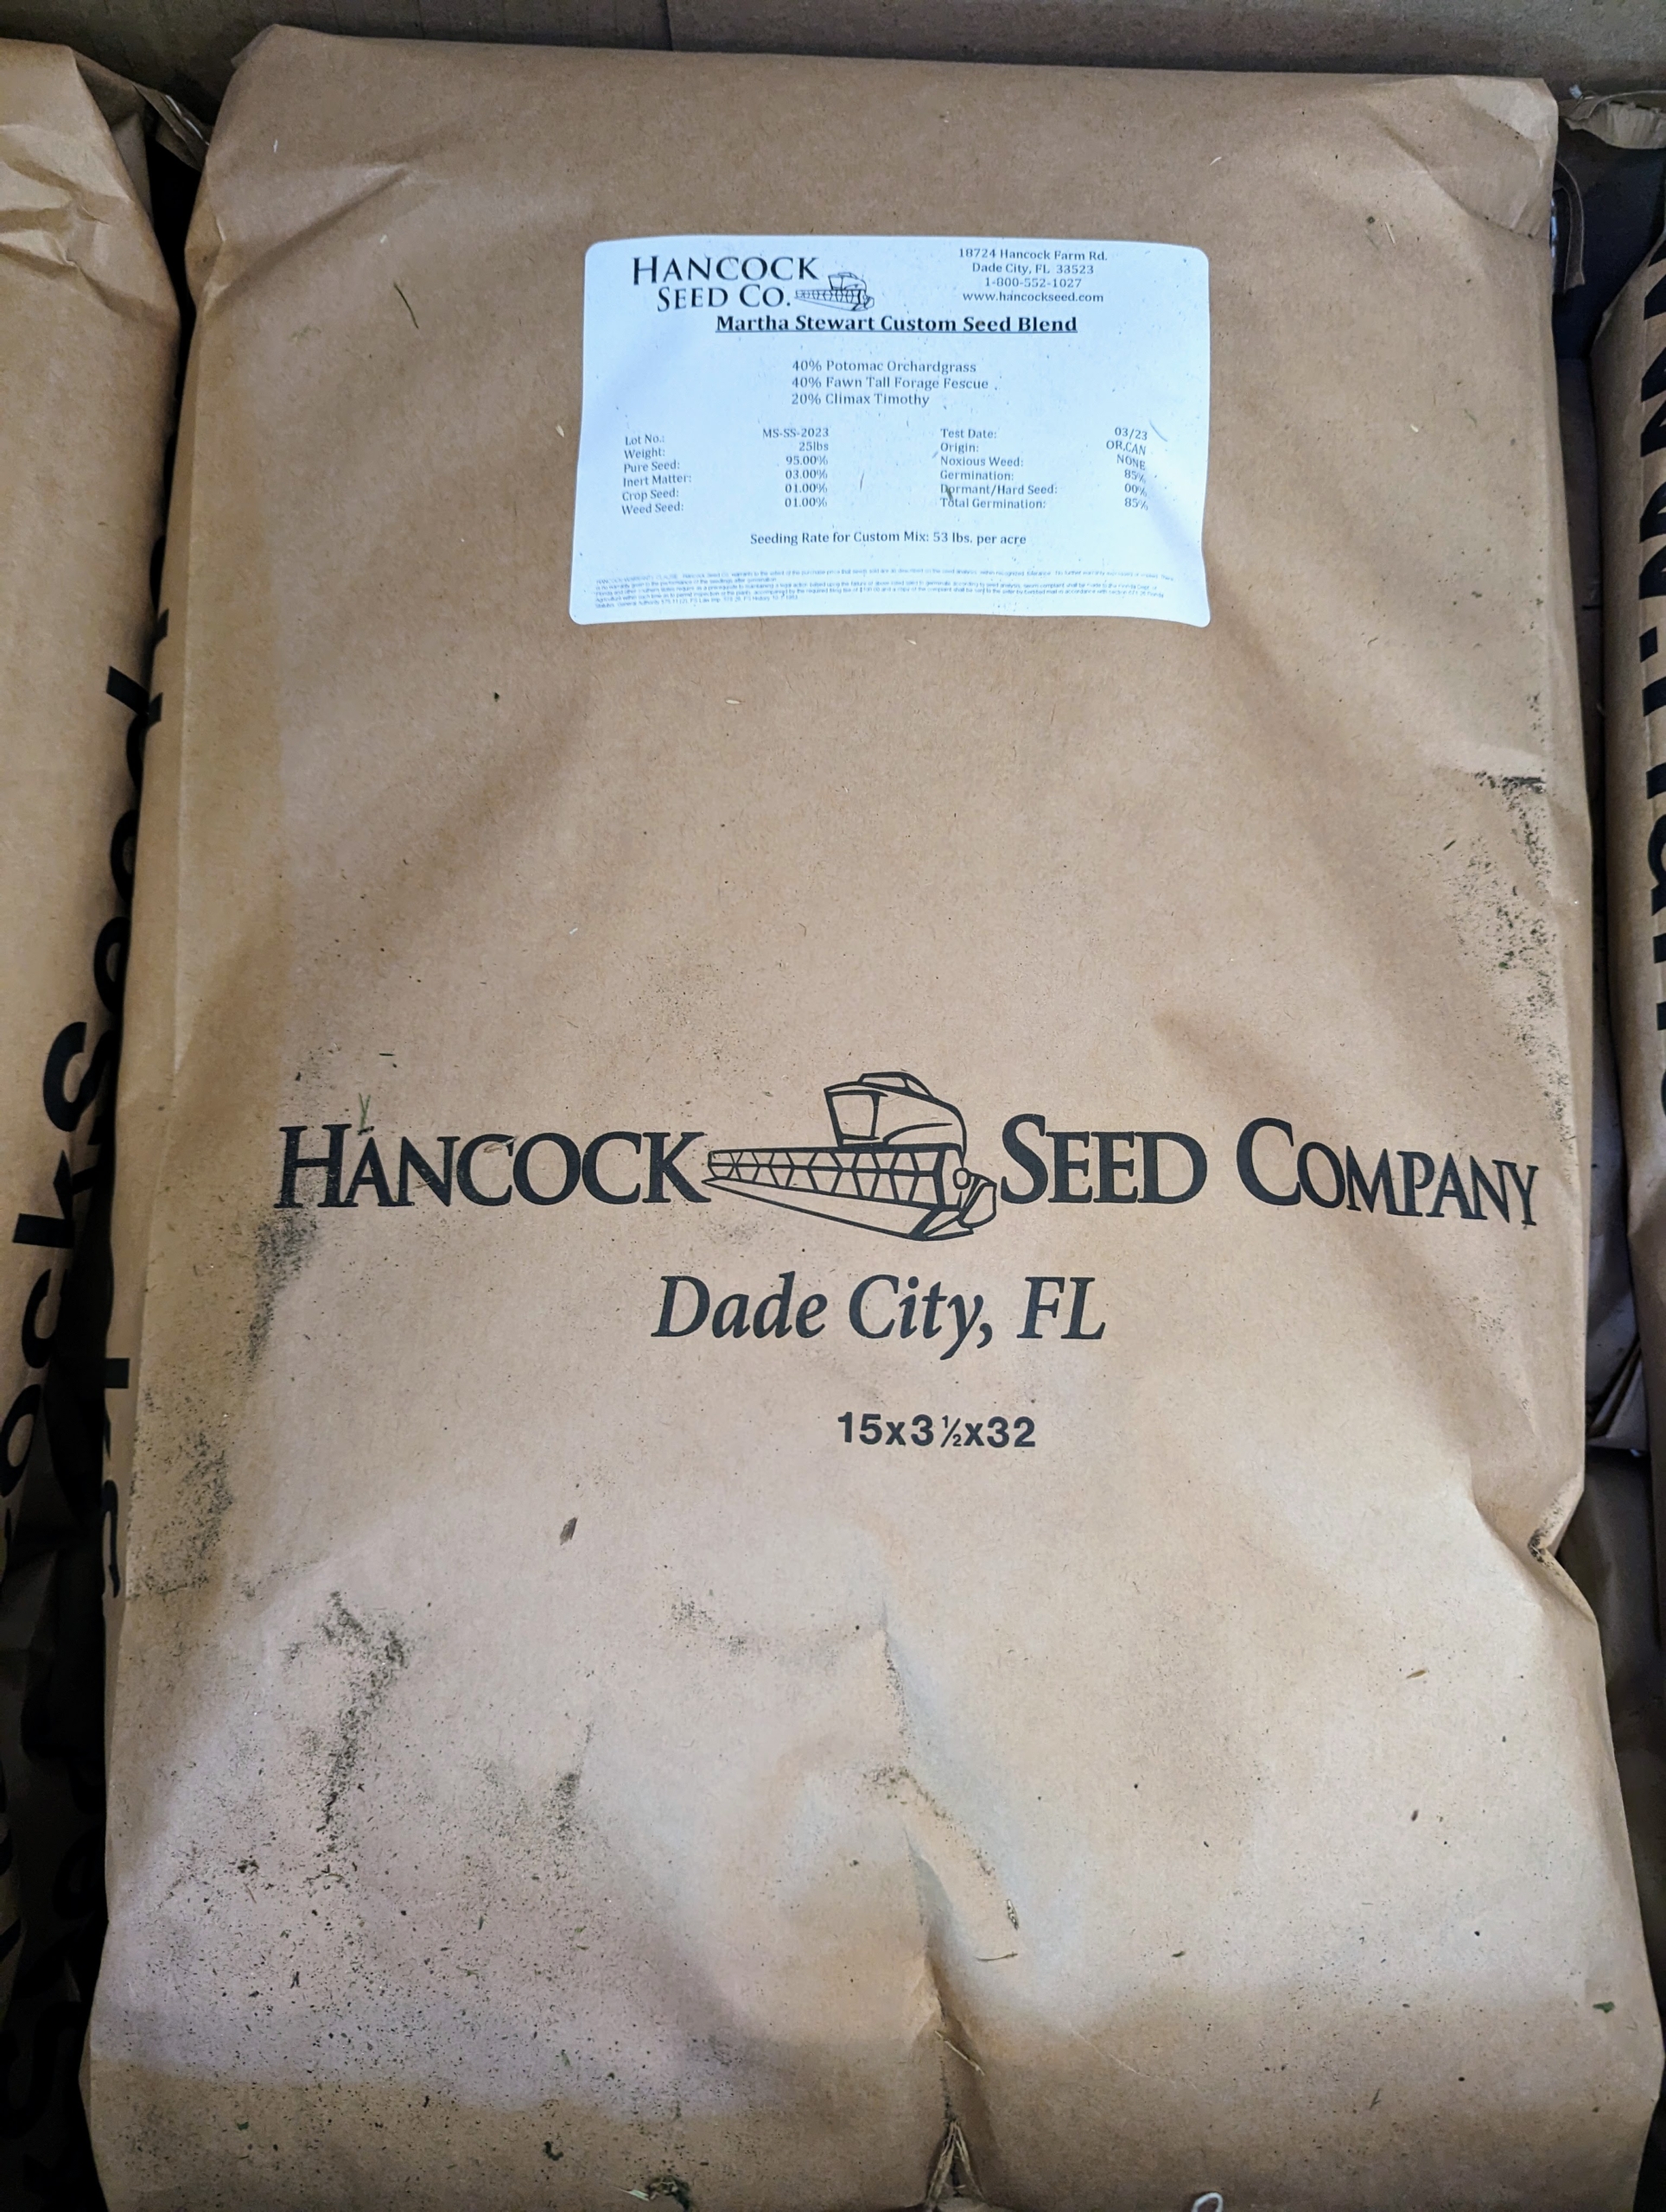
Next, Chhiring fills the spreader with seed. Our seed is from Hancock Farm & Seed Company, a 45-year old business that grows its own seed and ships directly from its Dade City, Florida facility.
Using good quality seed for hay is important for horses. It helps to provide proper fiber requirements and keeps their digestive systems healthy.
This is a 3-point spreader, which can be attached to a variety of tractors to spread seed or fertilizer. Chhiring starts by going around the field counter clockwise from the outer edge working inward. He also overlaps his passes, so he doesn’t miss any areas.
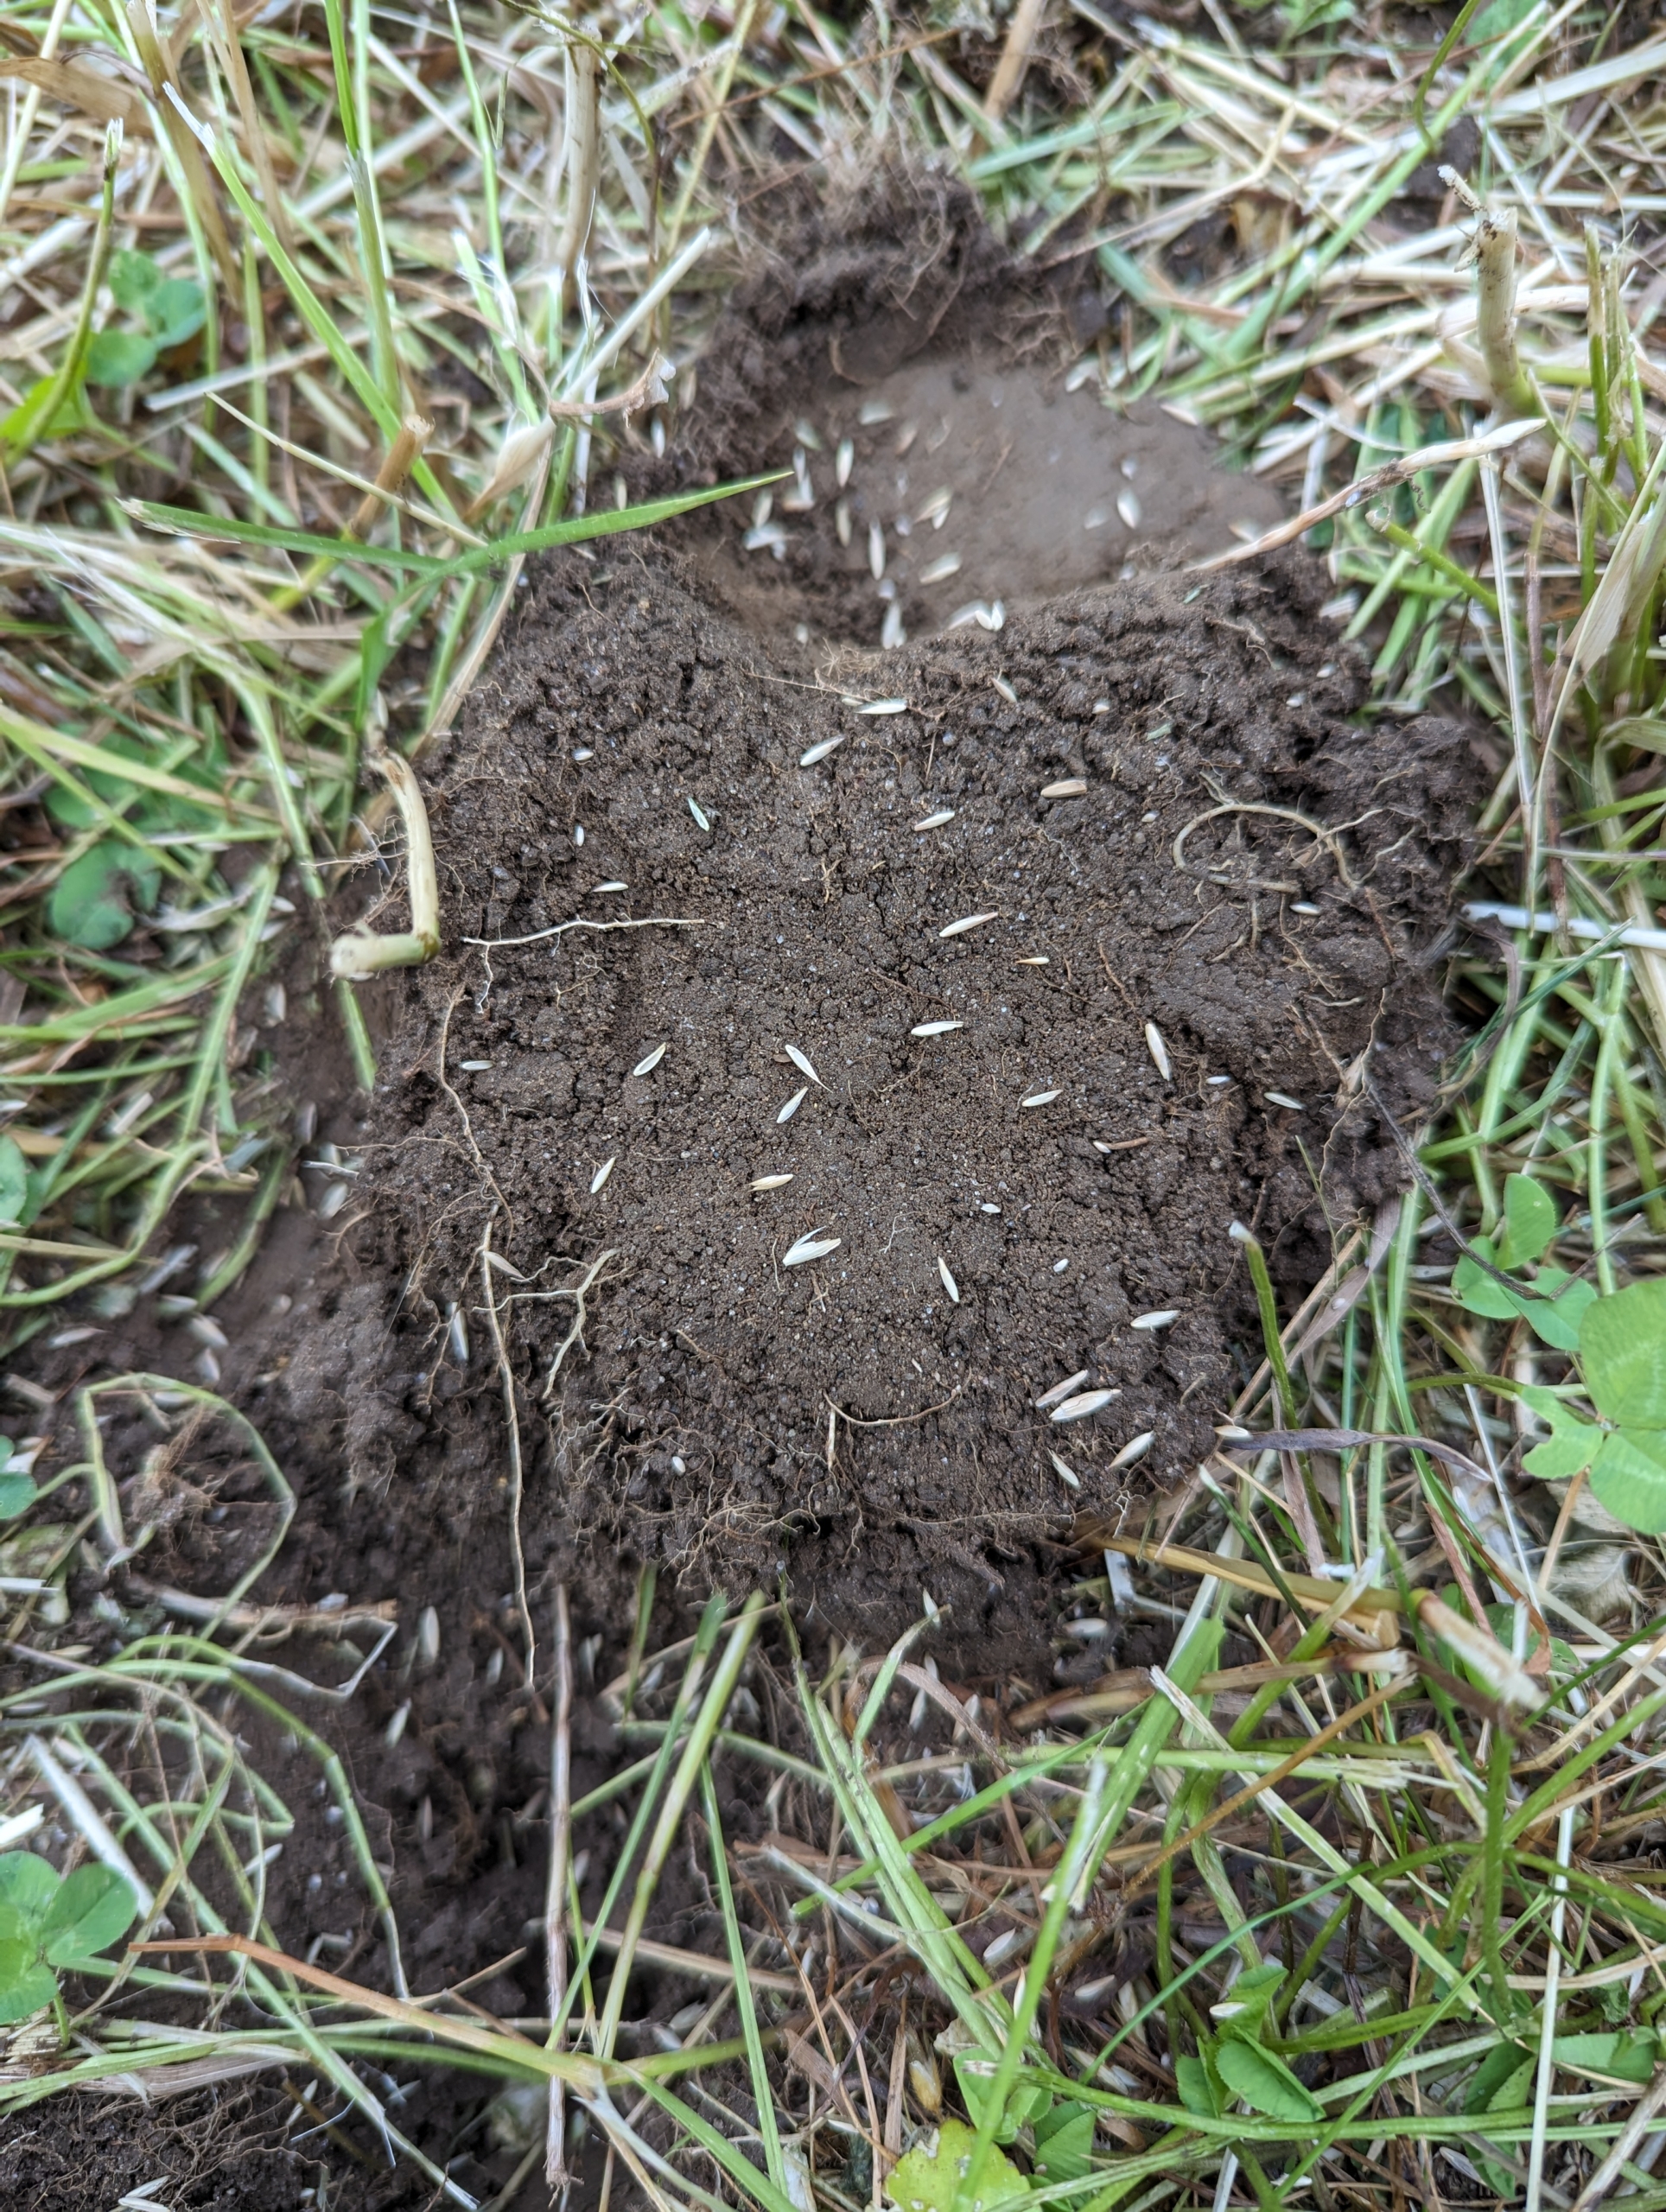
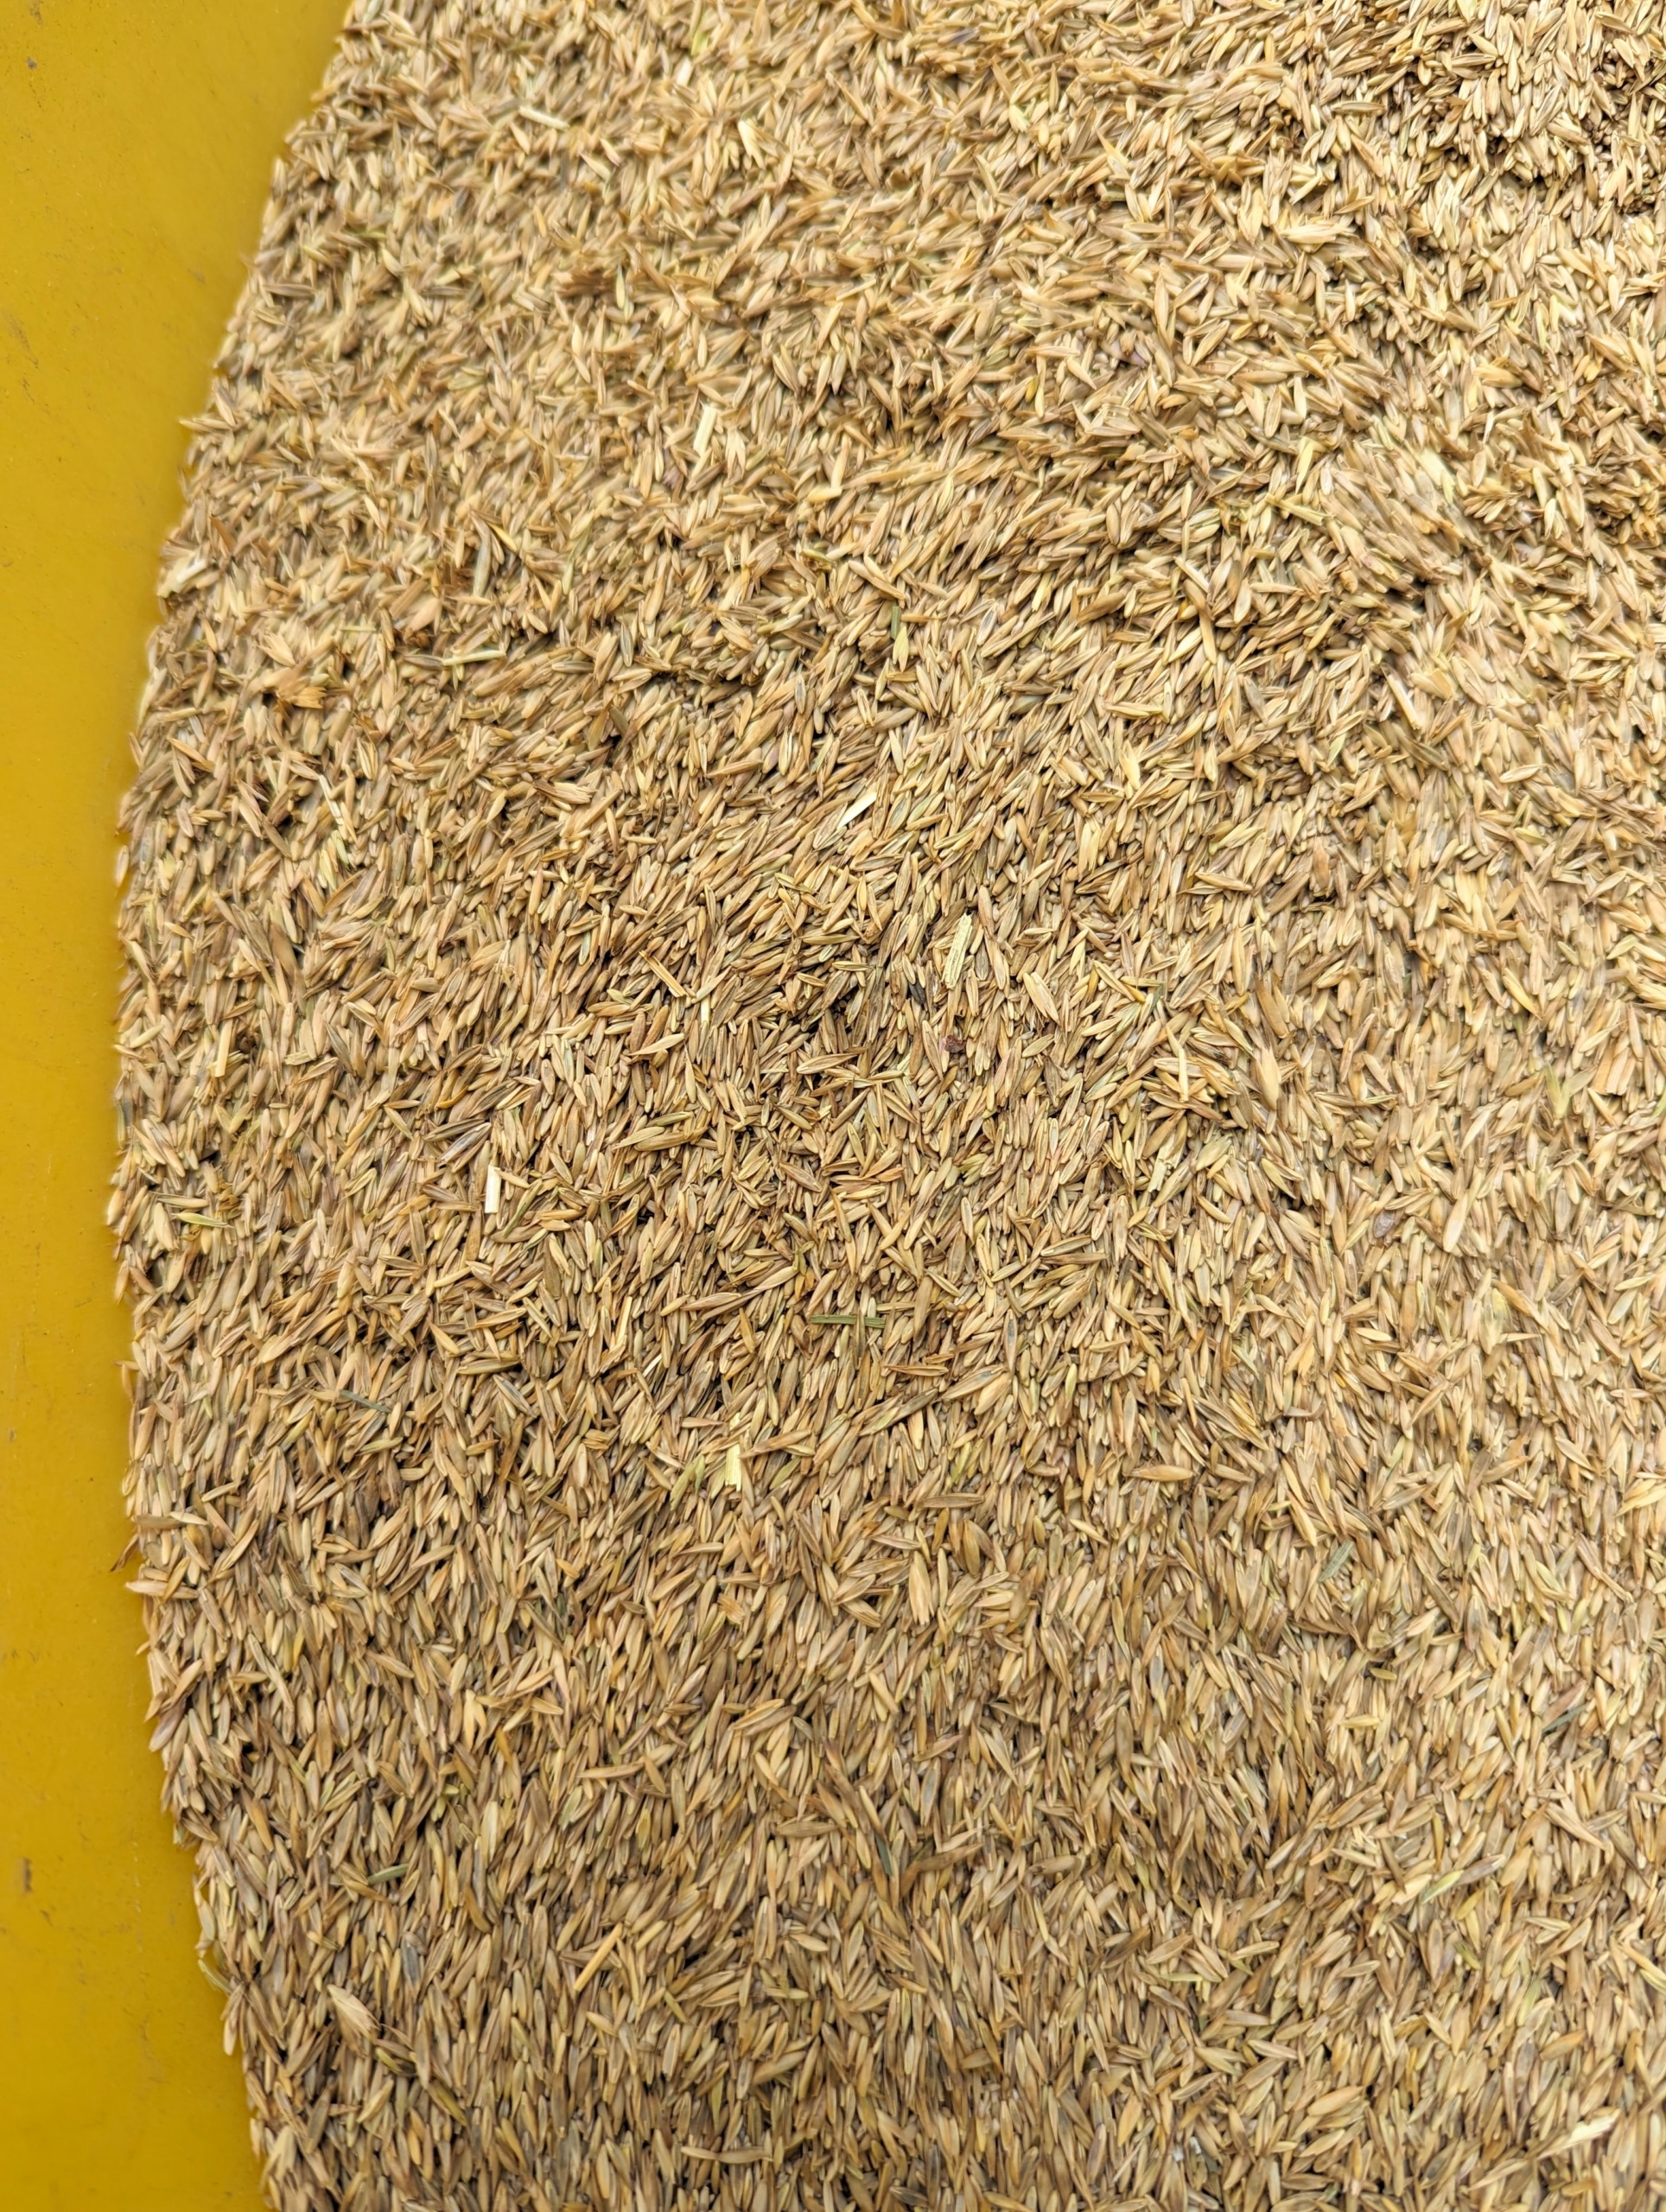
Looking closely at the ground, one can see the tiny seeds.
Hopefully the forecast is correct, and we’ll get some good rain in the coming days. Come September, we’ll be harvesting our second cut of good quality, nutritious hay for my horses.
Here at my Bedford, New York farm, the weather these last couple of weeks has been pleasantly warm, dry, sunny, with light breezes - perfect conditions for cutting, tedding, raking, and baling hay.
One of my objectives at my farm has always been to practice self-sufficiency. When I moved here, I designated three separate areas as hayfields, so I could grow lots and lots of delicious, nutritious hay for my horses and donkeys. I planted the fields with a mixture of timothy, orchard grass, and forage fescue - a quality custom seed blend from Hancock Farm & Seed Company in Dade City, Florida. This year, we have a bumper crop and the fields are ready for the first cut of the season.
Enjoy these photos.
This time every year, we hope for at least a week of good, dry weather, so we can get the first cut of hay from the fields. Timing is everything when cutting the hay crop.
Our seed is from Hancock Farm & Seed Company, a 45-year old business that grows its own seed and ships directly from its Florida facility. When selecting what kind of seed is best for any field, one should consider location, soil condition, and the desired goal. My fields are specifically for growing hay for my horses. Hancock created a seed mix that would work best for my farm.
Quality seed for hay should have adaptability, resilience, and excellent nutritional value. In the northern United States, varieties commonly used for hay are timothy, orchard grass, alfalfa and fescue. In the south, Bermuda and bahia hay are more commonly used, plus a mix of high quality legumes for protein.
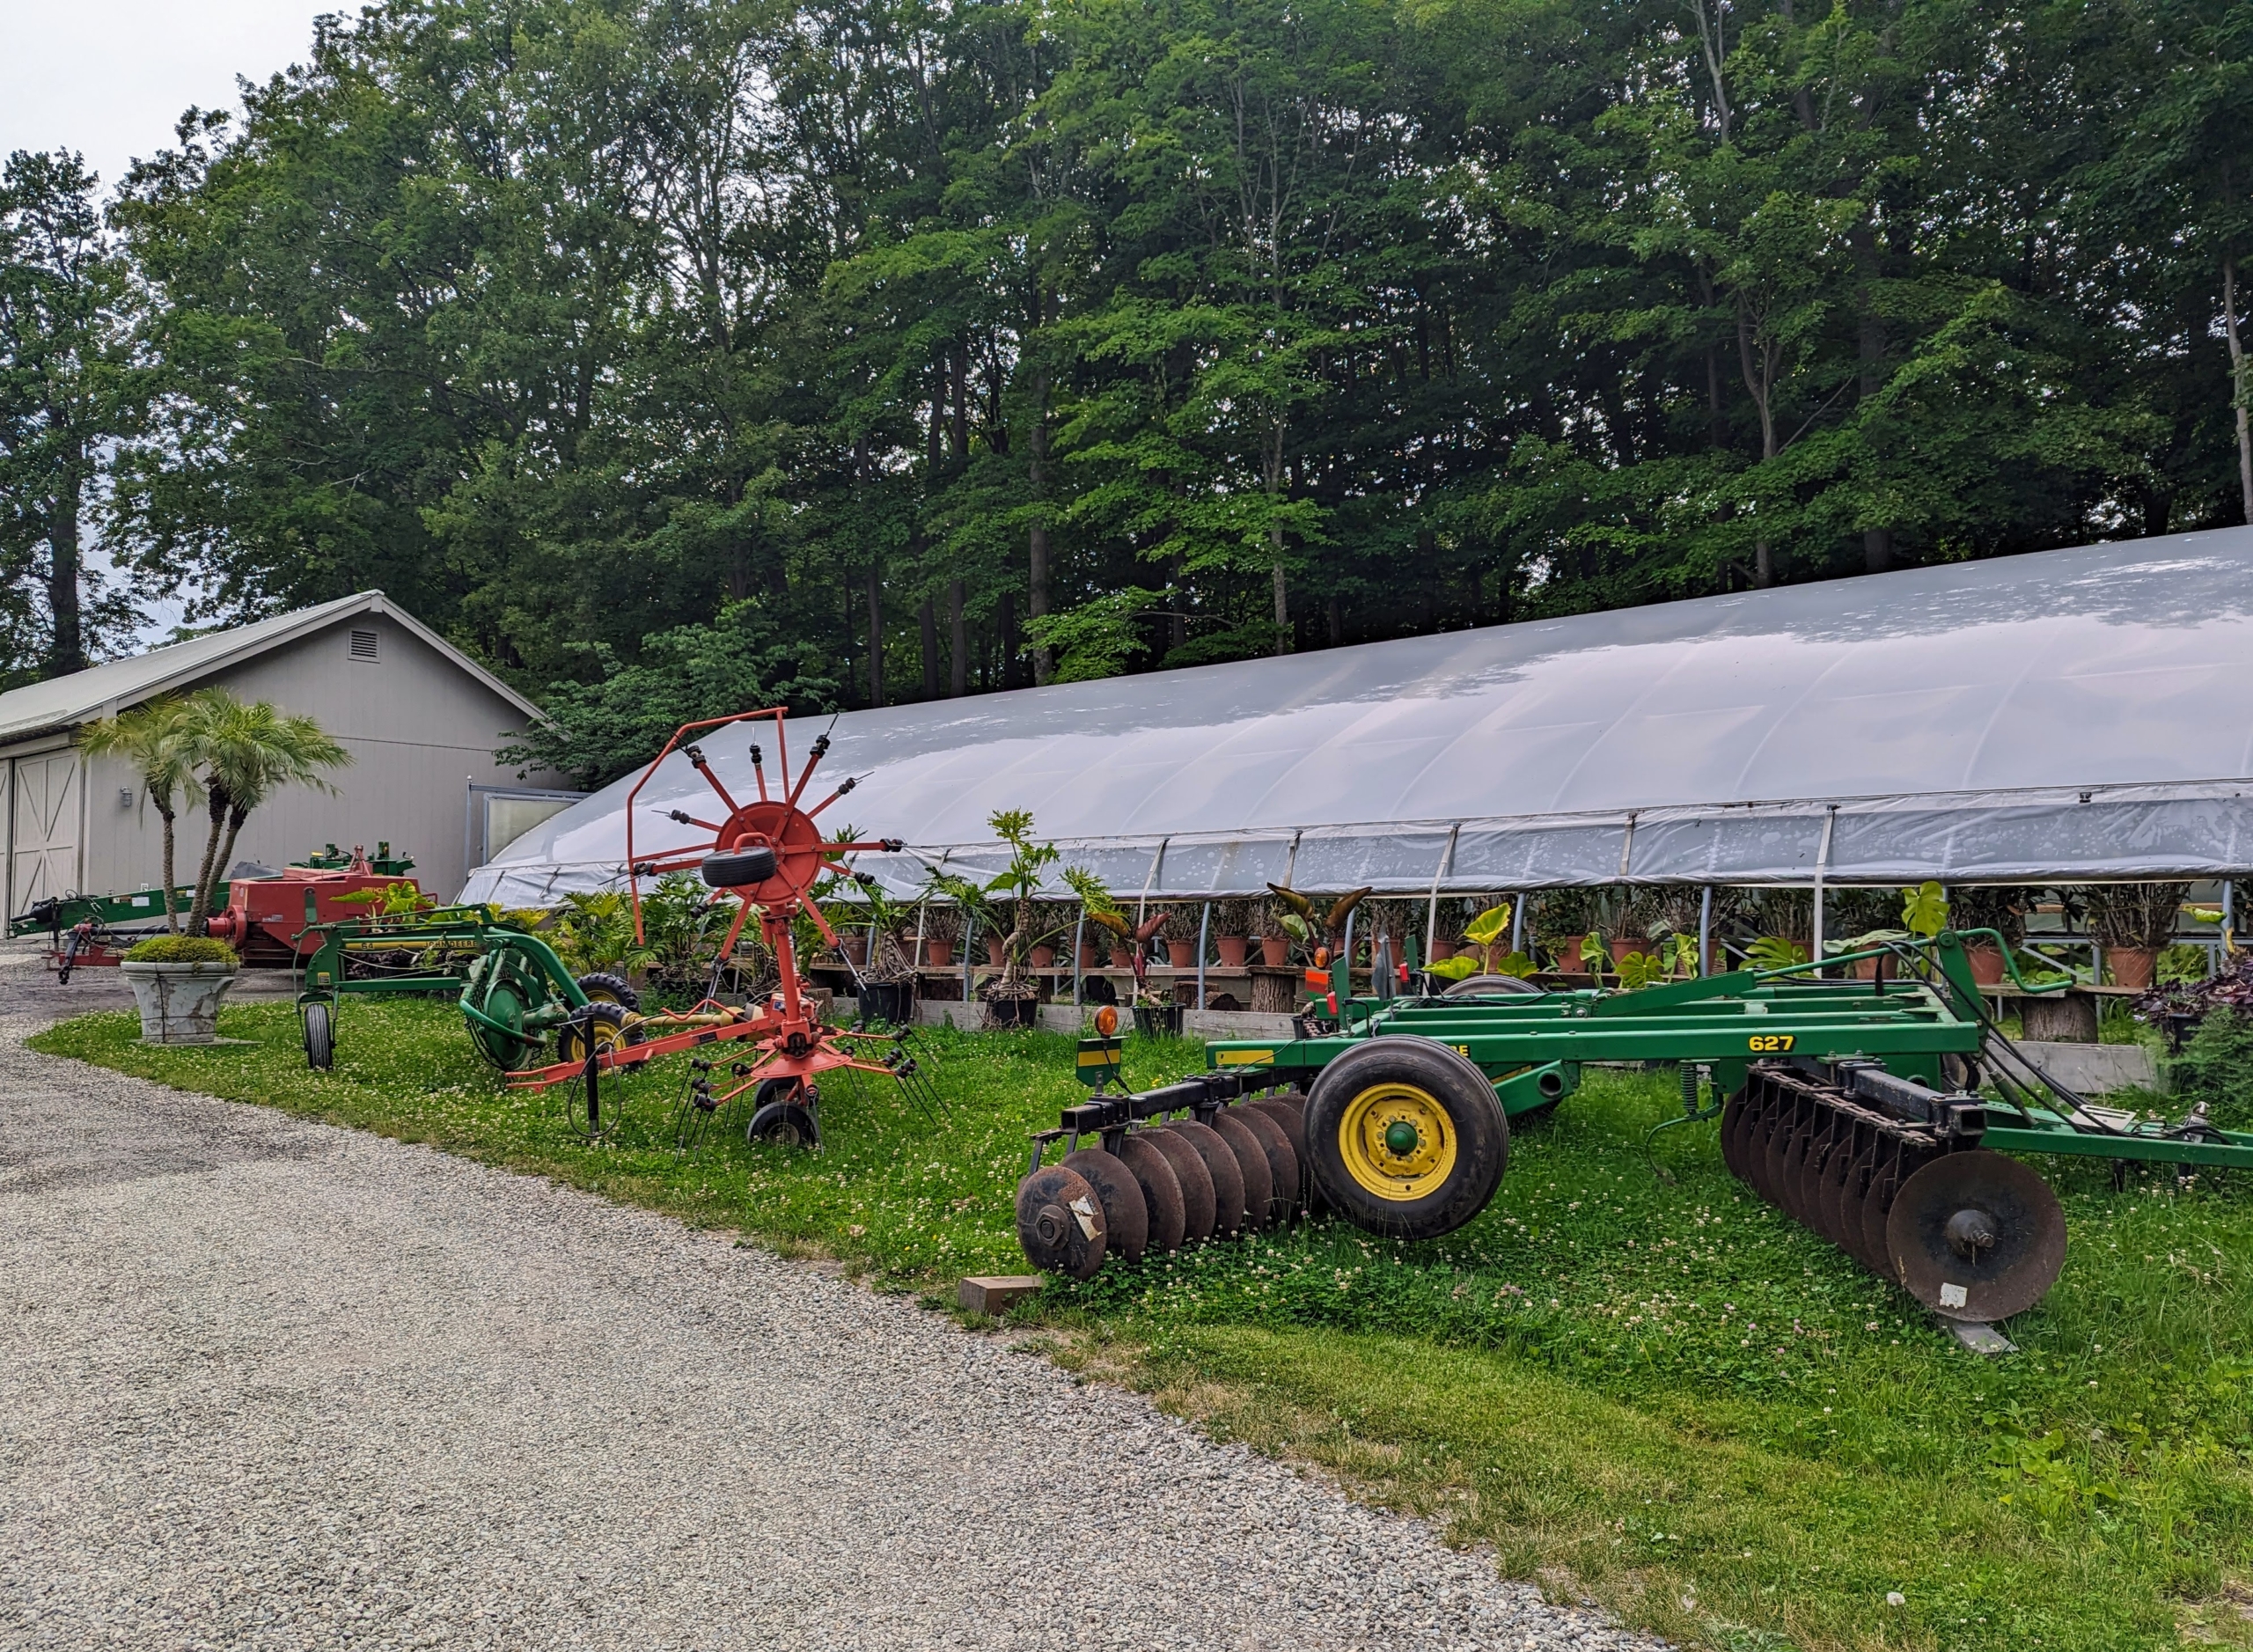
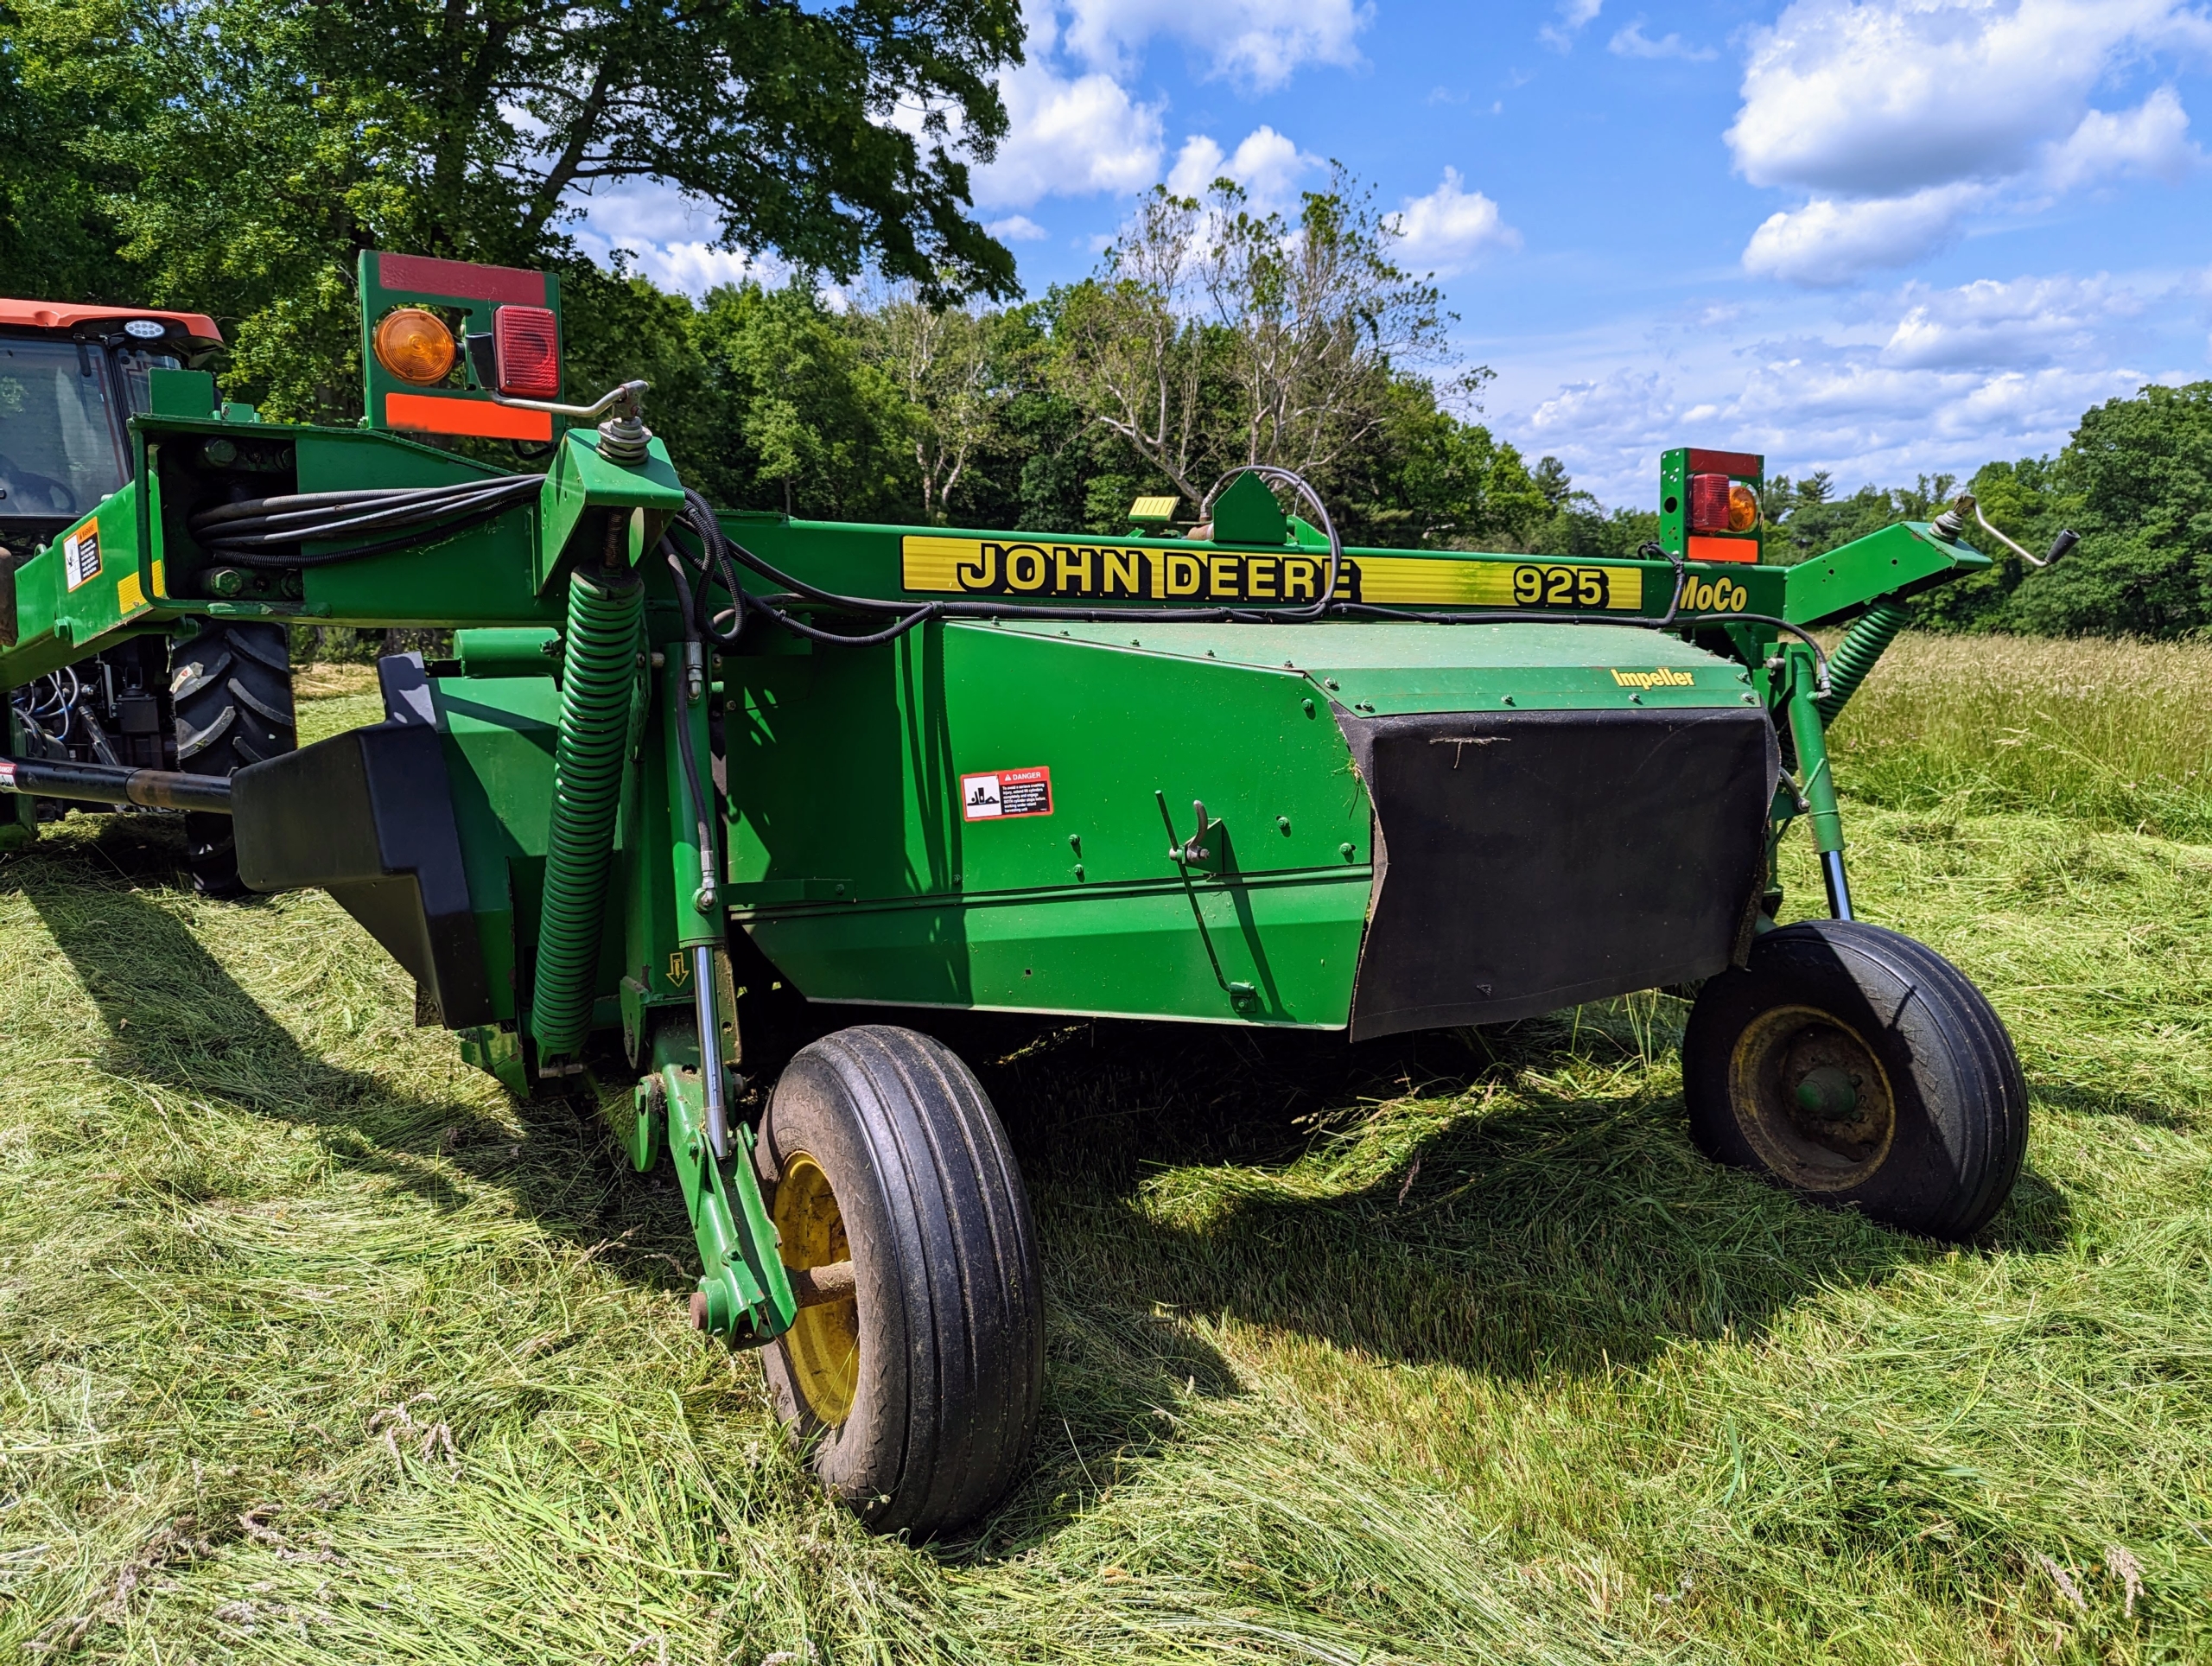
One of my steadfast mantras is to “always use the right tool for the right job.” Here are the equipment attachments we use to cut, ted, rake, and bale our hay.
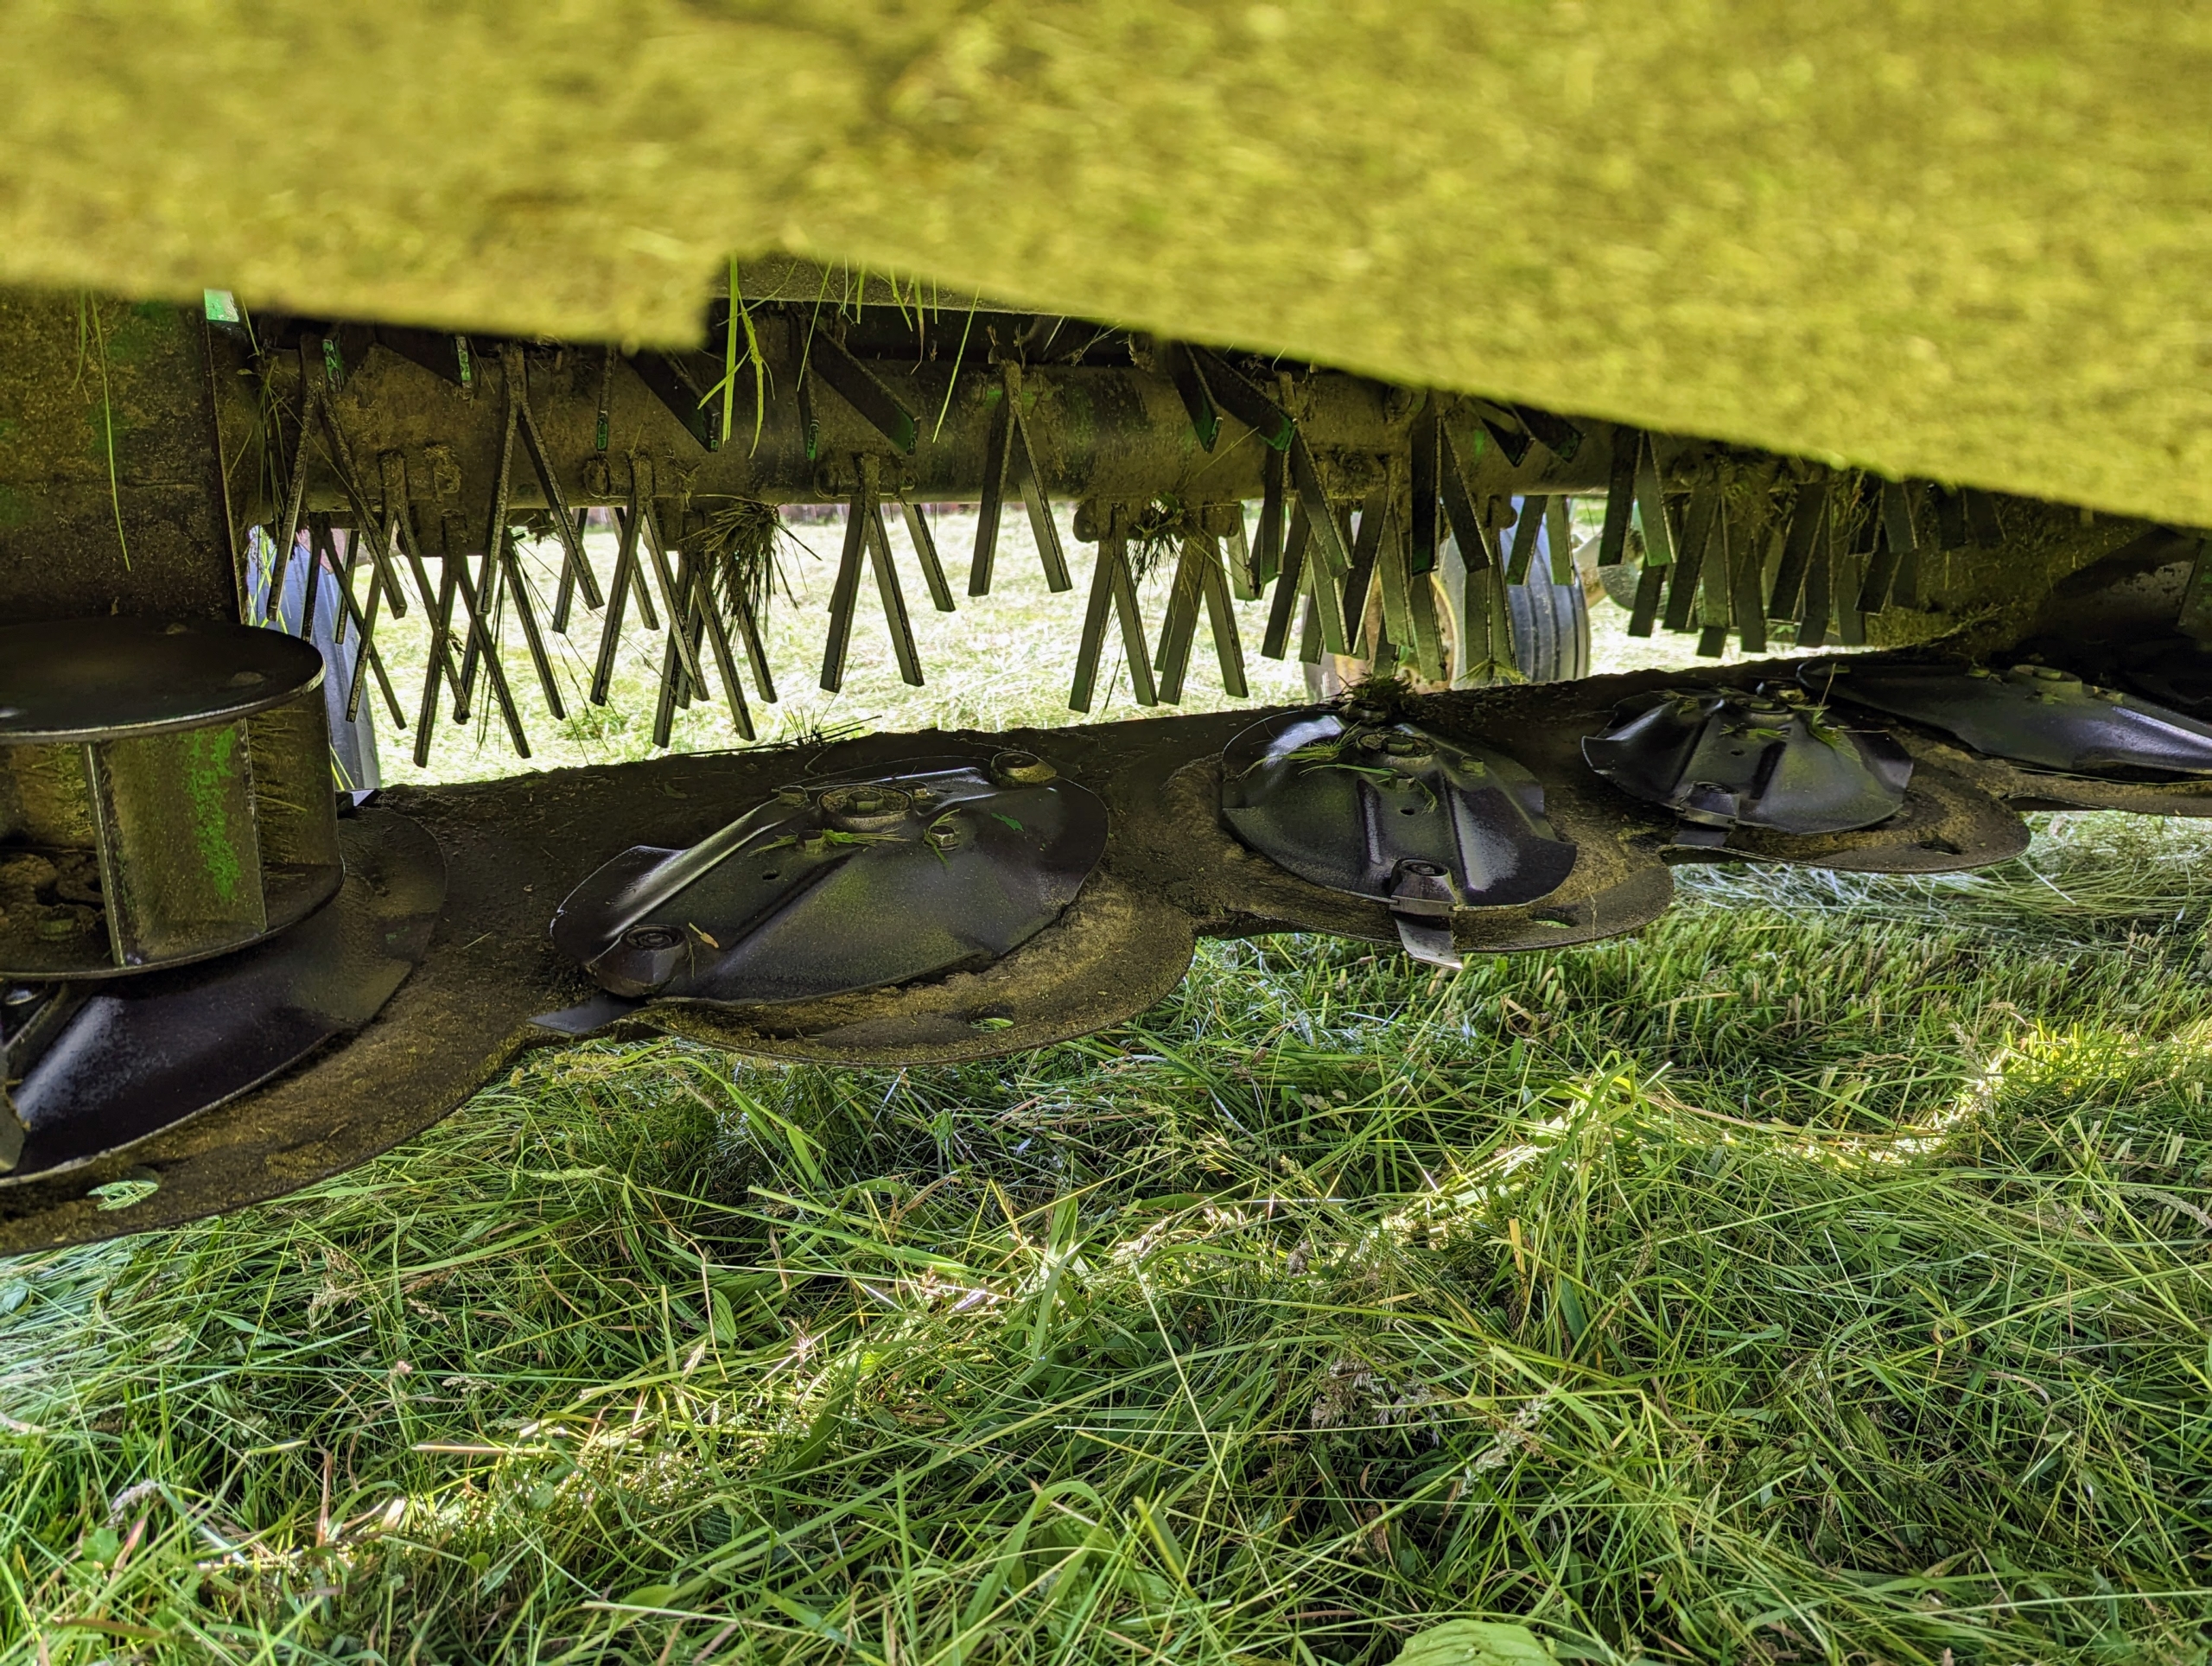
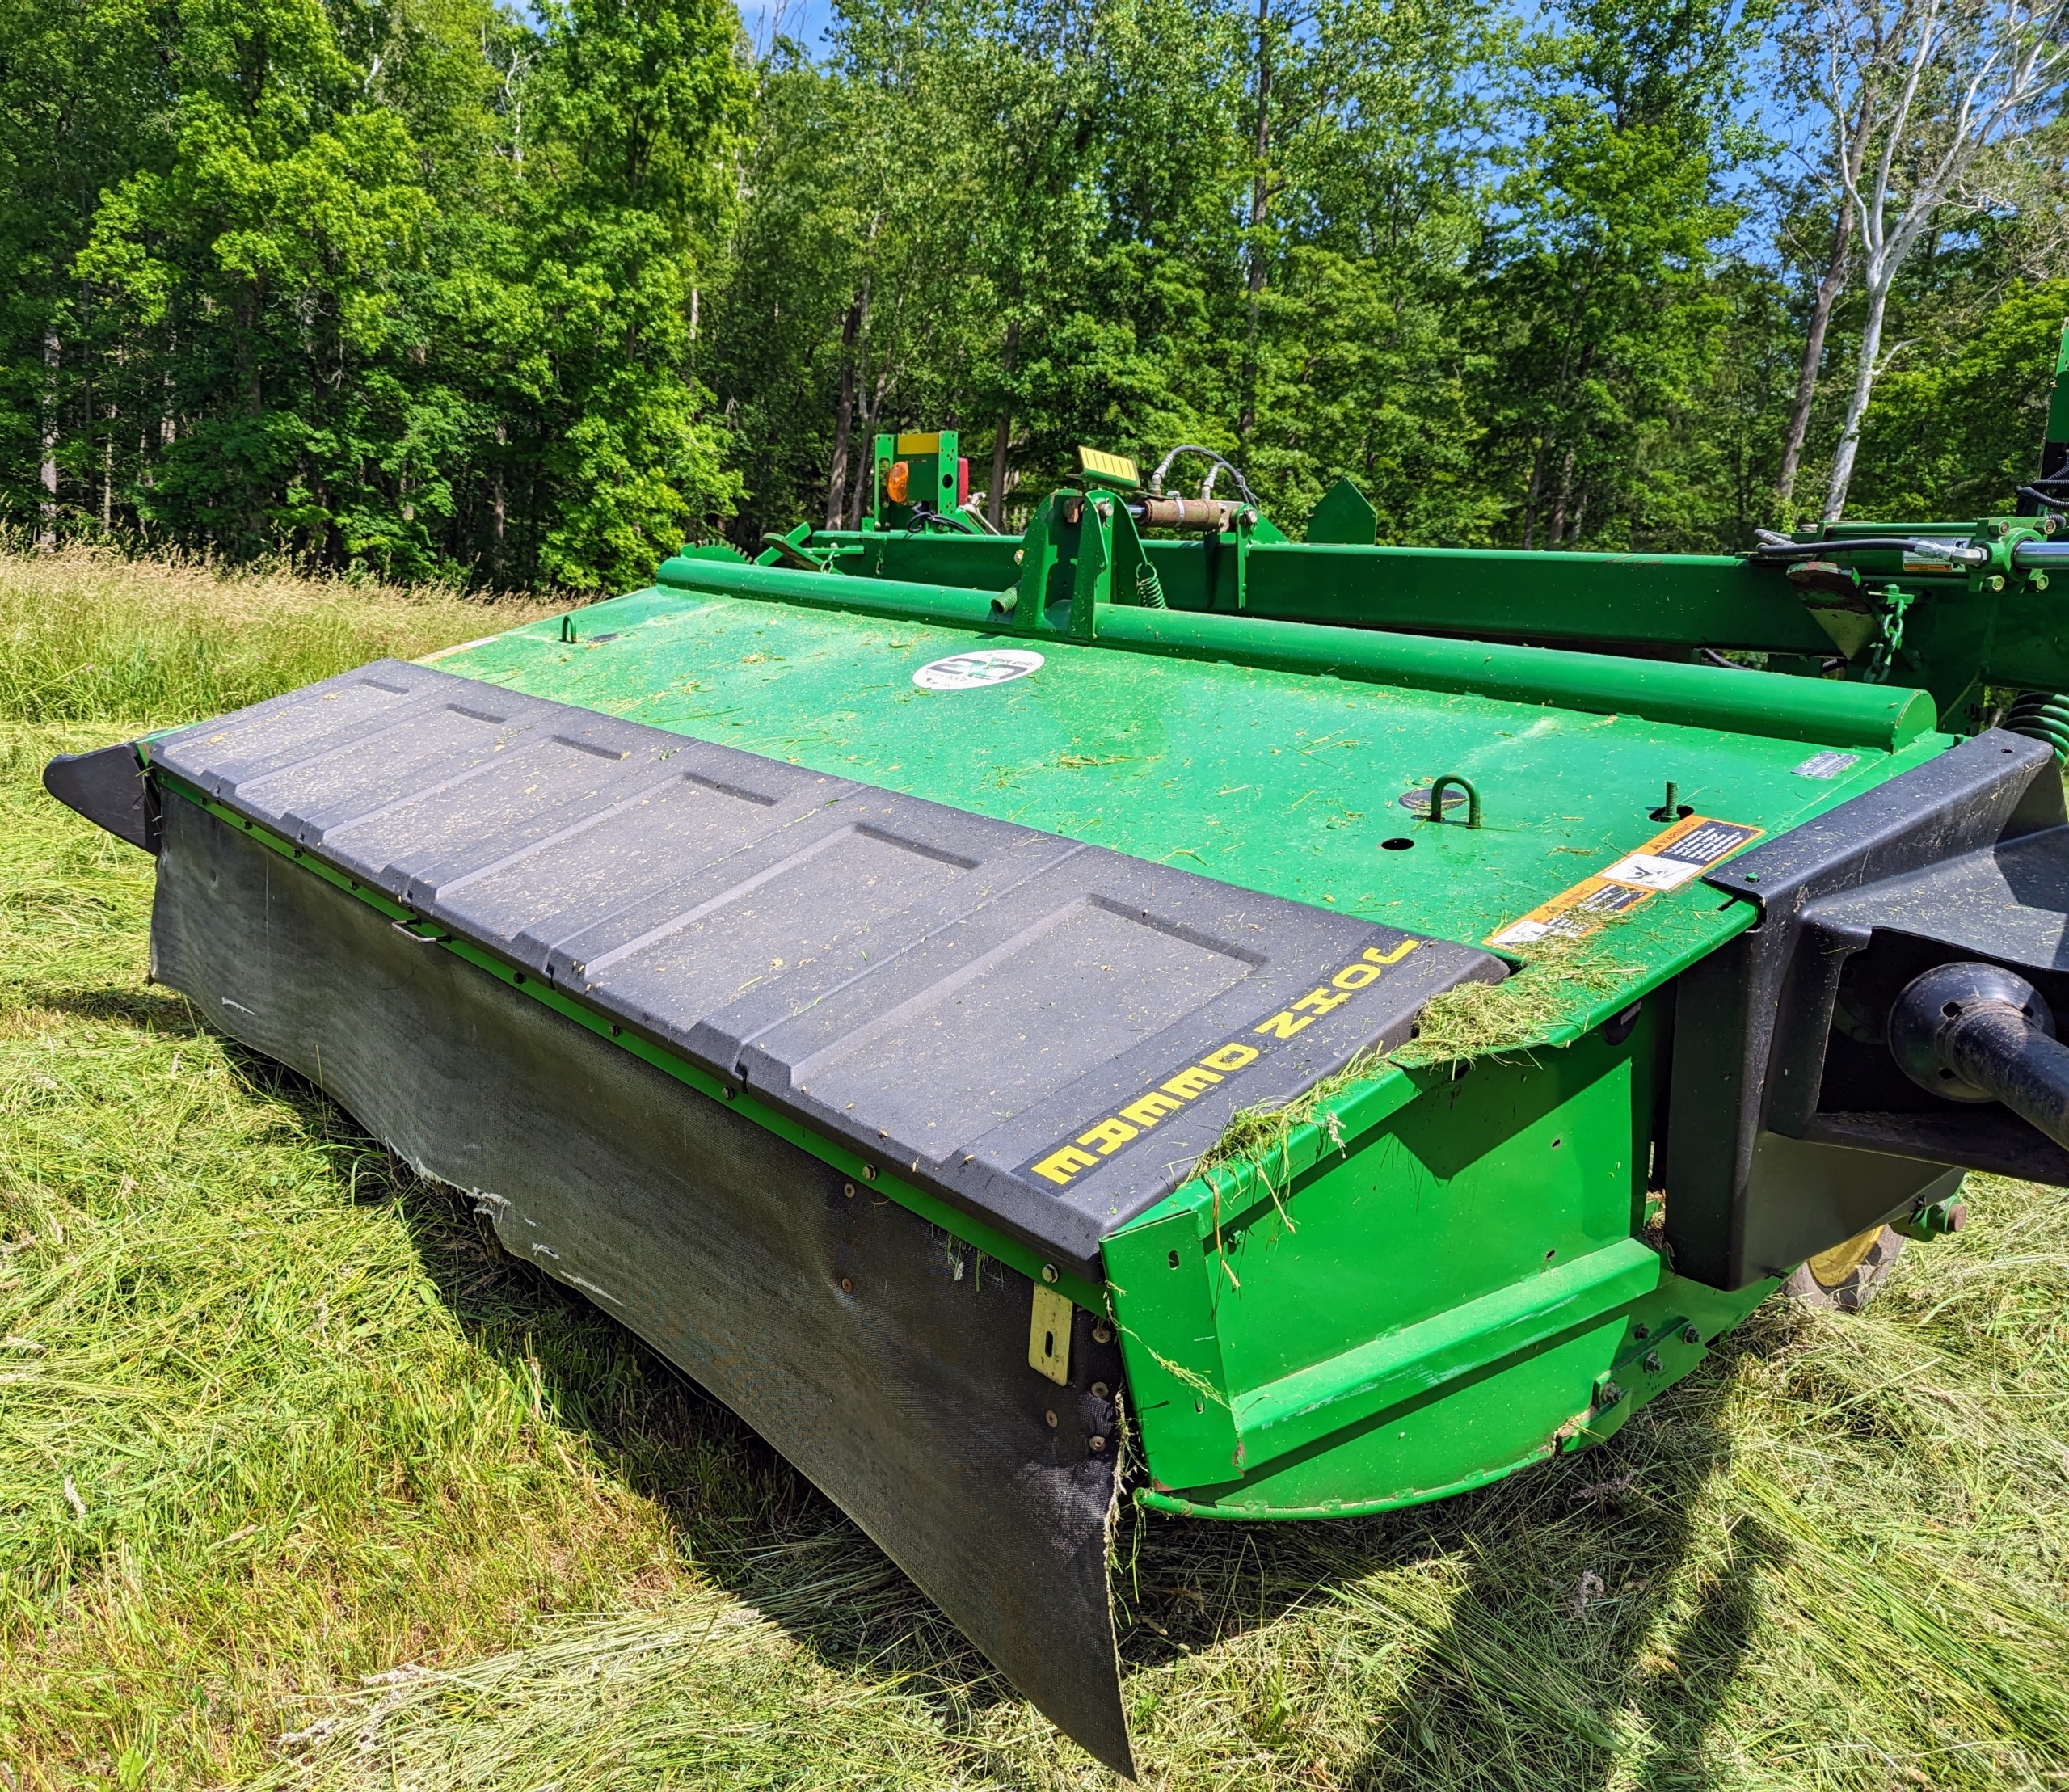
This is our mower-conditioner. Mower-conditioners are a staple of large-scale haymaking. It cuts, crimps, and crushes the hay to promote faster and more even drying. It is the first step in the hay baling process.
The discs and blades are located behind the protective shield of the mower-conditioner.
Here is the attachment with the protective shield in place. This equipment also works to remove the waxy coat on the crop as it conditions, making the hay dry faster – this means less waiting time and less chance for poor weather to negatively impact the hay quality.
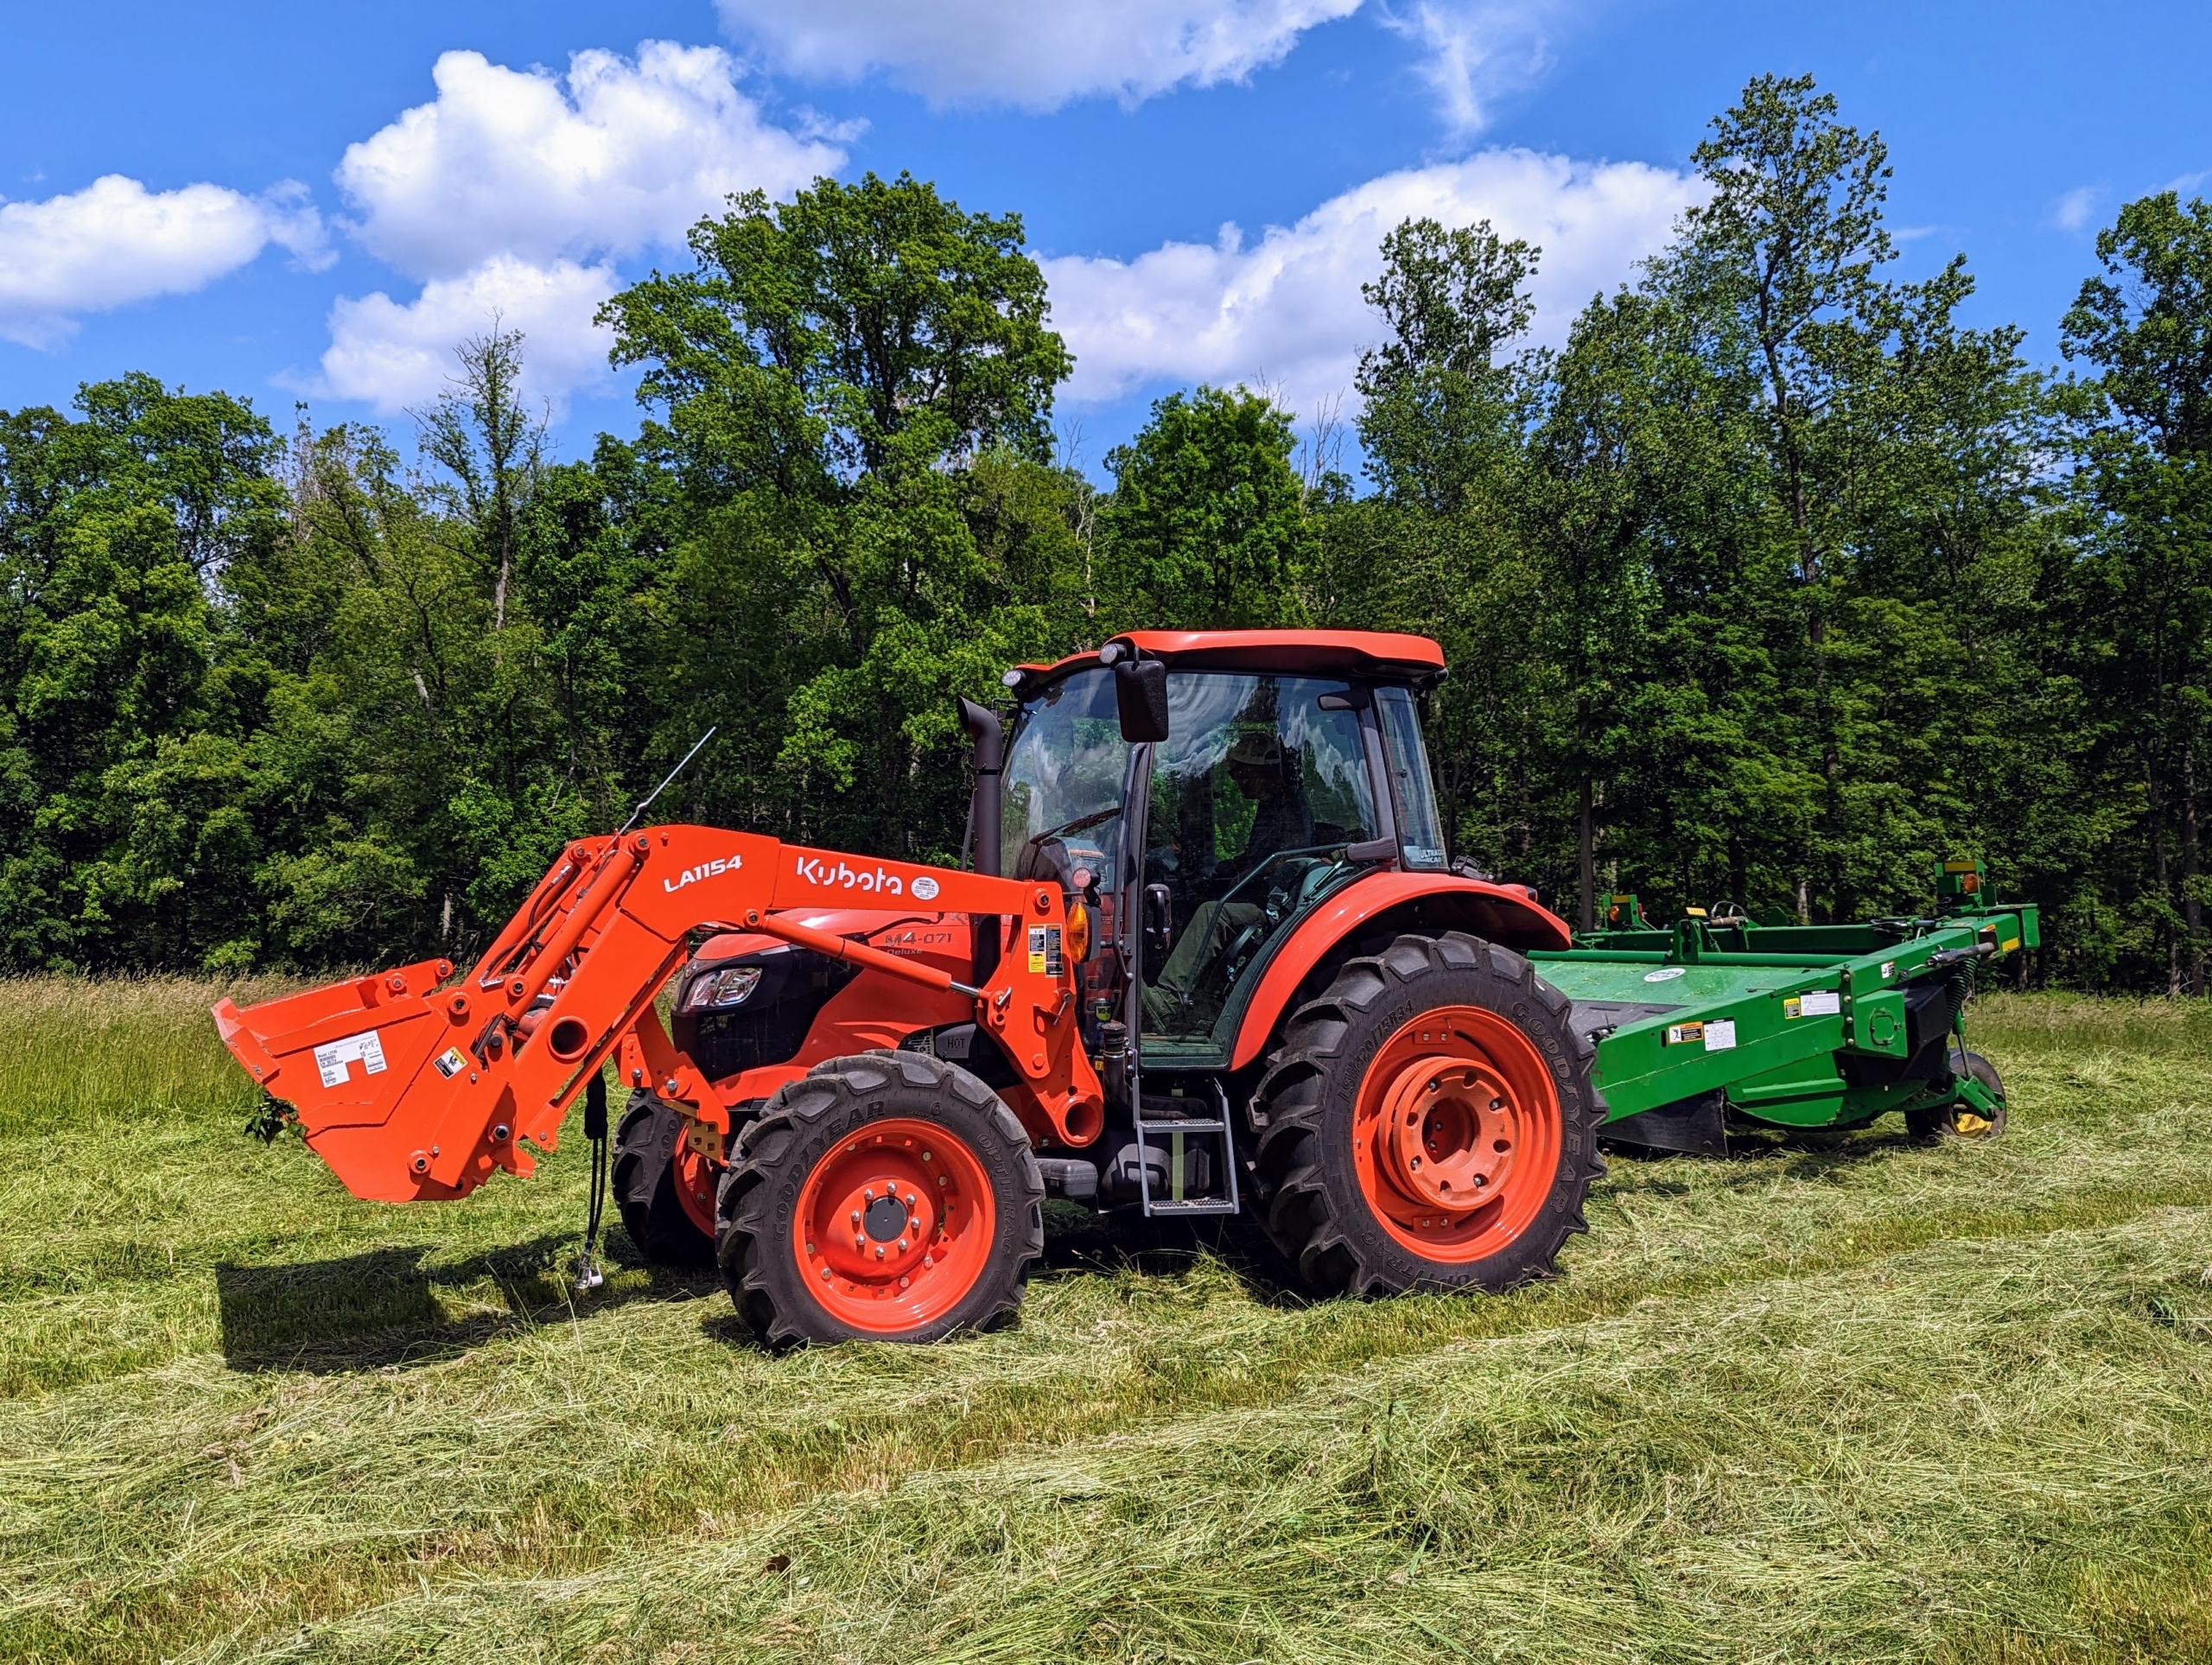
Chhiring hooks up the mower-conditioner to our trusted Kubota M4-071 tractor. Chhiring is now in the cab of the tractor ready to cut. The process of cutting should take about an hour.
When weather conditions are ideal, these machines allow farmers to cut wide and fast – the best formula for quality field productivity. Chhiring goes over the field slowly and evenly with the mower-conditioner. As the mower-conditioner goes over the grass, it cuts it and then conditions it – all under the protective hood of the machine.
Here, one can see what has been mowed and what has not. The first cut should be when grass has greened up and reached 12 to 16 inches tall.
The plants’ sugar content is highest at dusk but because of moisture, it’s not ideal to cut hay at night. The best time is to start as soon as dew is off in the morning, which will maximize drying time. After it is cut, it is left to dry the rest of the day.
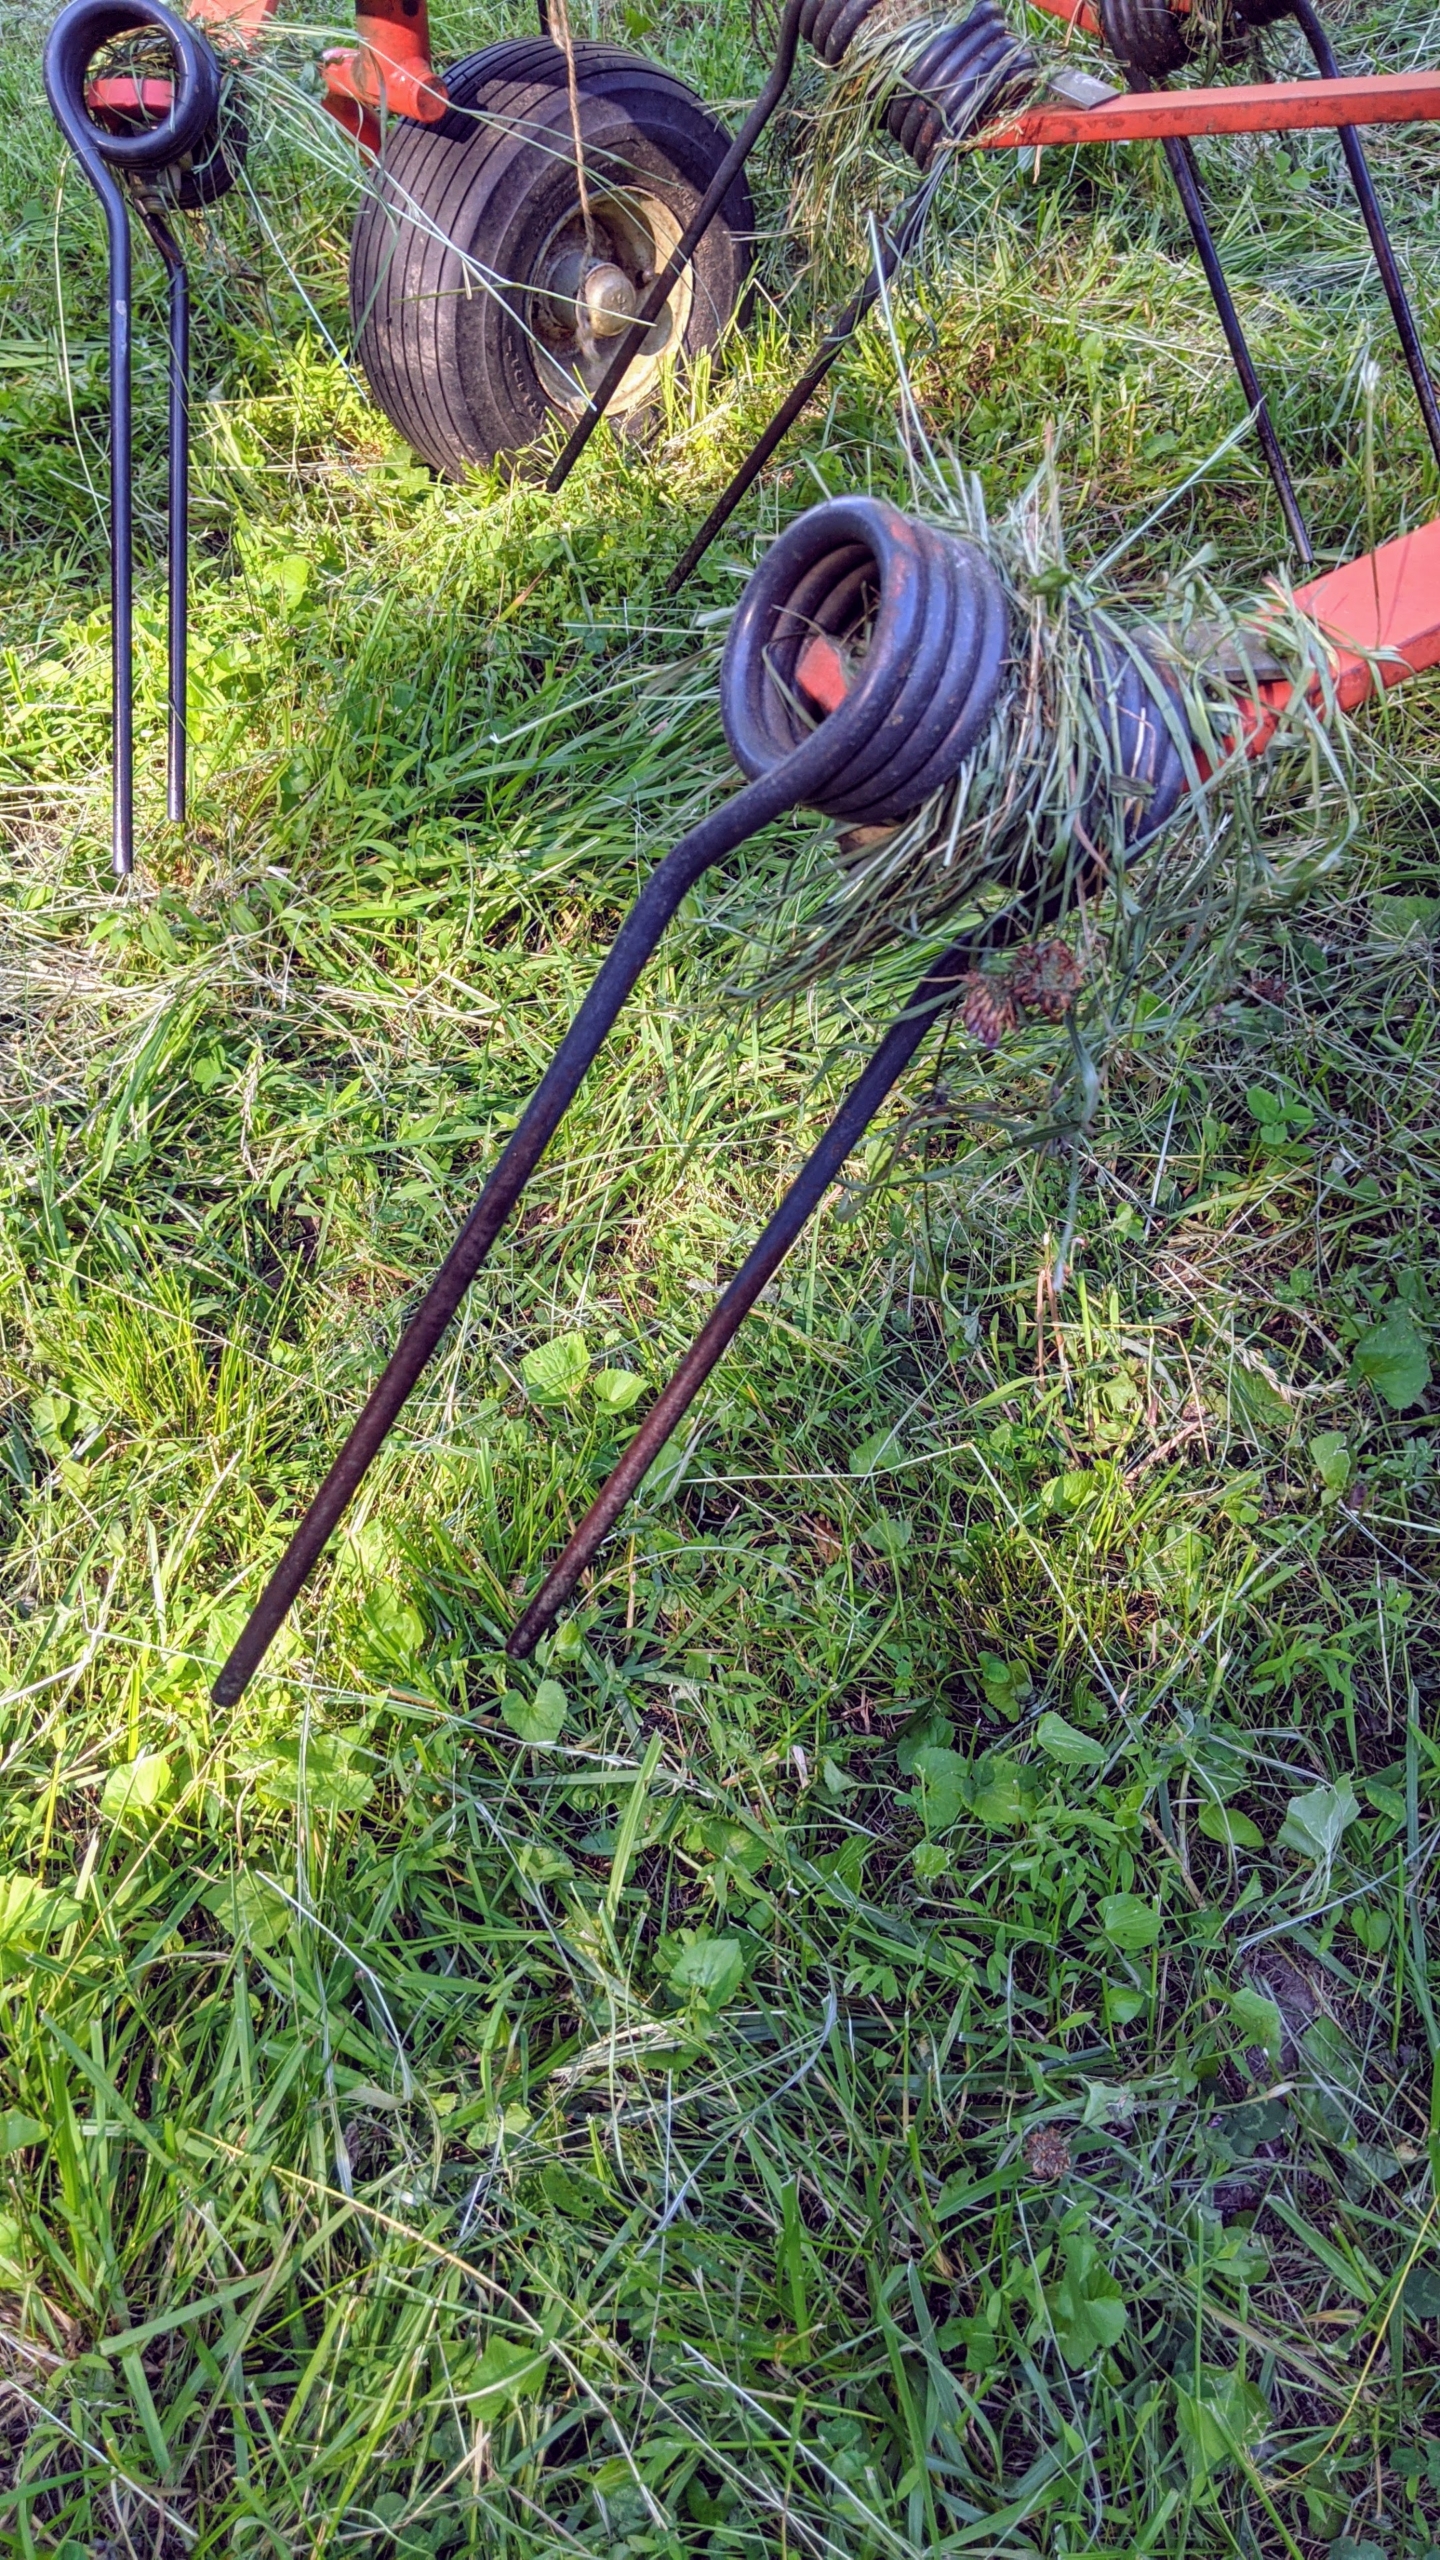
The next day, the cut hay is ready for tedding, also known as fluffing. This is our hay tedder. A tedder spreads and fluffs the hay in a uniform swath. It uses a rotary motion to grab the hay with spinning tines and then cast it out the back of the machine.
Here is a closer look at the tines, or moving forks, which aerate or “wuffle” the hay and speed up the drying process even more.
The tedder moves up and down the field taking all the greener hay from the bottom and turning it over to dry.
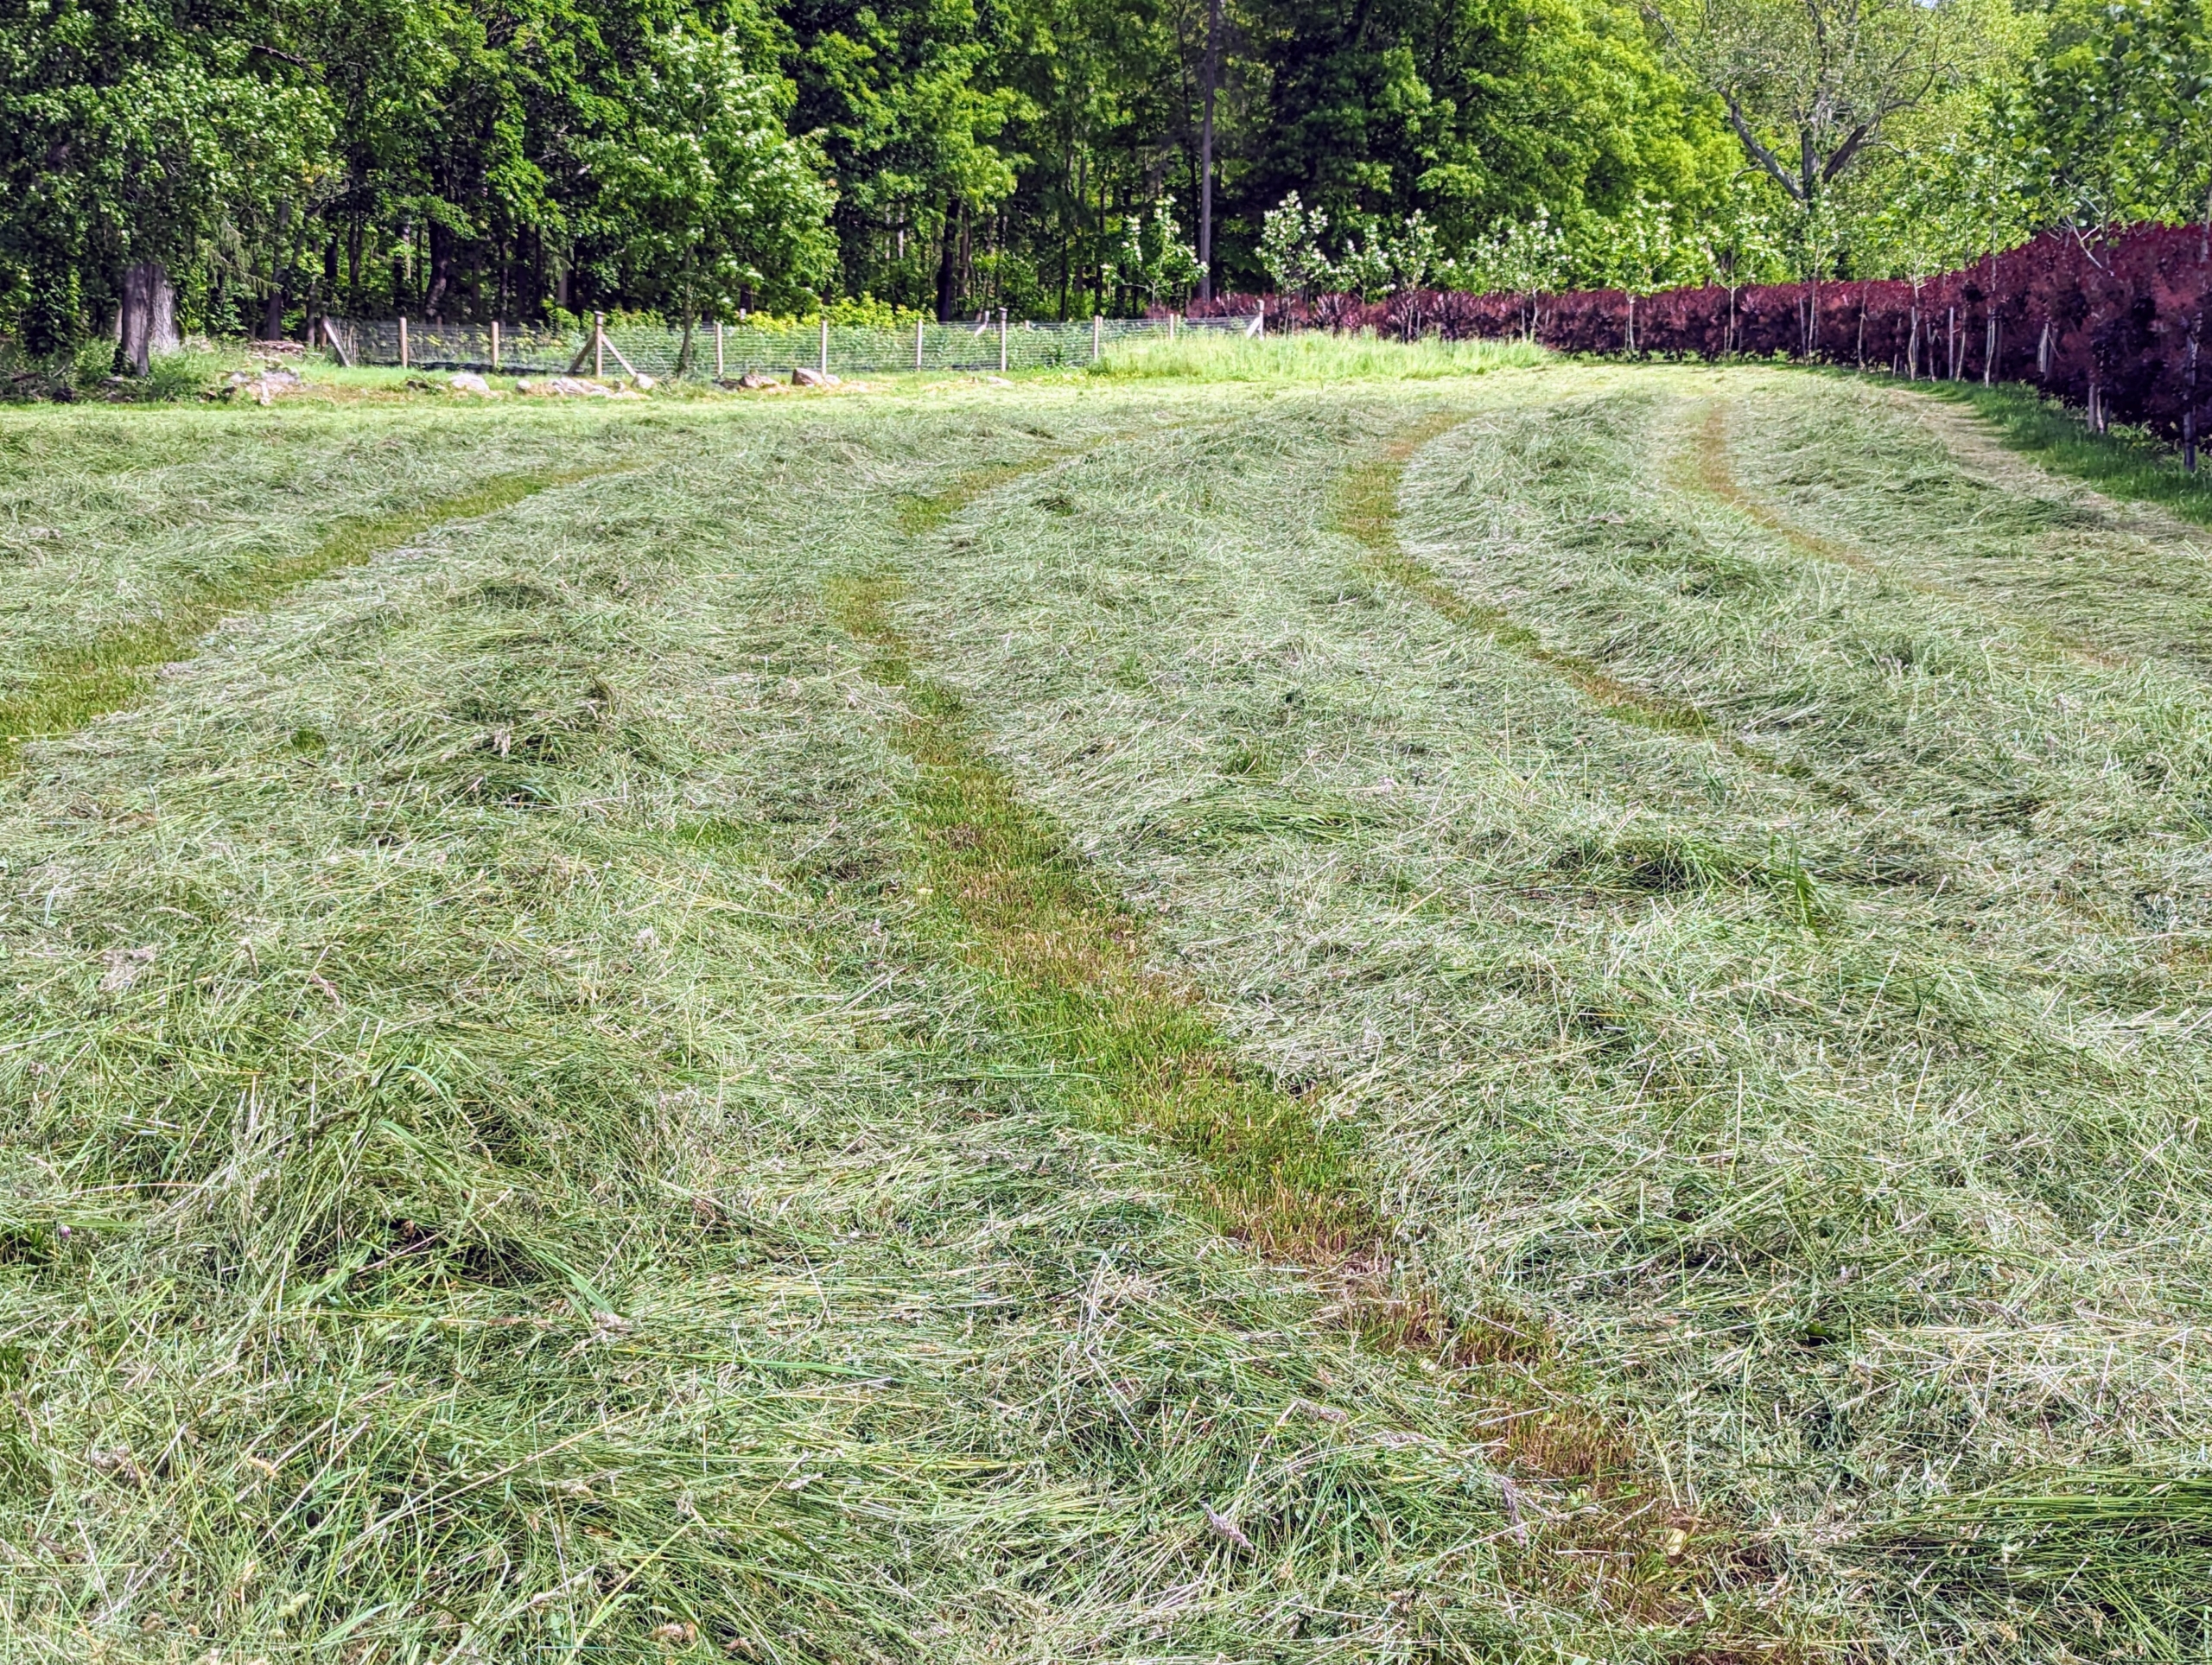
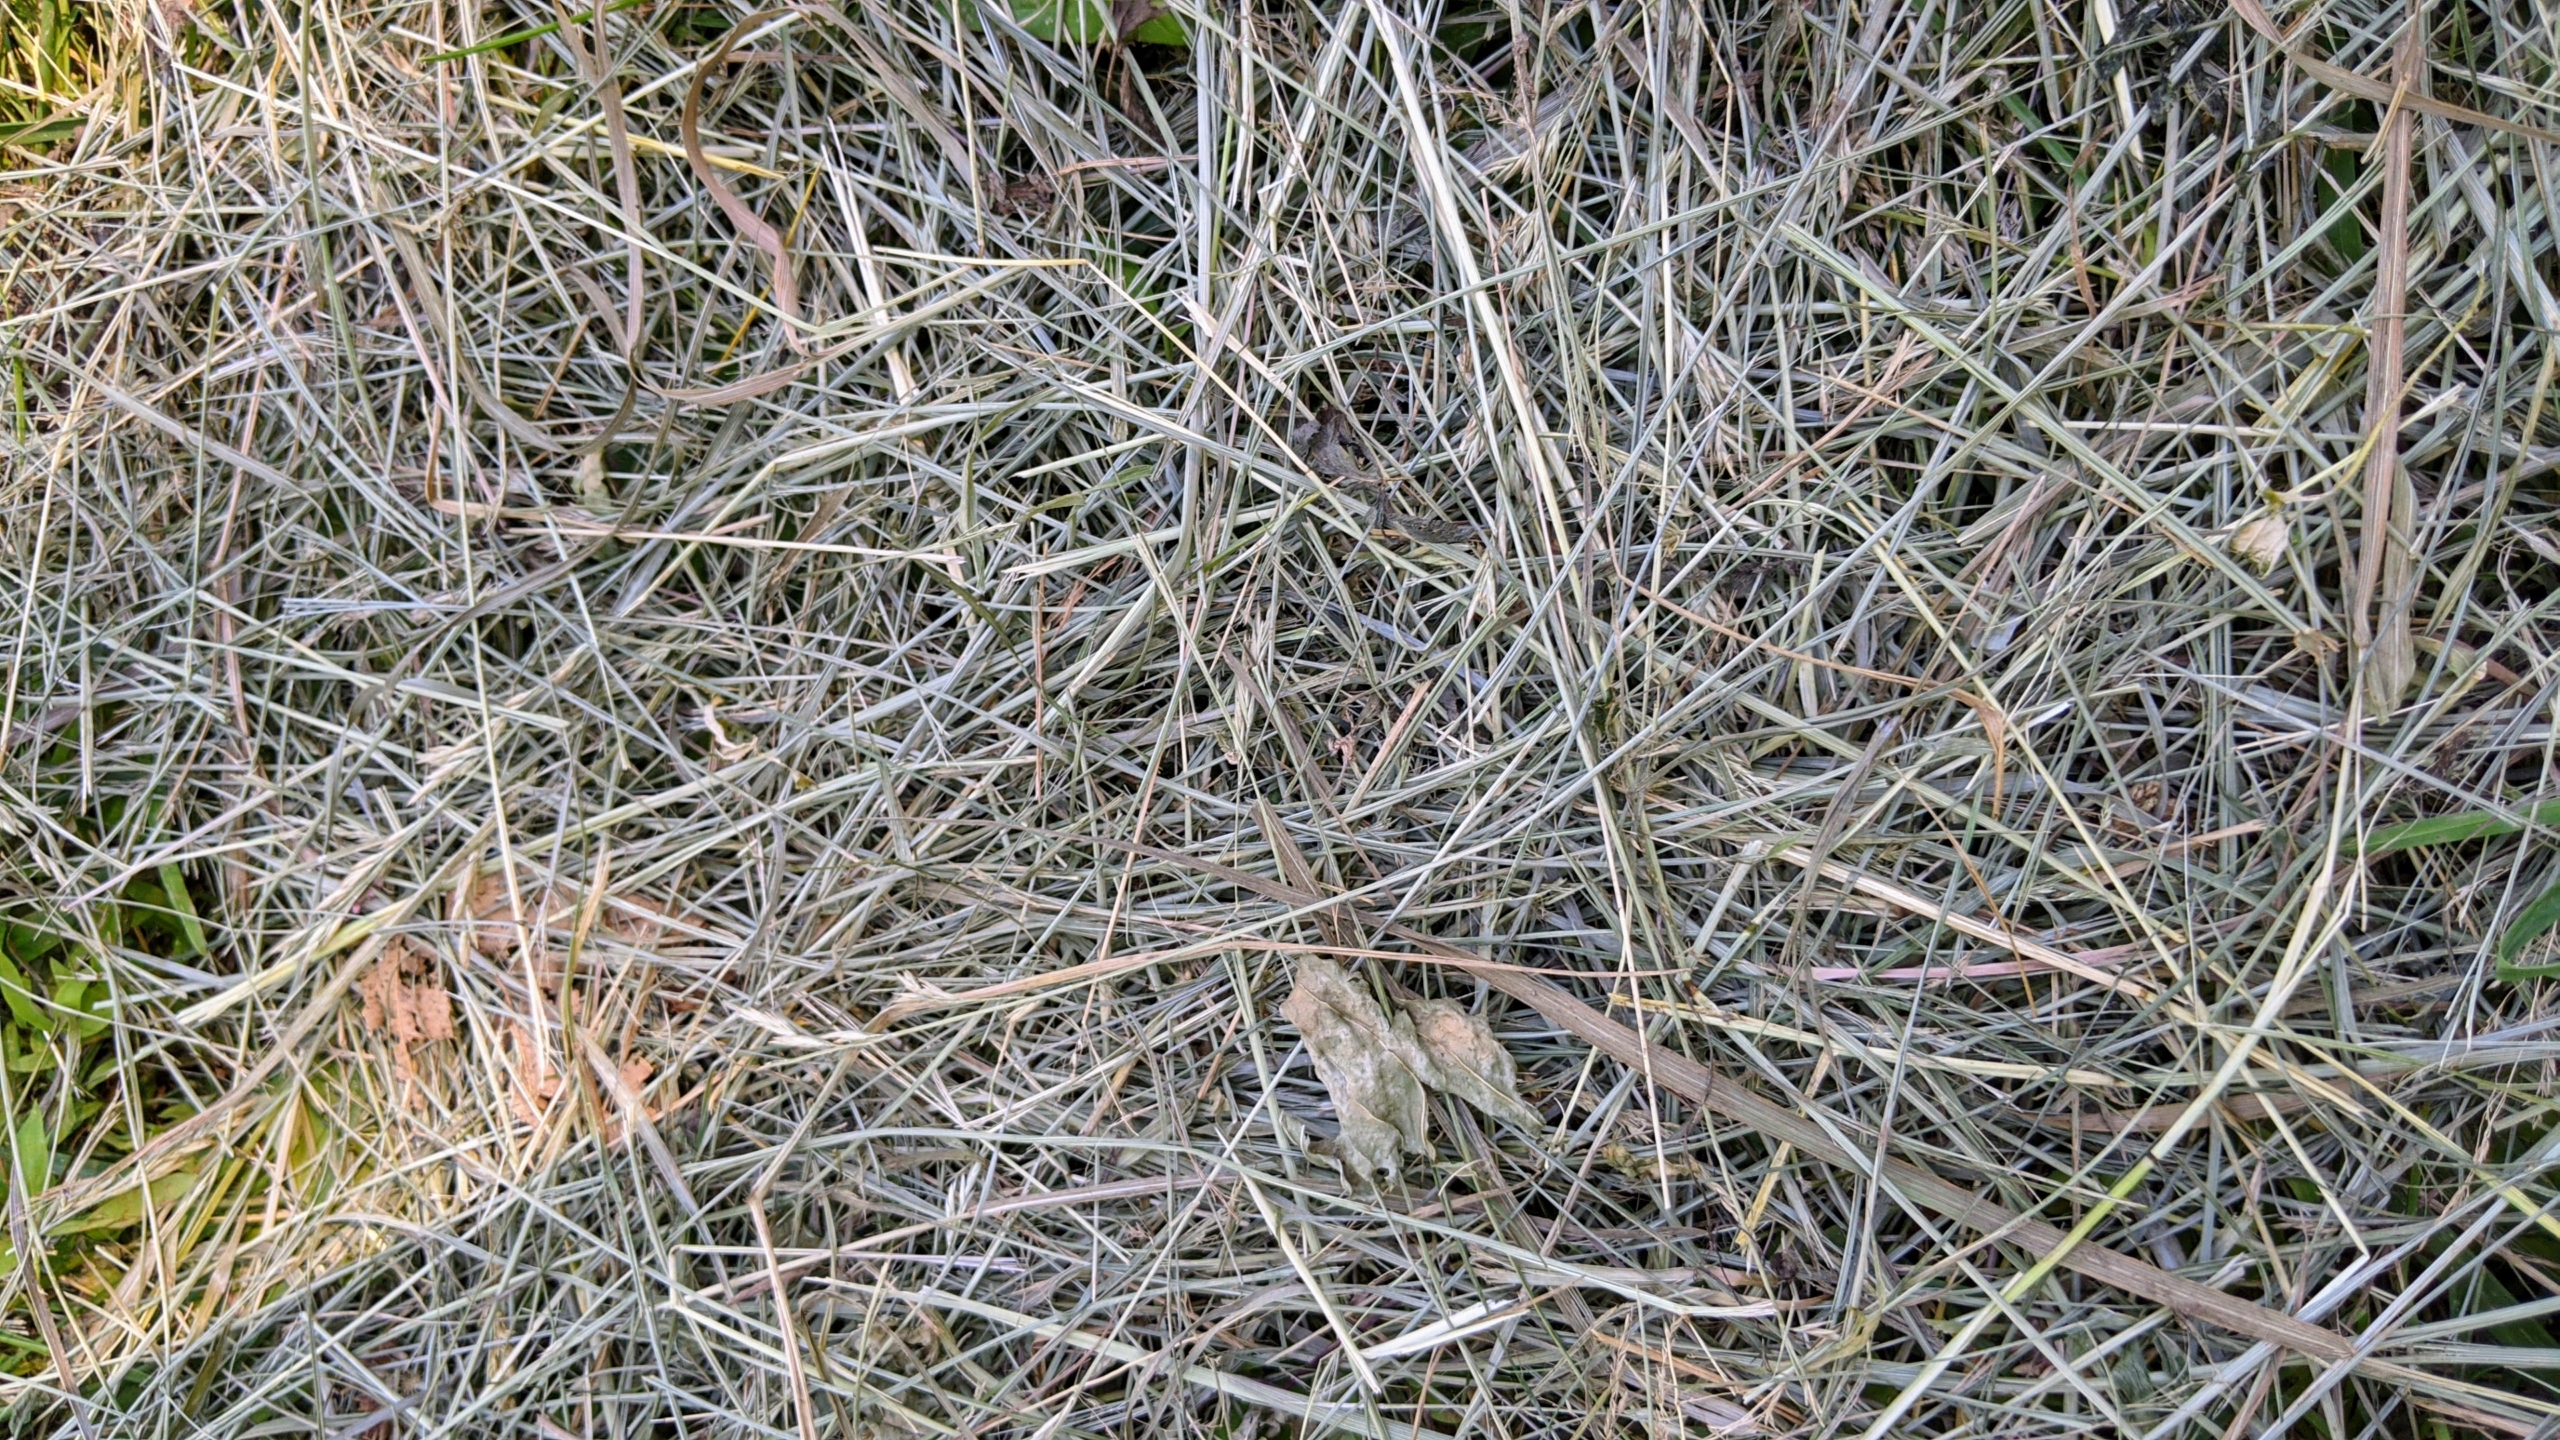
Here is some of the fluffed up hay, which will continue to dry and turn colors from green to tan over the next 24-hours. On average, it takes about three days per field, depending on the size of the field and the weather, to complete the entire process of mowing, raking, and baling hay.
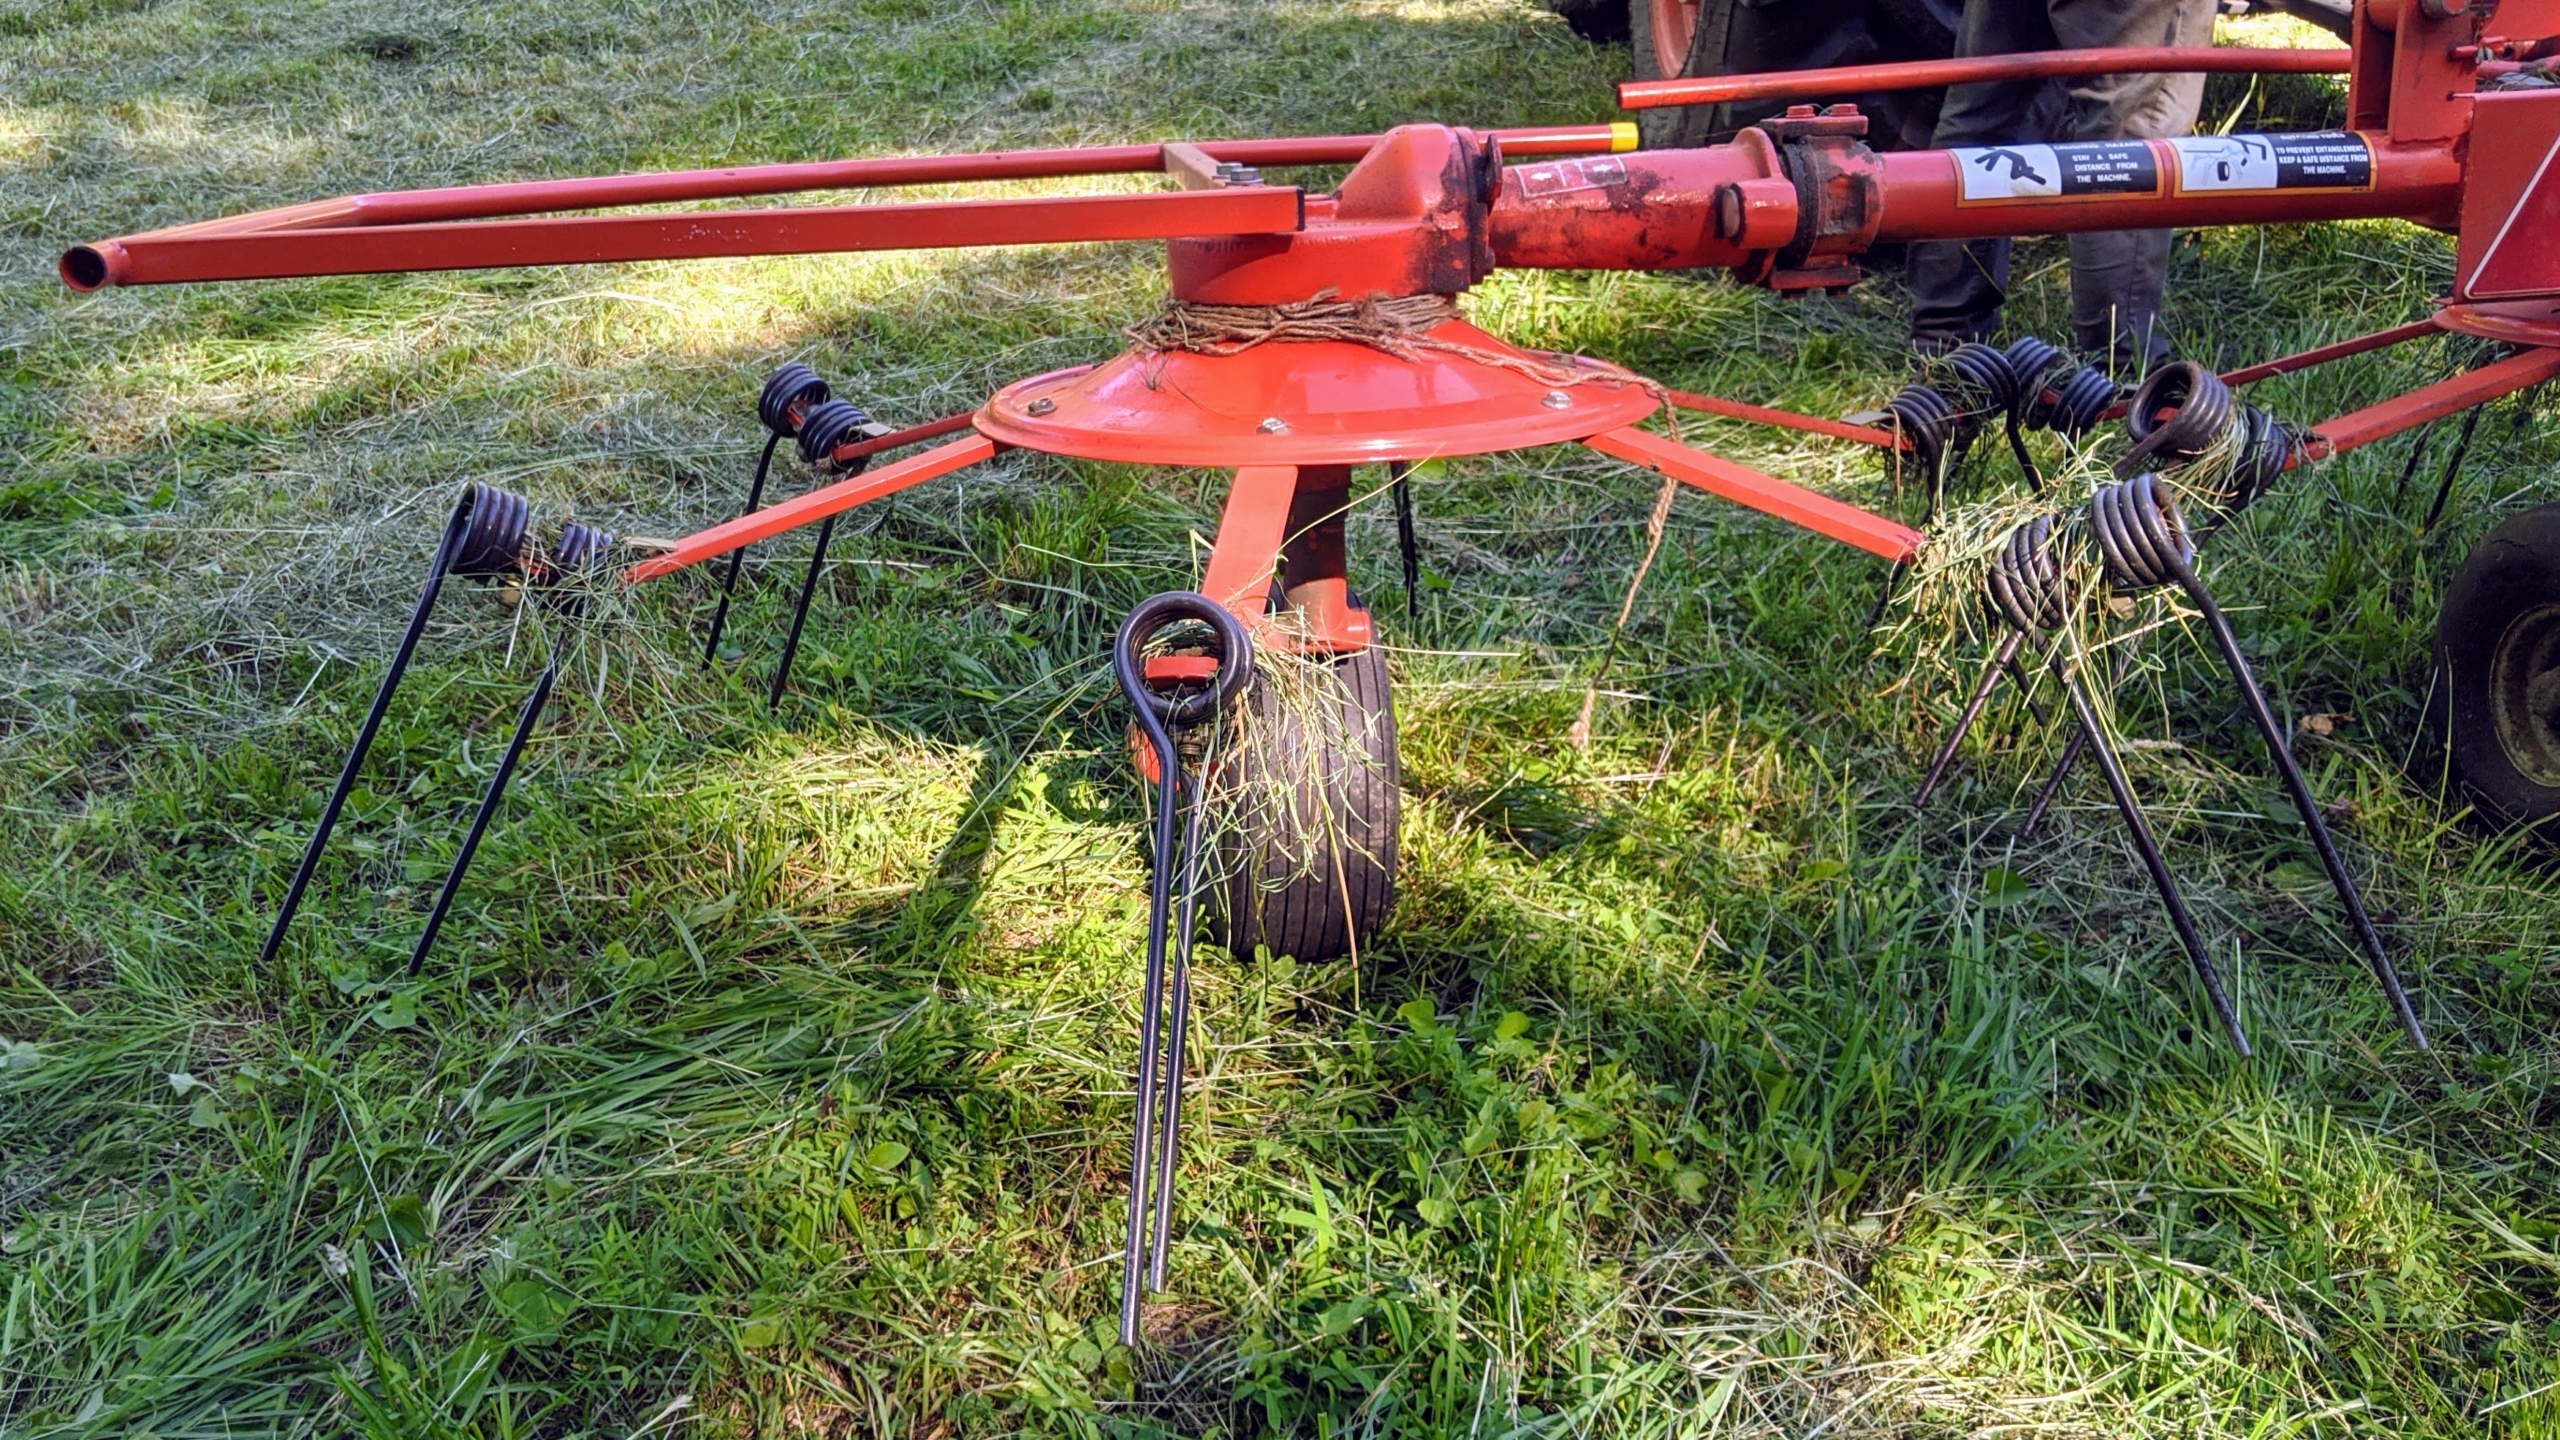
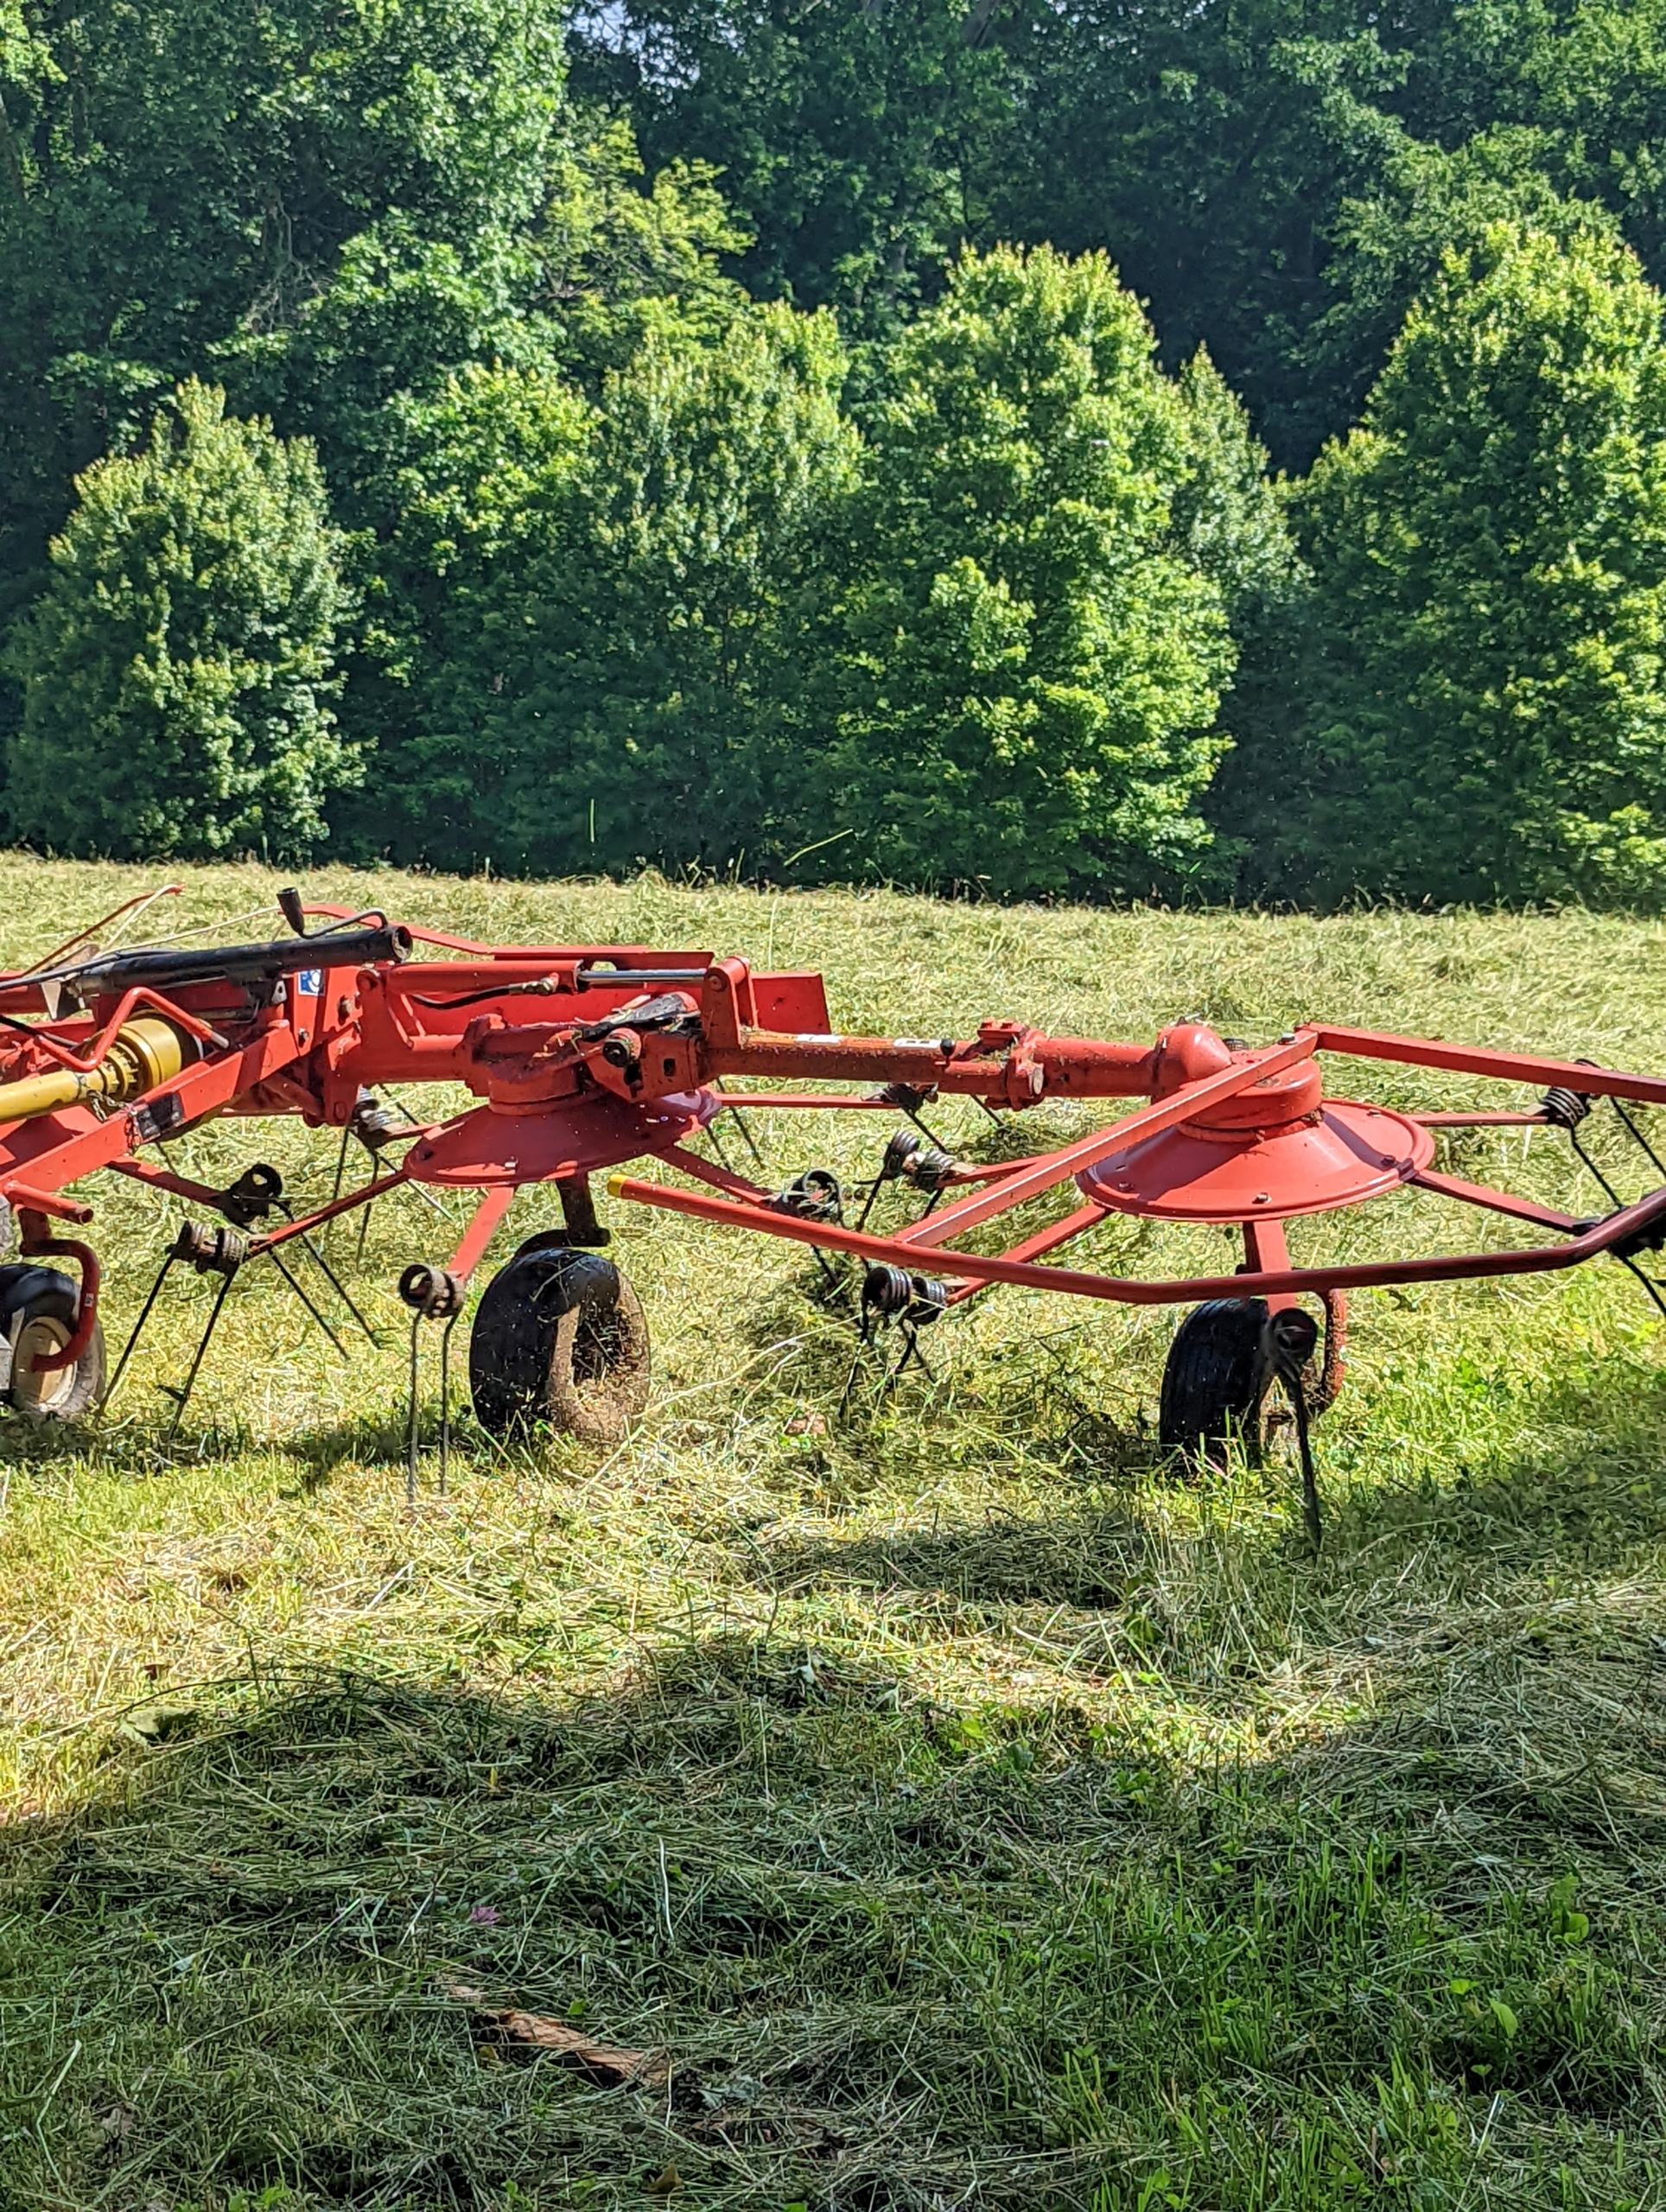
Next, it is time to make the windrows, which are rows of hay raked up and shaped before being baled. Here is Phurba pulling the bar rake and making windrows from the tedded hay.
The bar rake, also known as a basket rake is hydraulically driven. This rake allows for consistent movement across the fields making well-shaped windrows.
Here, one can see the tines creating the almost box-shaped windrows.
Here is a windrow now ready to bale. All the windrows are lined up straight next to each other with enough room in between for the baler to maneuver properly around the field.
The hay is ready to bale when hay pulled from the bottom of the windrow makes a crunching sound when snapped. I’ll share the very interesting process of baling the hay in my next blog. Stay tuned.
Everything here at my farm is looking so gorgeous this year - from the Cotinus and all its plumes of billowy hairs to the incredibly beautiful and fragrant roses to the lush green foliage of all the trees and boxwood. Many of you have commented on how much you enjoy seeing photos of my farm this time of year. Earlier this week, my dear friend and EVP Director of Design at Marquee Brands, Kevin Sharkey, came to the farm and took a series of interesting and artistic images of my new half-acre vegetable garden just bursting with spectacular growth. It’s always fun to view the familiar through someone else’s lens - enjoy his pictures.
And be sure to visit Kevin’s Instagram page @seenbysharkey to see more of his photographs.
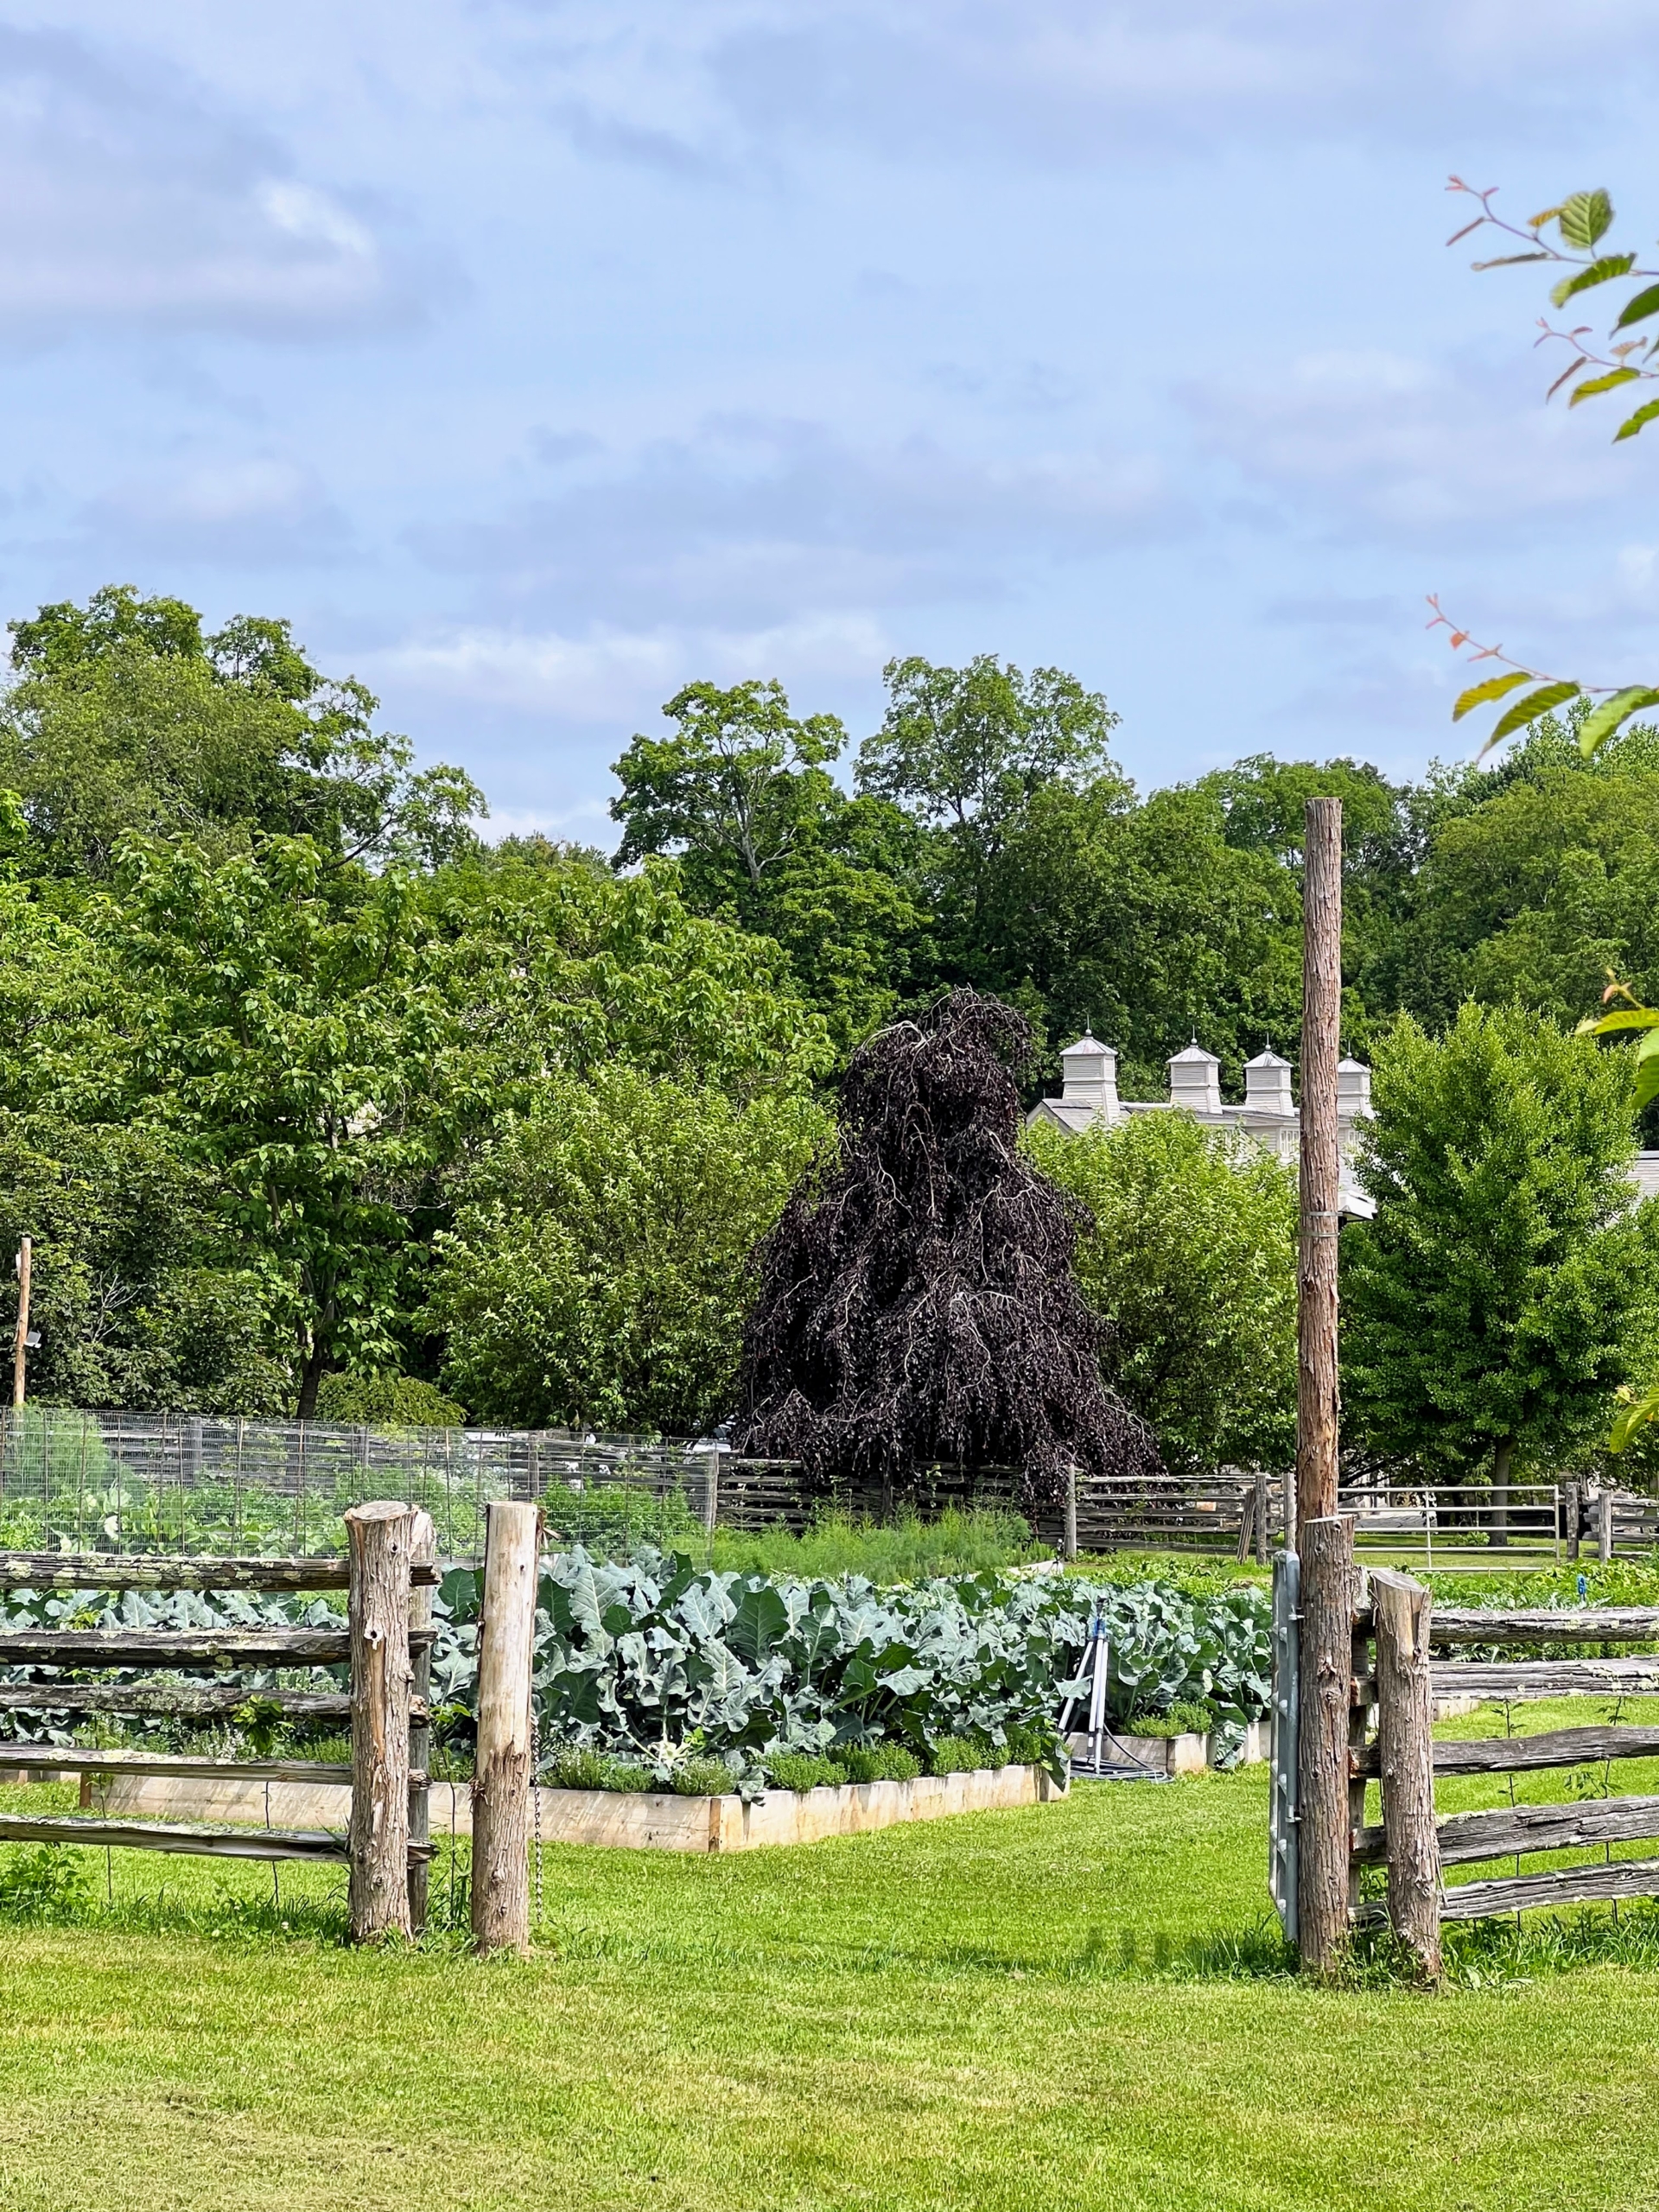
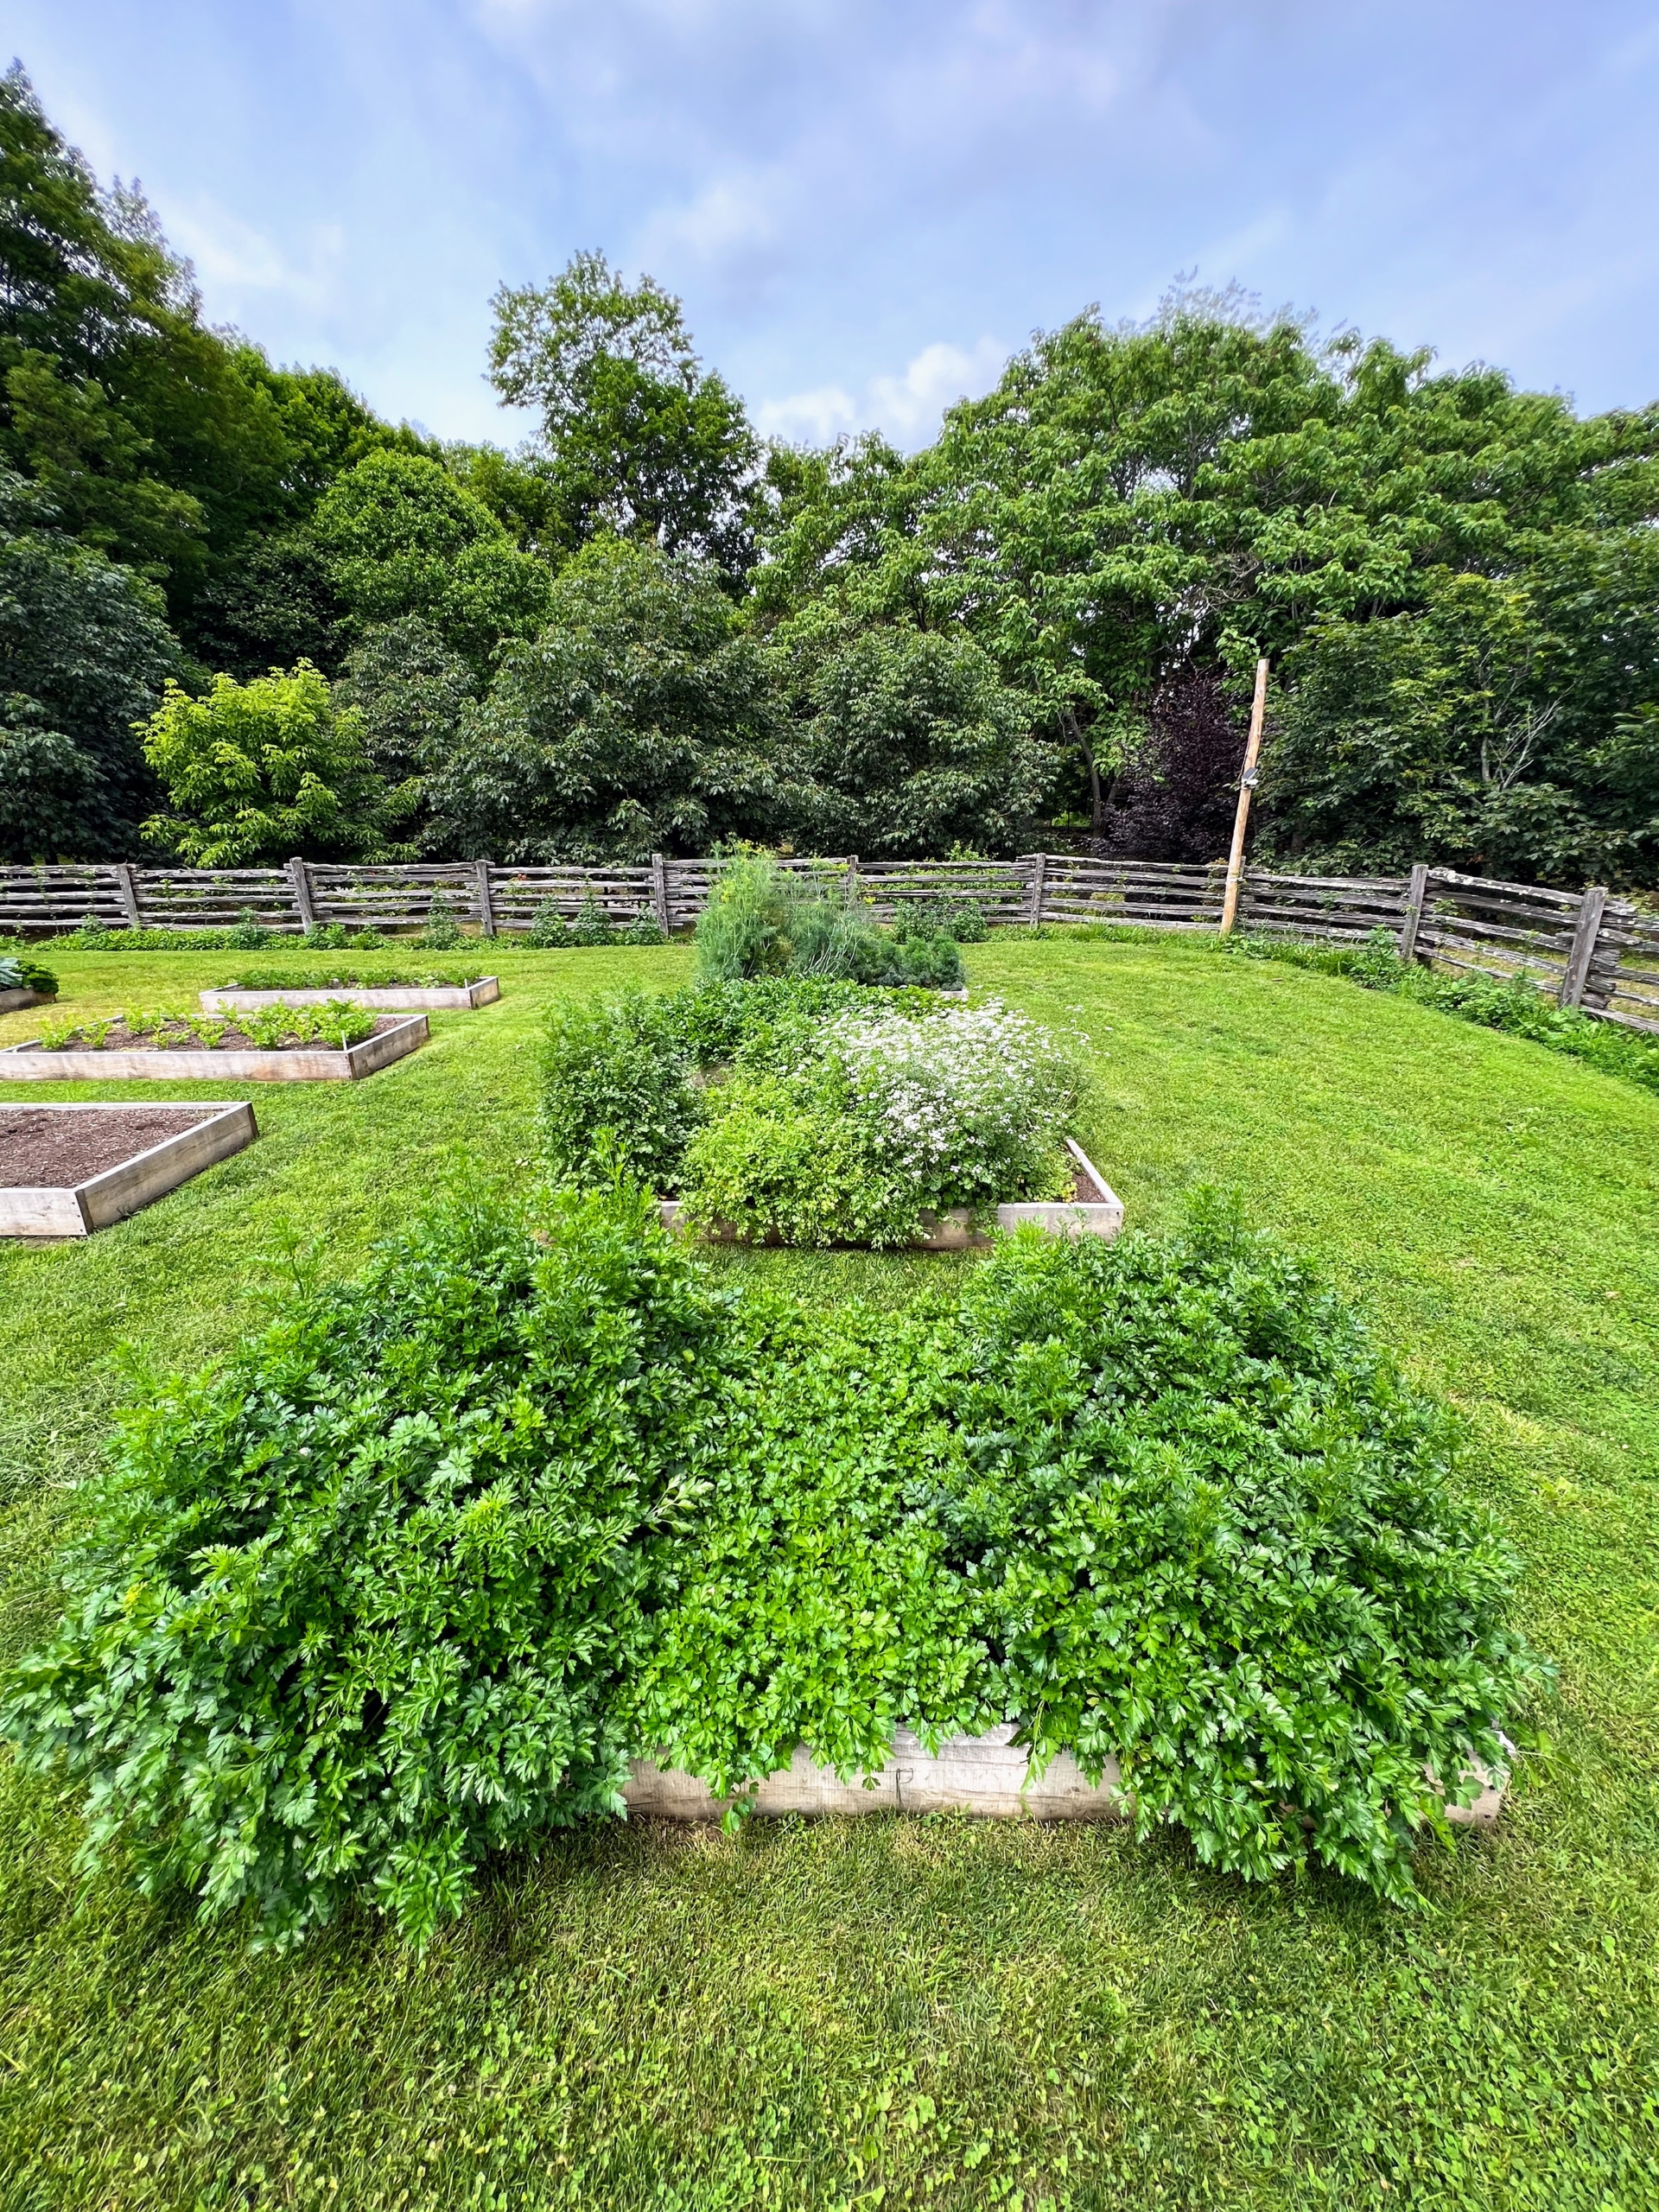
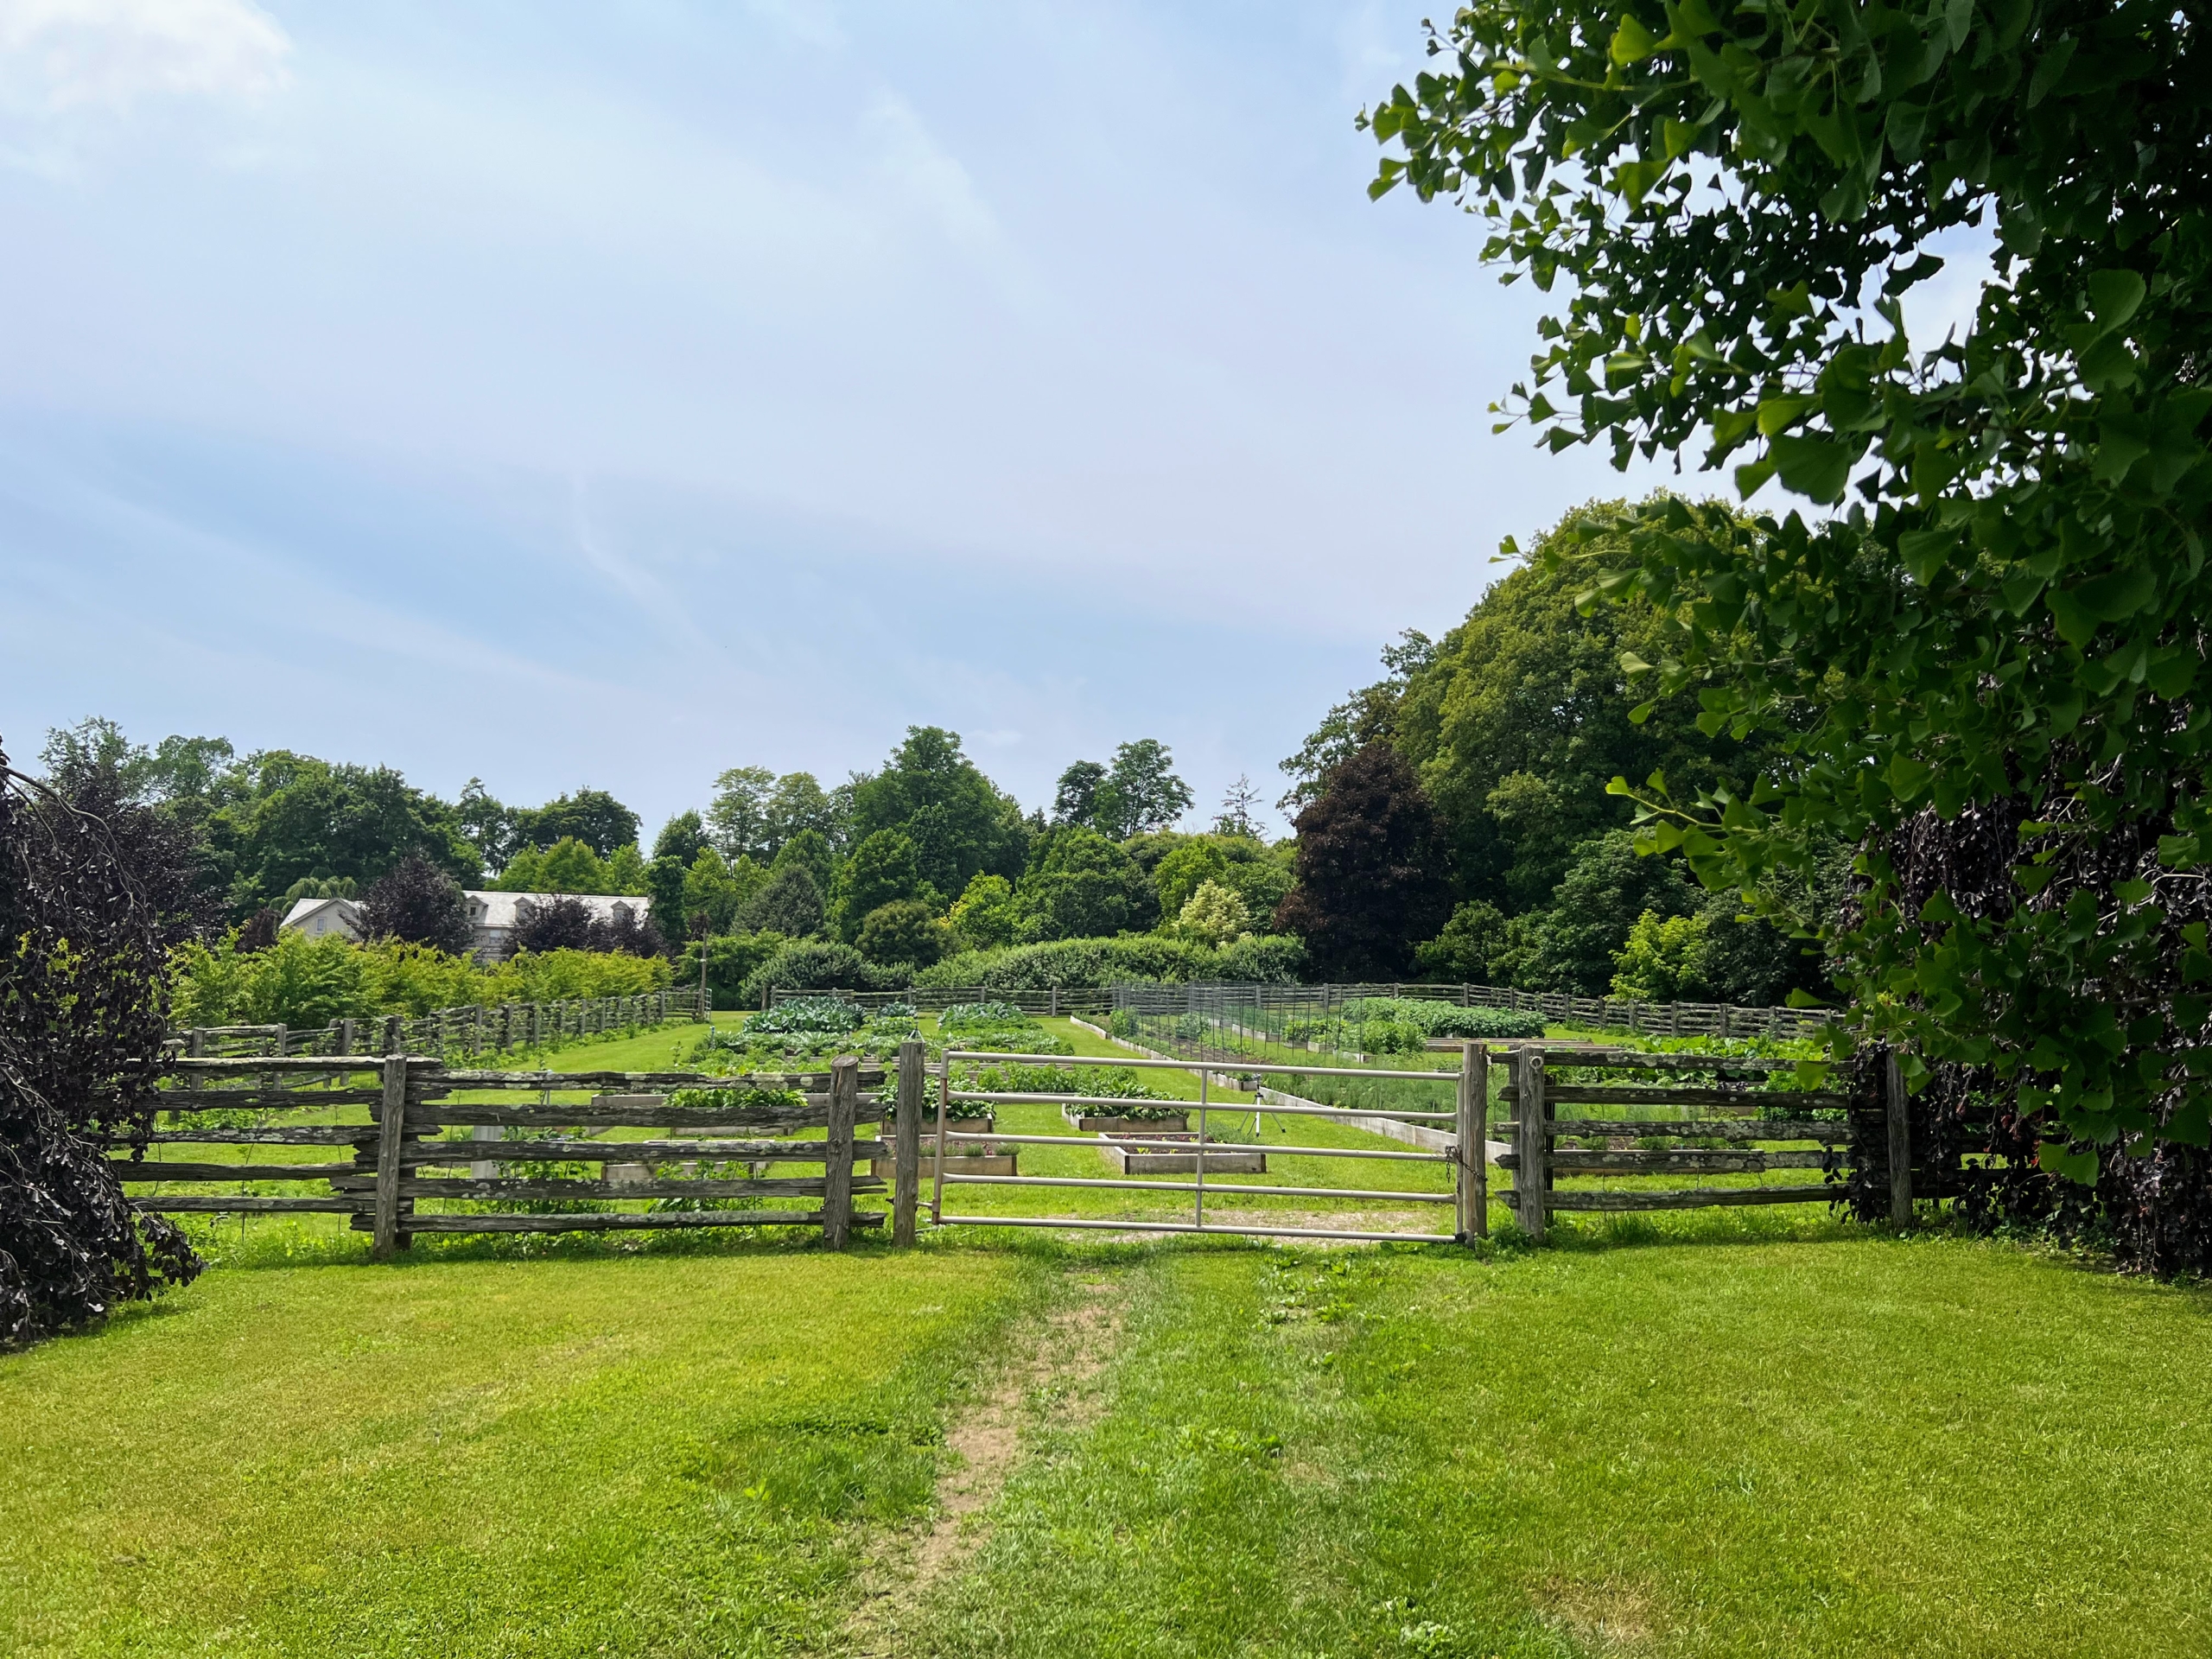
Kevin entered the garden from the southeast corner. You may recall, this enclosed space was my donkey paddock for many years. We created this gated entrance when we transformed it into a vegetable garden, so I could enter from both sides – on foot or by Polaris.
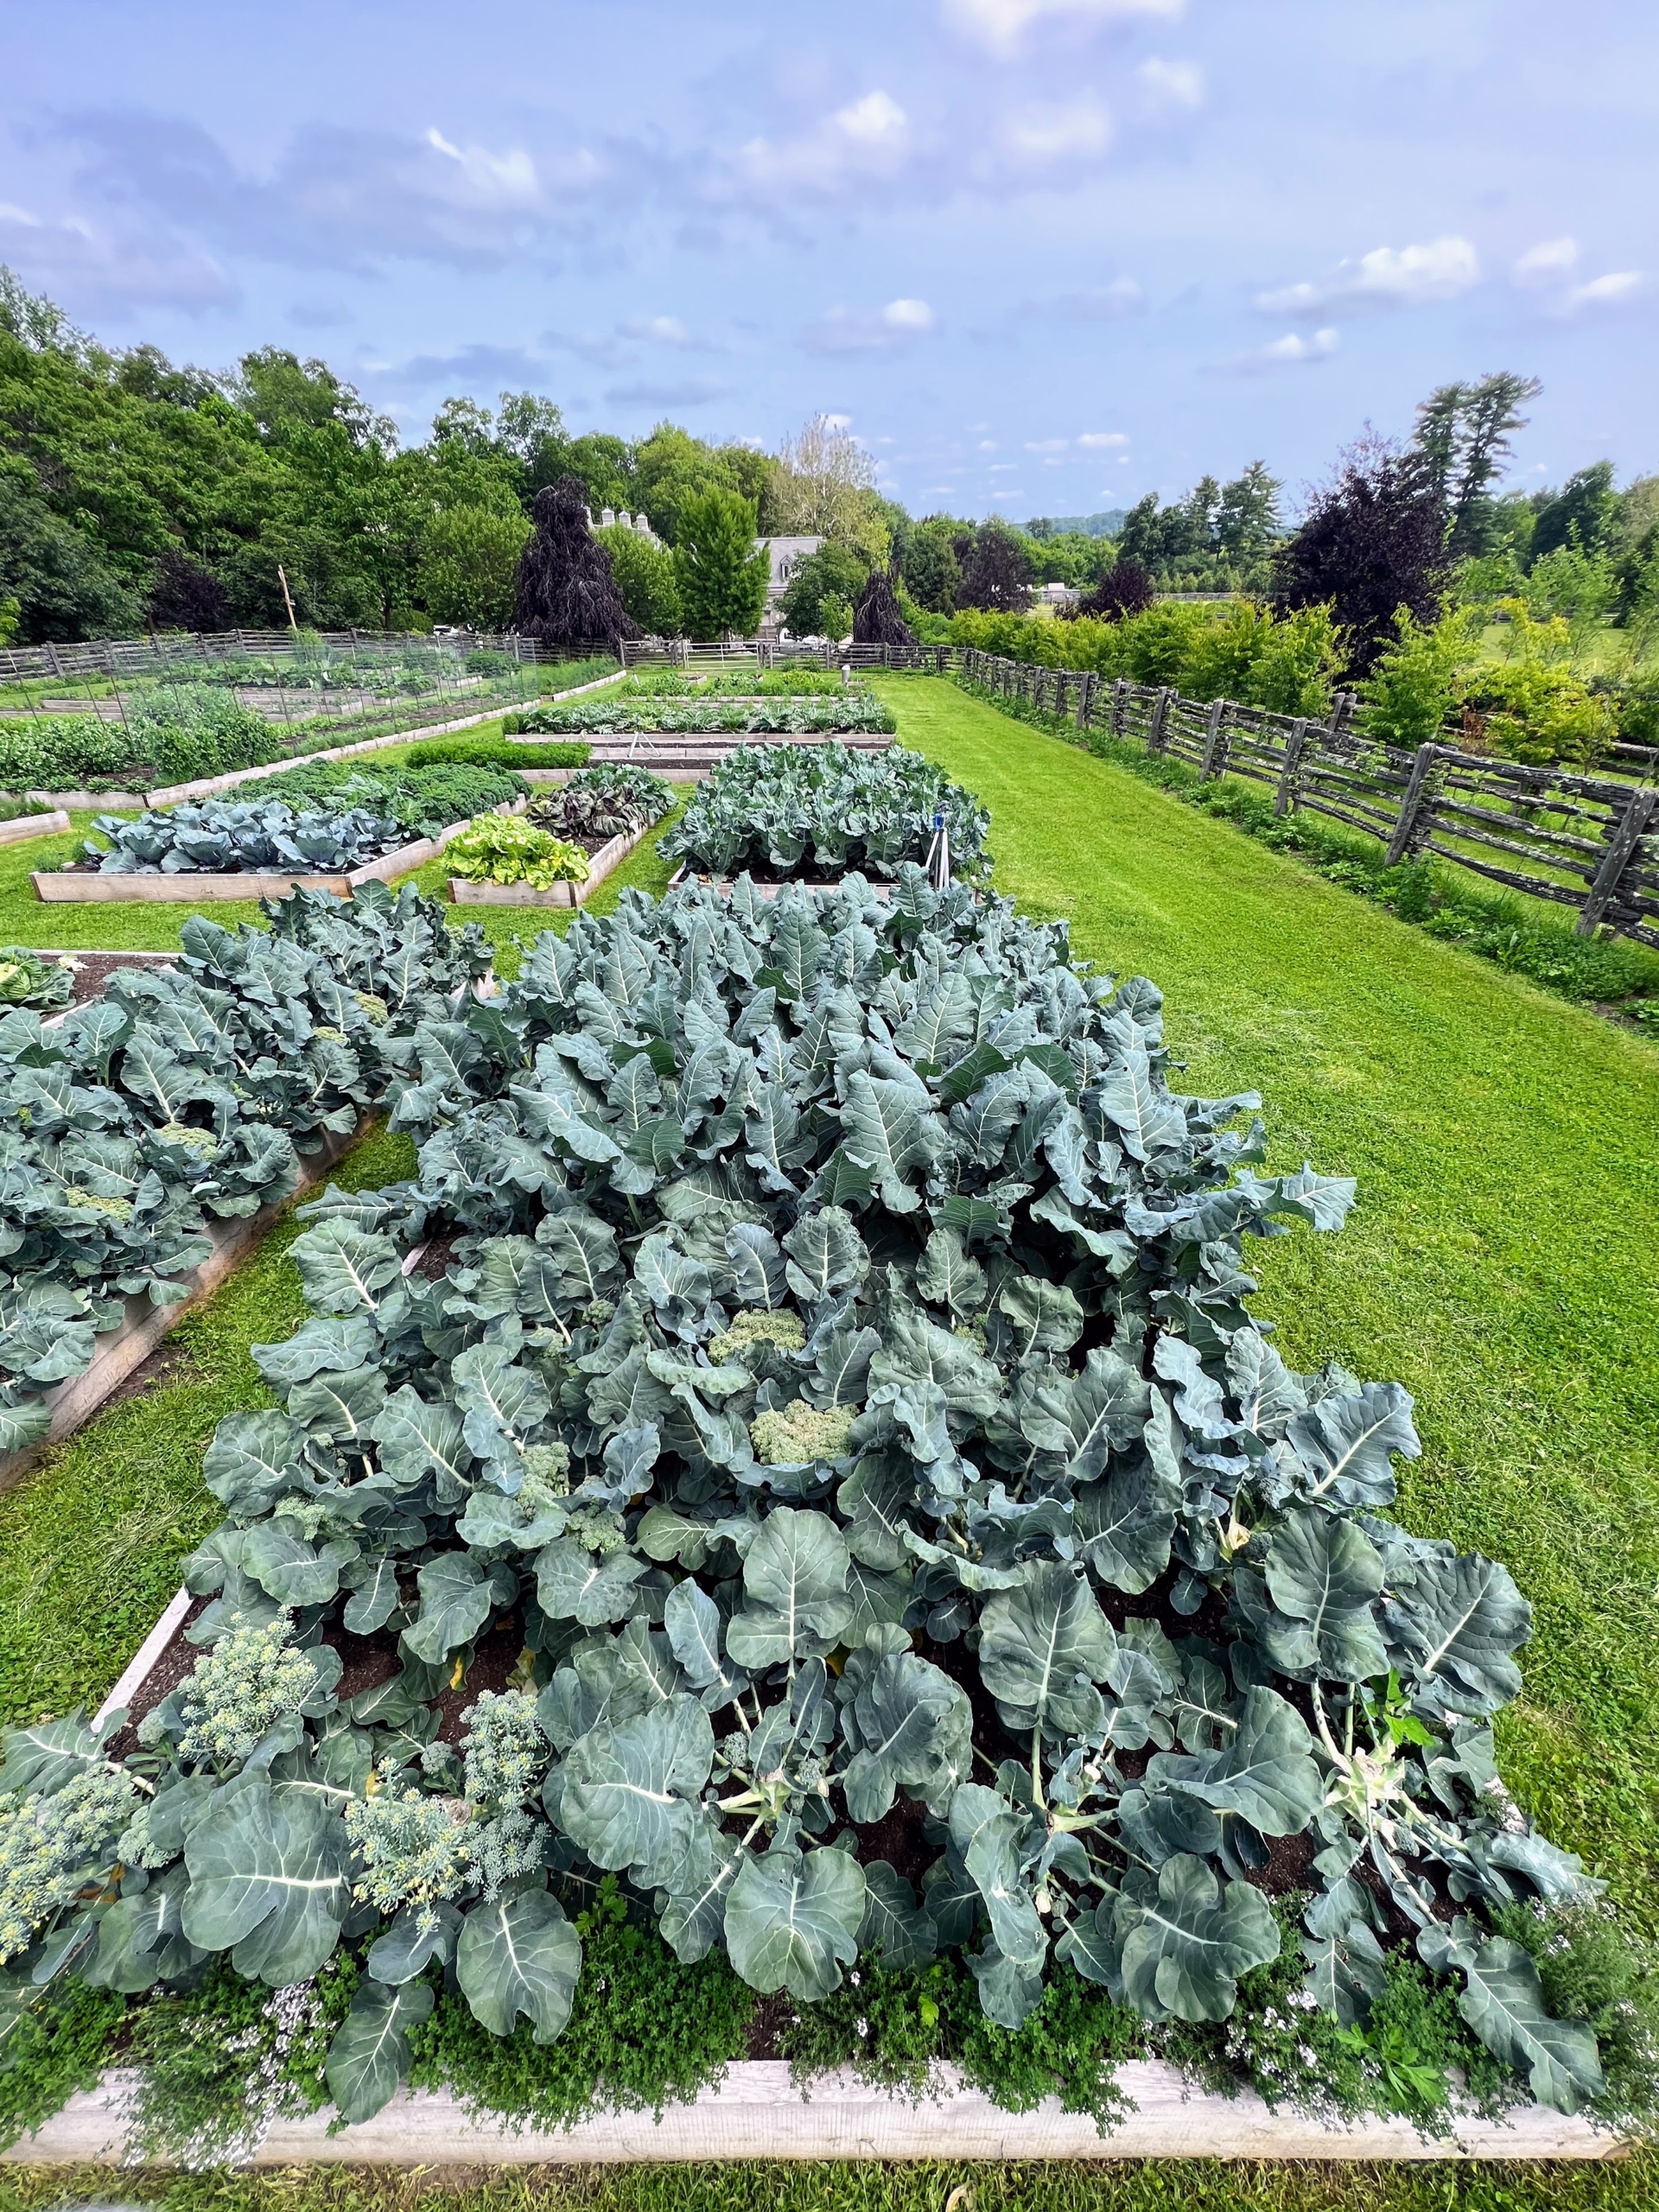
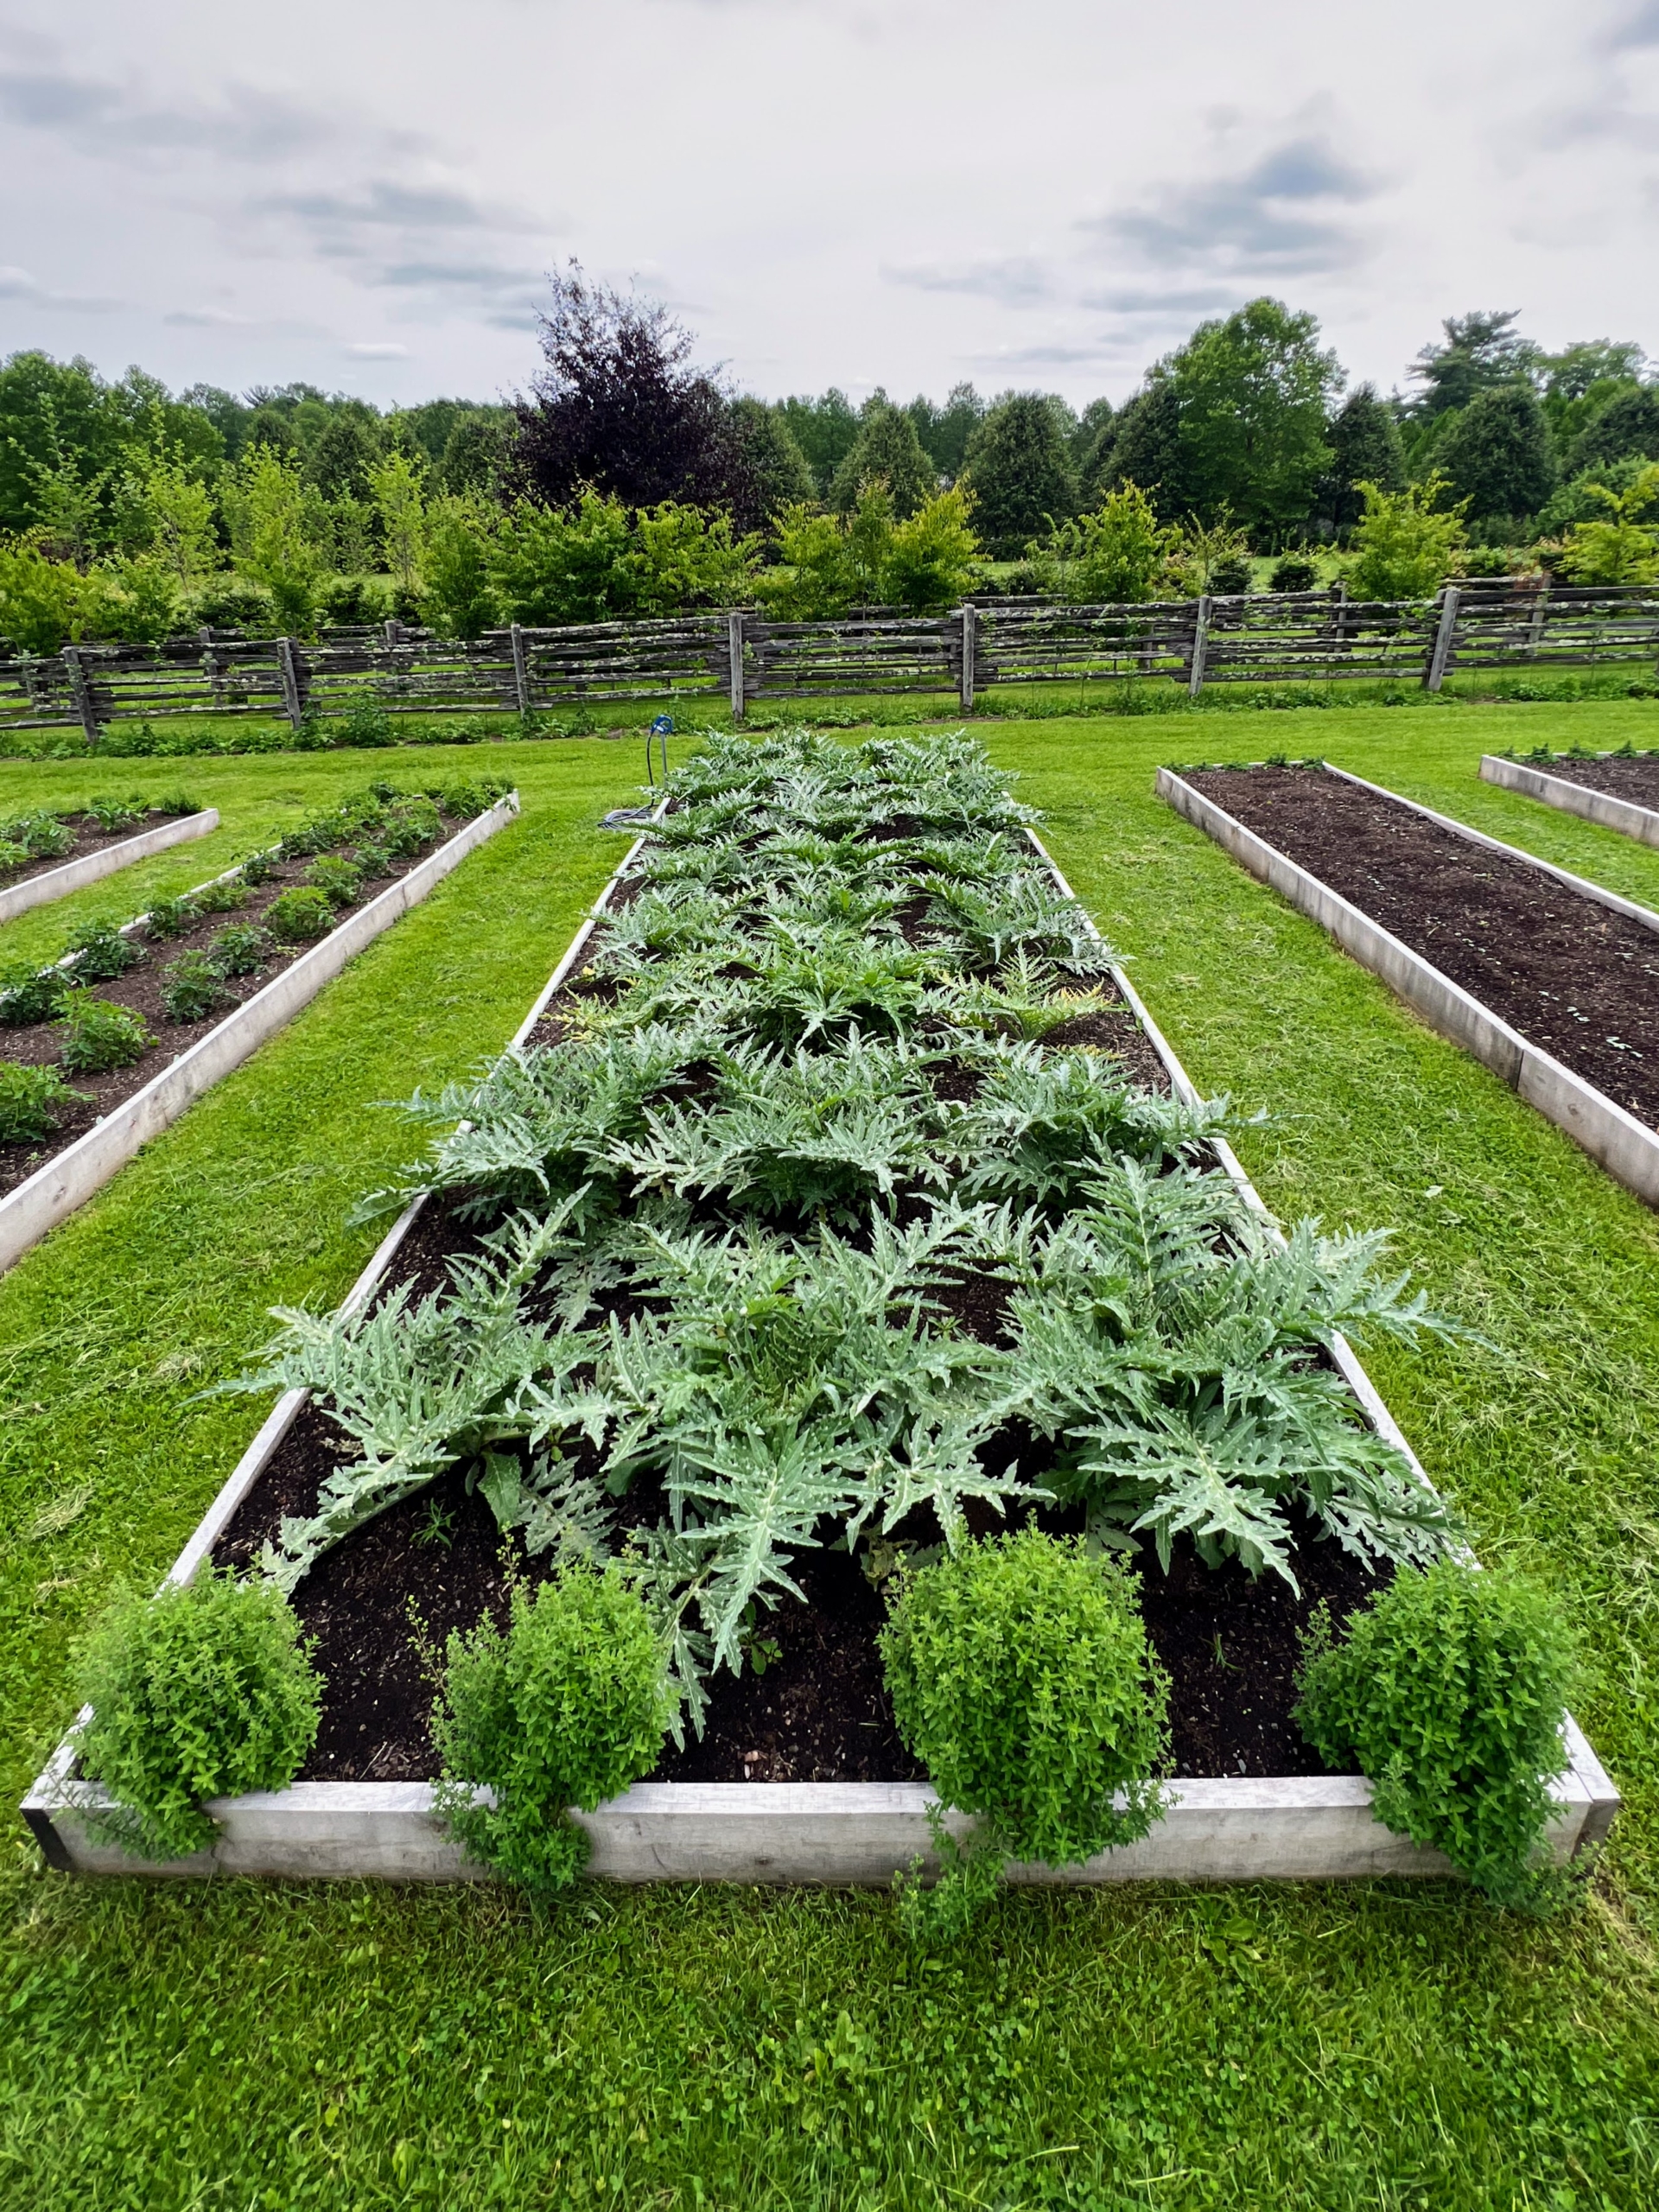
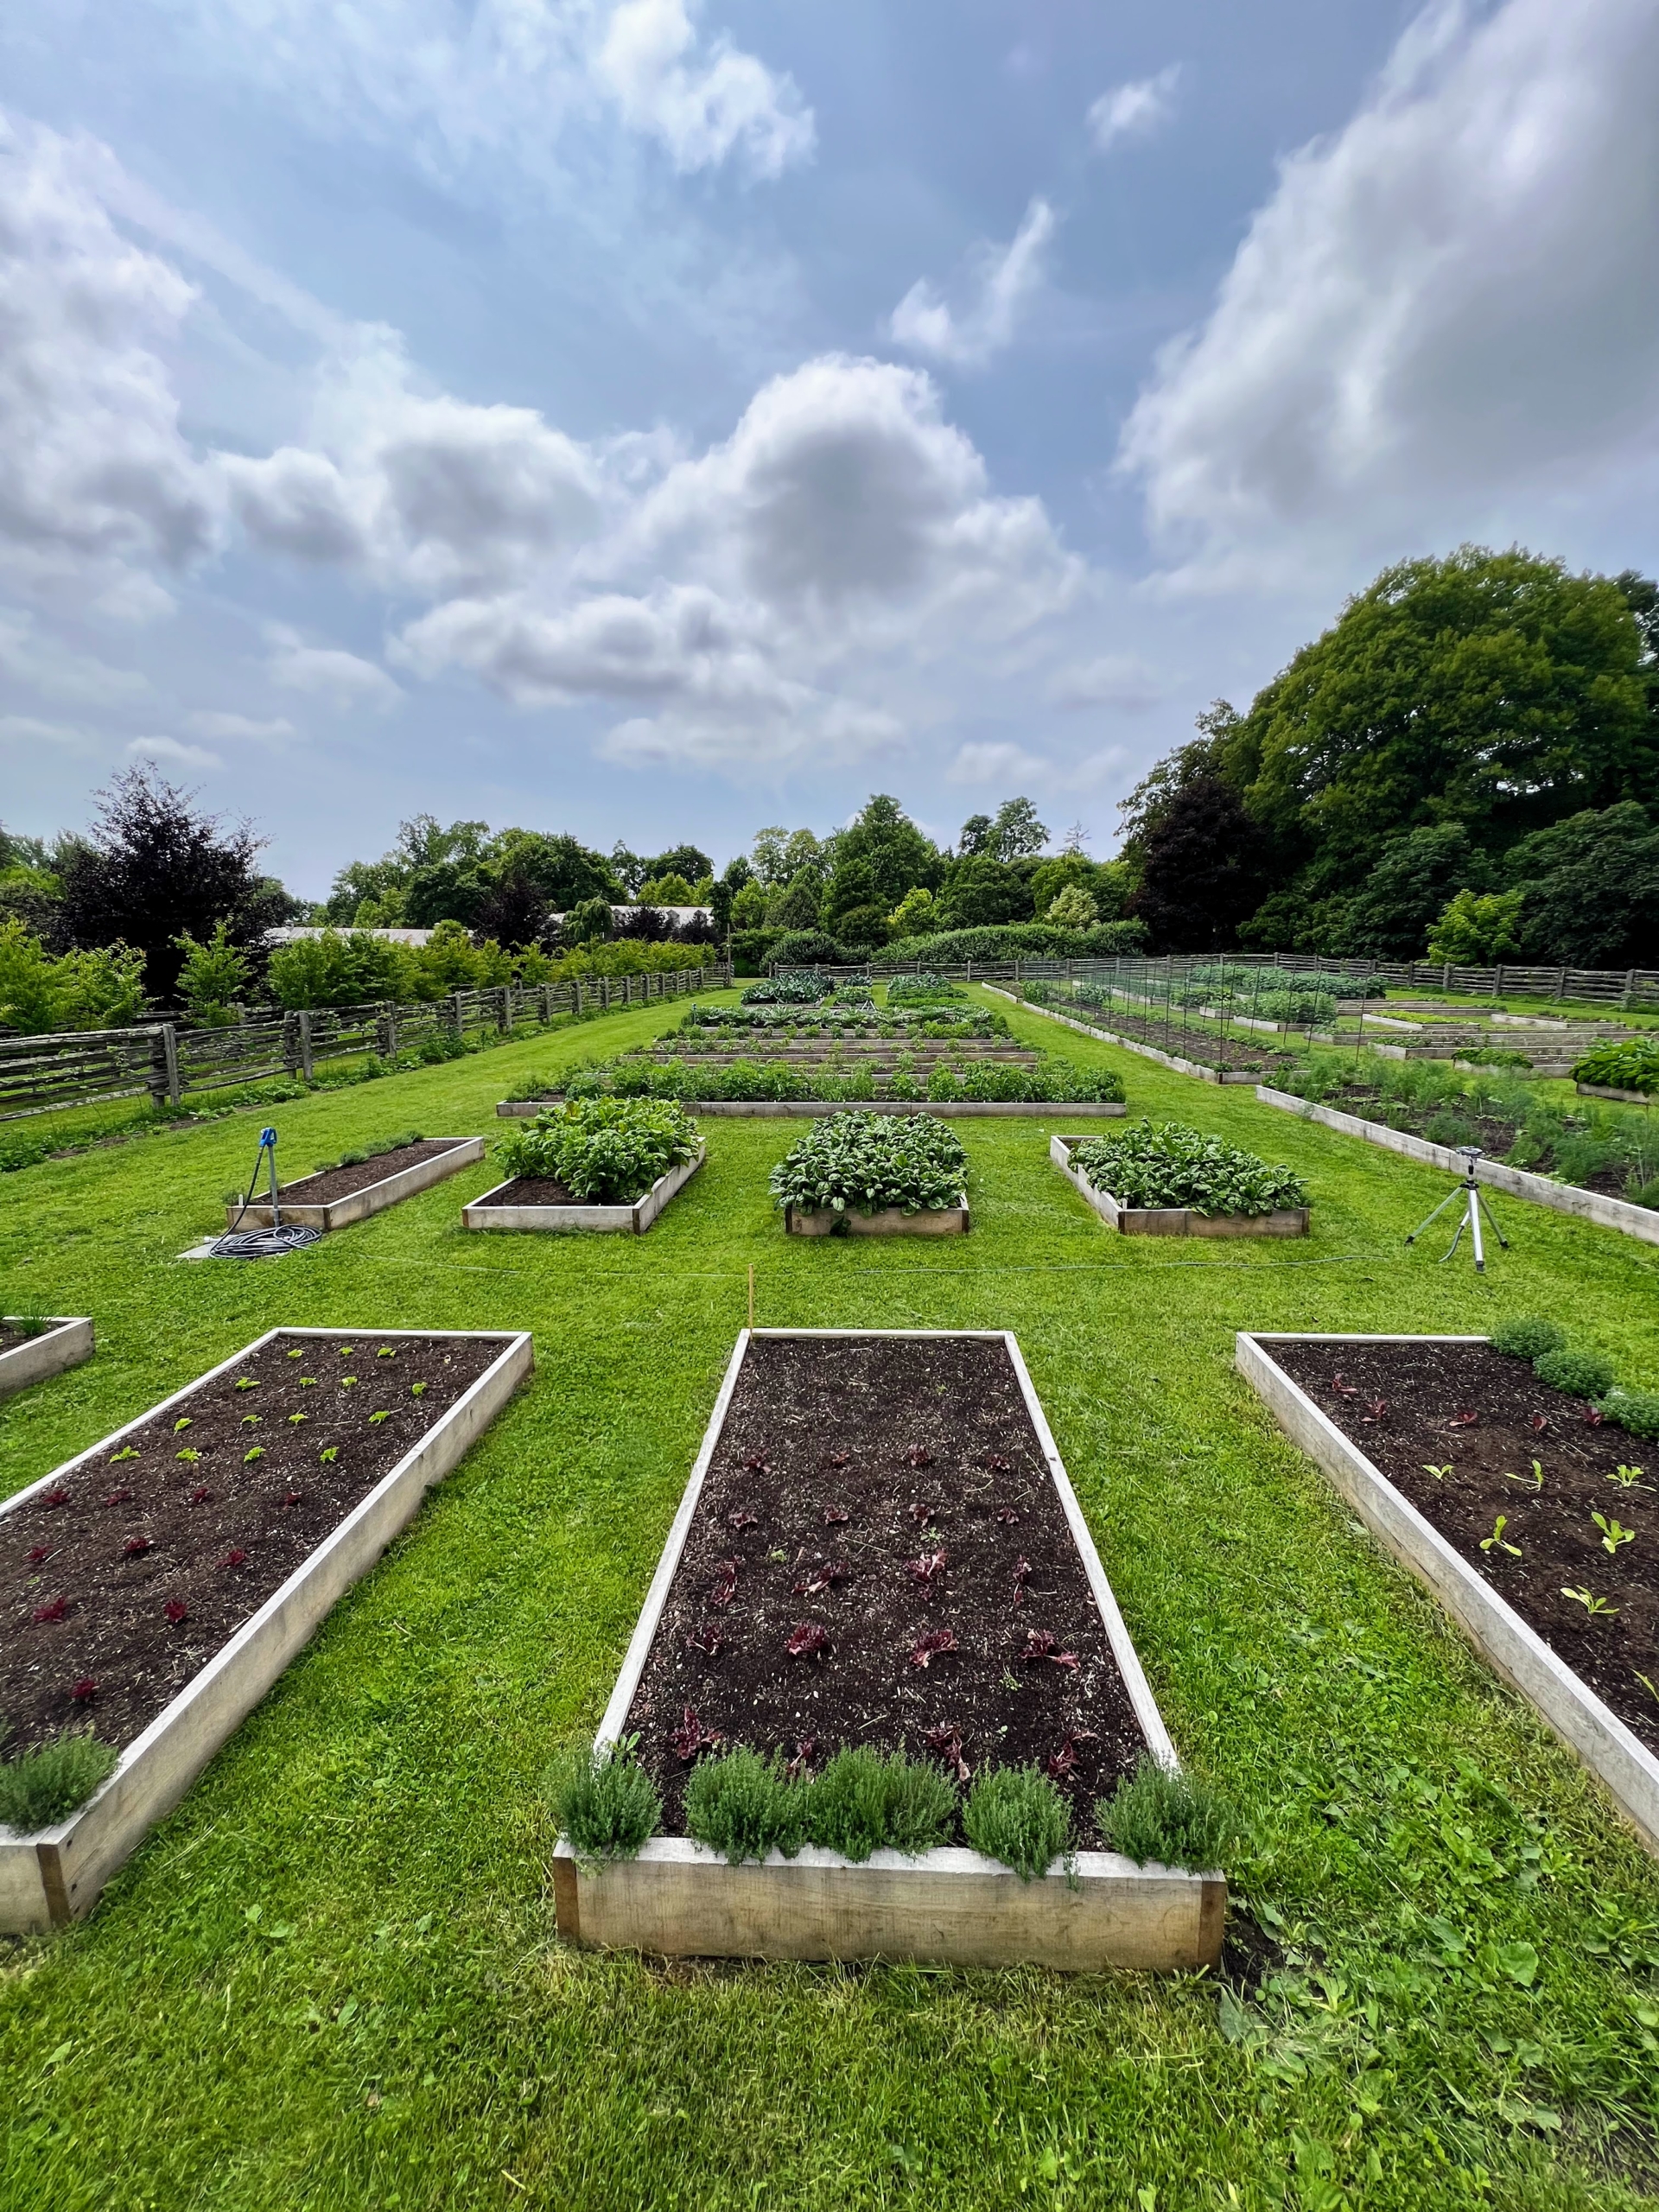
Kevin captured this image from the top of the garden looking down its length. This garden has more than 40 beds. My head gardener, Ryan McCallister, and I planned everything out on a map and made sure we accounted for every crop we wanted to grow.
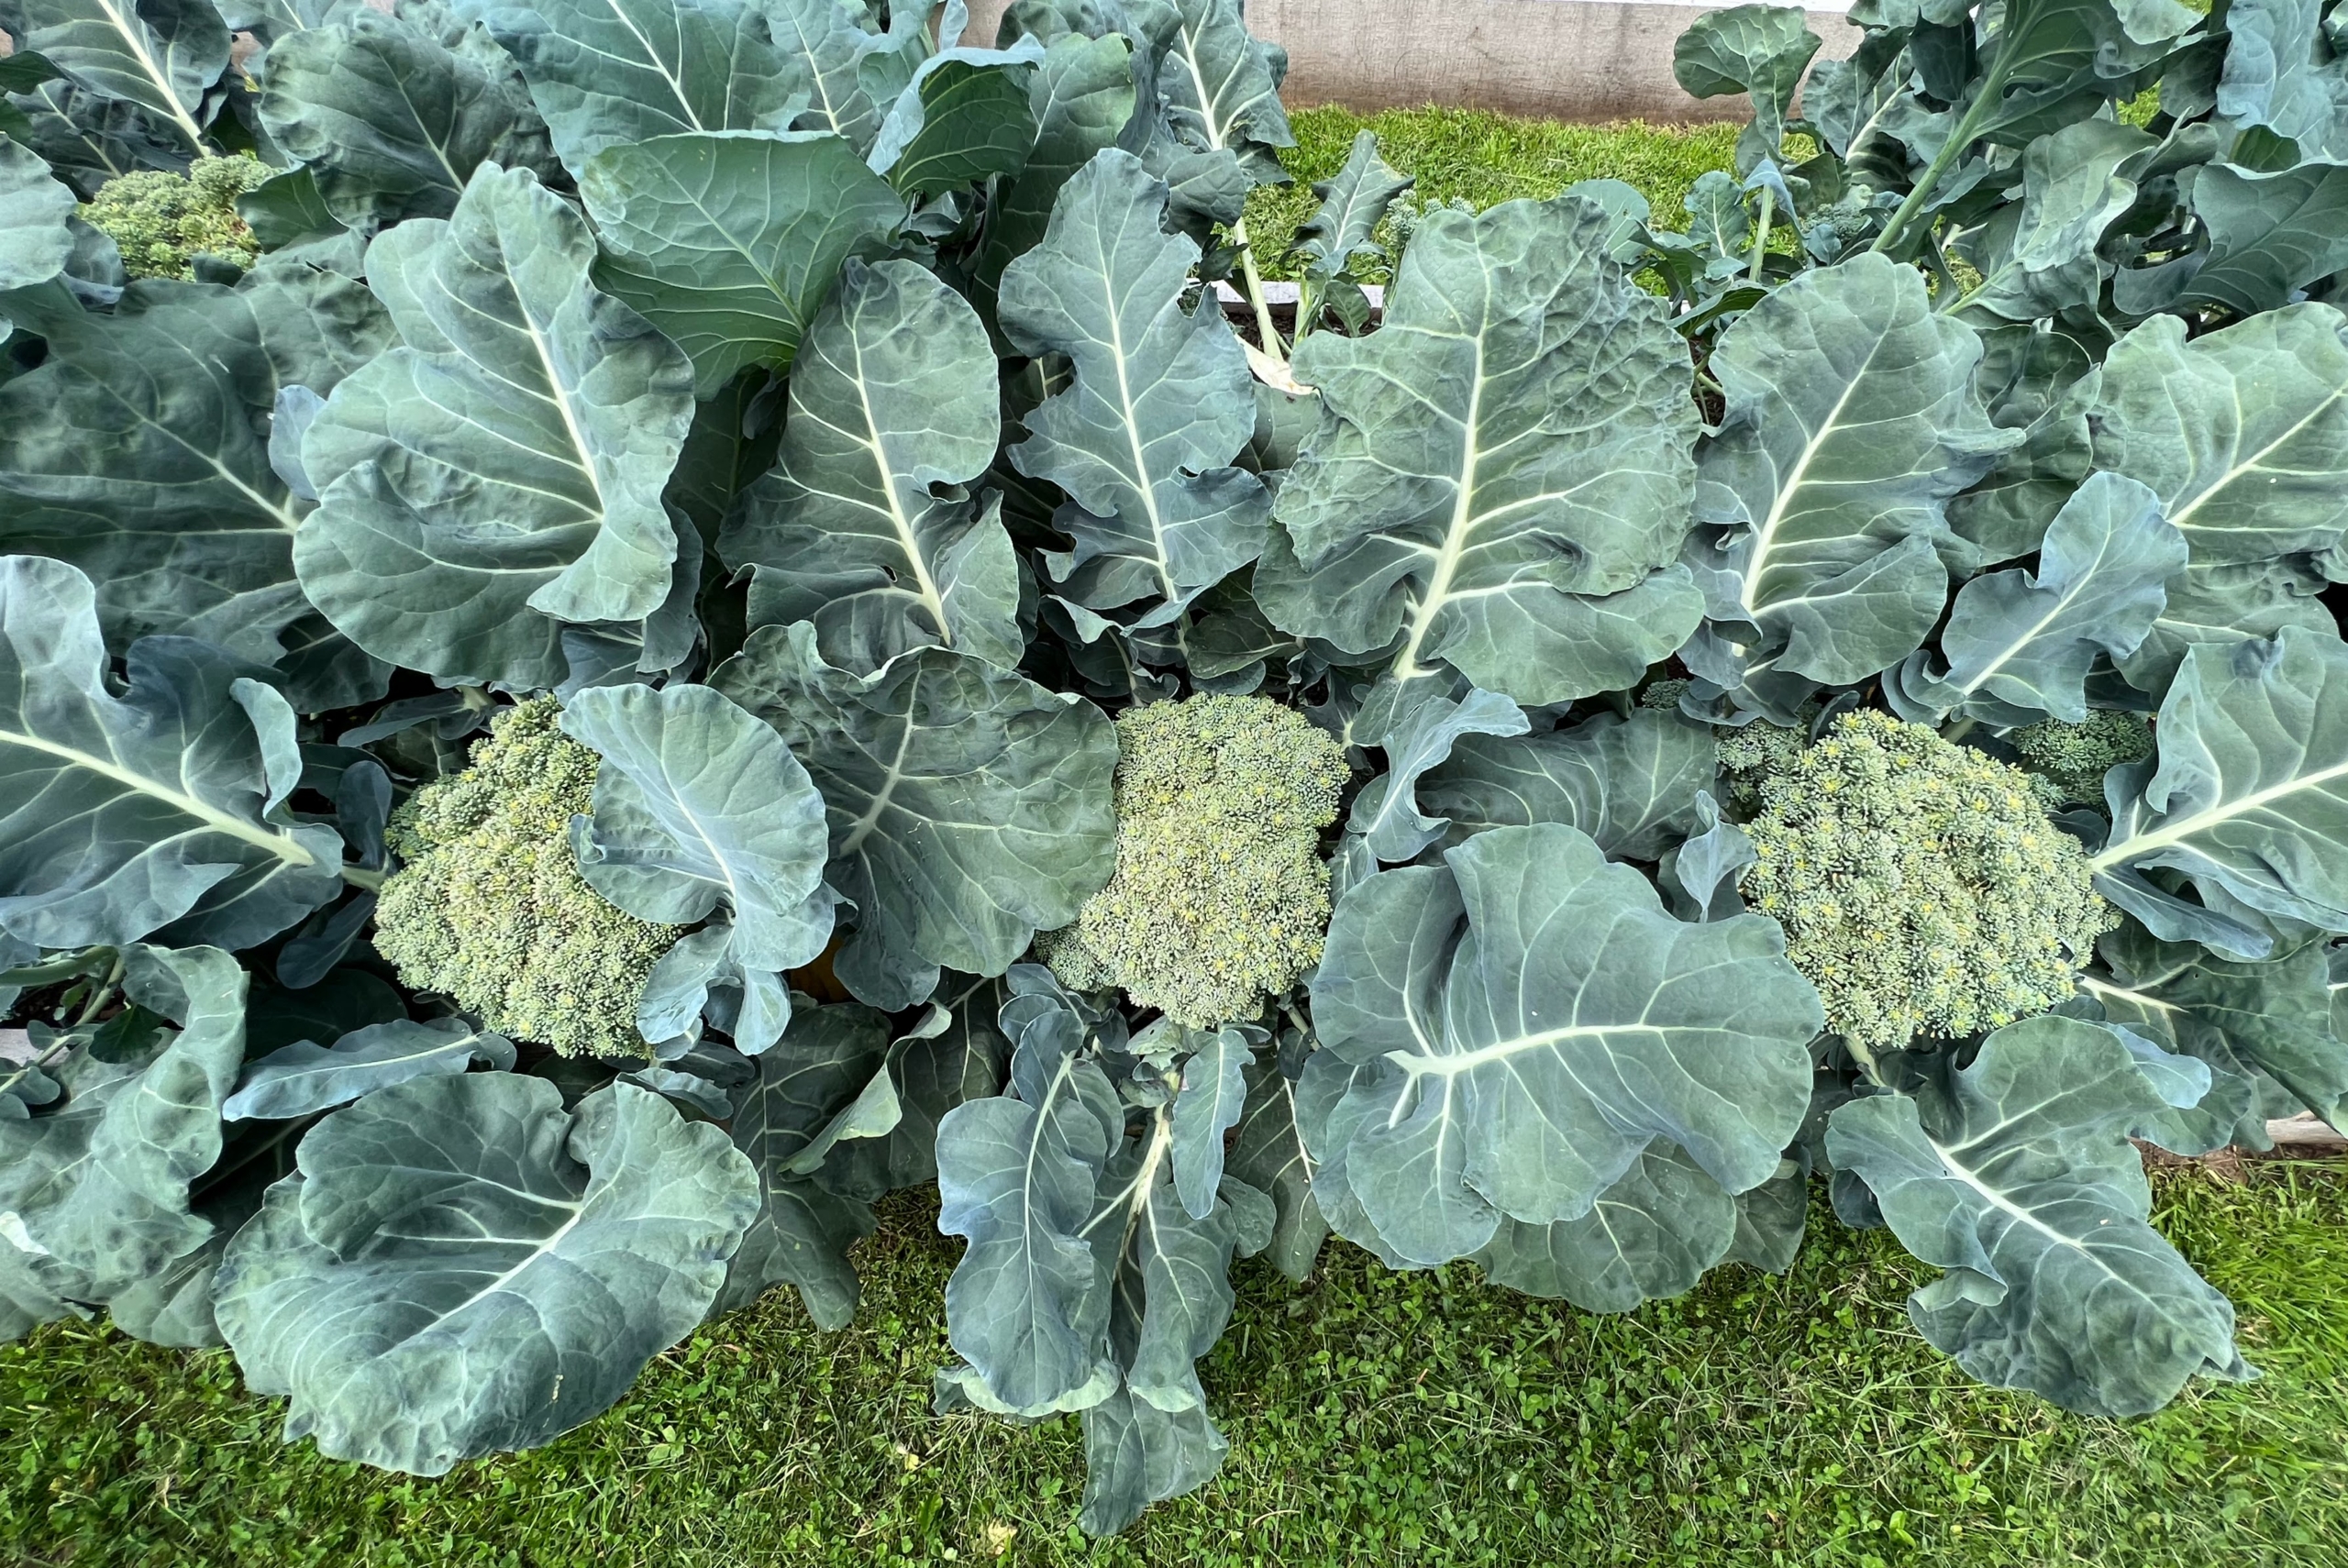
This year, the vegetables look utterly amazing. These are just three of the broccoli heads – each one more perfect than its neighbor. I picked one not long ago and it weighed two and a half pounds!
Usually, everyone looks for the beautiful head in the center, but its leaves are also quite pretty. Kevin took a side photo of our cabbages.
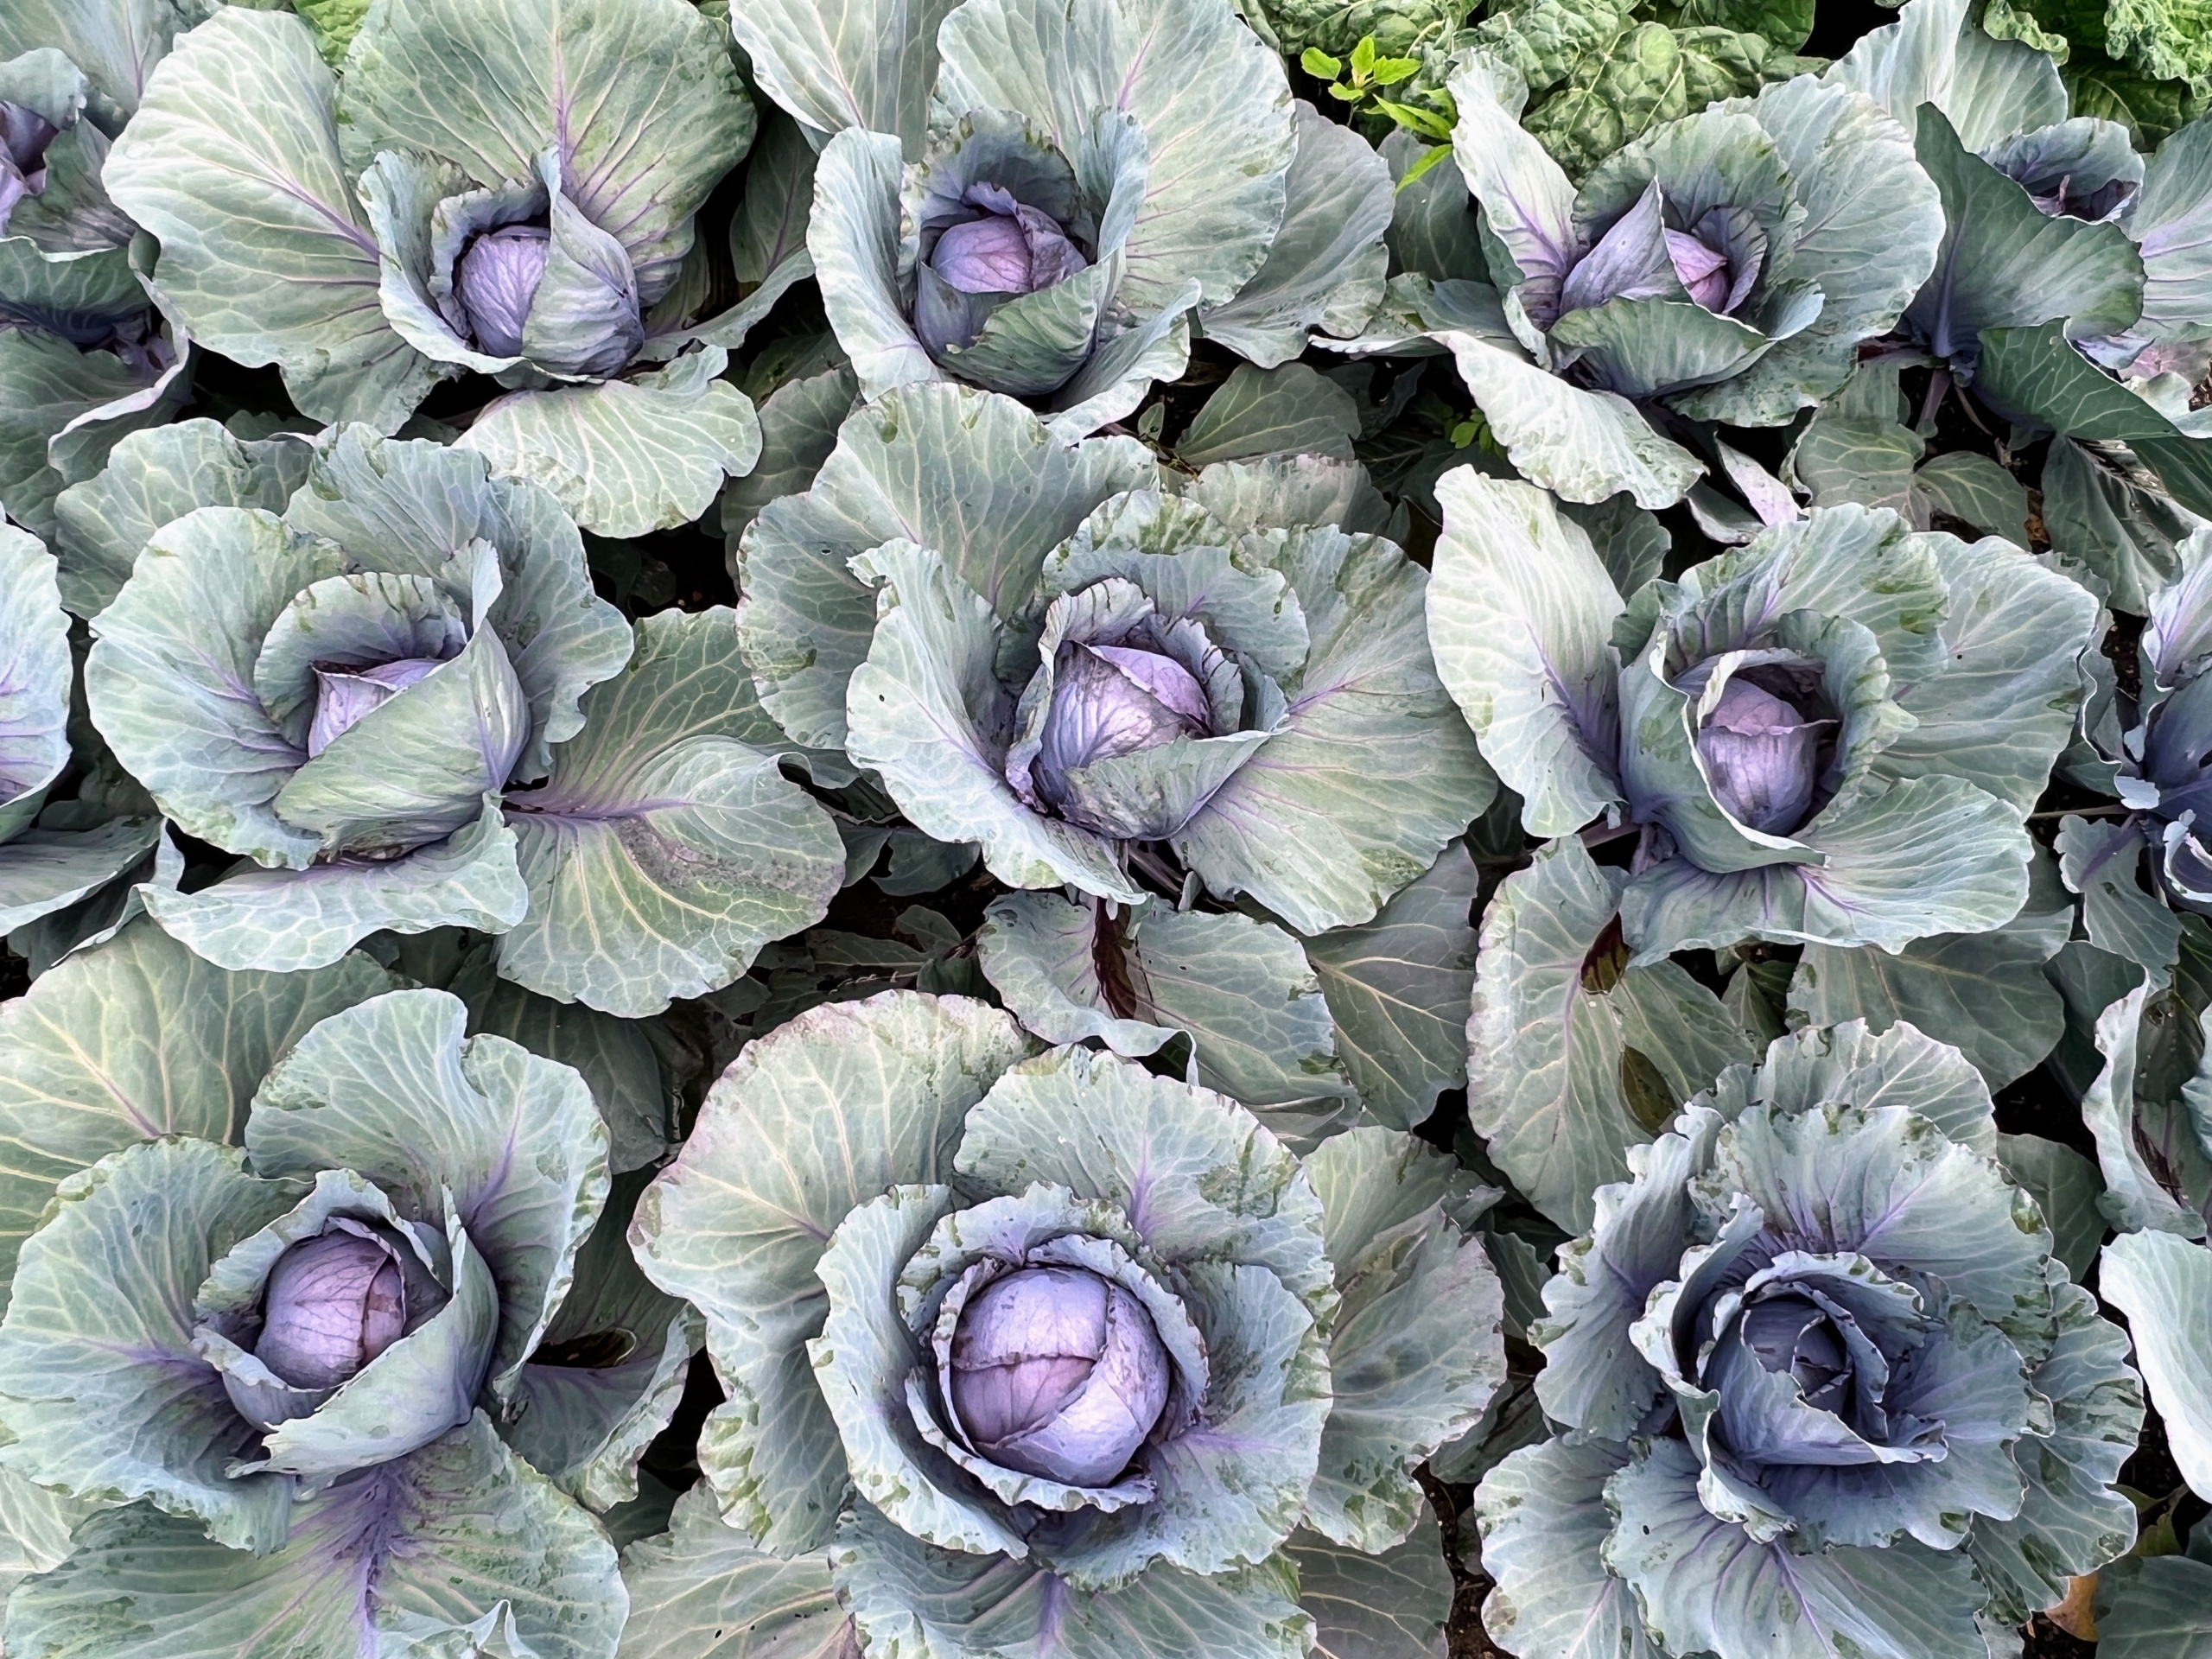
And here is a view from the top. To get the best health benefits from cabbage, it’s good to include all three varieties into the diet – Savoy, red, and green.
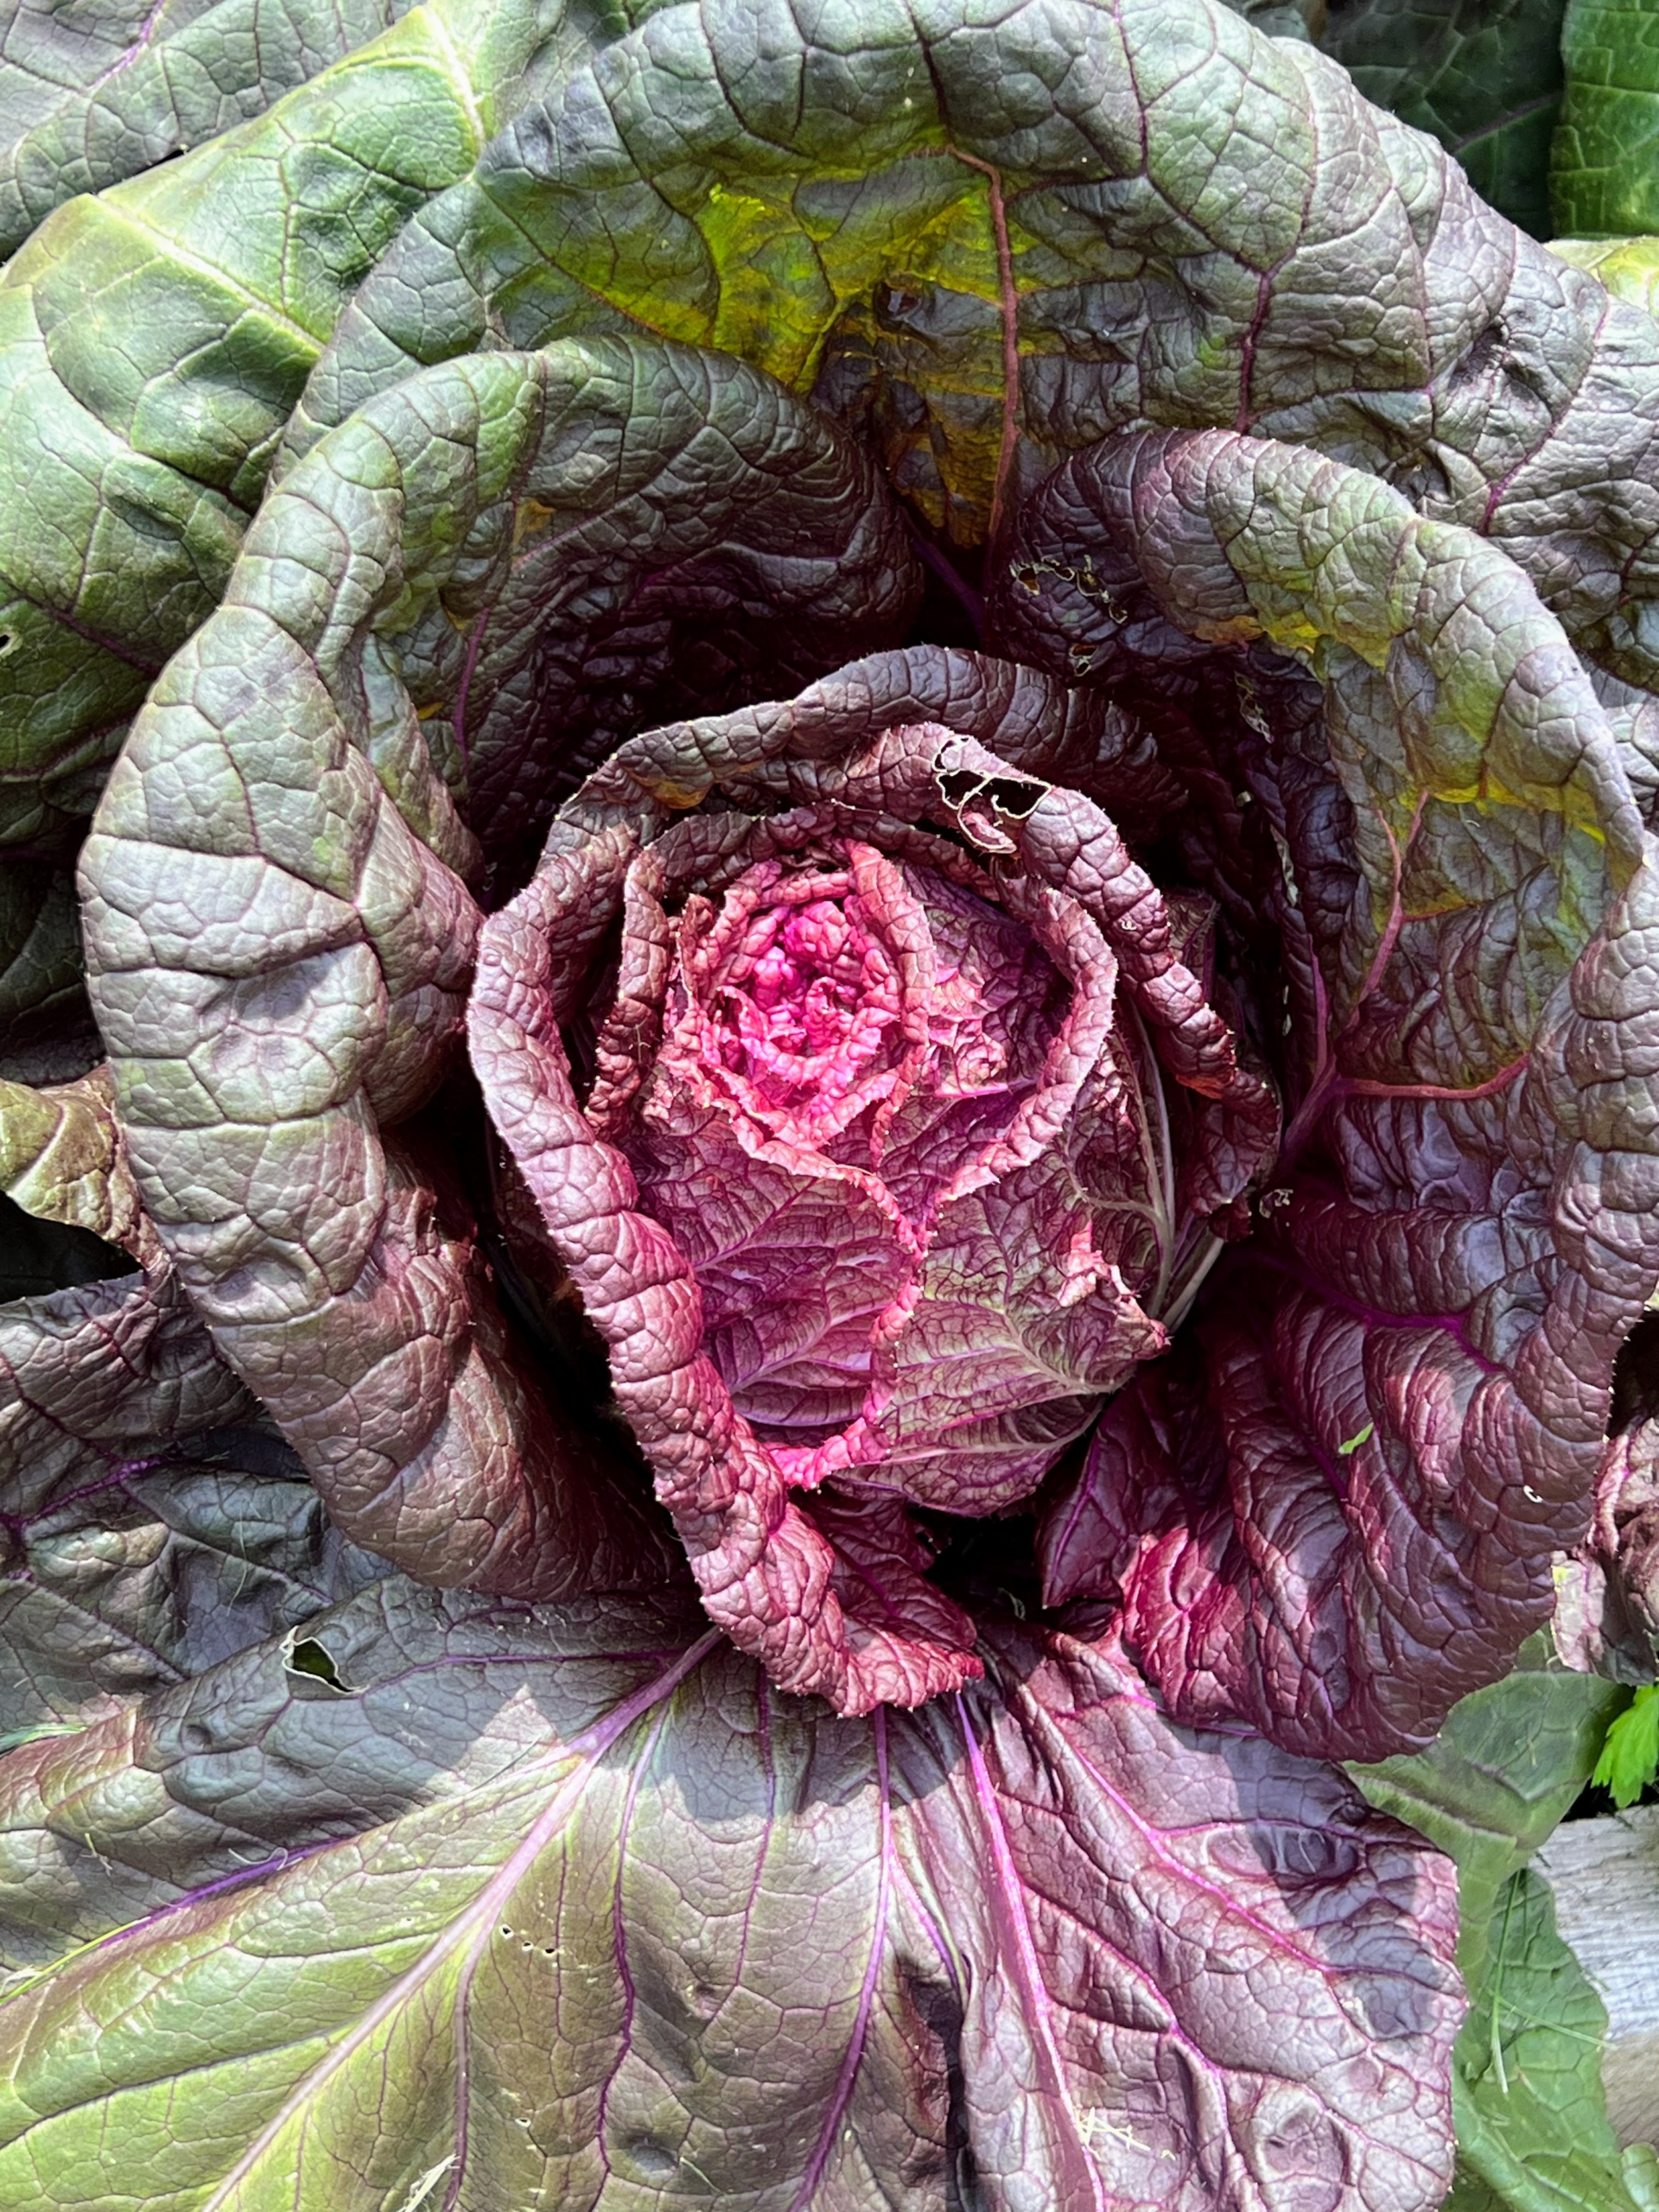
From this angle, this red cabbage looks like a rose just beginning to unfurl.
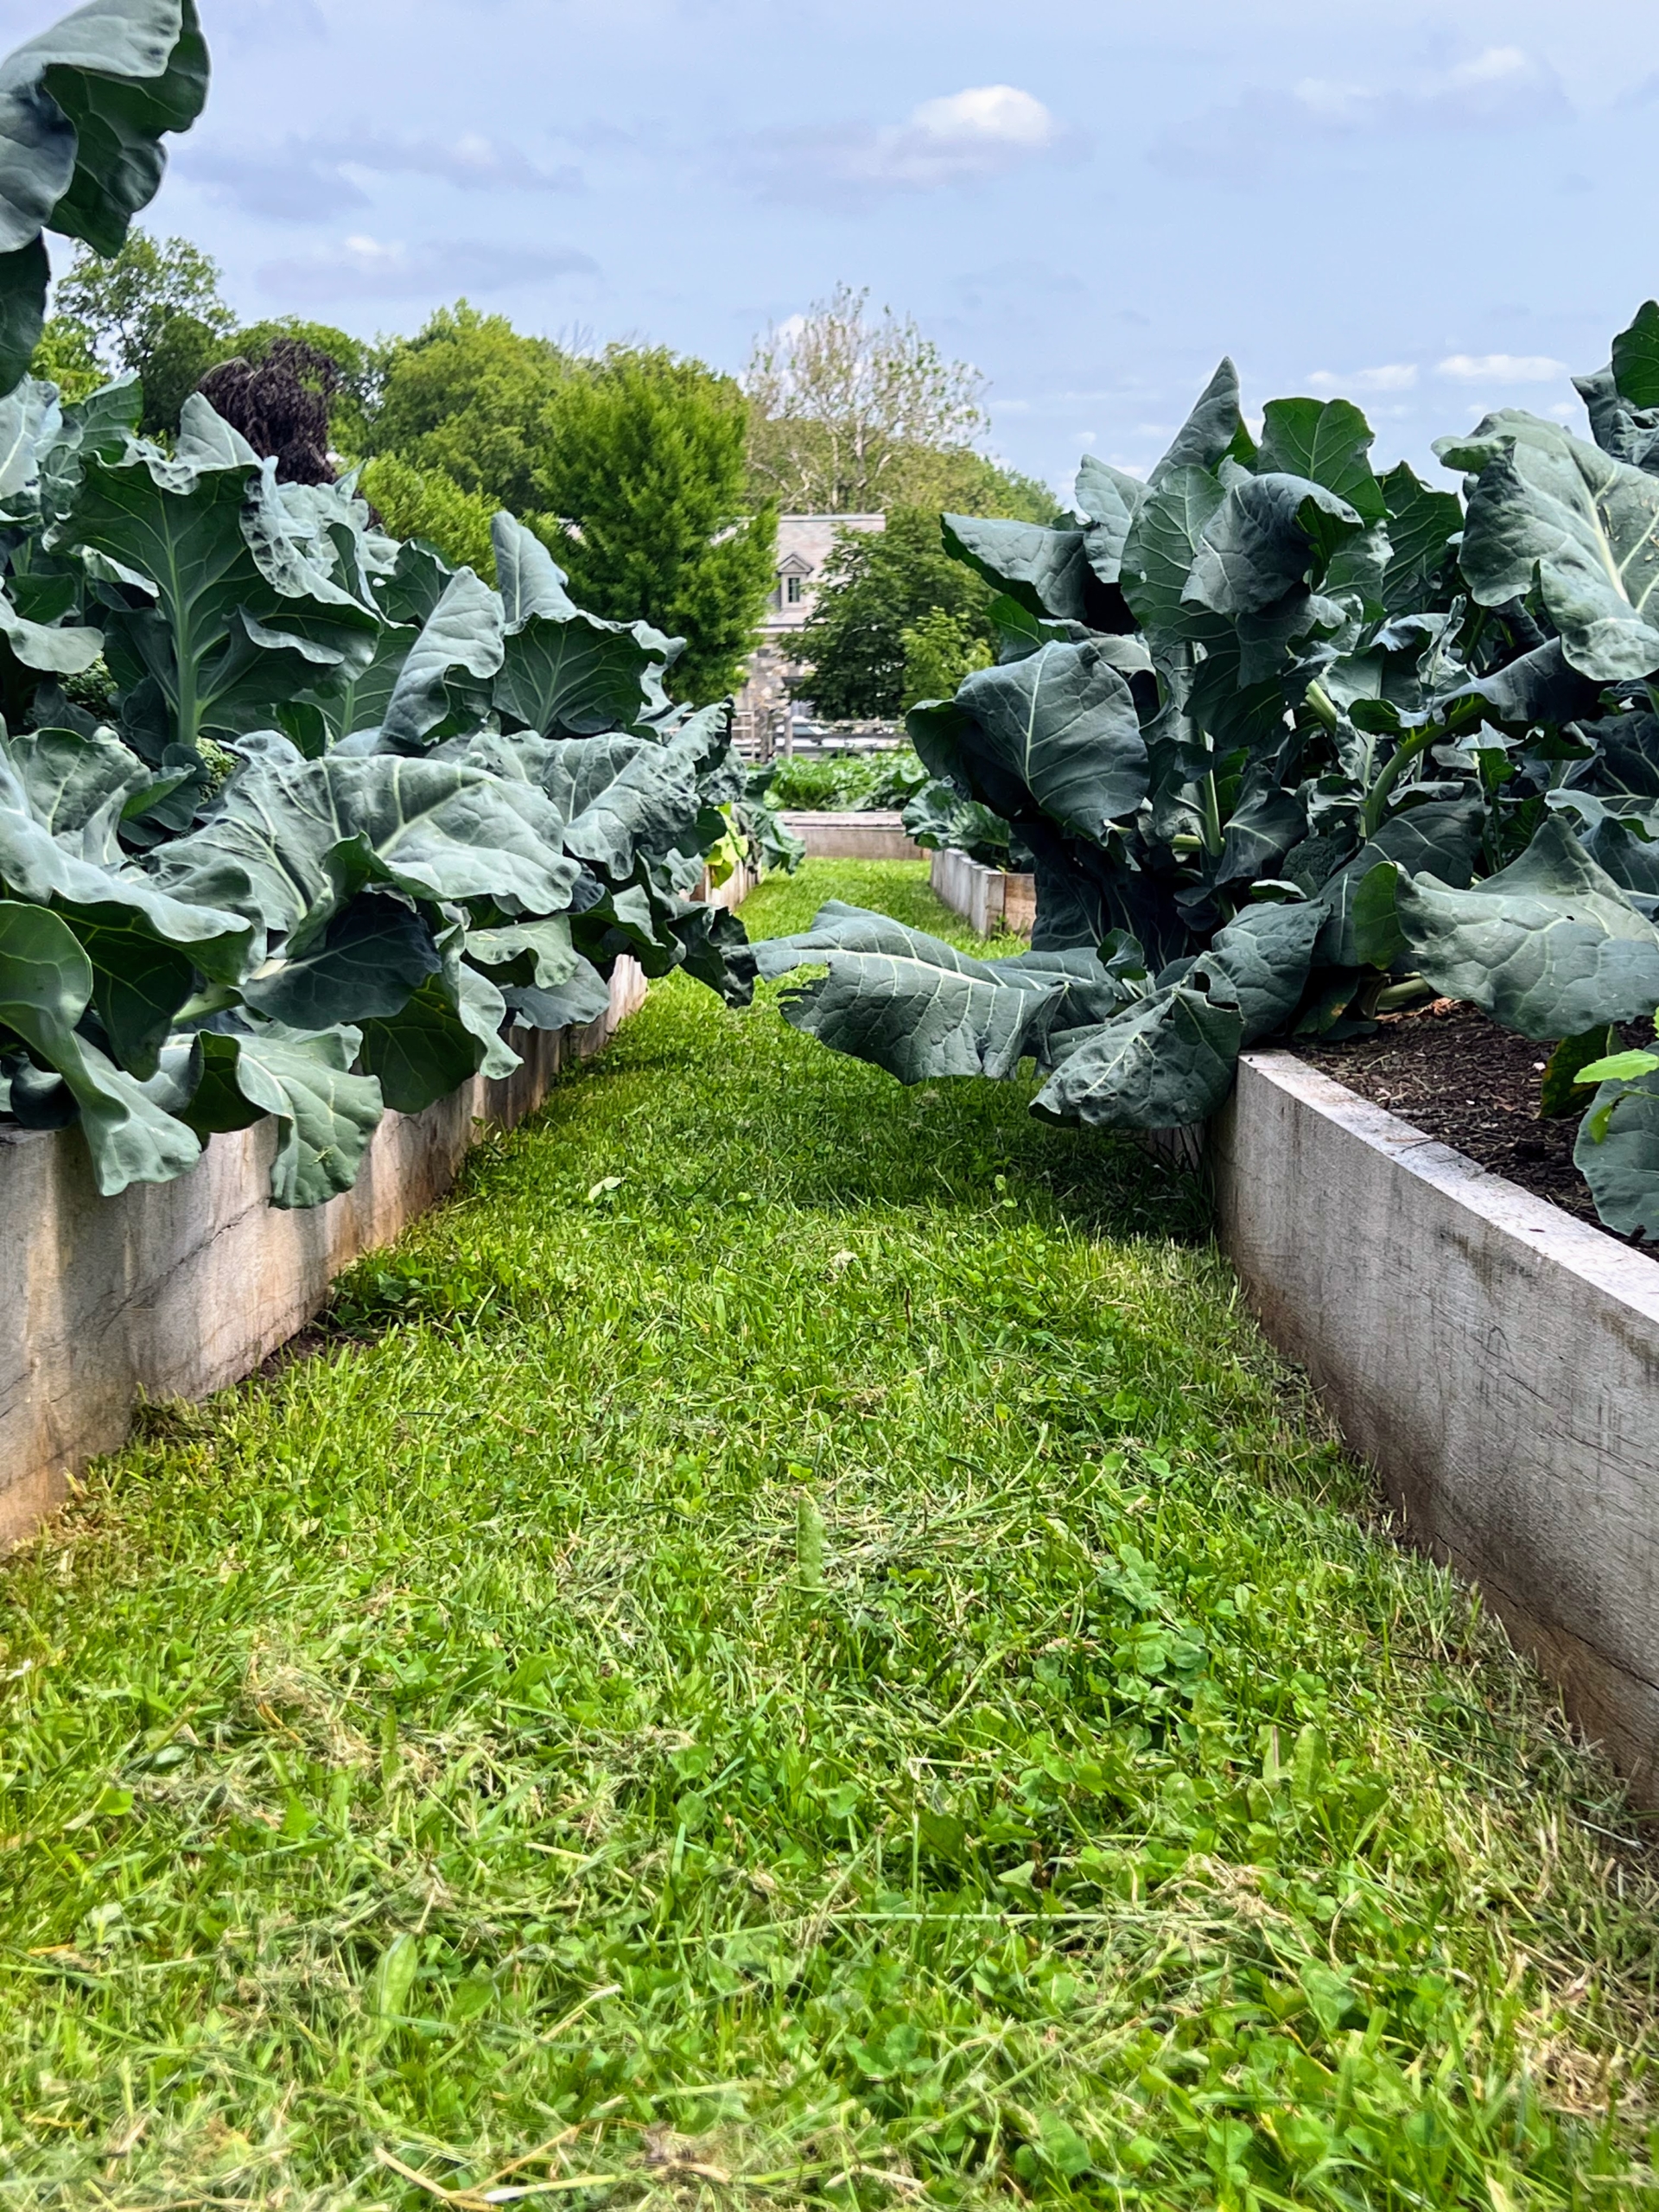
Kevin took this photo to show the giant leaves growing out of the garden box. We attribute so much of the growth to the excellent soil I have here at the farm. Not only is the base soil well fertilized by the donkeys, but we also used a mix of new soil and my own composted soil made here at the farm.
Here is another view – we’re all just so pleased with how well everything is growing.
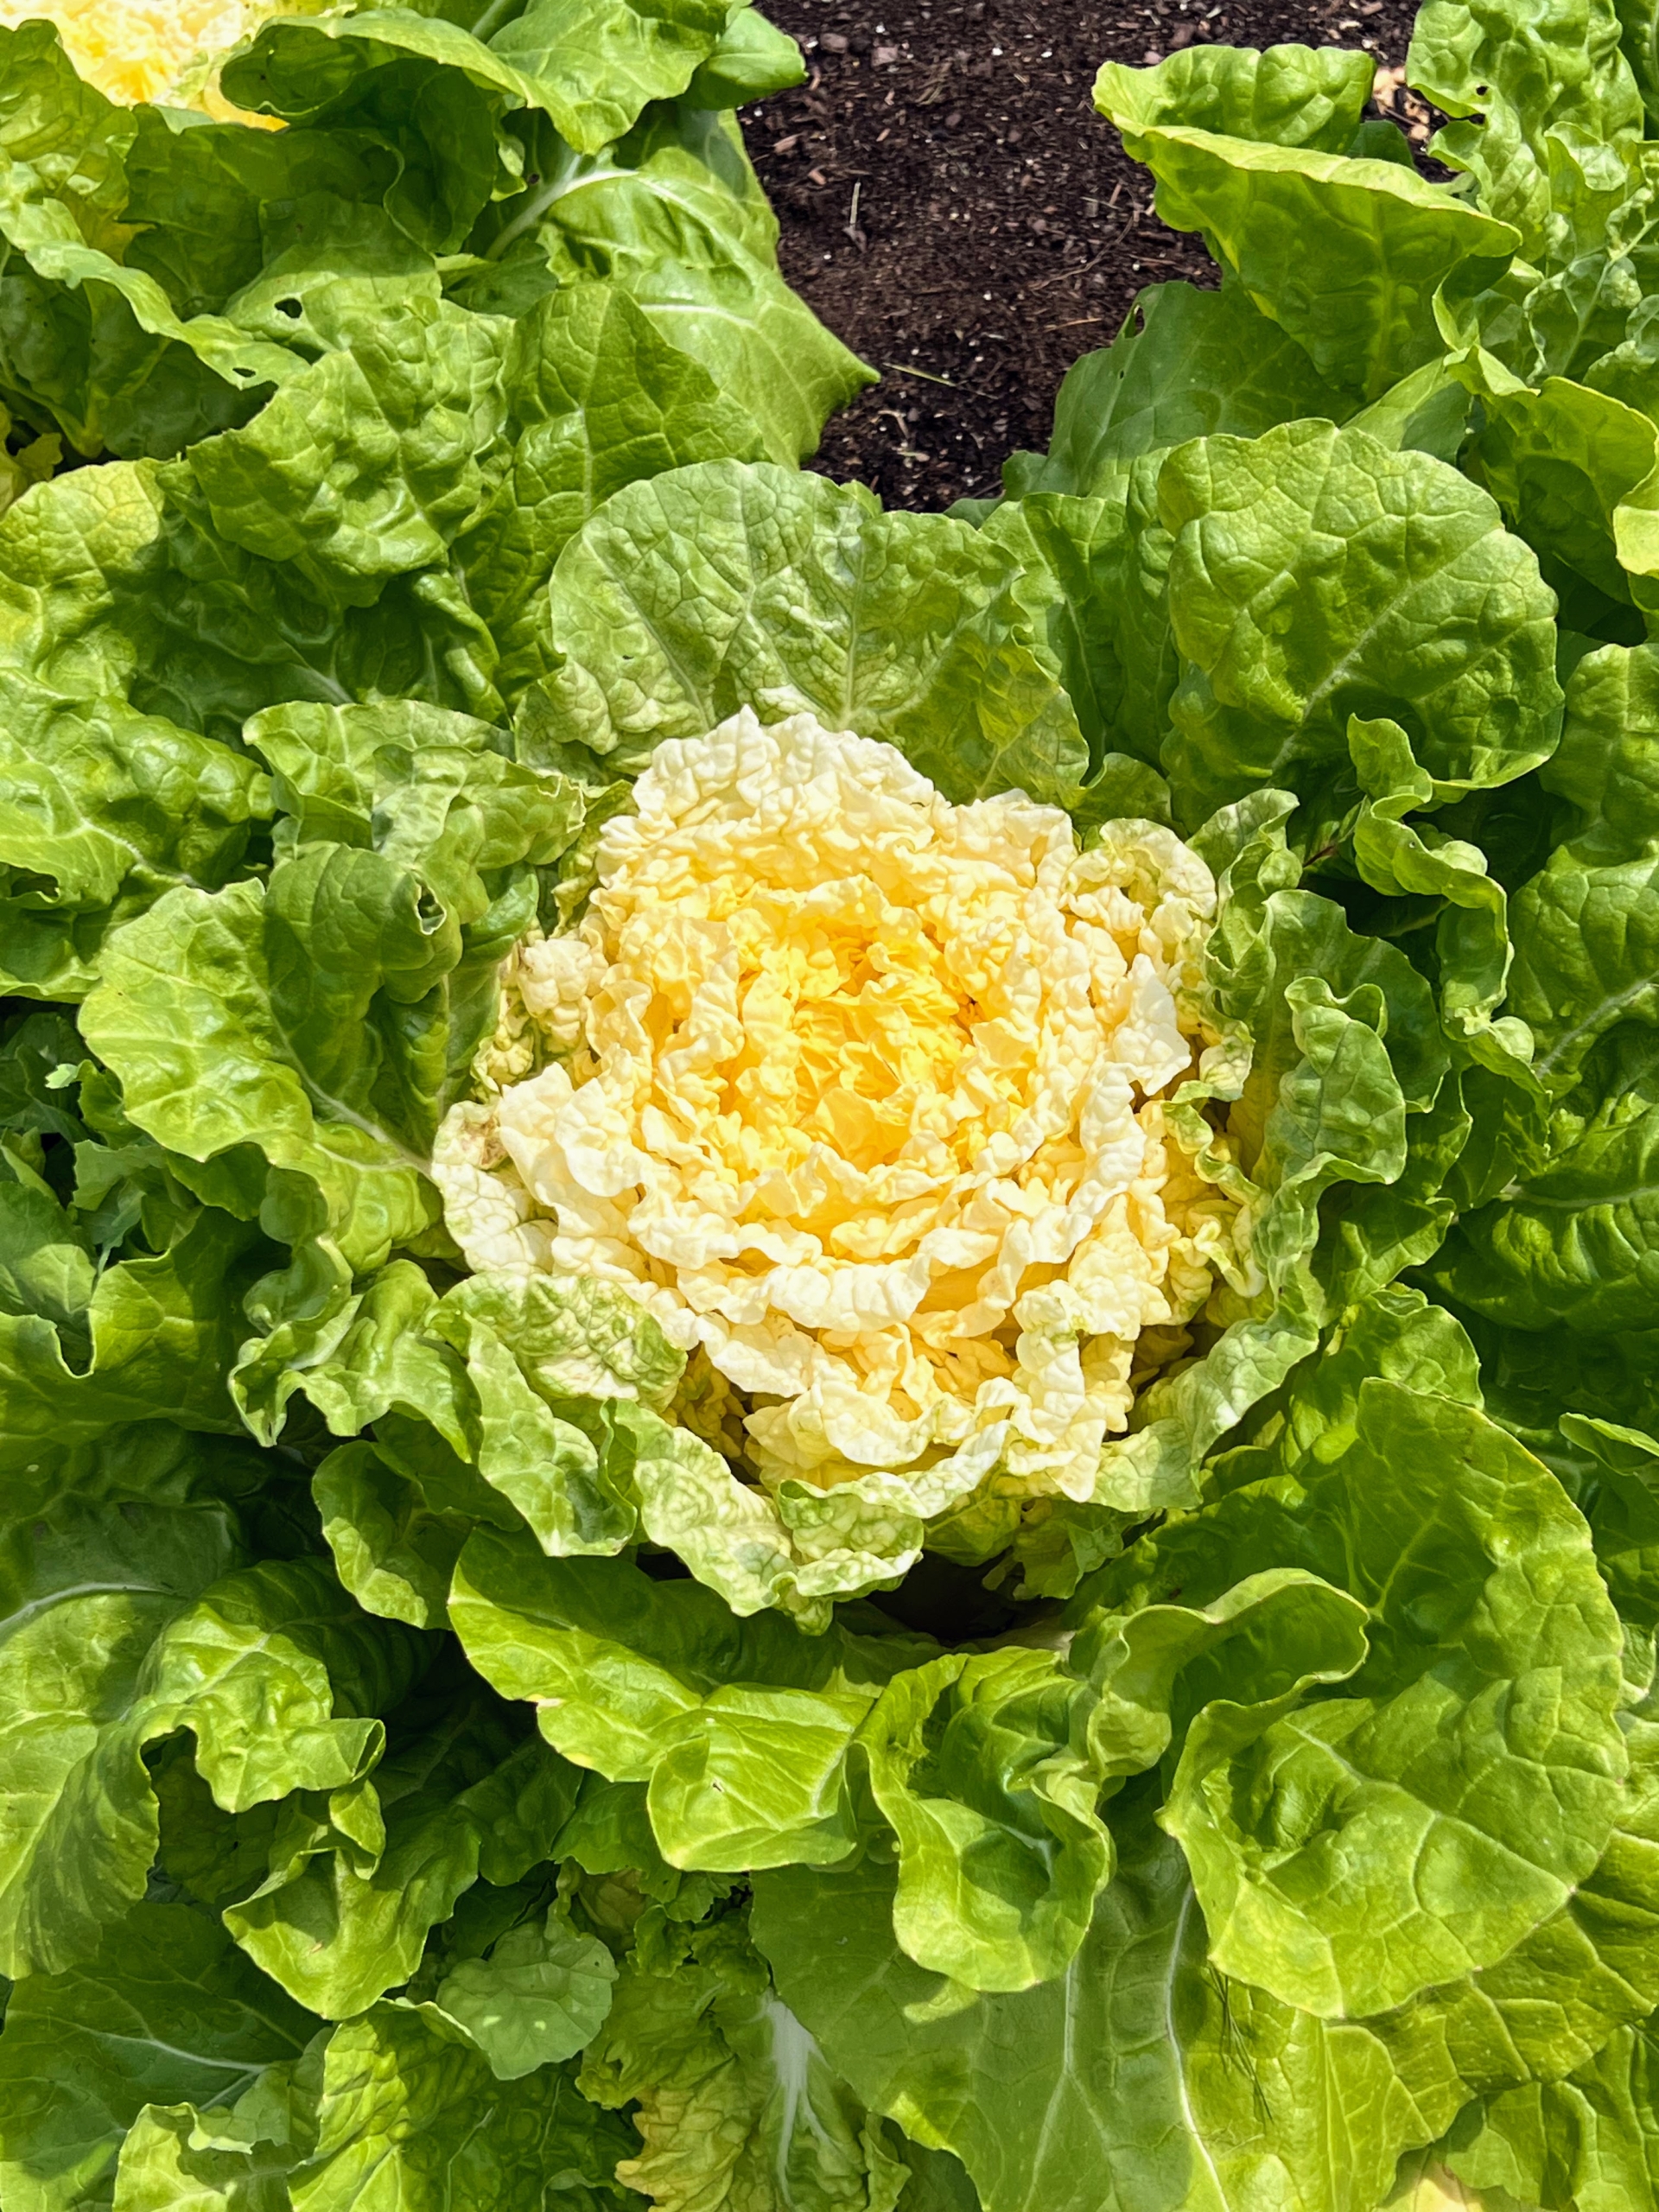
This is a Napa cabbage – the best-known variety of the Chinese cabbages with large, full-size heads. These heads are oblong with green, crinkly leaves on the outside and creamy yellow in the center.
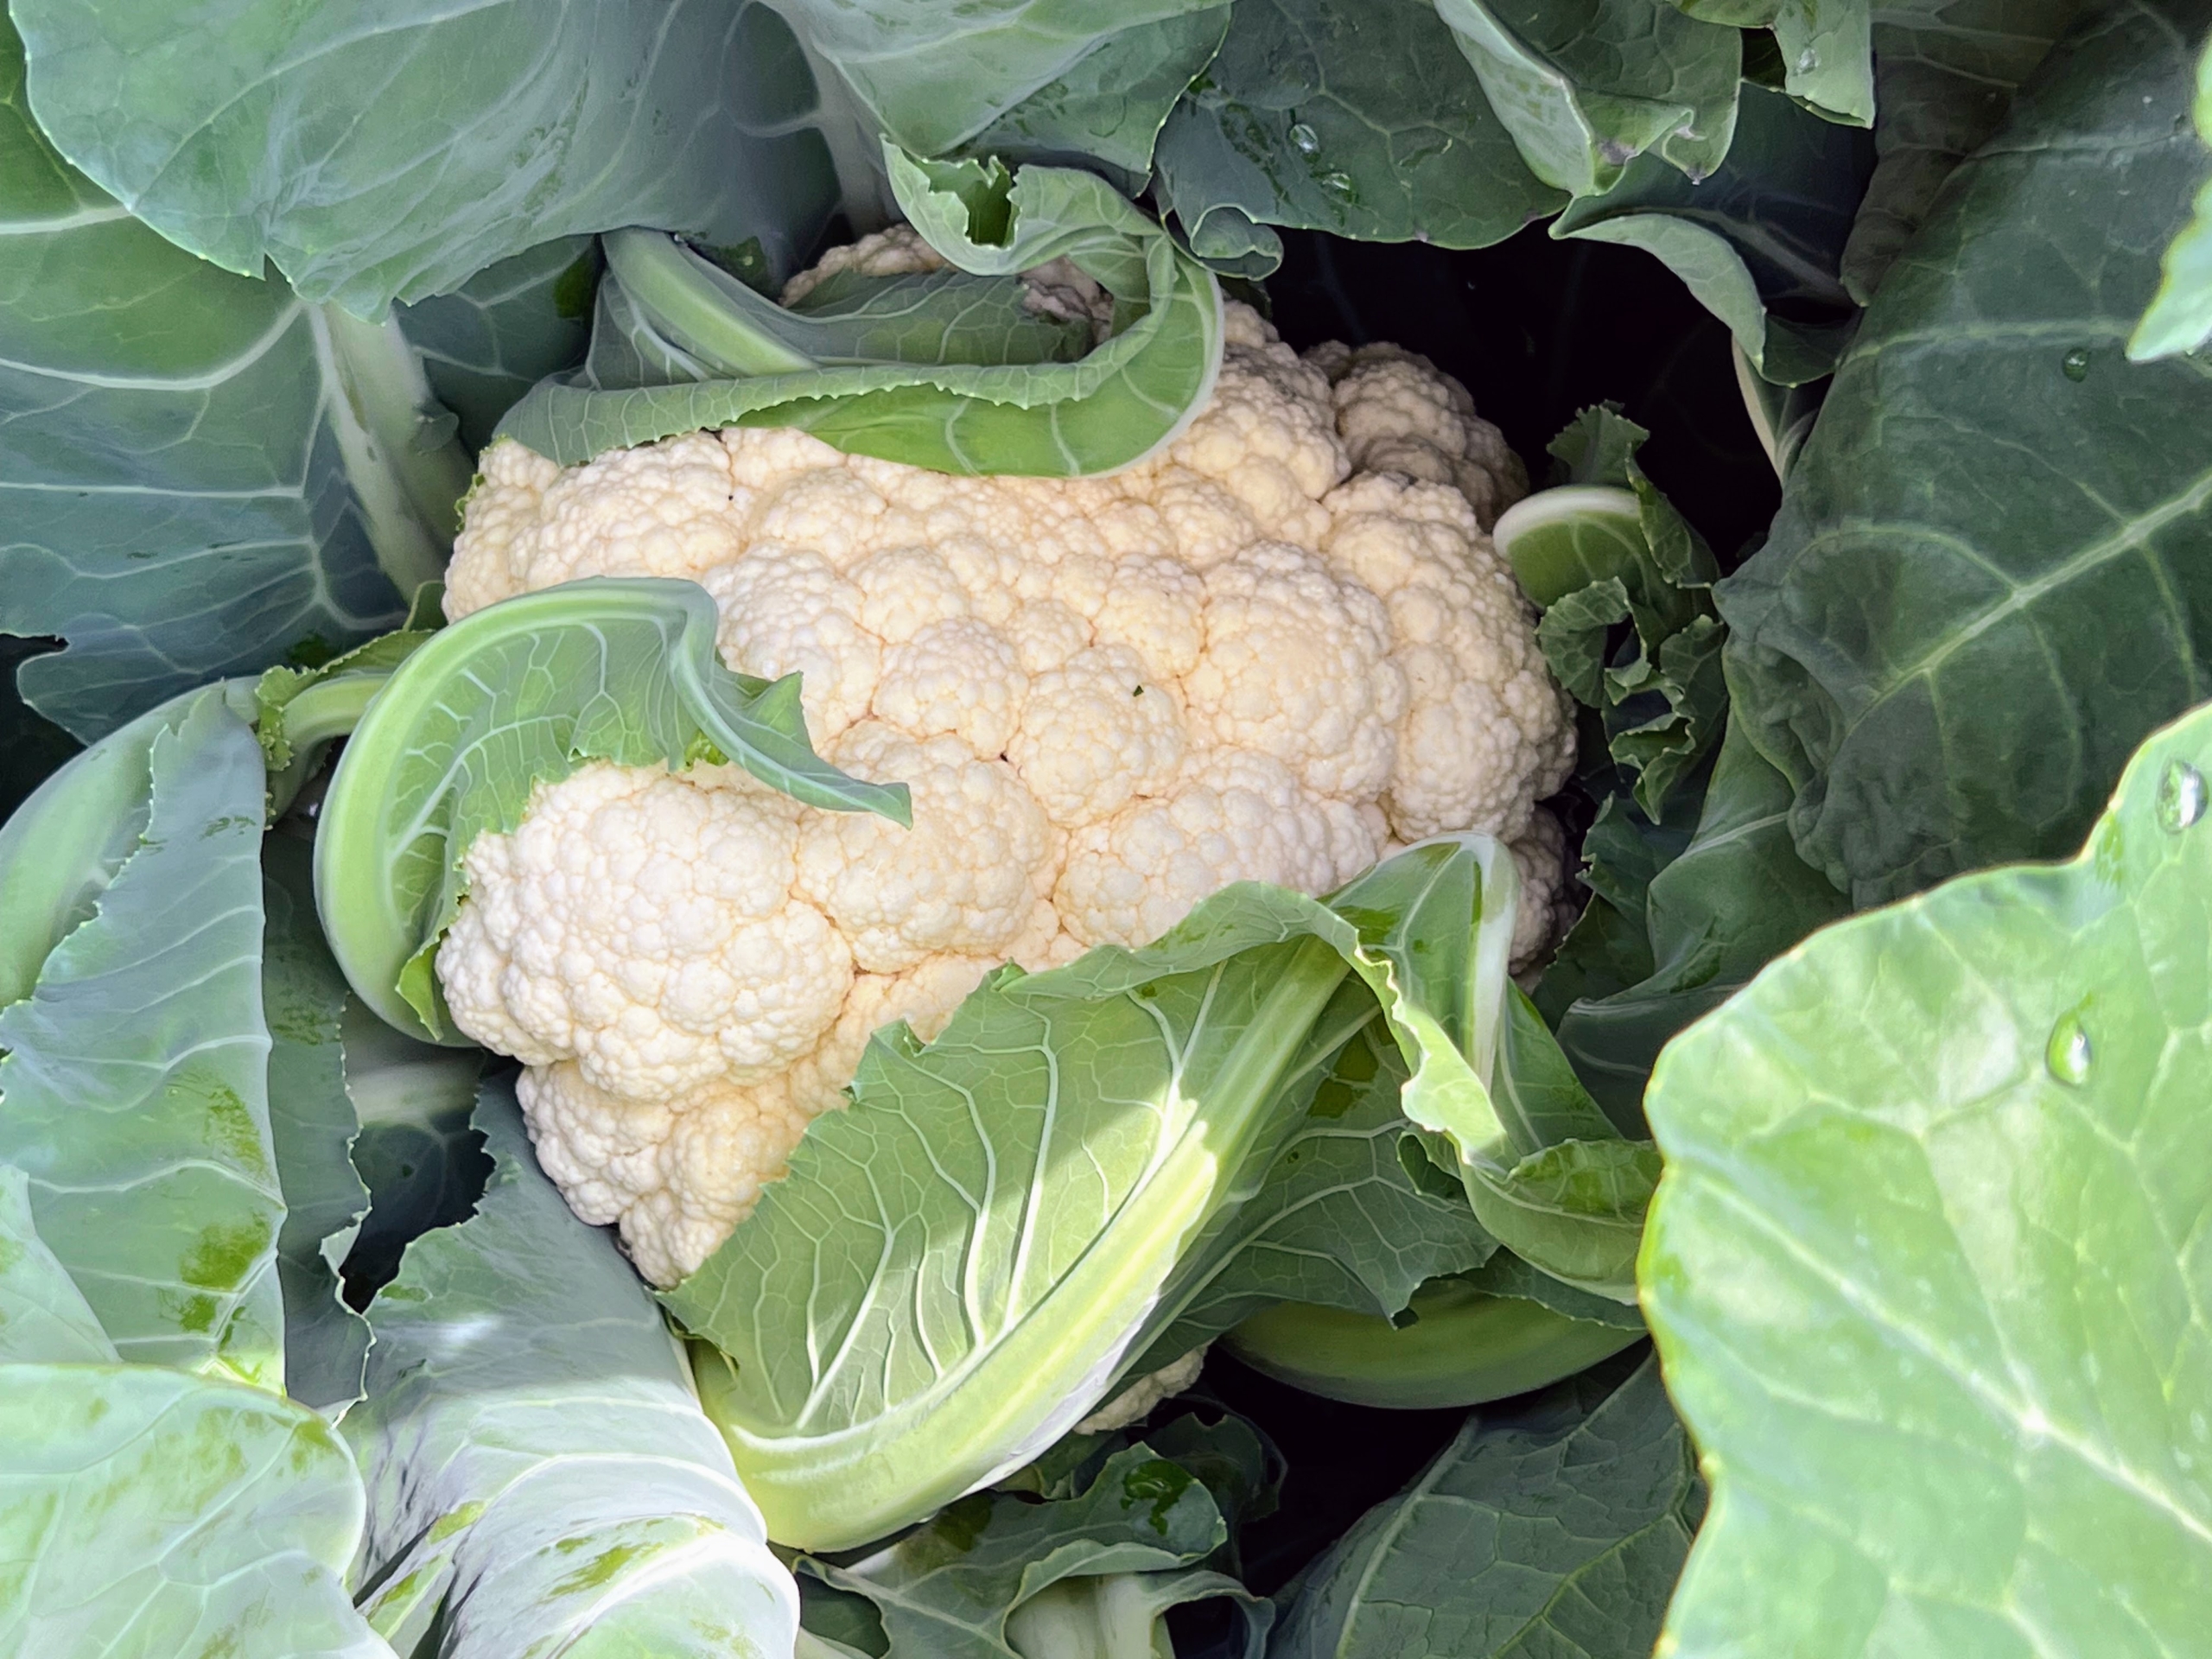
The cauliflower is just so pretty and so very large. Most are not ready just yet, but this one does look pretty close.
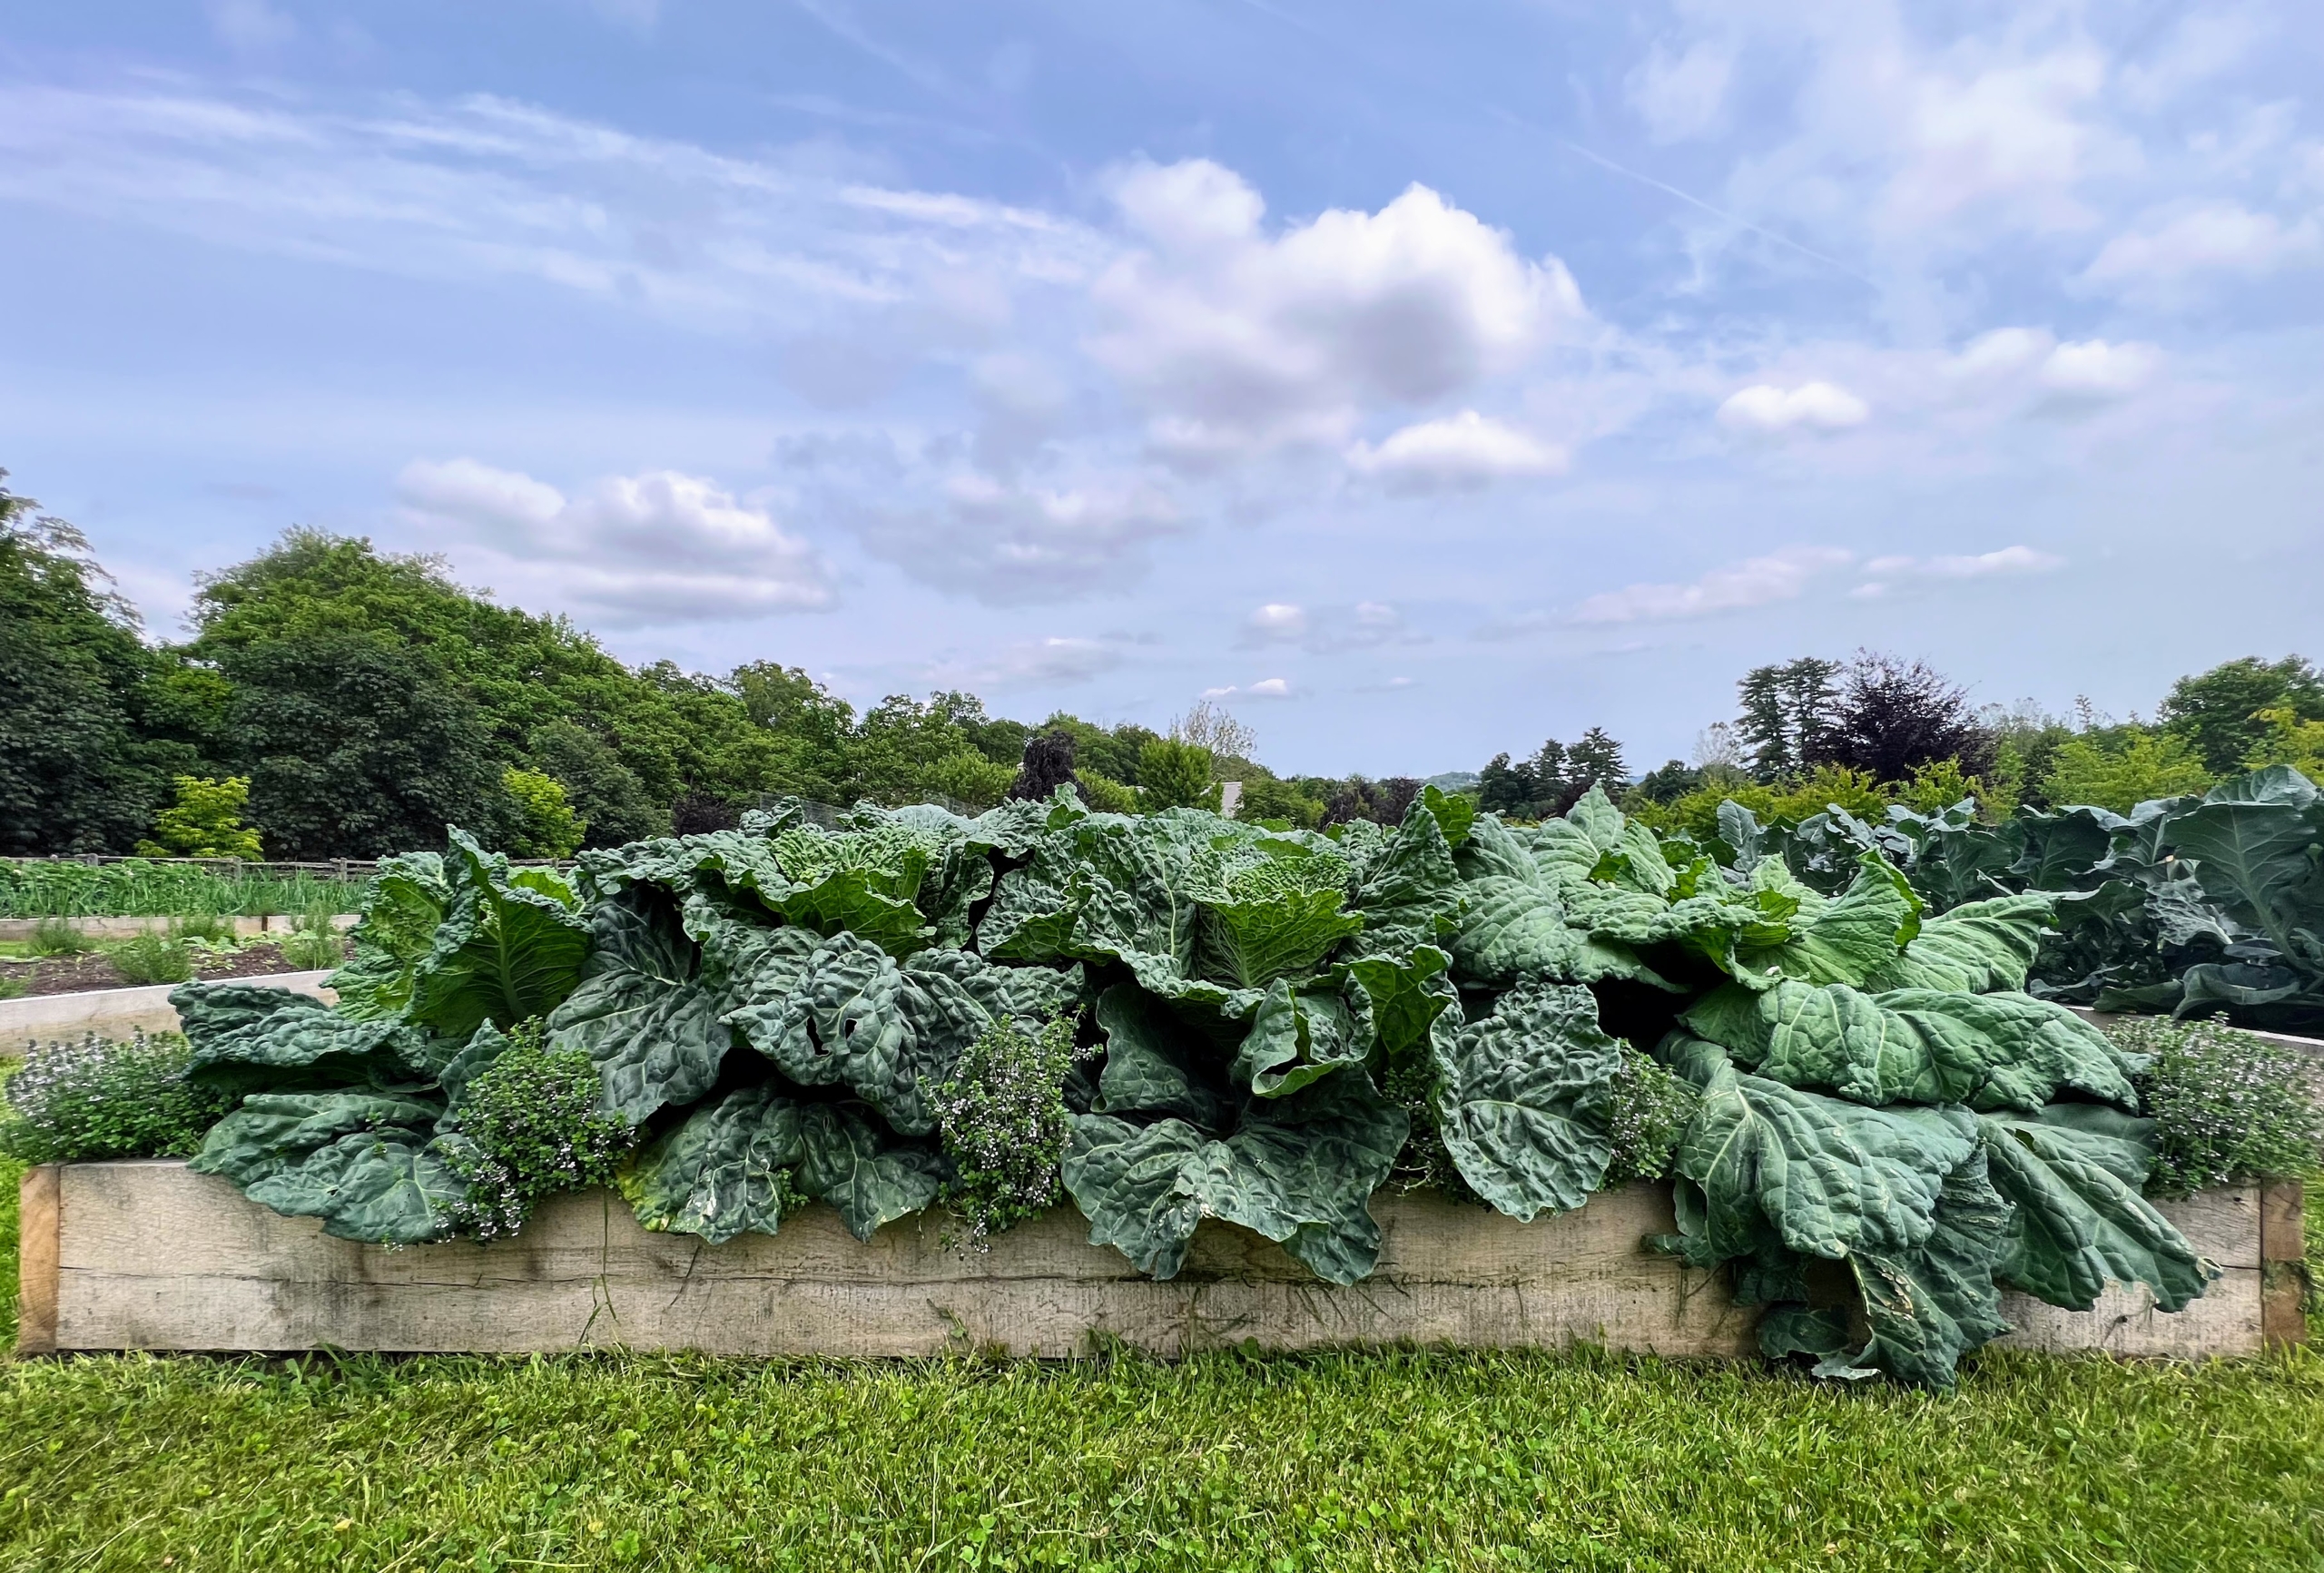
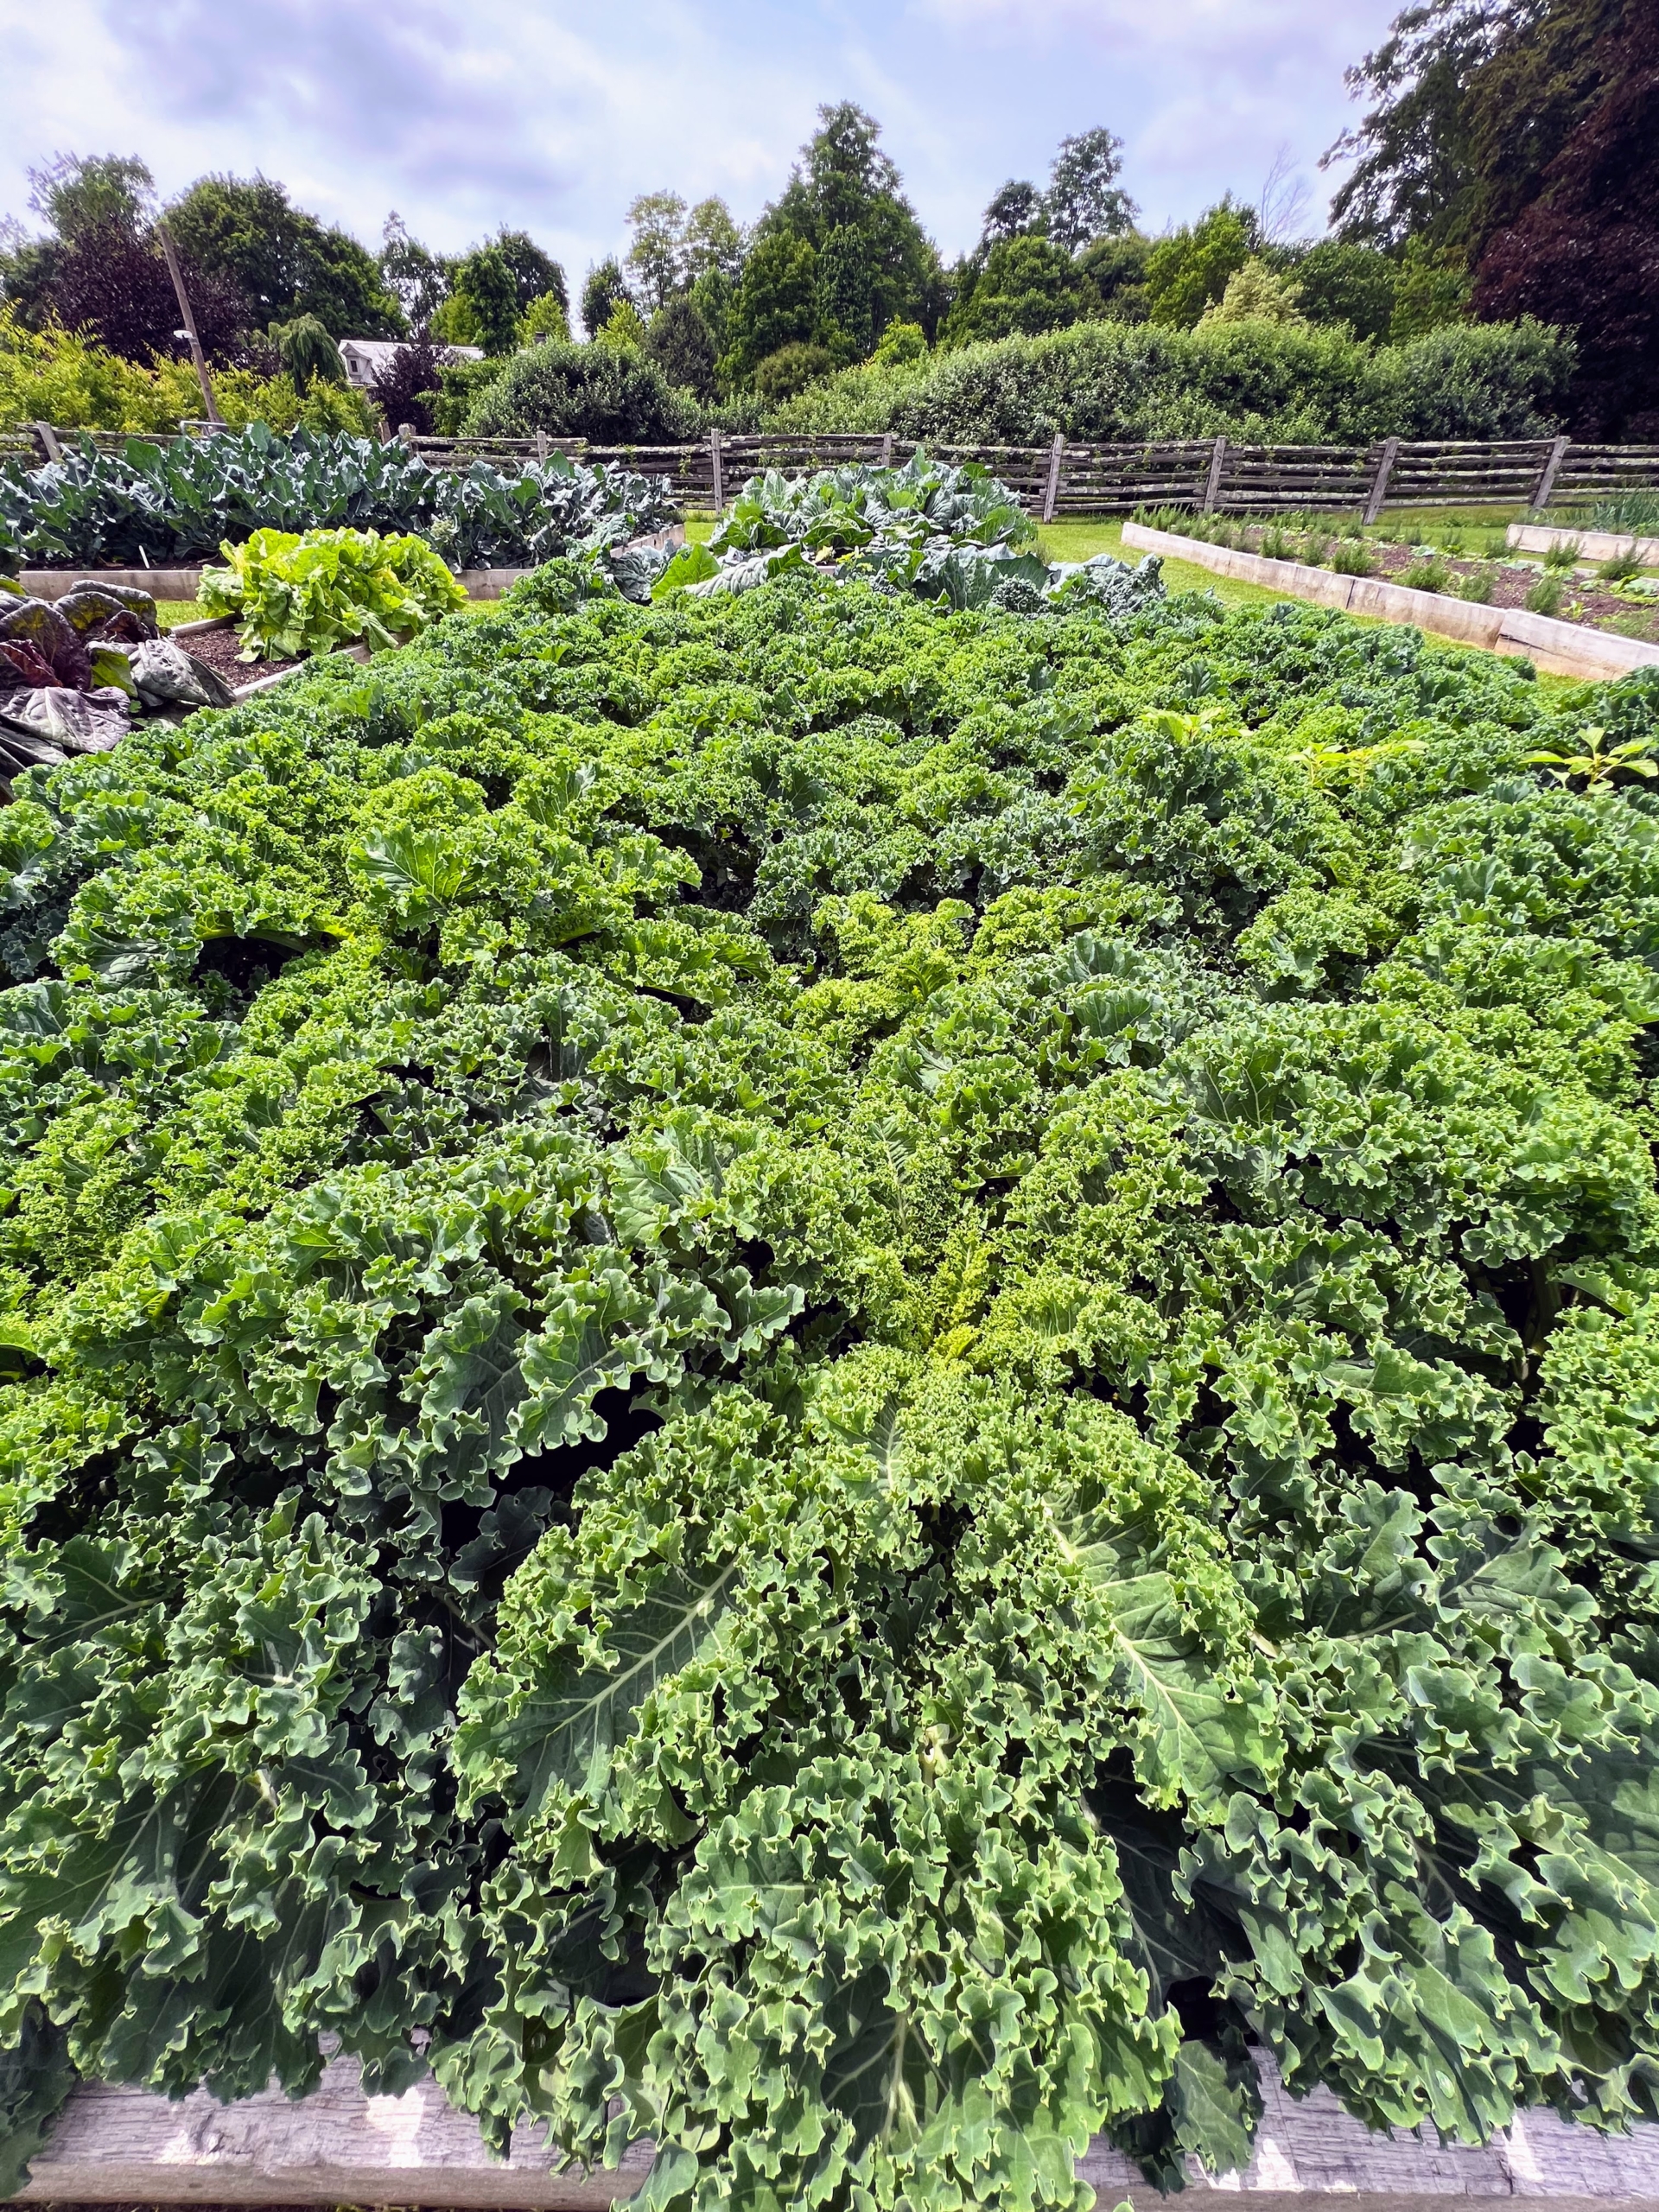
And look at our bed of kale! It has such lush green color.
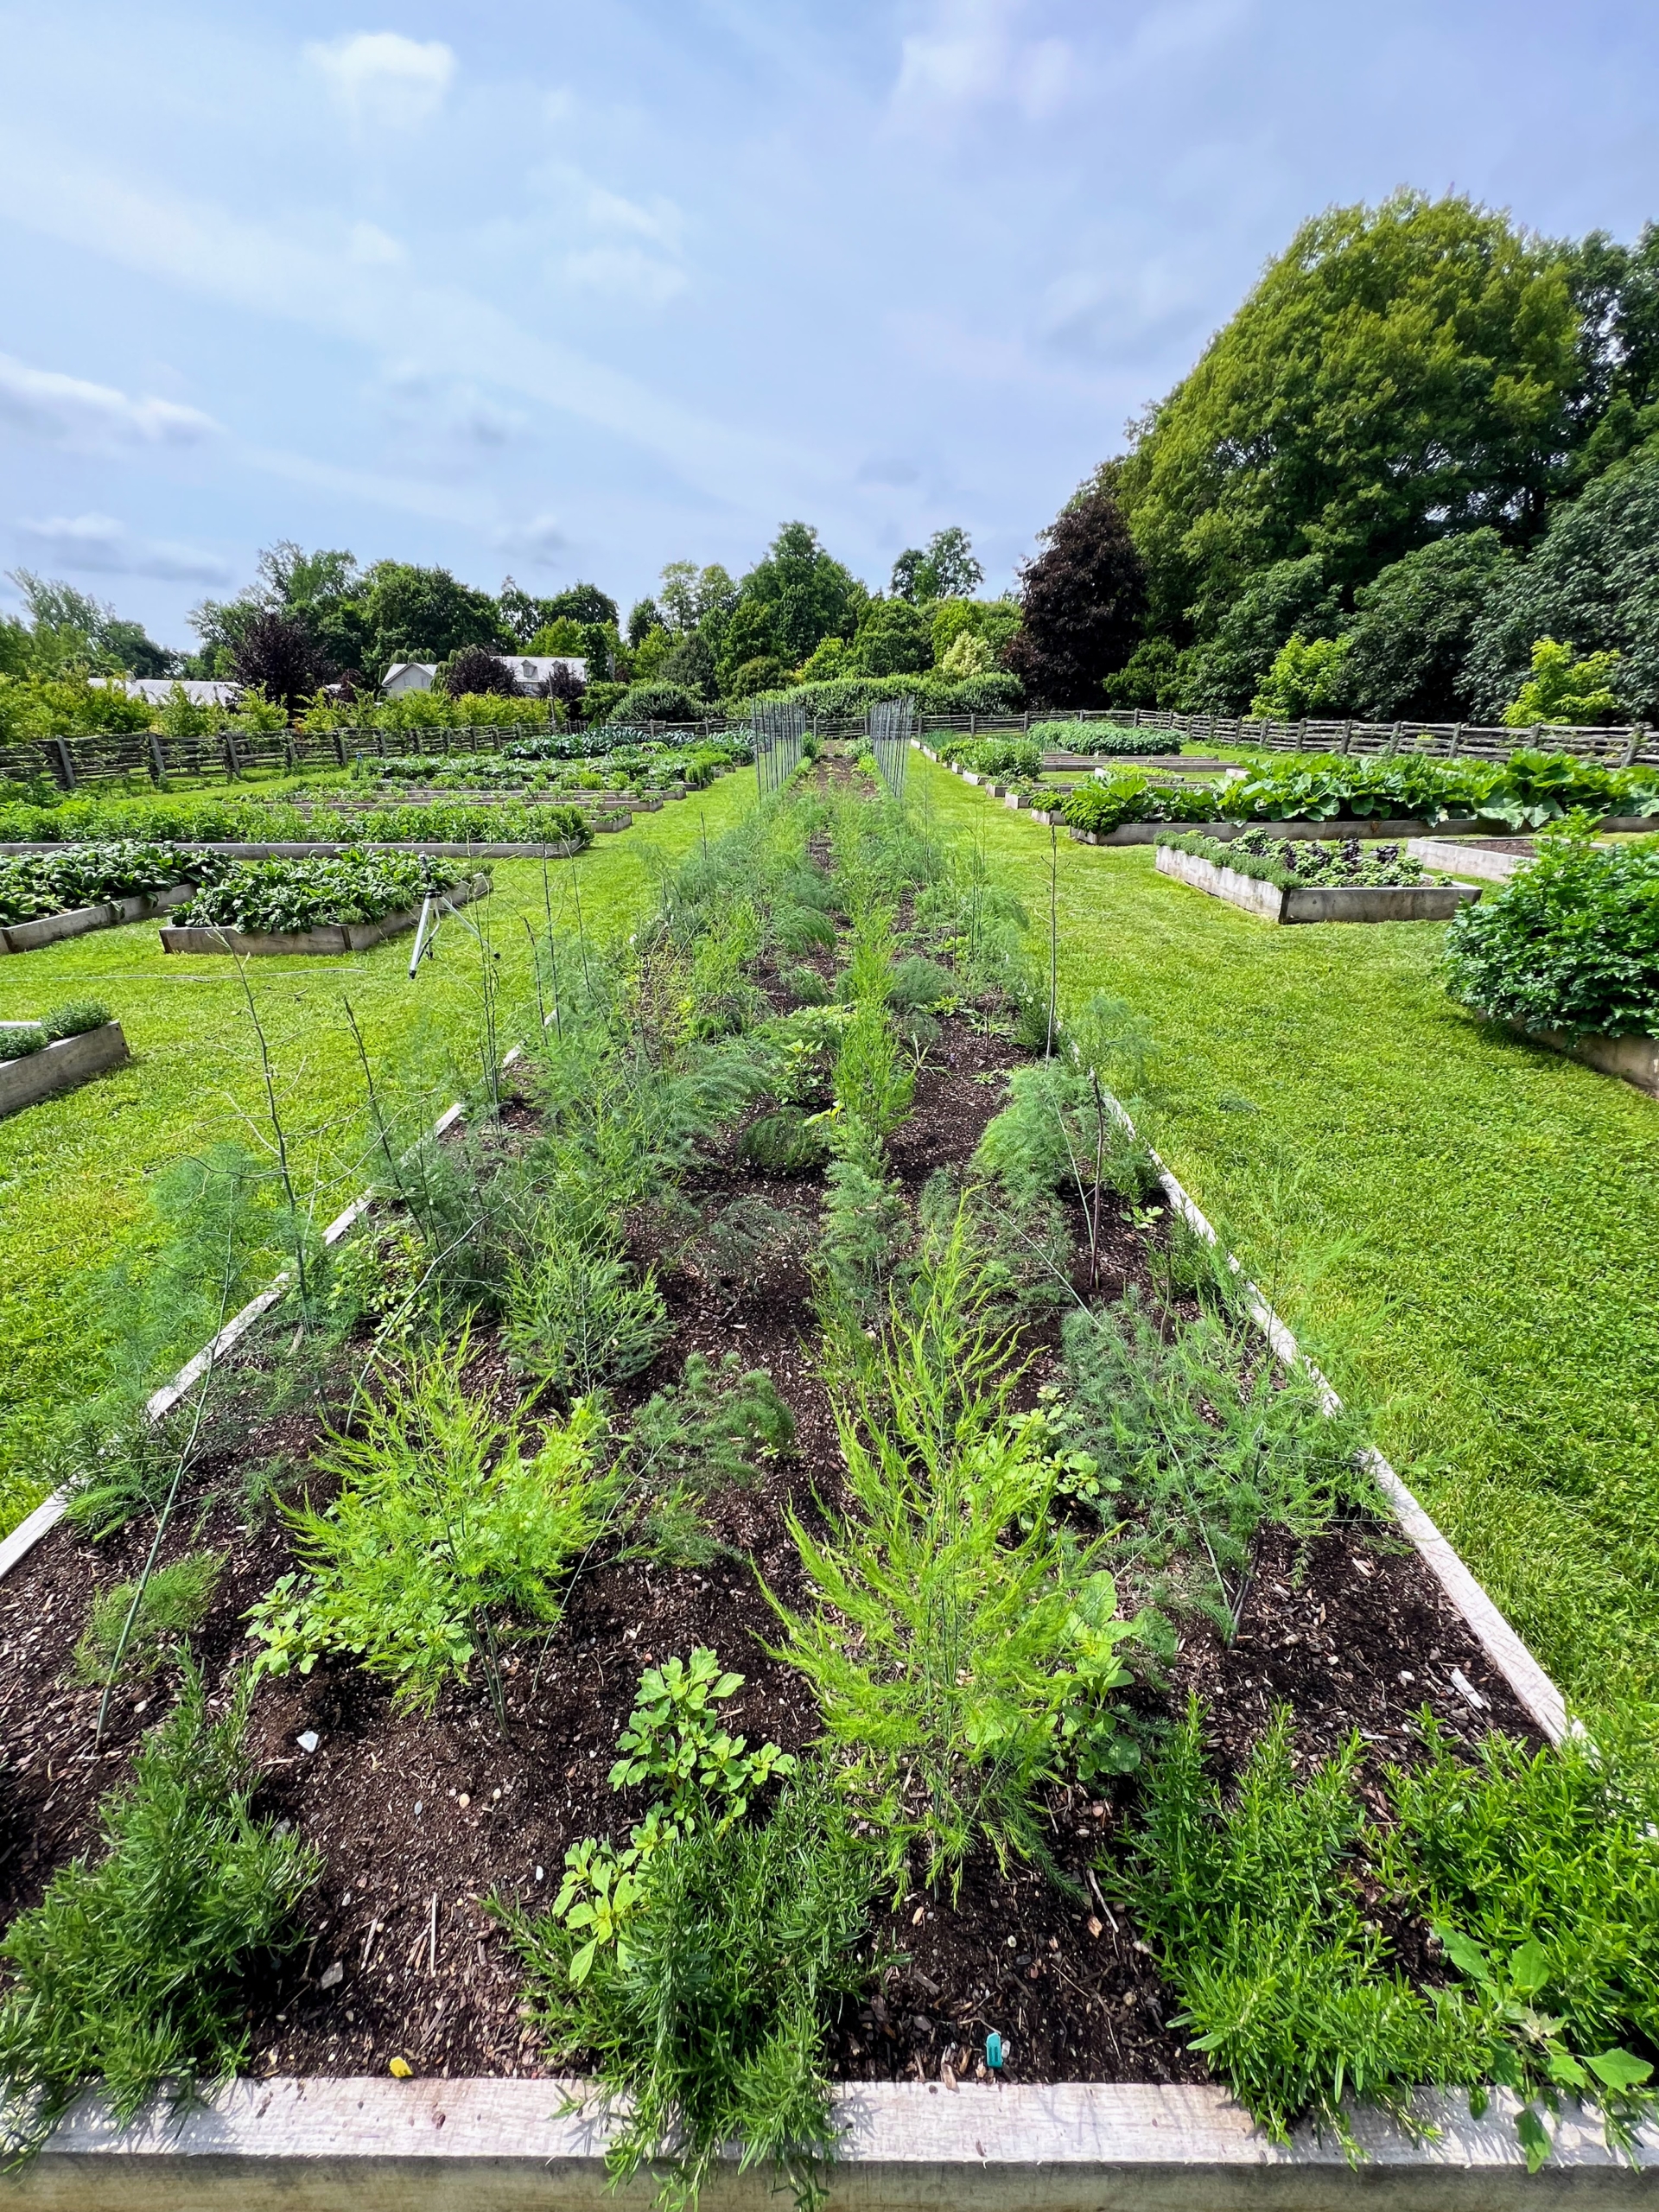
Kevin walked to the center of the garden to one of our longest beds. This one is planted with asparagus. We won’t be harvesting these for at least three years as asparagus needs all that time to develop, but after that they will produce an abundant crop of spears spring after spring.
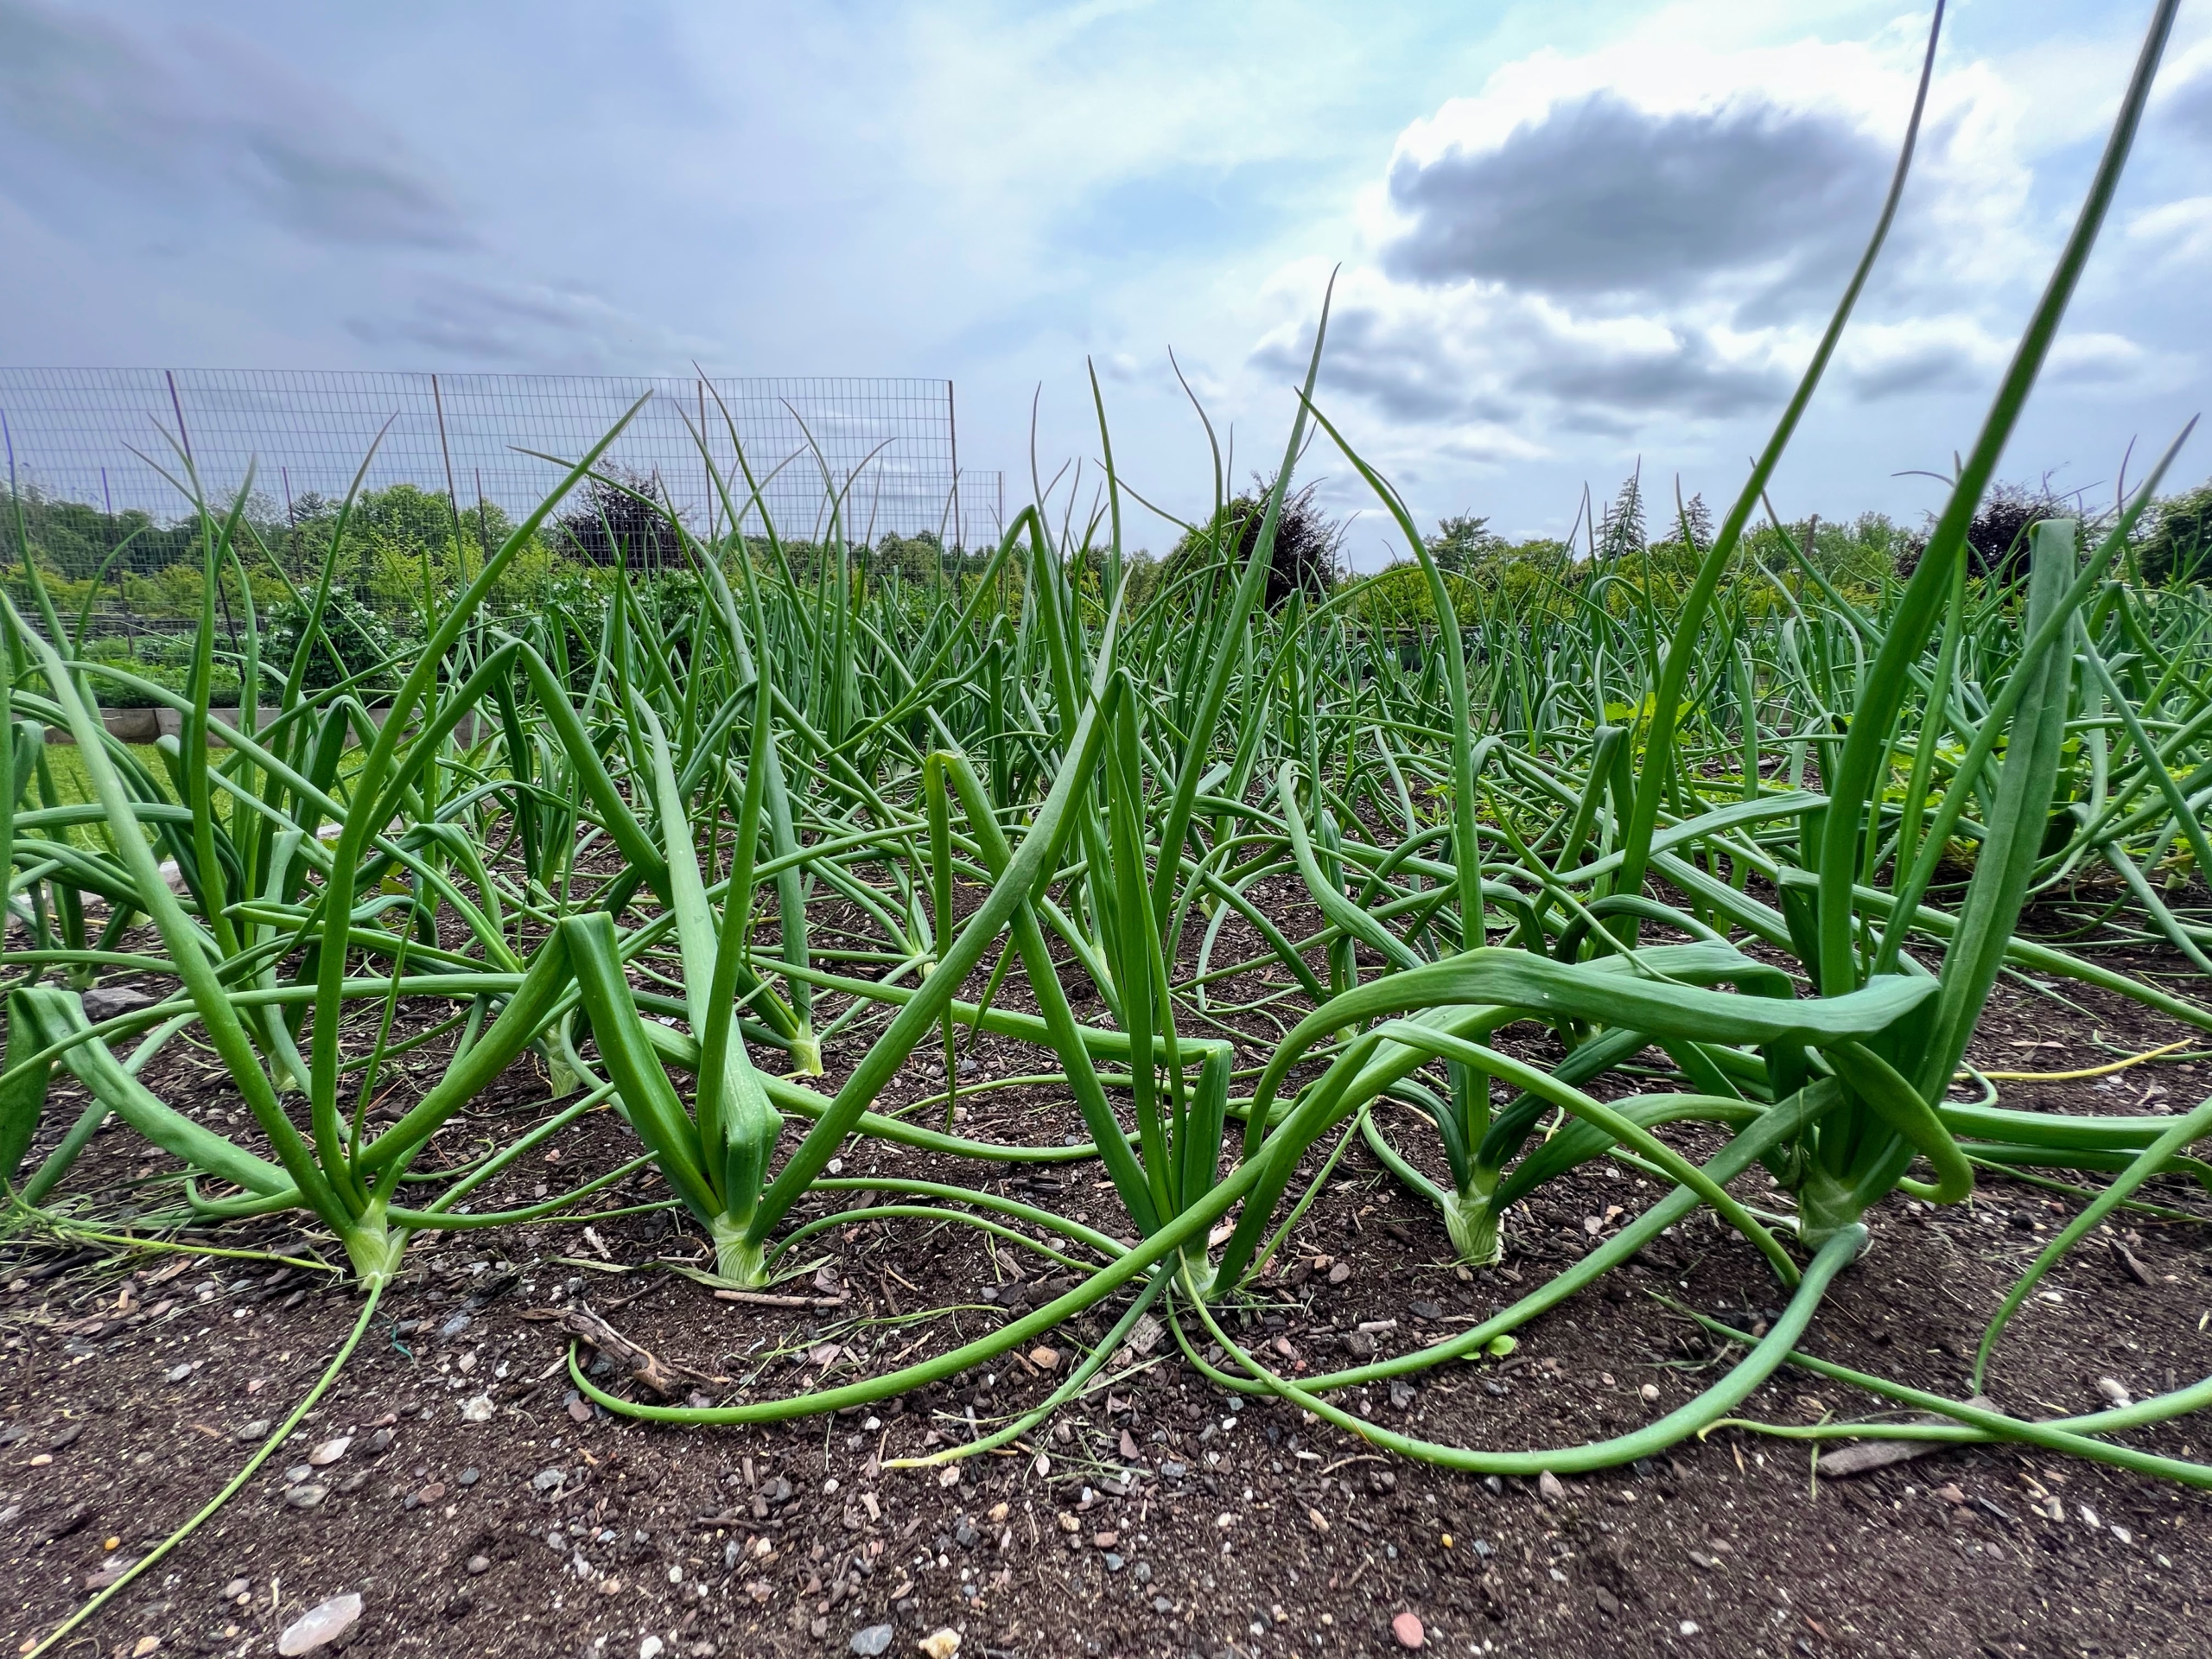
We planted leeks, shallots and onions back in late April – this is another interesting vantage point showing growth.
And these are the leaves of our artichokes. Globe artichokes, Cynara scolymus, are popular in both Europe and the United States. Artichokes are actually the flower buds, which will emerge from the center of the plants. At the ends of every bed, we planted all kinds of herbs.
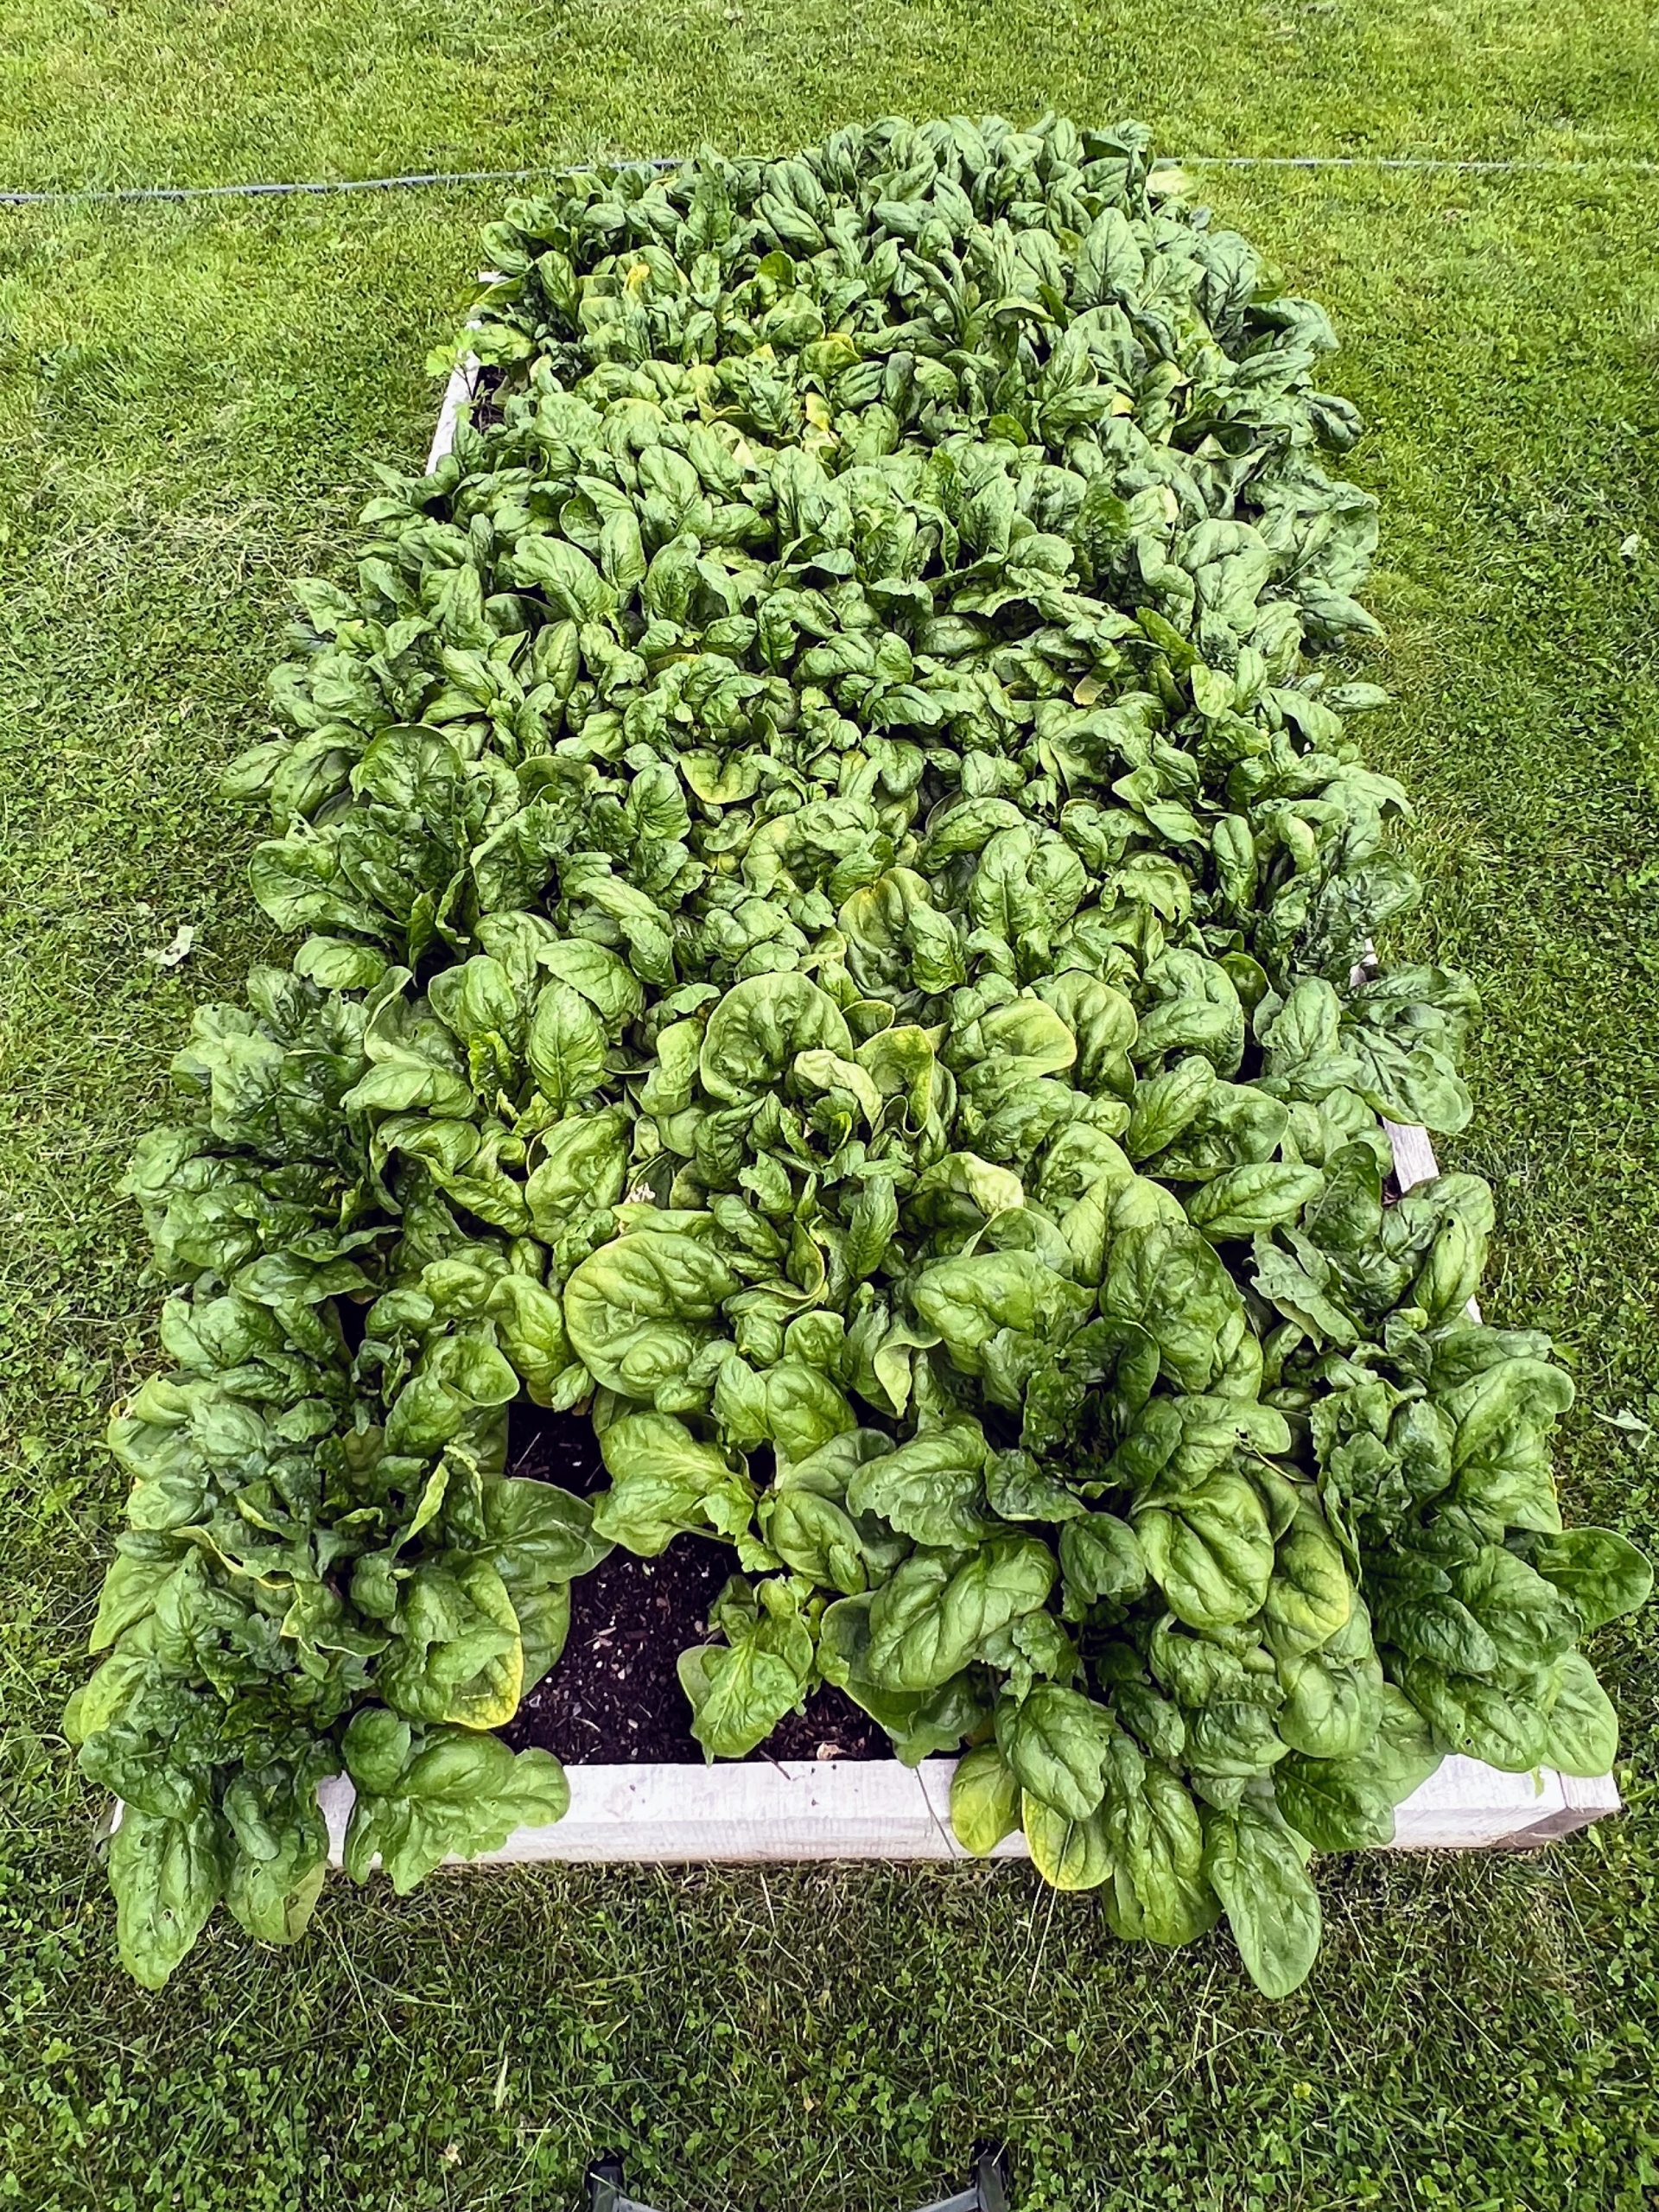
Here is a bed of spinach. We planted the spinach close to the end, so it is easy to access for my morning green juice.
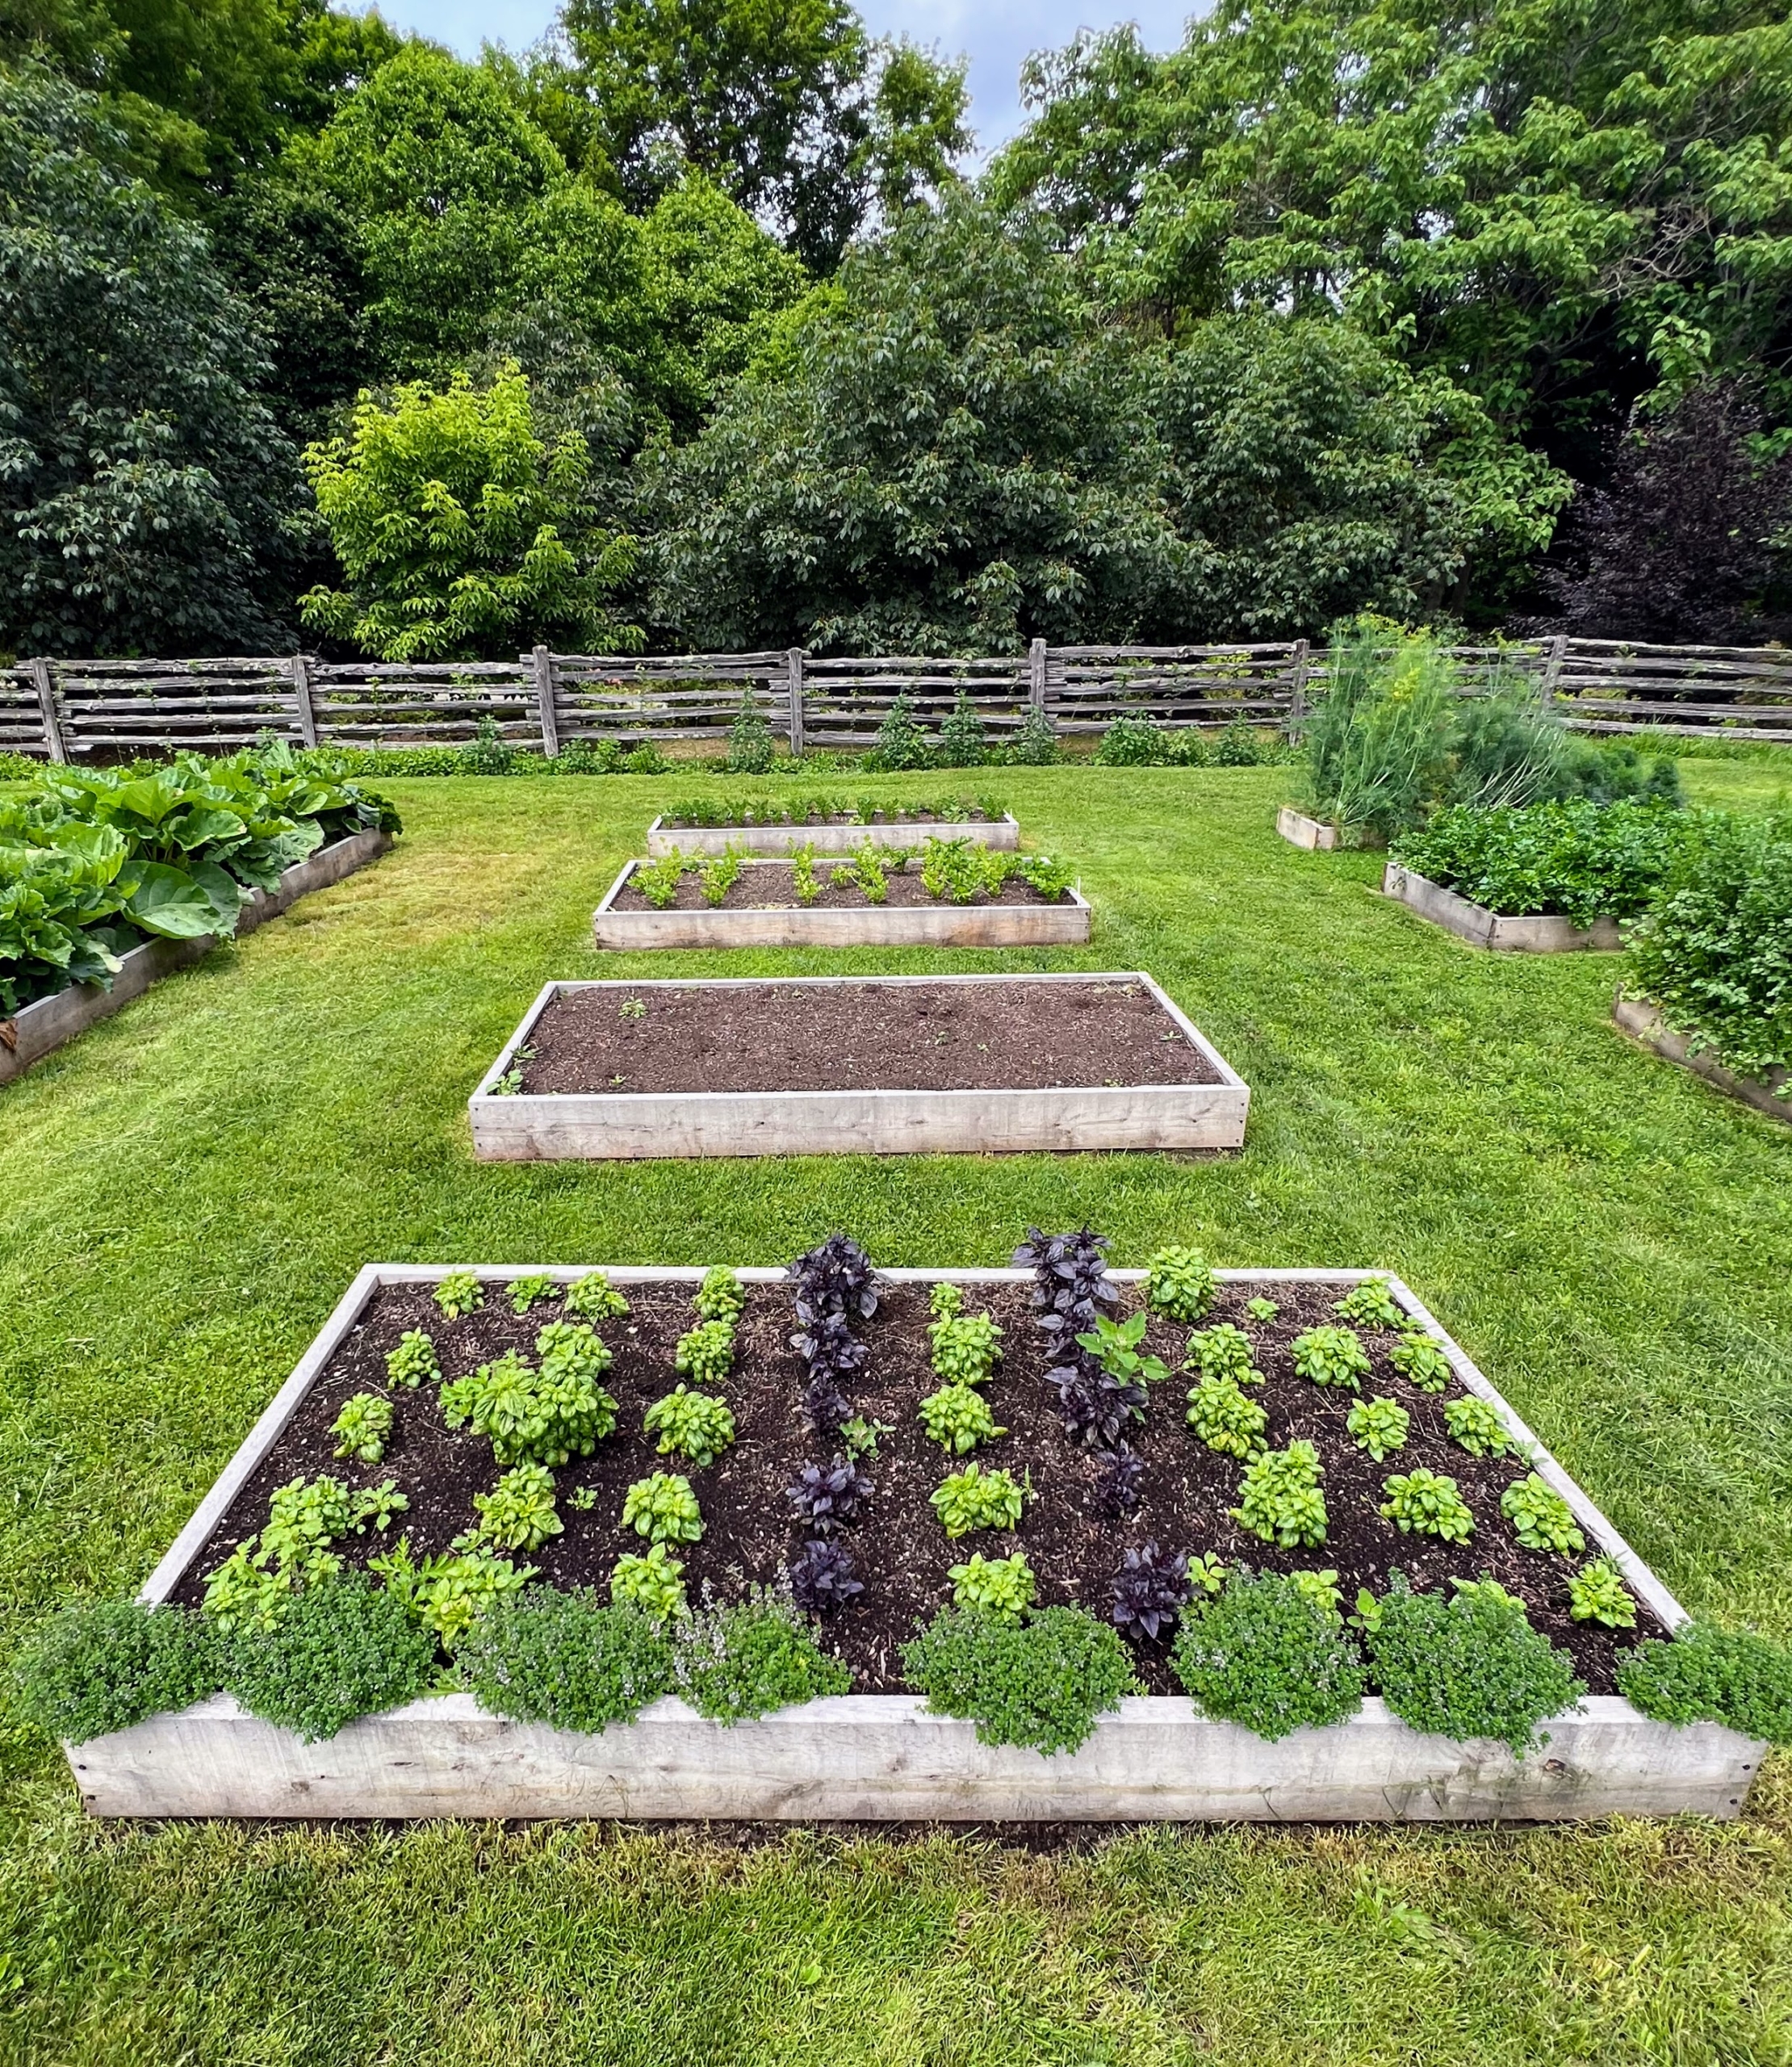
Some of the beds are smaller. This one is filled with basil – both green and purple.
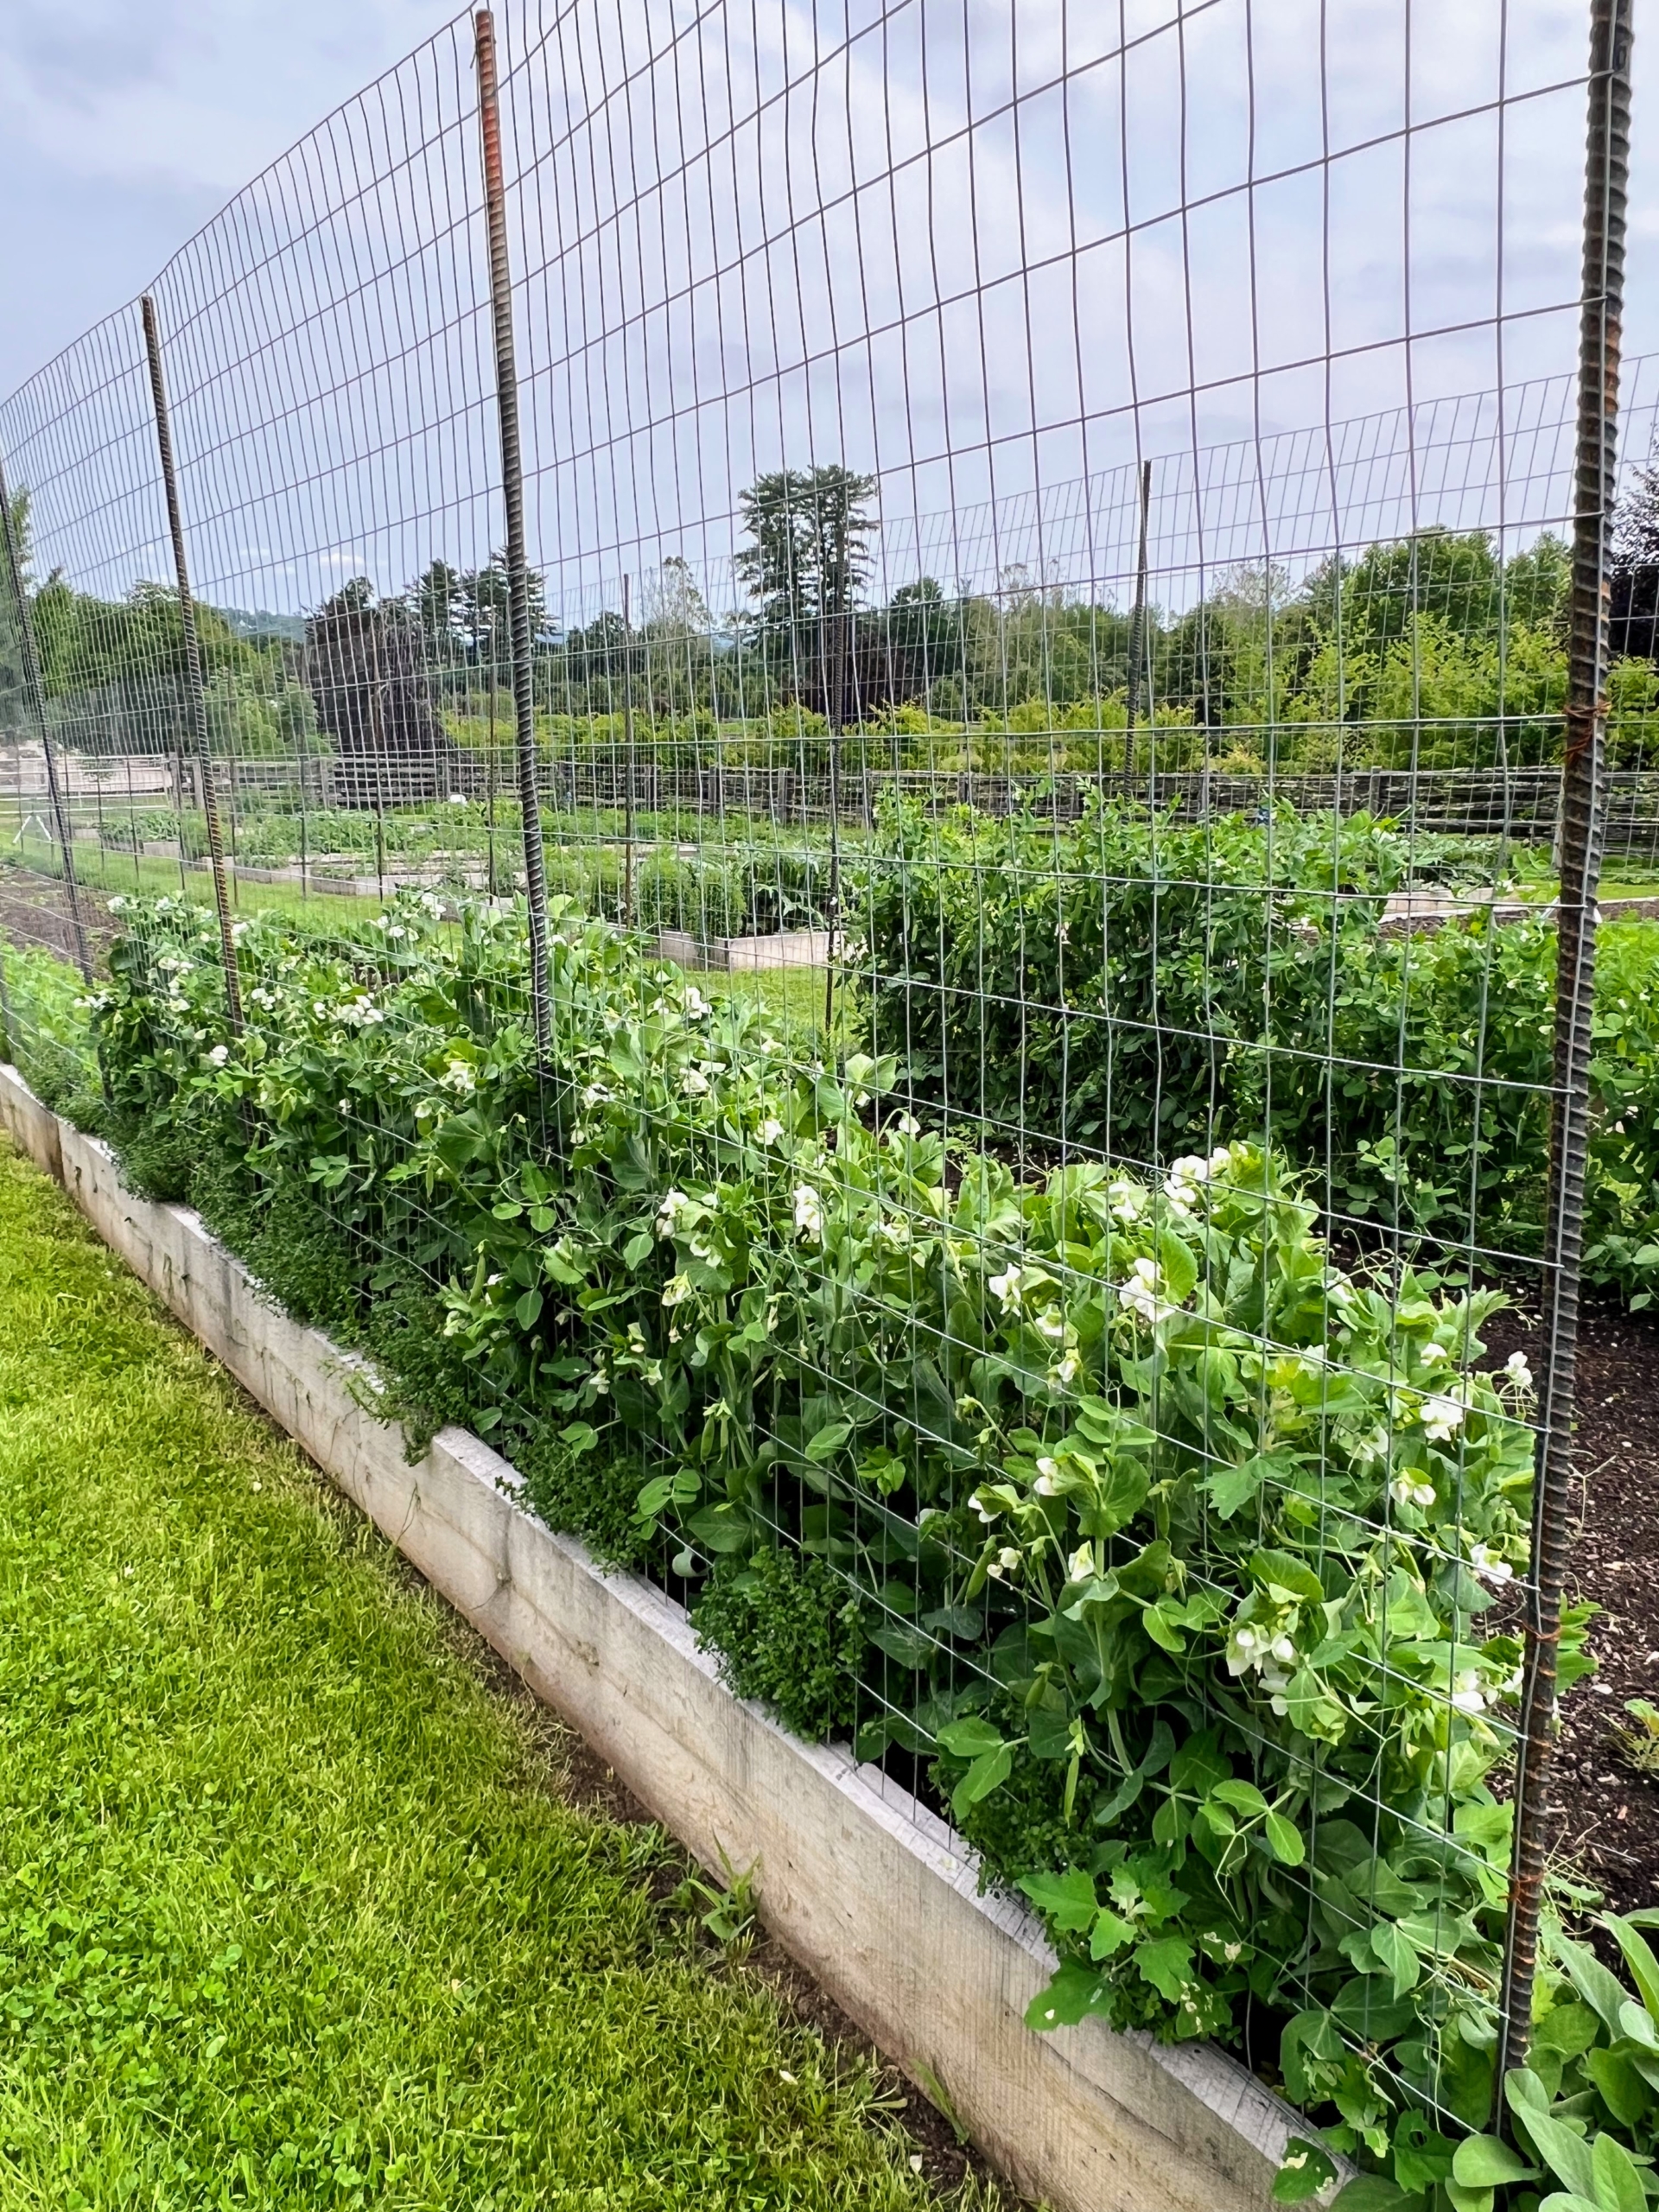
In another center bed, along this trellis we put up, are lots of peas – one section for shelling peas, which need to be removed from their pods before eating, and another for edible pods, which can be eaten whole, such as our snap peas. They are best grown on supports to keep them off the ground and away from pests and diseases.
At the north end, loads of cilantro and parsley. Everyone always asks me why I grow so much and what I do I use it for. I always love growing an abundance of vegetables for my daughter, Alexis, and her beautiful and vegetable-loving children. I use the produce for cooking shoots and various photography shoots here at the farm. I love sharing it with my friends and those who work so hard here at Cantitoe Corners. And don’t forget my chickens, geese, and peafowl – they all love delicious, fresh, and organic greens too.
Kevin took many photos showing how large this garden is, but also how well it was divided and built. These beds in the foreground may look empty, but they are just freshly seeded. We always plant in succession here at the farm, meaning we plant seeds every few weeks during the season, so there is always something ready to harvest.
I love visiting this garden whenever I can. This is the north gate. It is the closest entrance to my stable. Thank you for taking these beautiful pictures, Kevin. I’ll be sharing some of the bounty with you very soon.