Whenever possible, we always practice succession planting here at my Bedford, New York farm.
Succession planting is the practice of following one crop with another to maximize a garden’s yield. It is a very efficient use of gardening space and time. This year, we're all so excited about my new vegetable garden where we've already seen such amazing growth. If you follow my Instagram page @MarthaStewart48, you may have seen some of the first vegetables we've harvested - the cauliflower, cabbage, and broccoli are some of the largest I've ever grown. Over the last couple of weeks, my head gardener, Ryan McCallister, has also planted more seeds, so we have a consistent supply of harvestable produce throughout the season. He planted crops of beans, parsnips, and three rows of sunflowers, Helianthus - the popular and cheerful annuals whose giant, round flower heads look like the sun.
Enjoy these photos.
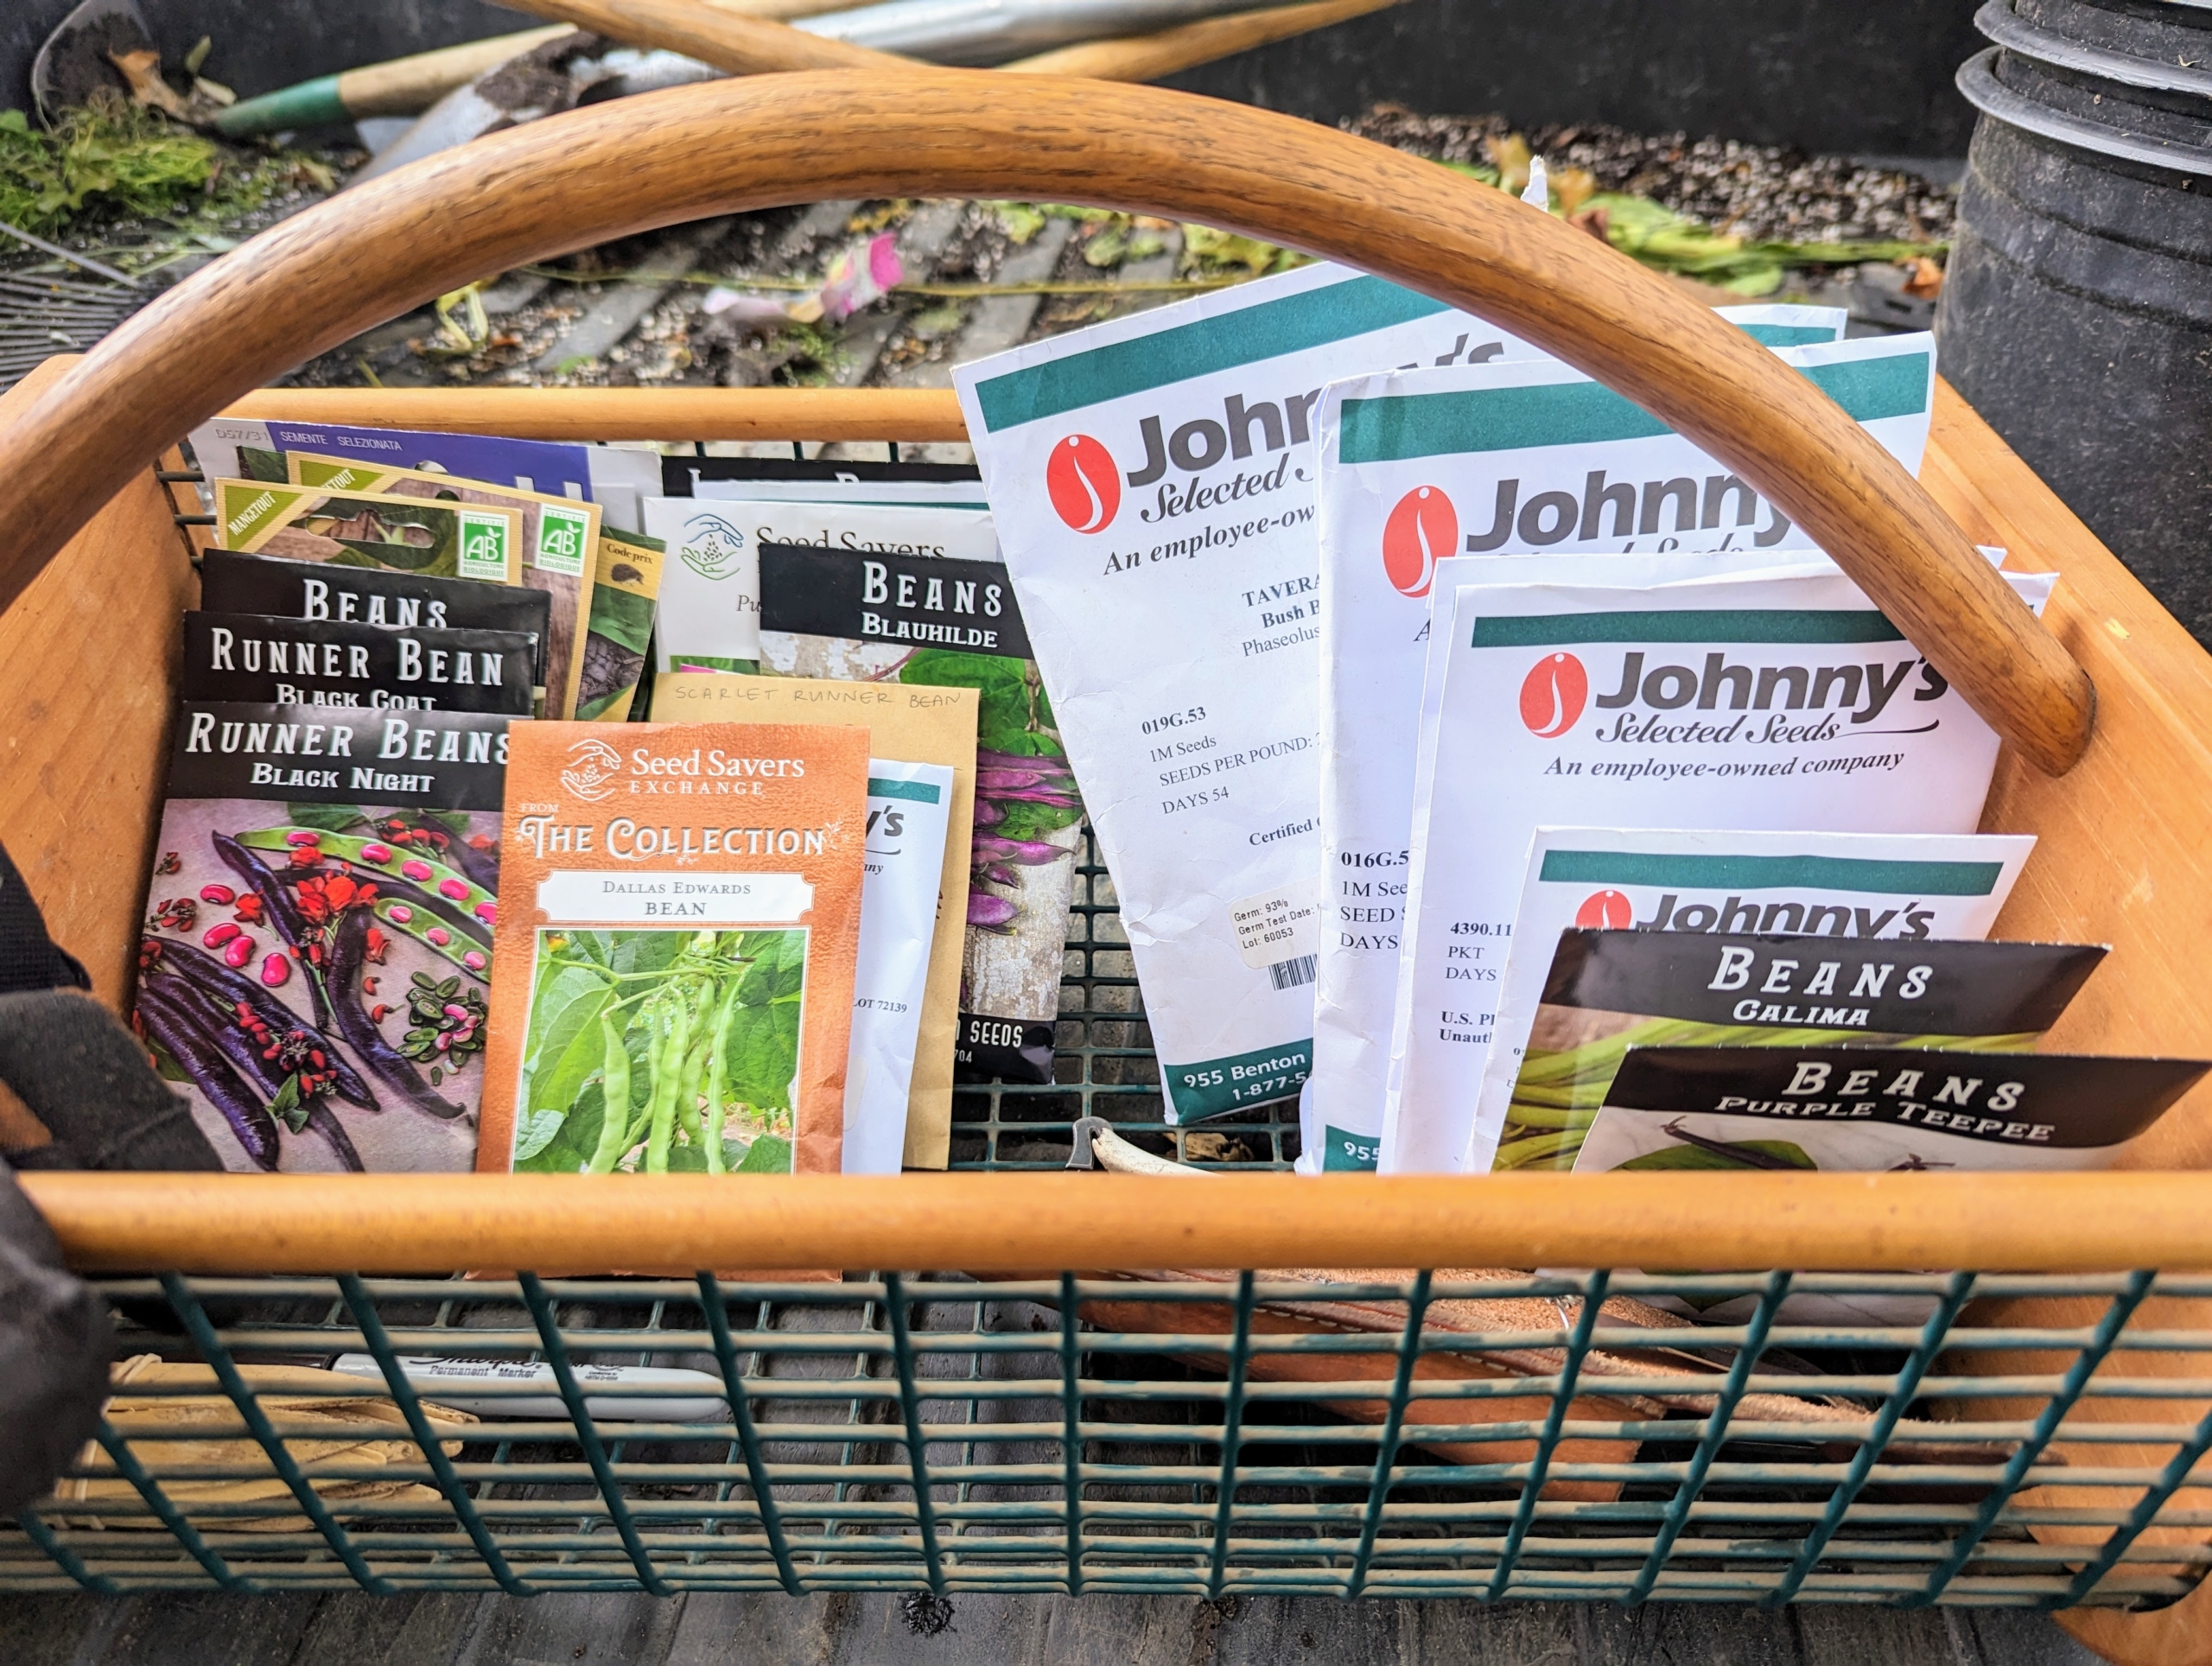
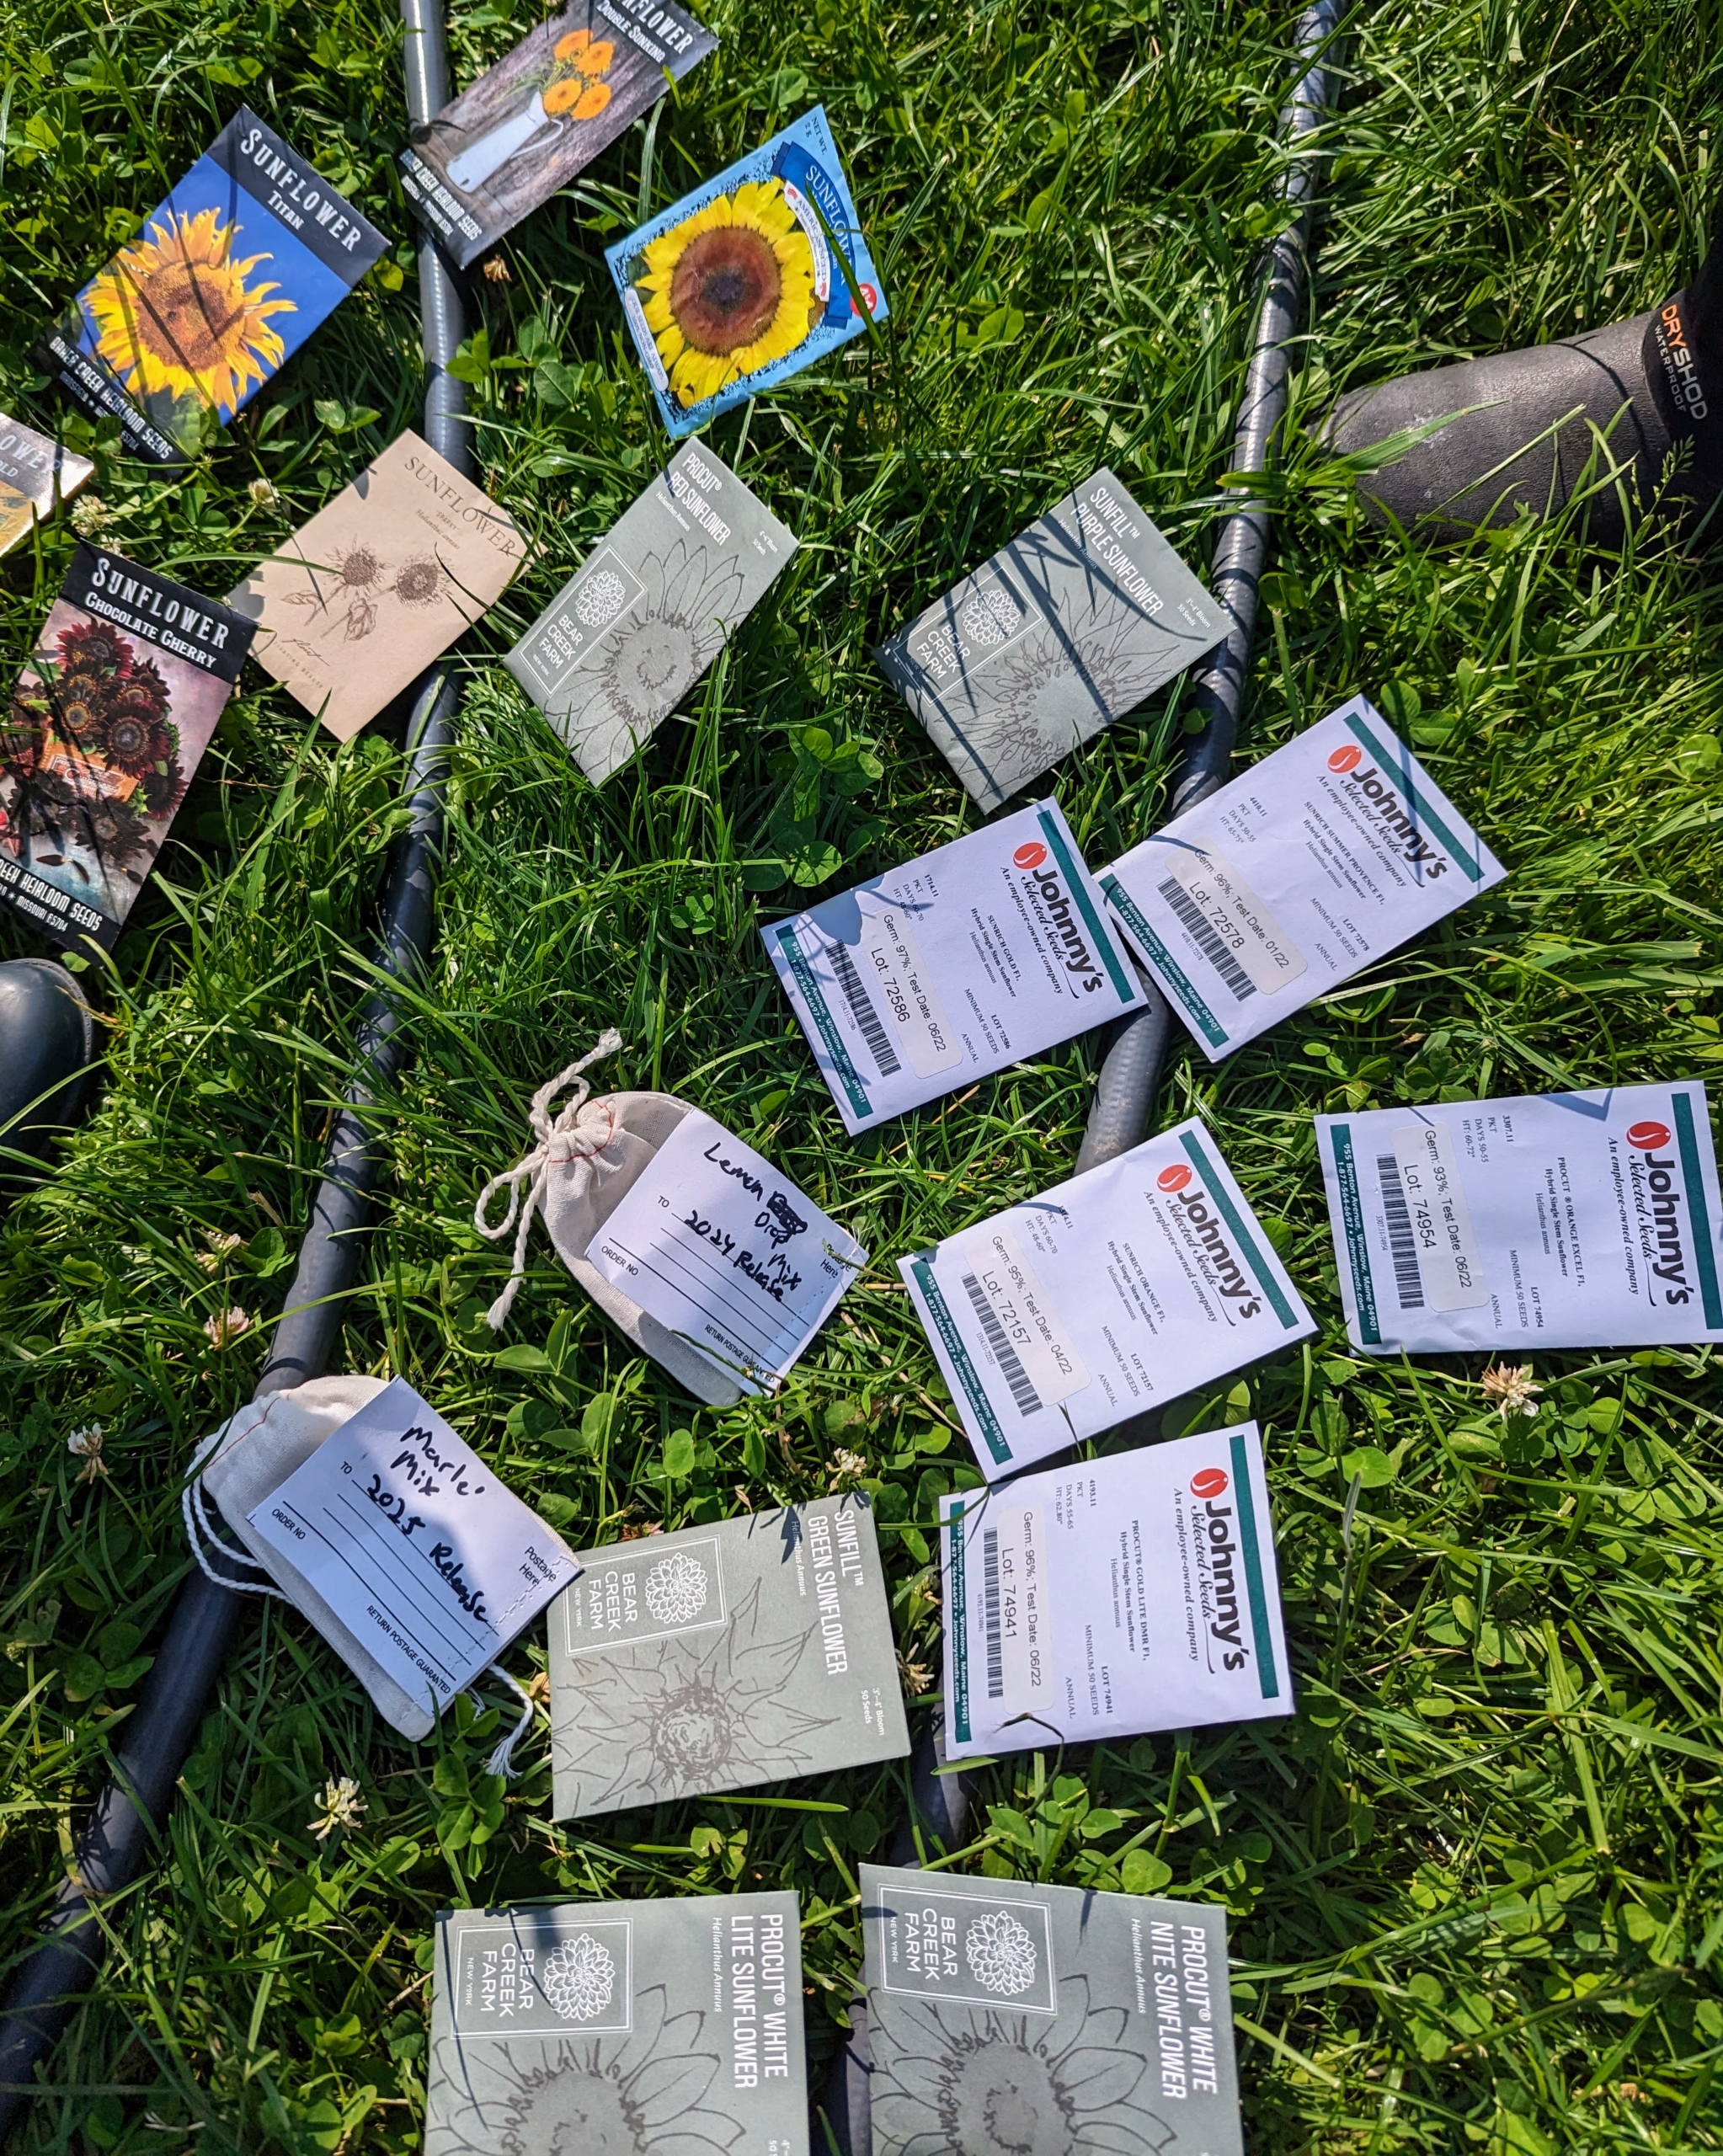
This time of year, we are constantly working in the vegetable garden to maintain what is growing and to plant more seeds for new crops. My gardeners keep seeds well organized in these baskets, so they’re ready to bring out to the garden when needed.
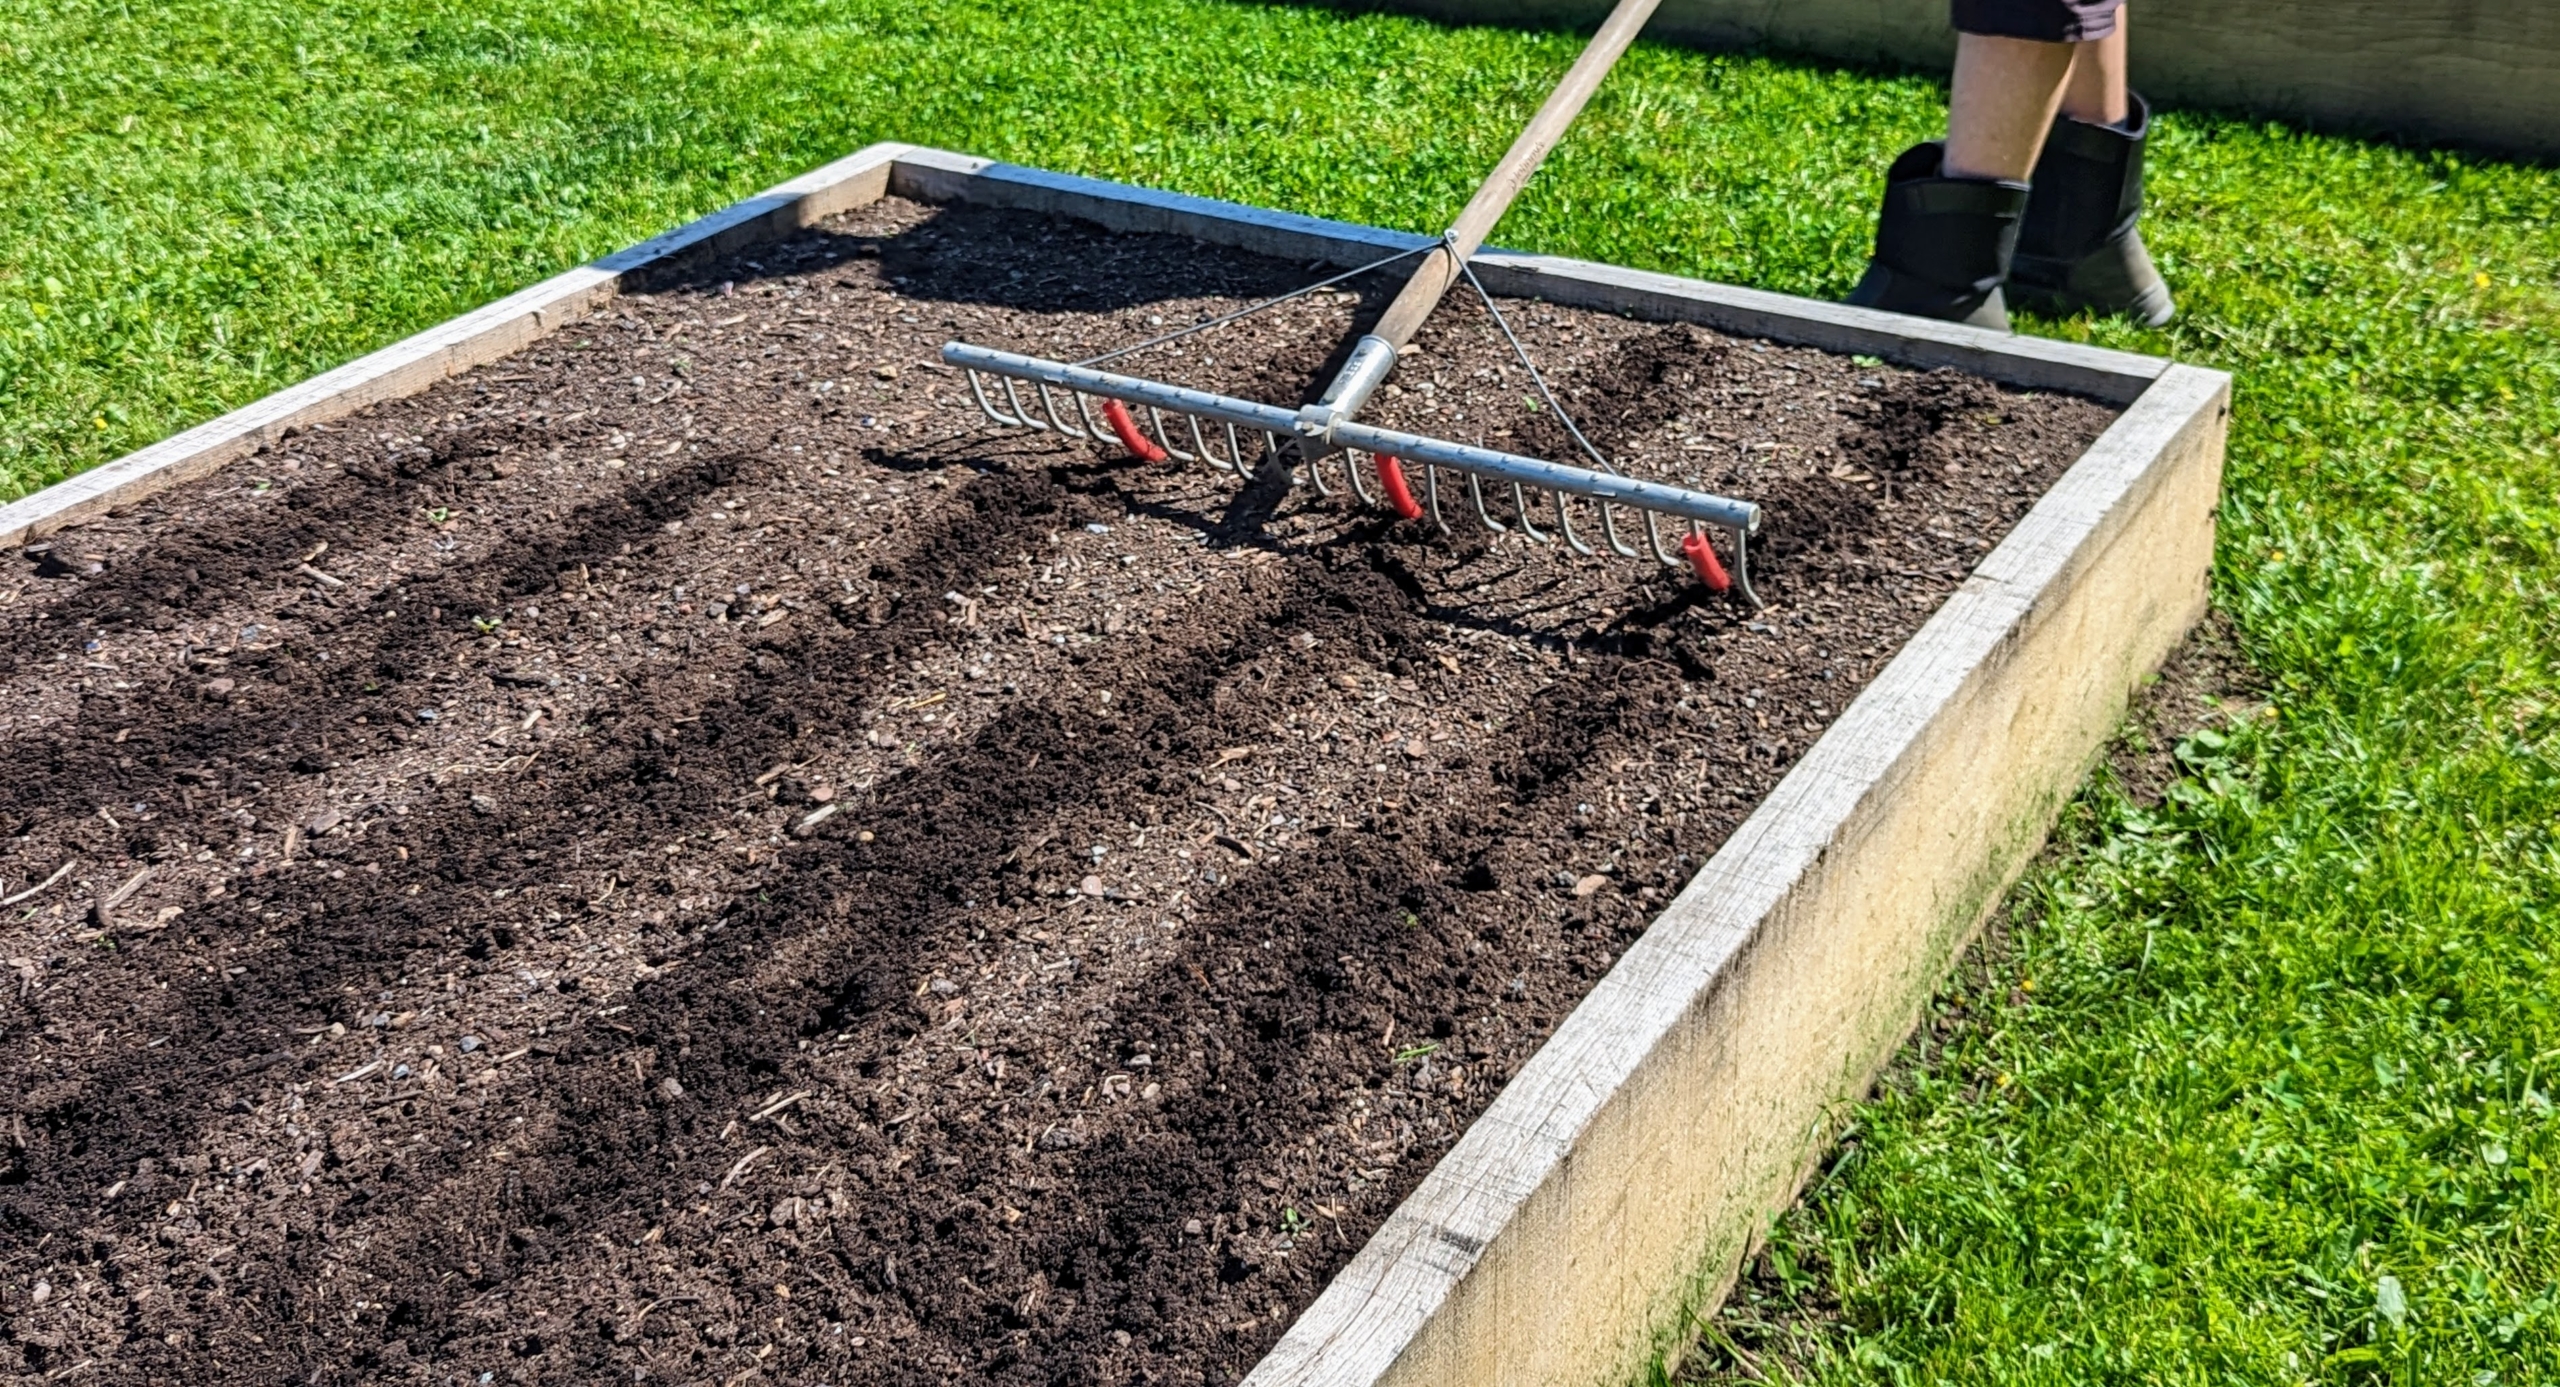
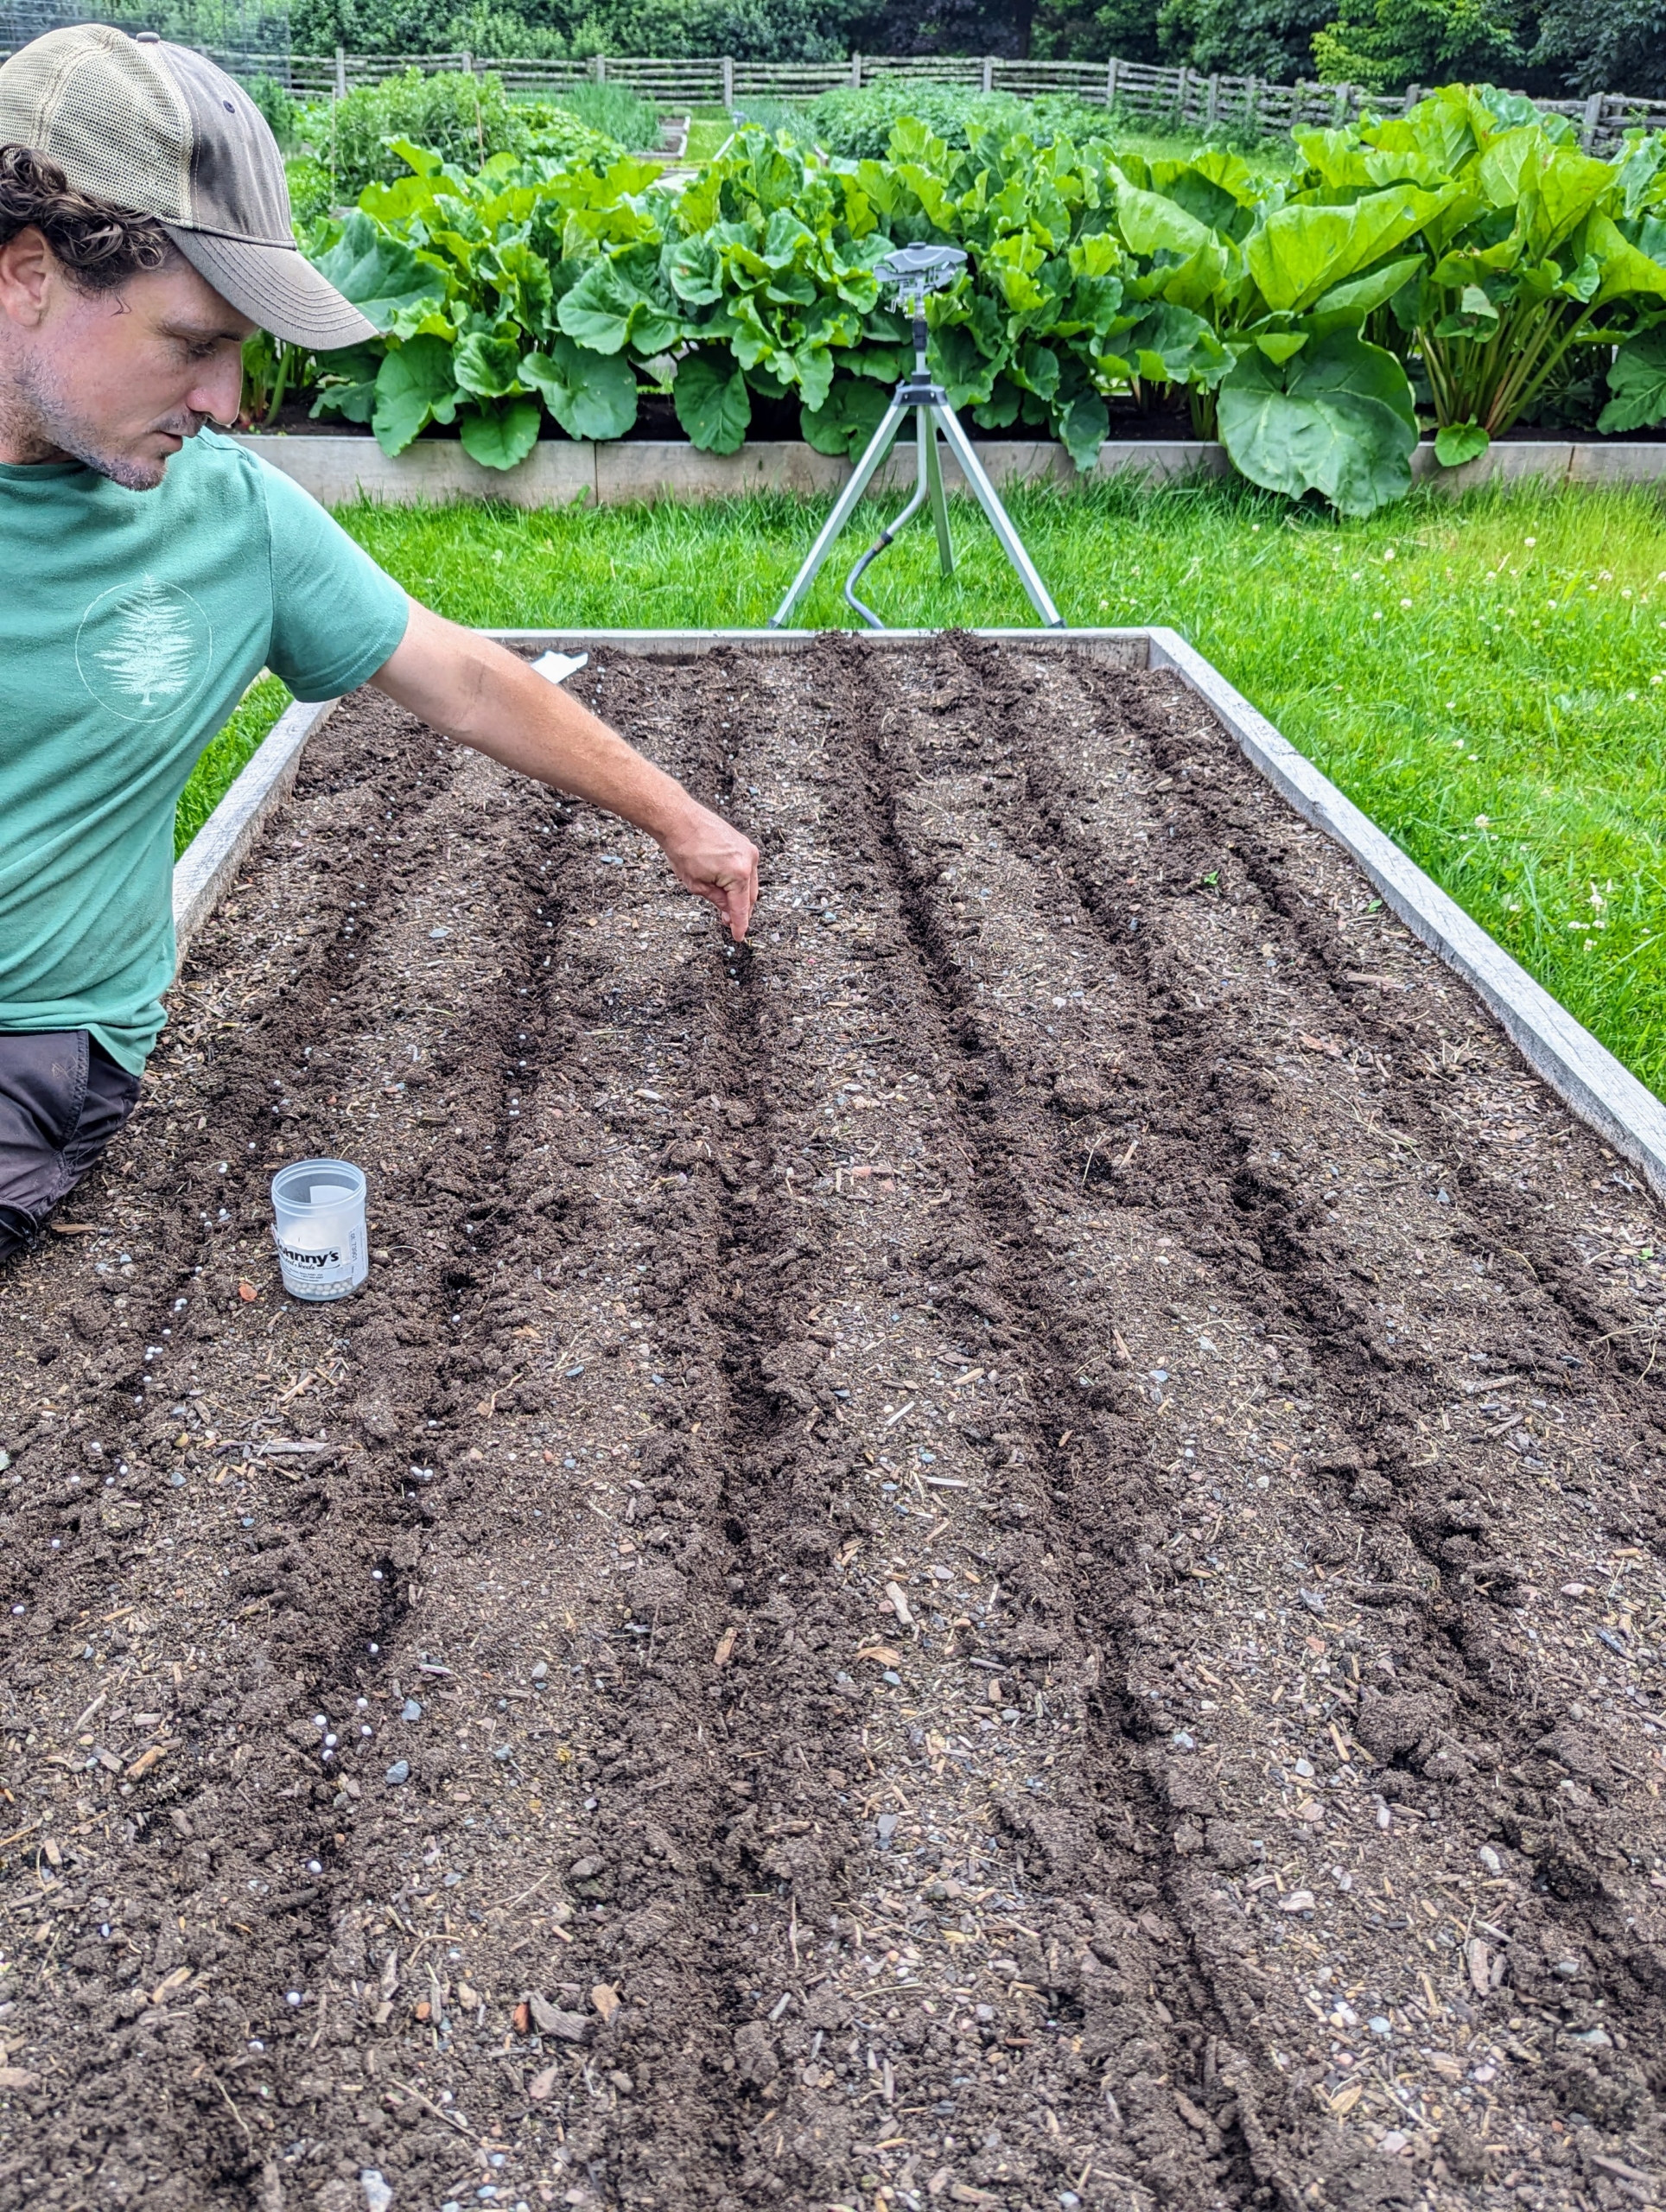
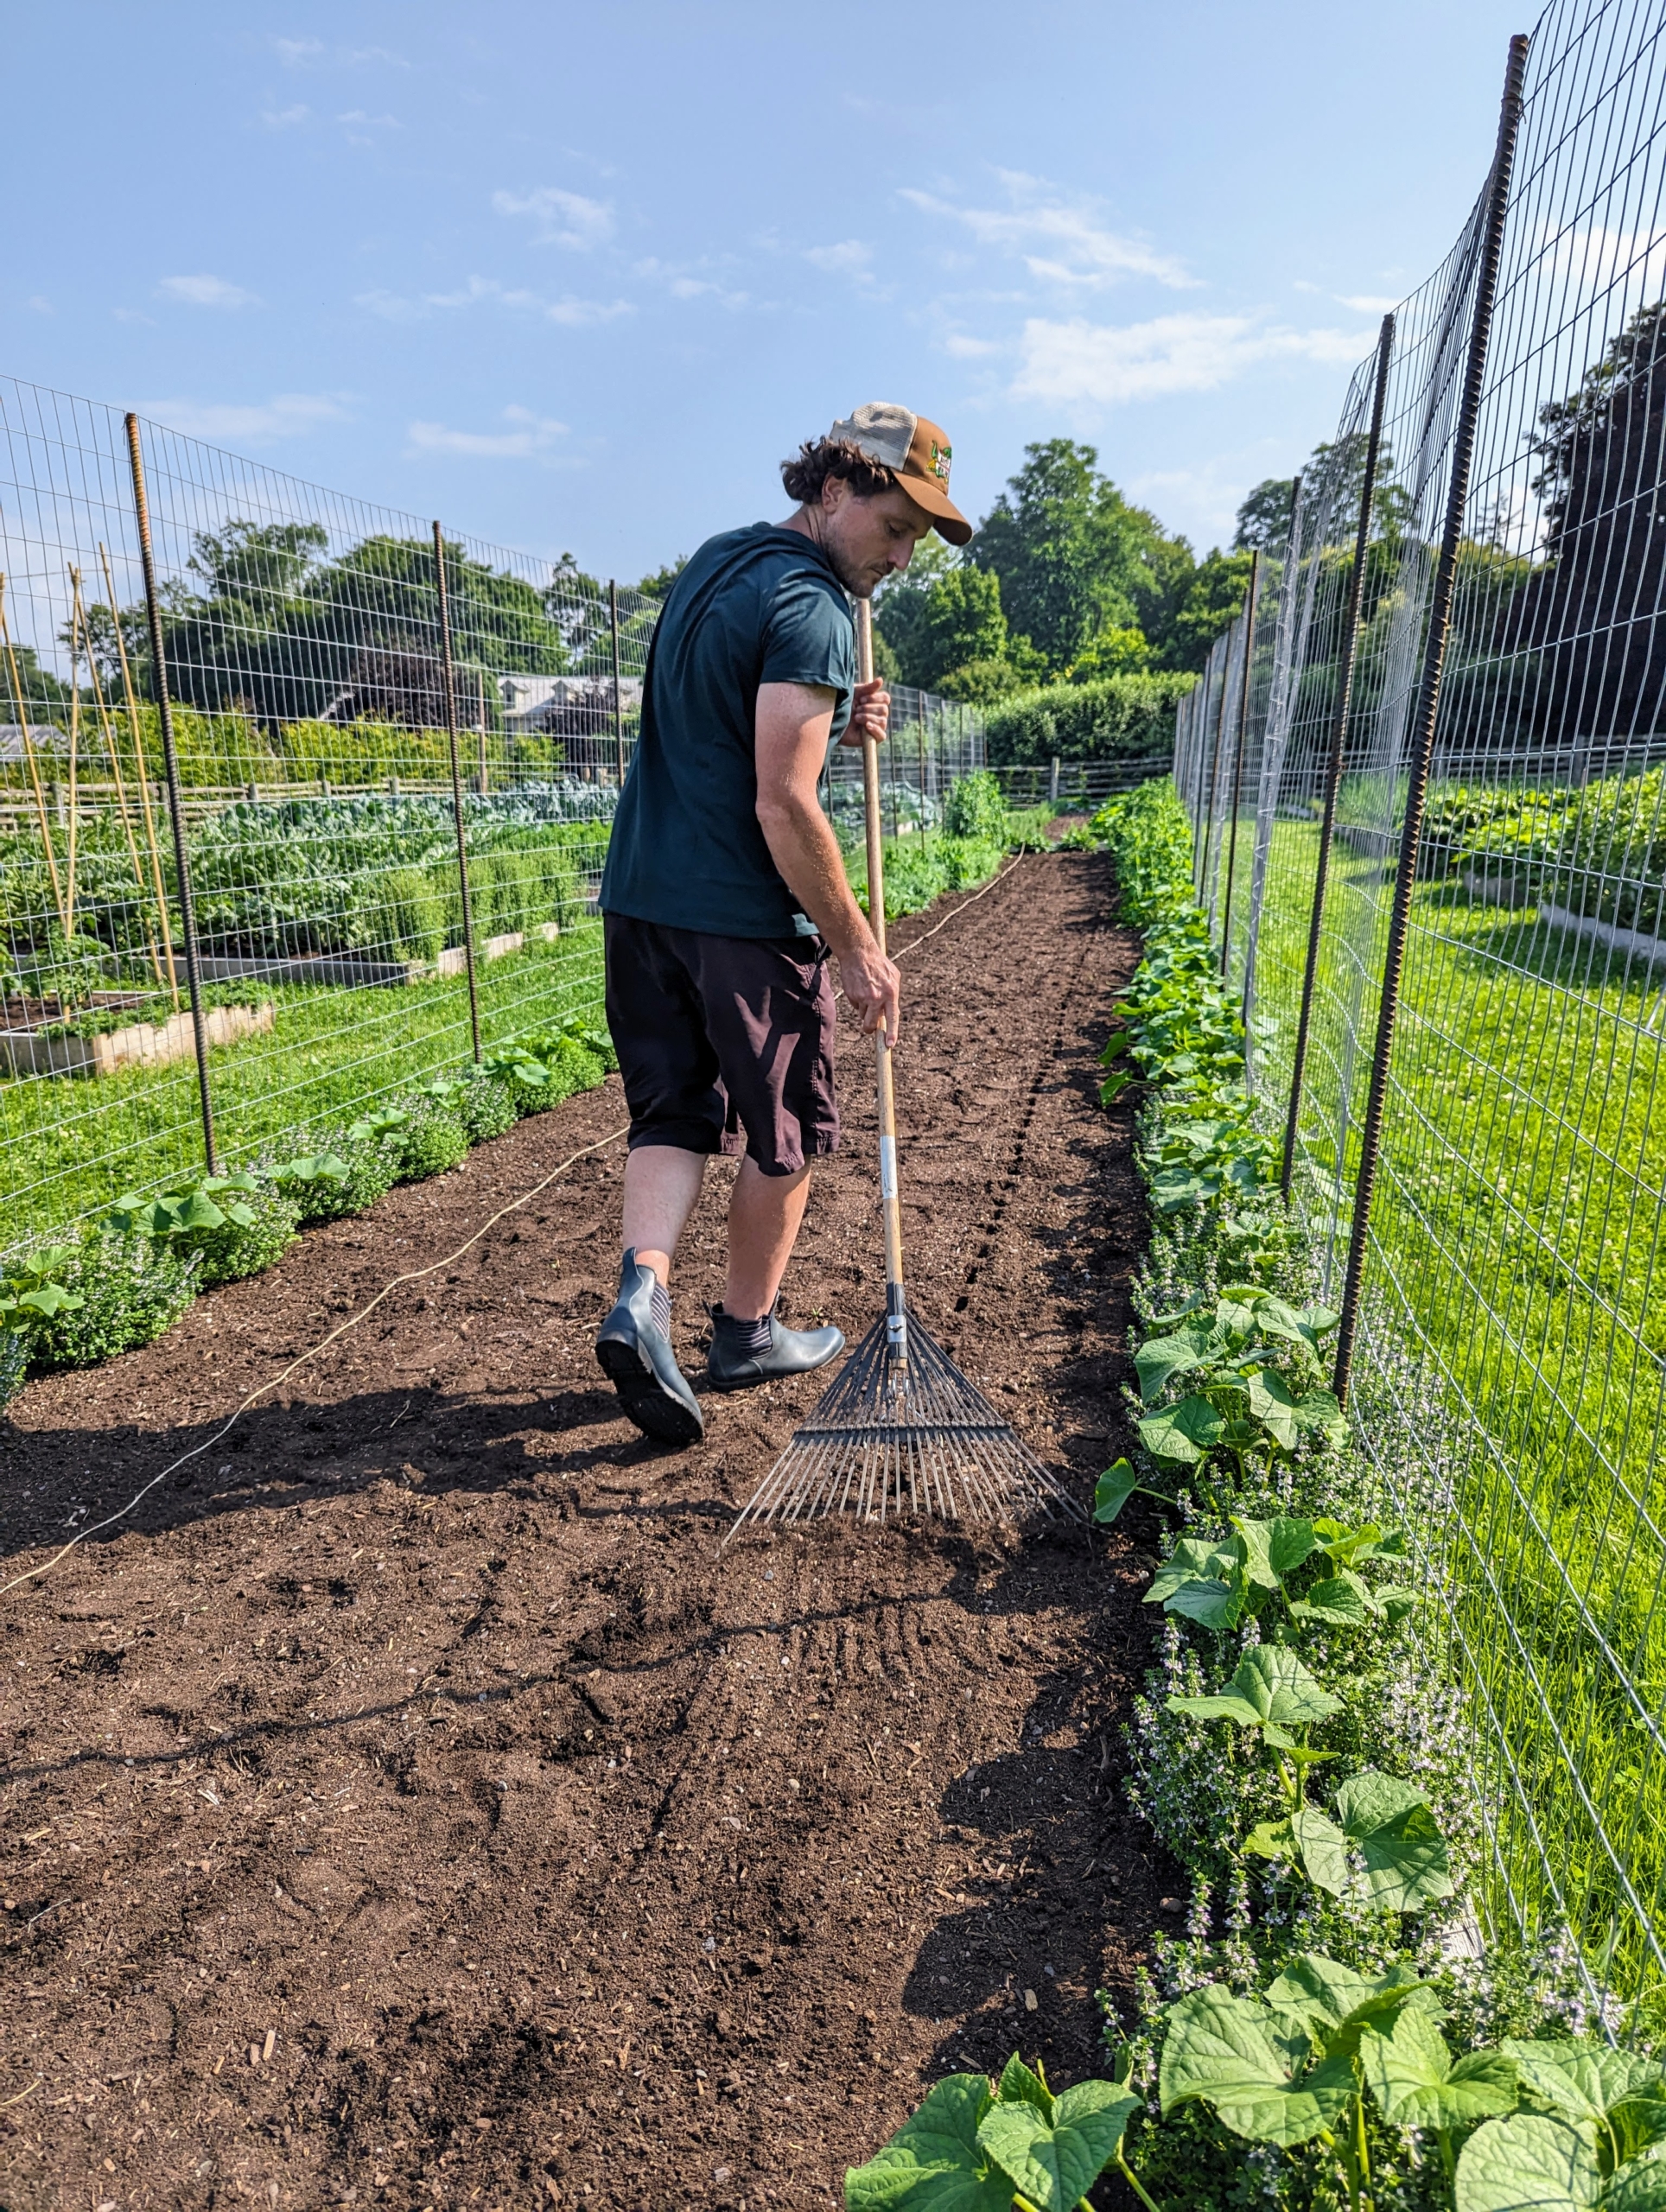
On this day, Ryan planted beans – soy beans, bush beans, pole beans and runner beans. Ryan uses this bed preparation rake from Johnny’s Selected Seeds to create furrows in the soil. Hard plastic red tubes slide onto selected teeth of the rake to mark the rows. The furrows don’t have to be deep. In general, seeds should be planted at a depth of two times the width, or diameter, of the actual seed.
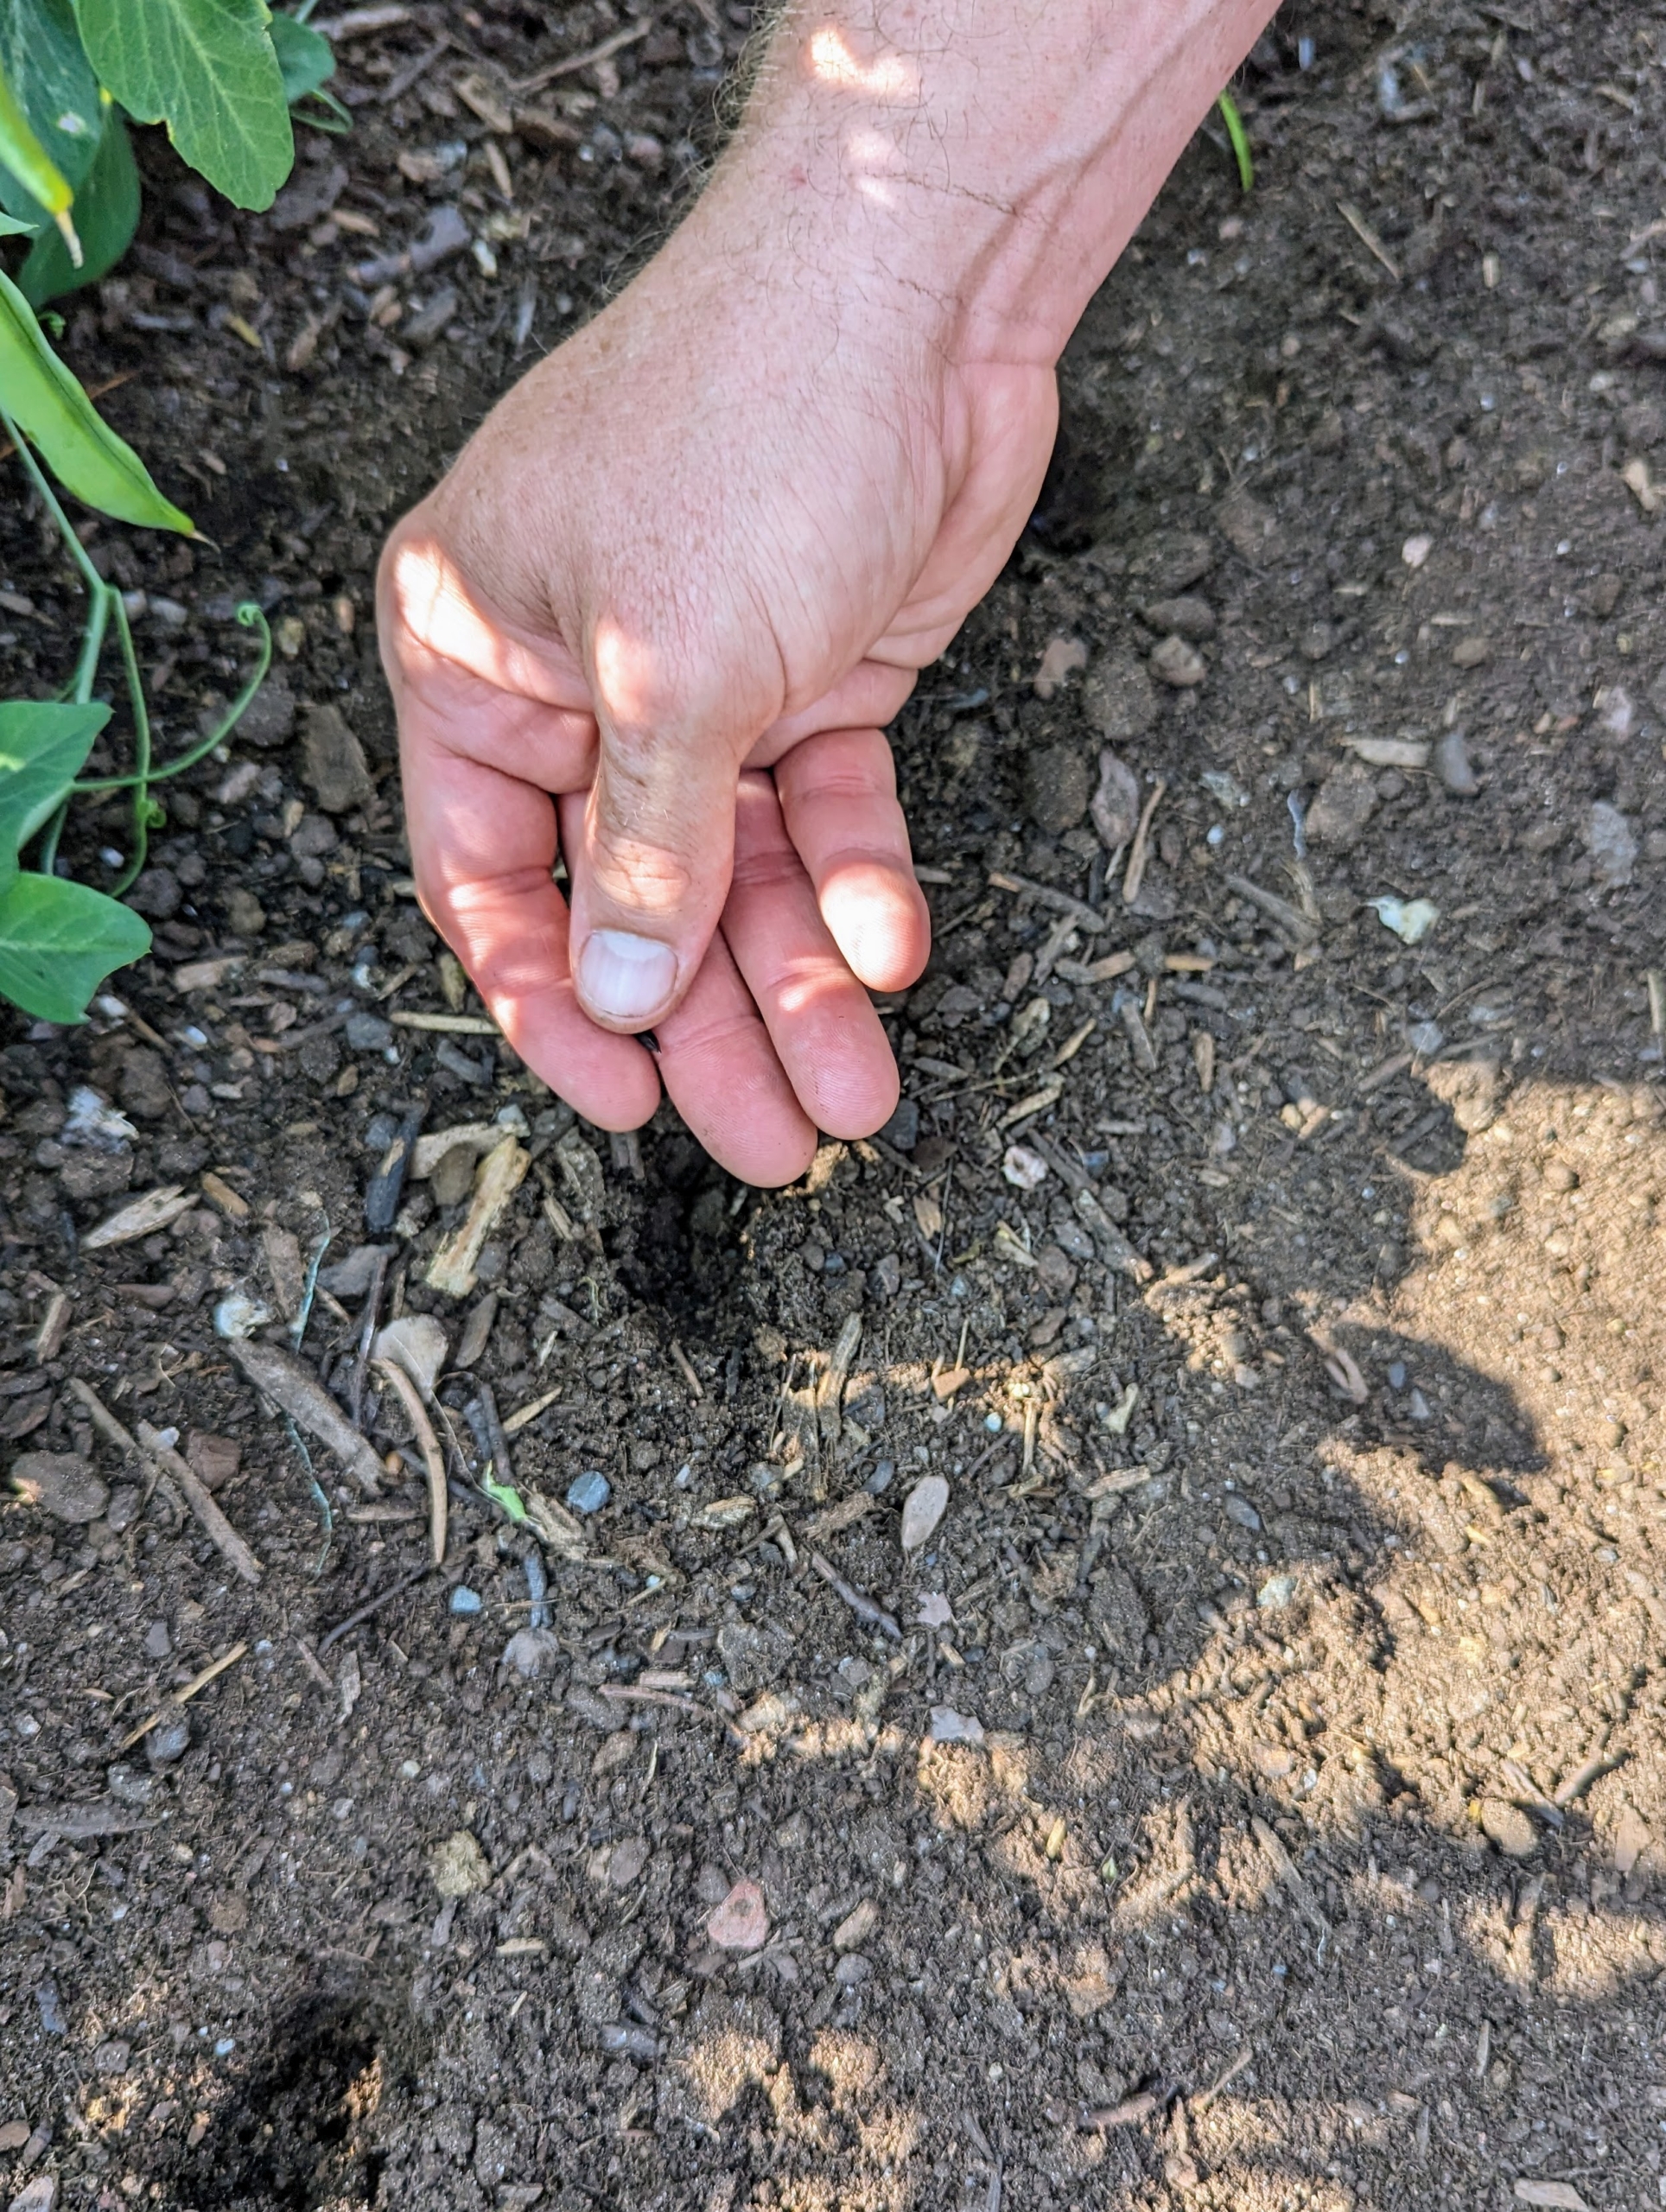
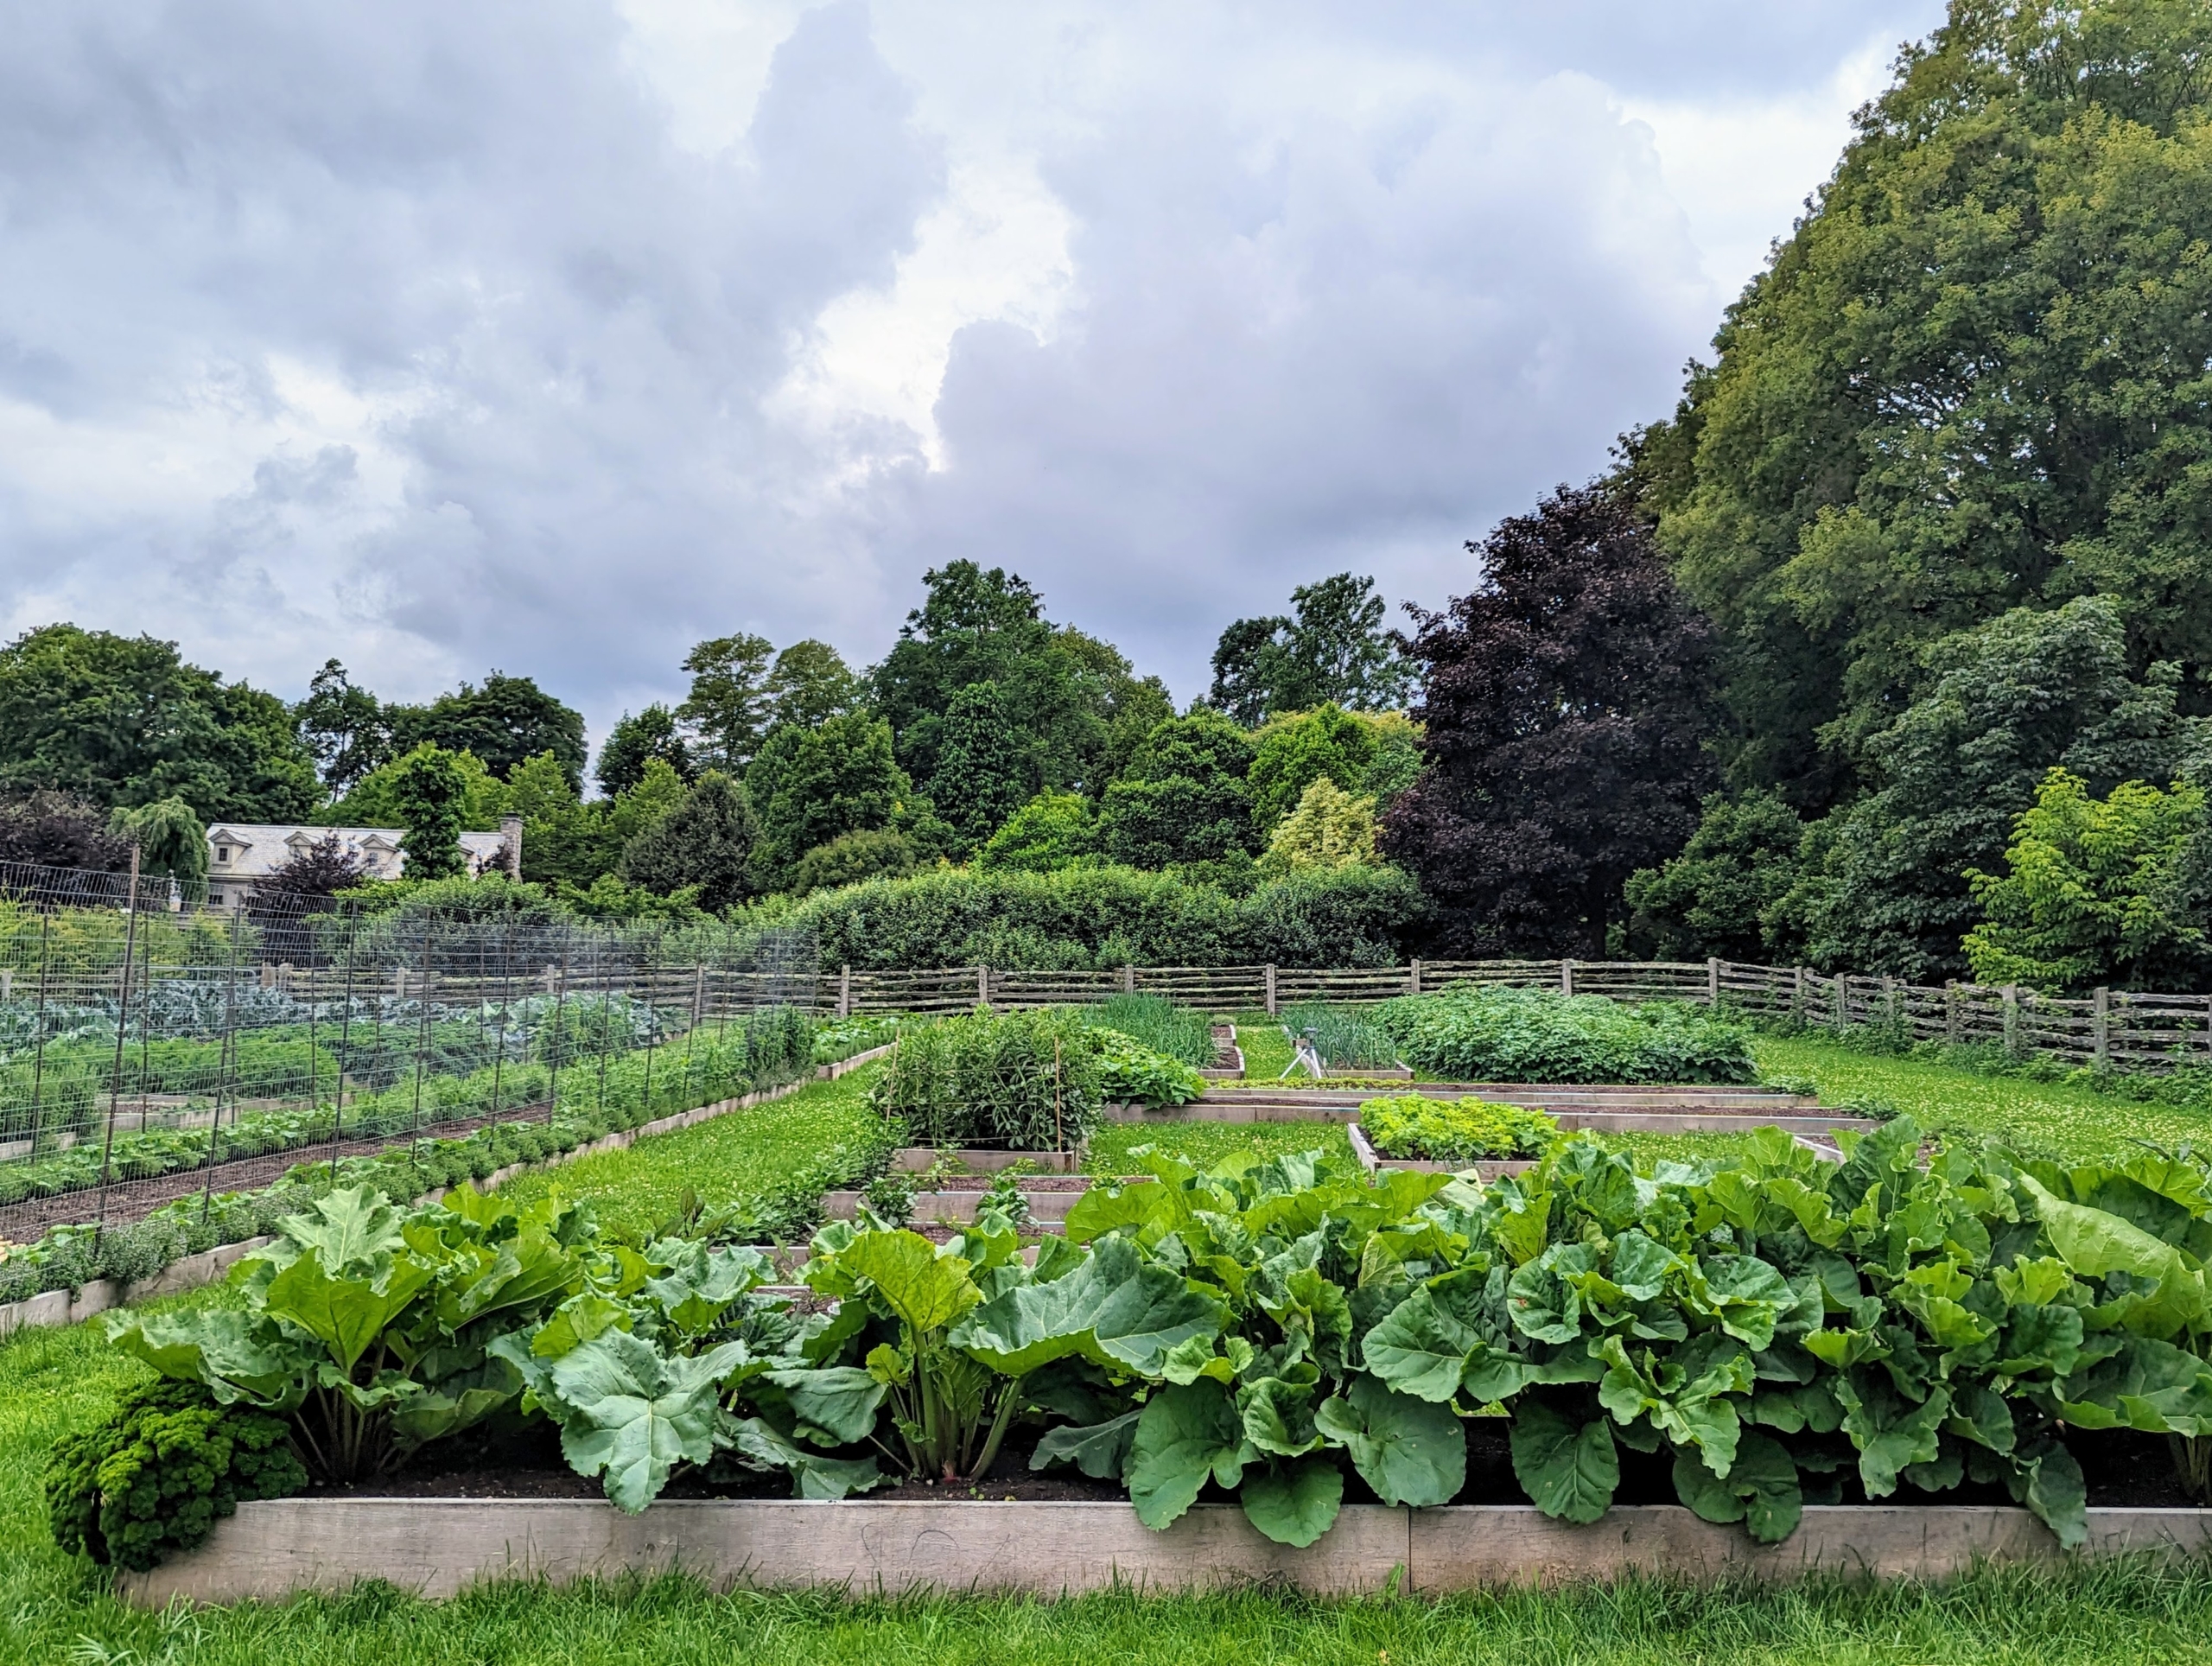
These soy bean seeds will be planted about an inch to an inch-and-a-half deep. Ryan plants the seeds in rows that are about a foot apart. All the beds are raised slightly and all surrounded by wood frames – more than 40 beds in this half-acre garden. Raised bed gardening allows good drainage, prevents soil compaction, and provides protection for those plants that may otherwise get trampled.
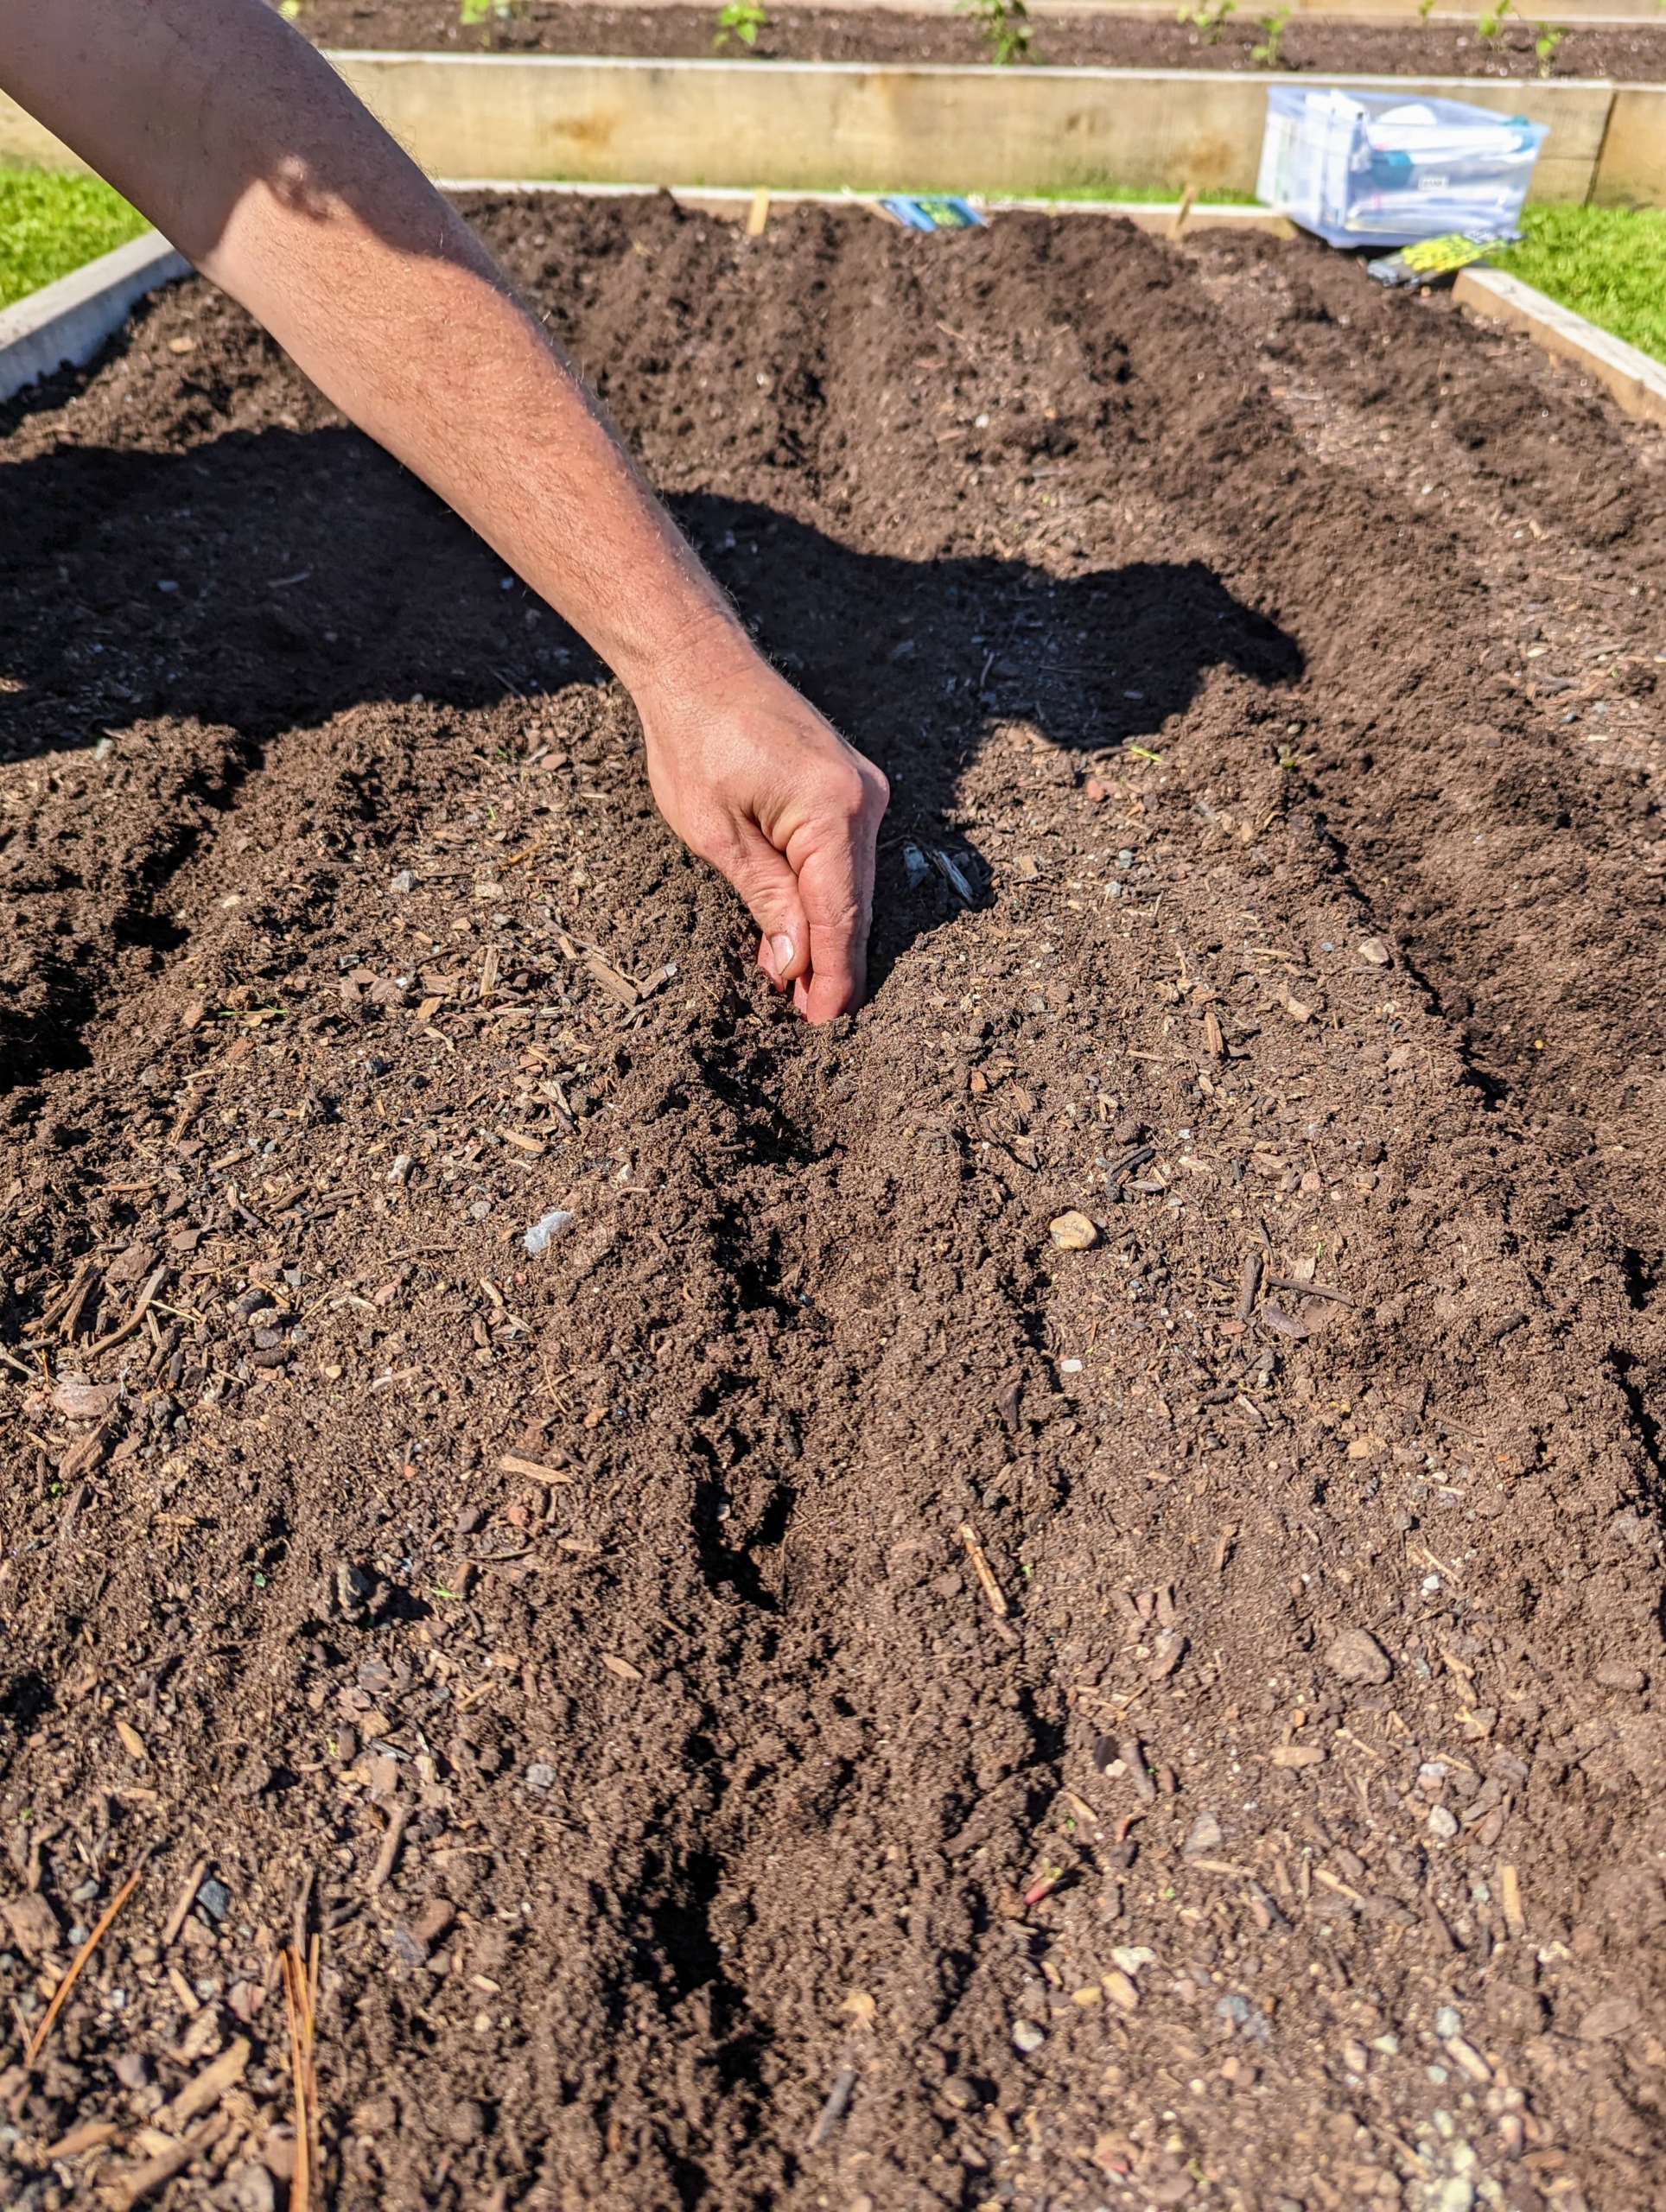
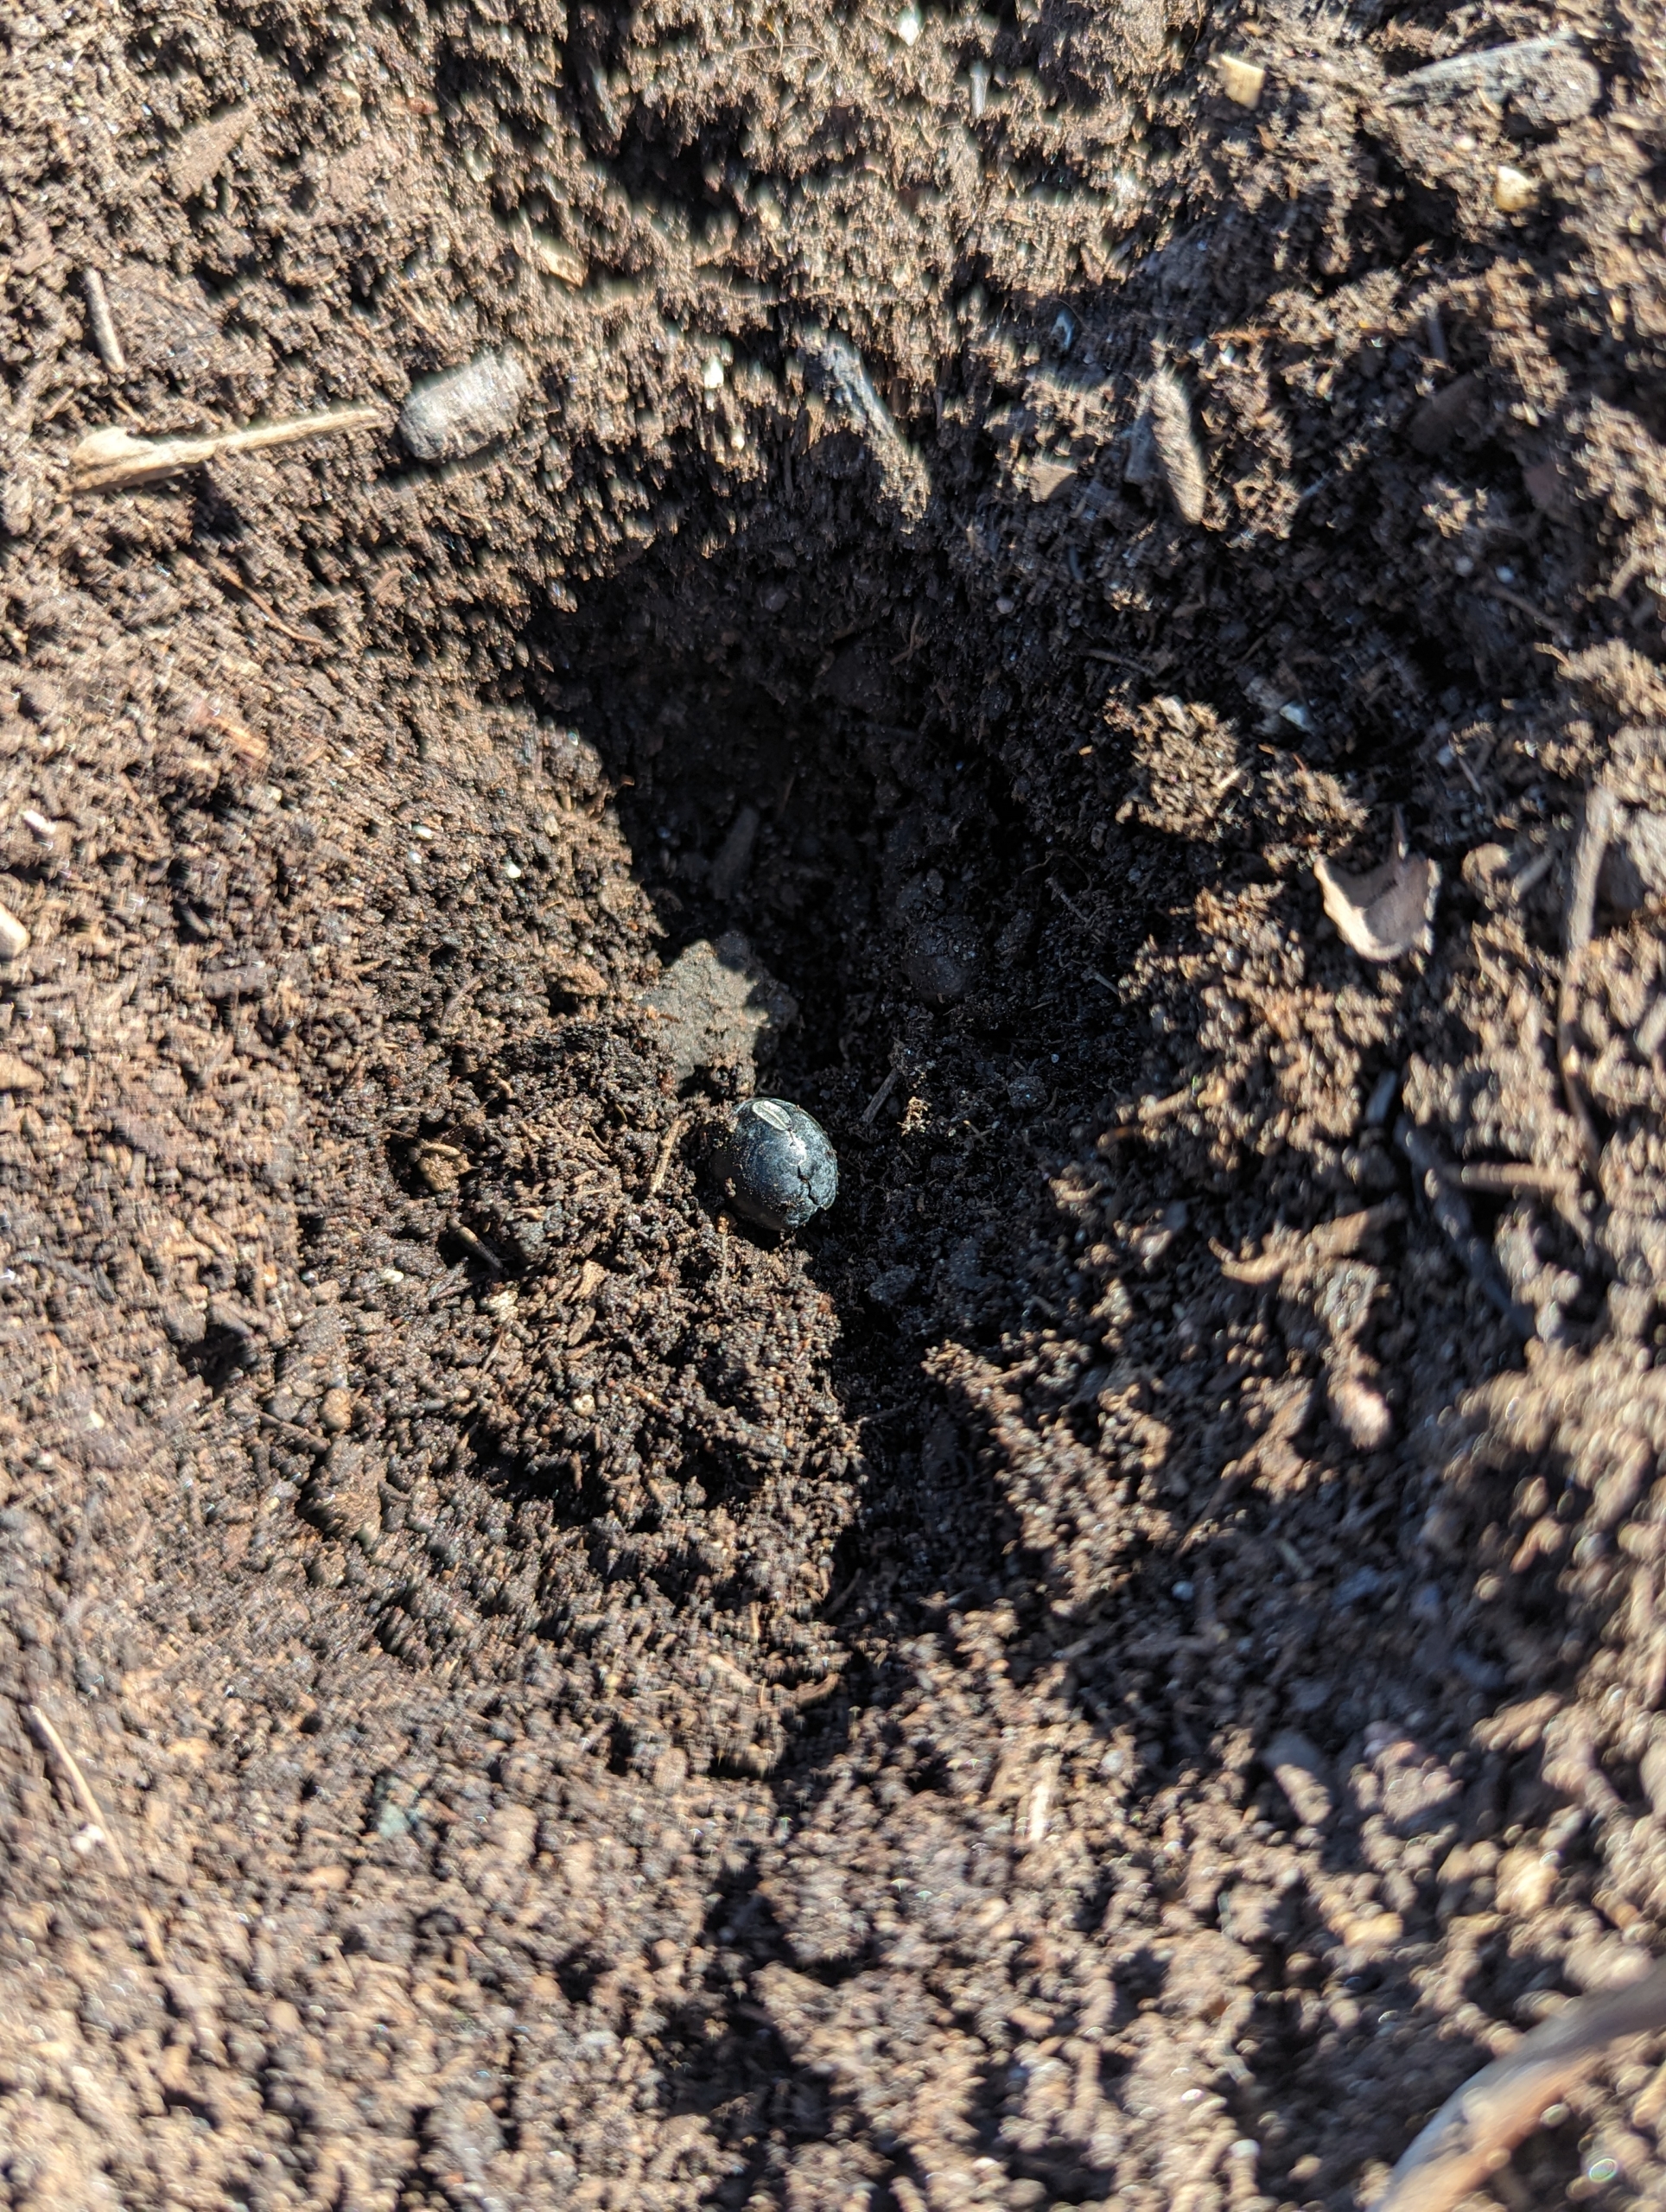
Here is one of the seeds dropped along the length of the furrow. For maximum yield, these soy beans need some space – about six inches in between them.
Both bush and pole bean cultivars are members of the same species, Phaseolus vulgaris, also called “common beans.” Bush beans are one of the easiest vegetables to grow. They grow in small bushes 12 to 24 inches tall and don’t require any trellising. Here are some of the bush beans Ryan is planting. Once the seeds are sown, the harvest of fresh beans usually begins in seven to eight weeks and lasts for around three weeks.
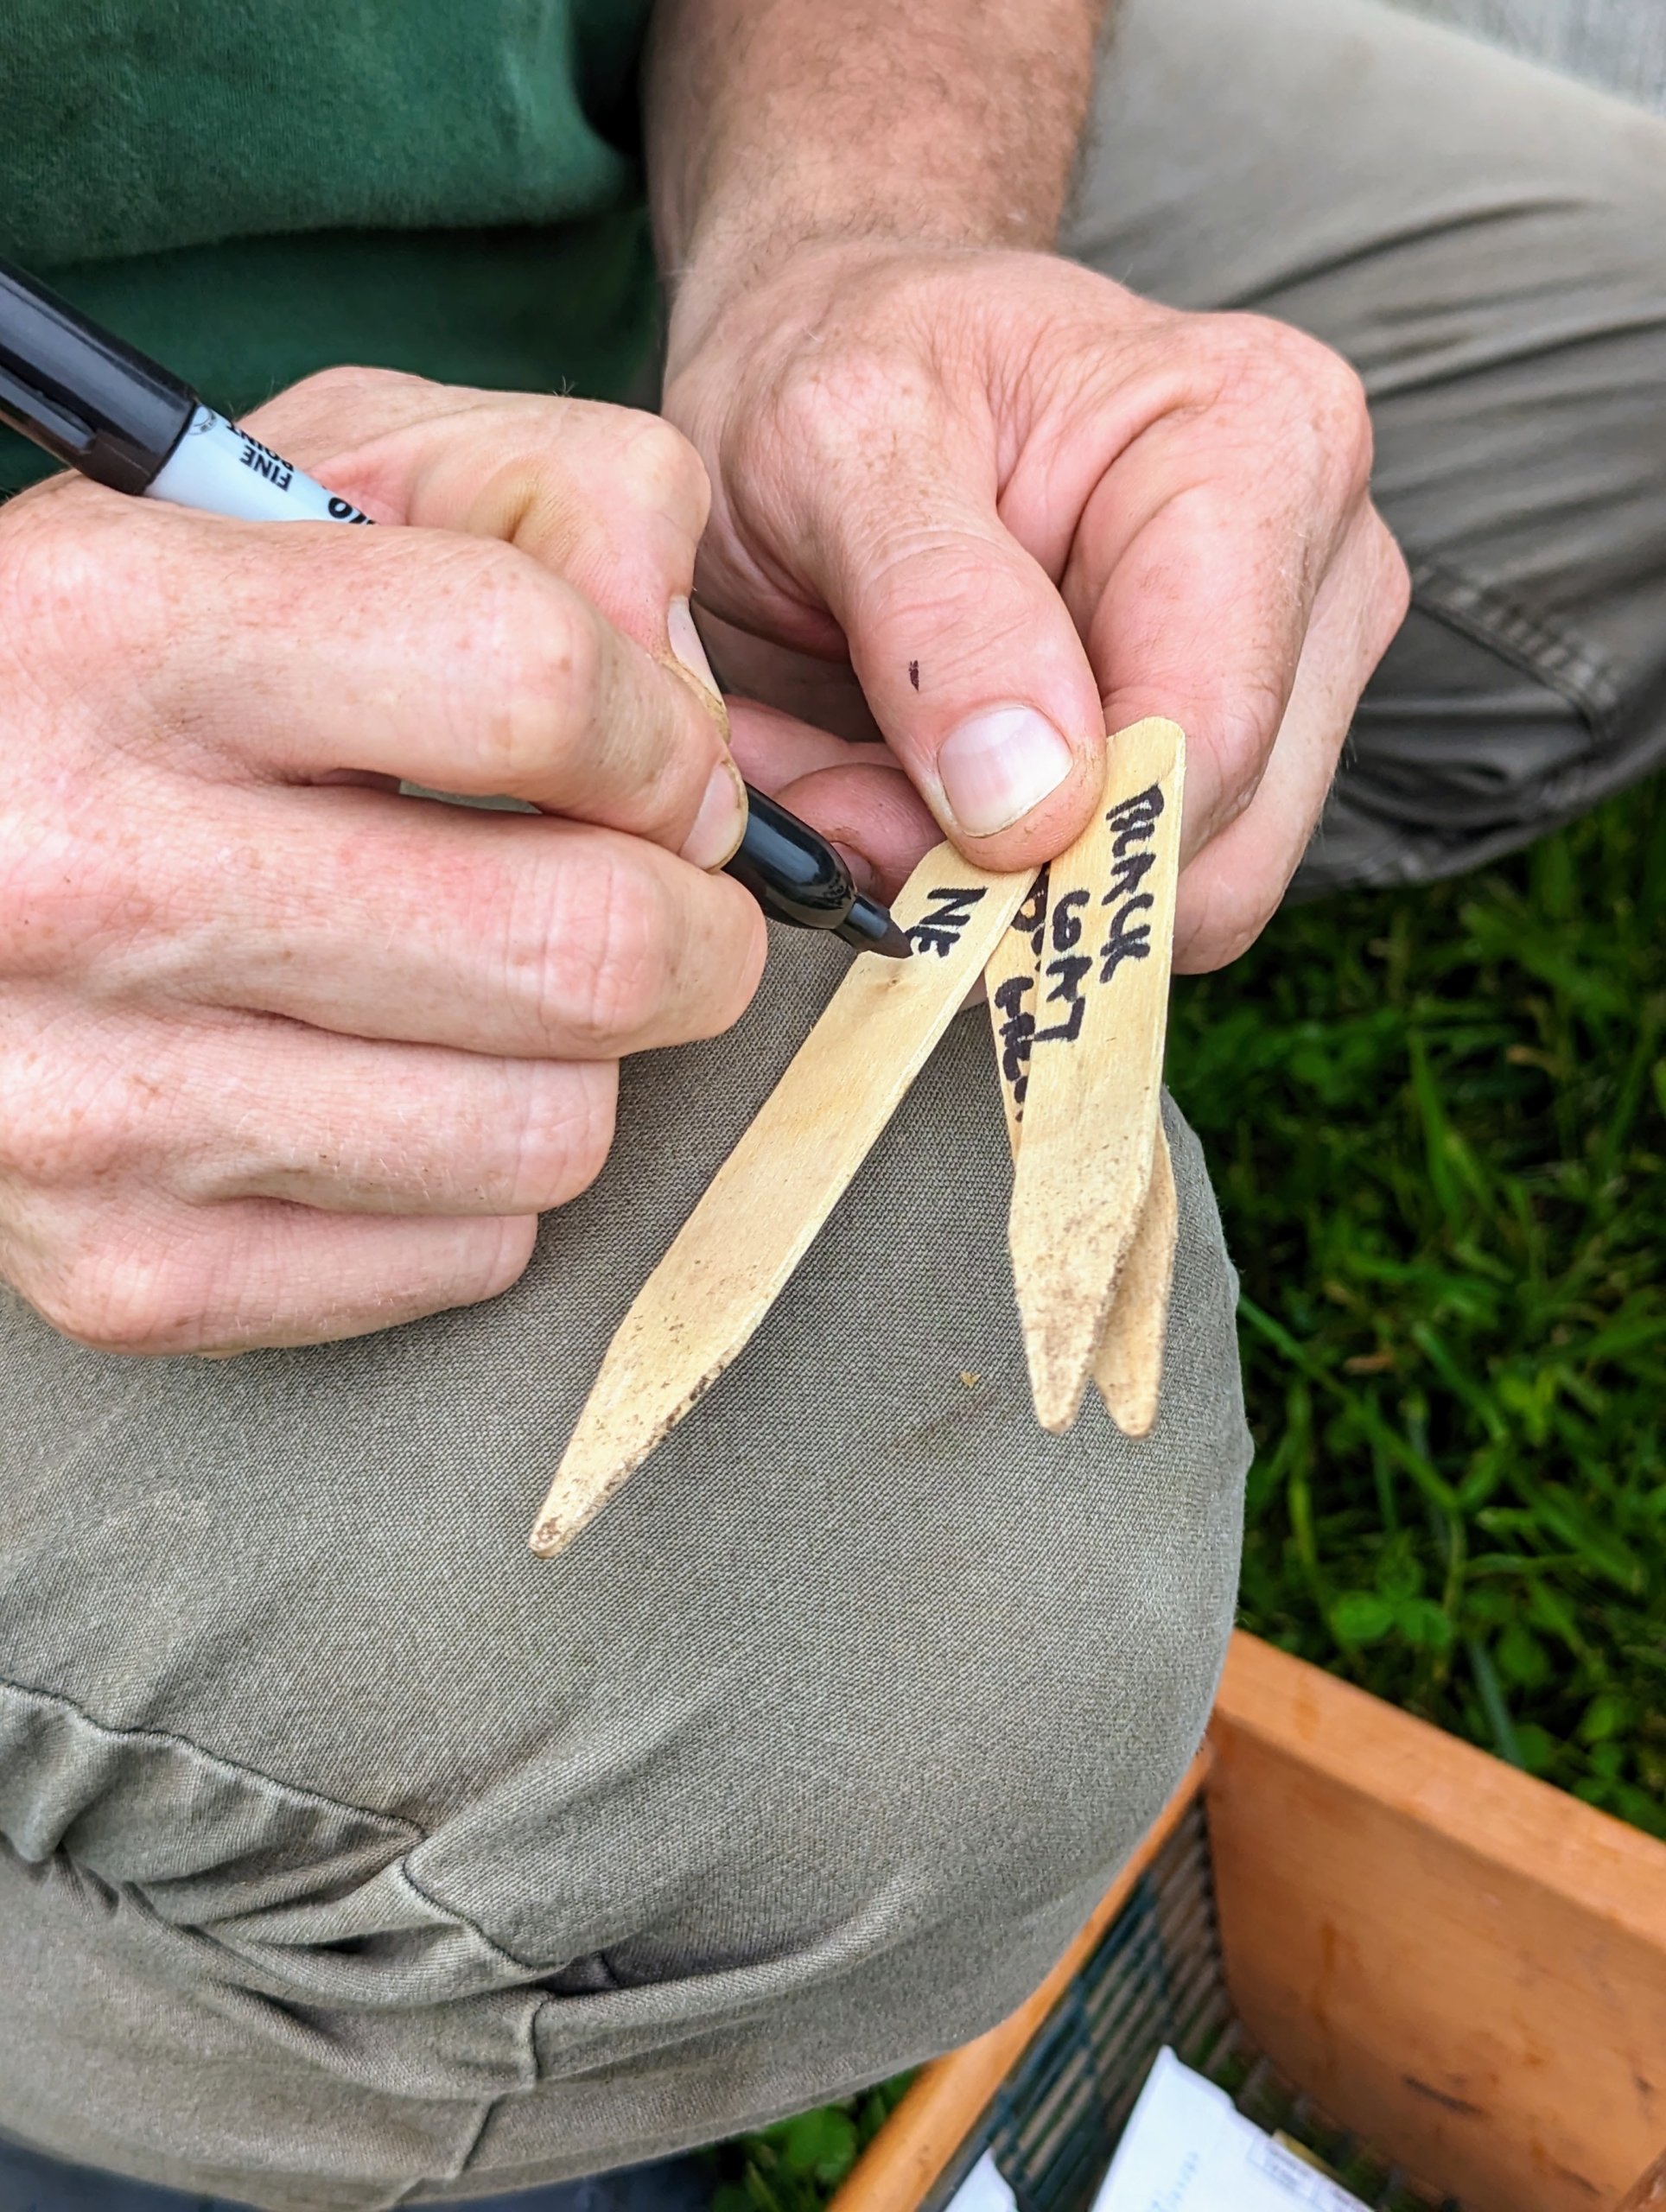
Ryan writes out small markers, so we can keep track of what varieties are growing and which ones we want to grow again.
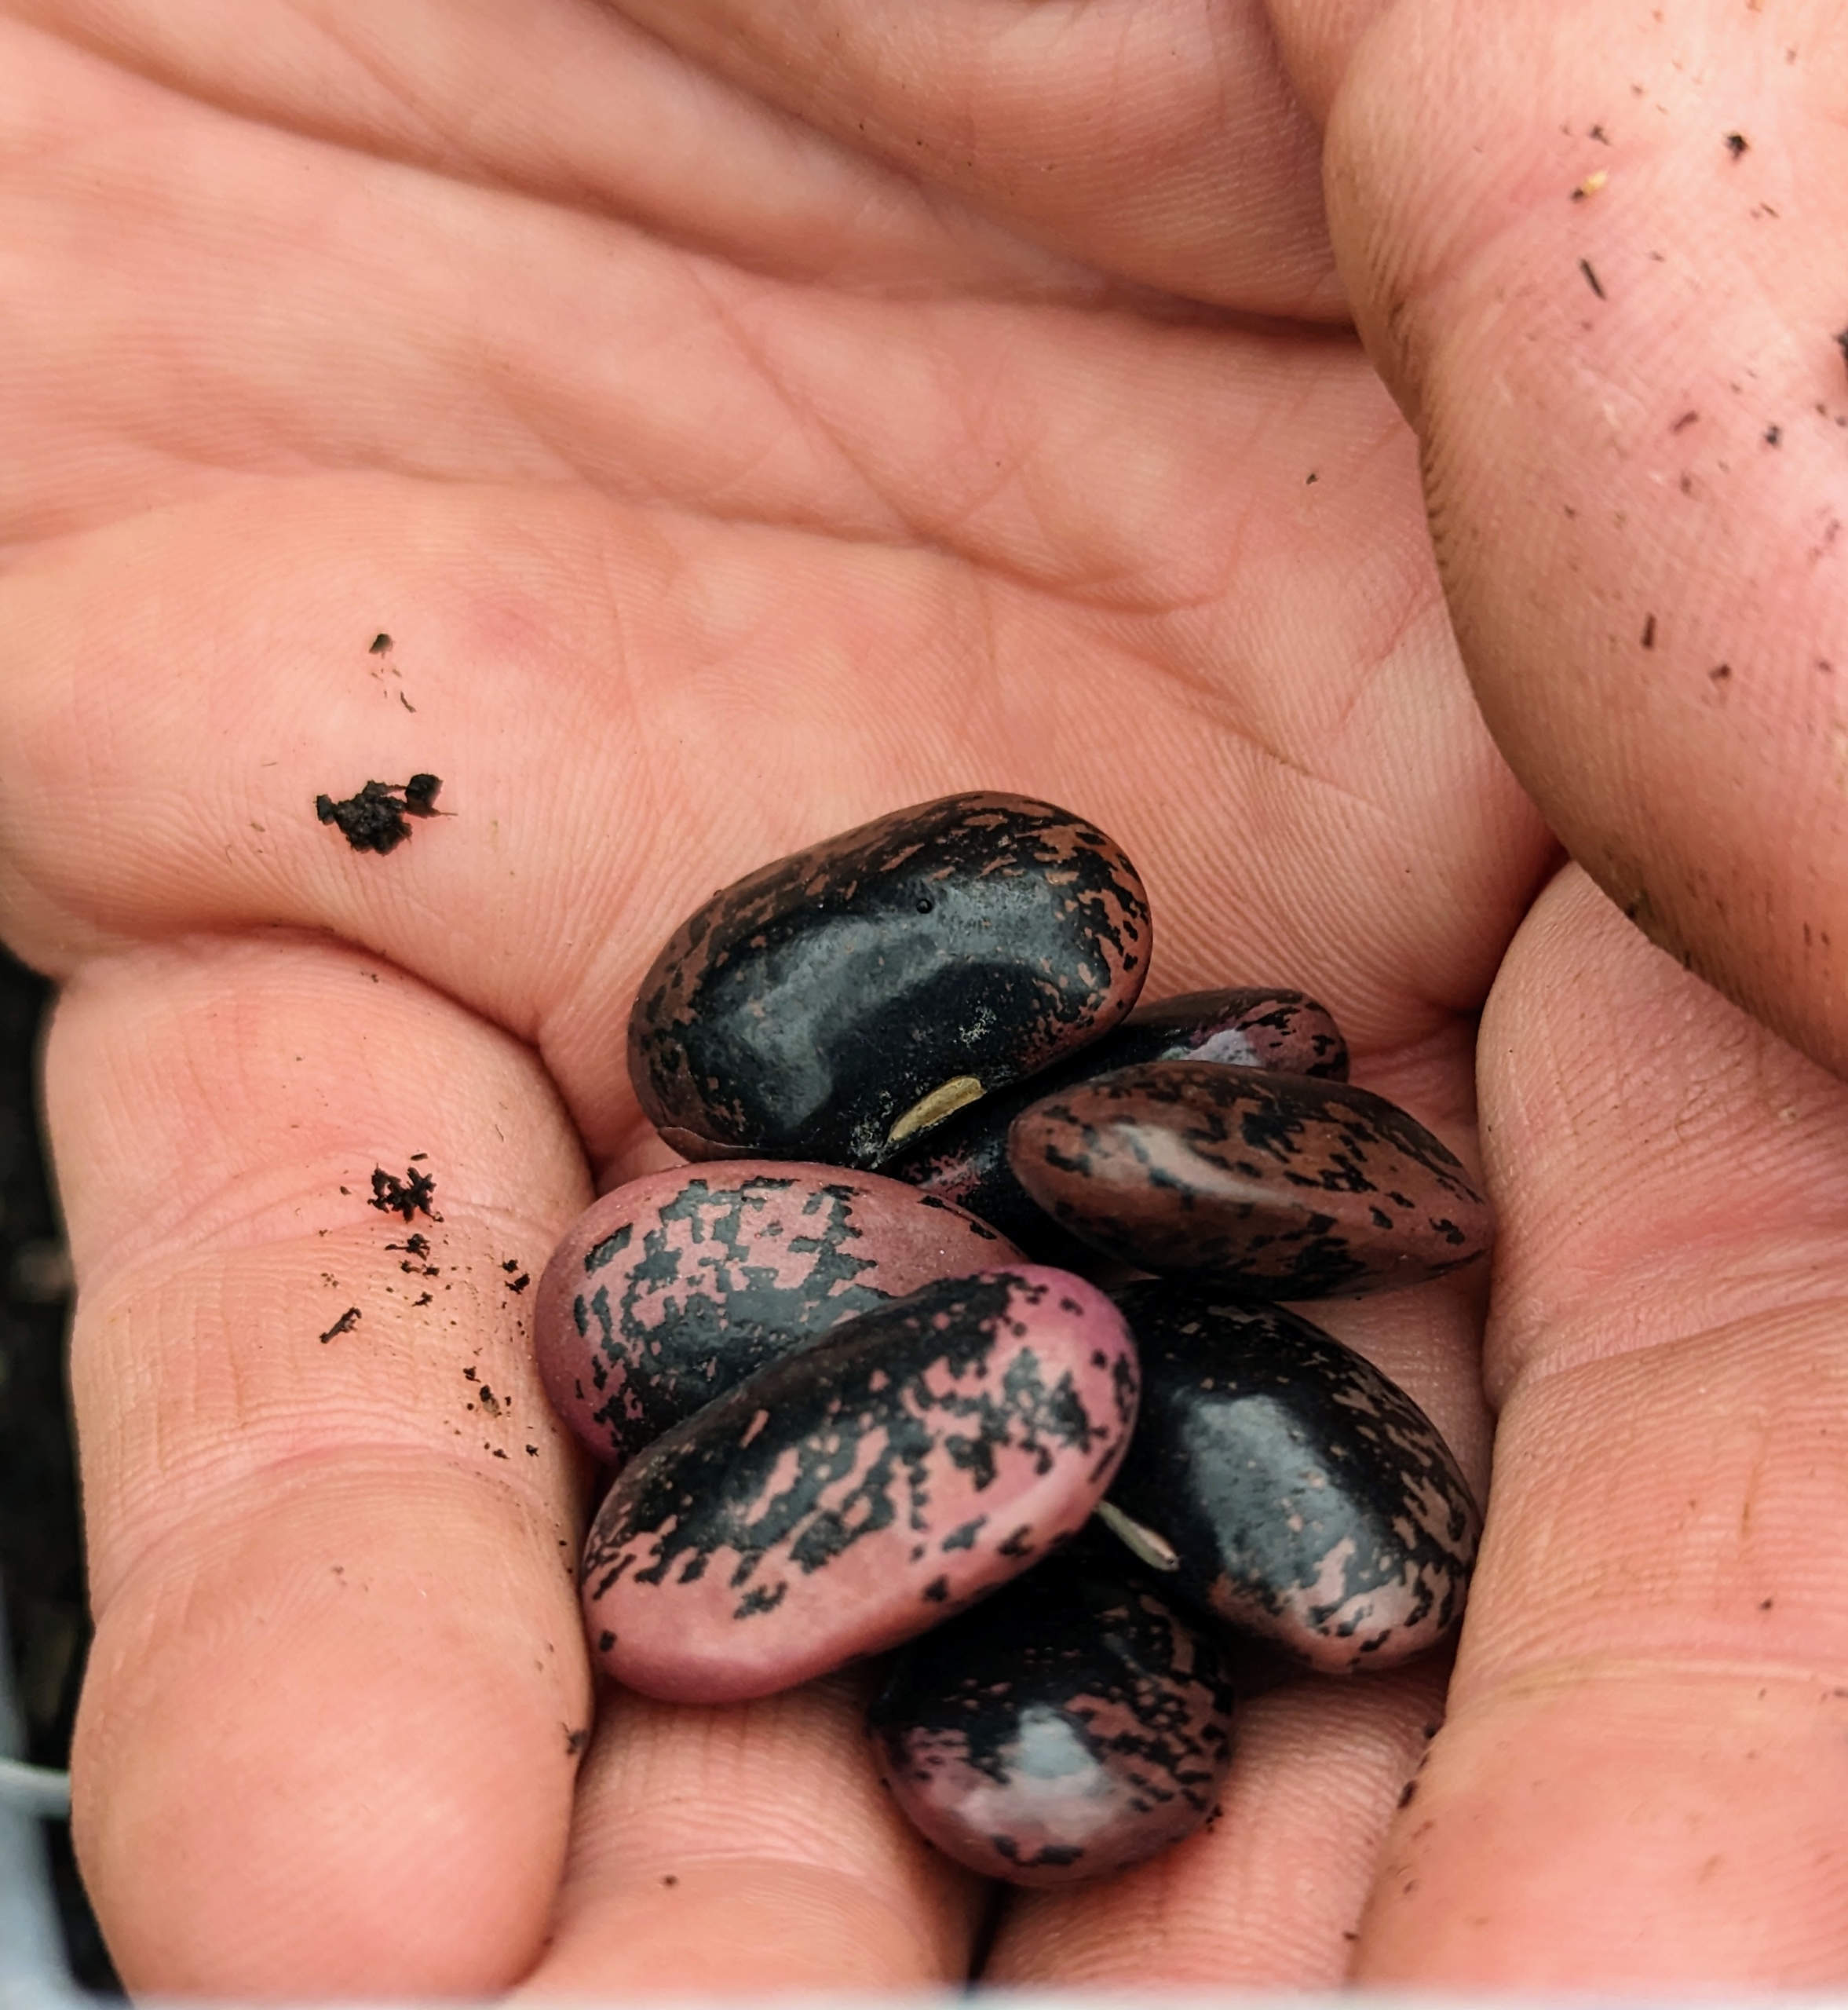
And, instead of growing in bushy form, pole beans and runner beans, Phaseolus coccineus, are vining and climbing plants. Ryan planted both types. And do you know… runner beans twine around their supports in a clockwise direction, while pole beans twine in a counter-clockwise direction? This is helpful to know when training beans to climb.
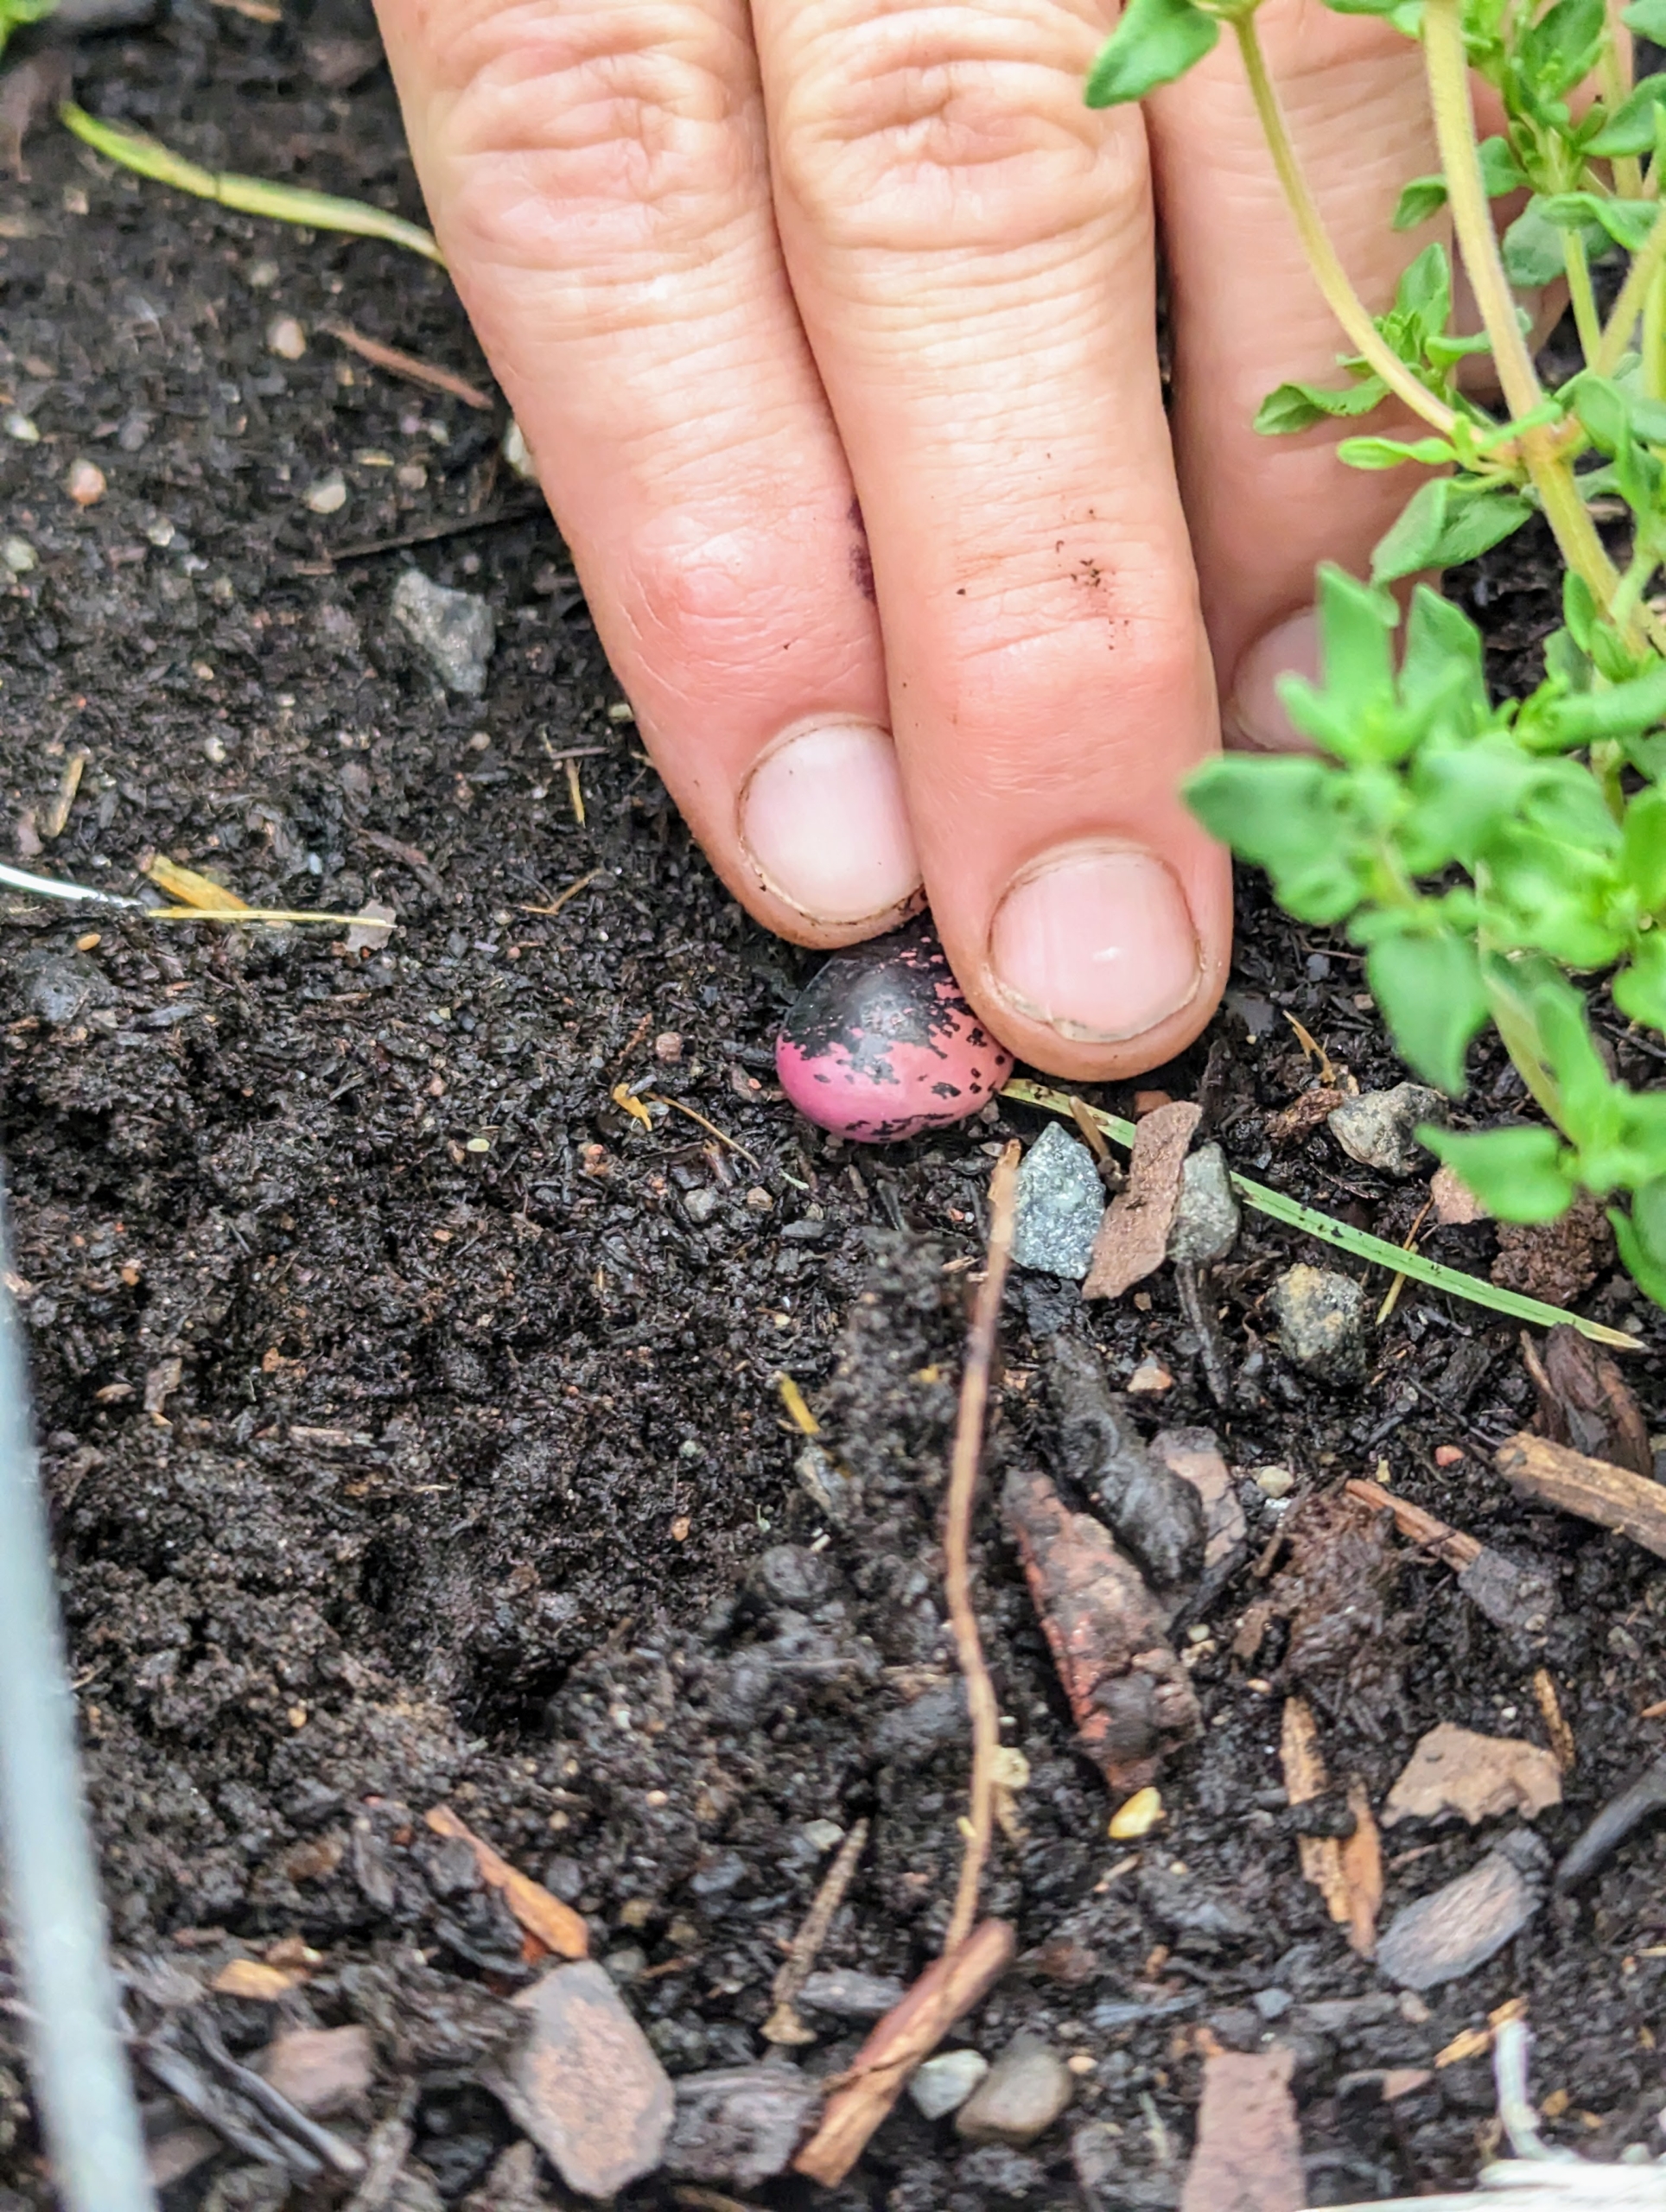
For these beans, Ryan pushes the bean into the soil about two inches deep and at least six inches from the last one.
Here’s a view from above. The beans are planted close to the trellis, so they can find their way once they begin to grow.
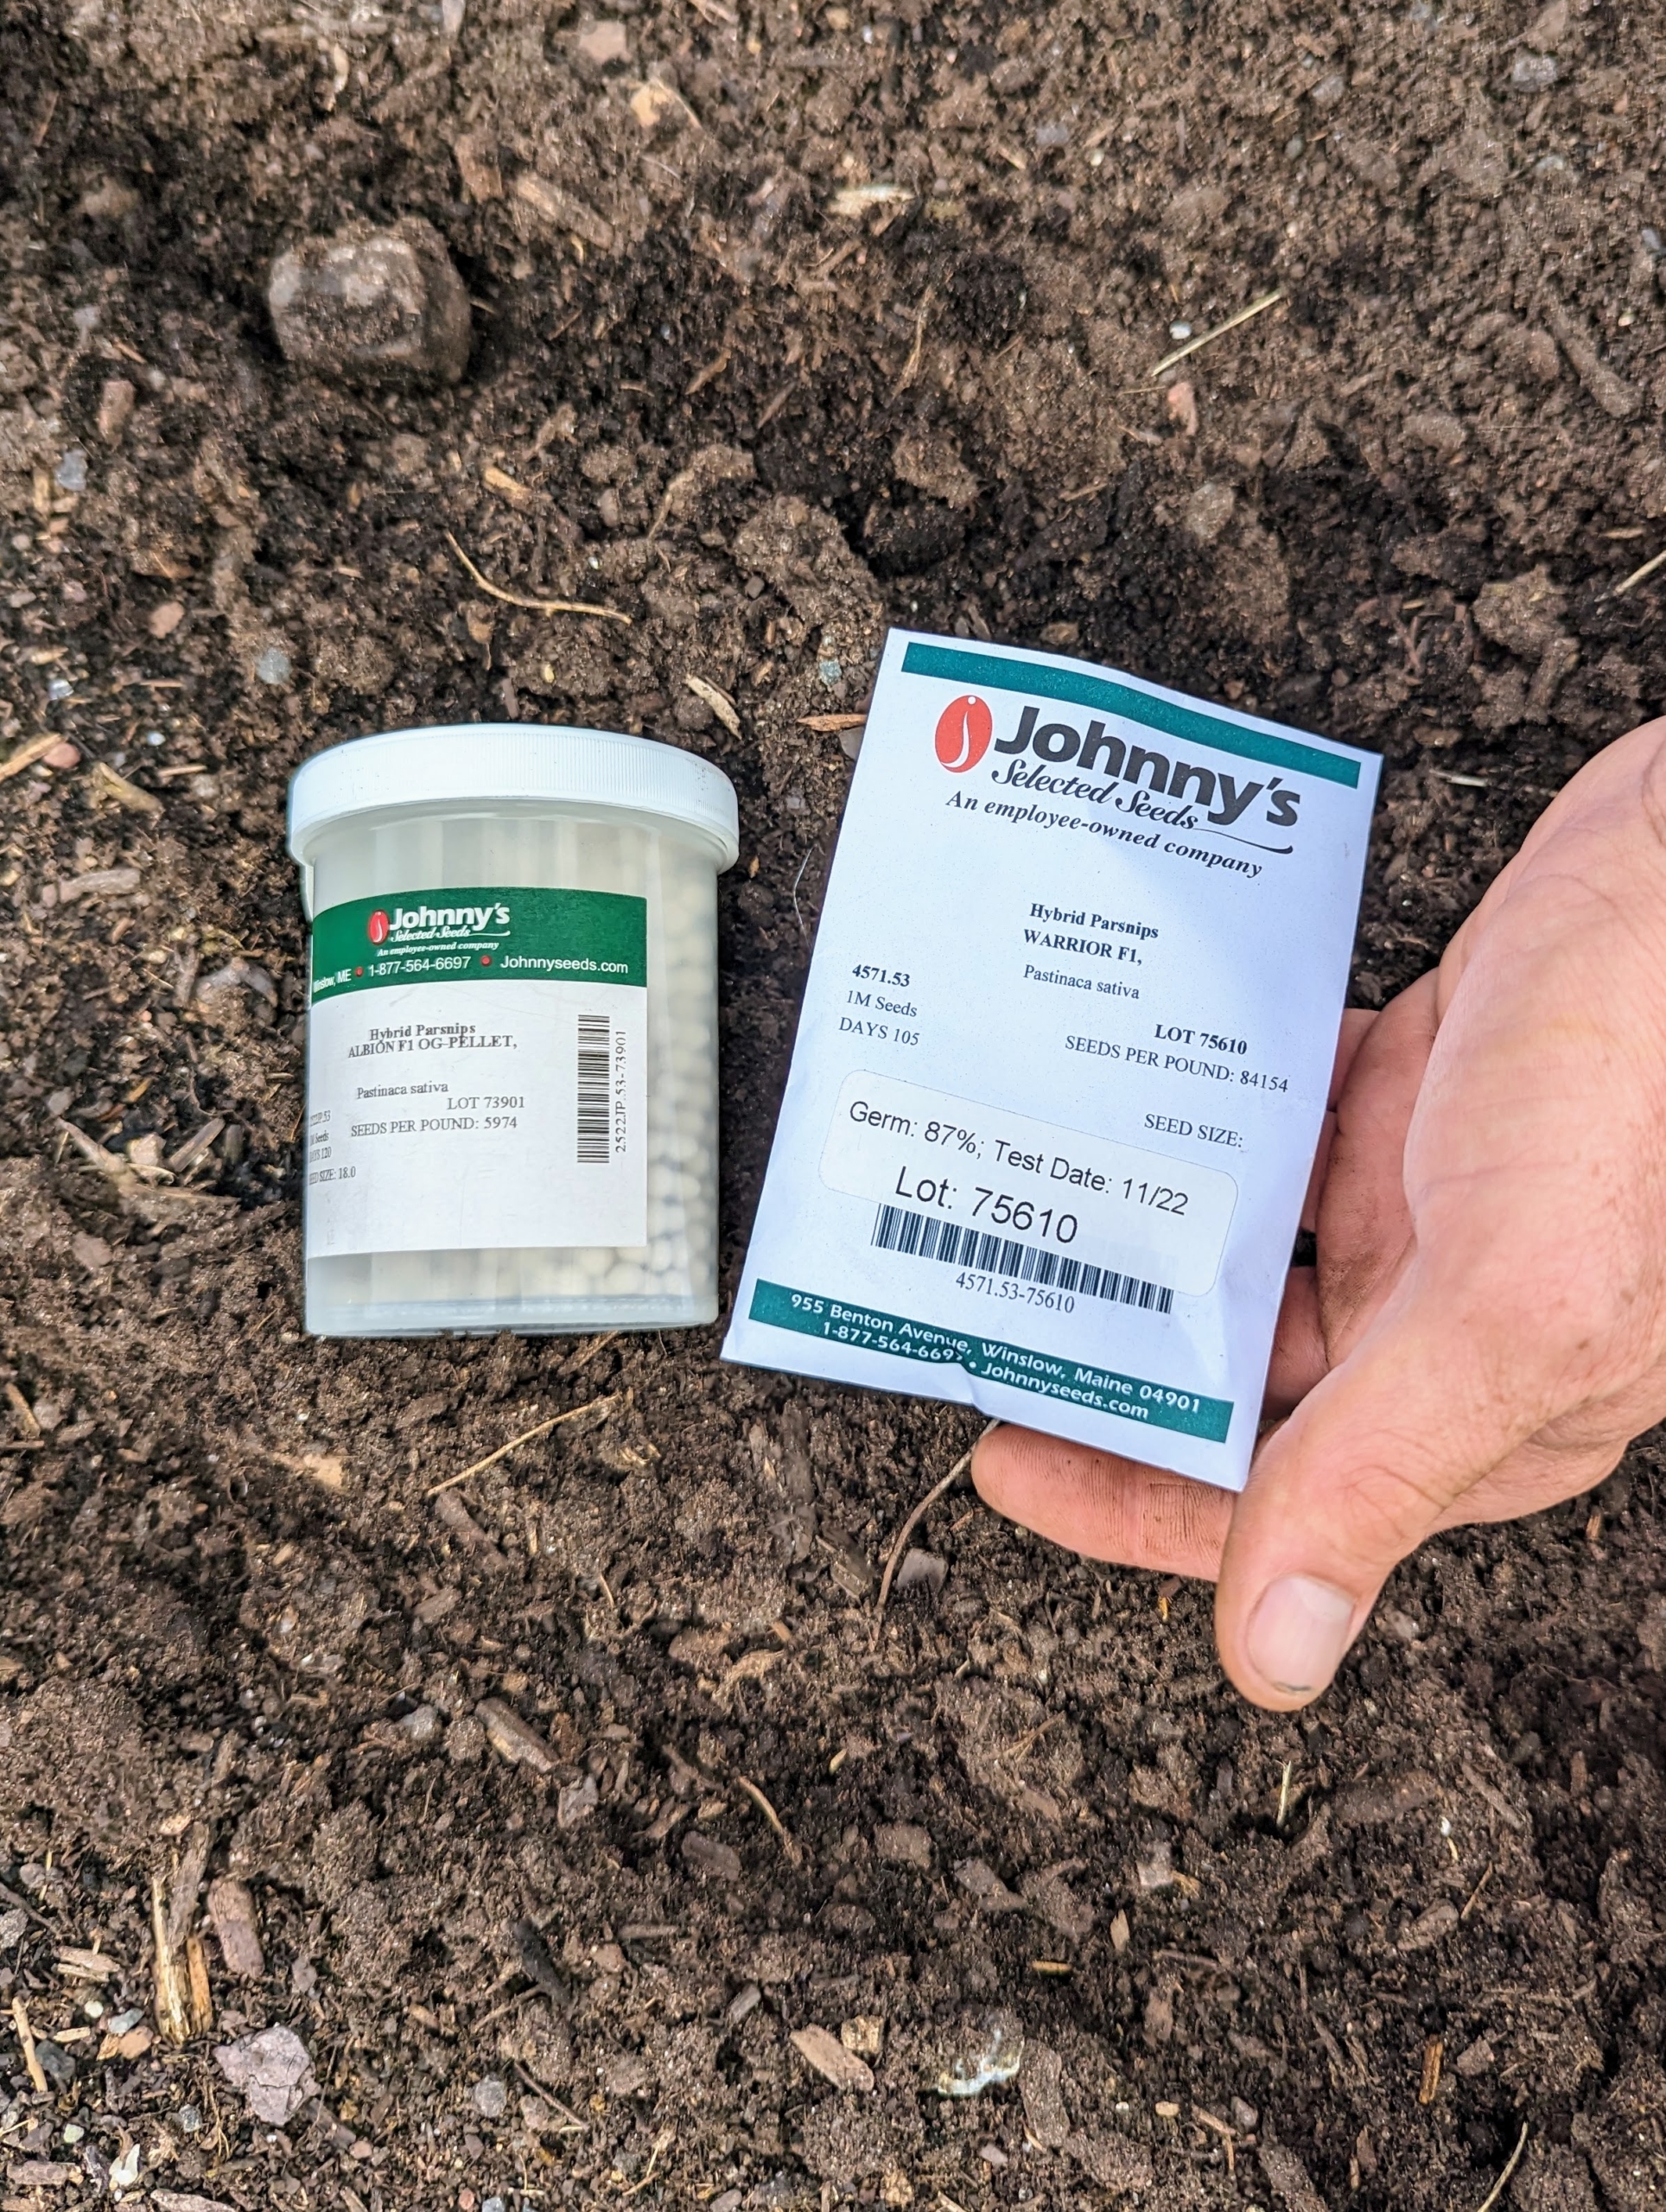
Our parsnip seeds are from Johnny’s Selected Seeds in central Maine – a company I’ve been using for quite some time. Johnny’s Selected Seeds is a privately held, employee-owned organic seed producer. Johnny’s offers hundreds of varieties of organic vegetable, herb, flower, fruit and farm seeds that are known to be strong, dependable growers.
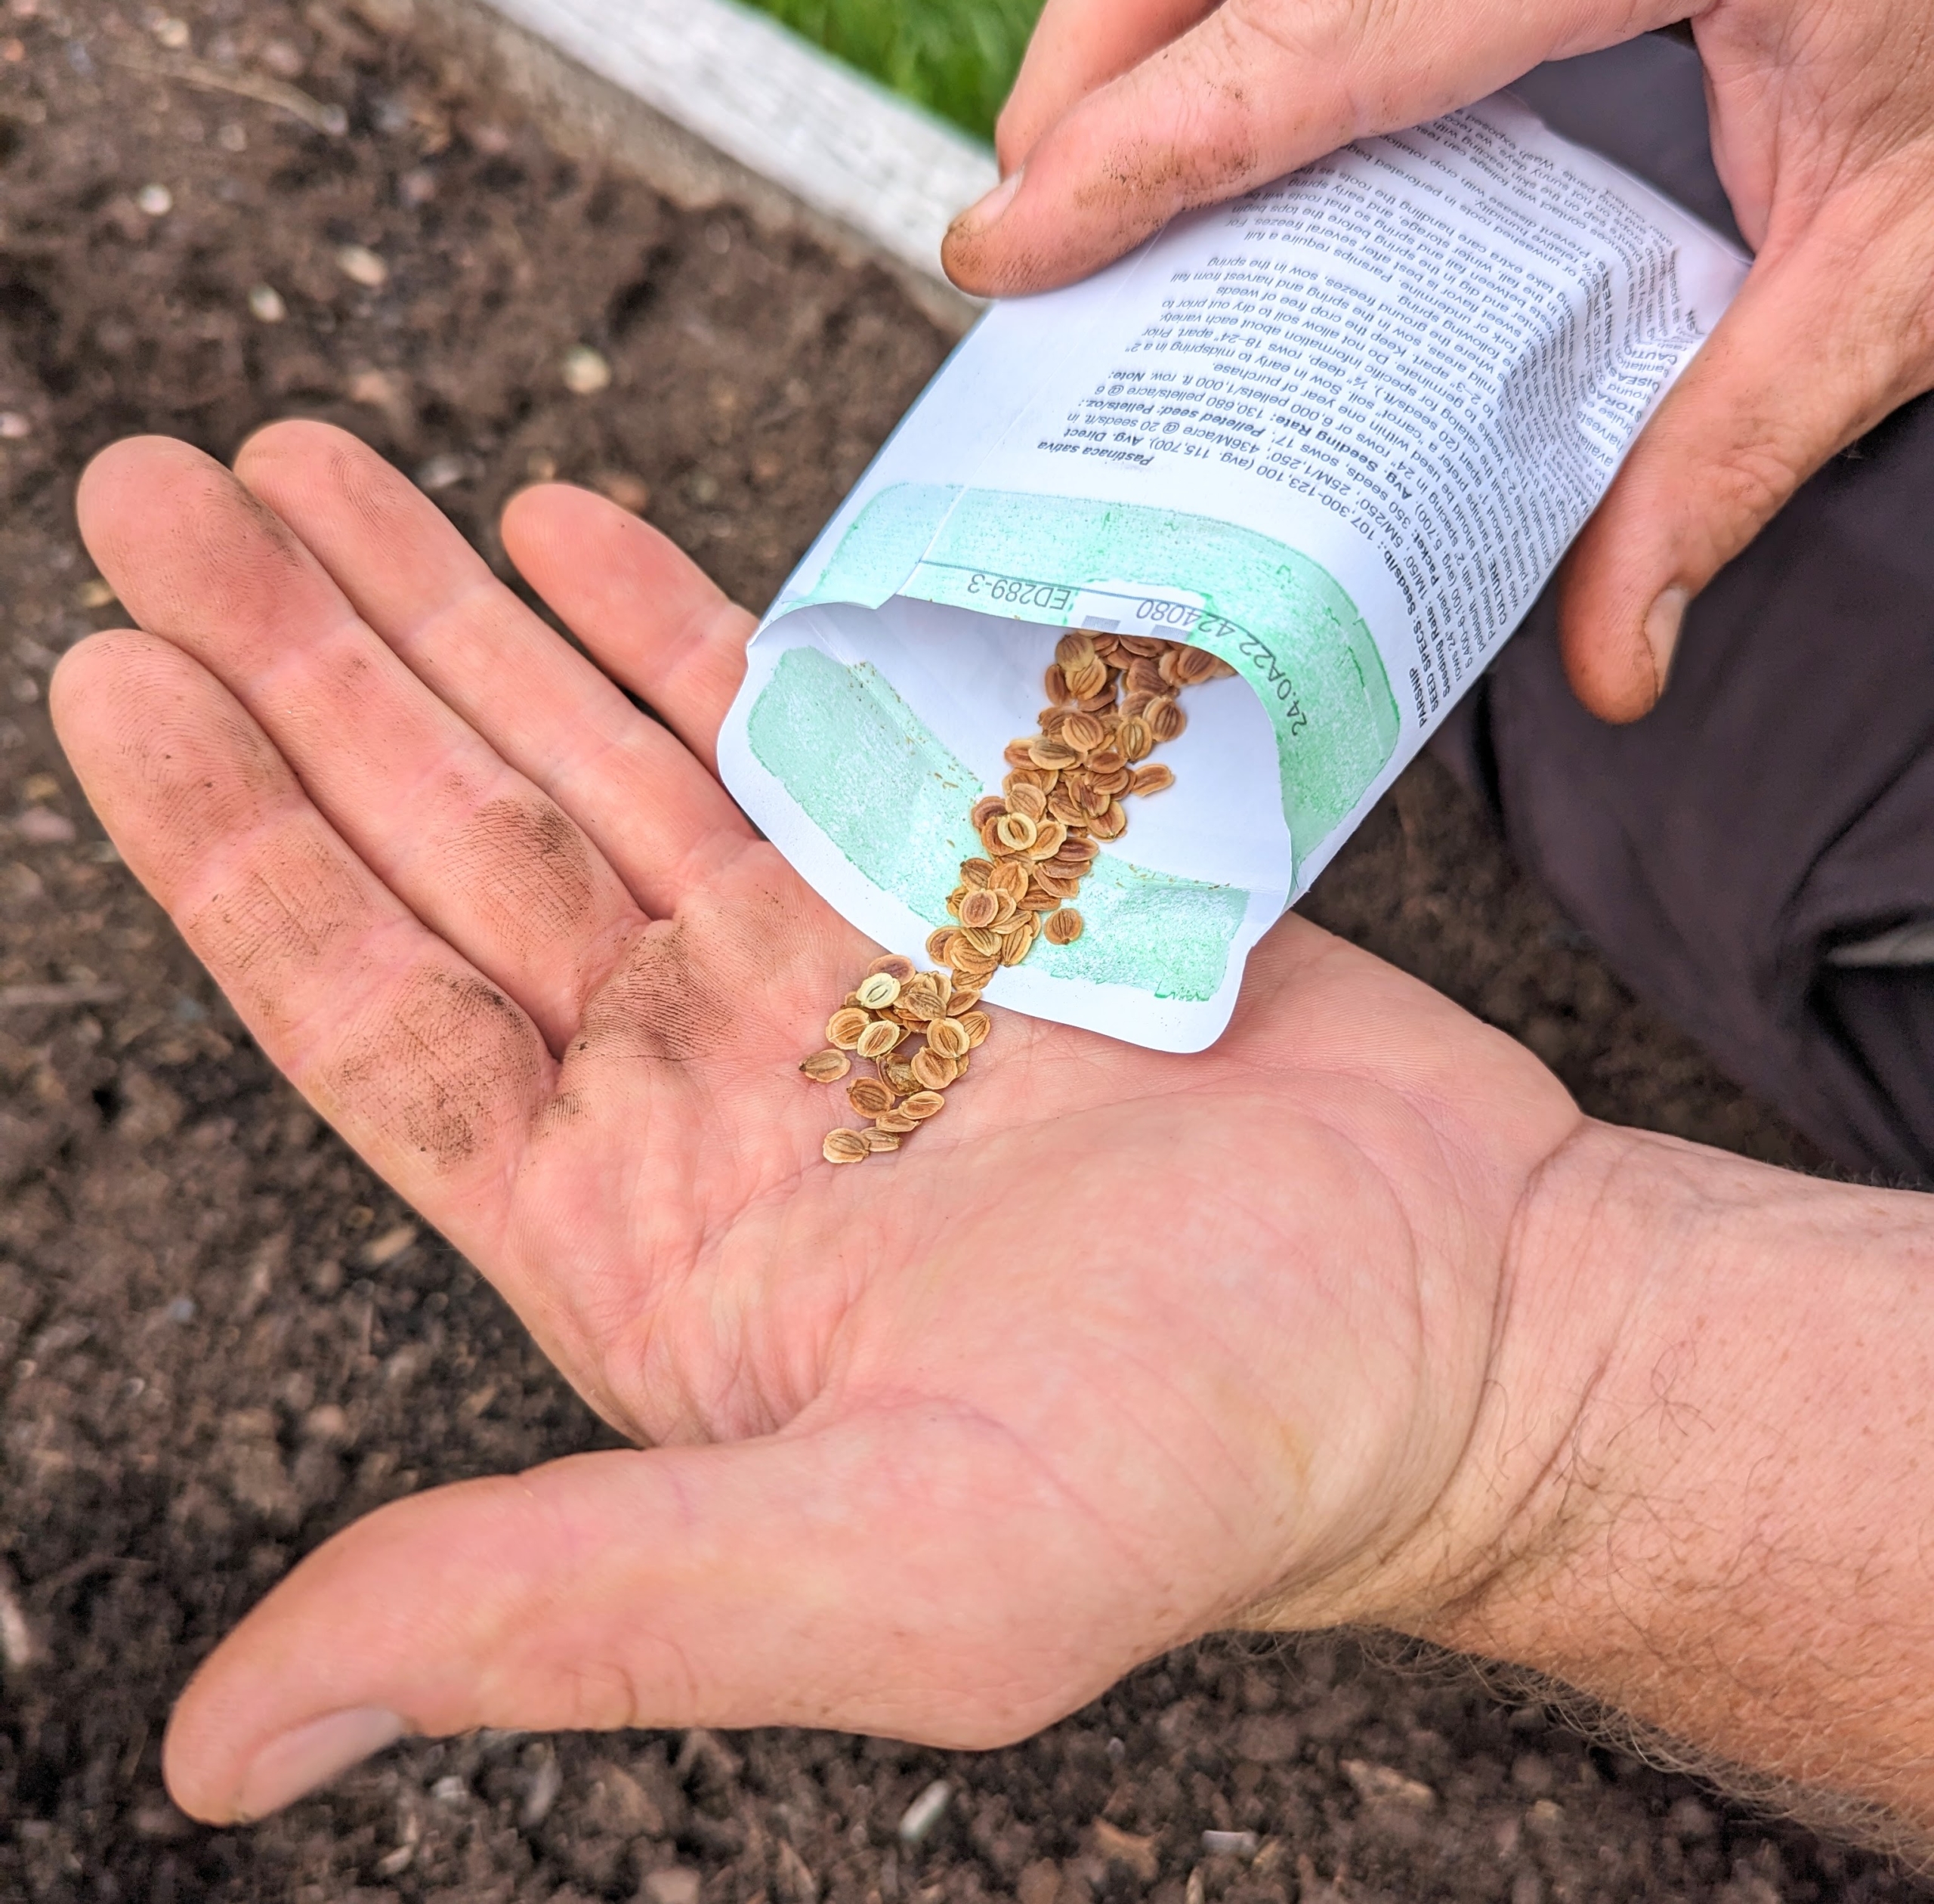
These are Johnny’s Warrior F1 hybrid parsnip seeds, a flavorsome, chunky parsnip with, gradually tapering roots that measure up to 11-inches in length.
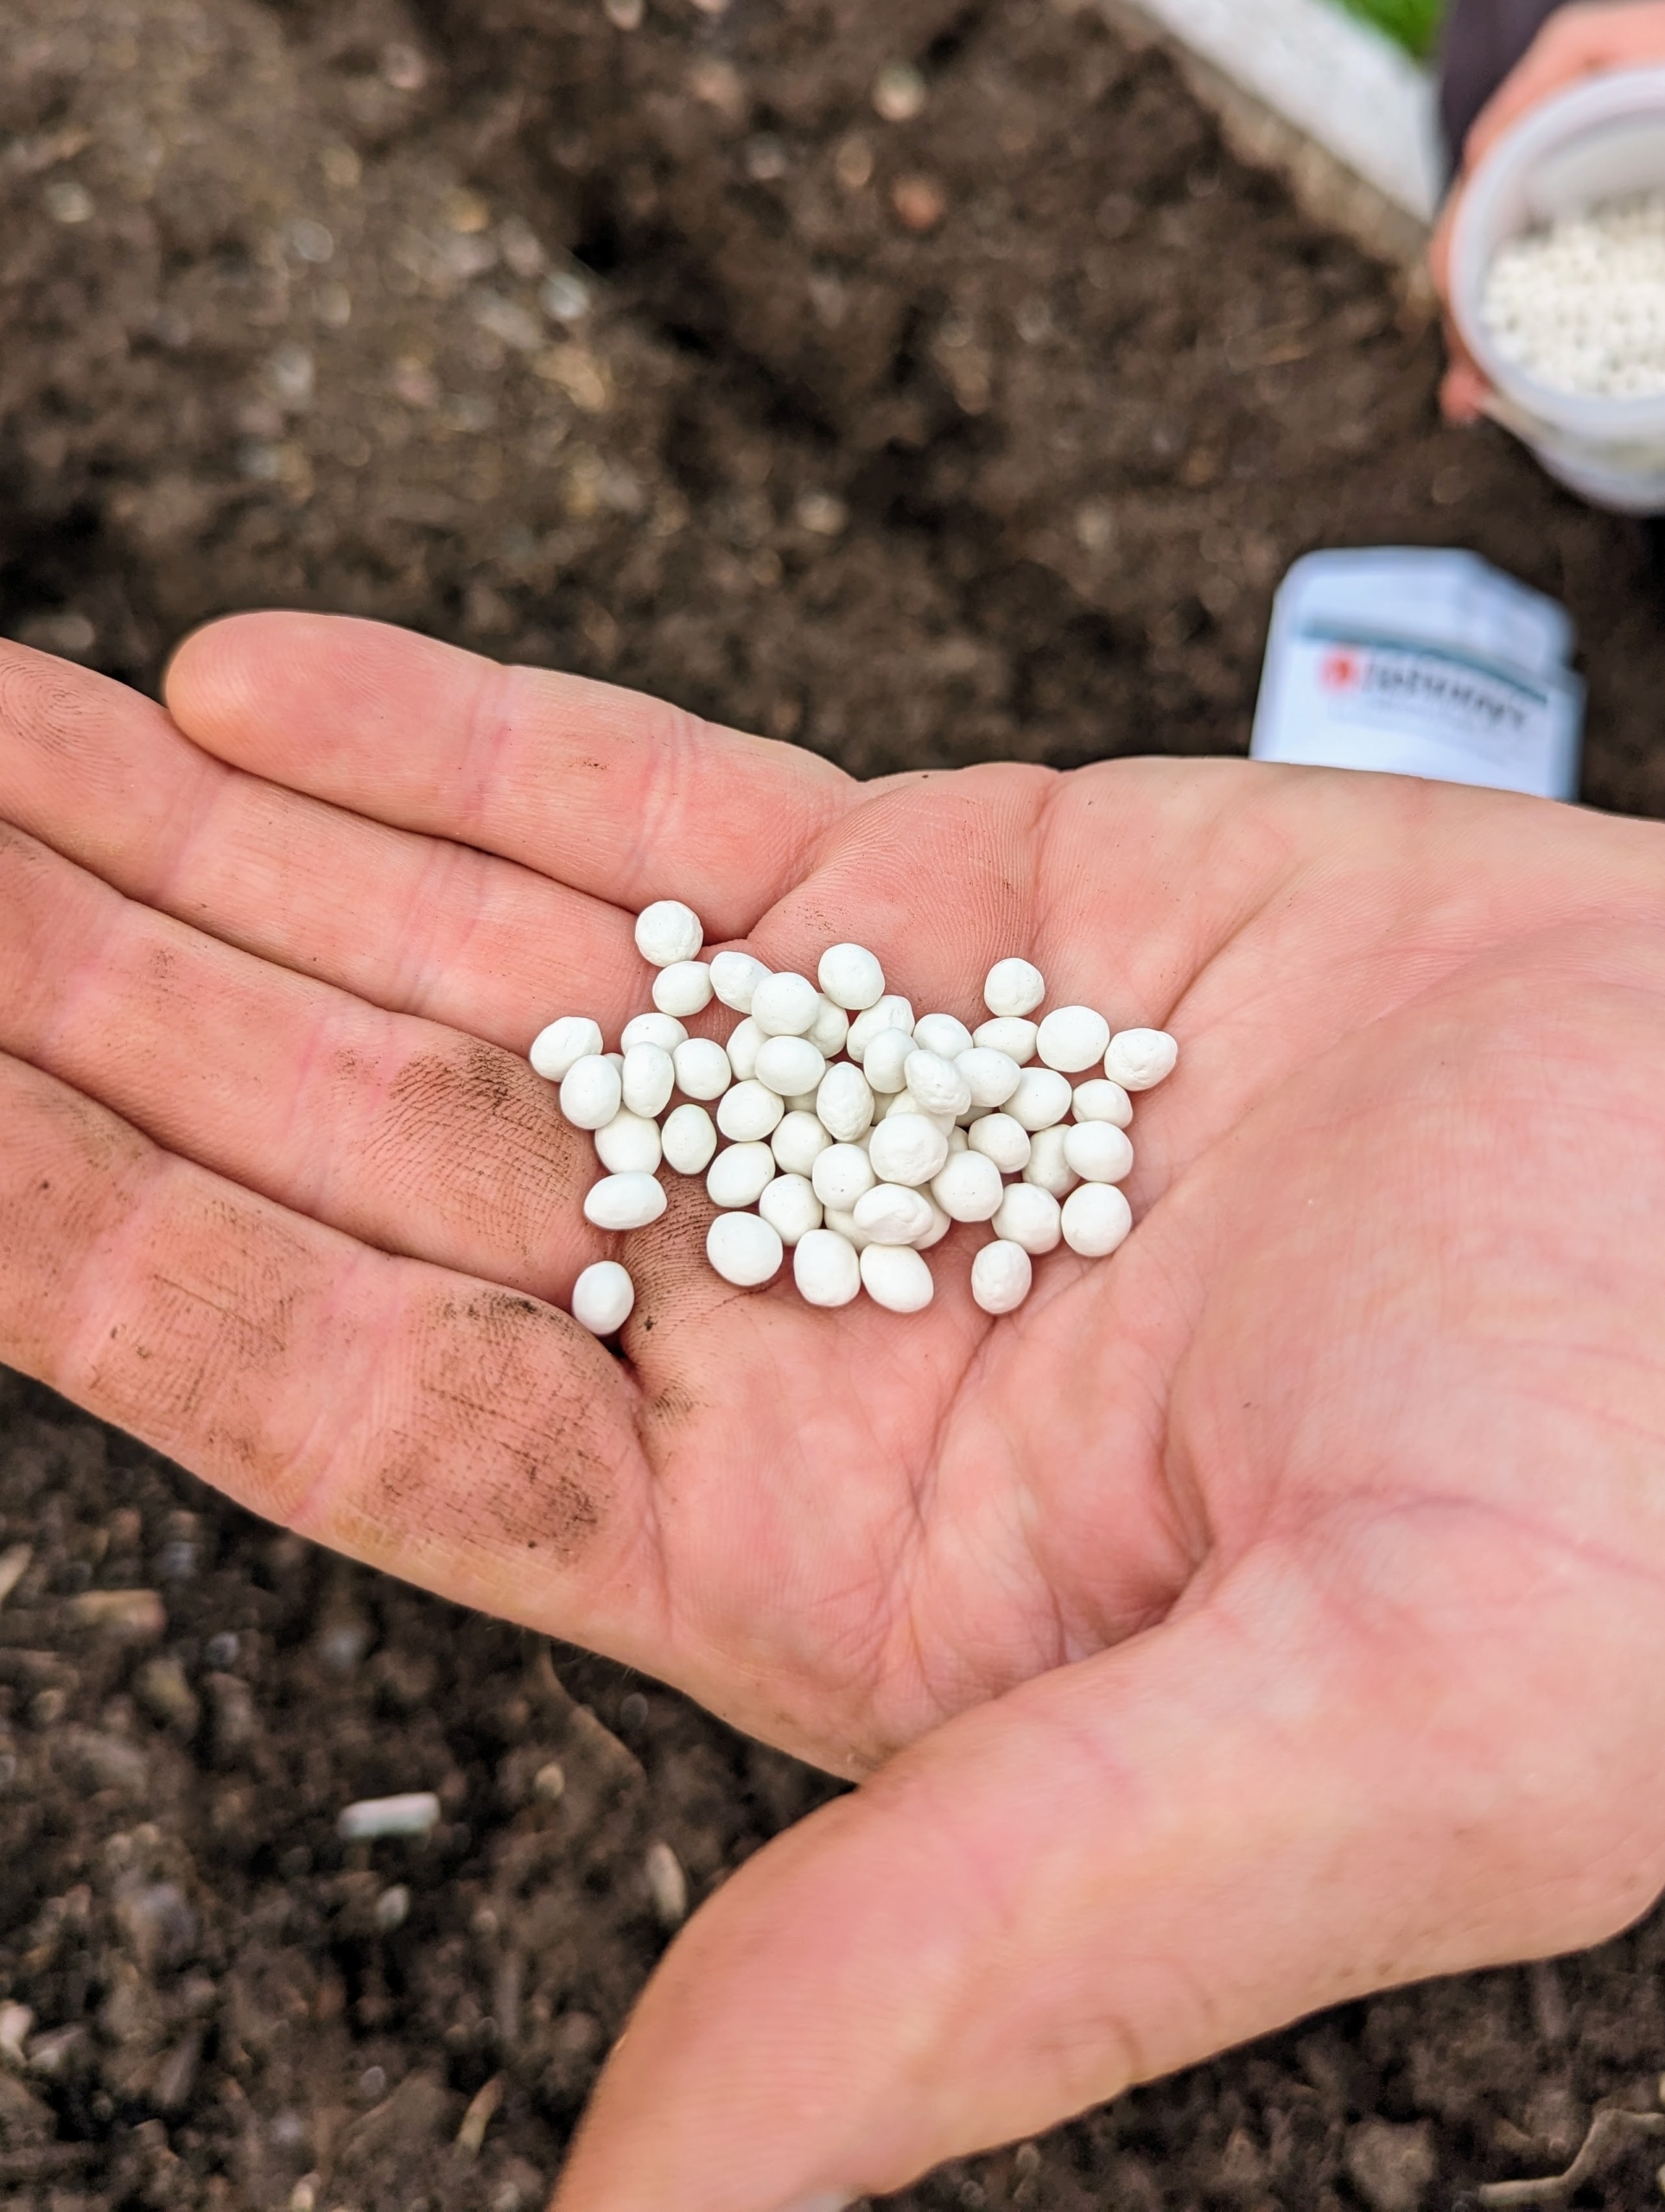
These are Johnny’s Albion Pelleted F1 parsnip seeds – another dependable grower. Some seeds are coated with a layer of clay to increase size for easier handling. This also makes spacing the seeds faster and increases evenness in germination.
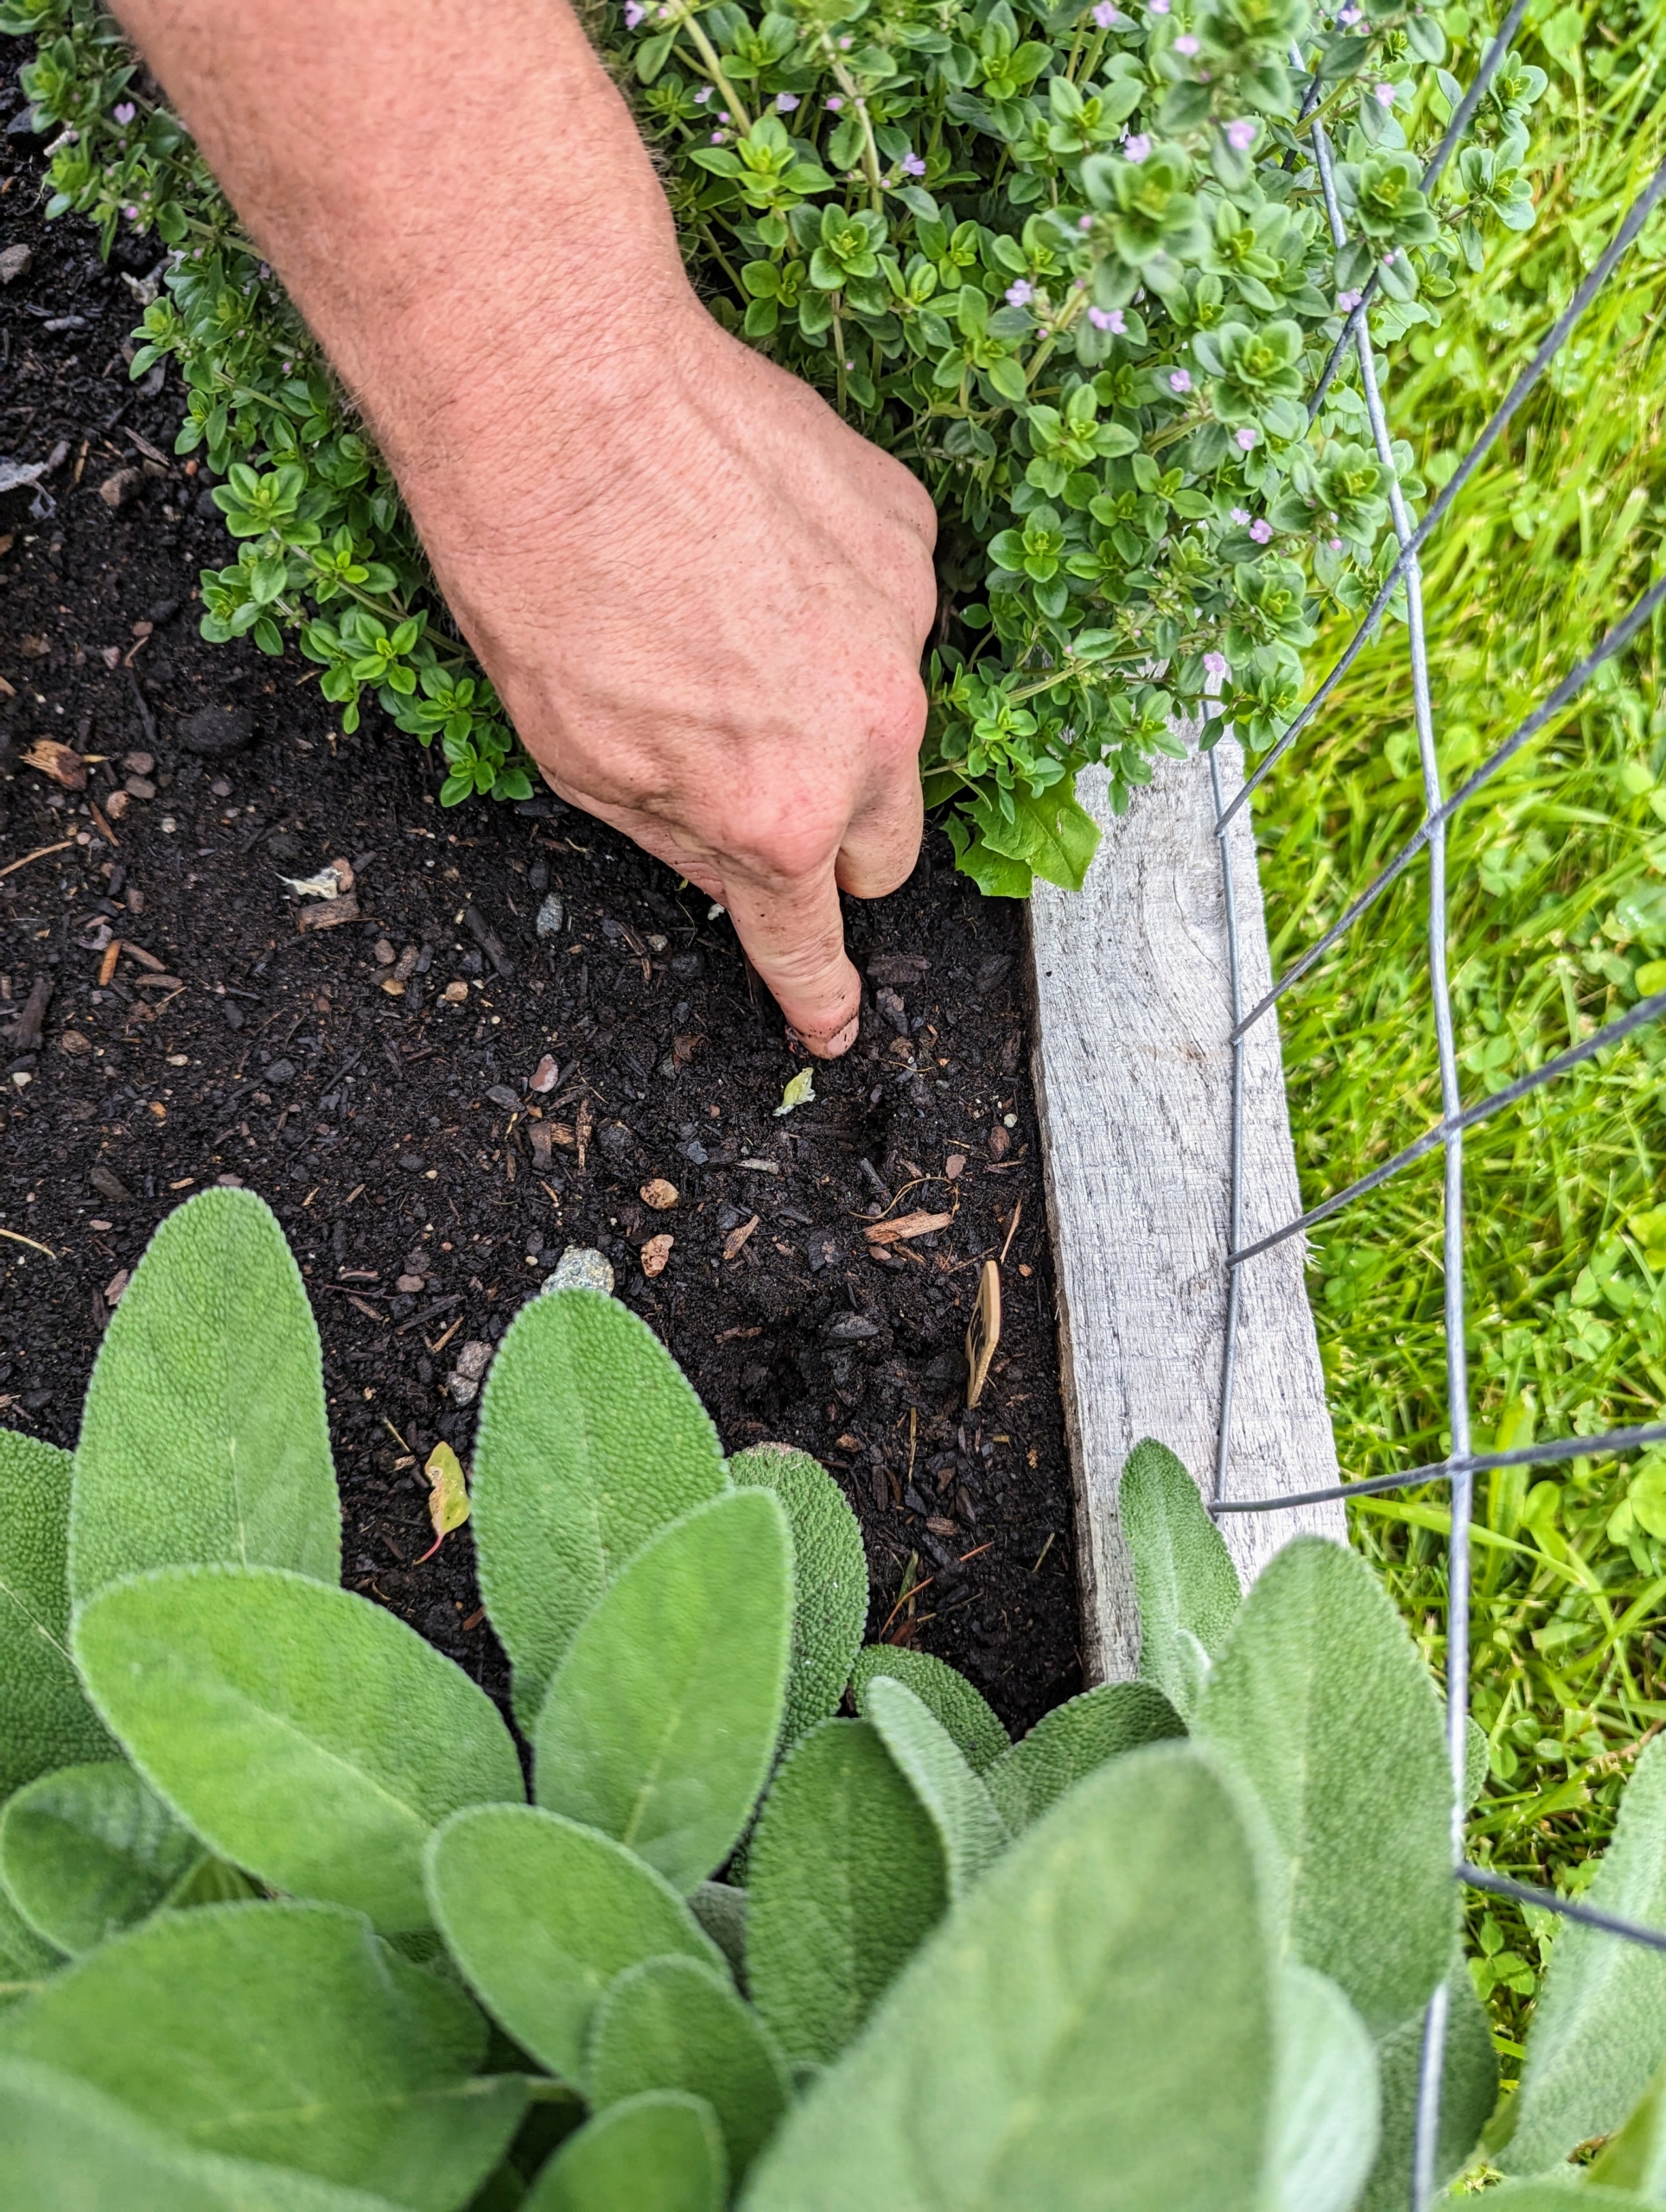
Ryan carefully plants the bed with these seeds spaced about three inches apart with the rows about one foot apart.
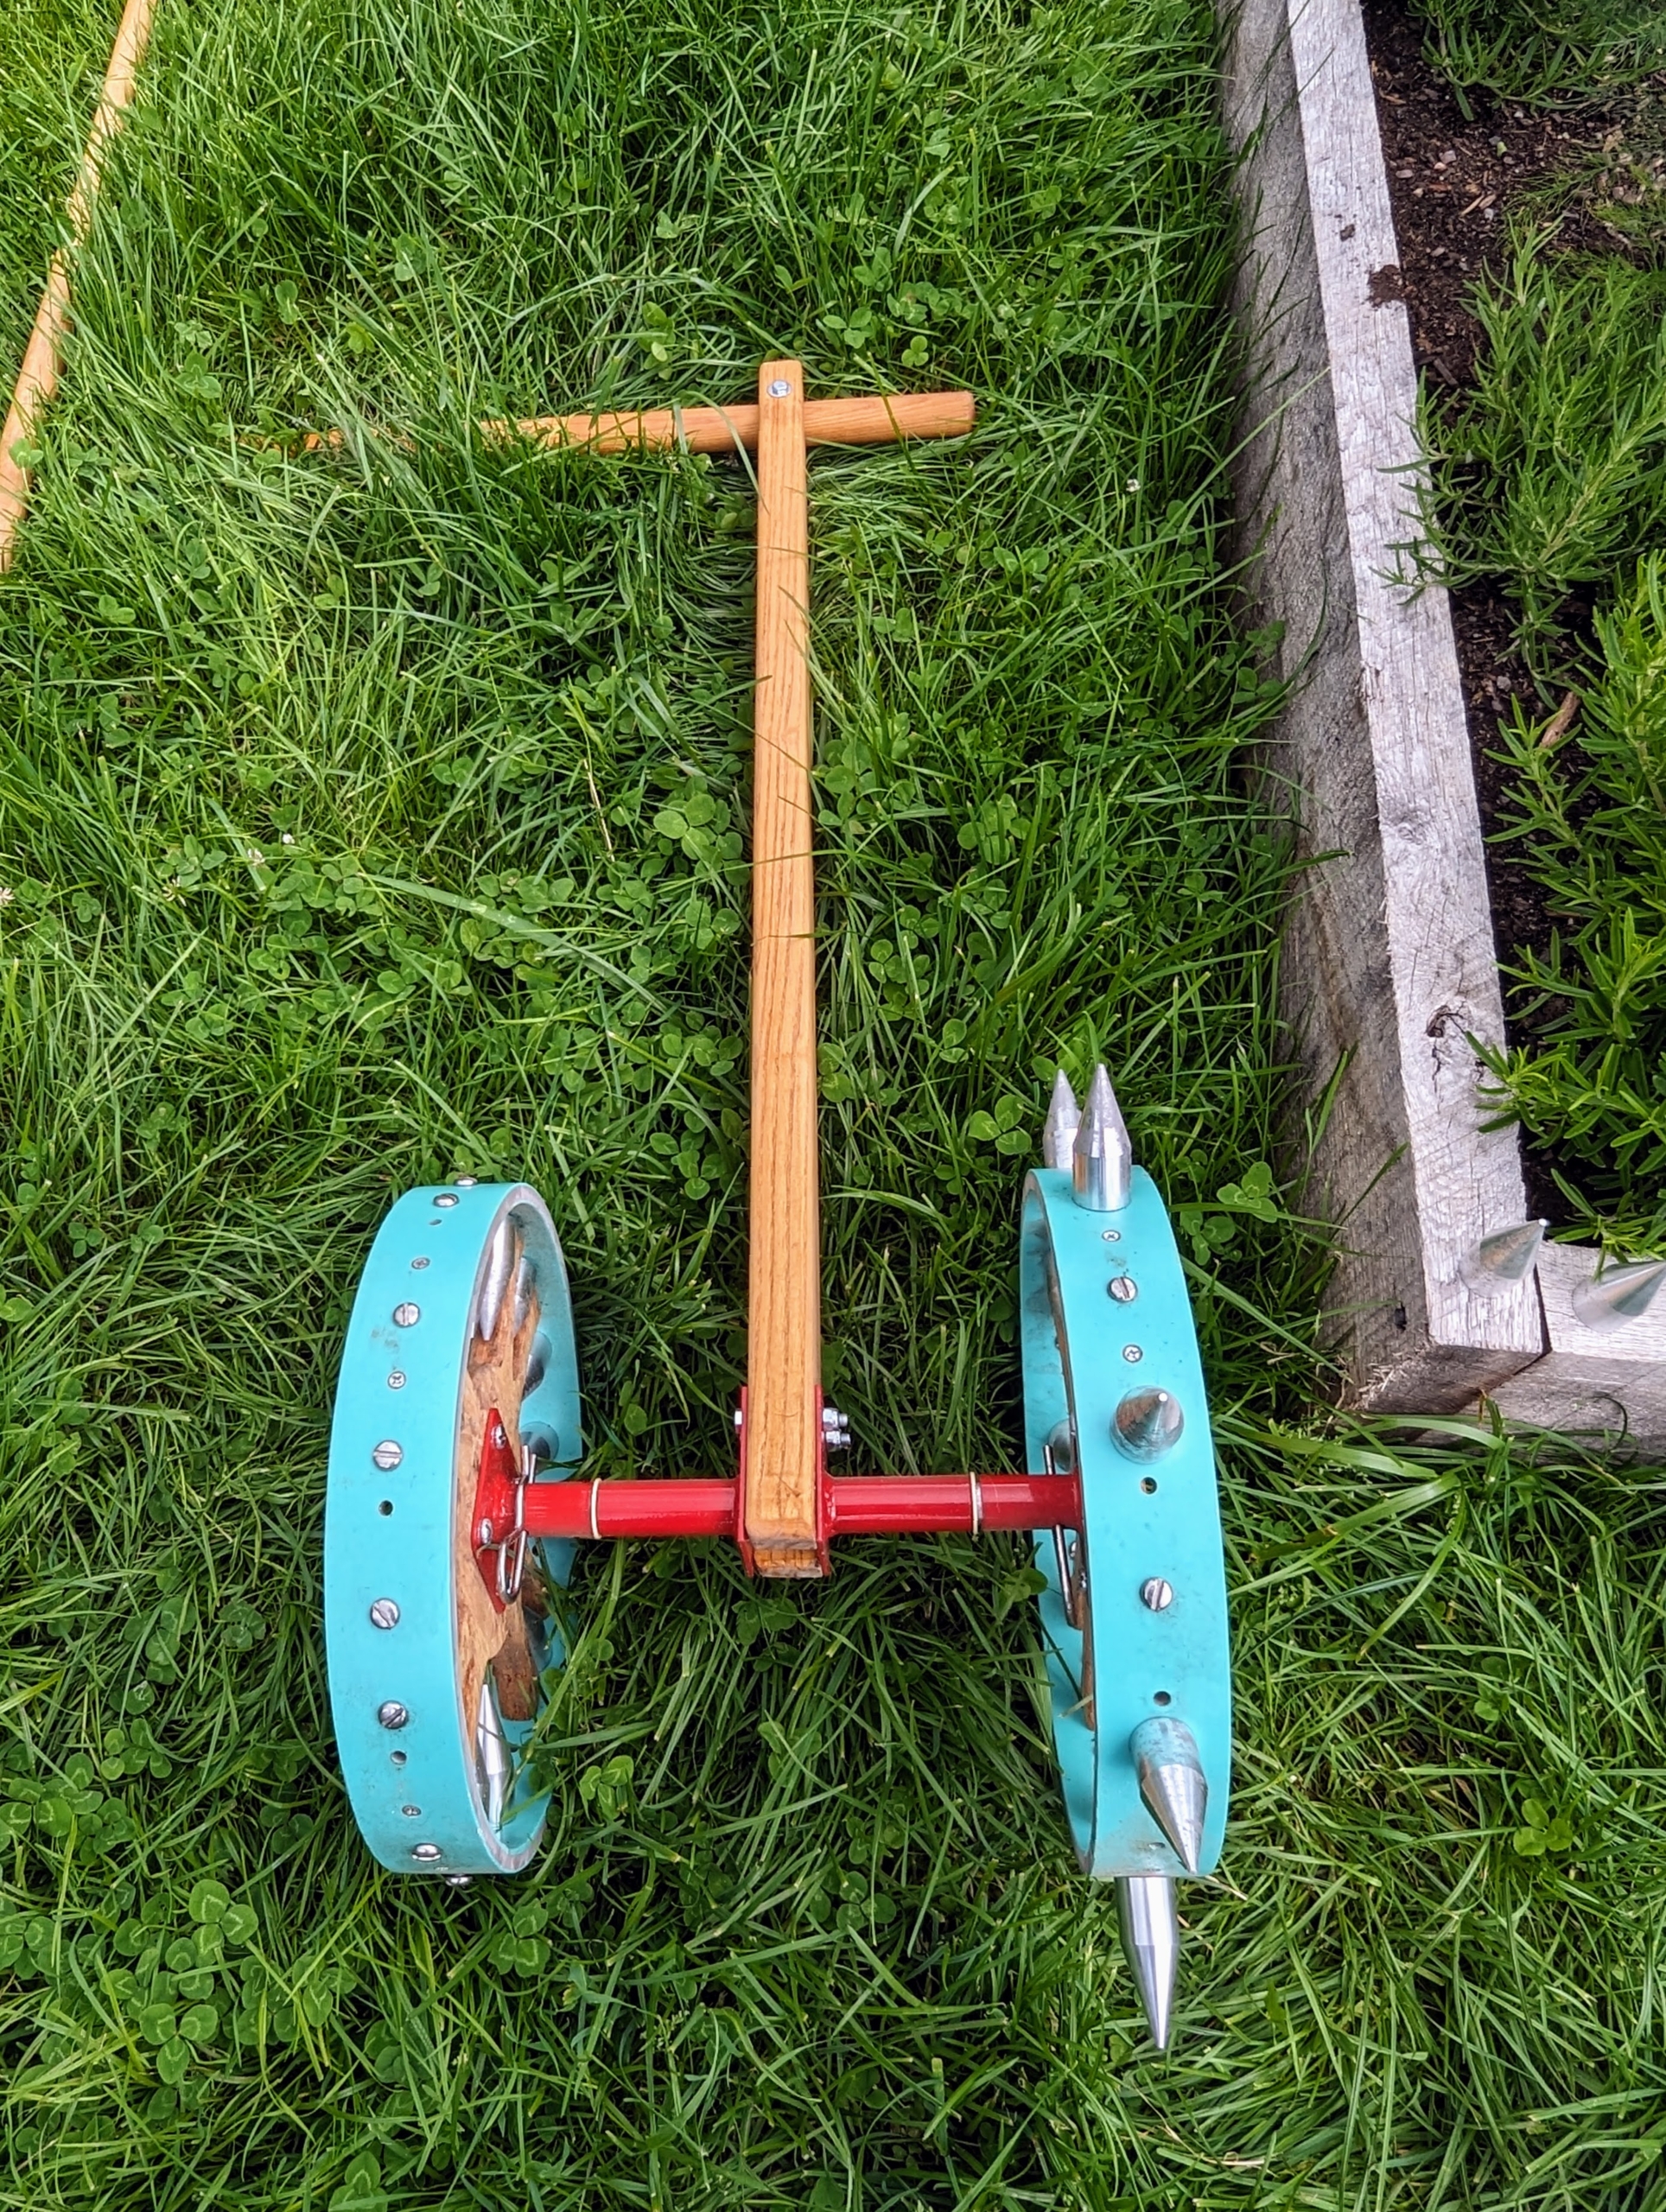
This is called a rolling dibbler available at Johnny’s Selected Seeds. It comes in single form like this one or with multiple wheels. It allows one to create evenly spaced impressions in the soil for accurate transplanting.
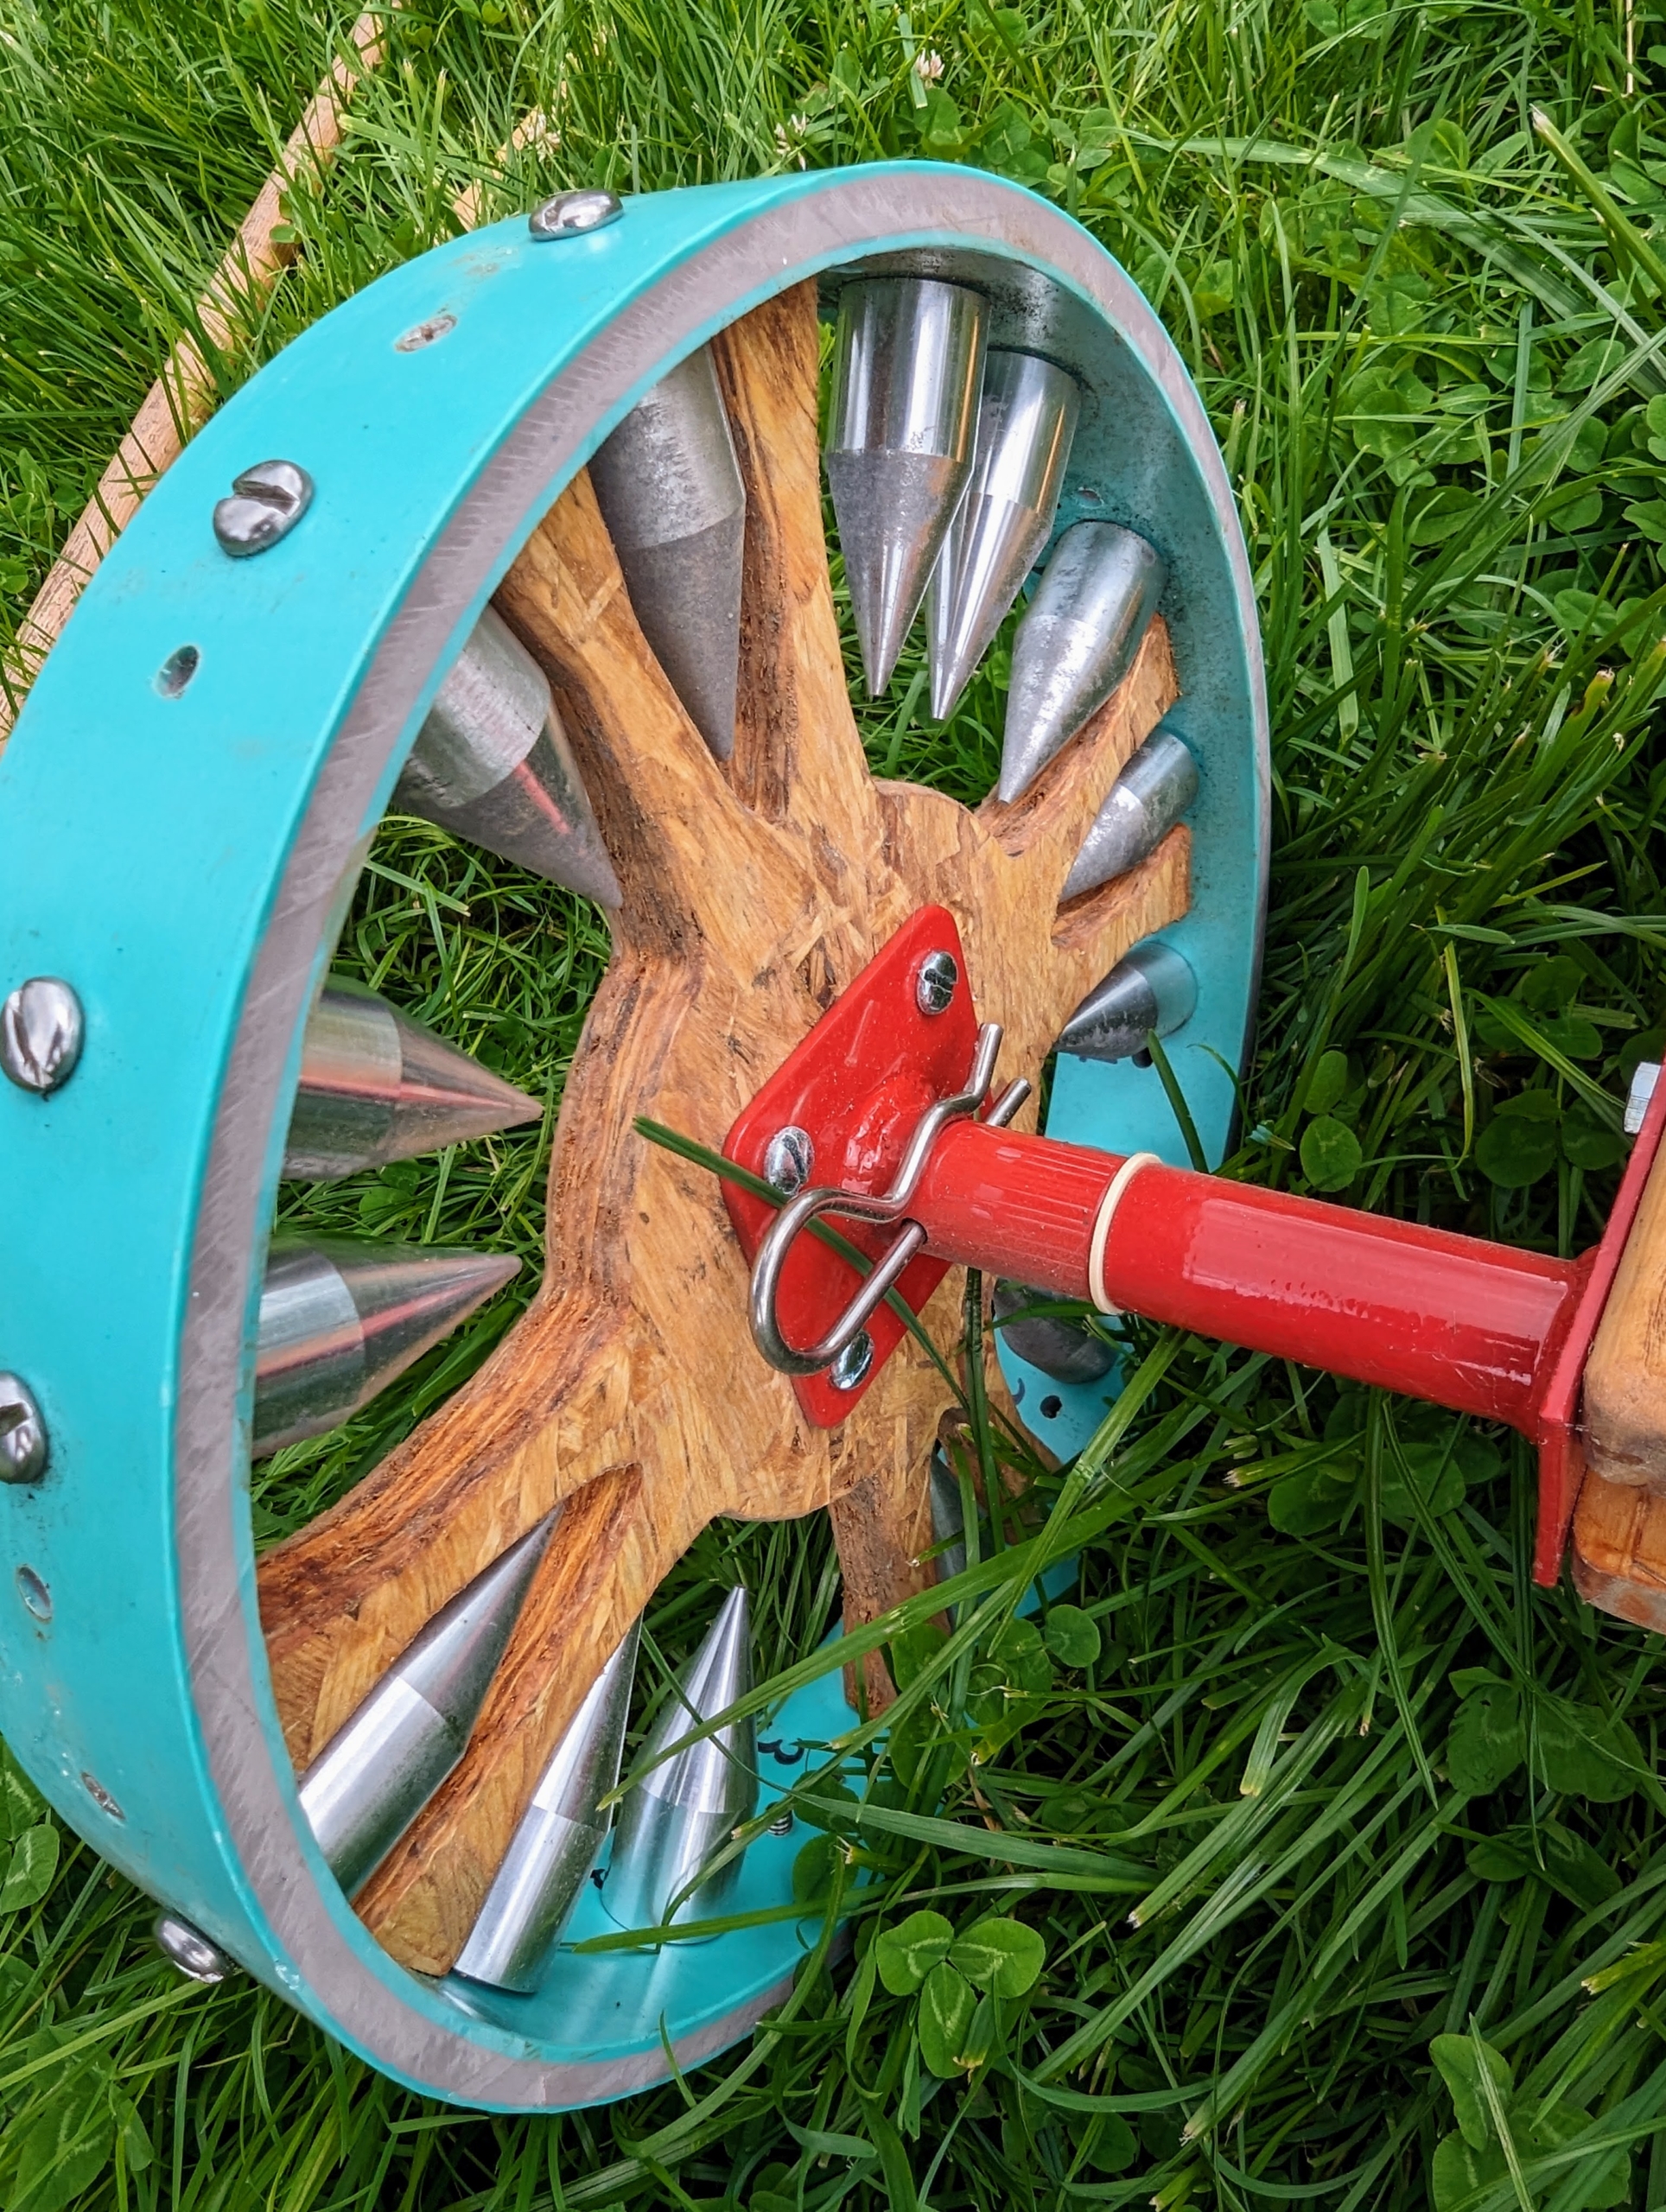
The actual dibbles are stored right on the wheel.
And then each one can be screwed onto the outside depending on the preferred spacing needed.
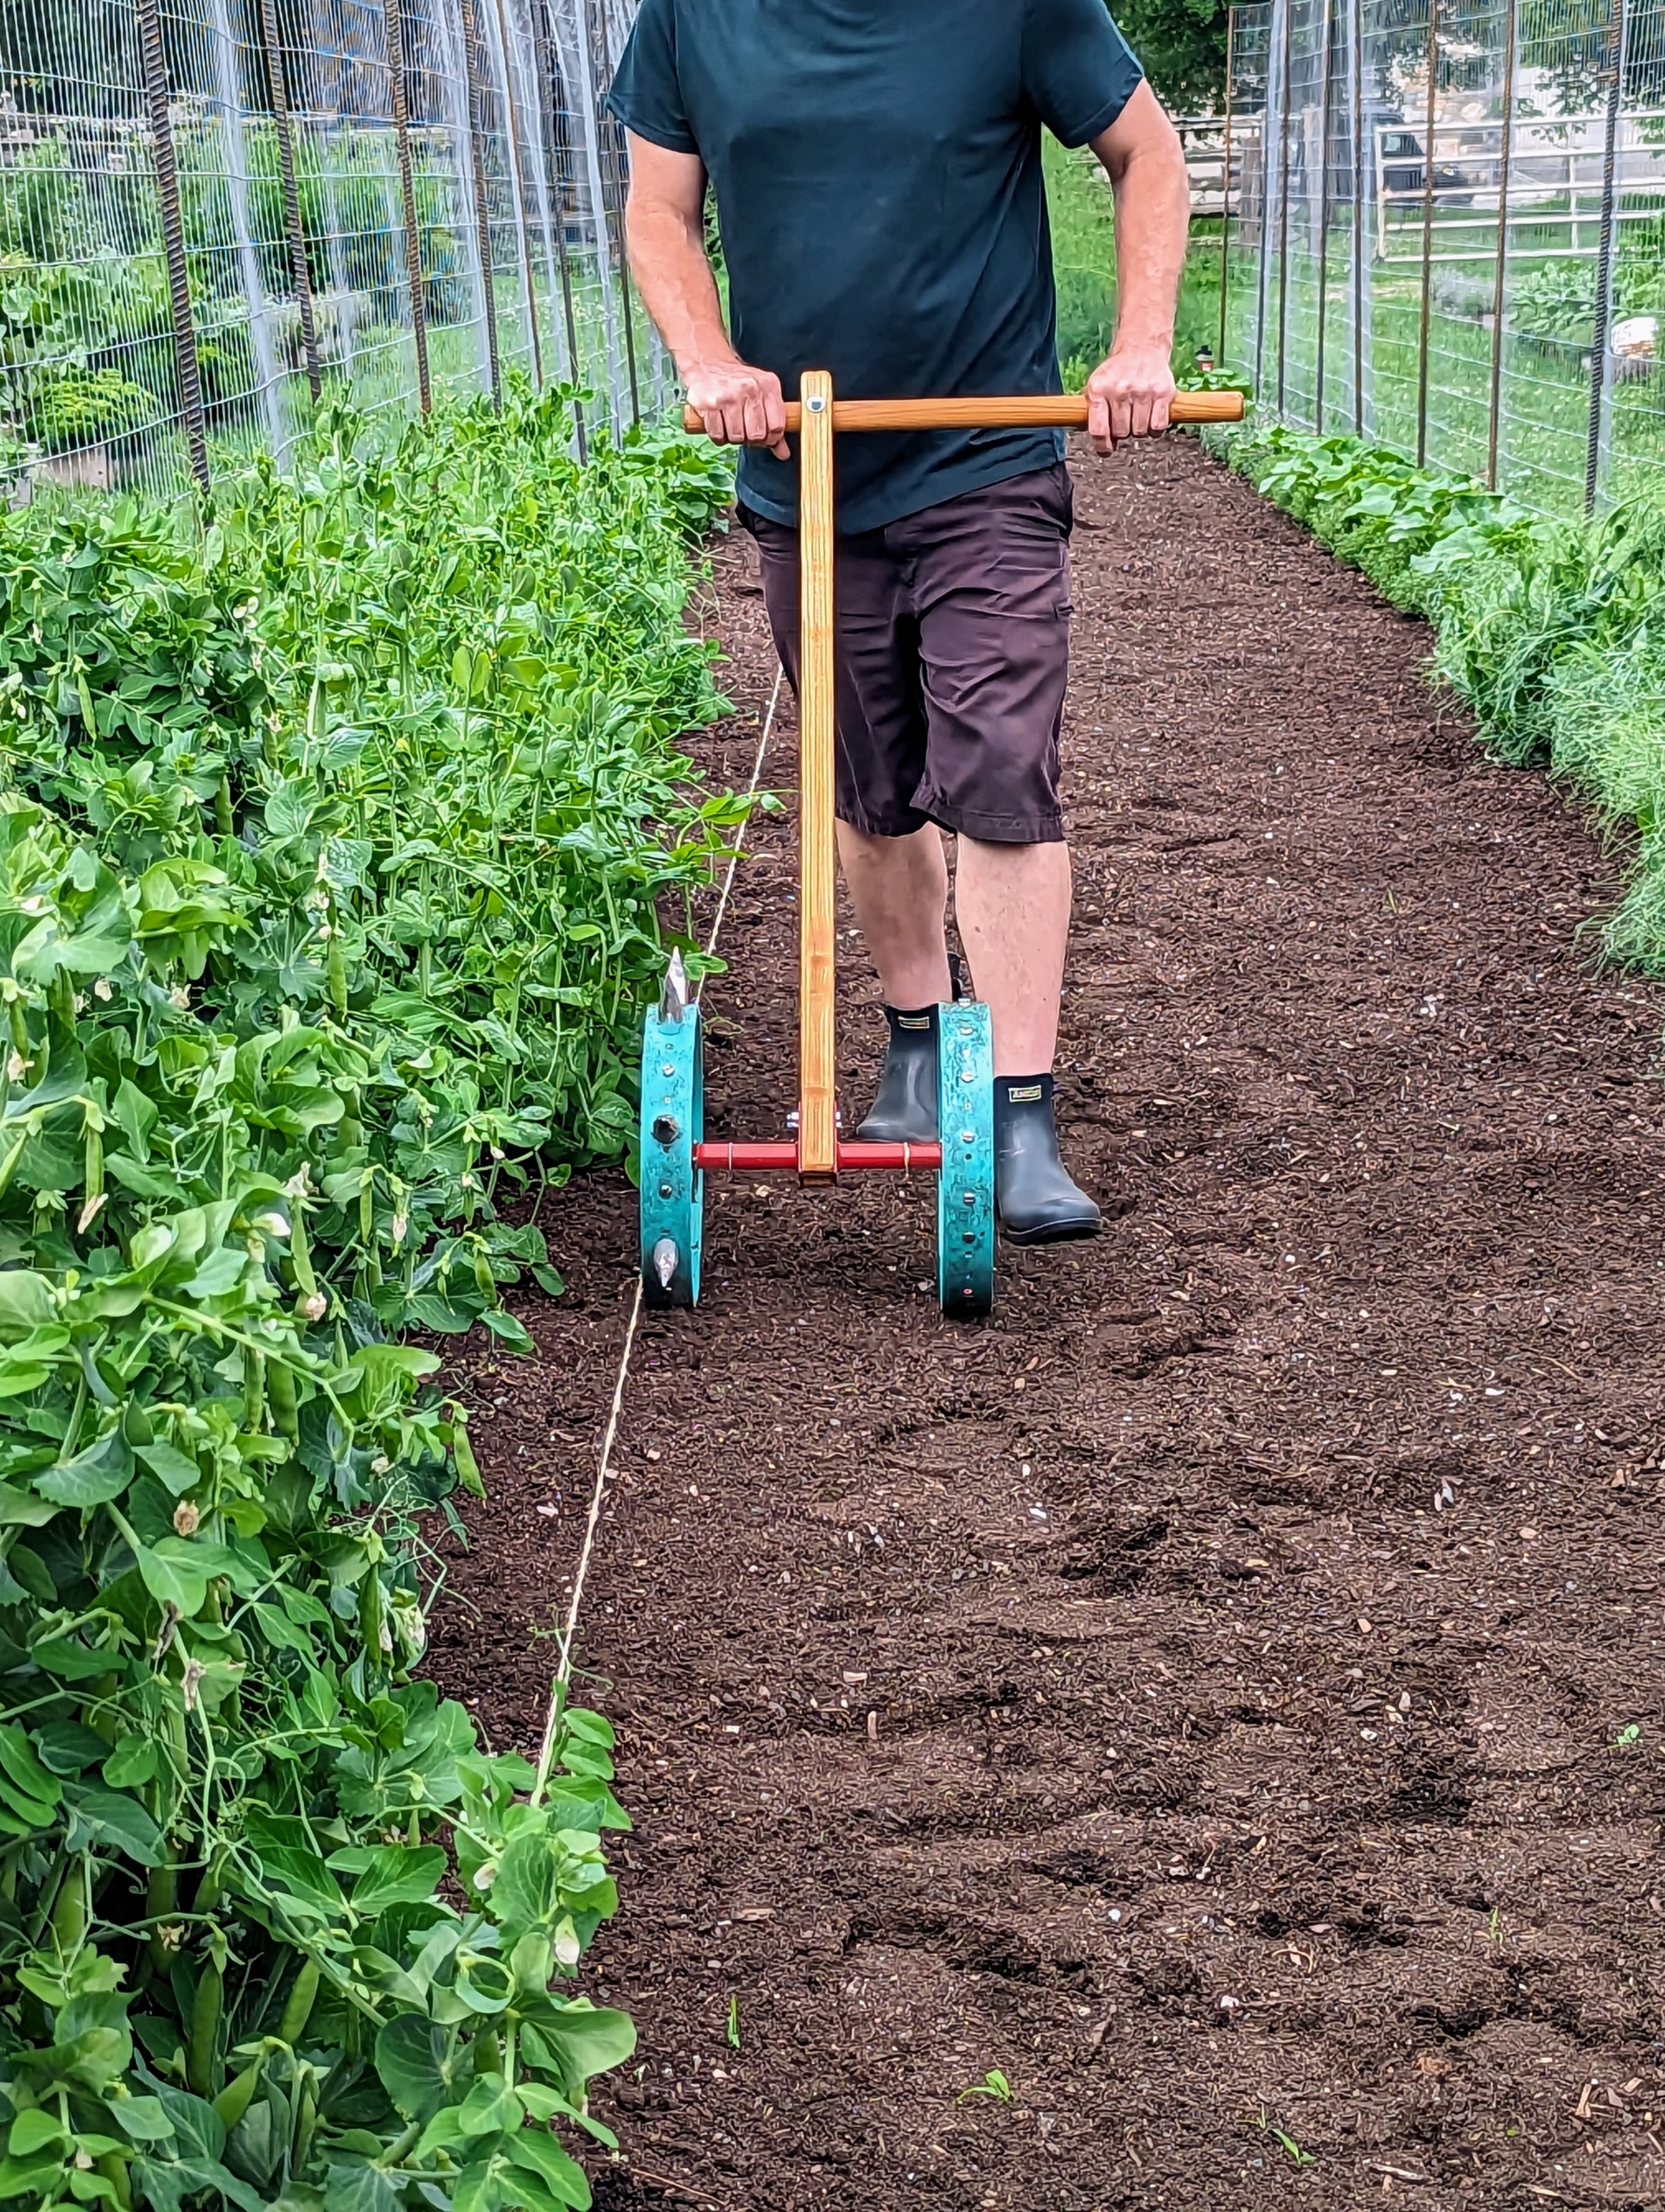
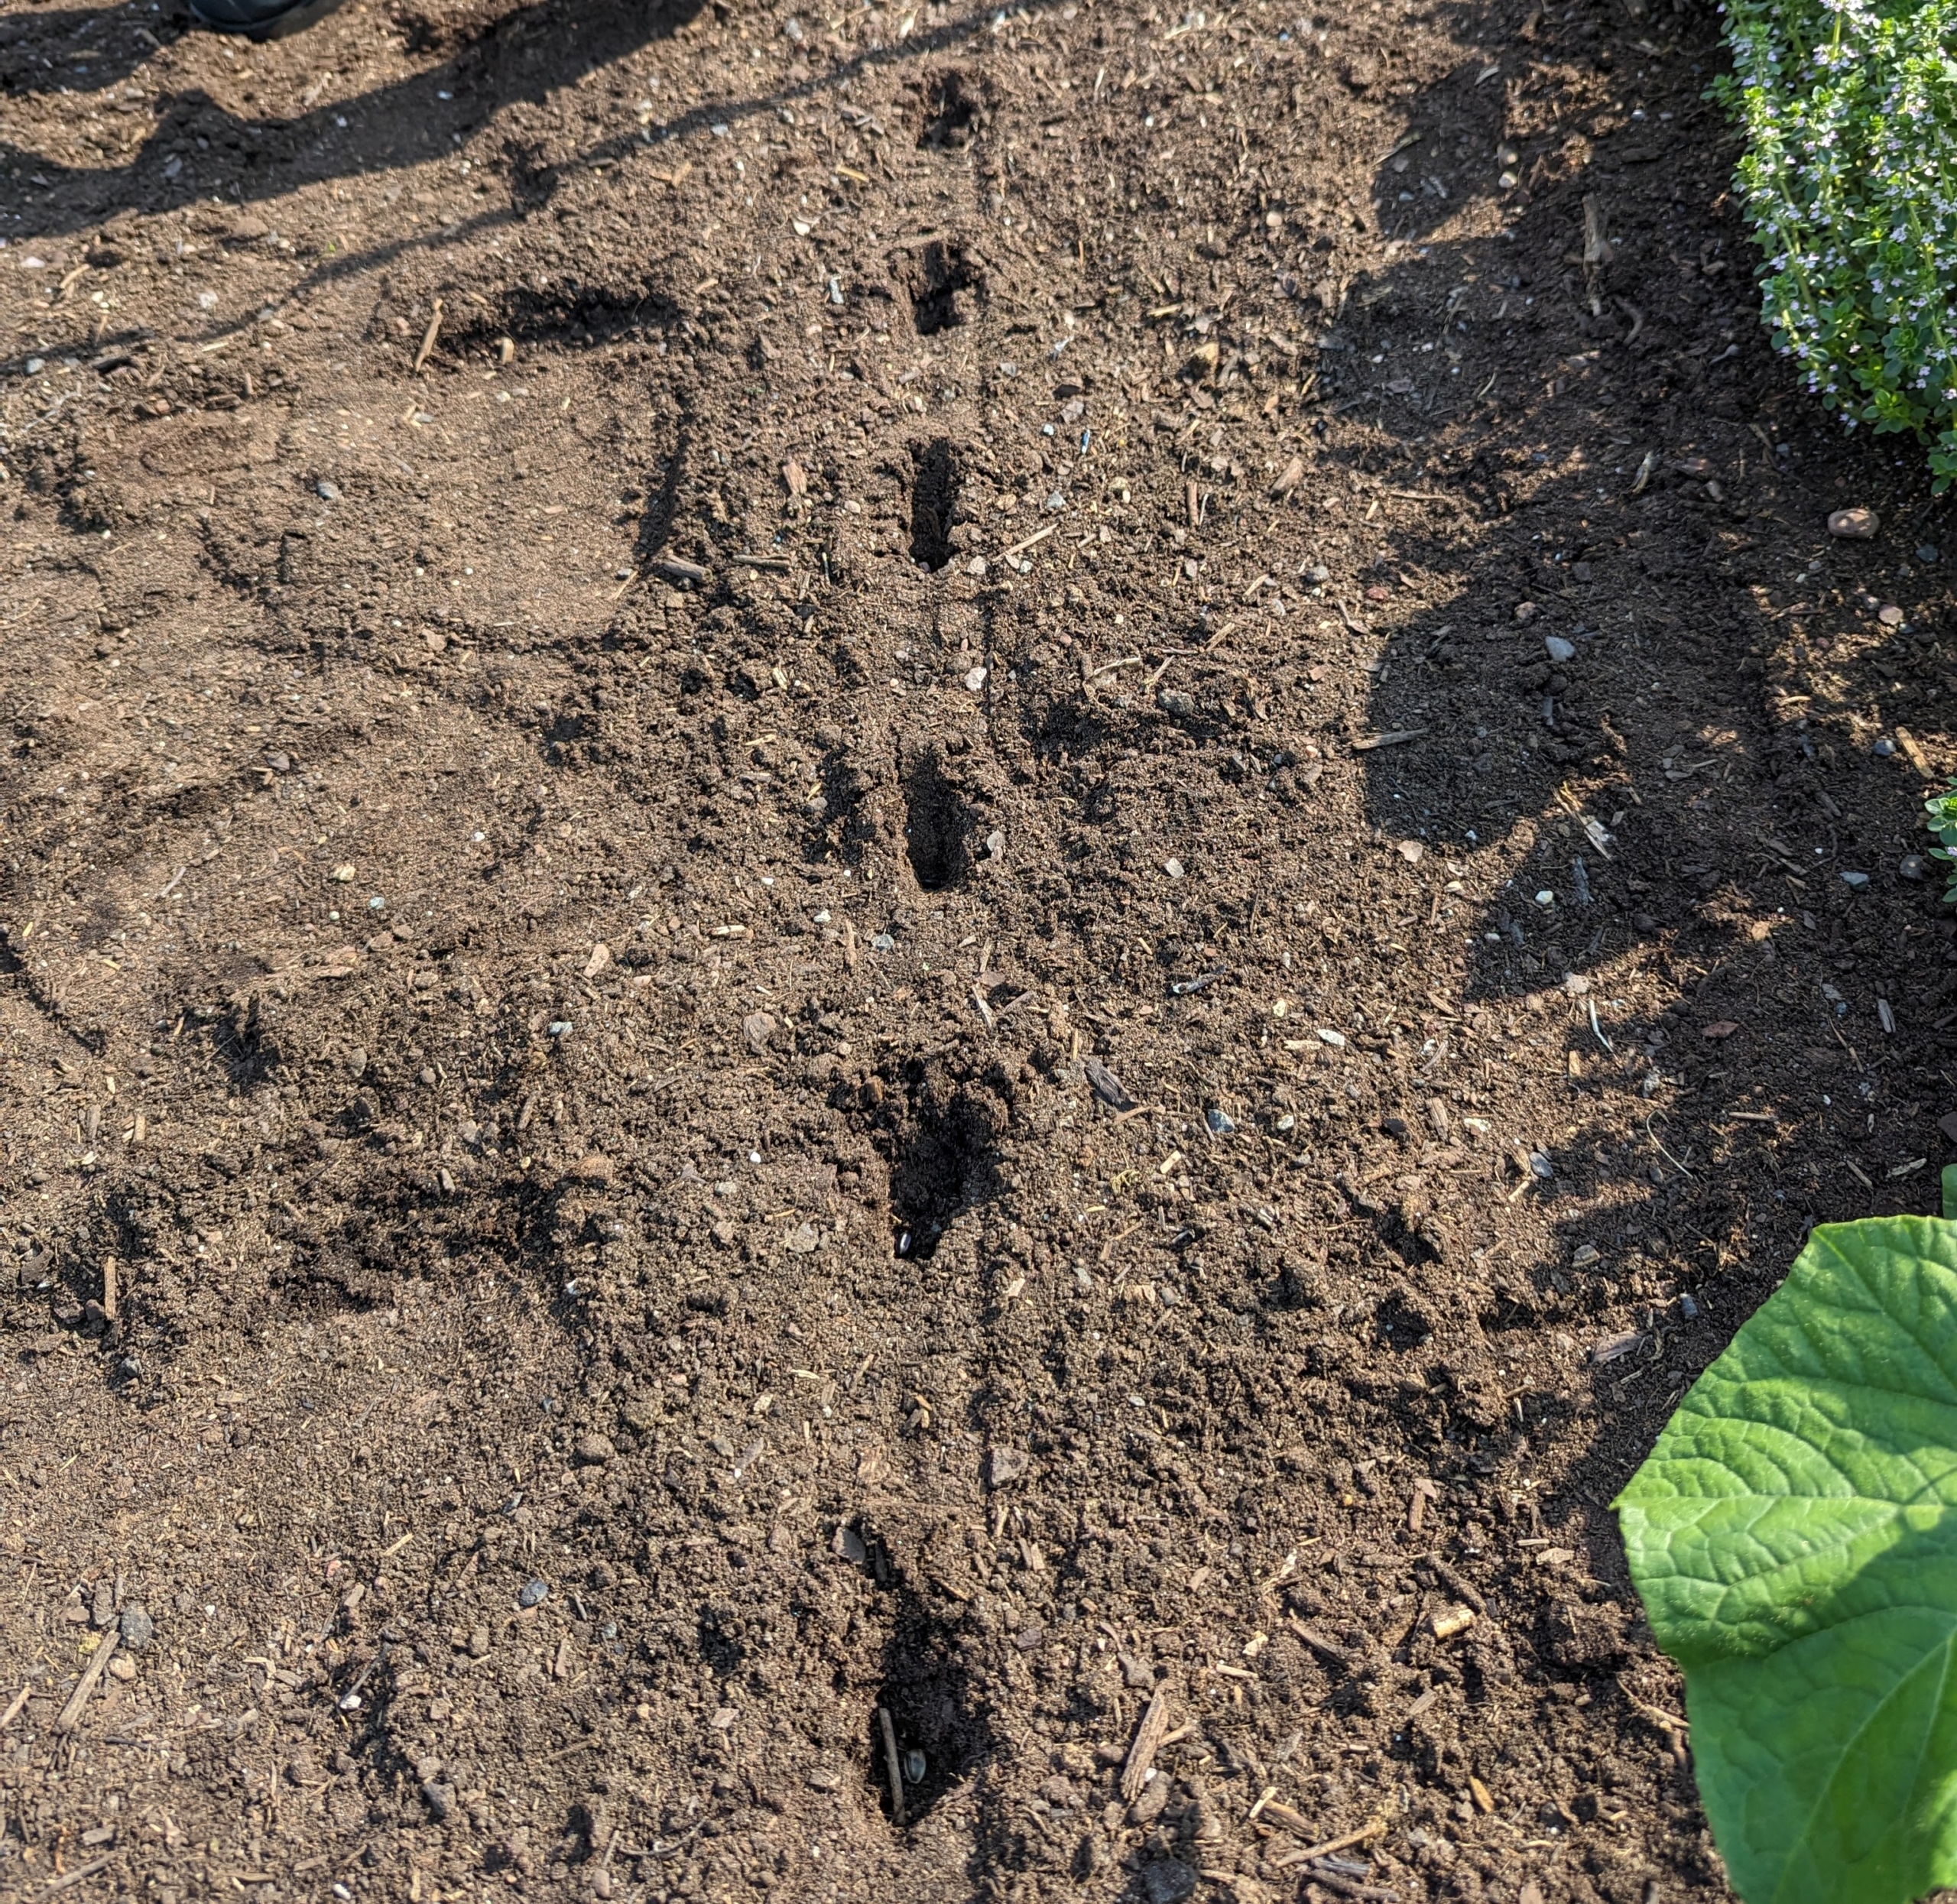
Ryan starts at one end to create the holes for the sunflower seeds using the twine as a guide, so the rows are perfectly straight.
Here is a view from behind. the spacing is about six to eight inches.
Ryan plants one seed into each hole. Sunflowers grow quickly. Many can grow 12 feet in only three months. With the proper growing conditions, sunflowers should reach maturity in 70 to 100 days after planting.
Then Ryan carefully back fills all the furrows in the bed until all the seeds are covered with soil.
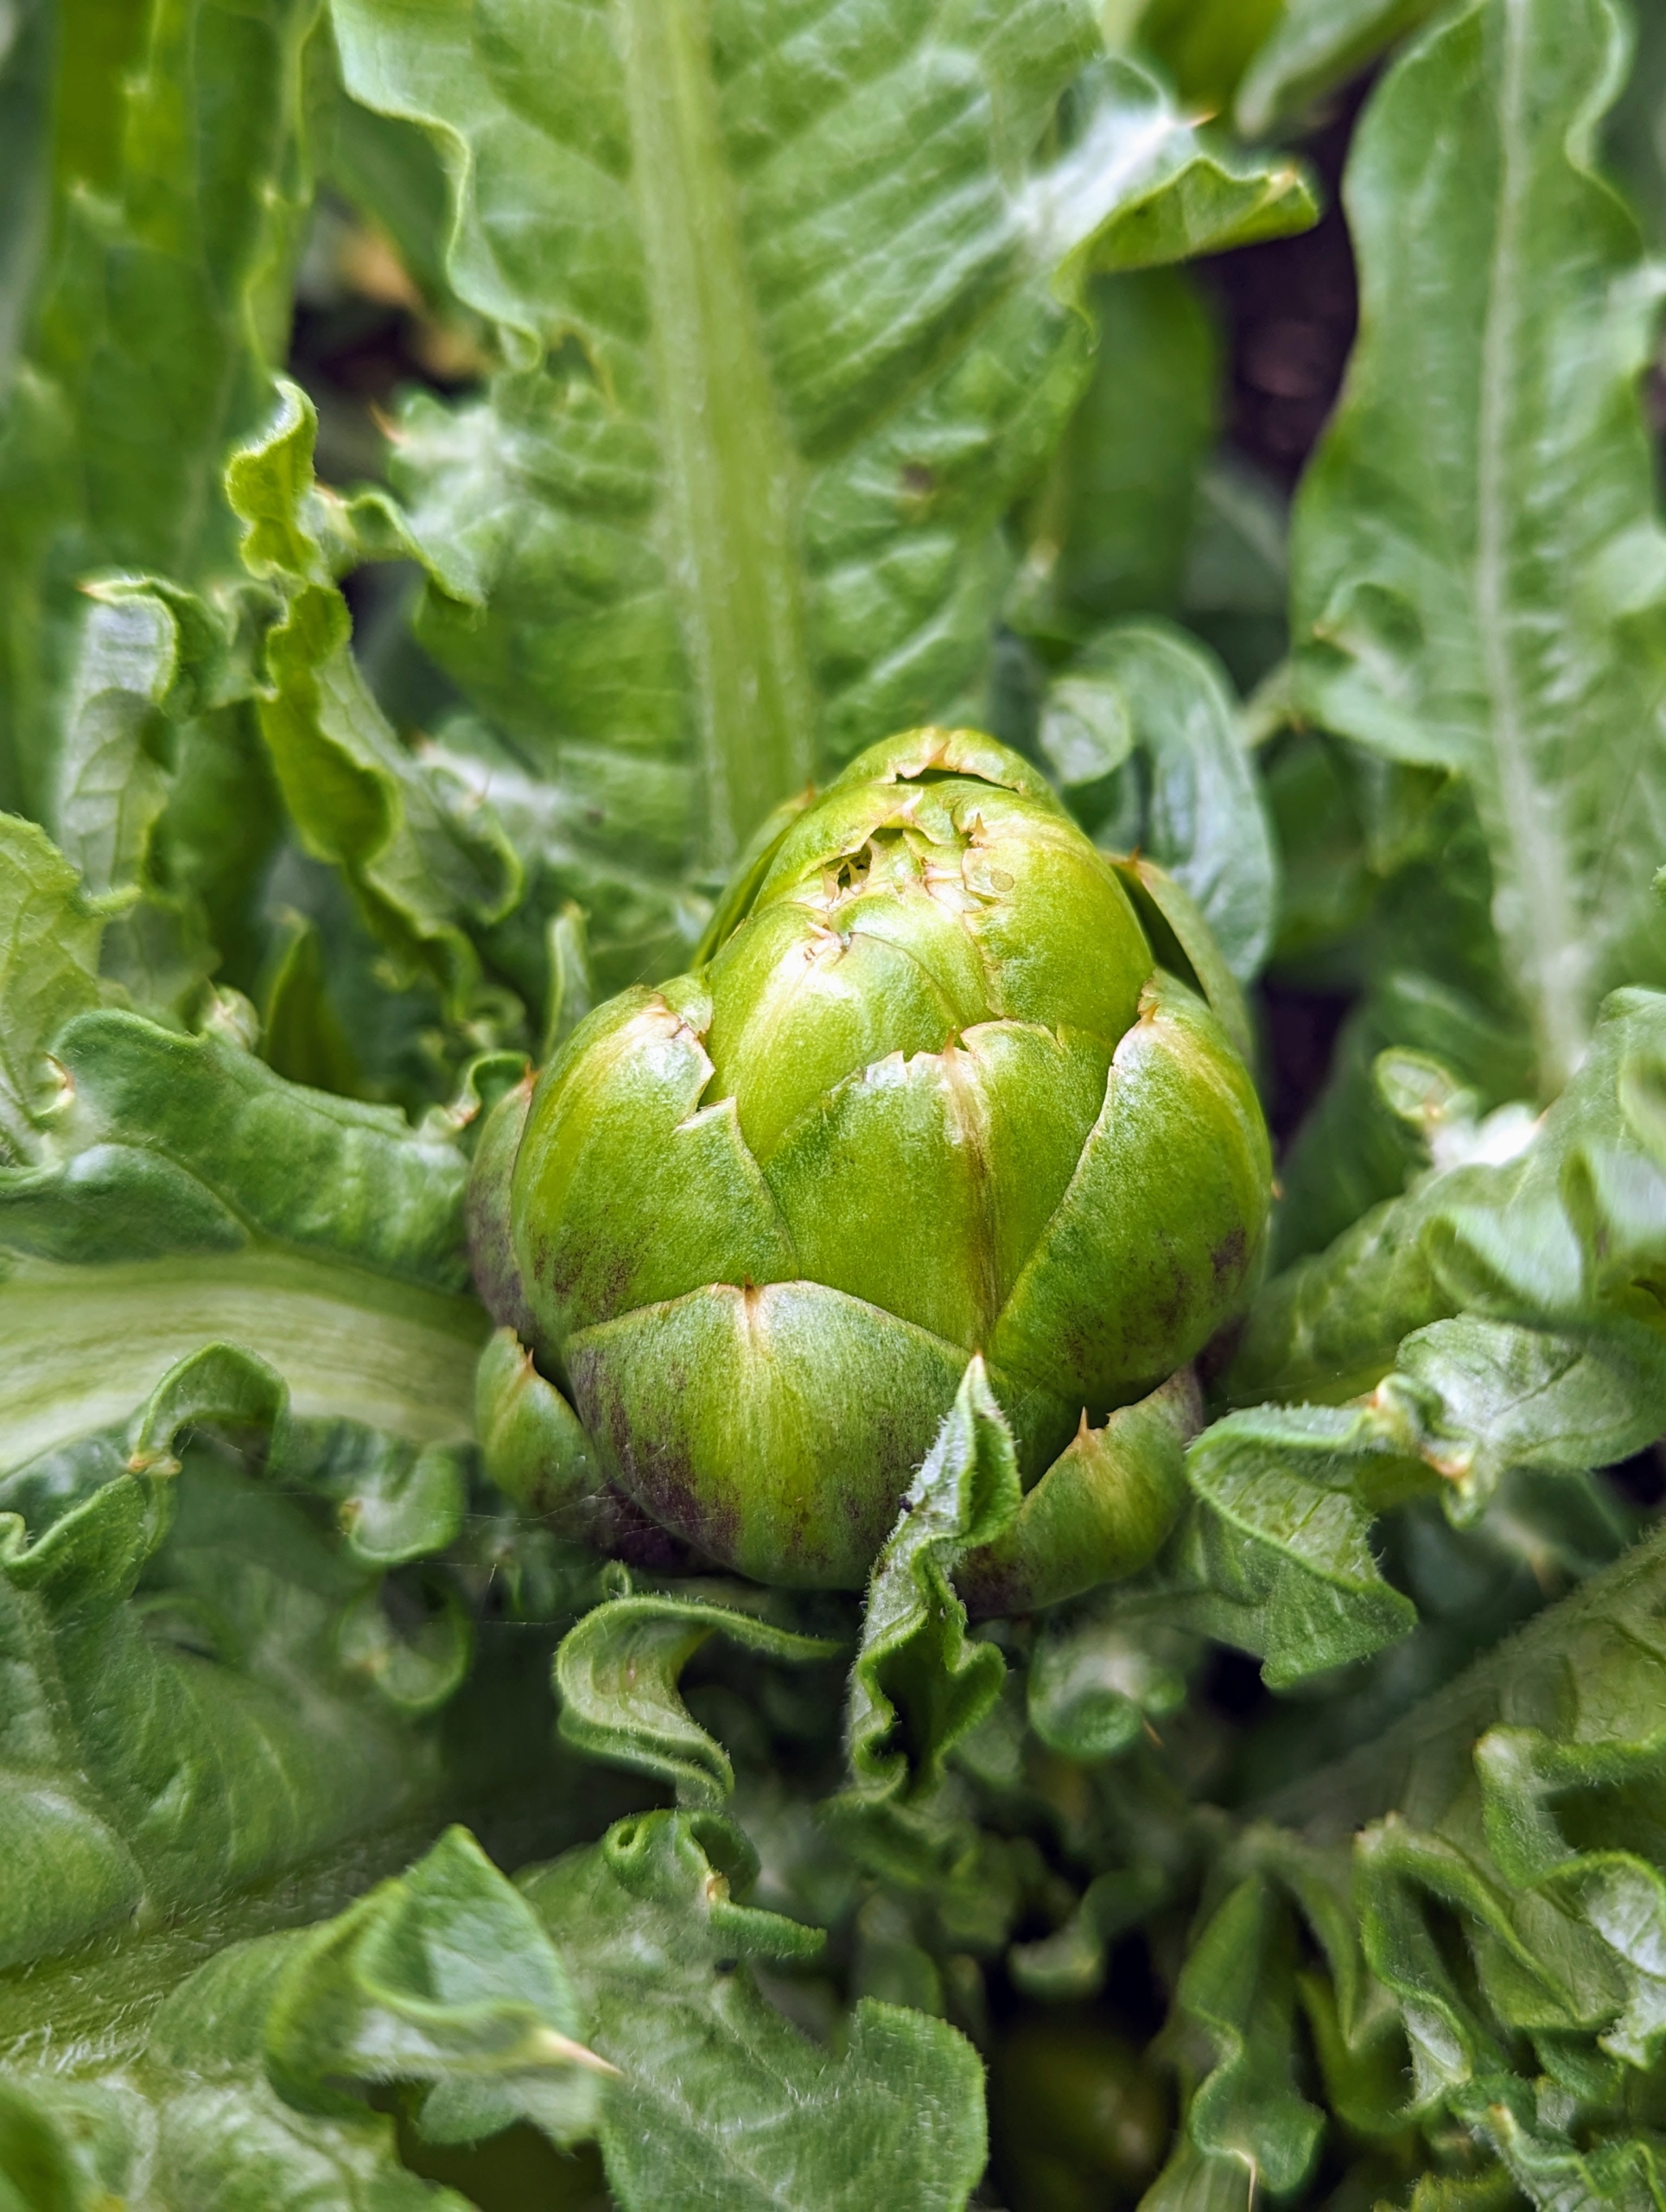
Meanwhile, look at some of the growing vegetables. This is a young artichoke. I like to harvest them when they are still small, but these need just a little more time.
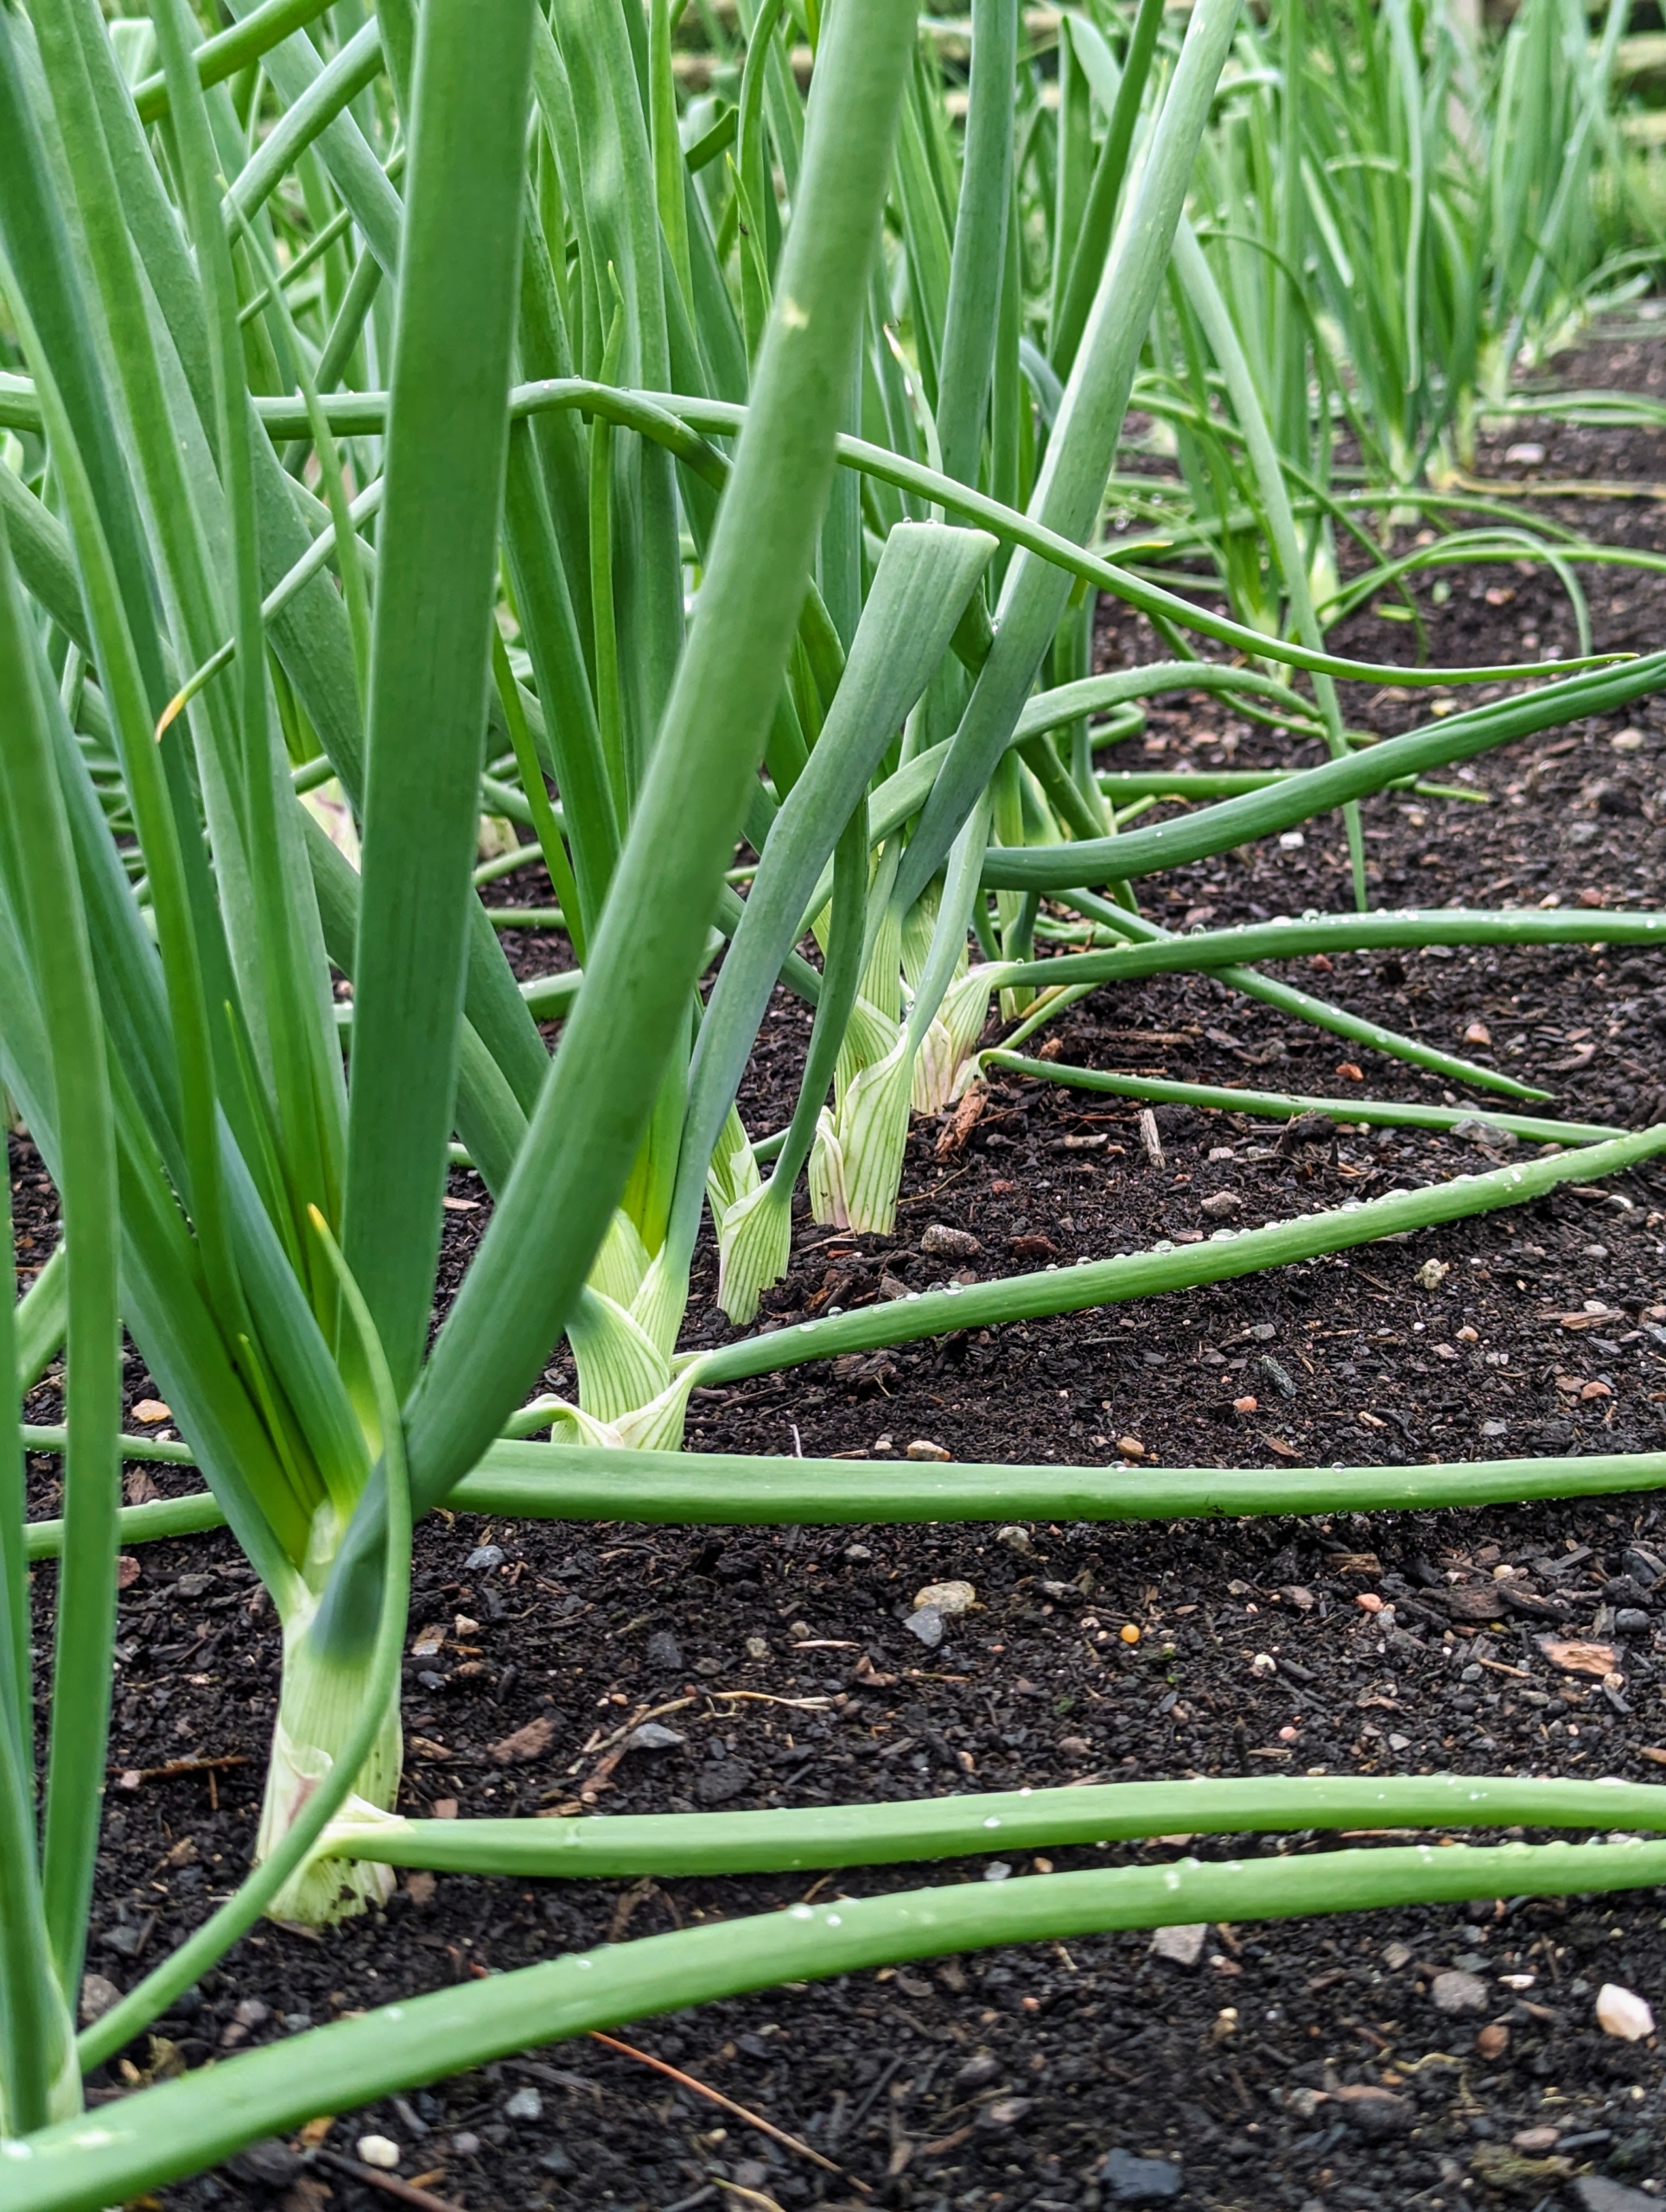
We planted leeks, shallots, and onions back in late April. They are all growing so beautifully.
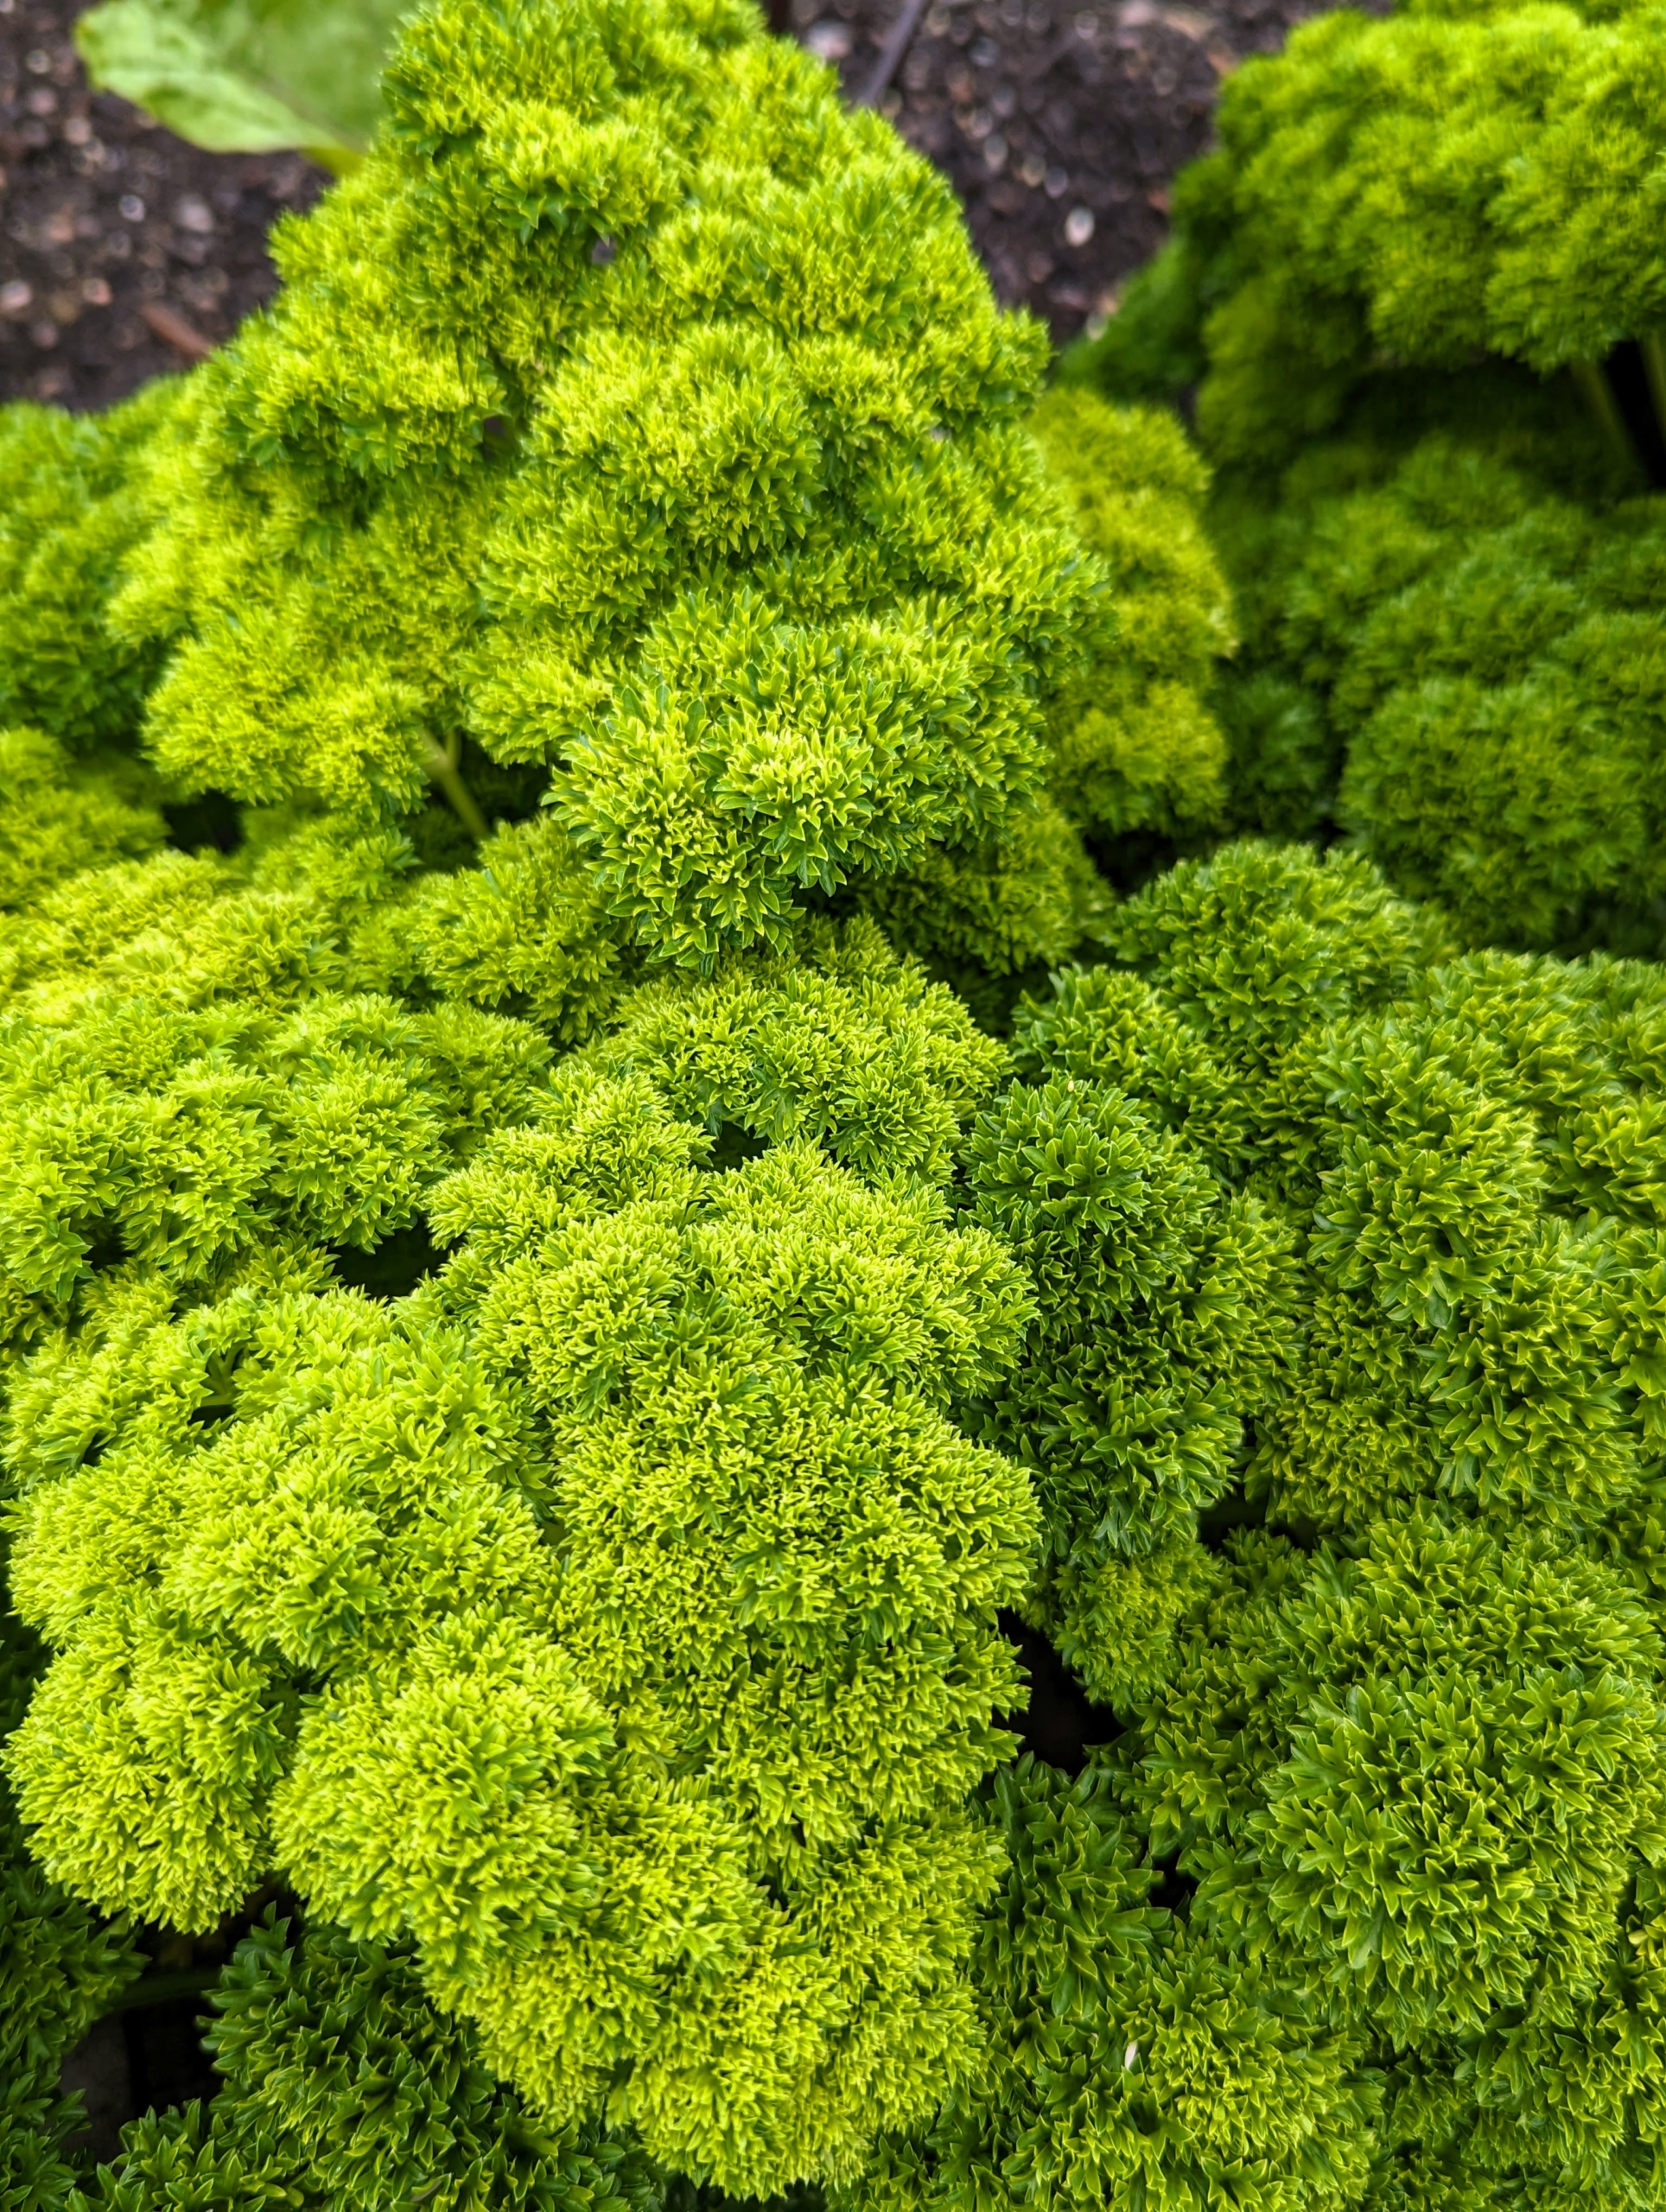
And do you know what this is? If you guessed parsley, you are correct. This is curly parsley. with round, curly leaves. The taste is stronger than that of the flat-leaf type.
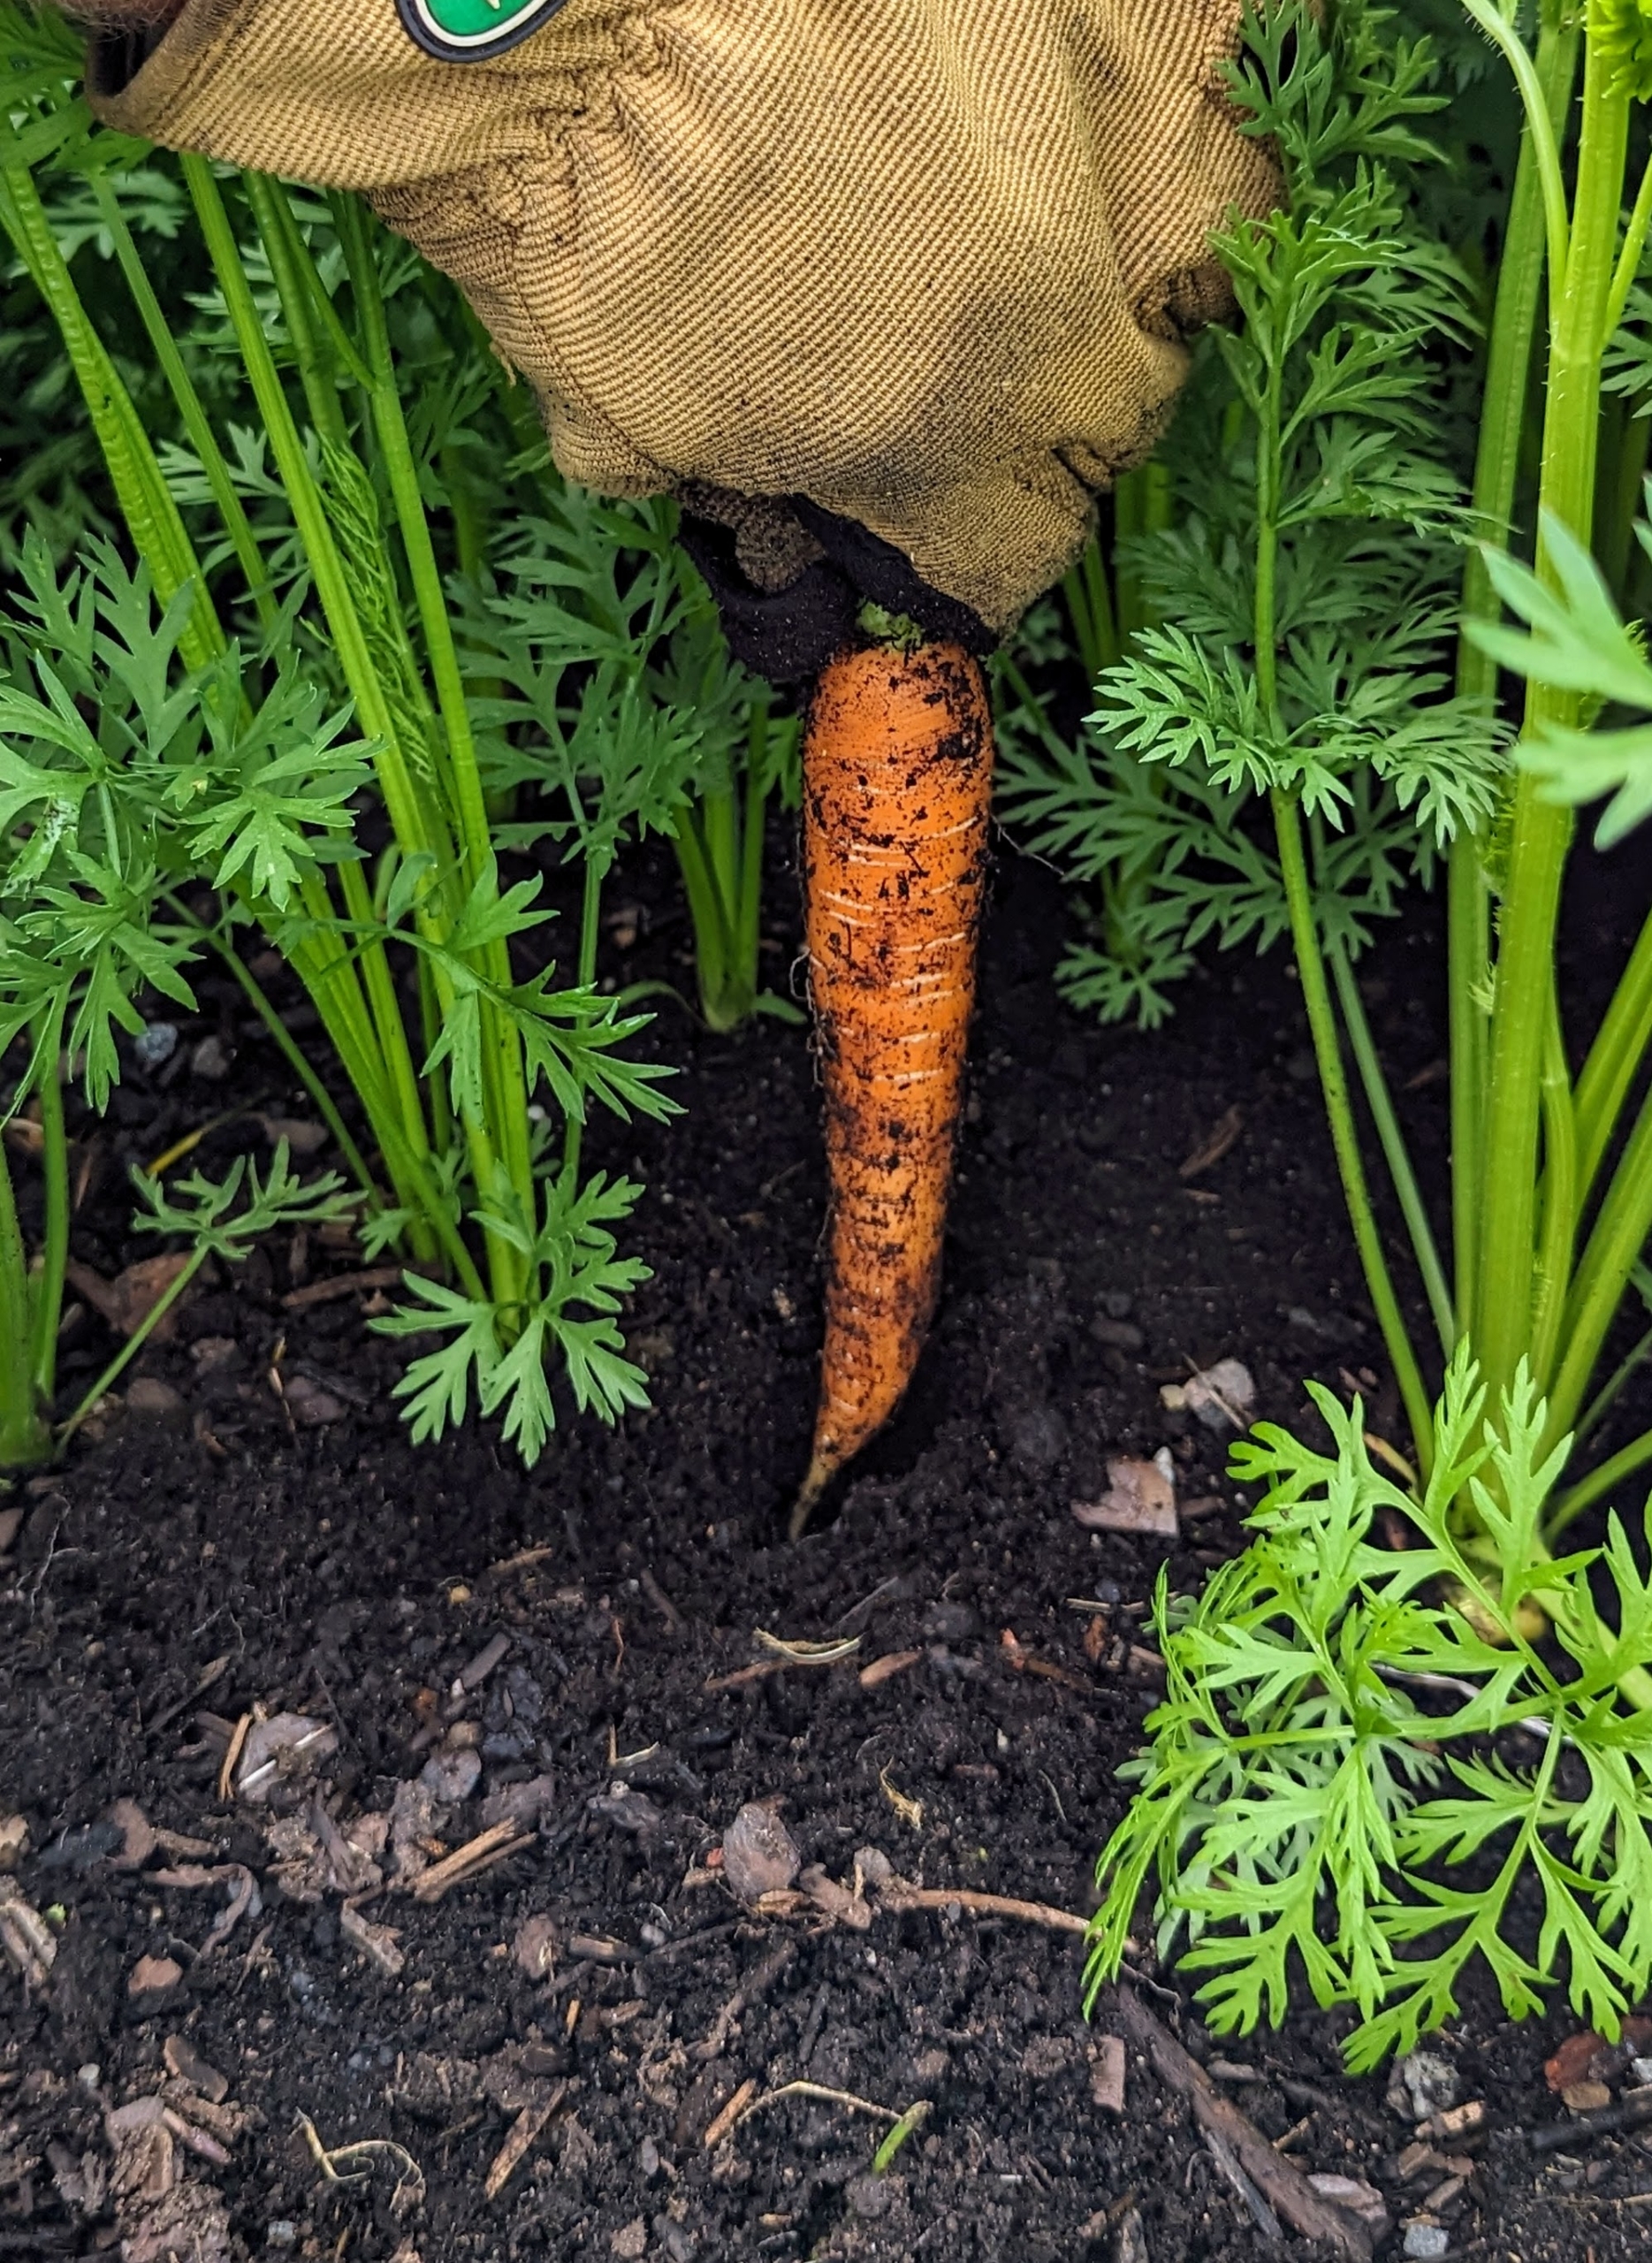
Ryan checked on the carrots – these, too, need a little more growing time, but they’re developing so perfectly and with such great color.
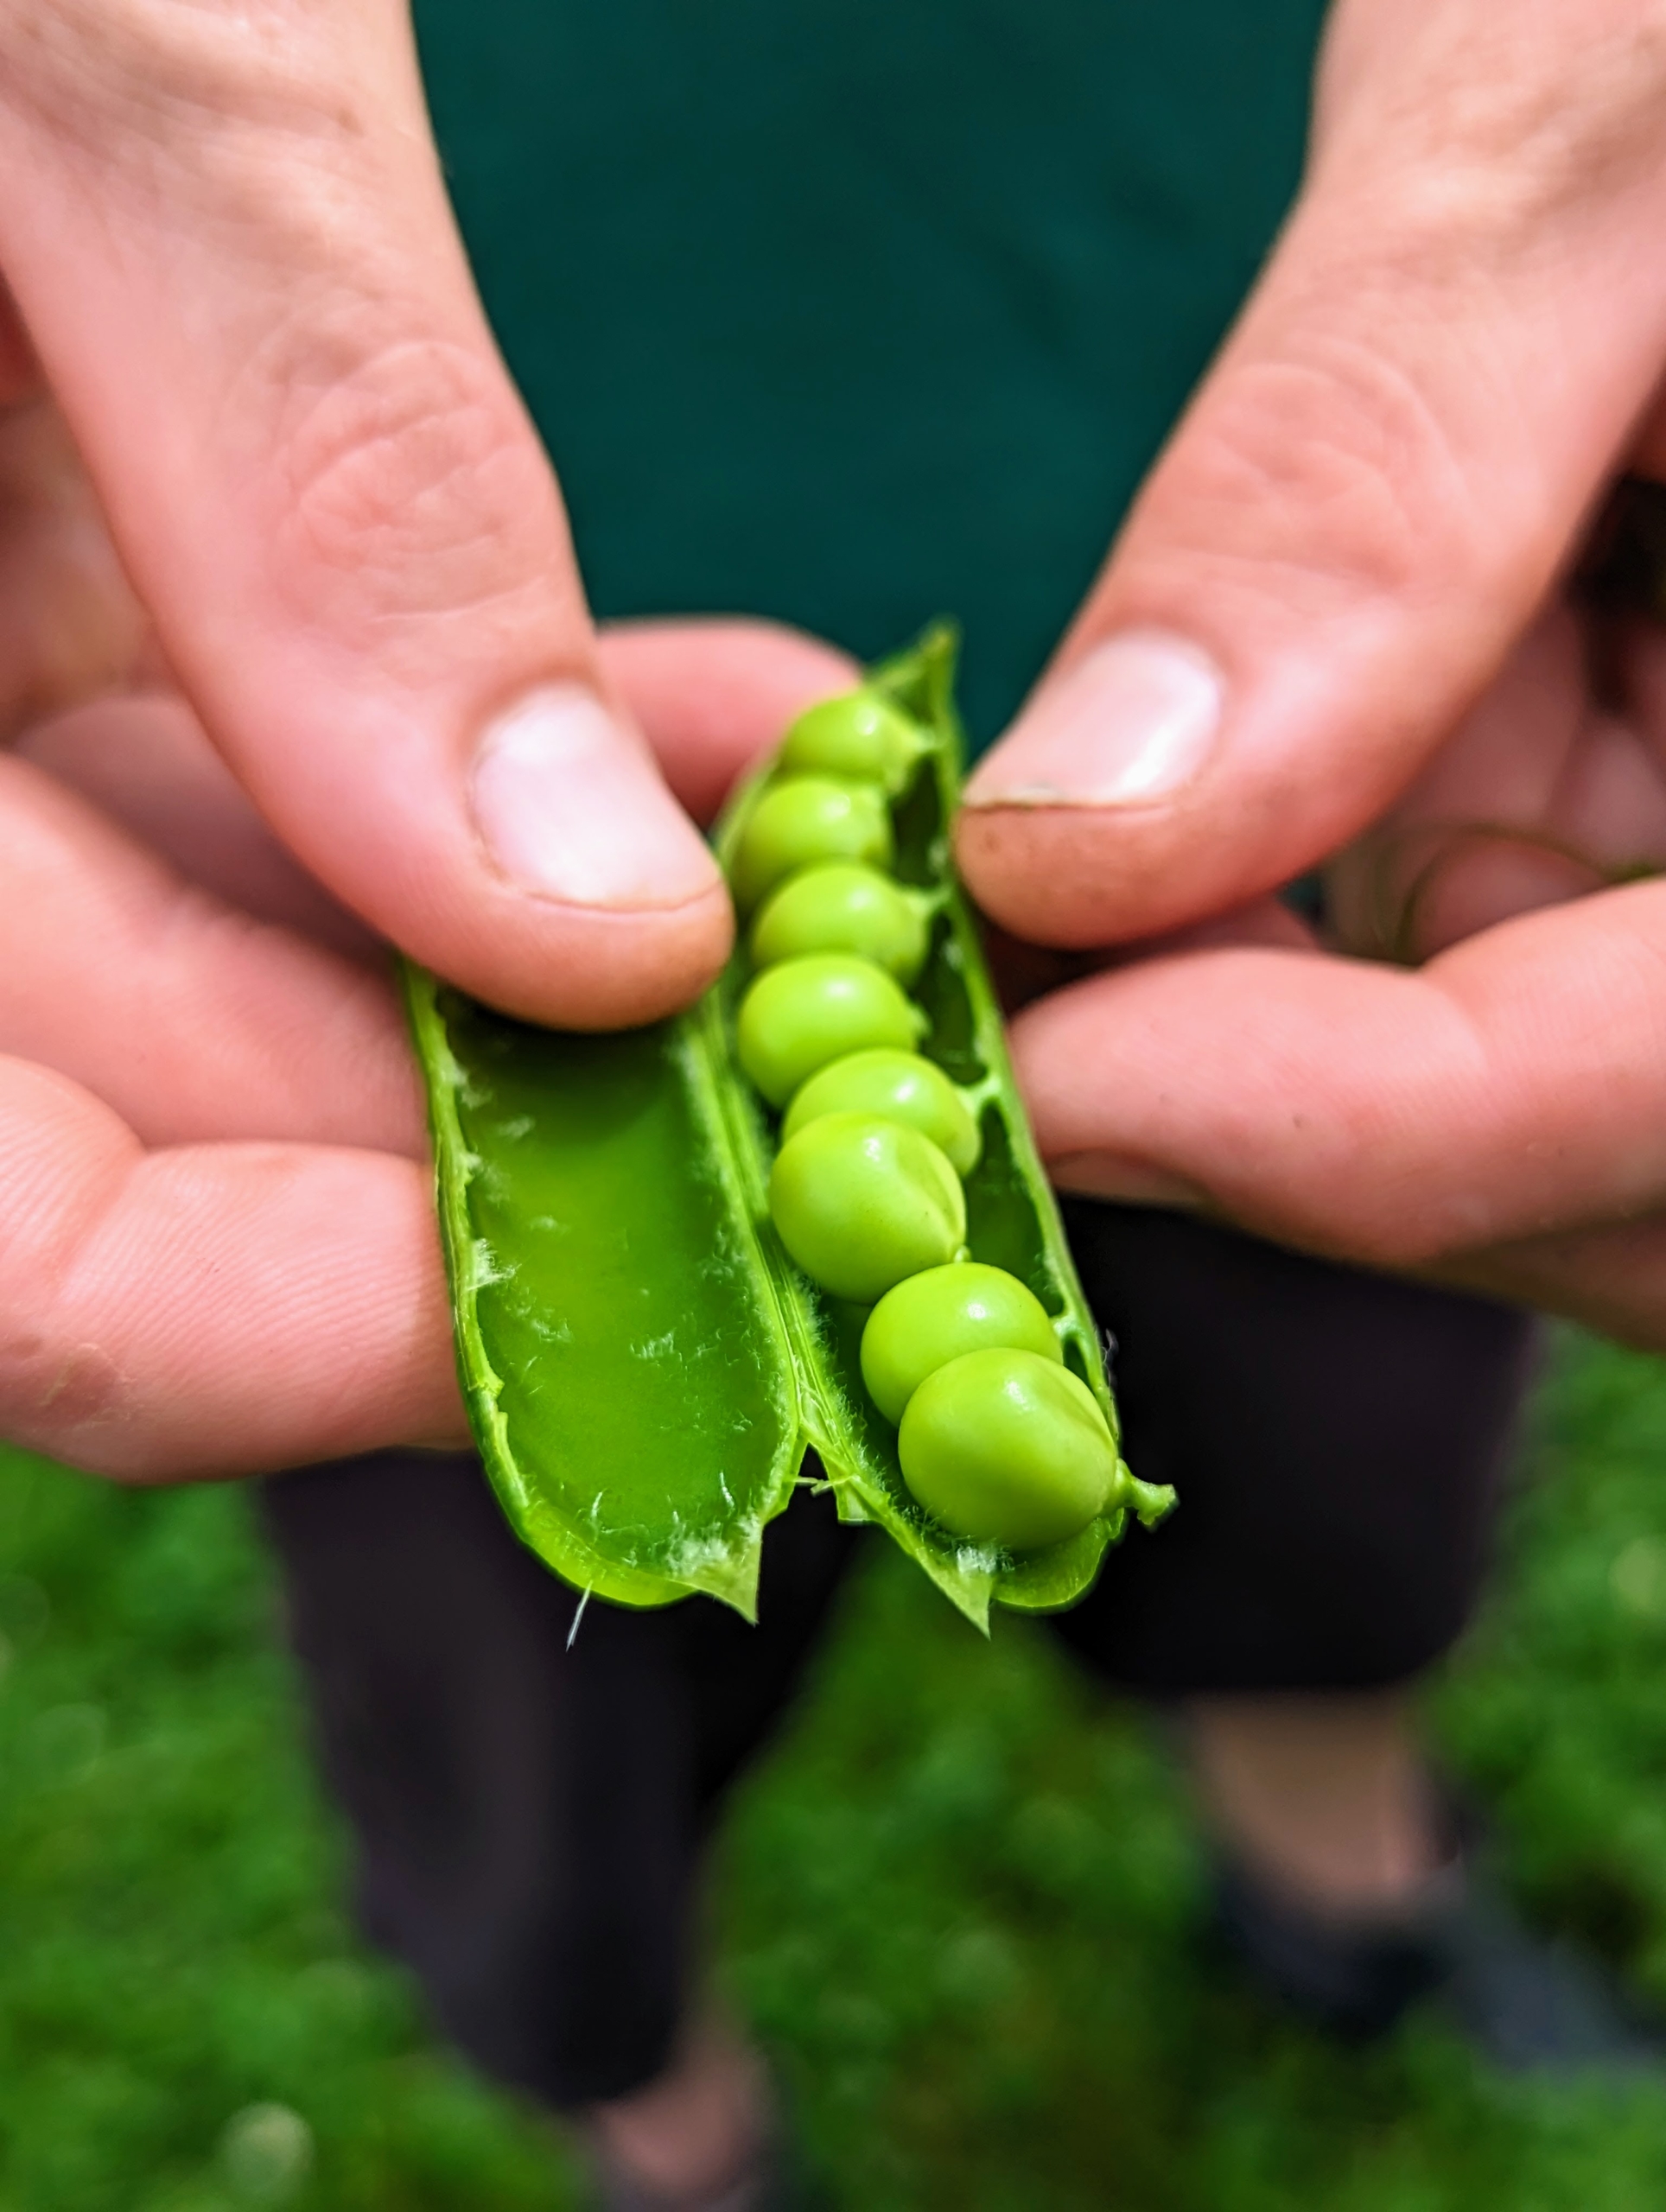
Our peas also look fantastic – these are ready to pick. We have both shelling peas and edible pods.
This garden so amazing. I love visiting every day to see what is growing. I am so happy with its progress. Take a look at my Instagram page @MarthaStewart48 to see more photos.
Clematis are among the most decorative and spectacular of all the flowering vines, and mine are blooming so beautifully this season.
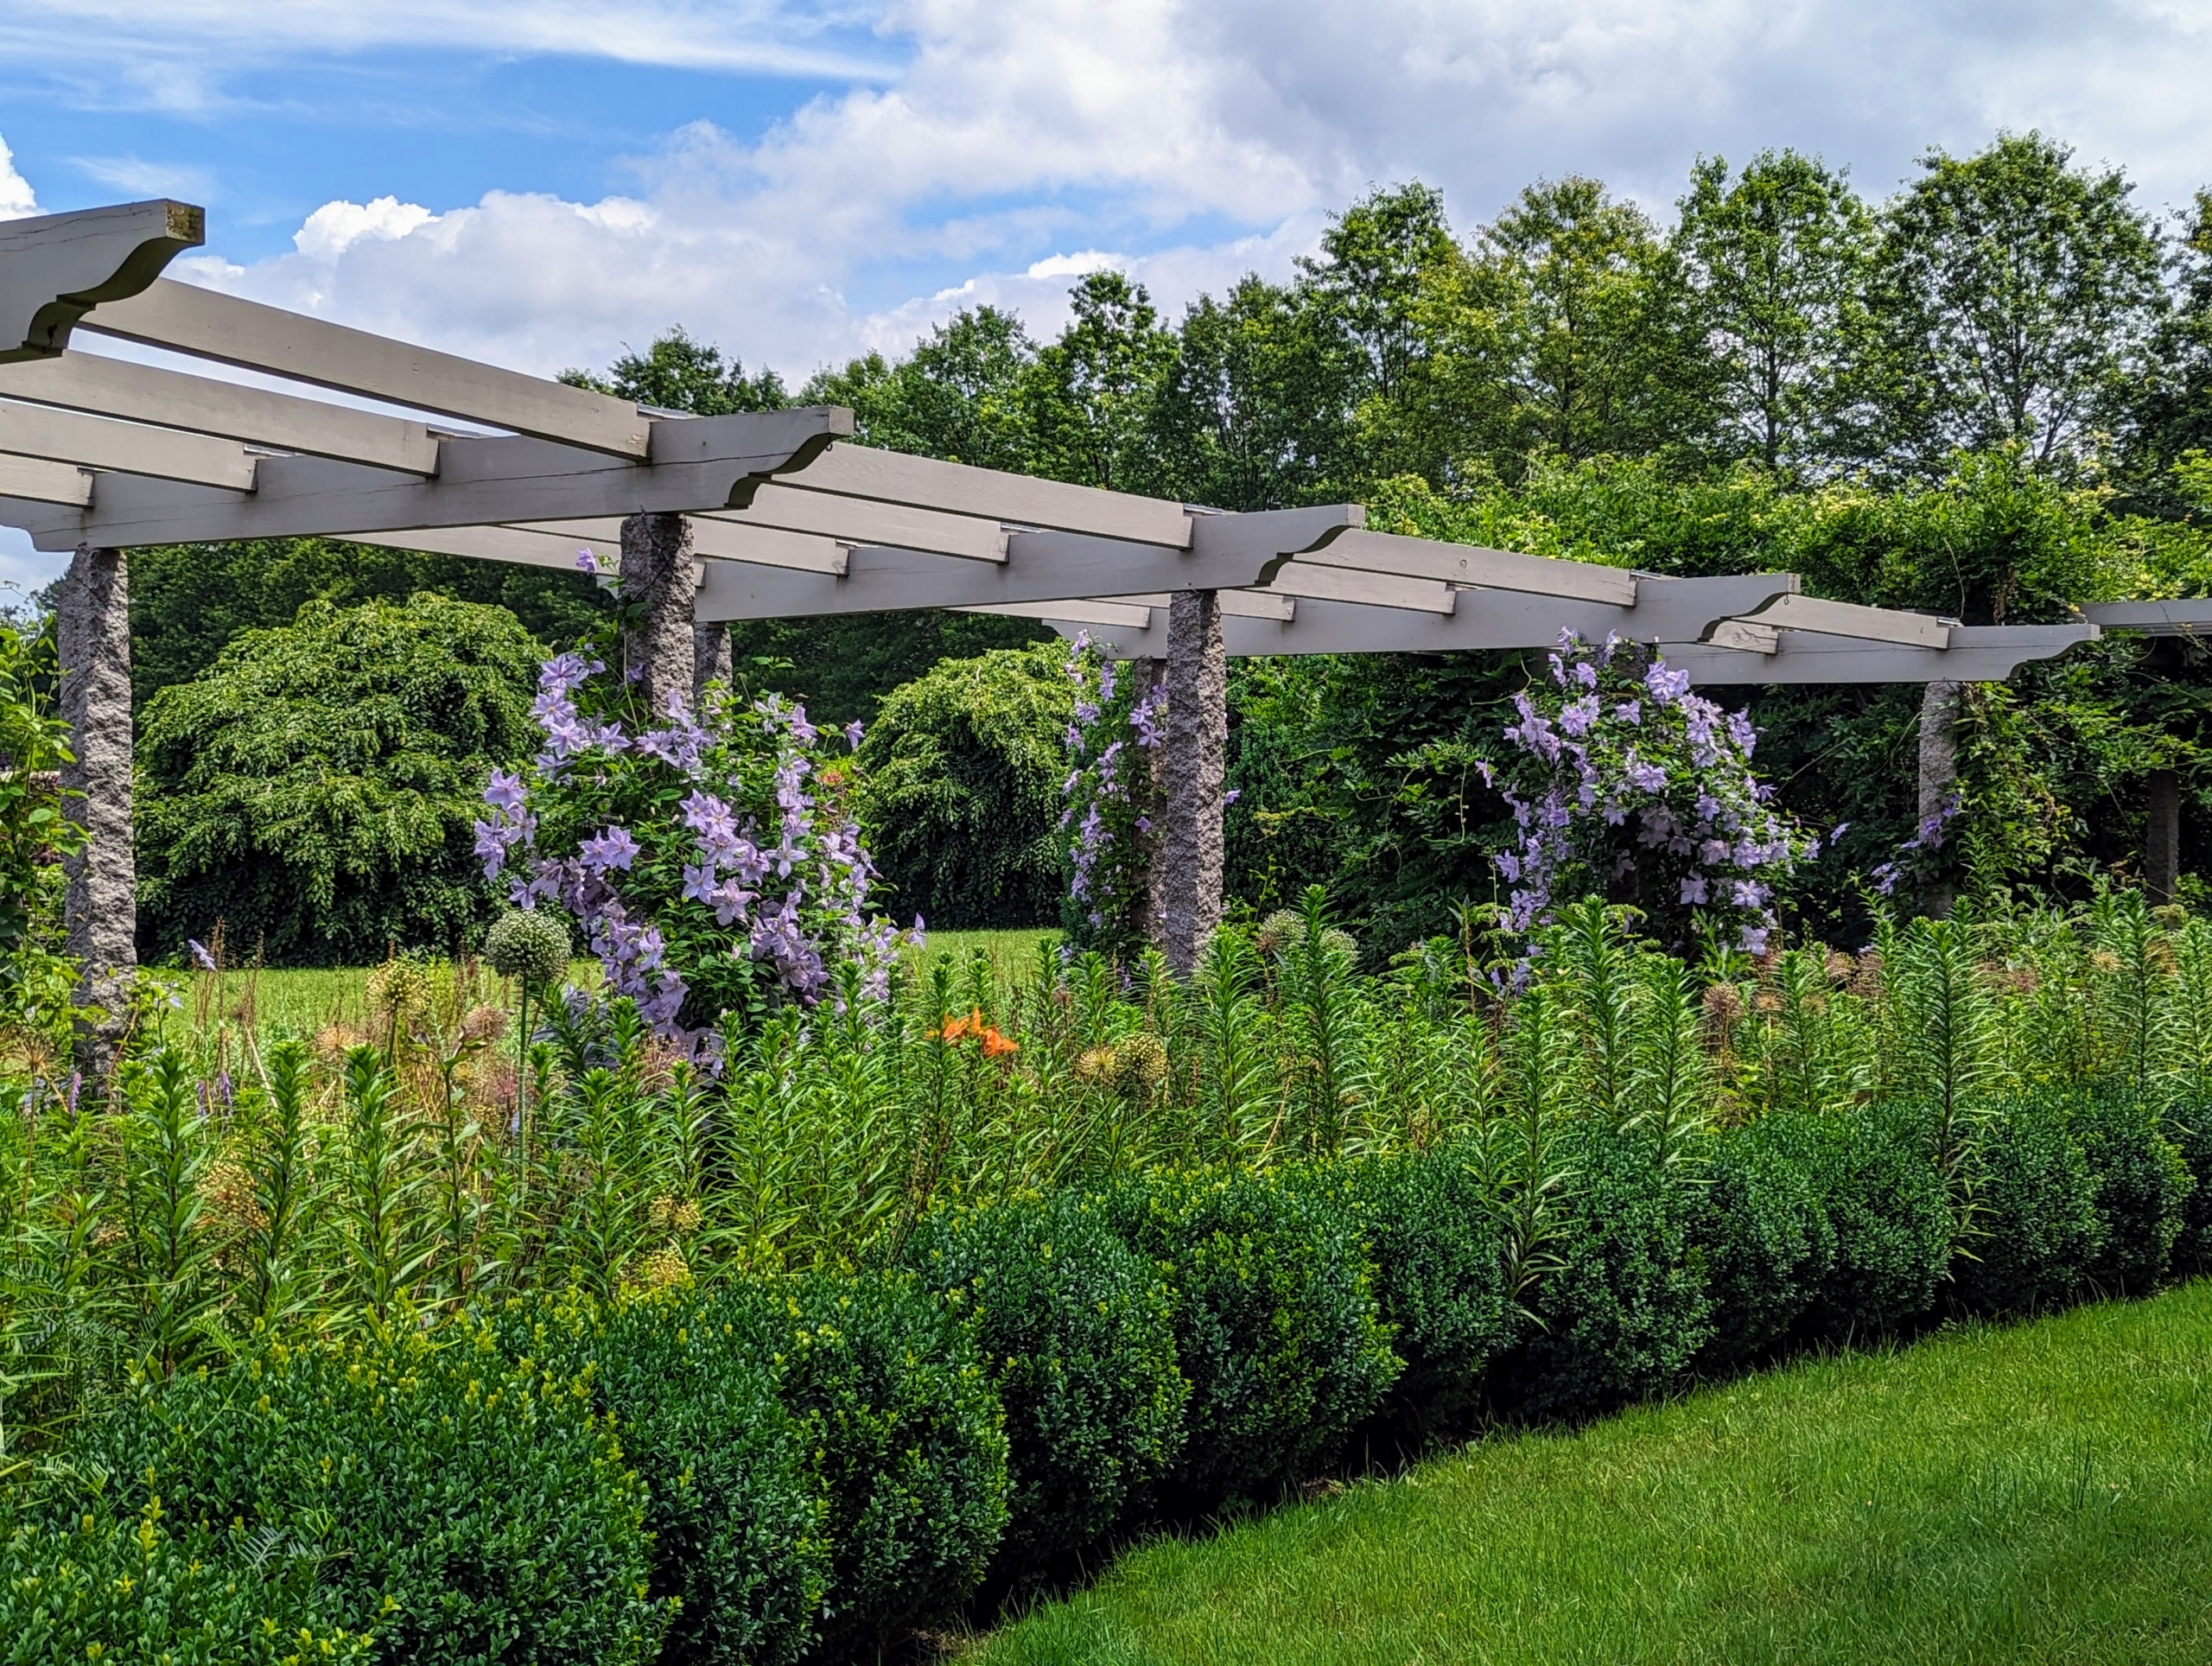
I have always loved clematis, and over the years I have grown many varieties of this wonderful plant. When I purchased my Bedford, New York farm, I knew I wanted to build a long, winding pergola where I could grow lots of clematis. After the pergola was constructed, I concentrated on creating a palette of blue-flowering cultivars and each year I always enjoy the vivid floral display.
Enjoy these photos.
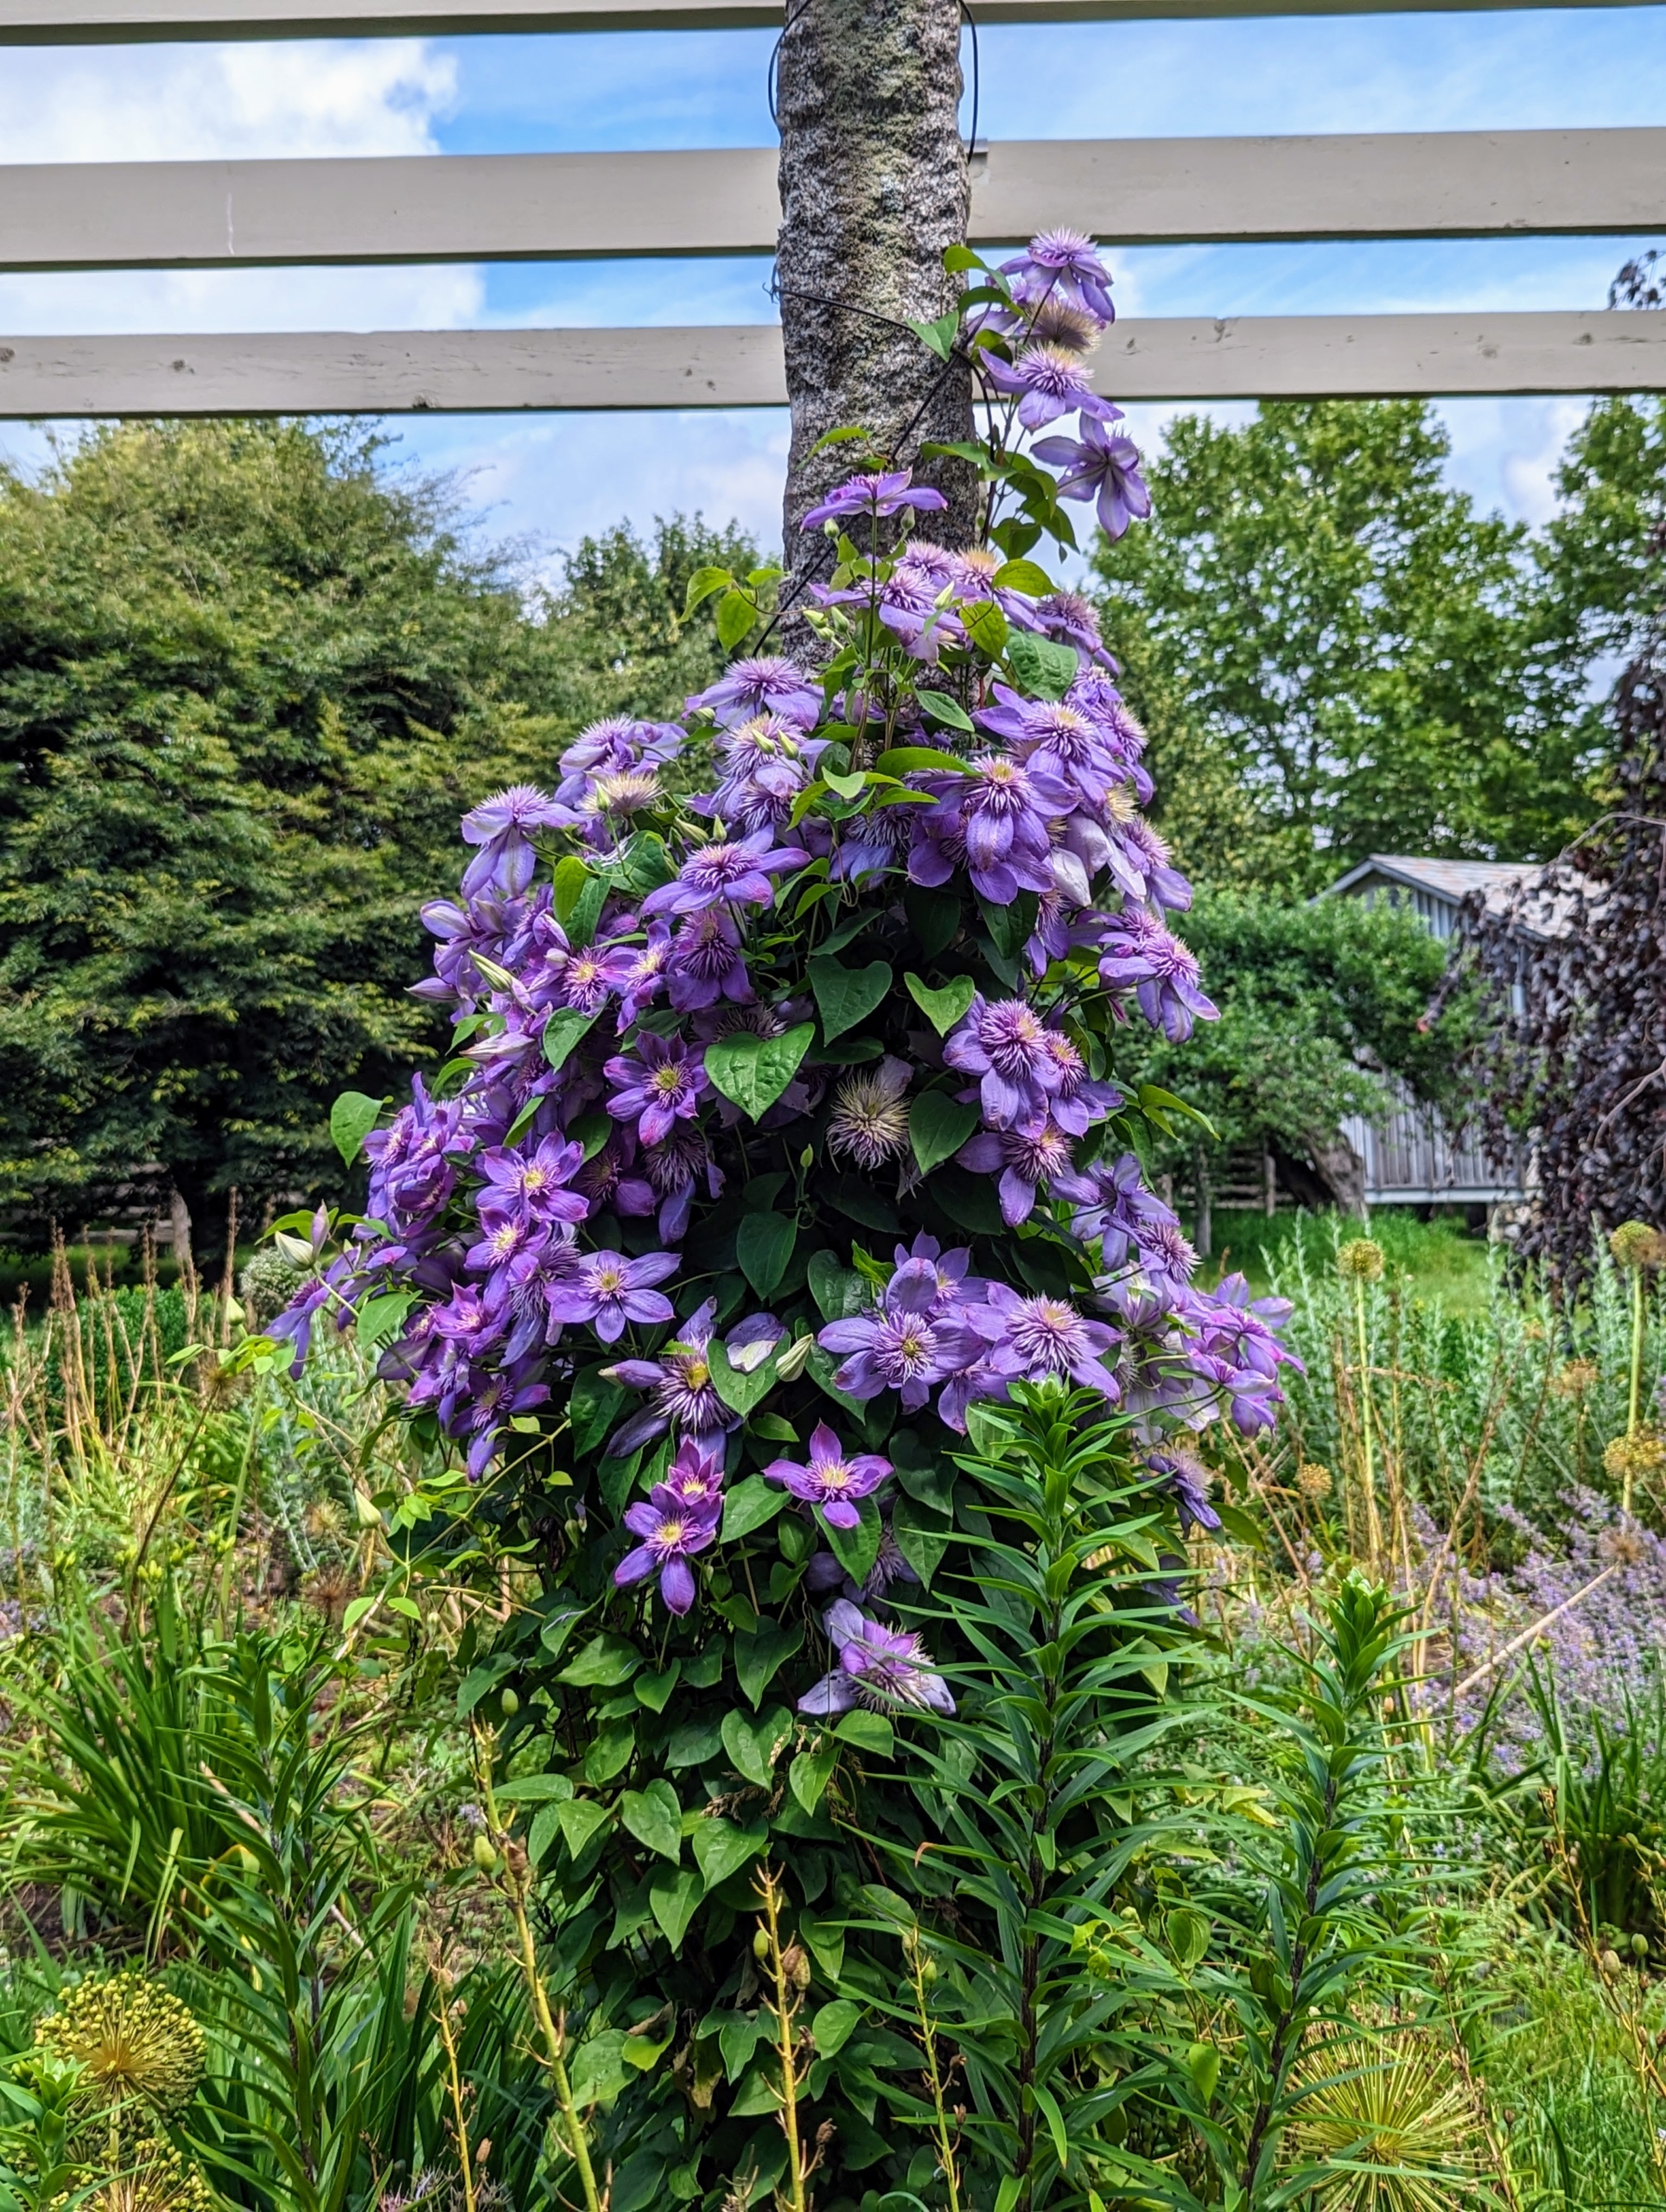
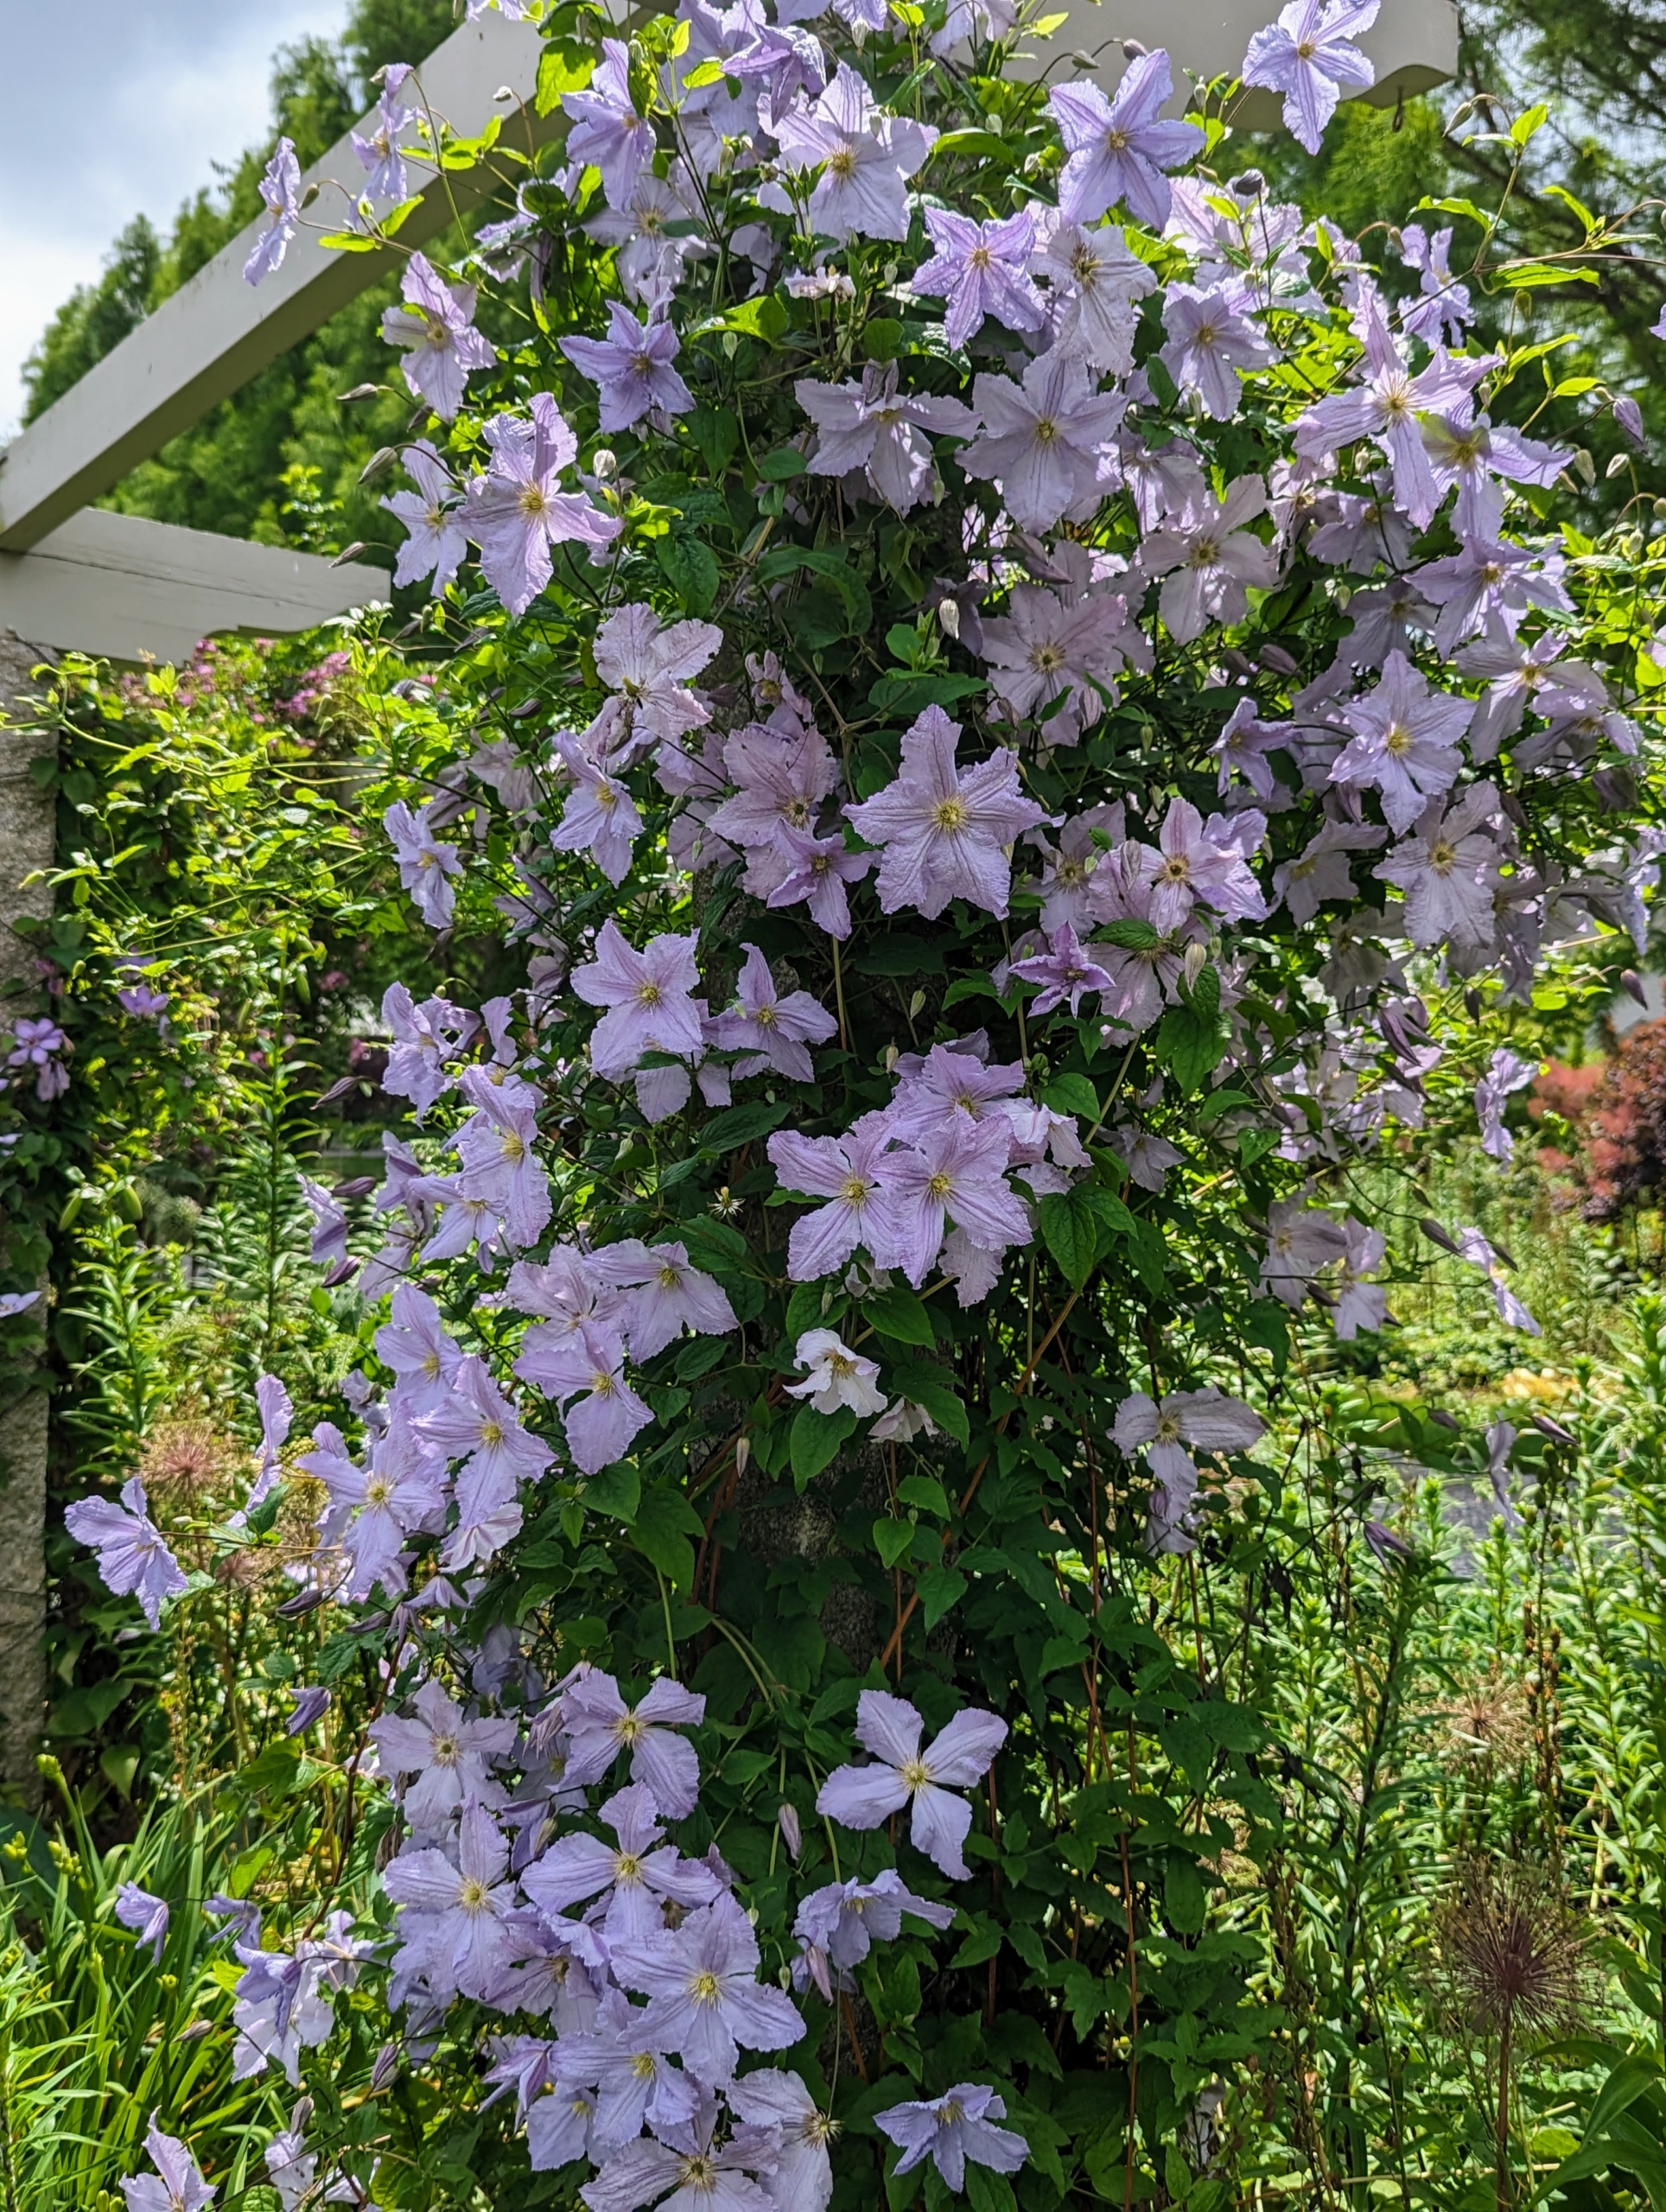
There are several different varieties of clematis planted along my winding pergola that extends from the carriage road in front of my flower cutting garden all the way to the west end of my soccer field. Each pair of posts supports the same variety and every year around this time, they stand out under in all their gorgeous colors.
Wire is wrapped around each post, so the climbing tendrils of the clematis vines could attach easily. The uprights for this pergola are antique granite posts from China originally used as grape supports. They’re perfect as posts because they don’t rot over time like wood does. A friend of mine acquired a lot of stone from this valley and I purchased a couple hundred of these posts. I only wish I had bought more of them.
Clematis is a genus of about 300-species within the buttercup family Ranunculaceae. The name Clematis comes from the Greek word “klematis,” meaning vine.
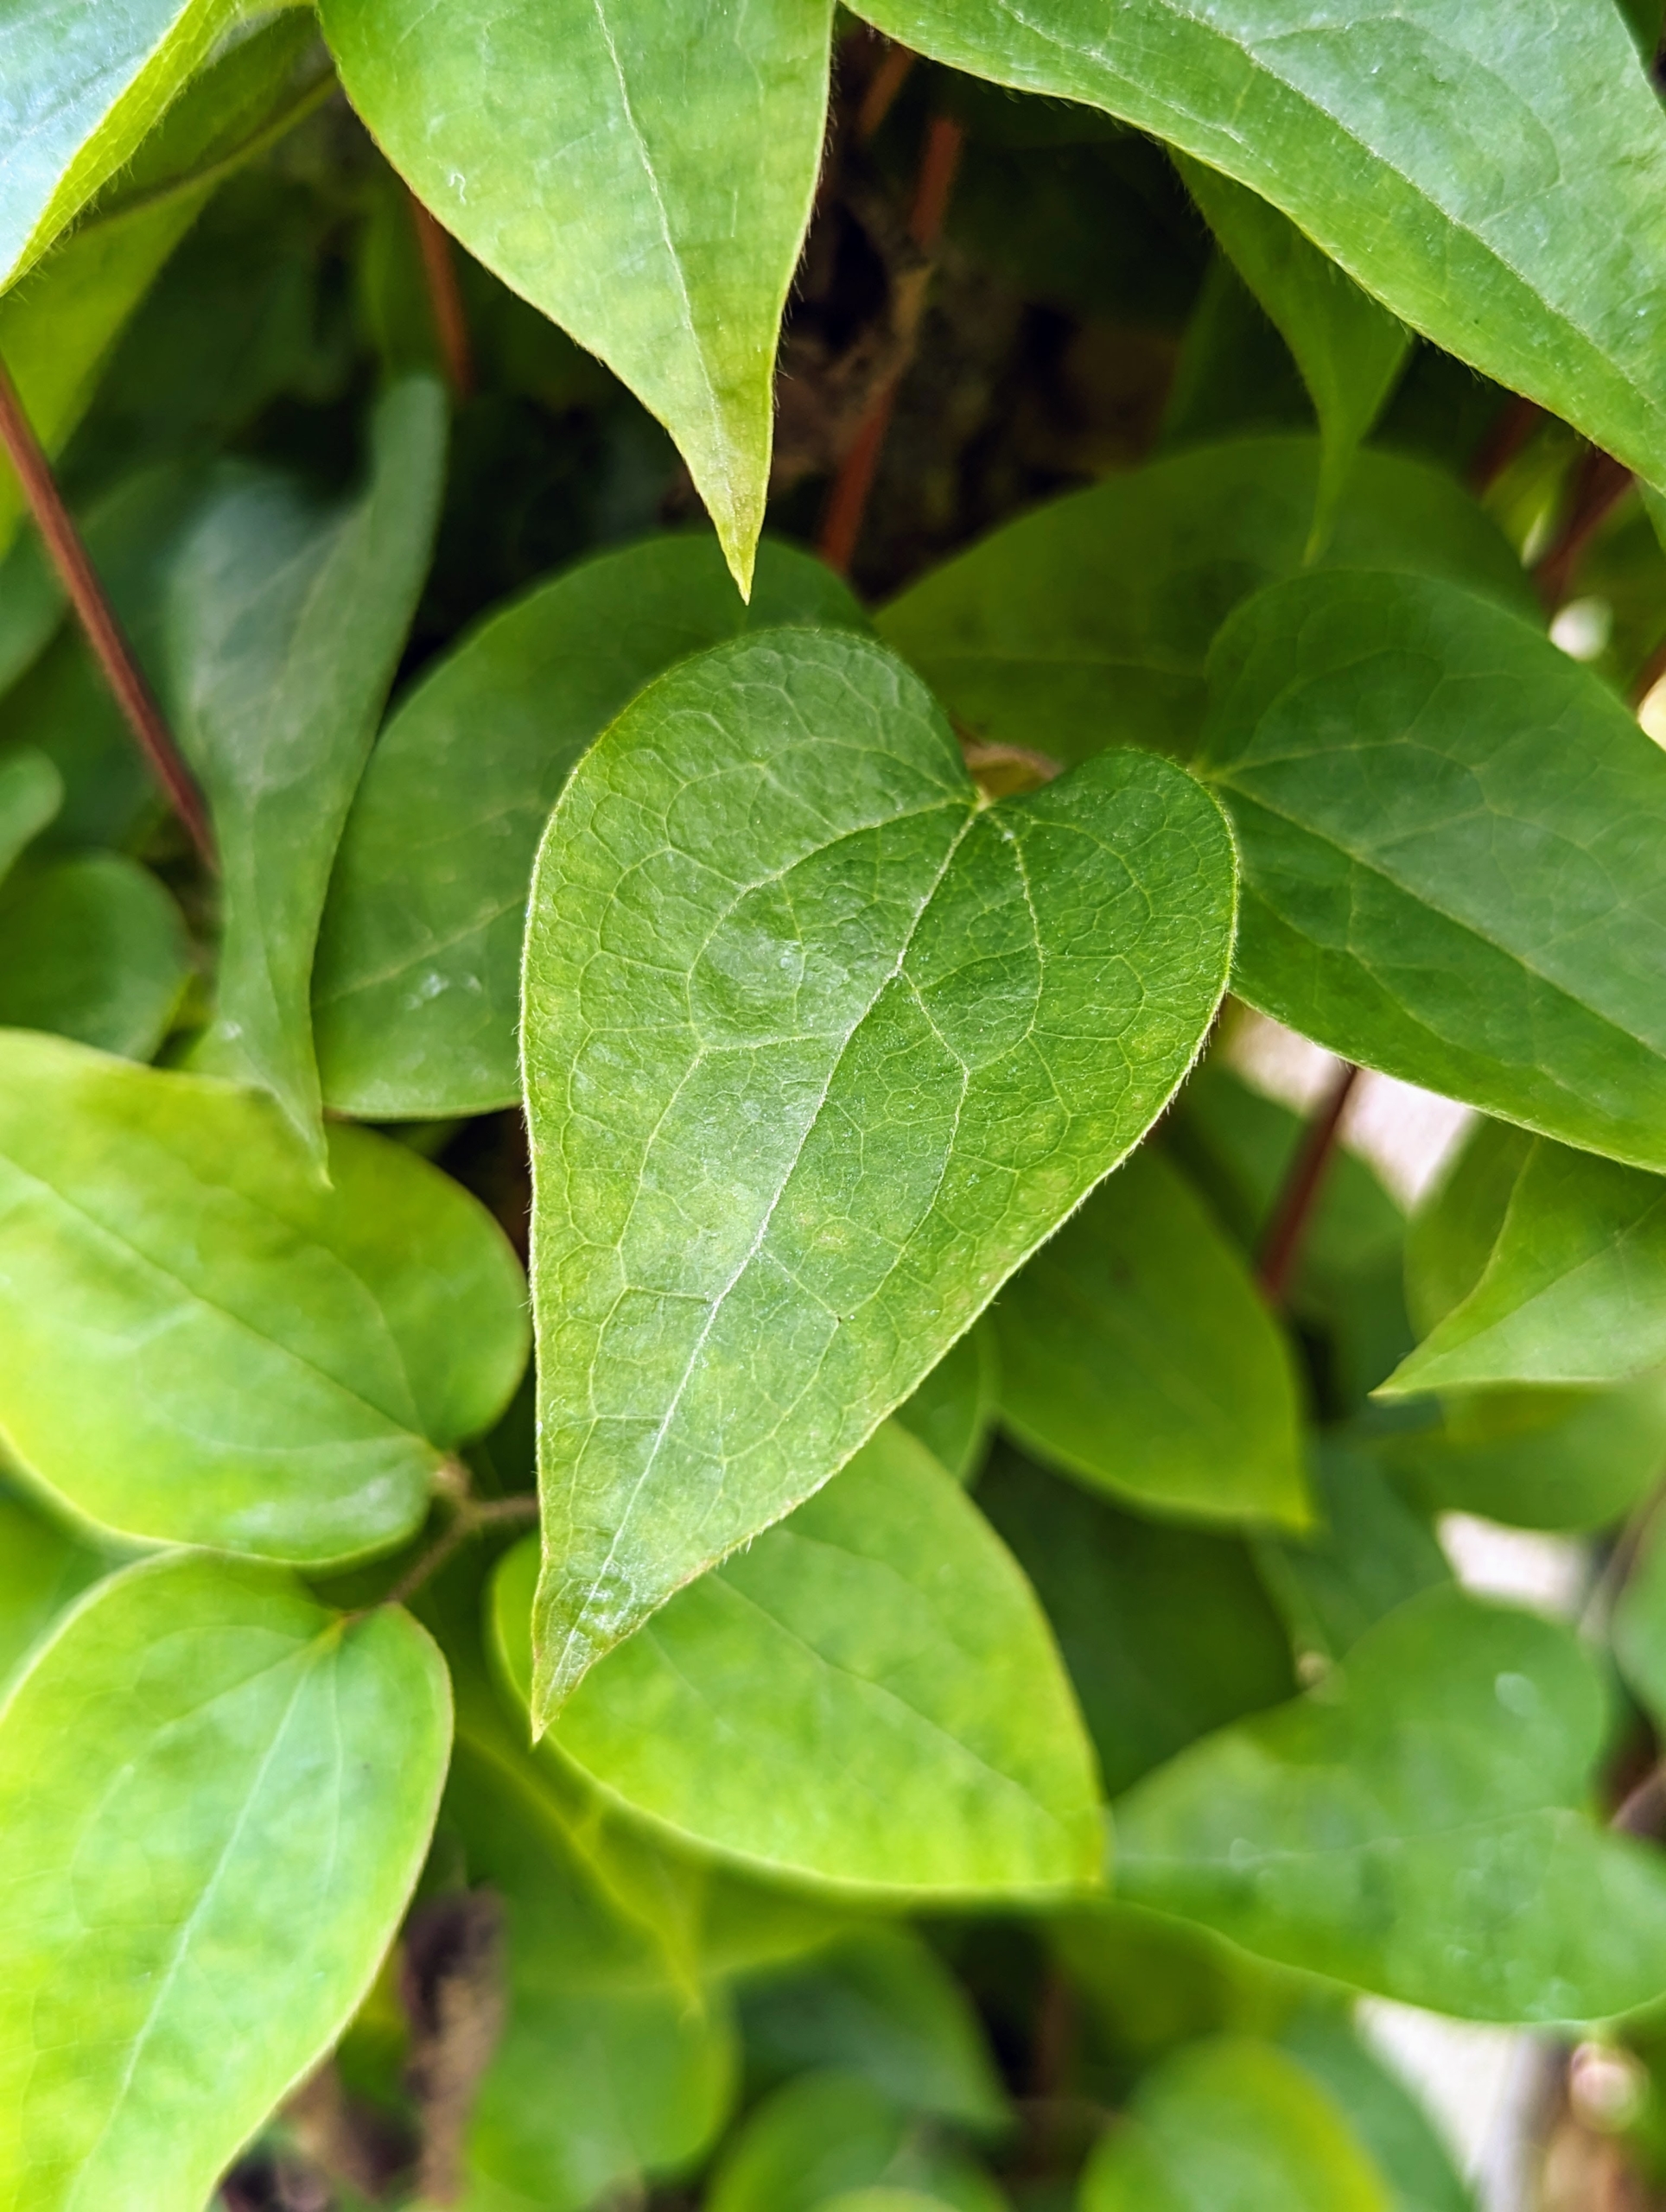
Clematis leaves grow in pairs along the stems. The clematis leaf shapes vary with different varieties, but knowing how they grow can help differentiate them from other vines.
Clematis are native to China and Japan and are known to be vigorous, woody climbers.
Most species are called clematis, but it has also been called traveller’s joy, virgin’s bower, leather flower, or vase vine. It’s also been called “Old Man’s Beard,” because of the long fluffy seed heads that look similar to an old man’s beard.
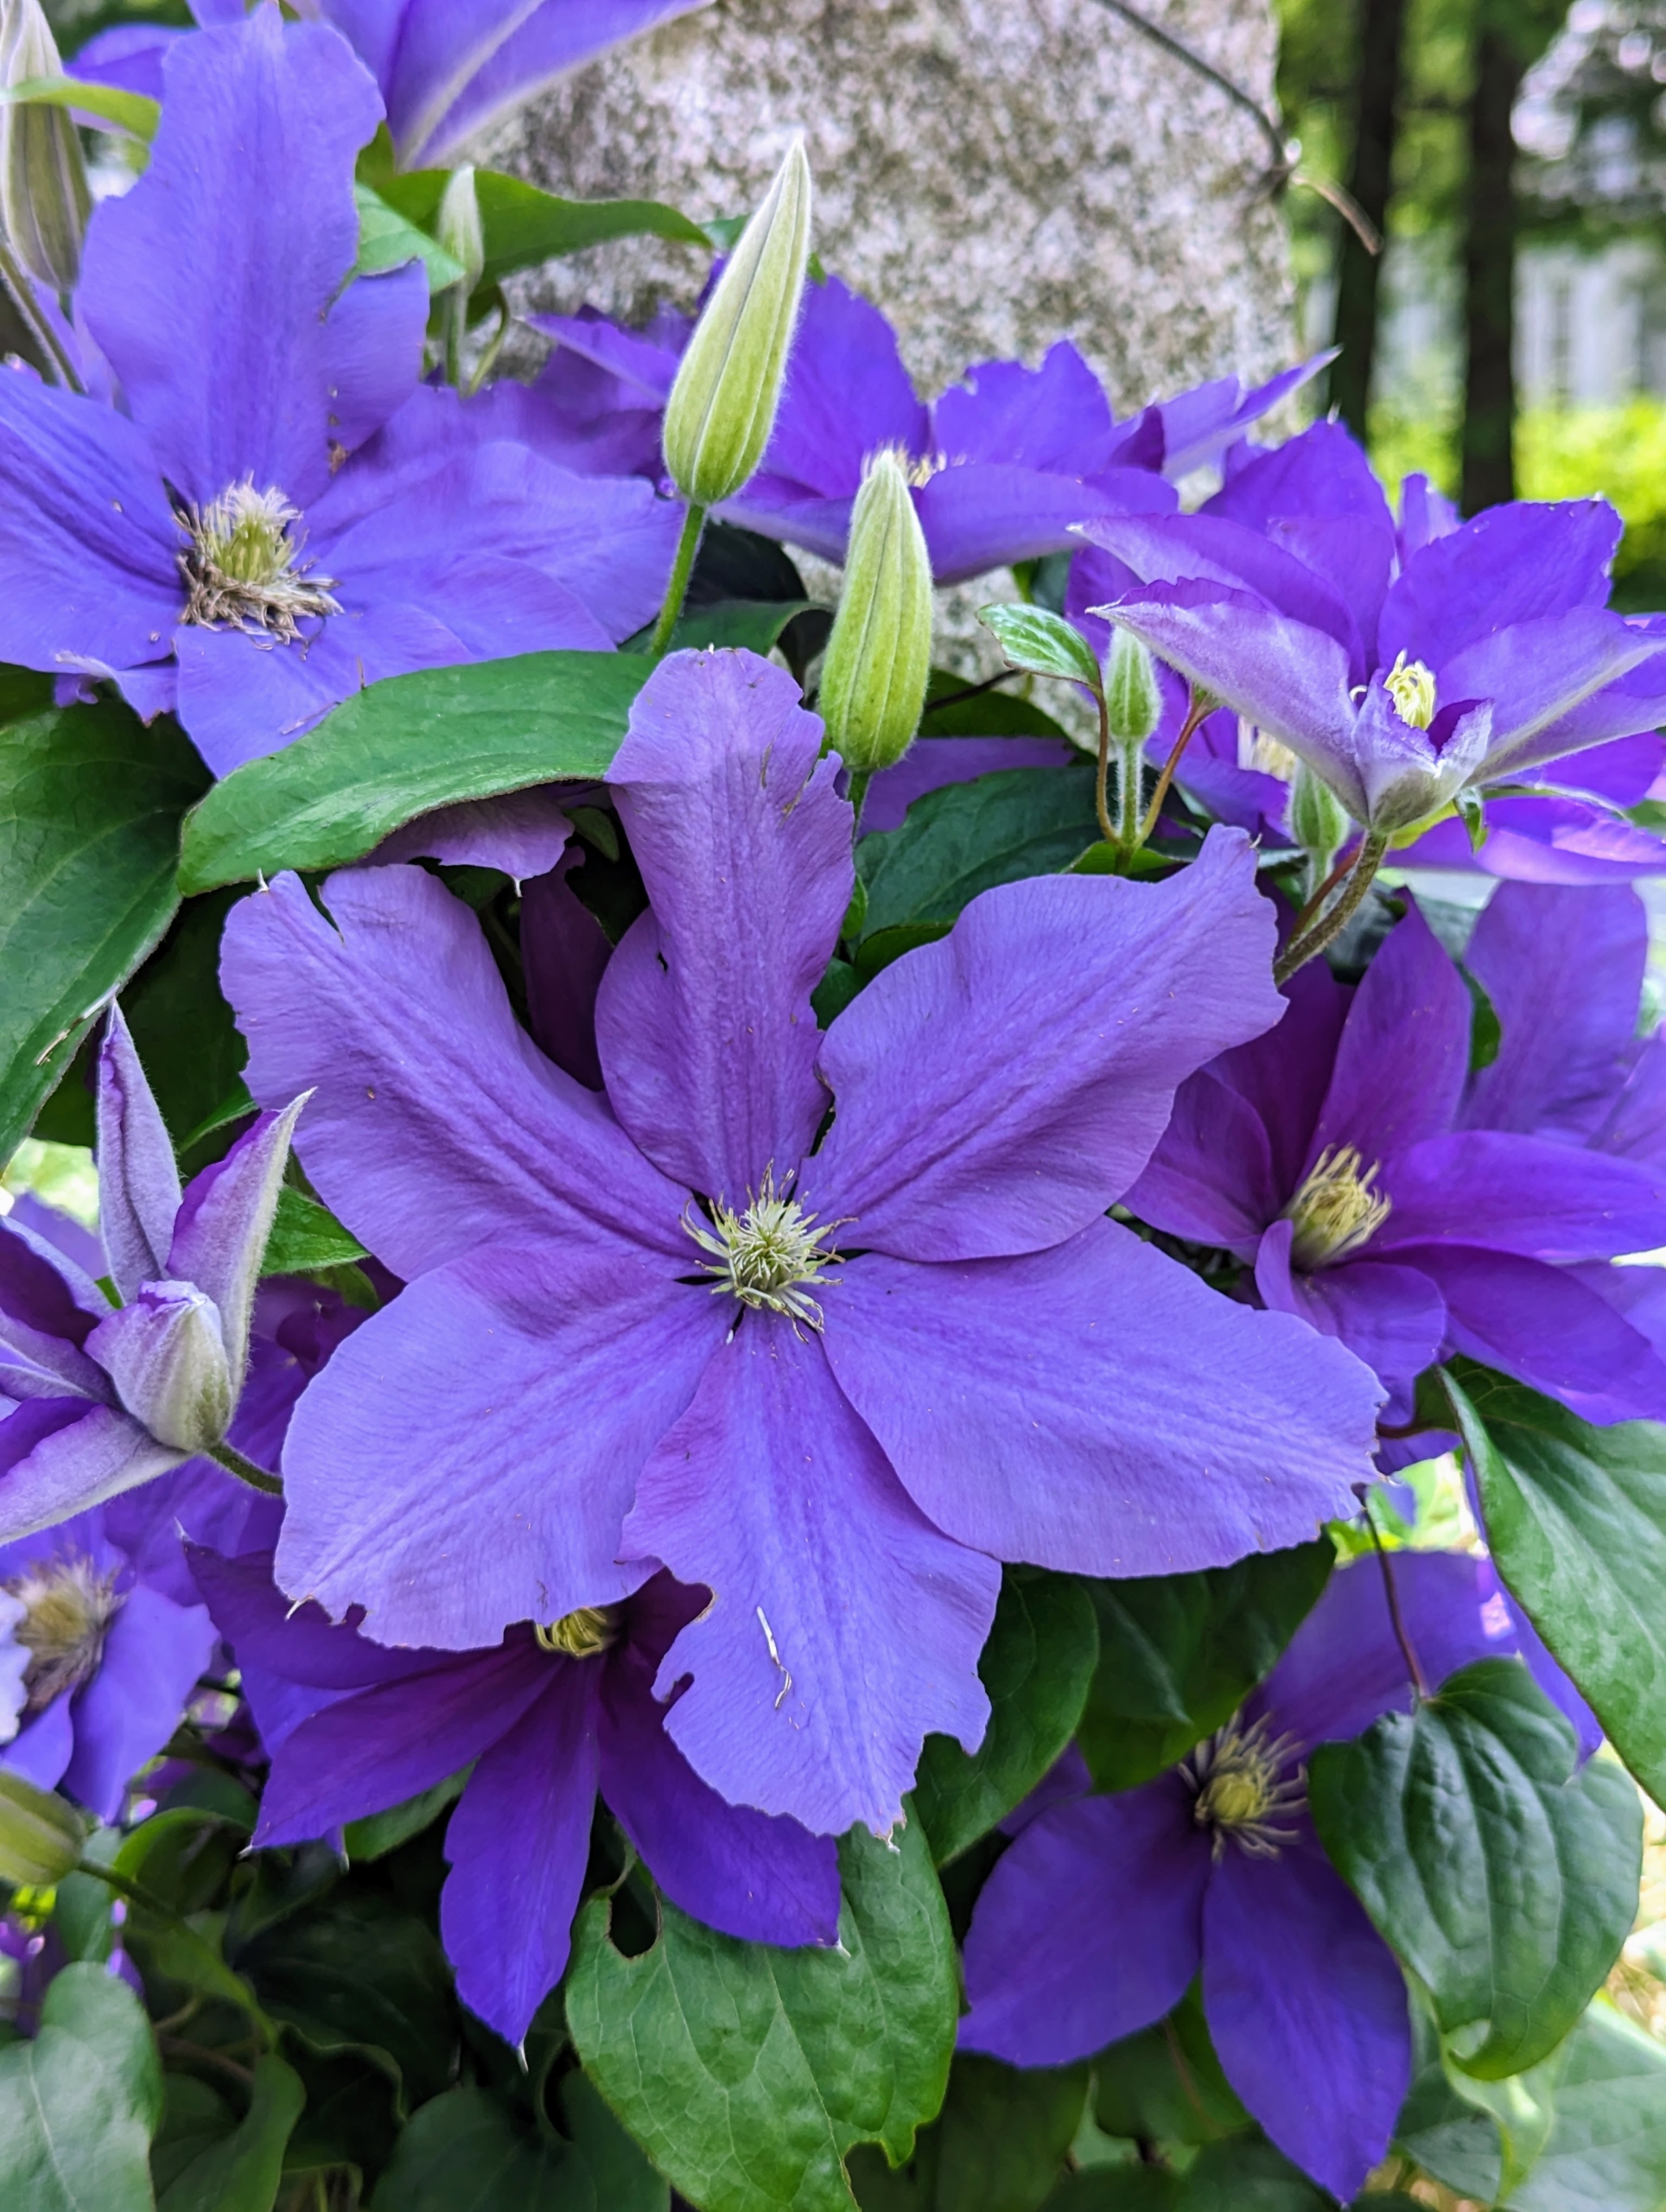
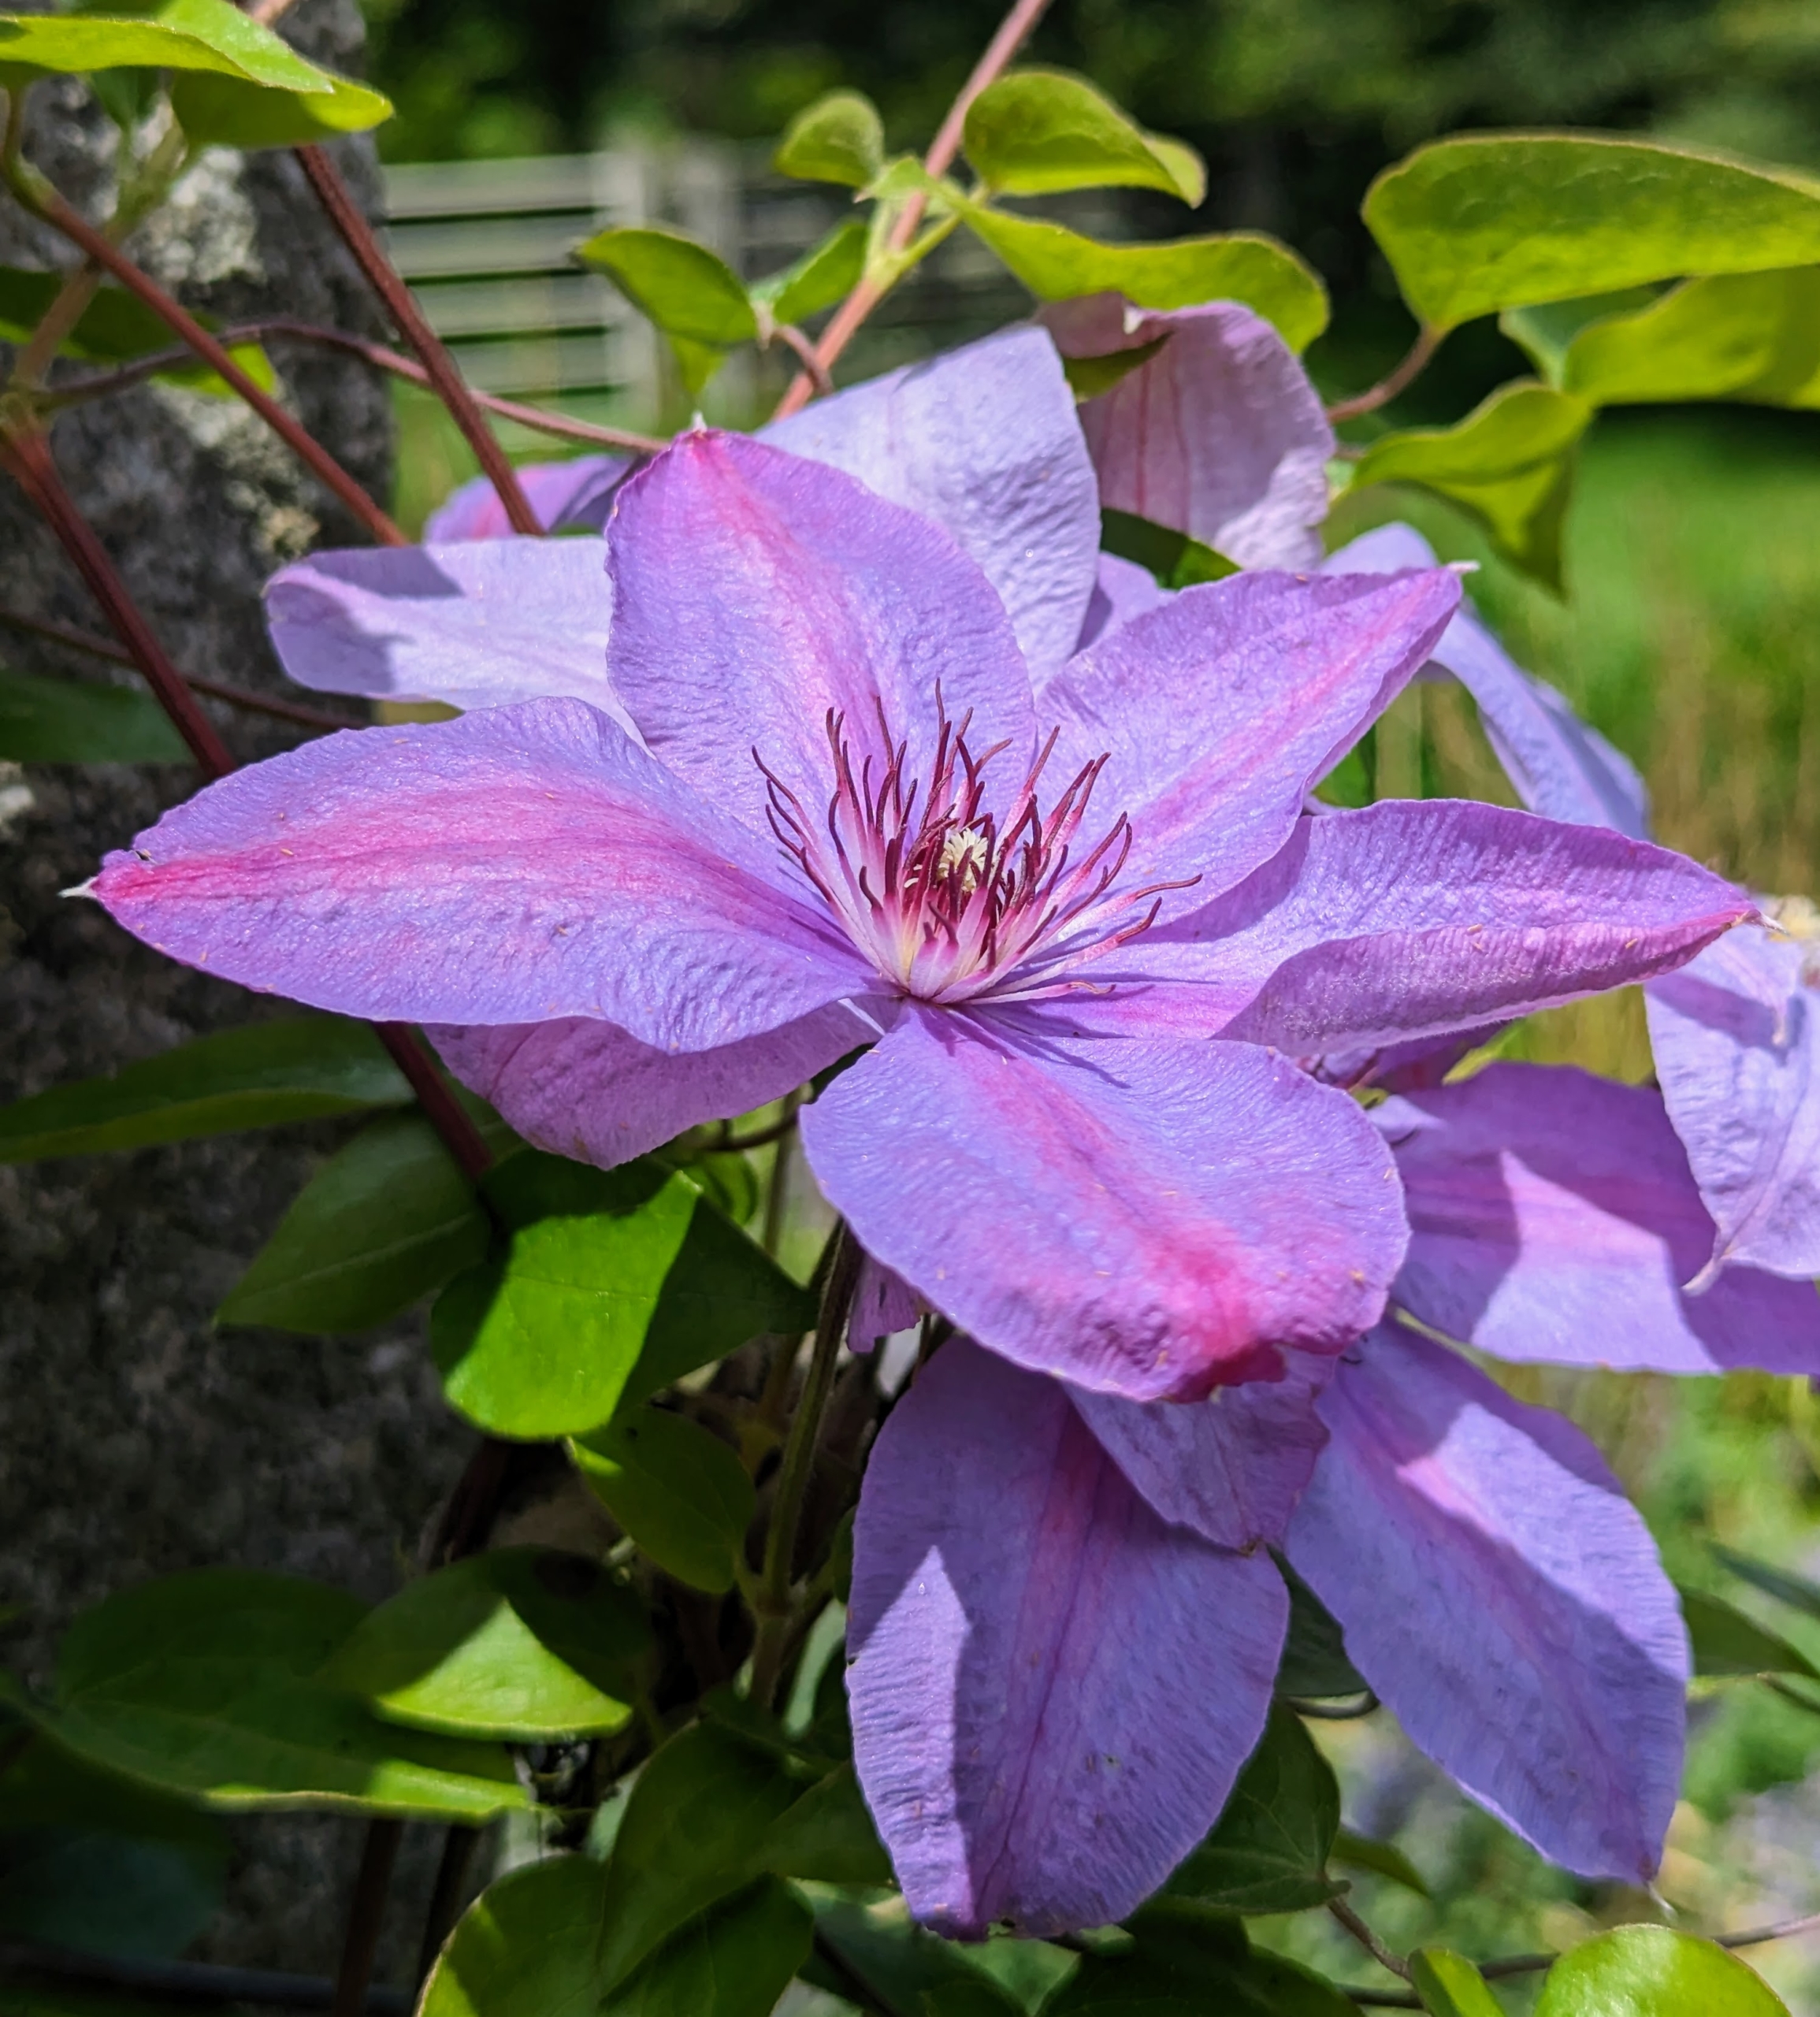
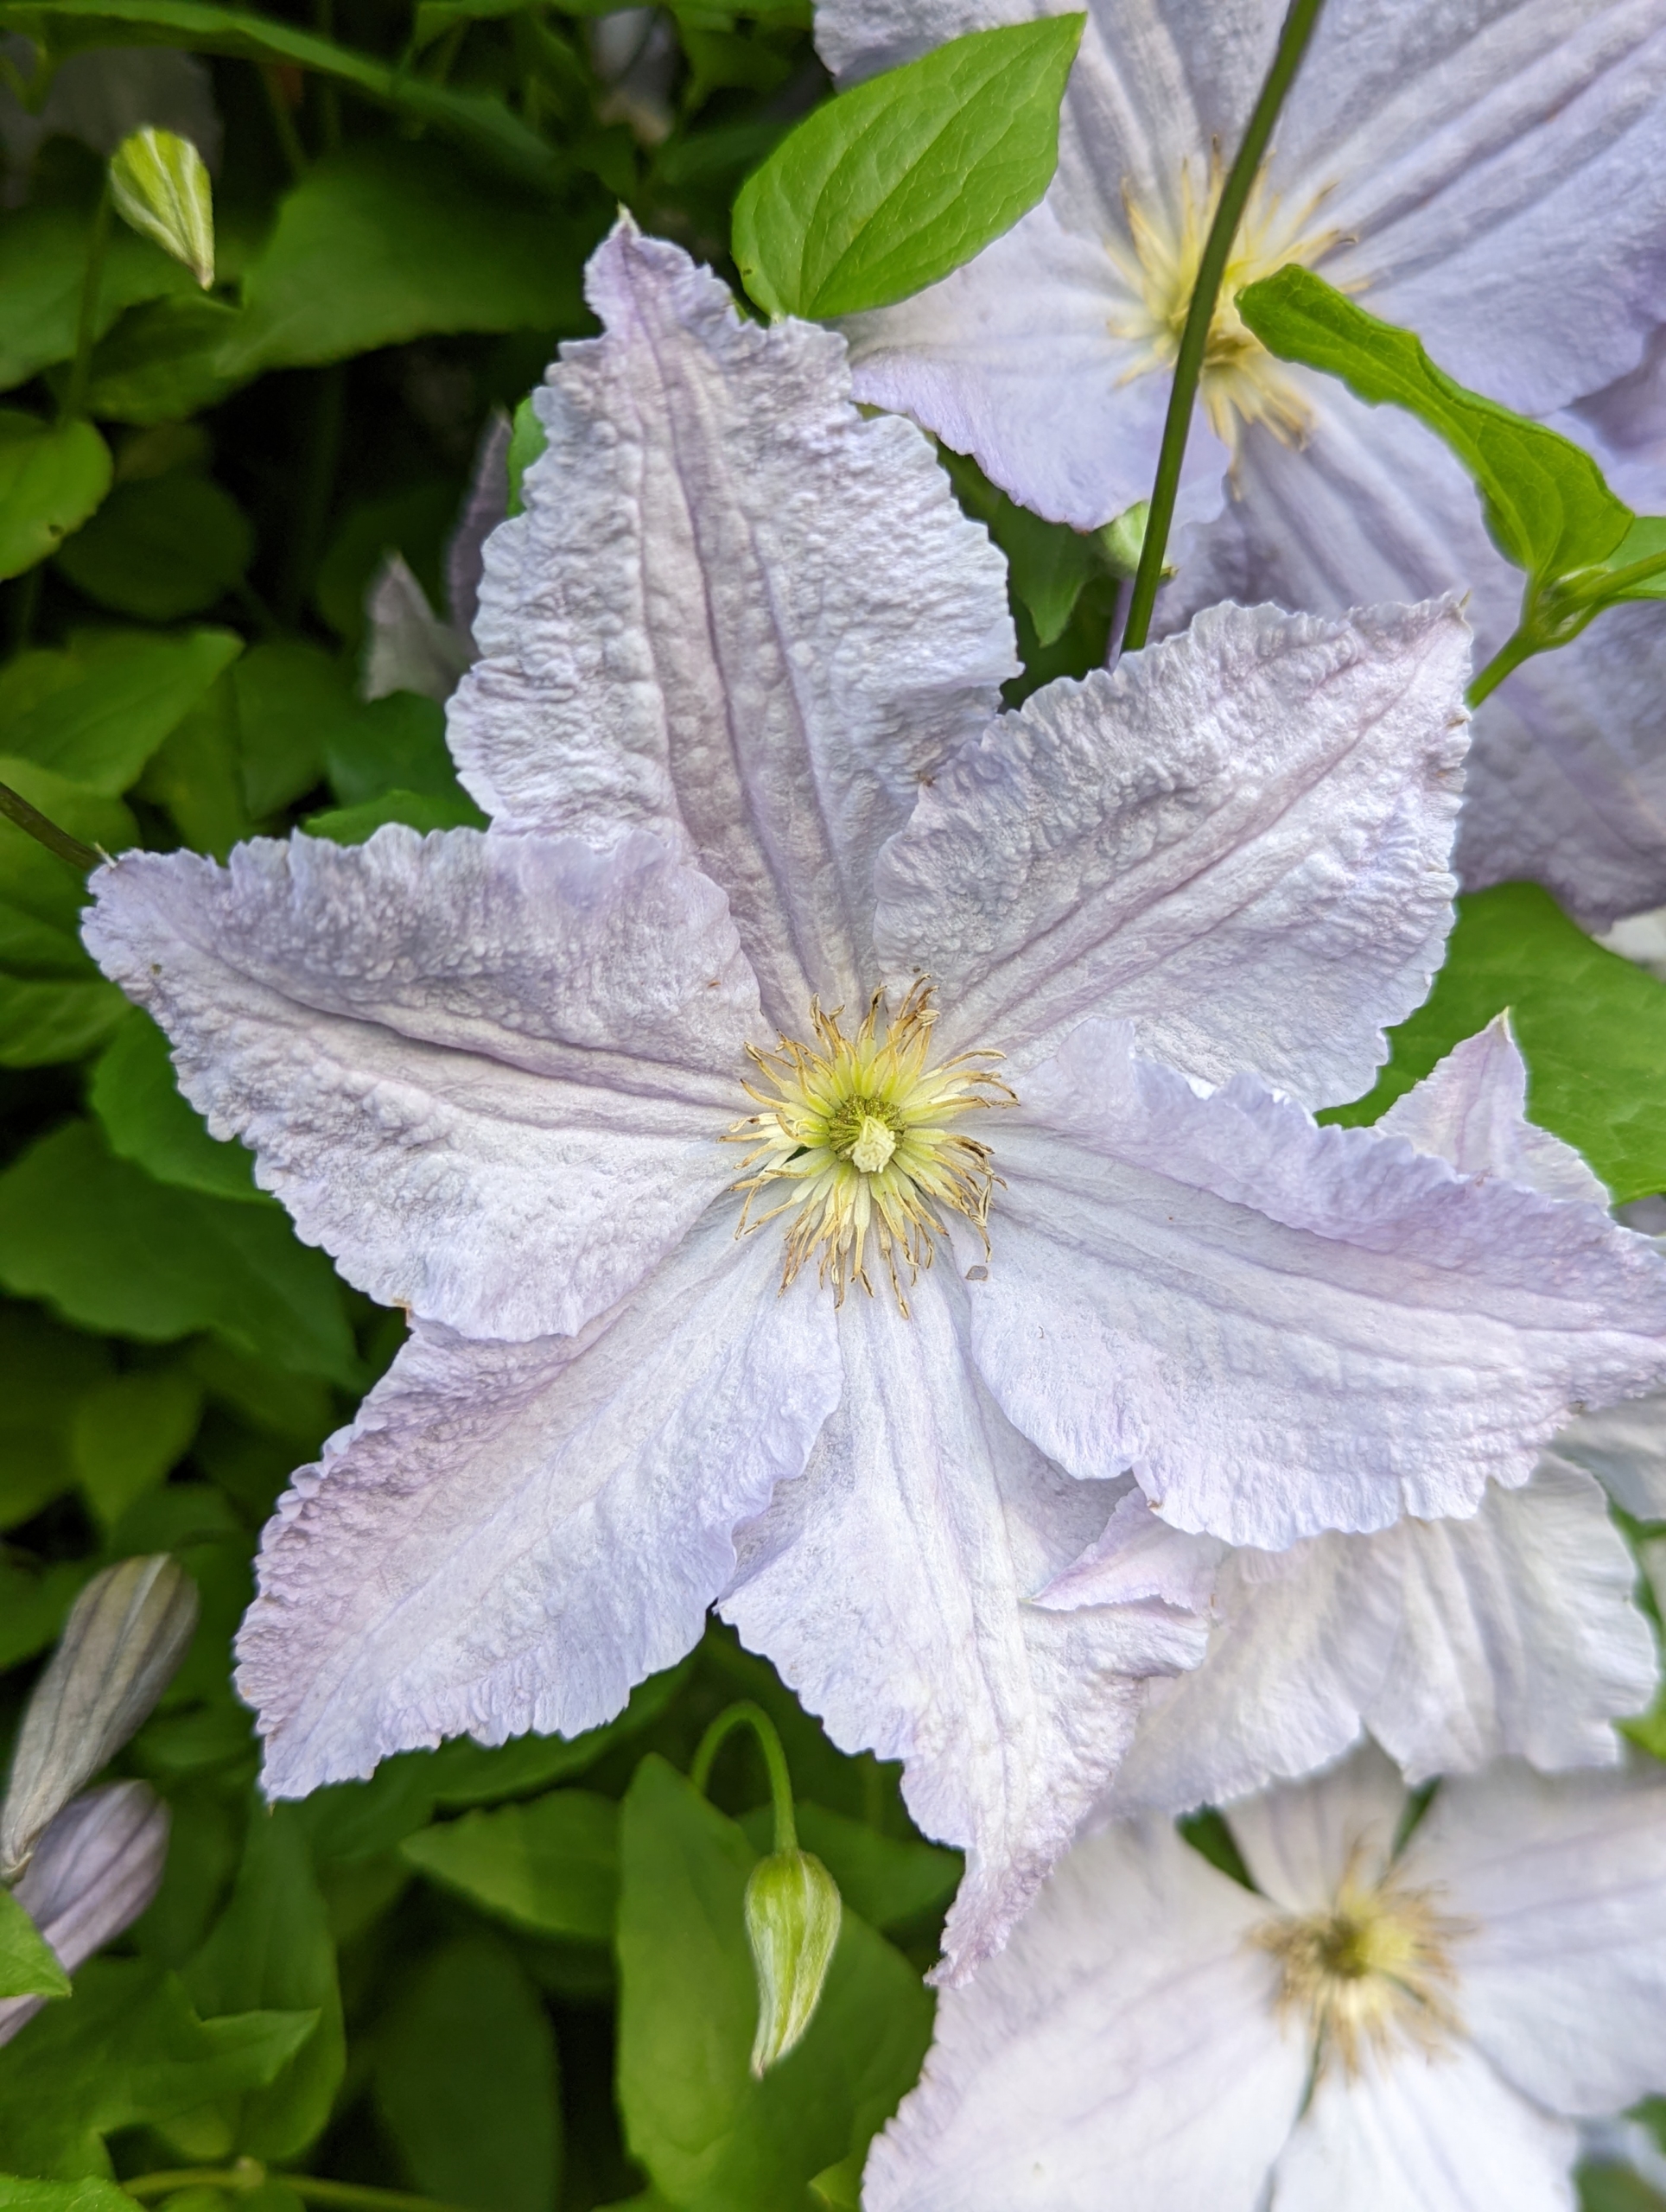
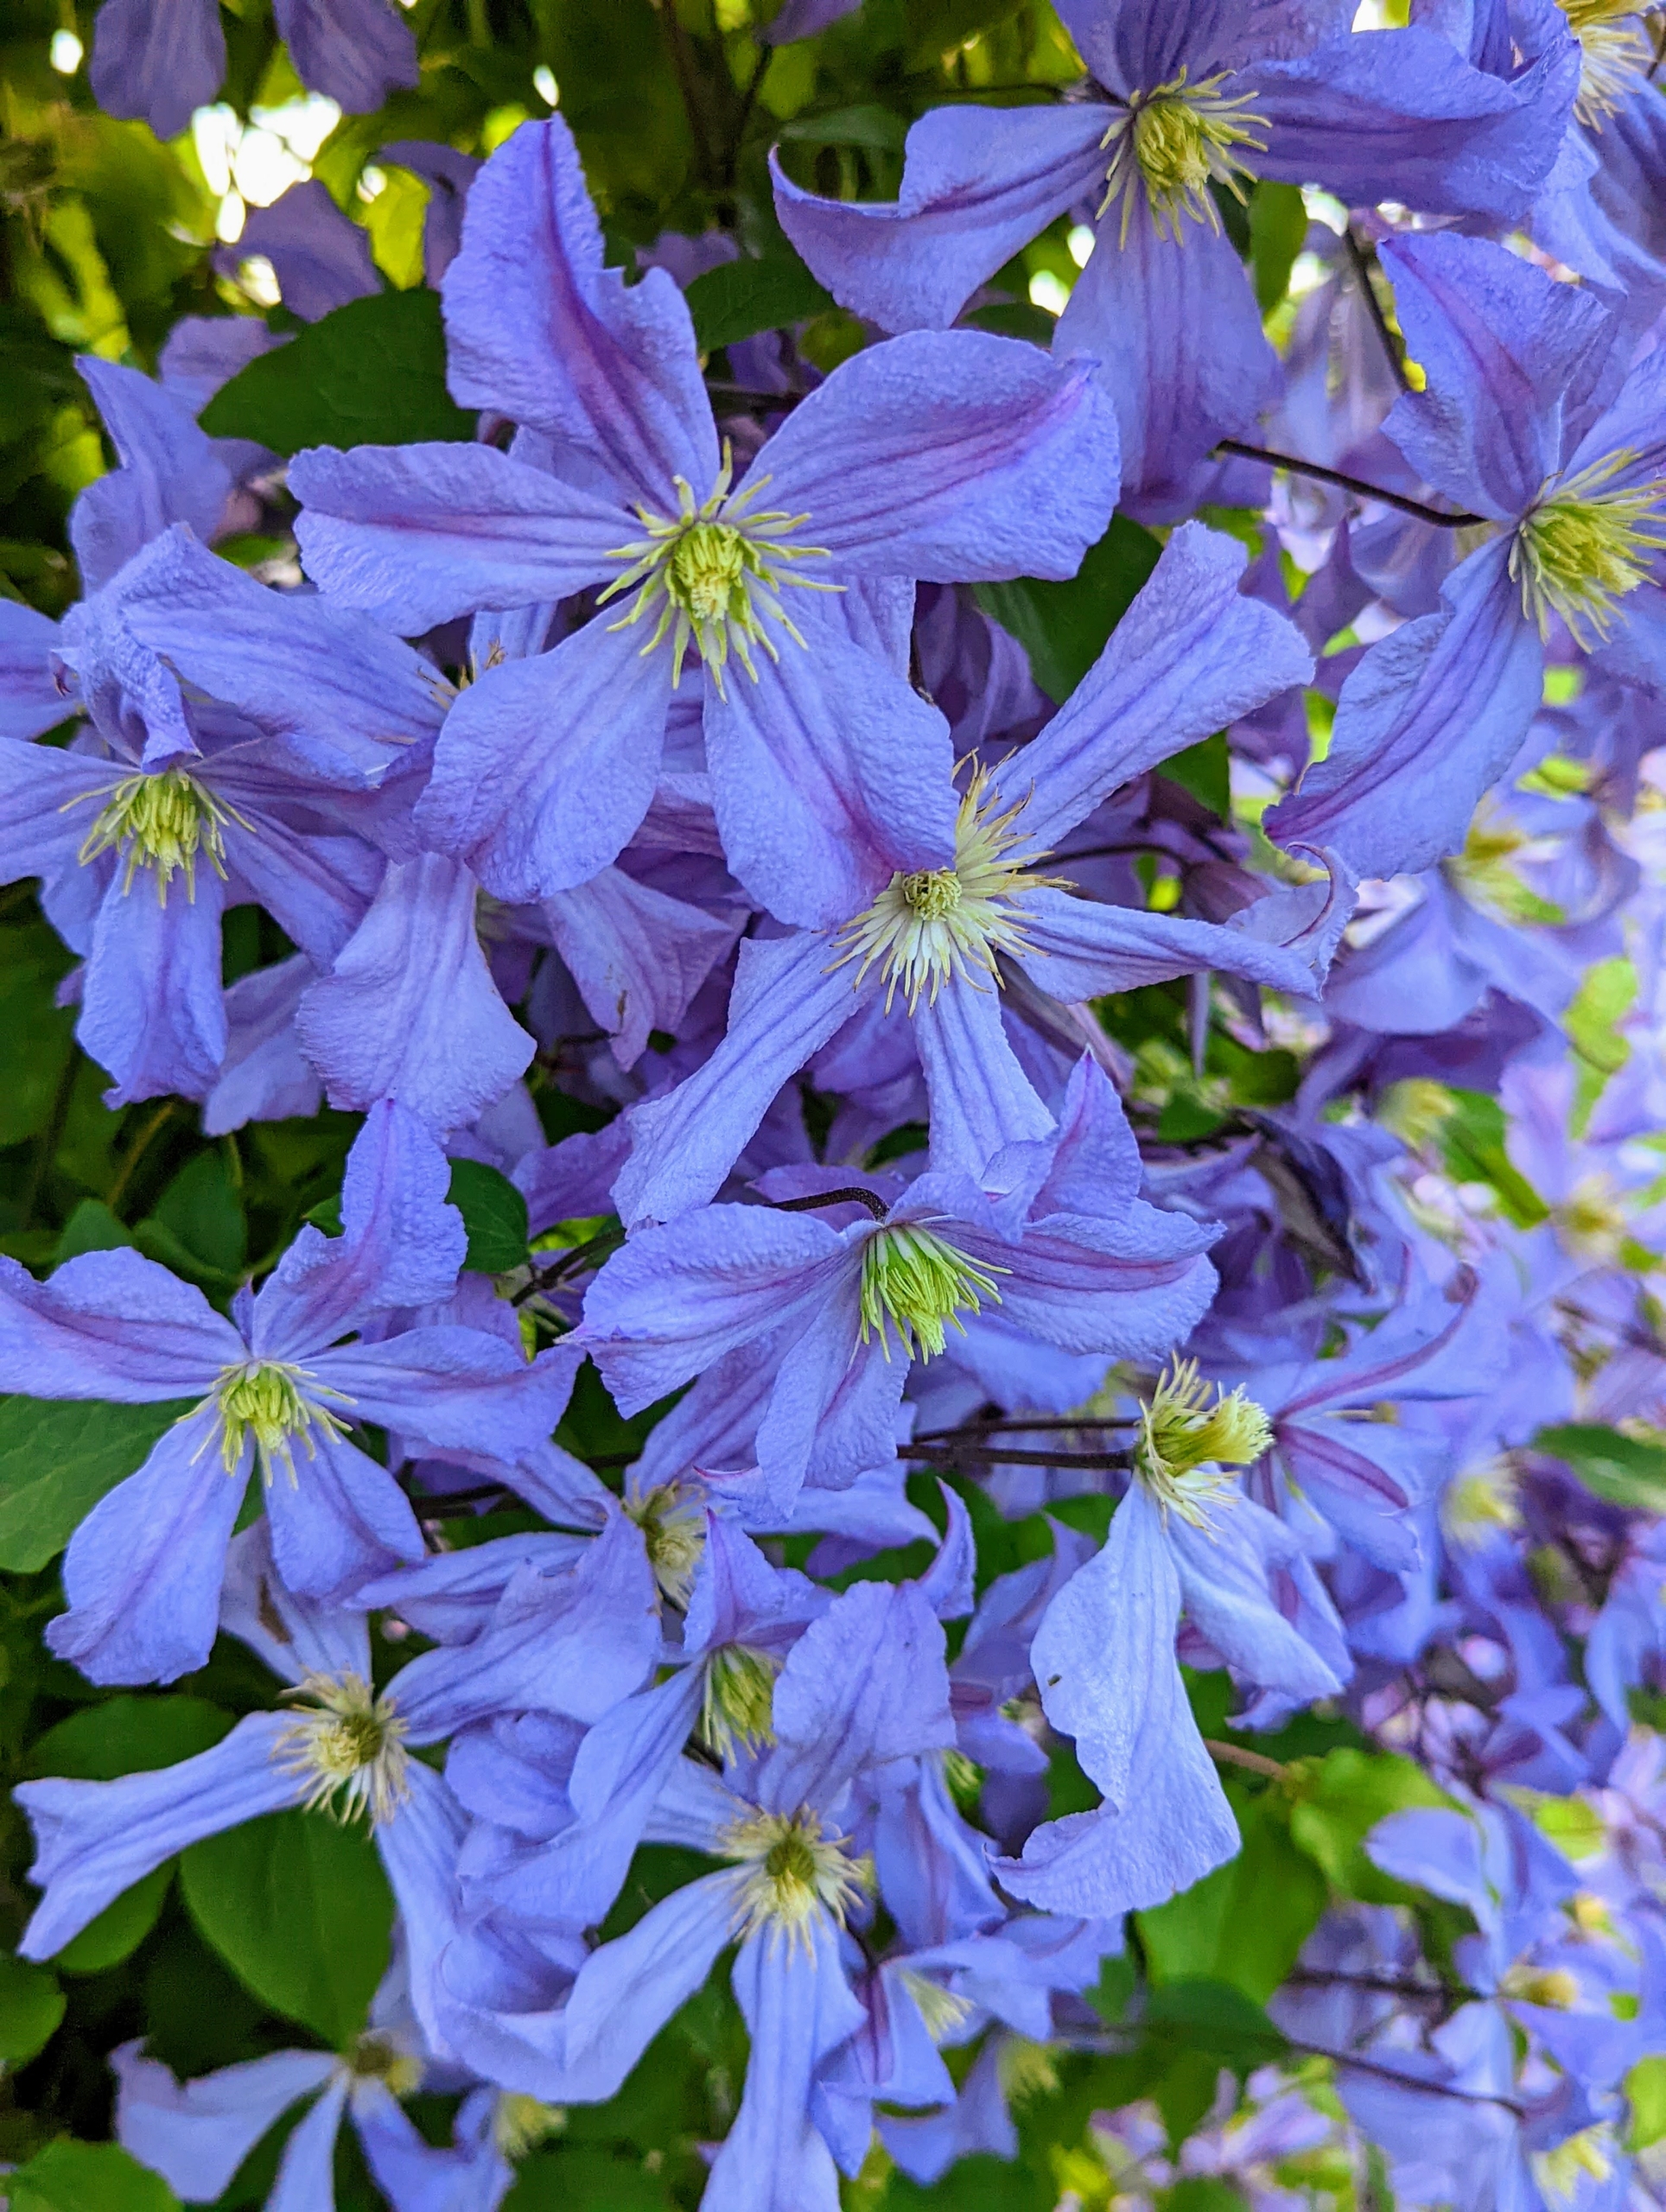
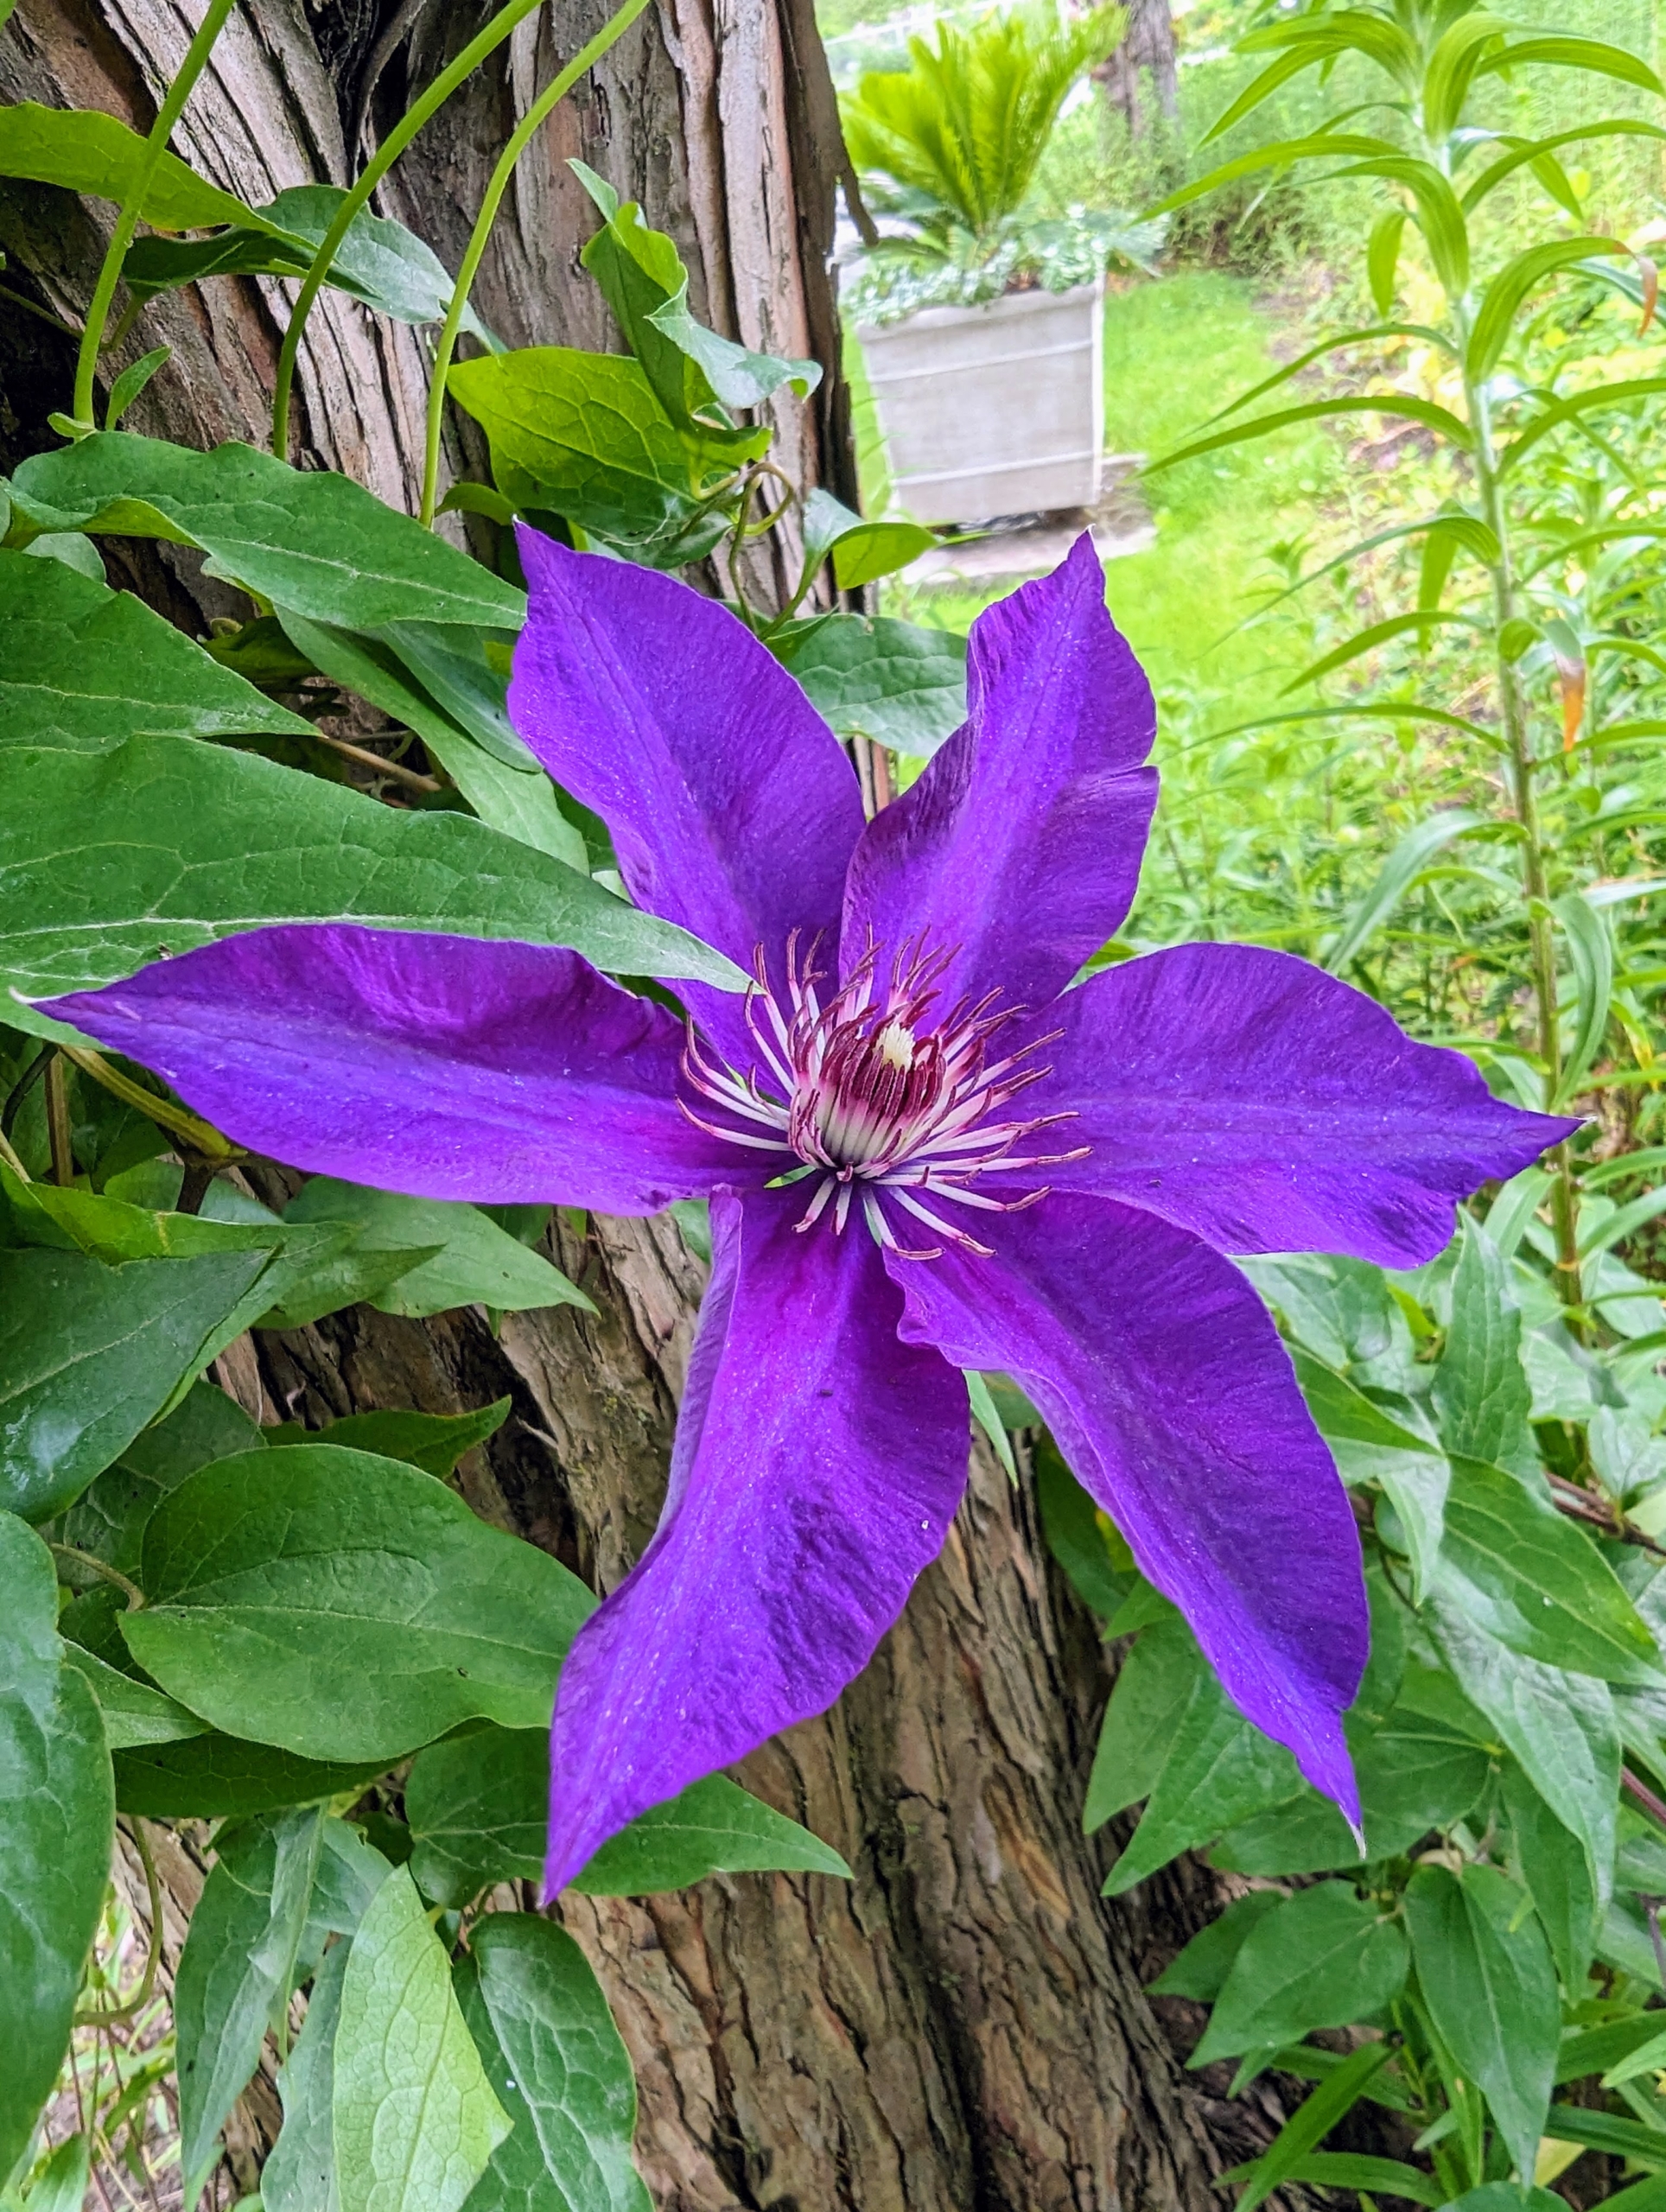
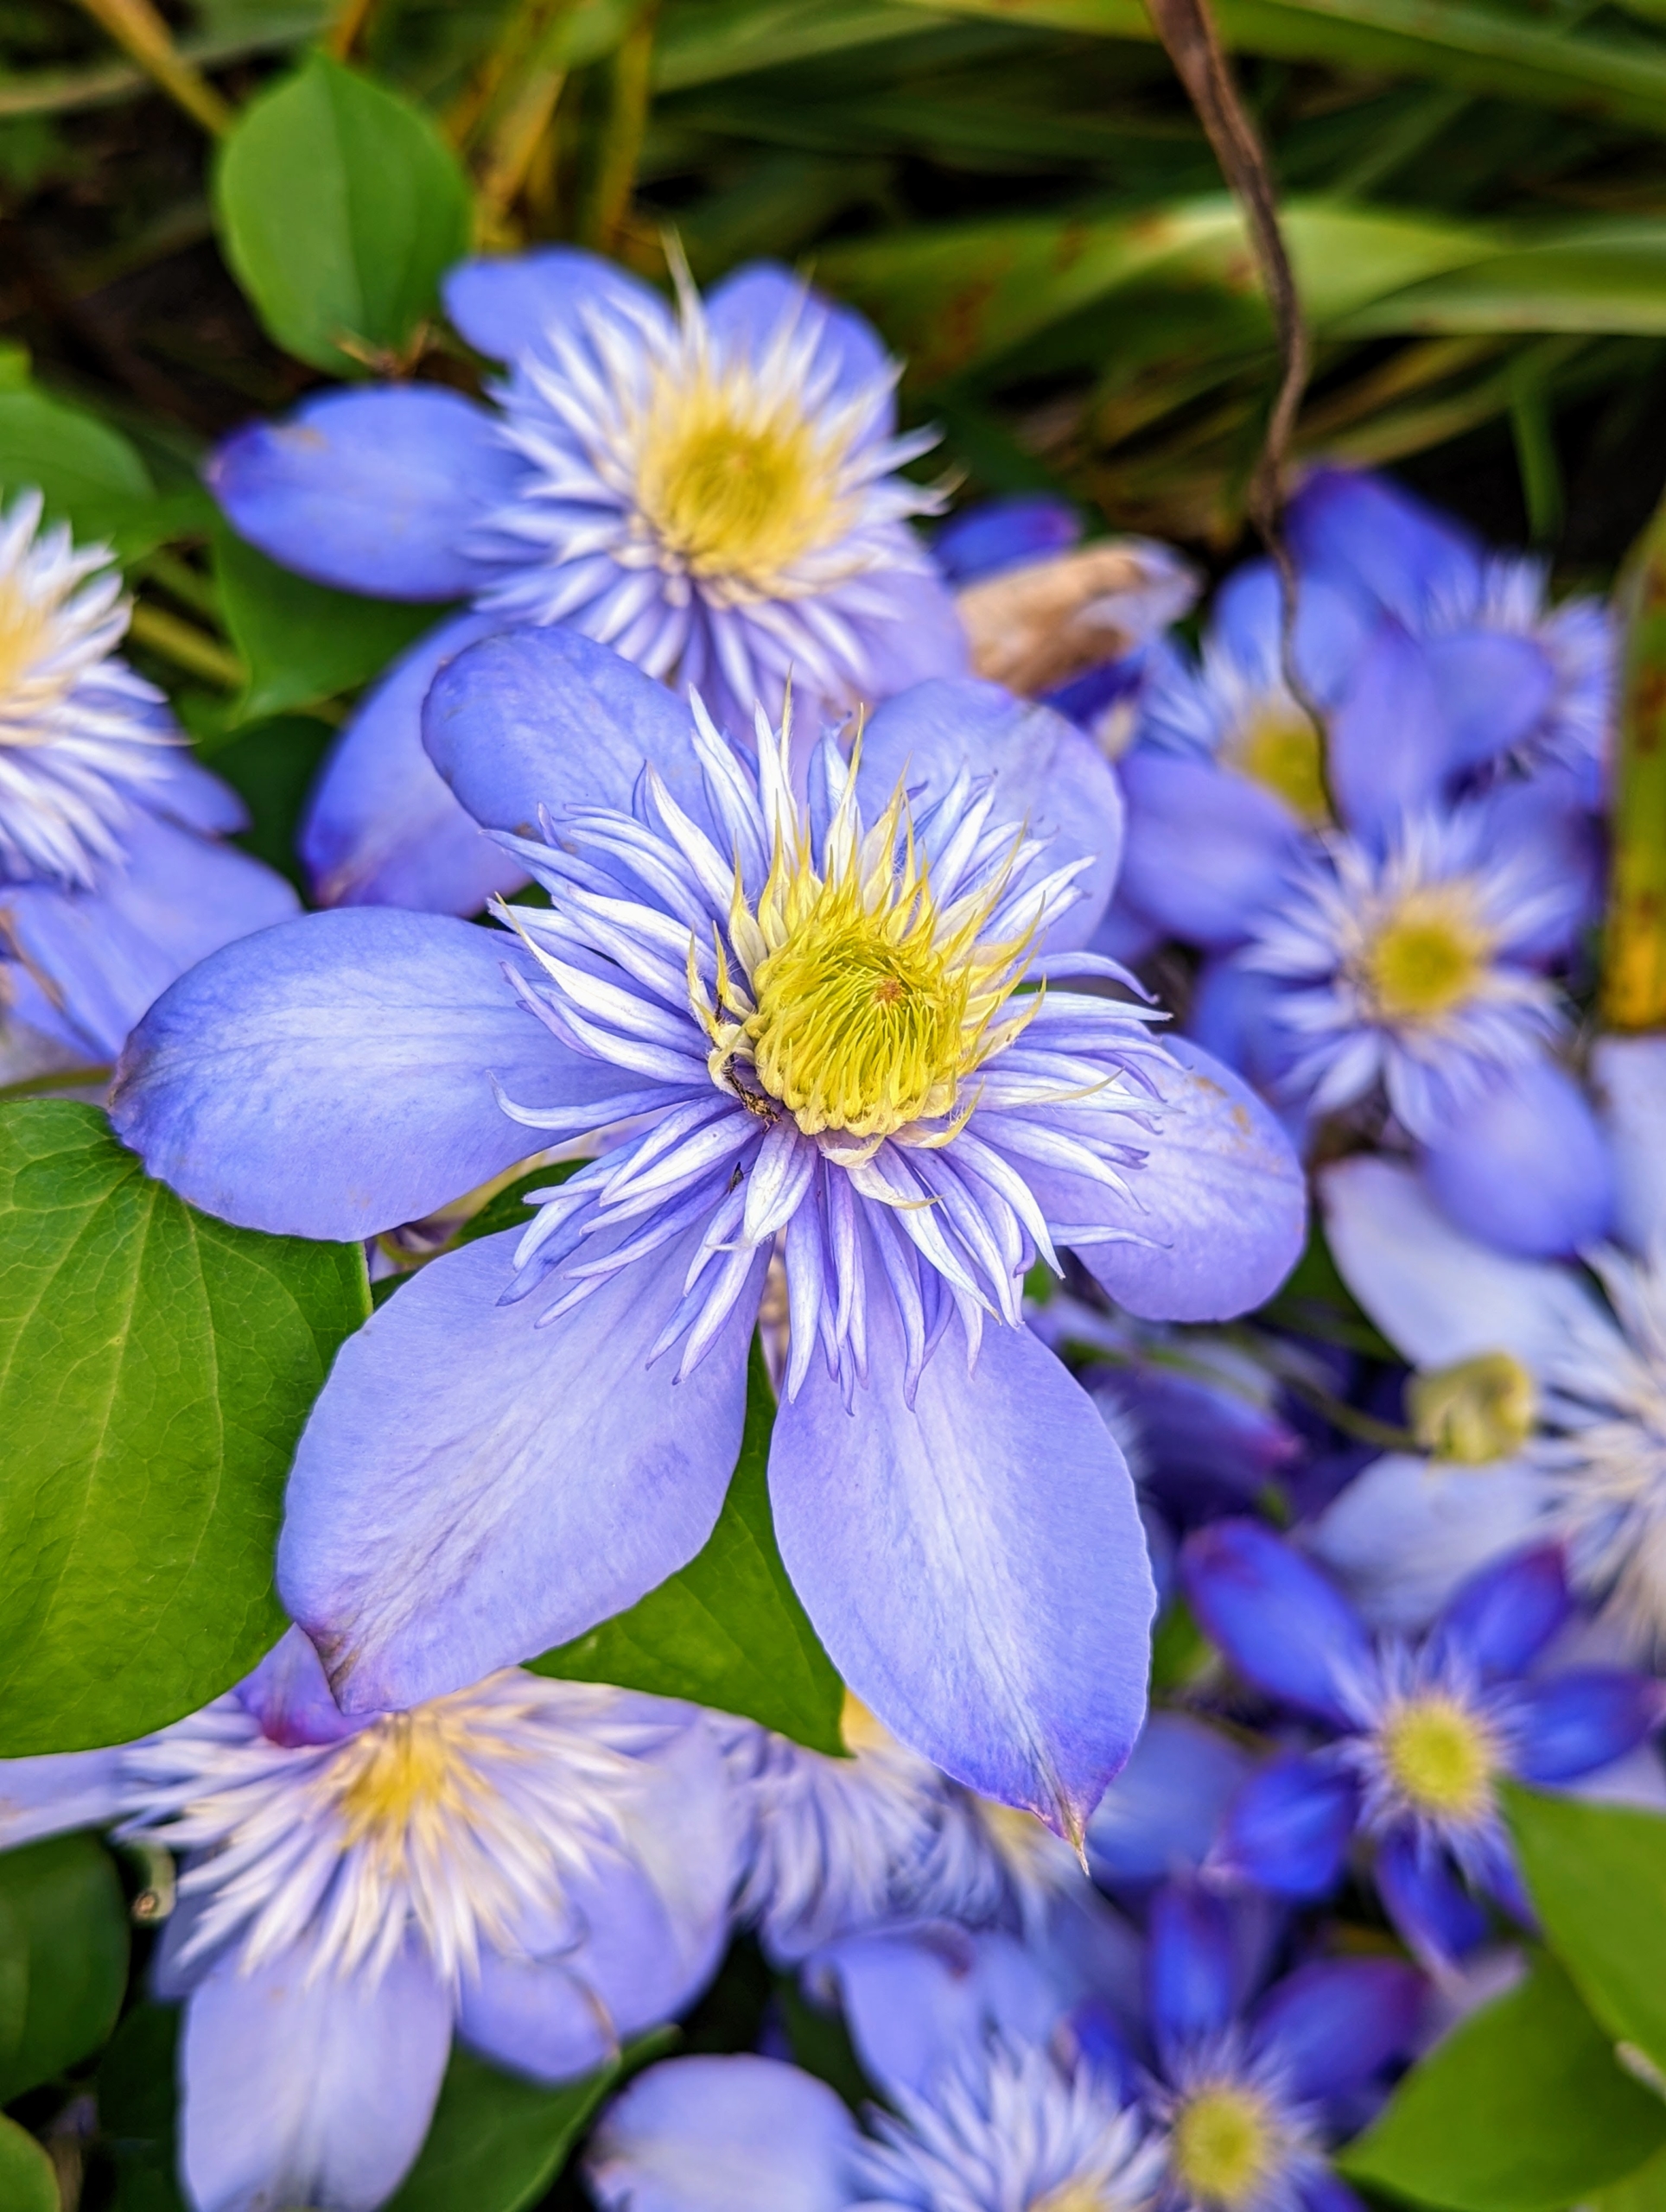
The standard clematis flower has six or seven petals, measuring five to six inches across. Colors range from lavender to deep purple, white to wine red, and even a few in yellow.
For this area, I chose various shades of lavender, purple, and blue.
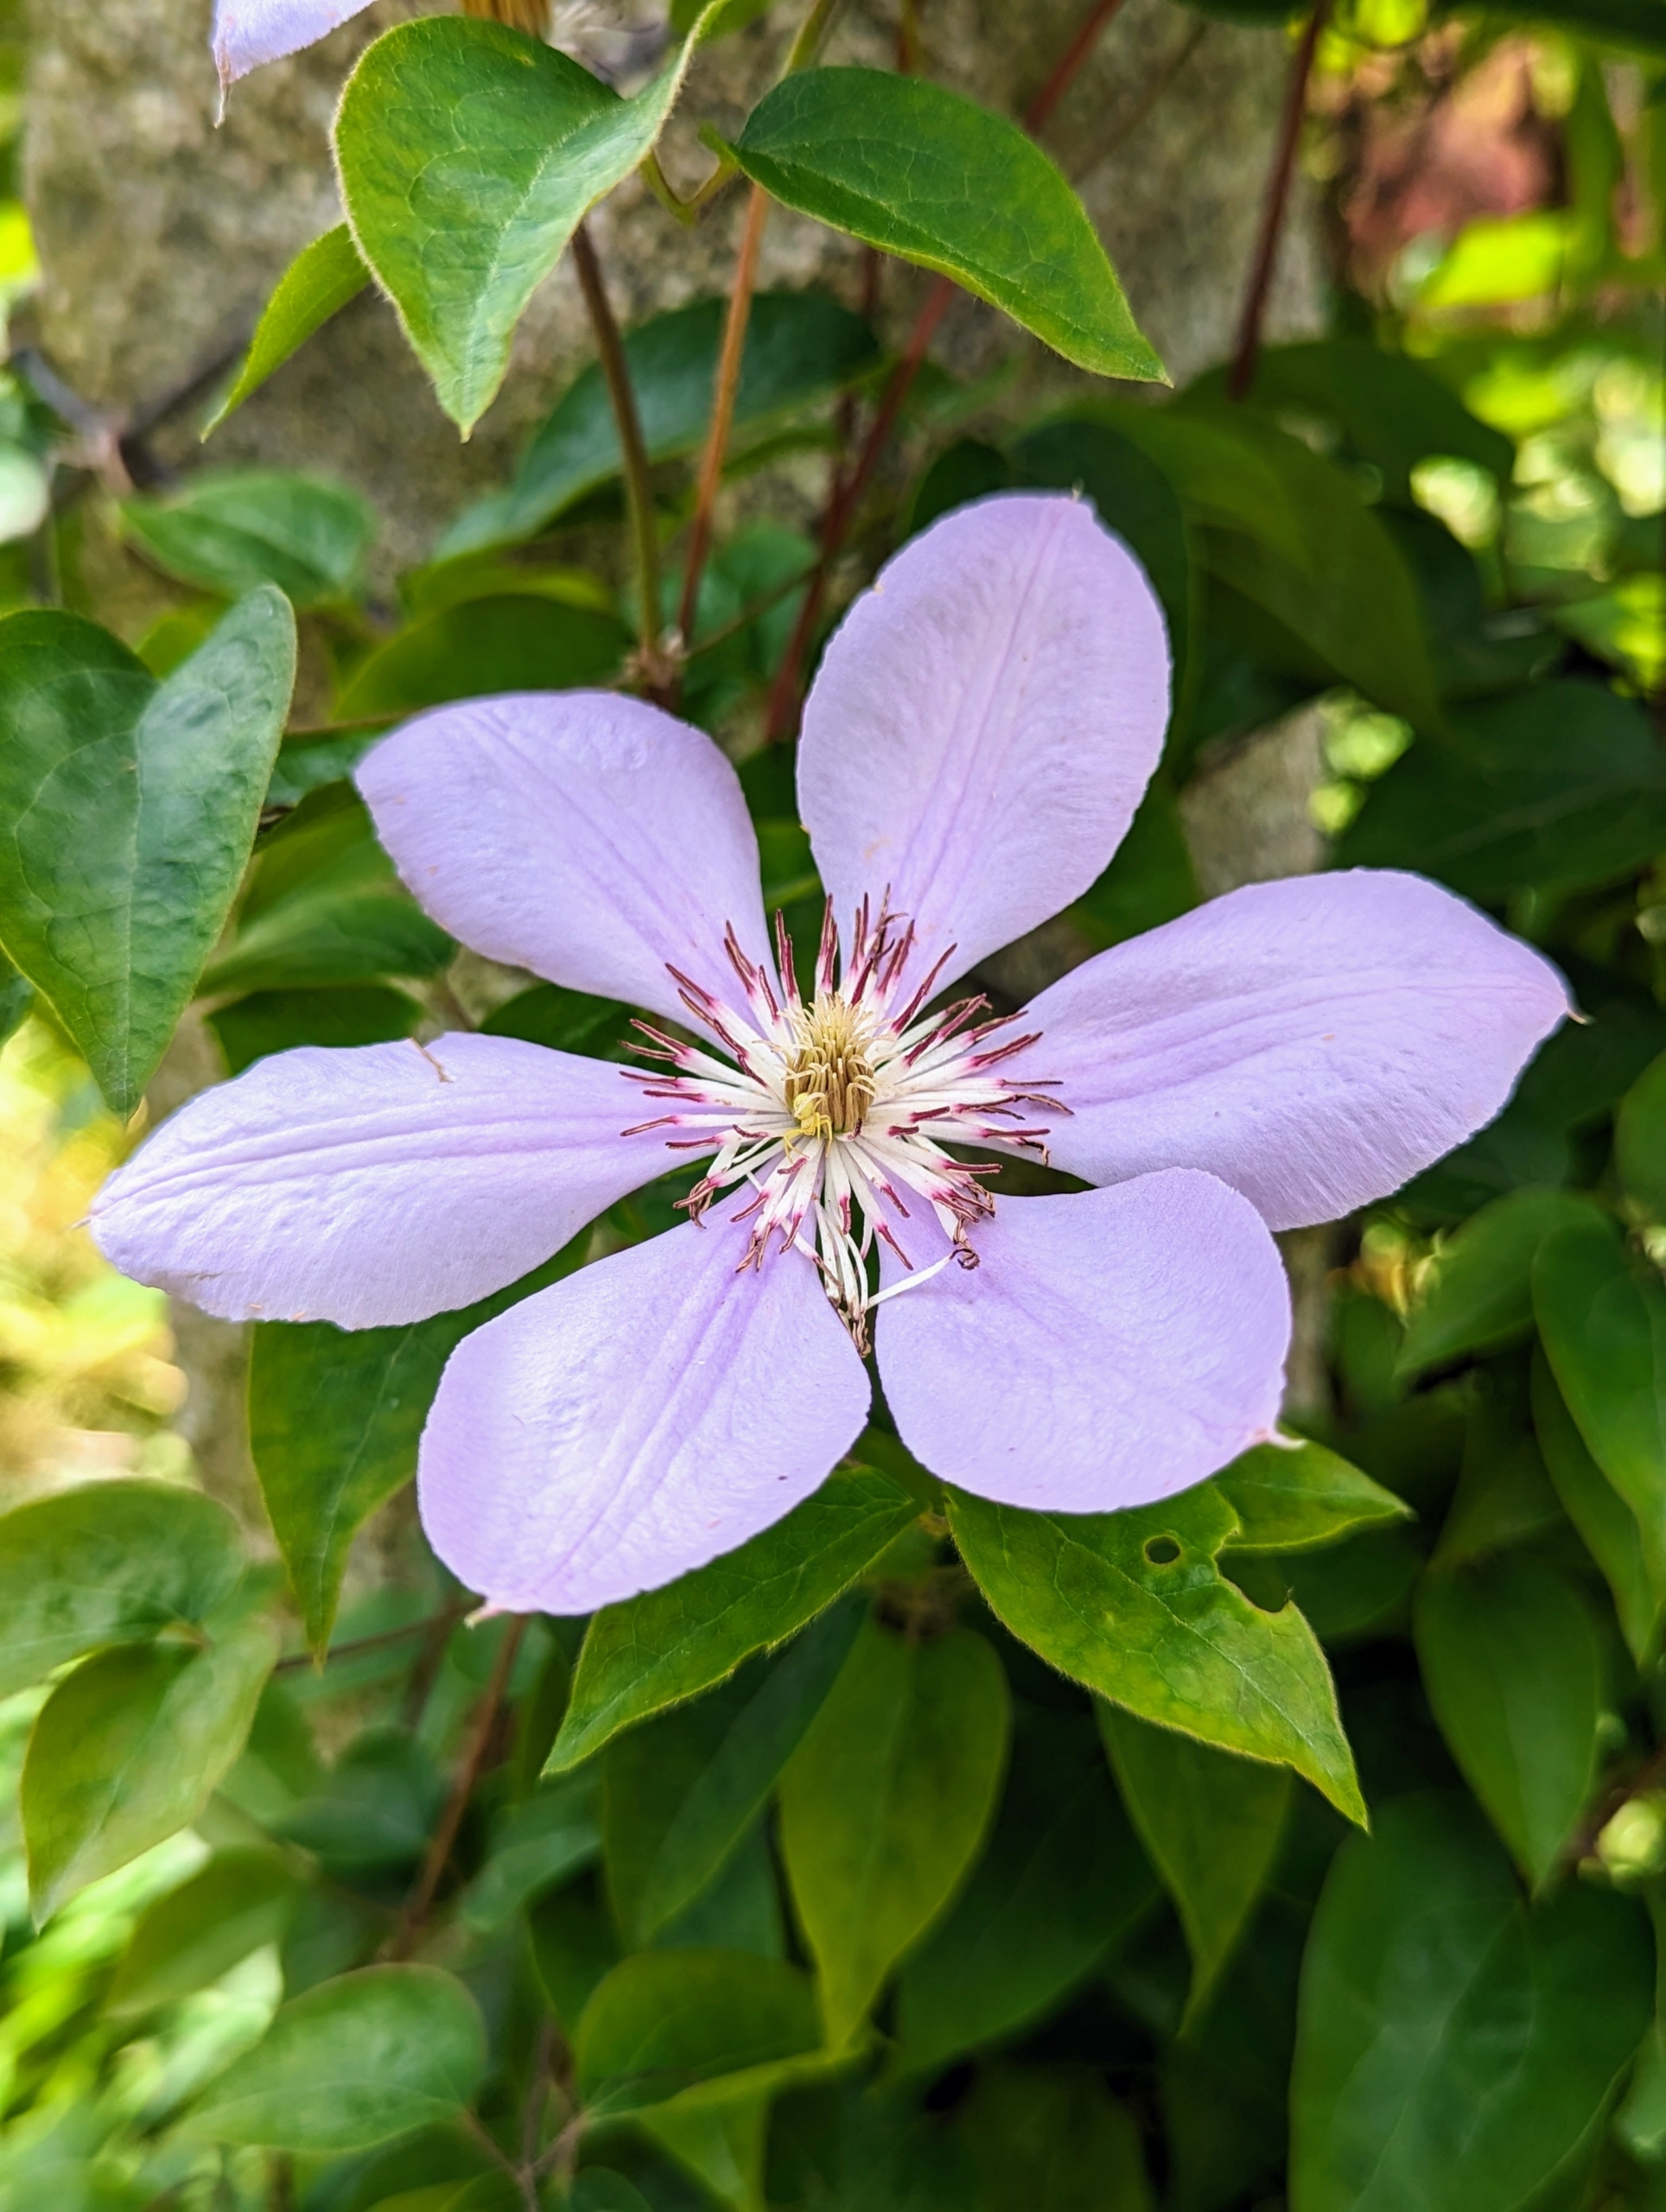
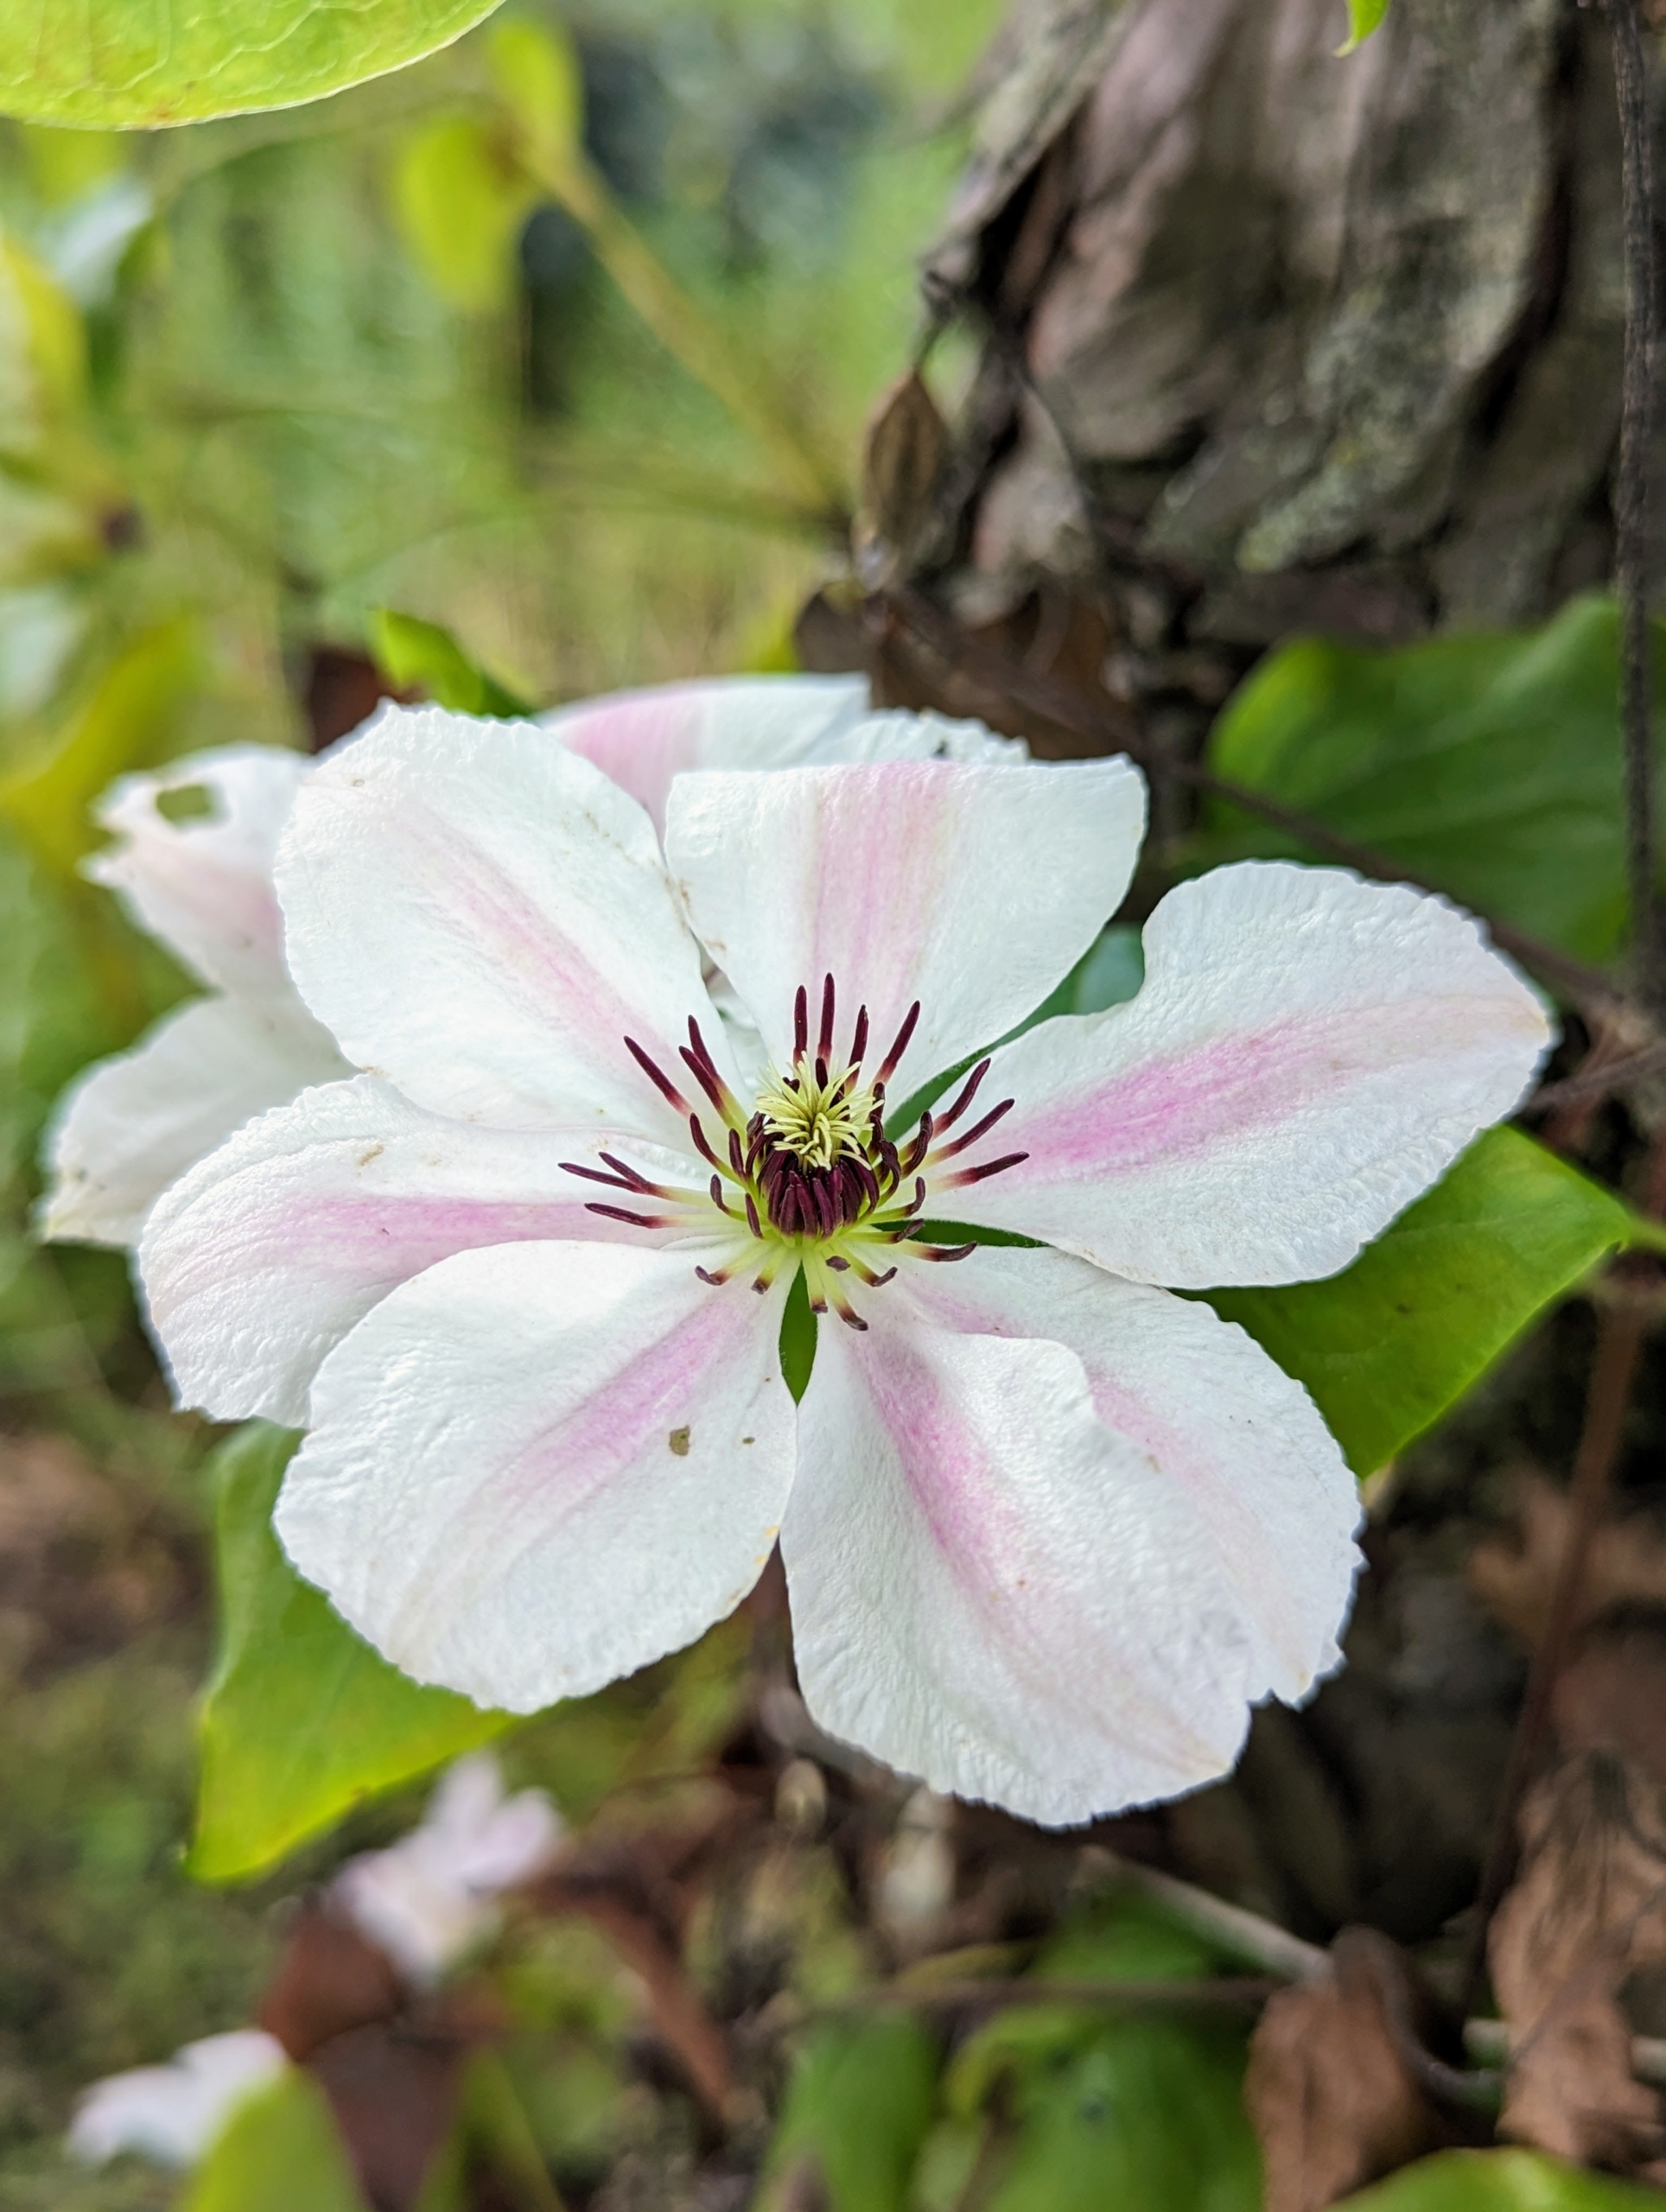
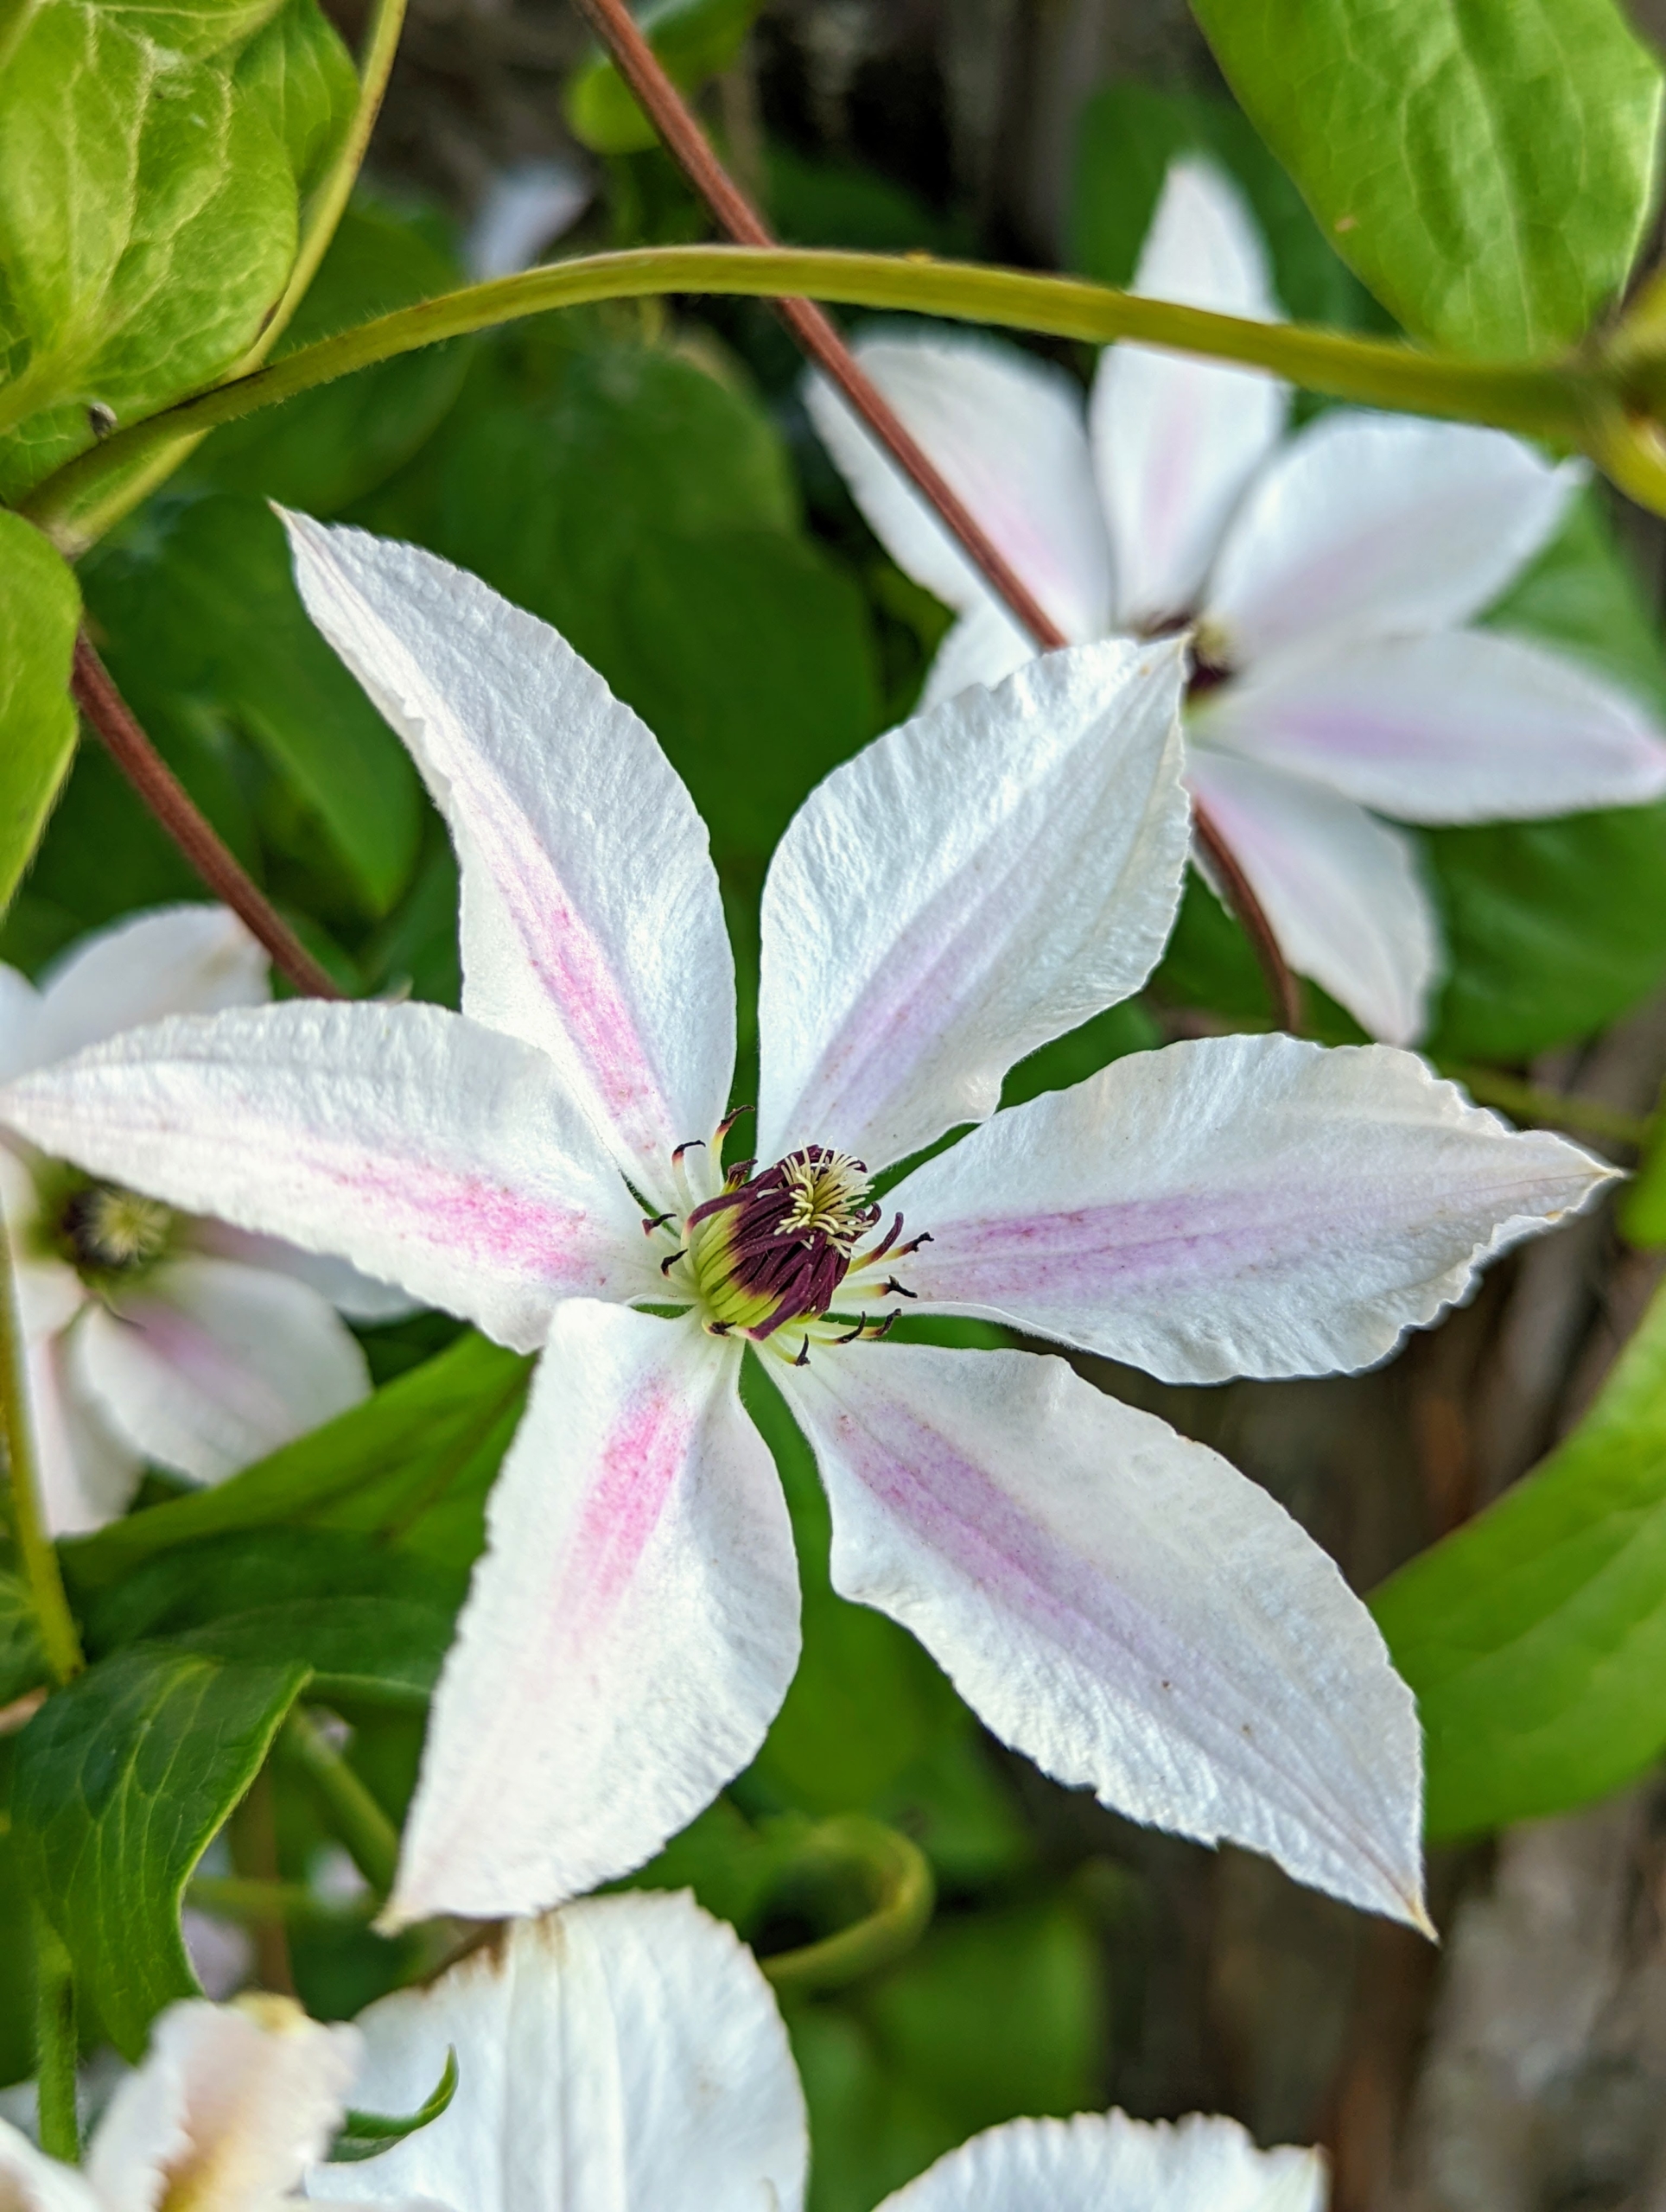
Some of the flowers are very light colored – almost white – with interesting centers.
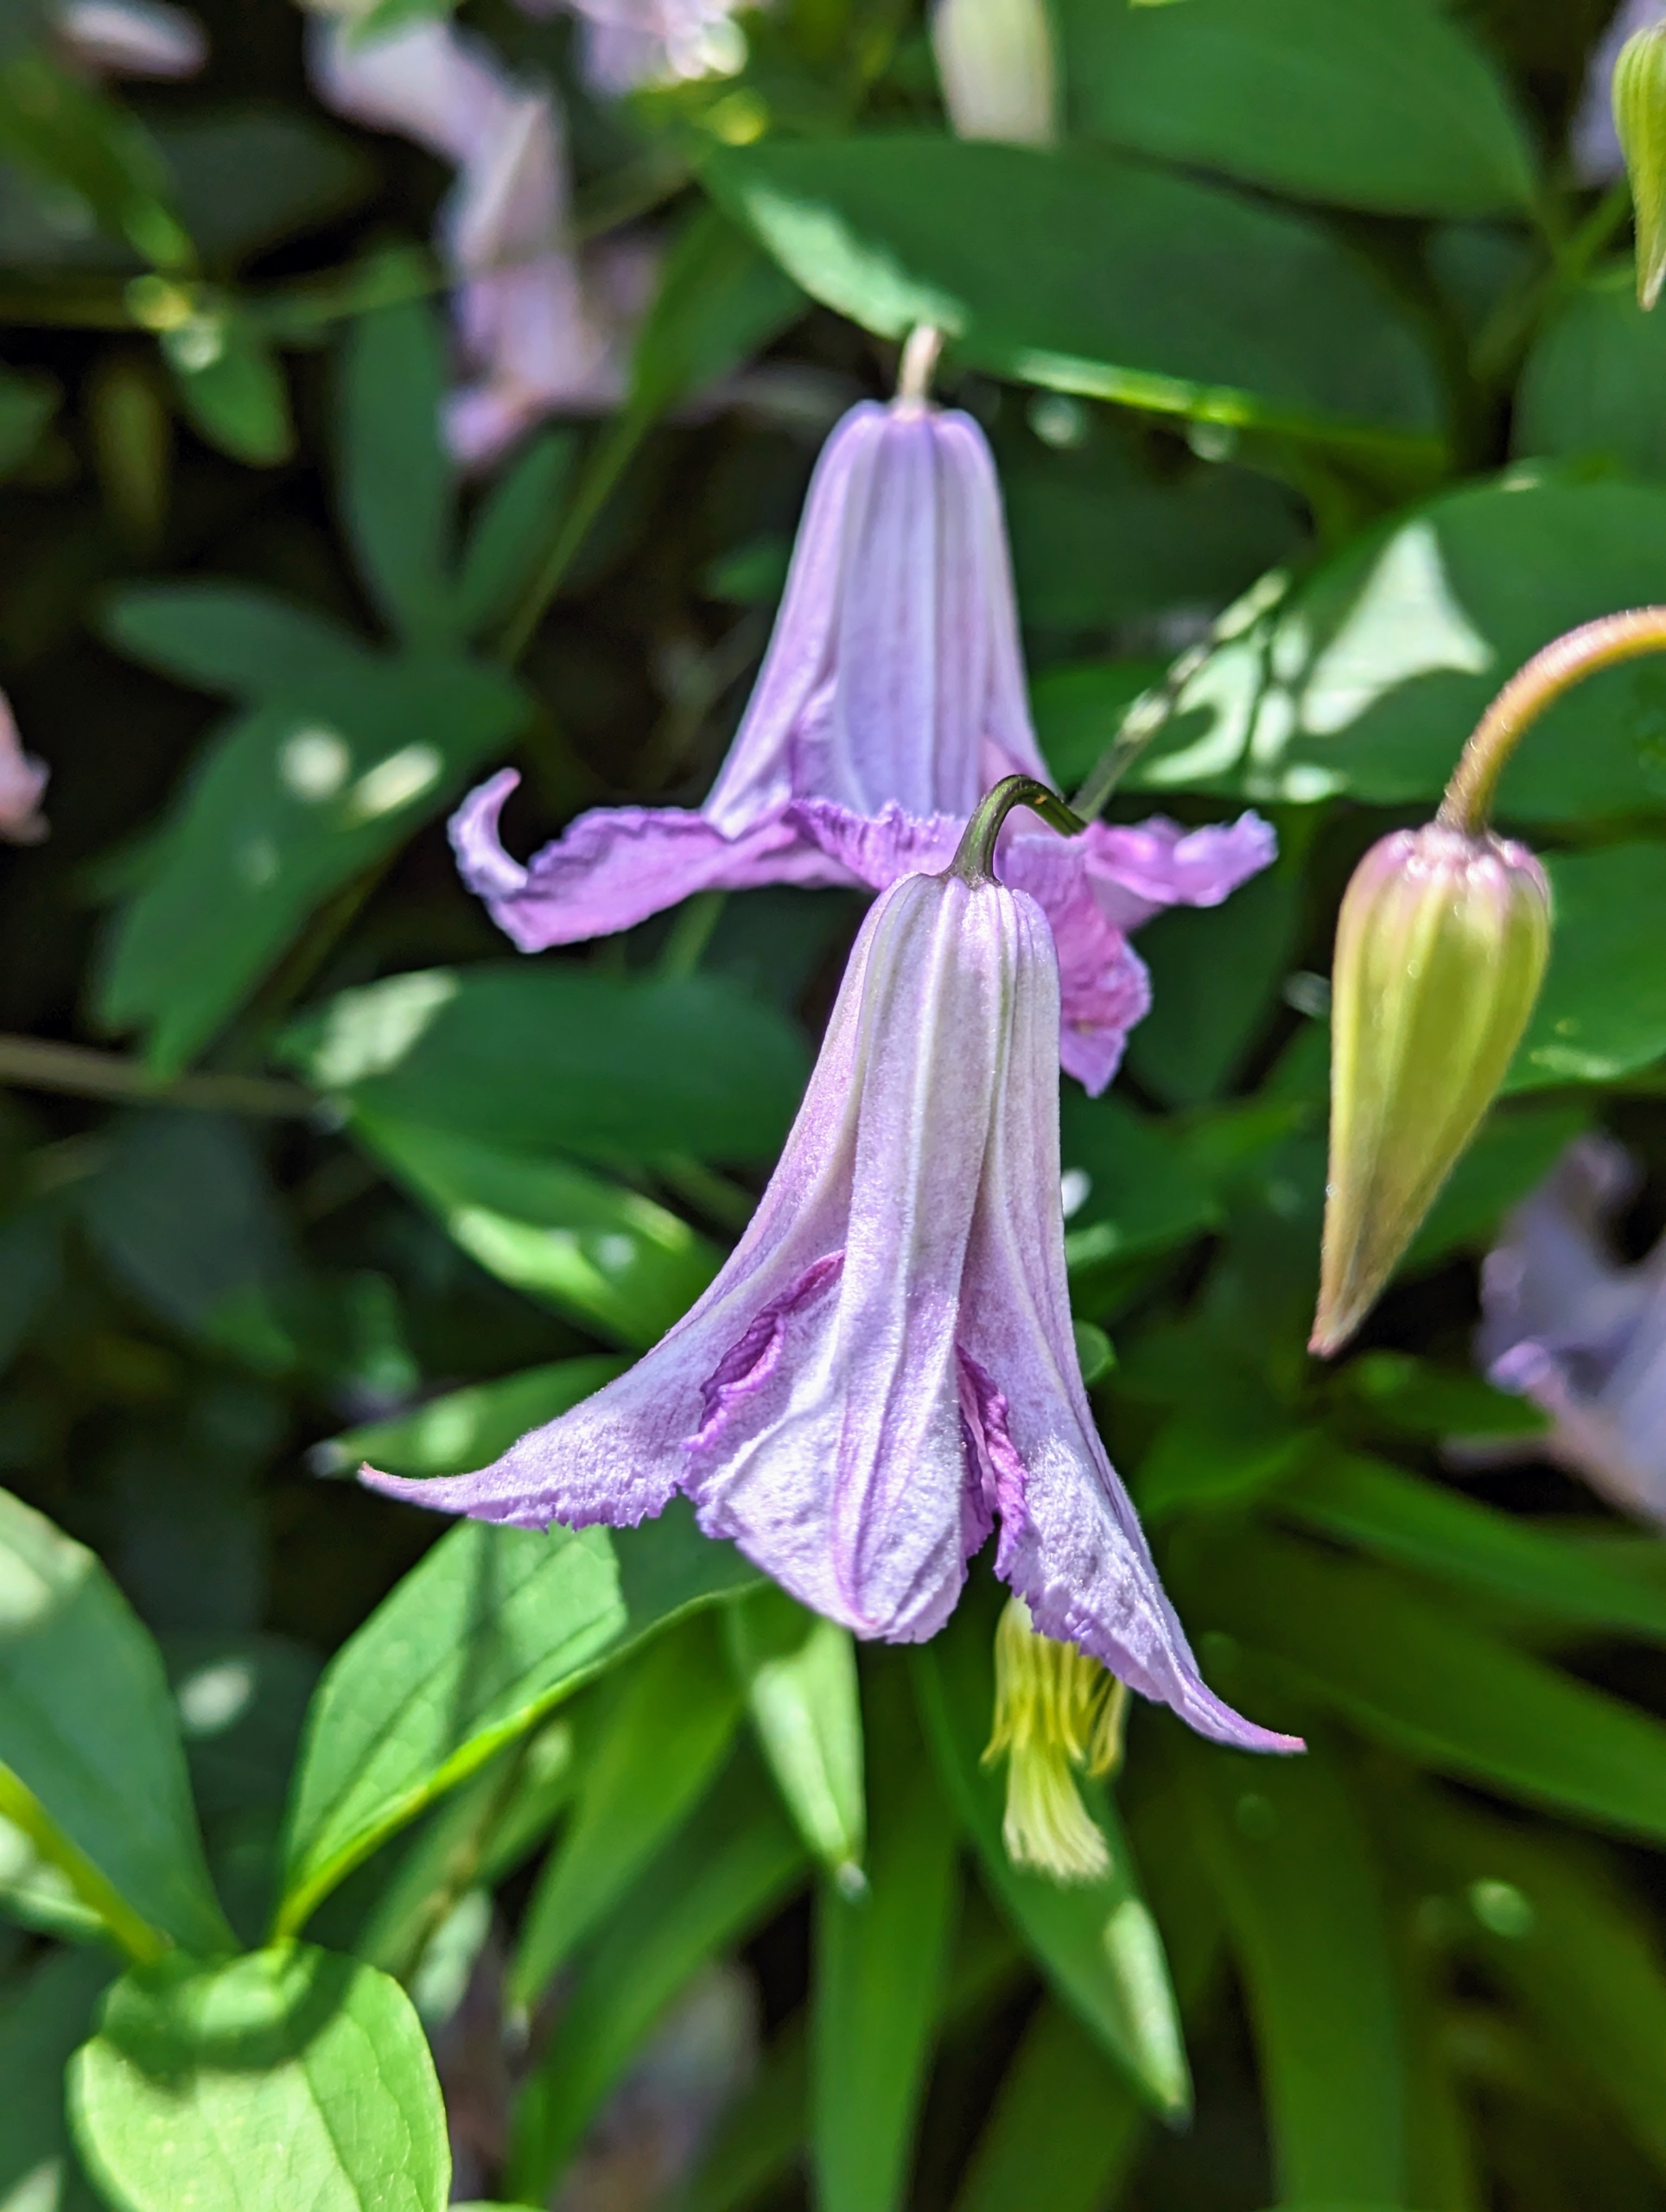
Many clematis are lightly scented. Flowers vary in shape and sizes. They can be flat, tubular or bell-shaped and can be as small as one-inch wide.
Some clematis cultivars will bloom in partial shade, but to really thrive, they need at least six-hours of sun each day. Just think, “head in the sun, feet in the shade.” The vines like sun, but cool, moist soil.
Once established, clematis should be watered about an inch or so weekly, and more deeply during dry spells.
Some of the cultivars grown here include ‘Parisienne,’ ‘Blue Angel,’ ‘Jackmanii,’ and ‘Eyers Gift.’
It can take several years for a clematis vine to mature and begin flowering prolifically. To shorten the wait, purchase a plant that’s at least two-years old. Clematis also prefer soil that’s neutral to slightly alkaline in pH.
This is Clematis viticella ‘Betty Corning’, which has slightly fragrant, bell-shaped flowers that bloom from summer to fall.
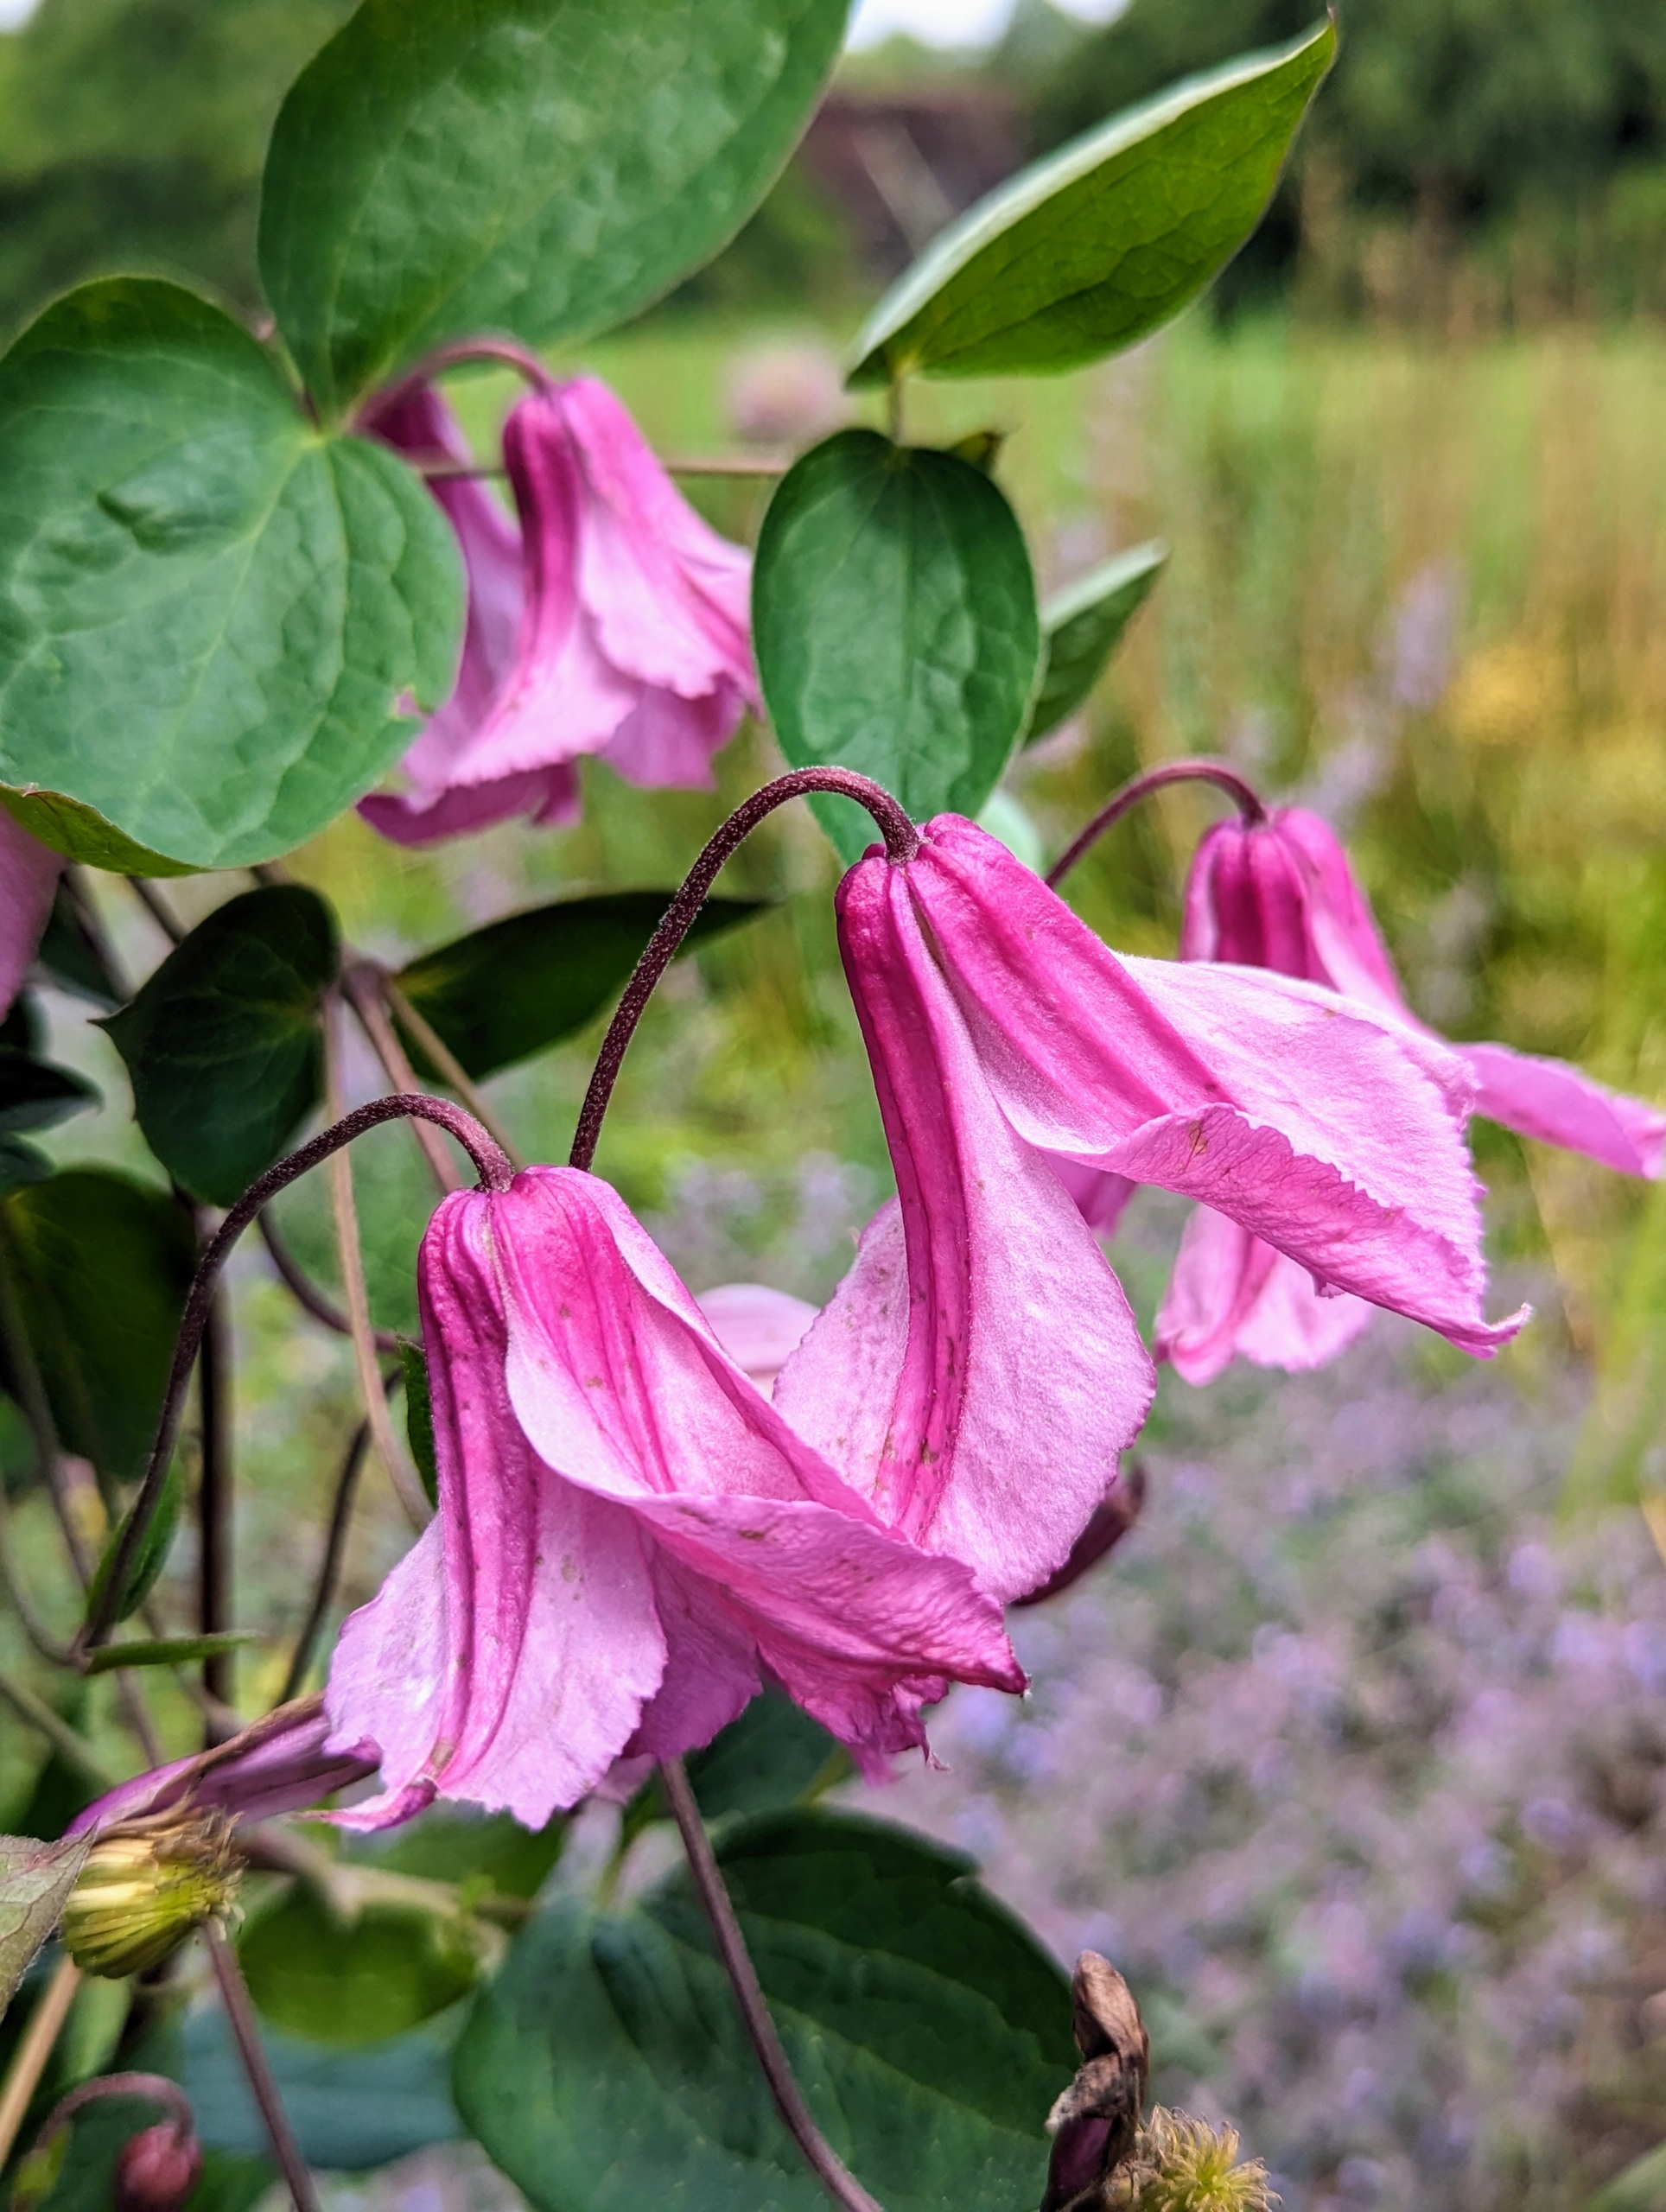
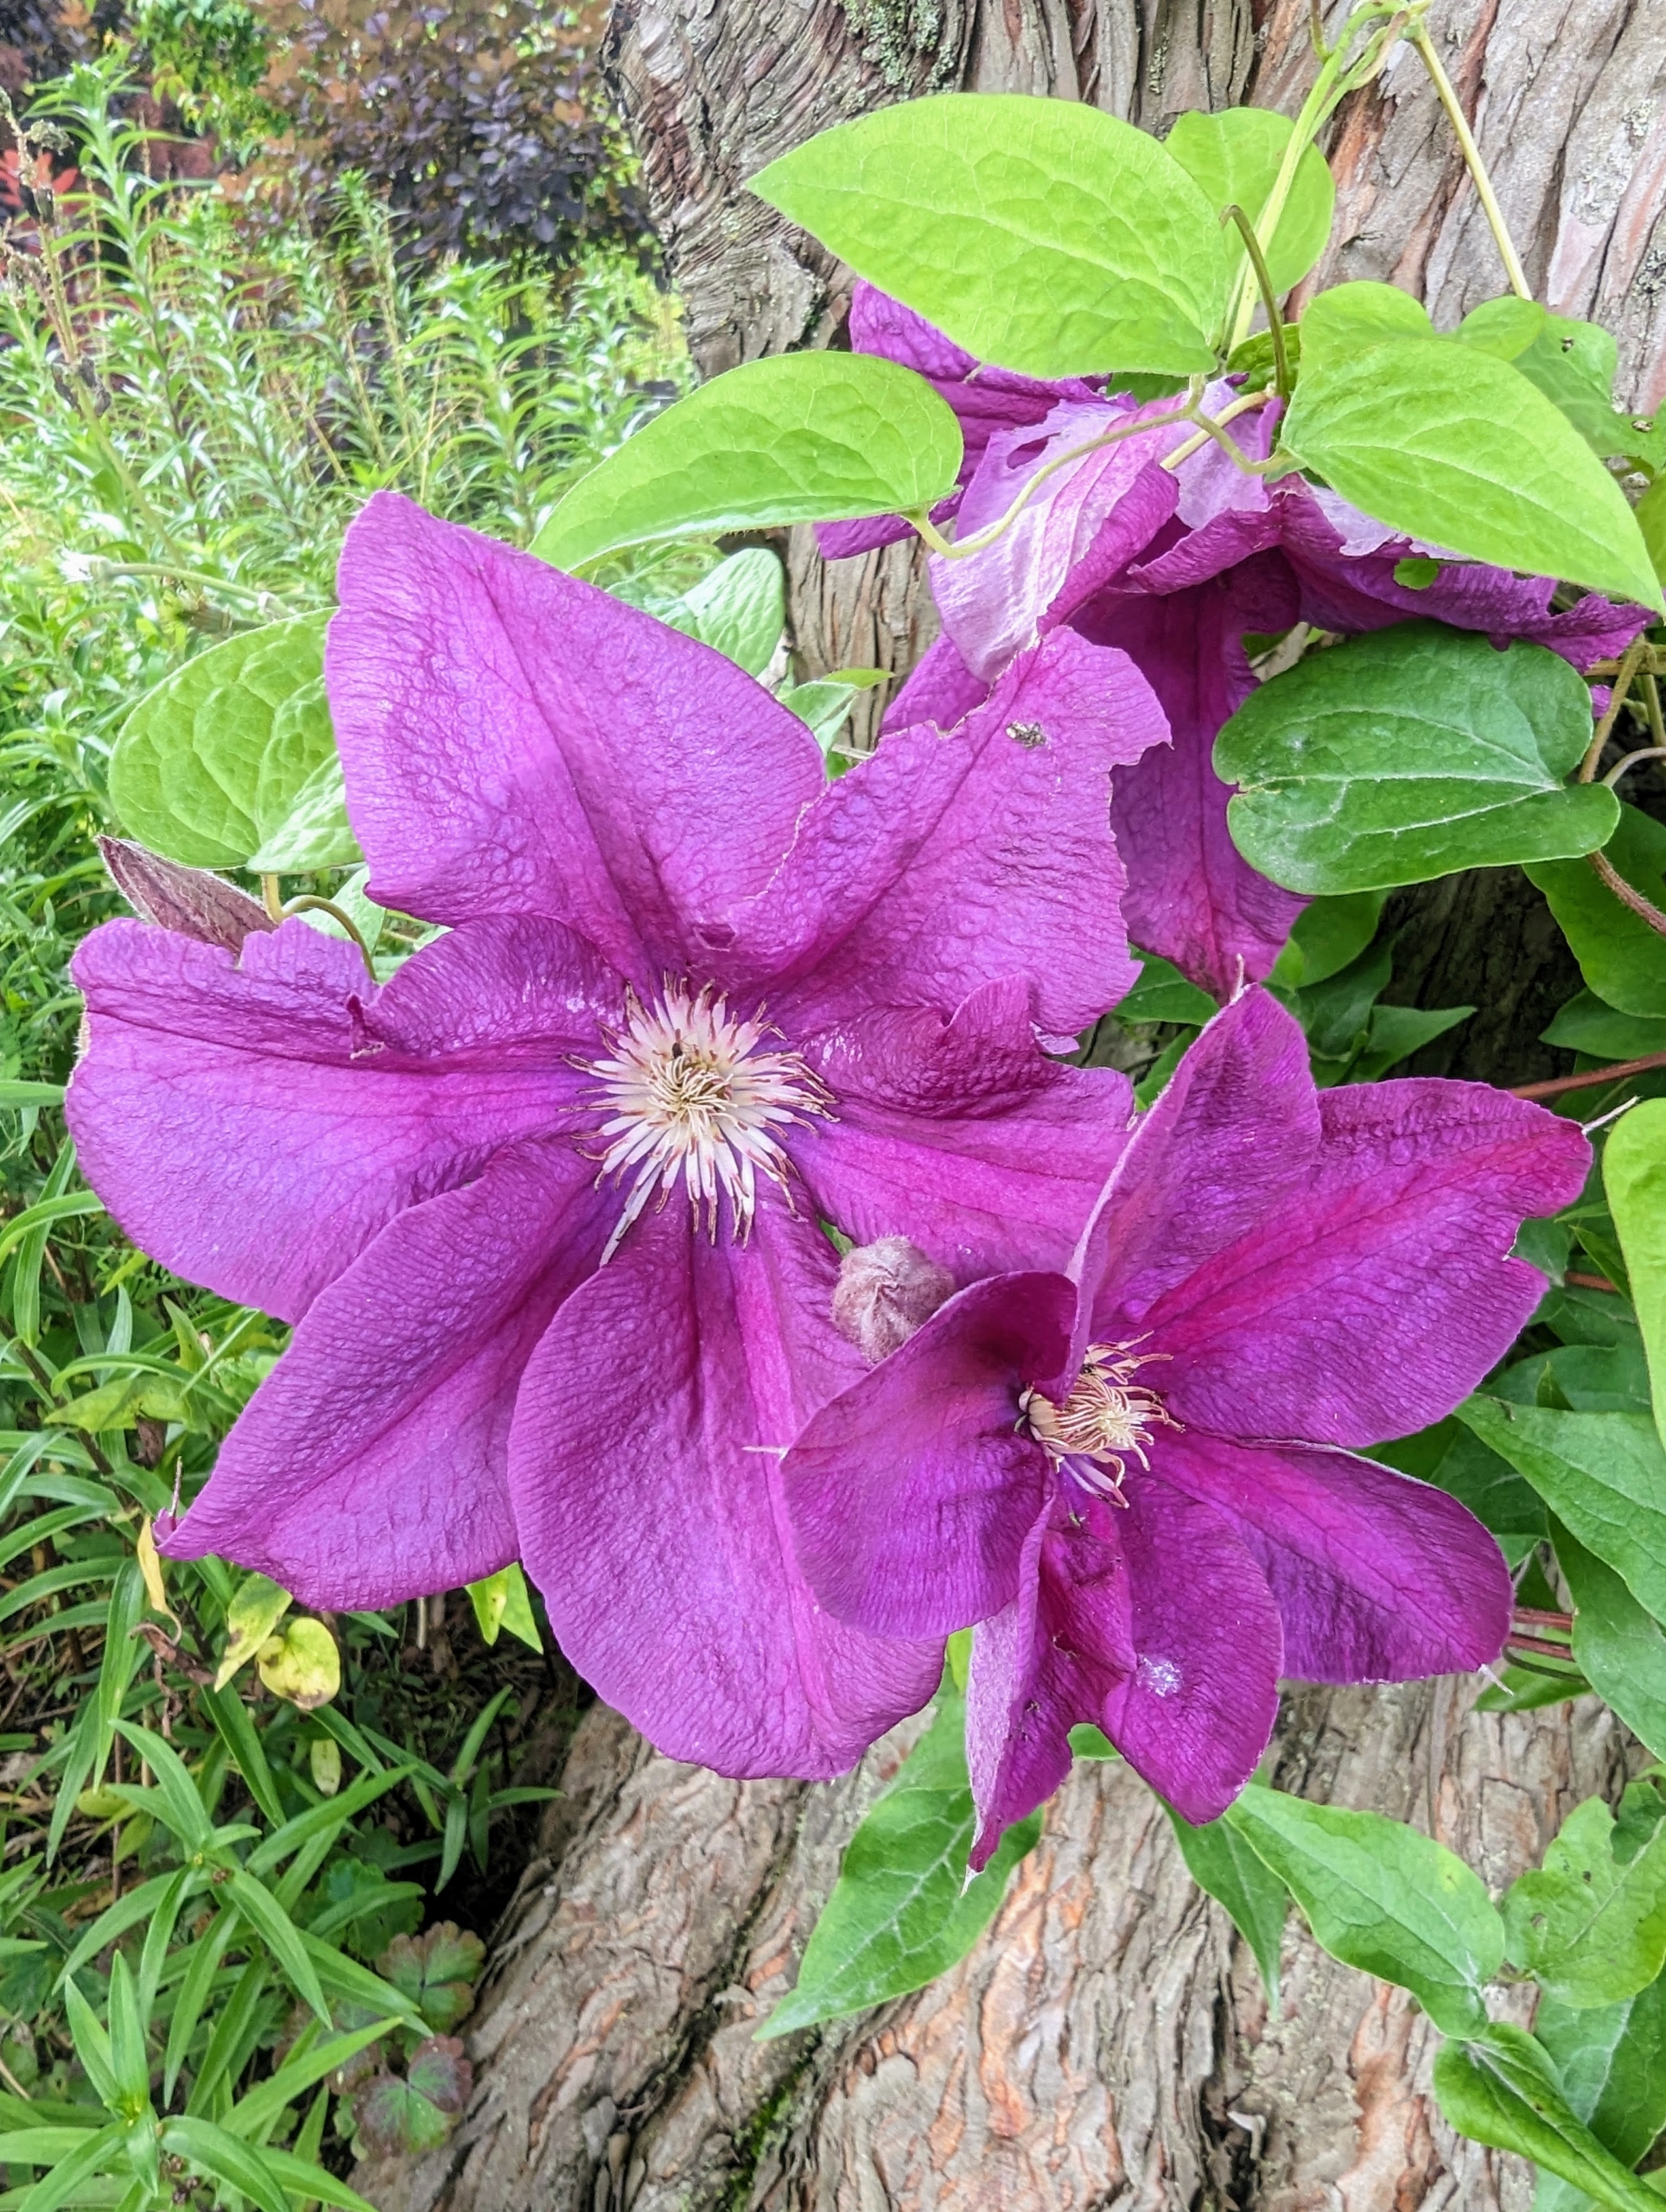
Here is a similar variety in pinkish purple.
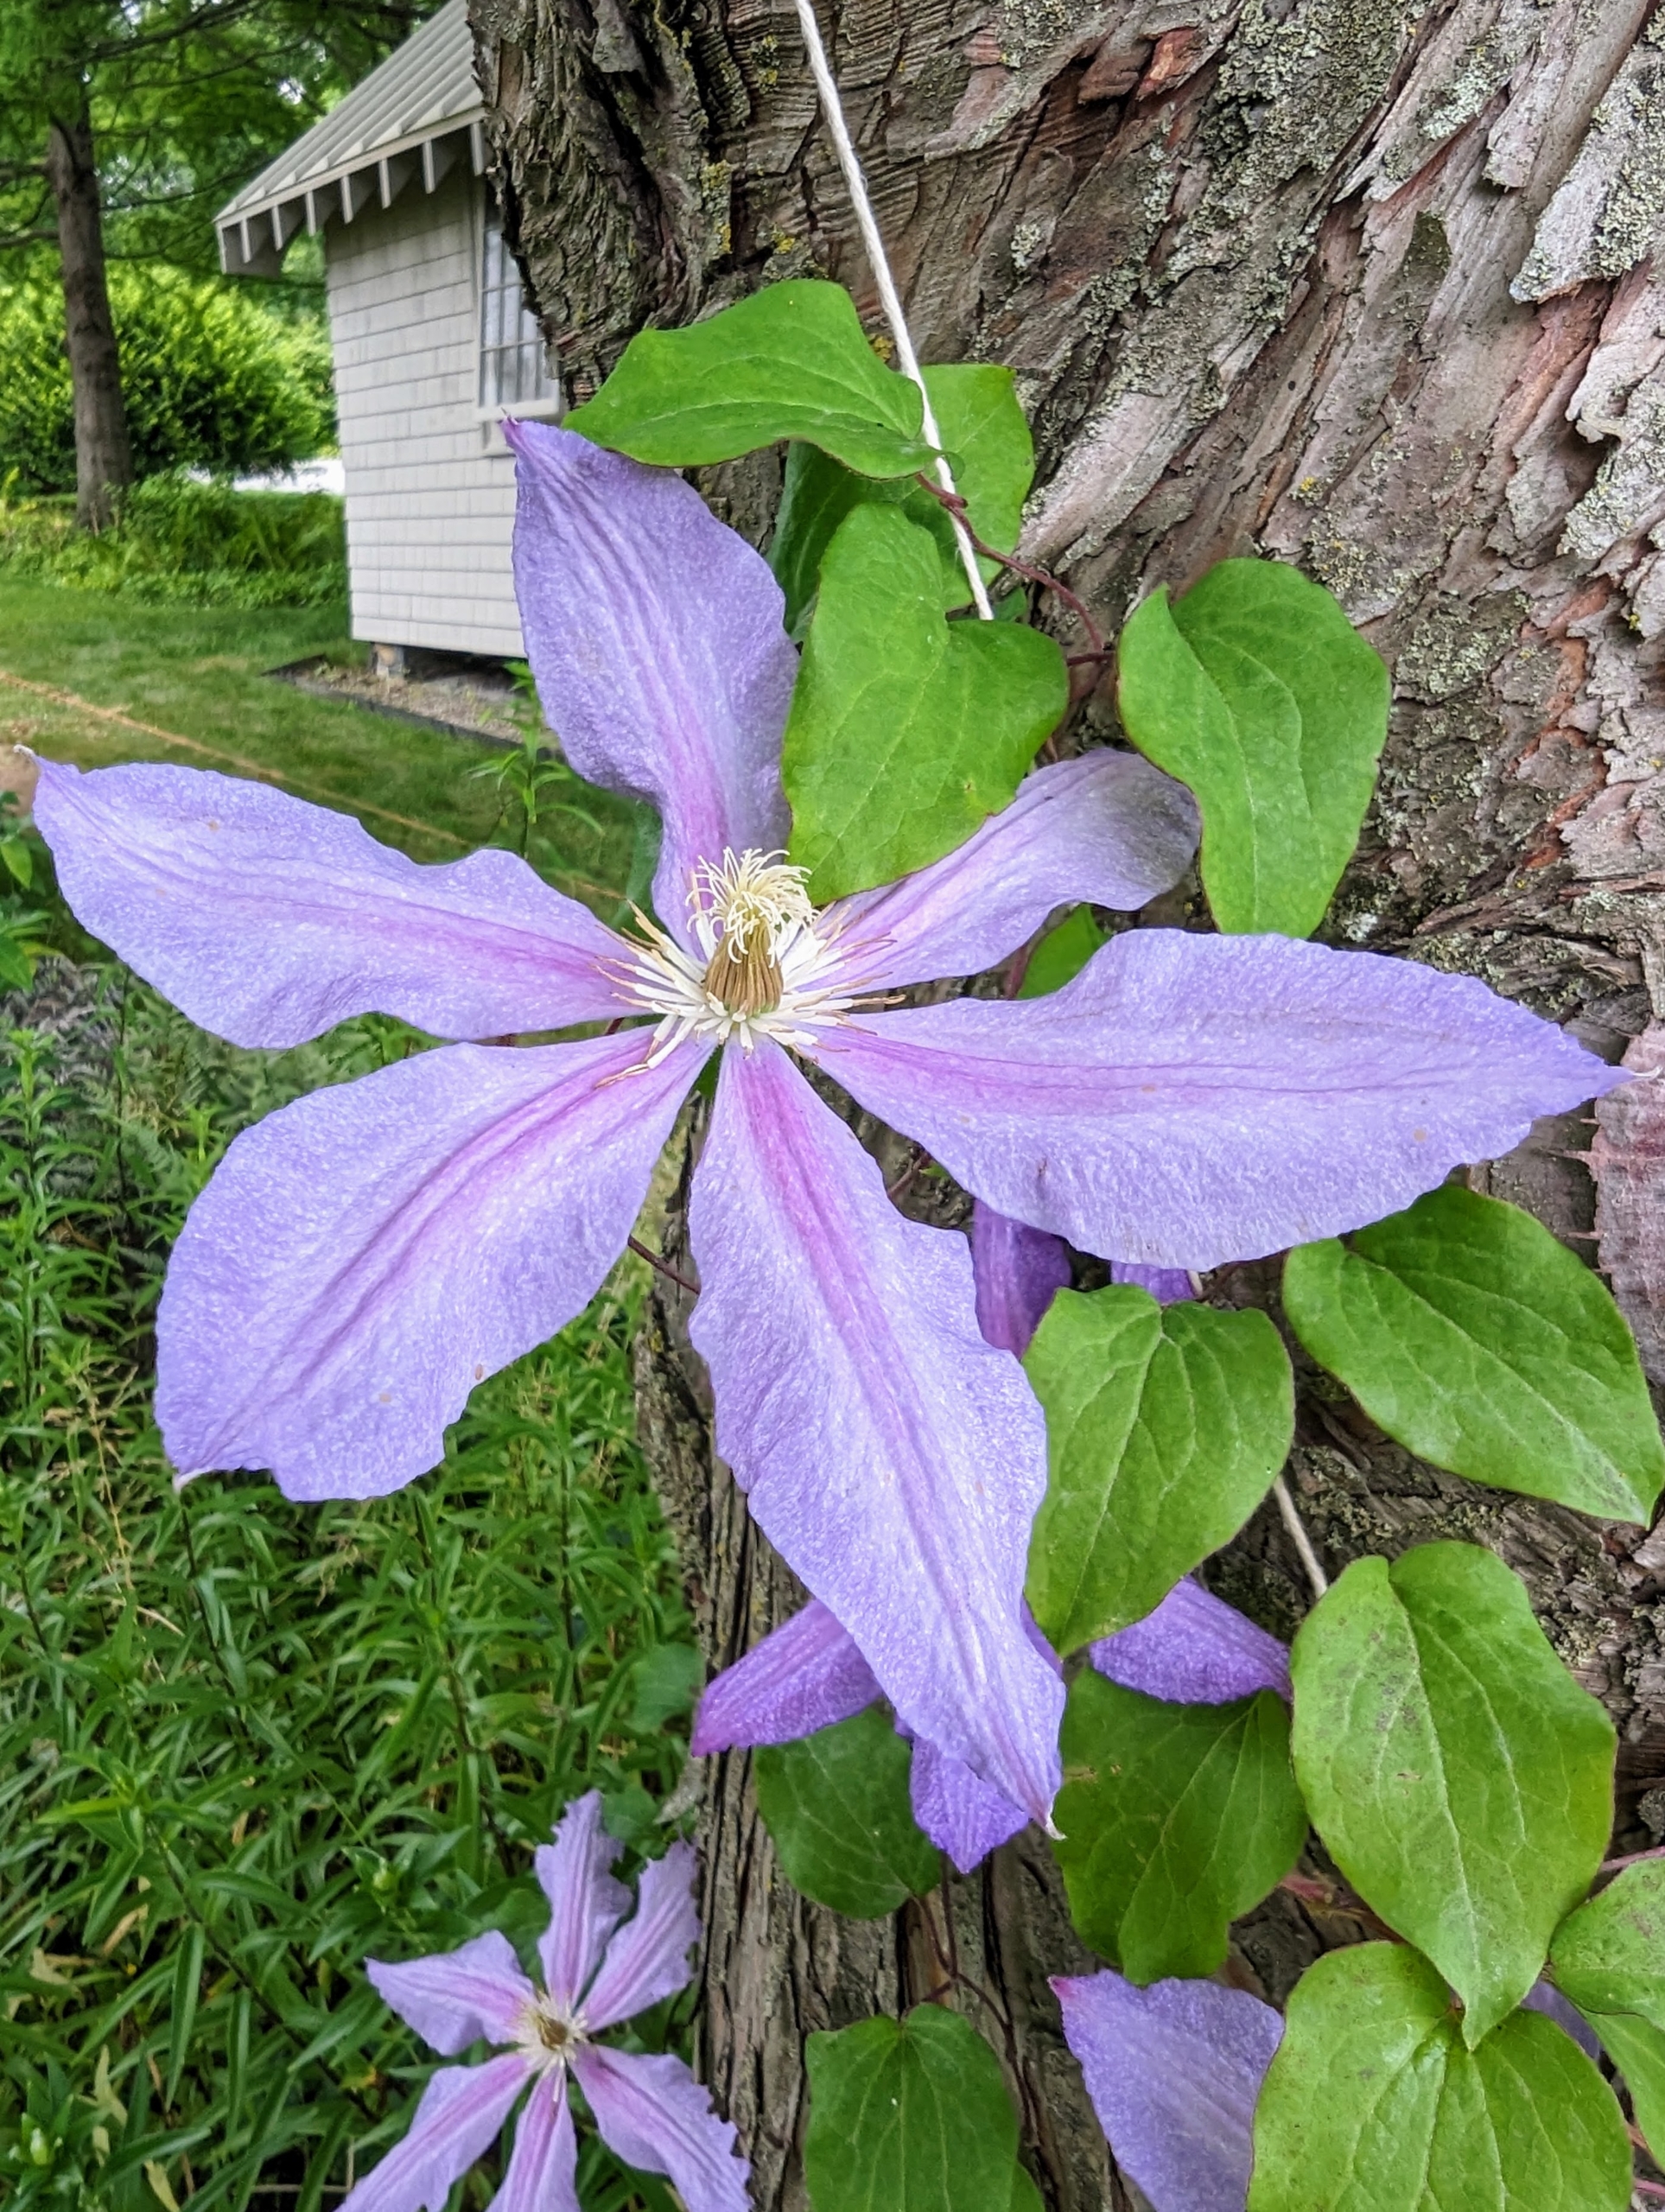
Across the carriage road from my pergola, I also have some clematis vines planted at the base of several bald cypress trees. On these trees, we used twine to secure the climbing vines.
The timing and location of clematis flowers varies – spring blooming clematis flower on side shoots of the old season’s stems. Summer and fall blooming vines flower on the ends of only new stems.
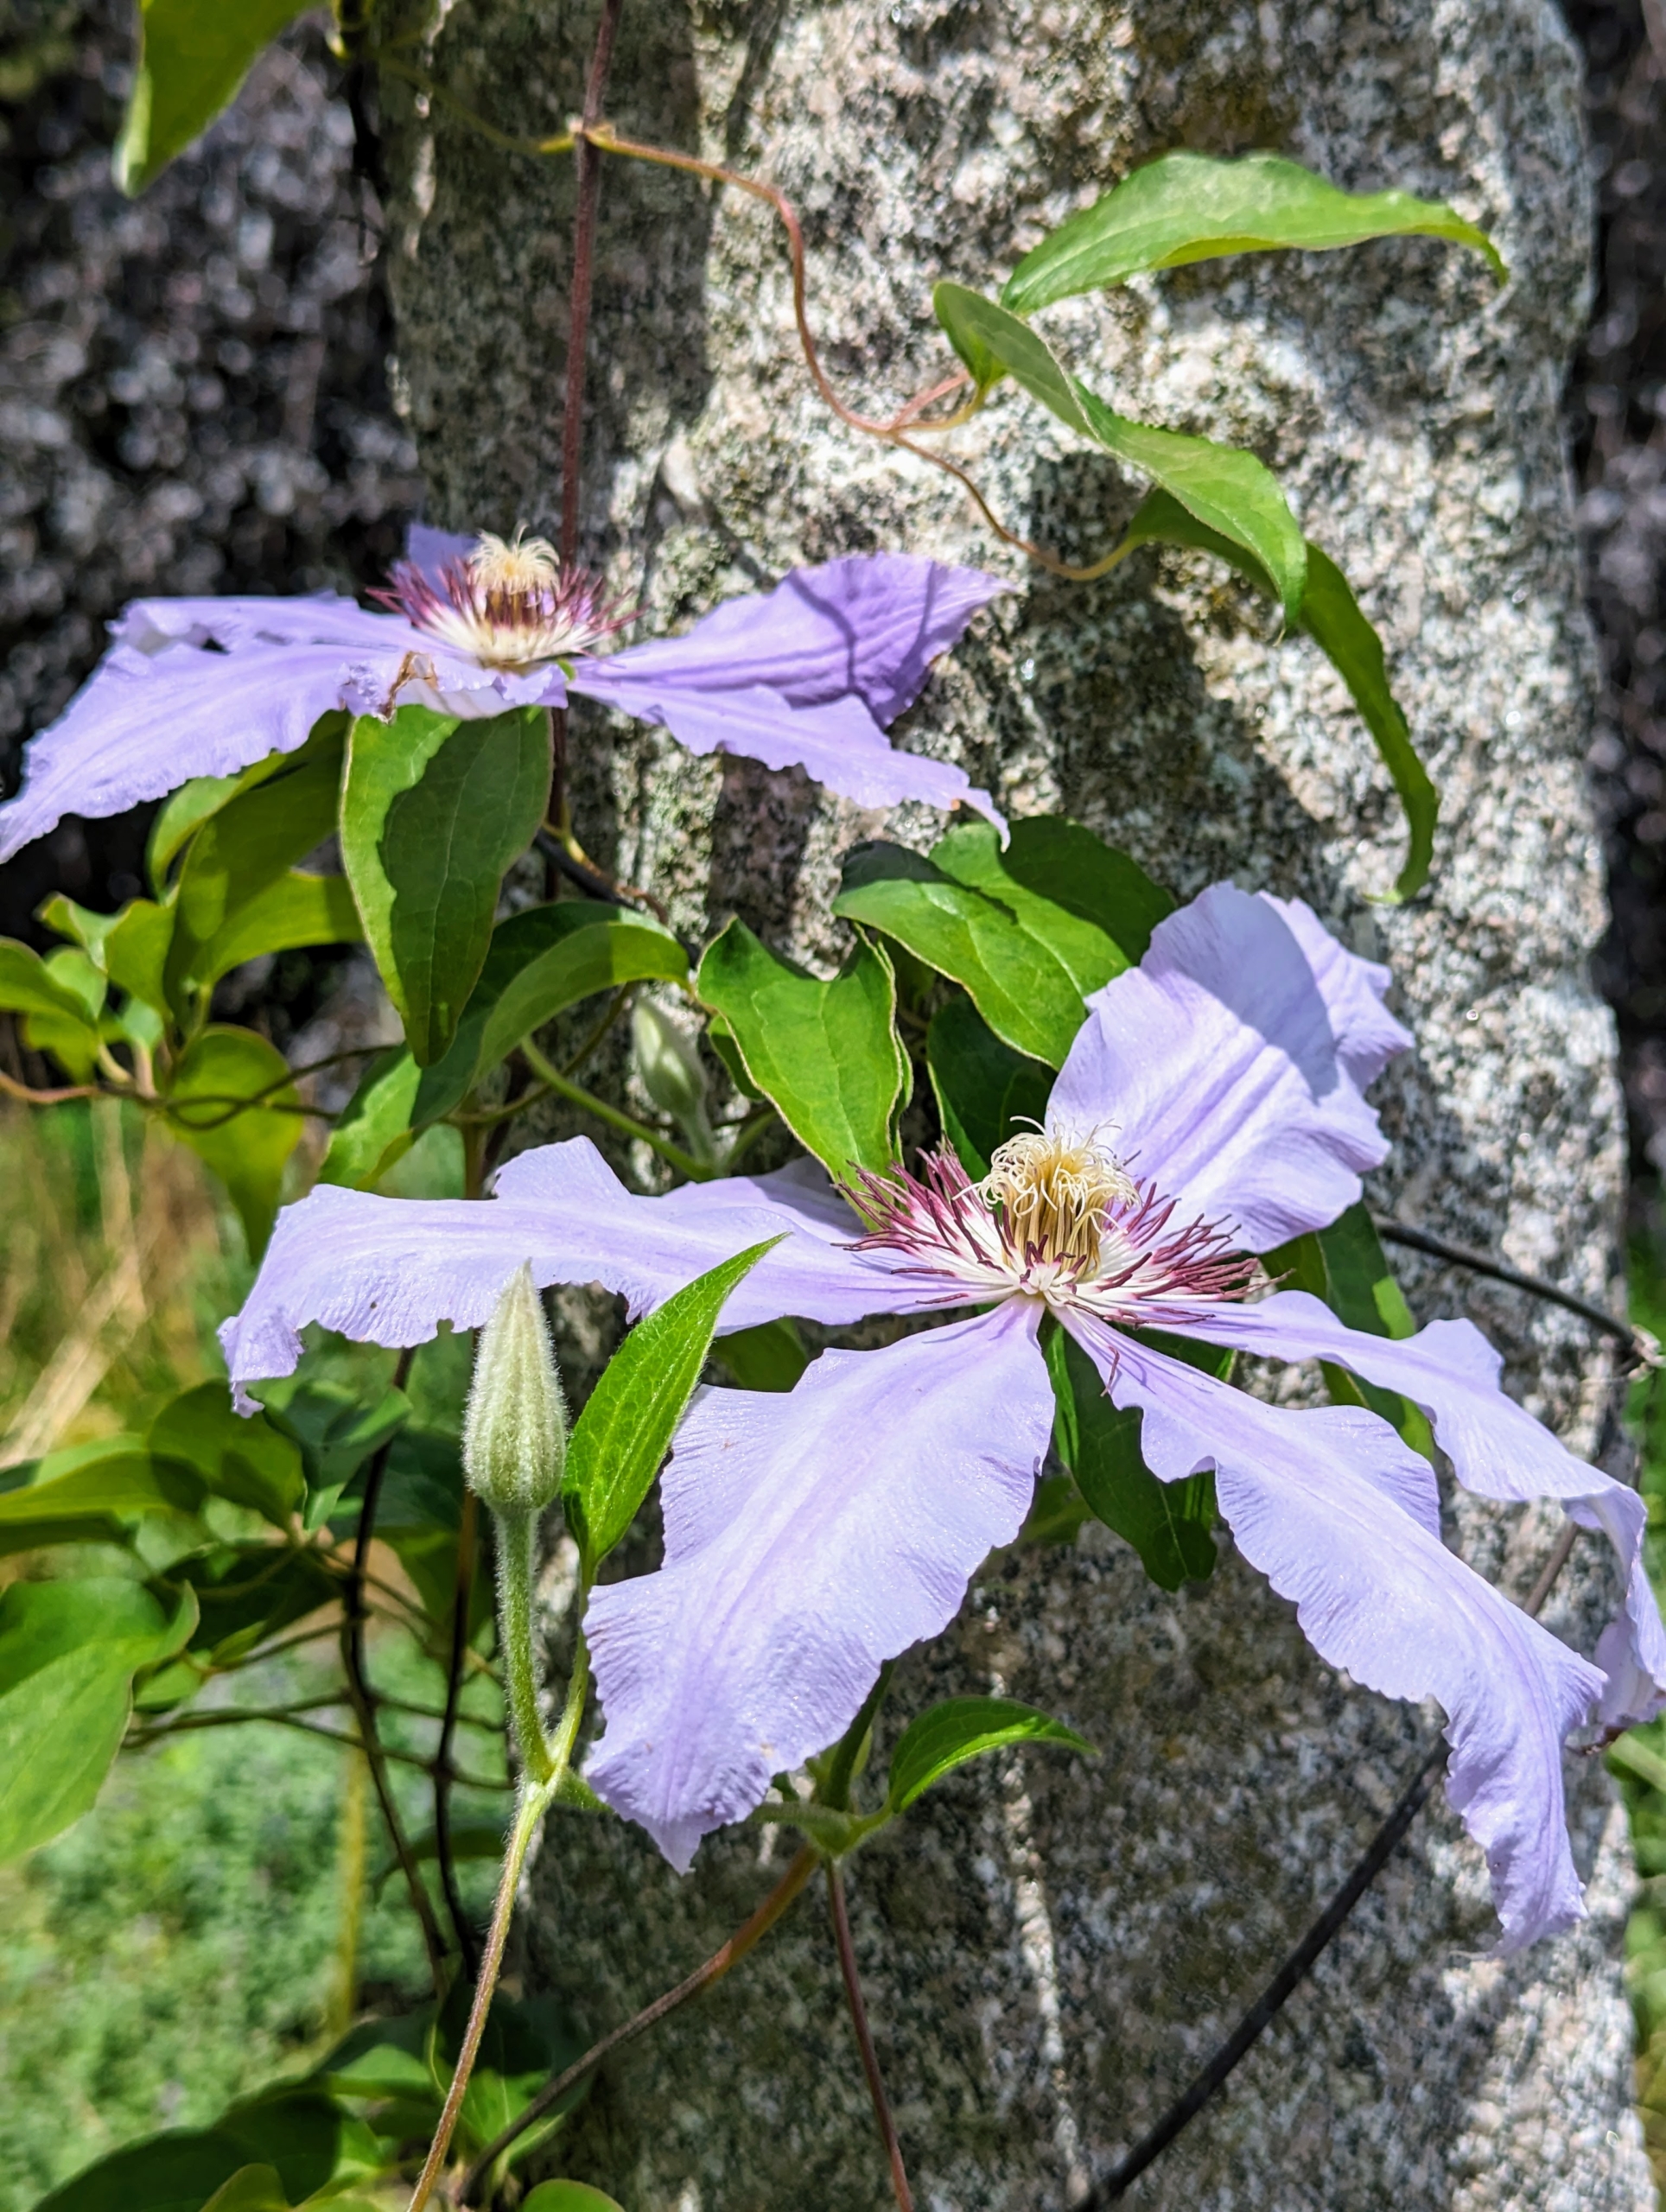
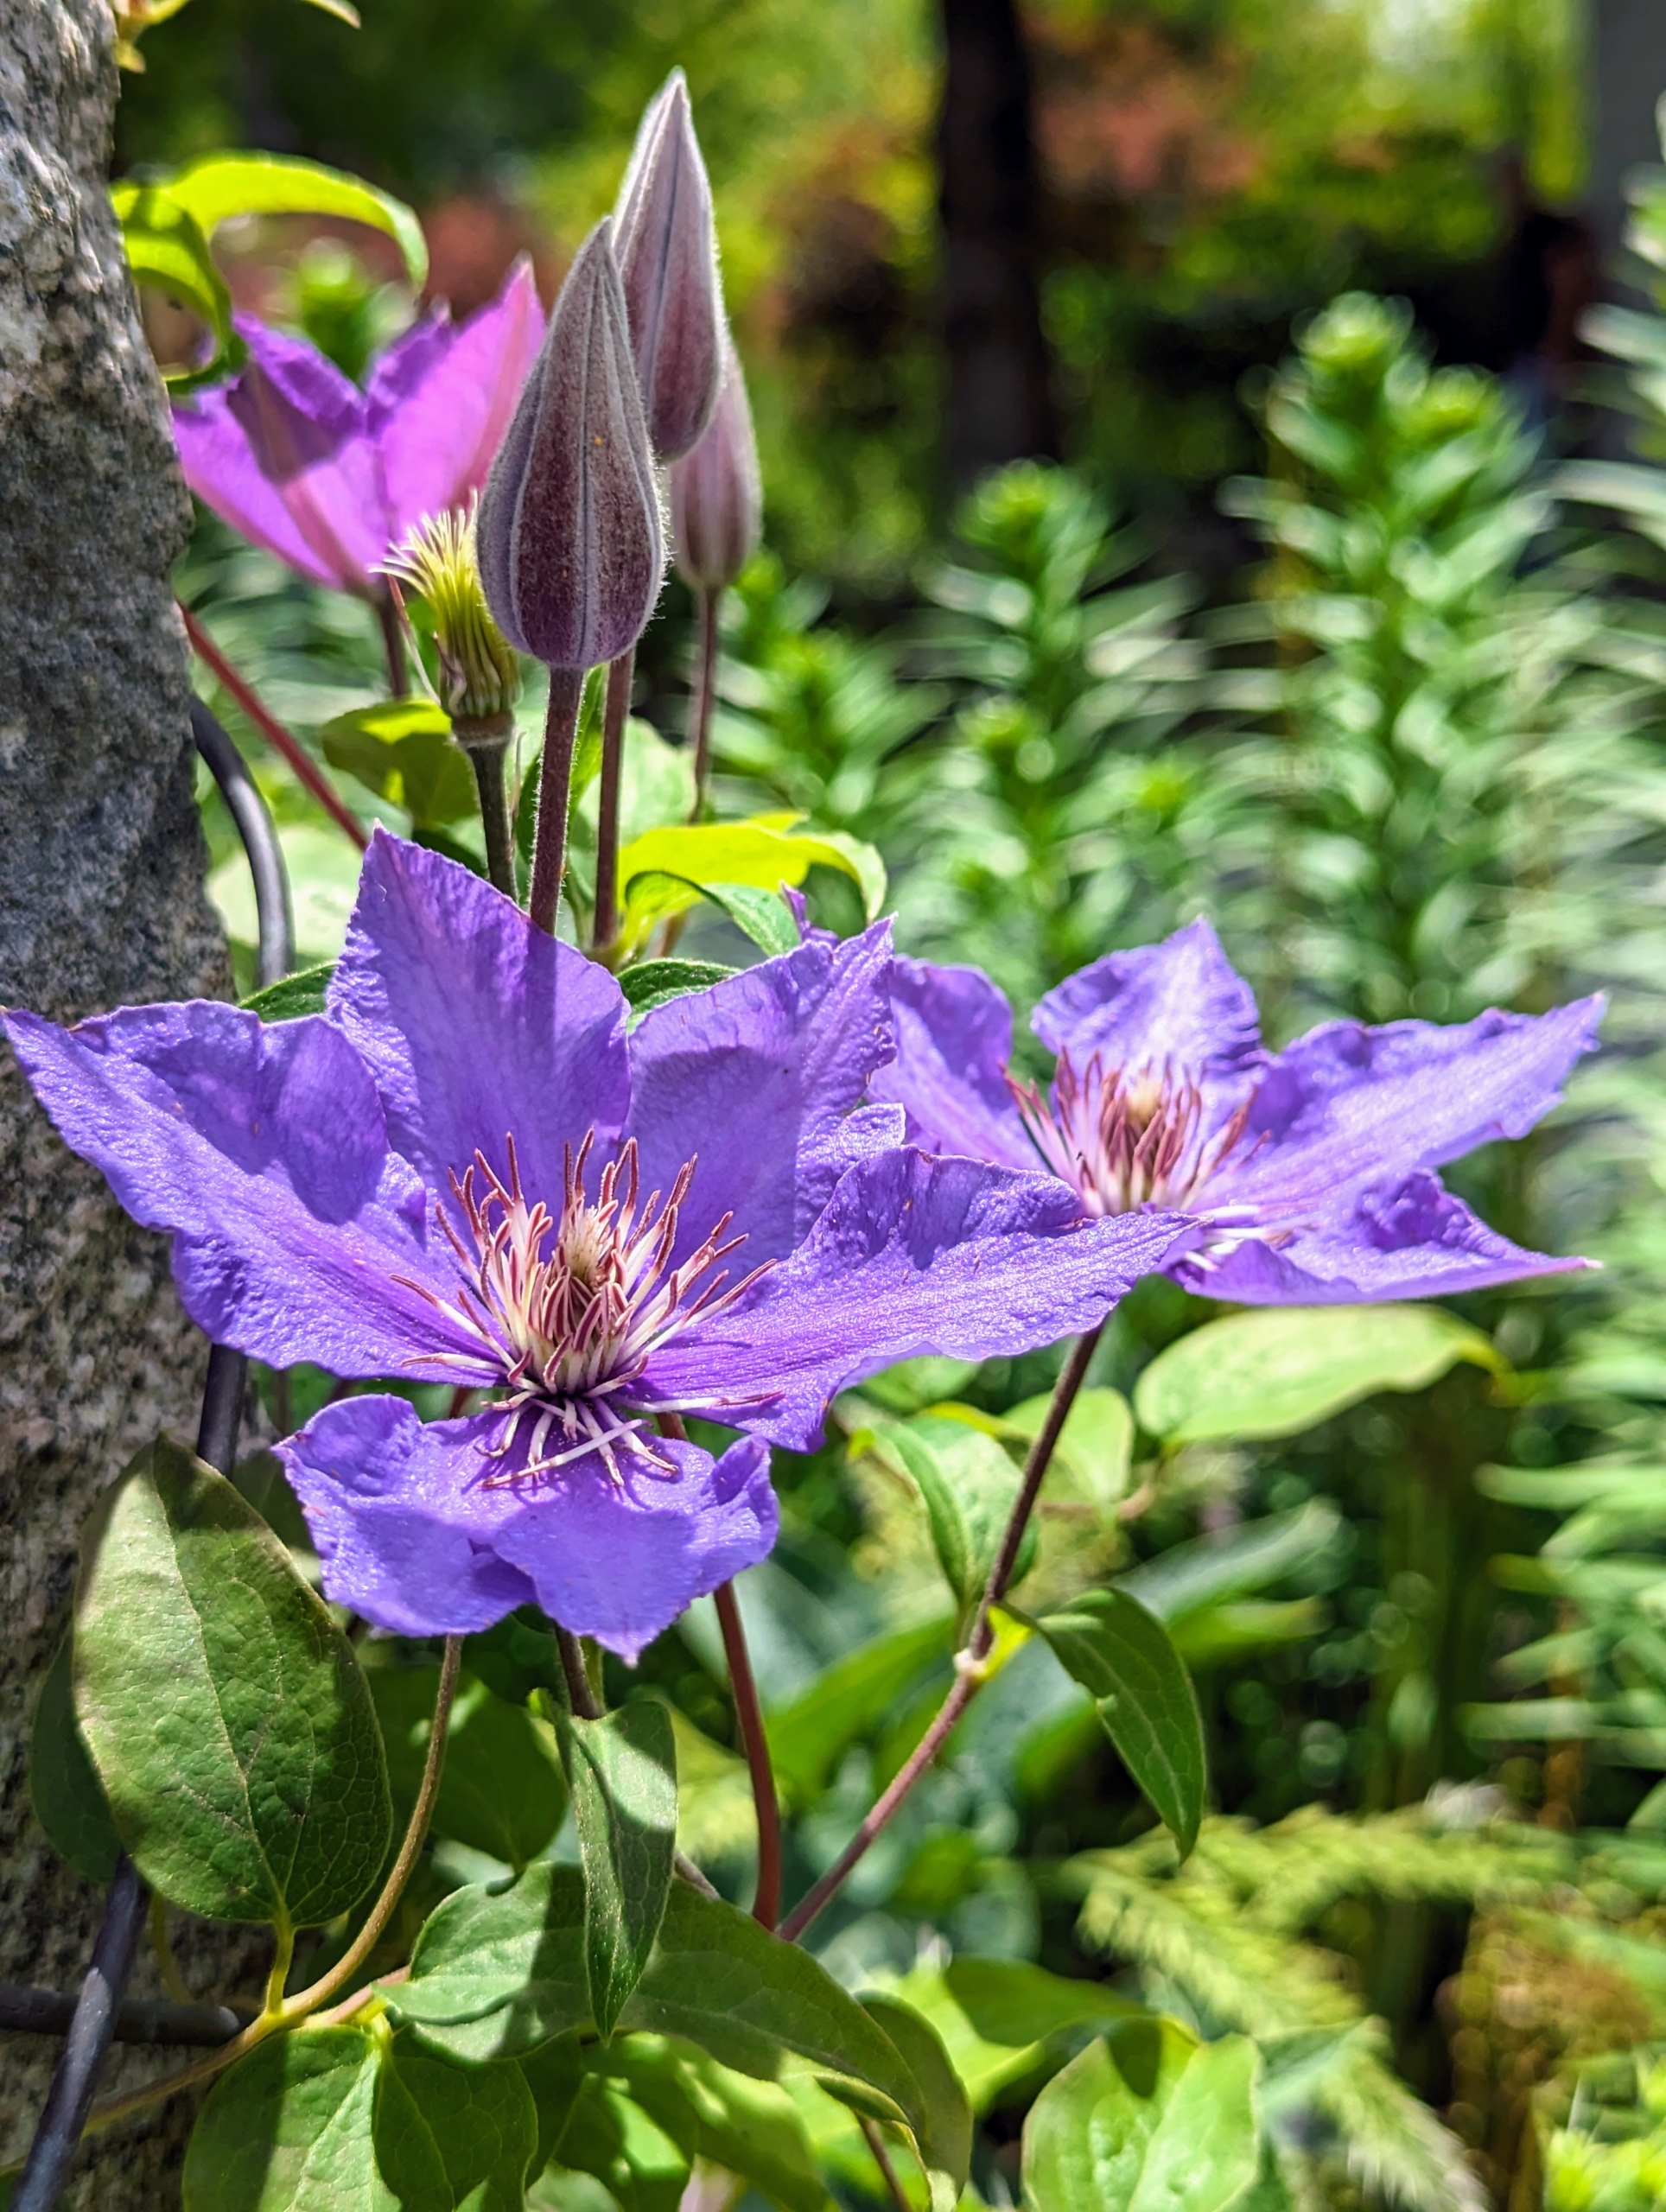
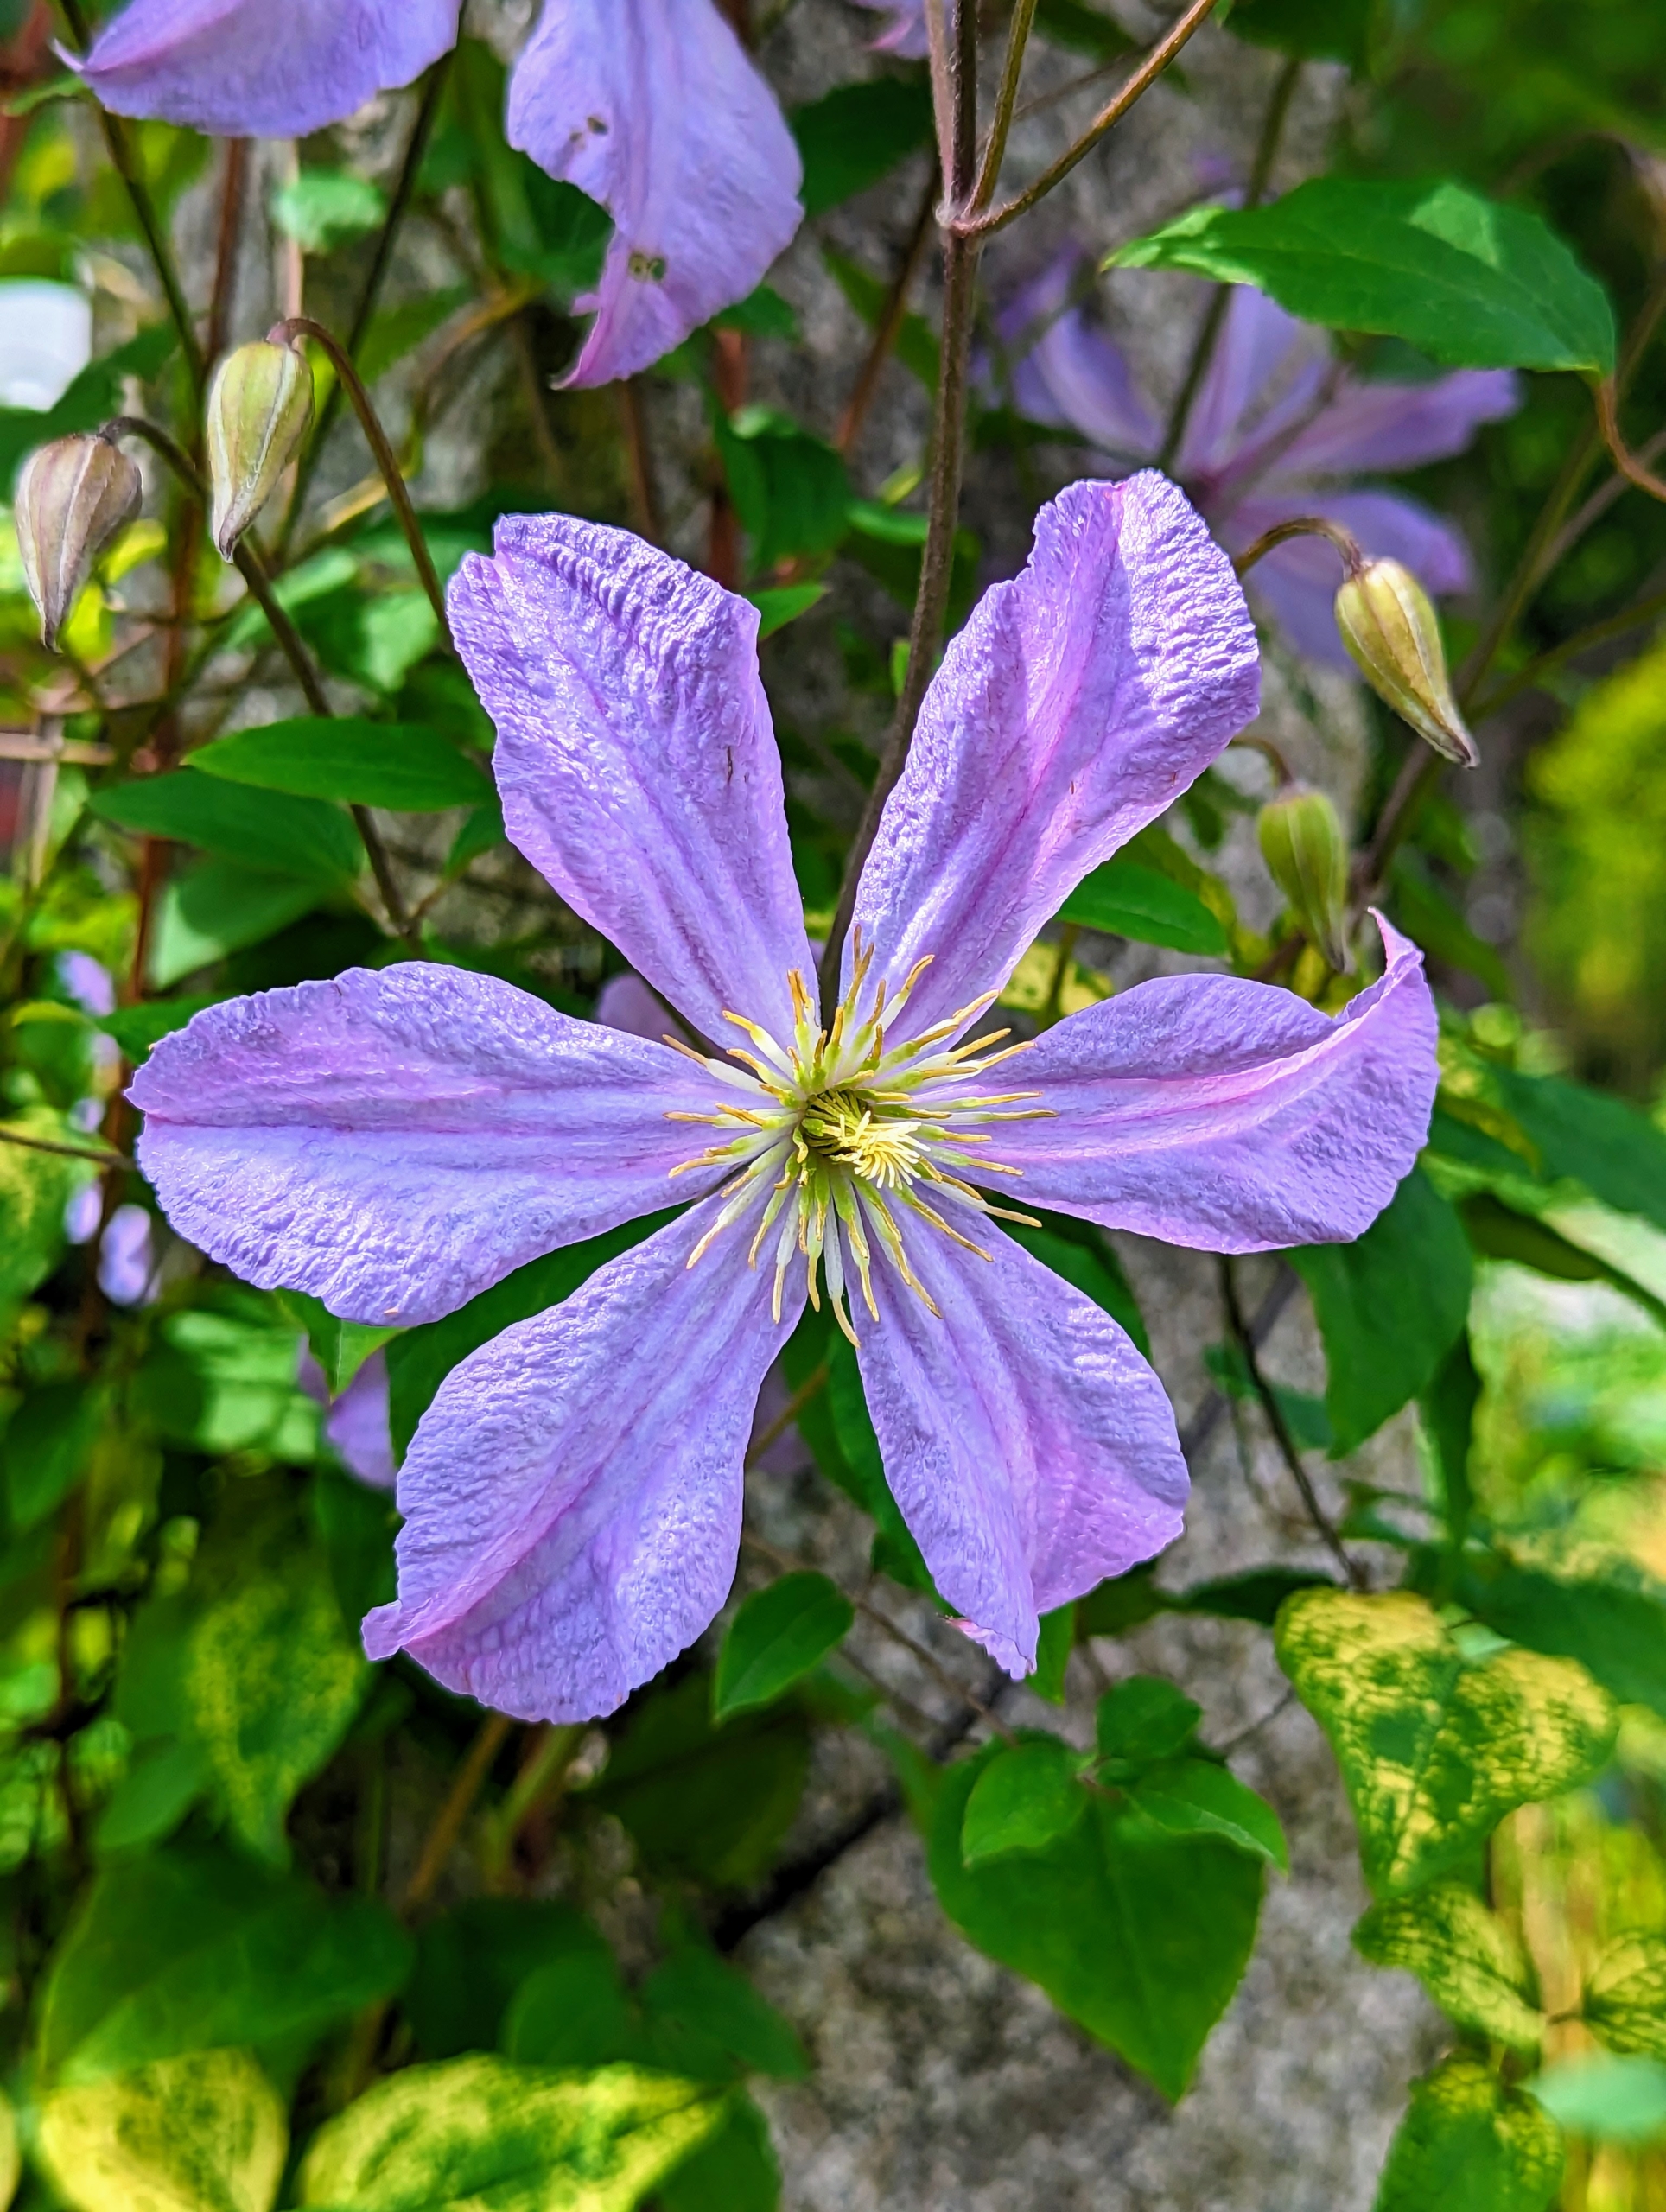
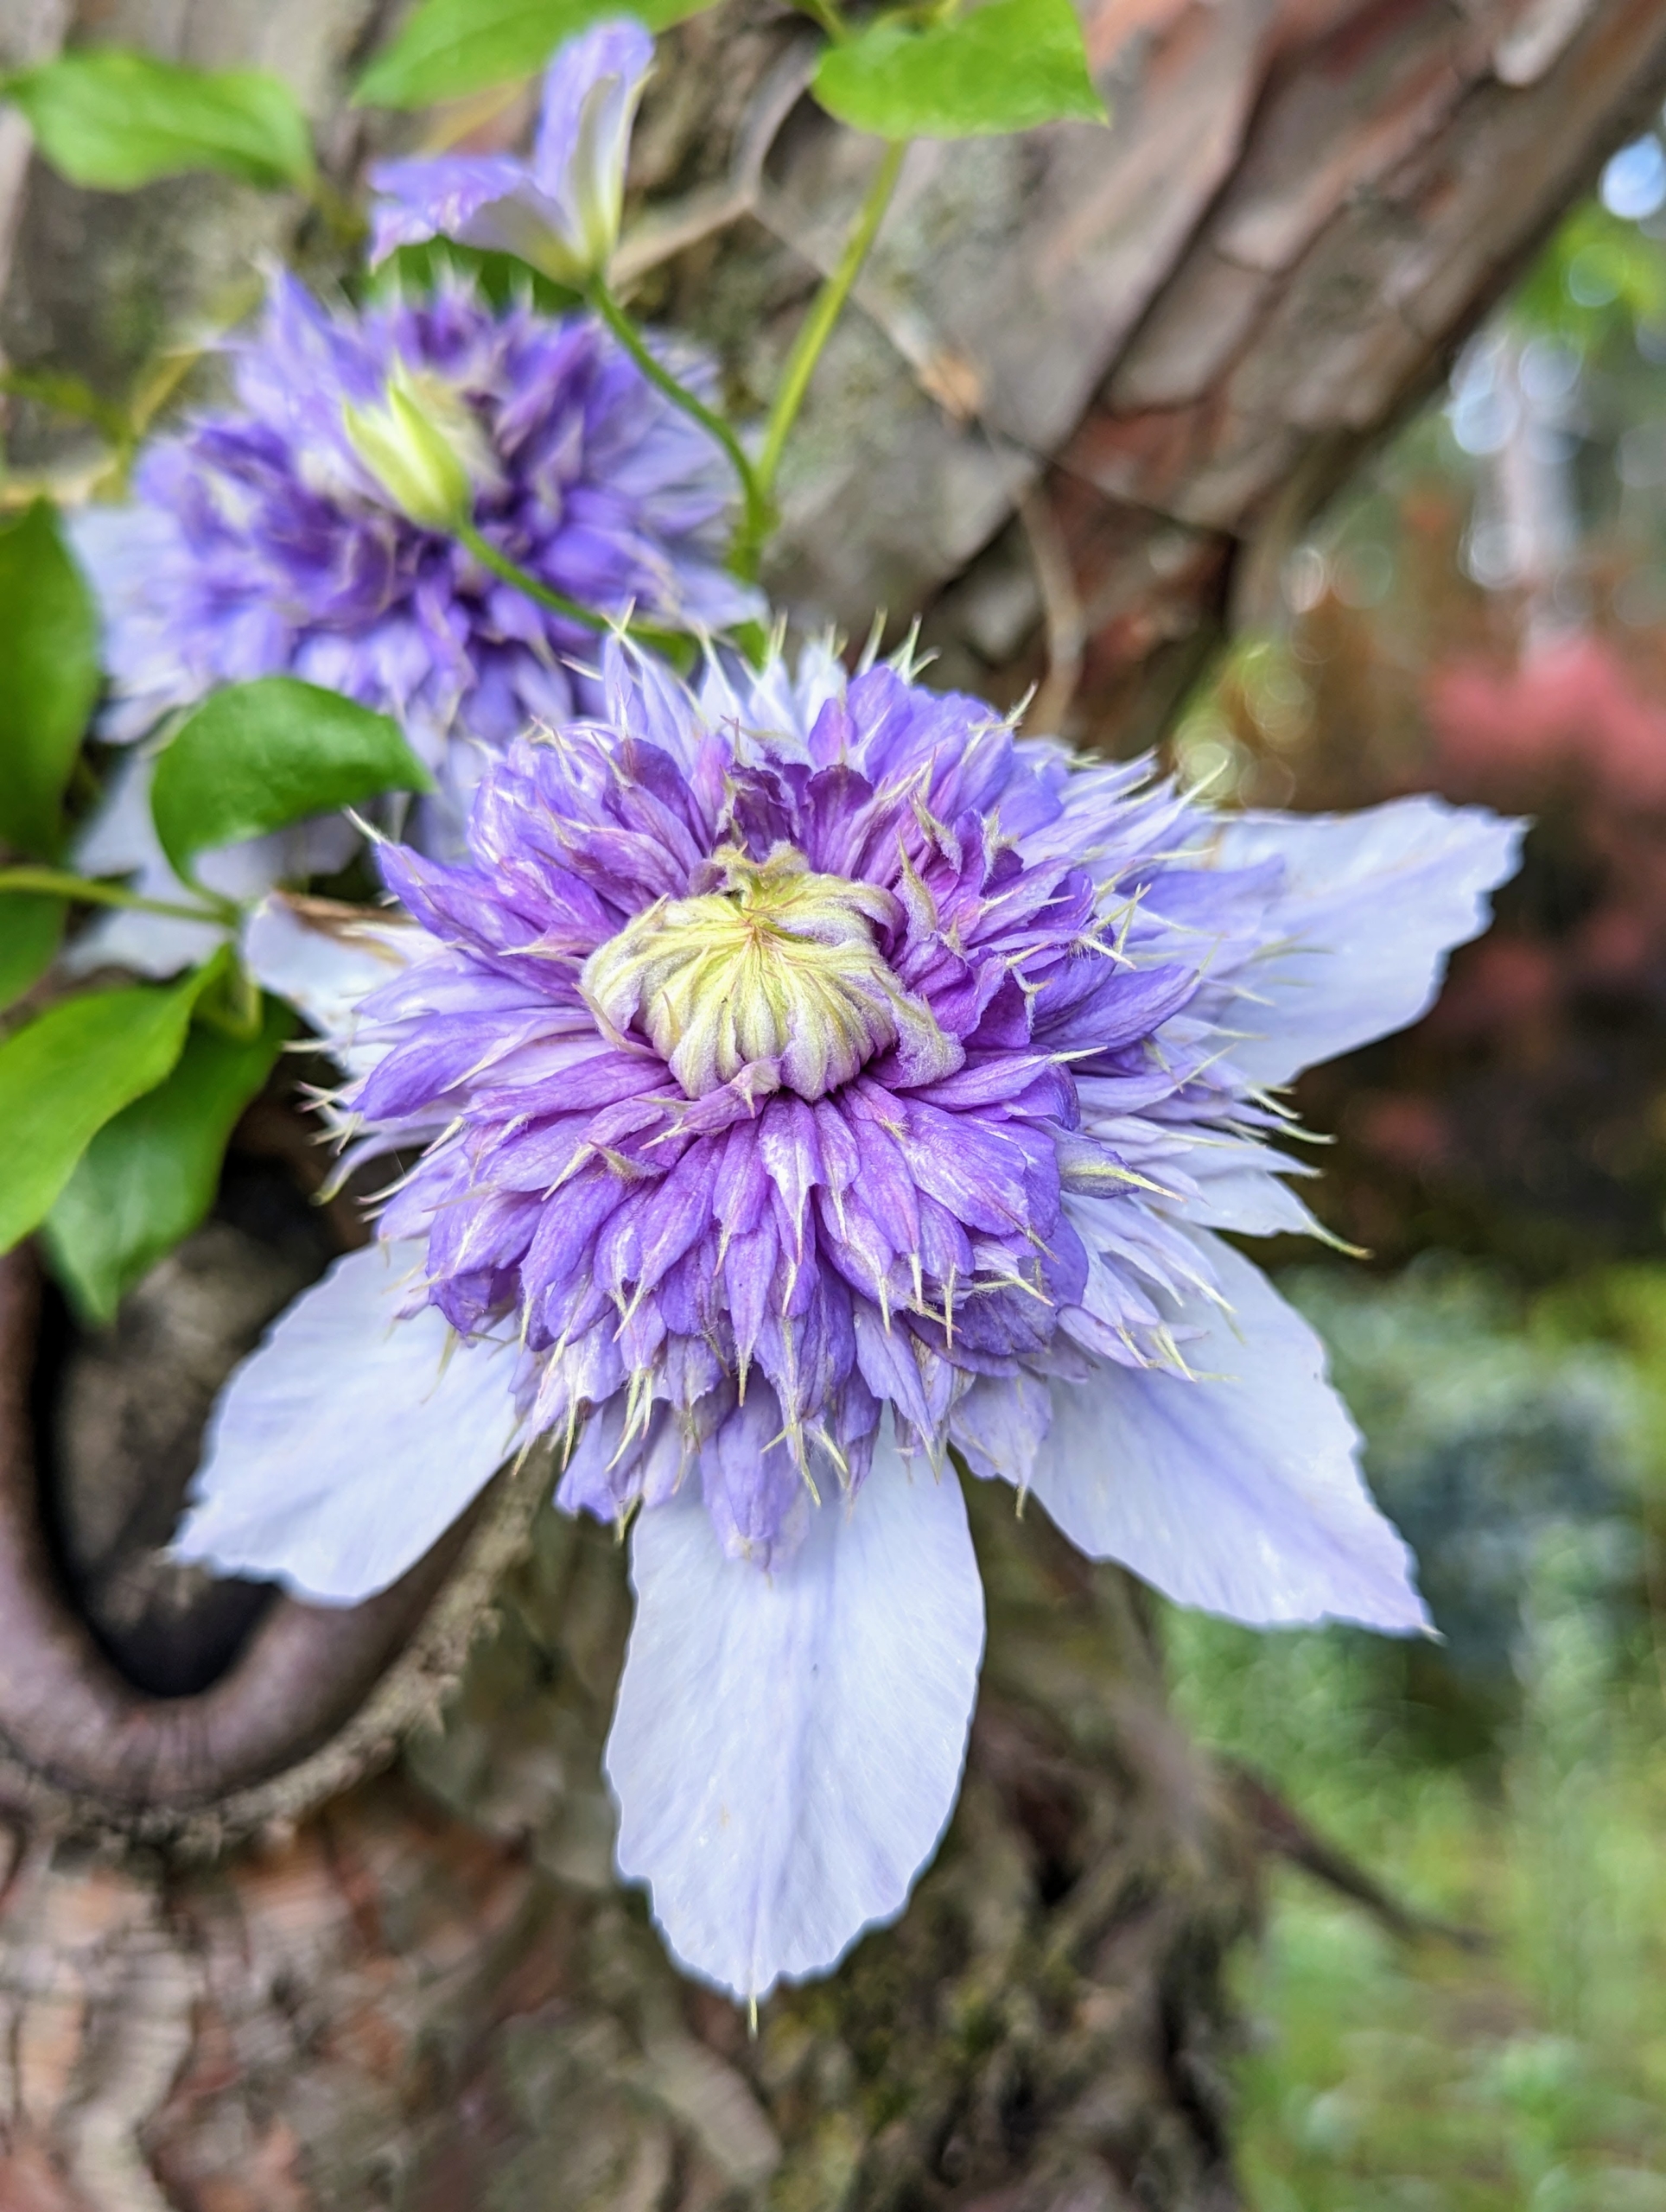
Here is lavender bloom with a large, showy center.
Here’s one in dark purple.
Clematis plants are also heavy feeders and benefit from a low nitrogen fertilizer such as 5-10-10 in spring, when the buds are about two-inches long. Alternate feedings every four to six weeks with a balanced 10-10-10 fertilizer and then continue this alternate feeding until the end of the growing season. The blooms appear constantly for many weeks making their everblooming nature a must-have in any garden.
As a perennial, clematis are vigorous vines that return yearly and are hardy in USDA zones 3 to 9. My farm is in zone 6b.
Both butterflies and hummingbirds are attracted to clematis flowers.
Known as the “Queen of the Climbers”, Clematis plants will train onto posts, trellises, and fences, or arch gracefully over doorways. What are your favorite clematis varieties? If you don’t already have clematis in your garden, I hope this inspires you plant one, or two, or three…
Here at my Bedford, New York farm, we already have lots of gorgeous, bright, and colorful dahlias blooming in the garden.
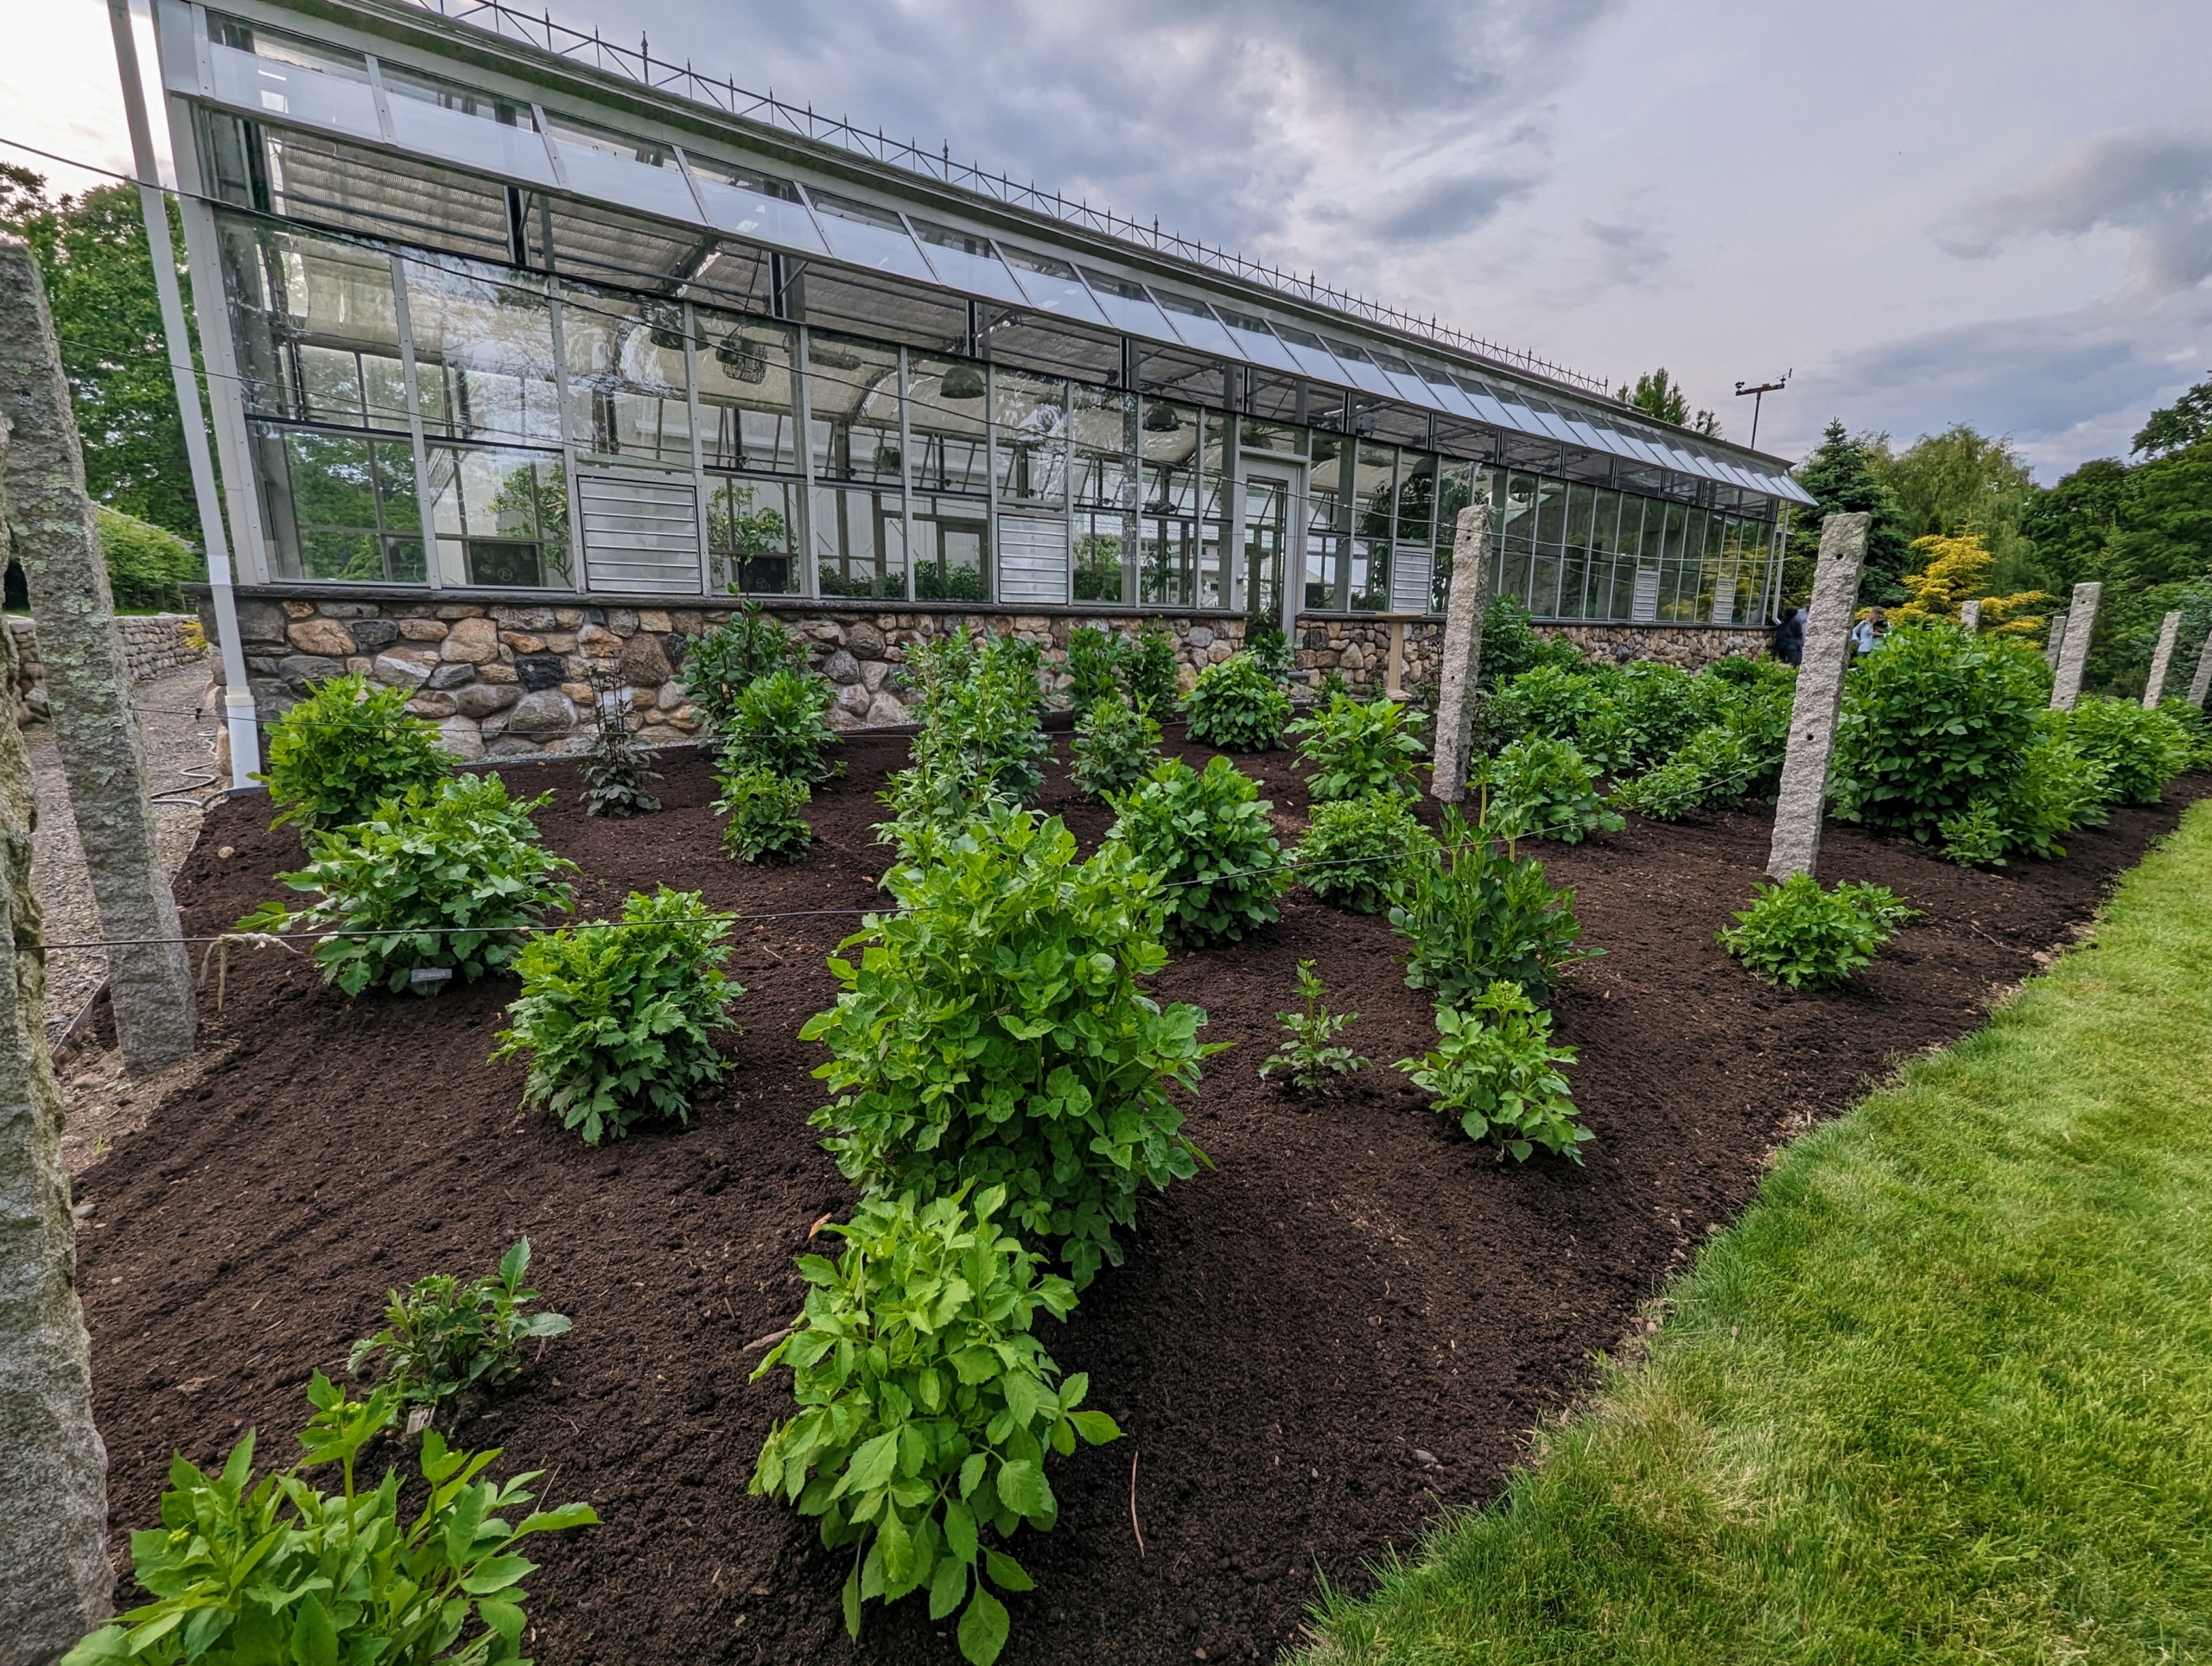
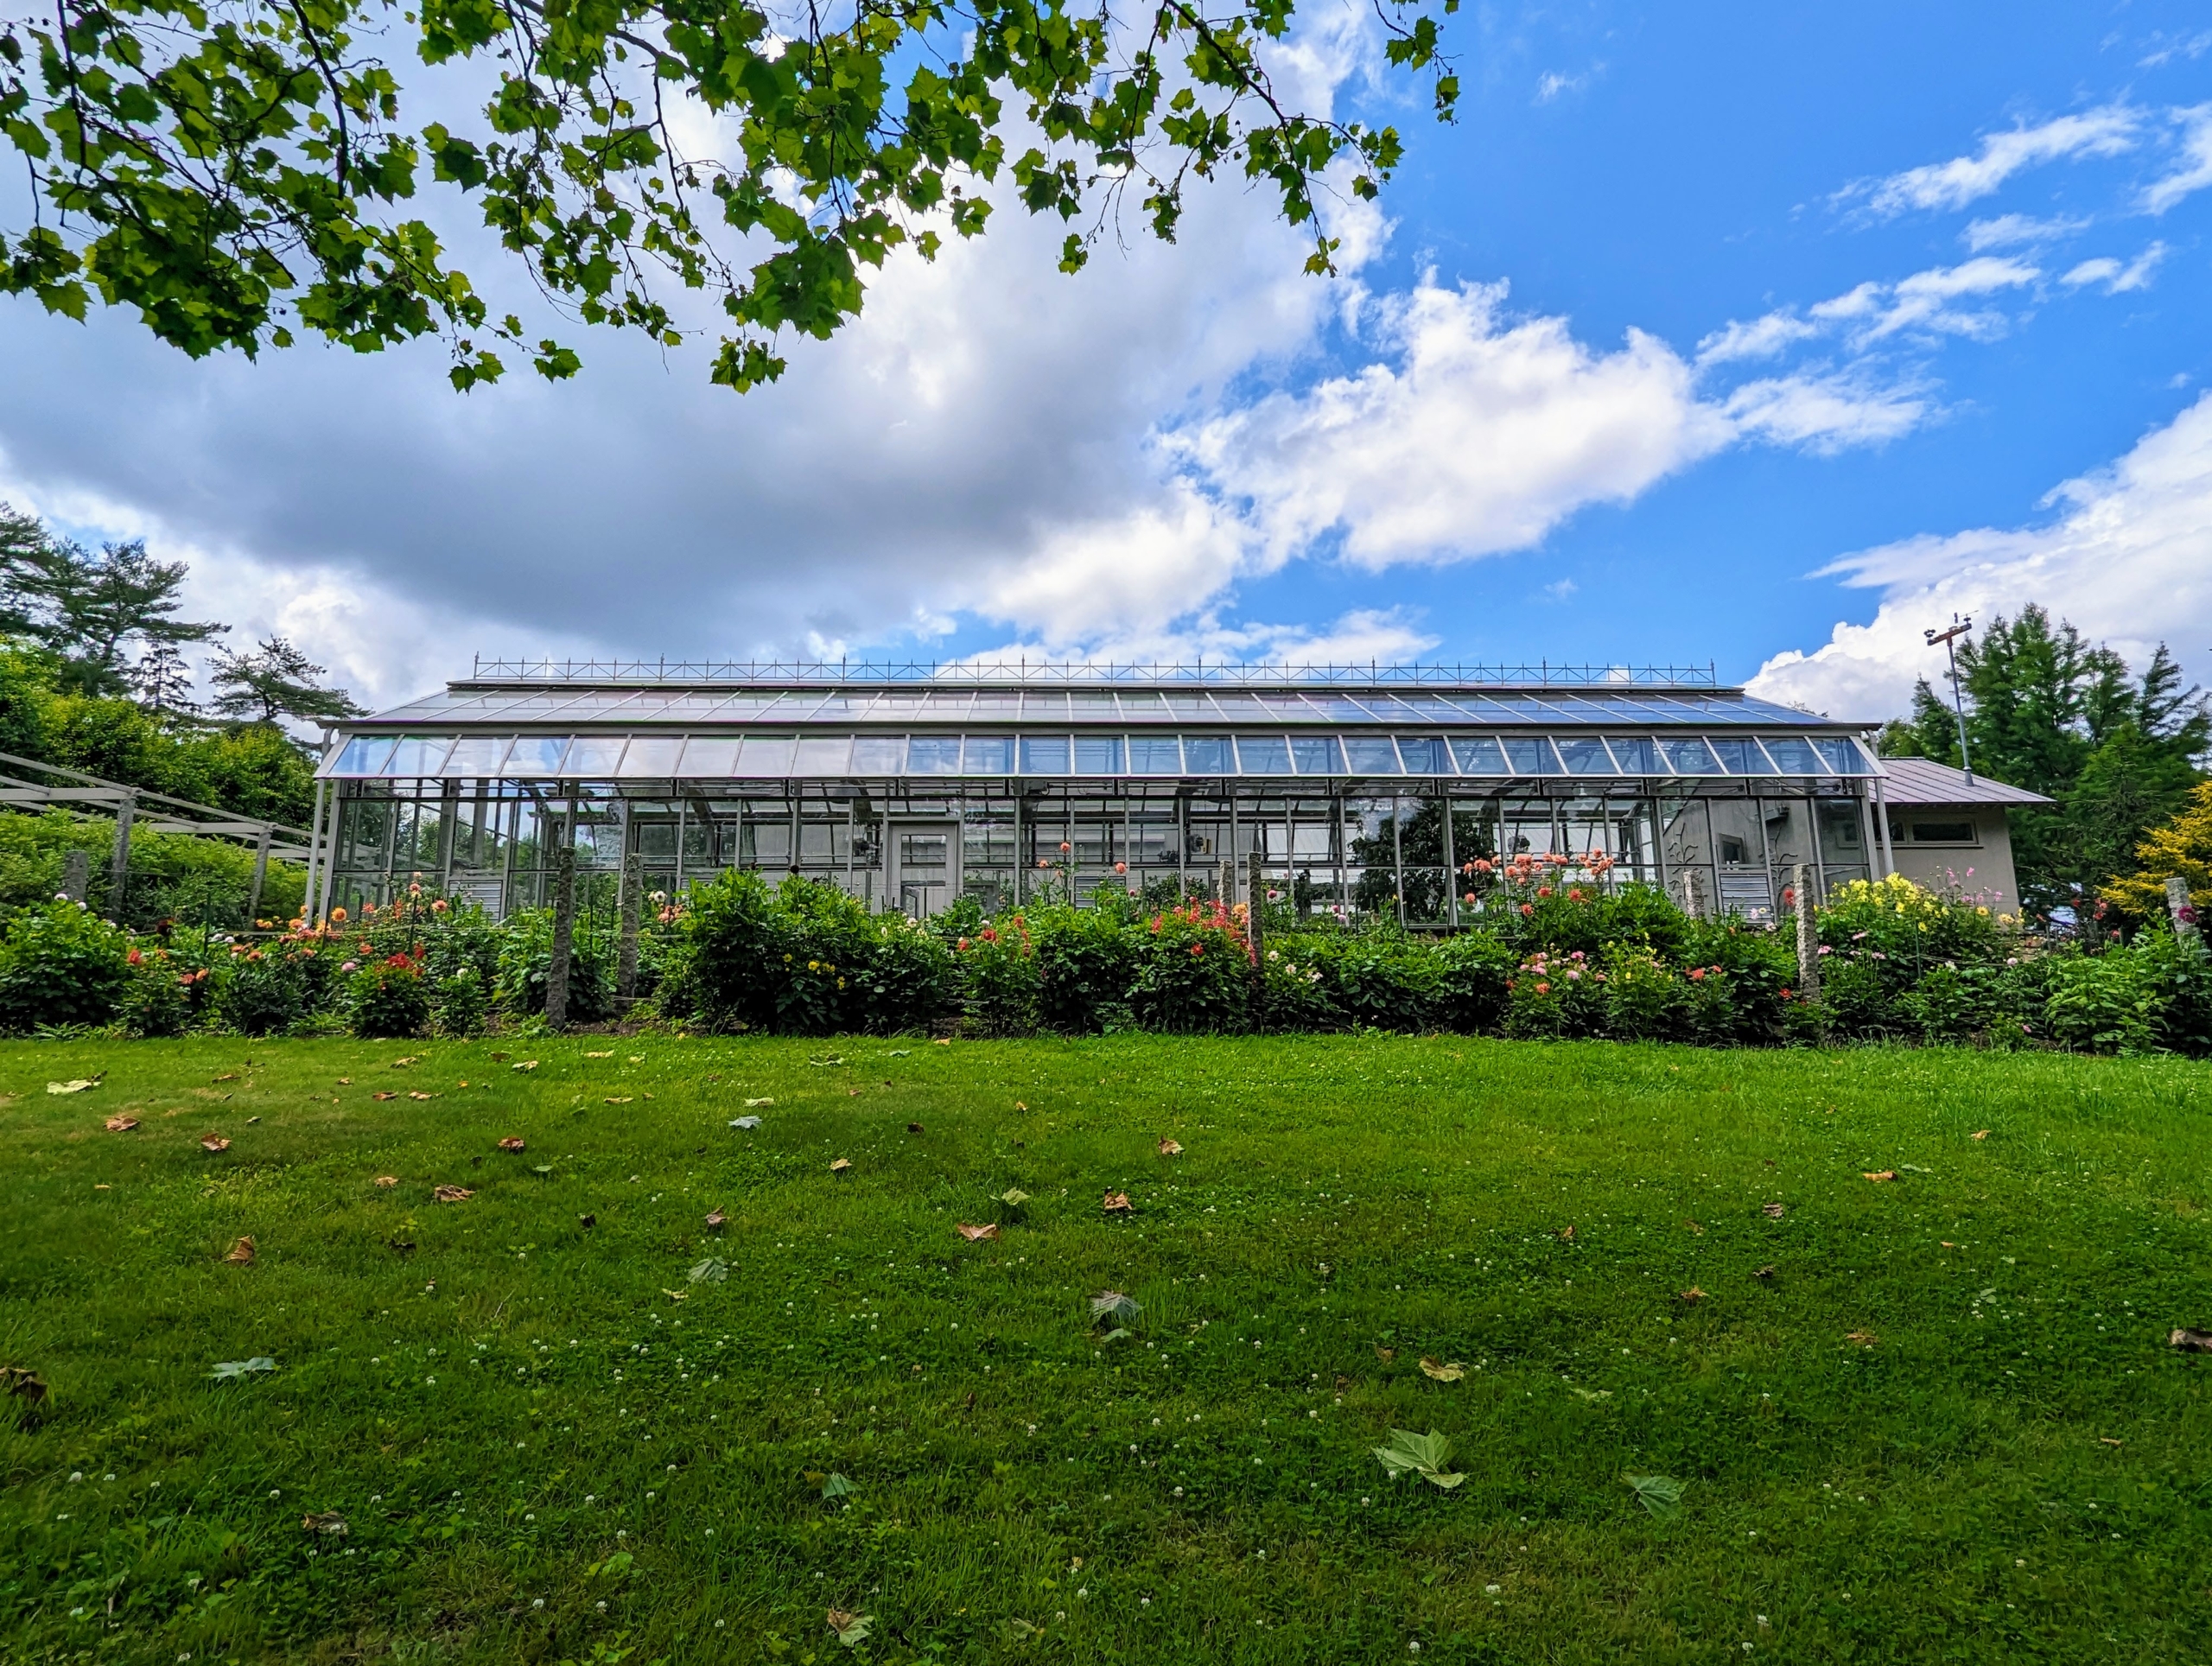
My dahlia garden is tucked behind my vegetable greenhouse in an area exposed to full sun and protected from strong winds. When in bloom, dahlias provide some of the garden's biggest and most spectacular flowers in a variety of different sizes, forms, and colors. However, because dahlias are native to Mexico, they are not winter-hardy and tend to split in freezing temperatures or mold in soggy, wet soil. In most areas outside the warmest regions of the United States, dahlia tubers must be dug up and stored or covered before the cold season. A couple of years ago, we started covering the entire bed with burlap and a thick layer of hay. And it's proven to be a great solution for protecting the plants so we have superlative dahlias blooming right now.
Enjoy these photos.
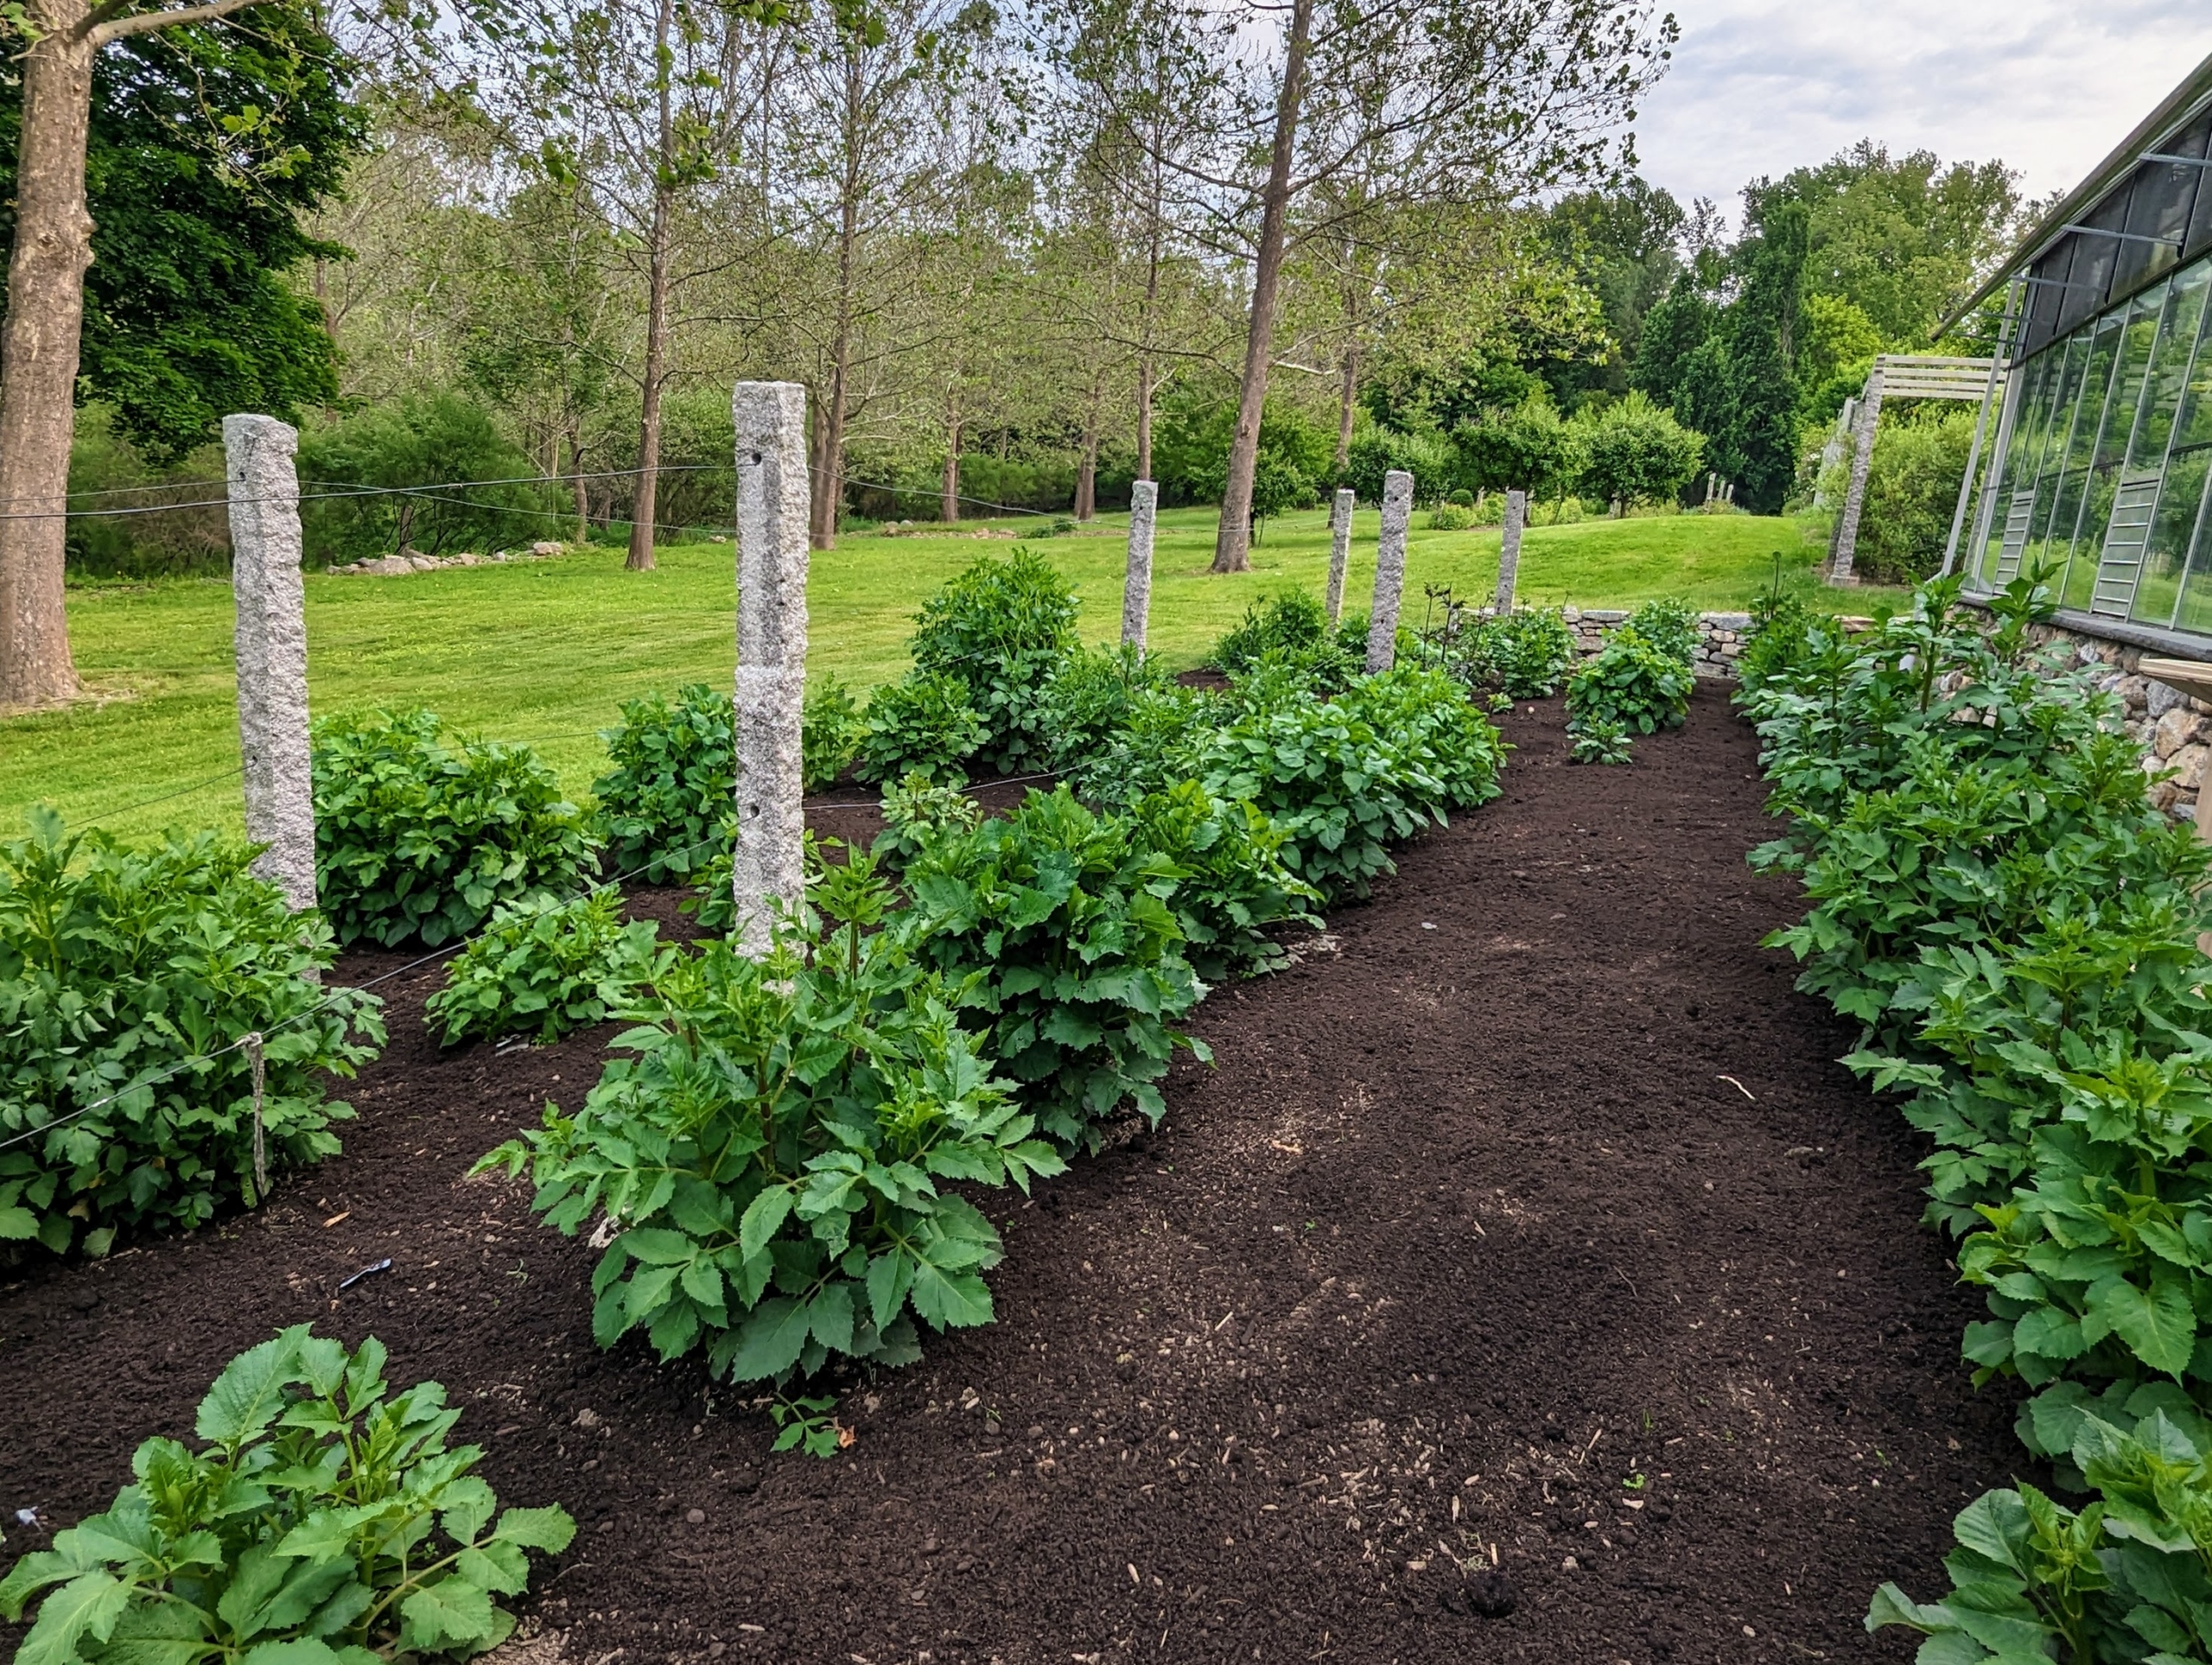
Here’s a photo of my dahlia garden less than three weeks ago. We had just mulched it. All the plants are lush and green, but at this time, there were no blooms yet – not one.
Dahlias thrive in rich, well-drained soil with a pH level of 6.5 to 7.0 and slightly acidic. Over the winter, the entire area was covered with hay and protective tarps. This area is also blocked by my large vegetable greenhouse. It has served us quite well in this location…
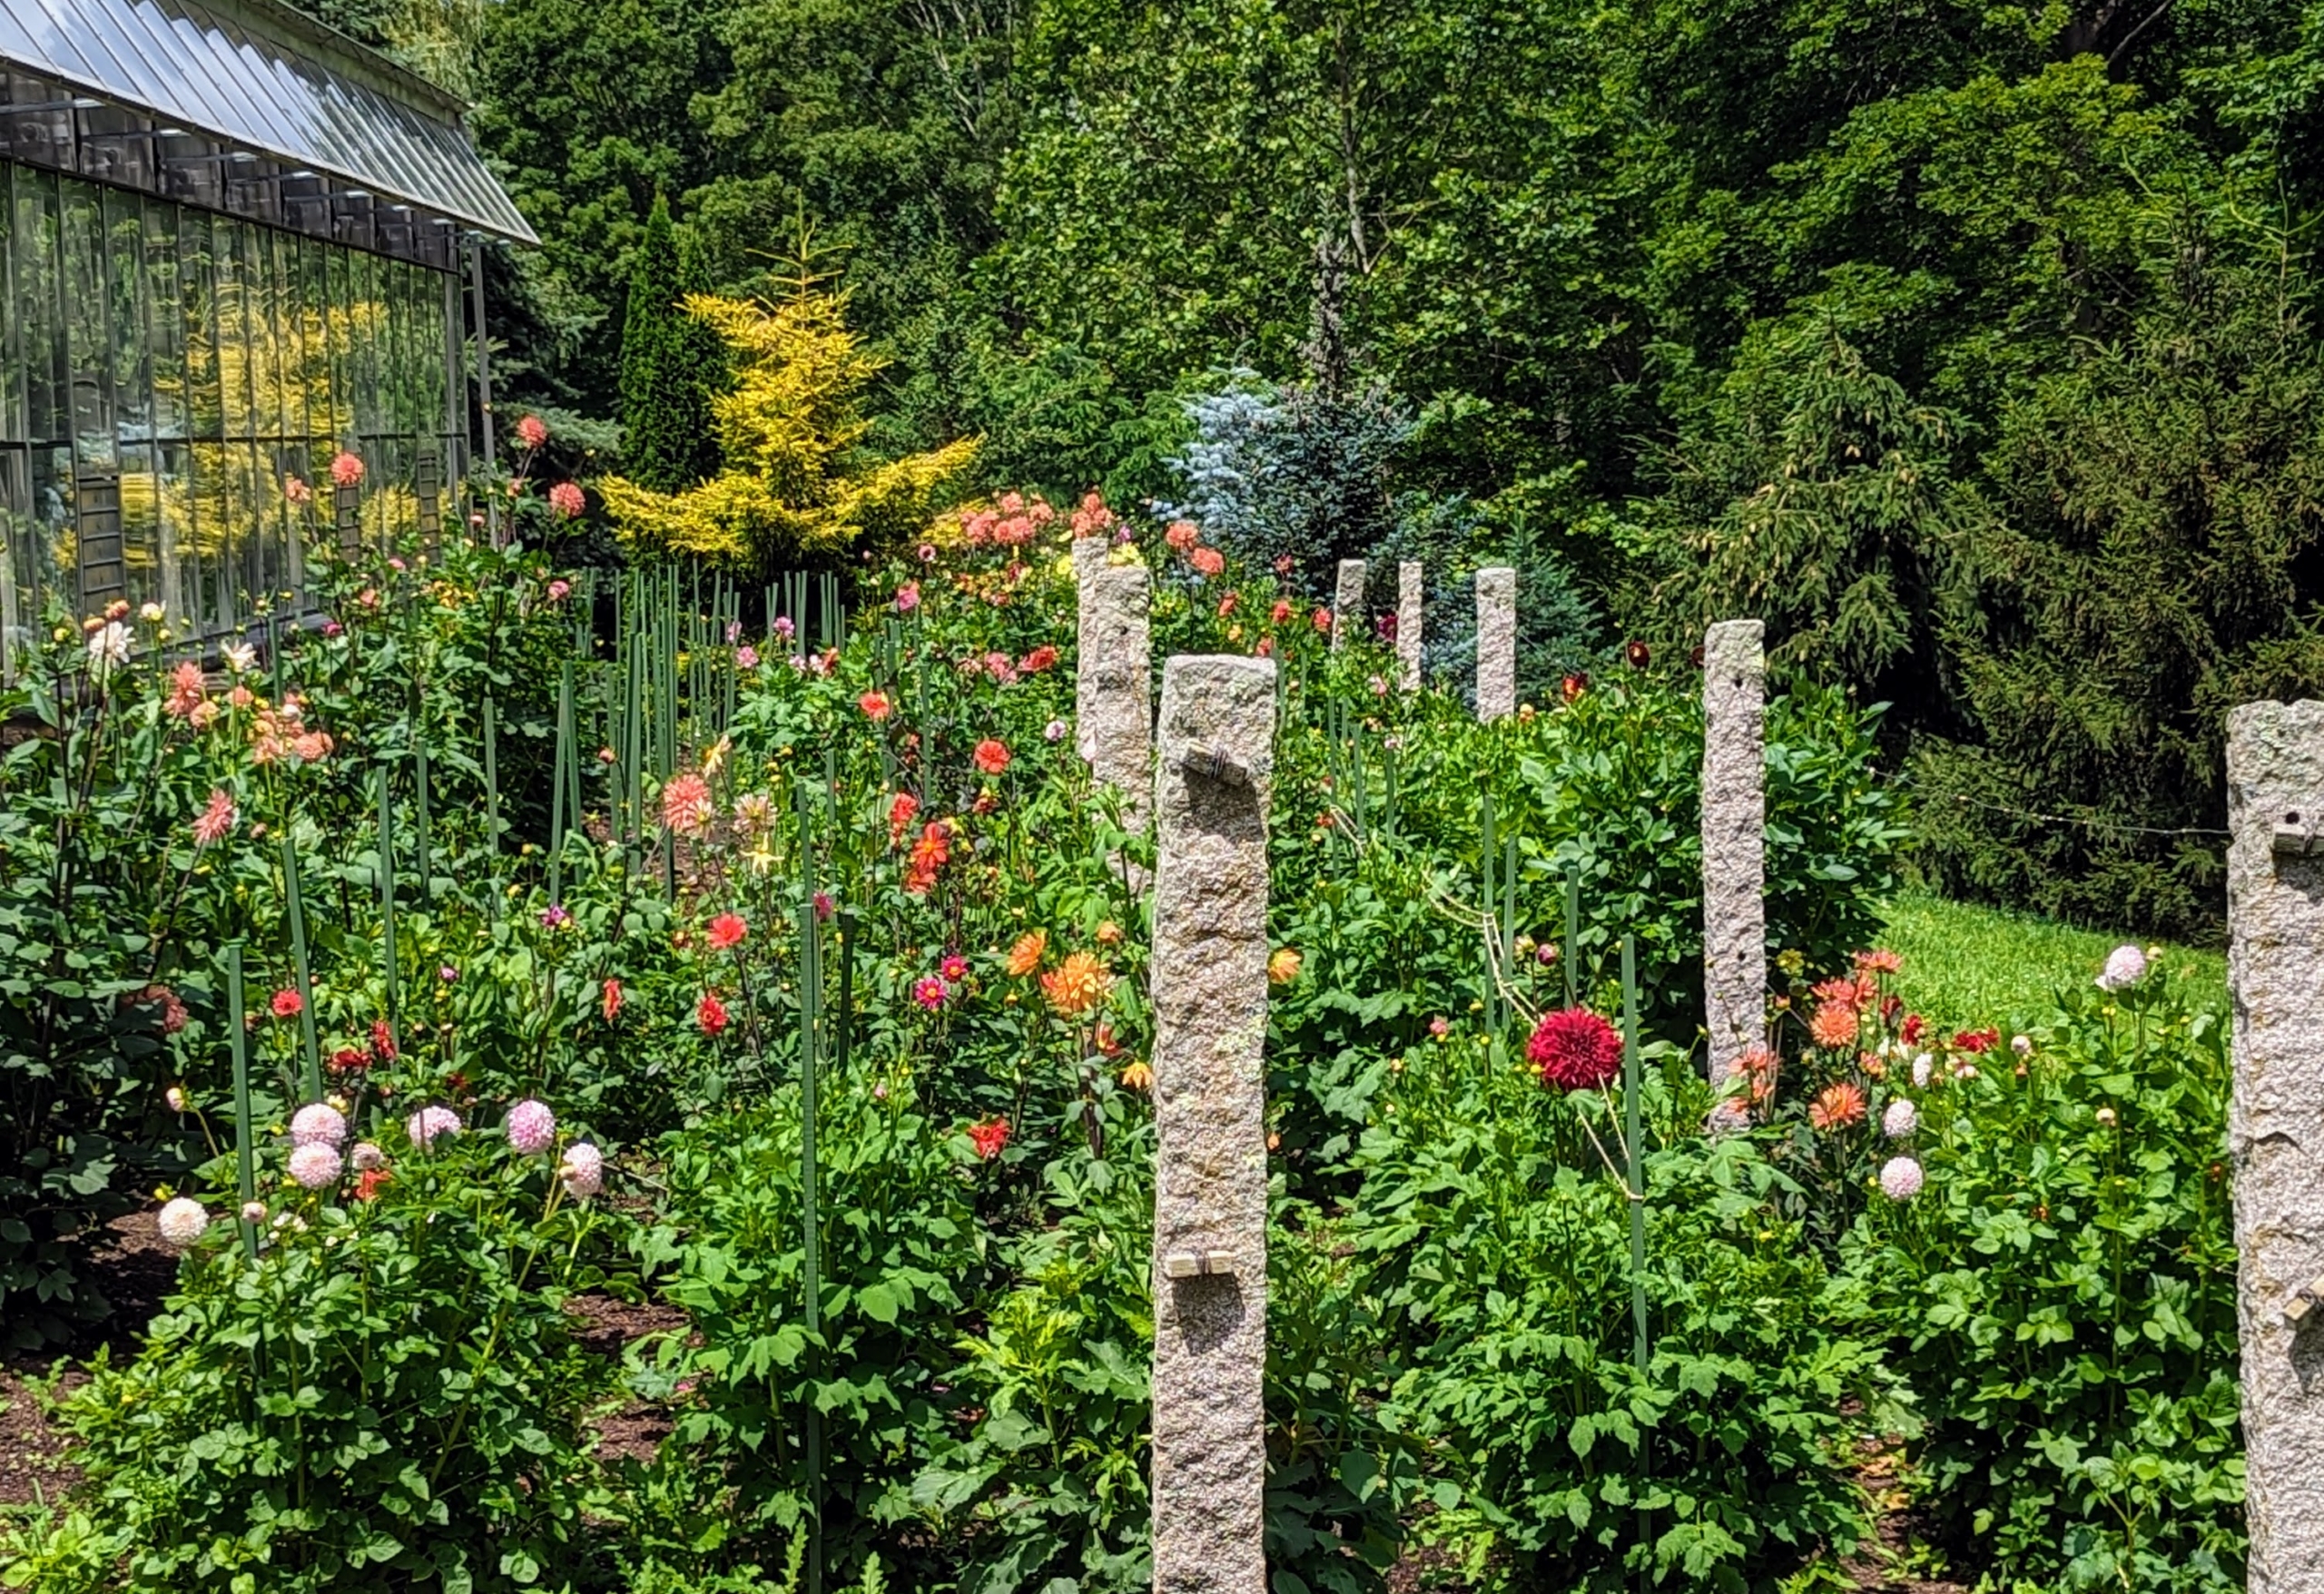
… And just like that, two and a half weeks later, we have all these blooms. Dahlias grow more blooms when they get at least six to eight hours of direct sunlight per day. This spot was previously used for growing grapes, but it has now turned out to be a perfect place for our dahlias.
For the most part, dahlias are at their best from late summer through fall, when many other plants are starting to fade, but our flowers are already looking spectacular so early in the season.
The array of flower colors, sizes, and shapes is astounding. Dahlias come in white, shades of pink, red, yellow, orange, shades of purple, and various combinations of these colors – every color but true blue. Do you know… in the 19th century, a London newspaper offered a pound, or a little more than a dollar, to the first breeder to create a blue dahlia? Interestingly, the reward was never claimed, but there have been many attempts that are near-blue. Like many flower varieties, there is also no pure black variety—only dark red and dark purple.
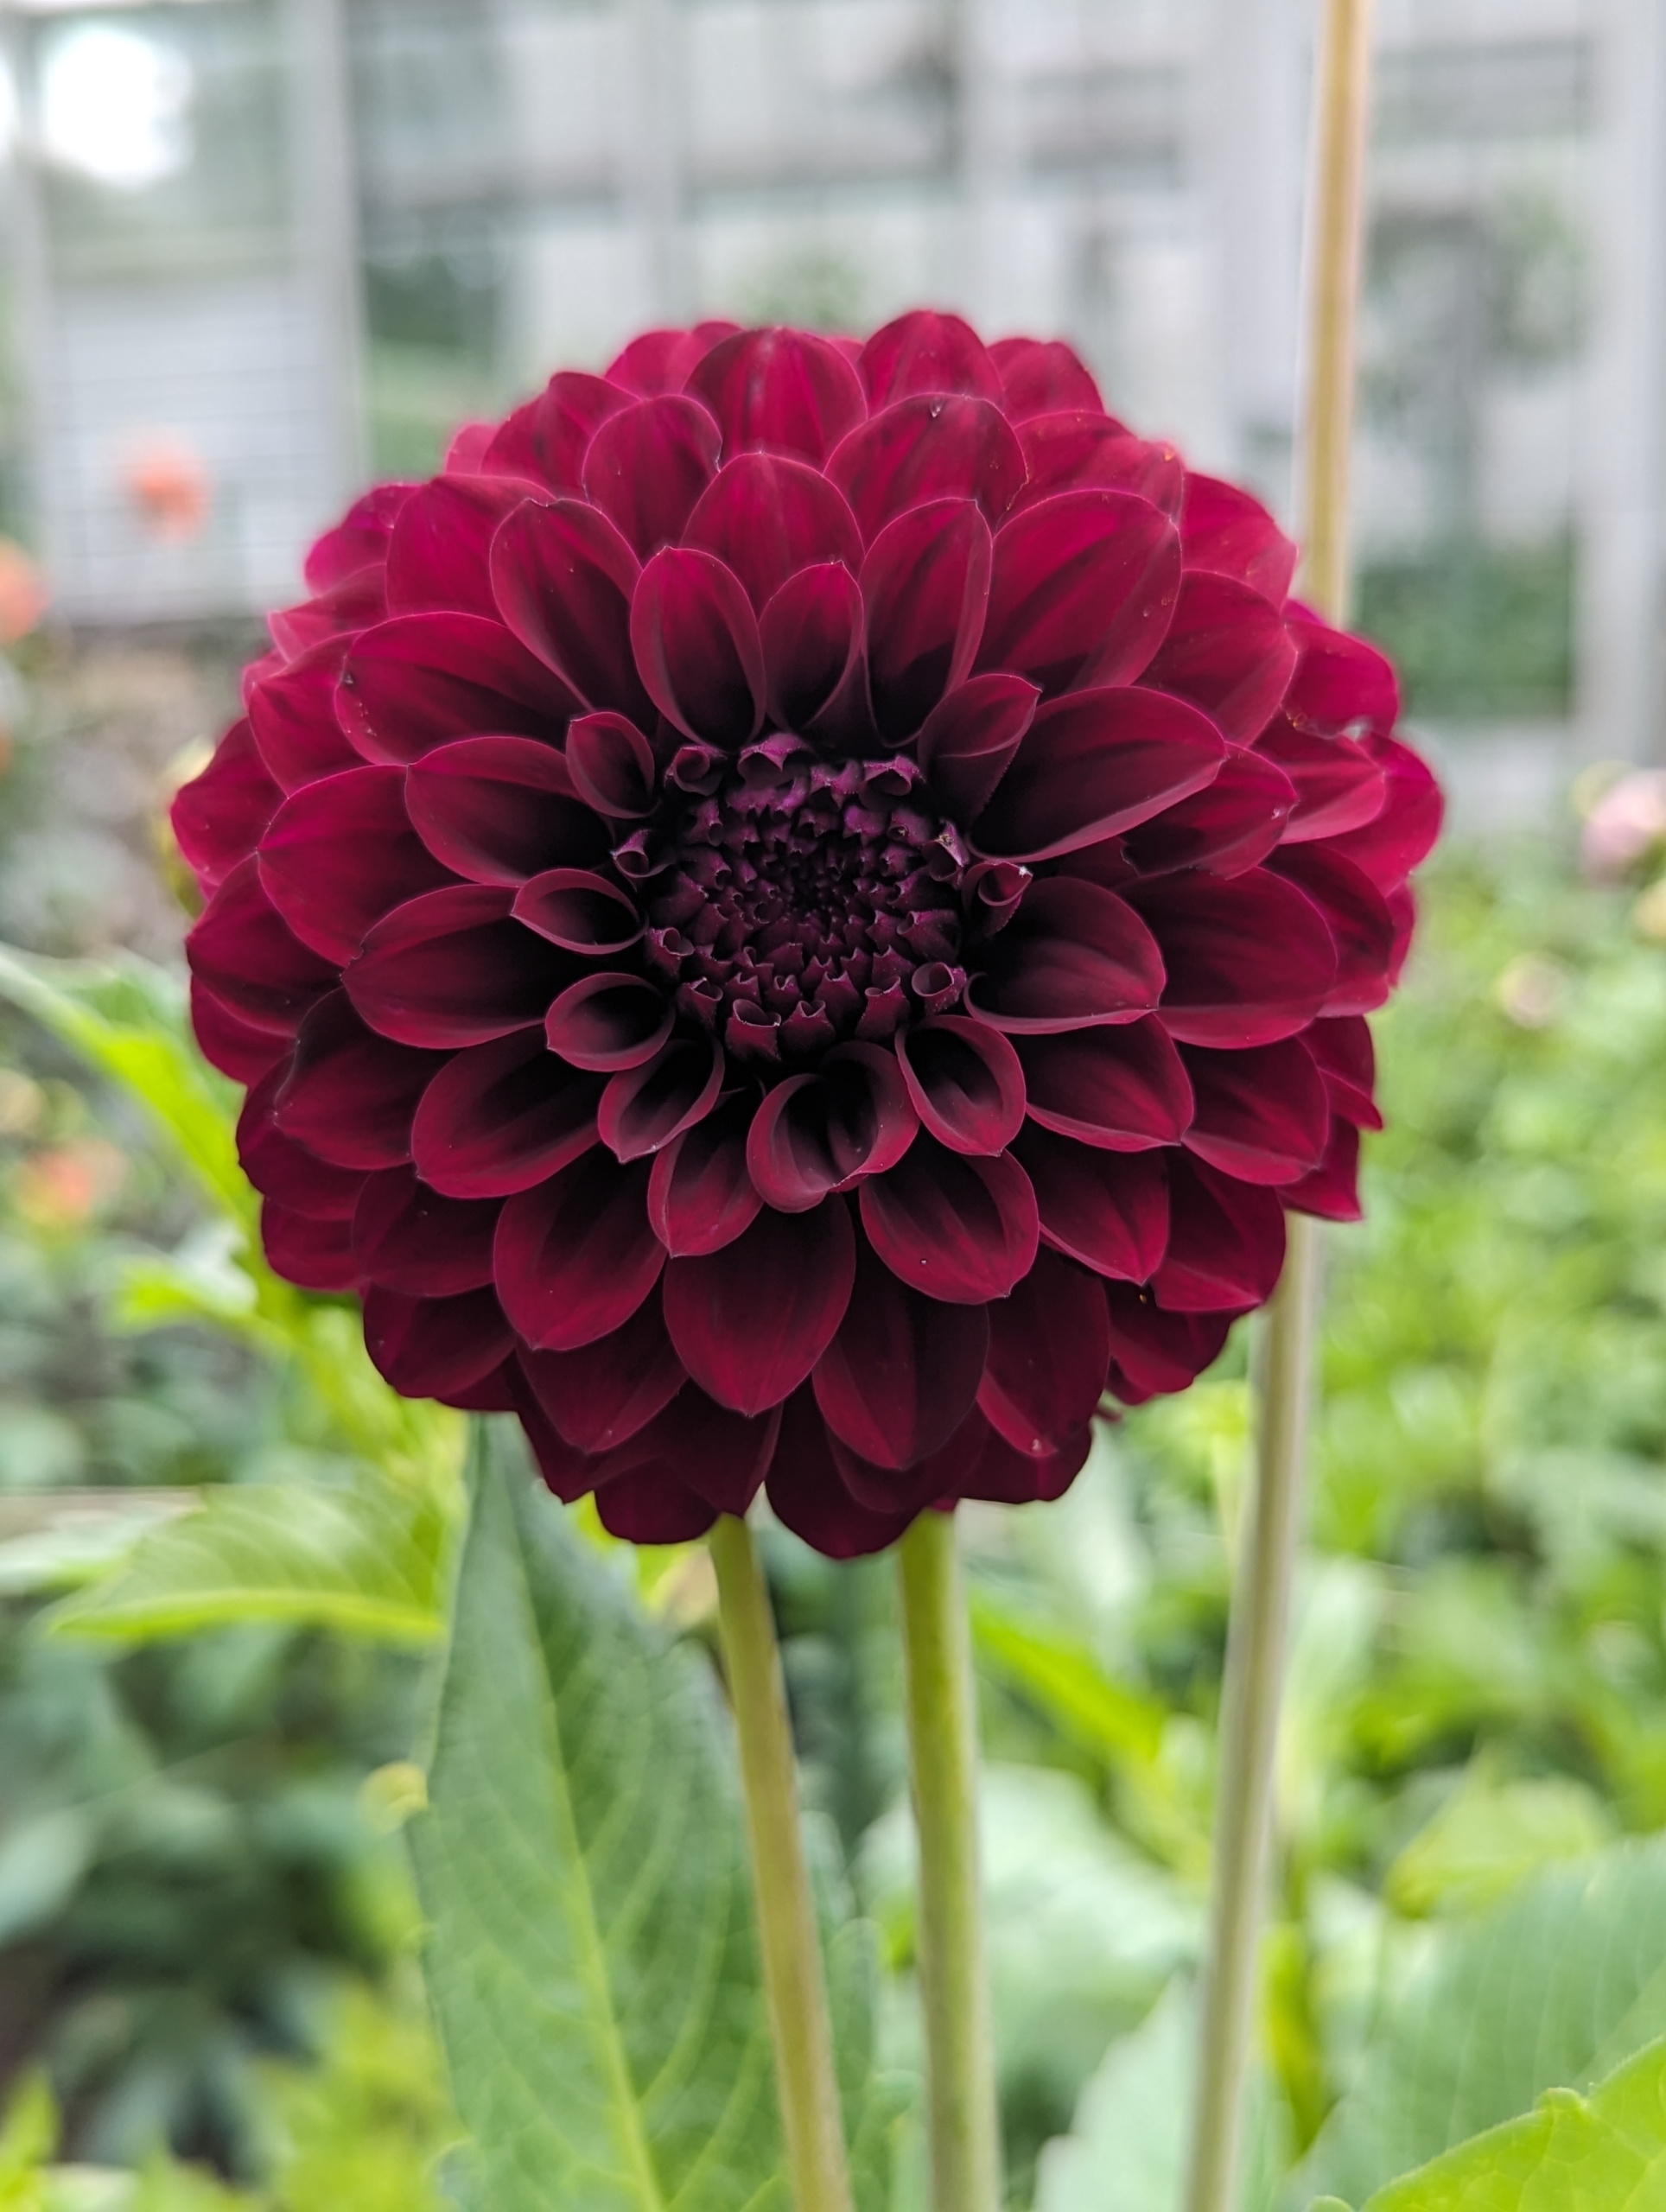
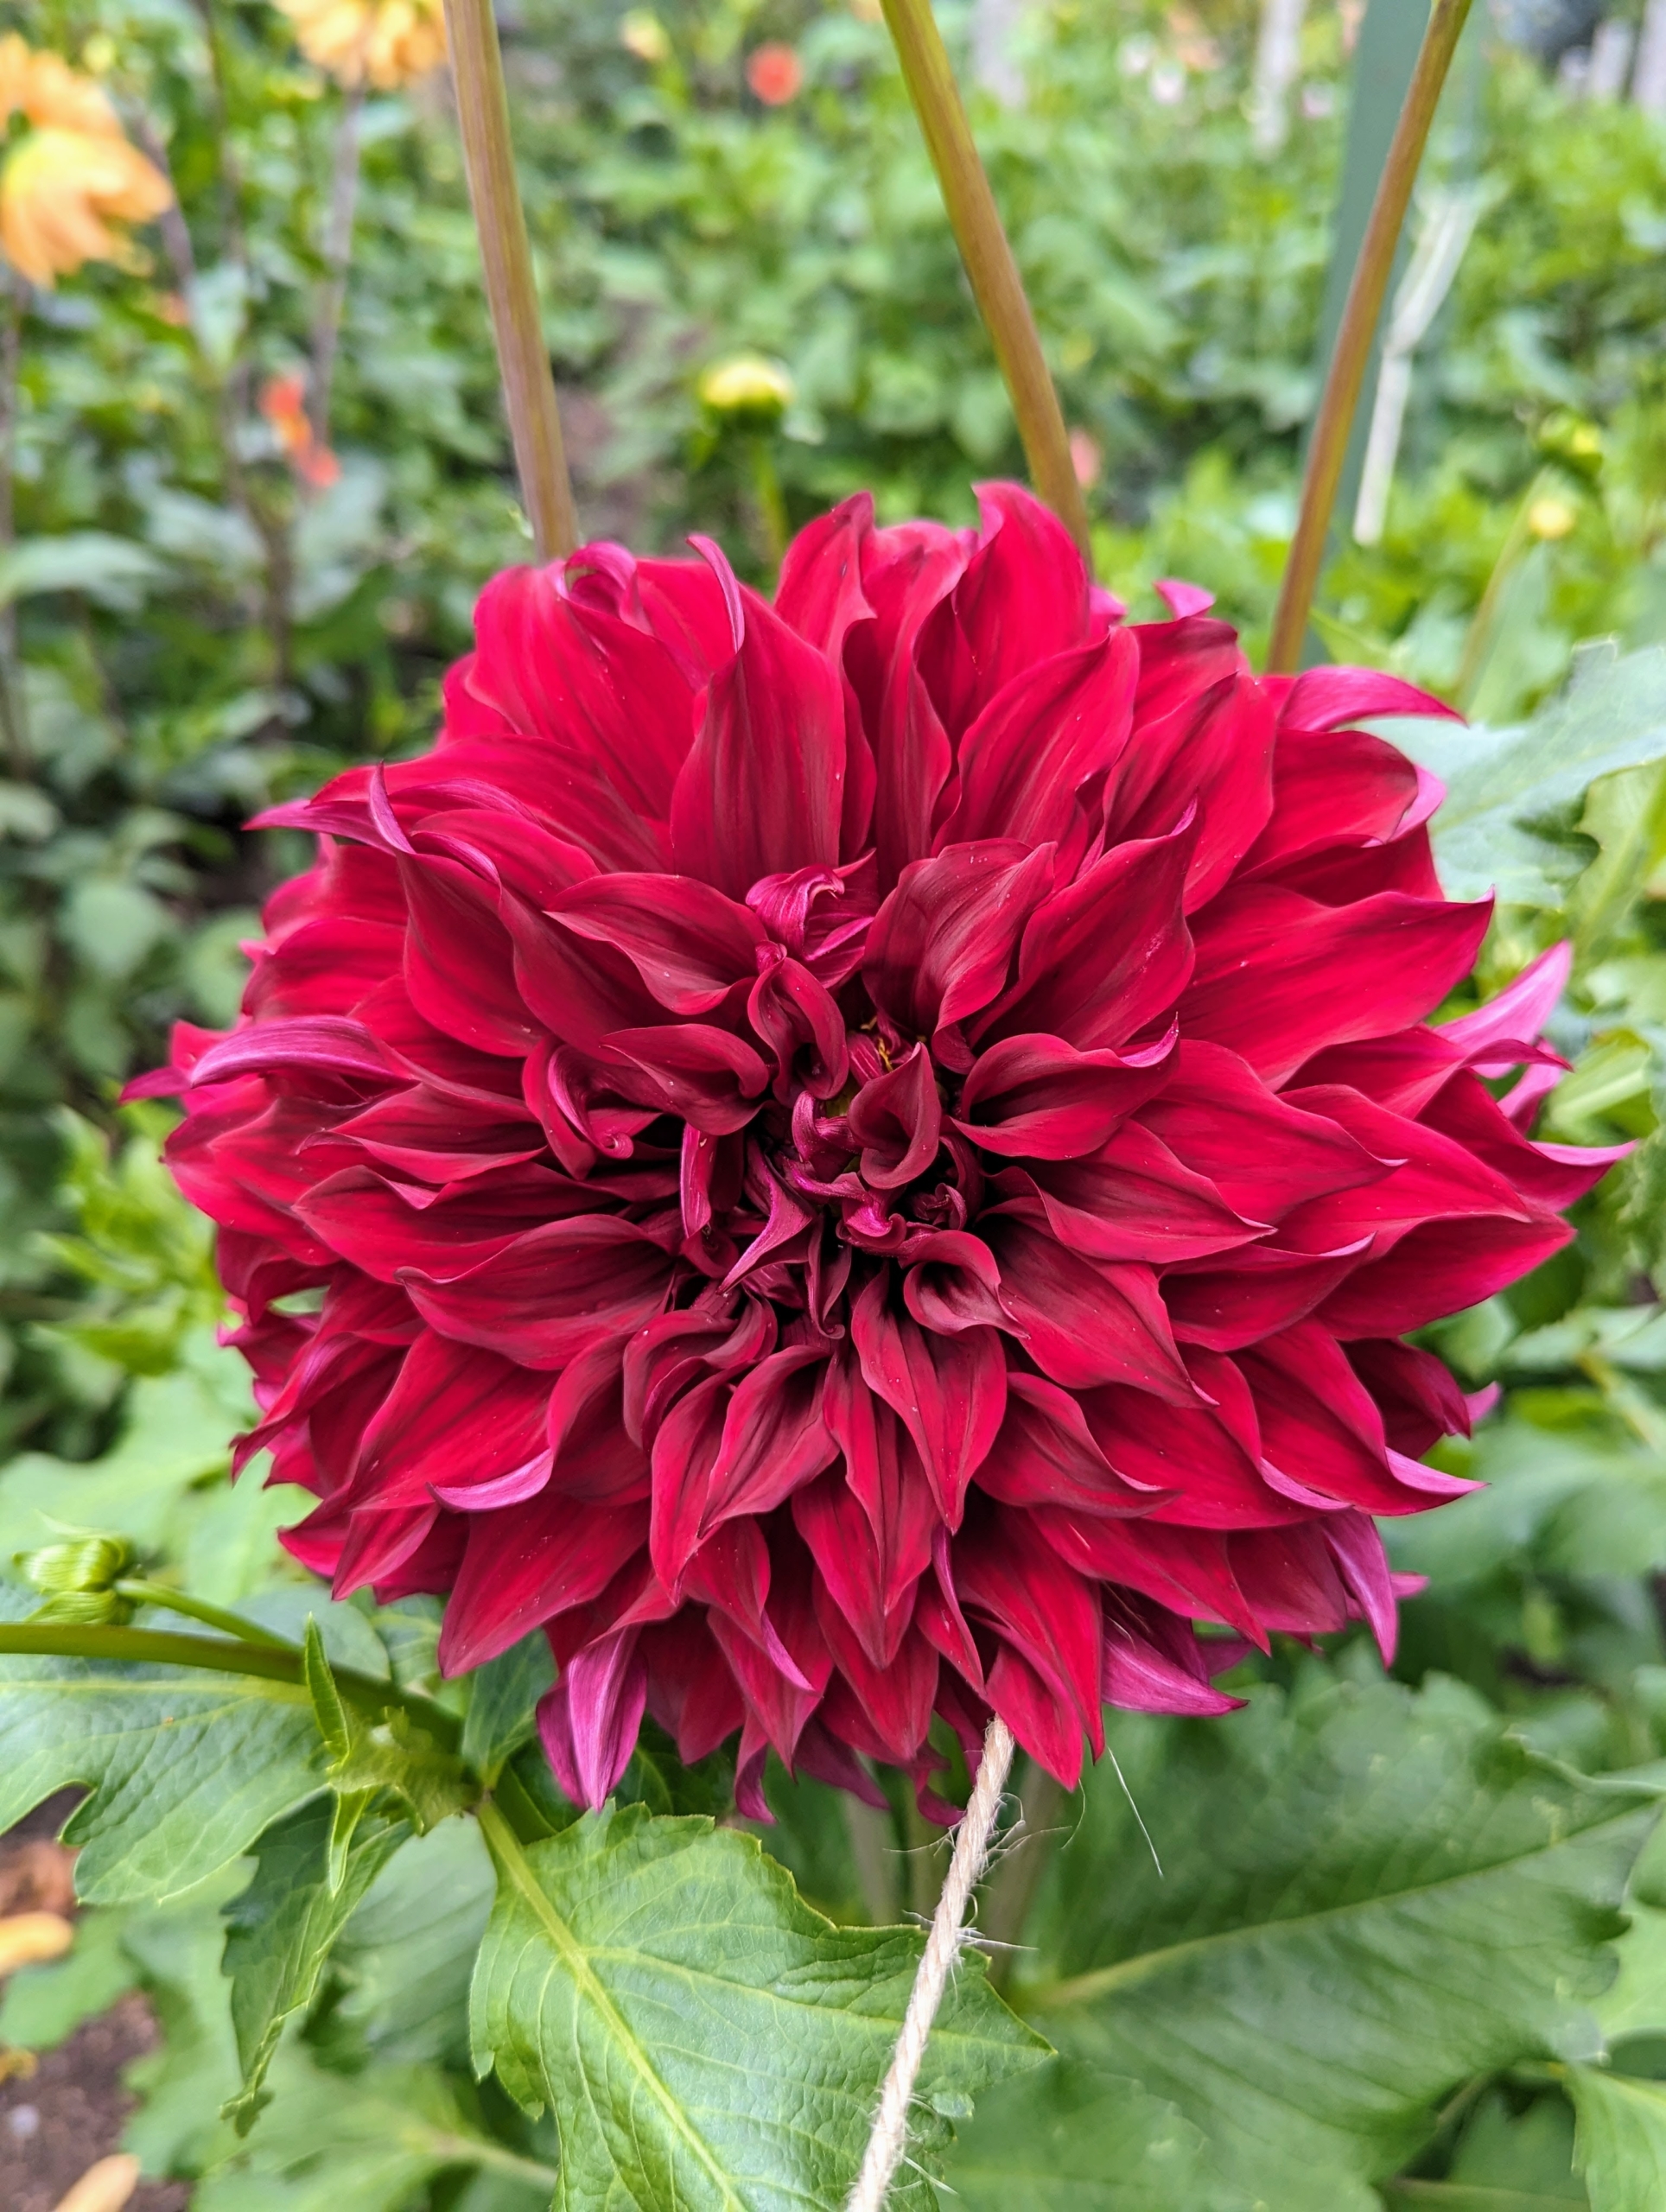
And here is one in burgundy standing so tall.
Dahlias are named after 18th-century Swedish botanist Anders Dahl. He actually categorized dahlias as a vegetable because of their edible tubers. The tubers are said to taste like a mix between potatoes and radishes.
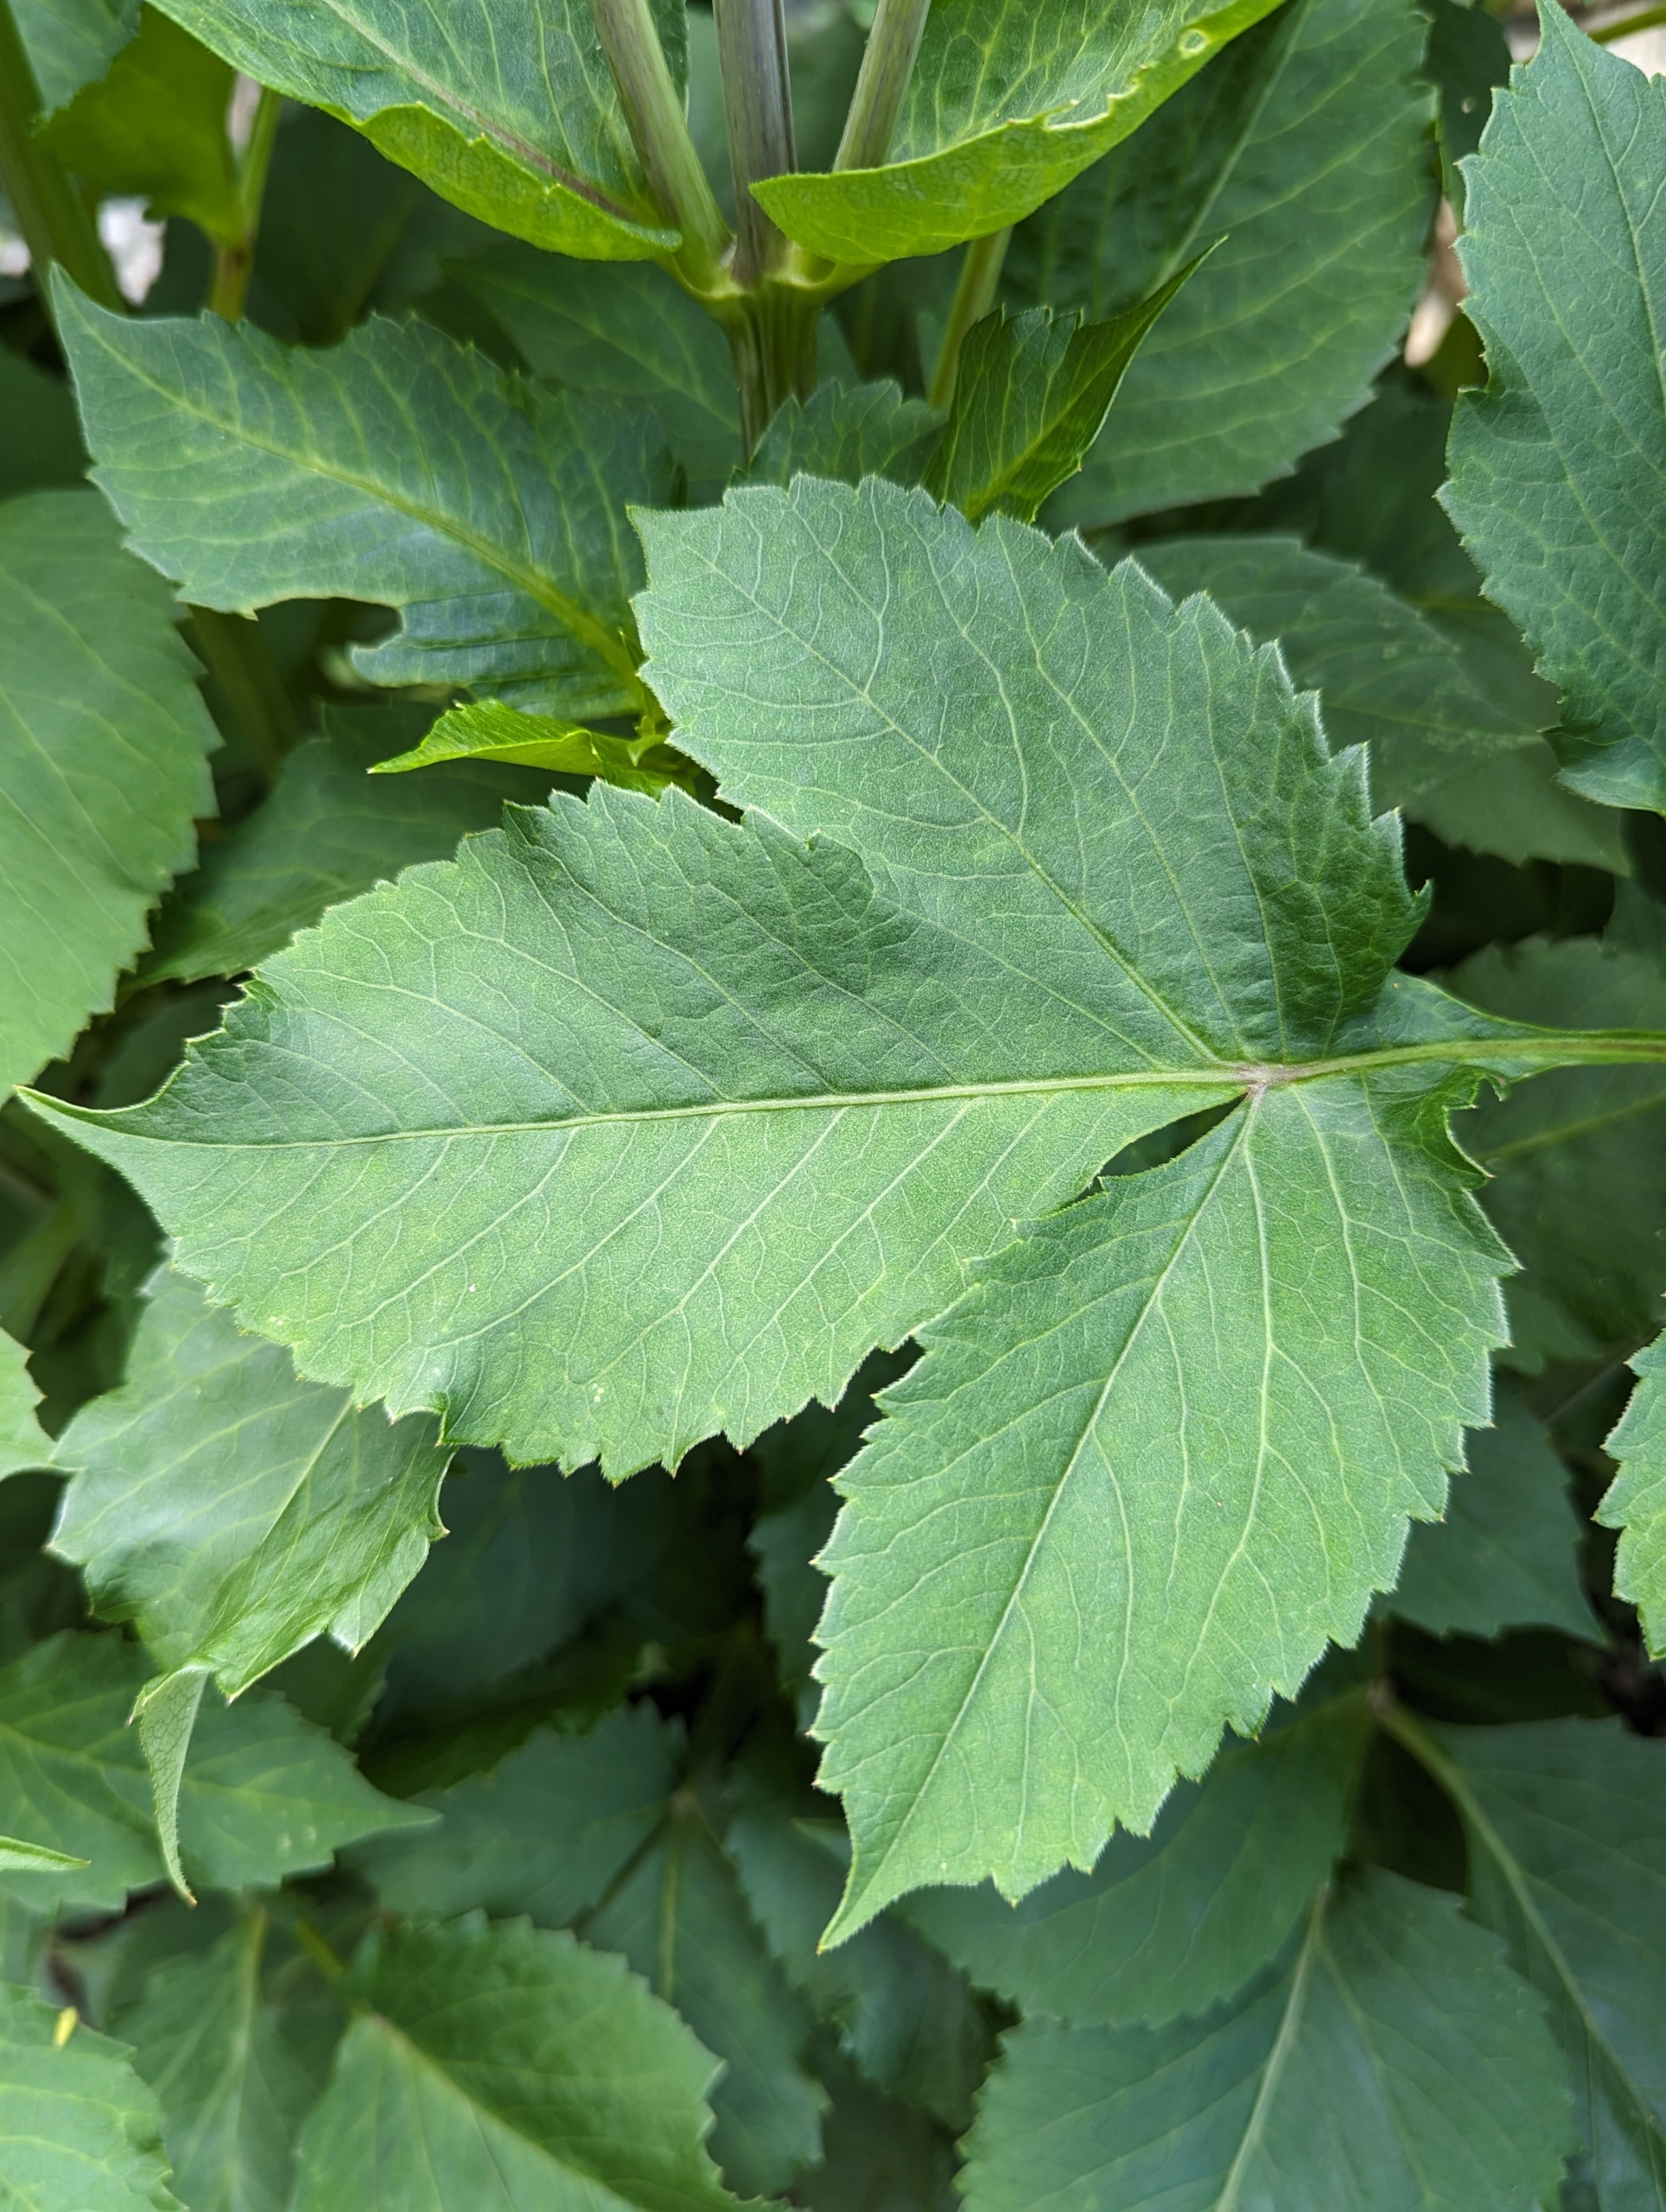
Dahlia plant leaves grow segments that are ovate to oblong to lanceolate in shape. The leaf margins may be lobed or dentate. Leaves may be green, reddish-purple, or purple-black depending on the variety.
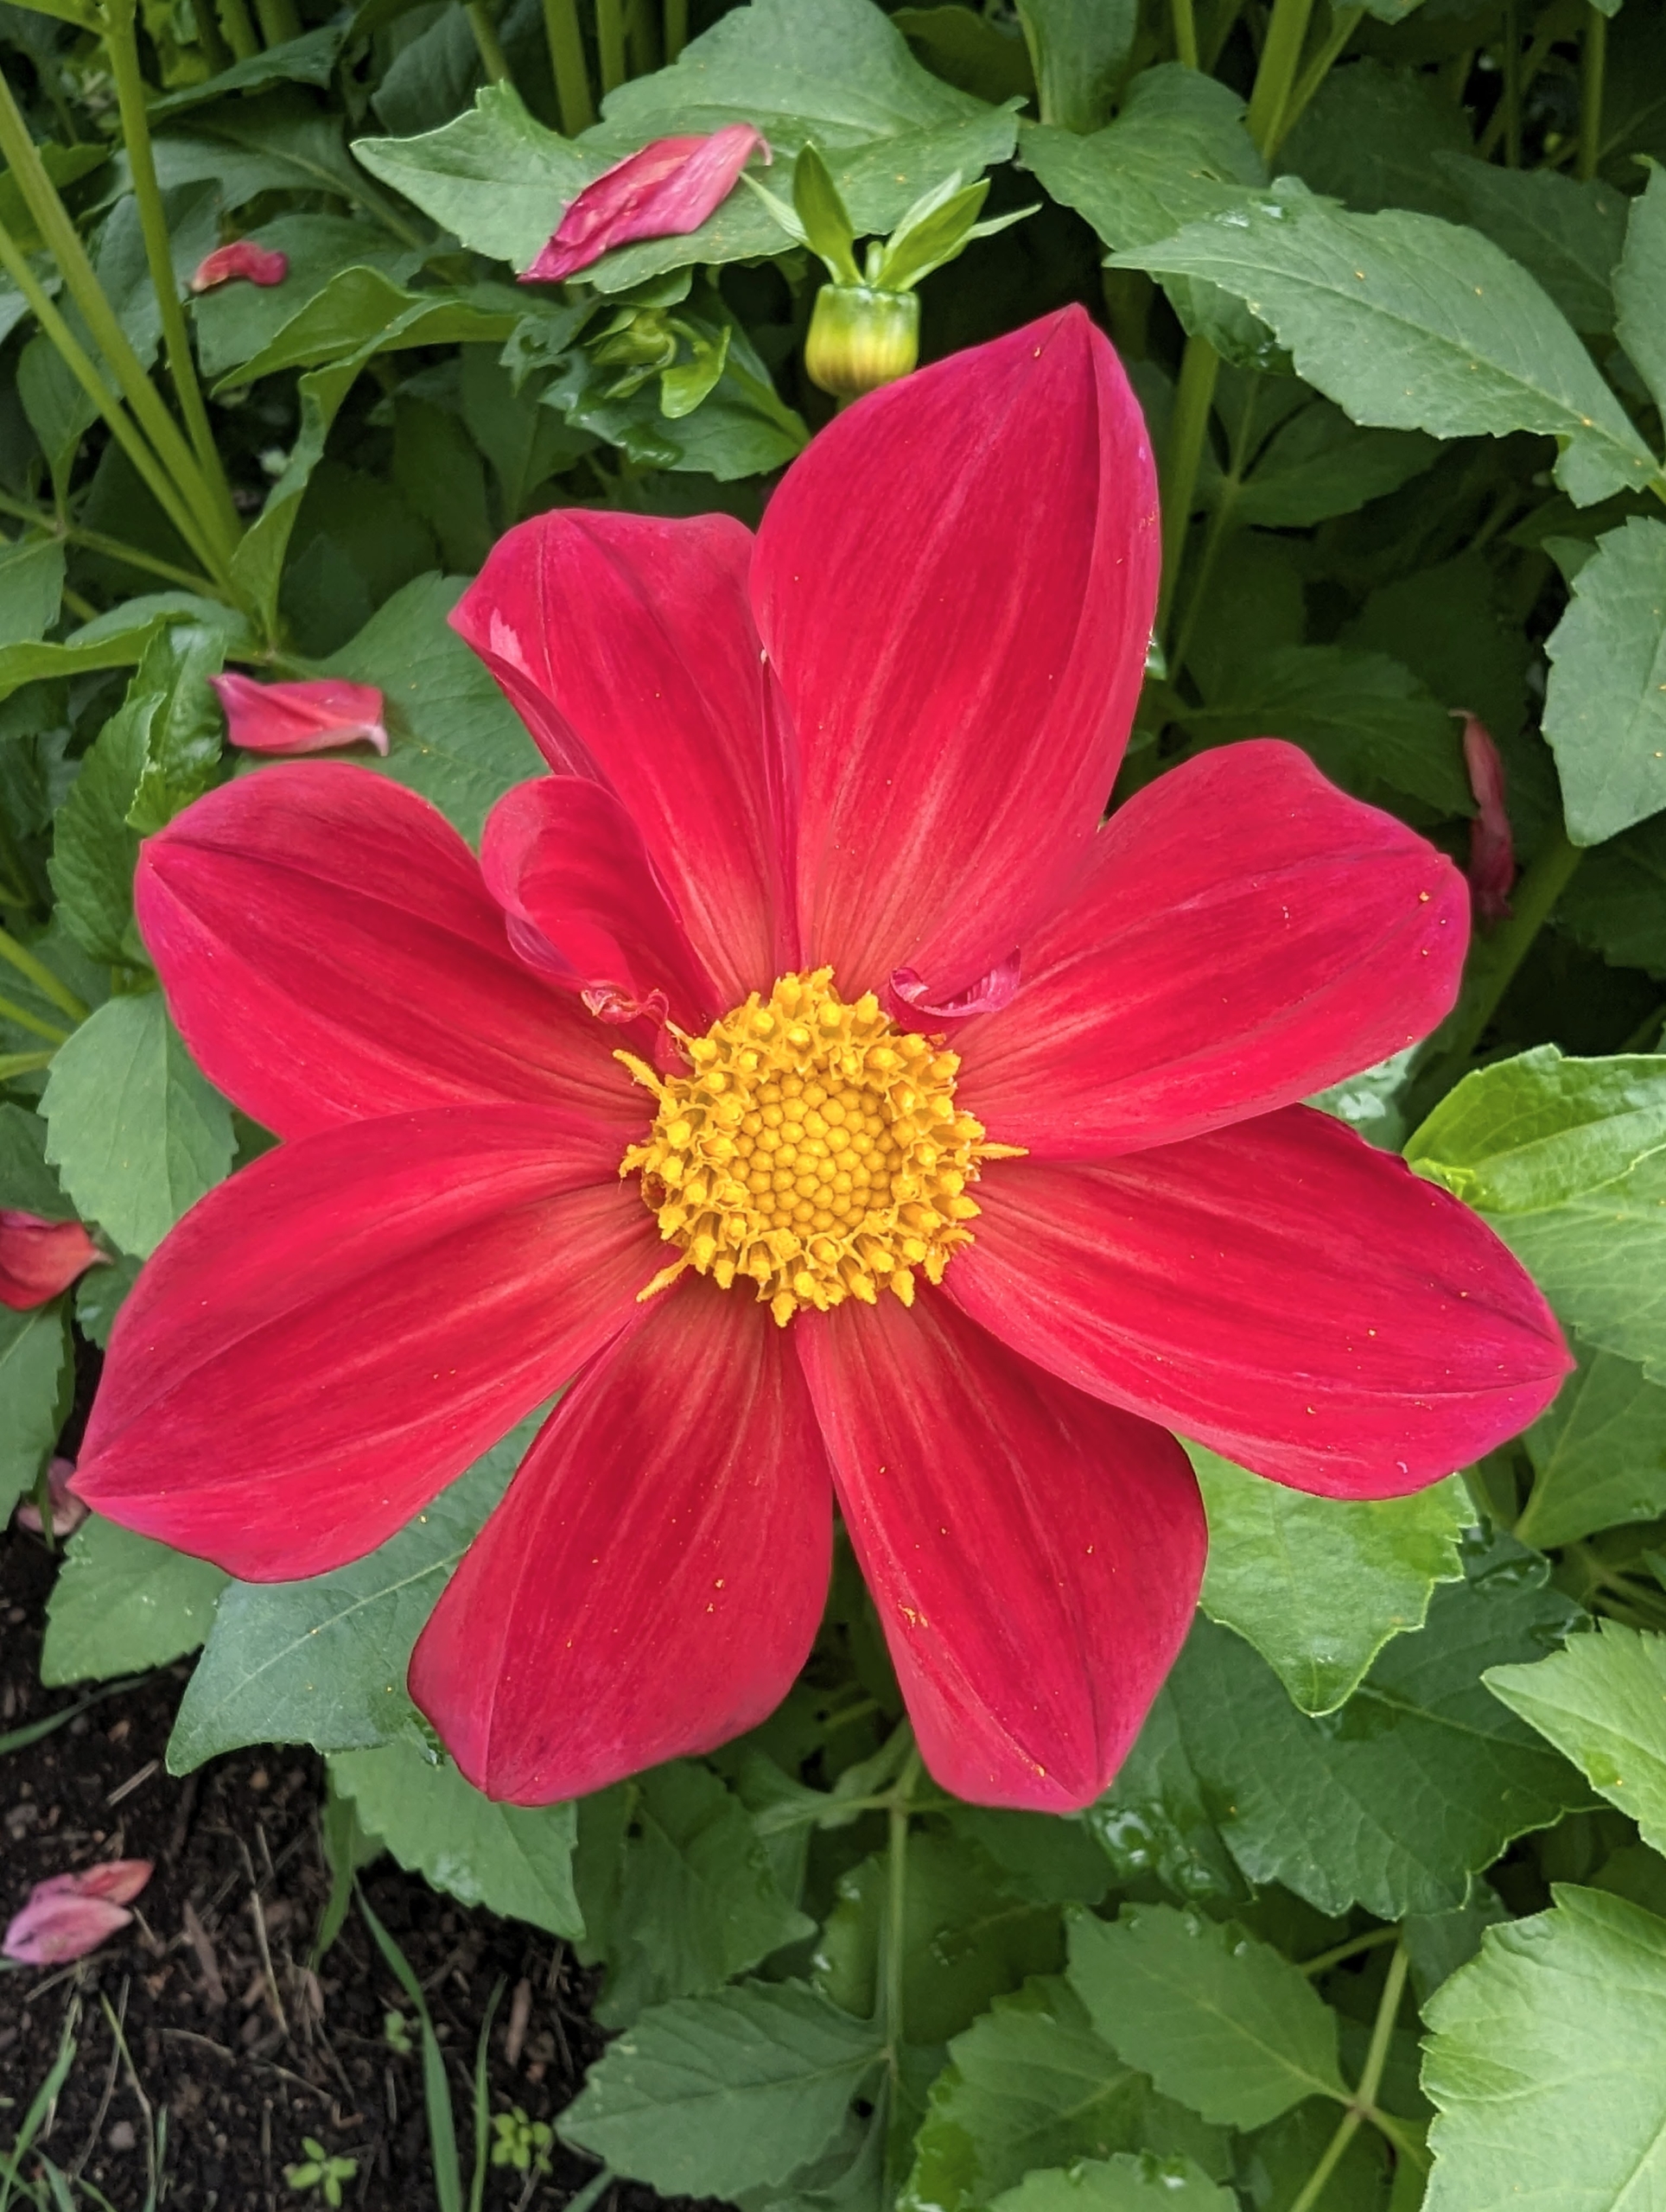
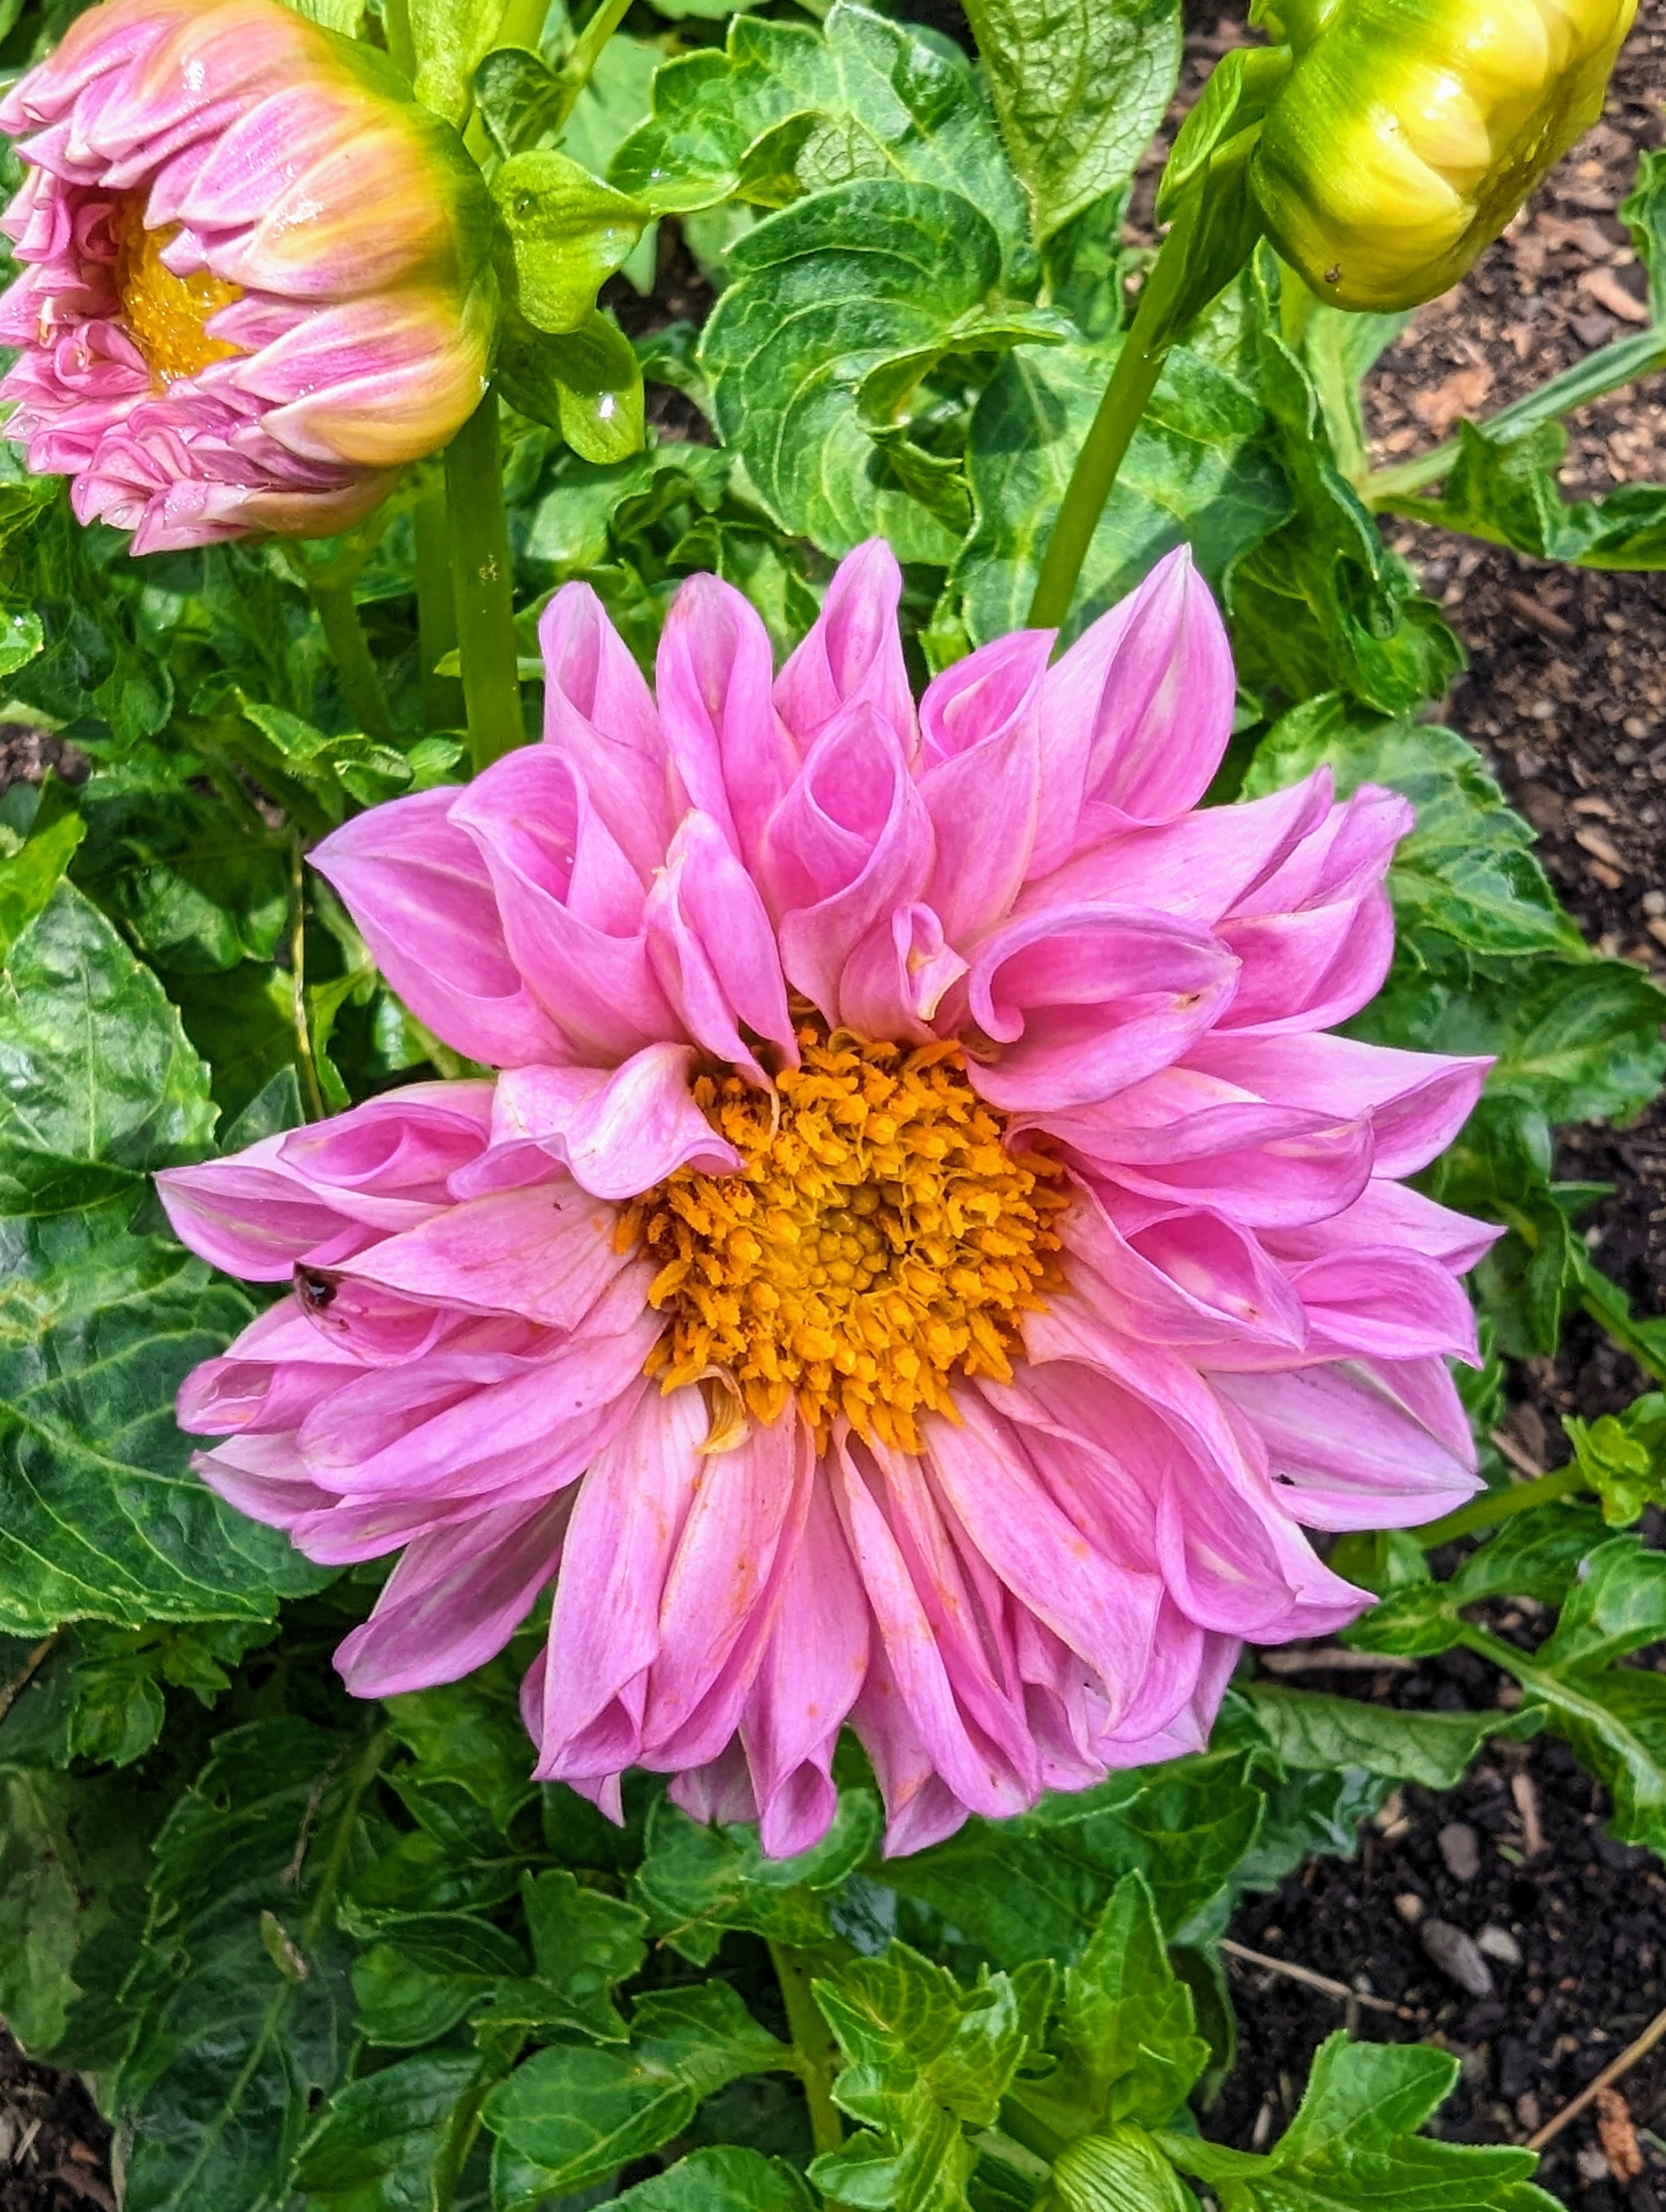
Dahlias are classified according to flower shape and petal arrangement. This one is a bright corn yellow with a bold yellow center.
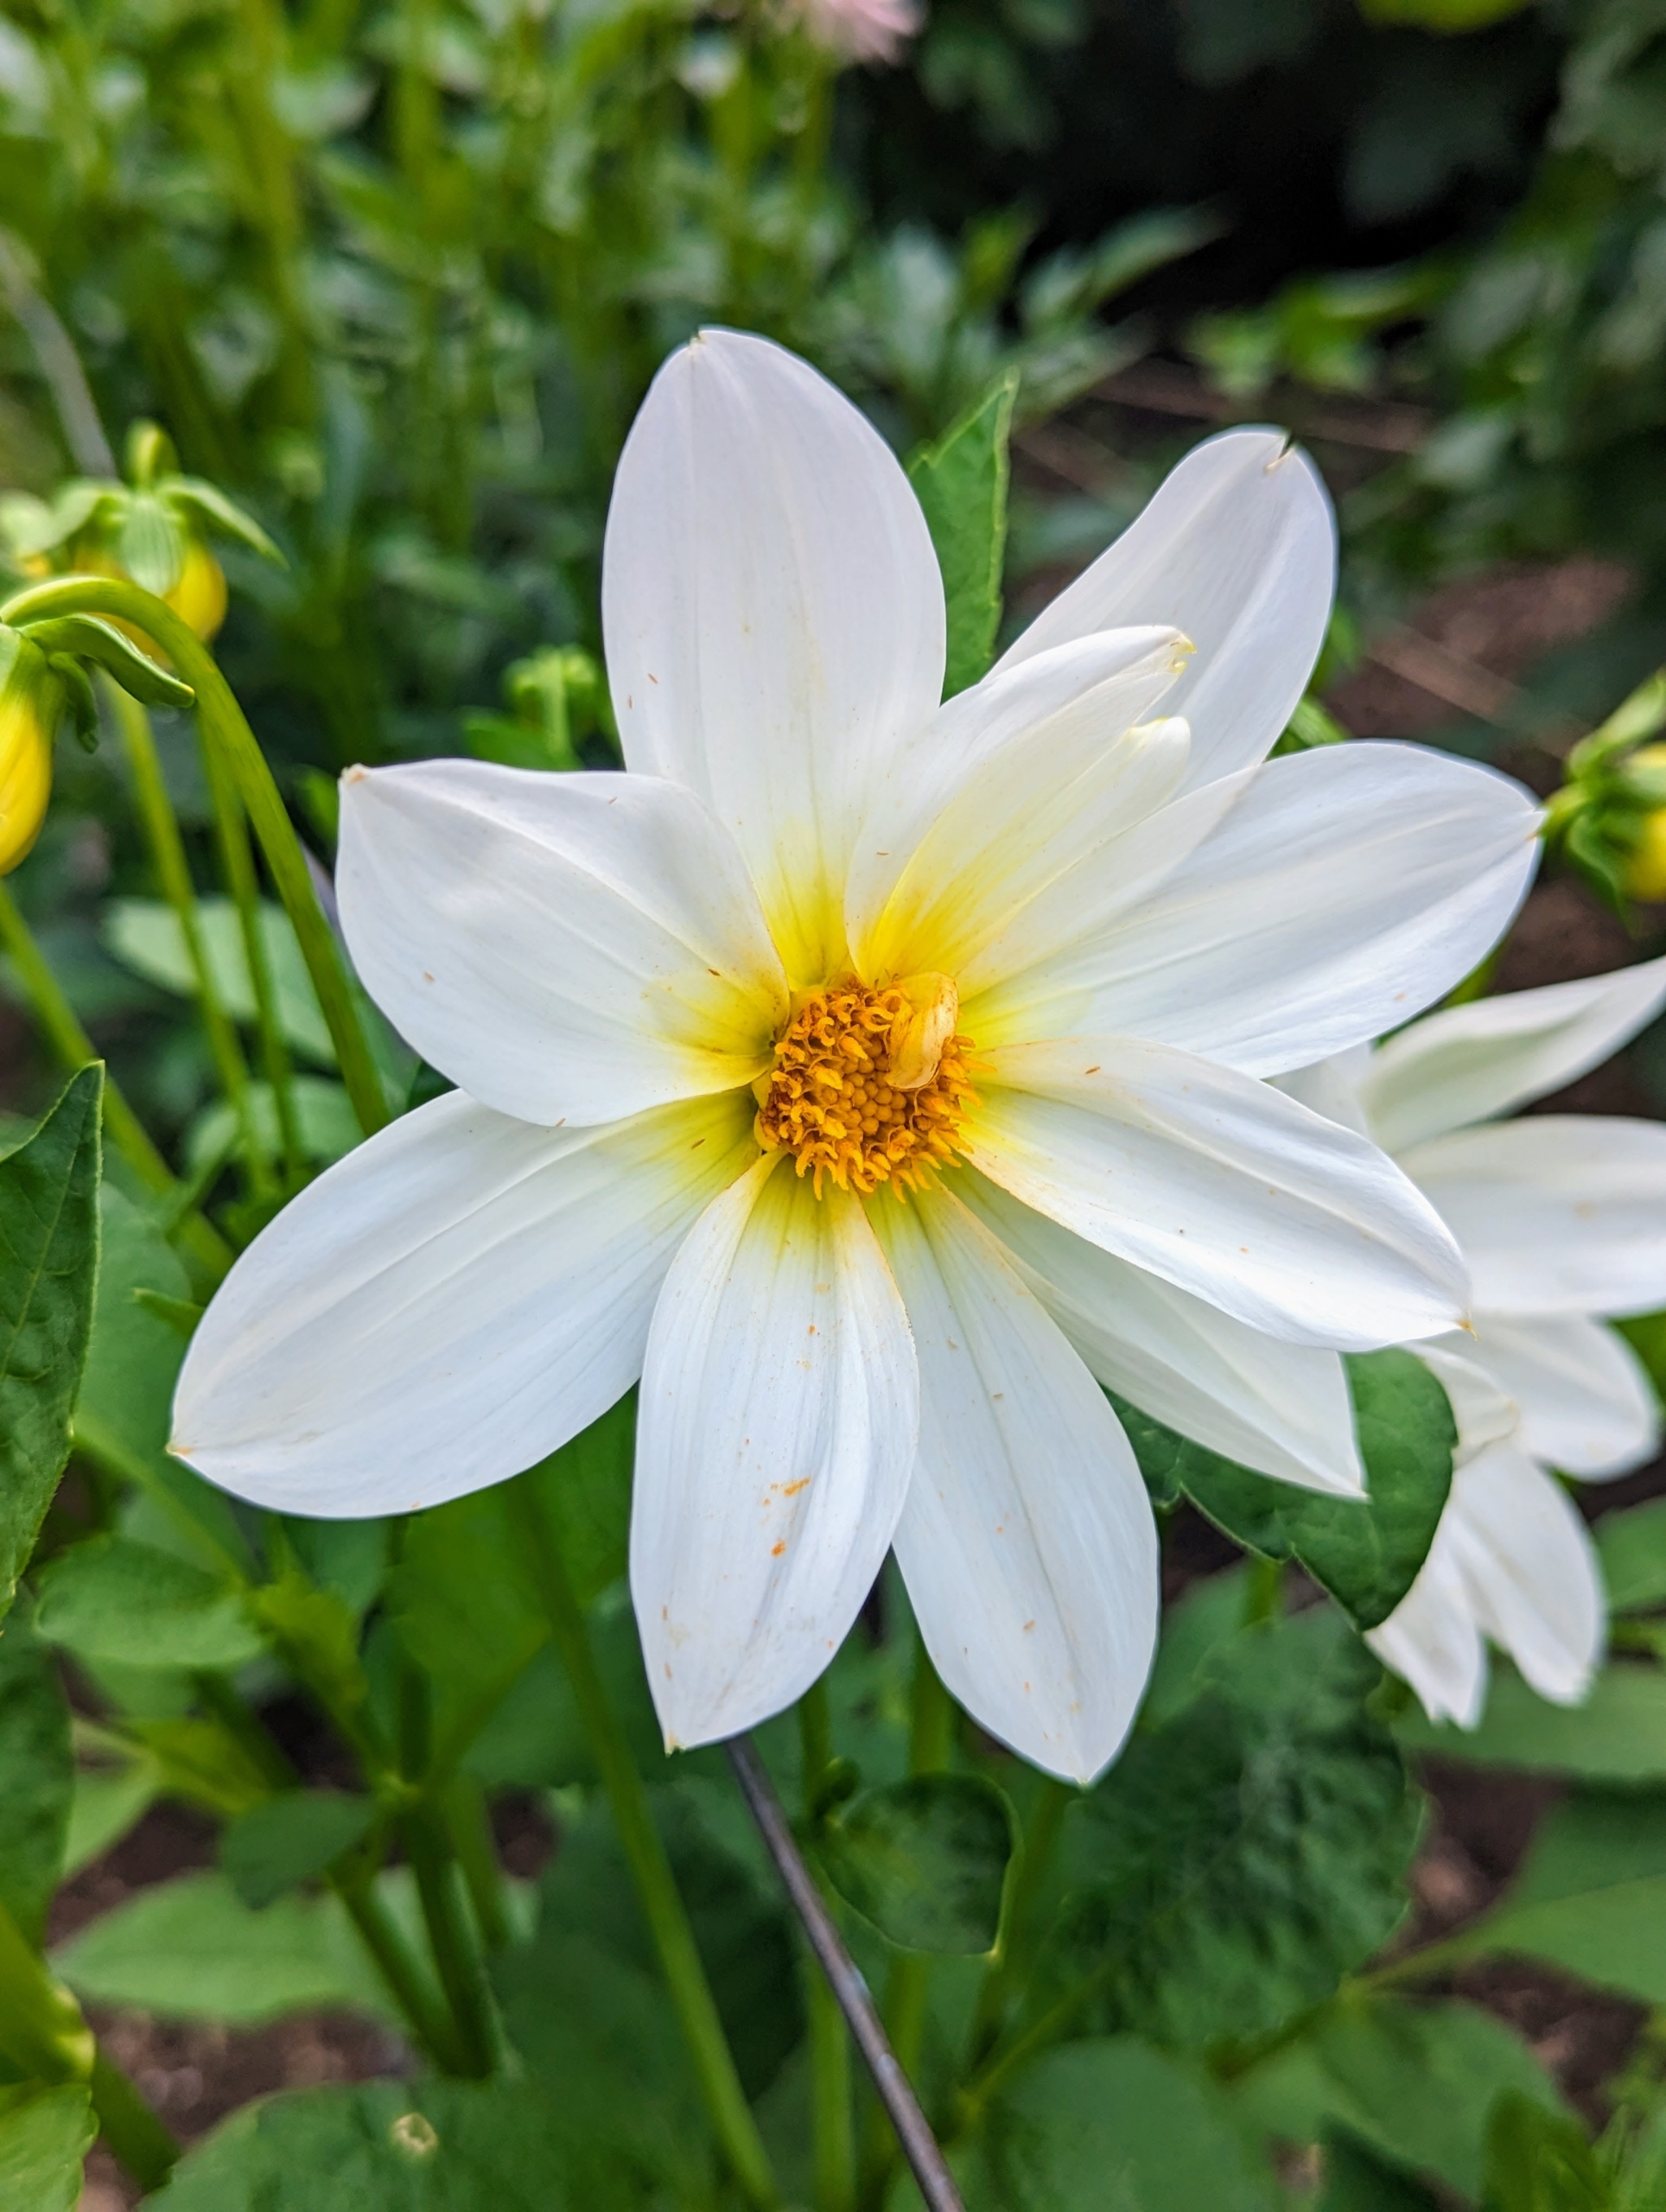
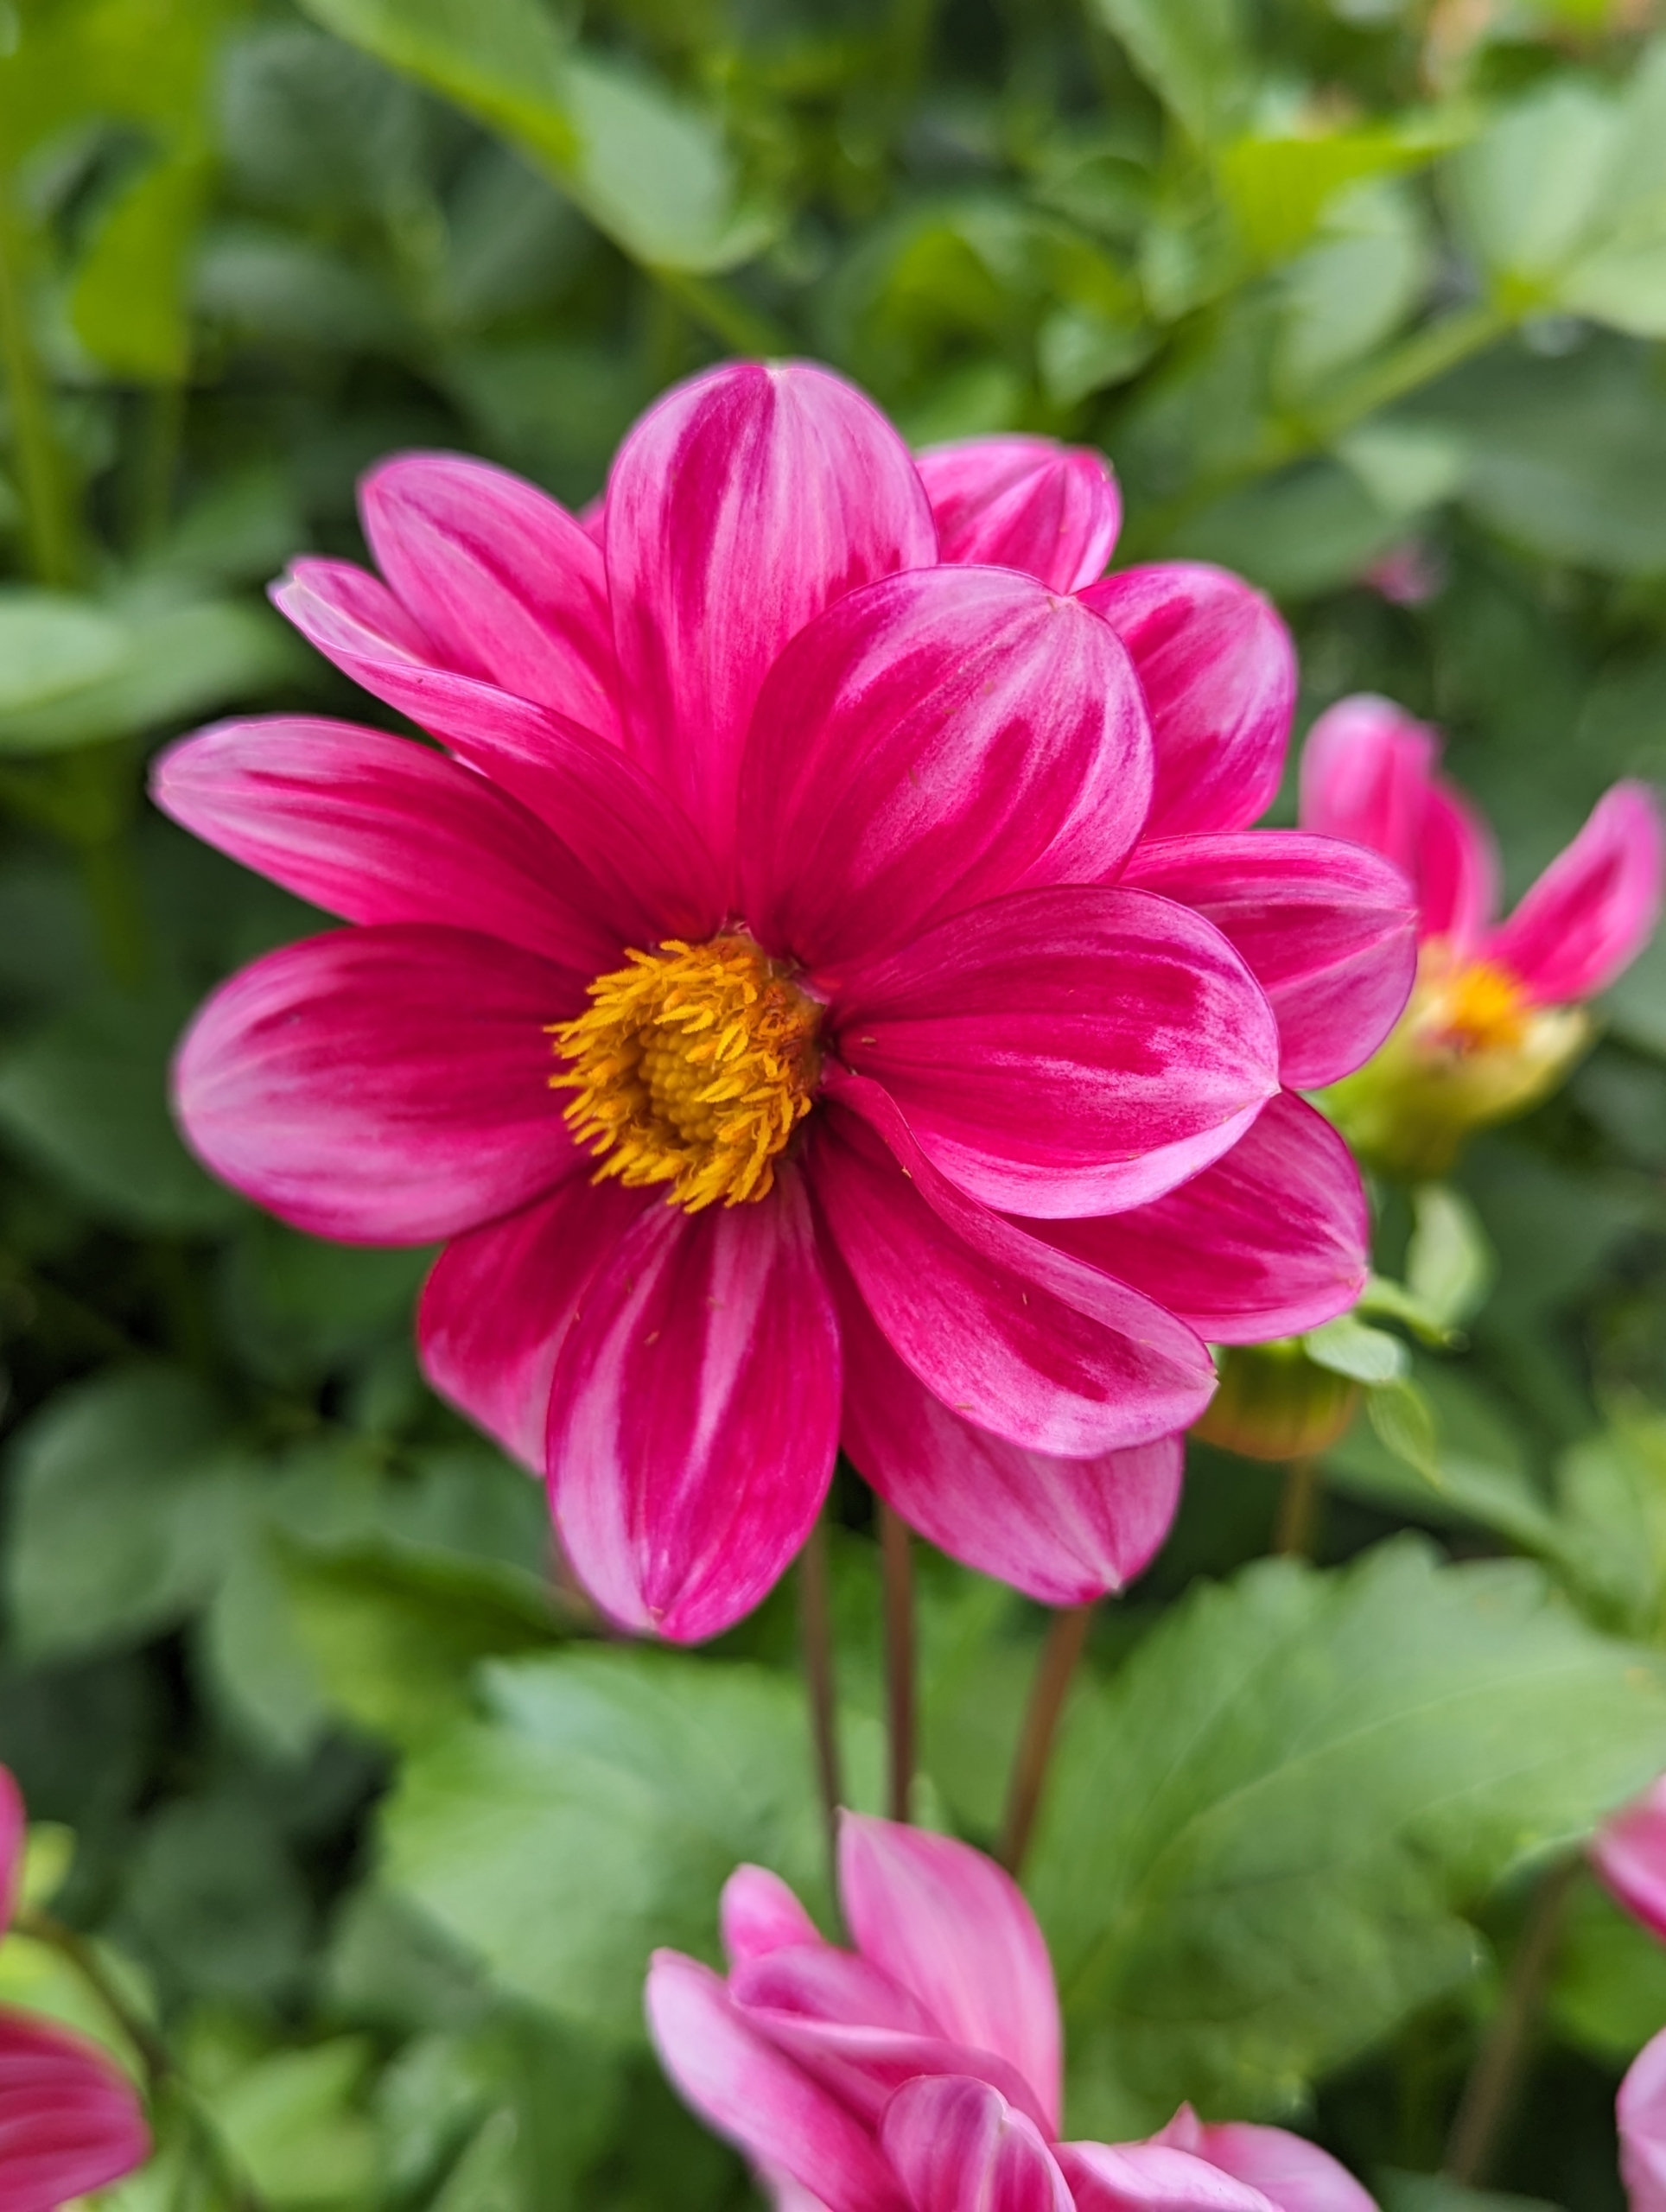
This is a single dahlia with just one row of petals surrounding the center disc. They range from a charming single, daisy-like flower to the popular double varieties which can be two-inch-pompons to 12-inch dinner plate size. They are divided into 10 groups: single, anemone, collarette, waterlily, decorative, fall, pompon, cactus, semi-cactus, and miscellaneous.
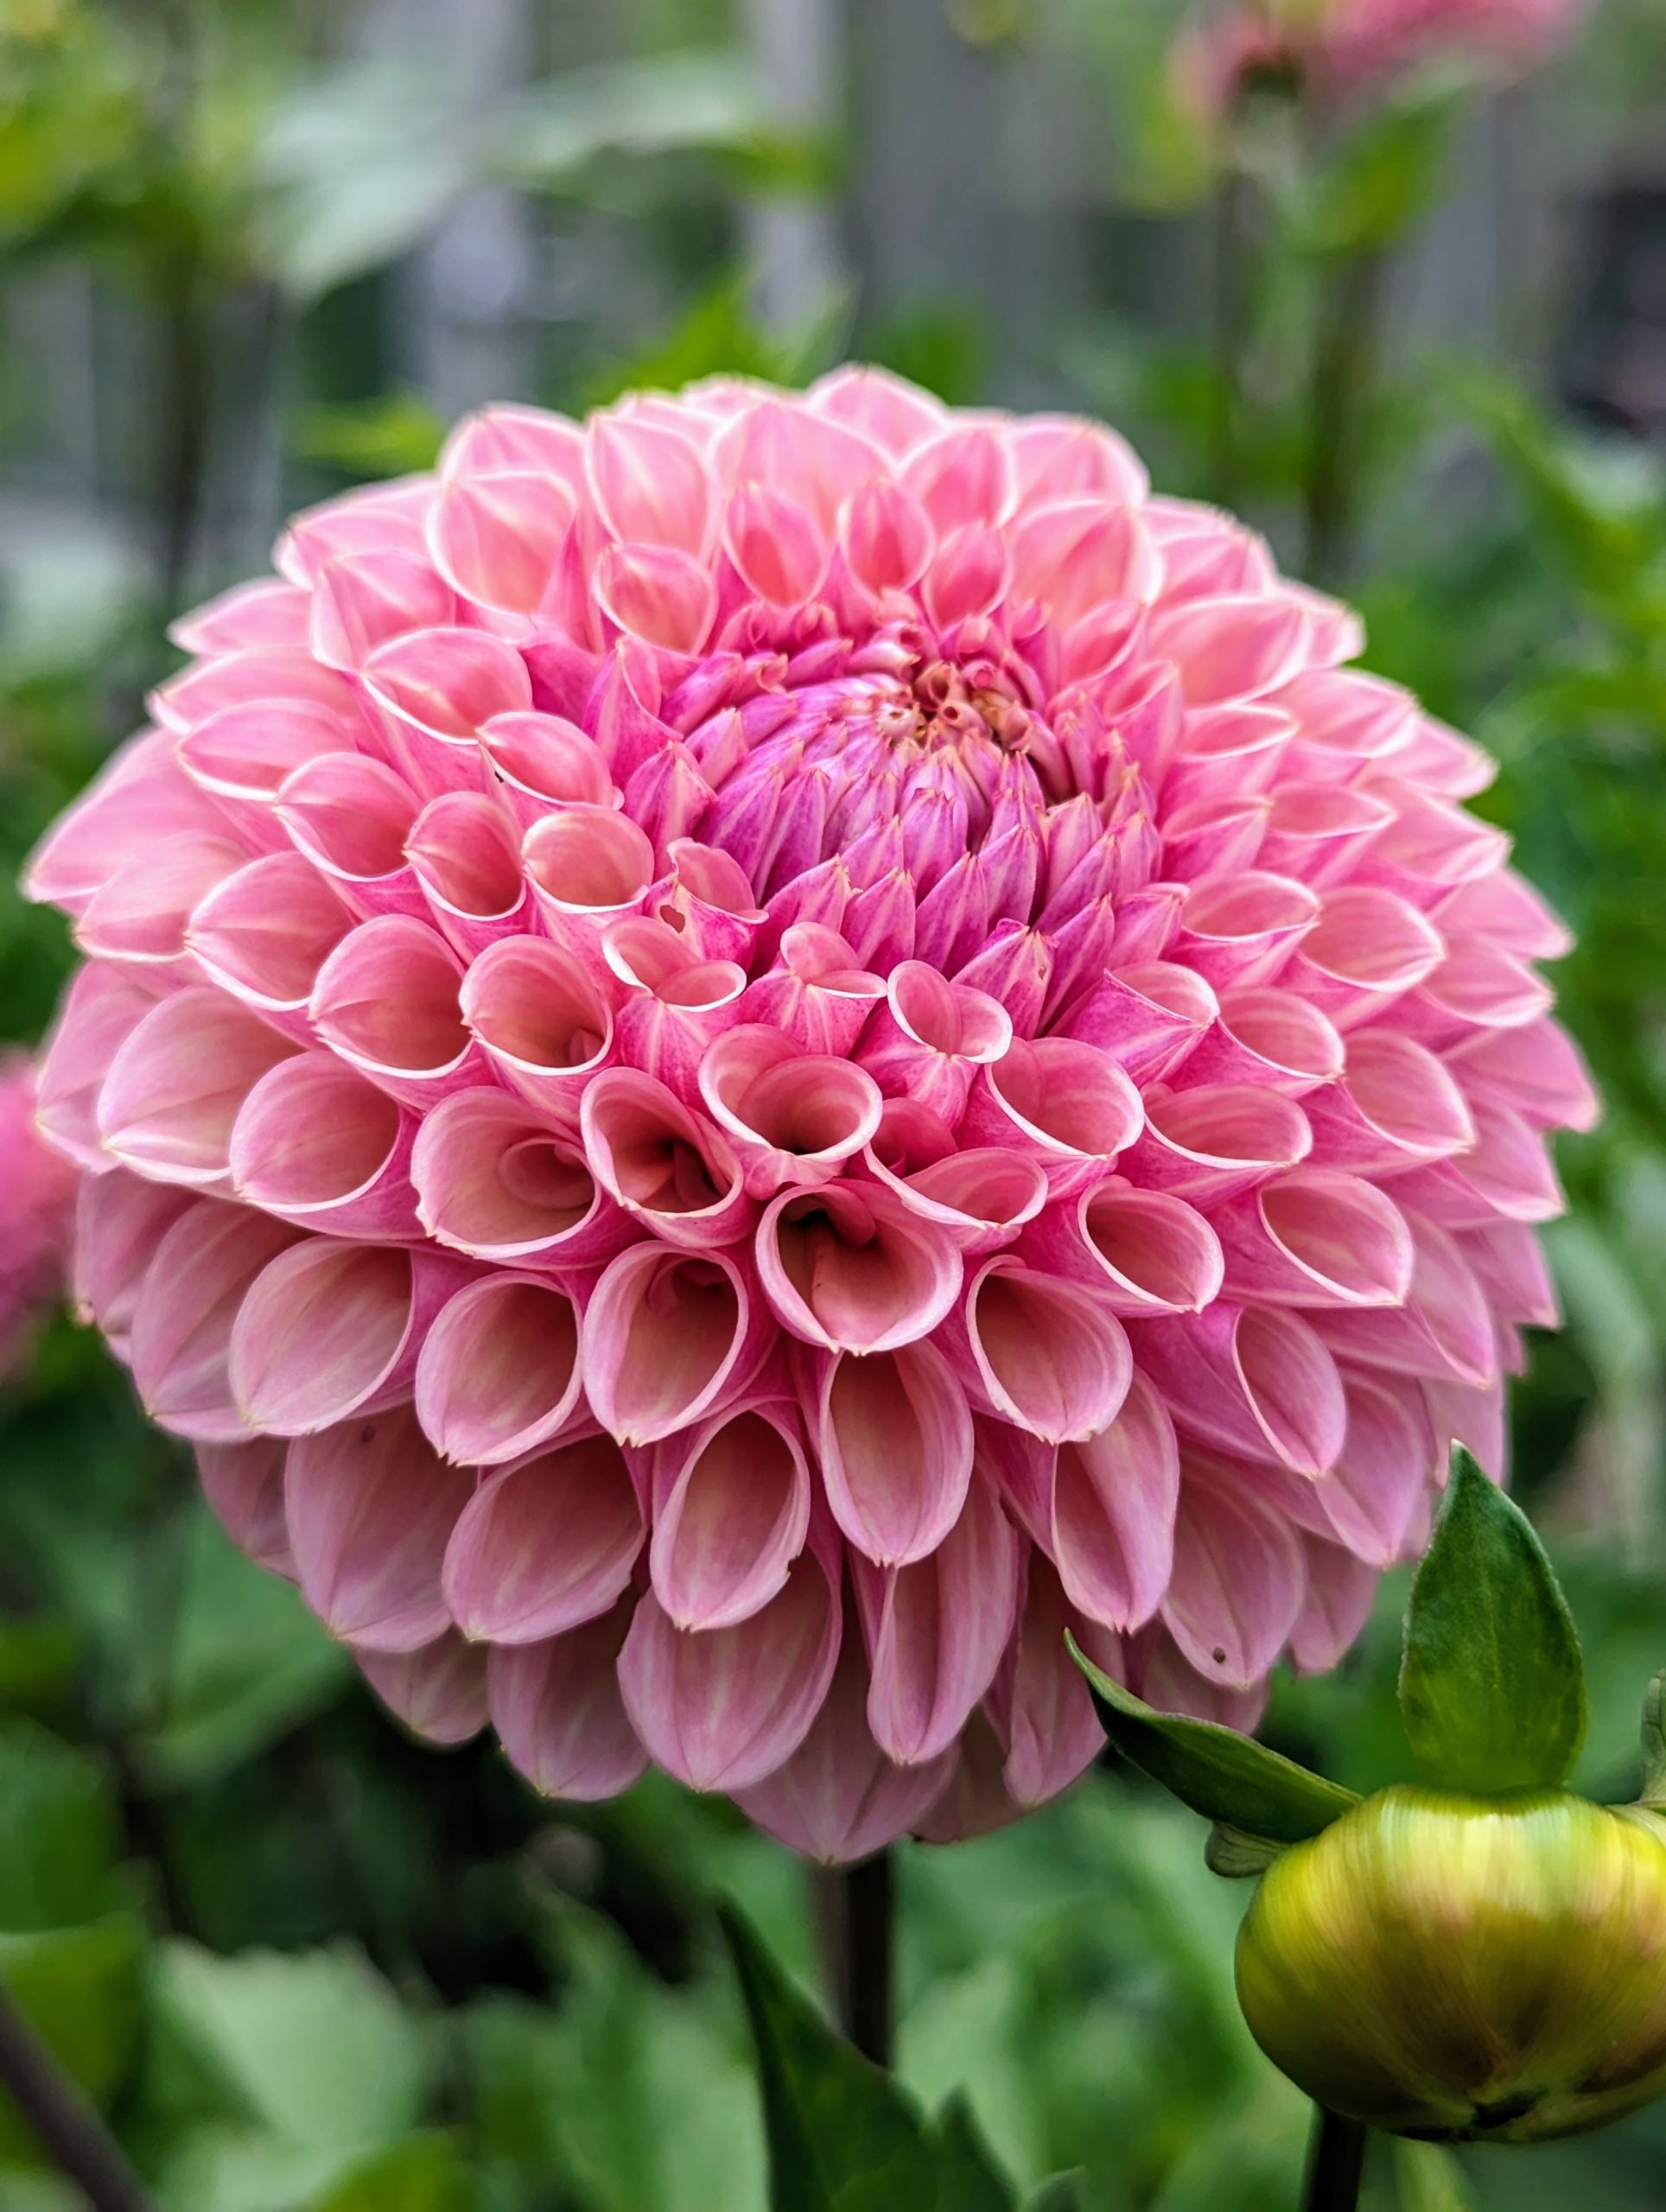
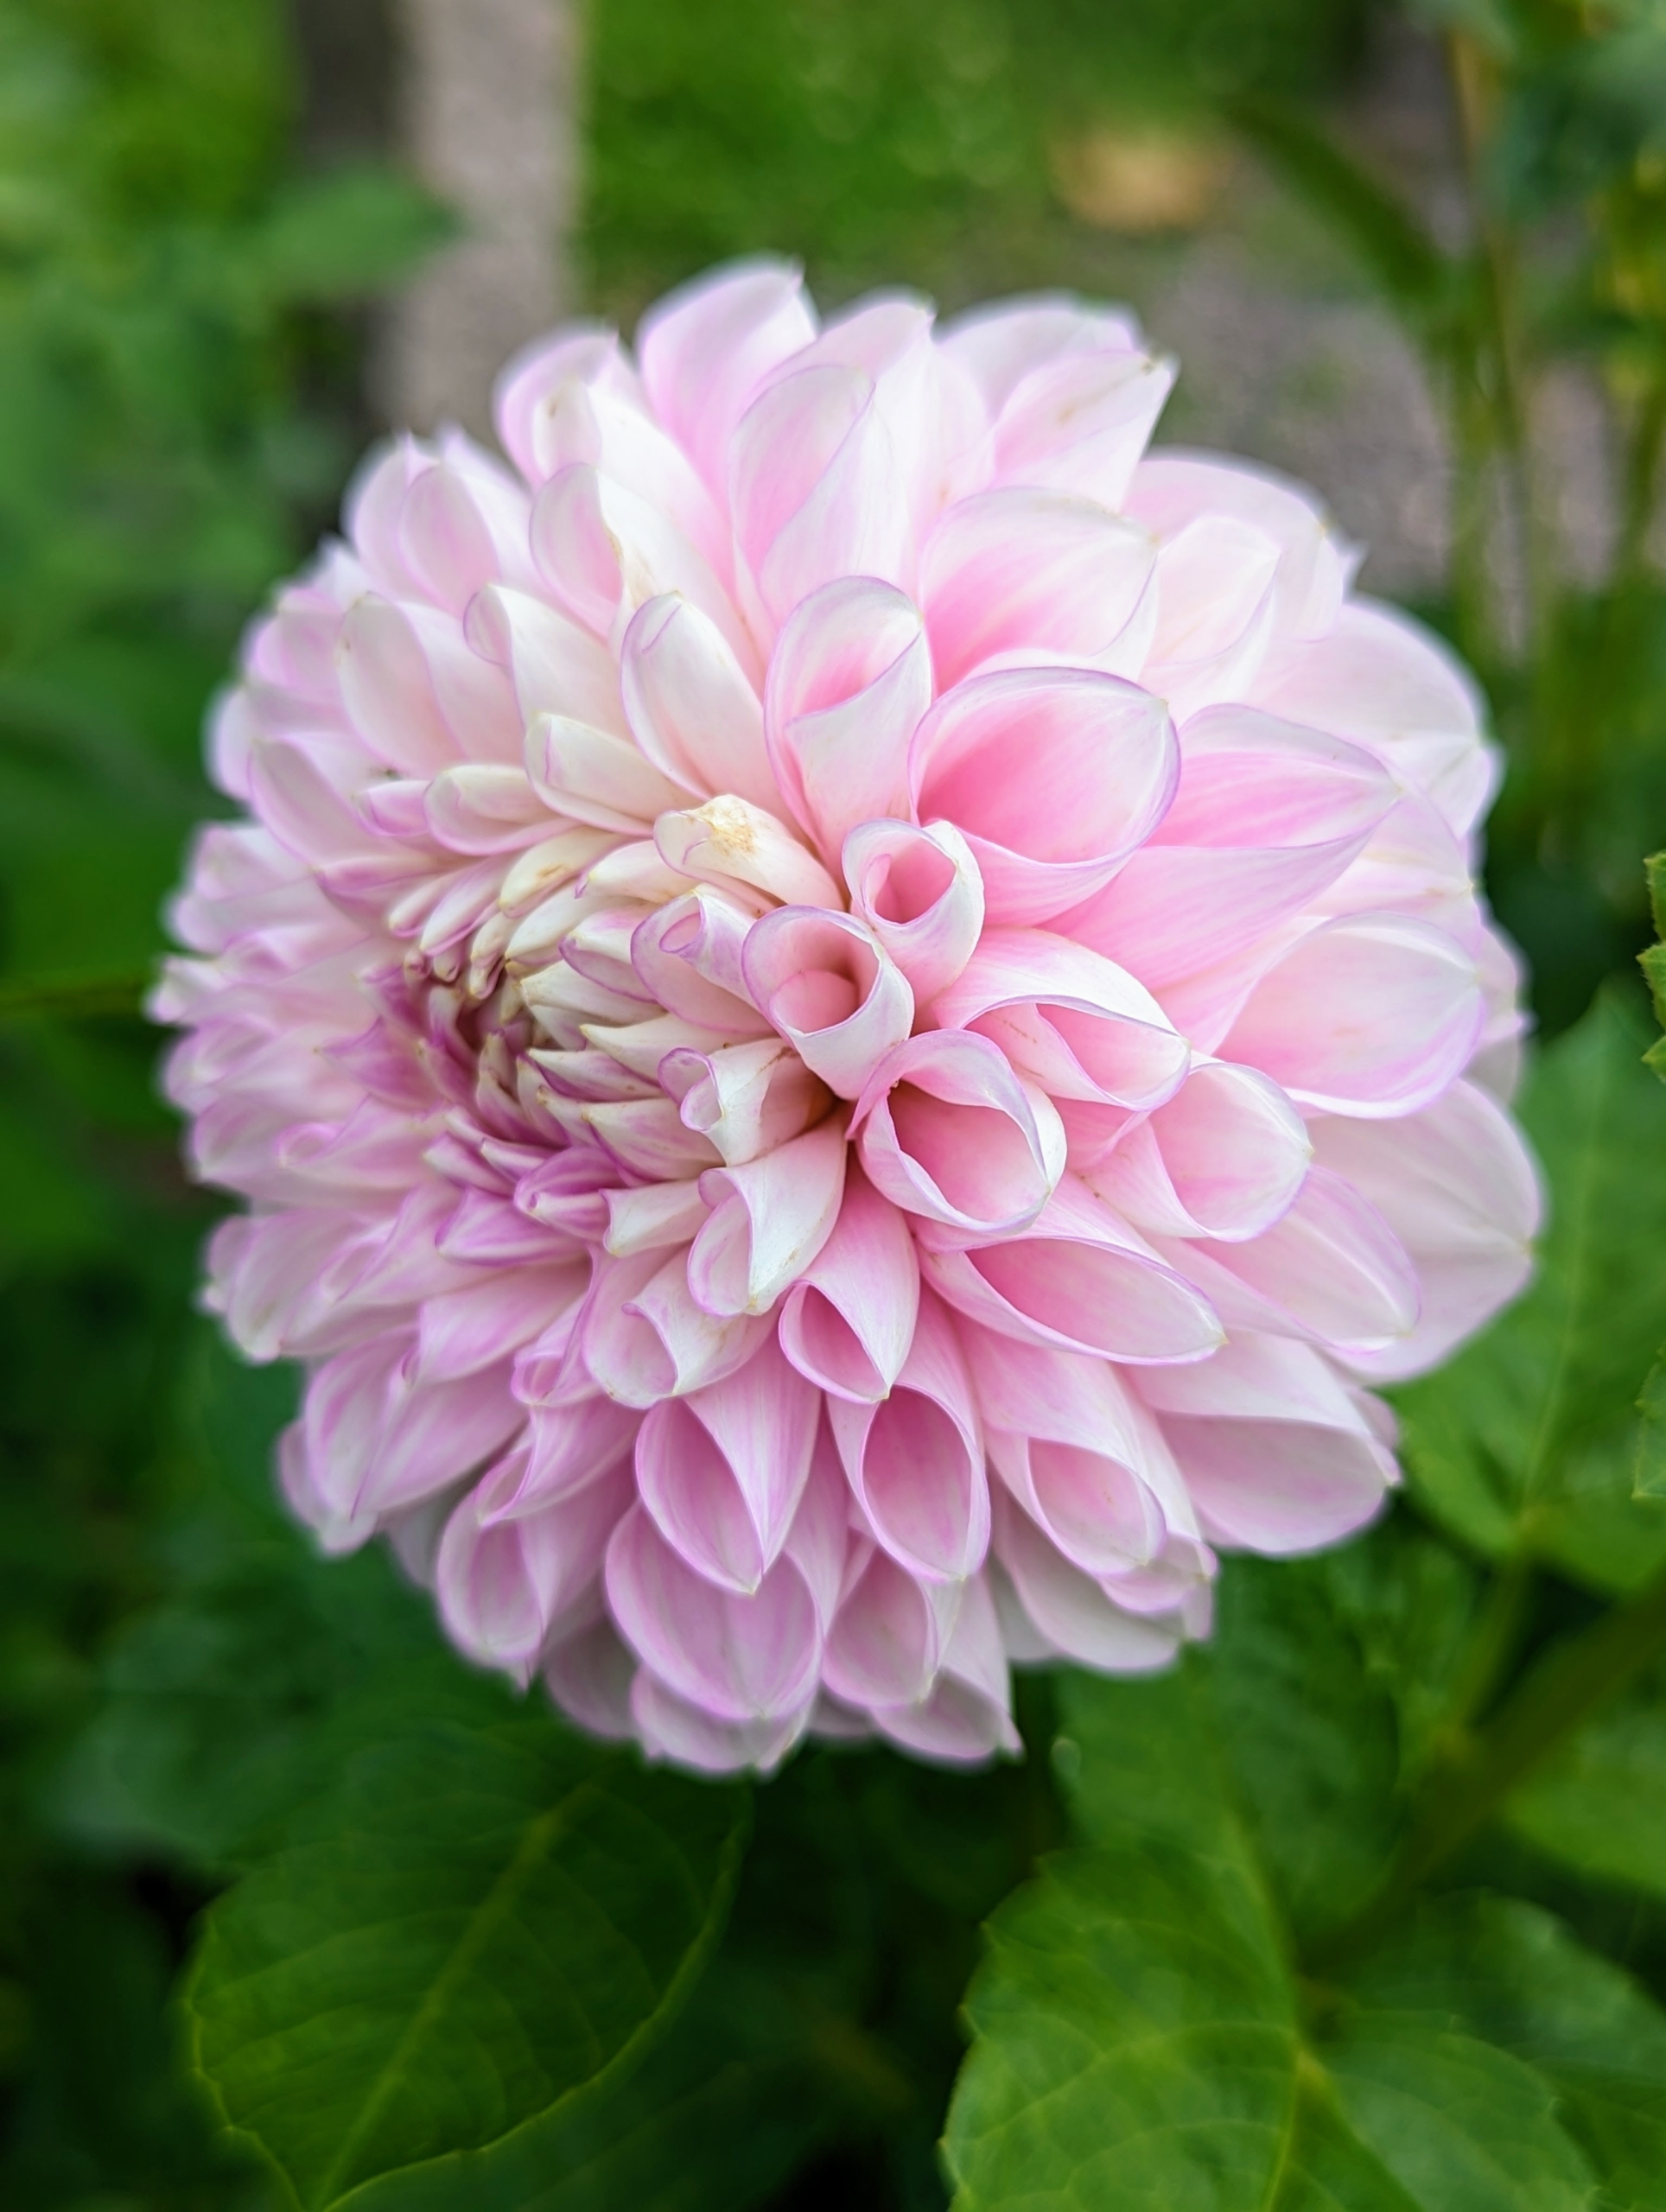
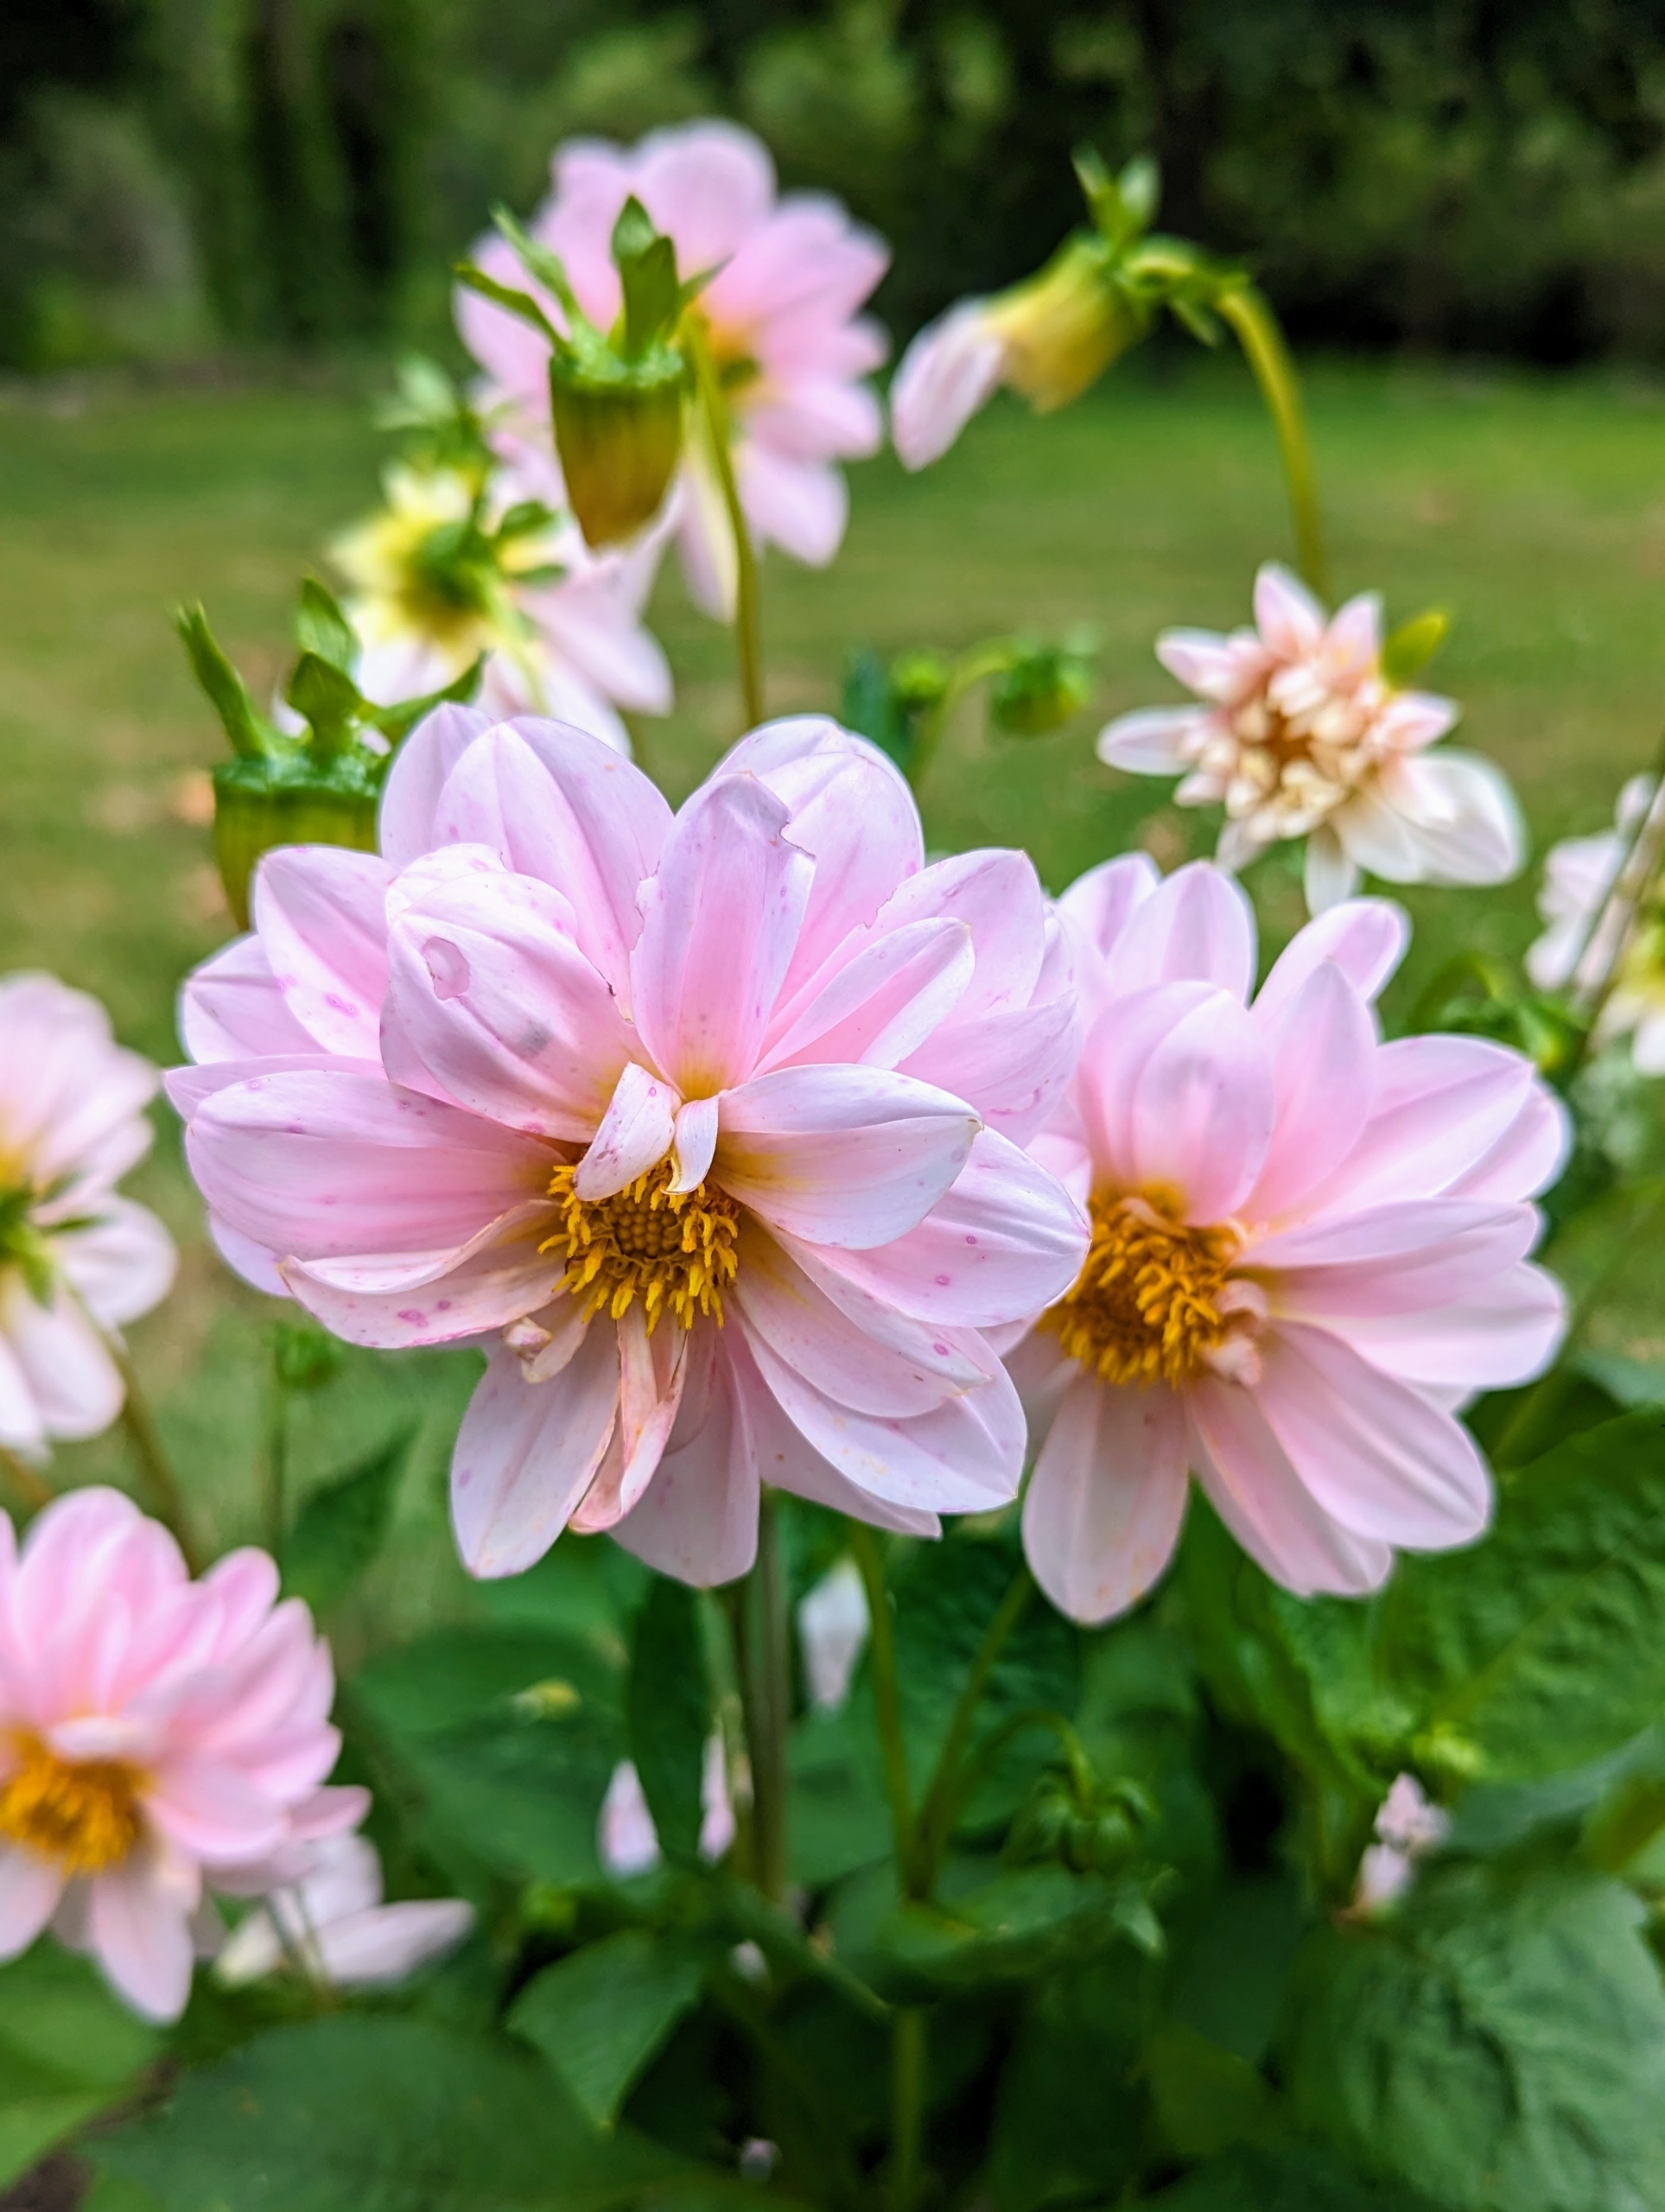
Pompon dahlias yield masses of intricate, fully double blooms measuring up to two-and-a-half inches across. This dahlia is a pretty light pink to salmon color.
Currently, there are about 42 species of dahlia, with hybrids commonly grown as garden plants. A member of the Asteraceae family of dicotyledonous plants, some of its relatives include the sunflower, daisy, chrysanthemum, and zinnia.
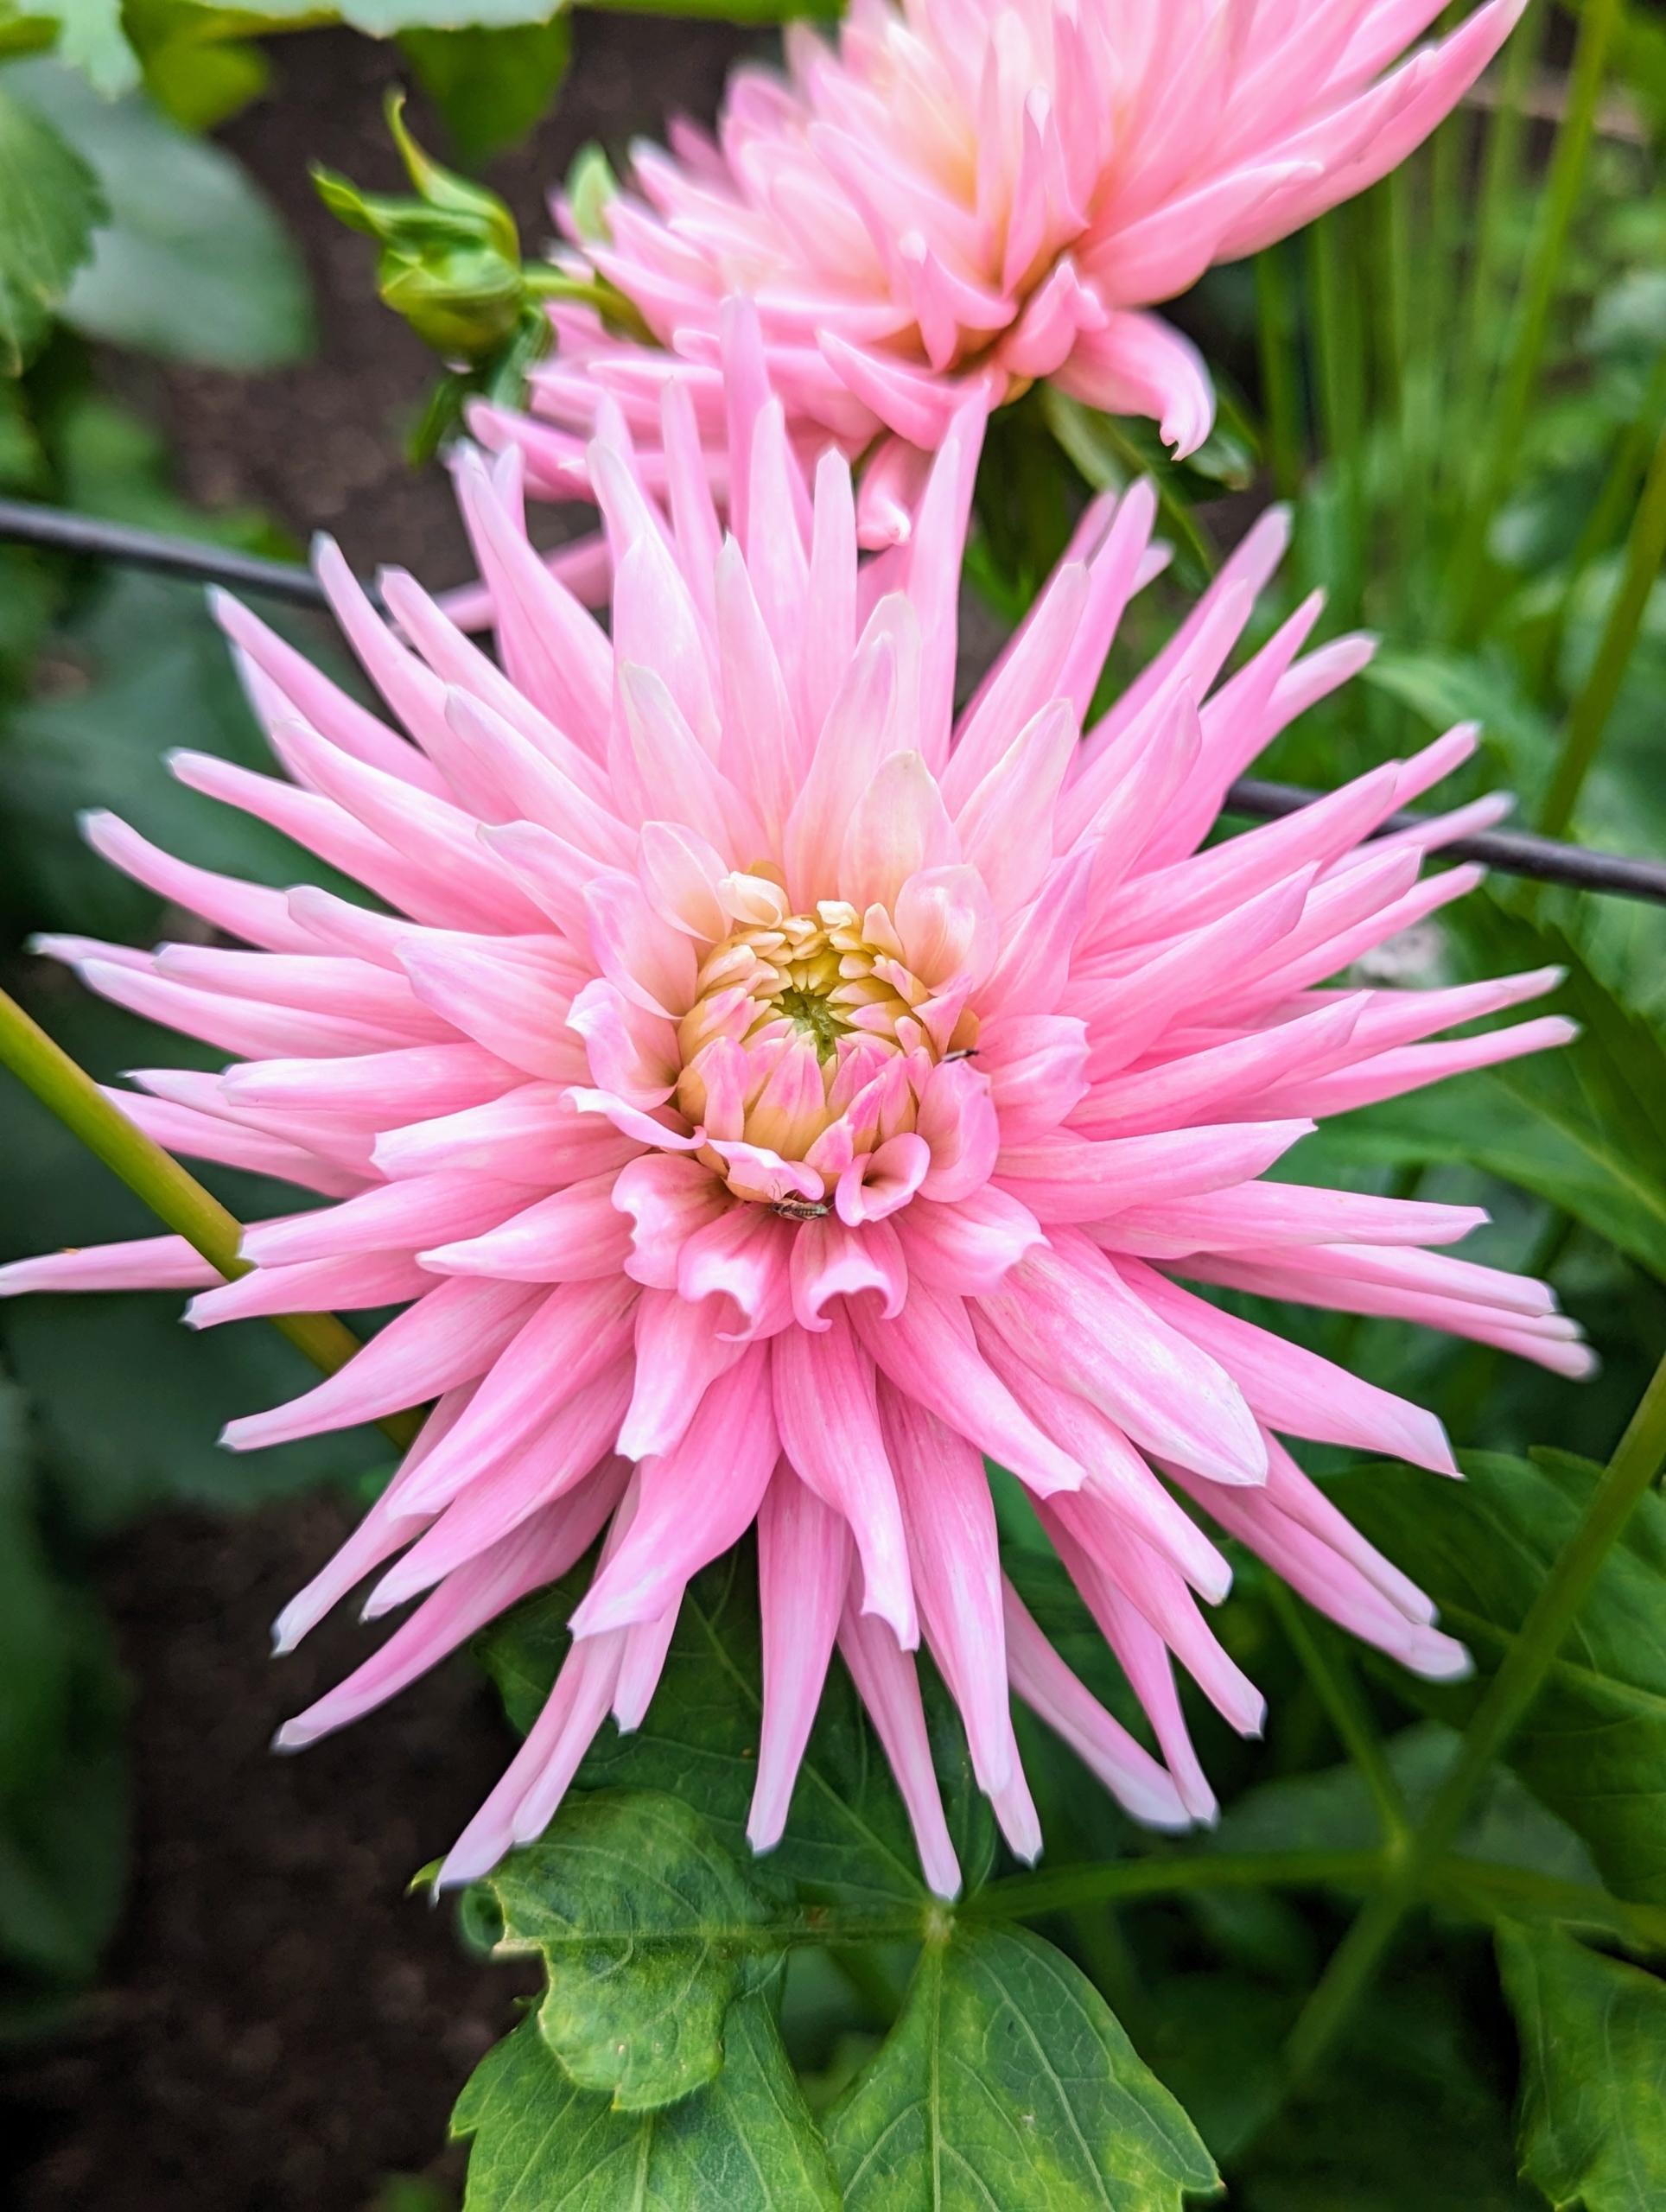
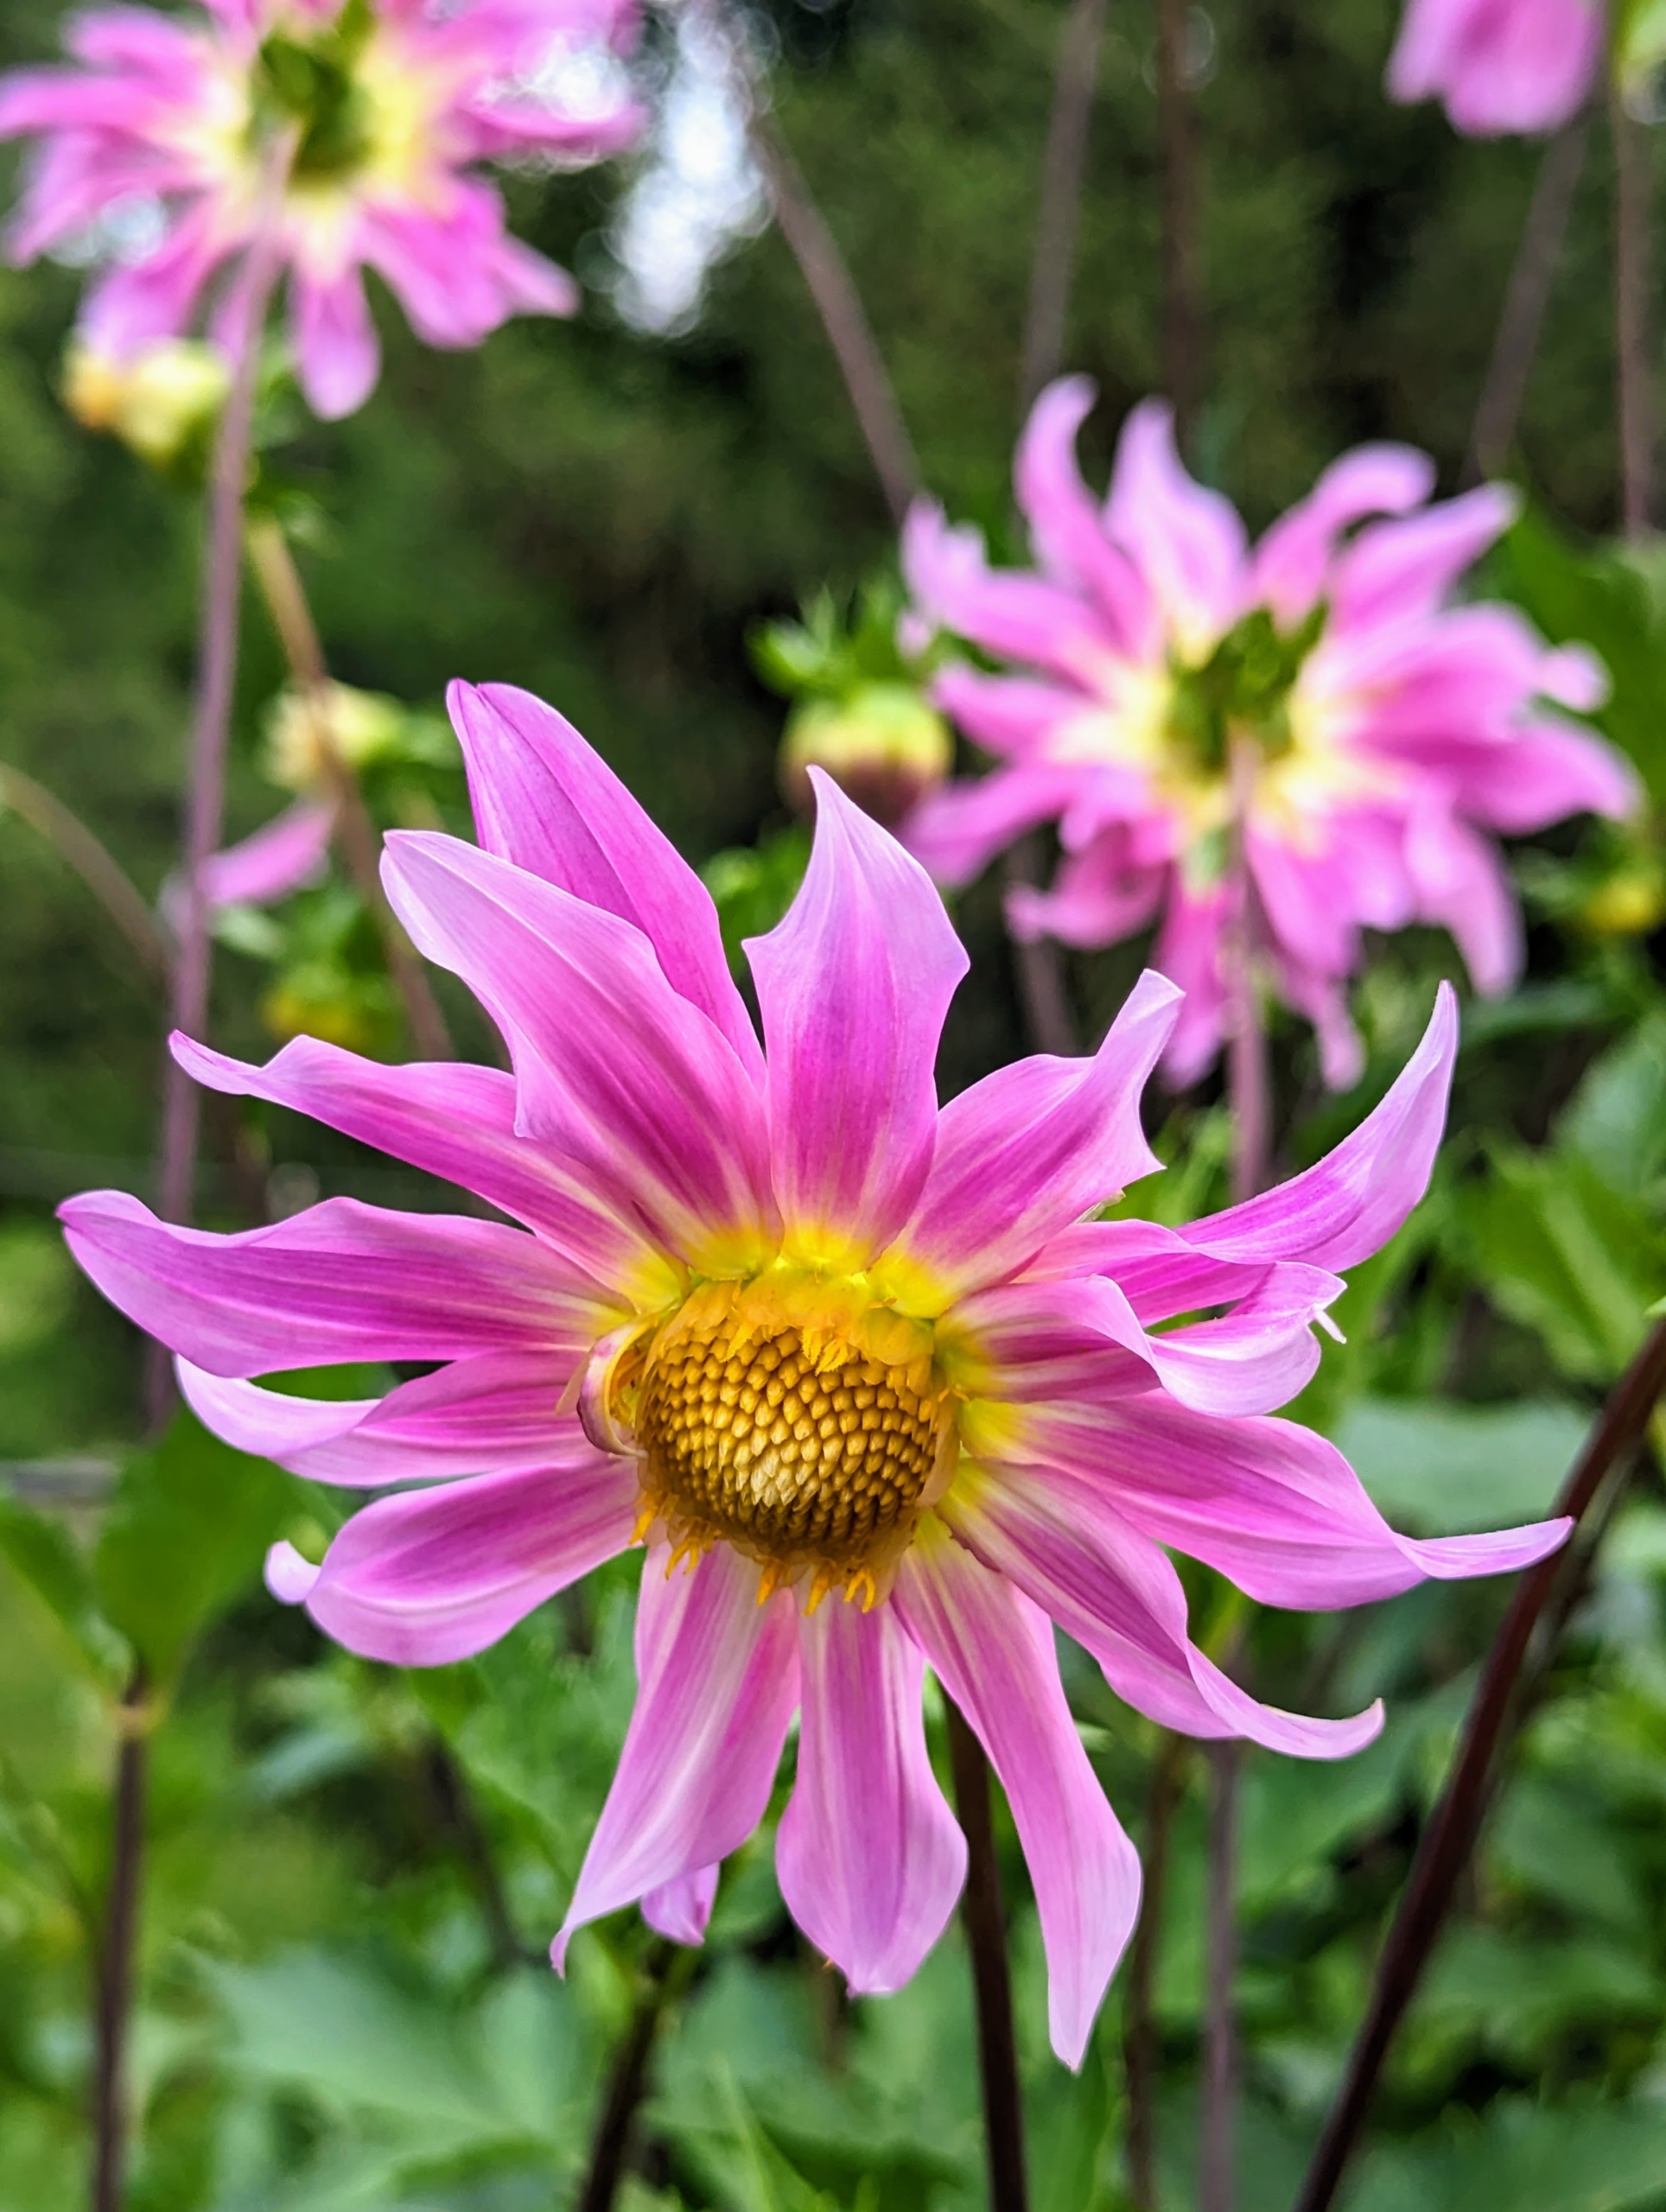
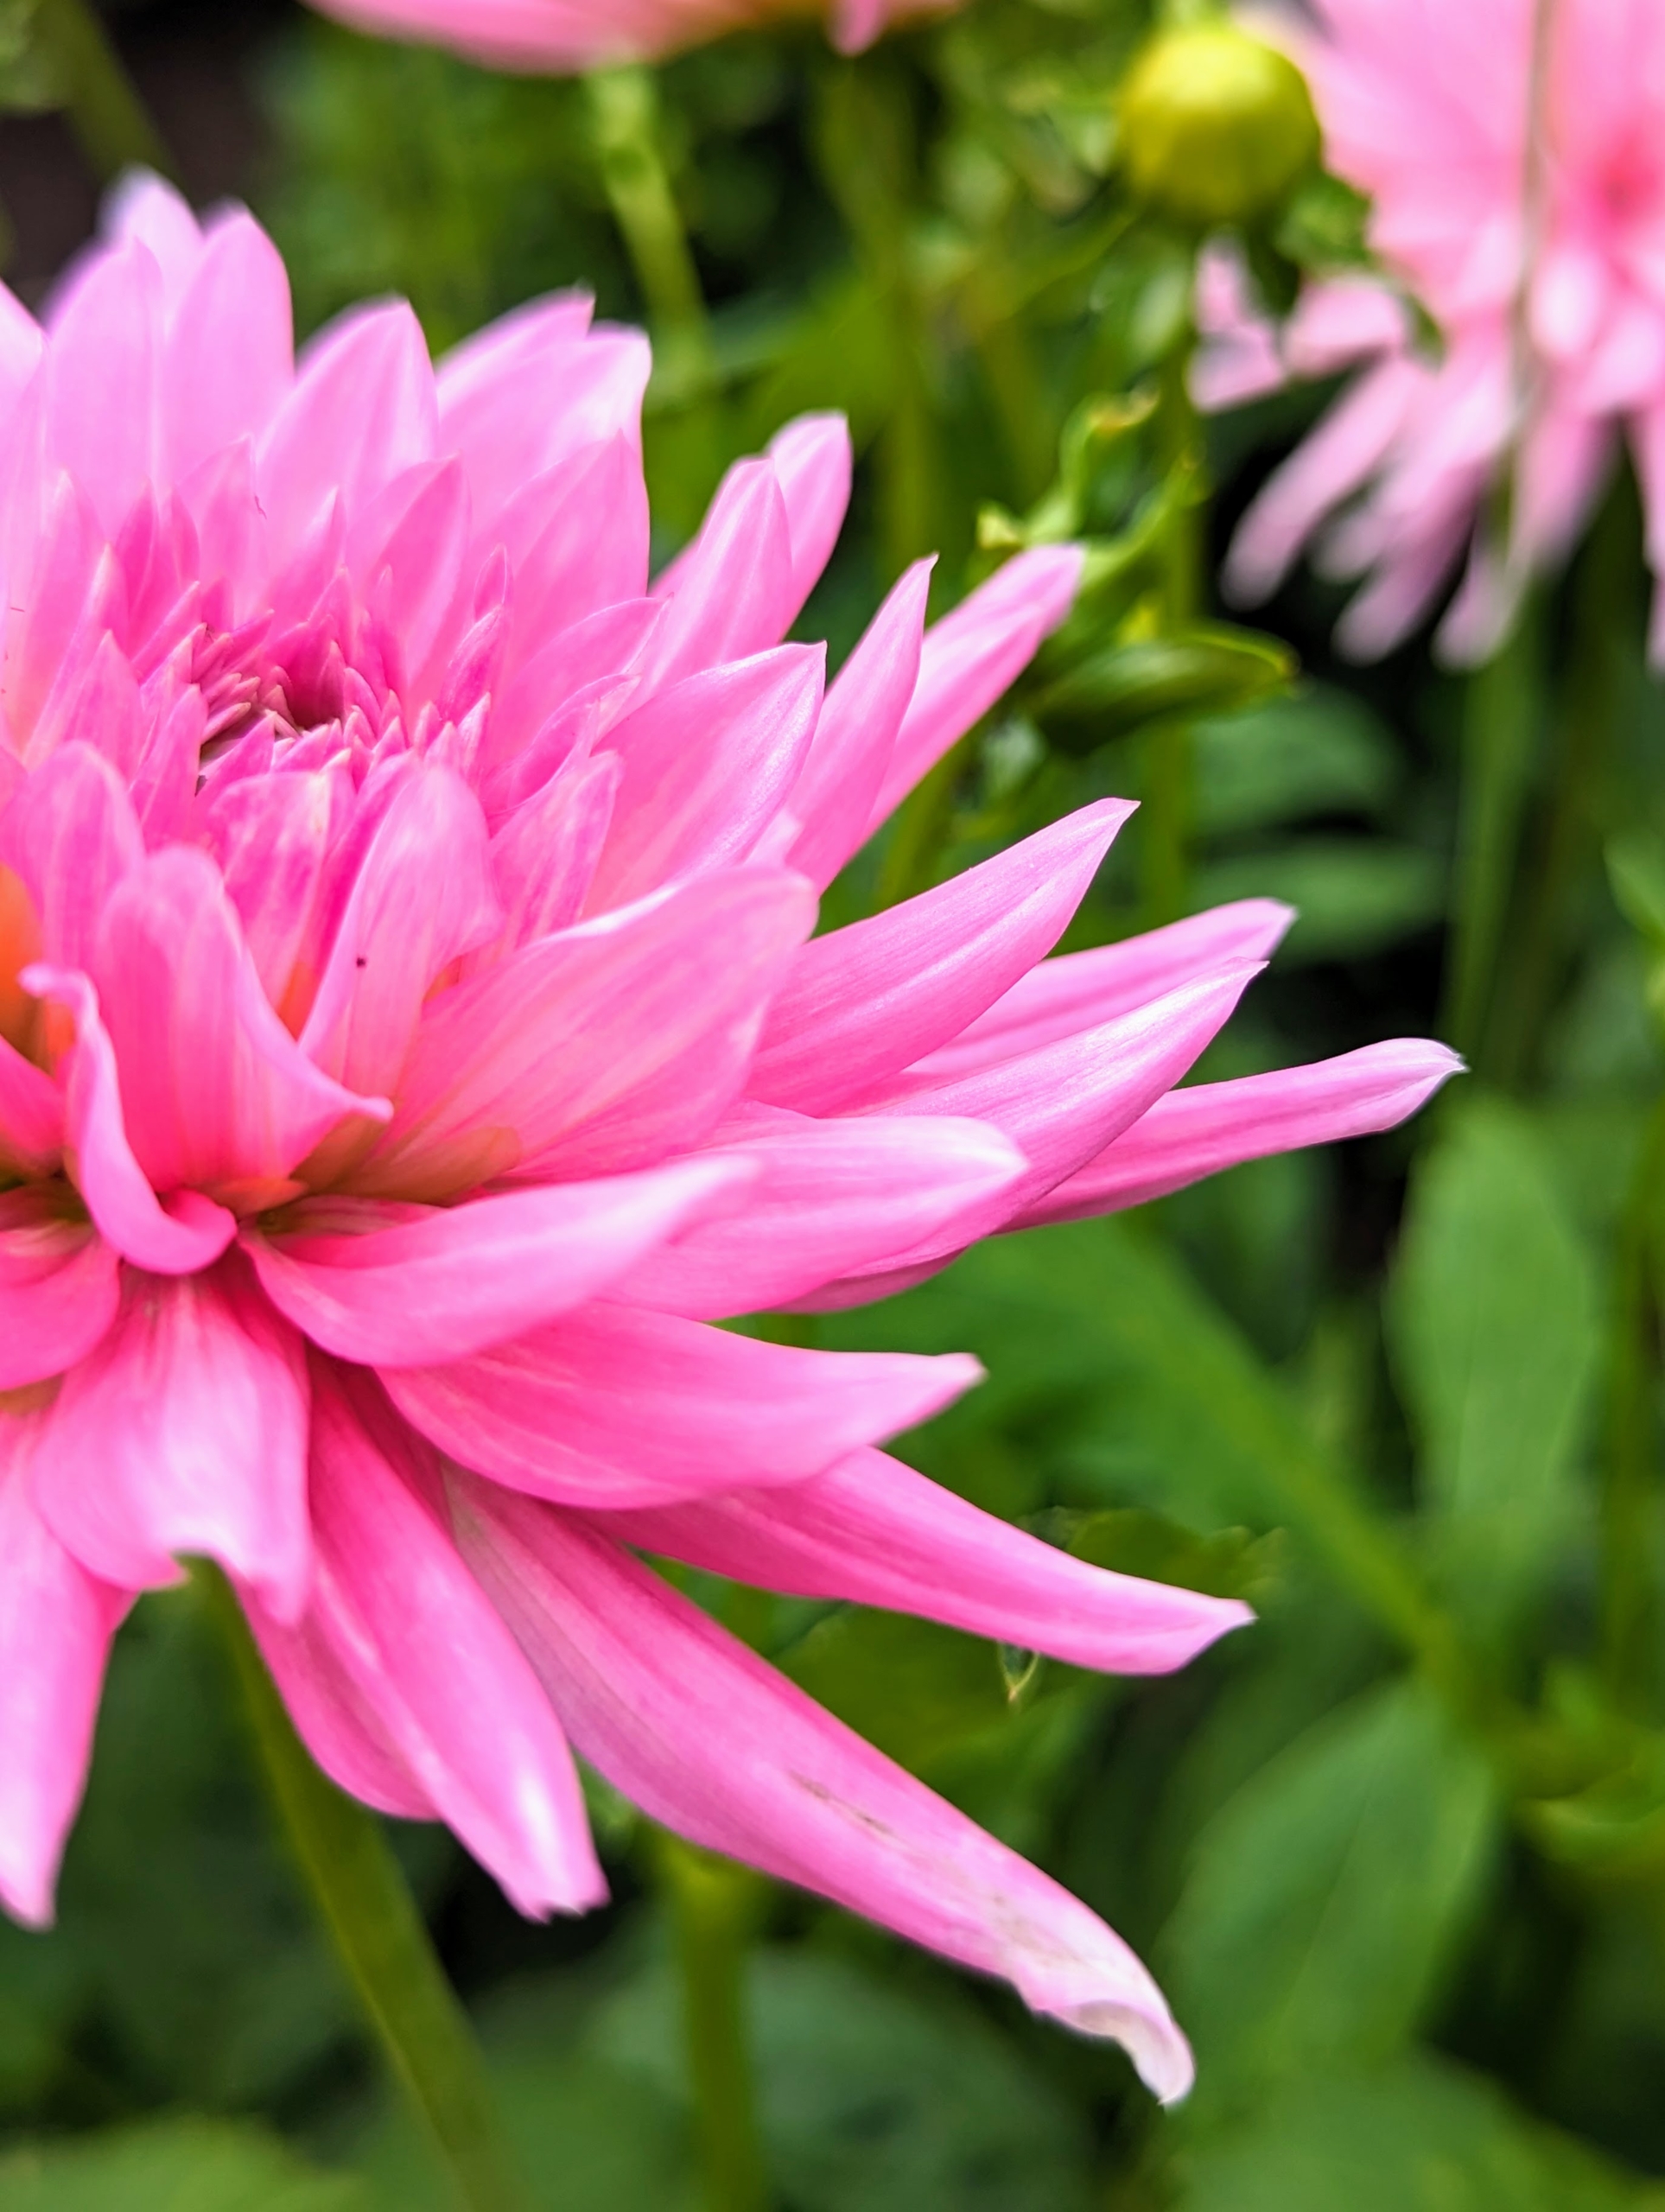
This cactus variety is called ‘Park Princess’ with tightly rolled rich, vibrant pink petals. It is a prolific re-bloomer and an excellent cut flower.
The majority of dahlia species do not produce scented flowers or cultivars, but they are brightly colored to attract pollinating insects.
Dahlias are very attractive to bees and hummingbirds.
The genus Dahlia is native to the high plains of Mexico. Some species can be found in Guatemala, Honduras, Nicaragua, El Salvador & Costa Rica as well as parts of South America where it was introduced.
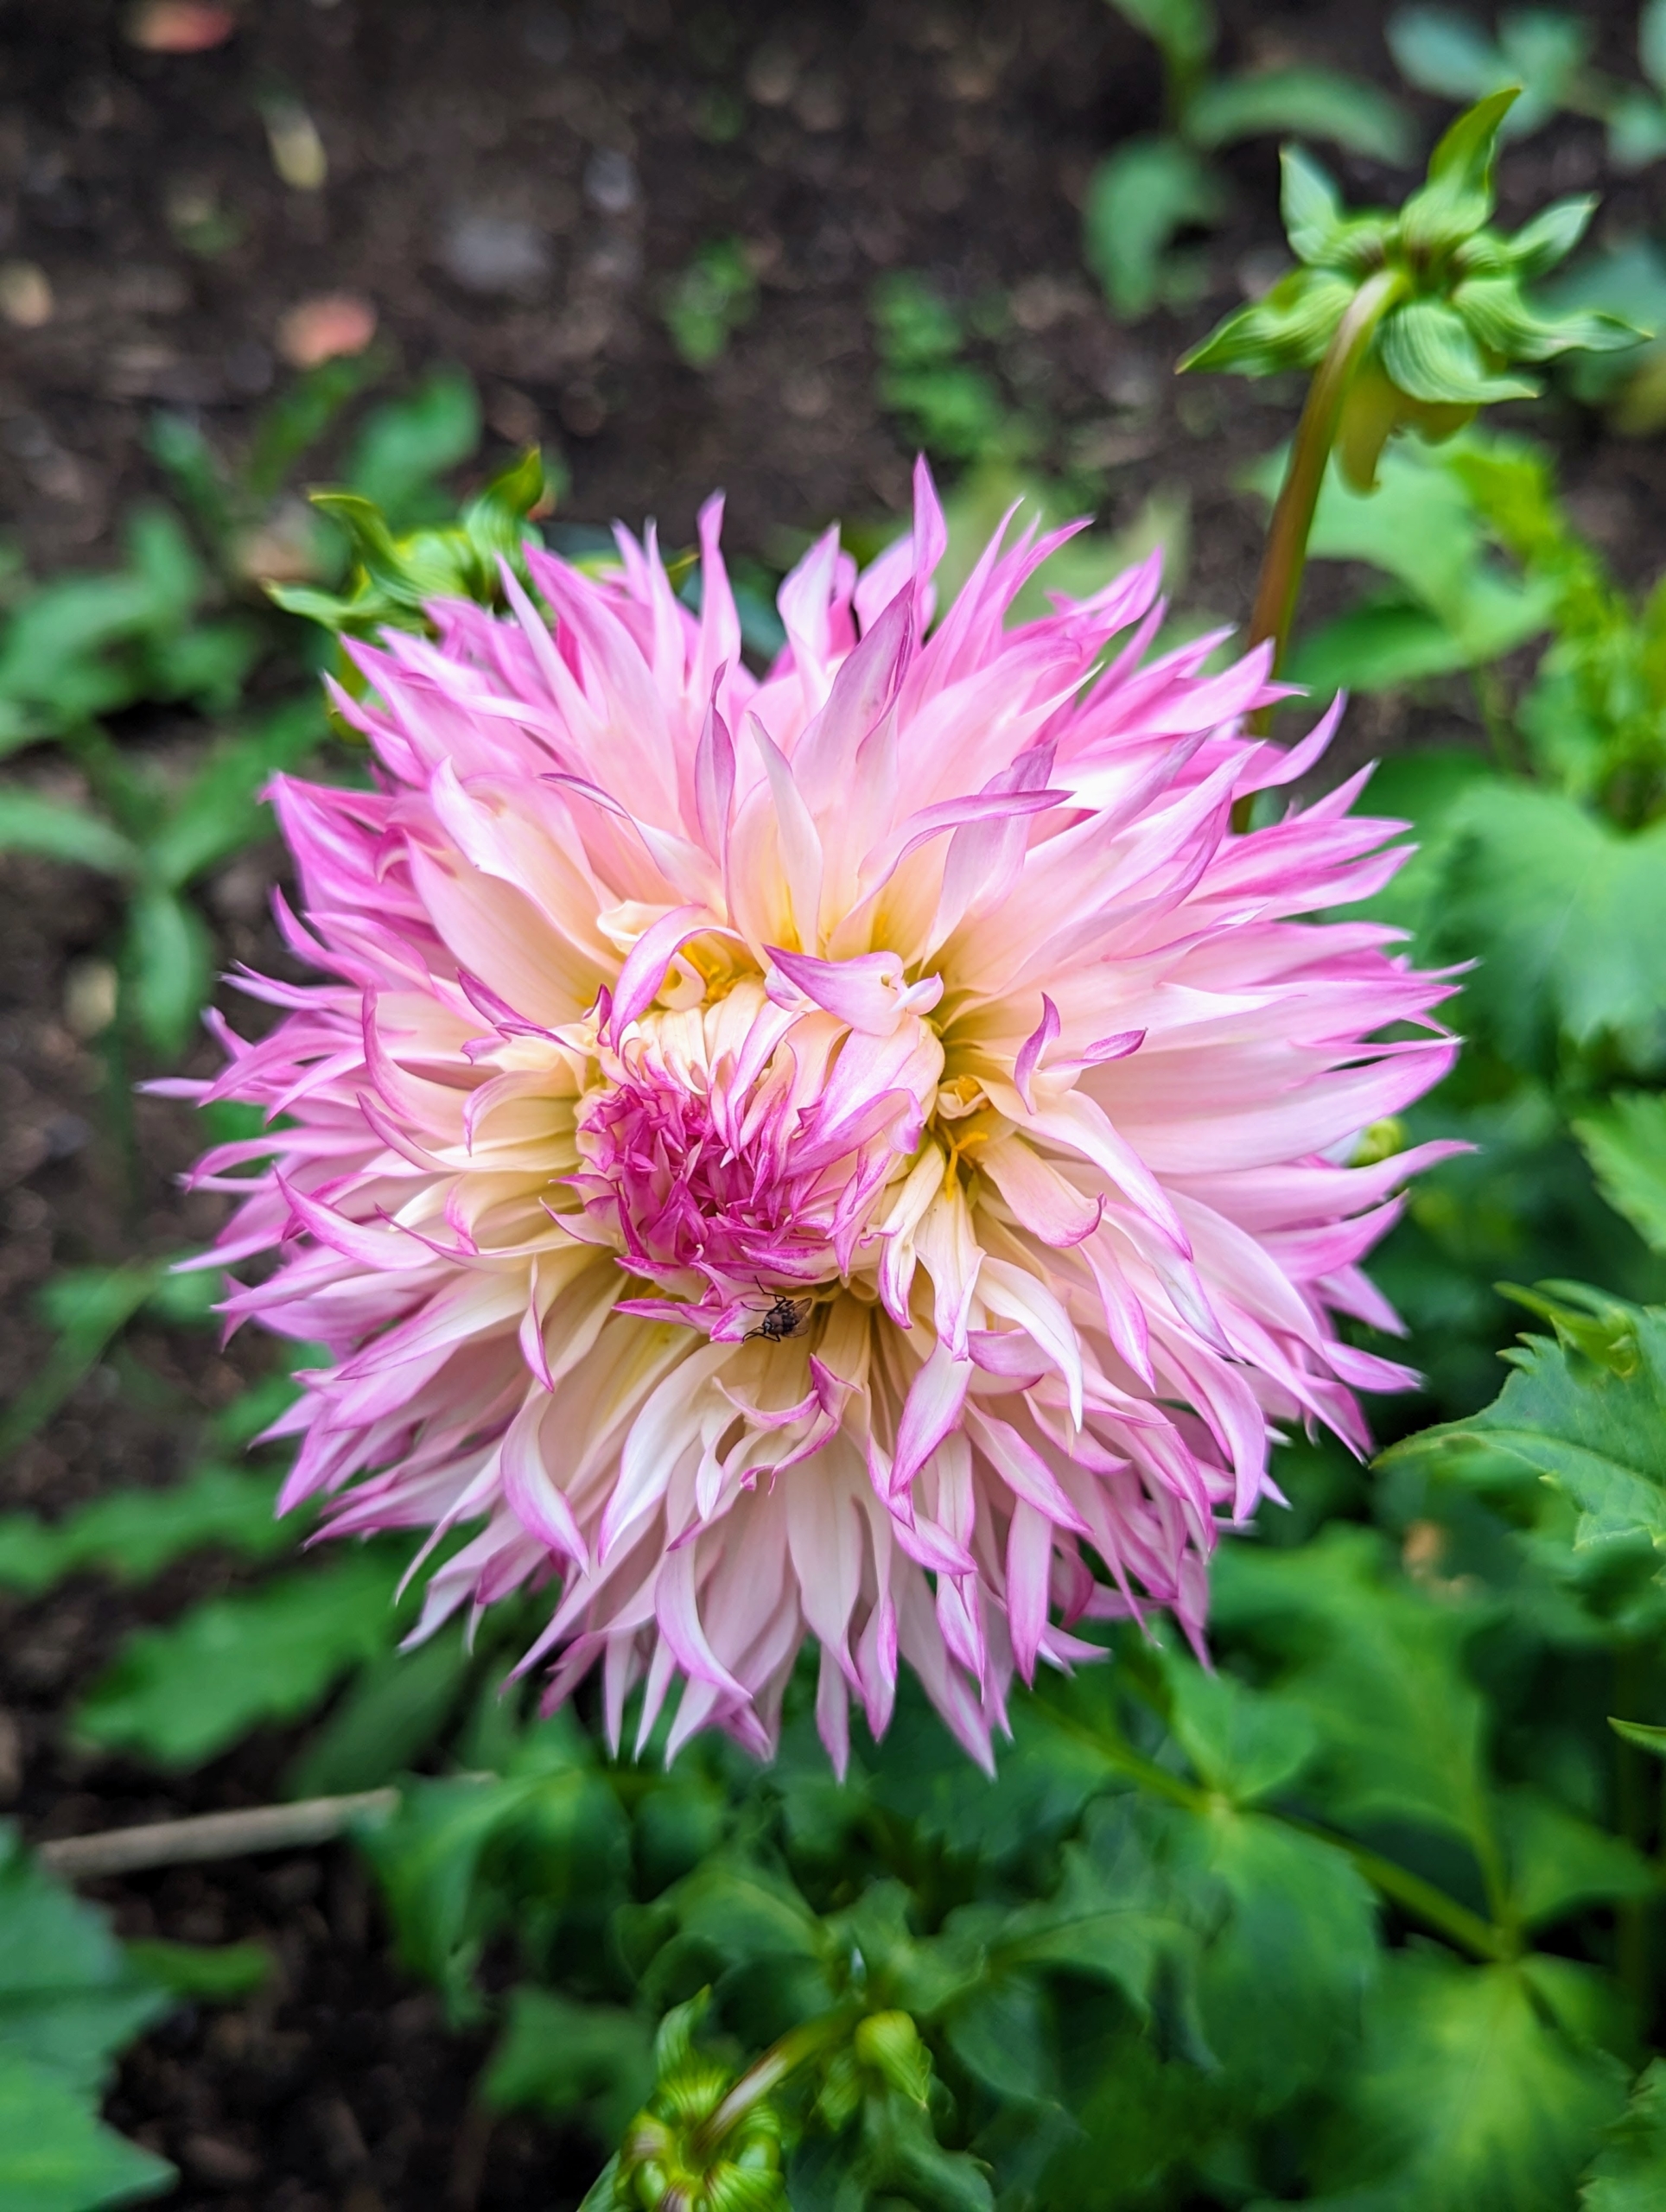
Here is an elegant dahlia which produces large blossoms with fully double, slender, deep pink petals with creamy throats that produce a frilled effect-hence the name Fimbriata meaning frilly.
This dahlia is named ‘Bashful’ with its dark burgundy petals, hot pink tips, and golden stamens in the center of the flower. The three-inch flower blooms on a plant that grows to two-and-a-half feet by the end of the season. This is a great dahlia for bedding, containers, and cut flowers.
Dahlias continue to produce an abundance of flowers through late summer until the first frost. I am looking forward to lots and lots of arrangements.
When arranging, always strip off all the leaves that would be below the water line in the vase. This is true for all flower arrangements, not just dahlias. When leaves stay underwater, they decay and release bacteria that shorten the vase life of the flowers. And change the water daily so they look fresh and last longer.
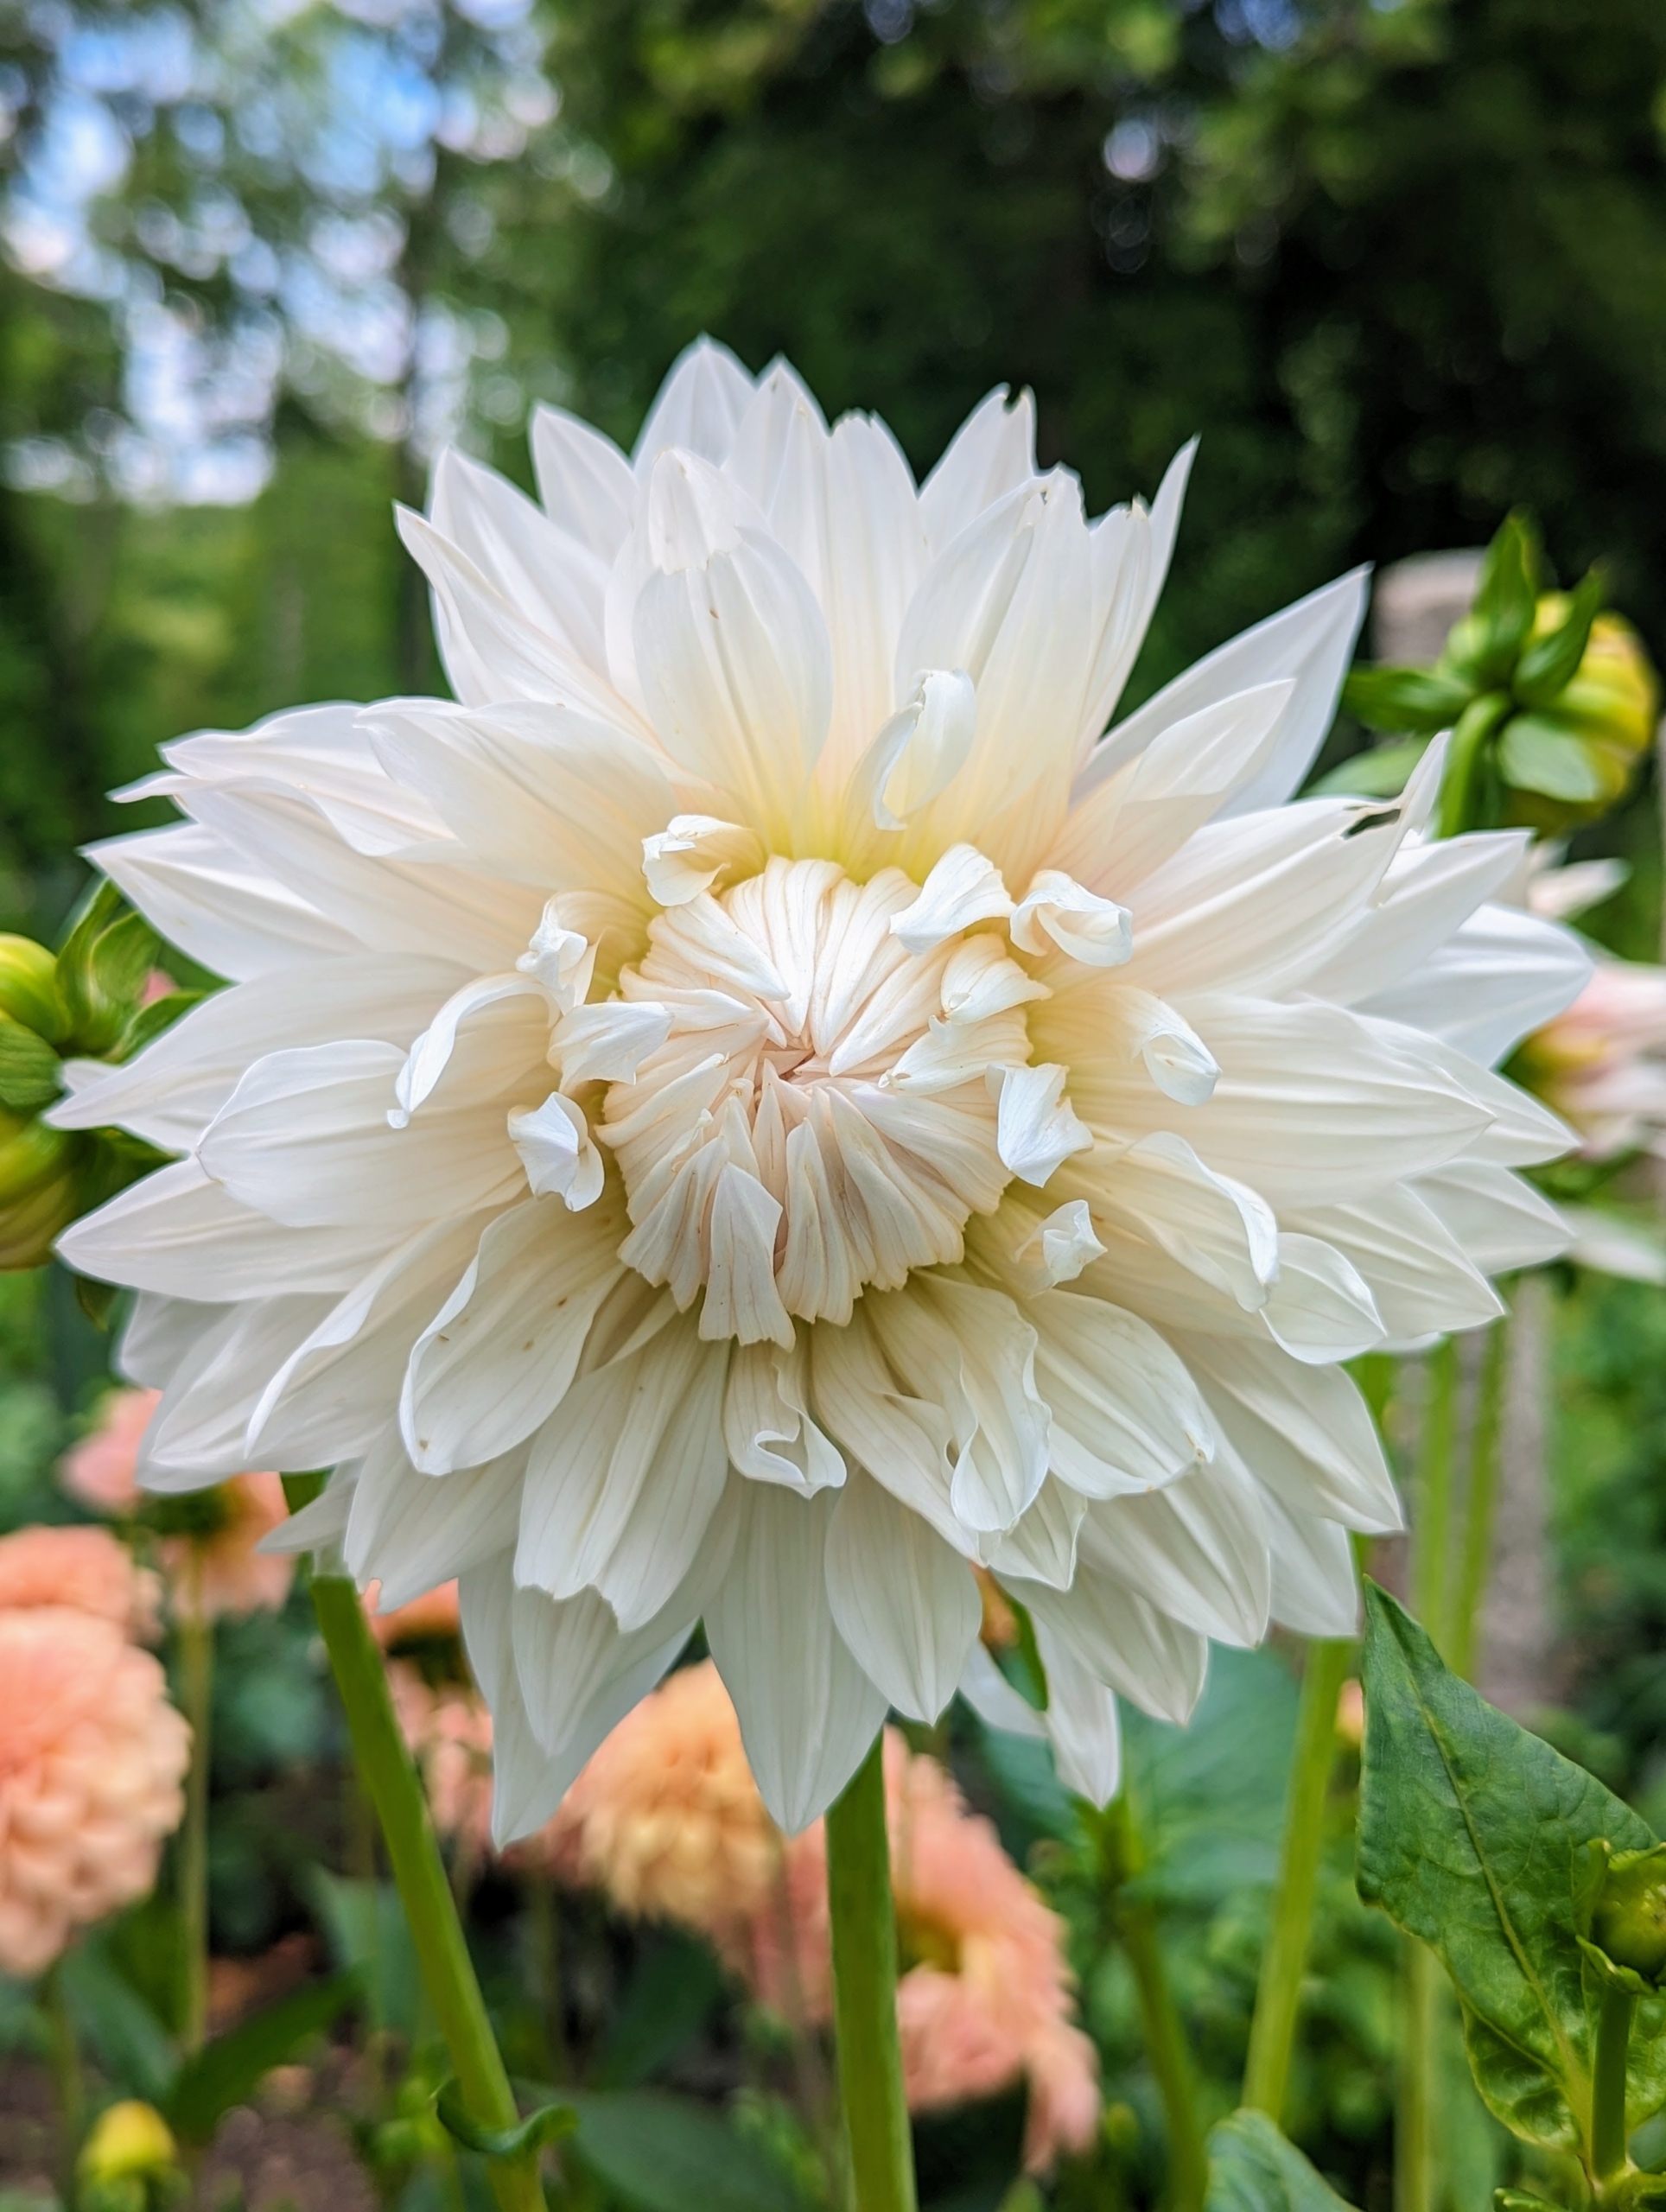
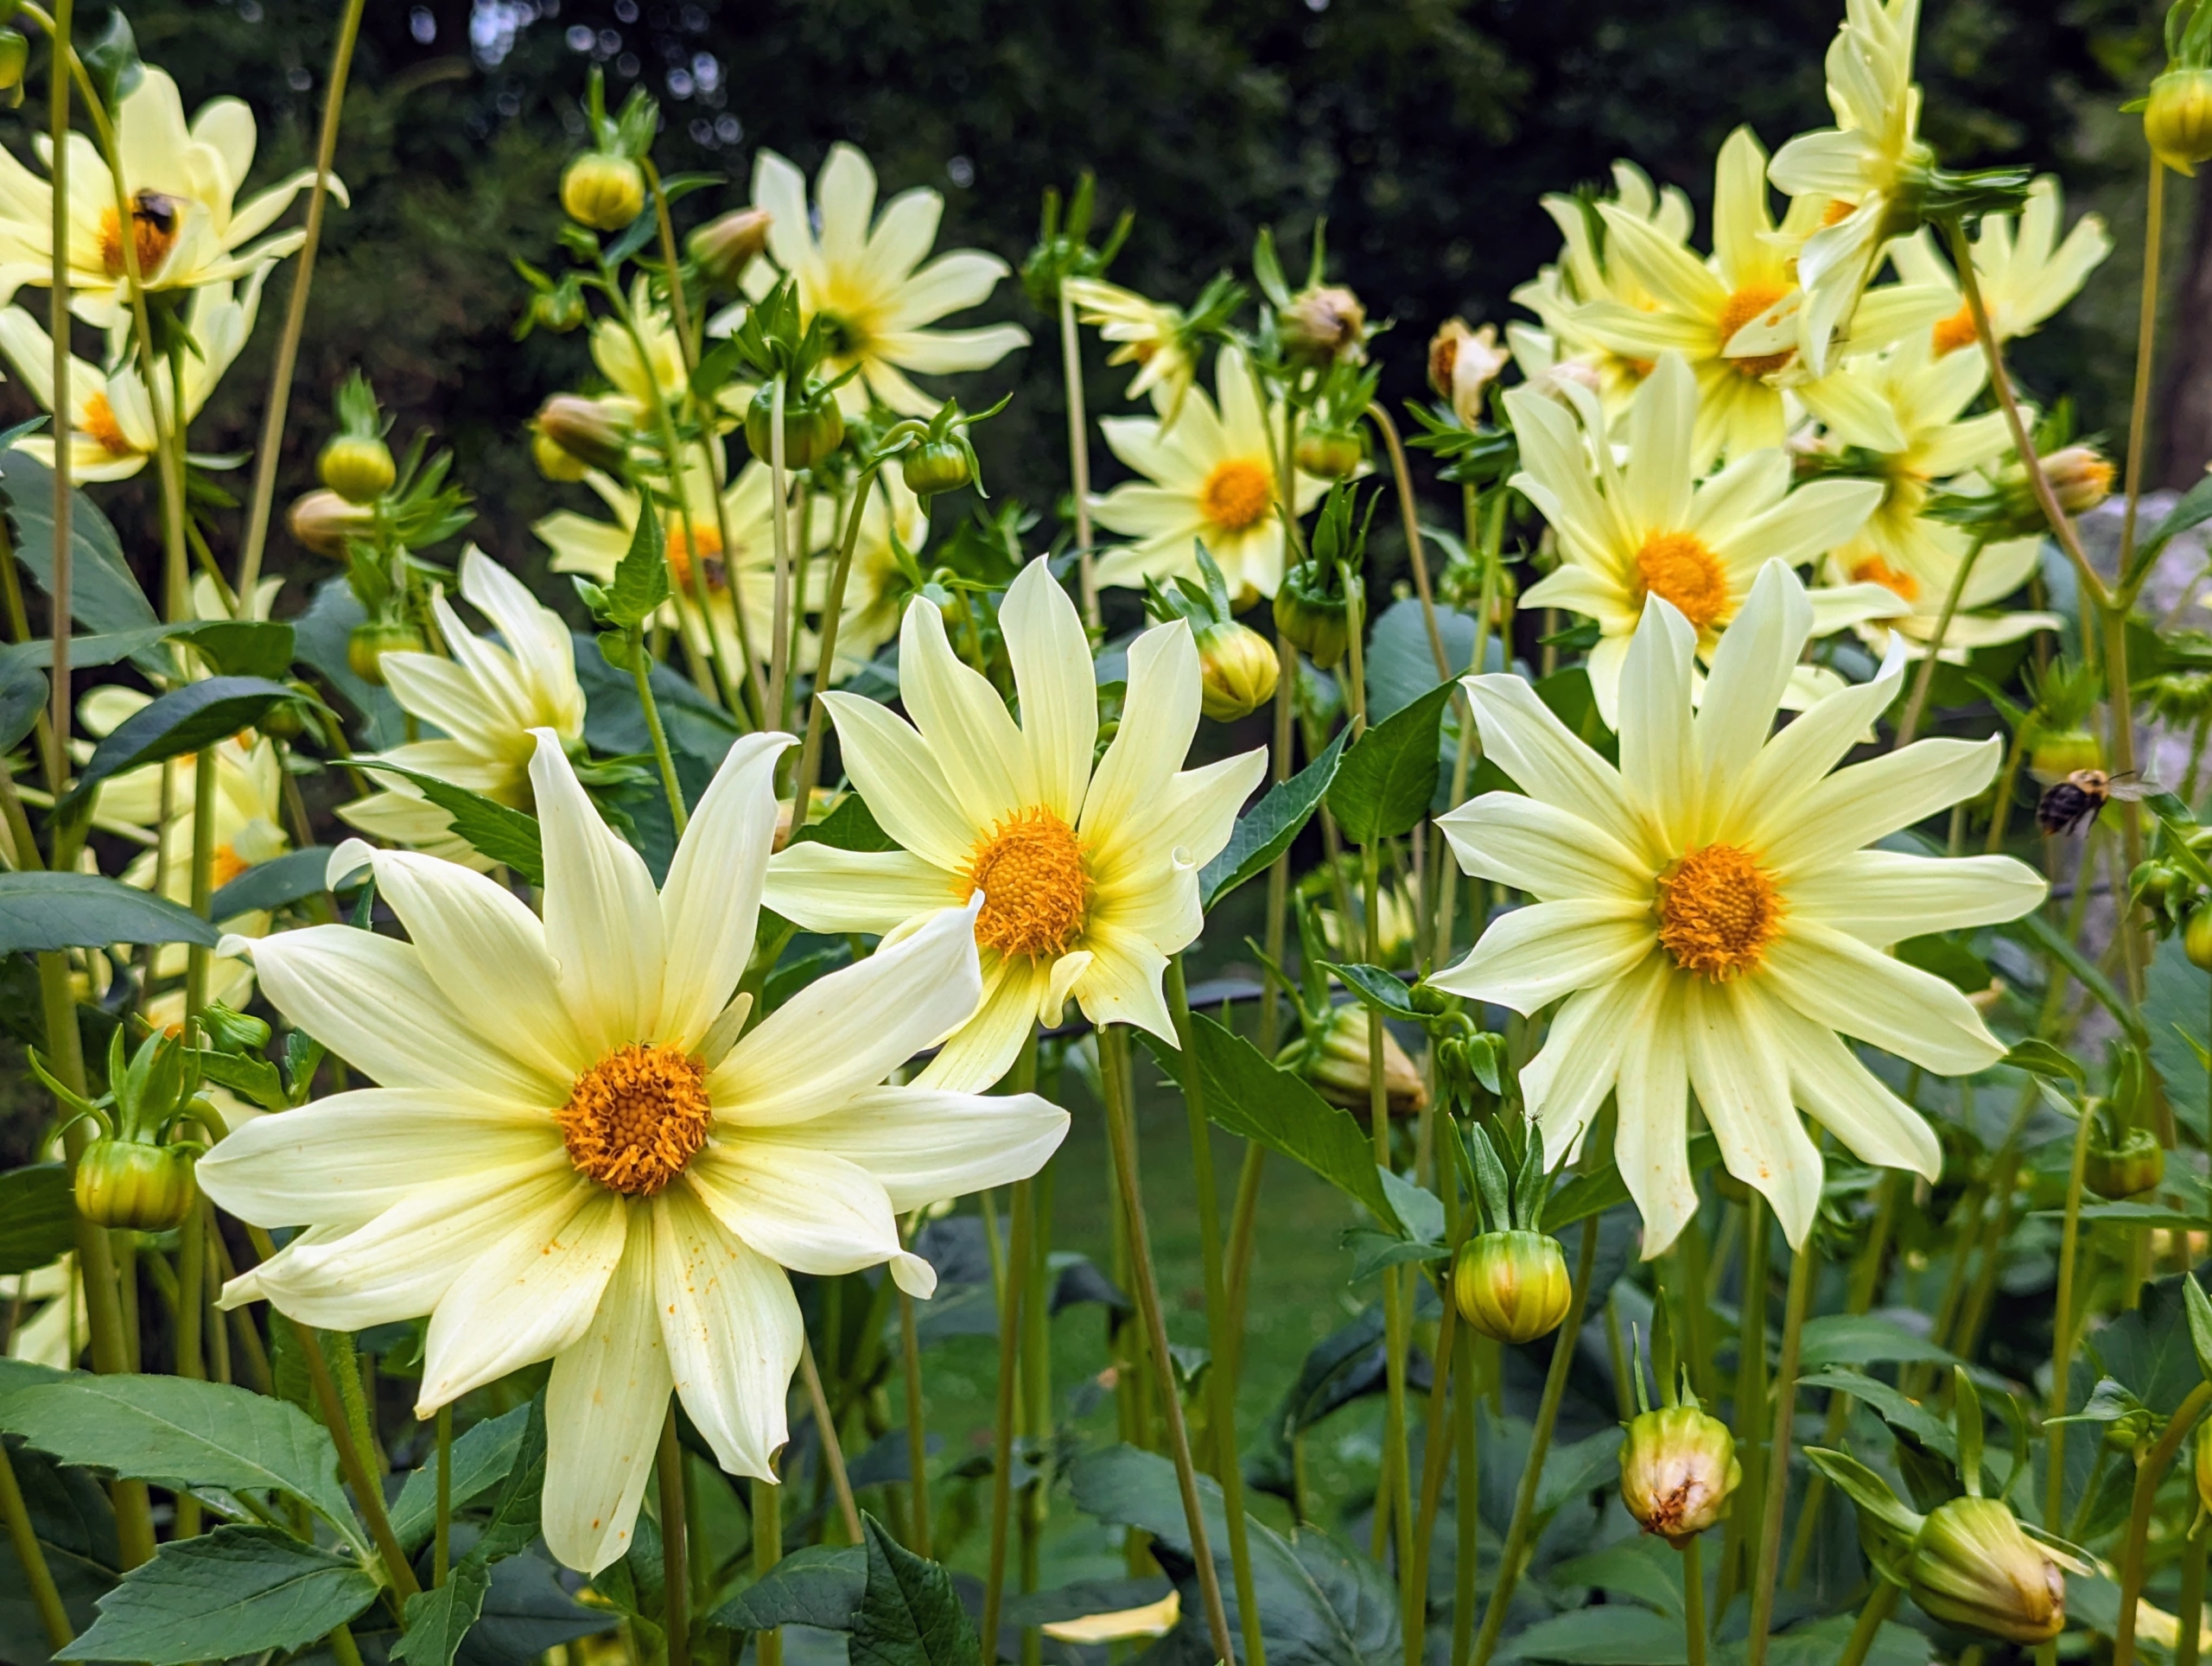
These dahlias are creamy yellow with bold yellow centers.
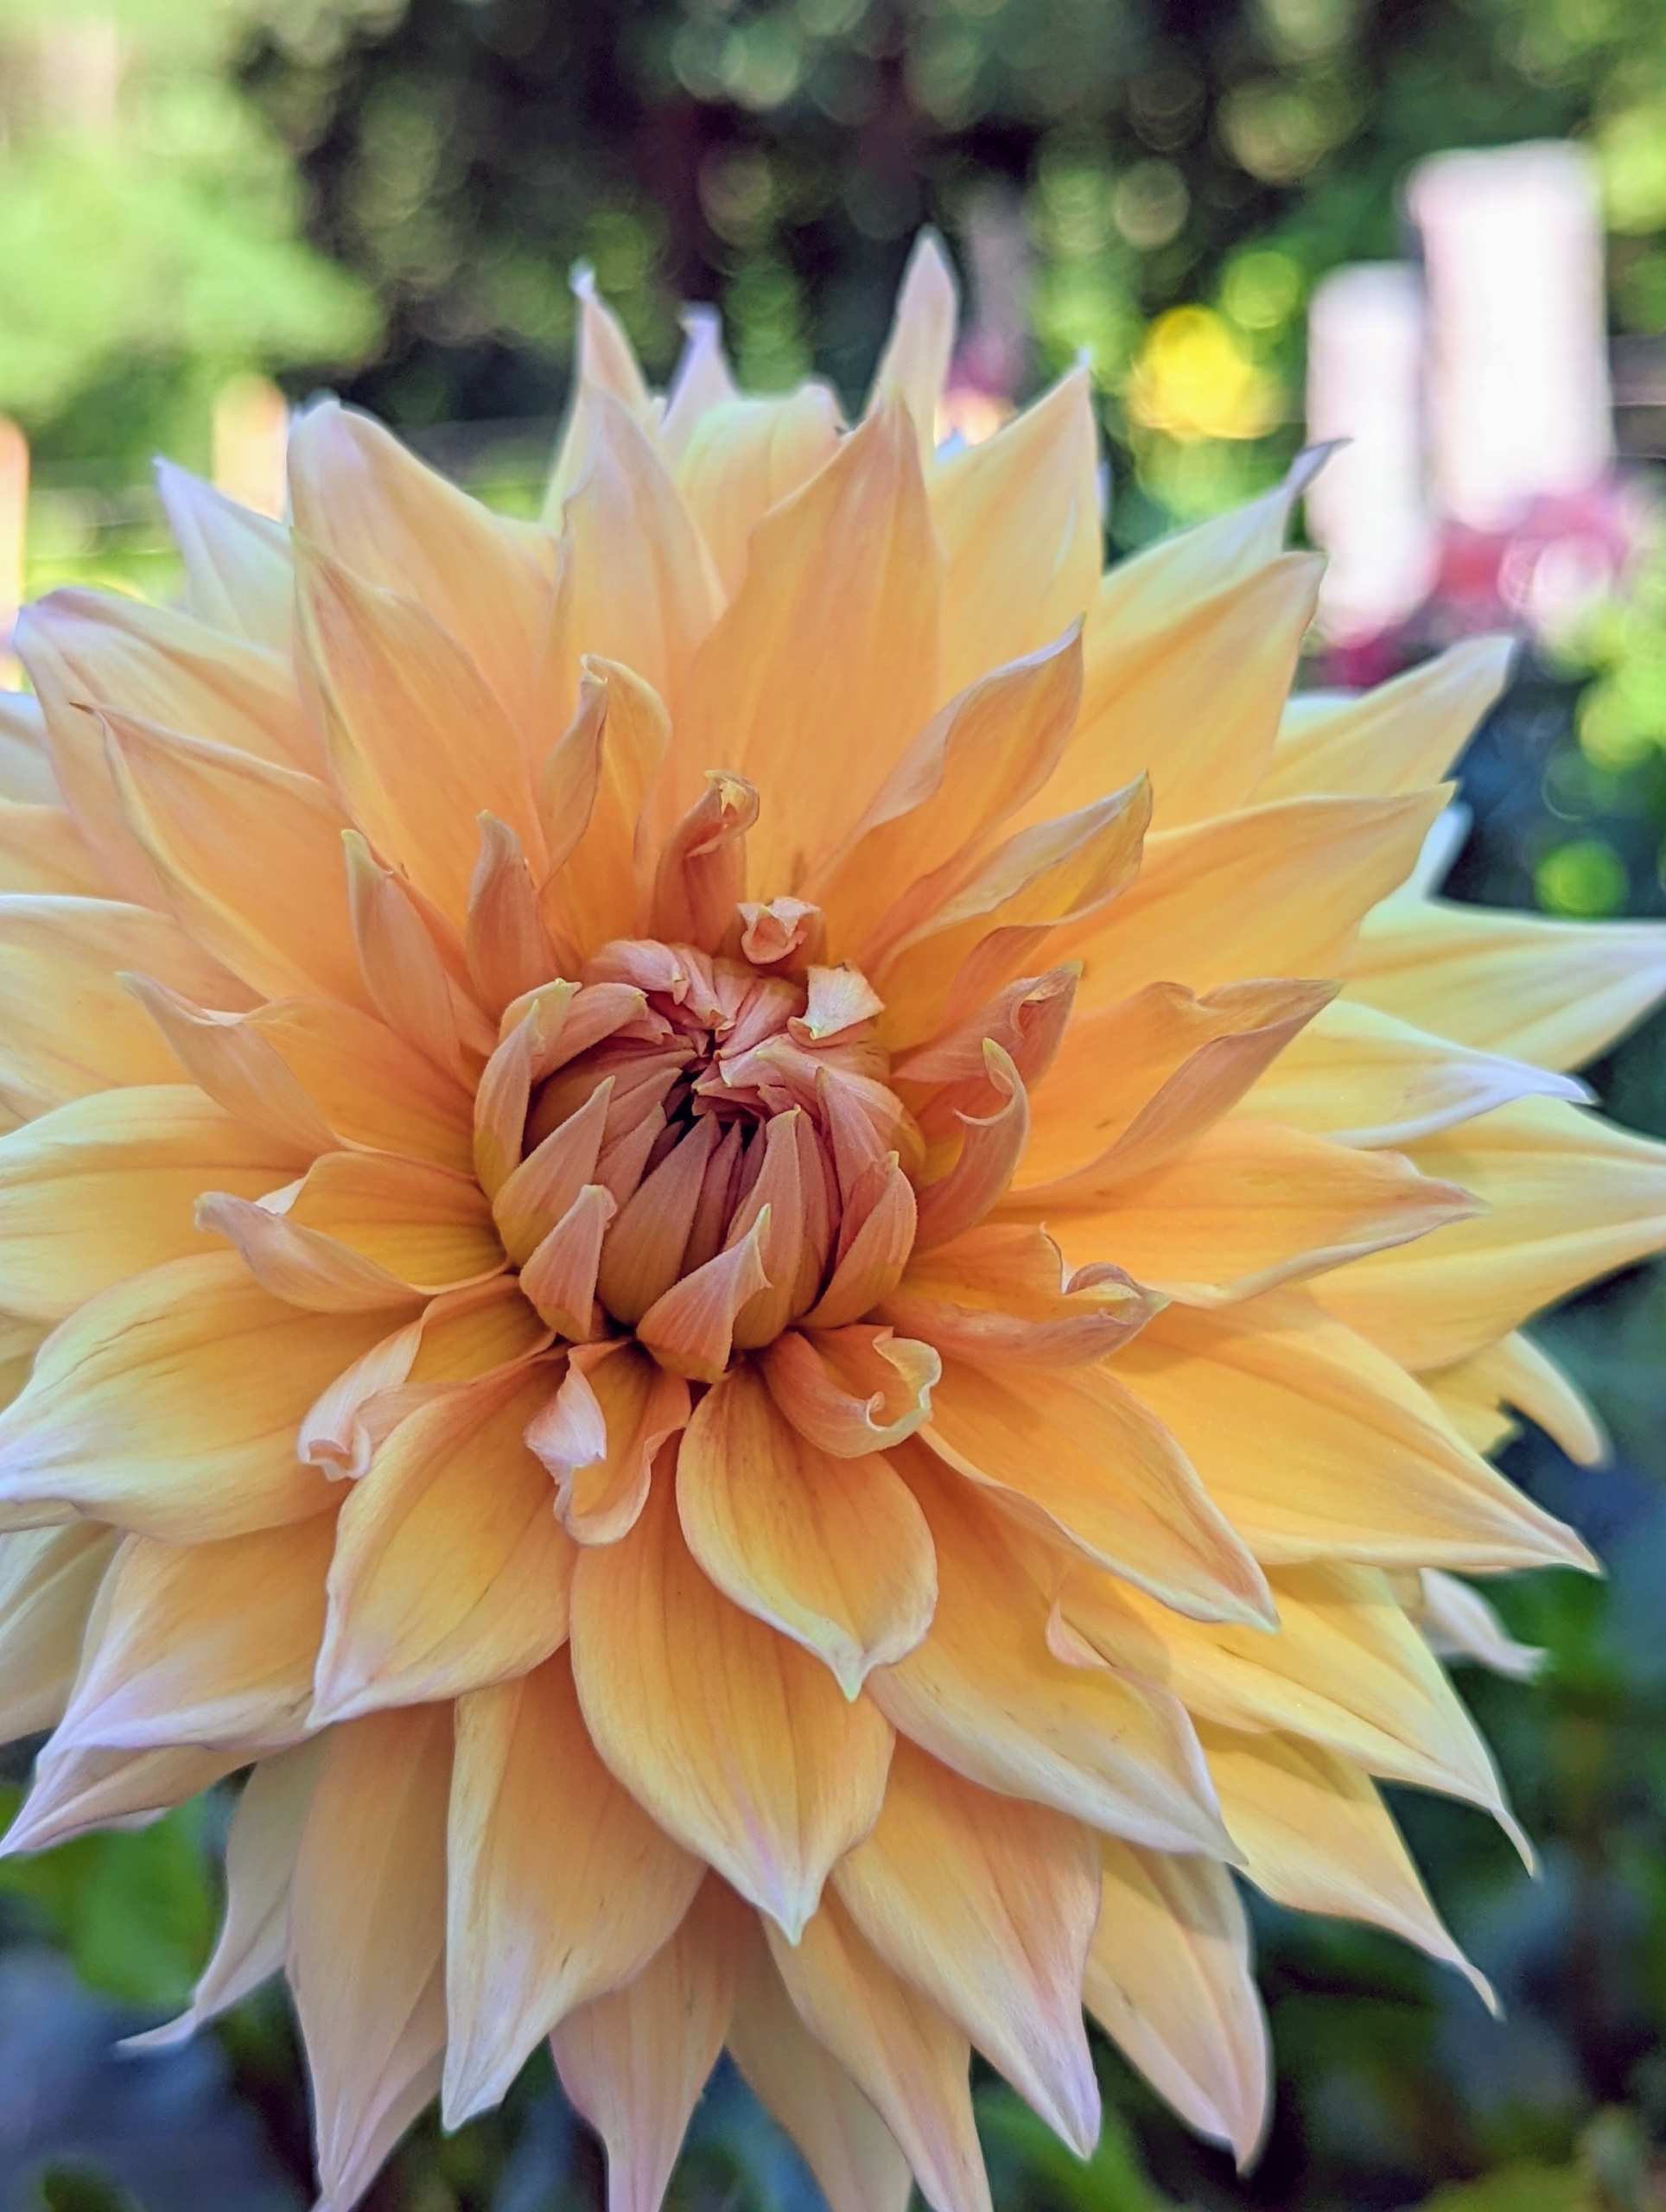
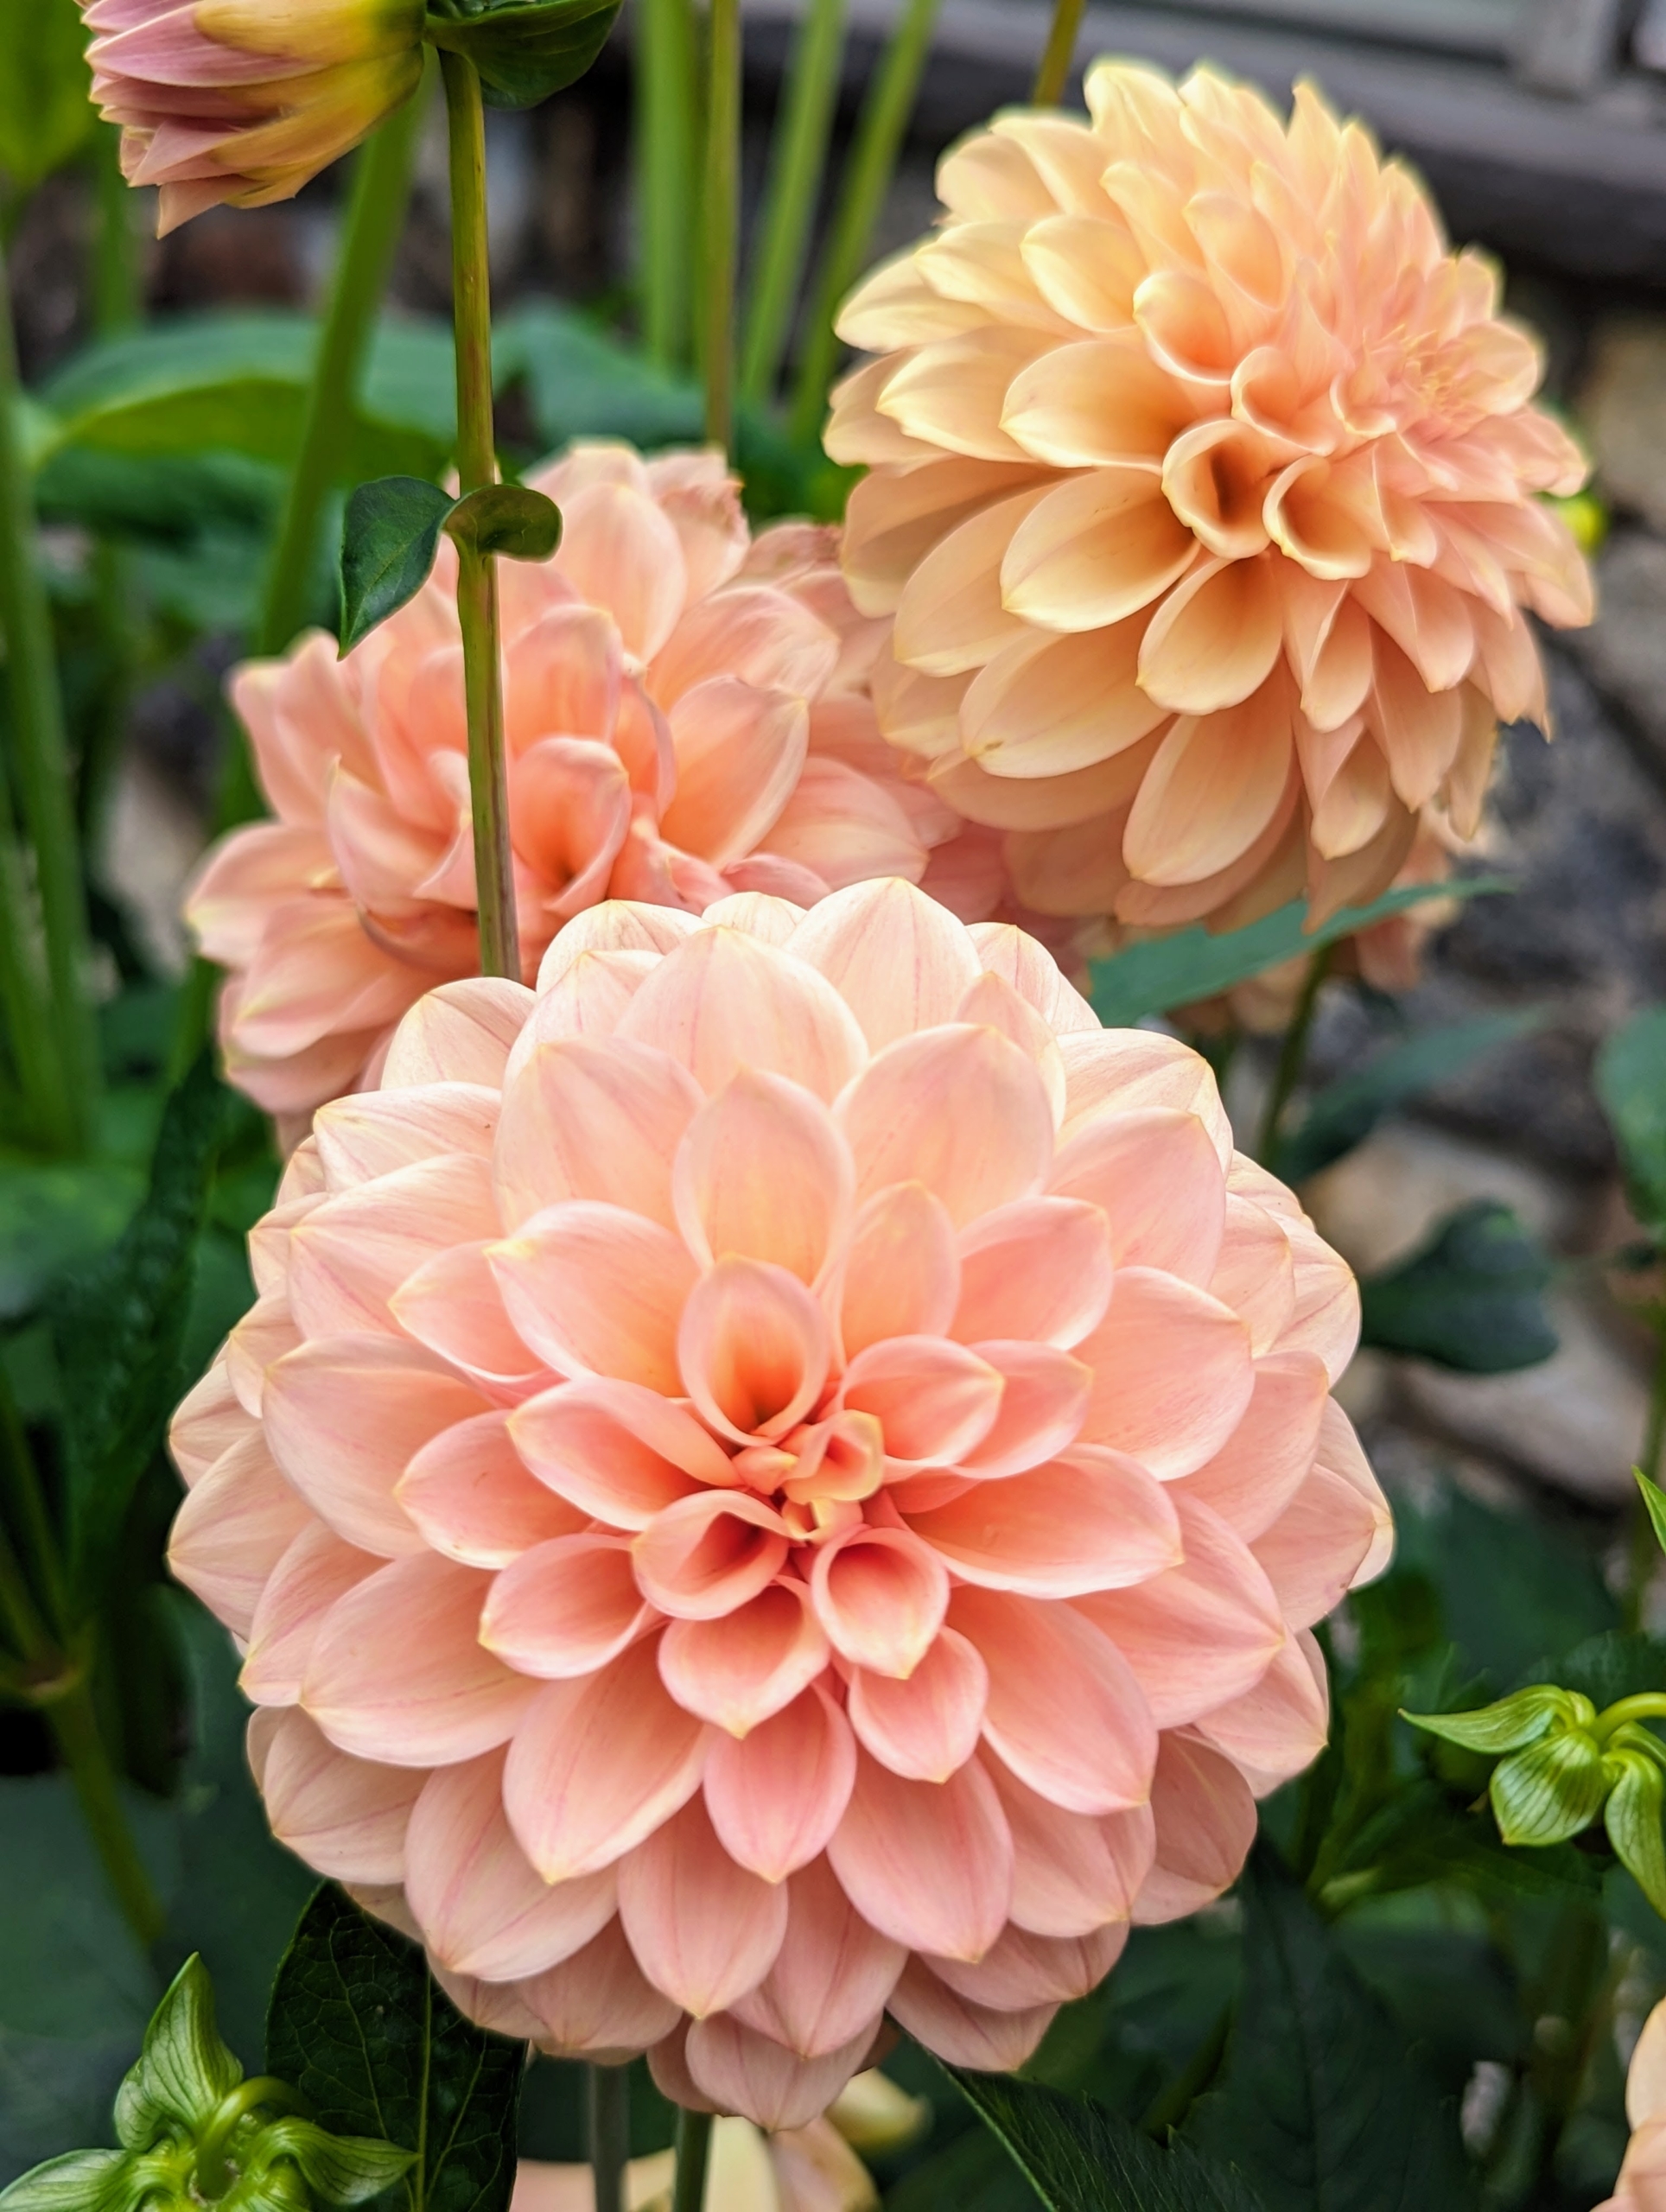
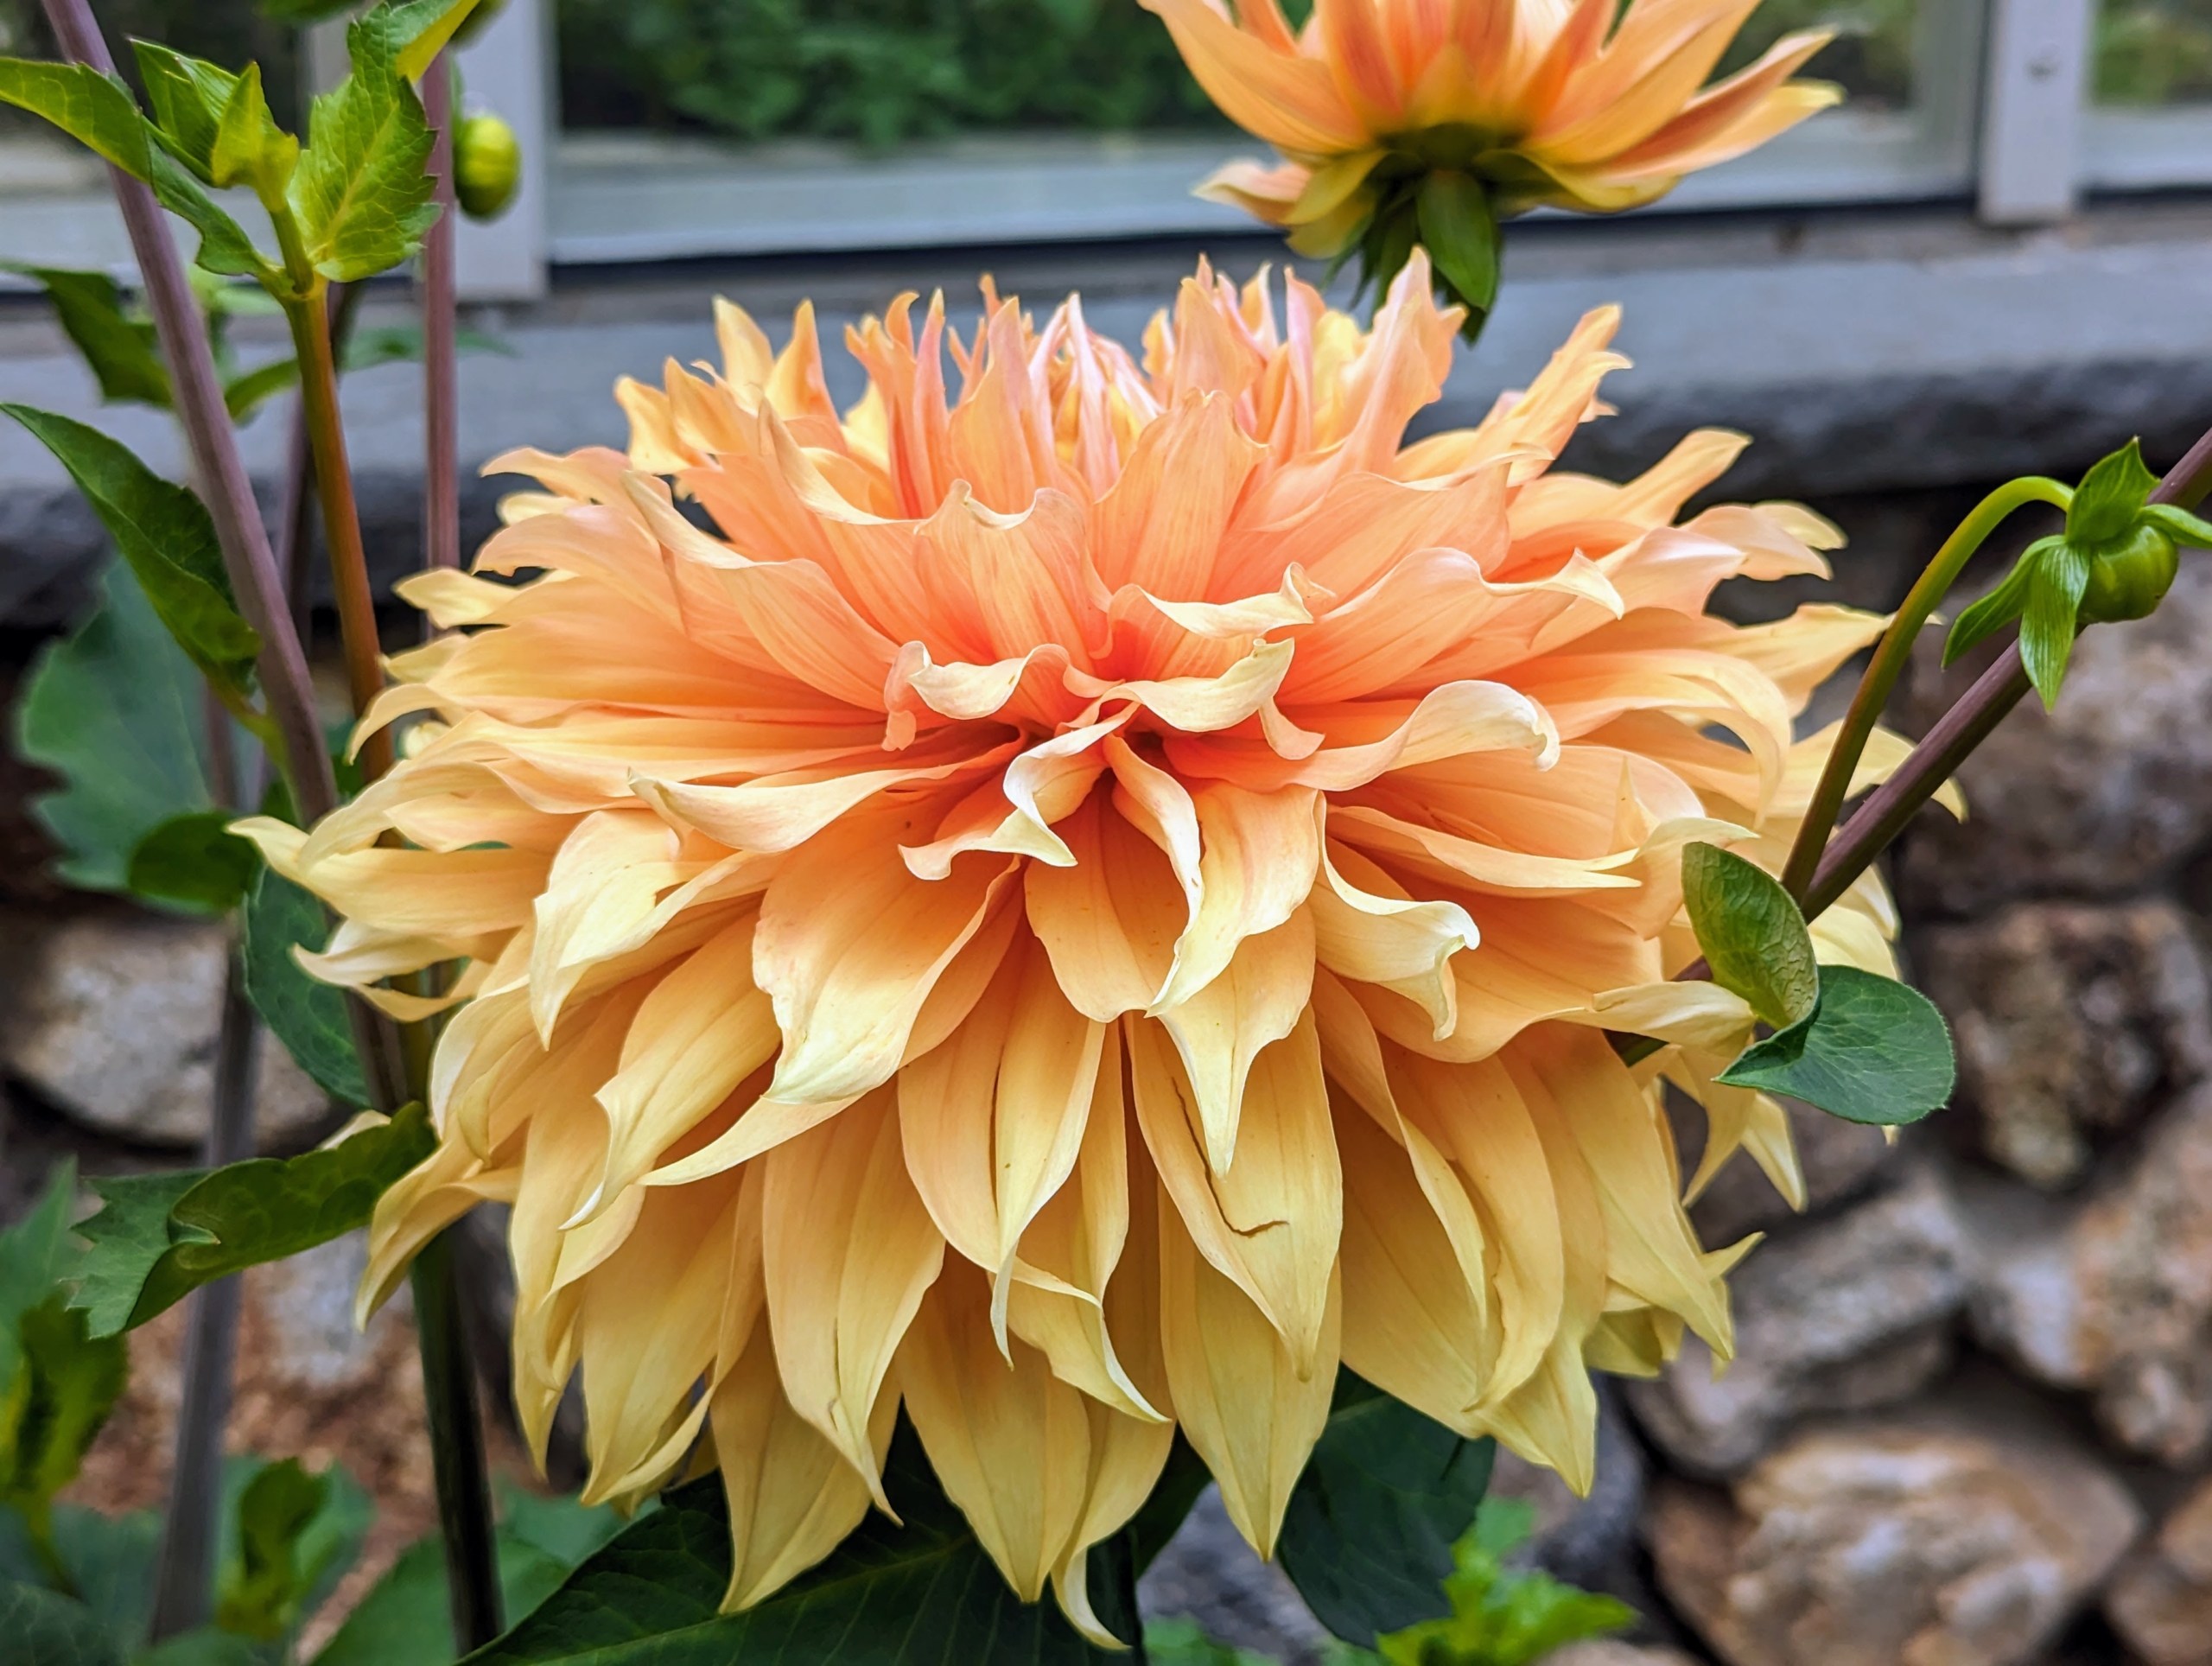
There are just so many flowers that have opened beautifully – this a pale light orange with prettily formed petals.
Nearly every plant is showing off at least one bloom. I am so pleased with how these flowers are doing this year. Dahlias are herbaceous perennials, but often grown as annuals.
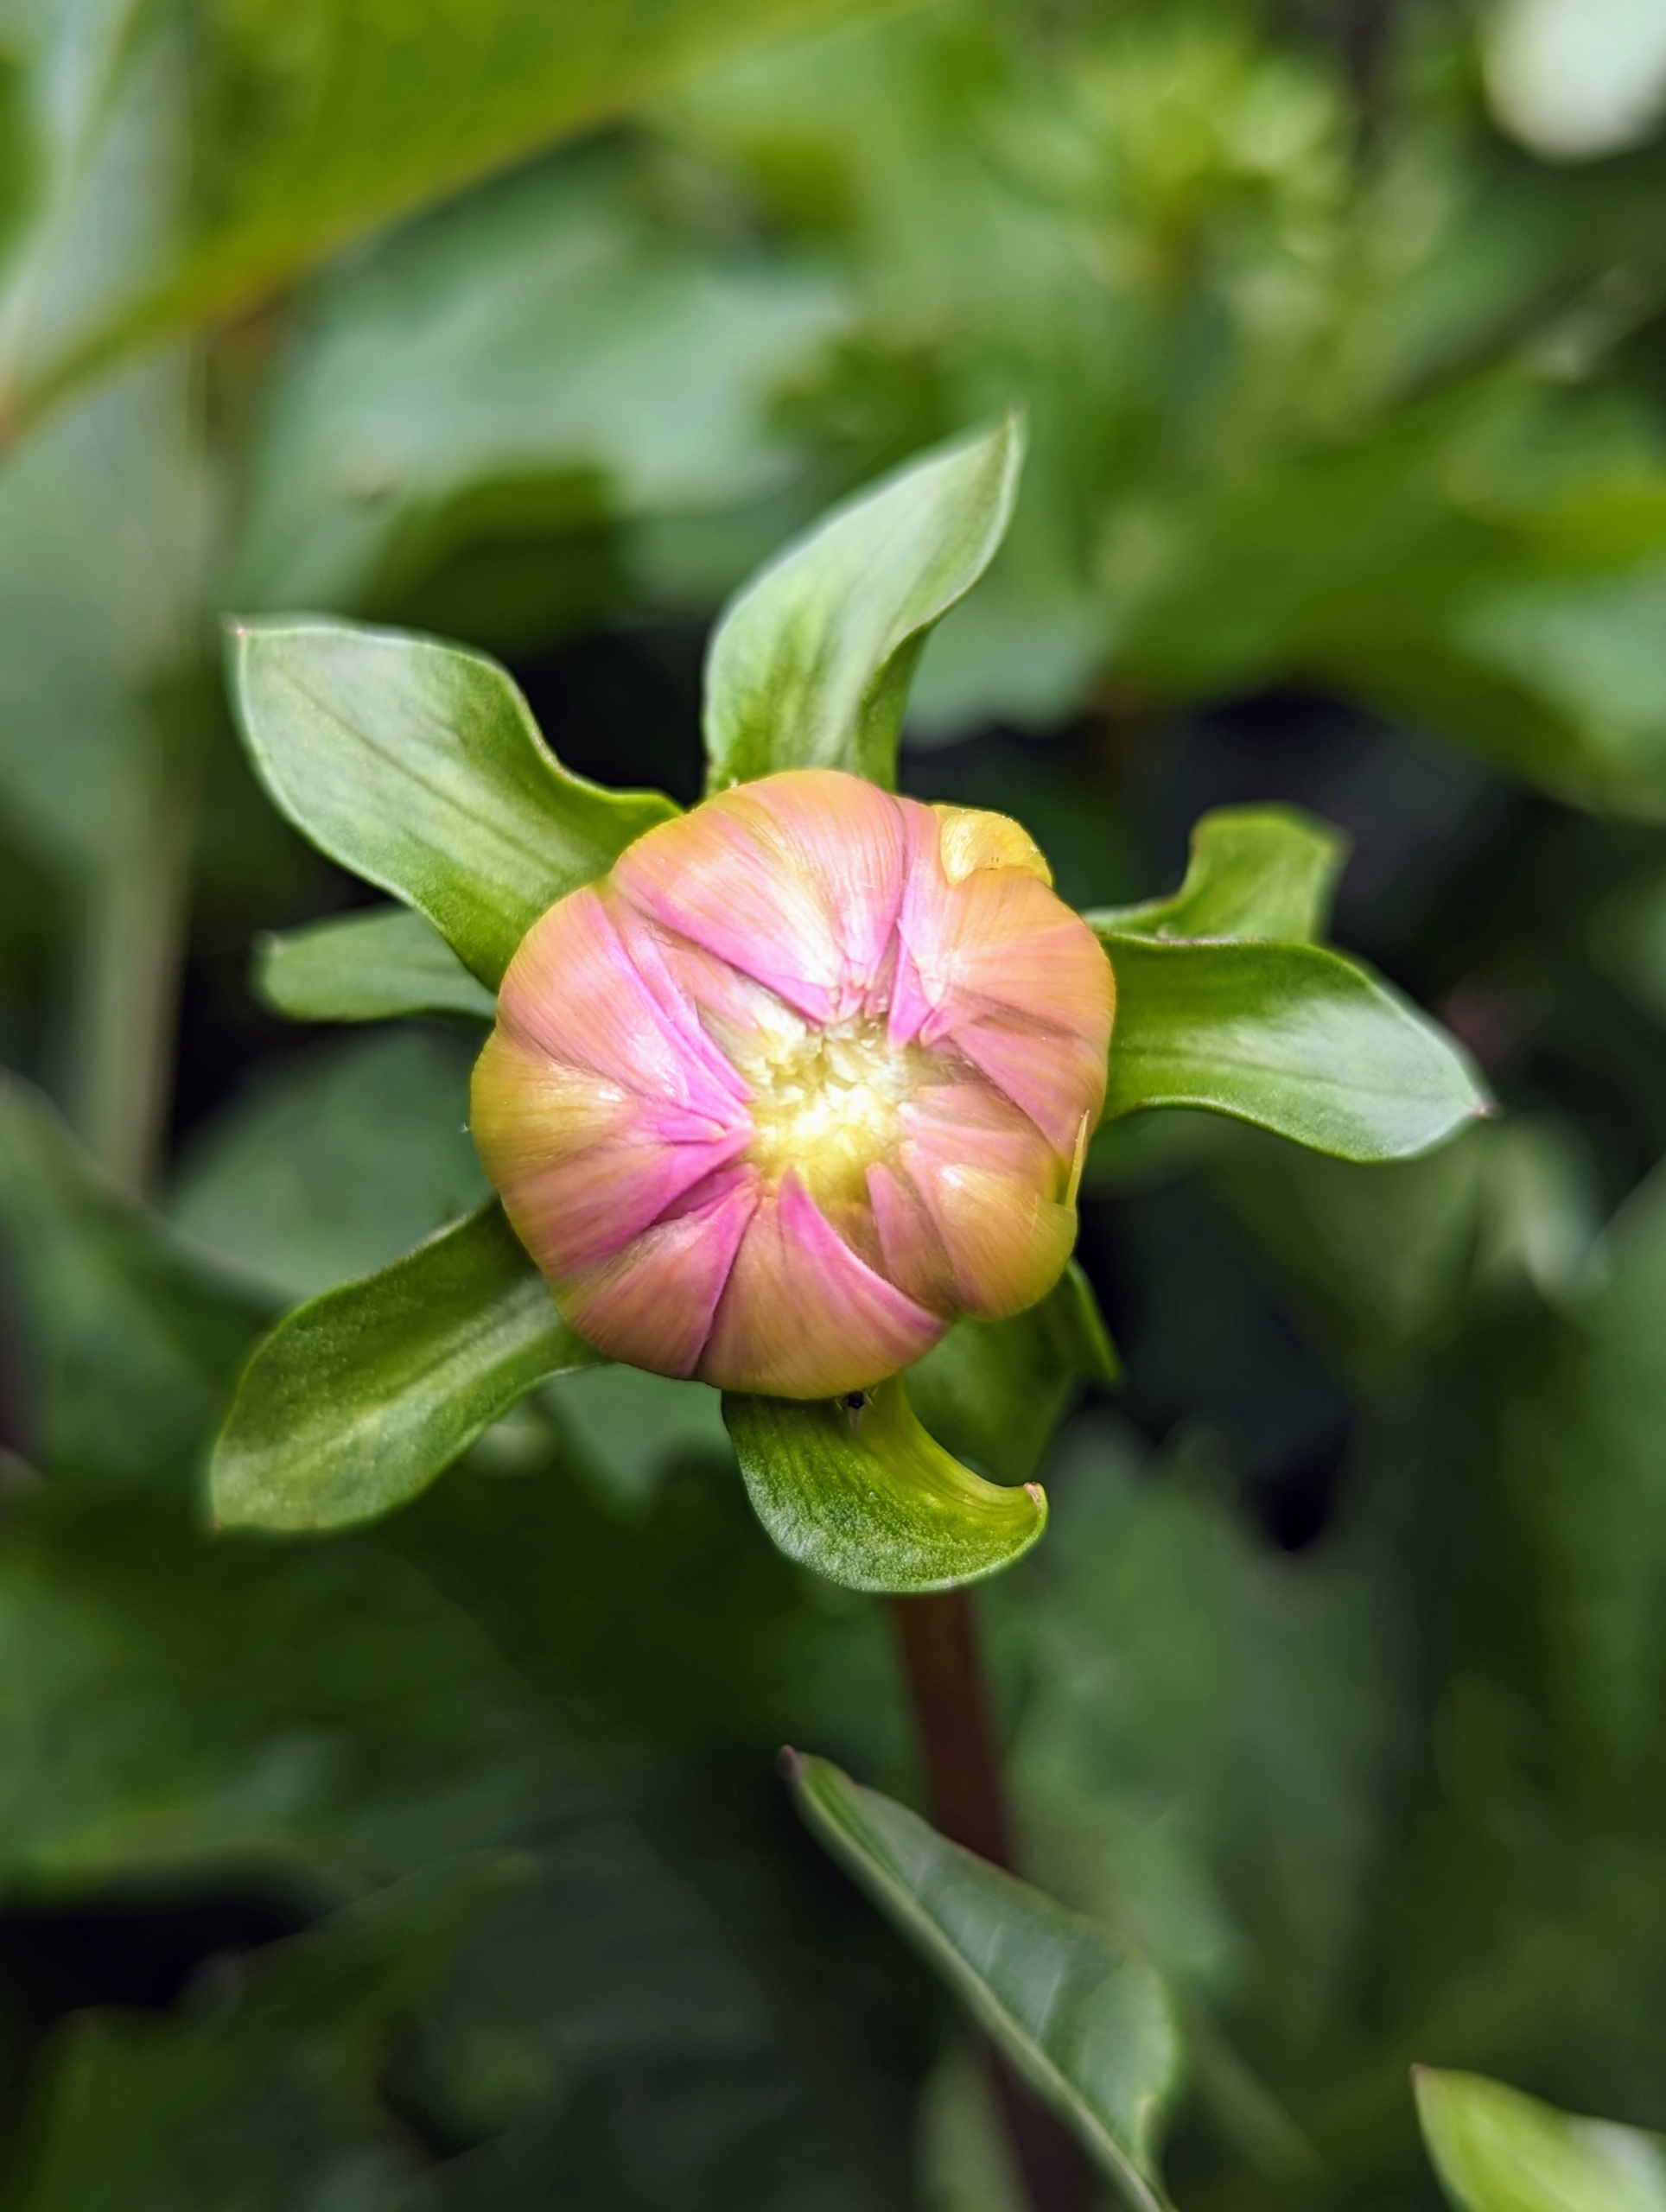
This dahlia bud is just about to open. When the flowers grow, they emerge small and pale at first. And gradually they get larger and more detailed.
The key to maintaining dahlia tubers for the winter is making sure they stay dry, have good air circulation, and are in a cool, dark spot. Covering them with bales of hay to protect them from the winter elements worked so well for us. Click here to see the blog on how we did it. And keep checking this blog to see more of these beauties blooming in the coming months.