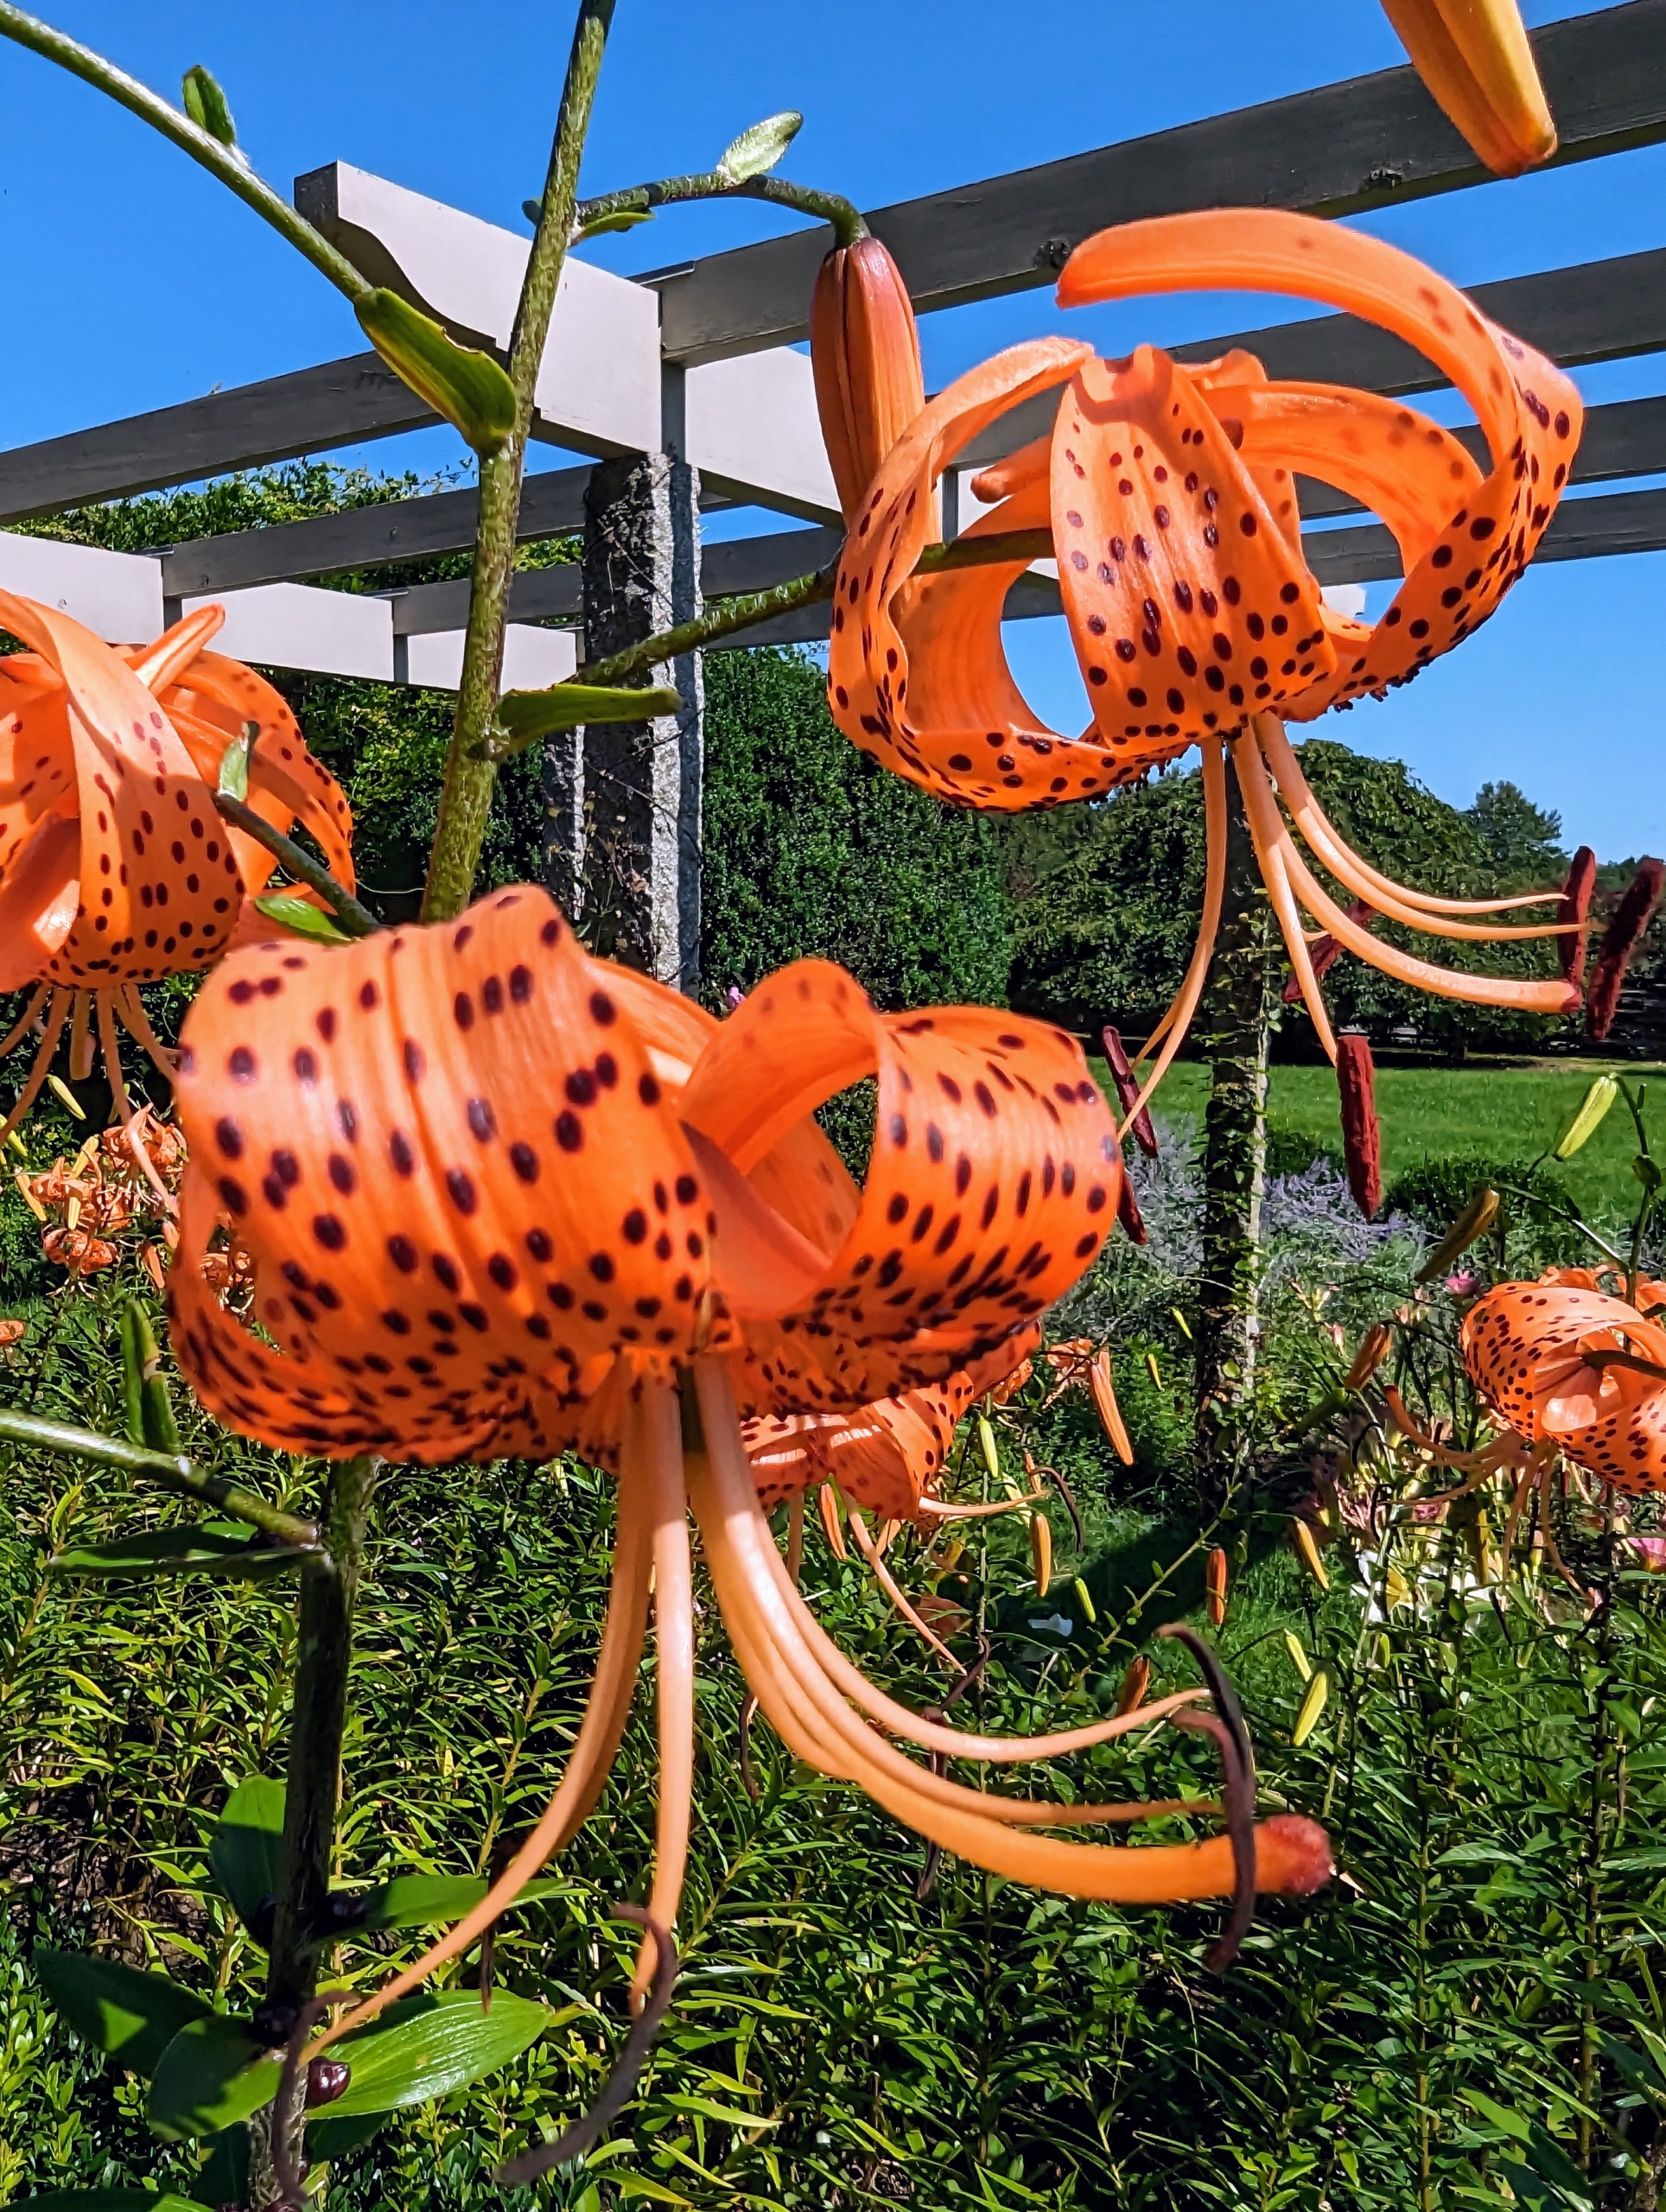
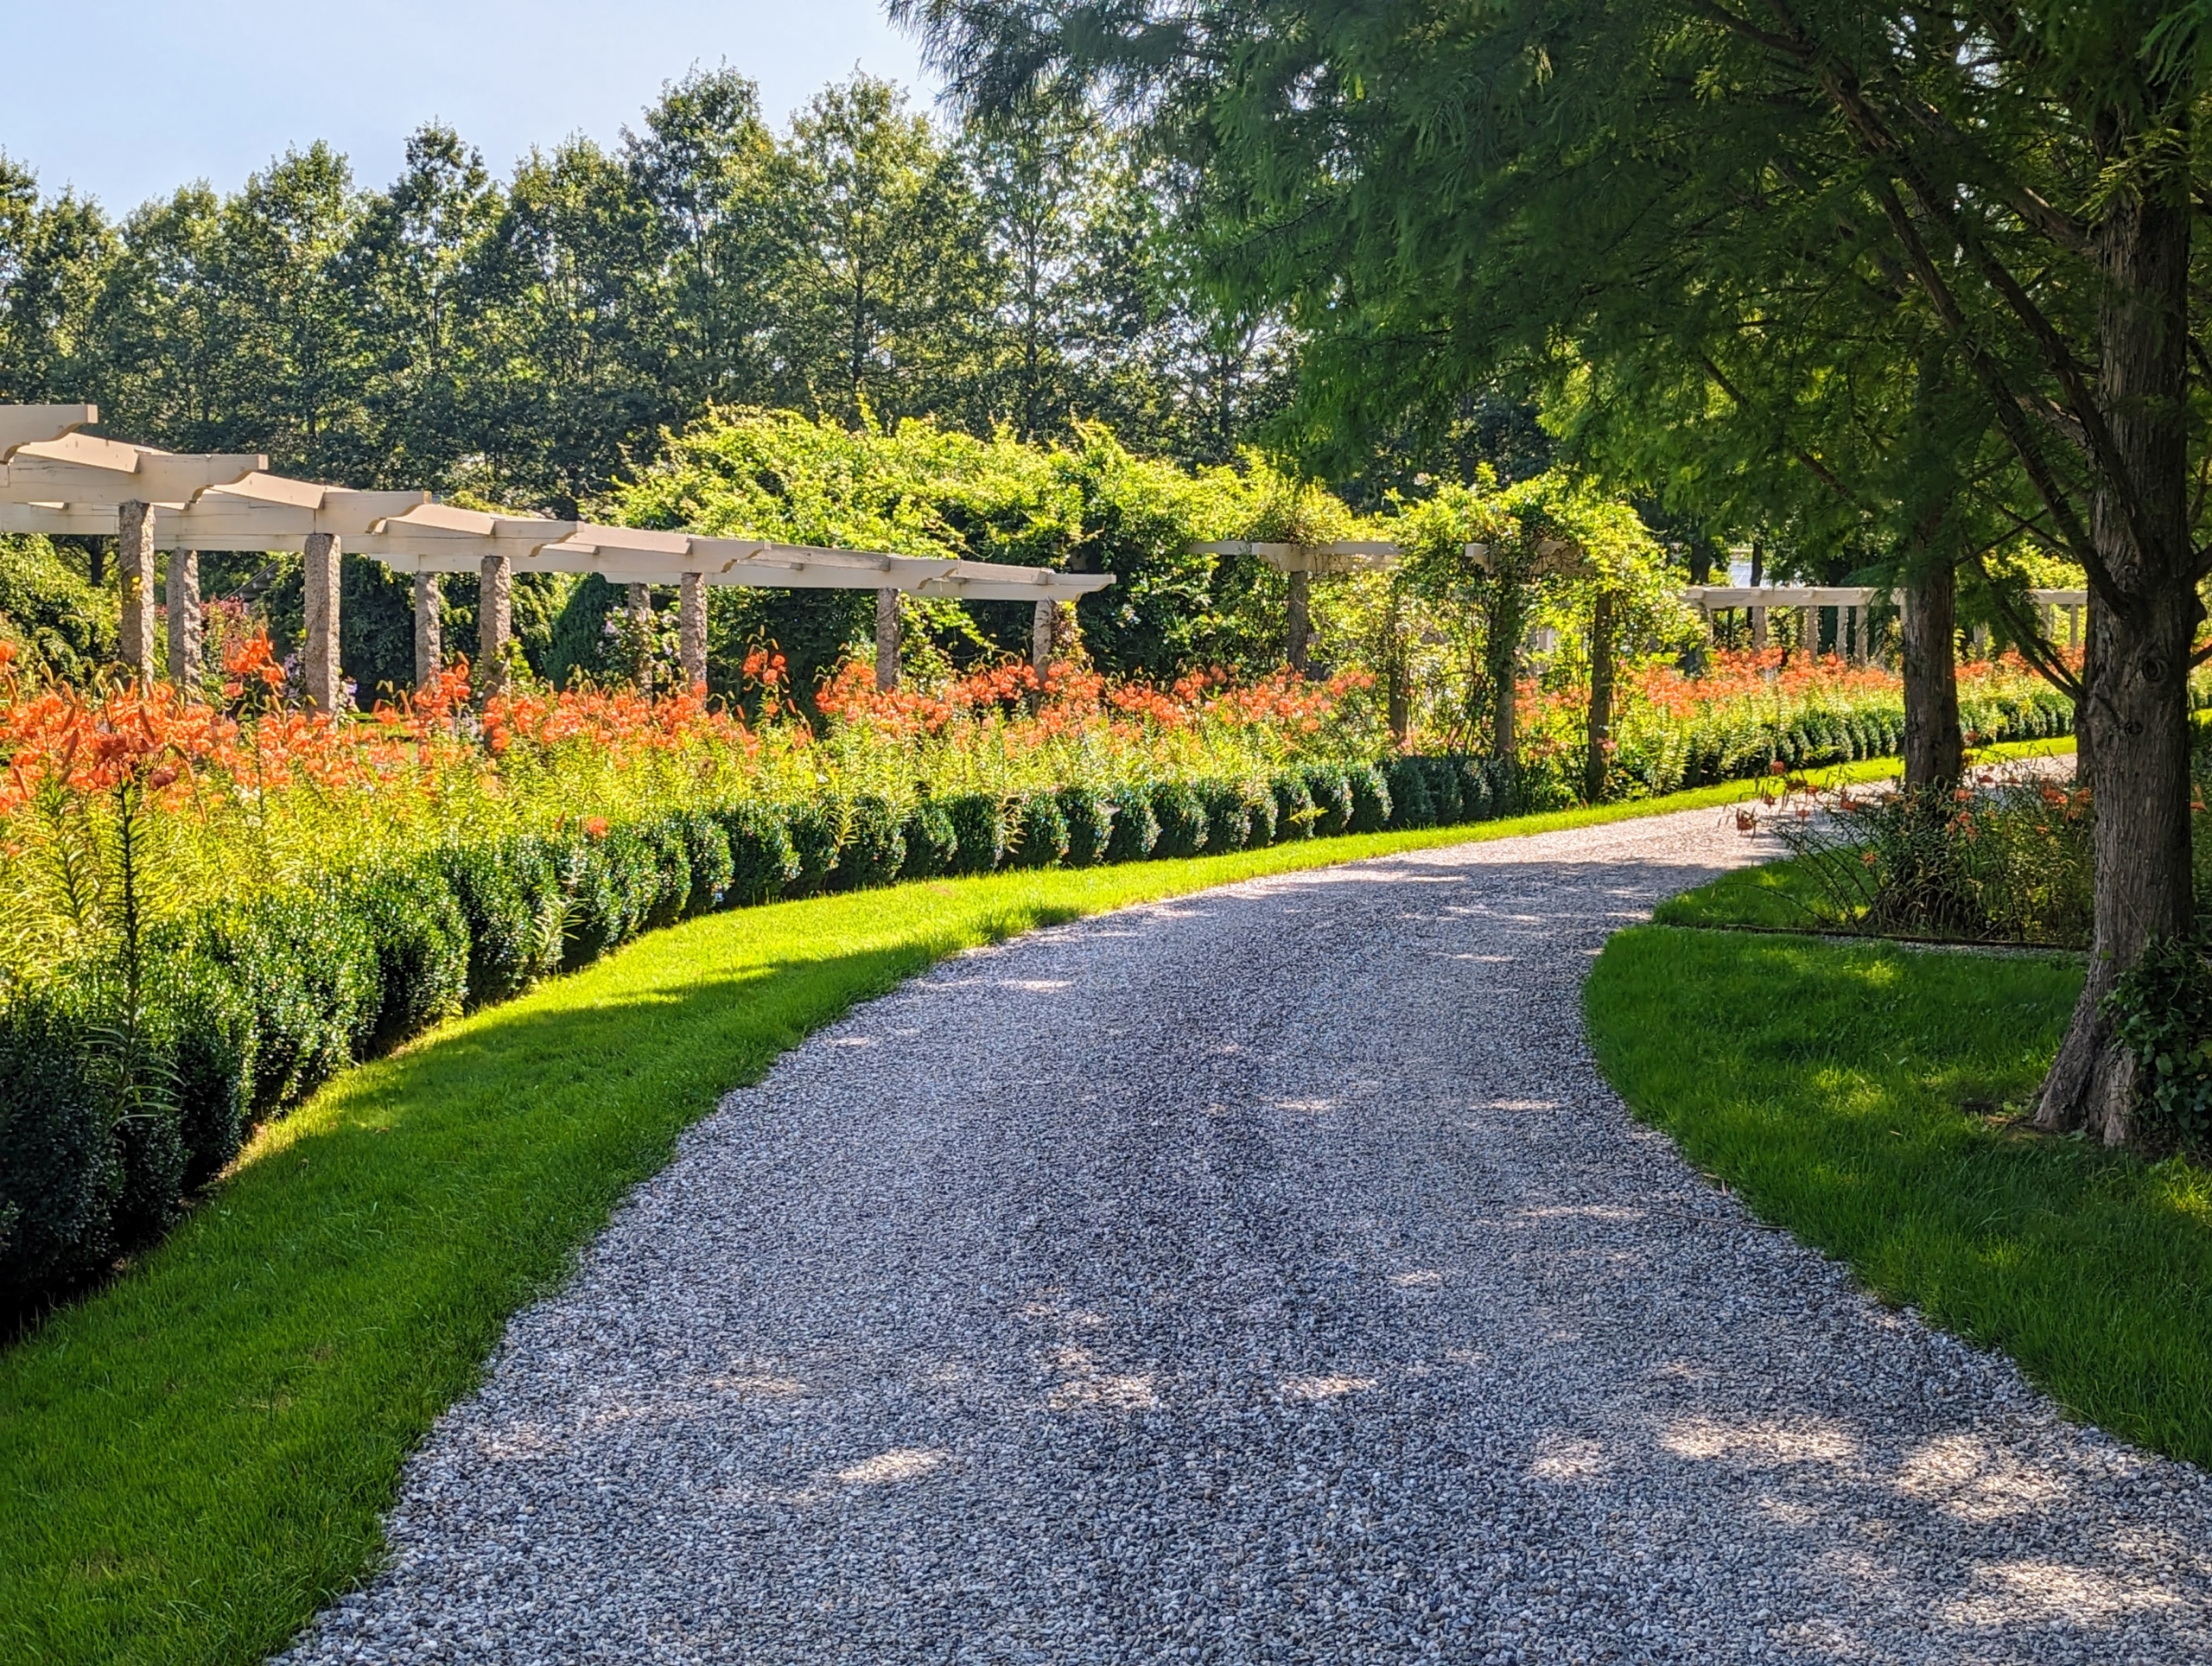
It's definitely mid-summer when my long and winding pergola is full of striking orange-colored tiger lily blooms.
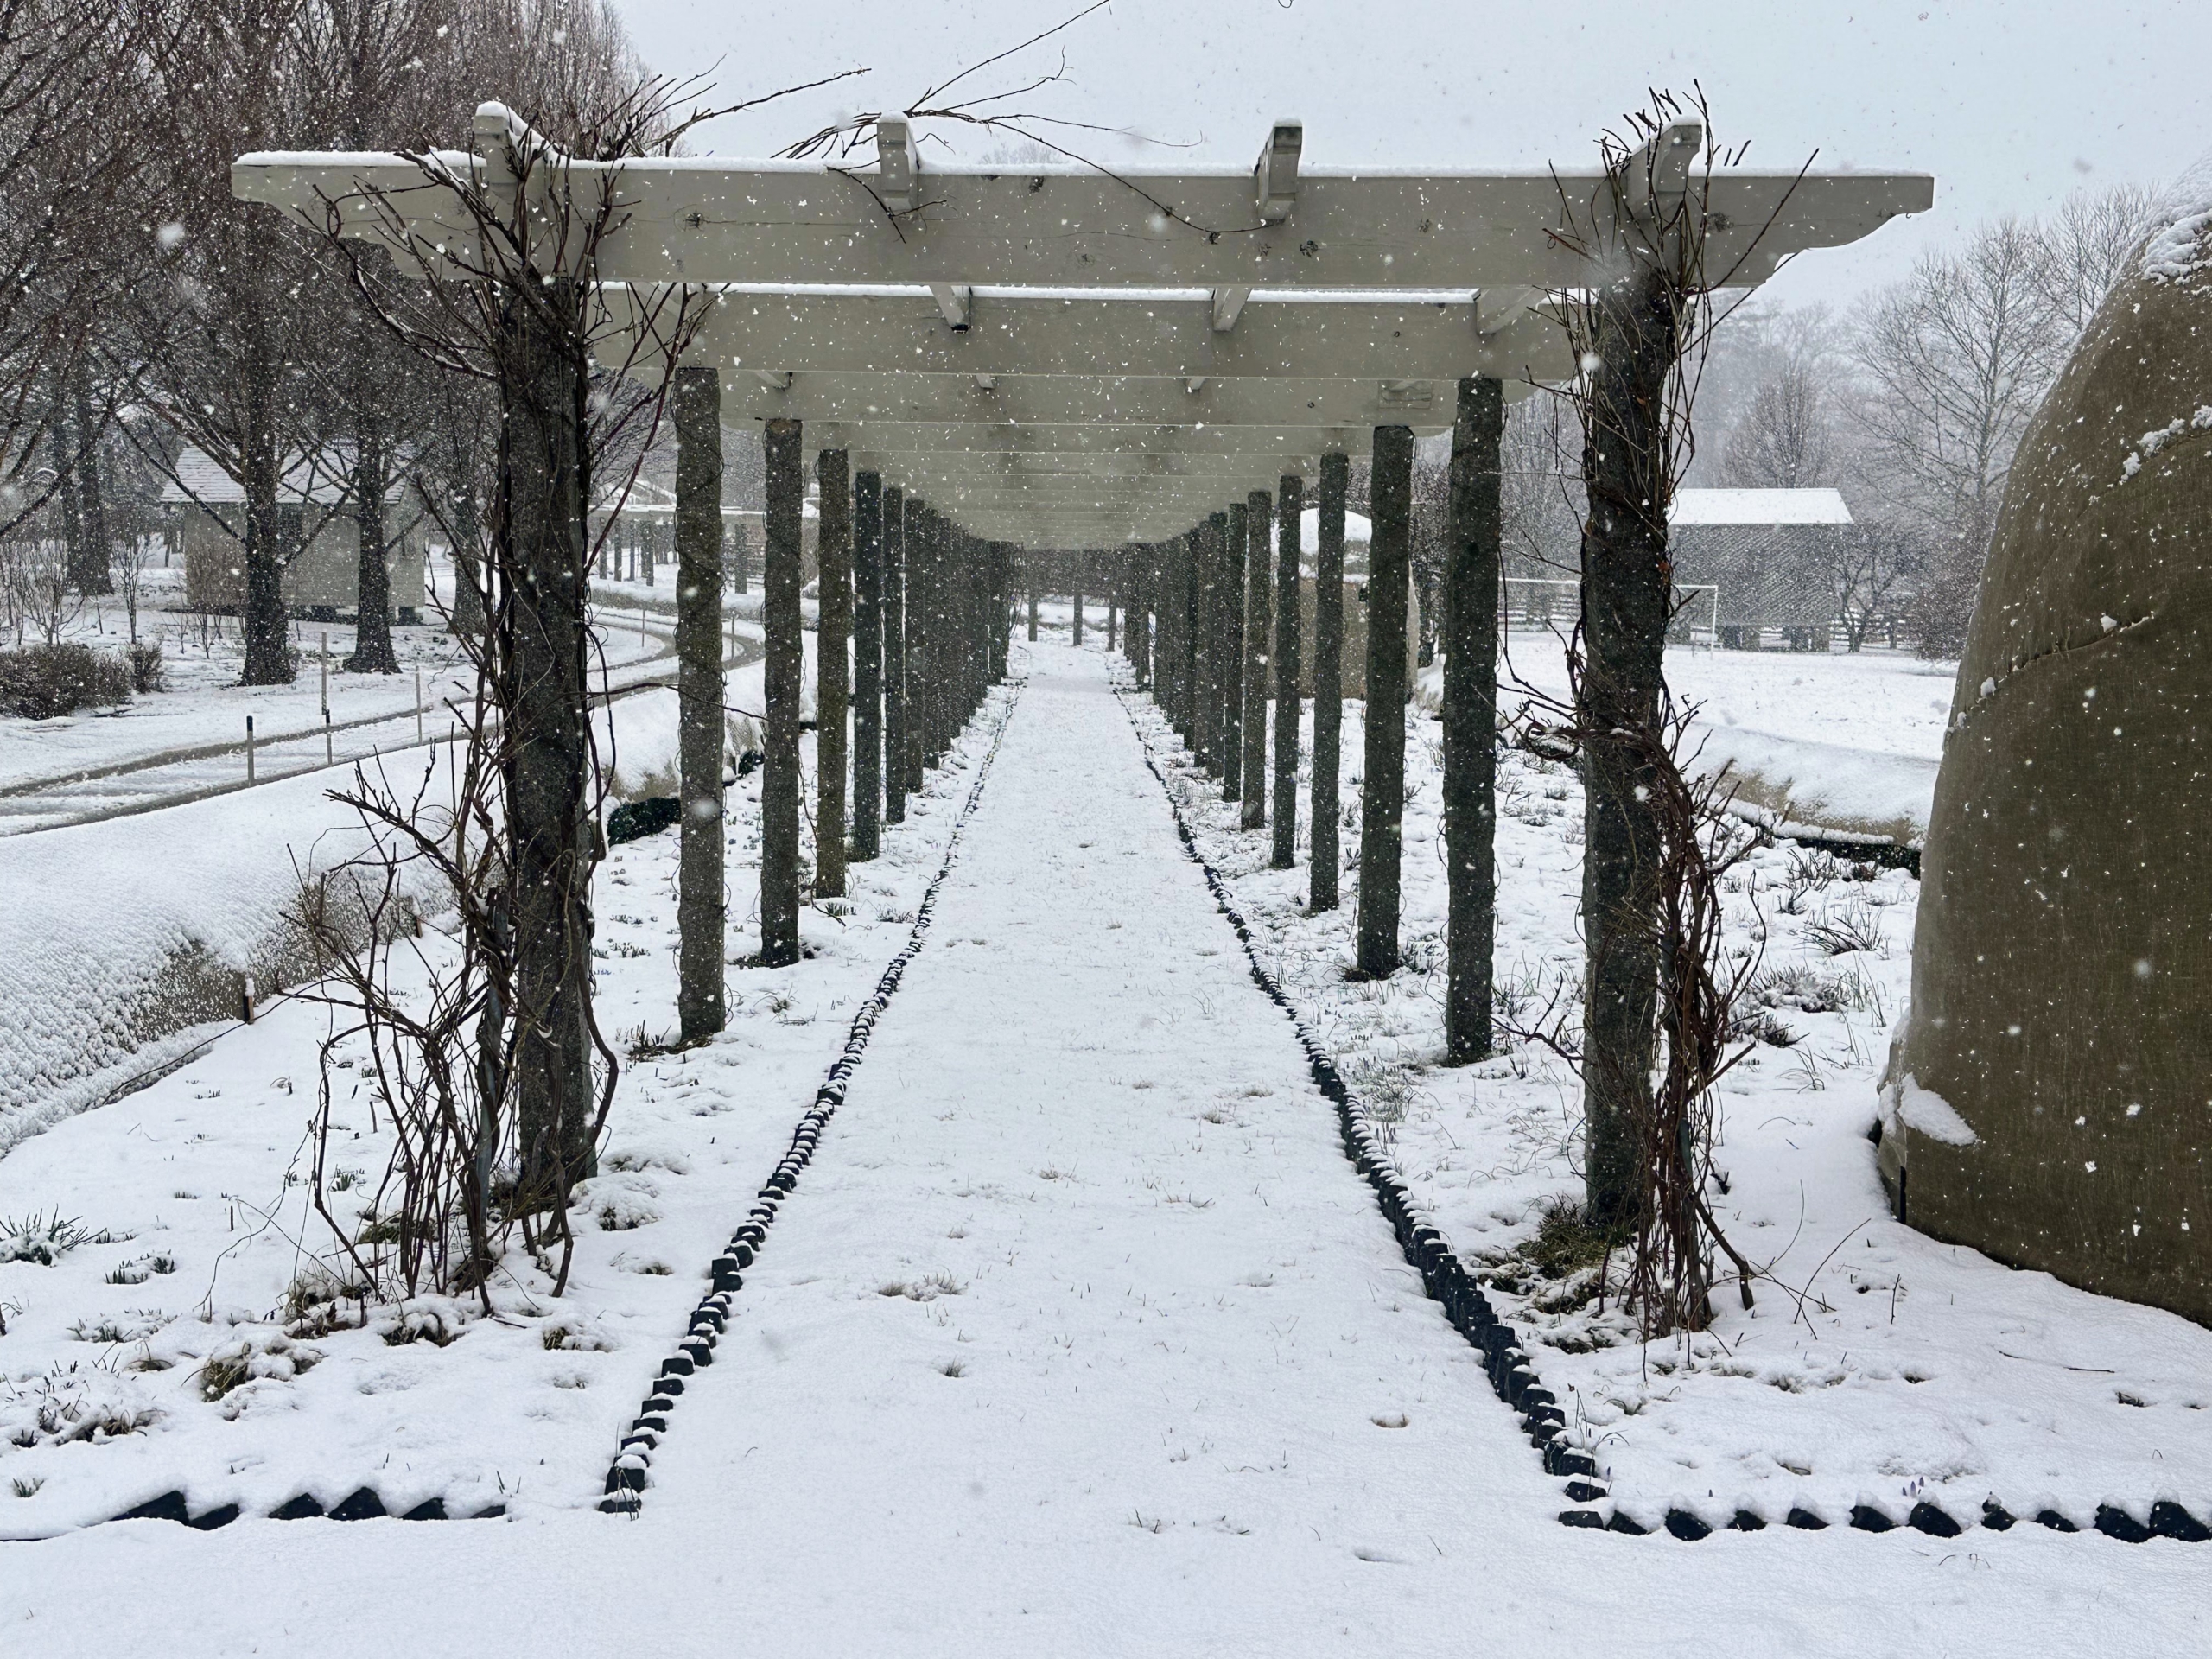
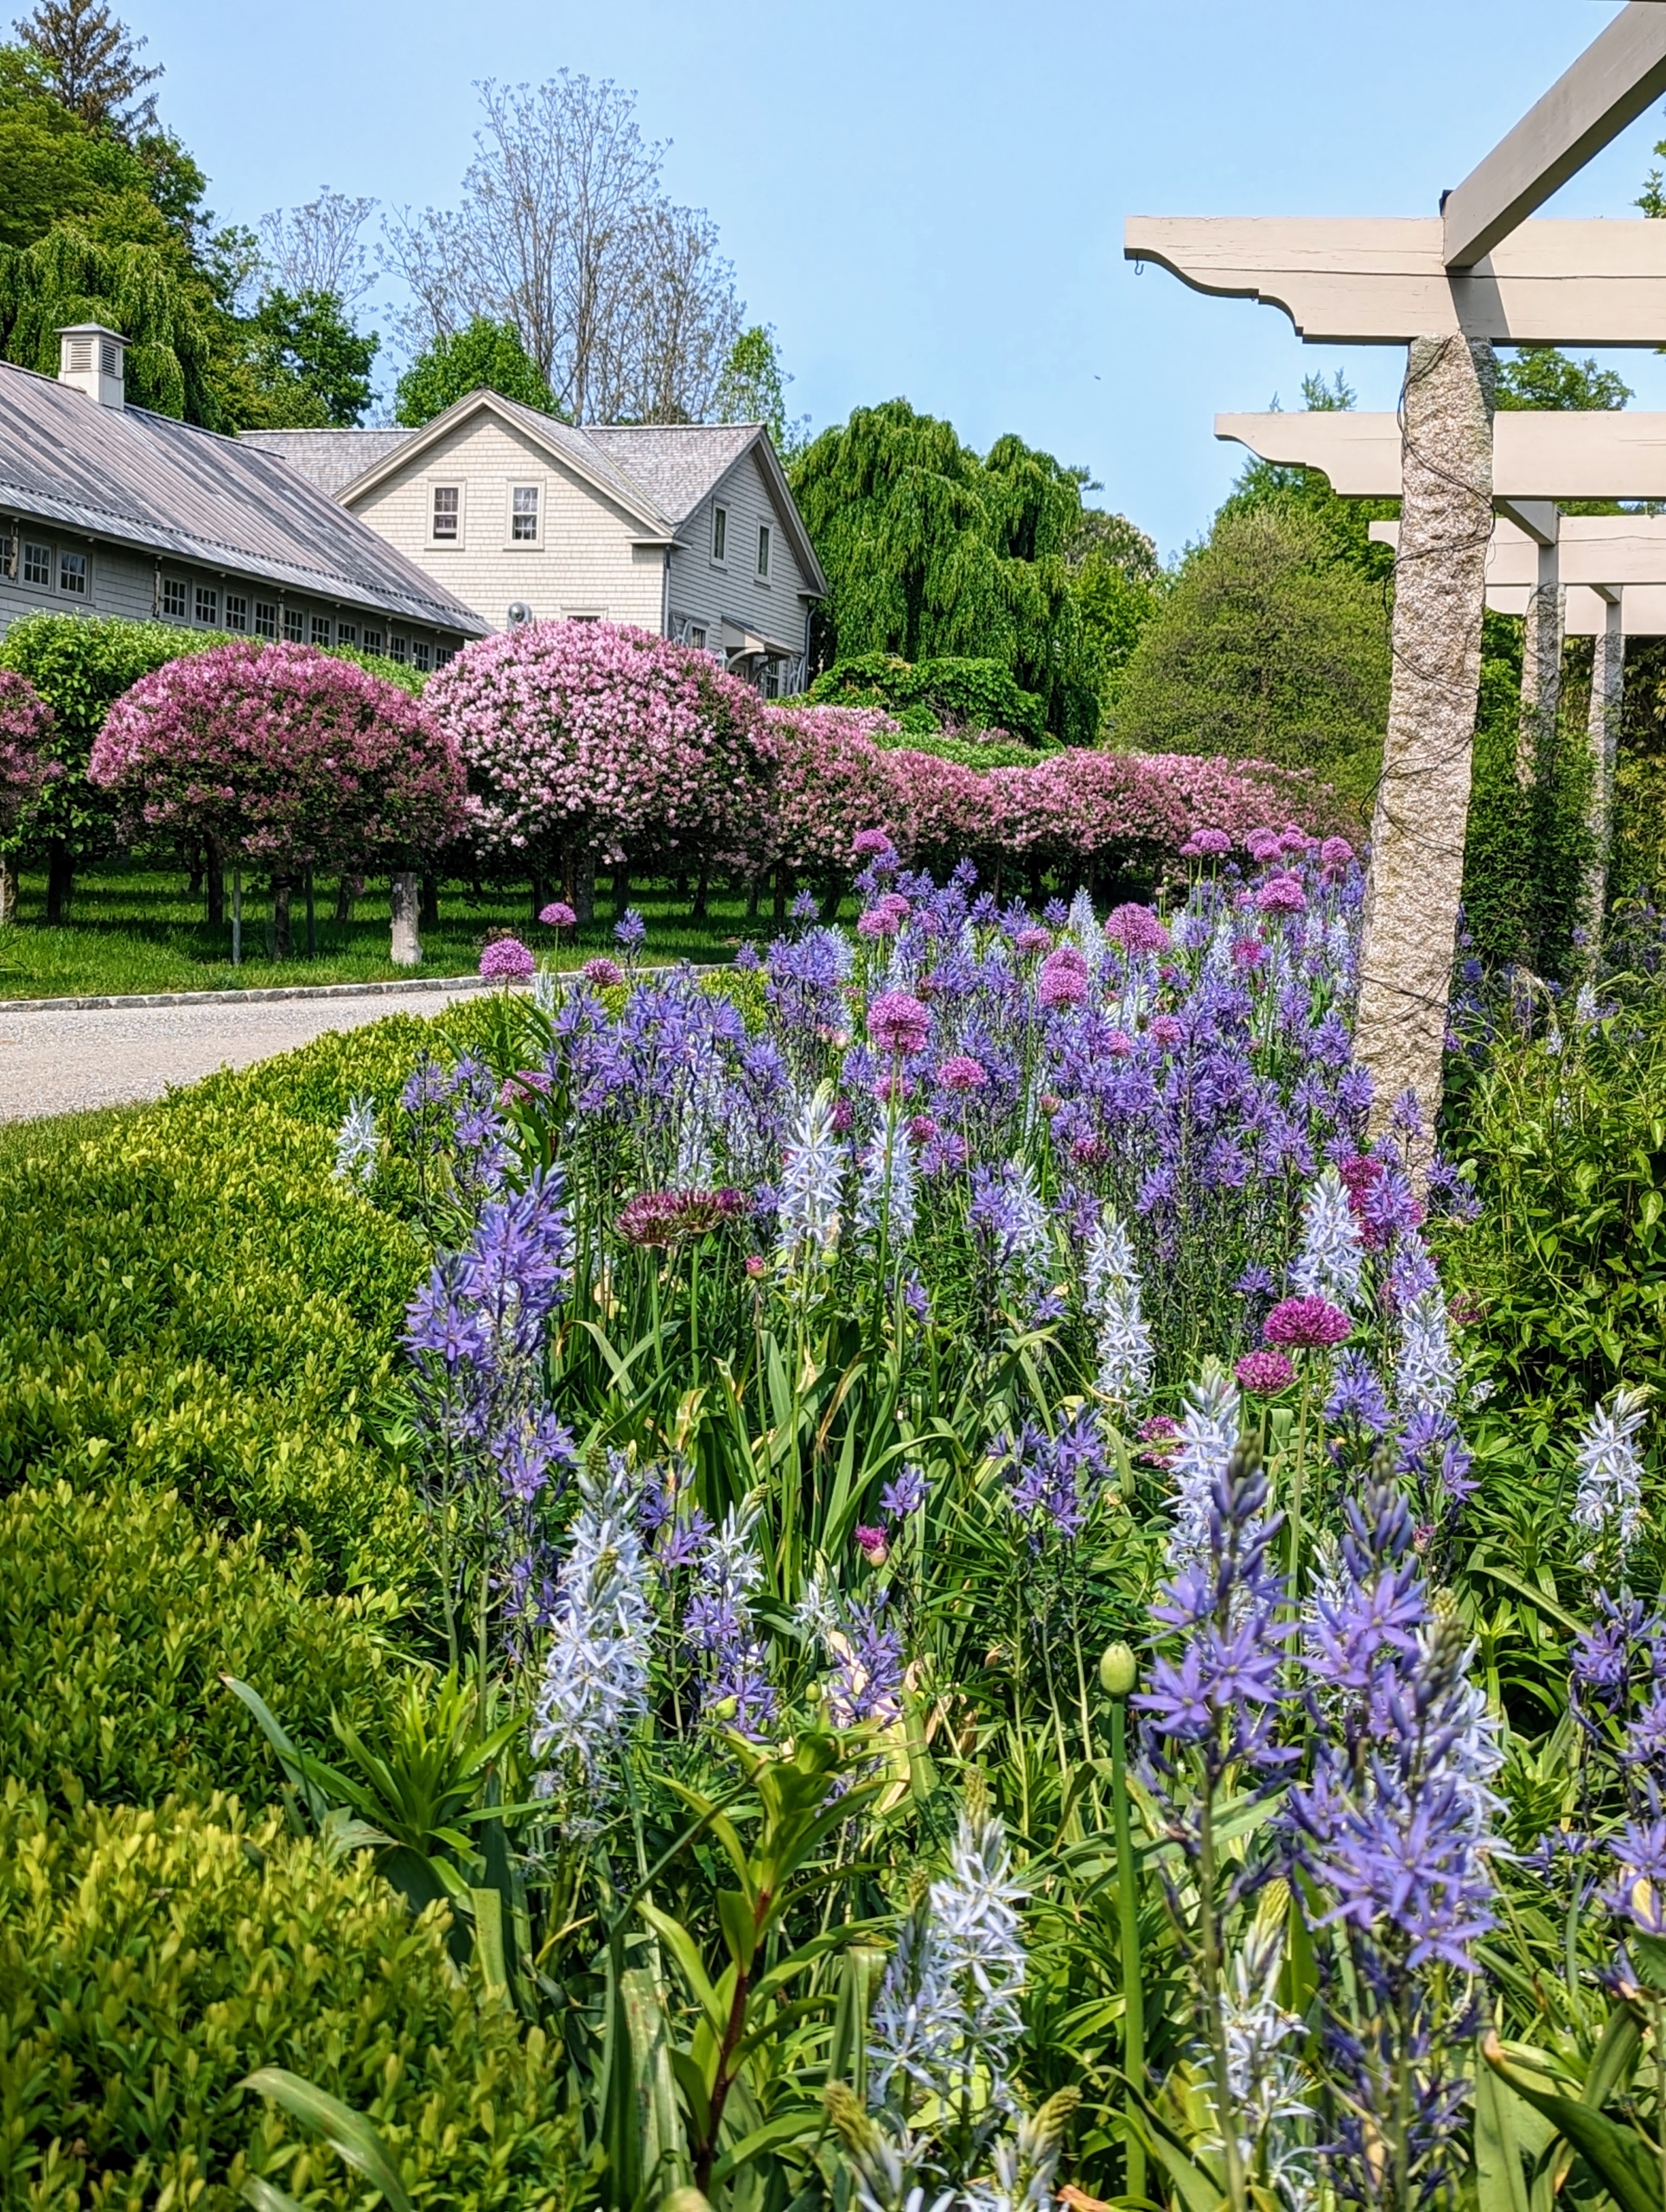
This pergola, located on one side of a carriage road near my Tenant House, goes through several transformations during the year. In winter, the beds are bare and the bordering boxwood is enveloped in protective burlap. In late spring, a palette of bold purple and white alliums covers the area, followed by the delicate shades of lavender and blue from the flowering clematis vines that wrap around each of the granite posts. And now, hundreds of brightly spotted tiger lilies line the garden bed for all to see - and they are thriving.
Enjoy these photos.
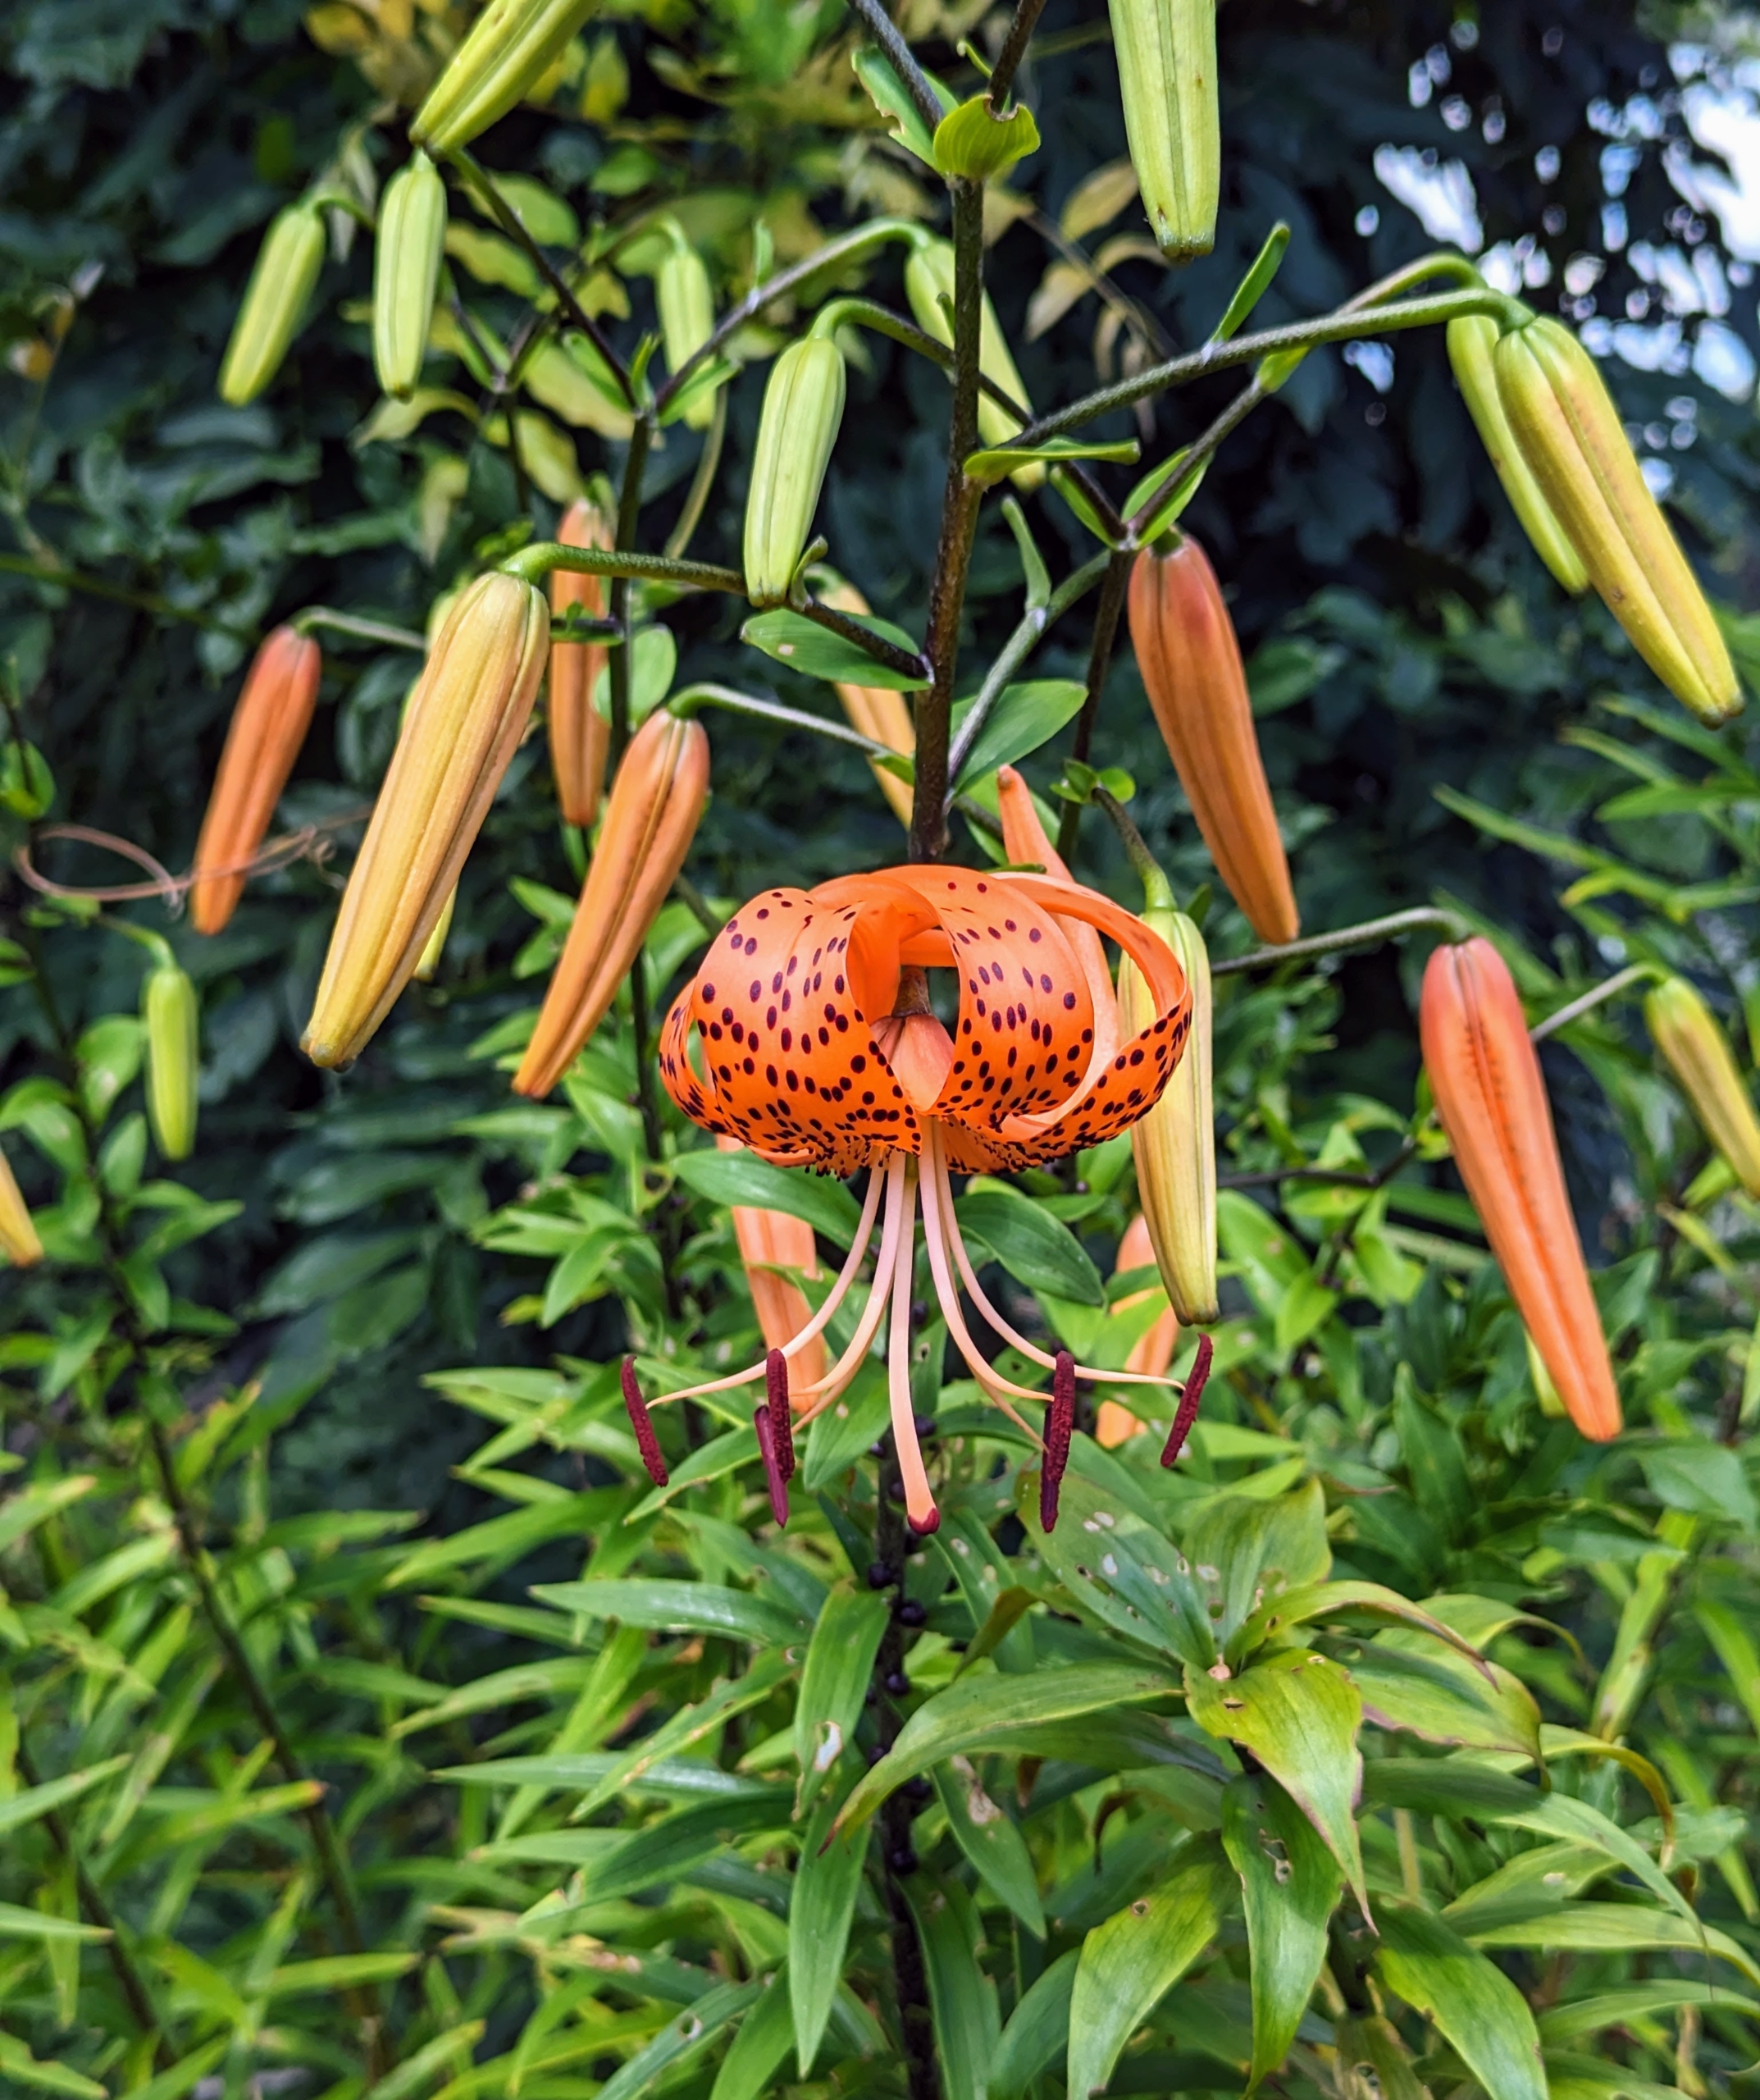
Tiger lilies, Lilium lancifolium, bloom in mid to late summer, are easy to grow and come back year after year.
Native to China and Japan, these robust flowers add striking beauty to any border. I love how they look with their bright and showy orange colored blooms.
In winter, my pergola is sleeping – the boxwood border is covered in burlap and the beds are bare. On this day in mid-March, the pergola was covered in snow.
In early spring, this garden is filled with bold green stems of new growth.
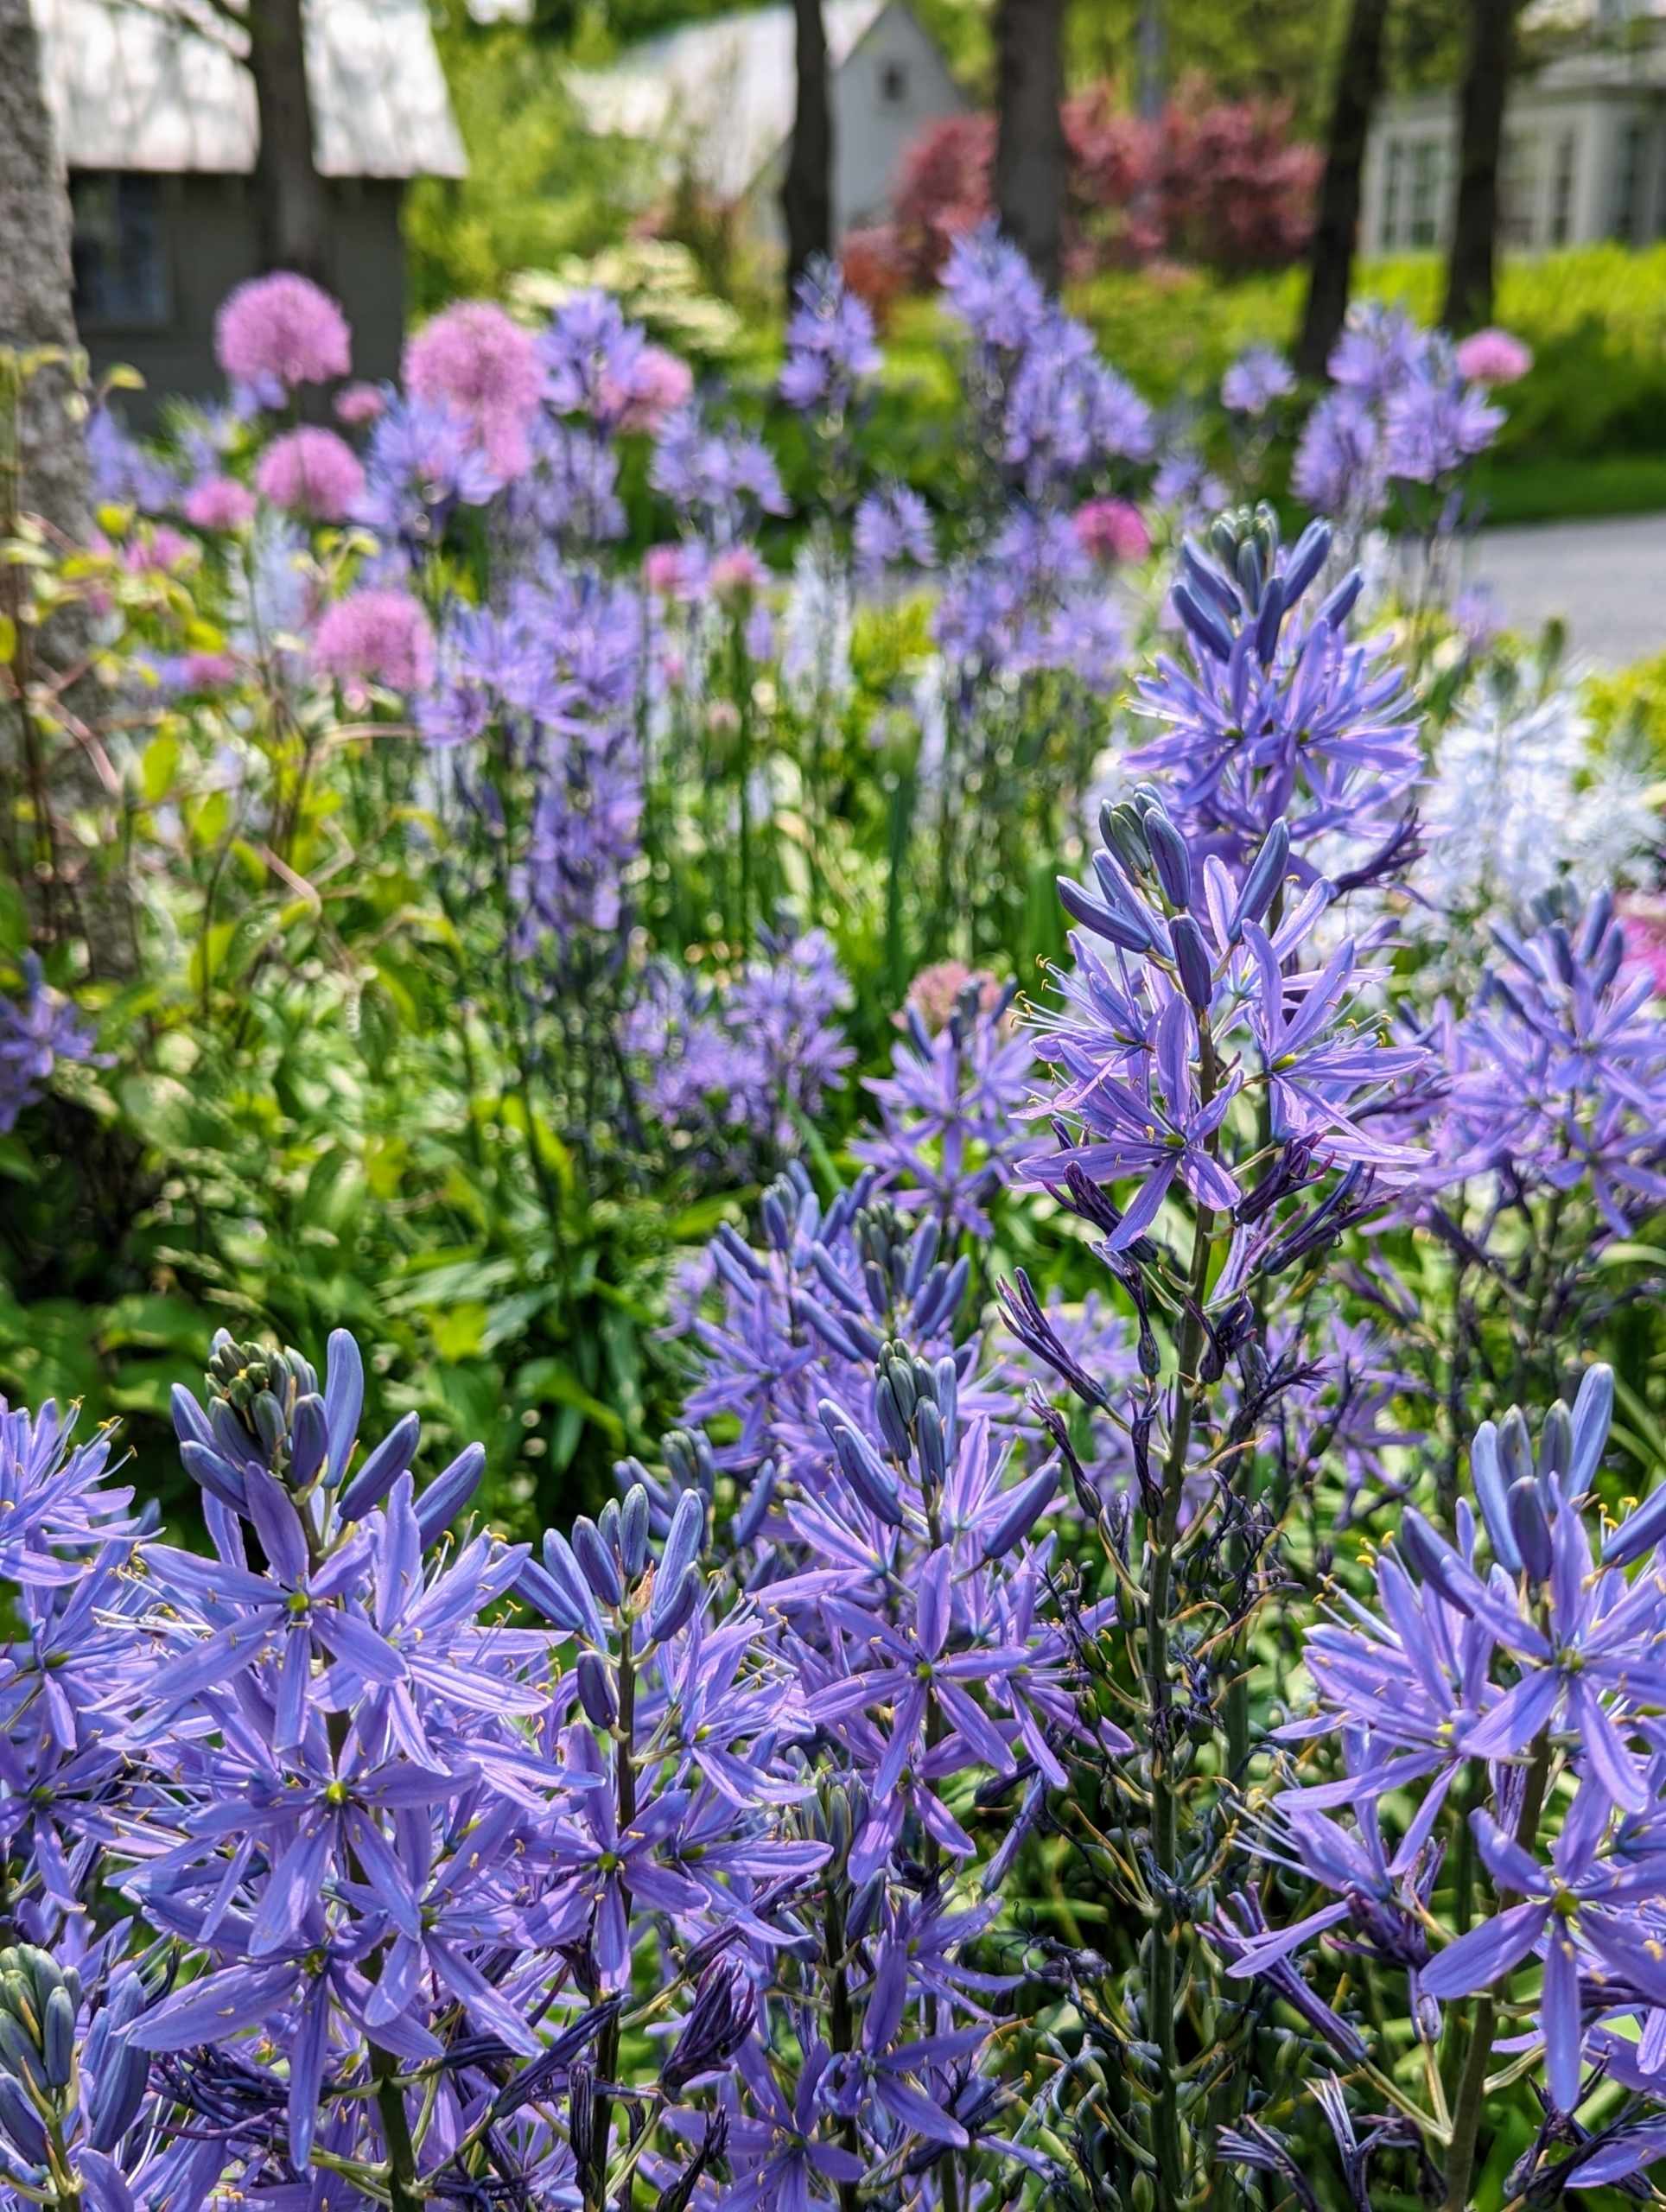
By late May, this pergola garden is filled with lots of blue and purple flowers. This palette of colors is a big favorite at the farm – it grows more colorful and vibrant every spring.
The beds are filled with Camassia, alliums, Hyacinthoides or Spanish bluebells, and others.
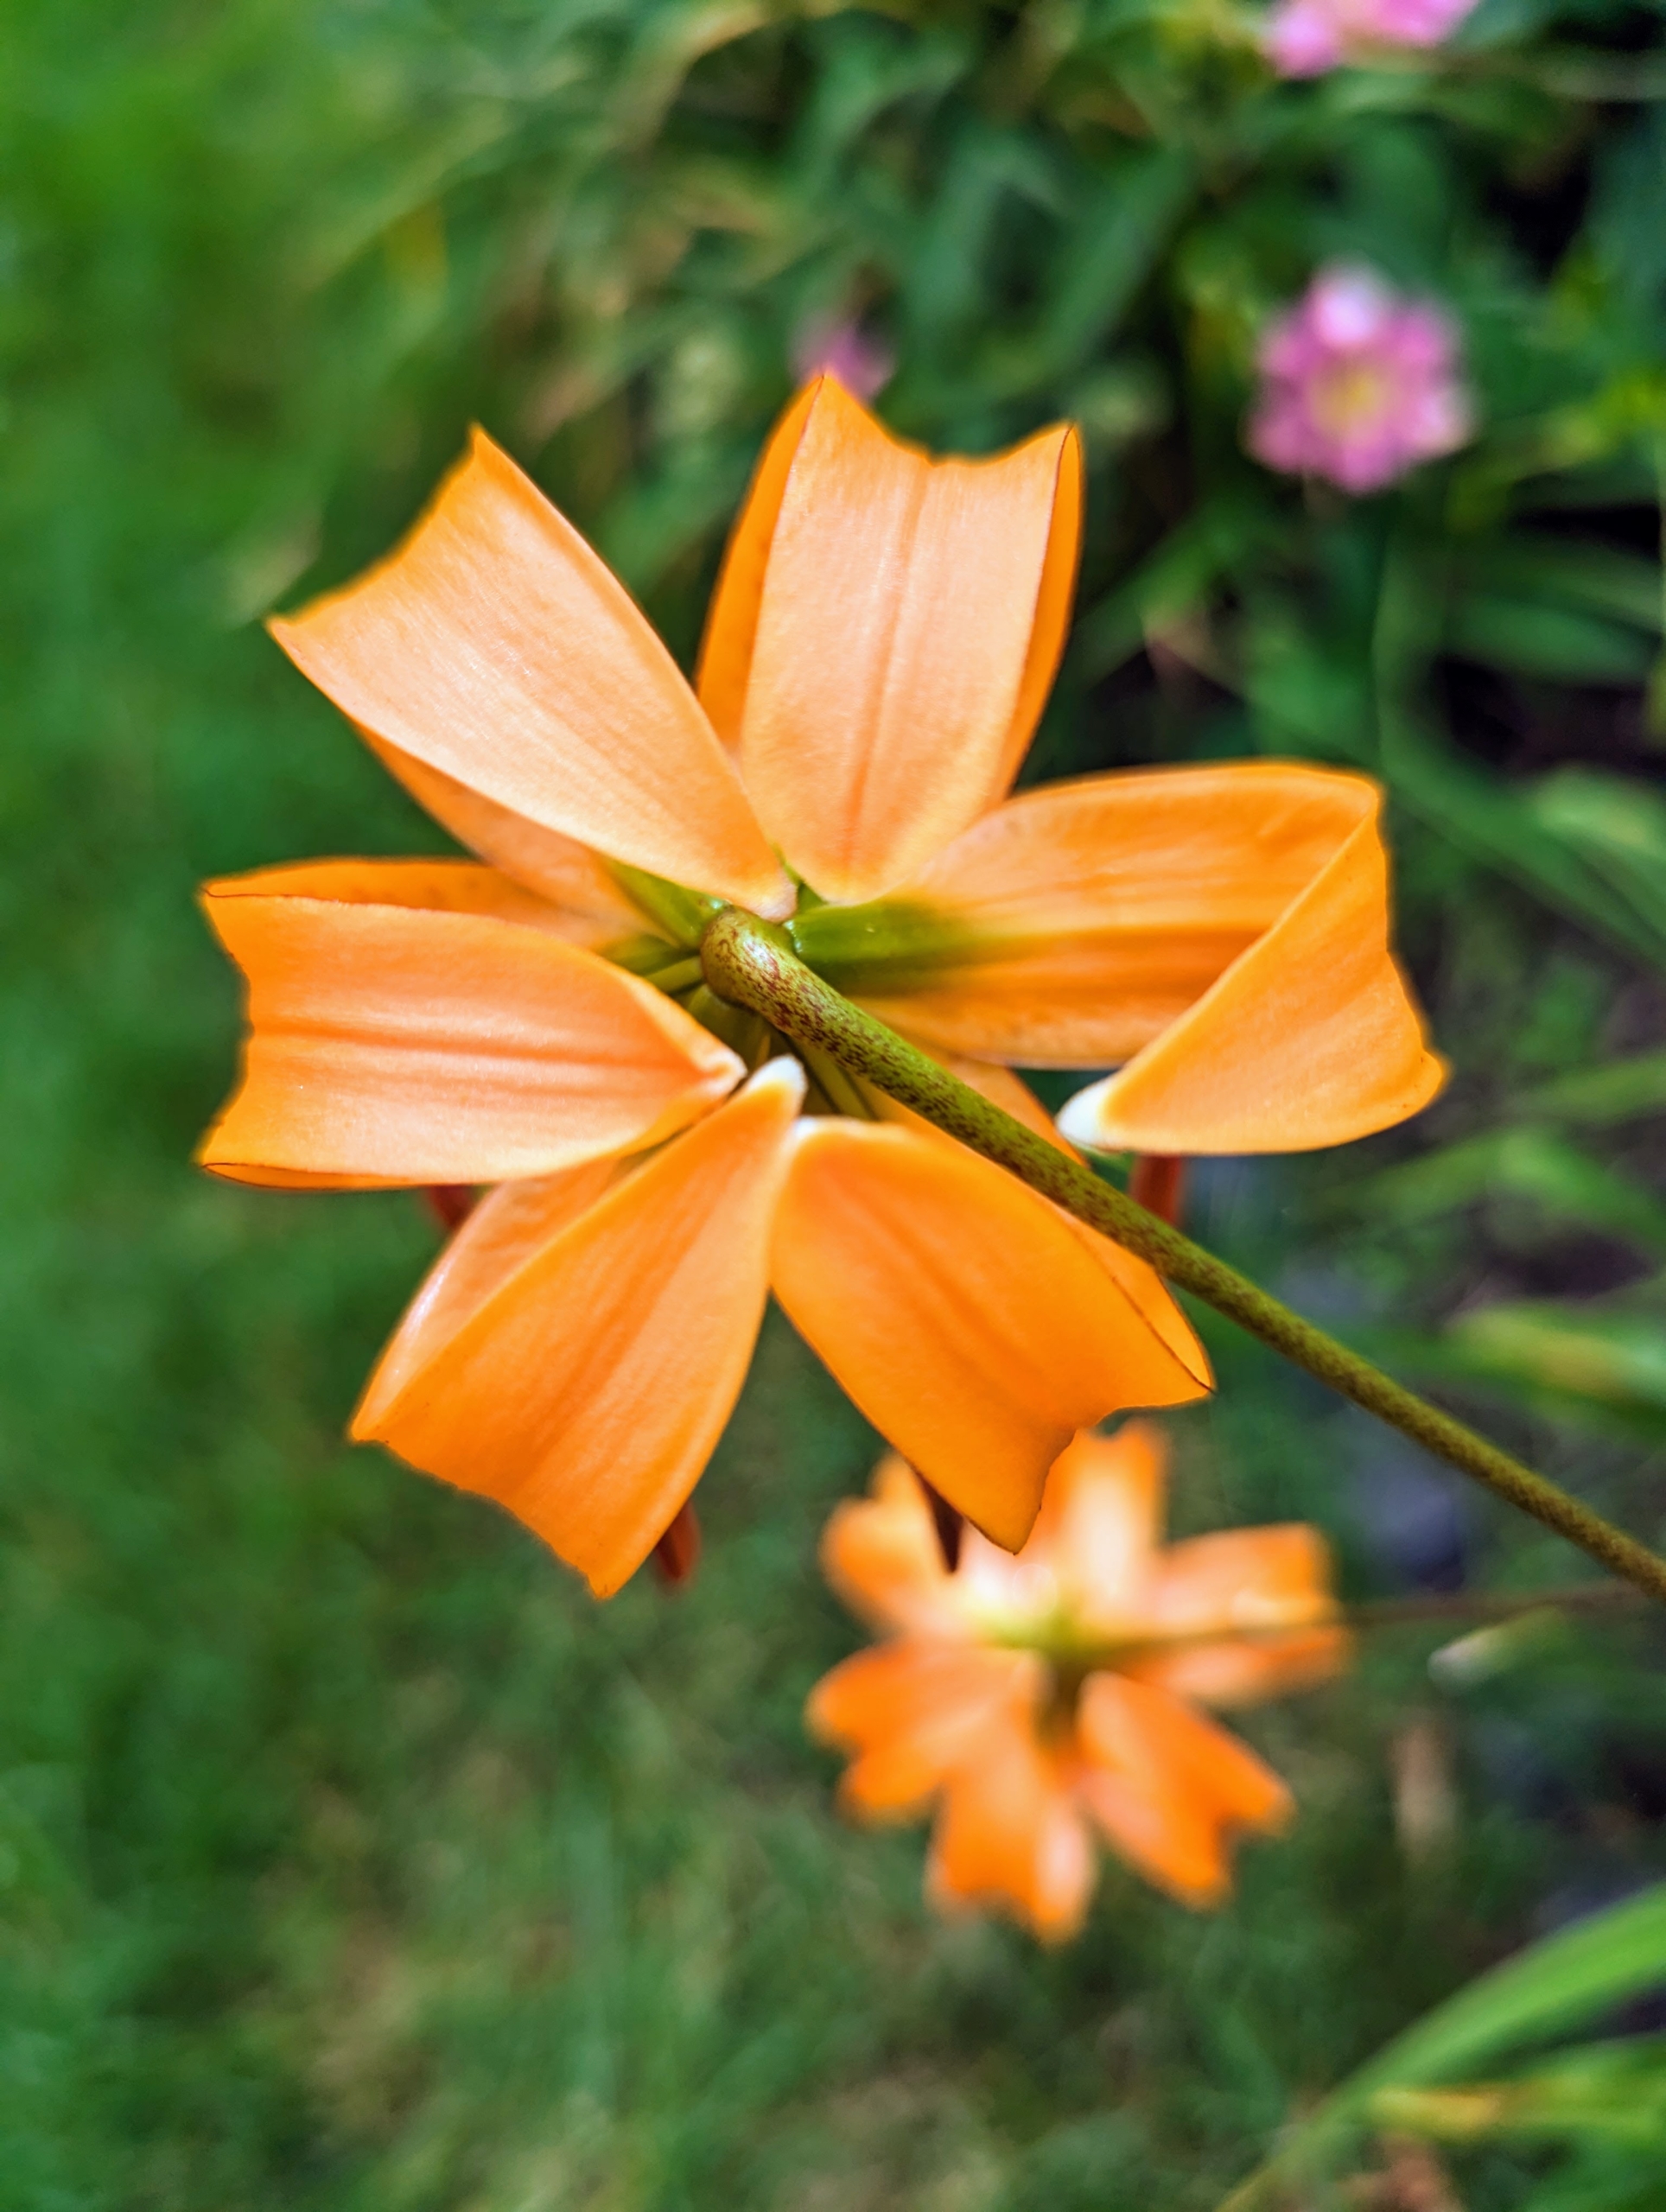
By June, the colors transform again. One by one, the orange lilies begin to open.
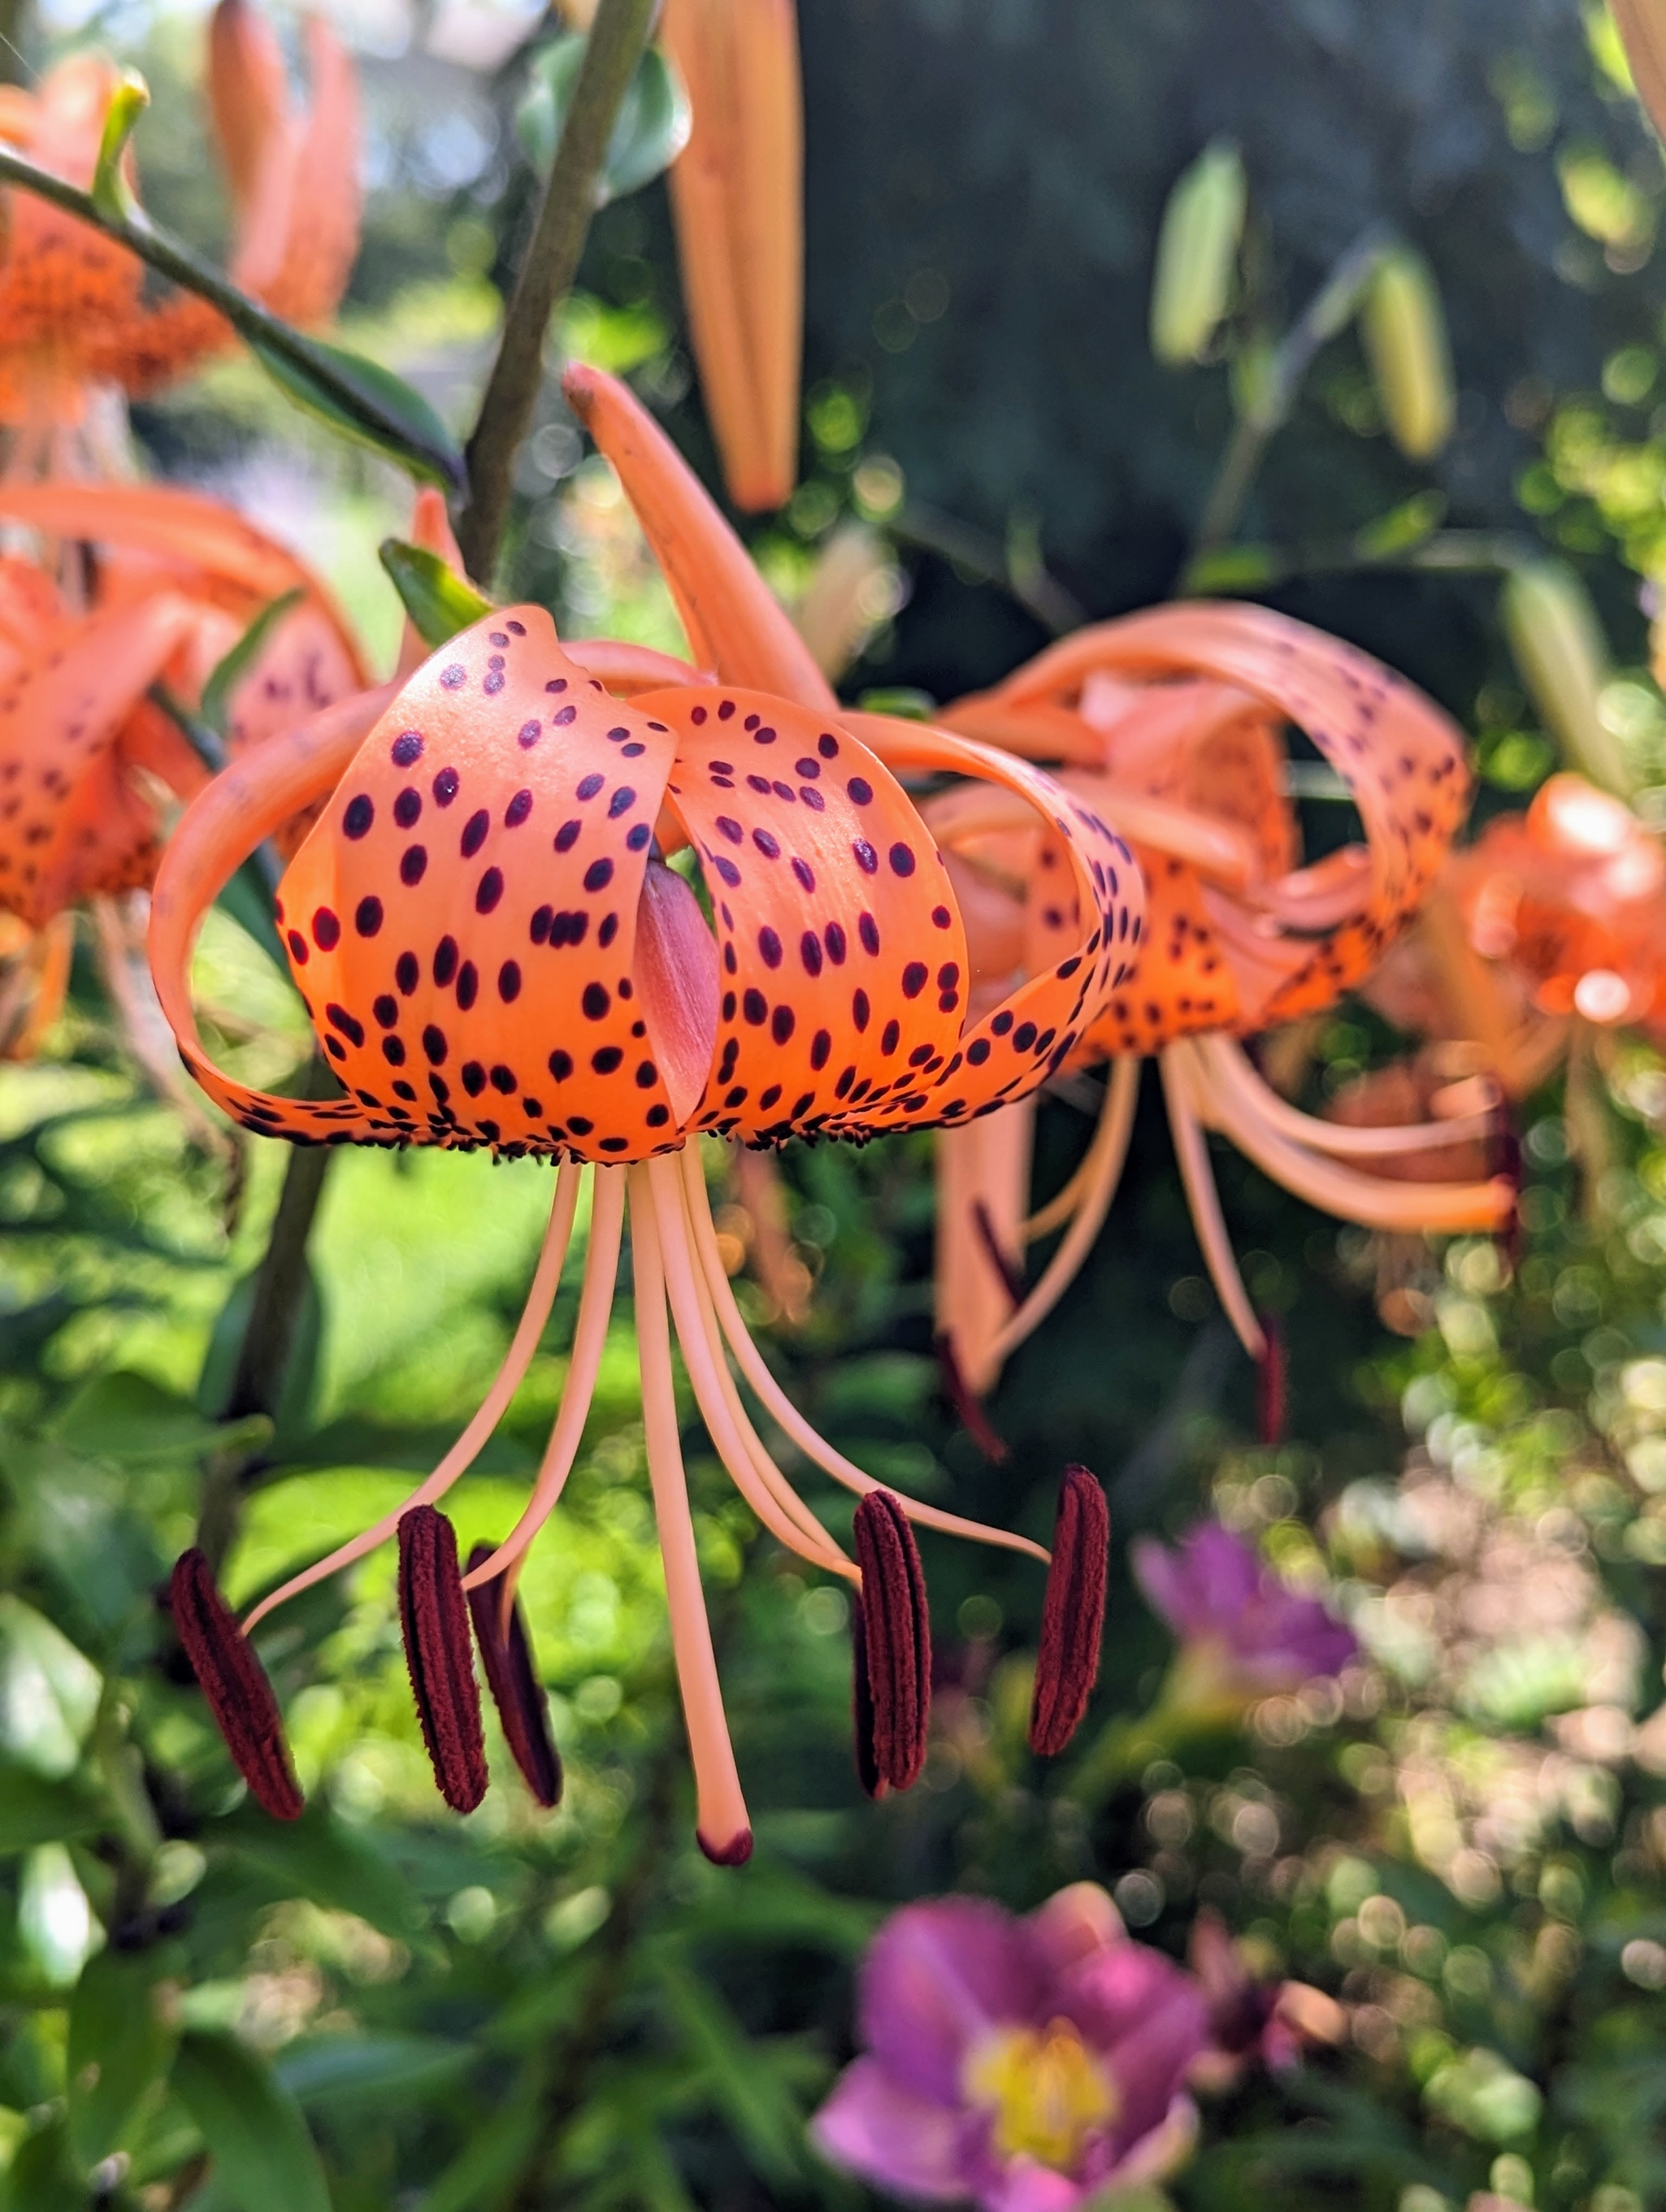
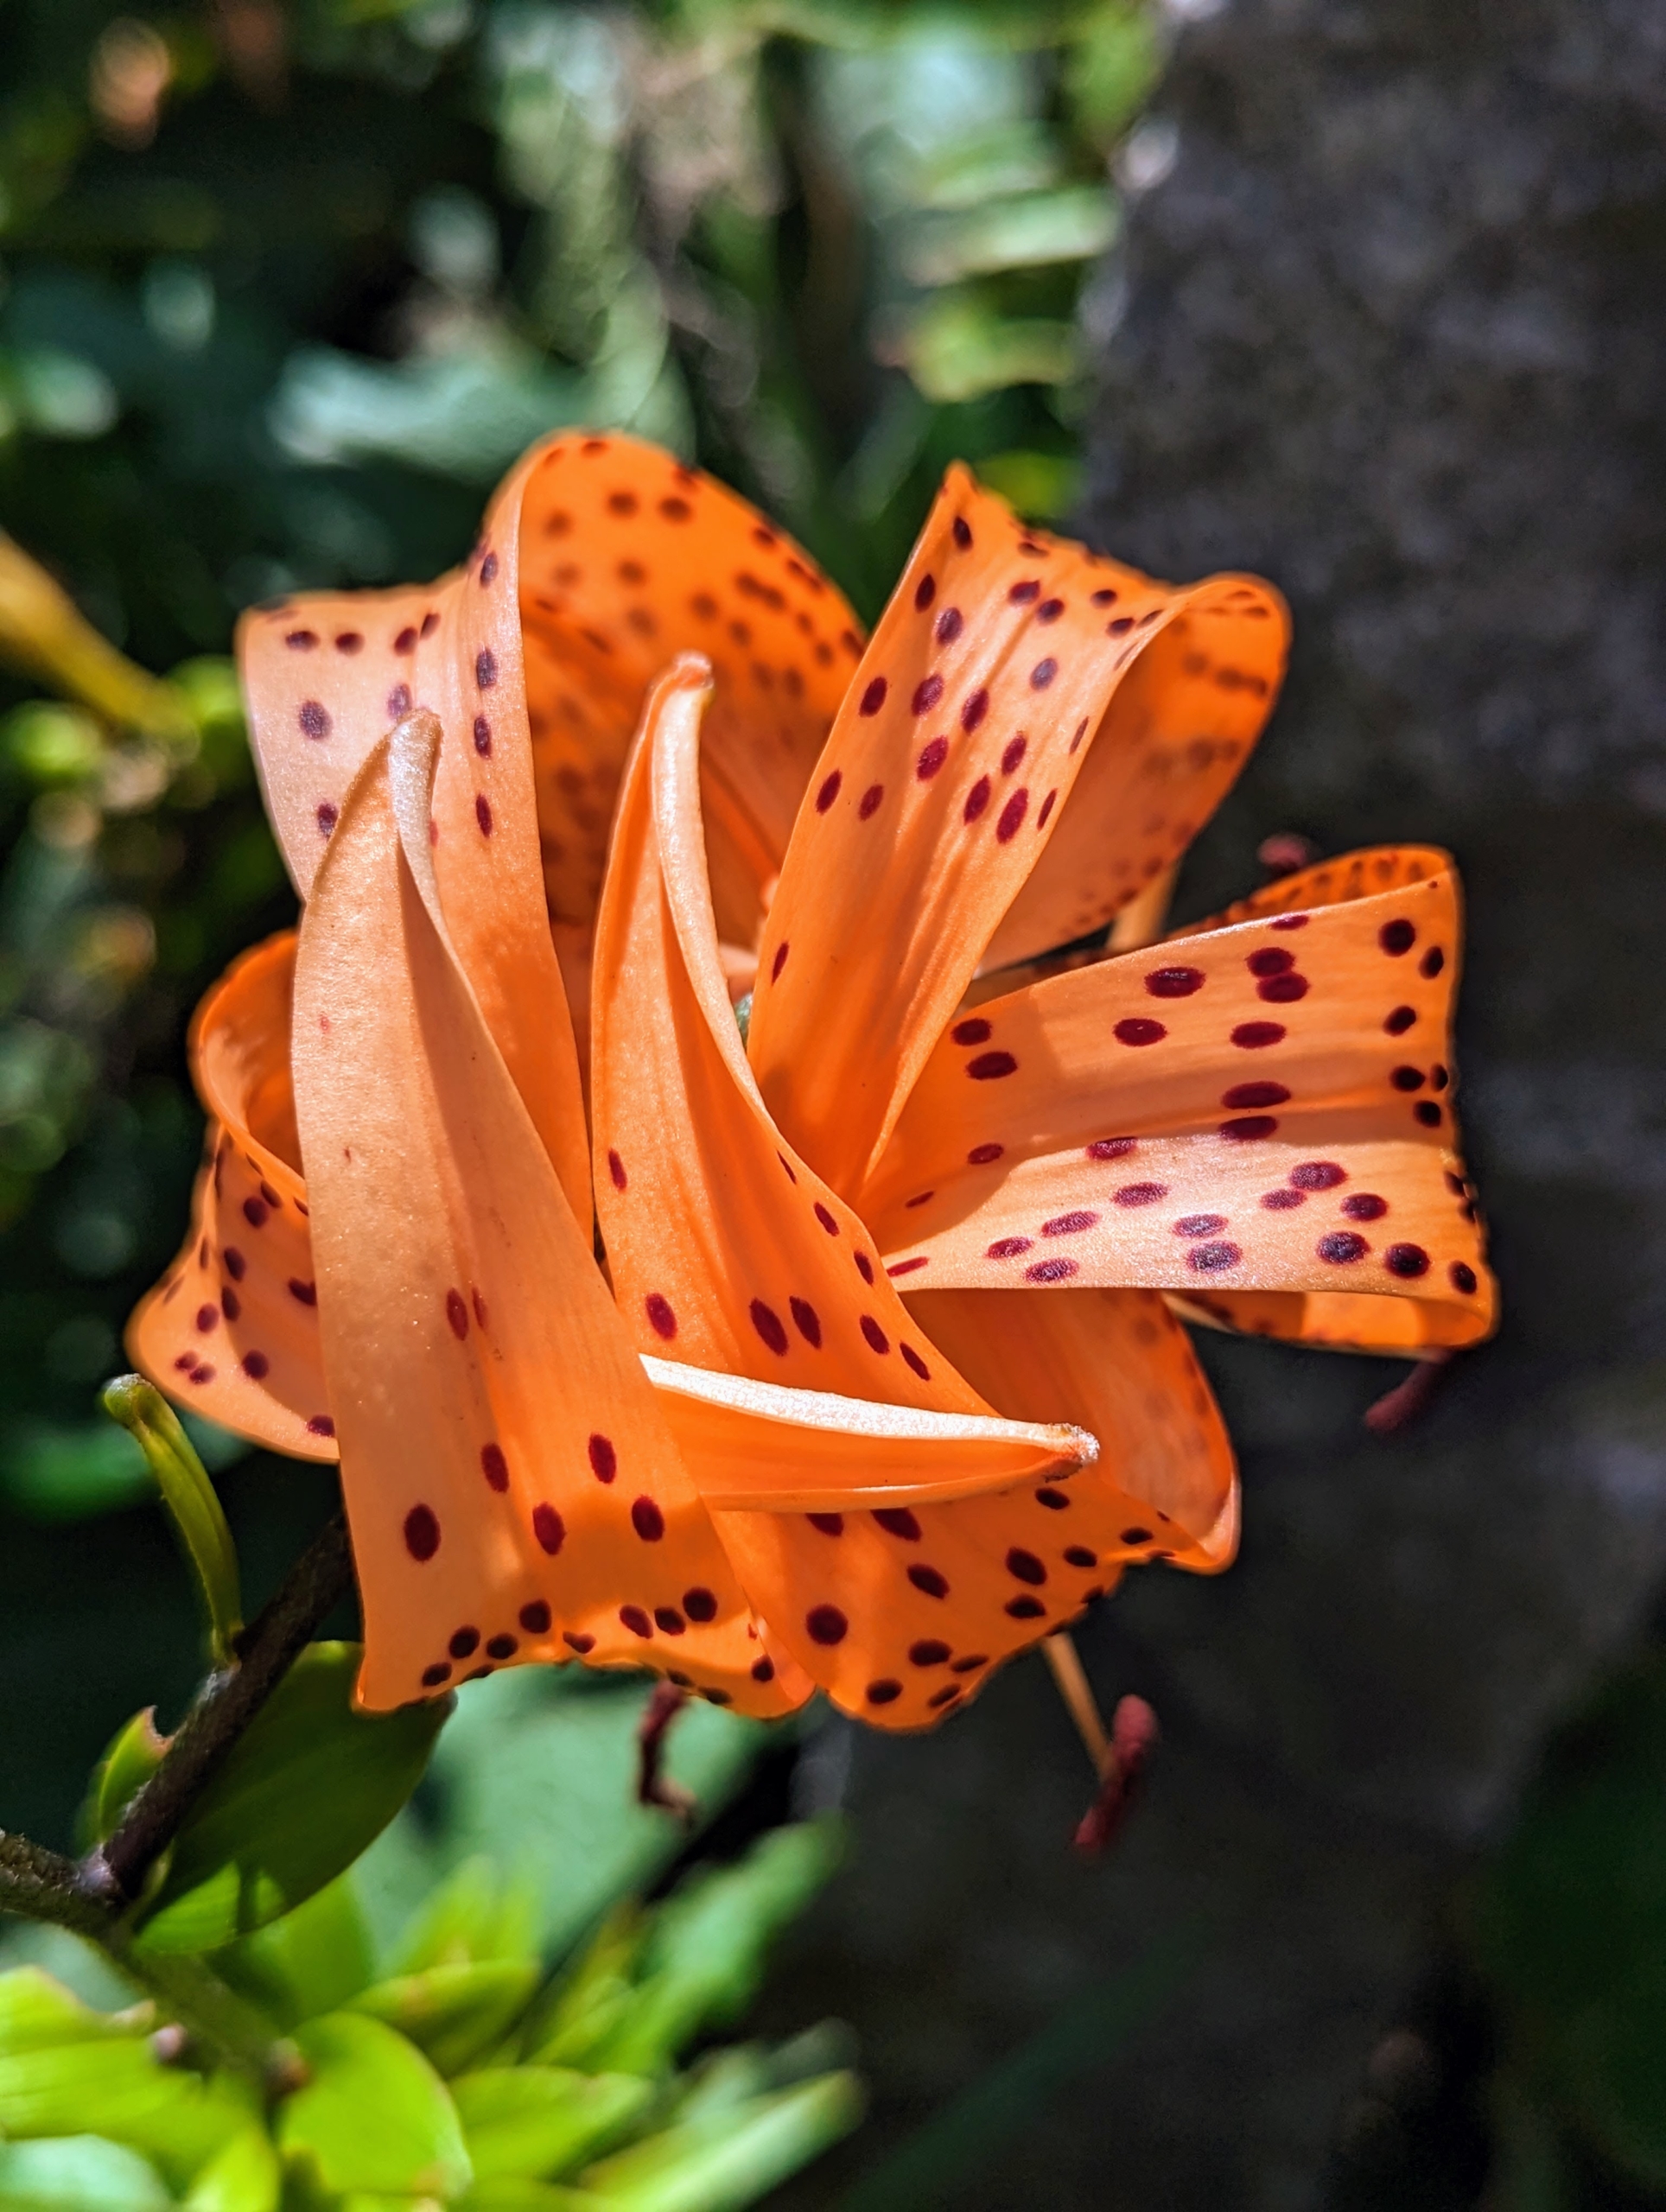
The tiger lily’s petals bend back far during the flowering cycle, curling up against its own stem and exposing the stamens and pistol for visiting pollinators.
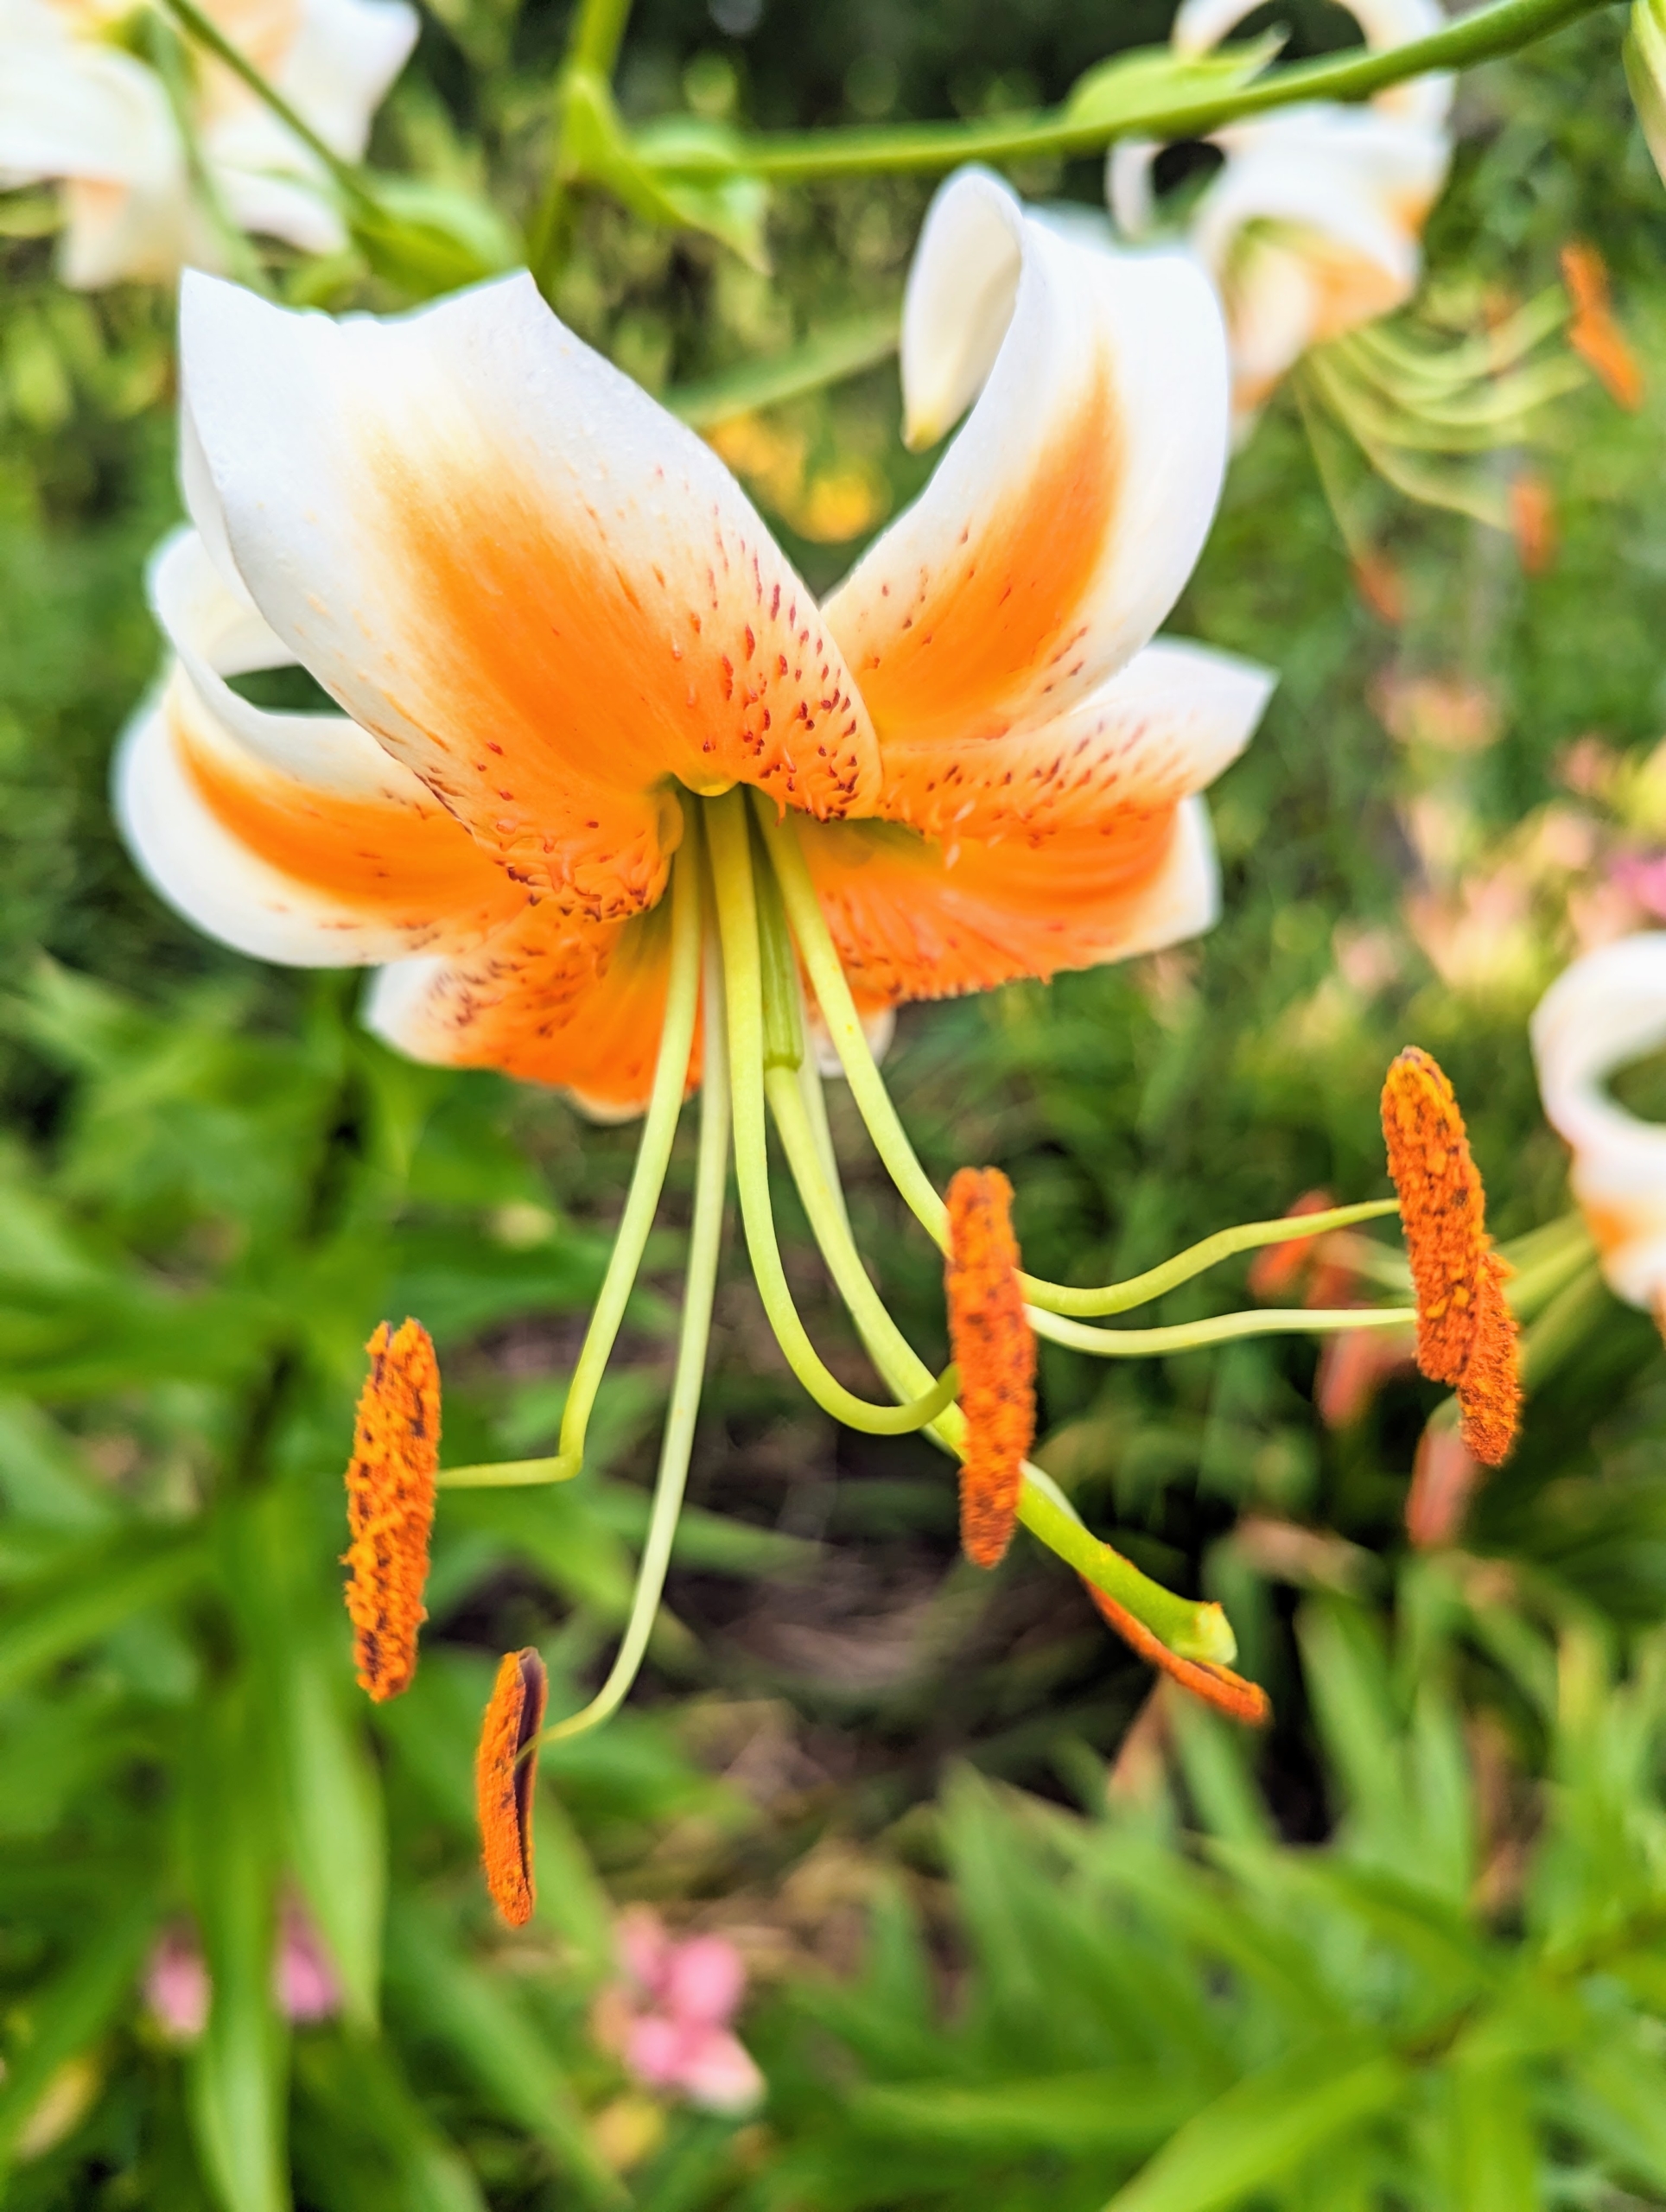
Tiger lilies are covered with black or deep crimson spots, giving the appearance of the skin of a tiger. They have large, down-facing flowers, each with six recurved petals. Many flowers can be up to five inches in diameter. Lilies are well-known for having heavily pollinated stamens, which stain. Here, it is easy to see those pollen-filled anthers. When cutting, always remove the anthers to prevent a clothing disaster – just pinch them off with gloved fingers.
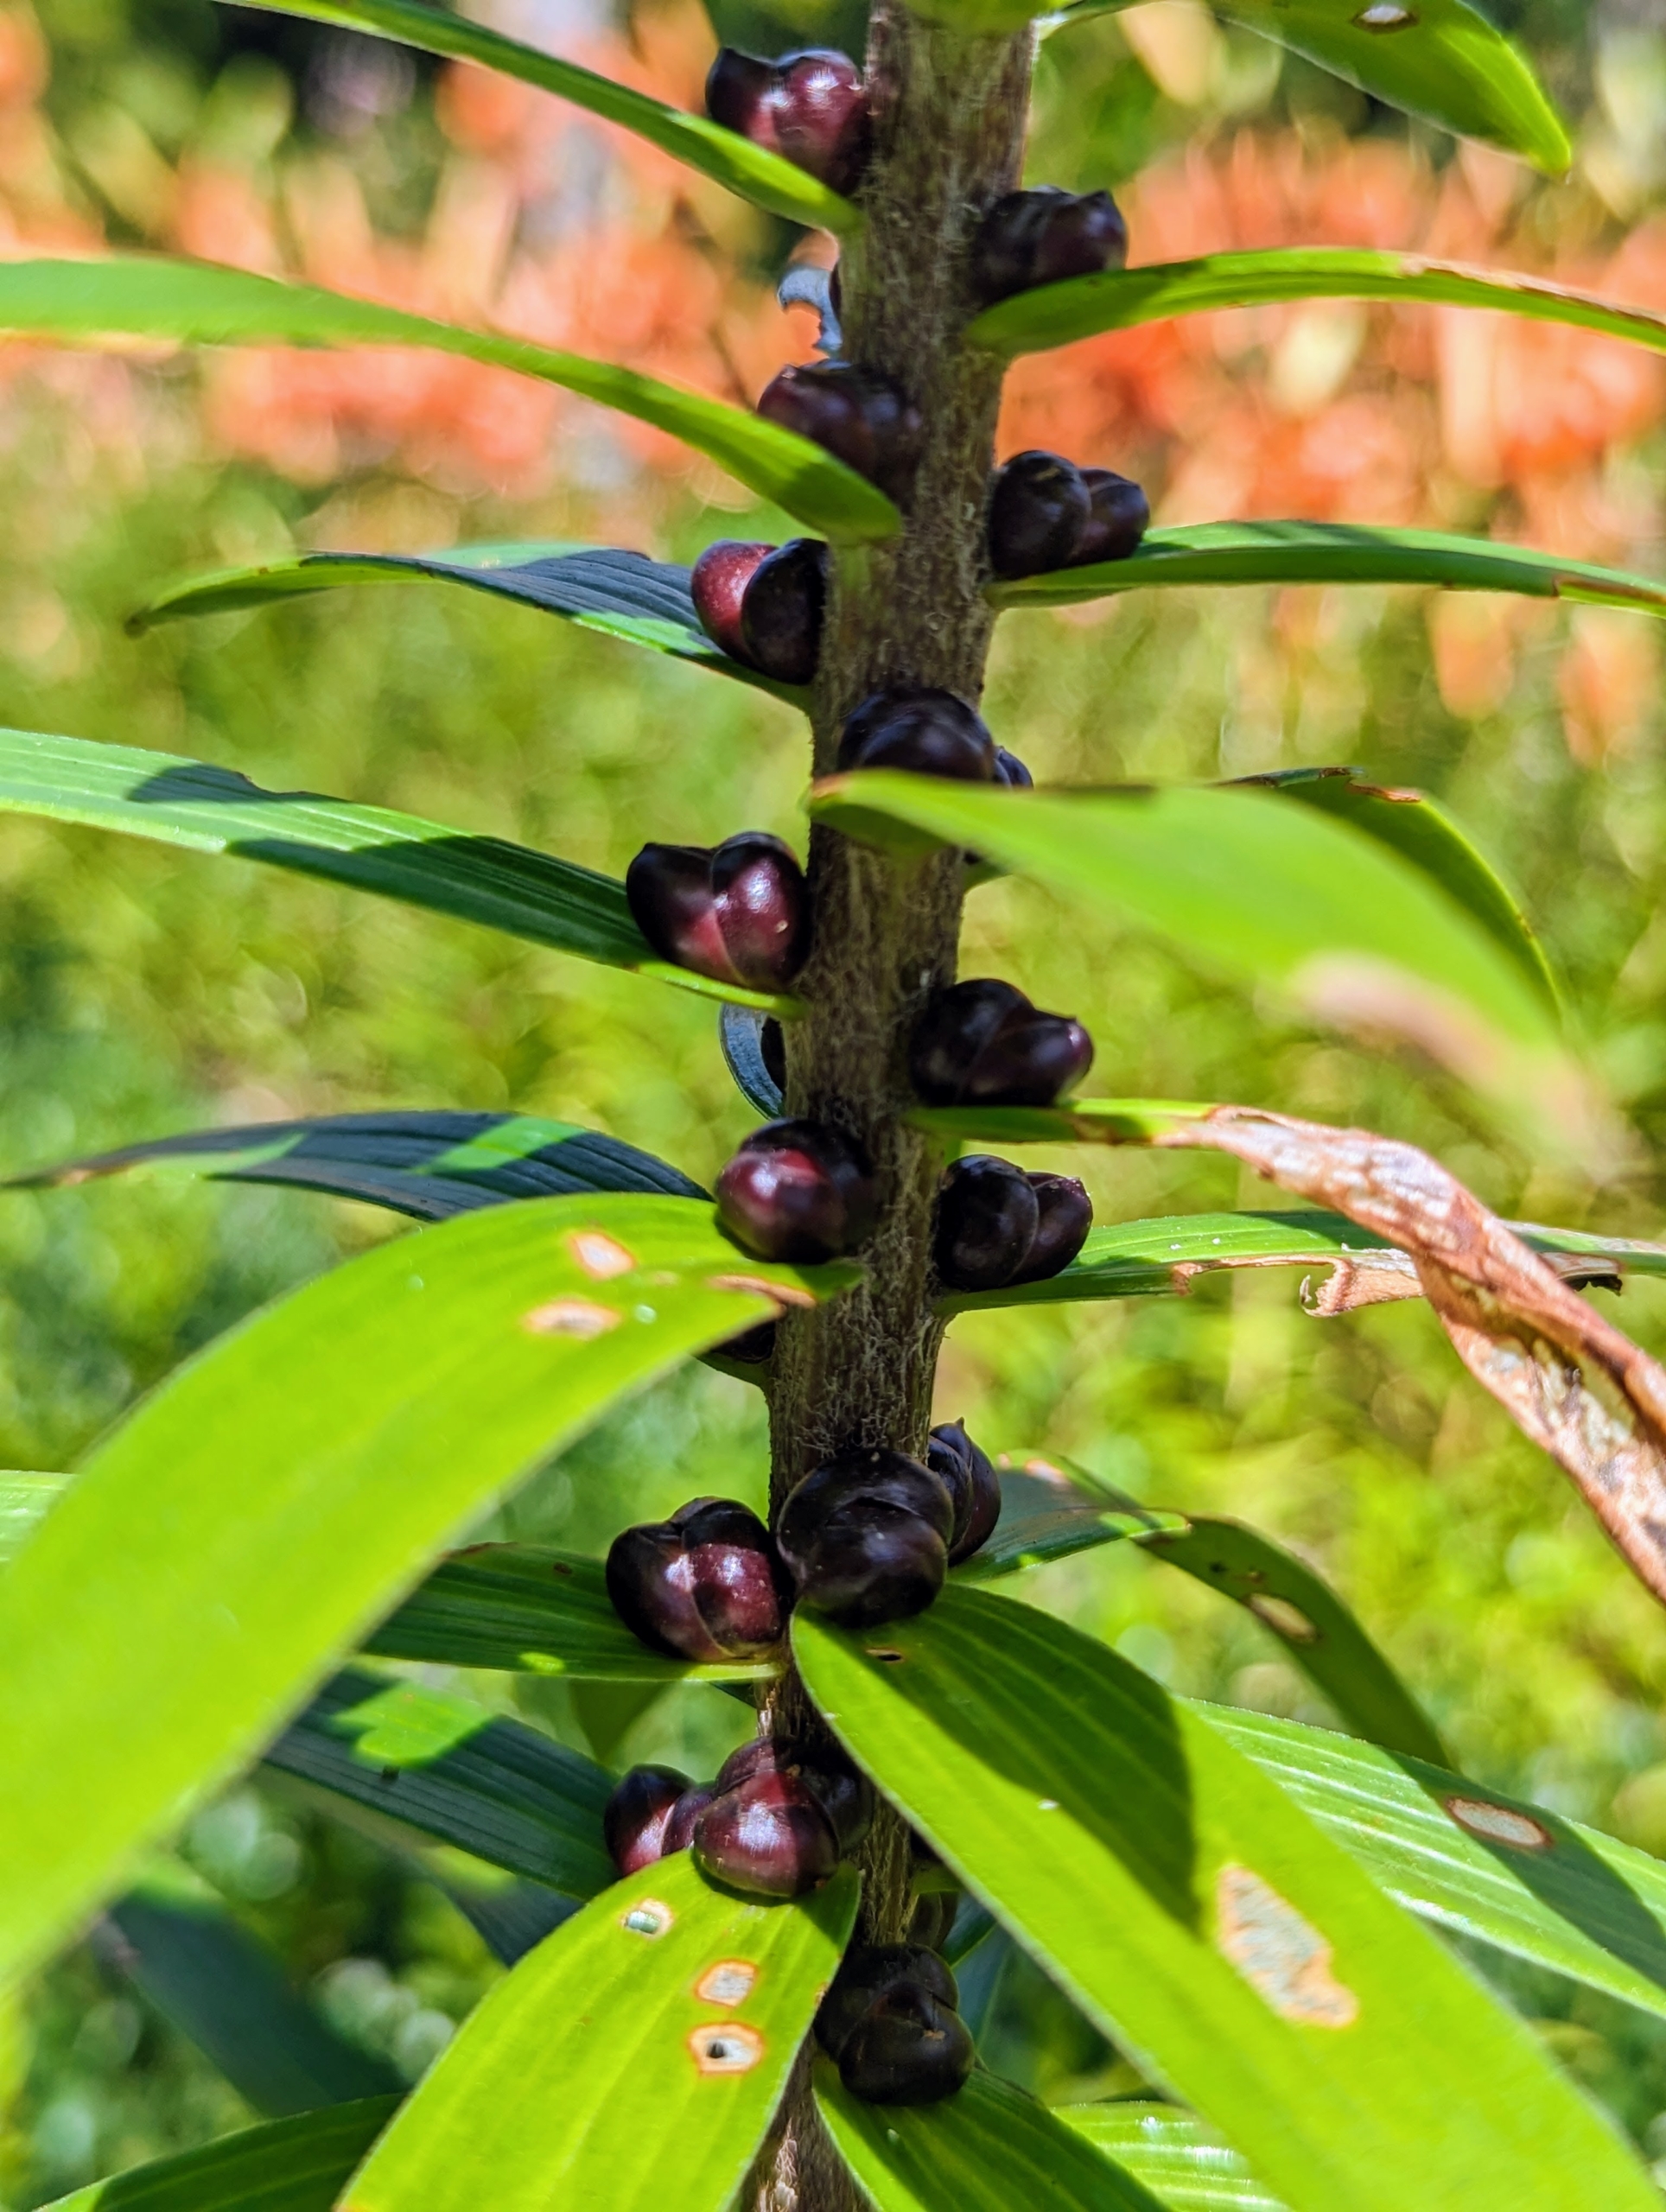
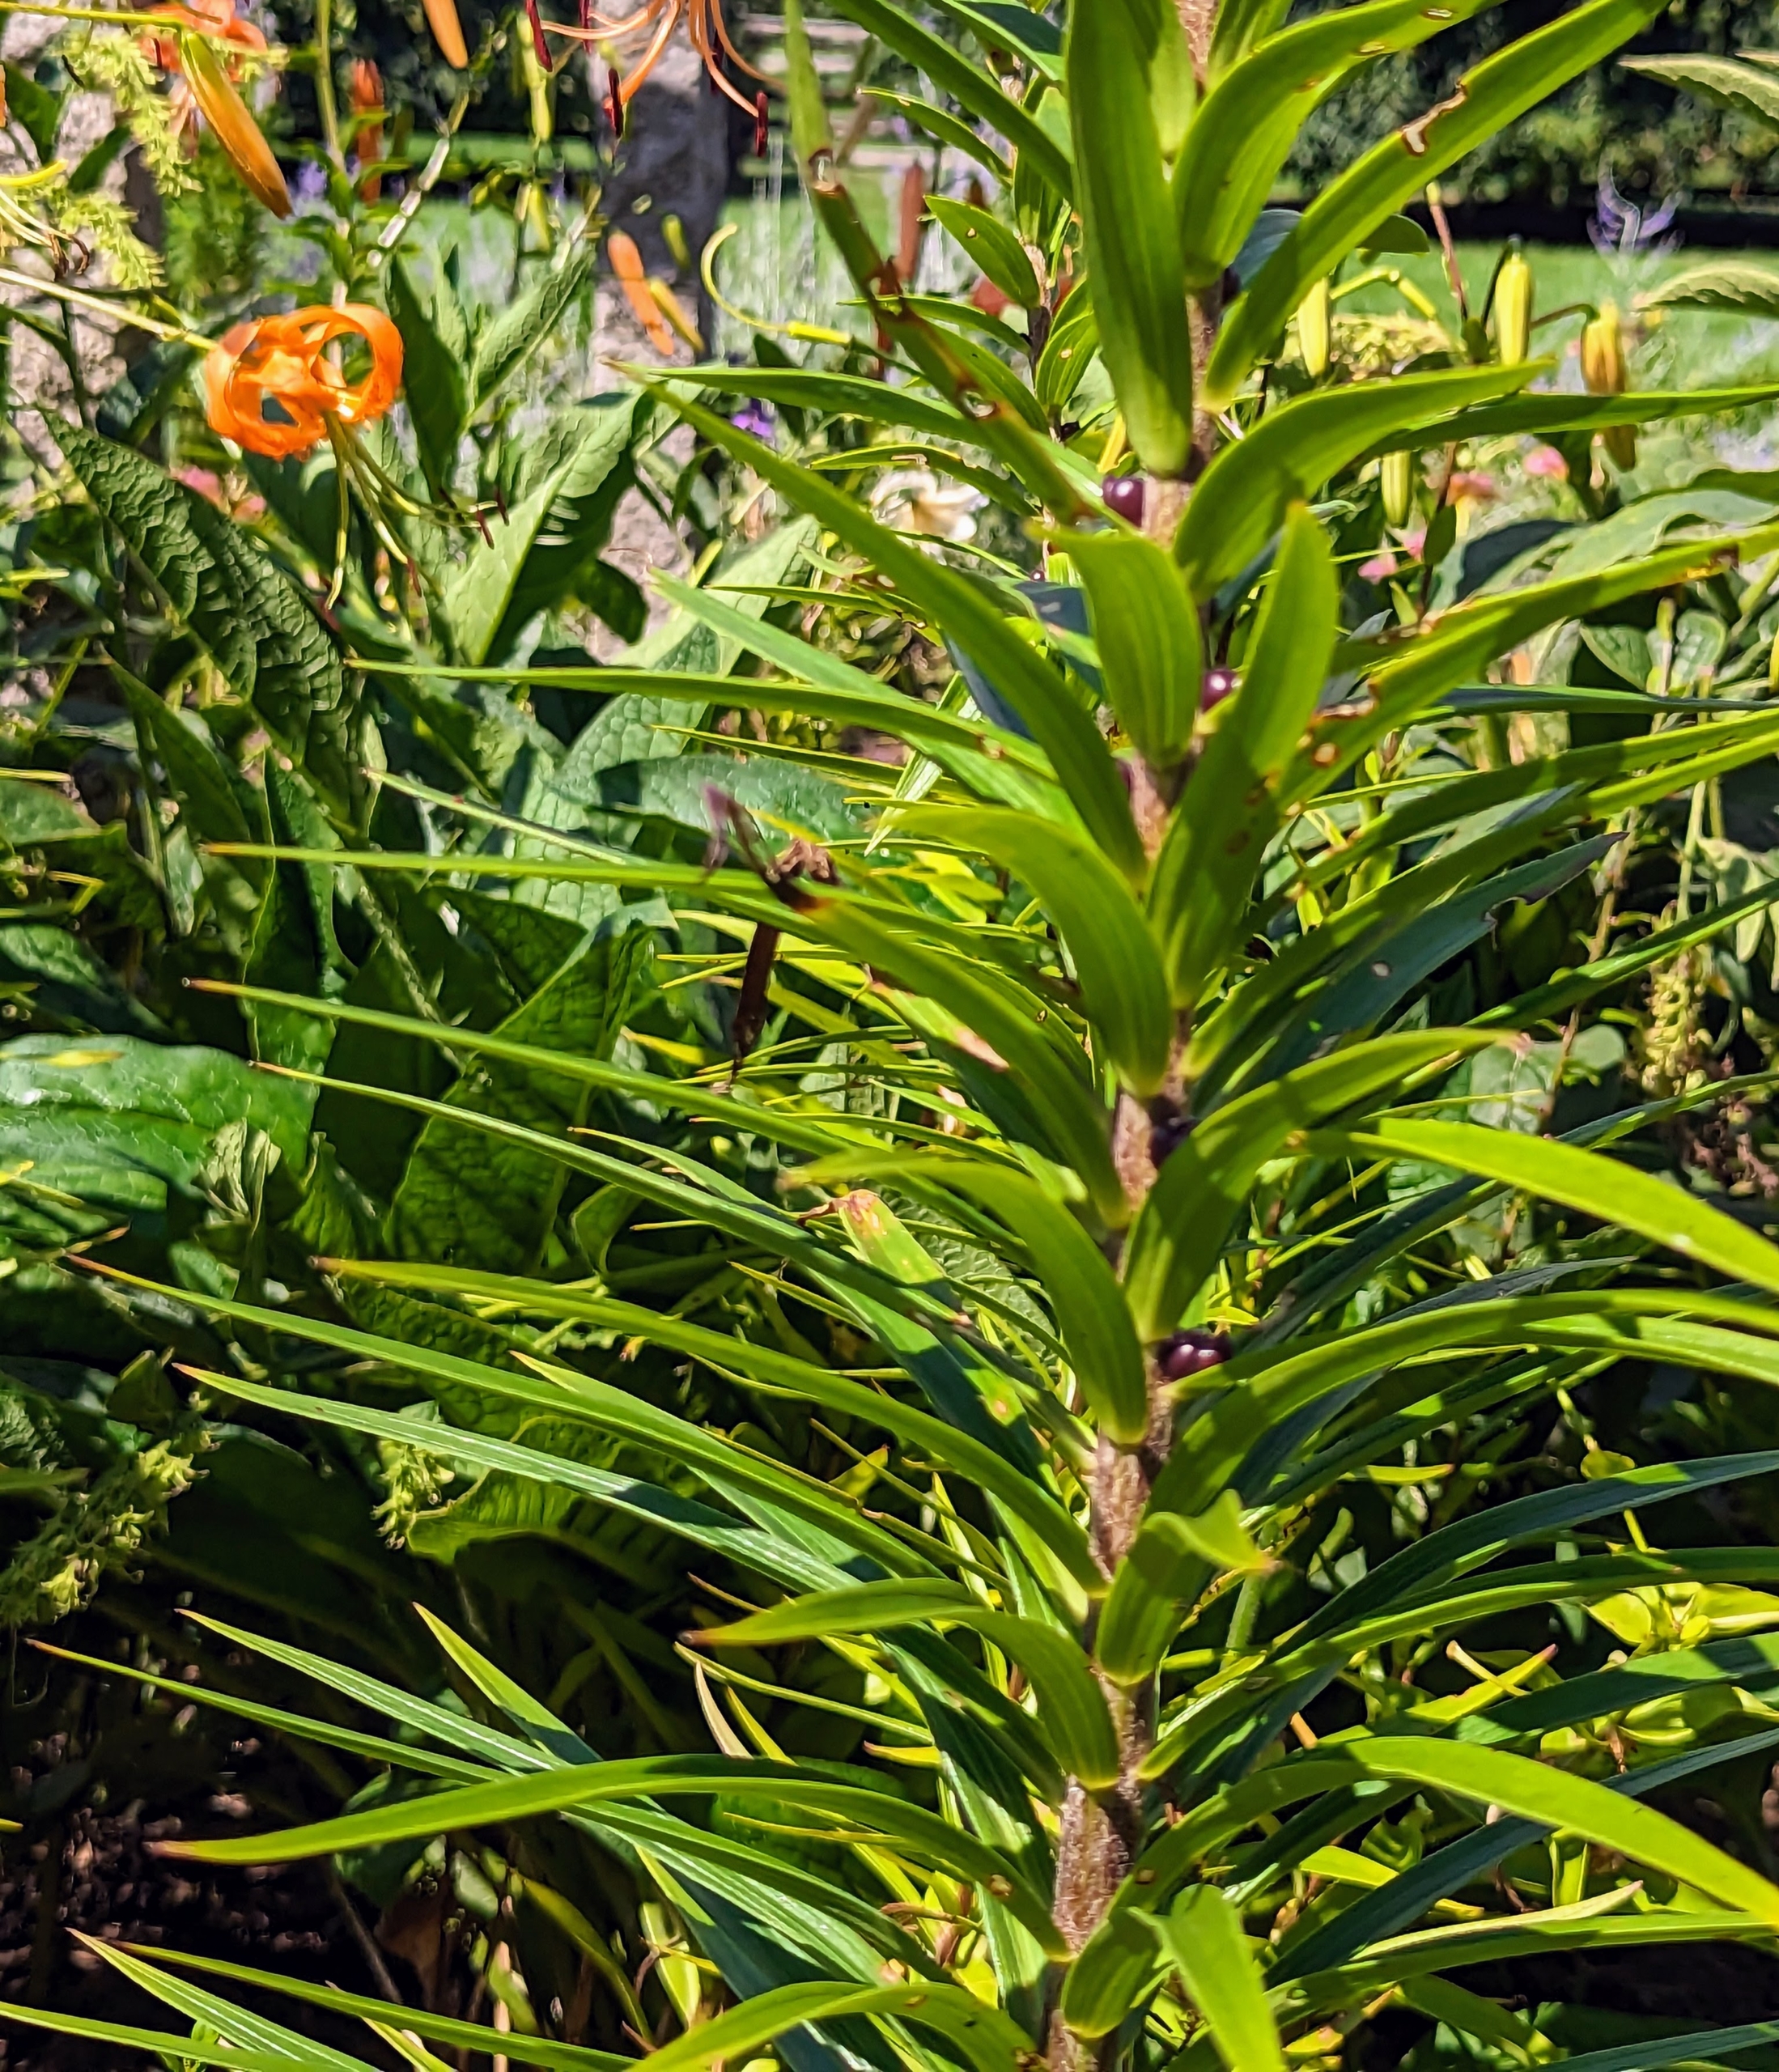
The blackish, round “seeds” that develop in the axils of the leaves along the main stem are called bulbils.
The leaves can grow to three inches long and about 3/4-inch wide. They are medium green, narrow, smooth along their margins, and glabrous, clasping the stem at their bases.
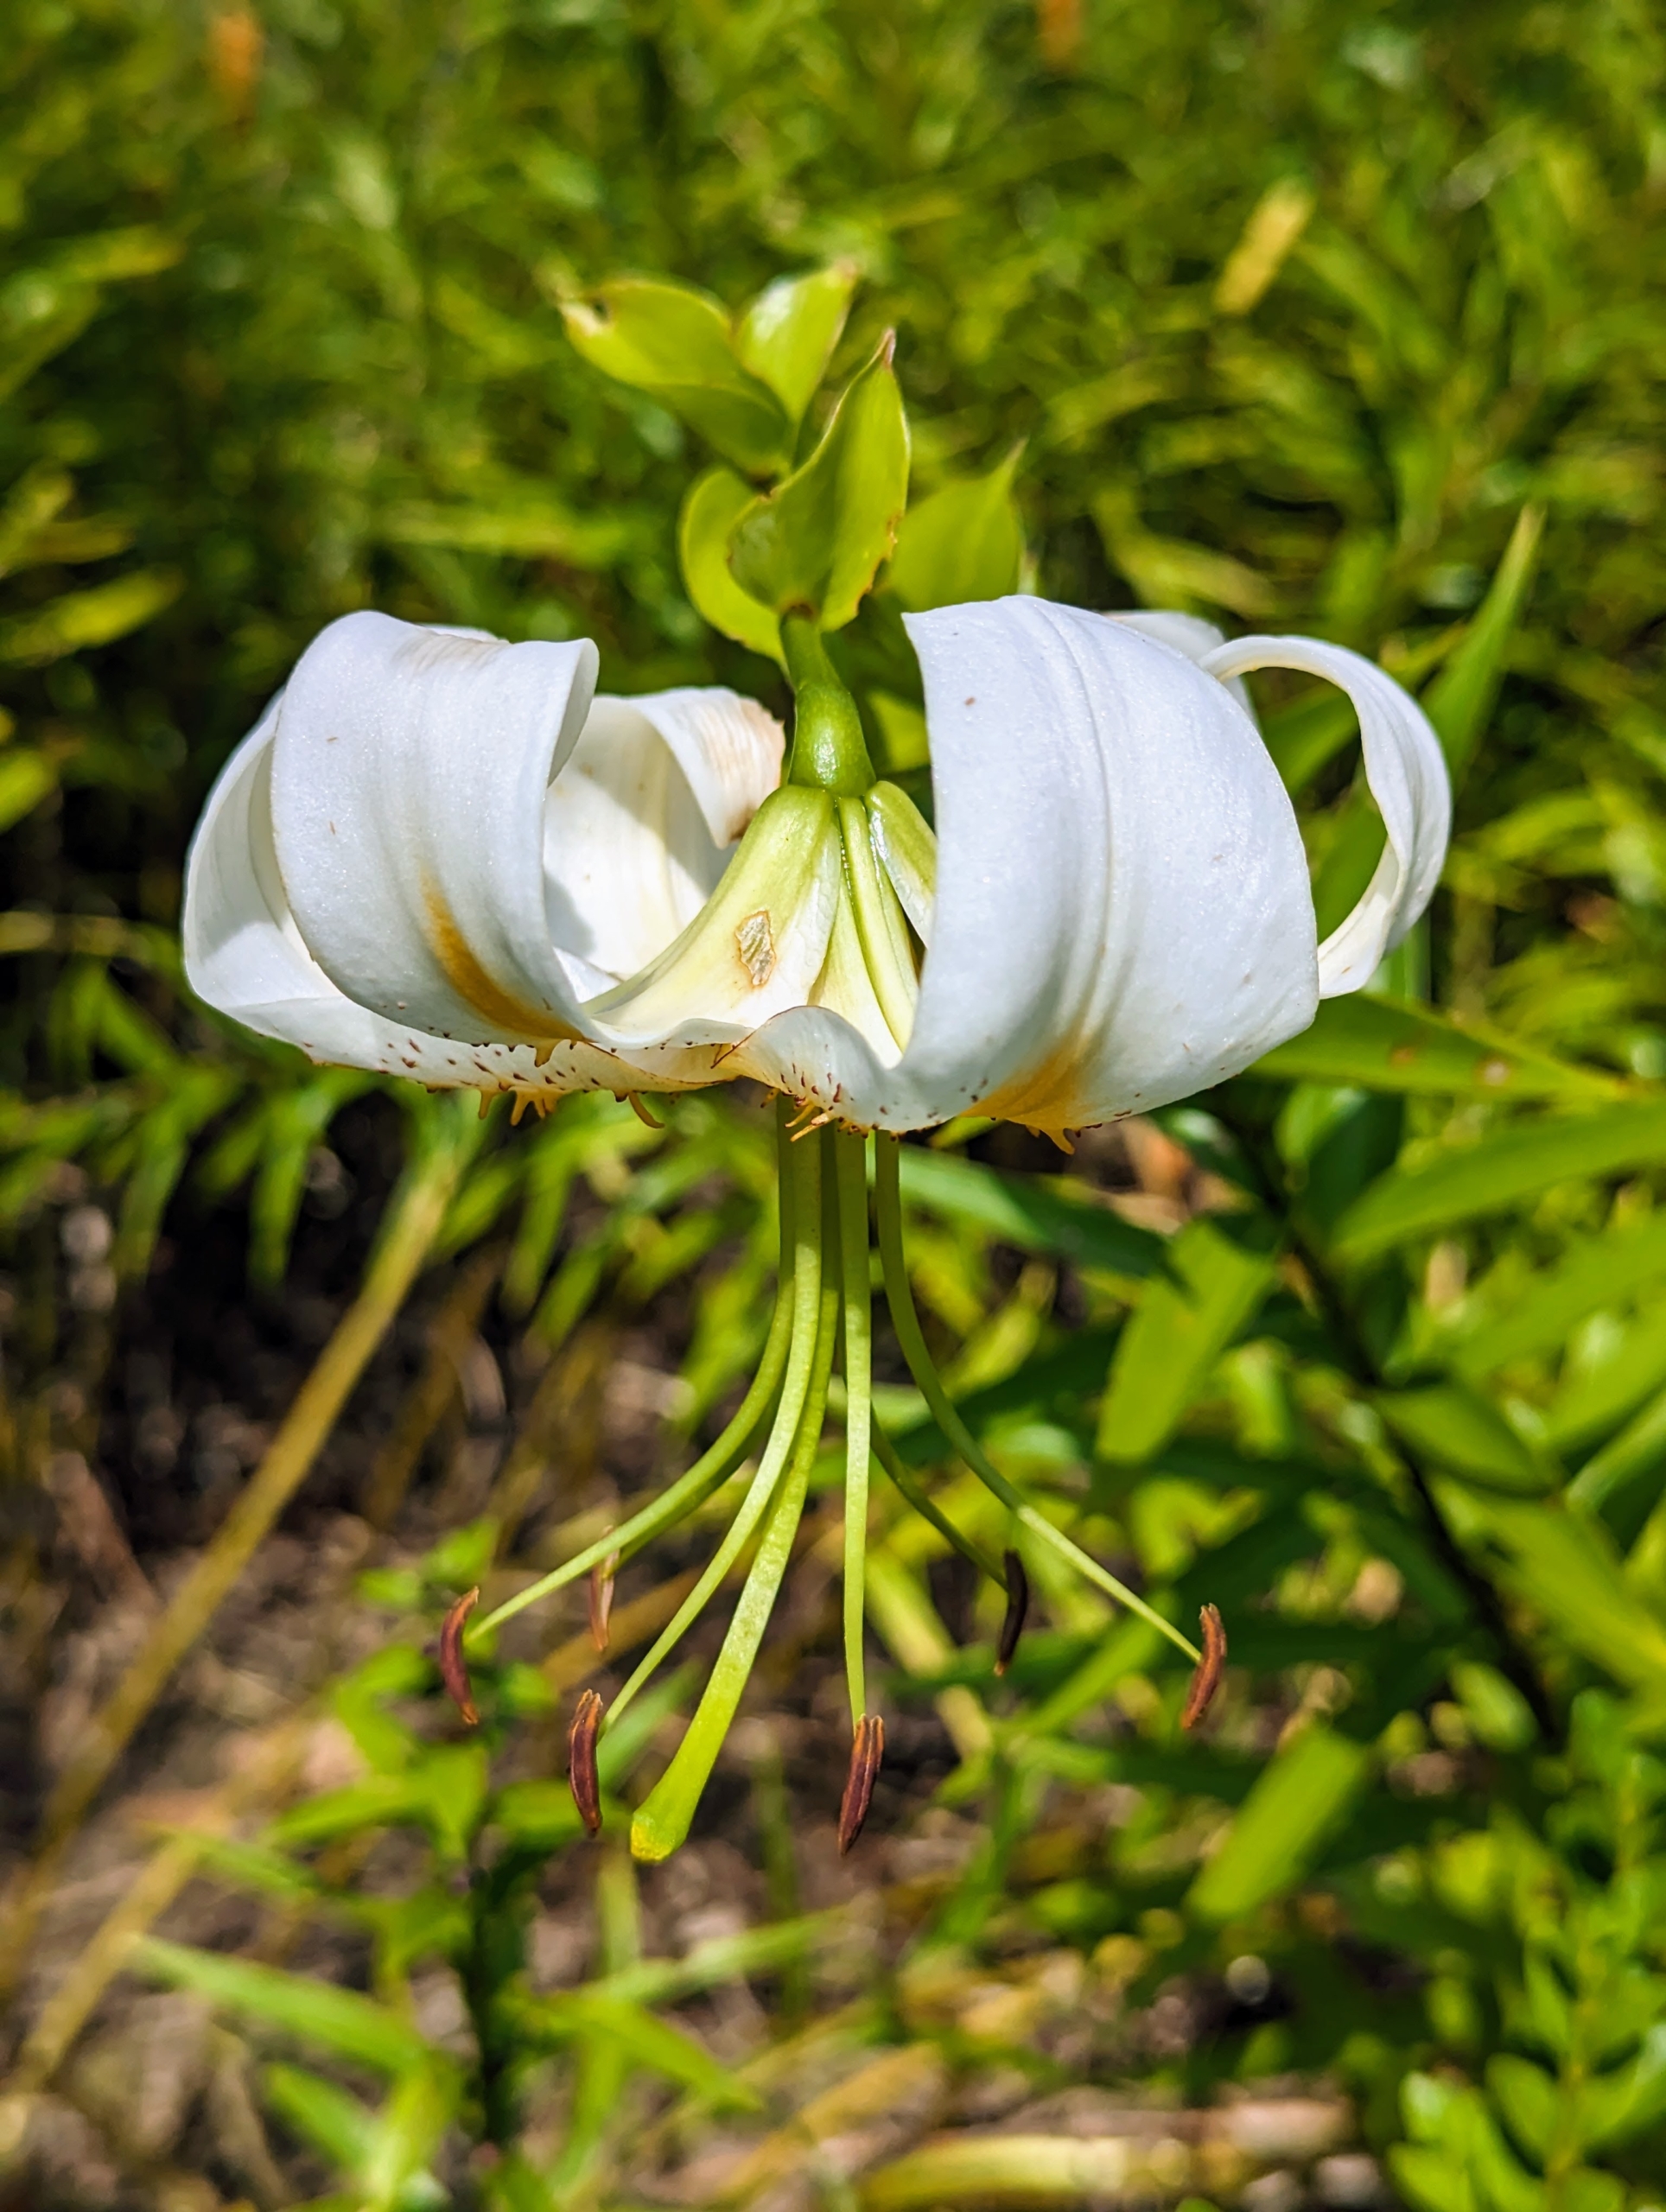
There are also a few white lilies in this bed – adding more interest to the long floral display.
This lily is white and orange with bright orange pollinated stamens, which also stain.
And there are also some lighter orange lilies.
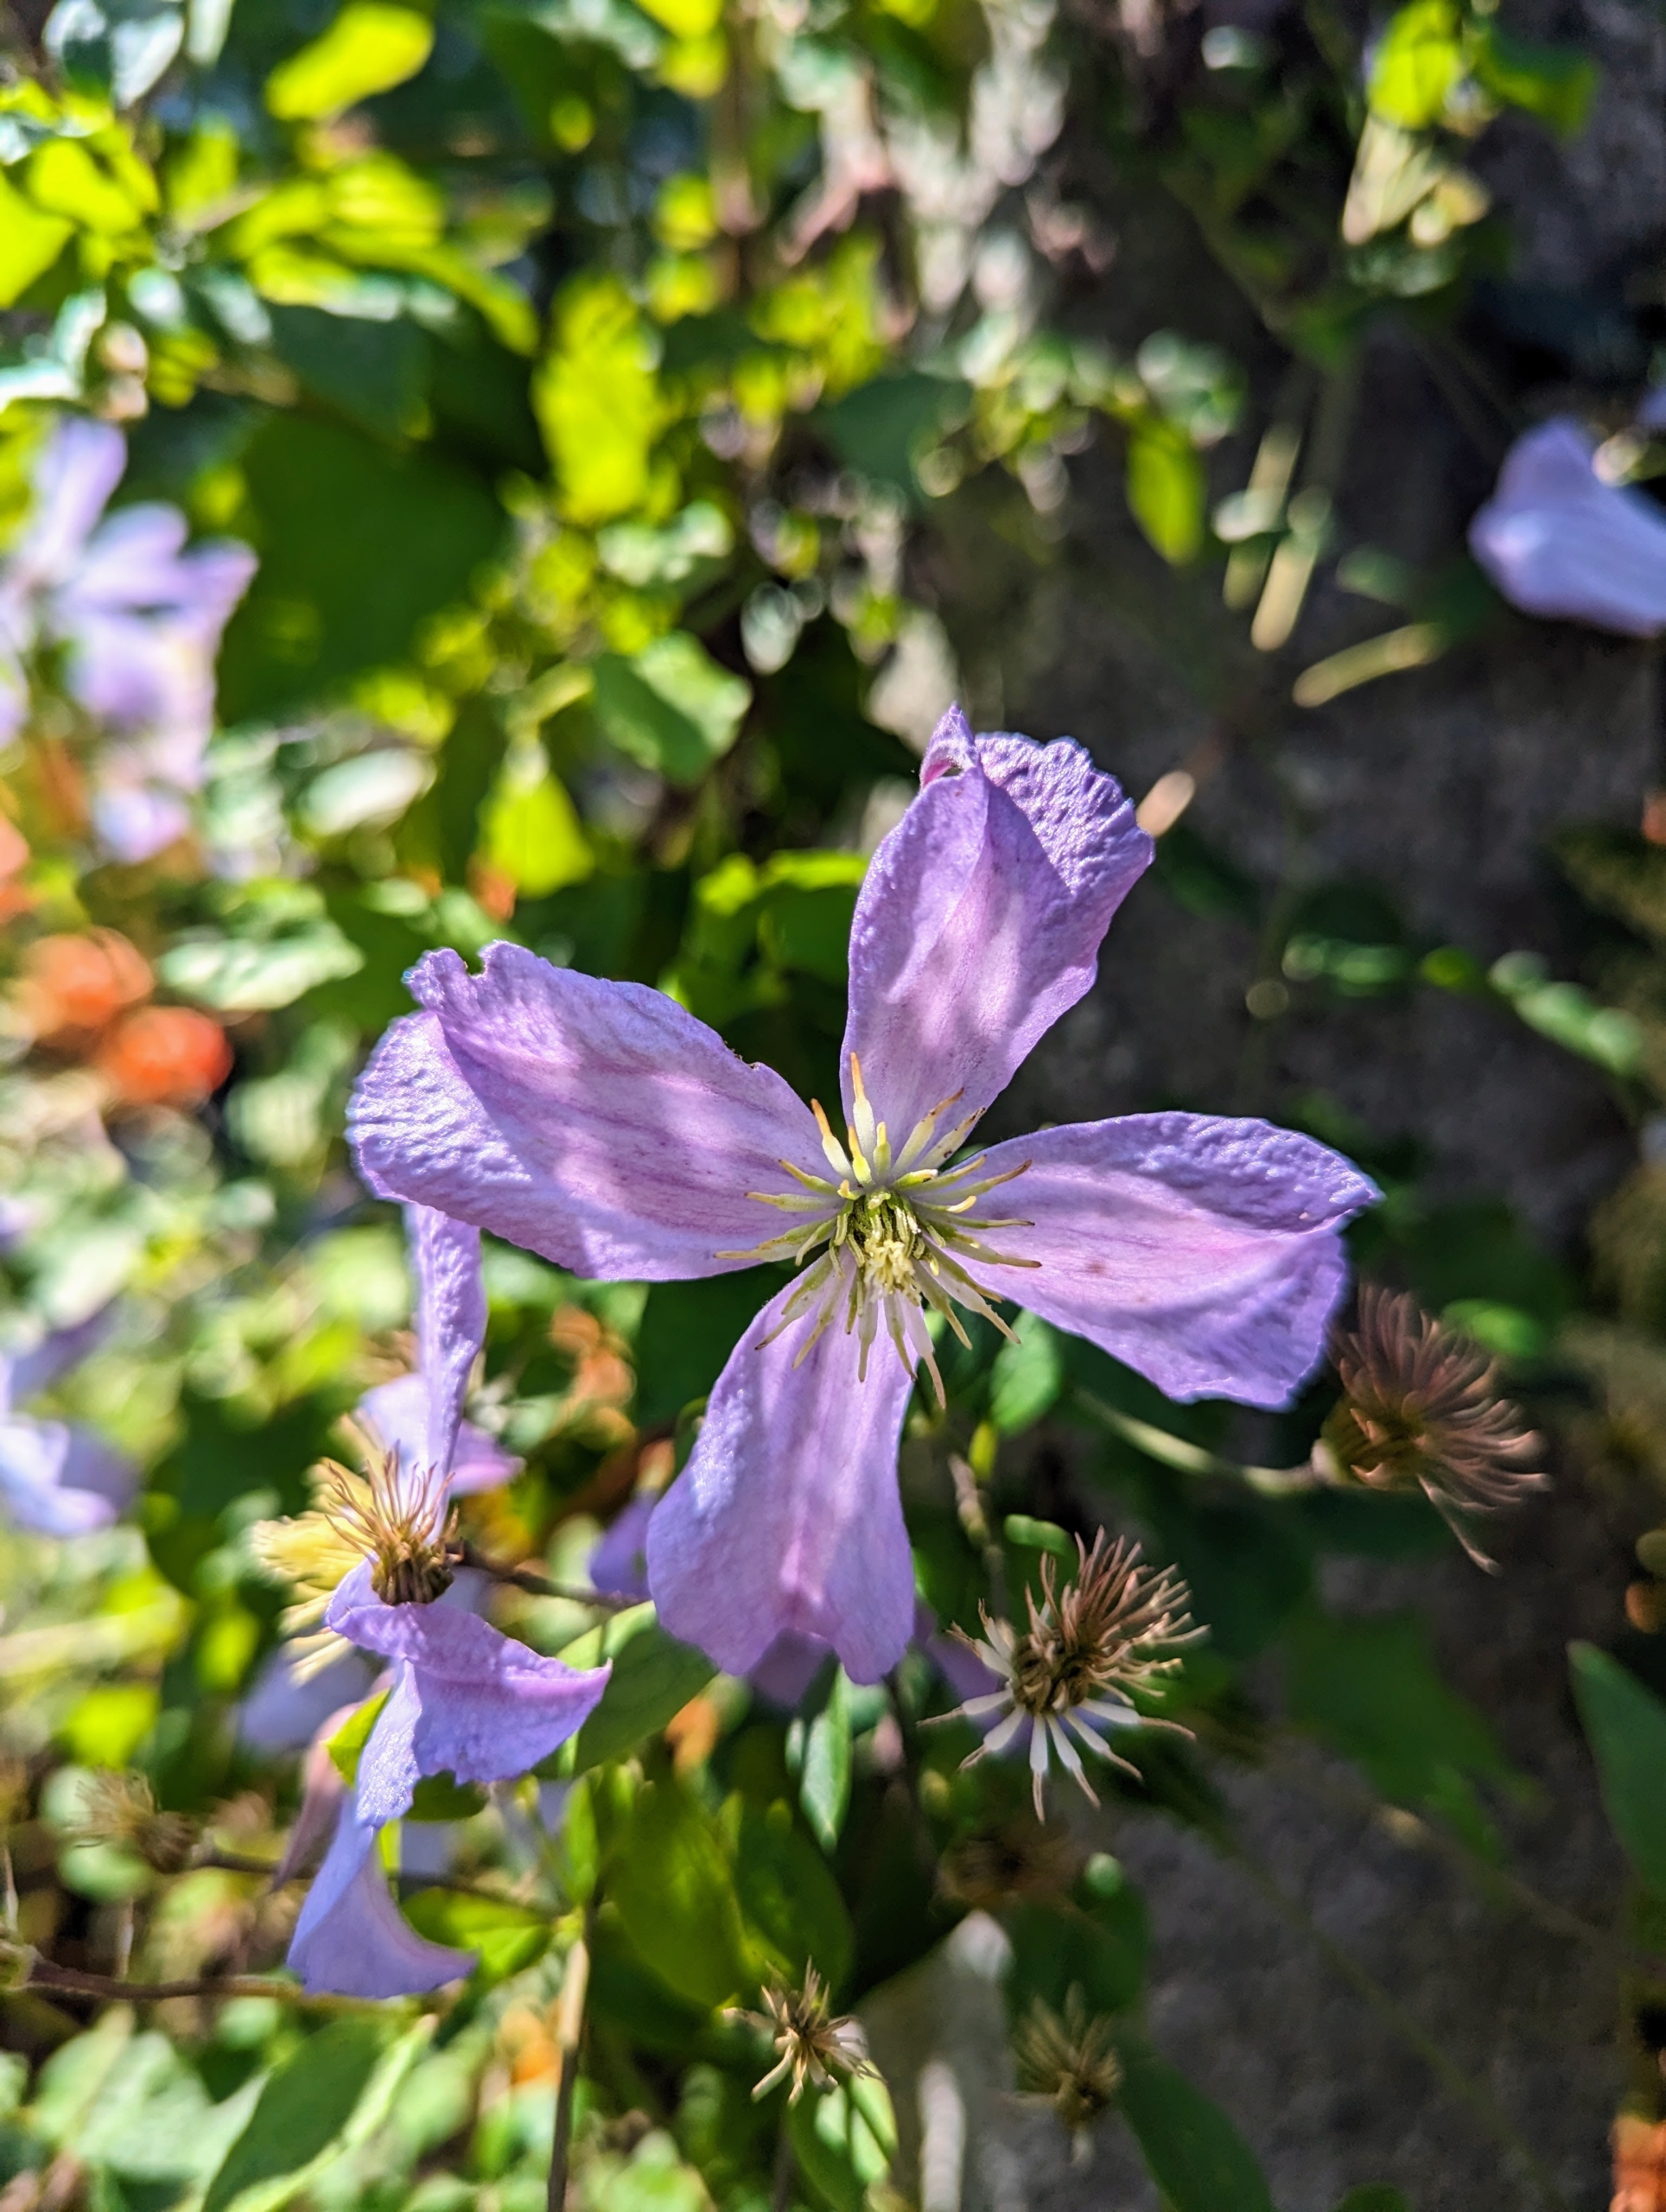
On the granite posts, there are a few lasting clematis flowers. I have always loved clematis, and over the years I have grown many varieties of this wonderful plant. Most species are called clematis, but it has also been called traveller’s joy, virgin’s bower, leather flower, or vase vine. It’s also been called “Old Man’s Beard,” because of the long fluffy seed heads that look similar to an old man’s beard.
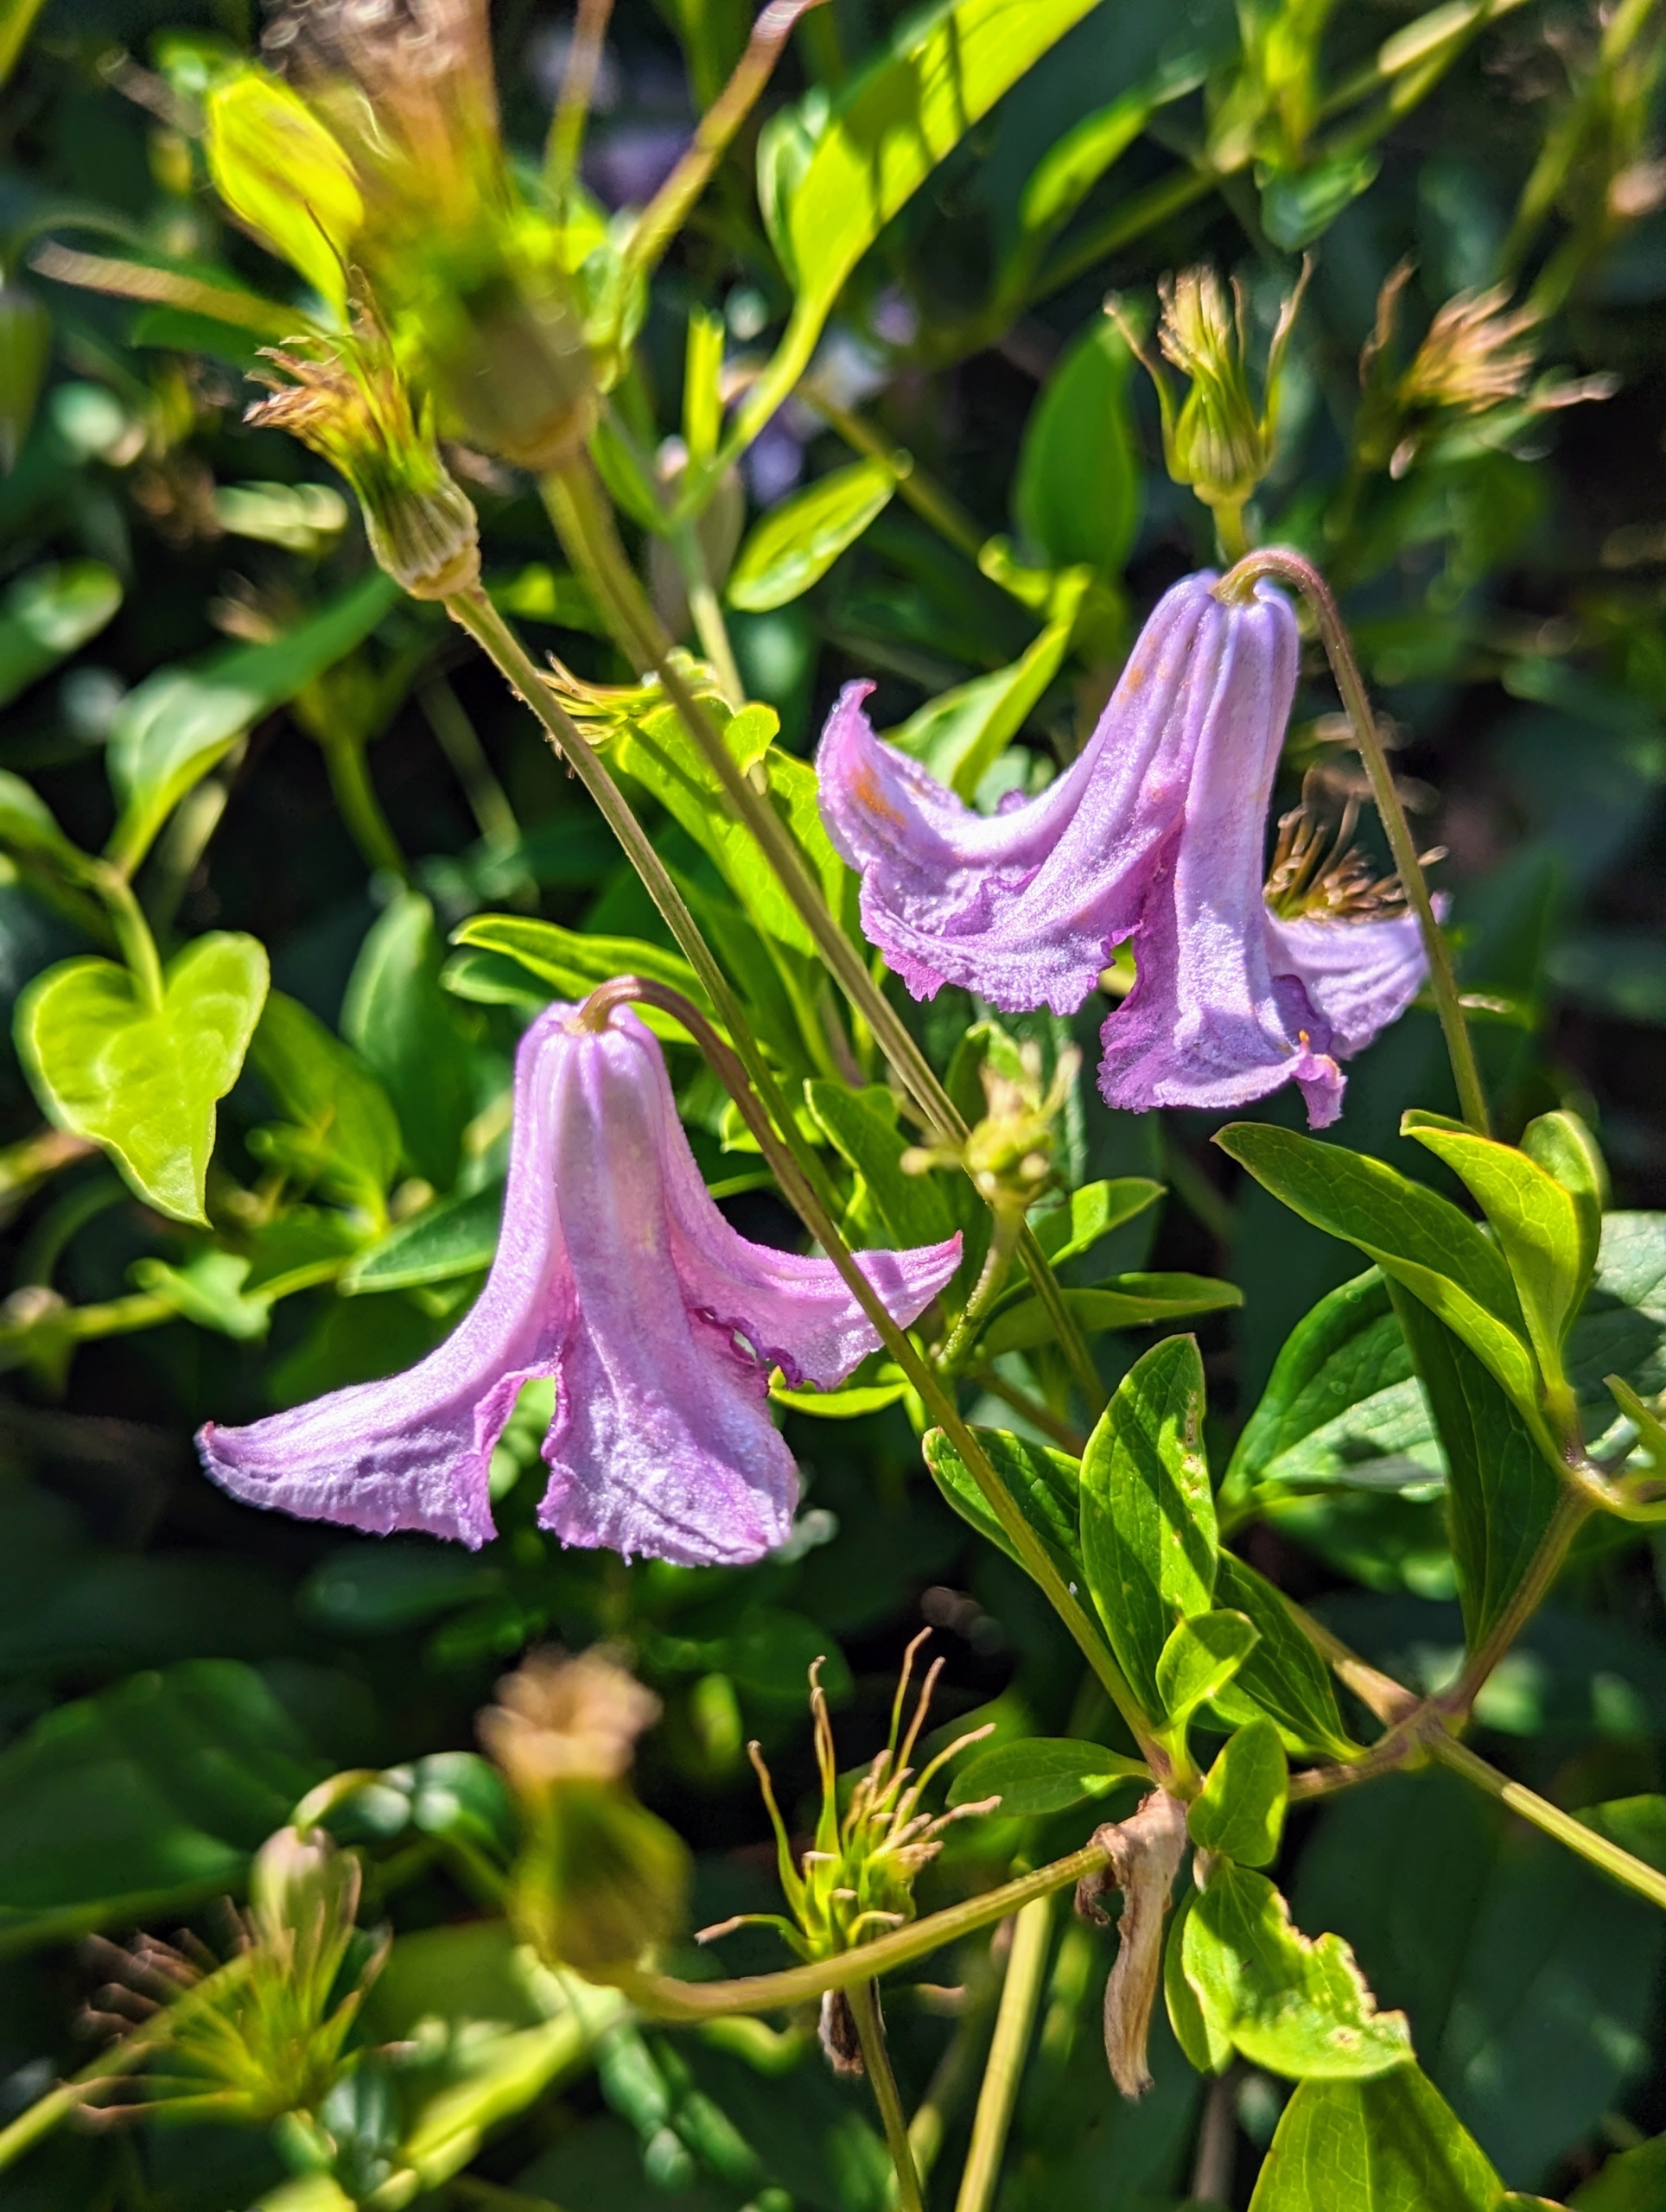
This is Clematis viticella ‘Betty Corning’, which has slightly fragrant, bell-shaped flowers that bloom from summer to fall.
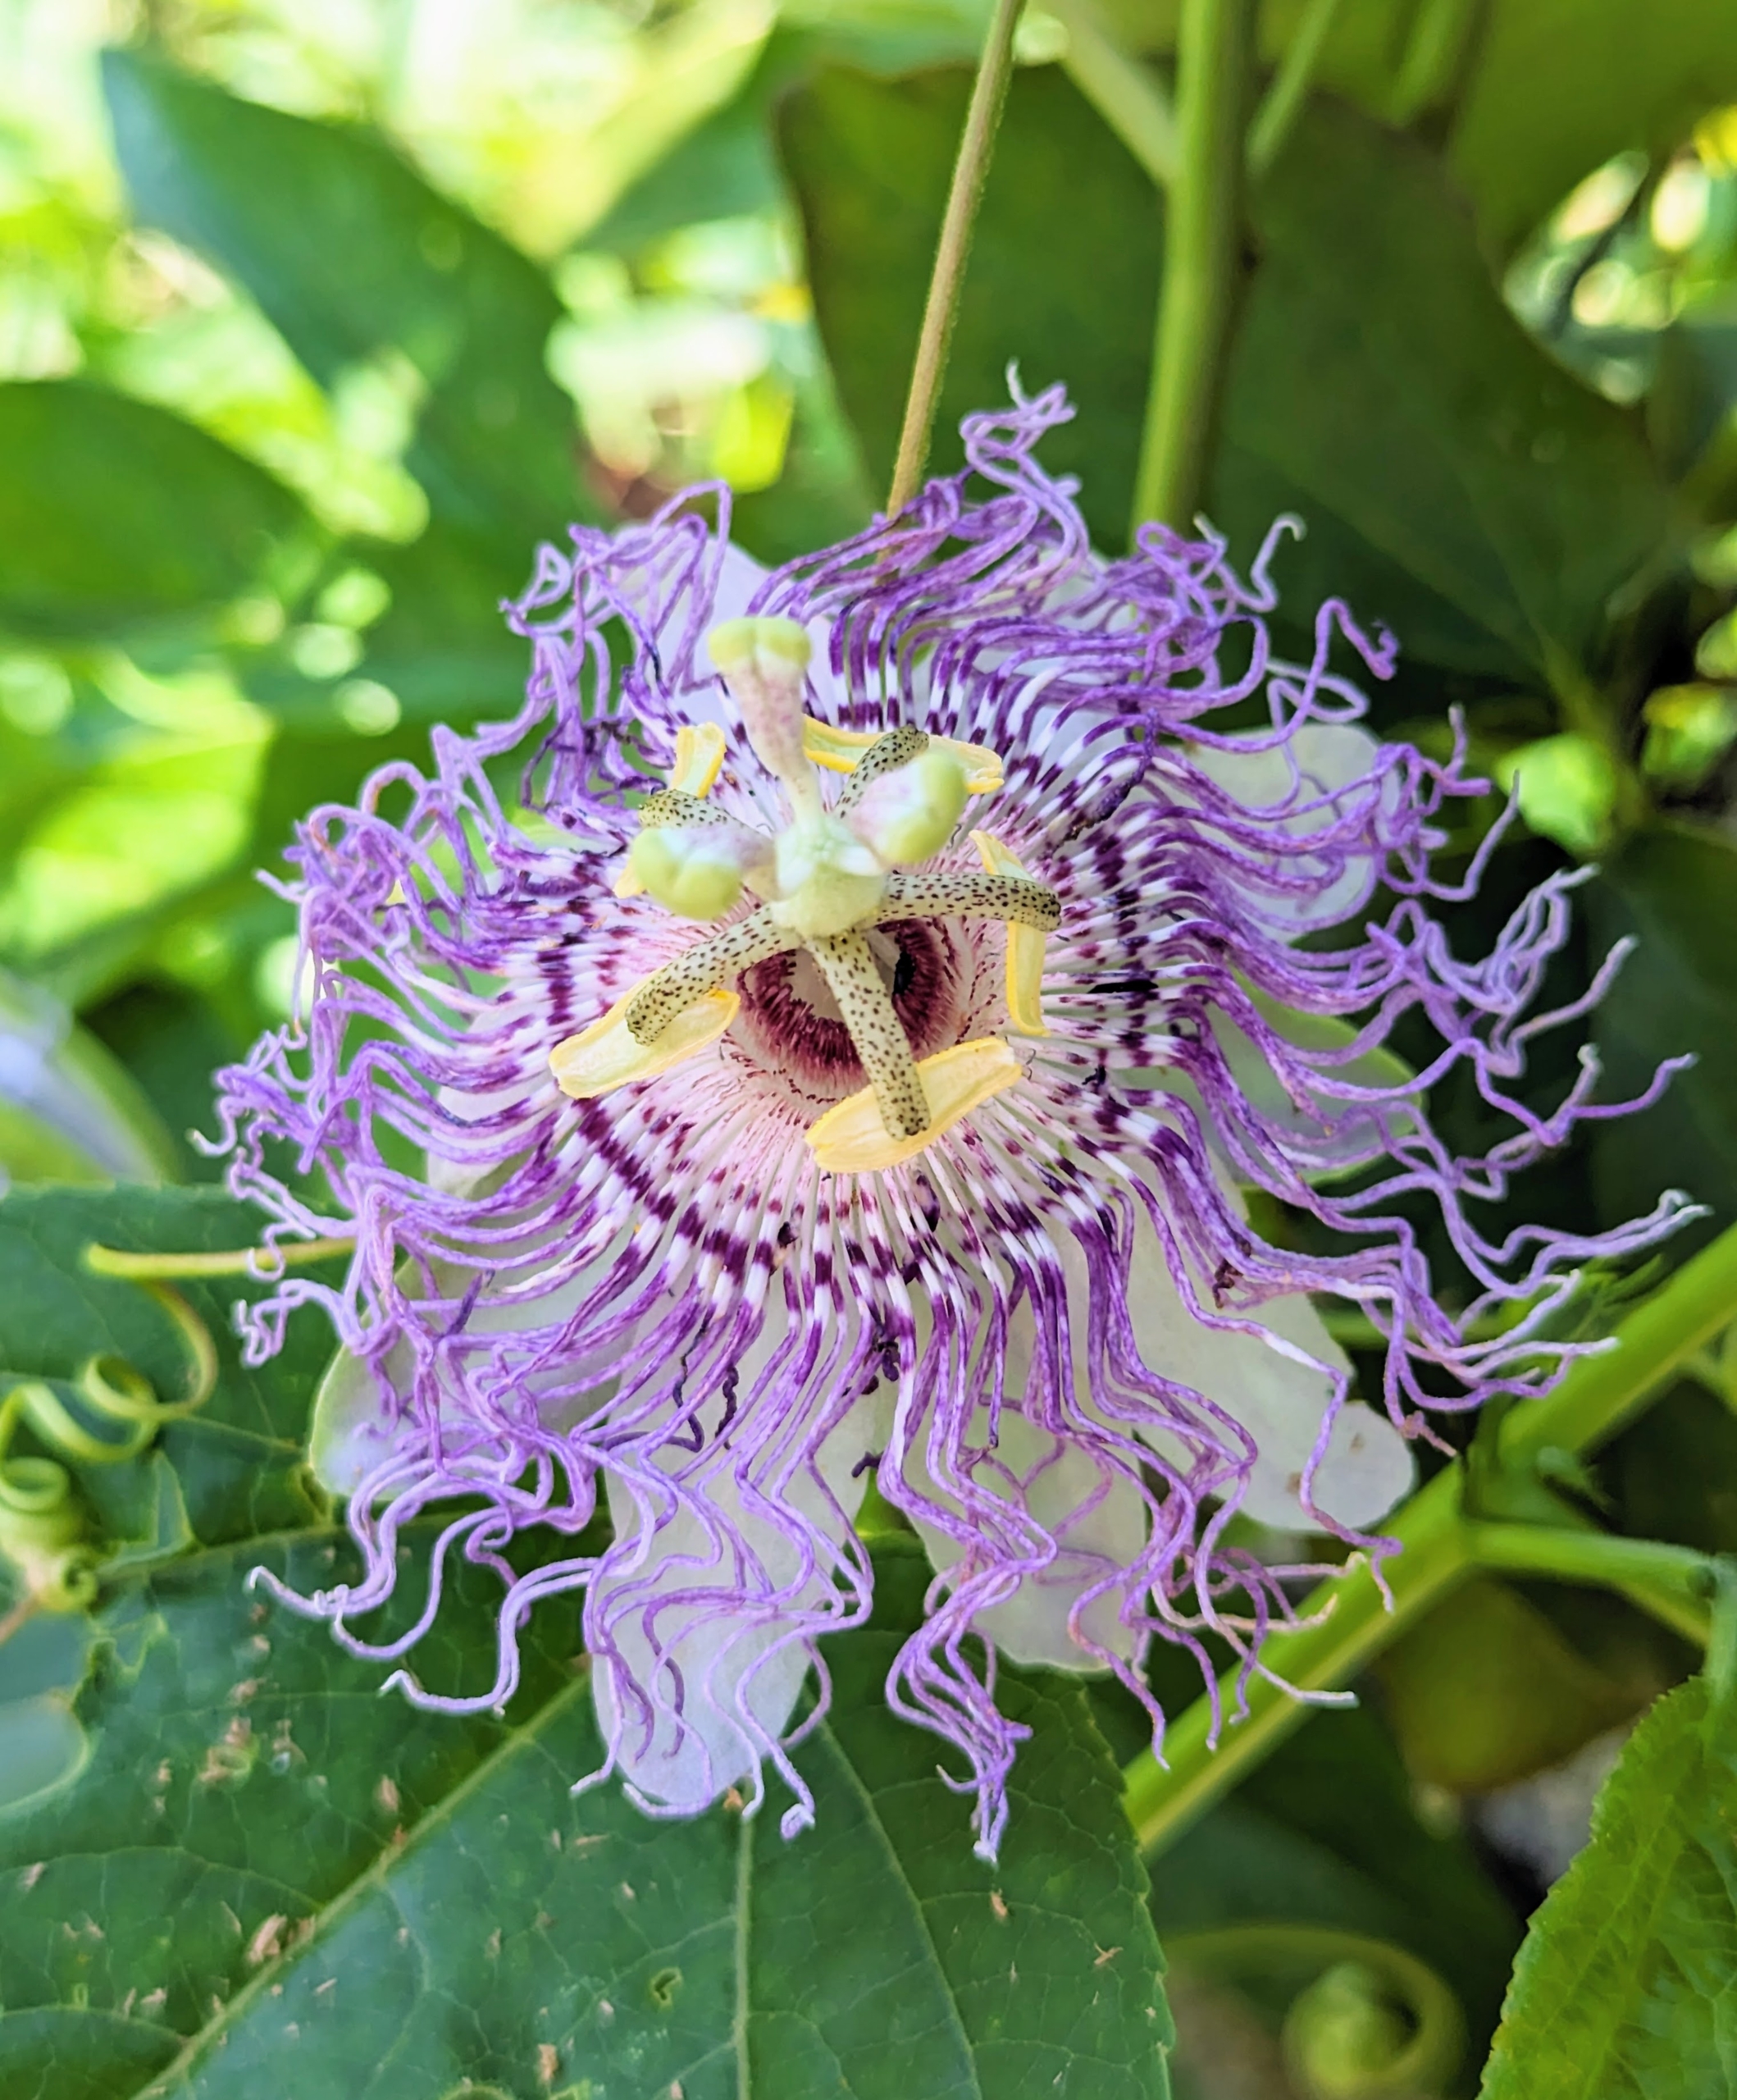
A few passionflowers also grow here. The passionflower has a wide, flat petal base with five or 10 petals in a flat or reflex circle. The ovary and stamens are held atop a tall, distinctive stalk encircled by delicate filaments. The stigmas start high above the anthers and slowly bend backward for easy pollination.
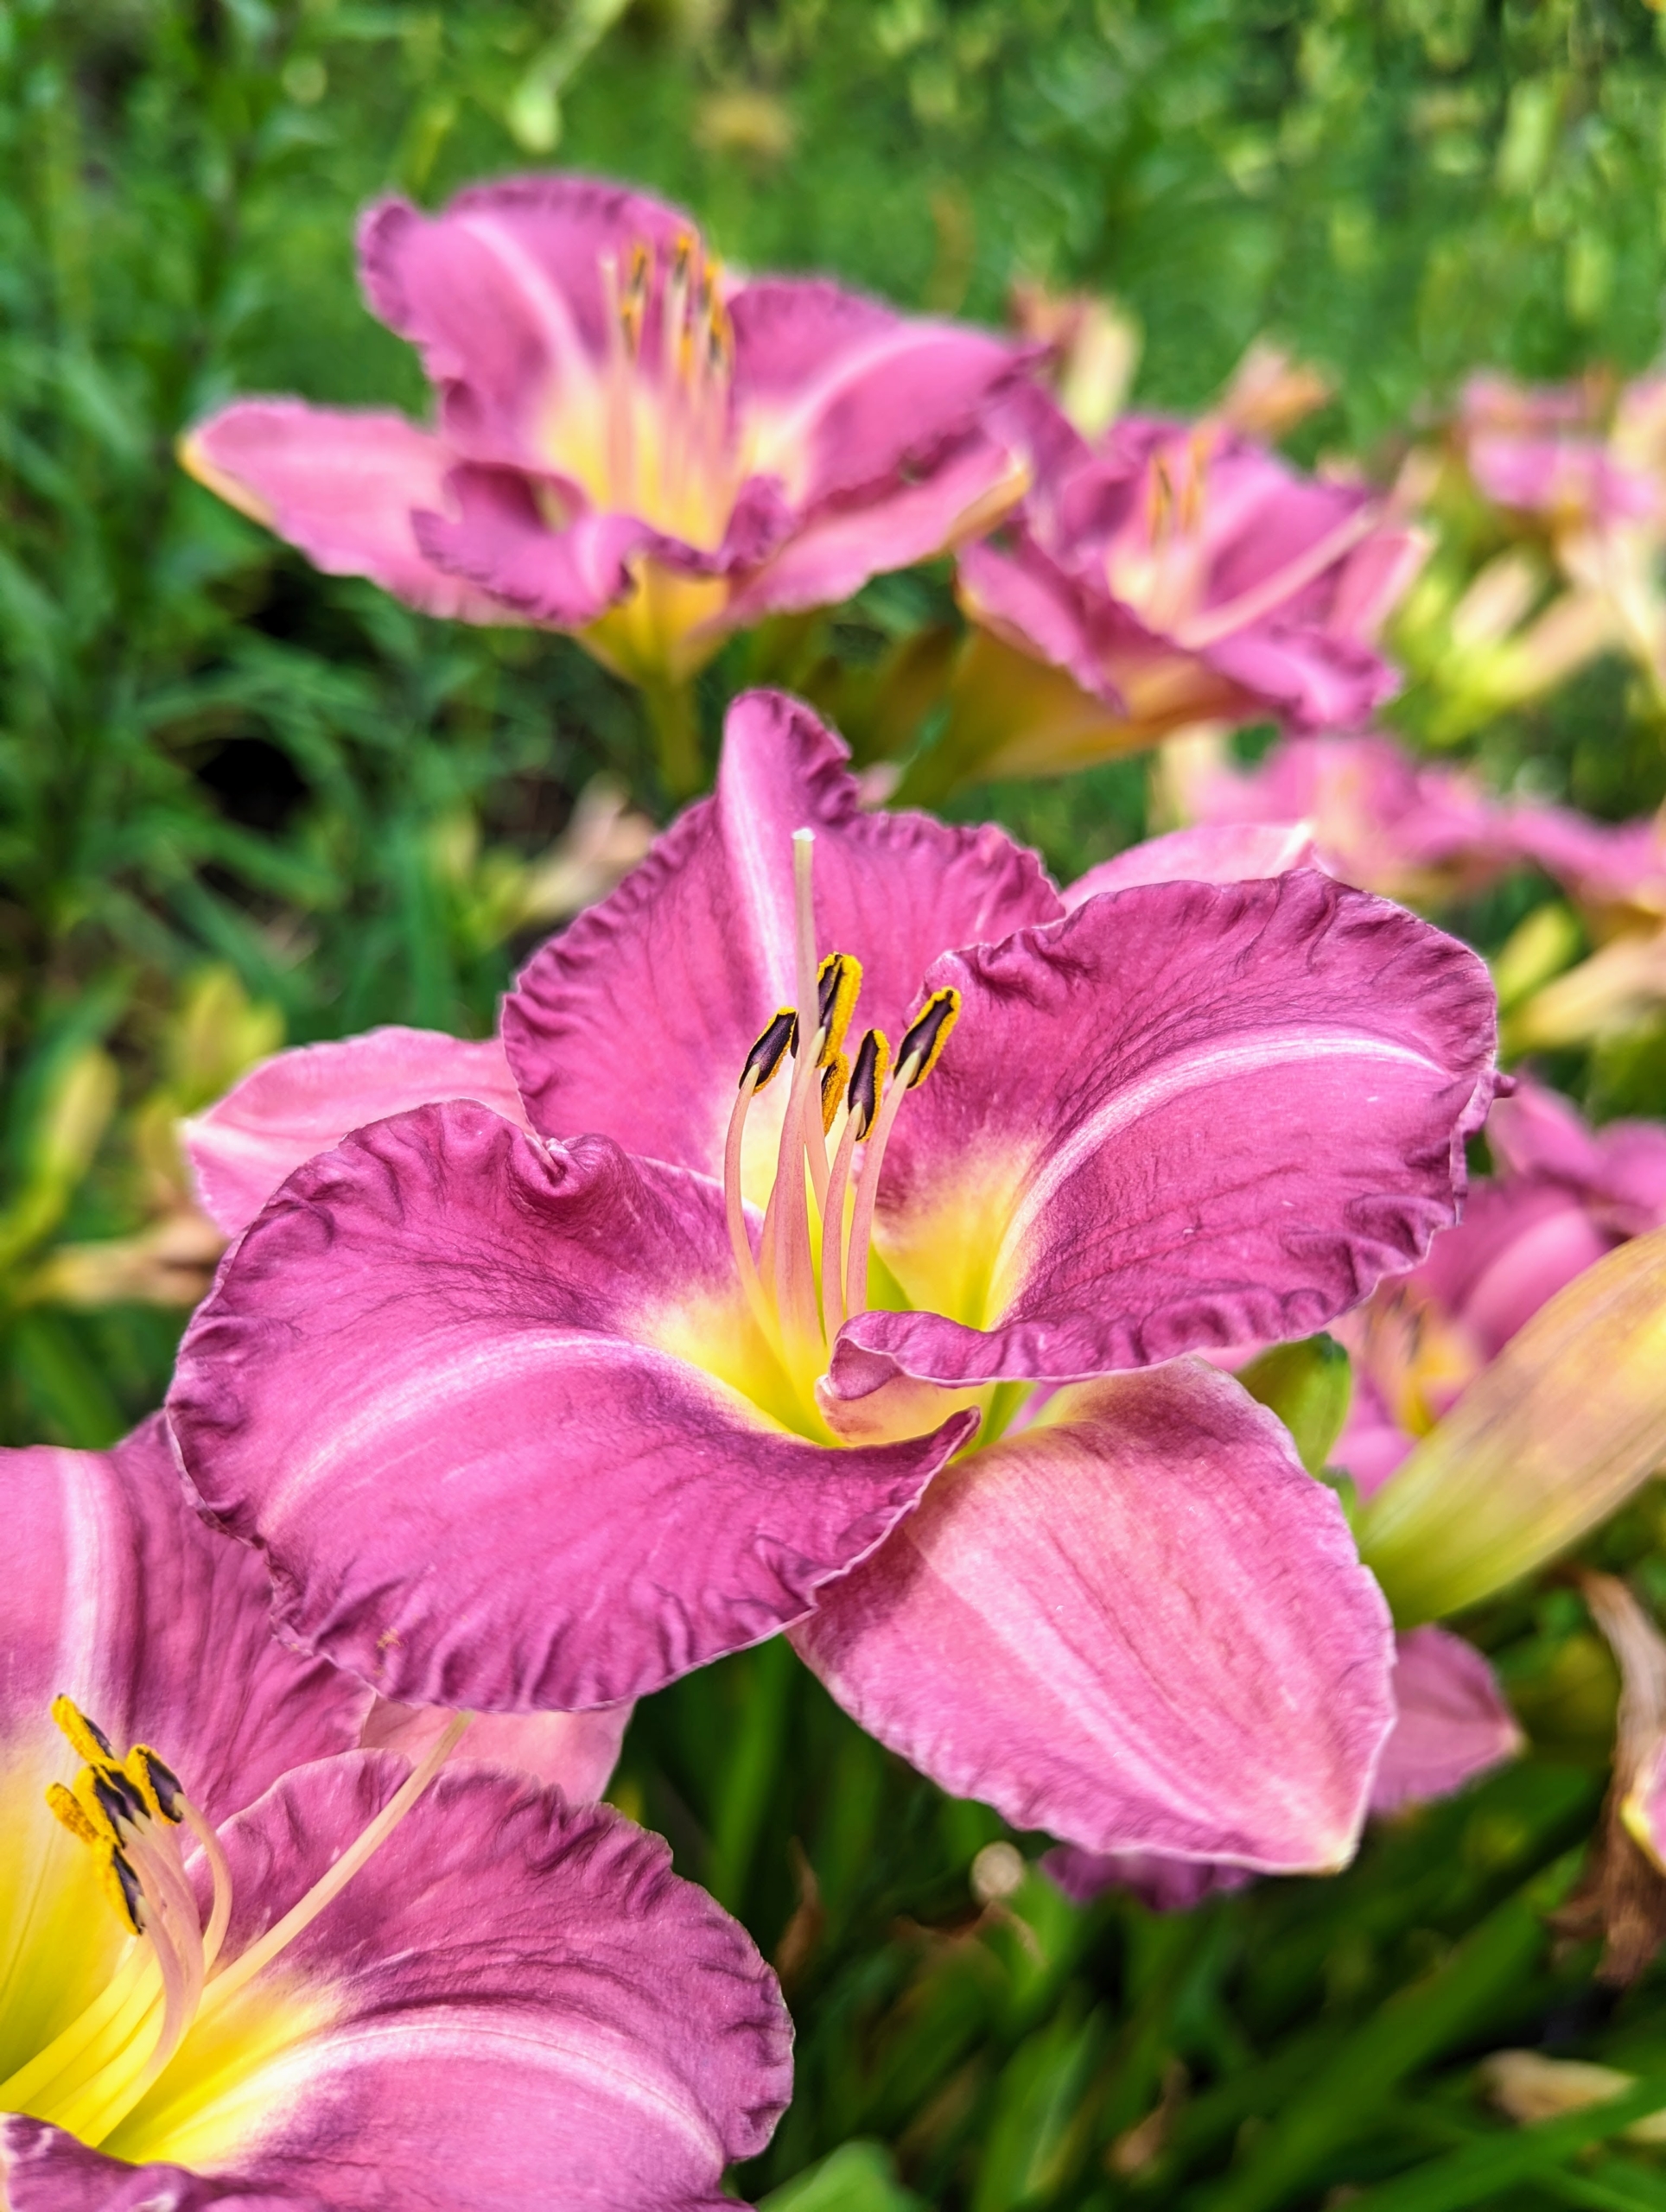
In this garden, we also have pops of daylilies. The daylily is a low-maintenance perennial—easy to grow, virtually disease- and pest-free, and able to survive drought, uneven sunlight, and poor soil. The daylily’s botanical name, Hemerocallis, comes from Greek hemera “day” and kallos meaning “beauty”. The name is appropriate, since each flower lasts only one day. Despite their name, daylilies are not “true lilies.” Leaves grow from a crown and the flowers form on leafless stems called “scapes,” which rise above the foliage.
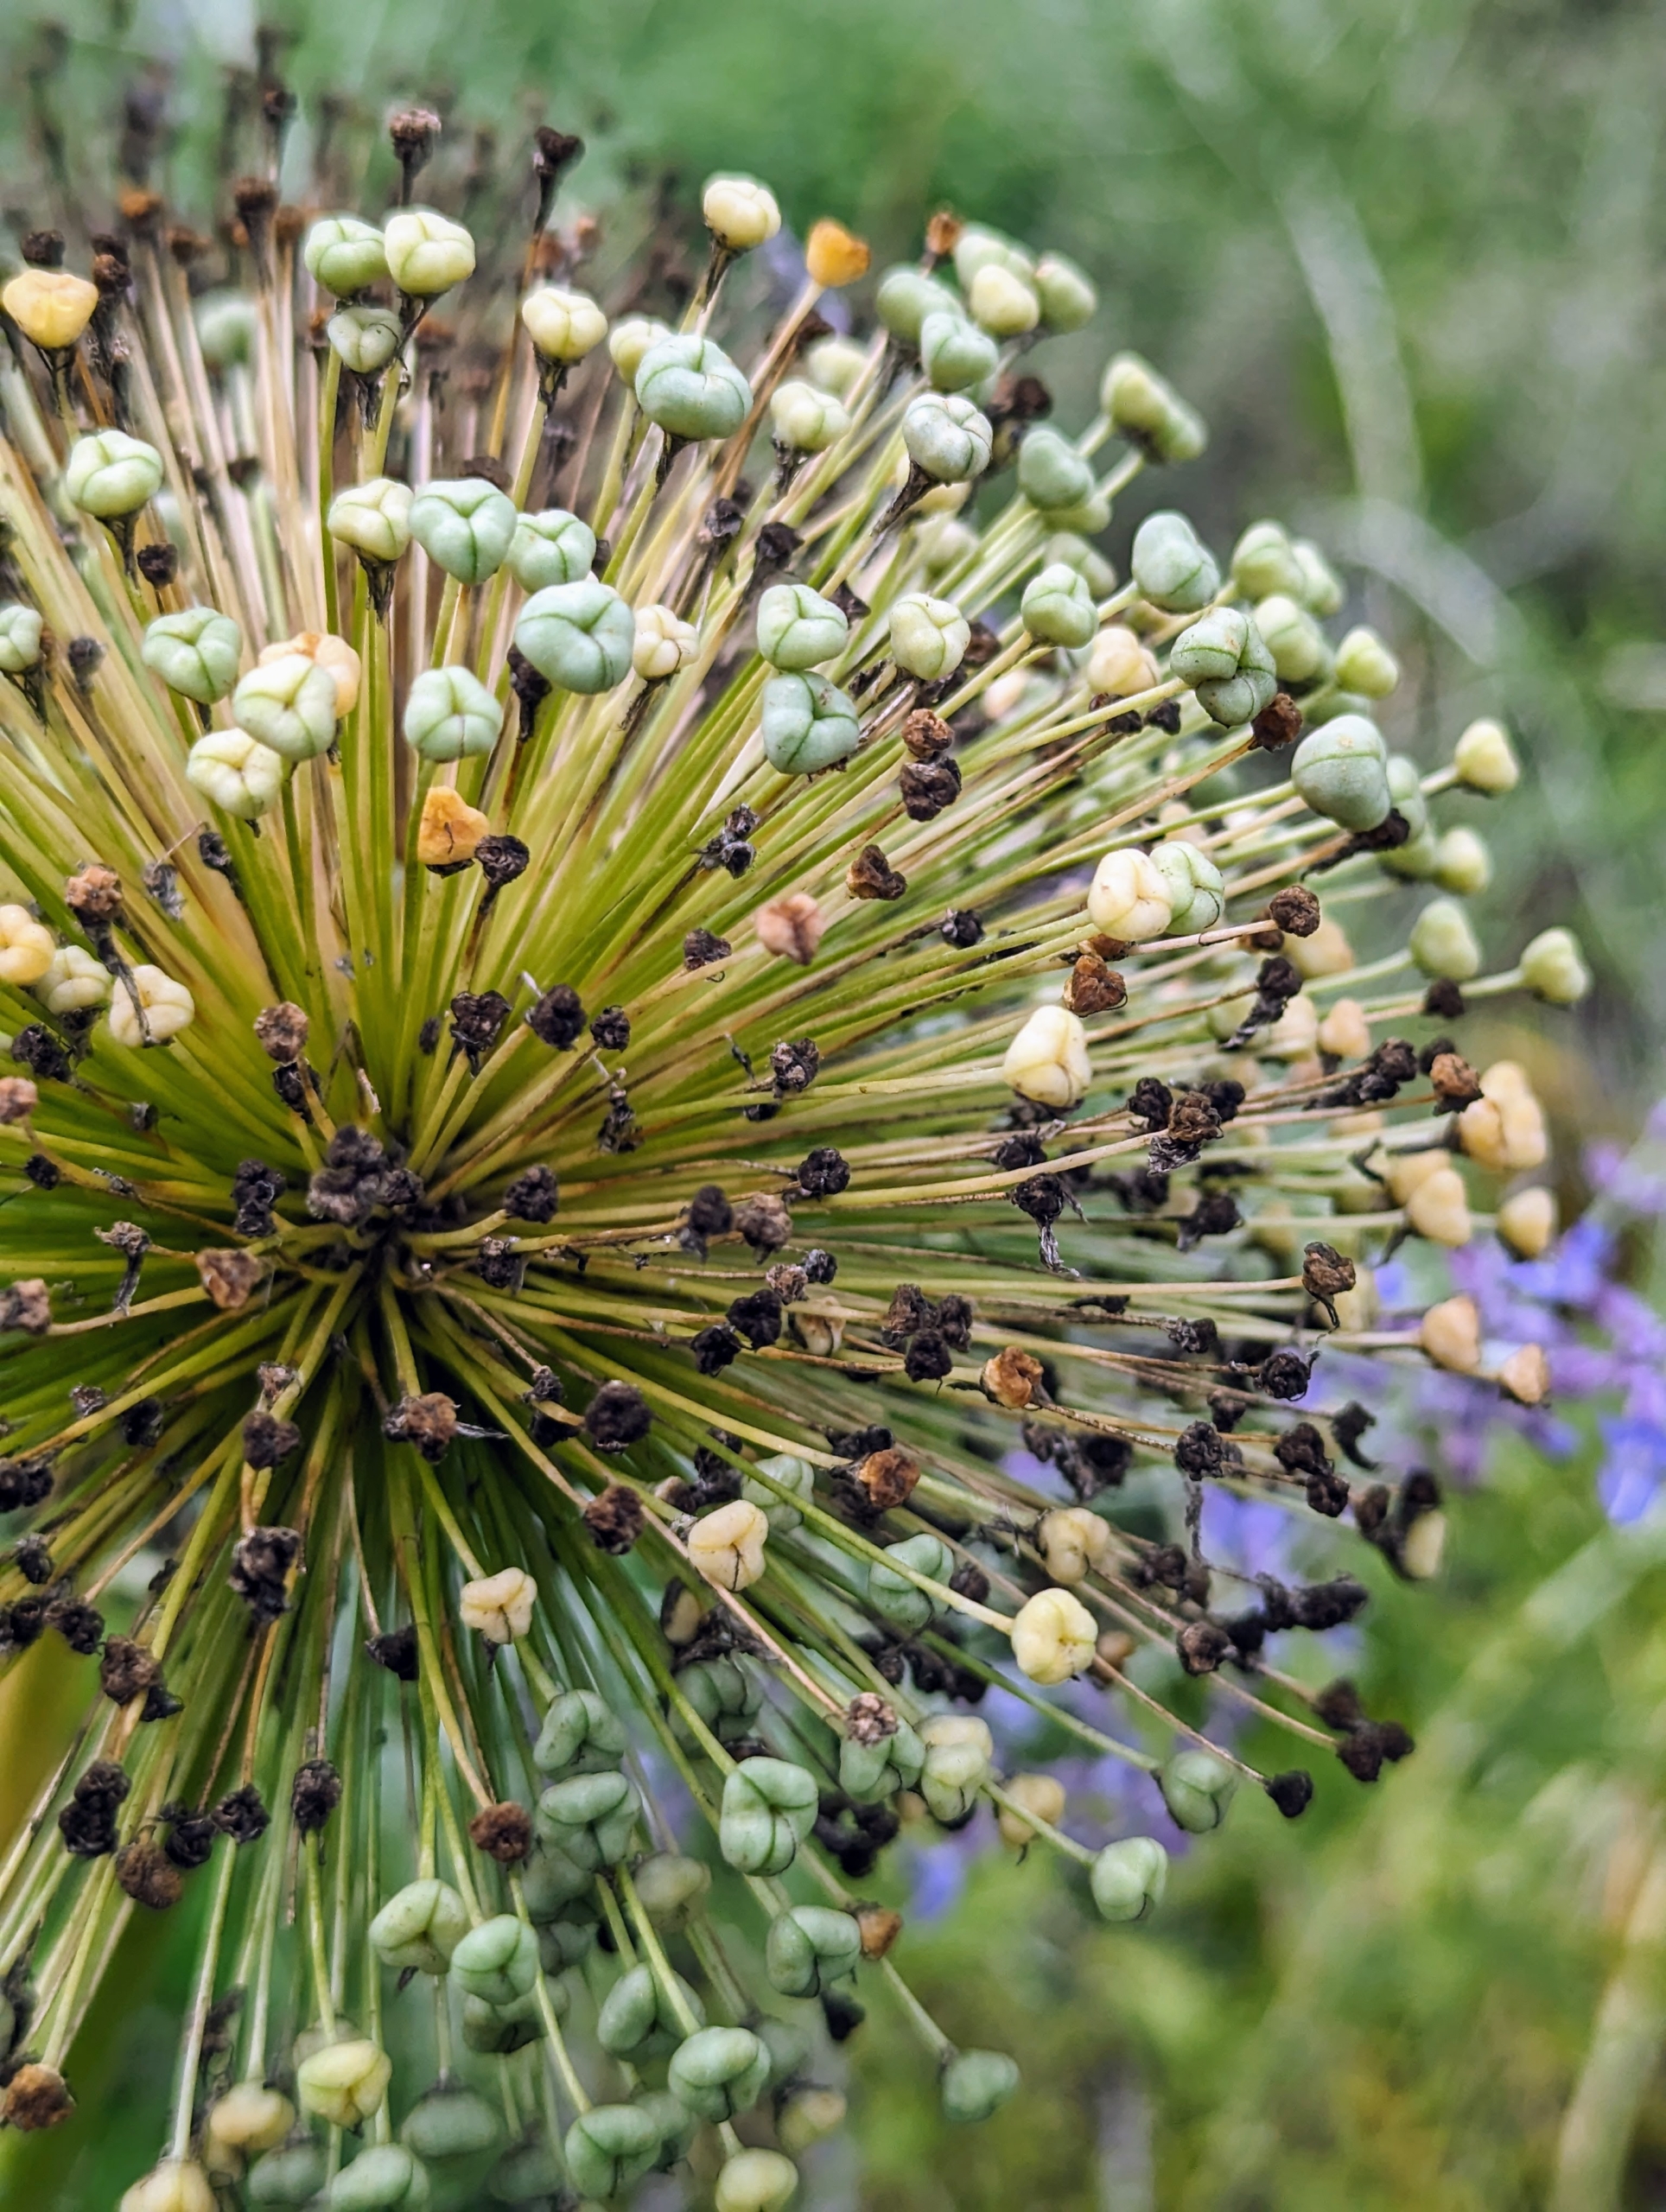
In various spots along the pergola garden are some of the dried alliums which I leave be as the garden transforms.
This pergola starts across from my perennial flower cutting garden and runs along one side of the carriage road leading to my Winter House. It’s one of the first gardens guests see when they come to visit.
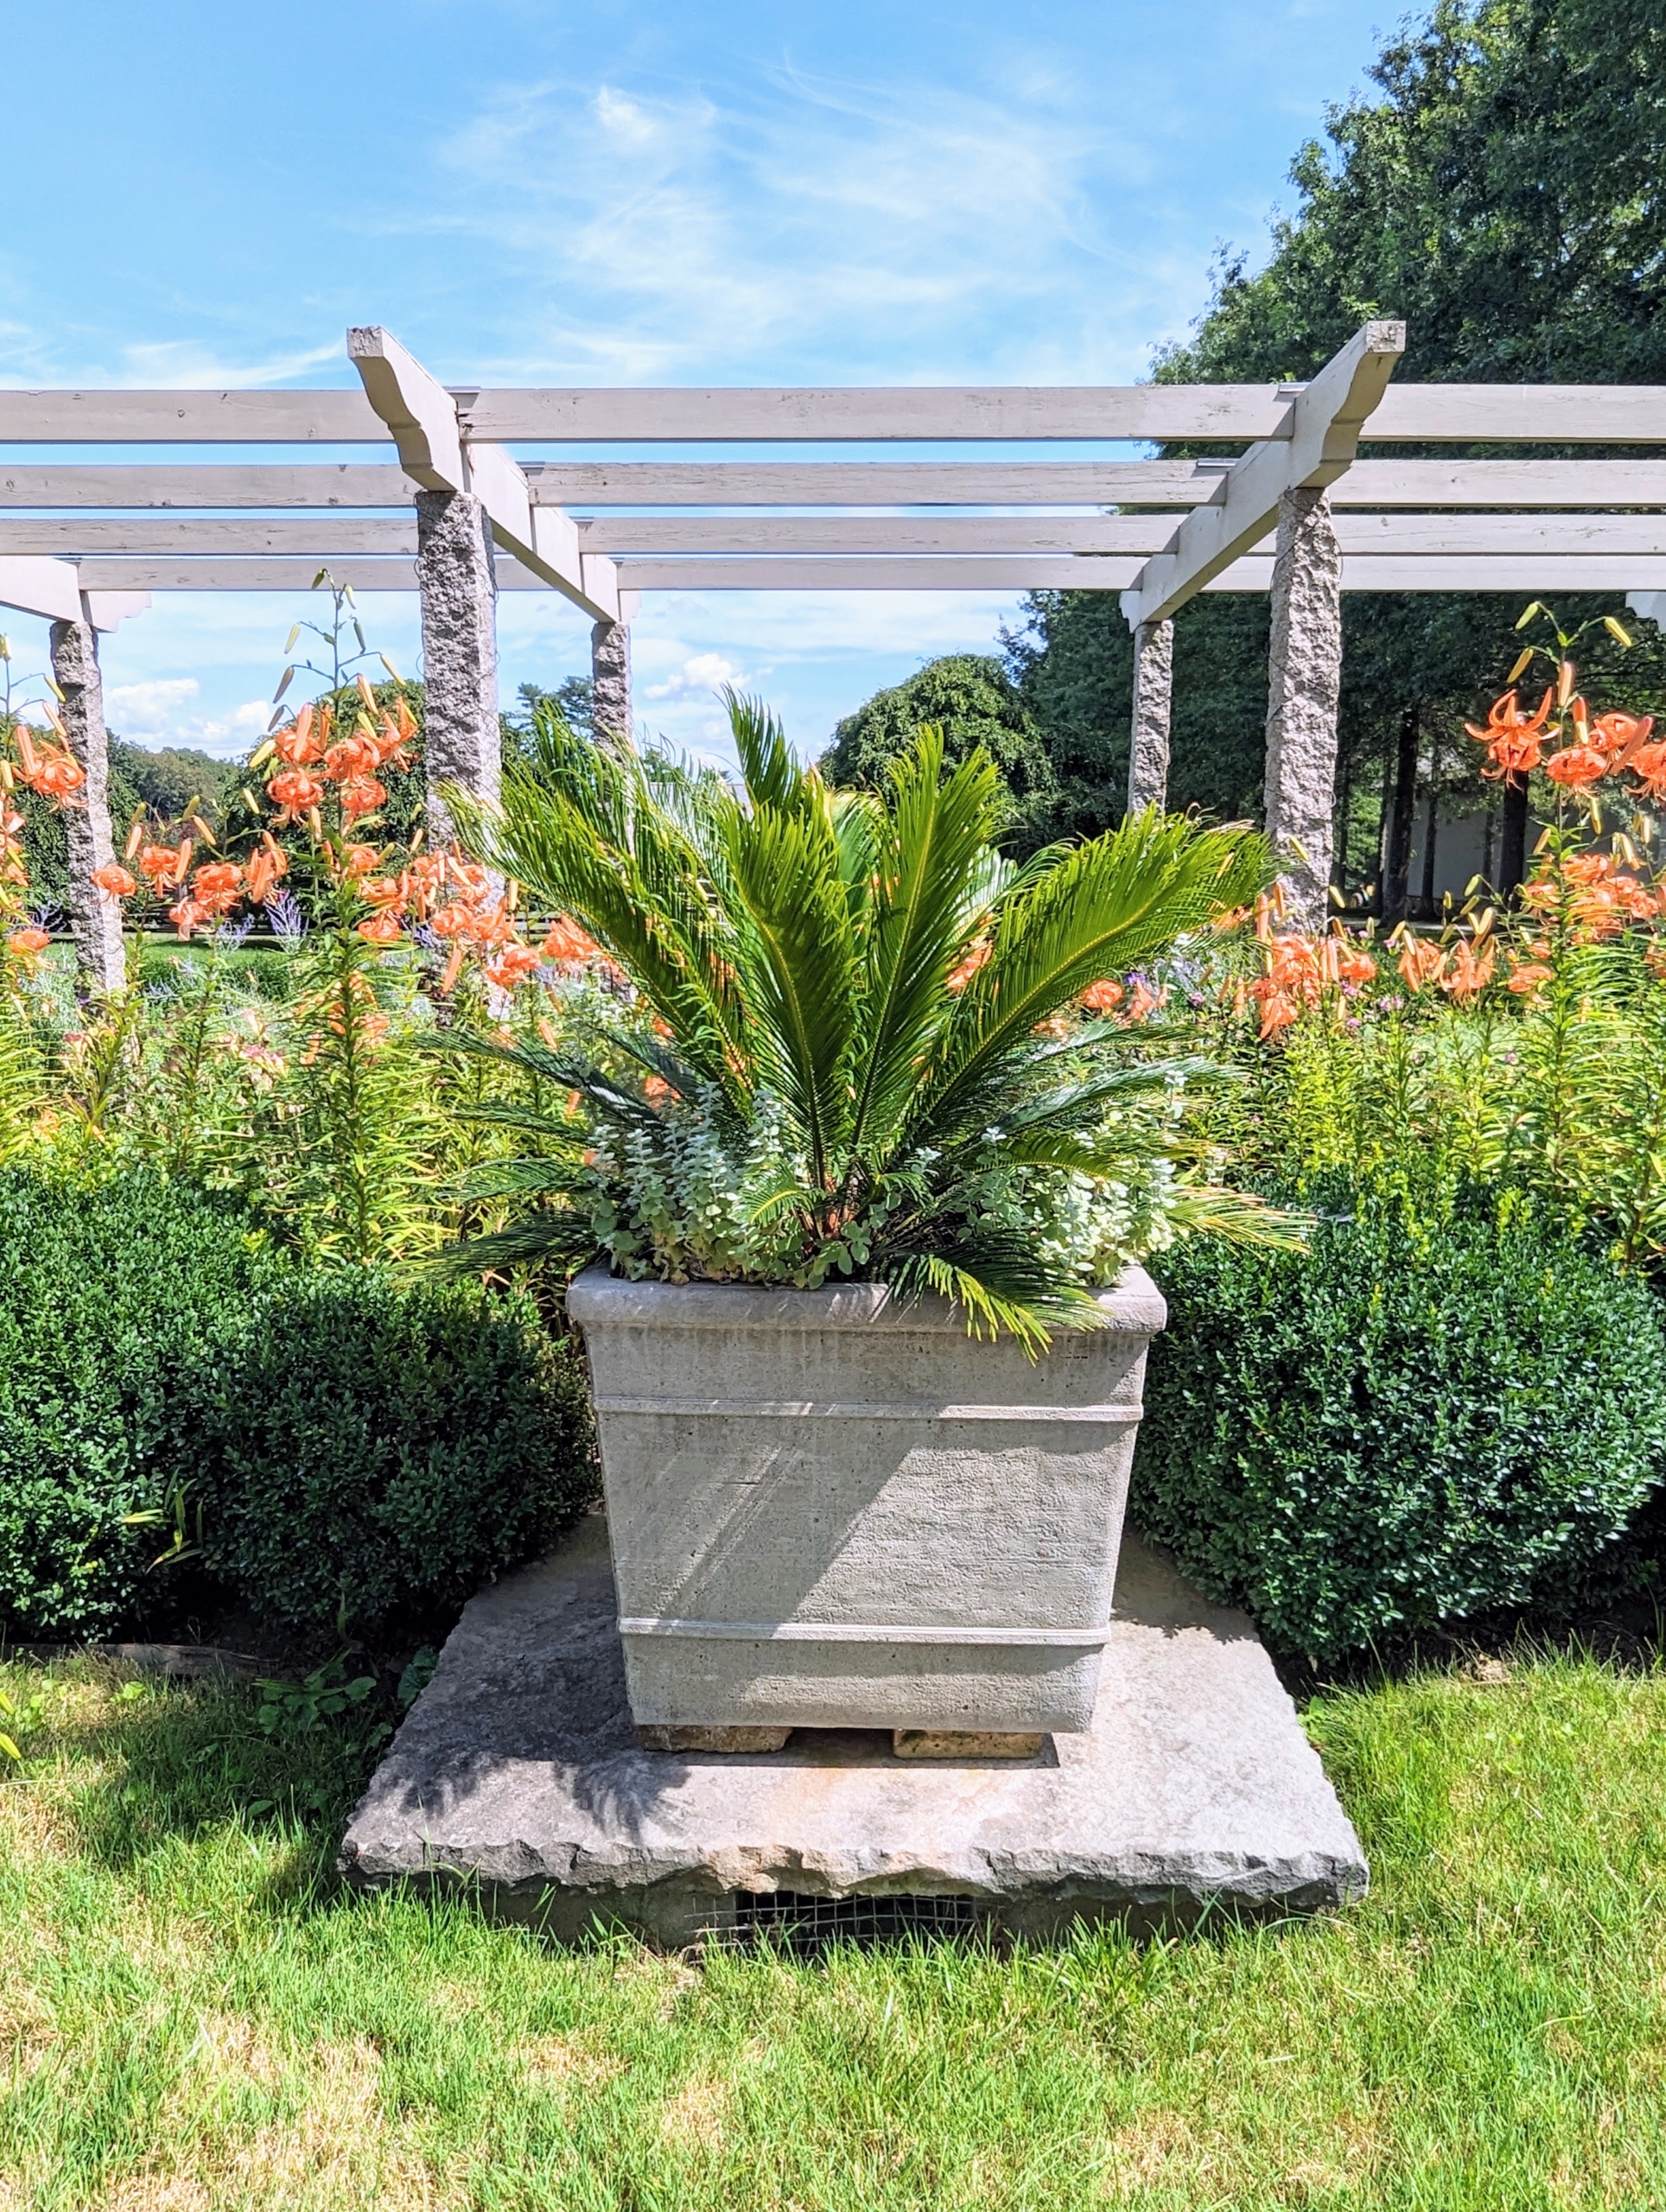
Beside the pergola, I also display some potted specimens such as this sago underplanted with Helichrysum petiolare, the licorice plant.
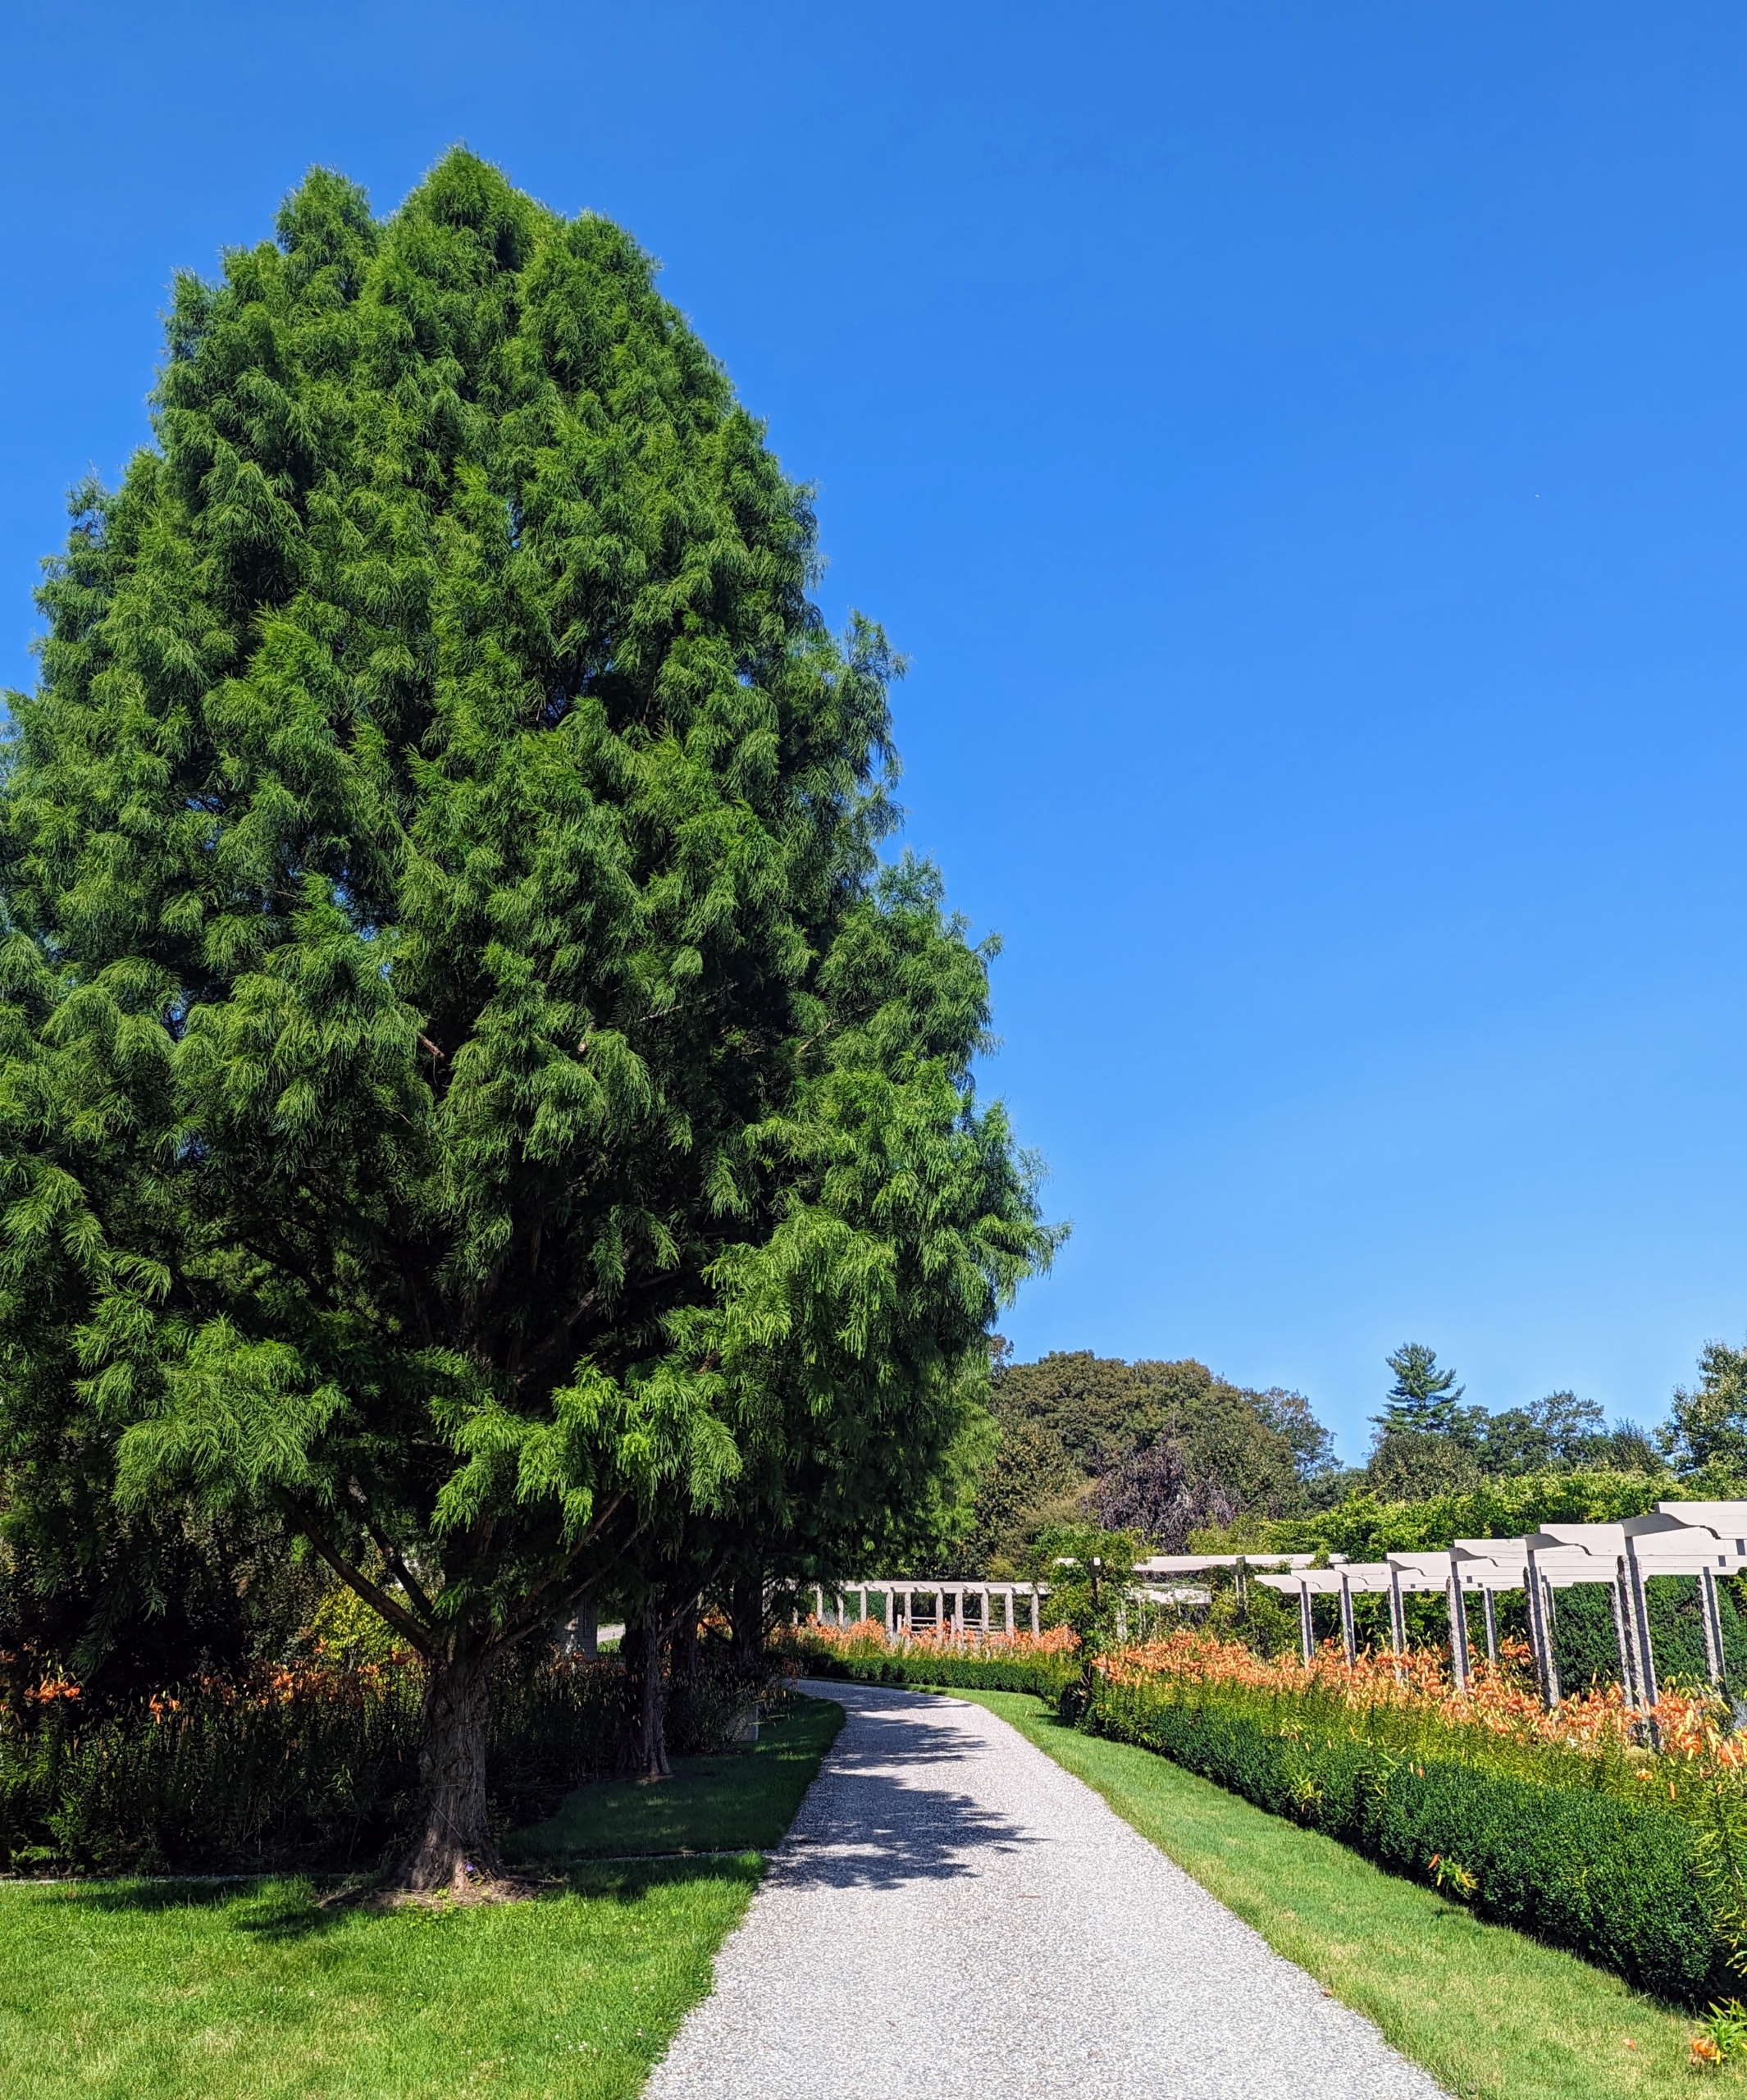
And across the carriage road, there are more orange tiger lilies blooming in my Stewartia Garden near the tall and stately bald cypress trees.
The entire pergola border and its surrounding gardens, trees, and other specimens provide a spectacular show every year. I am so proud of how it’s grown.
It takes a lot of close monitoring to stay on top of our watering tasks this time of year. We've had sporadic showers and thunderstorms, but sometimes they're just not enough to keep all the gardens well irrigated.
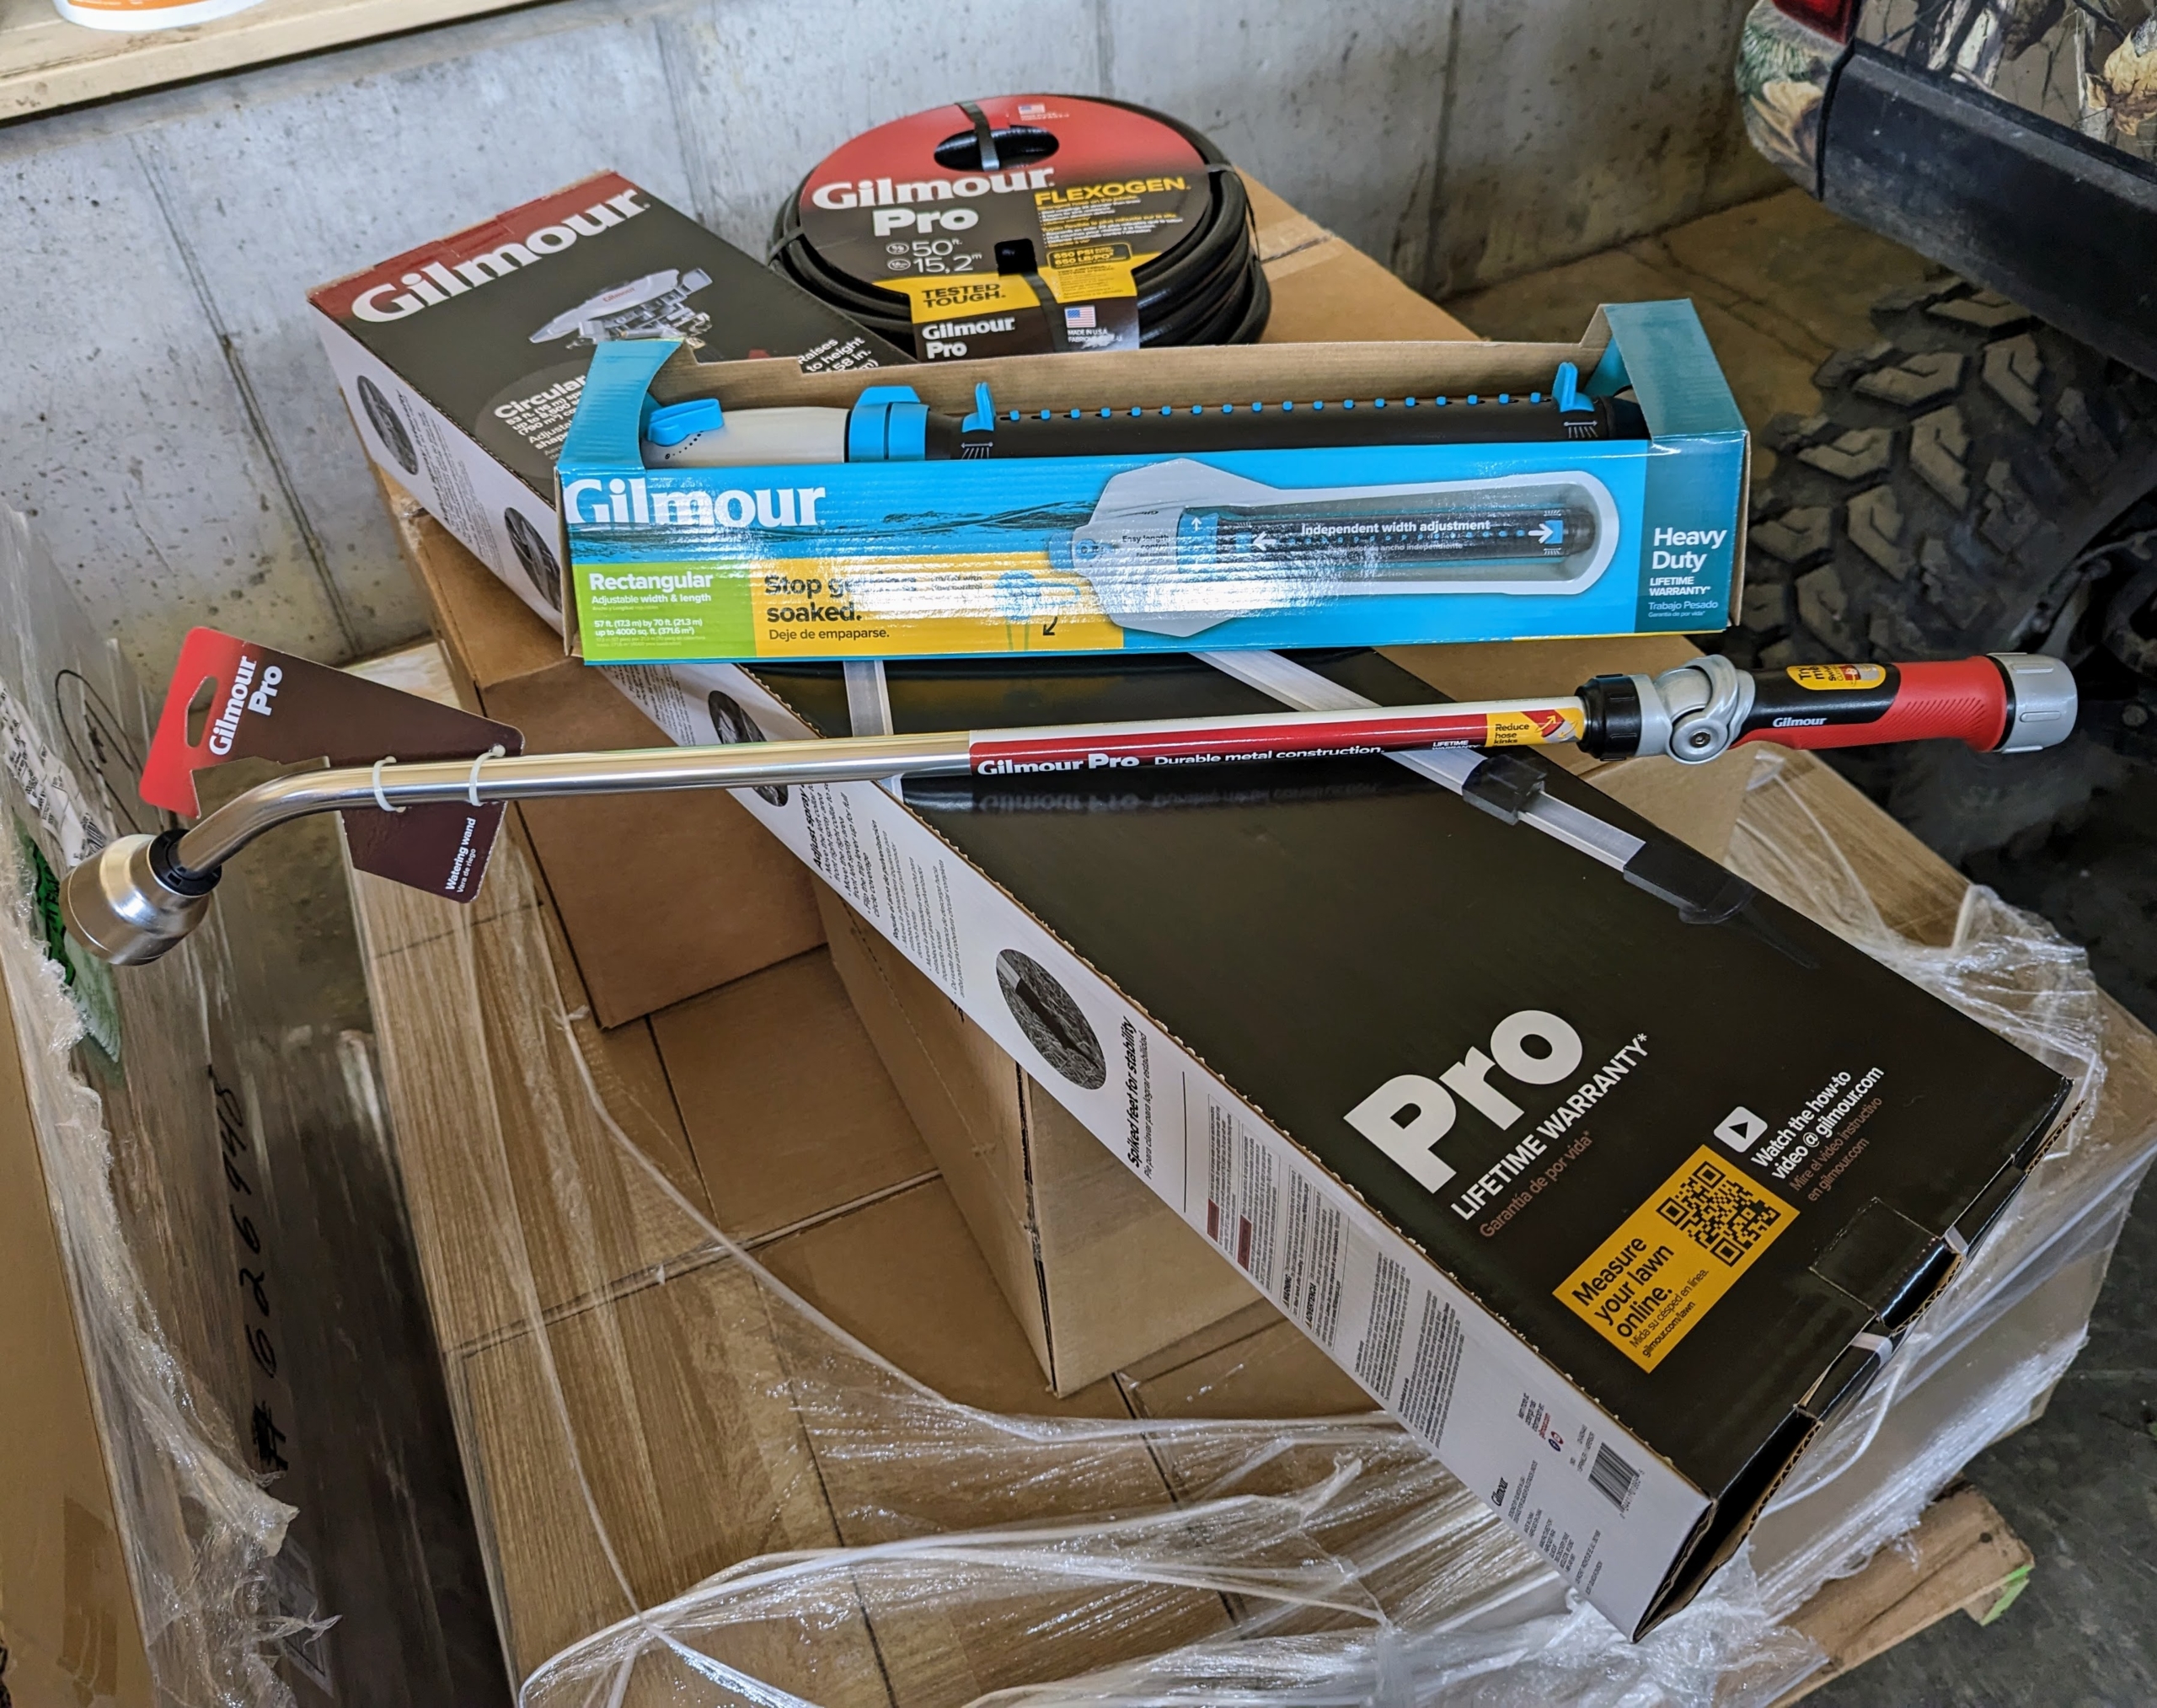
Because of this typical mid to late summer weather, our hoses and sprinklers are always very busy in July and August. One of my favorite sources for watering equipment is Gilmour, a Madison, Wisconsin-based company that’s been manufacturing hoses and other watering solutions since 1949. I use several of their products at my Bedford, New York farm and at Skylands, my home in Maine - they're durable, long-lasting, and easy to use. With so many trees, shrubs, and plants to maintain, it’s important we use only the best quality outdoor tools.
Enjoy these photos.
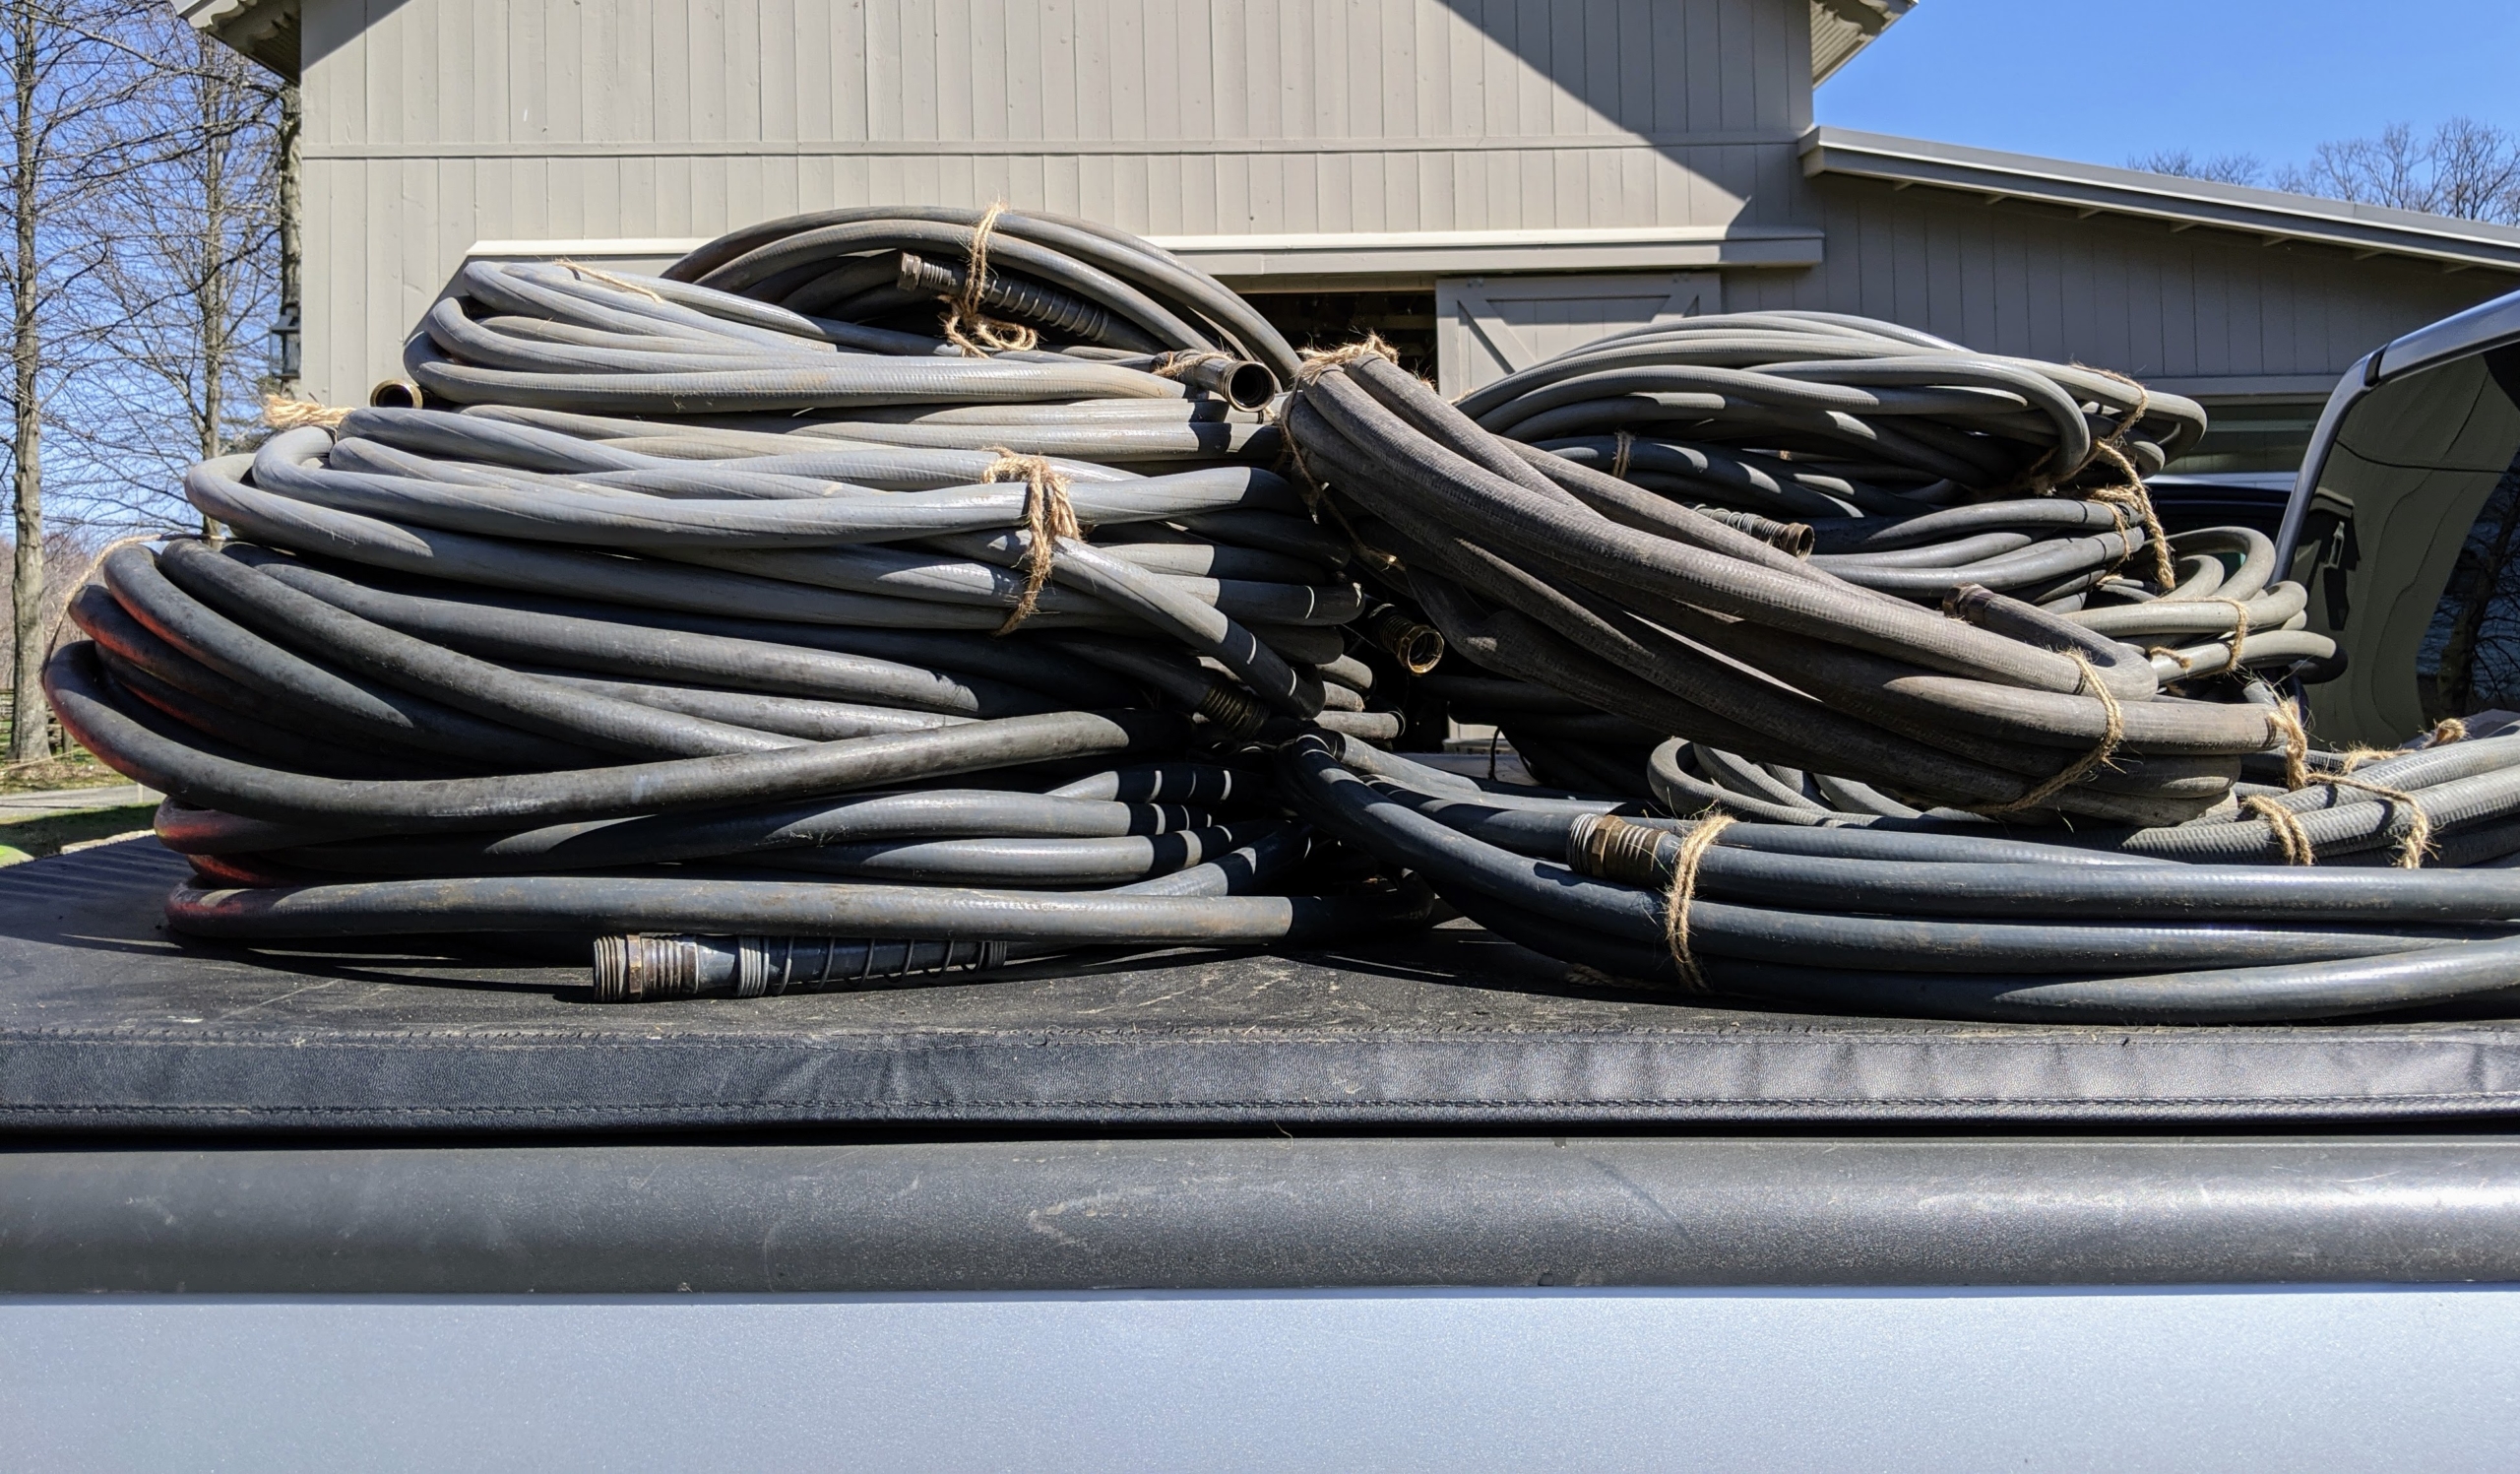
Every spring, when it starts to warm up, my outdoor grounds crew puts out all the sprinklers and hoses around the farm, so they’re ready to use. During the driest, warmest days of summer, we have to do lots of watering. Fortunately, I have deep wells and an elaborate underground irrigation system.
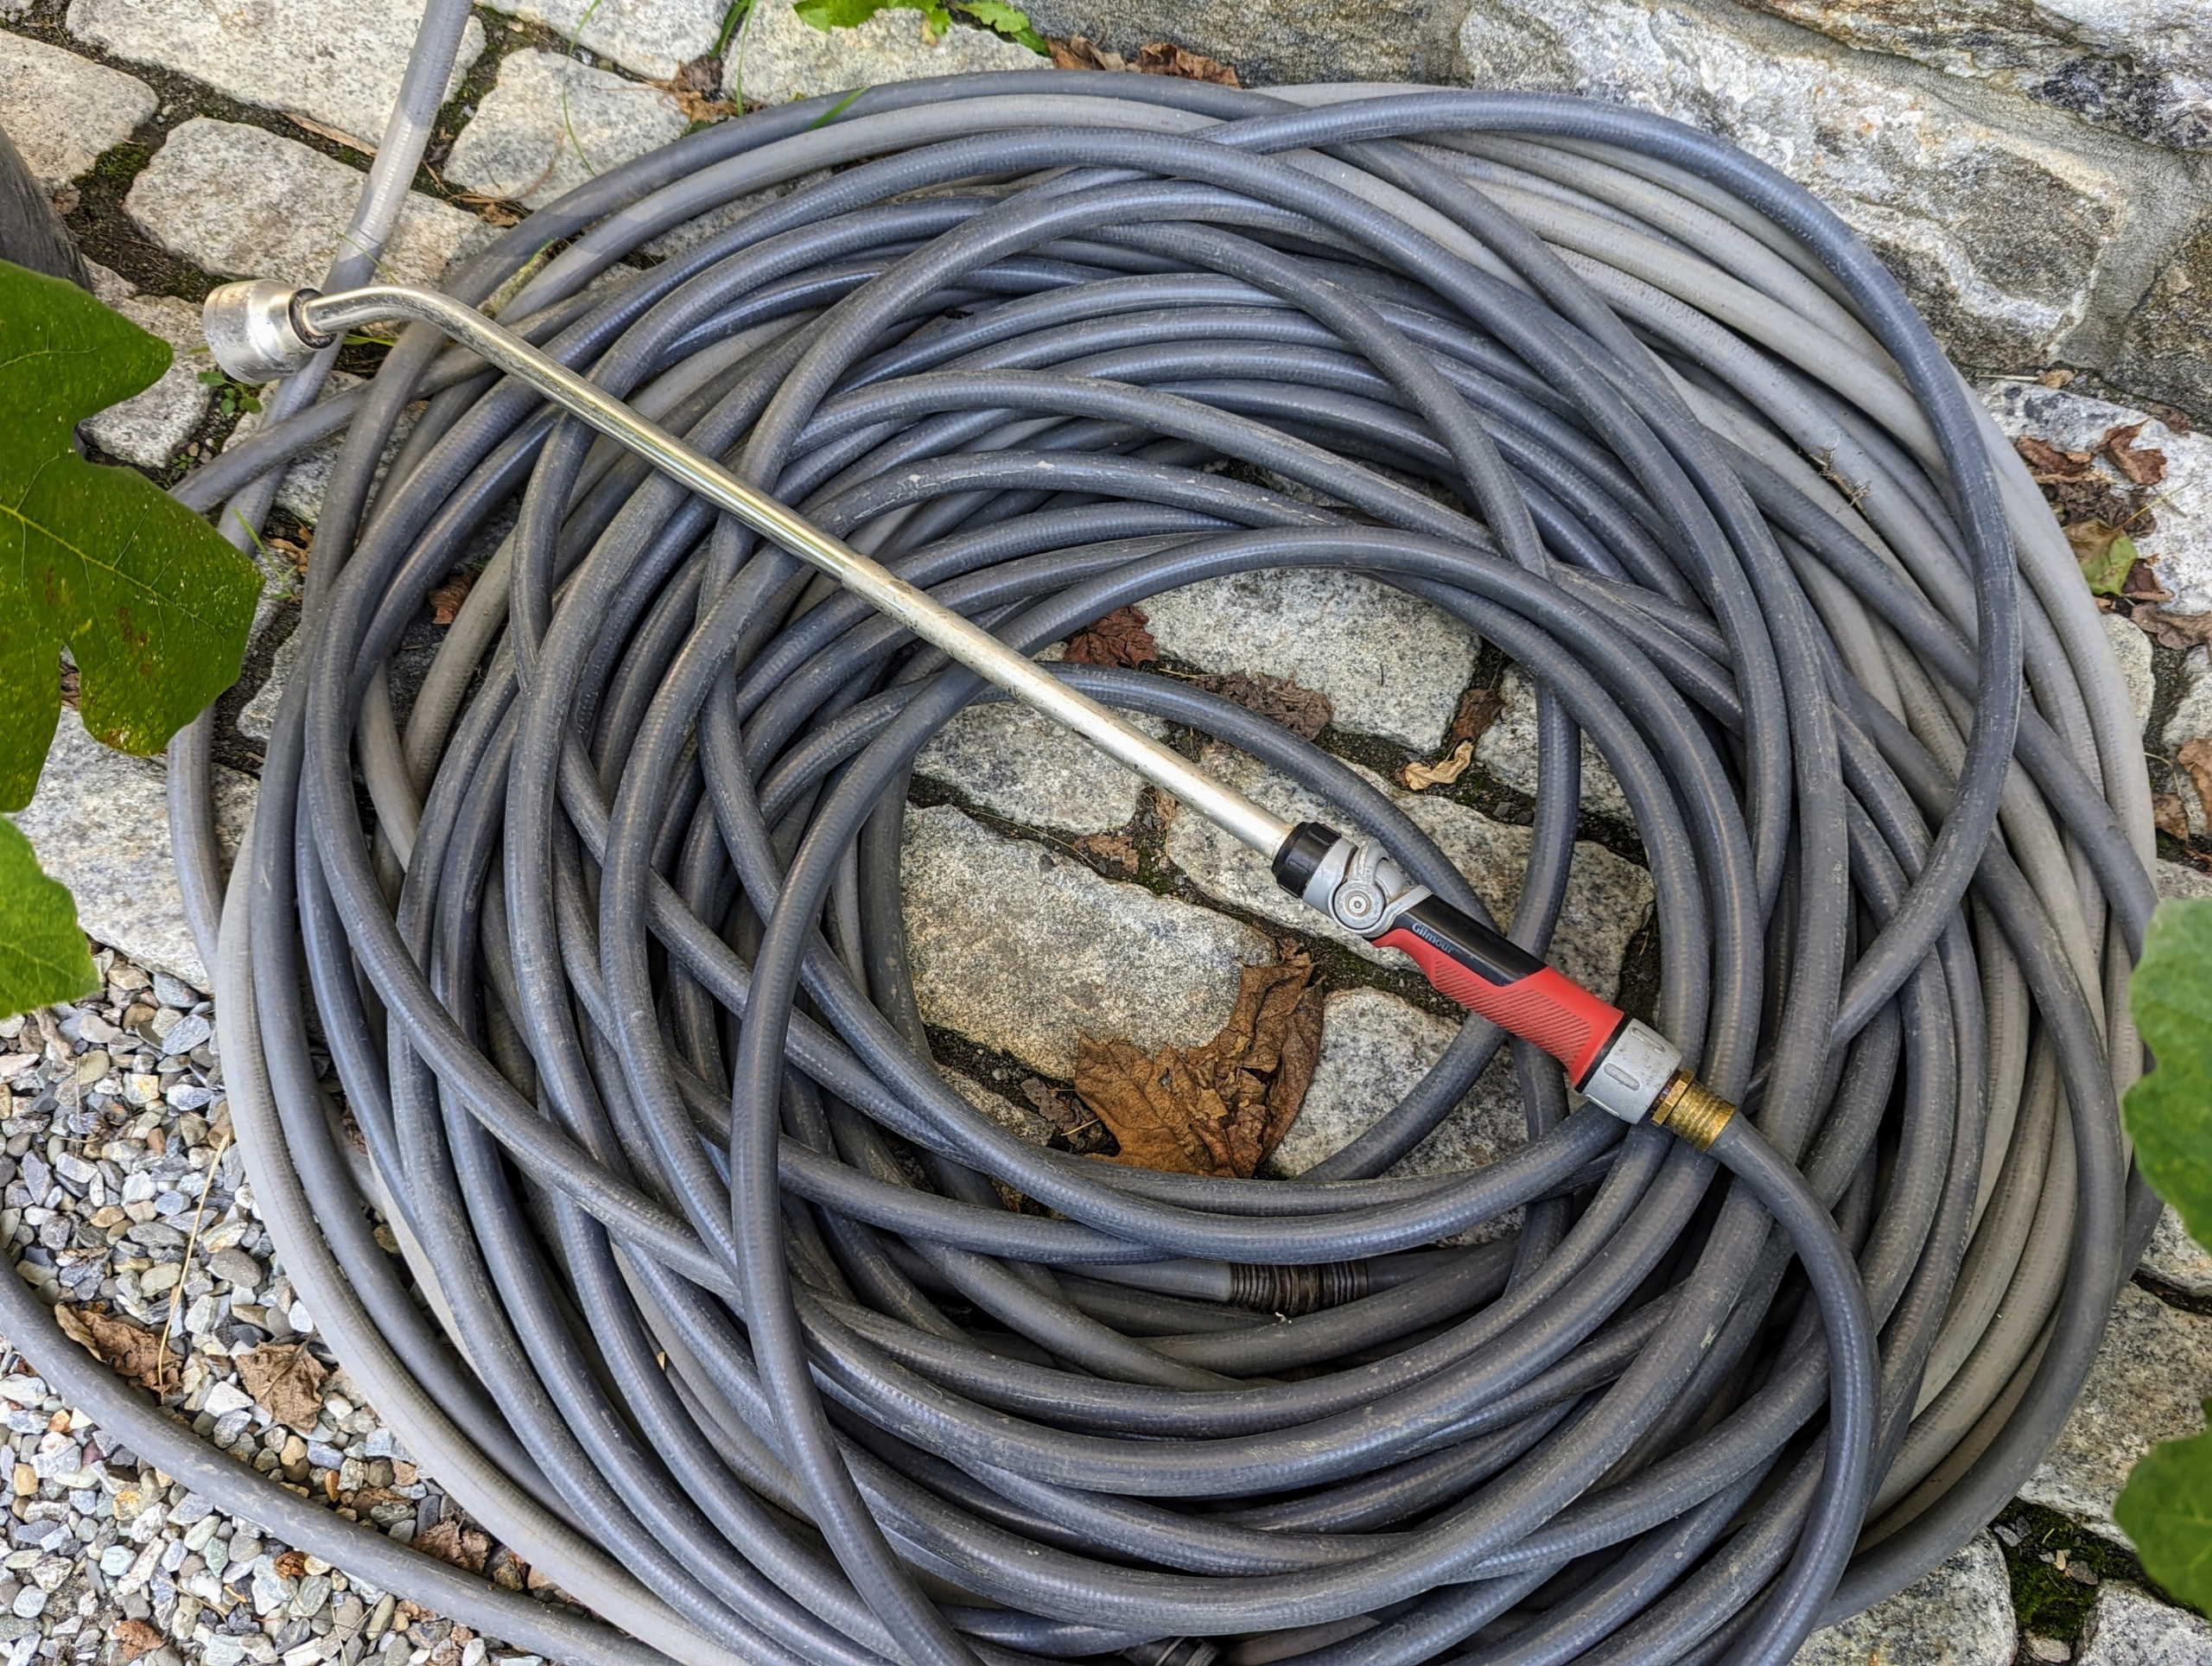
Gilmour has a very dependable collection of gardening supplies – I have been using Gilmour products for years. The hoses are always put to great use in the gardens and wherever thorough watering is needed. Plus, they curve without kinking, connect without leaking, and are easy to store. I also love Gilmour’s Professional Adjustable Circular Tripod Sprinklers, Rectangular Sprinklers, and their Professional Watering Wands with Swivel Connect.
A Gilmour hose and at least one sprinkler are placed at every bibb or faucet. And here’s a tip… to keep it from kinking, when it’s new stretch it along a path or the edge of the lawn and then loop the business end back to the tap.
This hose and sprinkler is near my Winter House, where it can be accessed easily for watering the terrace parterres.
Here, a hose is paired with a wand for watering the container plants around my home.
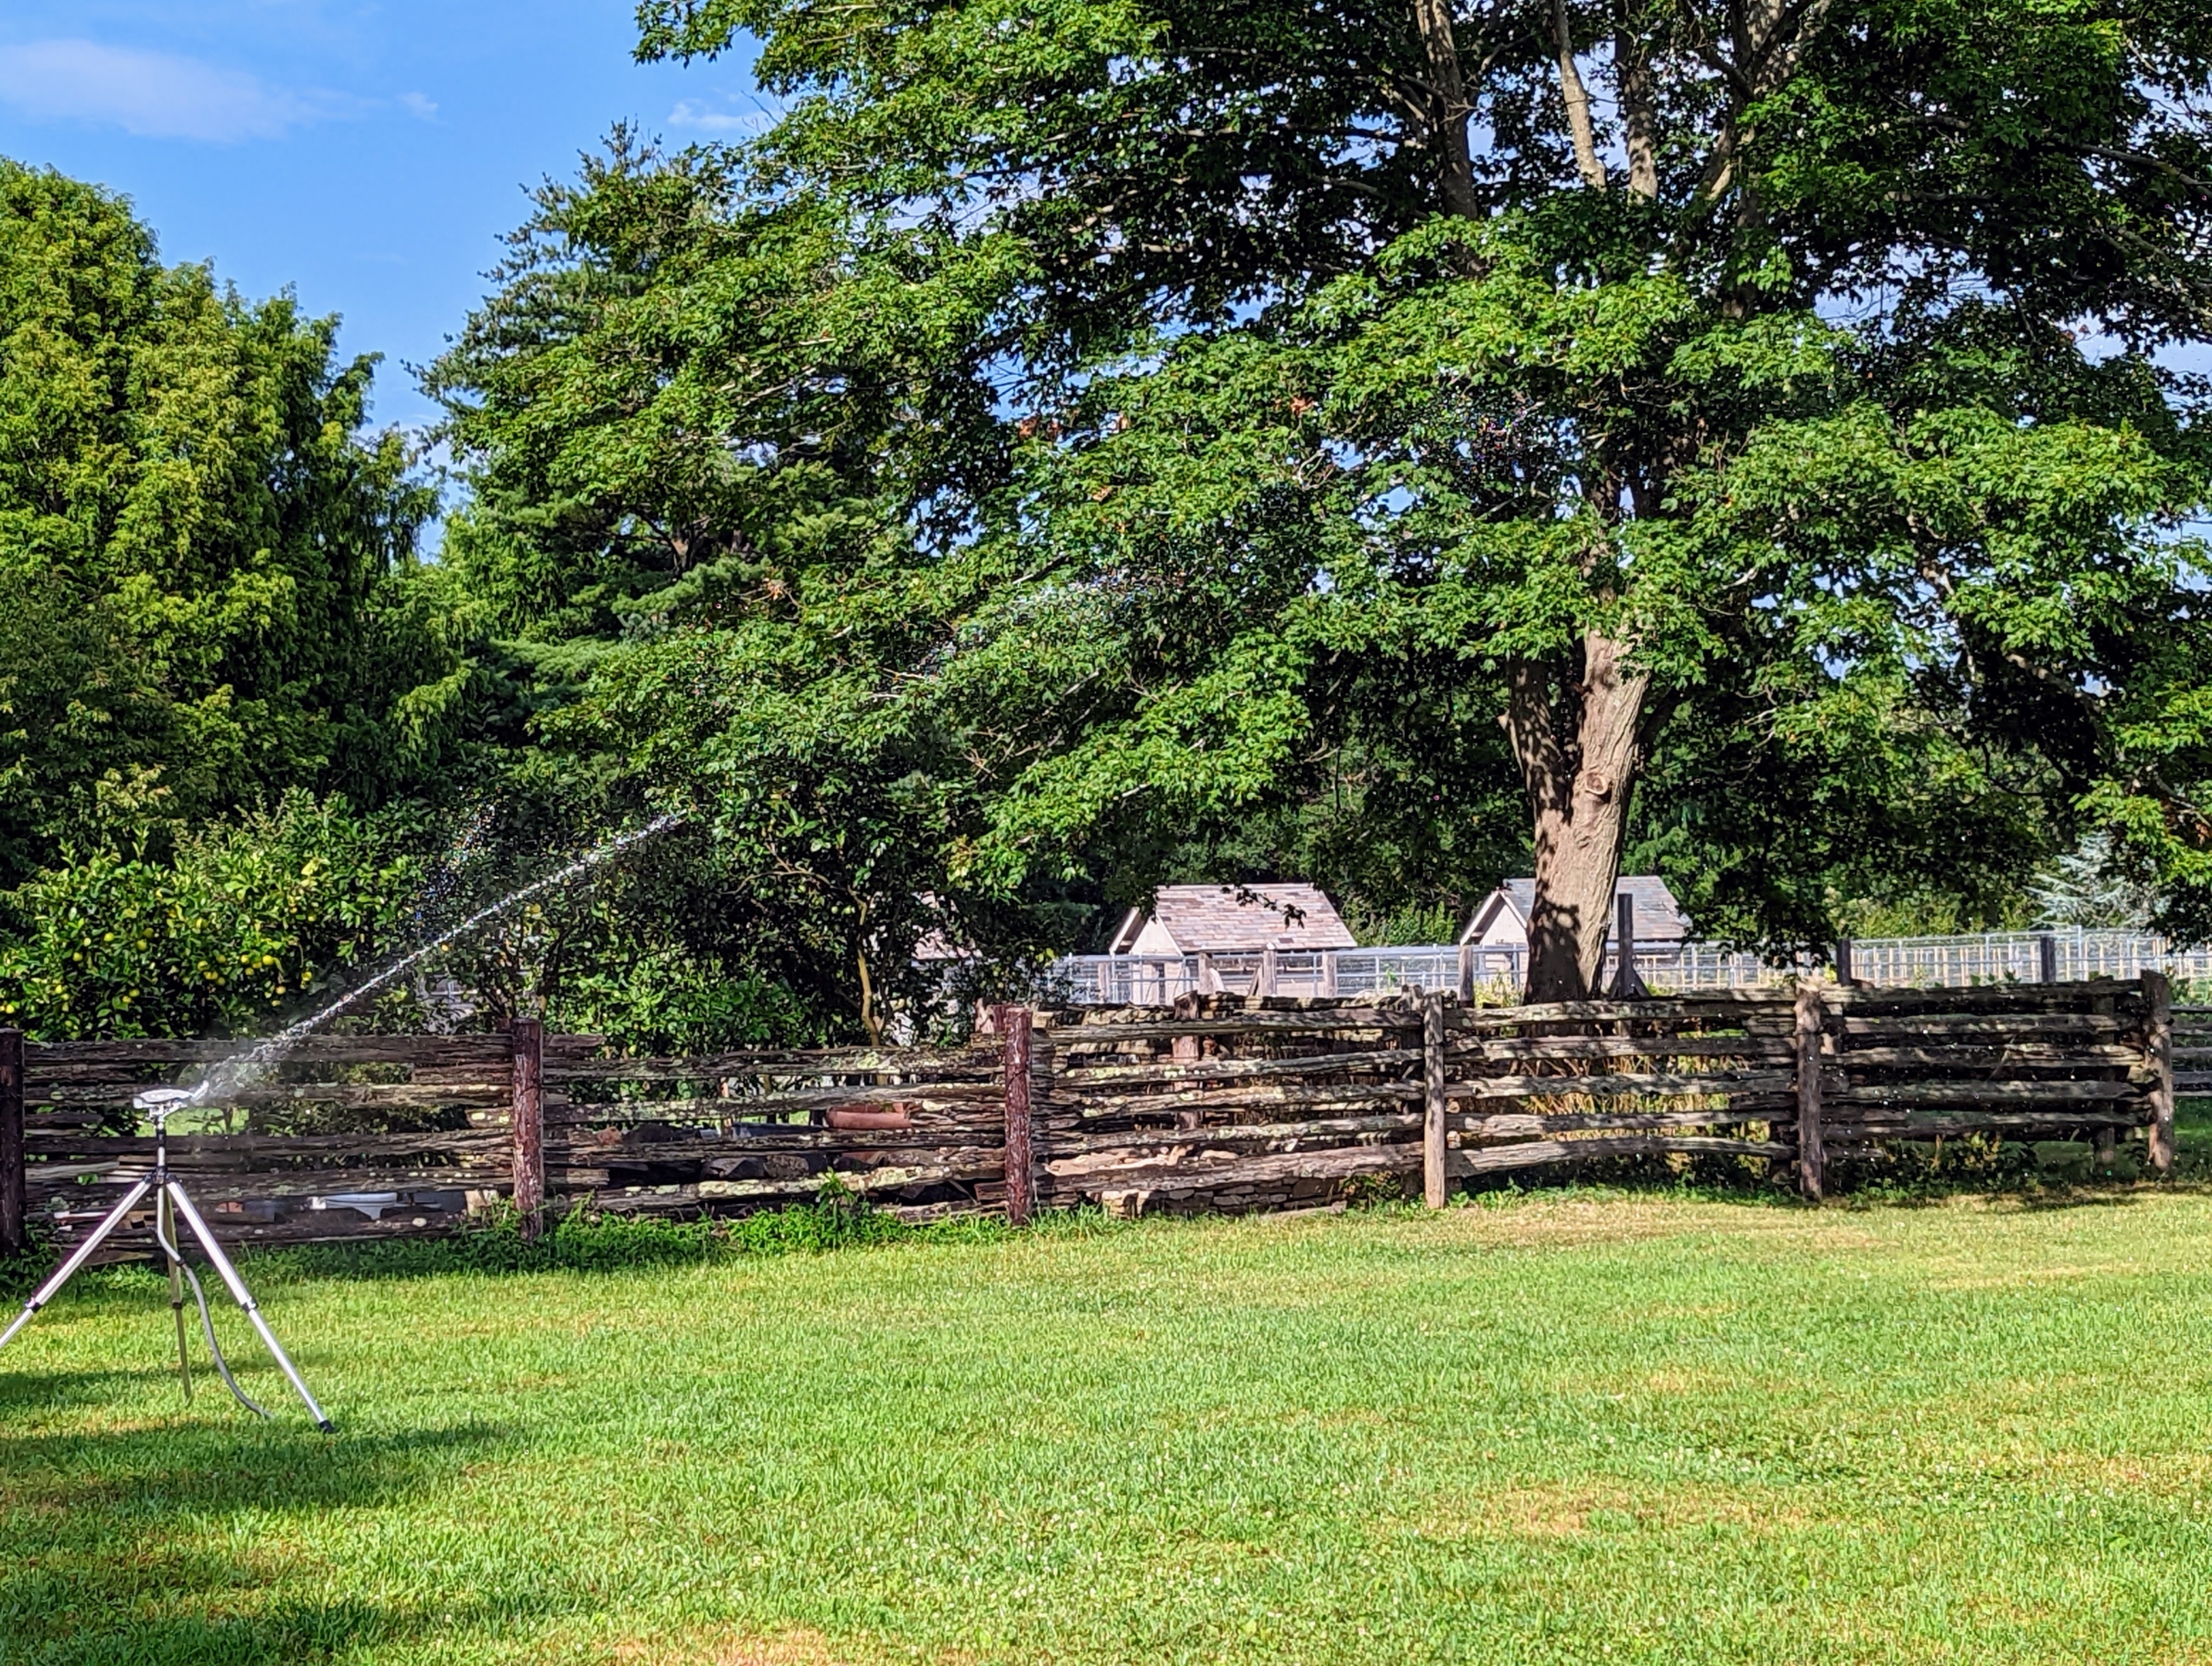
Here’s a tripod sprinkler in my orchard. The adjustable tripod can reach a height of 58-inches and can water everything from above. Once the watering in one area is done, it’s extremely important to turn off the water at the source. Just turning off at the sprinkler puts a lot of pressure on the hoses and pipes.
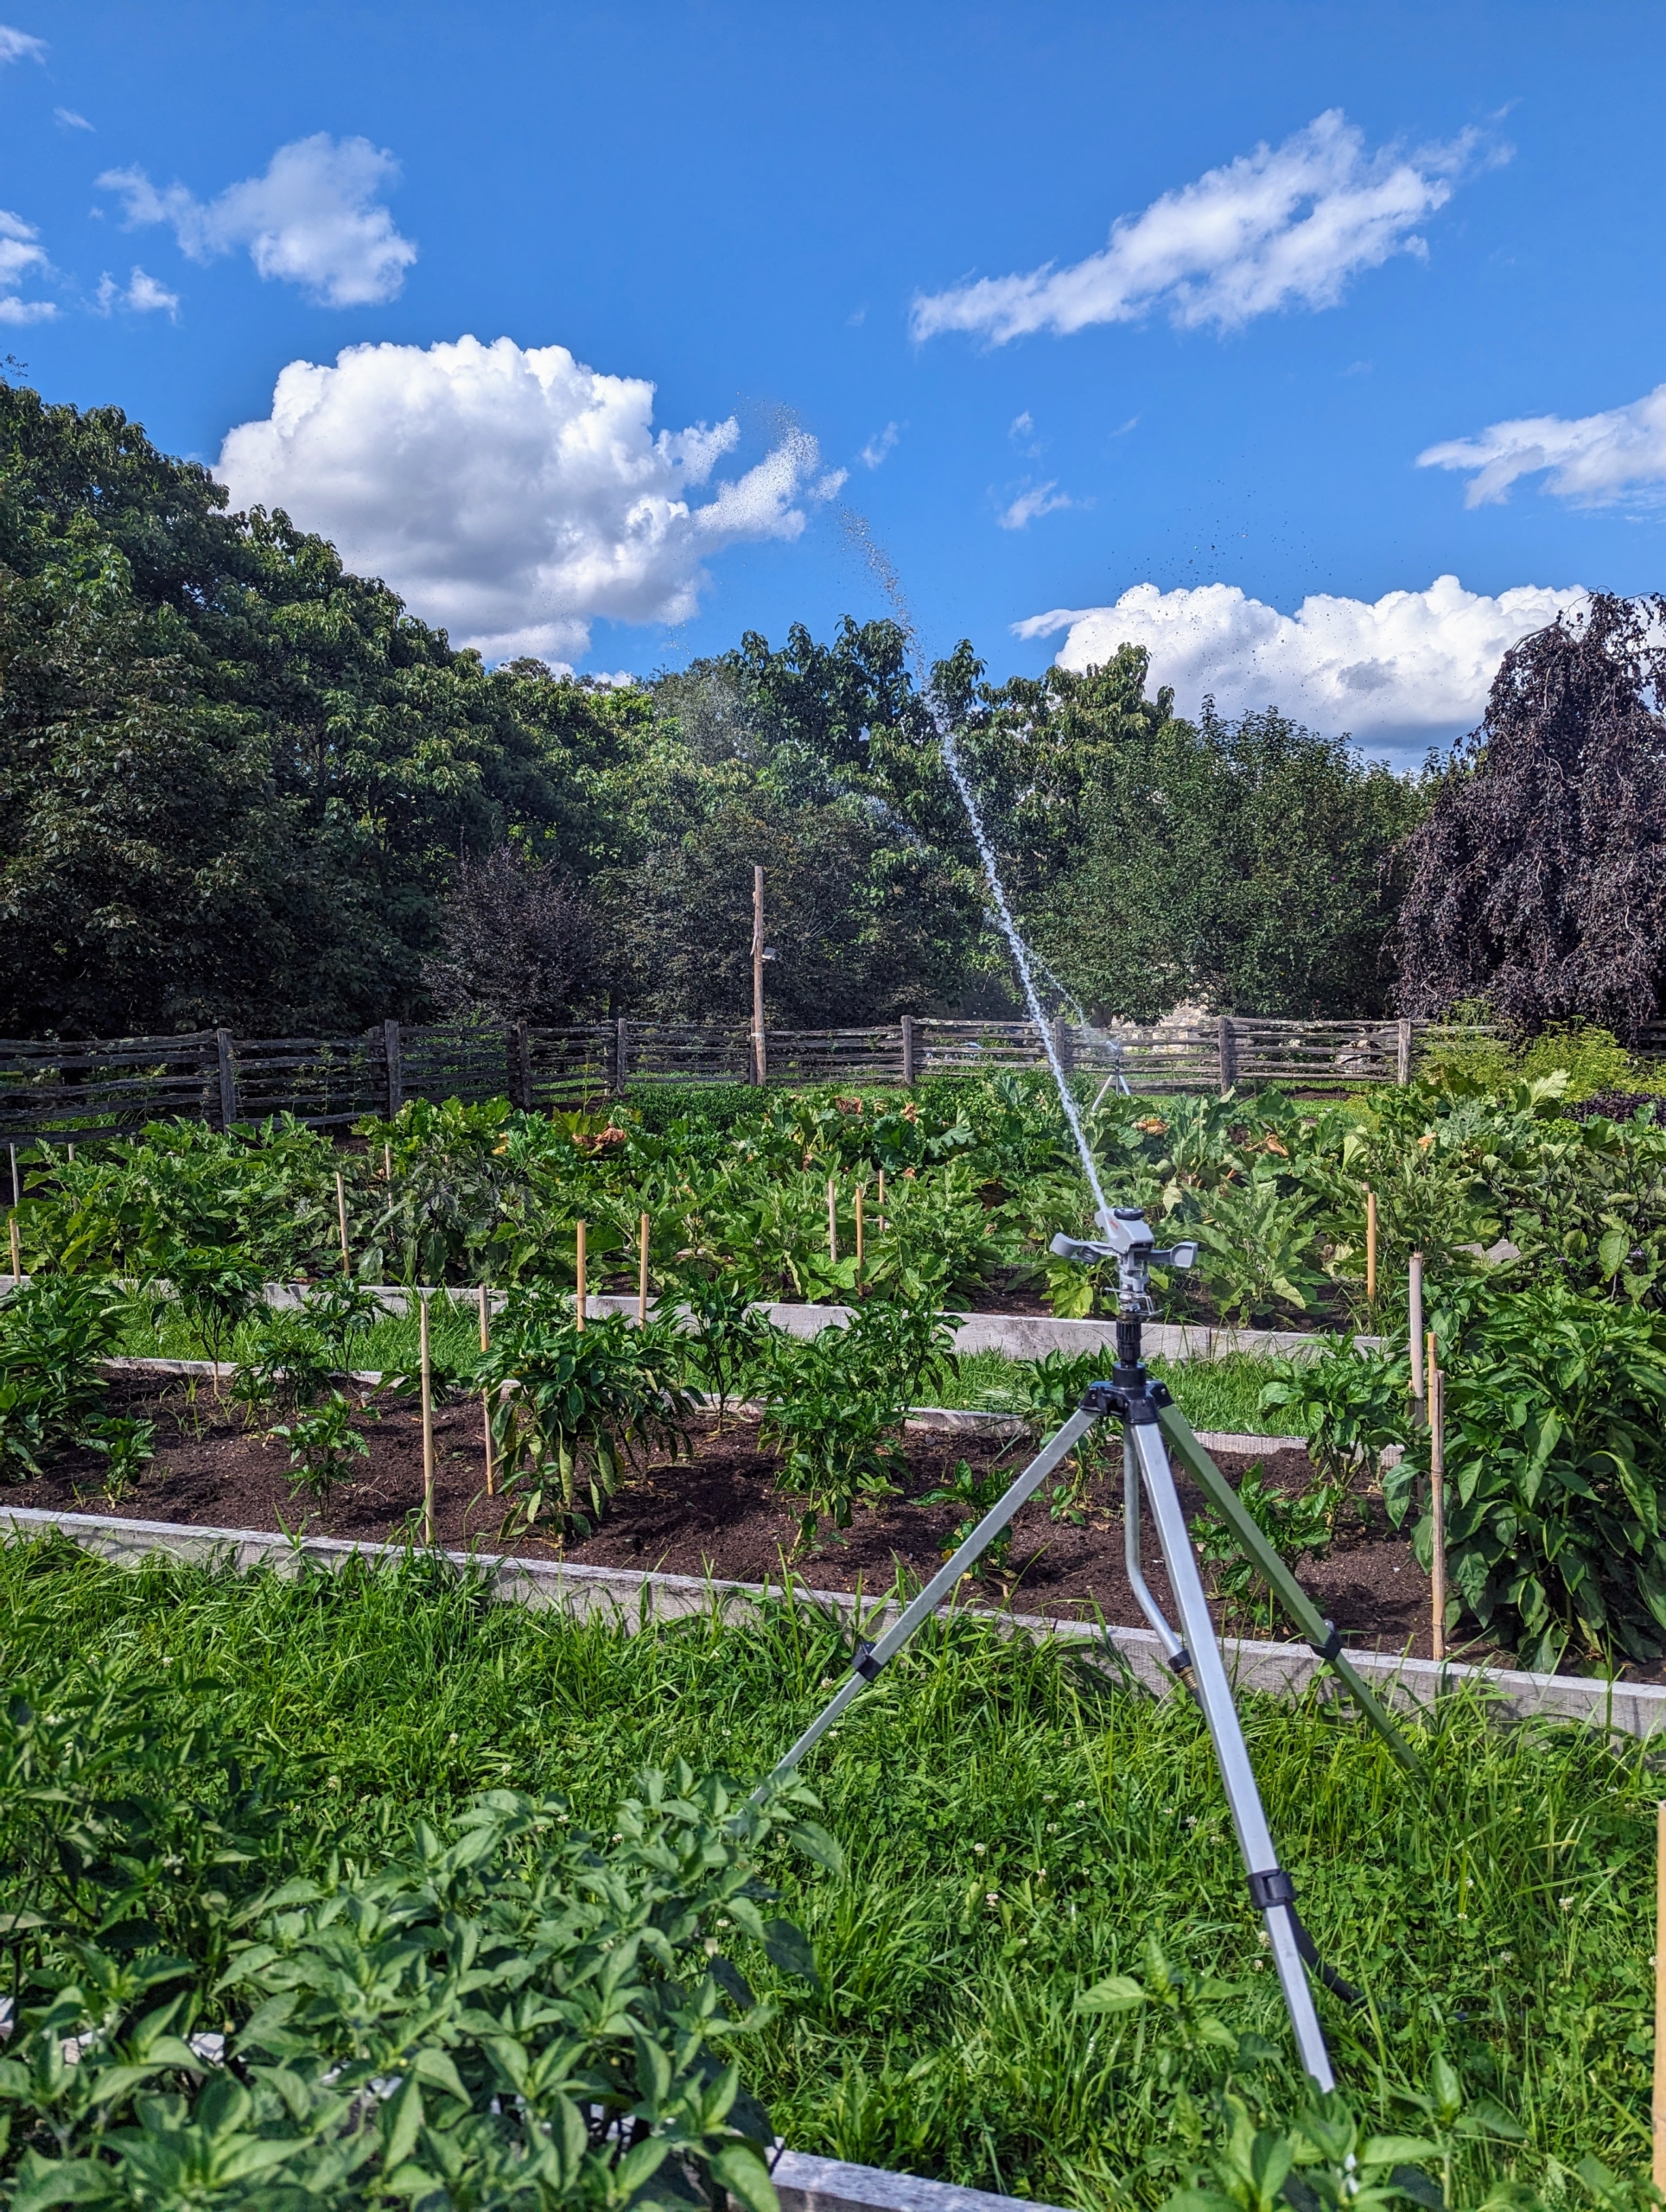
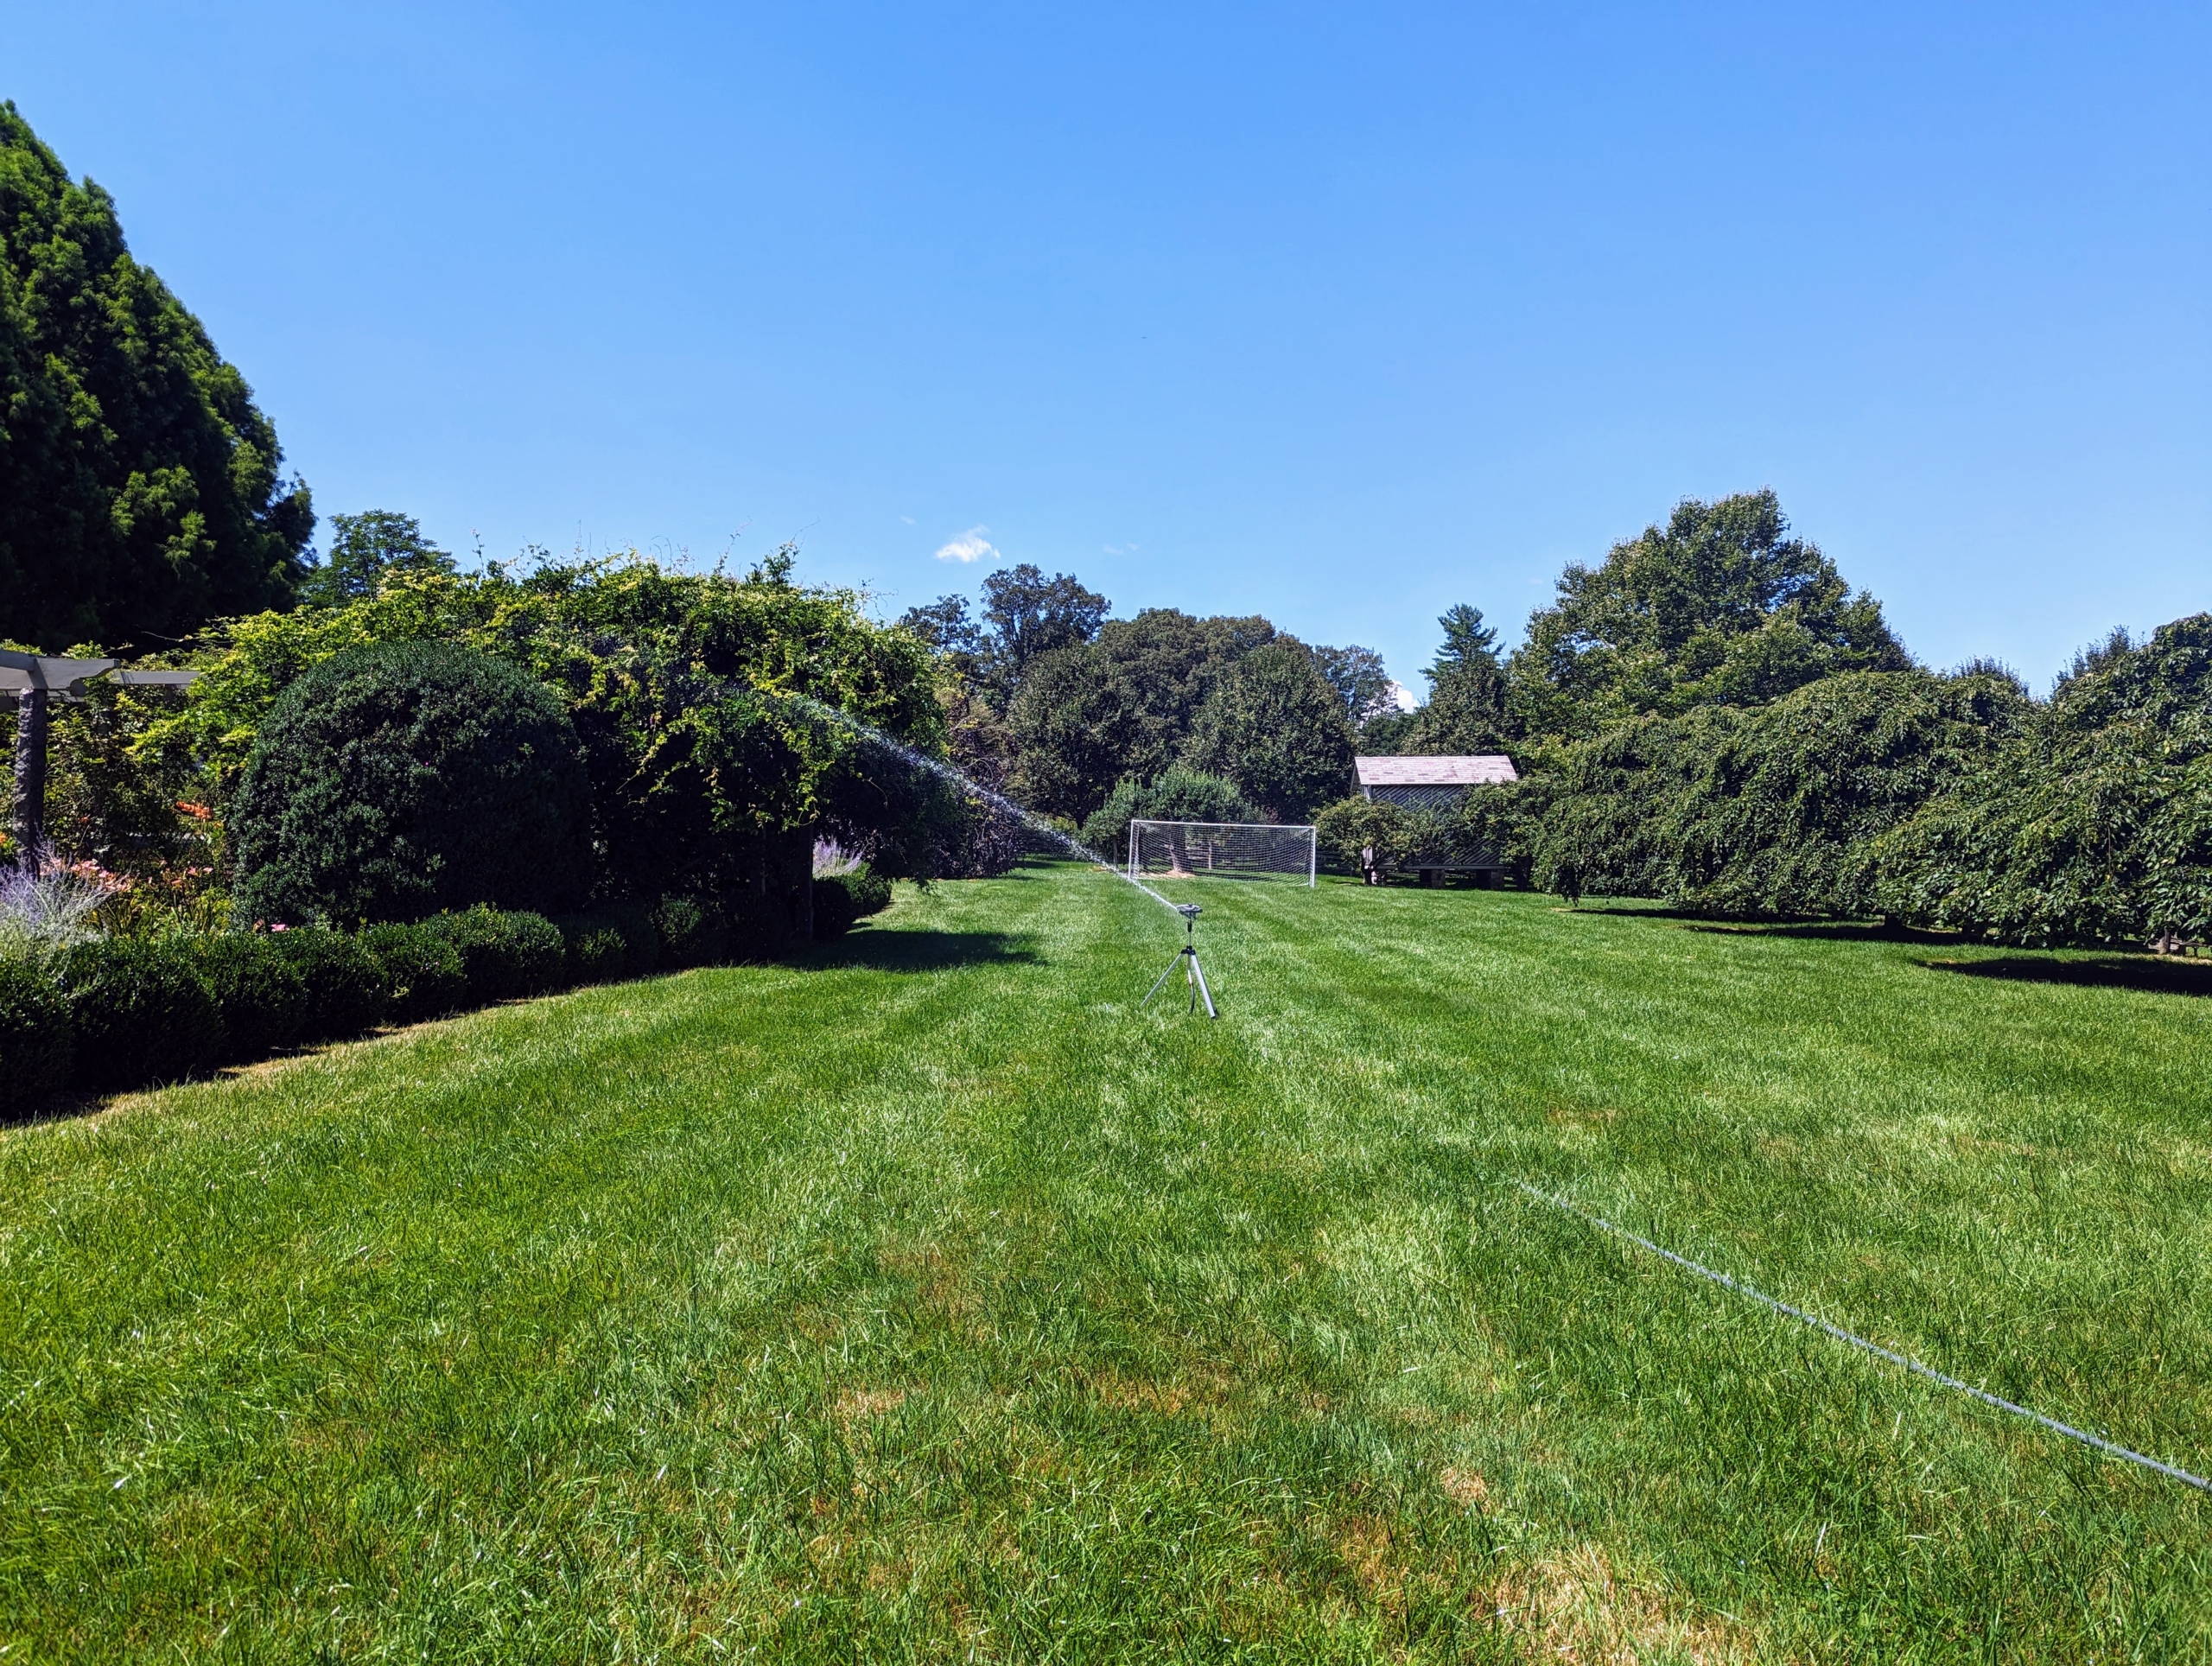
Here’s a tripod in my new vegetable garden. Look how far the sprinkler can reach – and the spray is very consistent.
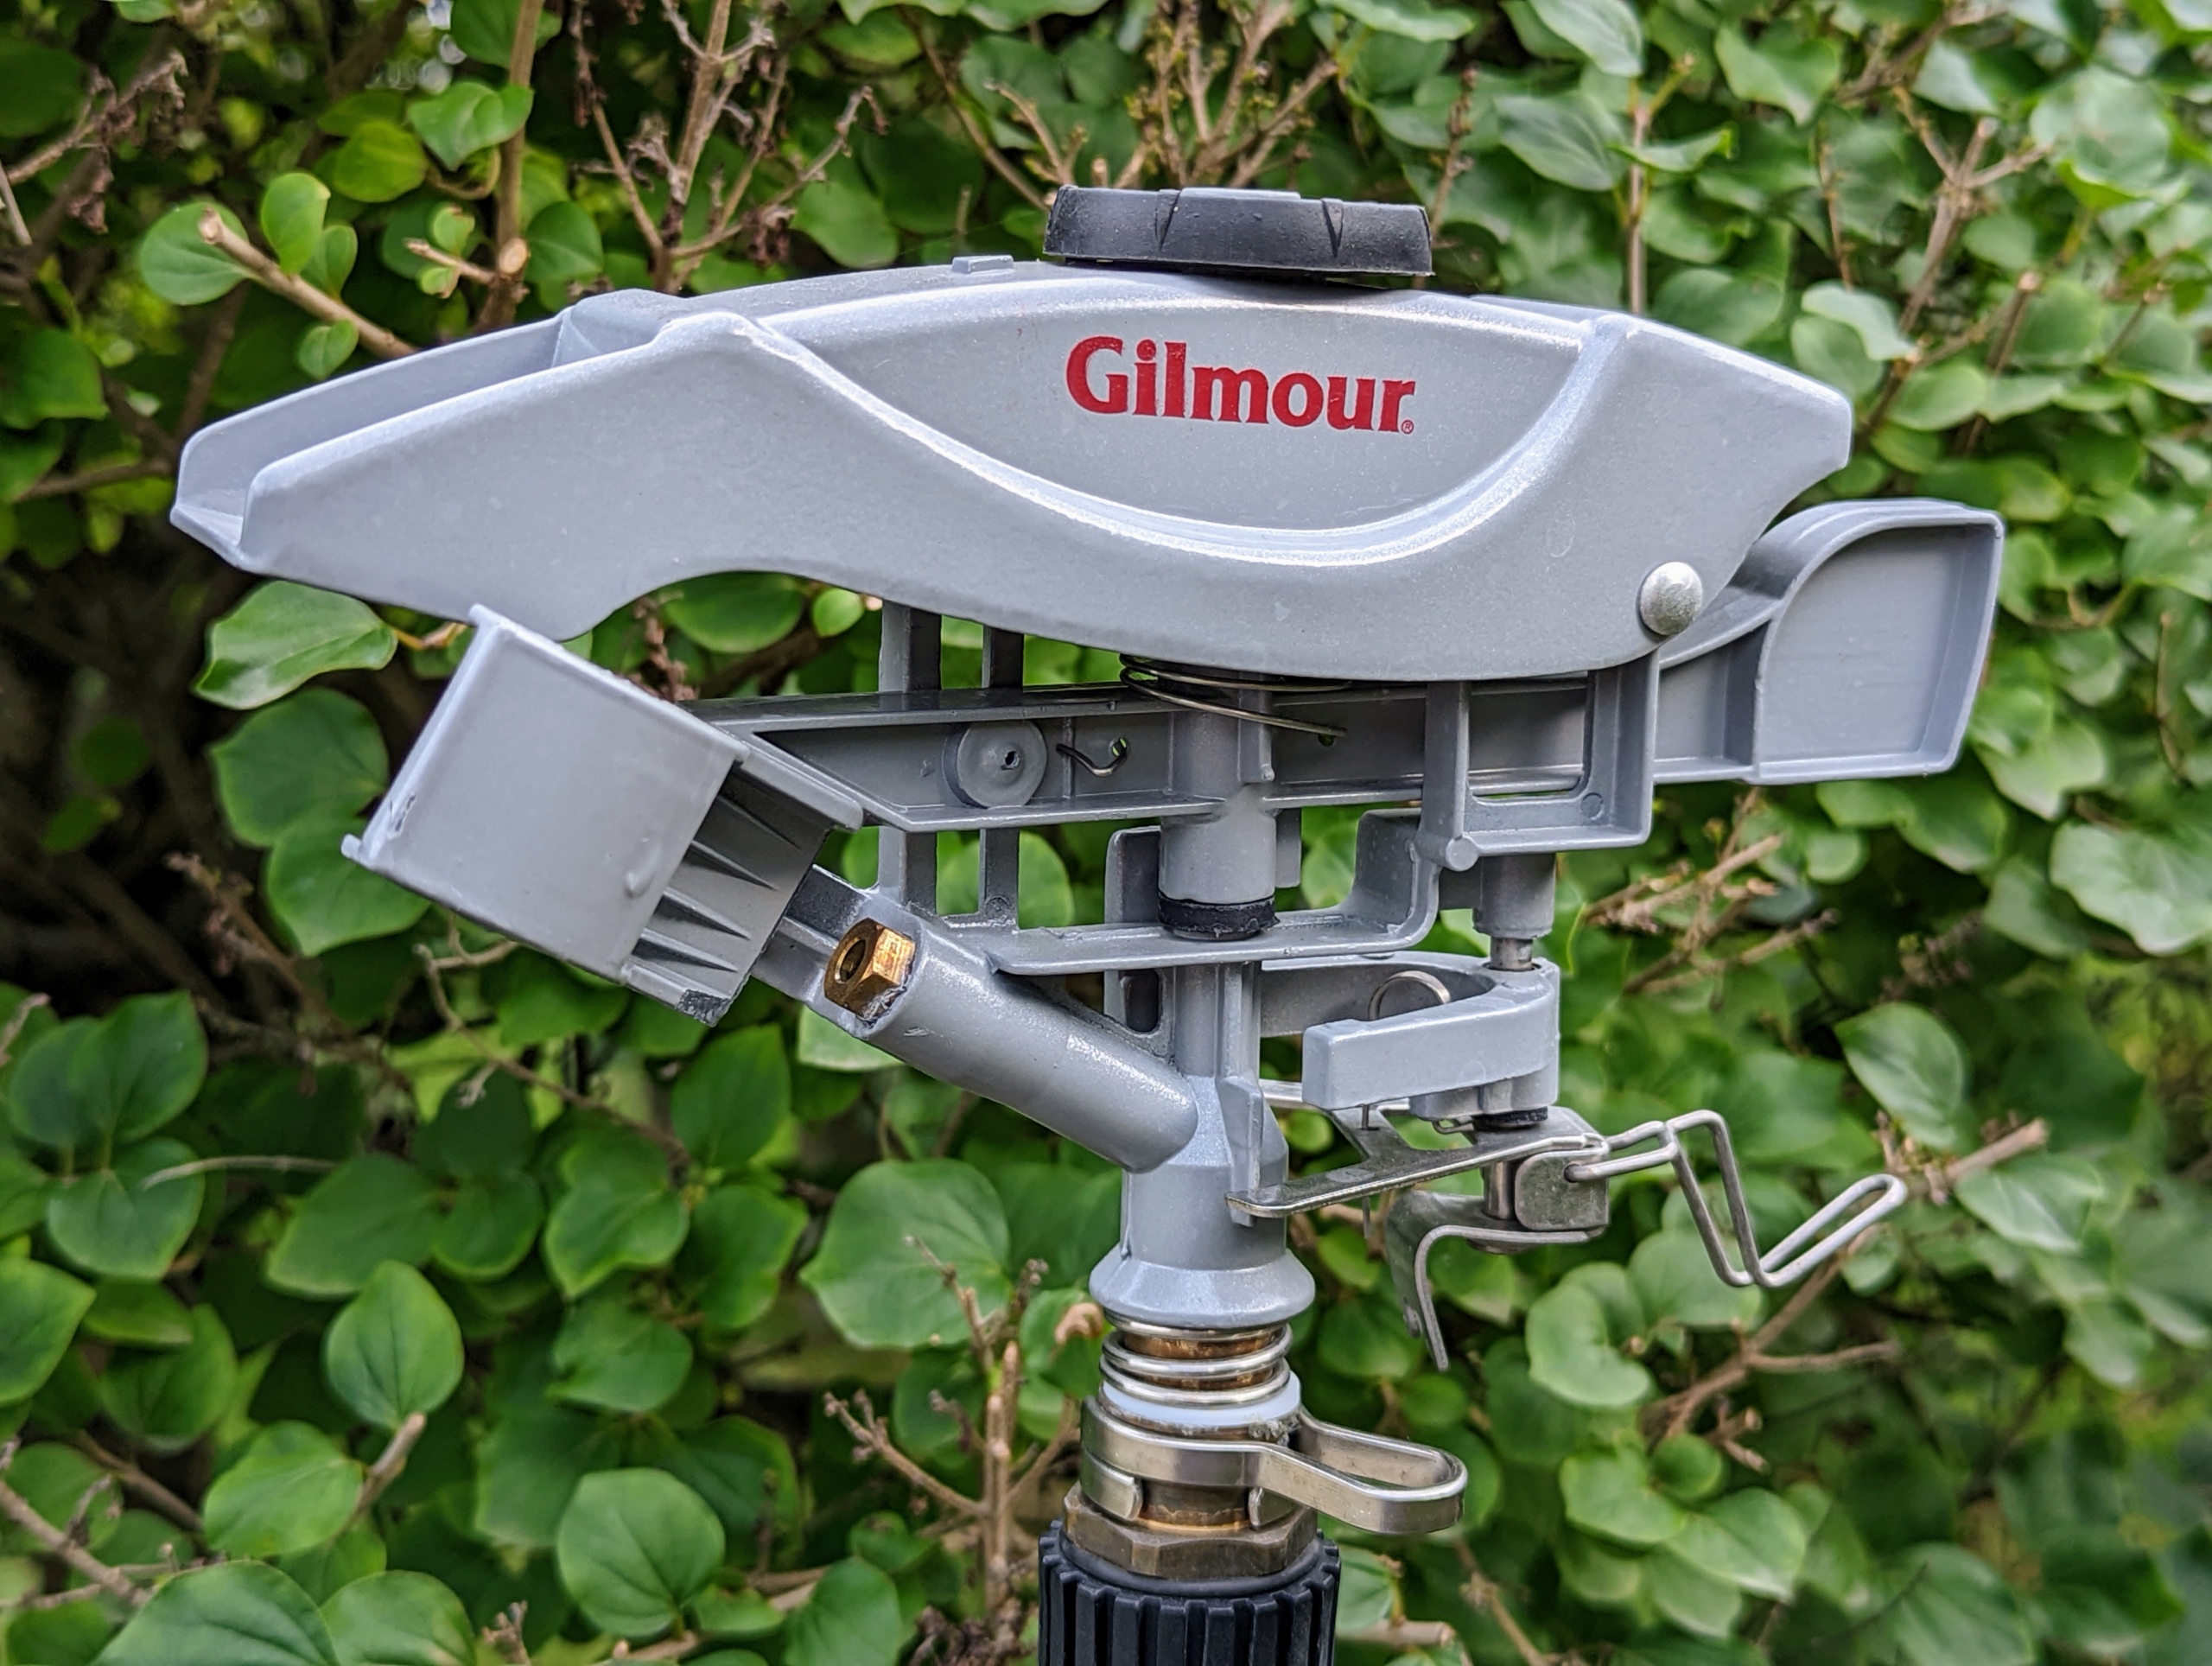
When ready to use, the collar of these tripod sprinklers can be adjusted for partial to full circle coverage. The controls are just under the sprinkler head.
A pin diffuser allows for a customized spray from powerful jet to gentle mist. I show every member of my crew how to use the sprinkler, so they can water properly and efficiently.
The round dial on top makes it easy to set the direction and length of the spray.
And, each of the legs is also adjustable. Here is one of the three spiked feet of the tripod sprinkler which provide lots of stability on varied surfaces.
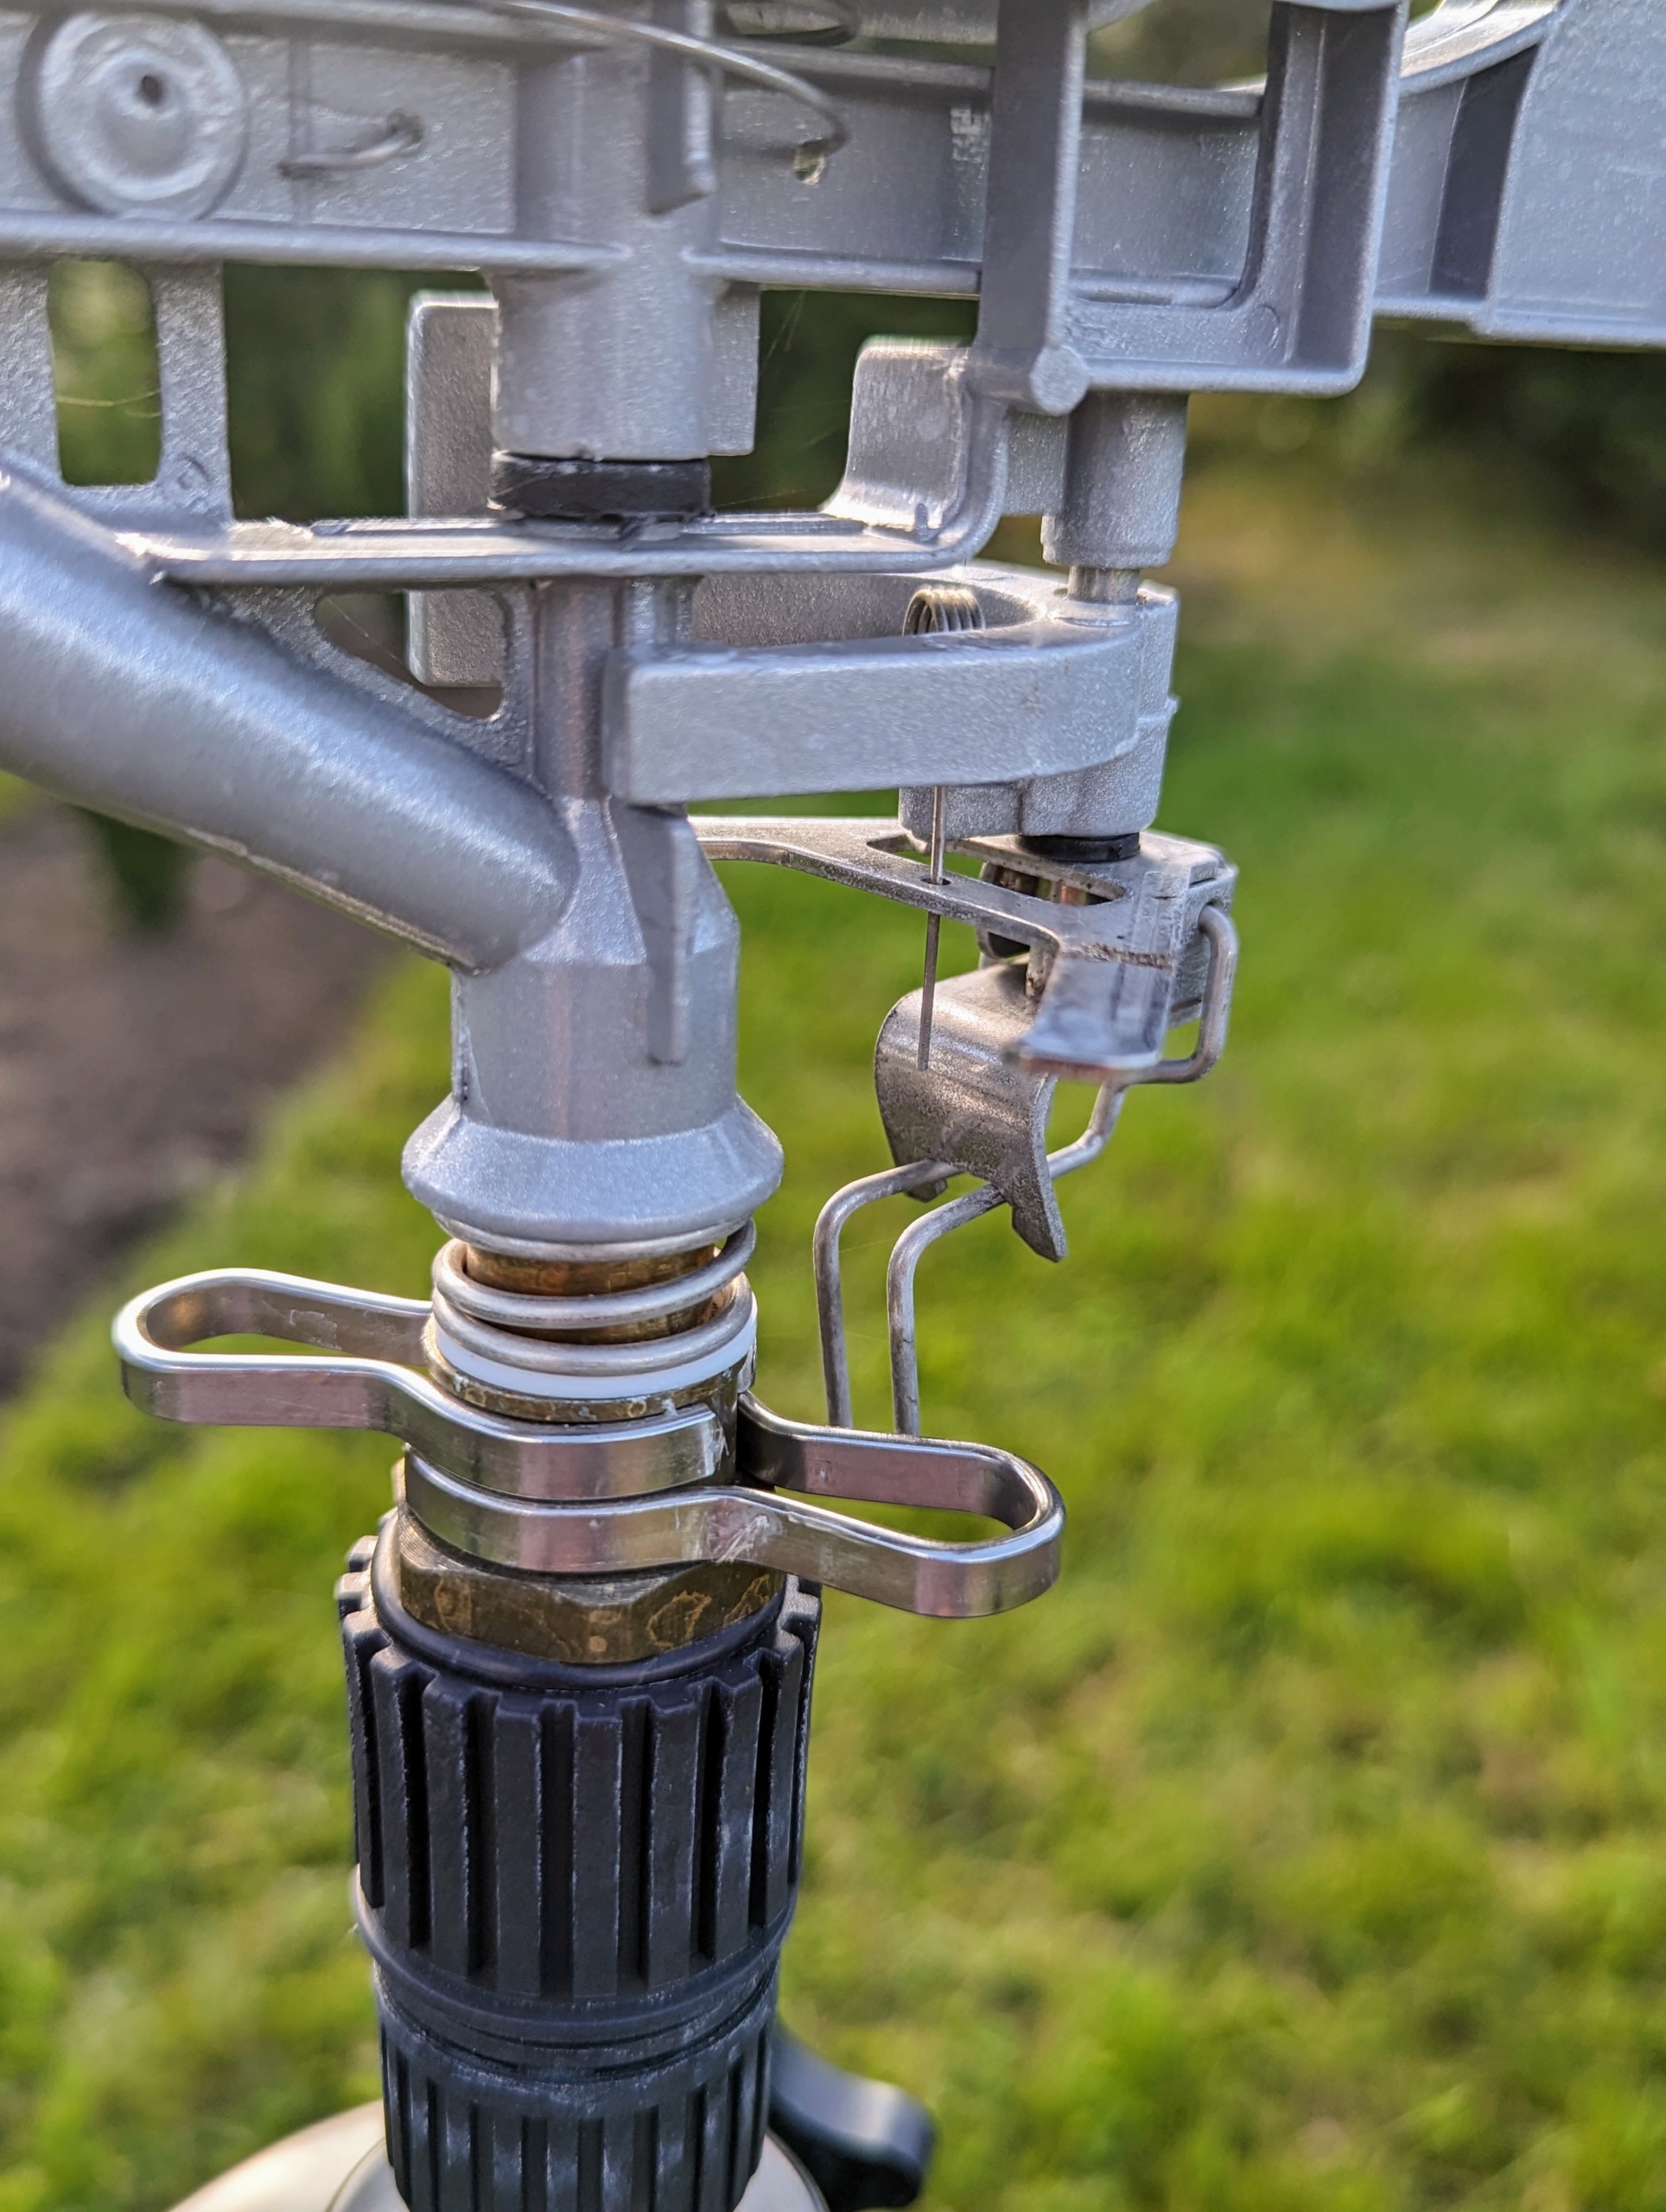
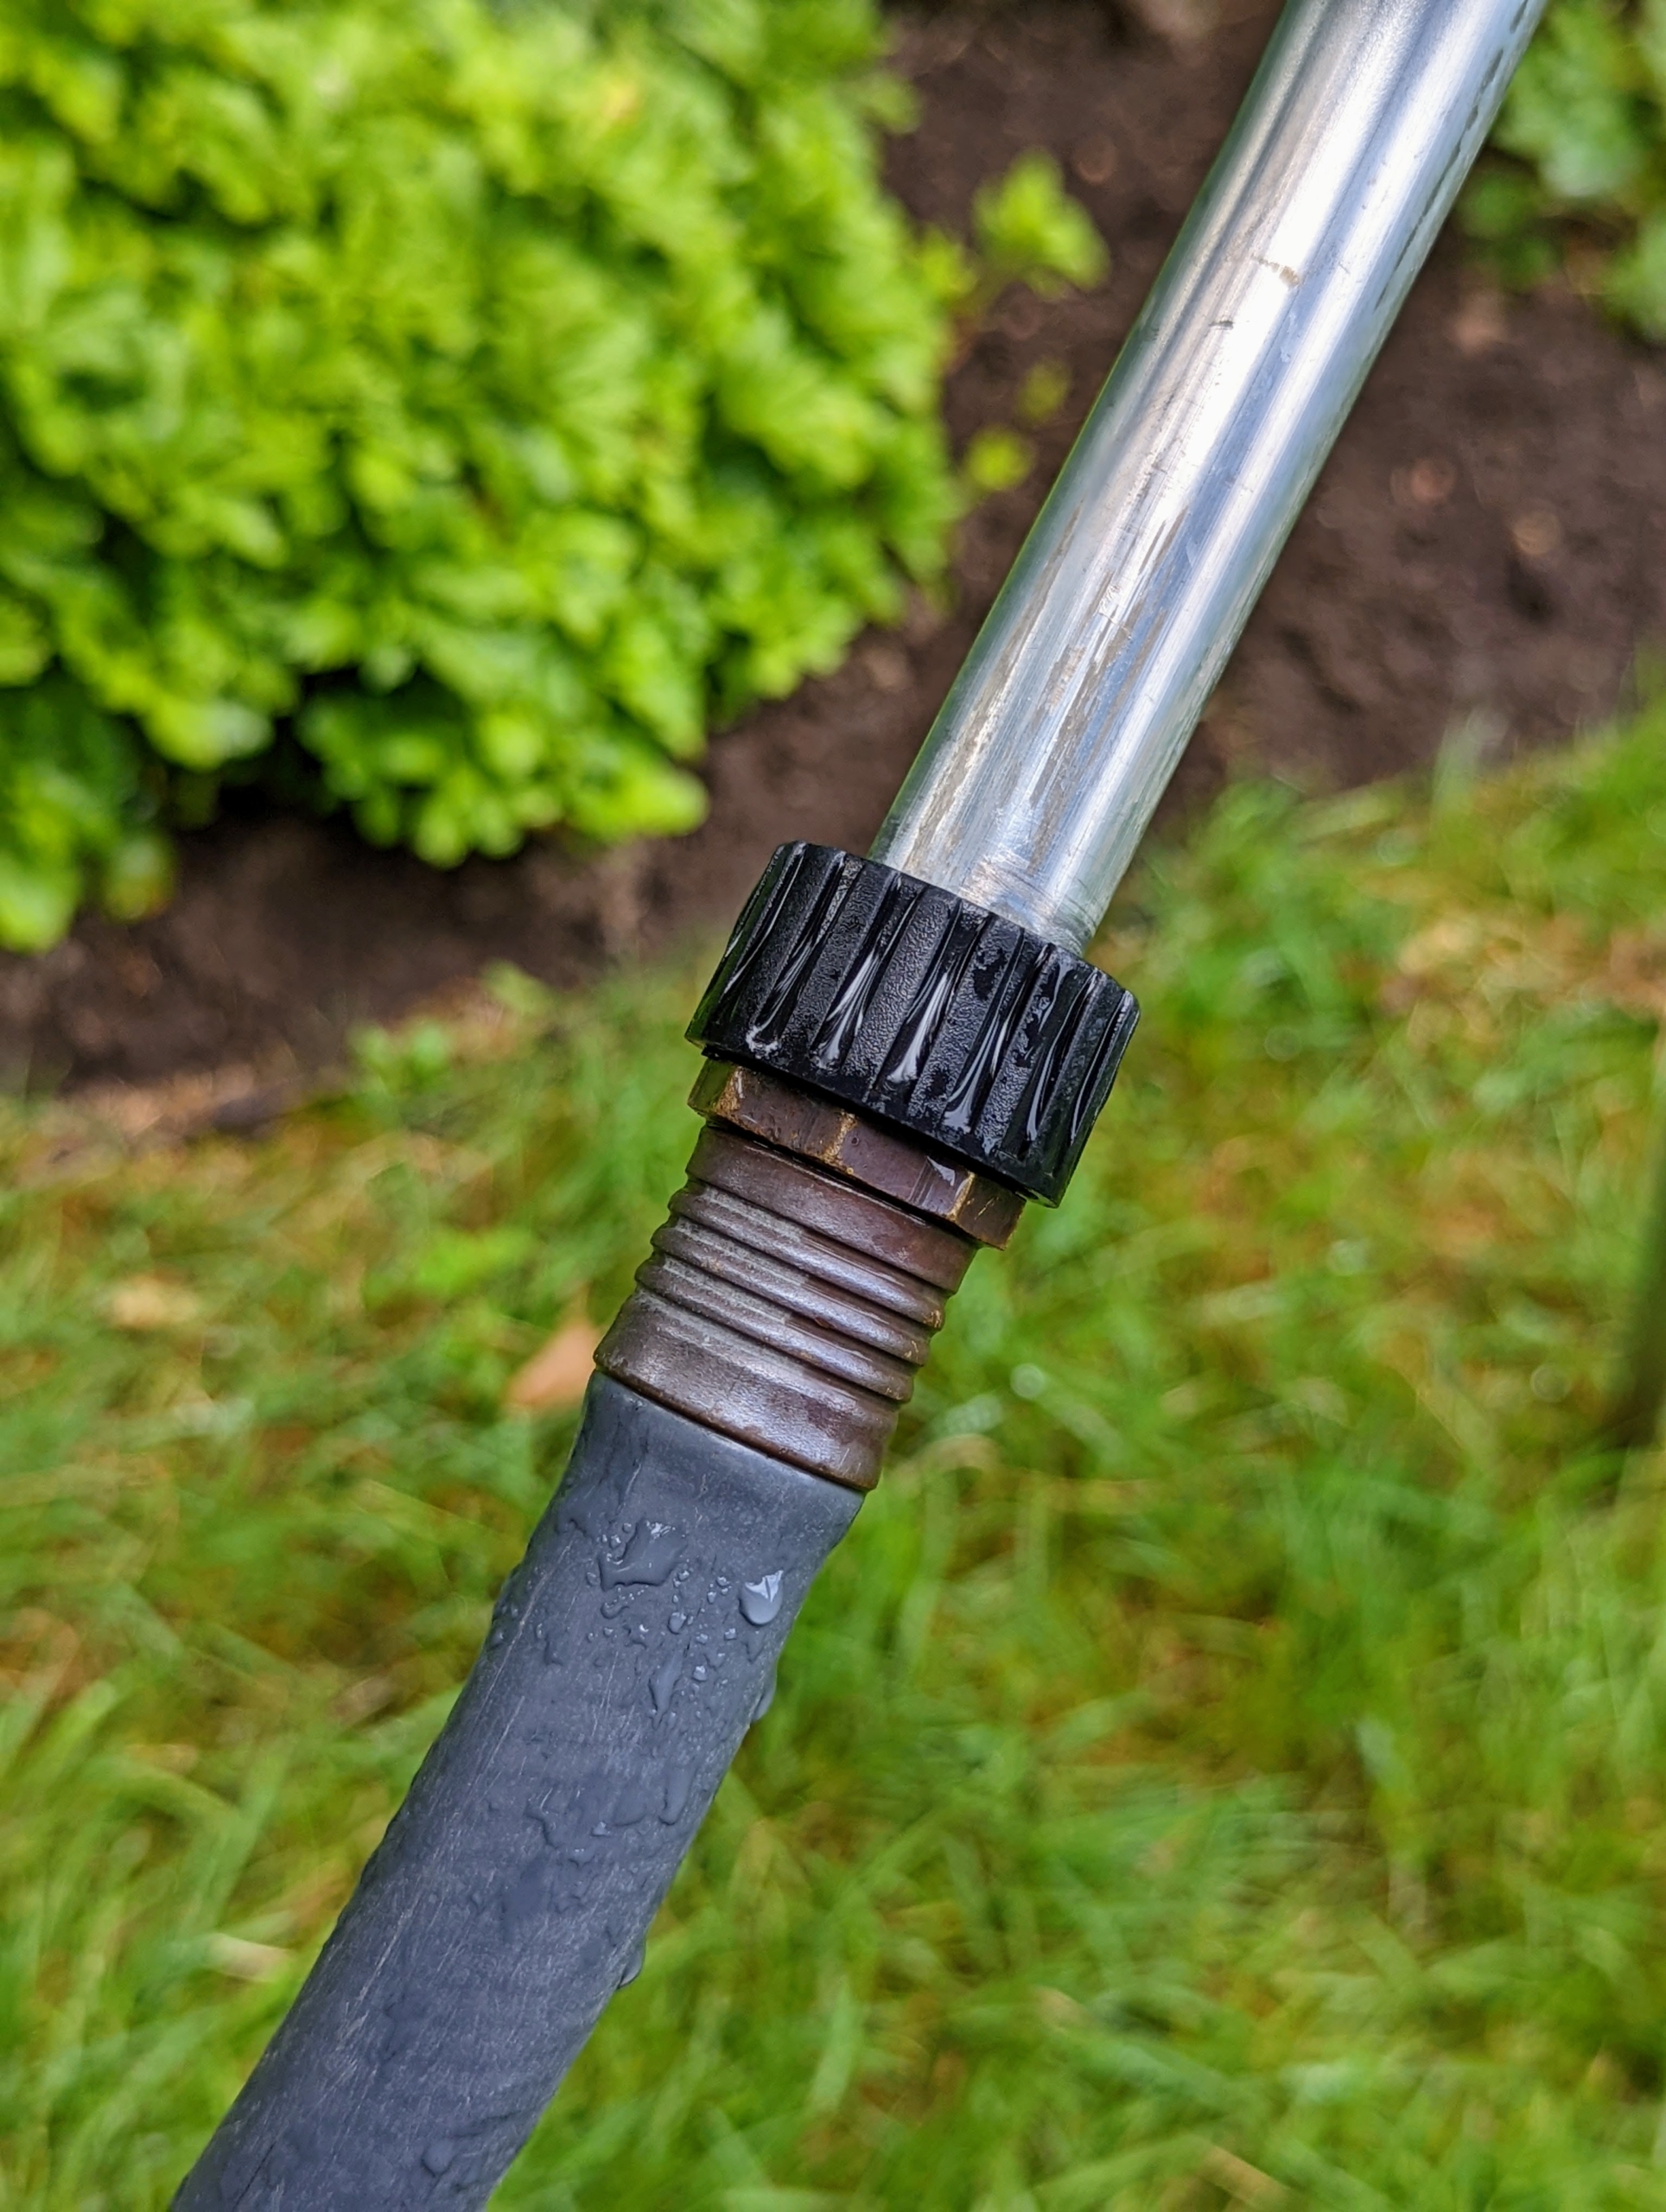
The hose connects easily to the sprinkler directly under the sprinkler head so it is well-balanced and won’t tip over when in use.
Mornings are the best times to water – when water pressure is high, evaporation is low, and the soil can absorb the water before the sun heats up the ground. The distance and spray patterns of these tripod sprinklers can also be adjusted to suit so many garden needs.
I always instruct the crew to never direct hard spraying sprinklers at trees – this may mar the bark. Instead, use harder sprays for open spaces and wide lawn areas.
Well-established trees with strong, deep root systems will be more drought tolerant.
To avoid dry spots, sprinkler heads should be positioned so they overlap slightly in their coverage areas. During the summer, a good watering is done to a depth of about six to eight inches. An even, intermittent sprinkling is best for thorough, deep watering.
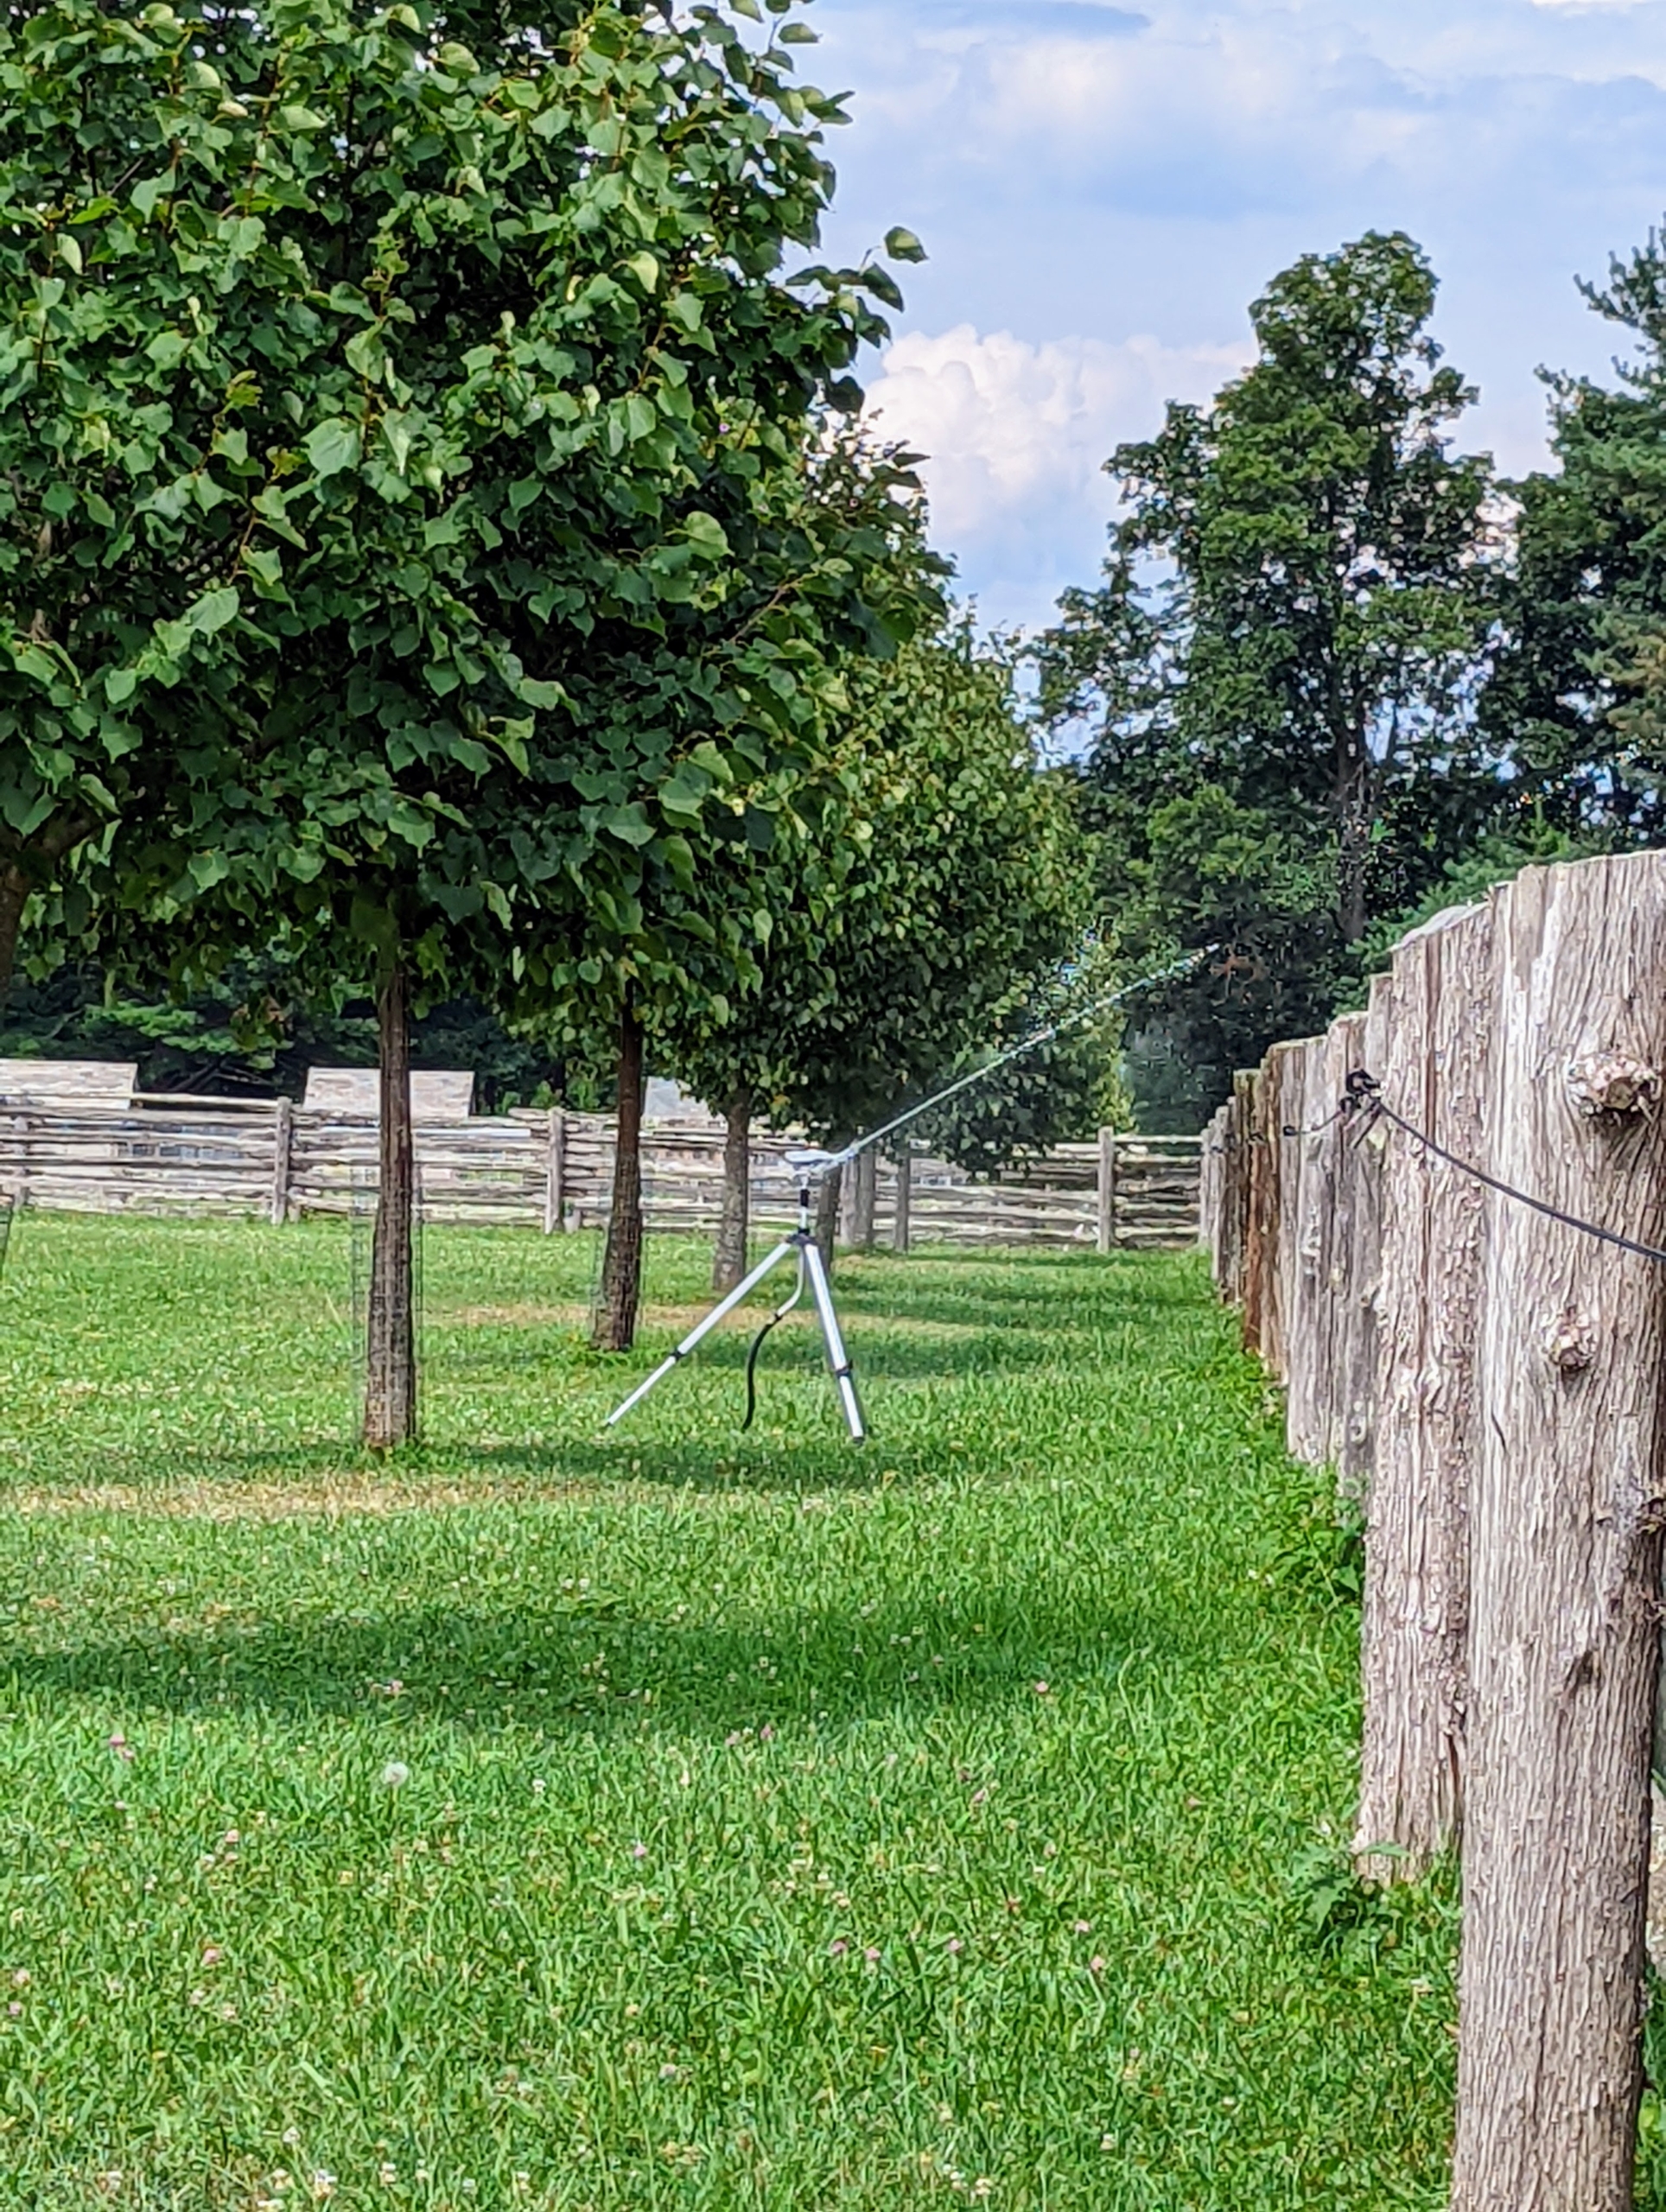
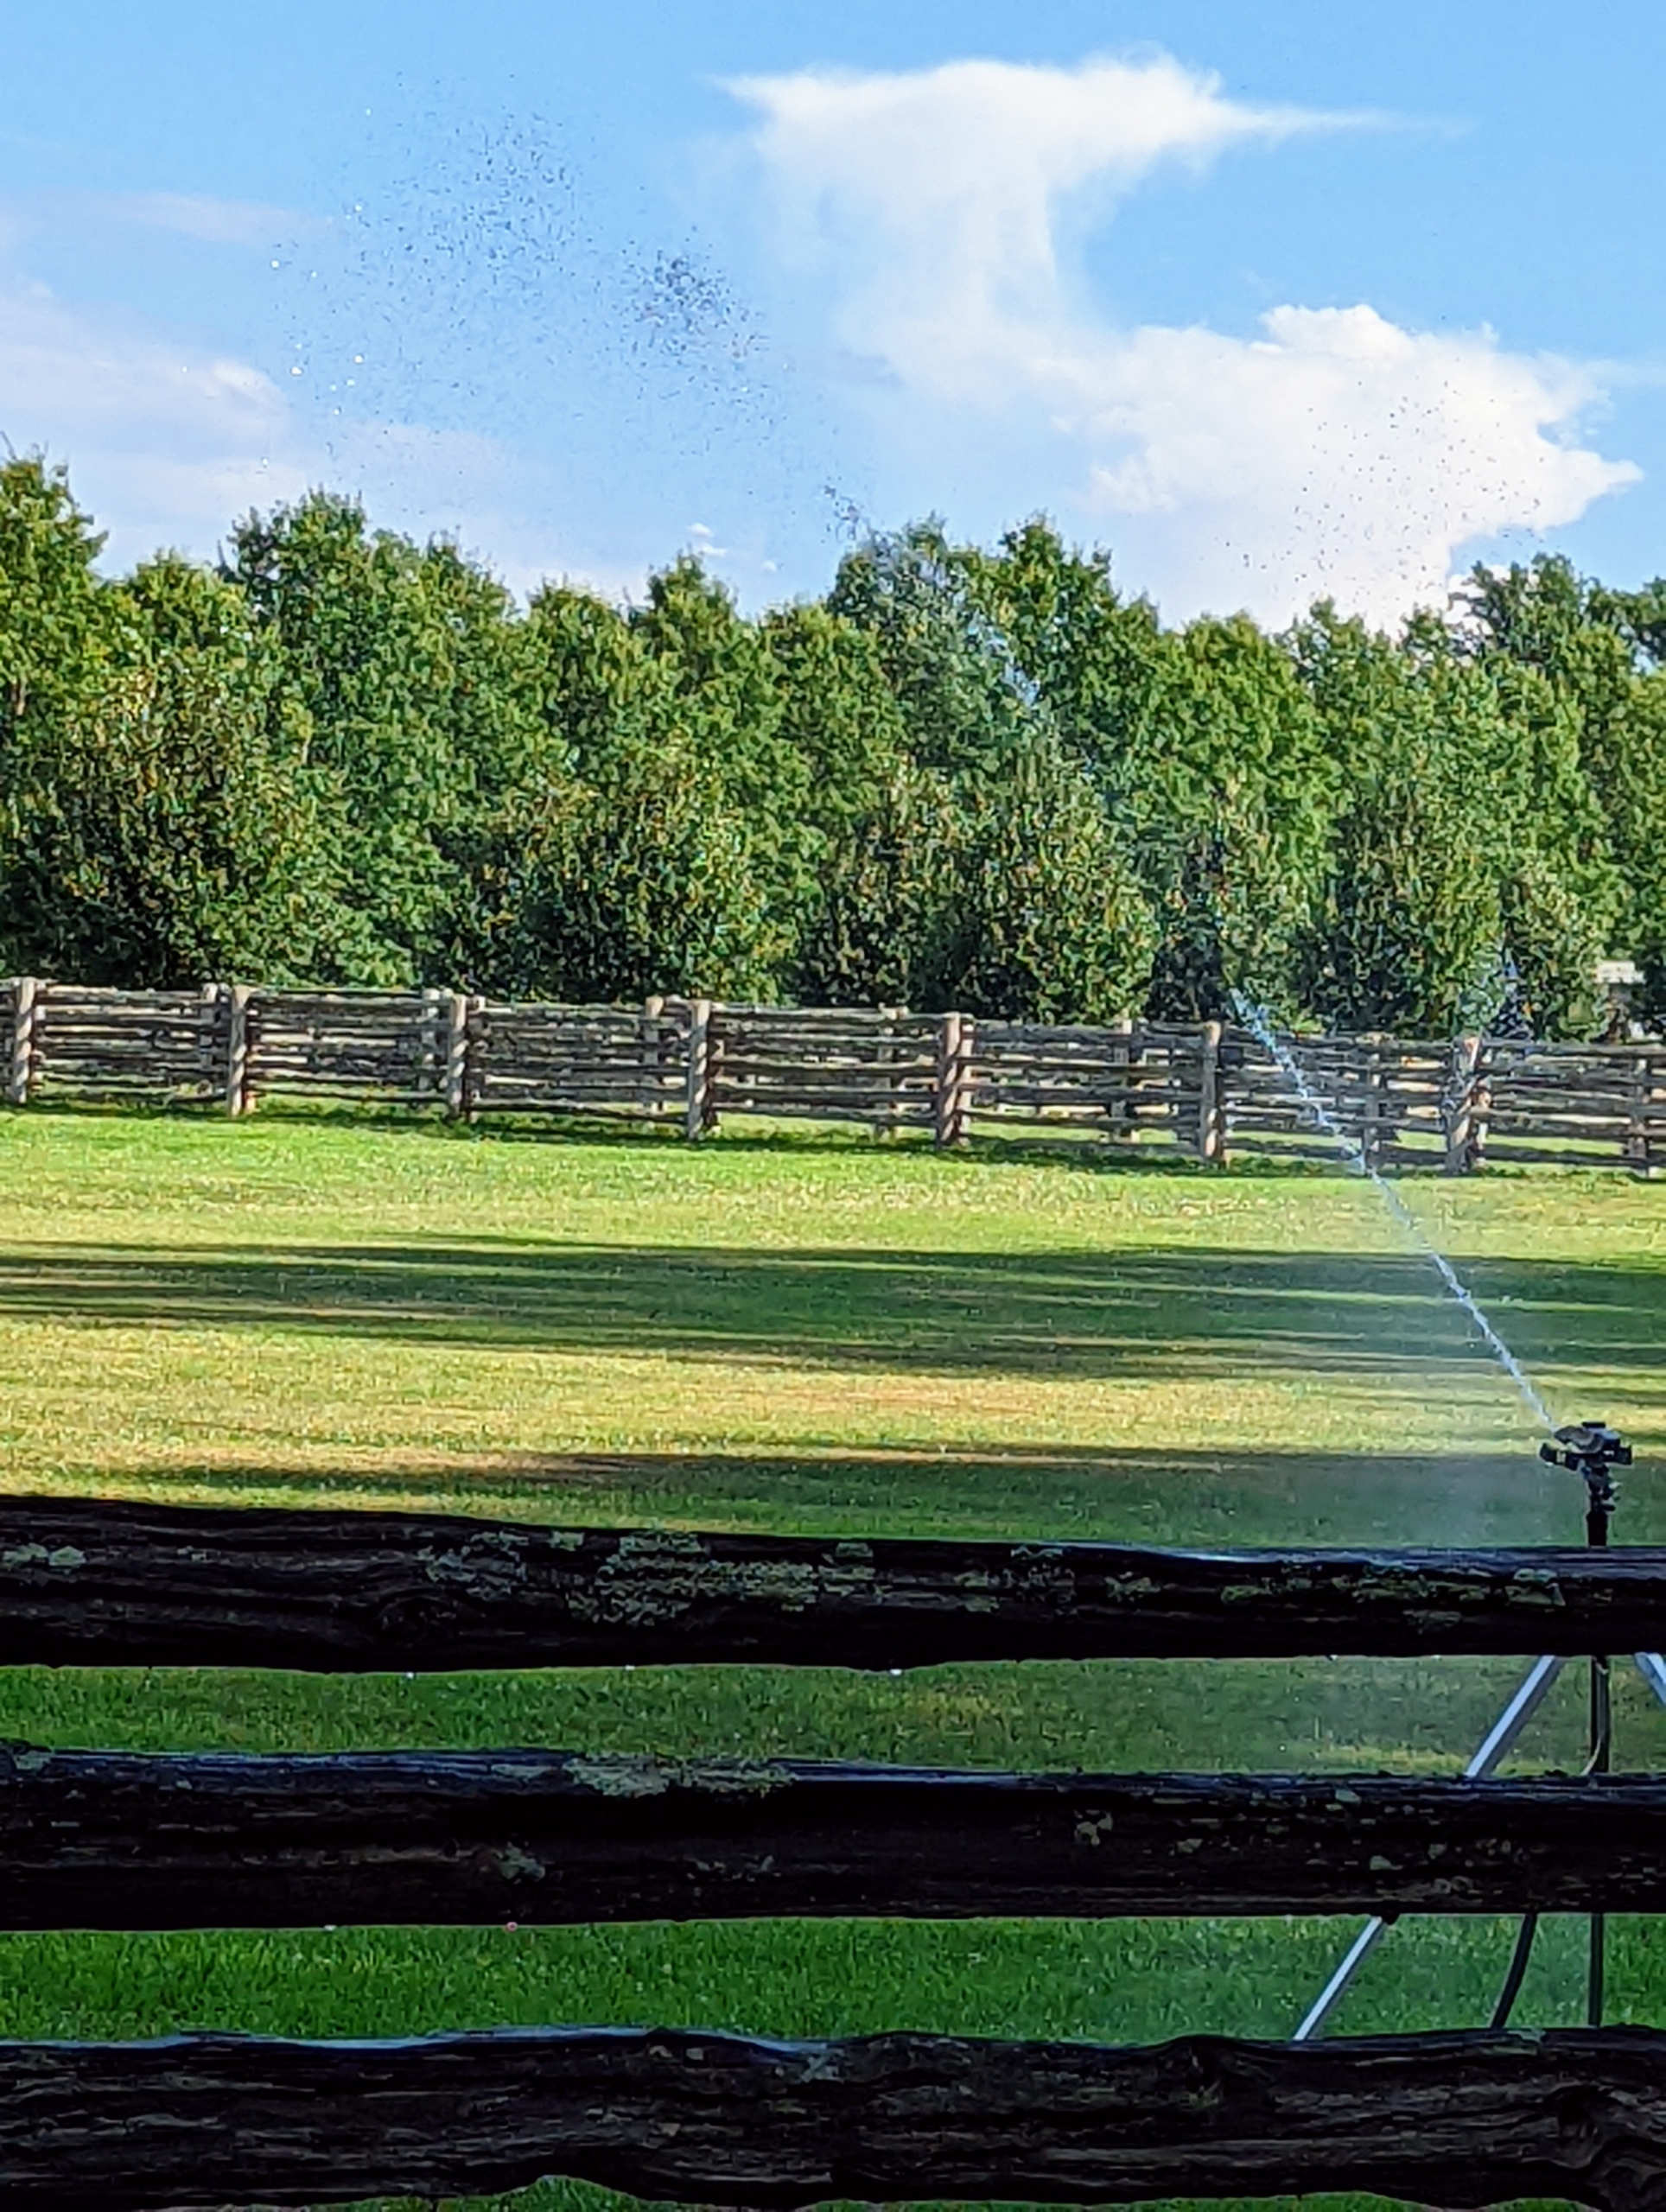
Here is a tripod sprinkler in a pasture. Every so often, observe any sprinklers in action and look for clogged or leaking heads that may need minor maintenance.
And when done, always take the time to properly roll up the hose, so it is neat, tidy, and out of the way.
Here at my farm, each person on the crew manages a day of watering during the warm weather season. This way, everything can be monitored and timed appropriately. This day is Phurba’s day – he goes around the farm checking that everything is adequately watered.
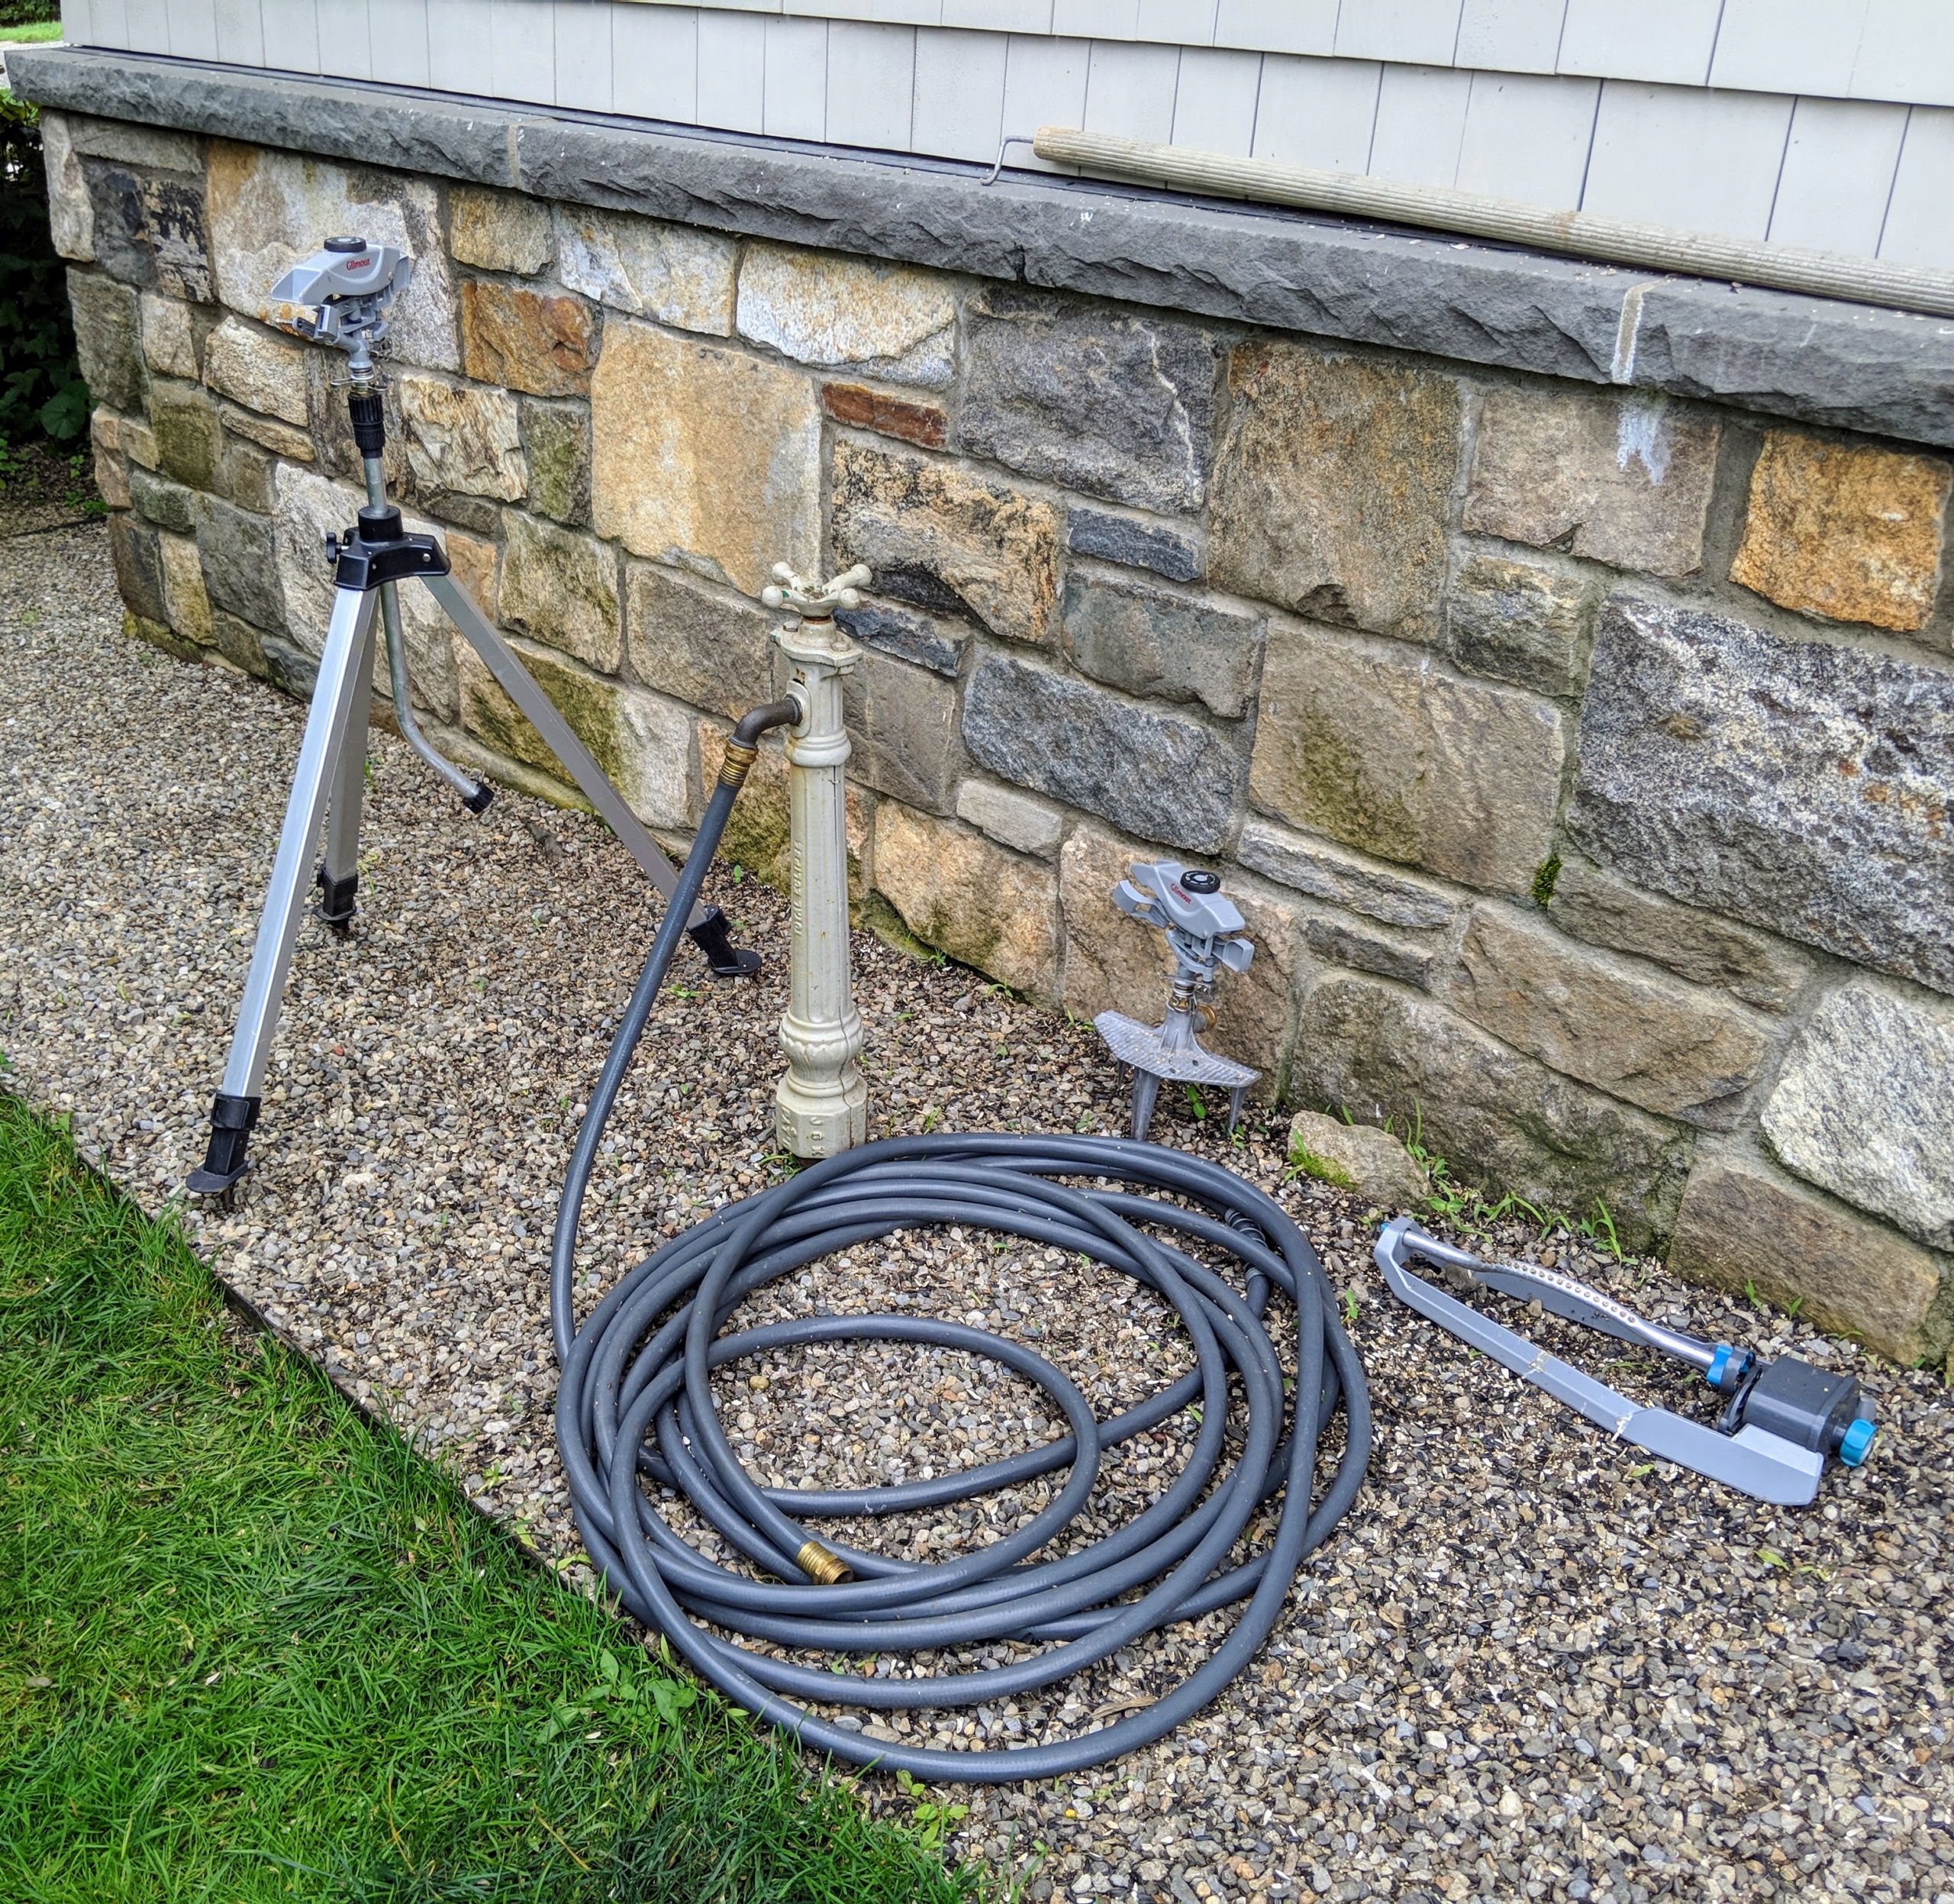
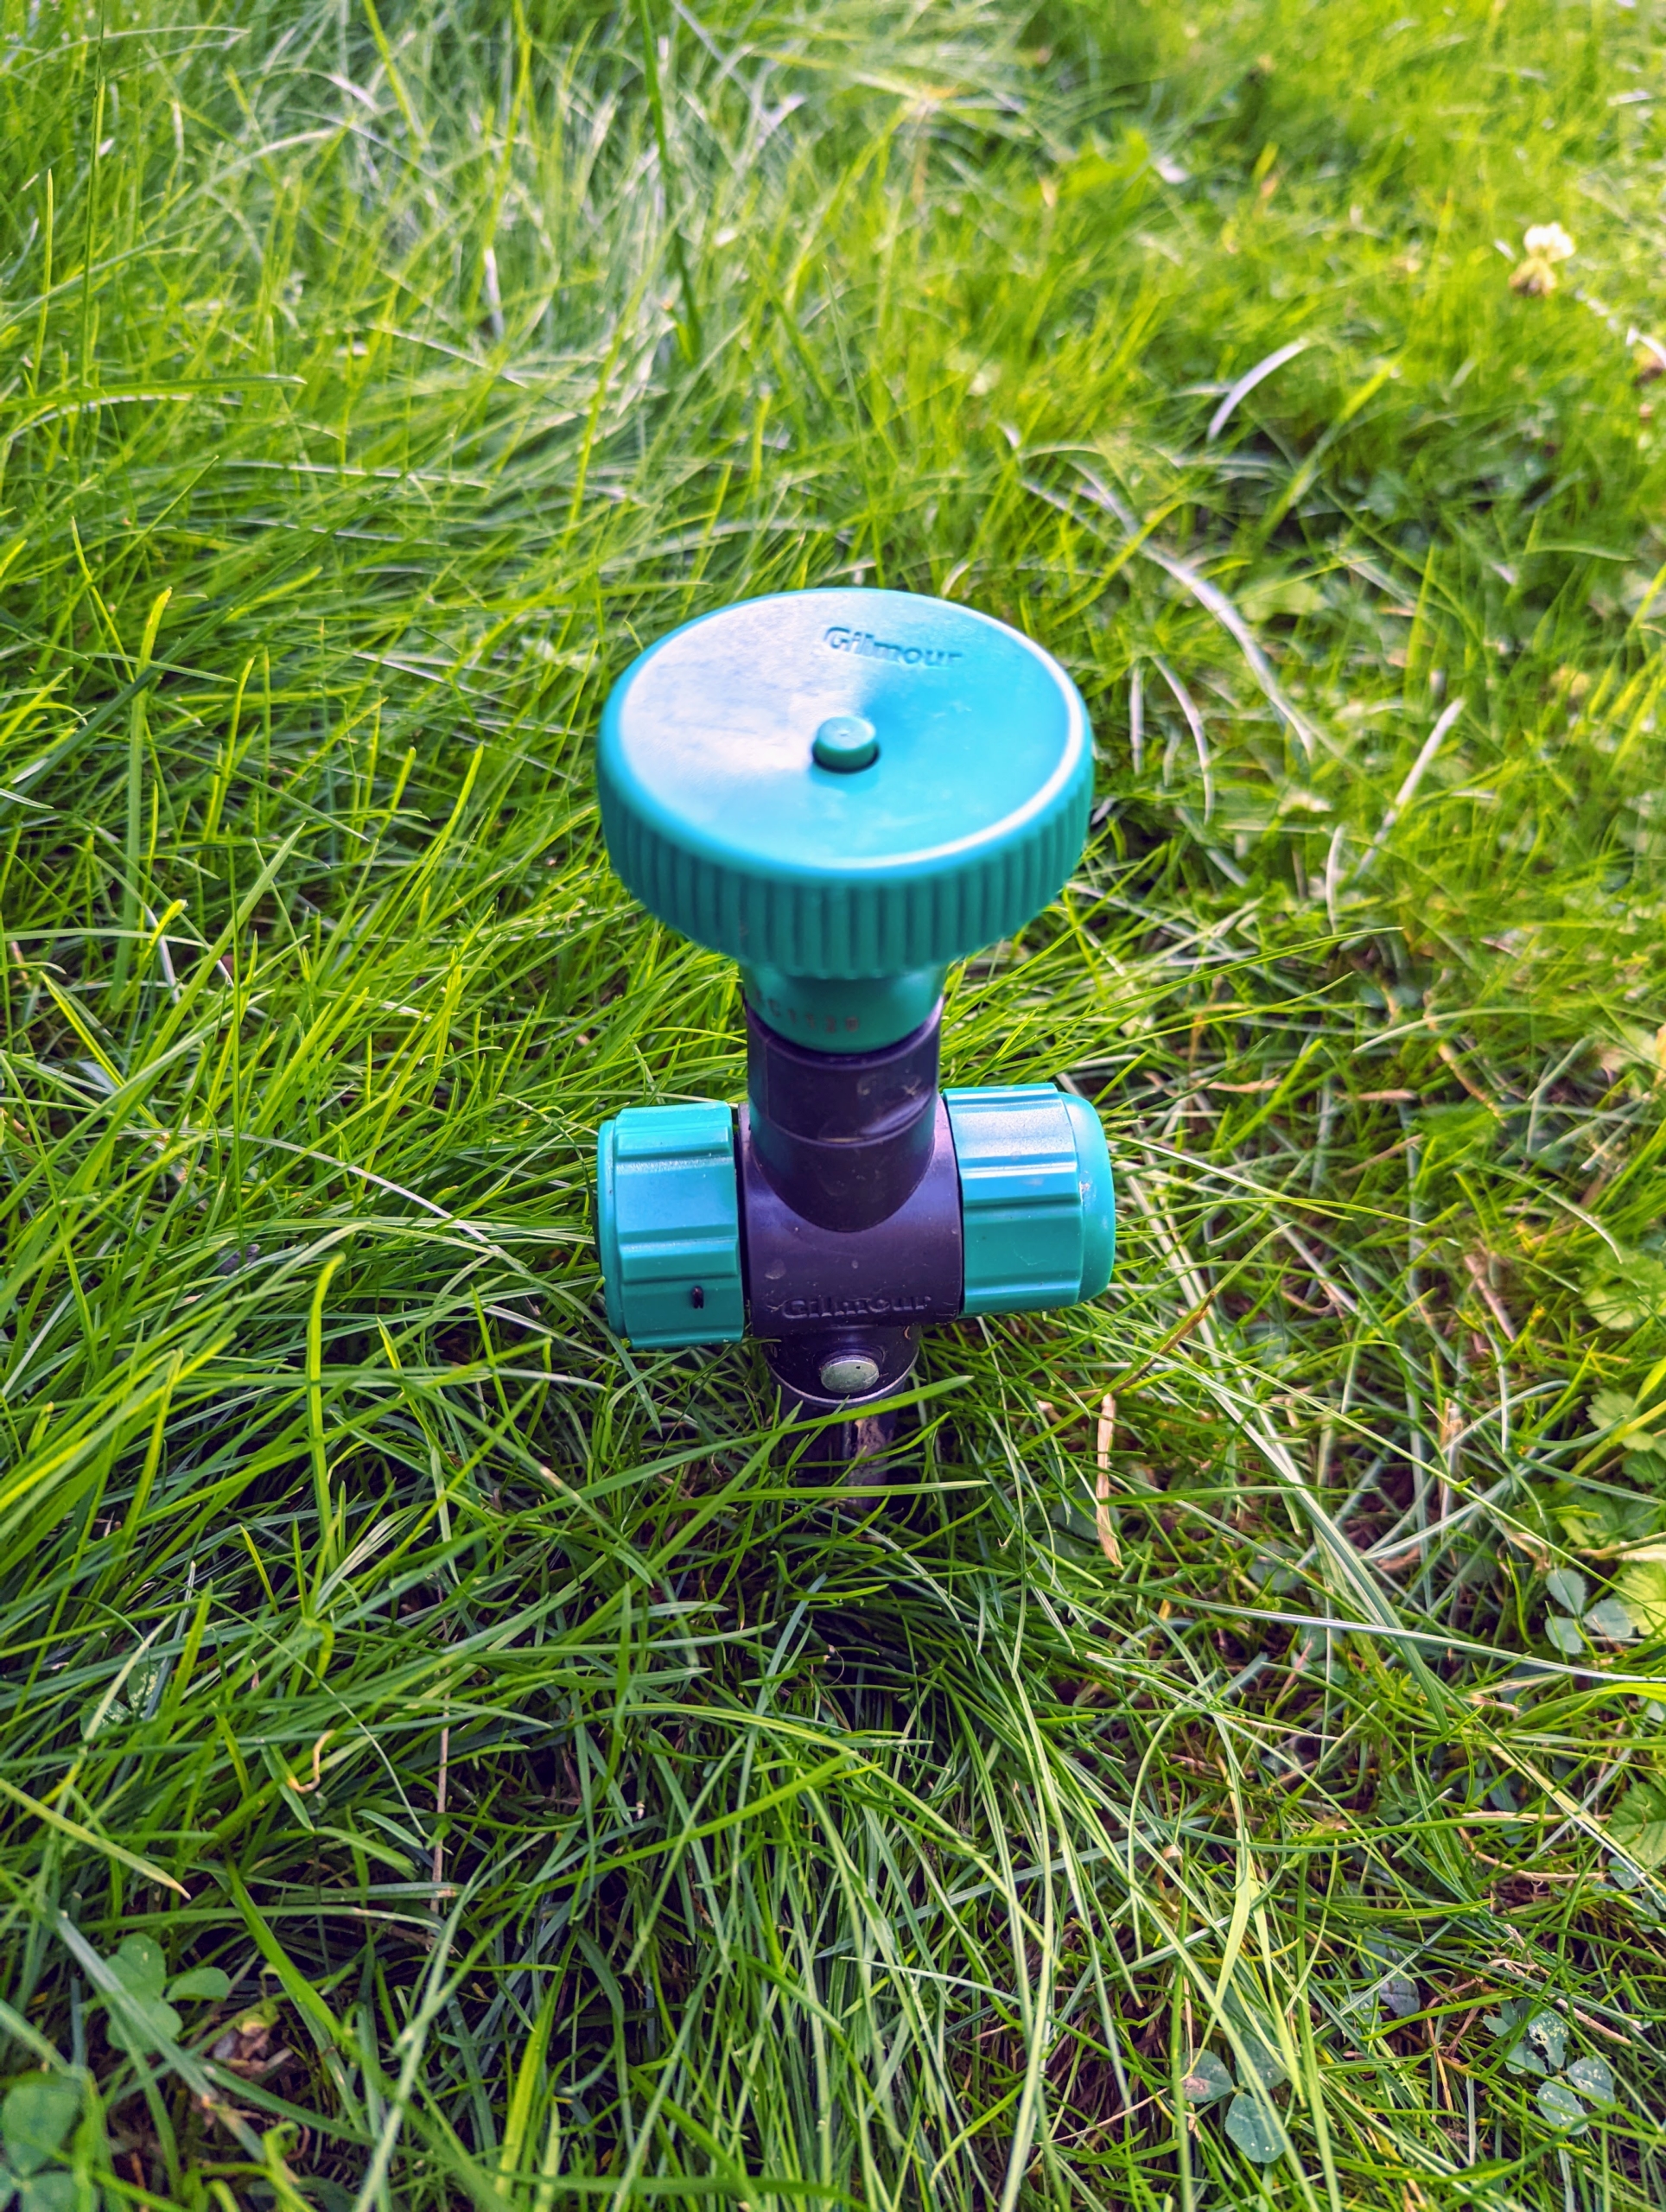
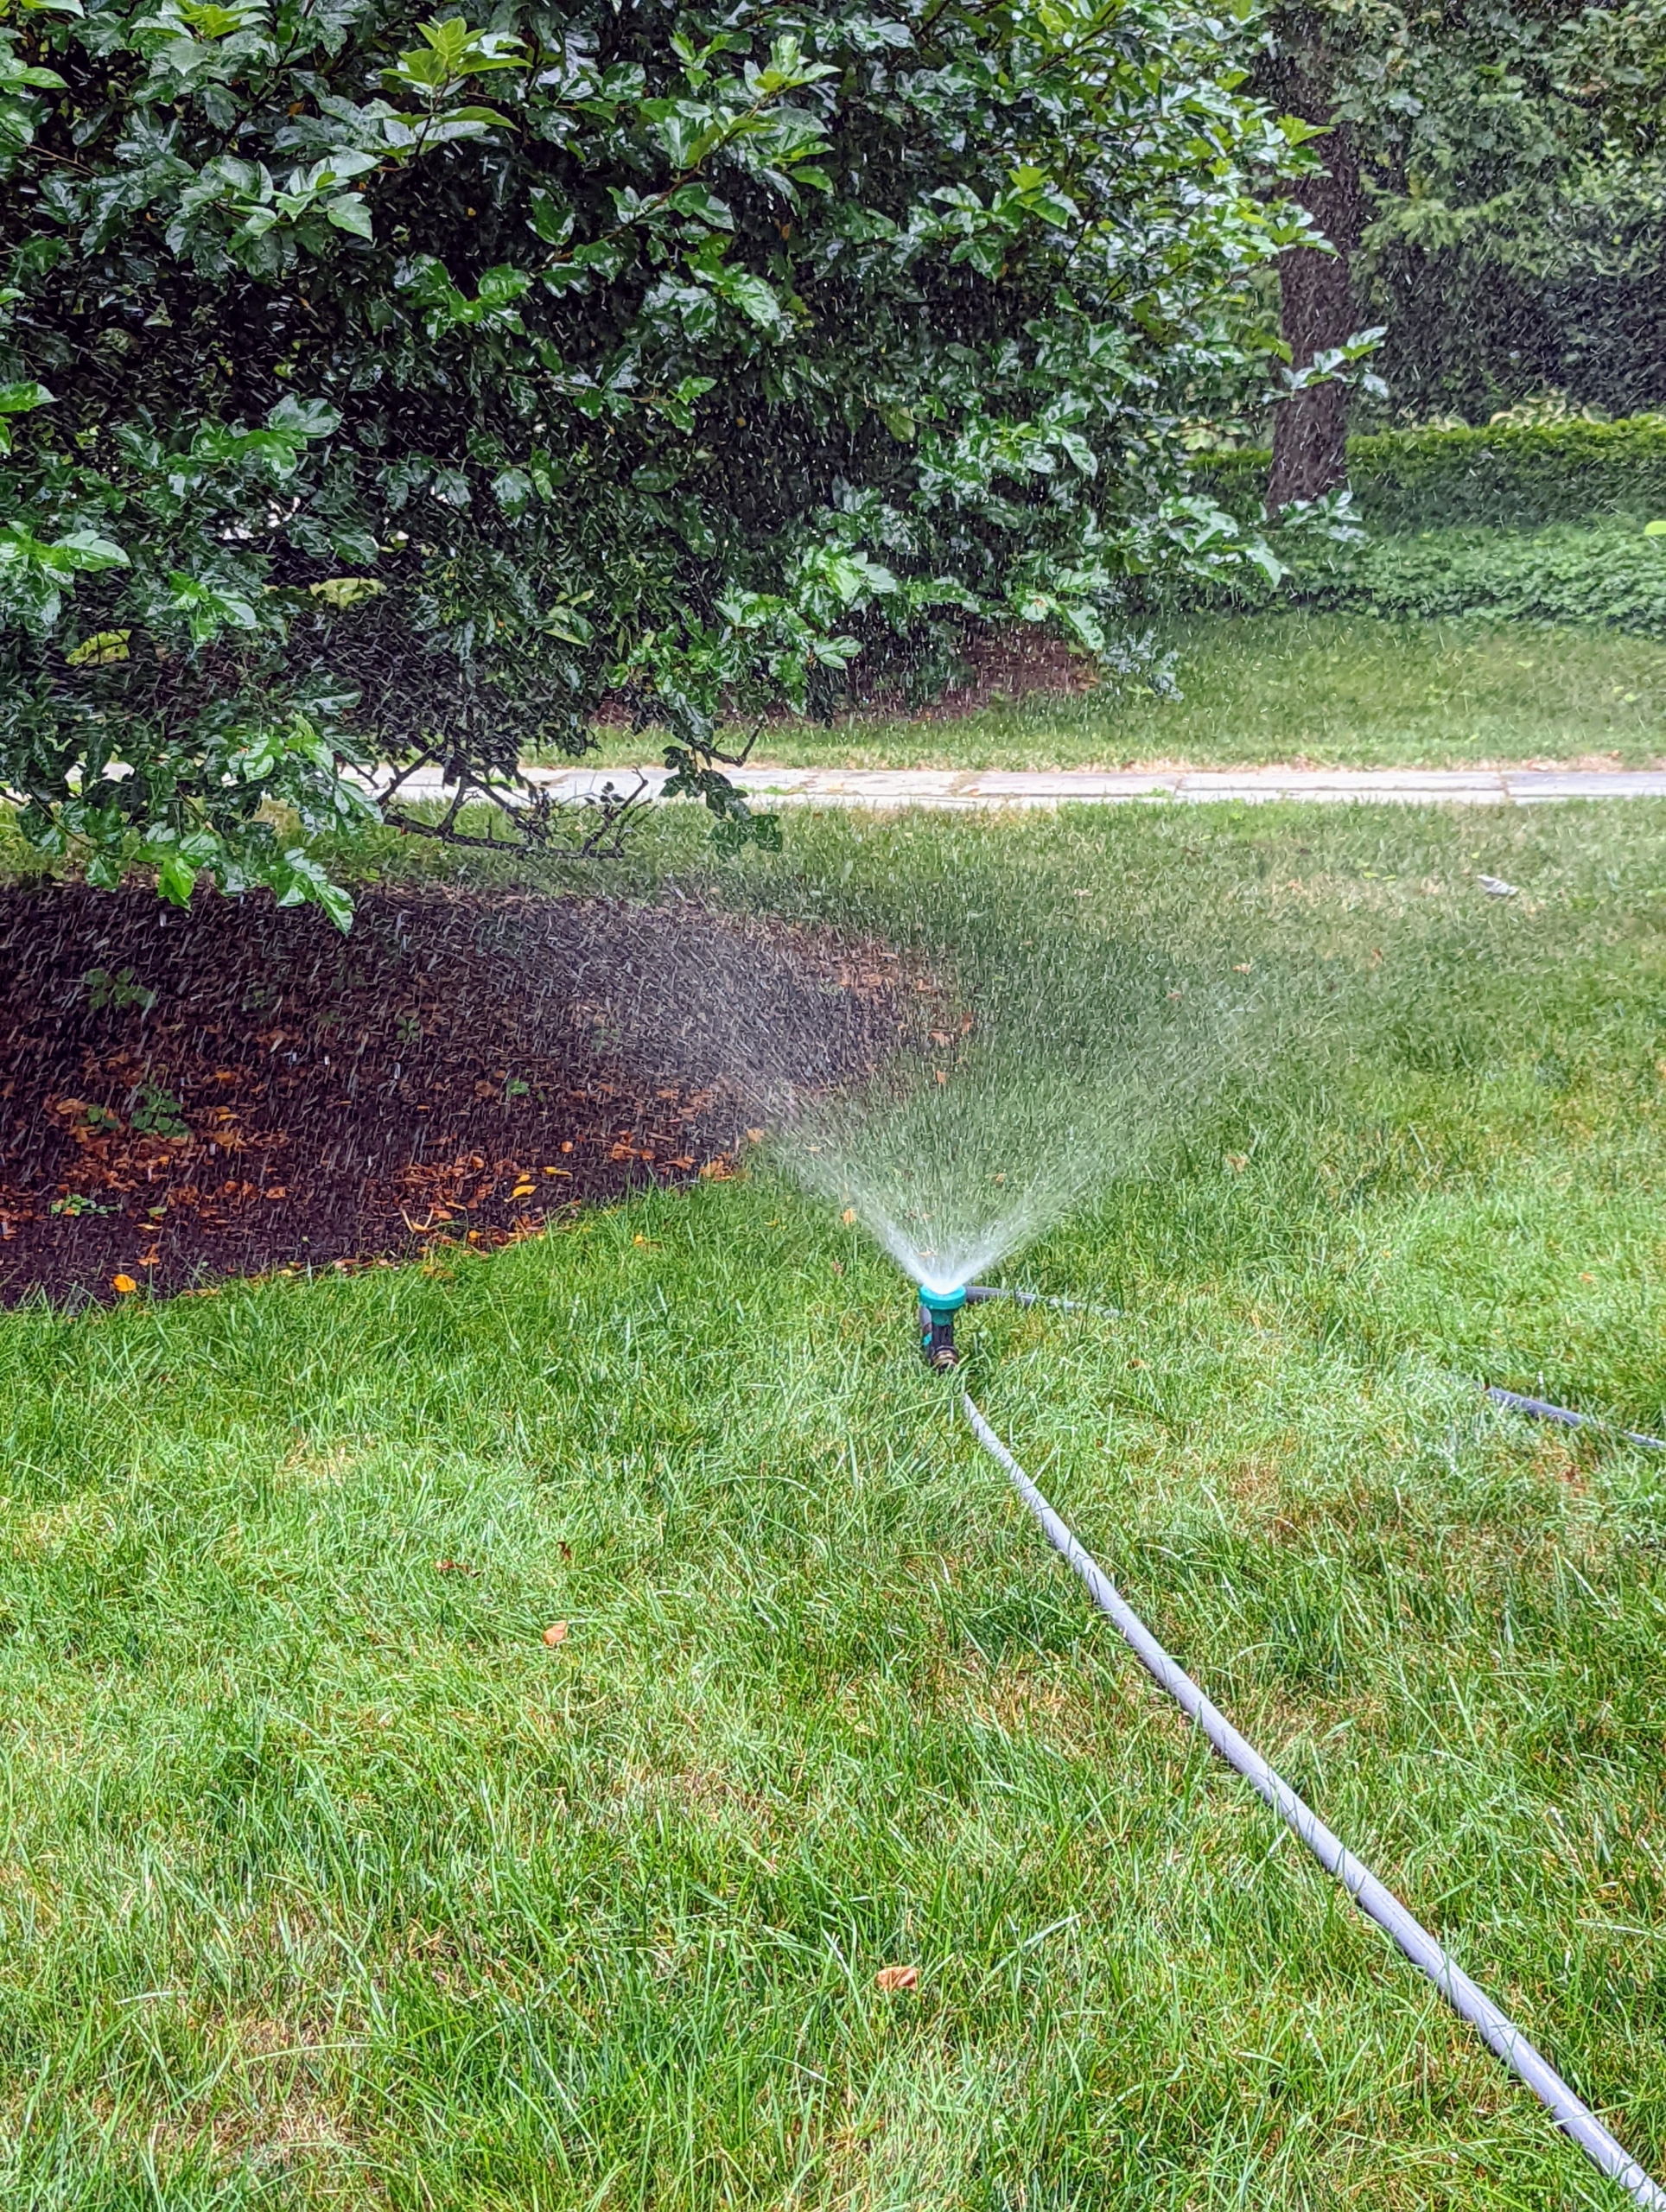
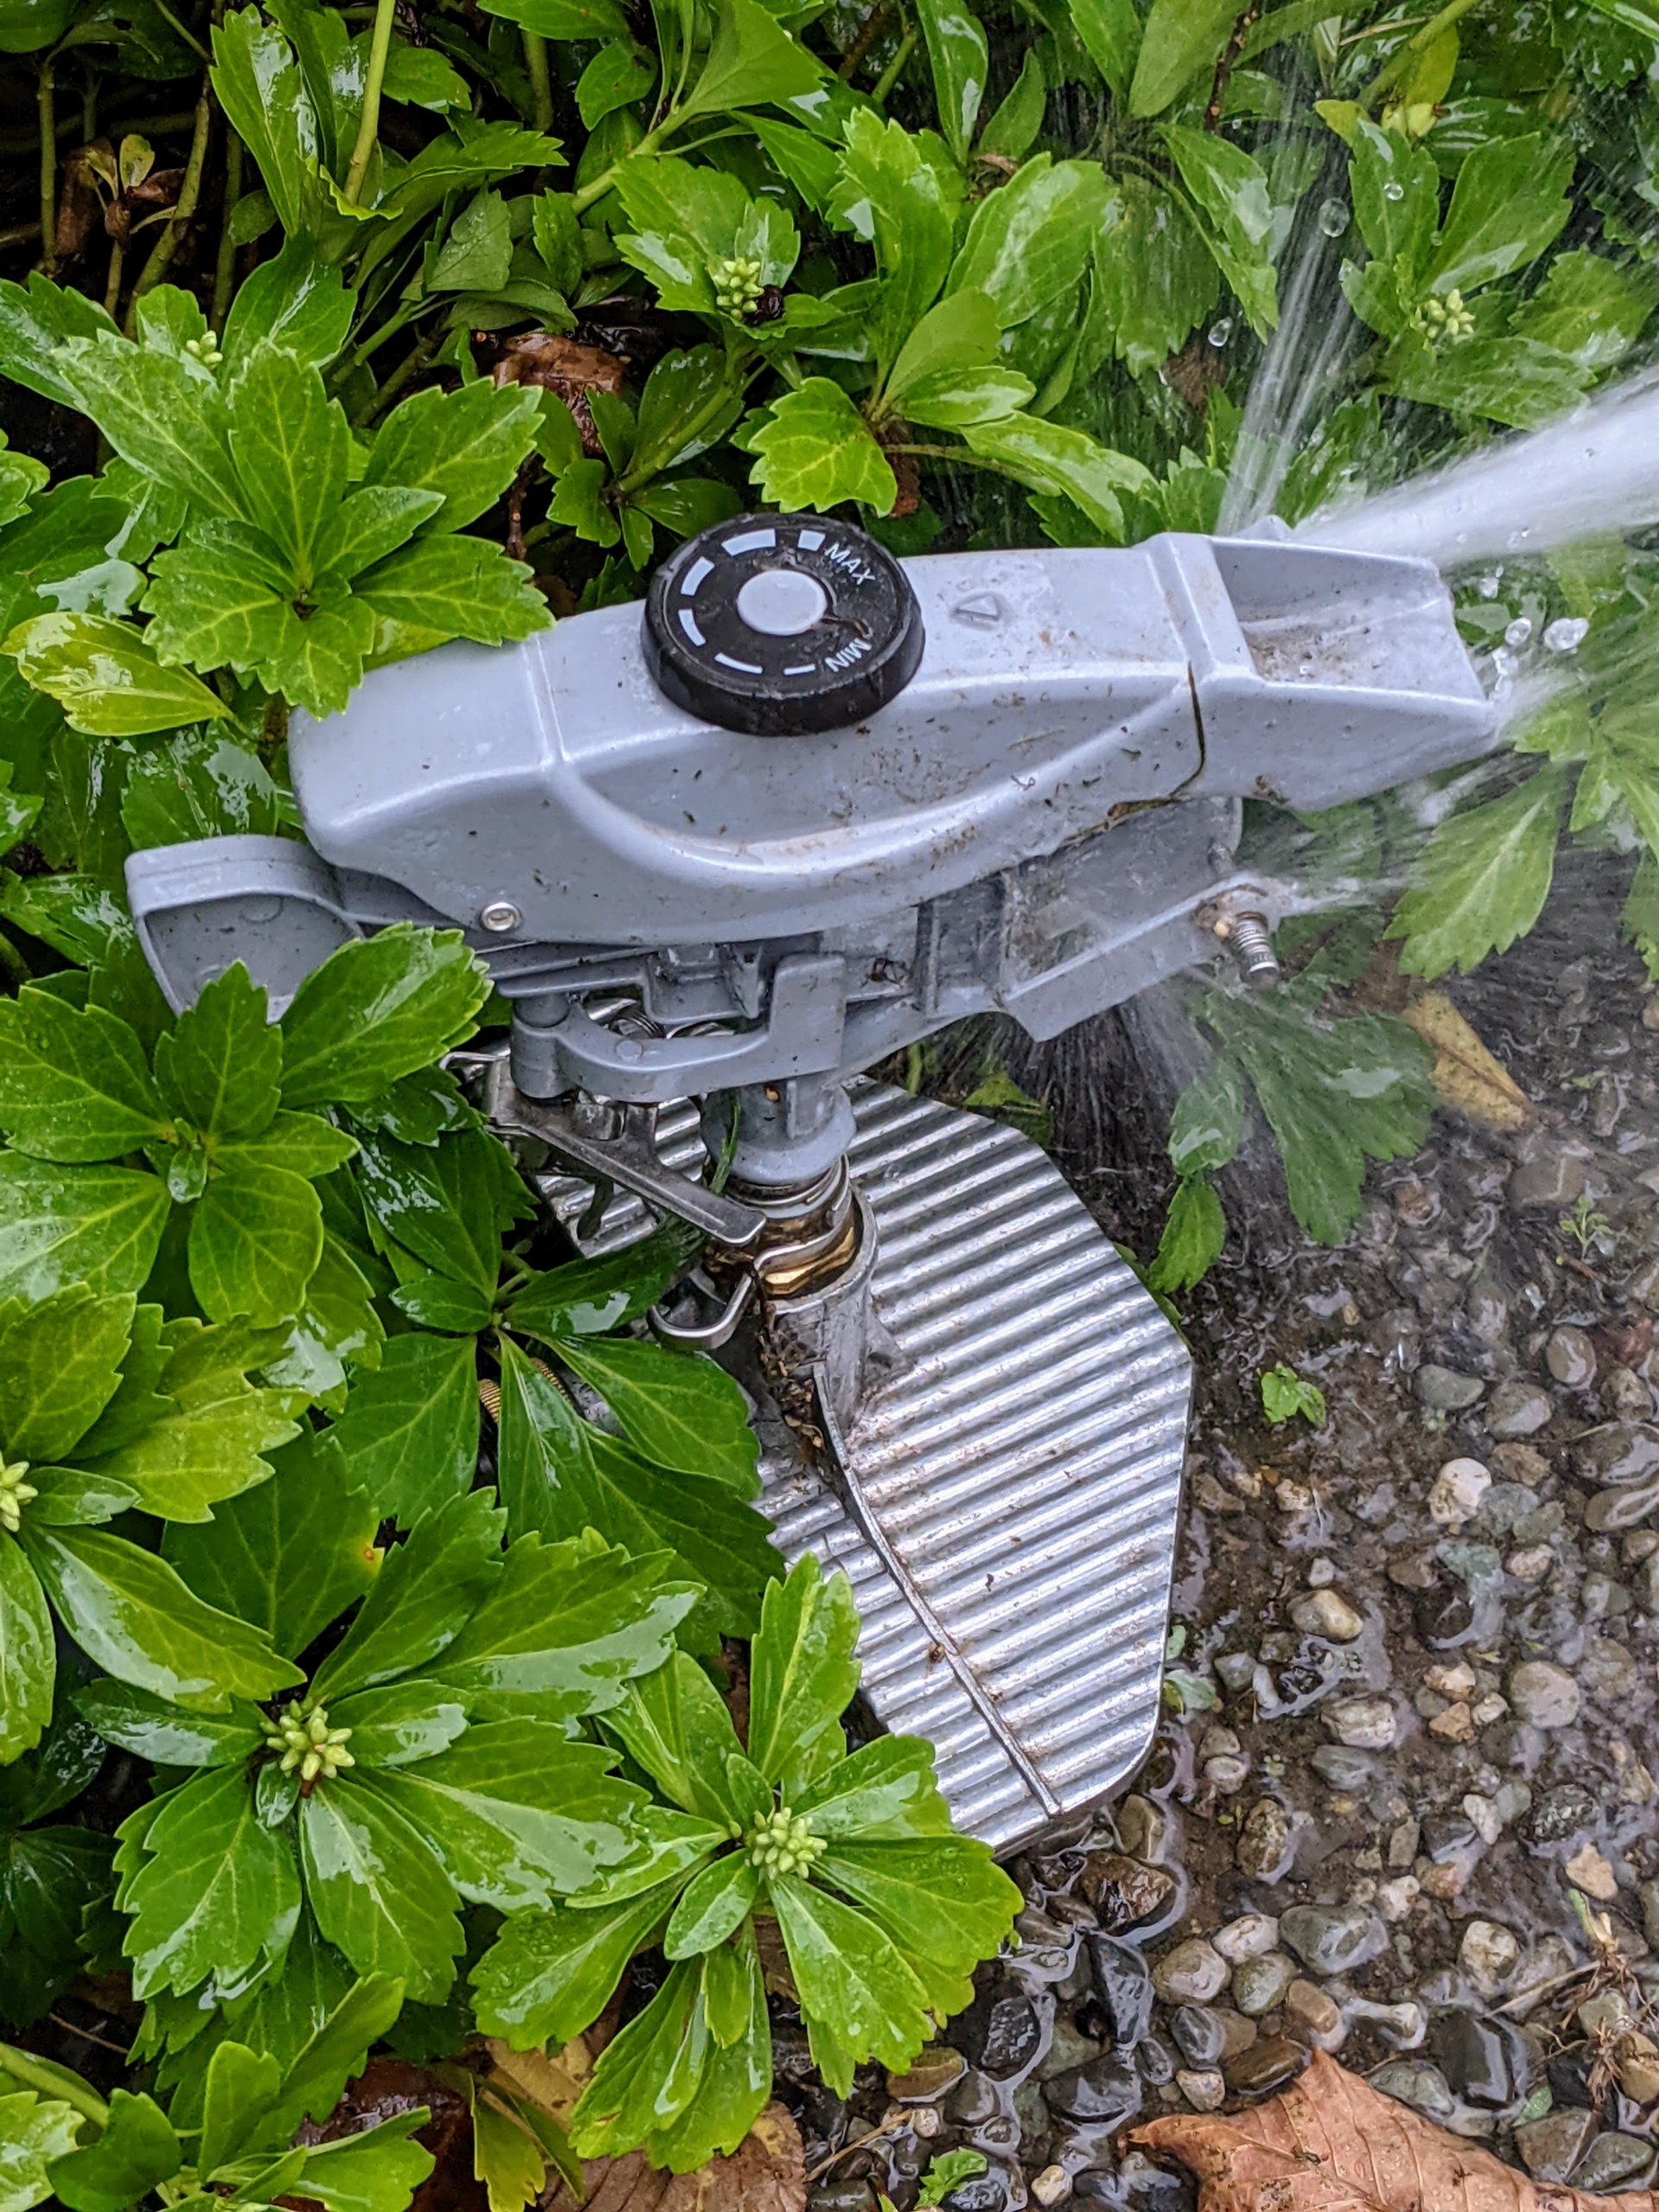
Some of the other Gilmour products we’ve used over the years include this Adjustable Spot Sprinkler with Spike Base. These are great for use where there are planters and garden beds. The durable metal spike provides stability in softer soil and on uneven ground.
These spot sprinklers are easy to push into the ground wherever needed and offer full circular coverage.
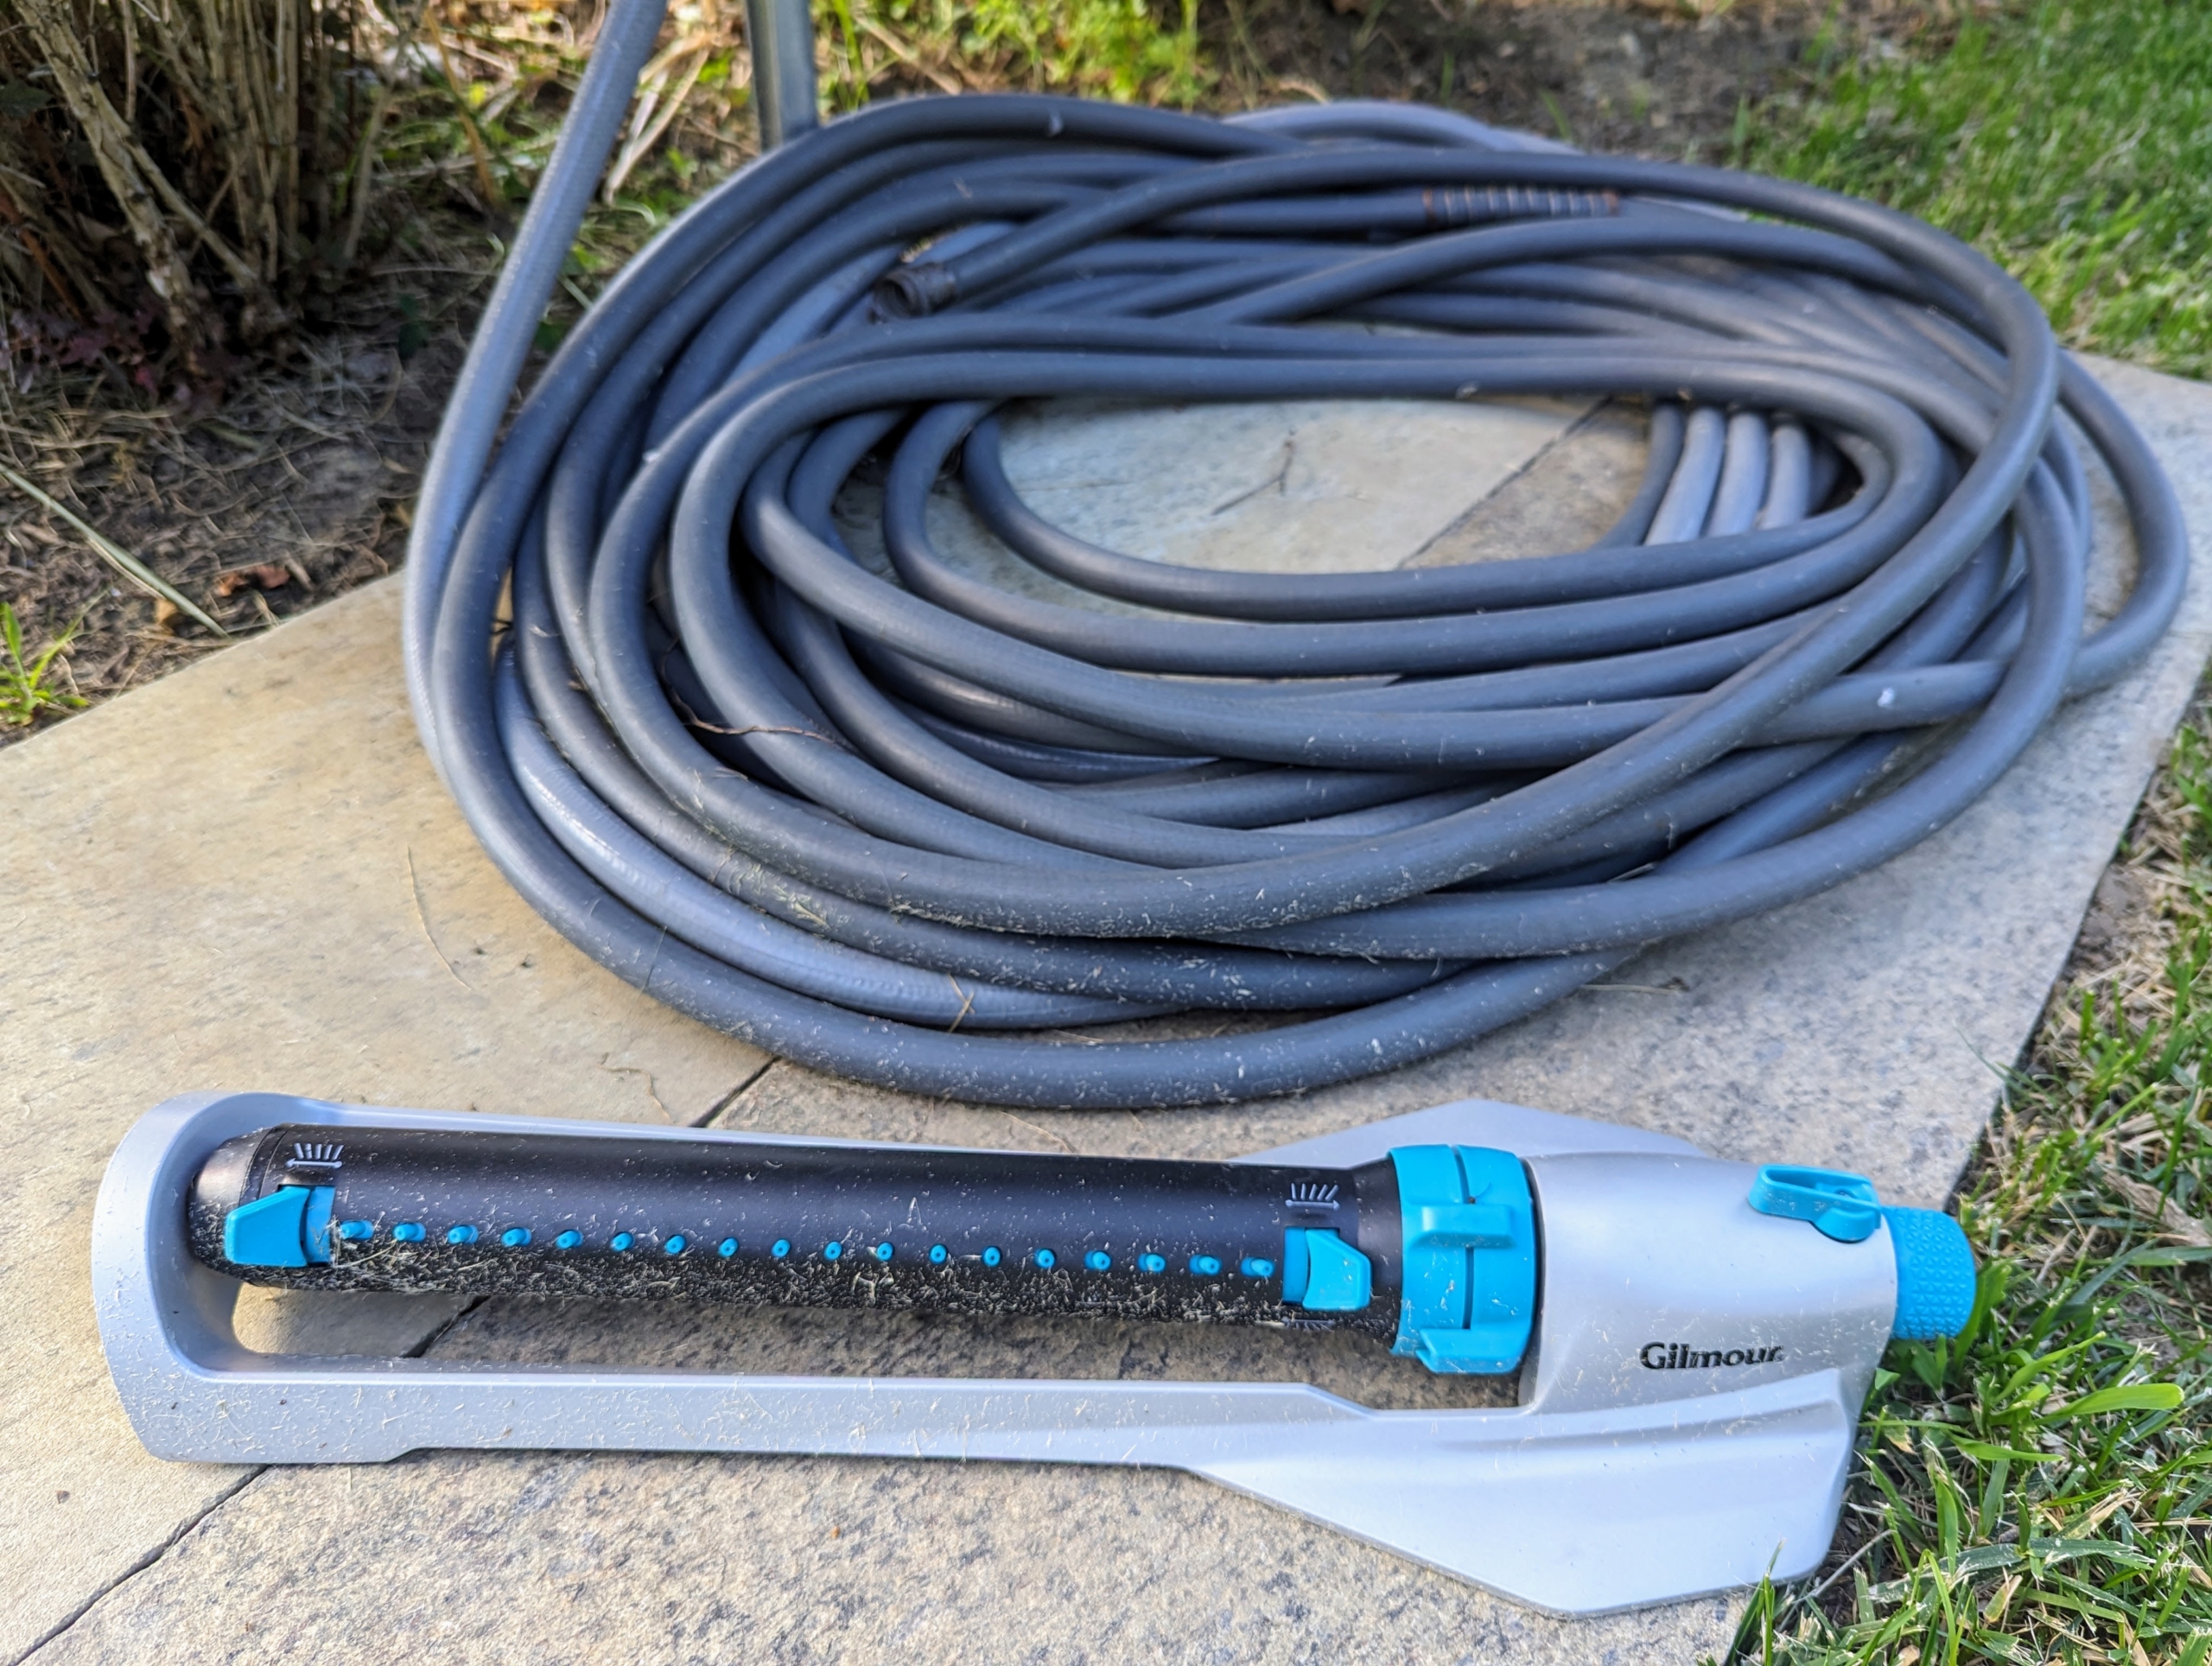
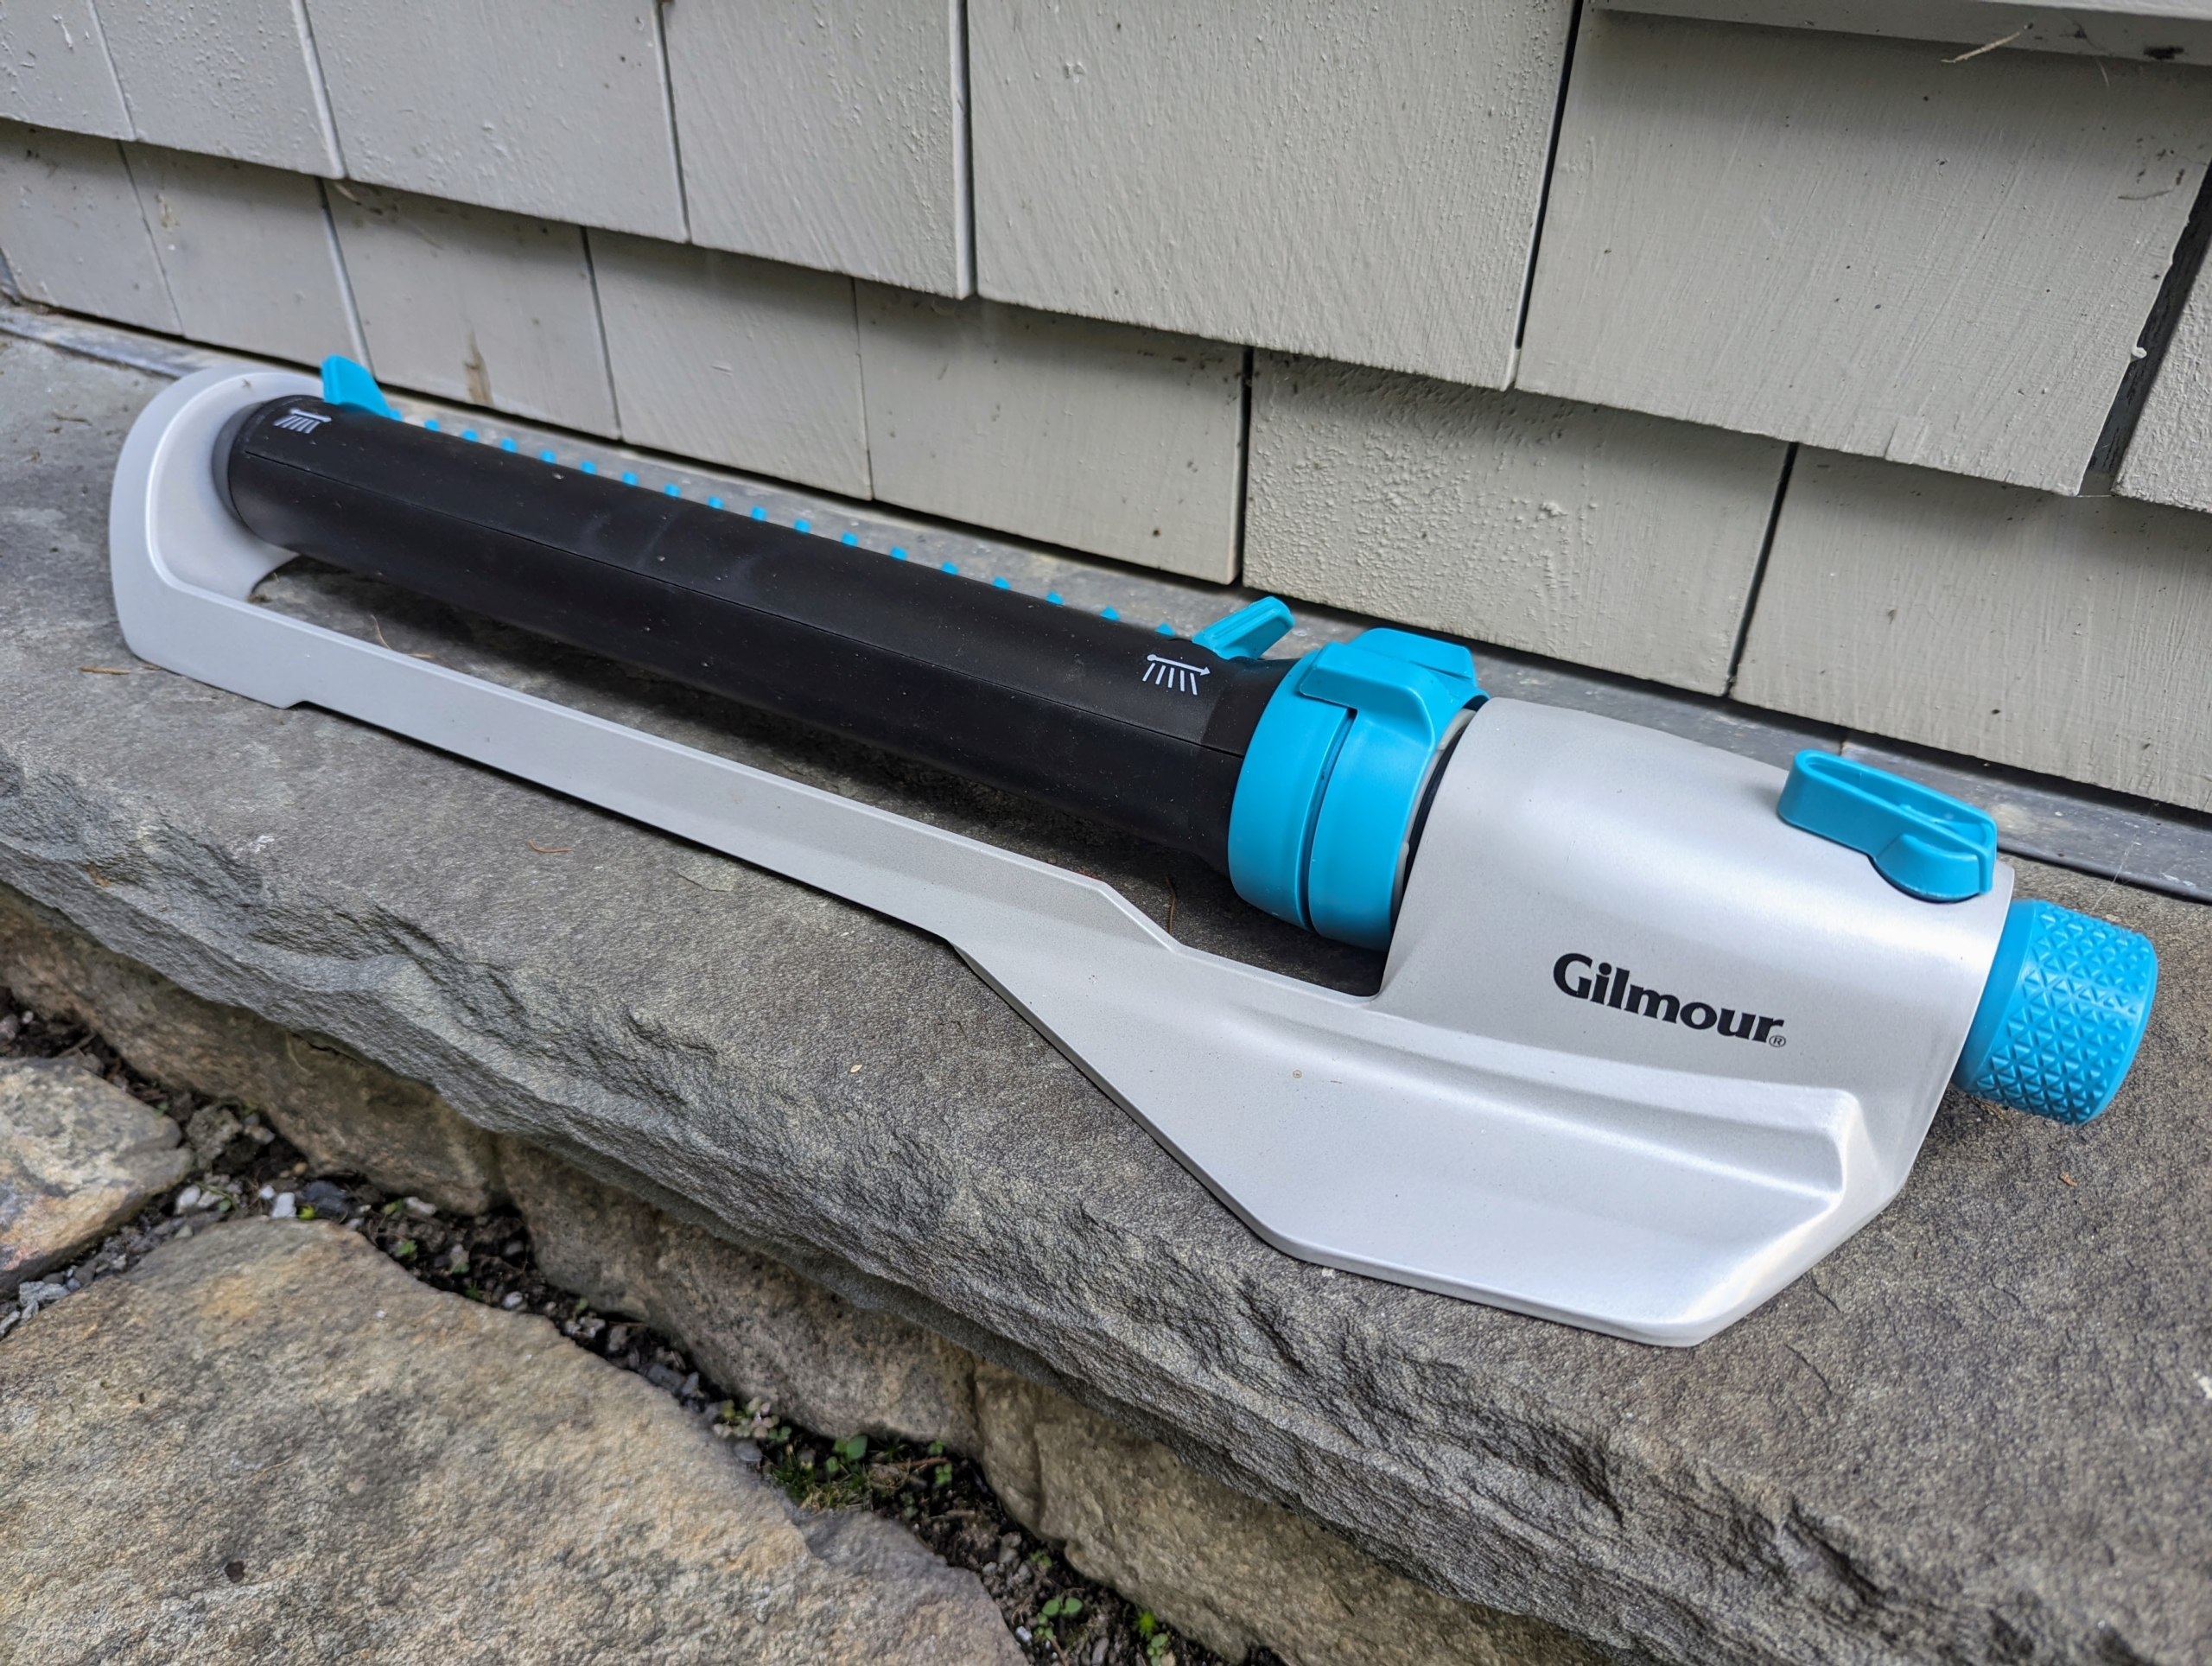
We use the Gilmour rectangular oscillating sprinklers that are easy to control in a variety of areas. They feature a tube with multiple openings that move back and forth to provide even watering.
I have many of these rectangular oscillating sprinklers. Some models are older, but they hold up so well through the seasons. They provide thousands of square feet in water coverage.
Fortunately, we’ve had good amount of rain this summer, but August is typically quite warm and dry. It’s nice to know we have the “right tools for the right jobs,” so all my gardens, groves, and allées will be well maintained. Wherever you live, I hope all your gardens are getting the water they need.
Gardeners, think ahead - mid-to-late summer is the best time to start seeds in order to extend the harvest window into autumn.
Here at my Bedford, New York farm, we always try to maximize the productivity of the gardens. Yesterday, my head gardener, Ryan McCallister, started seed trays of Brussels sprouts, broccoli, cauliflower, cabbage, romanesco, and kale - all considered brassicas, or cole crops - a genus of plants in the mustard family whose members are informally referred to as cruciferous vegetables. The seeds will remain in the greenhouse until they’re mature enough to be moved to my new vegetable garden. And then next season, we'll have another bounty of delicious, organic vegetables.
Enjoy these photos.
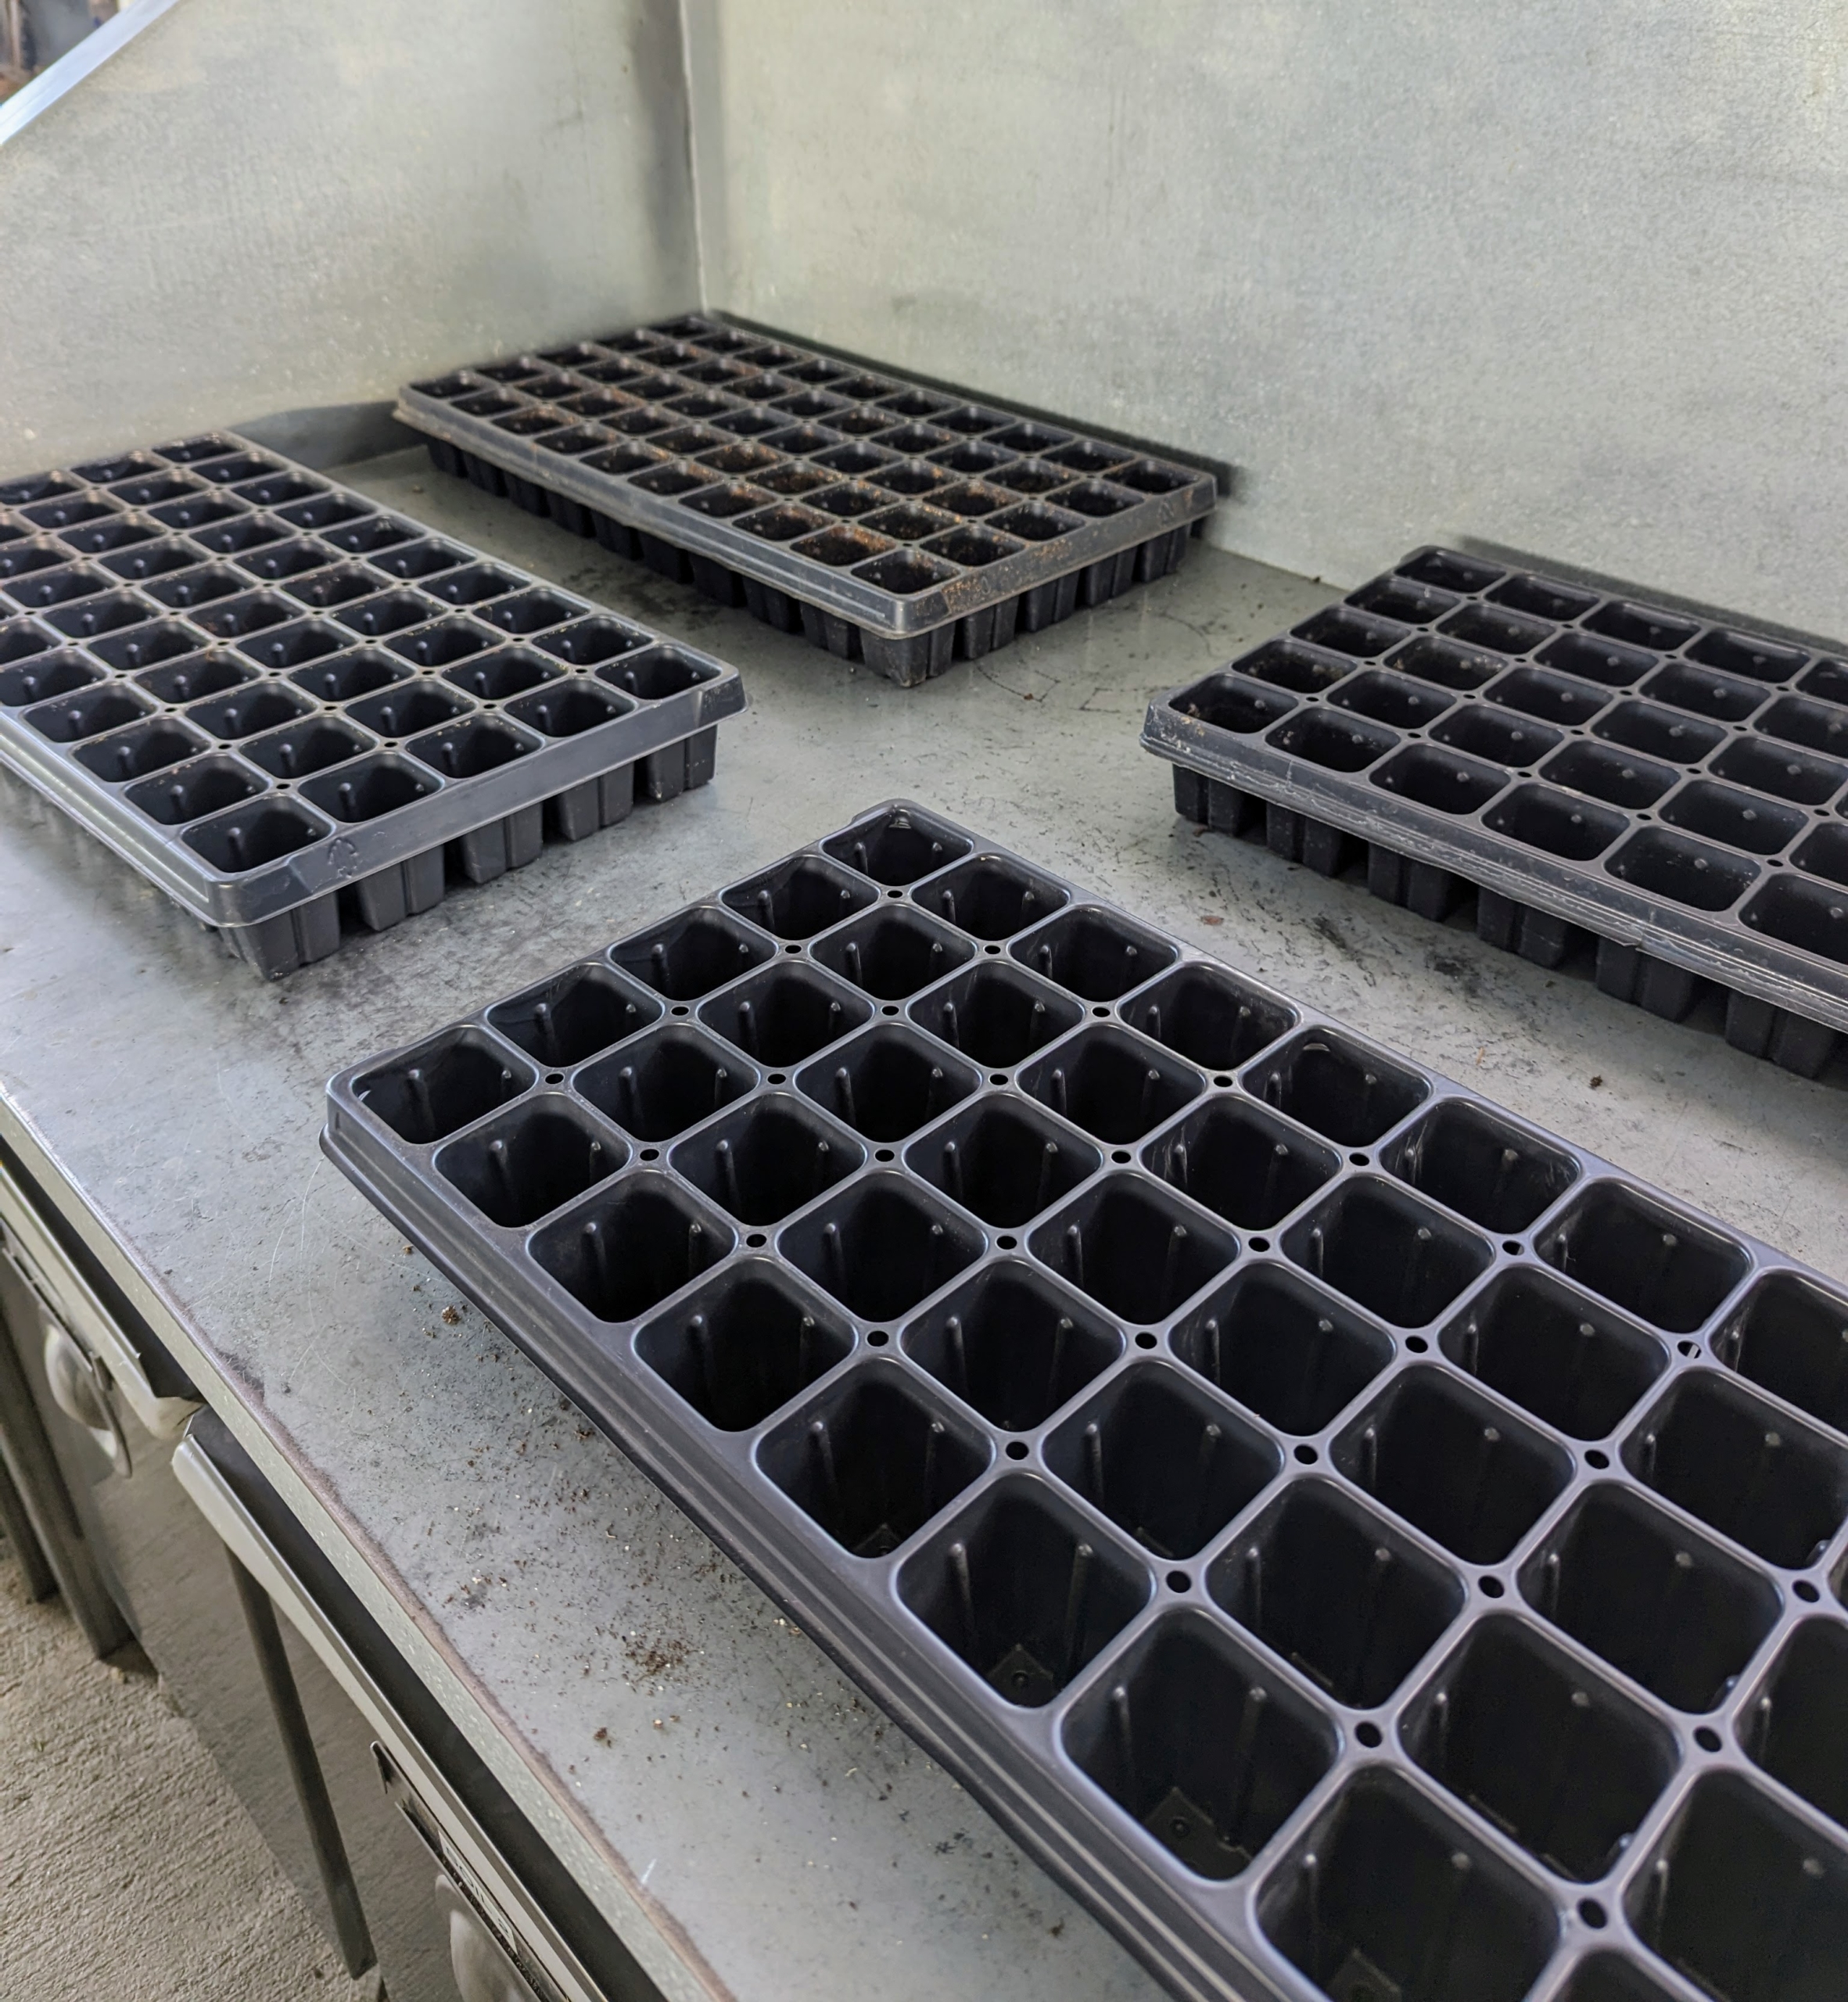
Ryan chooses all the necessary seed starting trays. These can be saved from year to year, so don’t throw them away after the season. Seed starting trays are available in all sizes and formations. Select the right kind of tray based on the size of the seeds. The containers should be at least two-inches deep and have adequate drainage holes.
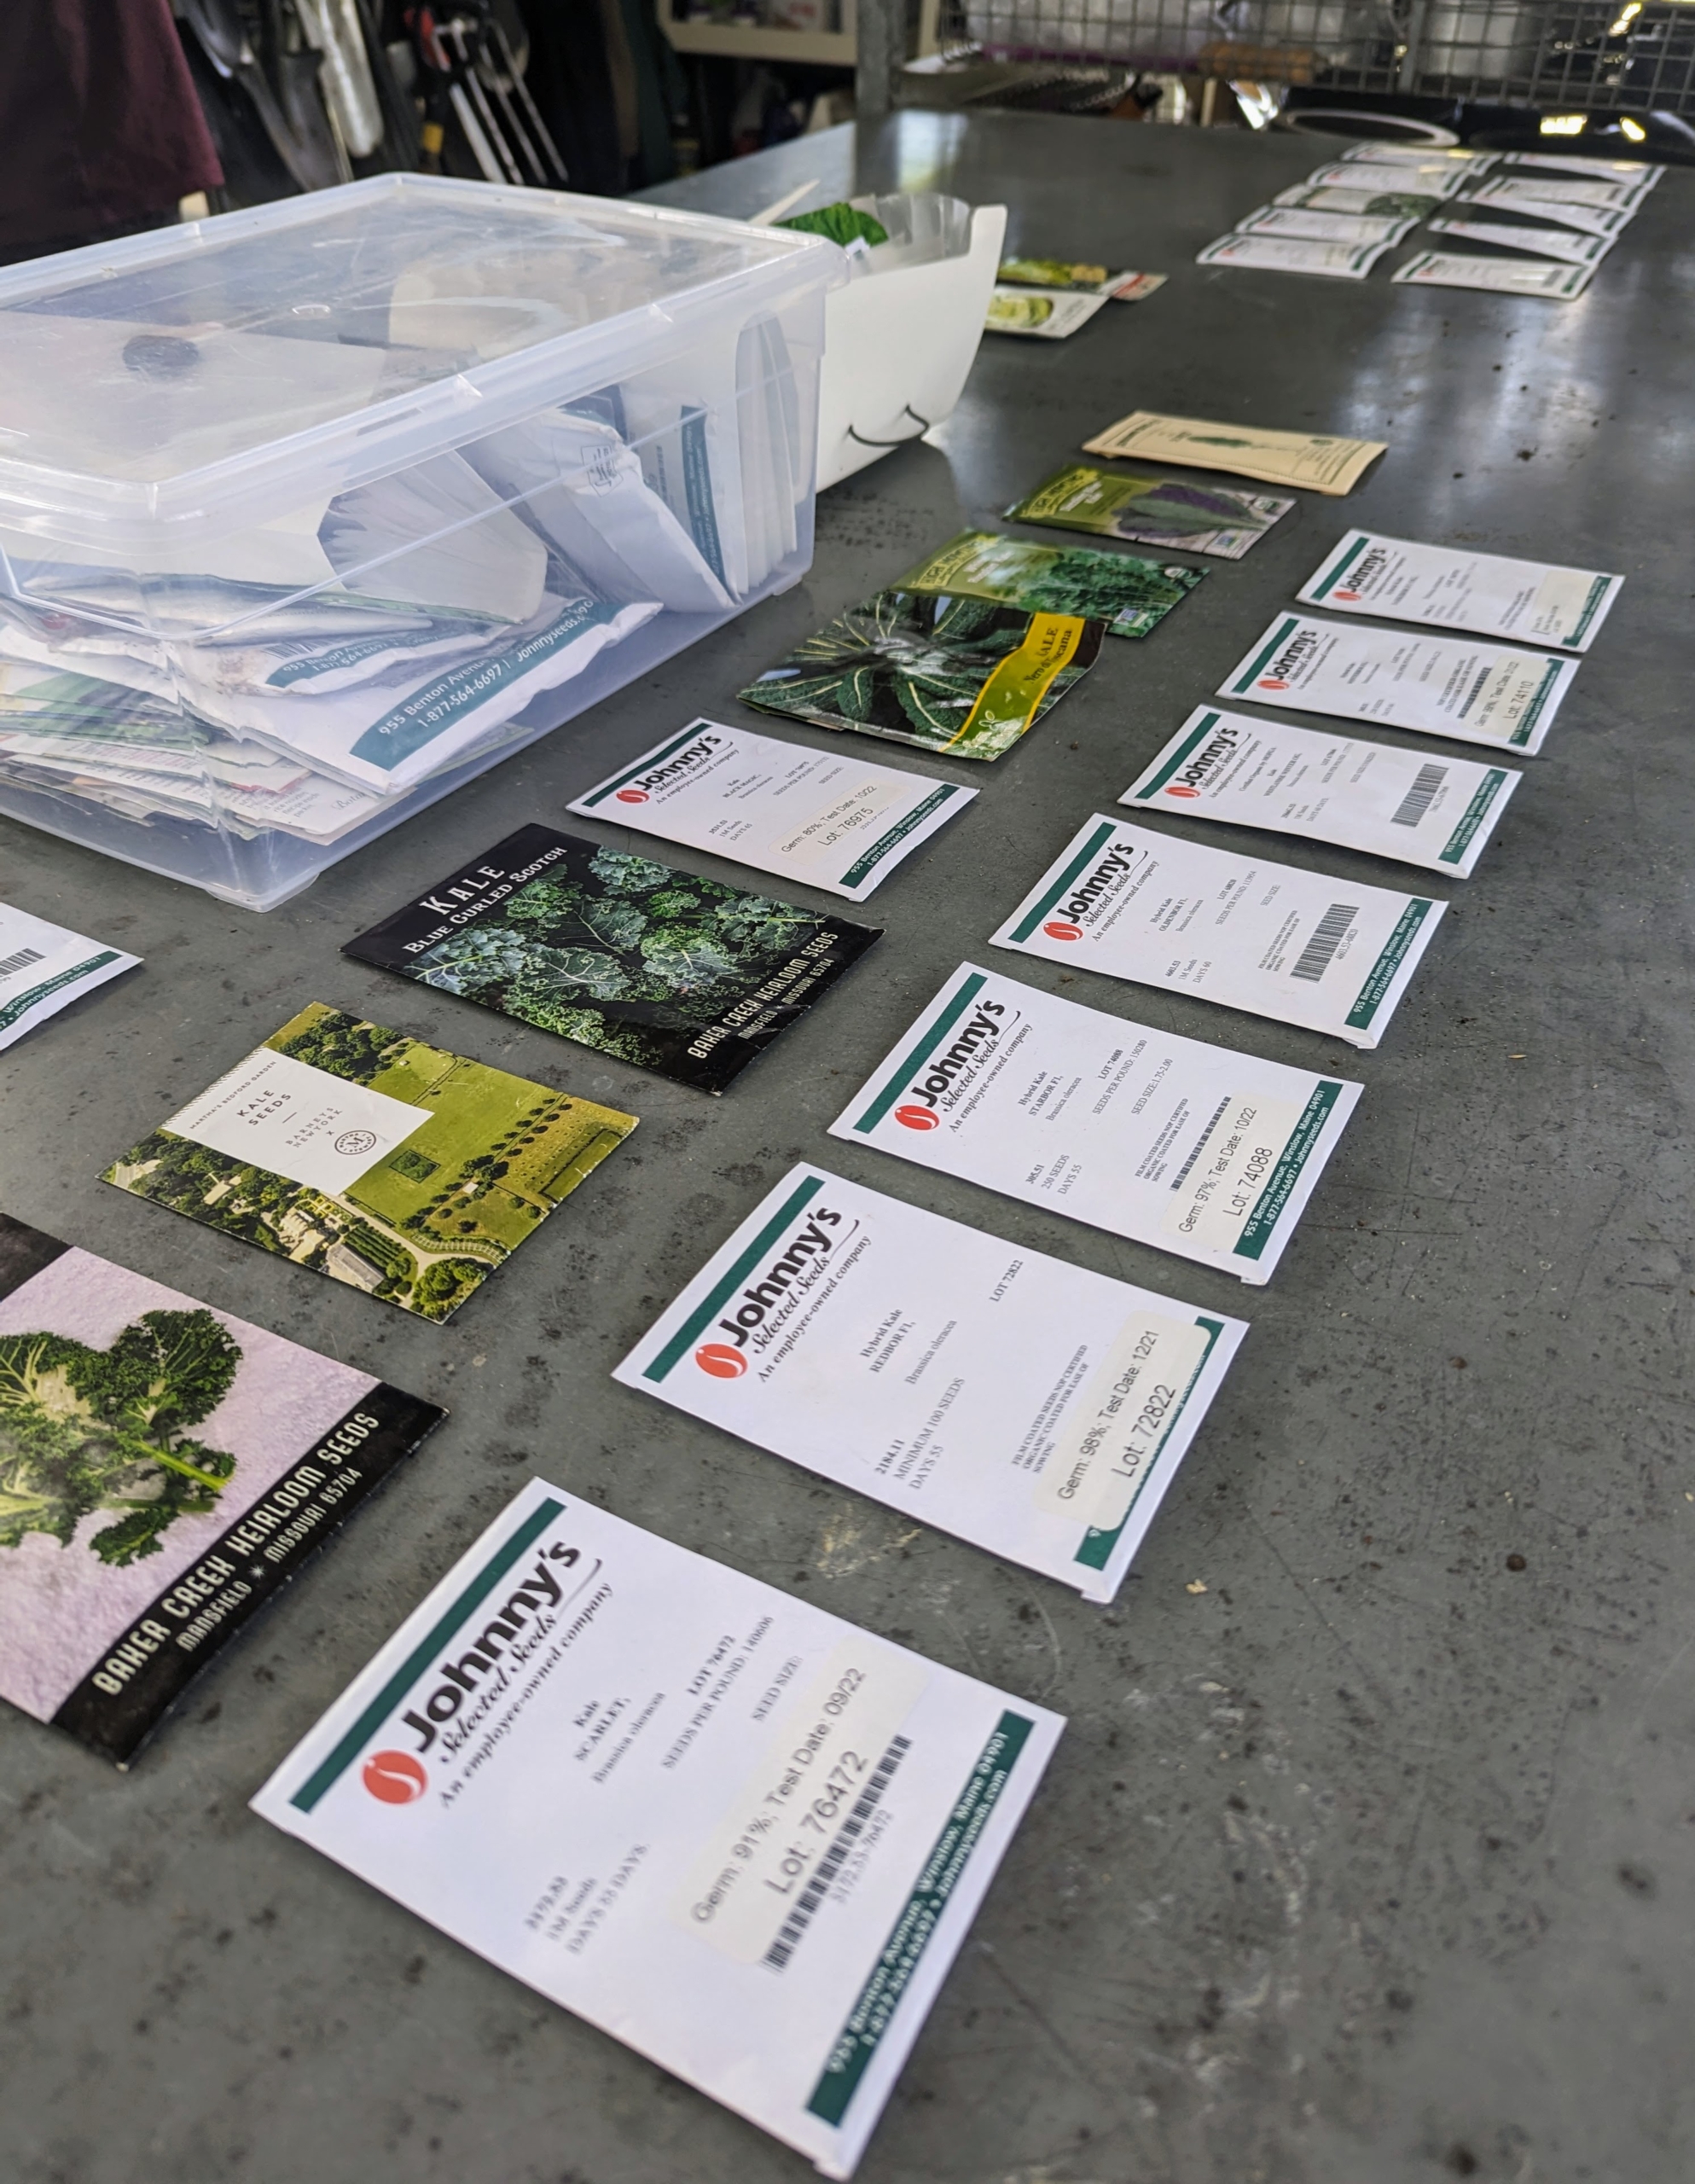
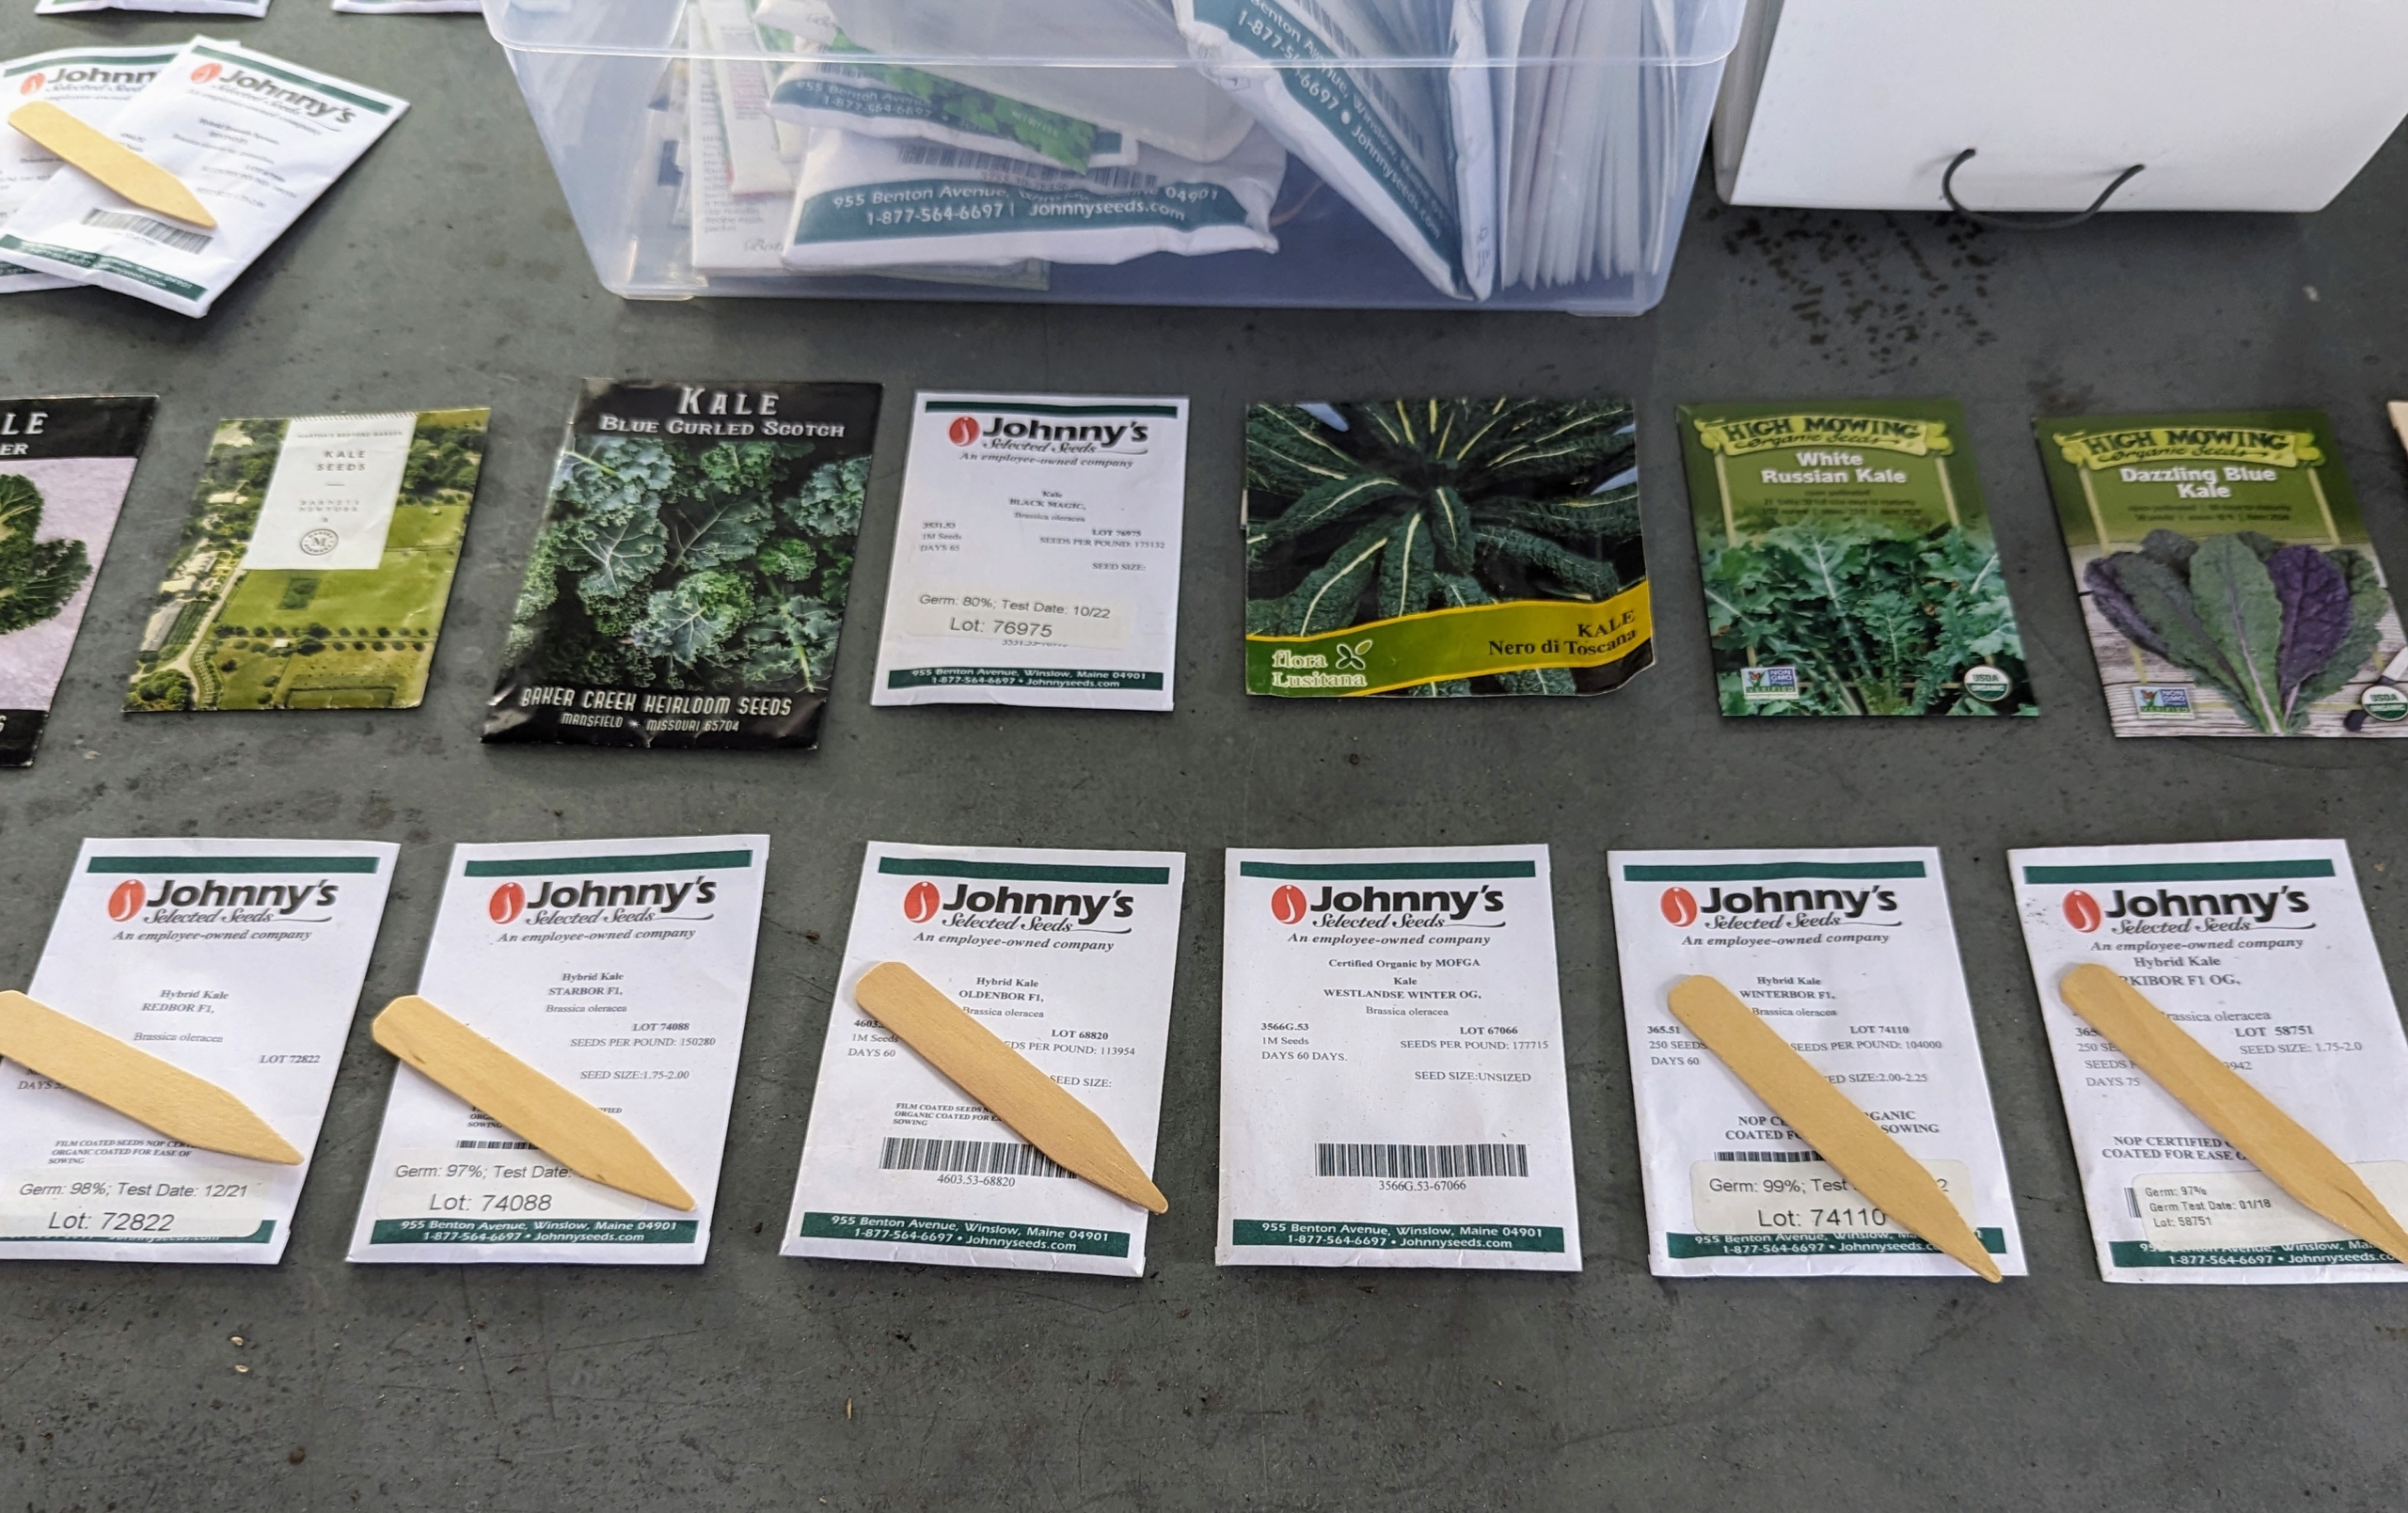
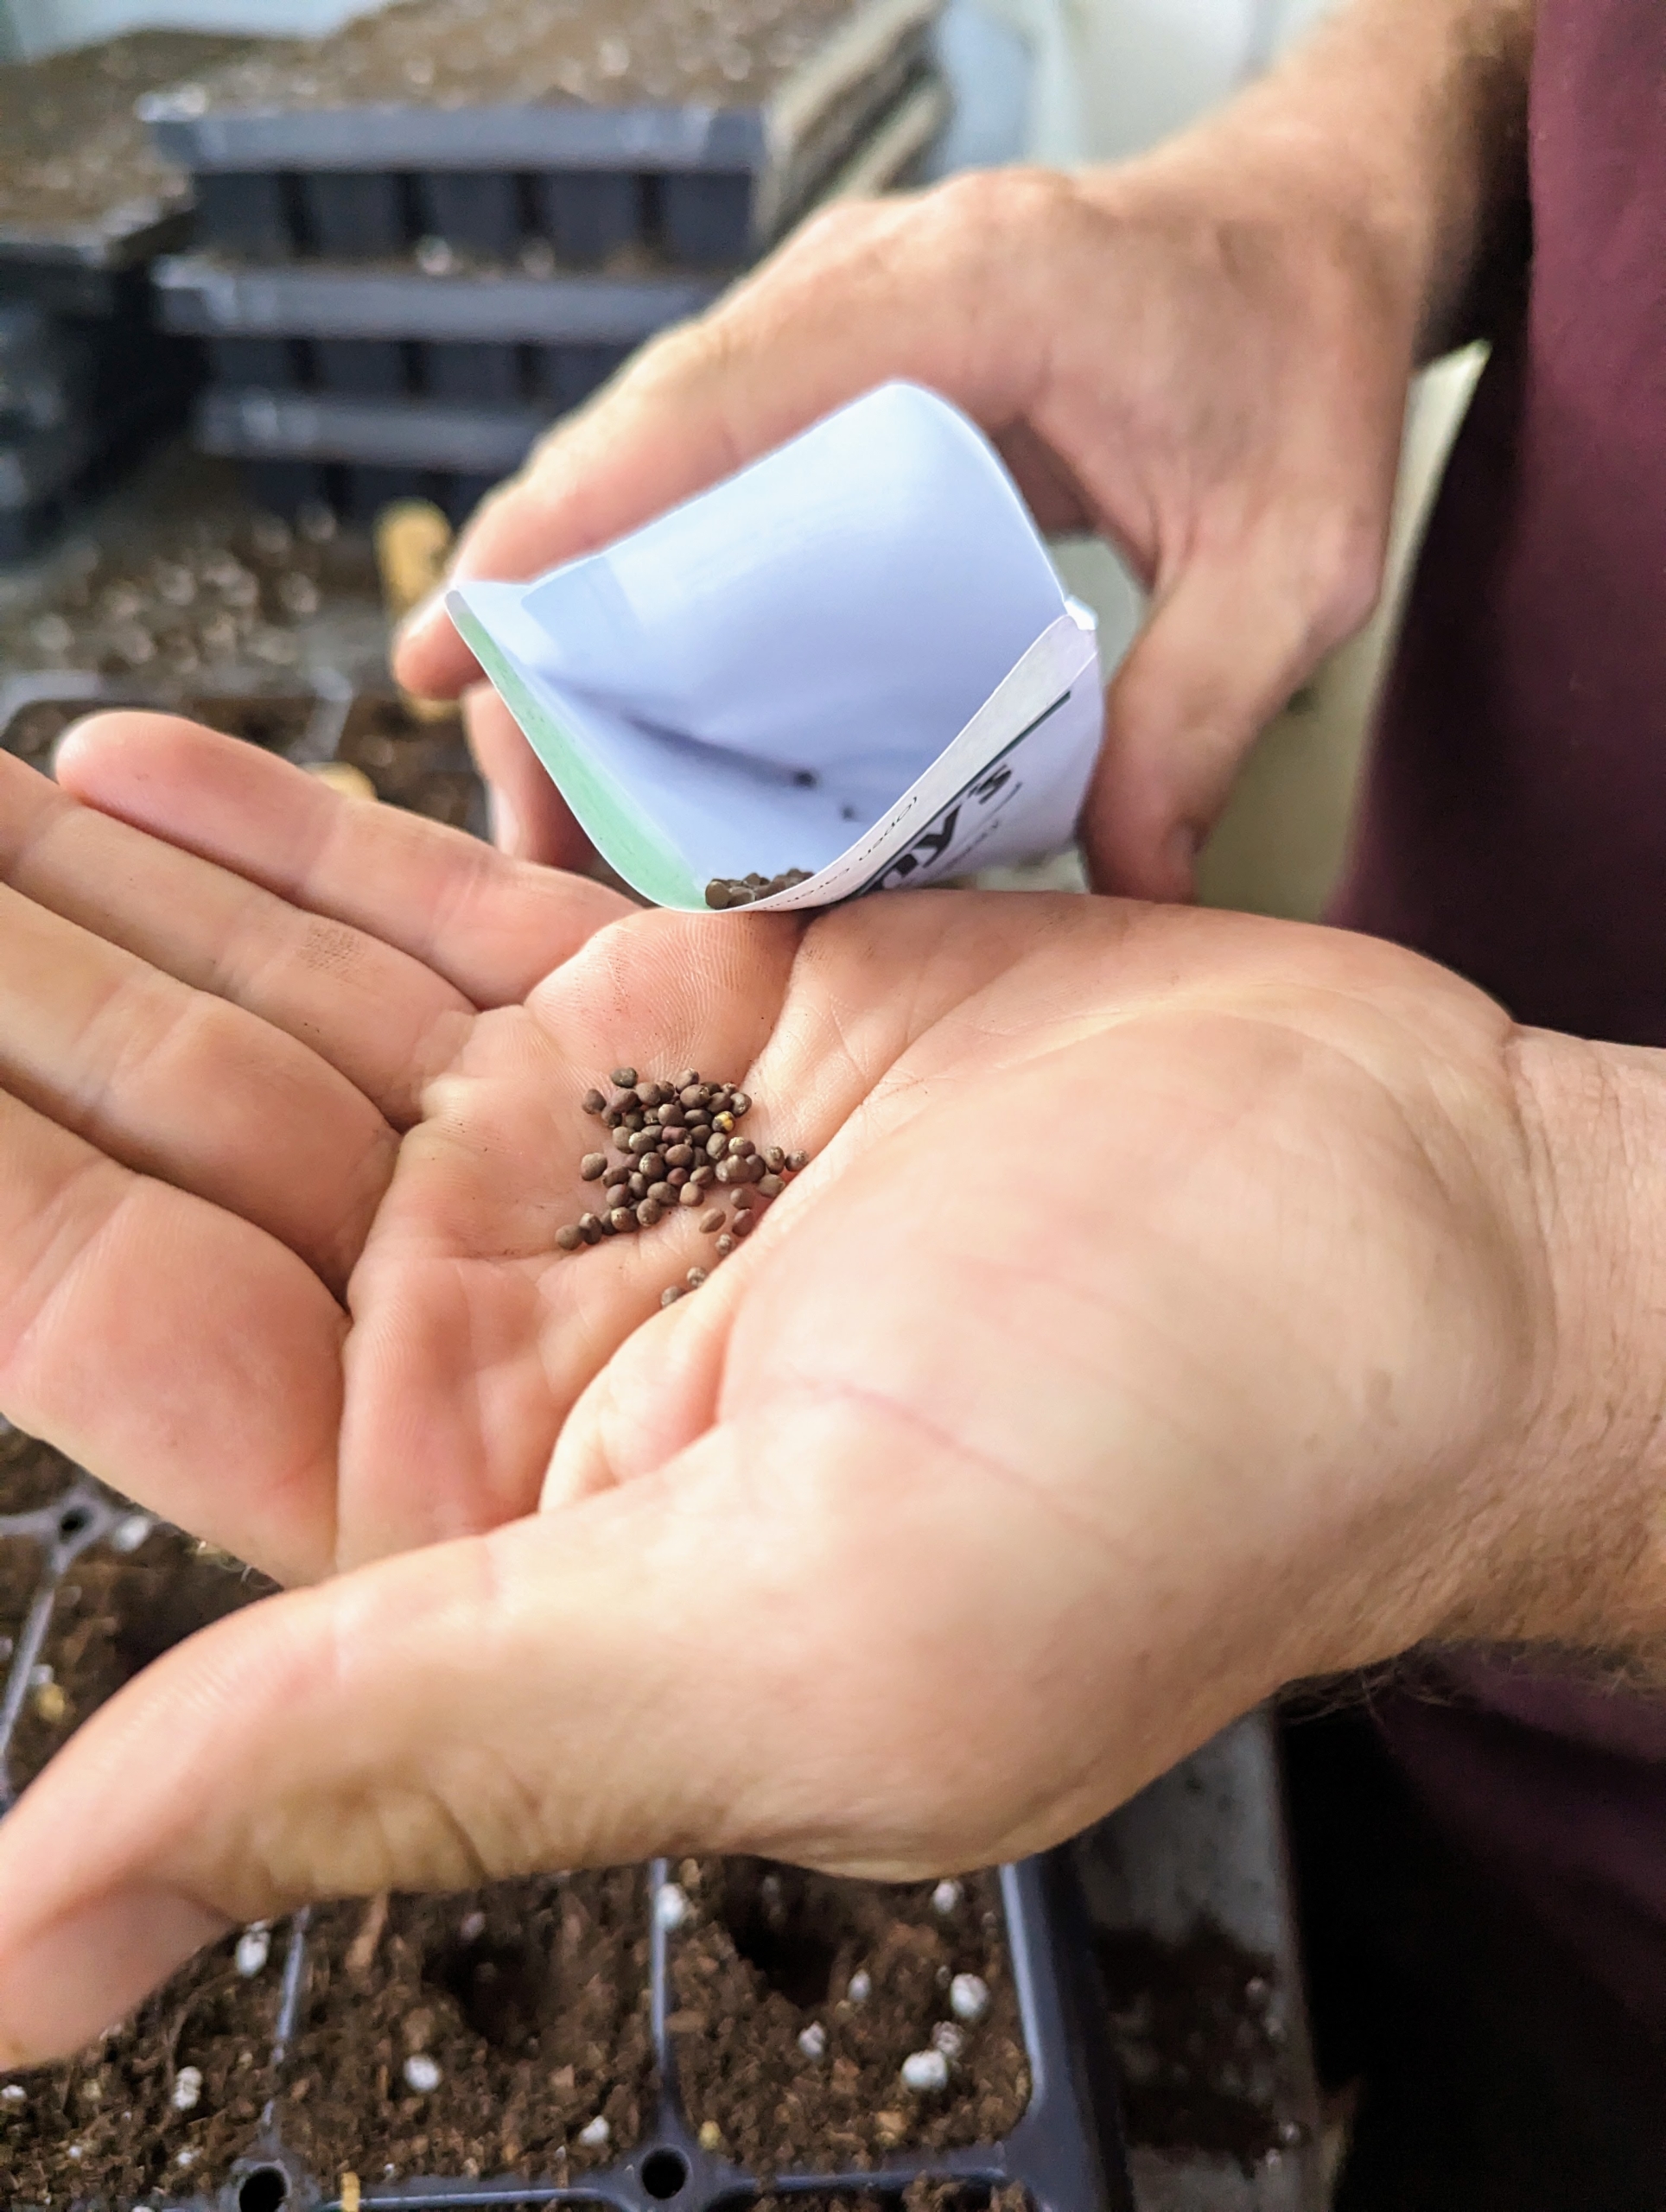
Here at my farm, we keep all our seed packets in plastic envelopes and plastic bins – all are labeled and filed for easy reference. Mason jars with tight-fitting lids, or glass canisters with gasket-type lids also work. Humidity and warmth shorten a seed’s shelf life, so we store the organized seed packets in a greenhouse refrigerator. Ryan takes out the seeds for those vegetables he wants to plant. We always have a lot of seeds from which to choose.
And then he carefully selects those varieties which are most hardy for fall production. When buying or ordering seeds, be sure to read the hardiness of a plant. And know your hardiness zone, so you can select the right seeds for your area. Here in Bedford, we are zone-6b. It is easy to look it up online.
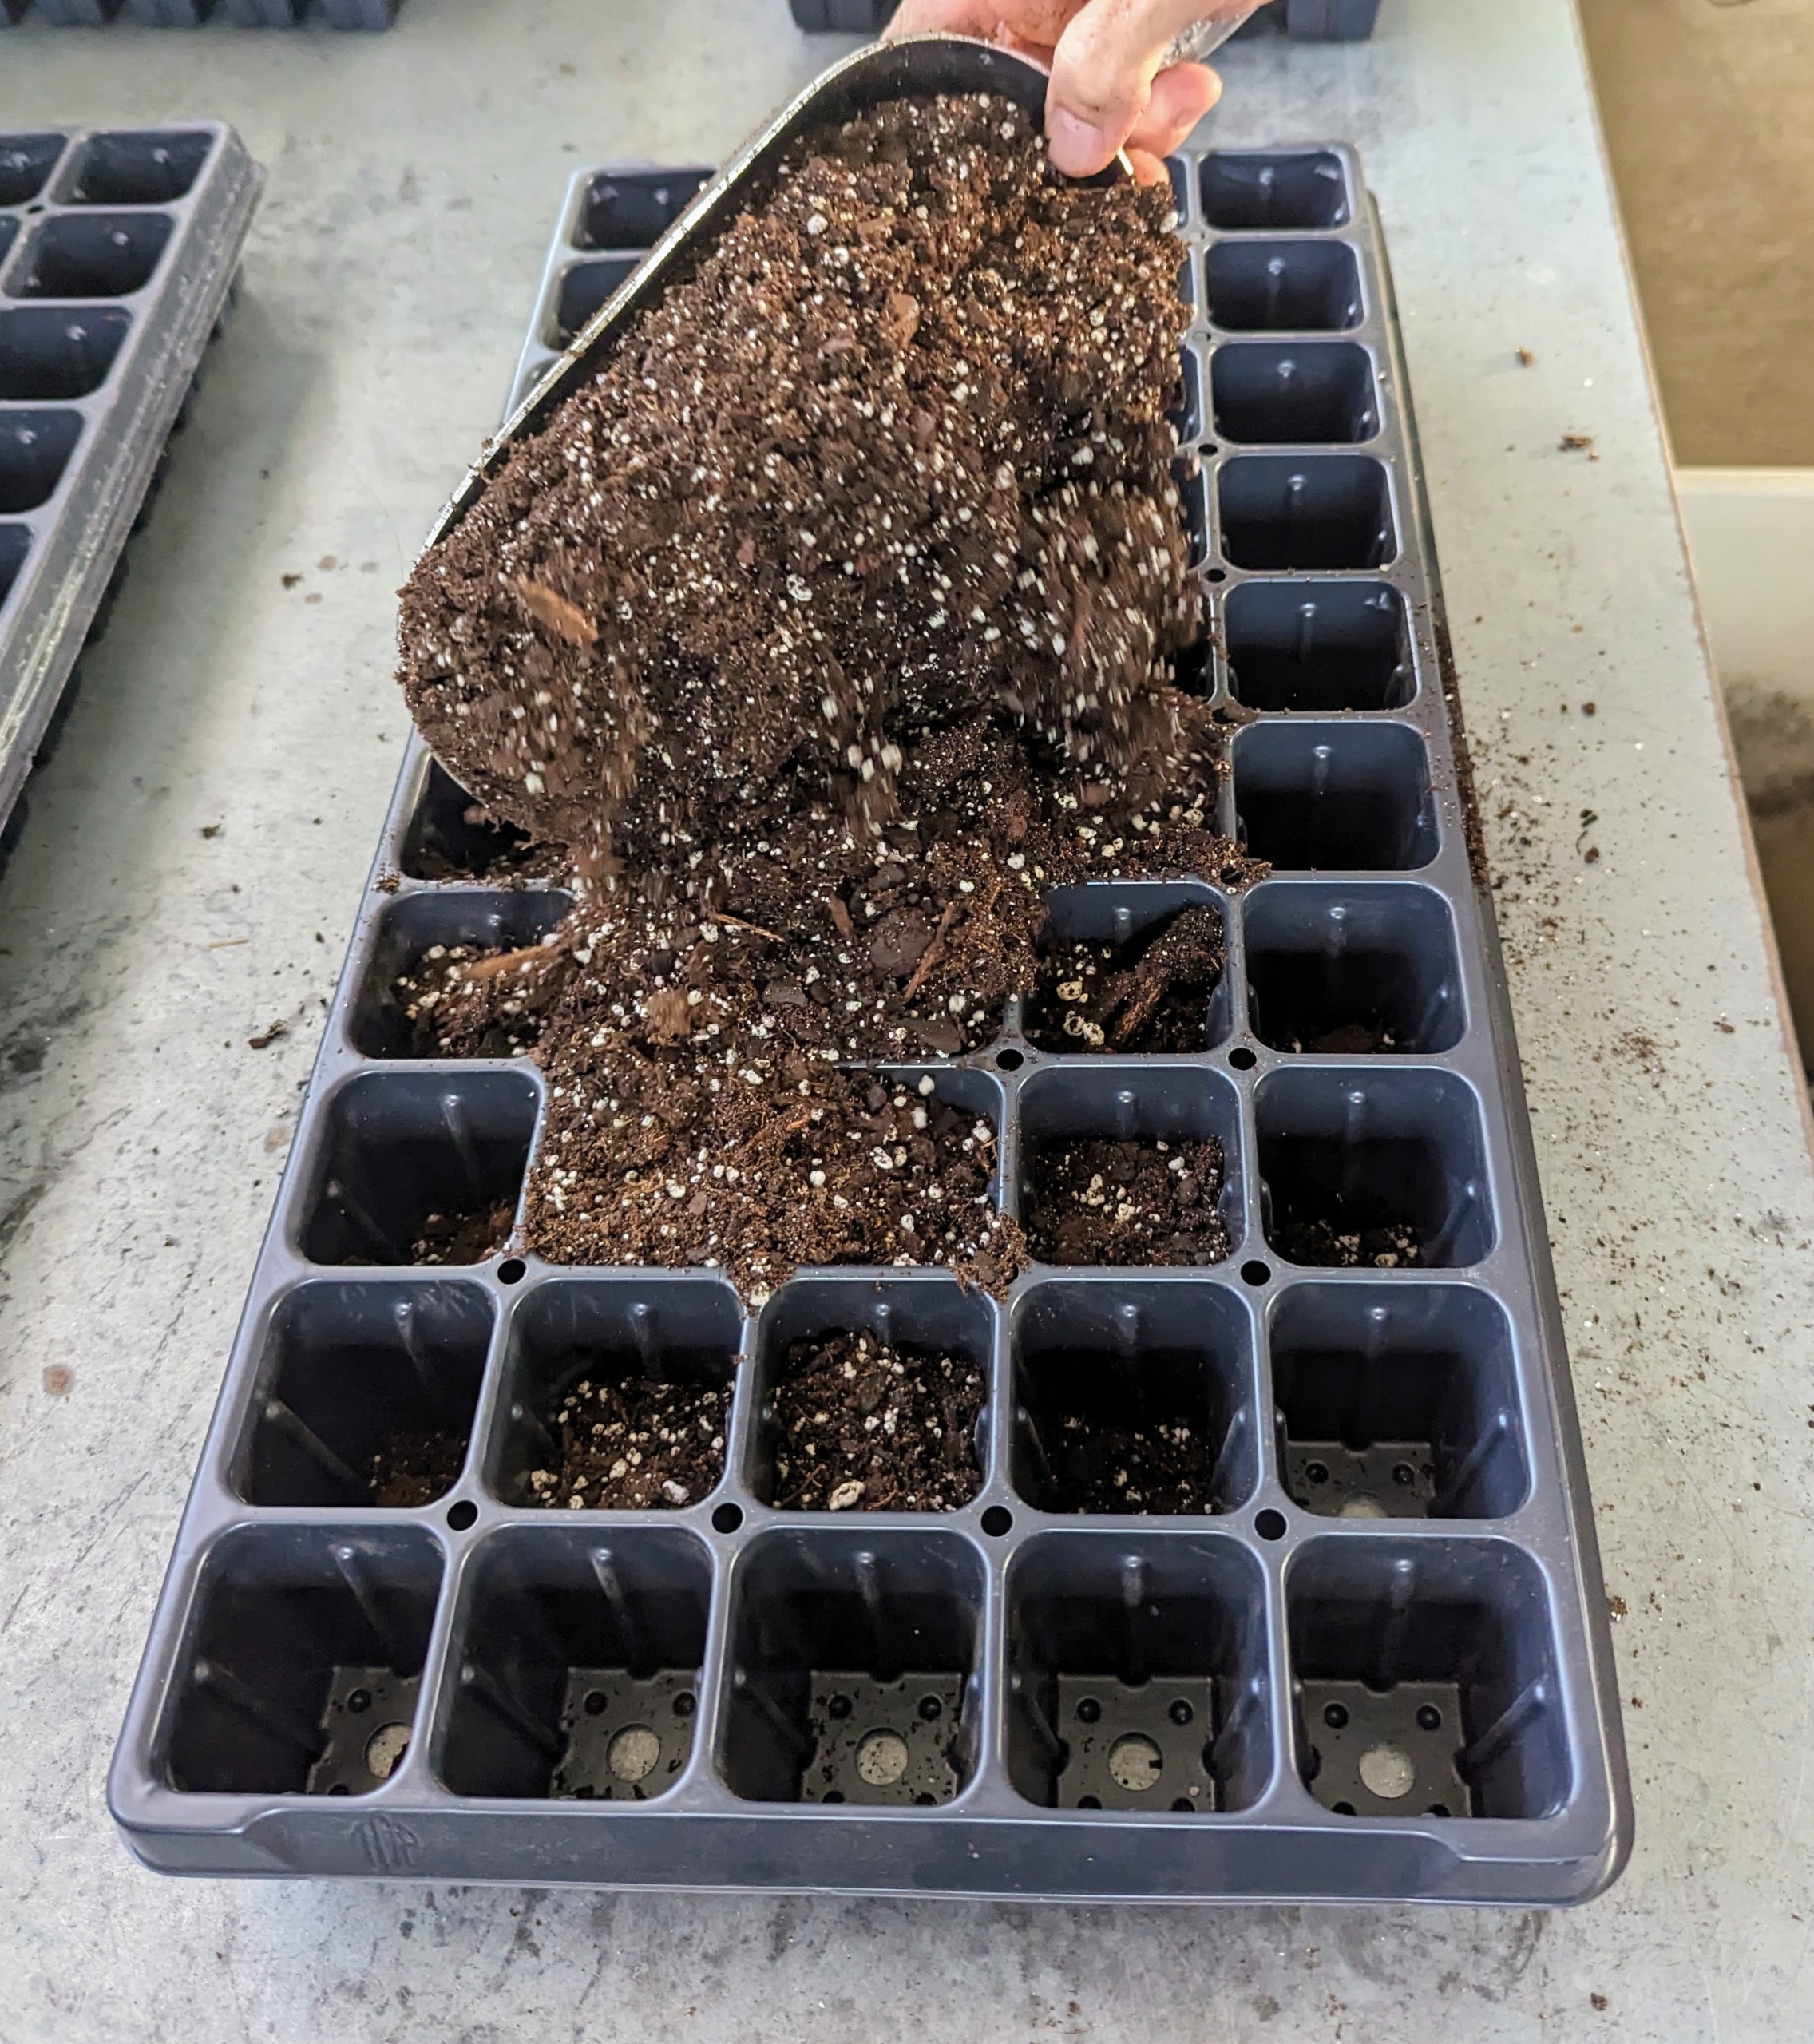
Next, Ryan prepares the trays. It’s best to use a pre-made seed starting mix that contains the proper amounts of vermiculite, perlite and peat moss. Seed starting mixes are available at garden supply stores.
Ryan spreads the soil mix across the seed trays completely and evenly, filling all the cells of each tray. When possible, prepare several trays in an assembly-line fashion, and then drop all the seeds. Doing this saves time and simplifies the process.
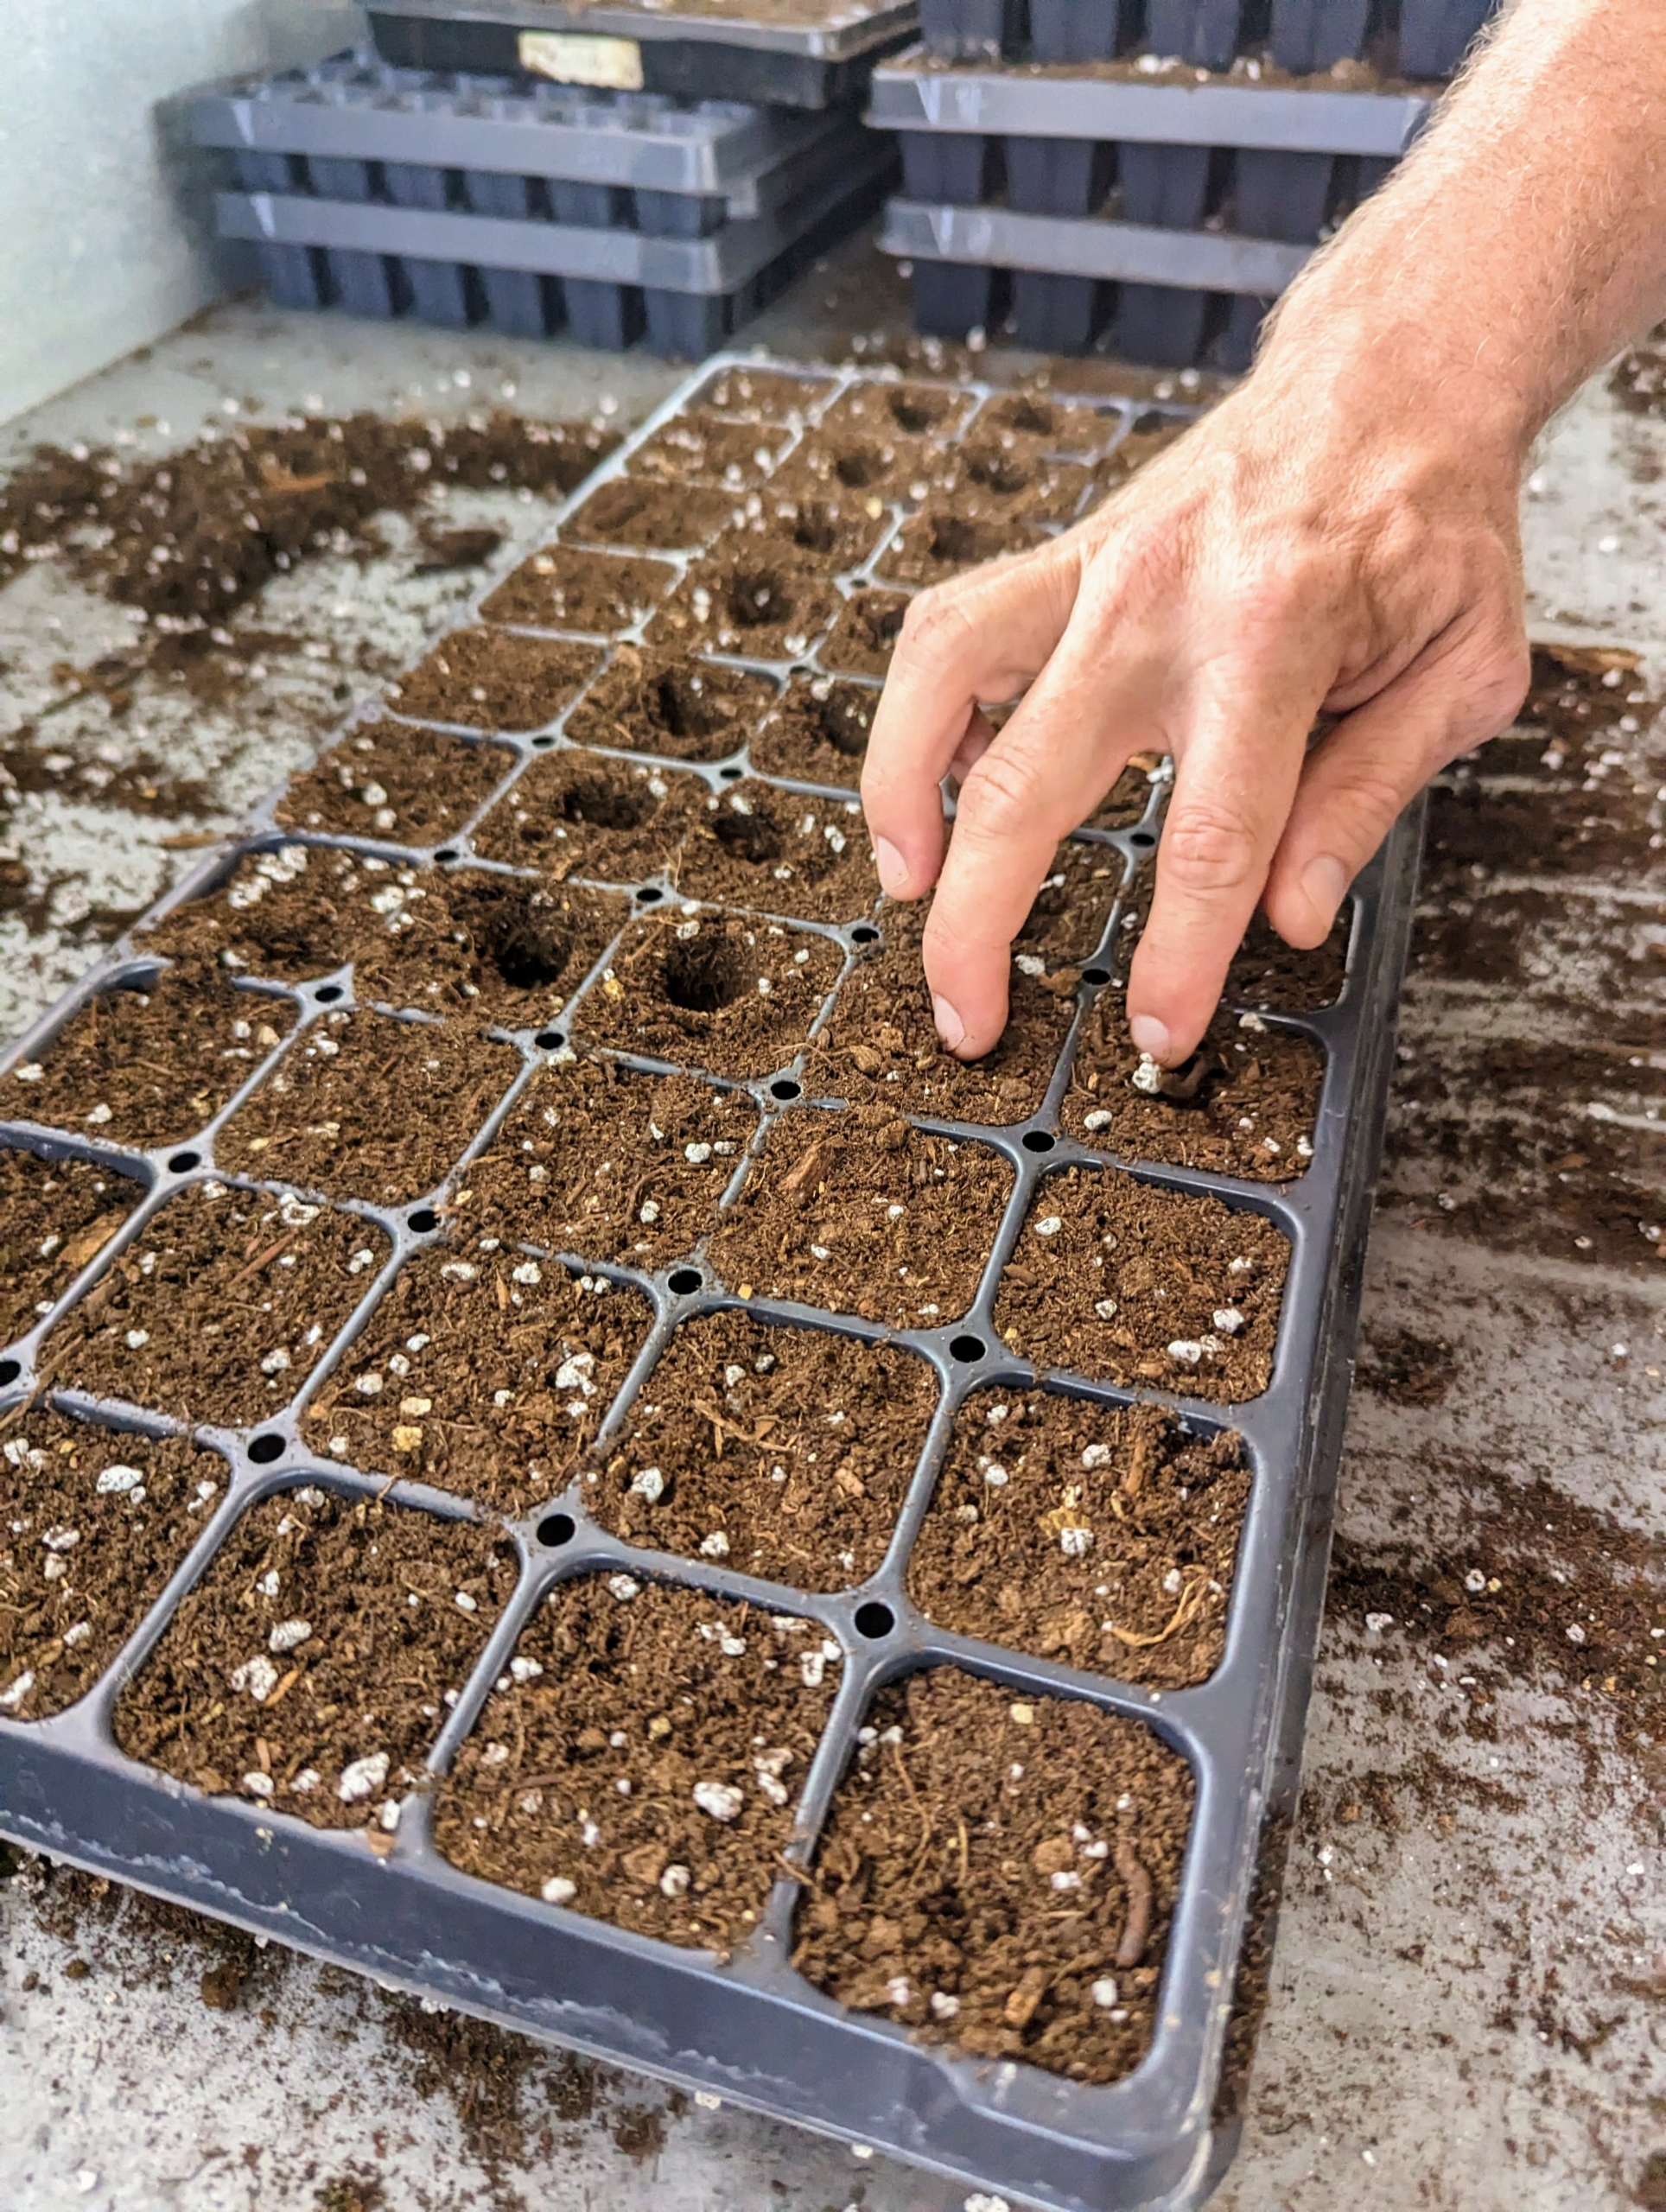
To create a quarter-inch deep furrow in the middle of each compartment, press fingers gently into each cell. This can be done pretty quickly especially if only seeding one or two trays. One can also use the capped end of a felt-tipped marker.
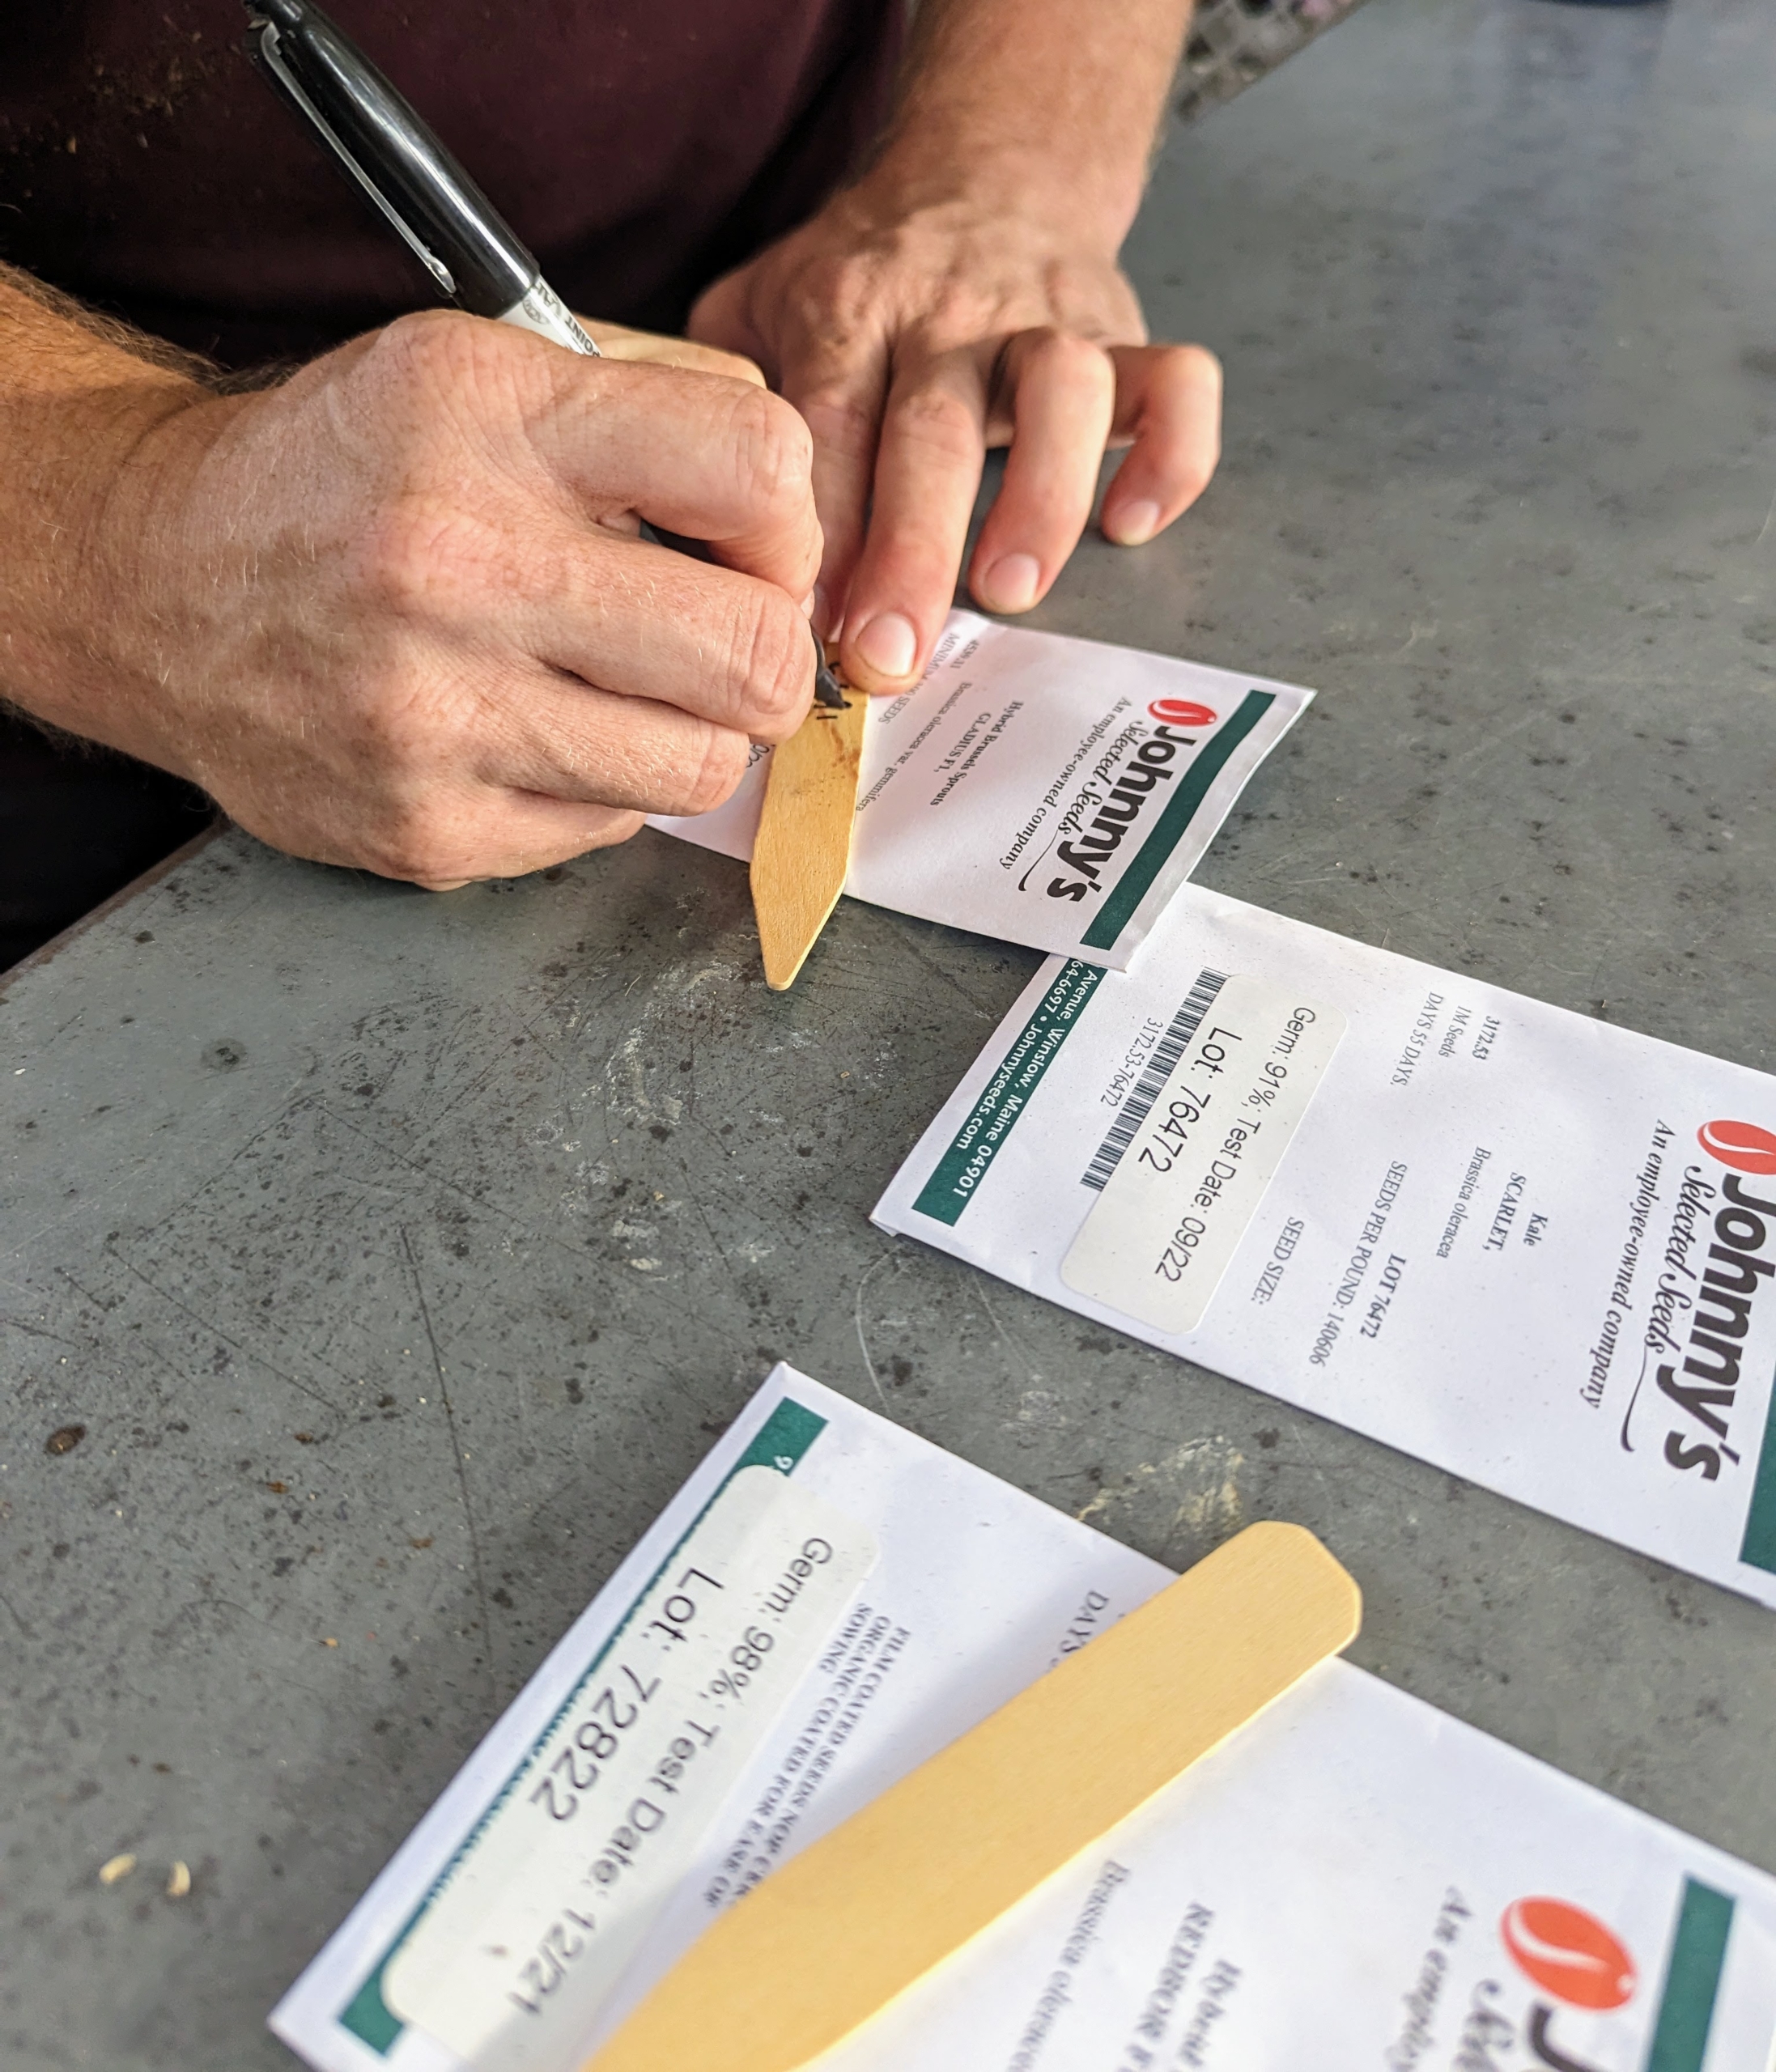
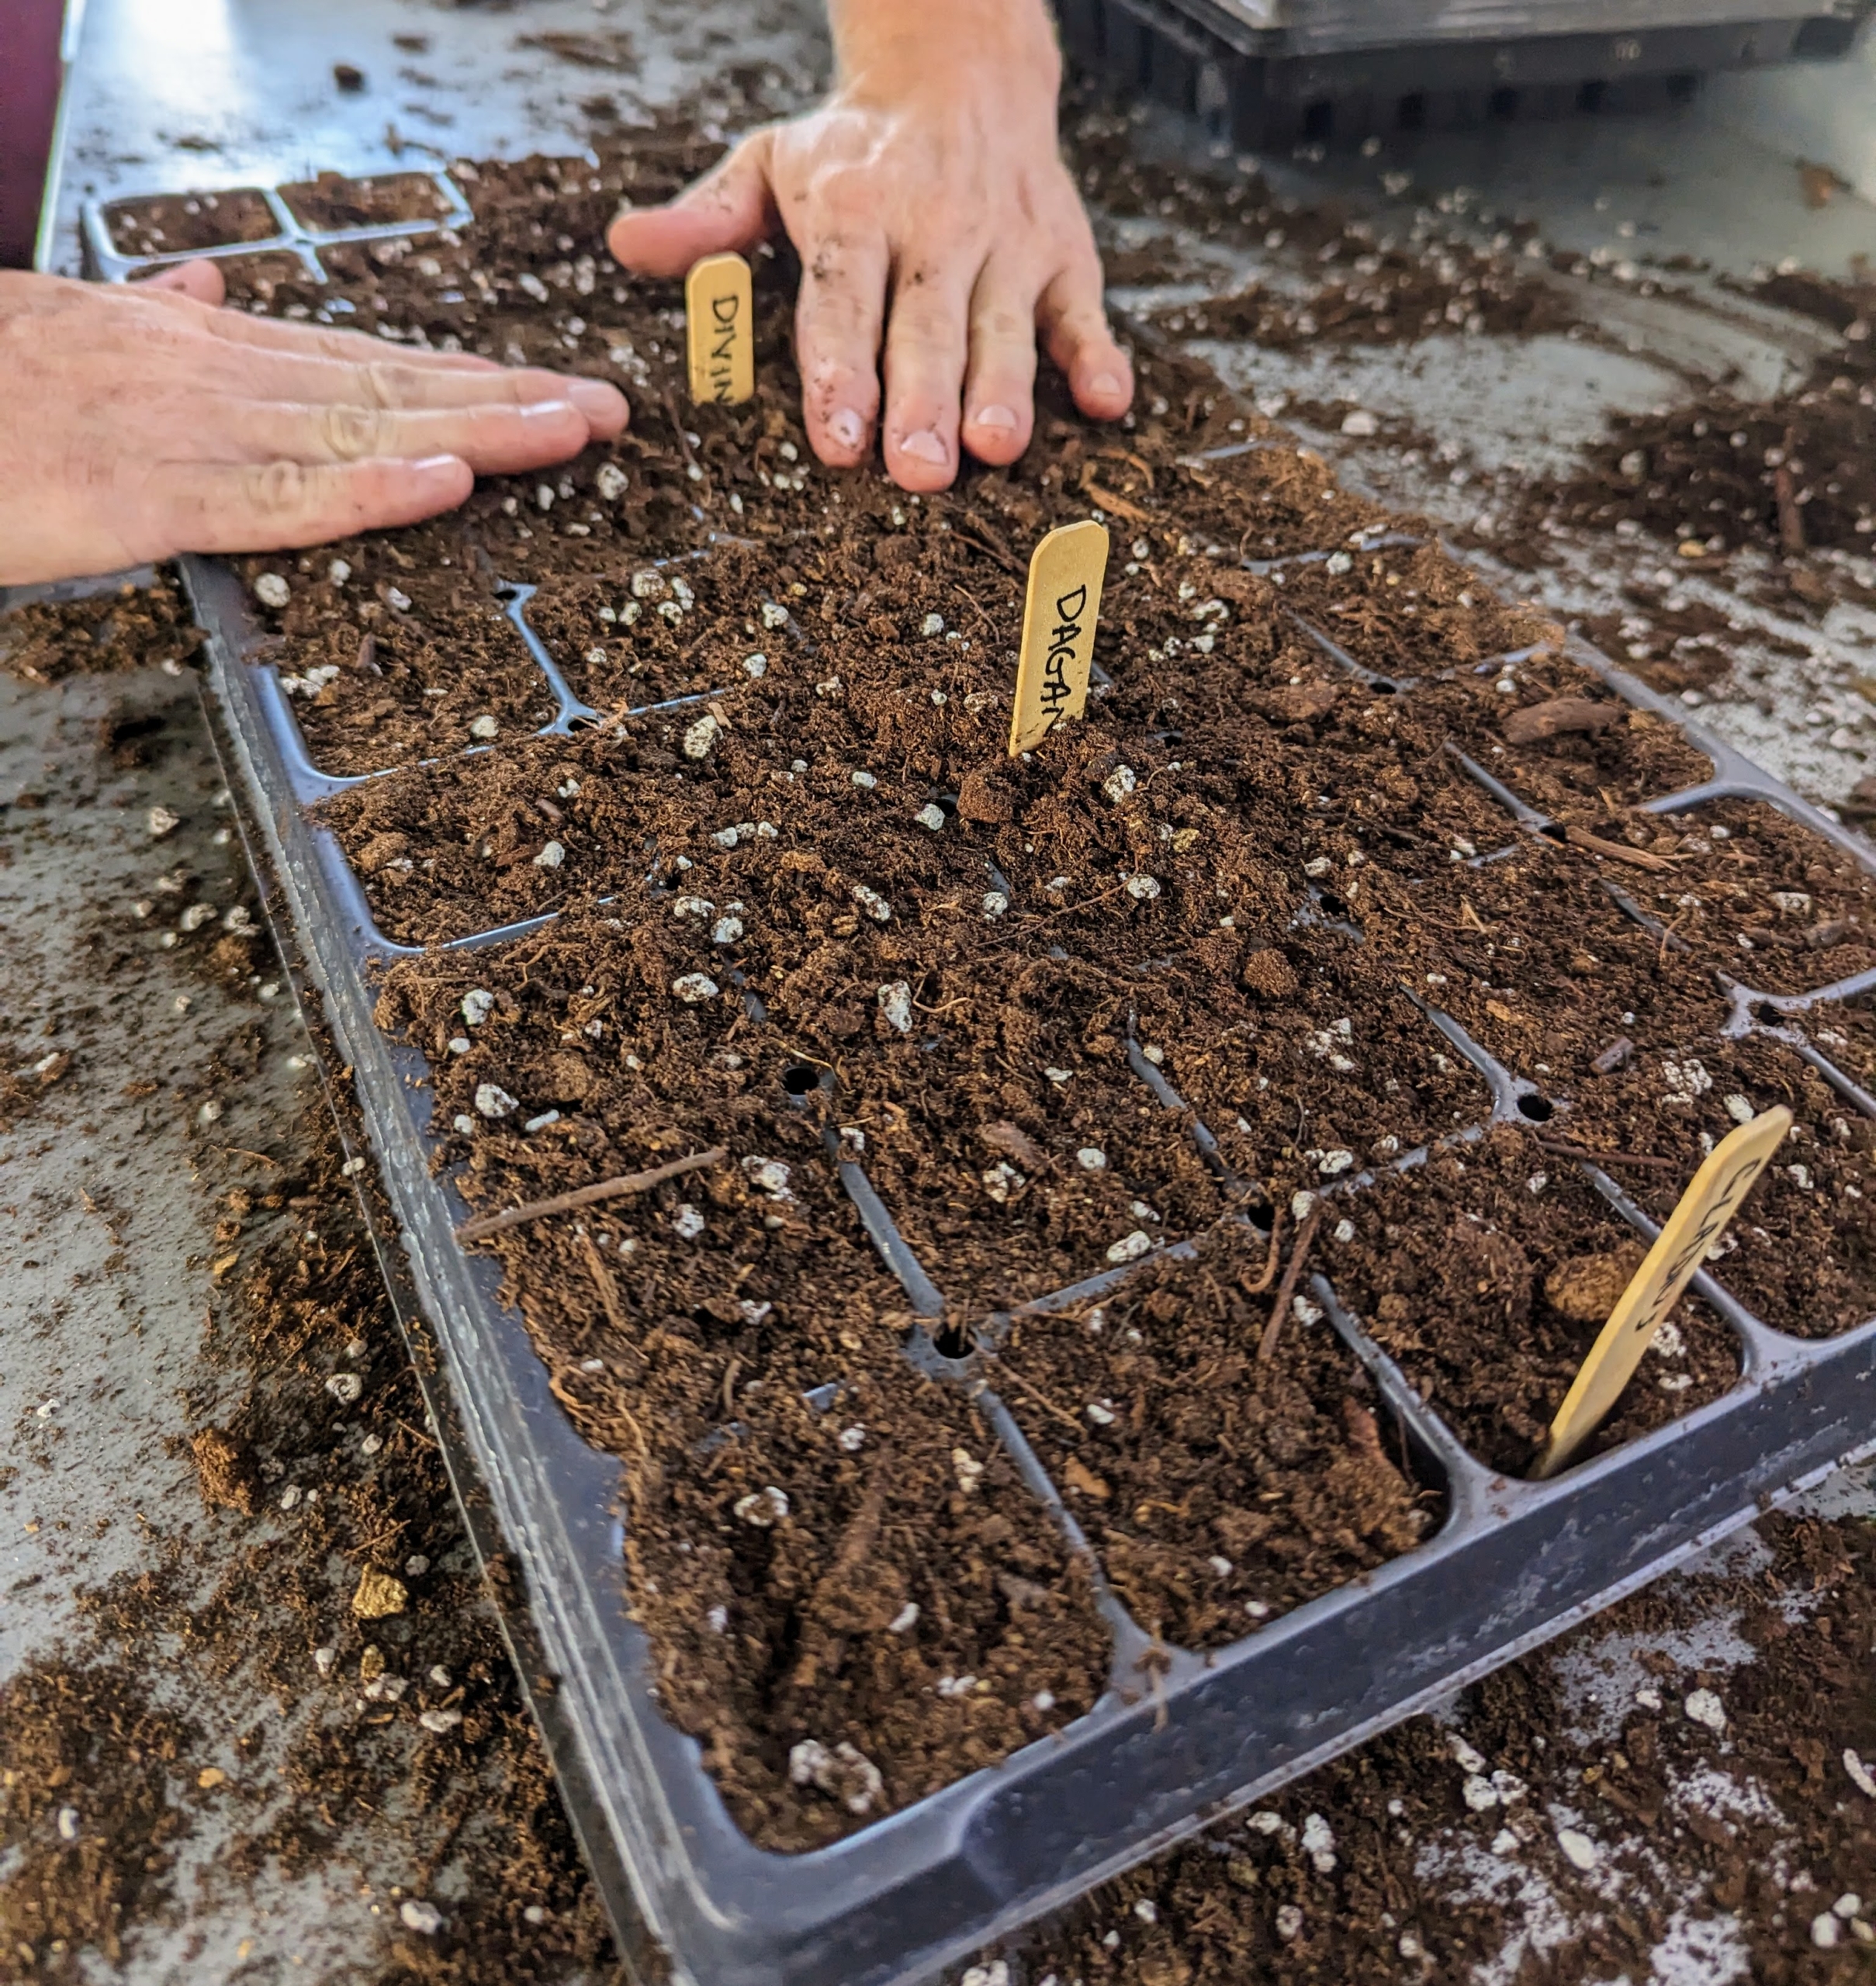
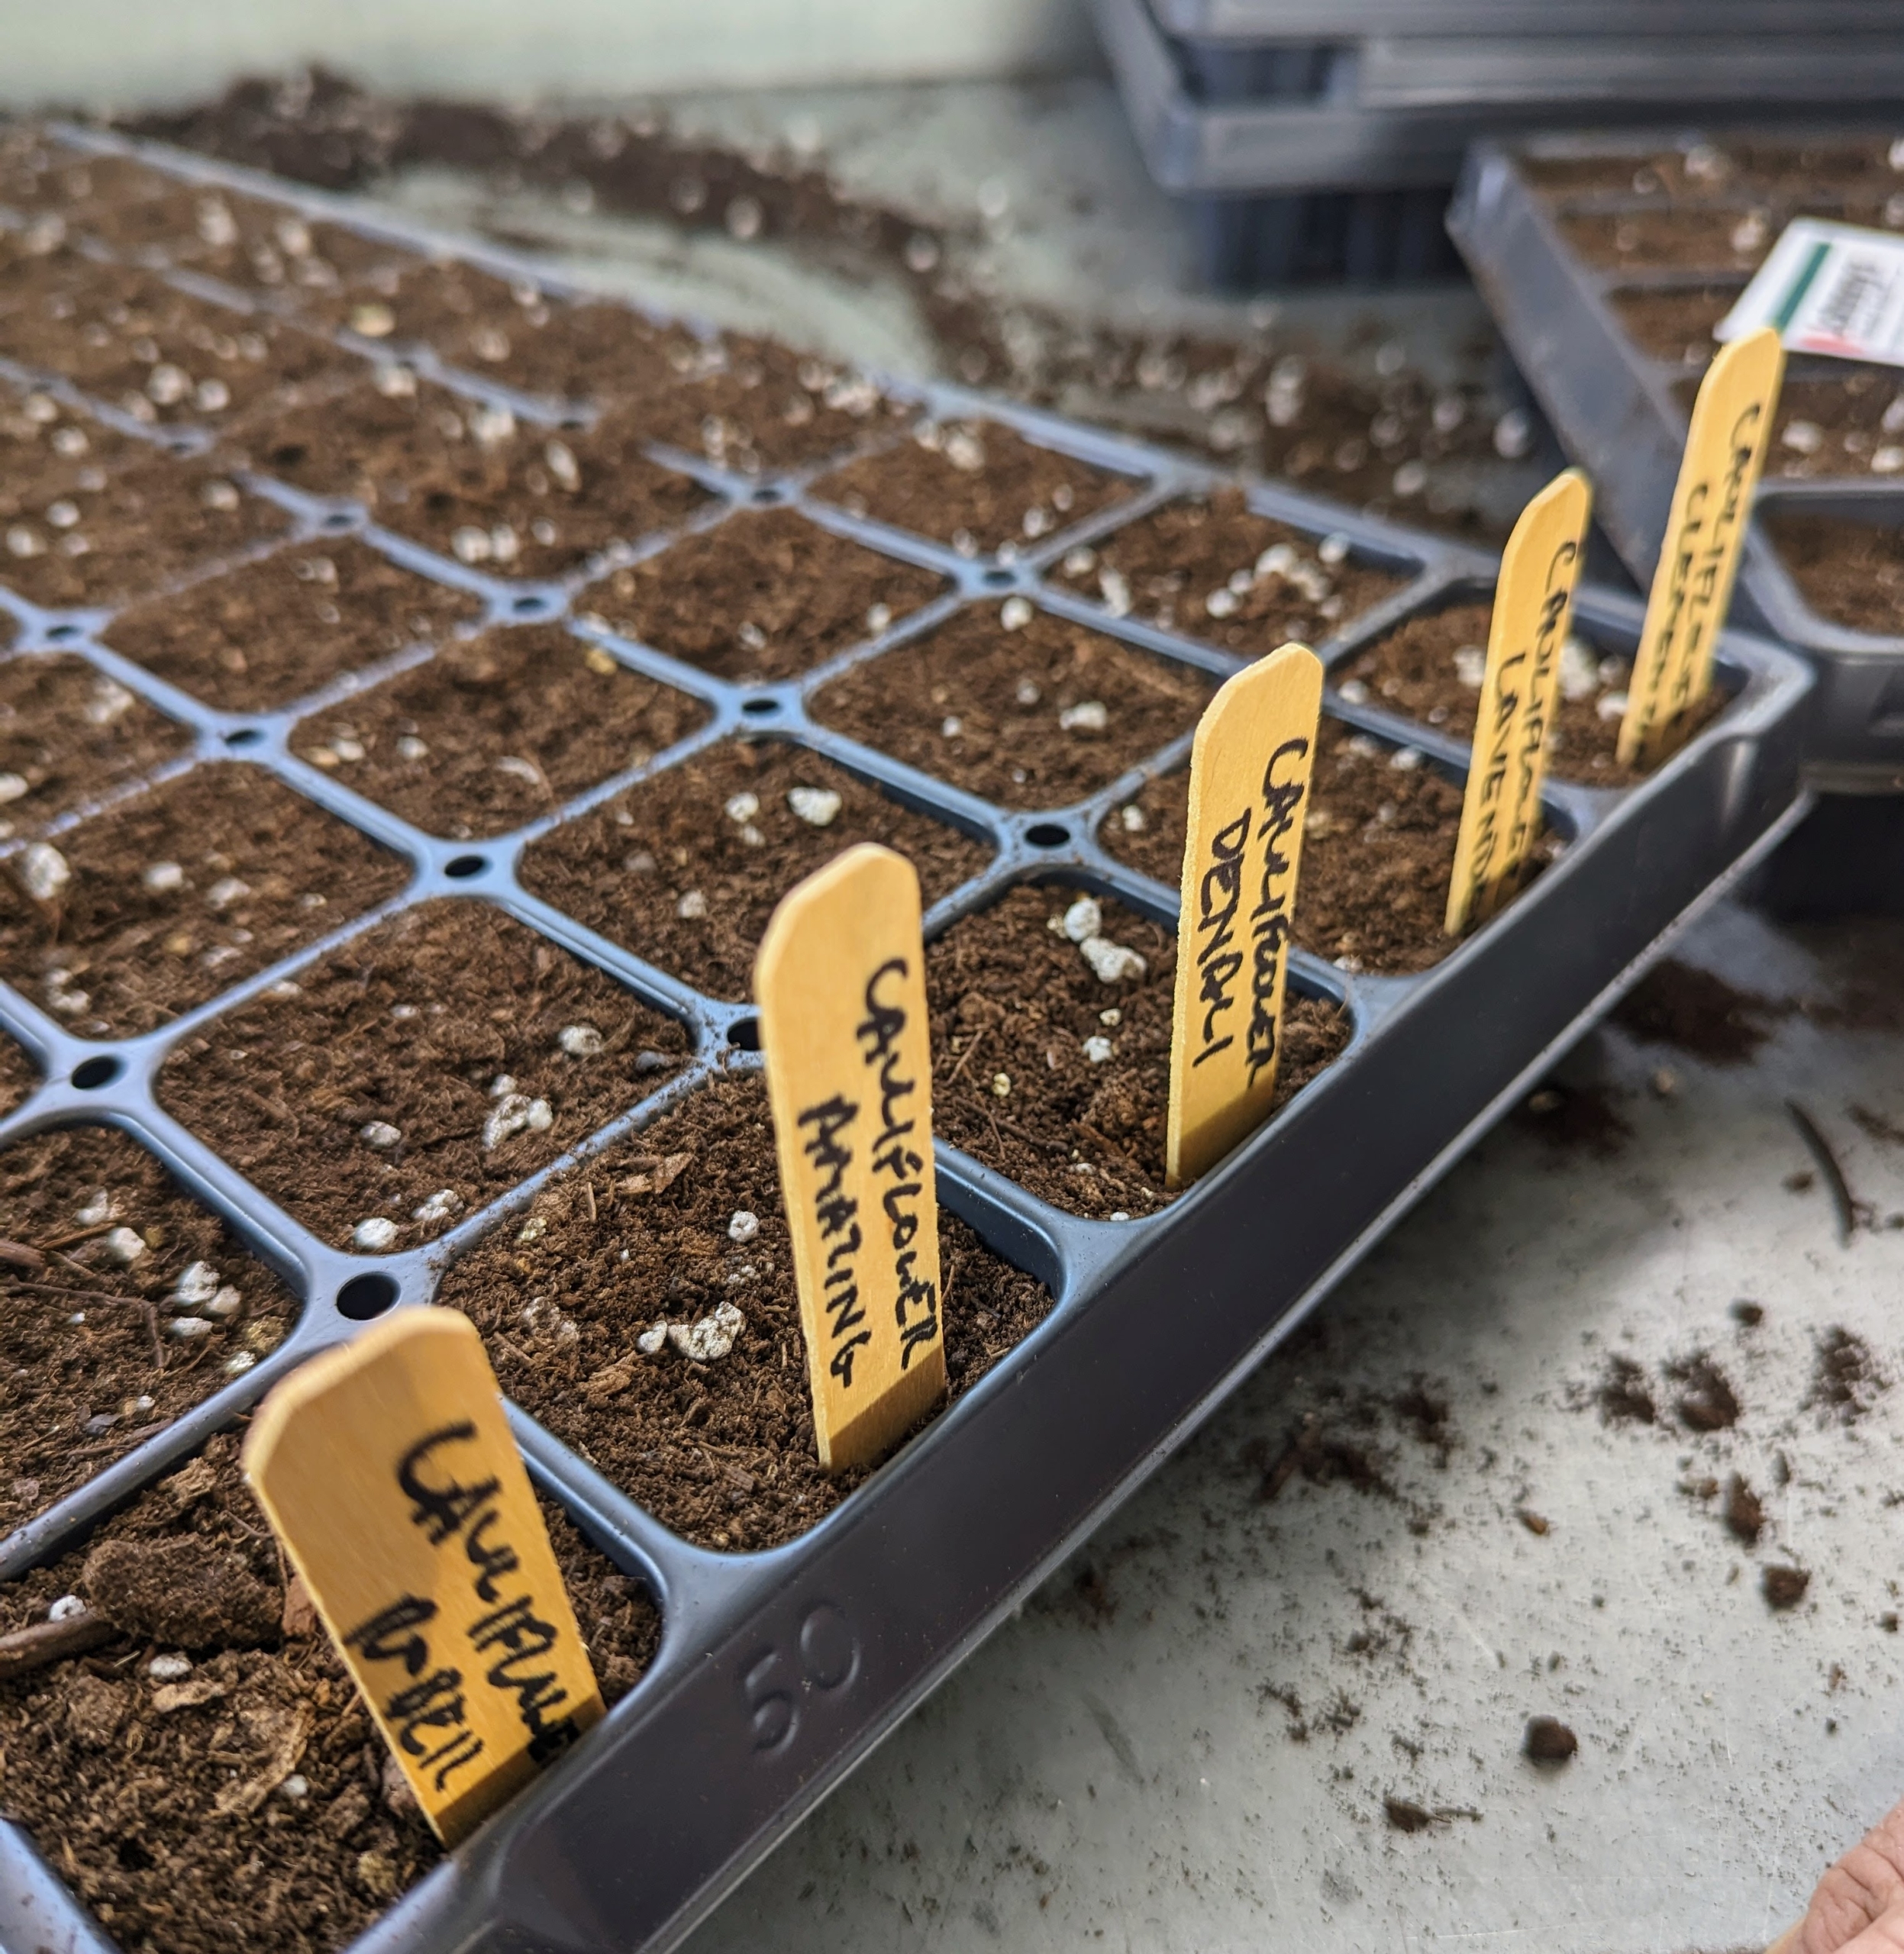
Here, Ryan writes the vegetable and variety on wooden markers. I often use Johnny’s Selected Seeds. Johnny’s is a privately held, employee-owned organic seed producer. Johnny’s offers hundreds of varieties of organic vegetable, herb, flower, fruit and farm seeds that are known to be strong, dependable growers.
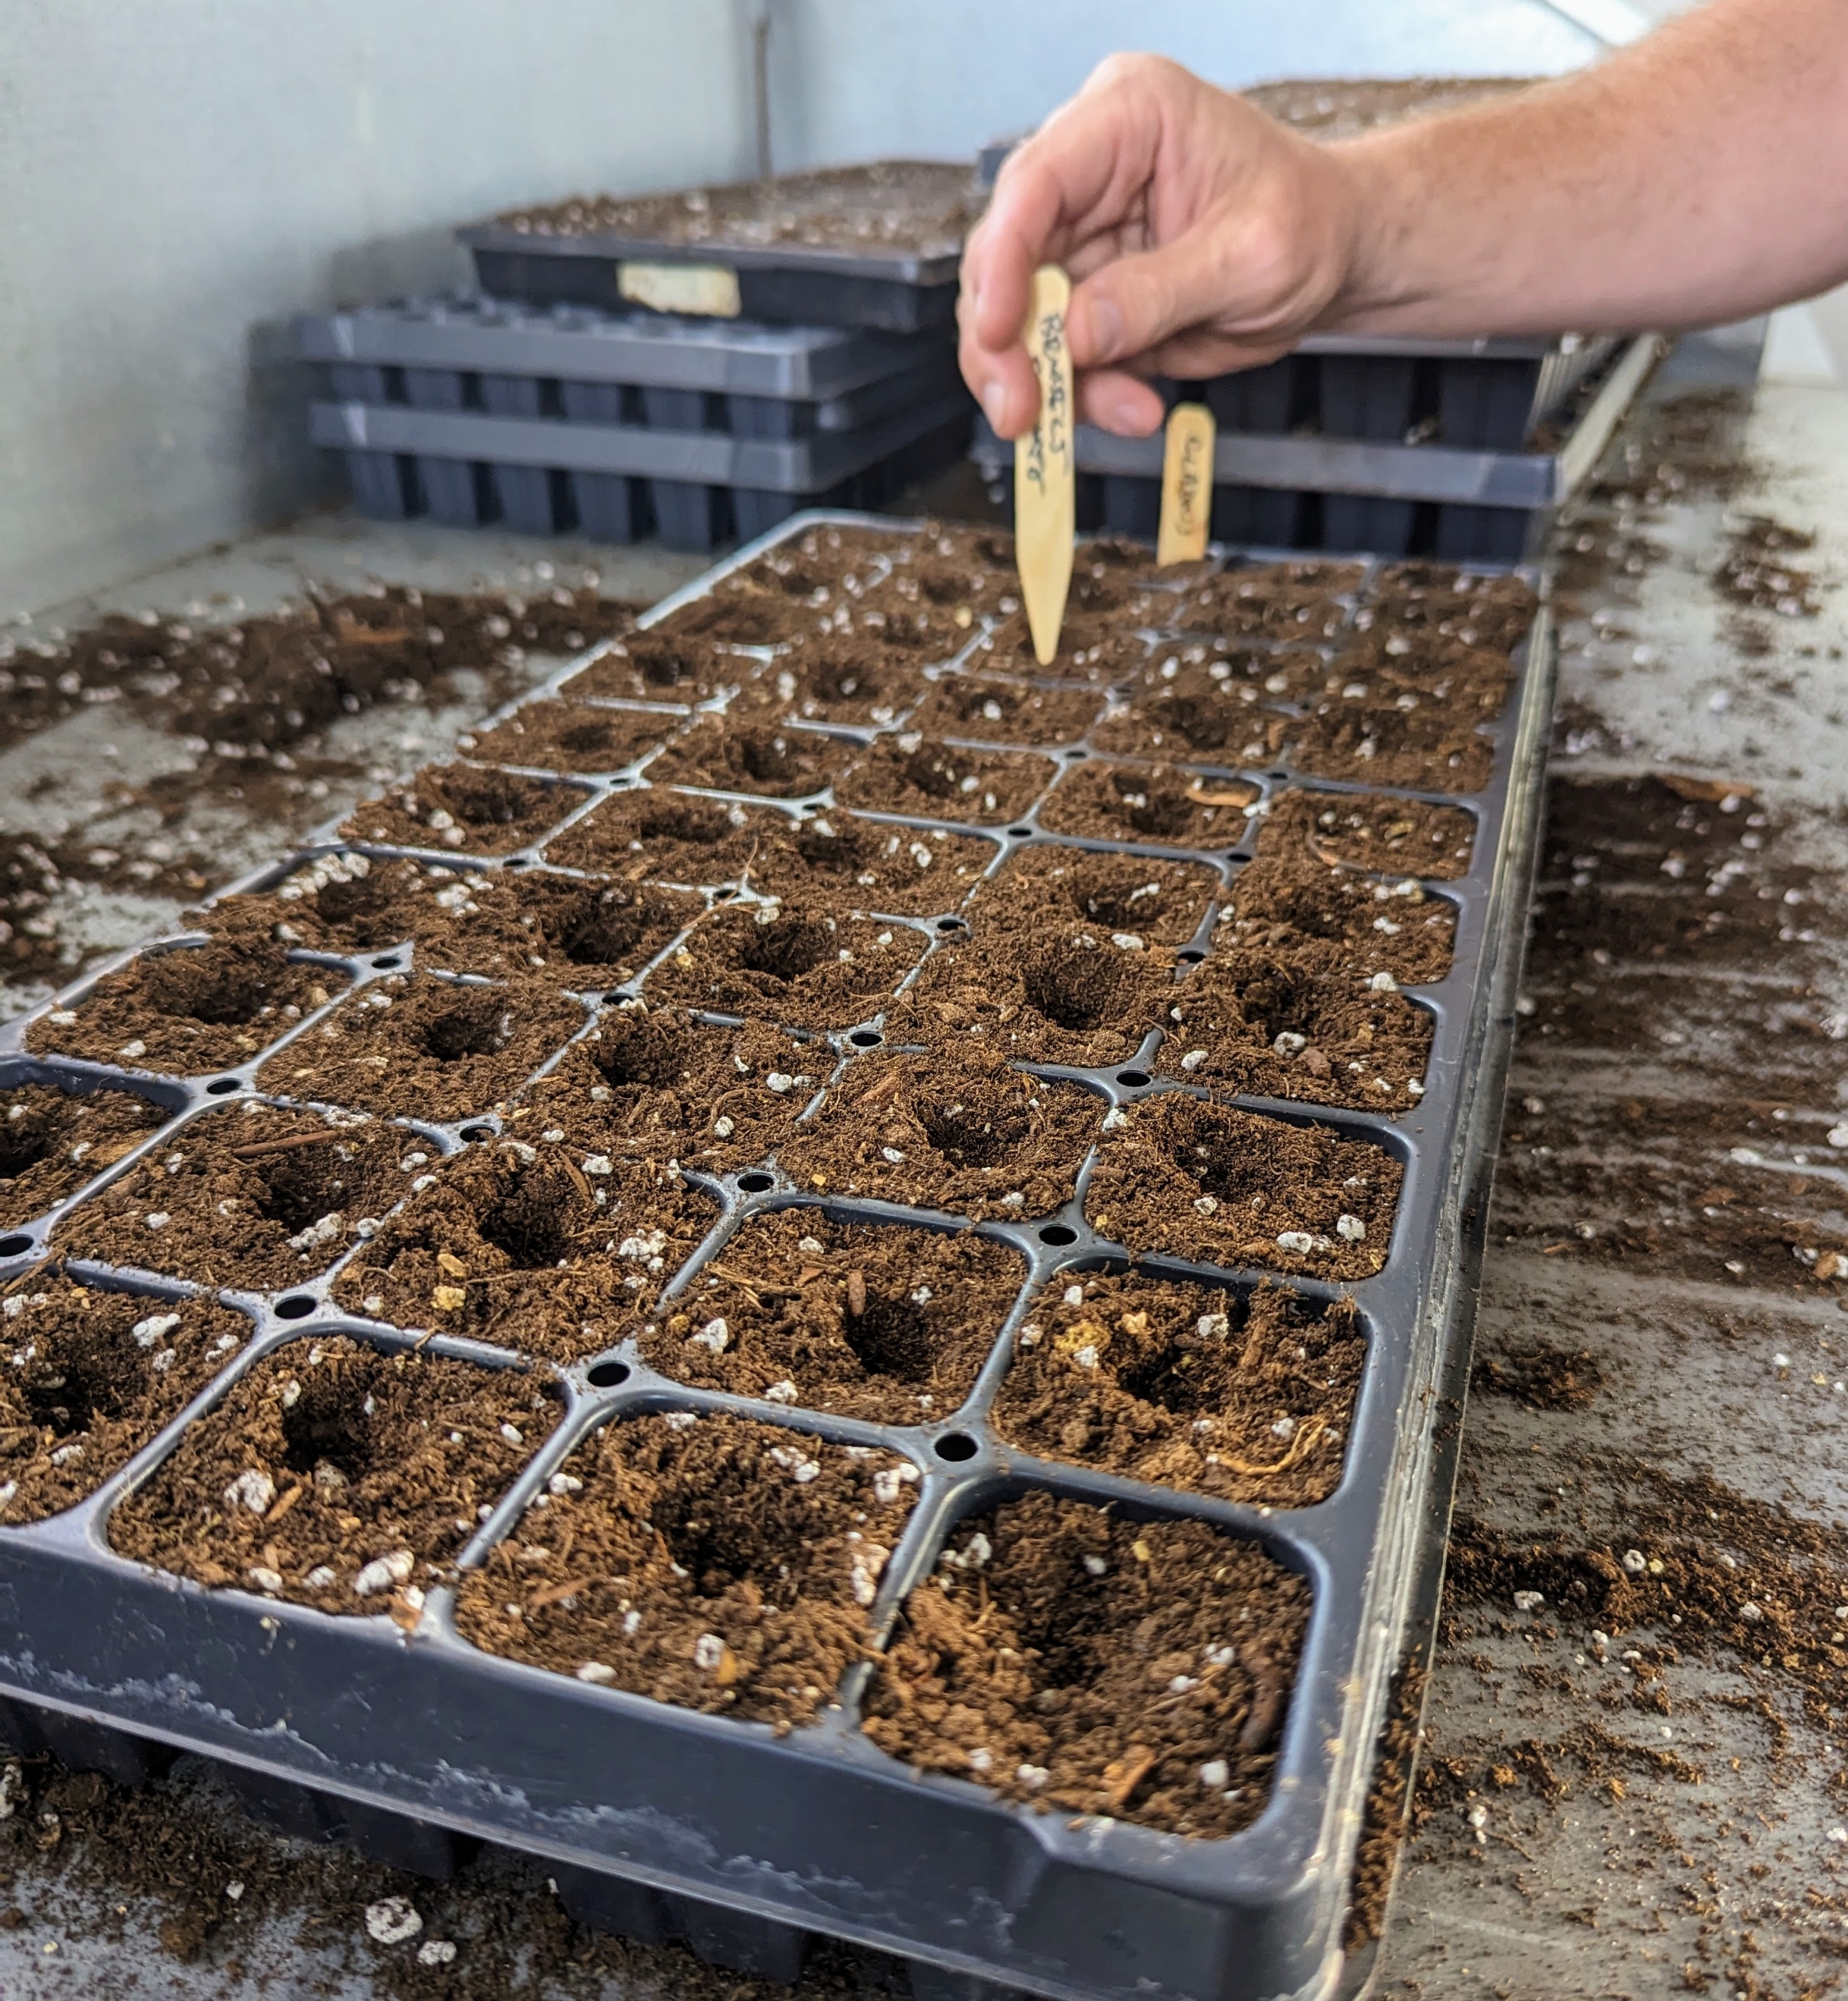
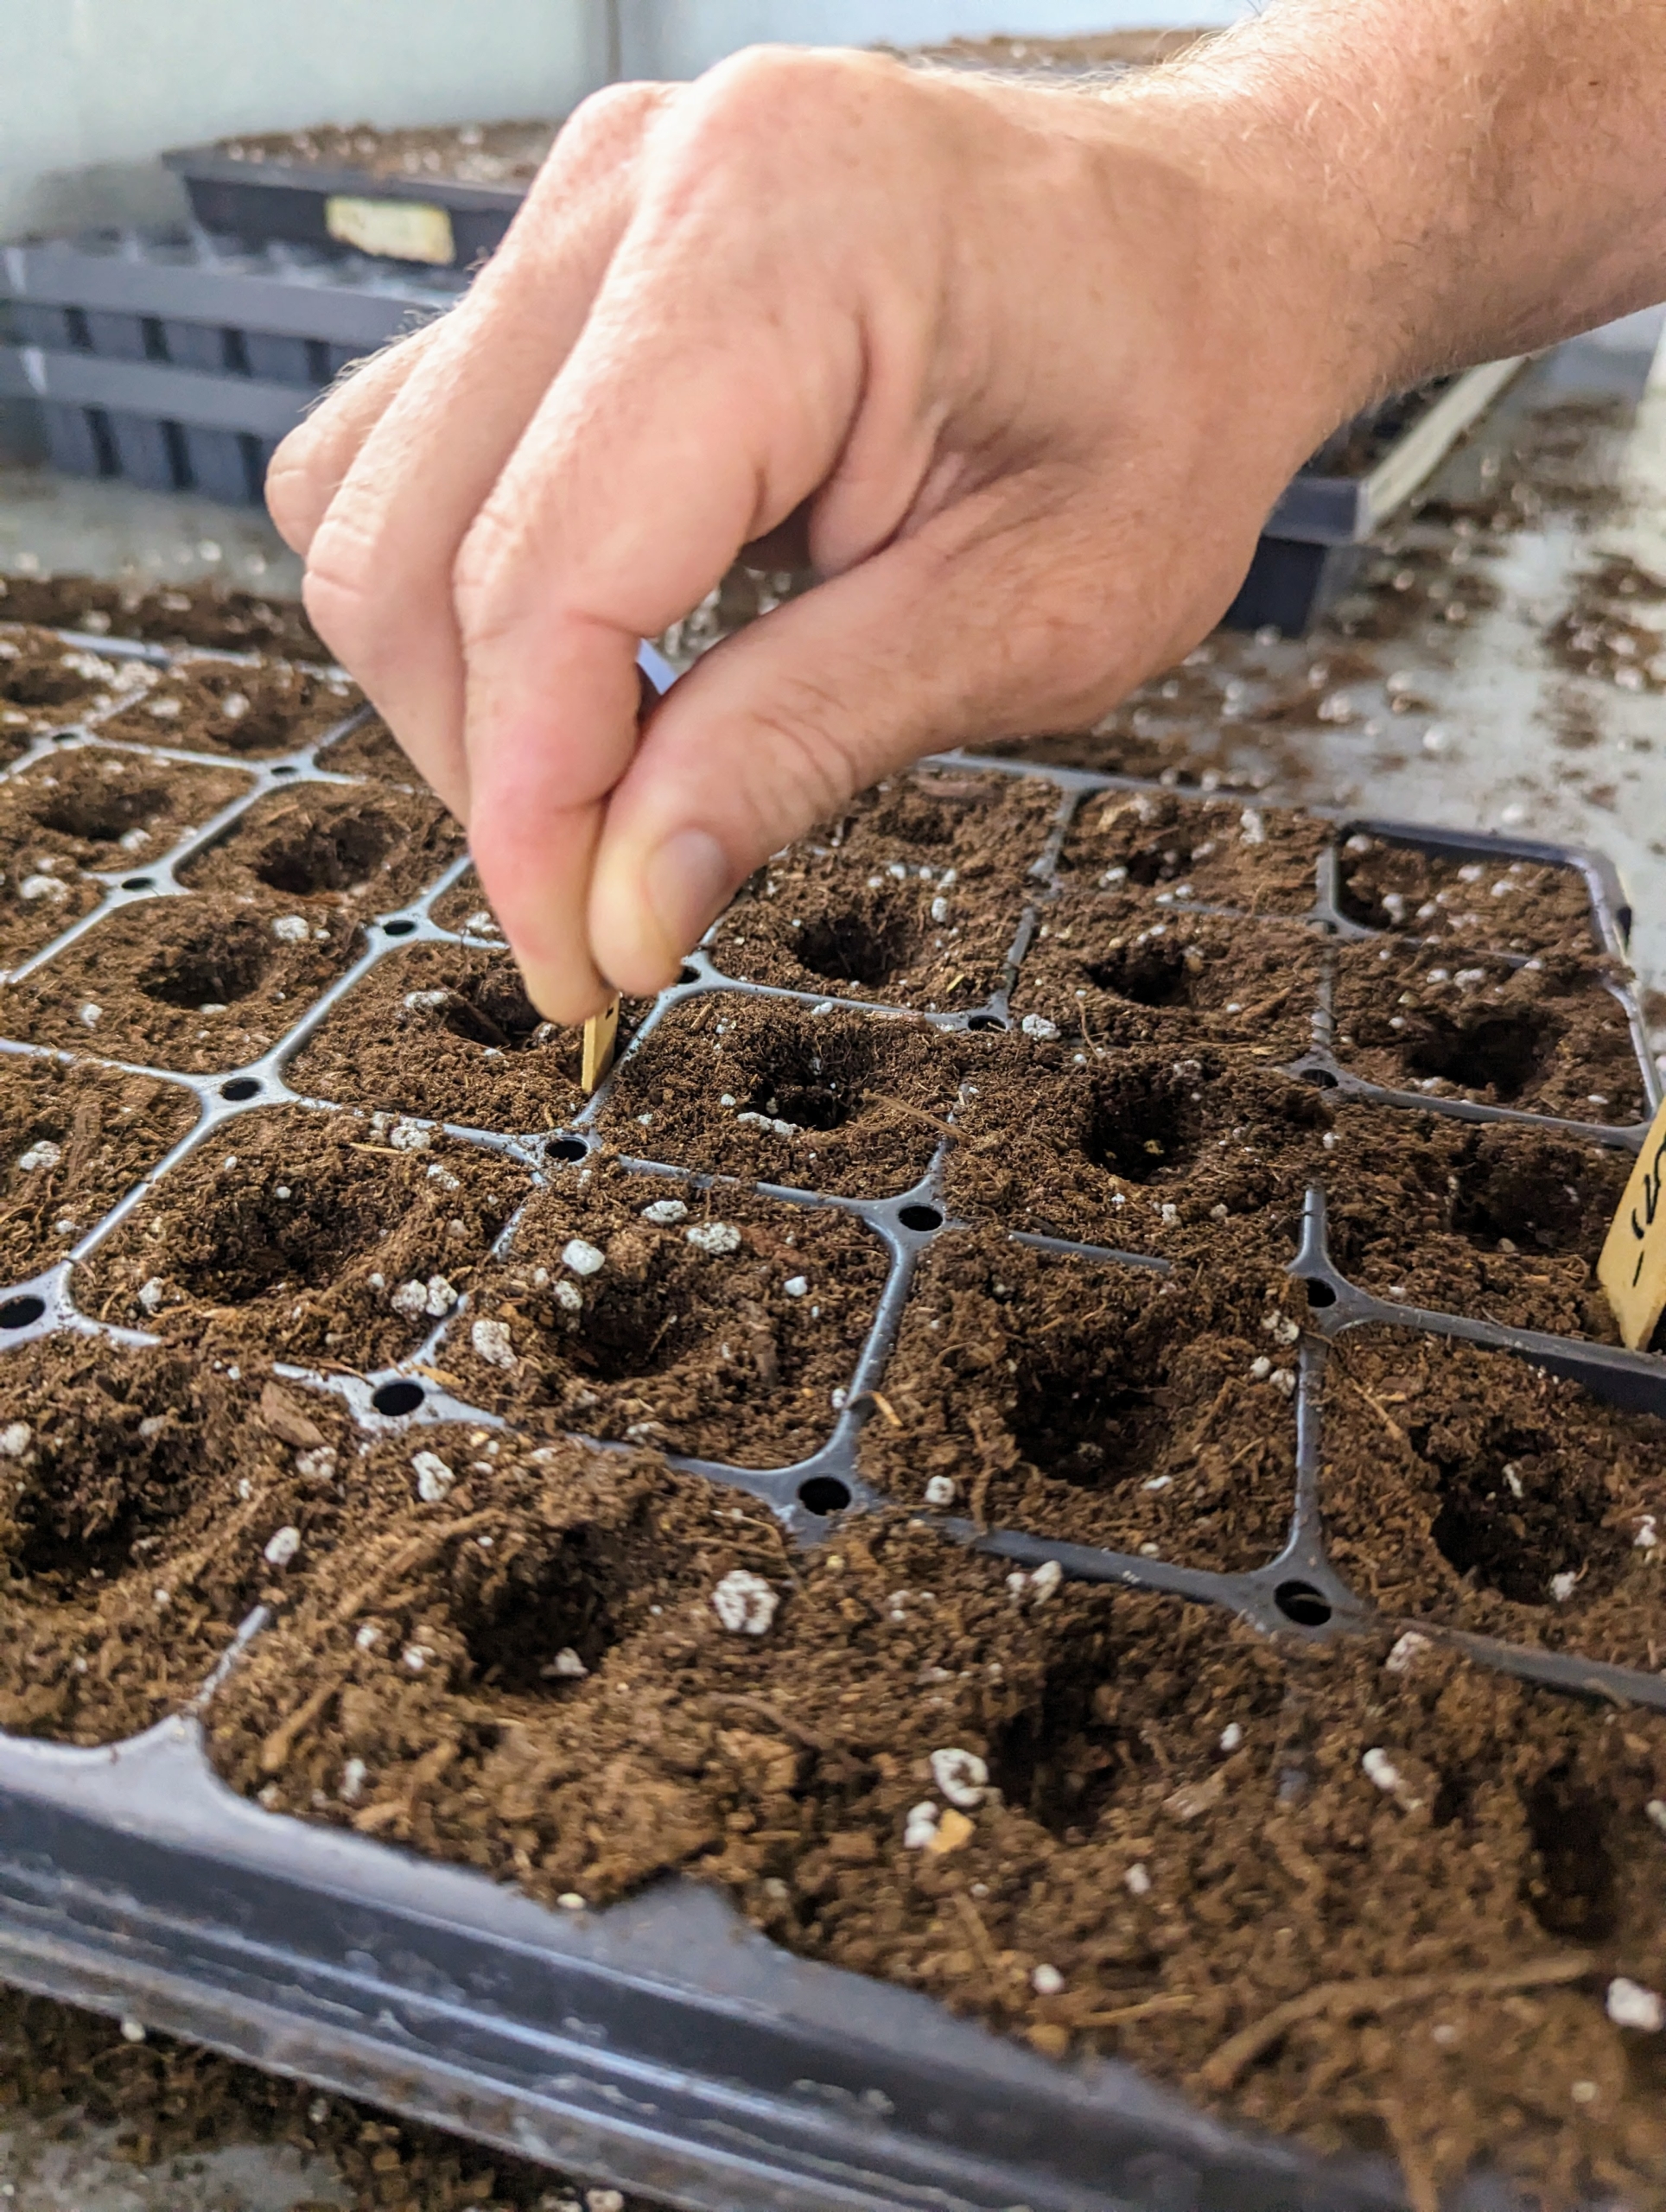
Once he is ready to drop the seeds, Ryan places a marker into one of the cells, so it is clear what variety is growing in what tray.
The seeds are very small, so be sure to take time dropping them into the tray cells. It’s also a good idea to keep a record of when seeds are sown, when they germinate, and when they are transplanted. These observations will help organize a schedule for the following year.
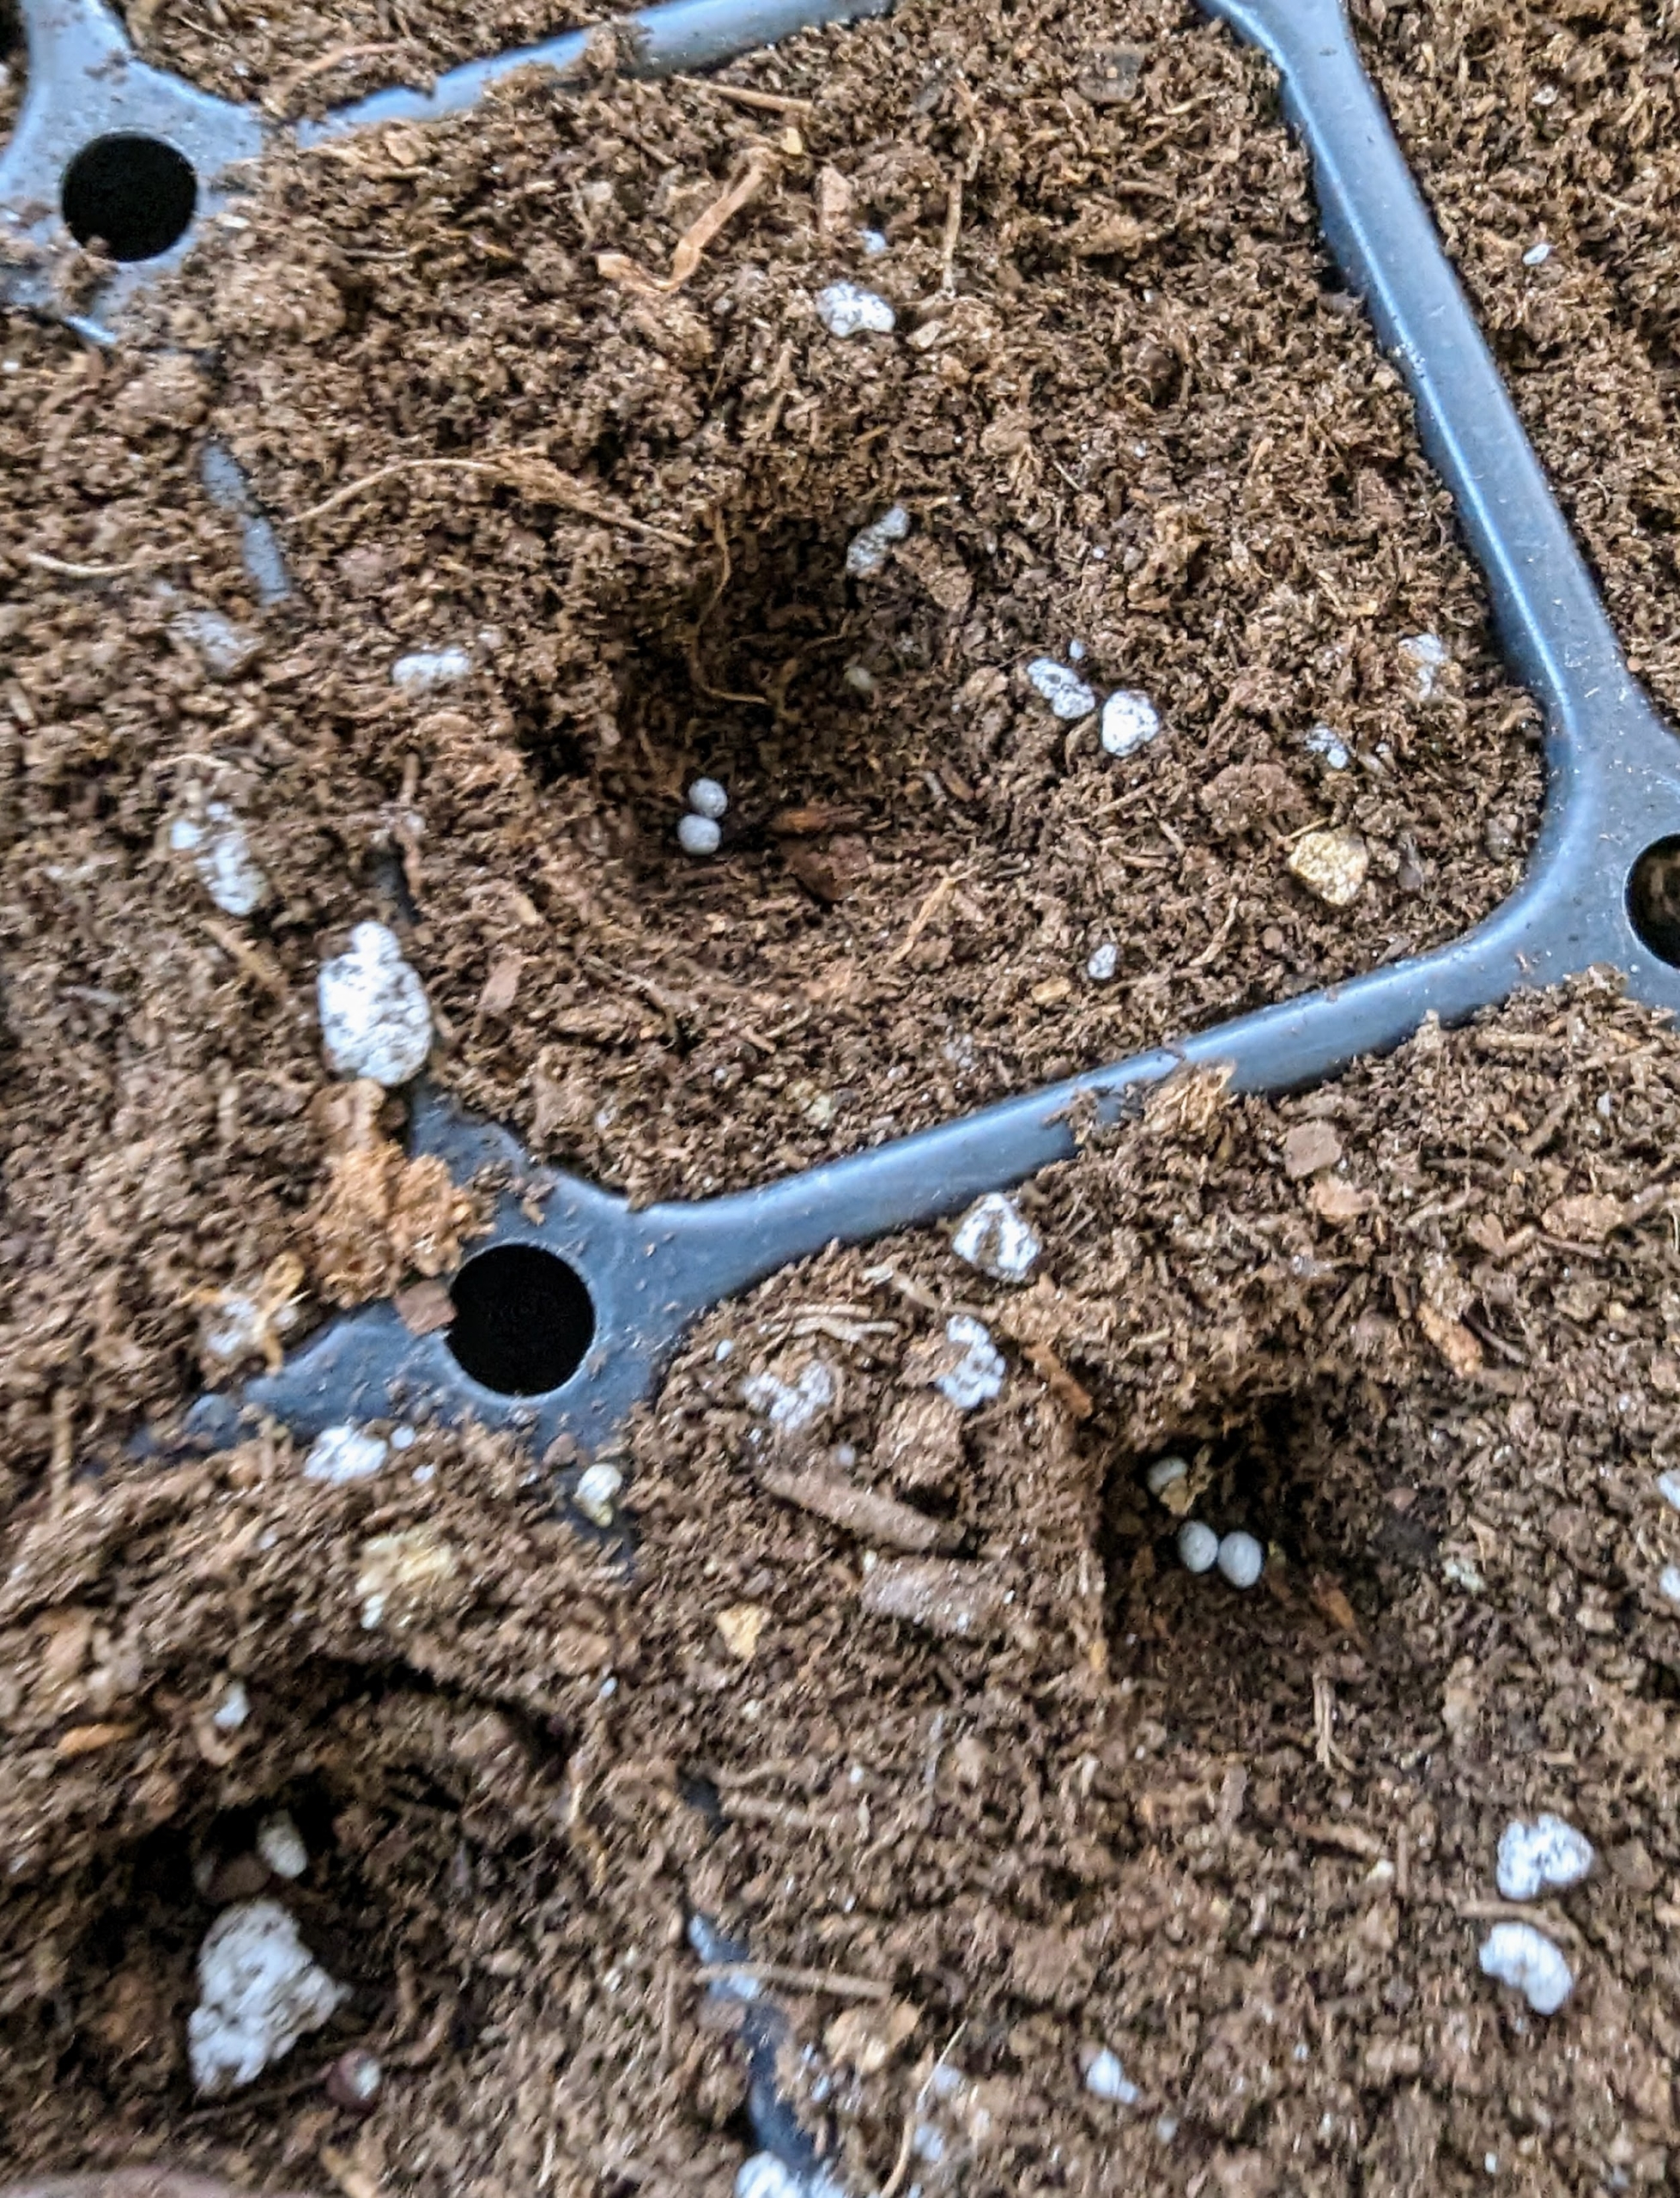
Ryan drops one to three seeds into each cell.
Look closely and one can see the seeds in the cell. These seeds will be selectively thinned in a few weeks. The process eliminates the weaker sprout and prevents overcrowding, so seedlings don’t have any competition for soil nutrients or room to mature.
Next, Ryan covers the seeds by leveling the soil and filling the holes back in with the medium.
This tray is planted with broccoli. Seeds will germinate in seven to 10 days in optimal temperature and lighting environments, which is 50 to 85 degrees Fahrenheit under bright light.
Our cauliflower has done so excellently in the new vegetable garden. Cauliflower is filled with nutrients. They hold plenty of vitamins, such as C, B, and K.
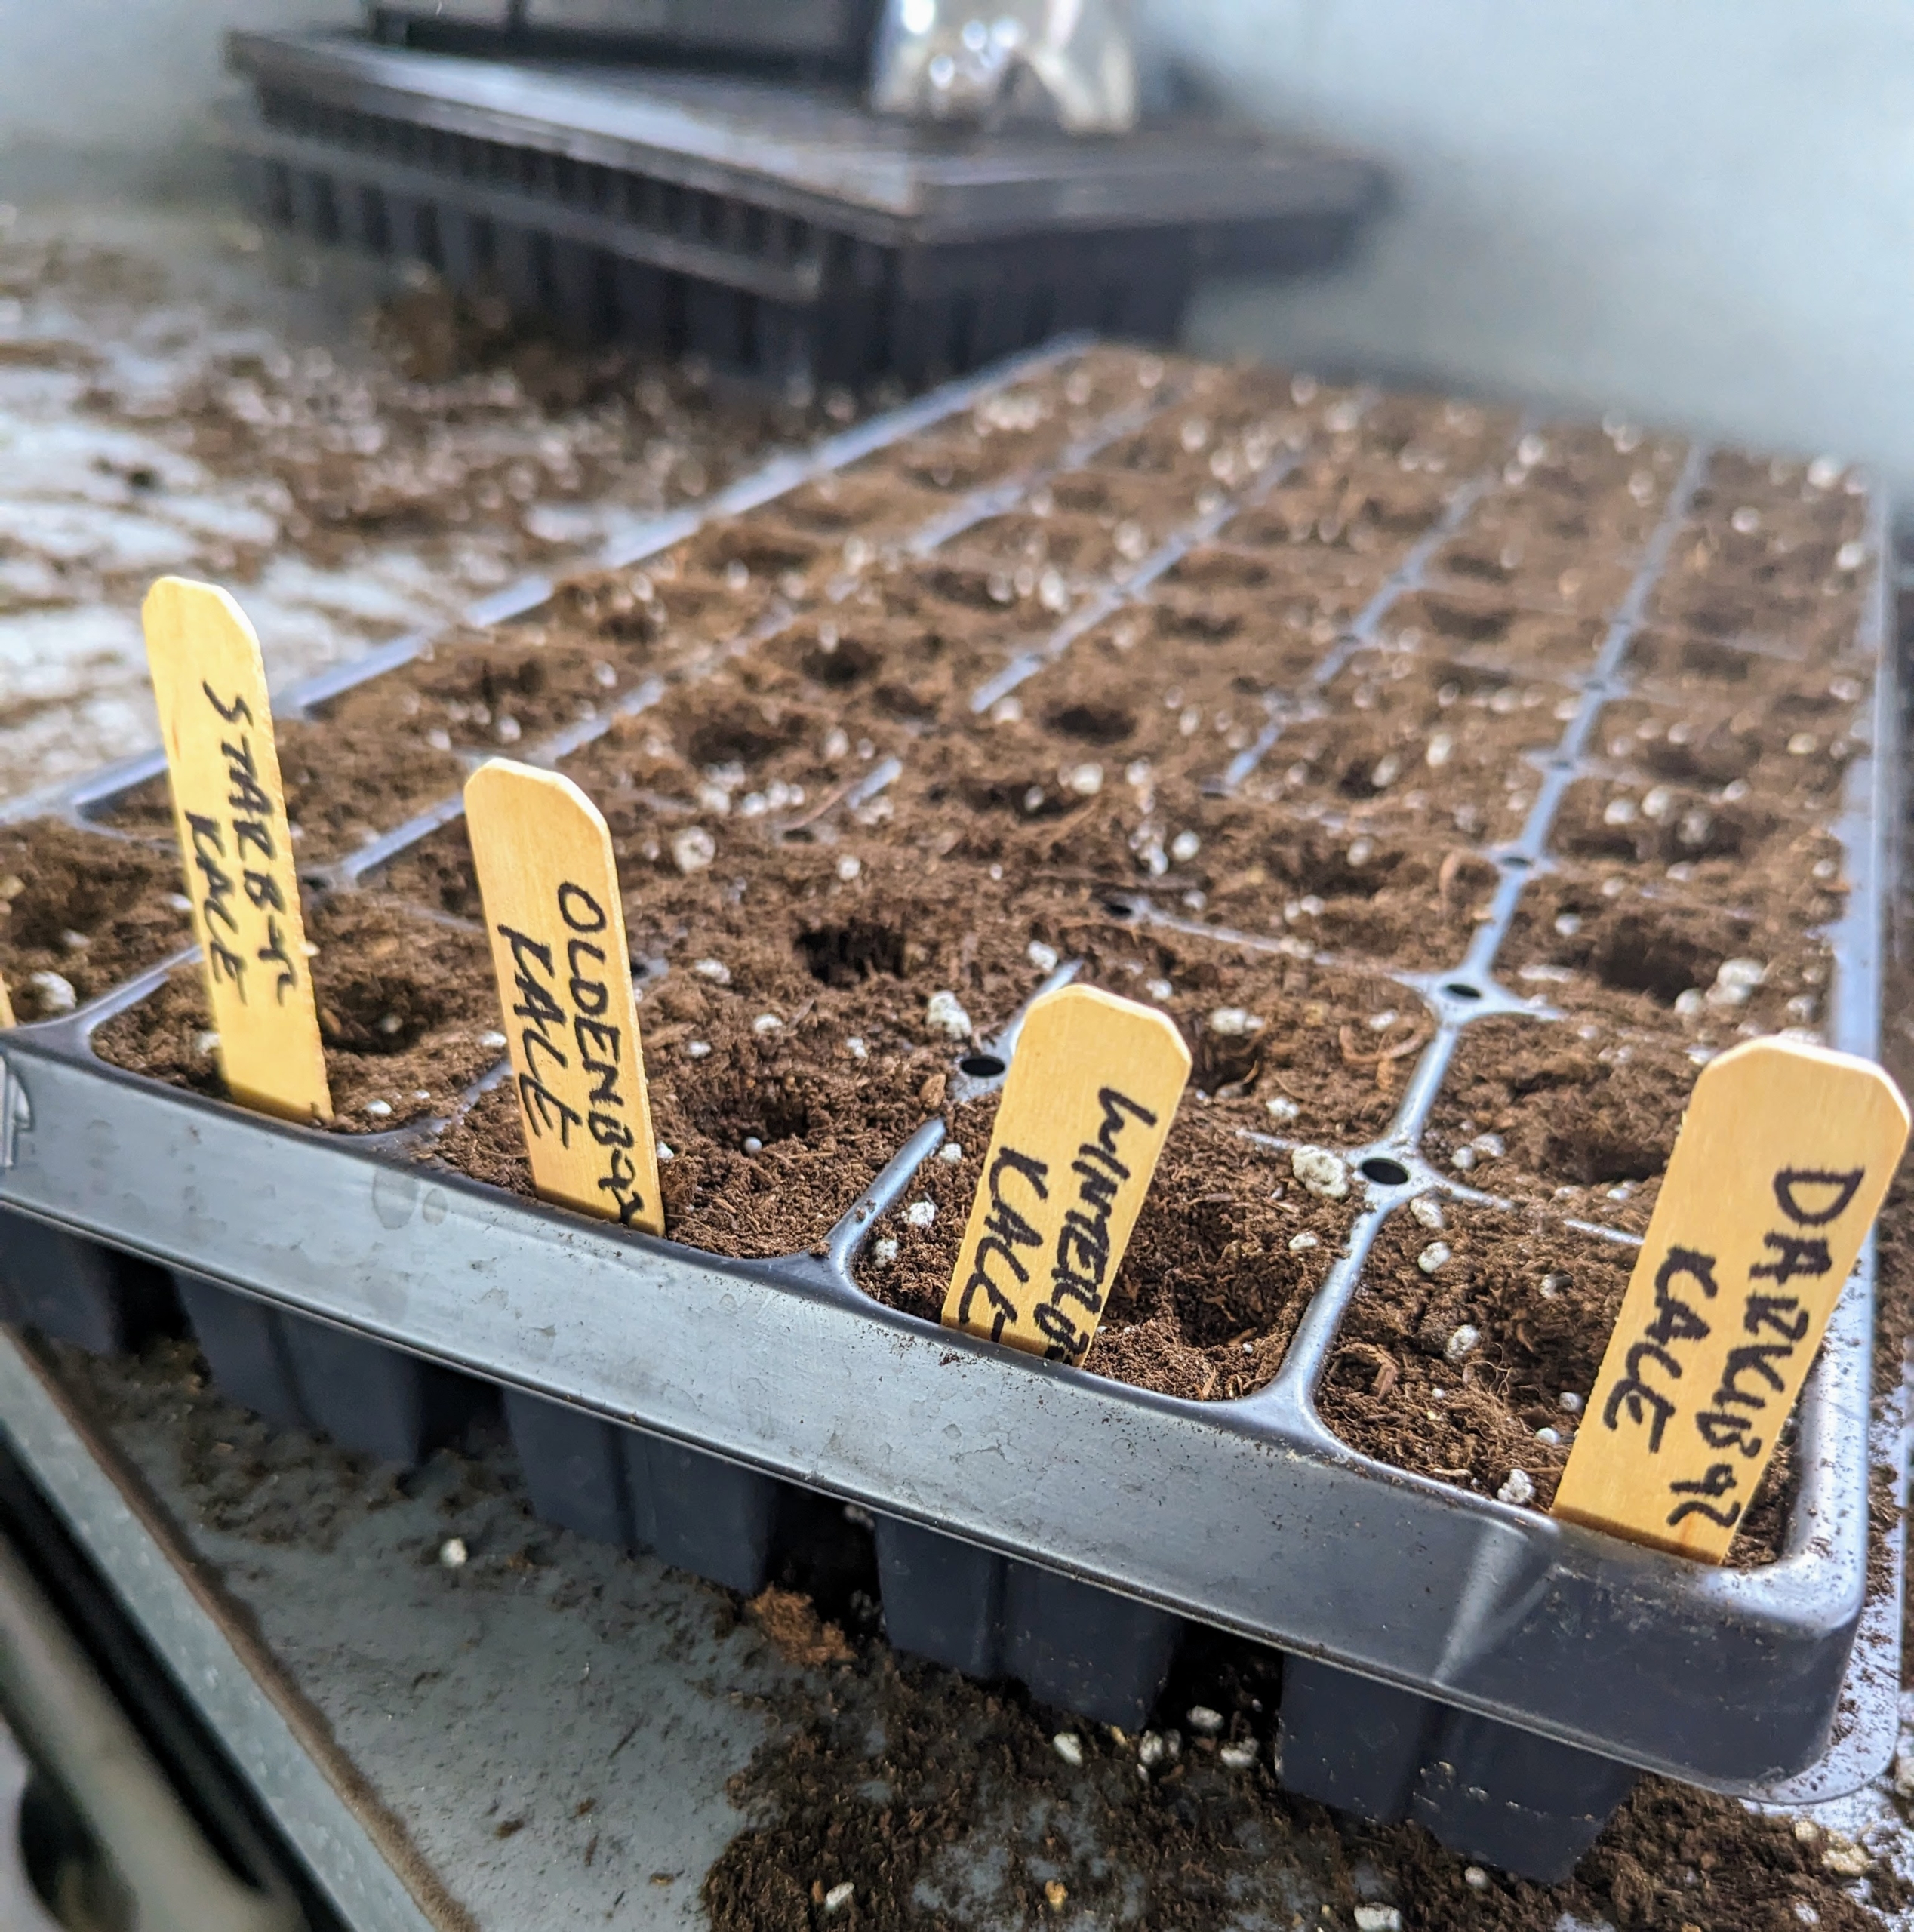
This tray is filled with kale. Kale or leaf cabbage is a group of vegetable cultivars within the plant species Brassica oleracea.
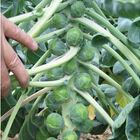
Some of the varieties Ryan seeded include this ‘Divino’ Brussels sprouts. These mature into firm, uniform, and attractive sprouts that hold well on the stalk for whole-stalk, late-season harvest. (Photo from Johnny’s Selected Seeds)
‘Kariba’ is one of the broccoli varieties – it’s a strong cold tolerant cultivar for fall and winter production. This variety will be mature in 66-days. (Photo from Johnny’s Selected Seeds)
Ryan chose ‘Amazing’ cauliflower for its late summer and fall hardiness. This variety features medium-sized plants with domed, solid curds and self-blanching, upright wrapper leaves when well fed. (Photo from Johnny’s Selected Seeds)
‘Clementine’ is a new, vibrant orange variety of cauliflower for Johnny’s. The big, sturdy plants produce excellent crops, even under less-than-ideal conditions. Do you know… cauliflower comes in a variety of colors? It can be found in white, orange, purple, and green. (Photo from Johnny’s Selected Seeds)
And this is ‘Oldenbor’ kale – a standard green curly kale with attractive, tight leaf curl and a beautiful medium-green color. (Photo from Johnny’s Selected Seeds)
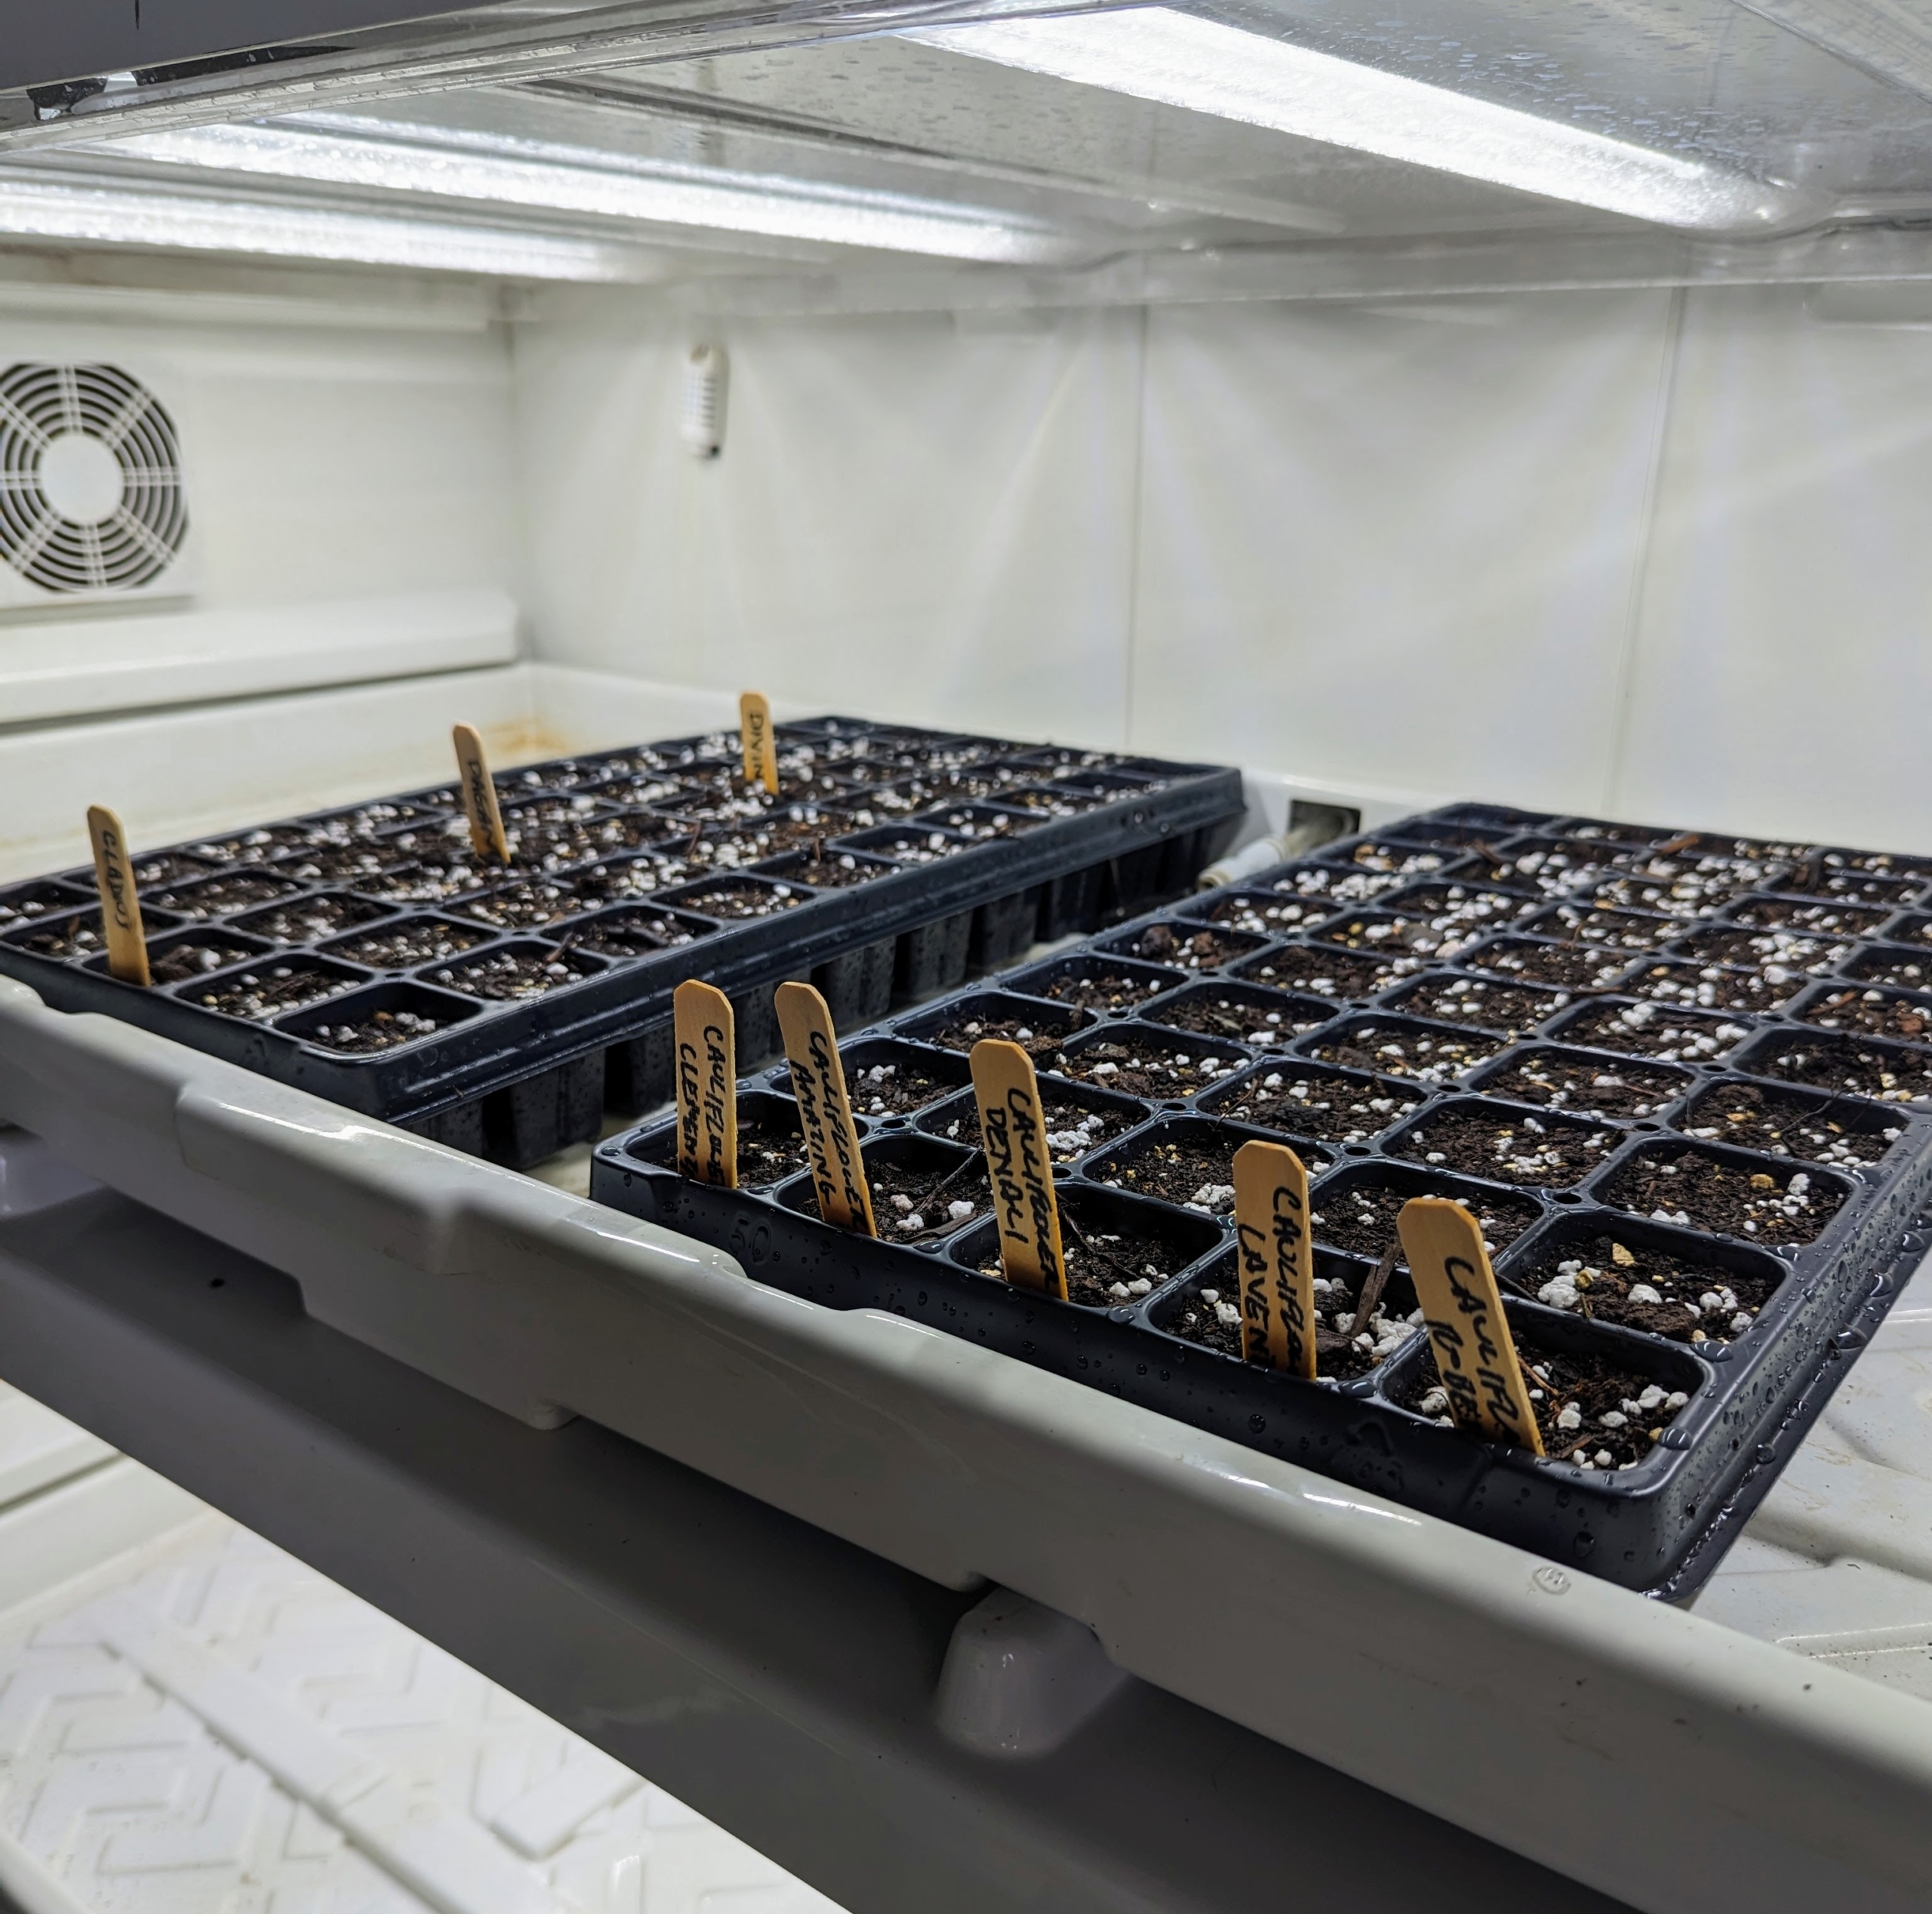
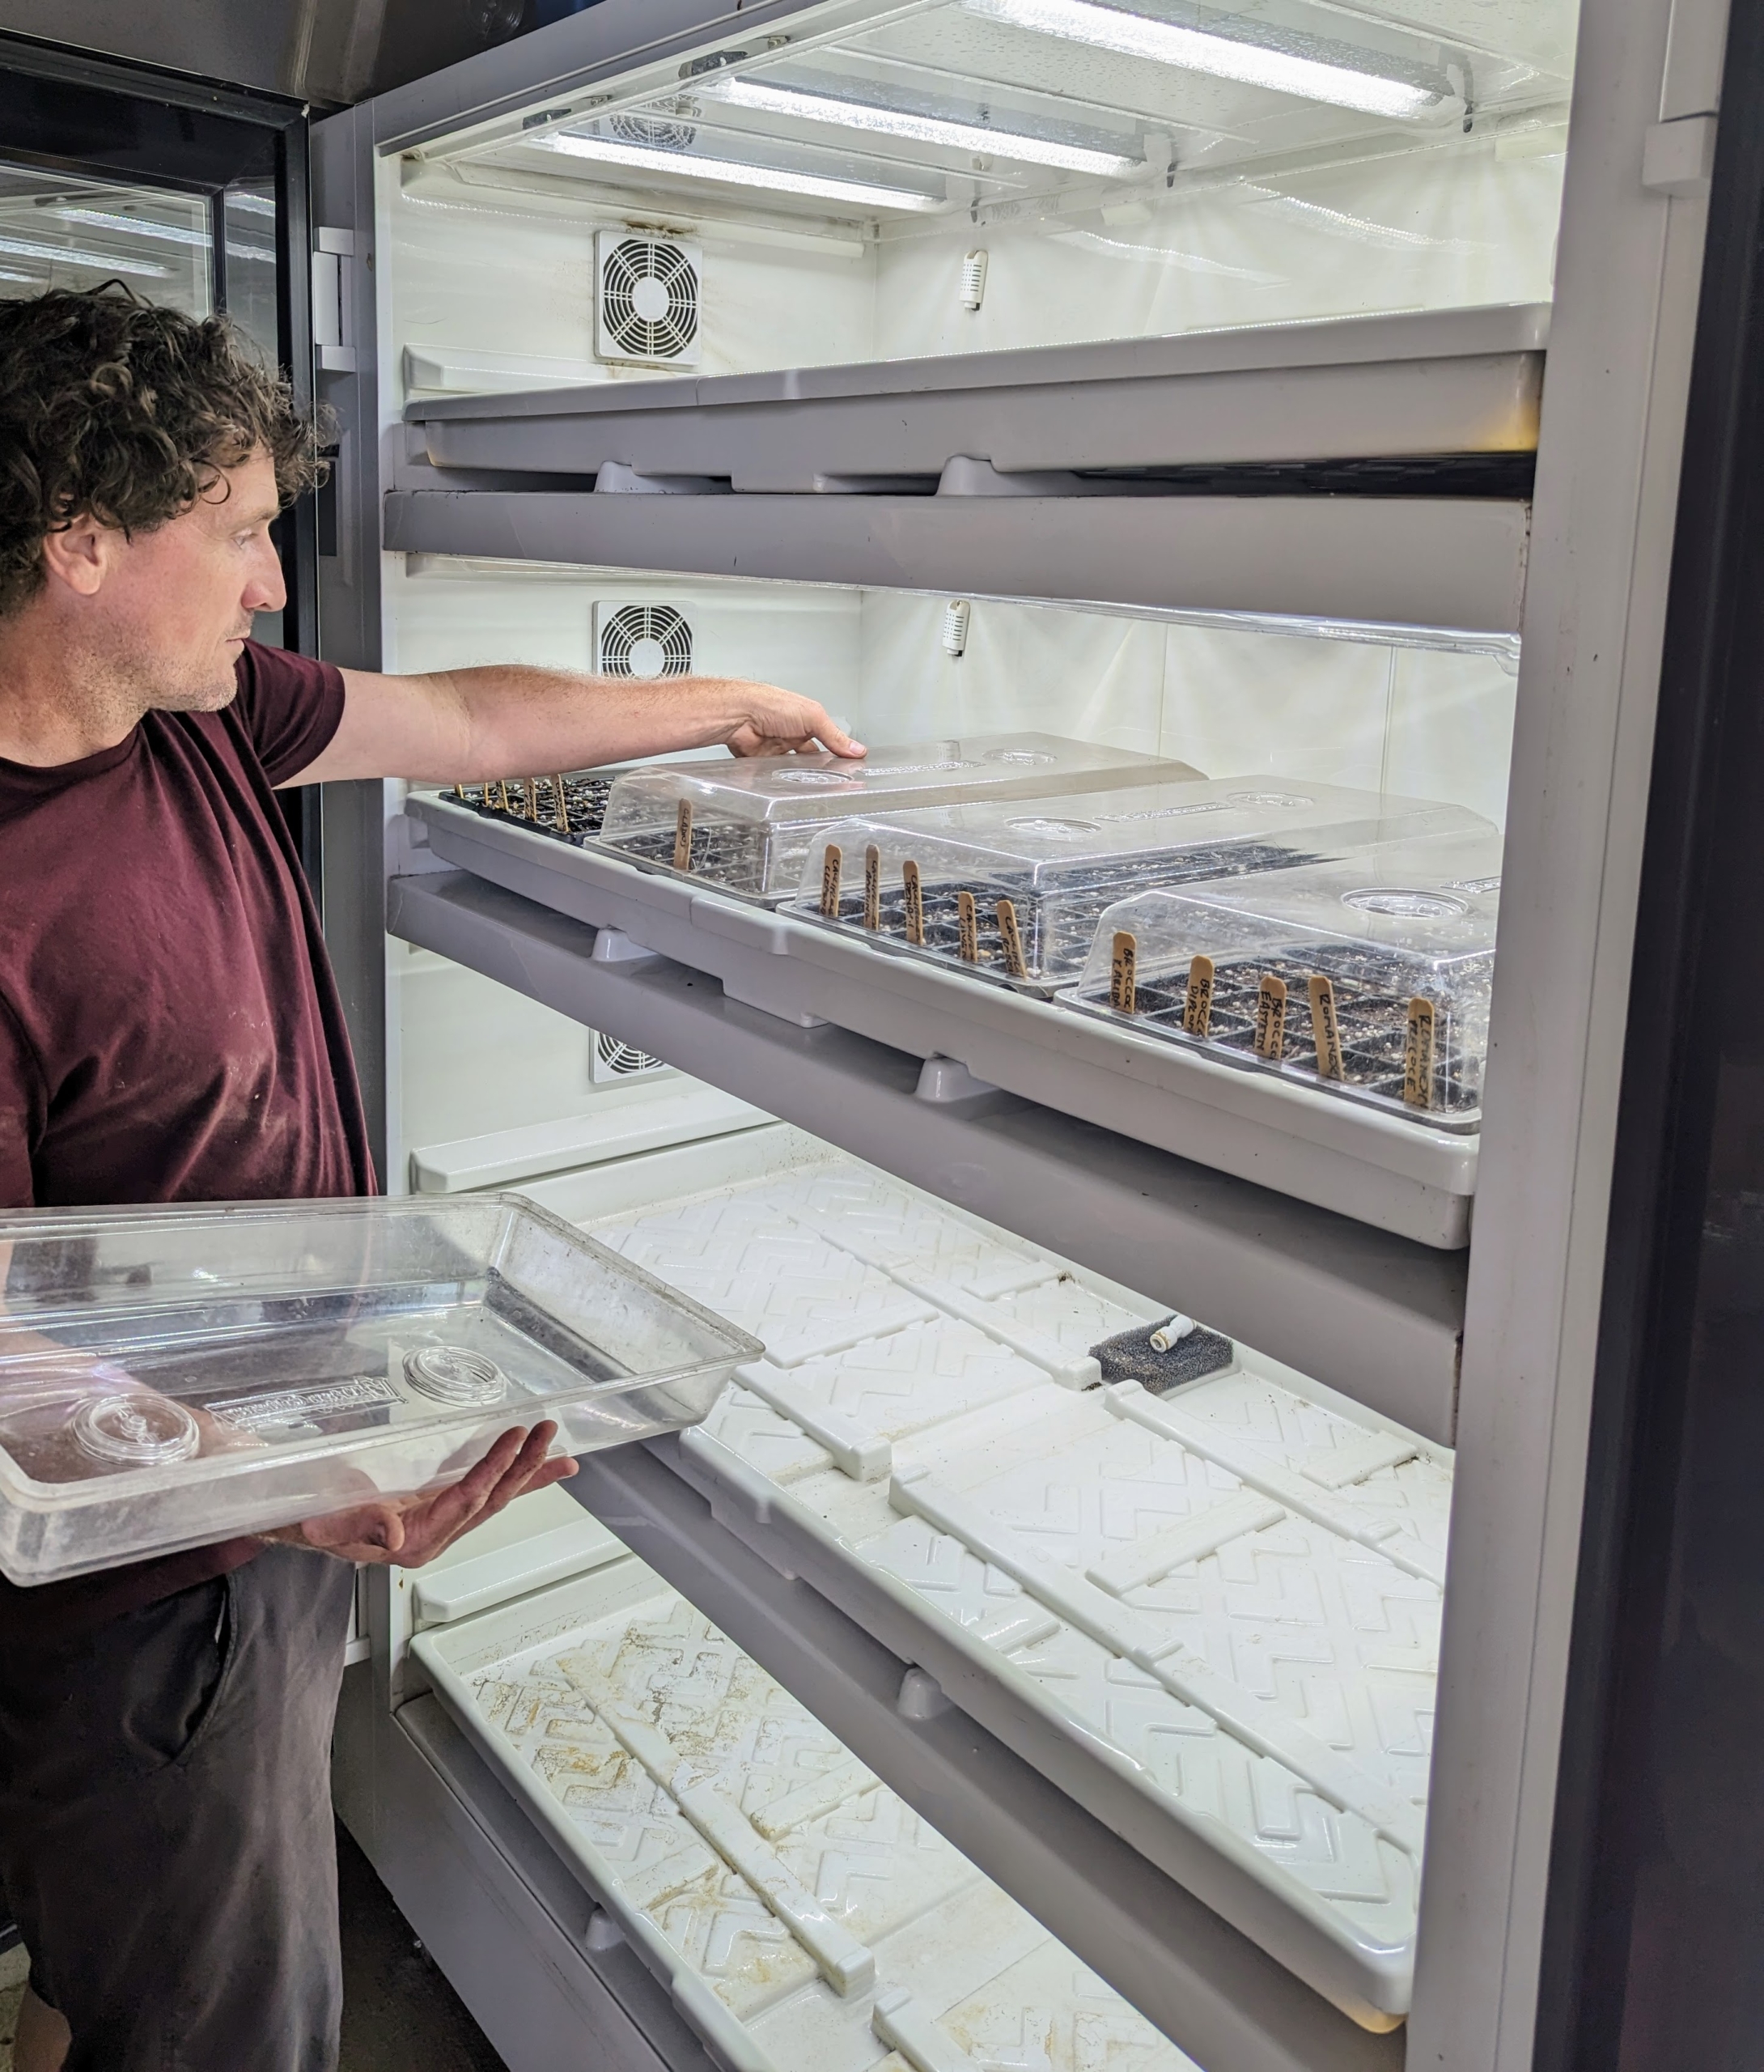
After all the trays are seeded, Ryan places them in our Urban Cultivator growing system – it has water, temperature and humidity all set-up in this refrigerator like unit.
He covers the trays with plastic humidity domes until germination begins. These seedlings will remain in the greenhouse for another four to six weeks until they are ready to be separated and transplanted into the ground. We’ll be harvesting from the garden through the next season – that’s a very good thing.