Planting evergreens is a great way to add color and texture in the garden, attract wildlife, and help clean and purify the air.
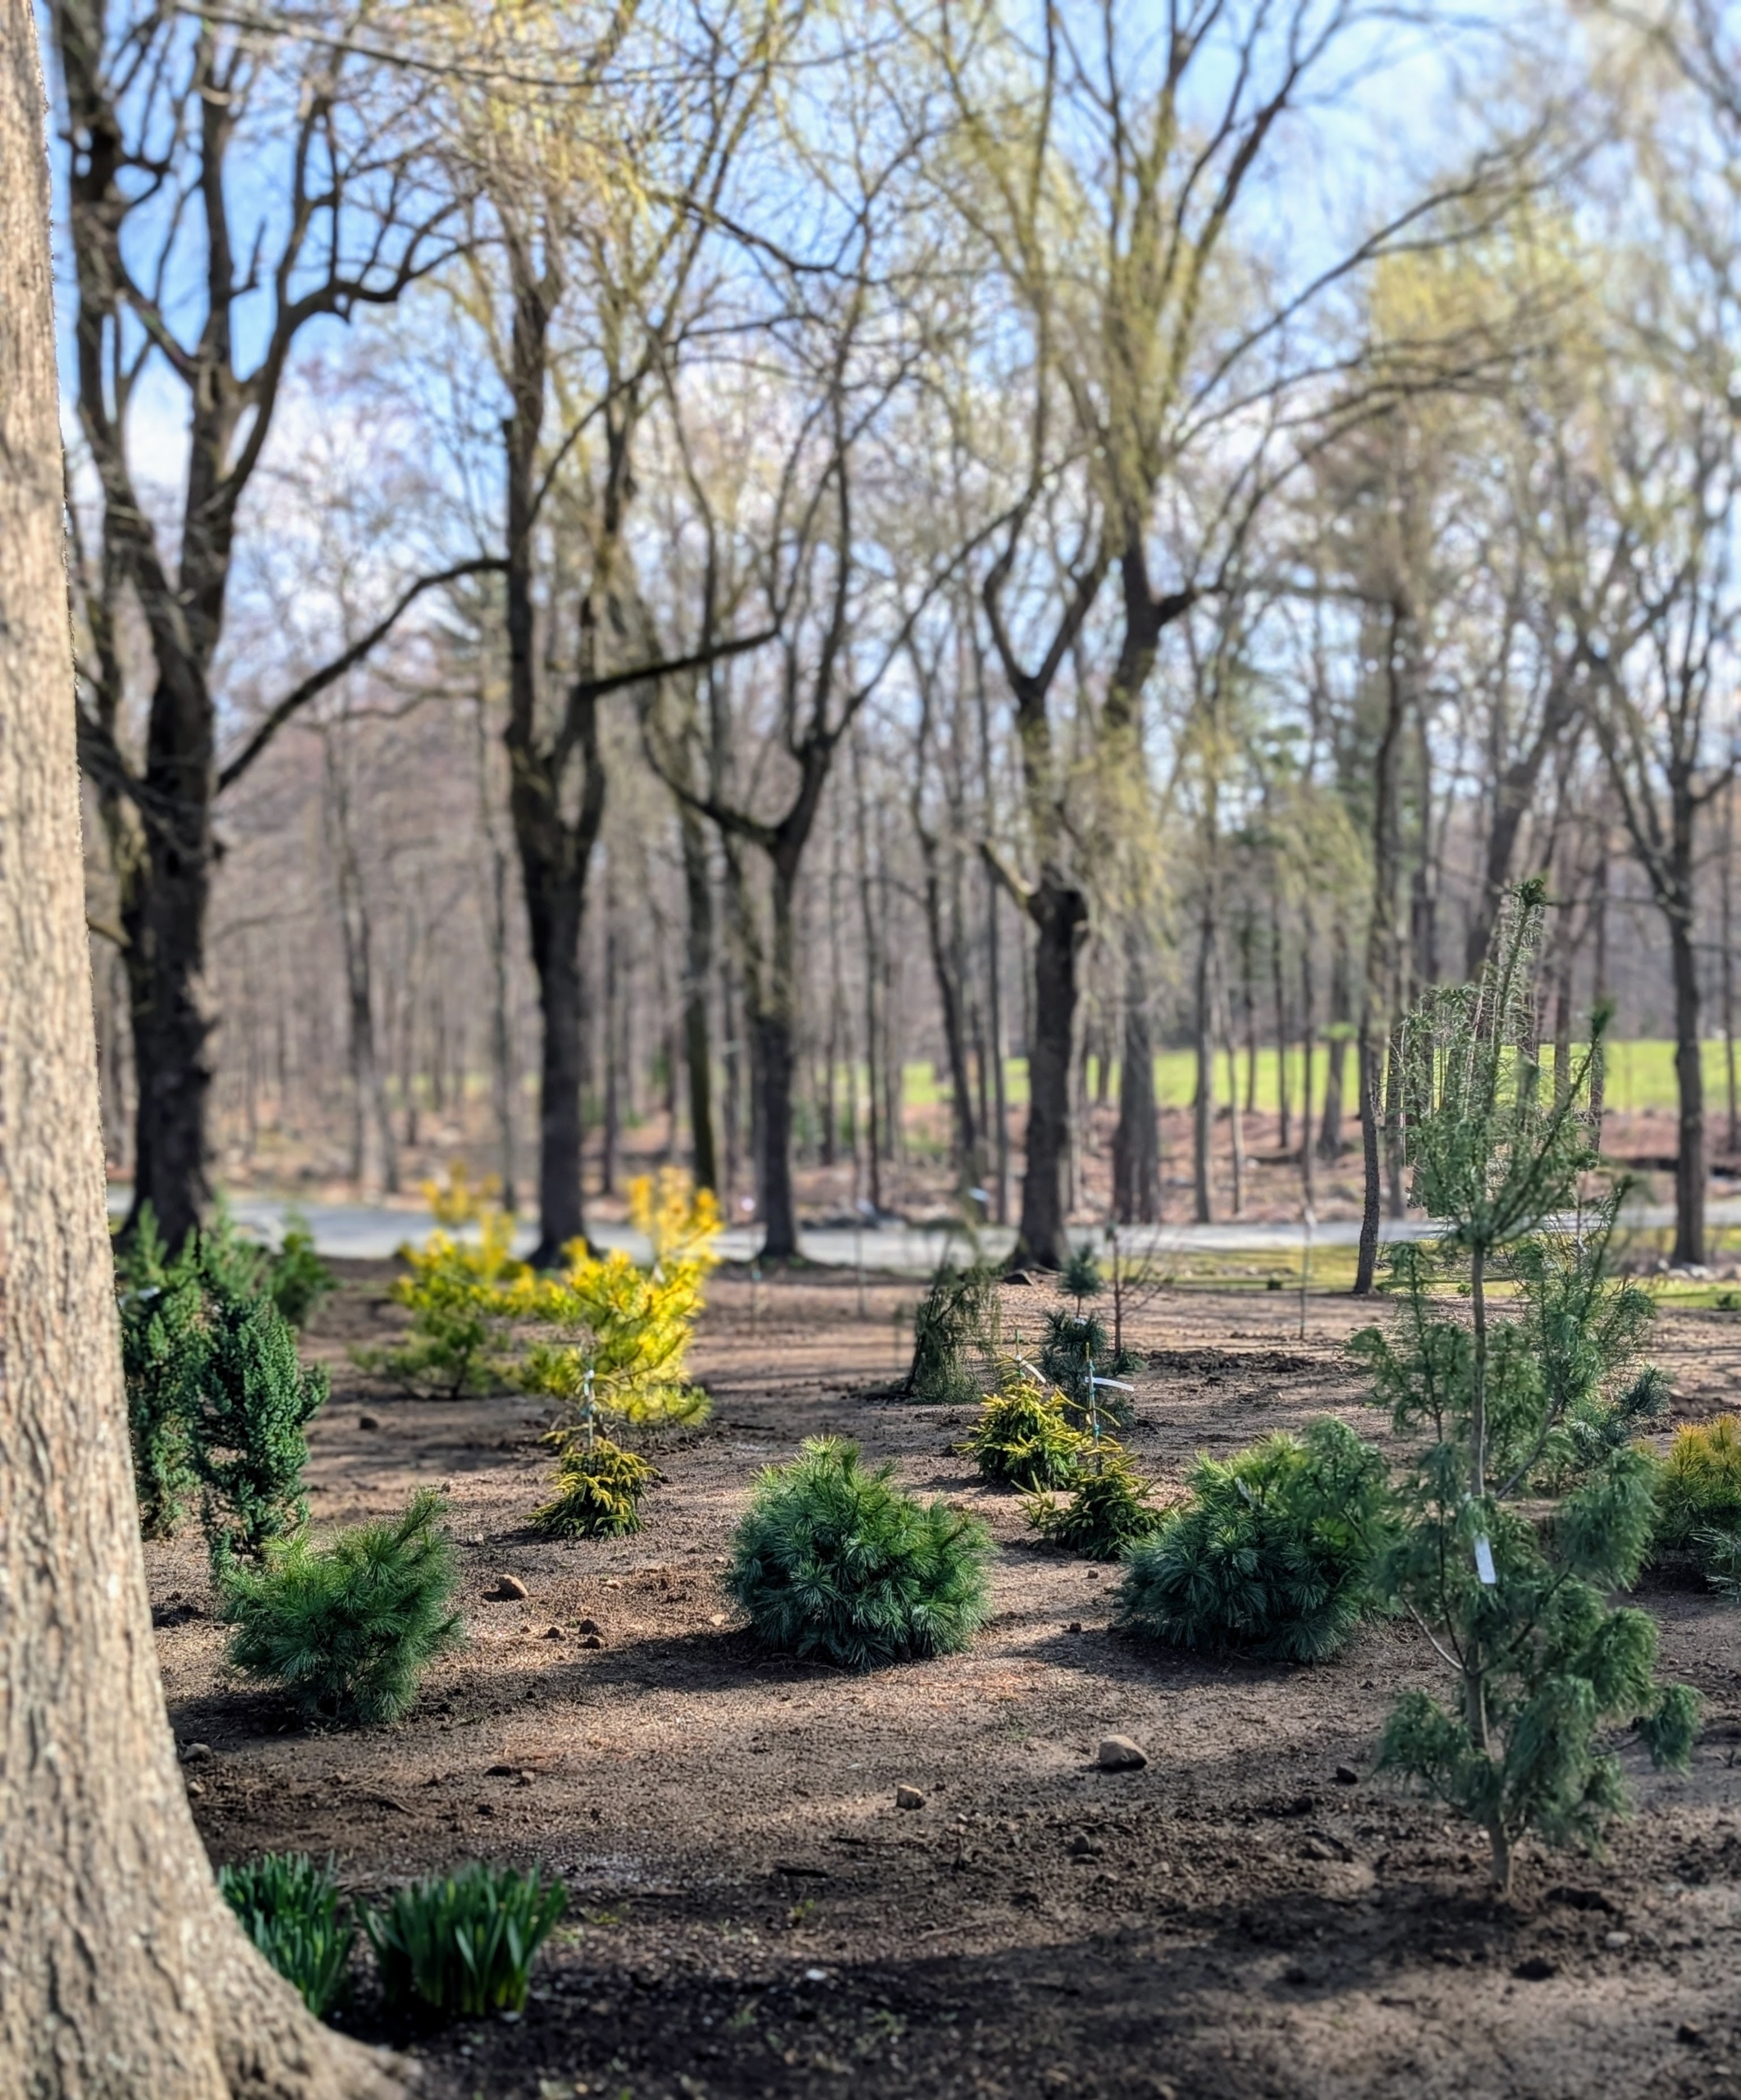
Here at my farm, I have an area I call my pinetum. It's an arboretum of pine trees and other conifers I developed soon after I moved to the property. The trees and shrubs have grown extremely well here, and I continue to plant additional specimens every year. Last week, I purchased a beautiful selection of young evergreens from Summer Hill Nursery in Madison, Connecticut. I knew they would be perfect for the recently expanded area of the pinetum garden. Among them - a variety of interesting pines, junipers, and Oriental spruce. I also added some dawn redwood and bald cypress trees. Once they arrived, I positioned them where they would be planted and the crew got to work.
Enjoy these photos.
For me, it’s always so exciting to bring home a new selection of plants for the farm. These evergreens from Summer Hill Nursery are all so beautiful and healthy.
Once I got them home, the plants were unloaded right away.
I was happy to place them in their approximate planting positions. My gardeners will also check each individual plant’s space and light needs and adjust accordingly.
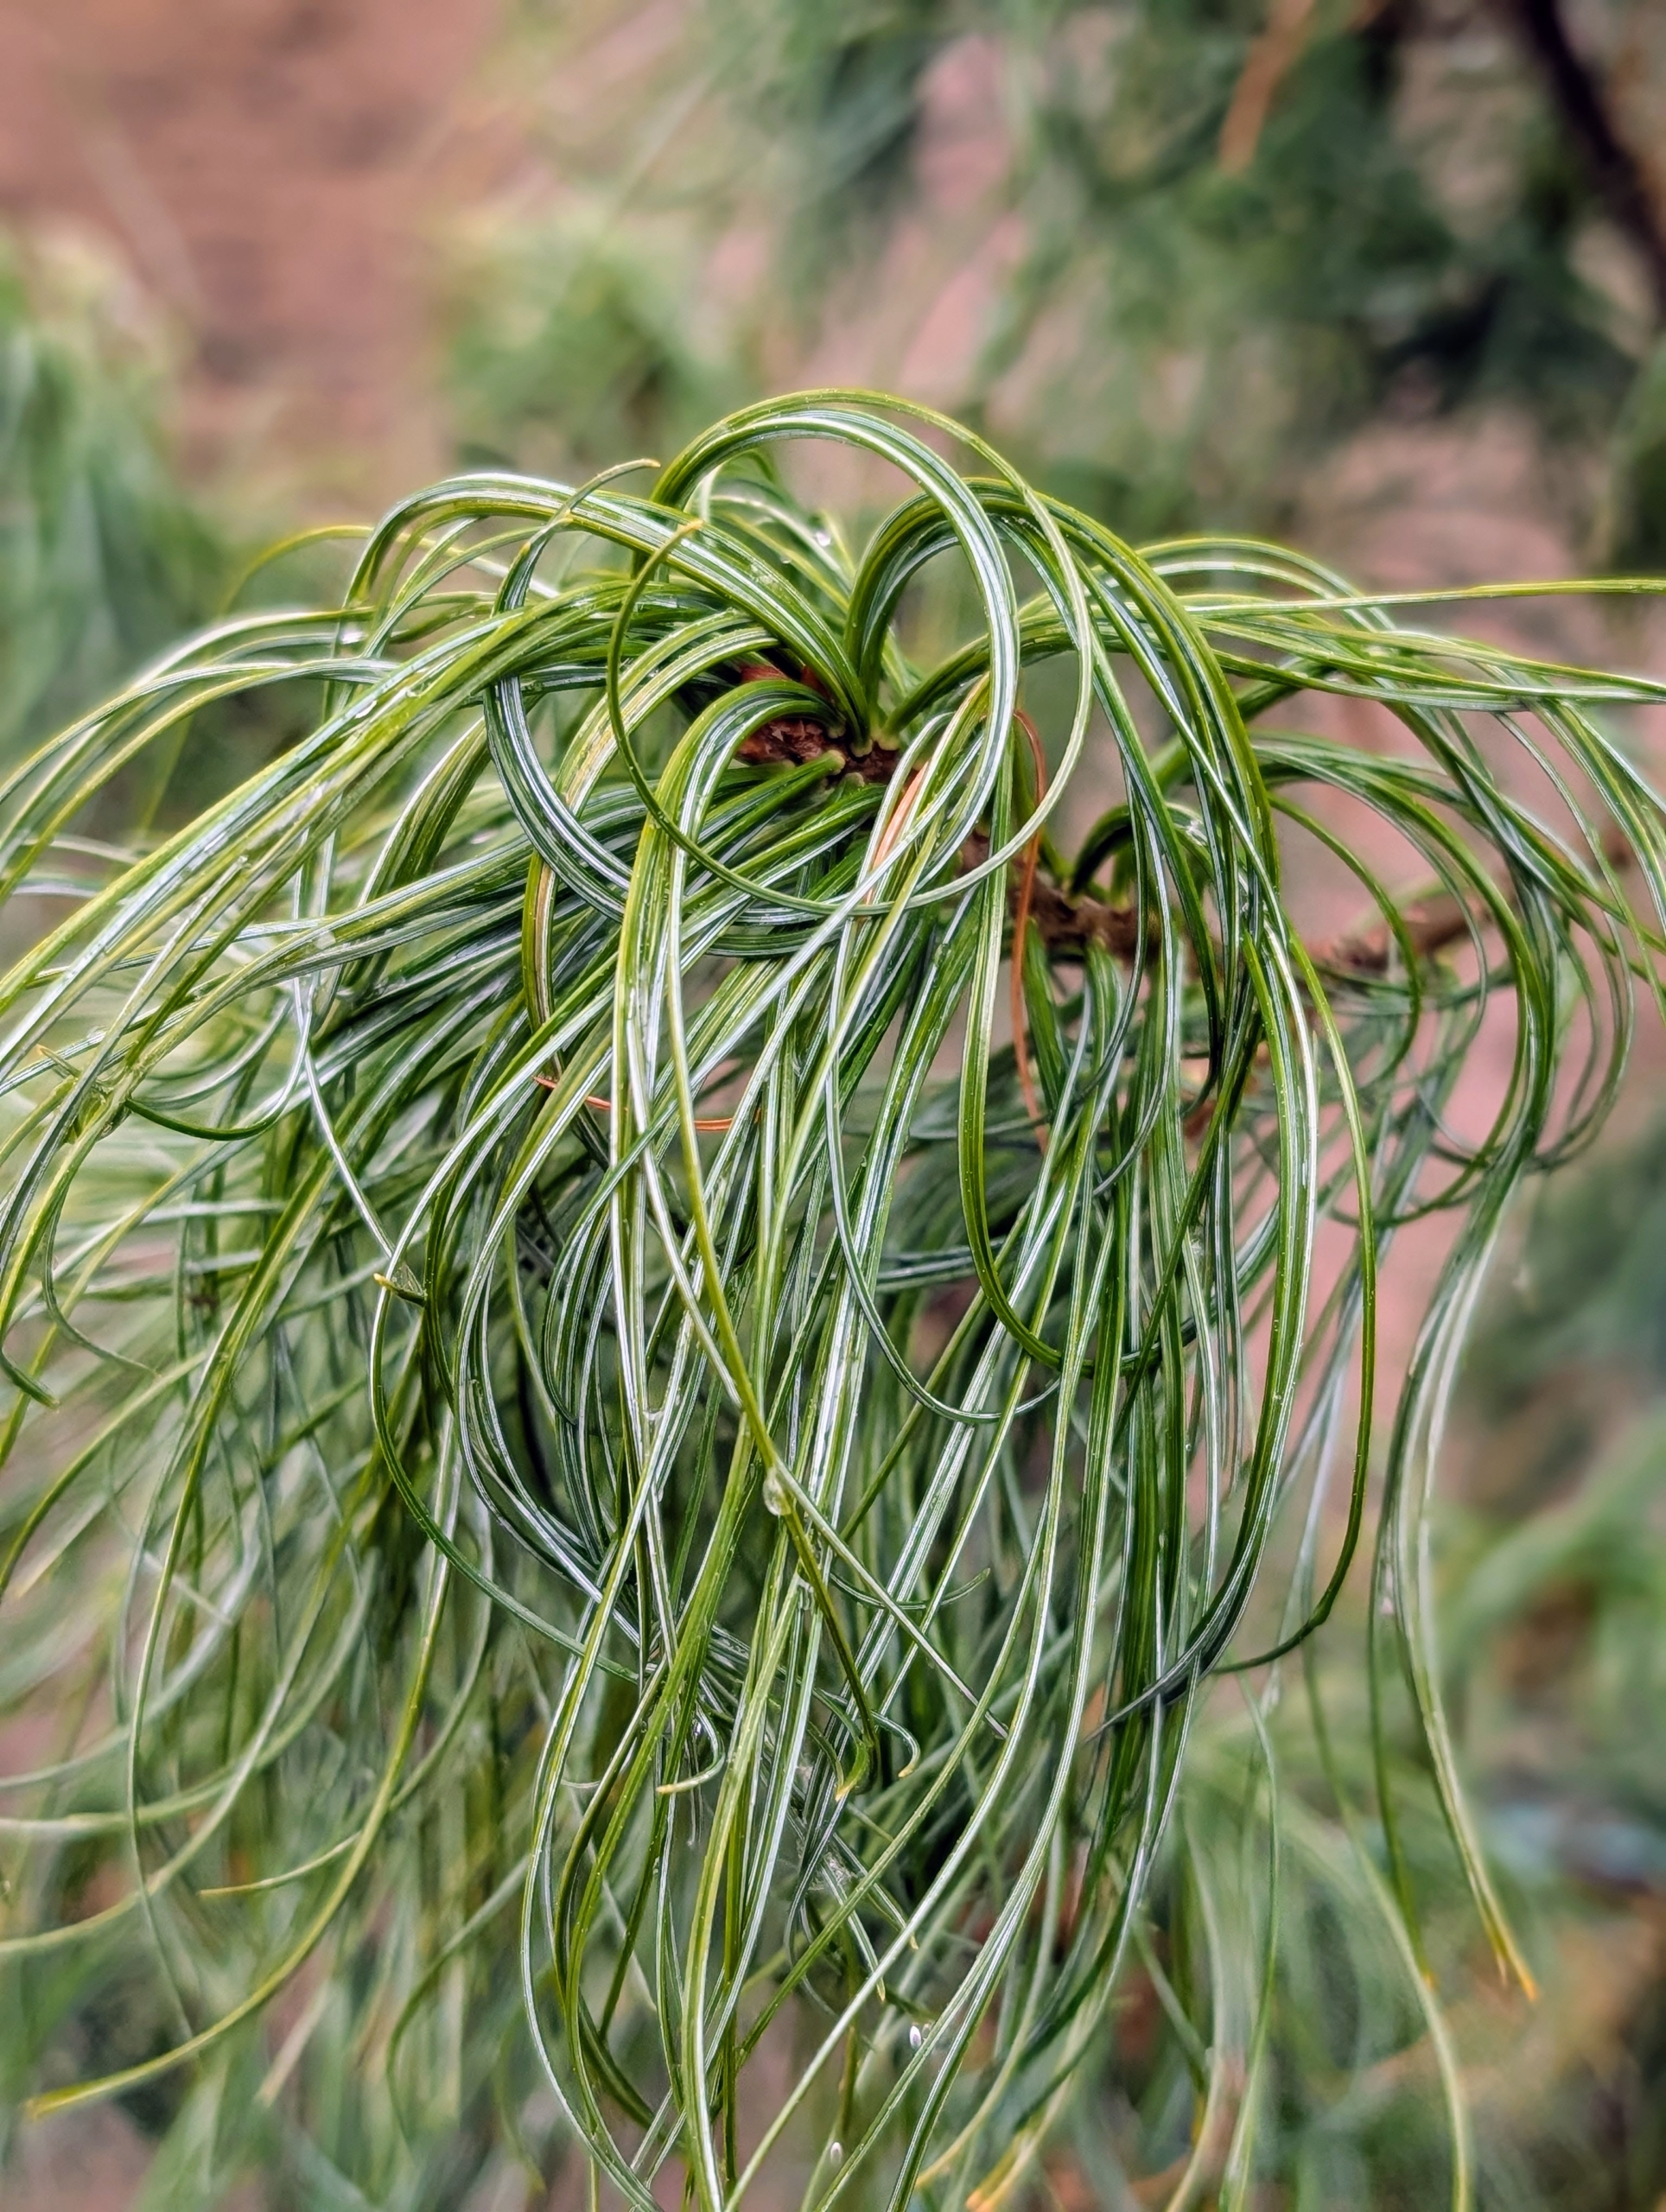
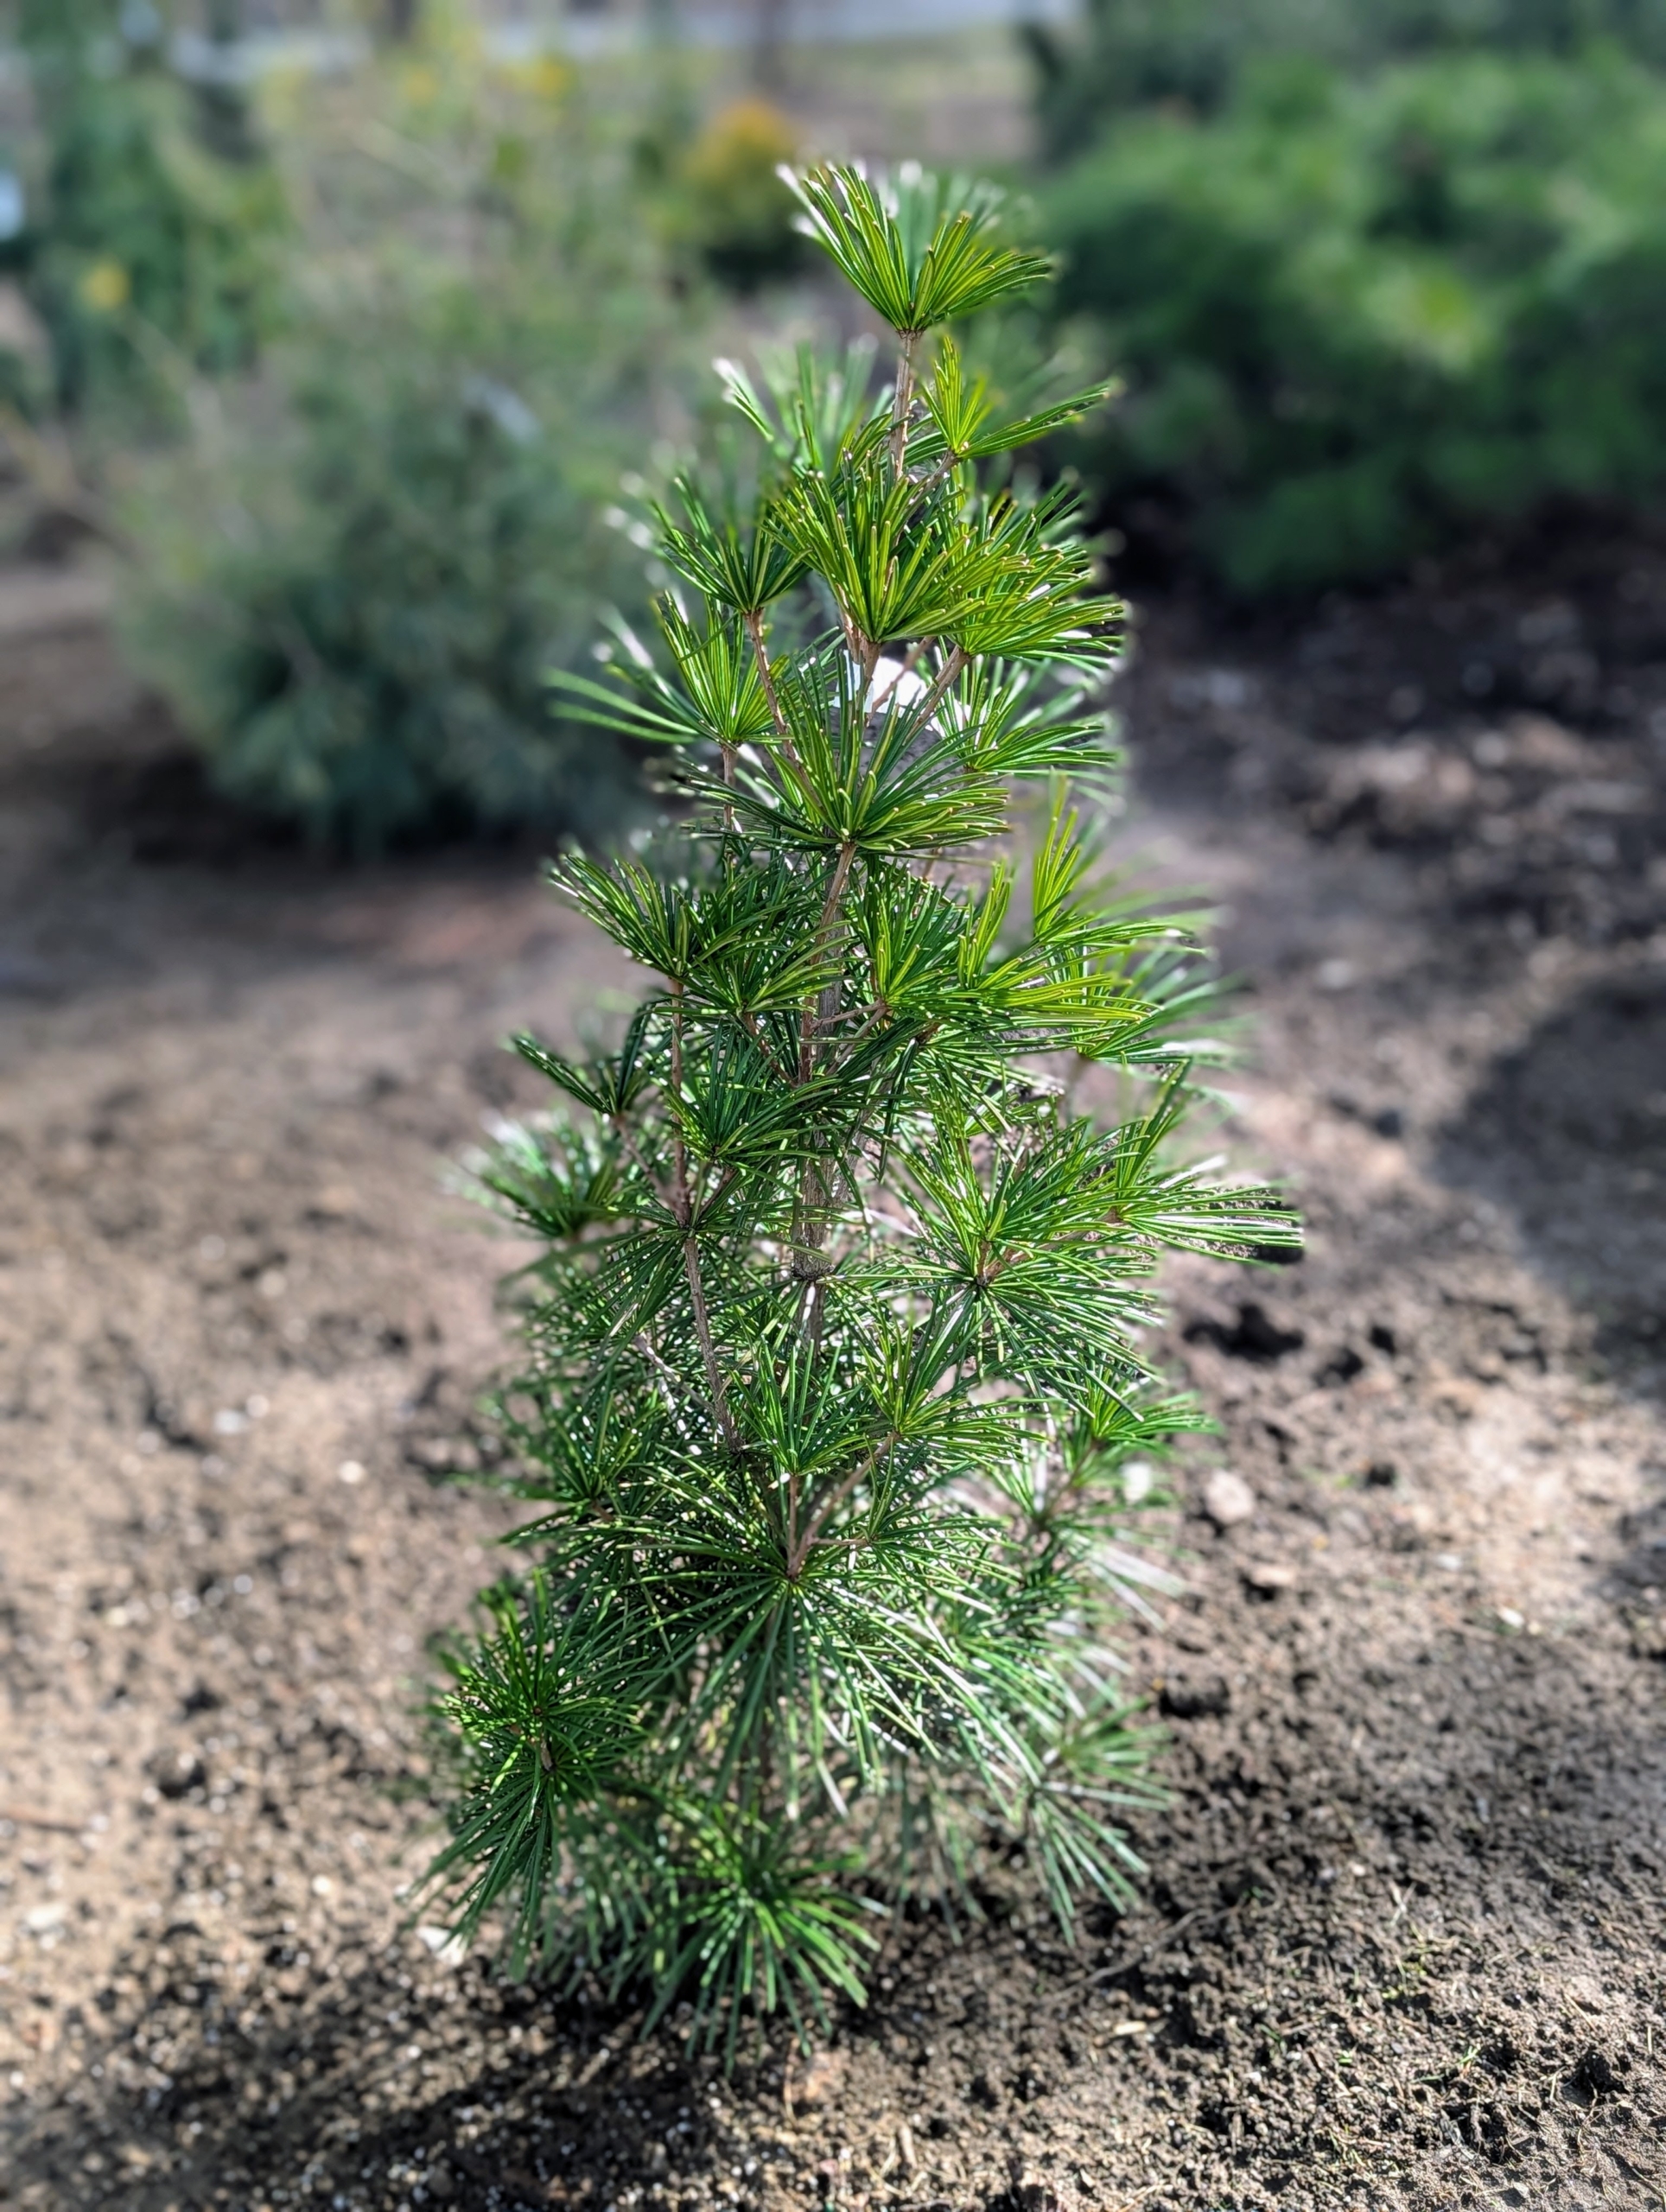
Twisted Needle White Pine is an evergreen with unique, green-blue ‘twisted’ needles. It is fast growing and reaches heights of more than 30-feet with just as wide a spread.
The twisted, spindly tufts of needles give the tree an almost fluffy appearance.
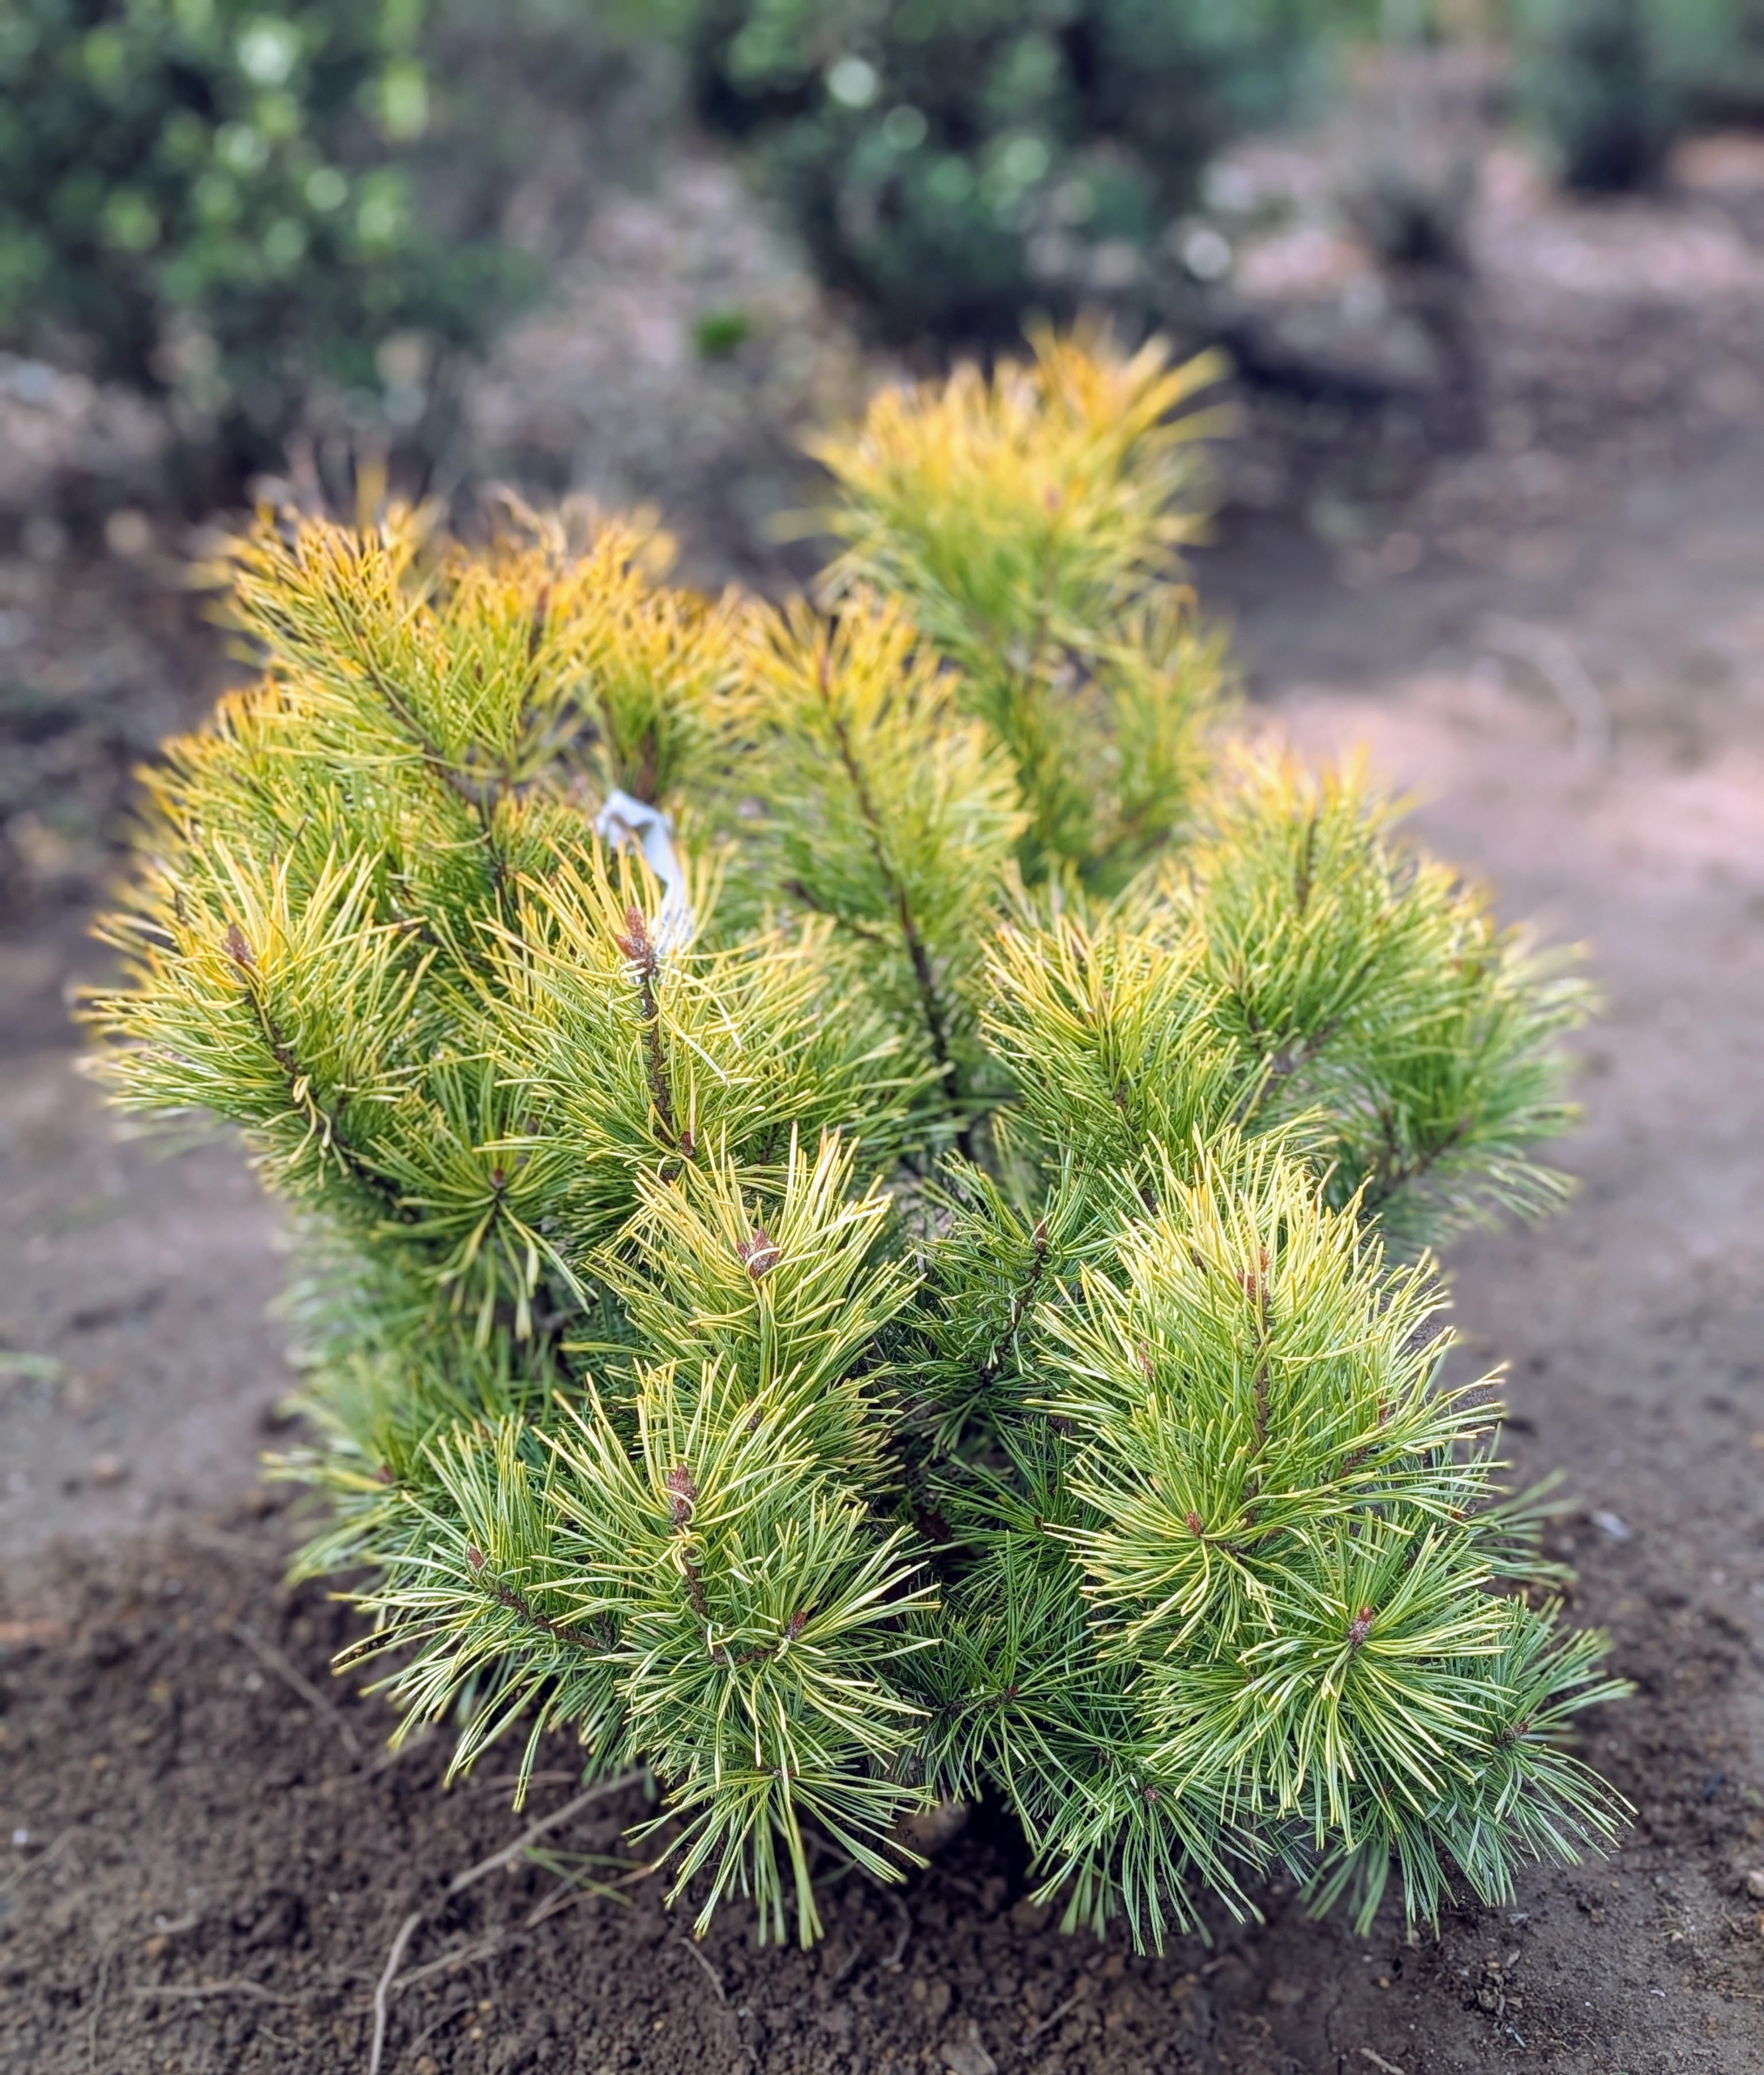
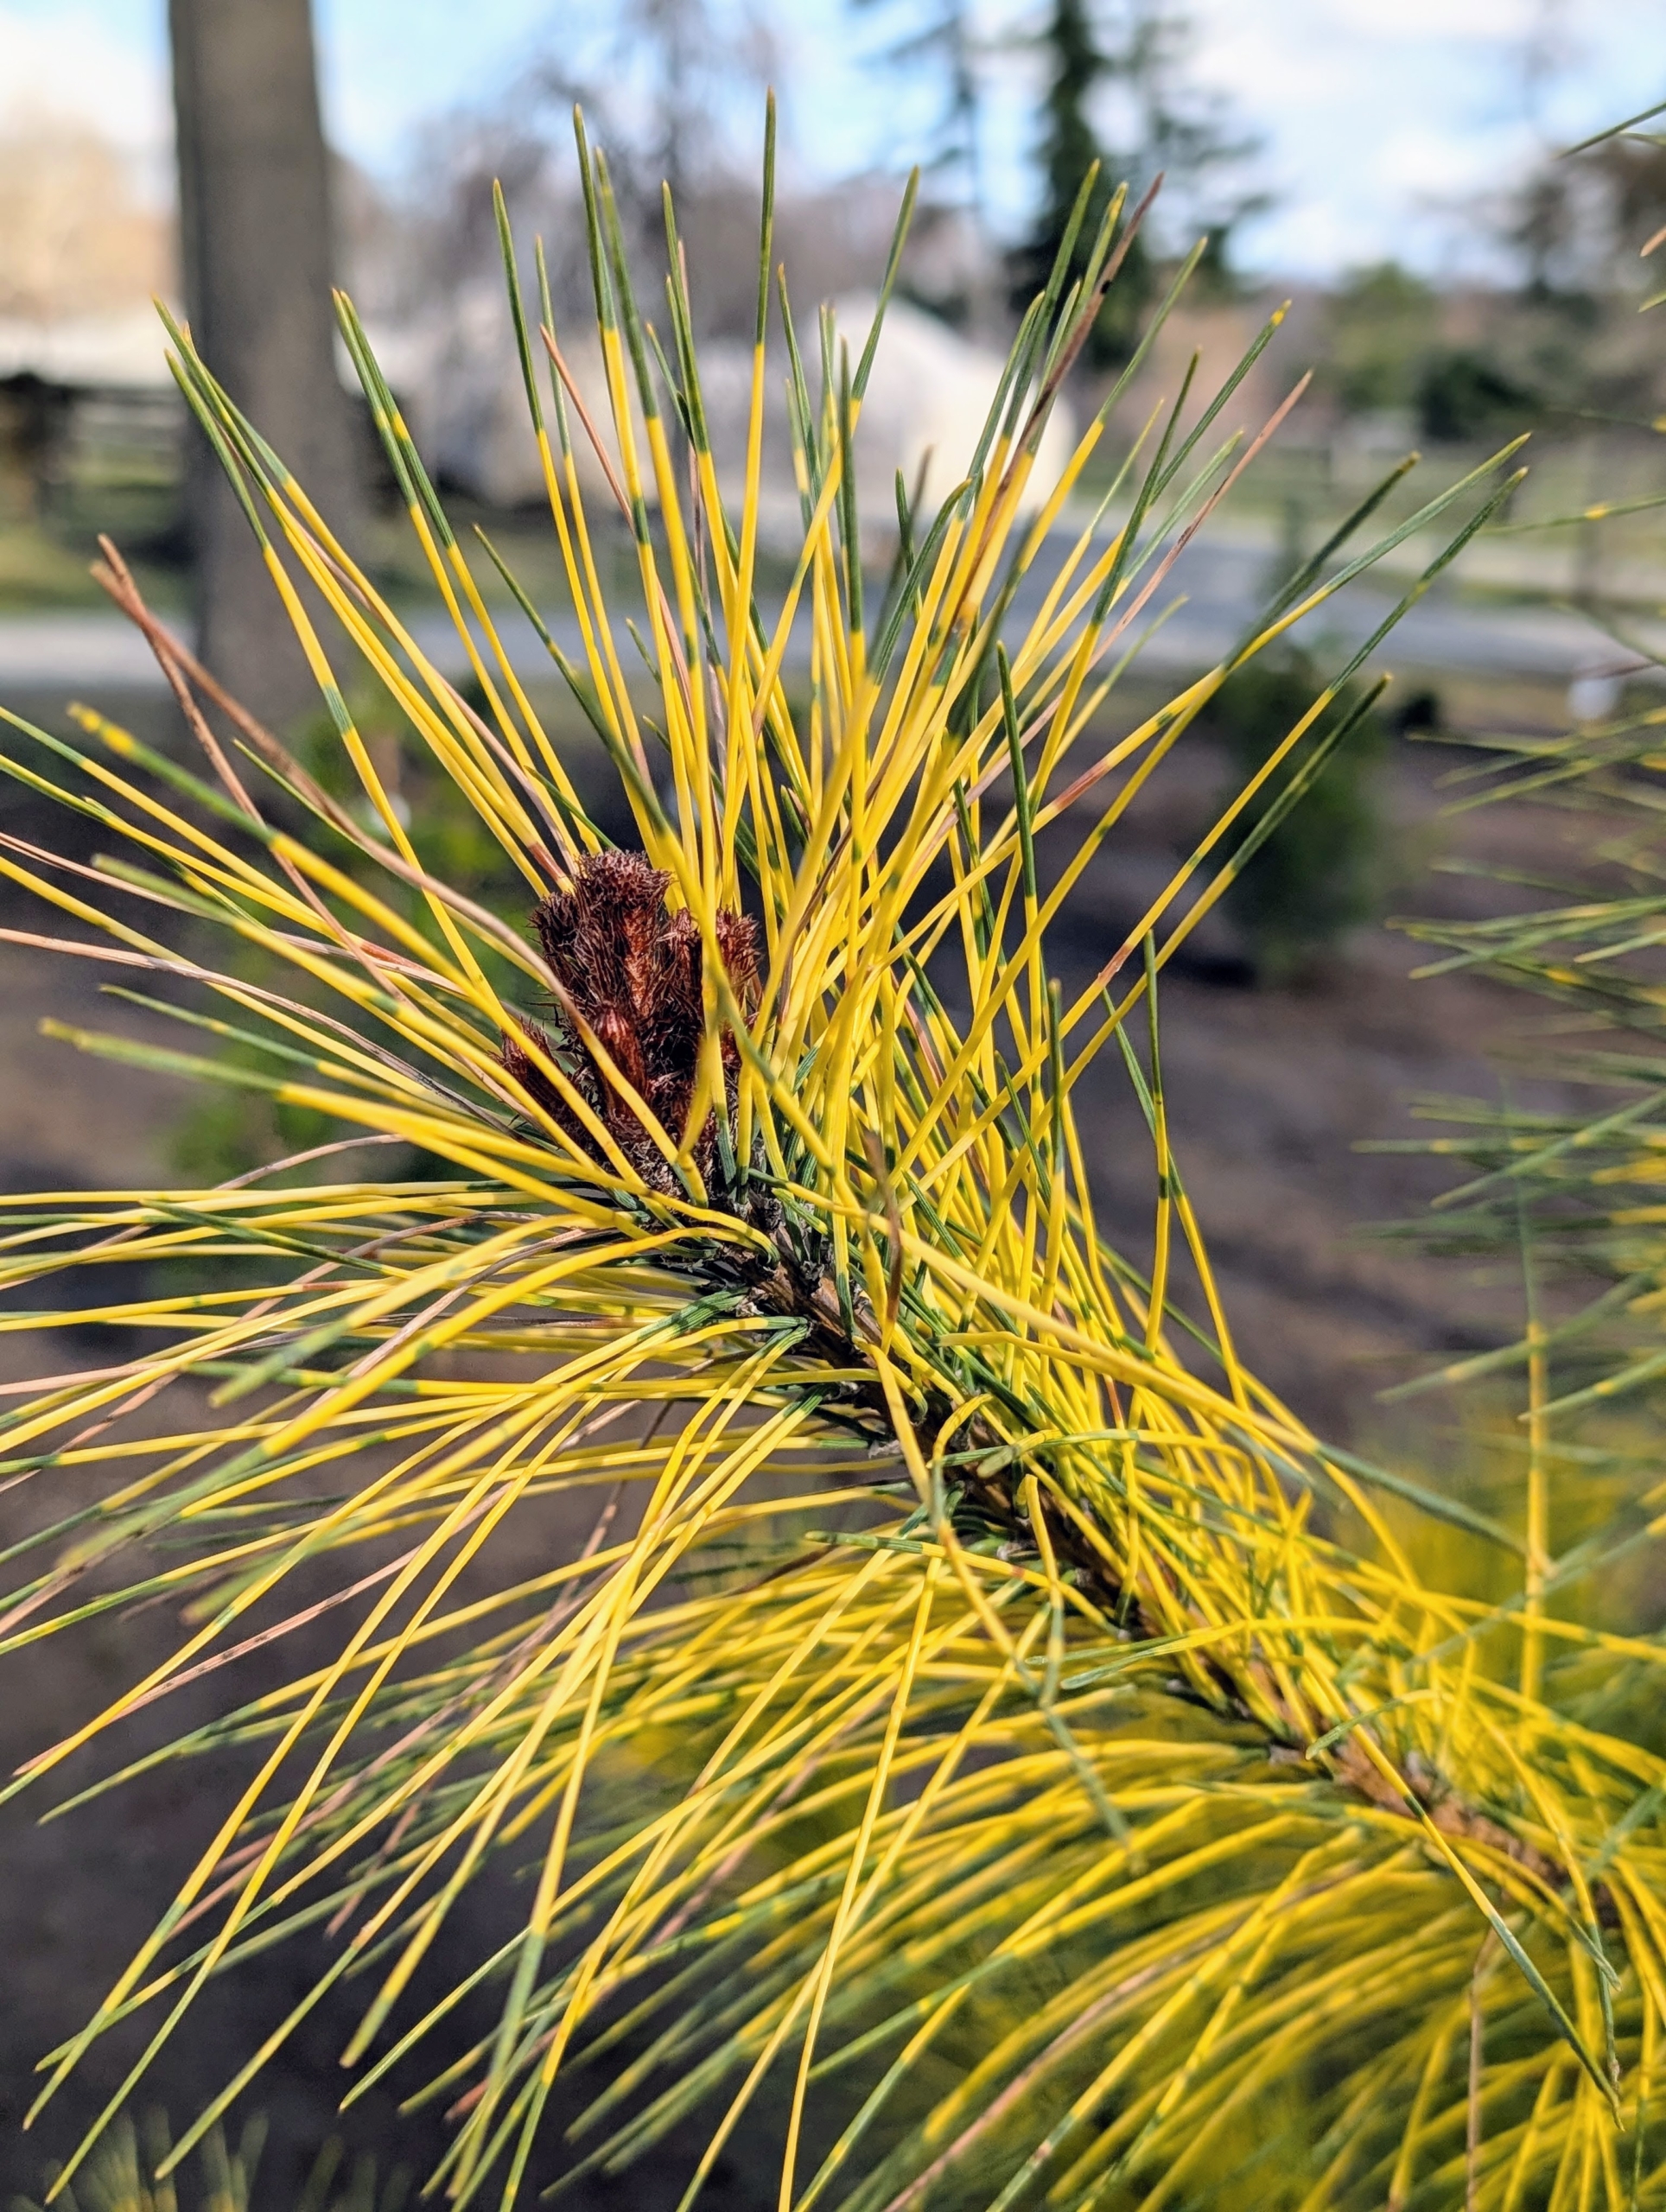
This is Pinus sylvestris ‘Gold Coin’ Scots Pine, a mid-sized pyramidal tree with gold needles year-round. Summer needles are a soft yellowish-green, while winter needles are more brilliant gold.
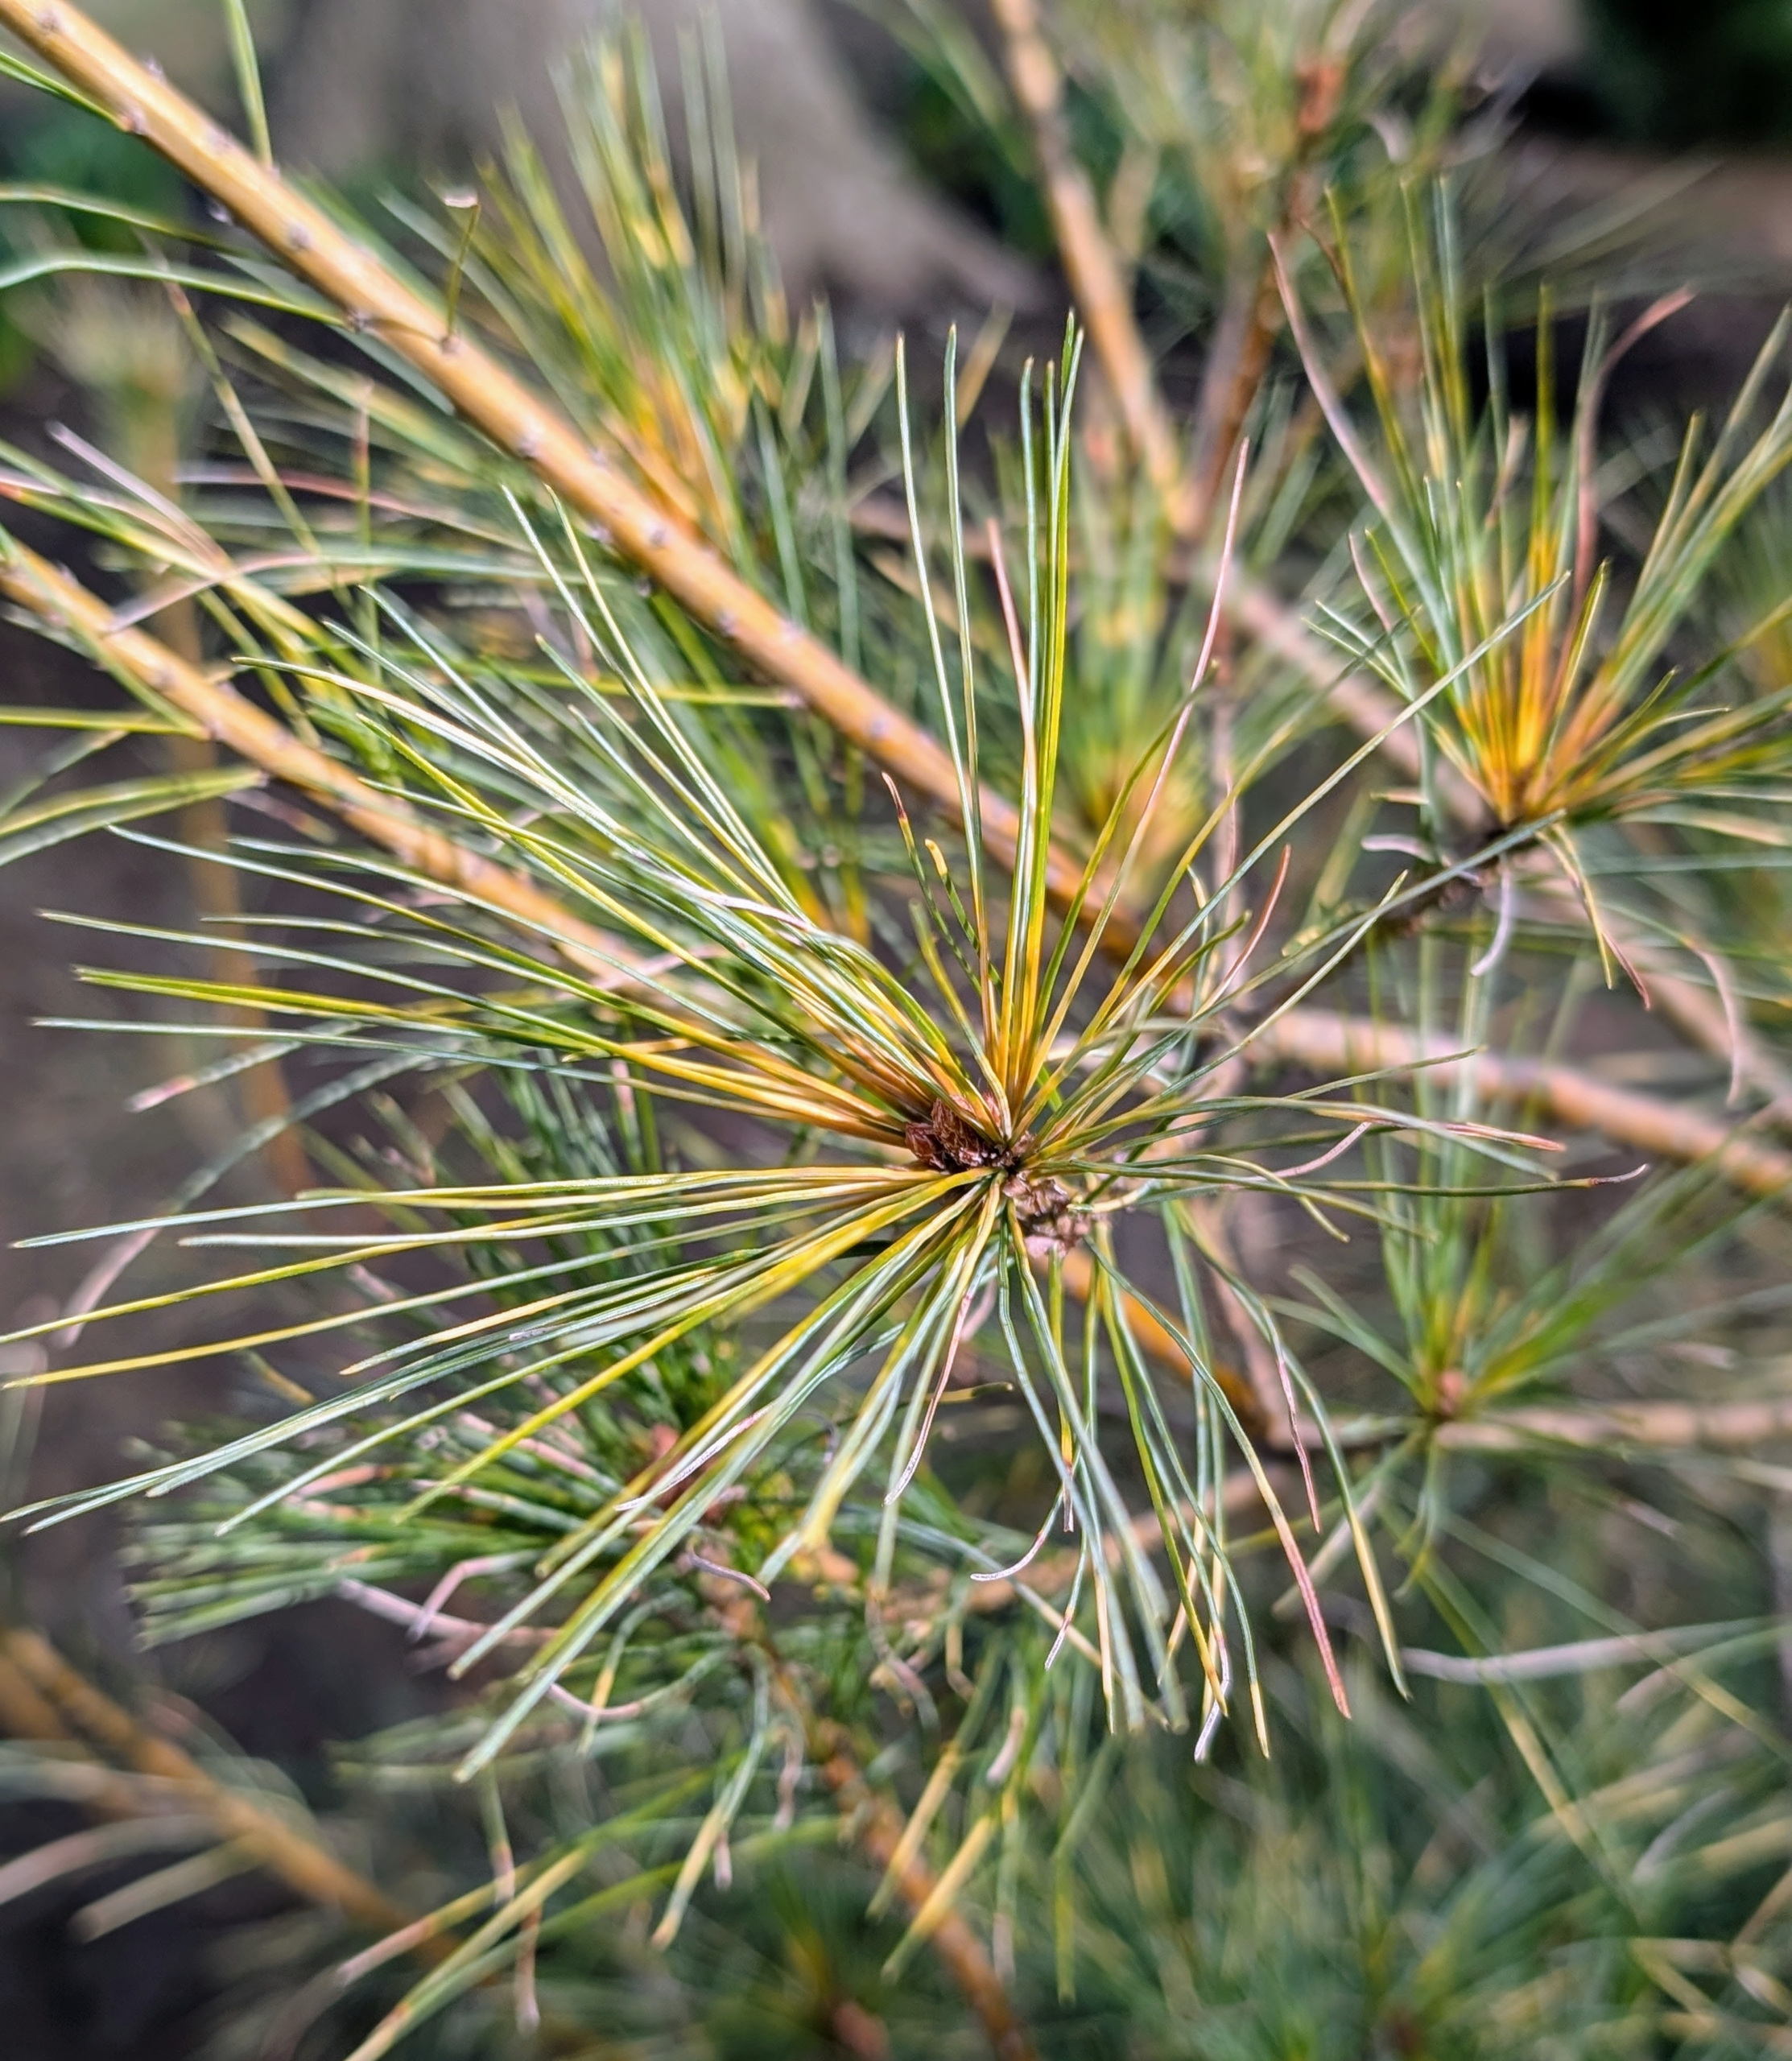
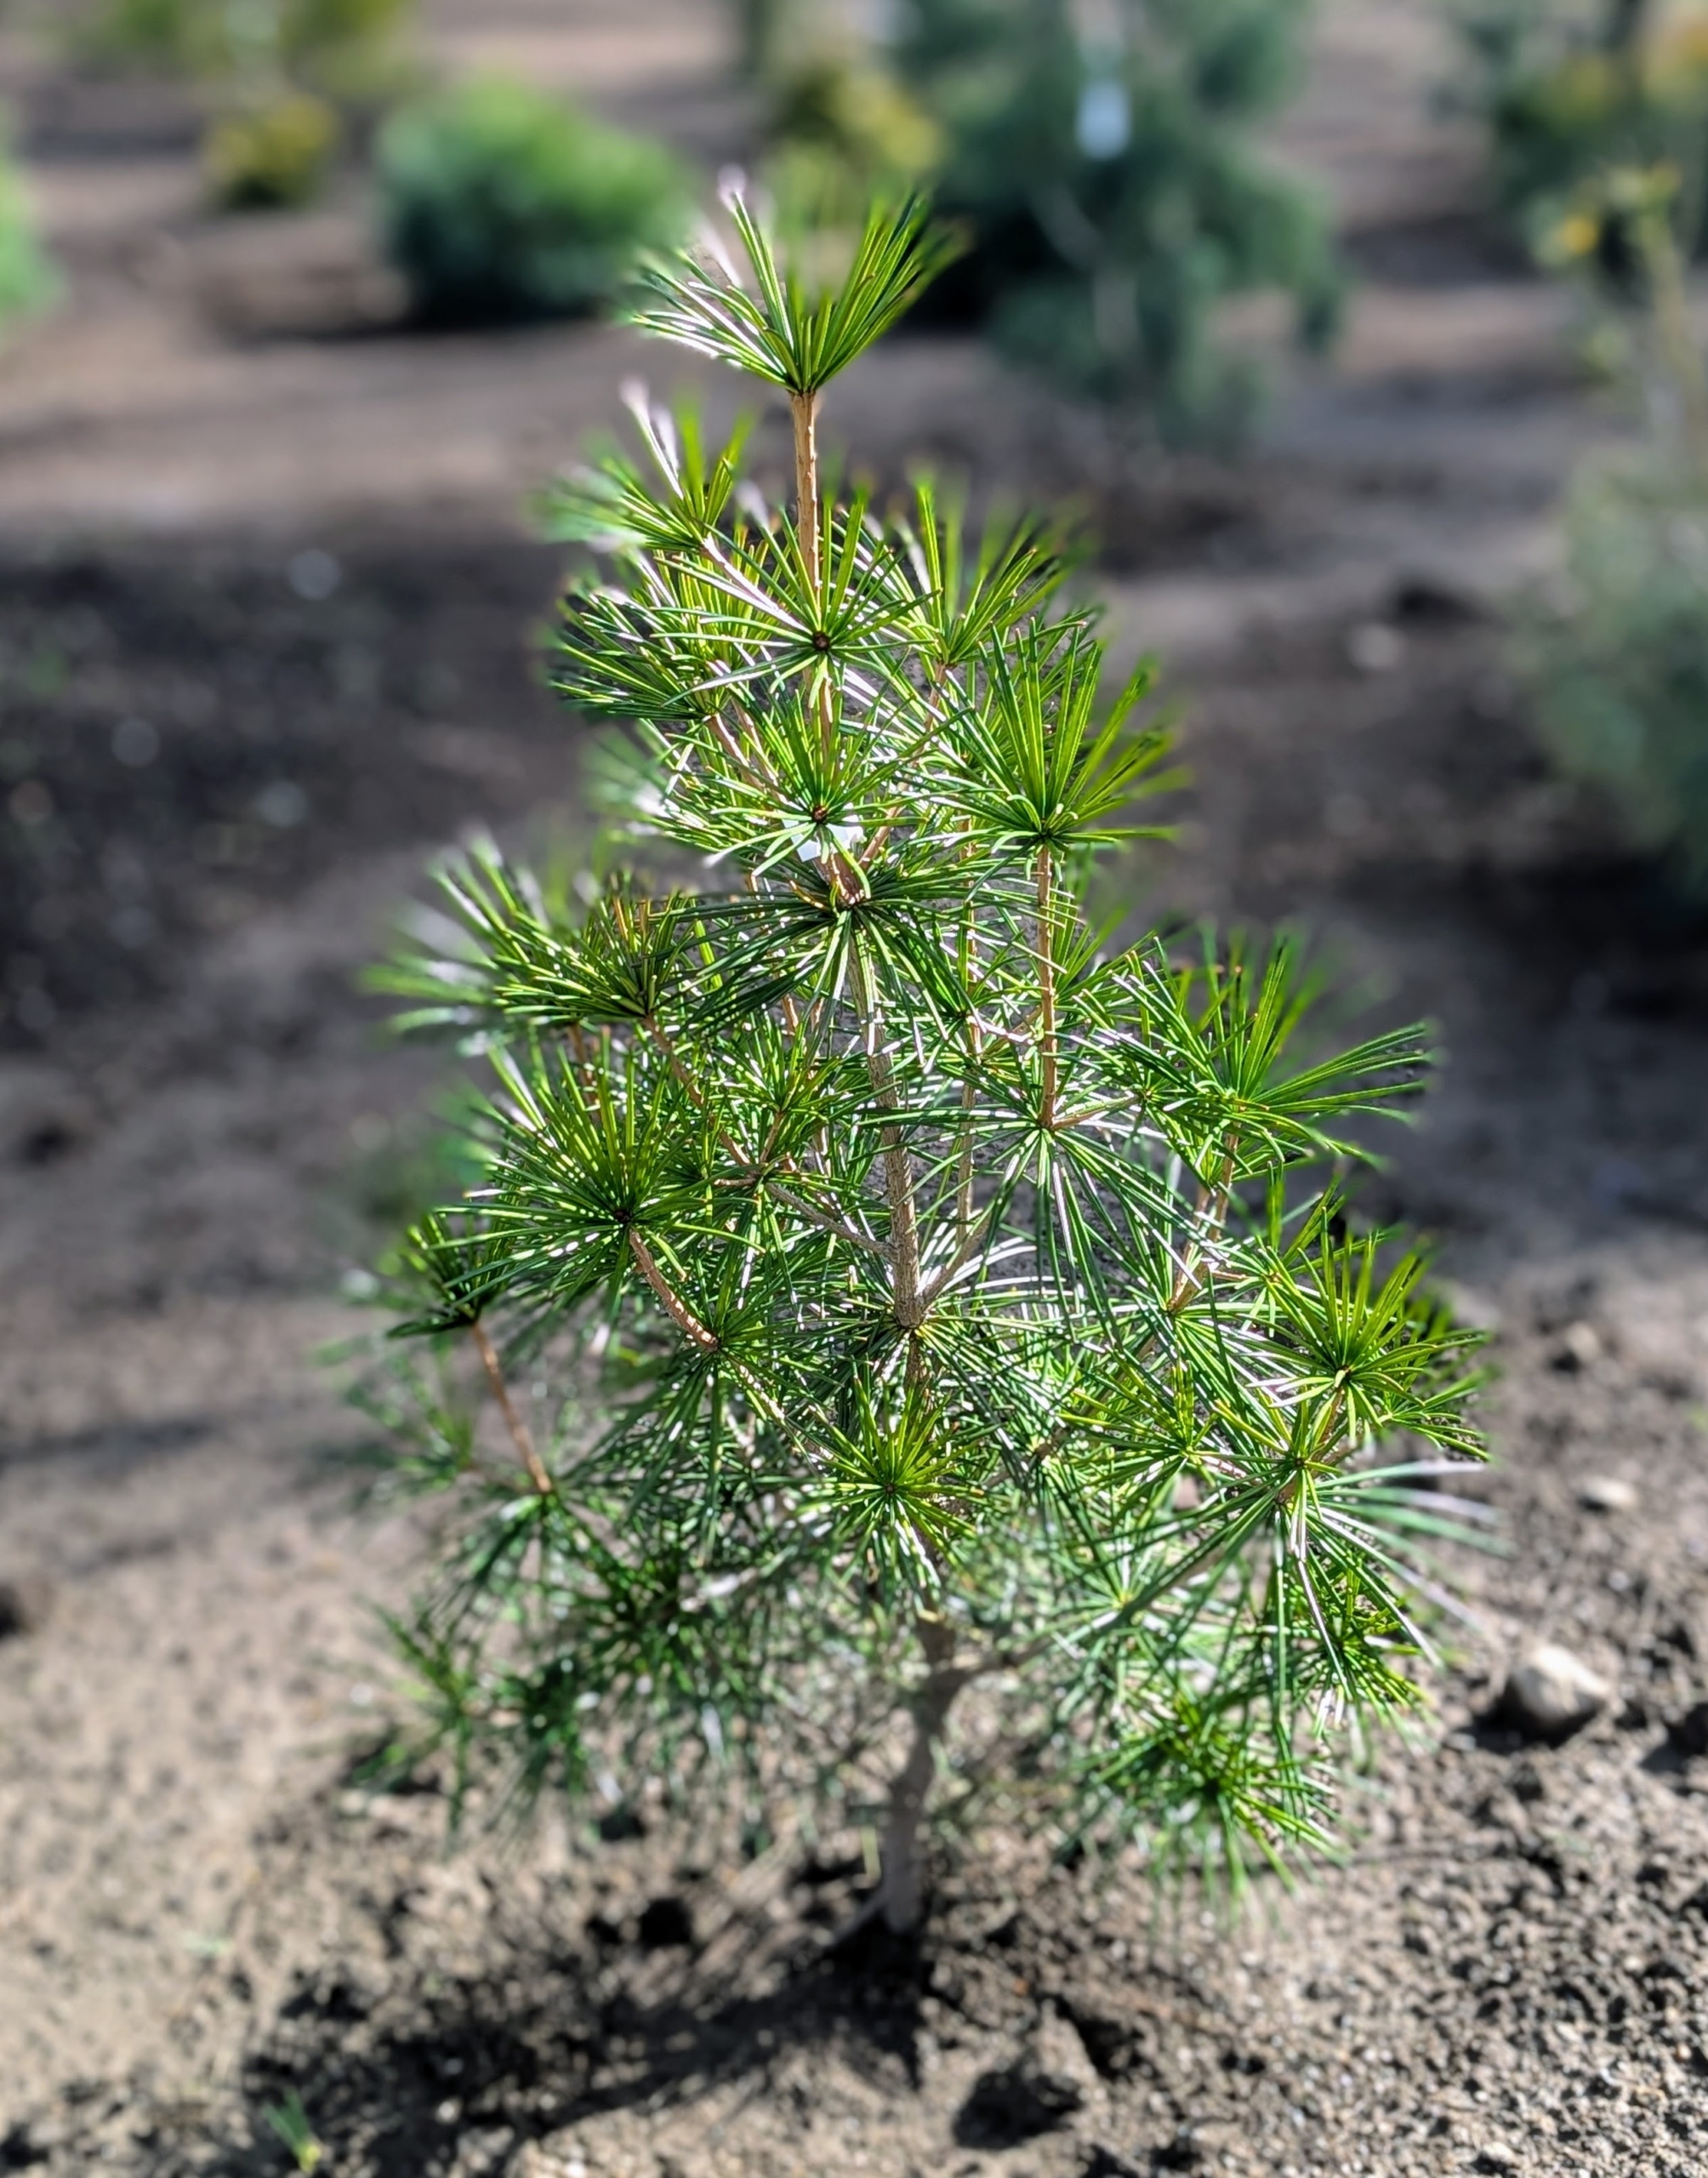
Pinus strobus ‘Golden Candles’ Eastern White Pine has electric yellow foliage in spring that softens to light green by end of summer.
The needles of the ‘Golden Candles’ White Pine are five-inches long and arranged in bundles of five.
‘Cynthia Waxman’ Japanese Umbrella Pine, Sciadopitys verticillata, is a dense, slow-growing, symmetrical, dwarf cone-shaped tree with dark green foliage.
The ‘Slim Jim’ Umbrella Pine is a compact, columnar variety known for its dense, dark green needles and slow growth.
The needles are long and soft to the touch. ‘Slim Jim’ is also non-cone bearing.
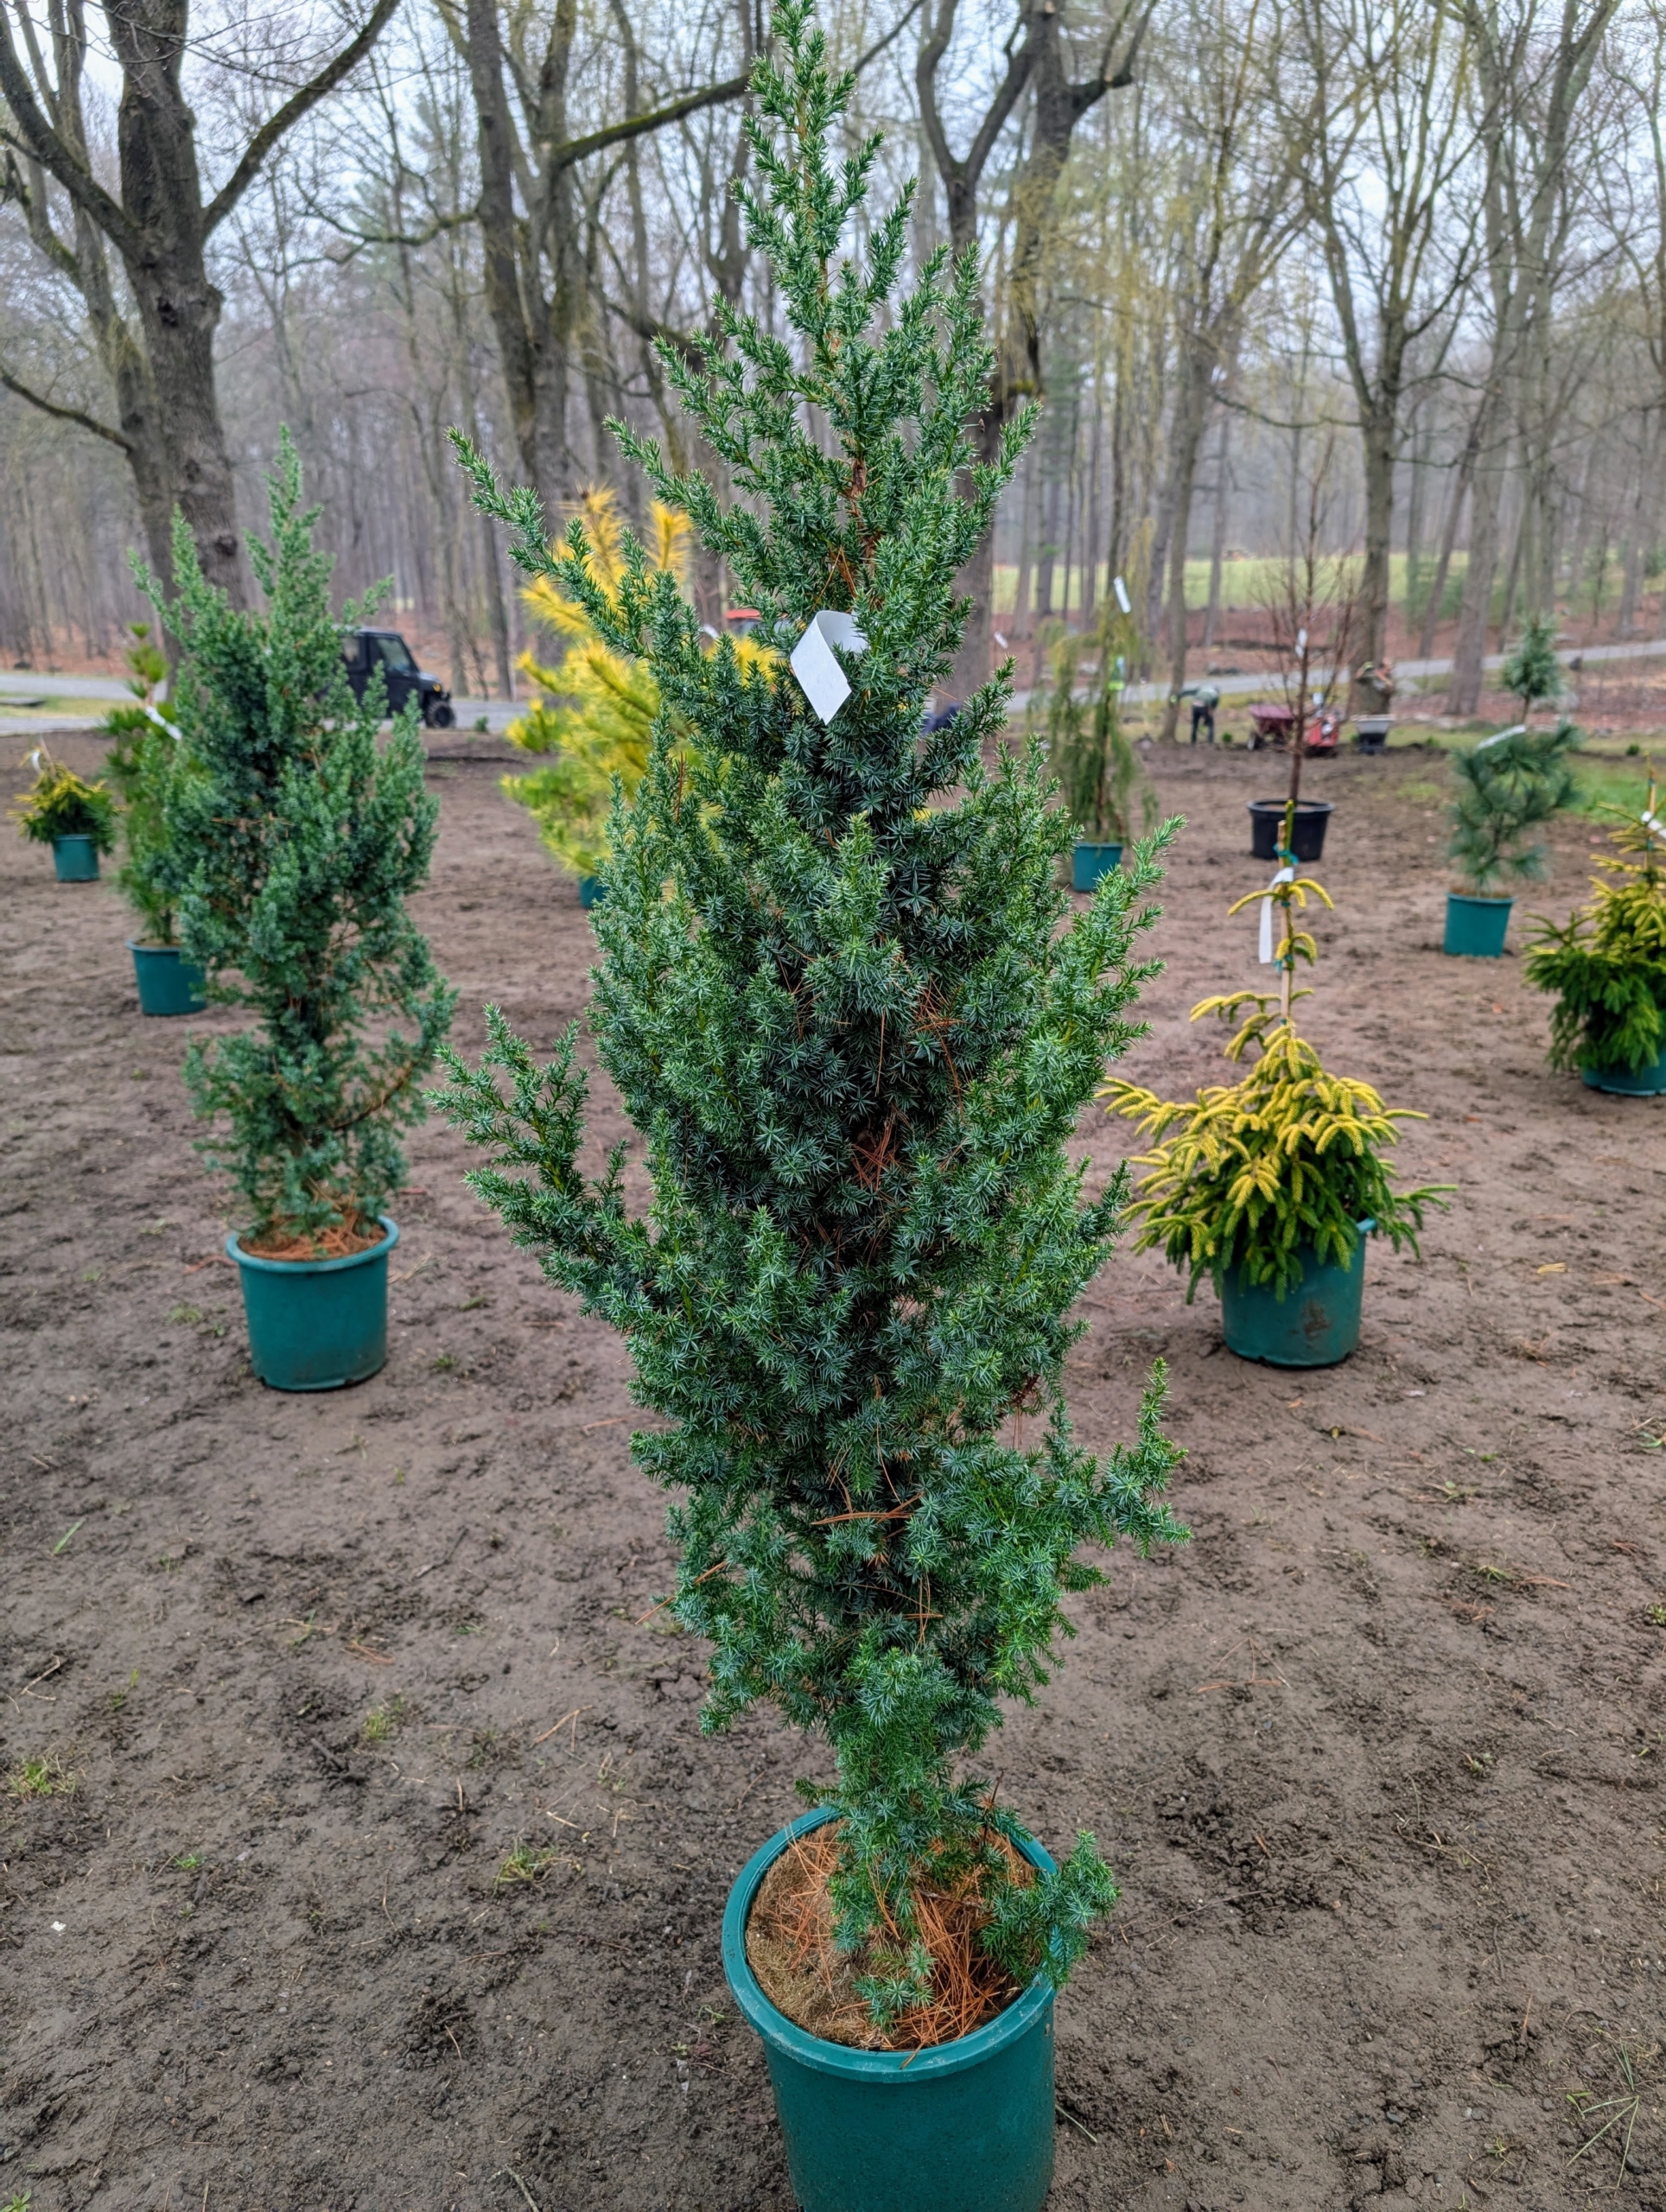
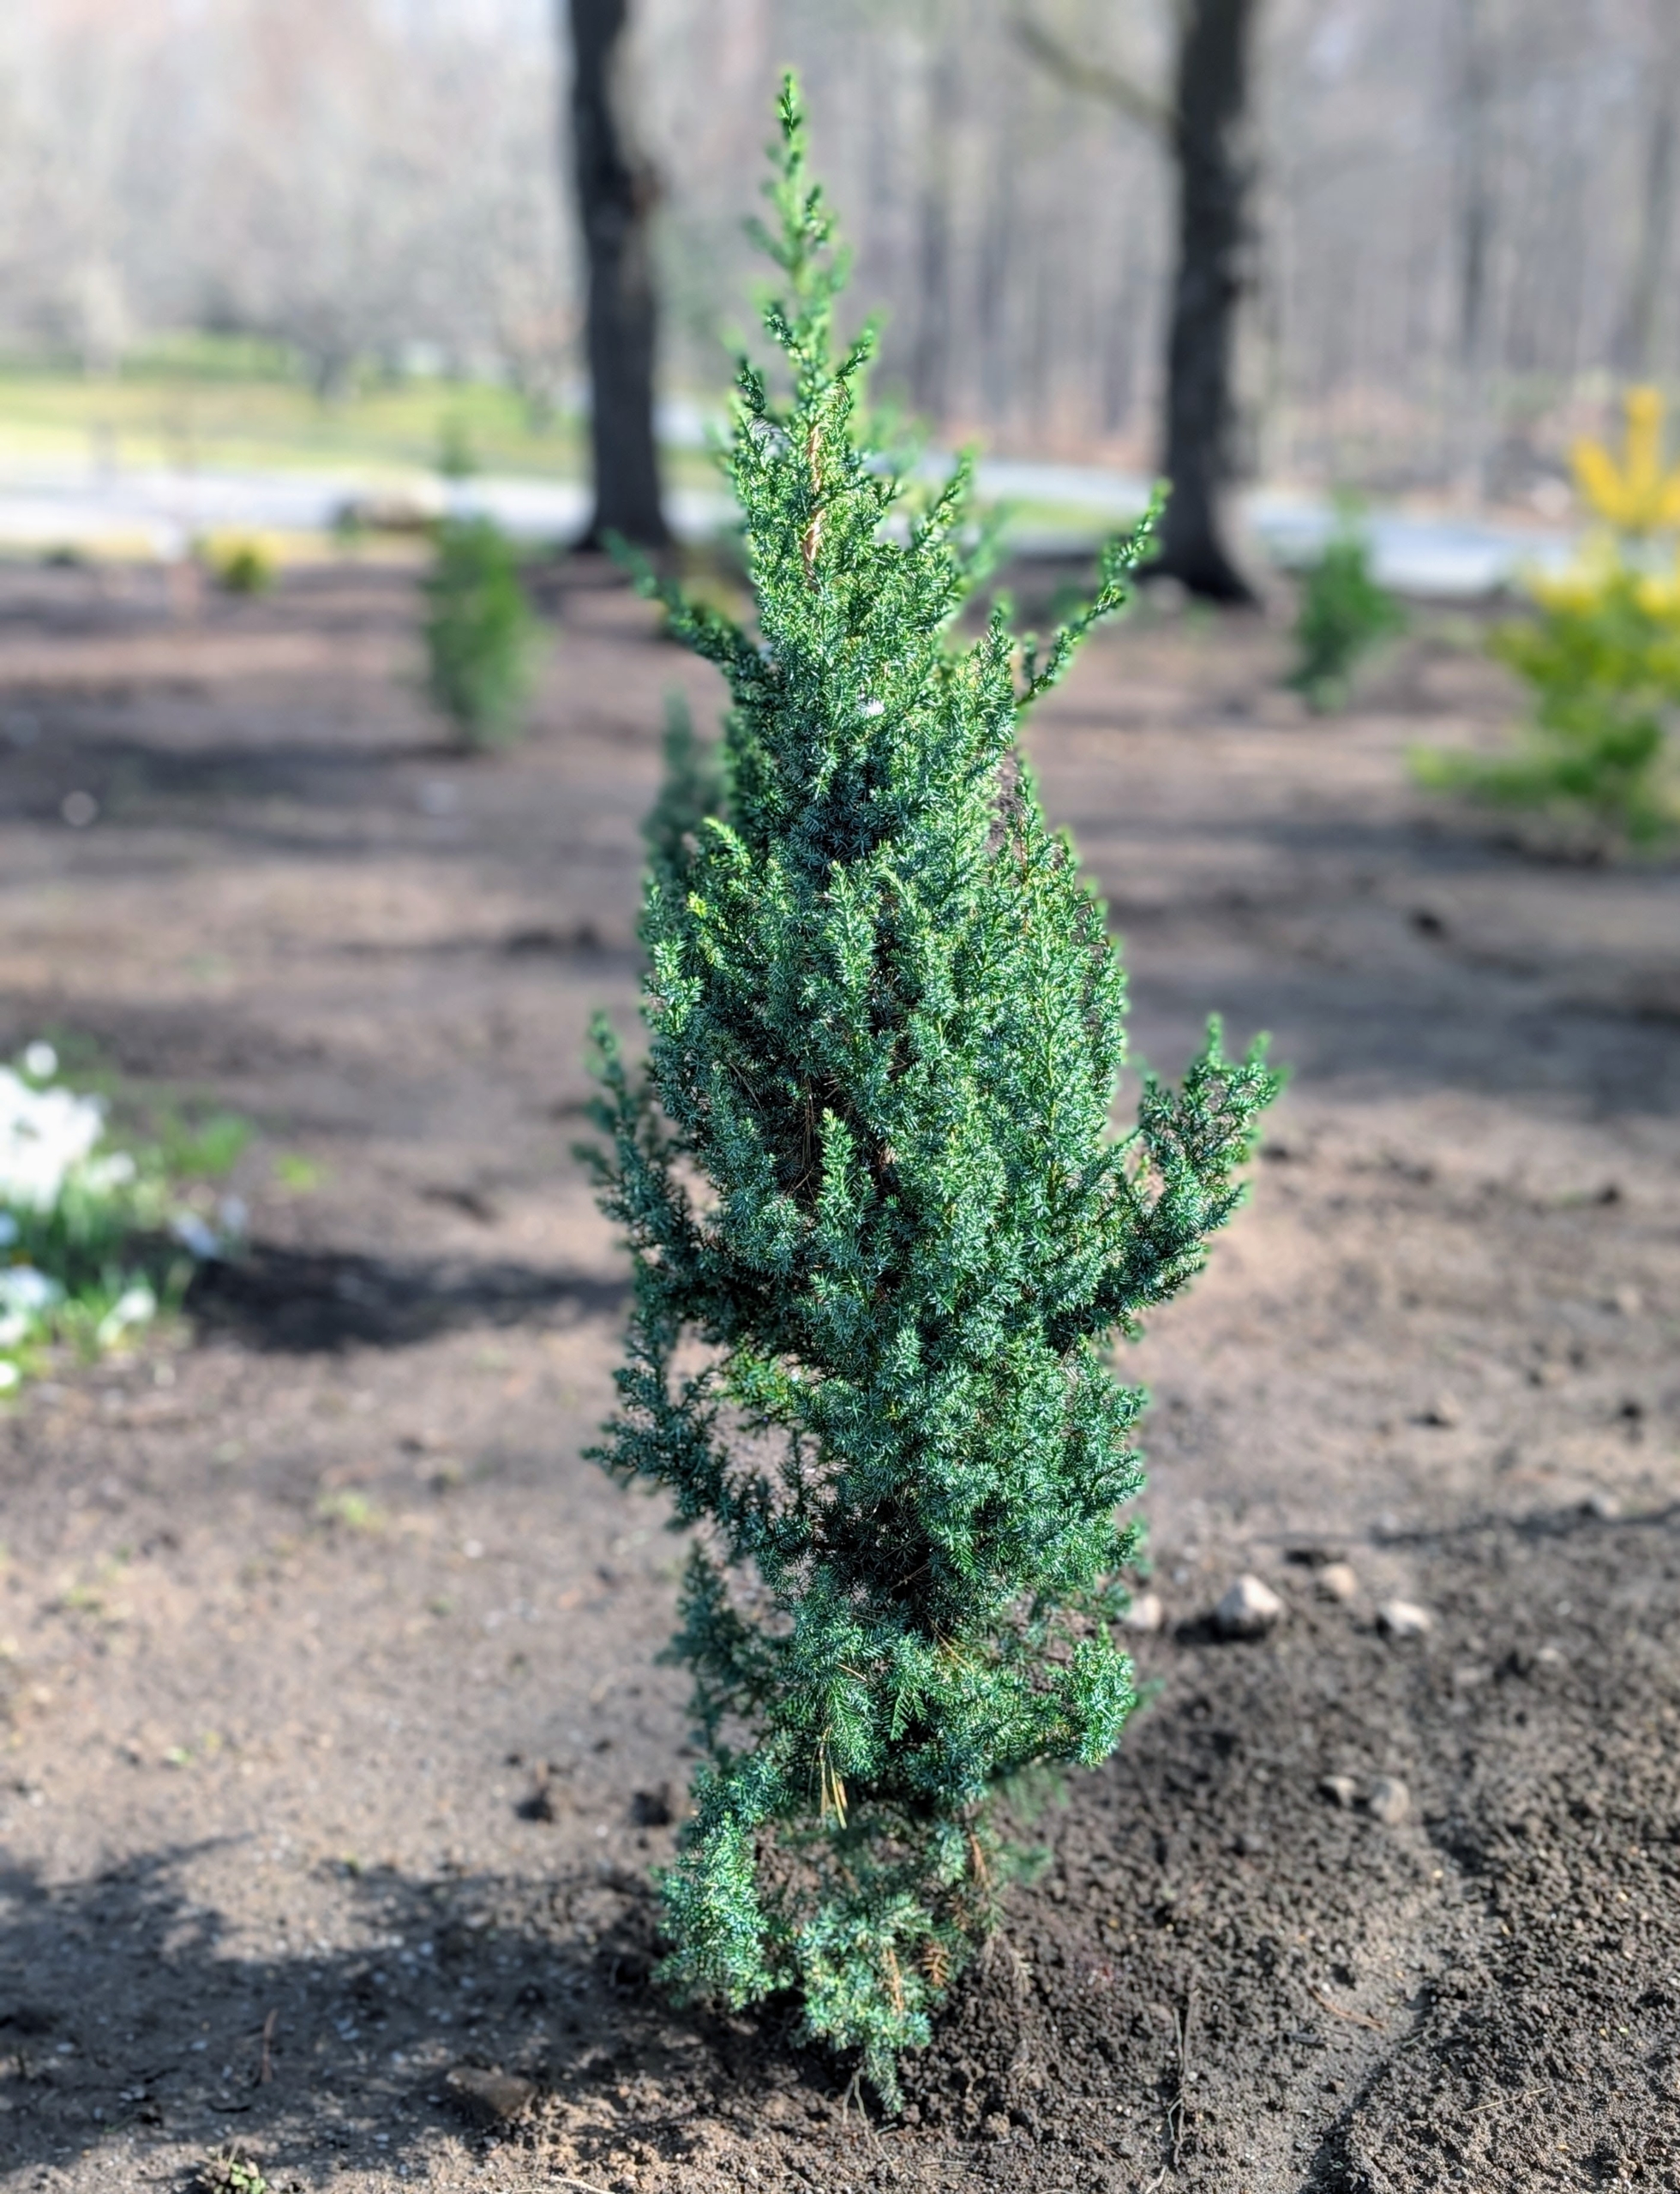
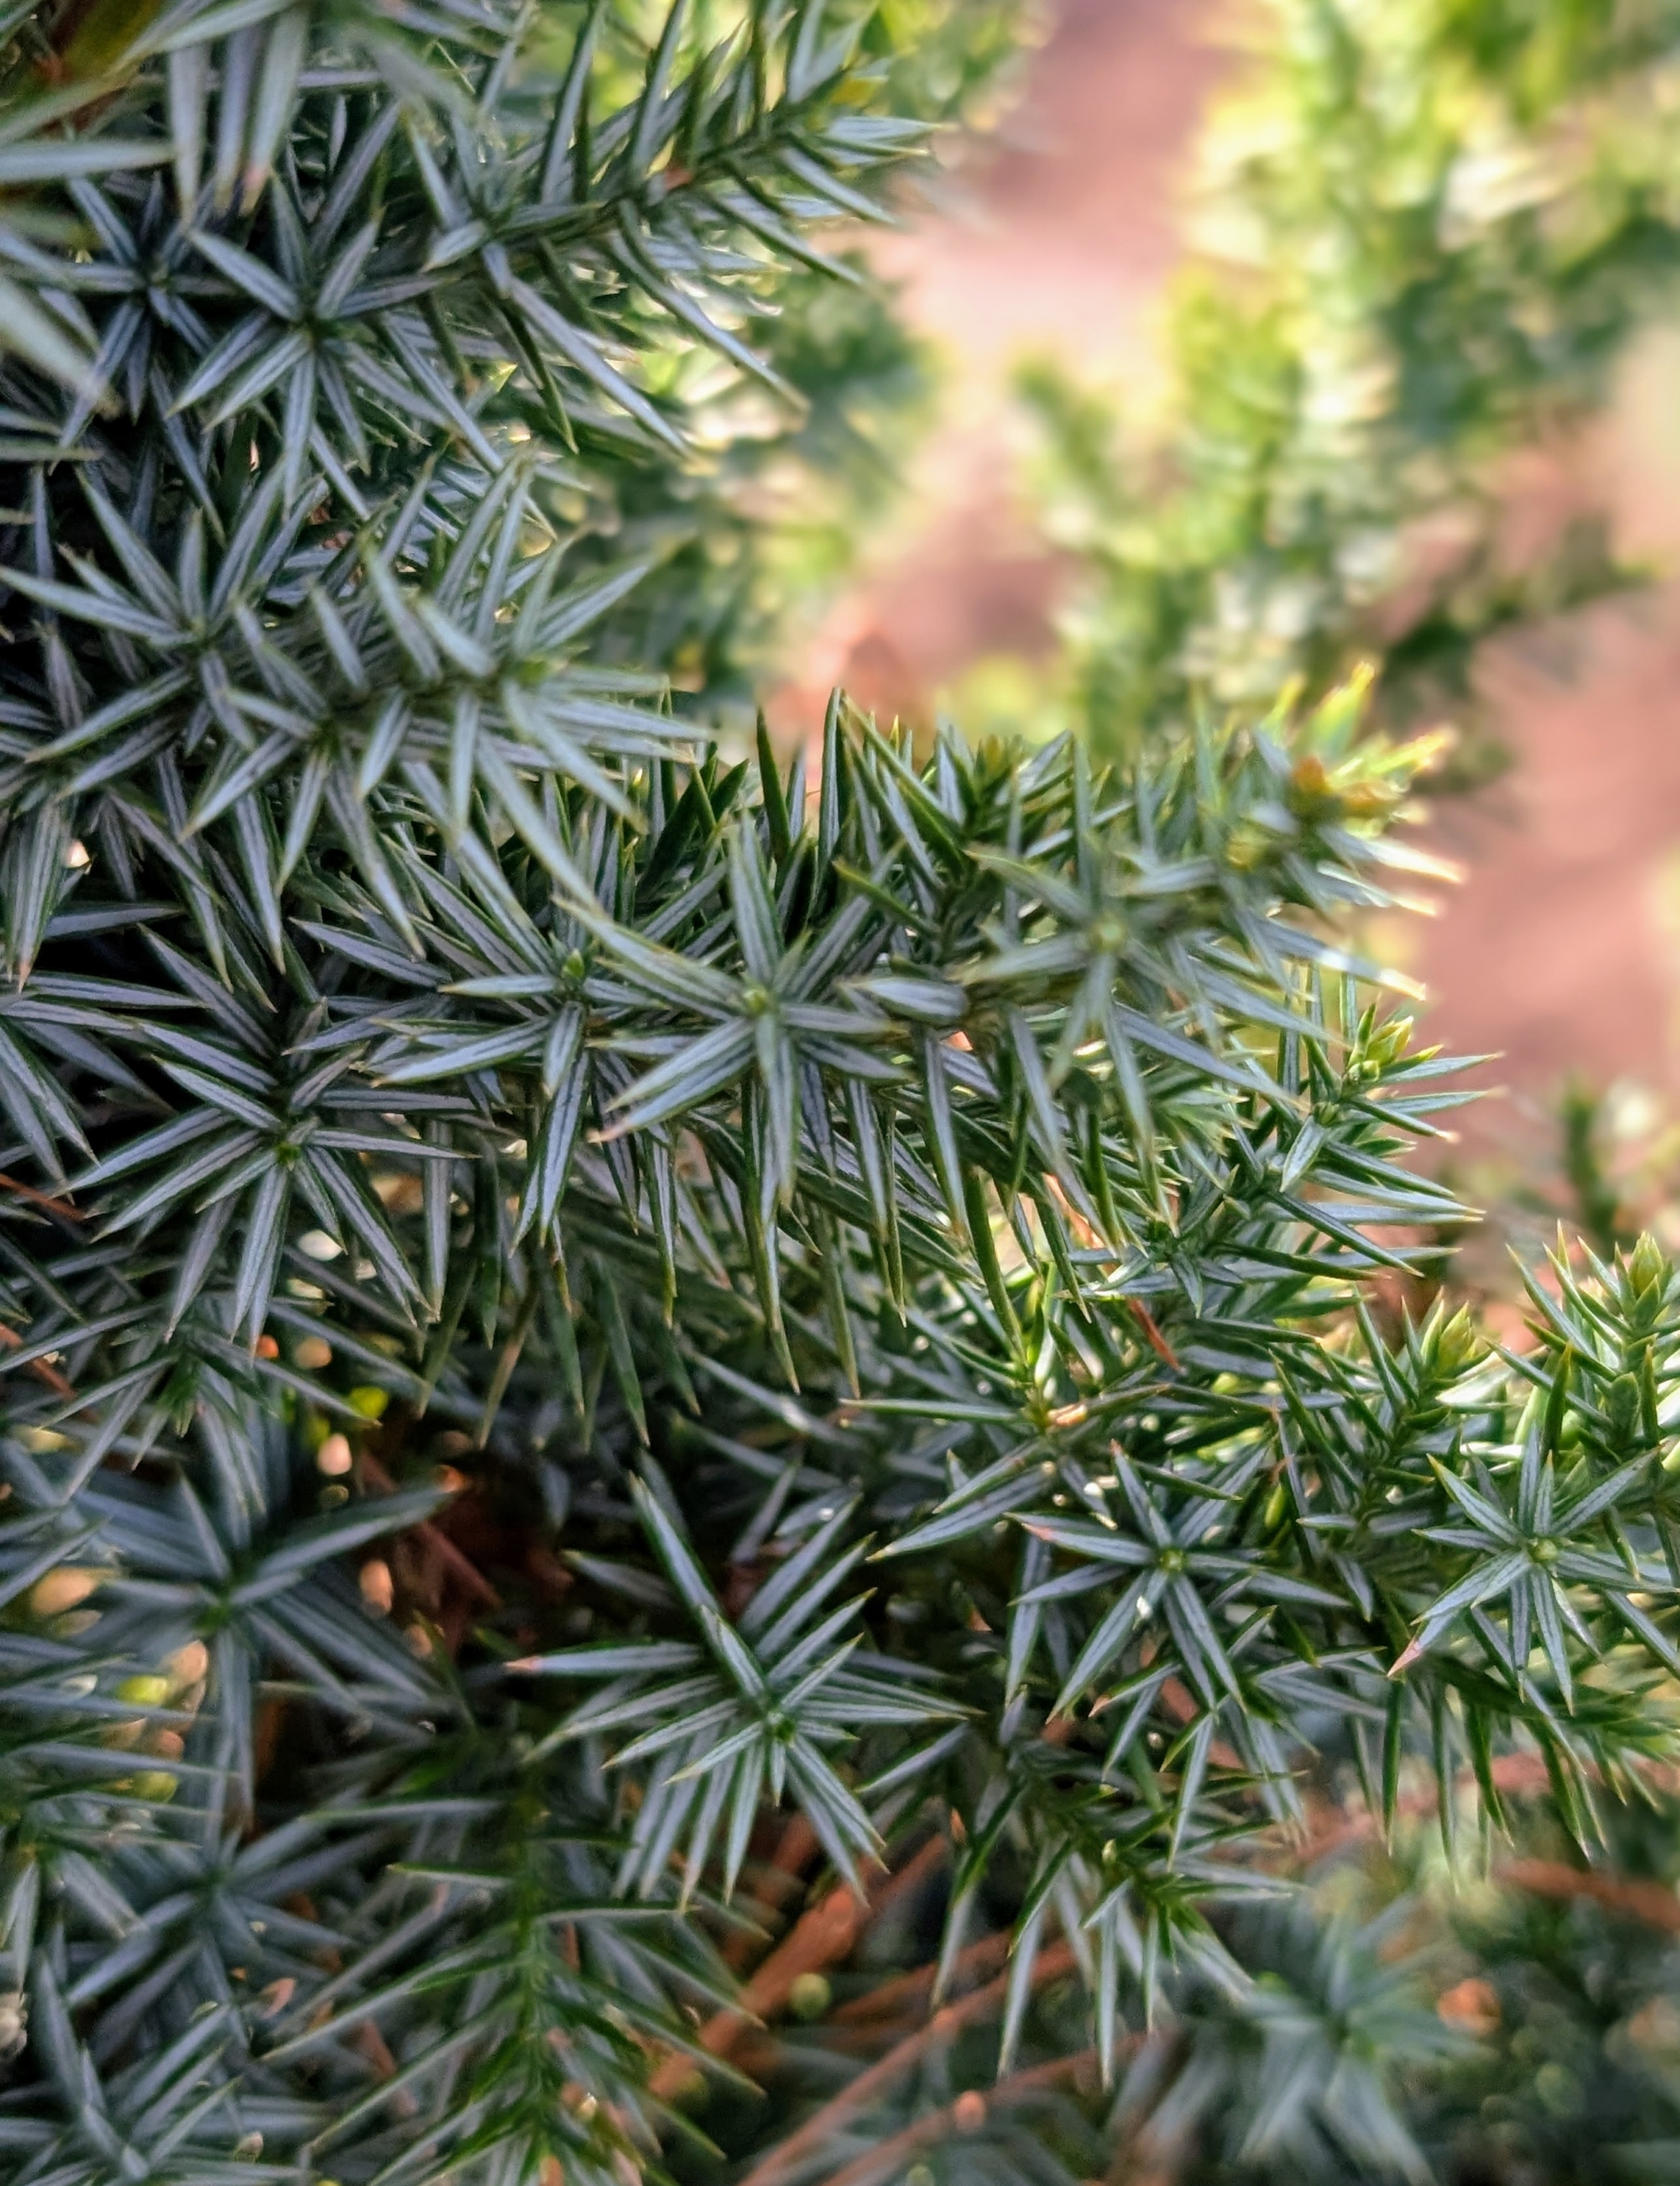
This is Juniperus chinensis ‘Obelisk’. It is a small, evergreen coniferous tree known for its dense, irregularly columnar shape and dark blue-green foliage. It’s a hardy drought and wind resistant specimen making it a great choice for many gardens.
The foliage of the Obelisk Juniper is dark blue-green. Its needles are pointed and can grow up to a half-inch long.
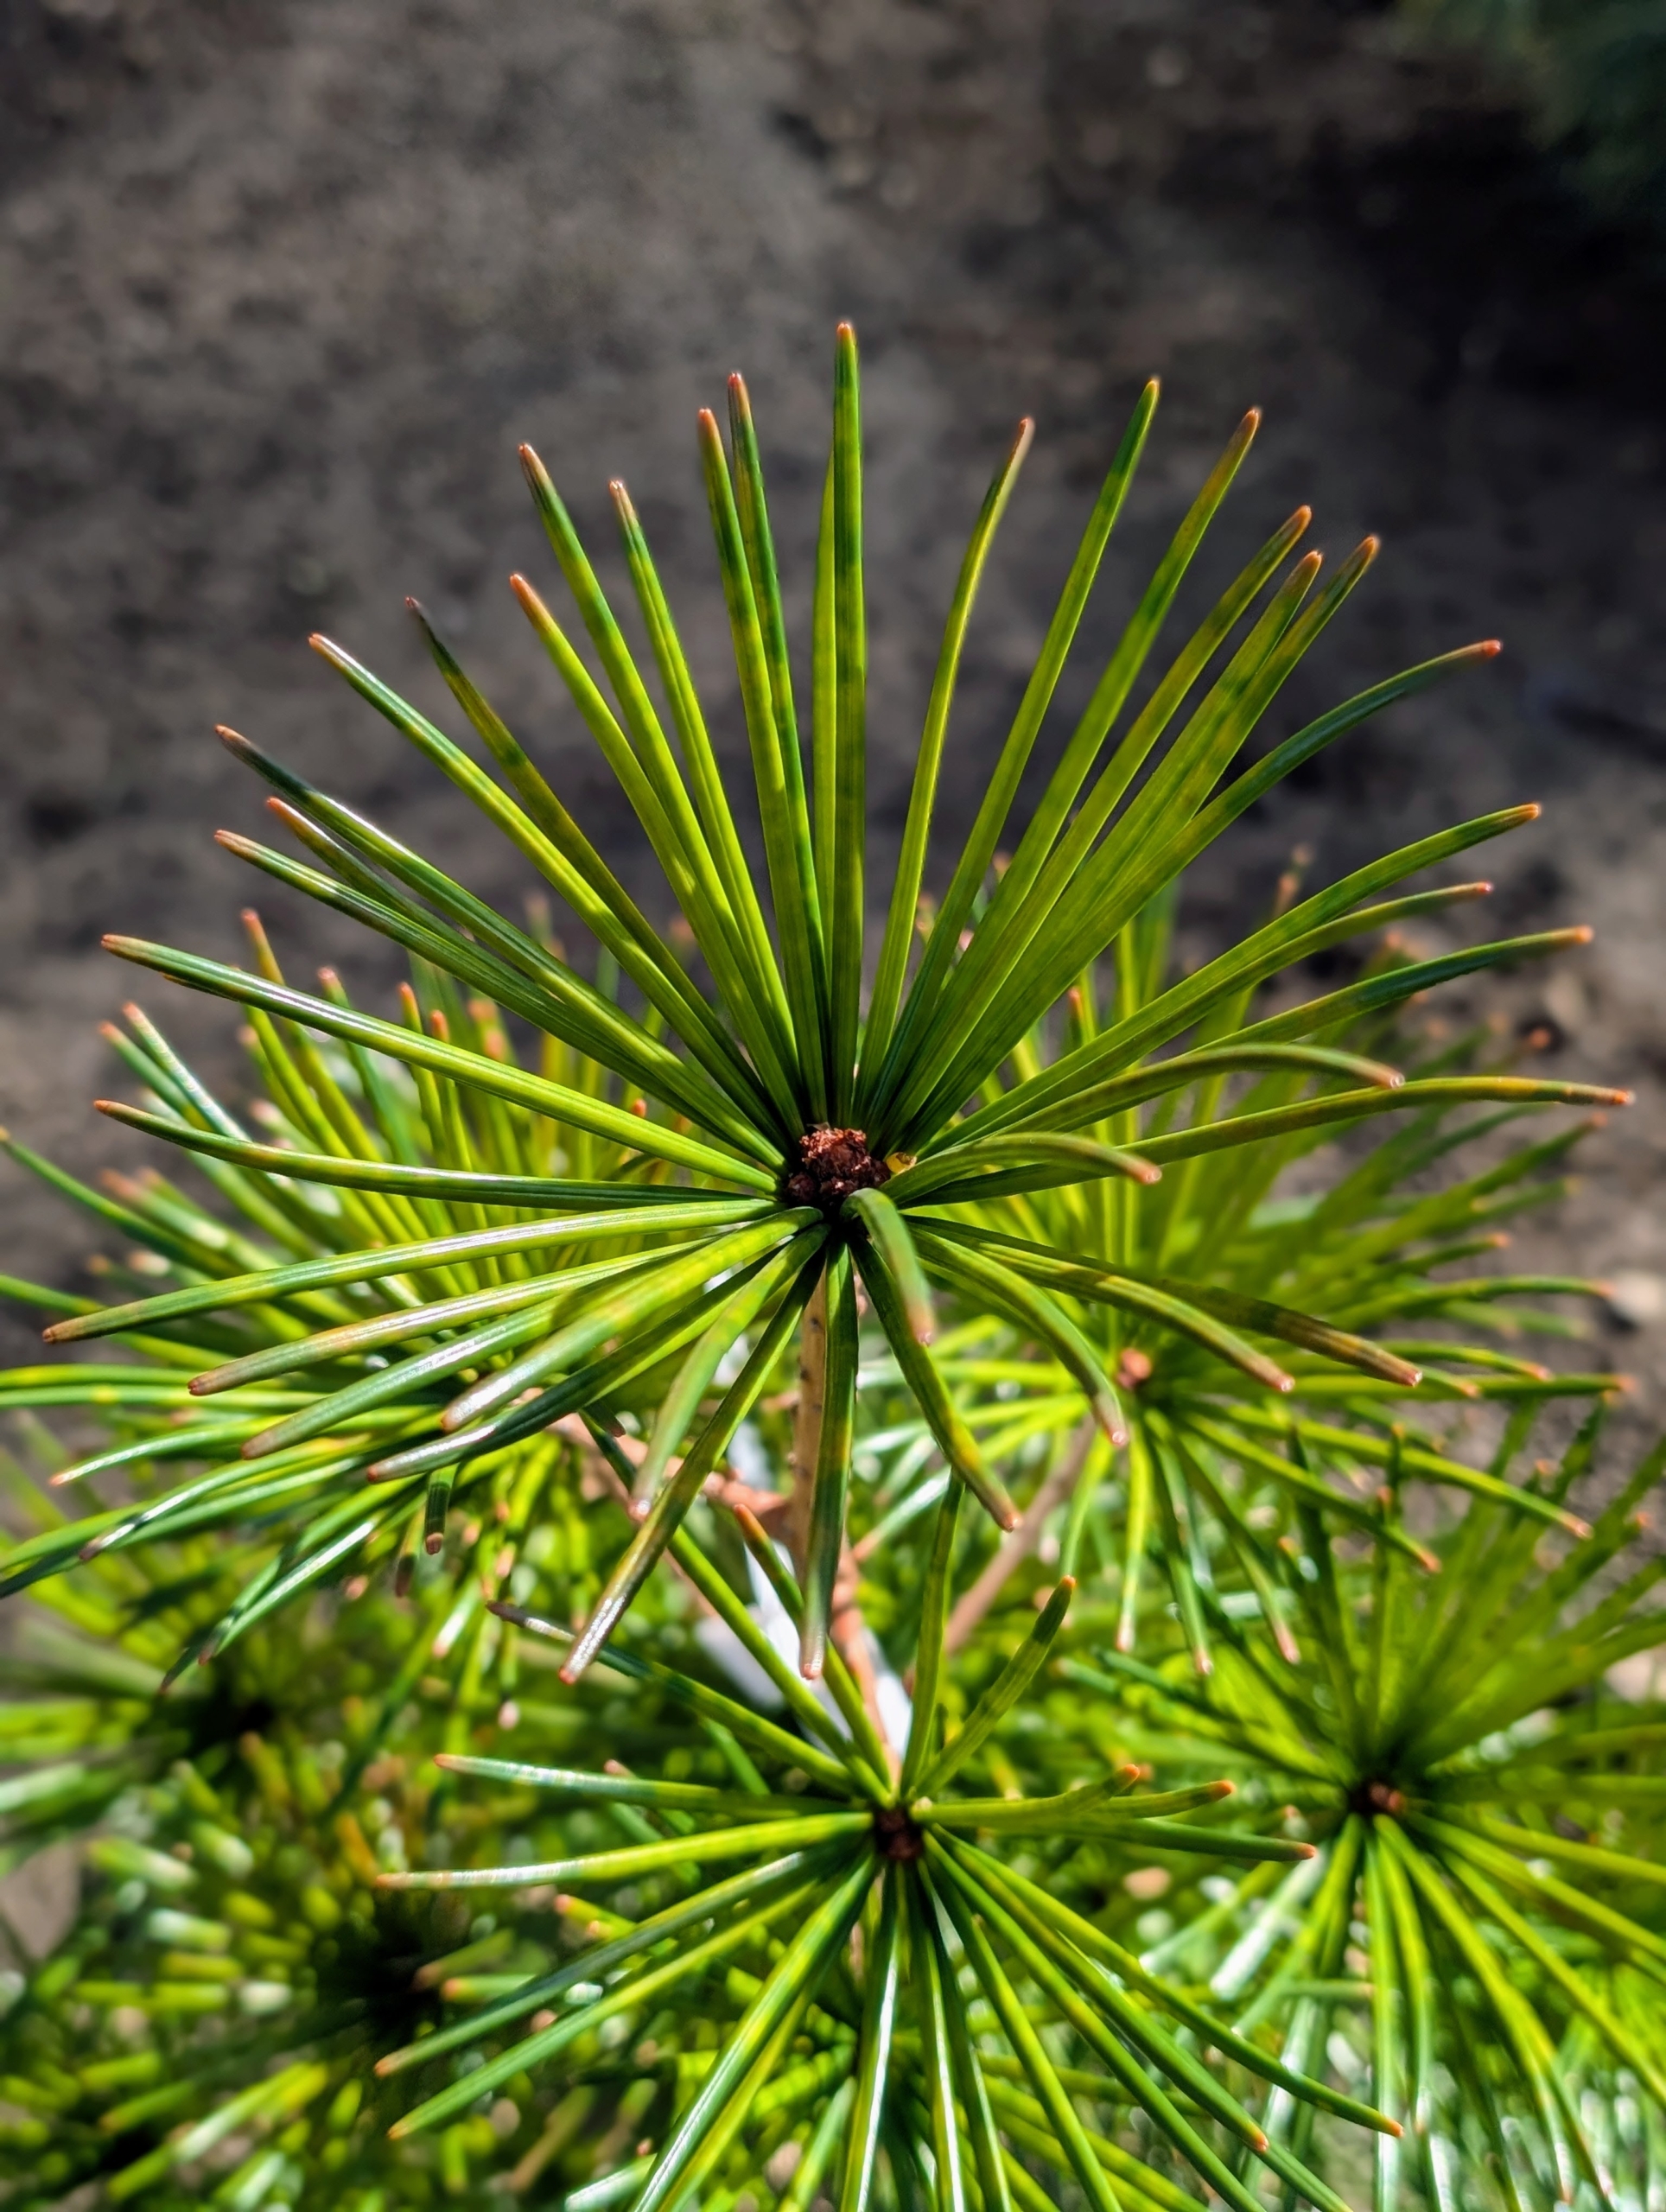
Burke’s Variegated Red Japanese Pine, Pinus densiflora, is a multi-stemmed evergreen with a distinctive and refined pyramidal form.
It features striking wide, horizontal, creamy yellow bands on each needle, which are visible year-round on rough branches.
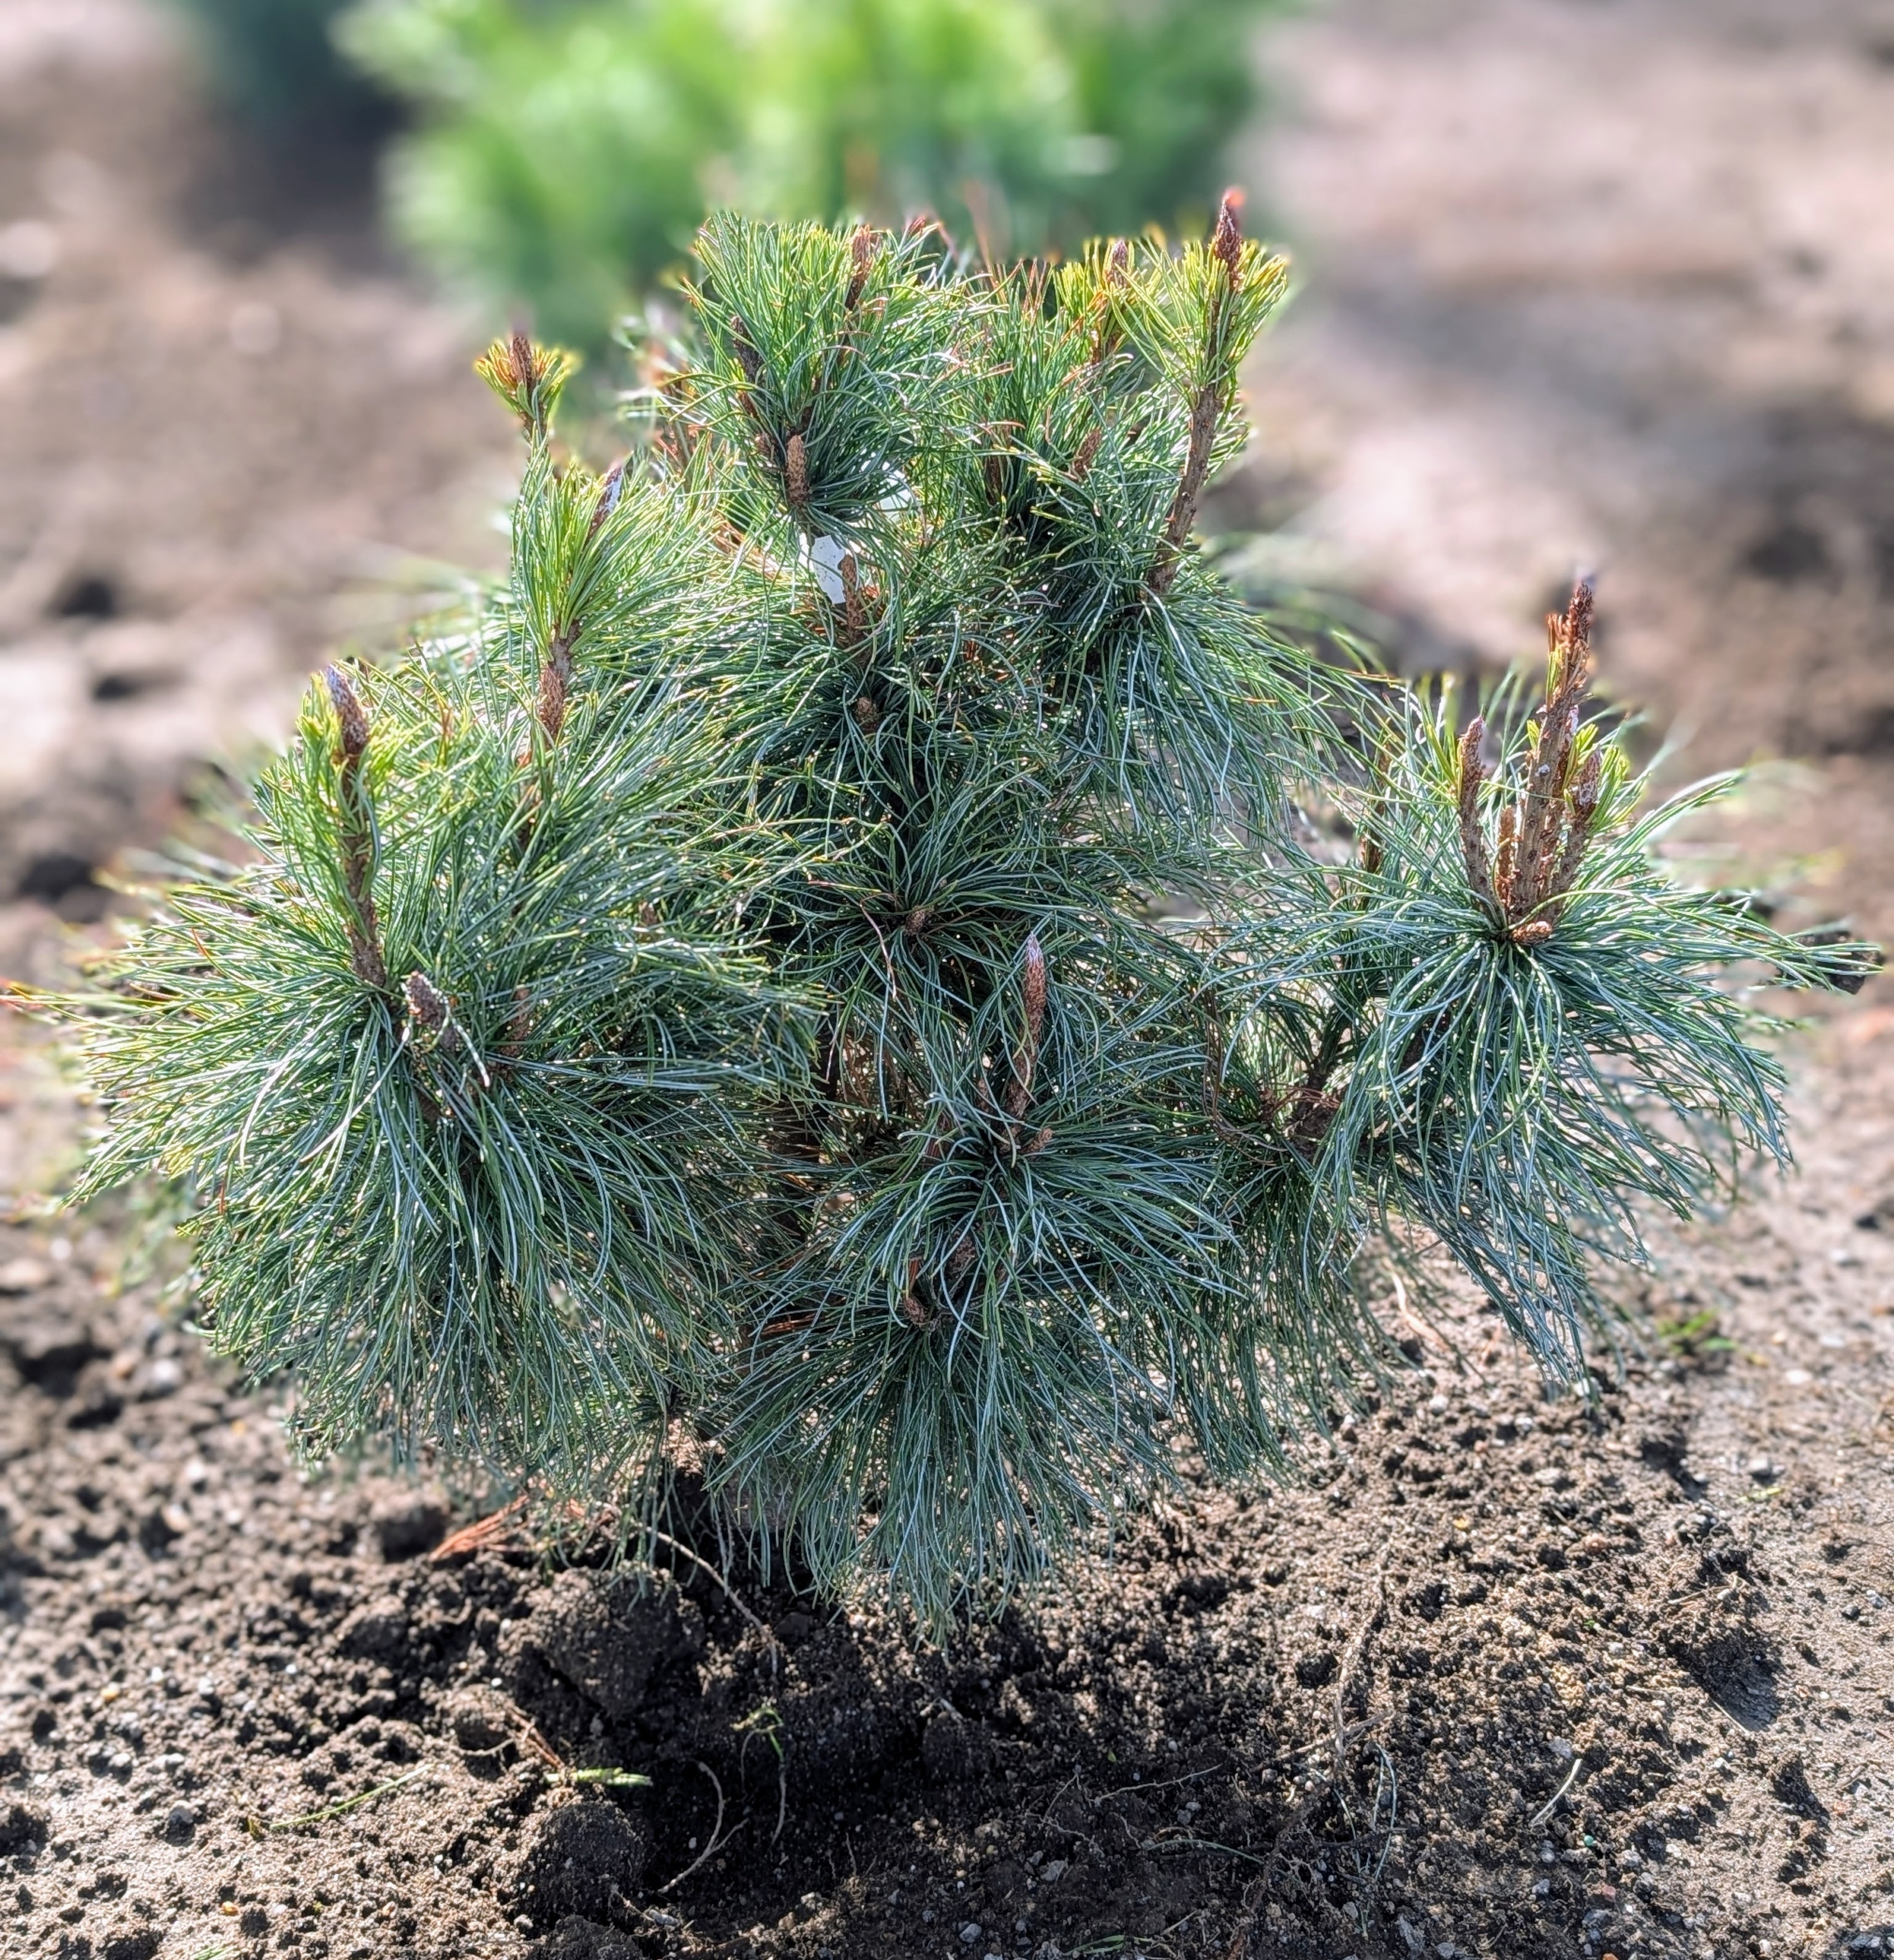
The Blue Dwarf Japanese Stone Pine is another a multi-stemmed evergreen shrub that only grows to about nine-feet tall. Its ground hugging habit will add a nice balance to the other taller columnar specimens.
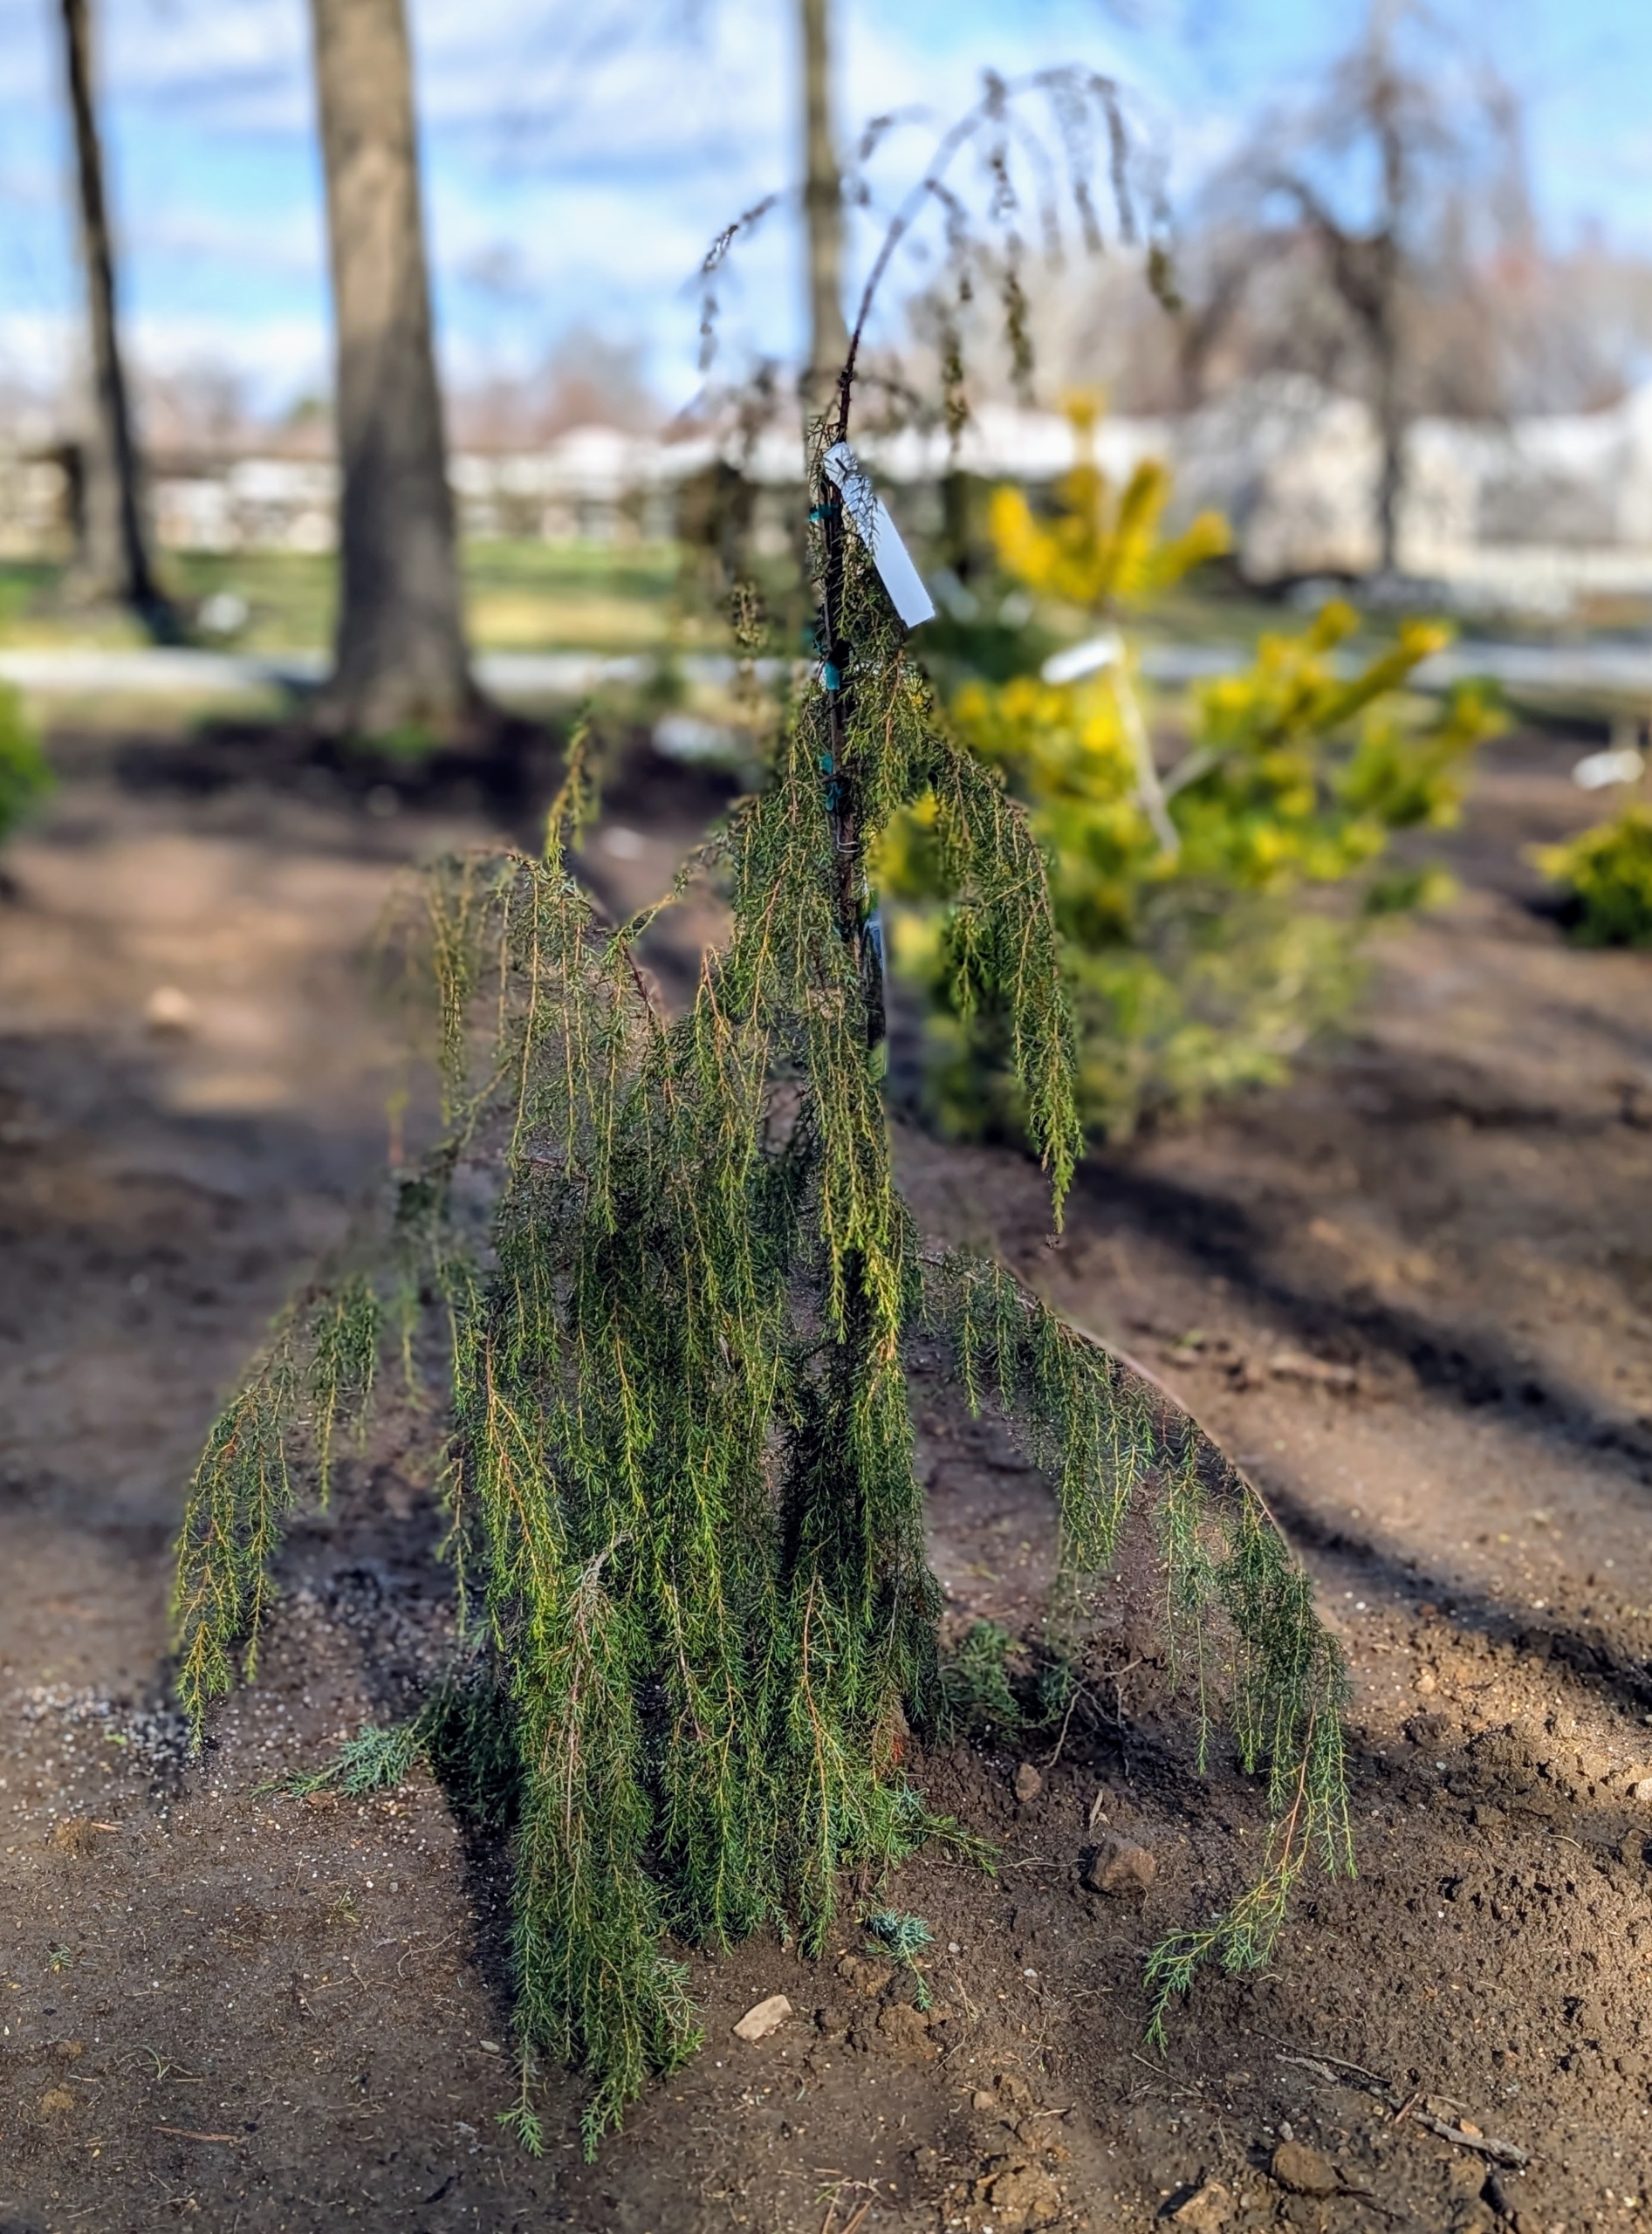
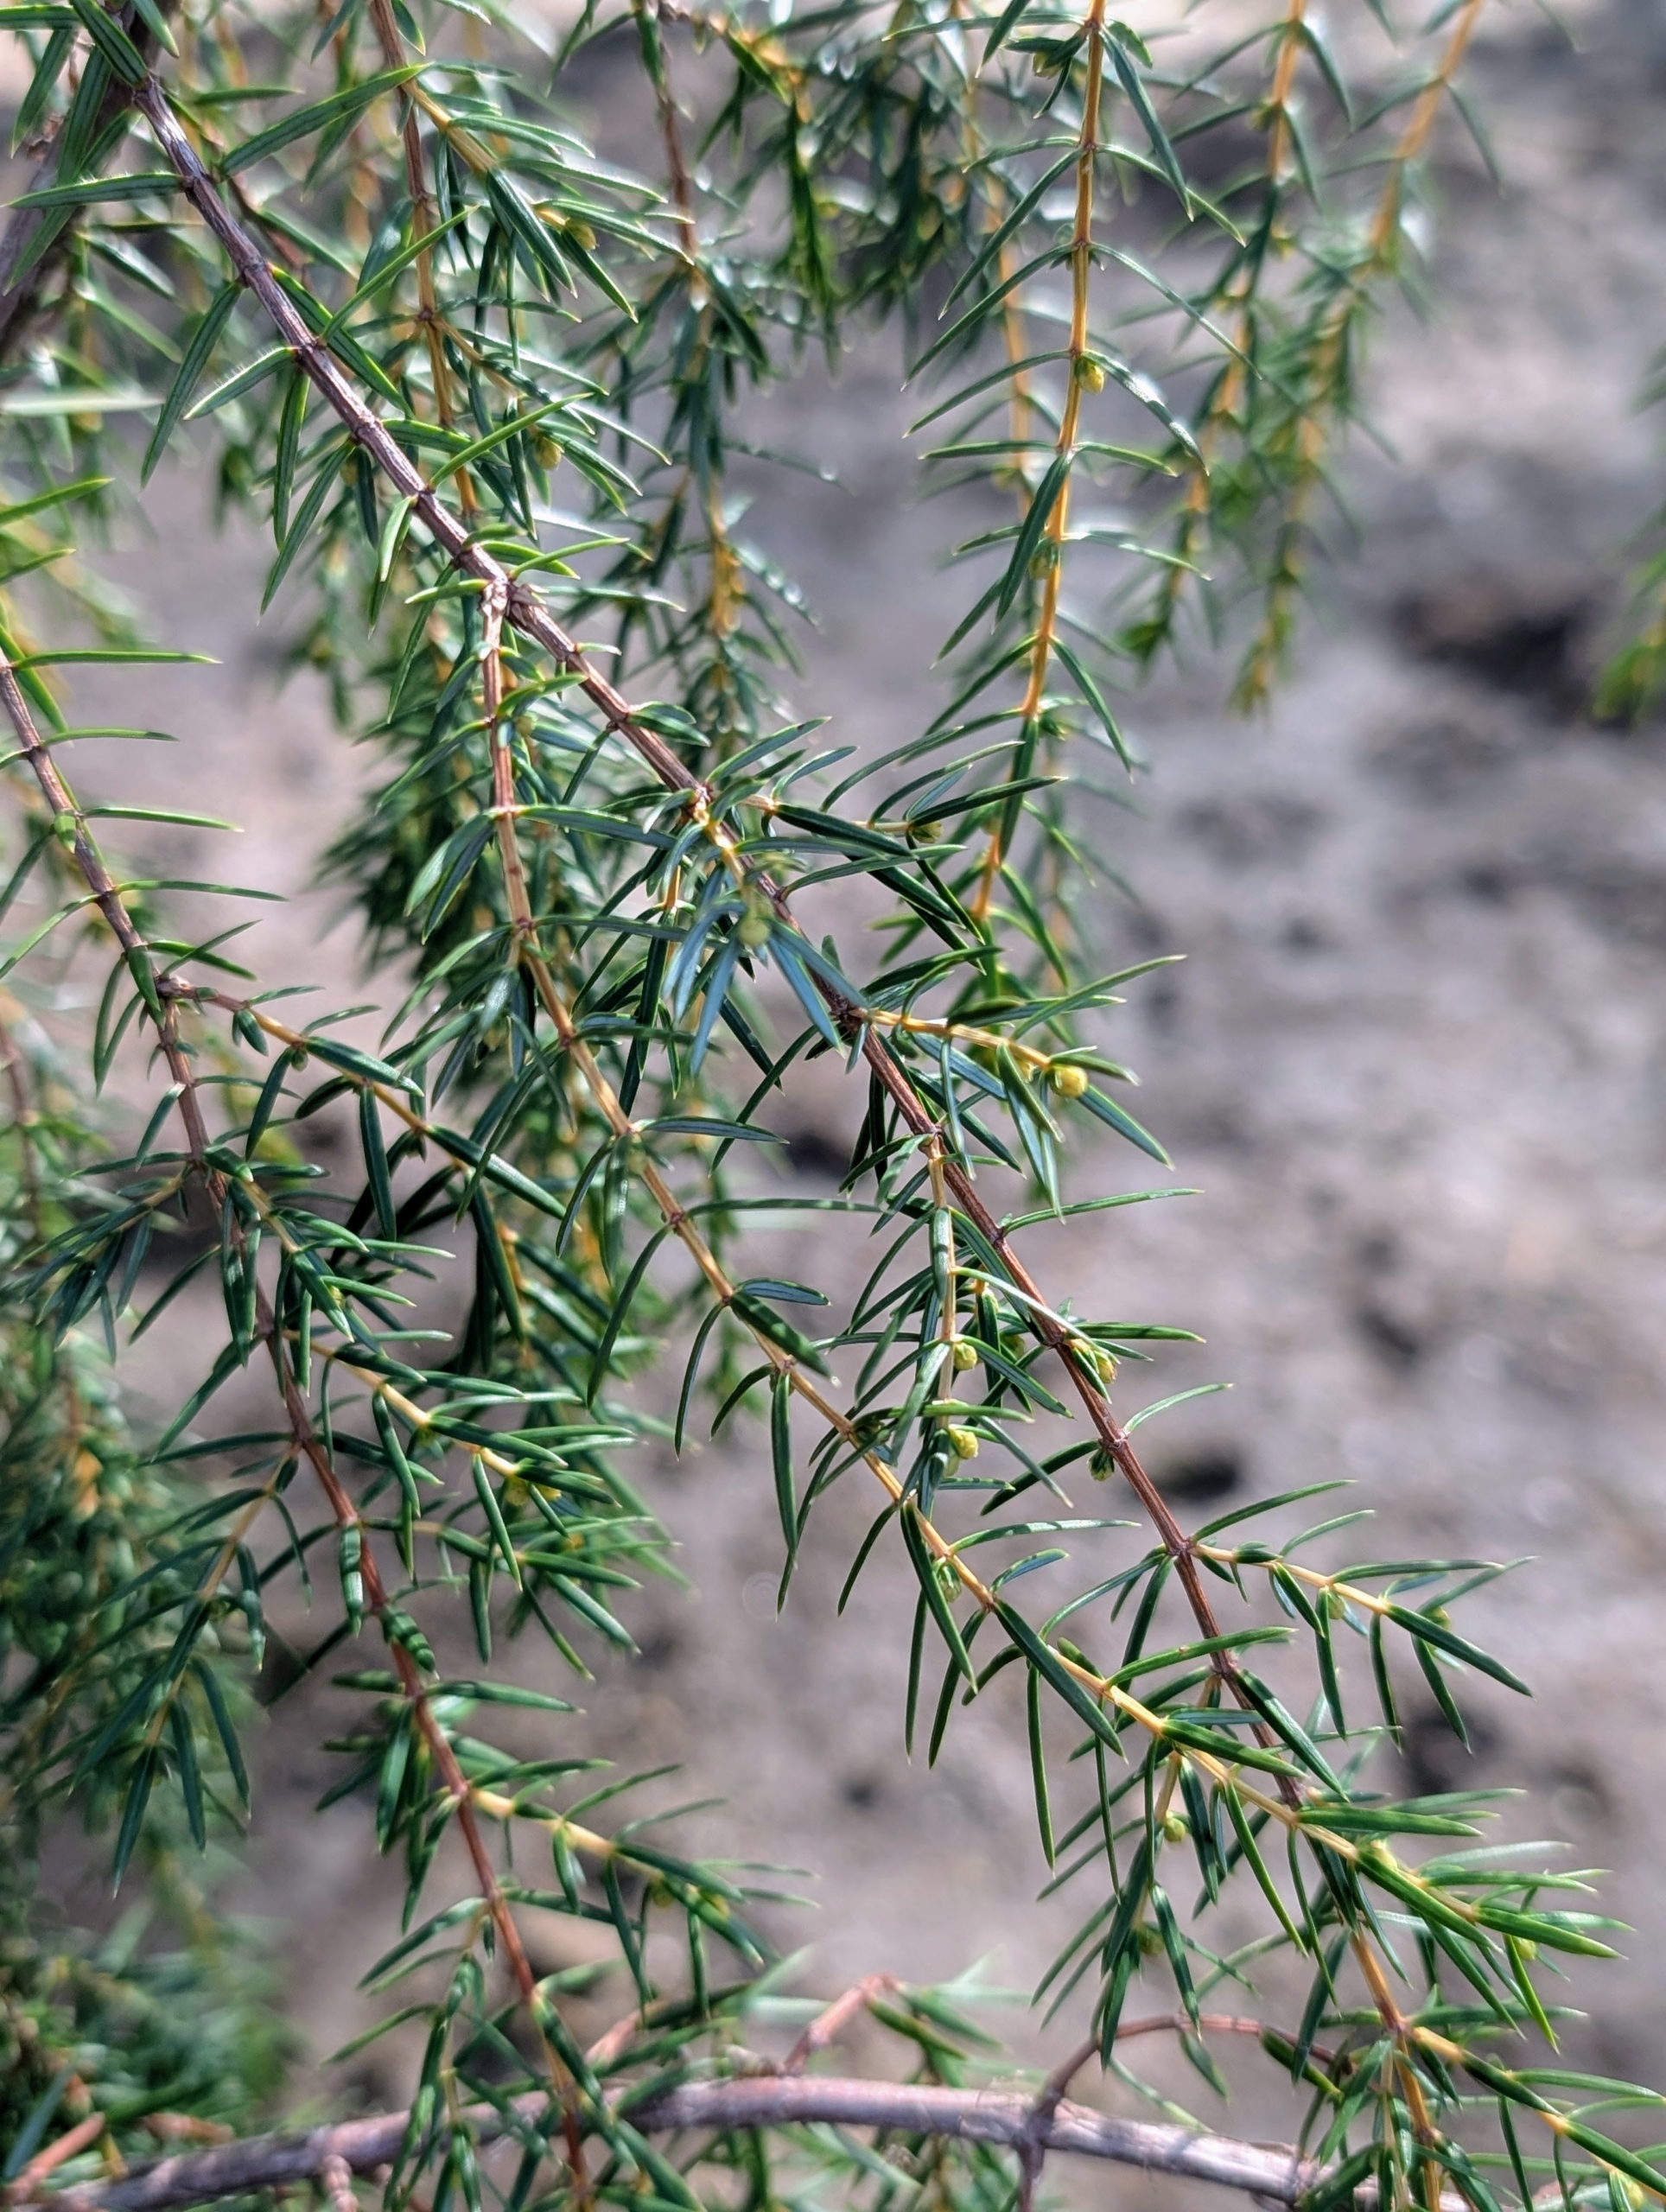
The Formosan juniper is a hardy, low maintenance evergreen. It typically grows to about 80-feet tall and has a branching irregular habit.
It has needle-like leaves on pendulous branches, giving it a fuzzy, droopy appearance.
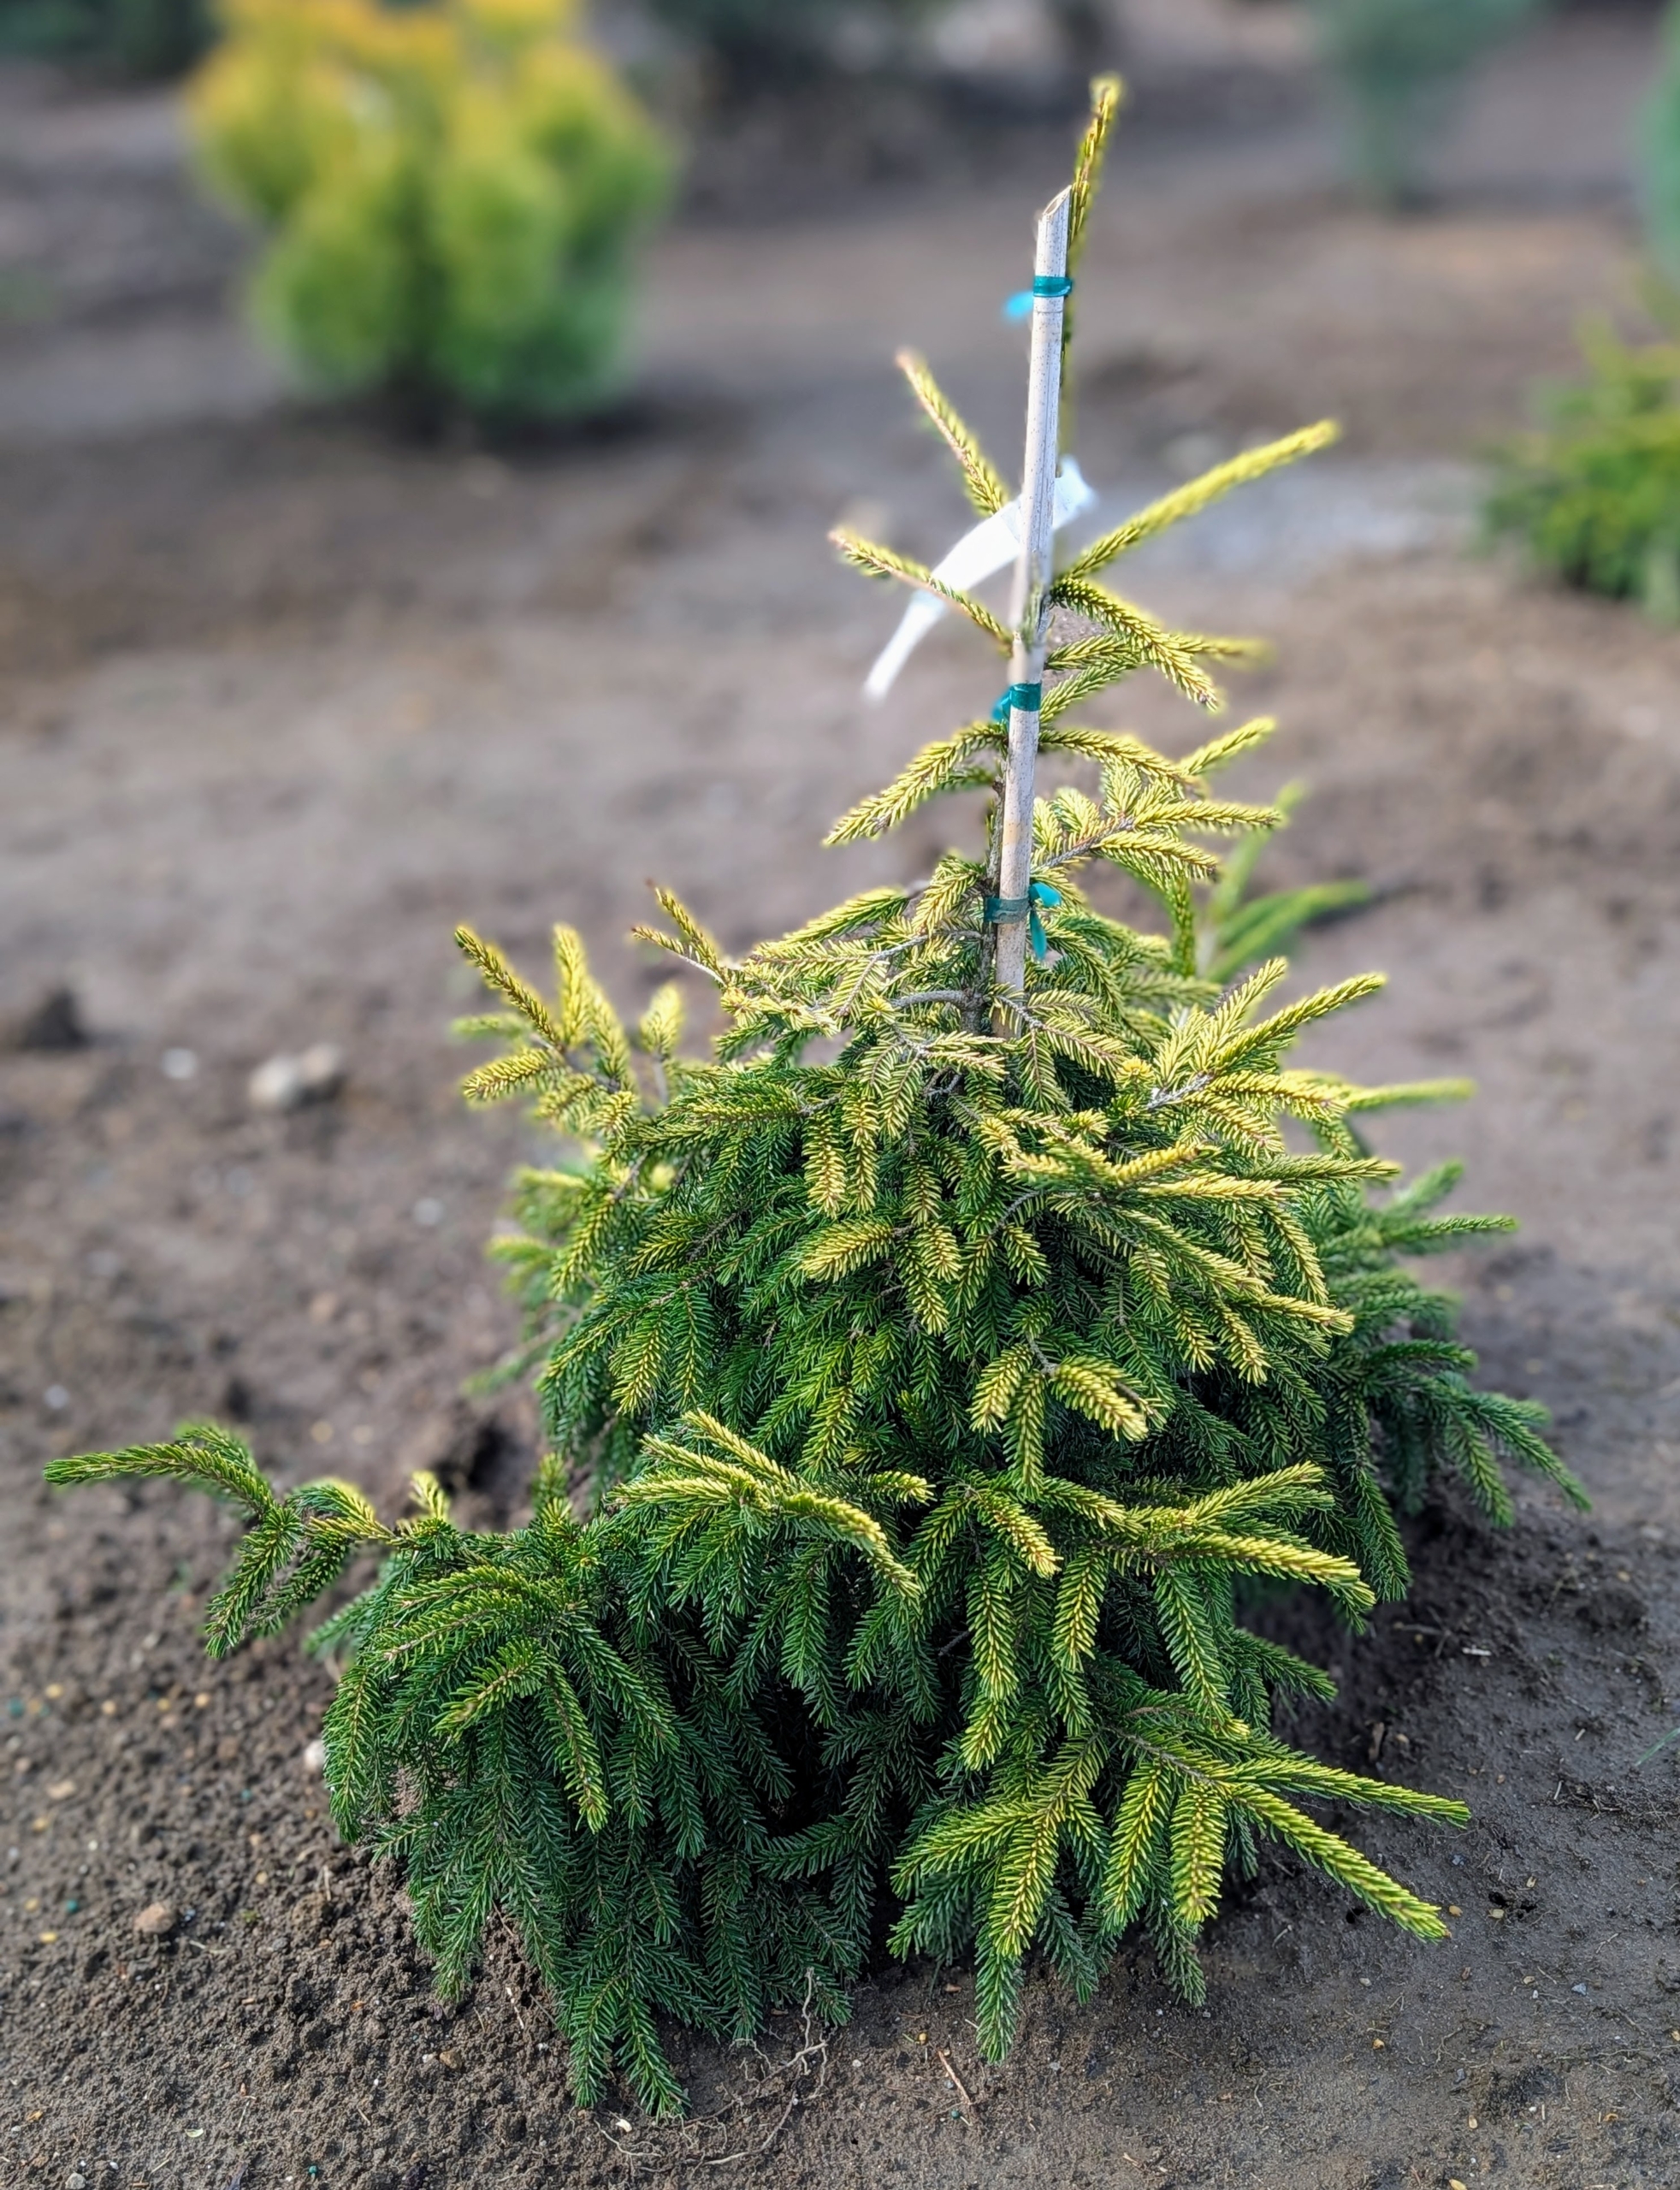
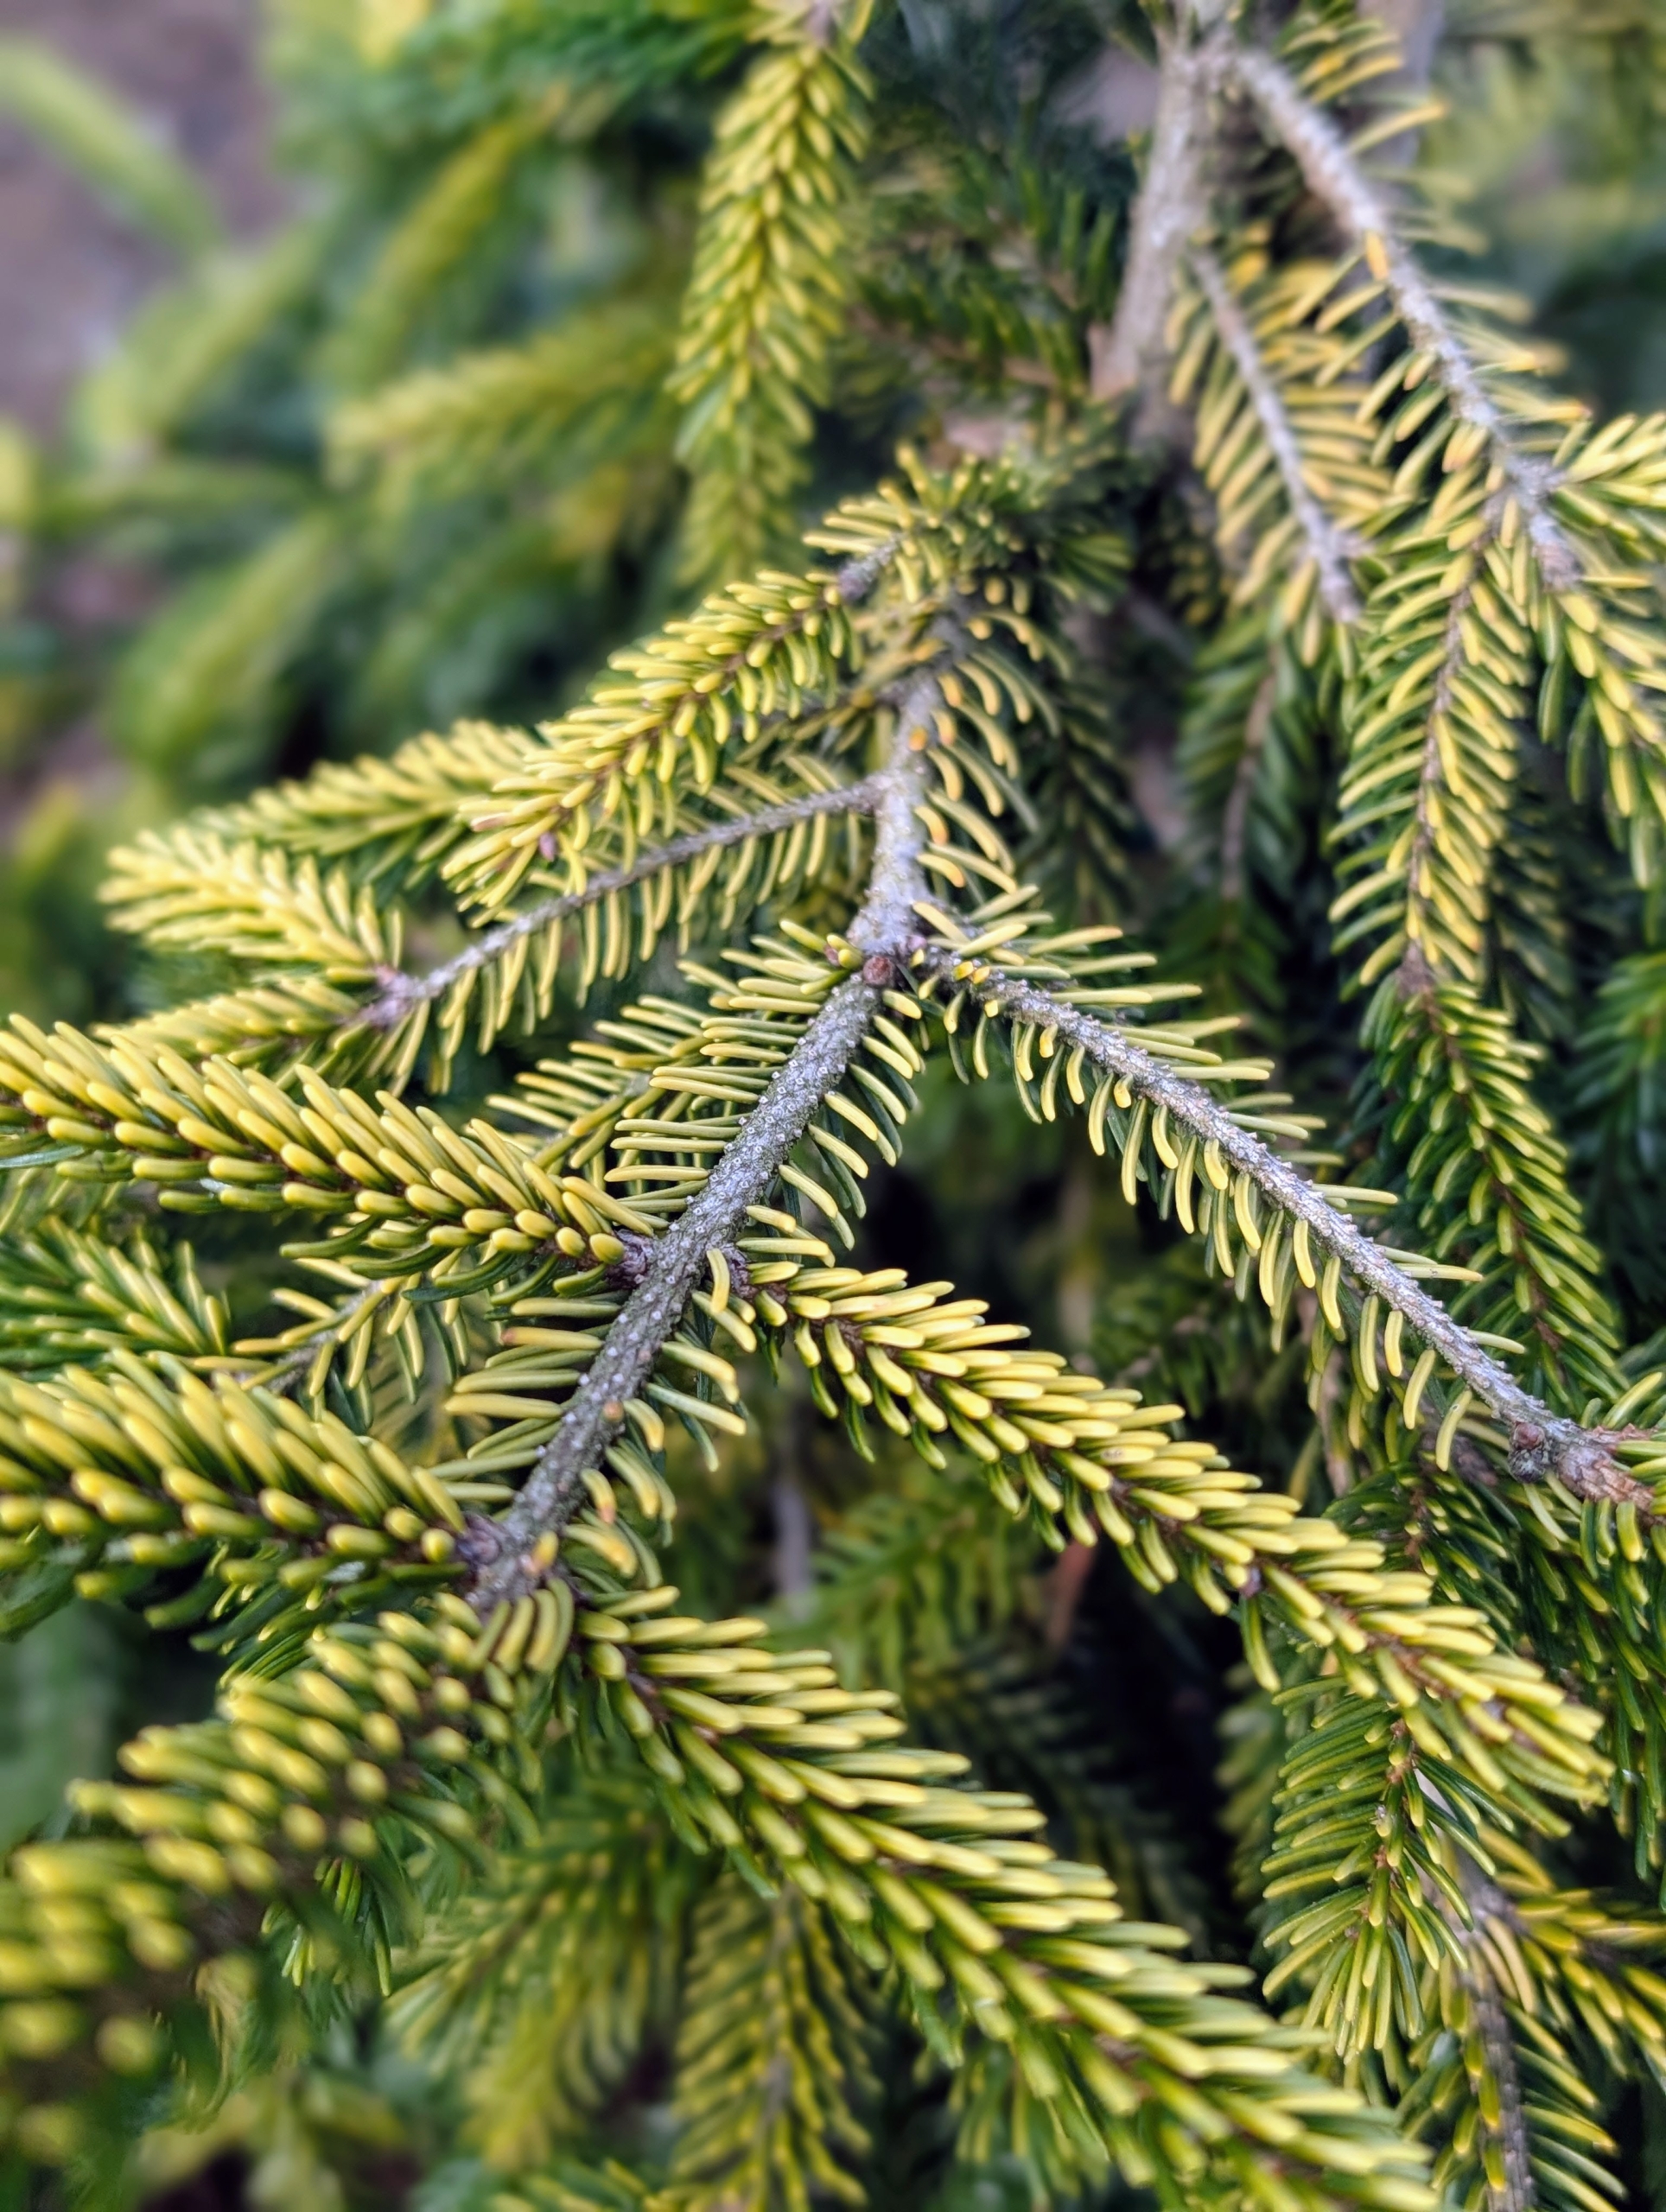
And this is one of my favorites, Picea orientalis ‘Skylands,’ a Golden Oriental Spruce. Can you guess why? The variety ‘Skylands’ – has the same name as my beloved home in Maine. This is a stunning variety of golden spruce with a nice tight upright habit. It reached 12 to 15 feet tall in about 10 years. I have a few of these trees in my pinetum.
Its foliage is attractive yellow that changes to gold in spring. The needles then turn chartreuse in the fall, which persists throughout winter.
These evergreens are young and small now, but they will thrive here and fill out this pinetum garden so nicely.
Here at my farm, whenever a member of my team returns from vacation, I always encourage them to share their photos. It's always interesting to see various sites from someone else's view.
Not long ago, my outdoor grounds crew foreman, Chhiring Sherpa, his wife, and their son Mingmar, returned from a brief trip to Istanbul, the only city in the world that straddles both Europe and Asia. Istanbul is known for its rich history, its impressive mosques, and its busy bazaars. Chhiring and his family also visited Abu Dhabi and Dubai in the United Arab Emirates. They enjoyed desert adventures, visited iconic landmarks, and experienced the vibrant nightlife. Chhiring says the nine day trip was an excursion that has been on his "bucket list" a long time.
Here are some of Chhiring's photos, enjoy.
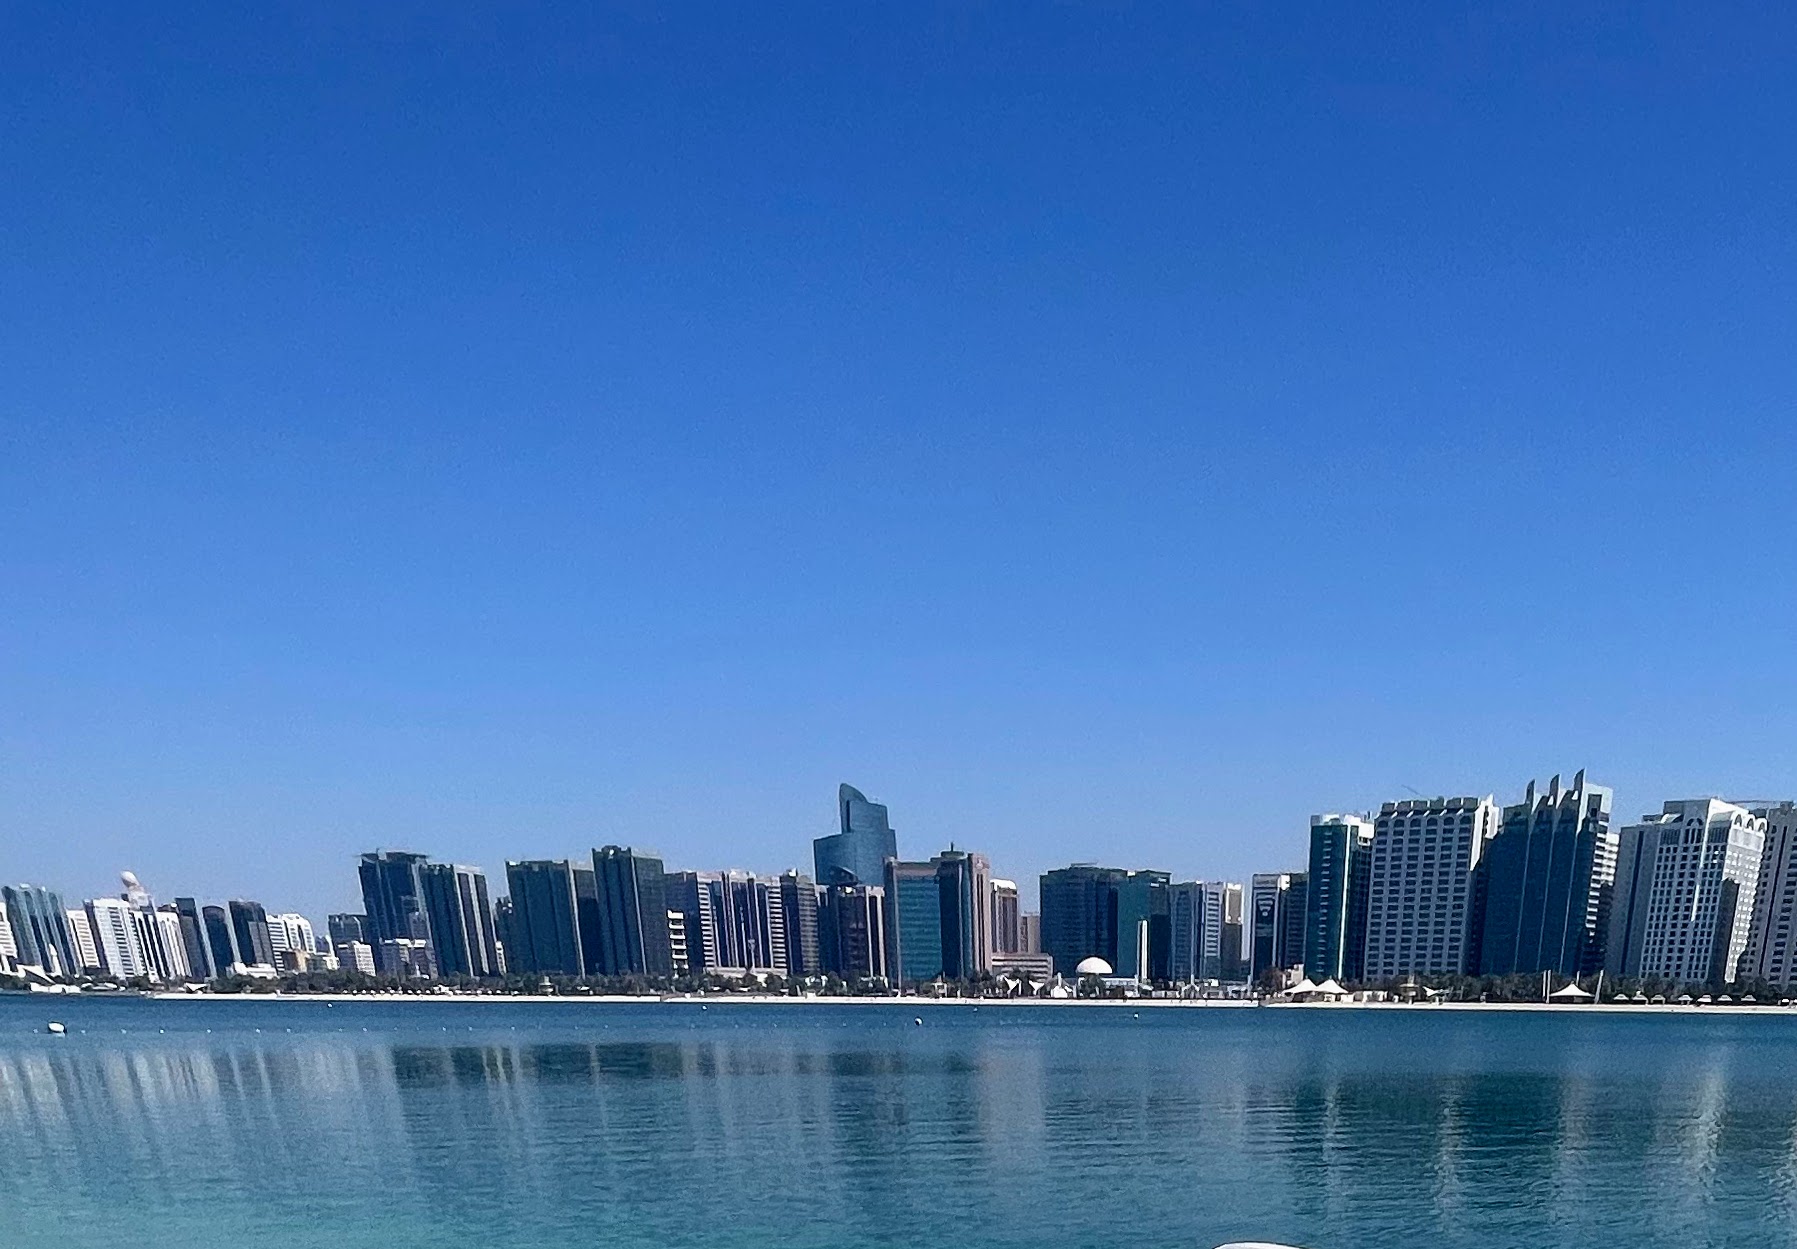
Chhiring and his family made a short stop in Abu Dhabi, the capital city of the United Arab Emirates and the UAE’s second-most populous city after Dubai. Abu Dhabi is located on an island in the Persian Gulf off the Central West Coast.
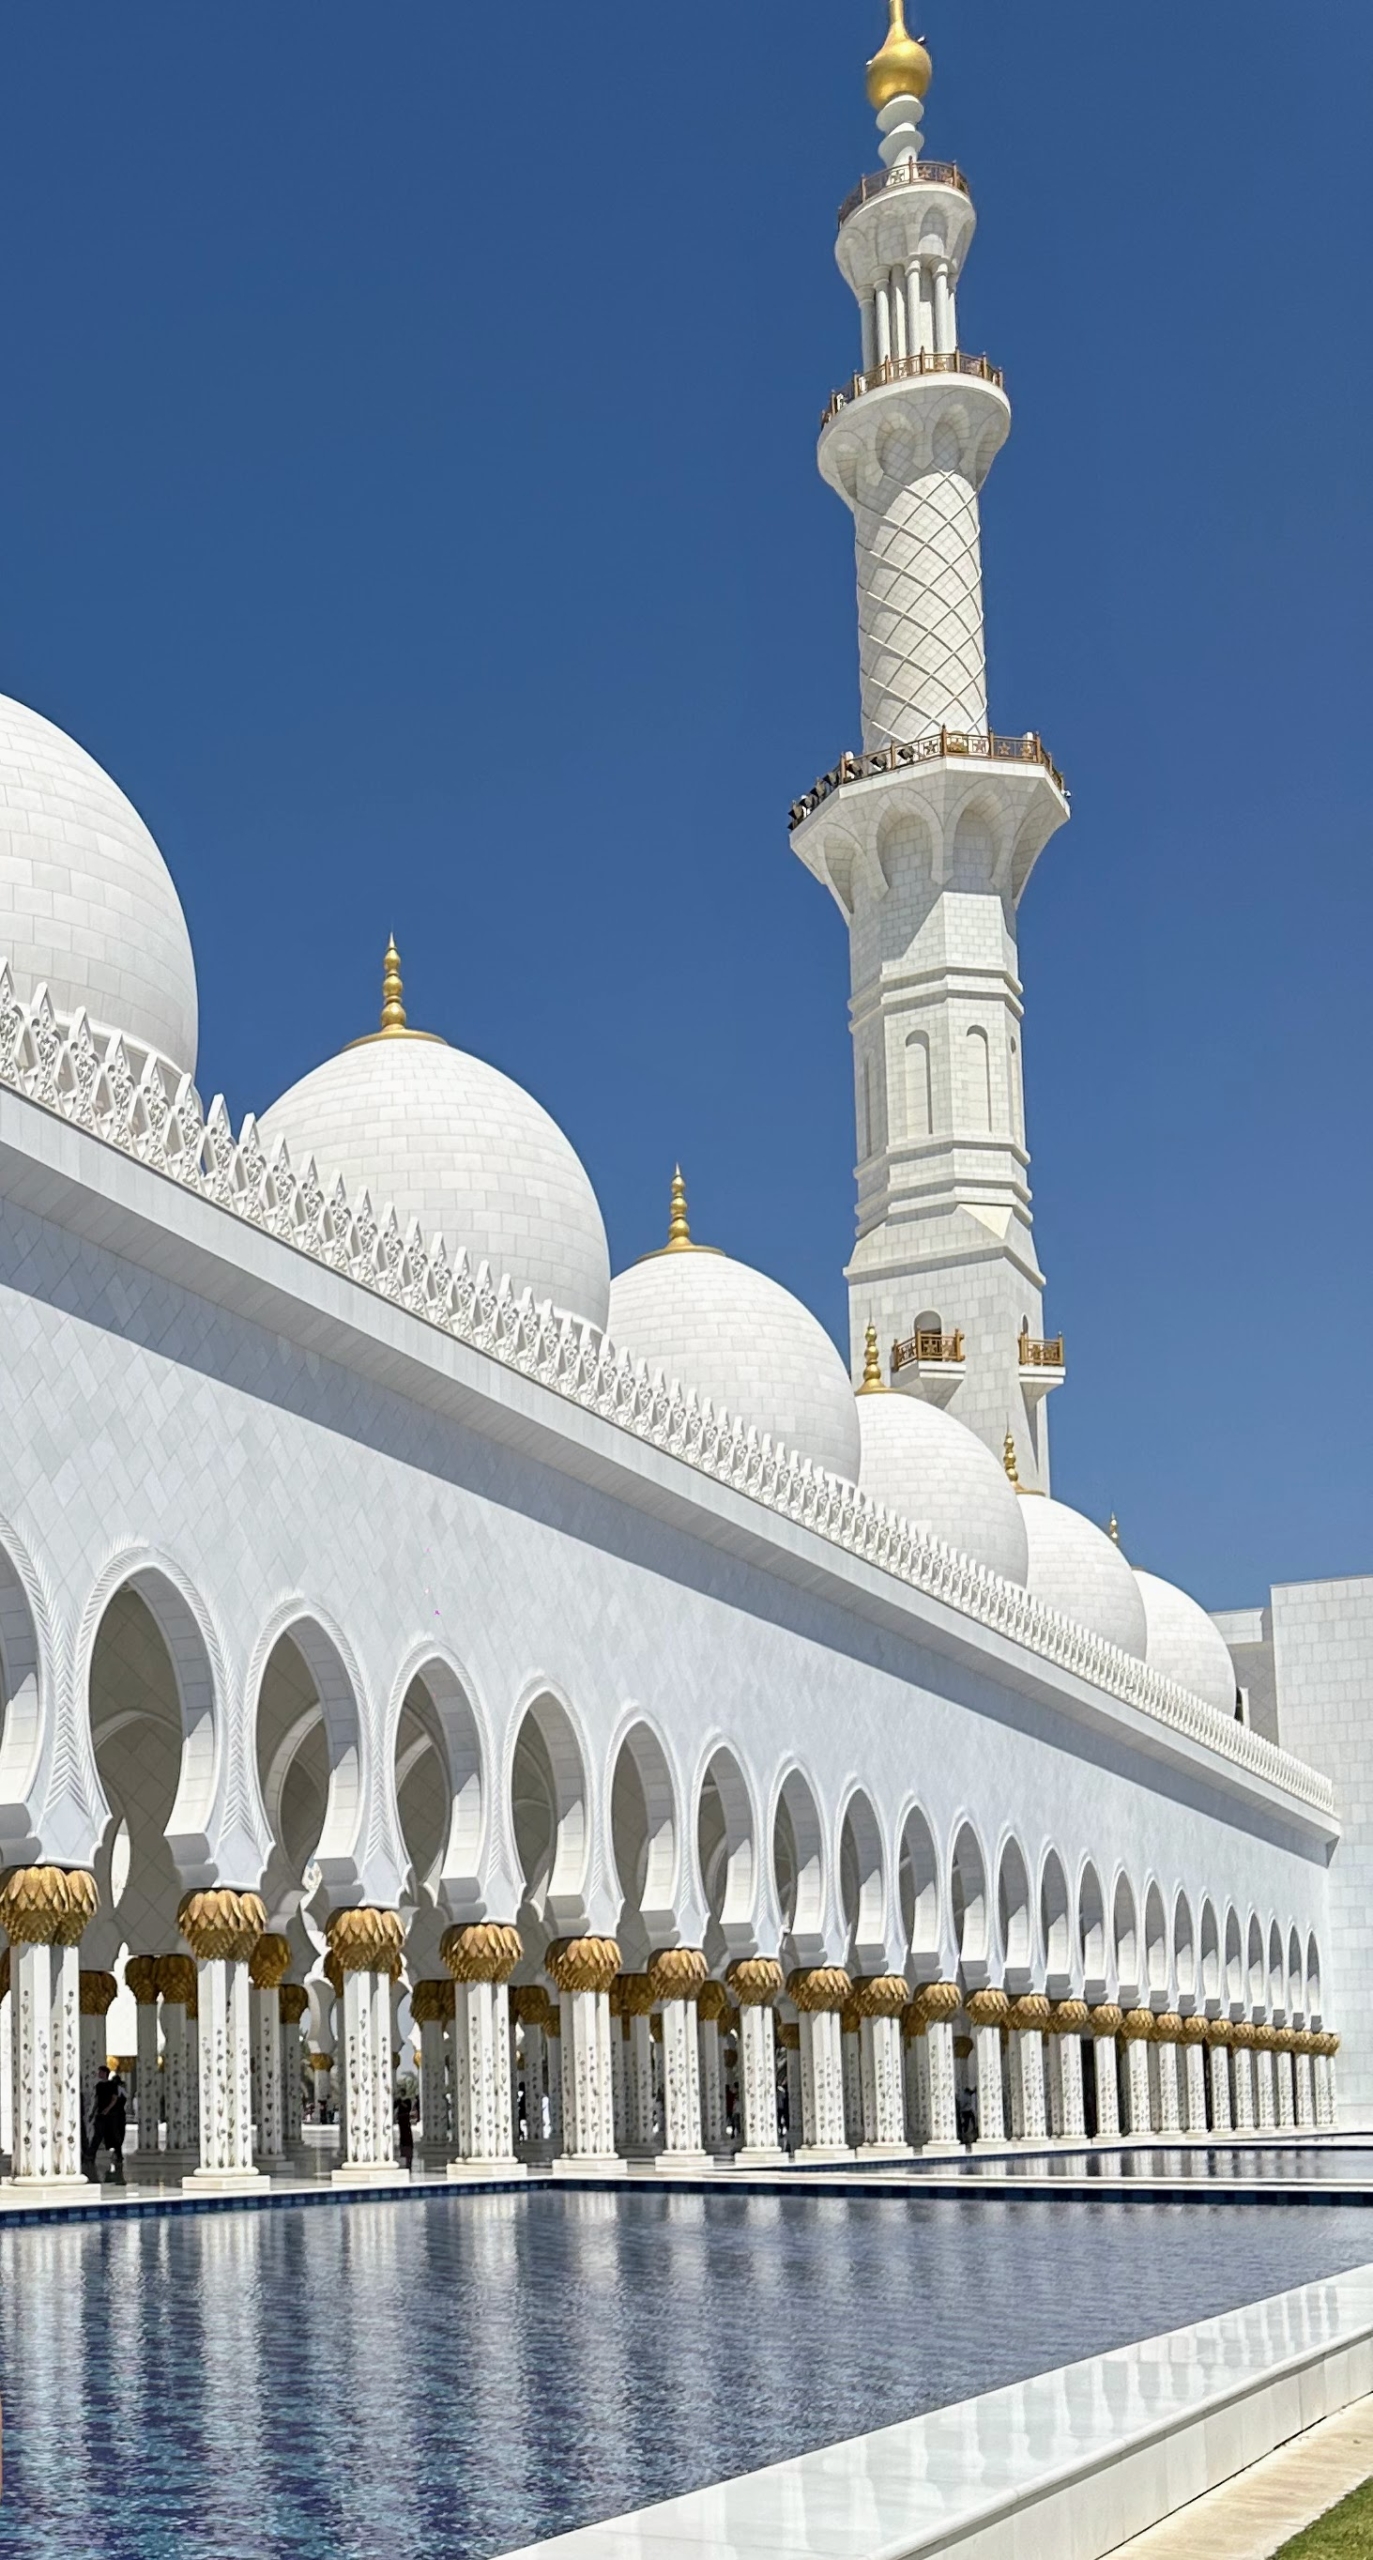
This is The Sheikh Zayed Grand Mosque in Abu Dhabi. It is the largest mosque in the UAE covering about 30-acres of land. The structure measures 950 feet by 1,380 feet and can hold up to 40,000 worshippers at one time.
The mosque includes 82 domes, more than 1,000 columns, gold gilded chandeliers and the world’s largest hand-knotted carpet.
In Dubai, Mingmar visited with this falcon. The falcon is UAE’s national bird representing strength, heritage, and agility.
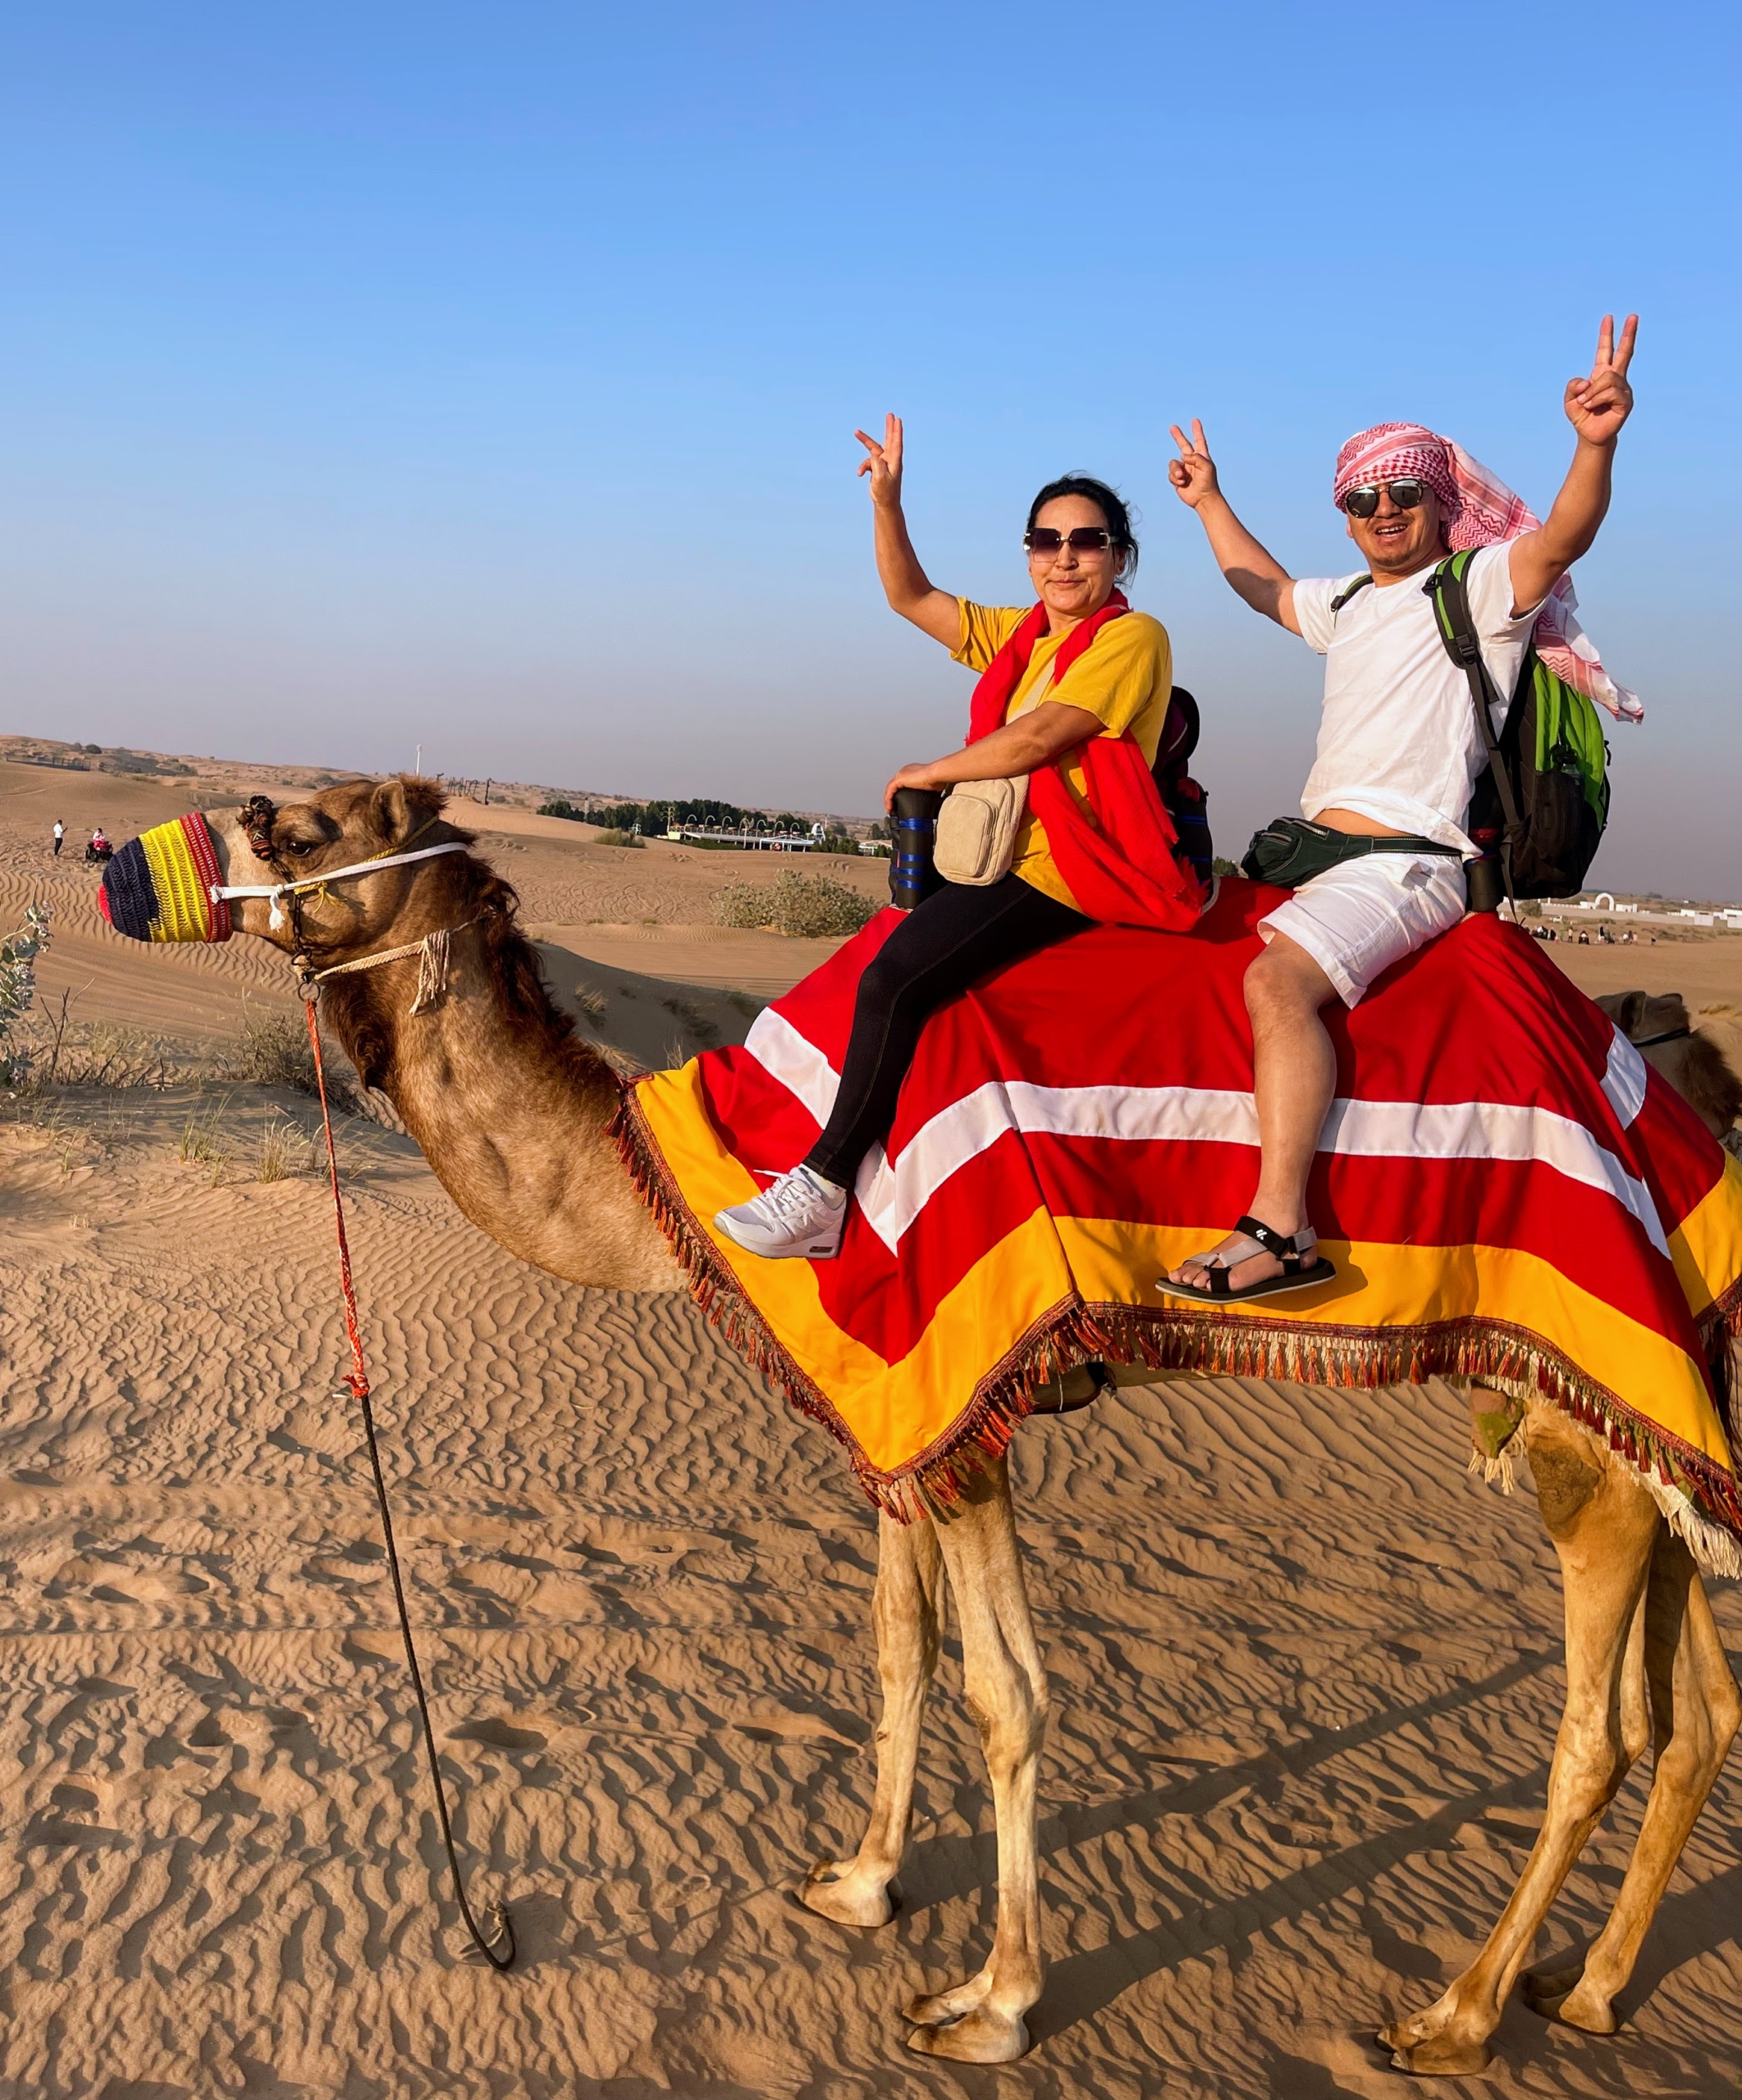
The entire family went on a desert safari – a guided excursion into the sandy desert away from the city center. One activity is a camel ride. A camel is an even-toed ungulate in the genus Camelus. It can carry about 375 to 600 pounds and is known as a “ship of the desert”.
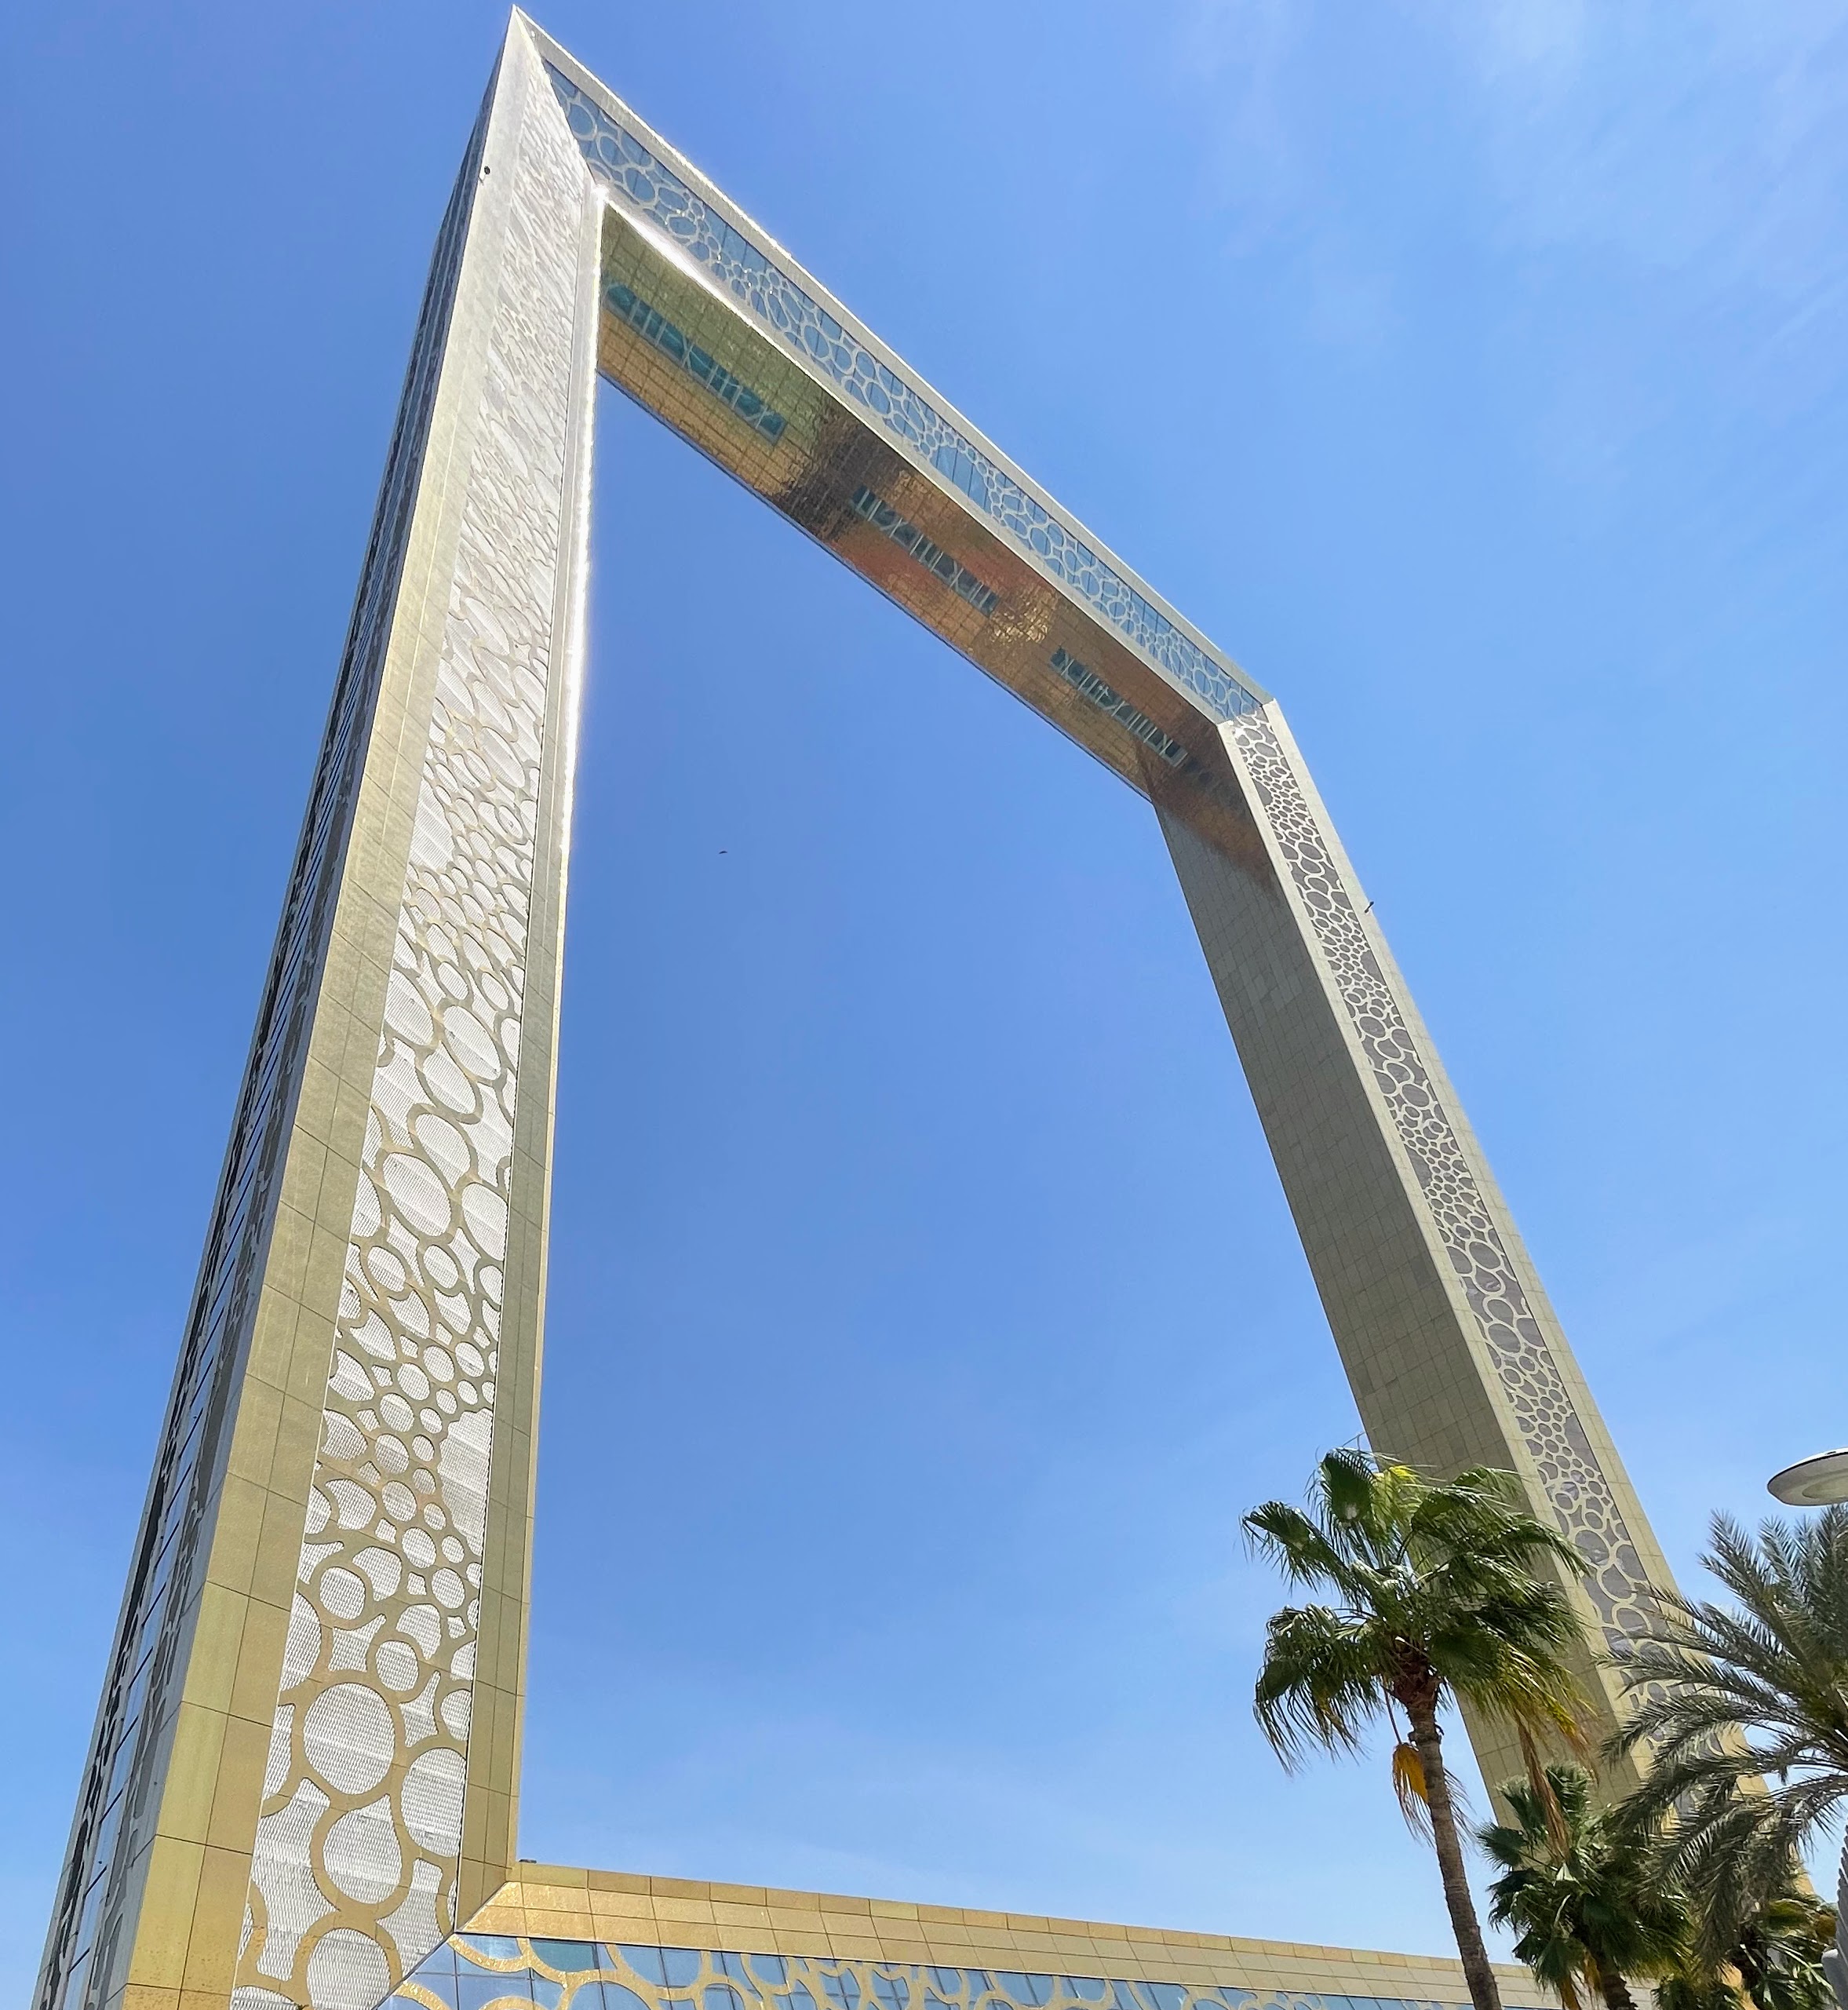
The Dubai Frame is an observatory, museum and monument in Dubai. The building, shaped like a giant picture frame, has a height of 493.4 feet and a width of 313.4 feet.
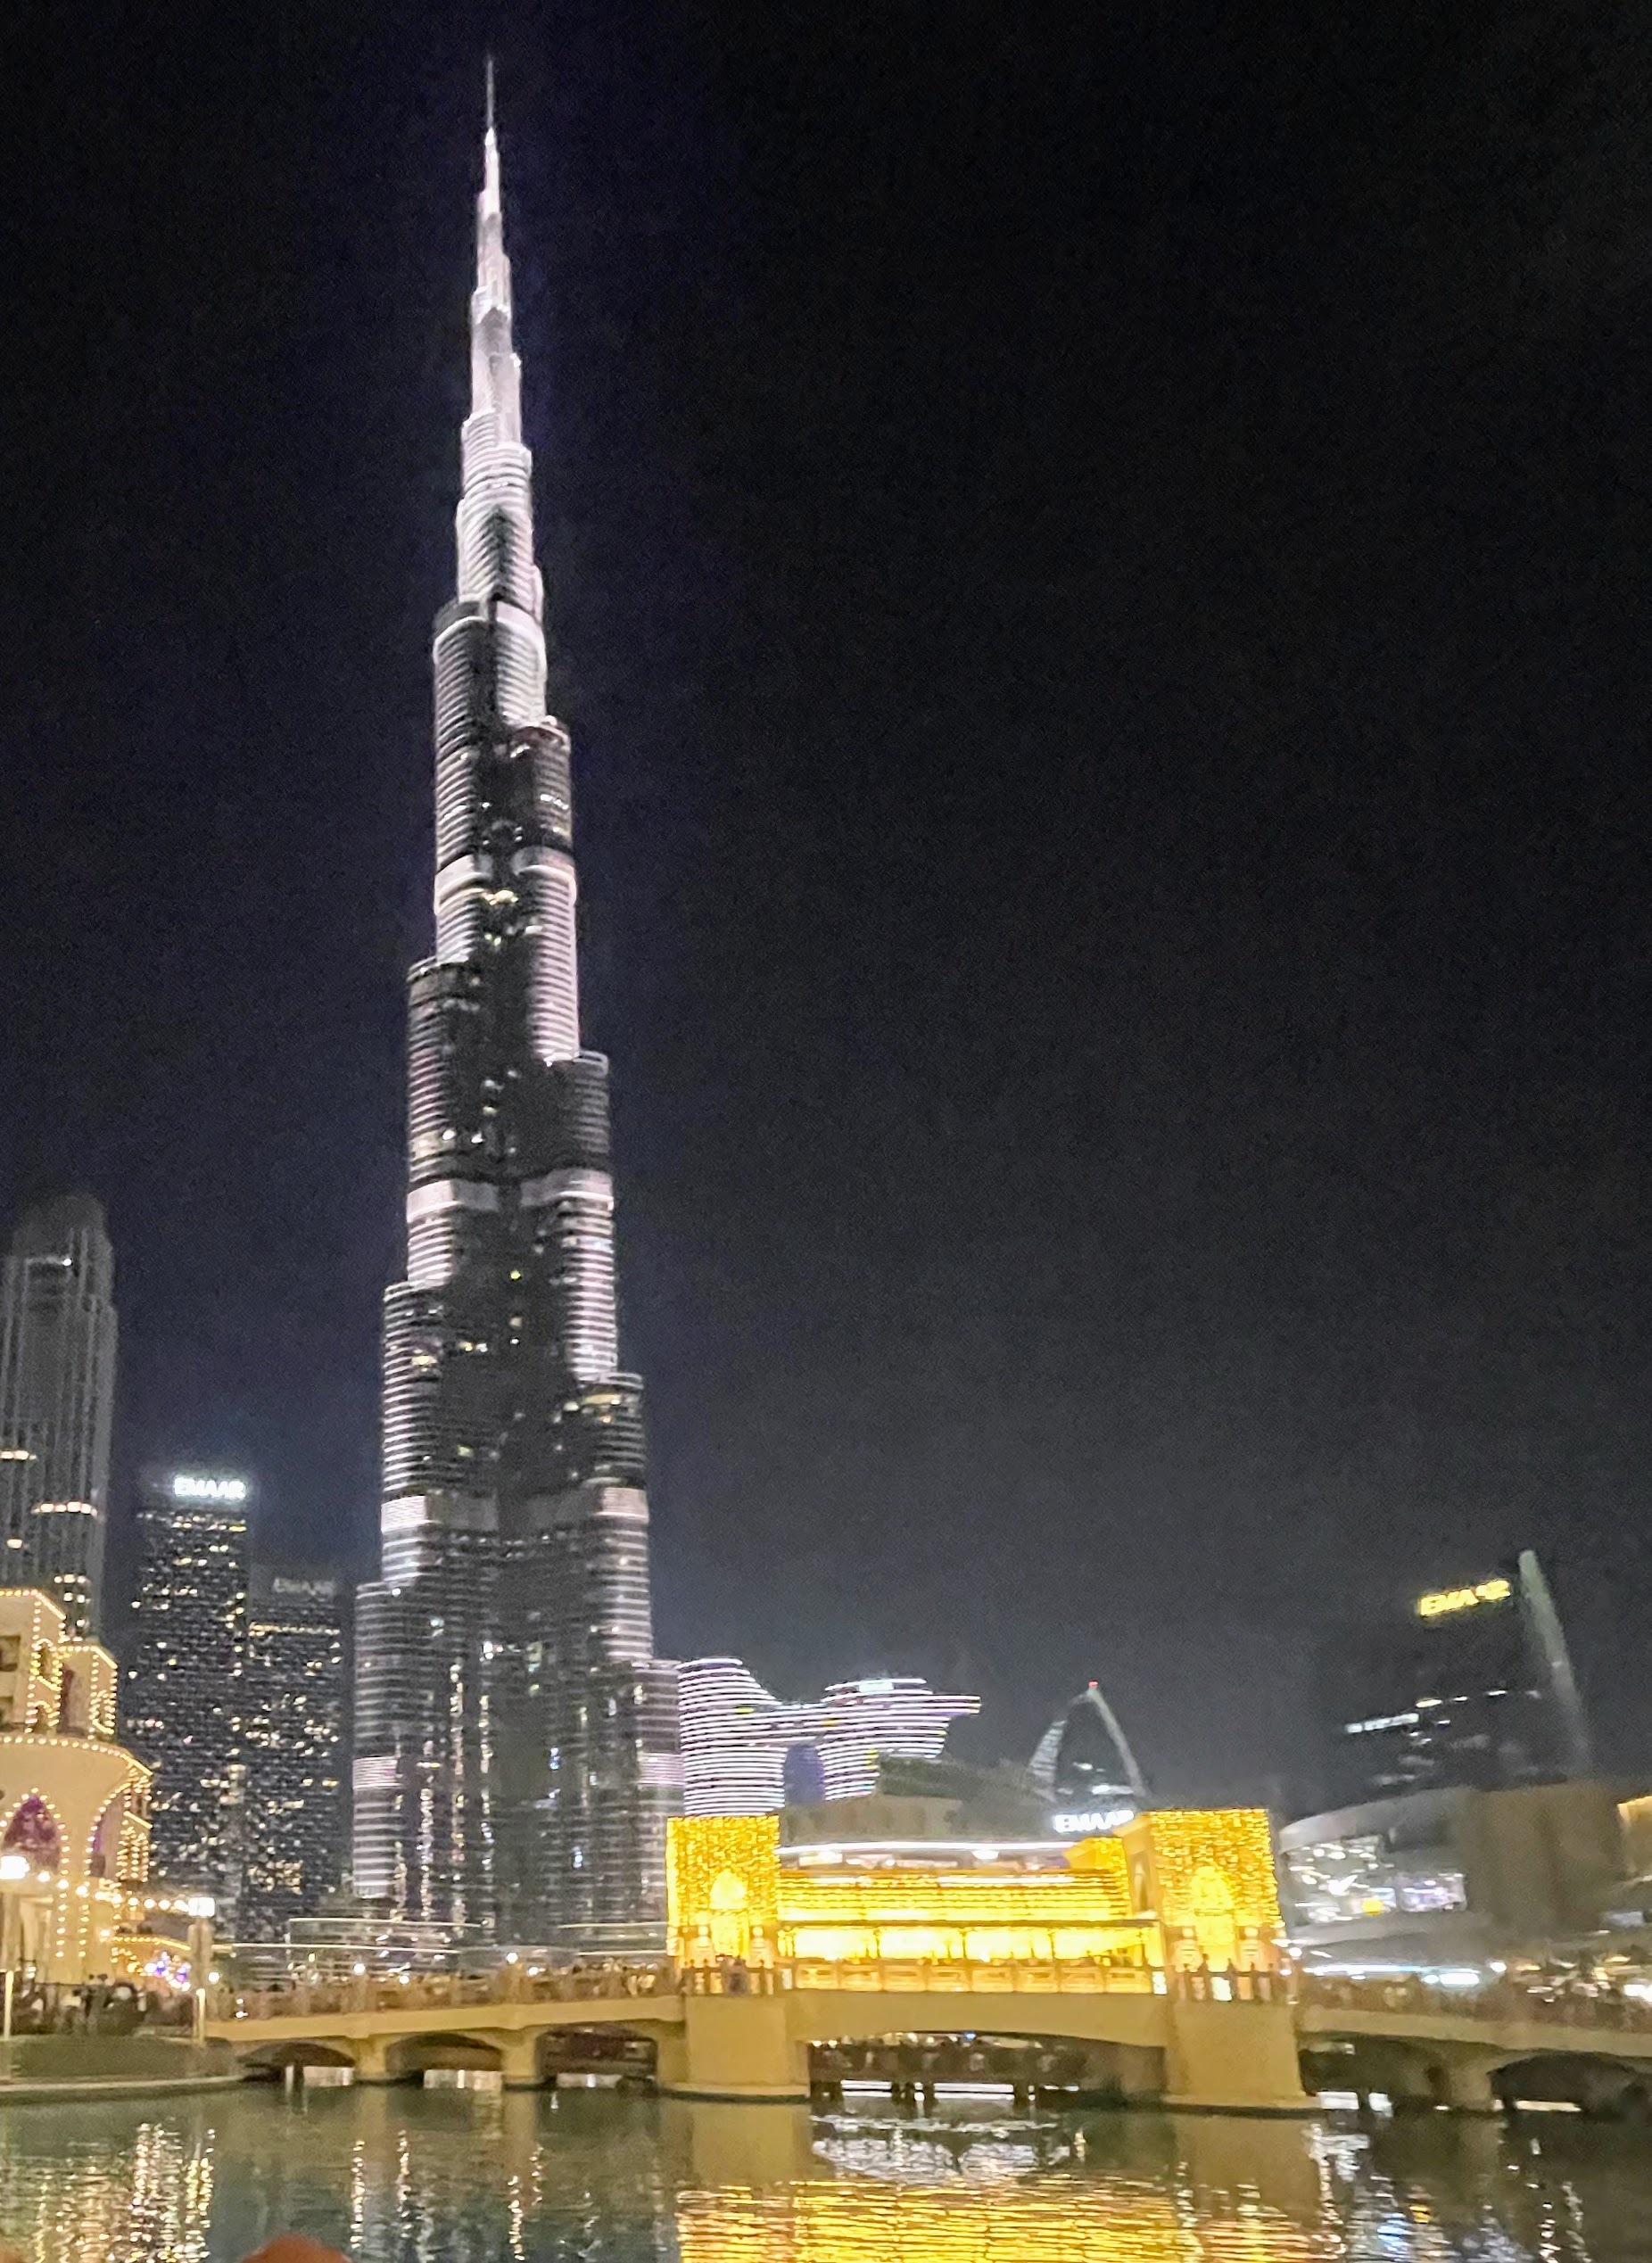
And anyone who visits Dubai must see the tallest building in the world – the Burj Khalifa designed by Adrian Smith, whose firm designed One World Trade Center. Here it is at night. The Burj Khalifa is 2,722 feet tall.
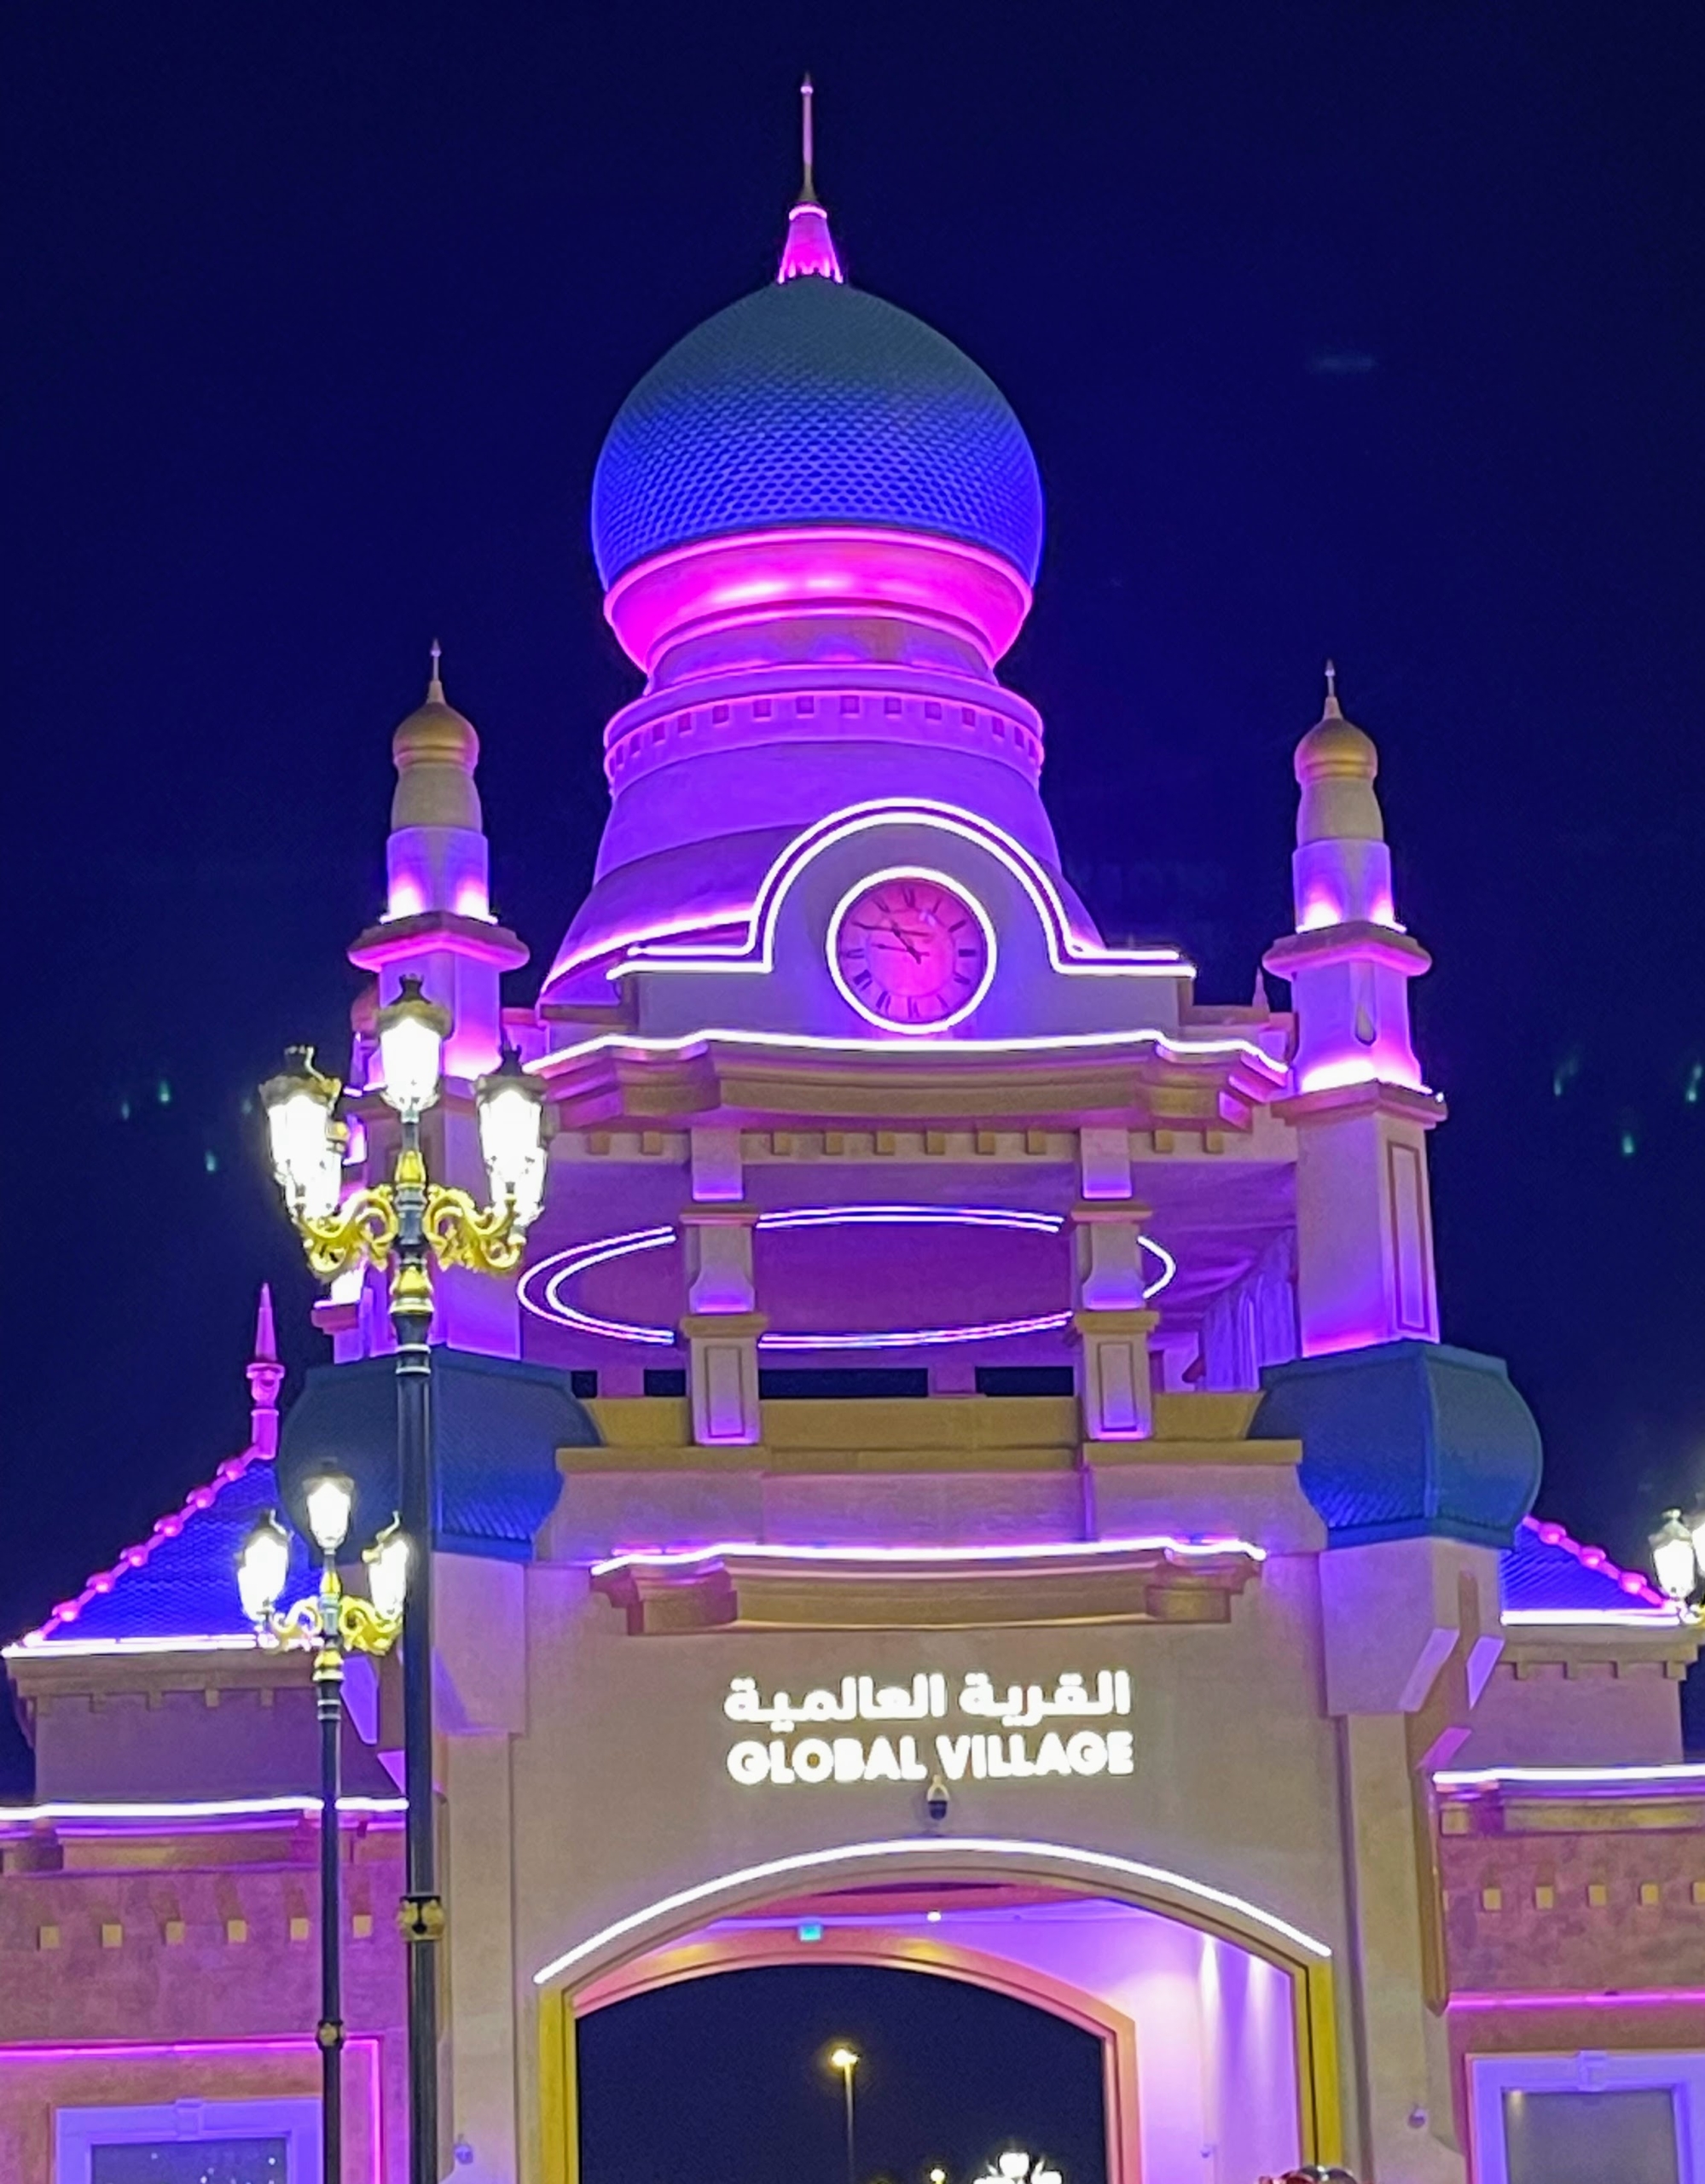
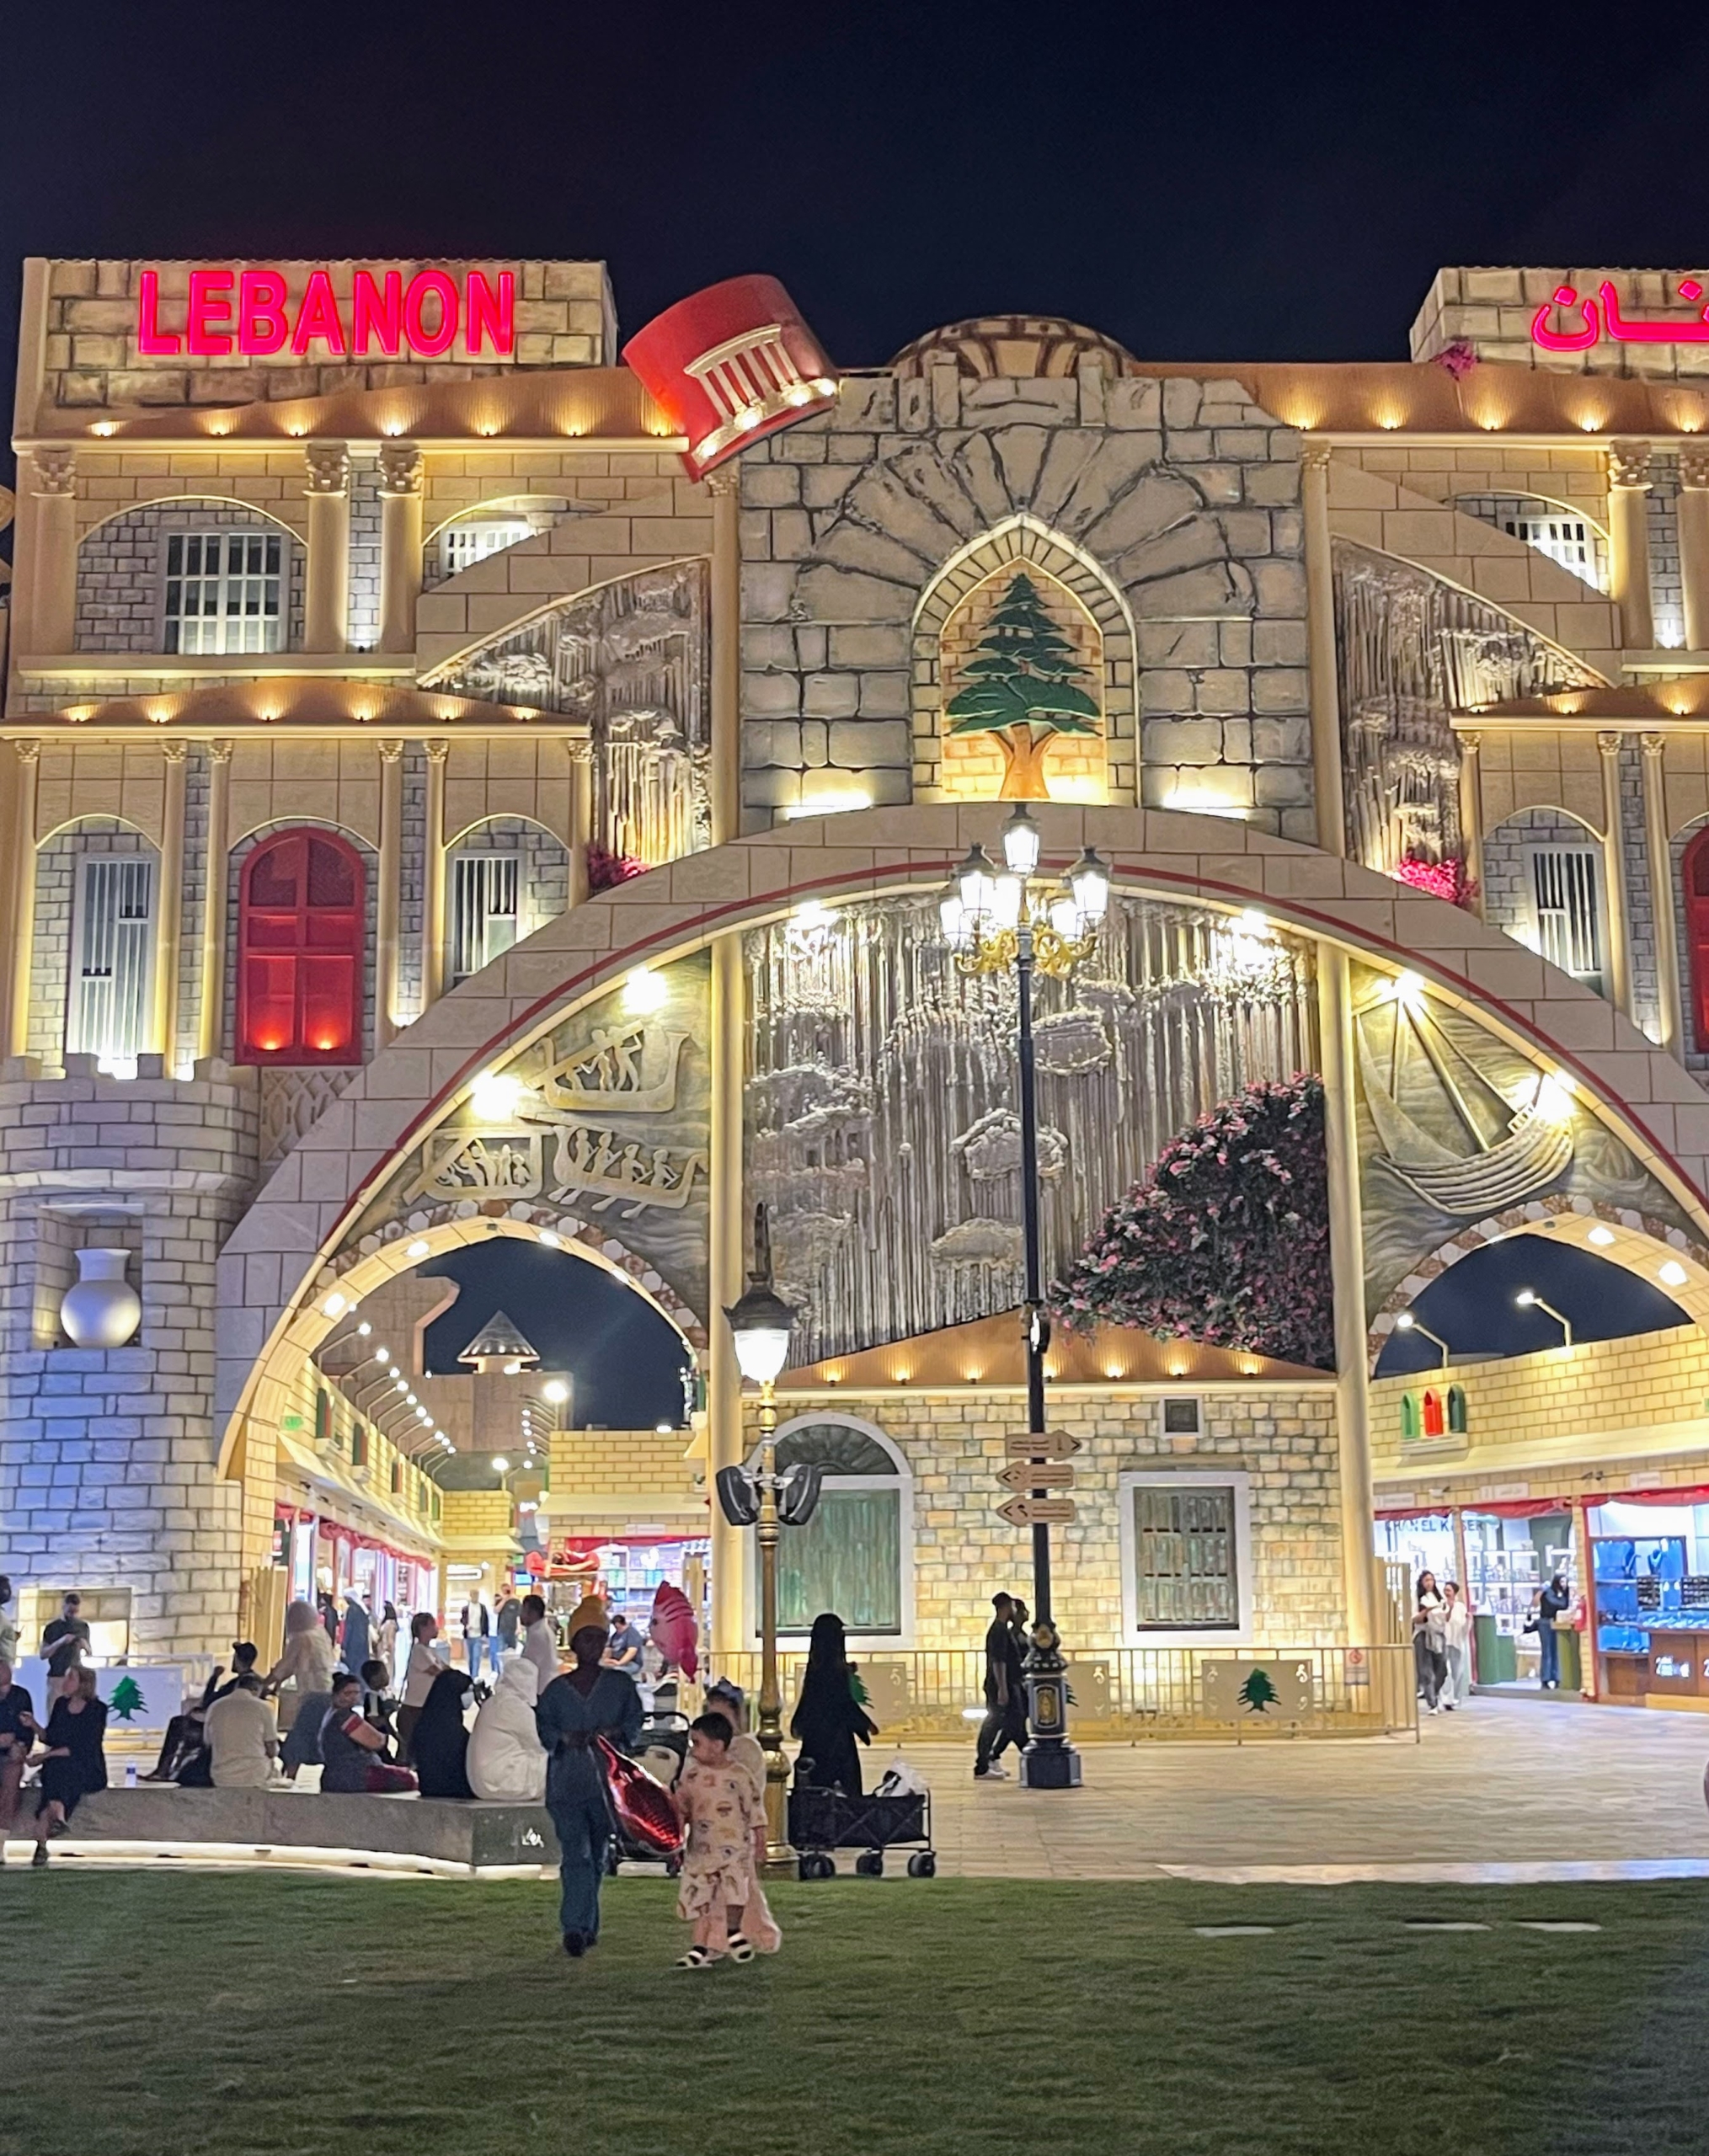
The Global Village is also in the city of Dubai. It has different pavilions to showcase the culture and traditions of each country around the world.
The pavilions are decorated in their native style and filled with lights at night.
Here is Chhiring and his family inside the Global Village.
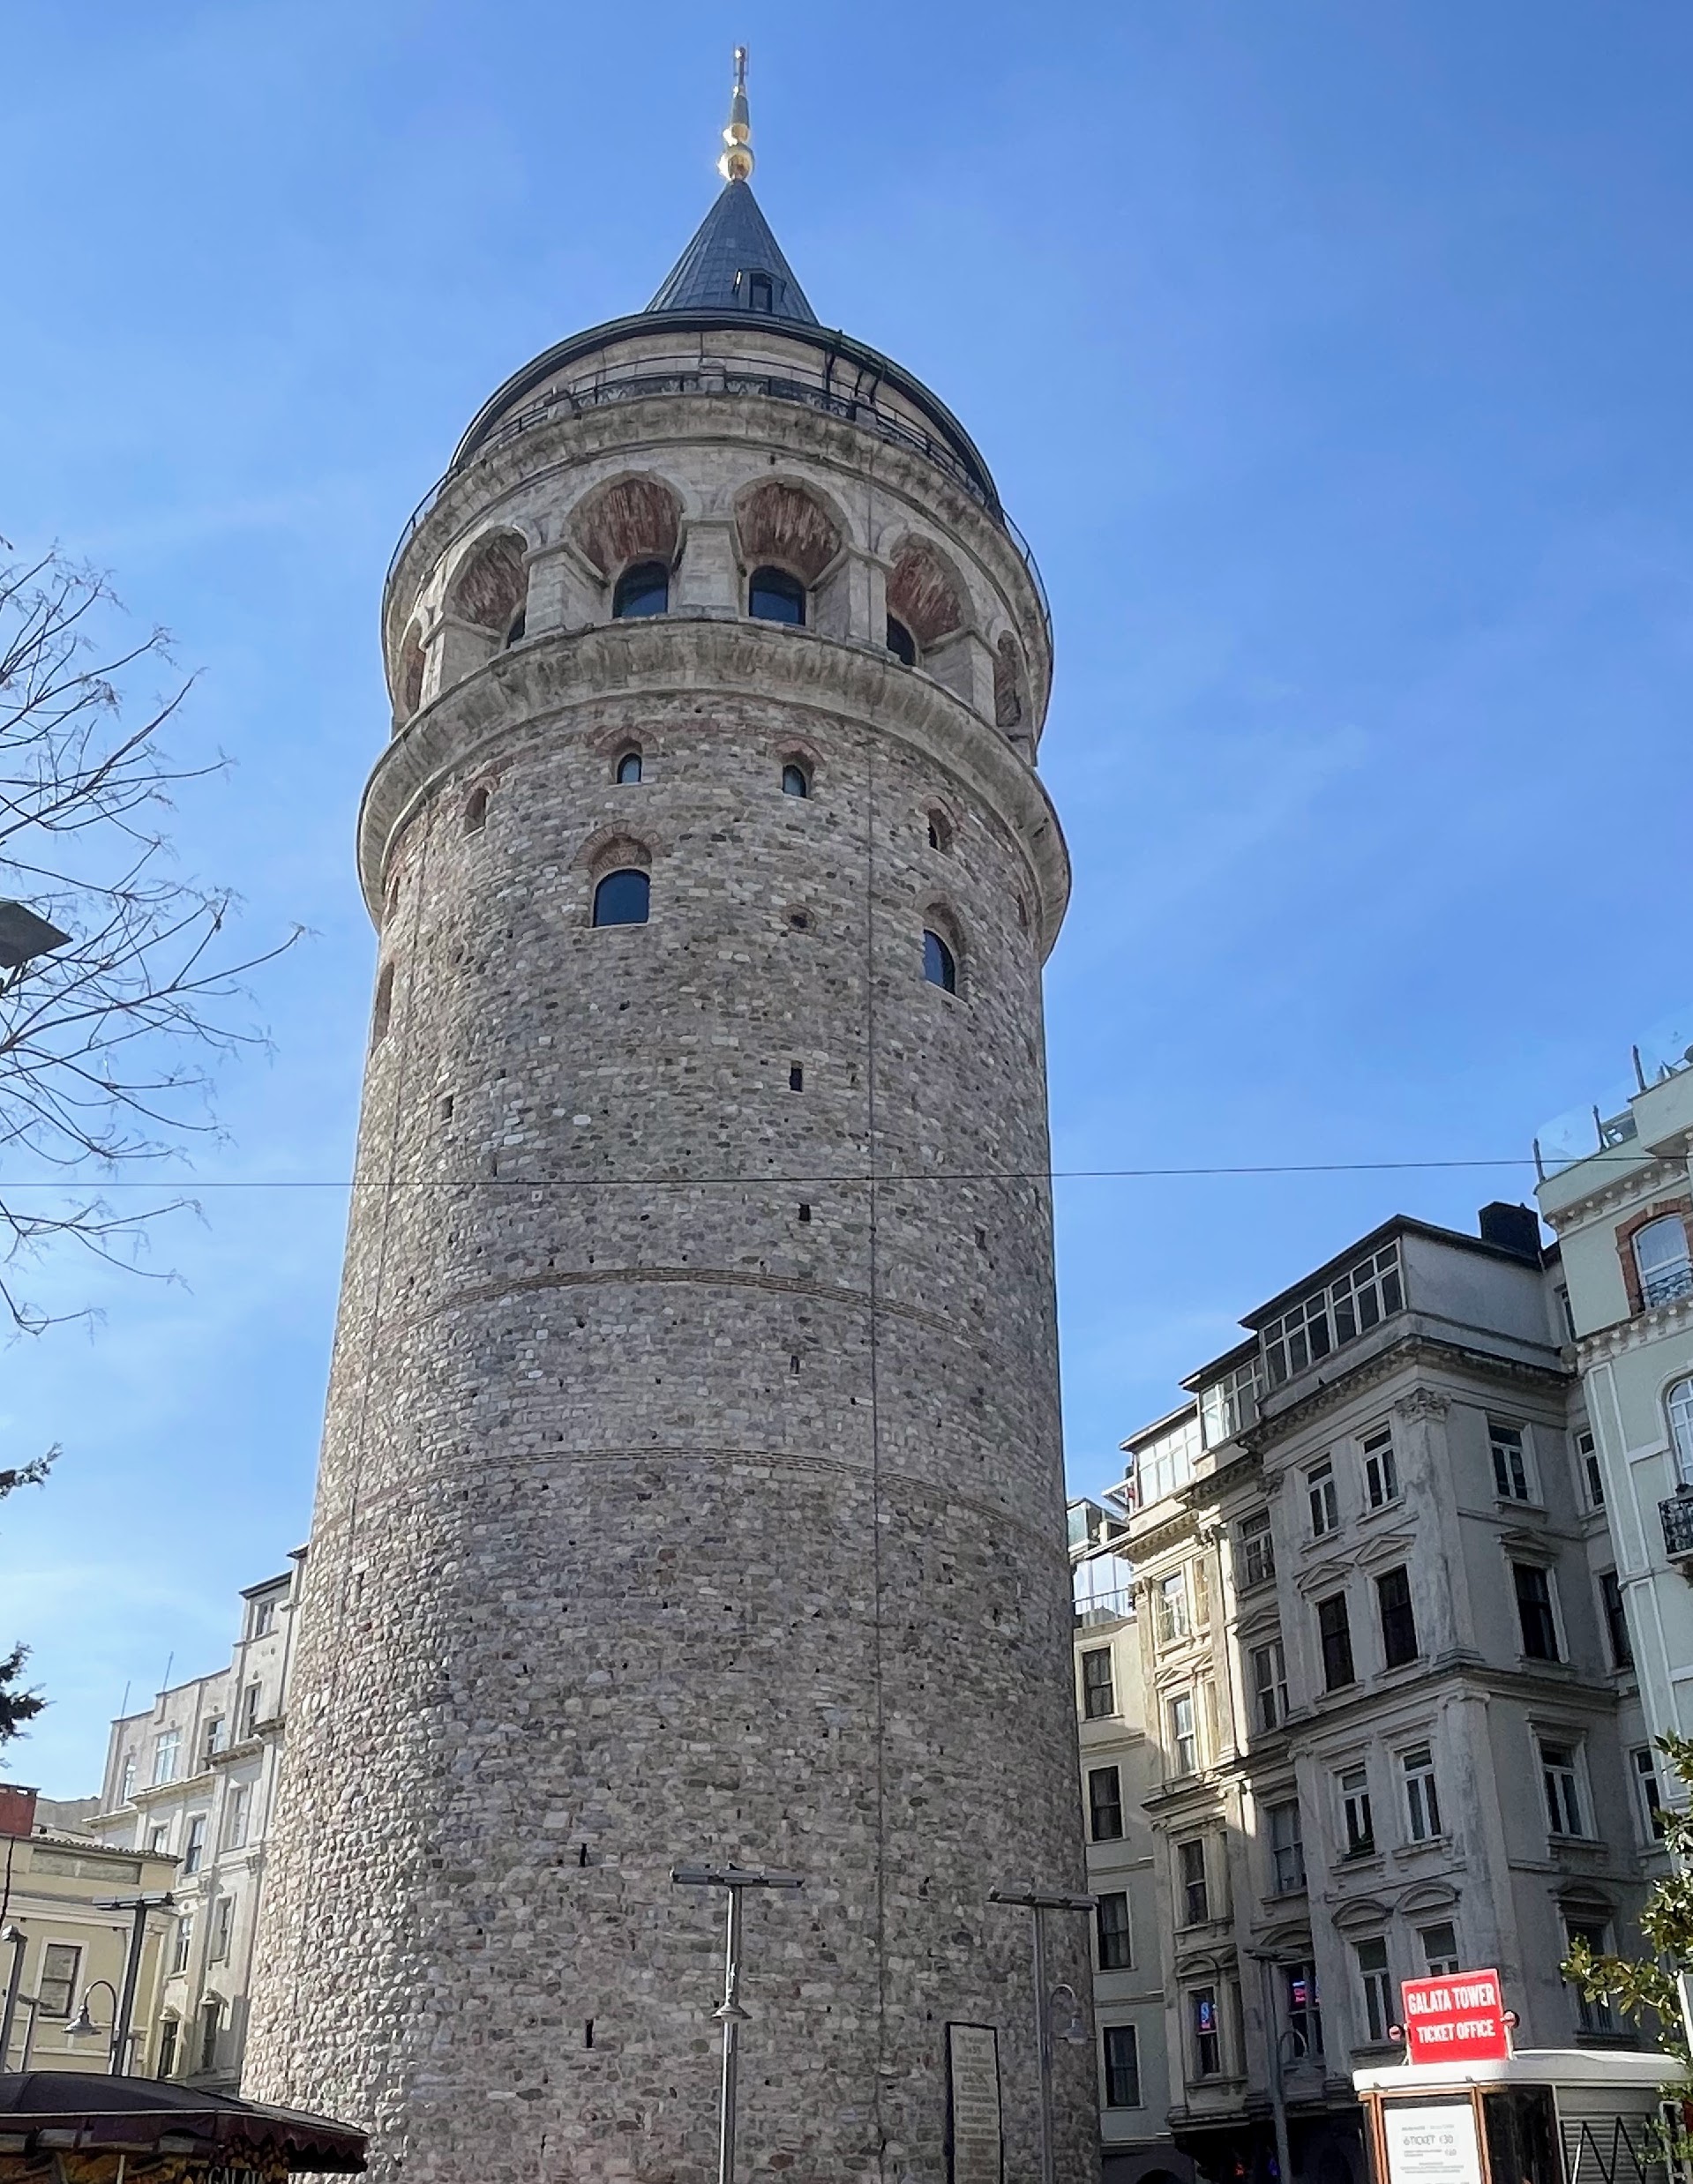
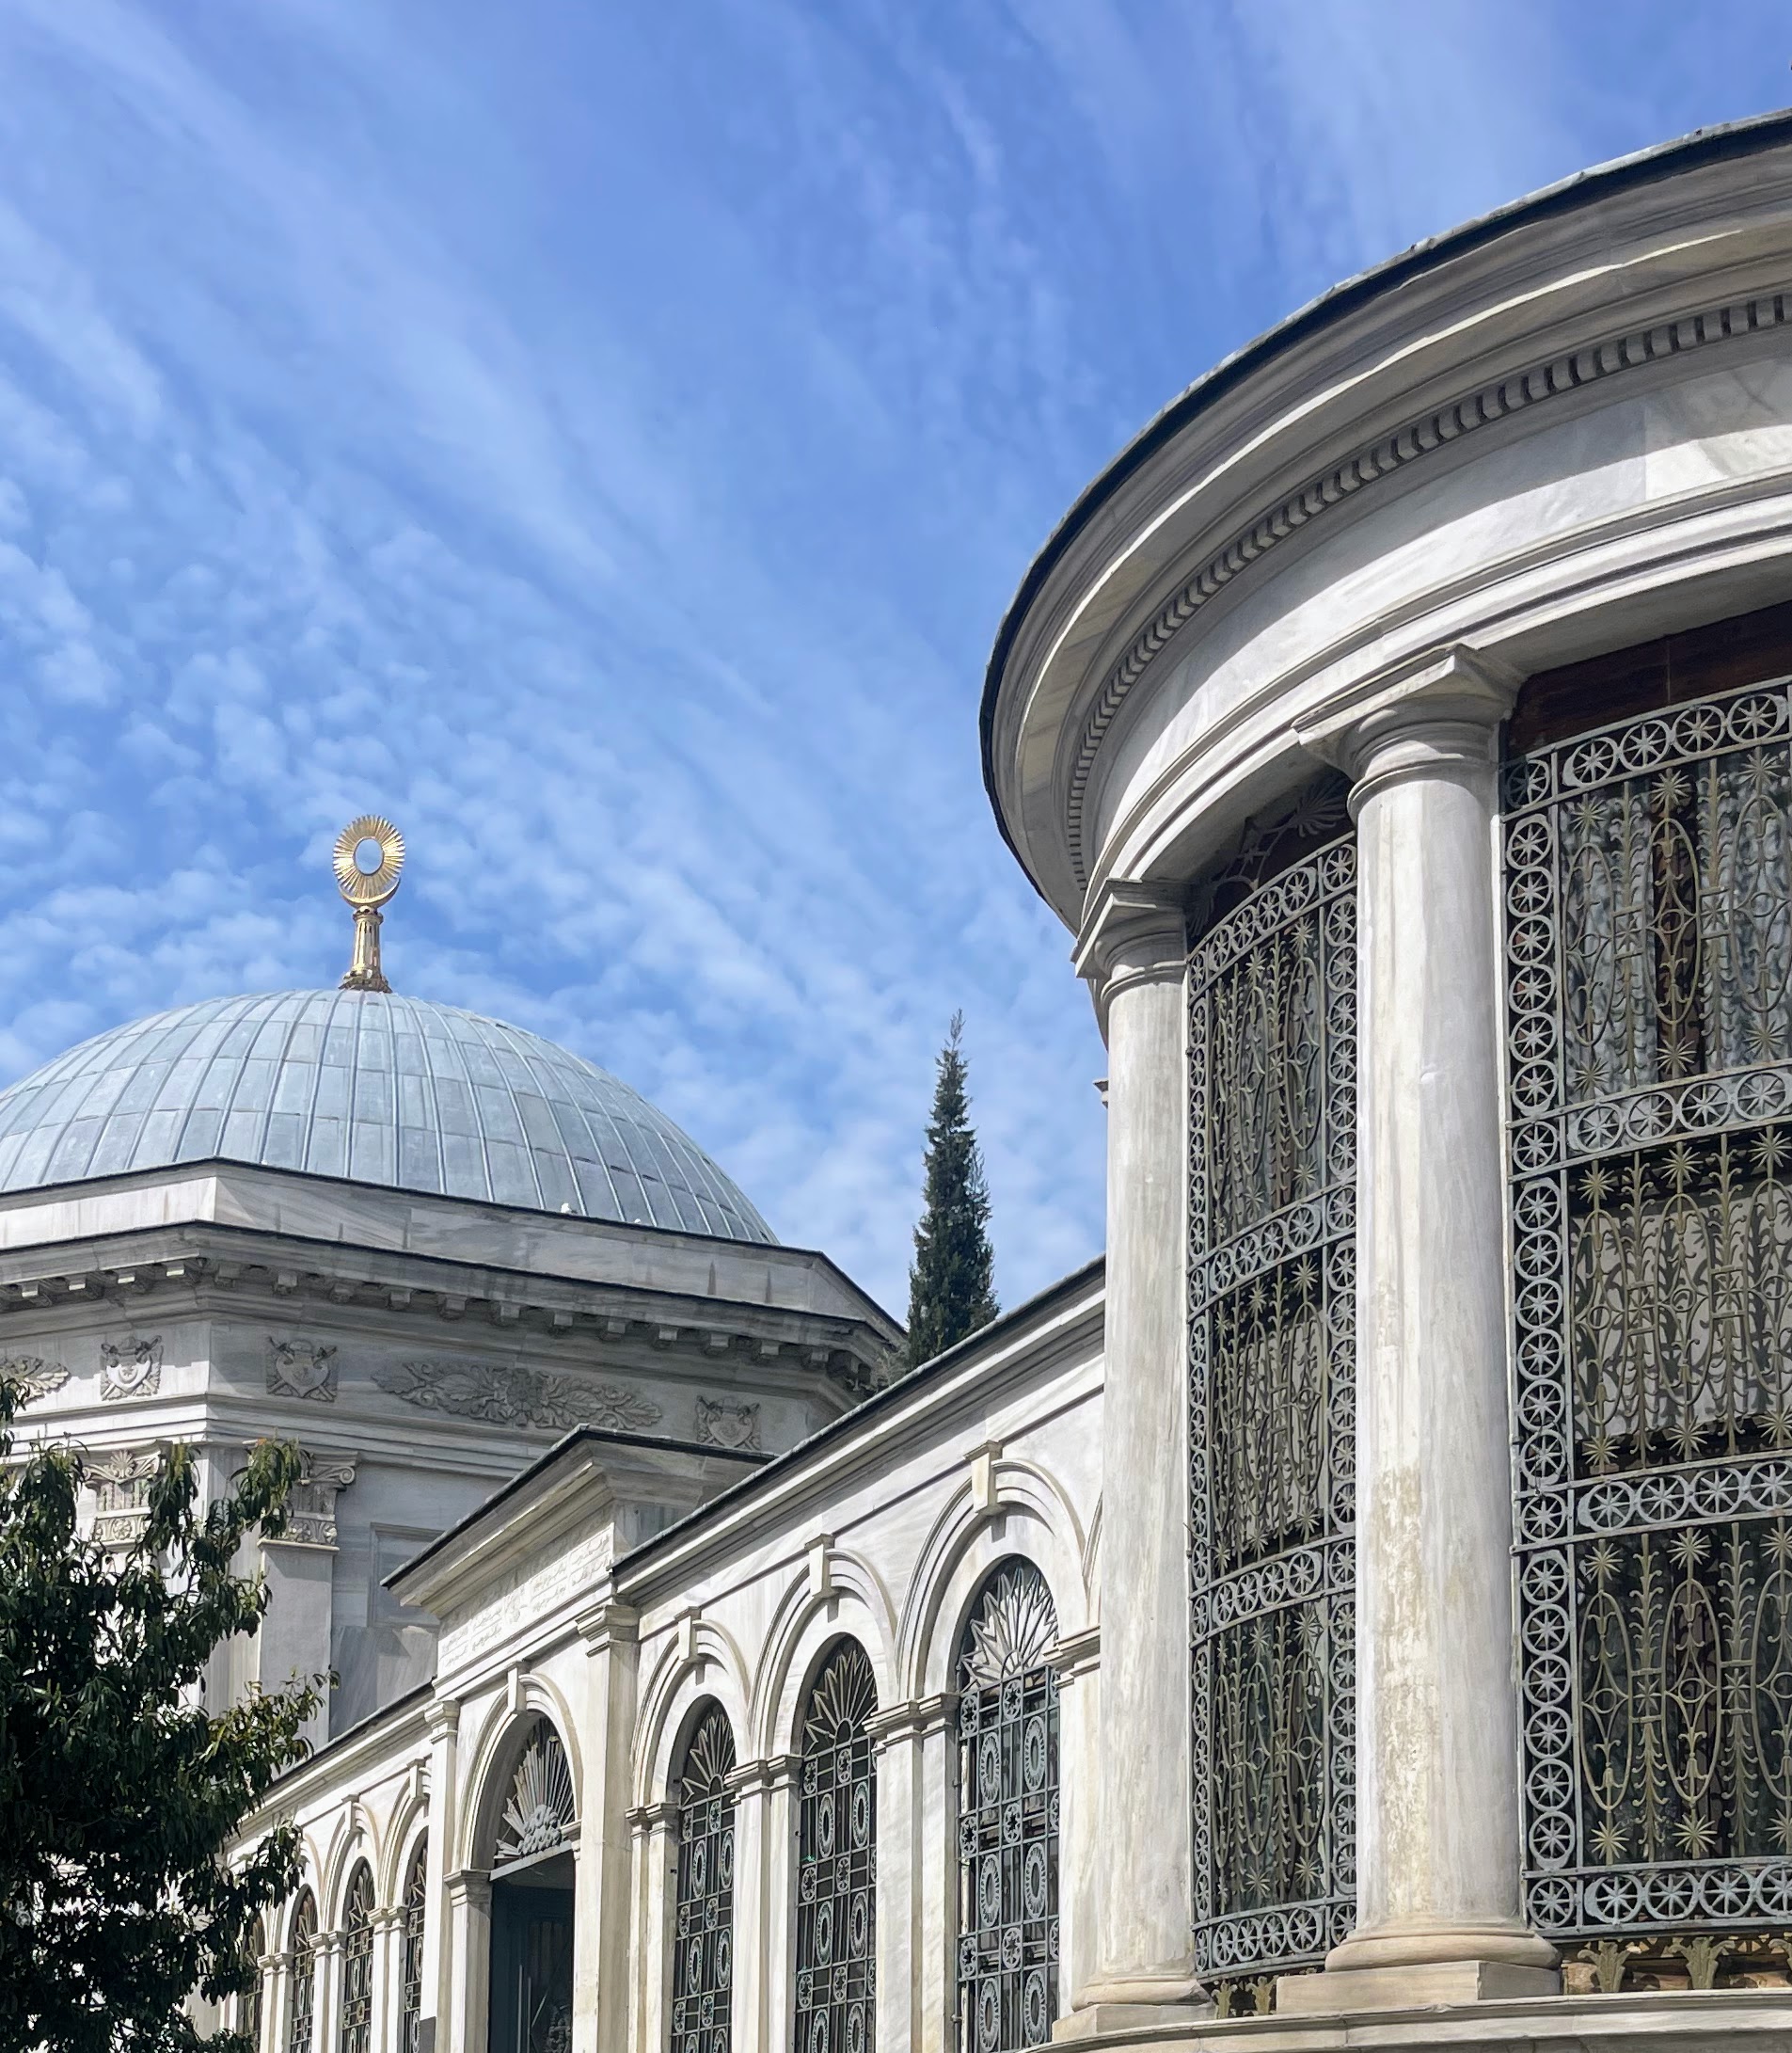
Next stop, Turkey. This is the Galata Tower, a medieval stone tower in Istanbul. Originally built as a watchtower, it is now an exhibition space and museum offering breathtaking views of Istanbul. It is considered one of the city’s most iconic landmarks.
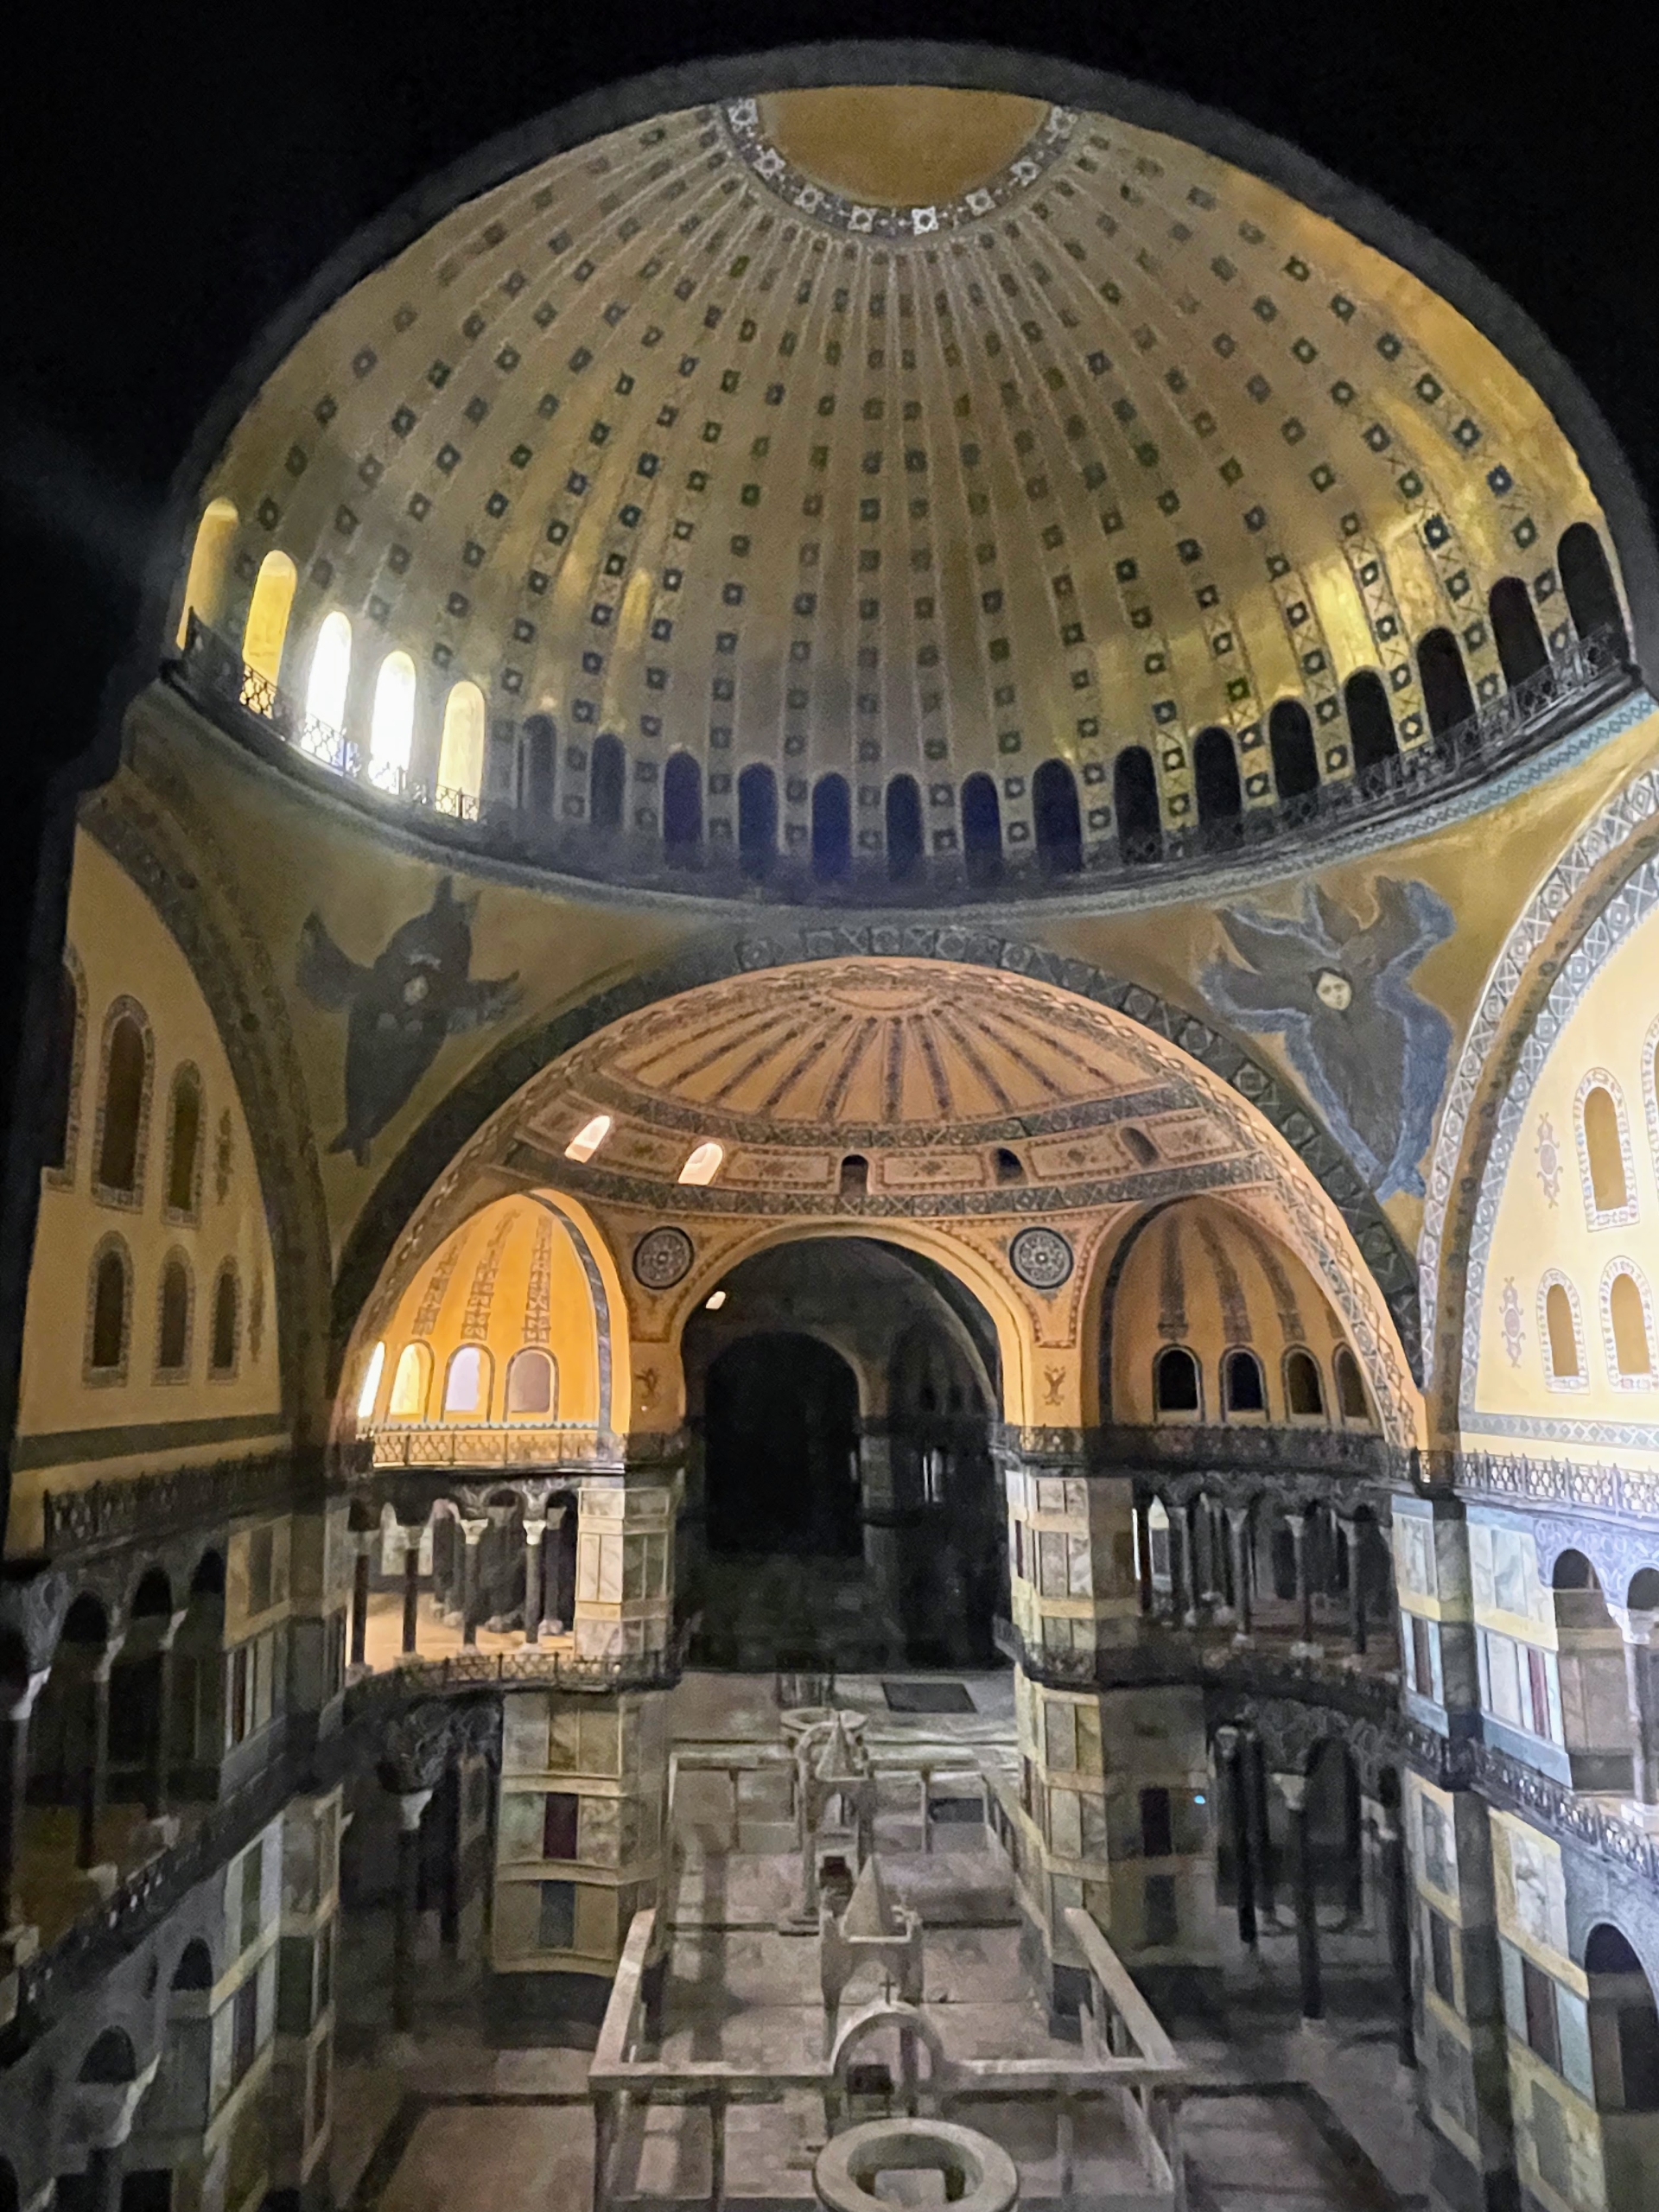
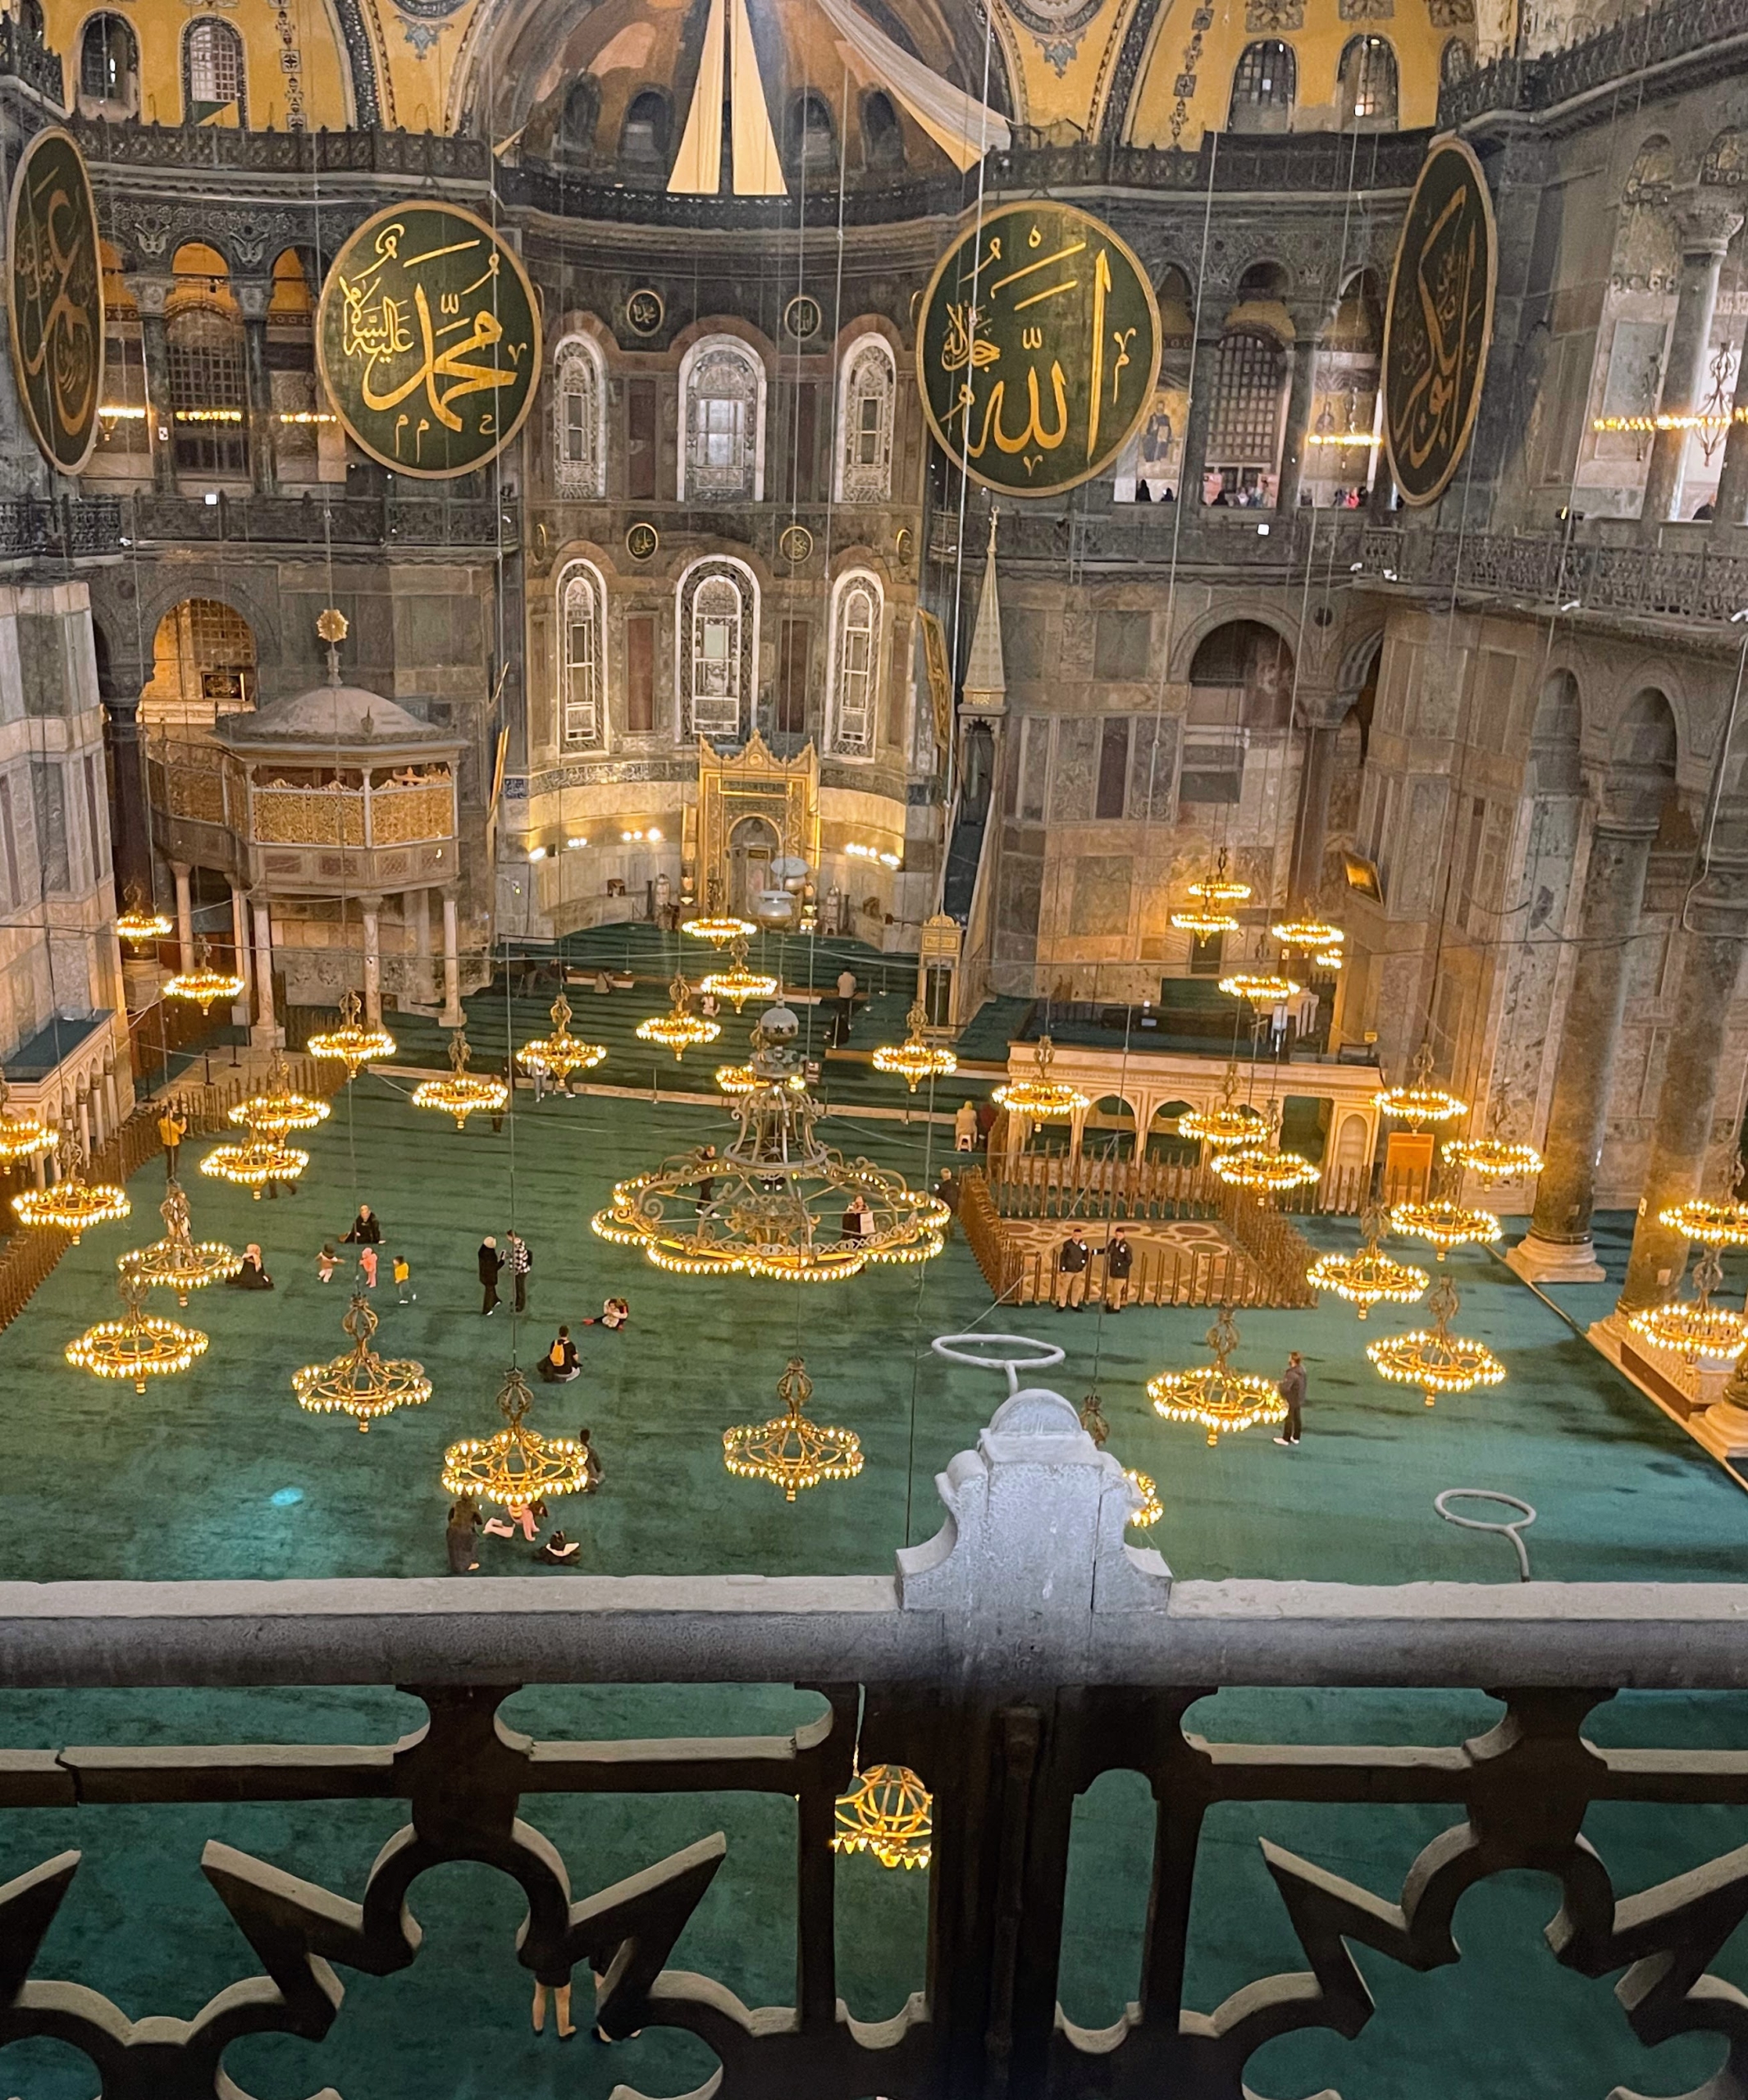
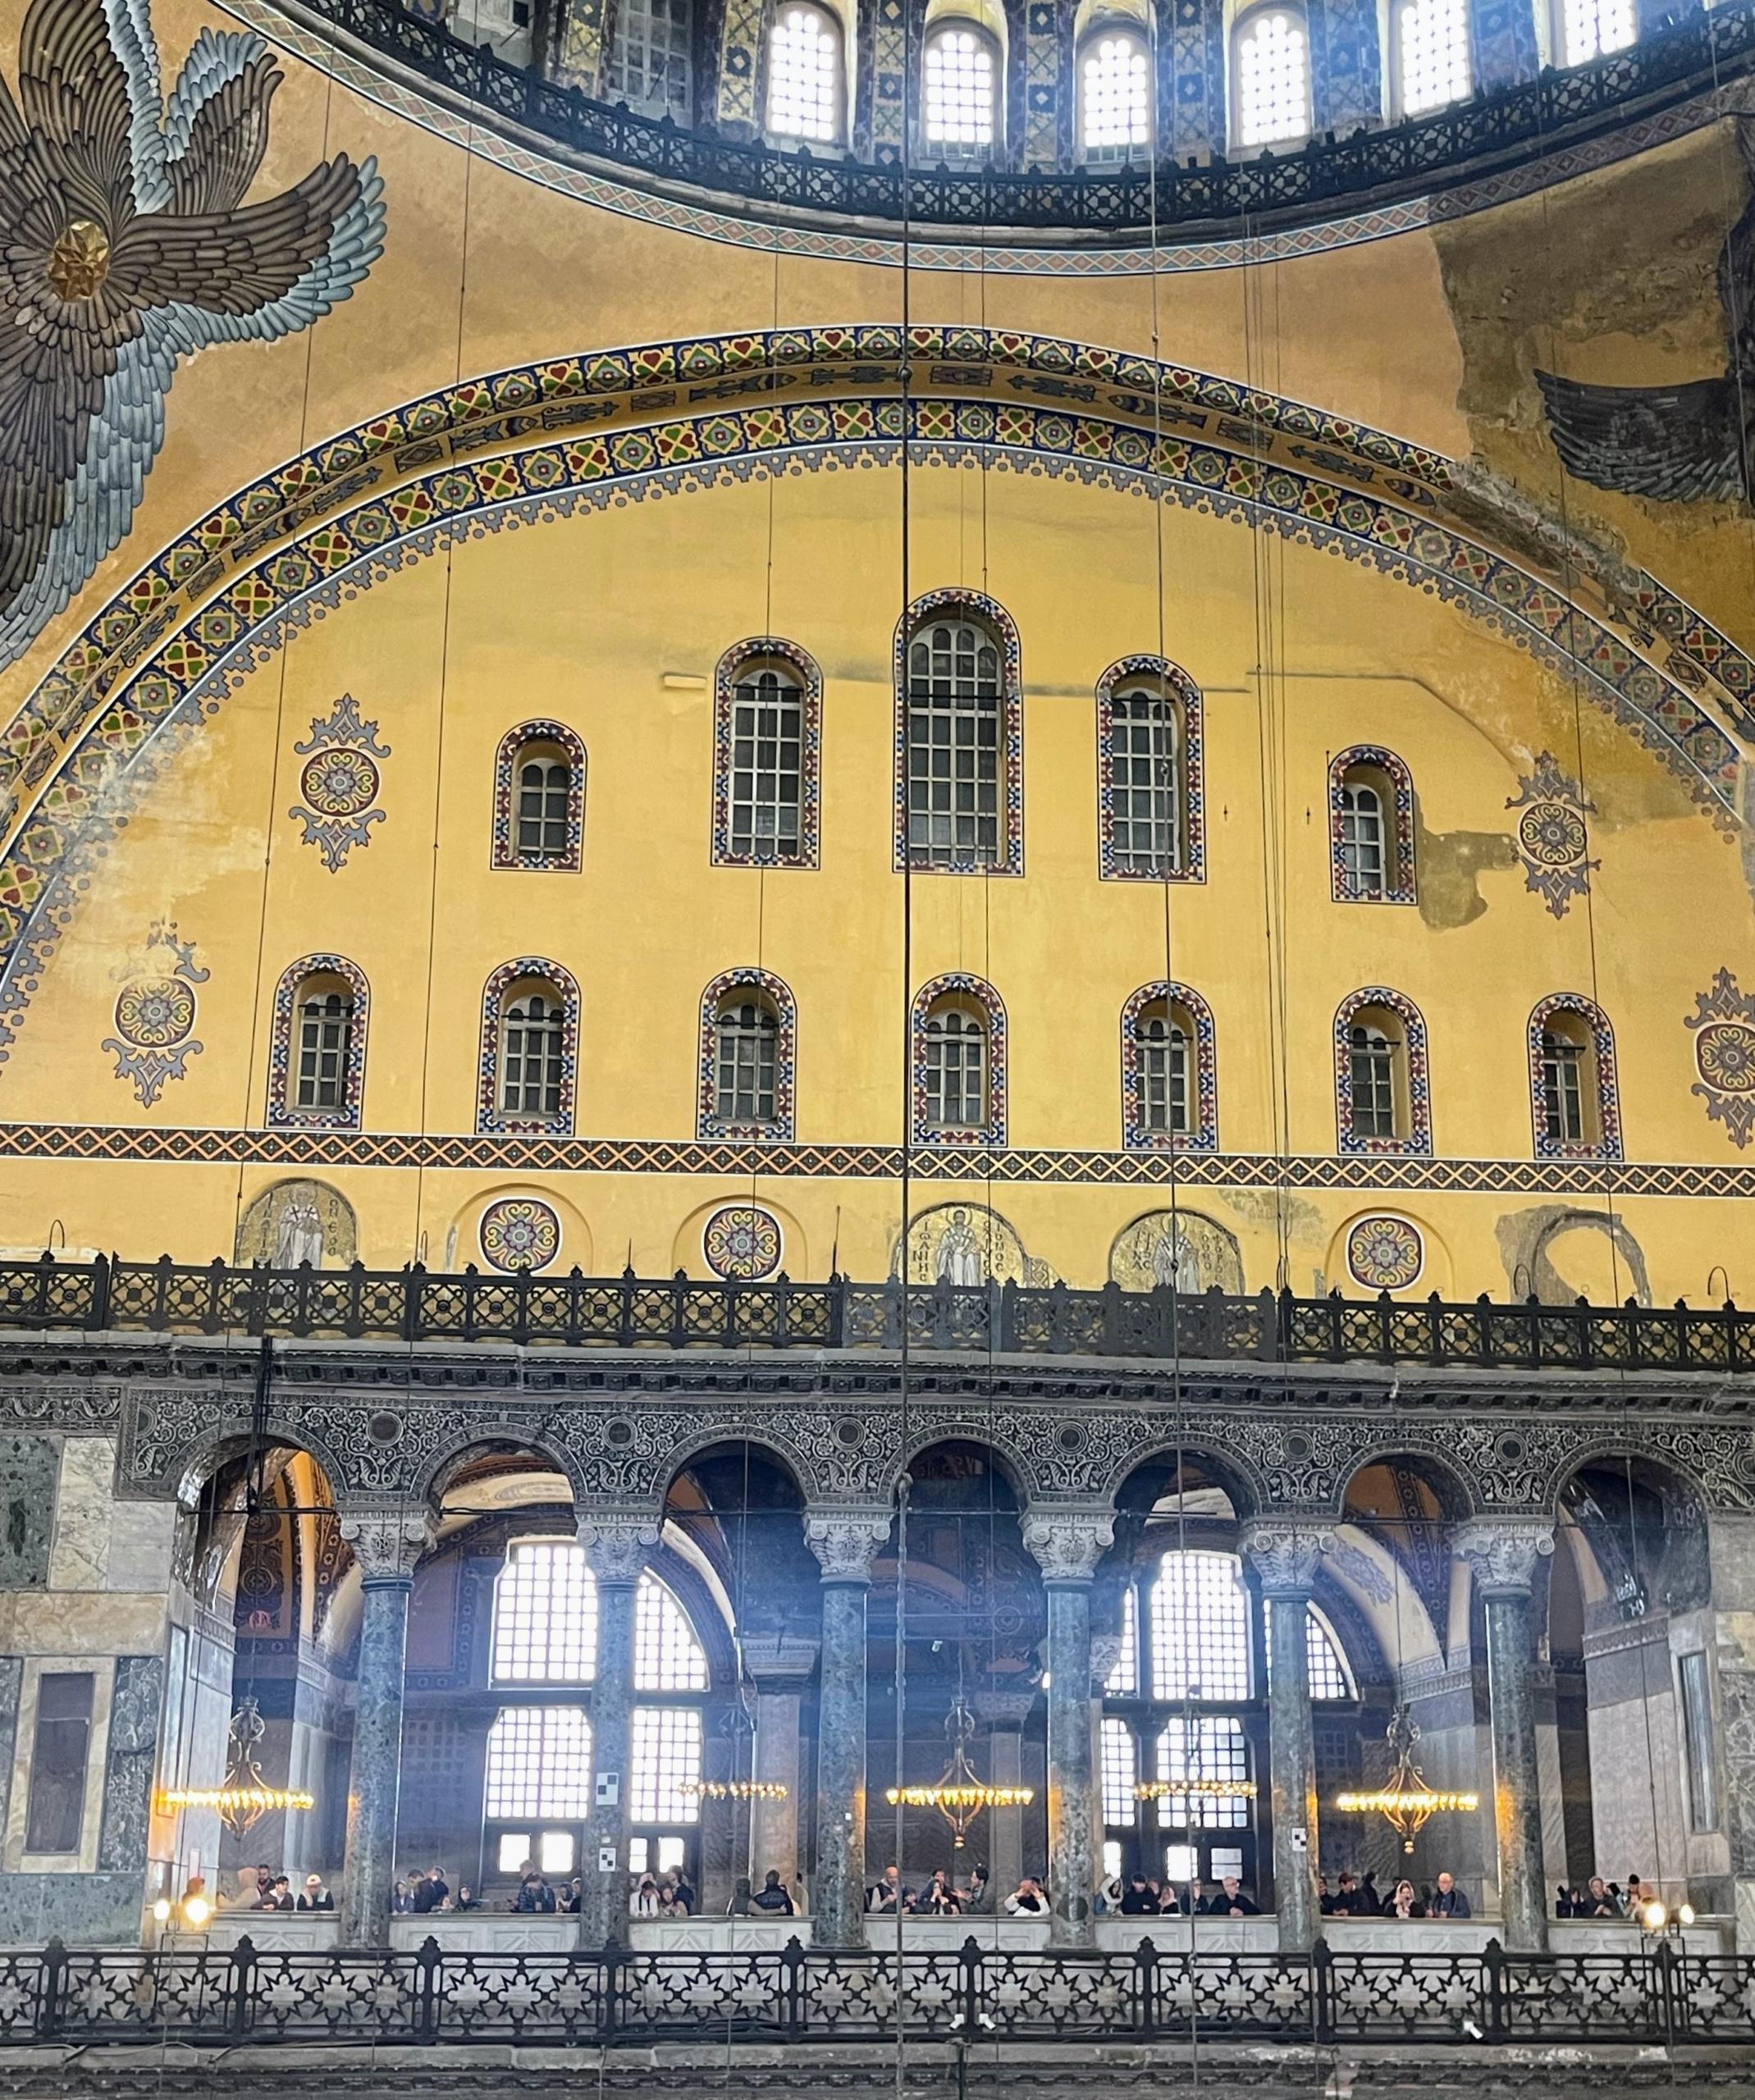
Not far is The Ayasofia Mosque, officially known as the Hagia Sophia Grand Mosque. It was originally a church and later converted into a mosque following the conquest of Istanbul by Mehmed II in 1453. The structure is considered the epitome of Byzantine architecture.
Tourists are not allowed on the ground floor, which is strictly for worshippers.
The yellow walls of the mosque are made from yellow marble sourced from North Africa.
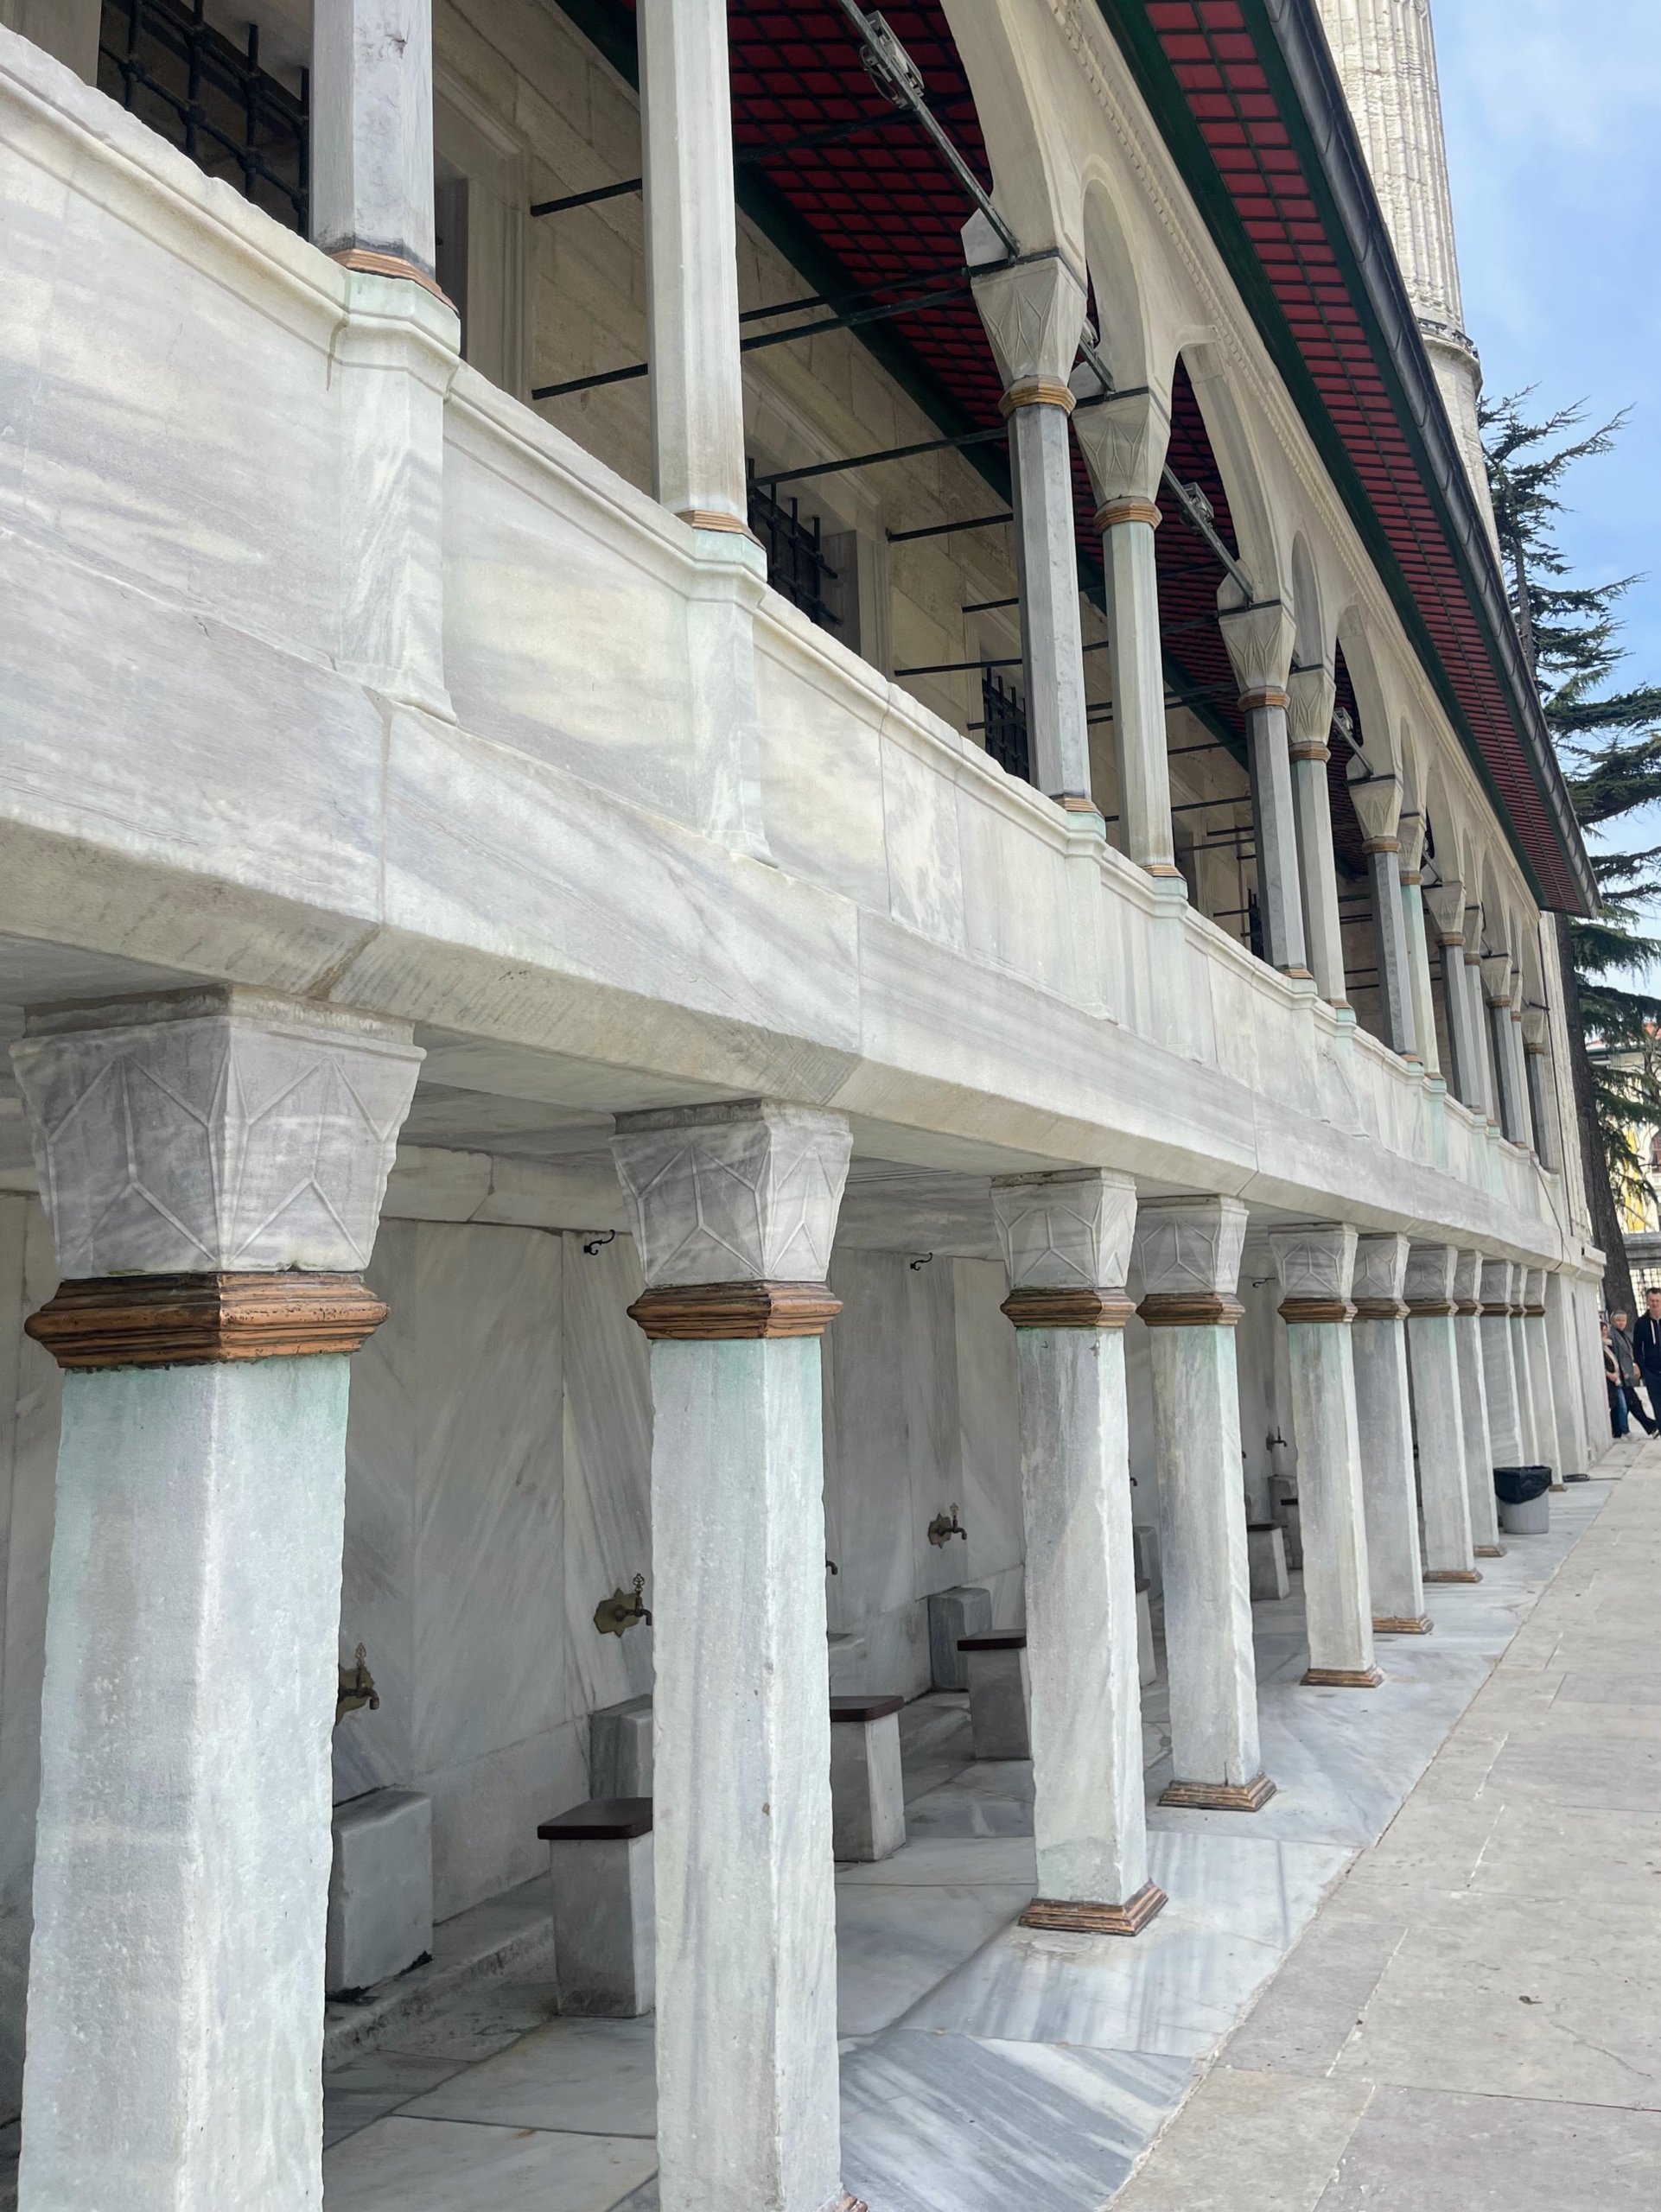
Across the street is the Blue Mosque, officially the Sultan Ahmed Mosque, an Ottoman-era historical structure. It was constructed between 1609 and 1617 and remains a functioning mosque today.
The exterior walls are light grey. The name “Blue Mosque” comes from the blue tiles used inside, which are predominantly blue but also feature shades of red, green, and white. The mosque has a central dome surrounded by four semi-domes over the prayer hall. It also has a large courtyard flanked by six minarets.
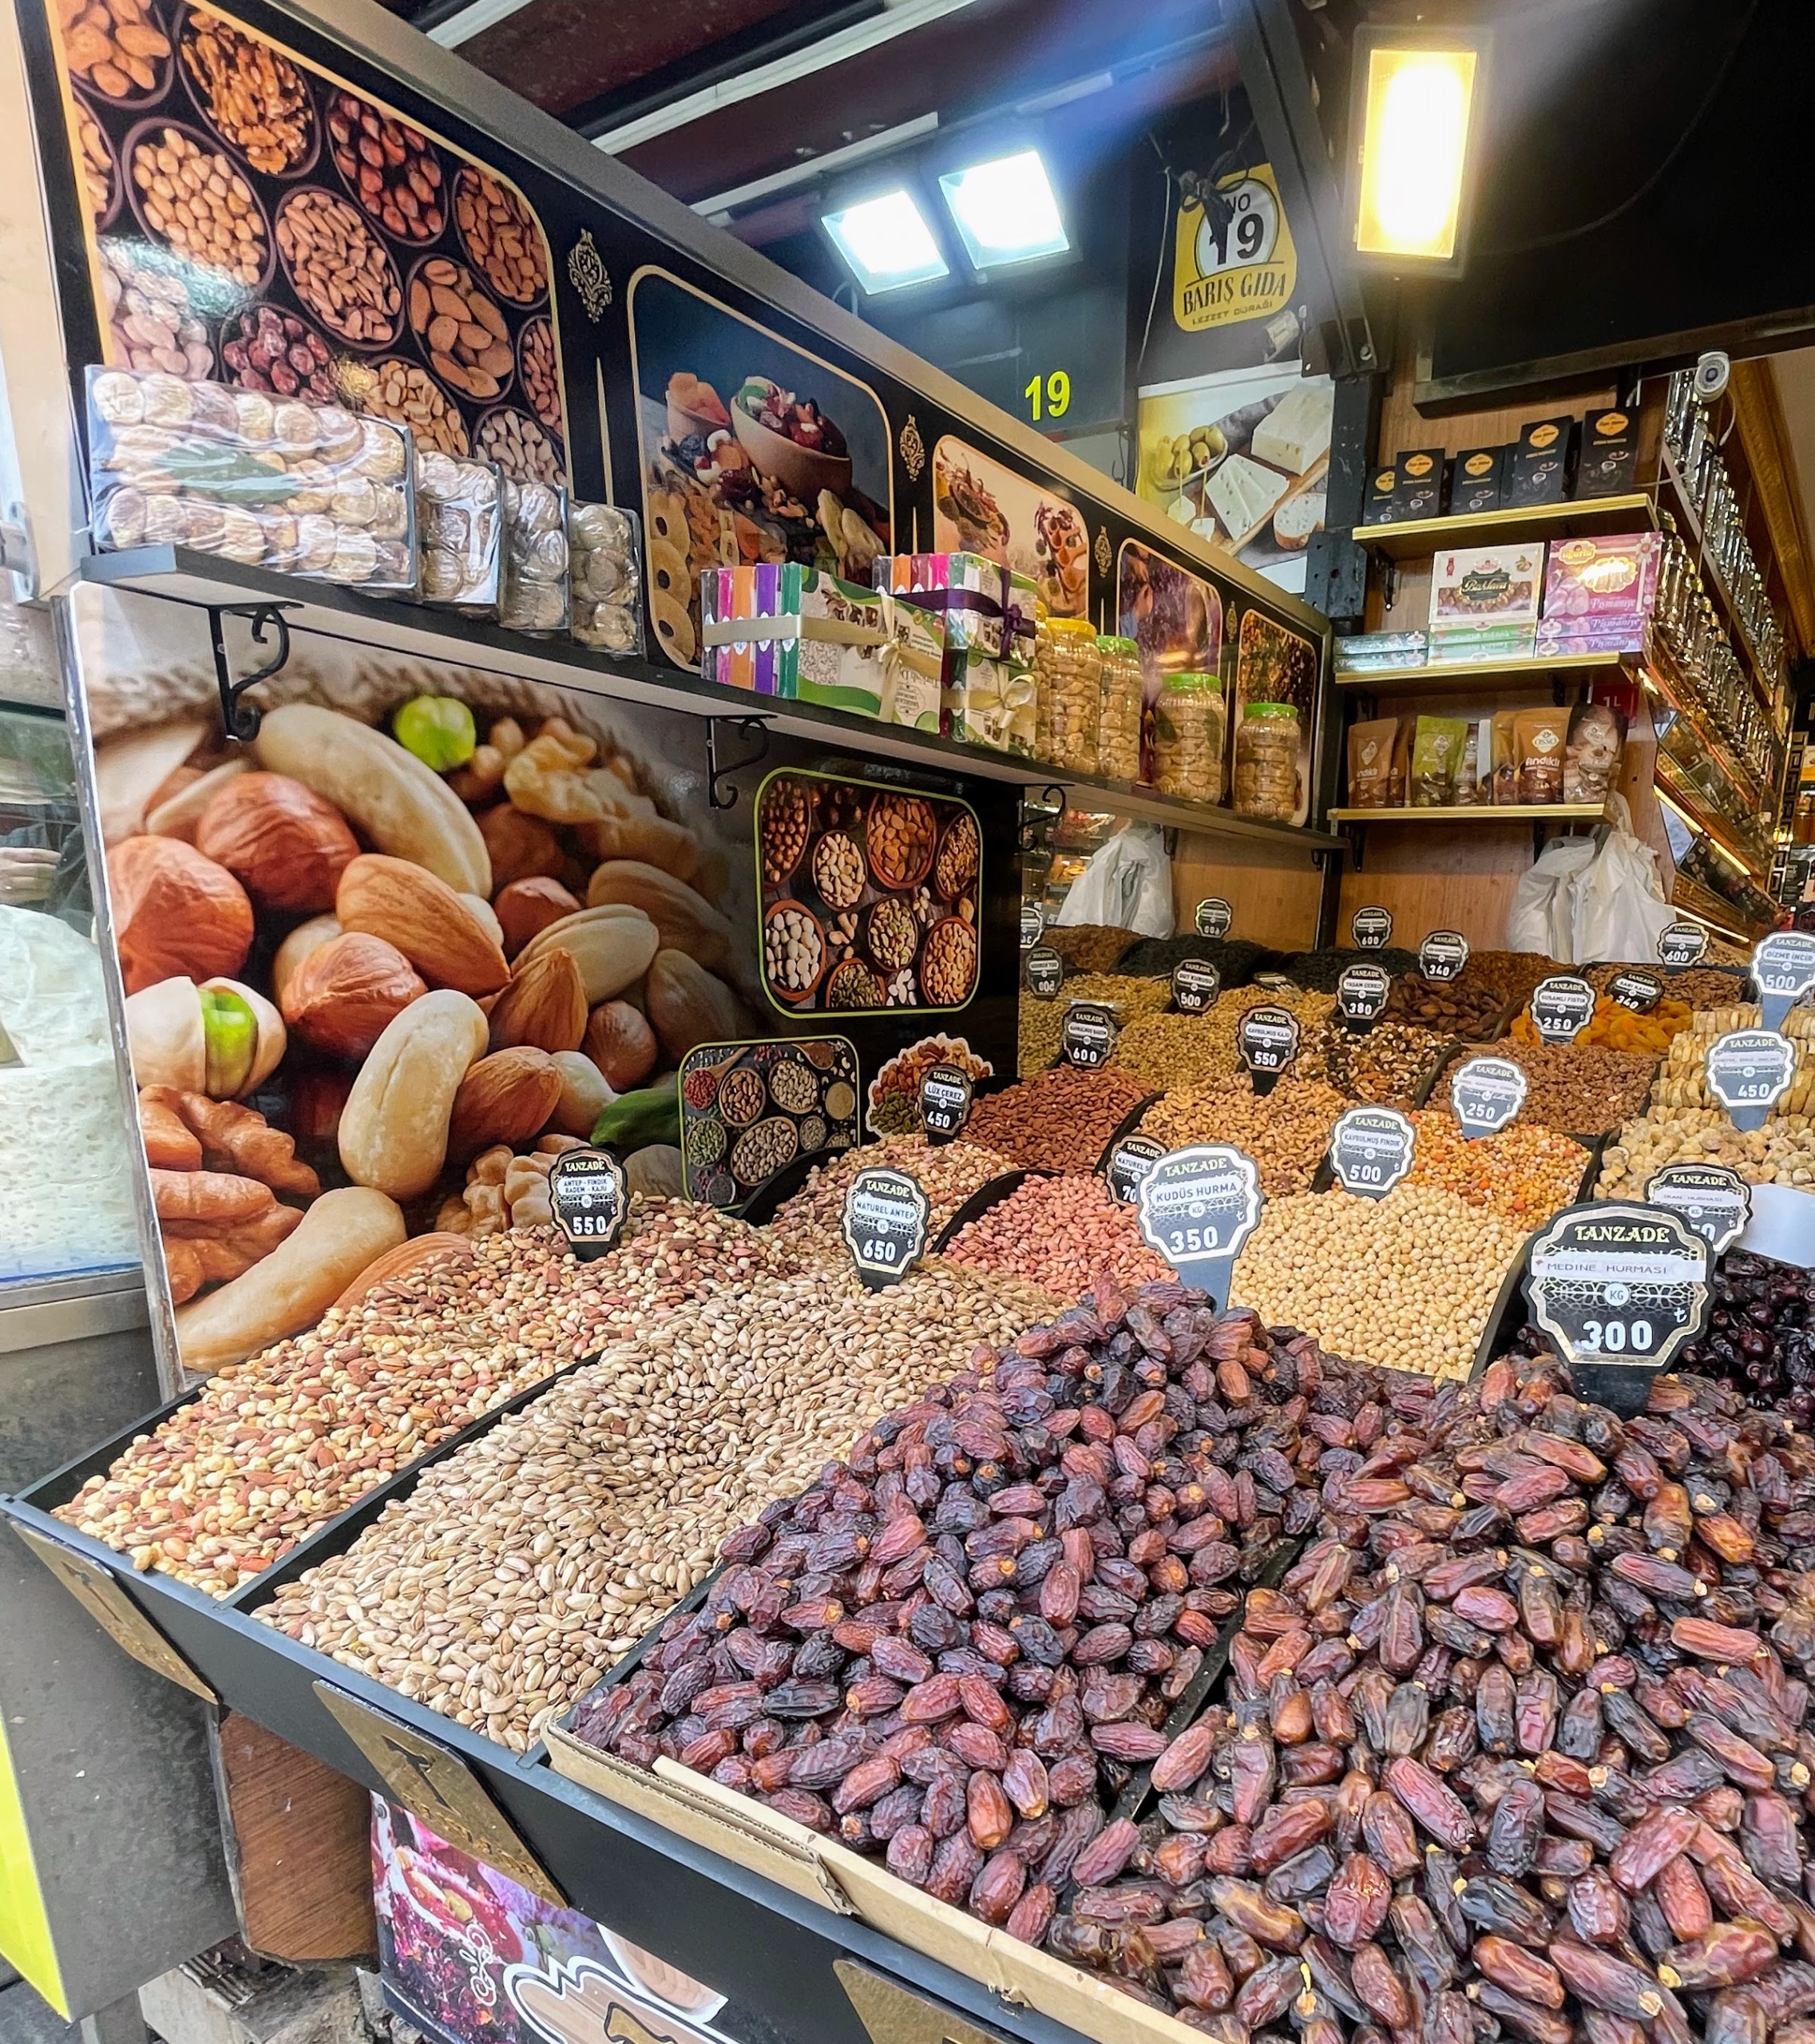
Chhiring and his family visited the busy bazaars of the Istanbul Market. One can find almost anything here including lots of candies.
This booth specializes in dates and nuts etc.
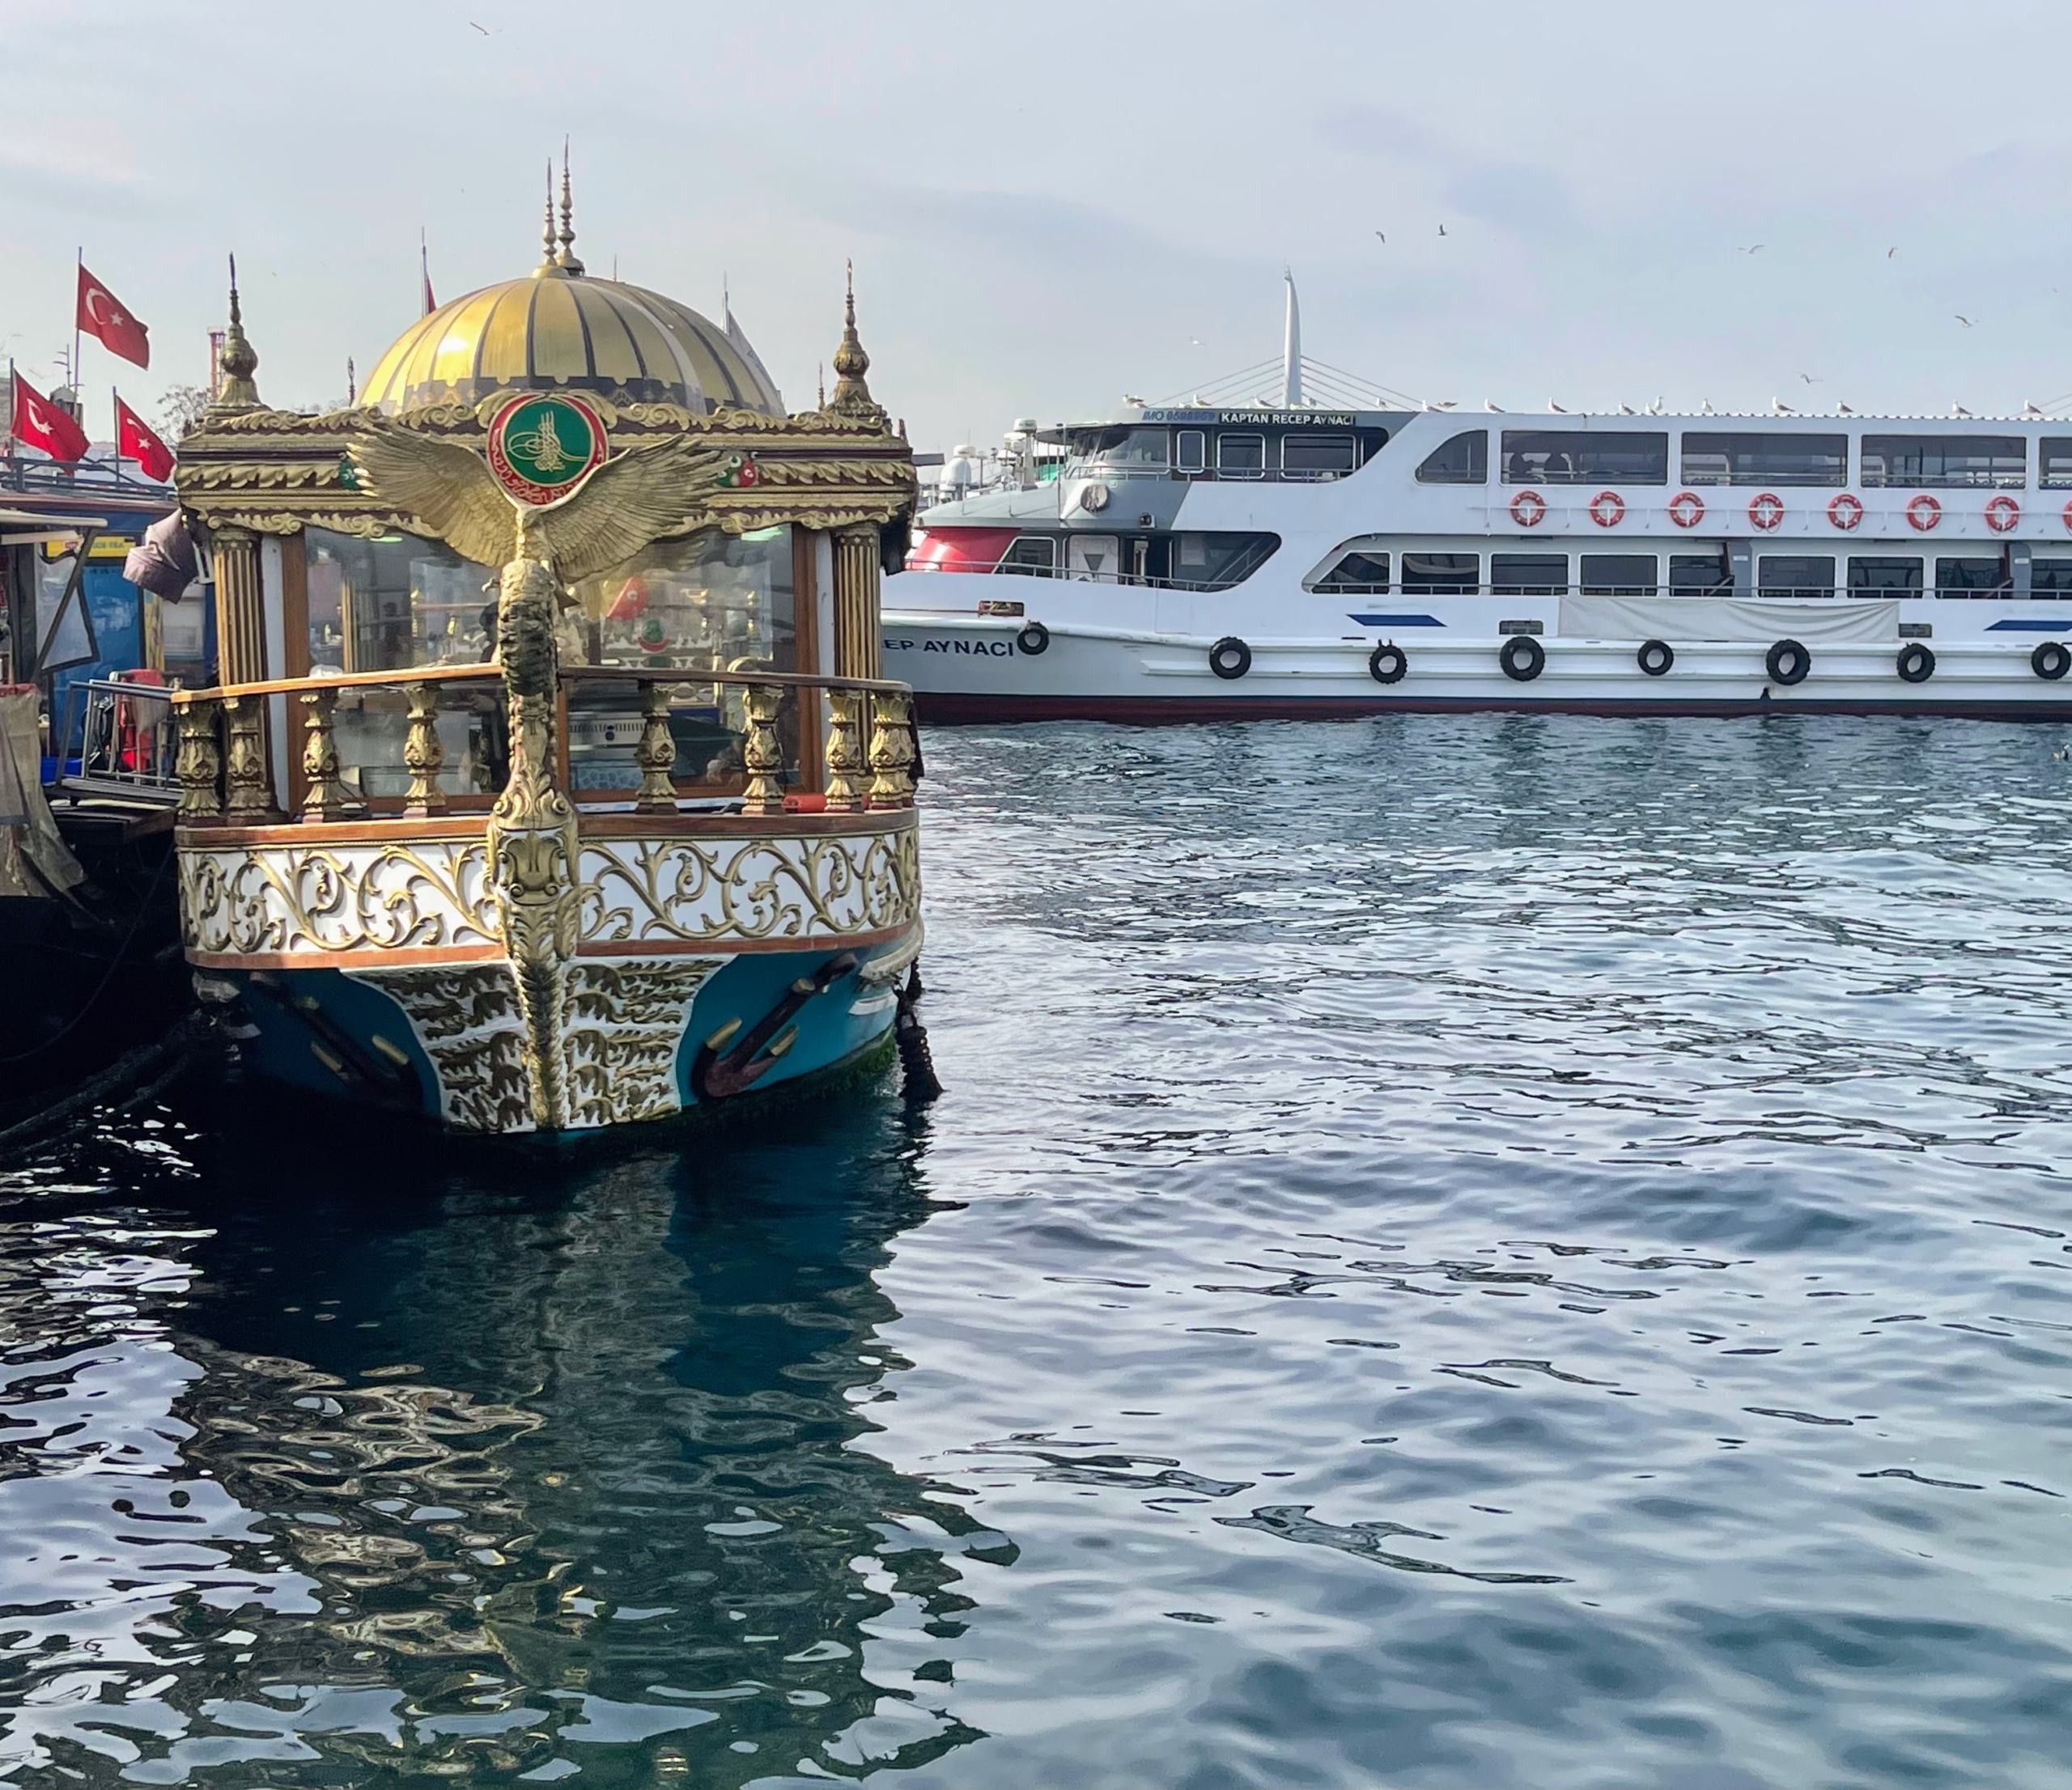
Turkey’s water transportation is very popular, especially in cities like Istanbul, where ferries are a common mode of travel.
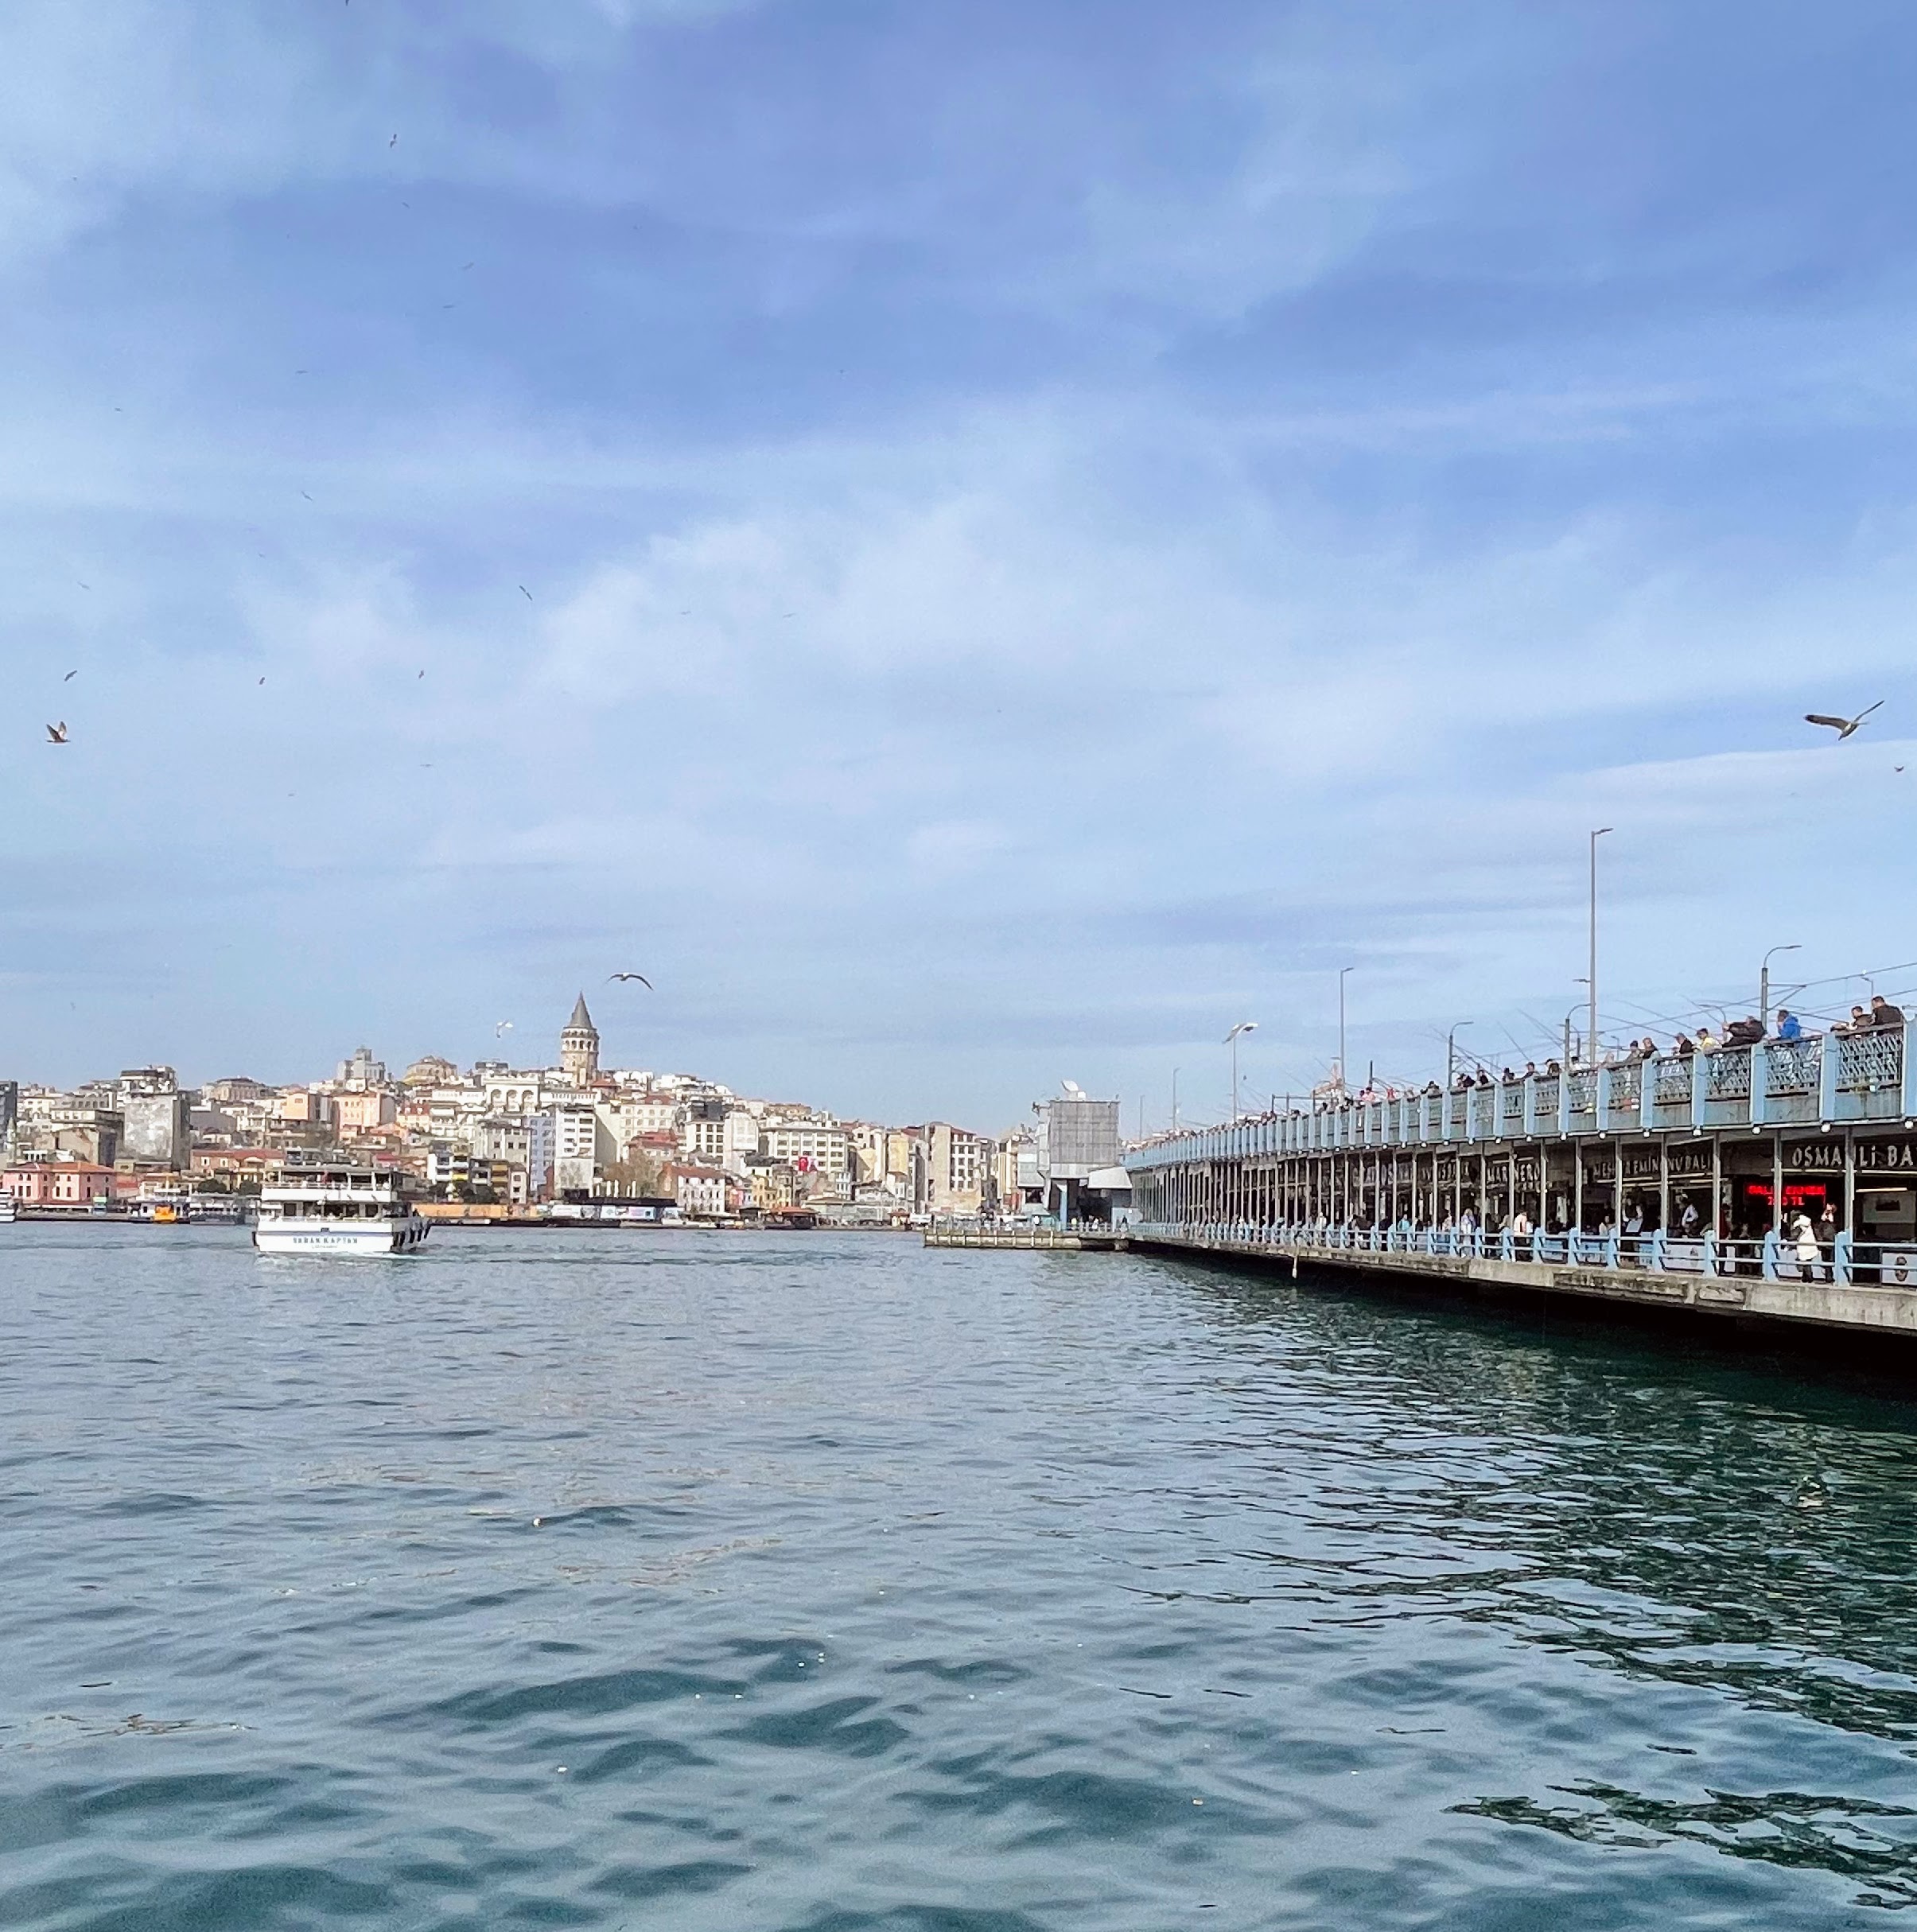
Locals also enjoy fishing off the Galata Bridge. The Galata Bridge is a 1607 foot long drawbridge located in the Golden Horn estuary, which unites the old Istanbul with the newer areas. Traveling is a great way to learn about a new city or country and its culture. As I always say, “learn something new every day.” Thanks for sharing your photos, Chhiring.
Business gatherings are always more enjoyable when accompanied by a delicious meal.
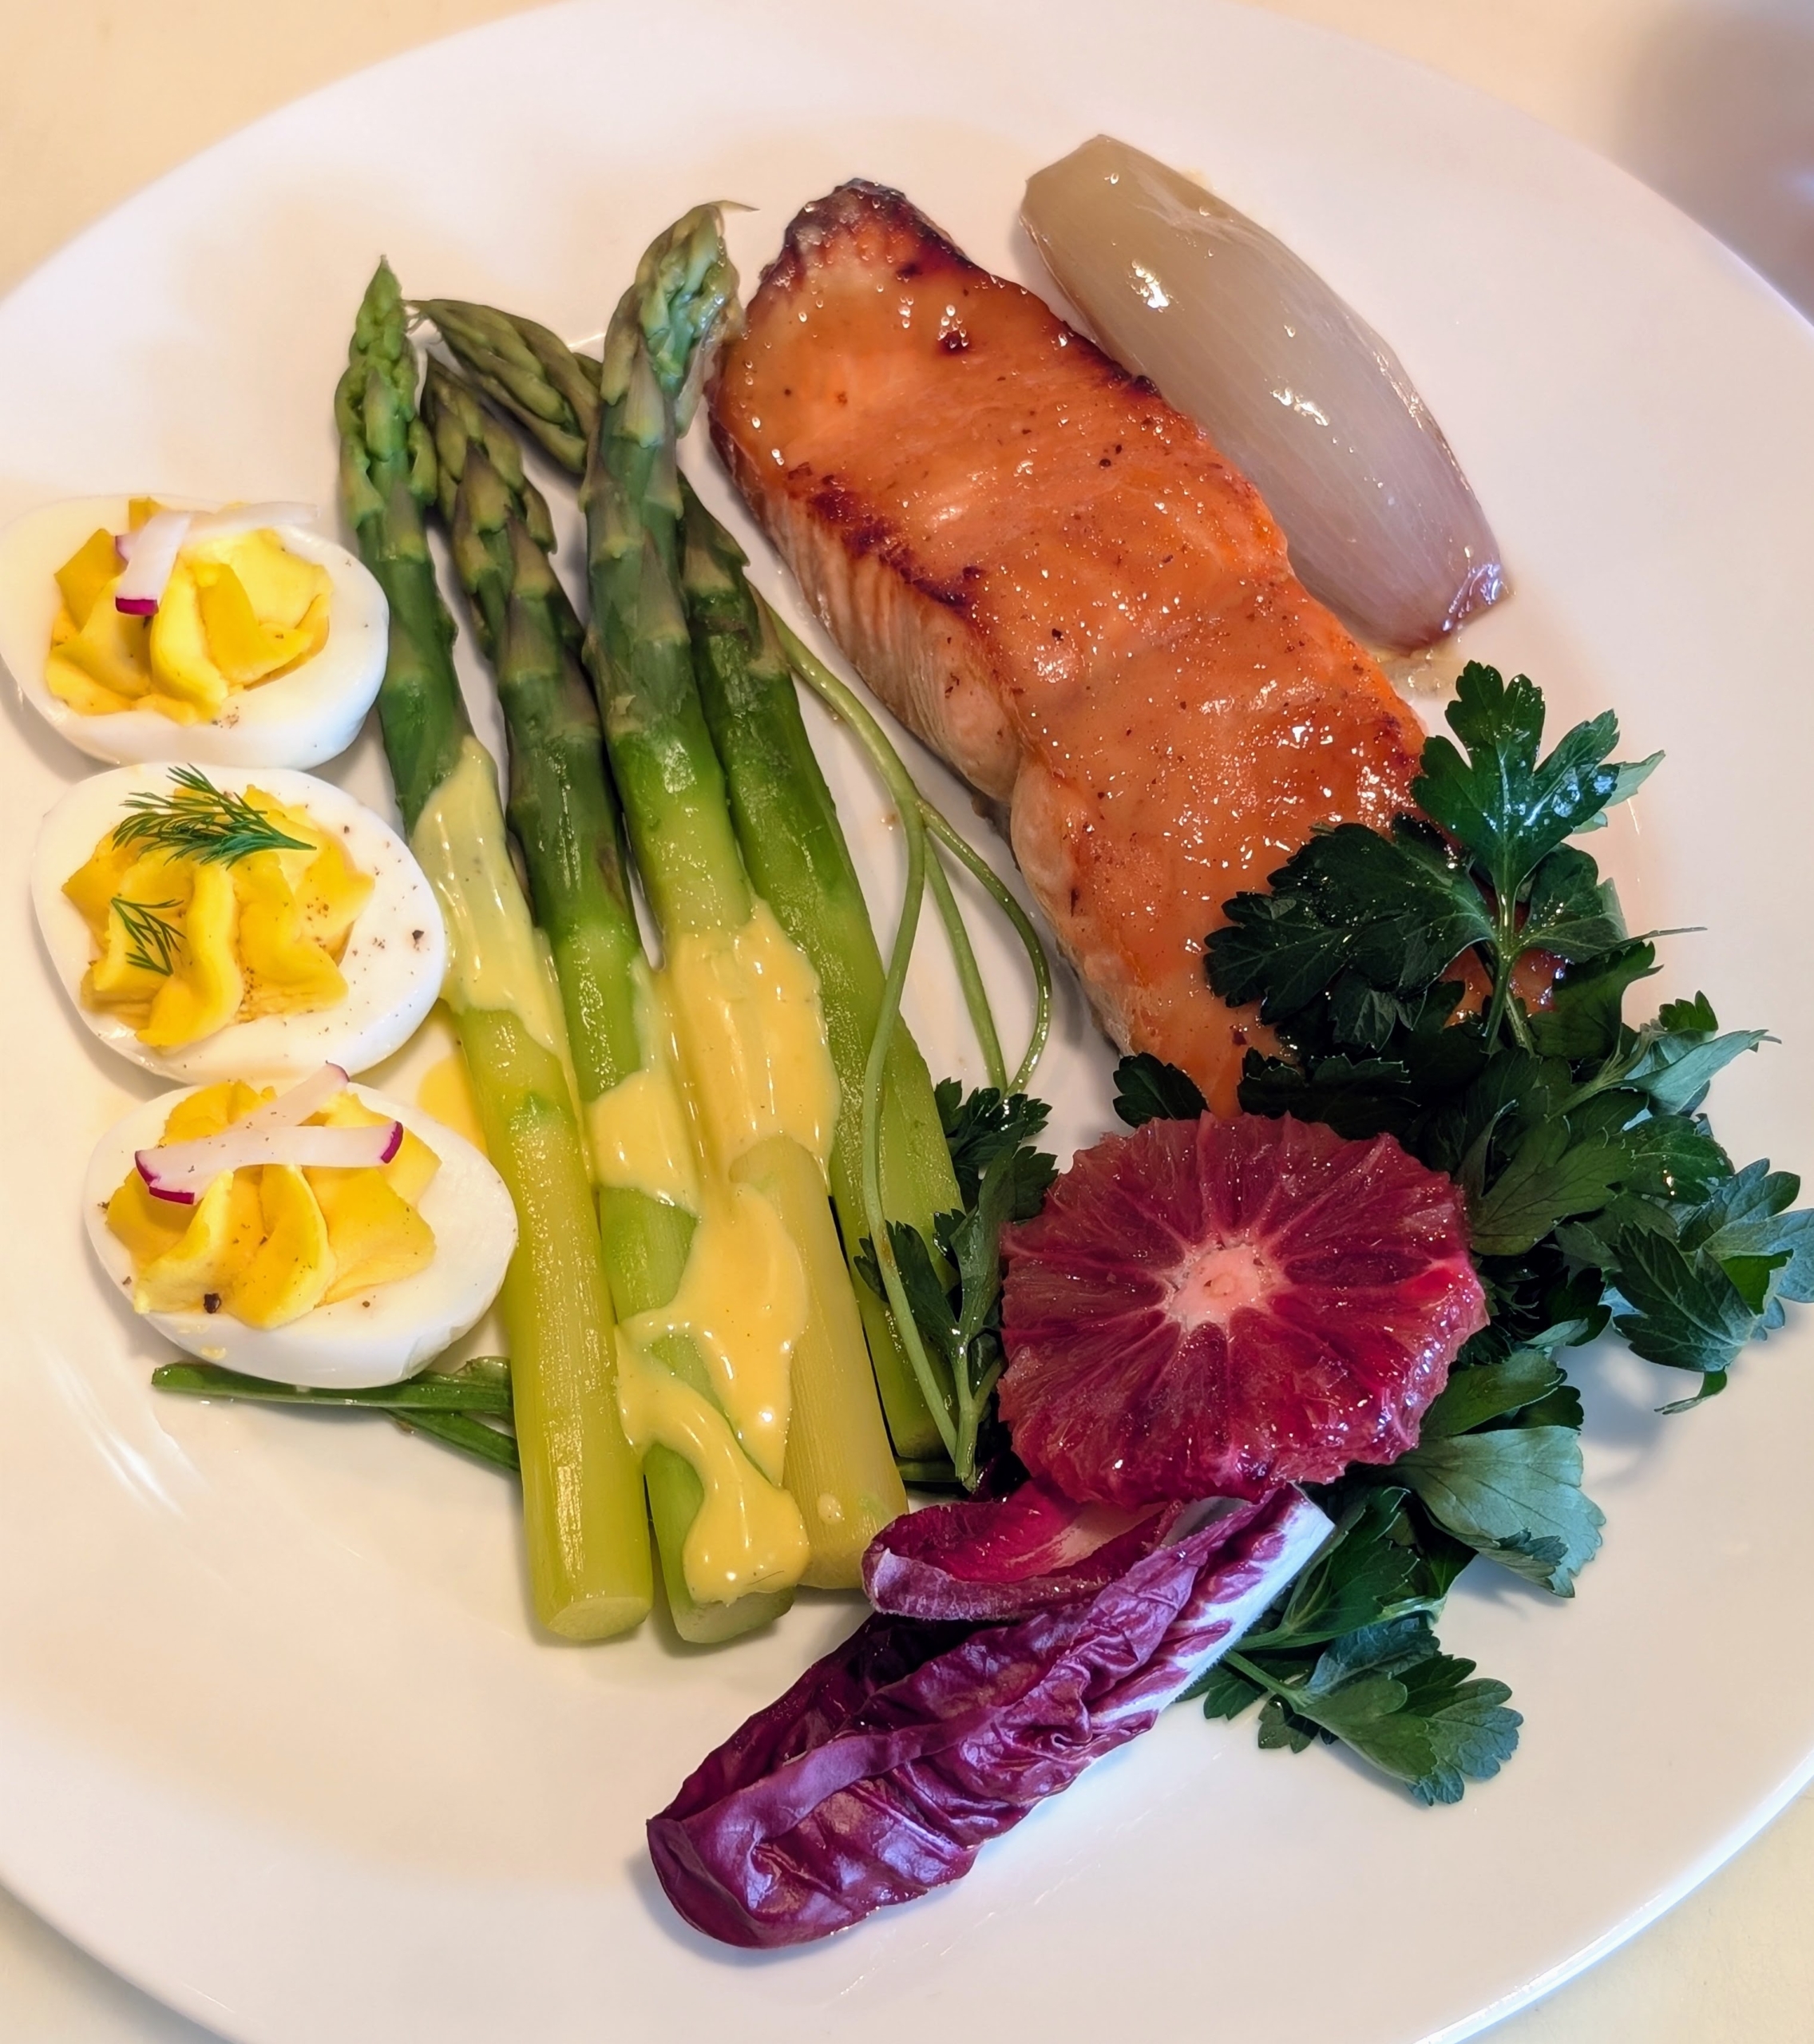
Last week following a busy morning at my farm, I hosted a luncheon for a group of nine guests. Chef Molly Wenk, who has worked with me on many television and video food productions, and I, collaborated on a wonderful menu that included endive and radicchio salad with blood orange and a citrus vinaigrette dressing, poached asparagus with Hollandaise sauce, broiled salmon with a honey mustard glaze served with shallot confit, deviled eggs, and for dessert - a variety of homemade cookies to eat right away or take home. Many of the recipes are from my 100th book New York Times Best Seller, MARTHA, THE COOKBOOK: Lessons and Stories from My Kitchen.
Enjoy these photos.
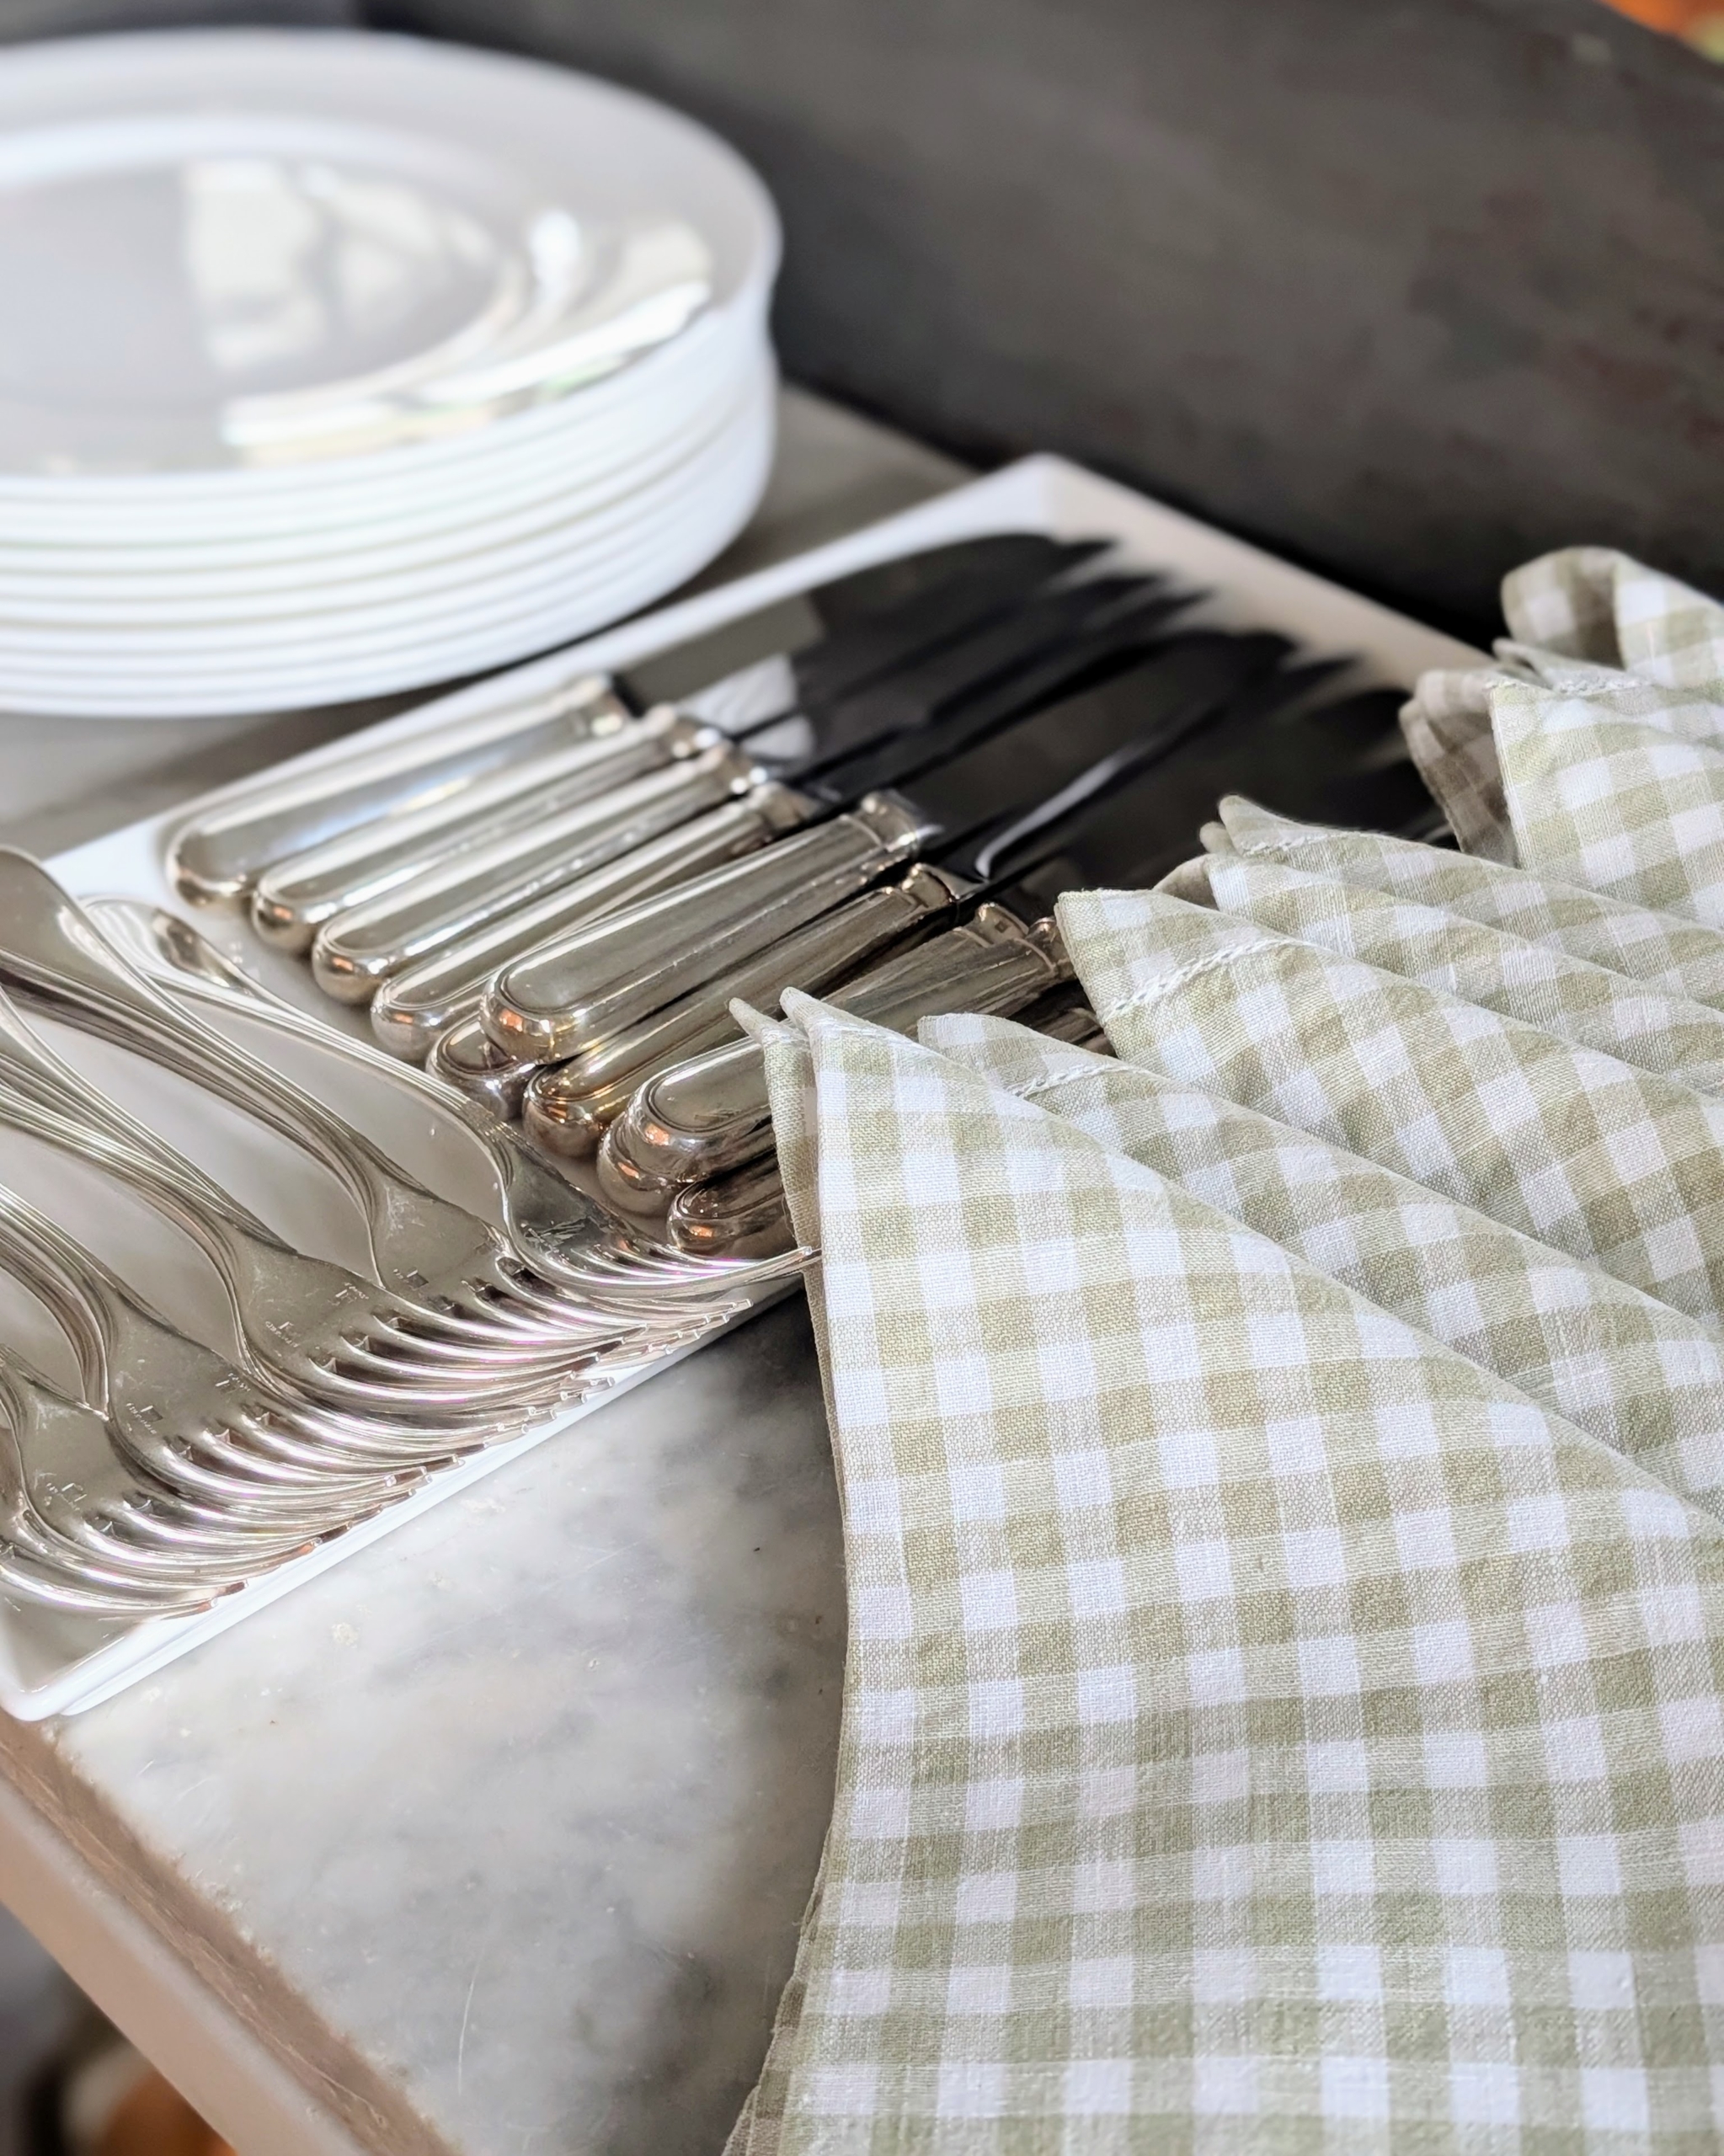
Oftentimes when I host small, casual business luncheons at my farm it is done buffet style, meaning my guests serve themselves from a variety of dishes set out in my servery.
And then we all gather and eat at my long kitchen counter decorated with plants or seasonal flowers.
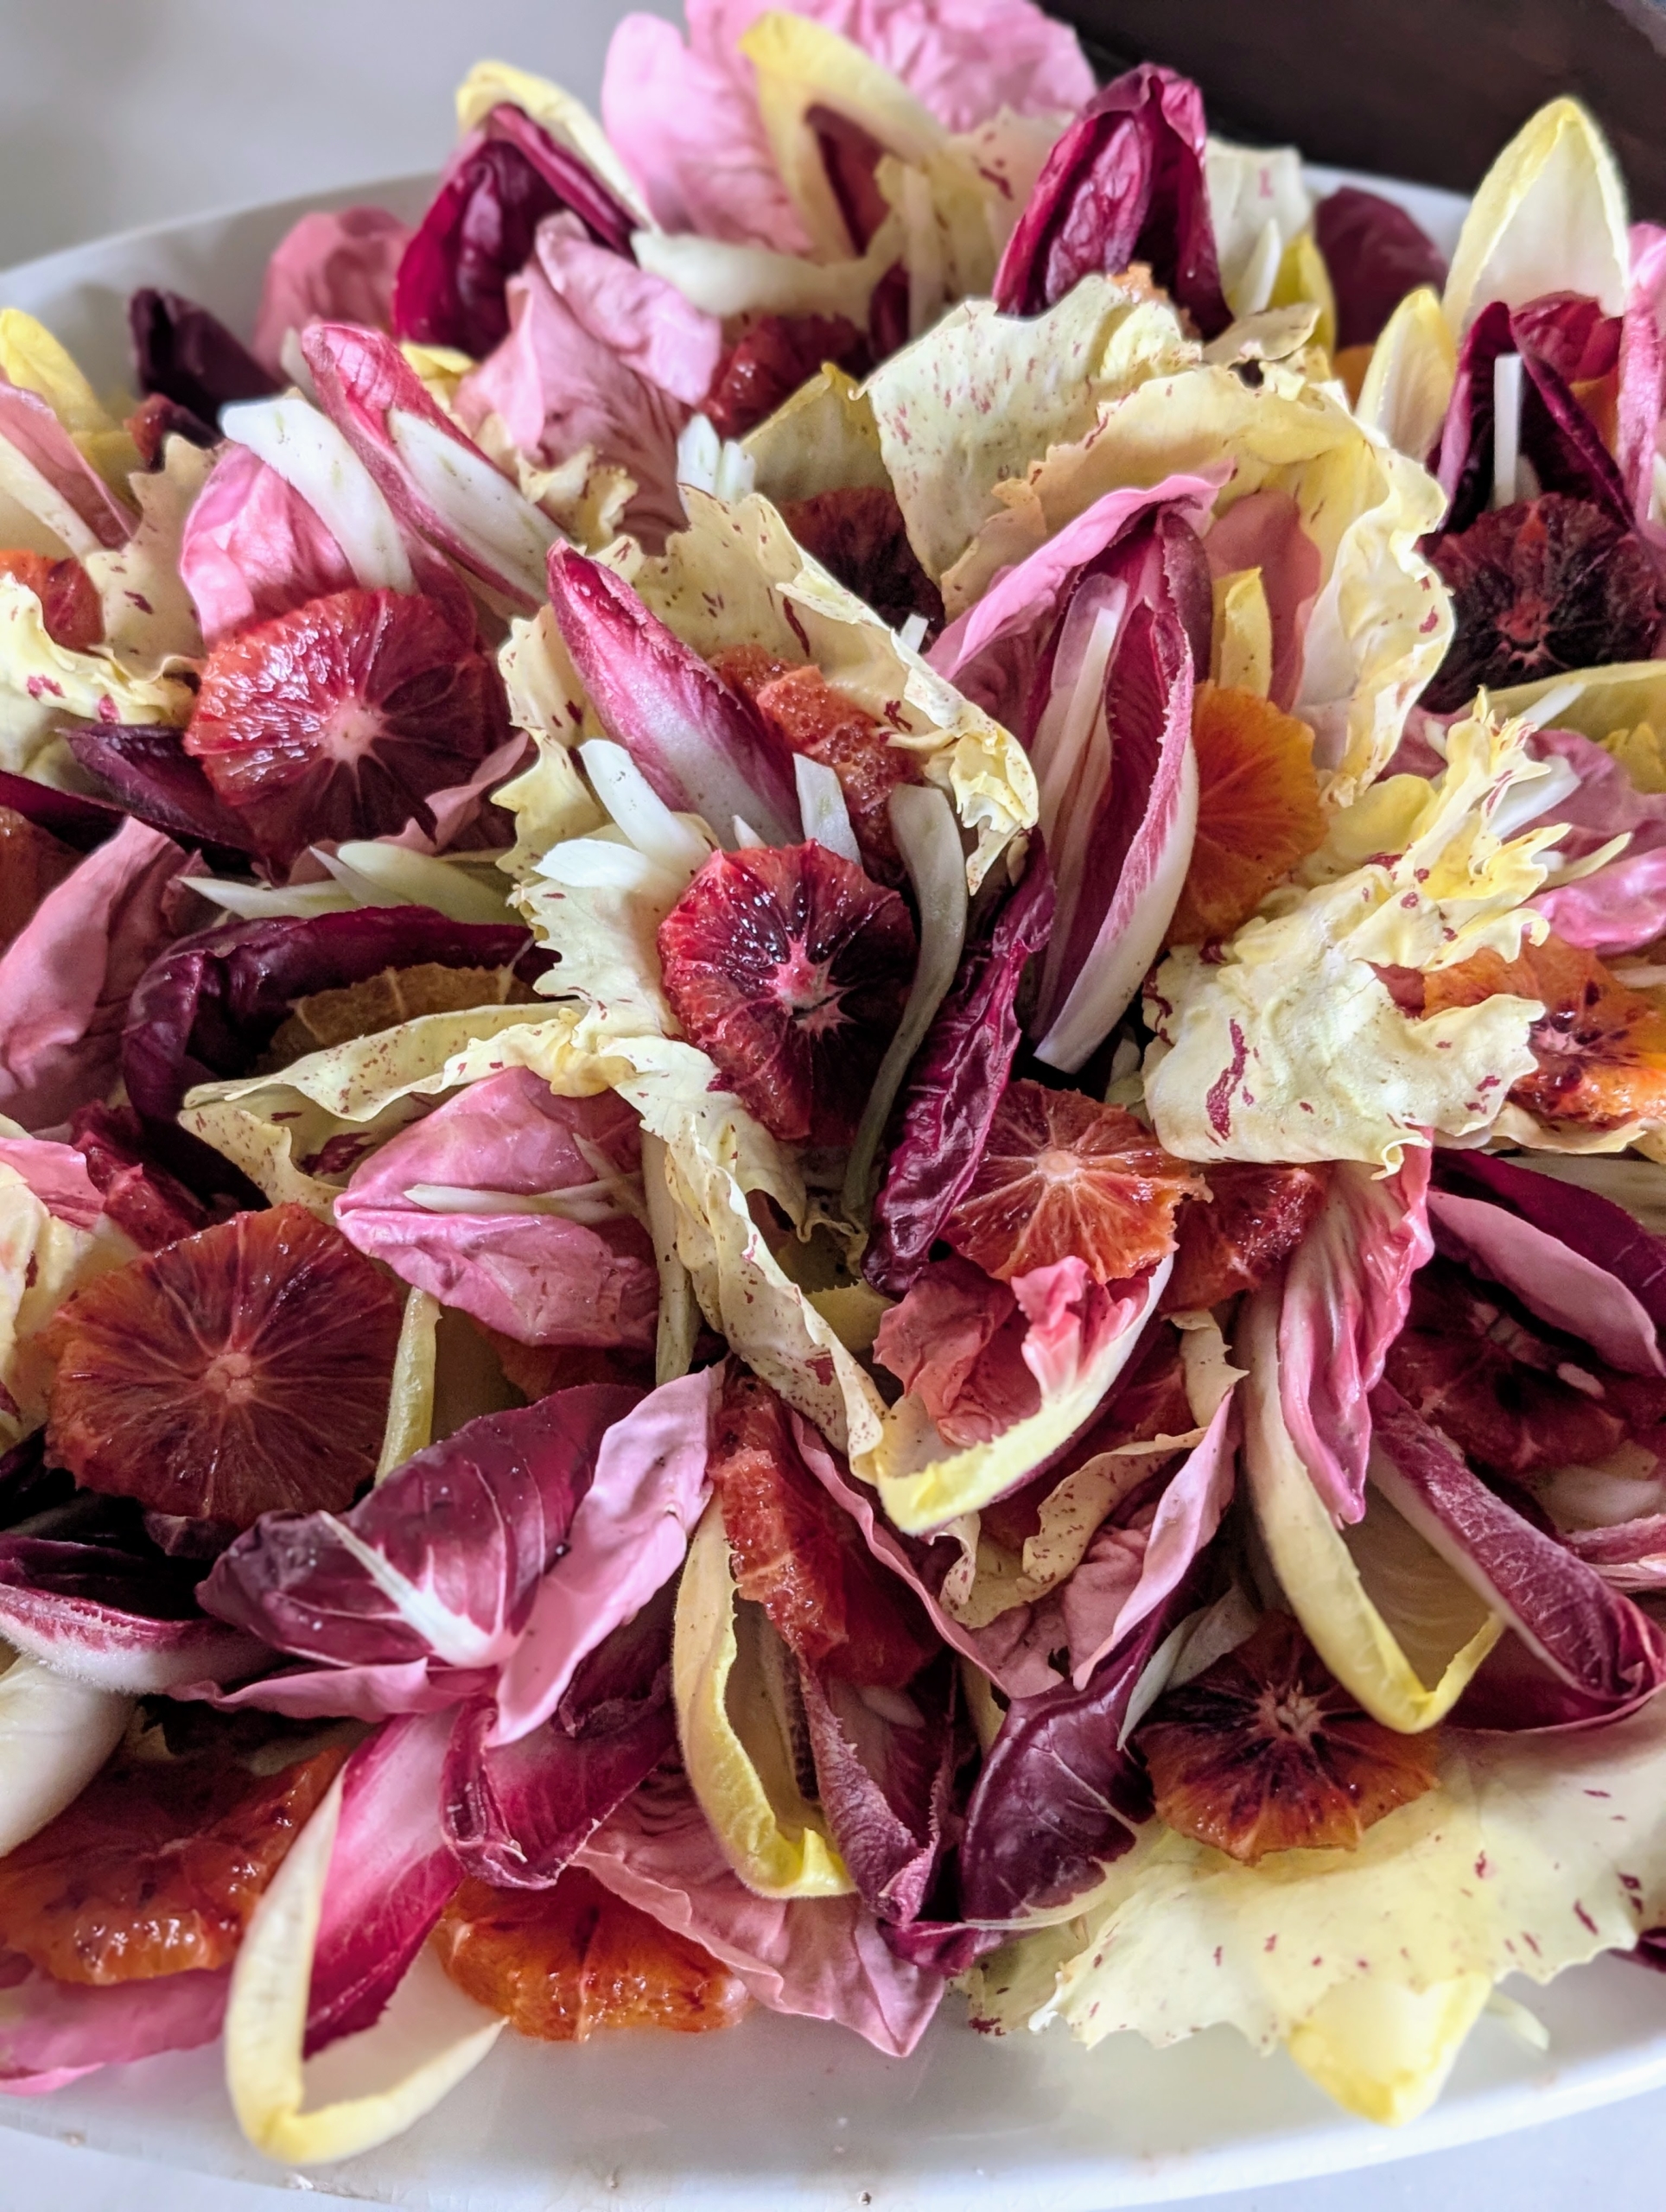
This lunch was so refreshing. I served this wonderful endive and radicchio salad with slices of blood oranges and drizzled with a citrus vinaigrette. Both endive and radicchio are part of the chicory family. Endive has a mild, slightly bitter flavor, while radicchio tastes more bold and peppery – they are great together.
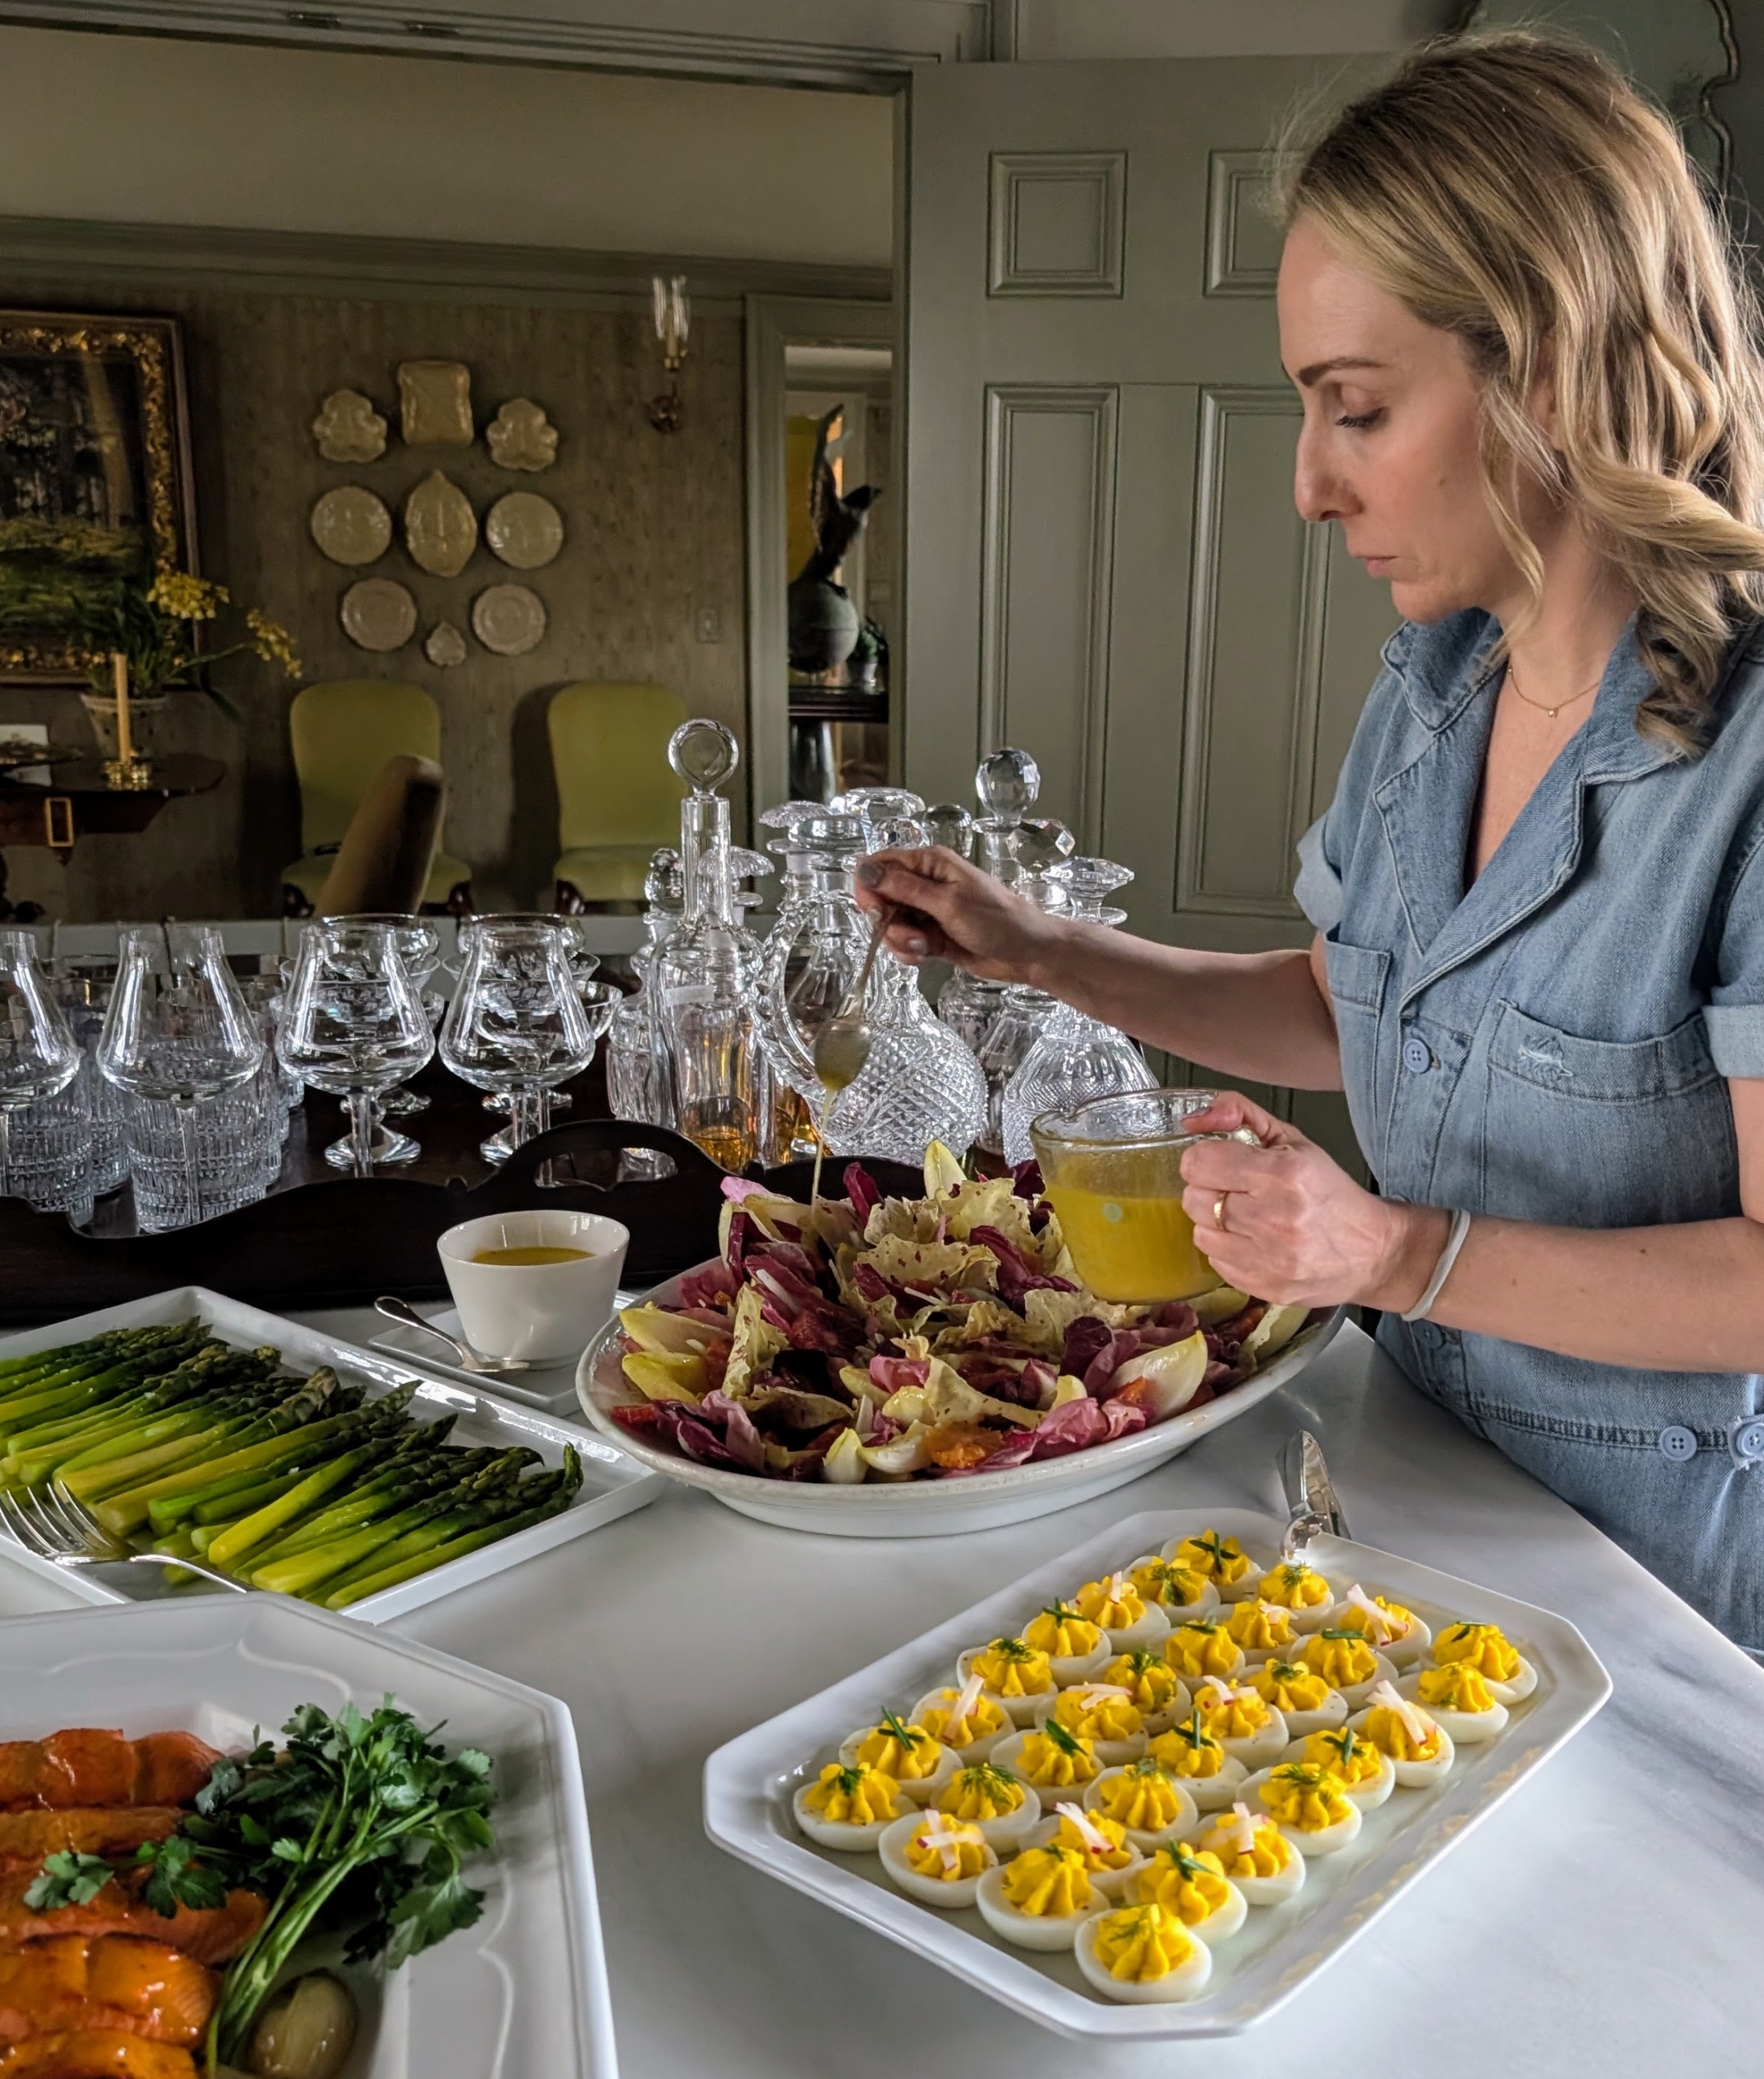
Molly dresses the salad right before guests begin serving themselves so it retains its best texture and flavor.
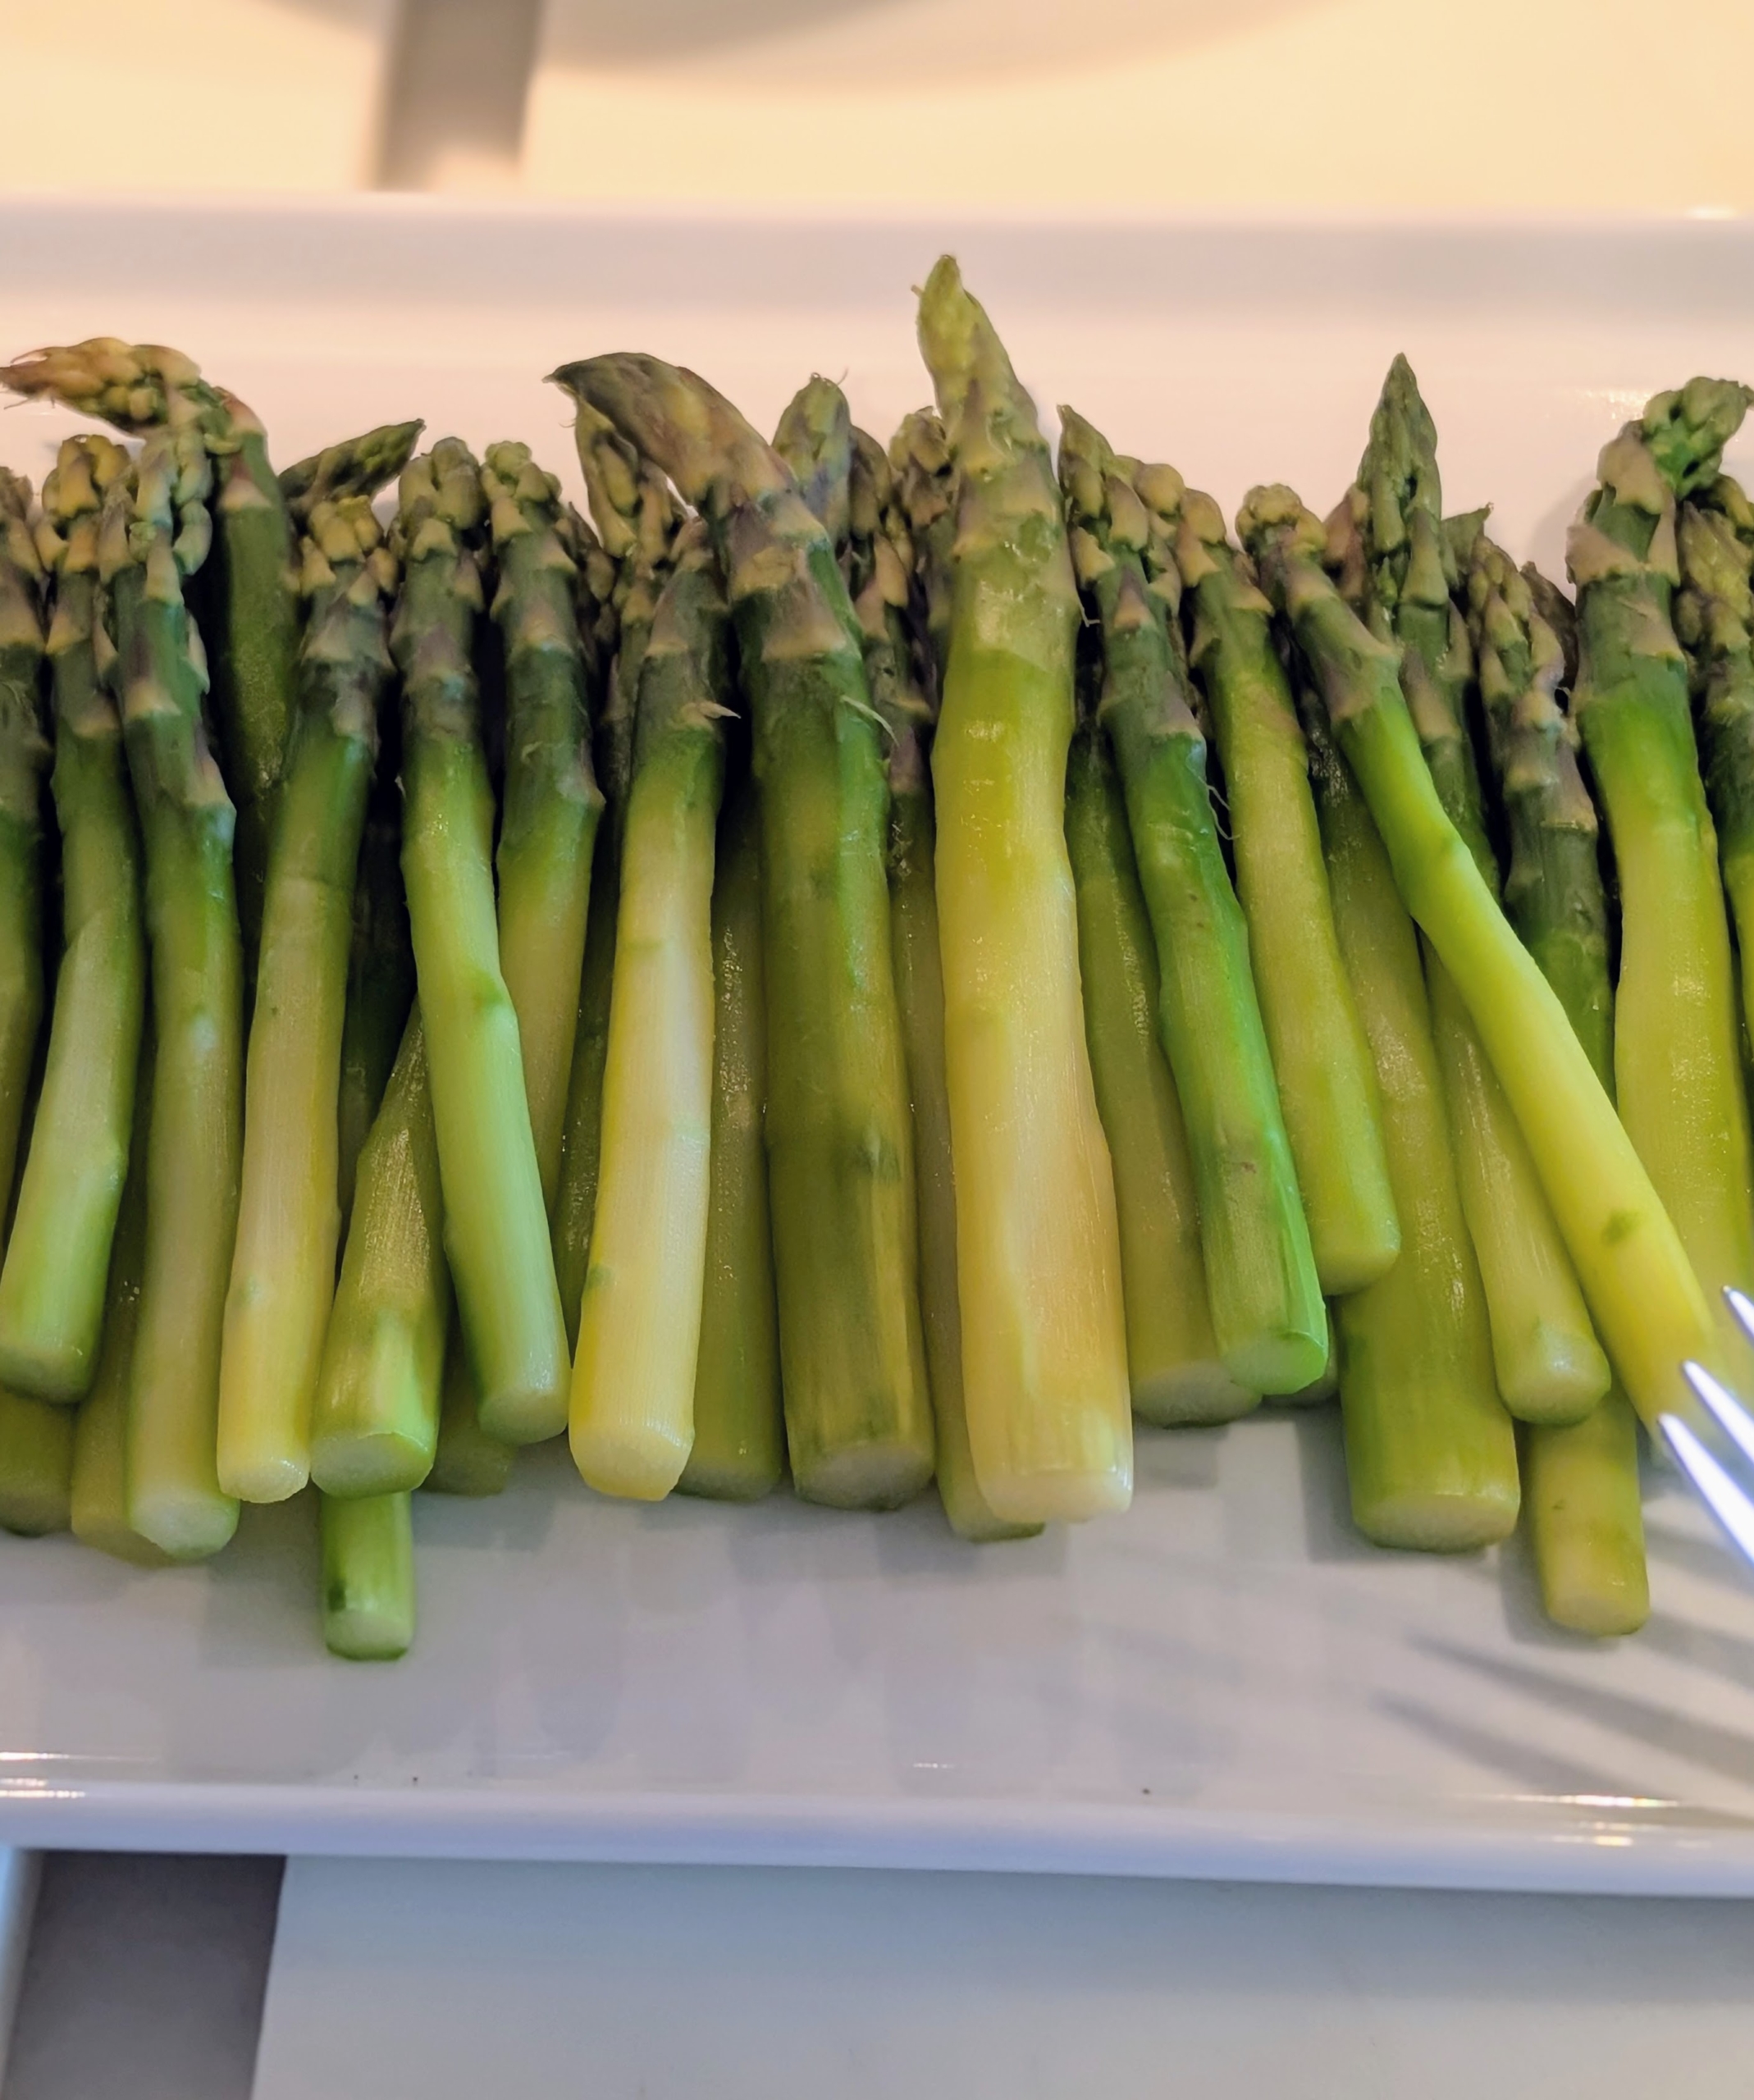
Asparagus is available year-round, but from now through May, it’s in peak season. These are poached asparagus stalks. Hollandaise is offered as a sauce when plating.
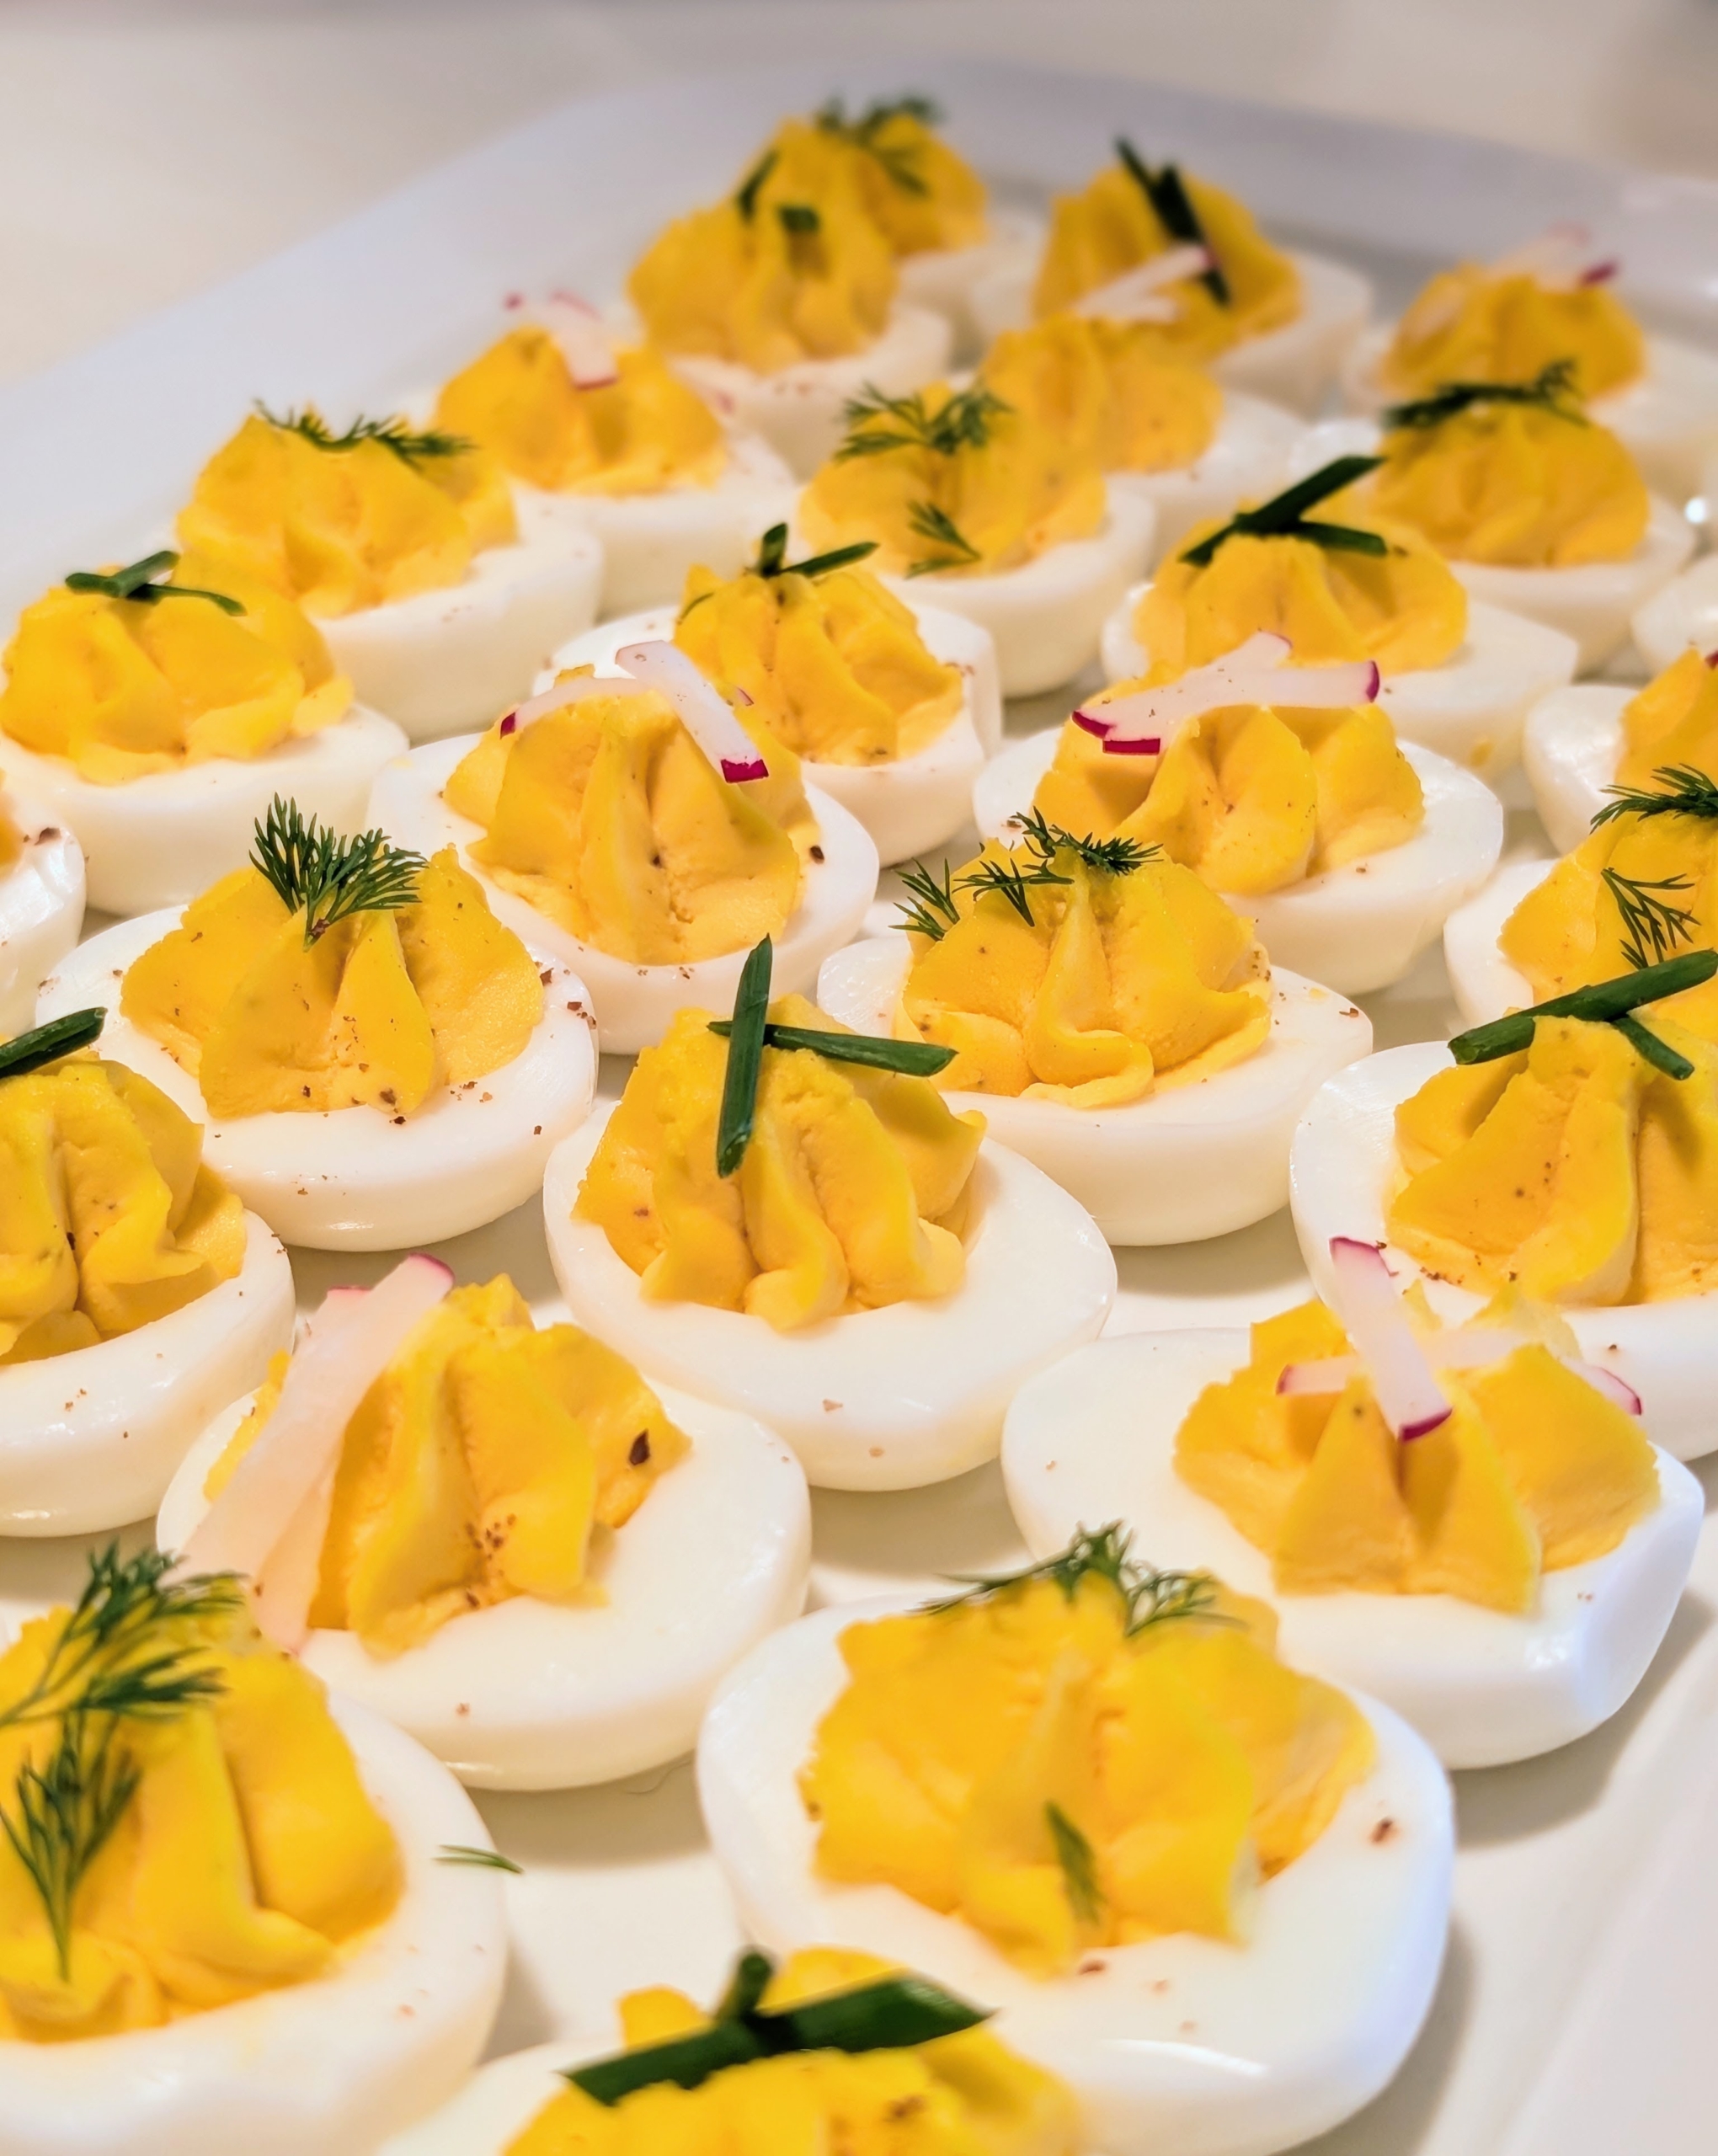
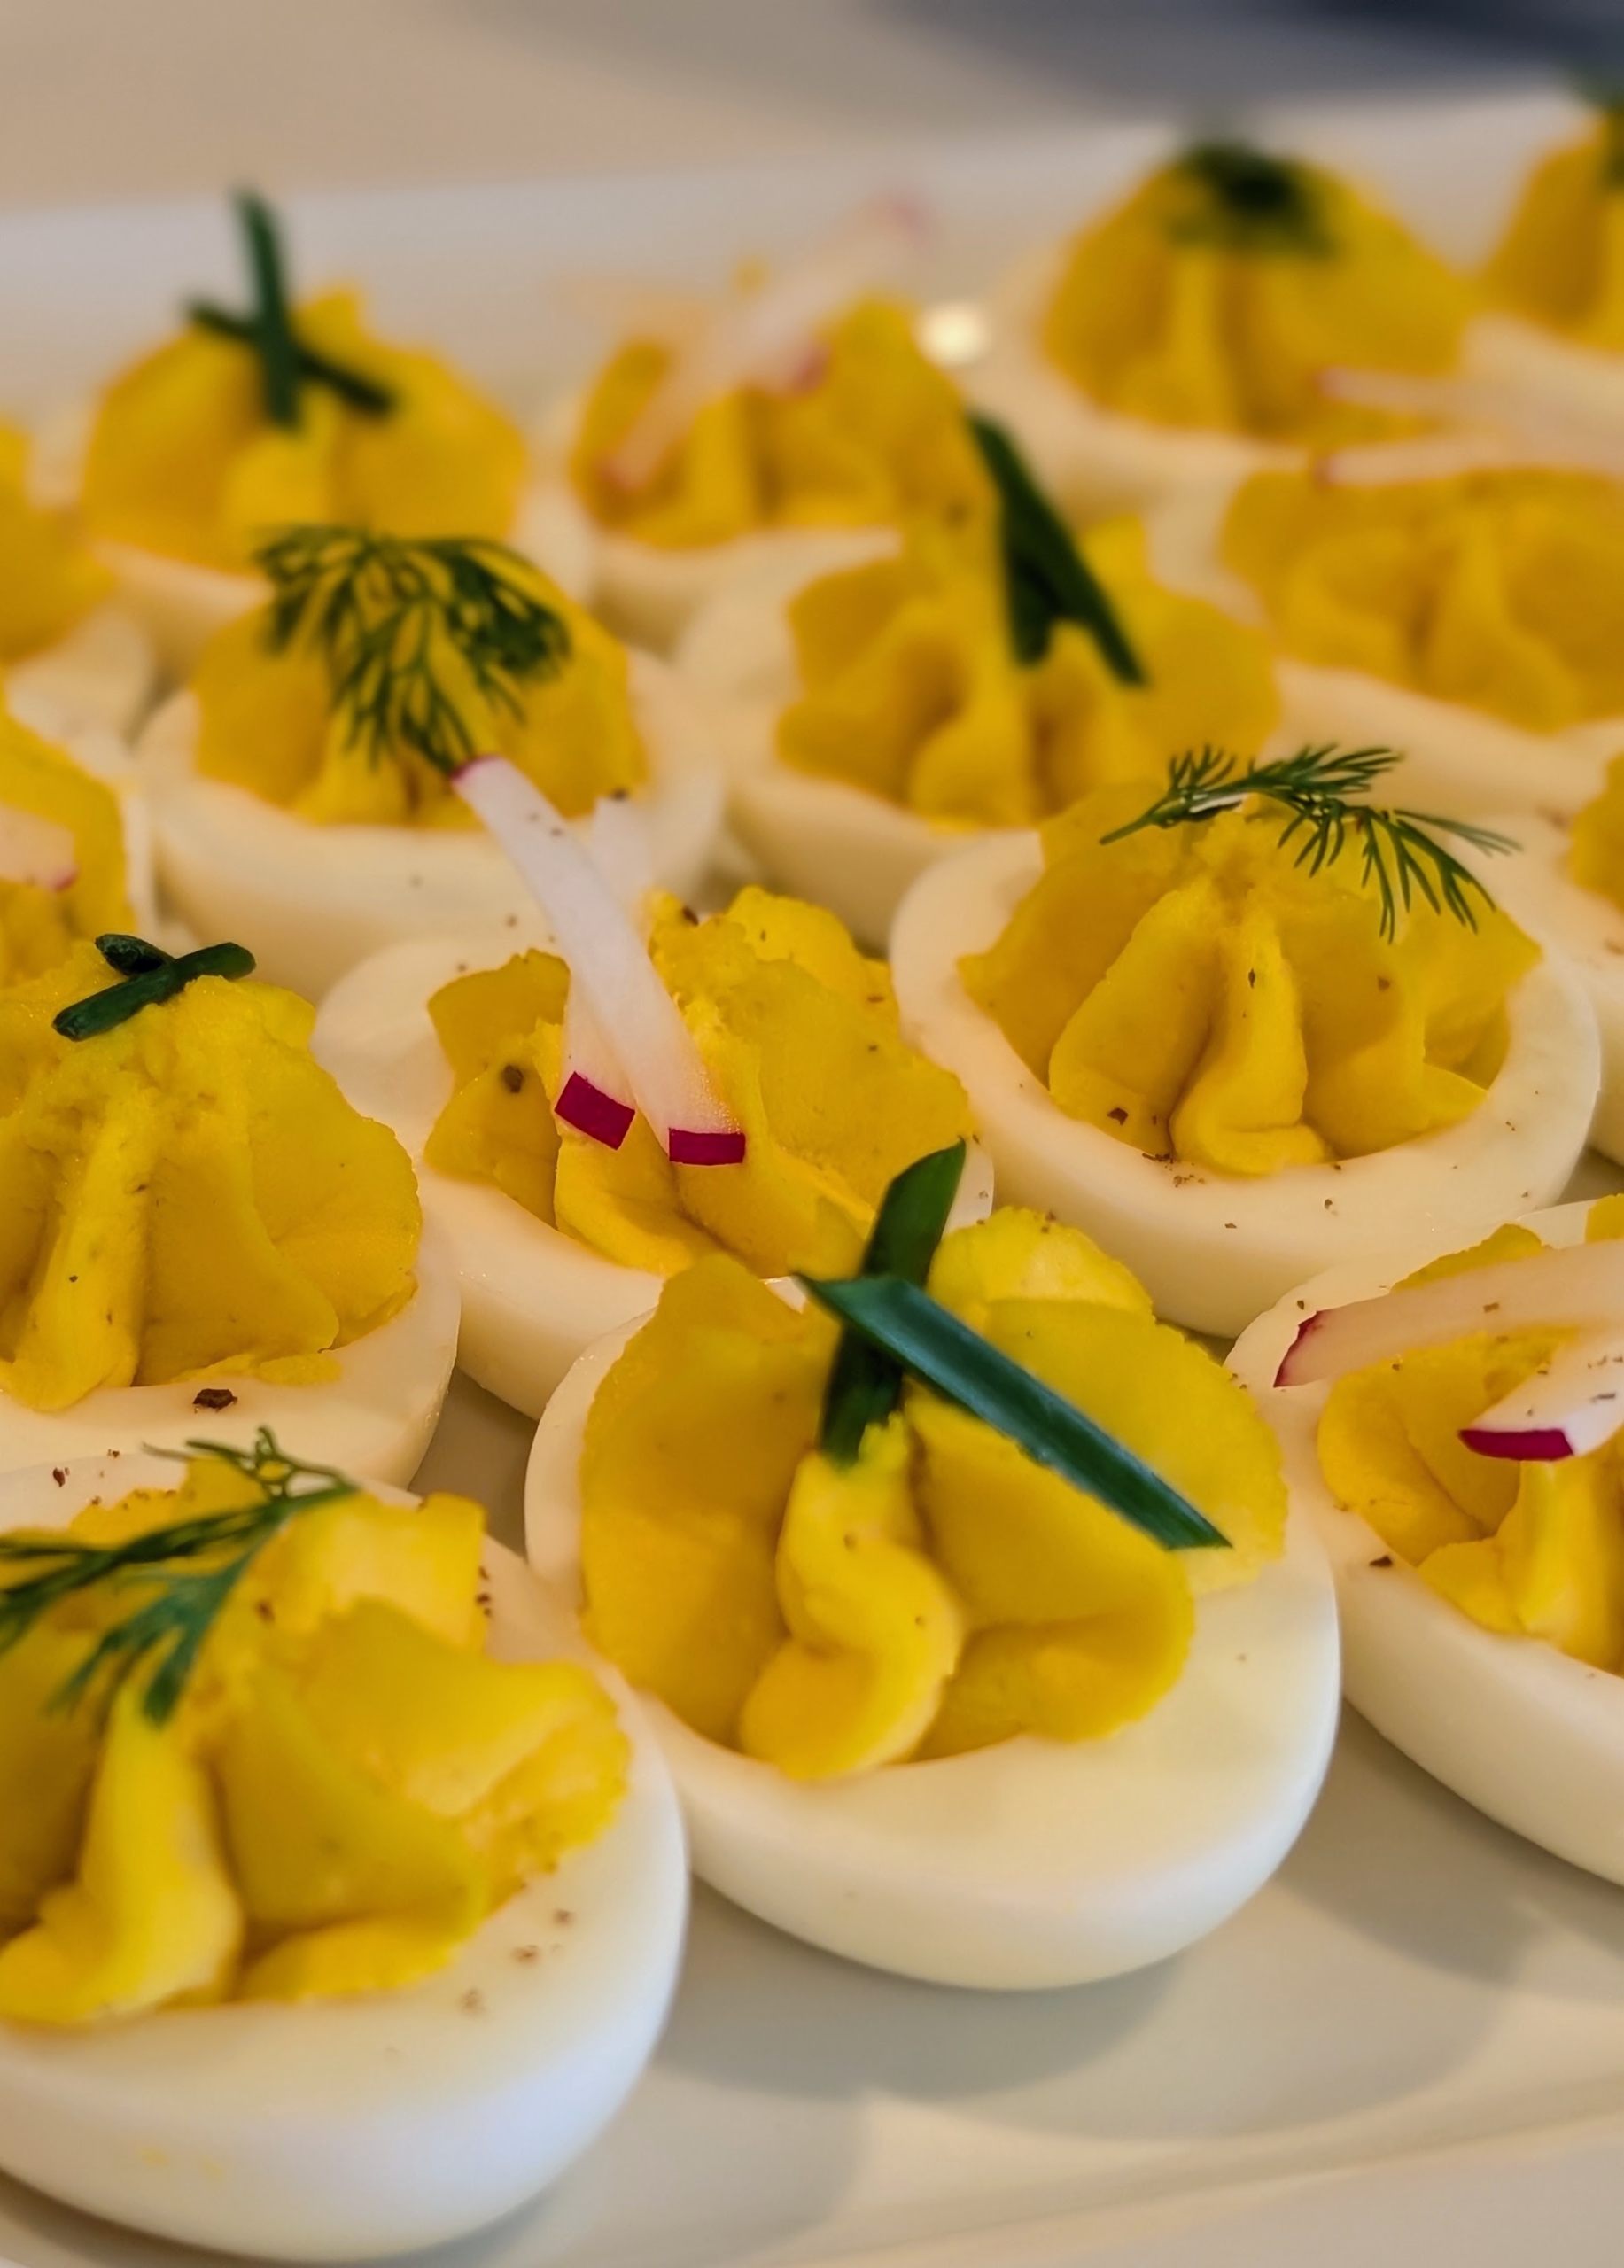
I also served these delicious deviled eggs. The recipe for mine is in my 100th book, MARTHA, THE COOKBOOK. I hope you have a copy.
Deviled eggs can be served with a variety of toppings, such as sprigs of dill, tarragon, or chives and sprinkled with paprika. And use small to medium sized eggs, which are the perfect mouthful.
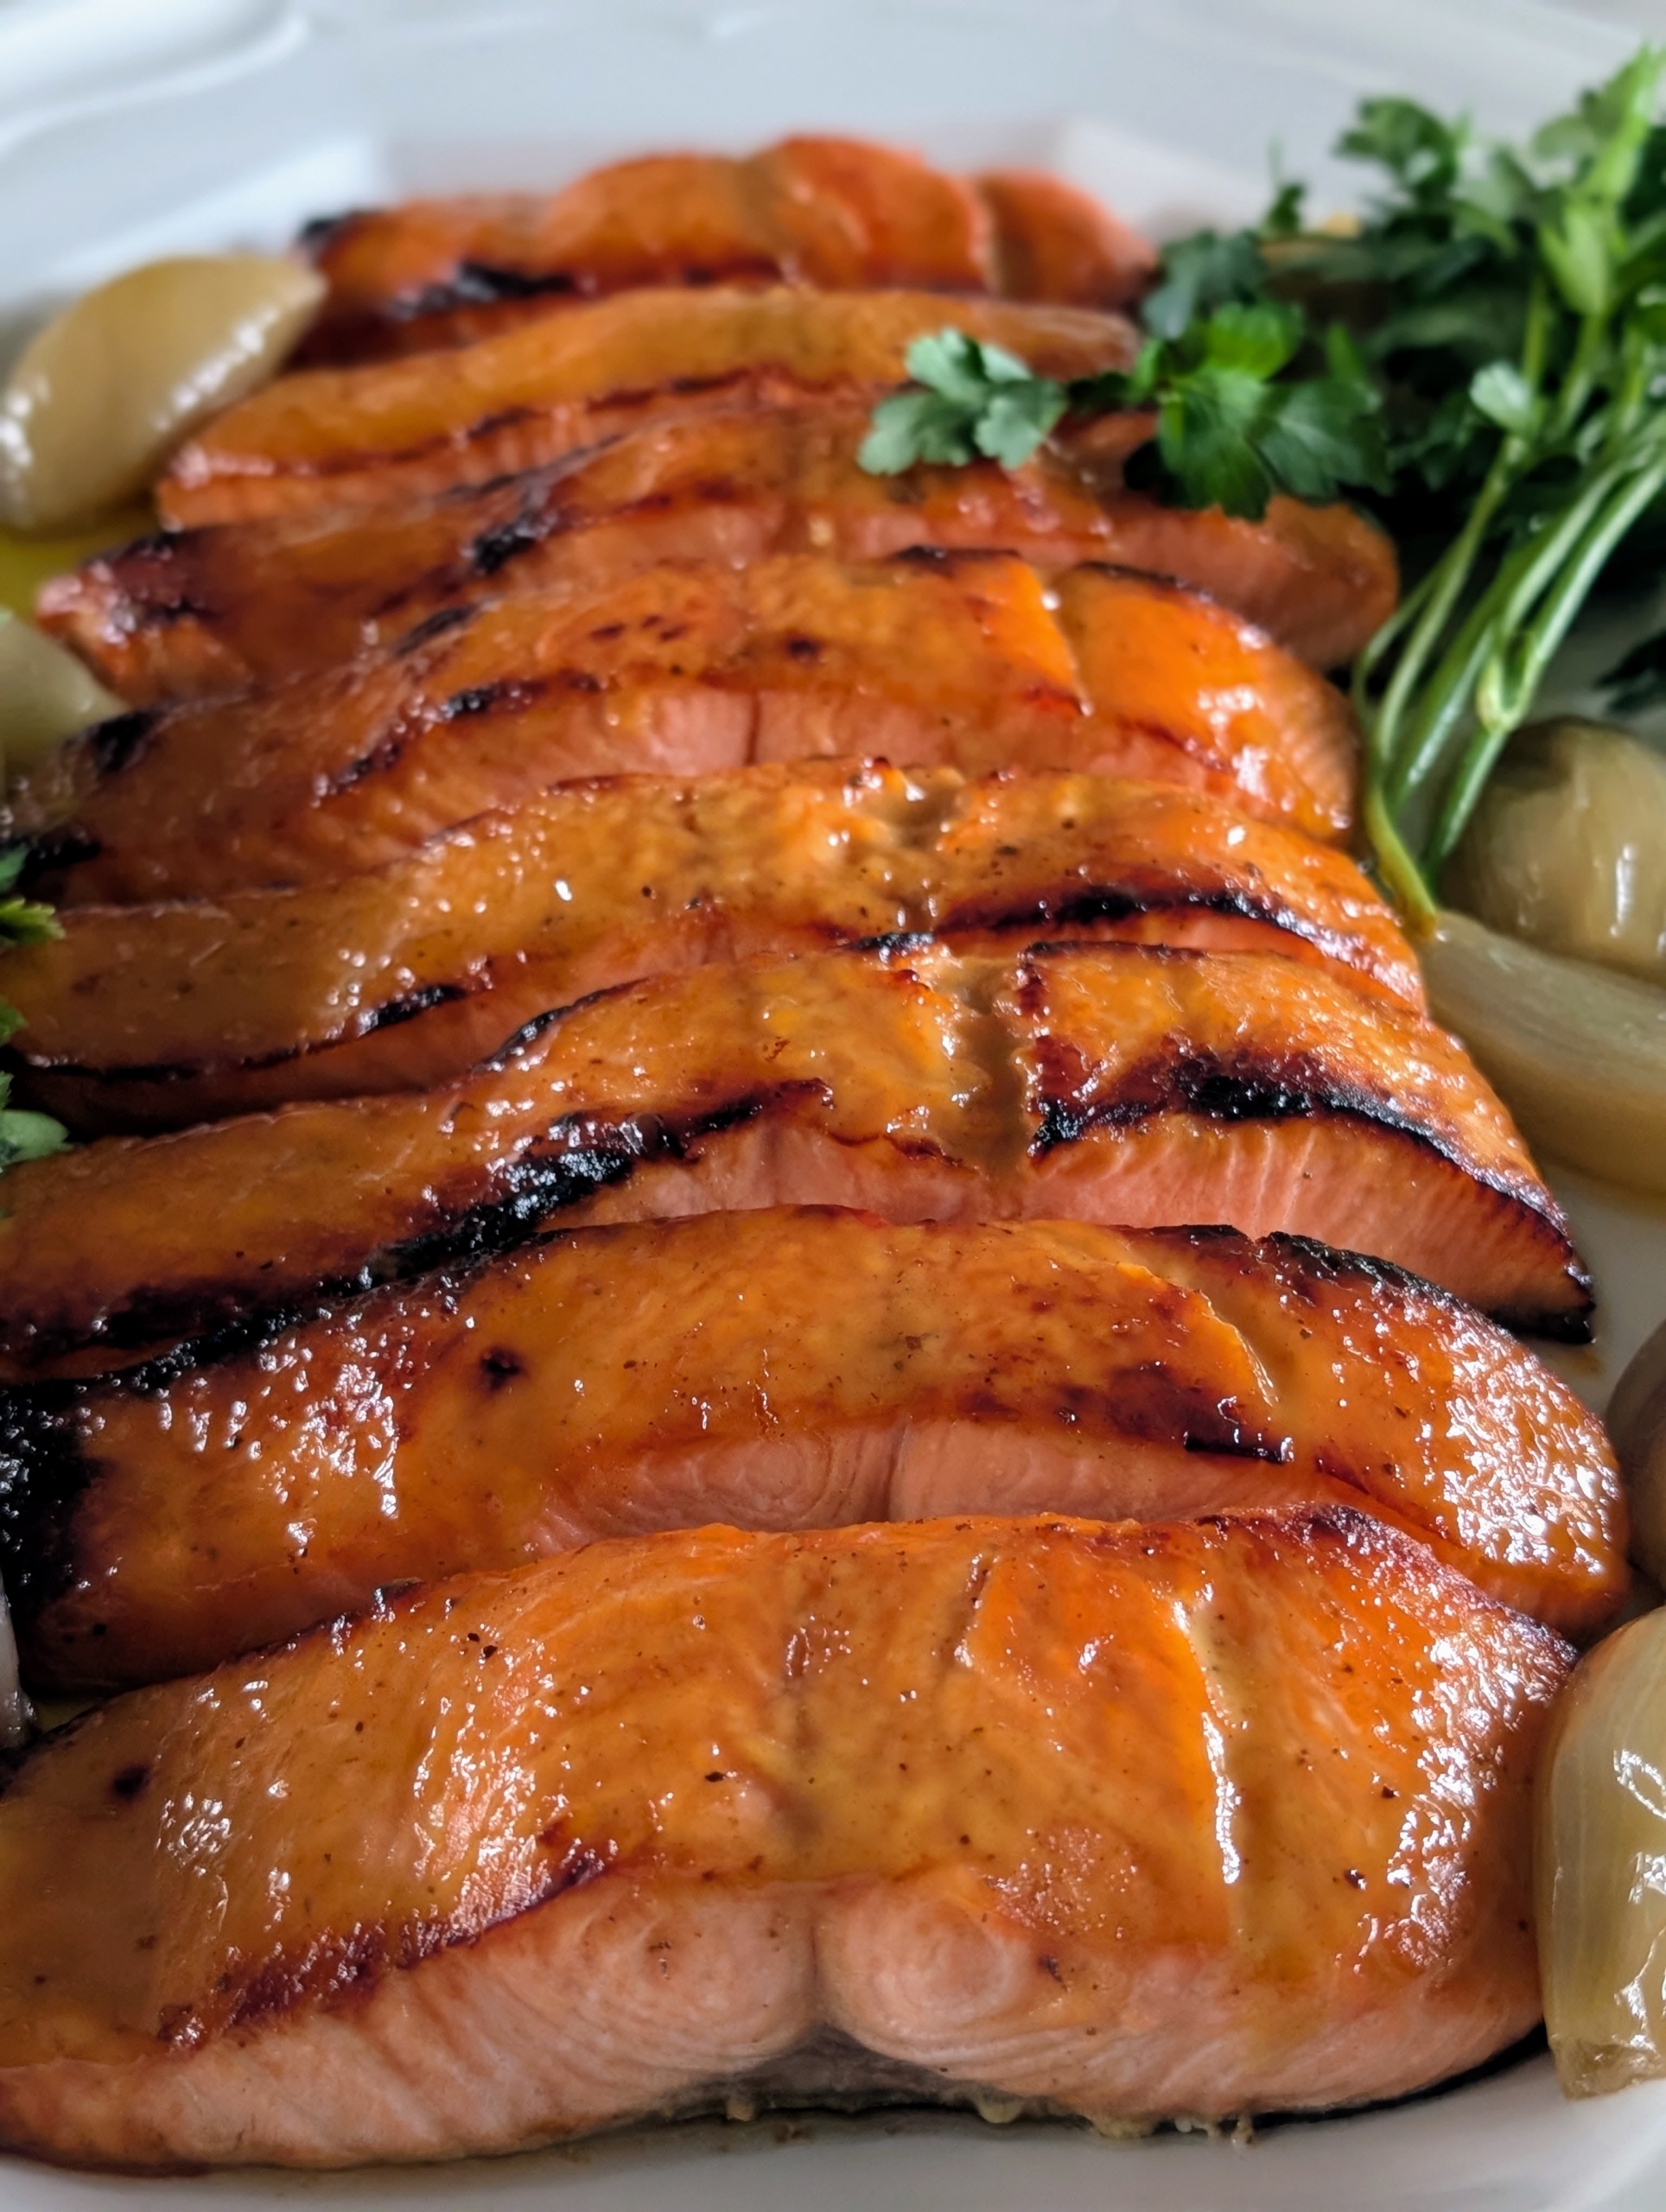
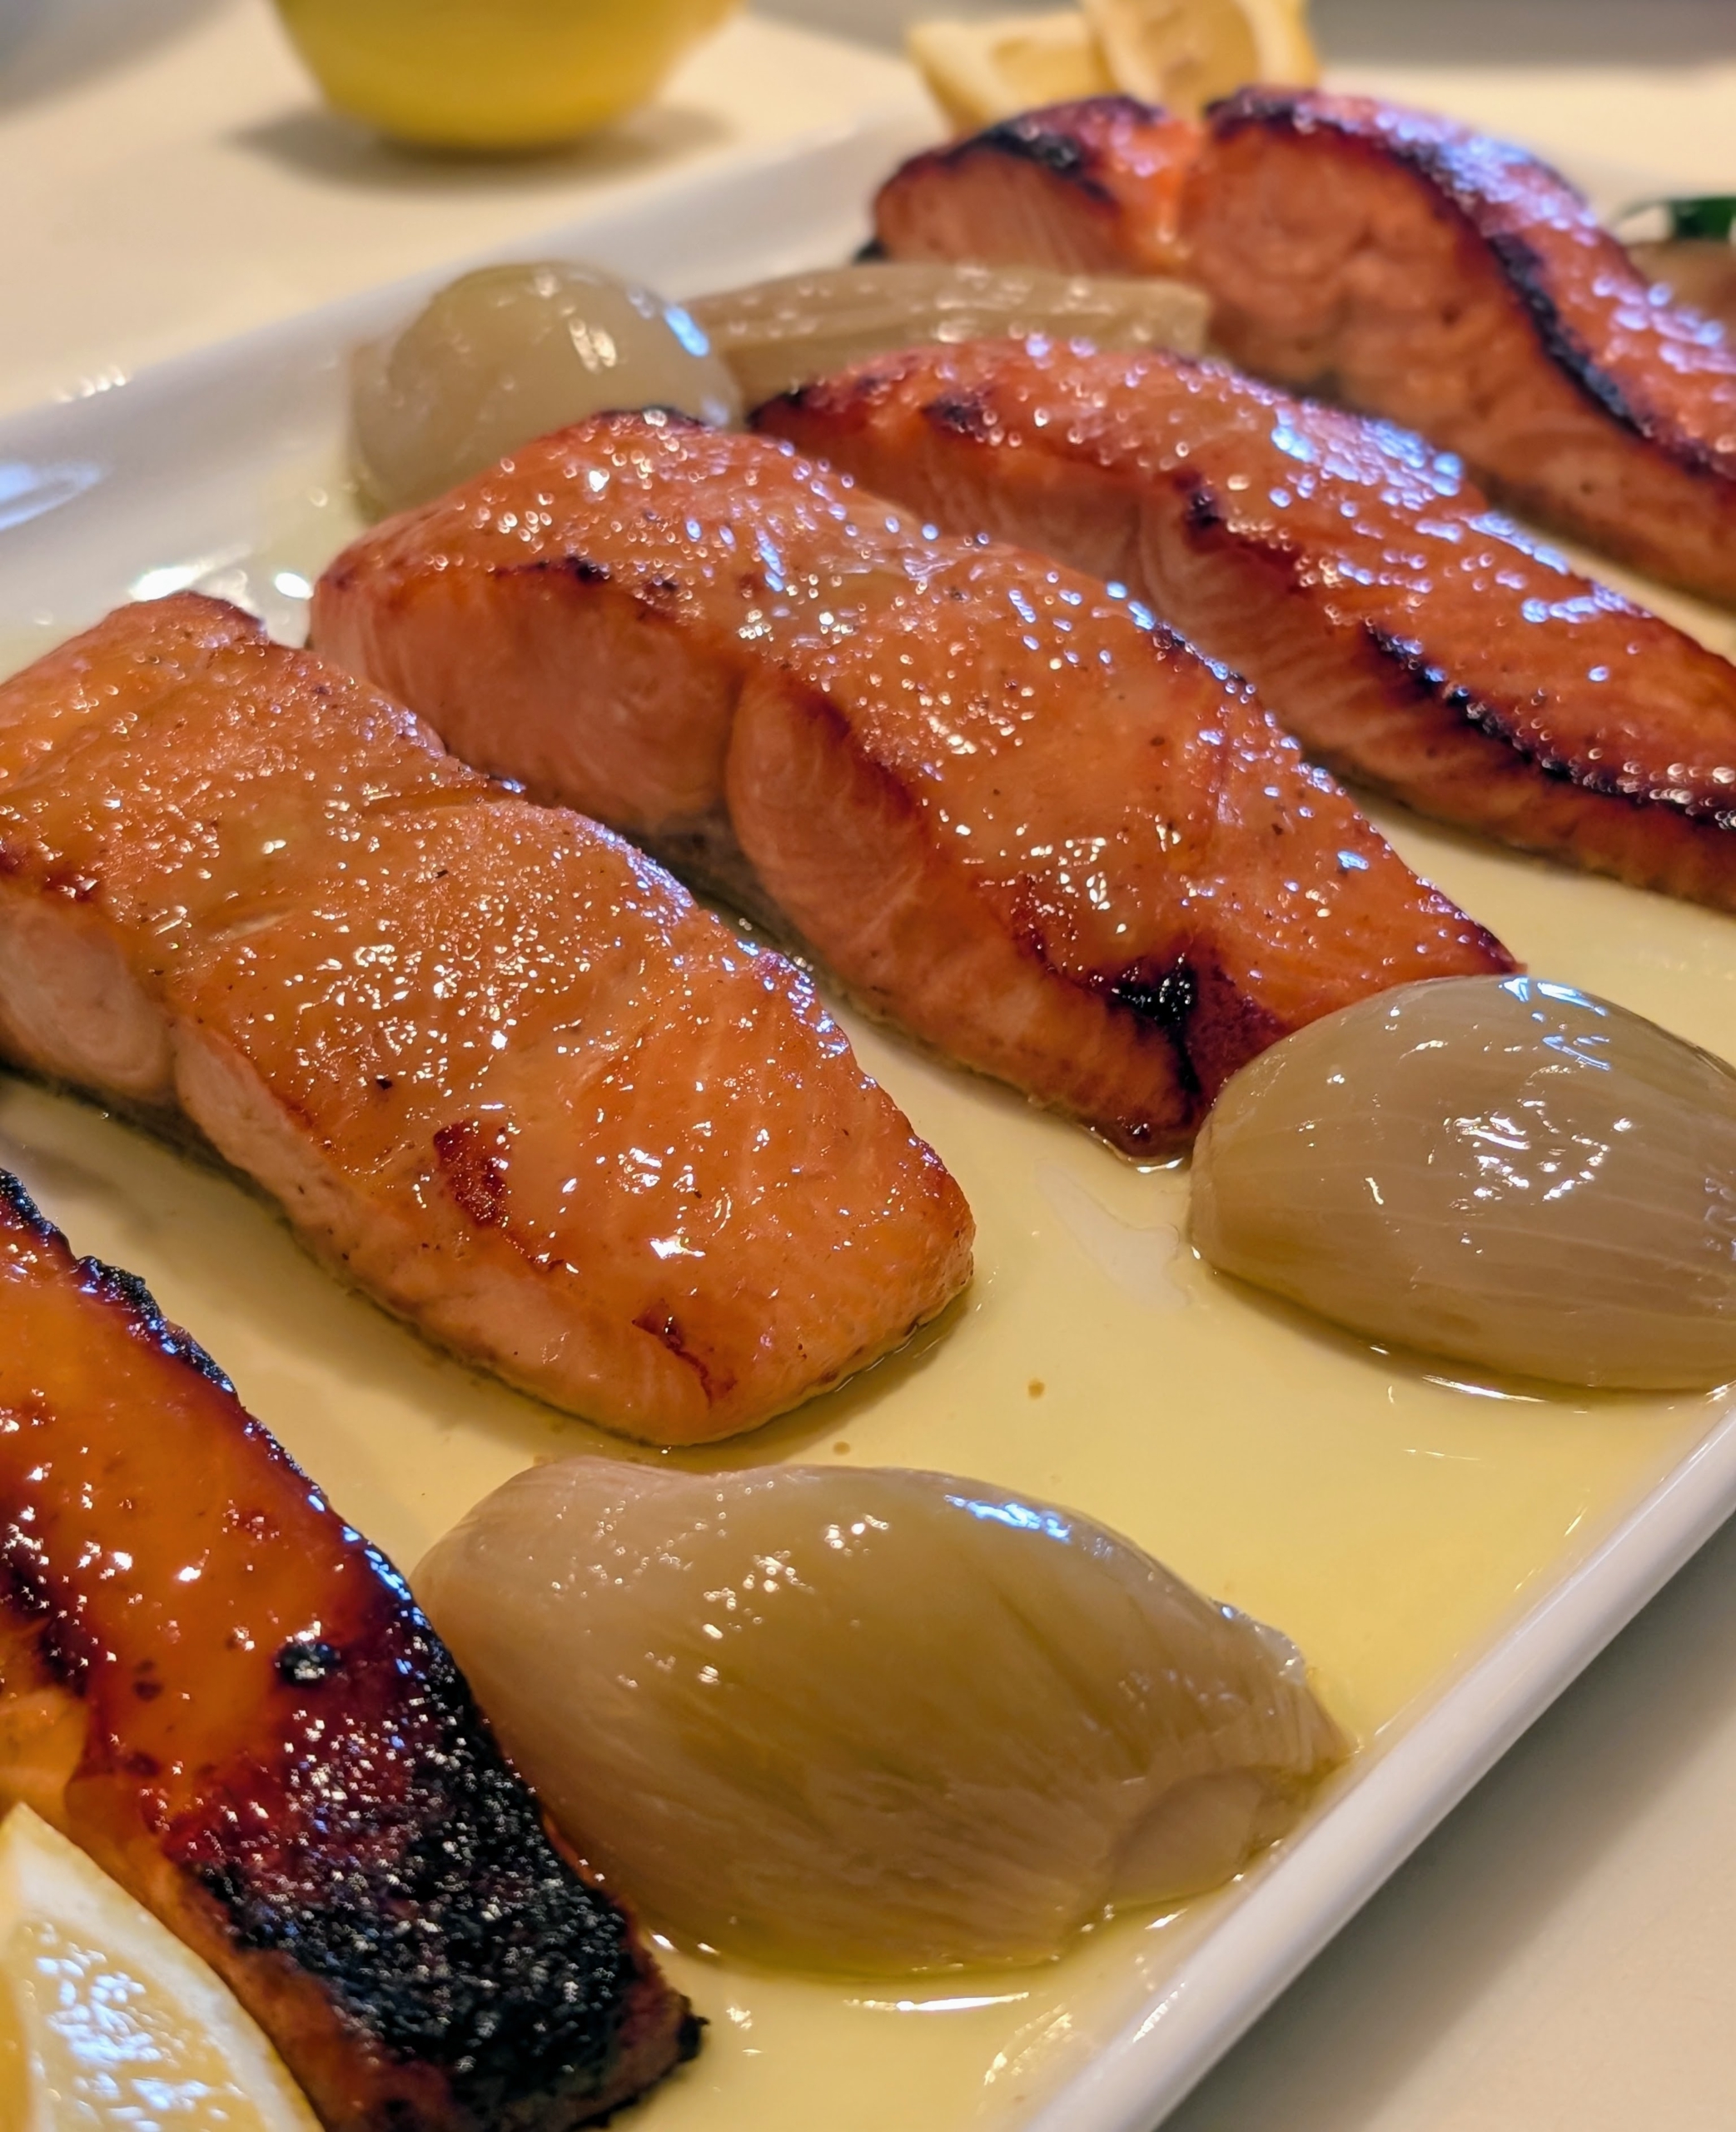
I love serving salmon with a glaze of honey-mustard. The recipe is also in my book. I broil the salmon – it only takes about seven to nine minutes depending on the size of the fillets.
This salmon was served with shallot confit, which is shallots submerged in olive oil and then slow-cooked until soft and translucent.
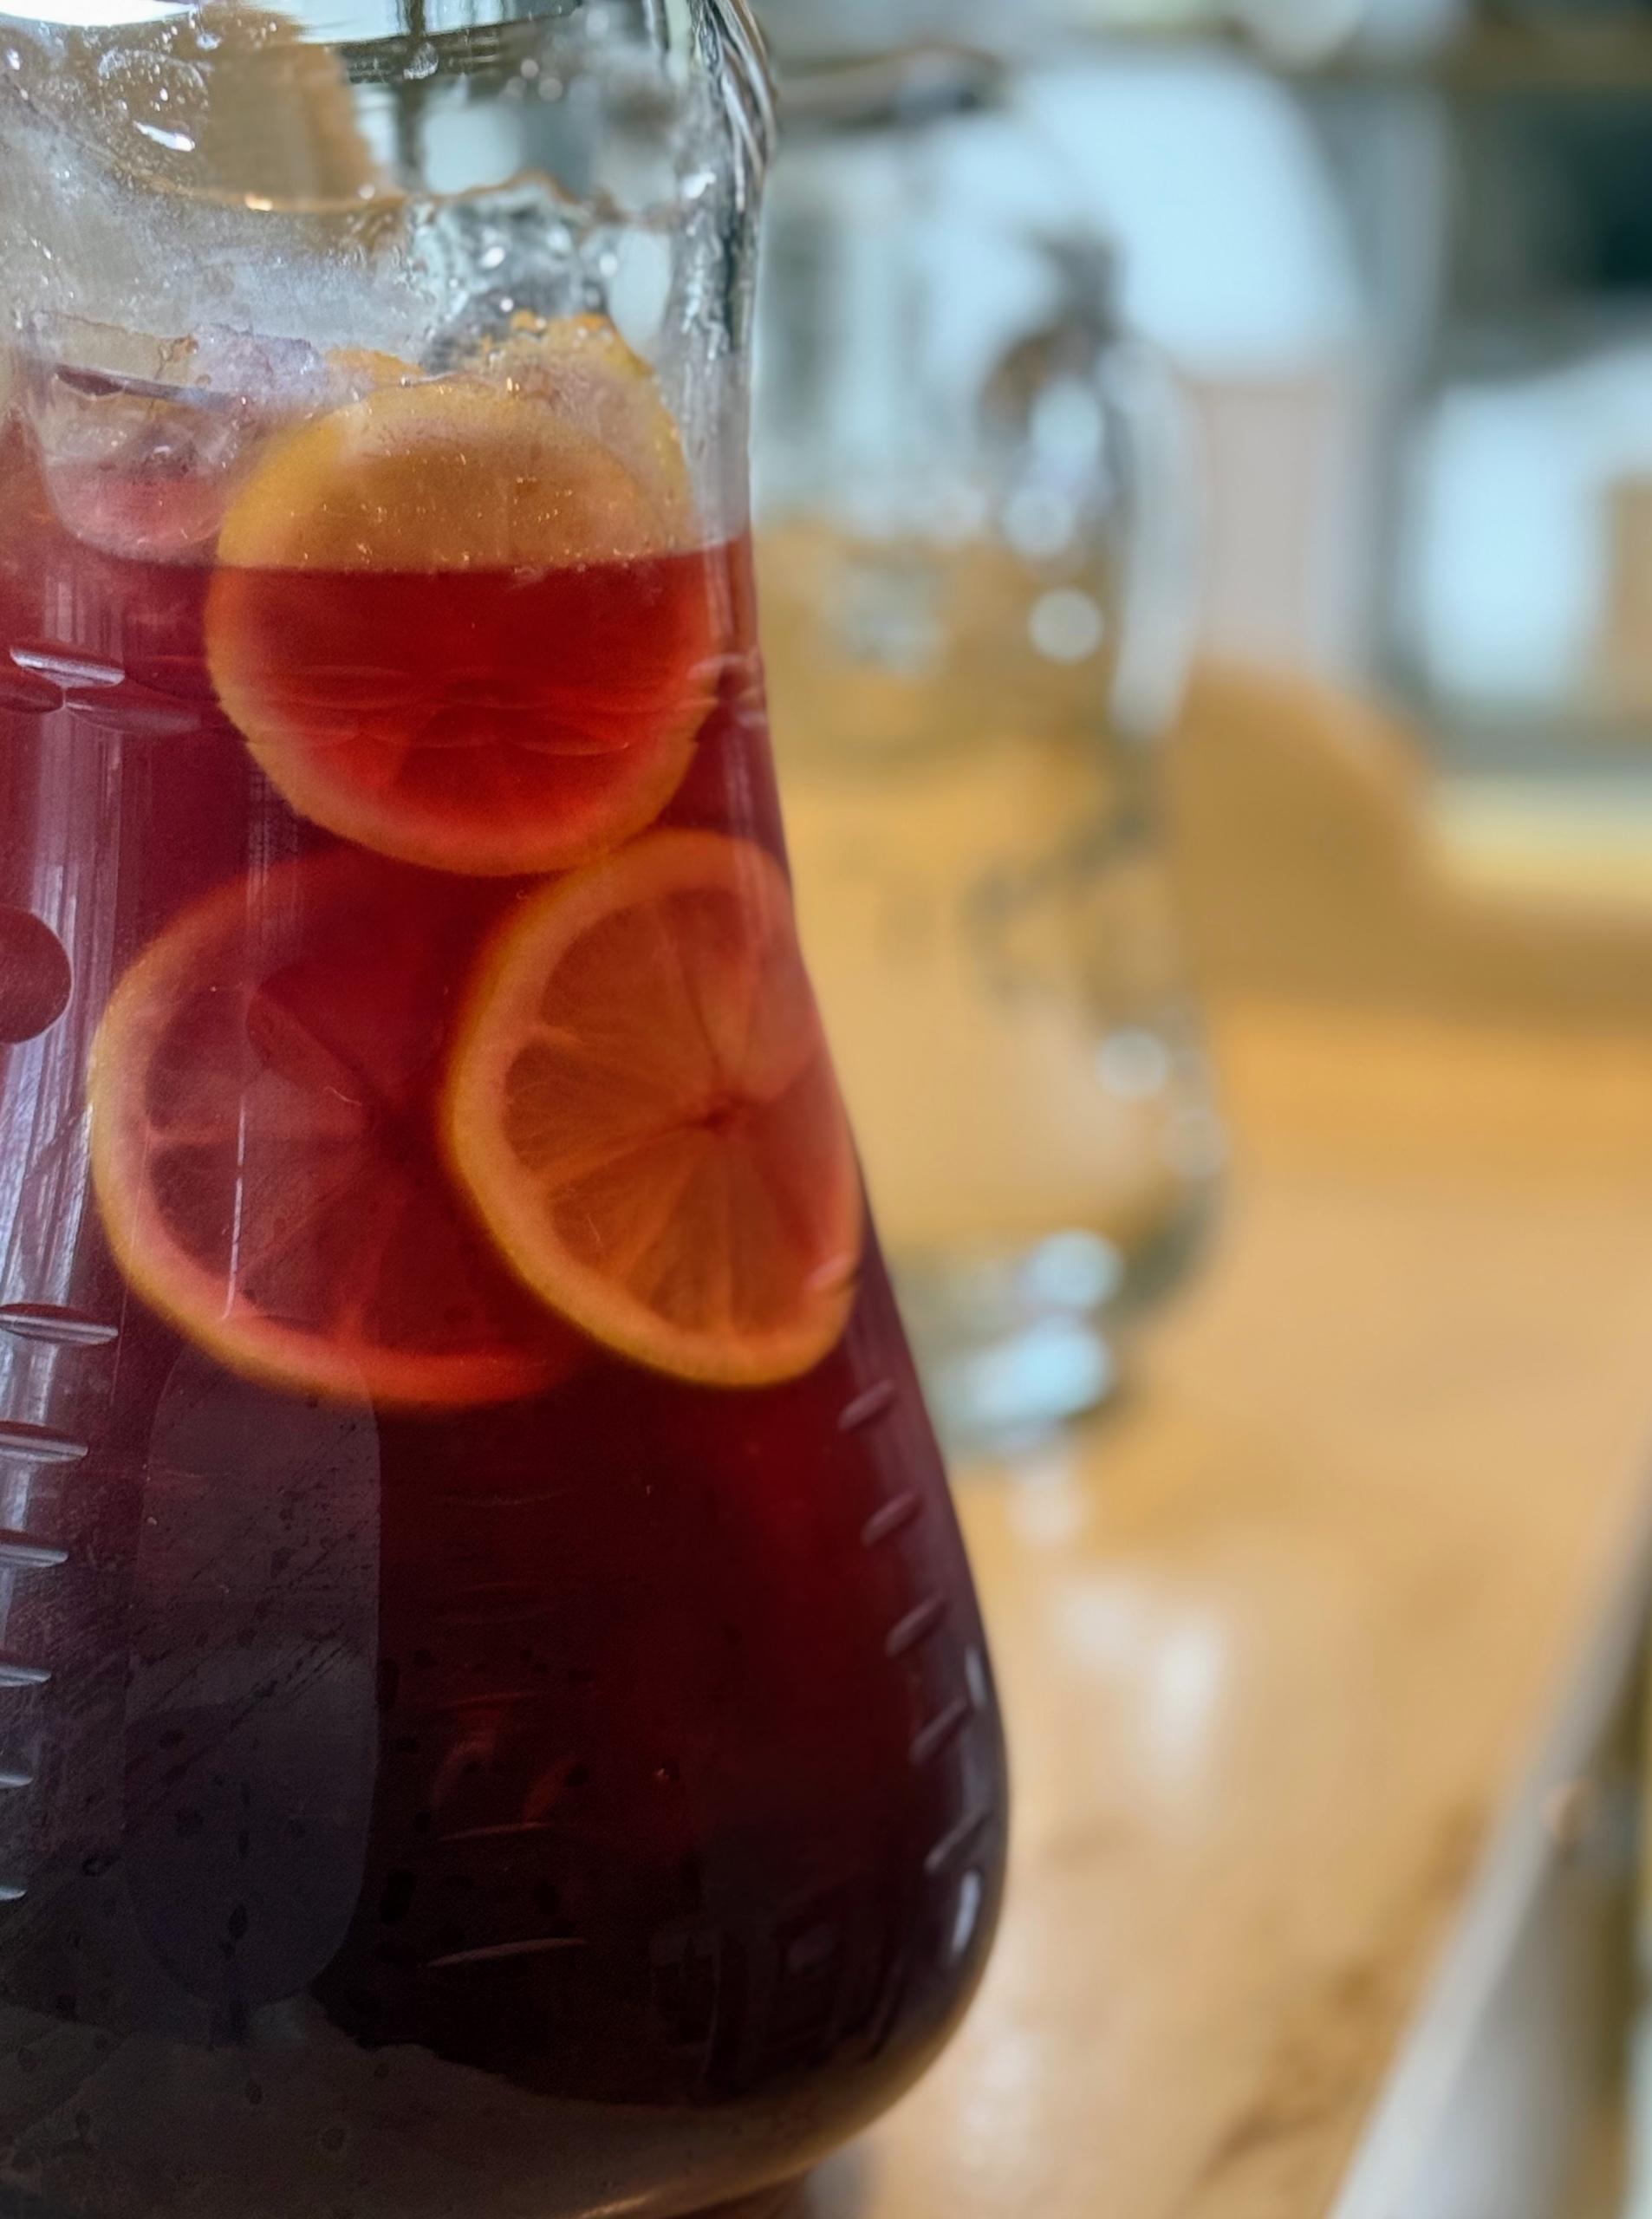
At most of my luncheons, I serve this pomegranate juice made with pomegranate concentrate, lemon, and slices of fresh citrus. I love the pomegranate juice from our friends at POM Wonderful.
Everyone’s plate was full, maybe even more than once.
Thanks, Molly. Everything was so delicious.
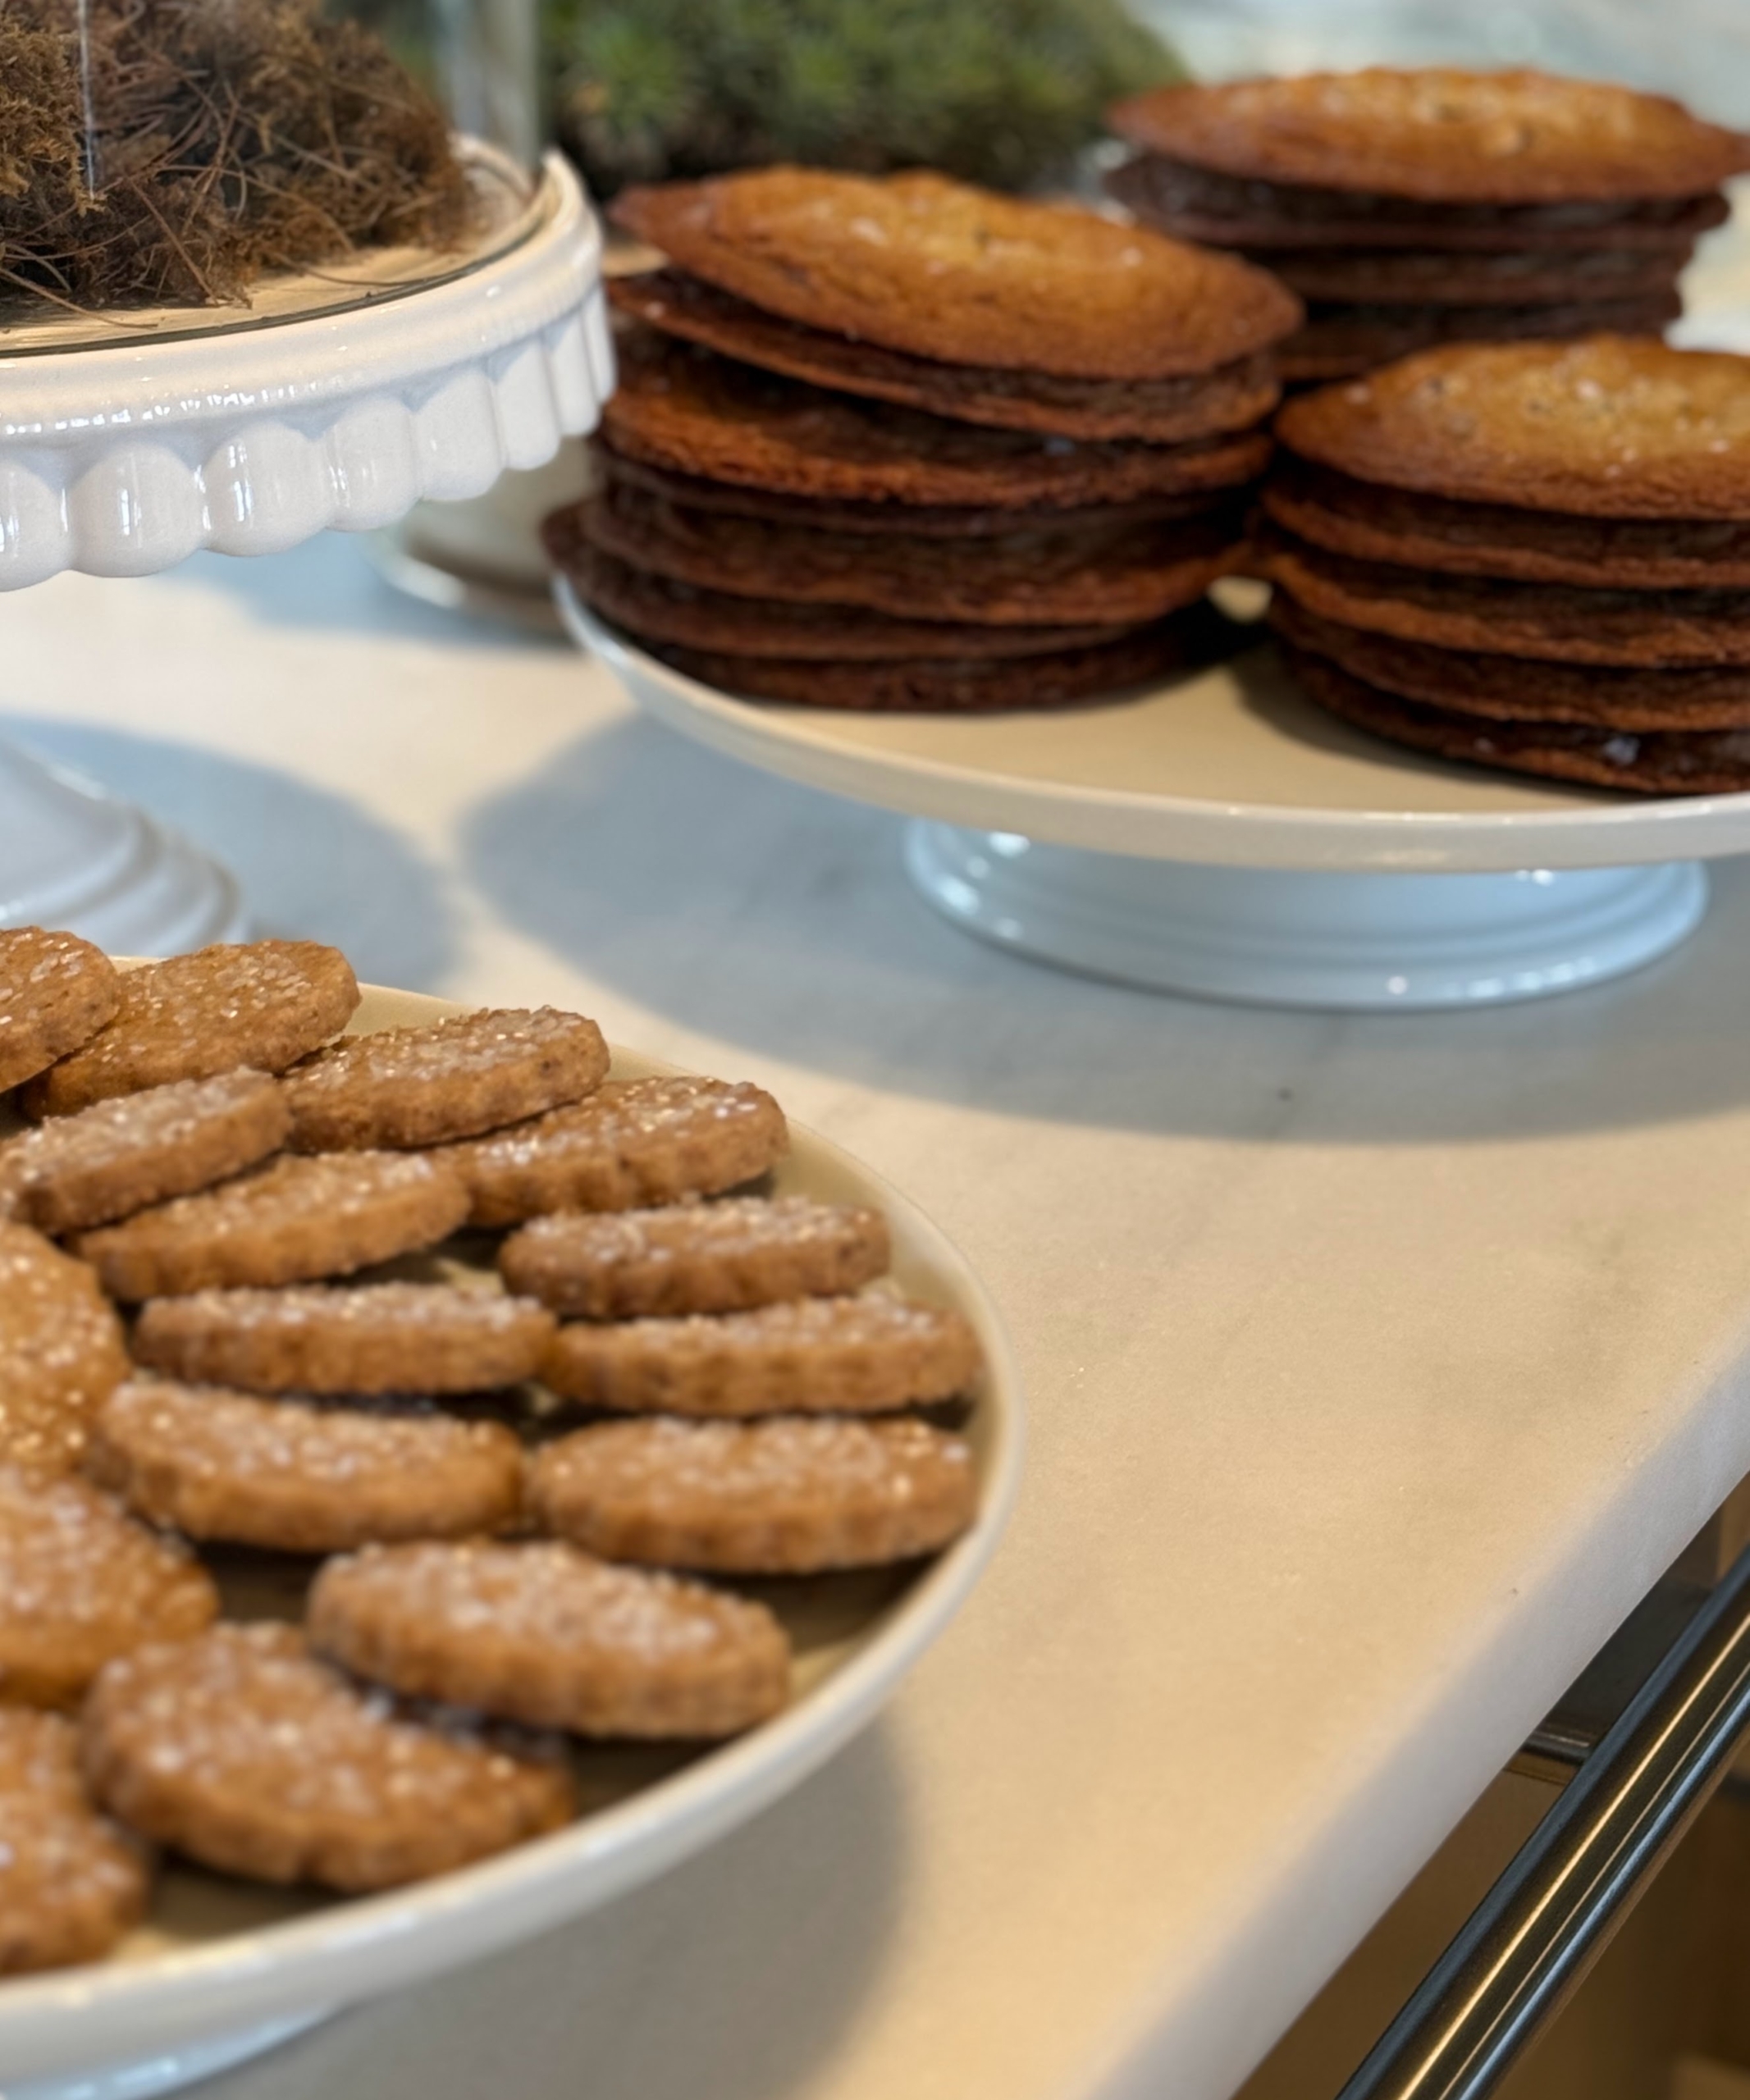
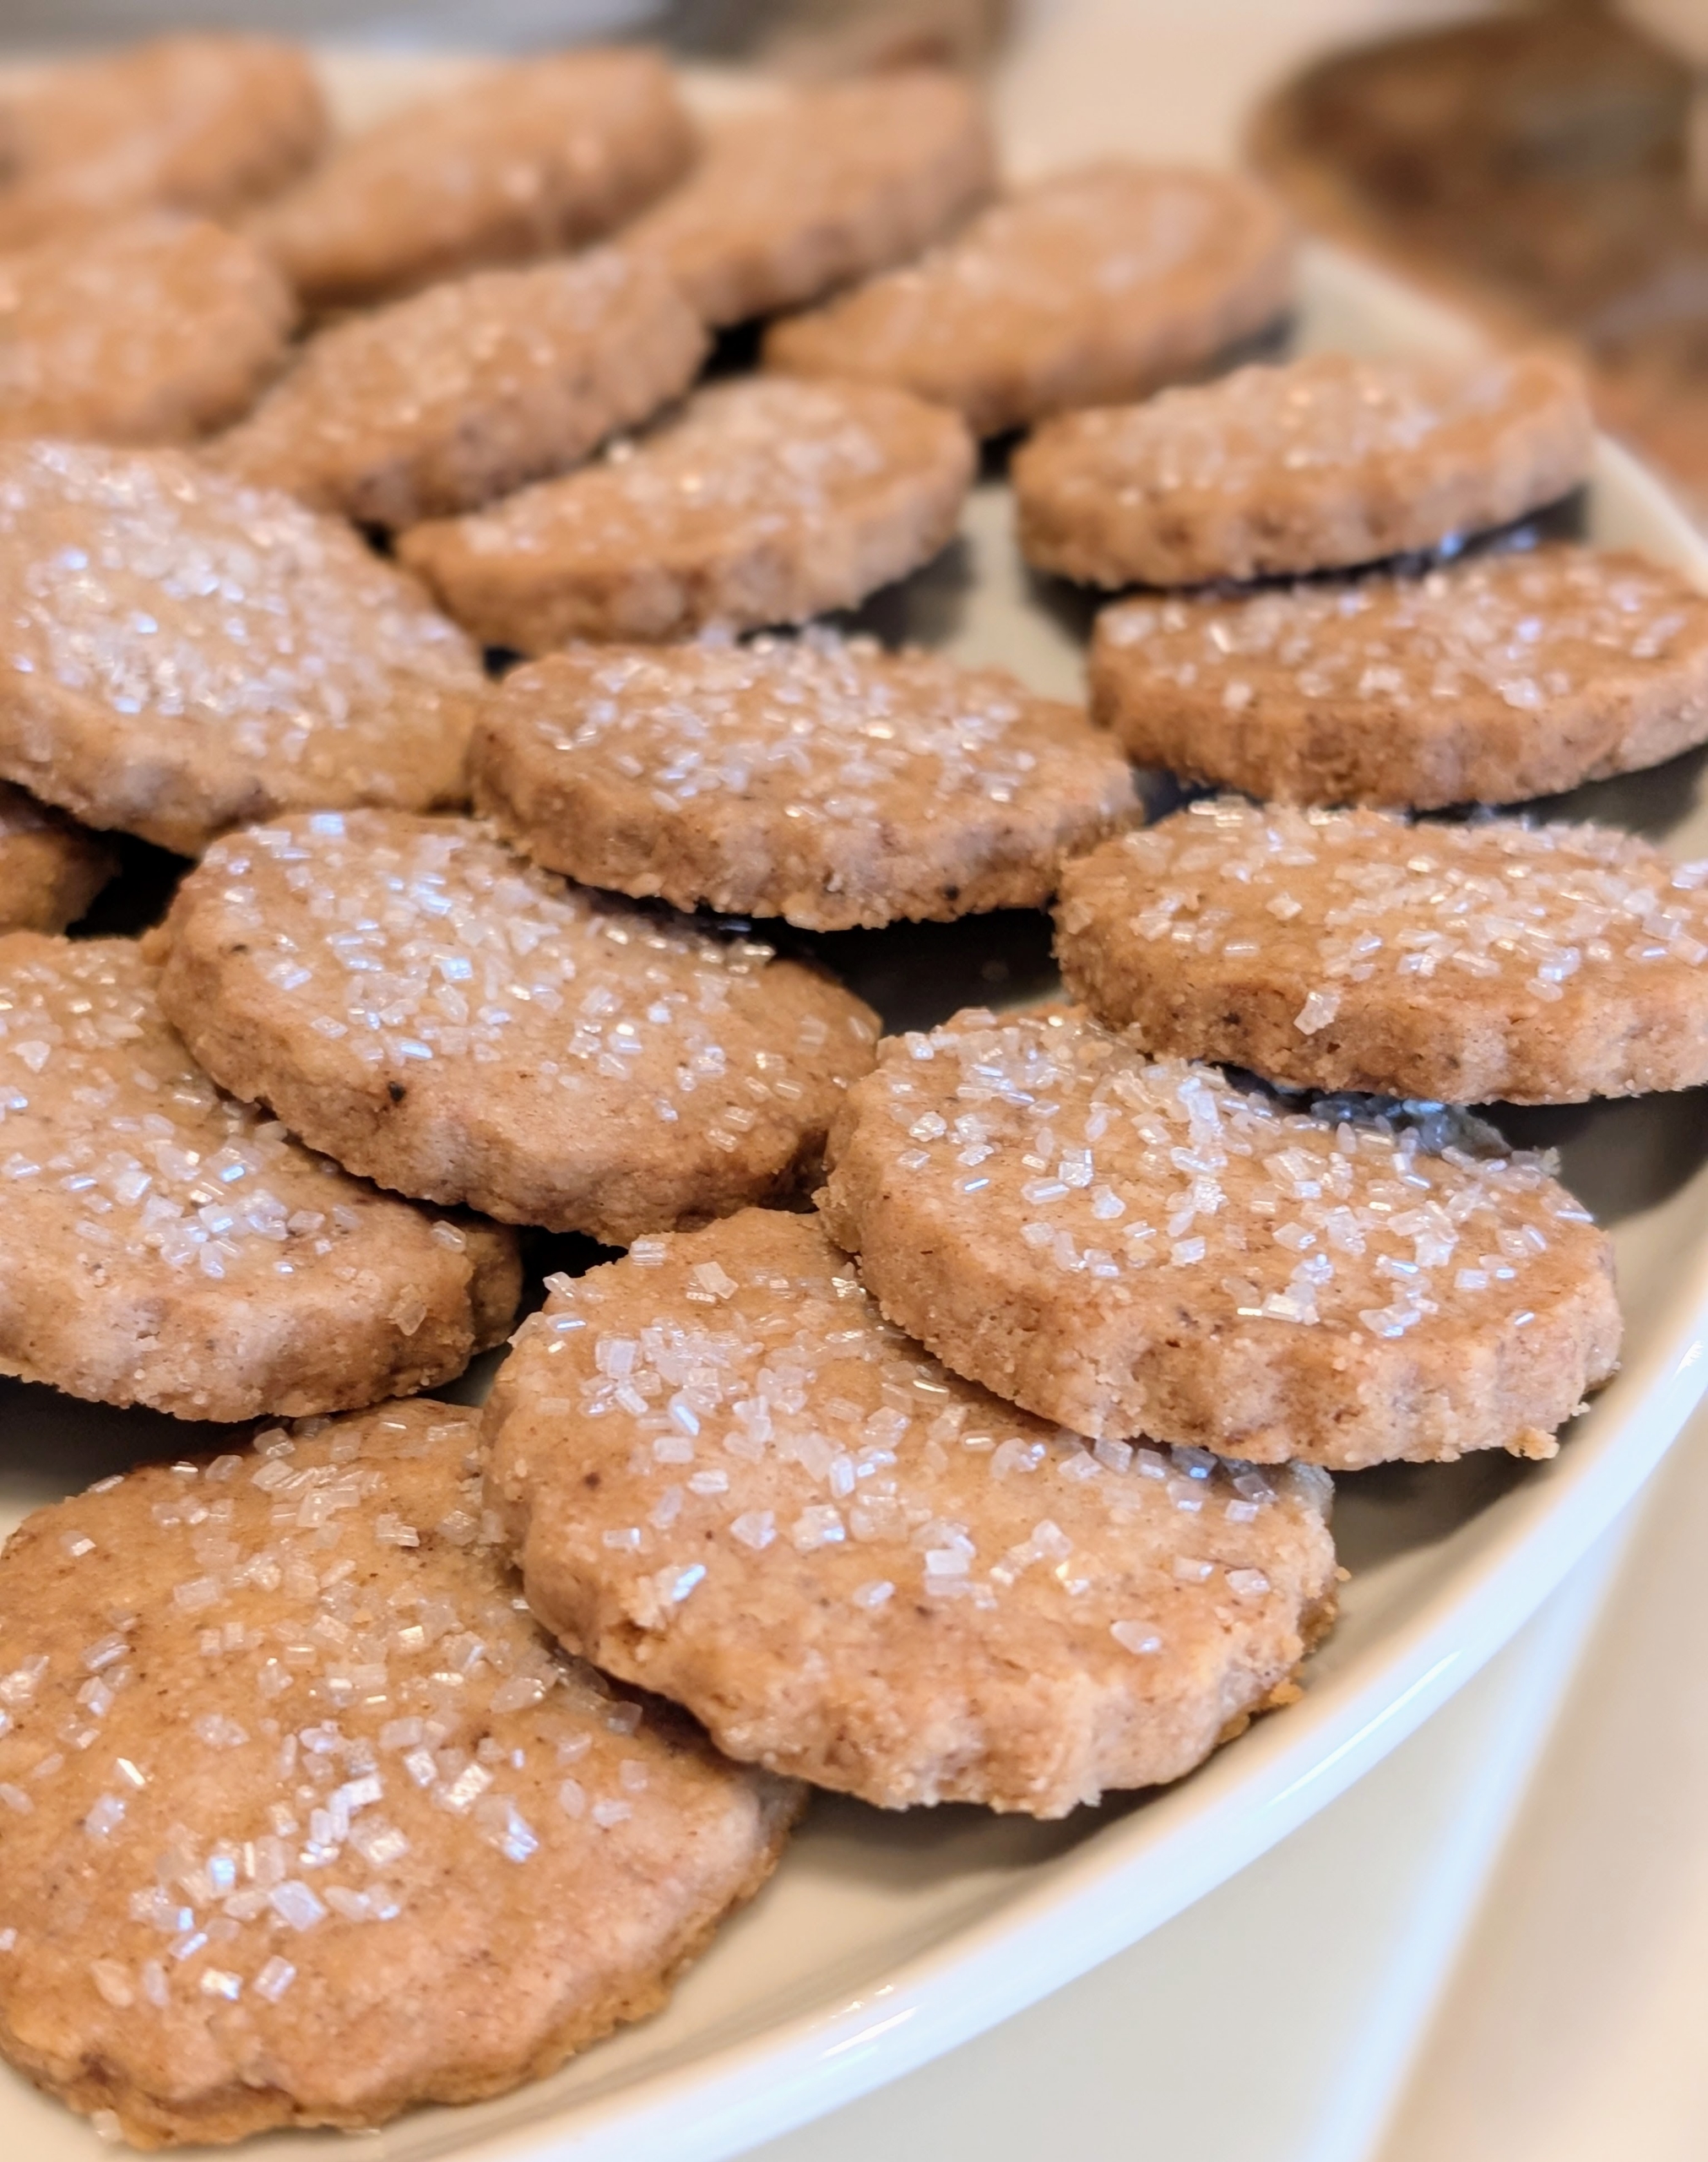
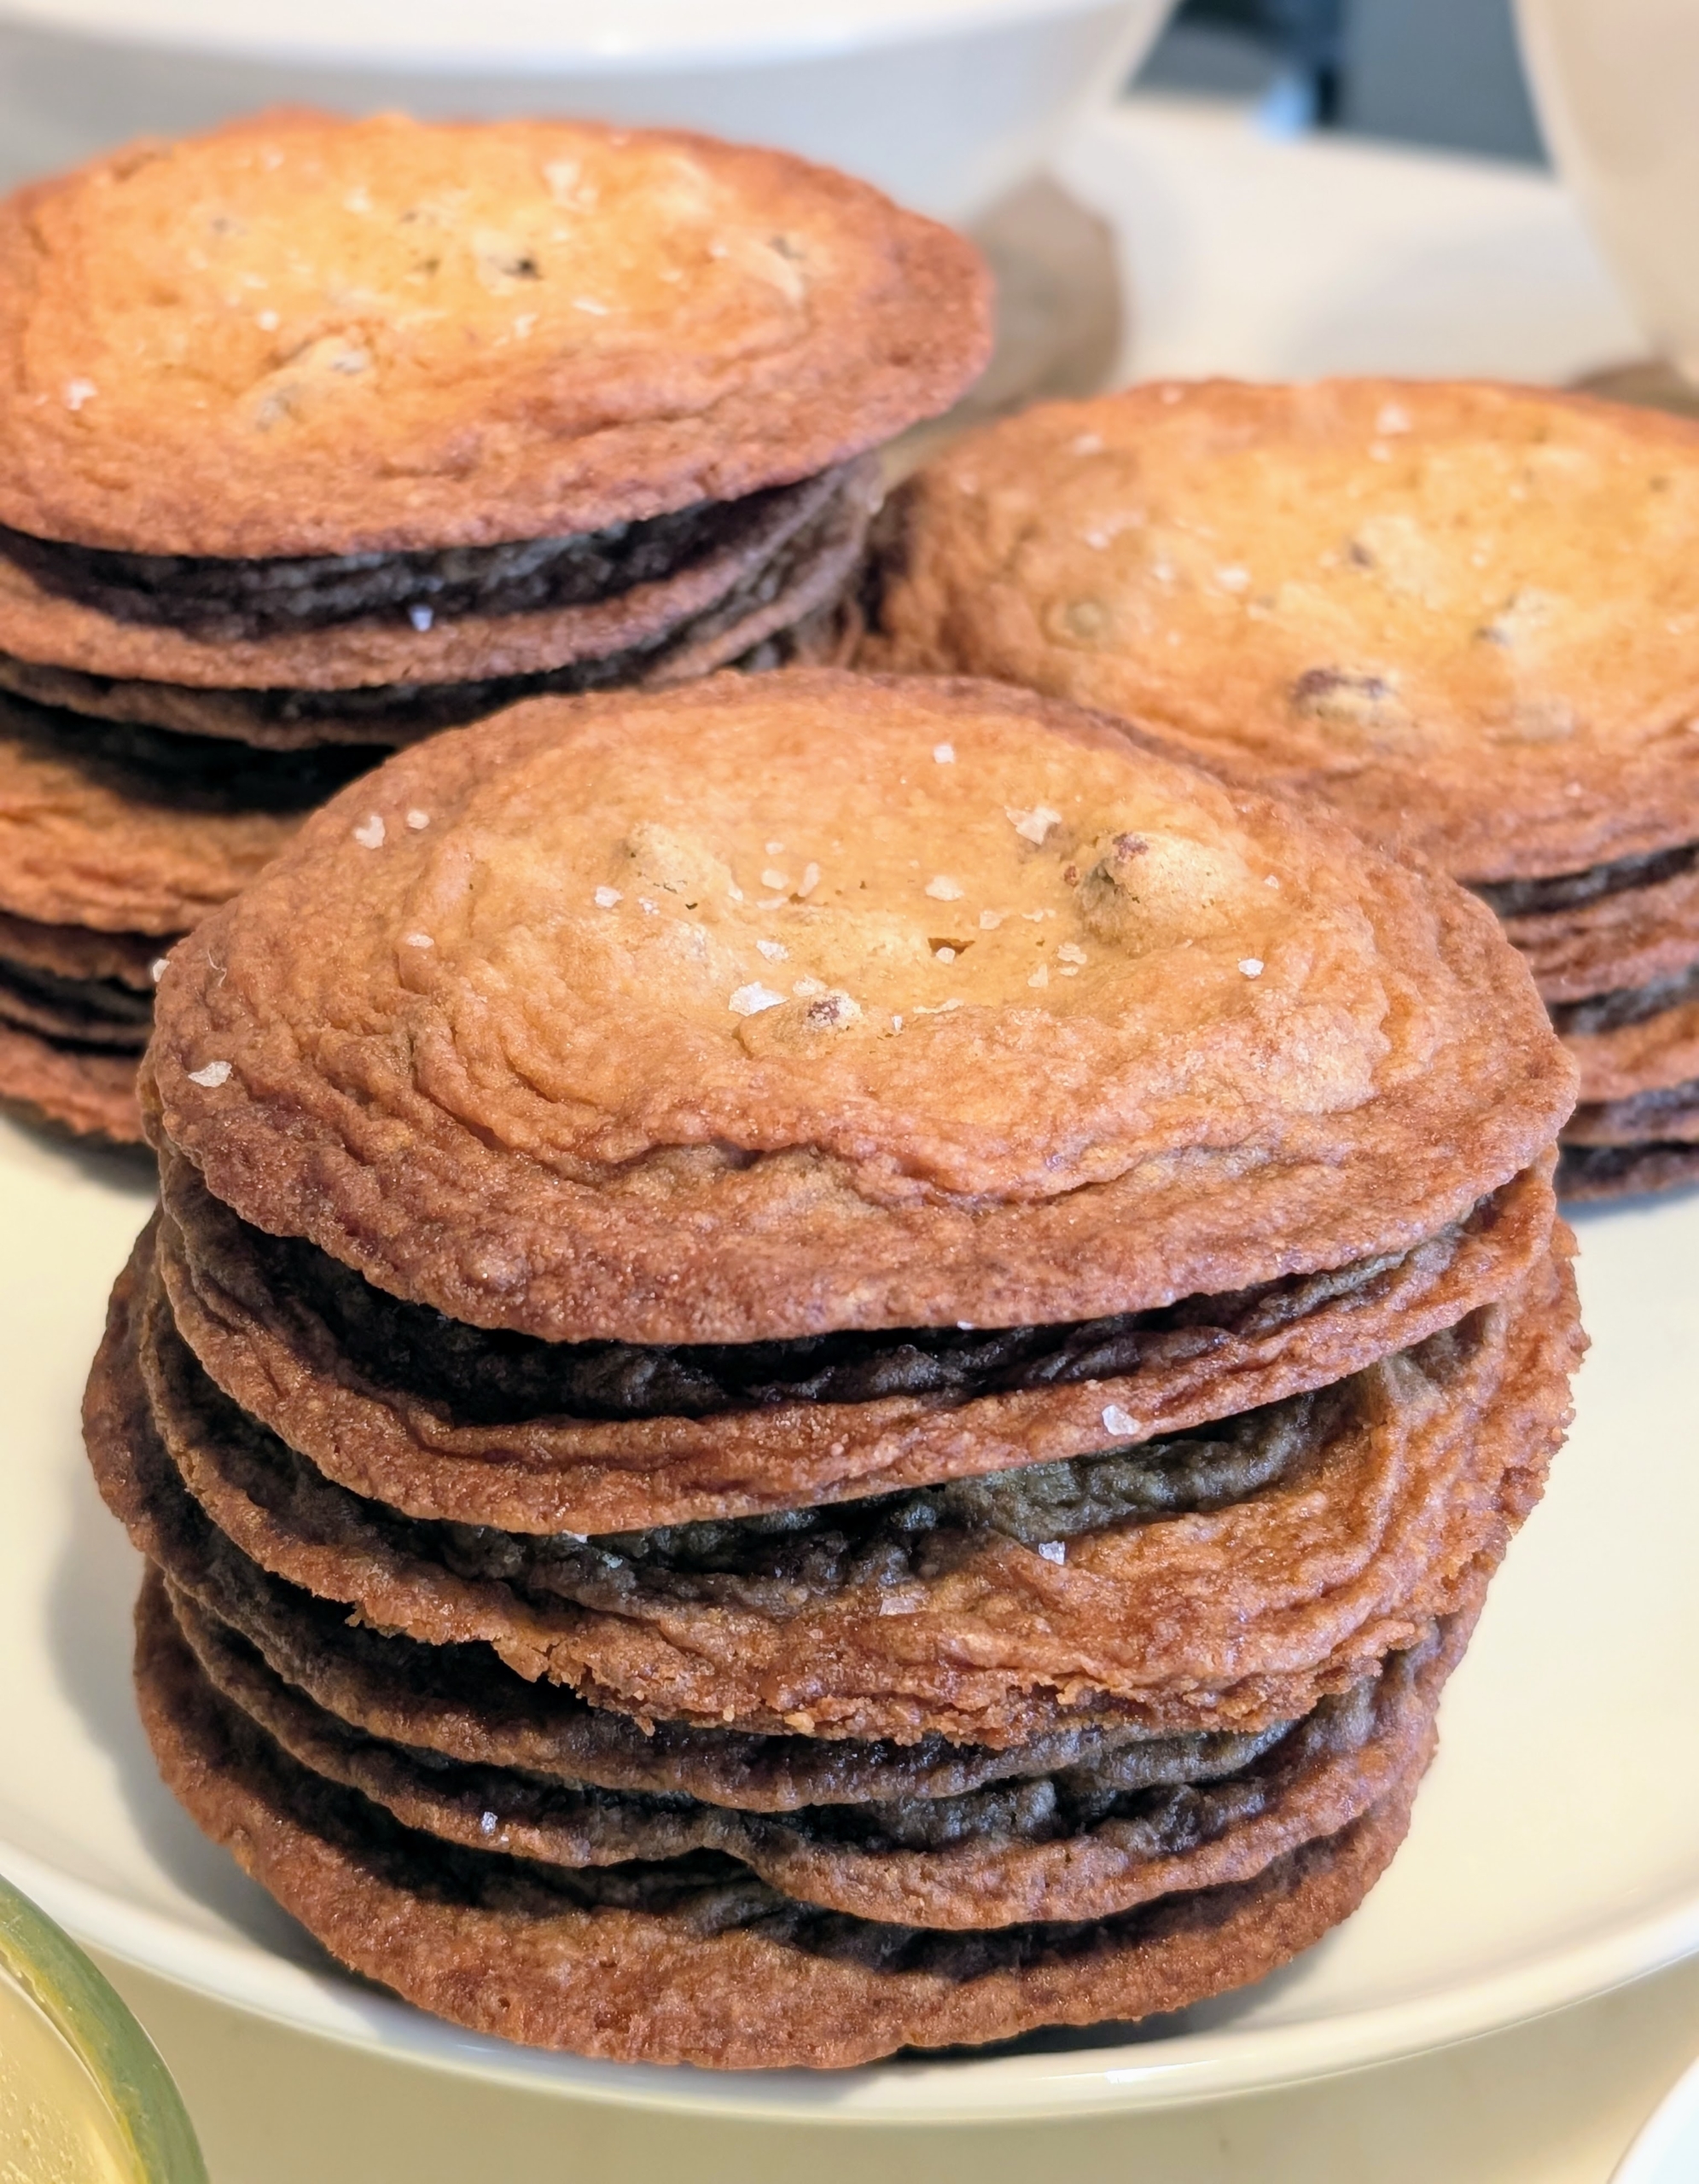
Two cookies from my book that are always devoured are my daughter Alexis’s Chocolate Chip Cookes and my Brown Butter Shortbread Cookies. Both cookie recipes are also in my book.
Brown butter enhances the texture and flavor of these cookies. Topping them with sanding sugar gives them a nice finish.
My daughter Alexis developed these cookies years ago, and they continue to be a huge favorite at parties – big, crispy, and filled with chips. My guests ate them after lunch and then brought some for the ride home too.
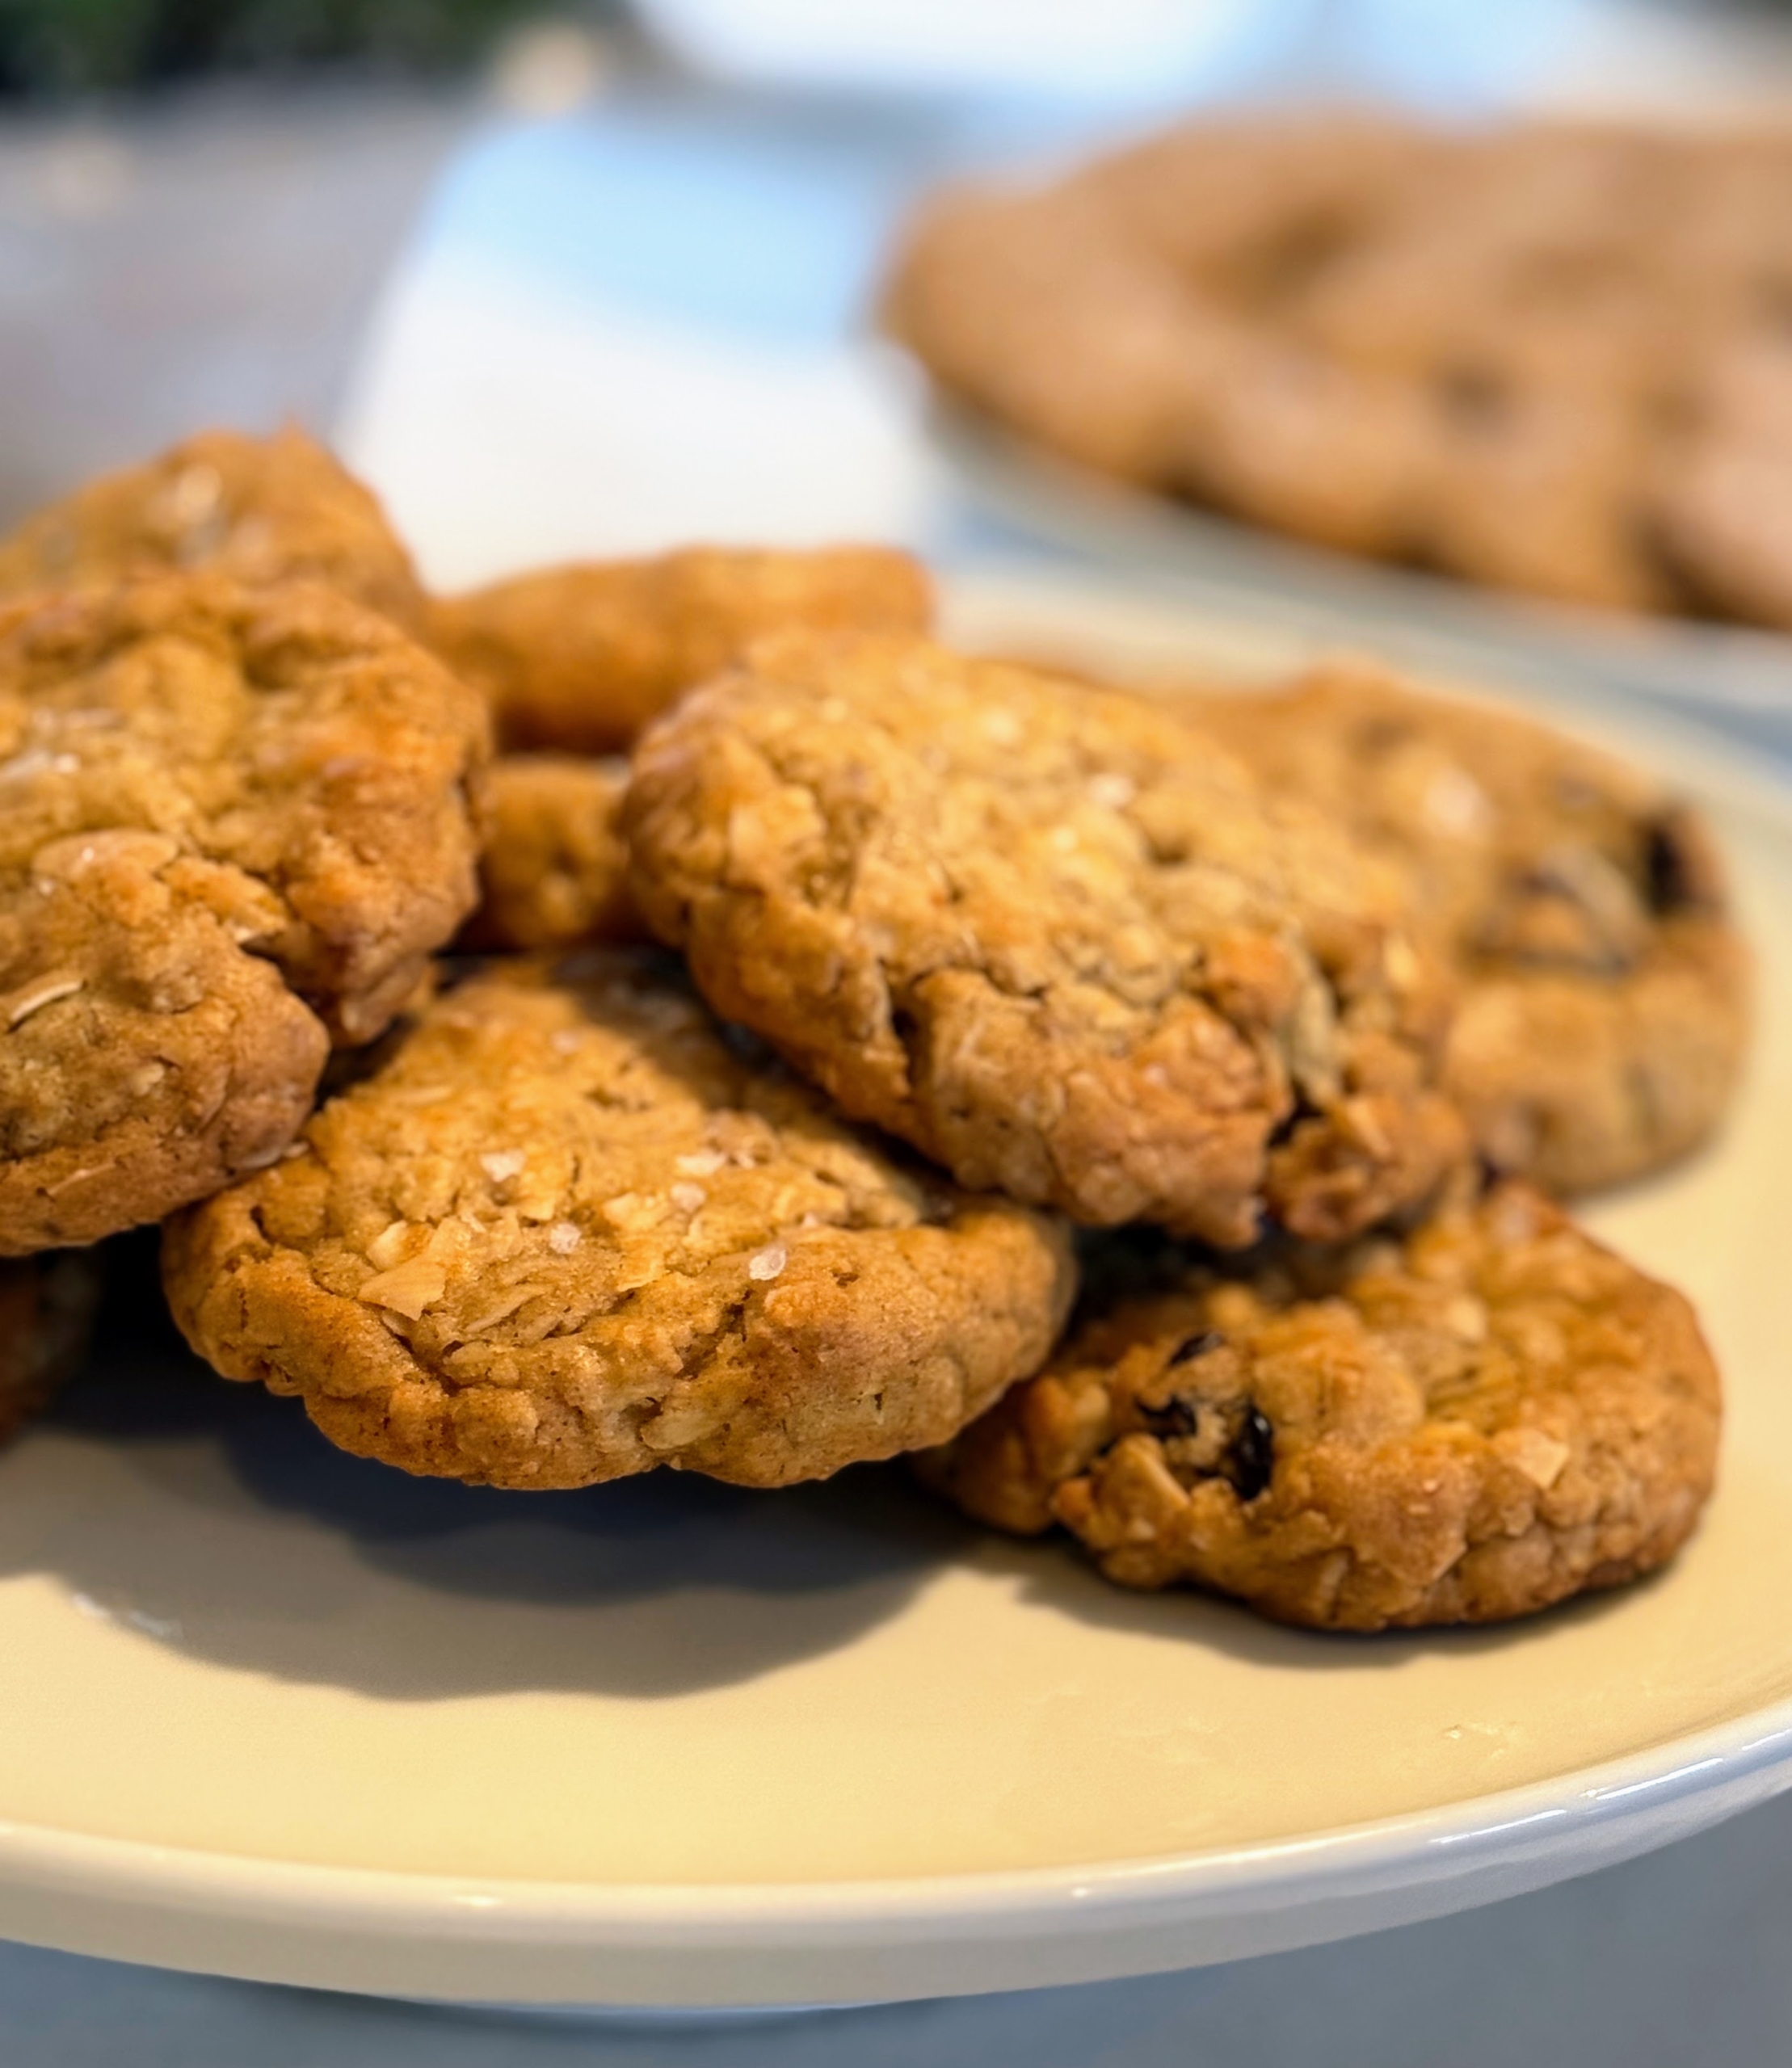
This is another cookie Molly made for the lunch – oatmeal, coconut, and cherry cookies.
And if you haven’t already, please get a copy of my 100th book. I am certain you will read it cover to cover and want to make every recipe.